Skip to content
  • Categories
  • Recent
  • Tags
  • Popular
  • Users
  • Groups
Skins
  • Light
  • Brite
  • Cerulean
  • Cosmo
  • Flatly
  • Journal
  • Litera
  • Lumen
  • Lux
  • Materia
  • Minty
  • Morph
  • Pulse
  • Sandstone
  • Simplex
  • Sketchy
  • Spacelab
  • United
  • Yeti
  • Zephyr
  • Dark
  • Cyborg
  • Darkly
  • Quartz
  • Slate
  • Solar
  • Superhero
  • Vapor

  • Default (No Skin)
  • No Skin
Collapse
WIBIMMERS logo

WIBIMMERS

  1. Home
  2. General Discussion
  3. Members BMWs
  4. ‘91 E30

‘91 E30

Scheduled Pinned Locked Moved Members BMWs
510 Posts 27 Posters 2 Views 1 Watching
  • Oldest to Newest
  • Newest to Oldest
  • Most Votes
Reply
  • Reply as topic
Log in to reply
This topic has been deleted. Only users with topic management privileges can see it.
  • YoungCRY
    YoungCRY
    YoungCR
    wrote on last edited by
    #442

    KaiserRolls said:

    plopping the s52 in it 

    Plotting The Simpsons GIF

    Chris Young
    BMWCCA #458972
    1986 528e/5  | 1994 530i/5 | 1995 540i/6 | 2013 X5 35d | 1998 C1500 Suburban | 1995 K2500 Suburban

    1 Reply Last reply
    1
    • KaiserRollsK
      KaiserRollsK
      KaiserRolls
      wrote on last edited by
      #443

      Dyno day got cancelled lol

      1 Reply Last reply
      1
      • KaiserRollsK
        KaiserRollsK
        KaiserRolls
        wrote on last edited by
        #444

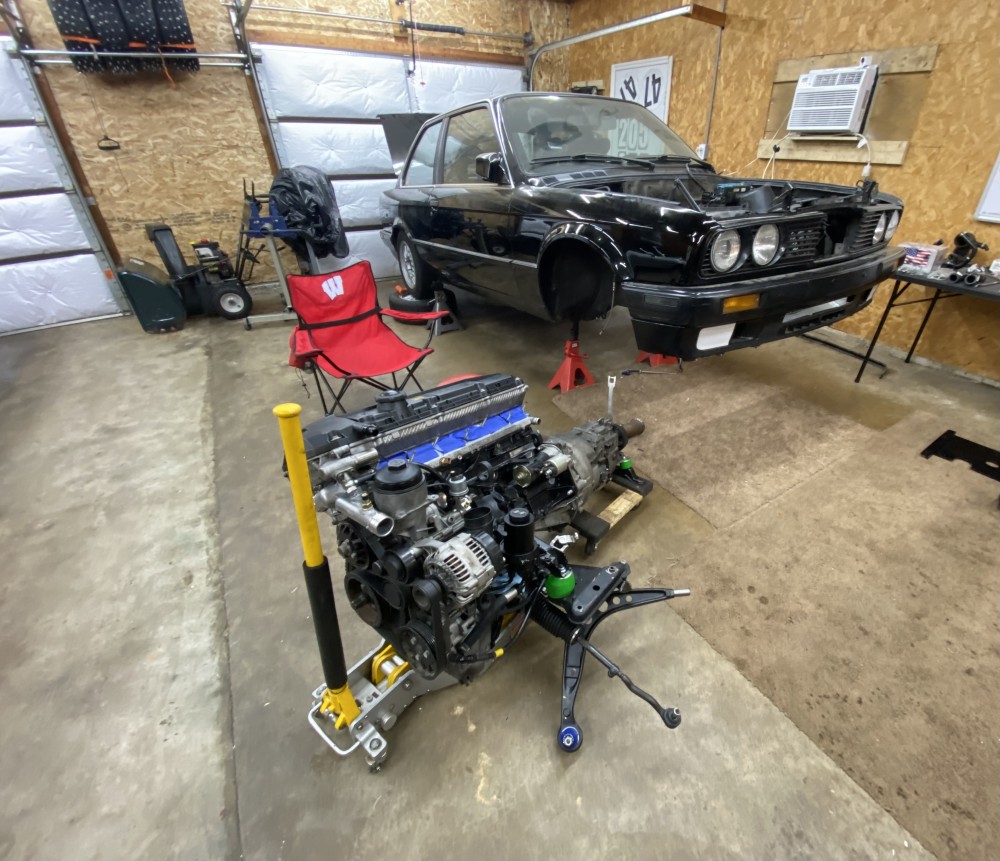
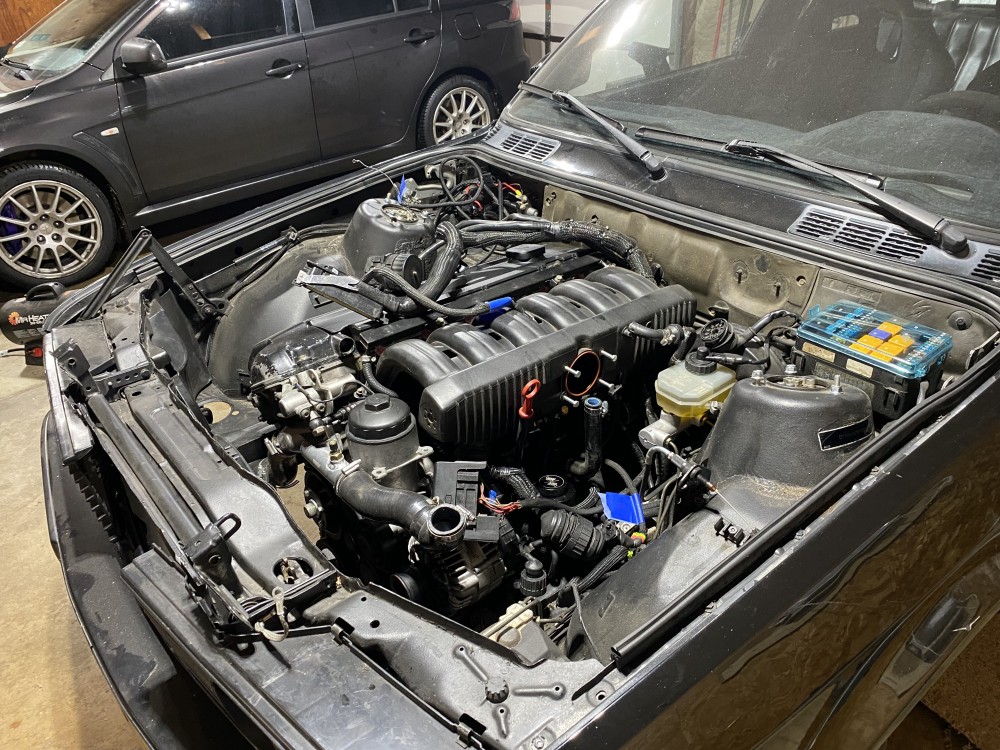
        Almost ready to drop the m52. 
        Need to remove: Fuel lines, heater core hoses & front suspension (to make it easier to manage on a jack) 
        278DA376-256A-44A7-8852-7F025286580B.jpeg

        1 Reply Last reply
        6
        • KaiserRollsK
          KaiserRollsK
          KaiserRolls
          wrote on last edited by
          #445

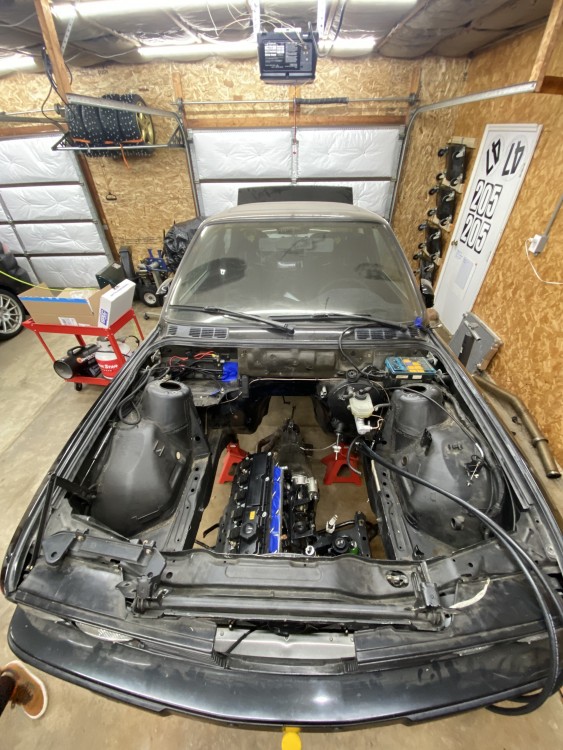
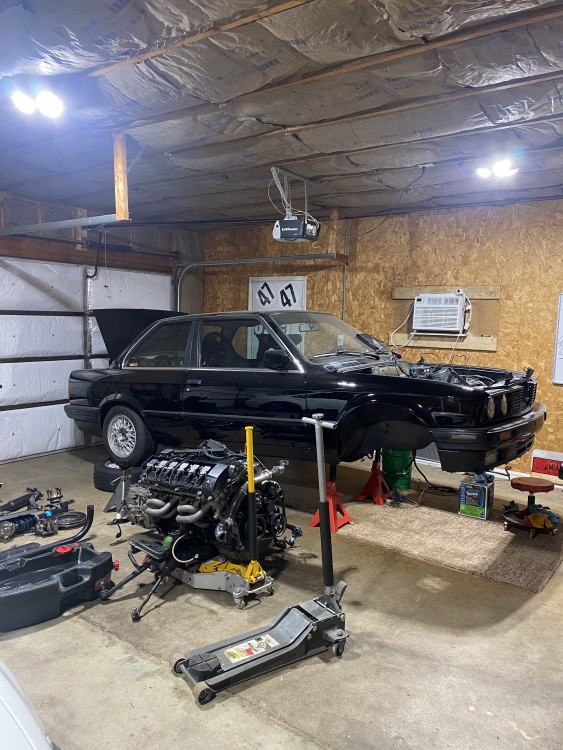
          Dropping it out of the bottom Is the way to go
          B7EFB135-3C21-4C6F-B9F6-BDBAA30CC4ED.jpeg
           

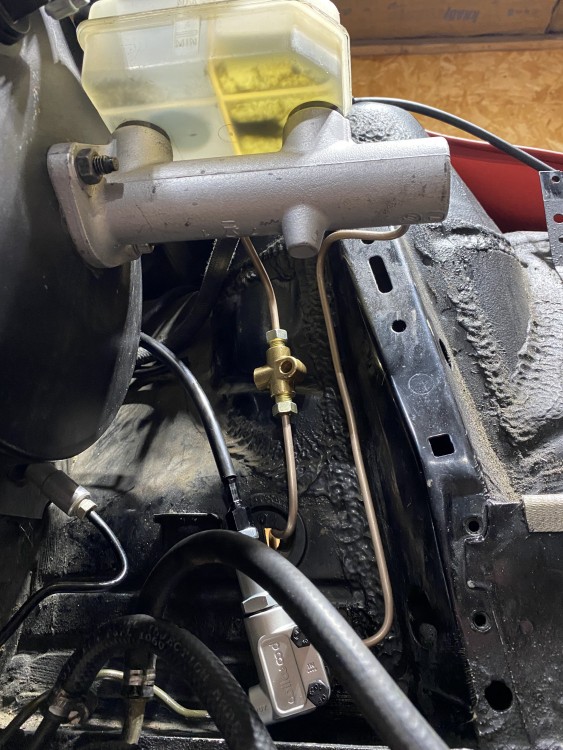
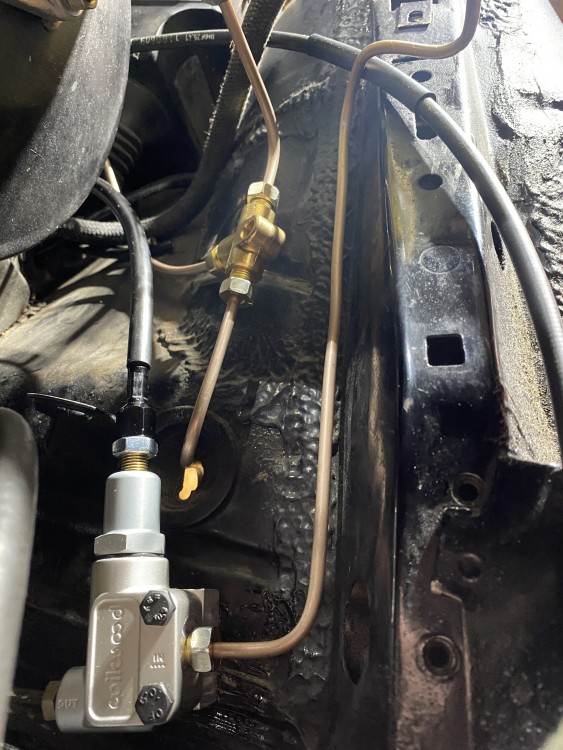
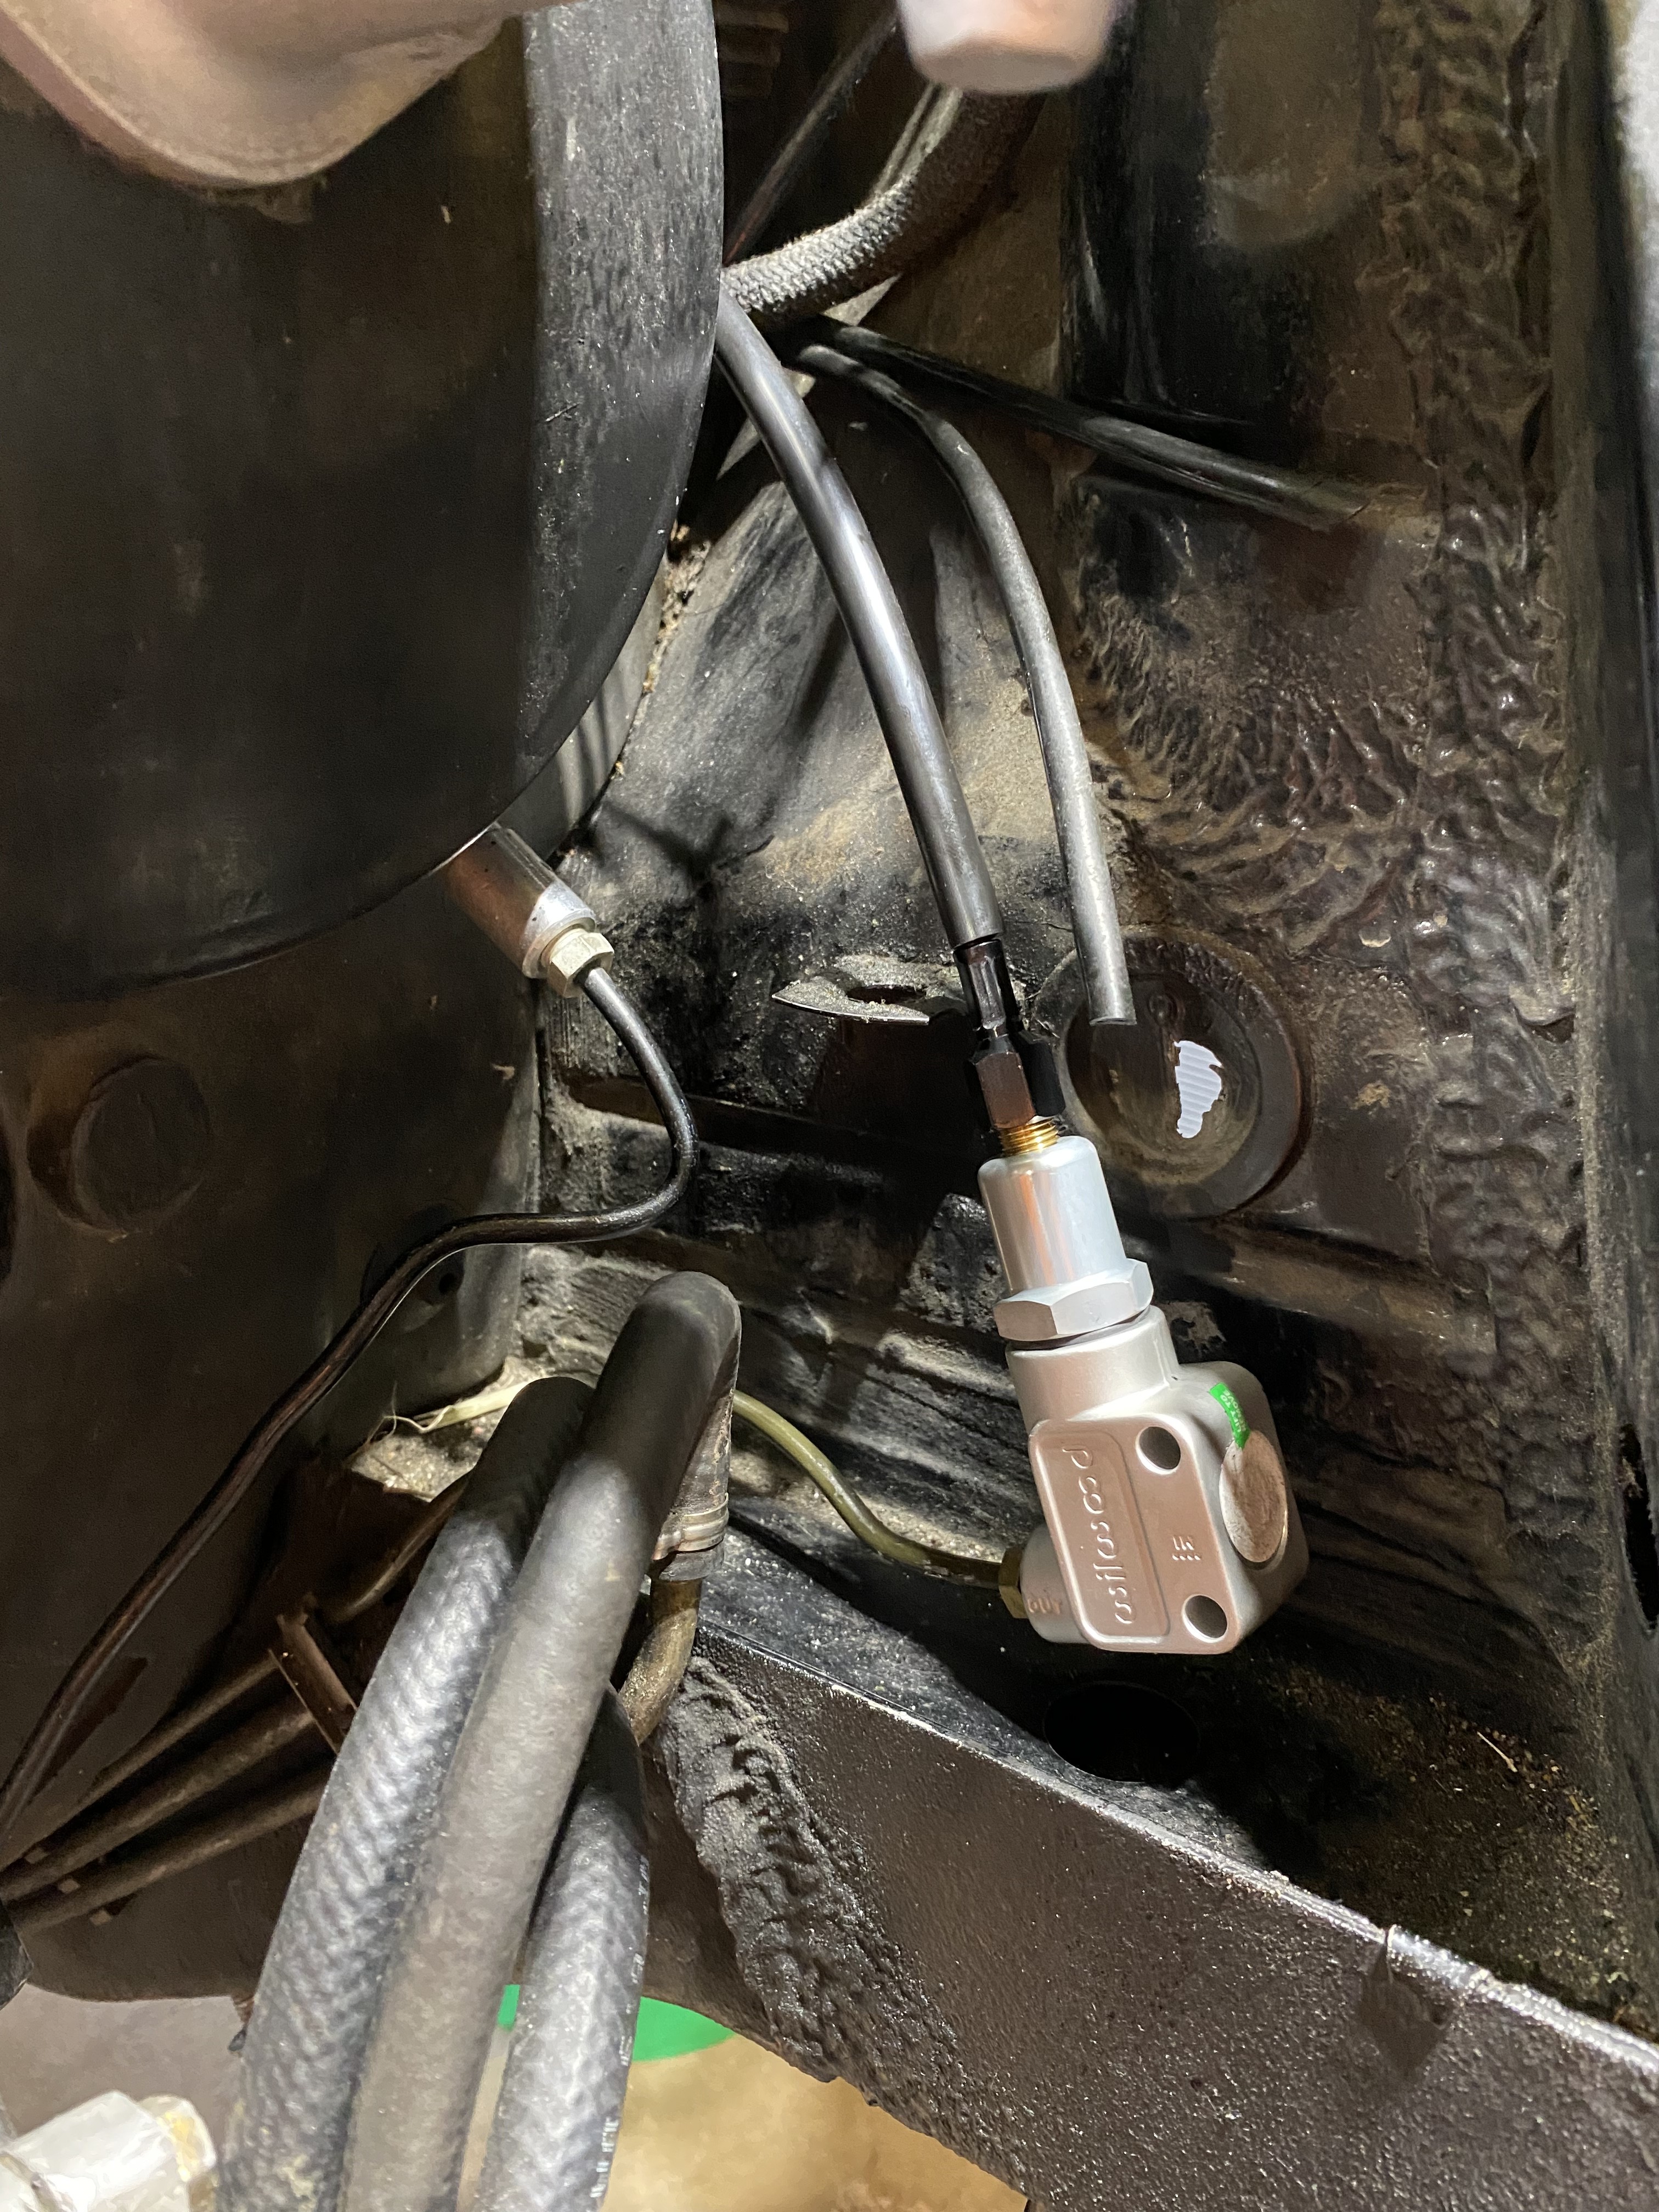
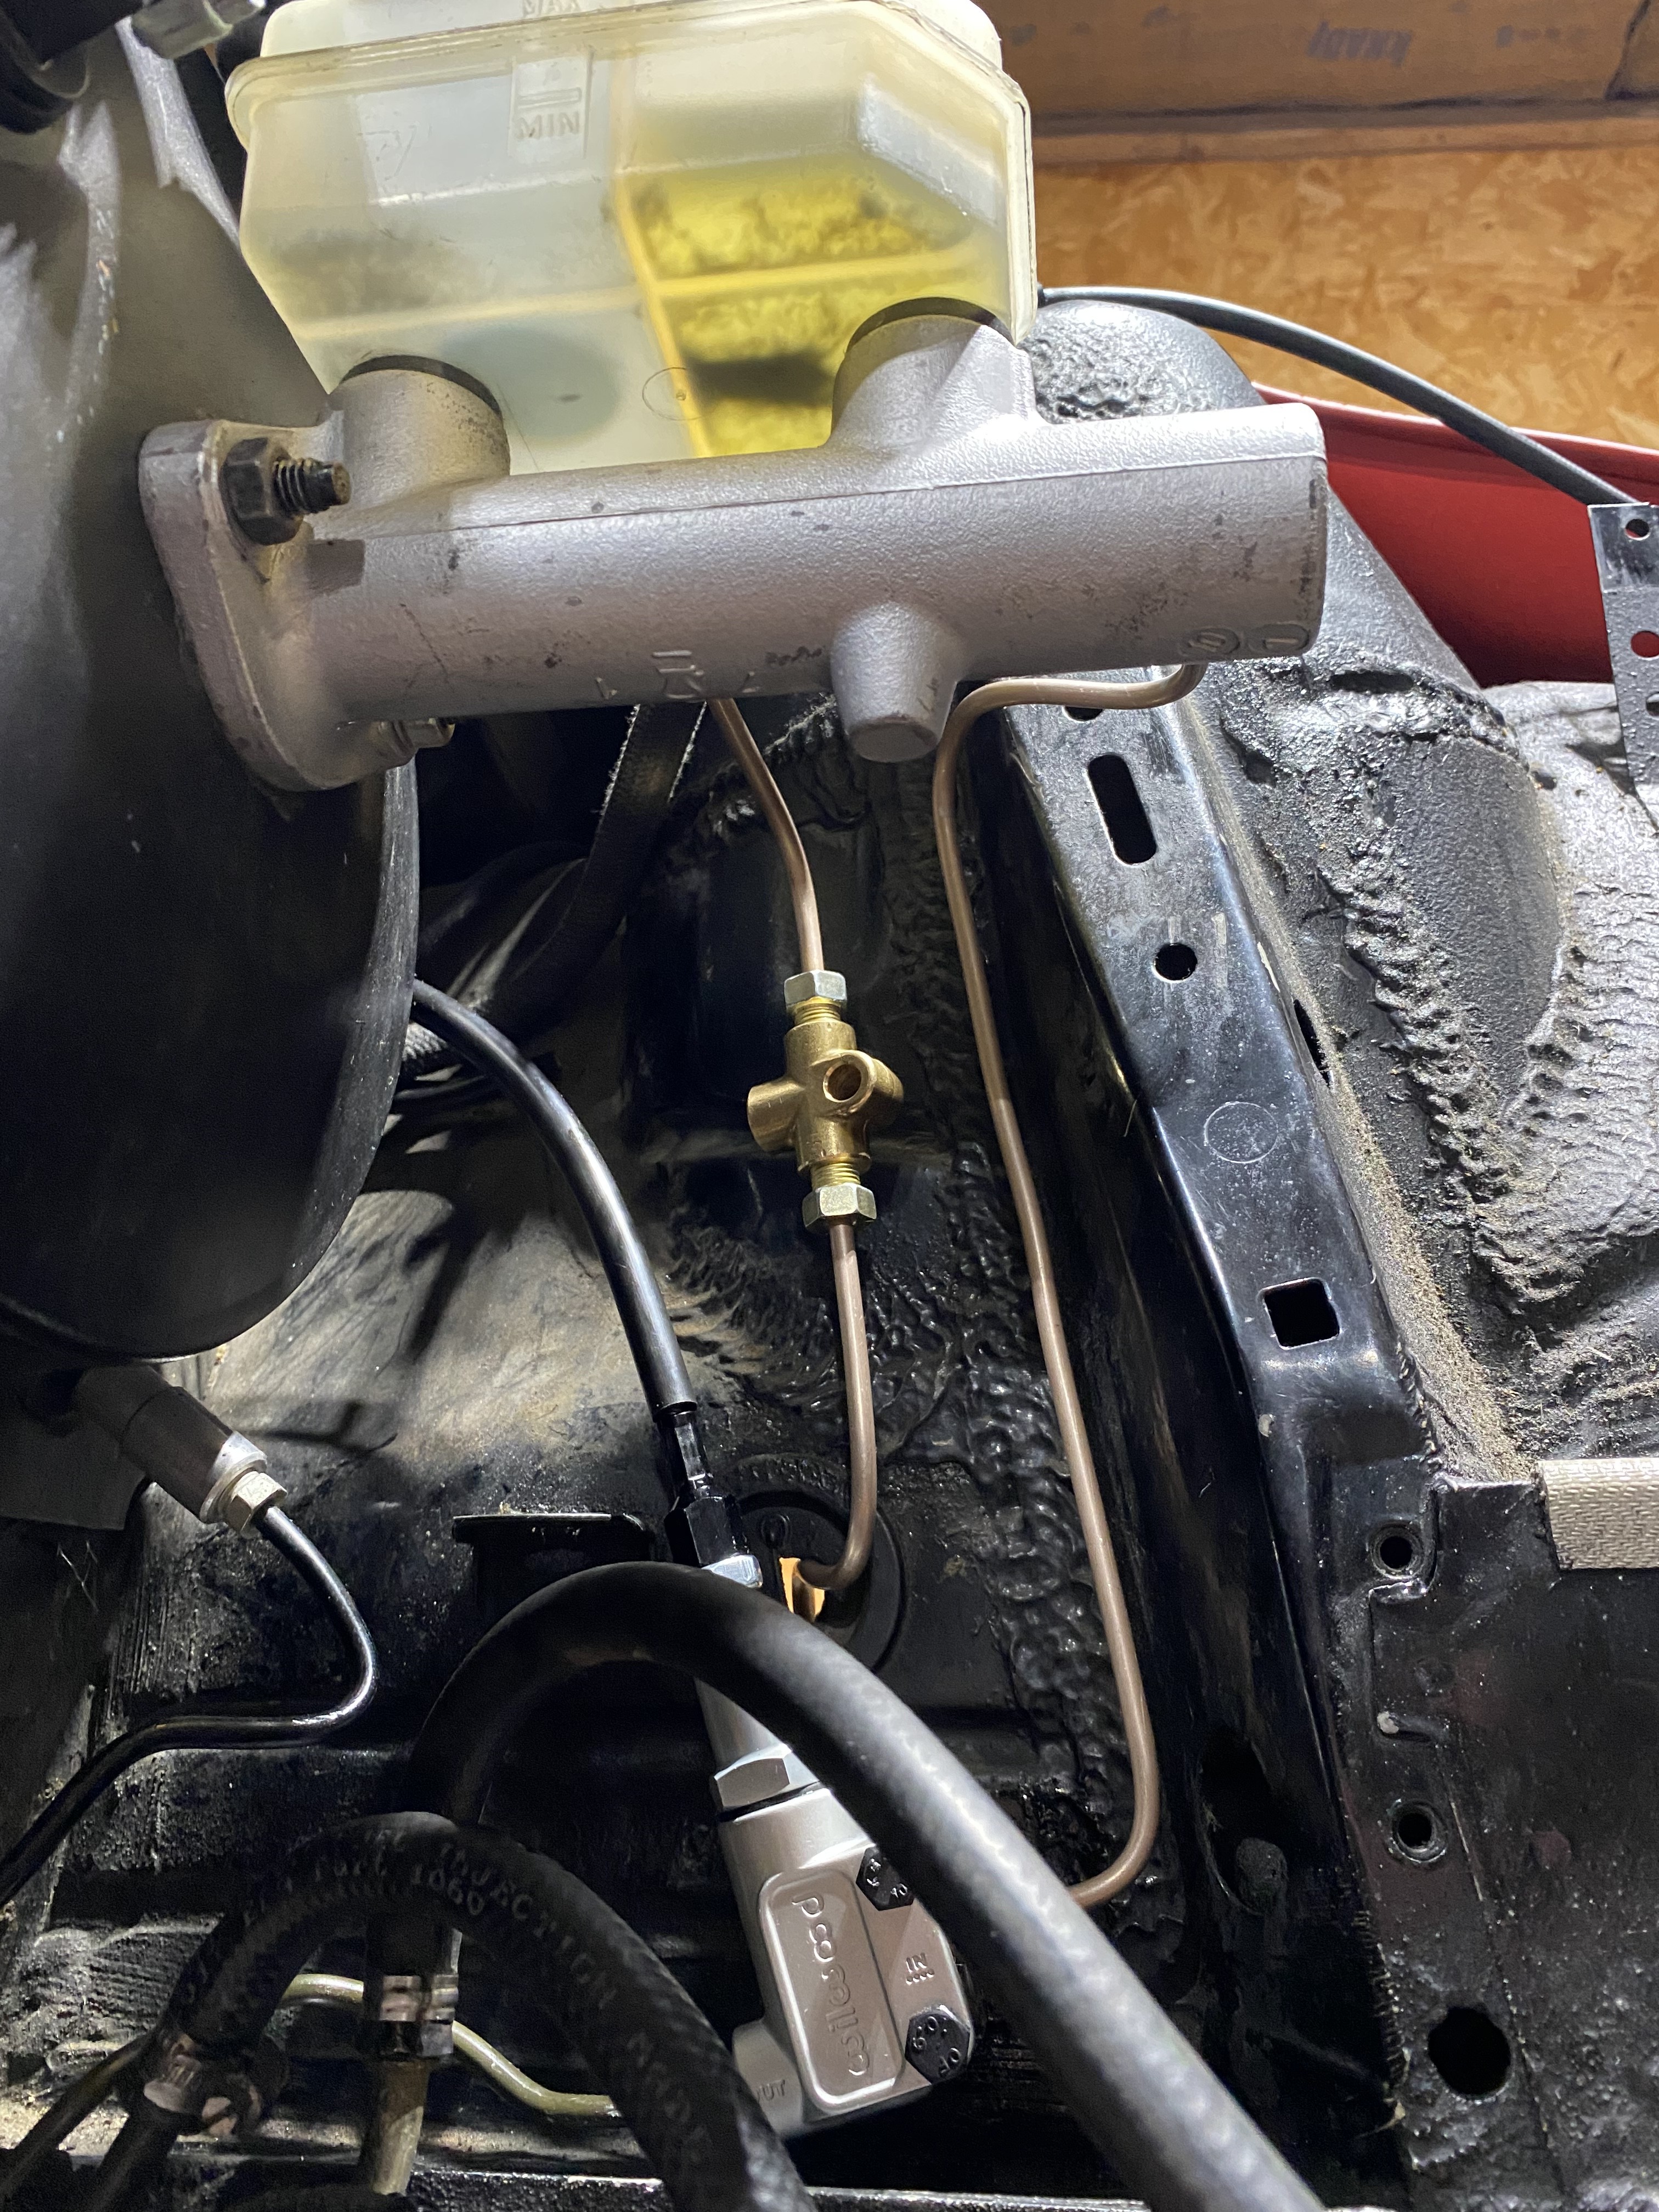
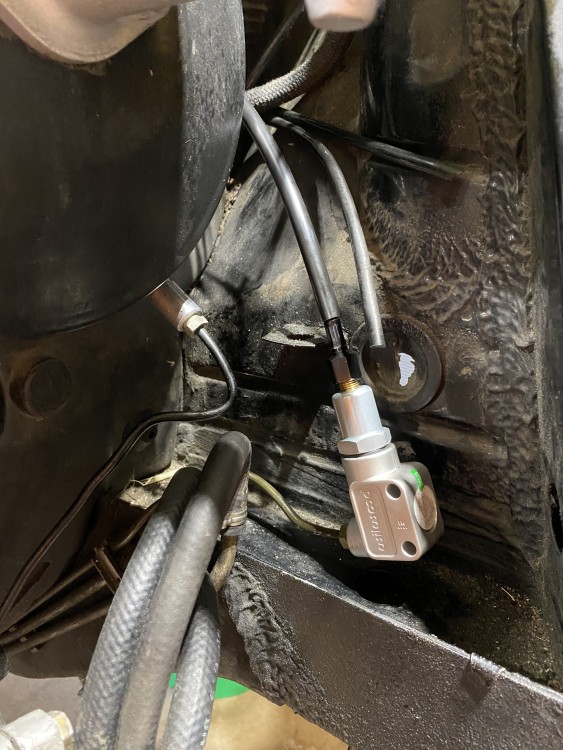
          ABS pump is already gone, as well as all the front brake lines. Working on getting the bias adjuster mounted and remote cable ran. 
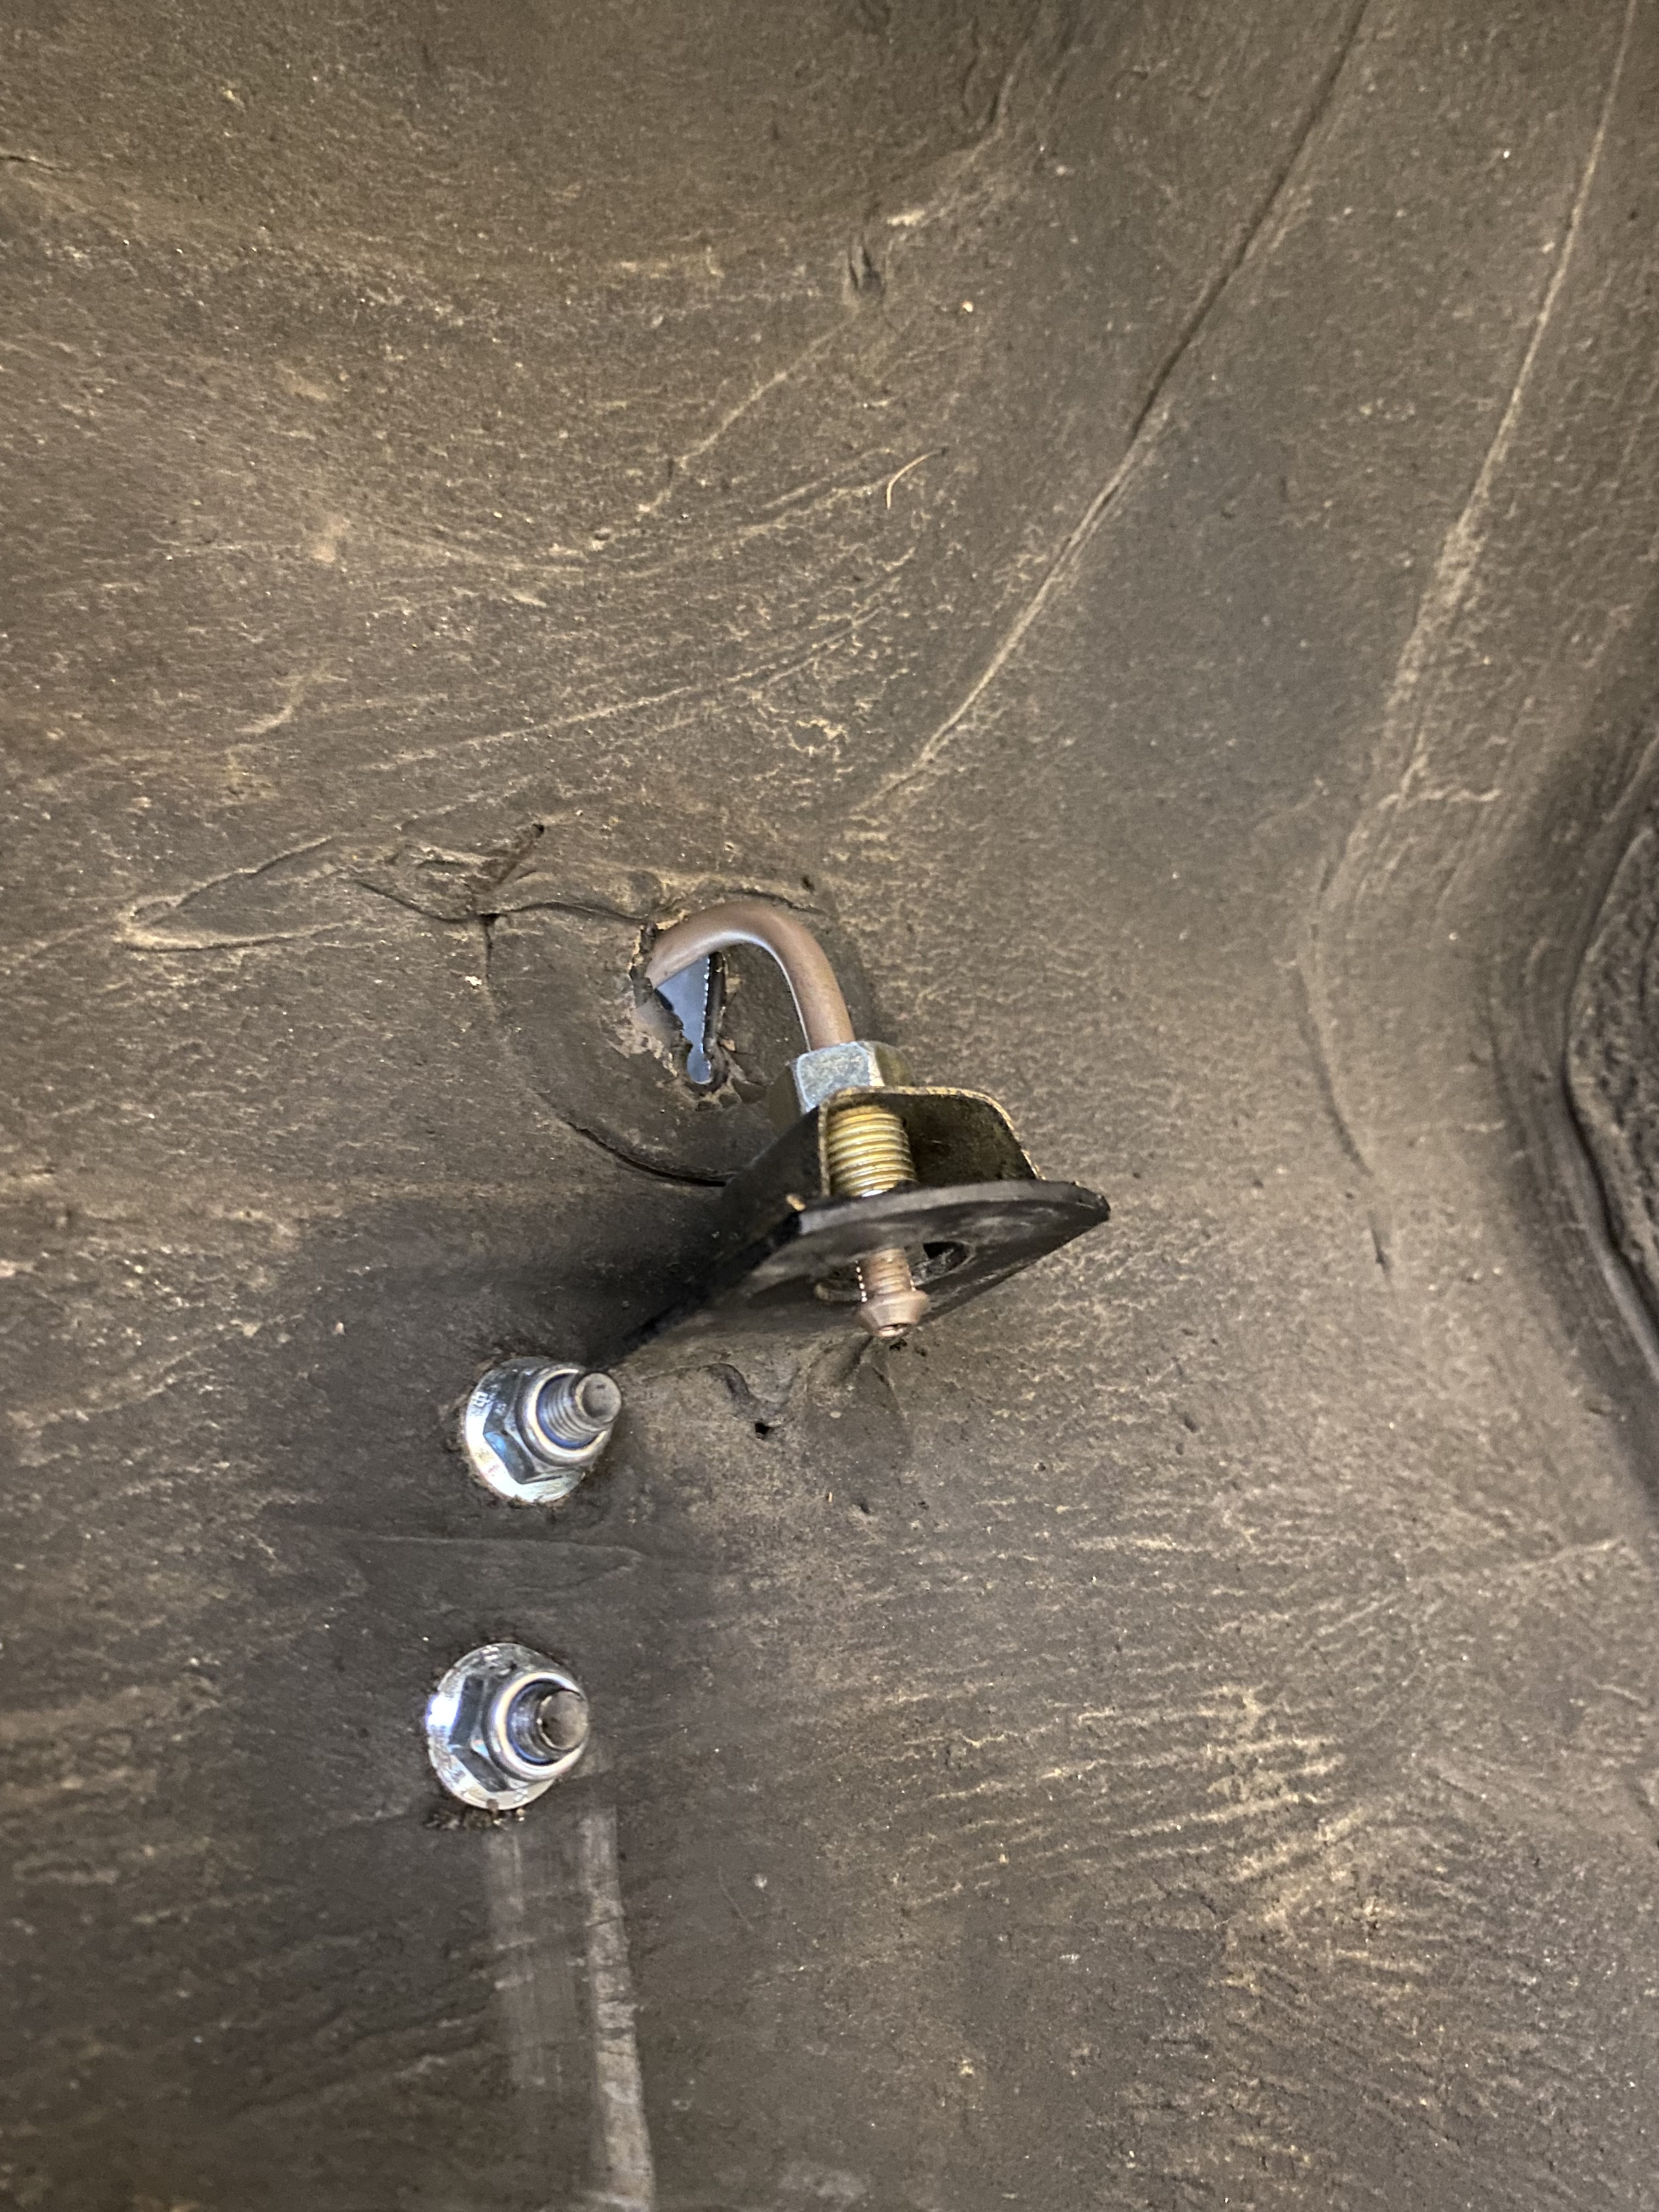
          quick bend of the rear line gets the angle right for the cable to run to an already existing grommet in the firewall next to the main fuse box harness 
          D0BA8894-E2B7-49FC-9DB3-9080AD2E013E.jpeg

          1 Reply Last reply
          4
          • KaiserRollsK
            KaiserRollsK
            KaiserRolls
            wrote on last edited by
            #446

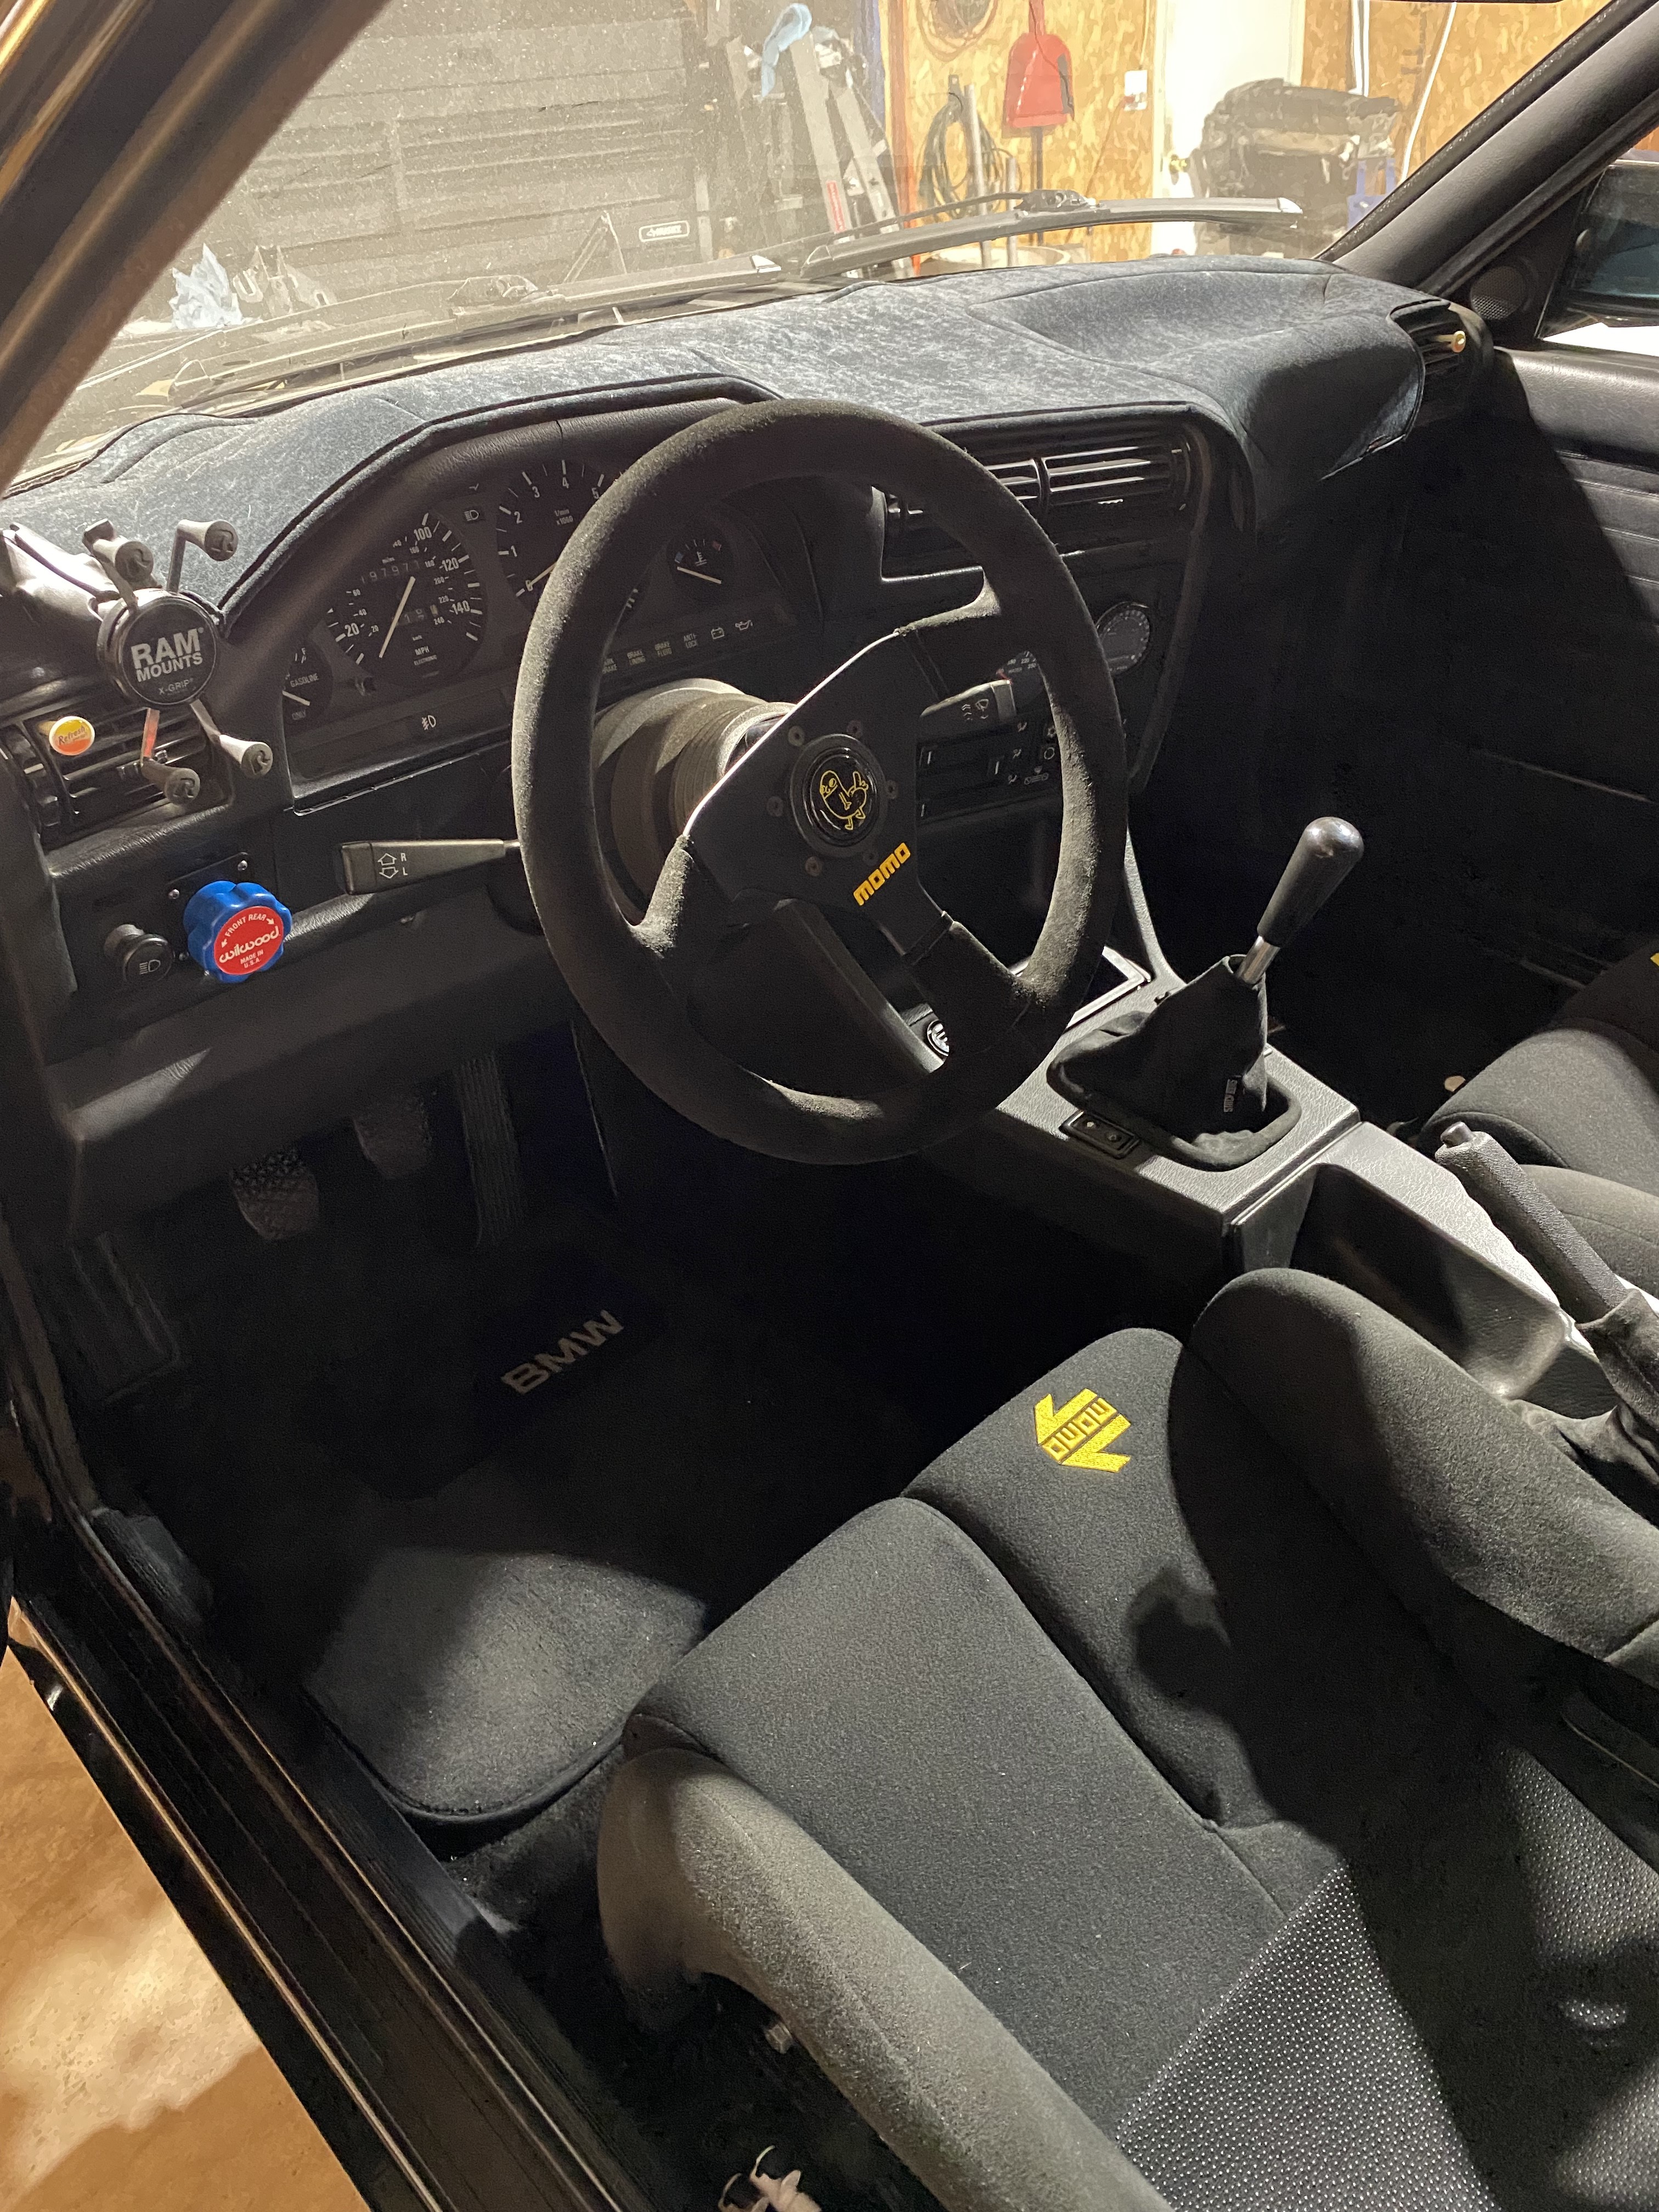
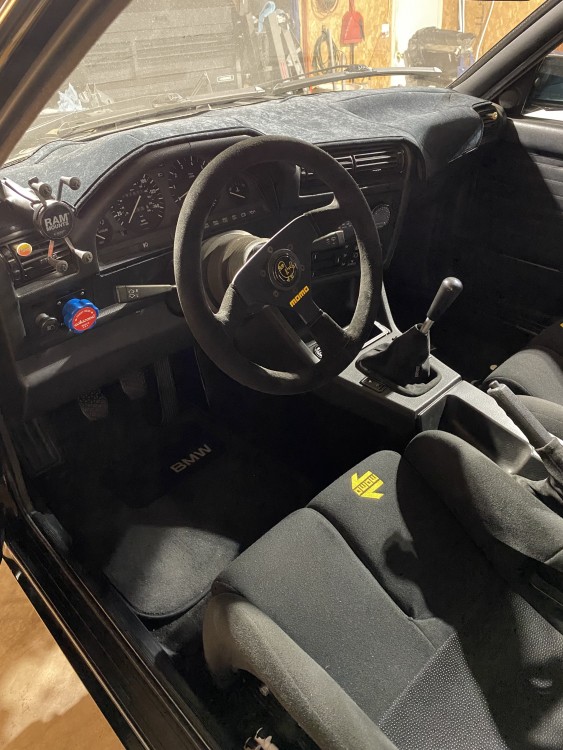
            Interior stuff is all done, remote Knob used the area for the fog lights (which Are being removed for the OEM “delete” panels) 
            04112149-B013-4AB9-B919-393B52795EAA.jpeg
            hoping I won’t have to touch interior stuff anymore for this chapter (wideband is already routed, just not connected to anything) 

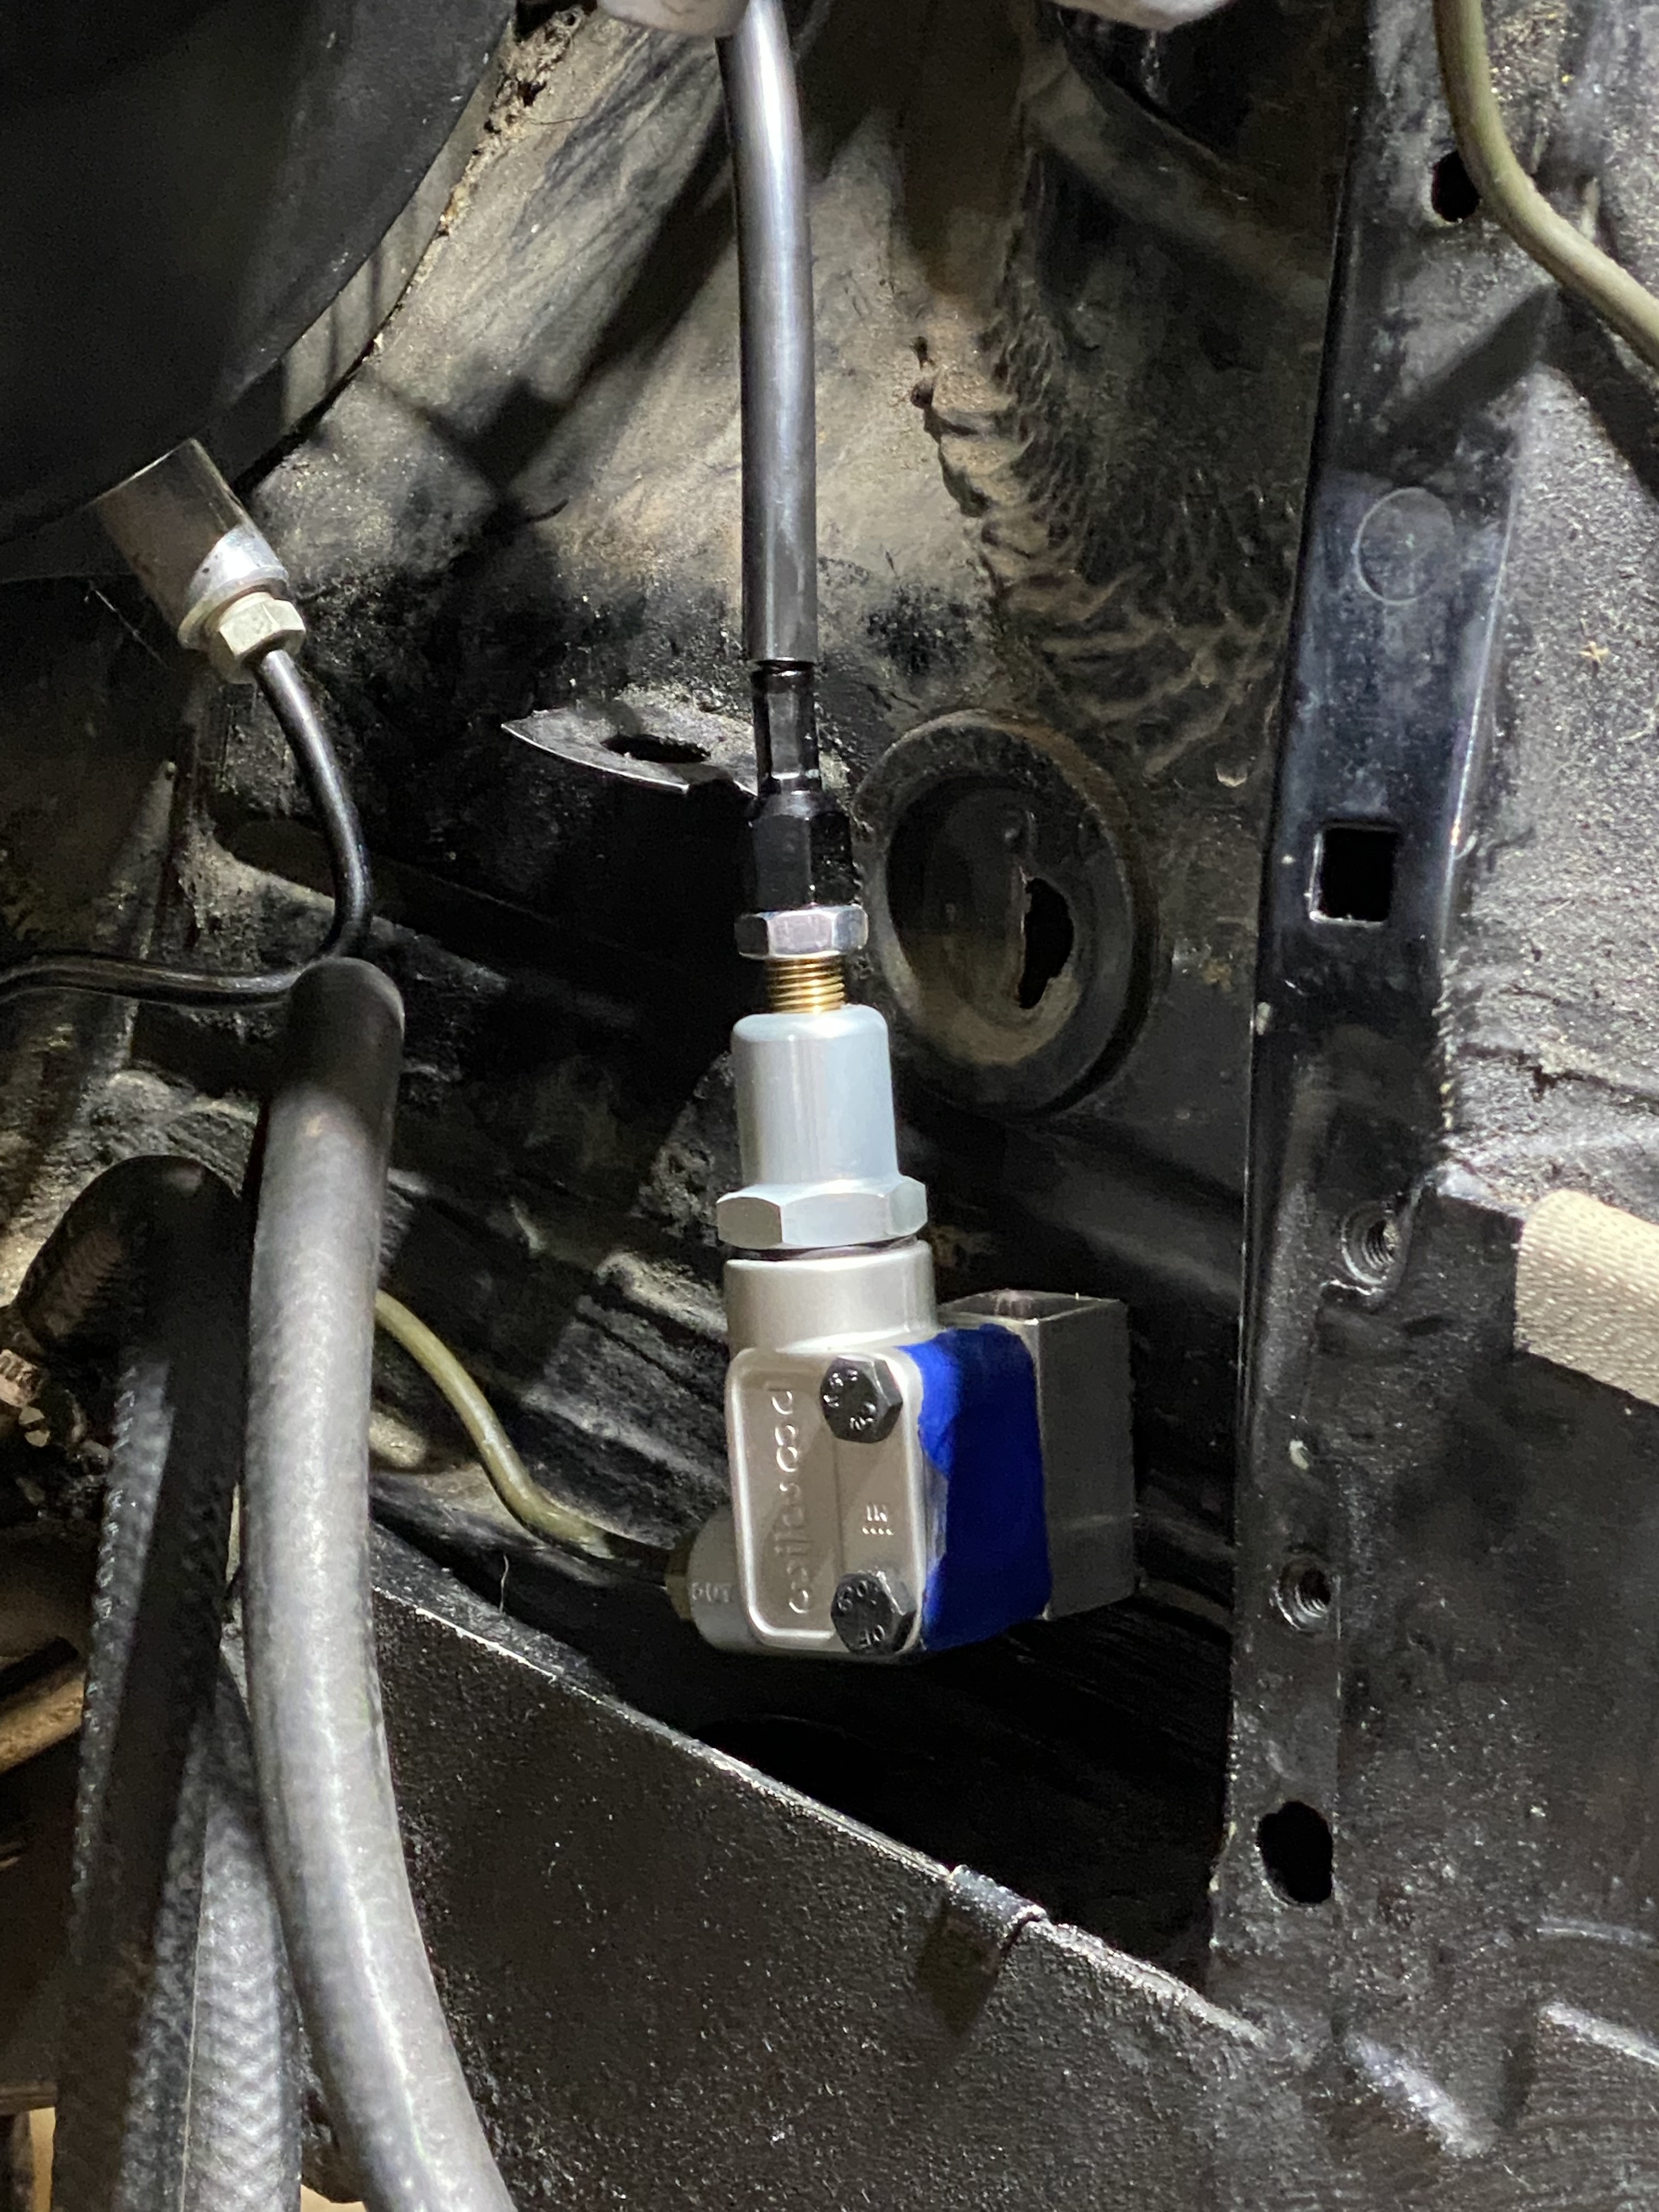
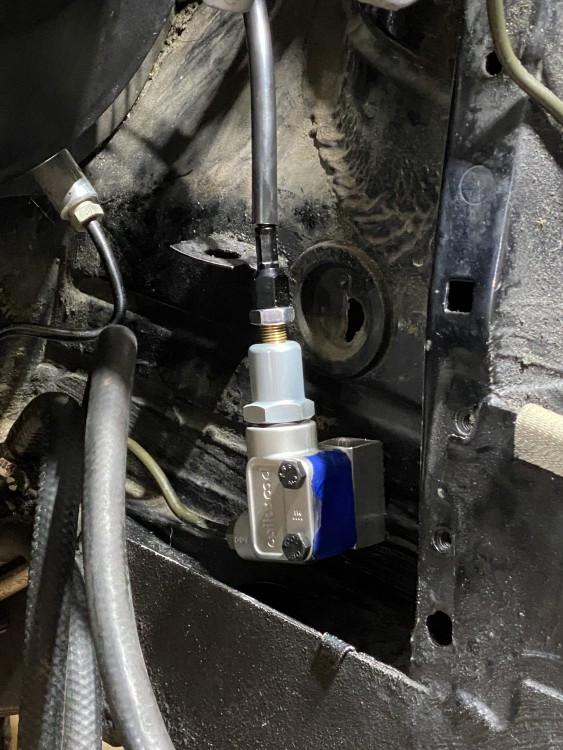
            made a quick “bracket” for the bias adjuster out of some scrap 3/4” alum square tubing. 
            3A9DB98E-2258-43BF-A22E-584572C9F43E.jpeg

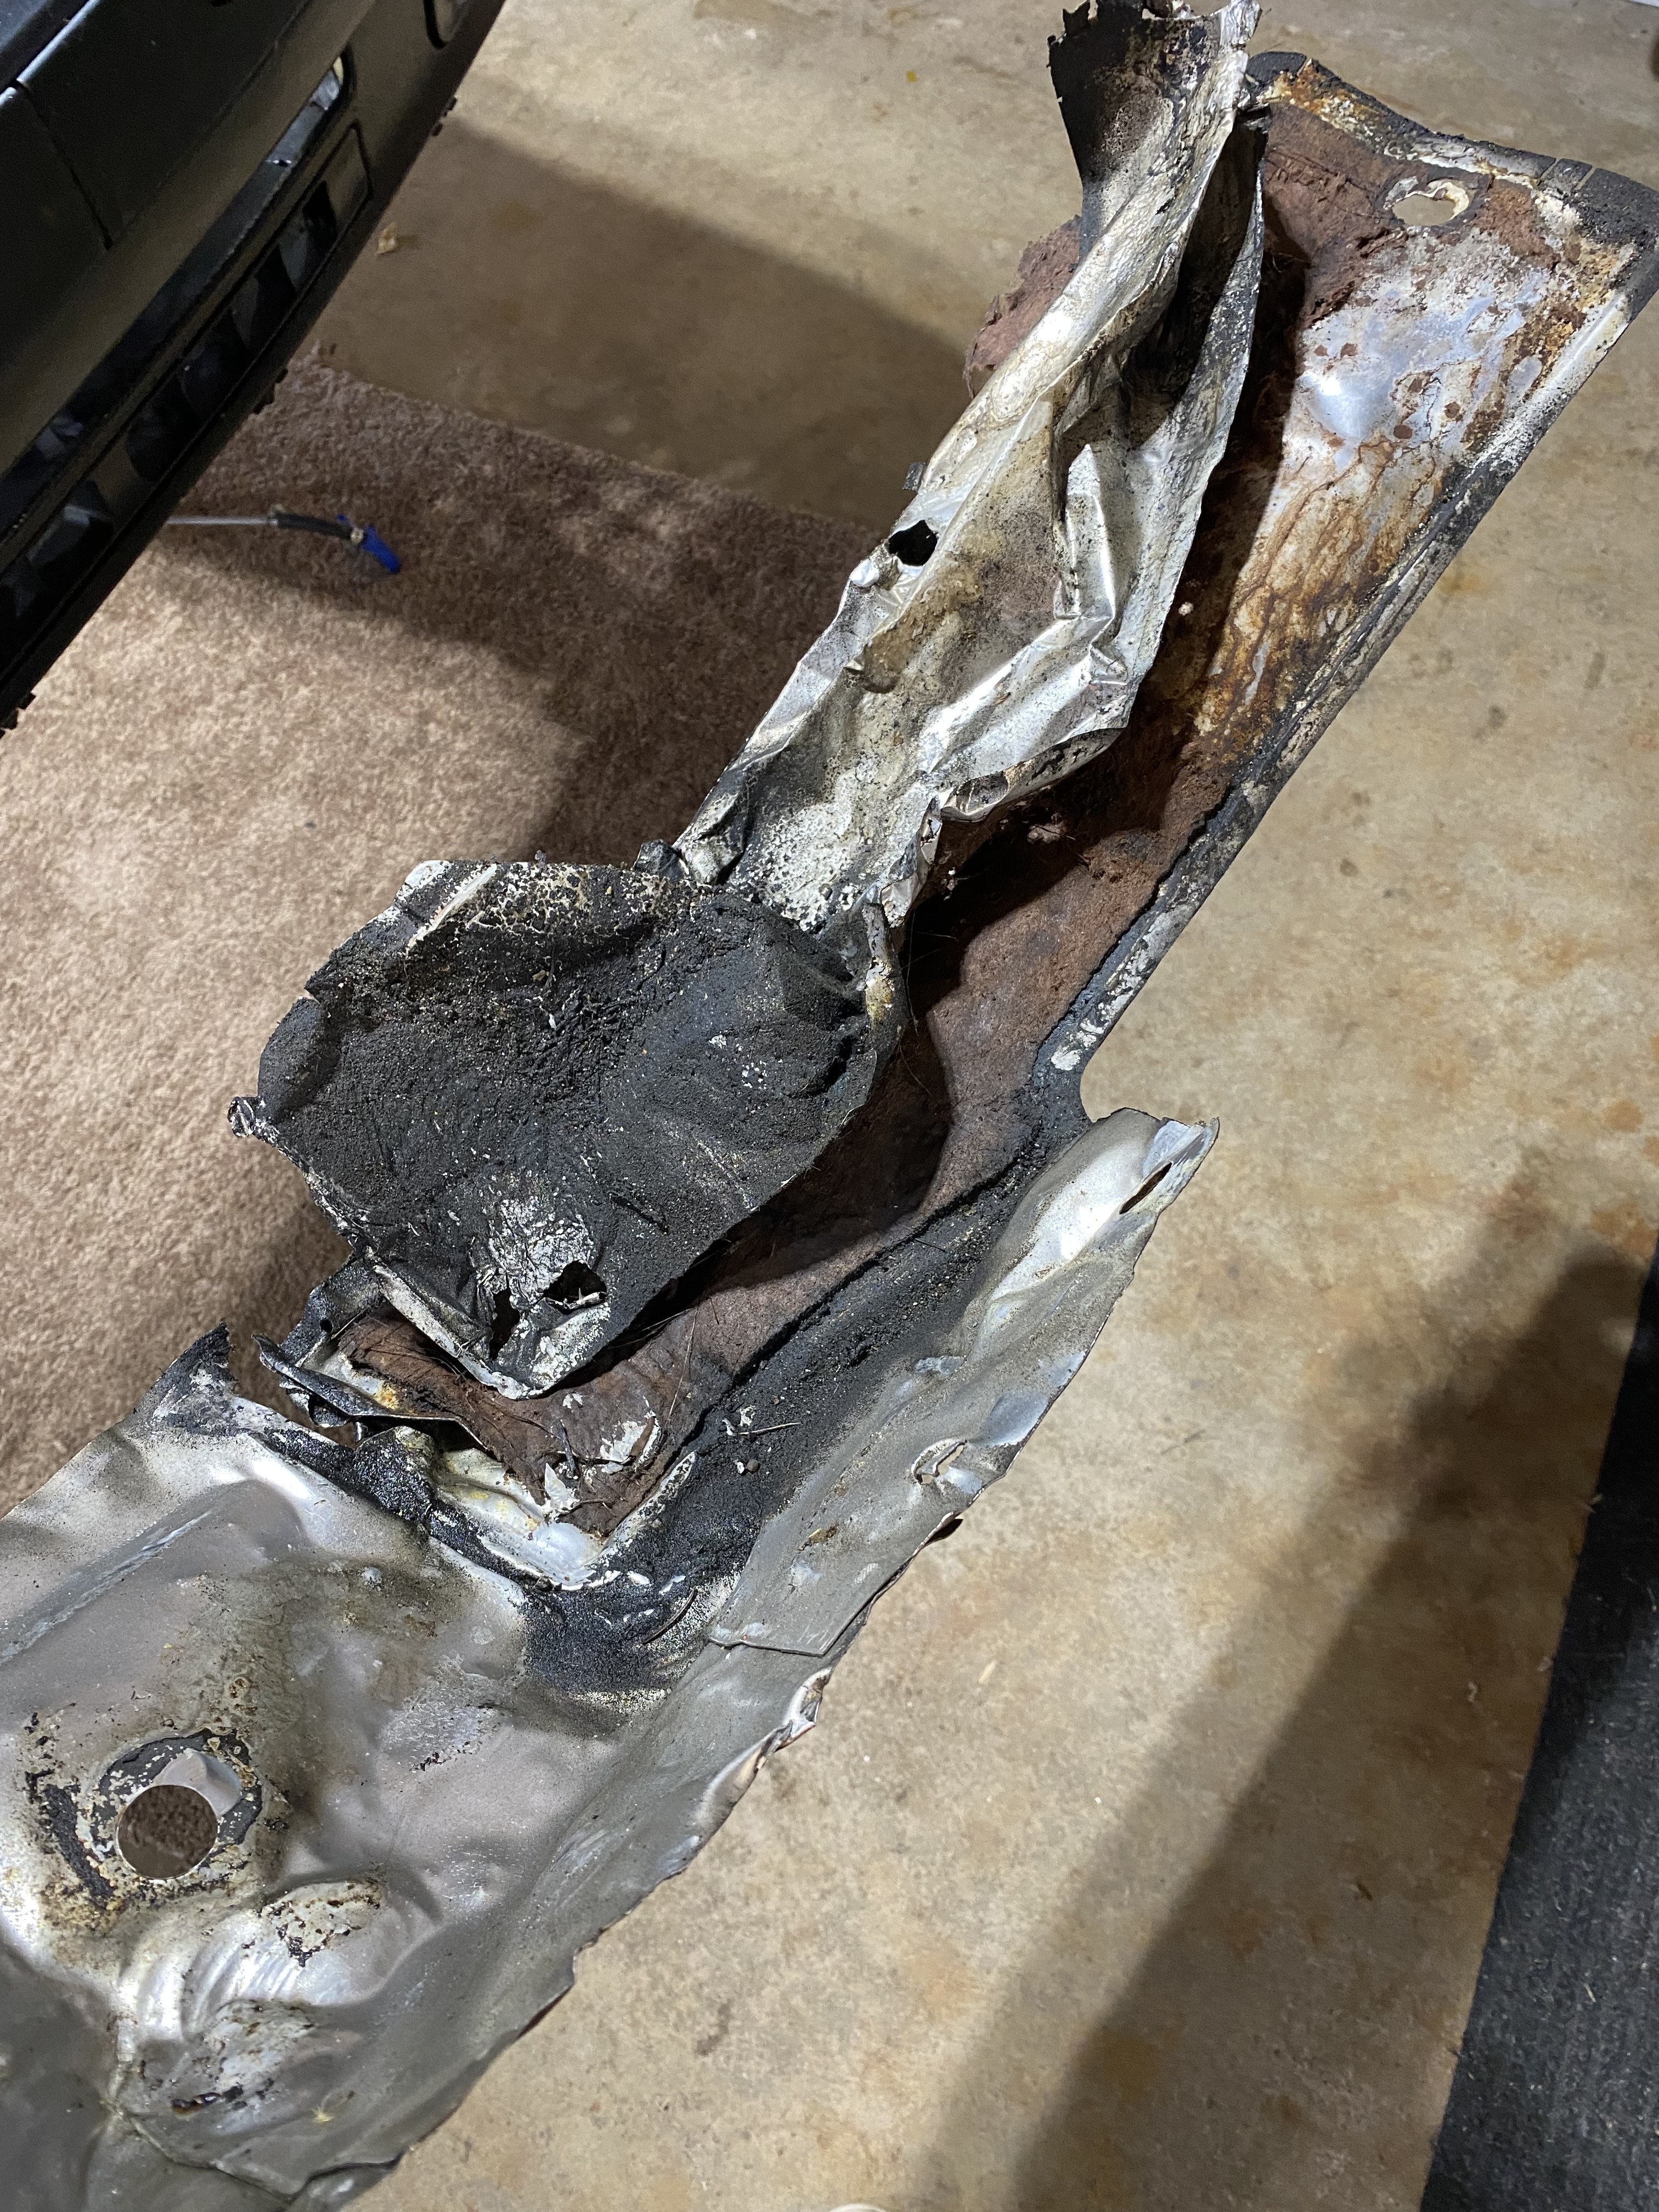
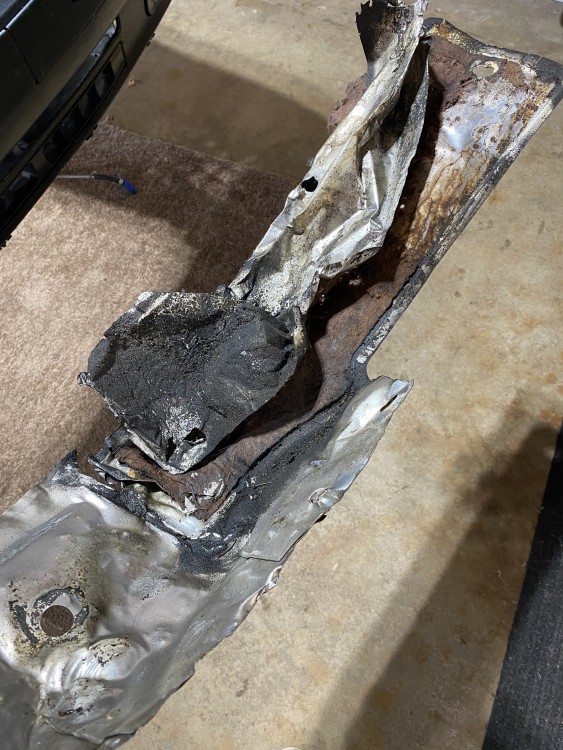
            removed the factory heat shield for the exhaust (firewall area, still running the one in the tunnel) as it was pretty disgusting and had seen better days.
            4258DF20-8E29-4ED5-A92B-B11F983A8AED.jpeg

            Eventually I’ll add some DEI stuff if needed. Also removed the factory sound deadening thing from the firewall/tunnel. After removing the flanged plastic nuts the stuff basically fell apart as I removed it. It was also gross. Have seen rot behind these before on other cars, but luckily this car has never seen winter. Removed all the studs with an angle grinder as well. 
            should have a lot more room to access trans stuff now if I need to. 

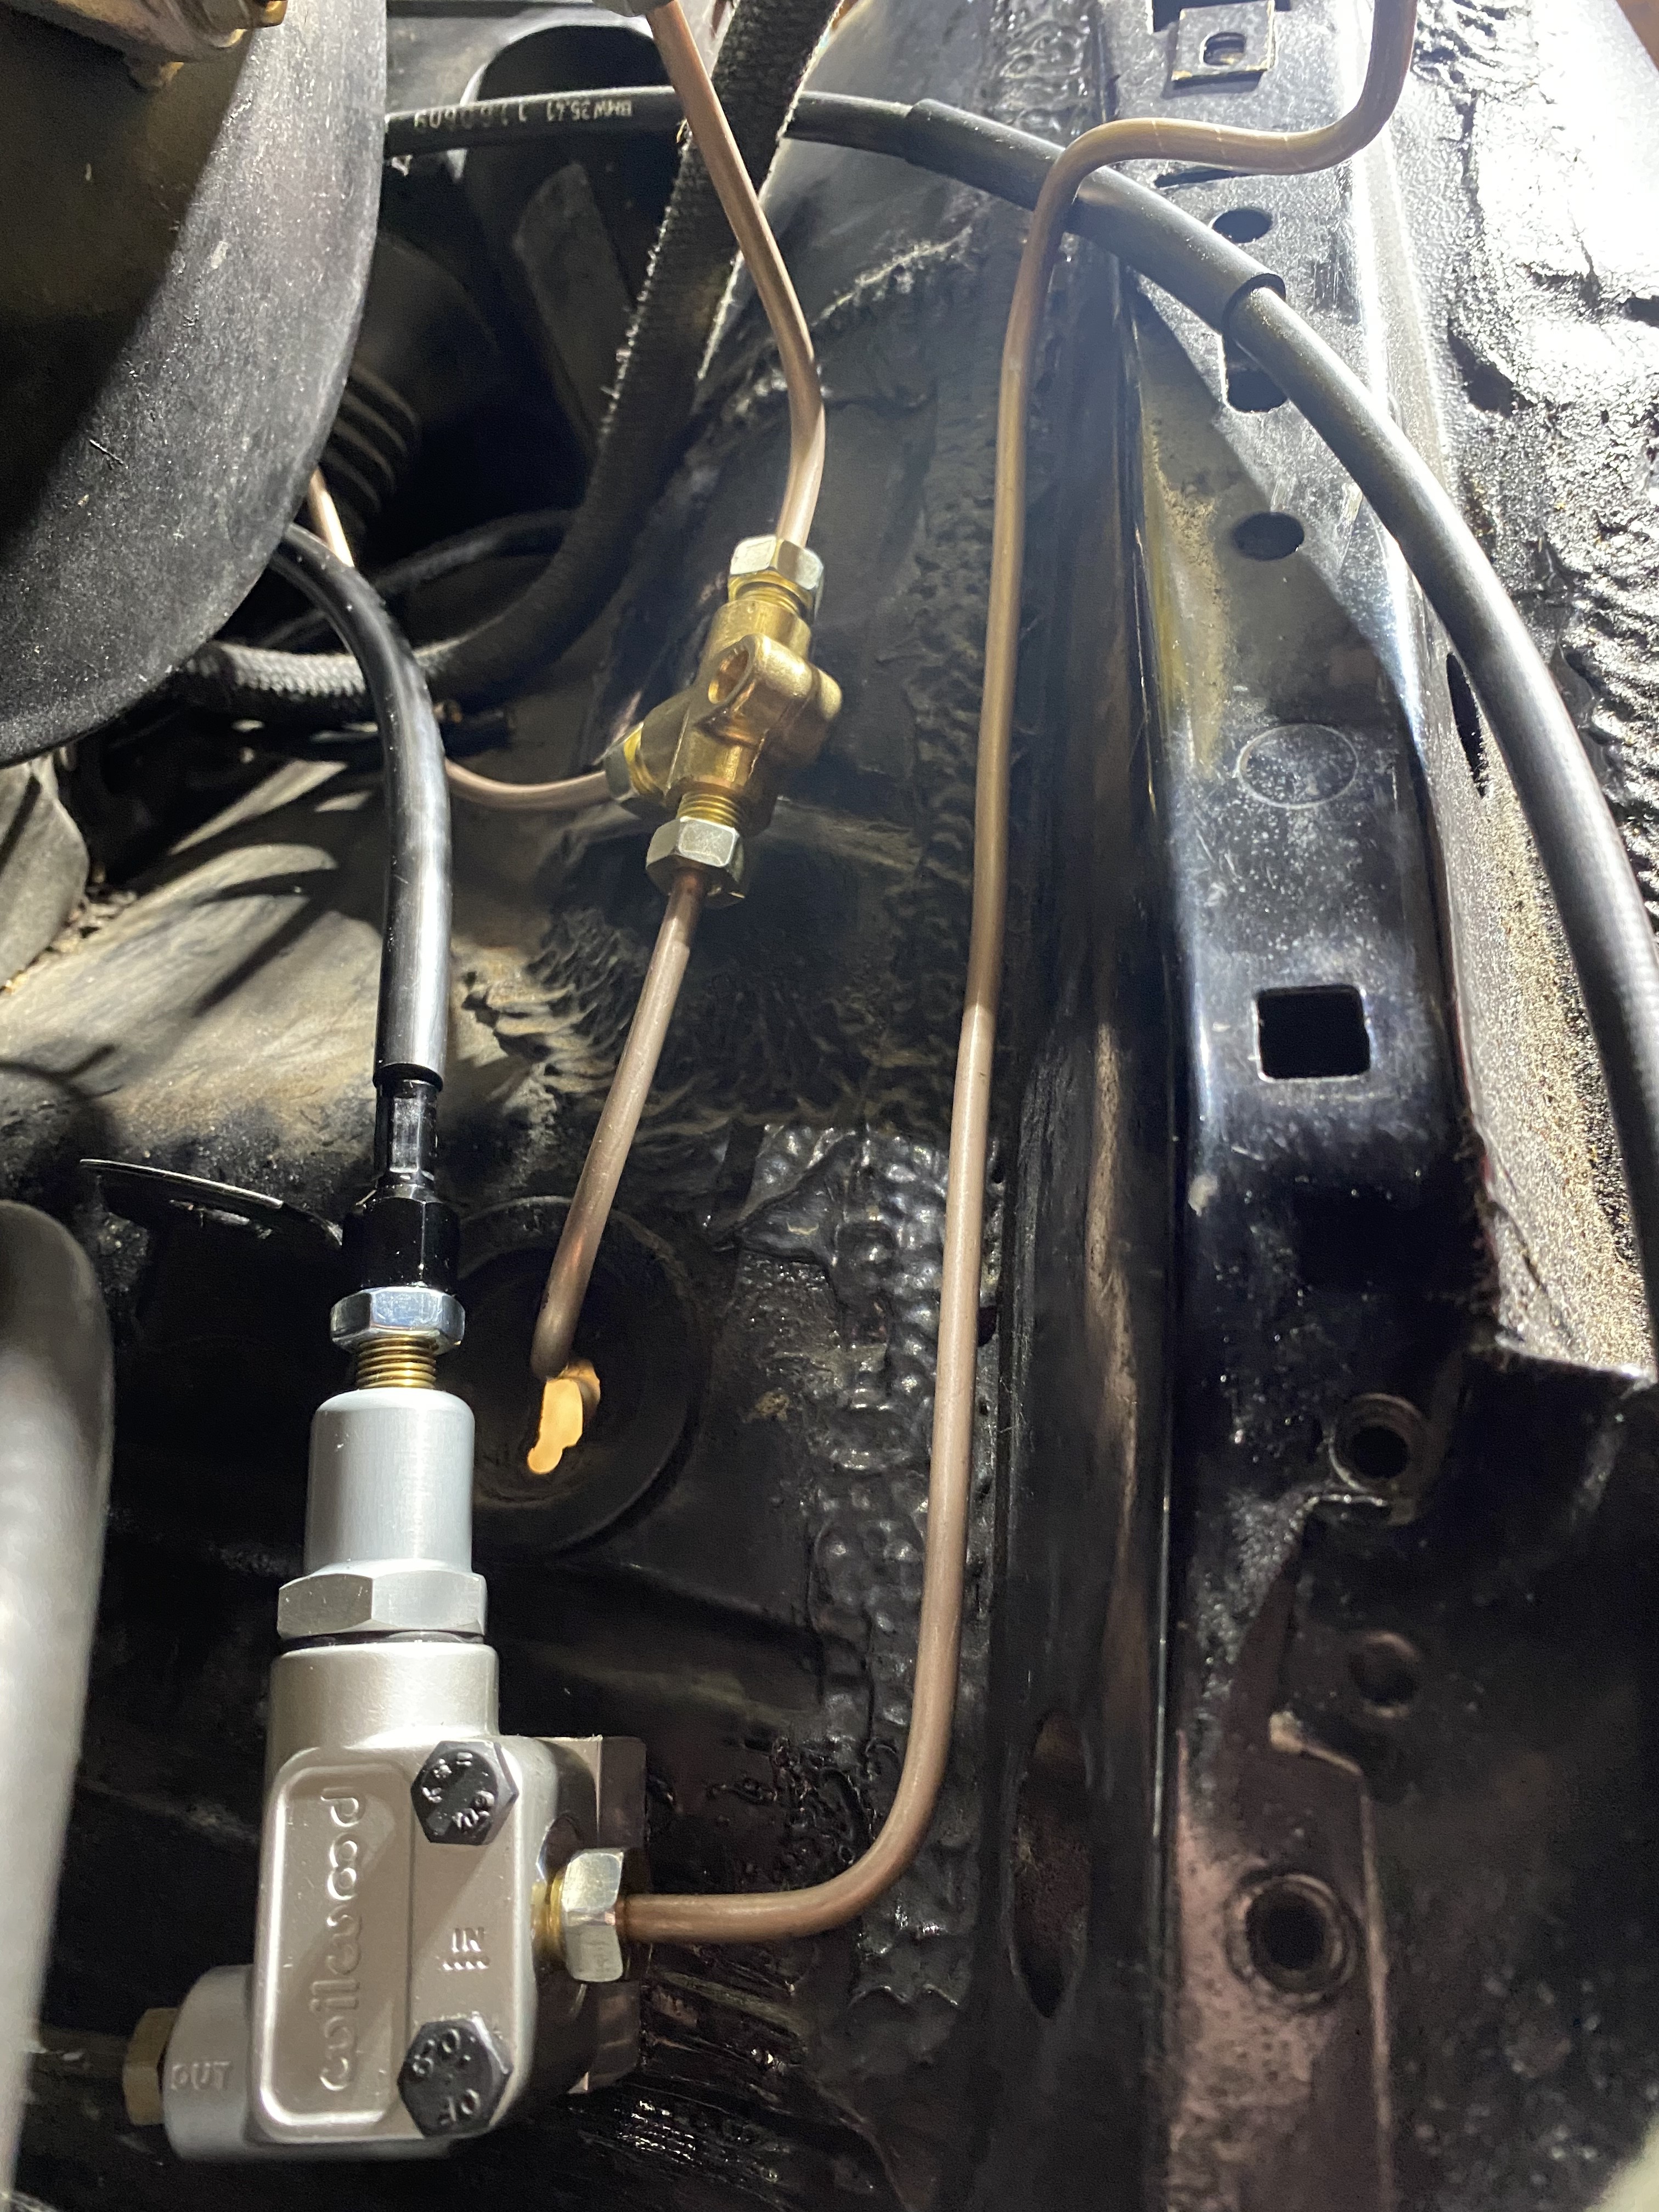
            next up is to finish making hardlines to go from master to bias valve and master to front brakes. Once that’s done I can start on the engine stuff

            1 Reply Last reply
            2
            • KaiserRollsK
              KaiserRollsK
              KaiserRolls
              wrote on last edited by
              #447

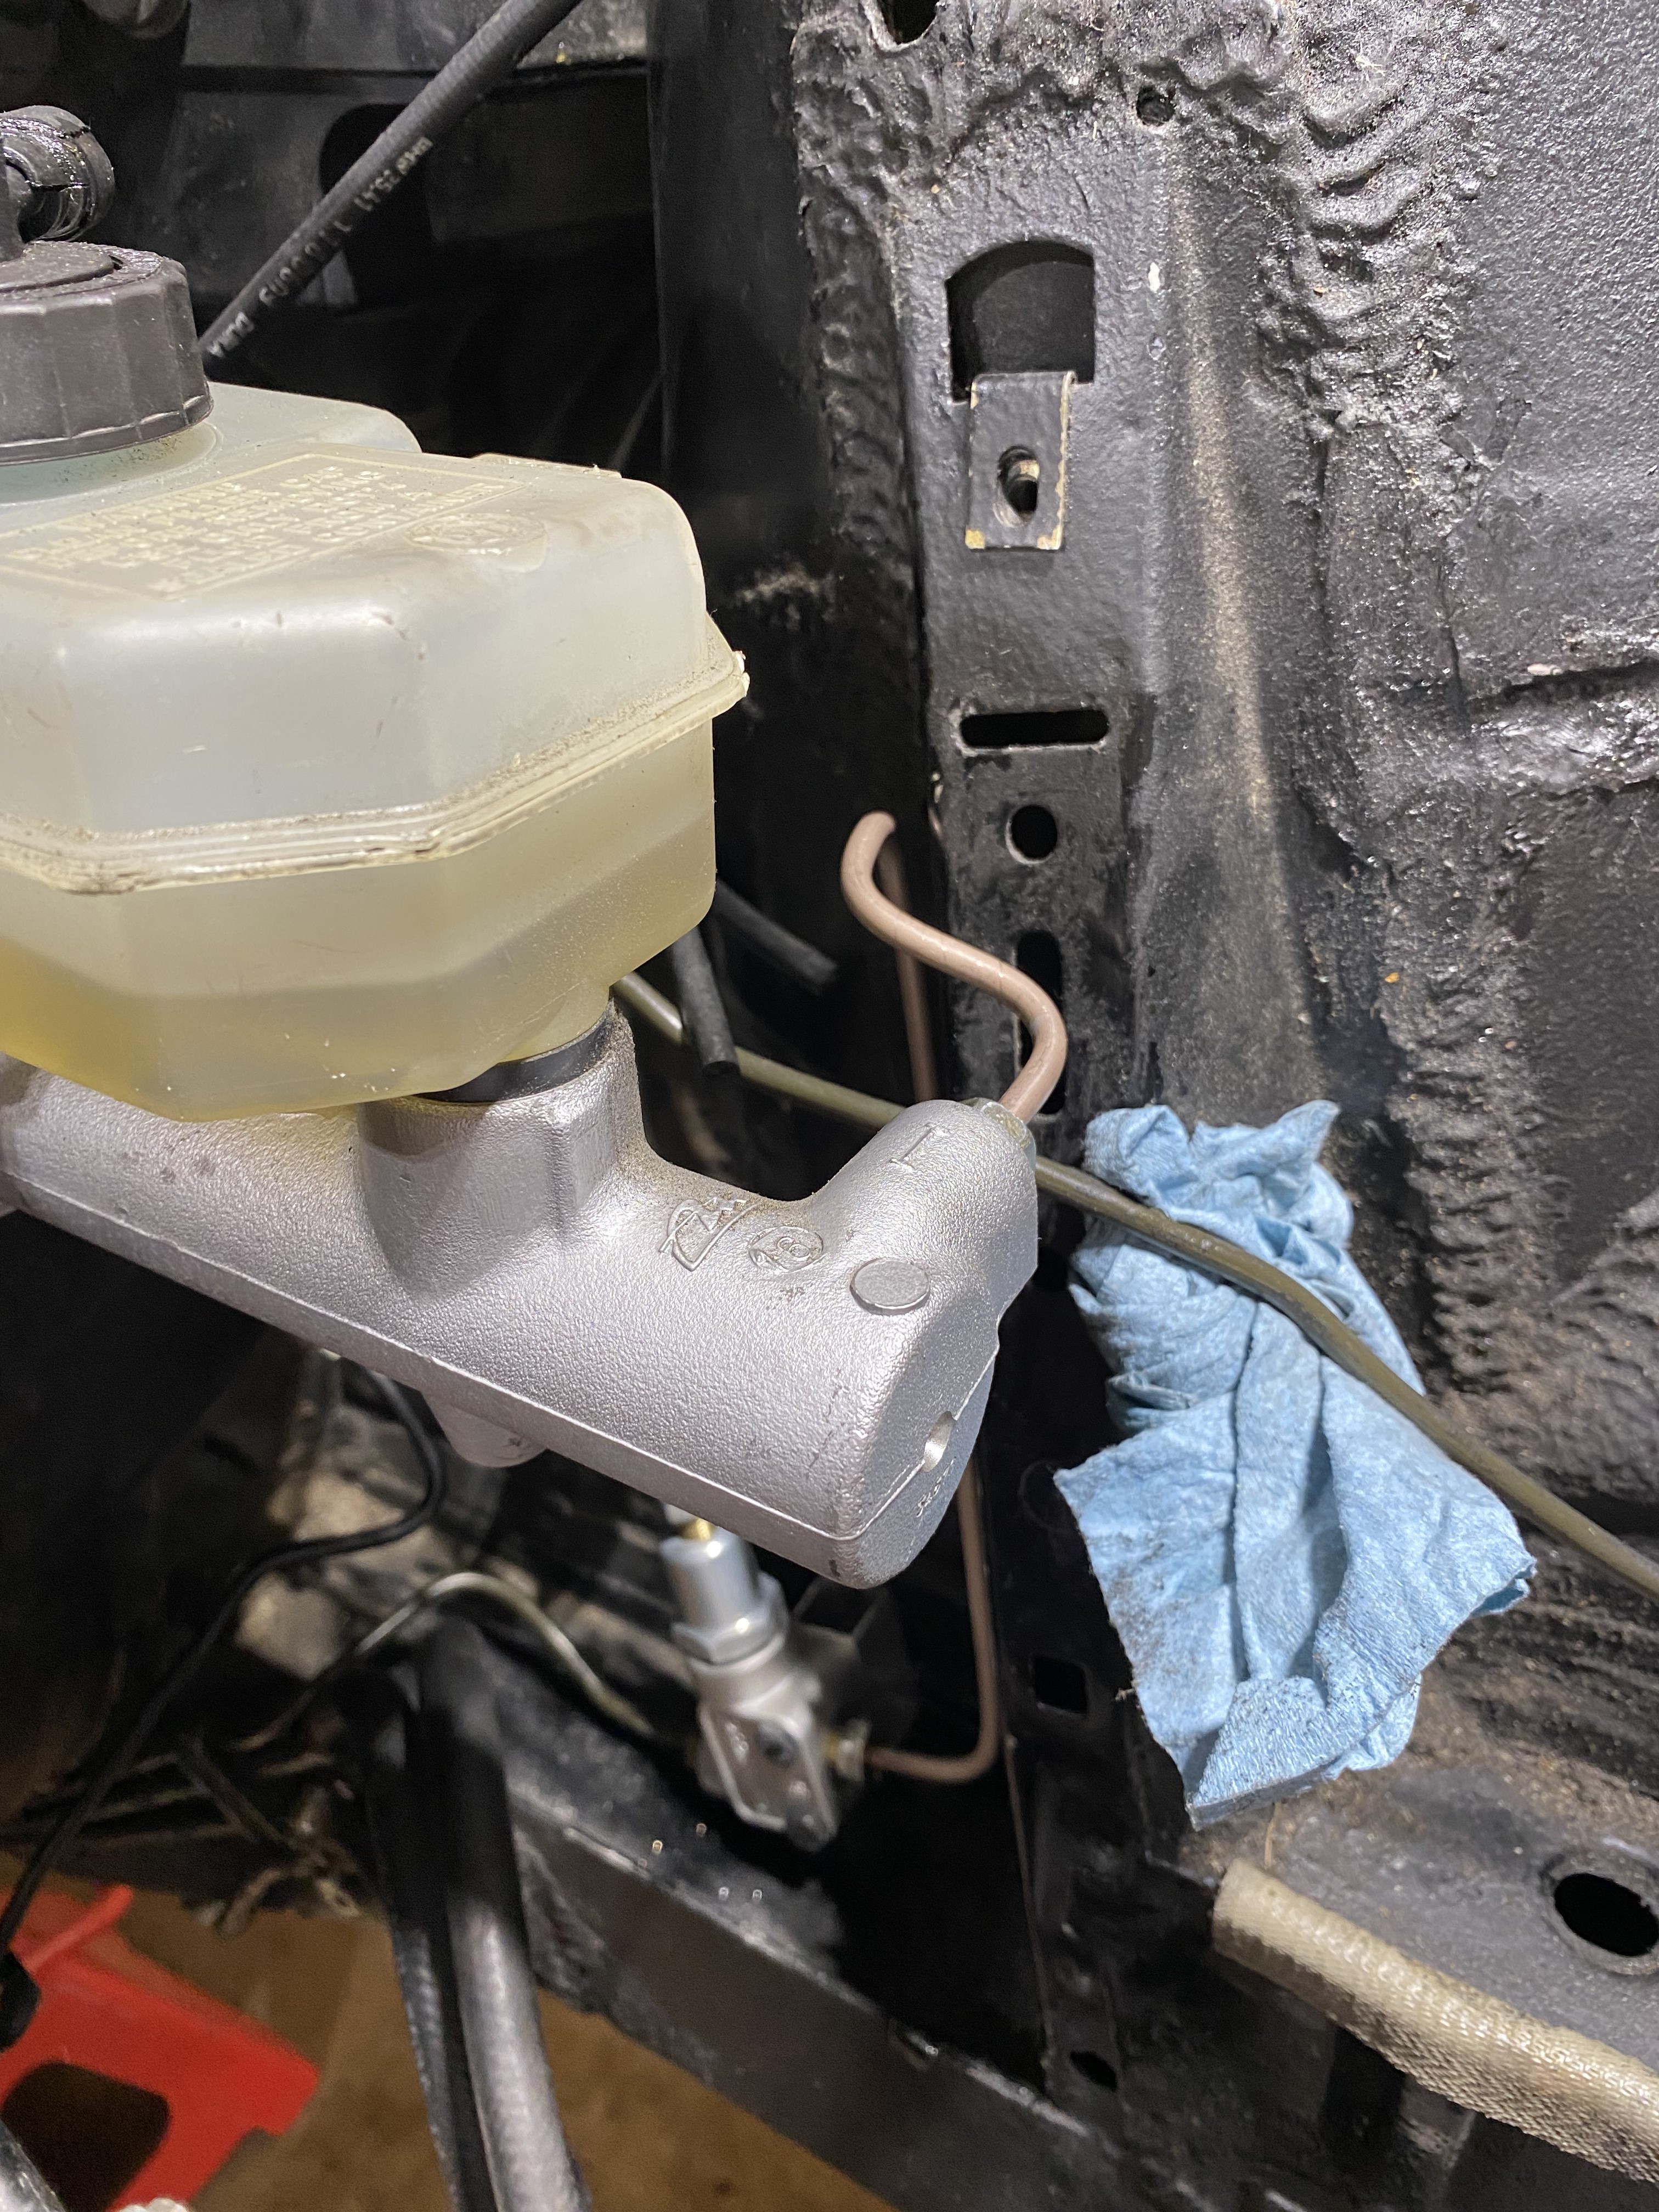
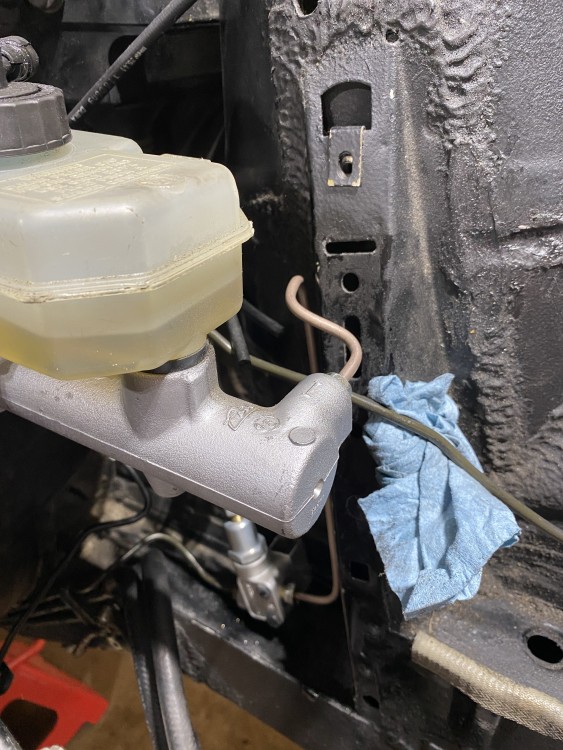
              Master to bias line done for rear brakes 
              DE2964CA-EB51-44C4-A575-253FE83162AB.jpeg

              1 Reply Last reply
              0
              • KaiserRollsK
                KaiserRollsK
                KaiserRolls
                wrote on last edited by
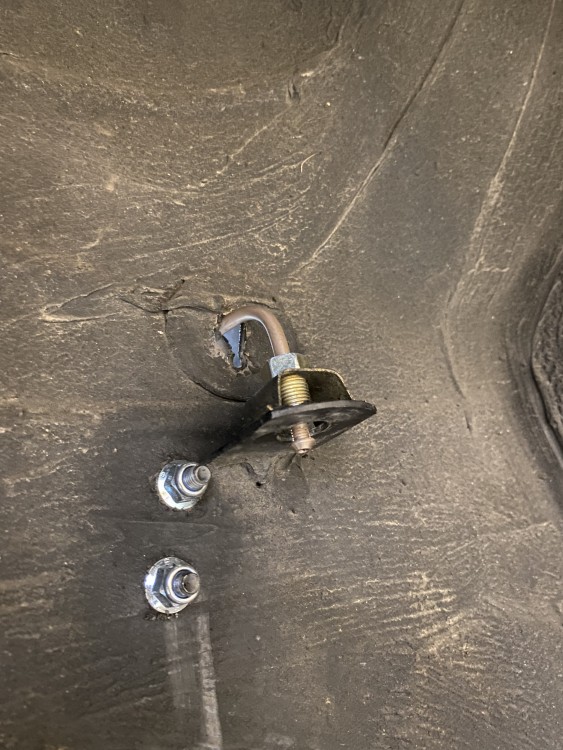
                #448

                Drivers side front brake line good to go, passenger line will be the longest run from the T4257271A-960E-4843-A92A-BE18AC89FA3F.jpeg

                might even be able to use the stock brake line metal clip things with a little finesse 
                559EA5DD-EBC6-45F5-AB9A-1156802811D9.jpeg

                1 Reply Last reply
                0
                • KaiserRollsK
                  KaiserRollsK
                  KaiserRolls
                  wrote on last edited by
                  #449

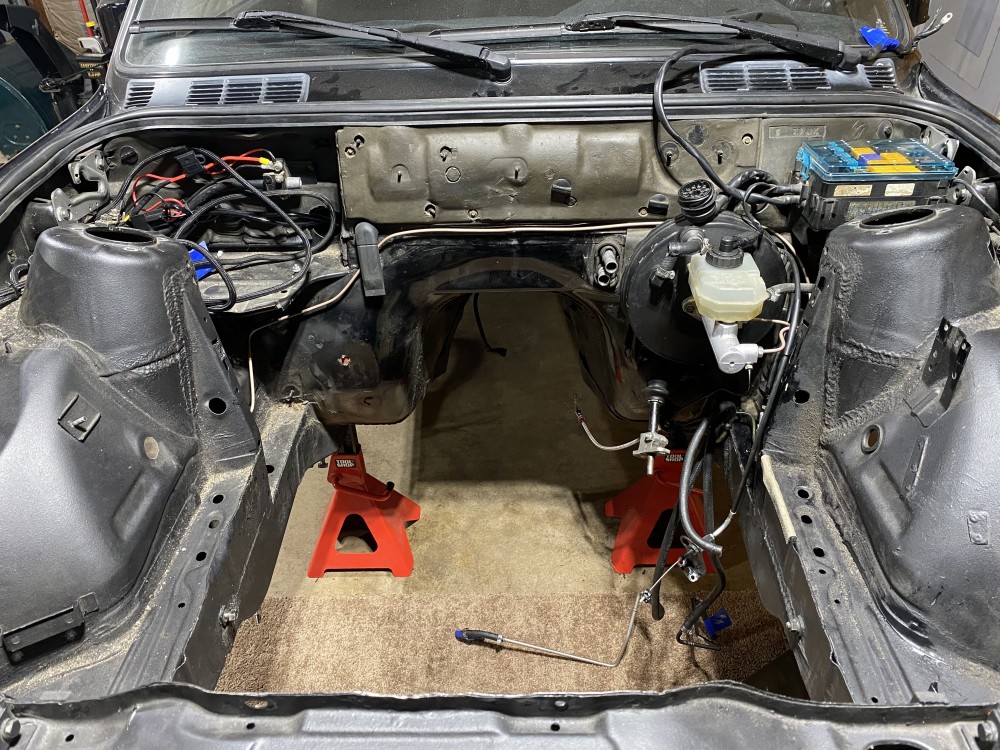
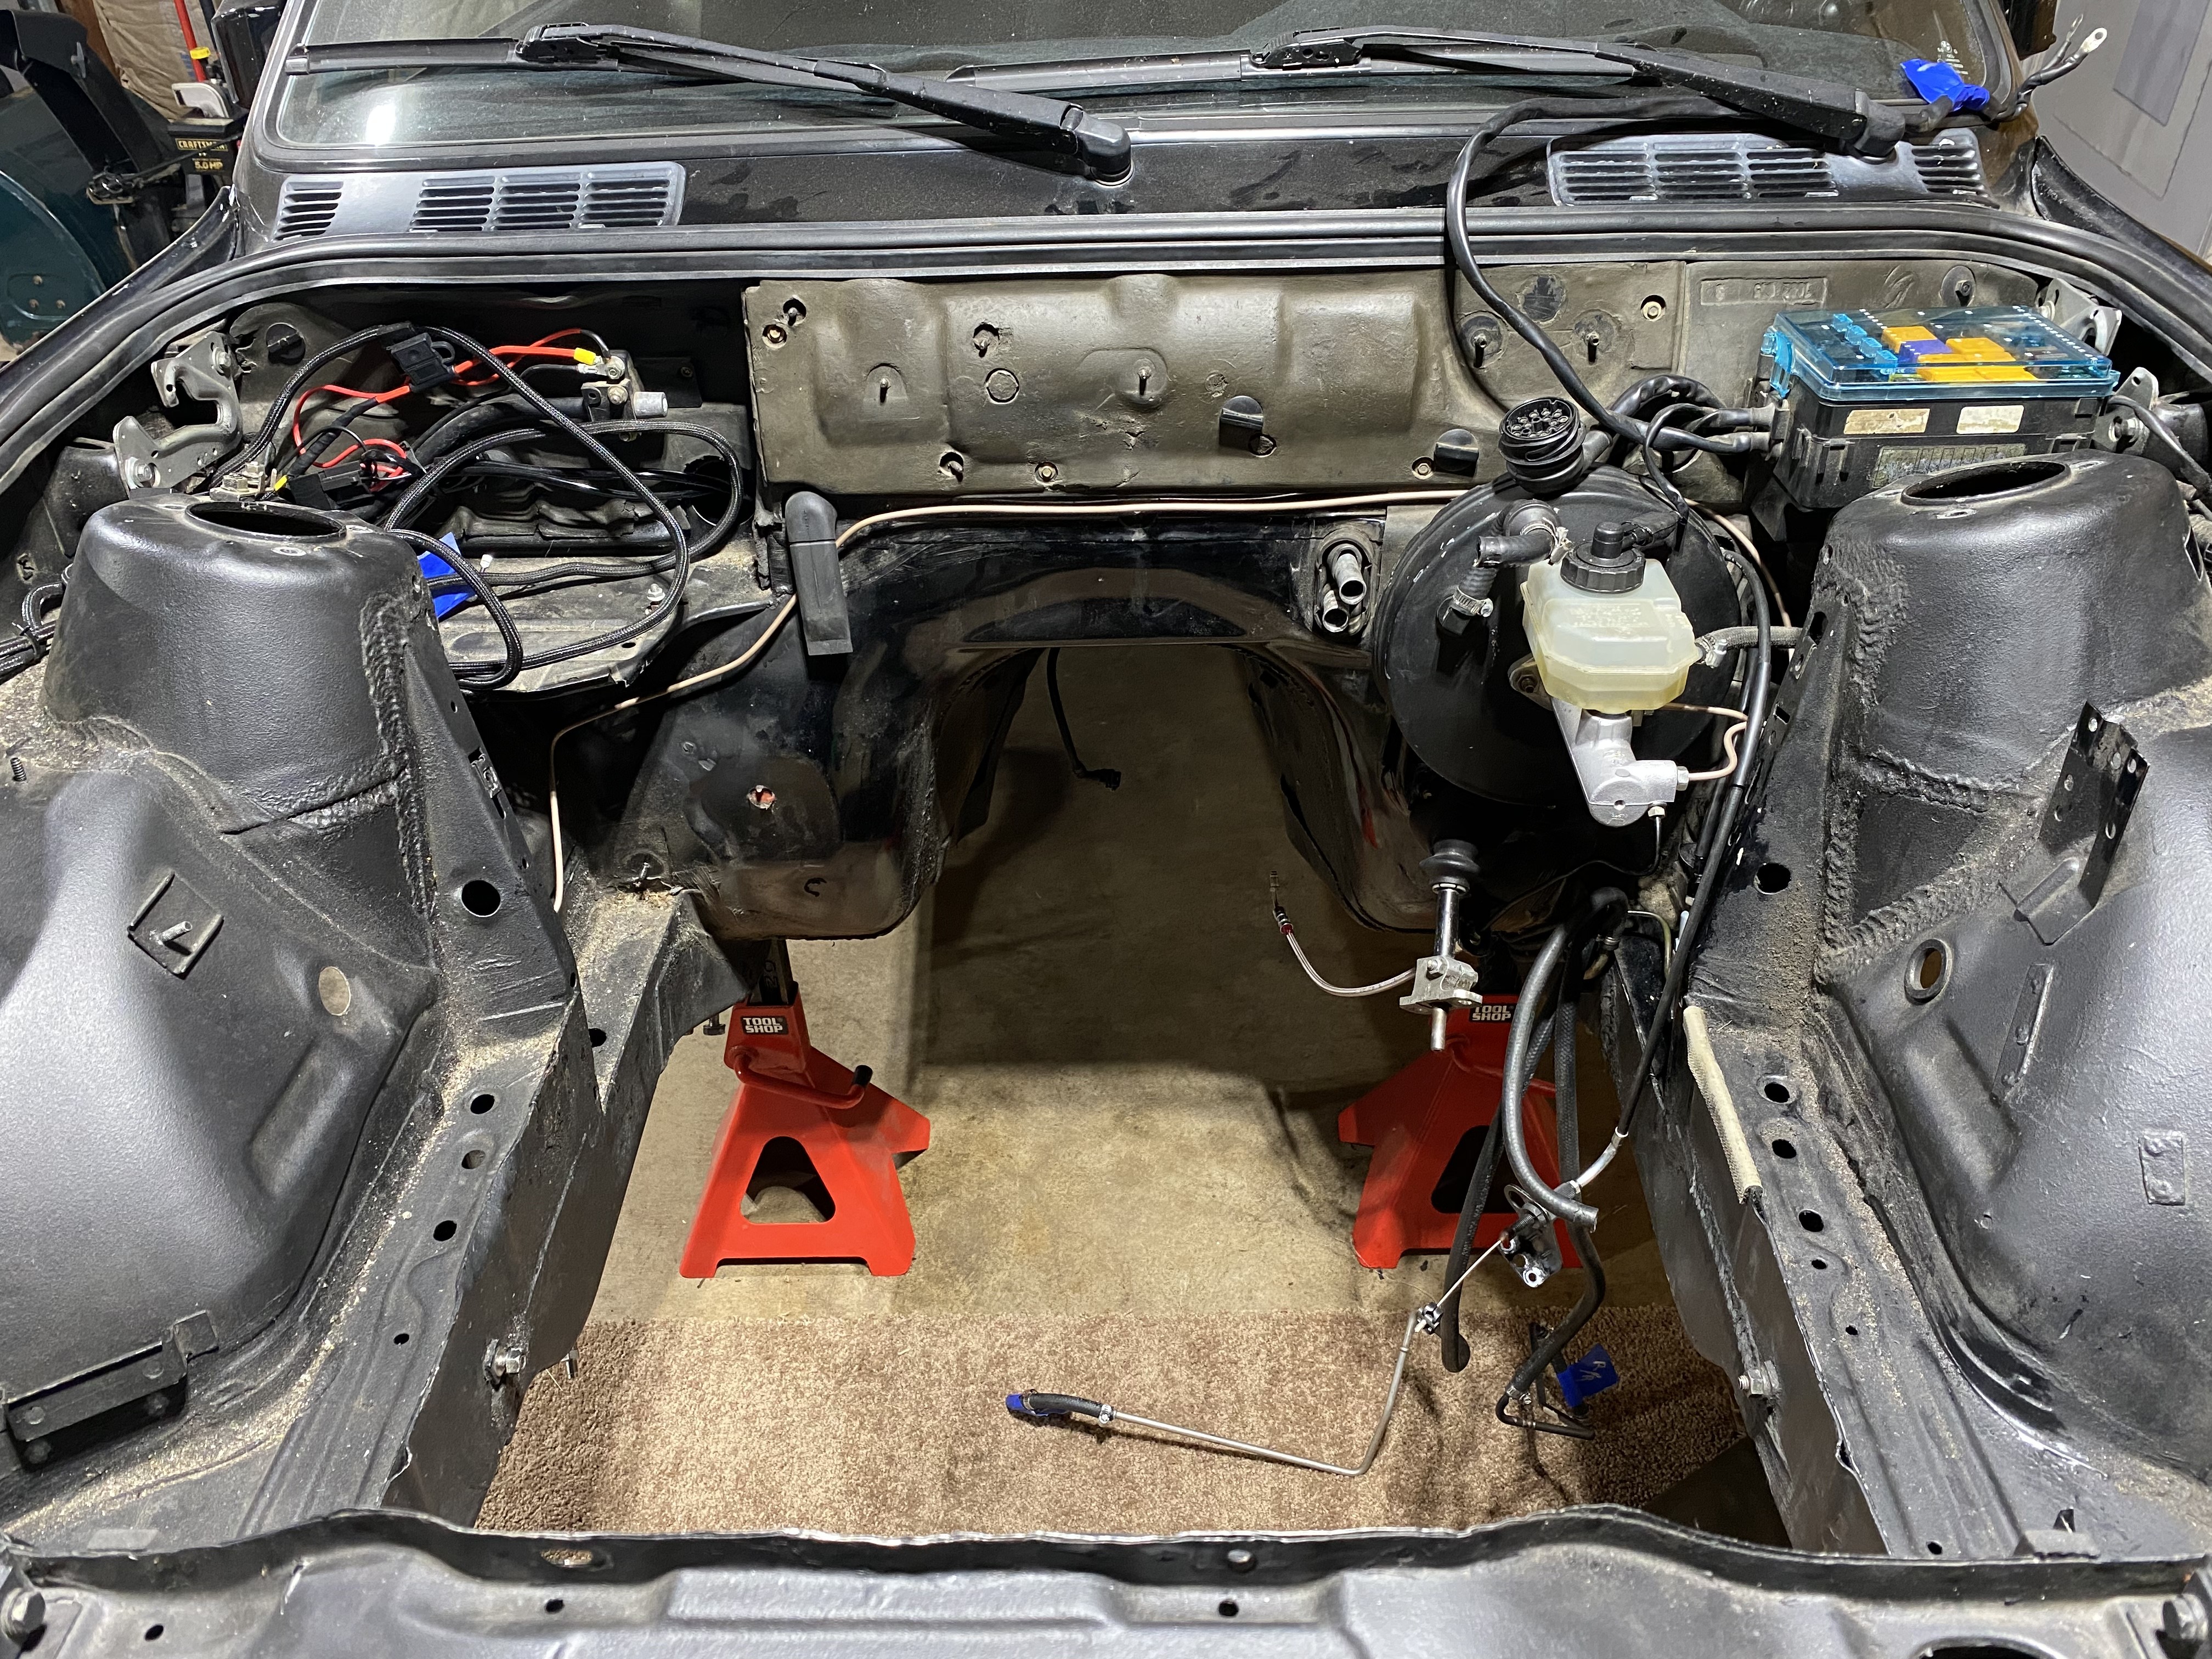
                  Hardlines are finished 

                  18506FA7-9441-4B0D-AB99-E64F35DD620F.jpeg

                  50CF6BDB-3E14-4A92-8EB4-5F7E77266ACB.jpeg

                  Next up is s52 stuff I think

                  1 Reply Last reply
                  1
                  • RekpointR
                    RekpointR
                    Rekpoint
                    wrote on last edited by
                    #450

                    KaiserRolls said:

                    Hardlines are finished 

                    18506FA7-9441-4B0D-AB99-E64F35DD620F.jpeg

                    50CF6BDB-3E14-4A92-8EB4-5F7E77266ACB.jpeg

                    Next up is s52 stuff I think

                    This done yet?

                    1 Reply Last reply
                    0
                    • KaiserRollsK
                      KaiserRollsK
                      KaiserRolls
                      wrote on last edited by
                      #451

                      Rekpoint said:

                      This done yet? 

                      Lol

                      1 Reply Last reply
                      1
                      • KaiserRollsK
                        KaiserRollsK
                        KaiserRolls
                        wrote on last edited by
                        #452

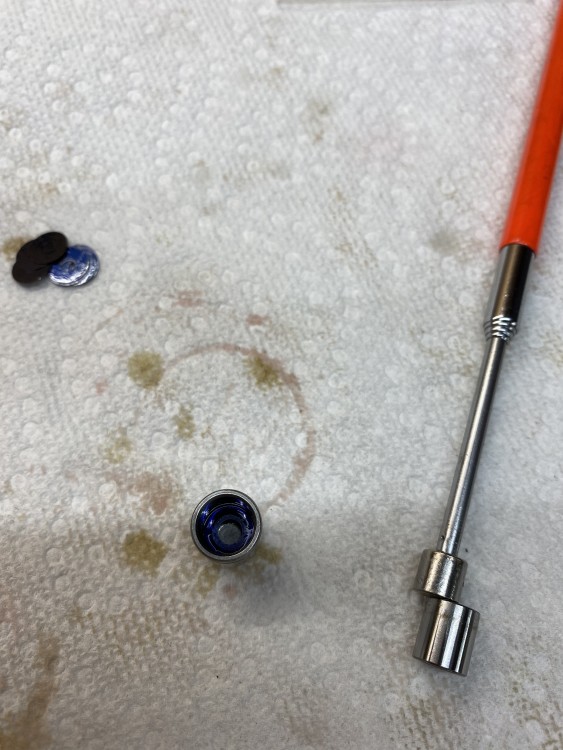
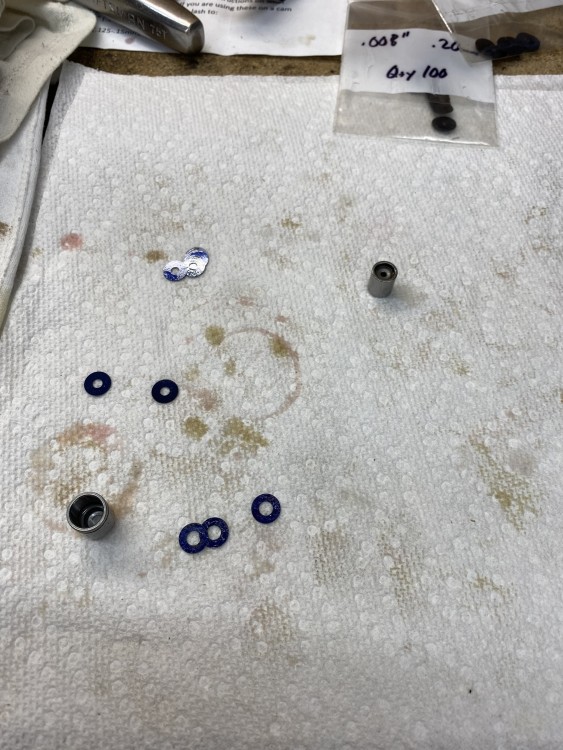
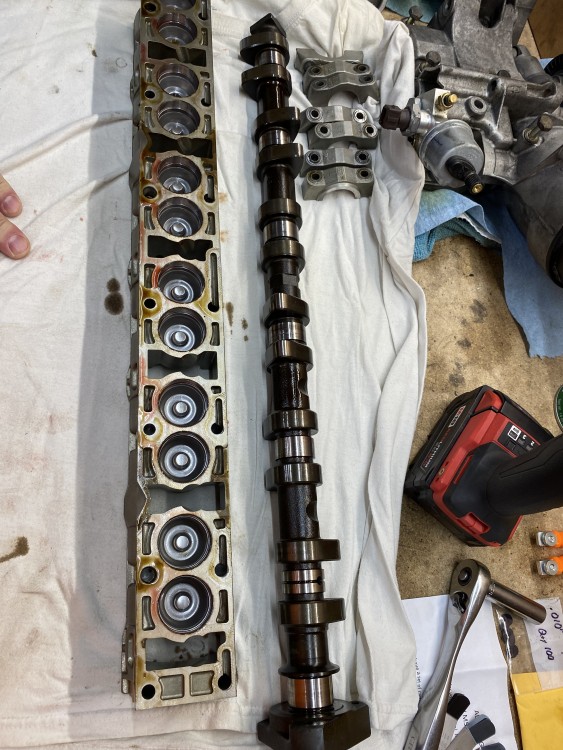
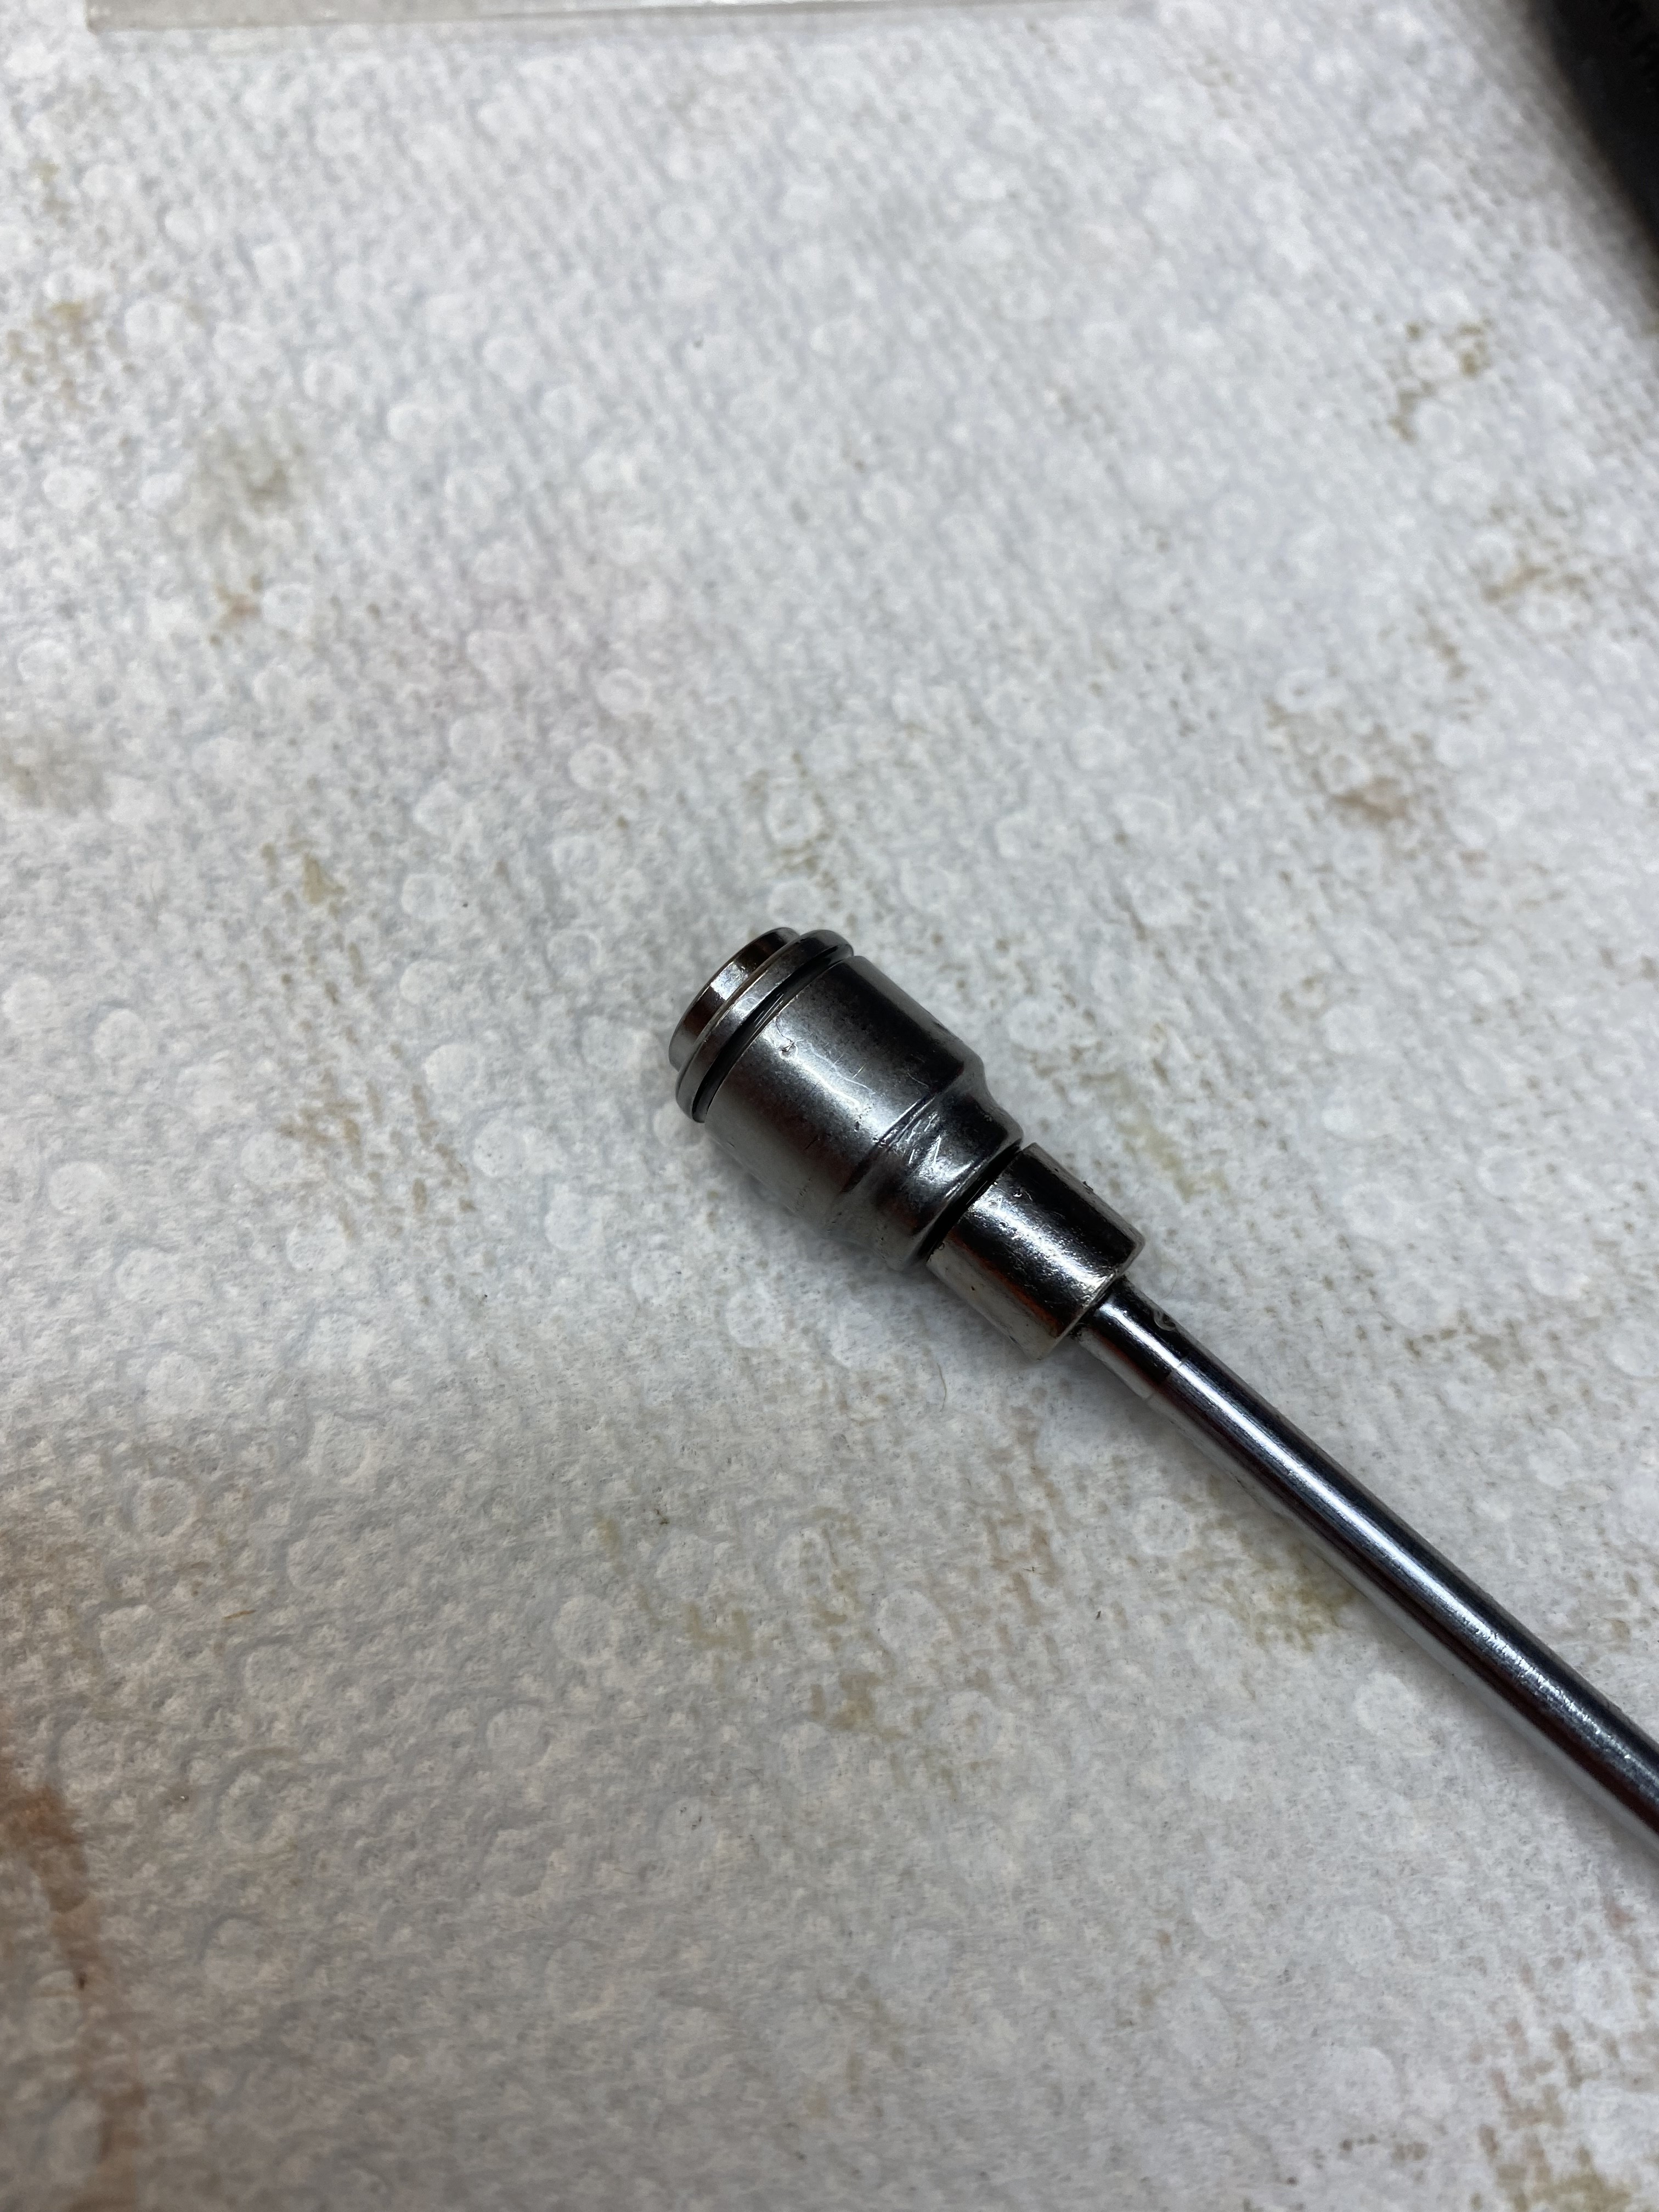
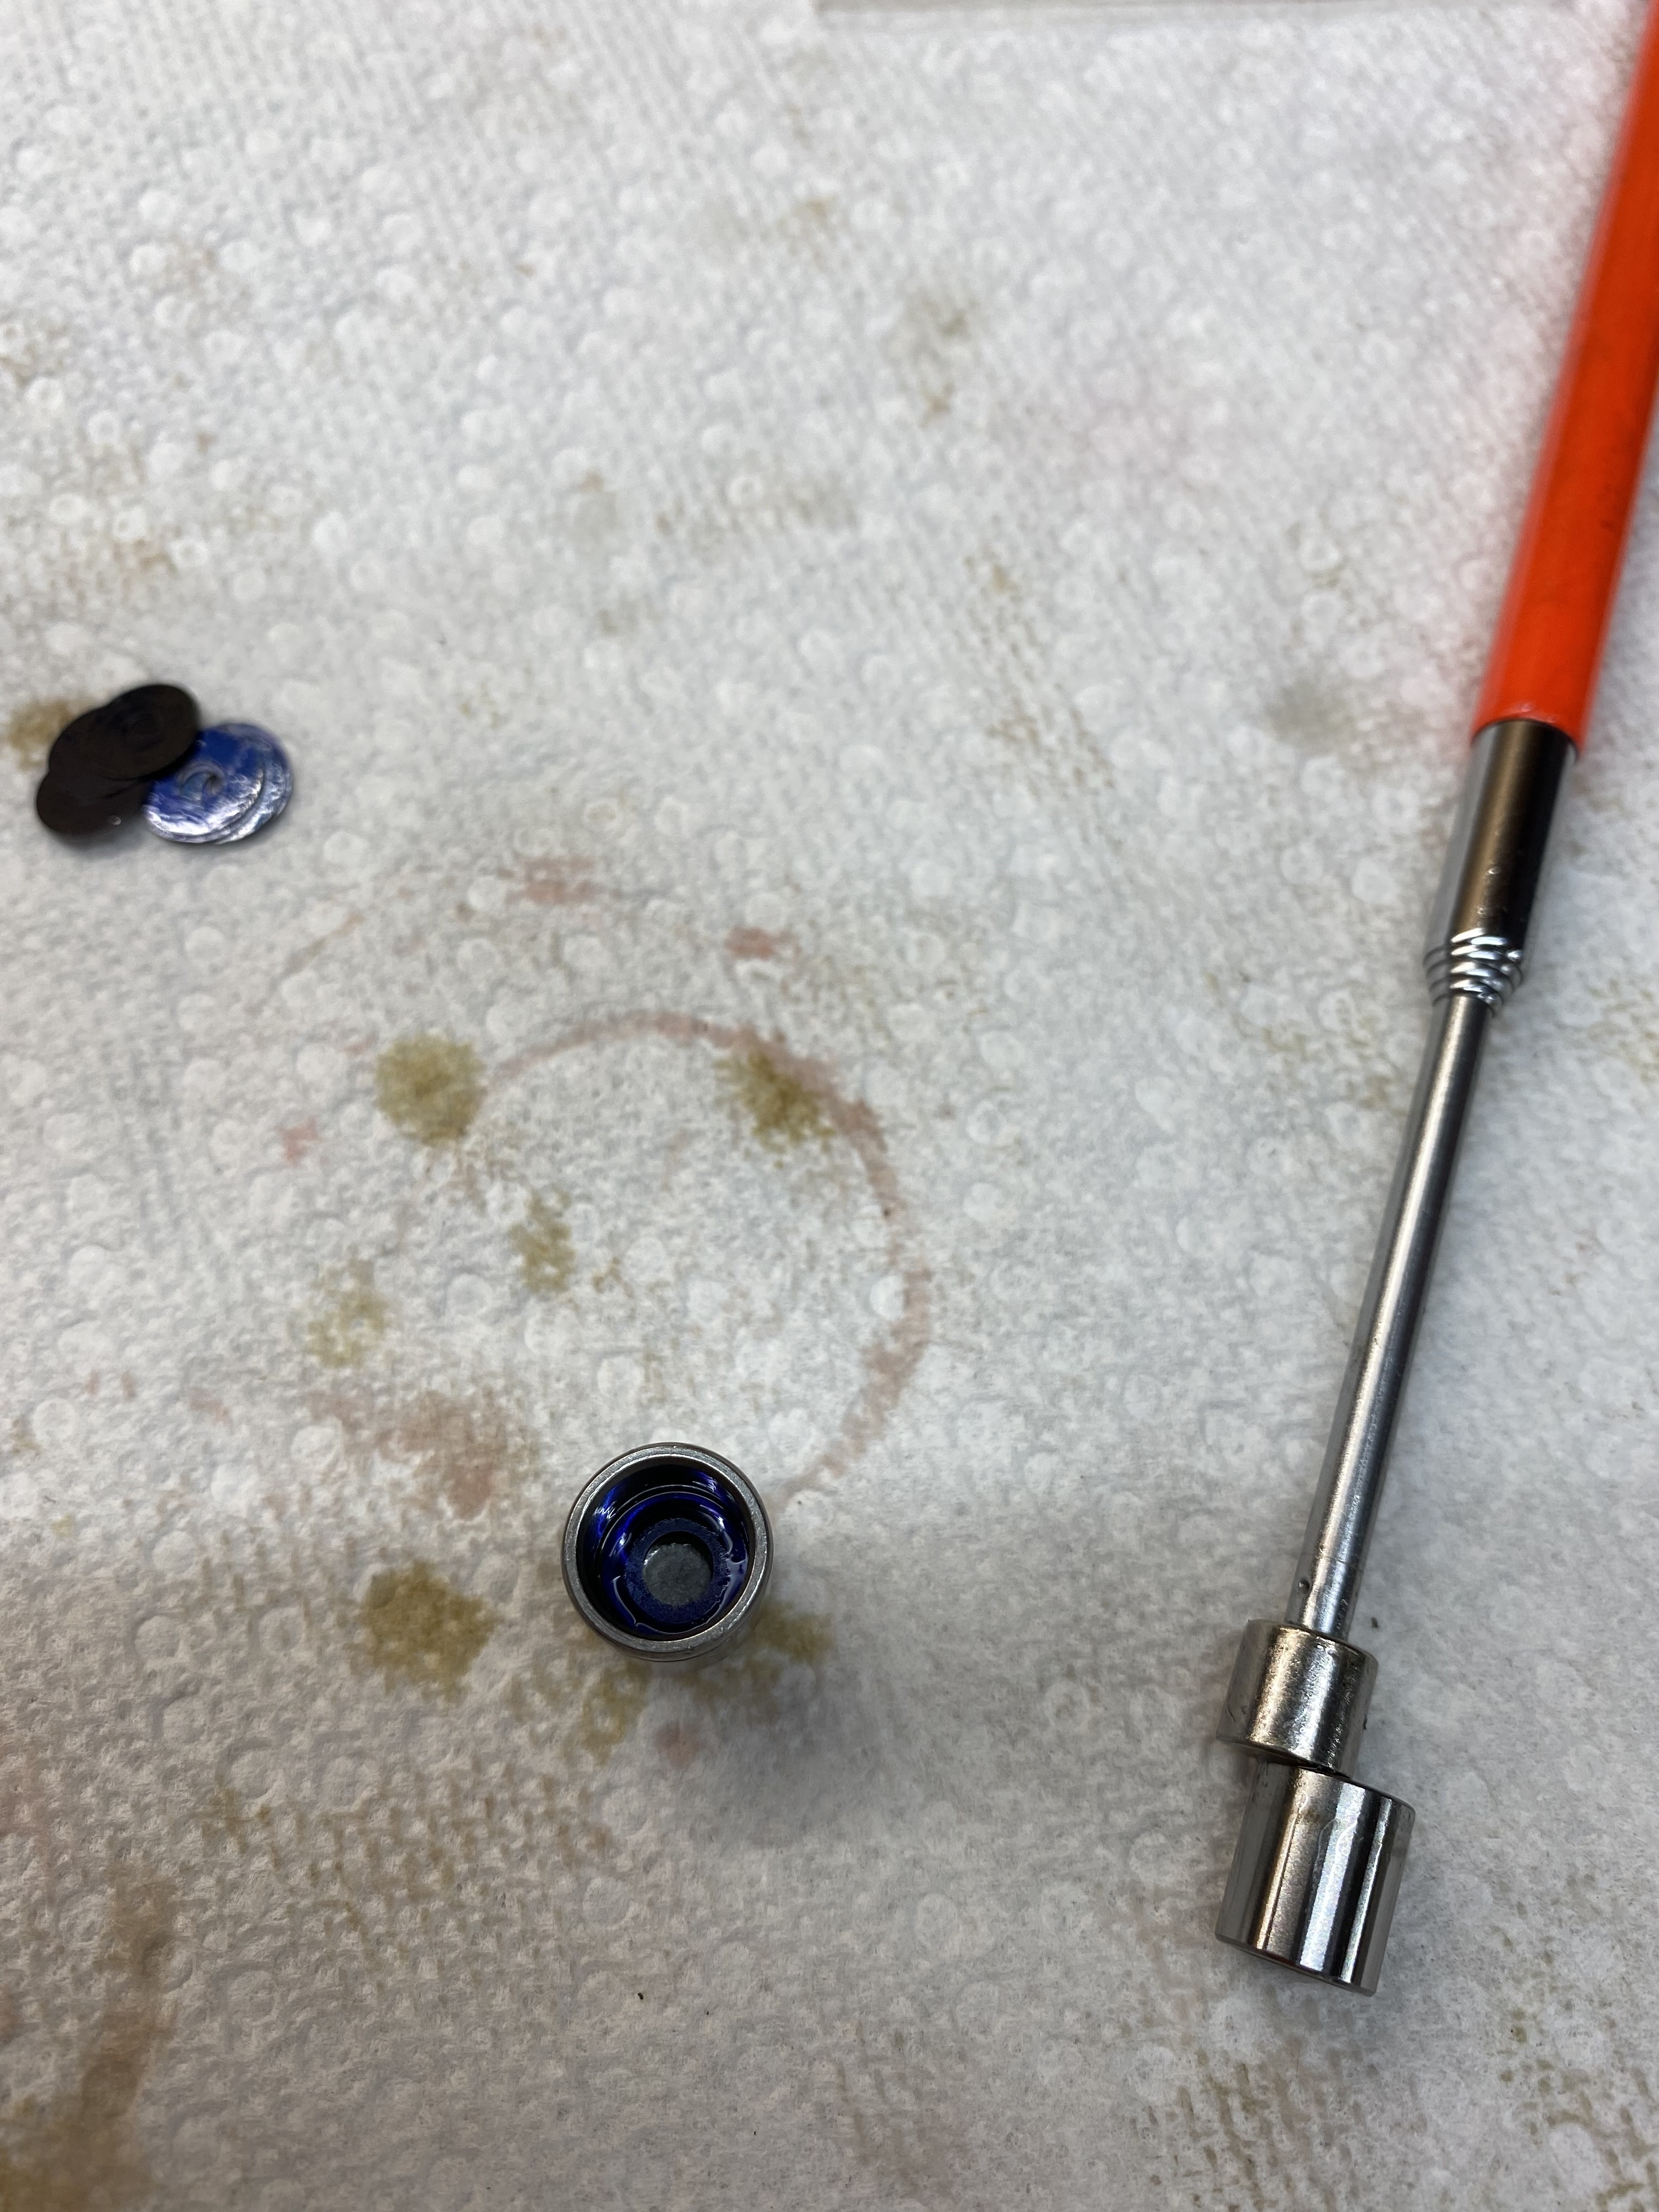
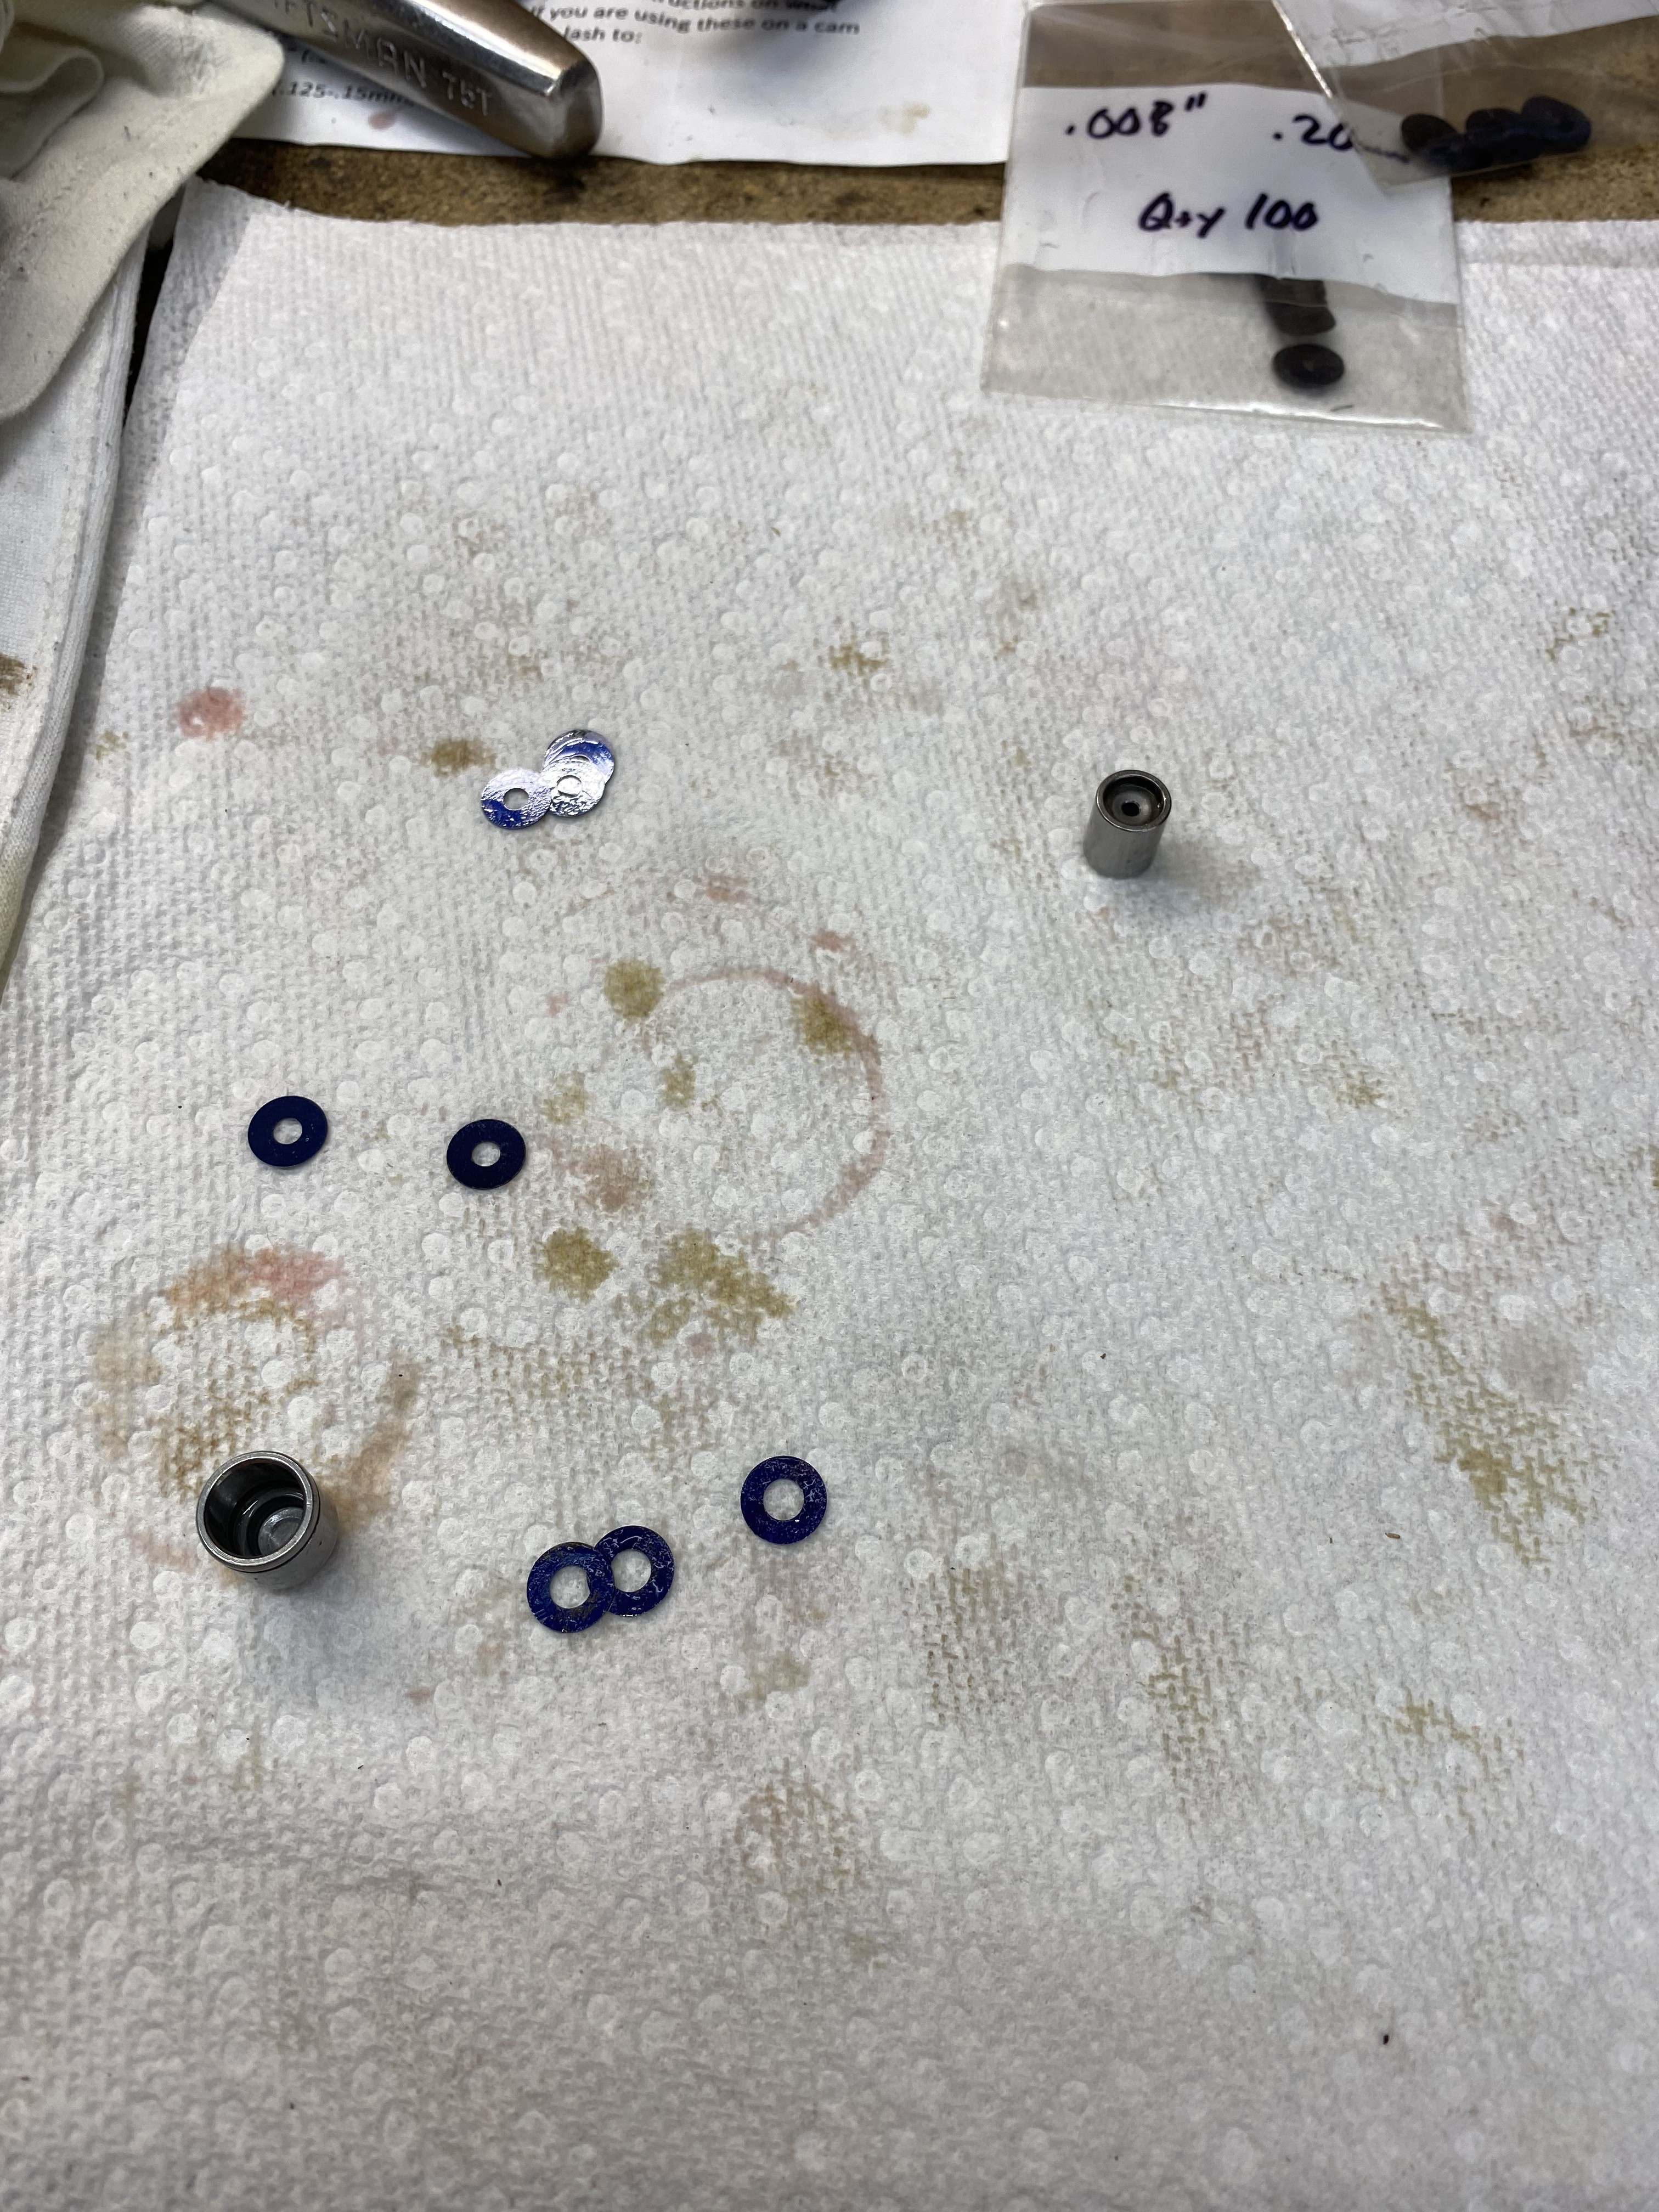
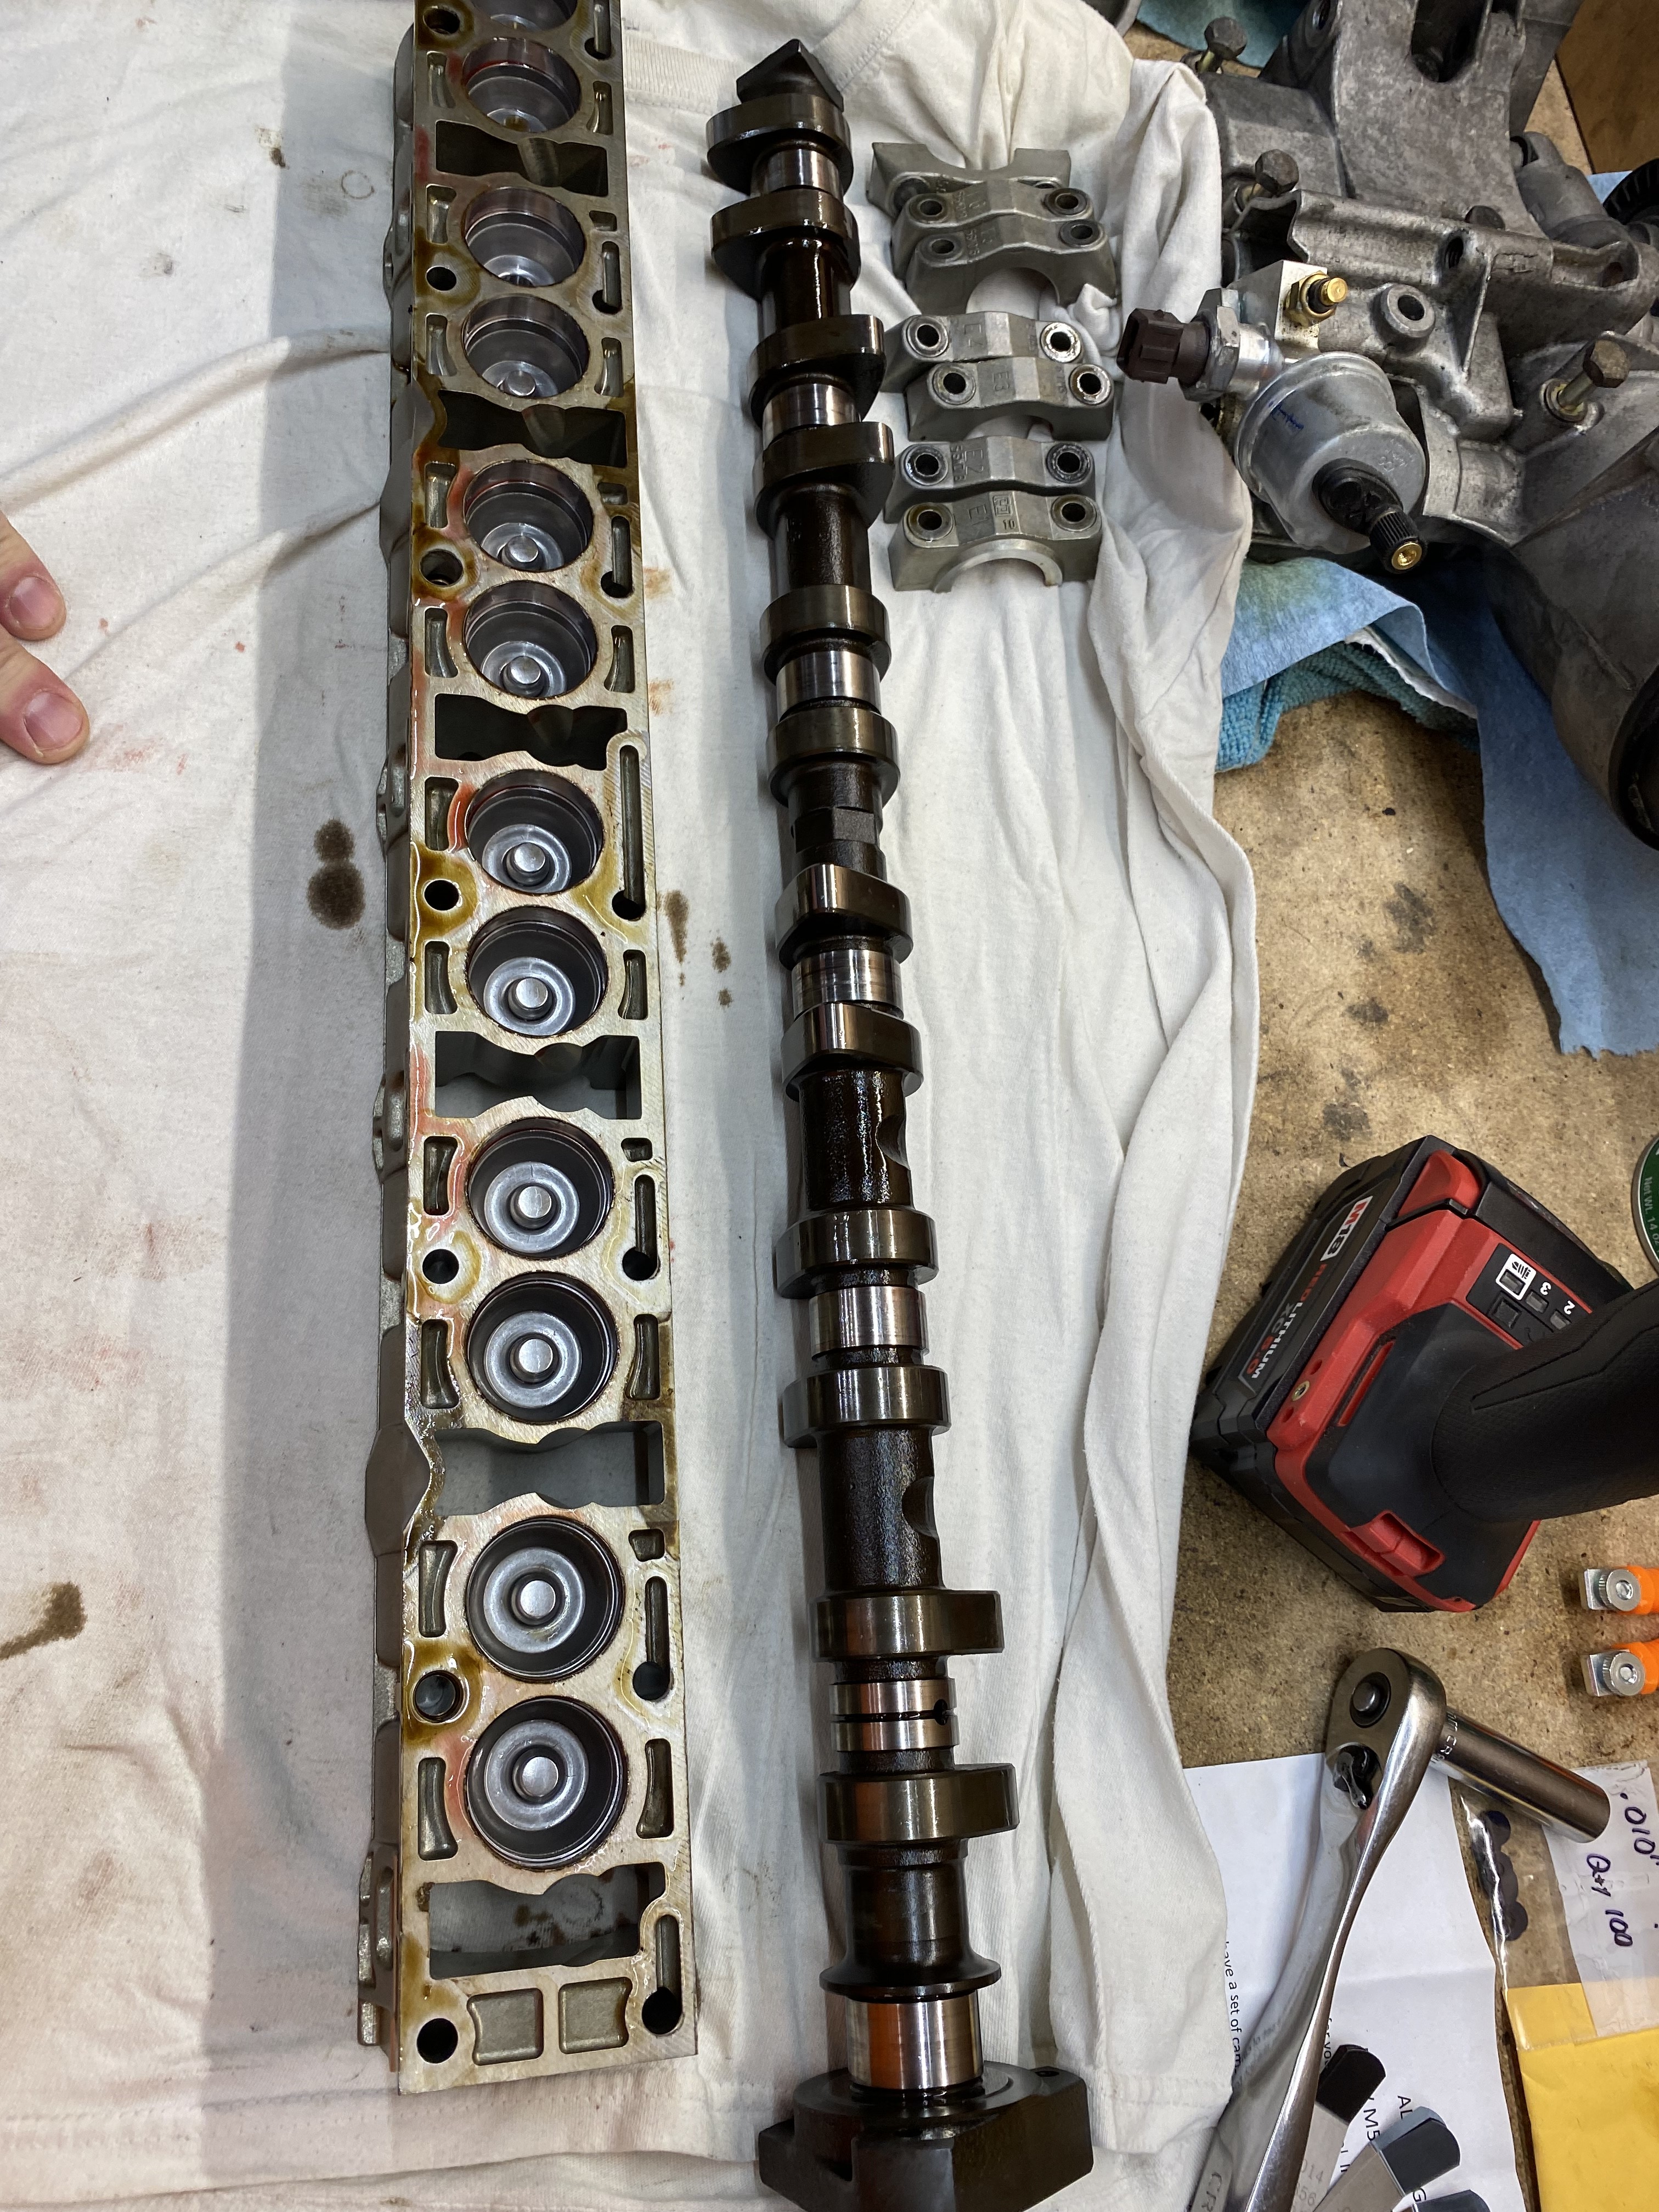
                        Solid lifter conversion is about 99.9% done. Cams were in and out a bunch while setting lash. 
                        this kit uses the stock lifter/hydraulic adjuster, but the hydraulic adjuster is basically gutted and you use shims that are .010” and .008” thickness

                        stock adjuster removed from lifter 

                        F1AFCC4B-1937-4E49-8927-871190712599.jpeg
                         

                        dropping in shims

                        D140D928-F23E-4C69-BF07-3B40C6DFF58D.jpeg

                        25195E9A-EA63-43DB-9A1F-0BEAC042AB5C.jpeg

                        and back in the trays 

                        F76D90B5-FD58-4BA0-8F5E-DDFEBC4DD986.jpeg

                        still using the stock s52 cams for now

                        1 Reply Last reply
                        2
                        • RekpointR
                          RekpointR
                          Rekpoint
                          wrote on last edited by
                          #453

                          So happy you finished this. What's next? Putting everything else on?

                          1 Reply Last reply
                          0
                          • KaiserRollsK
                            KaiserRollsK
                            KaiserRolls
                            wrote on last edited by
                            #454

                            Rekpoint said:

                            So happy you finished this. What's next? Putting everything else on?

                            Timing chains/timing cover/time it/oil pan/gaskets etc etc etc

                            1 Reply Last reply
                            0
                            • KaiserRollsK
                              KaiserRollsK
                              KaiserRolls
                              wrote on last edited by
                              #455

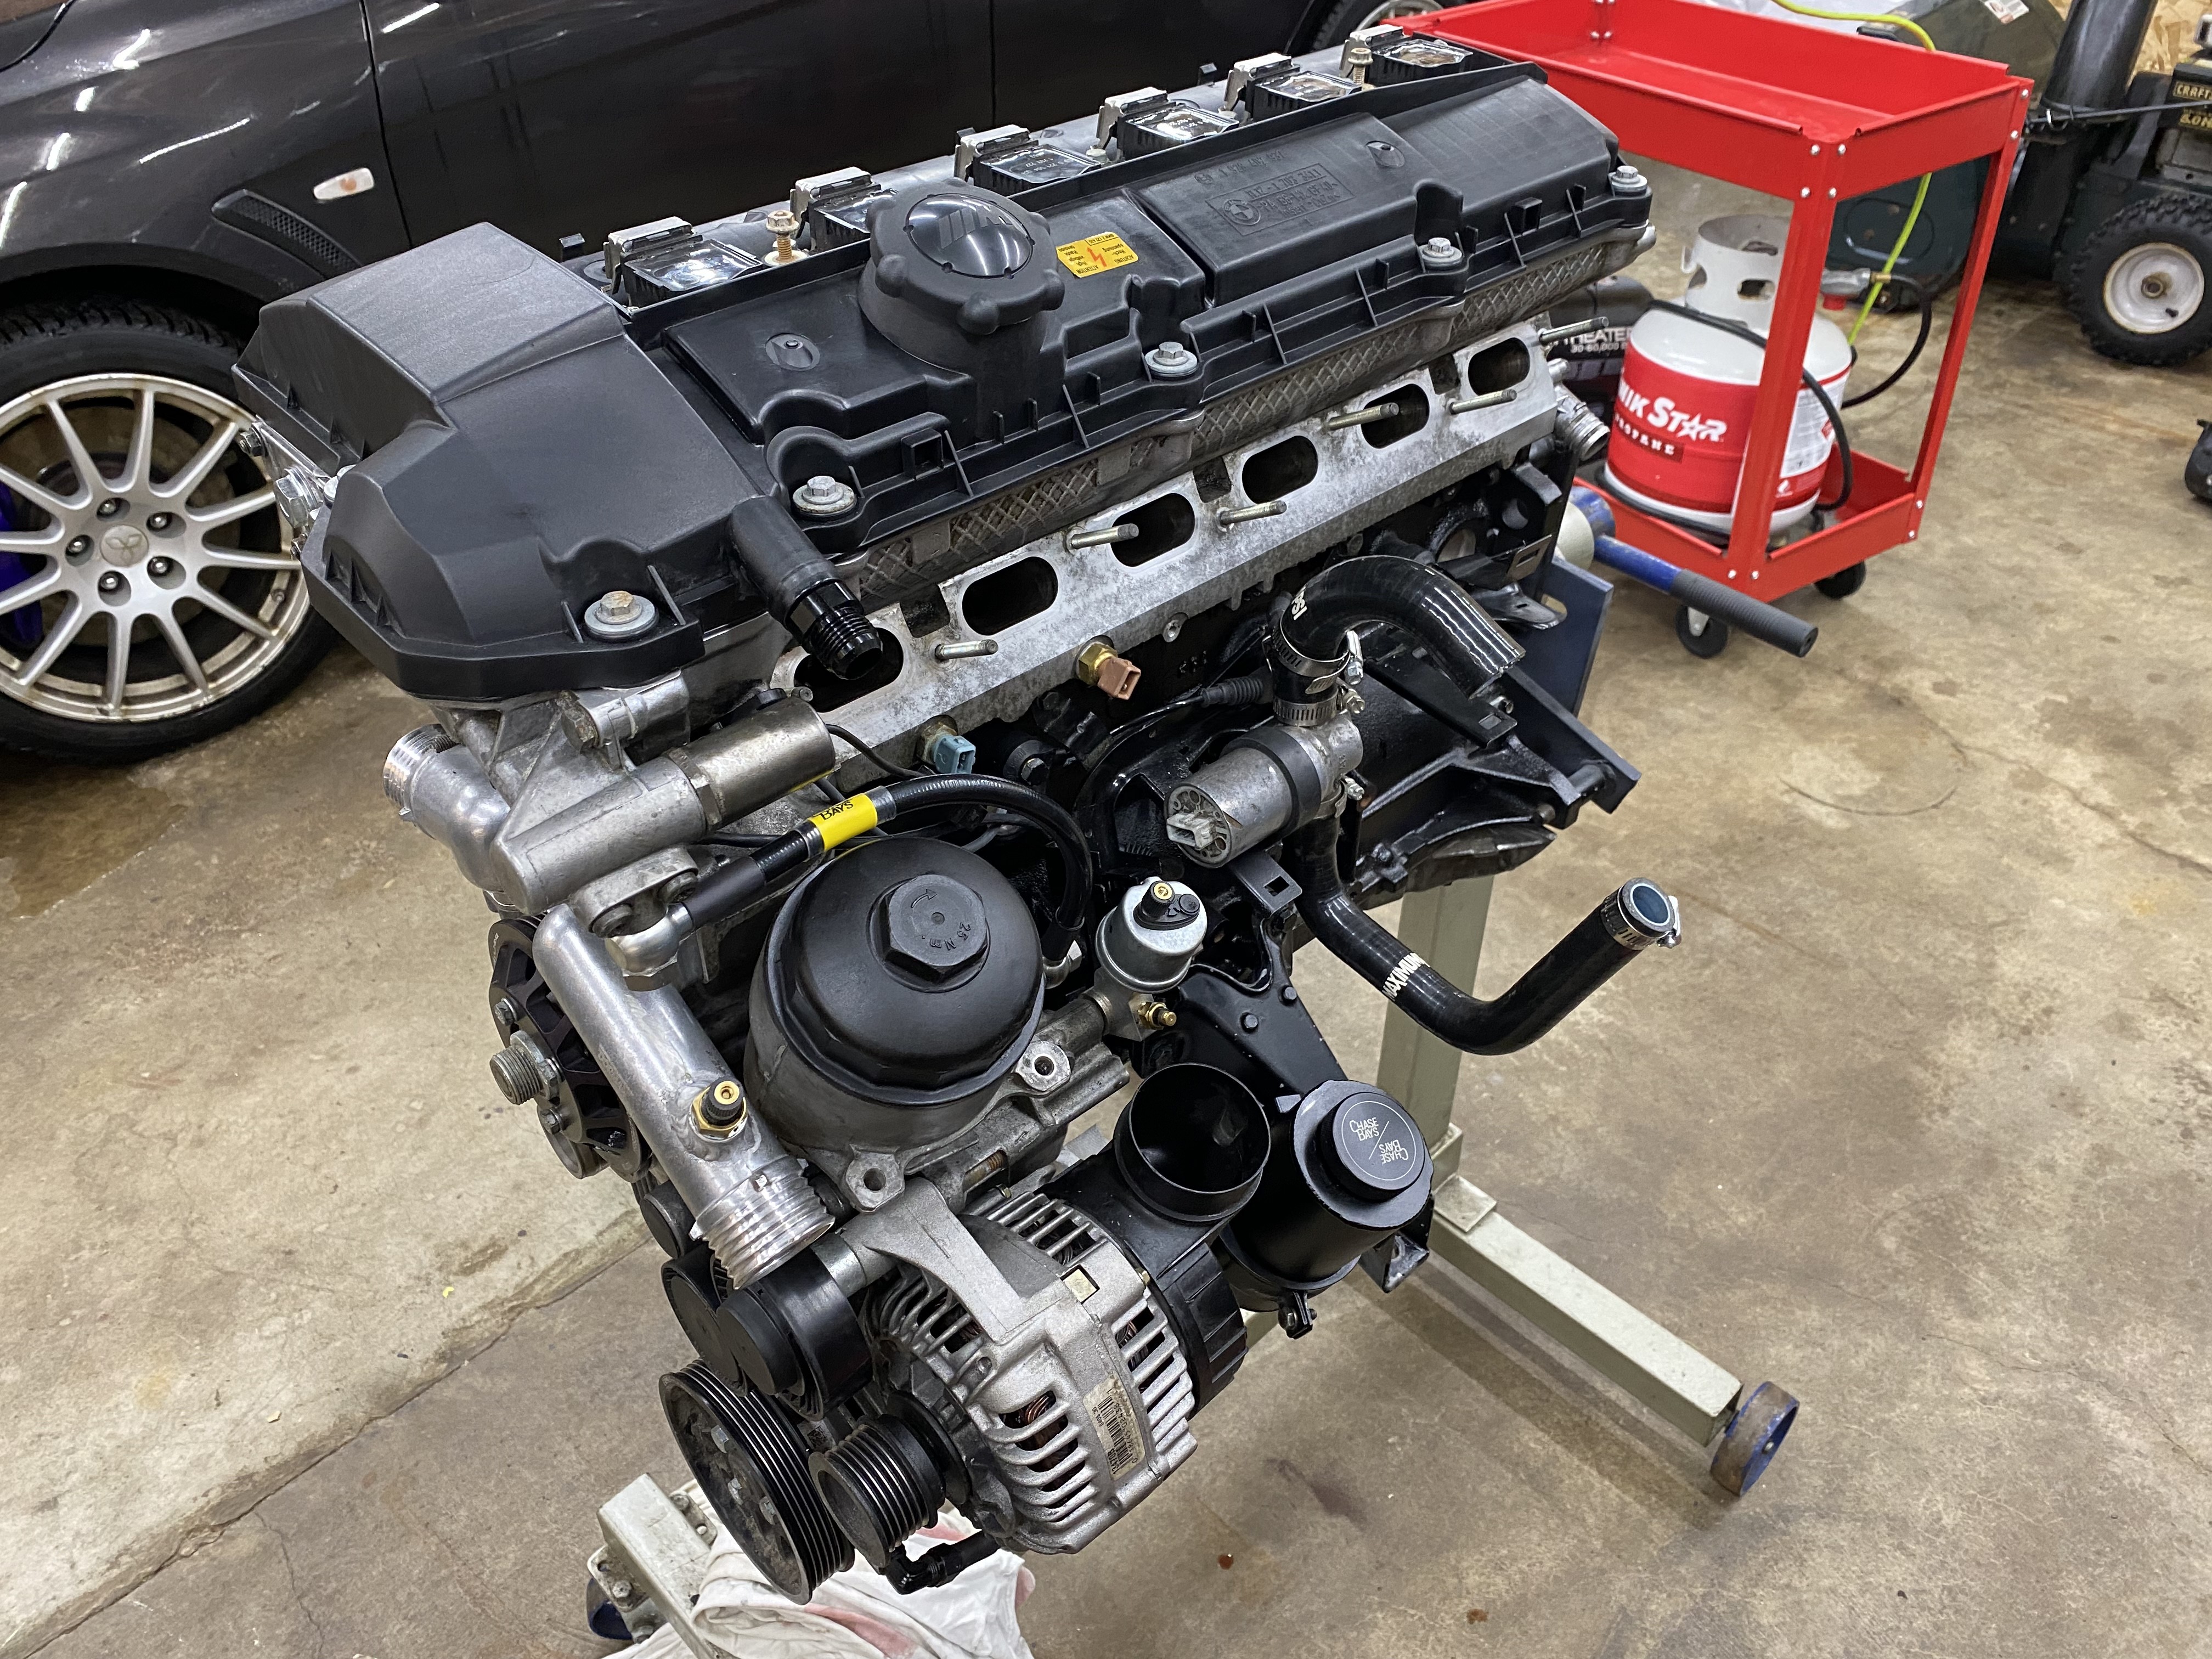
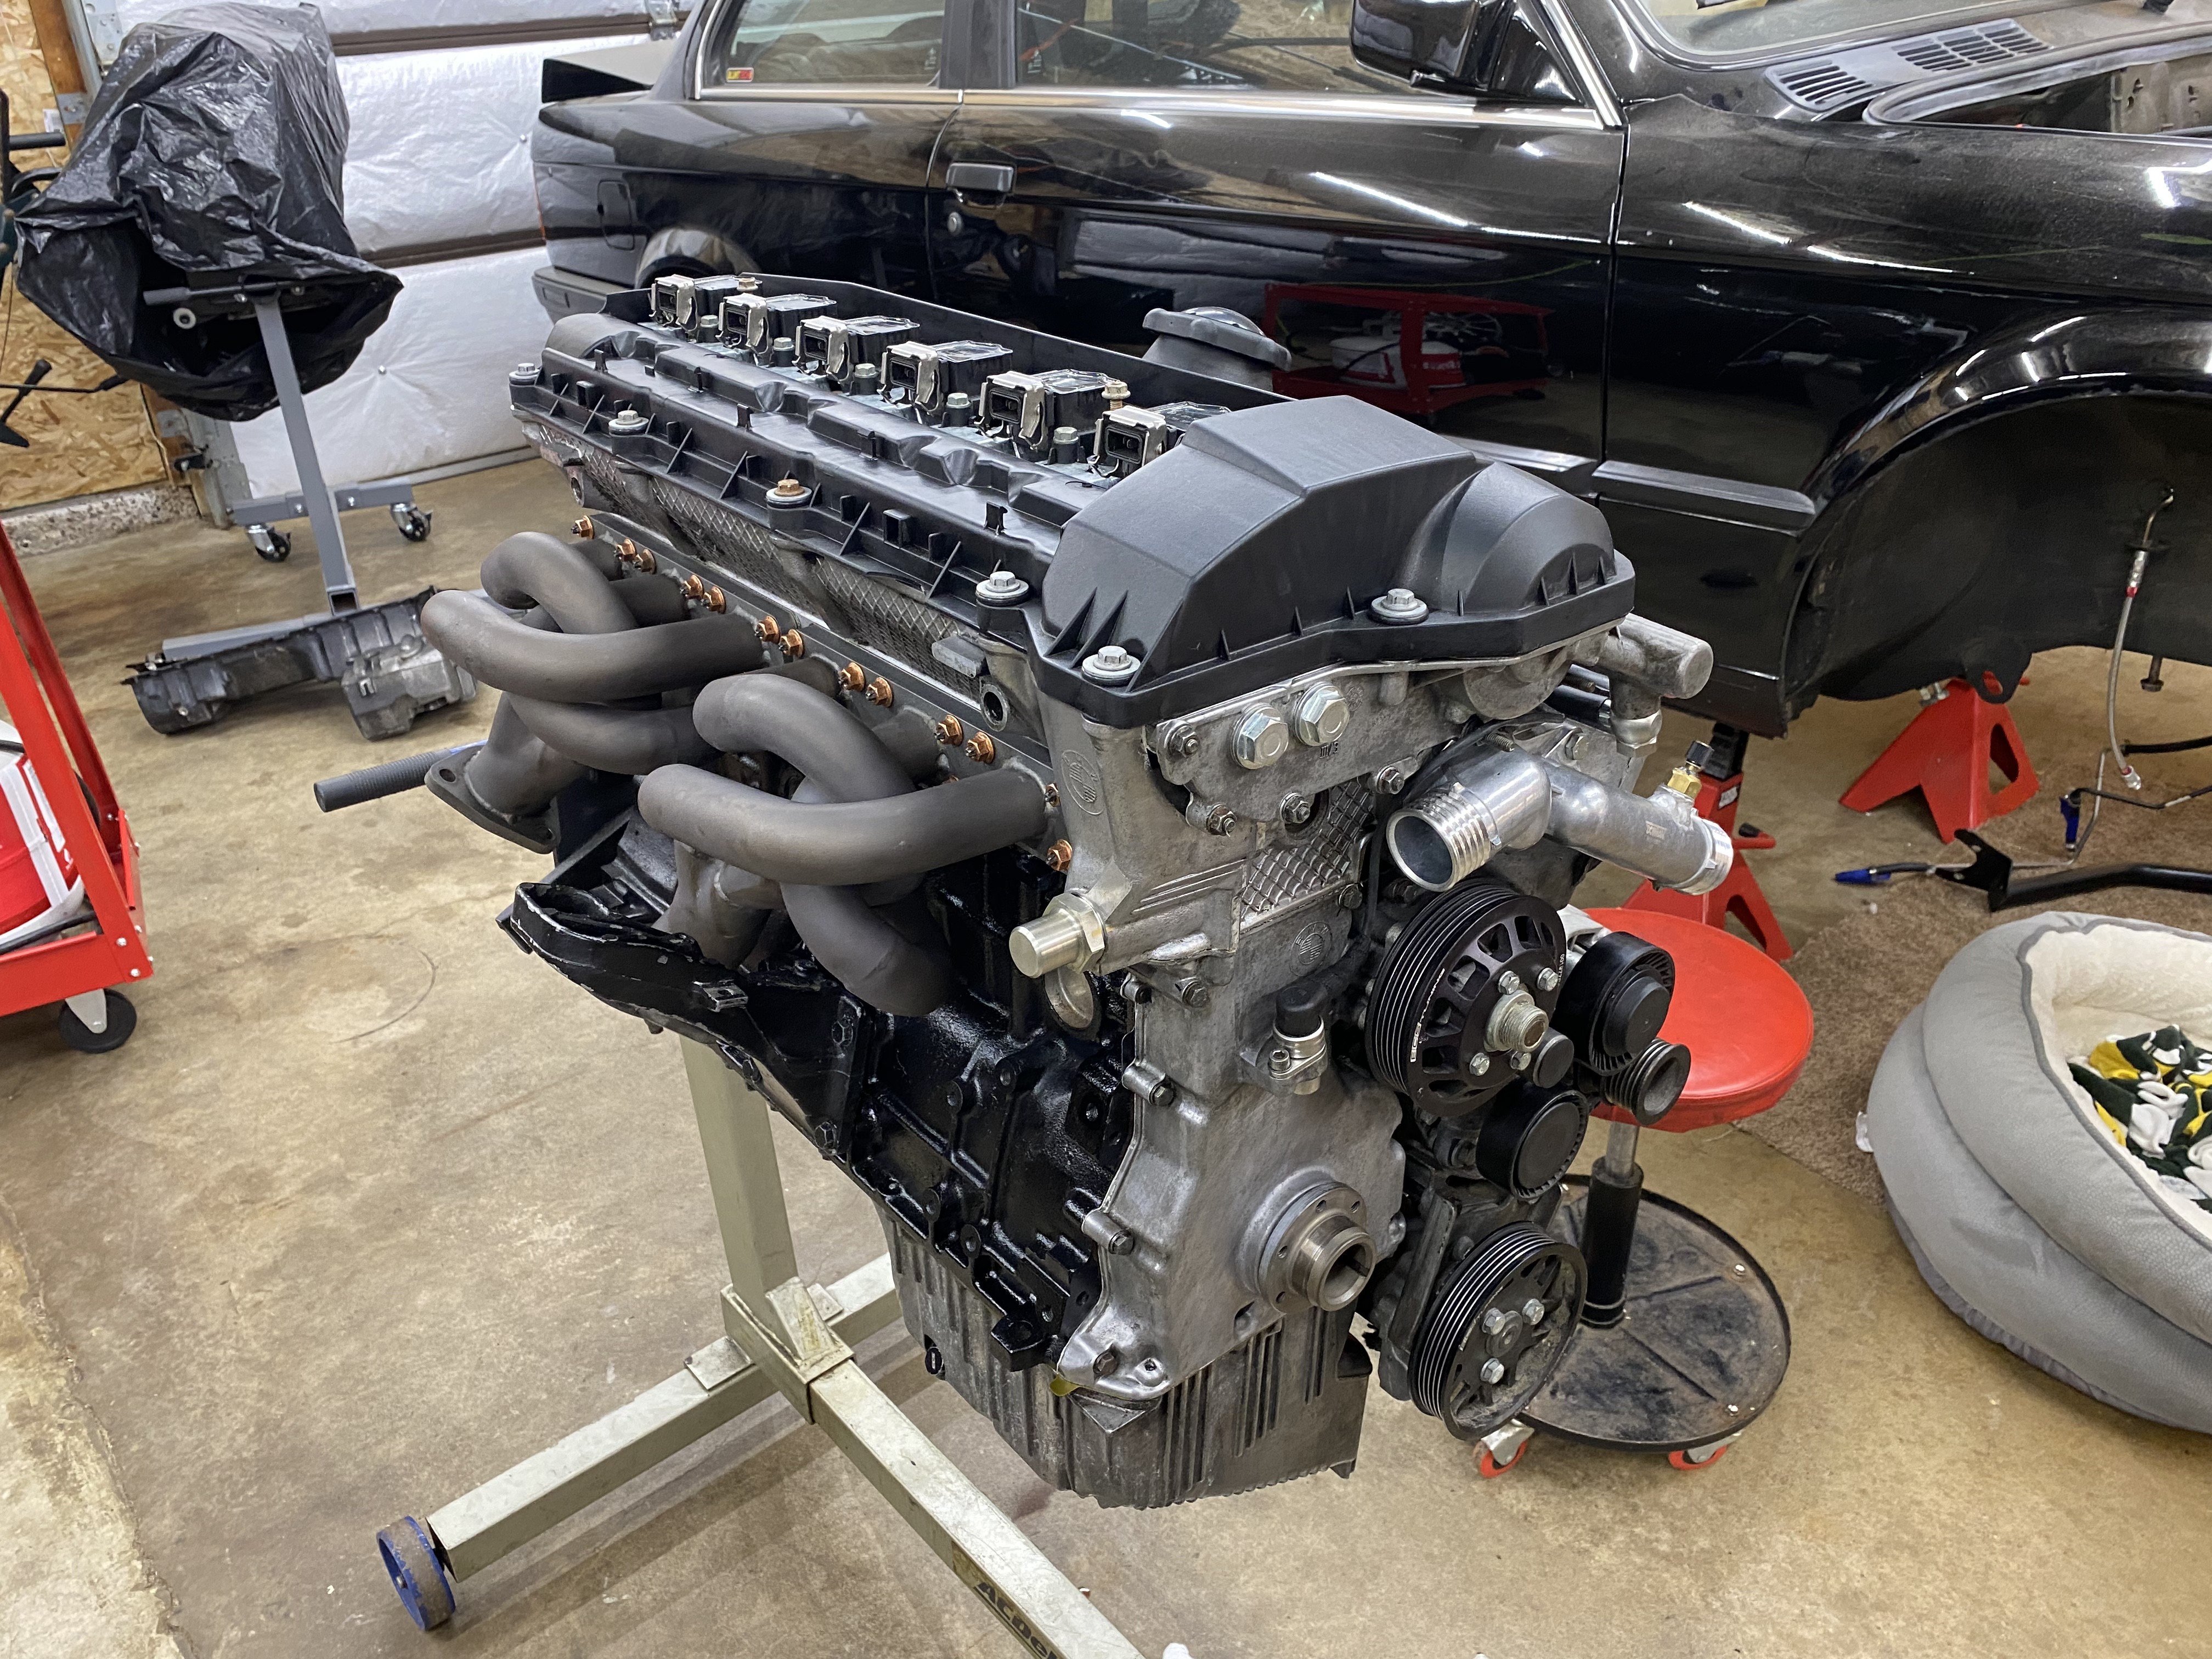
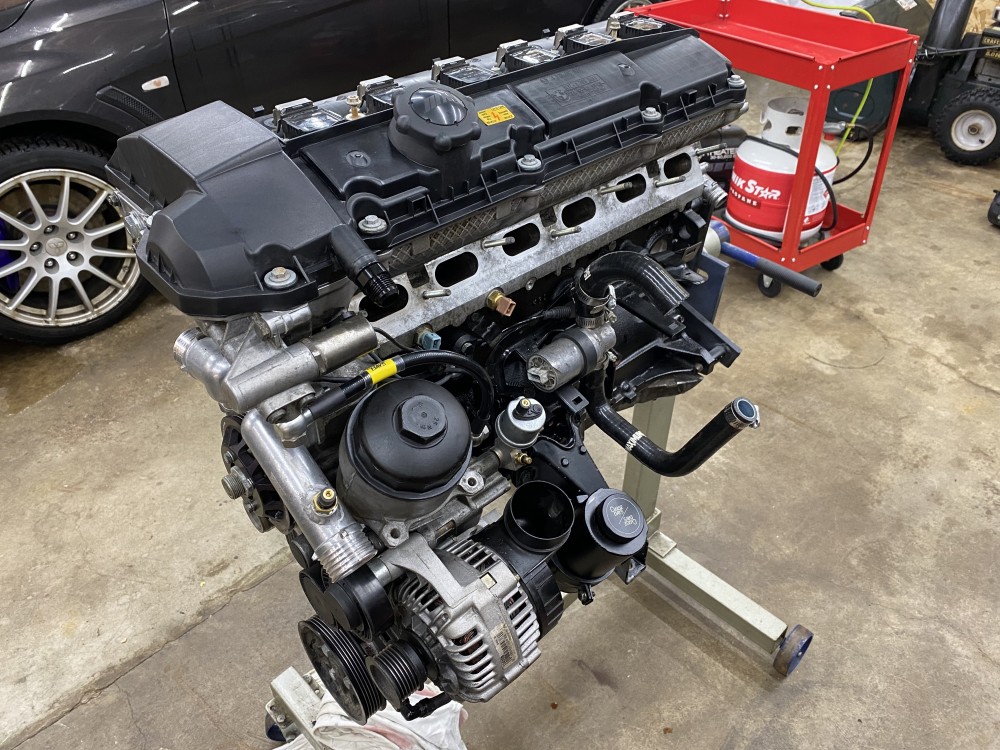
                              Ended up pulling the intake side to reshim 2 lifters, all back together & timed now

                              FCP order showing up soonish for some stuff that I either misplaced or never ordered. 
                              E32BEA29-2E22-48CB-8275-942FFD153B9E.jpeg

                              2A6C8D3F-DF41-4C07-B0AB-2F552C4844A2.jpeg

                              1 Reply Last reply
                              3
                              • YoungCRY
                                YoungCRY
                                YoungCR
                                wrote on last edited by
                                #456

                                Looks fantastic, nice work!

                                Chris Young
                                BMWCCA #458972
                                1986 528e/5  | 1994 530i/5 | 1995 540i/6 | 2013 X5 35d | 1998 C1500 Suburban | 1995 K2500 Suburban

                                1 Reply Last reply
                                1
                                • KaiserRollsK
                                  KaiserRollsK
                                  KaiserRolls
                                  wrote on last edited by
                                  #457

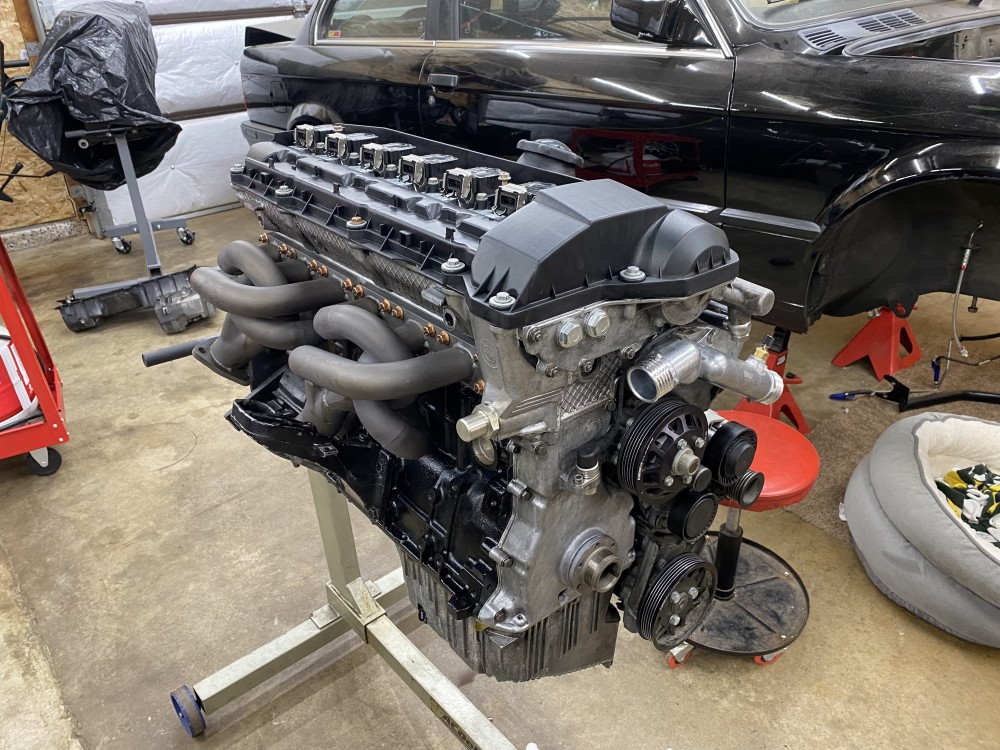
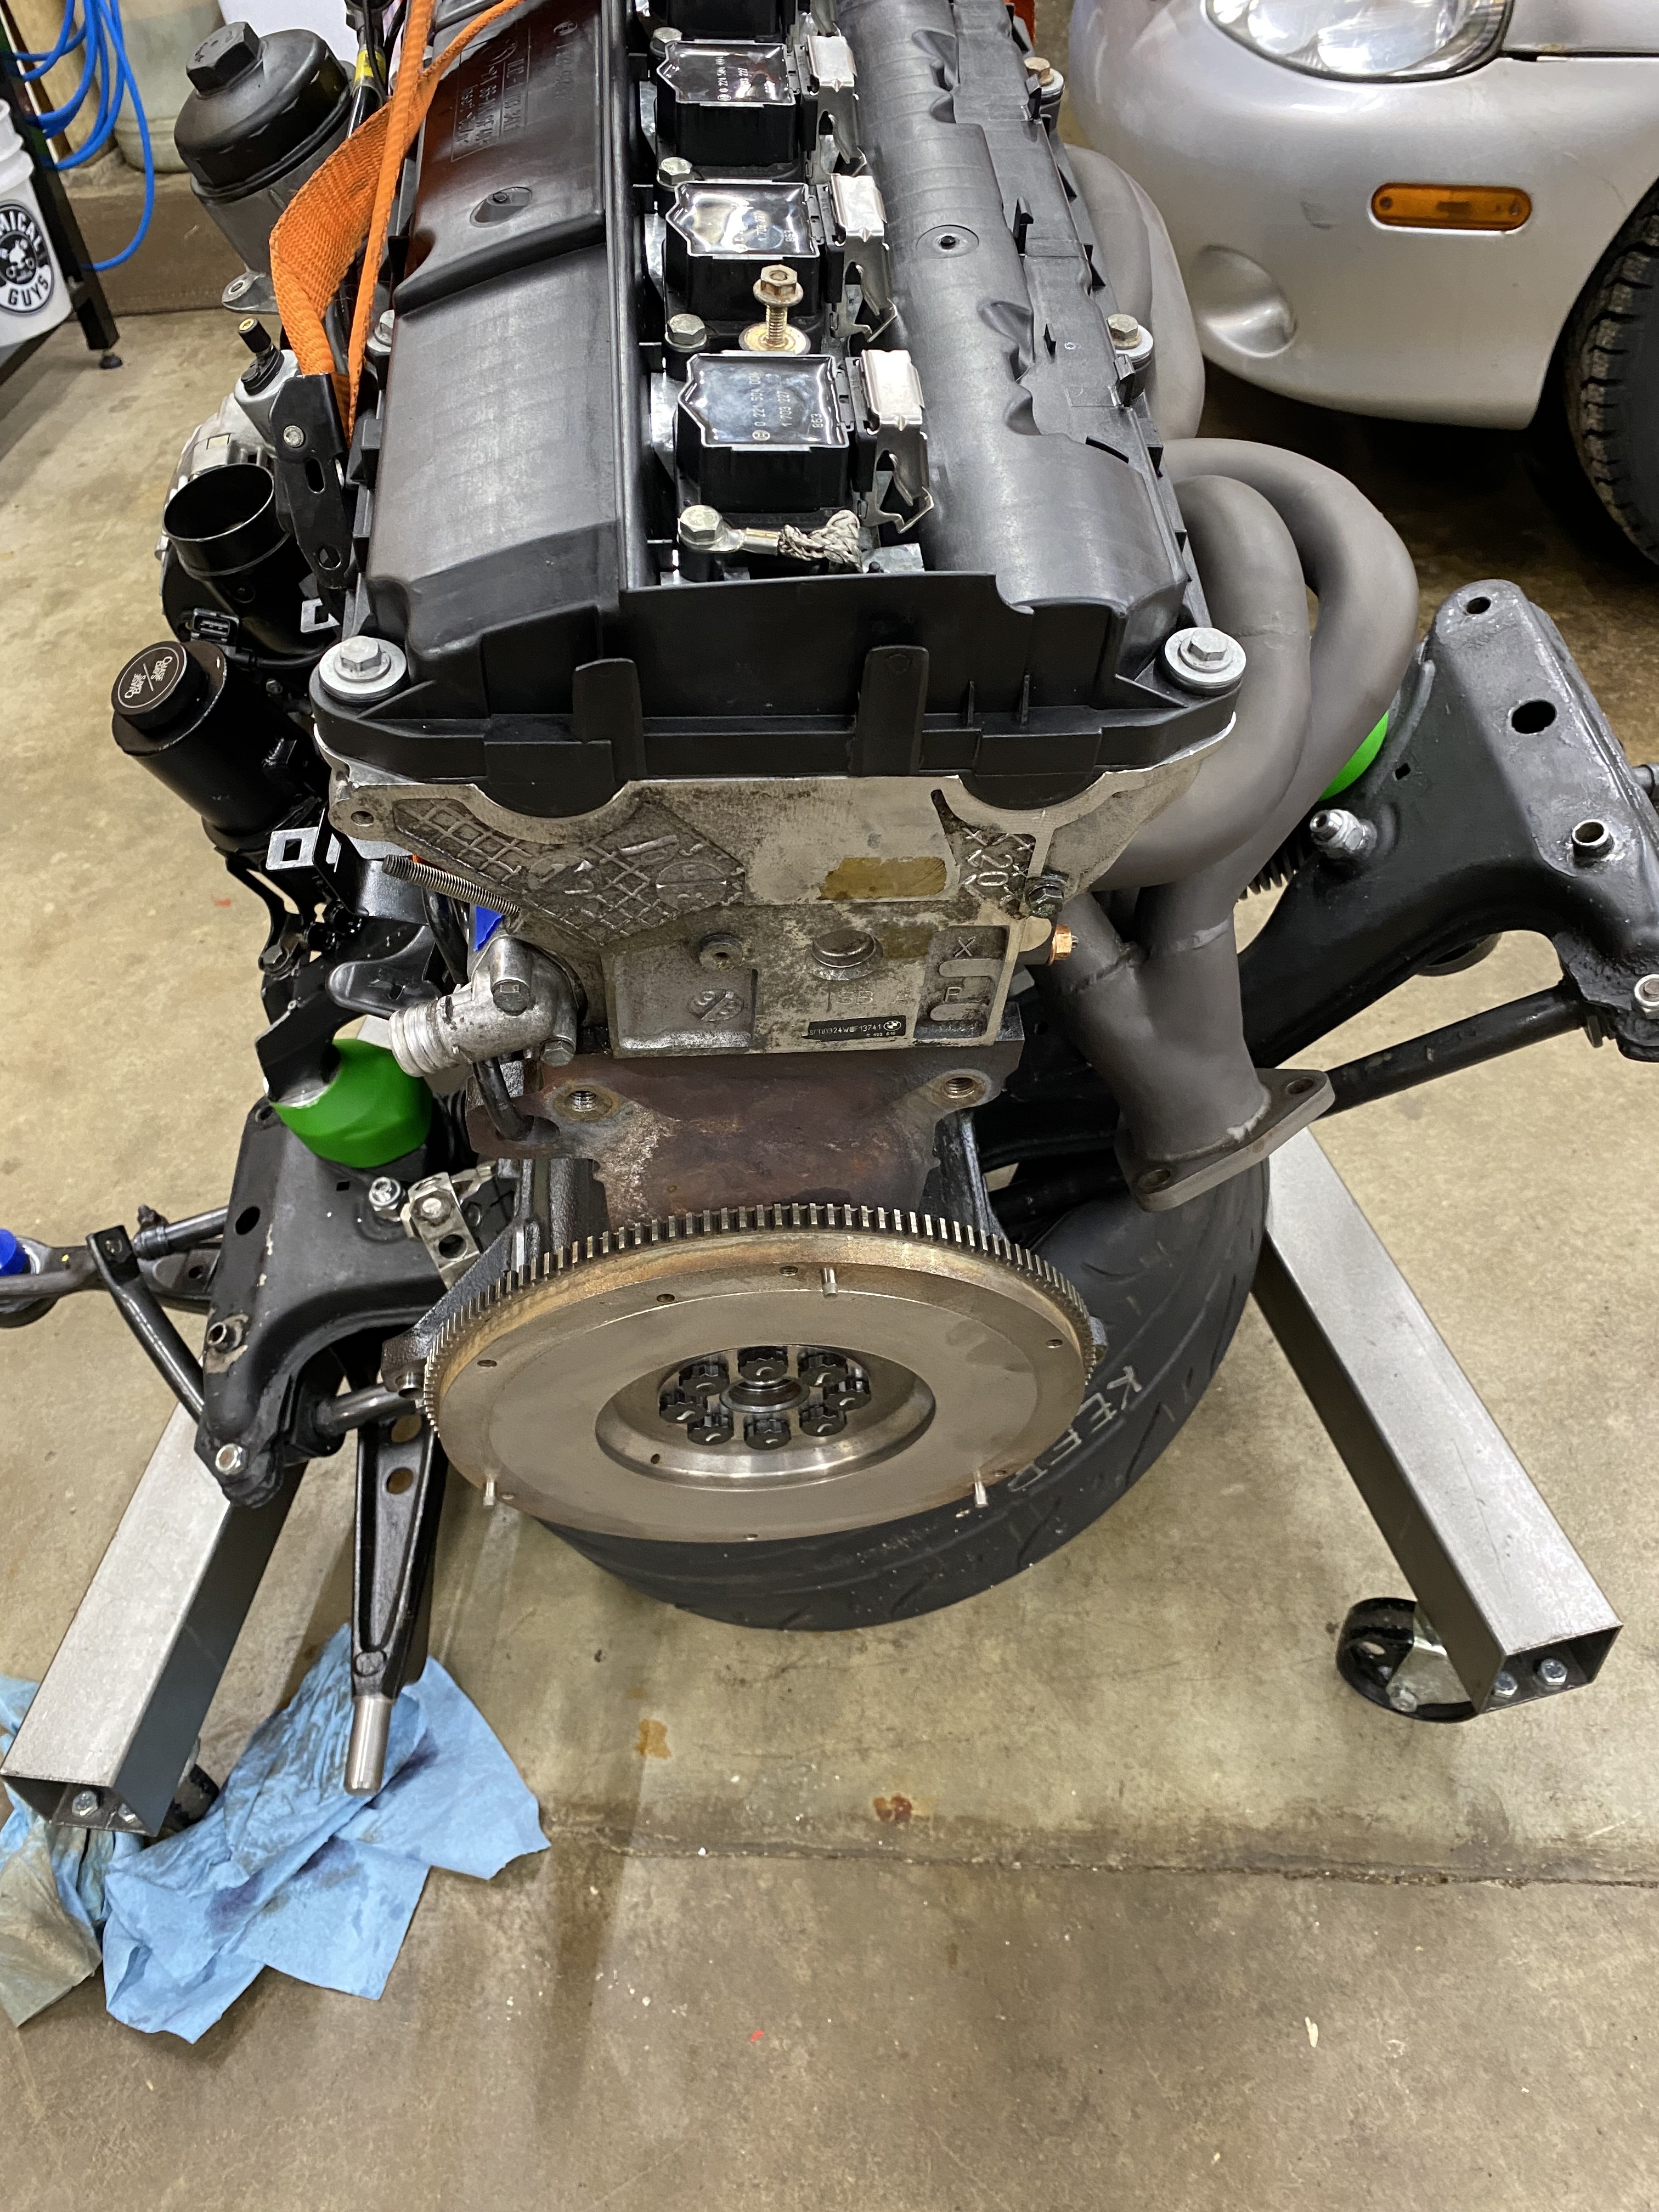
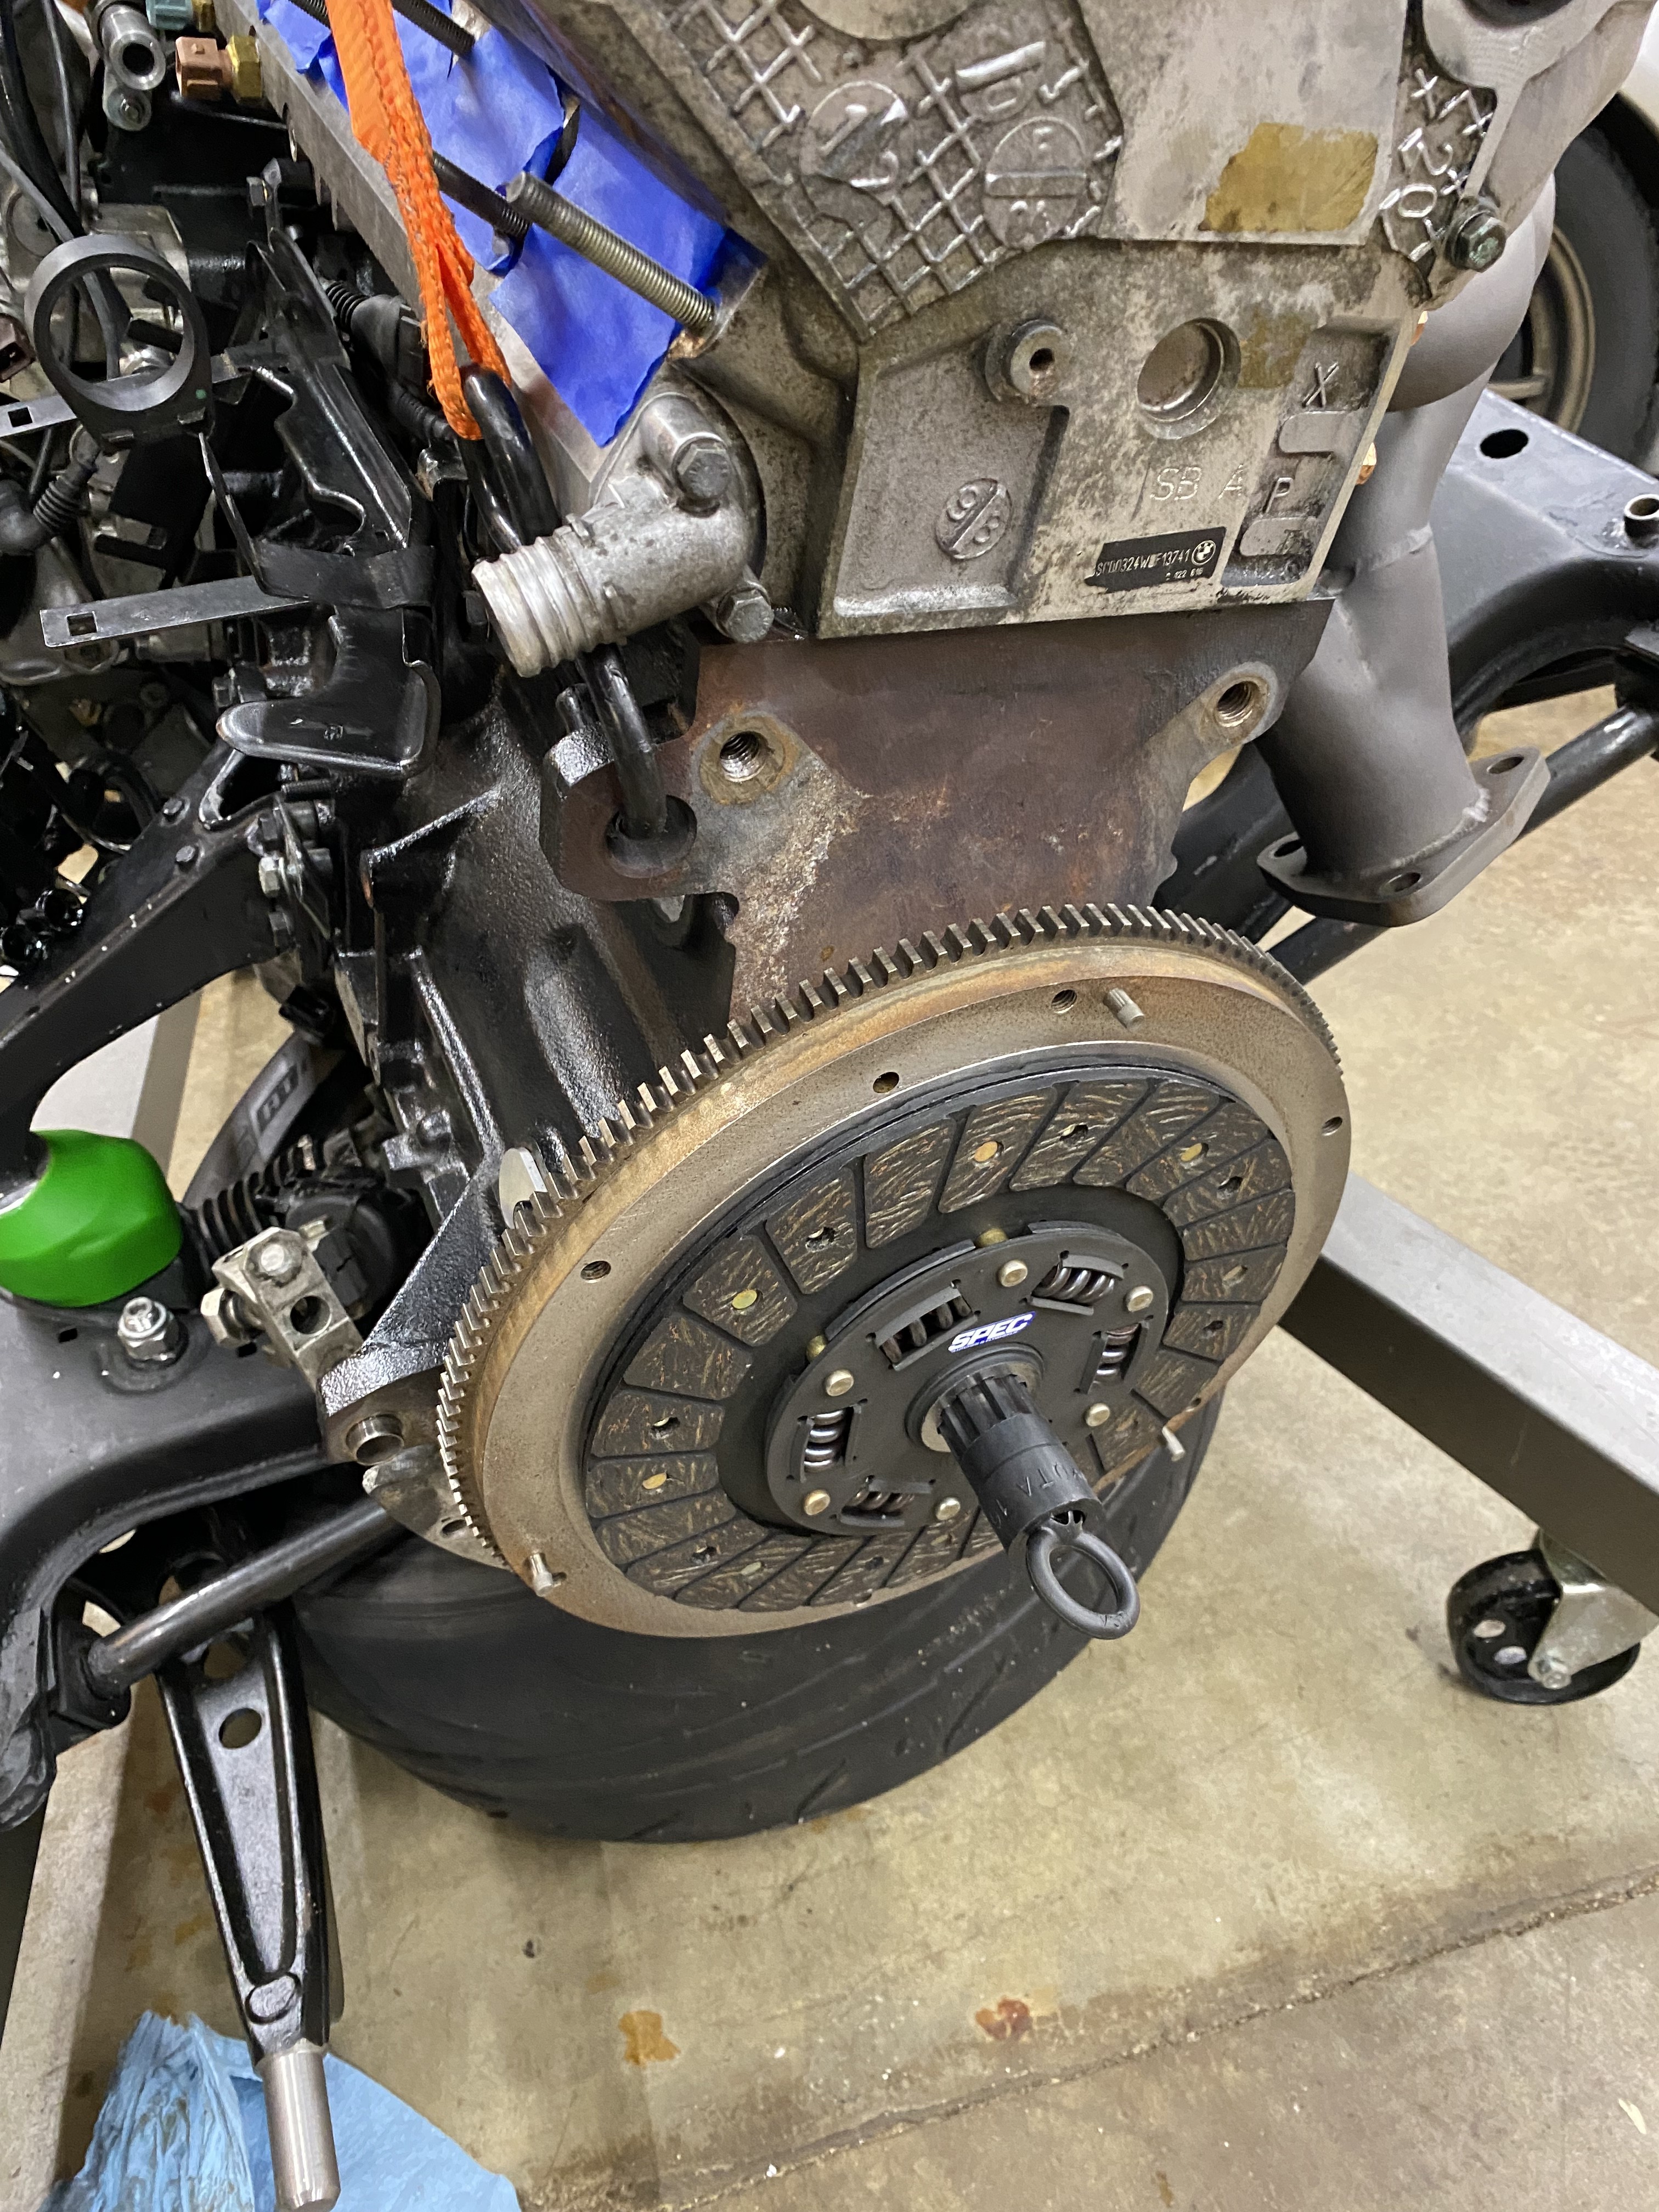
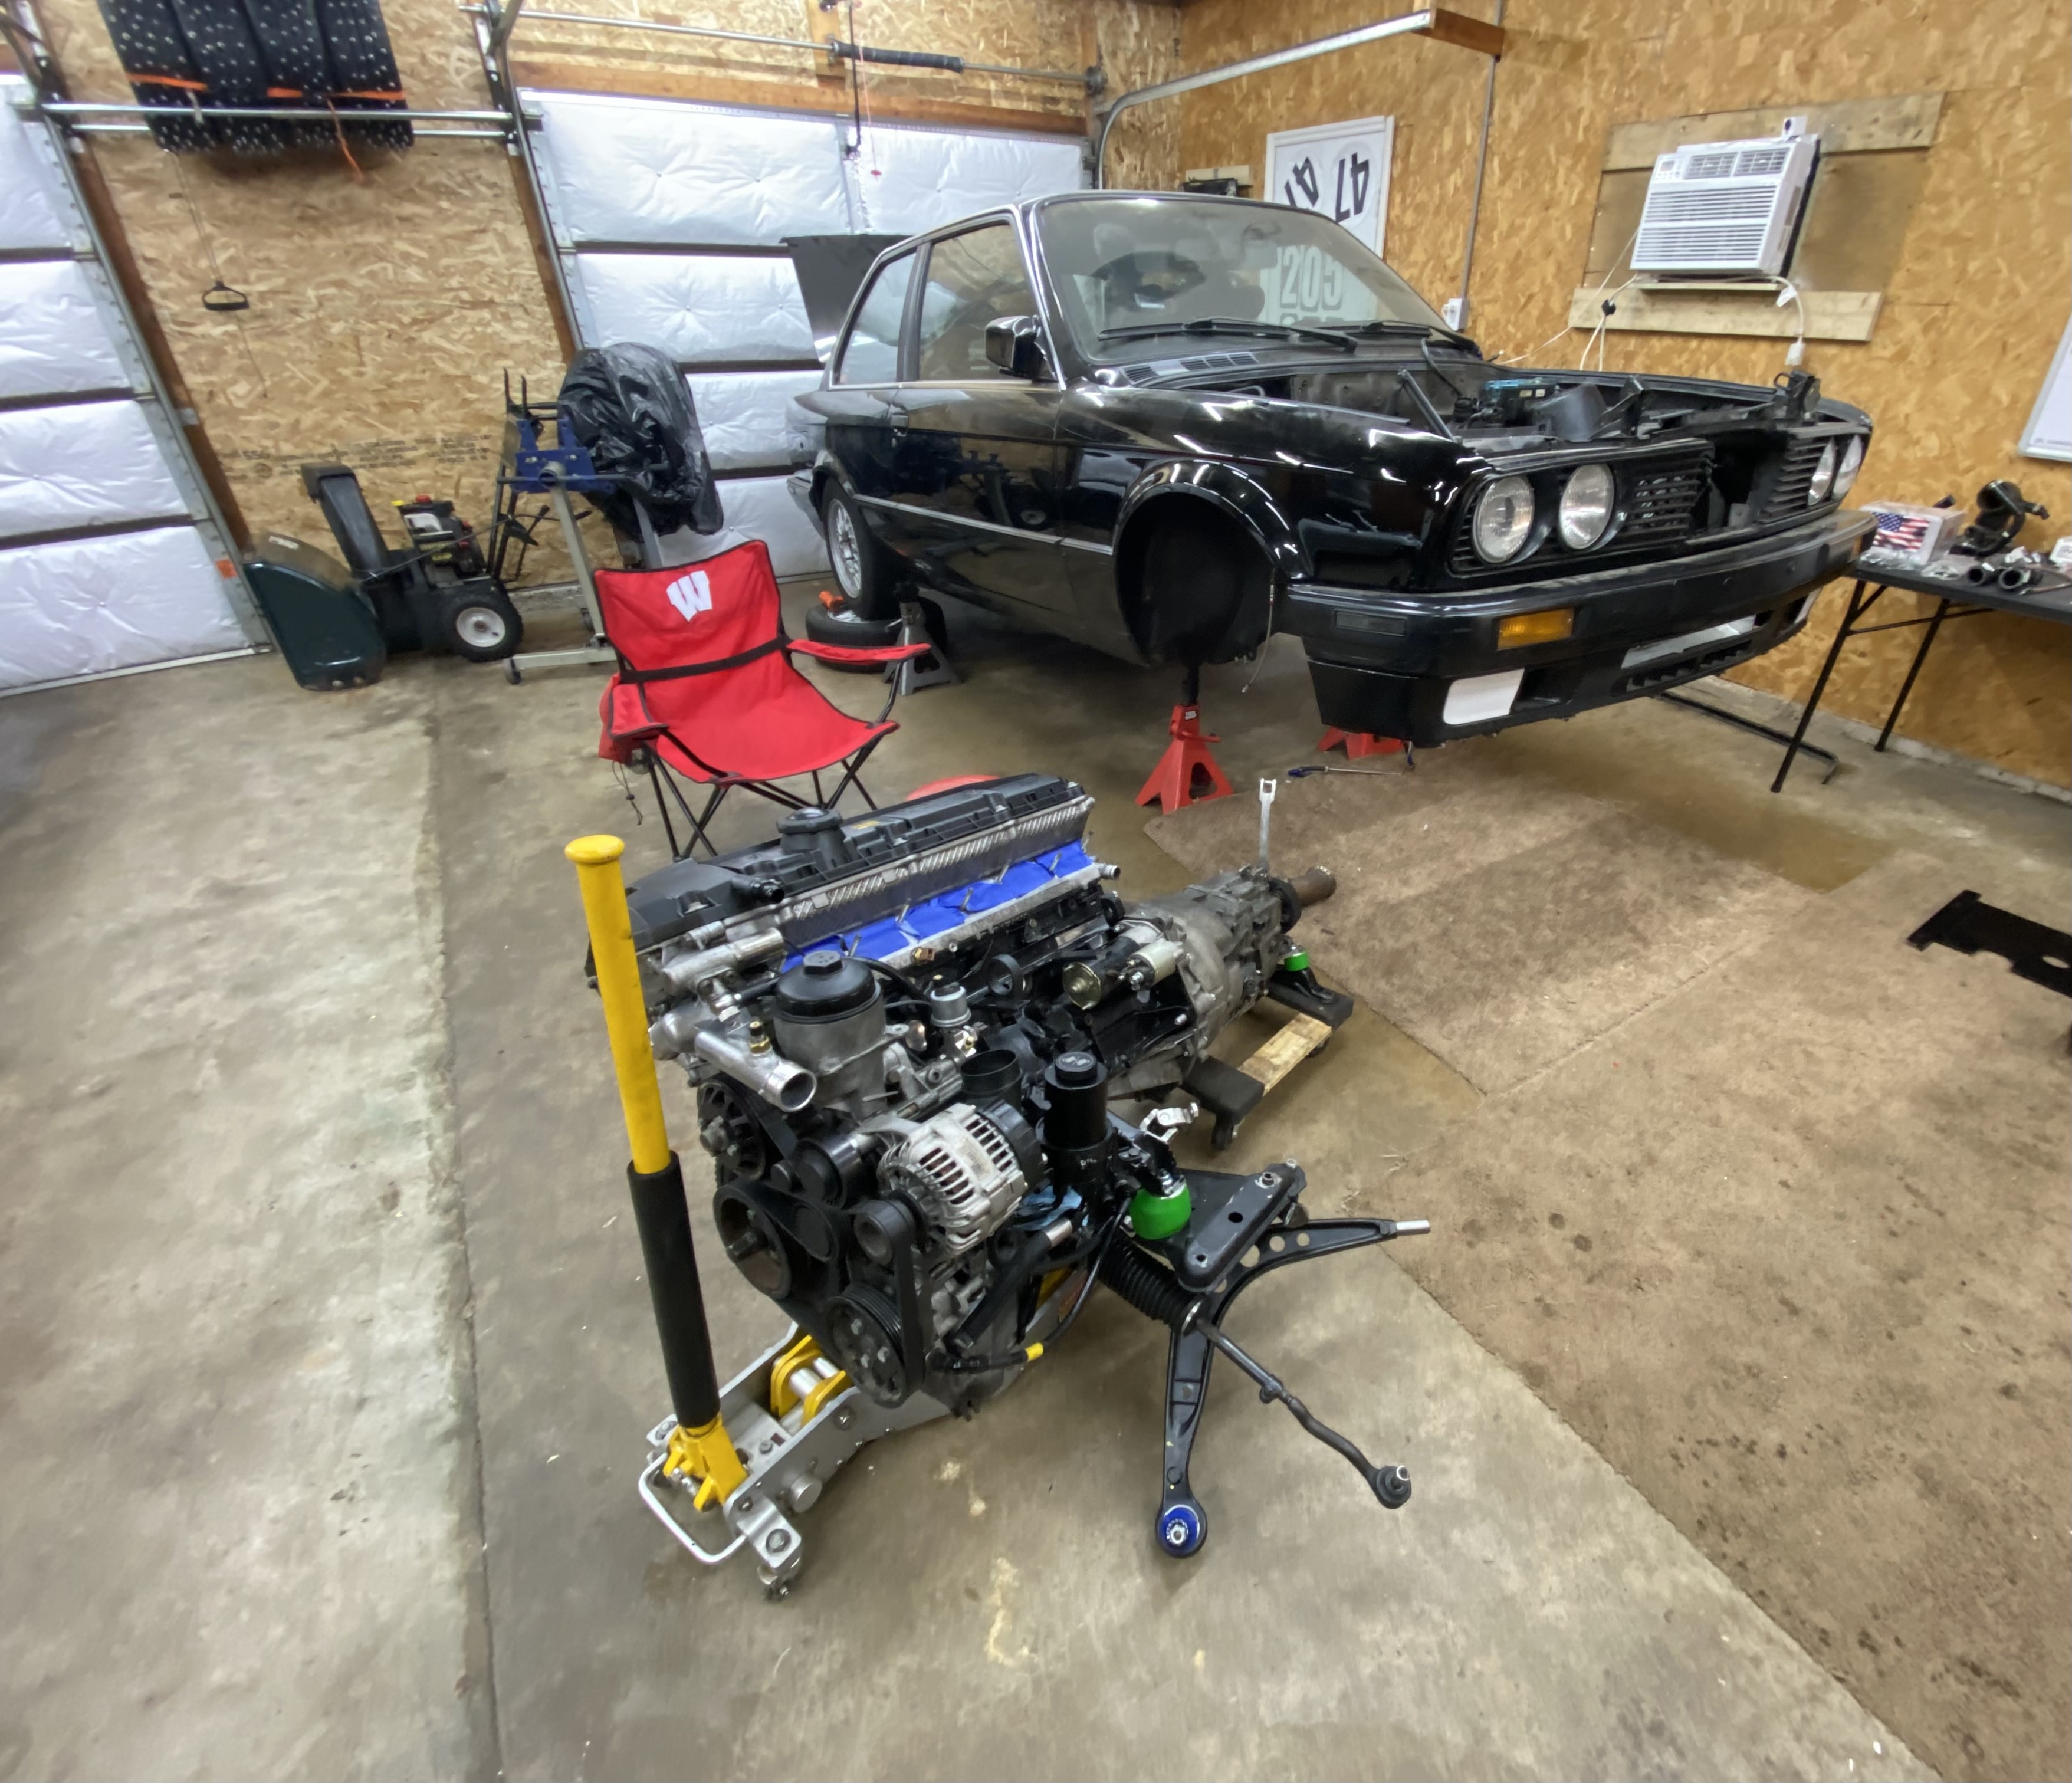
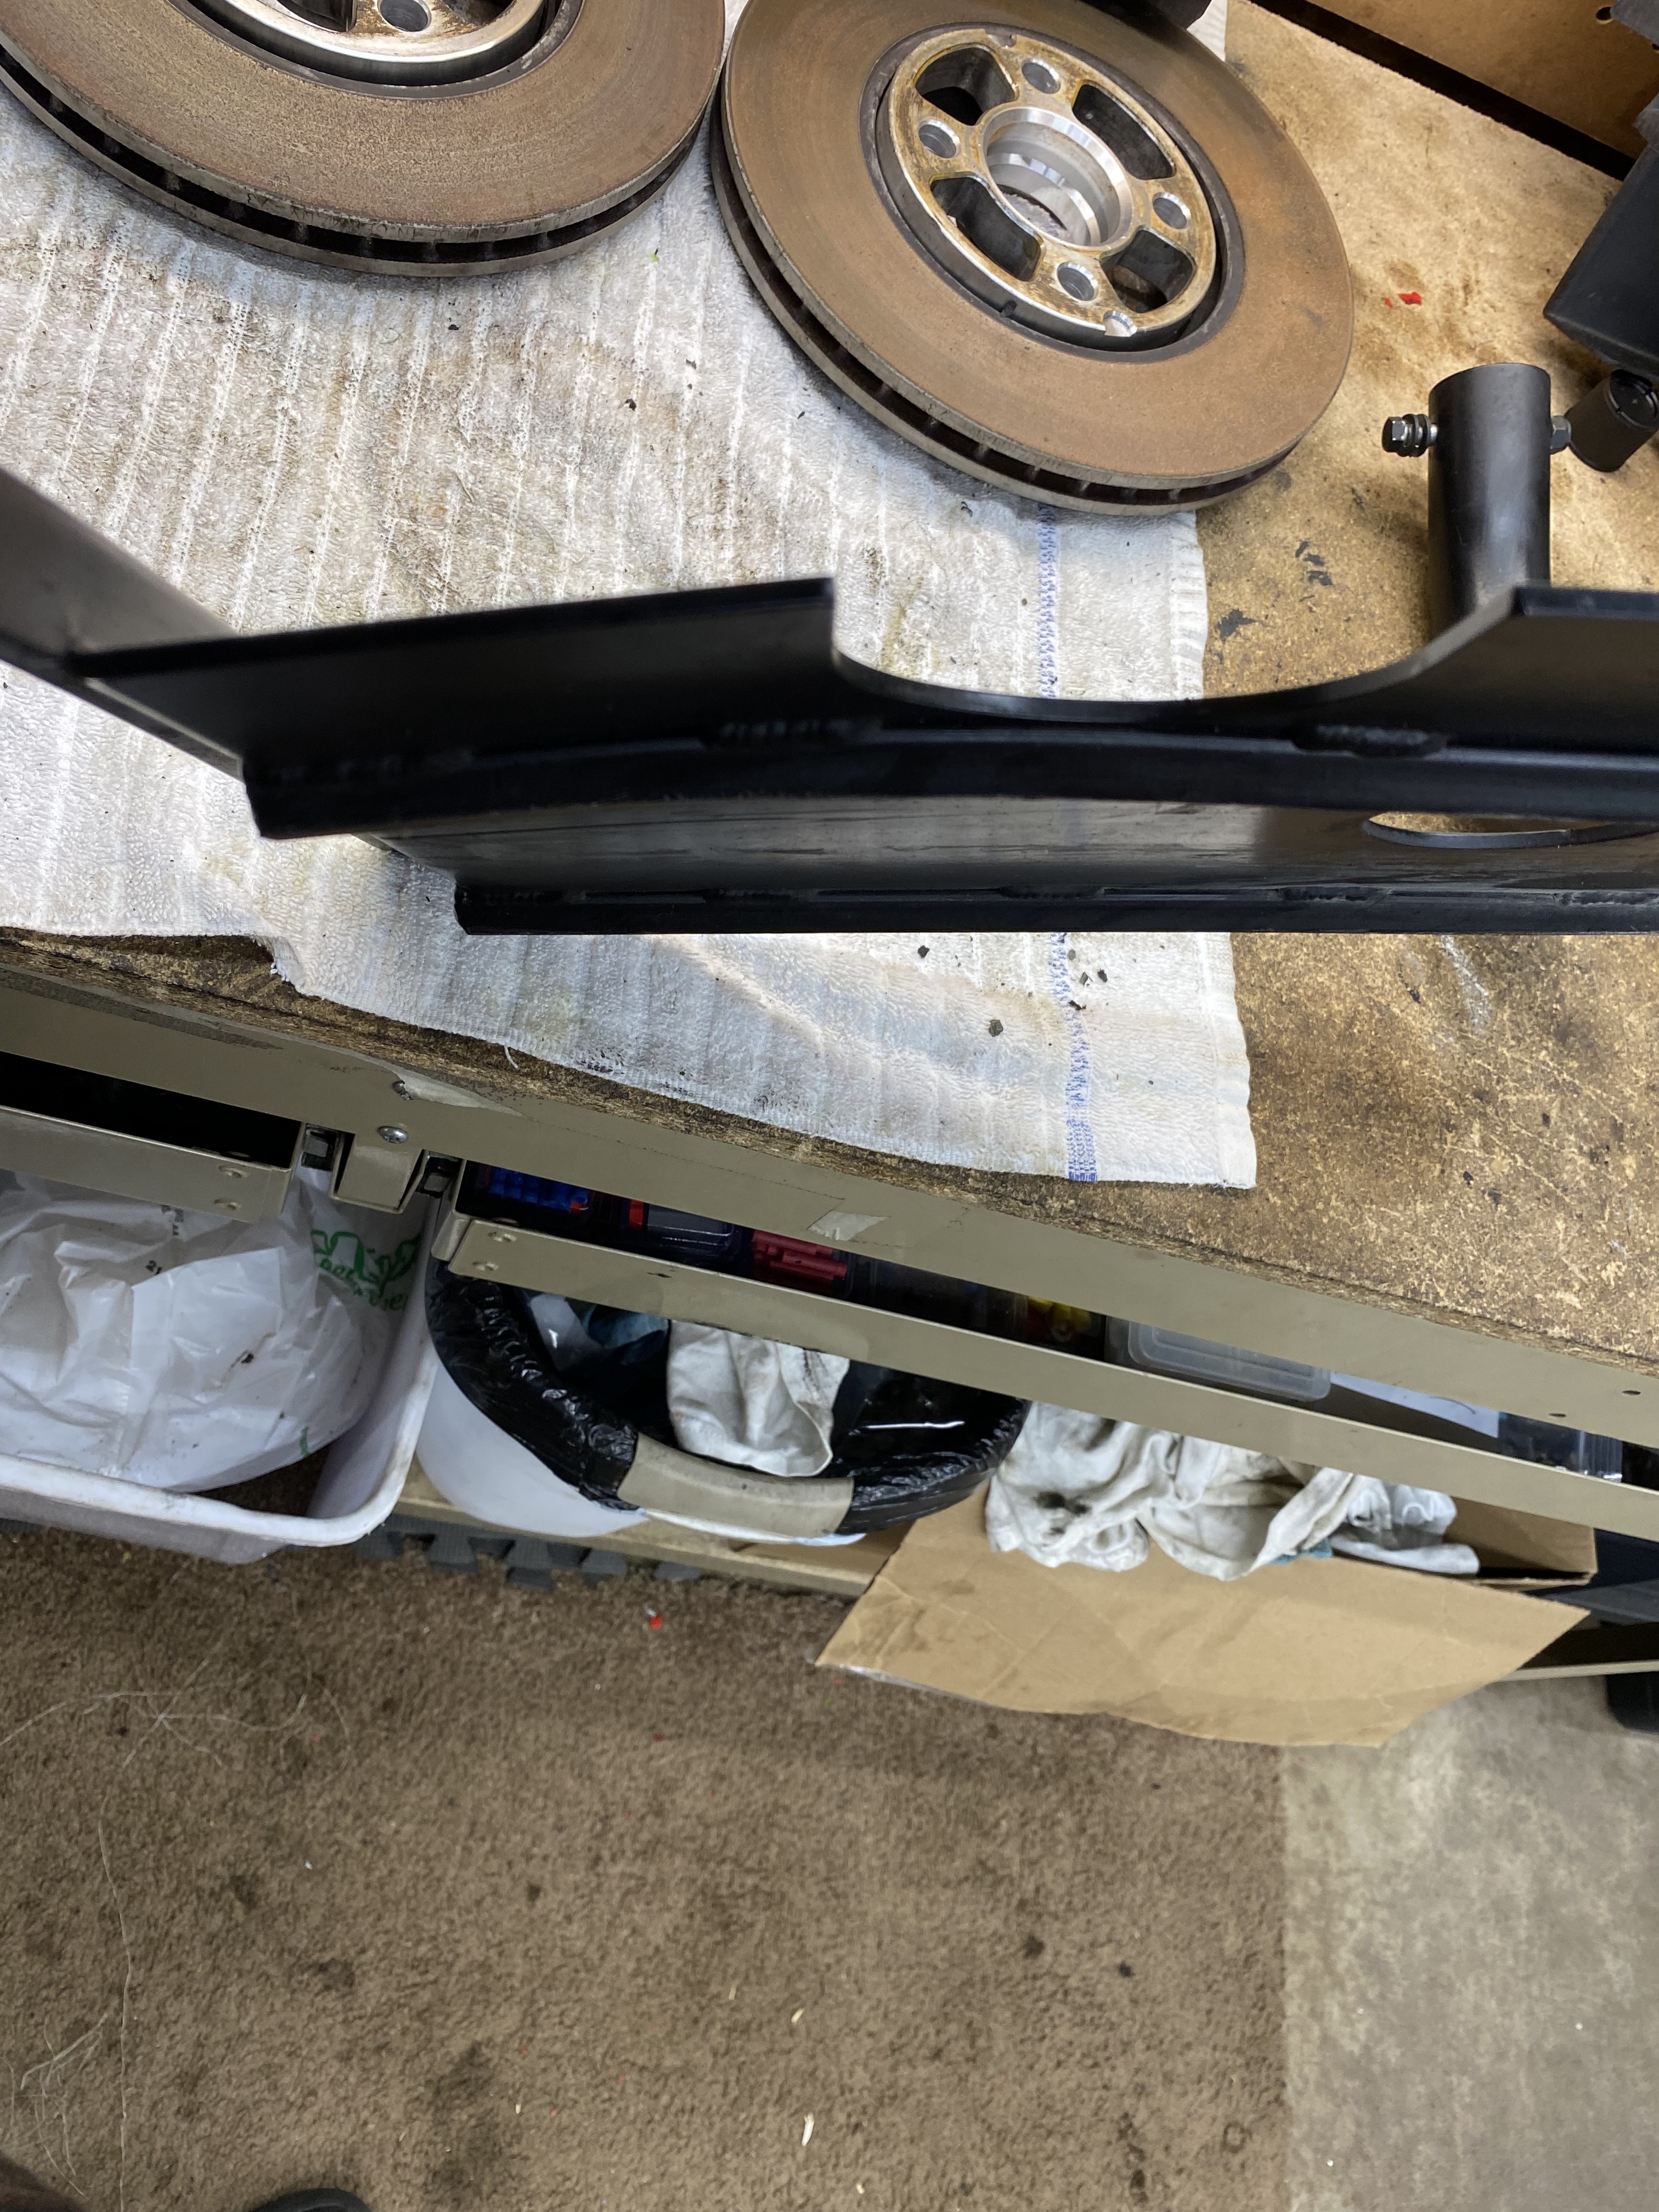
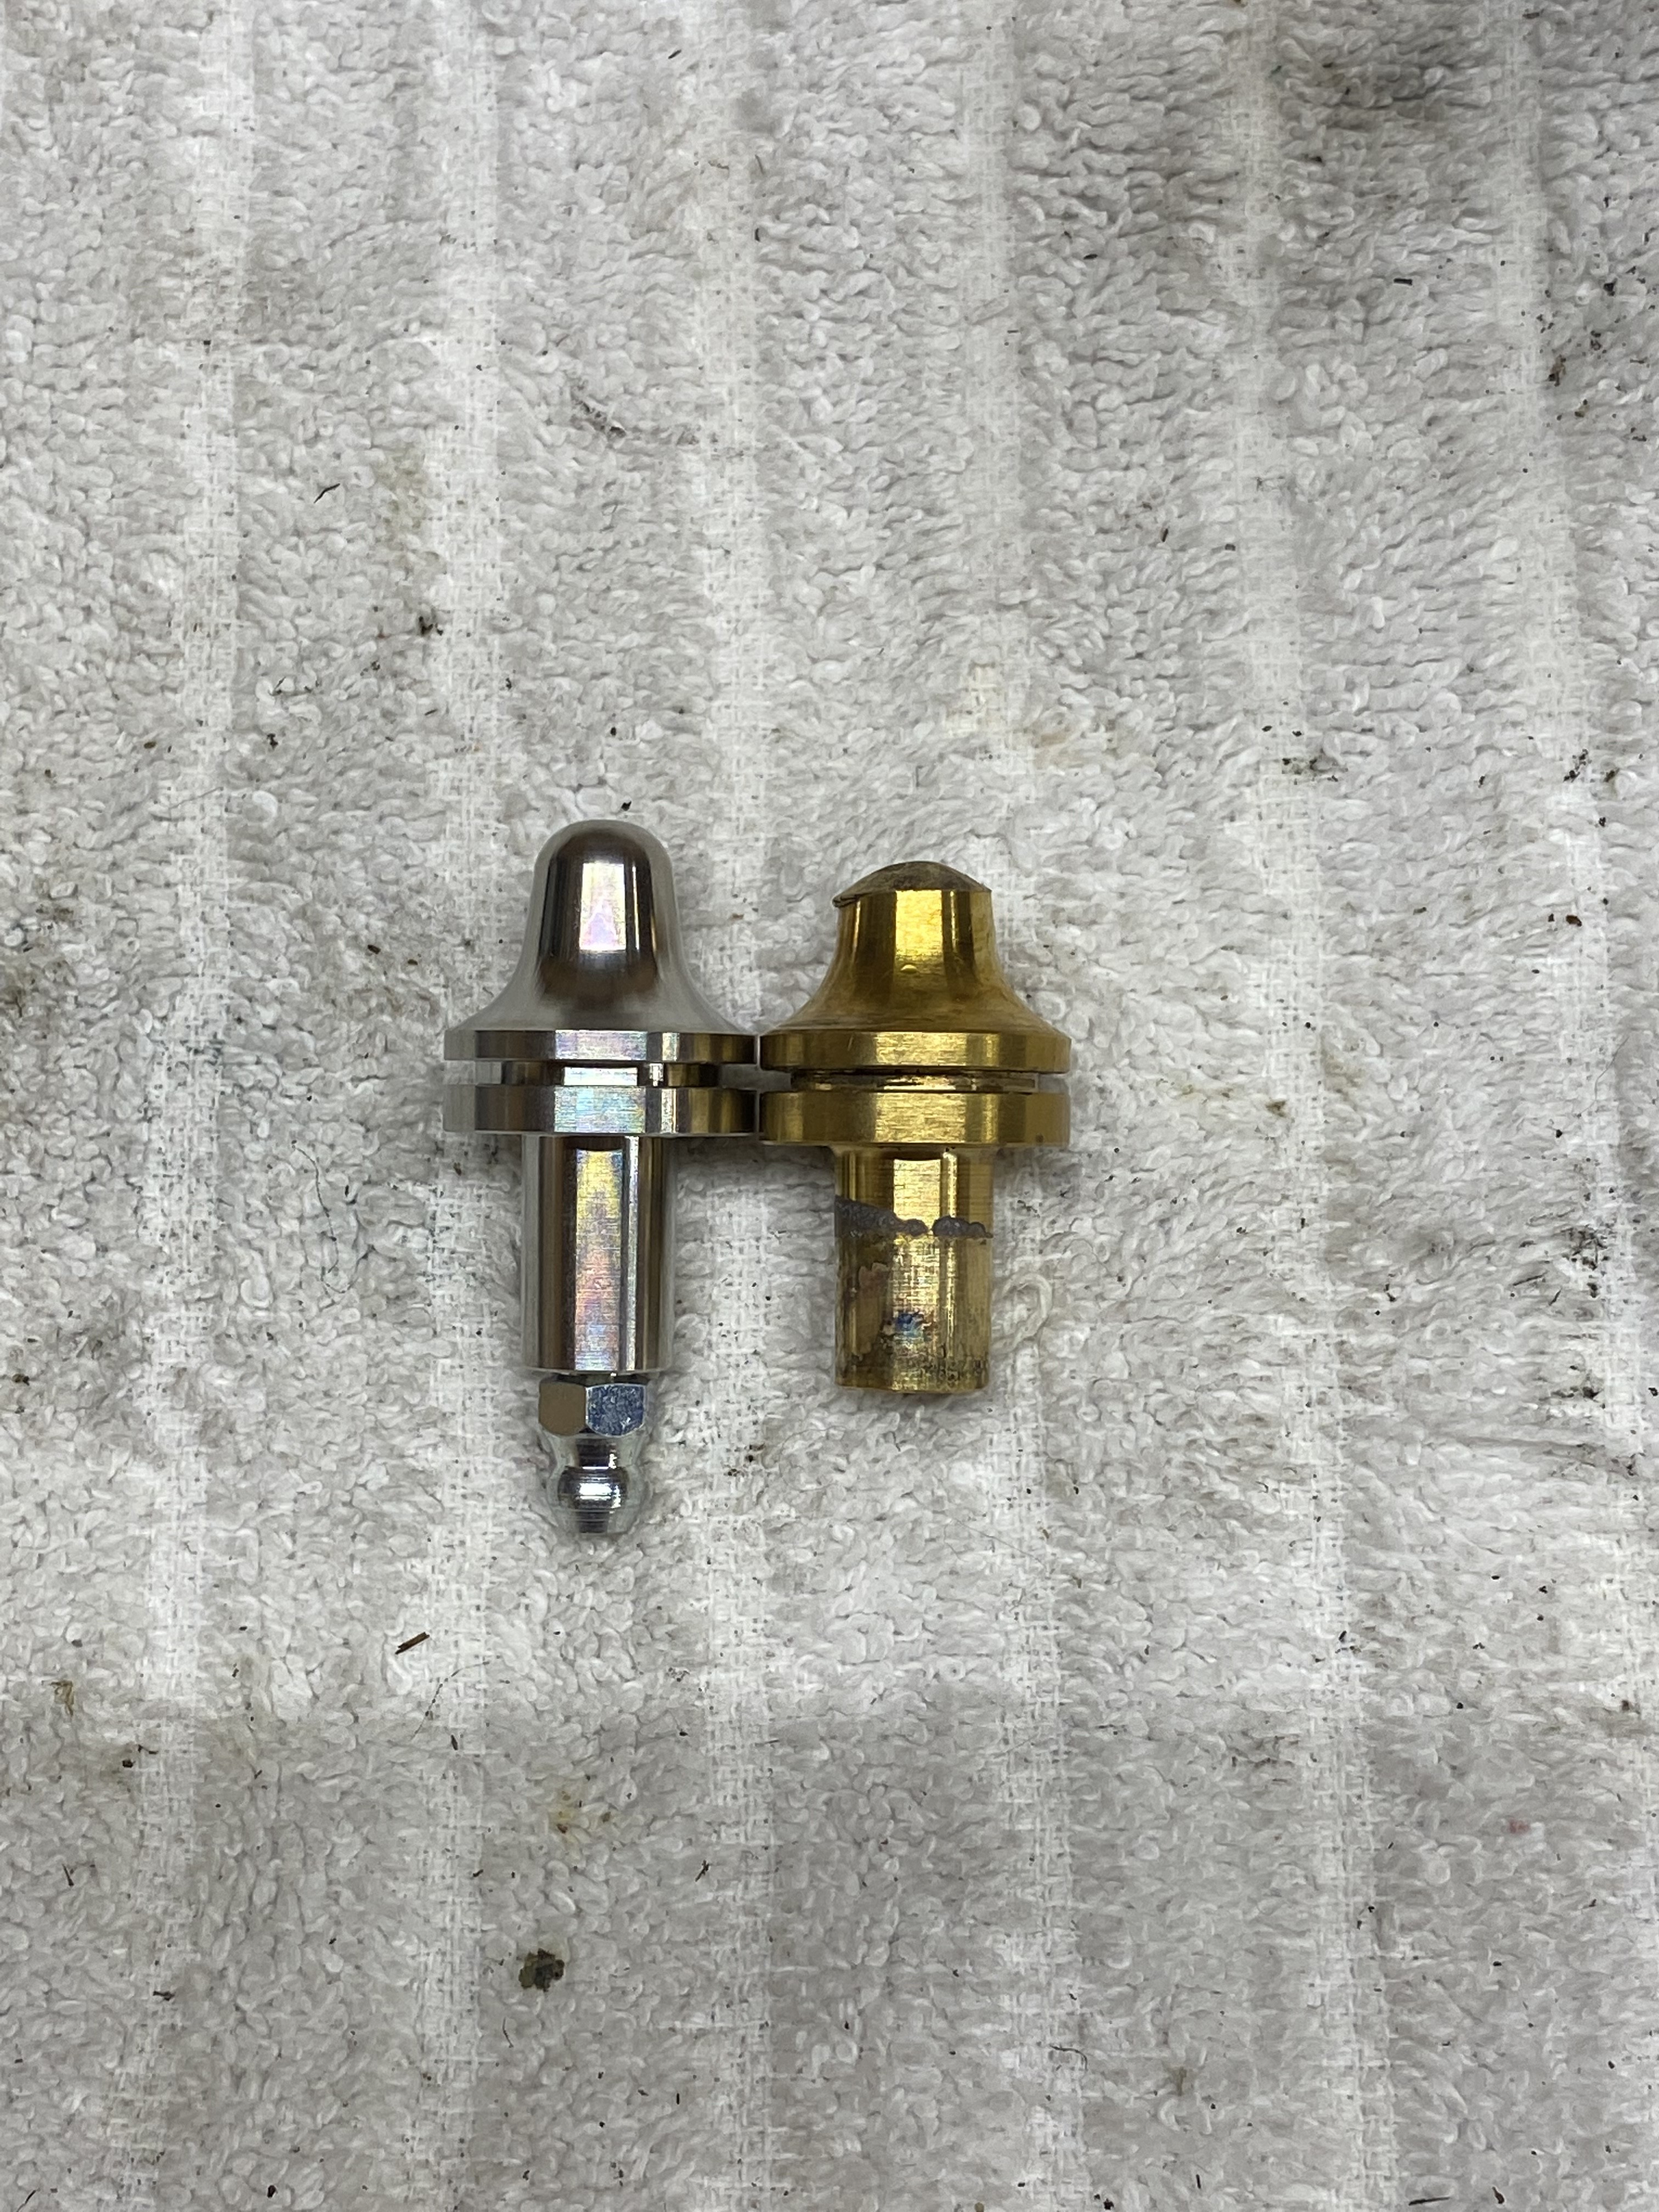
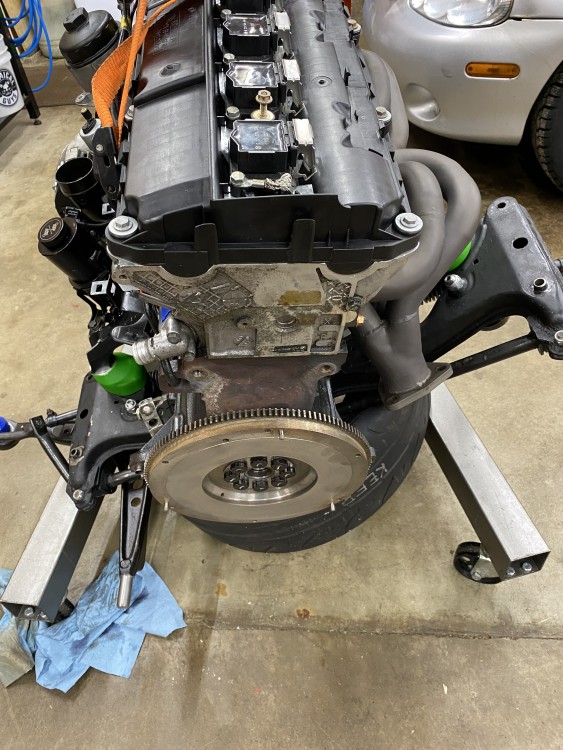
                                  Popped the front main in, installed the damper (still need to torque that, which basically means set the impact to max and send it home) engine is on the subframe now, m20 FW on with arp hardware, new spec clutch/pressure plate,TOB/PB, clutch pivot pin with grease fitting, trans put on, new control arms, bushings, etc etc 5140E845-79D0-4F4C-BFAF-788F1333C95E.jpeg6D479B9A-1D20-4217-ACCB-7D1CF0DB2B7D.jpeg8AA47068-9D58-4C26-A9DB-E549EFB872E0.jpeg
                                  @Rekpointis stopping by to help toss this thing in 

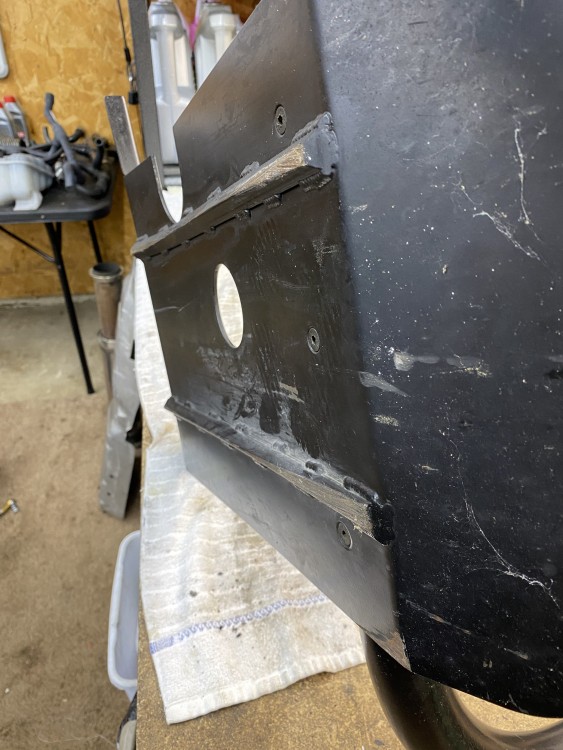
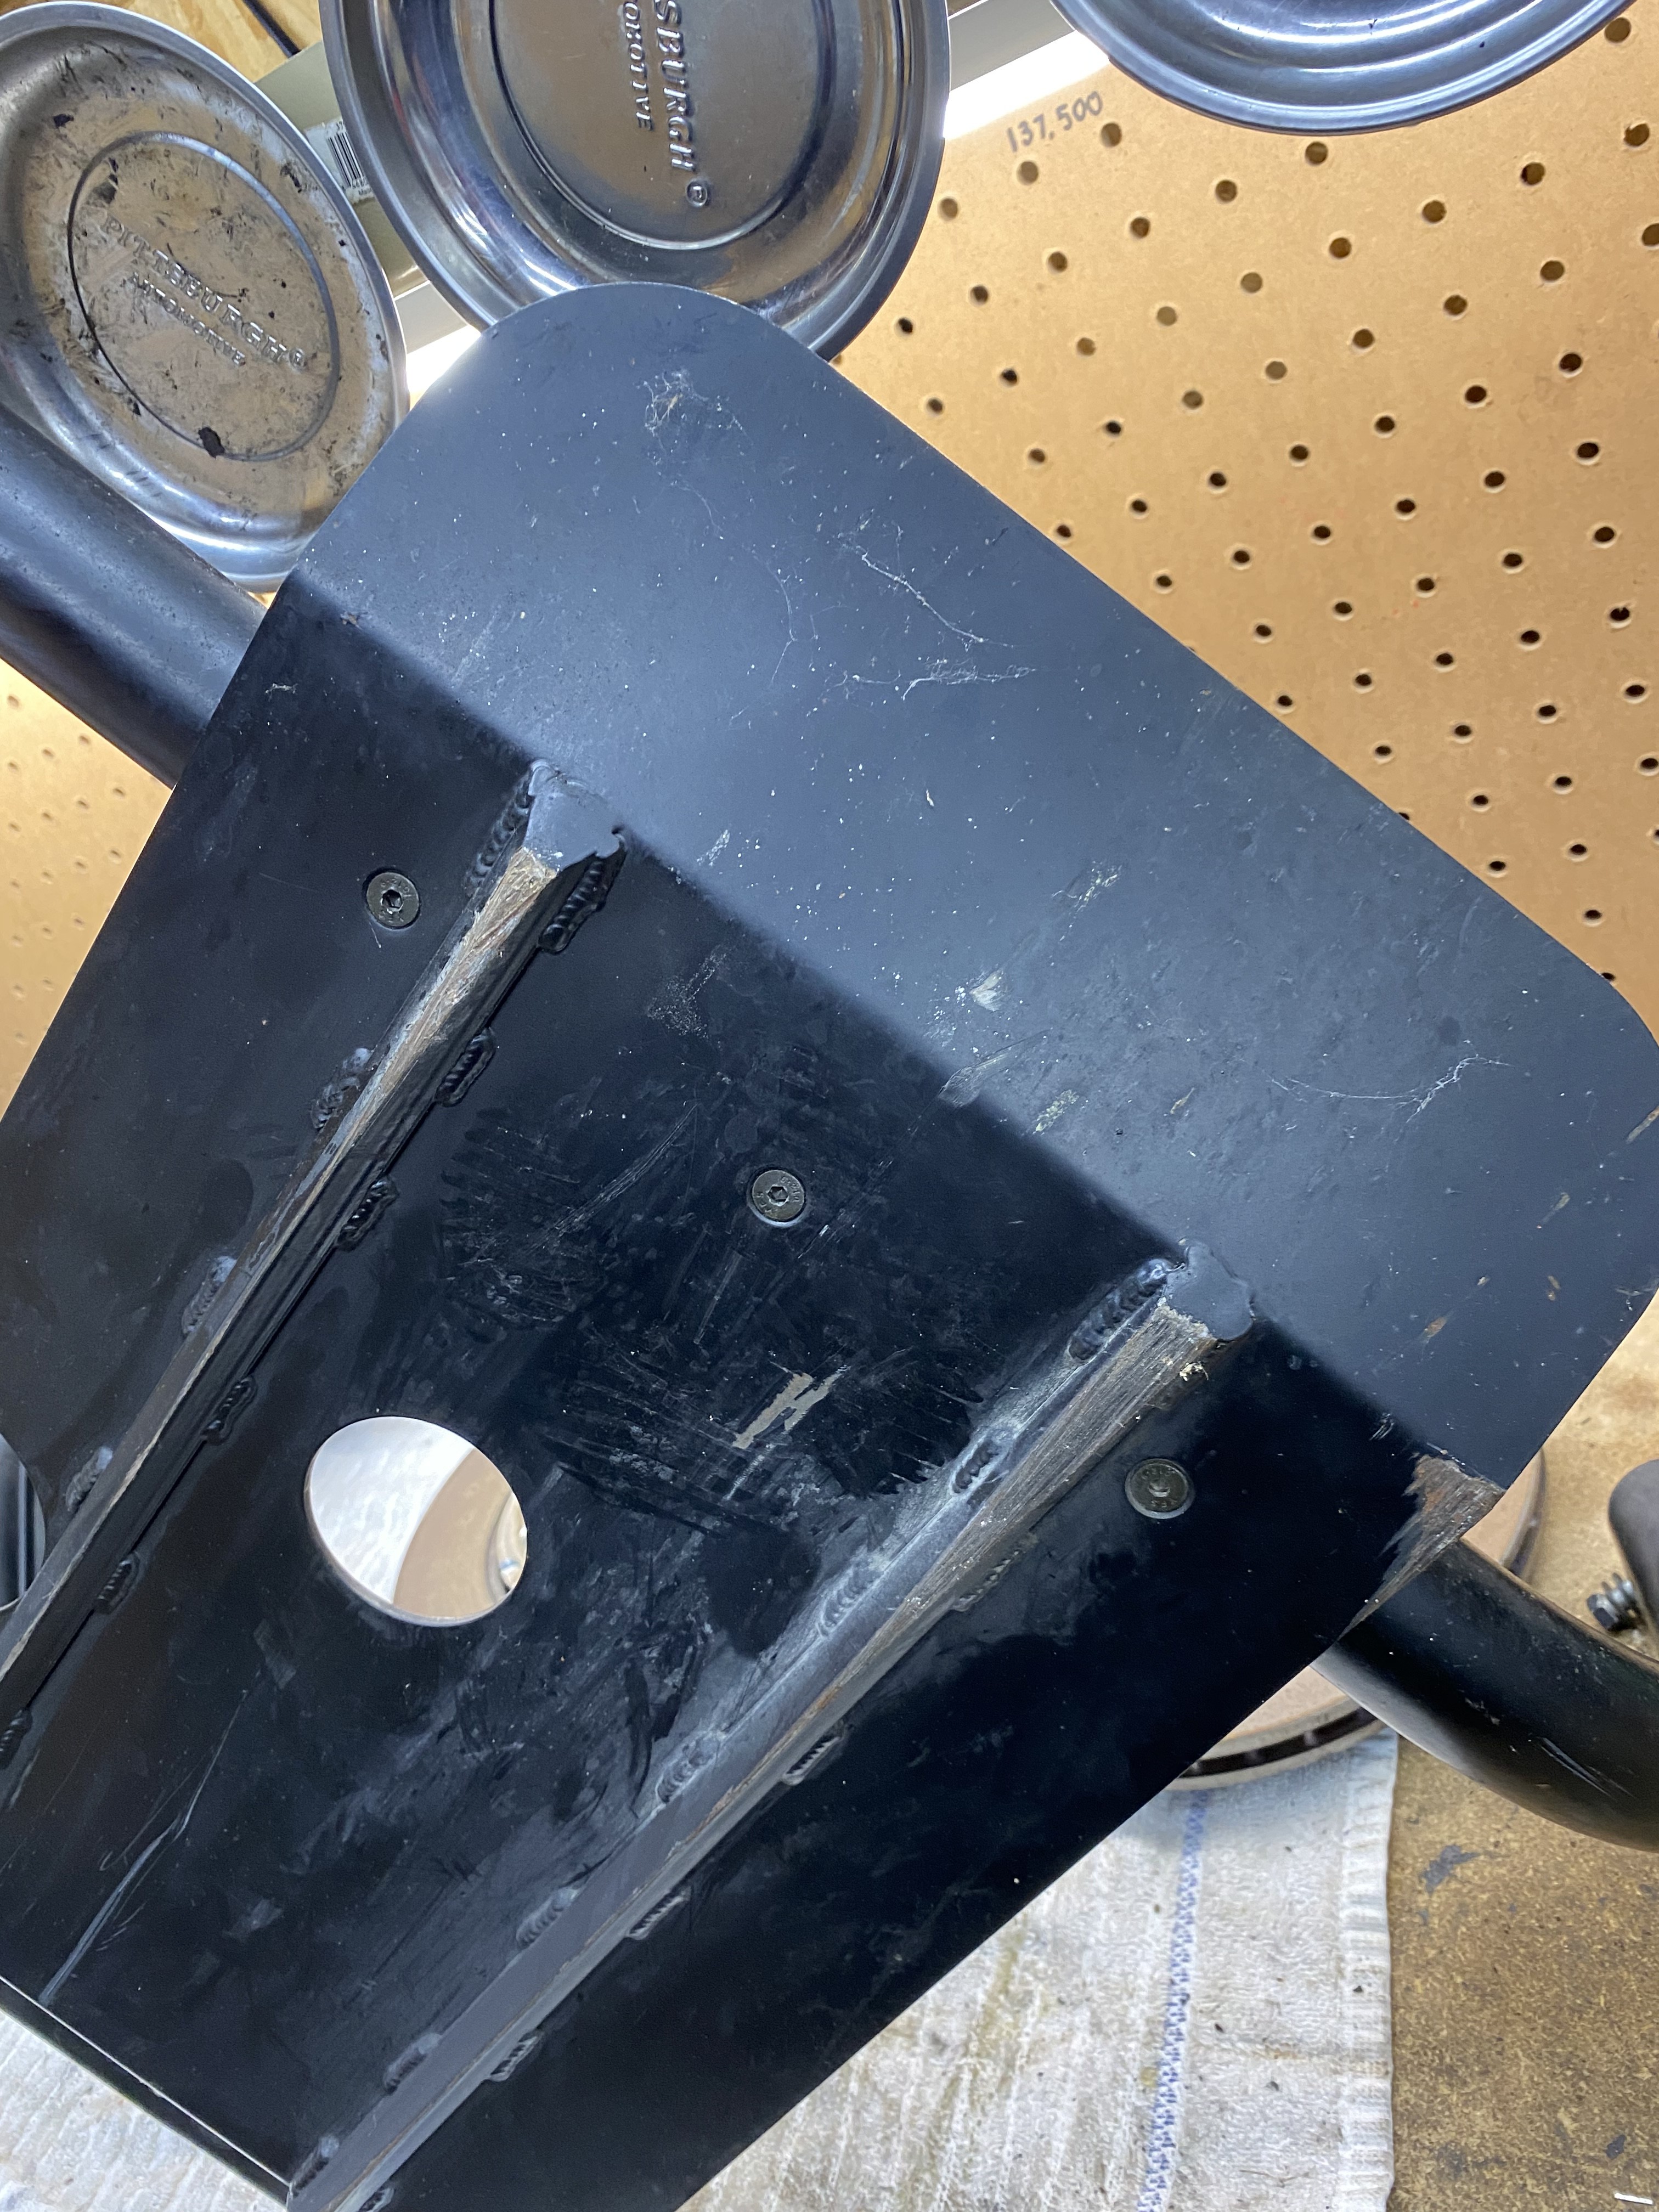
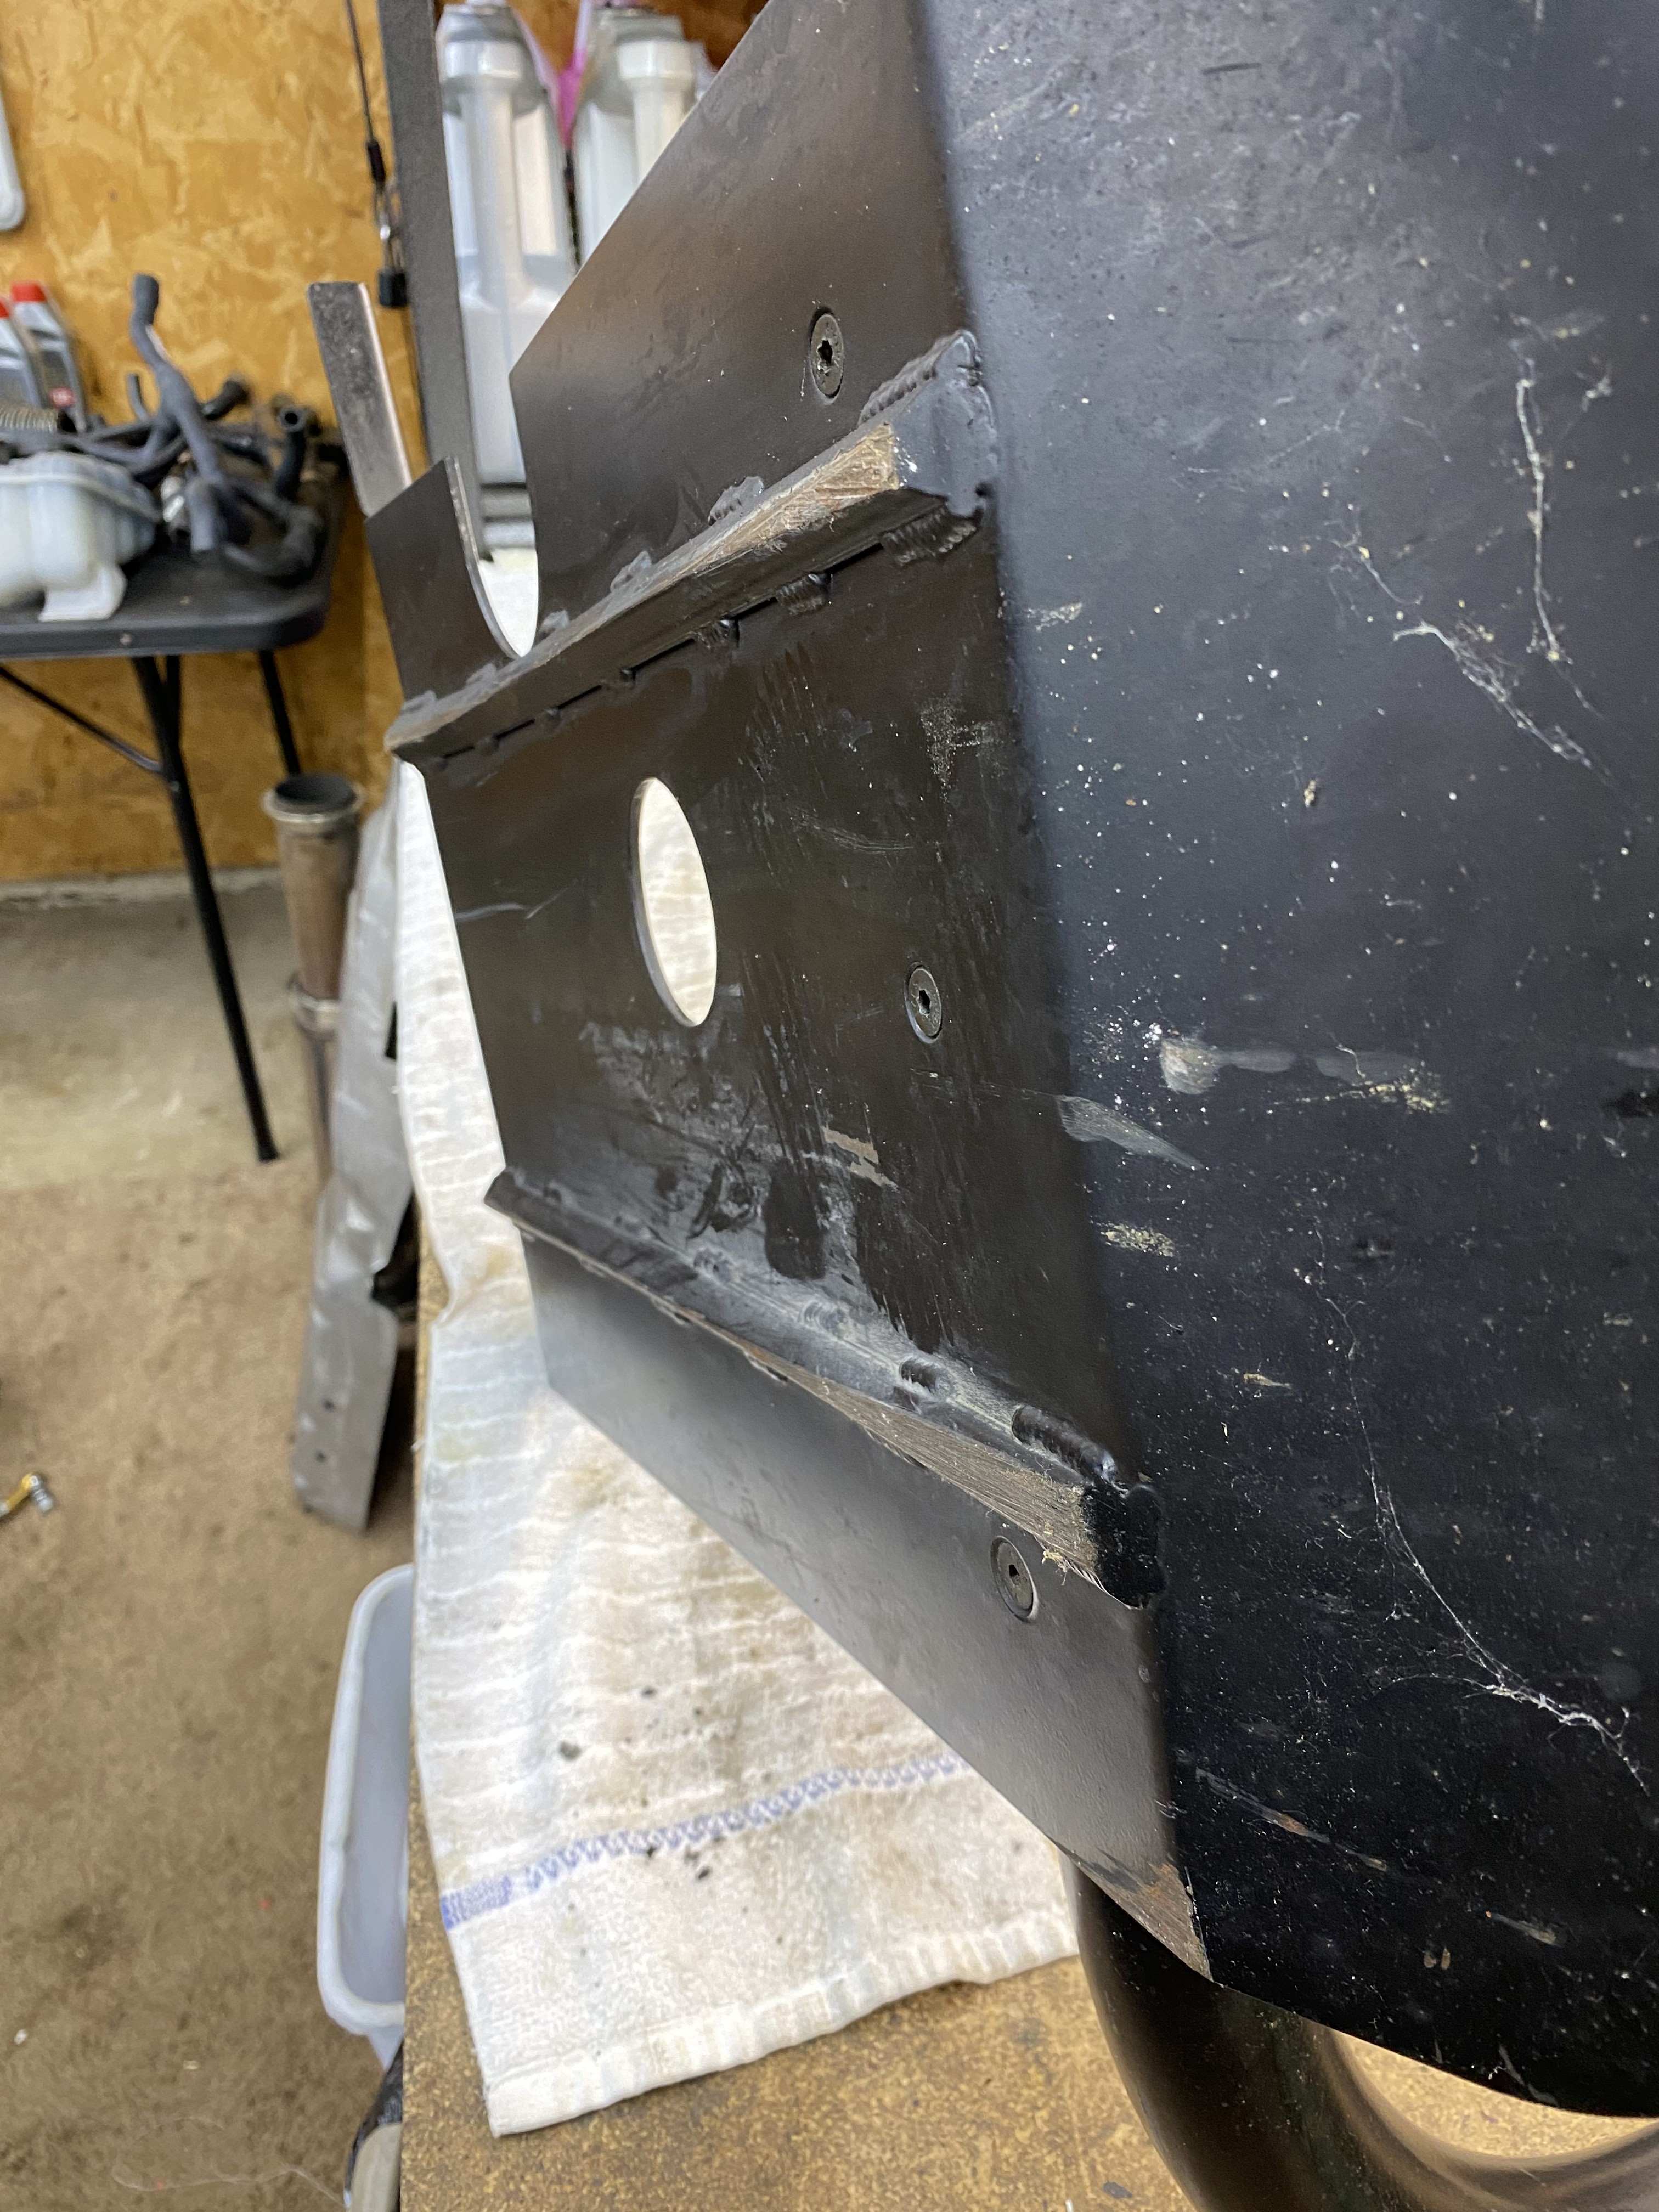
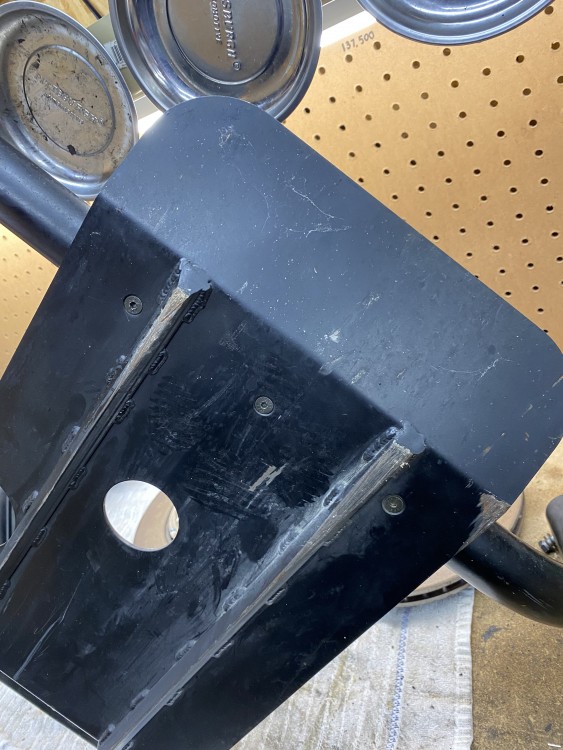
                                  side note, this hikfab plate has probably saved me from purchasing around 70 oil pans AEBC33A5-FF37-4BBF-AD77-EDB729CAD296.jpeg5B950114-3B06-4BFD-BBB5-F83490AF8E2E.jpeg

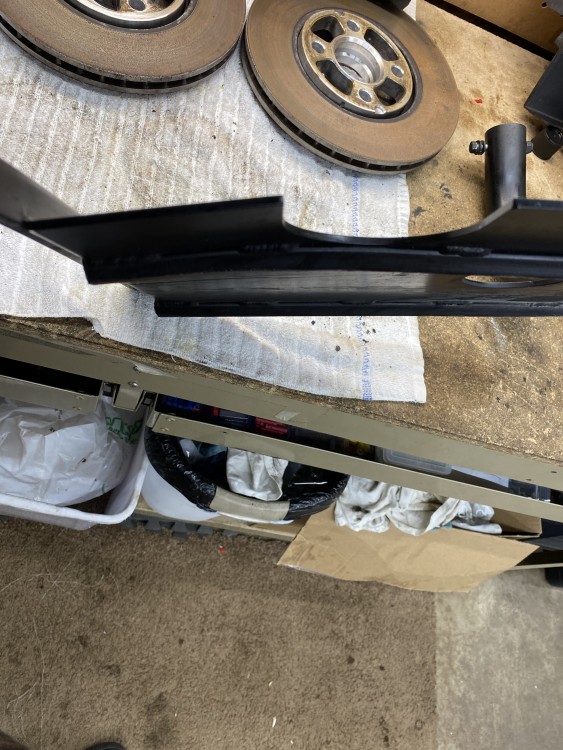
                                  it did pick up a slight bend, but I’m going to toss it in the press to see if I can’t straighten it back out a bit 

                                  87A67F02-B735-4333-8C64-272DB2B32262.jpeg
                                   

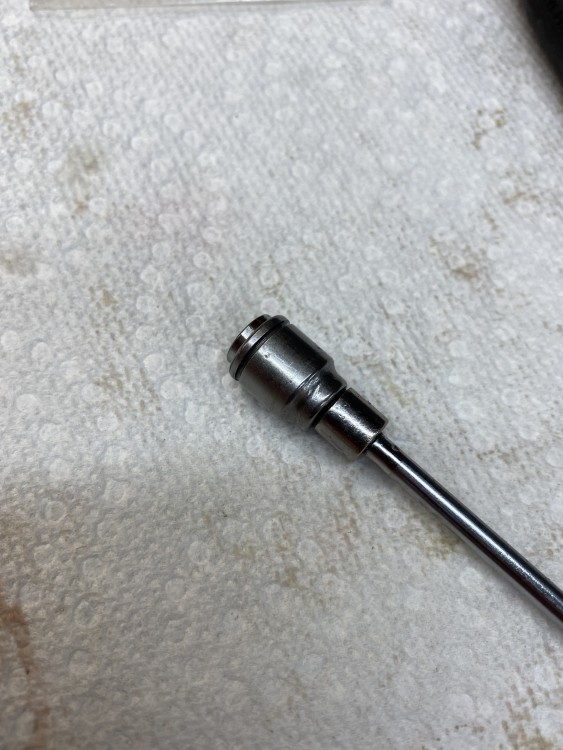
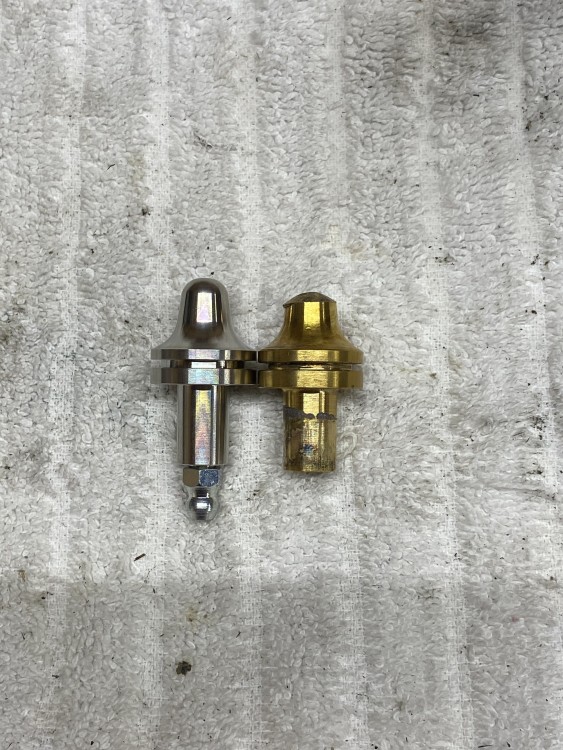
                                  also, say no to brass pivot pins lol. This maybe had like 4k miles on it - was previously running a south bend stg3 street clutch/pp

                                  94413380-E71F-437C-B76C-4258B3B35E9C.jpeg

                                  1 Reply Last reply
                                  4
                                  • P_RoloffP
                                    P_RoloffP
                                    P_Roloff
                                    wrote on last edited by
                                    #458

                                    KaiserRolls said:

                                    Popped the front main in, installed the damper (still need to torque that, which basically means set the impact to max and send it home) engine is on the subframe now, m20 FW on with arp hardware, new spec clutch/pressure plate,TOB/PB, clutch pivot pin with grease fitting, trans put on, new control arms, bushings, etc etc 5140E845-79D0-4F4C-BFAF-788F1333C95E.jpeg6D479B9A-1D20-4217-ACCB-7D1CF0DB2B7D.jpeg8AA47068-9D58-4C26-A9DB-E549EFB872E0.jpeg
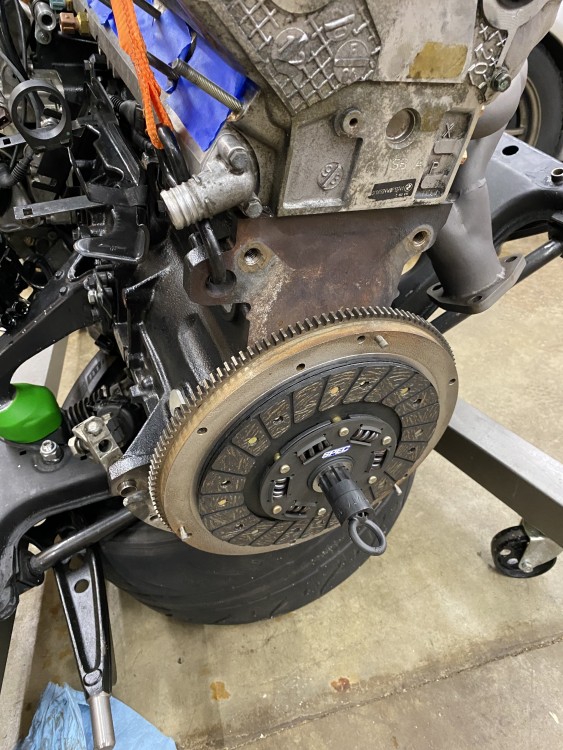
                                    @Rekpointis stopping by to help toss this thing in 

                                    side note, this hikfab plate has probably saved me from purchasing around 70 oil pans AEBC33A5-FF37-4BBF-AD77-EDB729CAD296.jpeg5B950114-3B06-4BFD-BBB5-F83490AF8E2E.jpeg
                                    it did pick up a slight bend, but I’m going to toss it in the press to see if I can’t straighten it back out a bit 
                                    87A67F02-B735-4333-8C64-272DB2B32262.jpeg
                                     

                                    also, say no to brass pivot pins lol. This maybe had like 4k miles on it - was previously running a south bend stg3 street clutch/pp
                                    94413380-E71F-437C-B76C-4258B3B35E9C.jpeg

                                    What’s the one on the left made out of? Is that a grease zerk that I see on it?

                                    1 Reply Last reply
                                    0
                                    • KaiserRollsK
                                      KaiserRollsK
                                      KaiserRolls
                                      wrote on last edited by
                                      #459

                                      P_Roloff said:

                                      What’s the one on the left made out of? Is that a grease zerk that I see on it?

                                      It is stainless steel, that is a grease zerk

                                      https://leogranderacing.com/products/greasable-stainless-steel-clutch-fork-pivot-pin

                                      1 Reply Last reply
                                      3
                                      • KaiserRollsK
                                        KaiserRollsK
                                        KaiserRolls
                                        wrote on last edited by
                                        #460

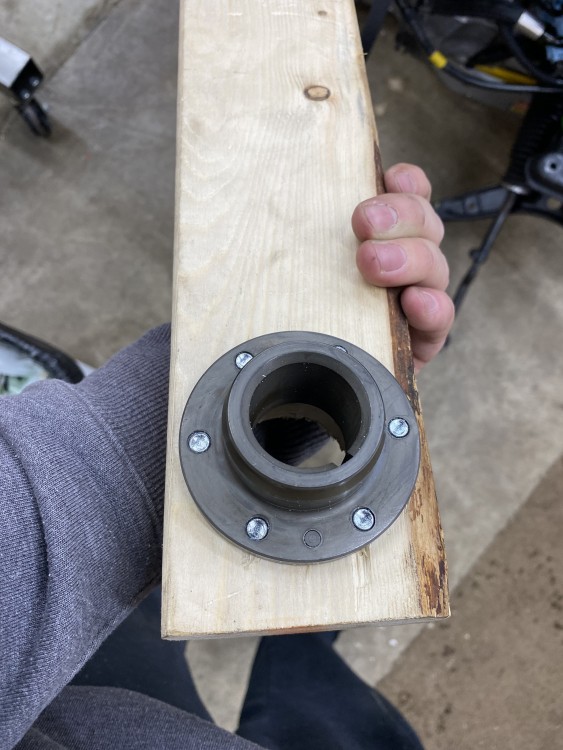
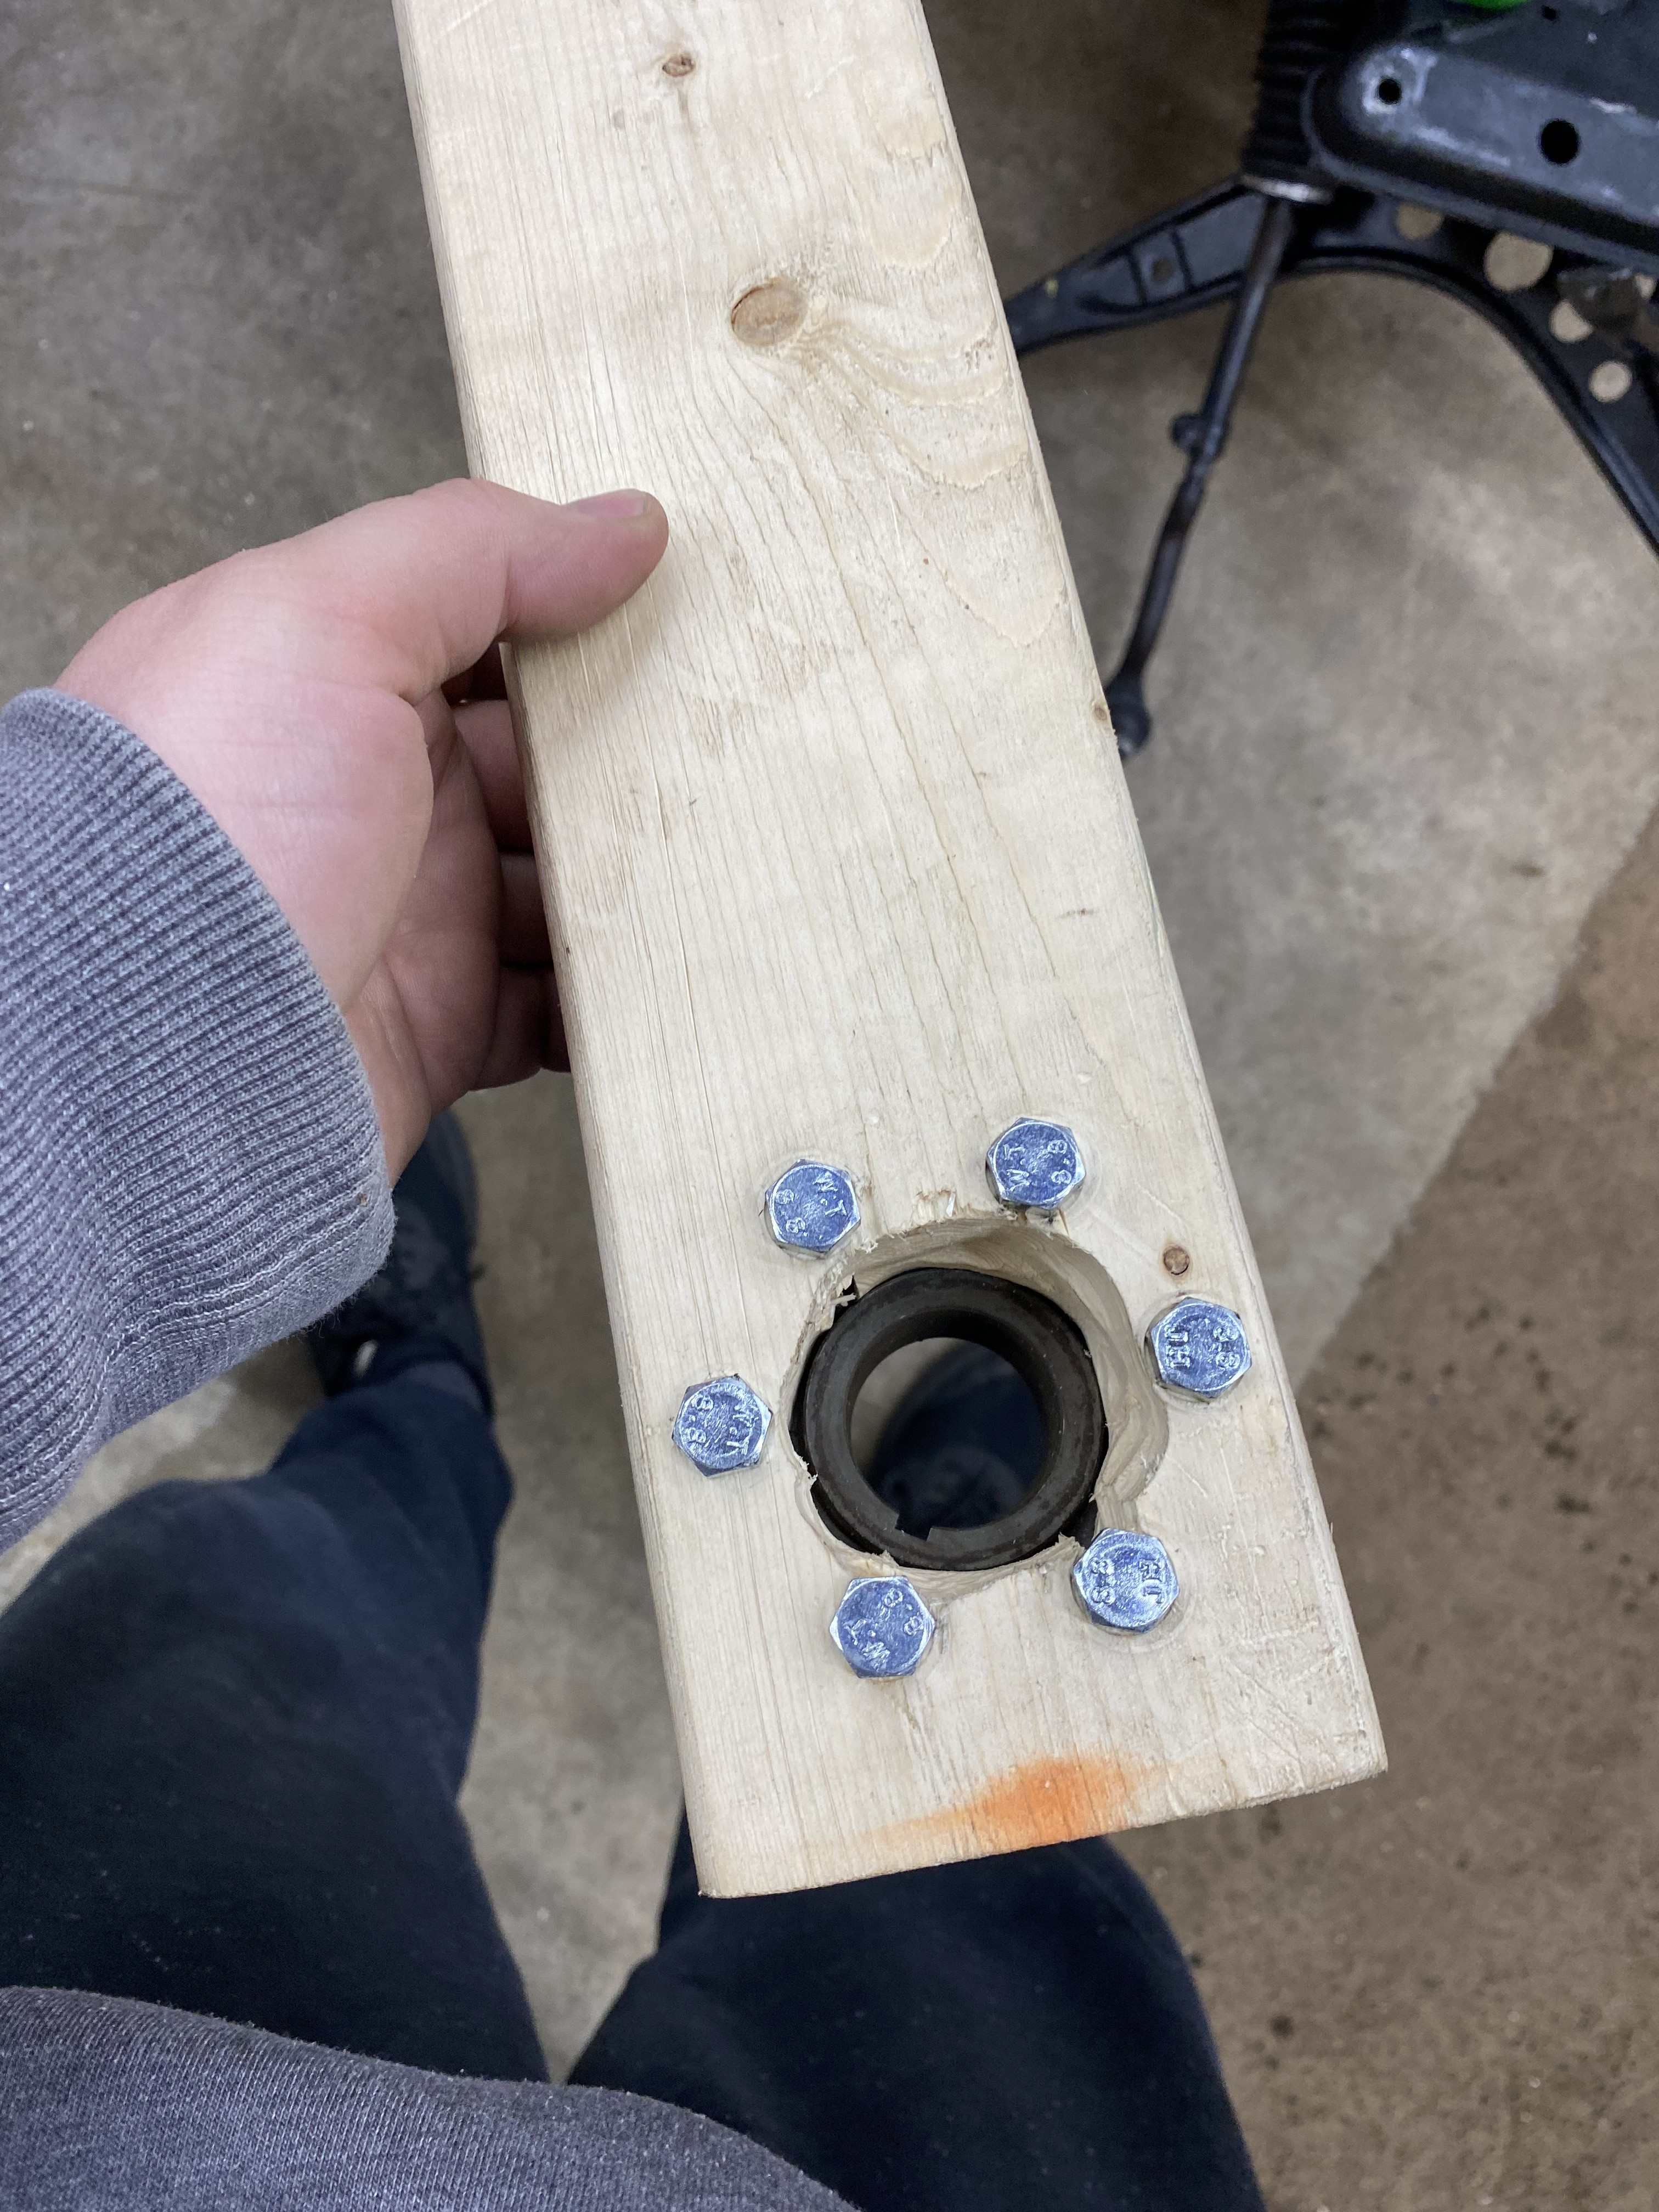
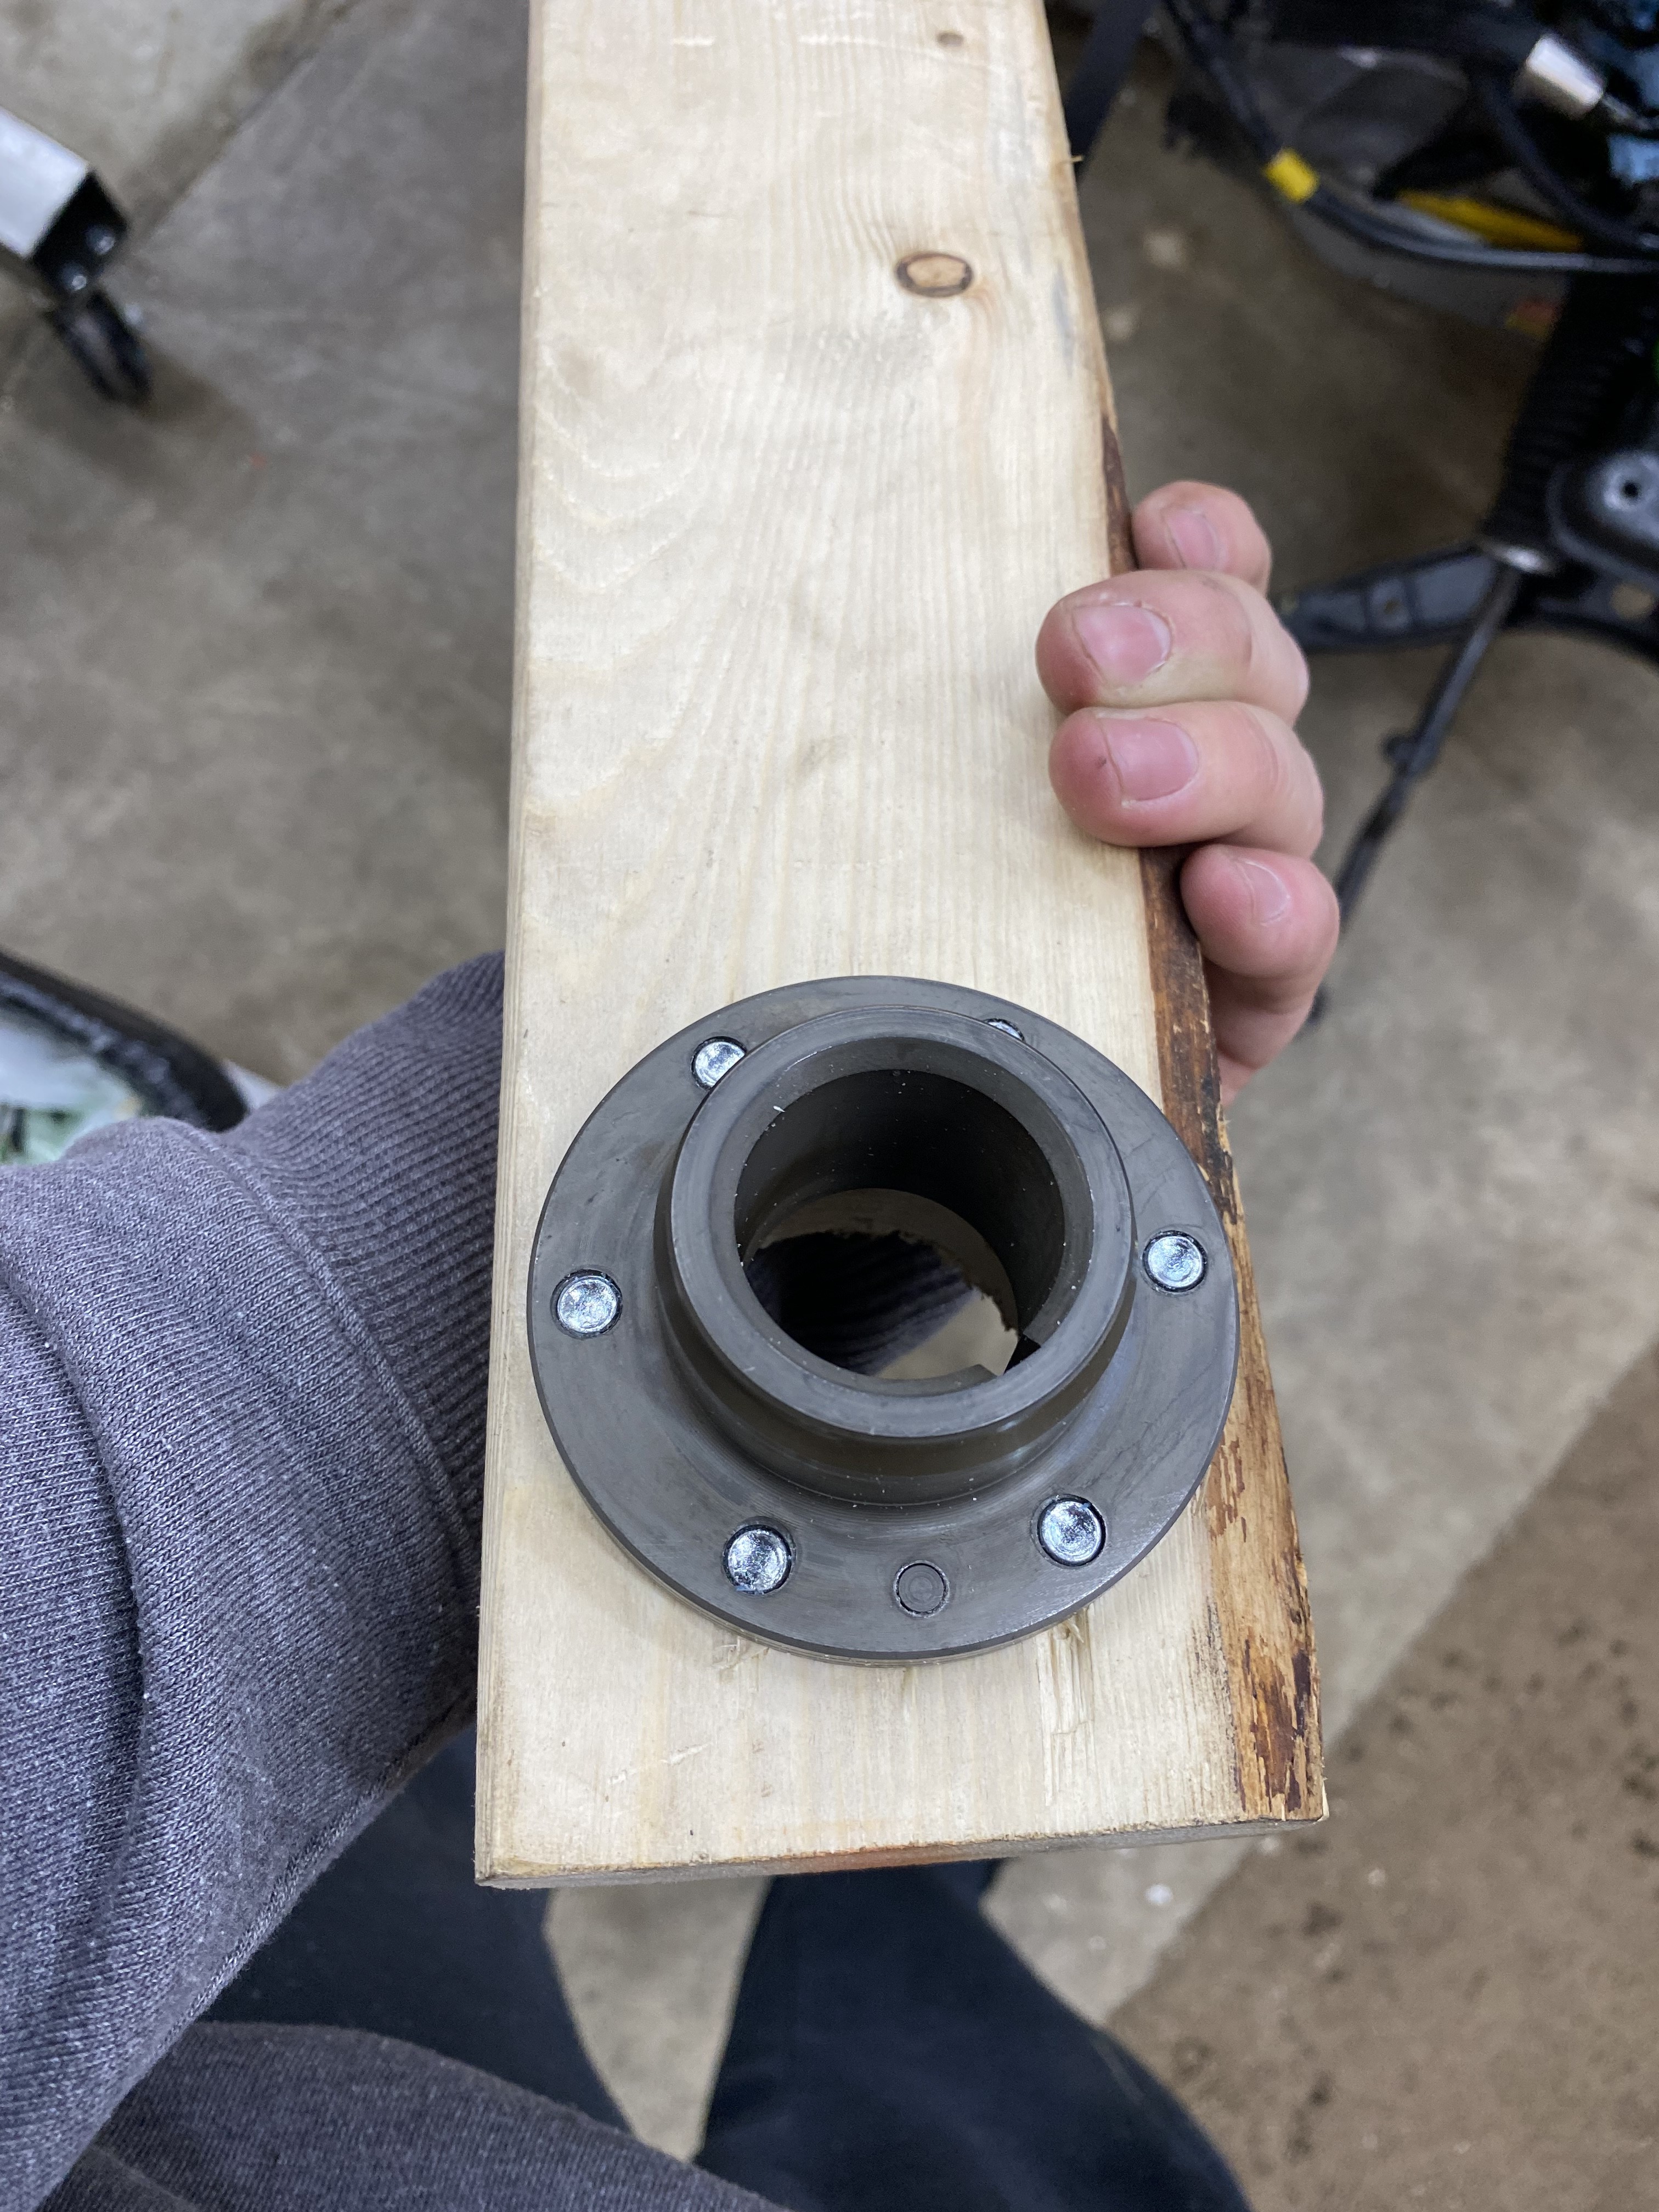
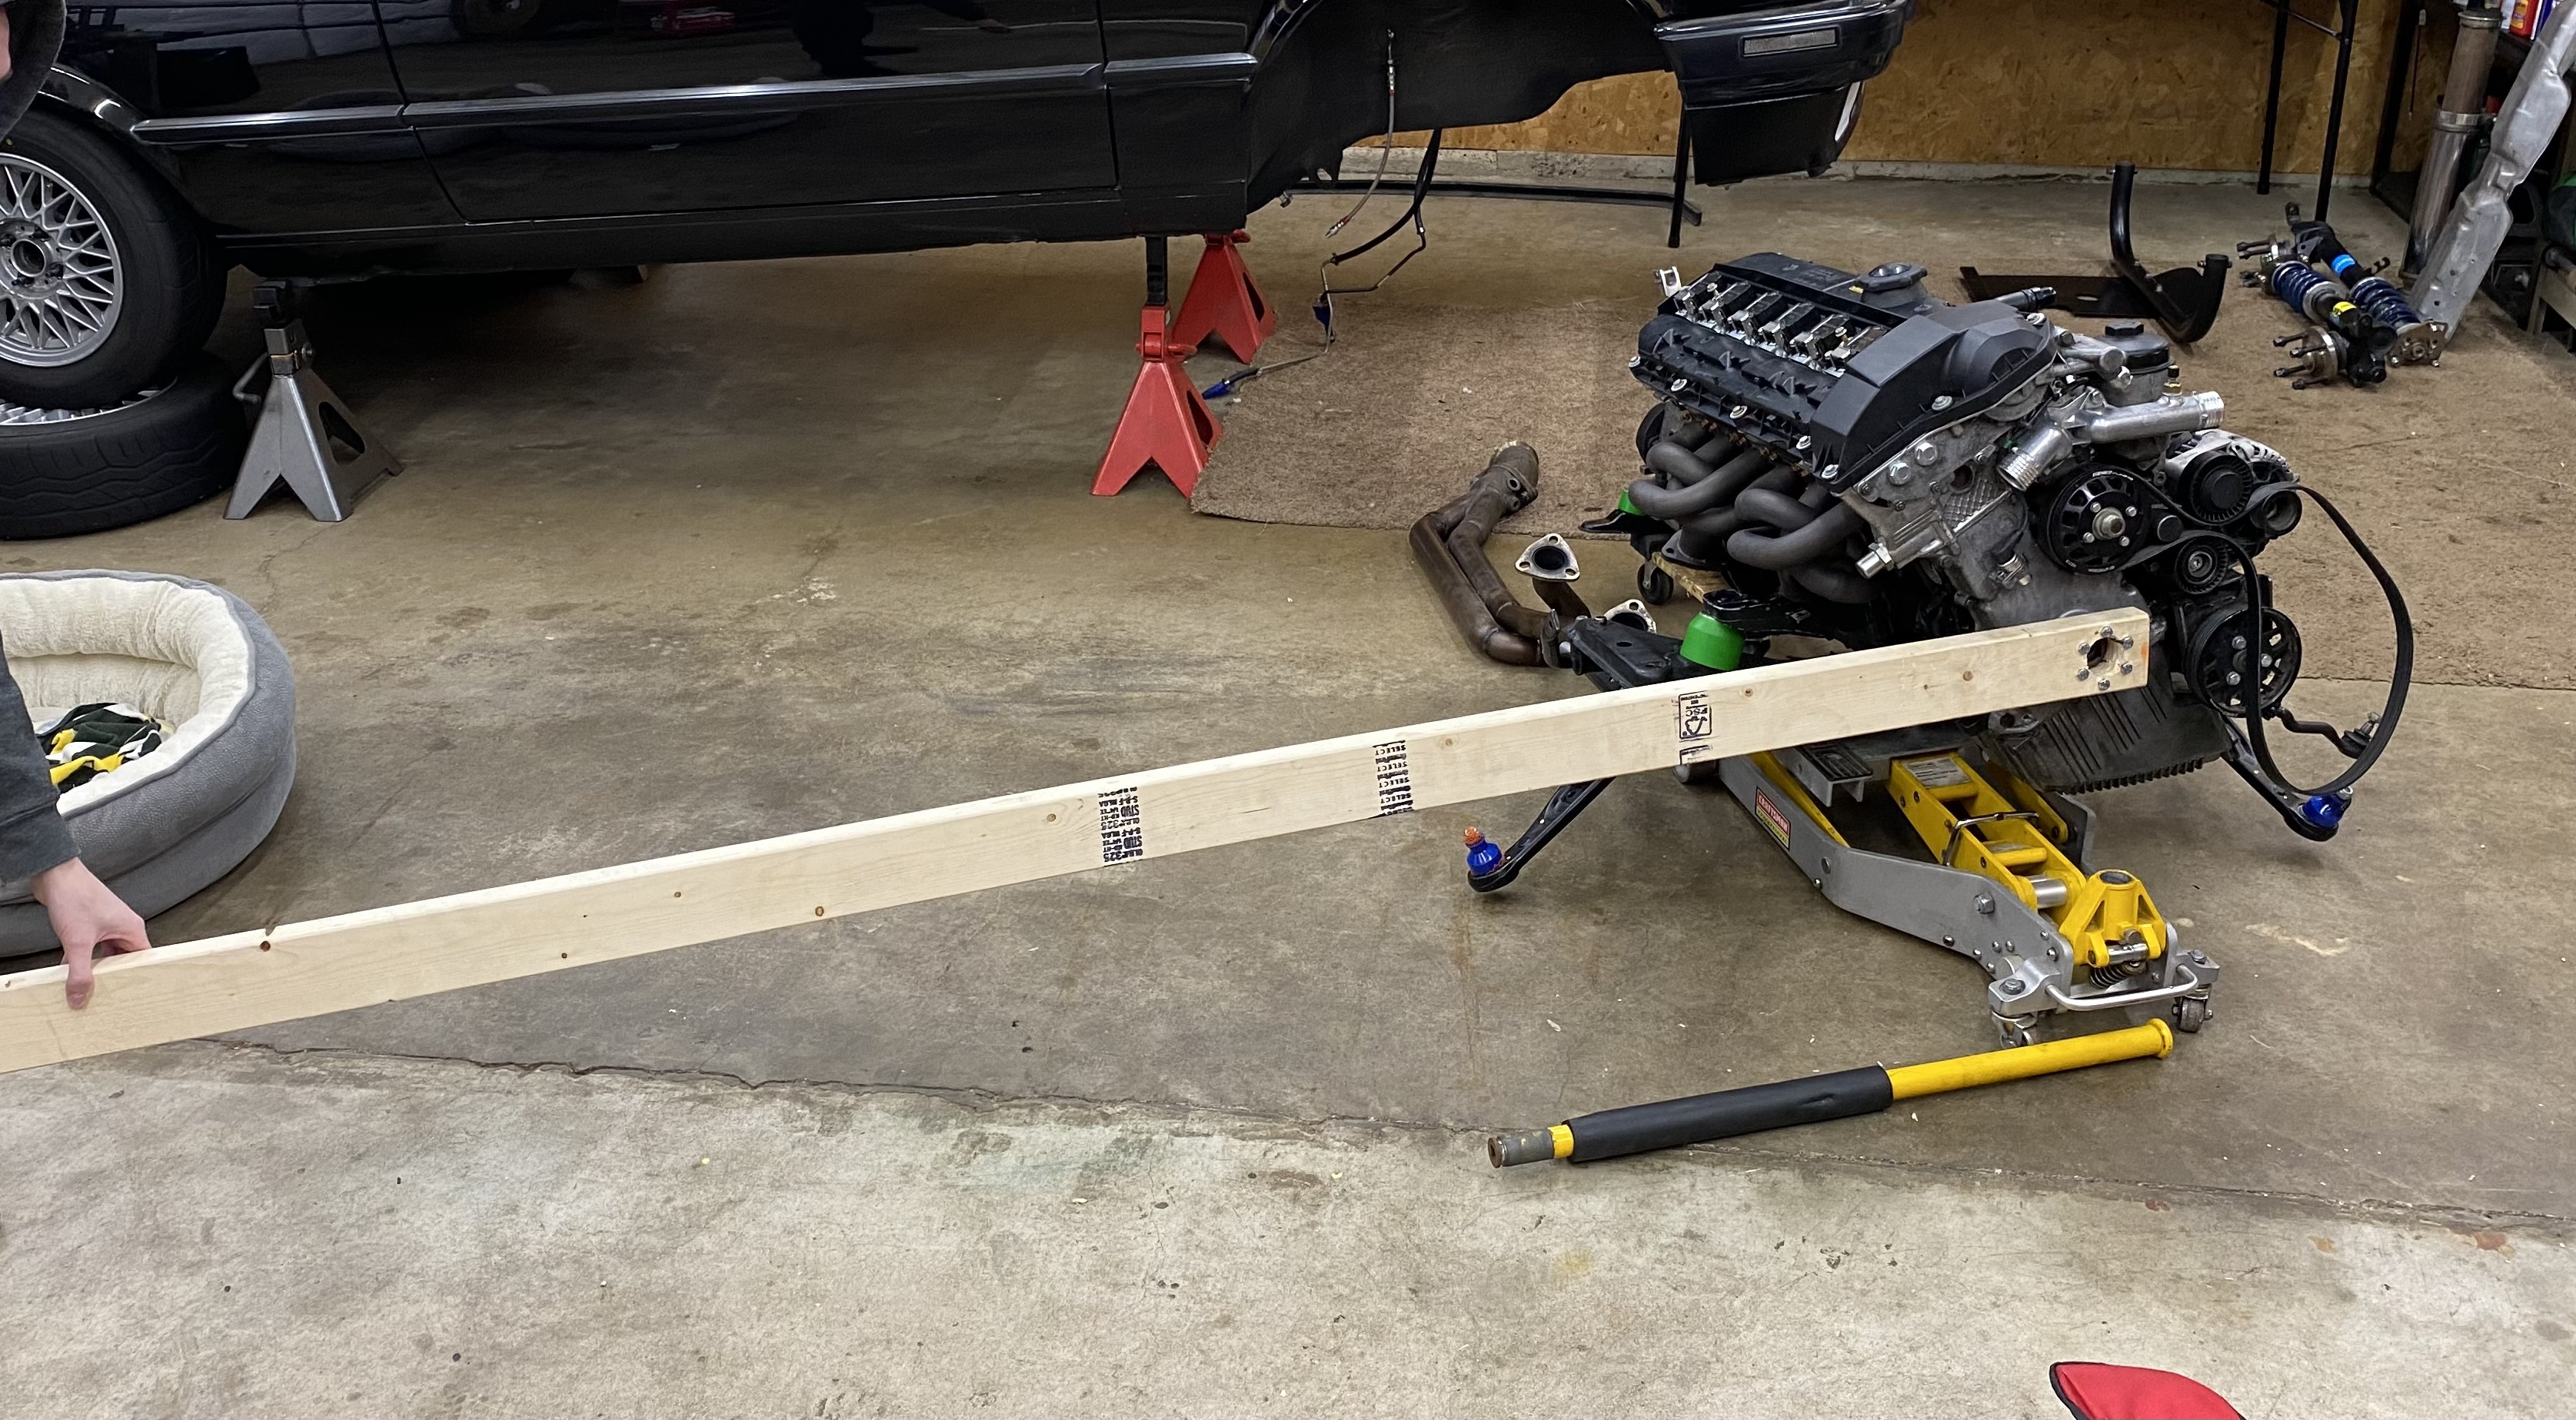
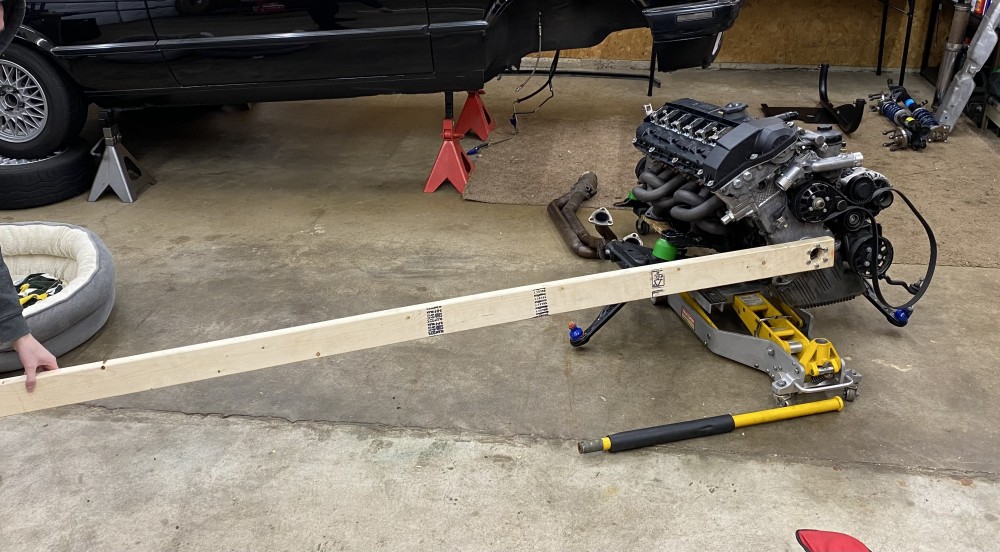
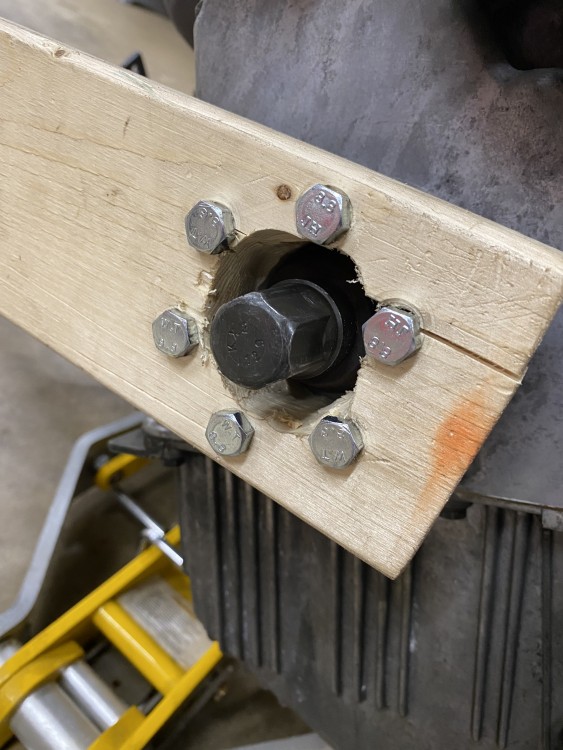
                                        @Rekpoint stopped by and we got to work. Instead of just blasting away at the crank bolt with an impact I figured I’d pick up a torque wrench that went to 300ftlbs - still needed a way to hold the crank as I don’t have that tool. 
                                         

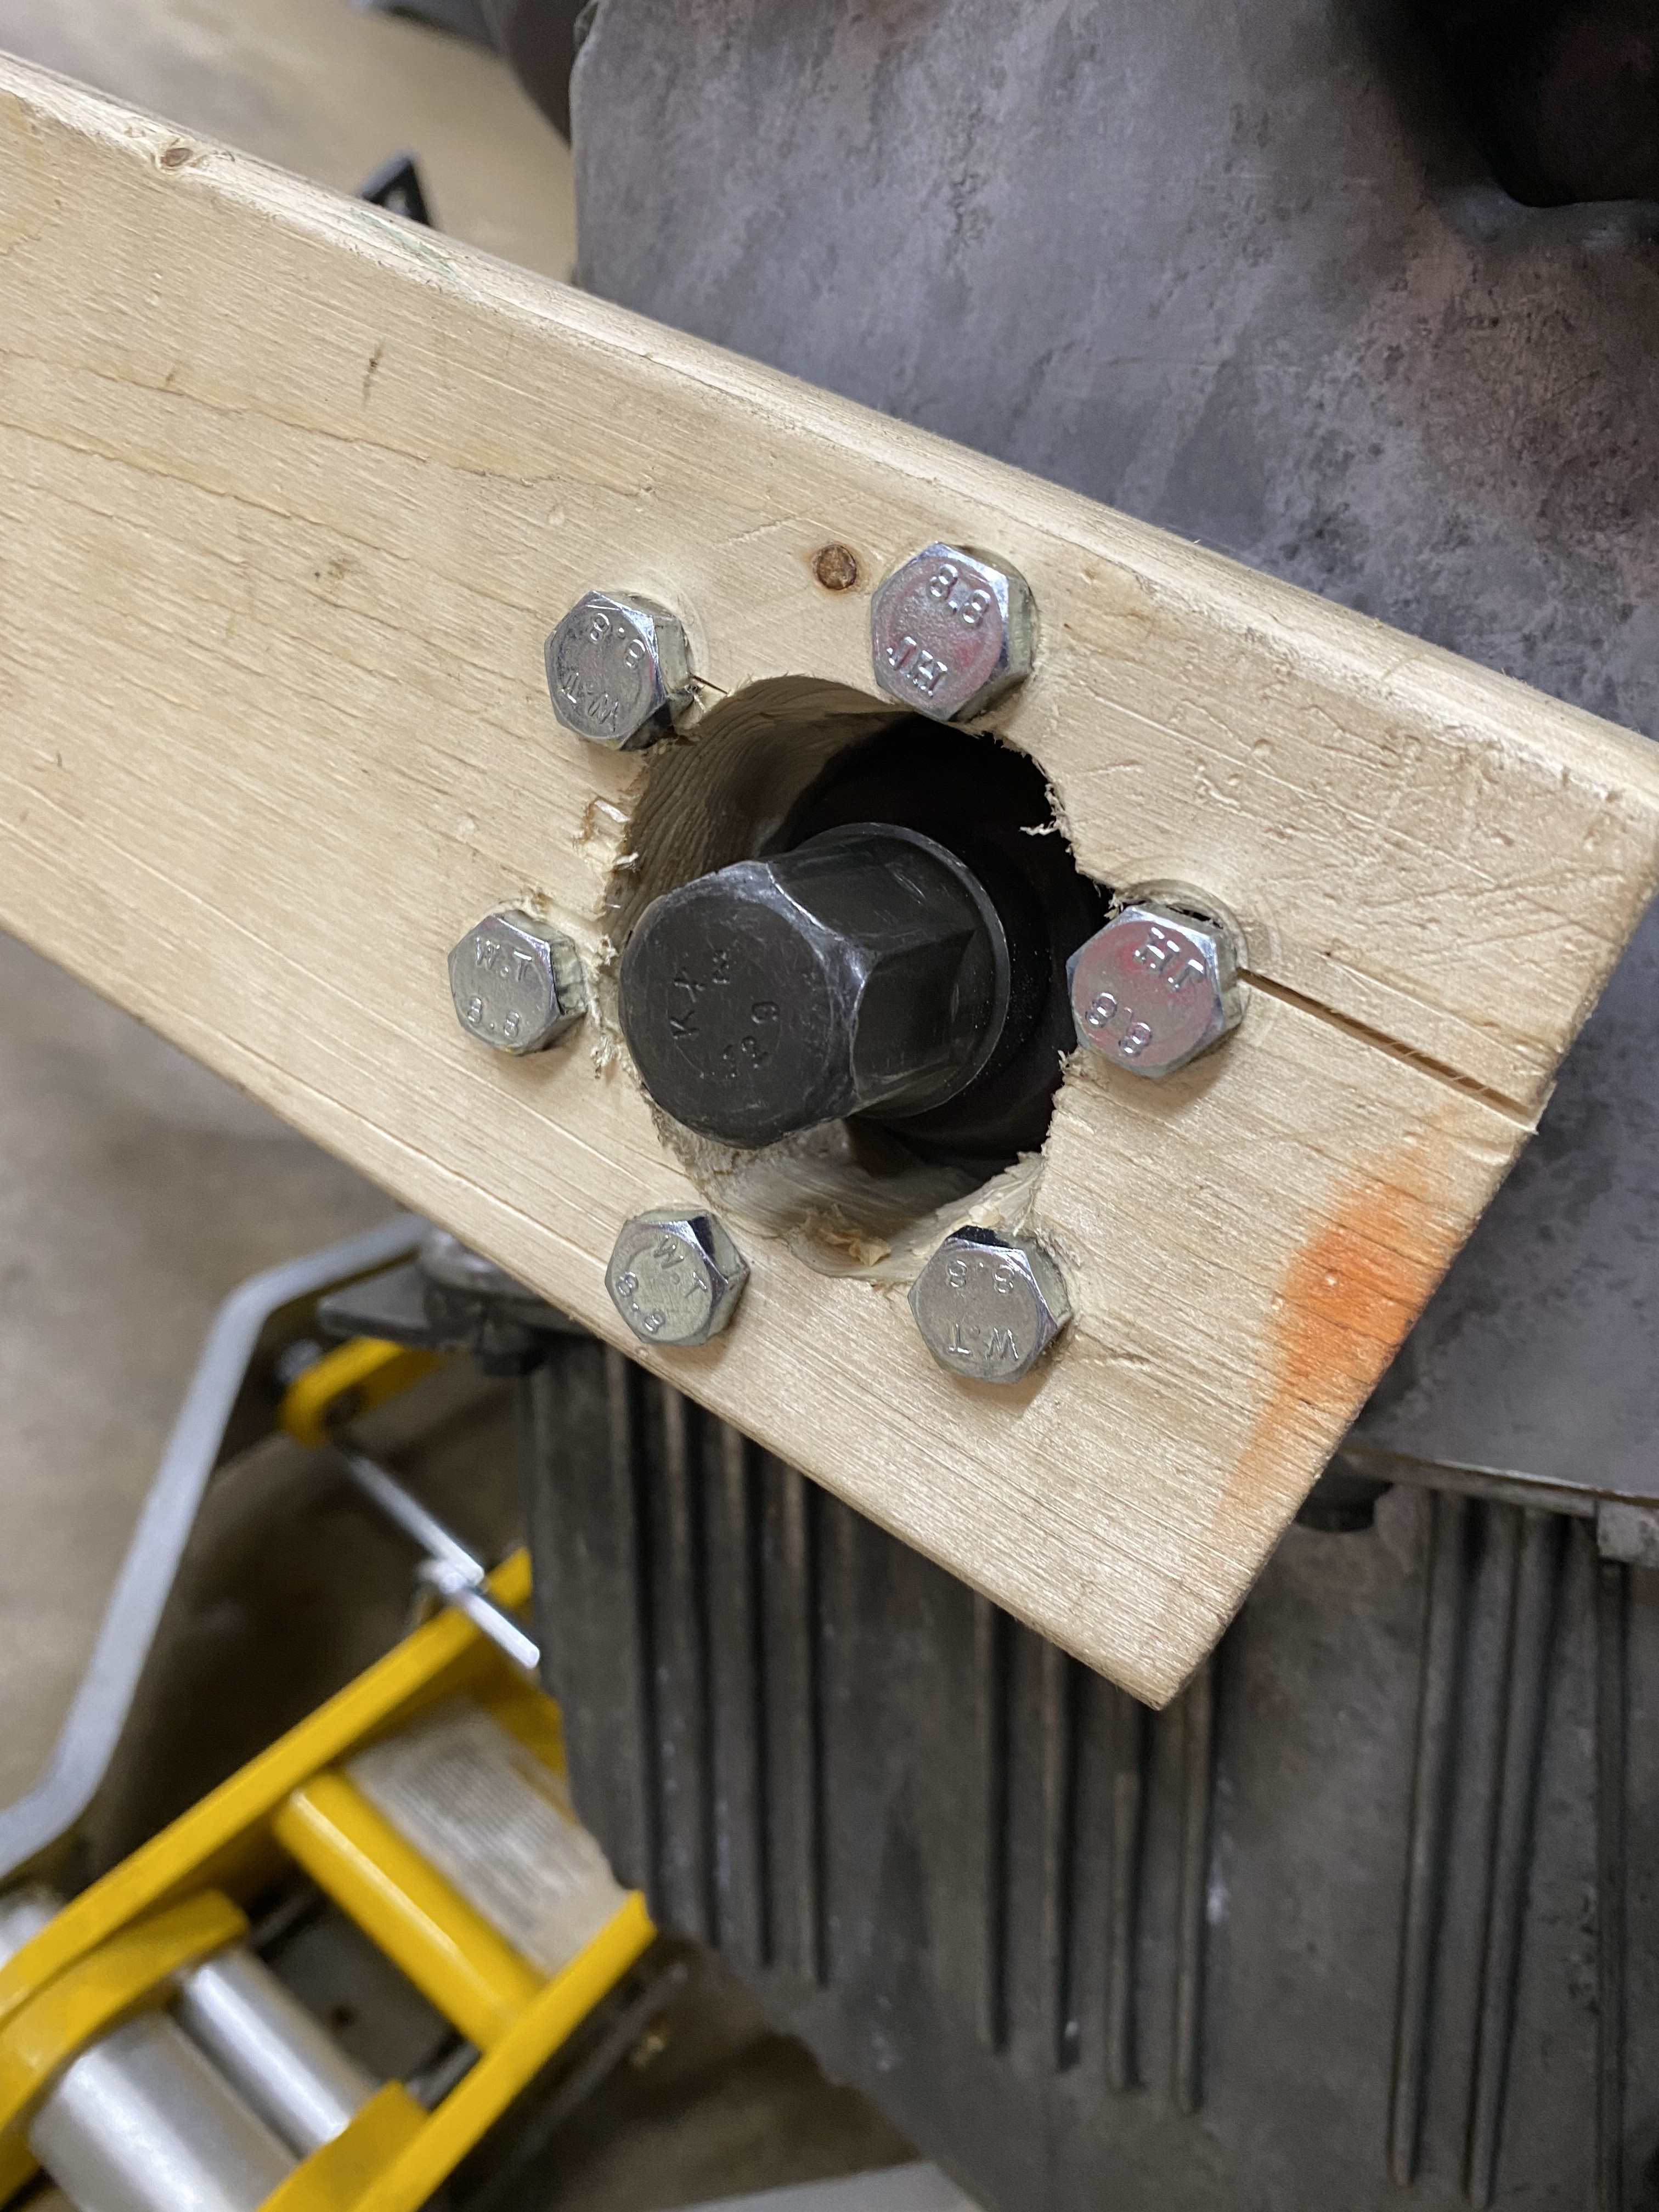
                                        the Amish-Inspired crank hub holder was born. 6D84B267-3010-474C-A715-F619EDFDCD9B.jpeg7012744B-21B7-4566-BF56-DEE0A008A8C5.jpeg
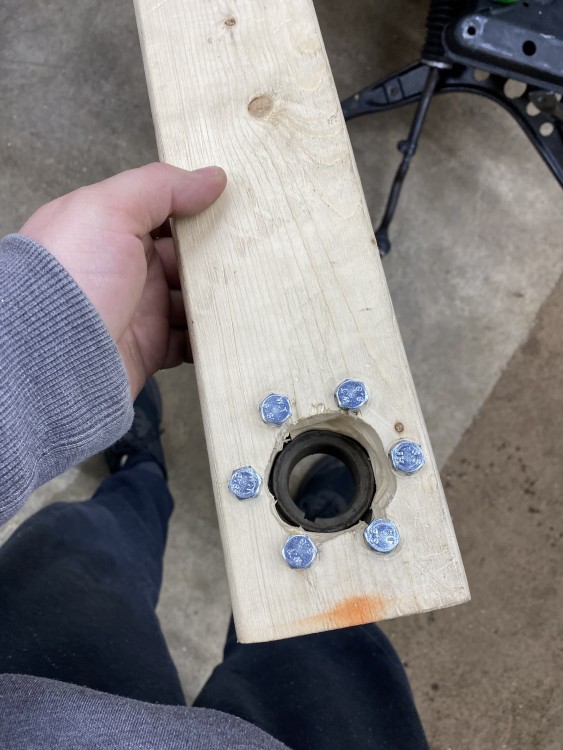
                                        in case it isn’t obvious I don’t own a hole saw. Drilled out what I could with a step bit and went after the rest with a die grinder lol

                                        Glen was the leverage and this stupid thing worked lol. Right around the last bit of torque, the end started to split but we made it to 300ft lbs lol
                                        38A4036A-5B7C-4F67-A328-8E945D45A129.jpeg

                                        03981103-F8E6-4837-ADB7-D8F2602AF258.jpeg

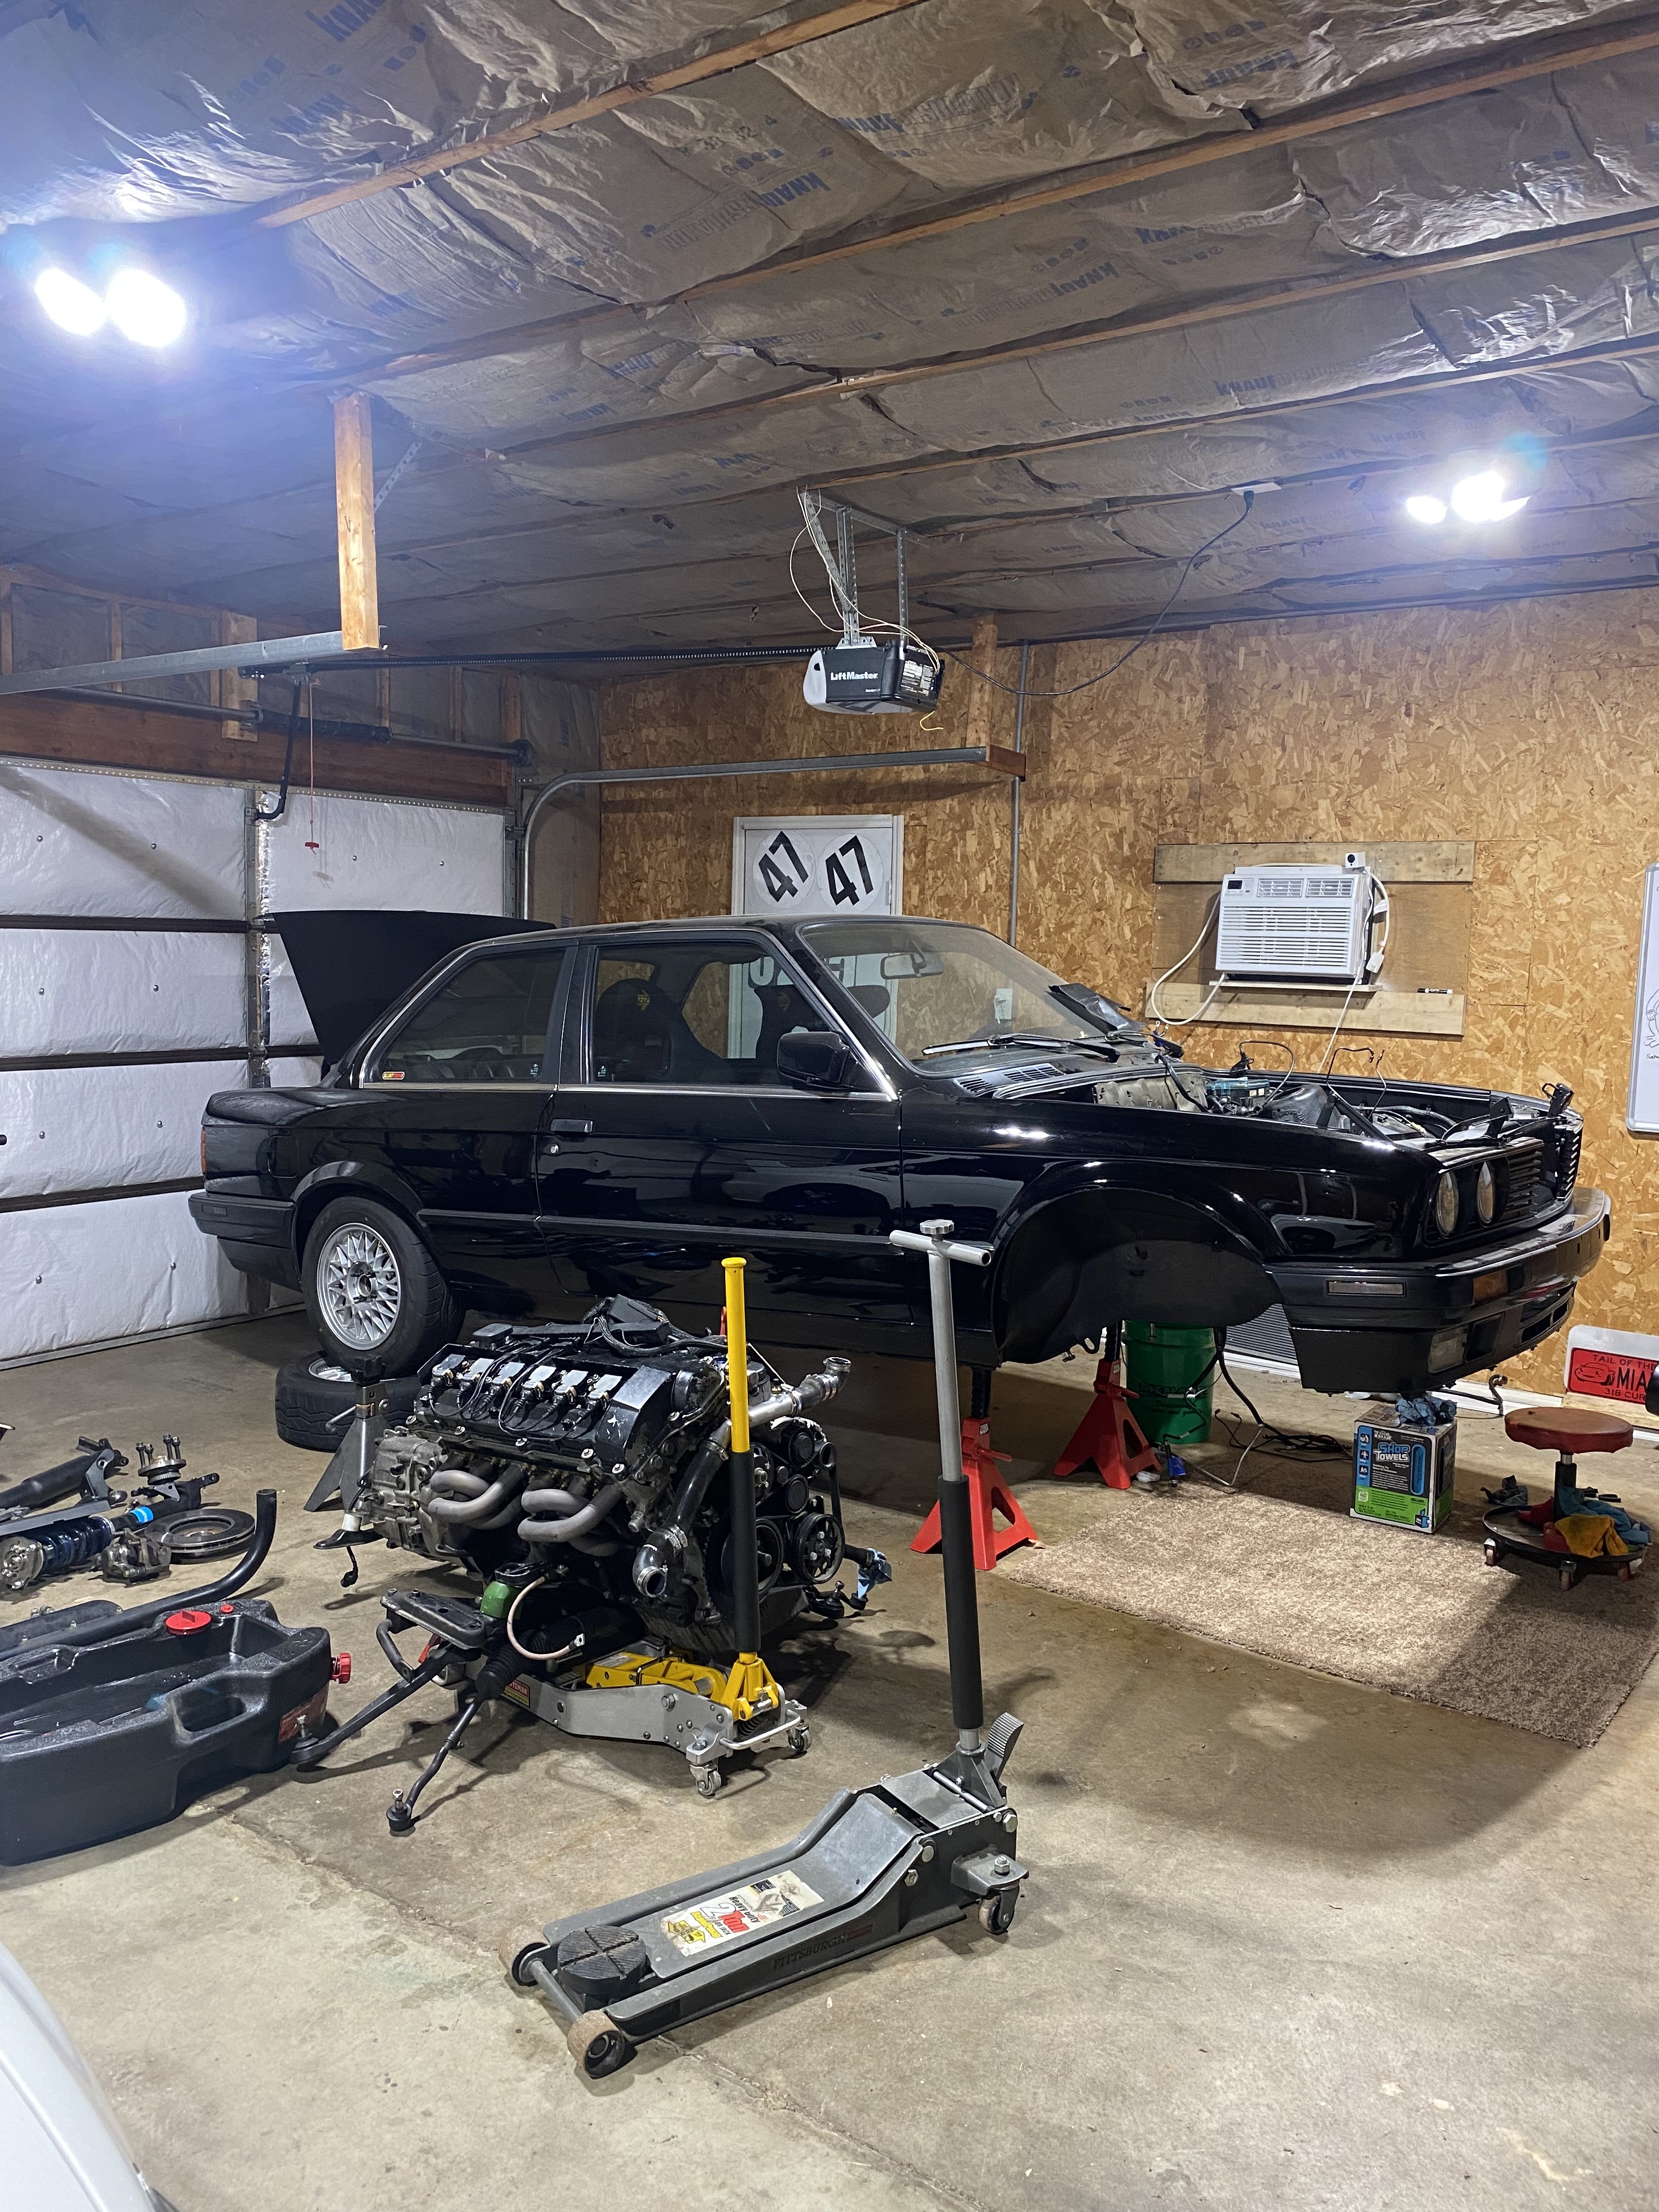
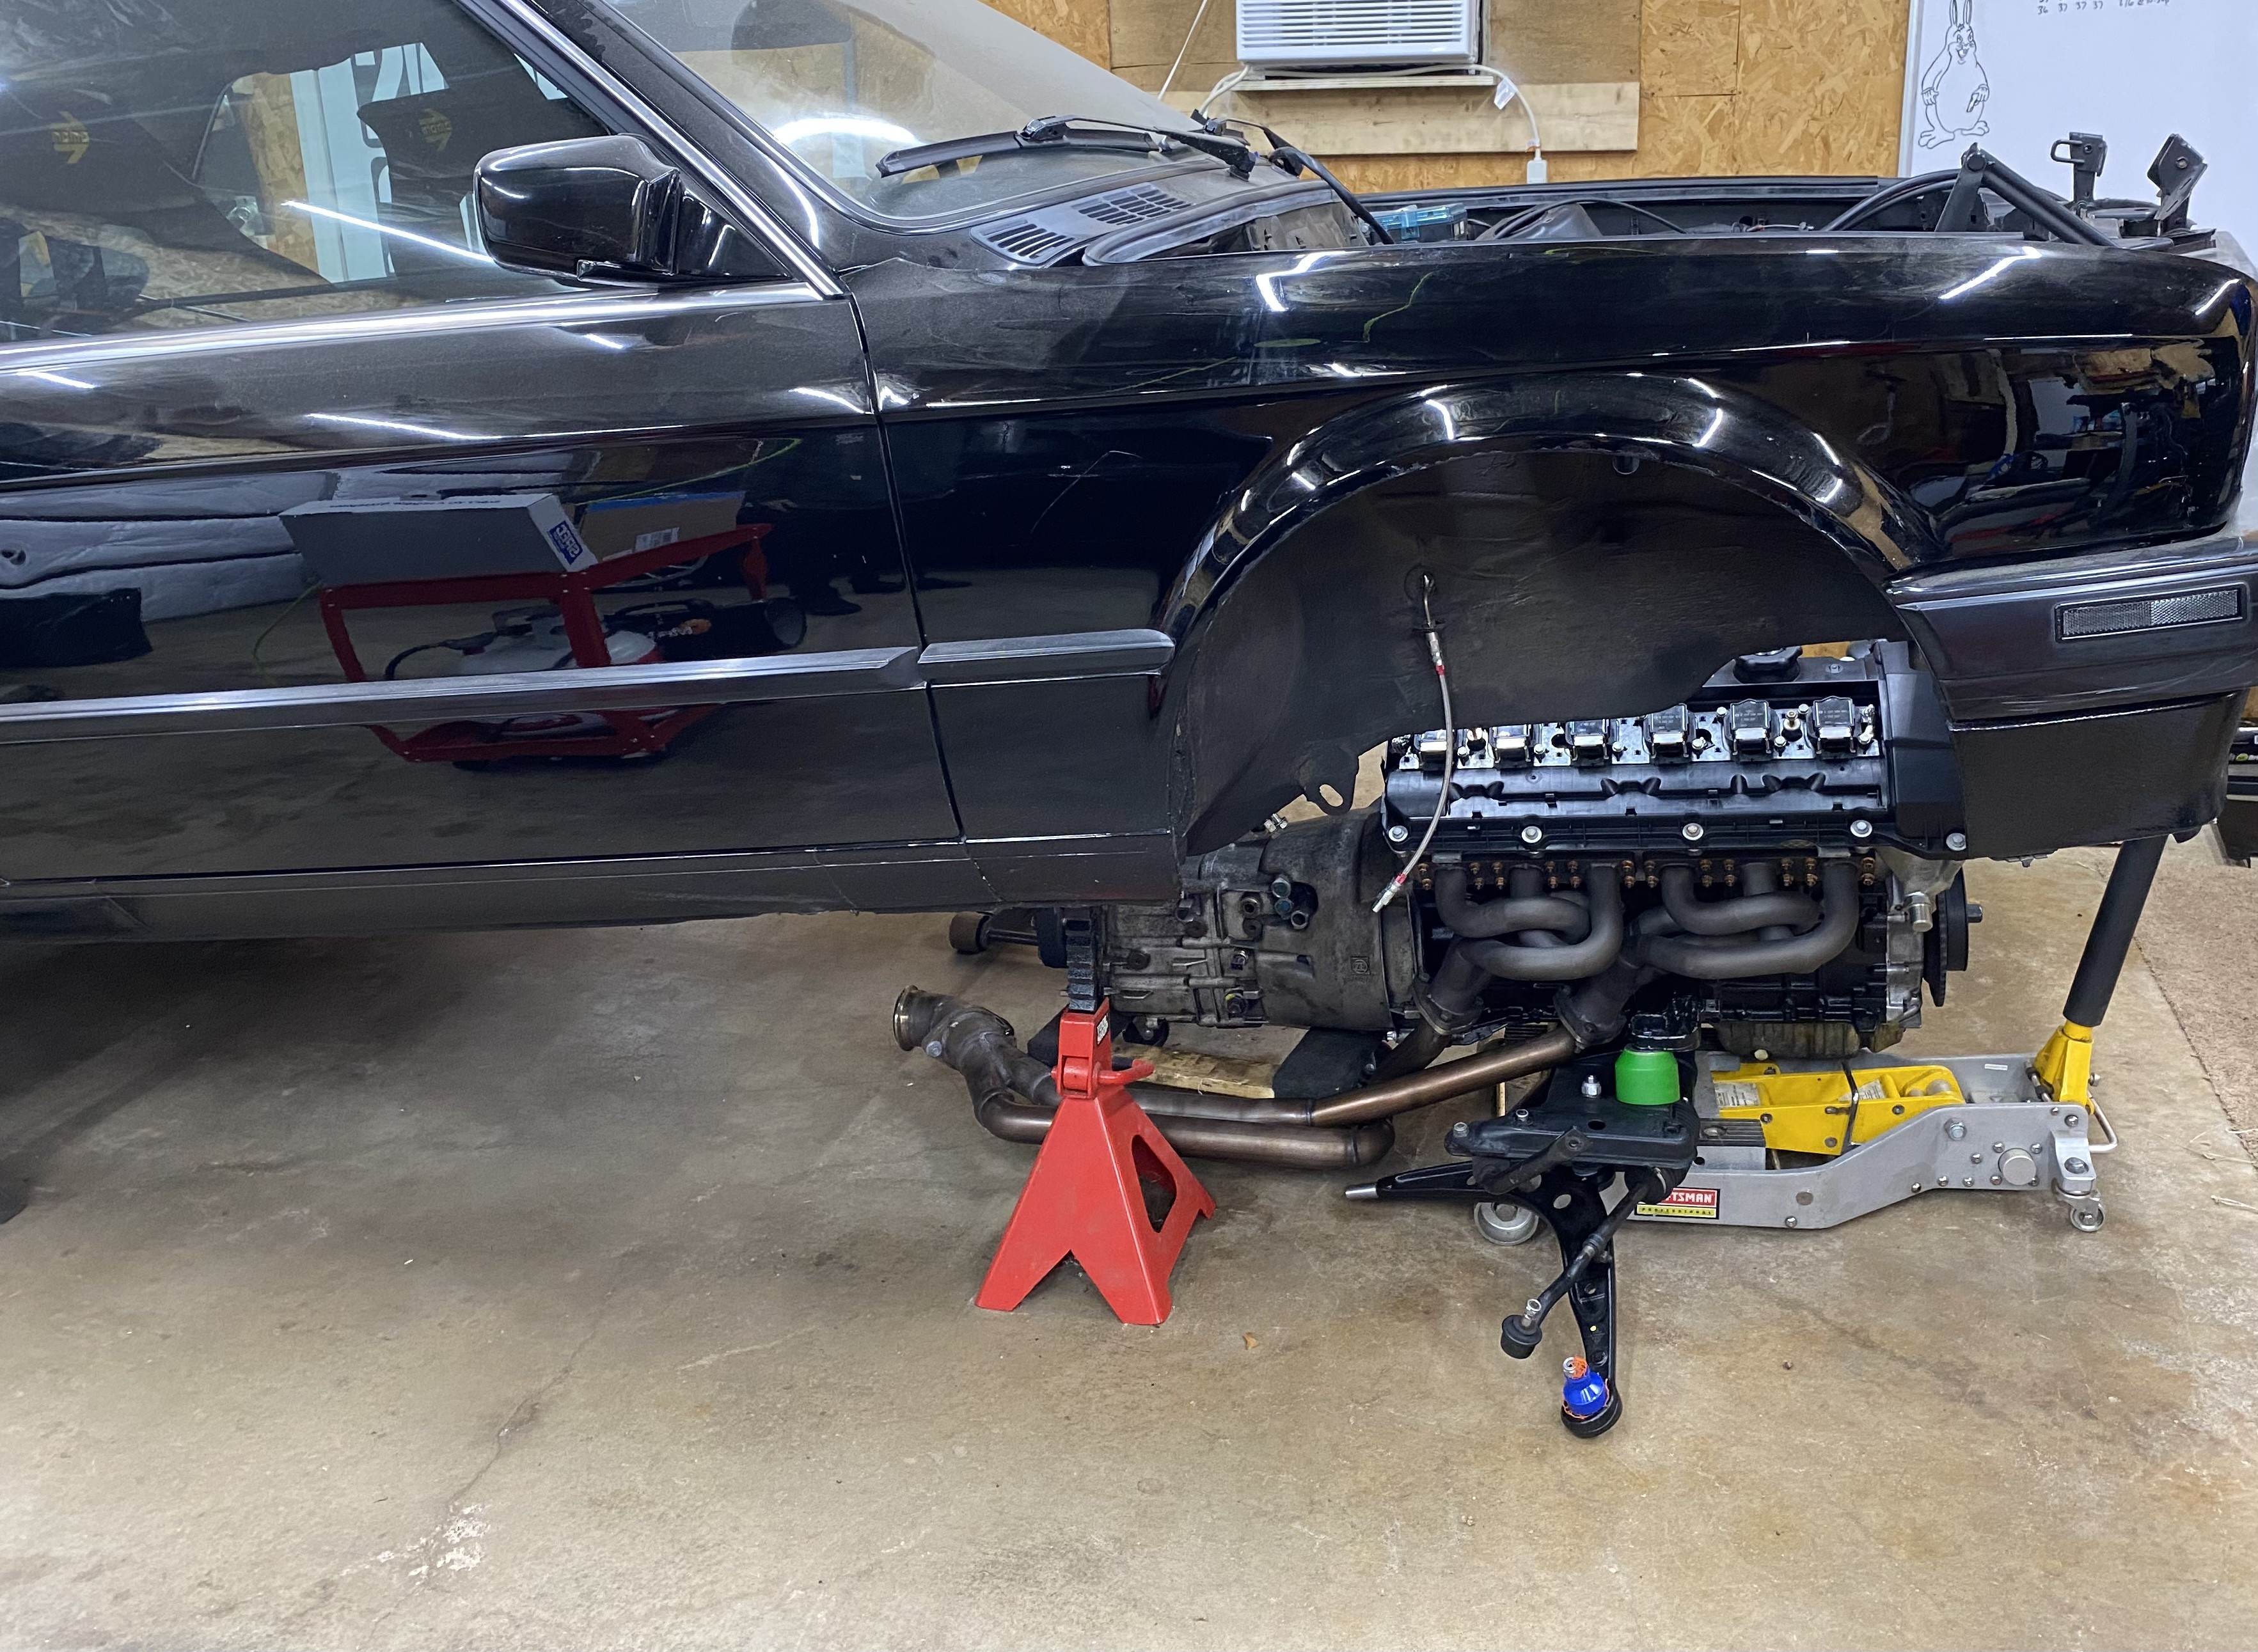
                                        Once that was torqued we made pretty quick work of it, still a fan of lifting the engine/trans/y pipe into the car all together vs using a hoist 
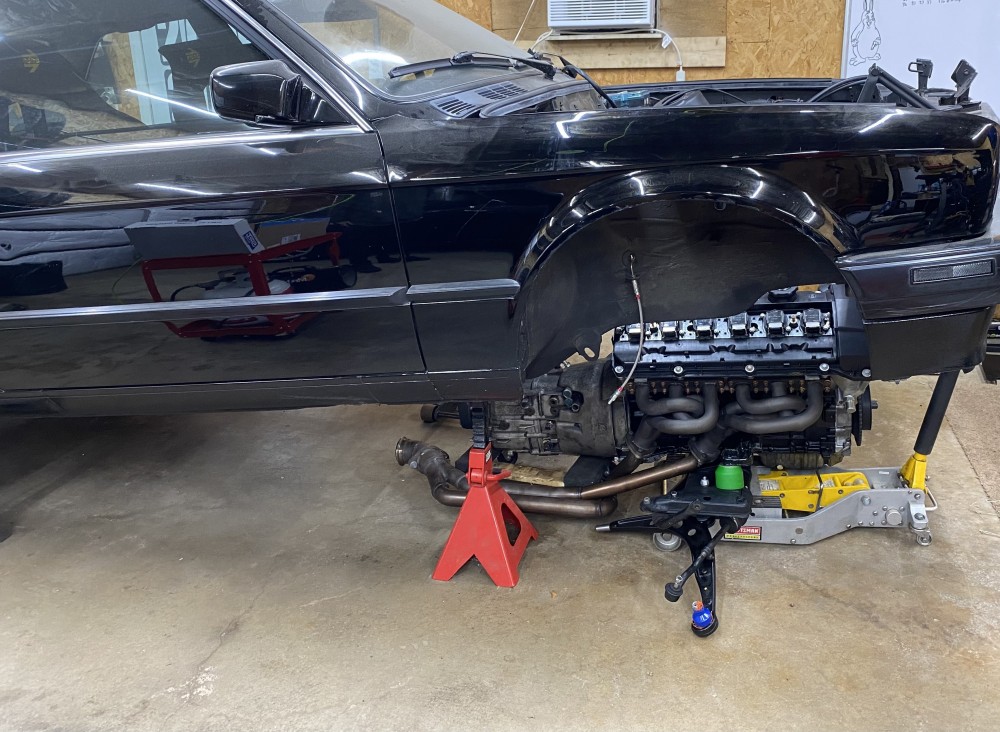
                                        4F290C1A-07E5-43B7-B2C6-CE73E63100E3.jpeg47EBE7AA-1CDE-4C8B-A1EE-1802E056A4C3.jpeg
                                         

                                        all jacked up and bolted in

                                        F50365BF-2D9B-46E2-A705-40EB2B130304.jpeg
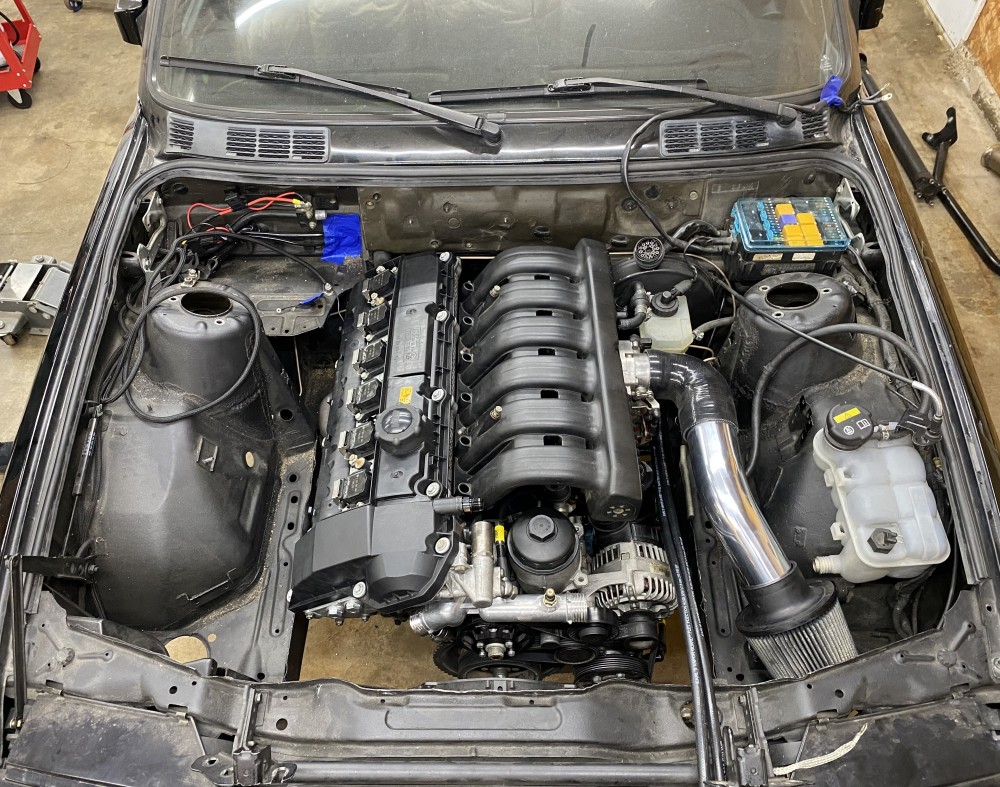
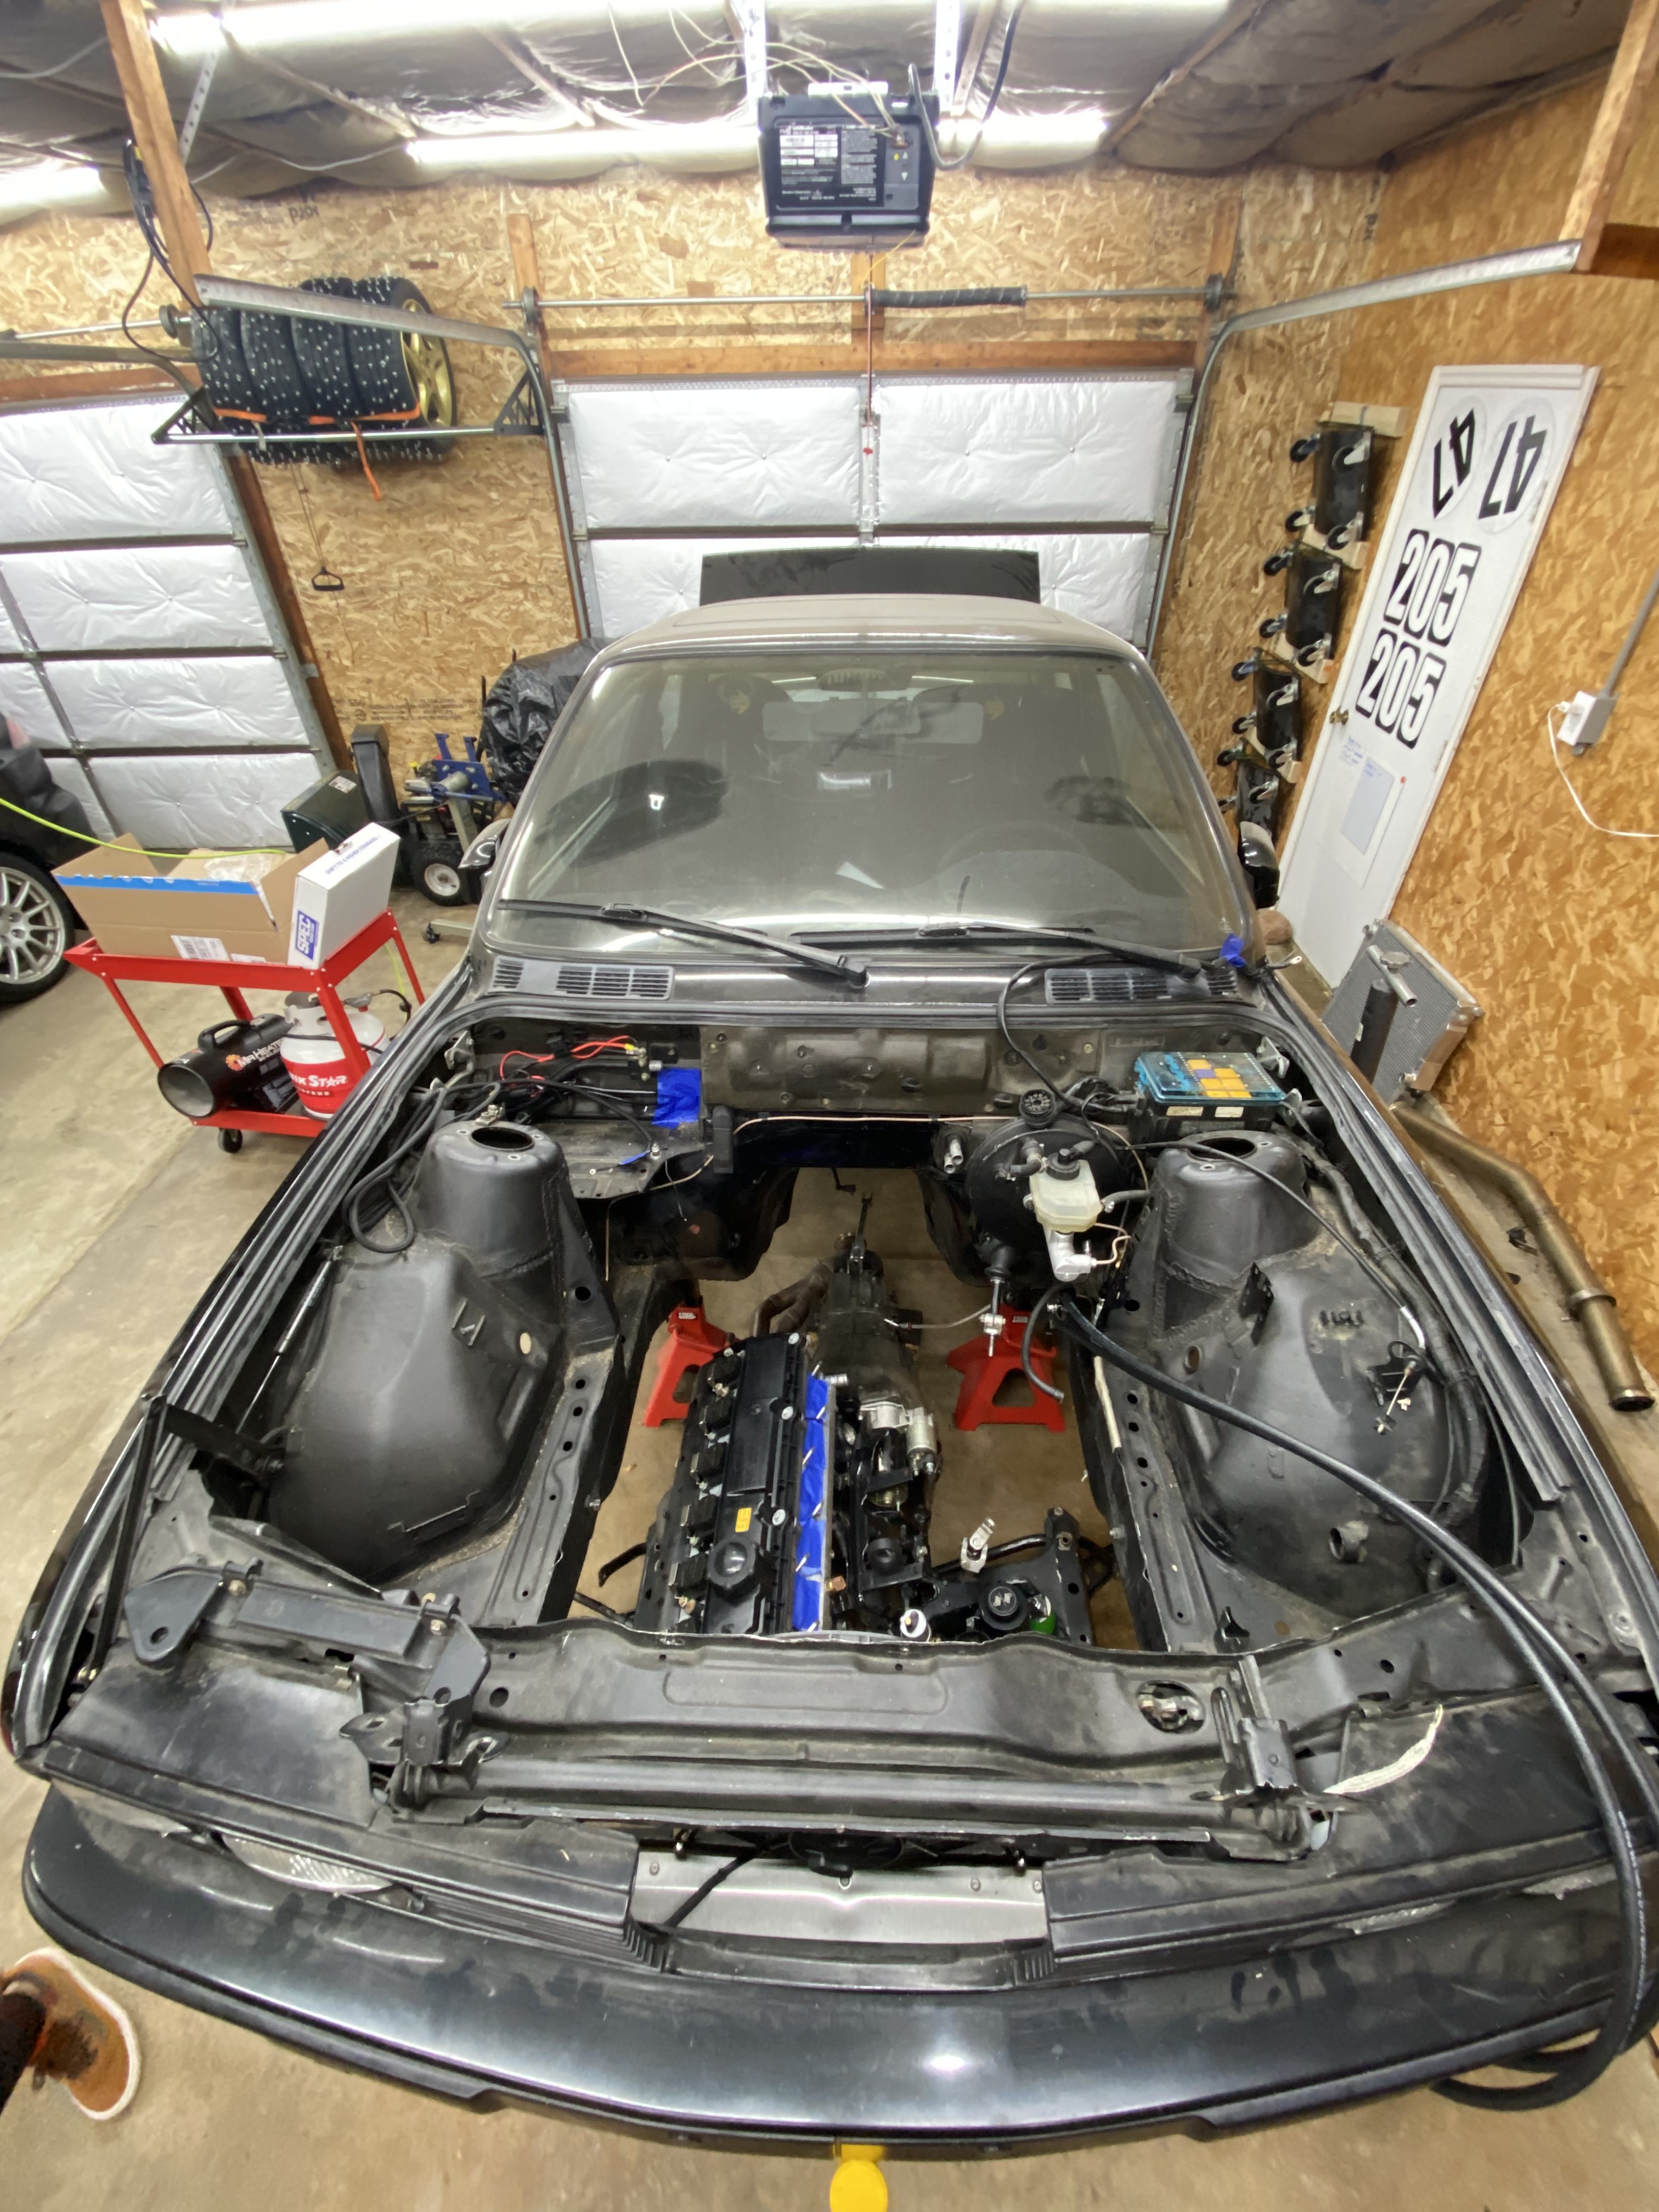
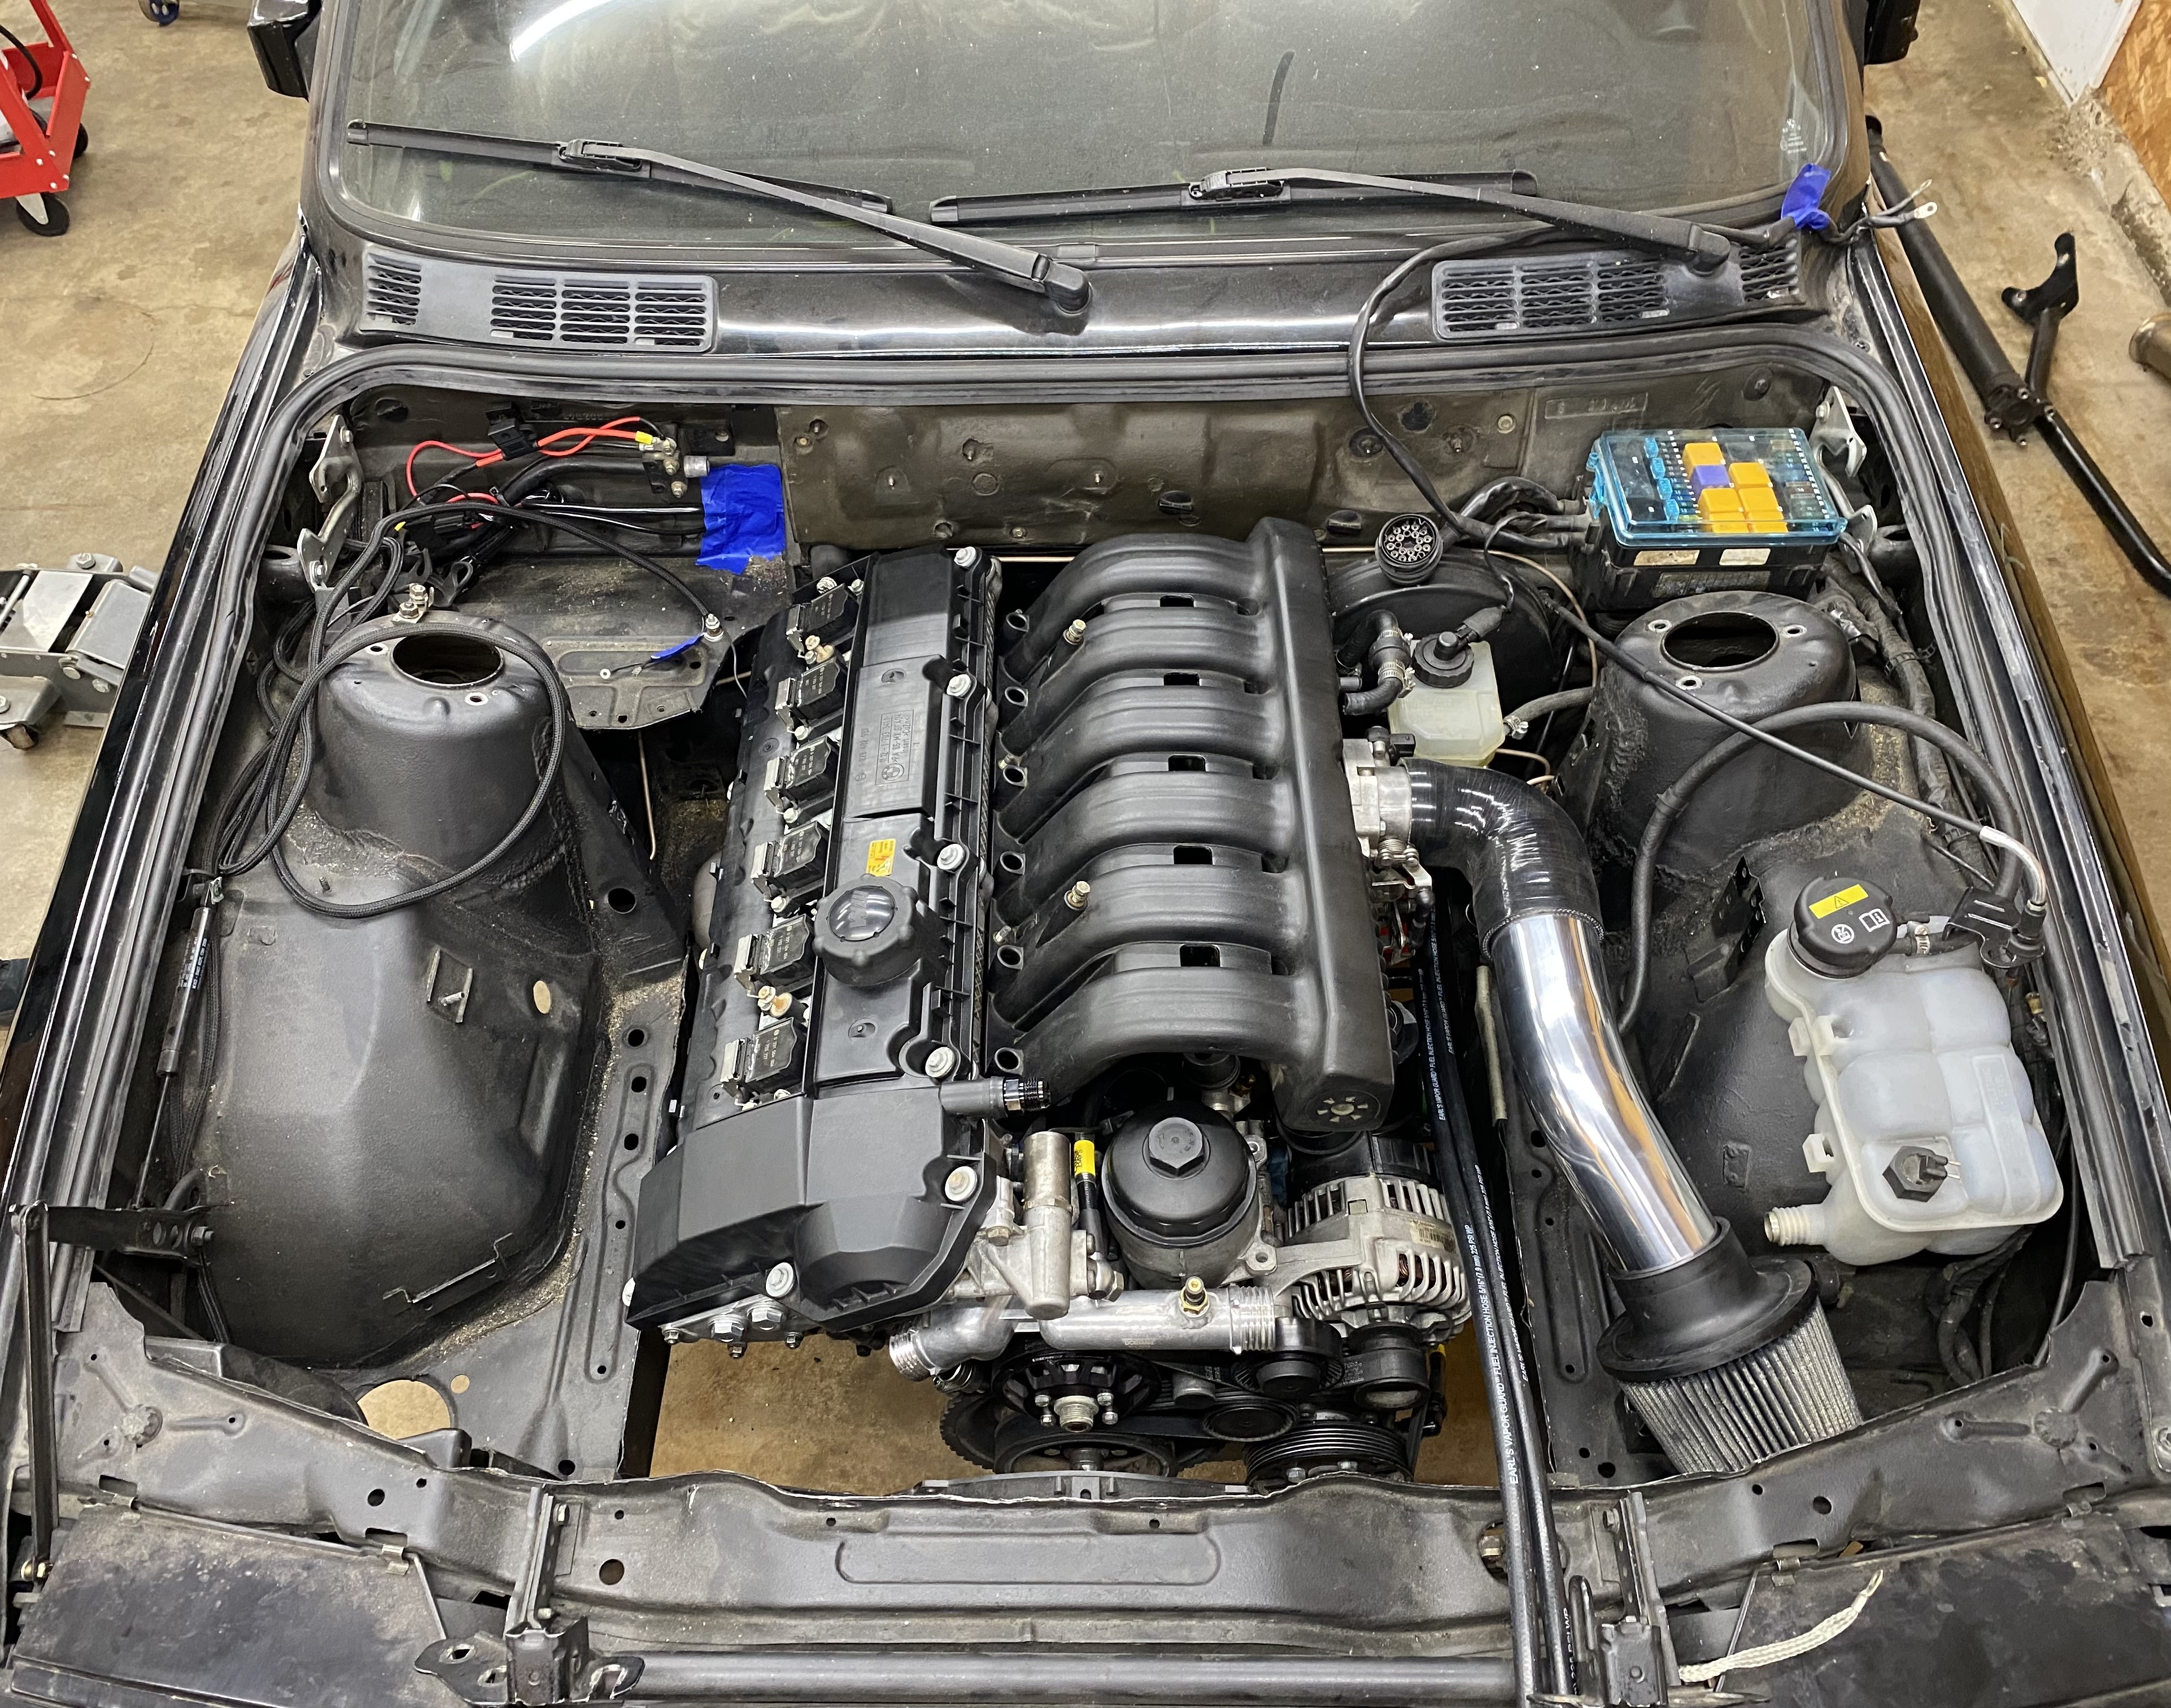
                                        intake isn’t bolted up yet, just wanted to make sure the 45° bend pipe was going to work for the intake - won’t be running a maf with MS3 

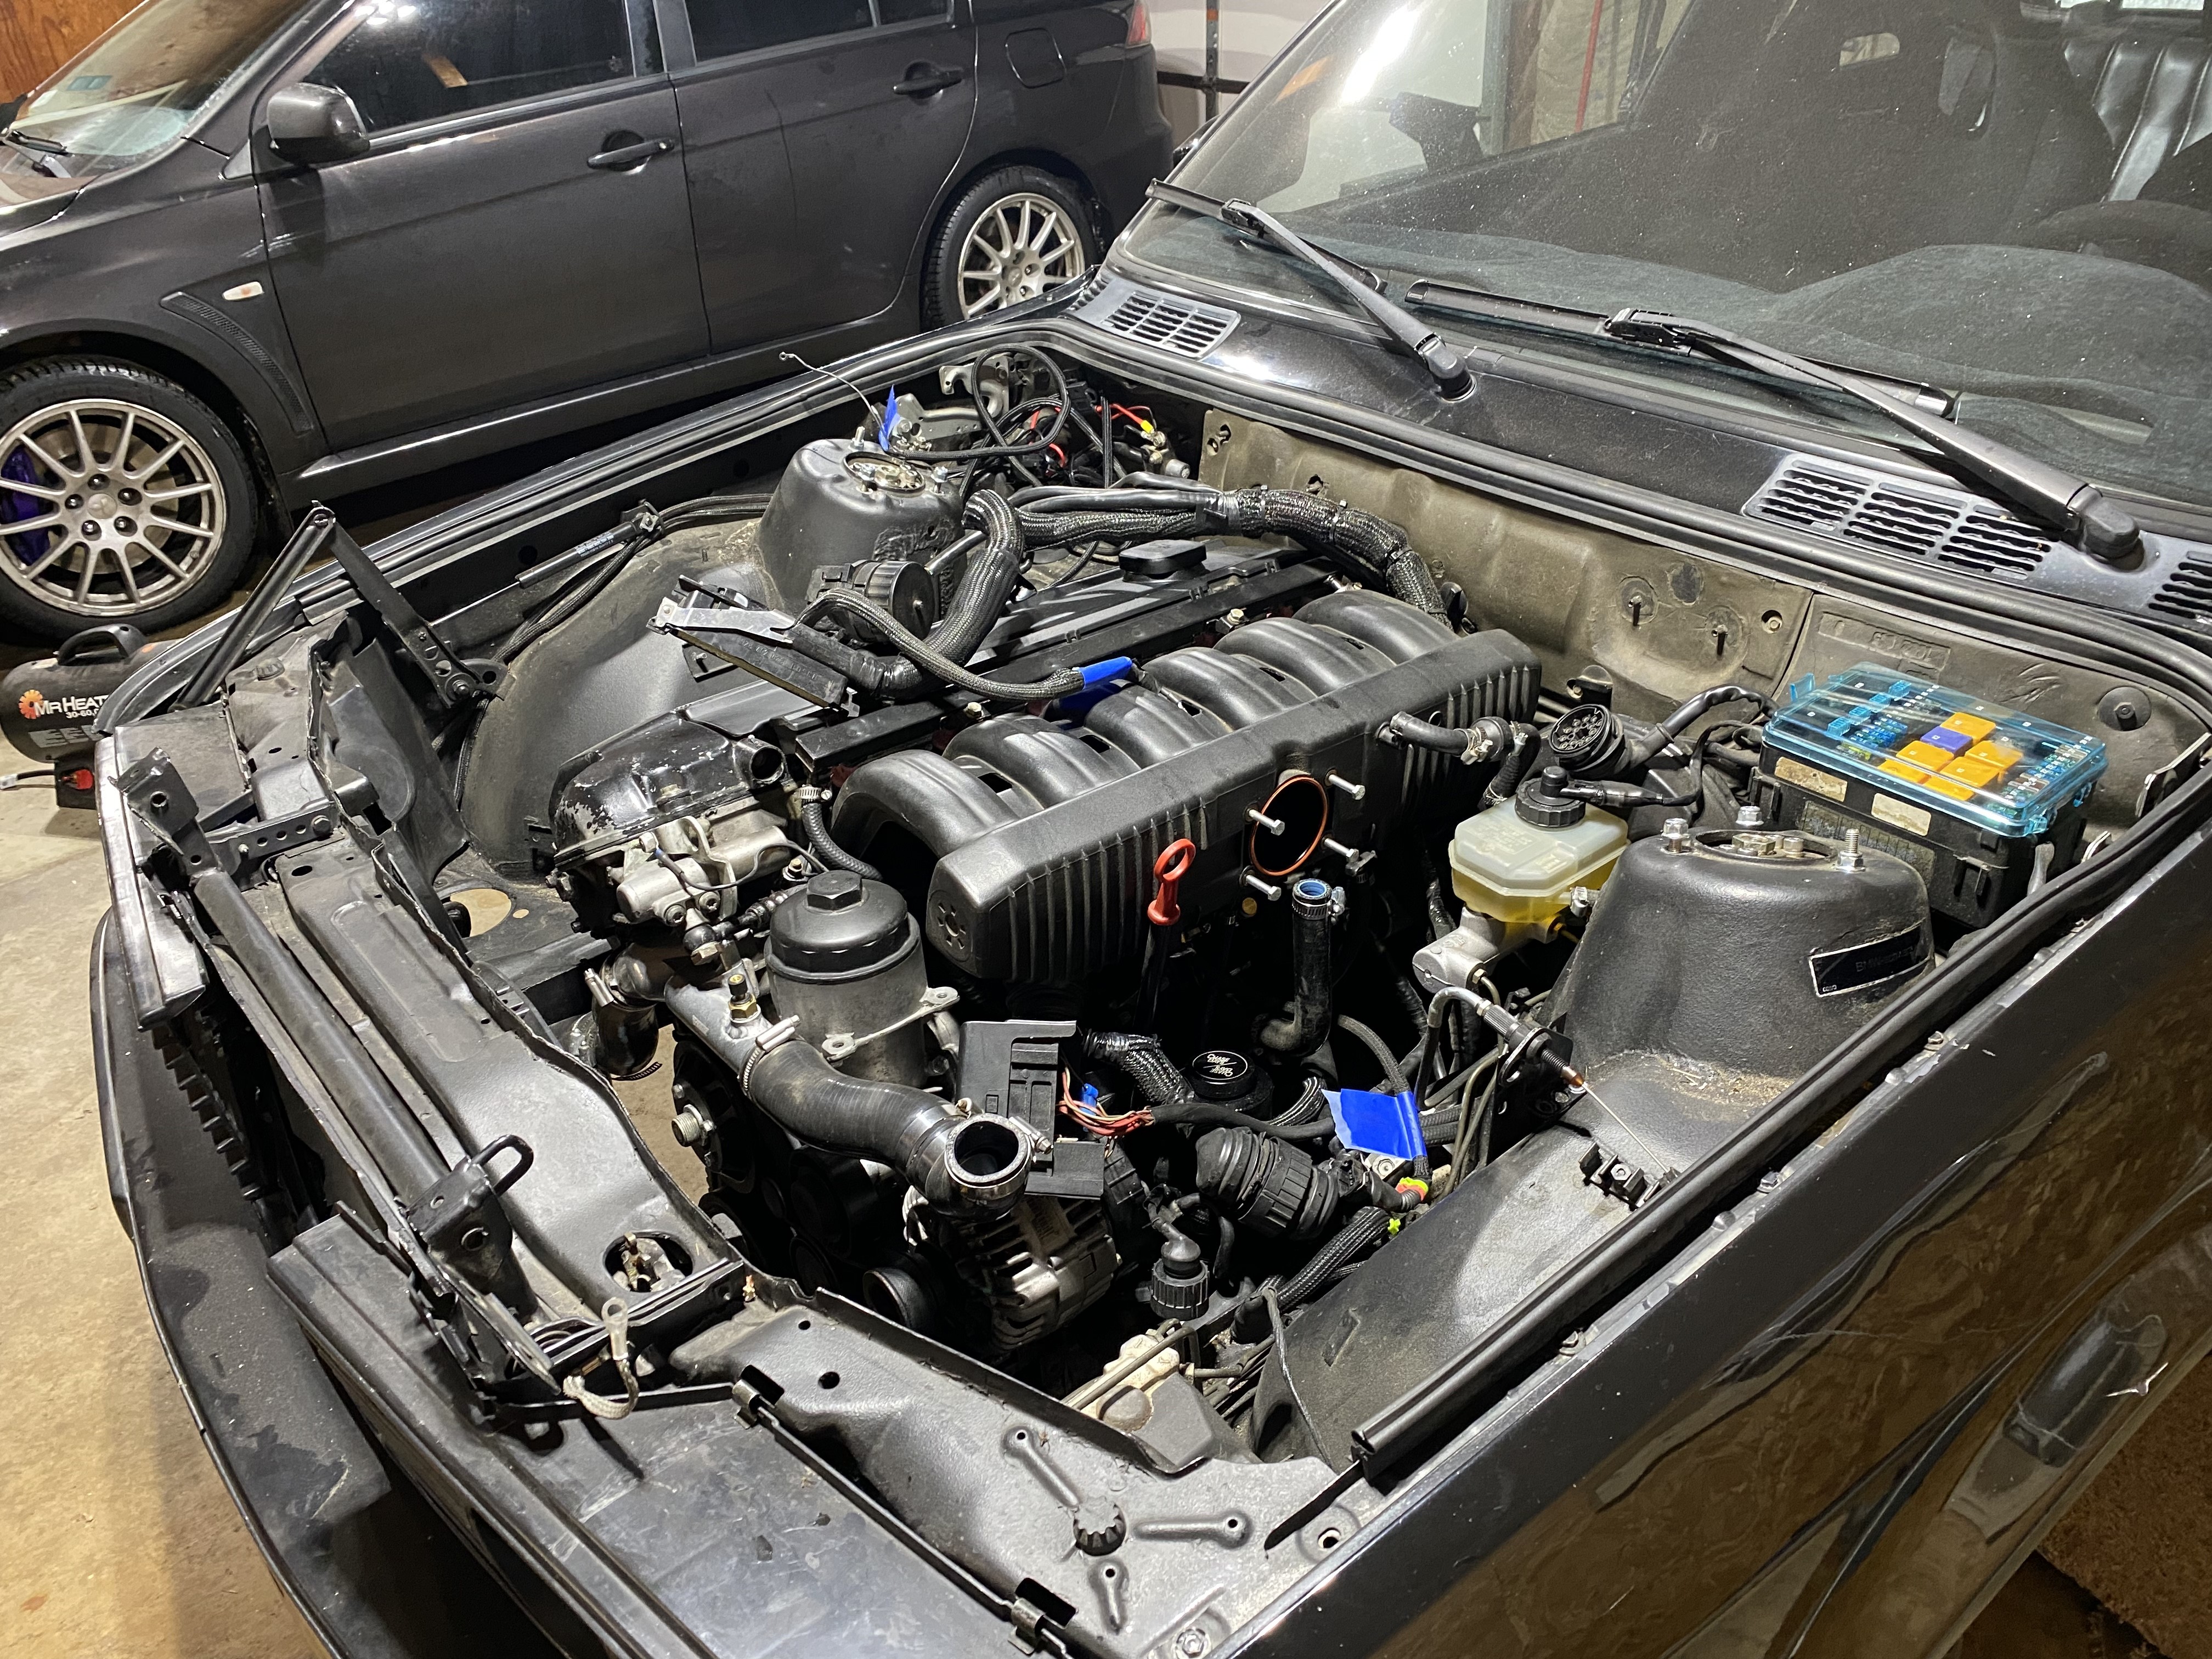
                                        next up is to make the car a roller again and get it down on the ground so I can get the harness in and connected as well as coolant hoses/radiator/etc etc


                                        1 Reply Last reply
                                        6
                                        • RekpointR
                                          RekpointR
                                          Rekpoint
                                          wrote on last edited by
                                          #461

                                          Literally took 15 mins to get the engine from outside and bolted up inside. Extremely fast!

                                          1 Reply Last reply
                                          1

                                          Hello! It looks like you're interested in this conversation, but you don't have an account yet.

                                          Getting fed up of having to scroll through the same posts each visit? When you register for an account, you'll always come back to exactly where you were before, and choose to be notified of new replies (either via email, or push notification). You'll also be able to save bookmarks and upvote posts to show your appreciation to other community members.

                                          With your input, this post could be even better 💗

                                          Register Login
                                          Reply
                                          • Reply as topic
                                          Log in to reply
                                          • Oldest to Newest
                                          • Newest to Oldest
                                          • Most Votes


                                          • Login

                                          • Don't have an account? Register

                                          • Login or register to search.
                                          Powered by NodeBB Contributors
                                          • First post
                                            Last post
                                          0
                                          • Categories
                                          • Recent
                                          • Tags
                                          • Popular
                                          • Users
                                          • Groups