Skip to content
  • Categories
  • Recent
  • Tags
  • Popular
  • Users
  • Groups
Skins
  • Light
  • Brite
  • Cerulean
  • Cosmo
  • Flatly
  • Journal
  • Litera
  • Lumen
  • Lux
  • Materia
  • Minty
  • Morph
  • Pulse
  • Sandstone
  • Simplex
  • Sketchy
  • Spacelab
  • United
  • Yeti
  • Zephyr
  • Dark
  • Cyborg
  • Darkly
  • Quartz
  • Slate
  • Solar
  • Superhero
  • Vapor

  • Default (No Skin)
  • No Skin
Collapse
WIBIMMERS logo

WIBIMMERS

  1. Home
  2. General Discussion
  3. Members BMWs
  4. Non-BMW Stuff on a BMW Forum

Non-BMW Stuff on a BMW Forum
Scheduled Pinned Locked Moved Members BMWs
1.2k Posts 29 Posters 0 Views 1 Watching
  • Oldest to Newest
  • Newest to Oldest
  • Most Votes
Reply
  • Reply as topic
Log in to reply
This topic has been deleted. Only users with topic management privileges can see it.
  • straight6pwrS
    straight6pwrS
    straight6pwr
    wrote on last edited by
    #742

    that cart seems pretty solid, $30 seems like a steal.

    Dan

    yajsYRL.jpg.e5f350b4dfe961d76ac8b32efce2e1a6.jpg

    1 Reply Last reply
    0
    • G
      G
      gilber33
      wrote on last edited by
      #743

      straight6pwr said:

      that cart seems pretty solid, $30 seems like a steal.

      It's great for $30. 

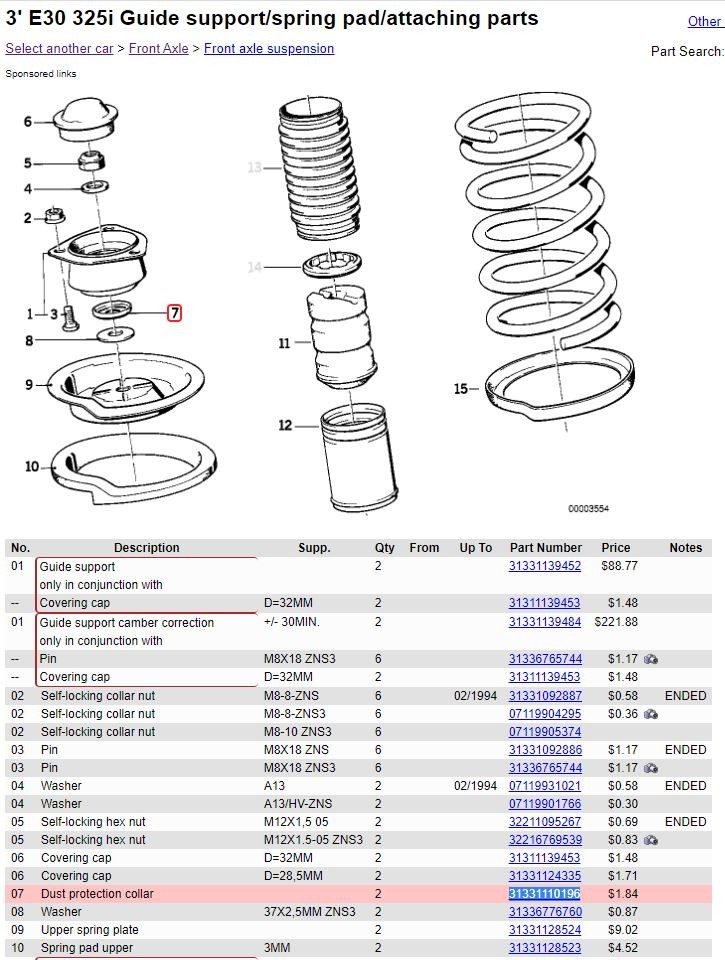
      I know the top of the strut mounts get a dust cap, but is there anything for the bottoms? They're just exposed like this? 
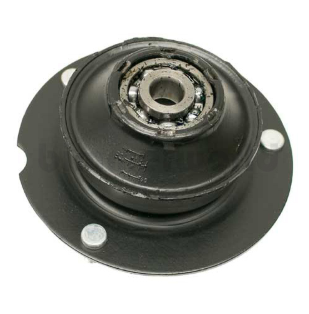
      image.png

      1 Reply Last reply
      0
      • P_RoloffP
        P_RoloffP
        P_Roloff
        wrote on last edited by
        #744

        It would appear that there is a dust cover of sorts and then a washer on the underside according to this diagram.

        Front Schock Assy.JPG

        1 Reply Last reply
        3
        • G
          G
          gilber33
          wrote on last edited by
          #745

          Thank you! When I removed them from the car they had the washer, but they did not have the dust cover.

          1 Reply Last reply
          0
          • straight6pwrS
            straight6pwrS
            straight6pwr
            wrote on last edited by
            #746

            @P_Roloff is correct

            check this video: at 4:10 he removes the top mount which someone failed to put the washer/dust cap under. you can see how gross the bearing is and at 4:20 you can see how badly the bottom of the bearing chewed grooves into the top spring plate. at 17:35 you can see him correctly installing the washer/dust cap on reassembly.

            Dan
            yajsYRL.jpg.e5f350b4dfe961d76ac8b32efce2e1a6.jpg

            1 Reply Last reply
            1
            • G
              G
              gilber33
              wrote on last edited by
              #747

              I was hoping to reinstall everything tomorrow, but I guess I will need to hold off to order those. Oh well.

              1 Reply Last reply
              0
              • straight6pwrS
                straight6pwrS
                straight6pwr
                wrote on last edited by
                #748

                gilber33 said:

                I was hoping to reinstall everything tomorrow, but I guess I will need to hold off to order those. Oh well. 

                another tip: before you install, pack the top mount bearing with more grease if it seems inadequate on either the top or bottom.

                Dan
                yajsYRL.jpg.e5f350b4dfe961d76ac8b32efce2e1a6.jpg

                1 Reply Last reply
                1
                • G
                  G
                  gilber33
                  wrote on last edited by
                  #749

                  straight6pwr said:

                  another tip: before you install, pack the top mount bearing with more grease if it seems inadequate on either the top or bottom.

                  Good idea. The bearings did look underpacked with grease.

                  1 Reply Last reply
                  0
                  • JdesignJ
                    JdesignJ
                    Jdesign
                    wrote on last edited by
                    #750

                    straight6pwr said:

                    another tip: before you install, pack the top mount bearing with more grease if it seems inadequate on either the top or bottom.

                    Also, keep in mind if you mix types of grease it can cause chemical reactions that will potentially cause premature wear! Sounds dumb, but I worked in a bike shop for 10+ years, and I have personally witnessed countless times that mixed types of grease caused chemical reactions that ate through bearings, bearing races, and softer material components such as plastics and urethanes. I always thoroughly clean parts before I re-grease or add grease to them if I don't know the type of grease that was originally installed.  

                    http://knowhow.napaonline.com/greasy-situation-can-you-mix-grease/

                    SumBunny.jpg

                    https://www.instagram.com/_jdesigner_/                                          http://nevertoolow.tumblr.com/

                    🥳SOLD BMW E24 633CSI - BMW M30B32                                          🧪SOLD HCH  ES9 - 1.3 LDA
                    👽BMW E30 325IC - Toyota 1JZ-GTE                                                     ⏰ HONDA EF9 CIVIC SI - JDM B18C5
                    ☠️BMW E36 318i - Ford 5.0 FE302                                                         🚴‍♂️ GT-Labomba - 26x2.75 Freeride
                    🤹‍♀️SOLD BMW E36/7 Z3 - BMW M54B25                                                🧓SOLD BMW E10 2002 - BMW M10M05

                    1 Reply Last reply
                    0
                    • G
                      G
                      gilber33
                      wrote on last edited by
                      #751

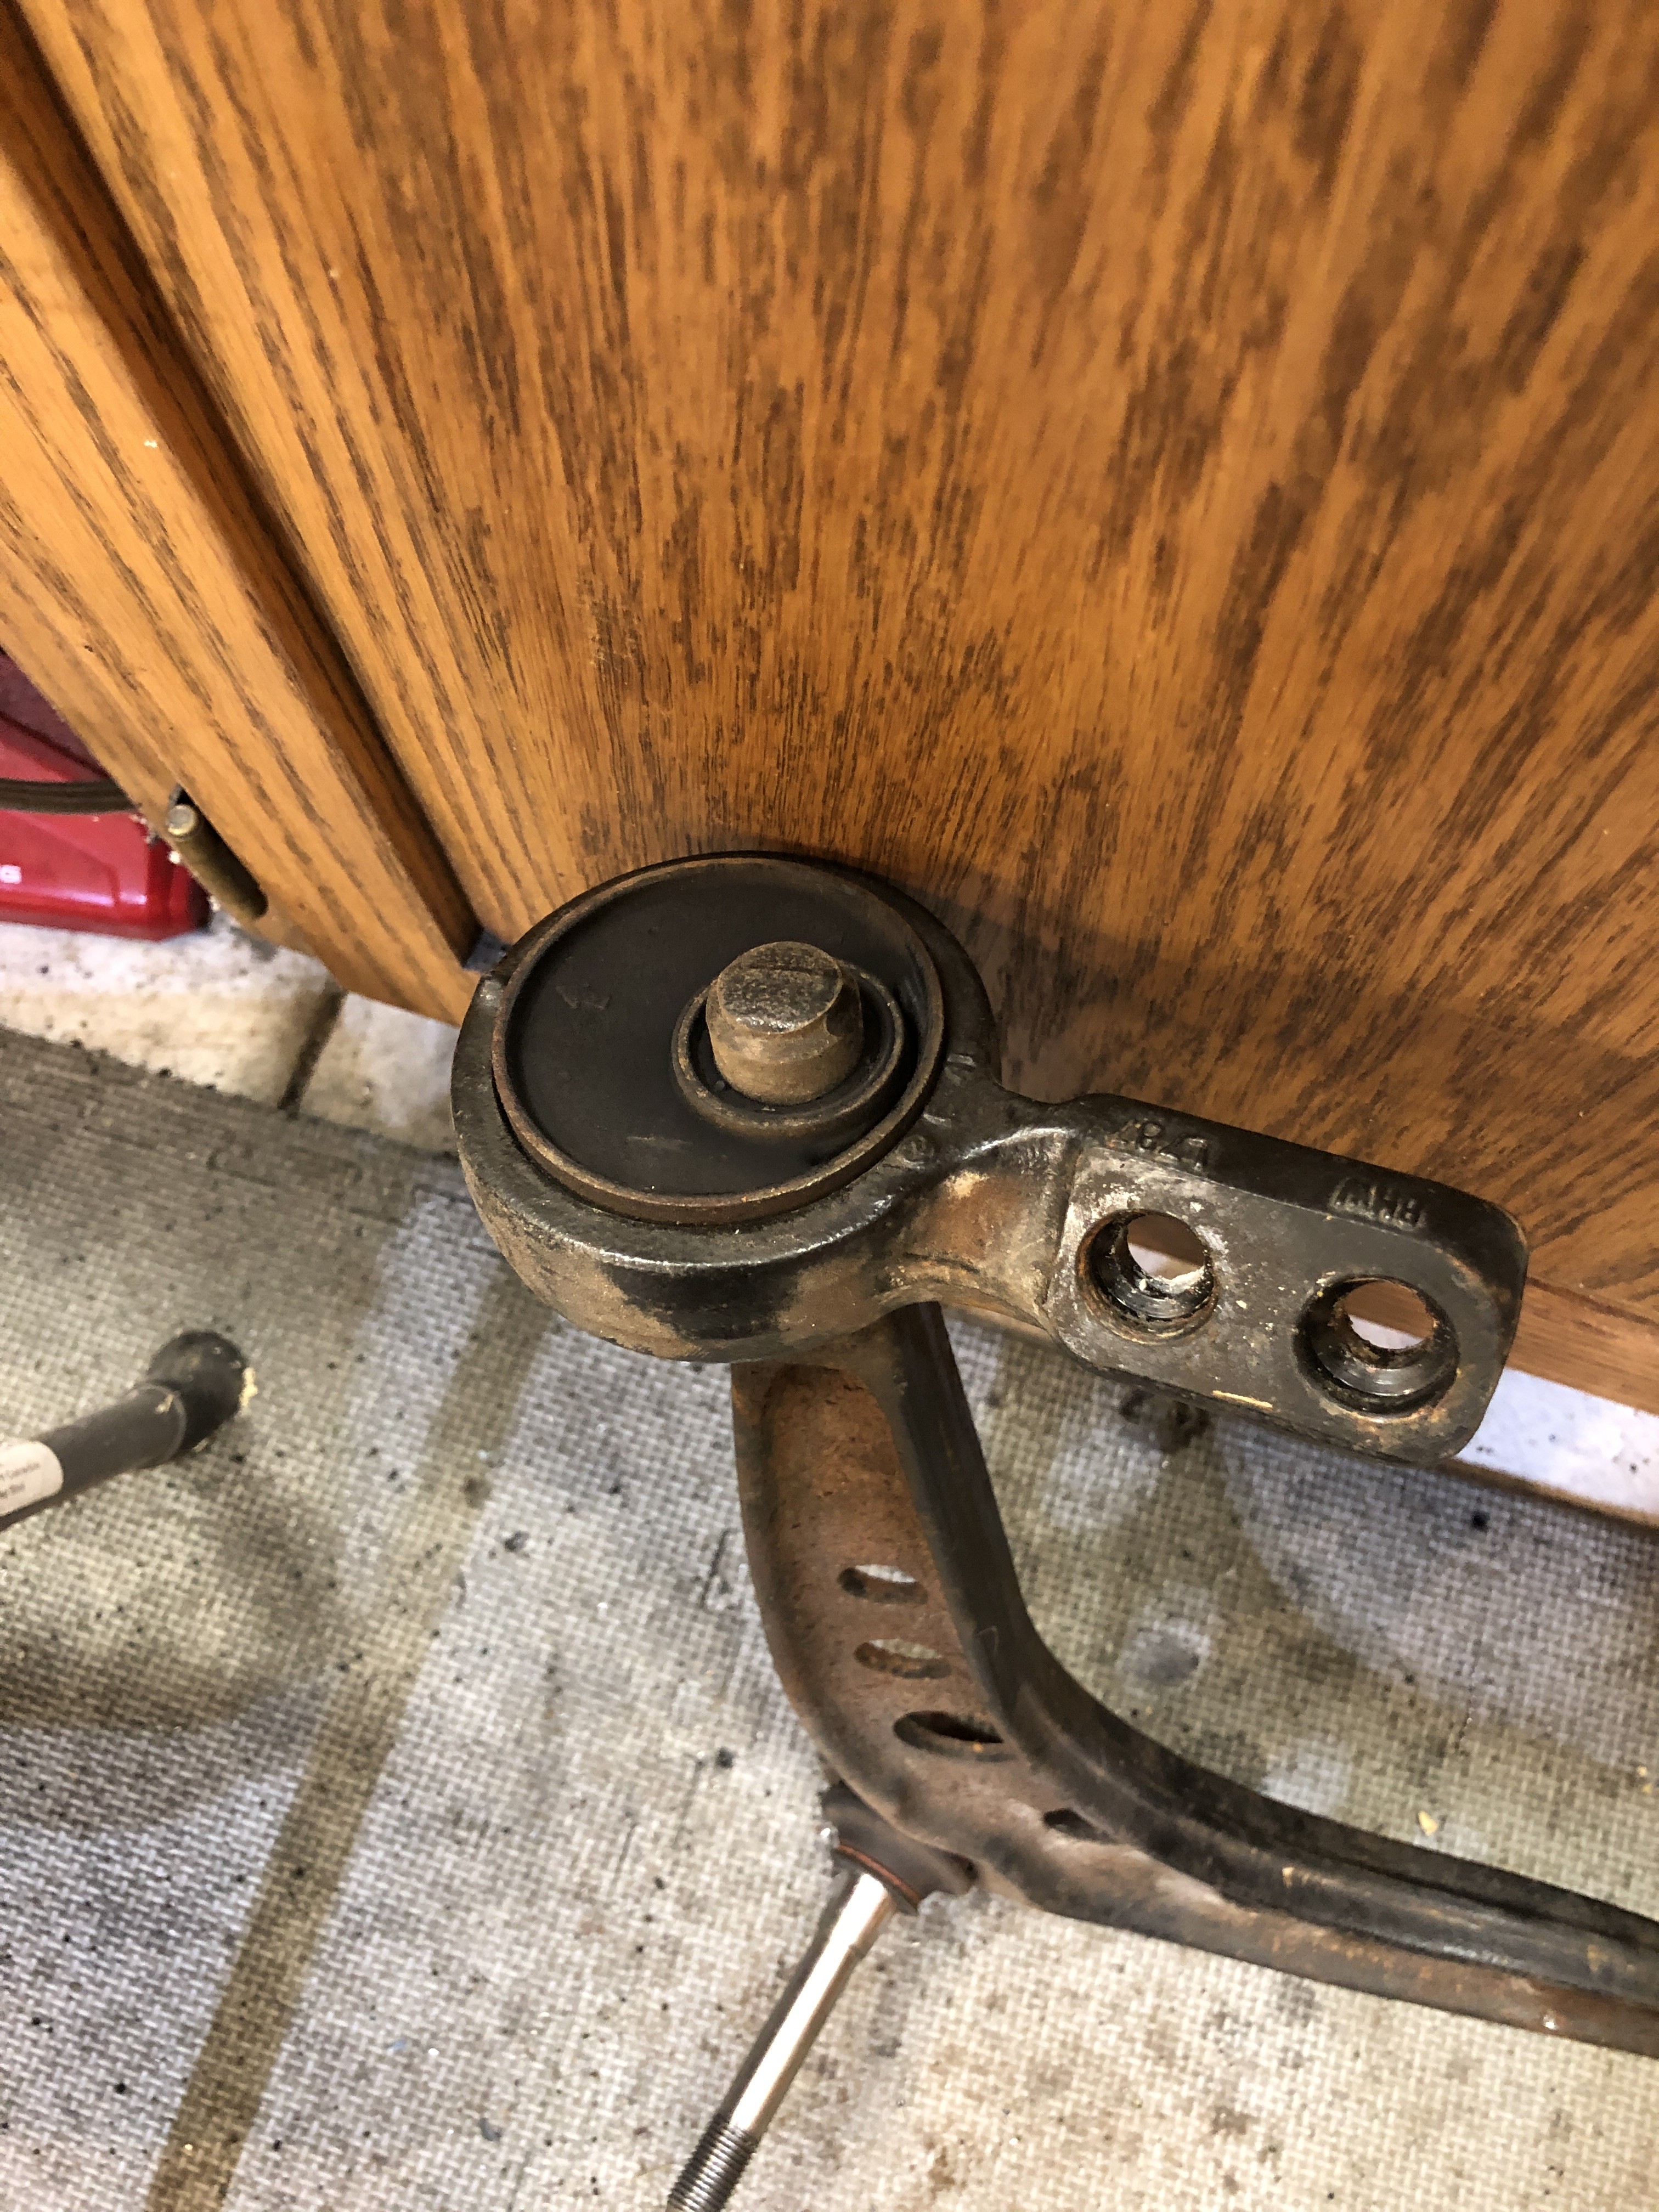
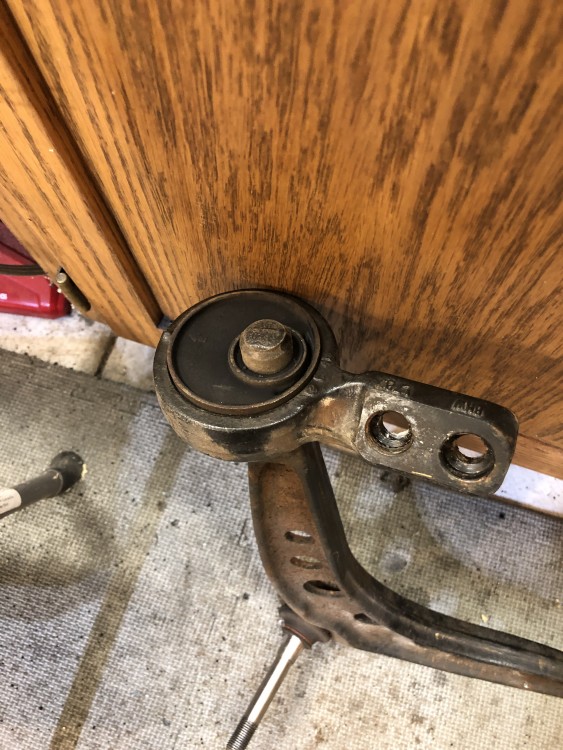
                      Reinstalling the struts and everything and j realized the threads on the outer ball joint for the DS control arm are cross threaded. The control arm assemblies are relatively cheap, but I can’t find a great how-to for removing the lollipop without the assumption that you’re going to be replacing the bushing. Any pointers? 
                       

                      46941524-CE97-40B4-AF1F-2E49648FF92A.jpeg

                      1 Reply Last reply
                      0
                      • straight6pwrS
                        straight6pwrS
                        straight6pwr
                        wrote on last edited by
                        #752

                        gilber33 said:

                        Reinstalling the struts and everything and j realized the threads on the outer ball joint for the DS control arm are cross threaded. The control arm assemblies are relatively cheap, but I can’t find a great how-to for removing the lollipop without the assumption that you’re going to be replacing the bushing. Any pointers? 
                         

                        i was able to pull those will a 3 jaw puller. i had to drill a hole in the center of the control arm 'post' to keep the puller from walking off of it, and i had to band clamp the arms of the 3 jaw to keep them from walking off the lollipop, since it is offcenter. i think i may have setup the 3 jaw with different length arms to help with the offcentering, as well. one of the two was very stuck and i was afraid i was going to tear it, so i had to hammer a pick between the control arm 'post' and the bushing to break the seal (which damaged it) so your results may vary.

                        alternatively, if you know a shop with the correct tools, you could order just that outer ball joint and have them press it in and leave the CAB alone.

                        Dan
                        yajsYRL.jpg.e5f350b4dfe961d76ac8b32efce2e1a6.jpg

                        1 Reply Last reply
                        0
                        • G
                          G
                          gilber33
                          wrote on last edited by
                          #753

                          straight6pwr said:

                          alternatively, if you know a shop with the correct tools, you could order just that outer ball joint and have them press it in and leave the CAB alone. 

                          From what I can find, these are just pressed it, right? There’s nothing special about them. A shop with a basic press should be able to do it.

                          1 Reply Last reply
                          0
                          • G
                            G
                            gilber33
                            wrote on last edited by
                            #754

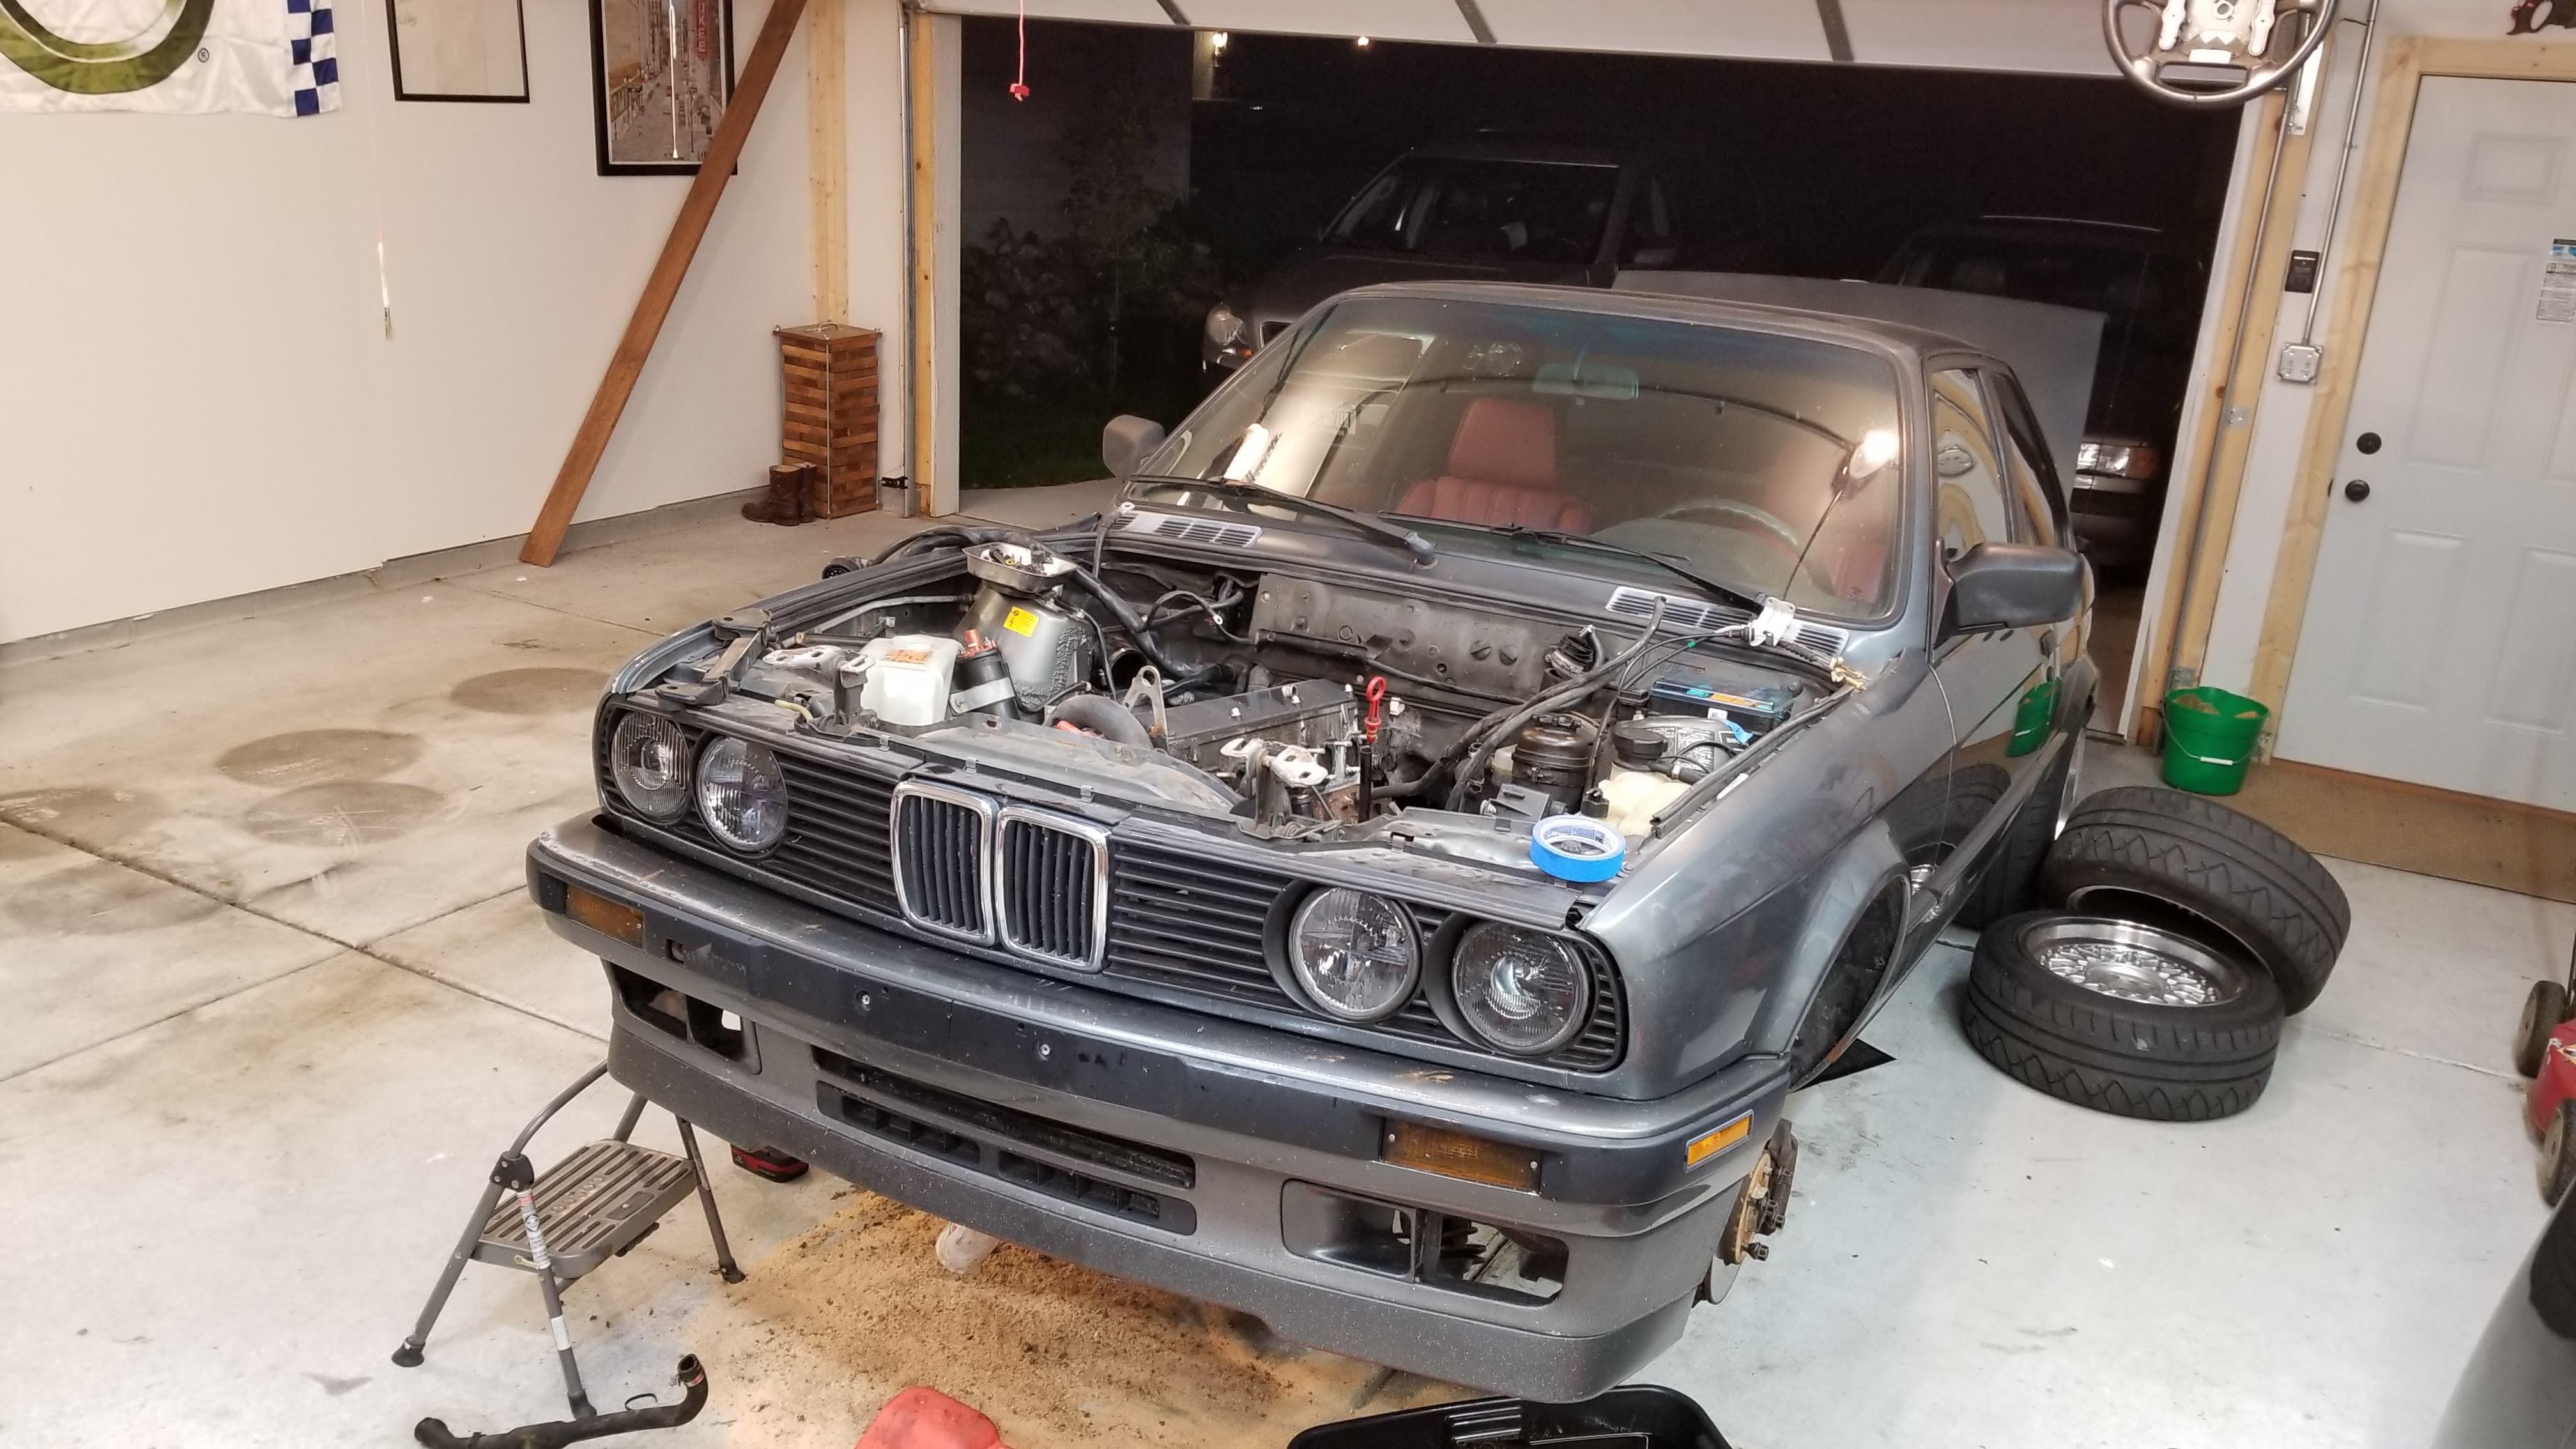
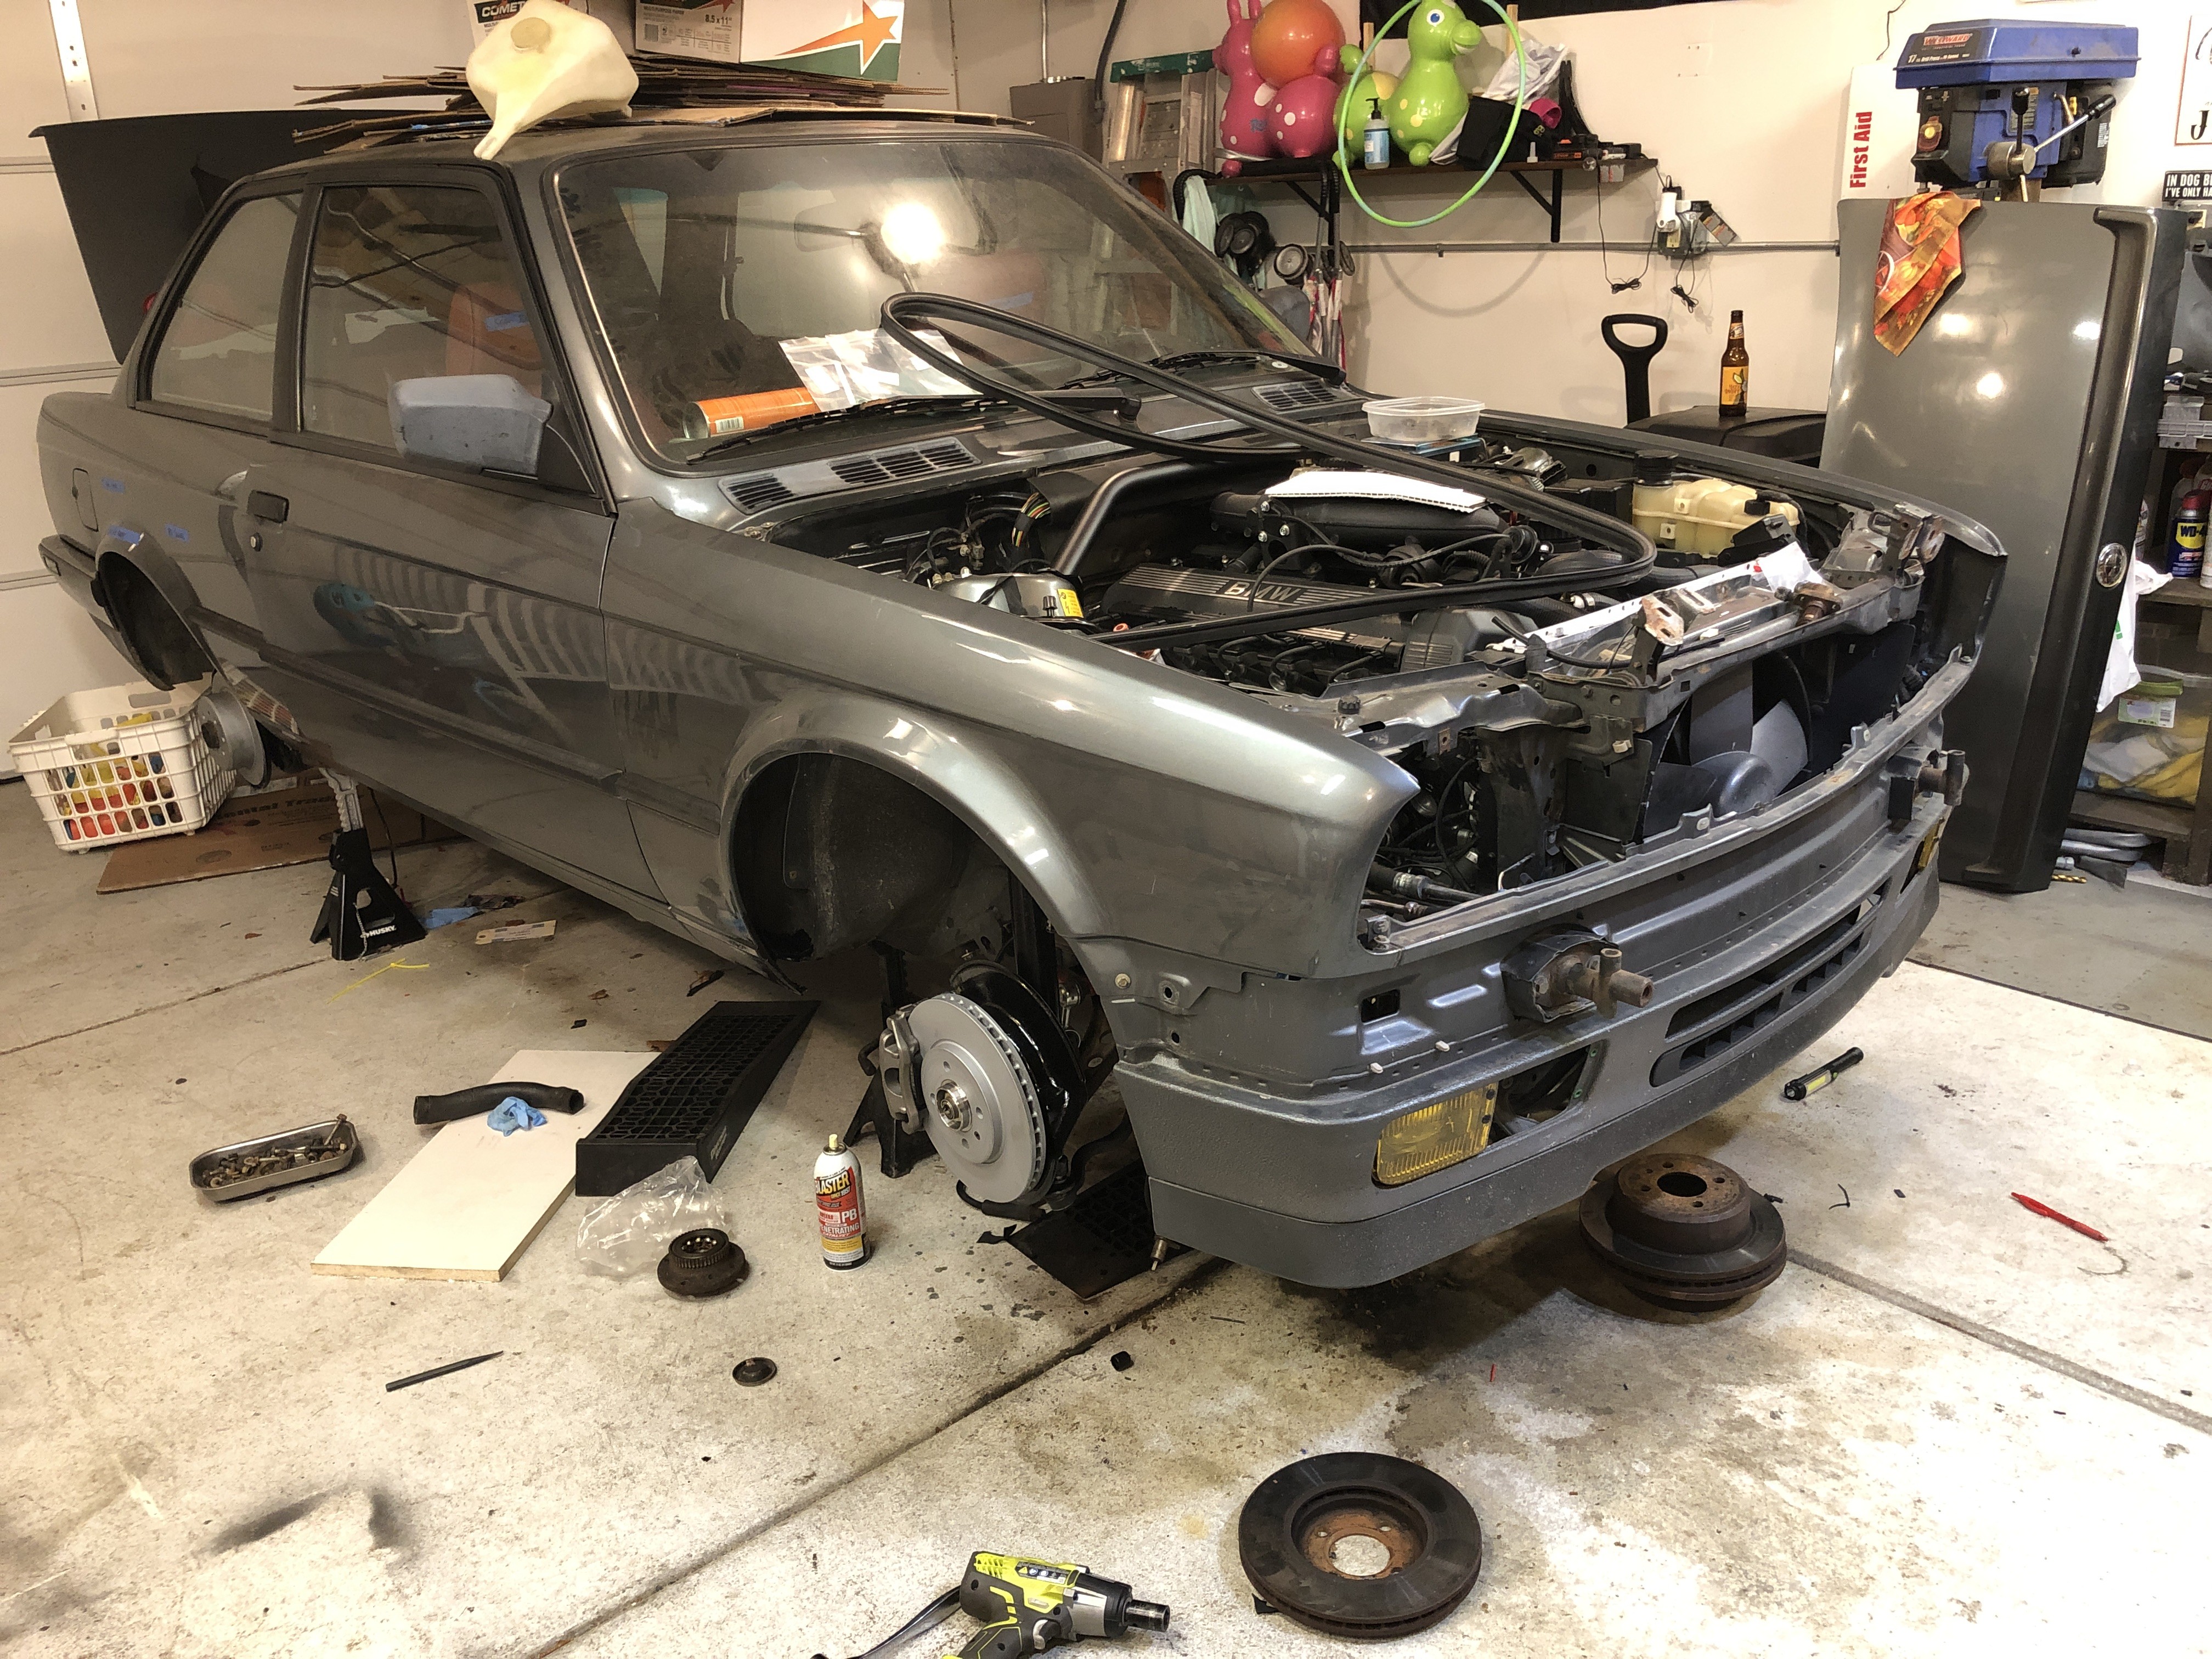
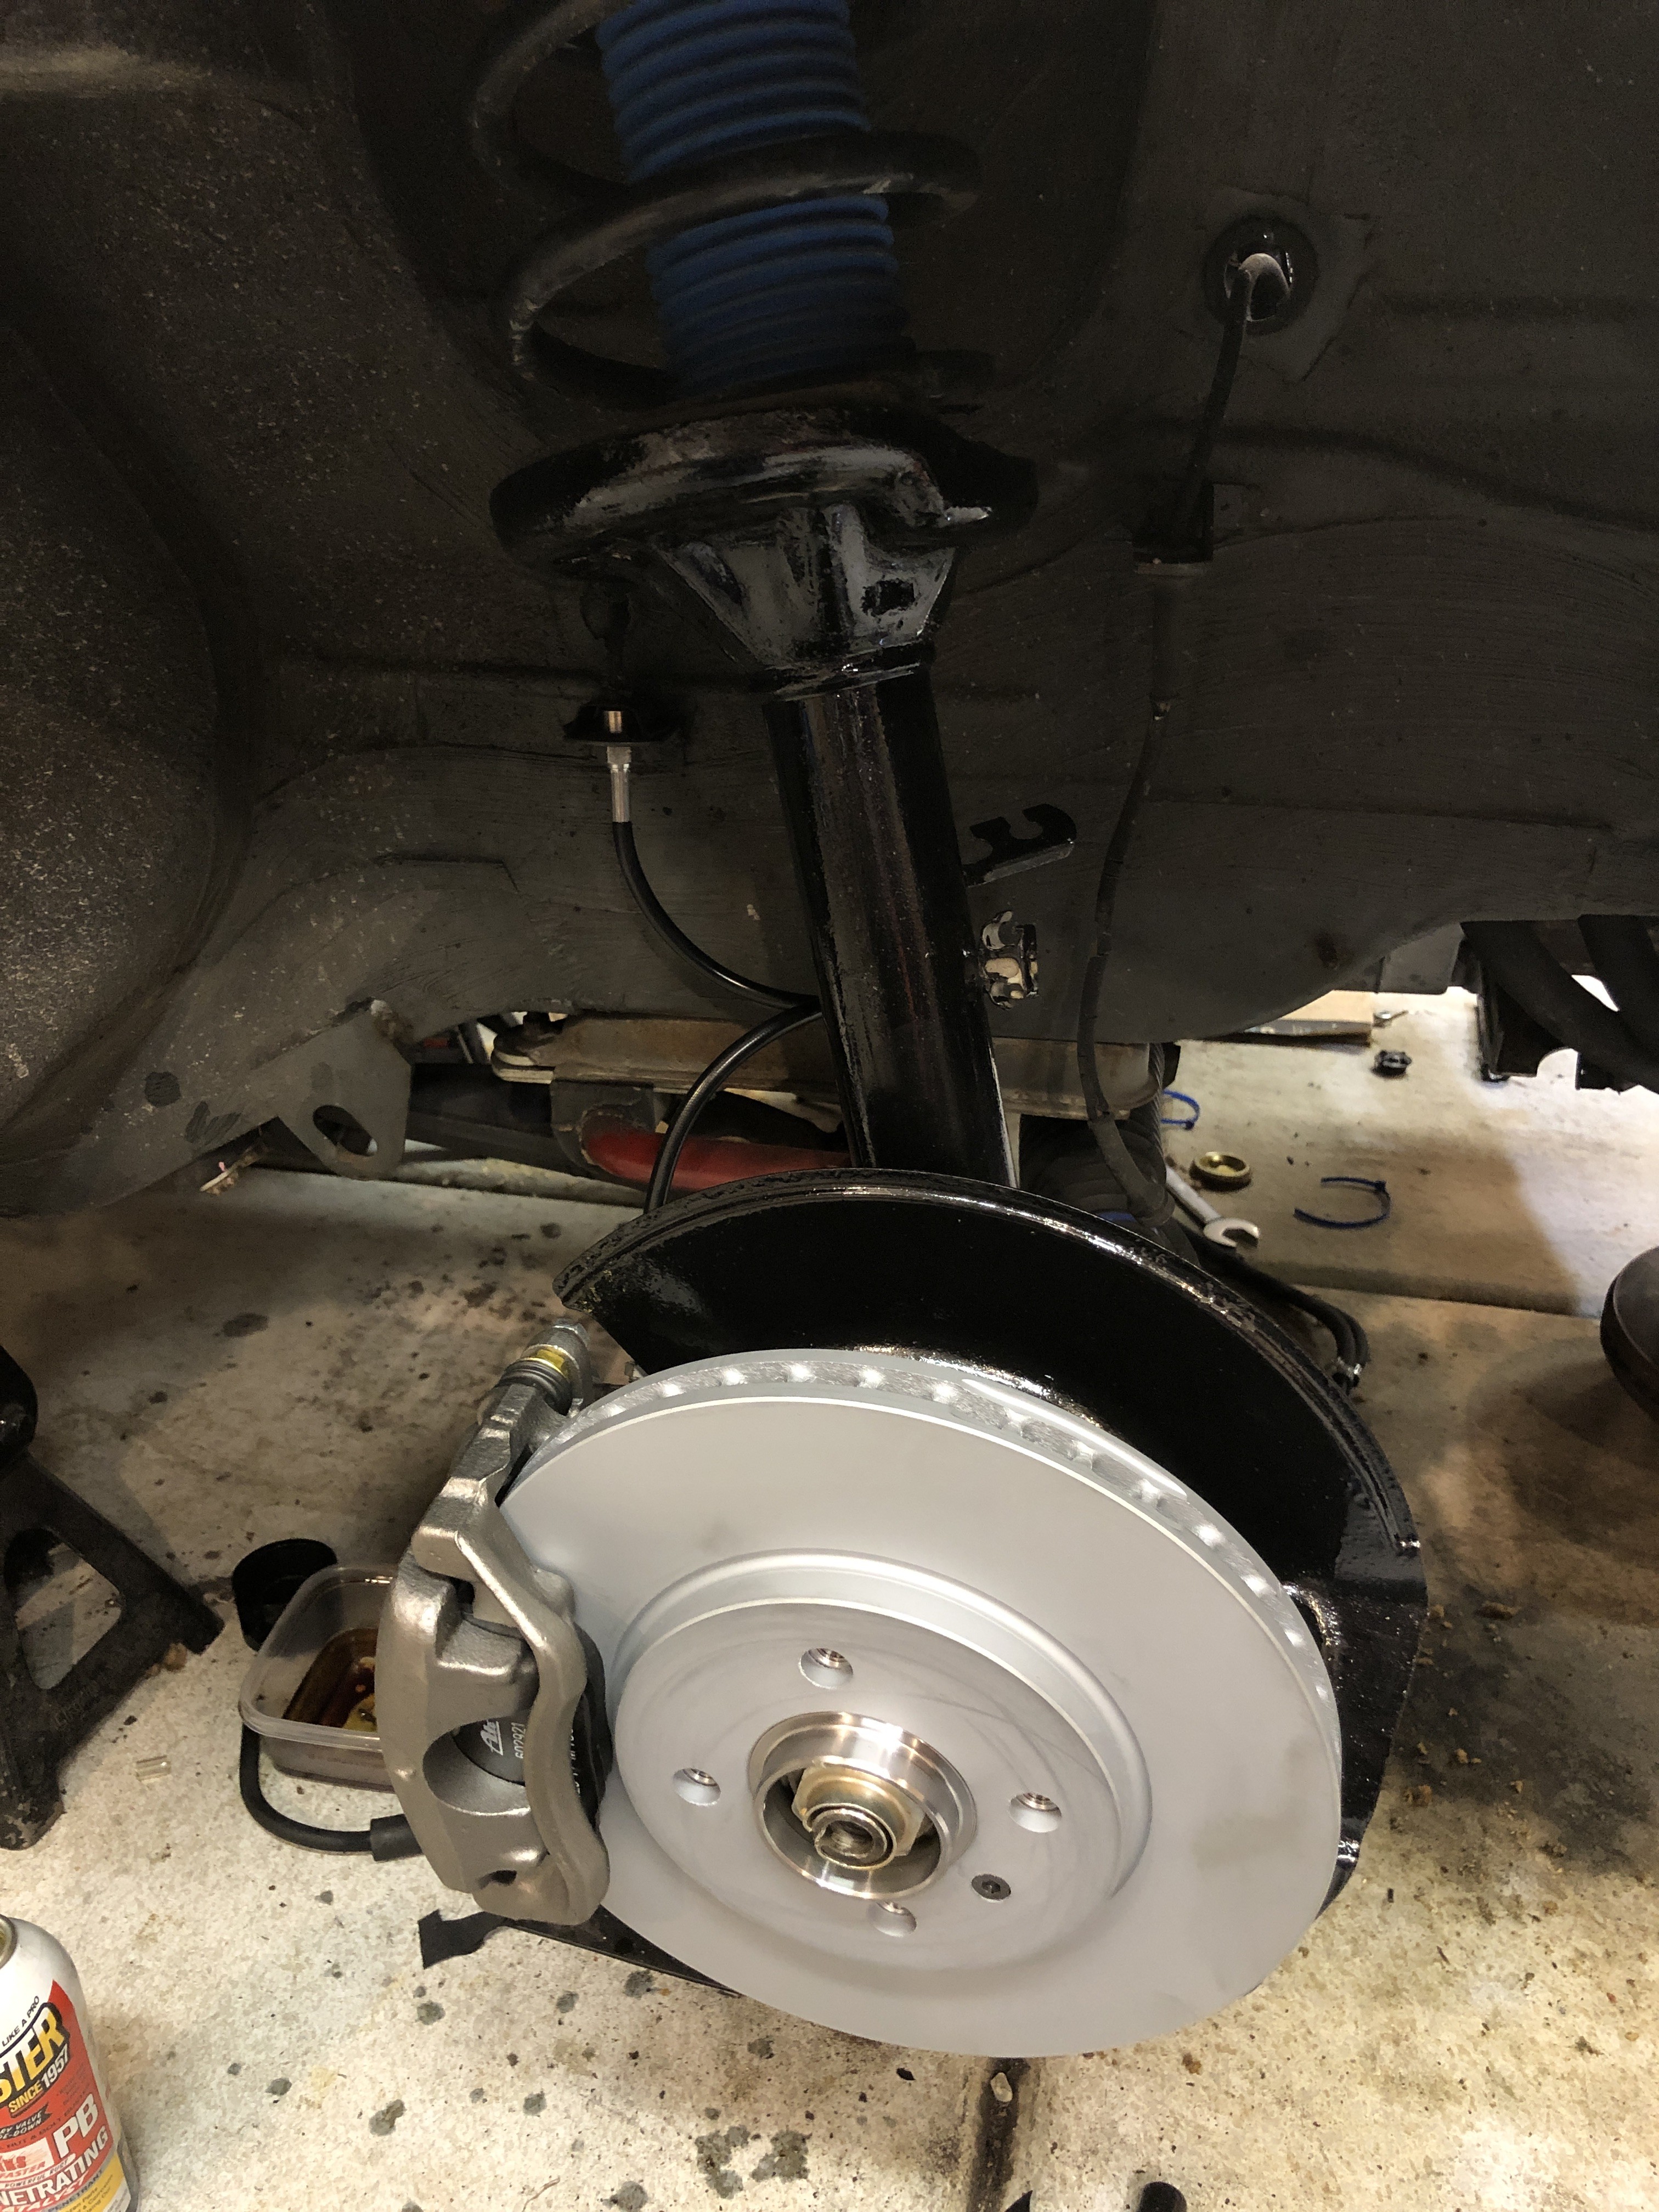
                            Car is coming back together last night (other than the control arm coming out as stuff was going in). Struts repainted, new mounts, new dust caps, new wheels bearings, brakes, calipers, and Chase Bays hard lines. Bumper and fenders loosely bolted into place. 

                            2D56B4D1-4A48-4398-8AB9-1A9951FAAB17.jpeg

                            12F1CDC7-6ACE-4137-ACBD-F7F6A57FDD4C.jpeg

                            5749541E-8561-4450-9F9F-9A4E5667C7D8.jpeg

                            1 Reply Last reply
                            0
                            • straight6pwrS
                              straight6pwrS
                              straight6pwr
                              wrote on last edited by
                              #755

                              gilber33 said:

                              From what I can find, these are just pressed it, right? There’s nothing special about them. A shop with a basic press should be able to do it. 

                              yes!

                              Dan
                              yajsYRL.jpg.e5f350b4dfe961d76ac8b32efce2e1a6.jpg

                              1 Reply Last reply
                              1
                              • G
                                G
                                gilber33
                                wrote on last edited by
                                #756

                                straight6pwr said:

                                yes!

                                Thank you for the info! I have it with me today to see what a shop would want for it and to make sure they can do it.

                                1 Reply Last reply
                                0
                                • G
                                  G
                                  gilber33
                                  wrote on last edited by
                                  #757

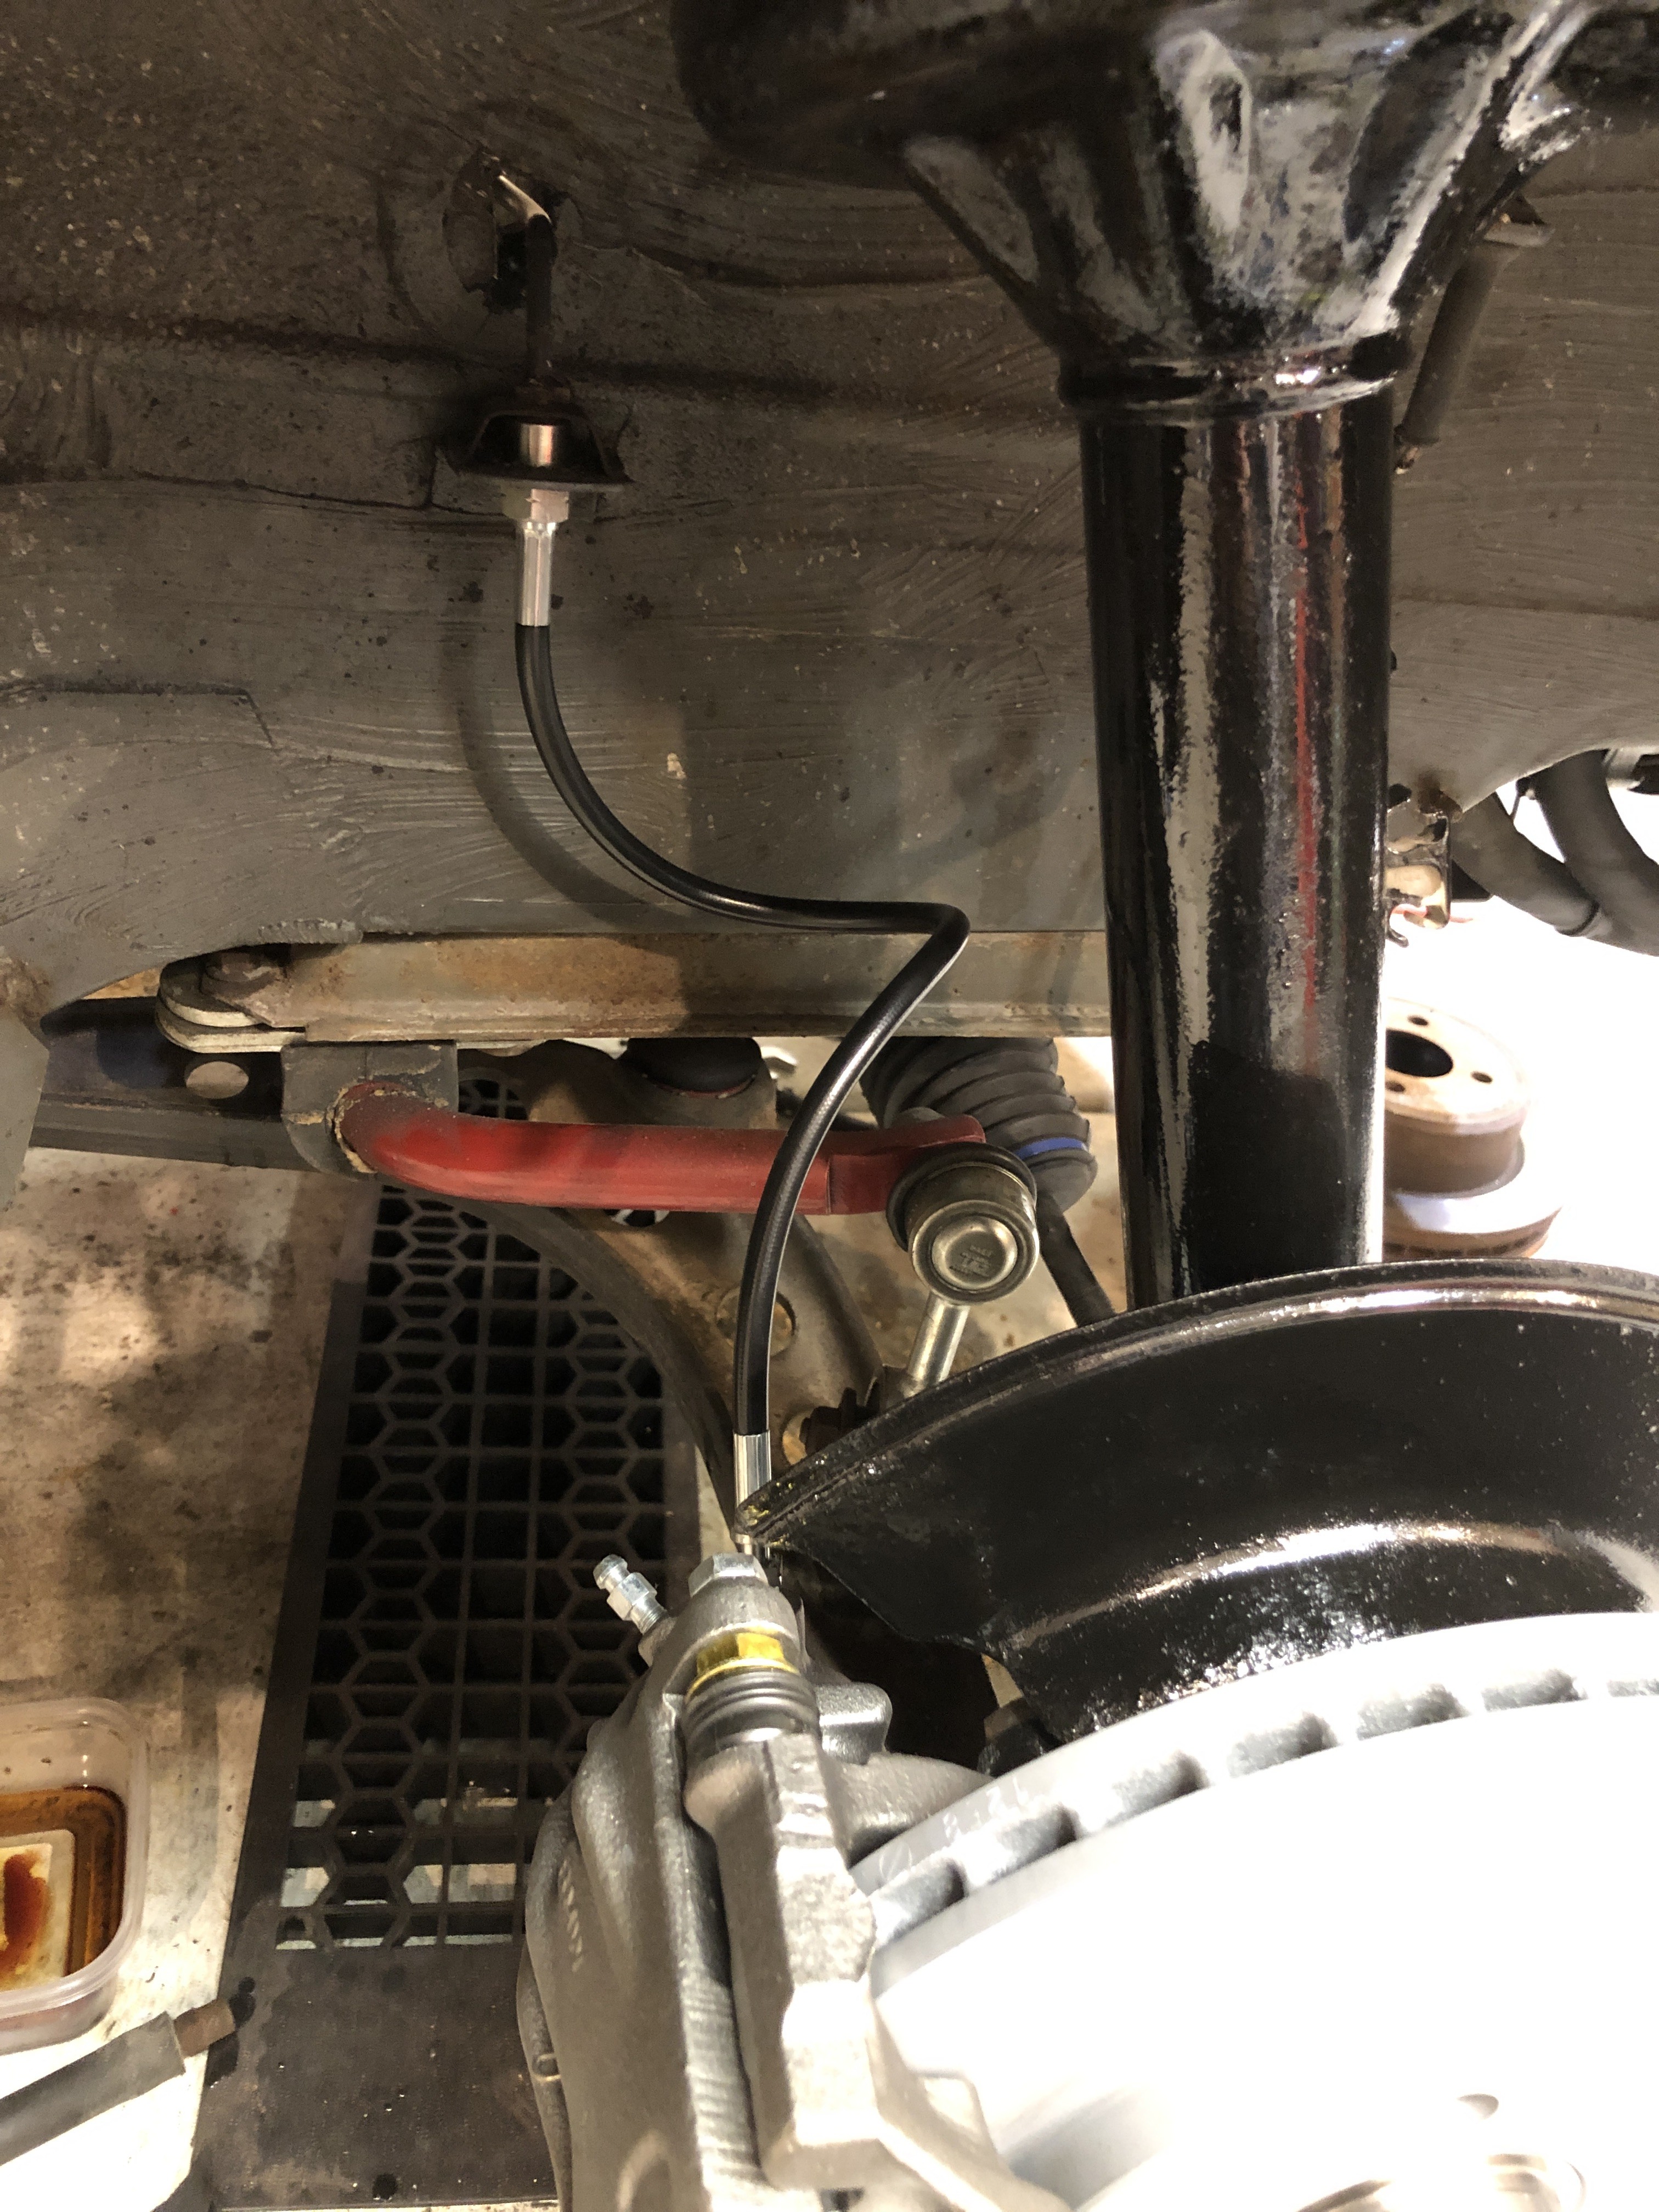
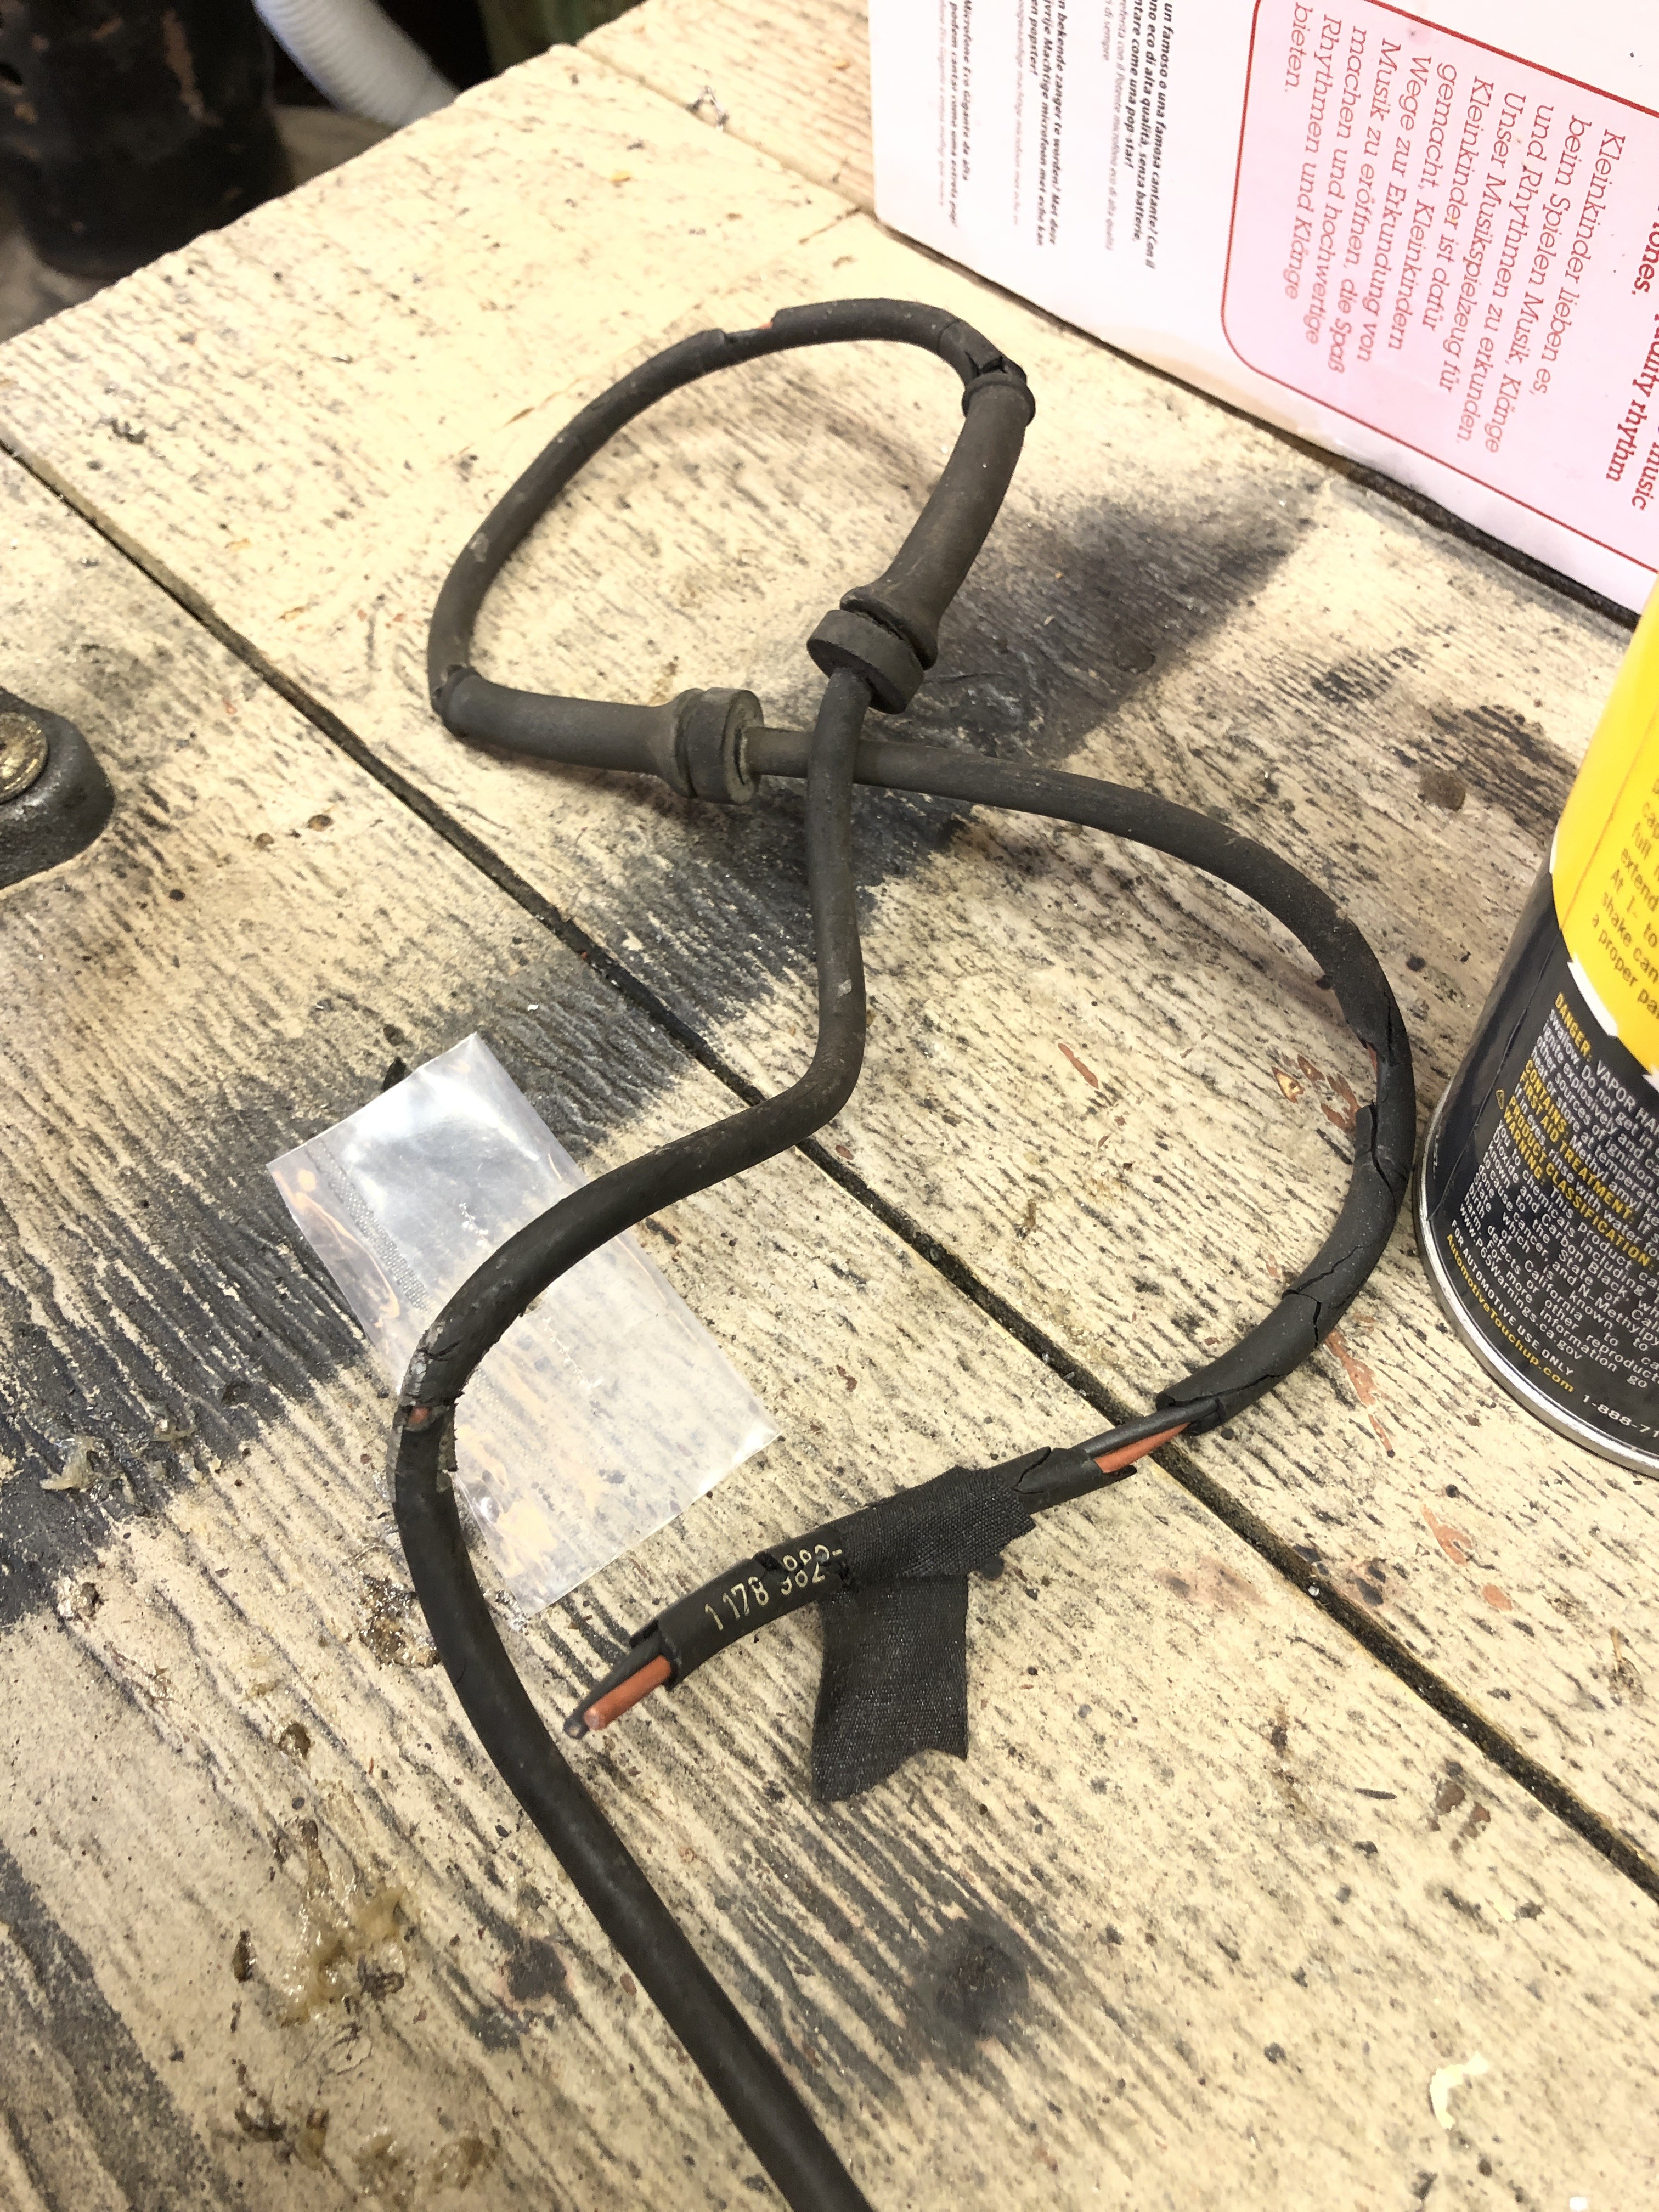
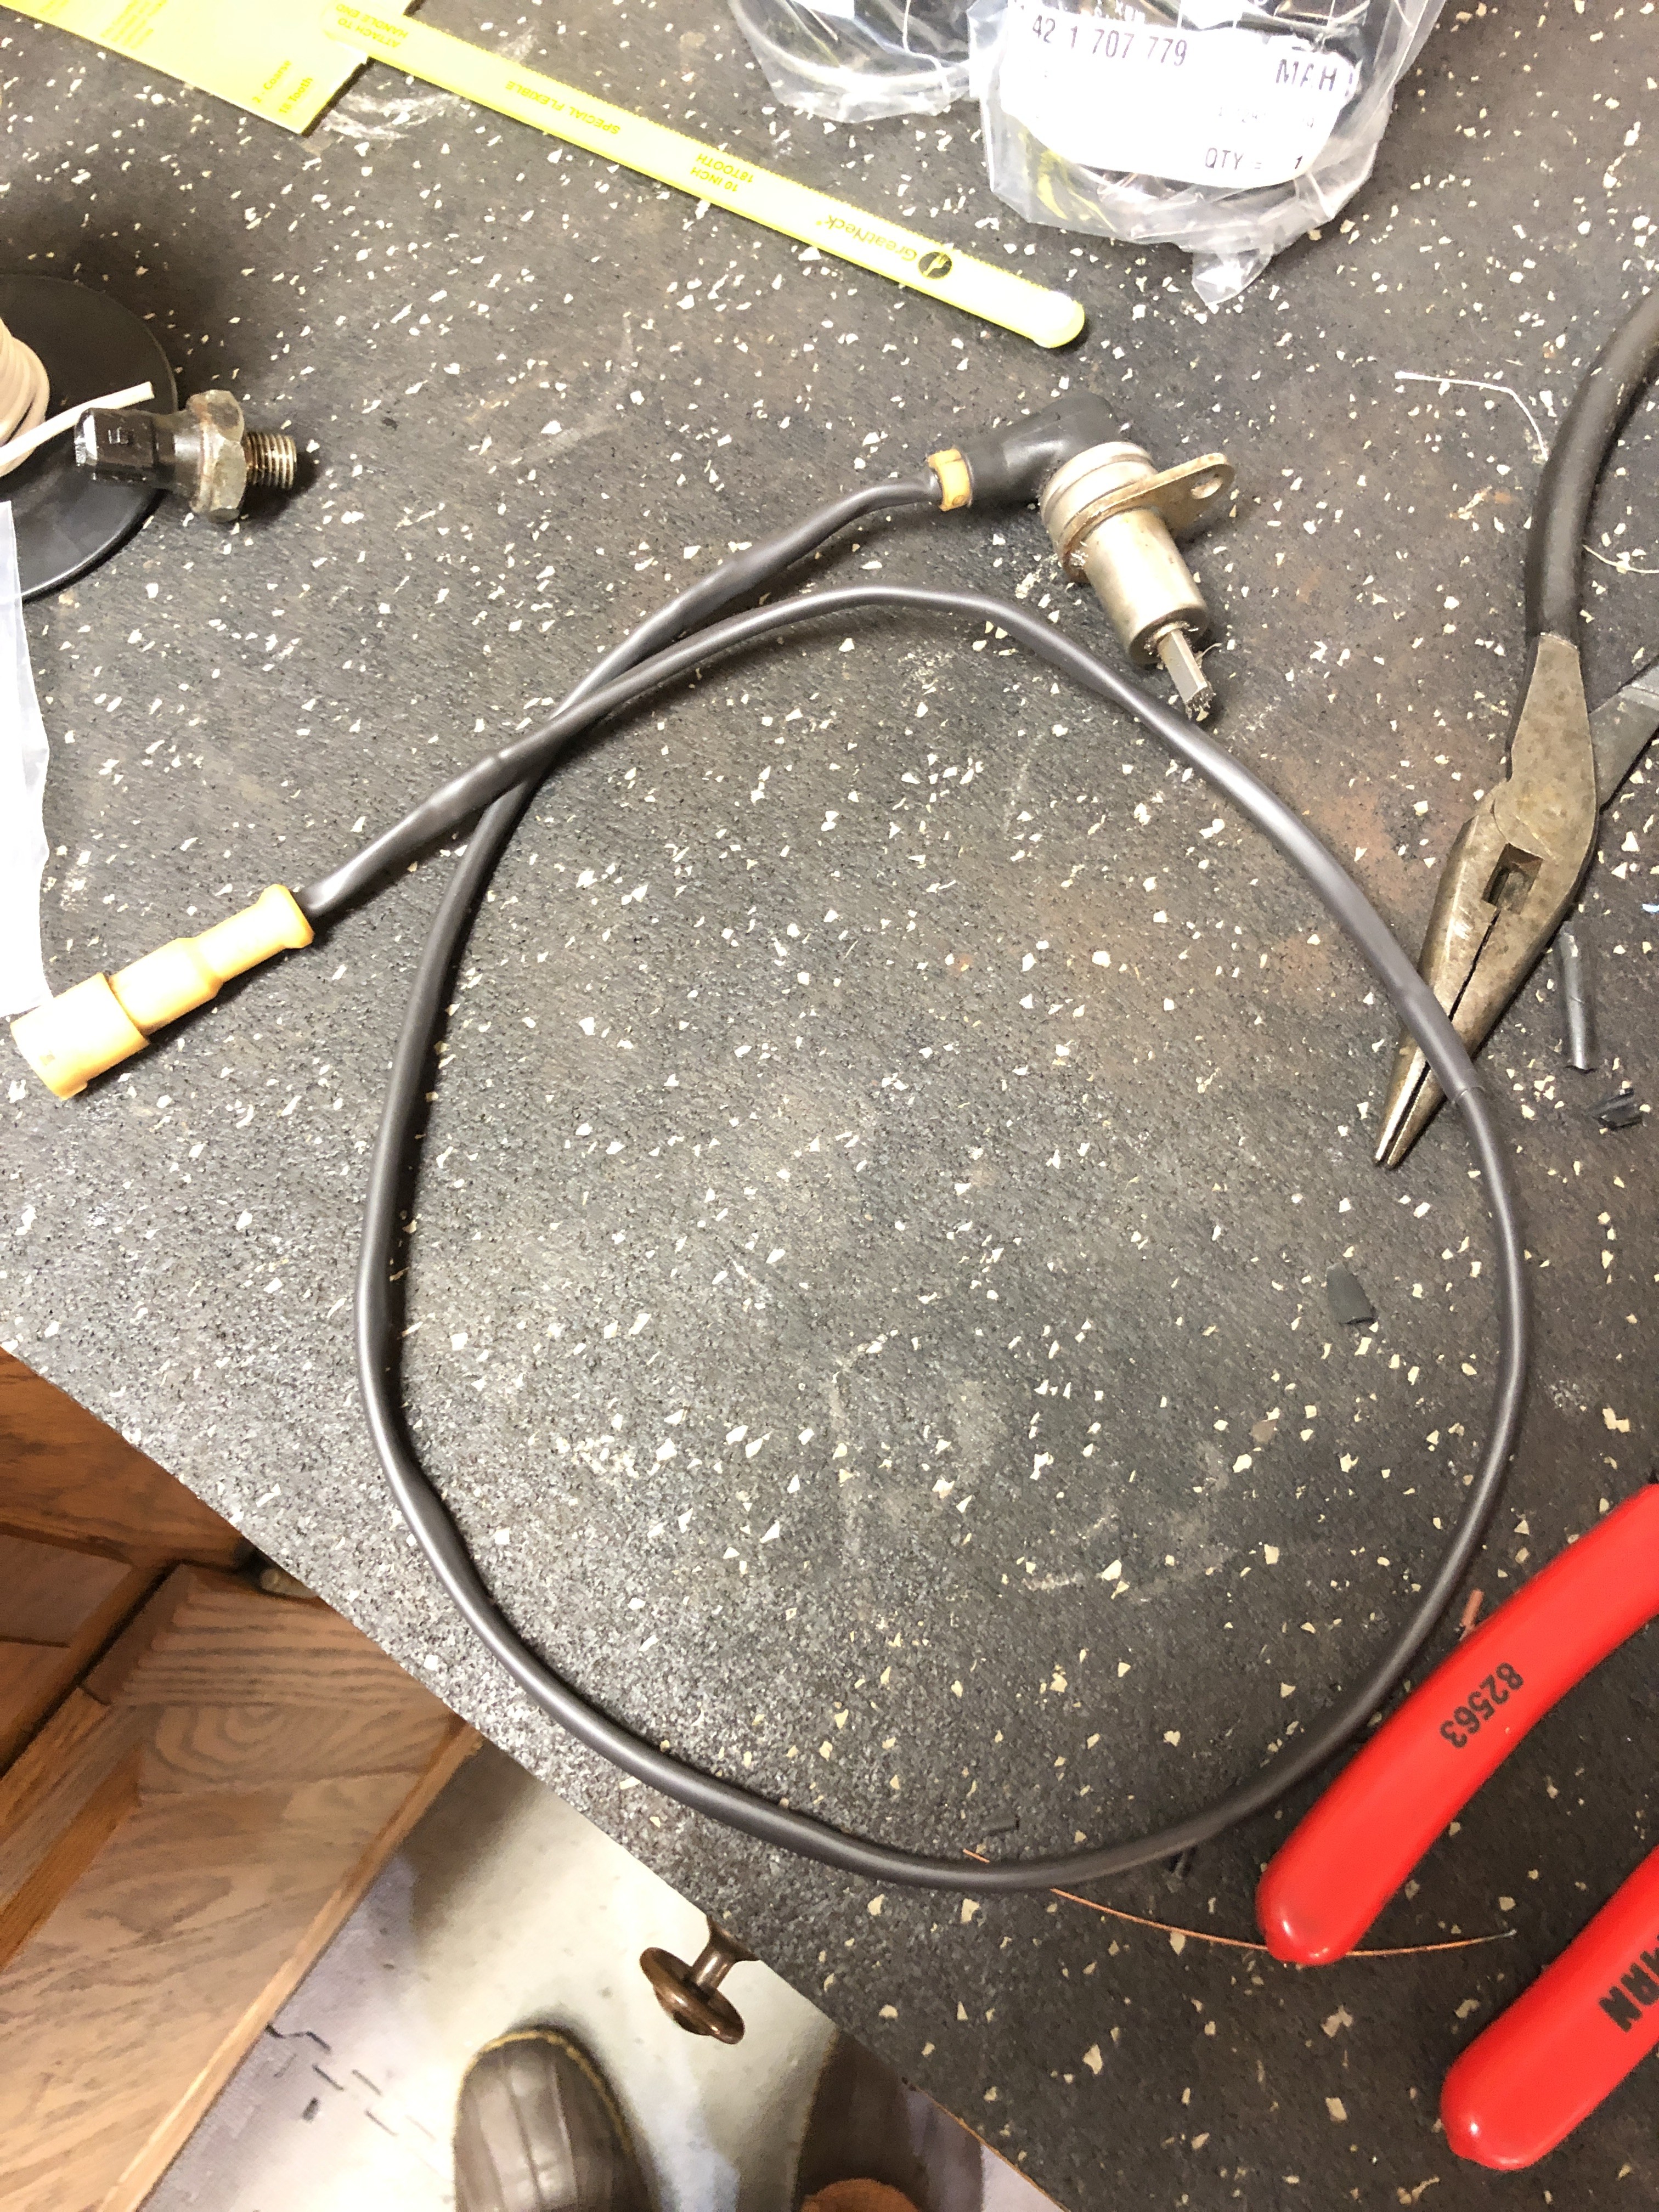
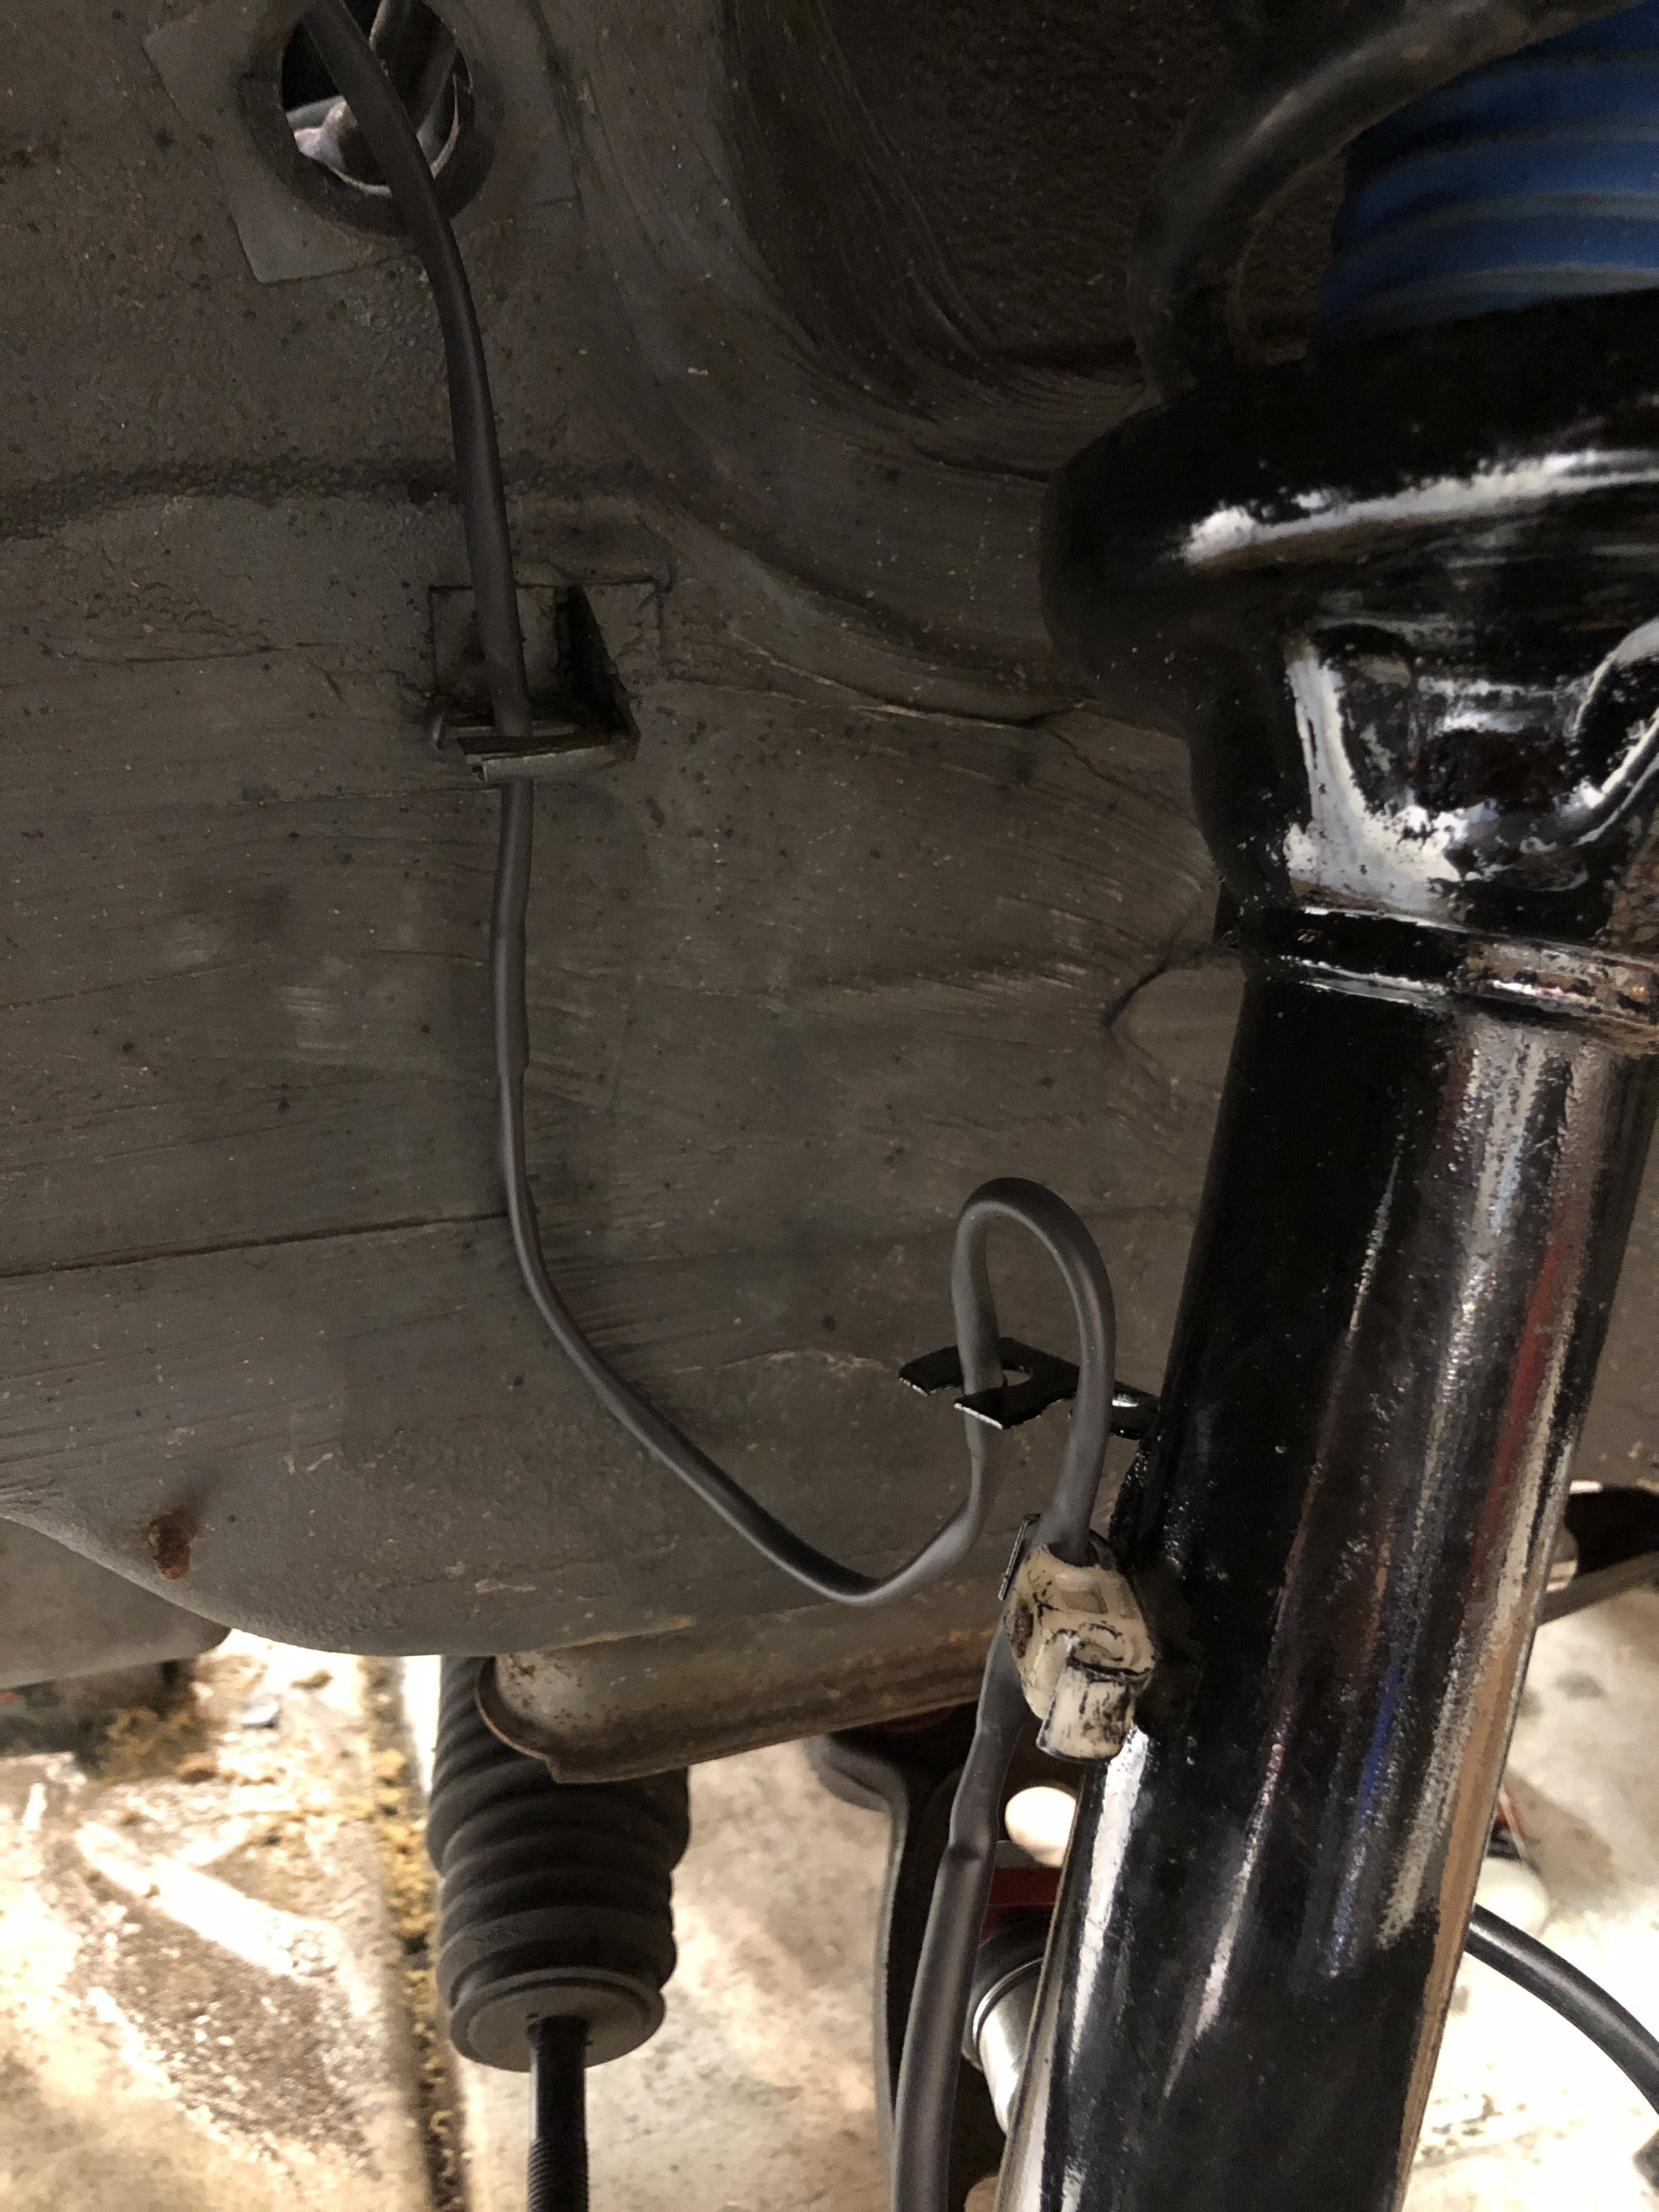
                                  Both ball joint threads ended up being trash so it has new outer ball joints. Most other stuff done isn’t really noticeable - brake line to the rear is in, control arms back in, interior back together for the most part. 

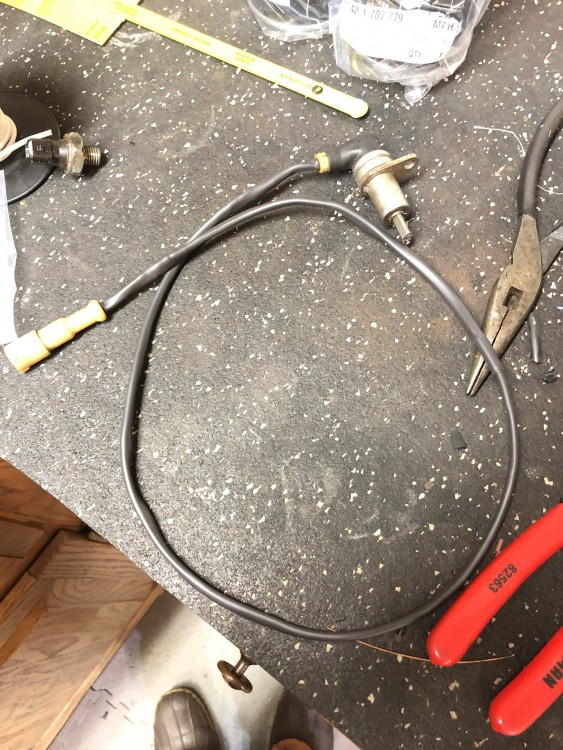
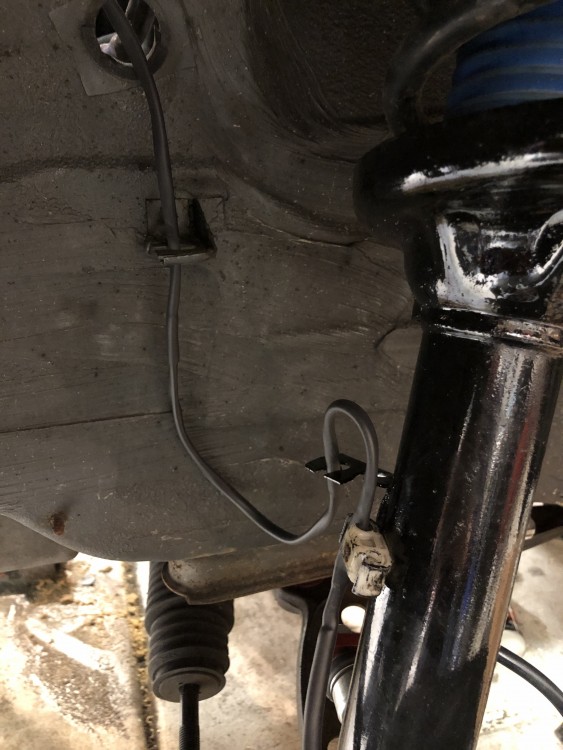
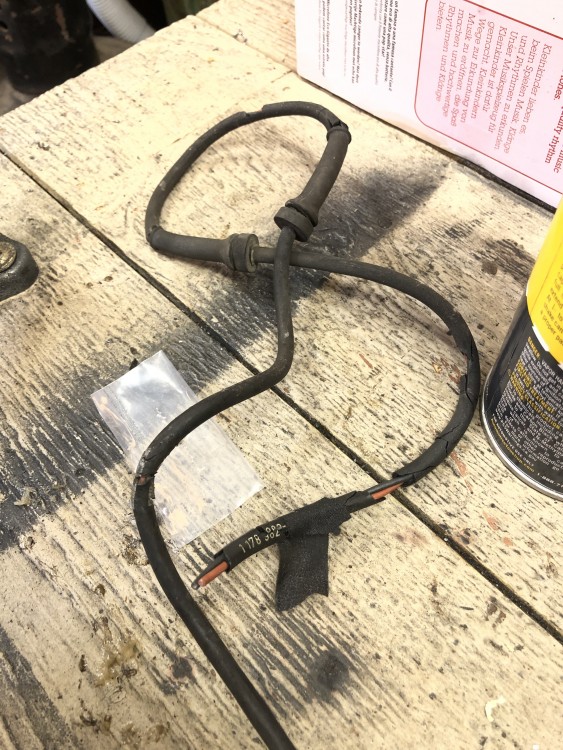
                                  Both front abs sensor harnesses were pretty cracked up and falling apart so I fixed those. 
                                  F84B752F-725C-4F70-90B5-CD5AD71B35D7.jpeg

                                  5FBD6830-FC90-47FA-B721-AE53B081412D.jpeg

                                  92F9514B-A99B-4377-8100-DBFA22E925BC.jpeg

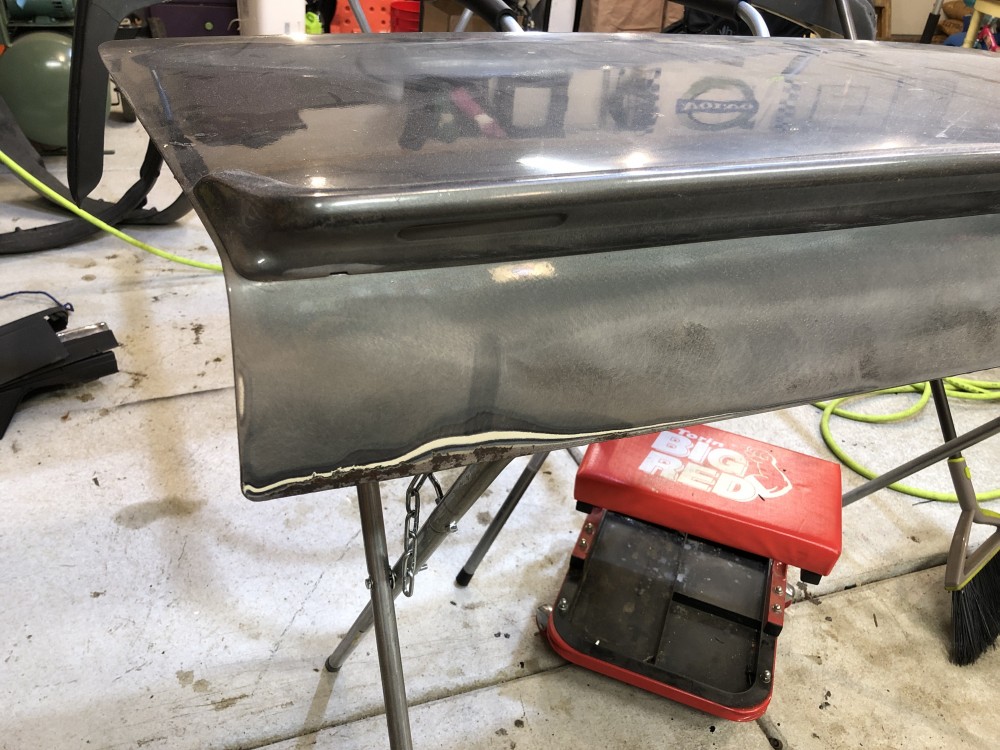
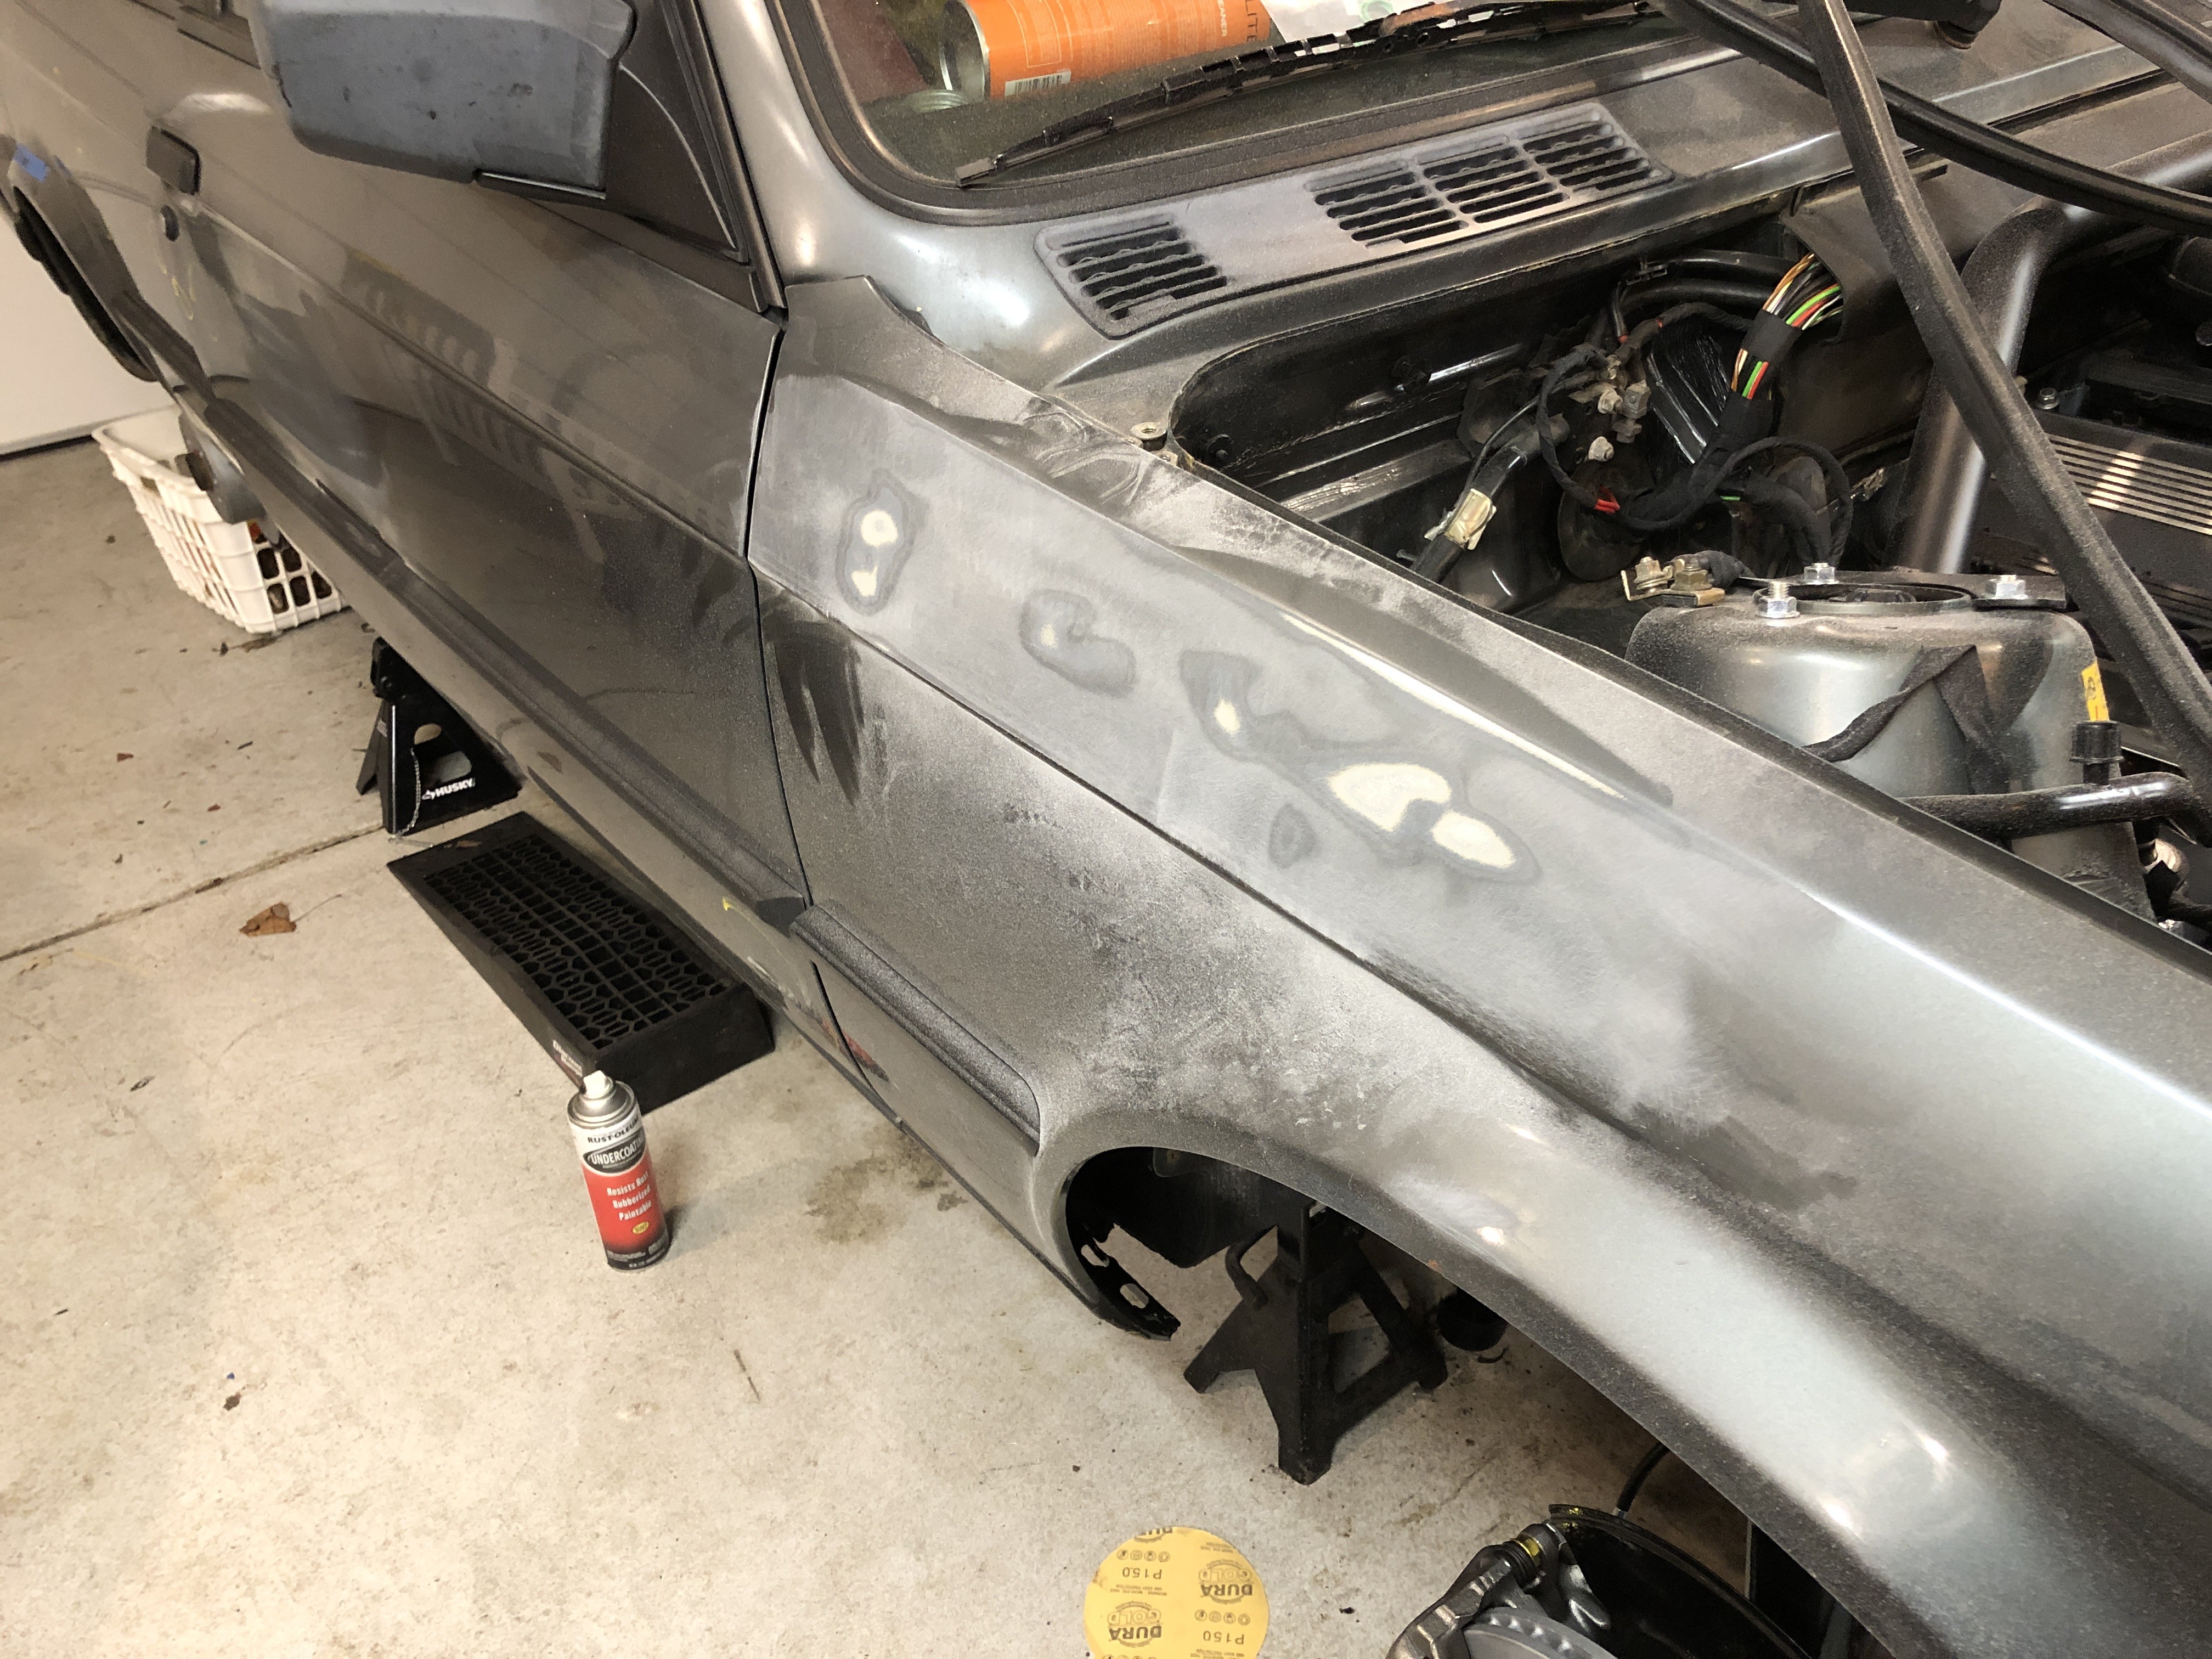
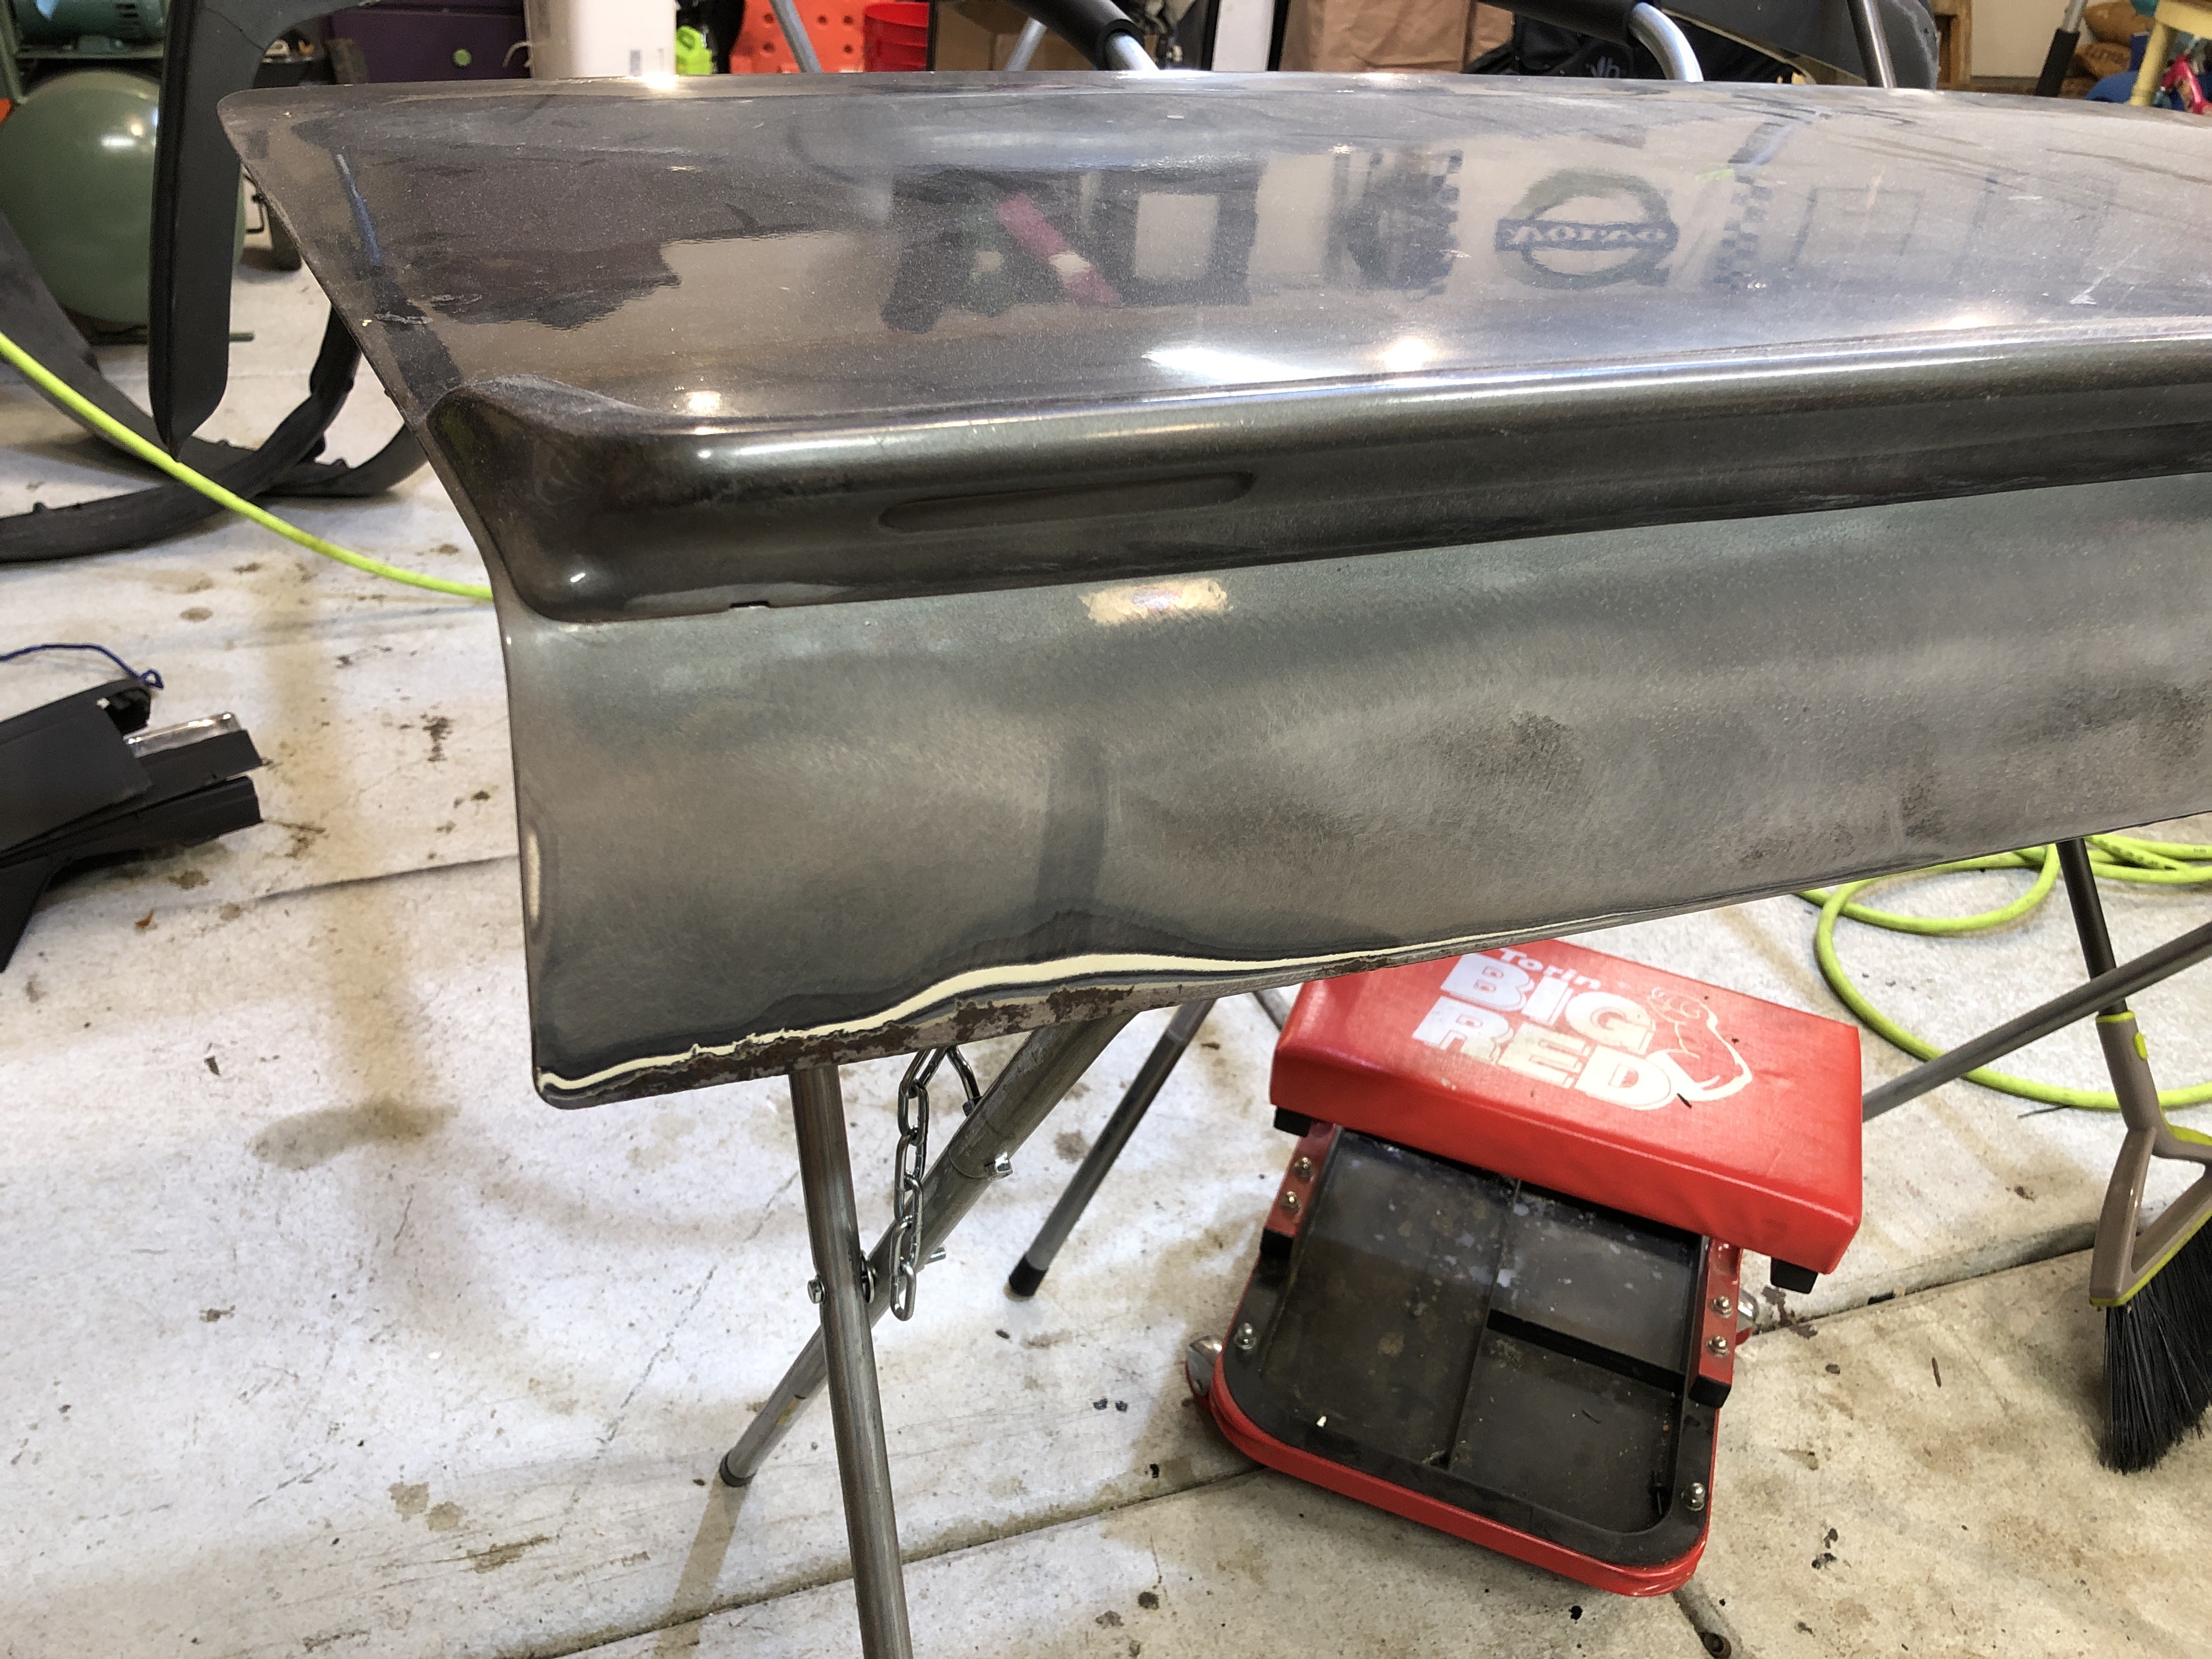
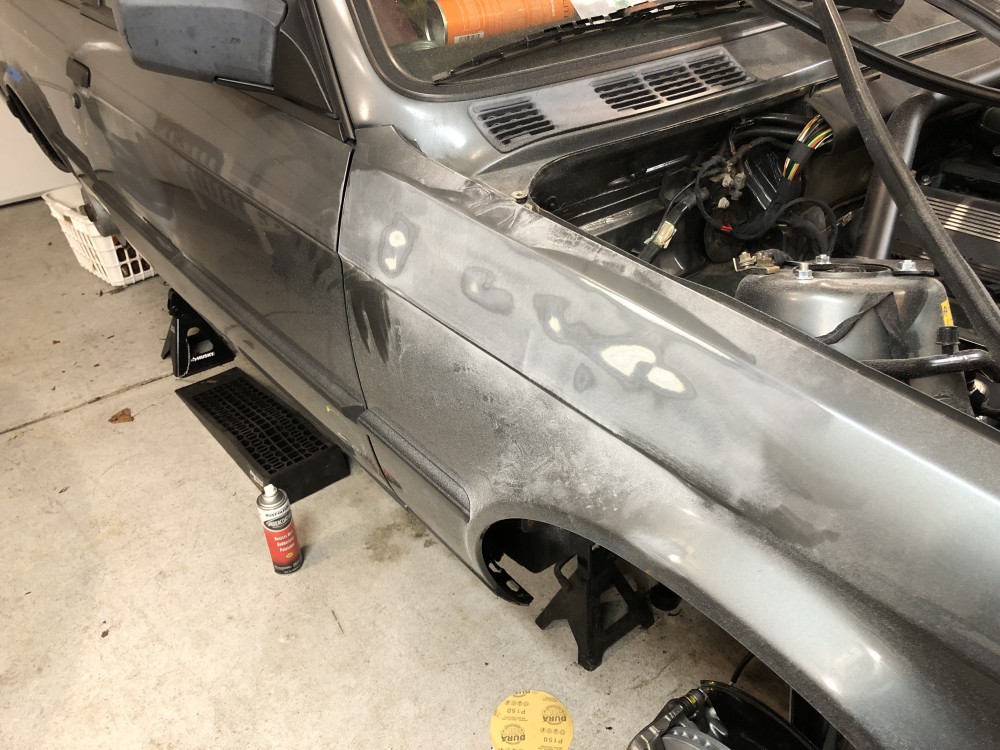
                                  And then I started playing with the sander tonight to get the hang of it. Not really sure what I was expecting from it, but using it was very comfortable and I’m excited to move on to the next phase of the project. 
                                  2FB9C721-FC32-4028-BD20-7DC95E855209.jpeg

                                  551DAB57-3EF7-4582-B982-70520CCA8105.jpeg

                                  1 Reply Last reply
                                  0
                                  • B
                                    B
                                    B C
                                    wrote on last edited by
                                    #758

                                    Is a respray next?

                                    1 Reply Last reply
                                    0
                                    • G
                                      G
                                      gilber33
                                      wrote on last edited by
                                      #759

                                      That’s the plan. Really no going back now that I’ve messed up the fender and door. I’m going to go around first and sand down the small dents so I can add a little filler to smooth them out. But up next I will be removing trim from the car, mirrors, taping off some edges, and masking off the engine bay to keep the dust out of it. 

                                      The new compressor setup did a pretty good job keeping up. I won't be able to sand non-stop, but it seemed that it would keep up while taking normal breaks - i.e. readjusting, changing sandpaper, moving to a new spot. 

                                      I'm doing this late at night, so I'm not sure how loud it is outside my garage. With it being fully insulated, I assume the sound is carrying to intensely to the neighbors' house with the outside ambient sound. At the same time, this is payback for my neighbor's stupid diesel super-duty the he parks in his backyard right next to our house that he needs to let idle for 17 hours before he drives it anywhere.

                                      1 Reply Last reply
                                      0
                                      • The Full BananaT
                                        The Full BananaT
                                        The Full Banana
                                        wrote on last edited by
                                        #760

                                        Extra bonus points if you put a rubber grommet in each of the ABS wire brackets to secure the wire and prevent rubbing through the heatshrink.

                                        Tom - I have a few BMWs, an overworked Volvo 242, and now a YouTube channel called Drive, Revive, Tinker

                                        1 Reply Last reply
                                        0
                                        • G
                                          G
                                          gilber33
                                          wrote on last edited by
                                          #761

                                          The Full Banana said:

                                          Extra bonus points if you put a rubber grommet in each of the ABS wire brackets to secure the wire and prevent rubbing through the heatshrink.

                                          Yup. That will be done whenever I order a grommet kit.

                                          1 Reply Last reply
                                          0

                                          Hello! It looks like you're interested in this conversation, but you don't have an account yet.

                                          Getting fed up of having to scroll through the same posts each visit? When you register for an account, you'll always come back to exactly where you were before, and choose to be notified of new replies (either via email, or push notification). You'll also be able to save bookmarks and upvote posts to show your appreciation to other community members.

                                          With your input, this post could be even better 💗

                                          Register Login
                                          Reply
                                          • Reply as topic
                                          Log in to reply
                                          • Oldest to Newest
                                          • Newest to Oldest
                                          • Most Votes


                                          • Login

                                          • Don't have an account? Register

                                          • Login or register to search.
                                          Powered by NodeBB Contributors
                                          • First post
                                            Last post
                                          0
                                          • Categories
                                          • Recent
                                          • Tags
                                          • Popular
                                          • Users
                                          • Groups