 A
A
AsparagusMike
@AsparagusMike
Posts
-
the one and only e30 s52 engine swap -
the one and only e30 s52 engine swapVery long and over due update...
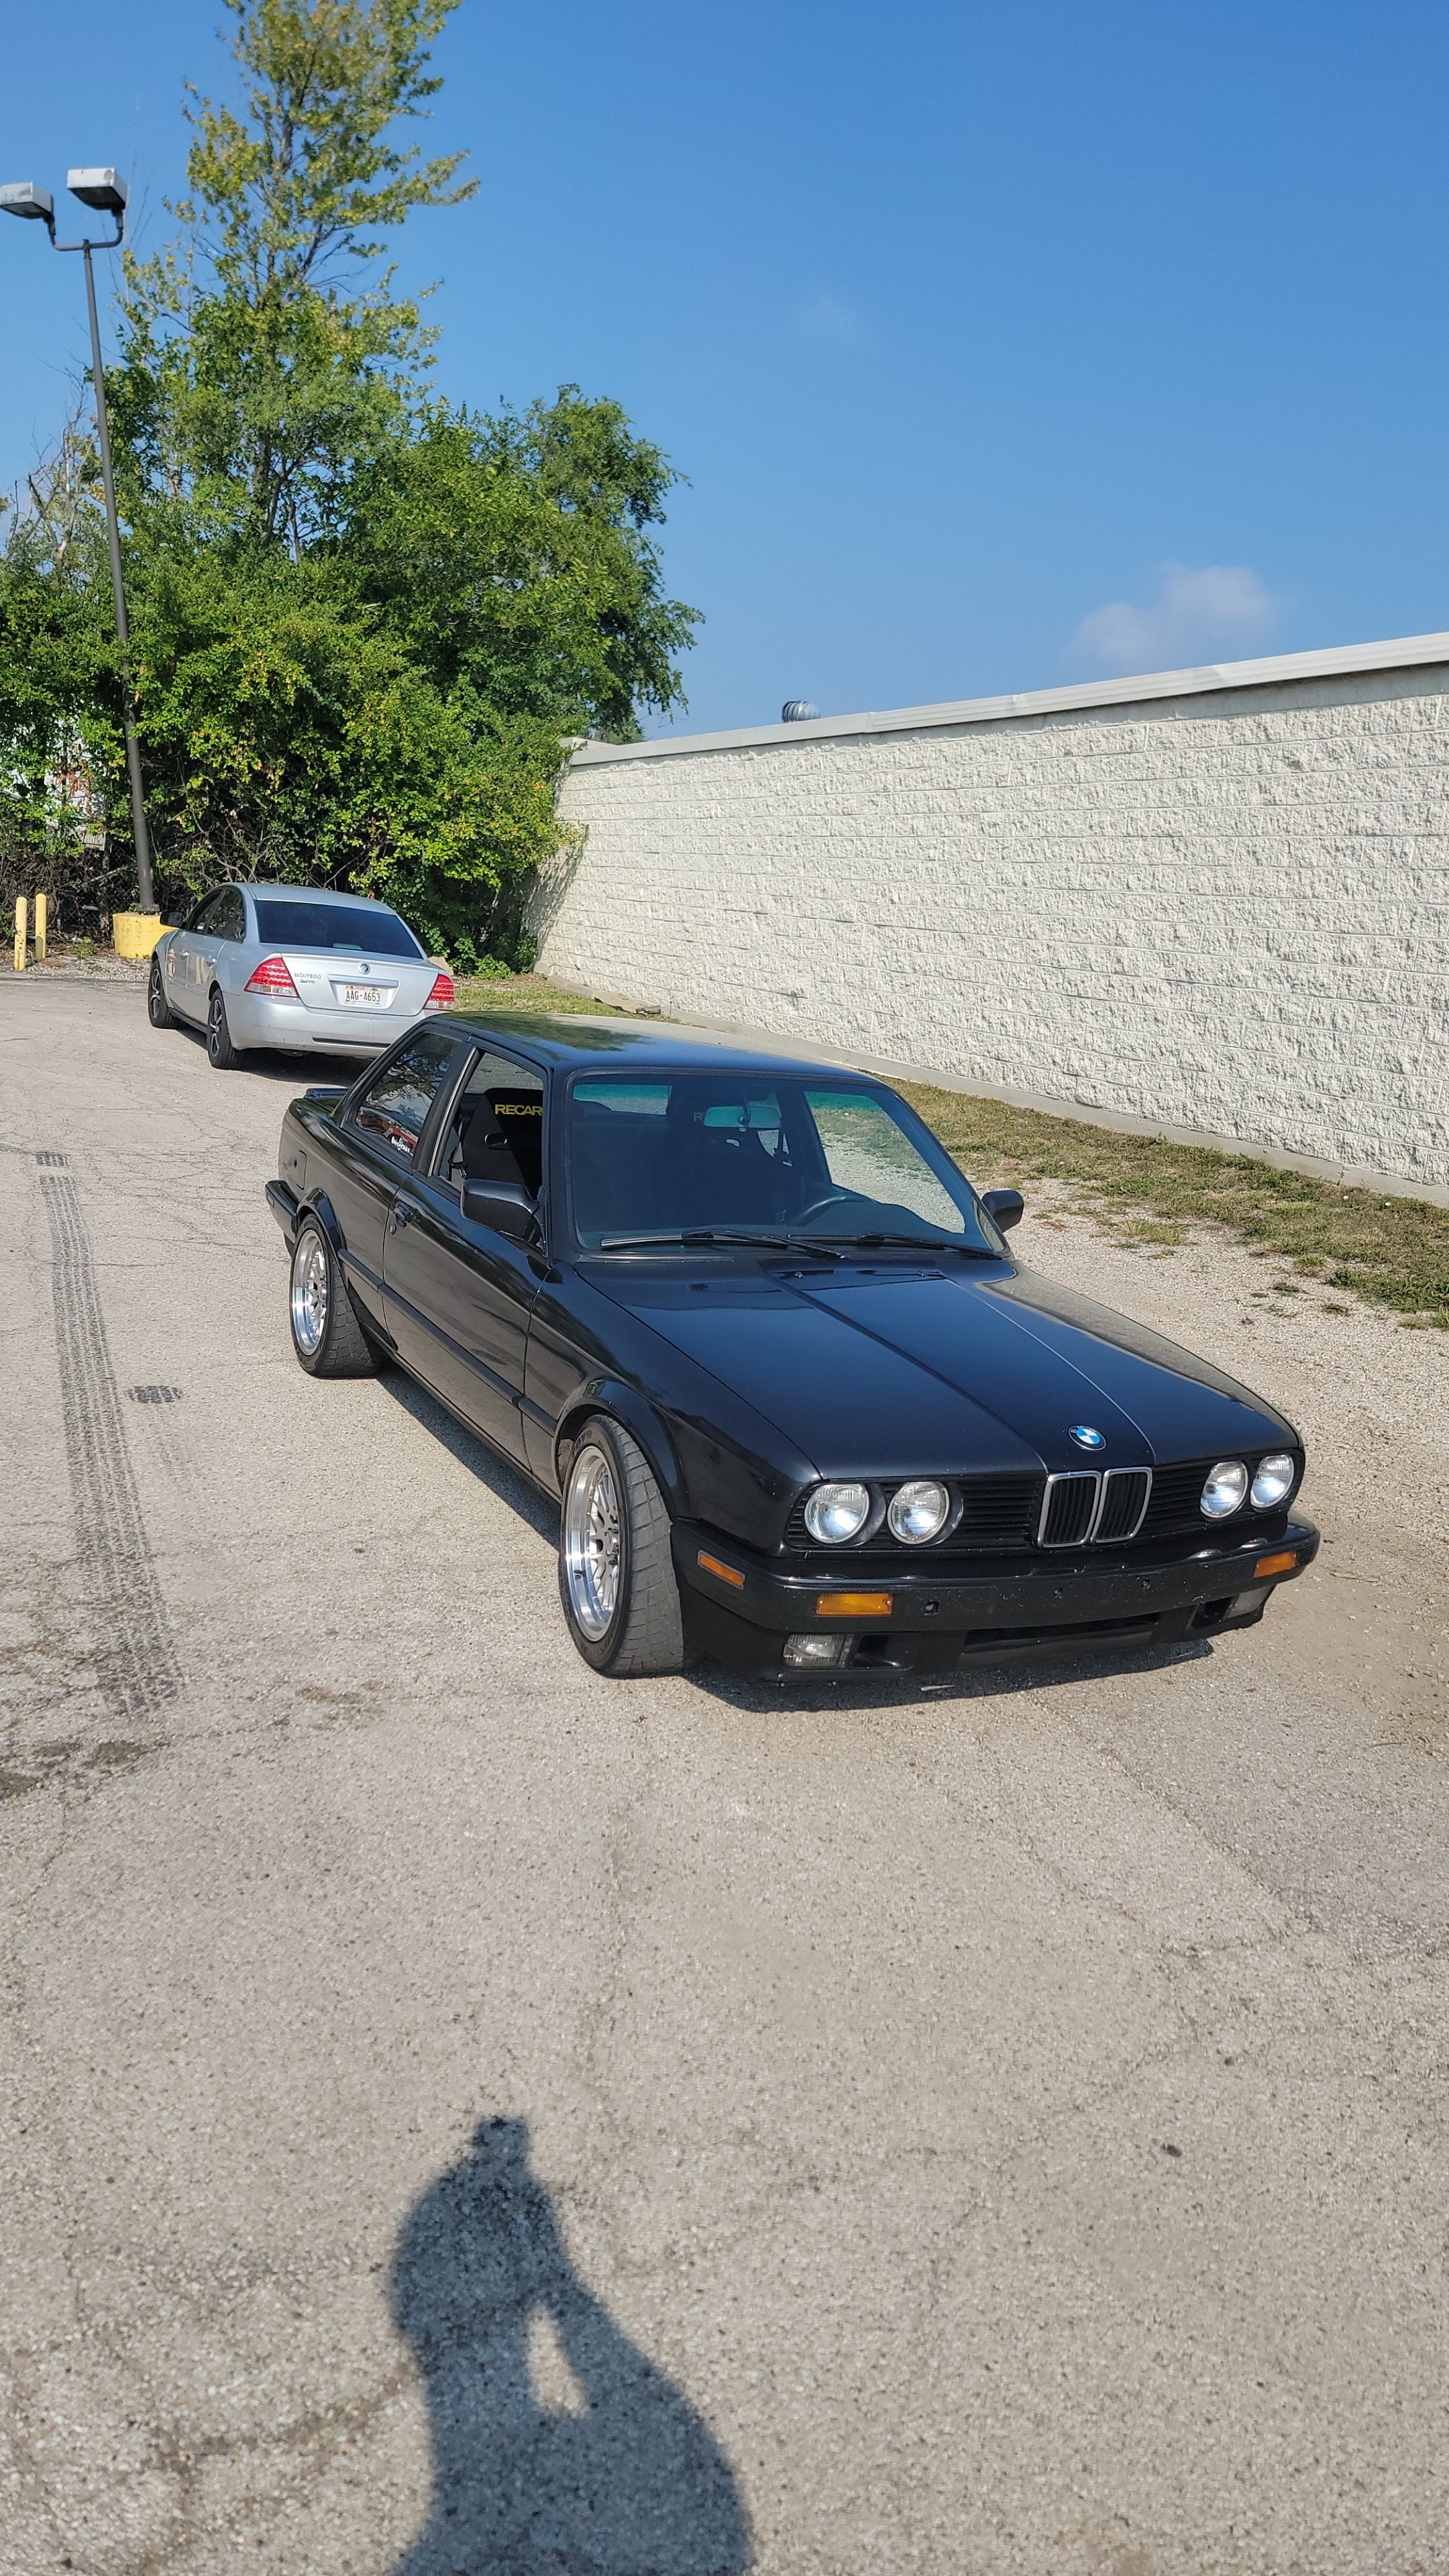
The last 2 months or so have been unbelievably fun with this car and its been exciting to see how competitive she can be against other considerably quick cars.
Over the month of May I took the car to a couple shows, local meets, and the occasional trips to Mexico. The car has been really good and for the most part has been running spectacular except for the occasional mishaps.
First off, guibo...
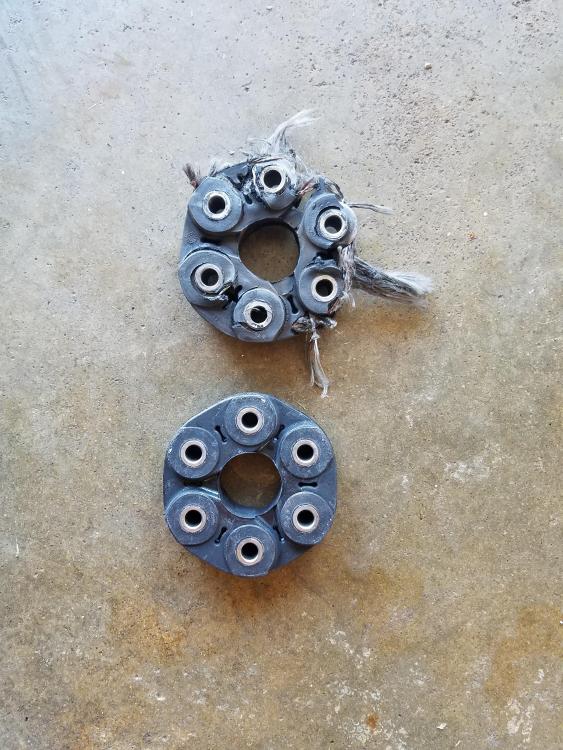
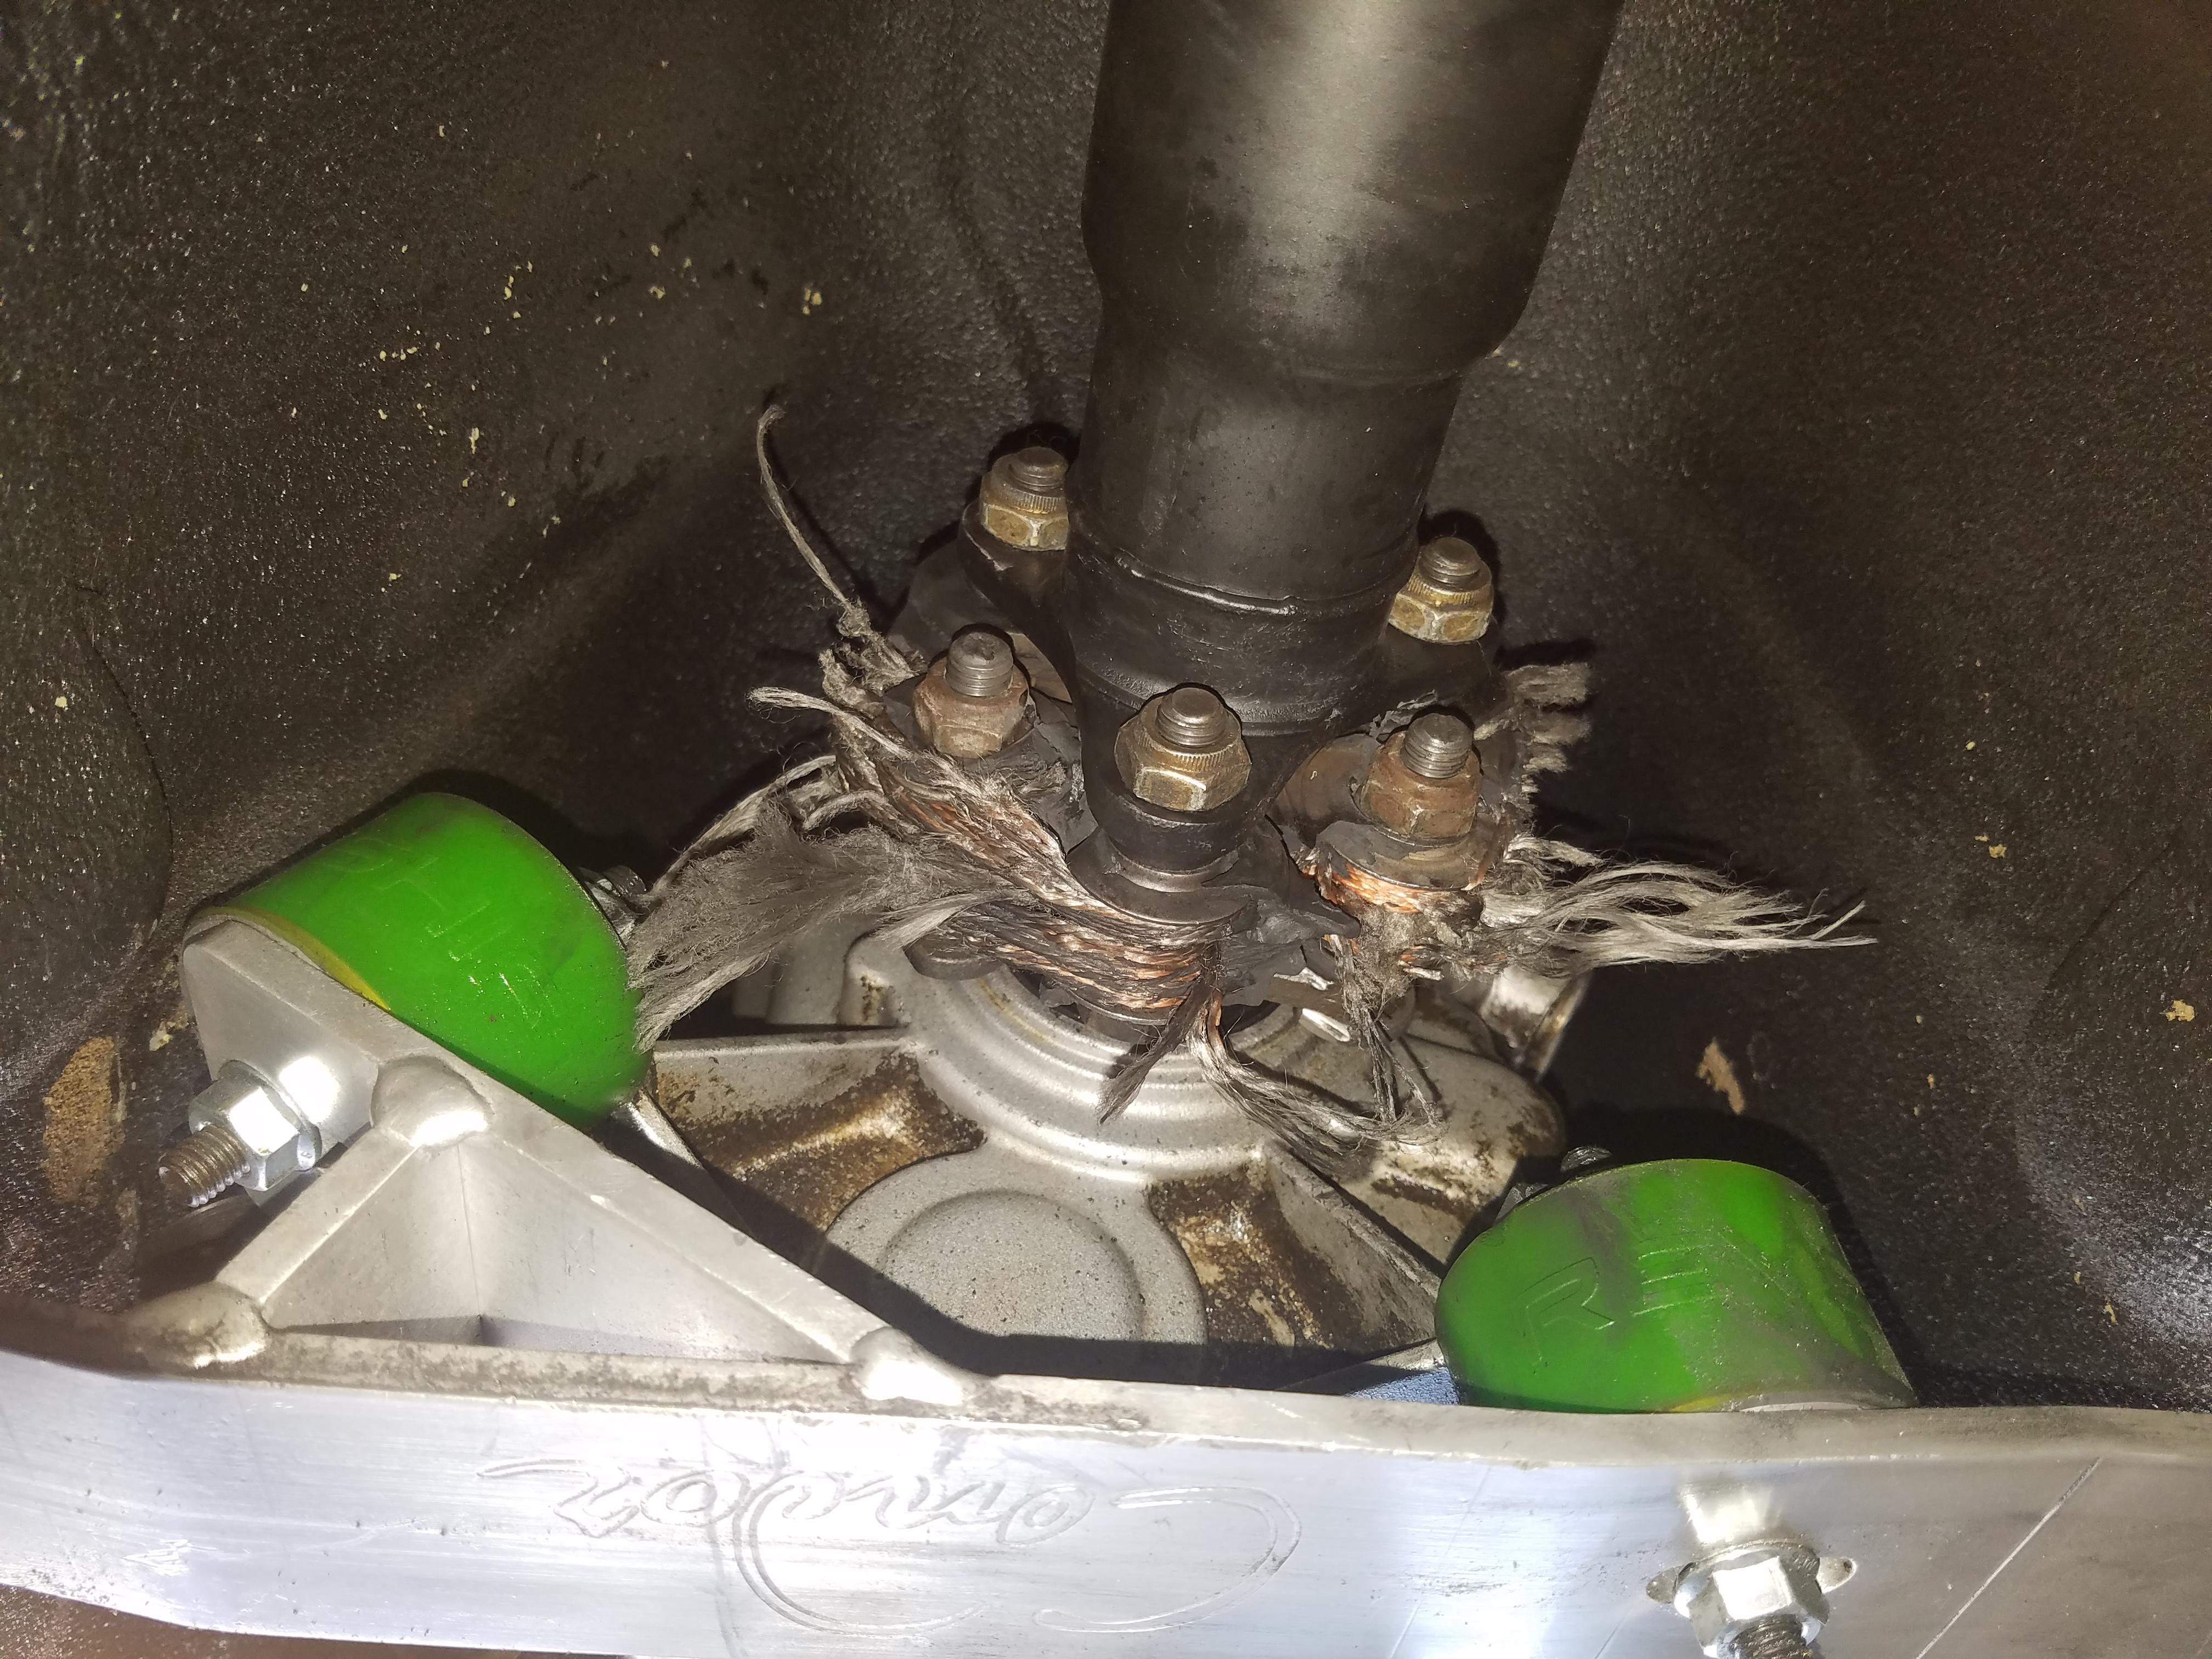
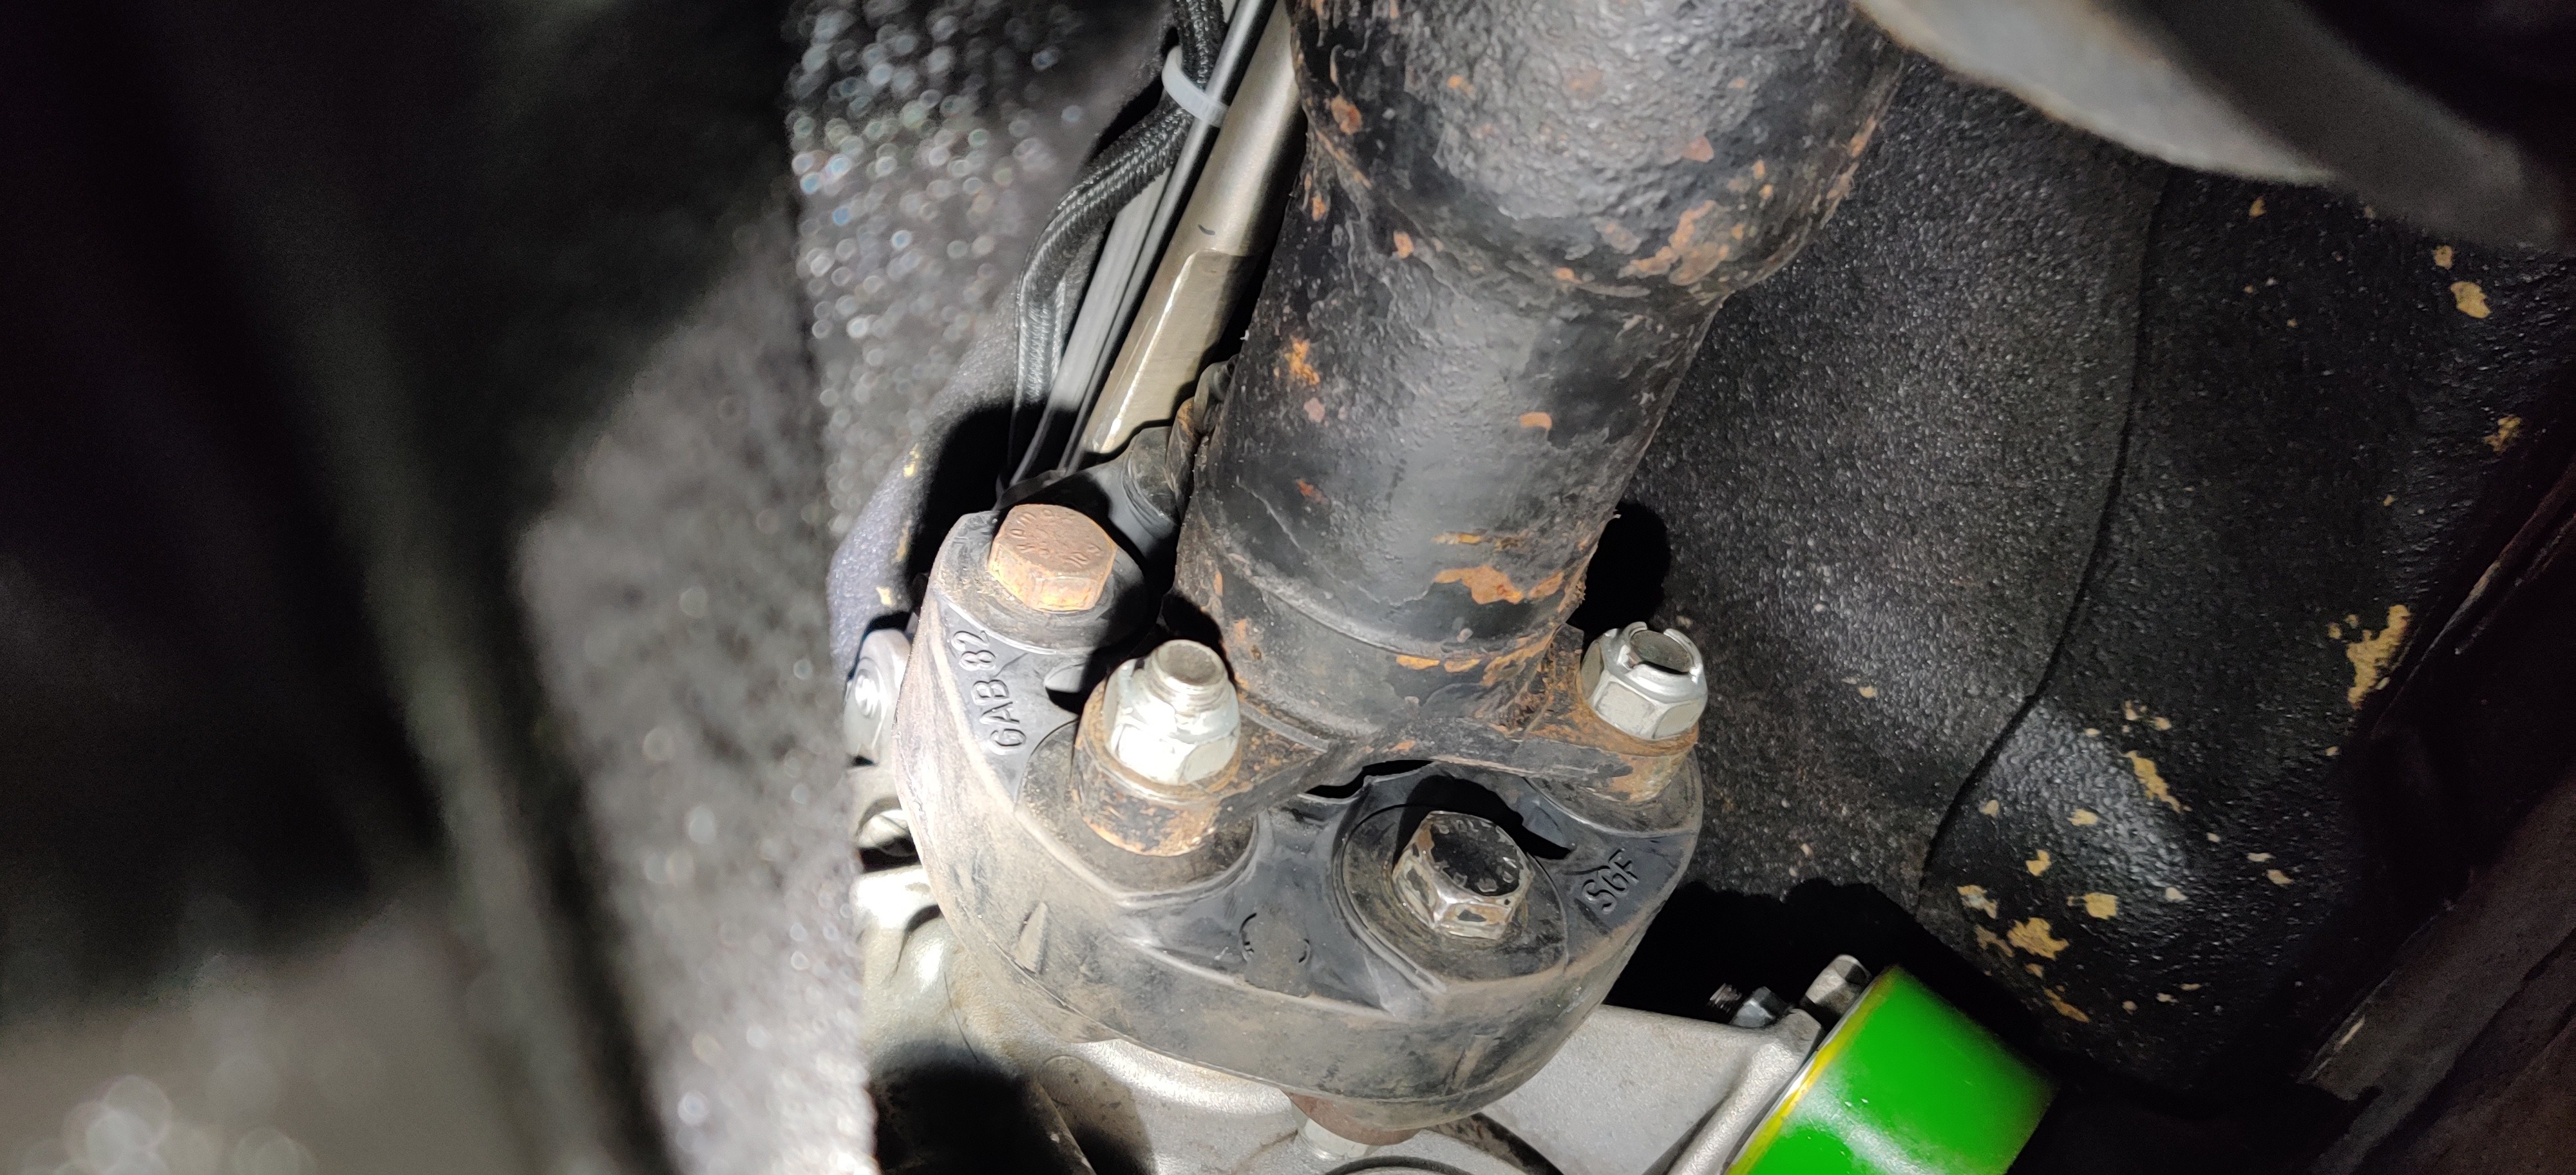
After about 2 weeks of driving the car I started noticing a lot of vibrations in 2nd and 3rd gear and knew something was up. At first it seemed like suspension so I did a shake down test and while doing this I came upon this.
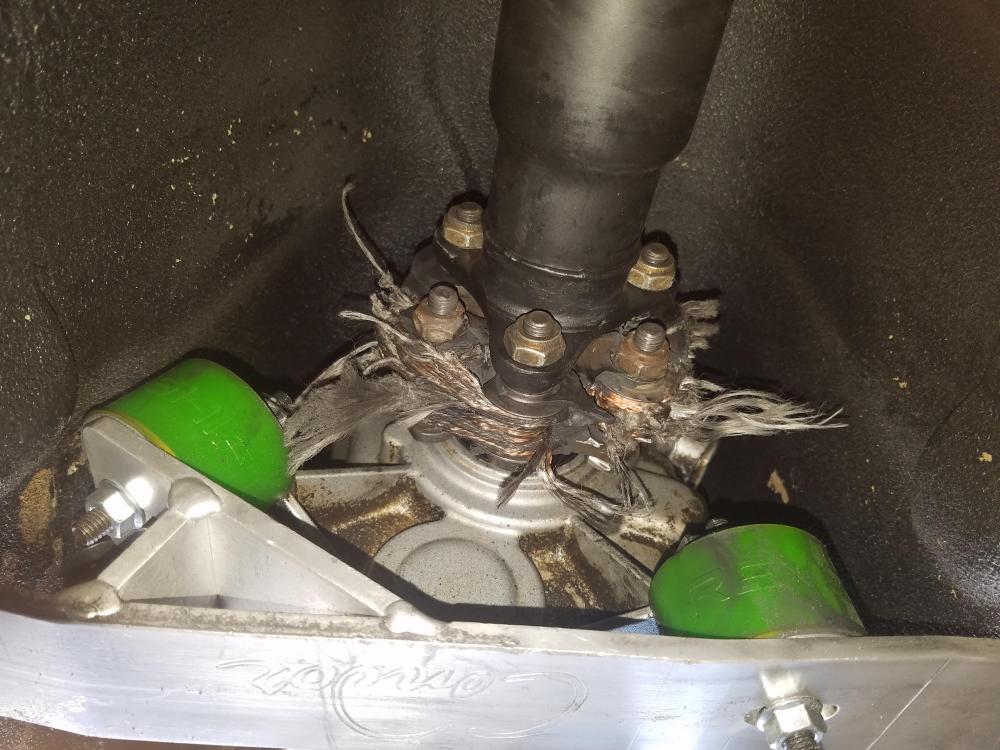
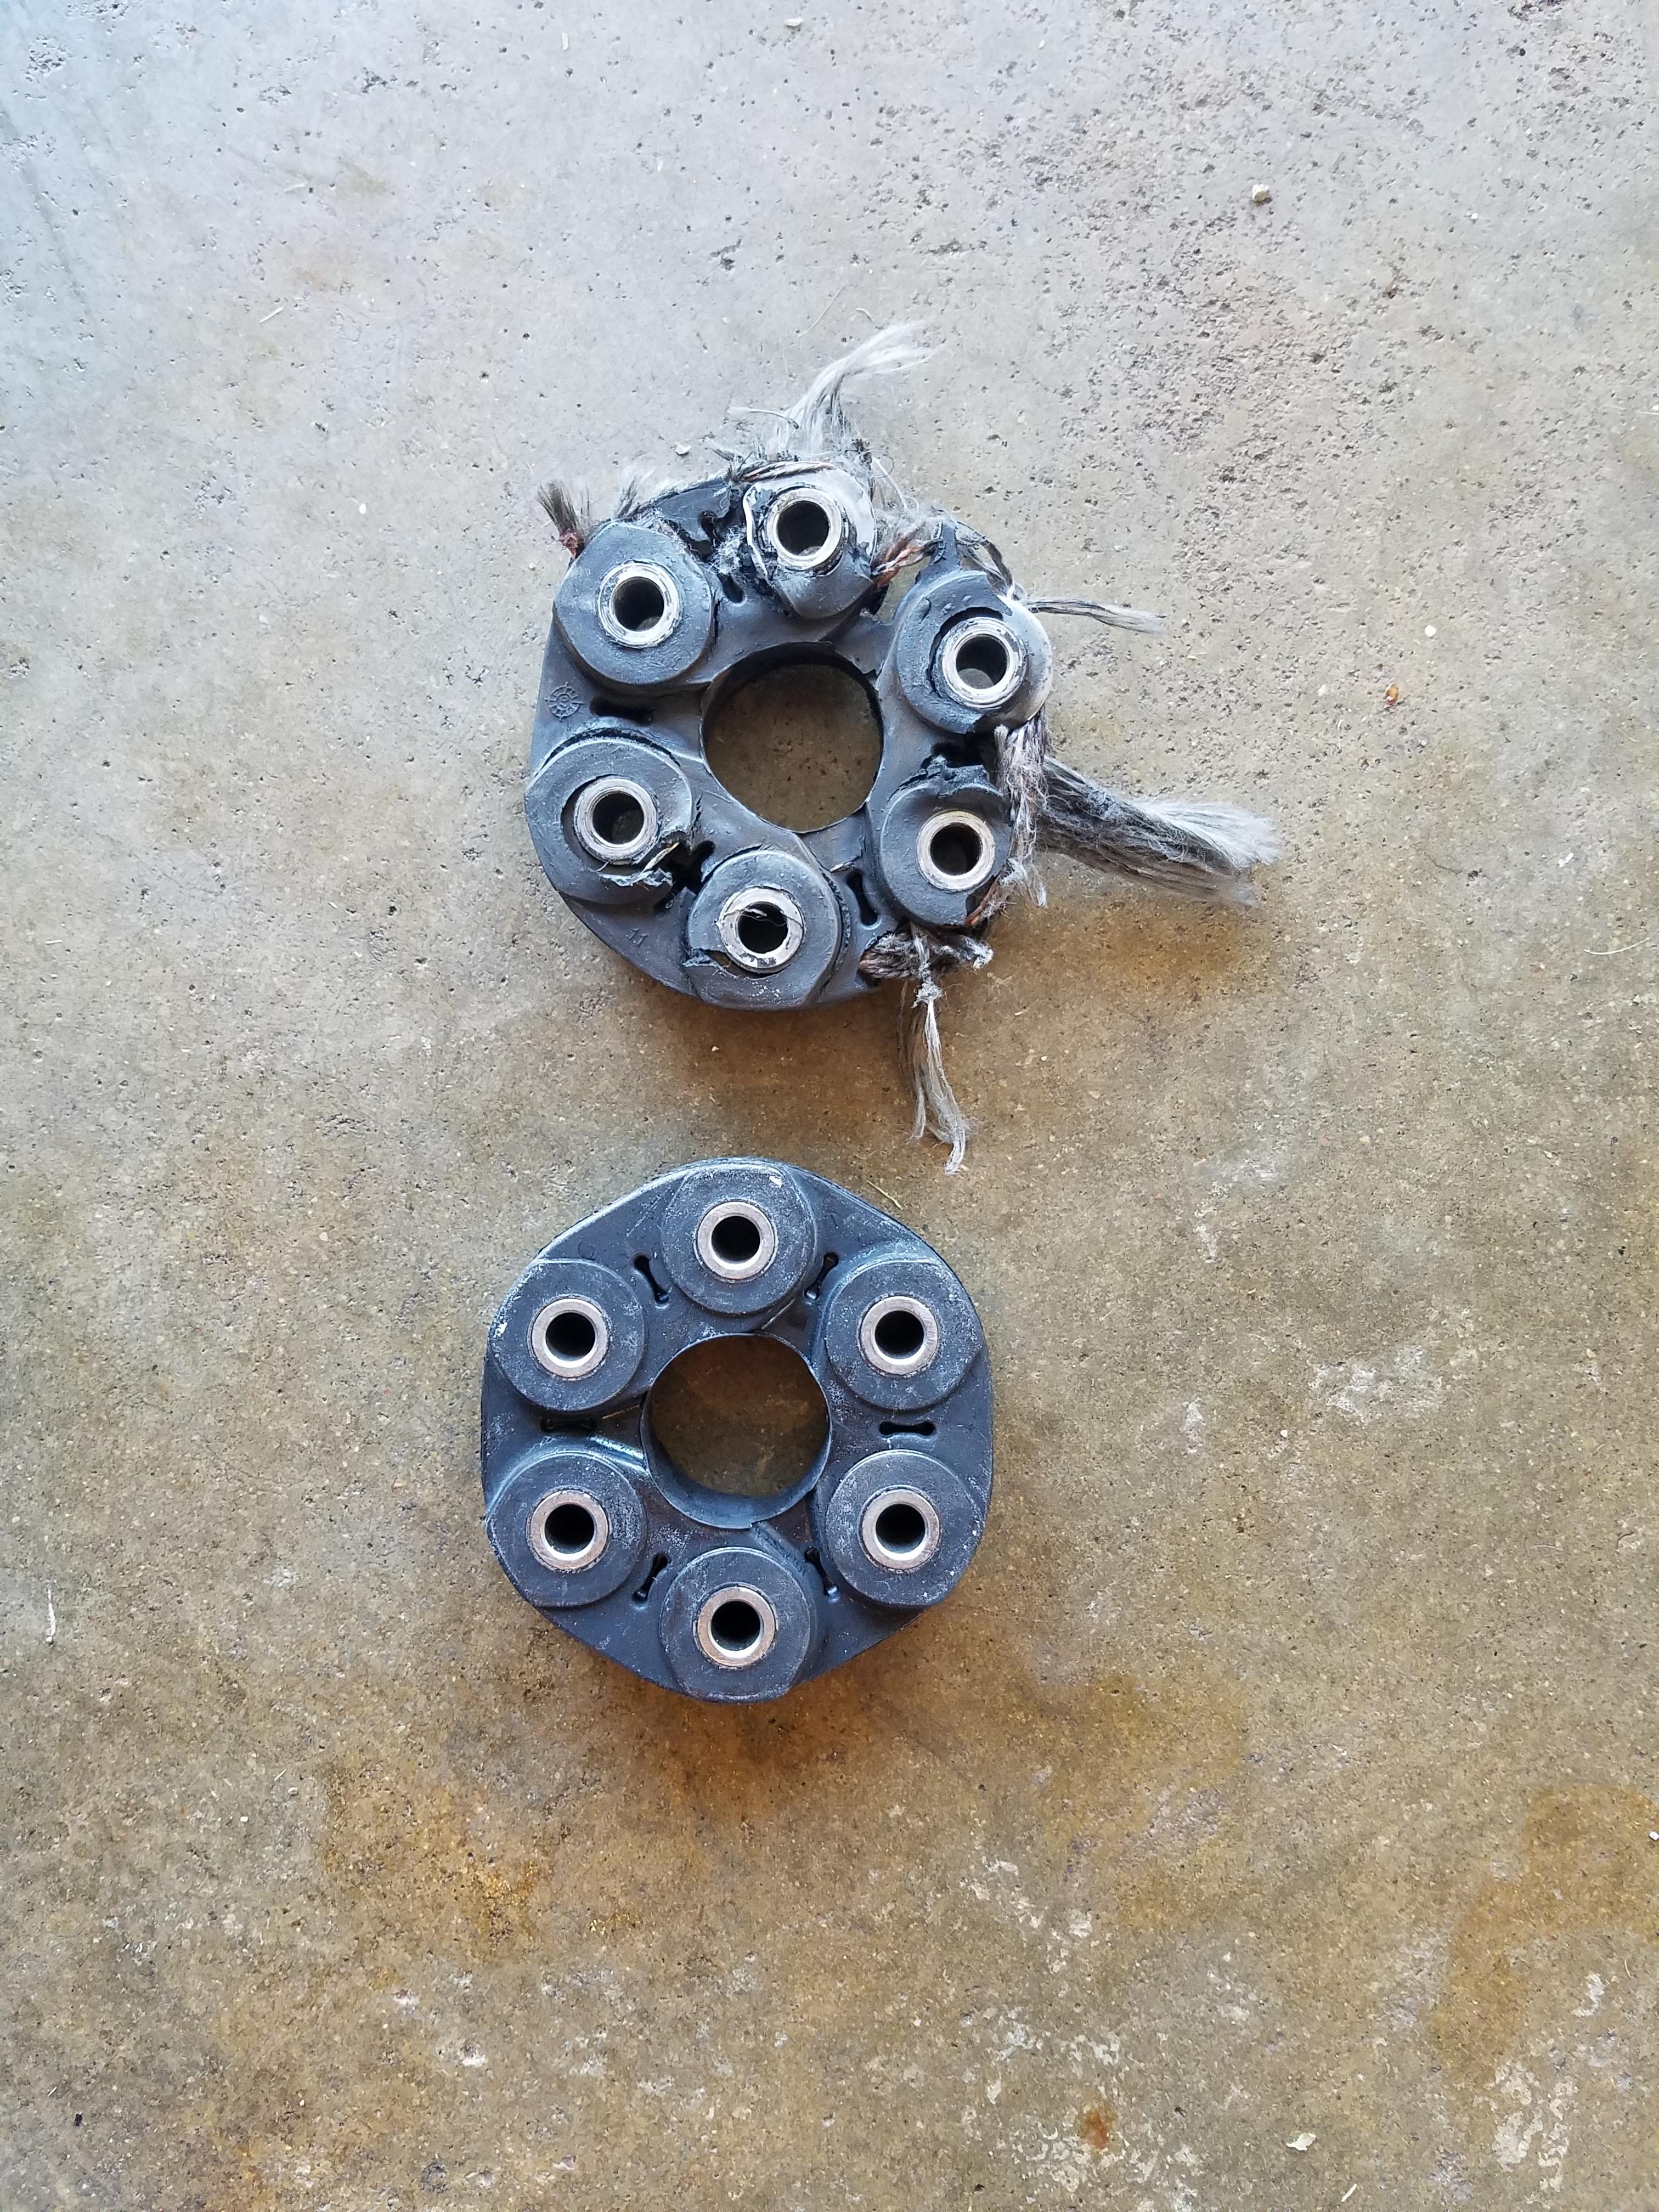
When I got the new reman'd driveshaft the guibo seemed alright but with the extra torque it didn't last long.
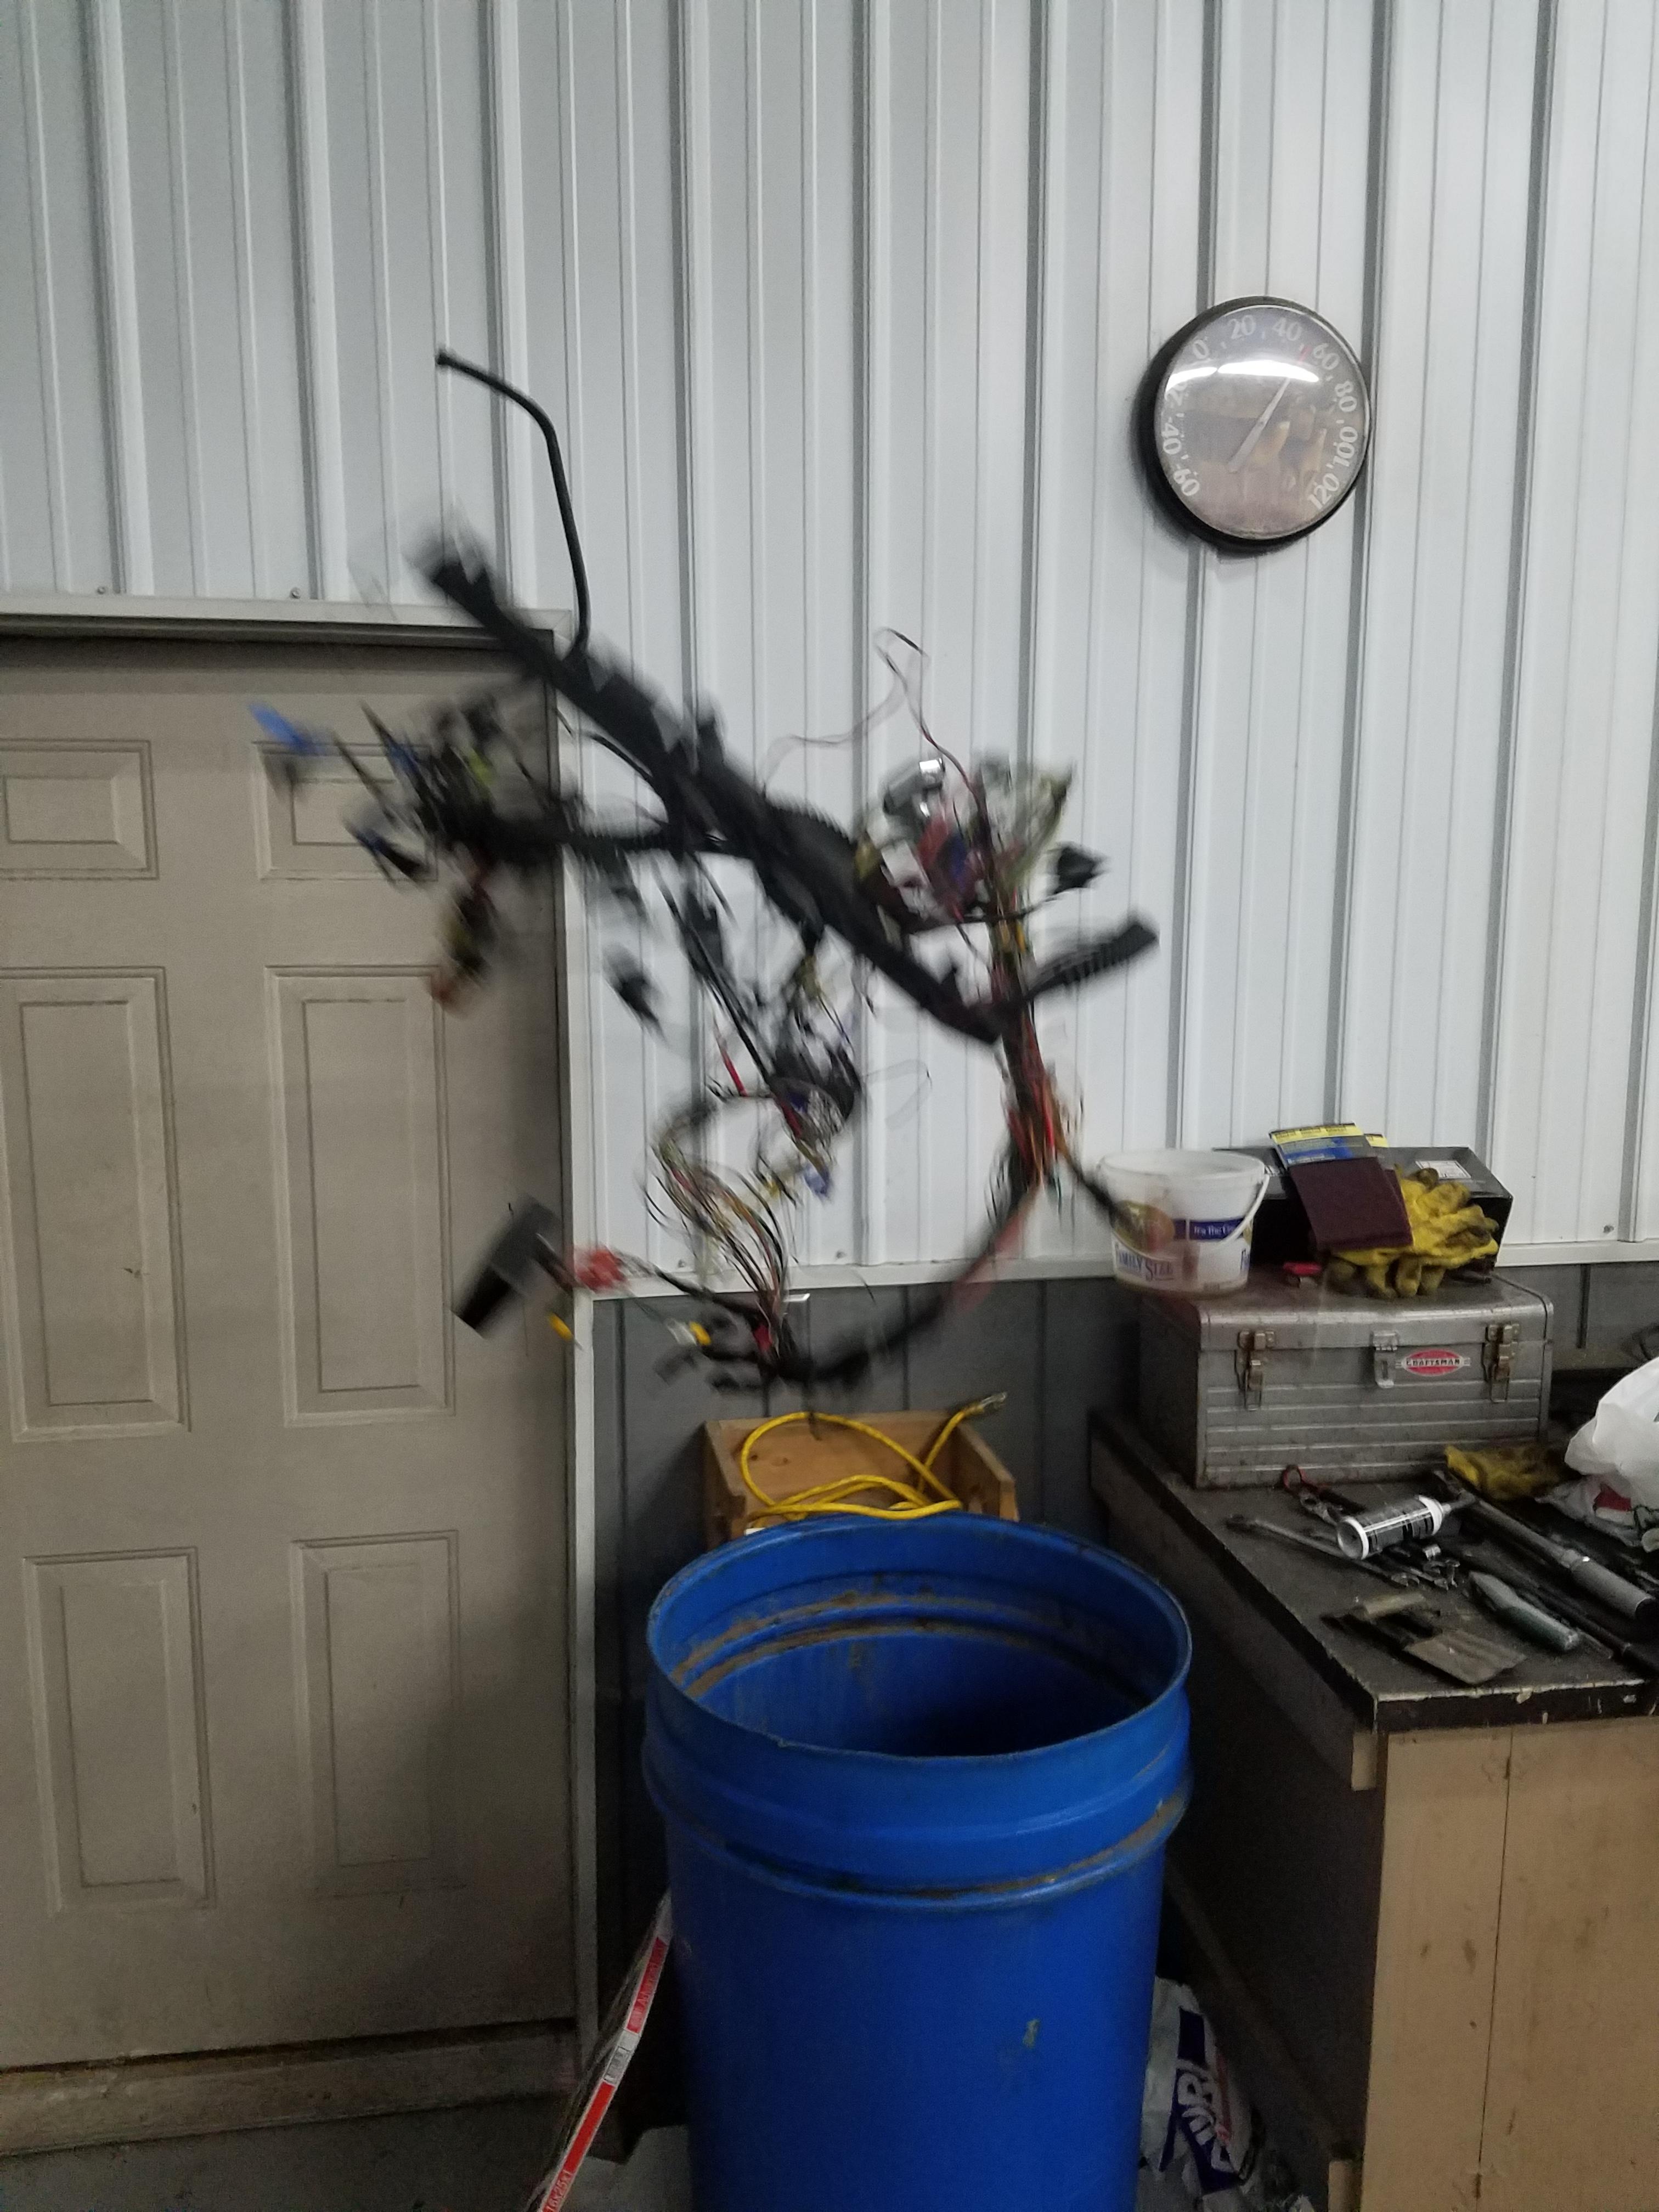
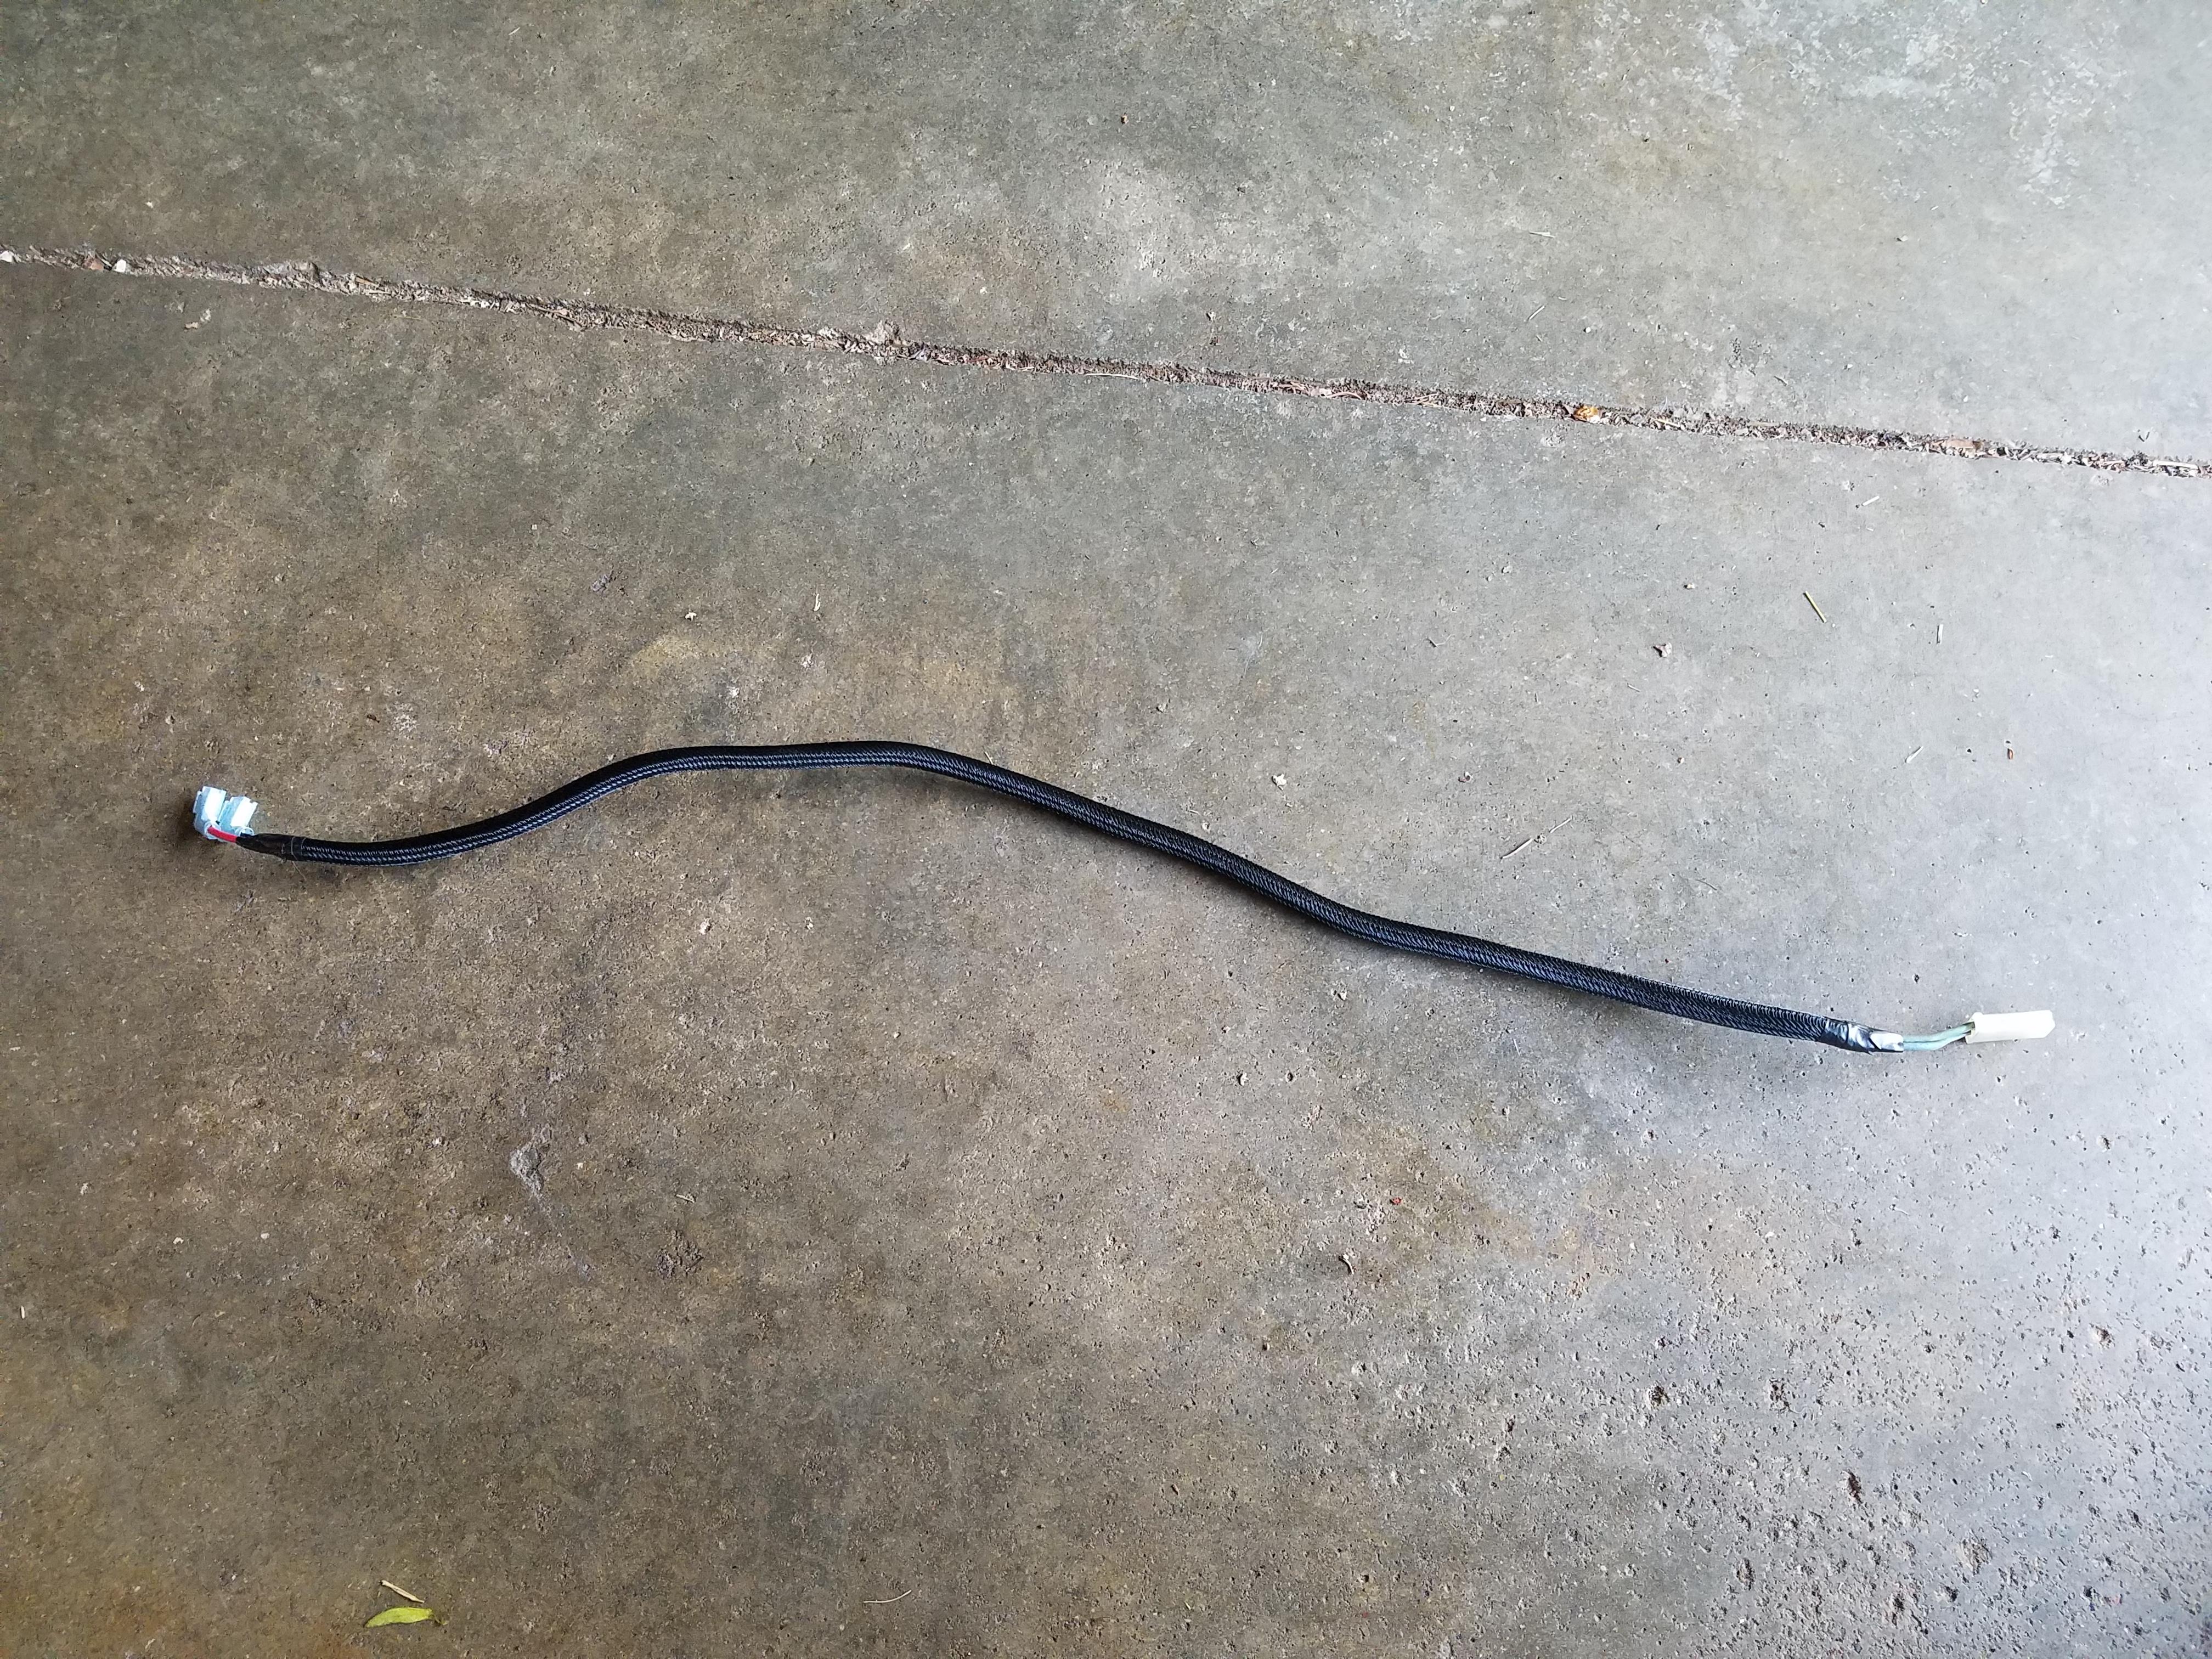
Not only did my guibo shred up quite badly but my reverse light wire wasn't tied up enough causing it to droop down resulting in it getting caught in the driveshaft and being ripped out leaving only some wire running to the connector by the shifter. Ended up having to make a new one which I wrapped up nicely above the trans where it should hopefully no longer have any interference with any more moving parts.
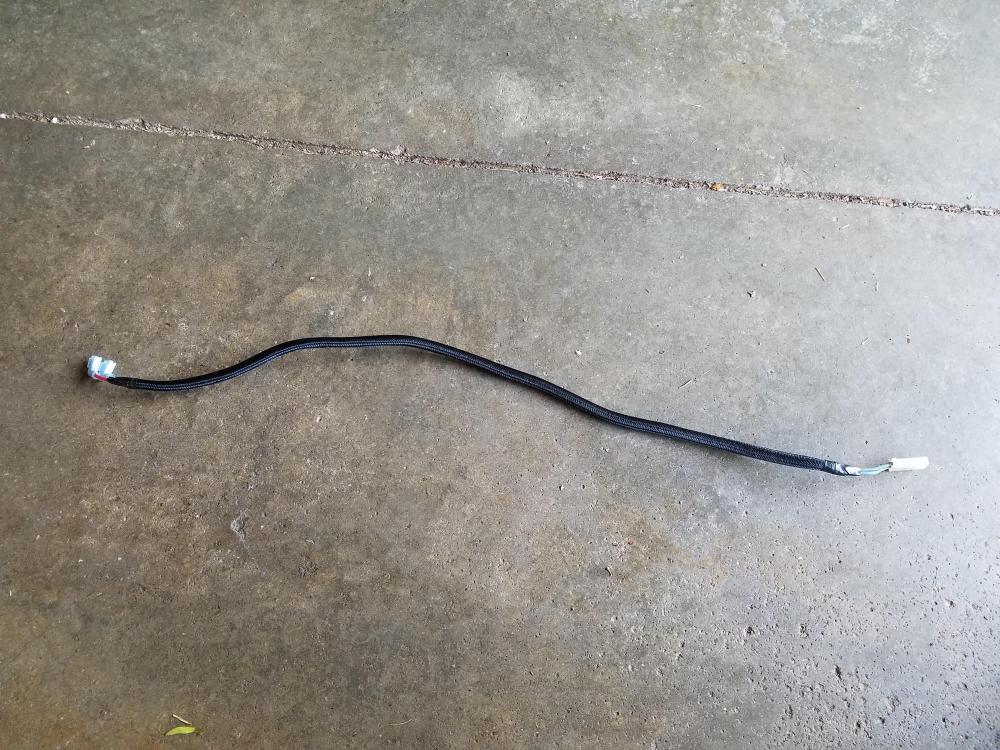
Ordered a new oem guibo through fcp and haven't had an issue sense.
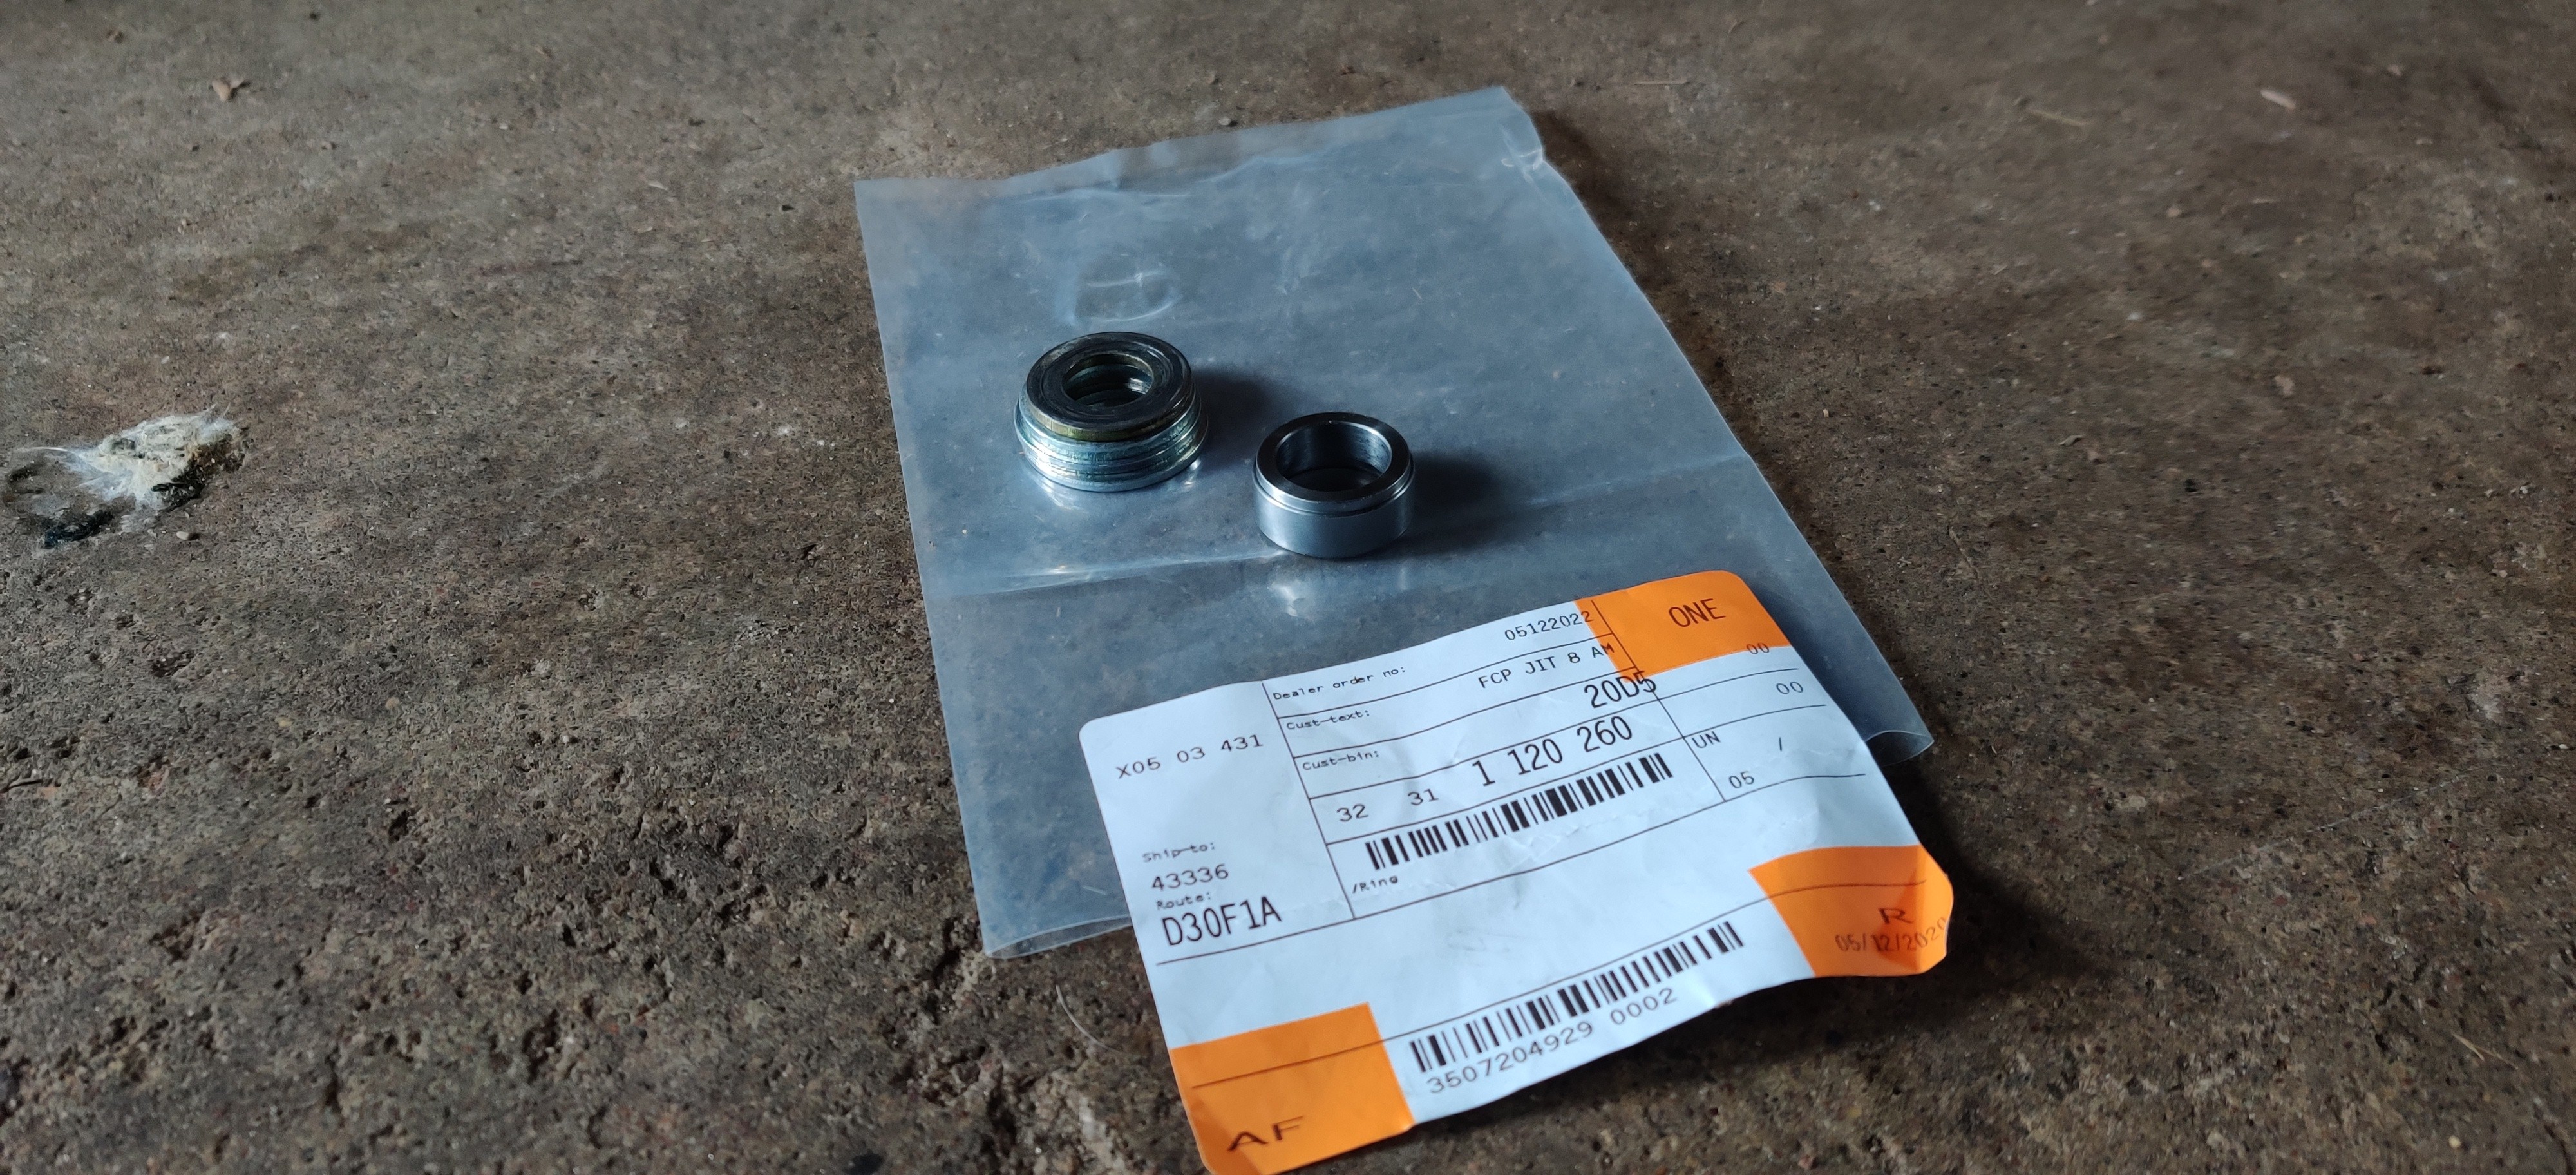
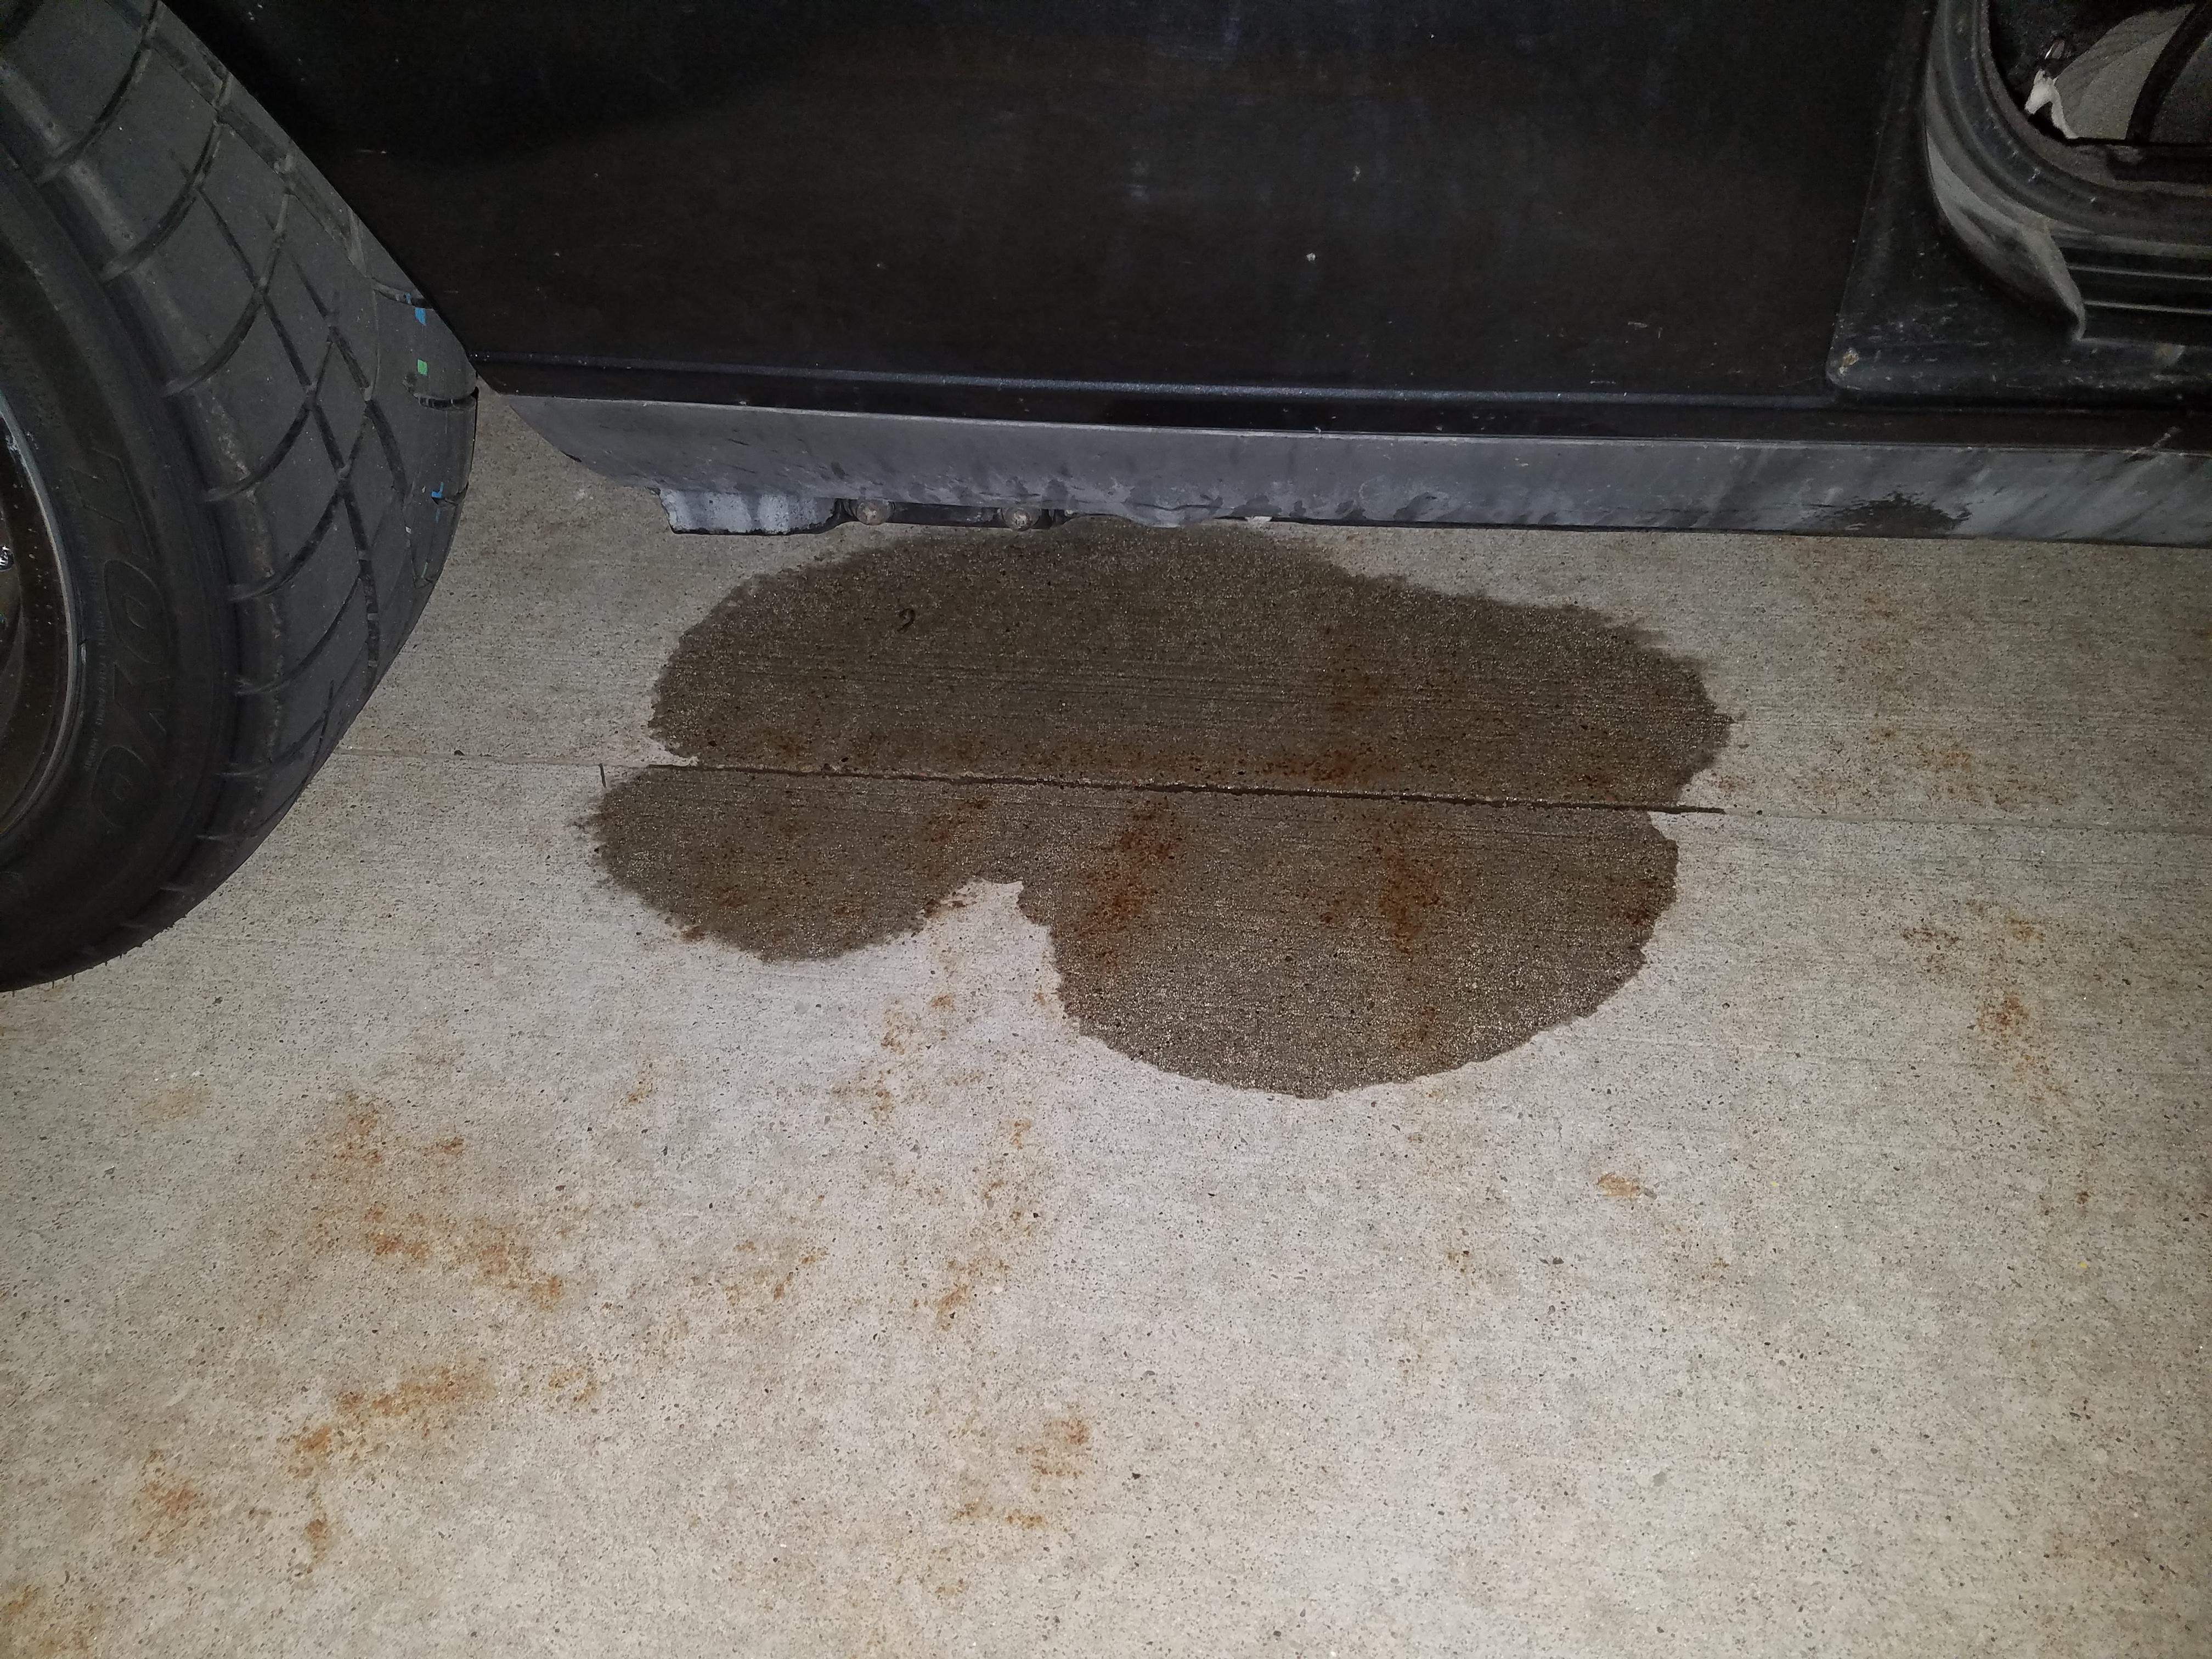
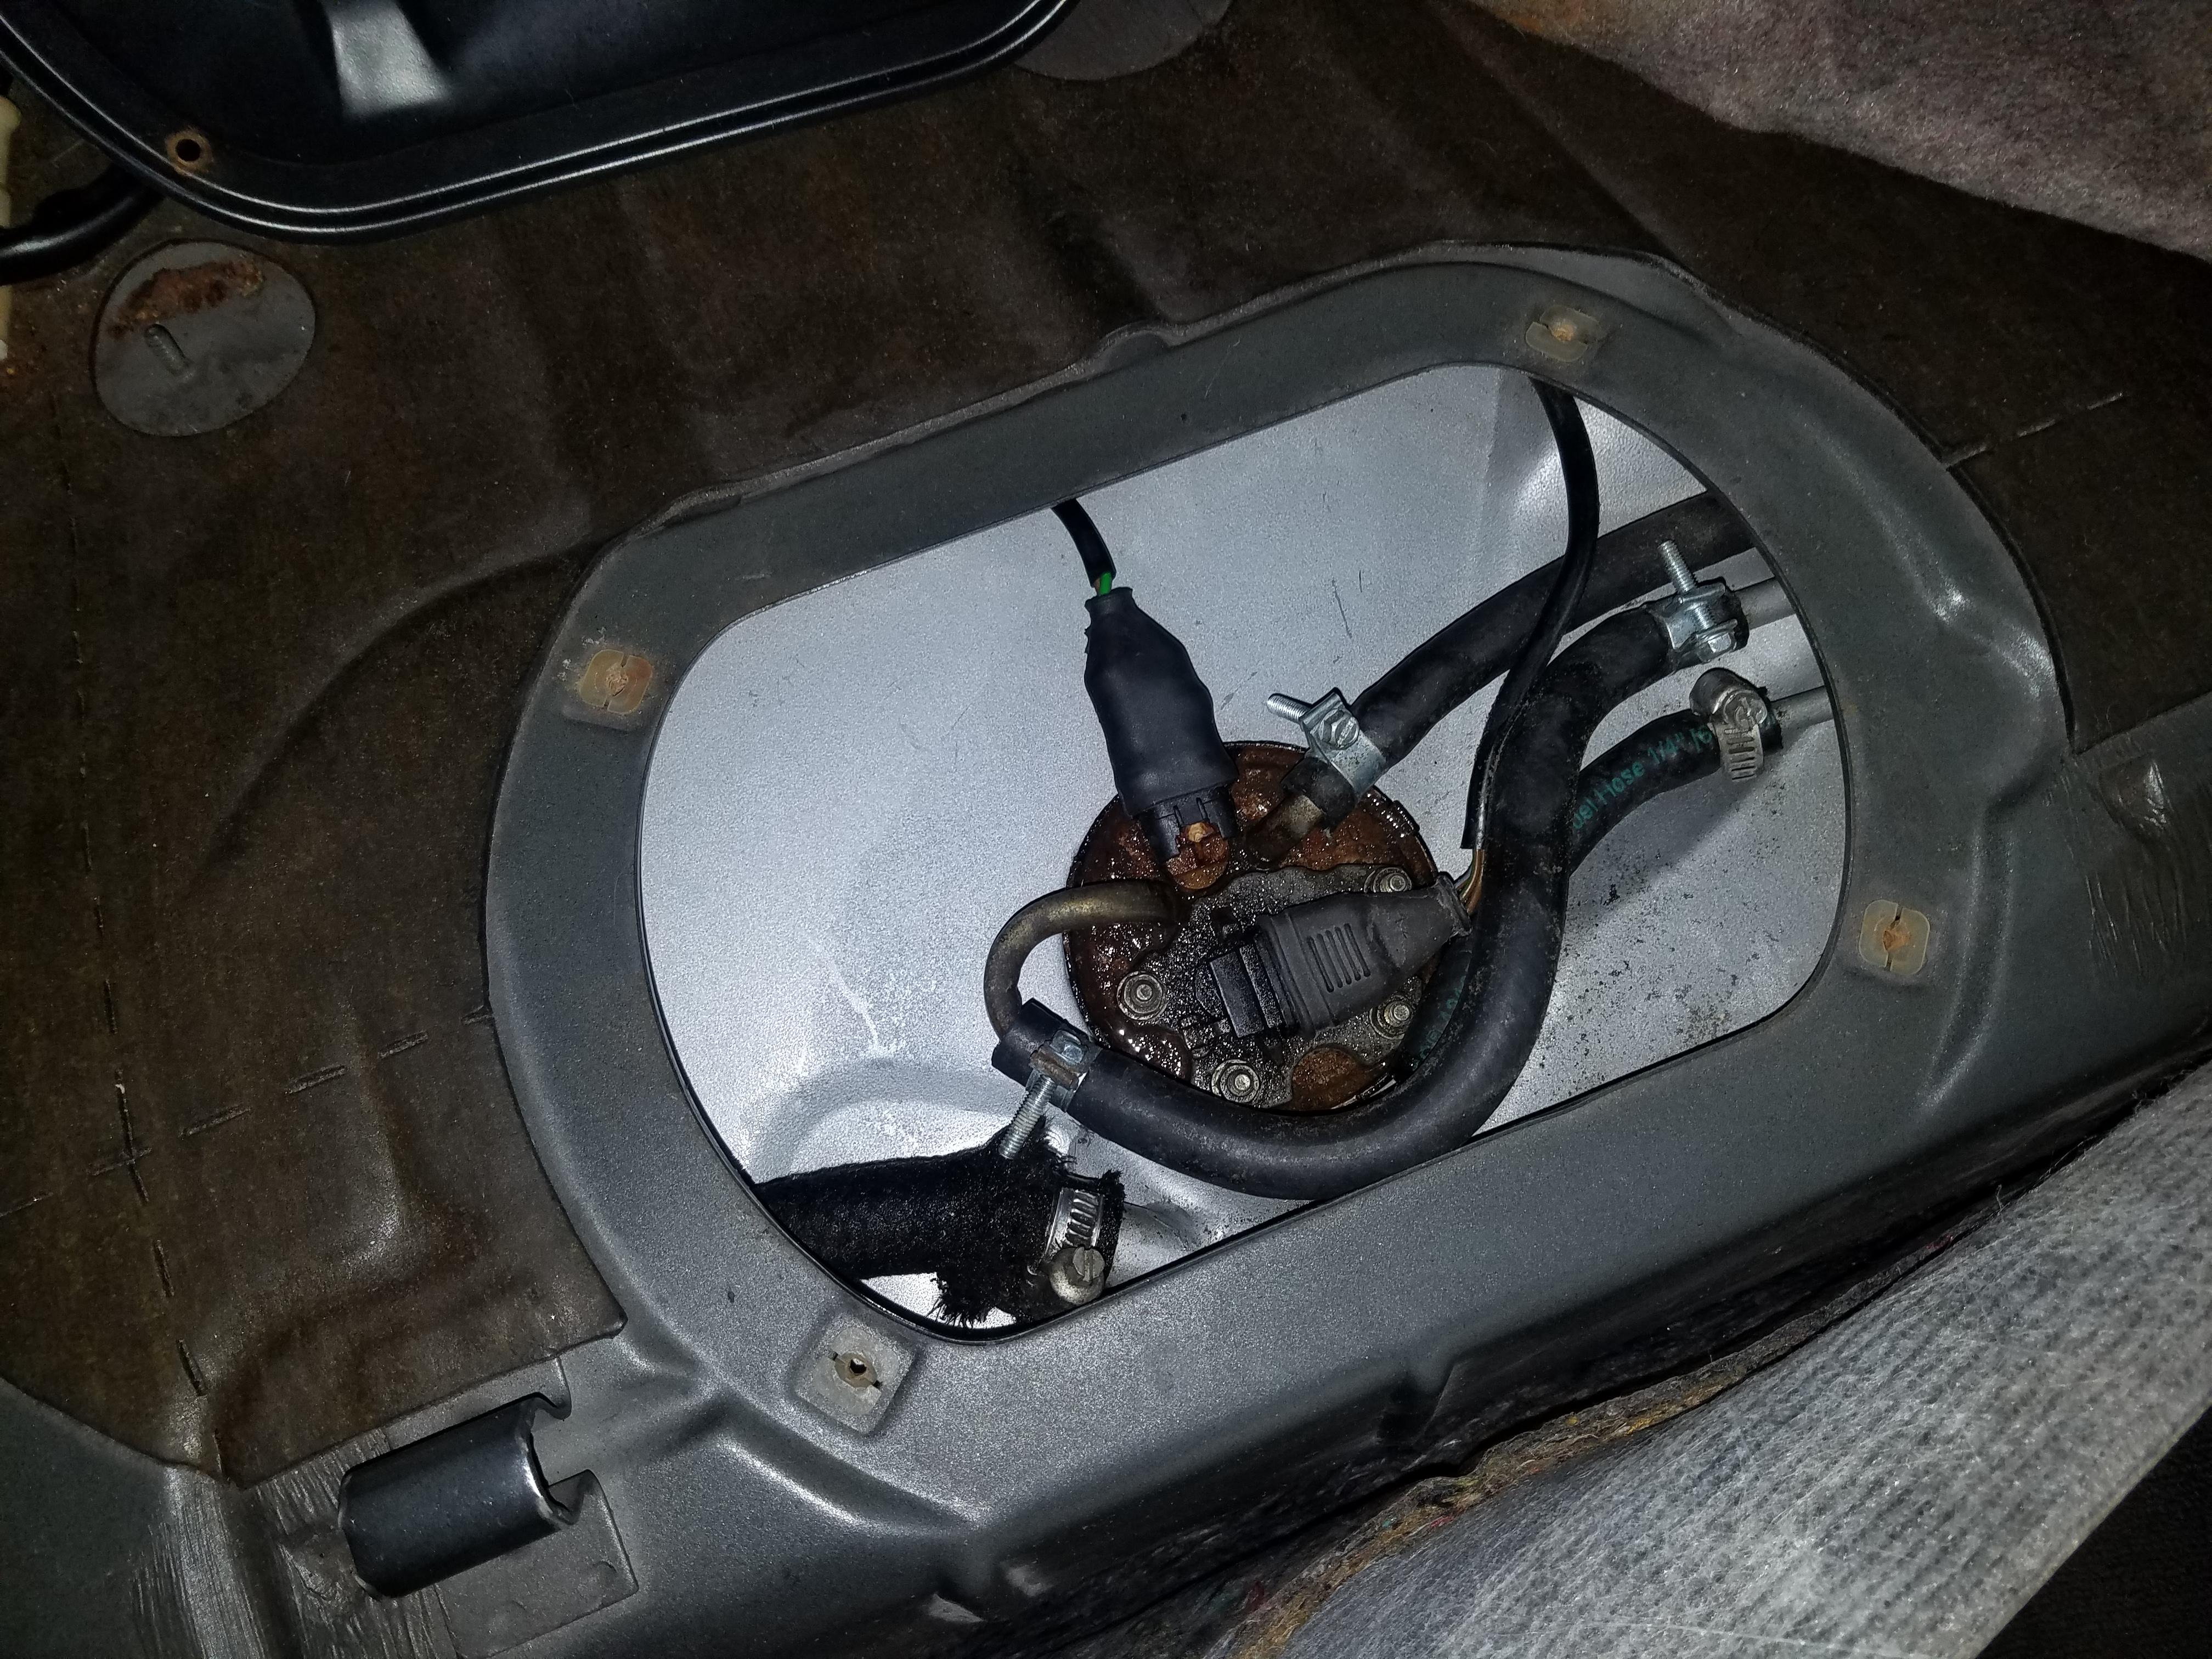
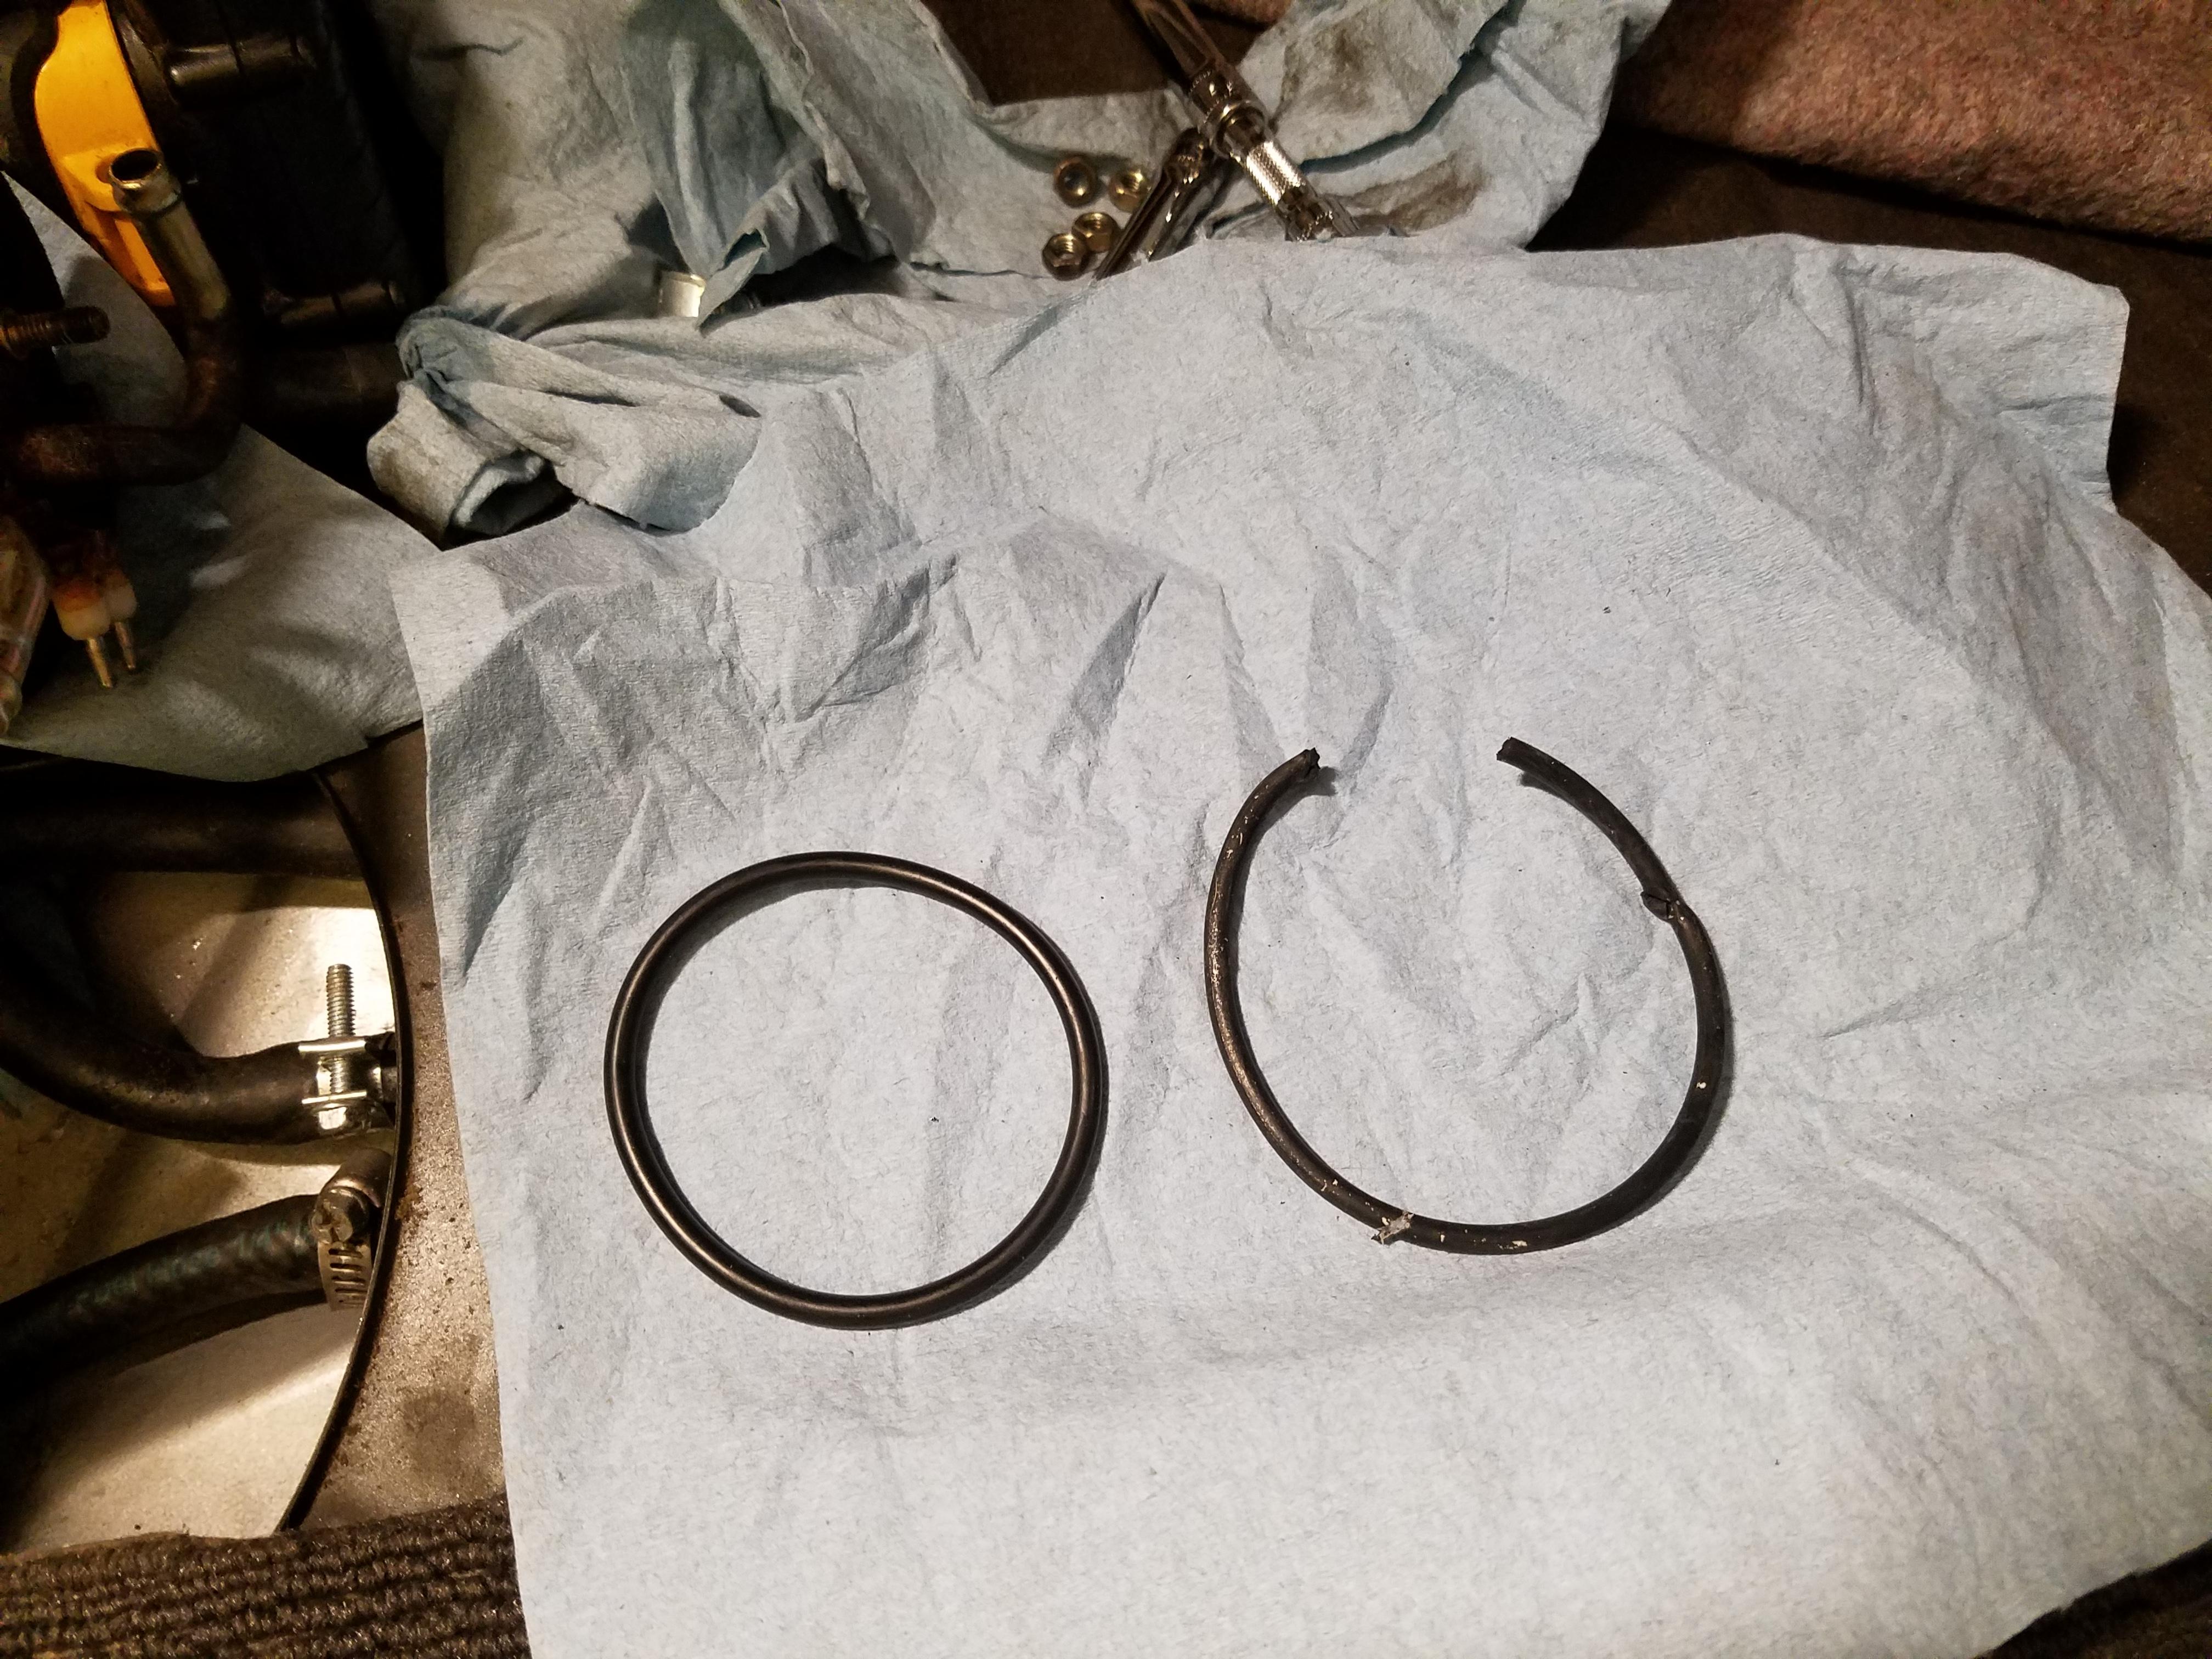
Next little fun incident I had was my fuel pump assembly o-ring going bad causing fuel to leak out of the top every time I topped off the gas tank.
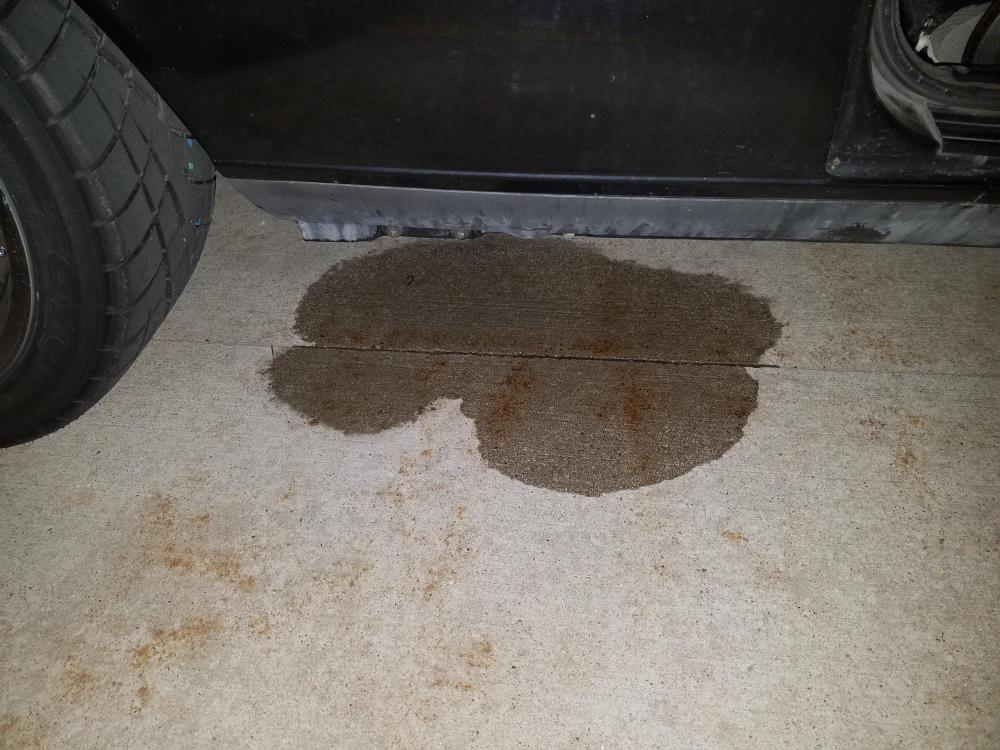
It would pool out a good quarter to a half a tank of gas from the top of the tank. After pulling the back seat and access panel I found this knowing right away that's what it was.
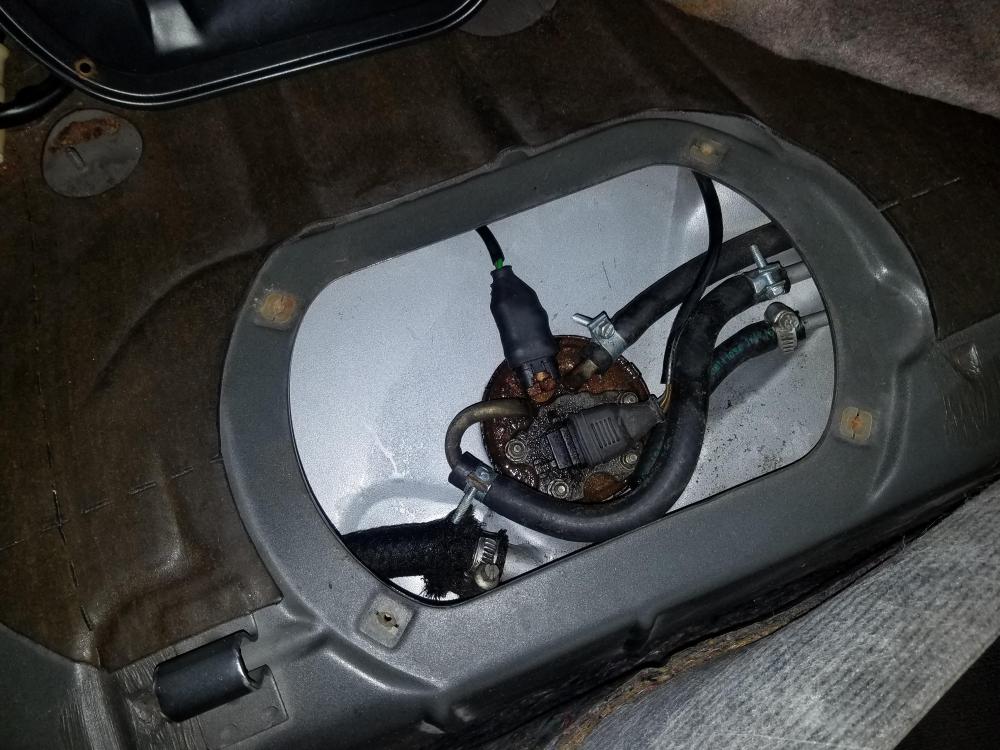
Ordered a new oem ring through the dealer which came the following day, easy swap out. I'm assuming the e85 just took the best.
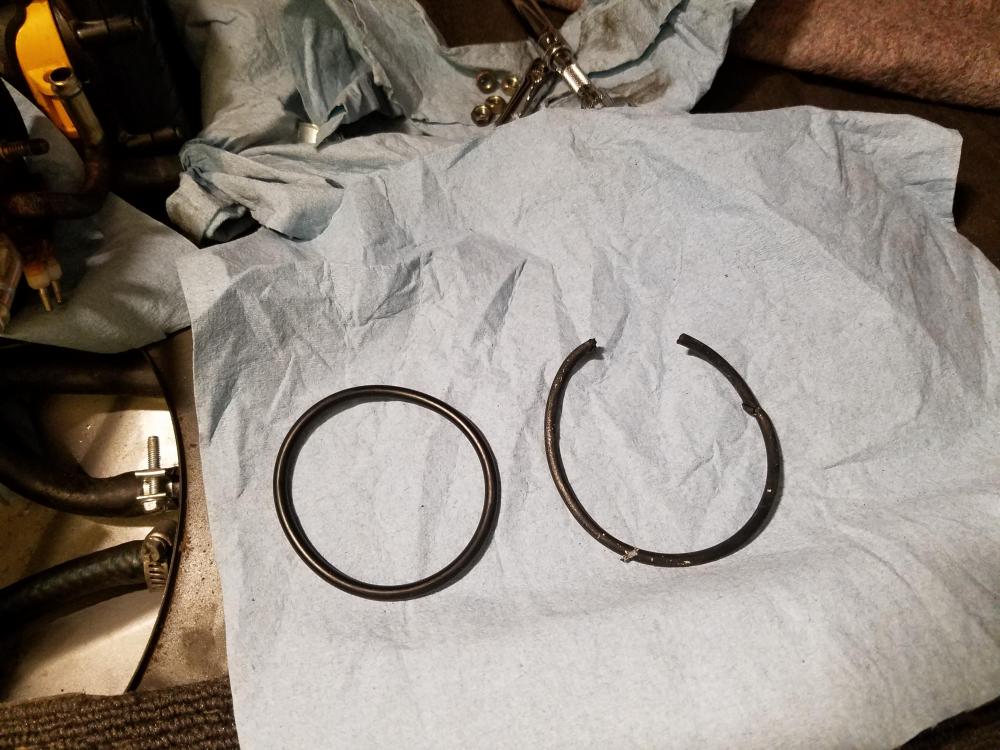
Haven't had a leak sense!
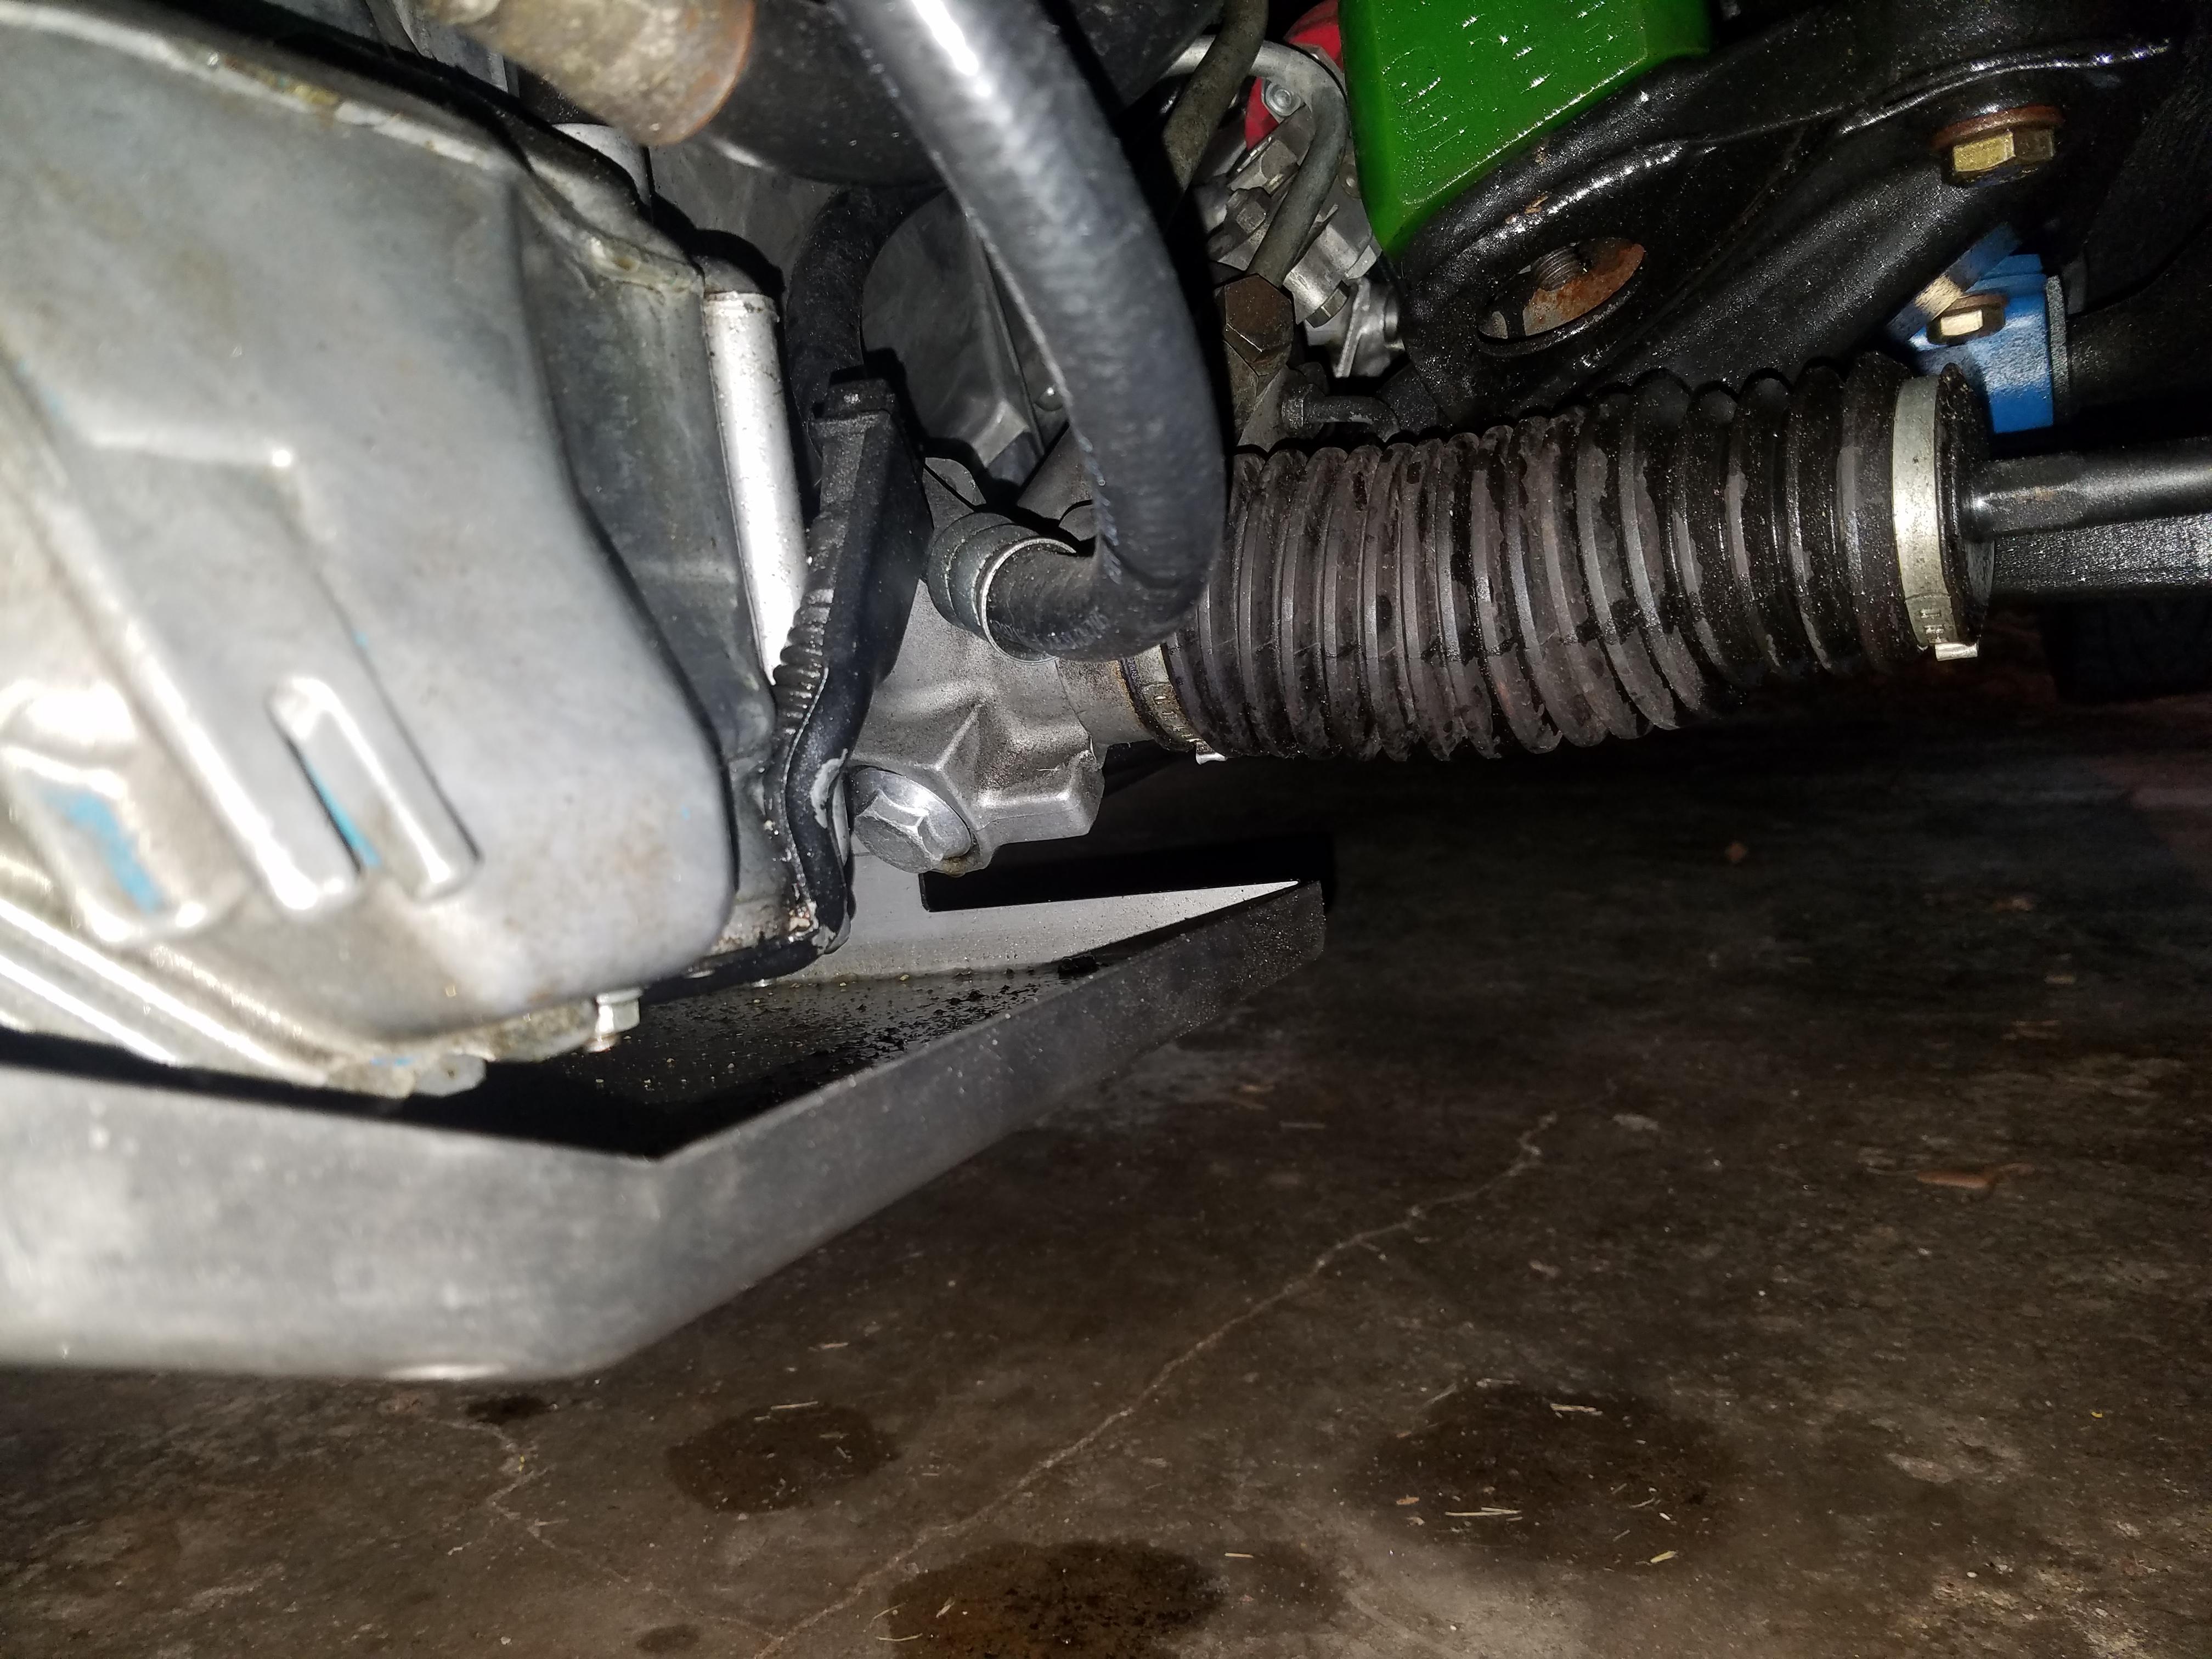
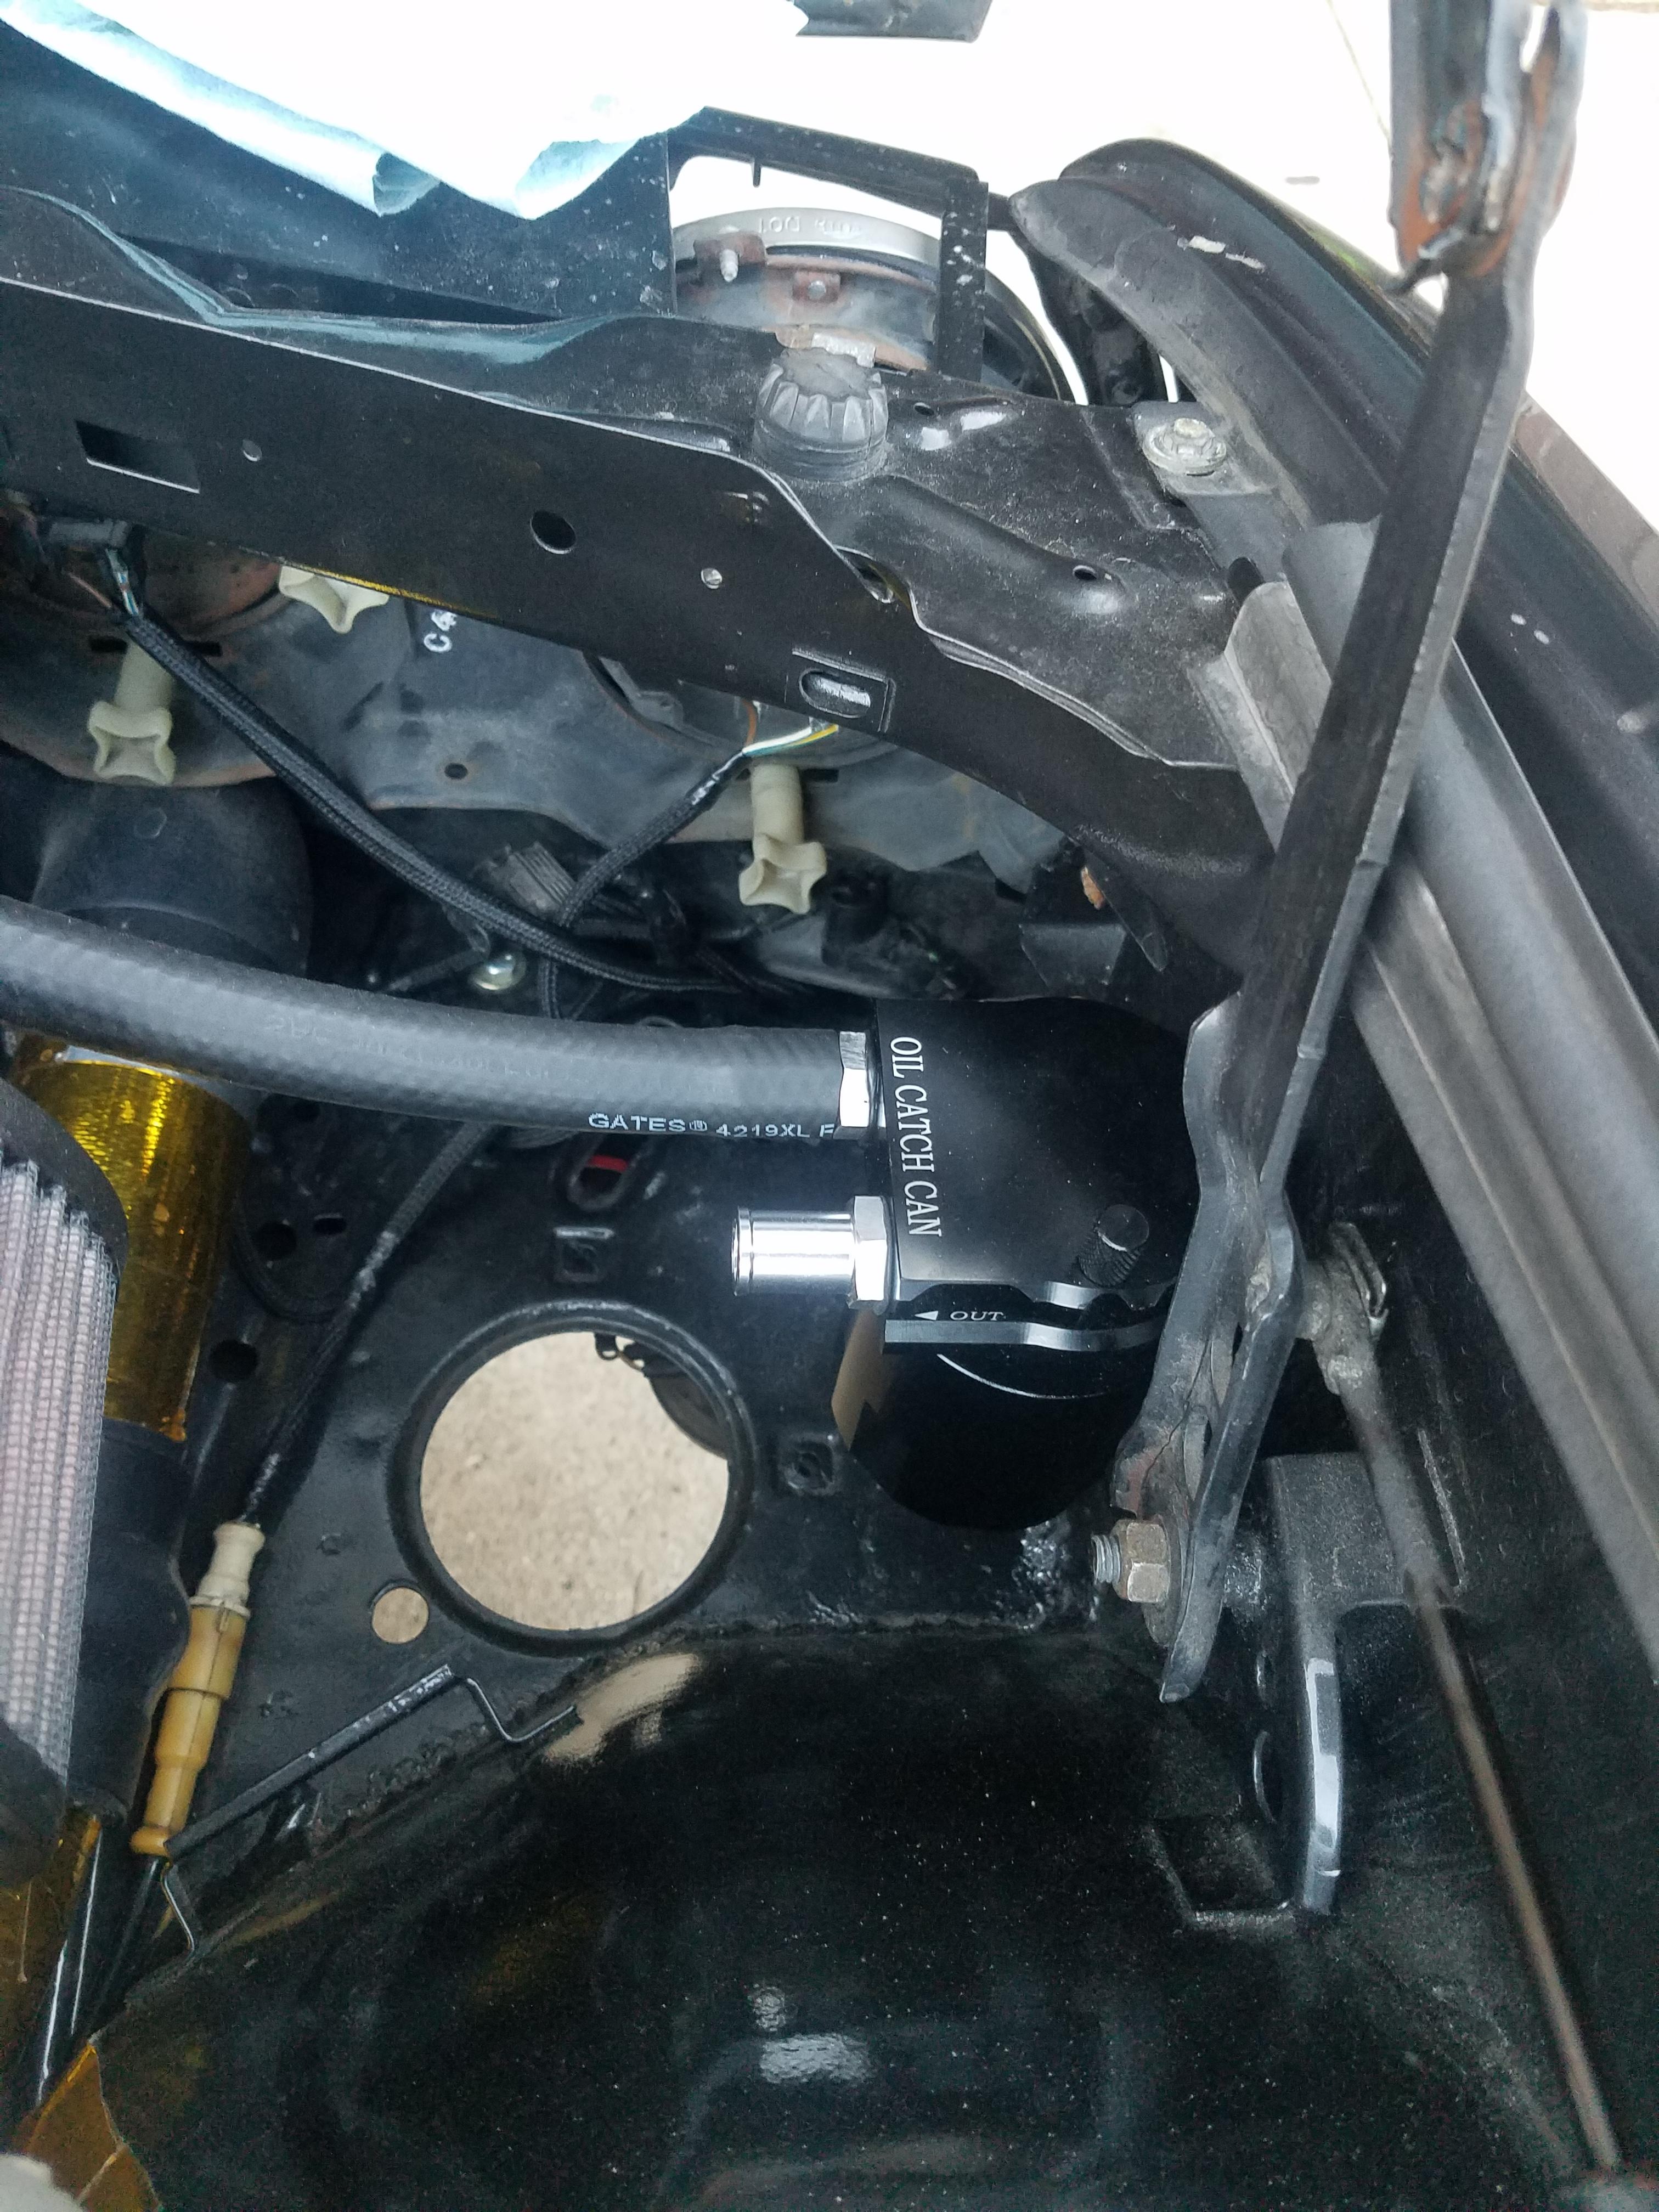
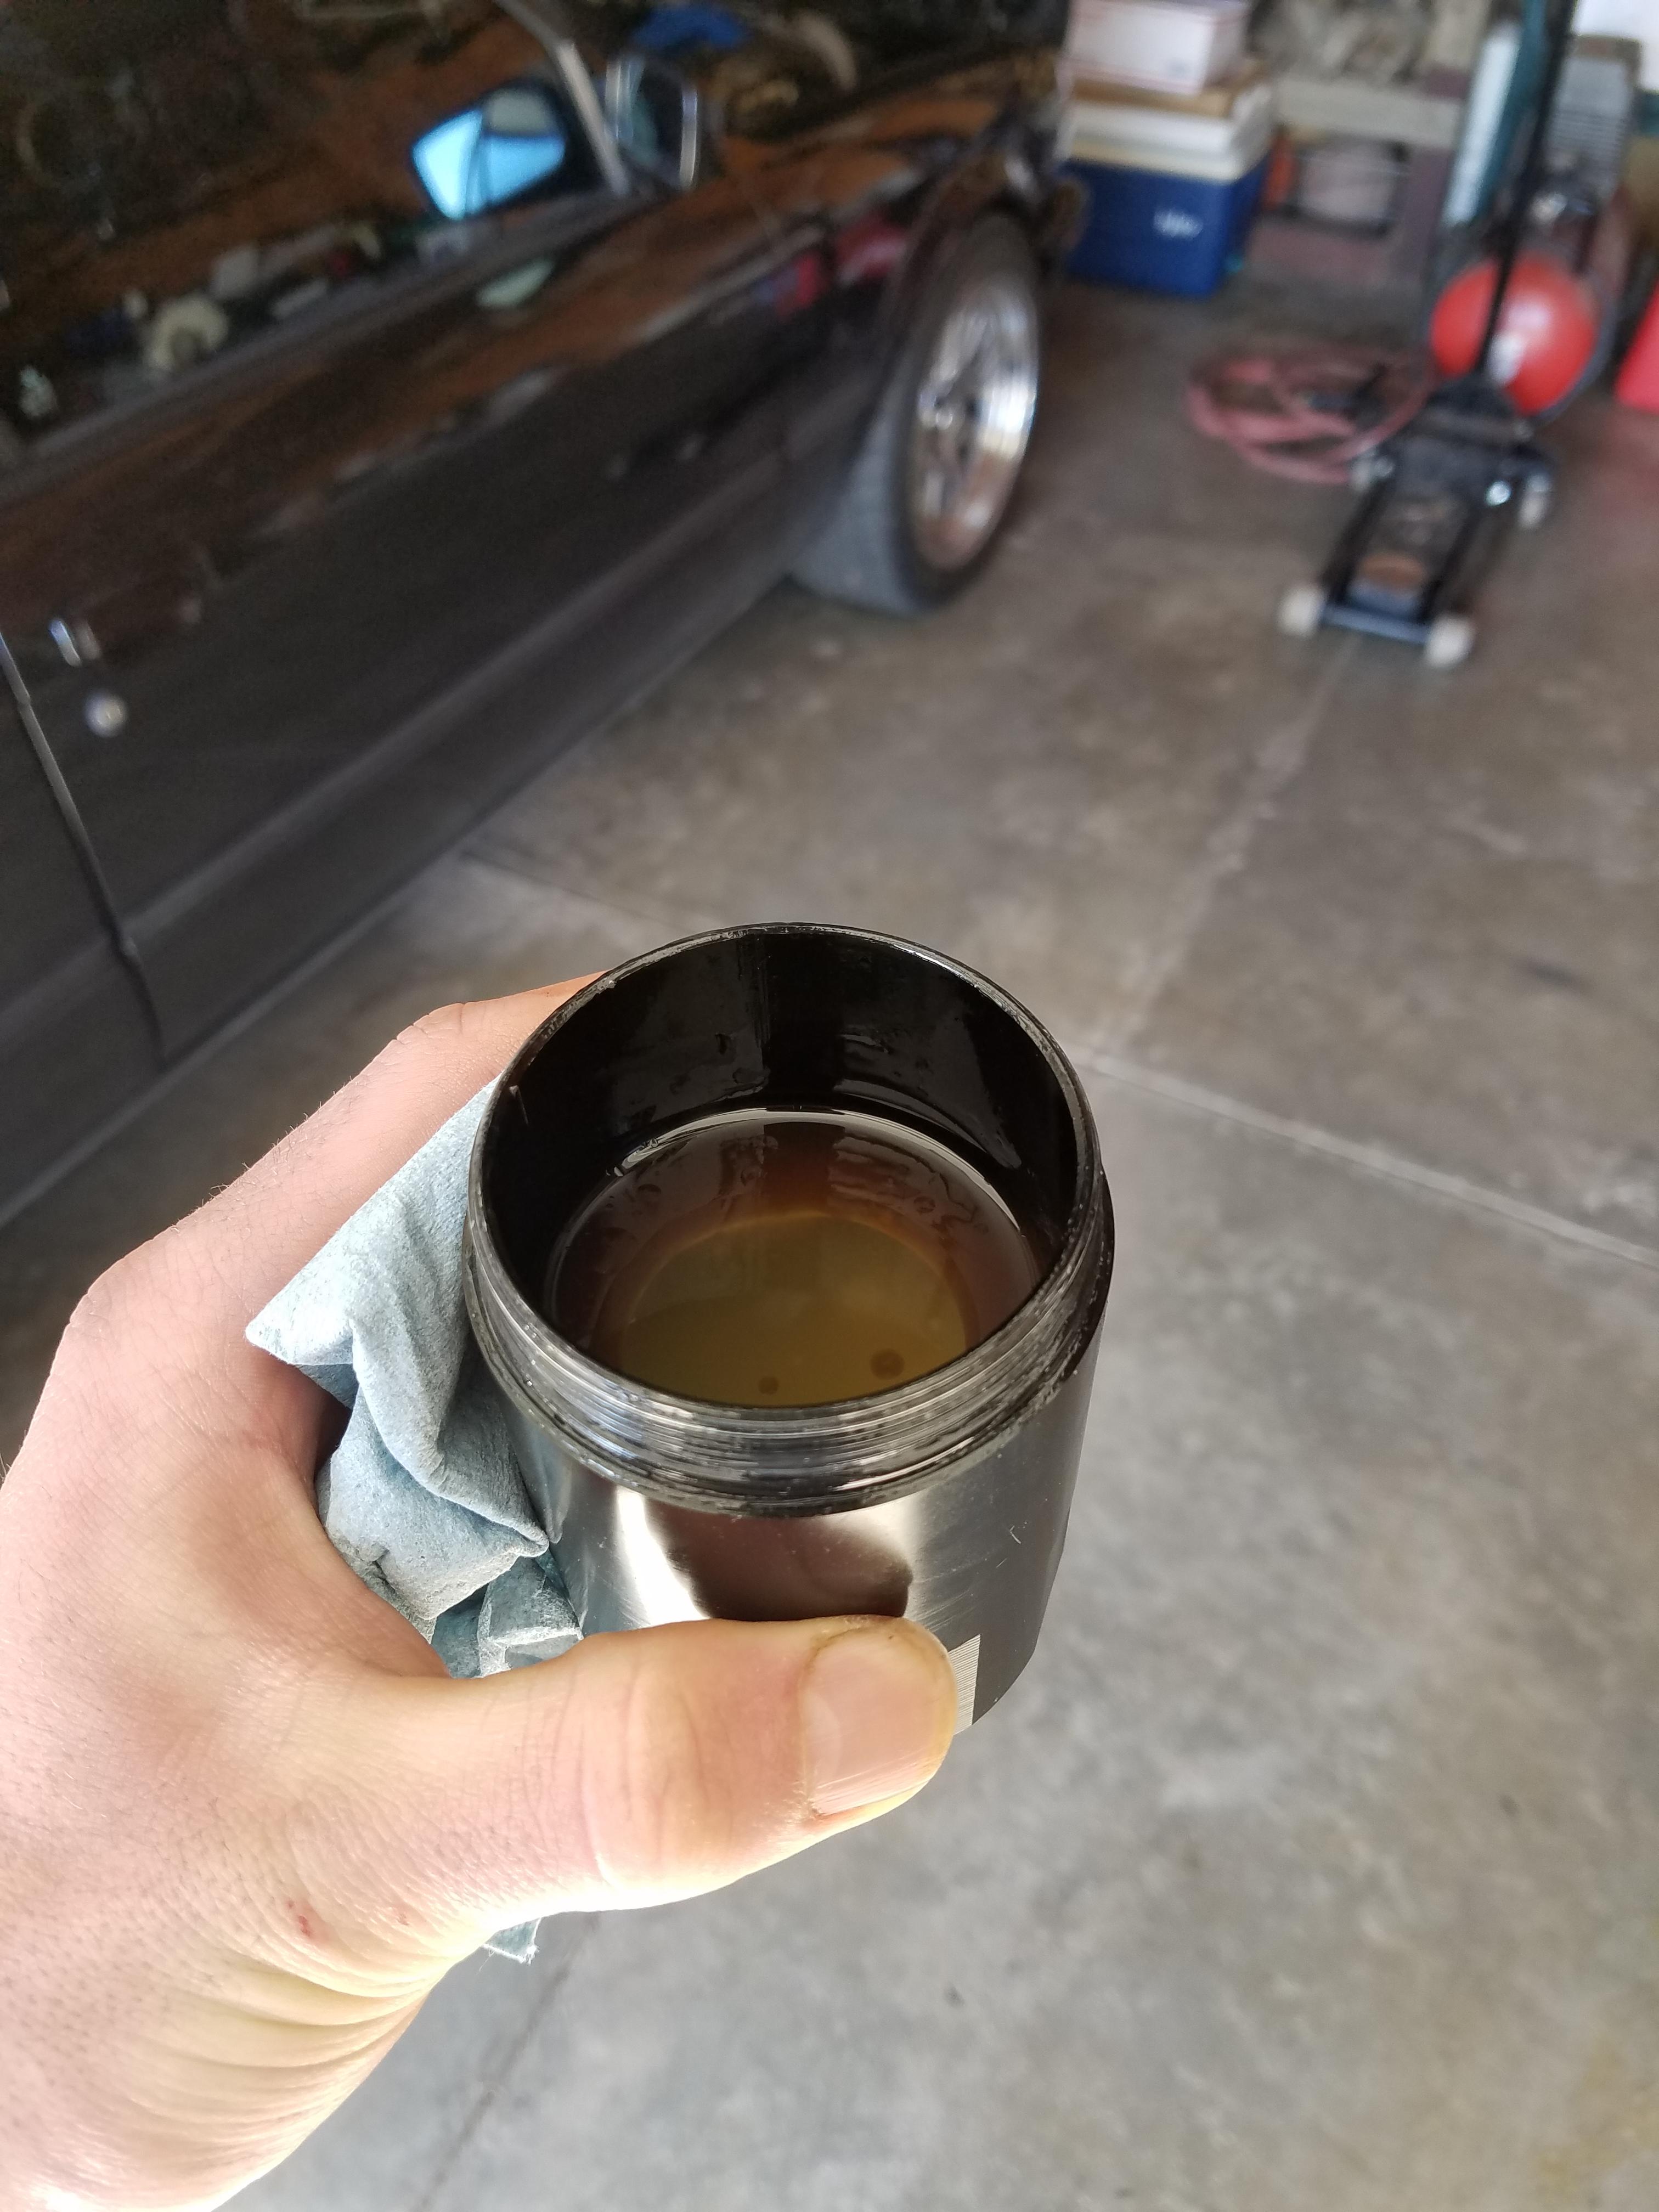
Next up I installed a catch can. The catch can was a much needed item as I had the ccv hose just running down underneath by the skid plate causing a oily mess in the skid plate and the surrounding areas.
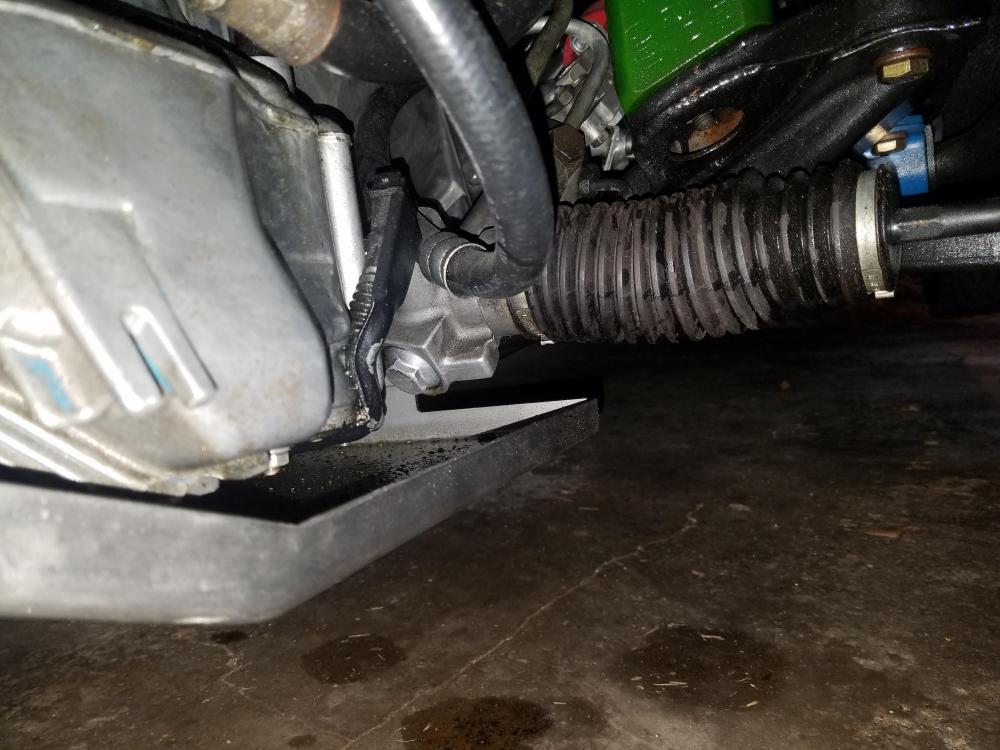
The catch can was a fairly cheap one from amazon but being that I didin't have it recirculating back into the intake I didn't need anything fancy with a good filtration system, just something to catch everything coming out of the crank case. Mounted it in the only place I could find that would make for easy access and fairly clean look.
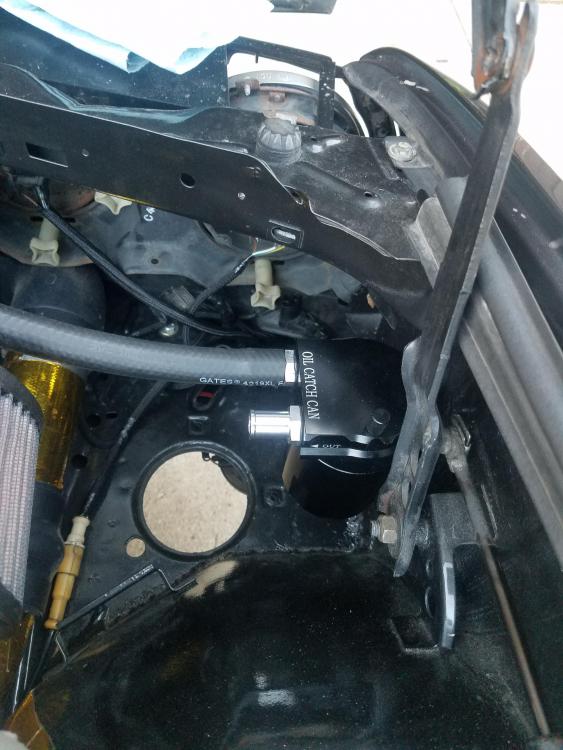
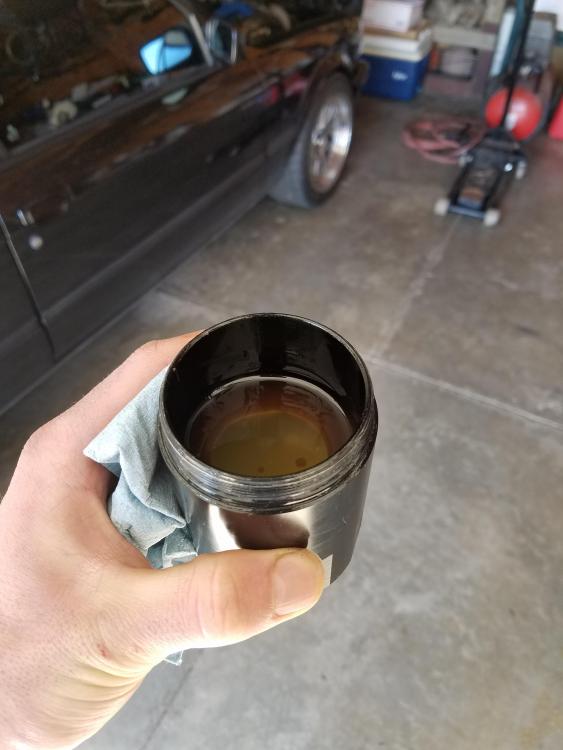
No more oily messes!
This was after a weekend of driving and racing around quite a bit.
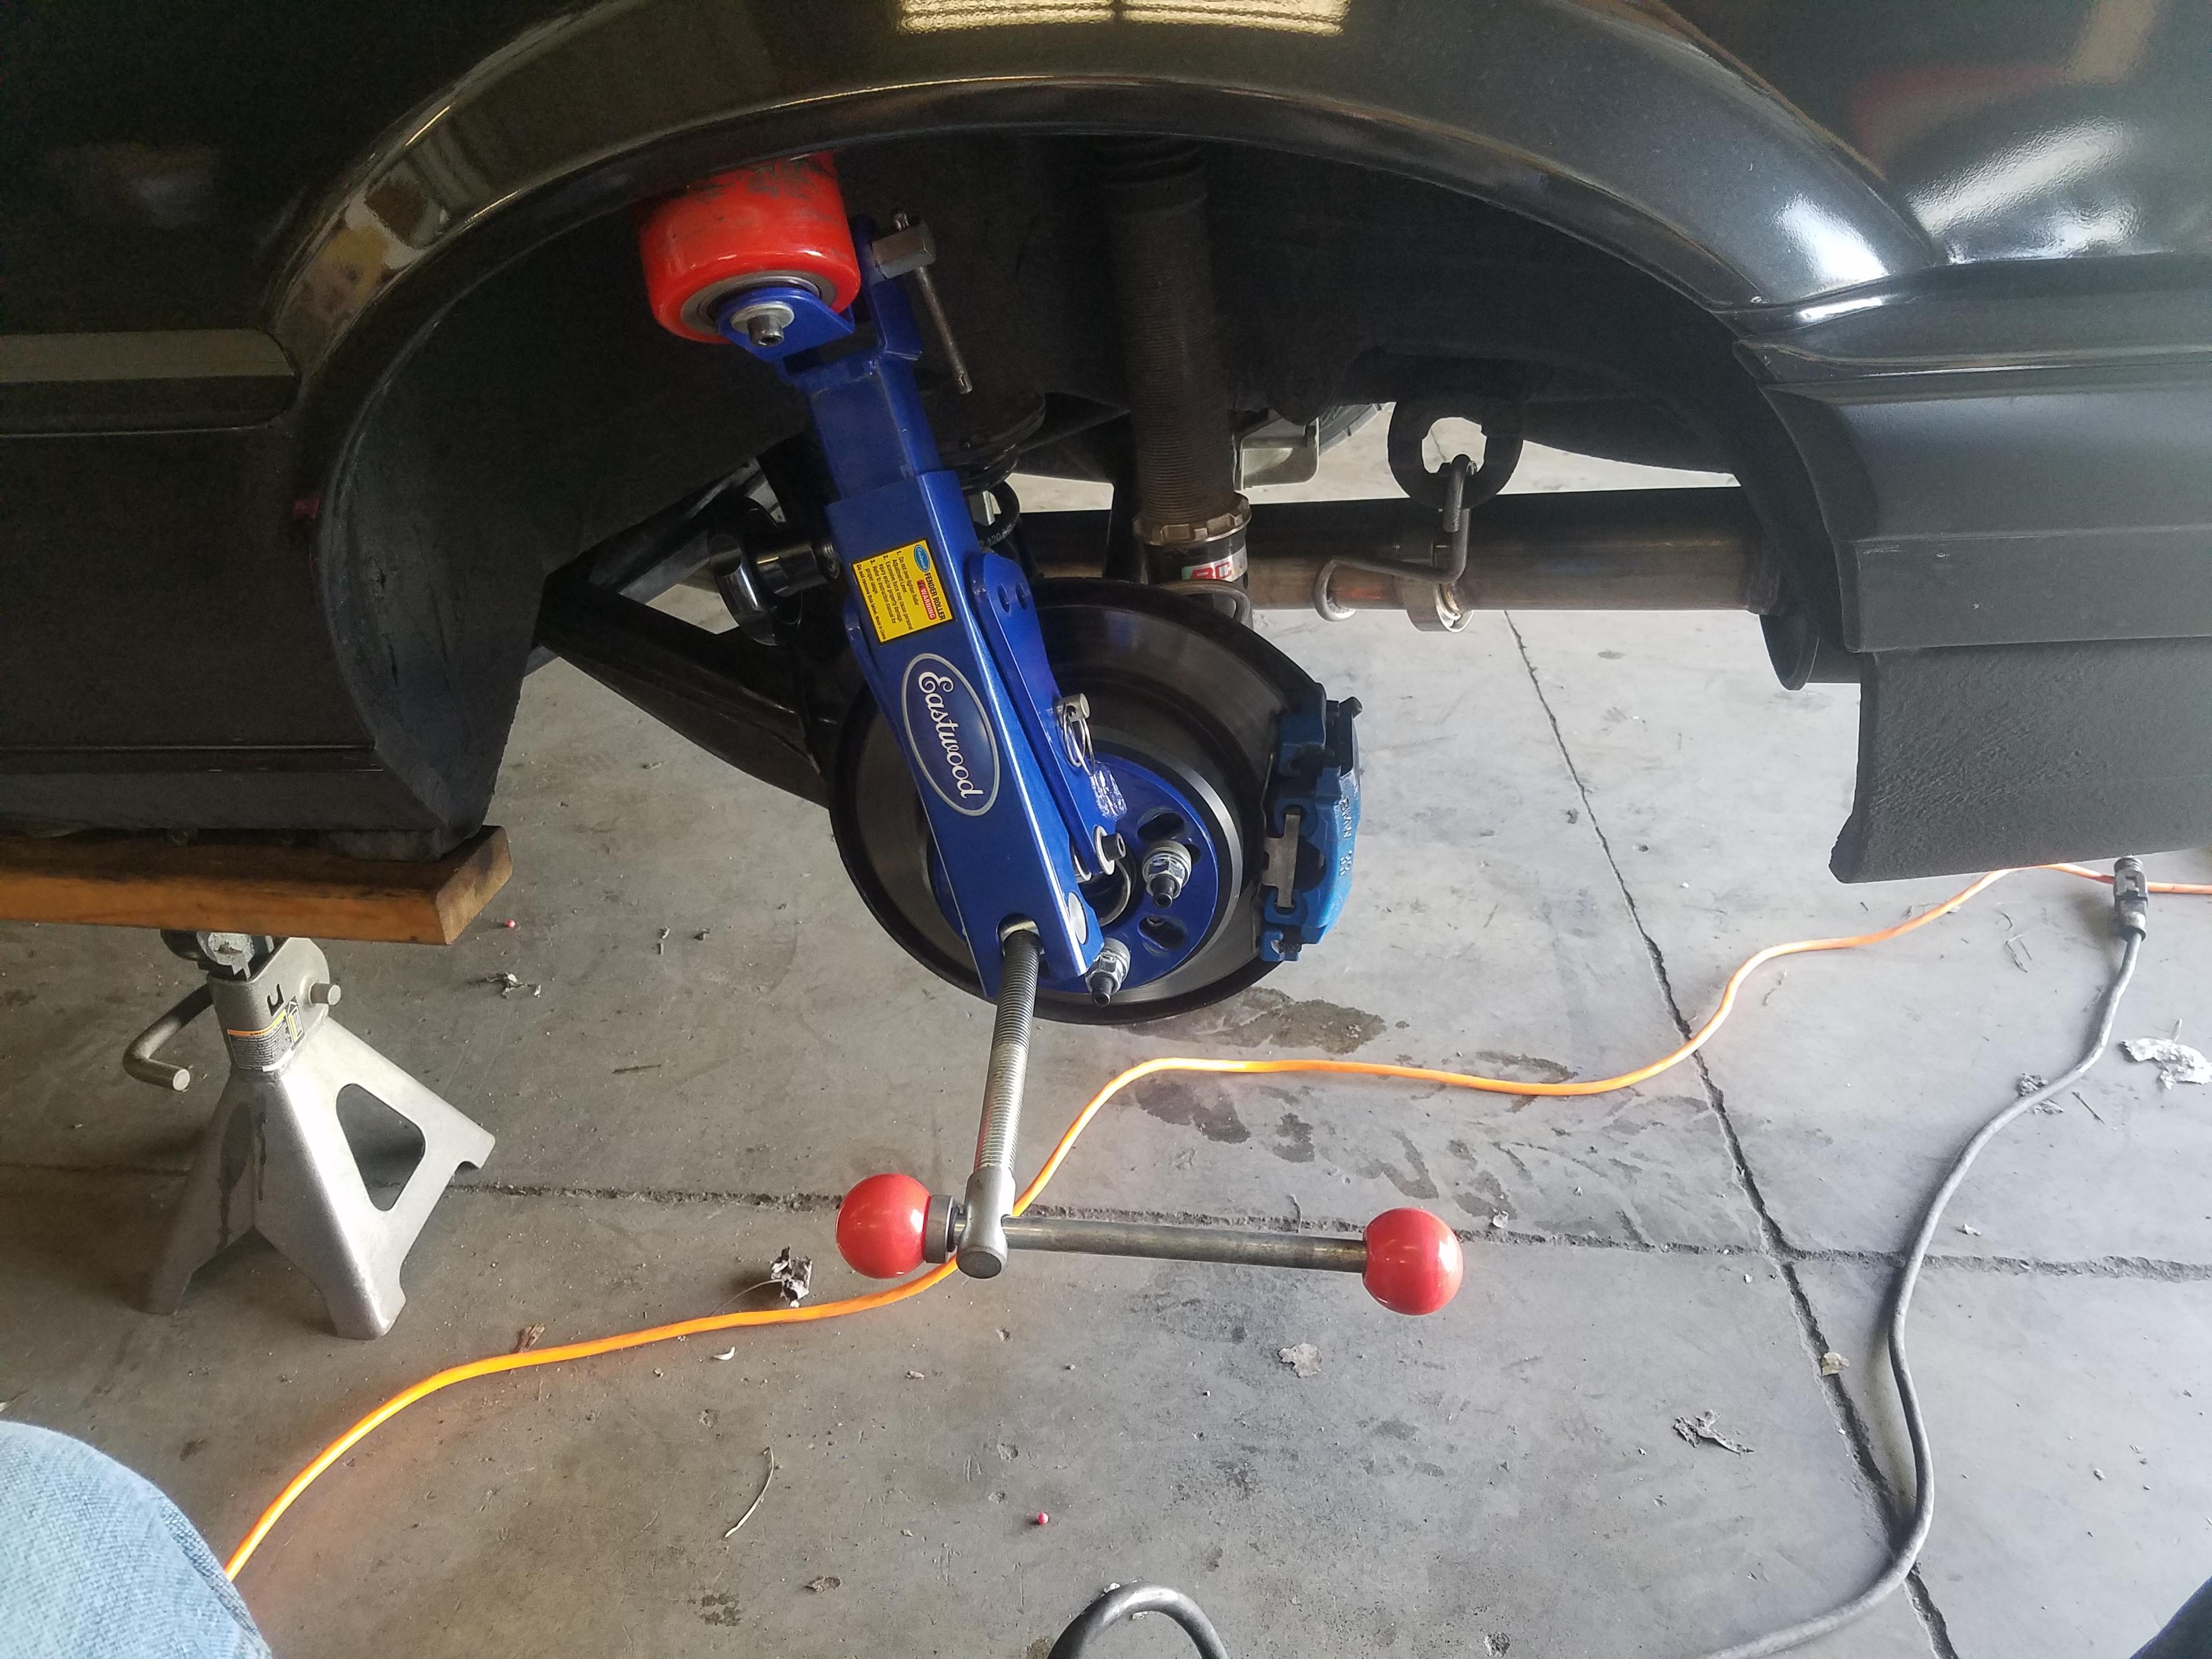
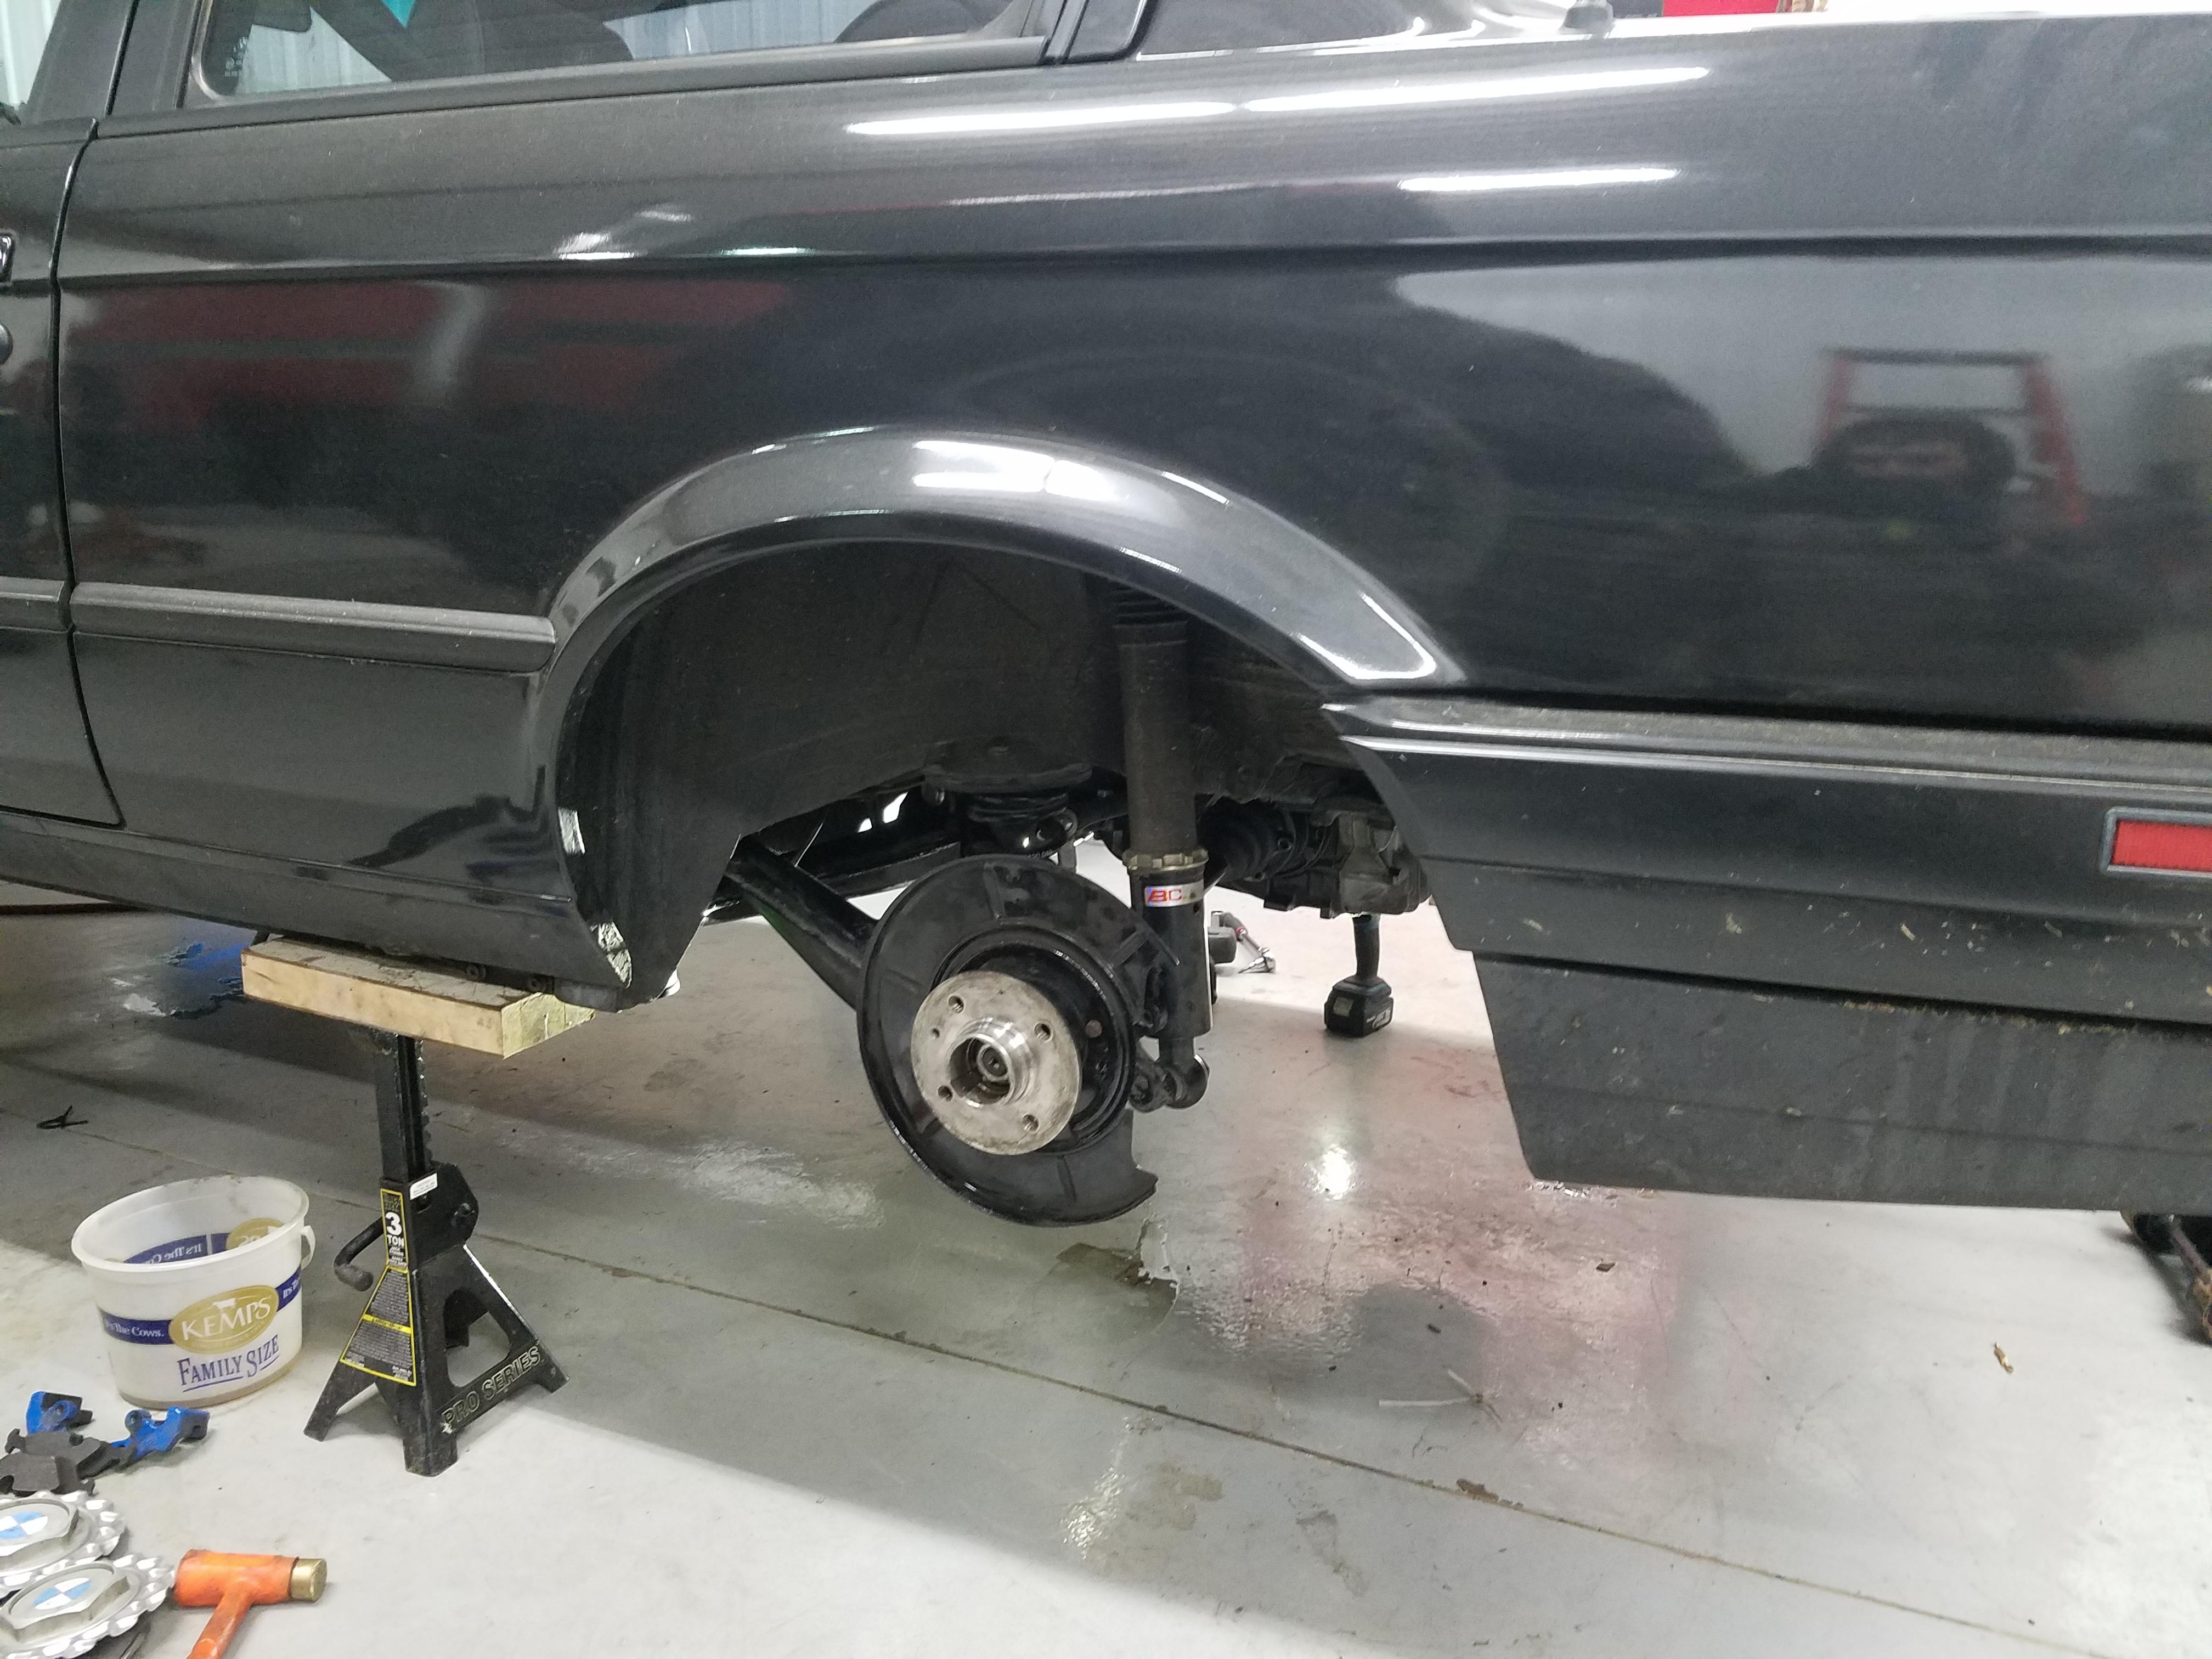
Next up was my fenders. For the most part, my wheel and tire setup have been great but my front tires clearance from the inner fender was tight and was causing quite a bit of a rubbing. Thanks to @GunMetalGrey hooking me up with a fender roller and some guidance I spent a few hours making some better clearances.
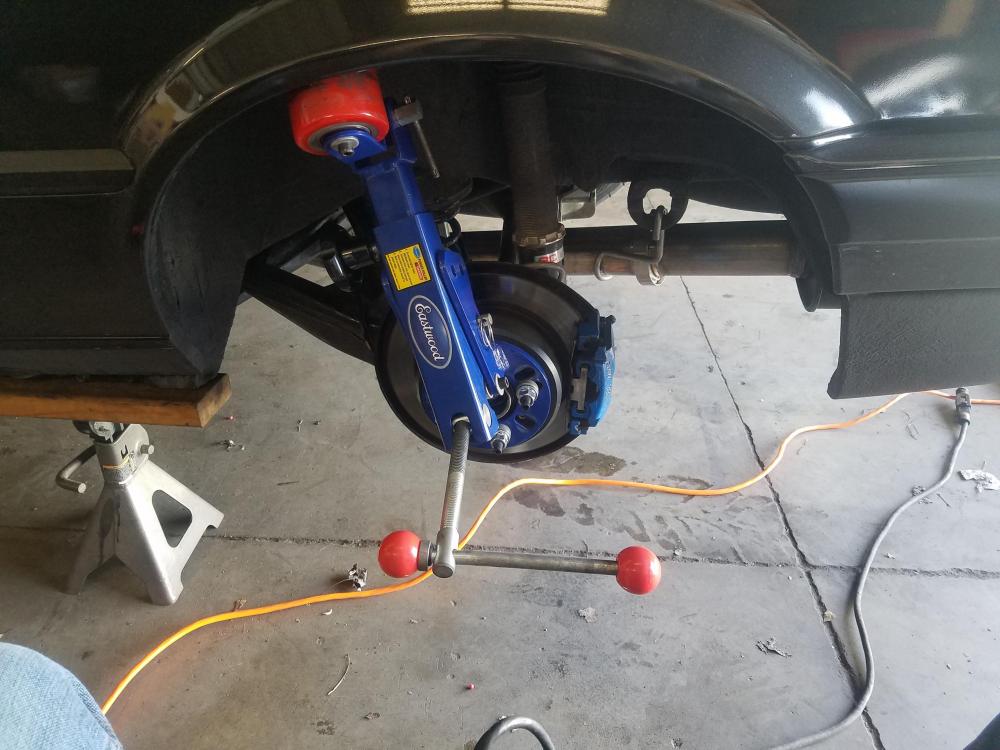
Sense I had all the wheels off and the roller I decided to do the rear as well which oddly enough had been rolled but only halfway on both sides. After checking on a couple other e30's we determined that it definitely wasn't something done from the factory. Nevertheless it made for an easy job on the rears and they went quickly.
No more rubbing issues!
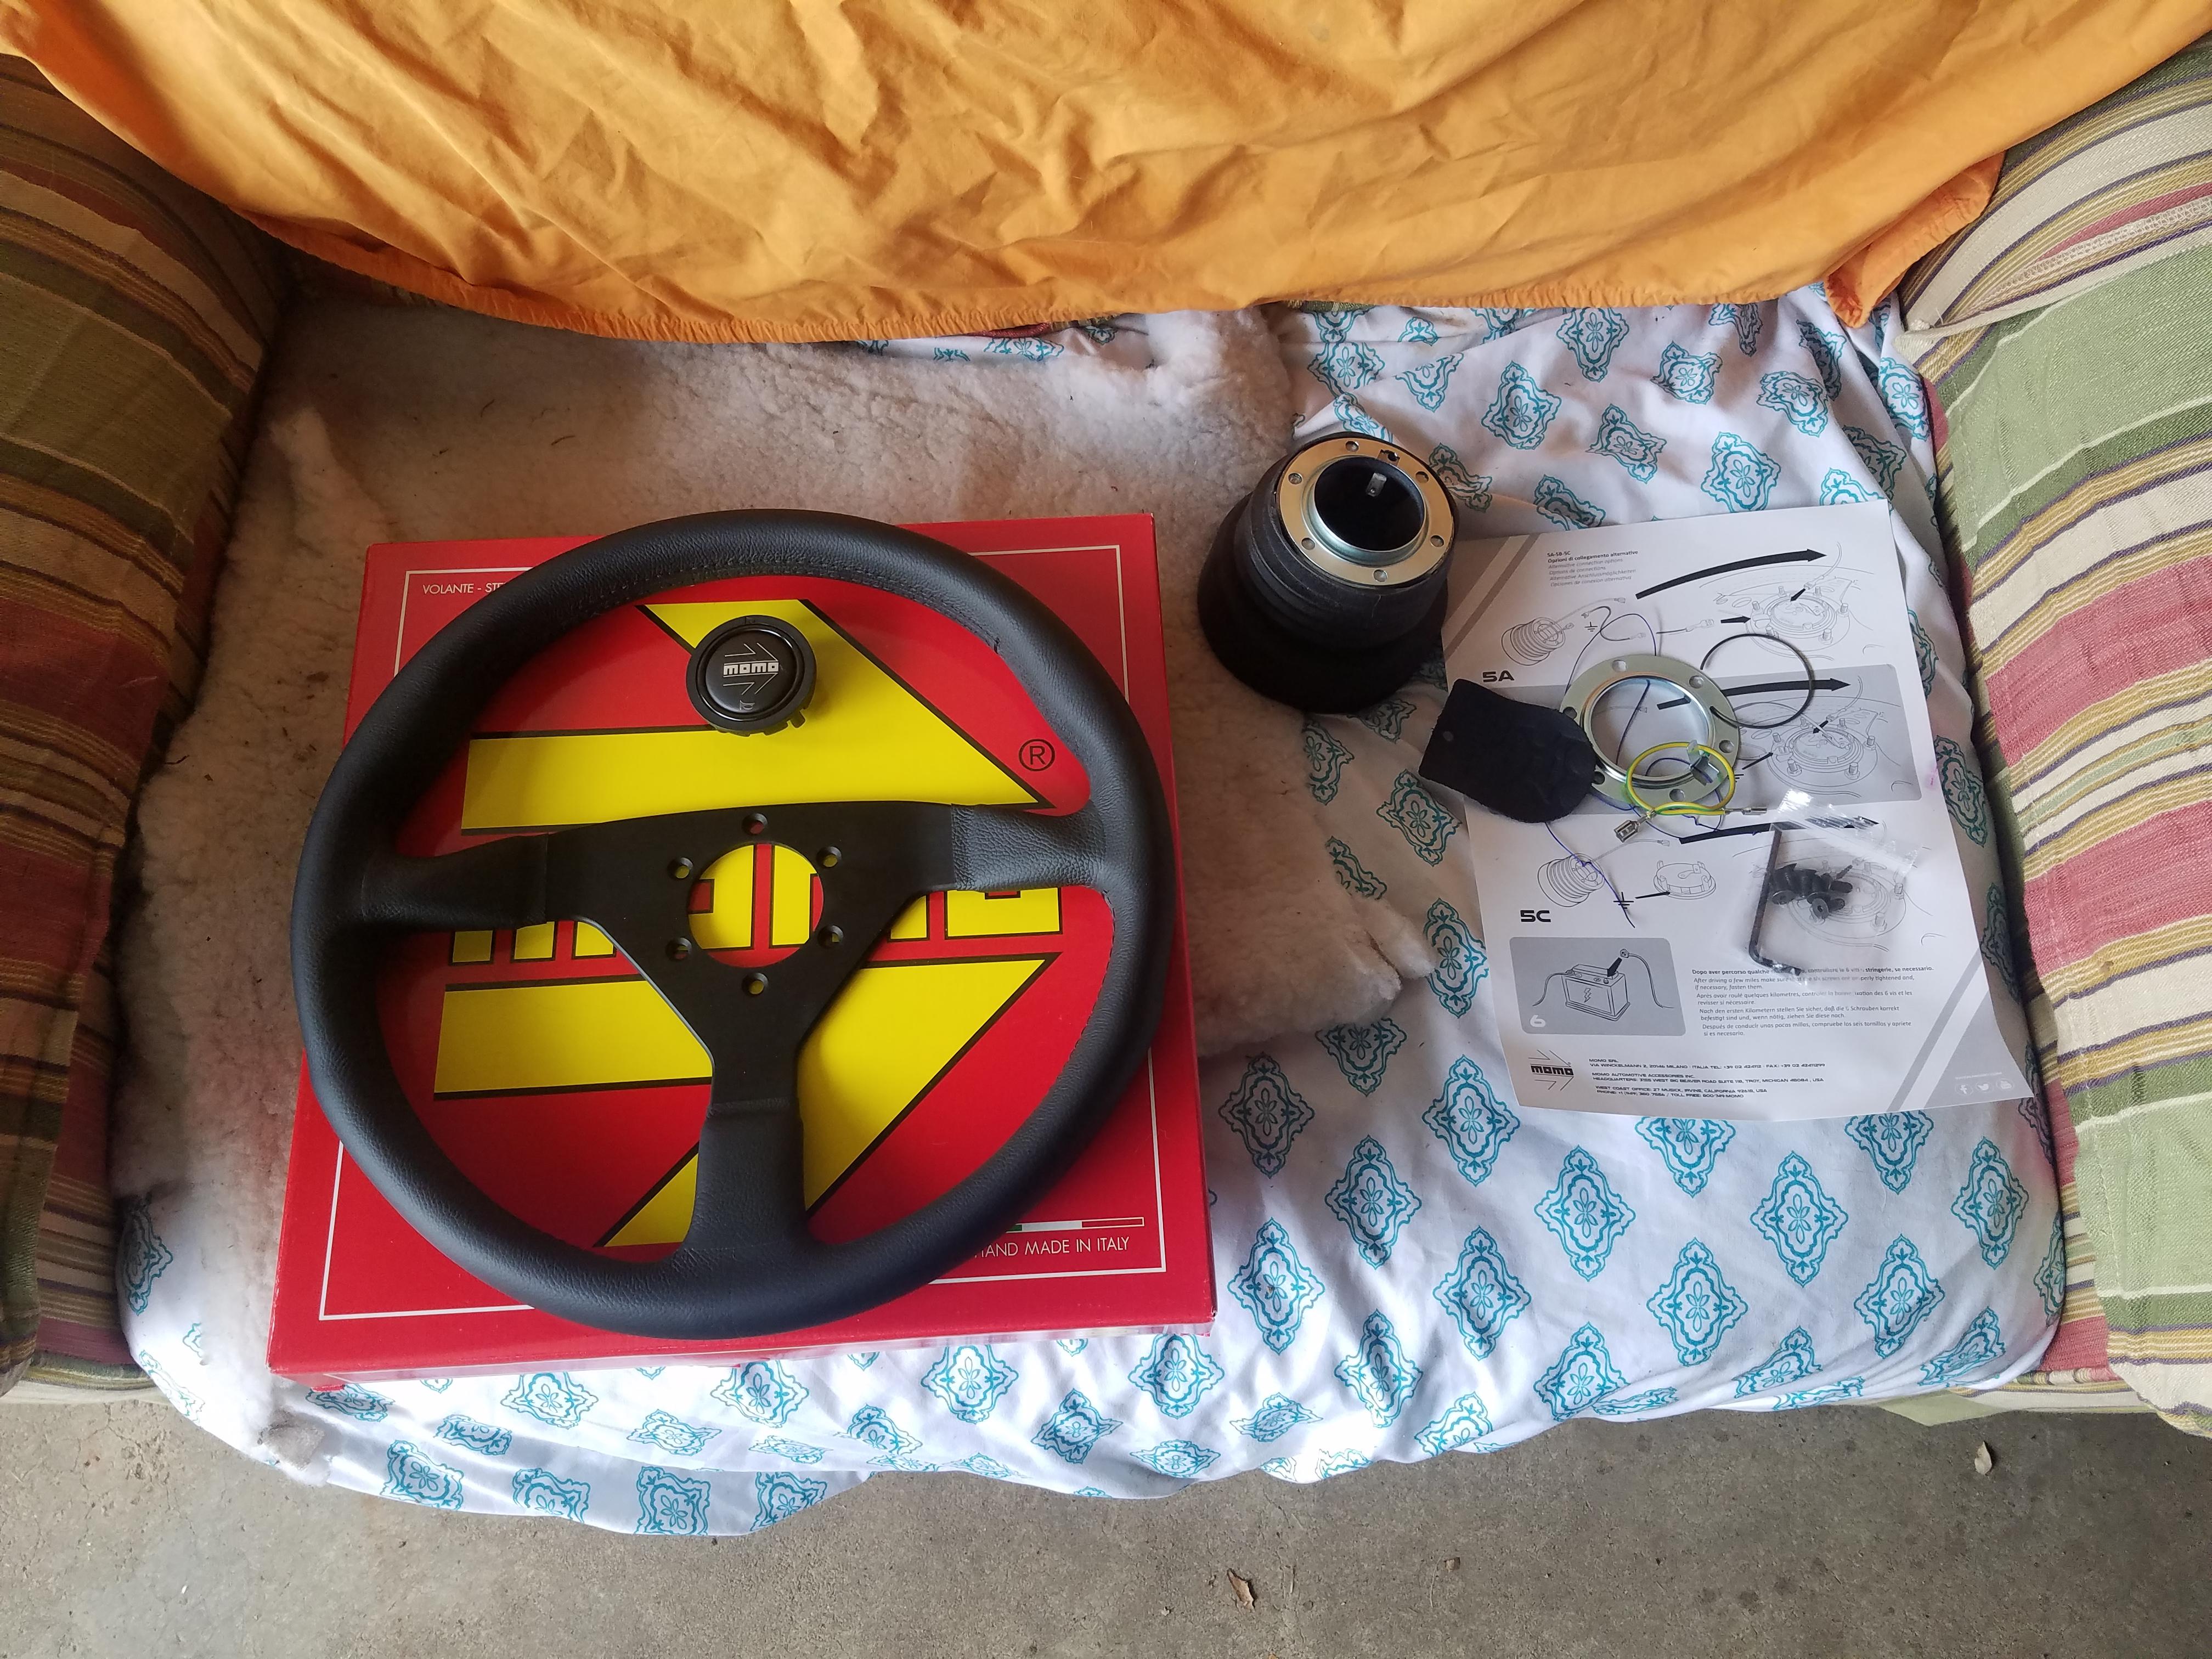
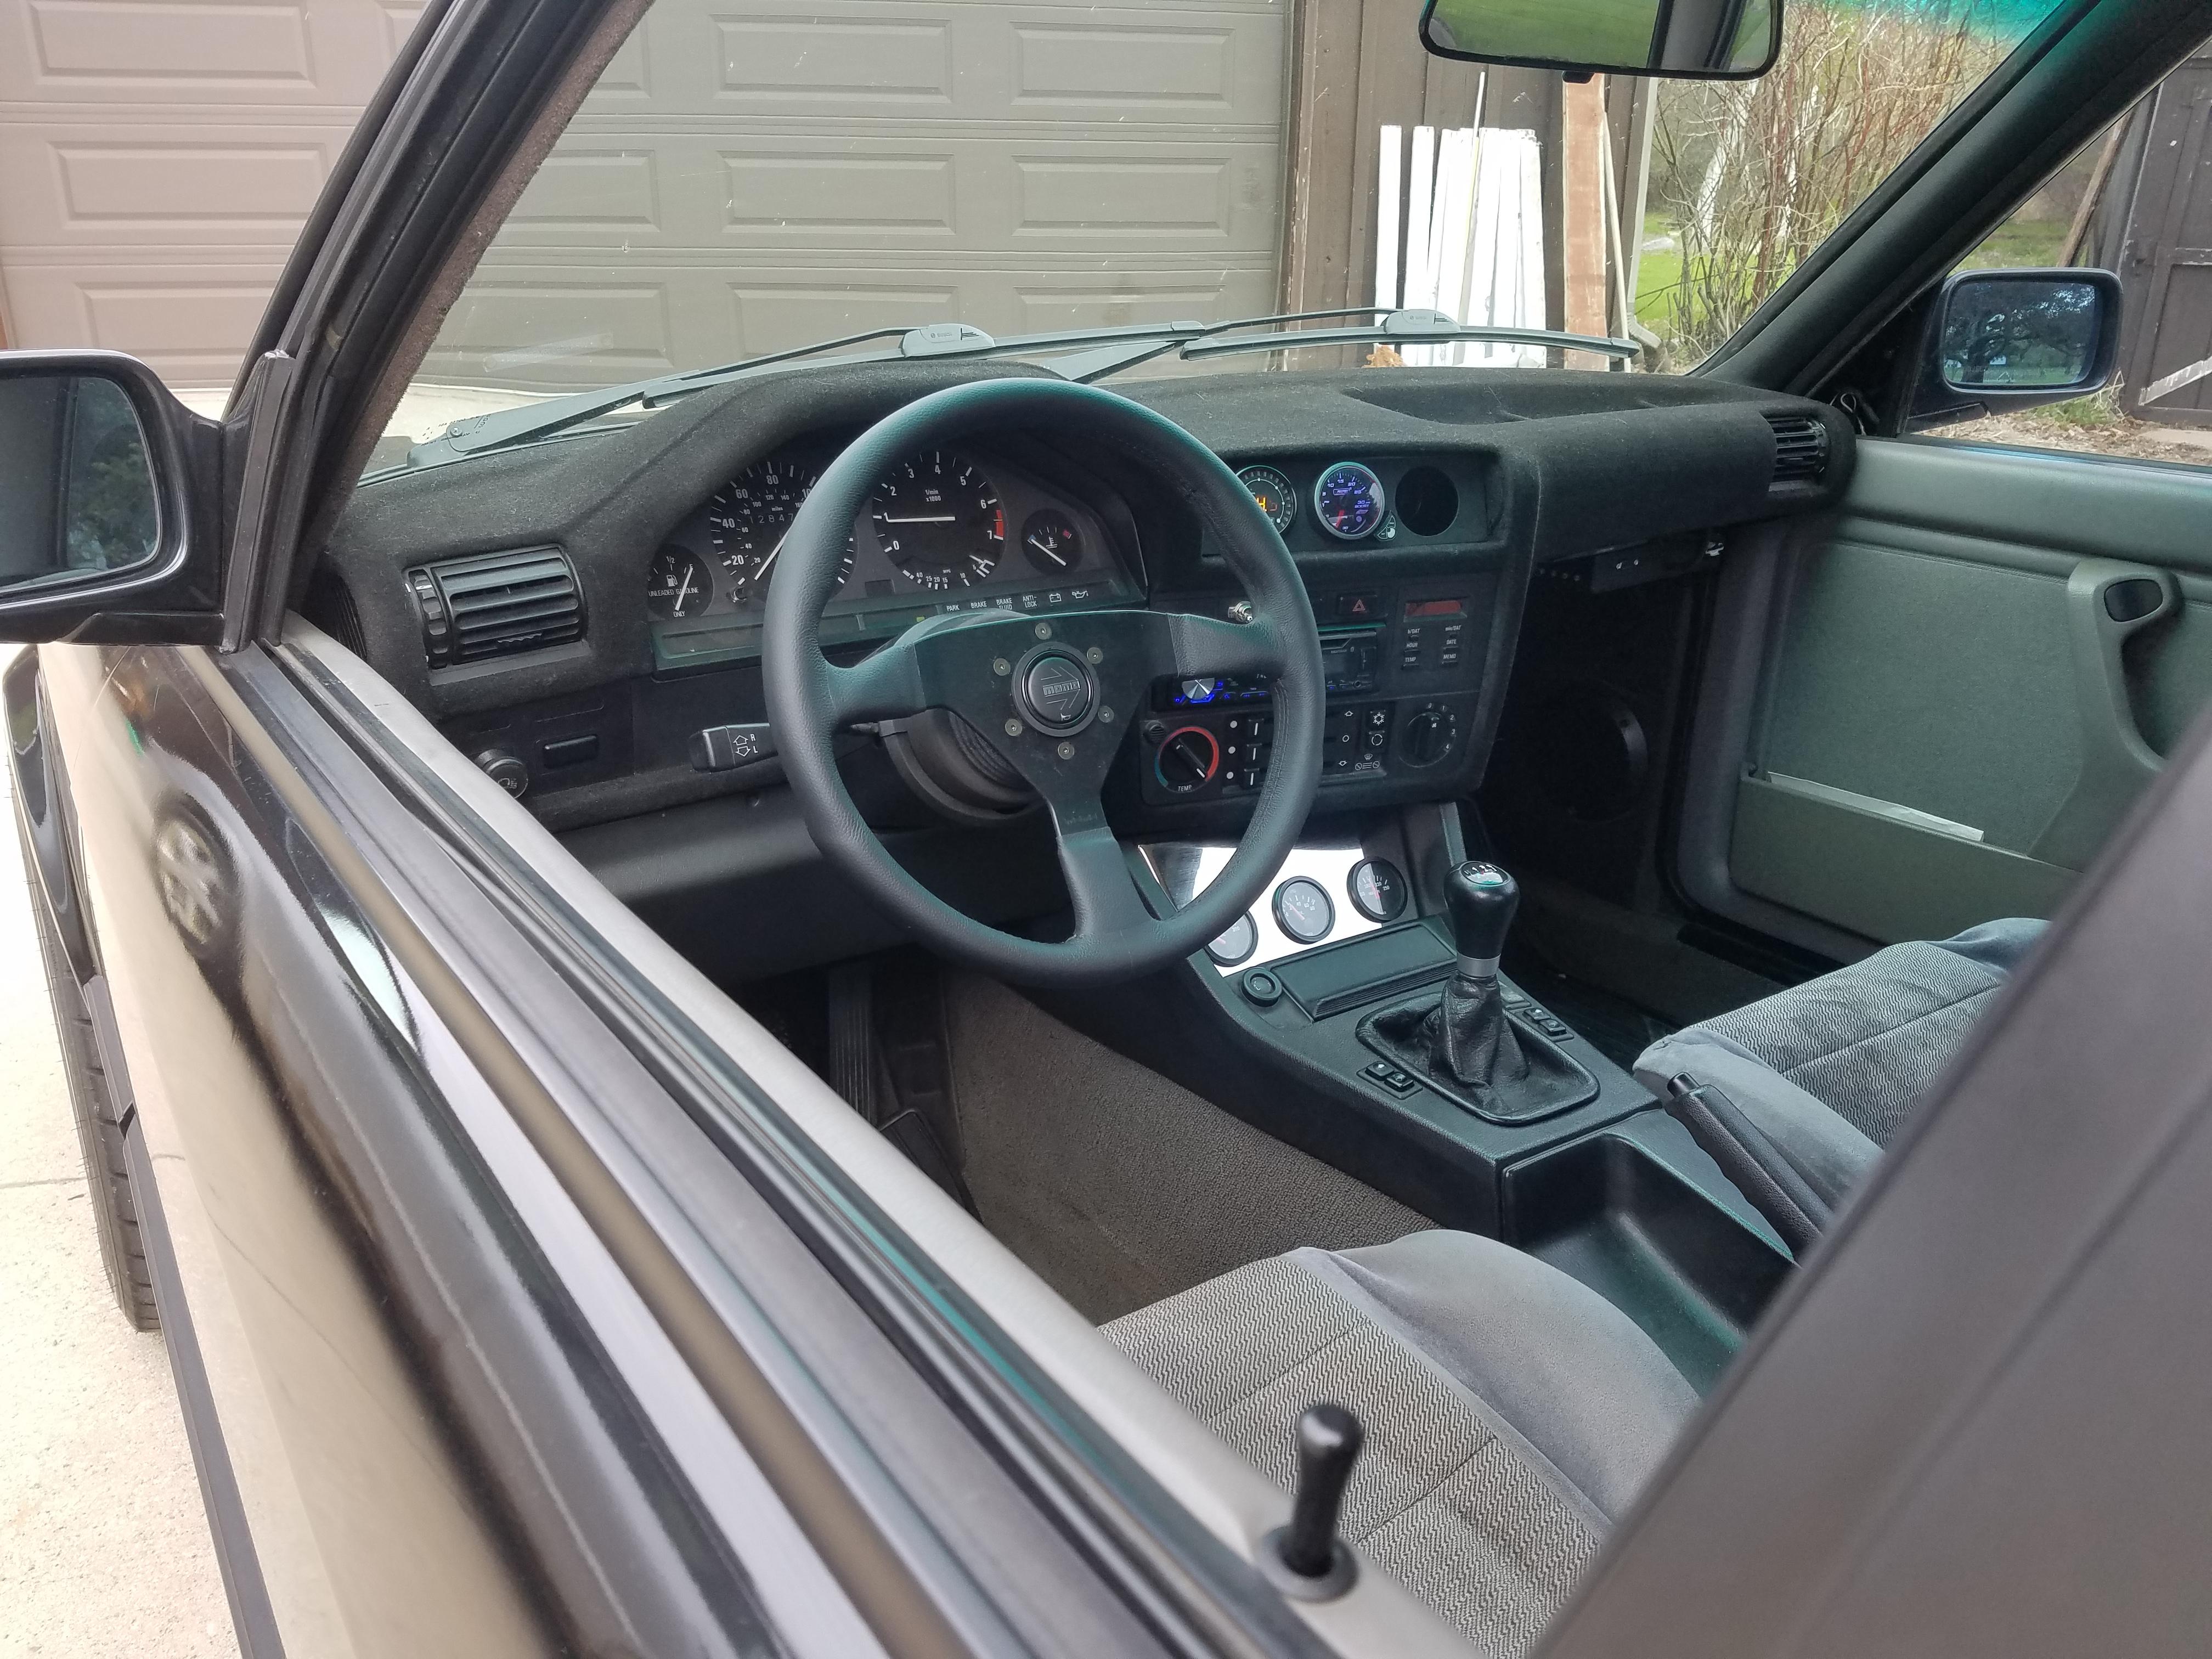
Next up was the steering wheel. I had just about enough with the airbag steering wheel and decided it was time for it to go. After spending a week researching and deciding on what to replace it with I decided on a momo steering wheel, the montecarlo.
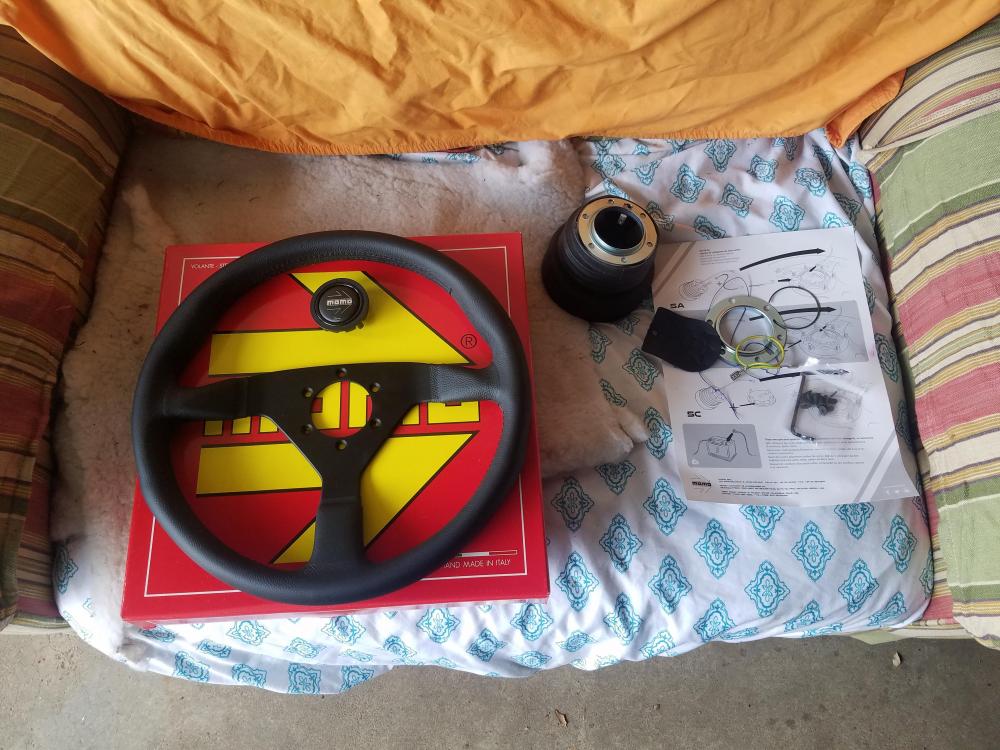
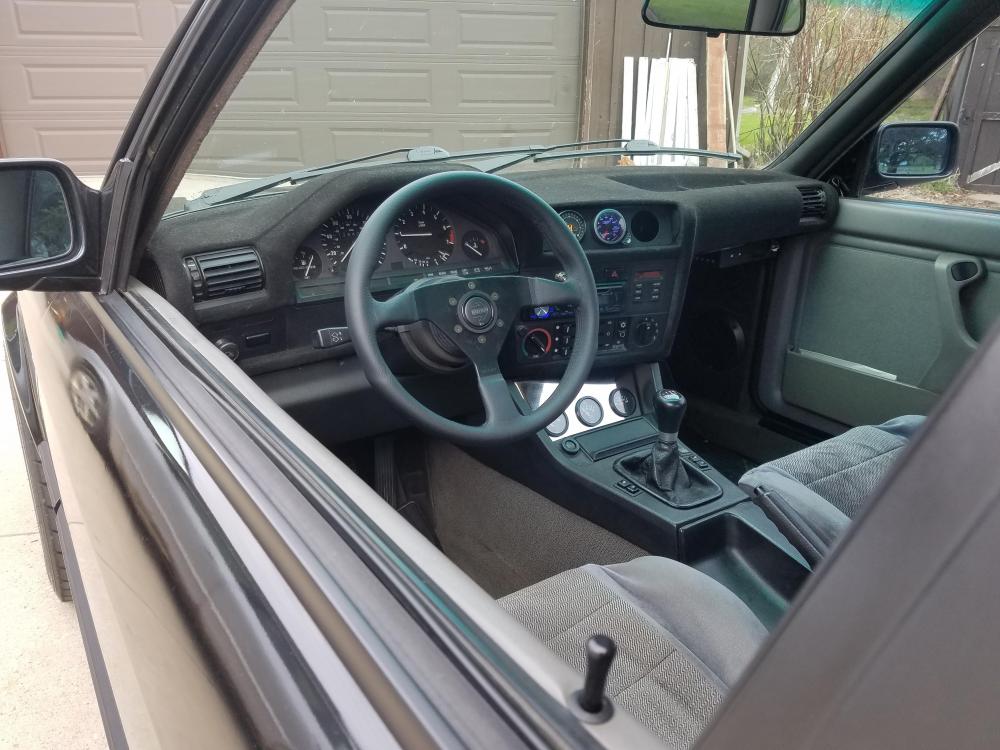
Its incredible how much of a difference a slightly smaller better feeling steering wheel can make. The new steering wheel matched with the z3 steering rack makes for an unbelievable feeling that reminds me of driving a go cart, I love it!
Oh and I also have a horn now lol. The original airbag steering wheel was messed up causing the horn to go off every time I turned it forcing me to pull the fuse and run without.
Next up, brakes.
After refreshing the entire brake system I installed centric oem high carbon rotors and stoptech sport pads. This setup worked great with the NA s52 setup and I felt like I had sufficient stopping power. Now with the extra power they are starting to show their weakness. I went out with a couple of friends this last weekend and drove some country back roads with quite a few curves pretty intensely. By the end of it my front wheels were smoking really badly and I even noticed quite a bit of fade on the brake rotor. After seeing this I knew it was time for me to upgrade to something a bit better. I stuck with an oem high carbon rotor but switched over to some hawk hps pads for both front and rear. I was considering doing another step up to the hp+ pads but found that many said they weren't the most ideal if the car is being drivin on the street as they squeak quite a bit. I will see how the hps pads perform and go from there.
Lastly and most importantly, my cut out issue.
This is something I've had ever sense I got the car back from the dyno. It happened very rarely at the beginning but as I drove the car I figured out where and why it was happening but wasn't quite sure how i should adjust it.
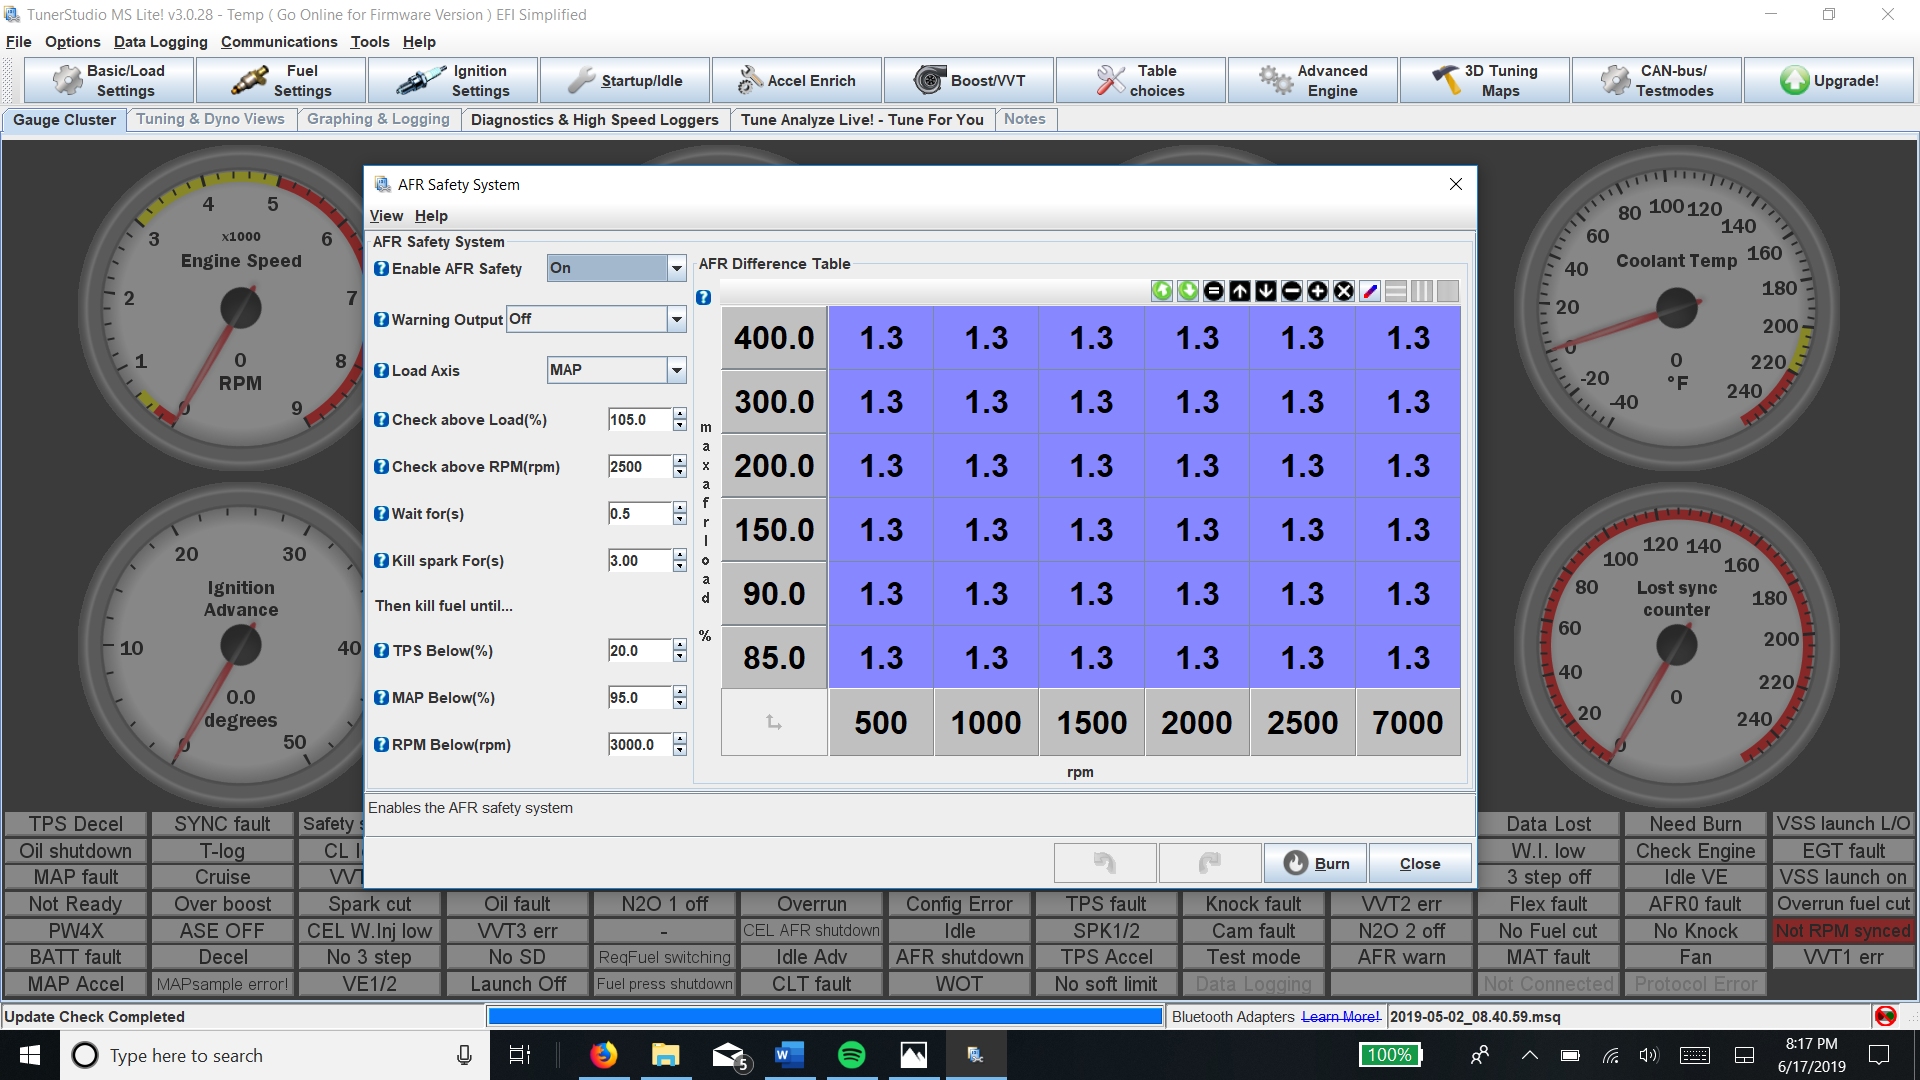
Scenario: I'm driving in 3rd gear at about 2600 rpms. If I gave the car 100% throttle right away the car would almost immediately cut out and I would lose all power. I would then let off the throttle completely and let the car roll for a few seconds in which it would then return to normal and I could go along my way with no problem. Now, if I rolled into the throttle in 3rd gear instead of 100% she never cut out and would pull well with no issue. It would also never cause an issue when starting from a dig and revving out all the gears. I started digging through TS a bit and I came upon the afr safety settings. After reading through the settings and thresholds set compared with when the issue was happening I feel that this is what is causing it. After 2500 rpm's when the afr was found to be off by 1.3 lean or 1.3 rich it would kill spark and then fuel tell I let off the throttle for 3 seconds in which it would return to normal.
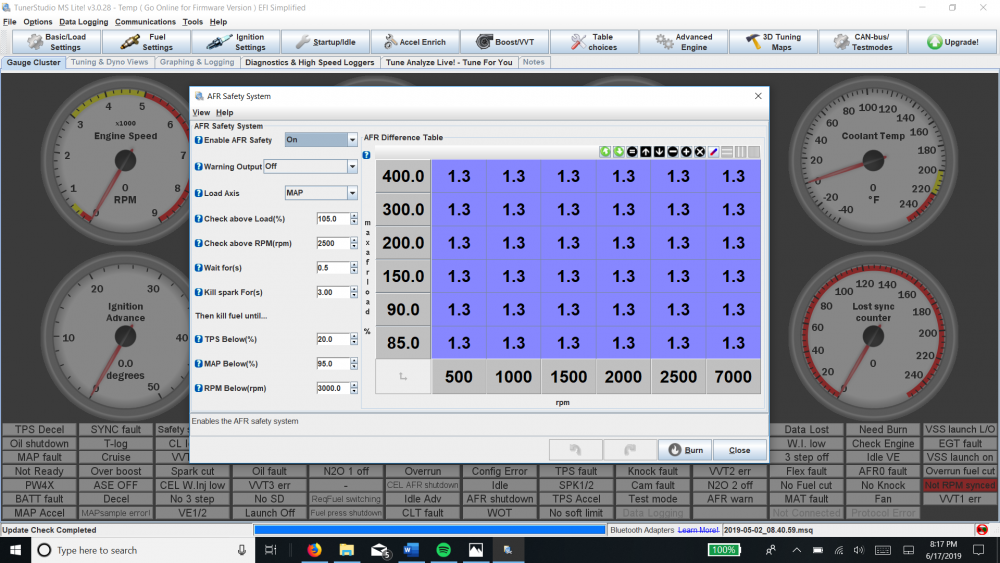
Luckily I just recently found a local guy who tunes a lot of standalone systems and is quite familiar with MS and tunerstudio. I'm bringing the car over to him Wednesday and hopefully we will be able to clear up this issue before the weekend.
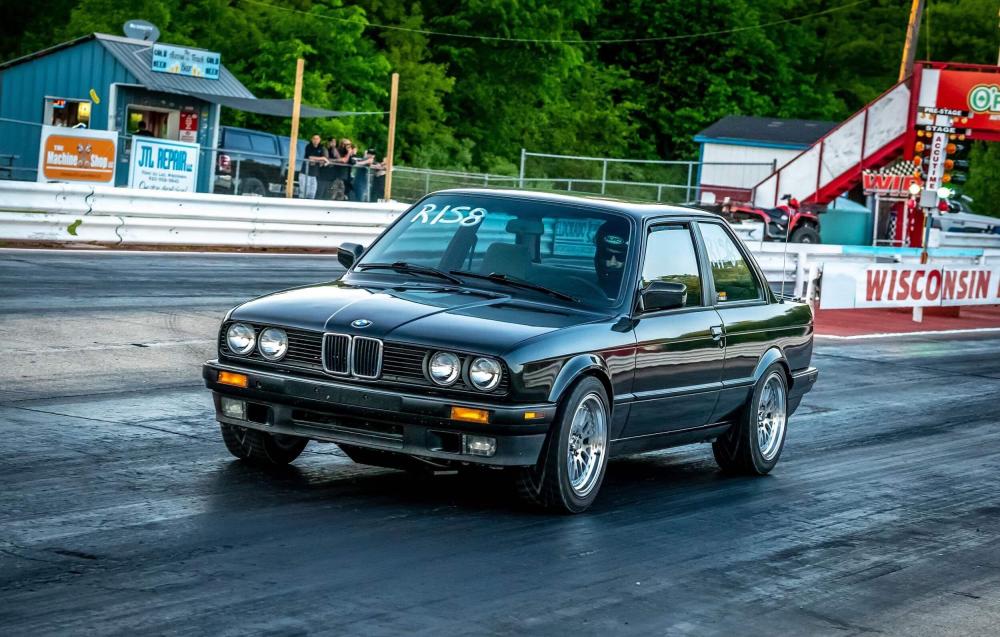
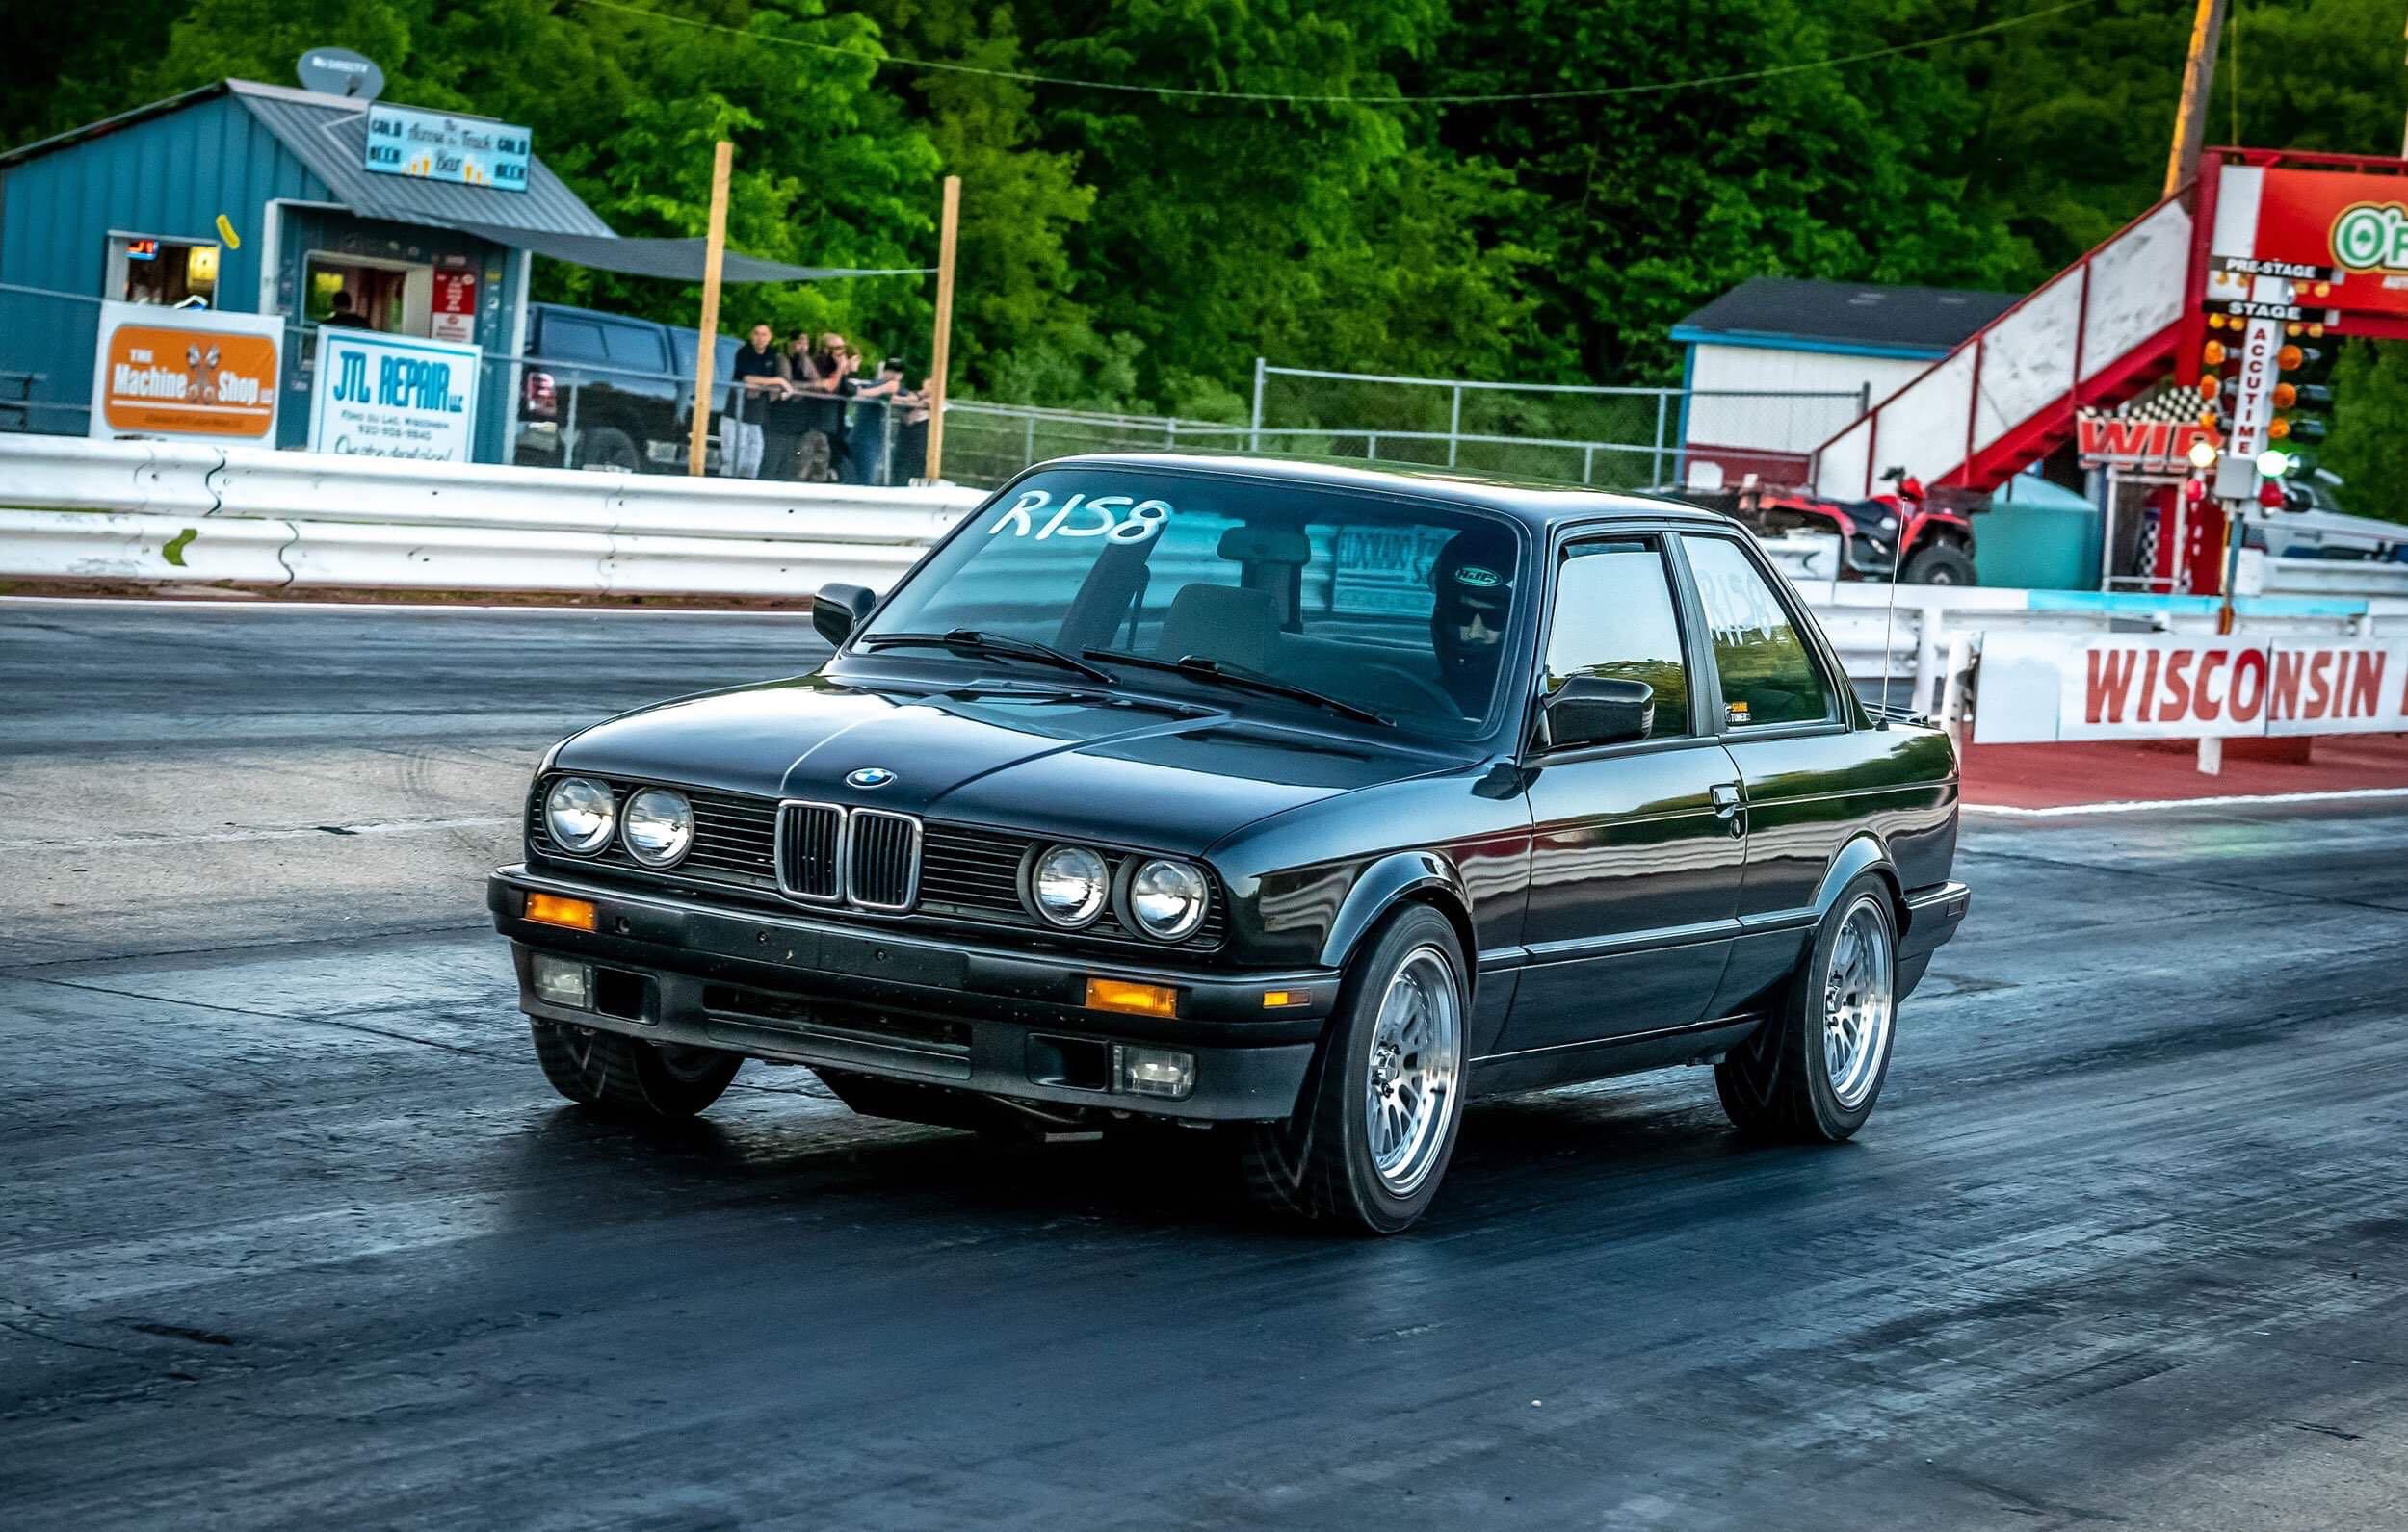
Well that's about it in terms of things that were fixed and what needs improvement. For those of you who I didn't get to talk to at the picnic I finally got to take the car to my local drag strip and got to see what she runs in the 1/4 mile. Being that it was my first time doing this I was quite nervous causing my first two runs to a little weak.
All in all I was able to get in four runs total with my best time on my third run, 12.23 seconds at 118 mph.
The match was against a Mitsubishi ralliart which had quite a bit of work done to it including a larger turbo and running e85. (Owner predicted it at around 425 hp awd)
Well, it wasn't quite enough...
What hurt me the most was my 60 foot which was about 2 seconds. I think I should be able to shave off a good .3 seconds off of that but it's a bit challenging being that trying to launch the car at all results in me spinning a little tire.
I had a lot of fun overall and it was a great experience.
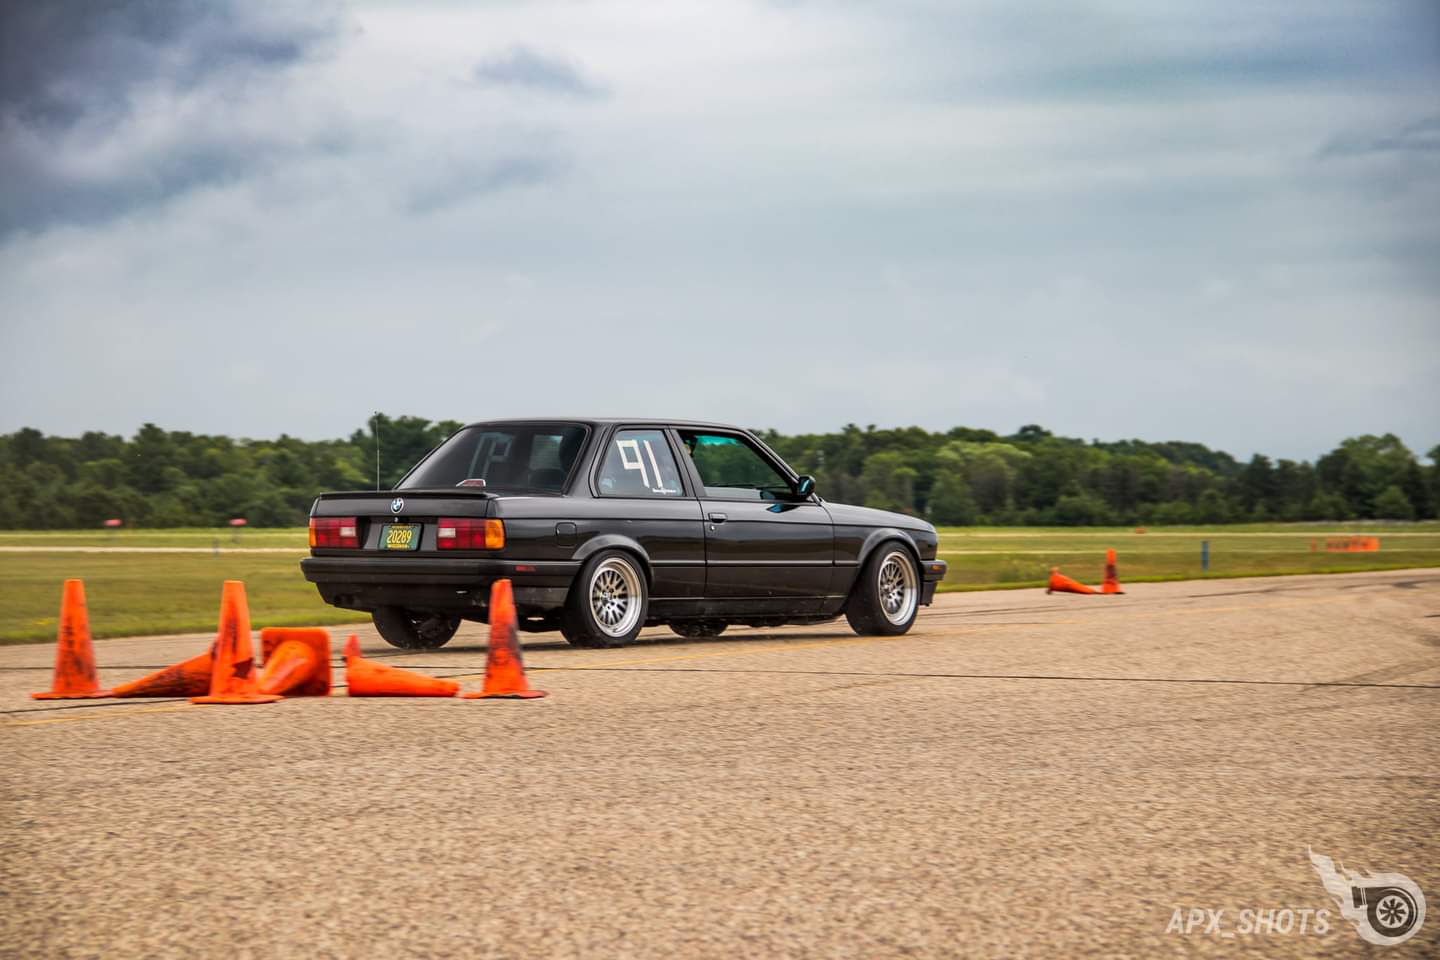
As for upcoming events I am excited to say that I will be participating in my first auto x event this Sunday at the US air motorsports raceway in Shawano. Hoping to see a few of you guys there!
Burnout vids coming soon.
-
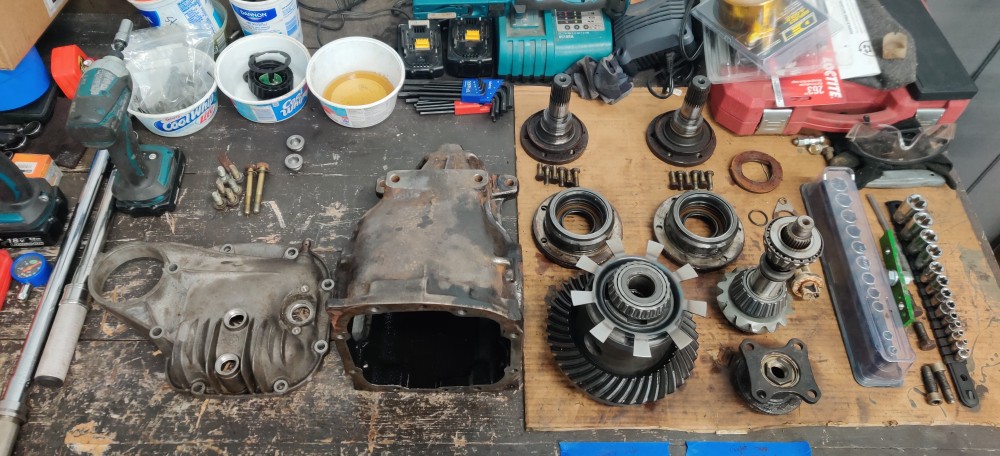
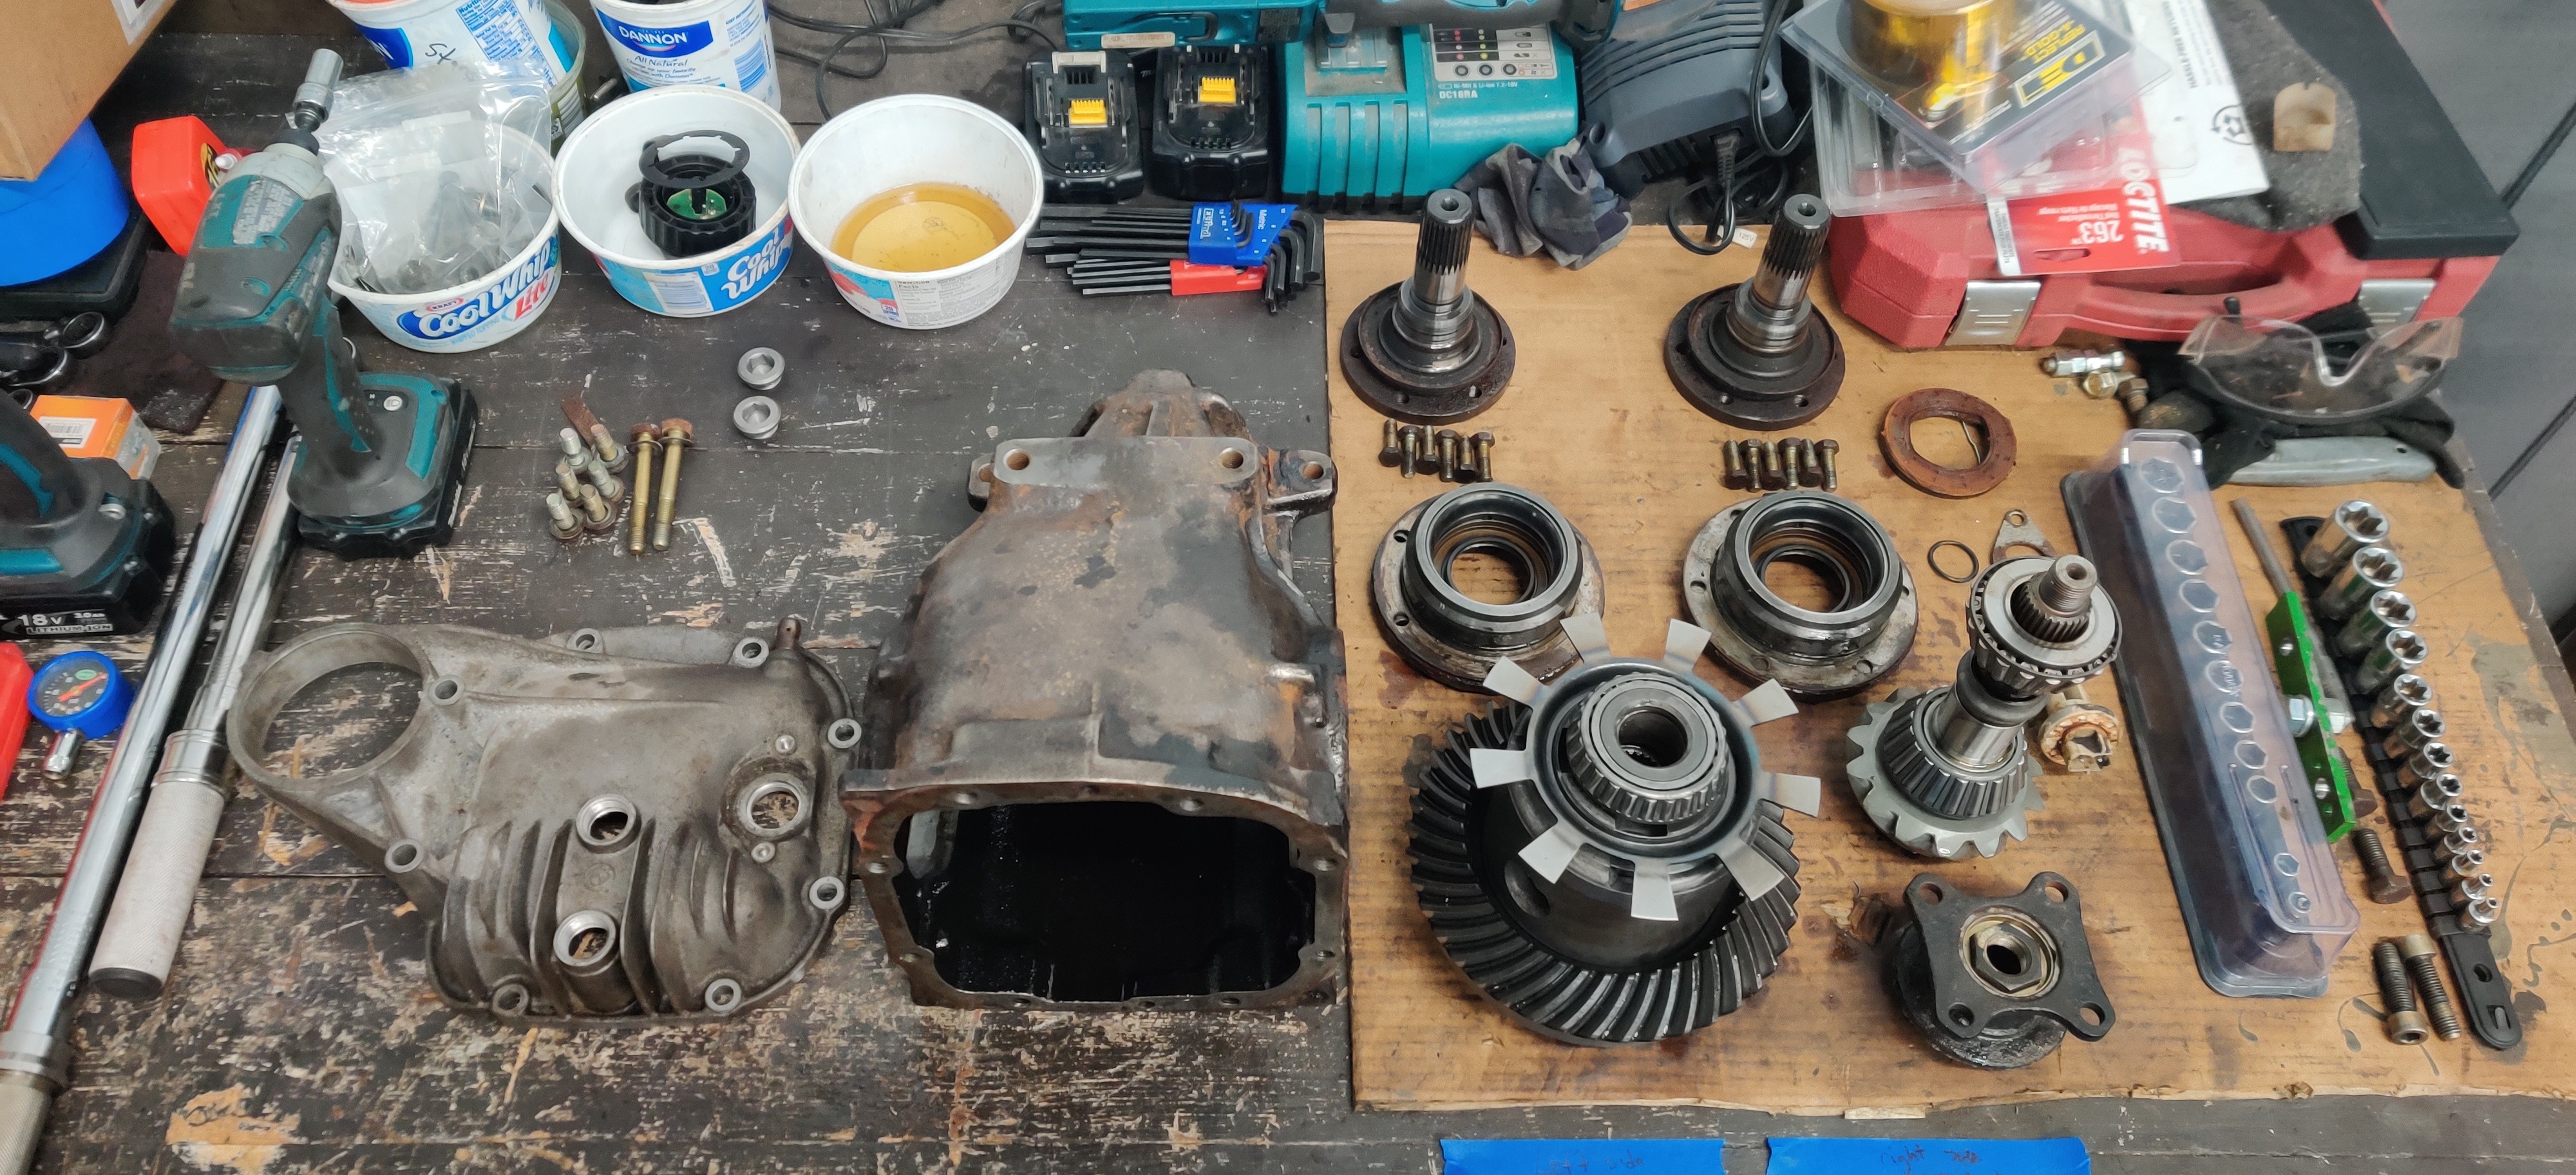
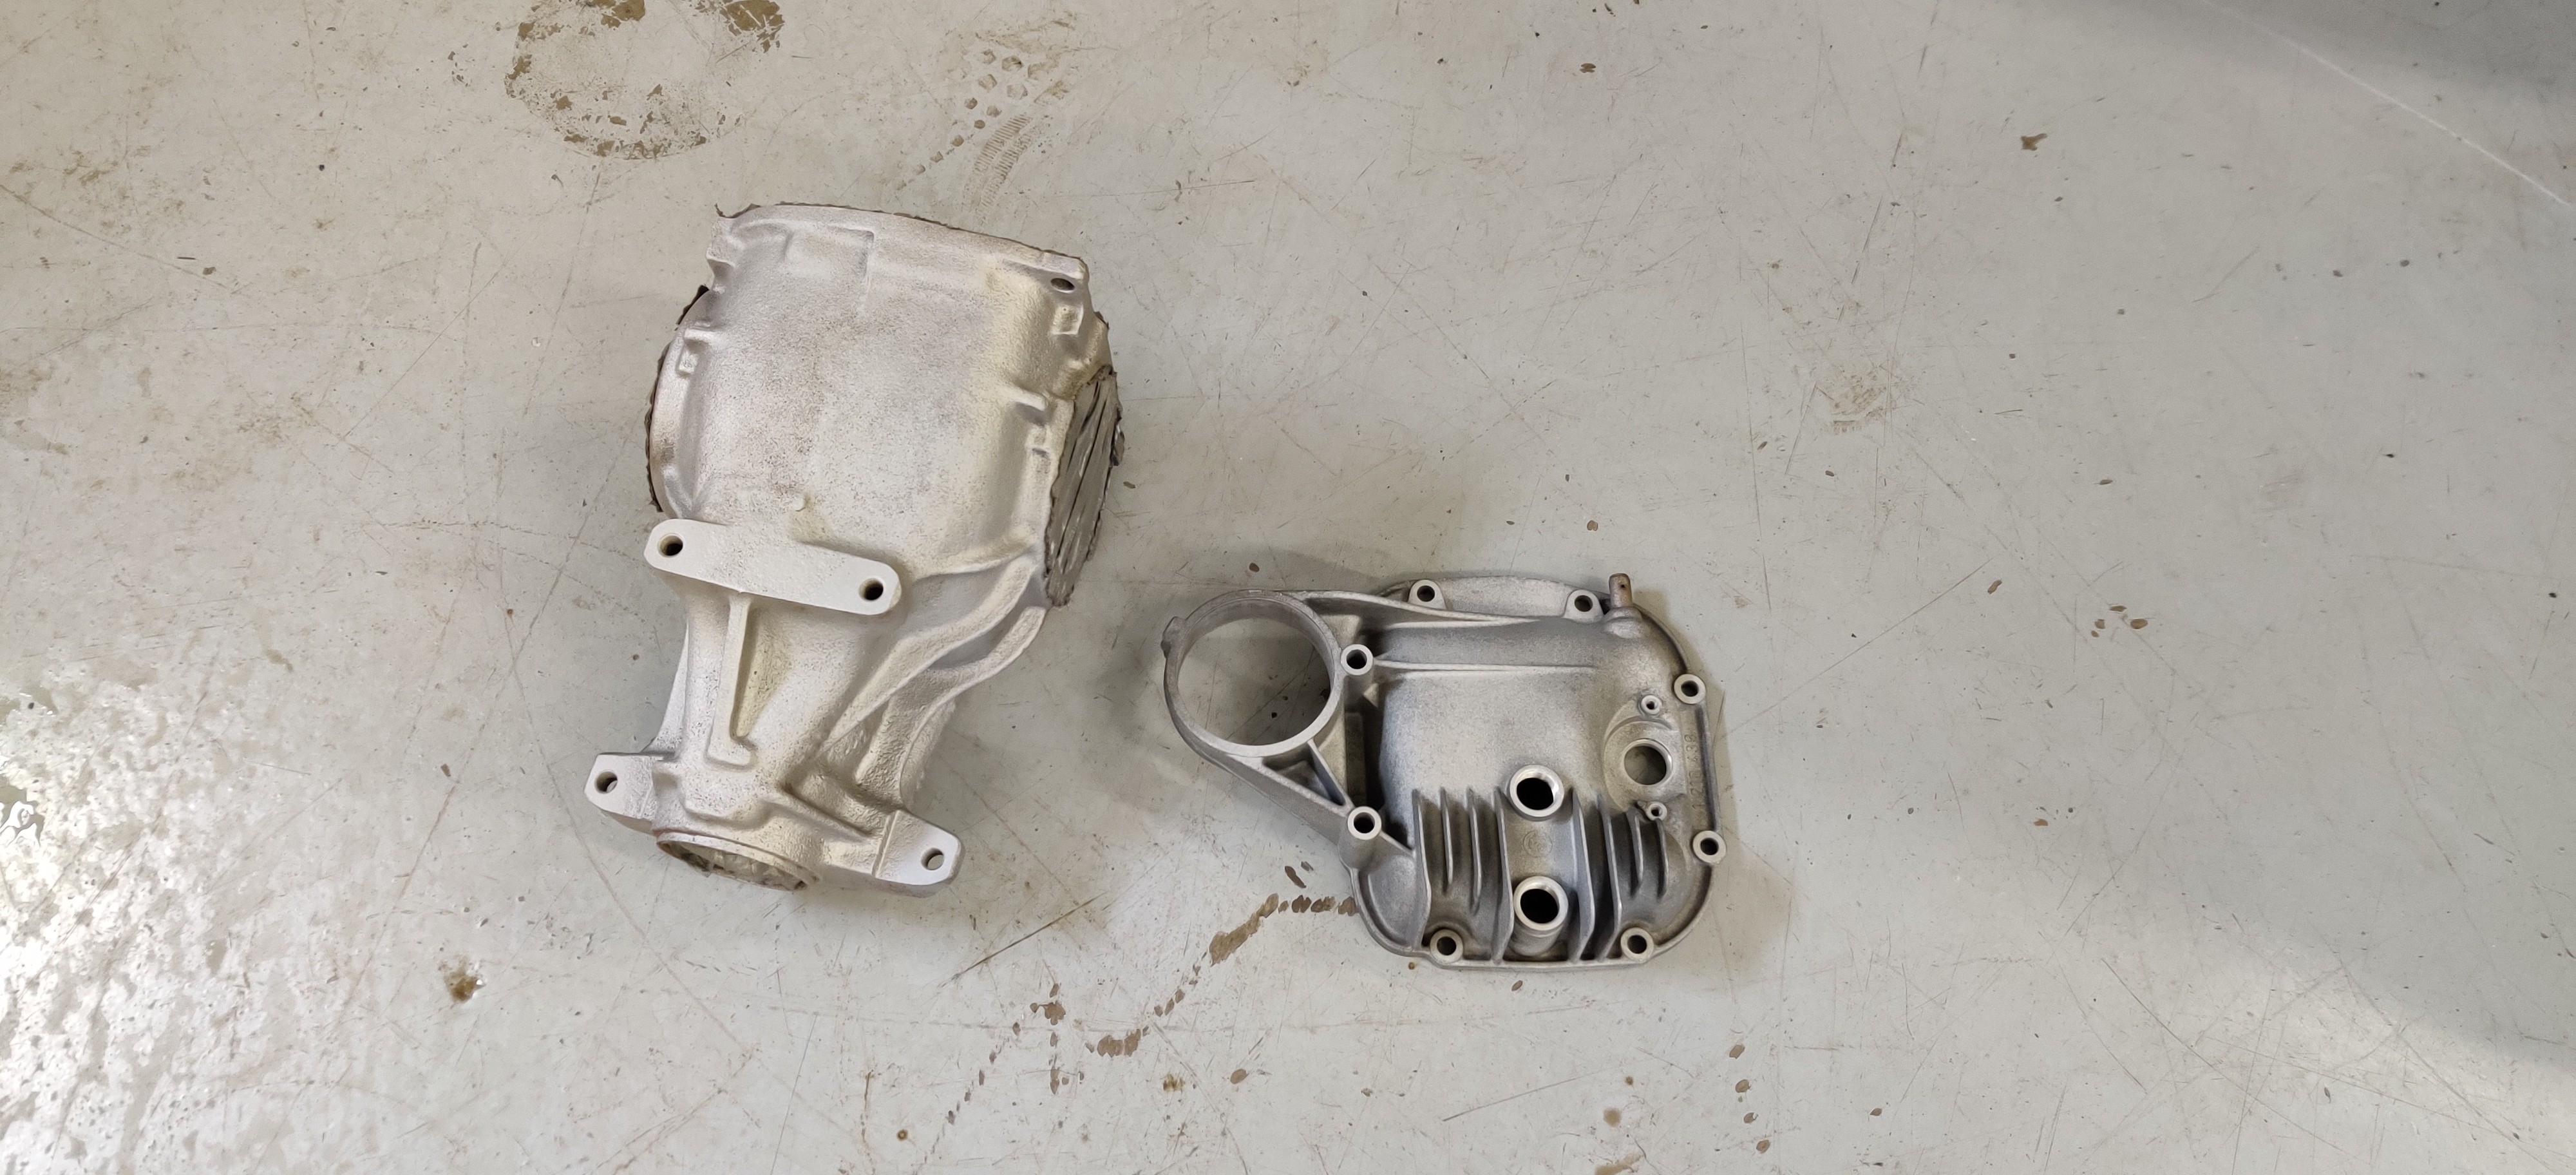
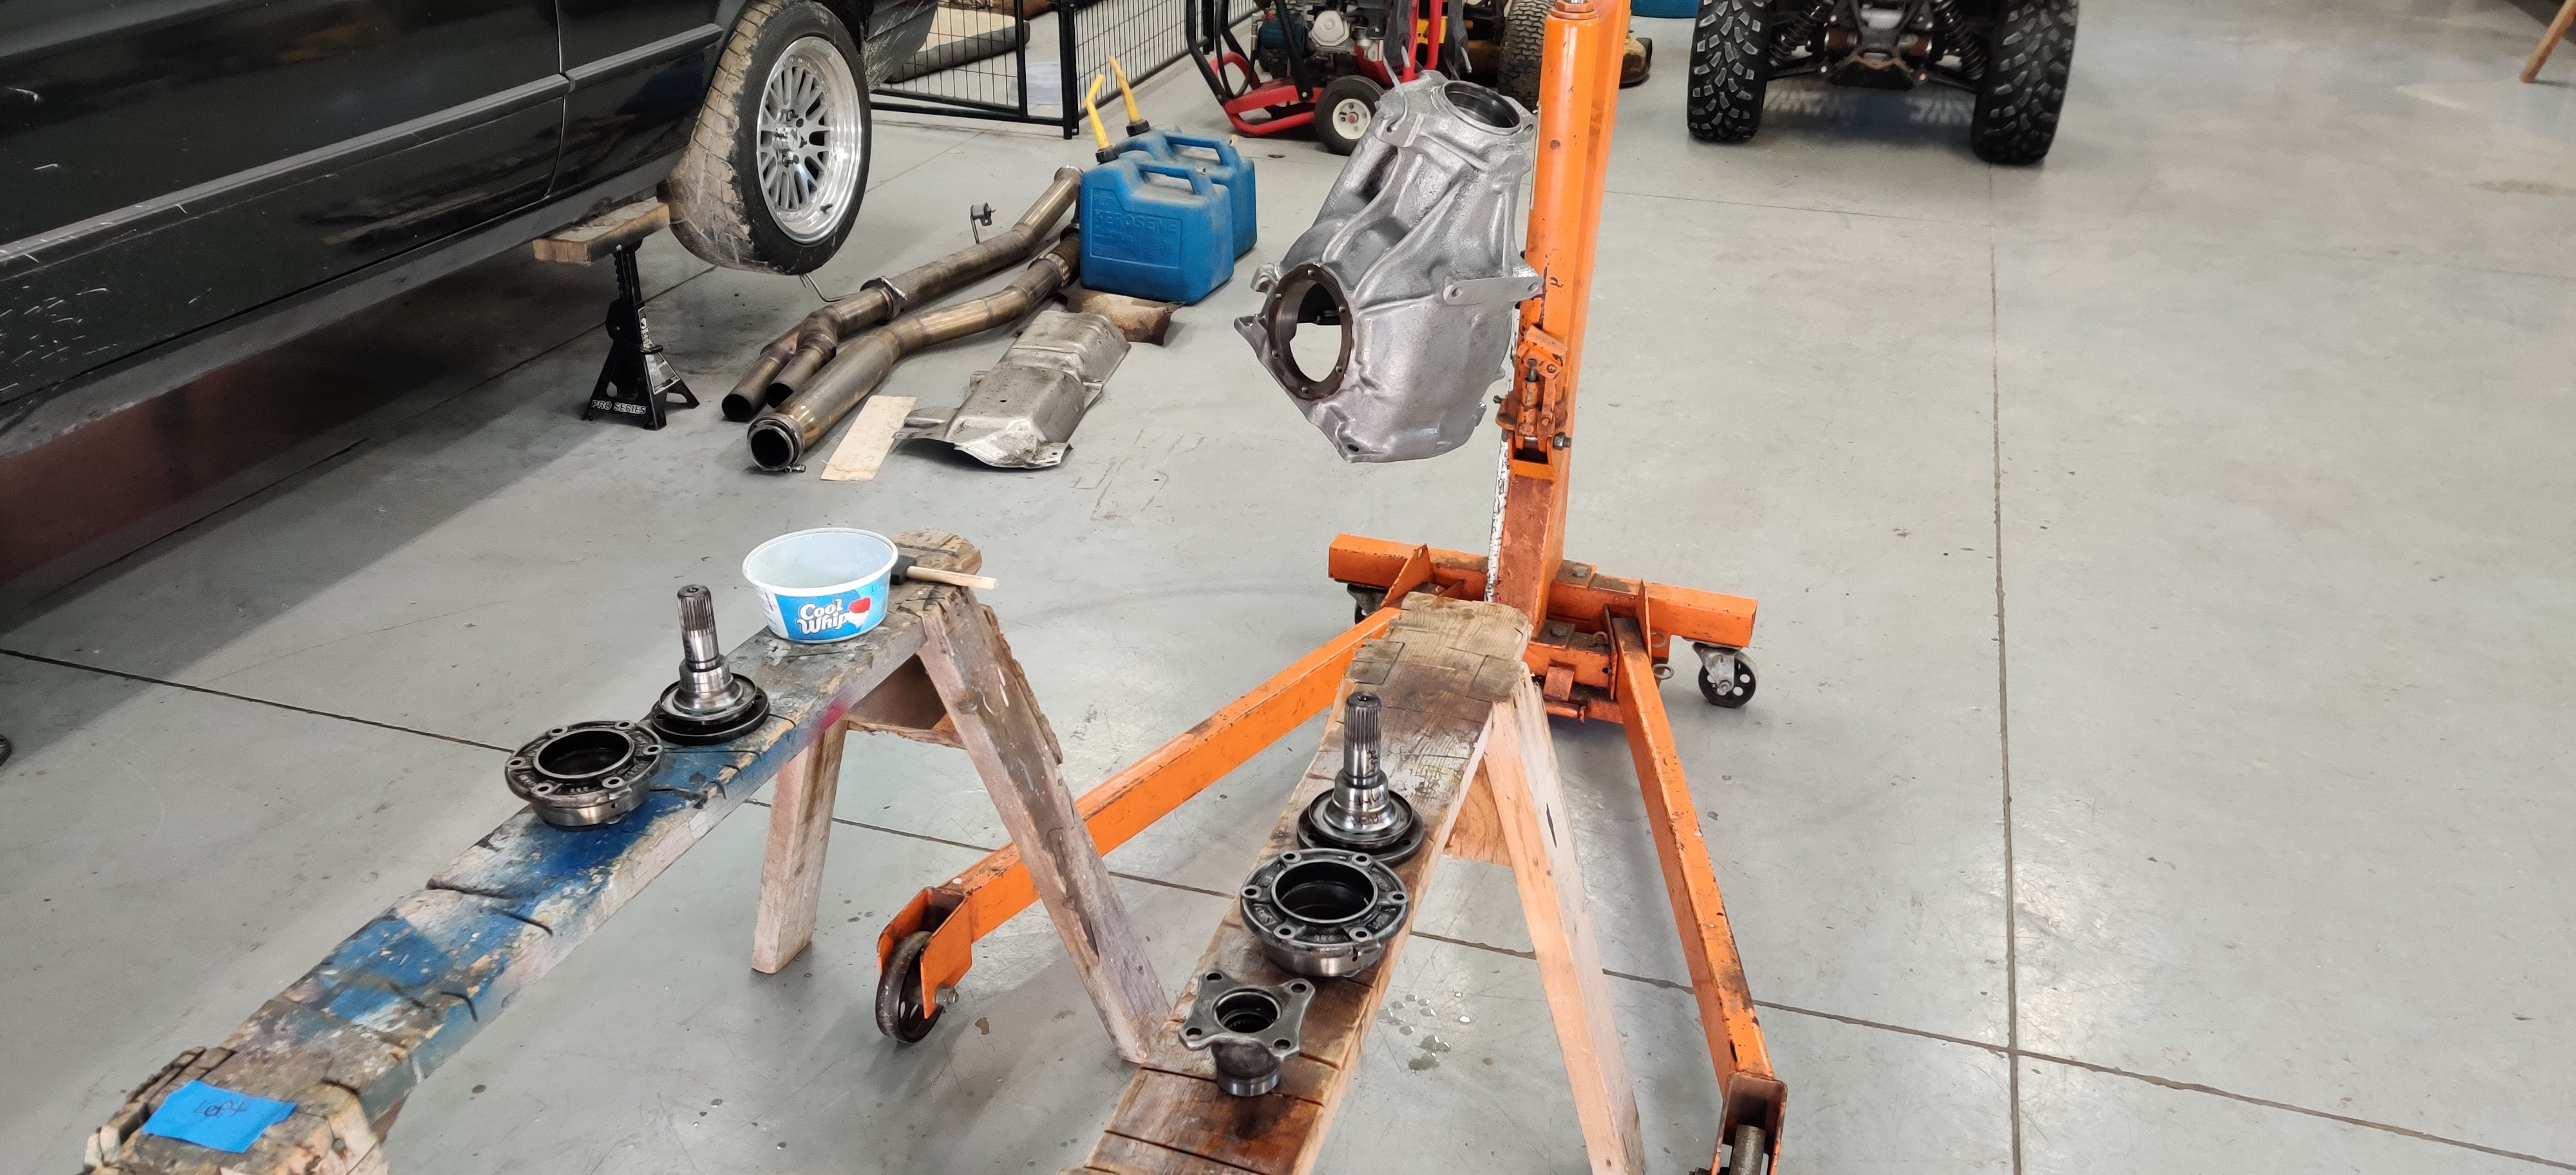
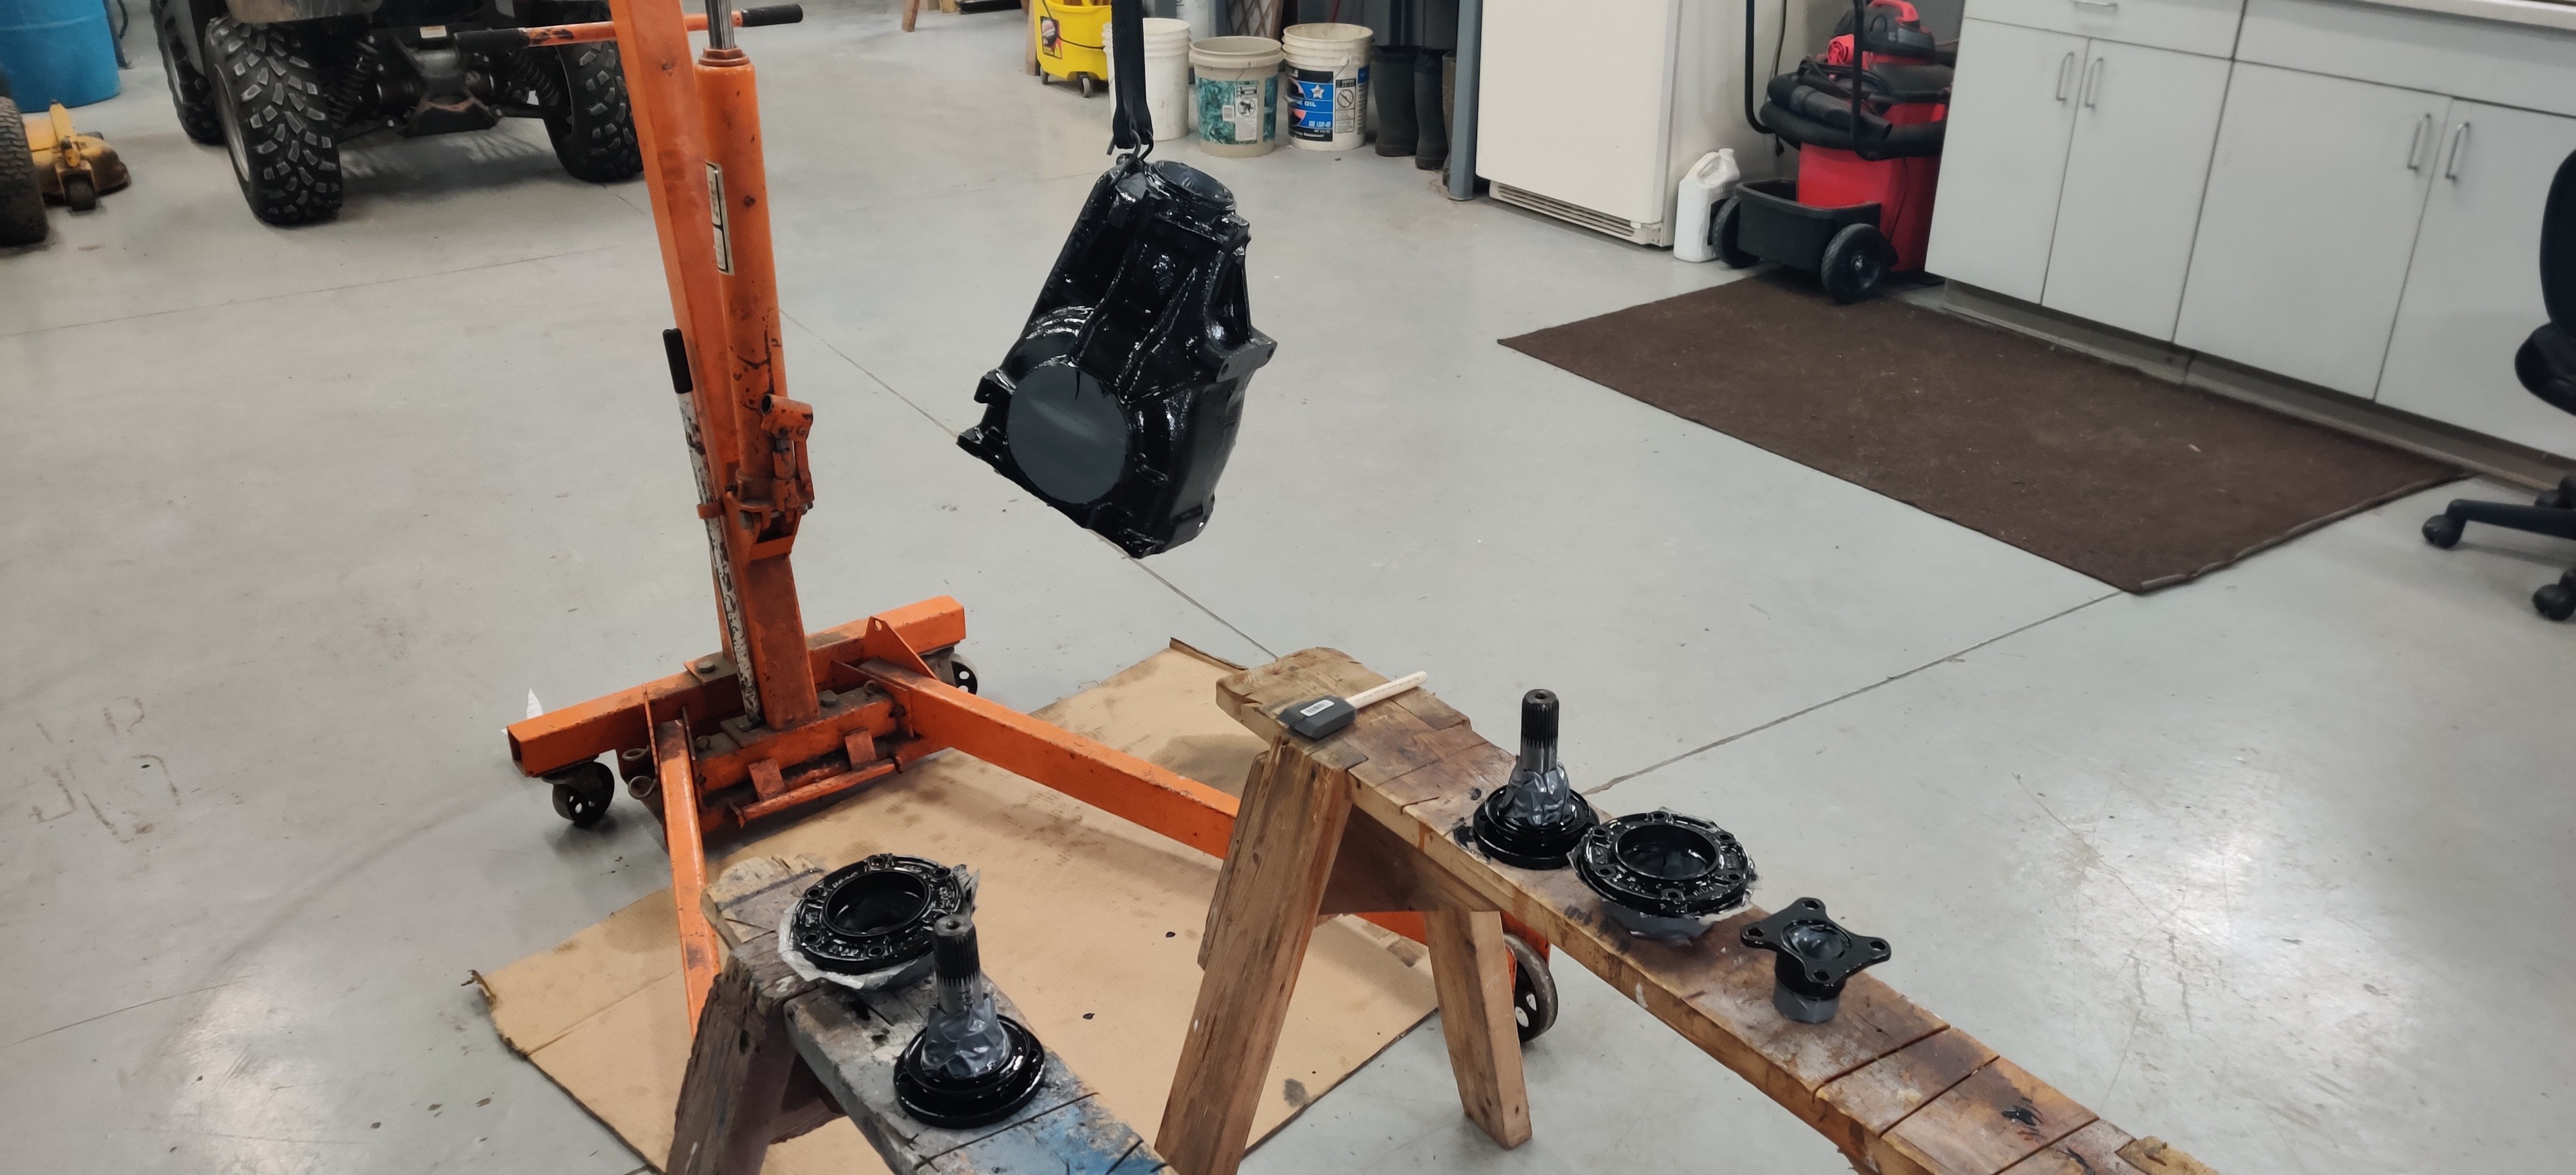
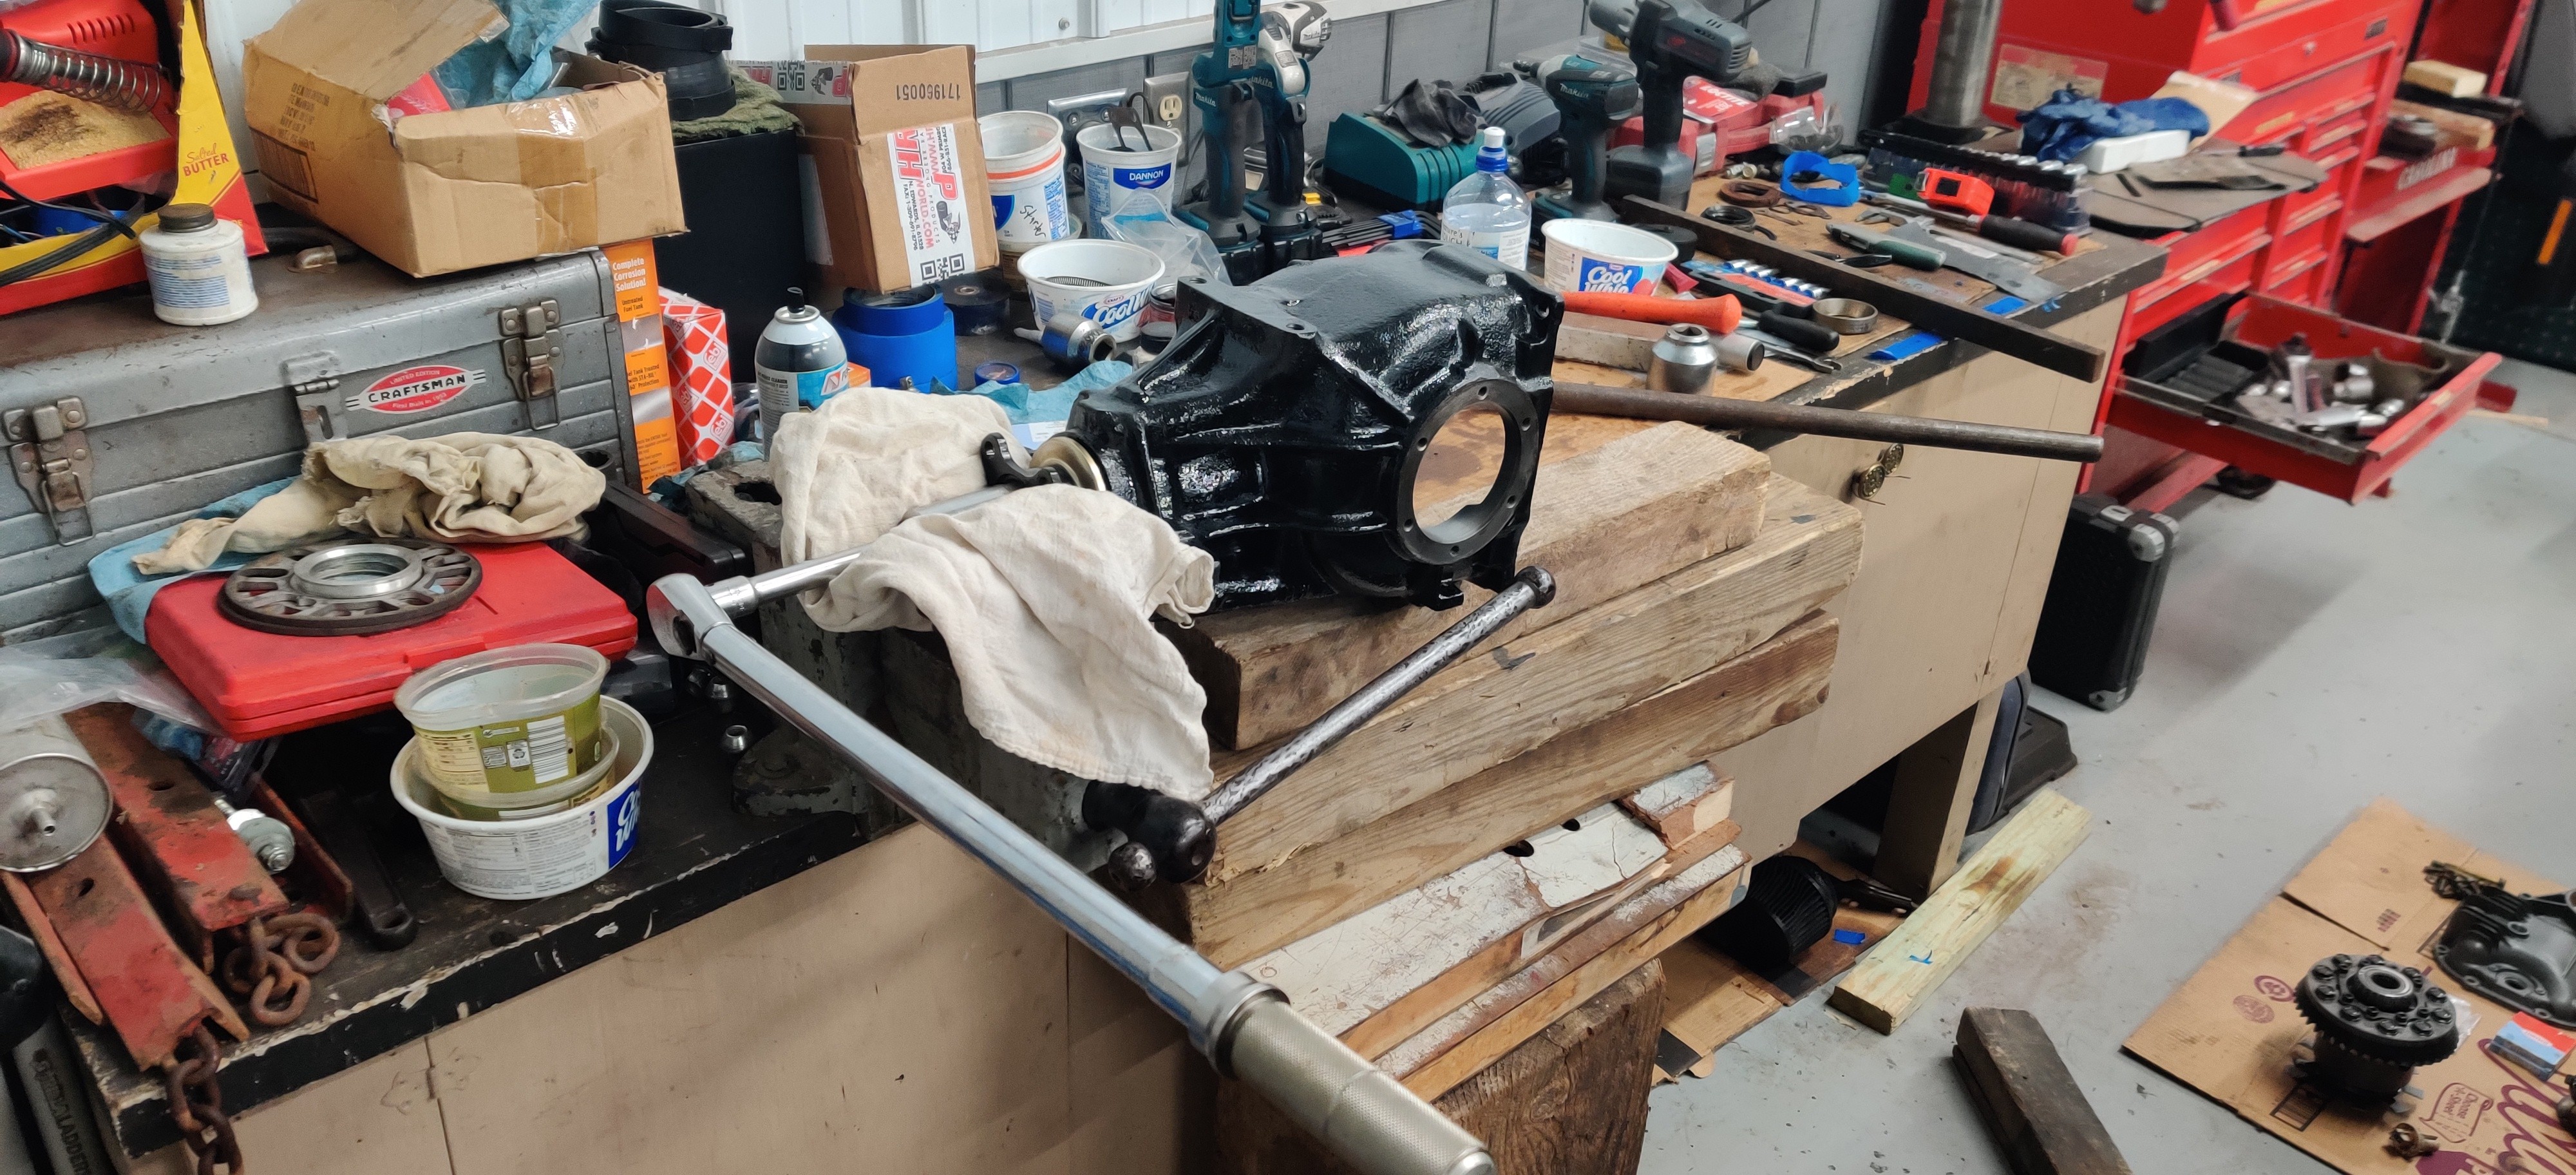
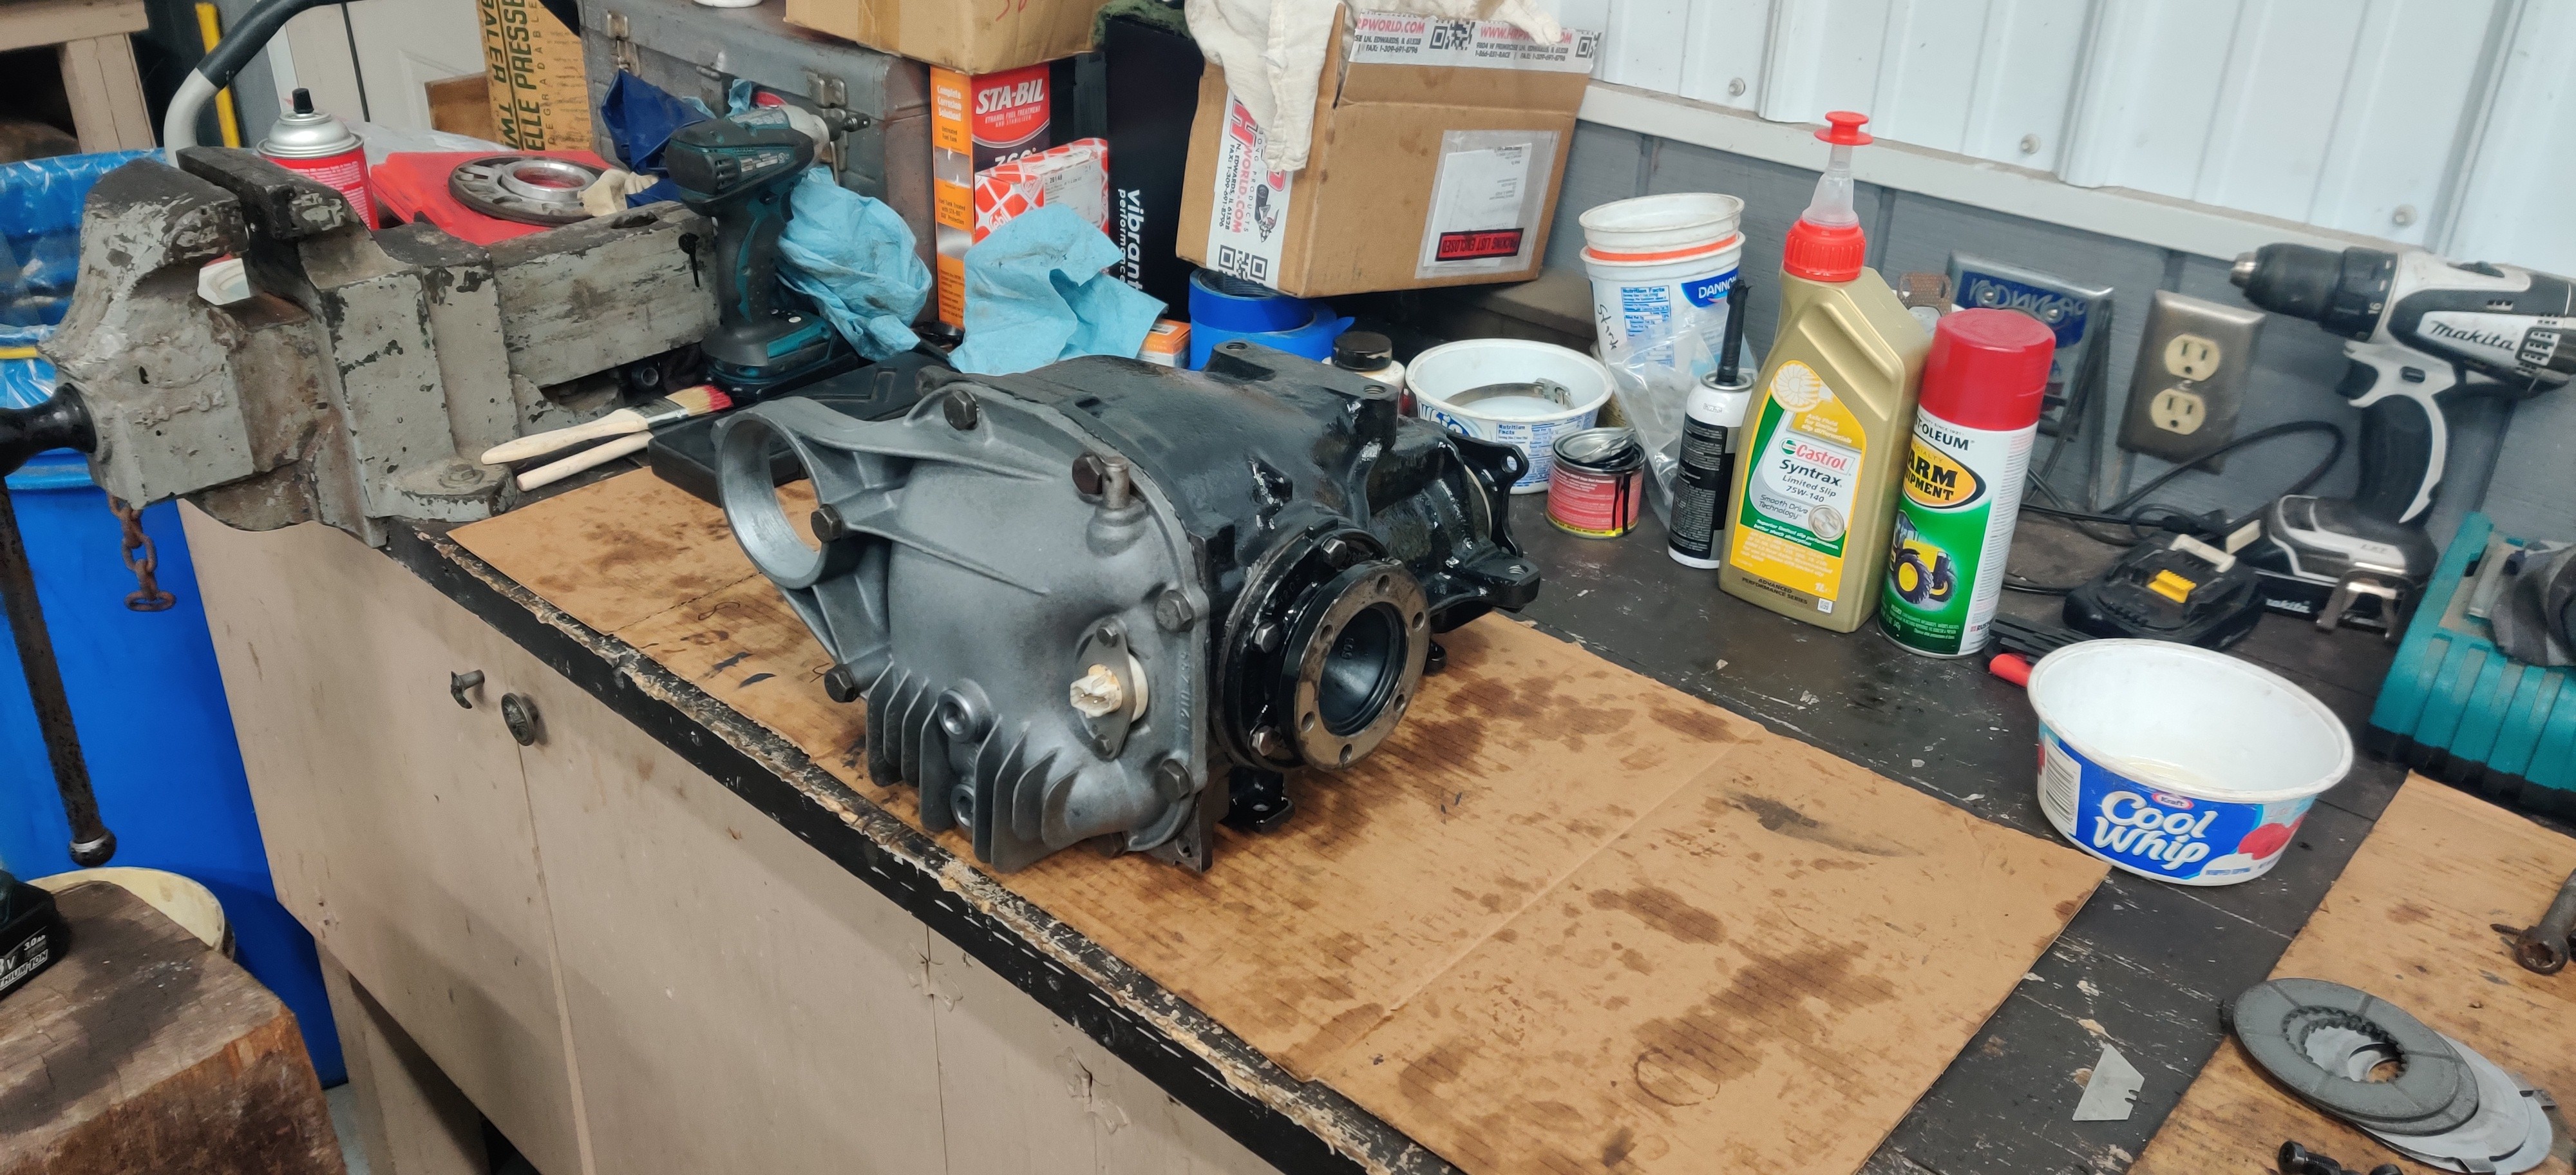
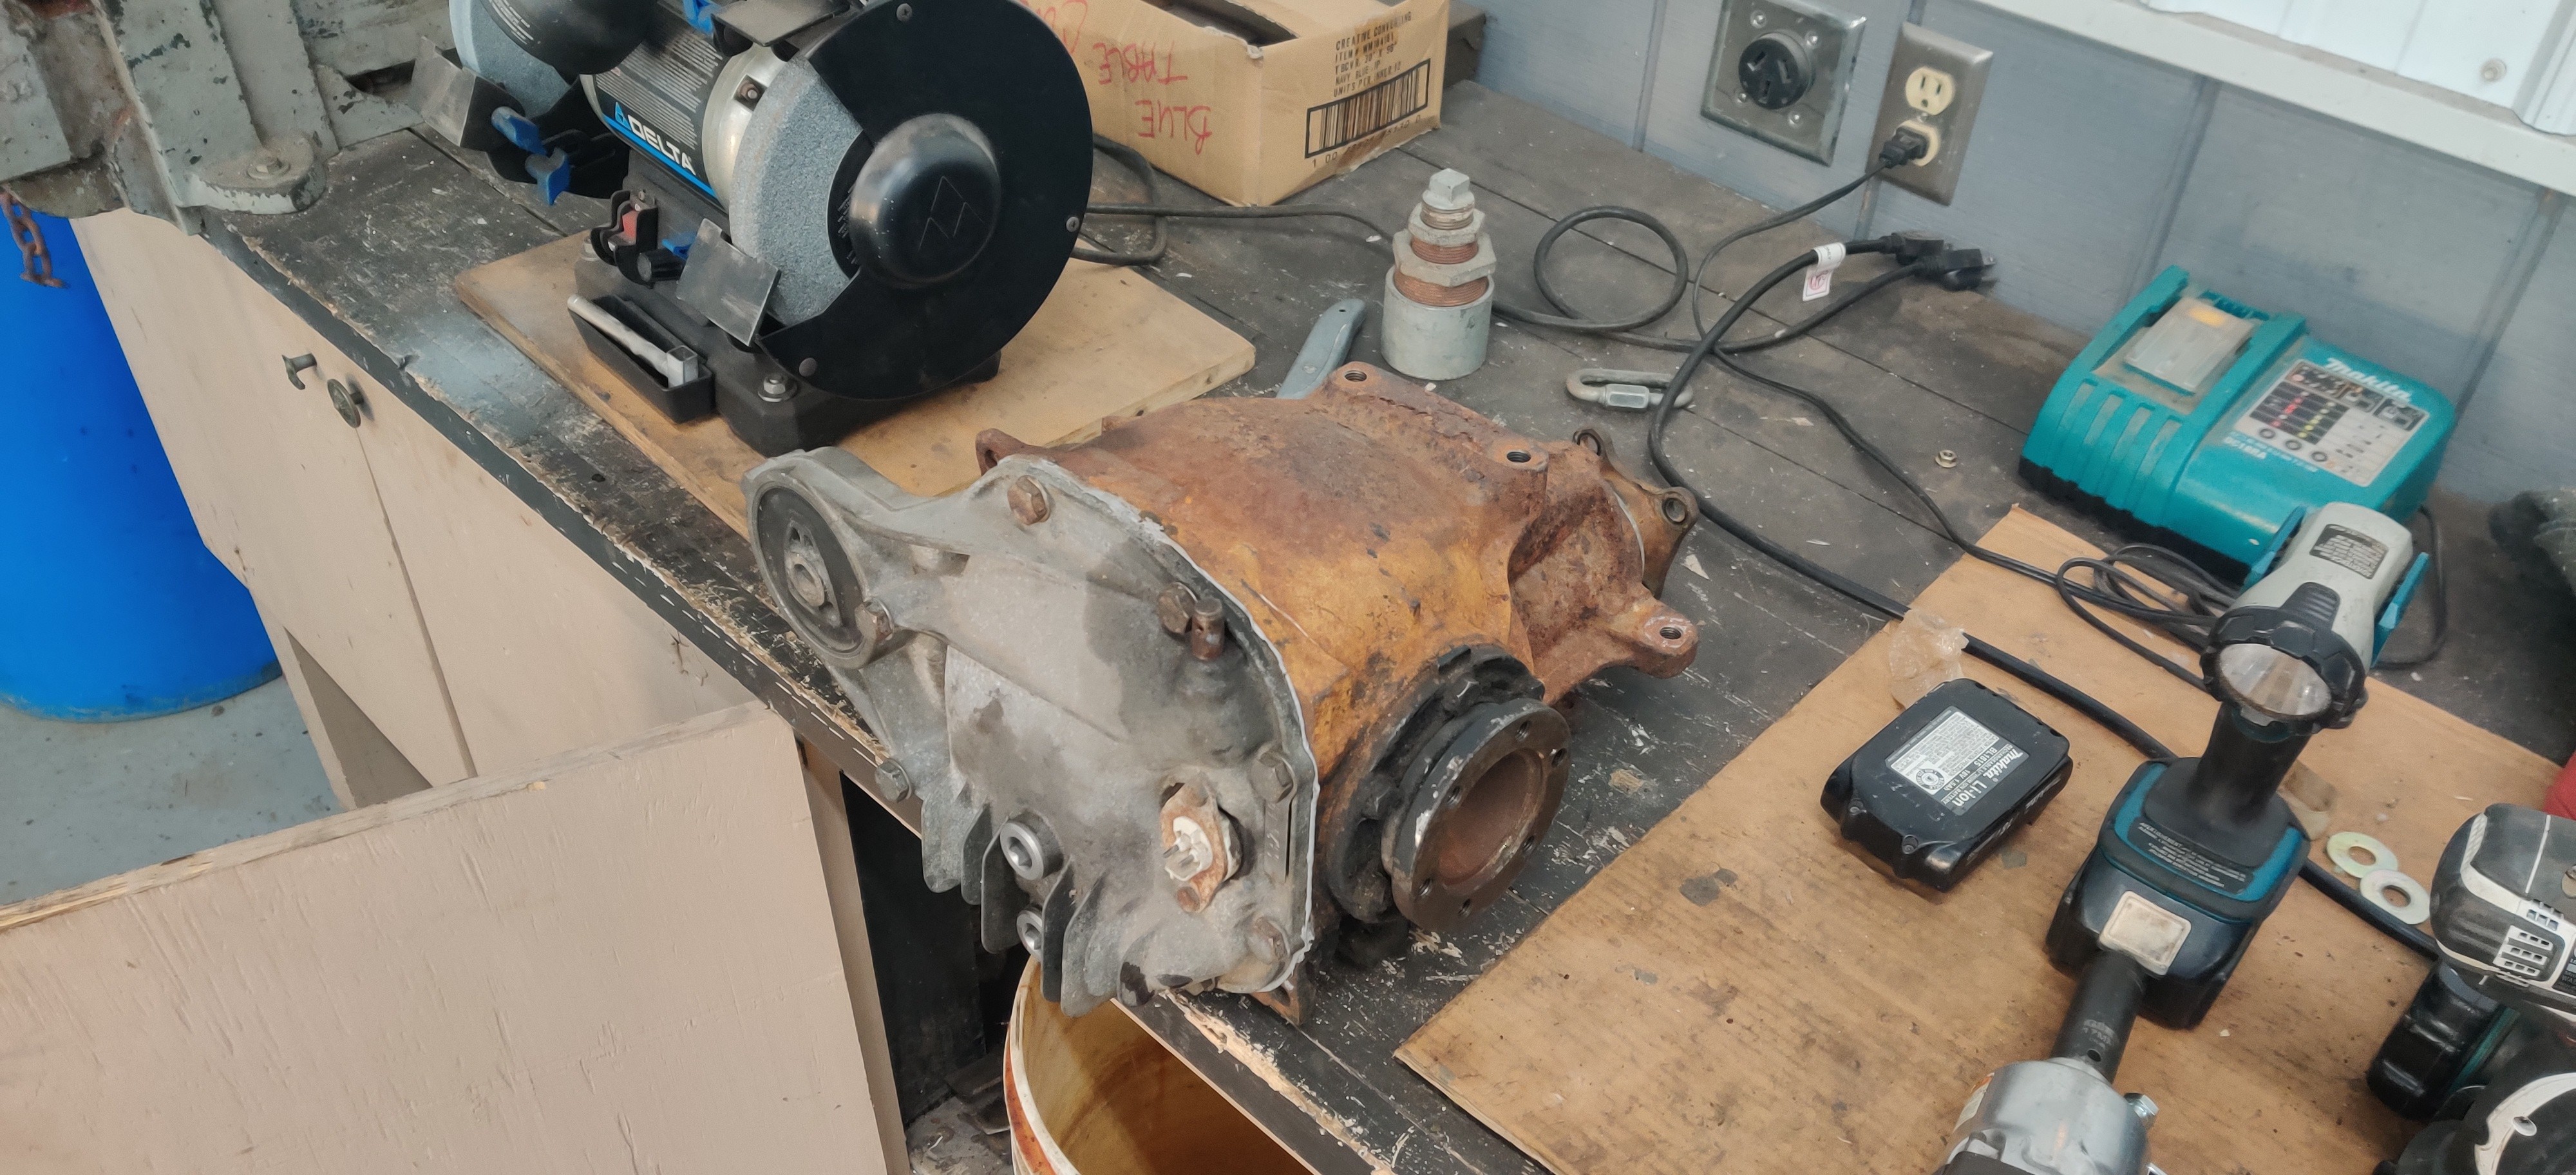
the one and only e30 s52 engine swapDifferential was fully dissembled for the case and cover to be sent in for sand blasting.
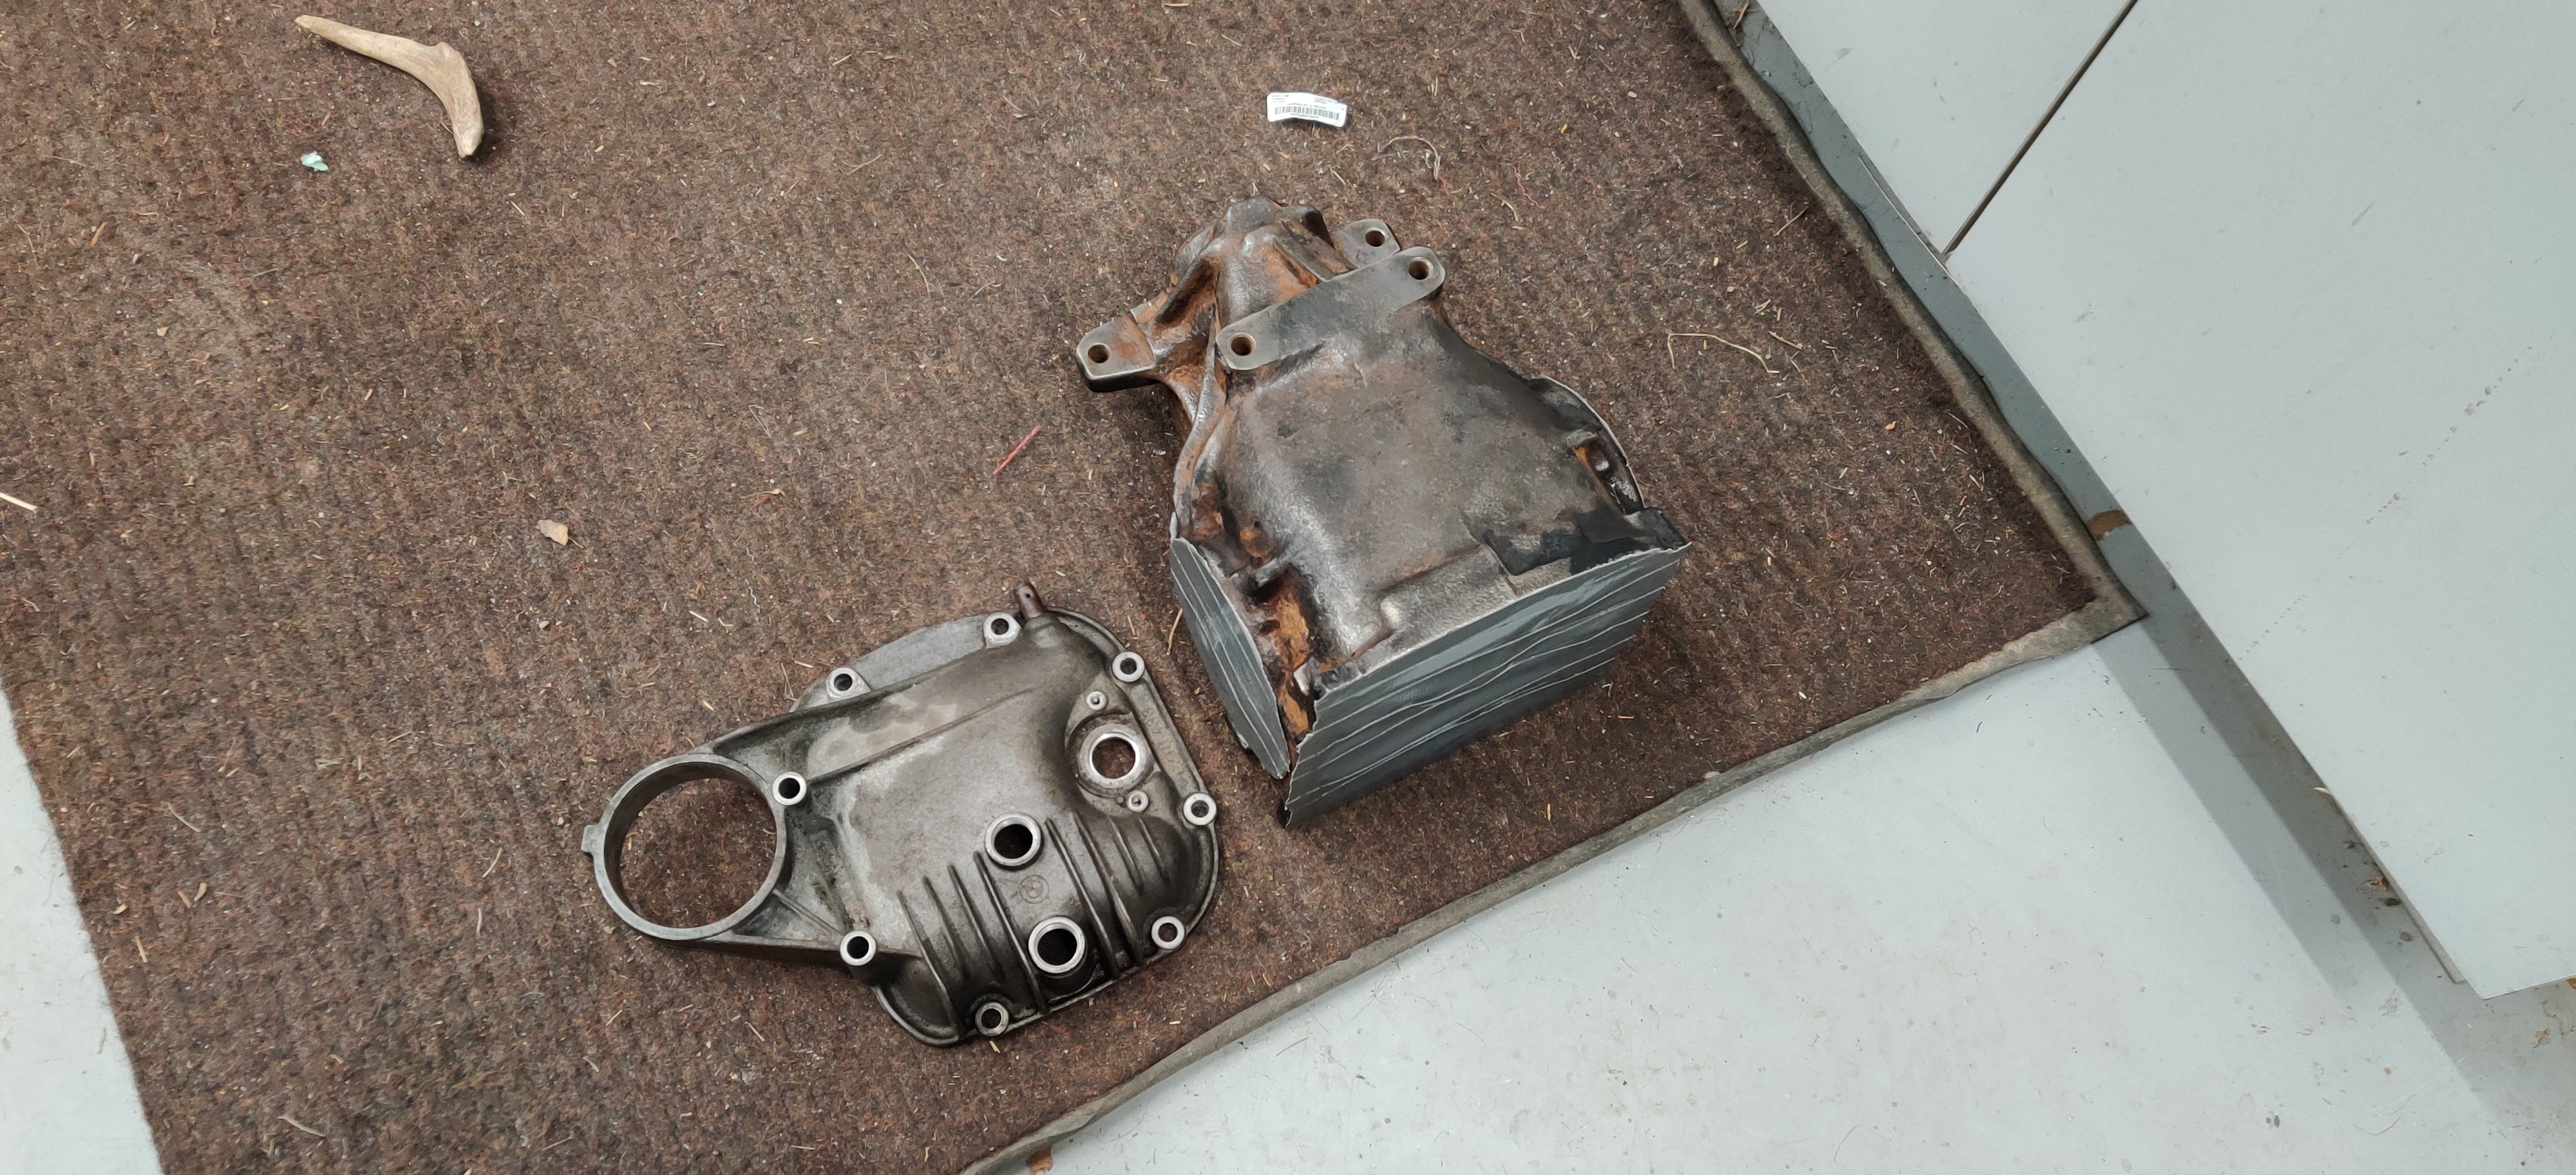
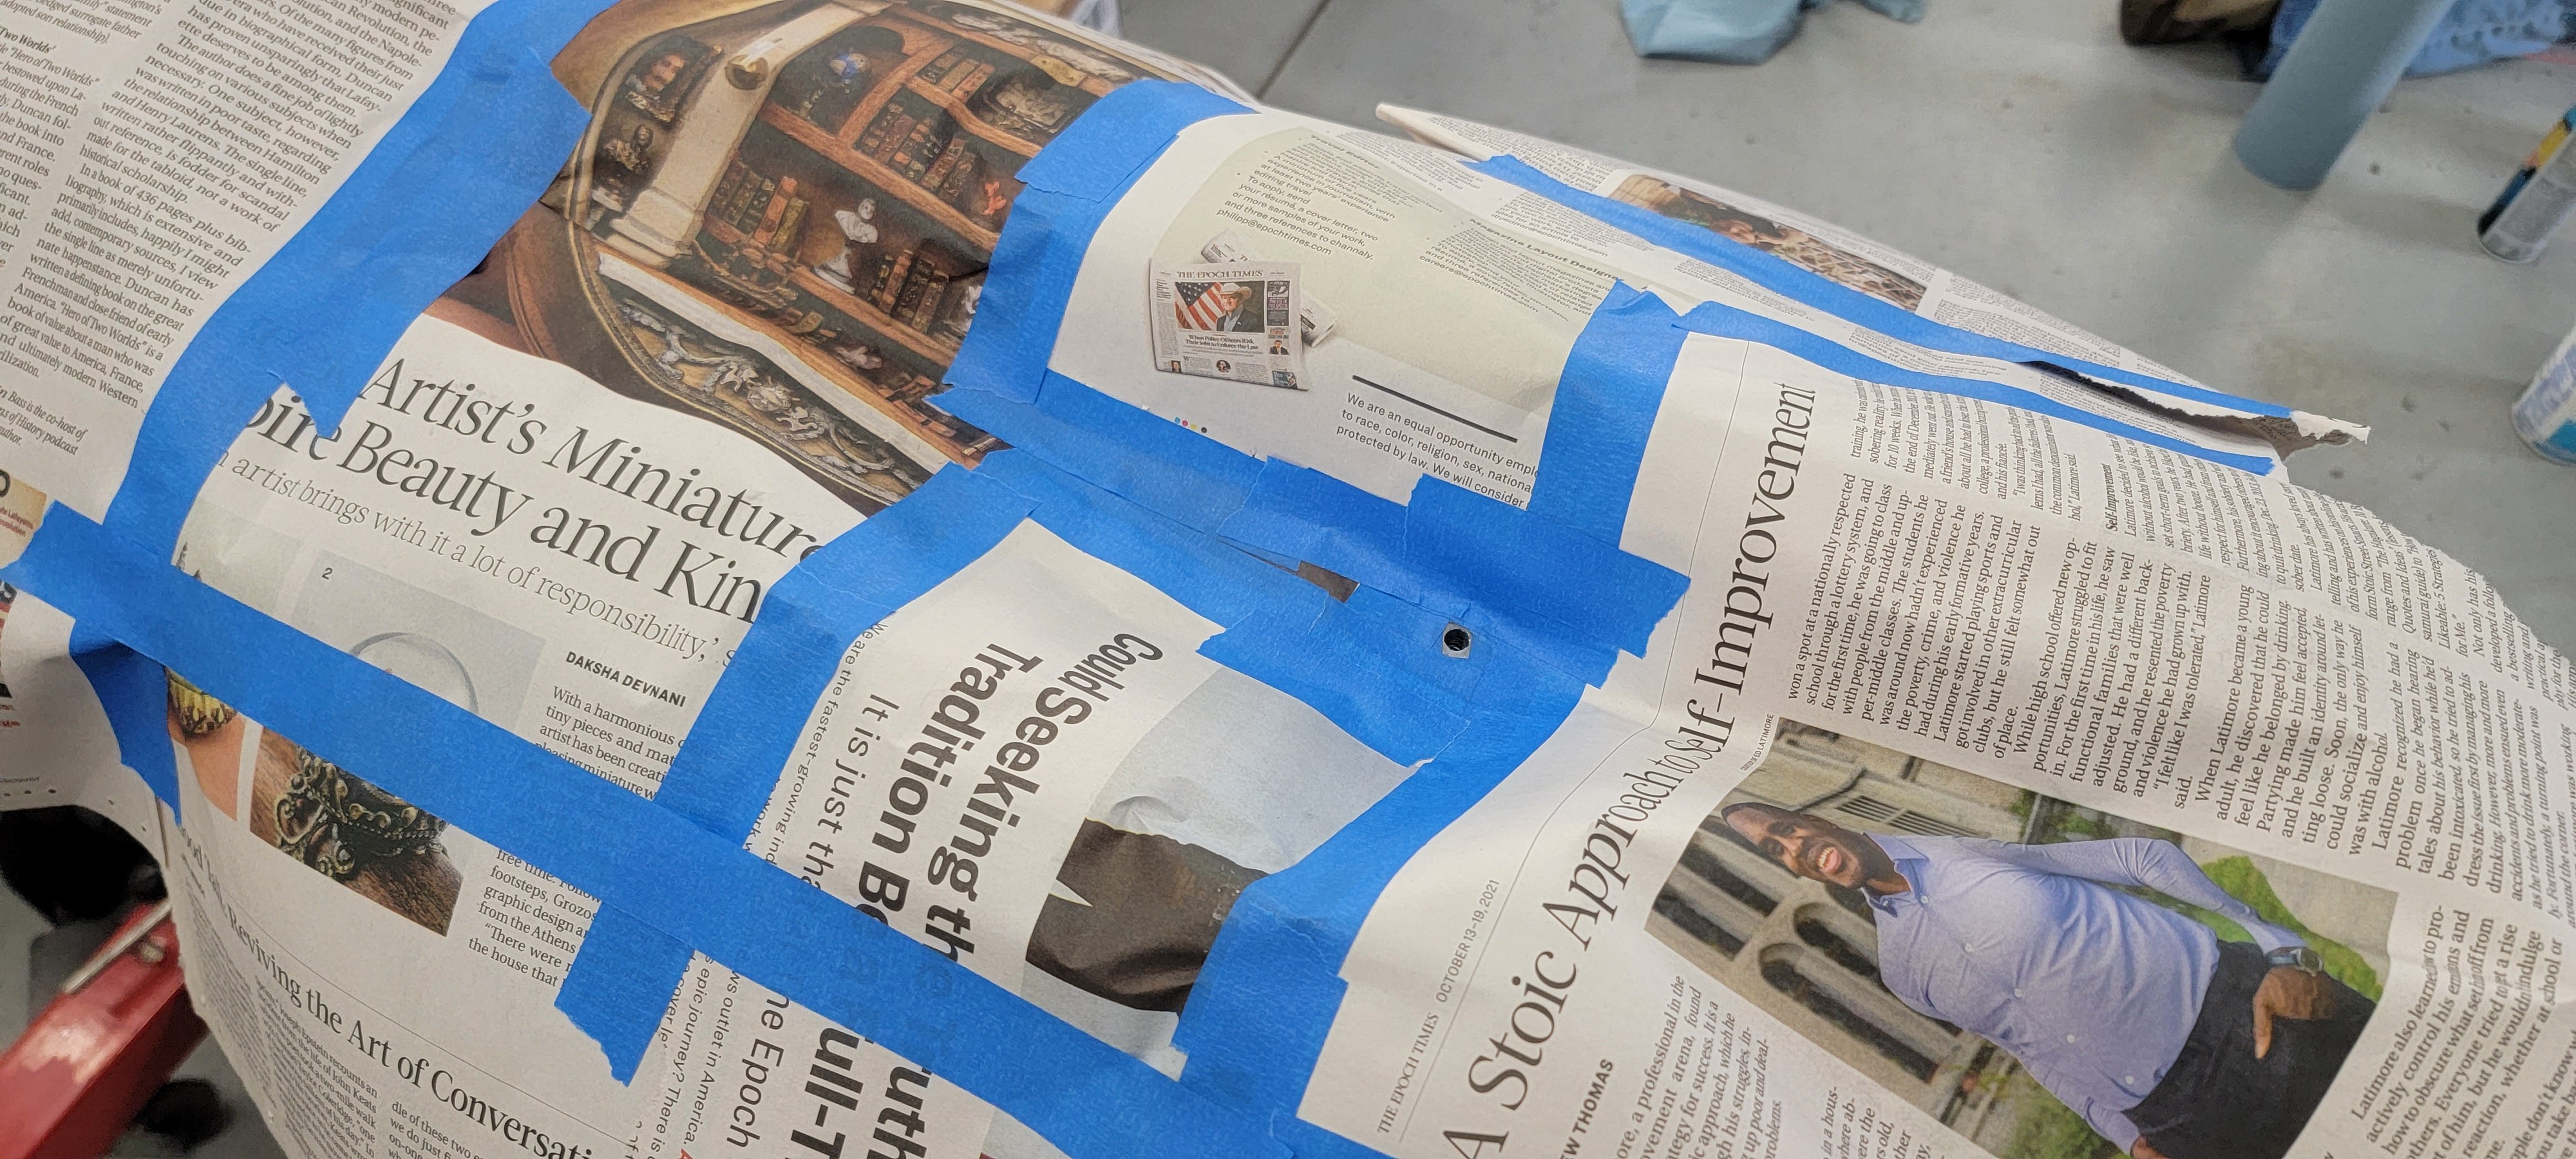
That Thursday I dropped the case and cover off at a local industrial painting shop. I stuffed the casing full of newspaper and duct taped the holes to help prevent to much sand from getting inside or hitting the bearing races for the pinion gear shaft.
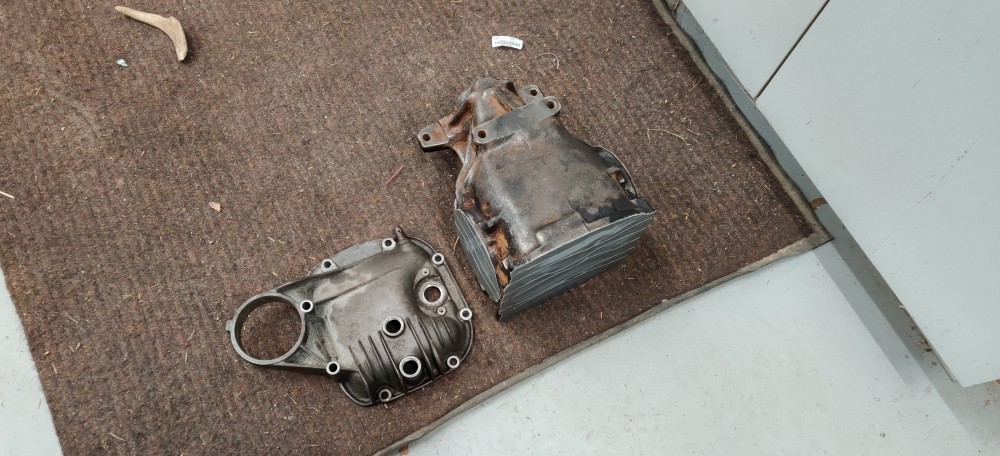
The following day after work I picked them back up.
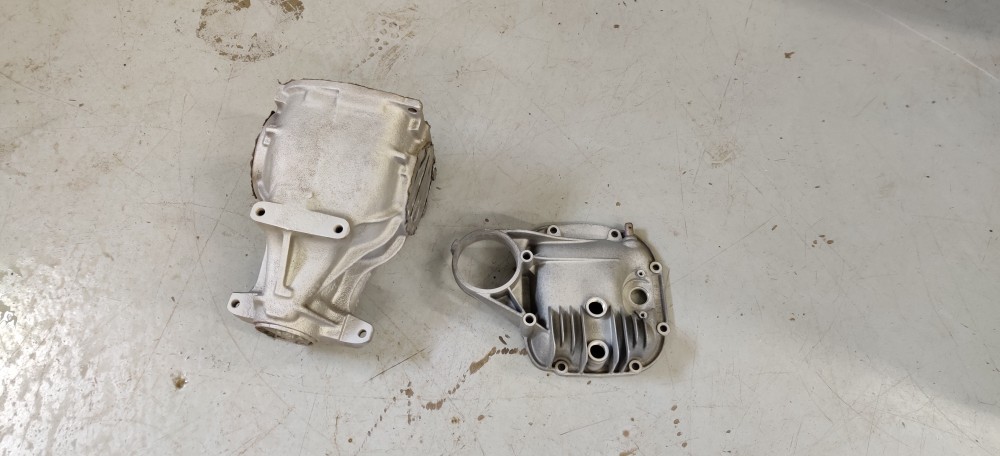
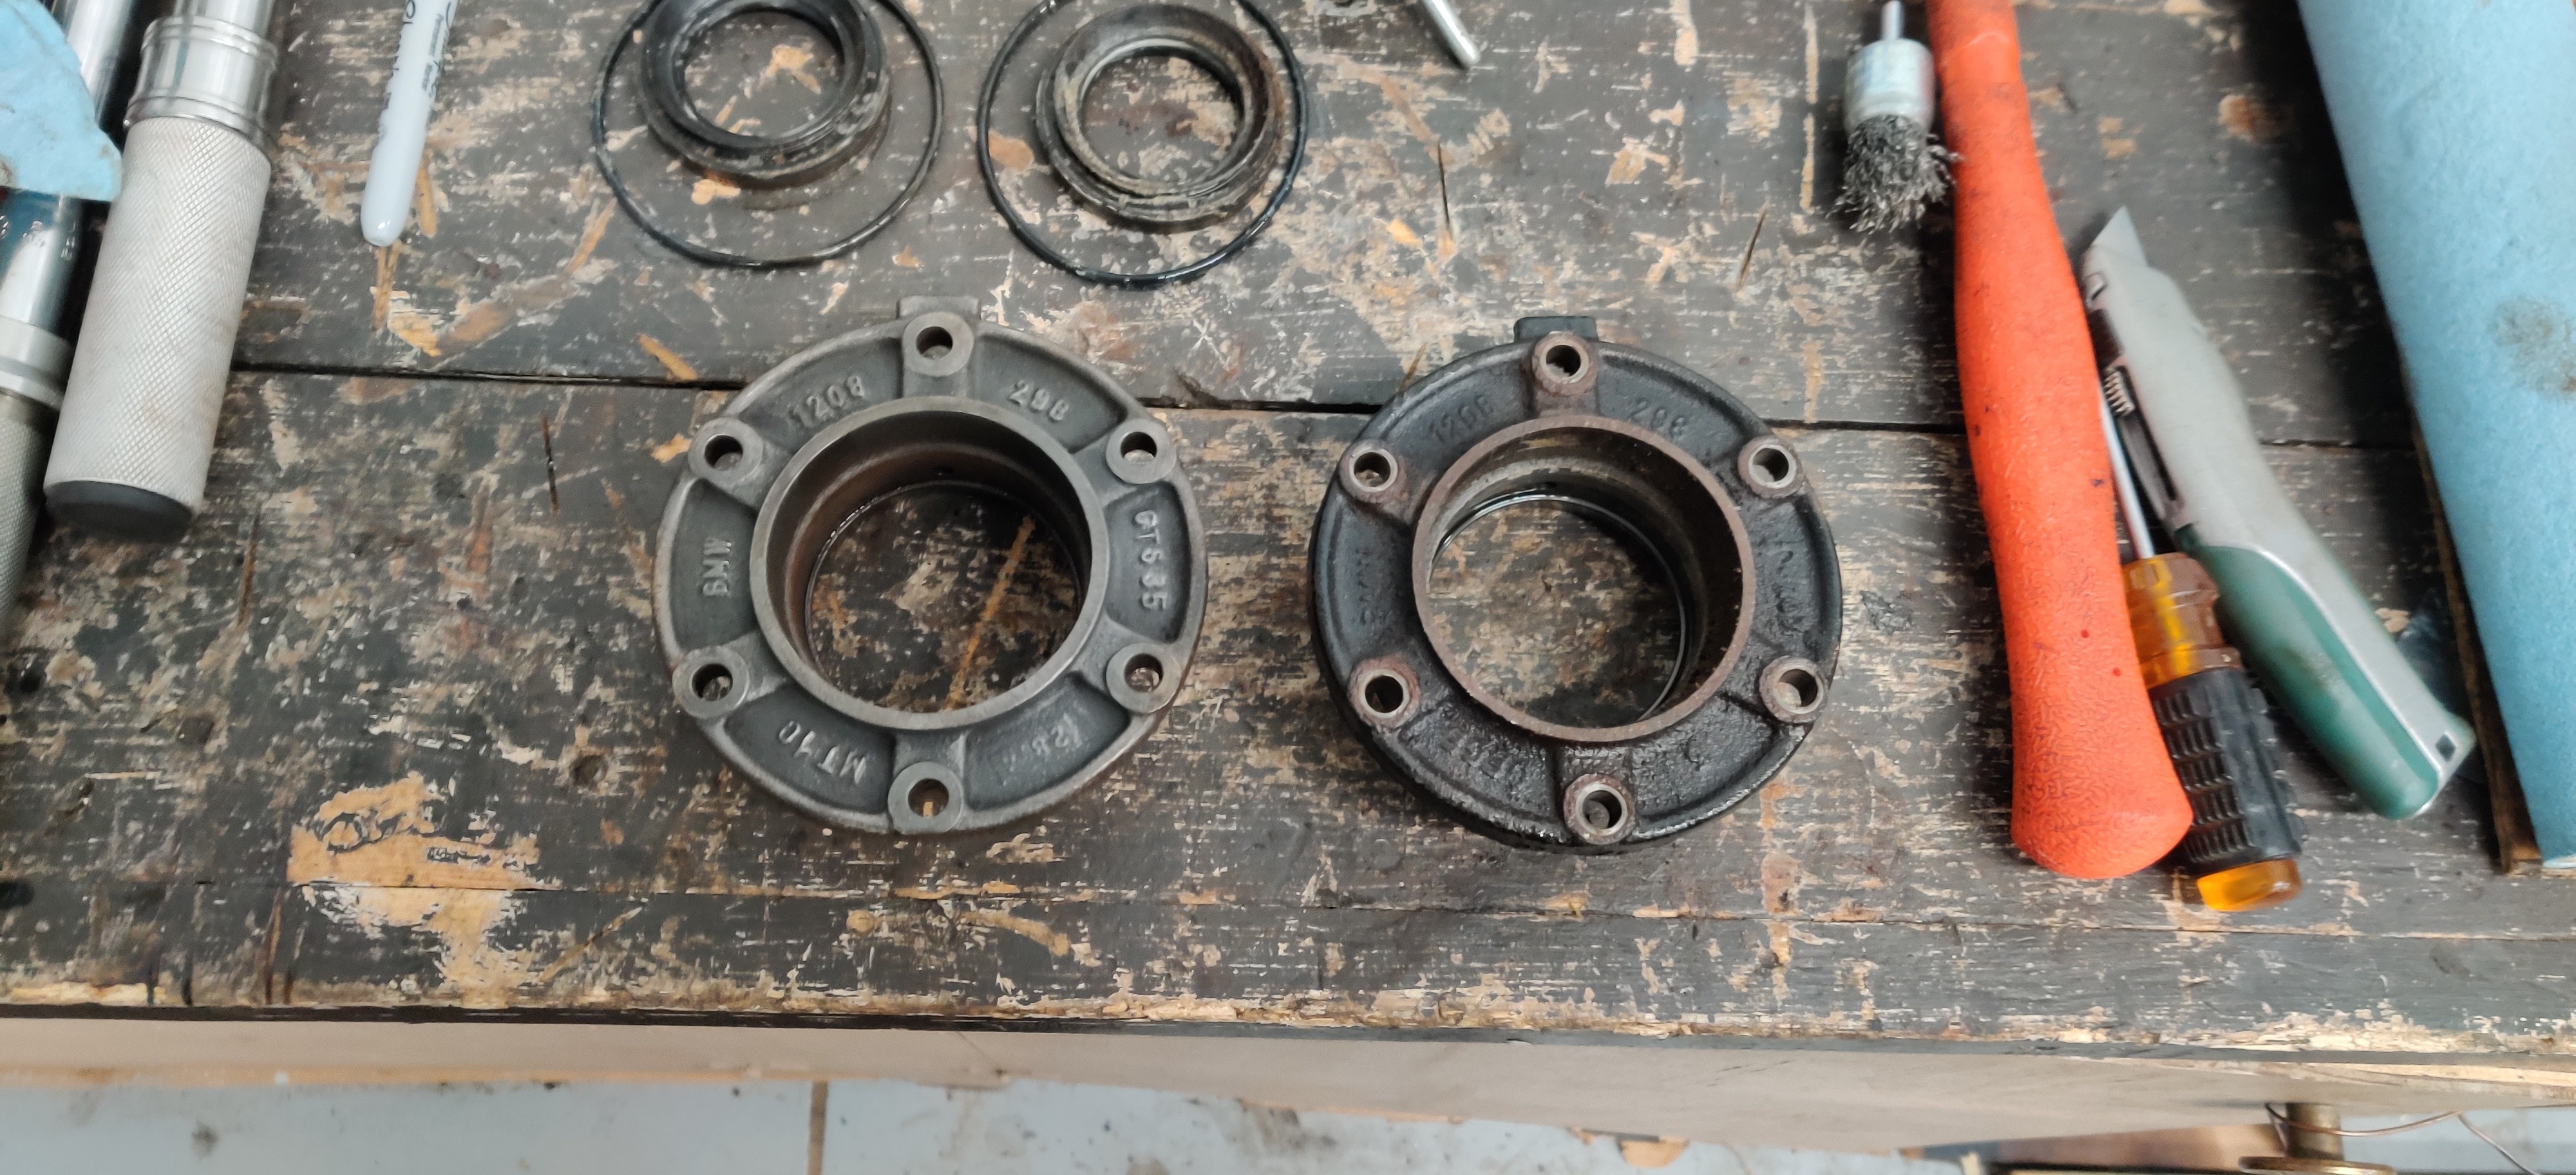
As for the smaller components I threw a wire wheel on a die grinder and went to town cleaning them up.
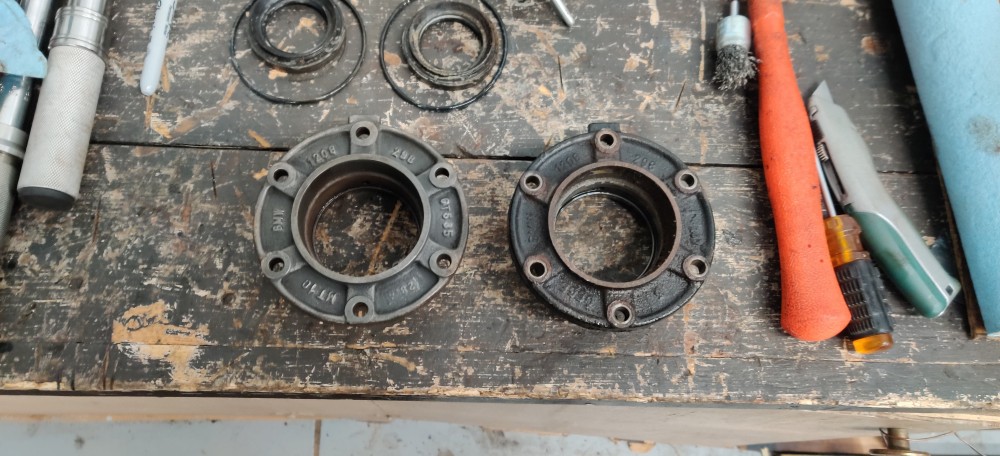
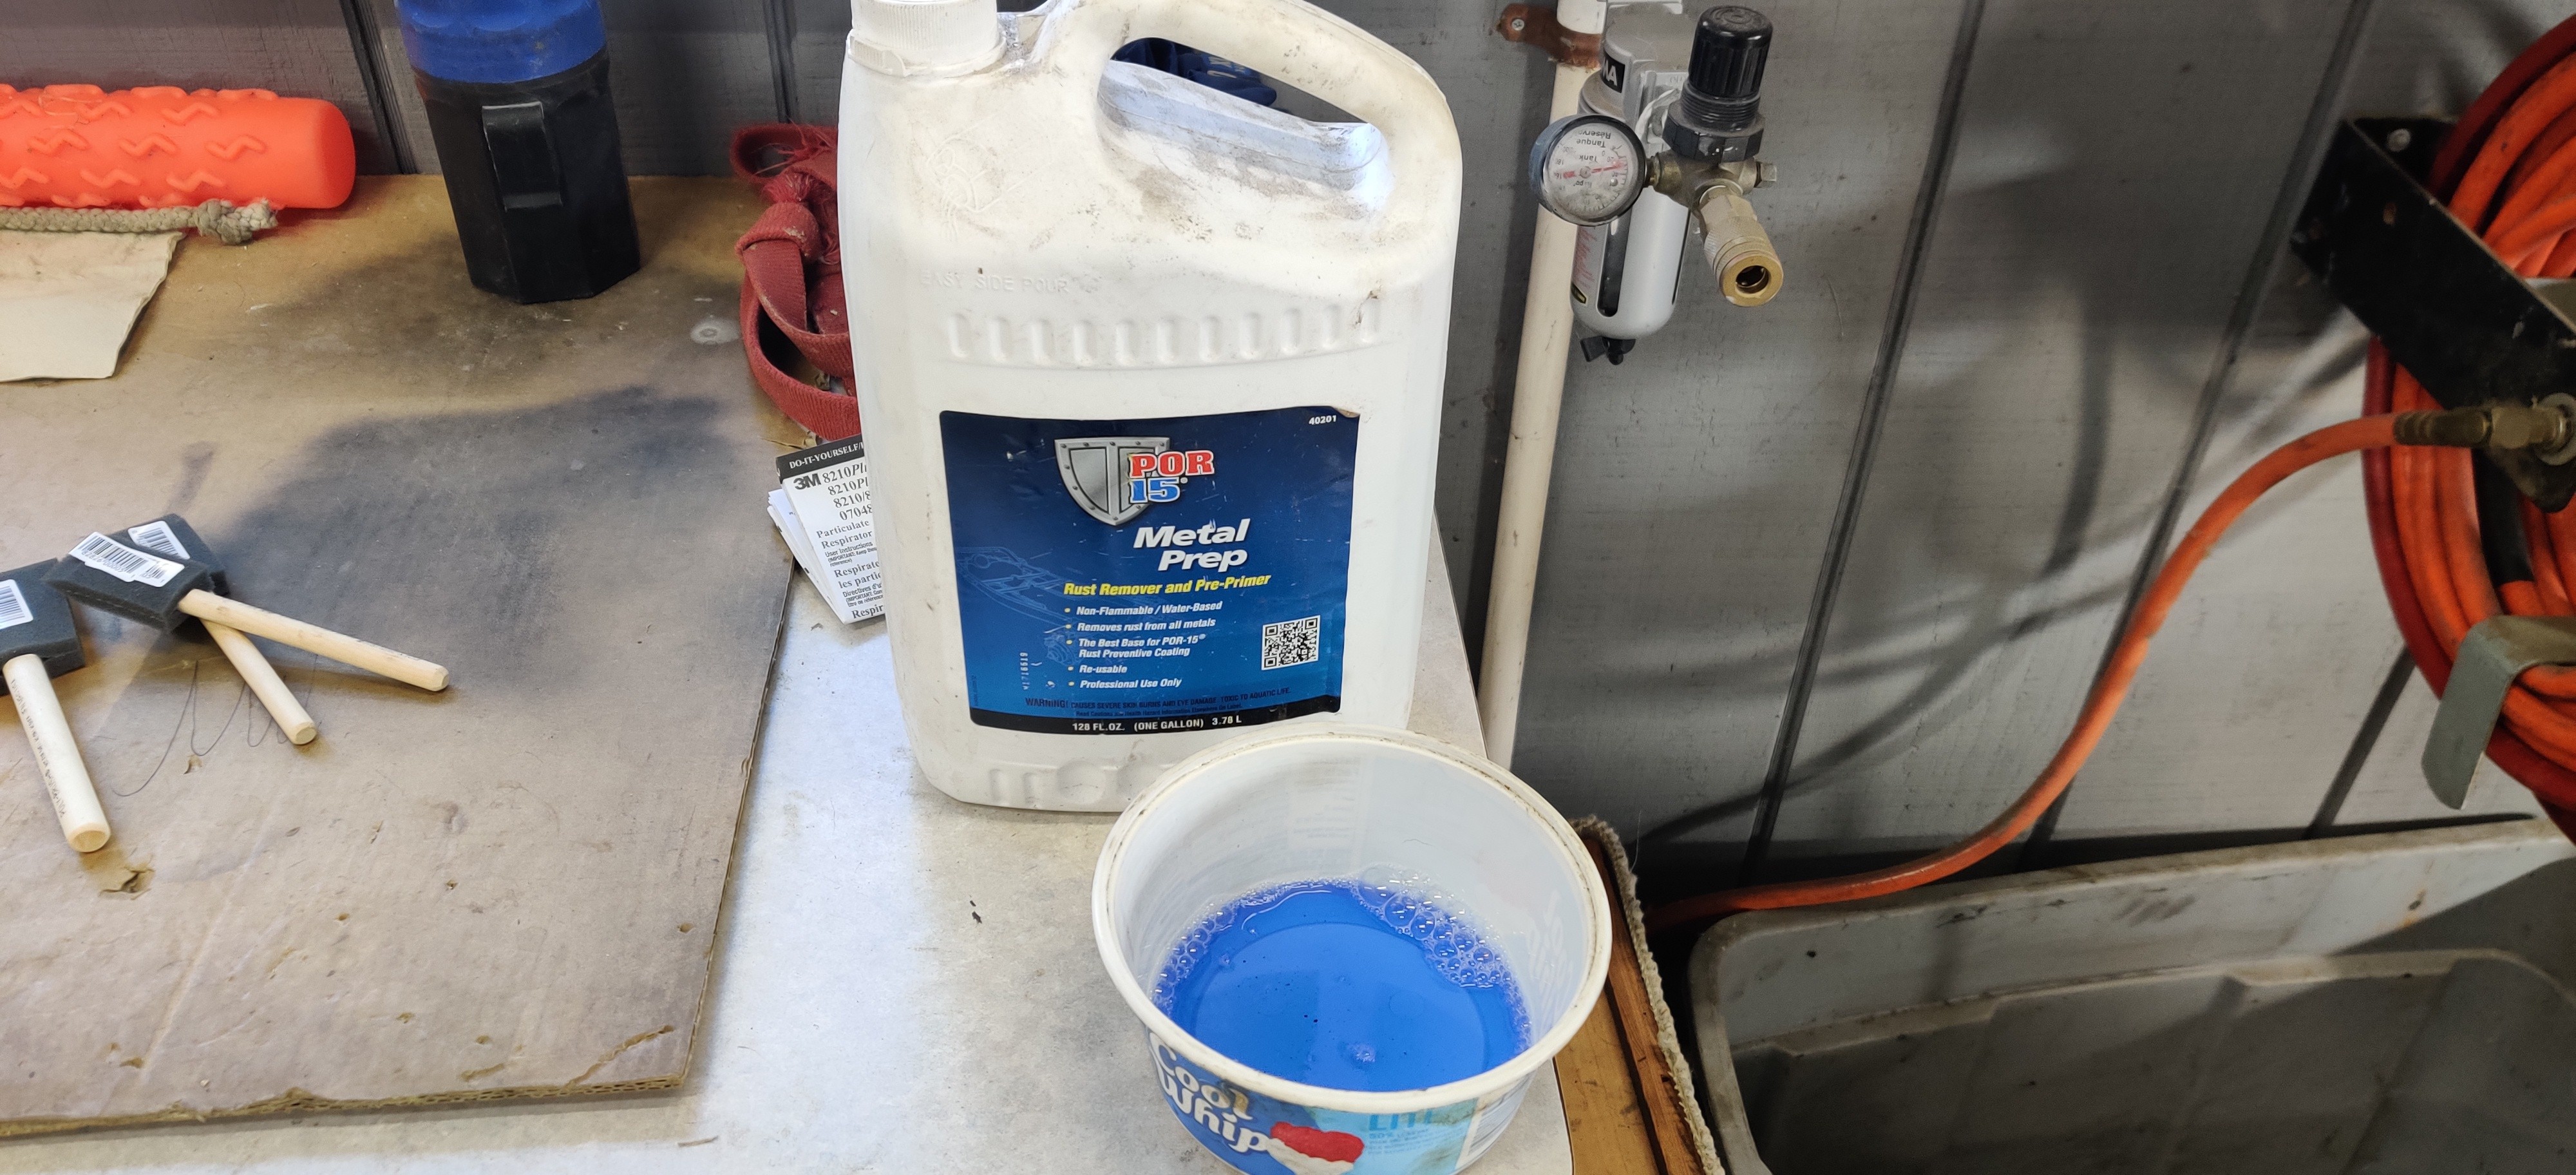
After going through and de-greasing/blowing everything off I prepped all the metal with some por-15 metal prep to add an extra etch to the metal for better adhesion.
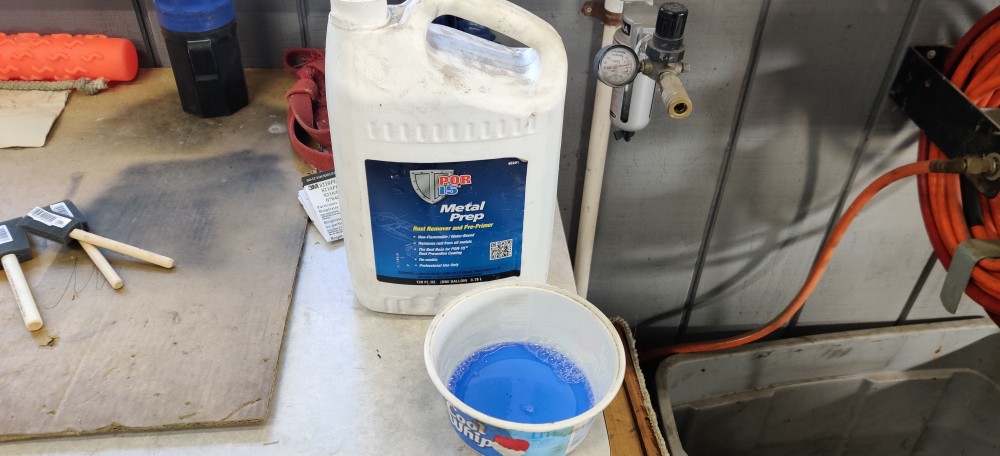
It's a pretty simple task, just simply brush it on all the areas where paint will be applied and let it sit for a half hour. Once a half hour has past rinse everything off with water and your set to go.
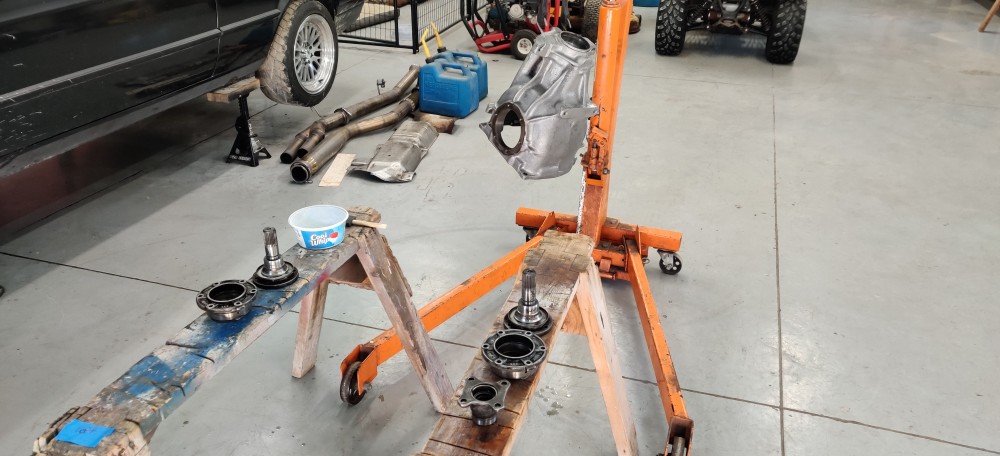
Did two medium coats of por-15 waiting about an hour in between coats. After the last coat I let it dry for a full 24 hours.
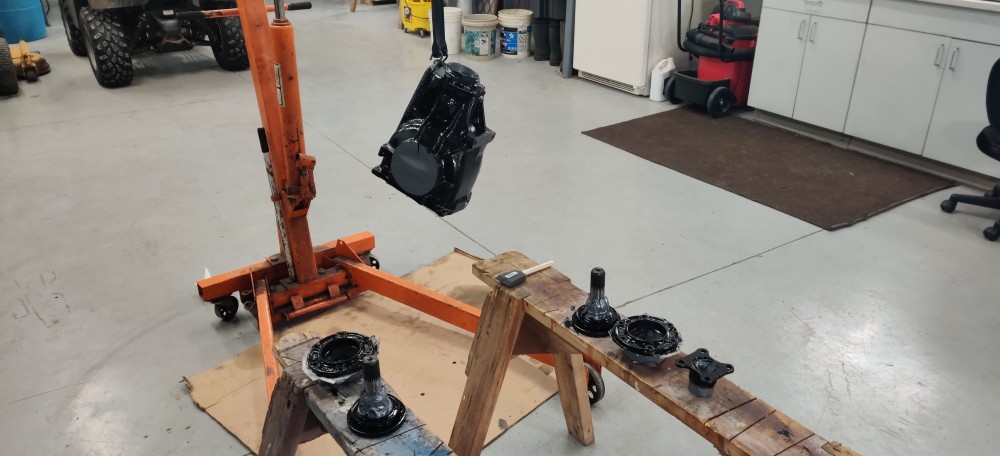
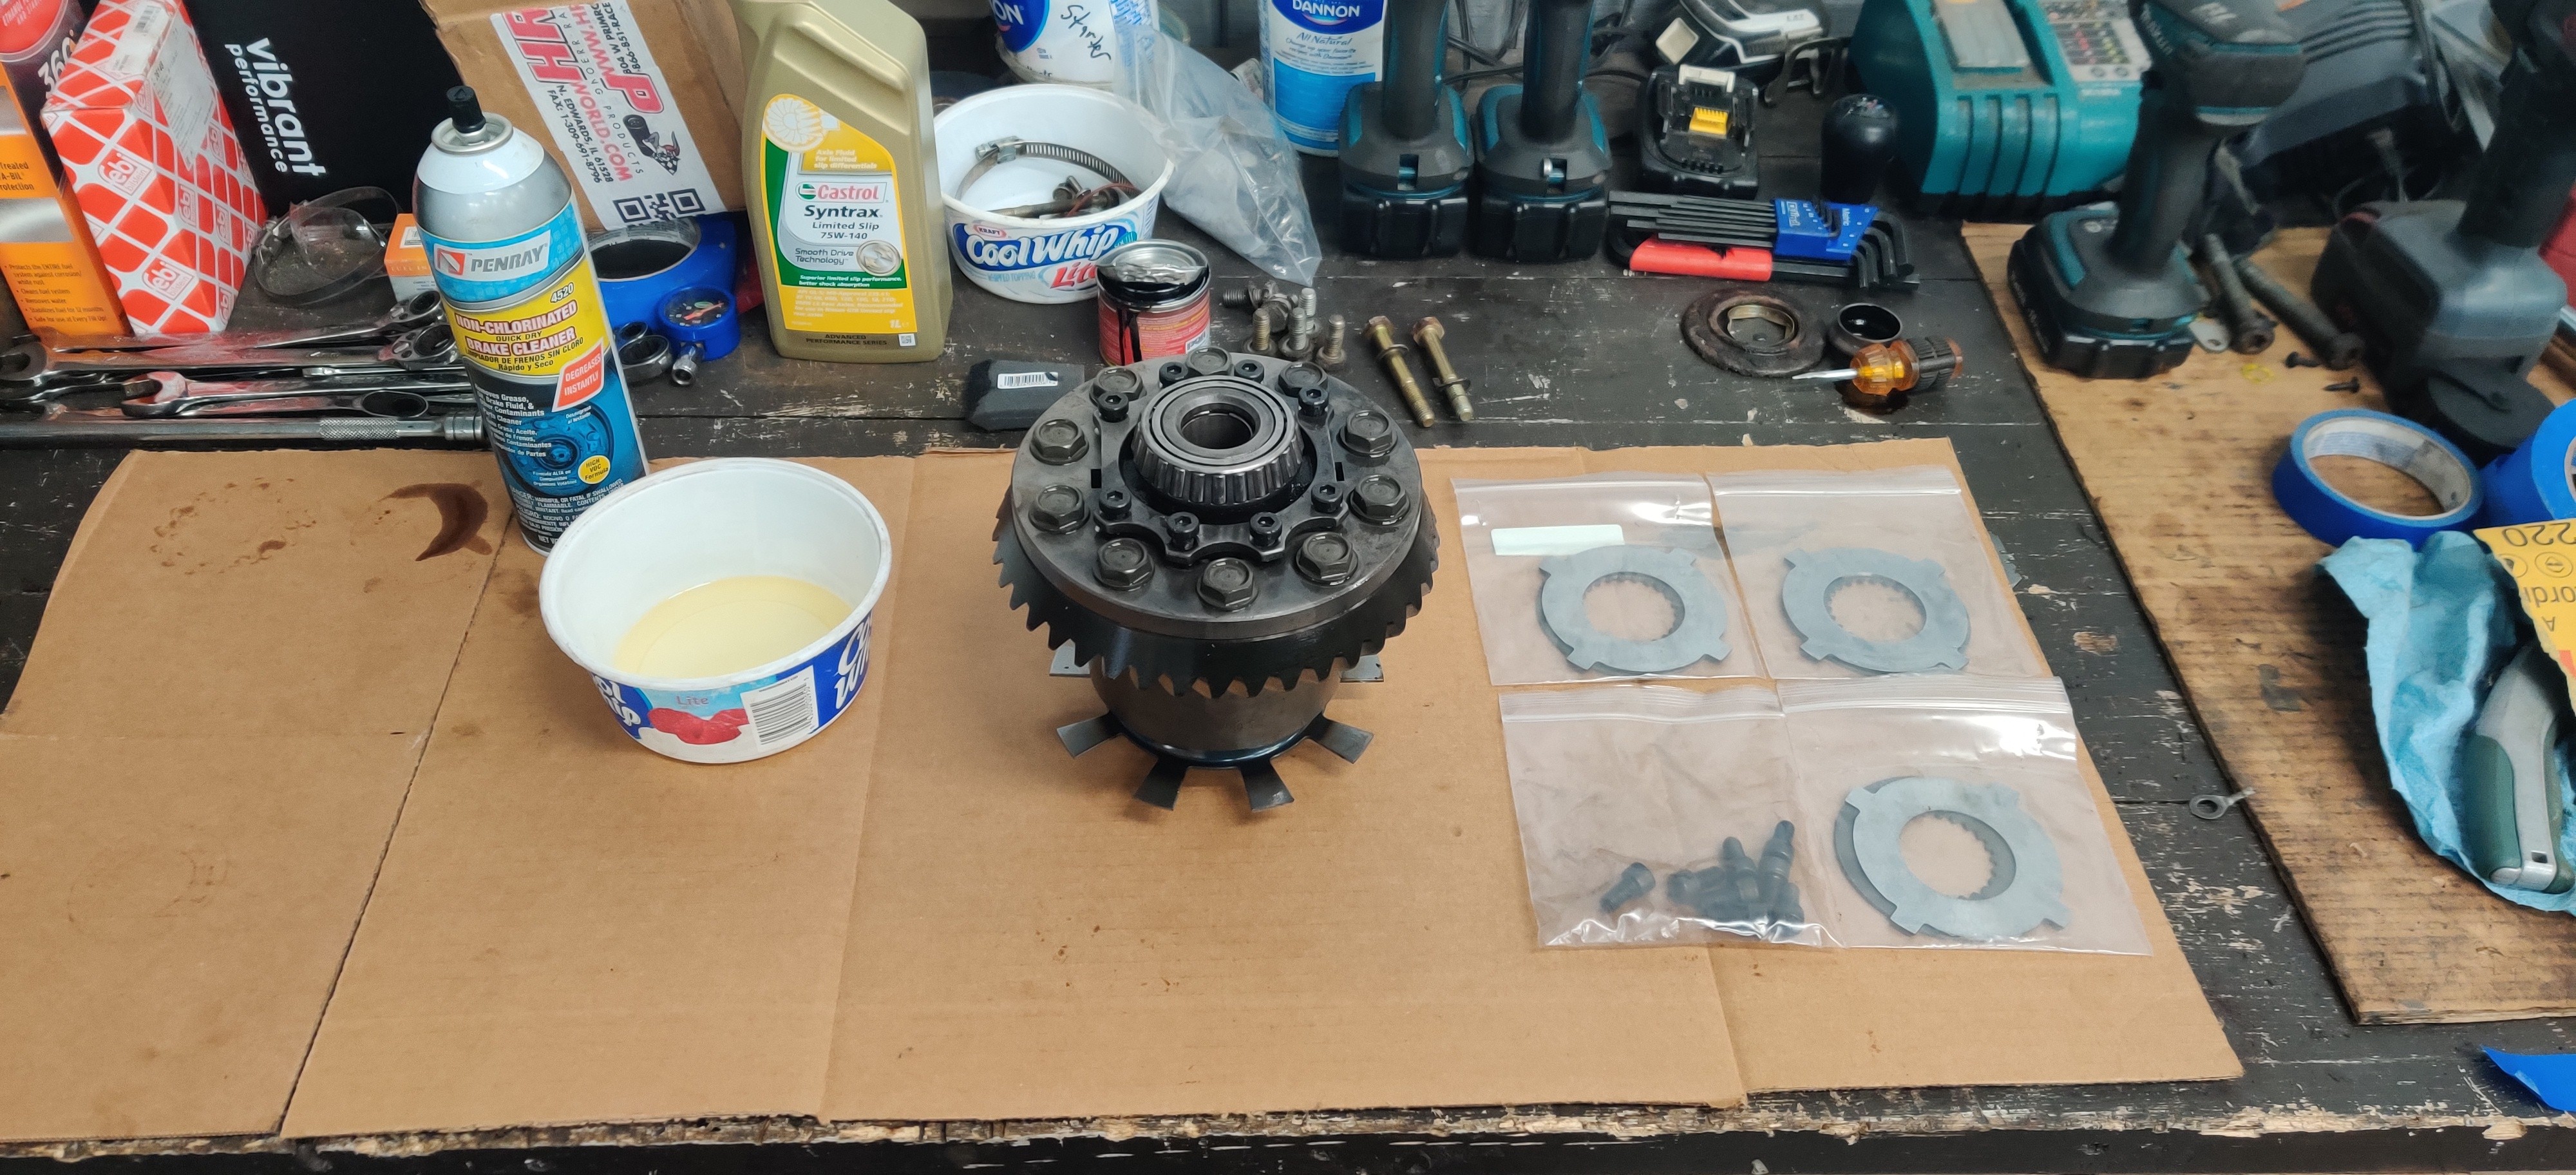
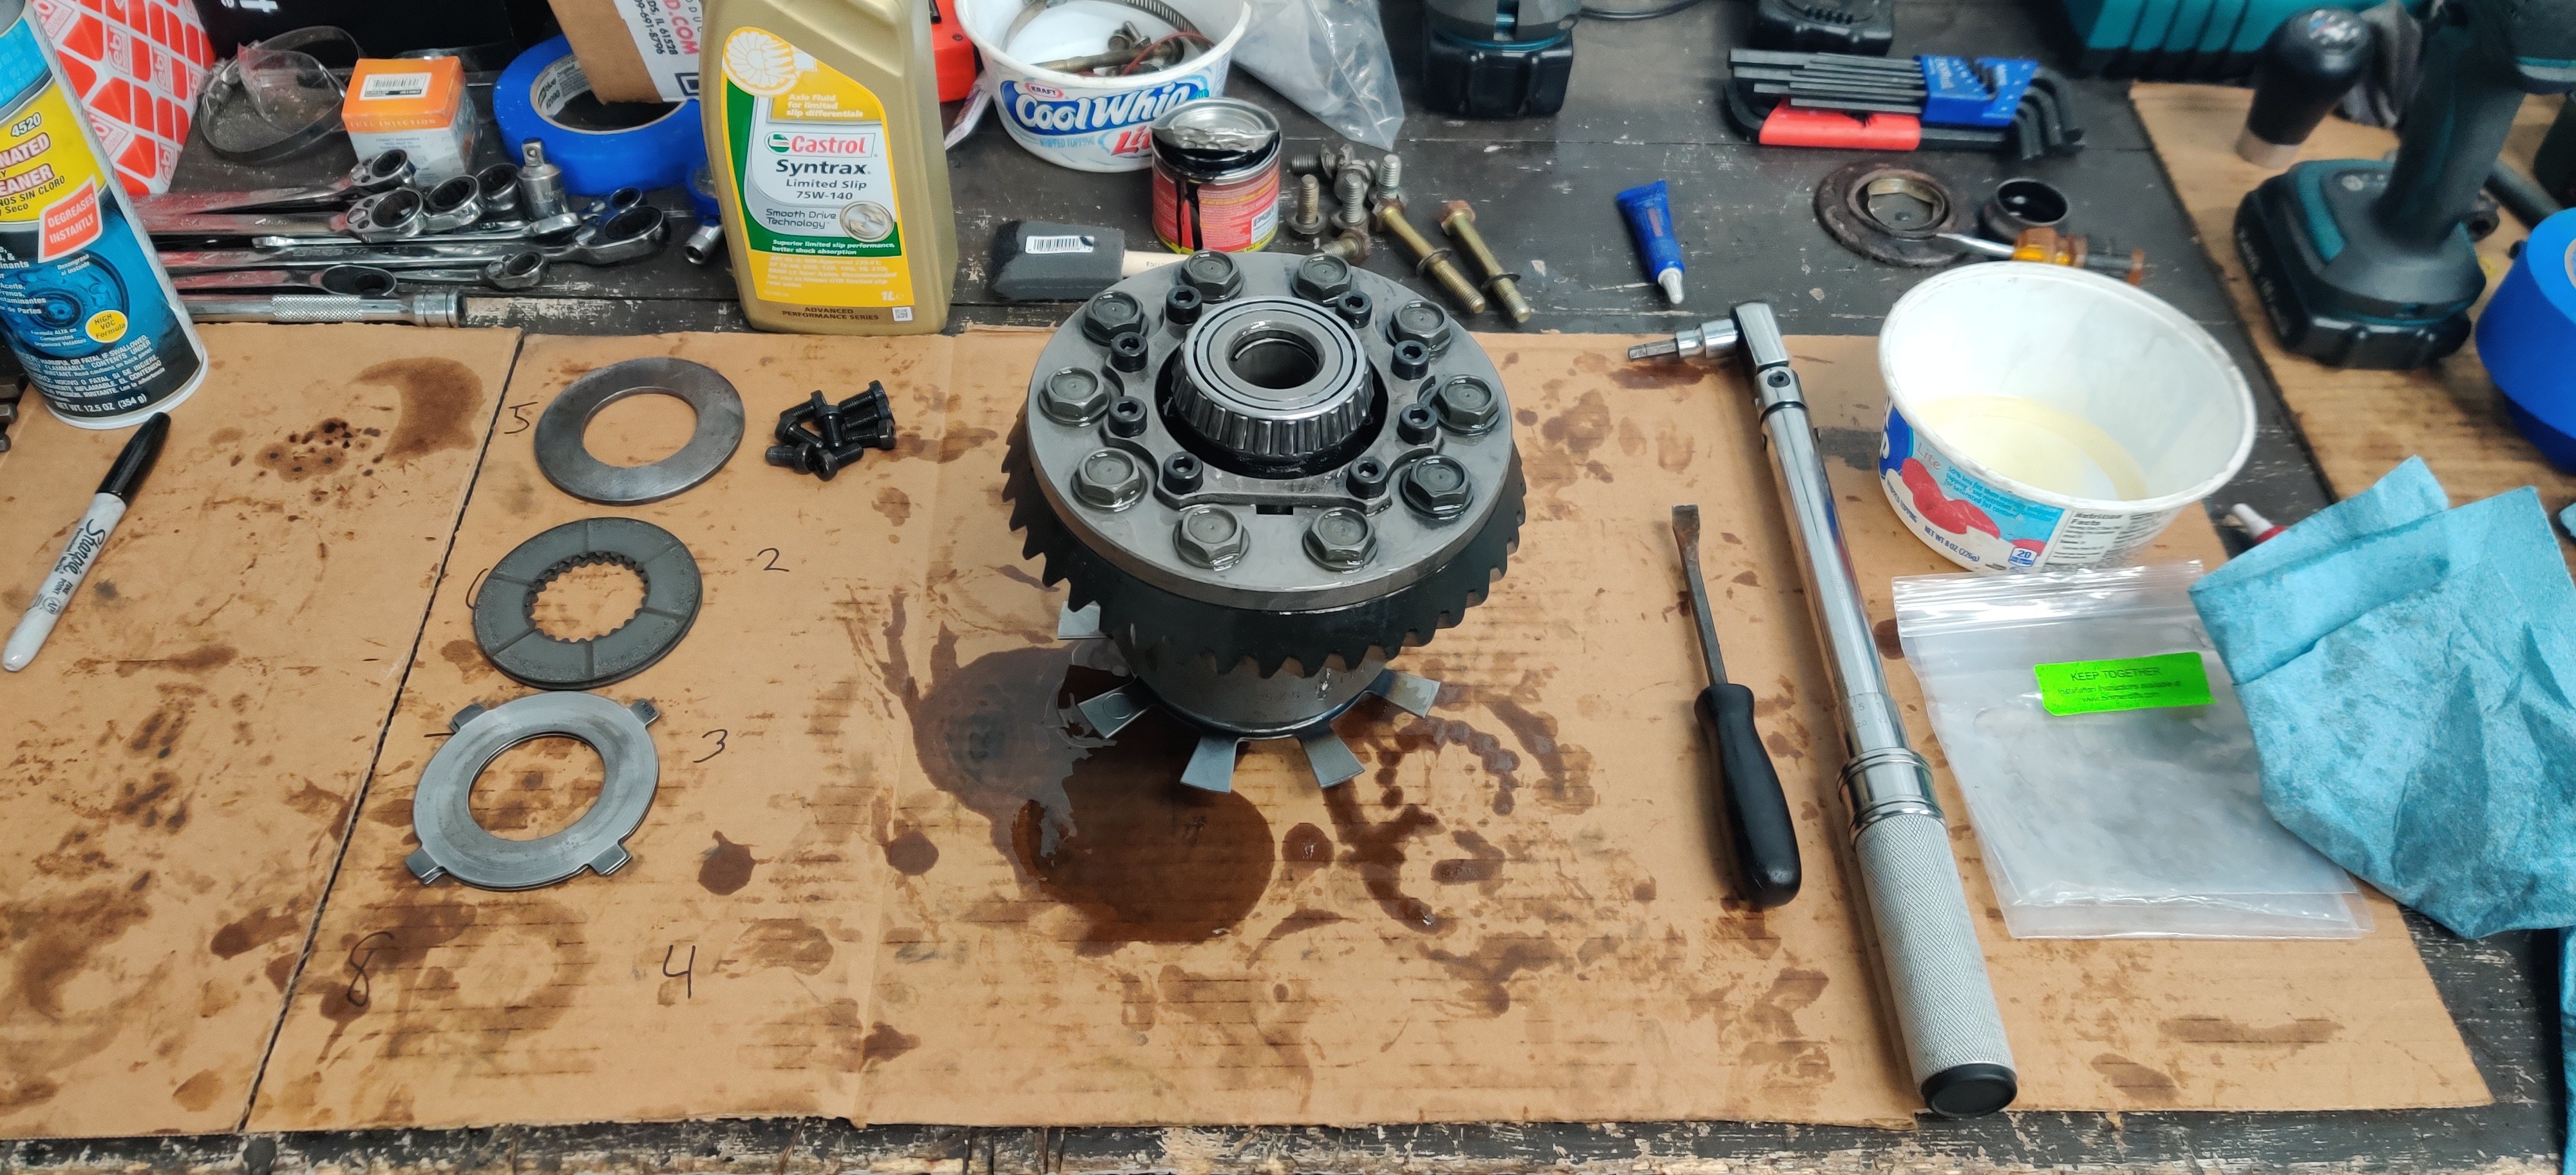
While the paint dried I started on the lsd rebuild. As a refresher this is getting the 3 clutch disc upgrade from thayer motorsports increasing the lock up to around 50%.
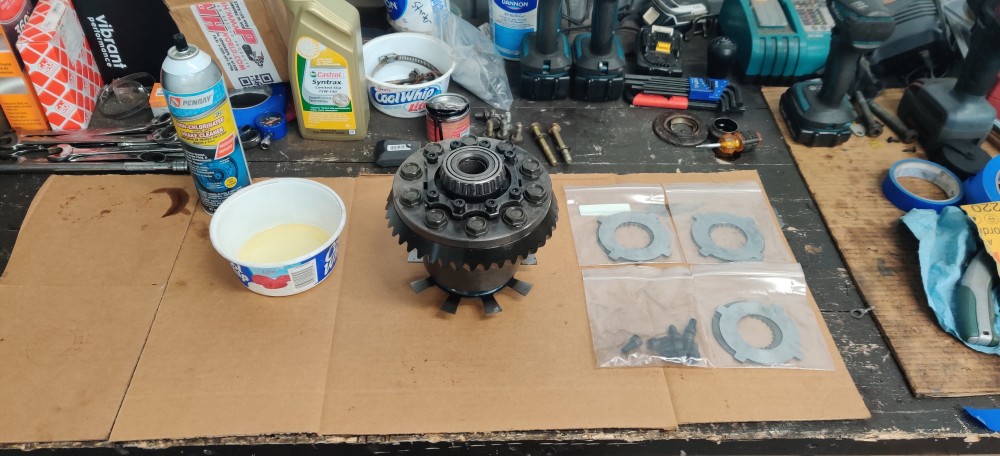
The rebuild is very straight forward and Thayer includes a link on their site with a step by step process. Biggest thing here is taking your time and double and triple checking yourself making sure everything is in the right order facing the correct way. After removing all the guts I did soak the lsd unit in de-greaser cleaning it thoroughly before beginning reassembly. Remembering to lubricate every component with diff oil as it is being installed is crucial. Left over parts after the rebuild was the two old clutchs and dog ears, 4 mm spacer that the third clutch takes the place of and the eight old carrier cap screws.
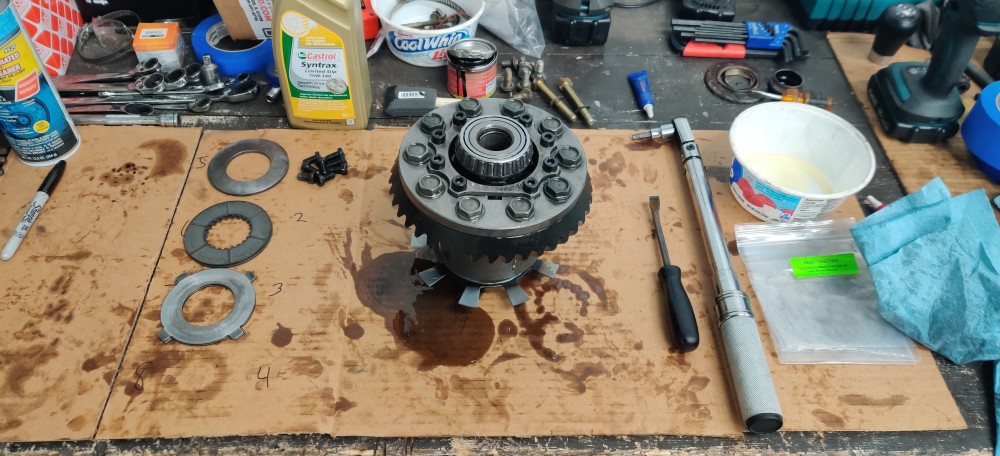
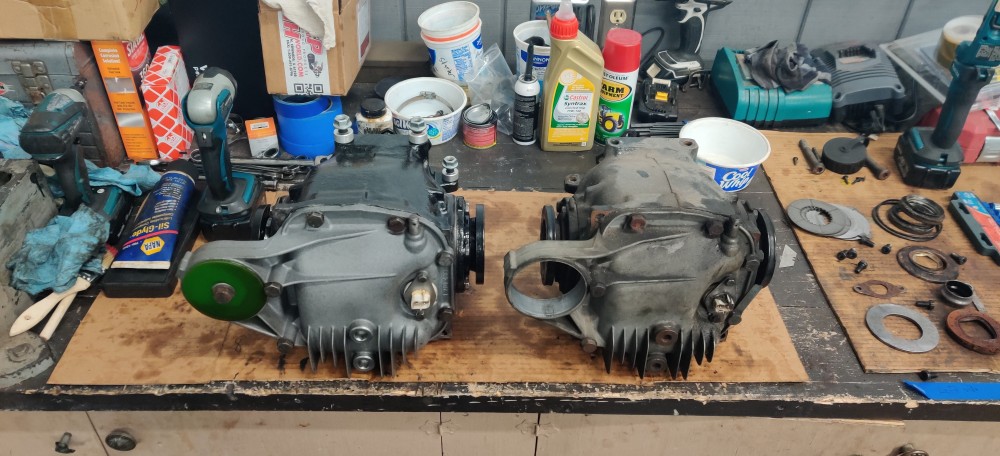
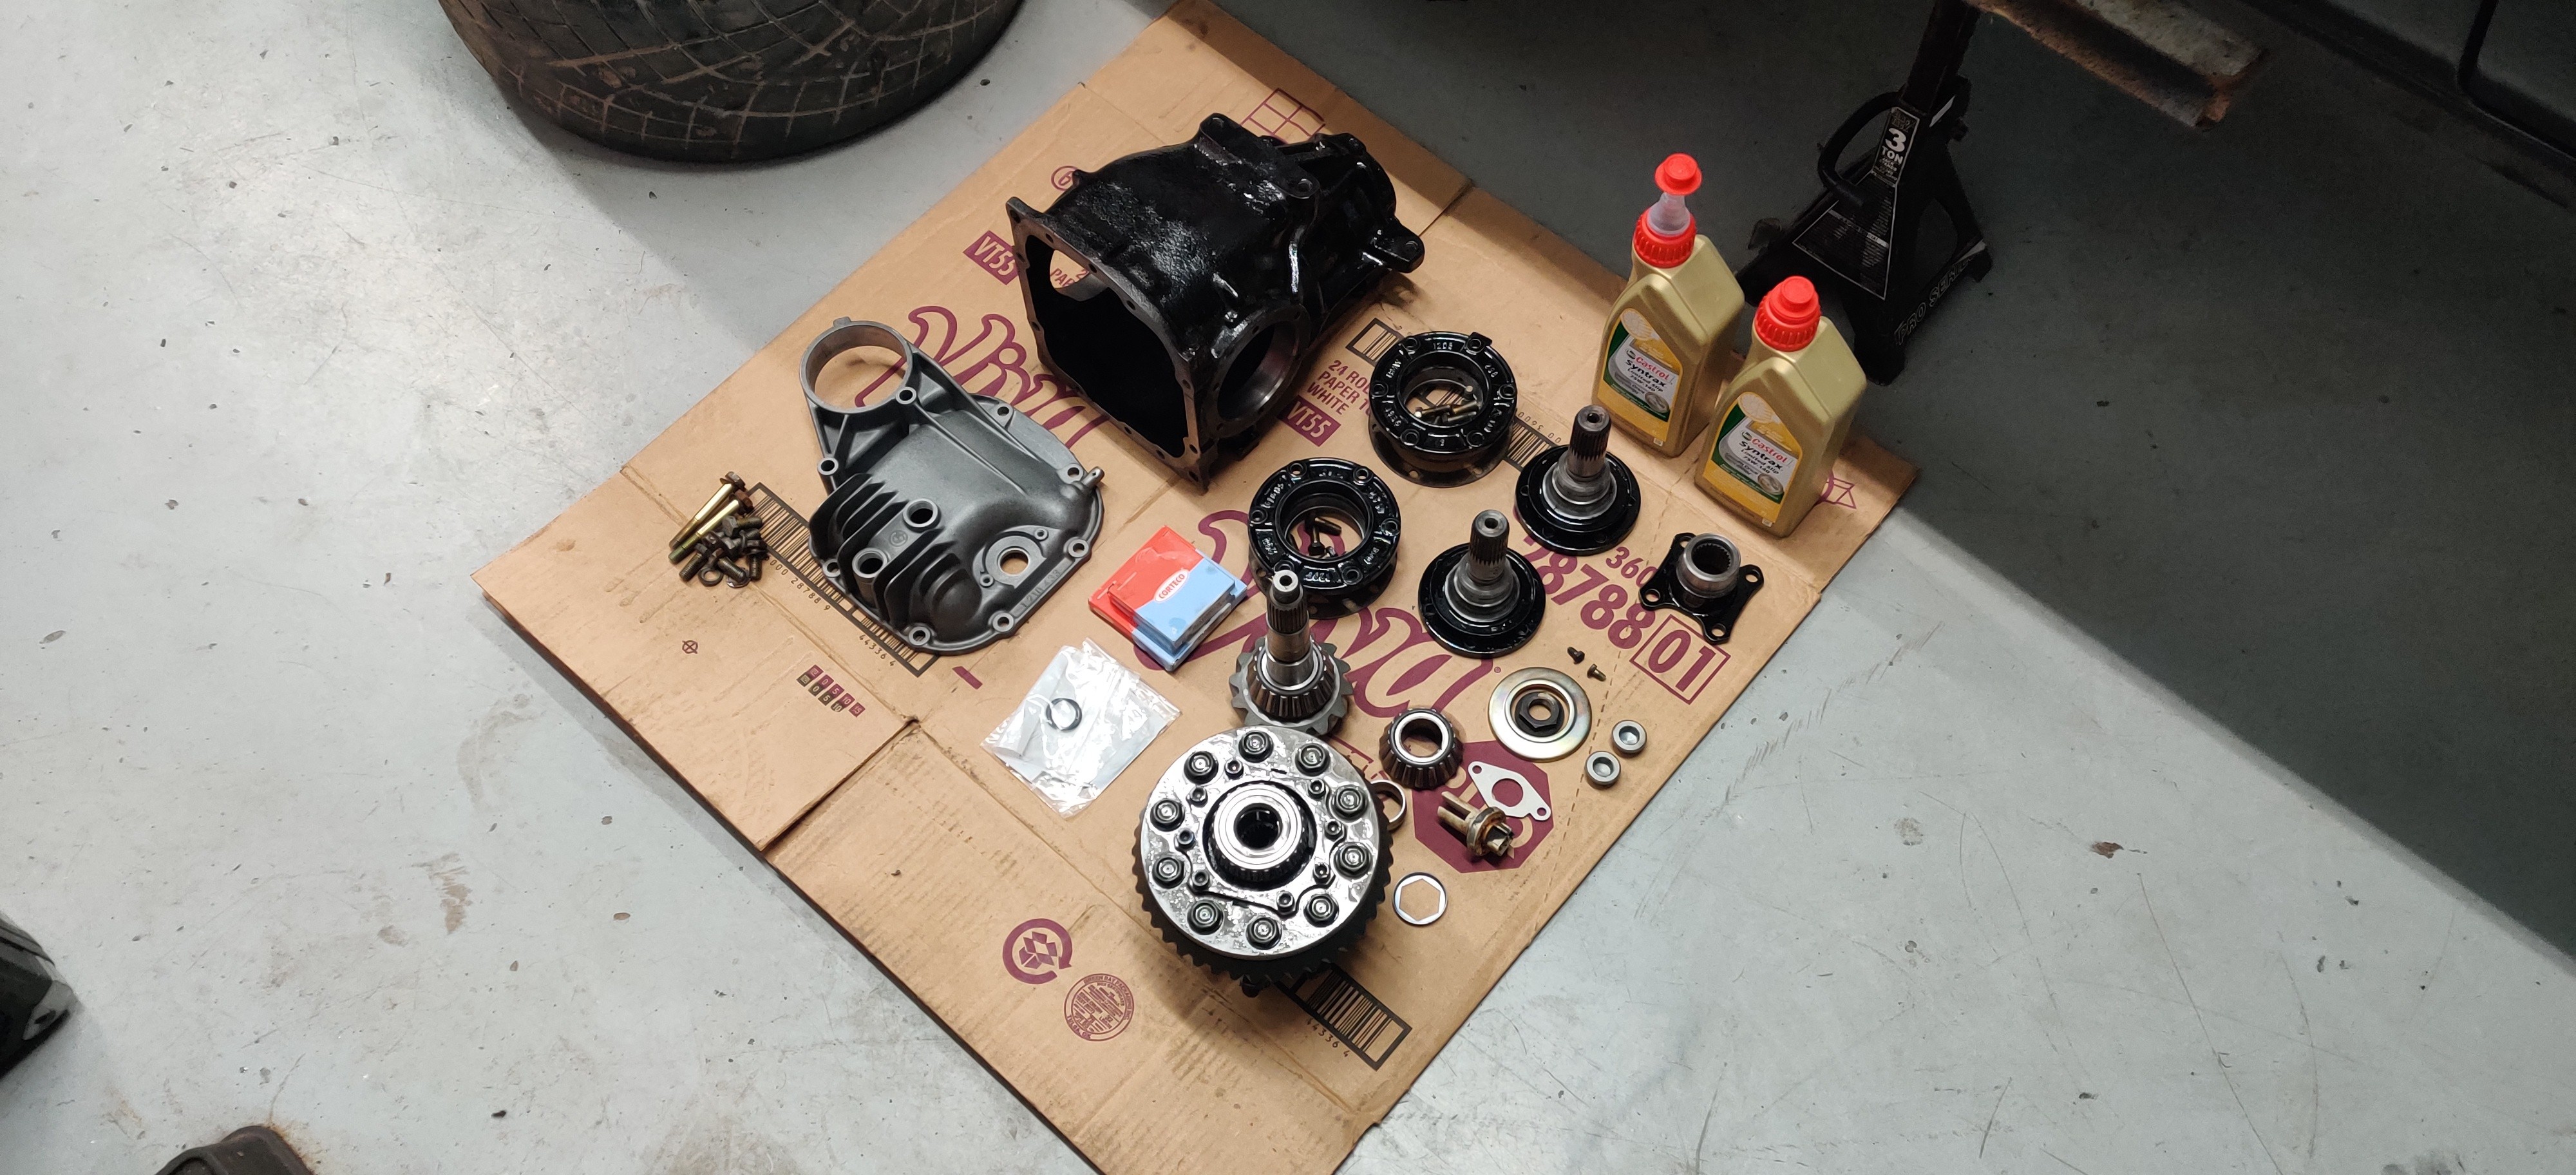
The following day I removed the masking off everything and cleaned everything once more through. I also threw a few light coats of satin clear to the diff cover to protect from corrosion.
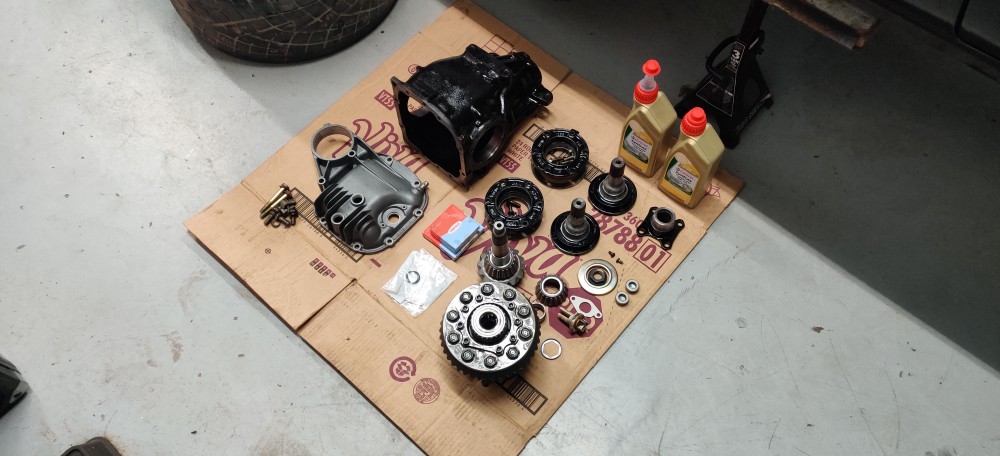
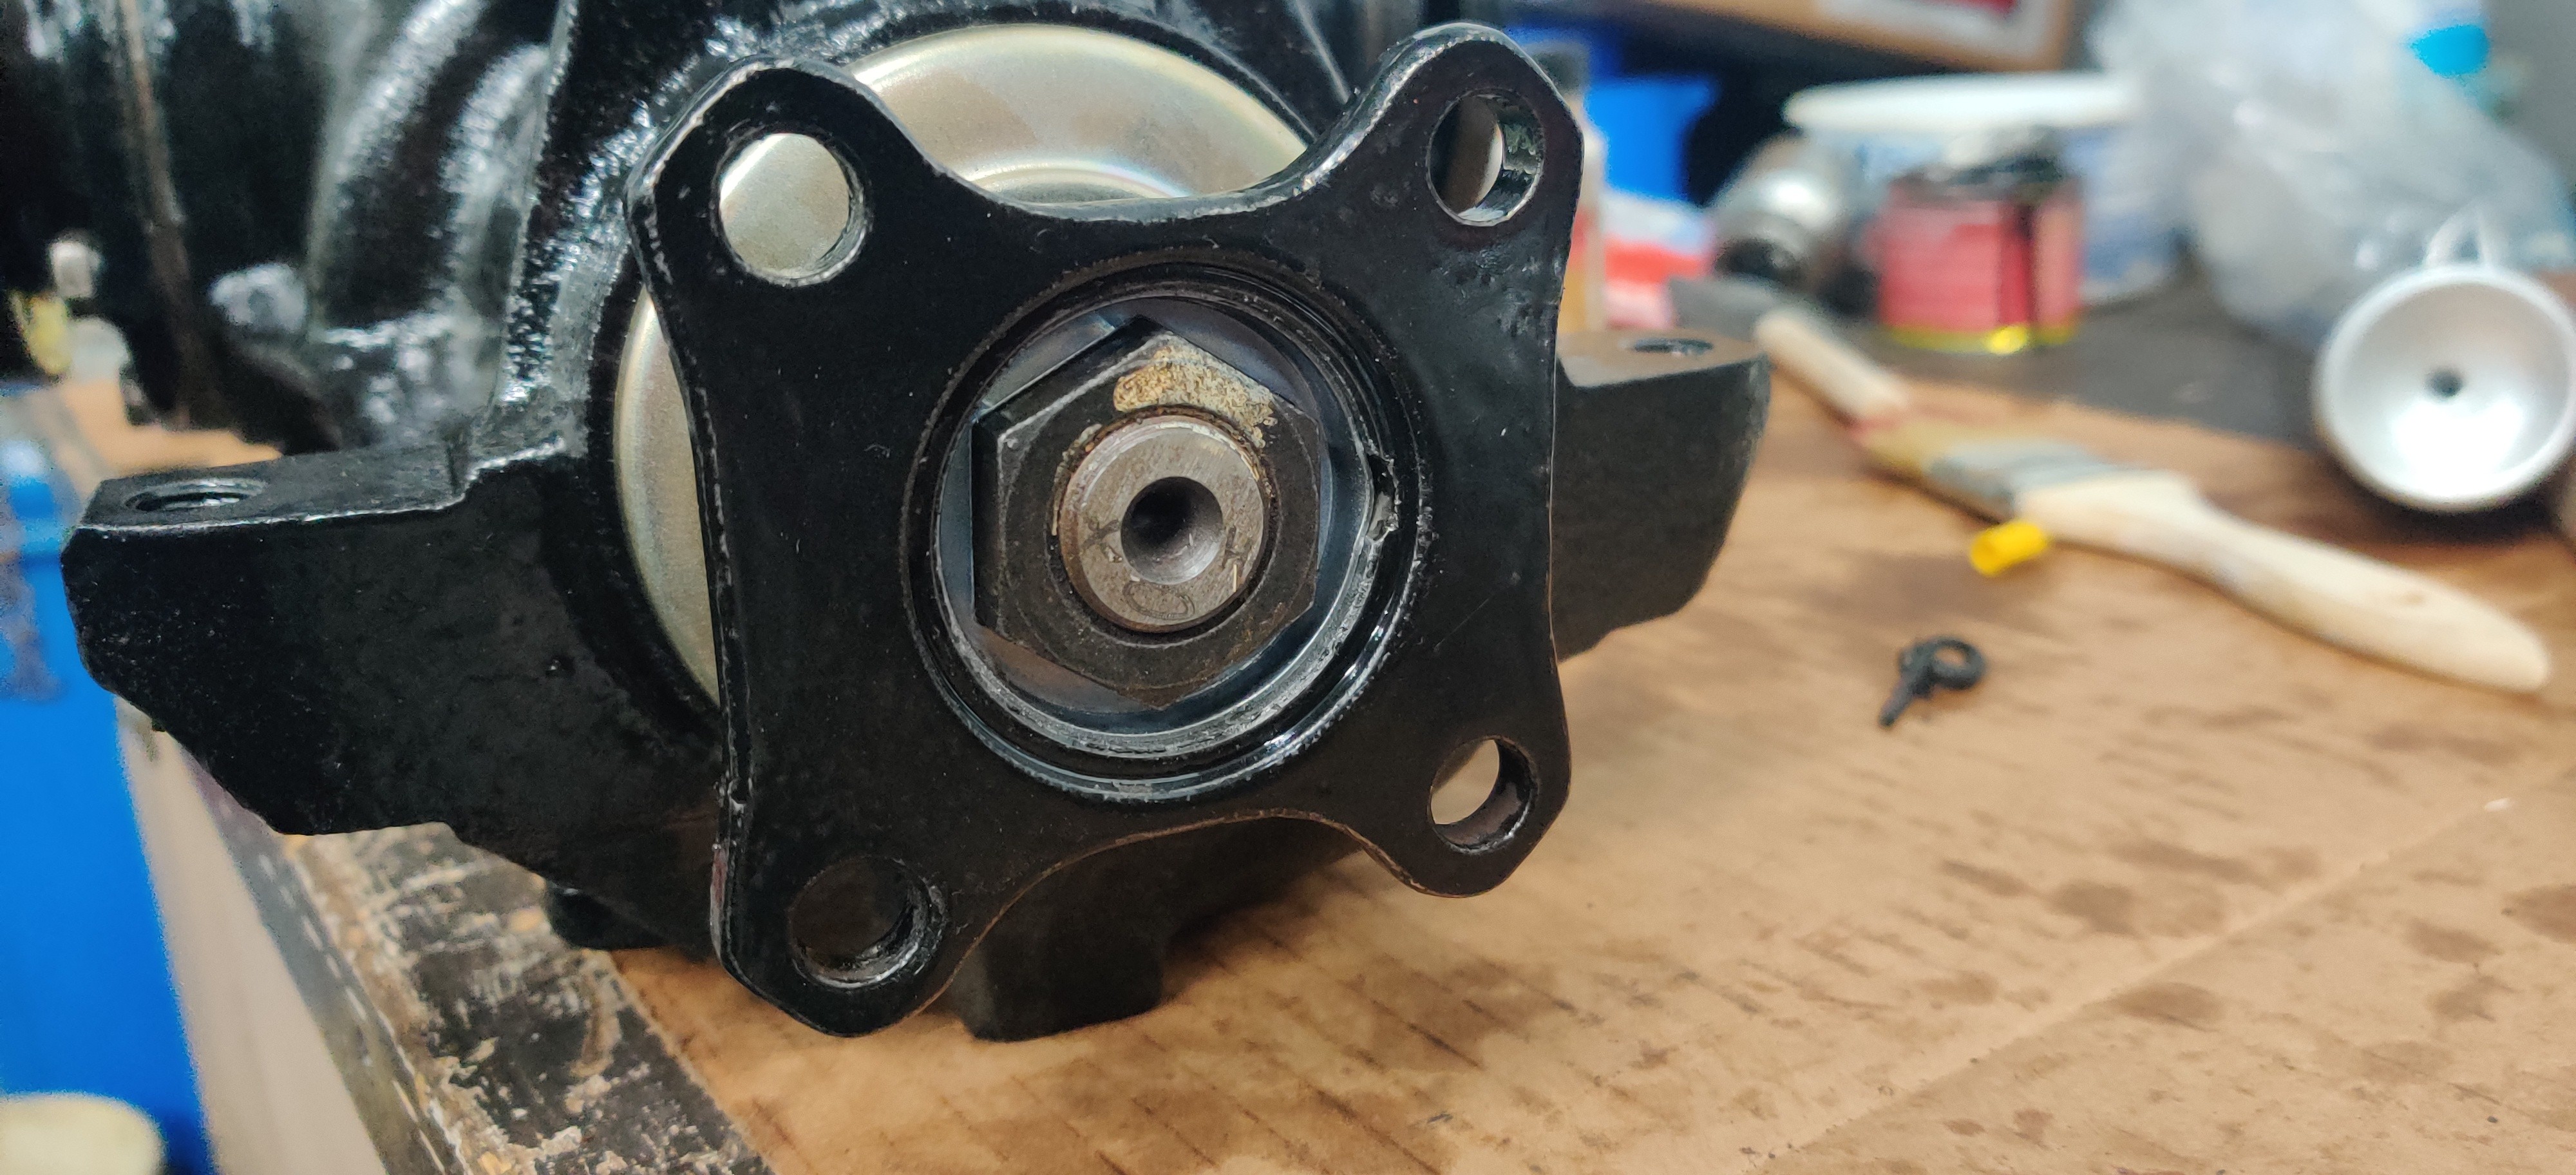
First part of the rebuild is reinstalling the rear pinion gear. I did replace the clamping bushing and the dust cover. After inspecting the bearings I chose to reuse the original ones as they were still in good shape. Being that I hadn't changed anything with gear clearances I simply torqued the nut down to 137 ft lbs as specified from bmw and what I confirmed on a couple threads on other forums and called it good.
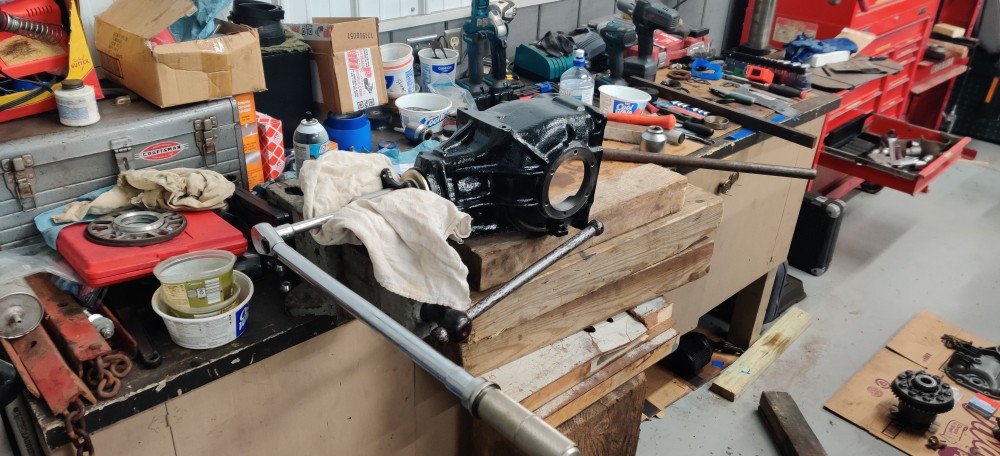
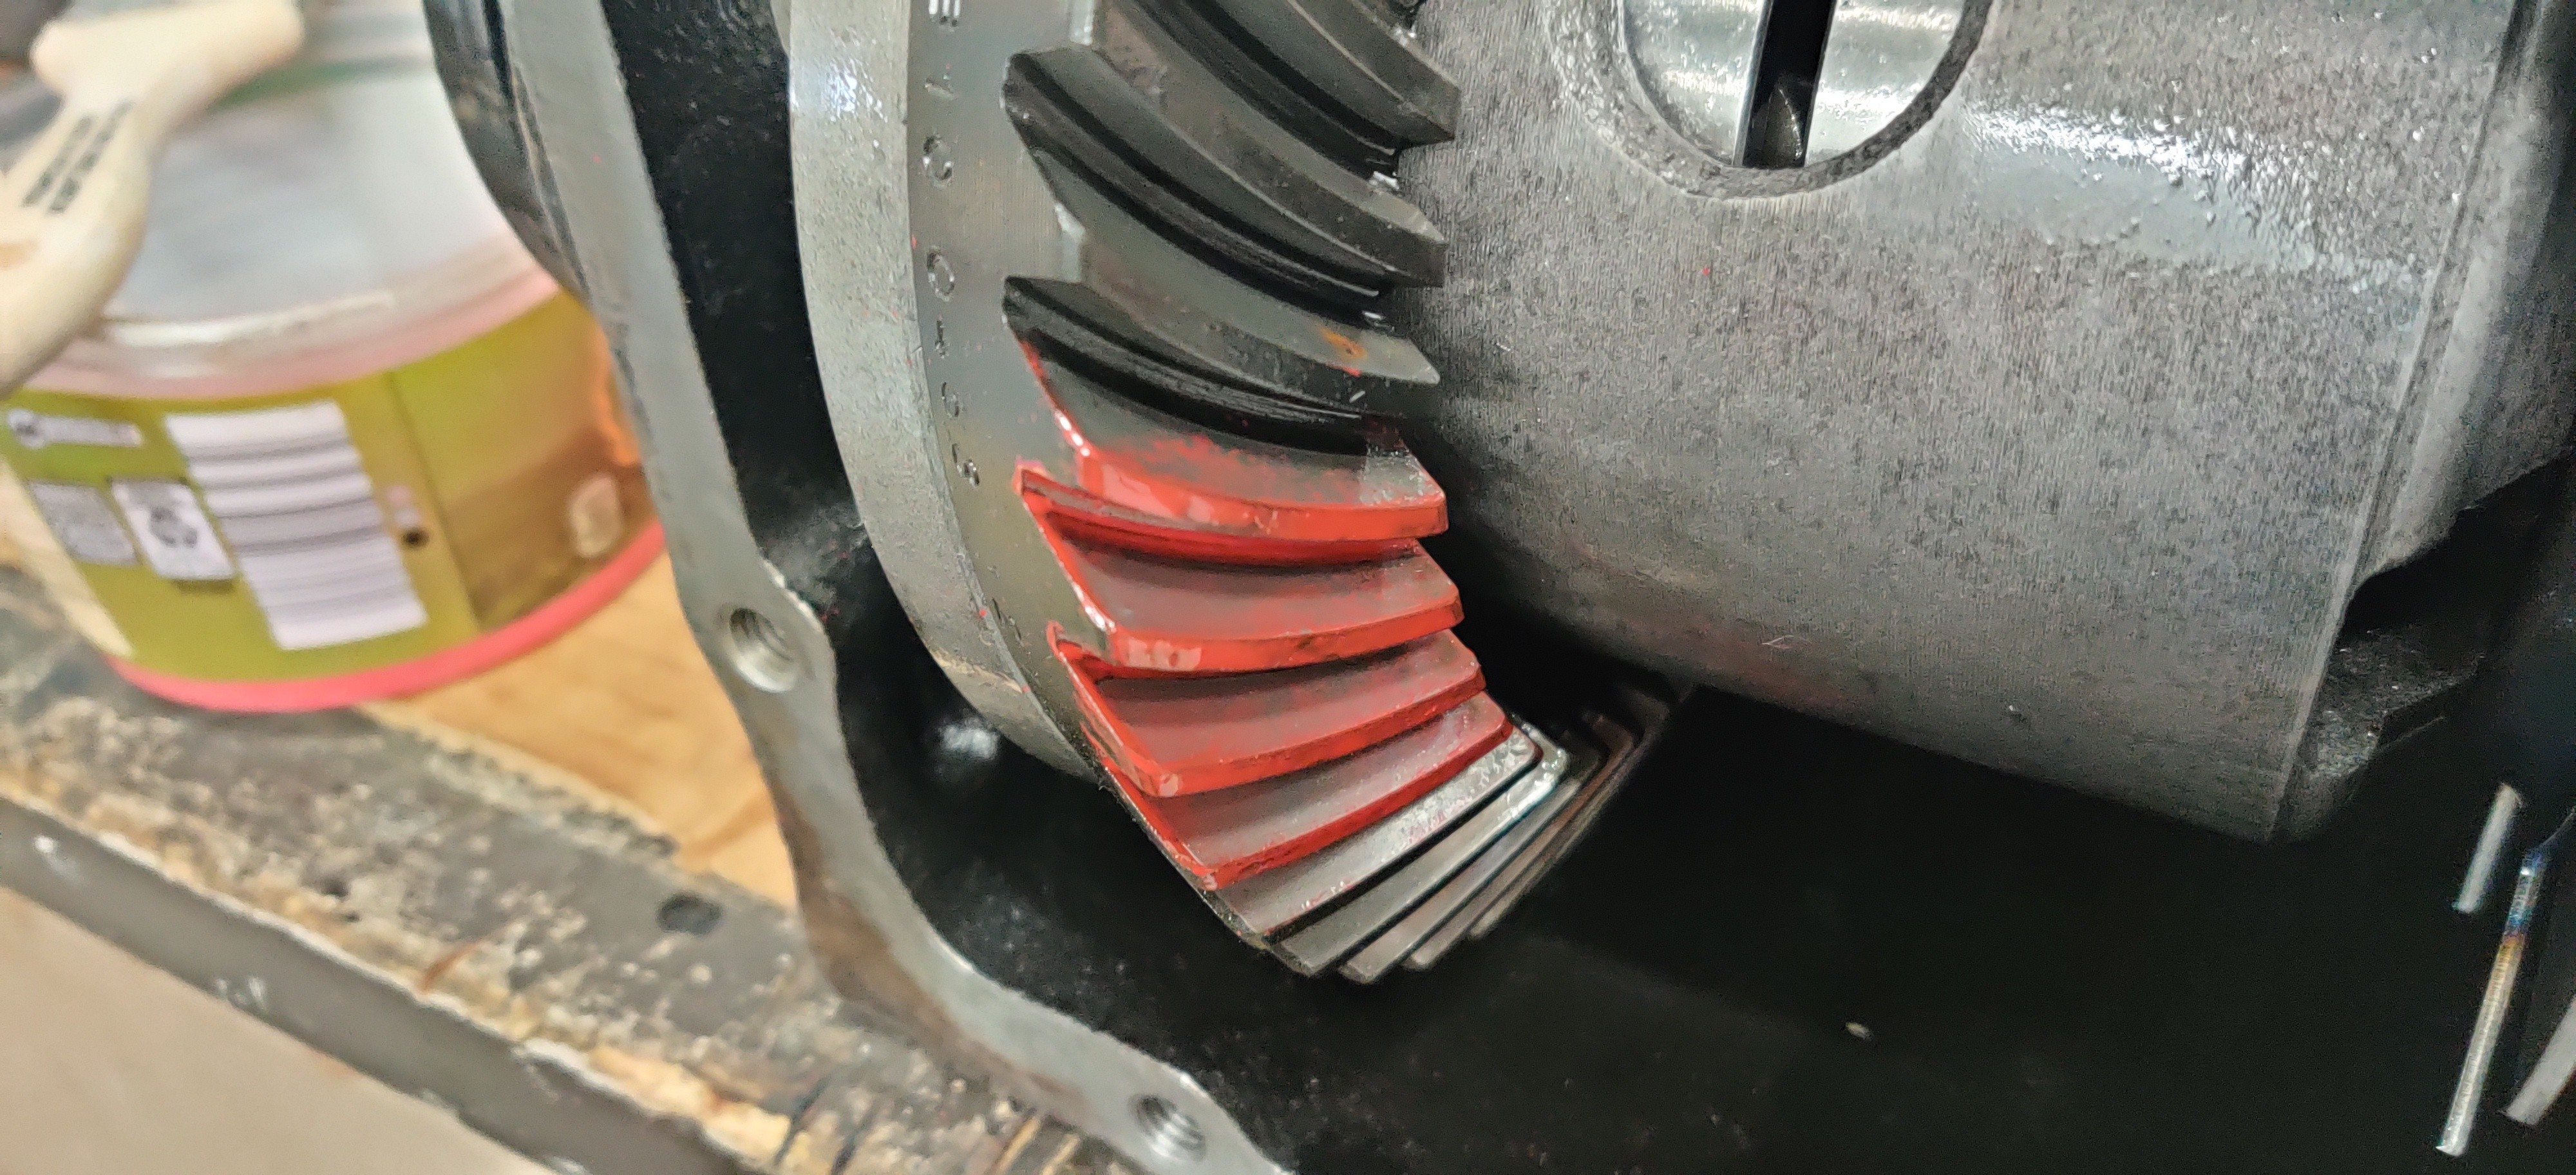
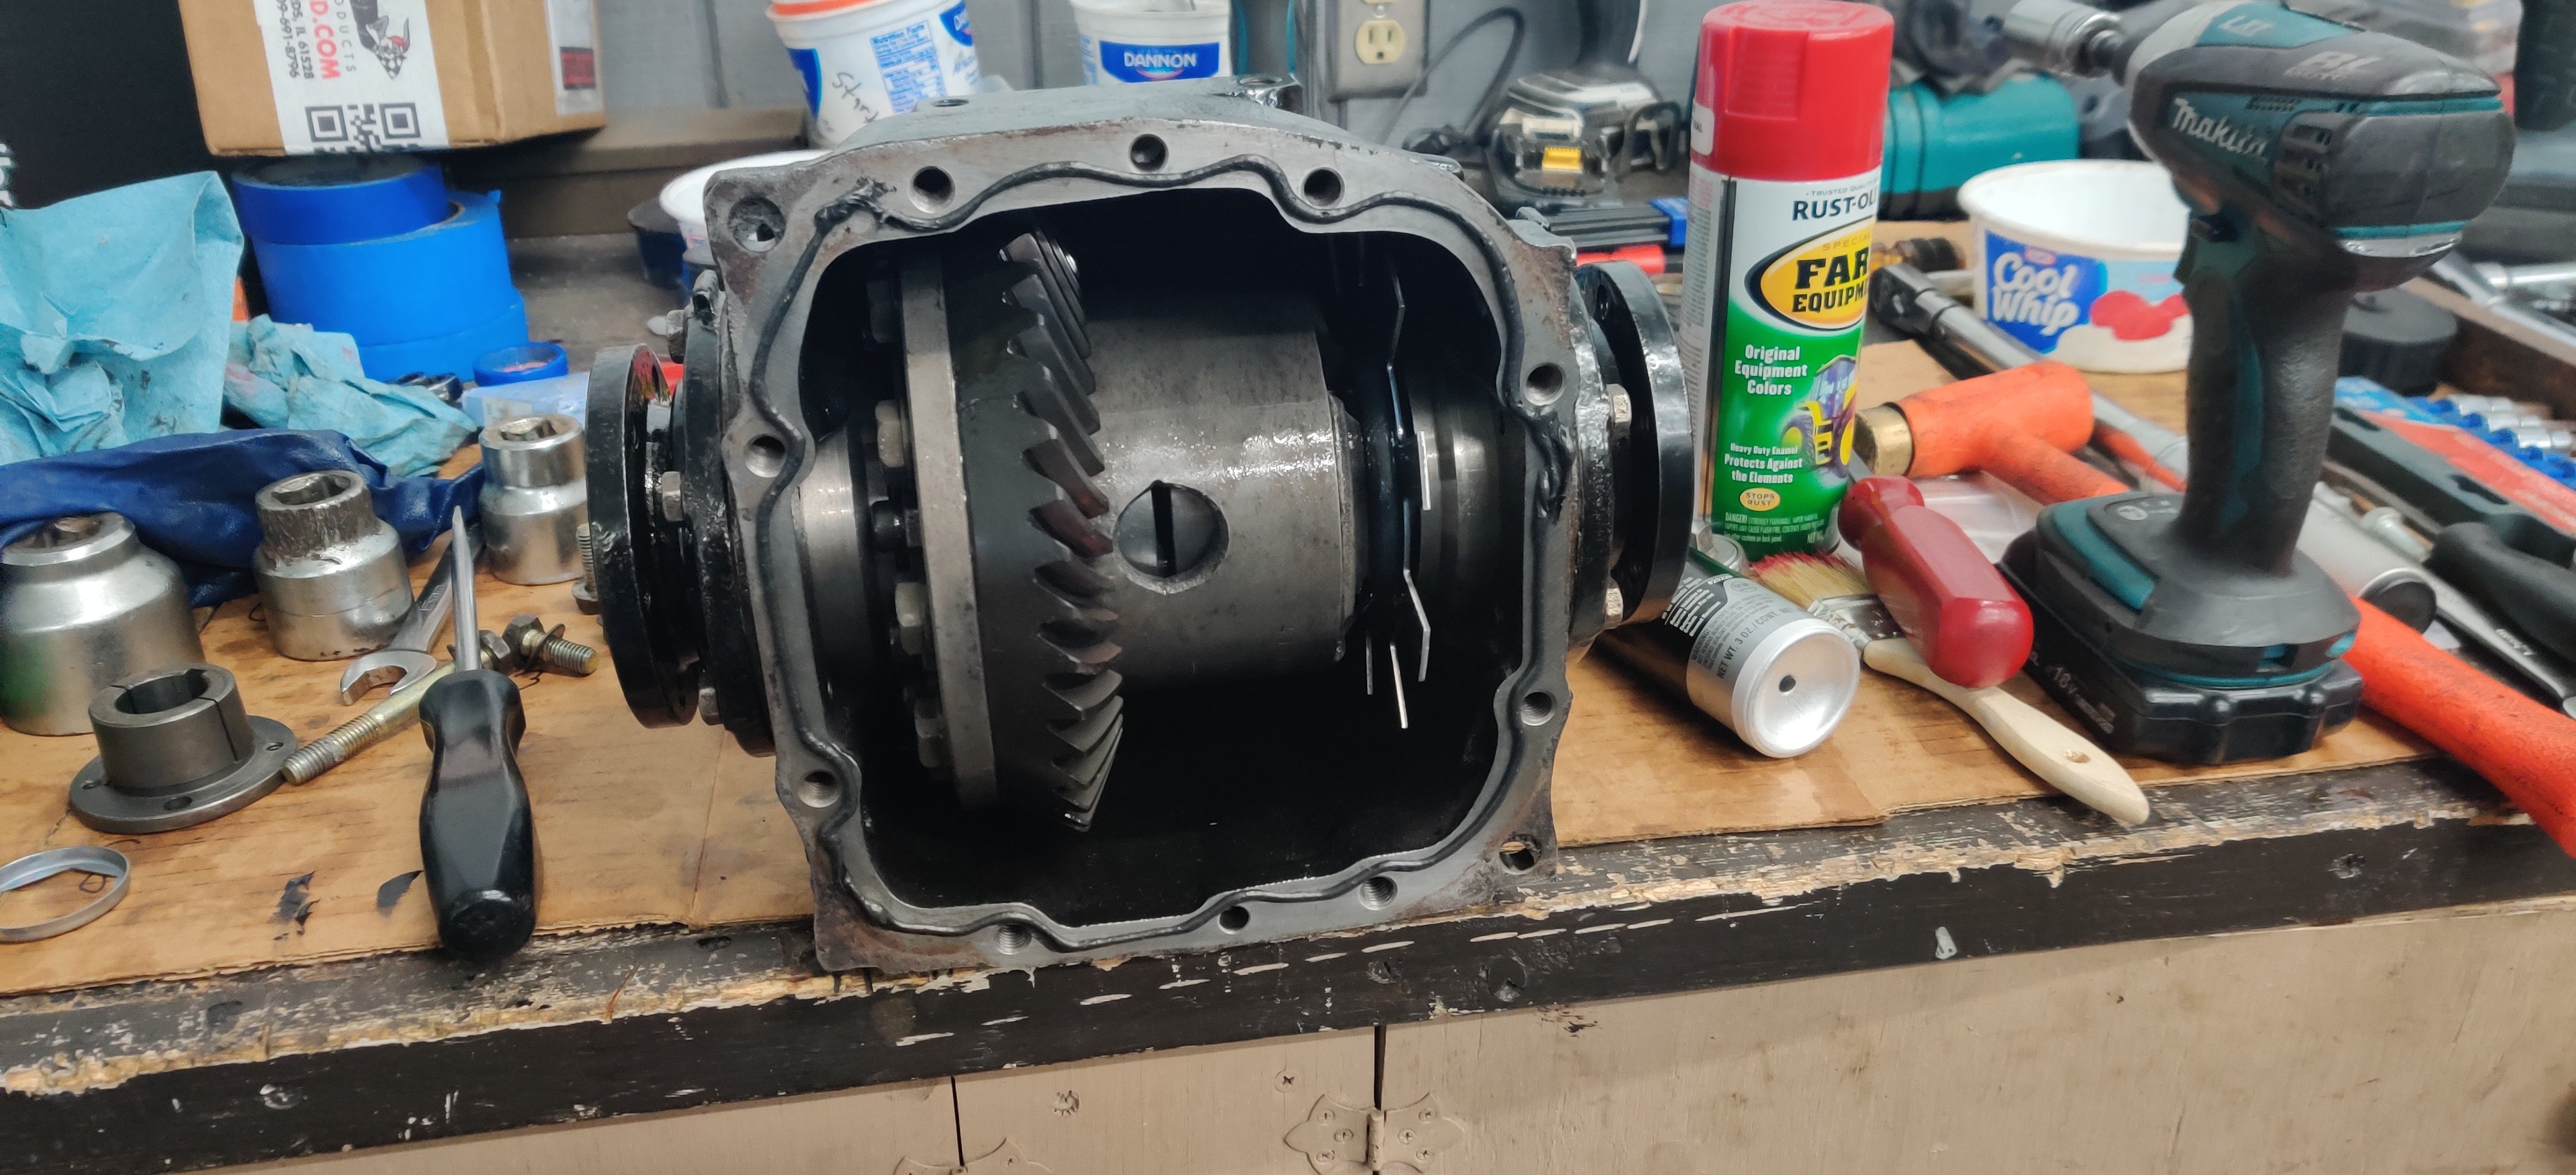
After installing the freshly rebuilt lsd with the ring side retainers and axle shafts I took a little red paint and brushed it on the ring gear and spun it a full turn to ensure that the gears were still properly meshing. I also checked for any crazy amounts of backlash which was also within spec.
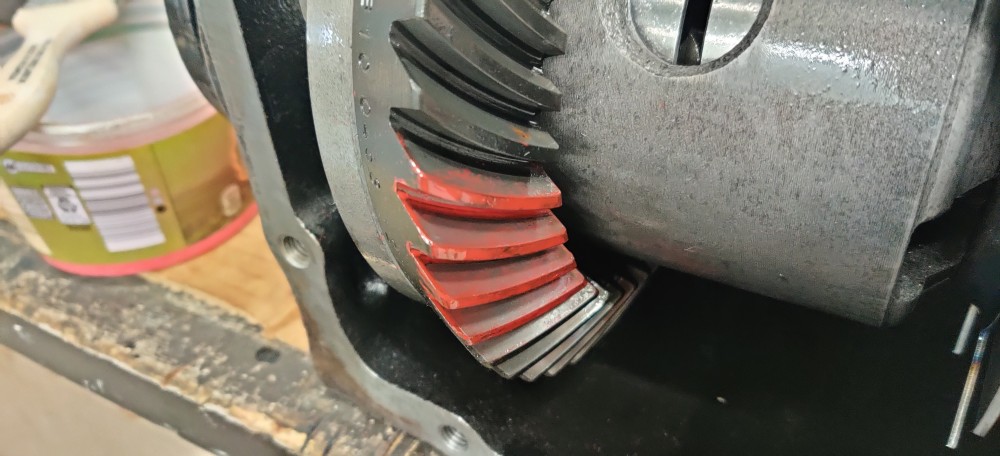
Used some permatex "the right stuff" gasket maker to seal the diff cover to the diff.
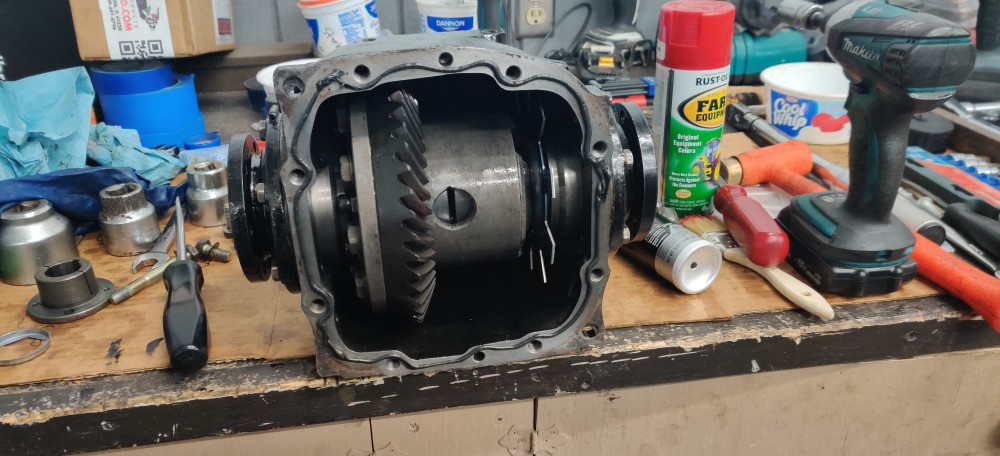
After ensuring the preload of the pinion gear was within spec I popped in a new locking plate for the nut.
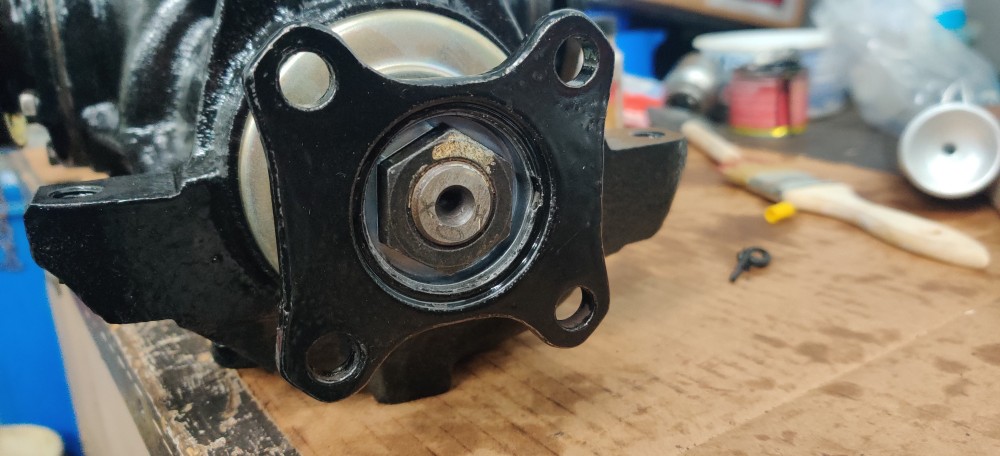
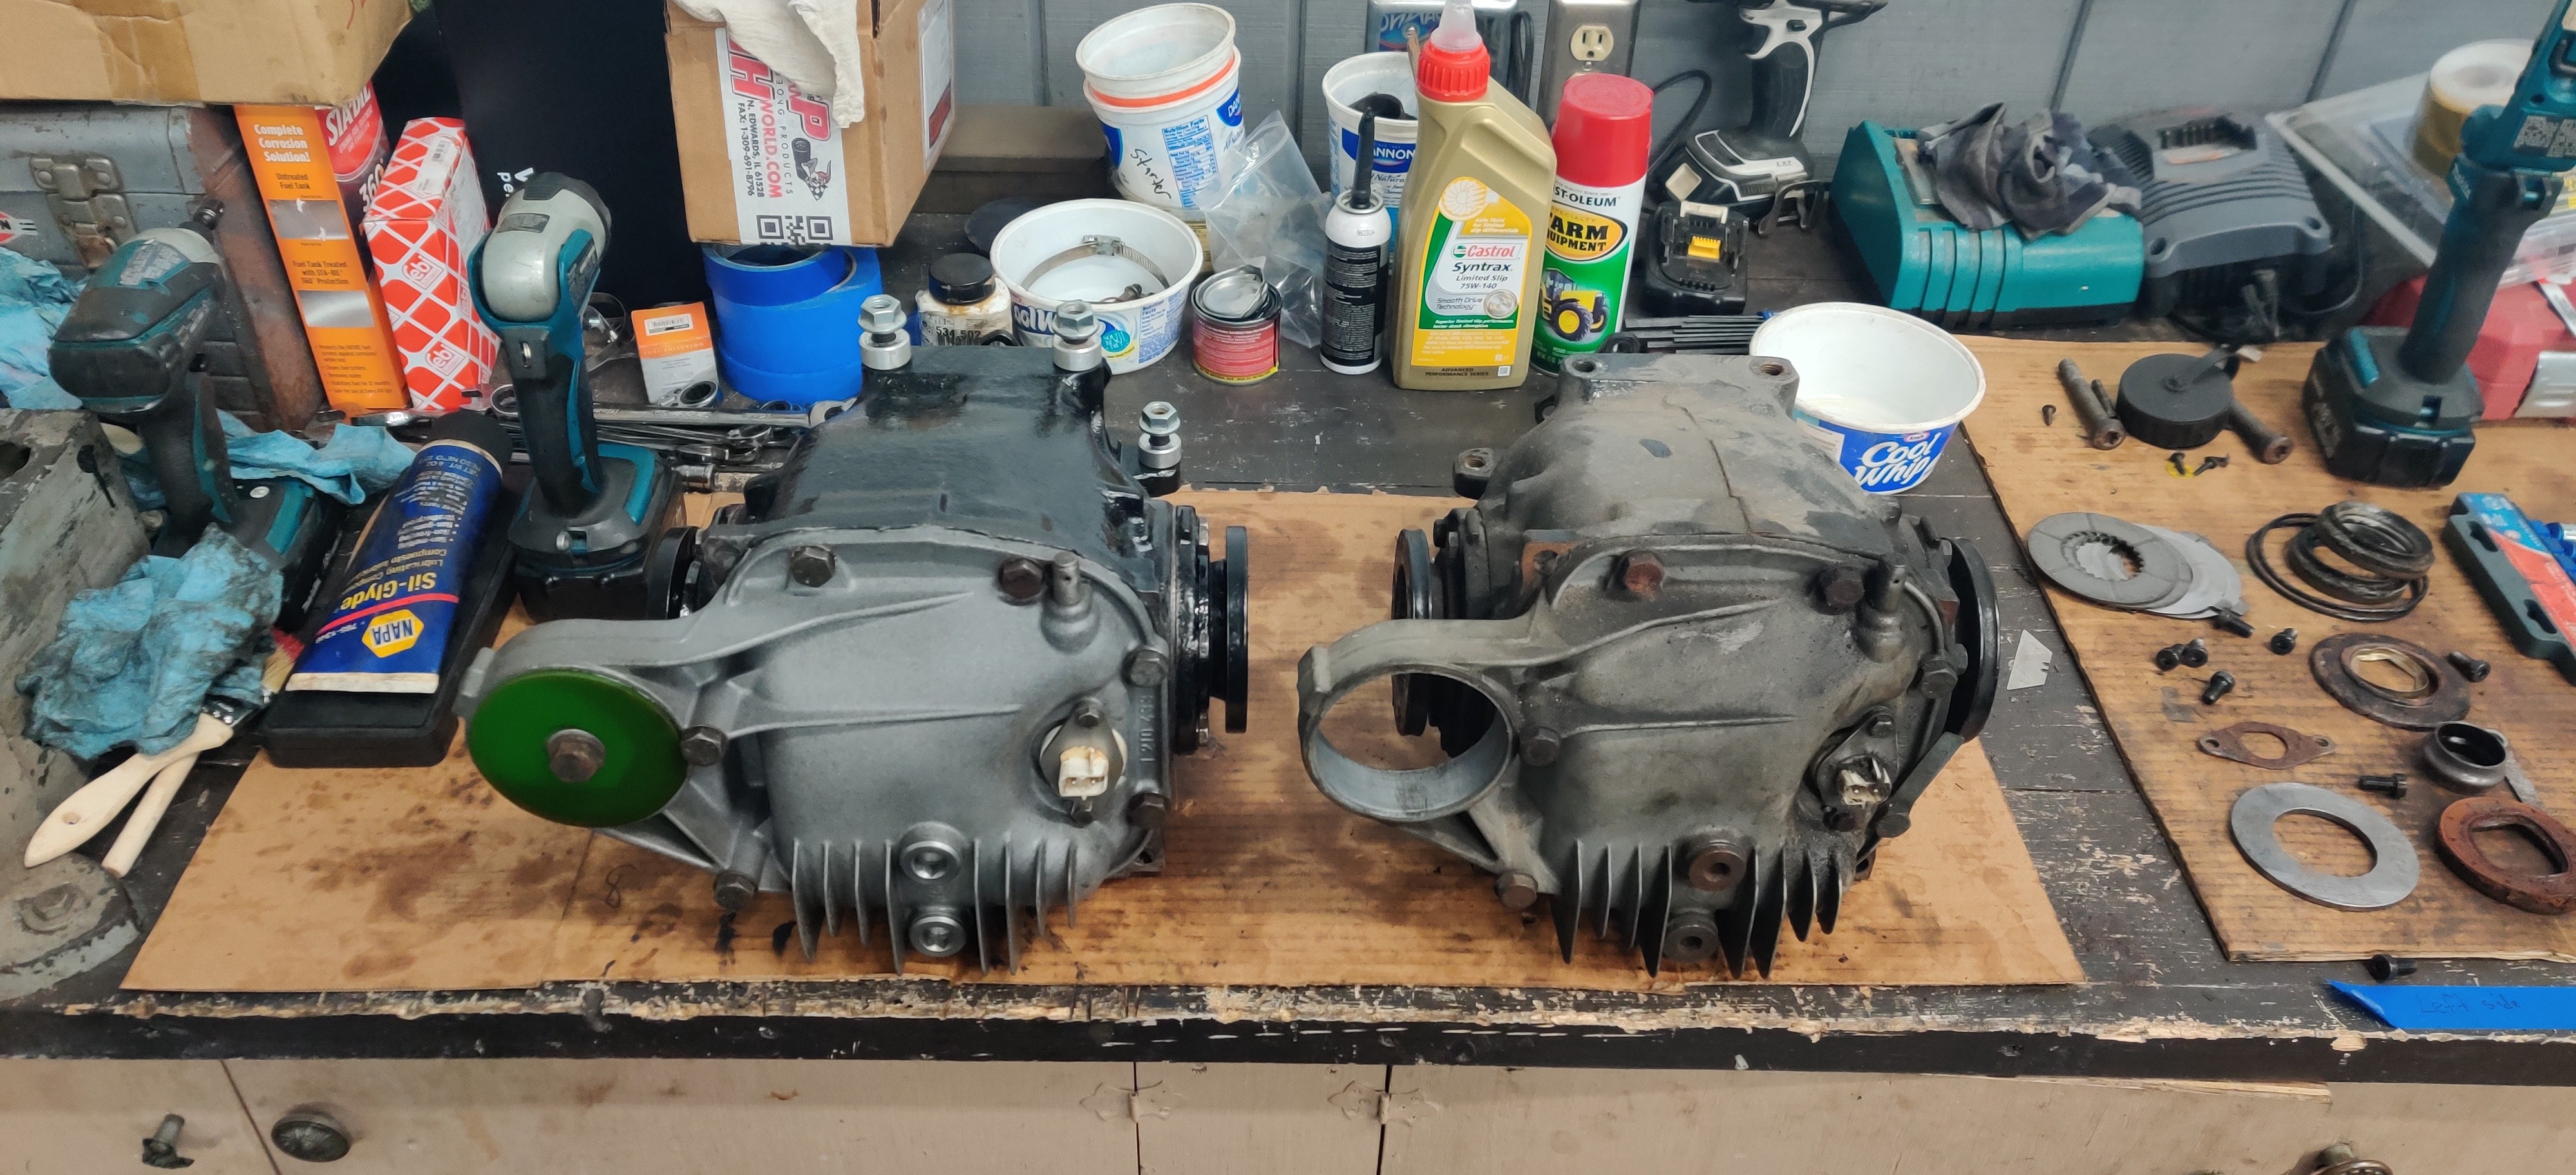
Added 1.75 qts of castrol 75w-140 diff fluid which includes the lsd additive needed for the clutch plates. Also popped in the speed sensor with a new o-ring and metal plate. She is ready to be installed in the car.
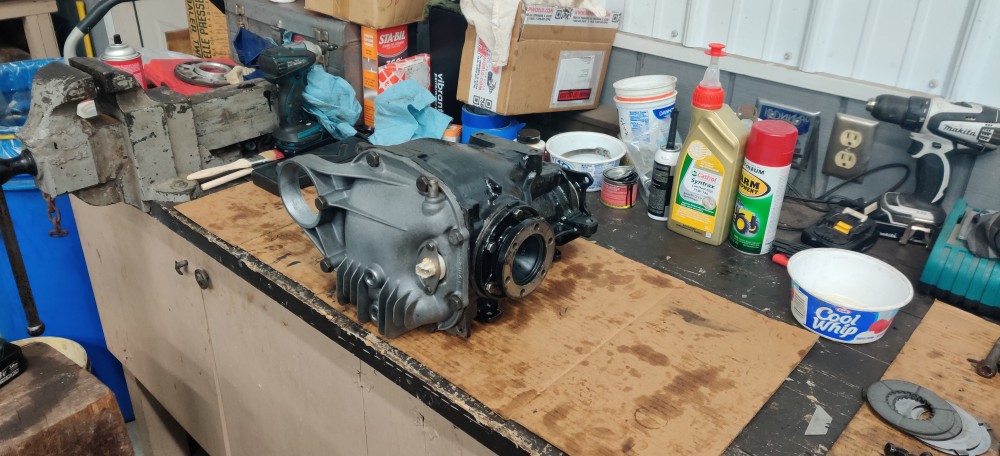
3.73 diff that was in the car on the right.
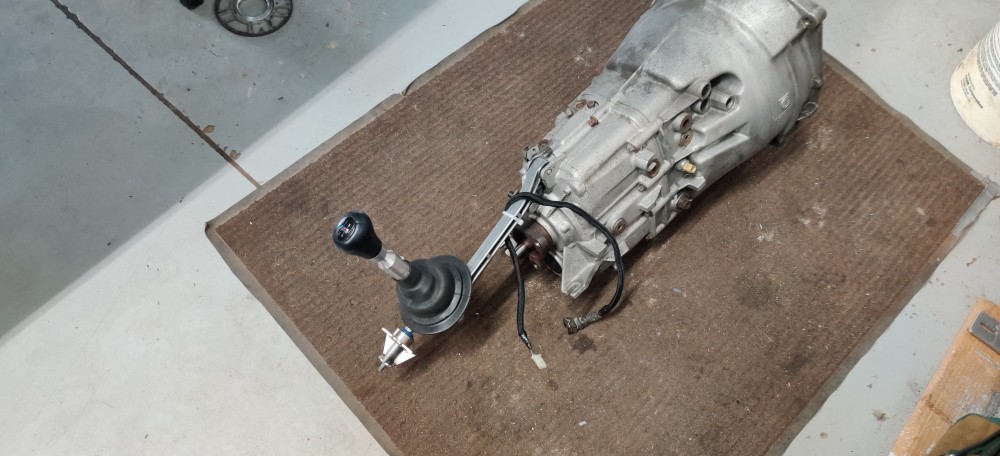
On to the next thing. In a previous post @KaiserRolls mentioned the detent pins in the zf trans. I had not looked into these and did a bit of research as well as checking that it didn't need the replacement done. One of the major signs of failure was the shifter not popping back to center after pulling it out of 5th gear. Luckily everything still felt good.
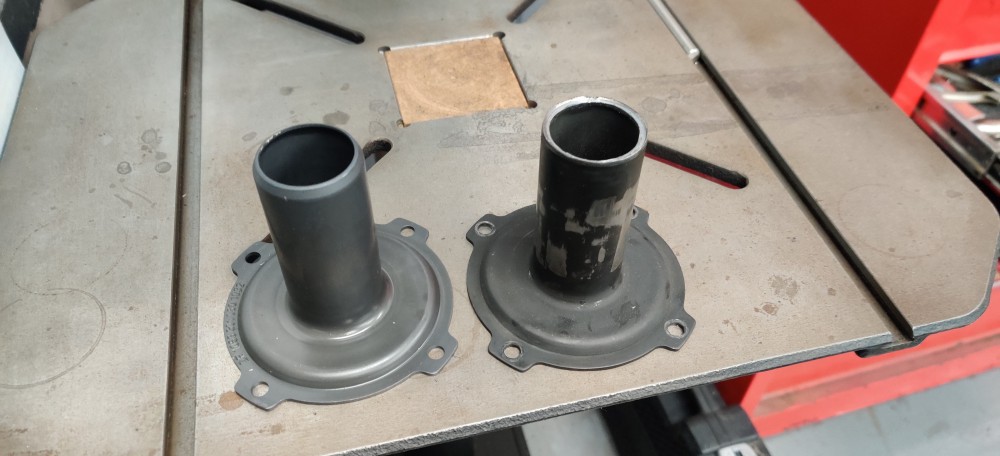
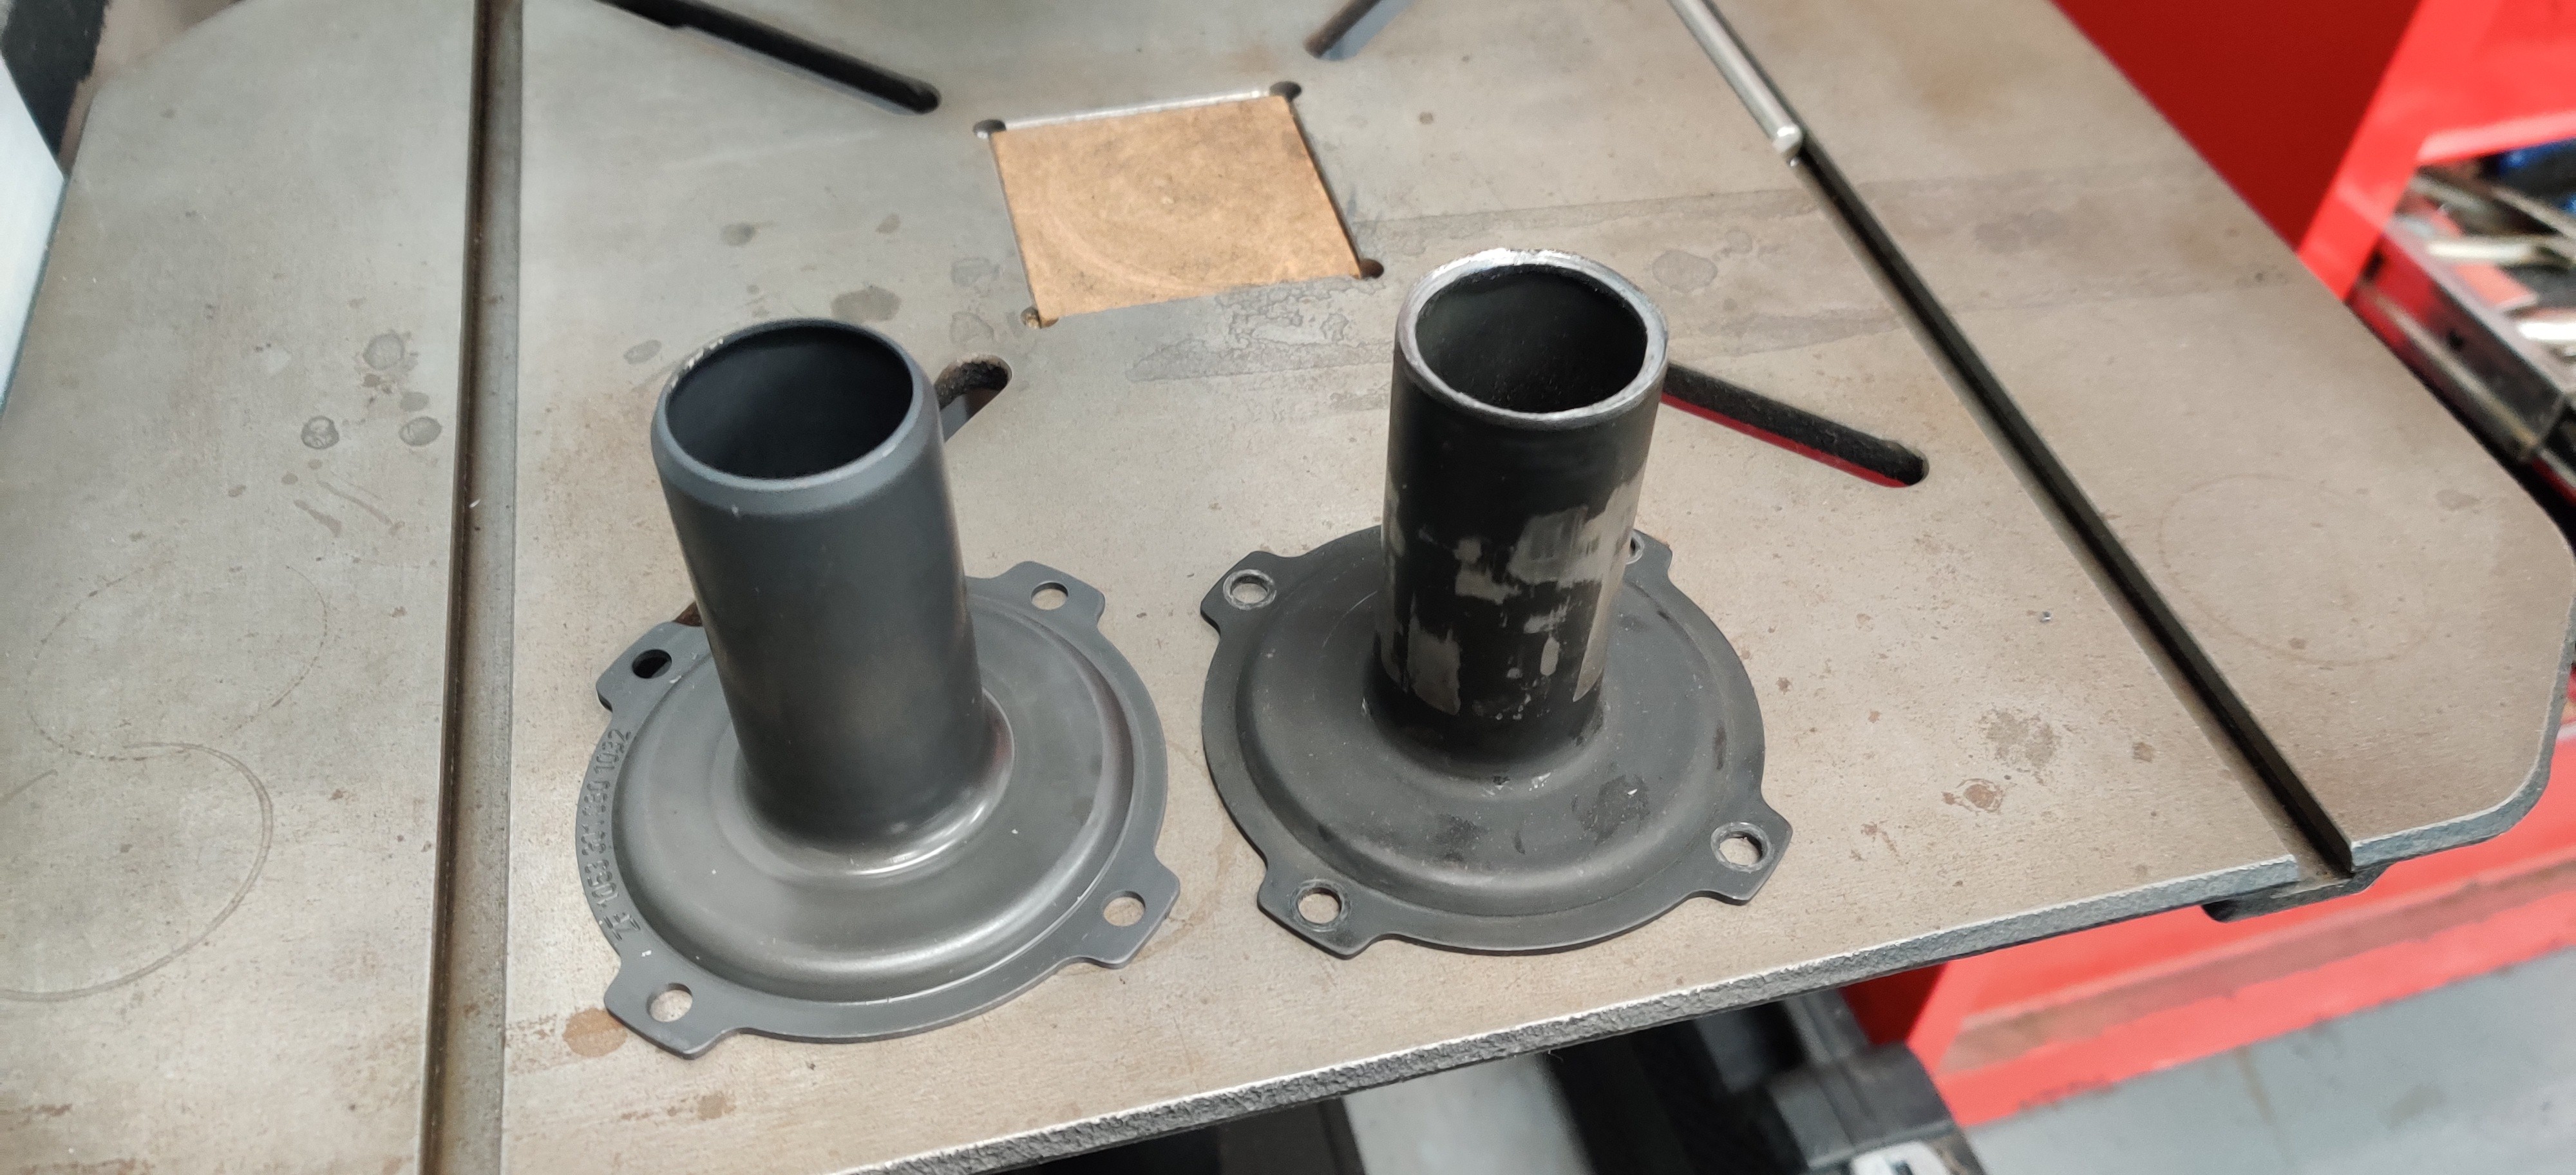
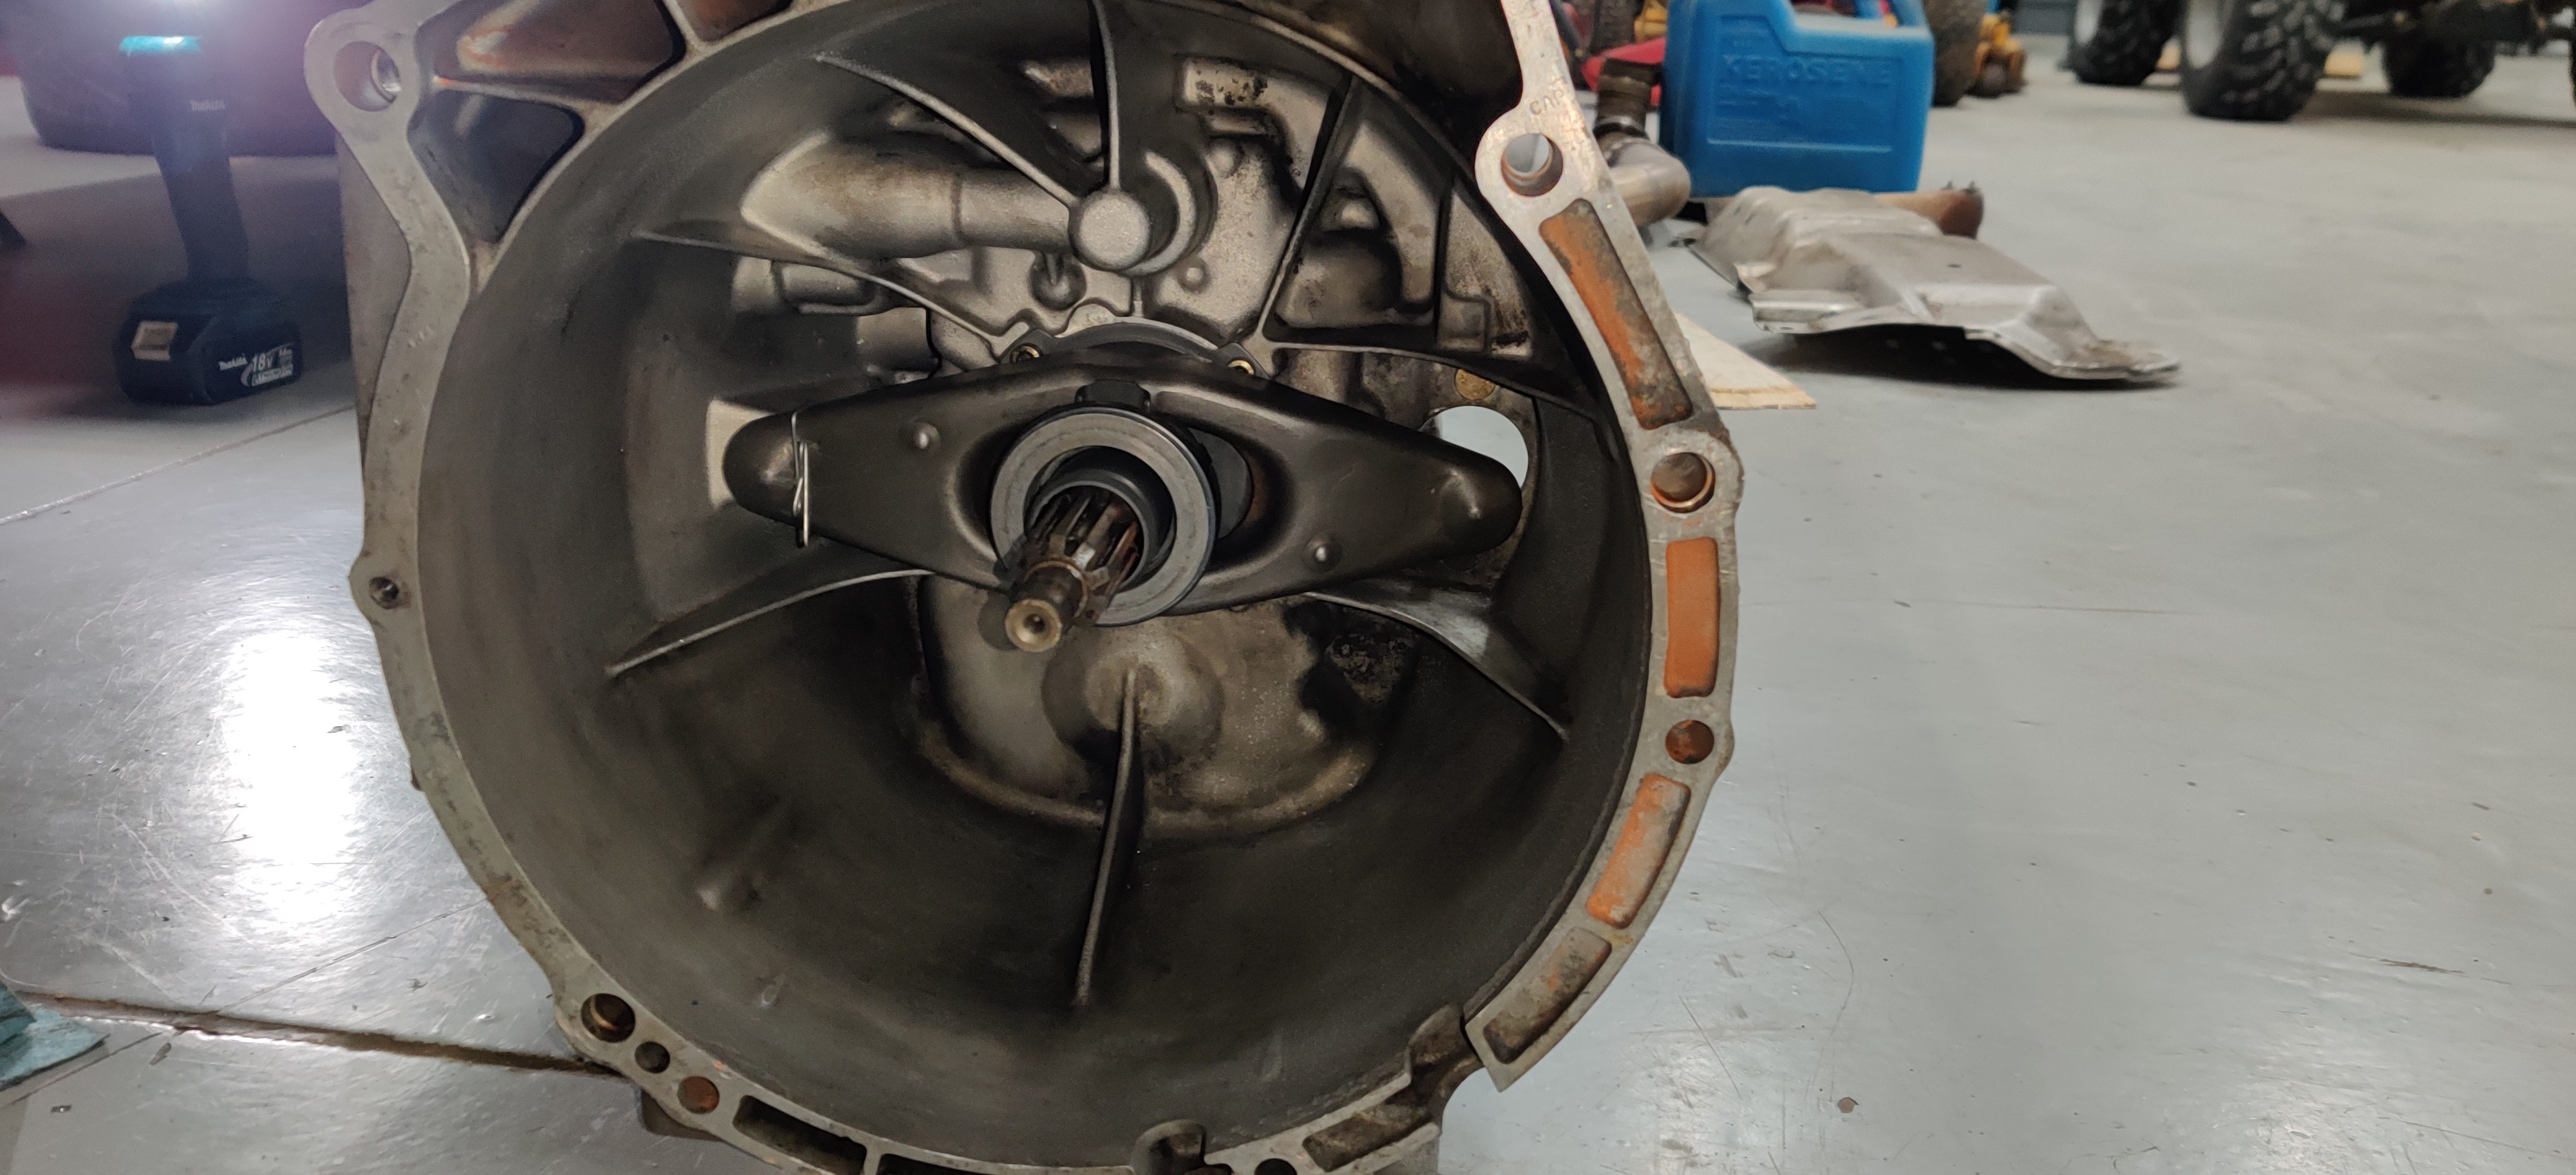
New guide tube came in and the damaged one from the clutch disc was replaced.
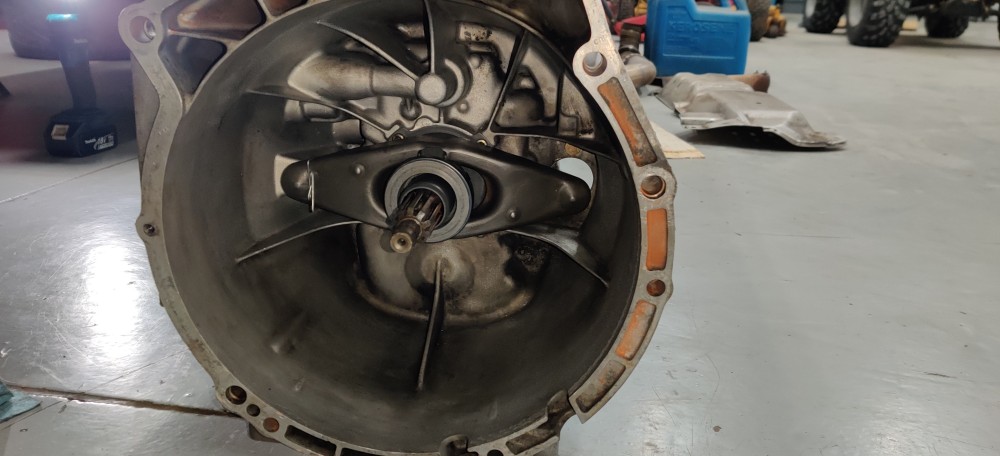
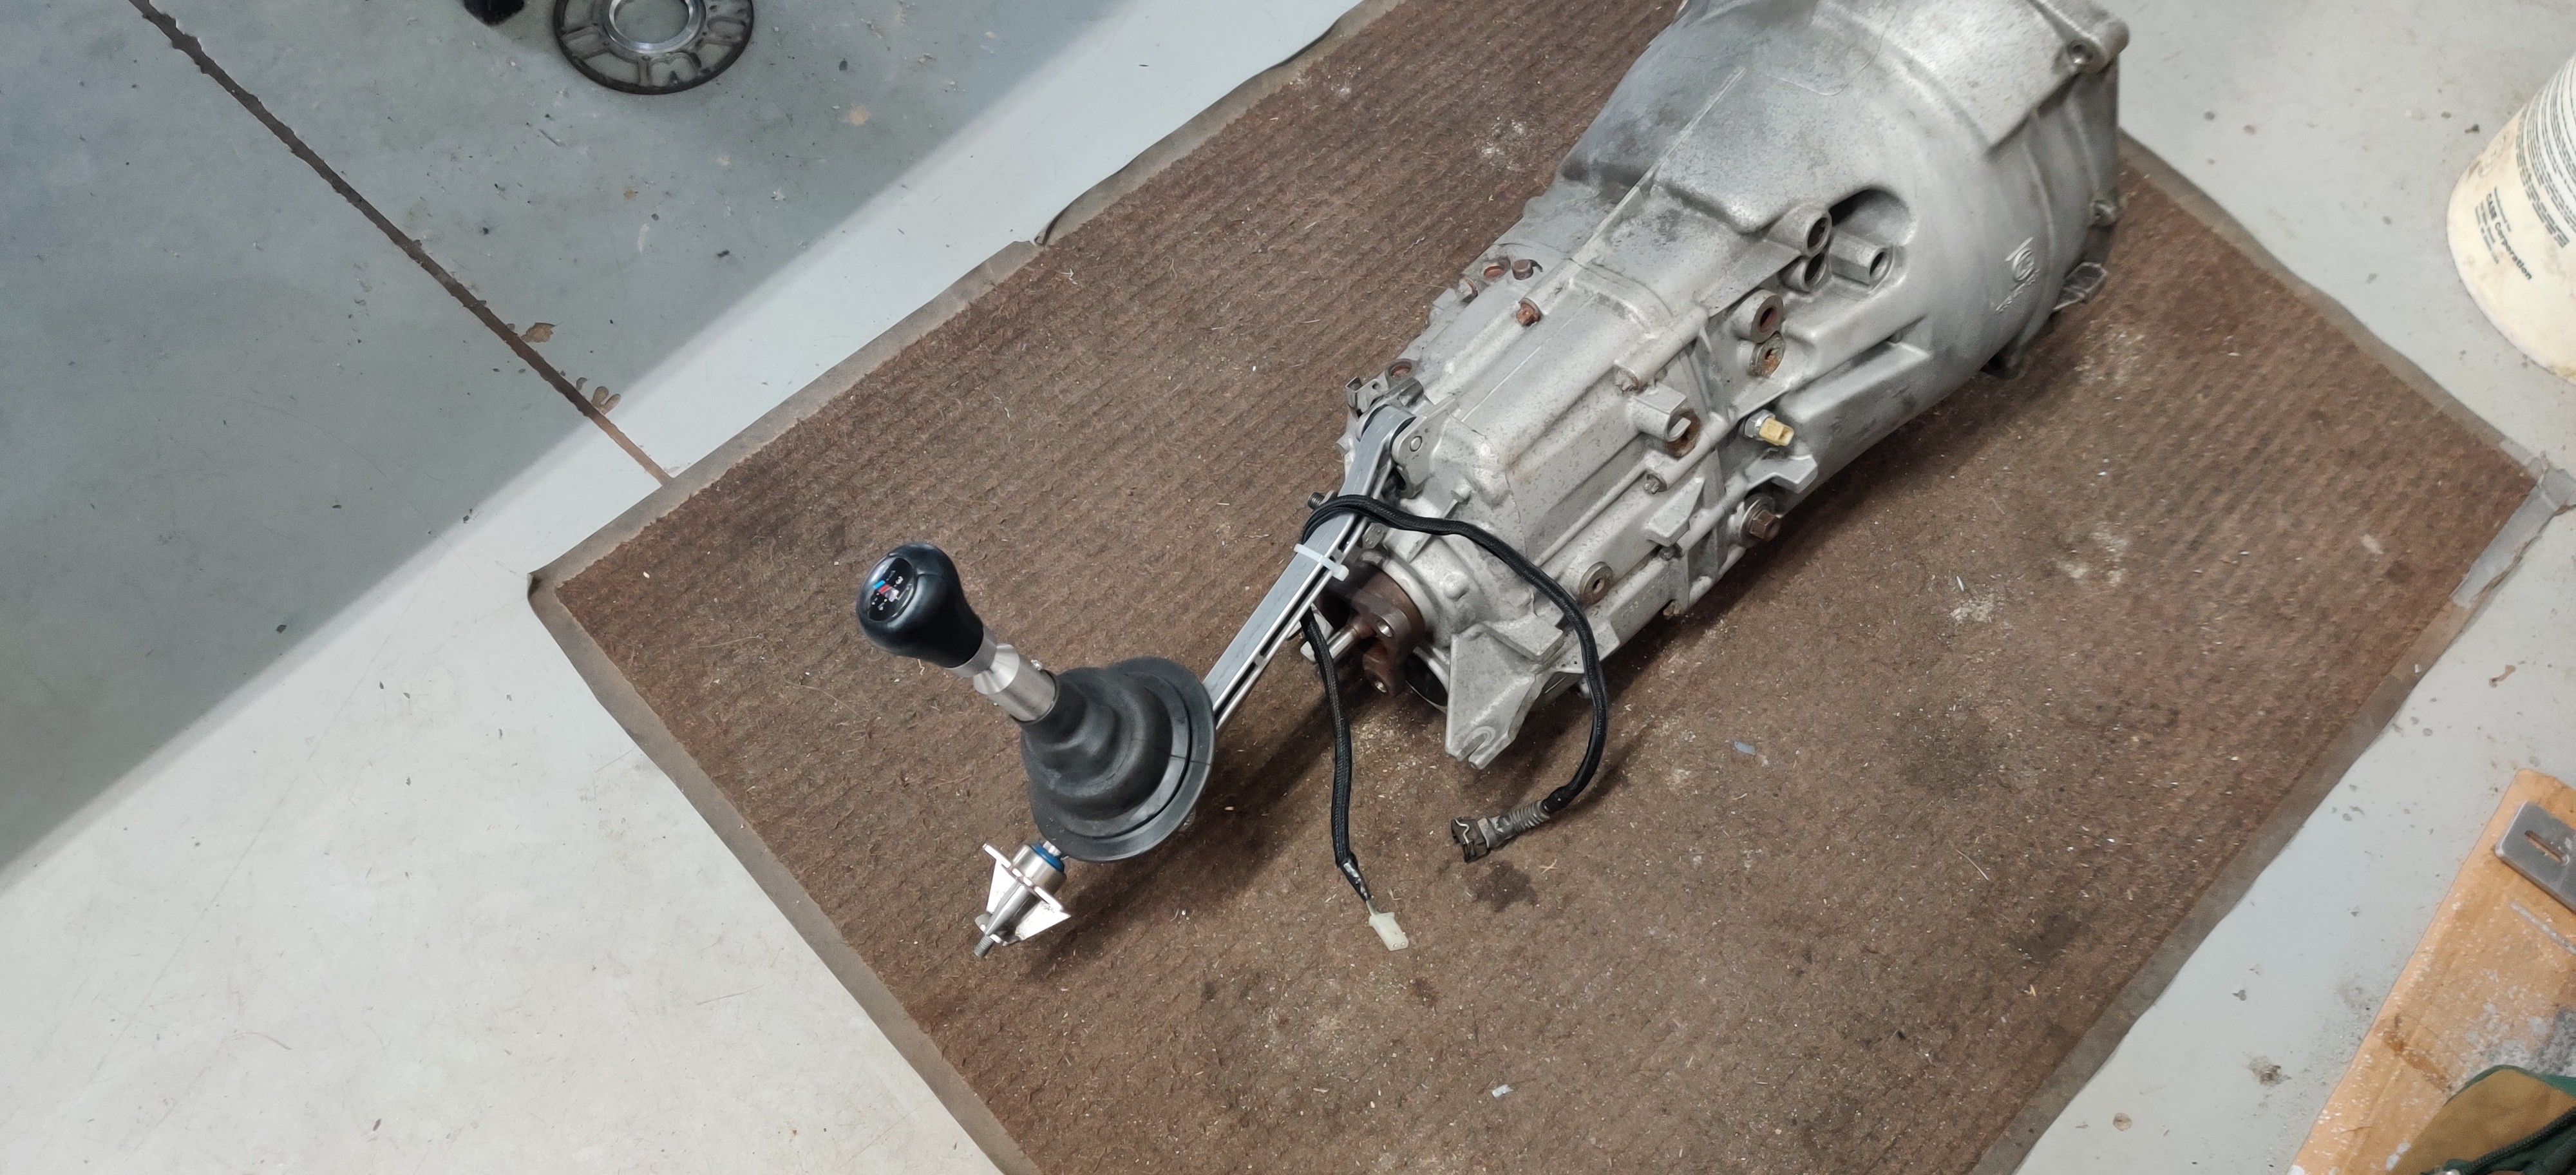
After that was all said and done and the clutch disc was flipped around the correct way the trans was re-installed.
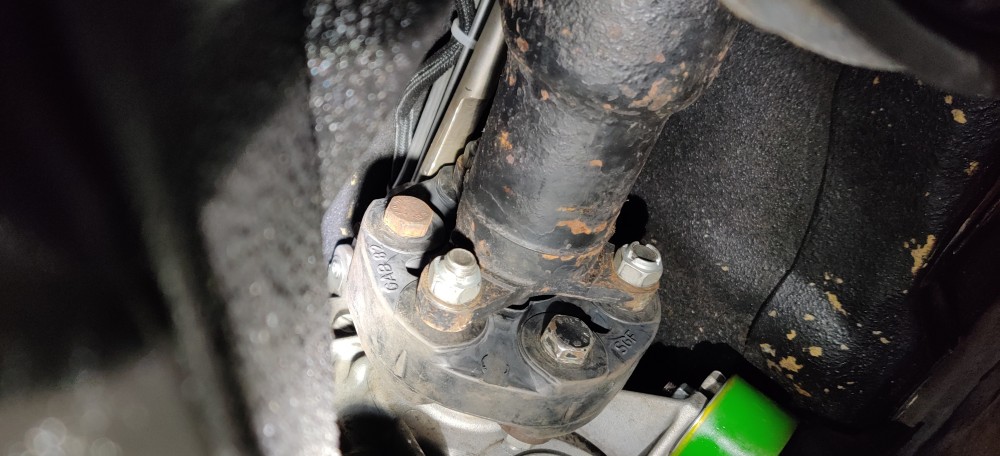
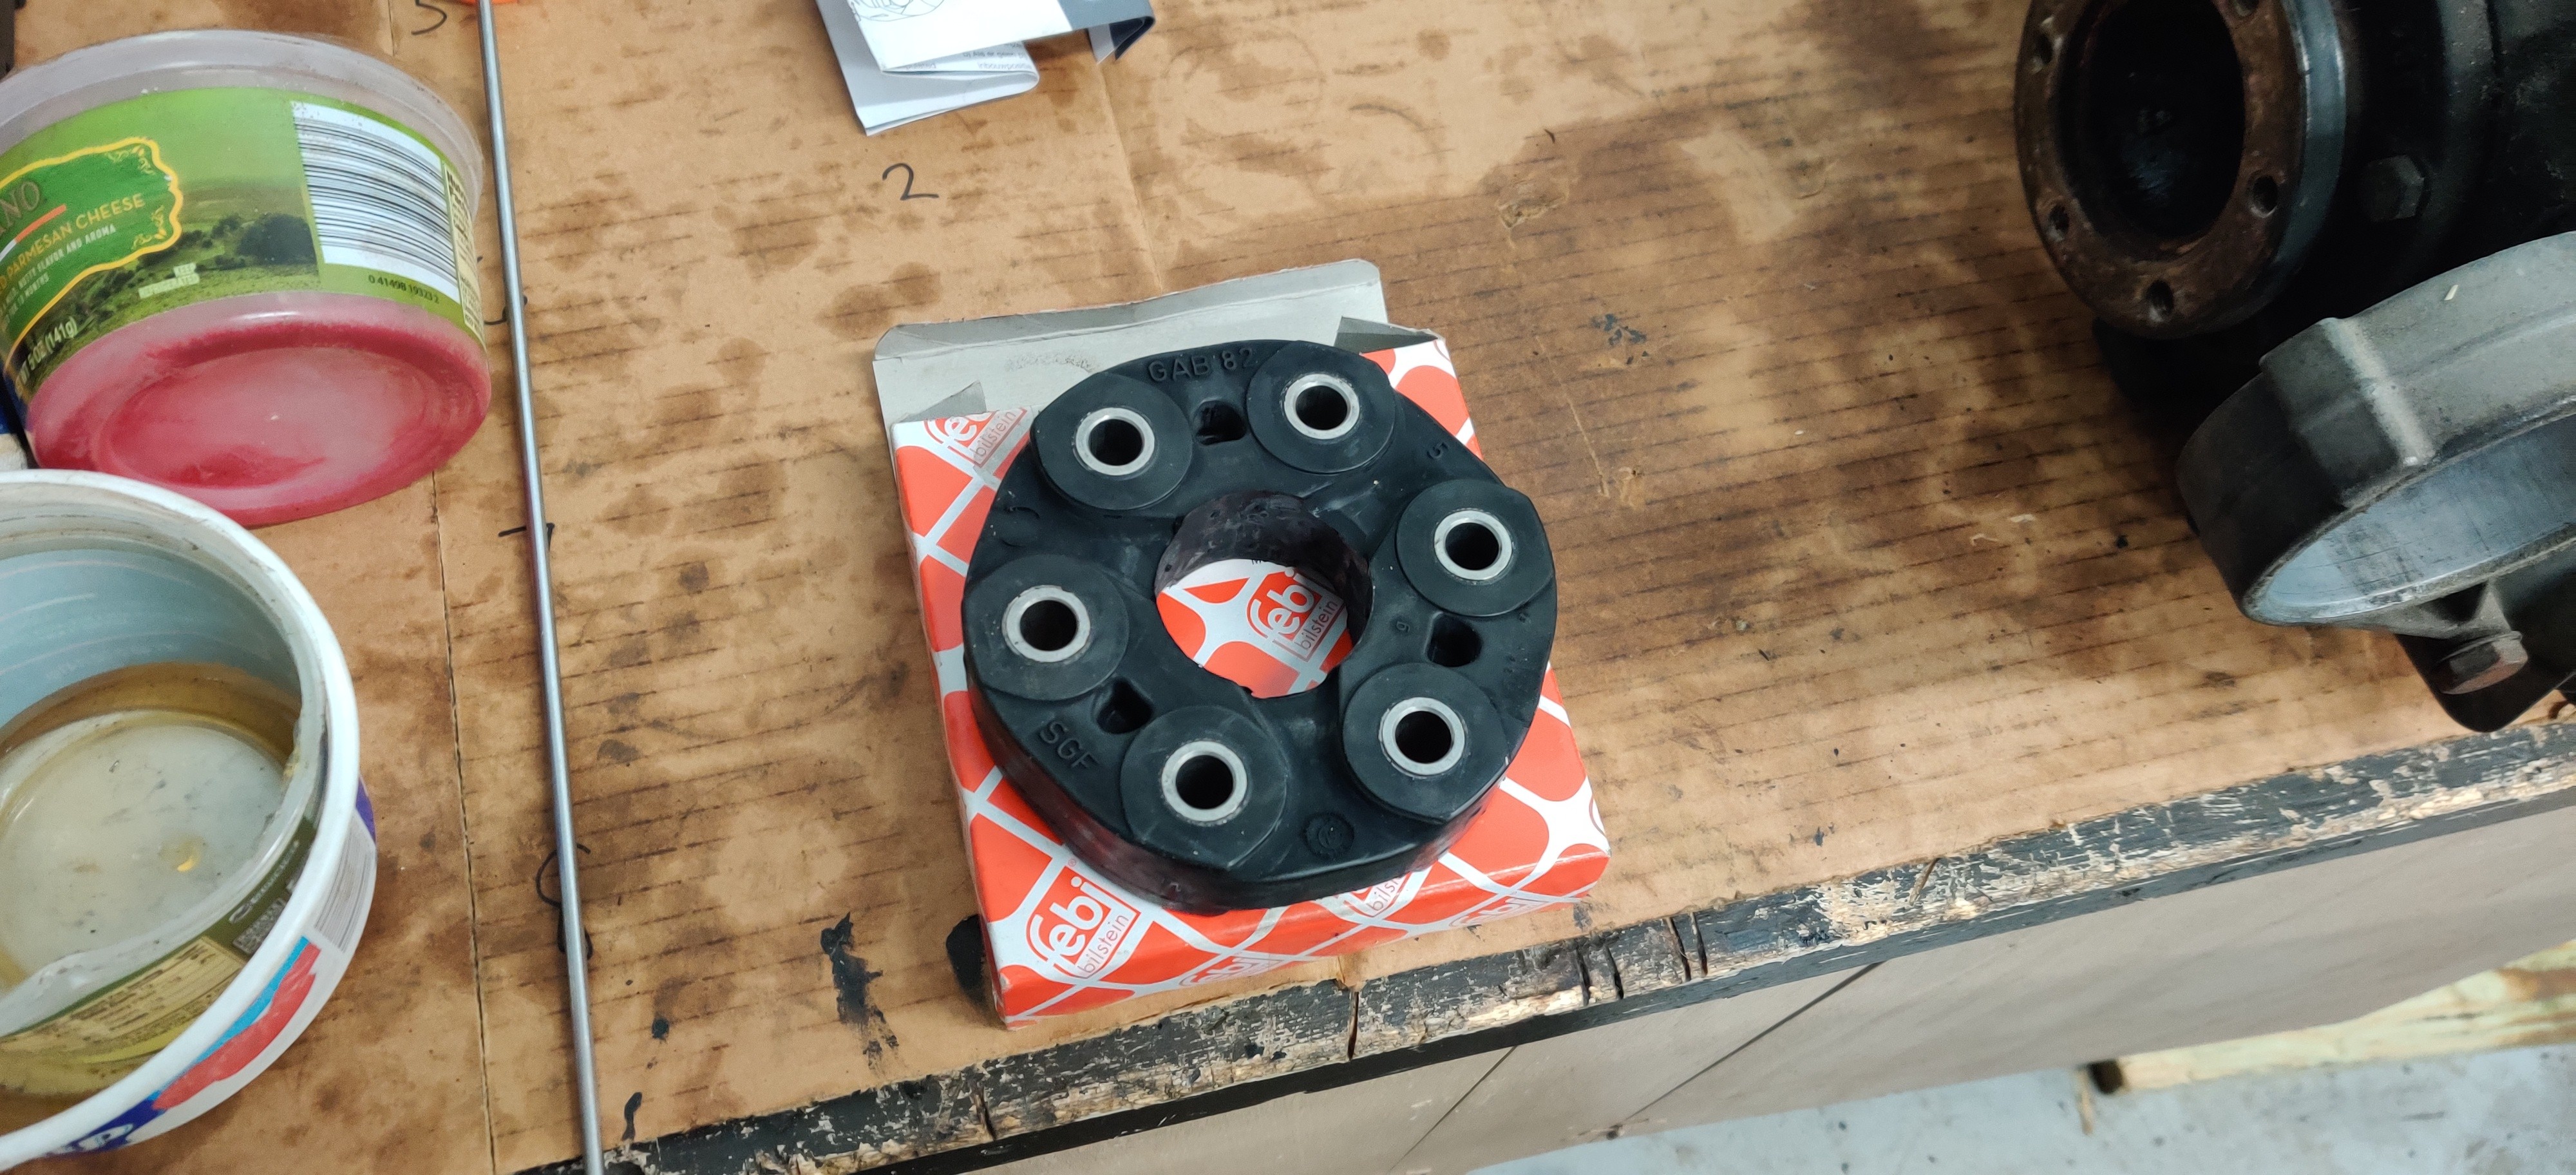
Also installed a fresh guibo
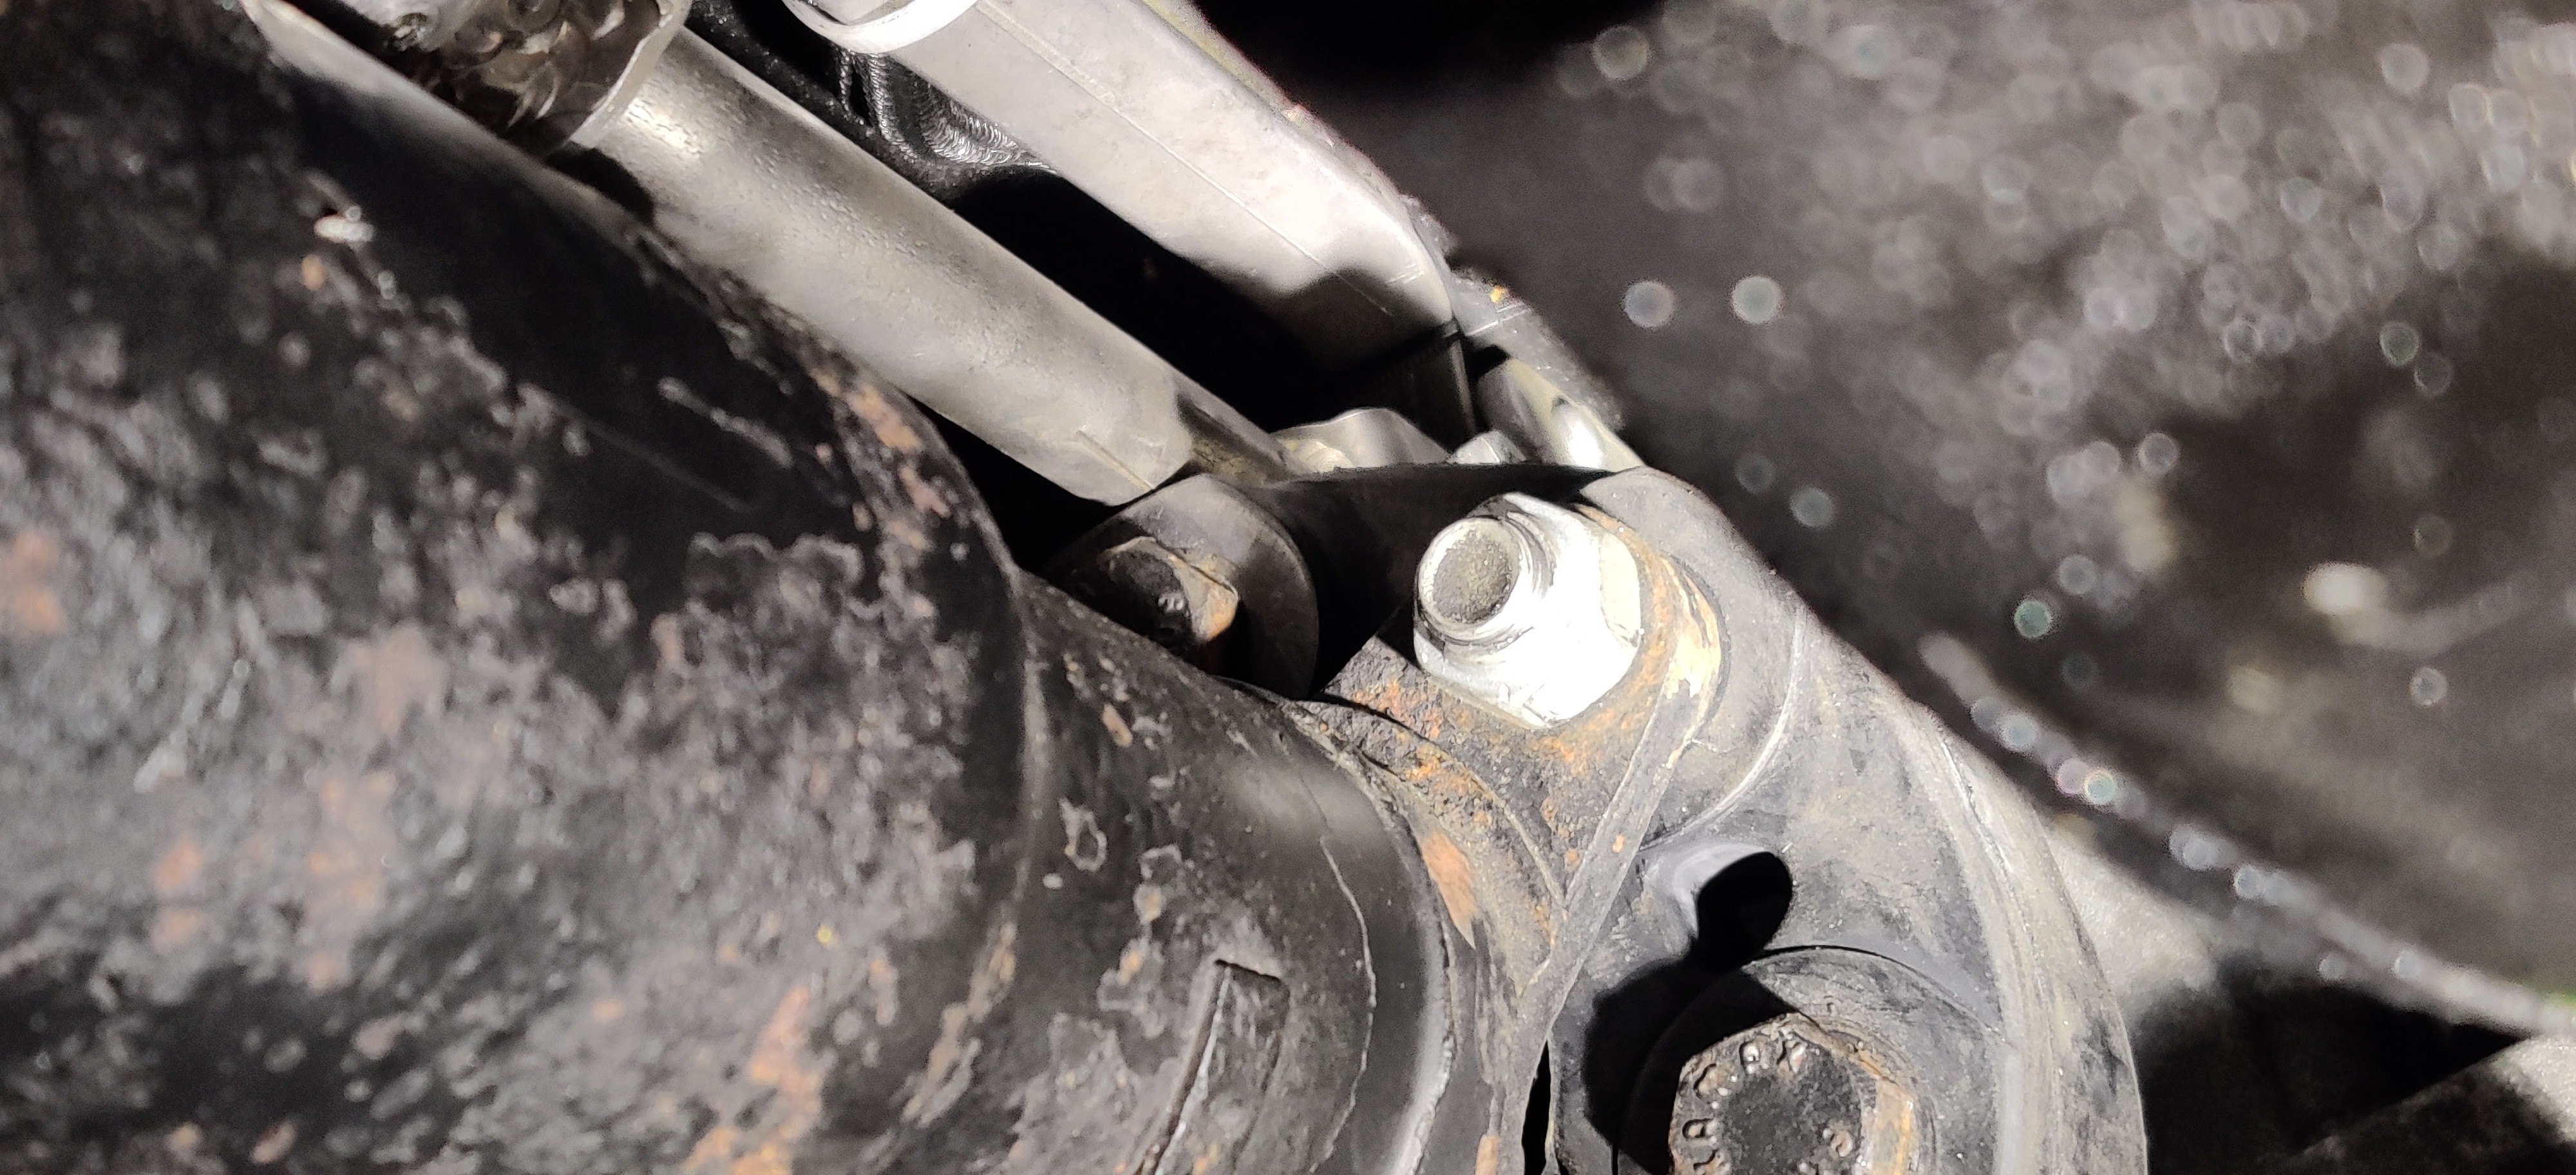
For the manual e36's the 325i guibos were thinner and a bit smaller while the e36 m3 guibos were slightly larger and thicker. If you chose to run the m3 guibo which I preferred the dssr has to be modified. They usually are bent in order to add clearance. Being that I would have had to make a whole new dssr I instead chose to grind away the area that came in contact with the guibo. I over did it on the grinding in order to insure I had no clearance issues. I always knew about the bent dssr's but never knew why until now.
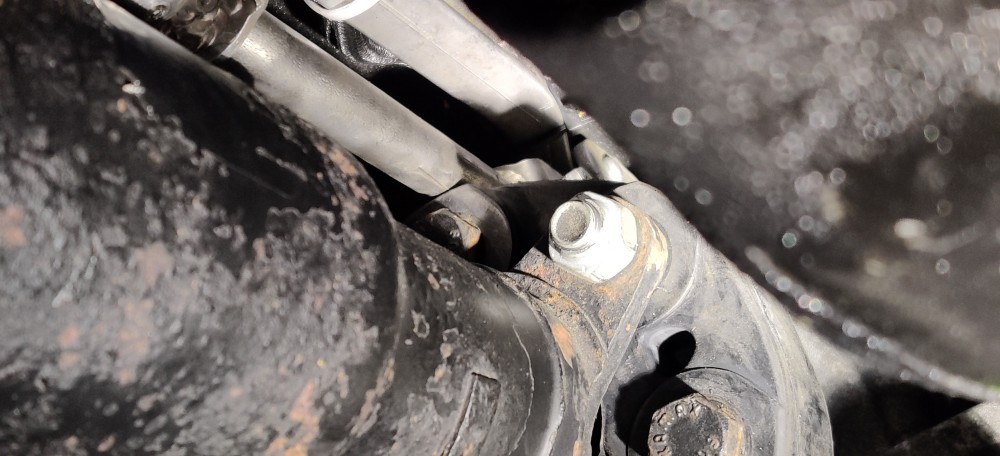
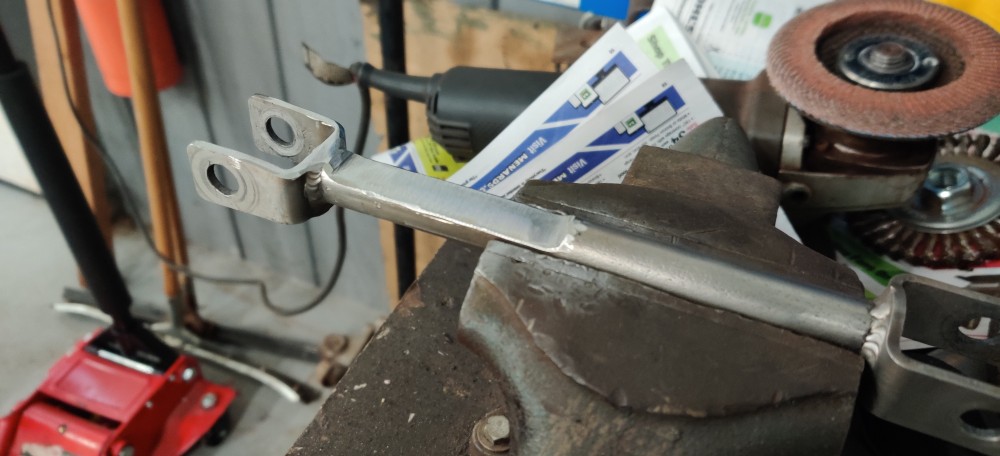
After re-installing I found that I had plenty of clearance now.
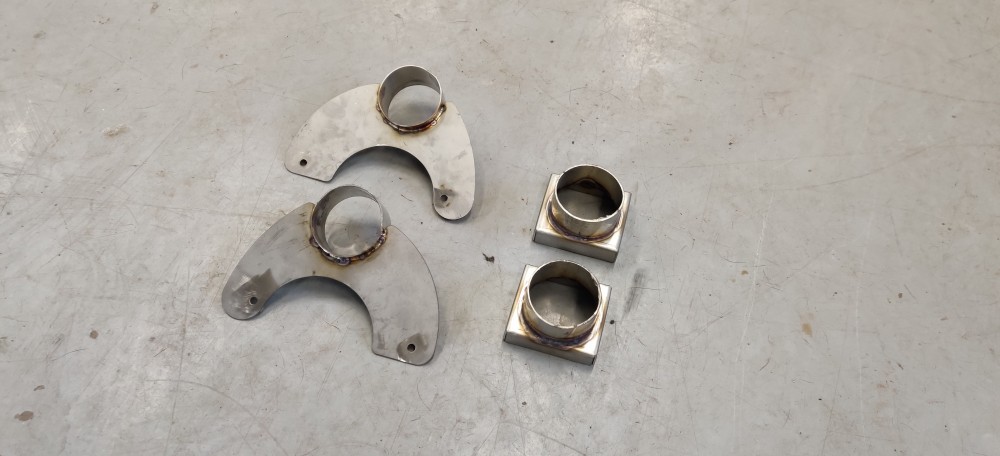
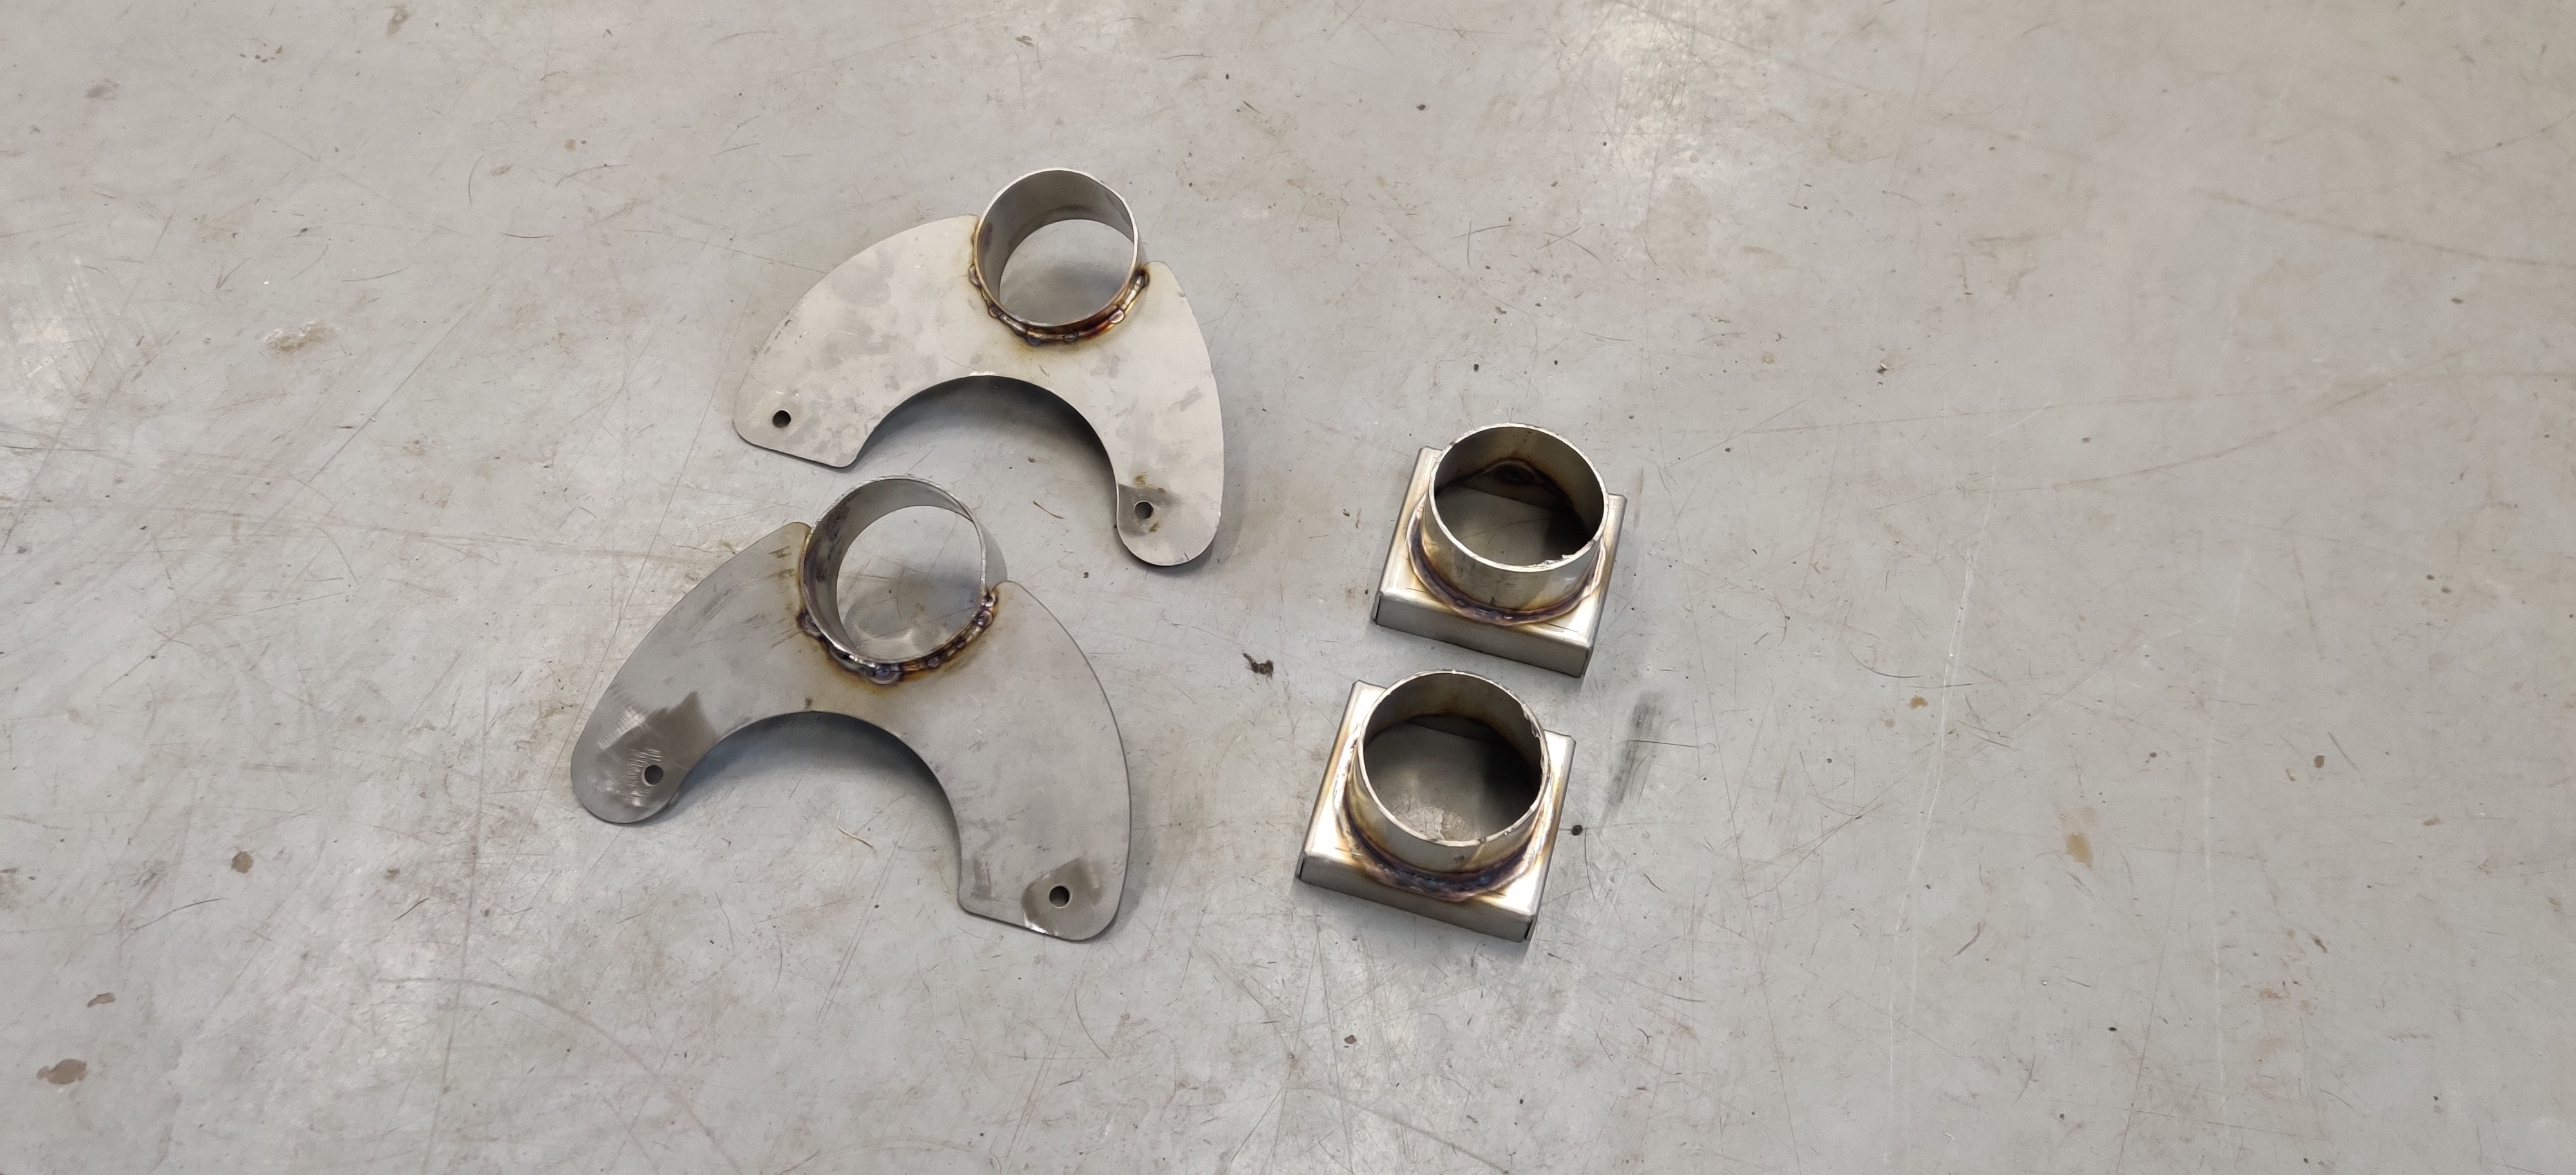
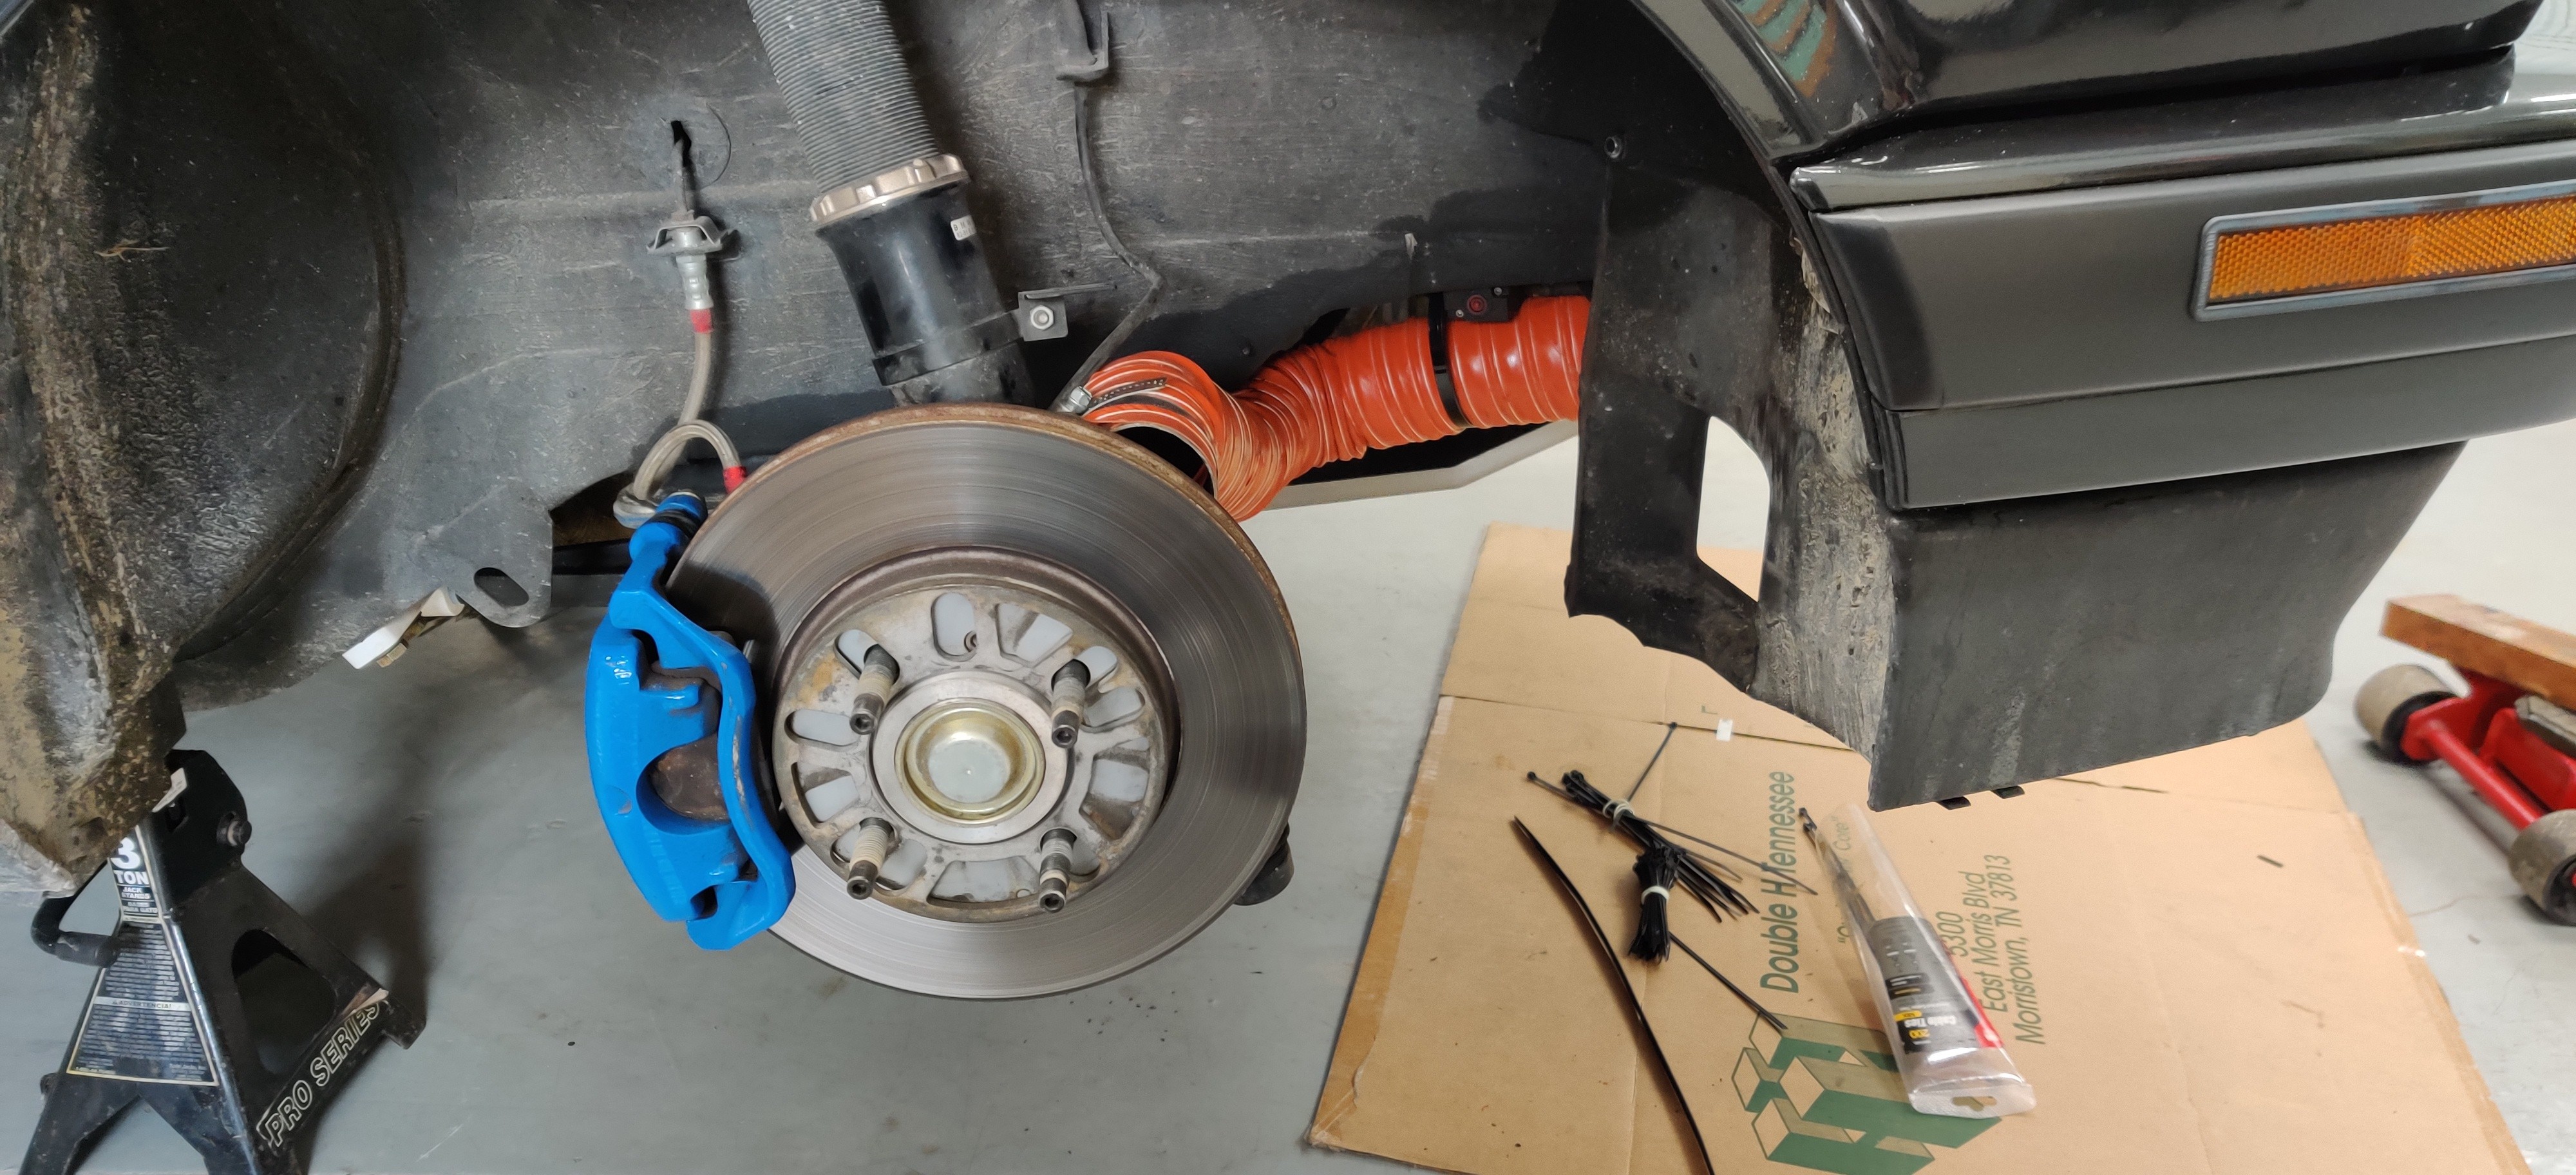
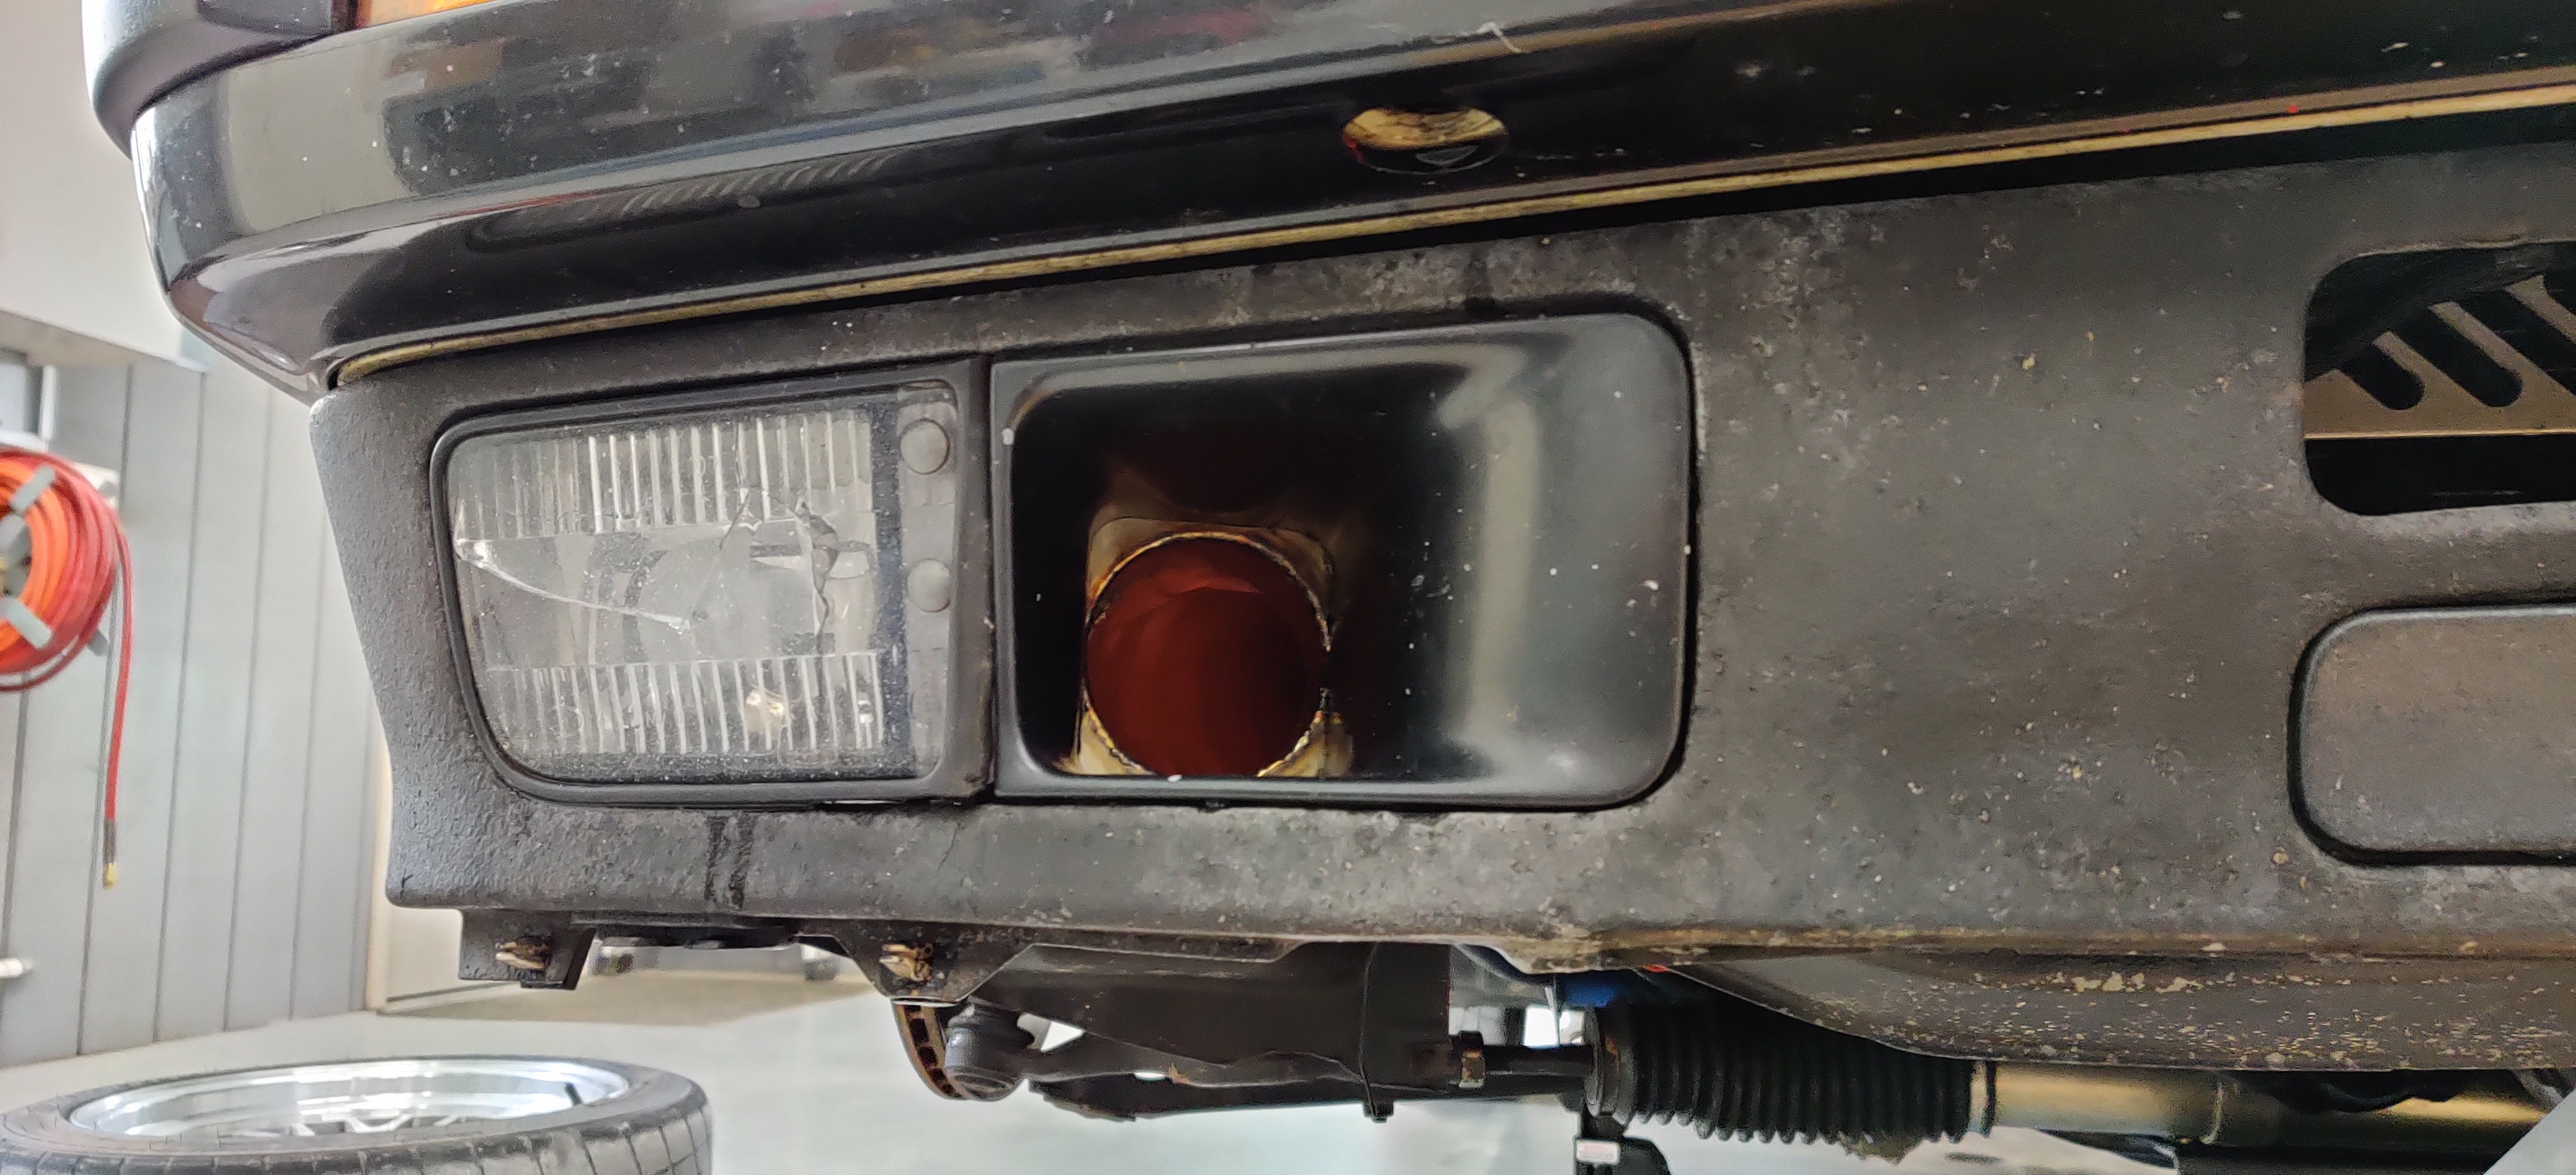
Up next... brake cooling. About a year ago I drew these up on Solidworks in a class I was taking and had them cut out on the water jet. As for the tubing portions I had some left over 2.5 inch stainless exhaust tubing laying around that I cut into sections and had my buddy tig weld them up.
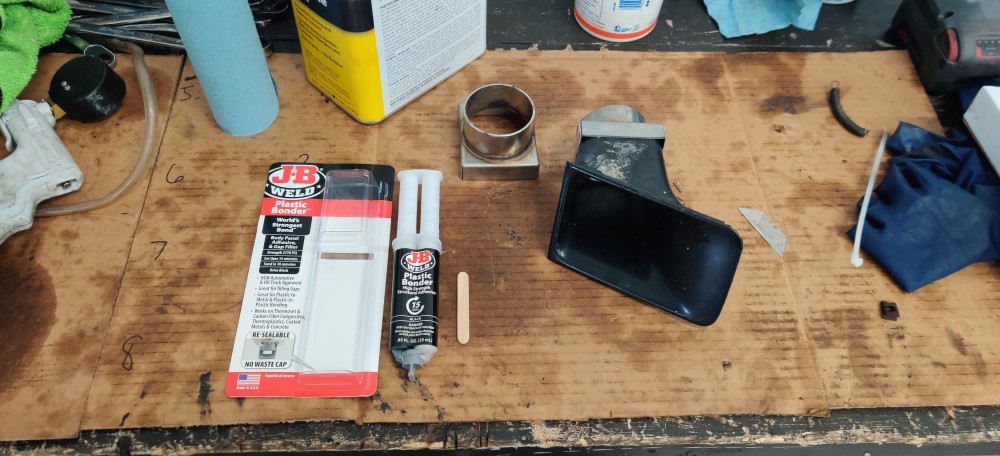
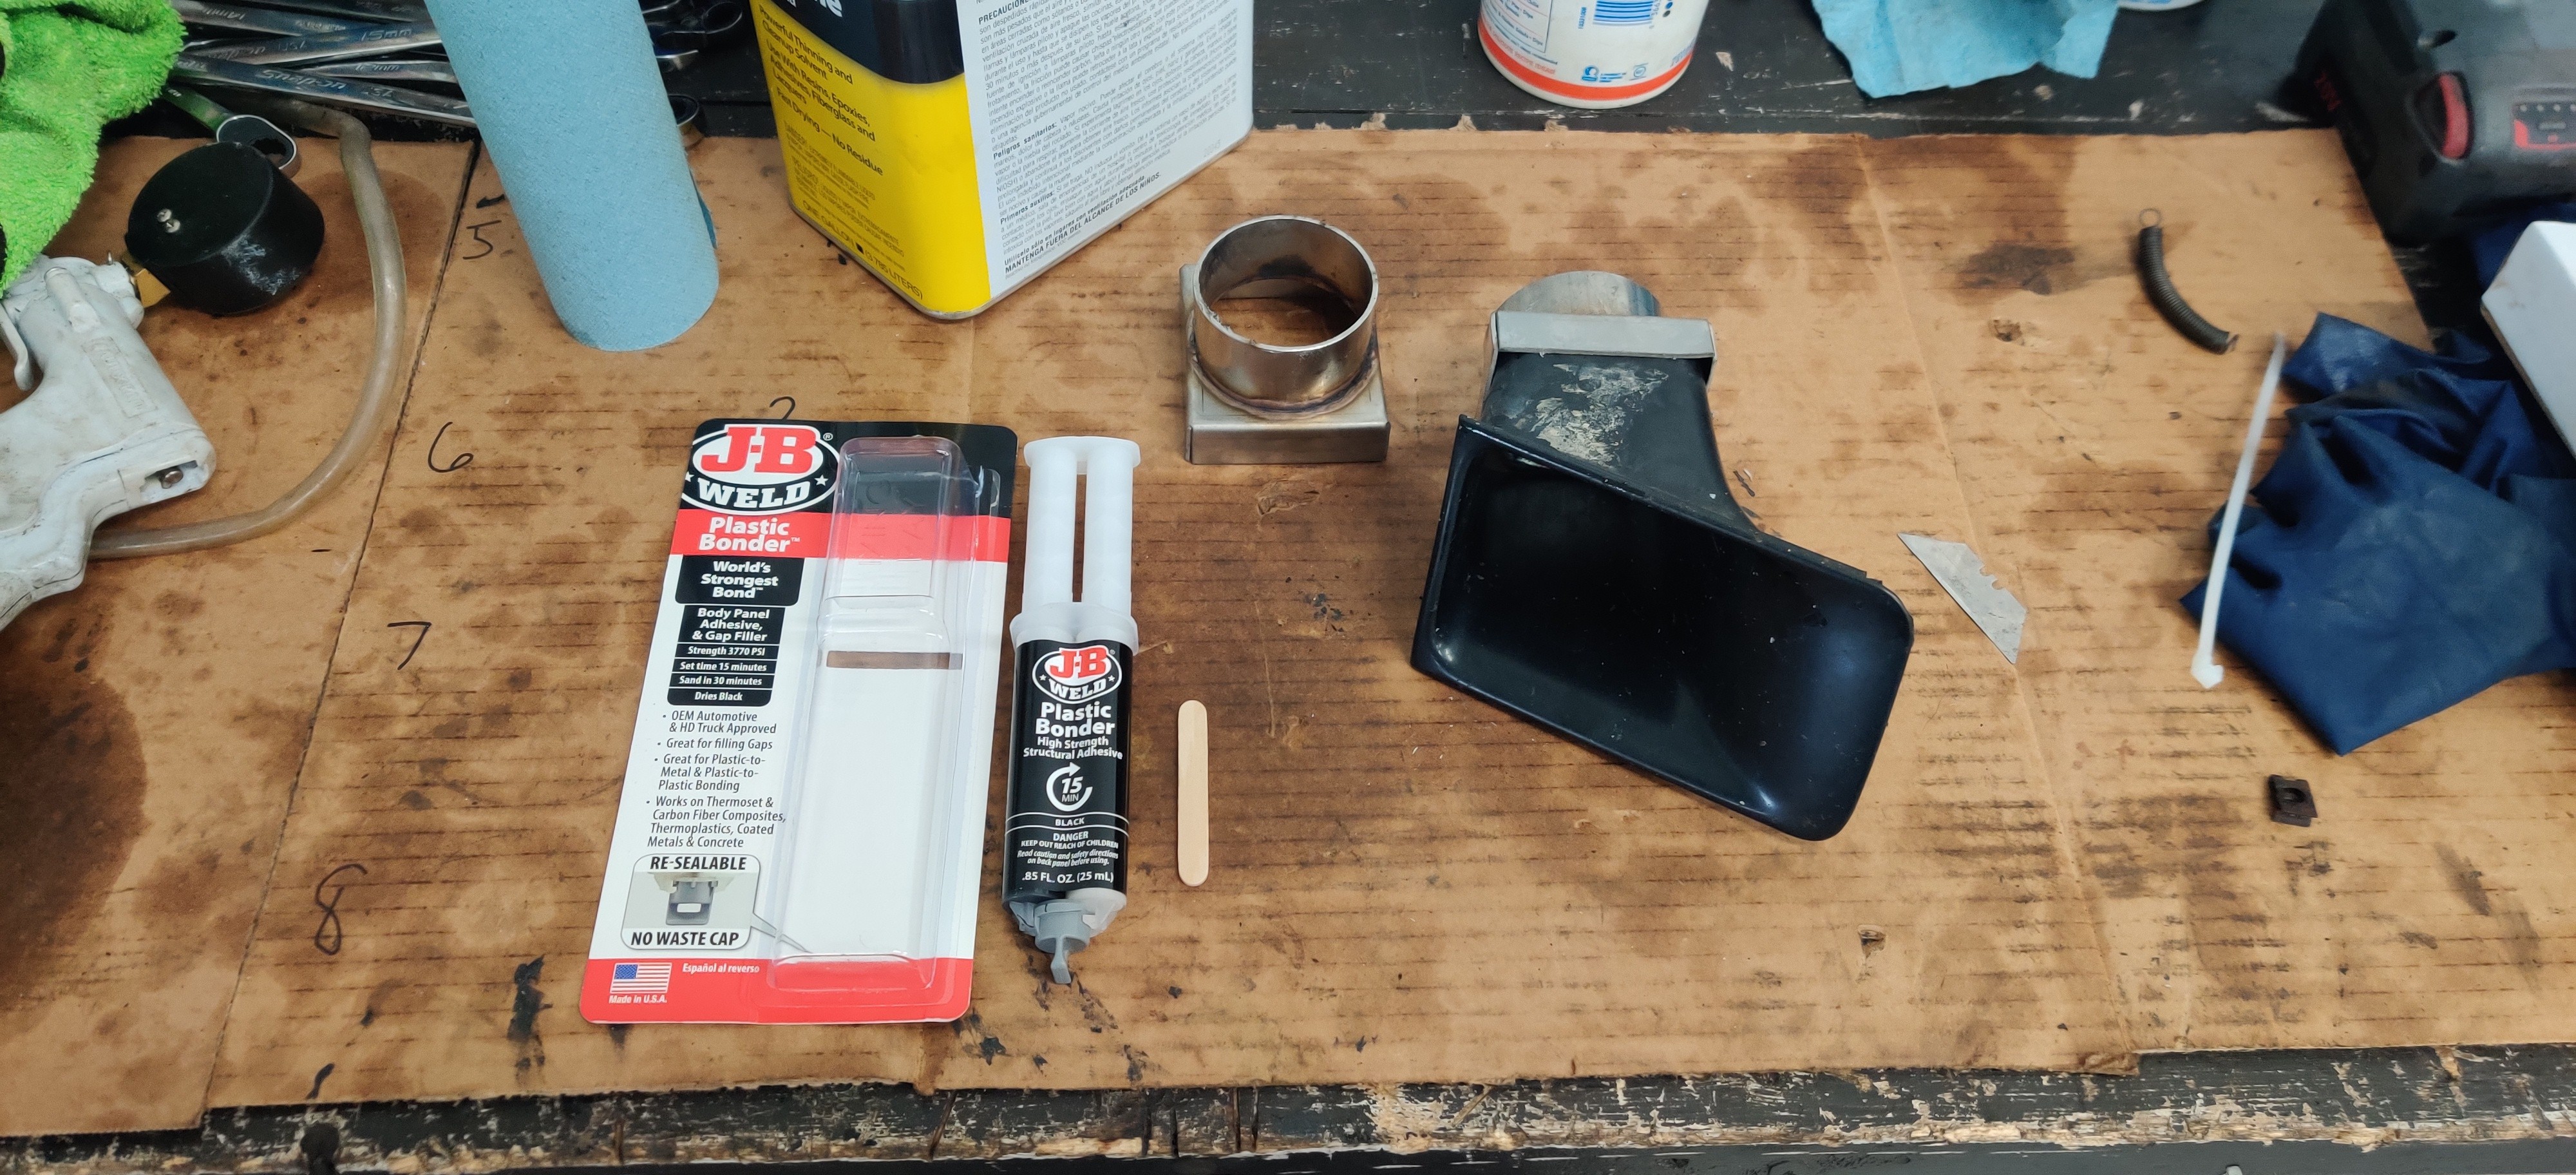
In order to get the adapters for the air ducts on the valance attached I picked up some jb weld plastic bonder. The stuff is designed to attach plastic to metal so I thought I'd give it a try. After letting it dry for about an hour it was solid and definitely not coming off.
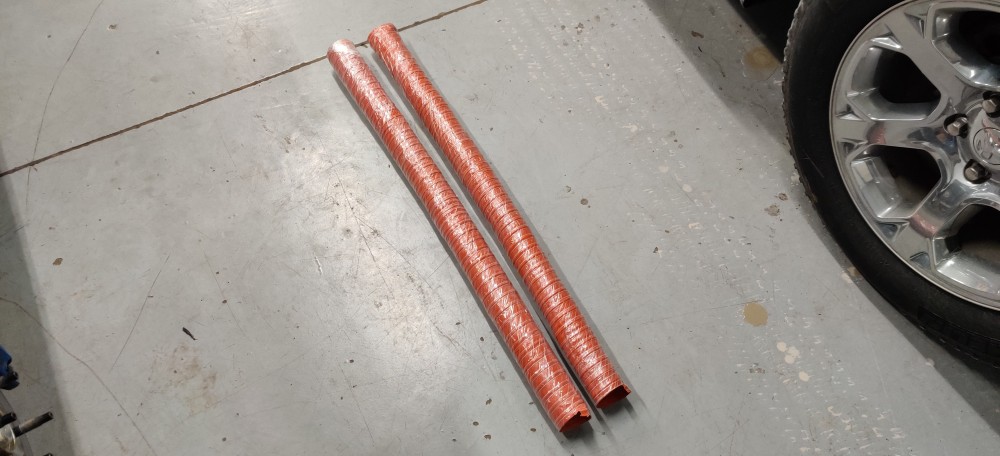
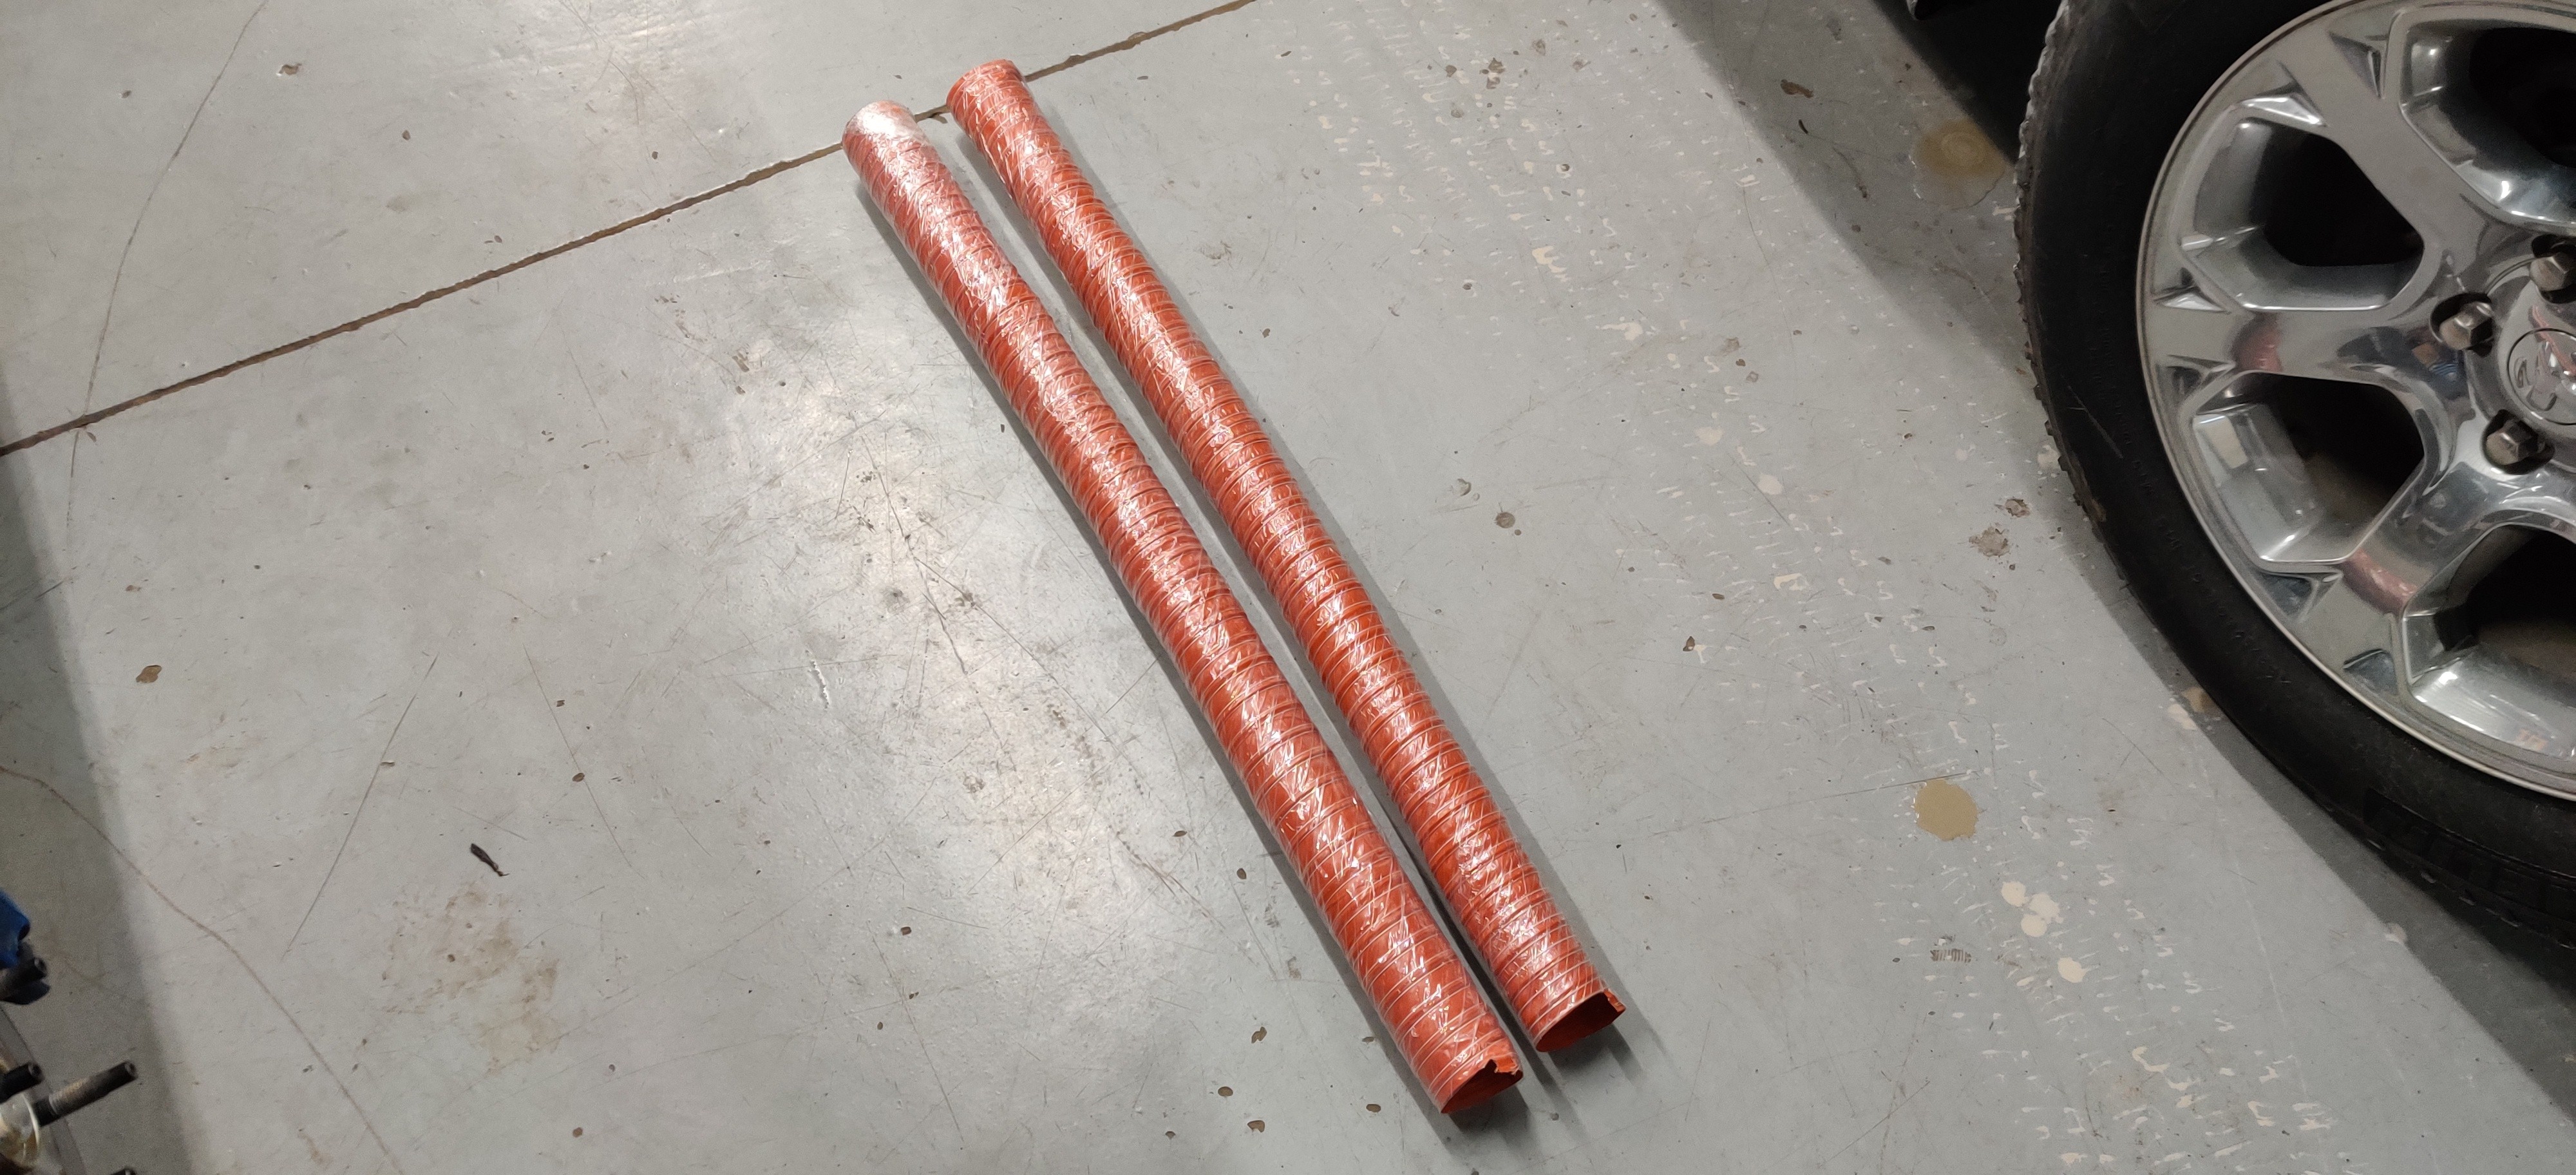
Towards the beginning of March I ordered some ducting tubing 2.5 inch on amazon. I ordered two 1 meter sticks which would be more then plenty for both sides.
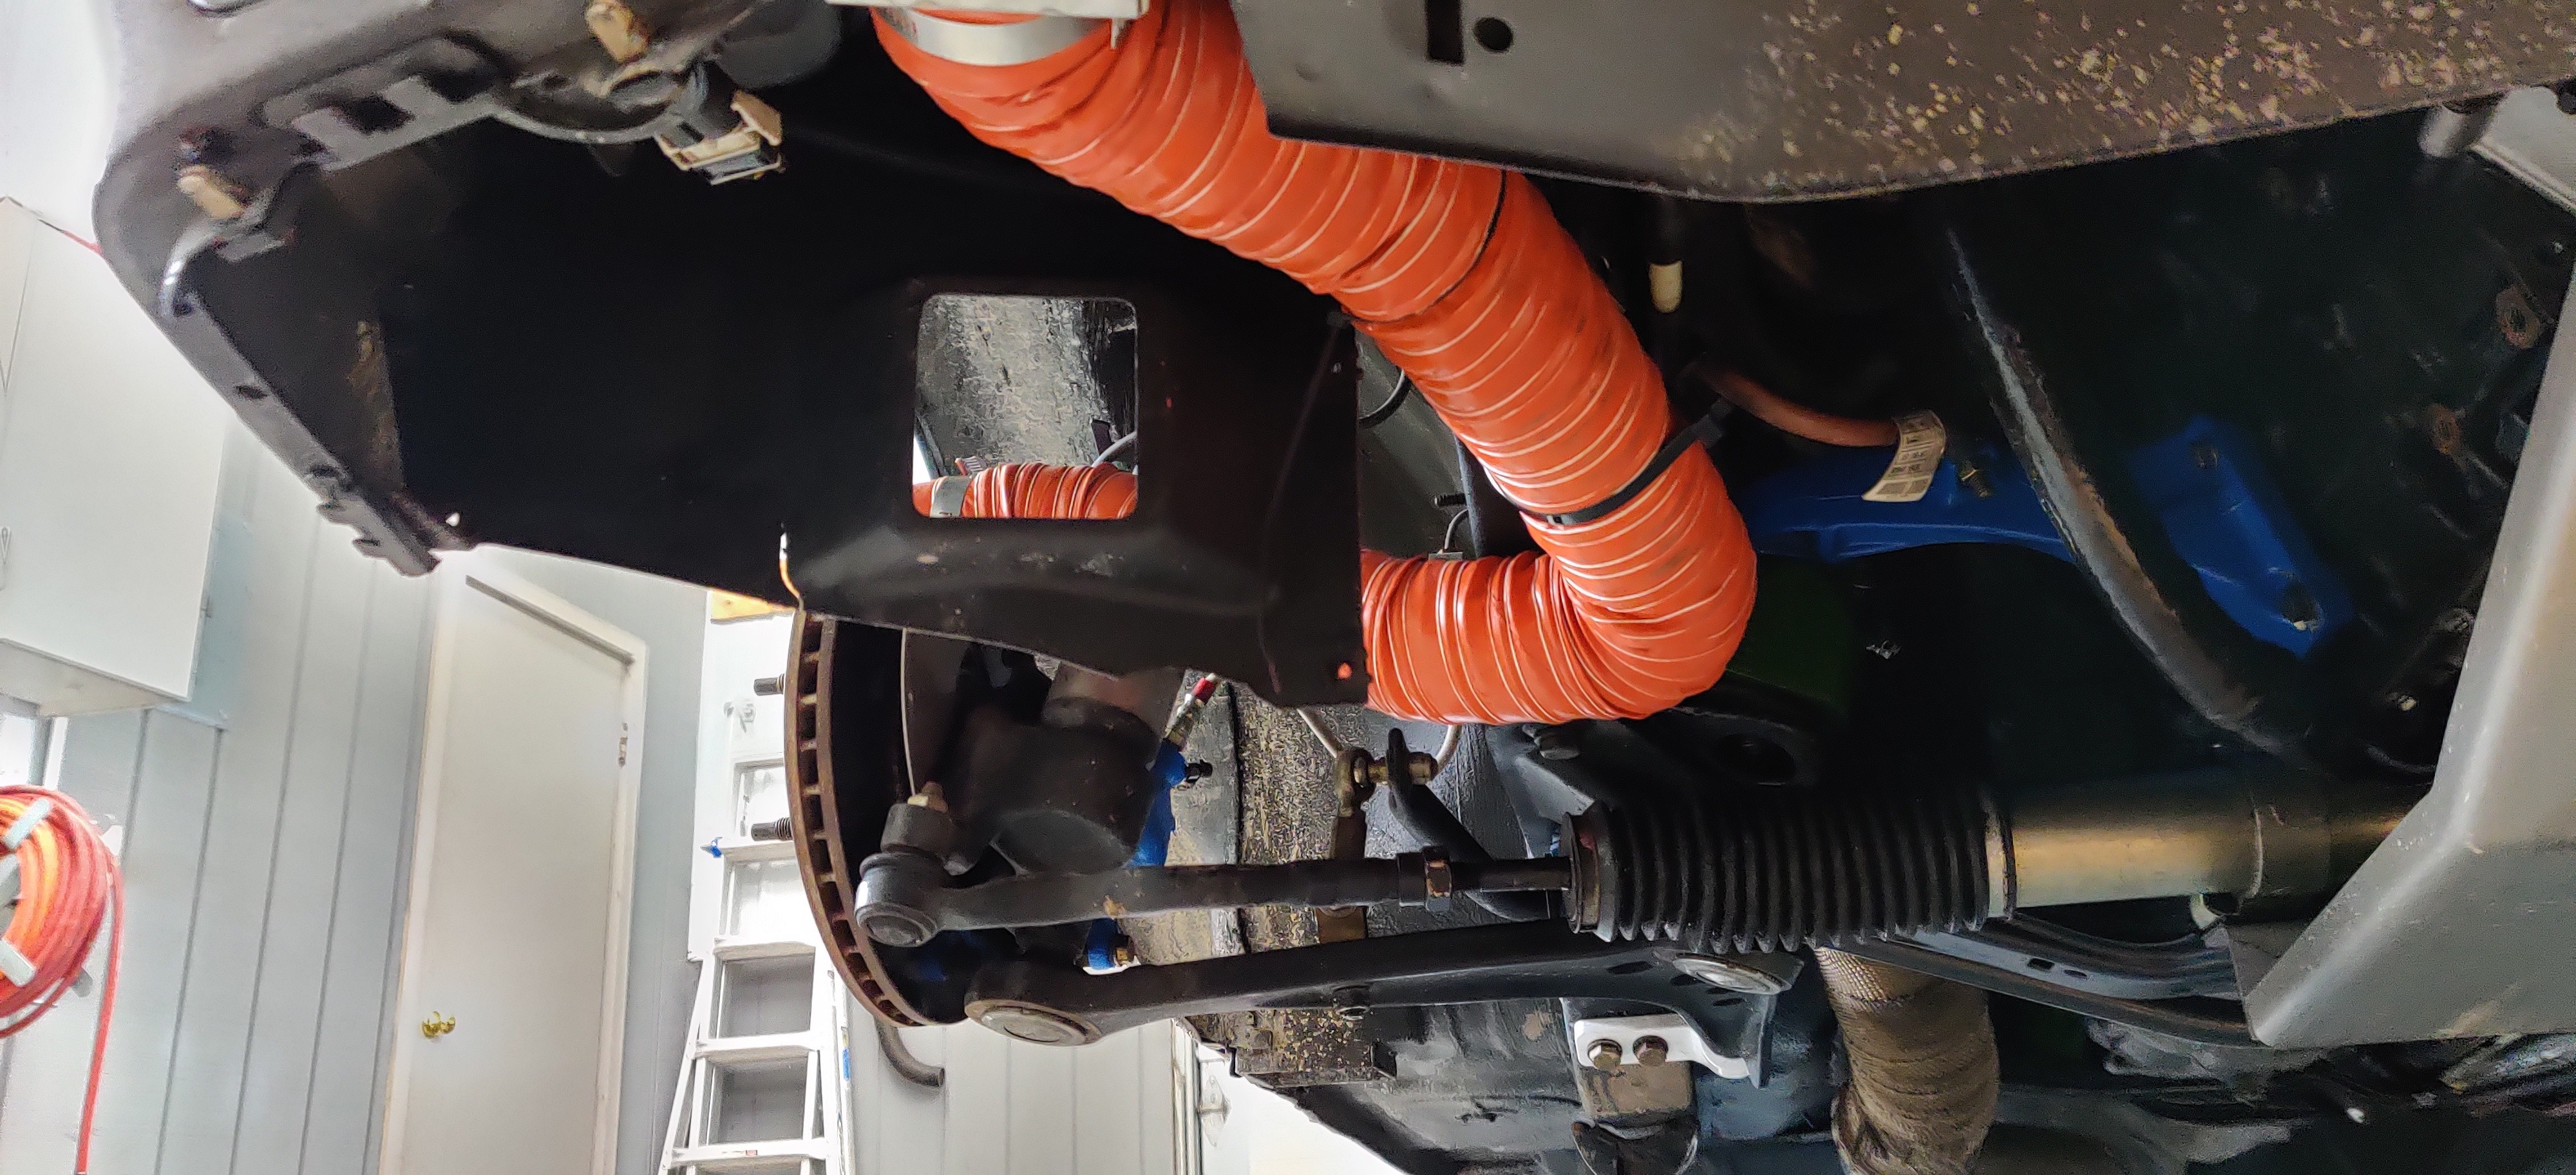
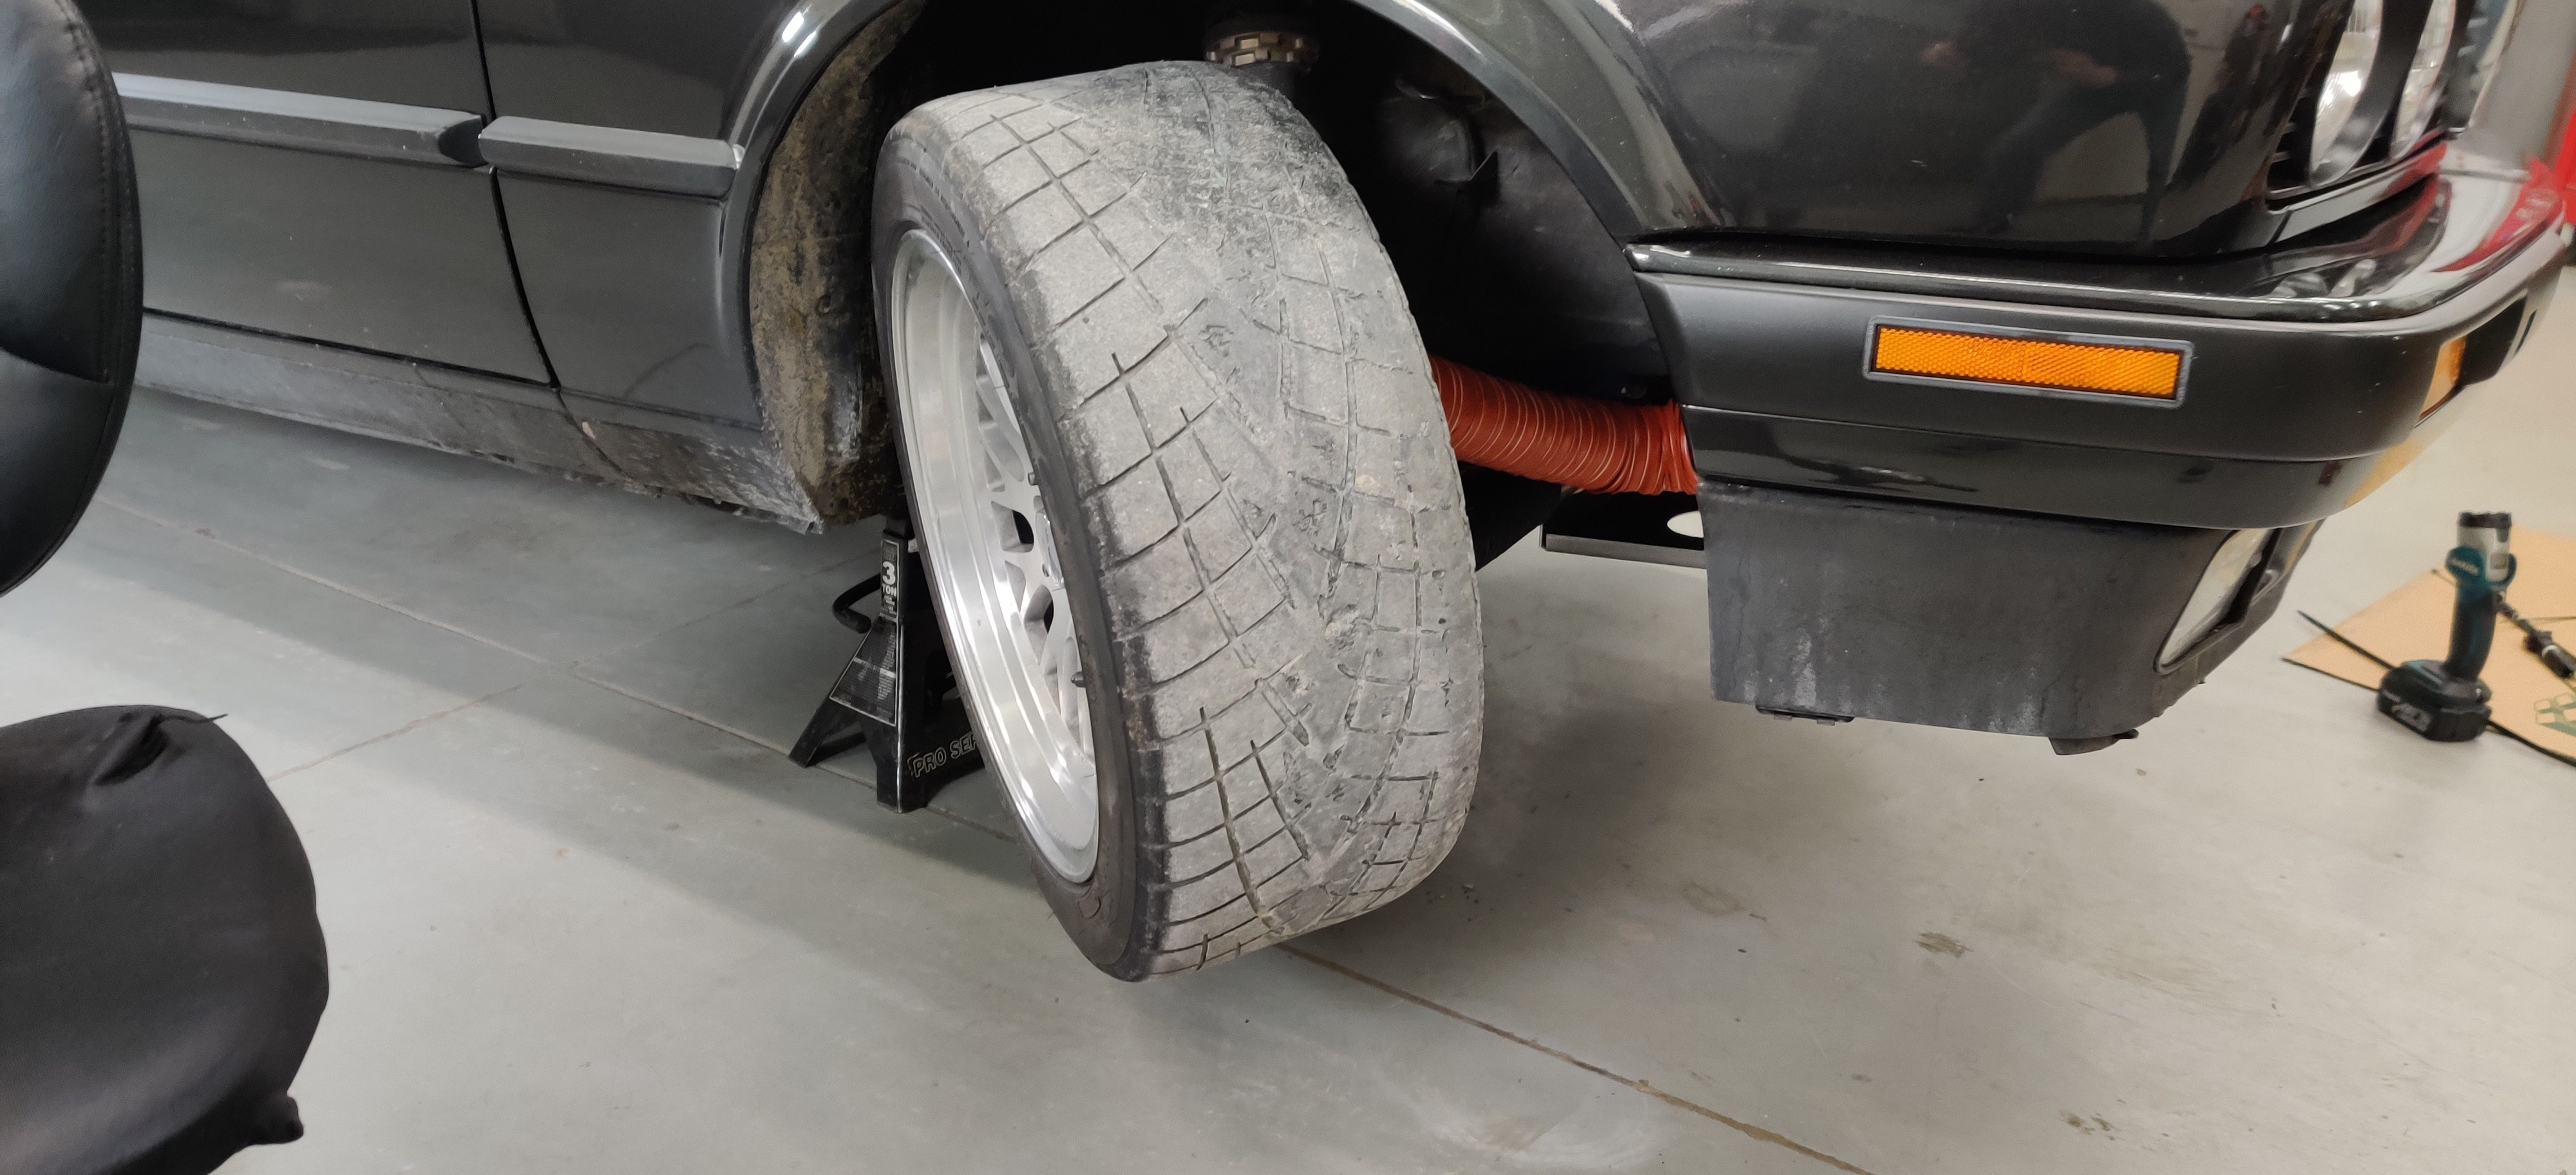
Unfortunately, I did not take any pics of the backing plate installed but it fit up really well. I did have to cut out the original dust shield in order to fit these up. My bigger challenge with this hole setup was where to route the ducting. Originally I thought I'd just run it right through the hole that the factory duct ran through but I ran into issues with the wheel rubbing on it when turning in. I found that my only option was to route straight back and then along the bottom of the frame rail up to the front.
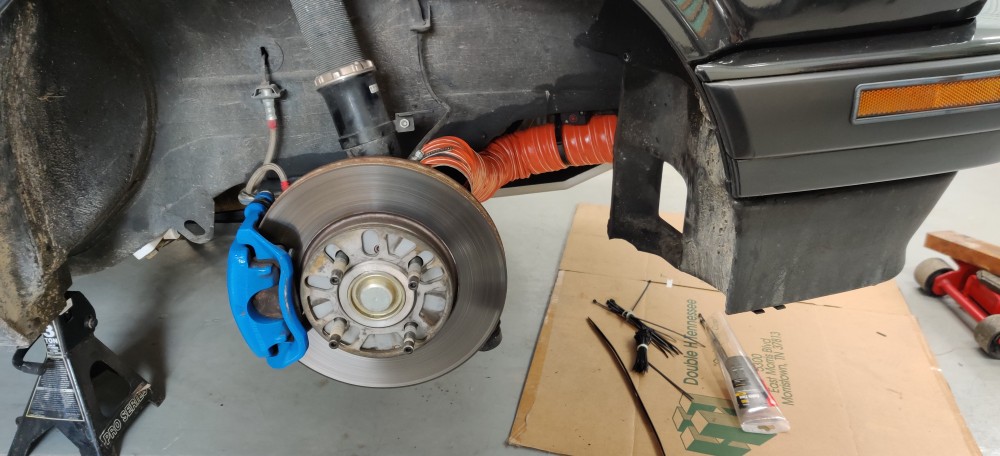
I didn't really have any other method to hang it other then zip ties so I got some beefier ones to make sure it was tight in place but not to tight that it would collapse the tubing.
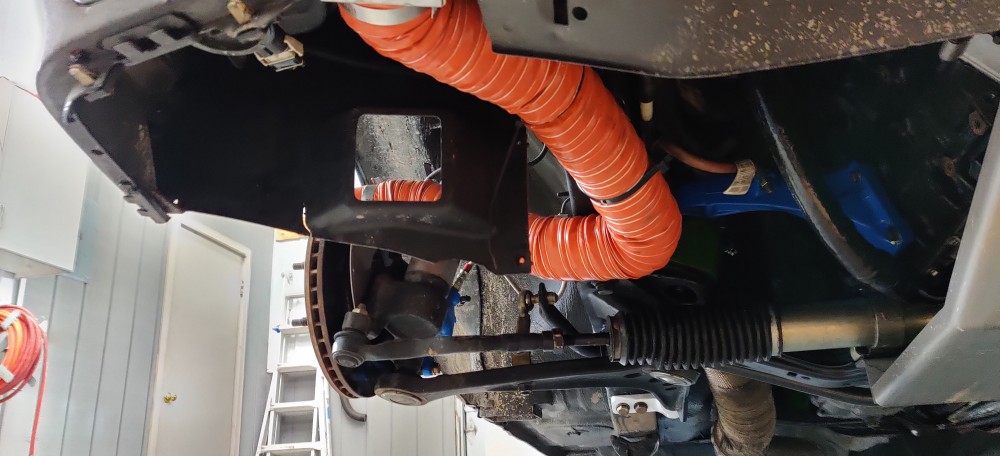
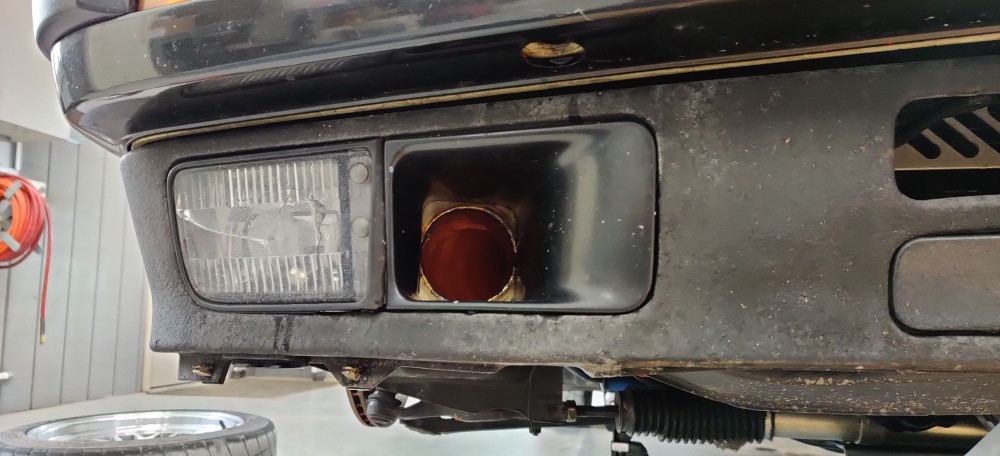
Plenty of clearance with the wheel turned in and enough flexibility with it all the way out.
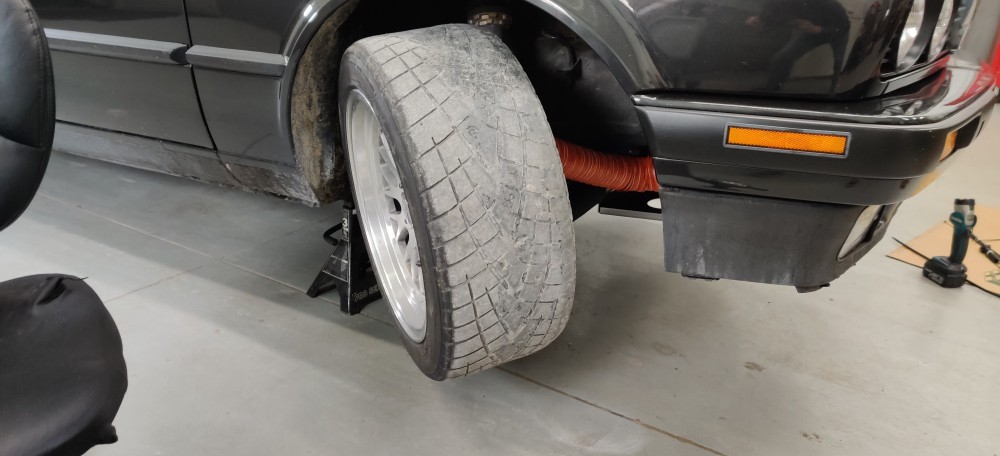
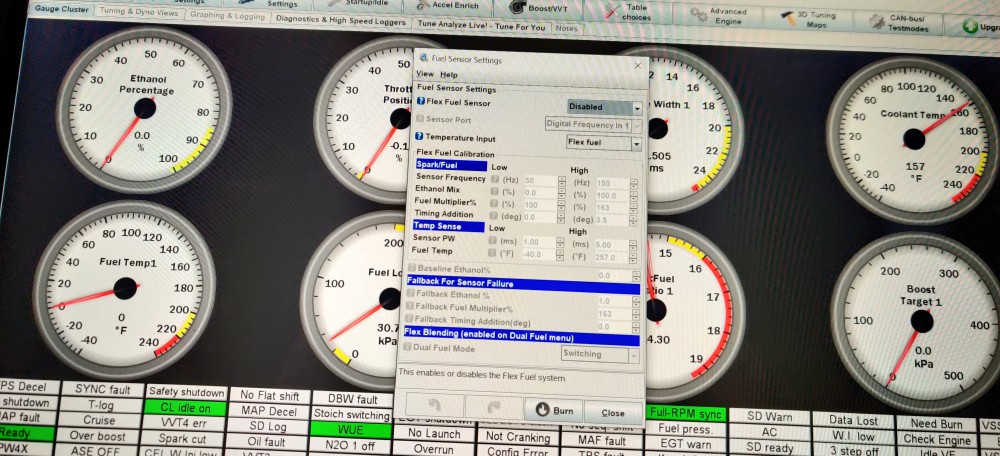
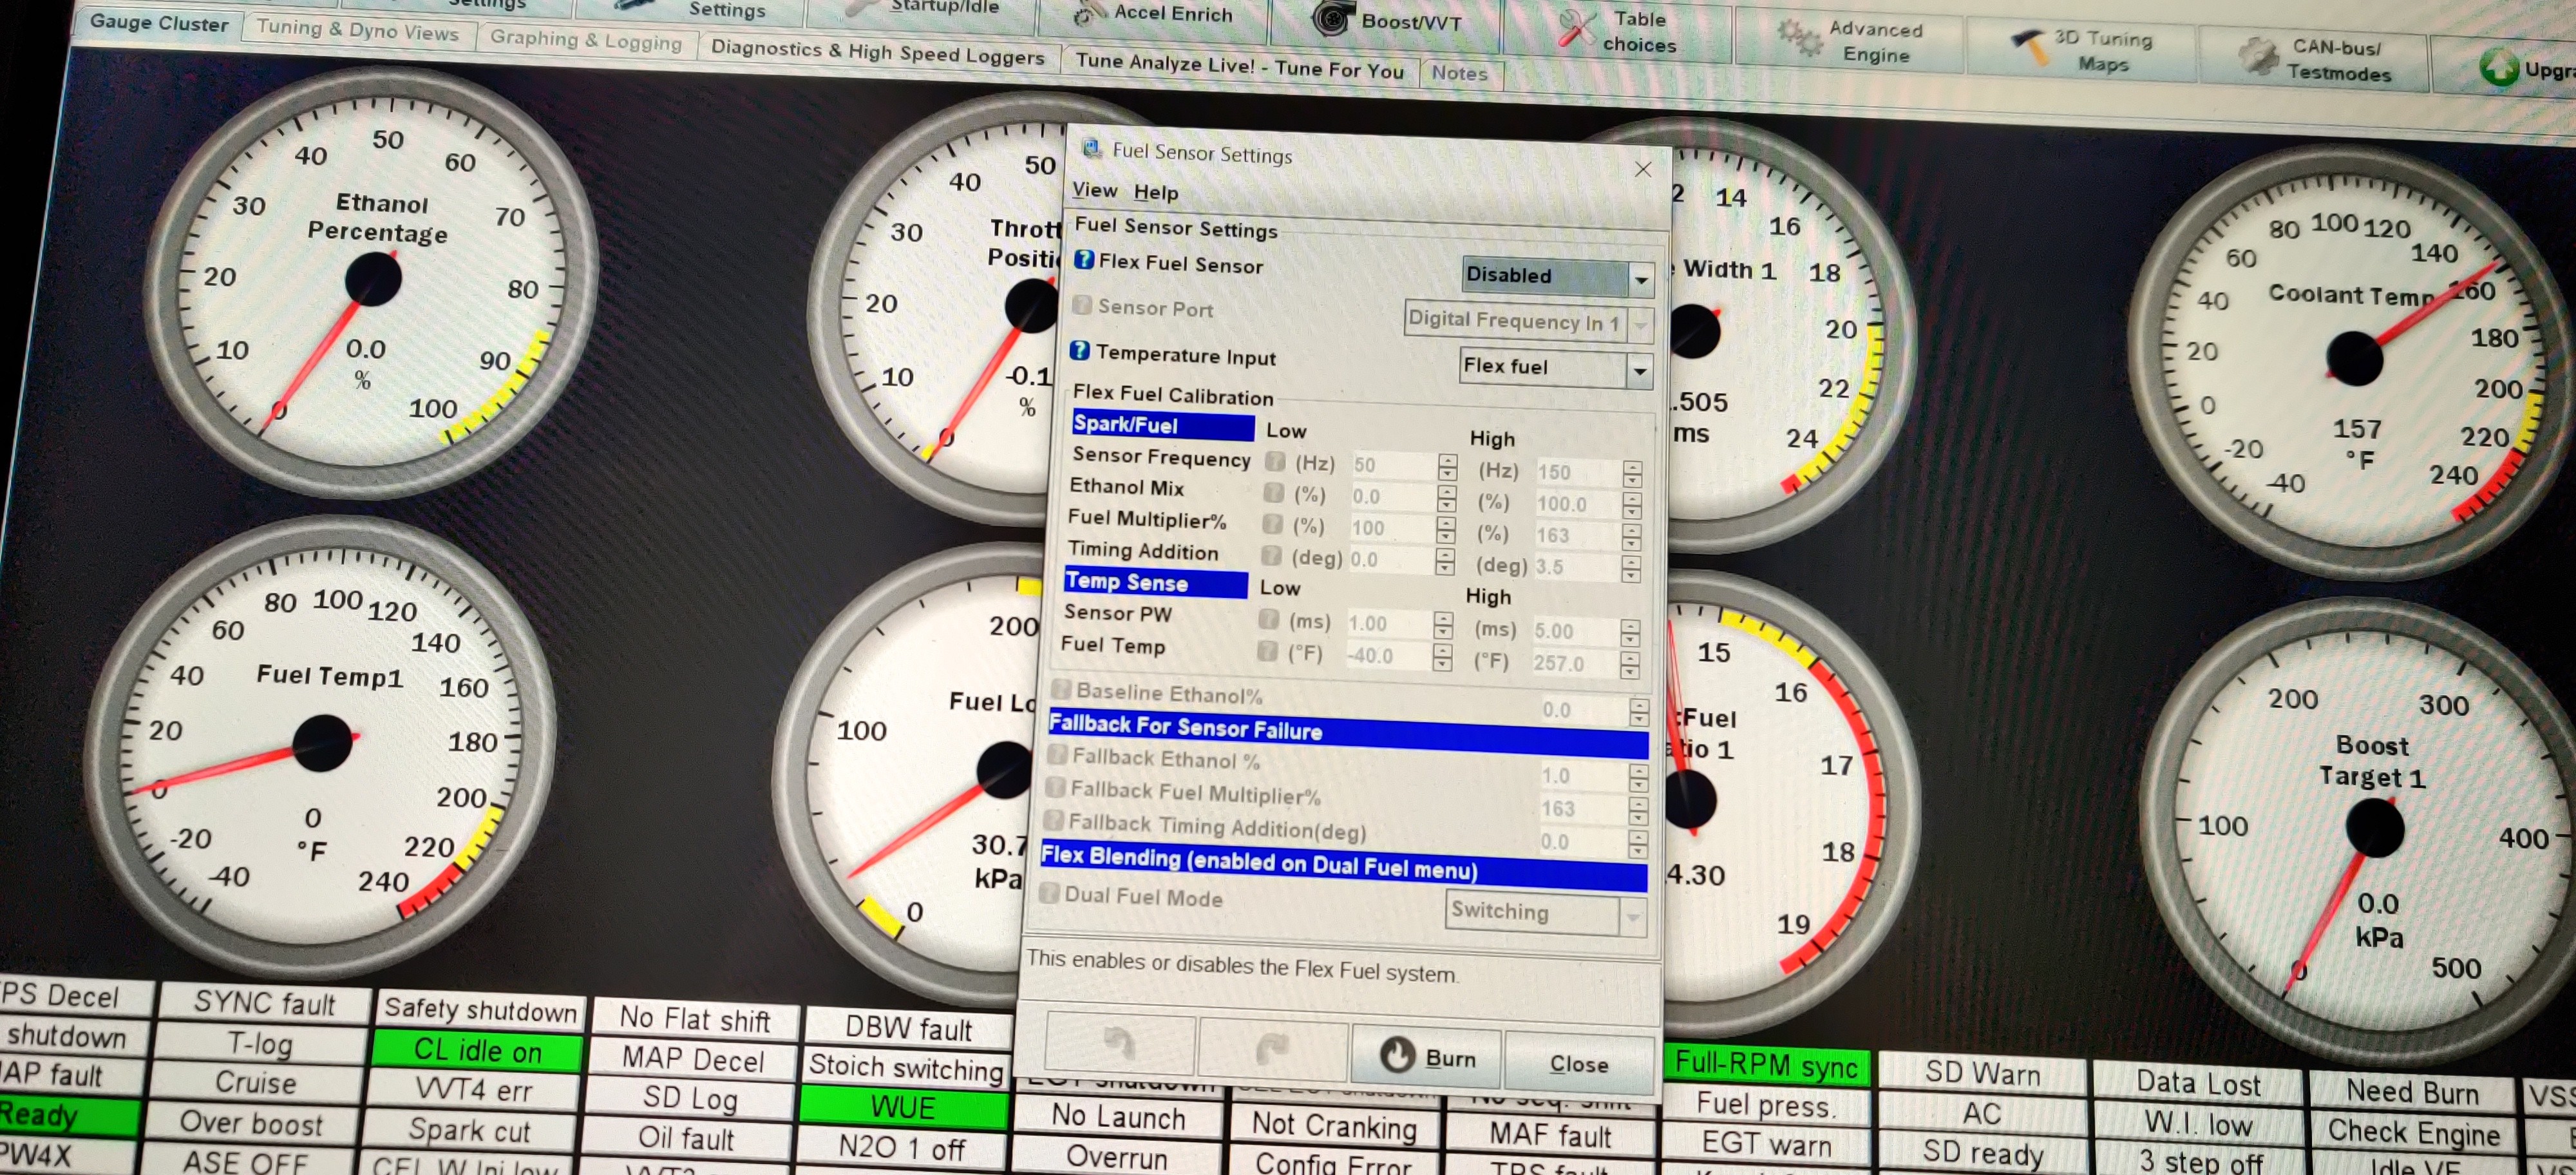
After this was finished I had the car back on the ground and buttoned up the last little bits and pieces. The same day I took the car out for a short drive around the neighborhood and I found the car was running really rich and there was a ton of drone in the cabin. After taking a look through tuner studio I had found that I had left the flex fuel sensor settings enabled and it was messing with the tune. After disabling it the car was back to normal running at the right afr's and no more drone.
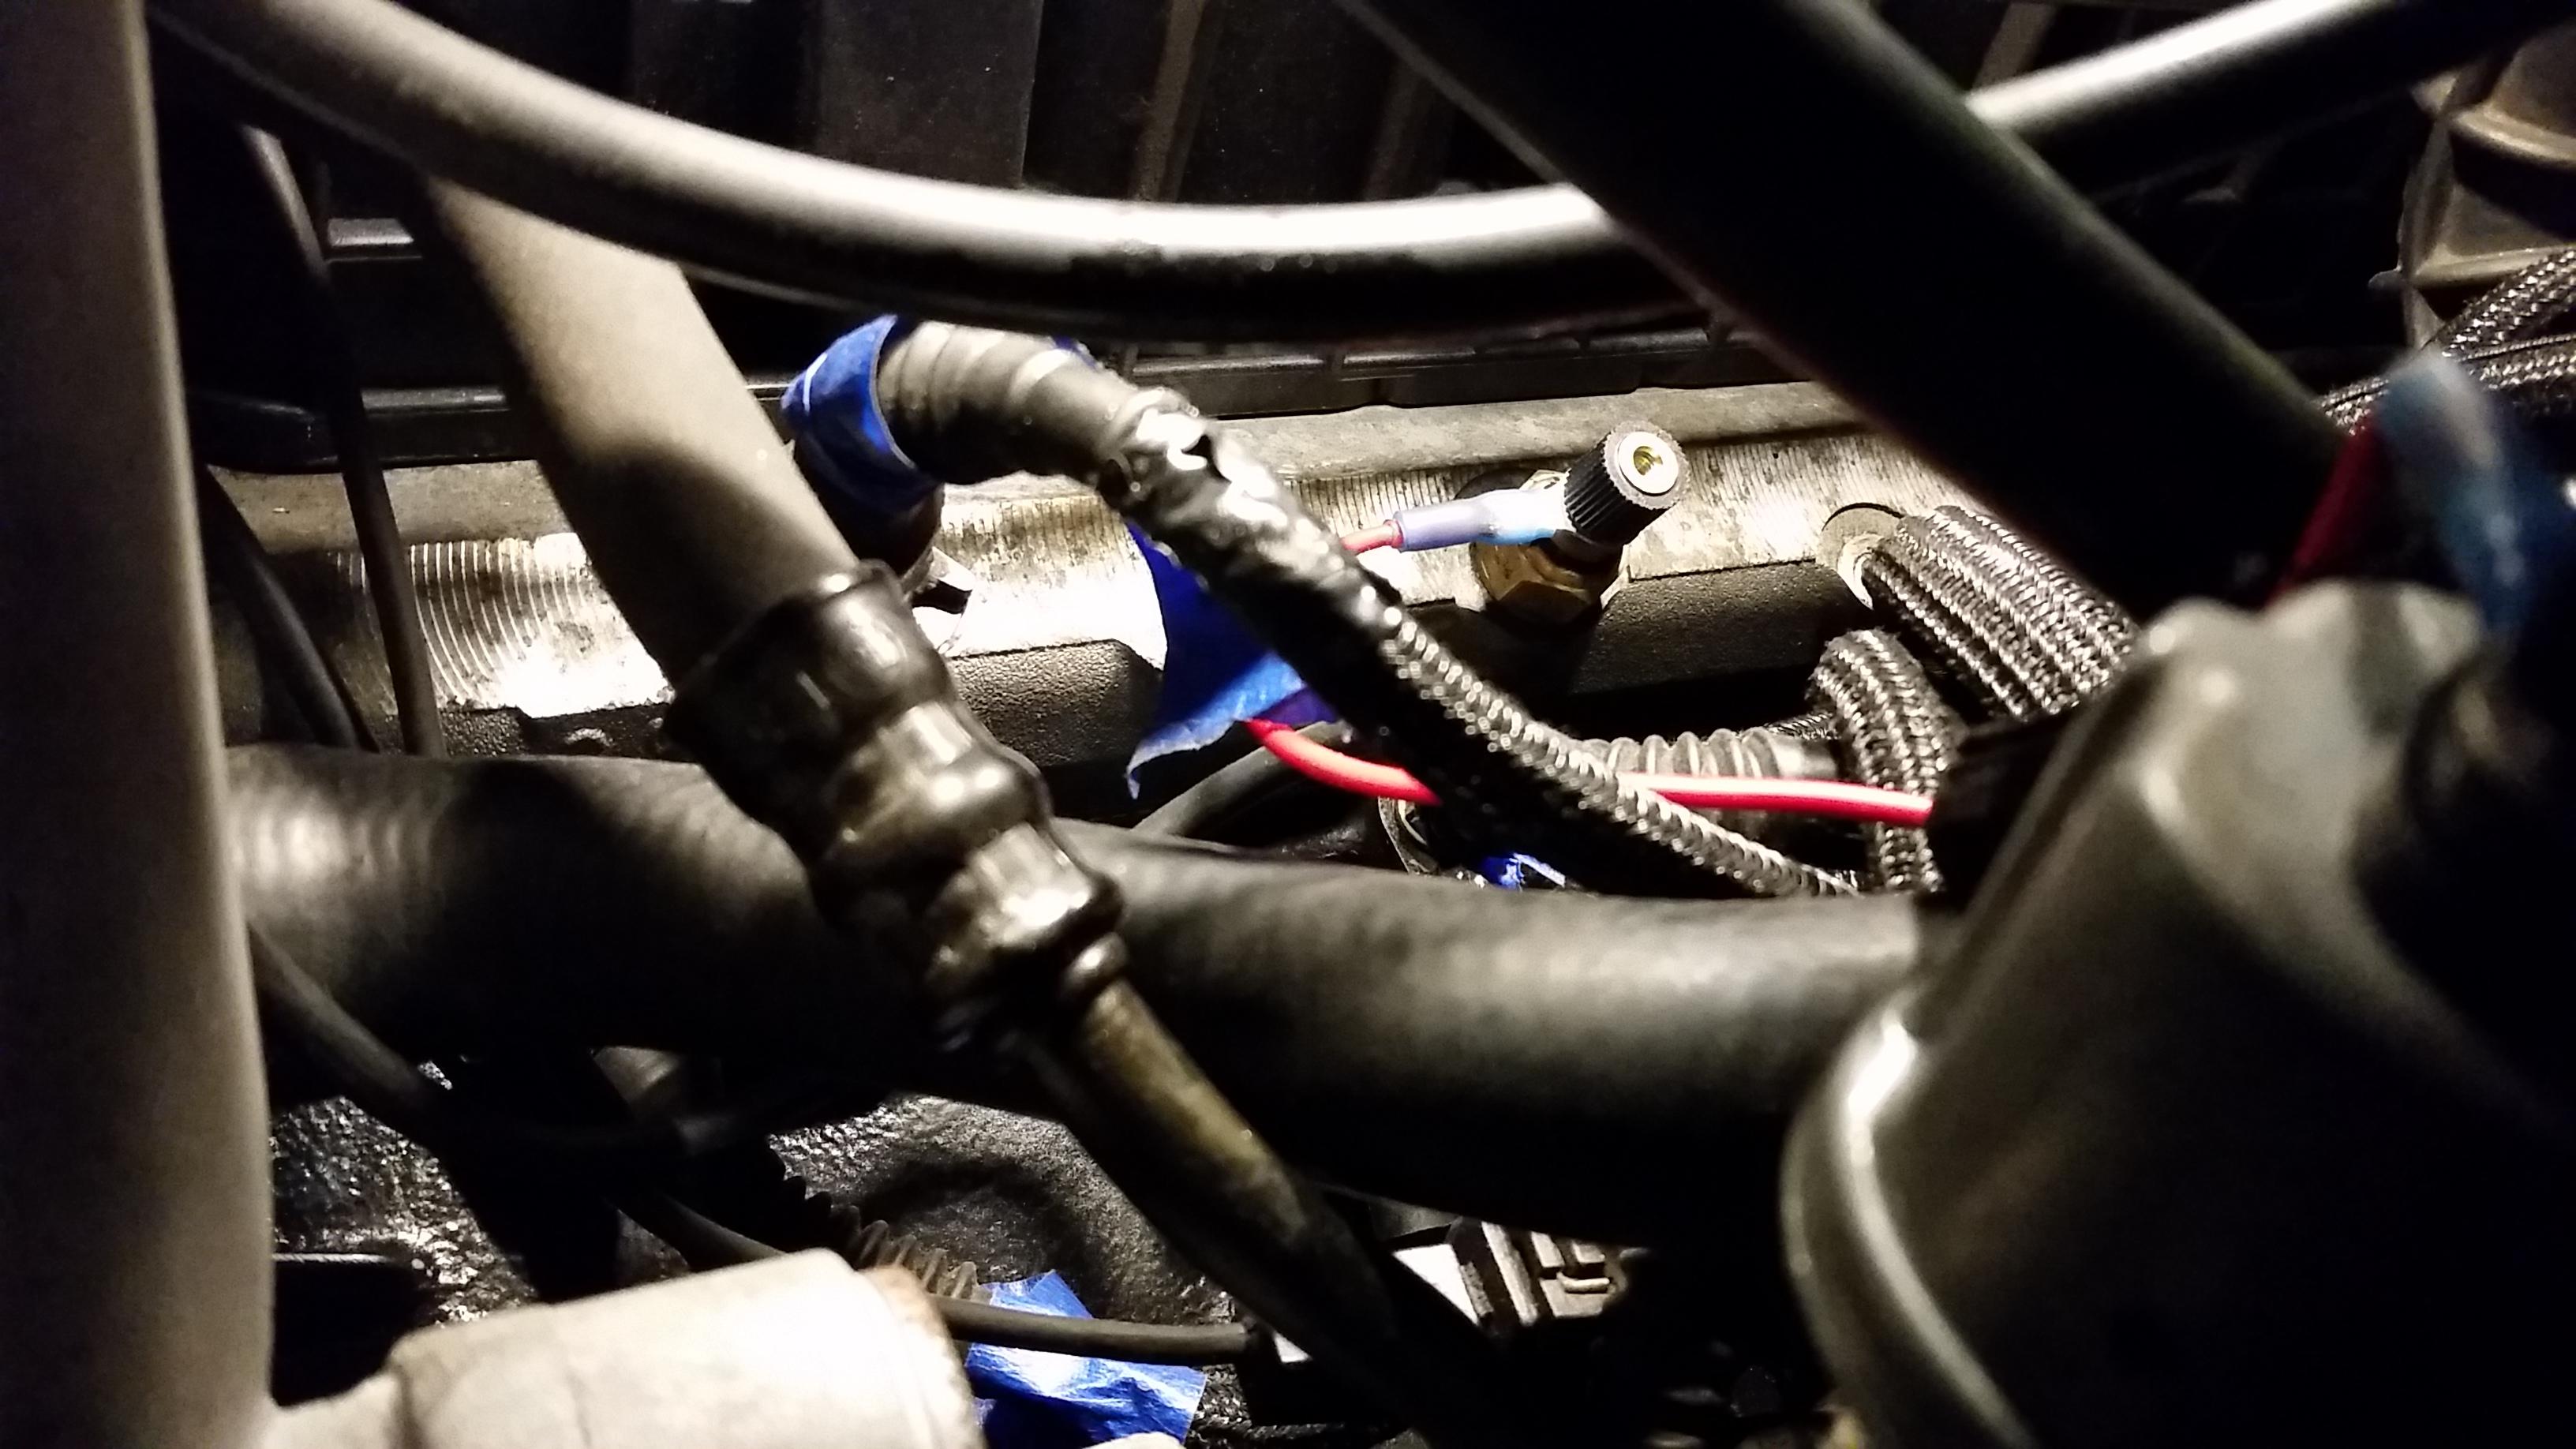
I never did take any pics or mention anything about it but I did get a flex fuel sensor installed. I ordered a gm sensor which seemed to be the popular option among many tuners. I ran the sensor on the feed line right below the intake manifold where it goes from hard line to rubber hose. I ordered a gm pig tail as well and wired that in except for plugging it into the ms unit which I decided on waiting to do tell I get the car back into the tuner to get it tuned for 91 octane fuel so I have the option to run both e85 and 91.
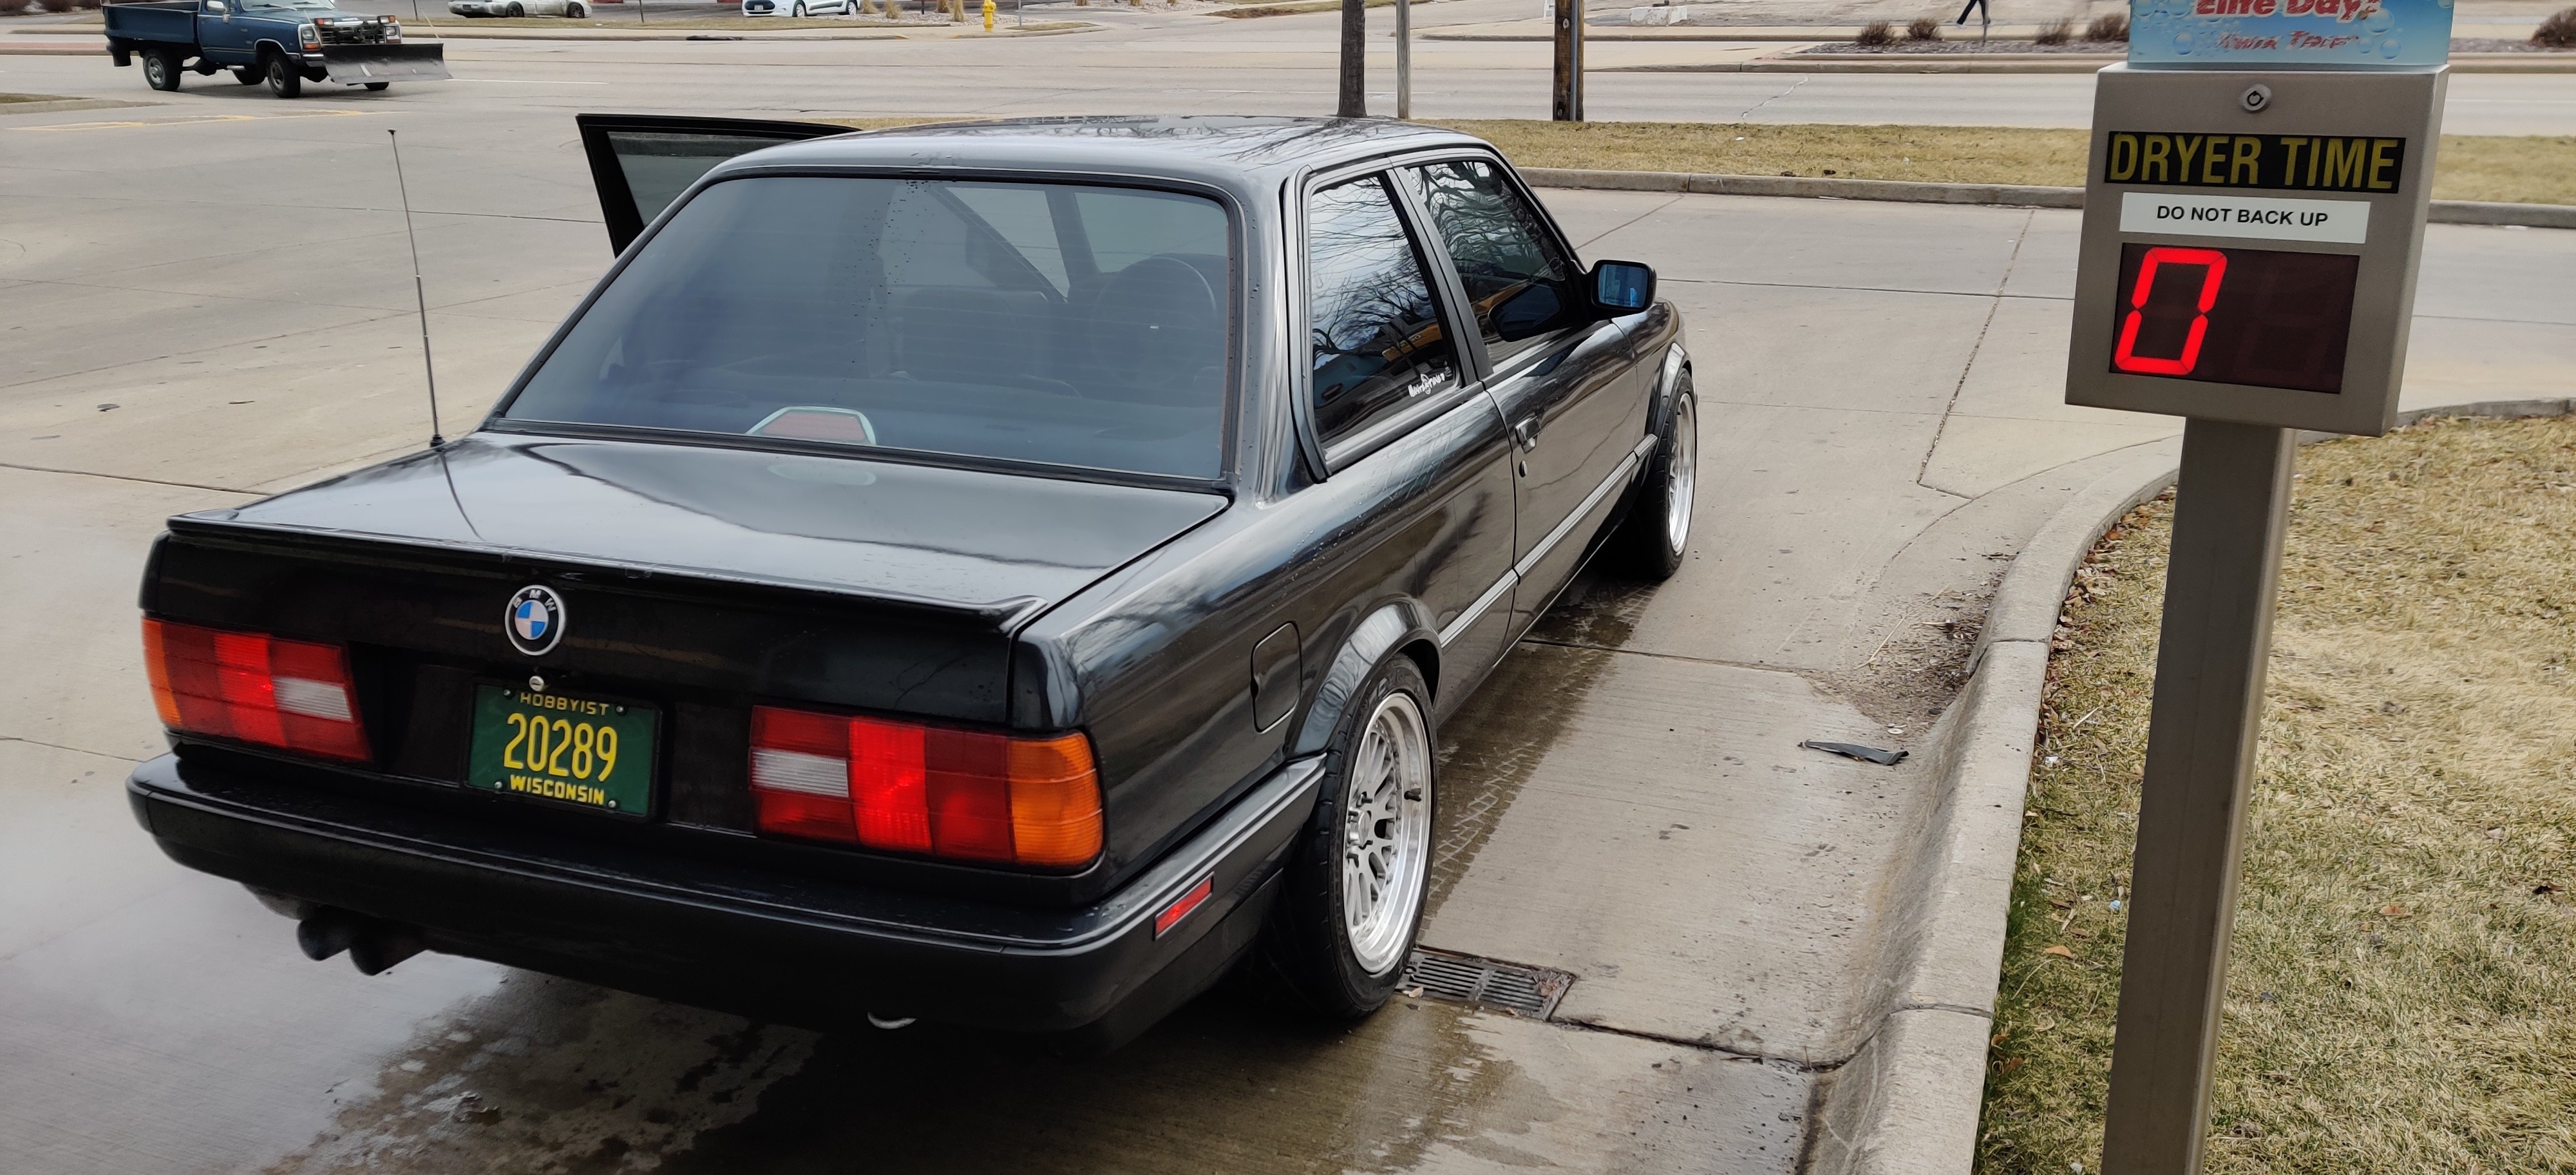
The following Sunday morning I took the car for a drive down to the local gas station and ran it through the car wash. First impressions with the new setup were pretty great. The zf trans shifts so smooth compared to the g260 and with the power numbers I am making it handles it so well. The stage 3 clutch surprisingly does not feel that much heavier over the stage 2 and with the zf trans the pedal feels like it is much less grabby and has a more consistent feel. Right away I took the car for a 25 mile drive of very easy driving to break in the new lsd clutch packs properly.
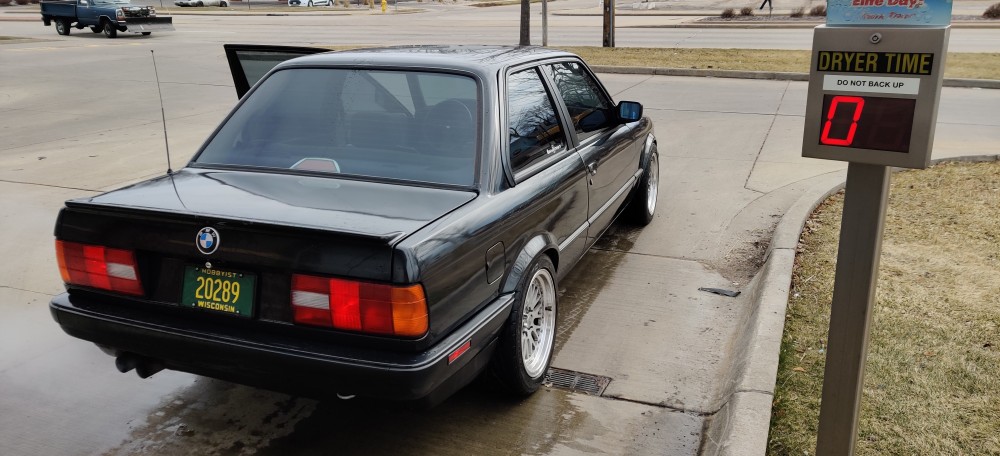
Still on the list to get done is finding some replacement seats and ordering some fresh rubber for the upcoming season. Very excited for this summer and really hoping this pandemic pans out soon.
-
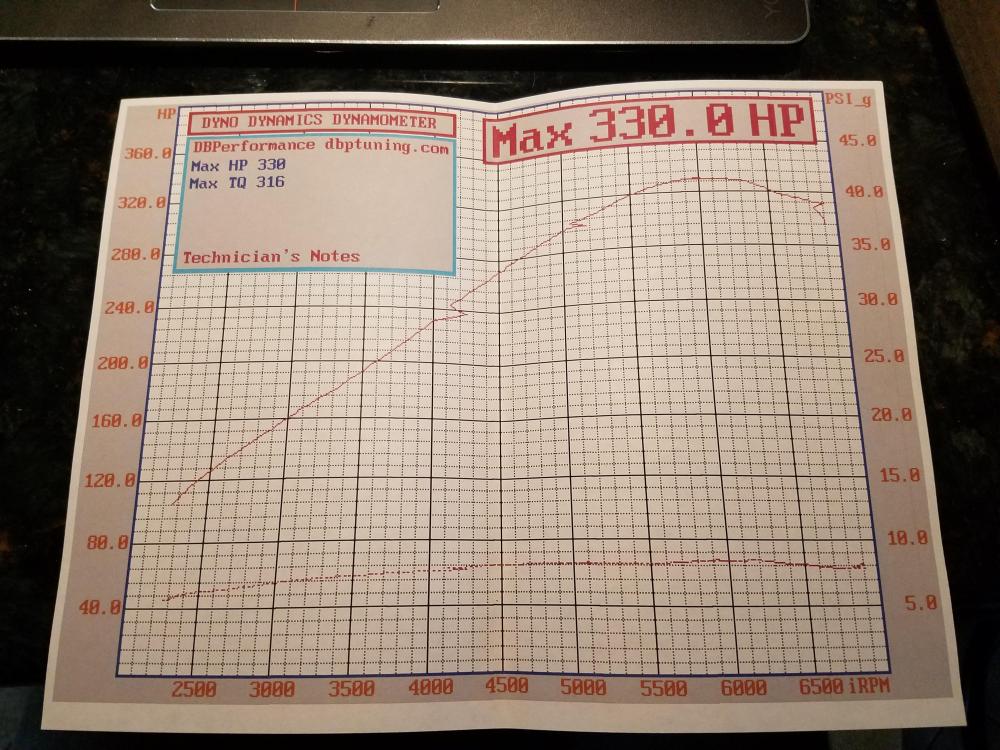
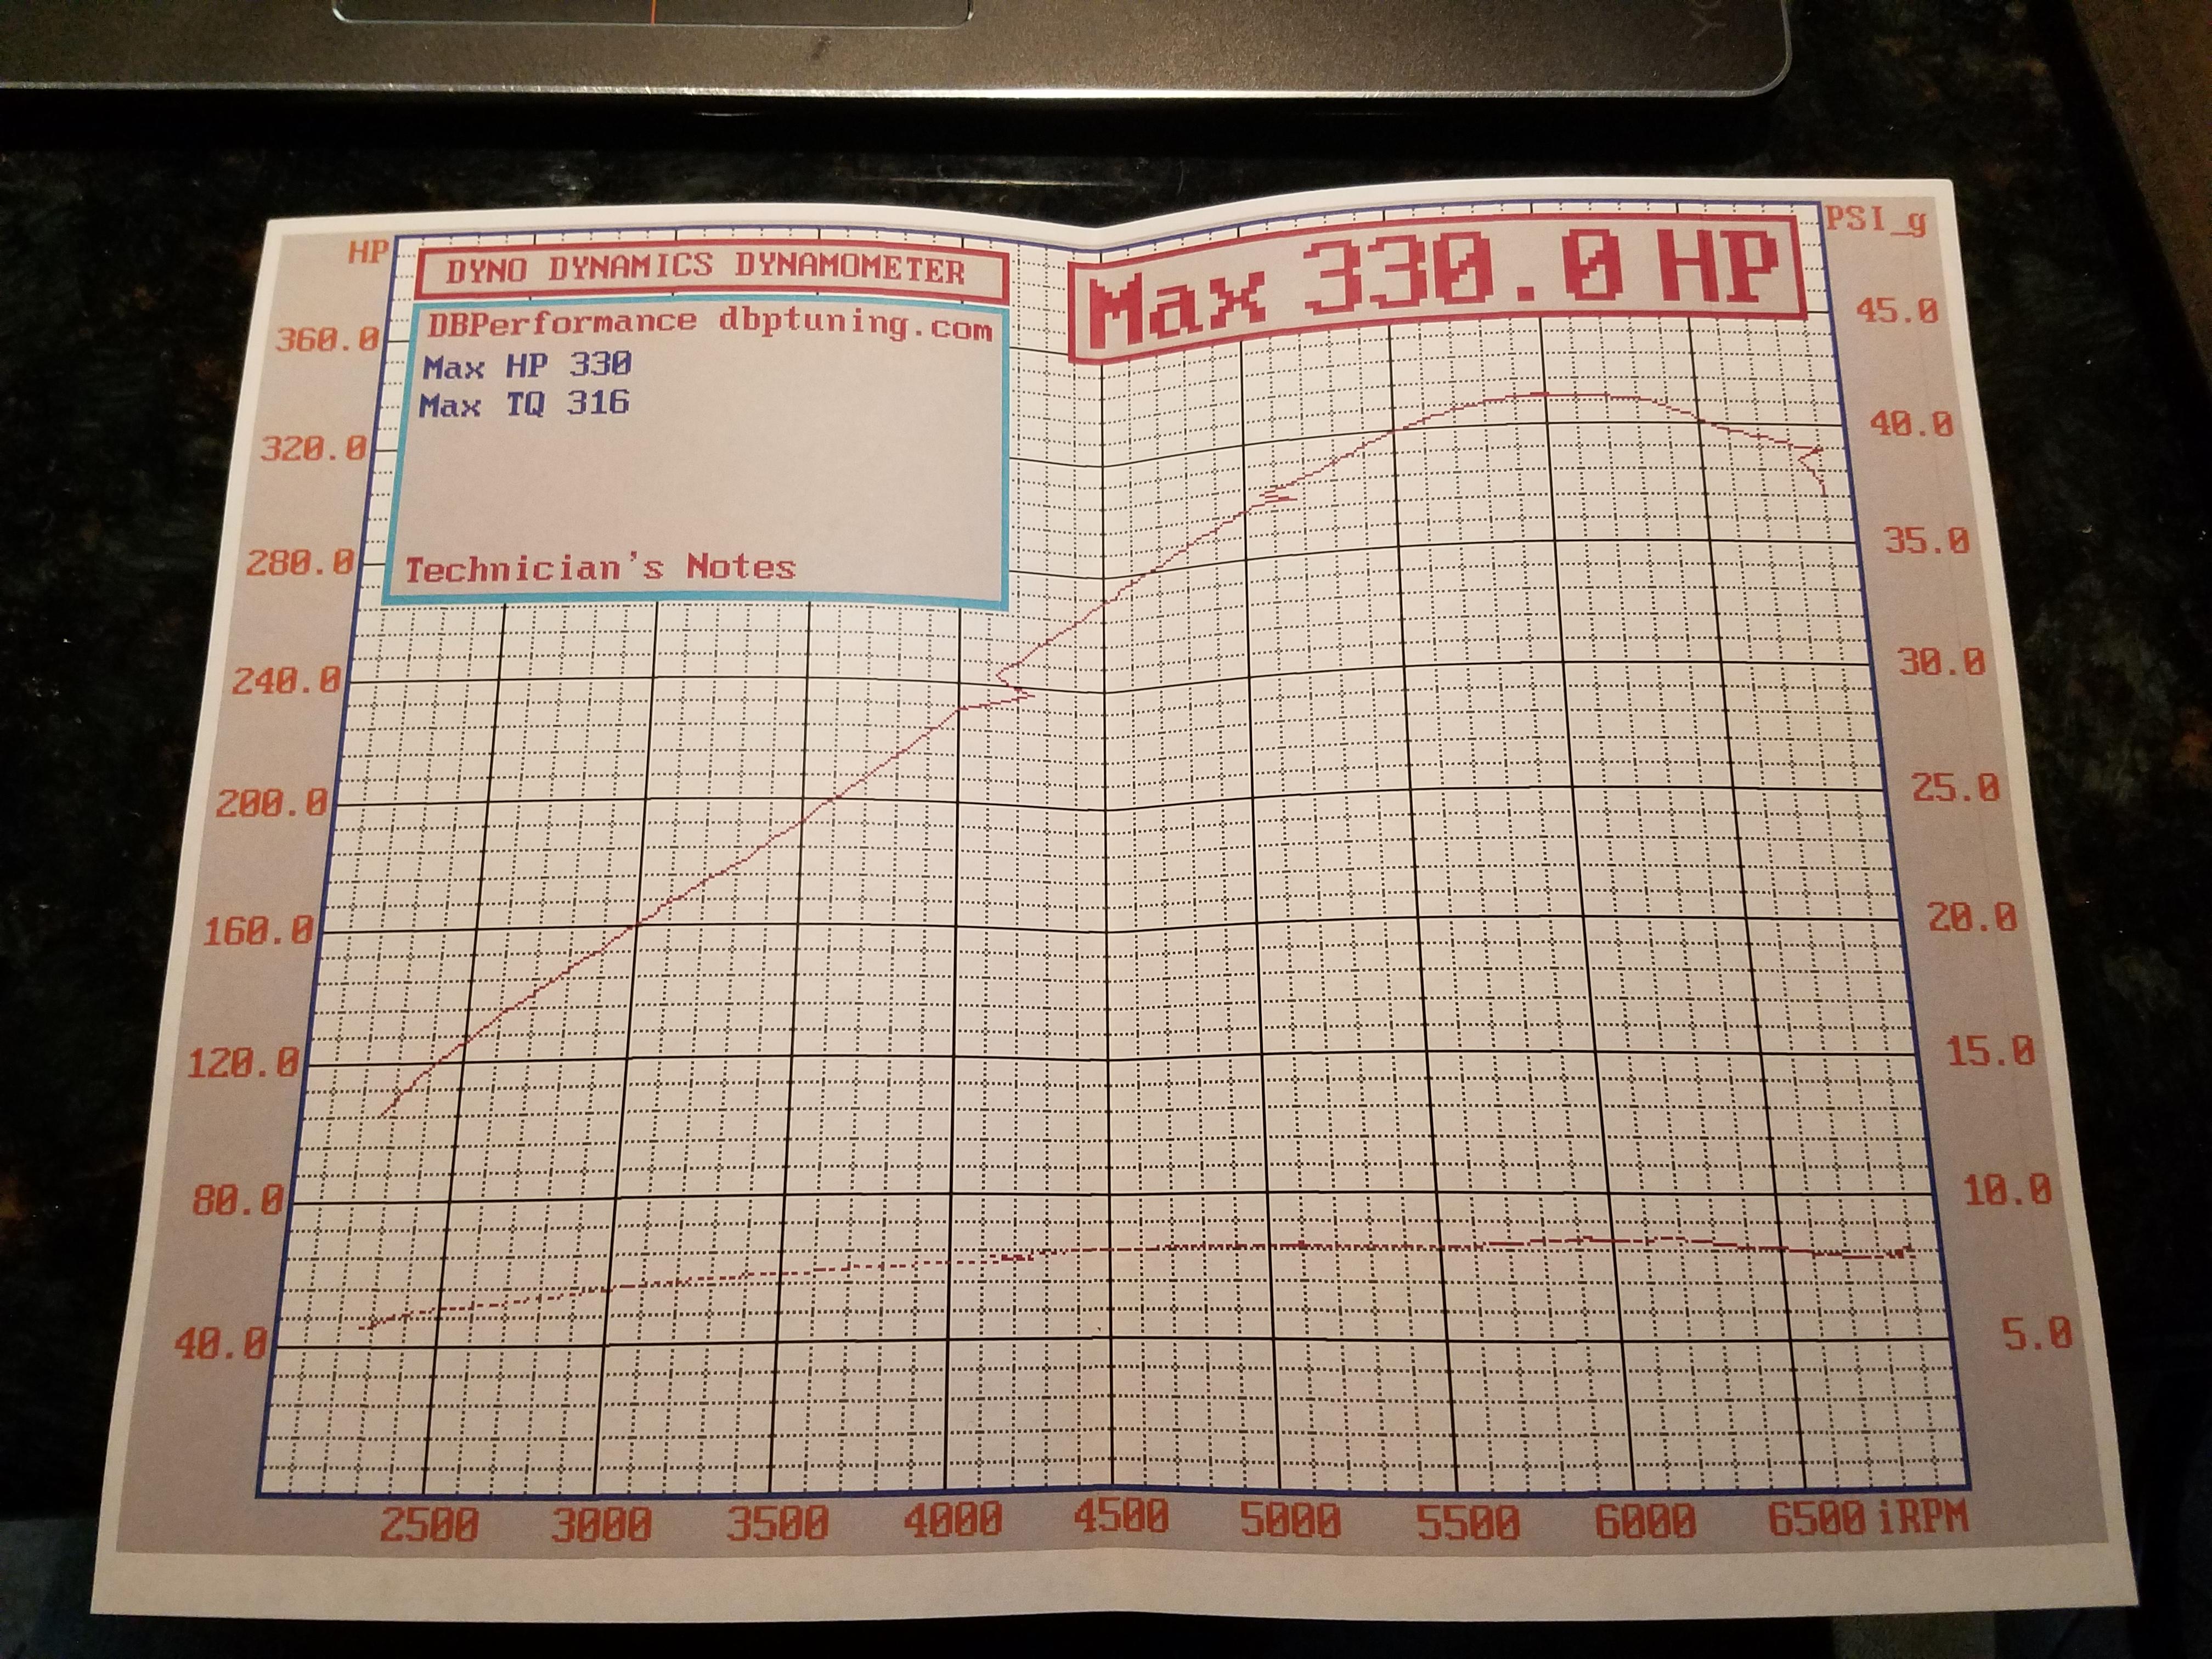
the one and only e30 s52 engine swapbaseline run? or final result? either way 300whp in an E30 is no joke!
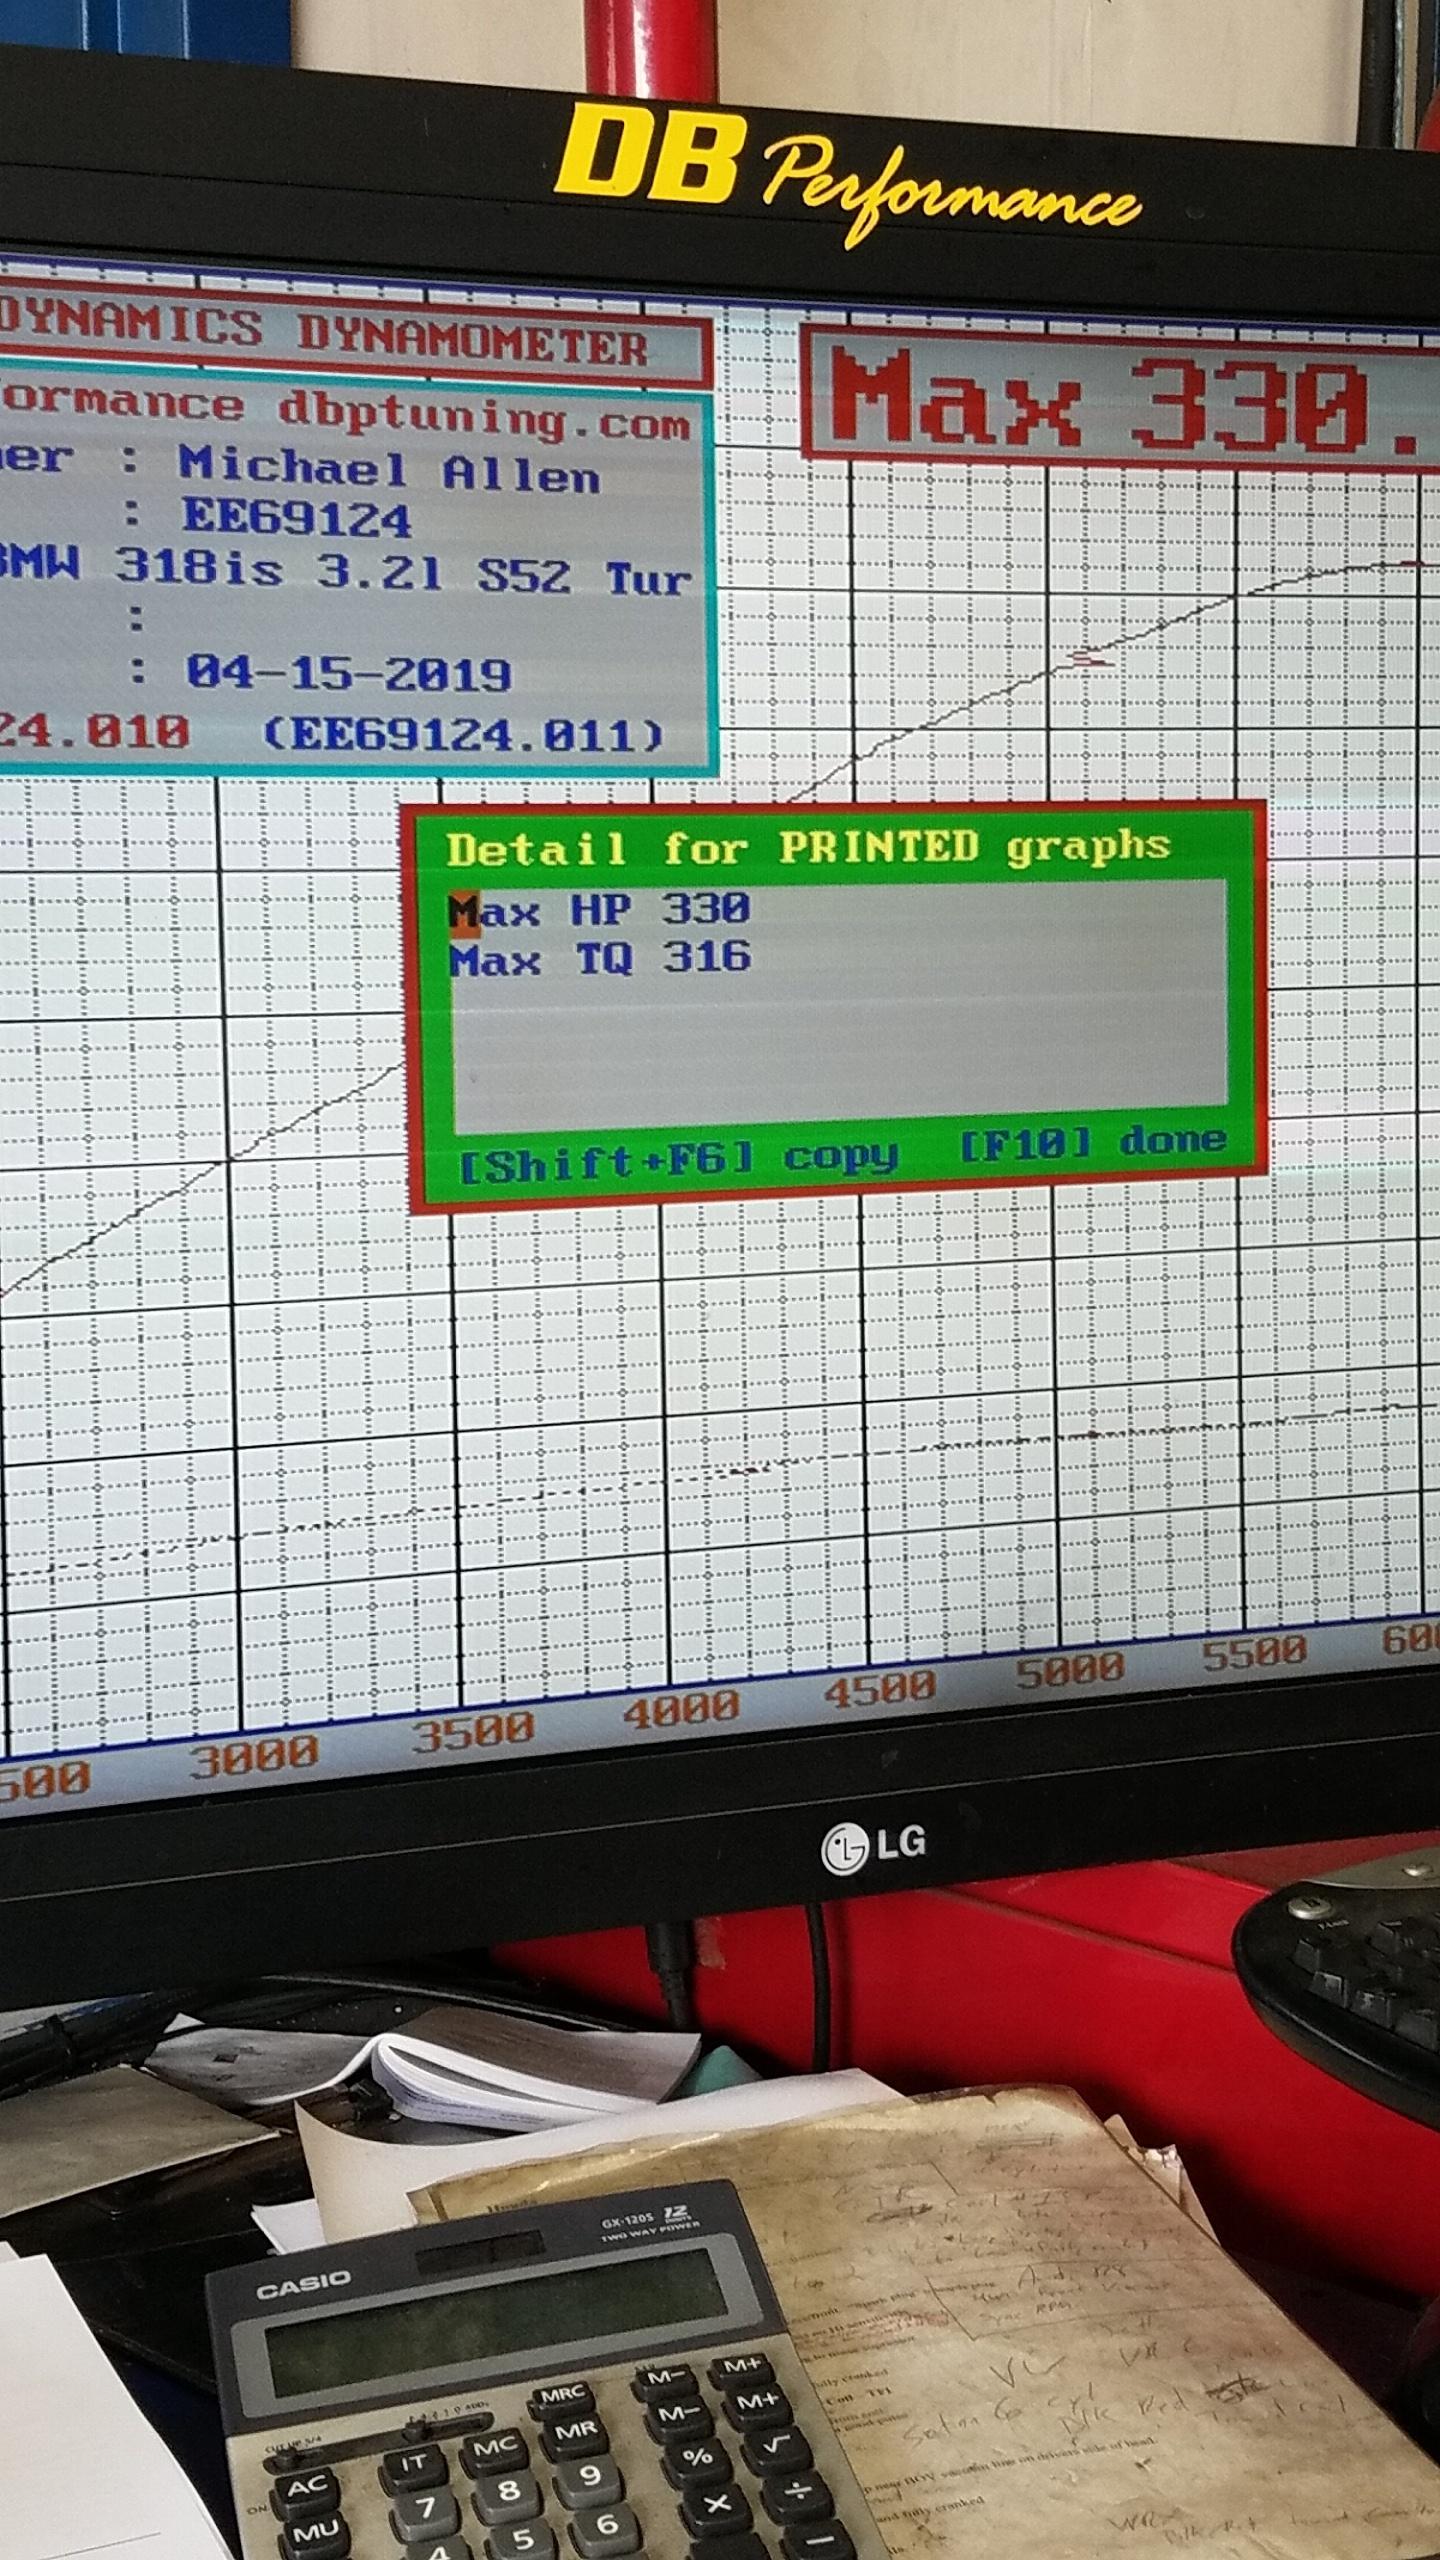
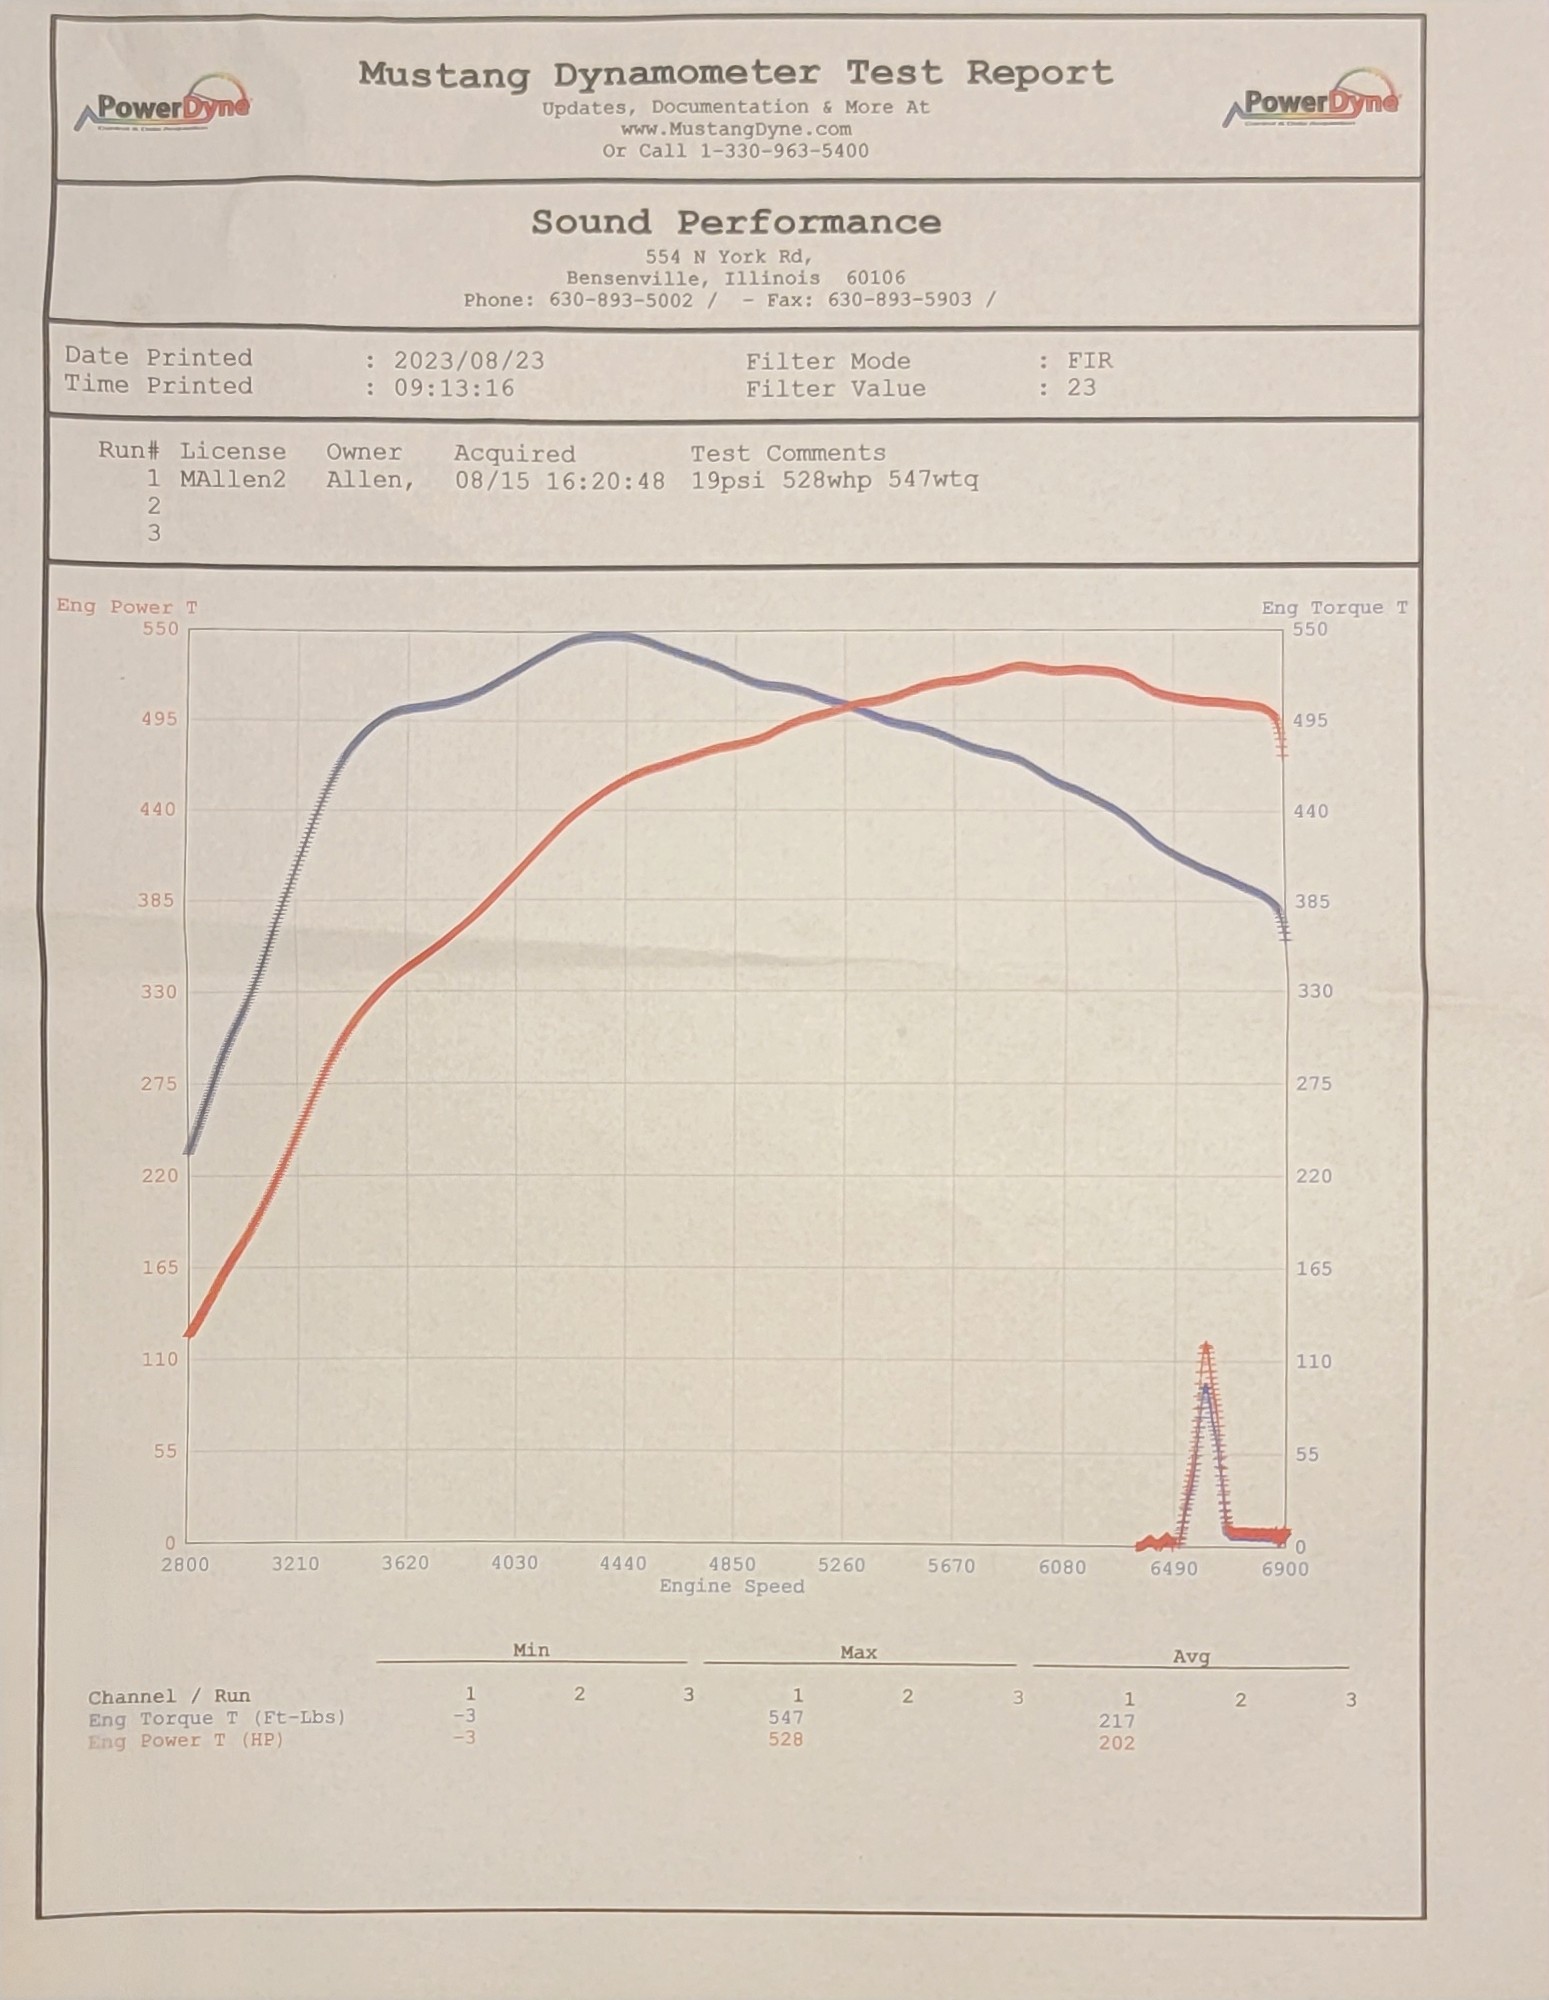
Final result. 330hp 316 tq 0n 8.5 psi at around 6000 rpm
-
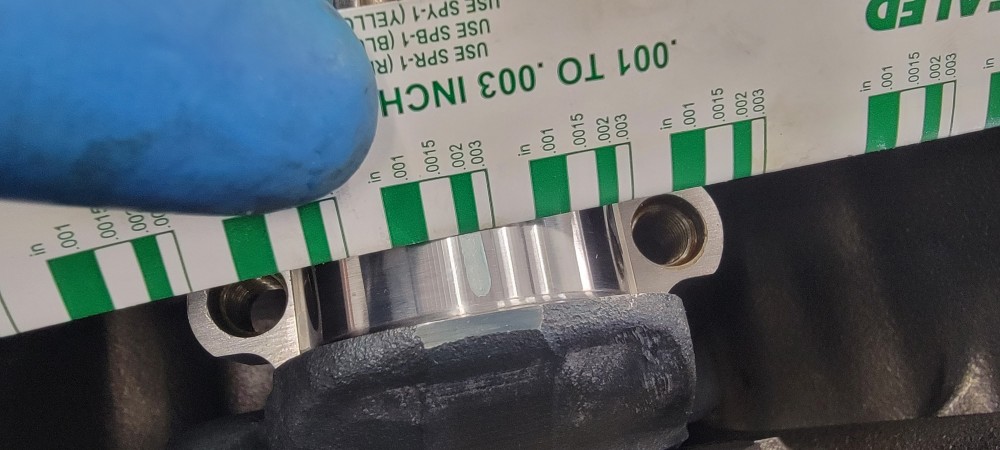
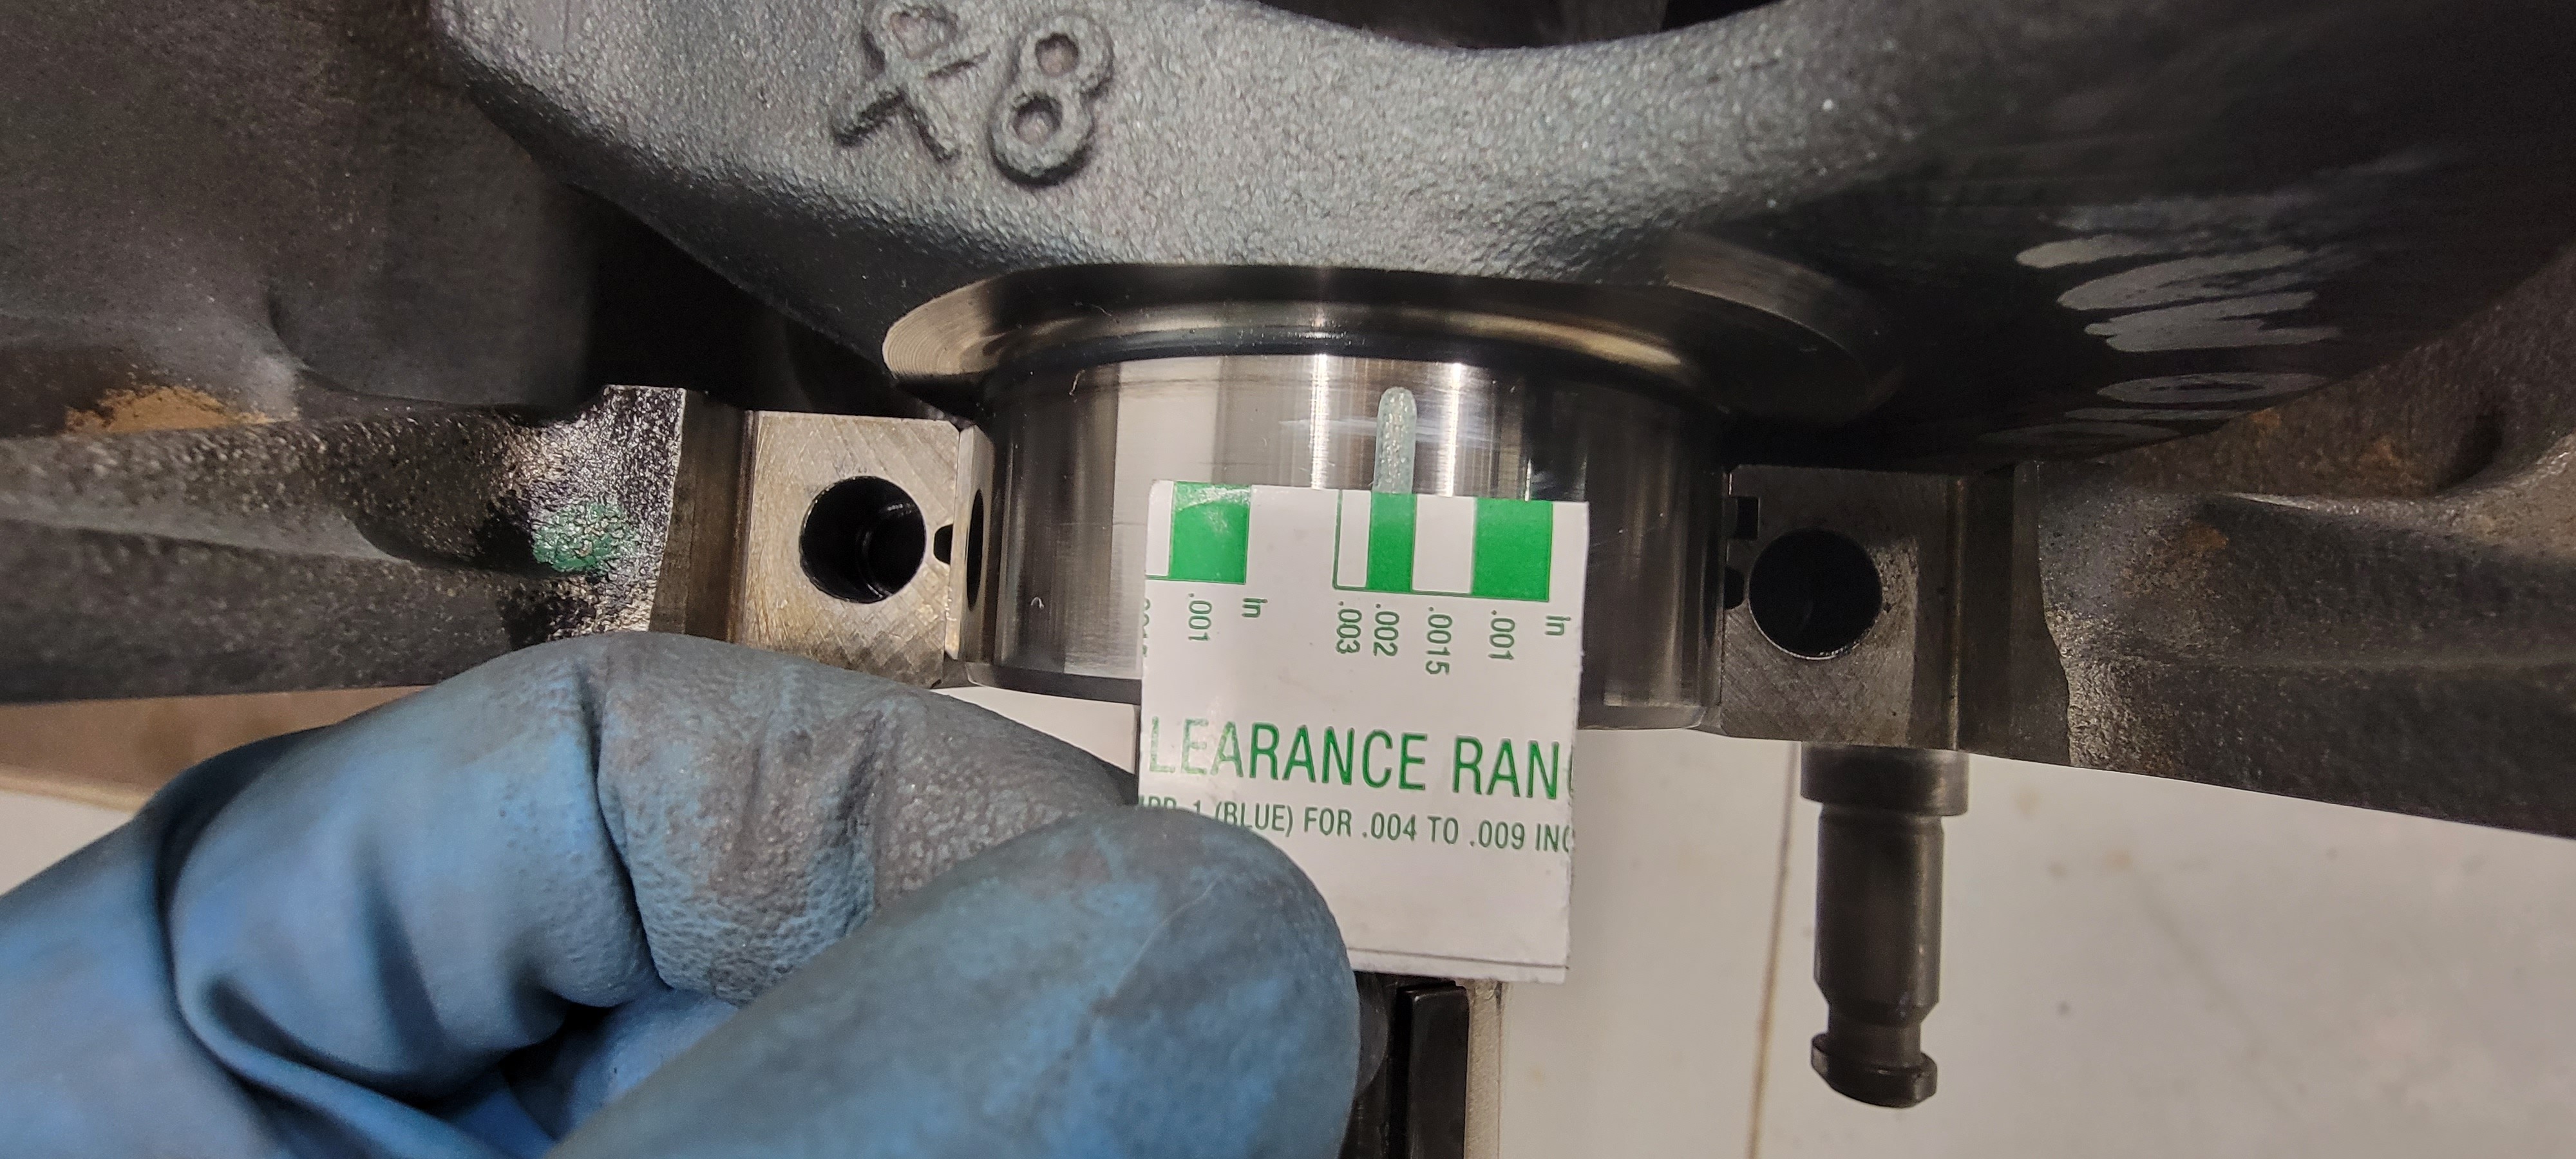
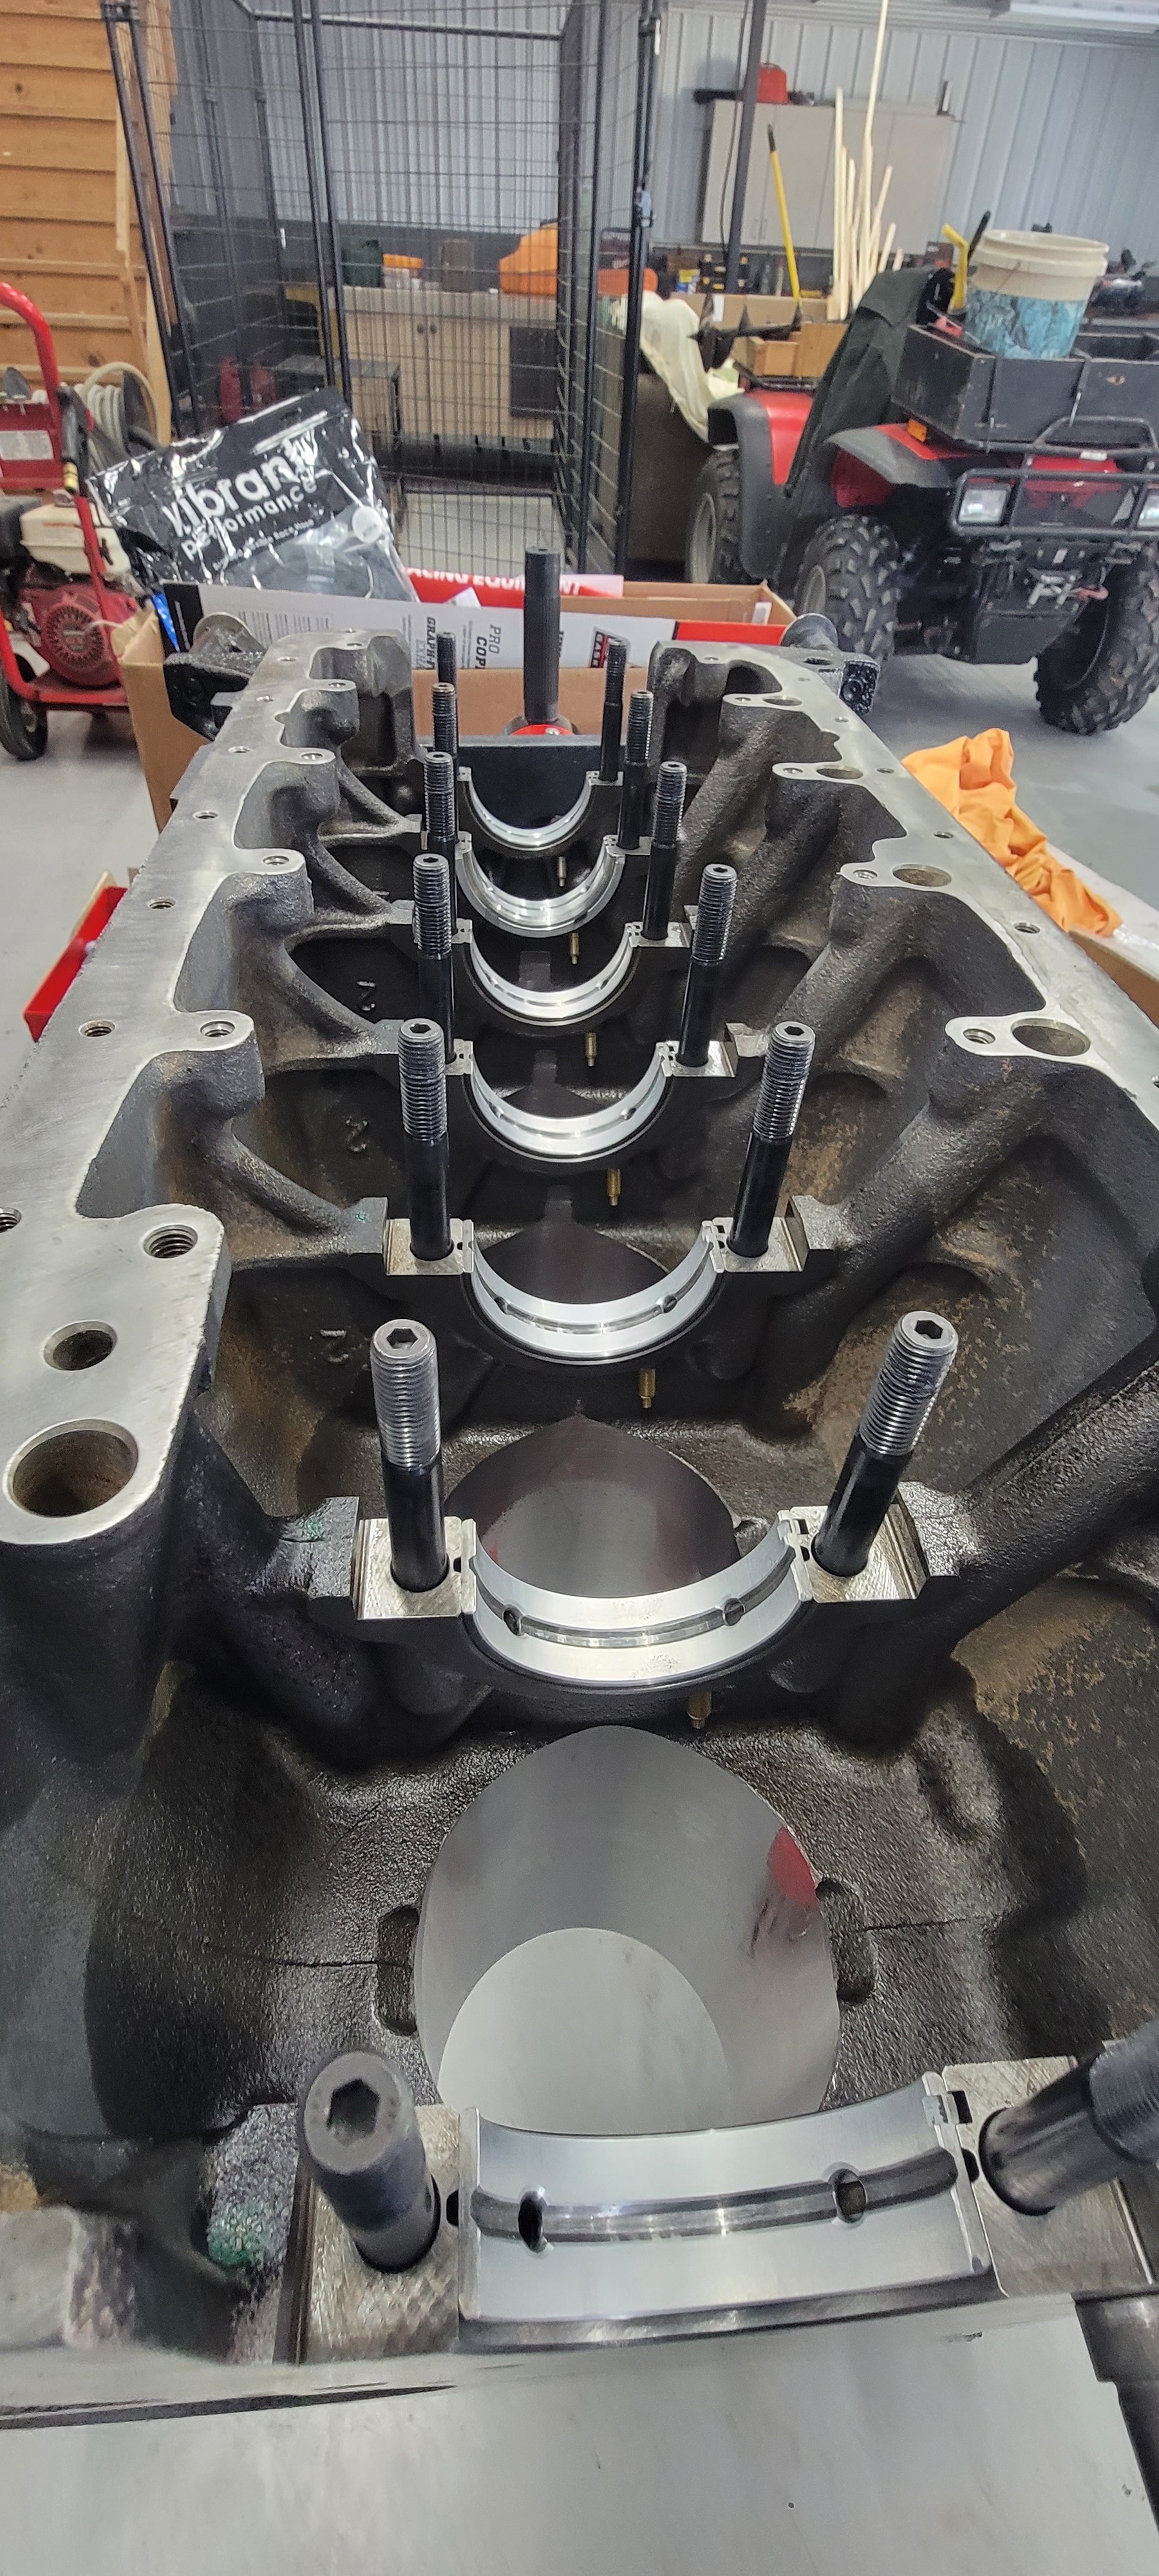
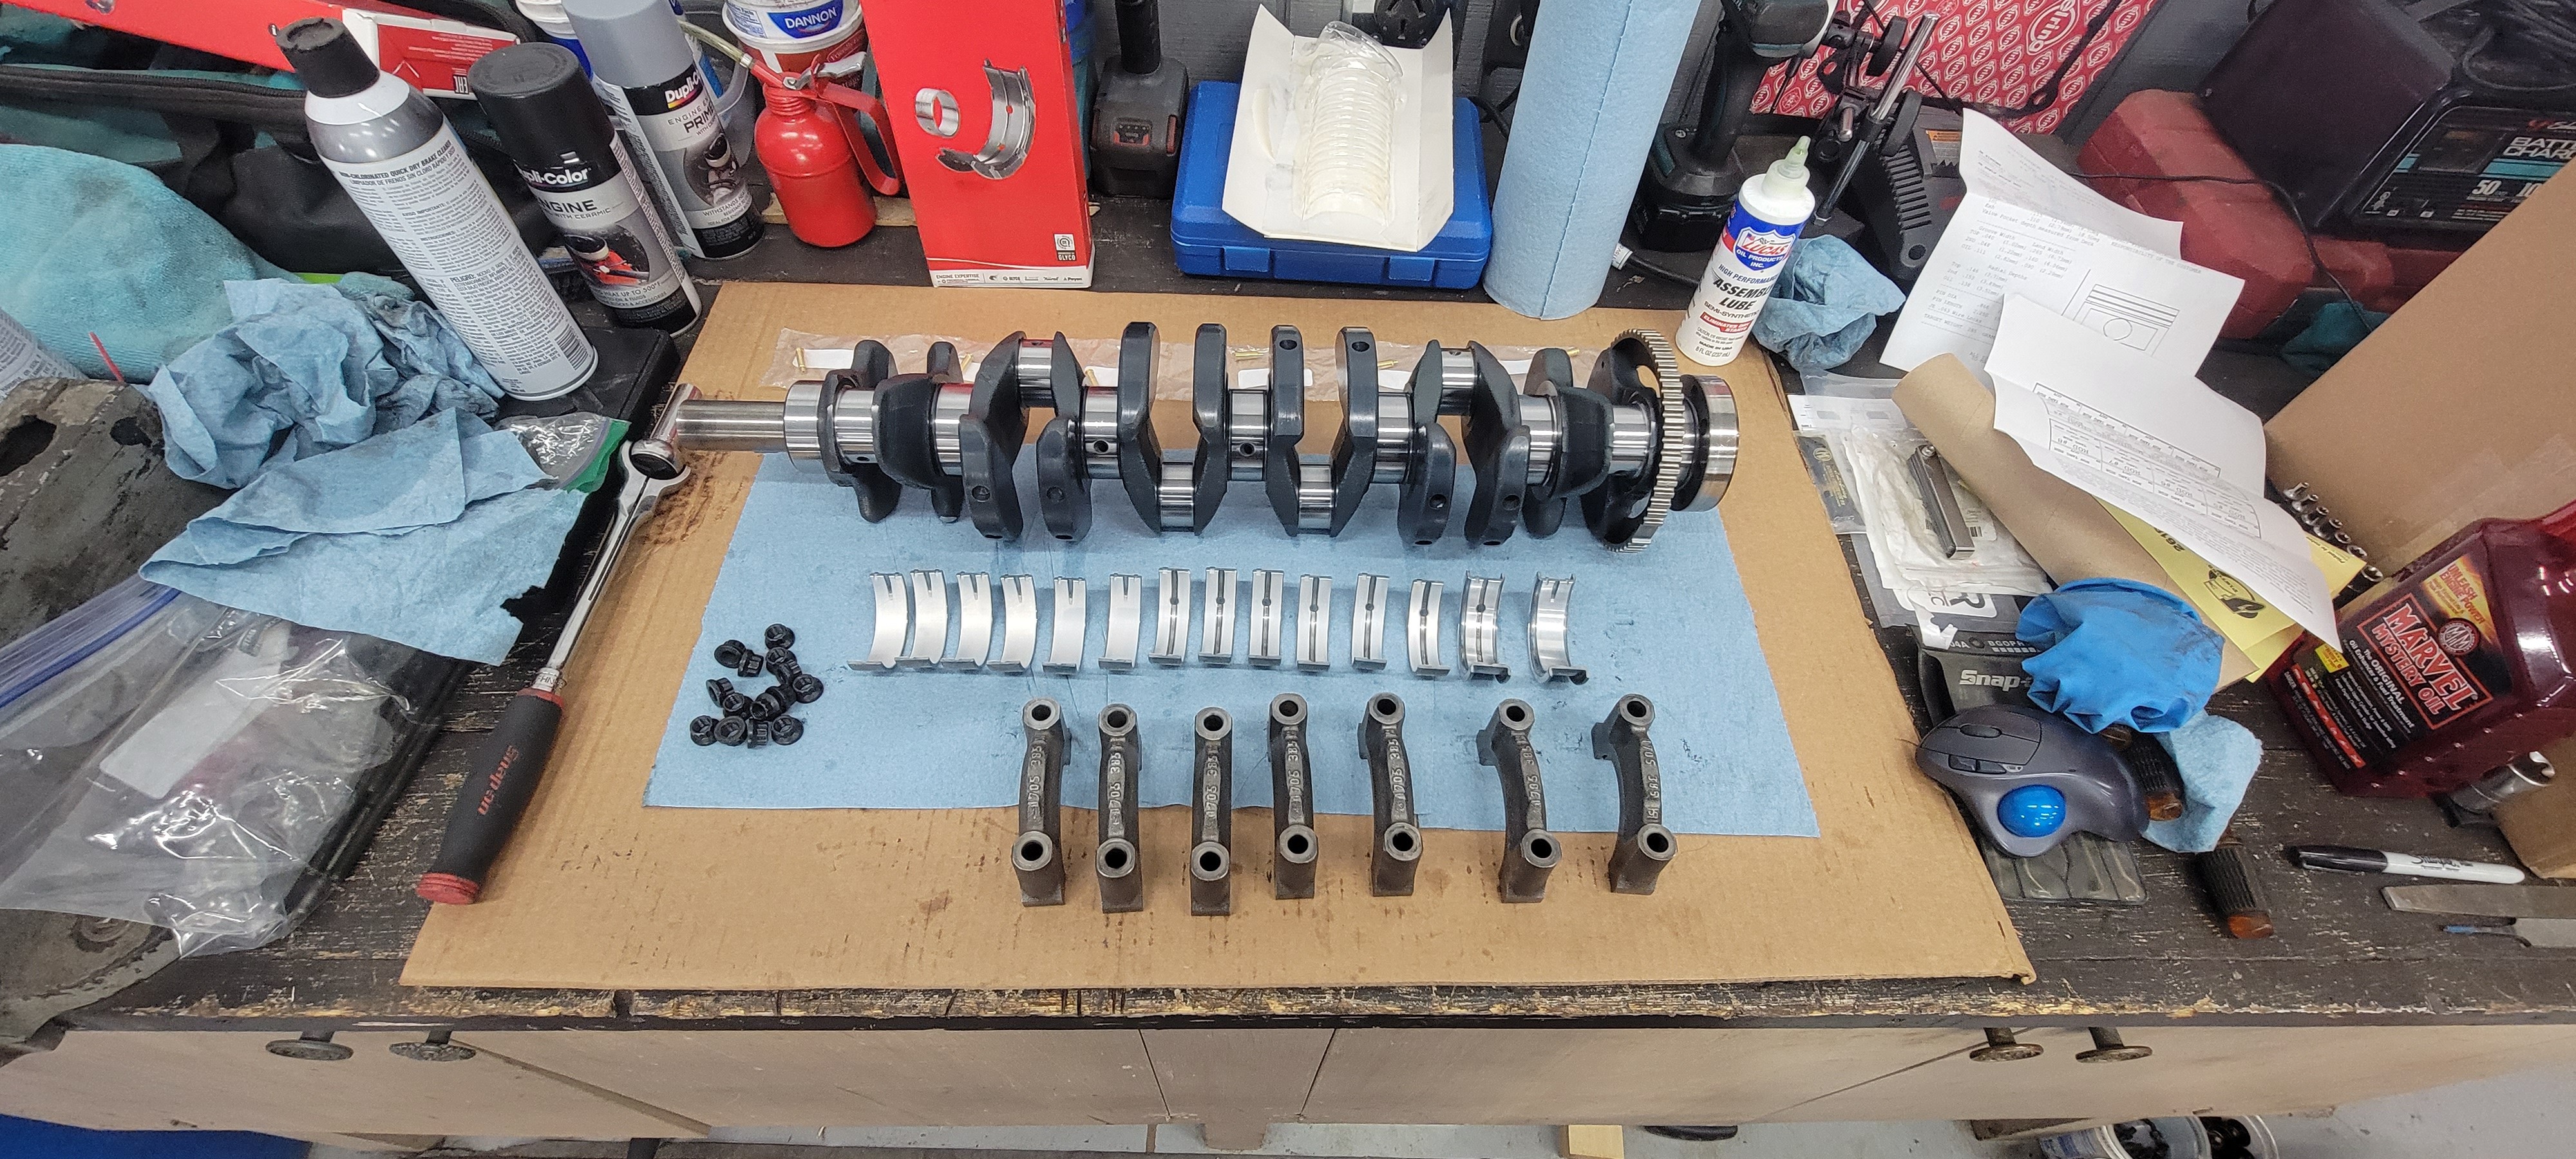
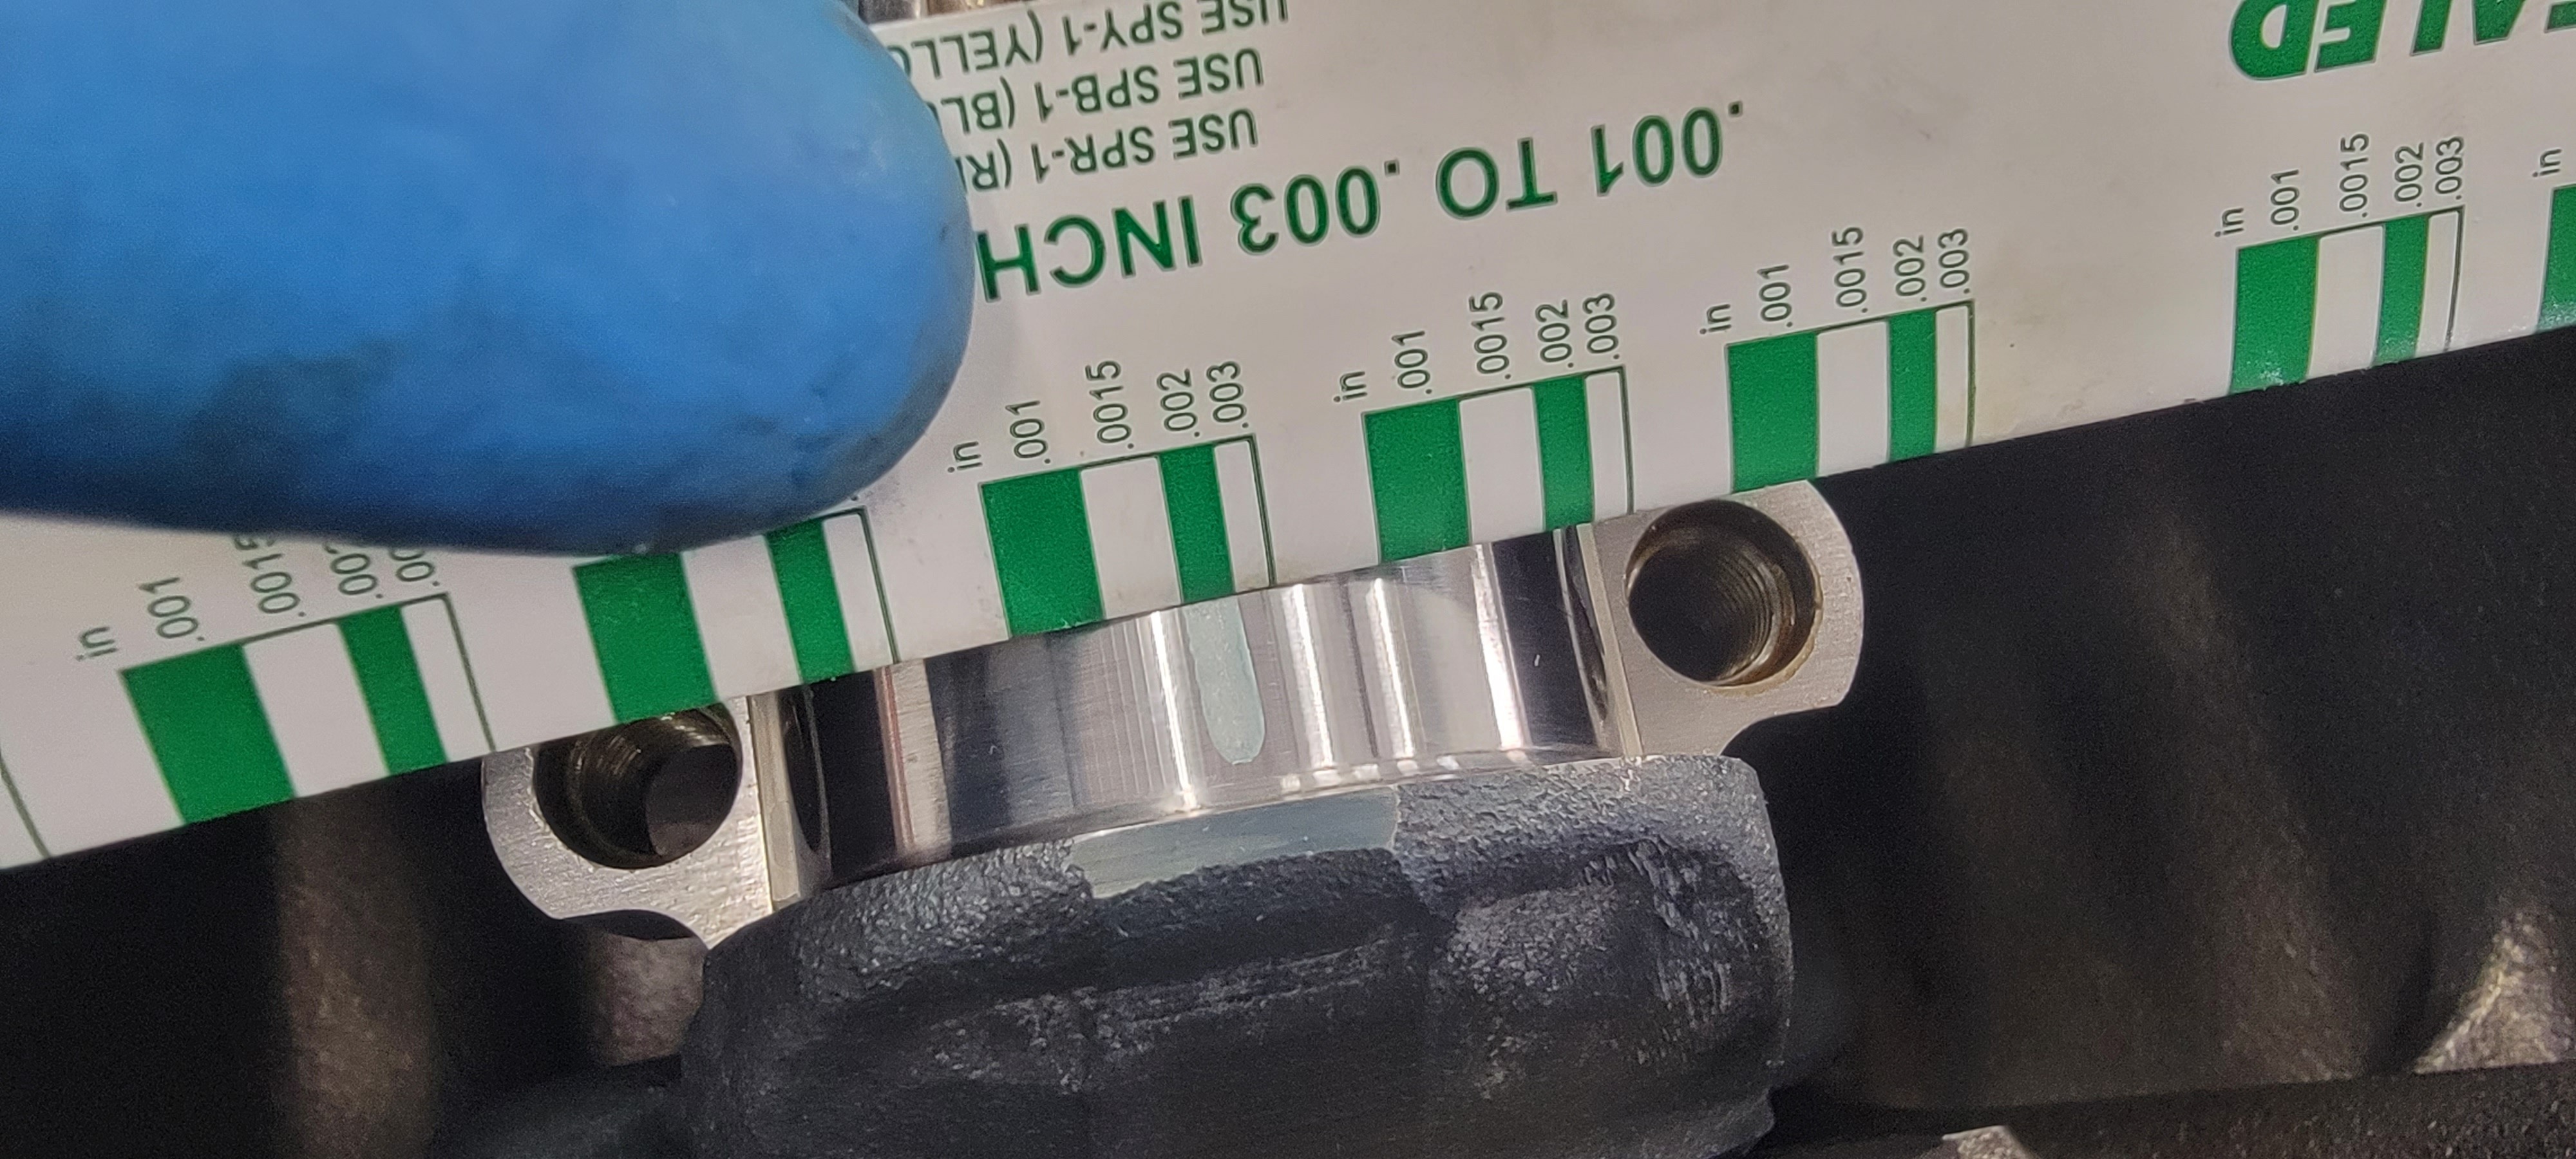
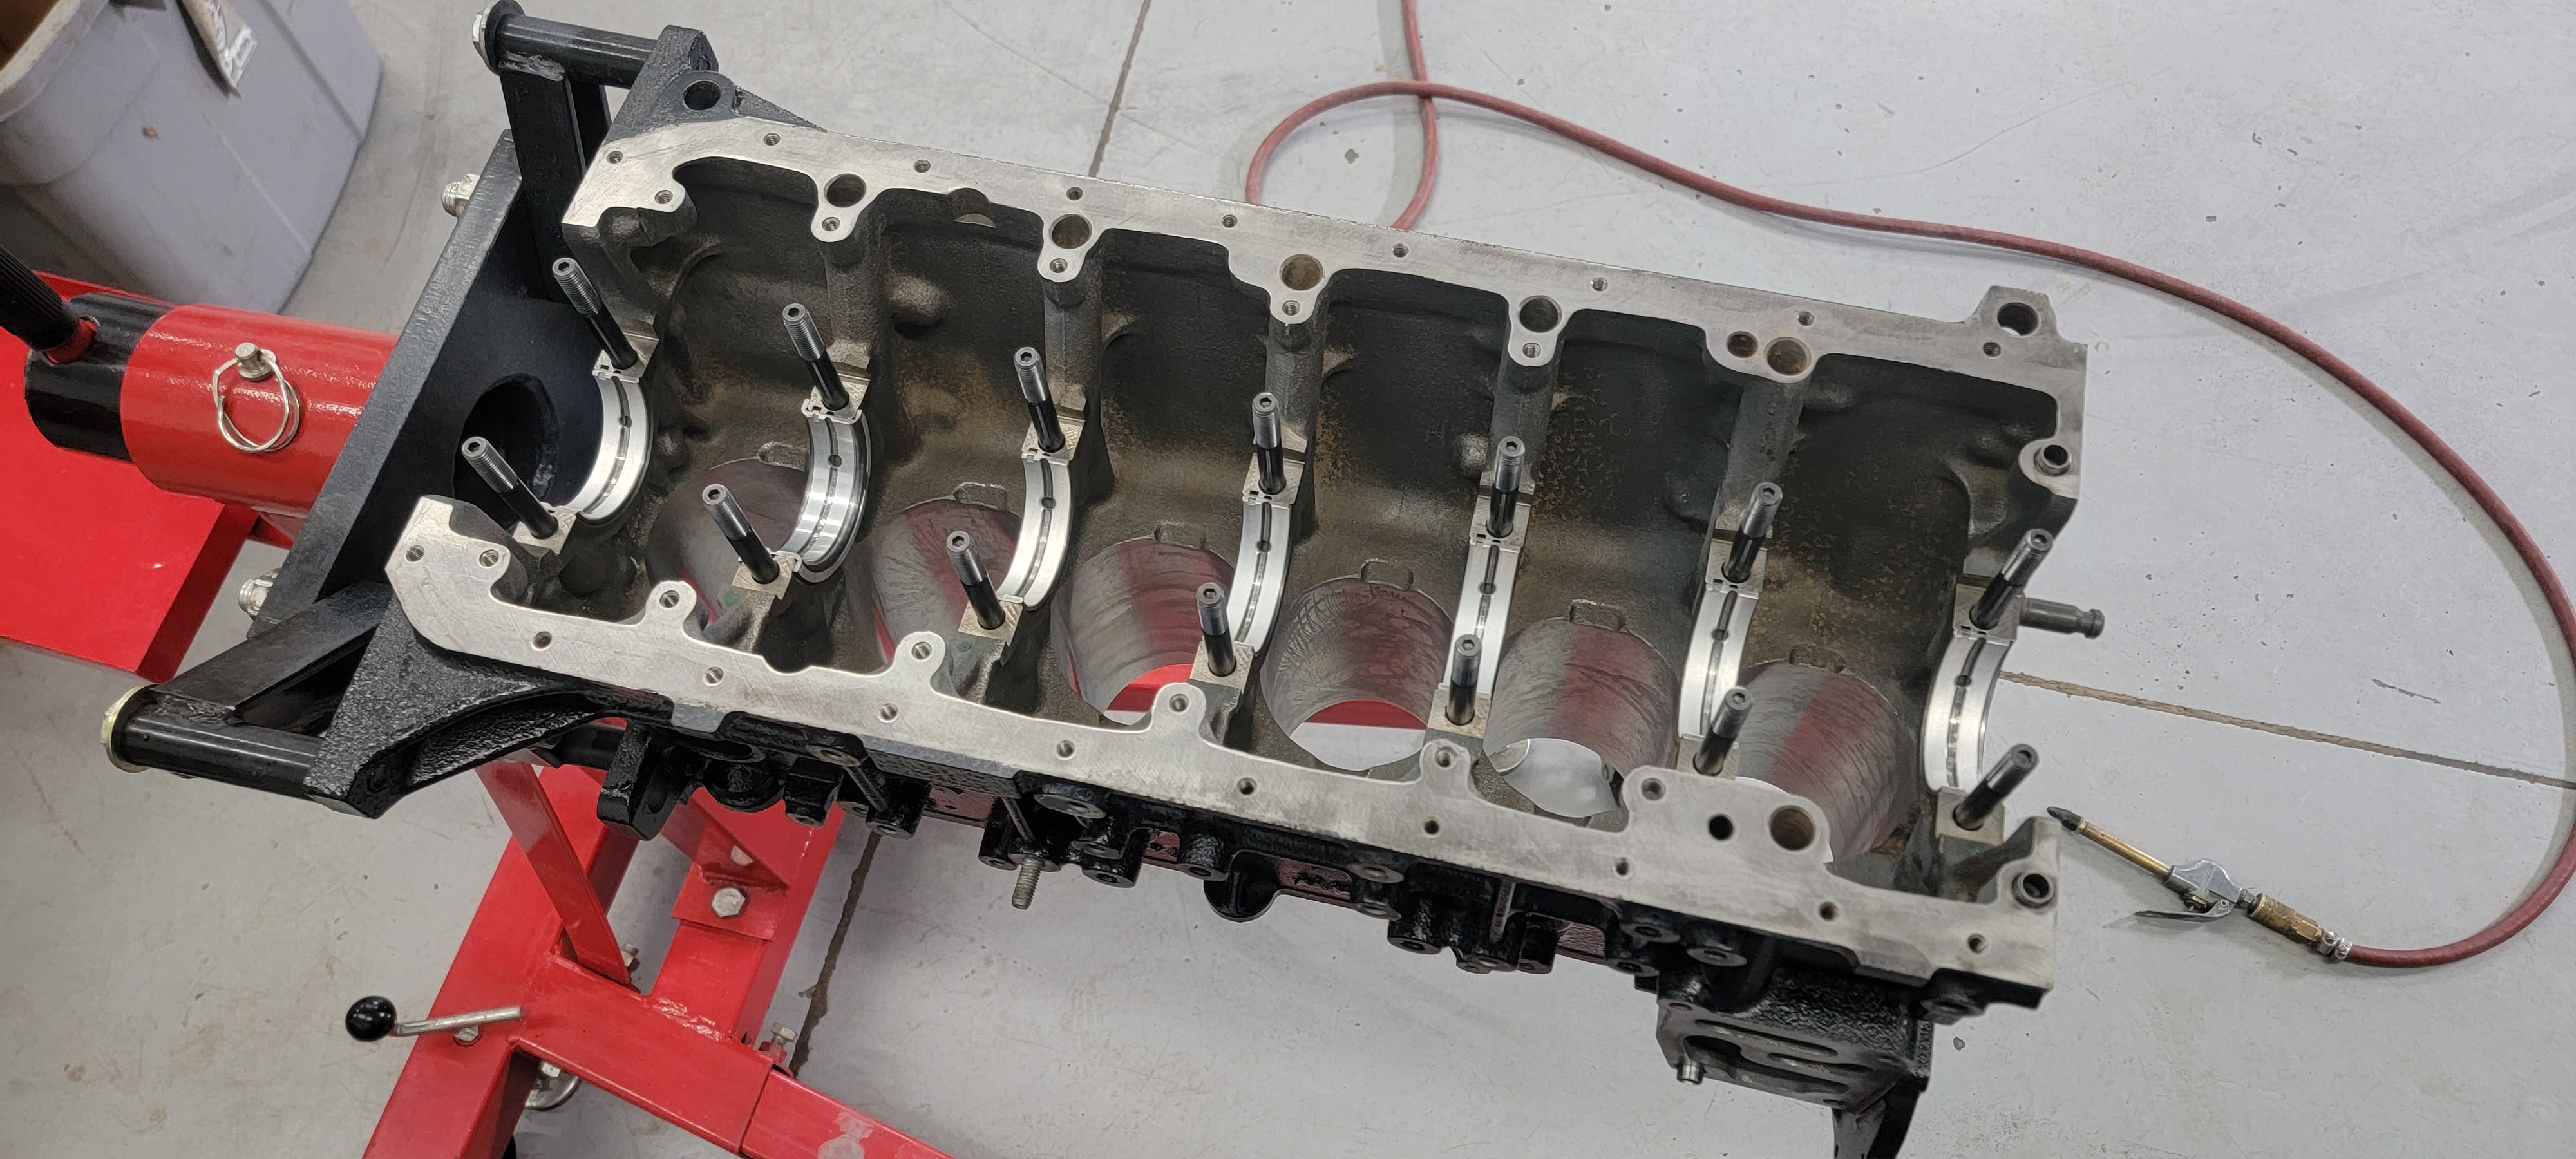
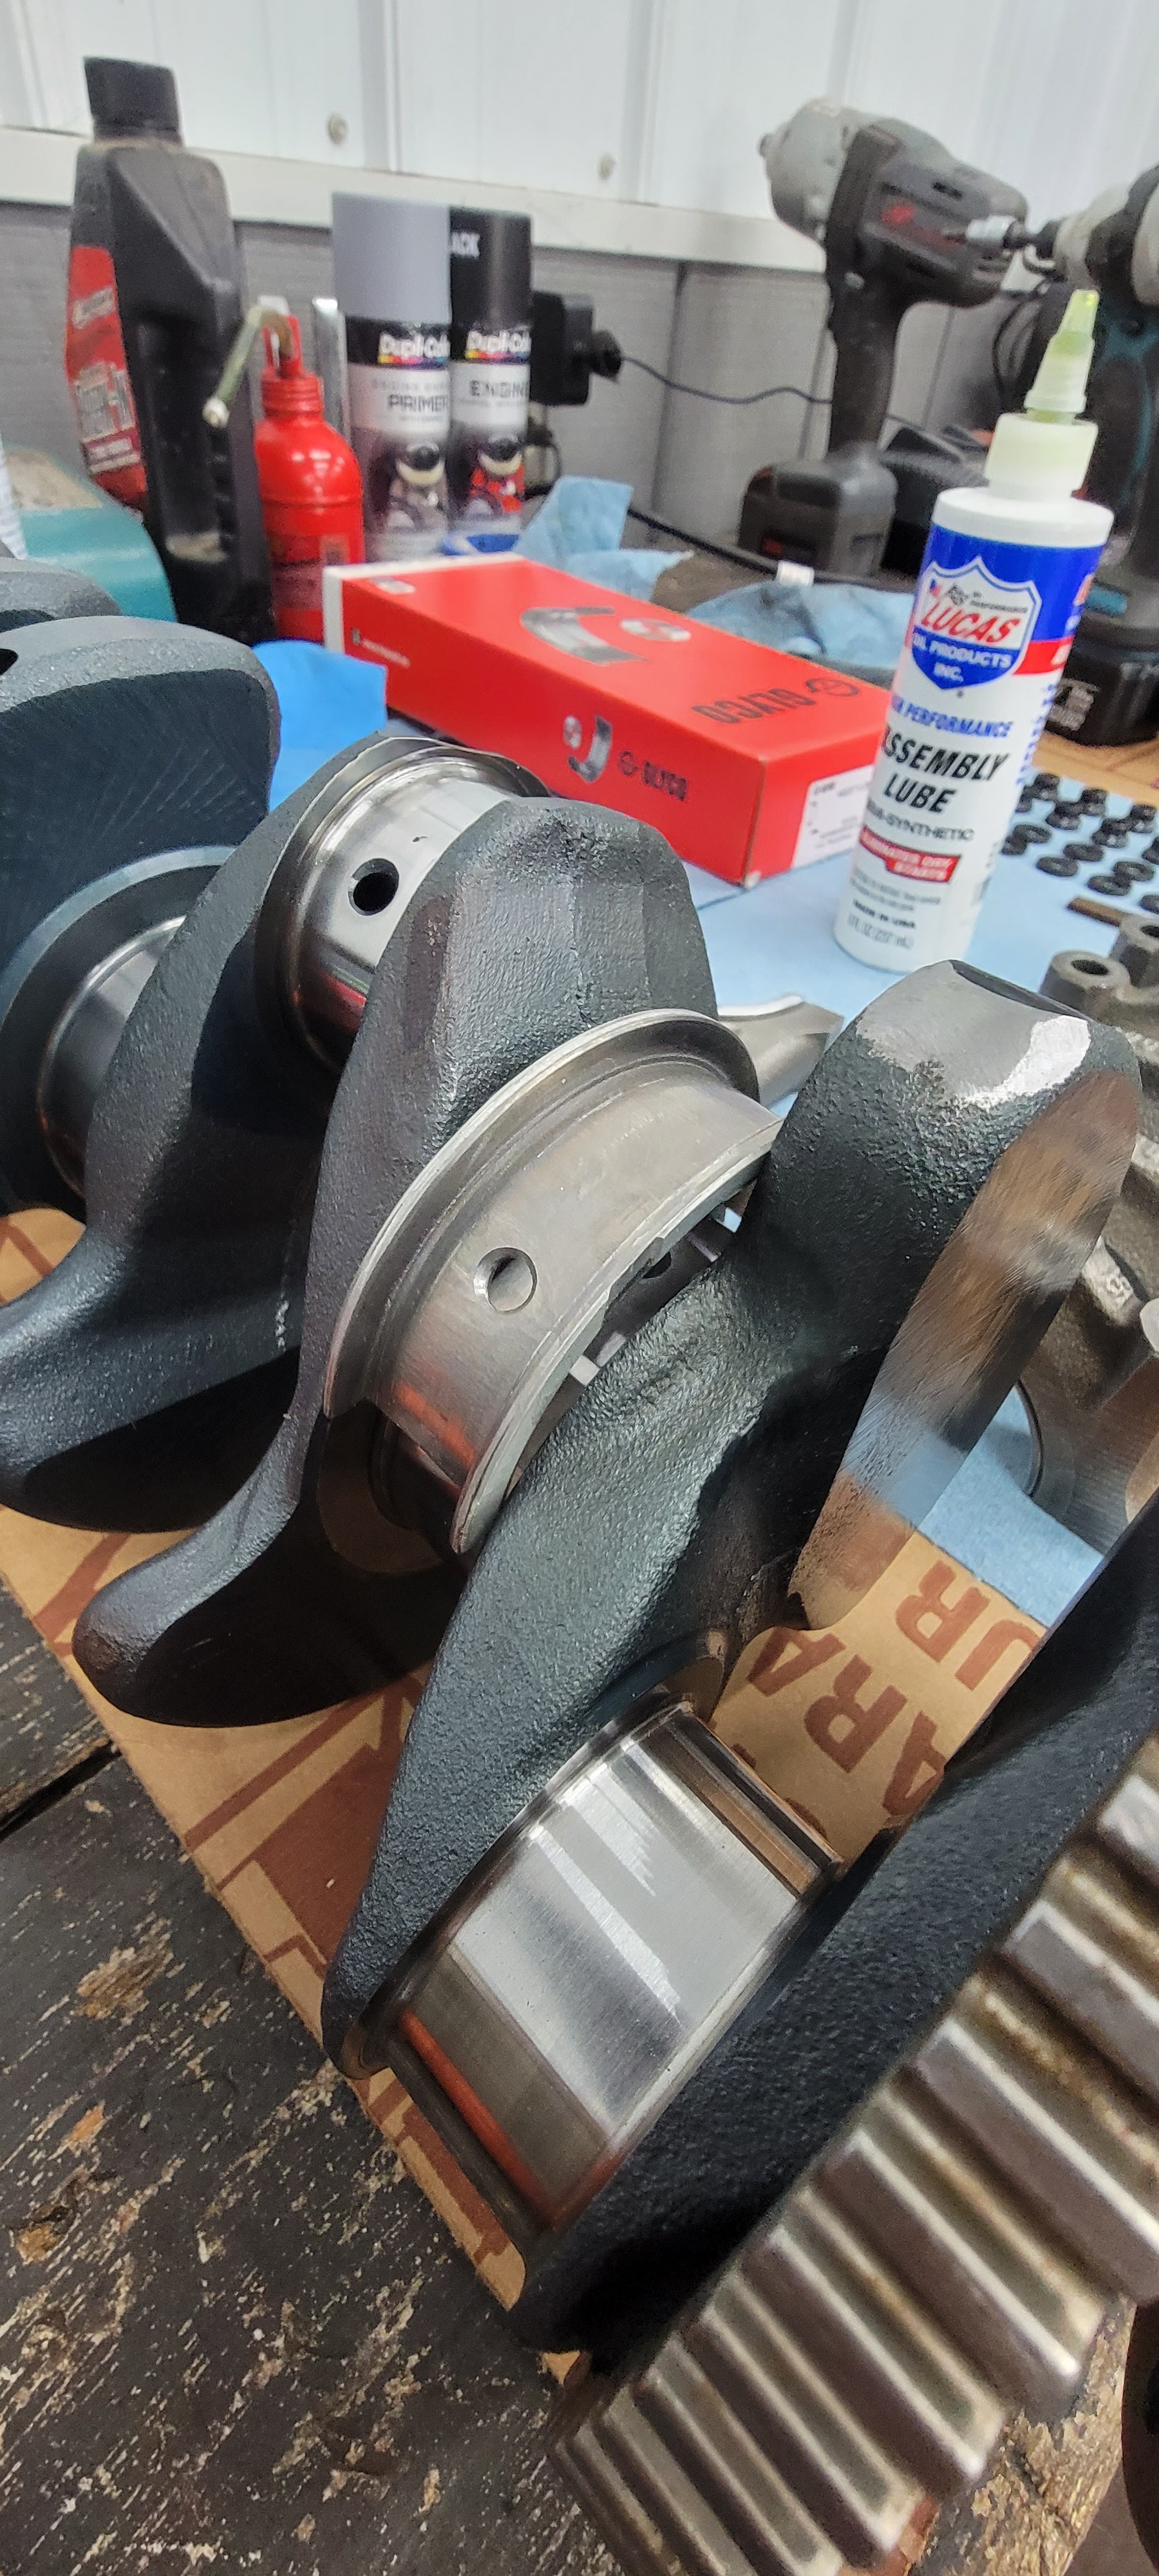
the one and only e30 s52 engine swapGot the crankshaft back from the machine shop. They got .010 removed from the thrust services and the thrust bearings fit much better now! With that figured out I got to measuring all my main bearing clearances.
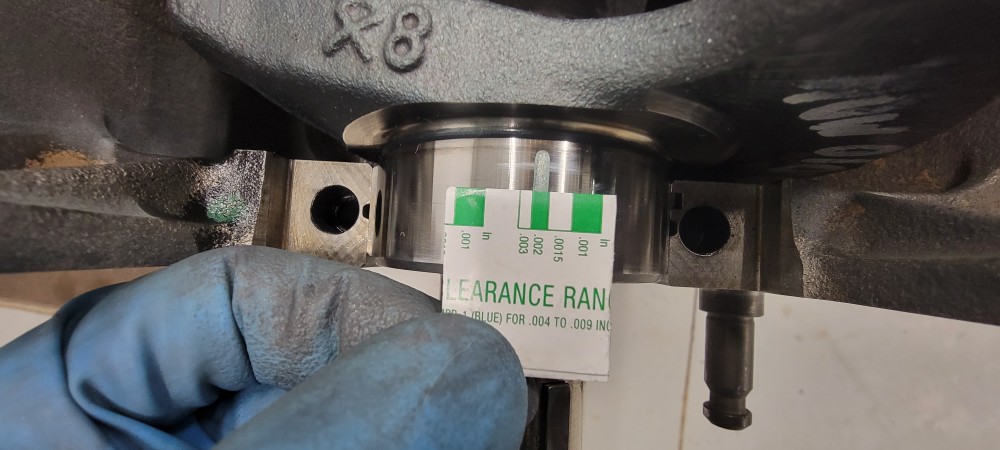
All seven mains came in at .002 clearance which was right within spec so I was good to get things lubed up and installed permanently.
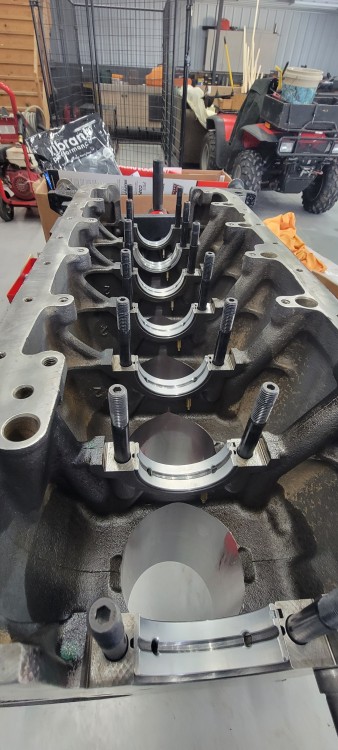
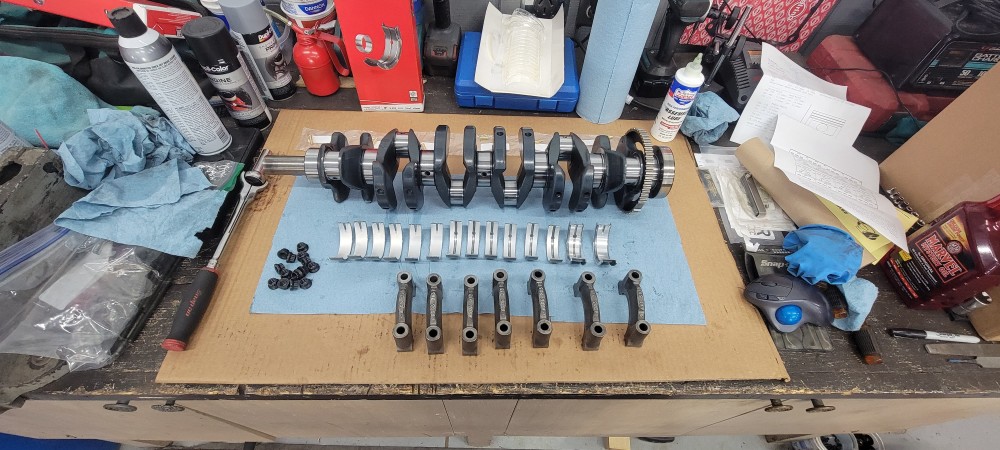
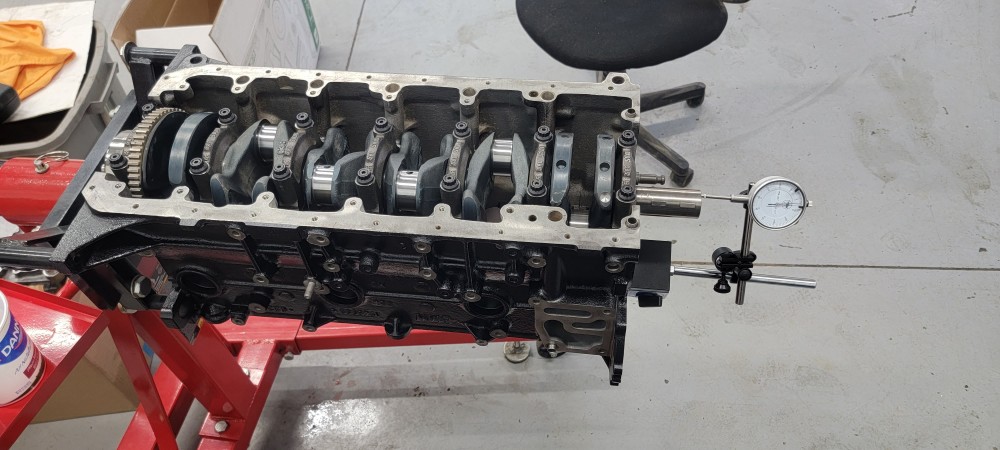
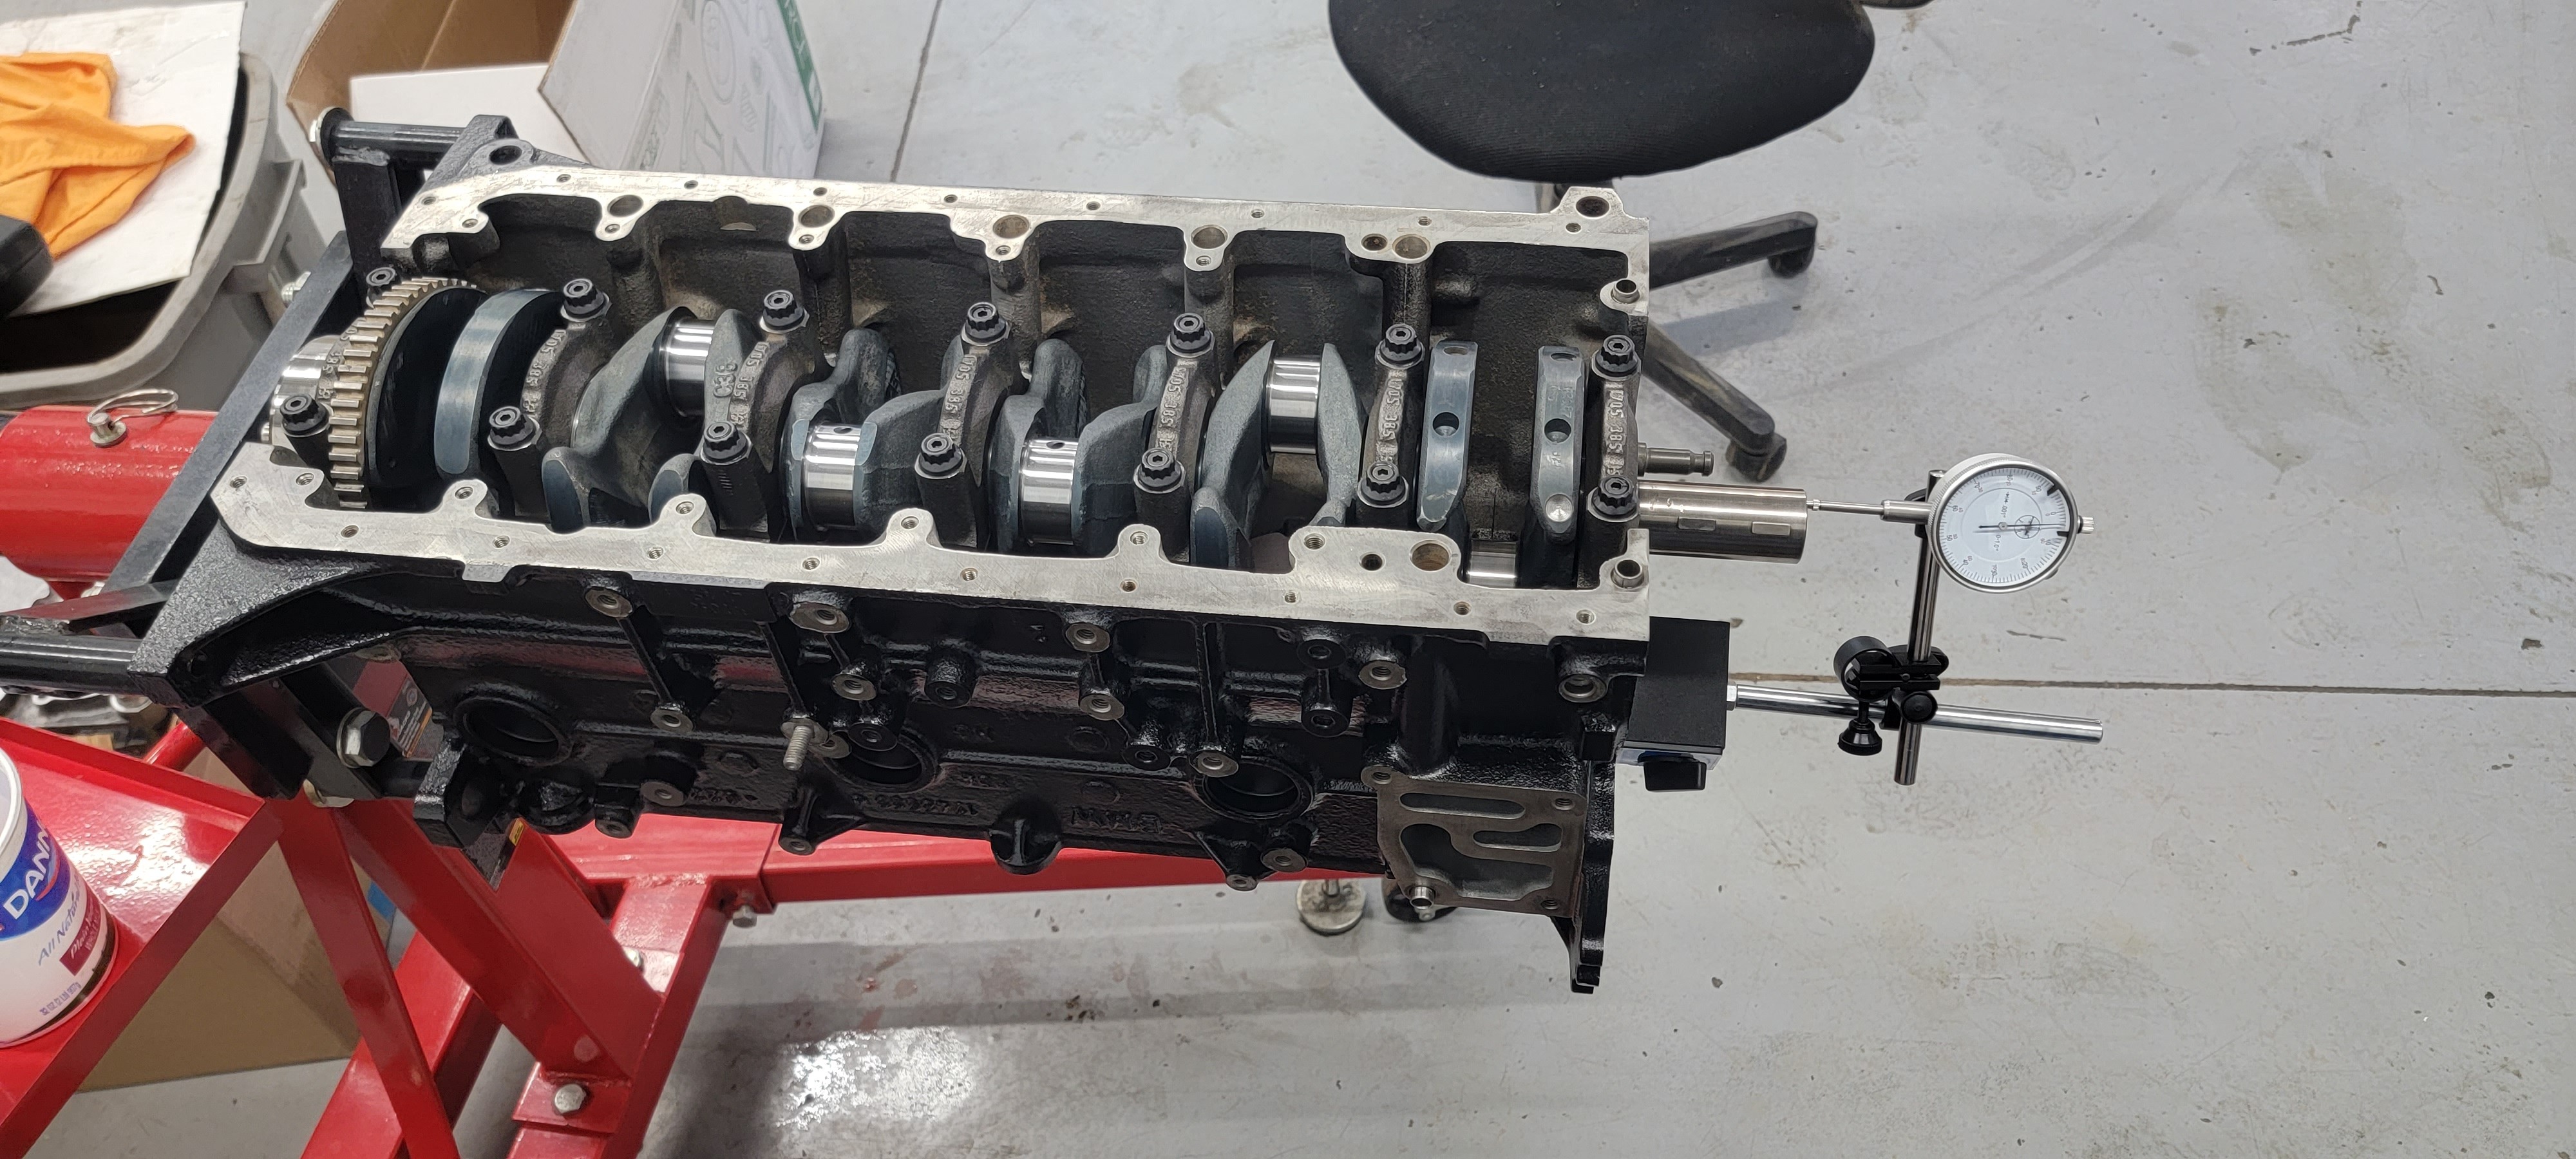
So something that I did with the last rebuild which I decided to change up this time was involving the arp main studs. Straight from arp when you receive their set of main studs they end up being too short and the nut only engages about halfway. On the first rebuild I dropped small 1/4" ball bearings in the holes to raise the studs and be able to bottom them out. I wanted to look into this a little further then I had and see what arp actually recommends to solve this issue. Two options... Back the stud out tell you get full thread engagement or ditch the washers. After reading through what a lot of others have done it seemed the option used with the most success was just ditching the washers. So I did just that. Torqued them all down and followed the proper torque procedure and checked my crank end play with a dial indicator which came in right at .003, right within spec.
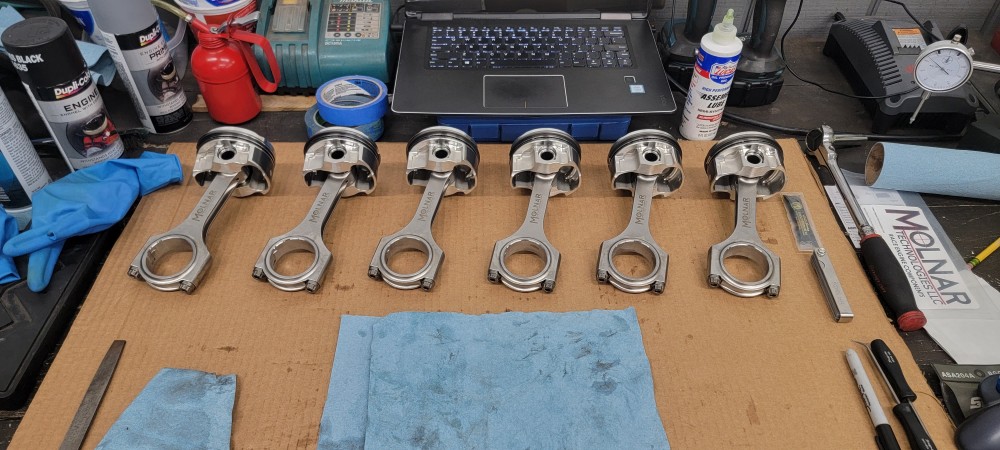
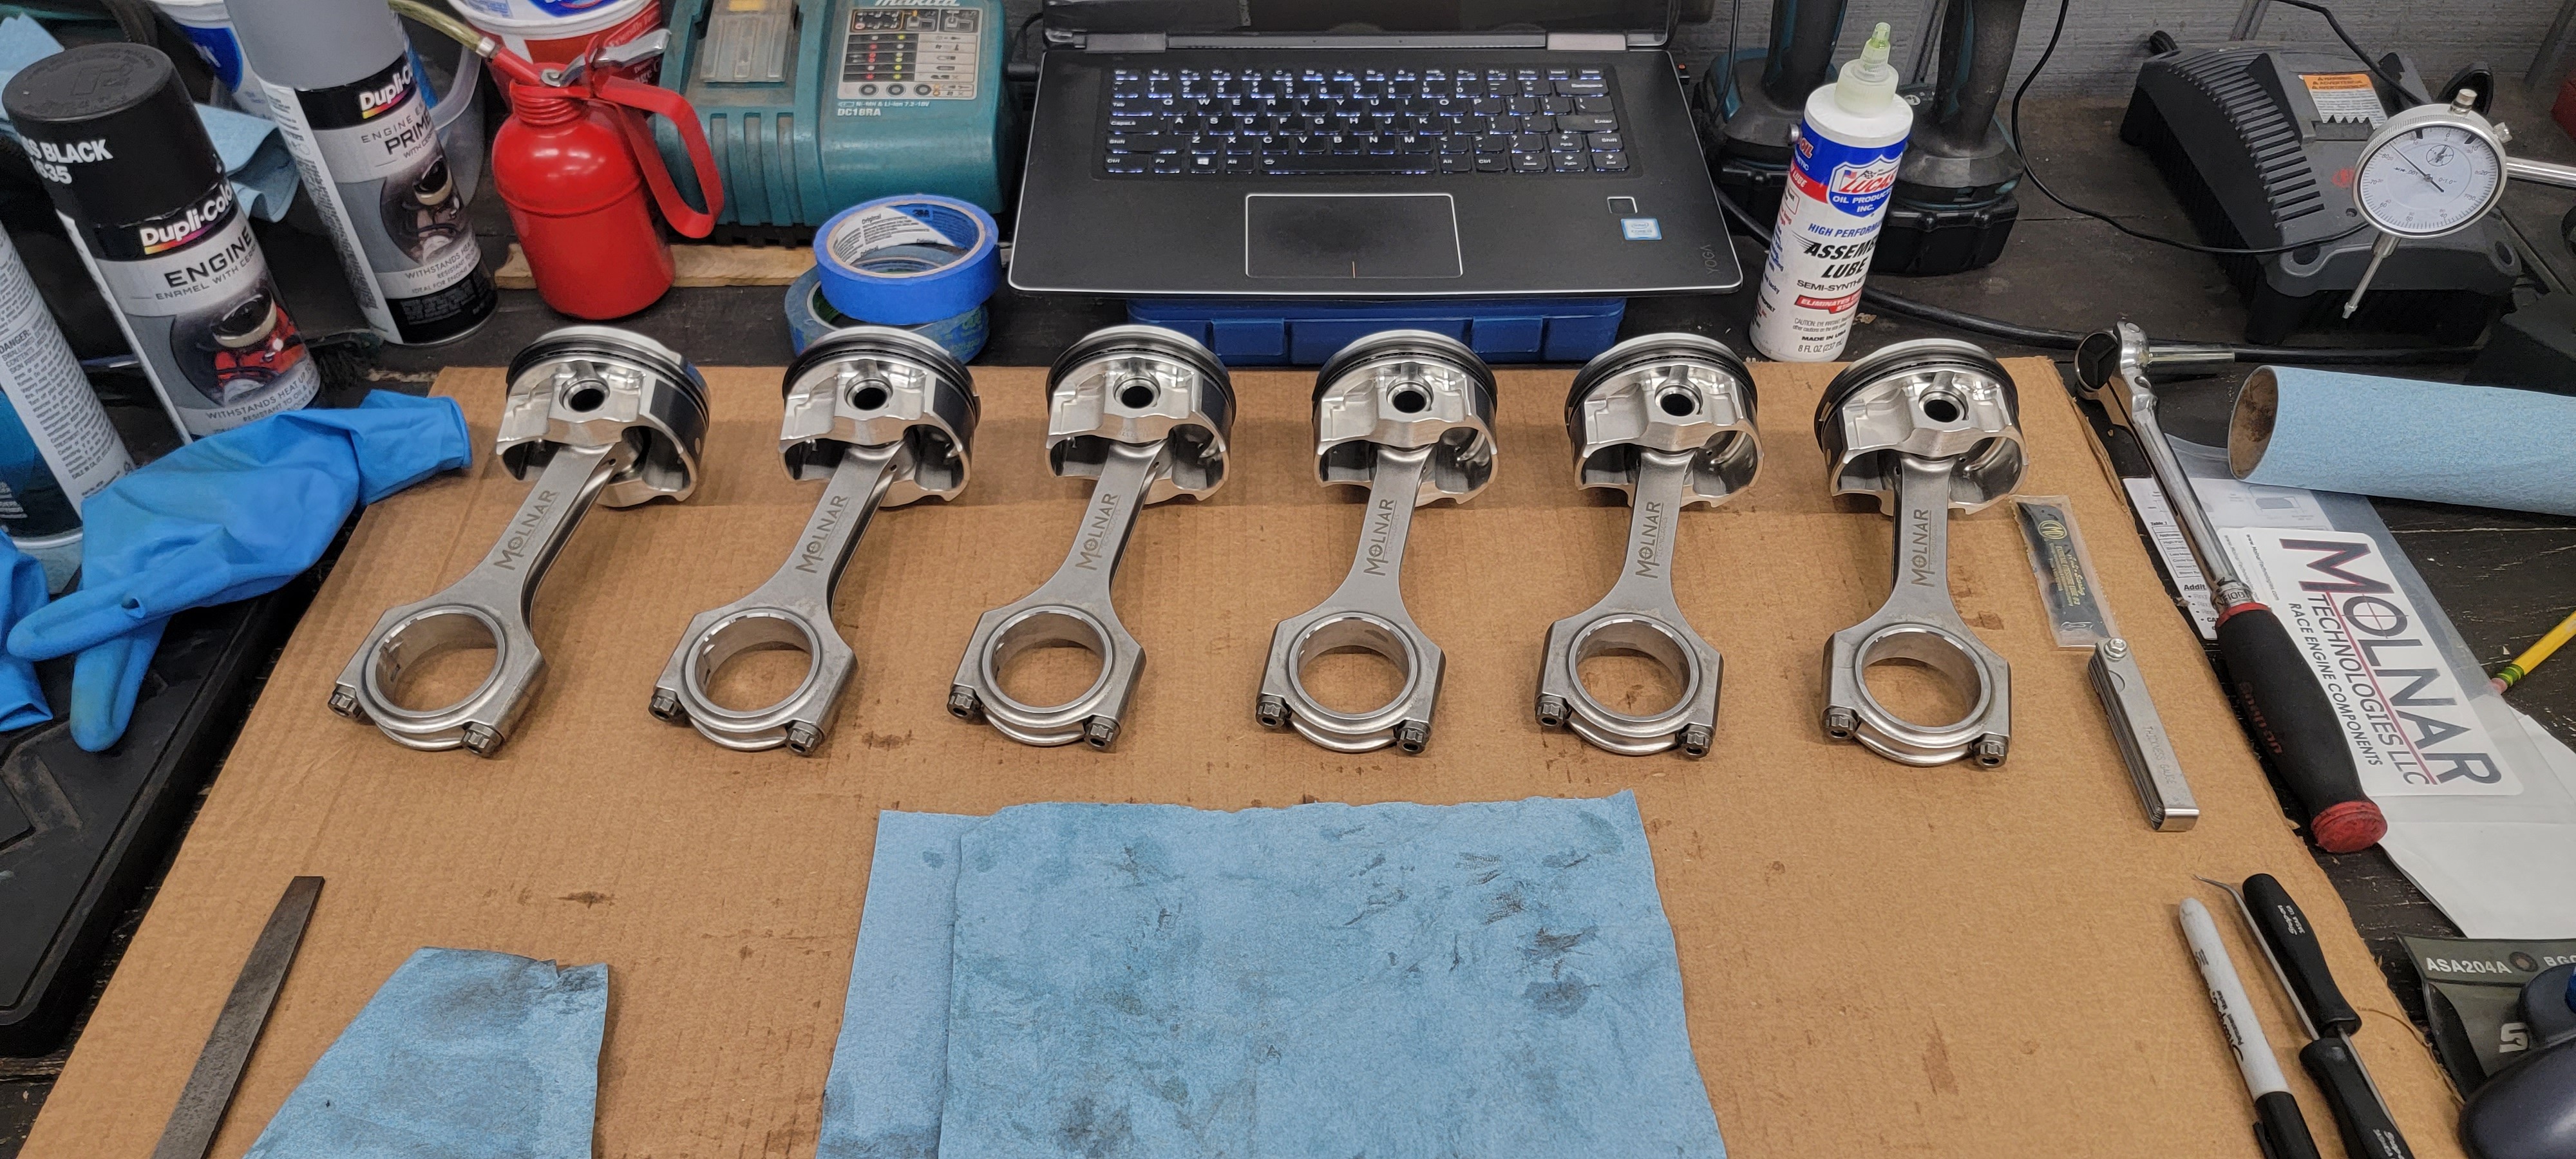
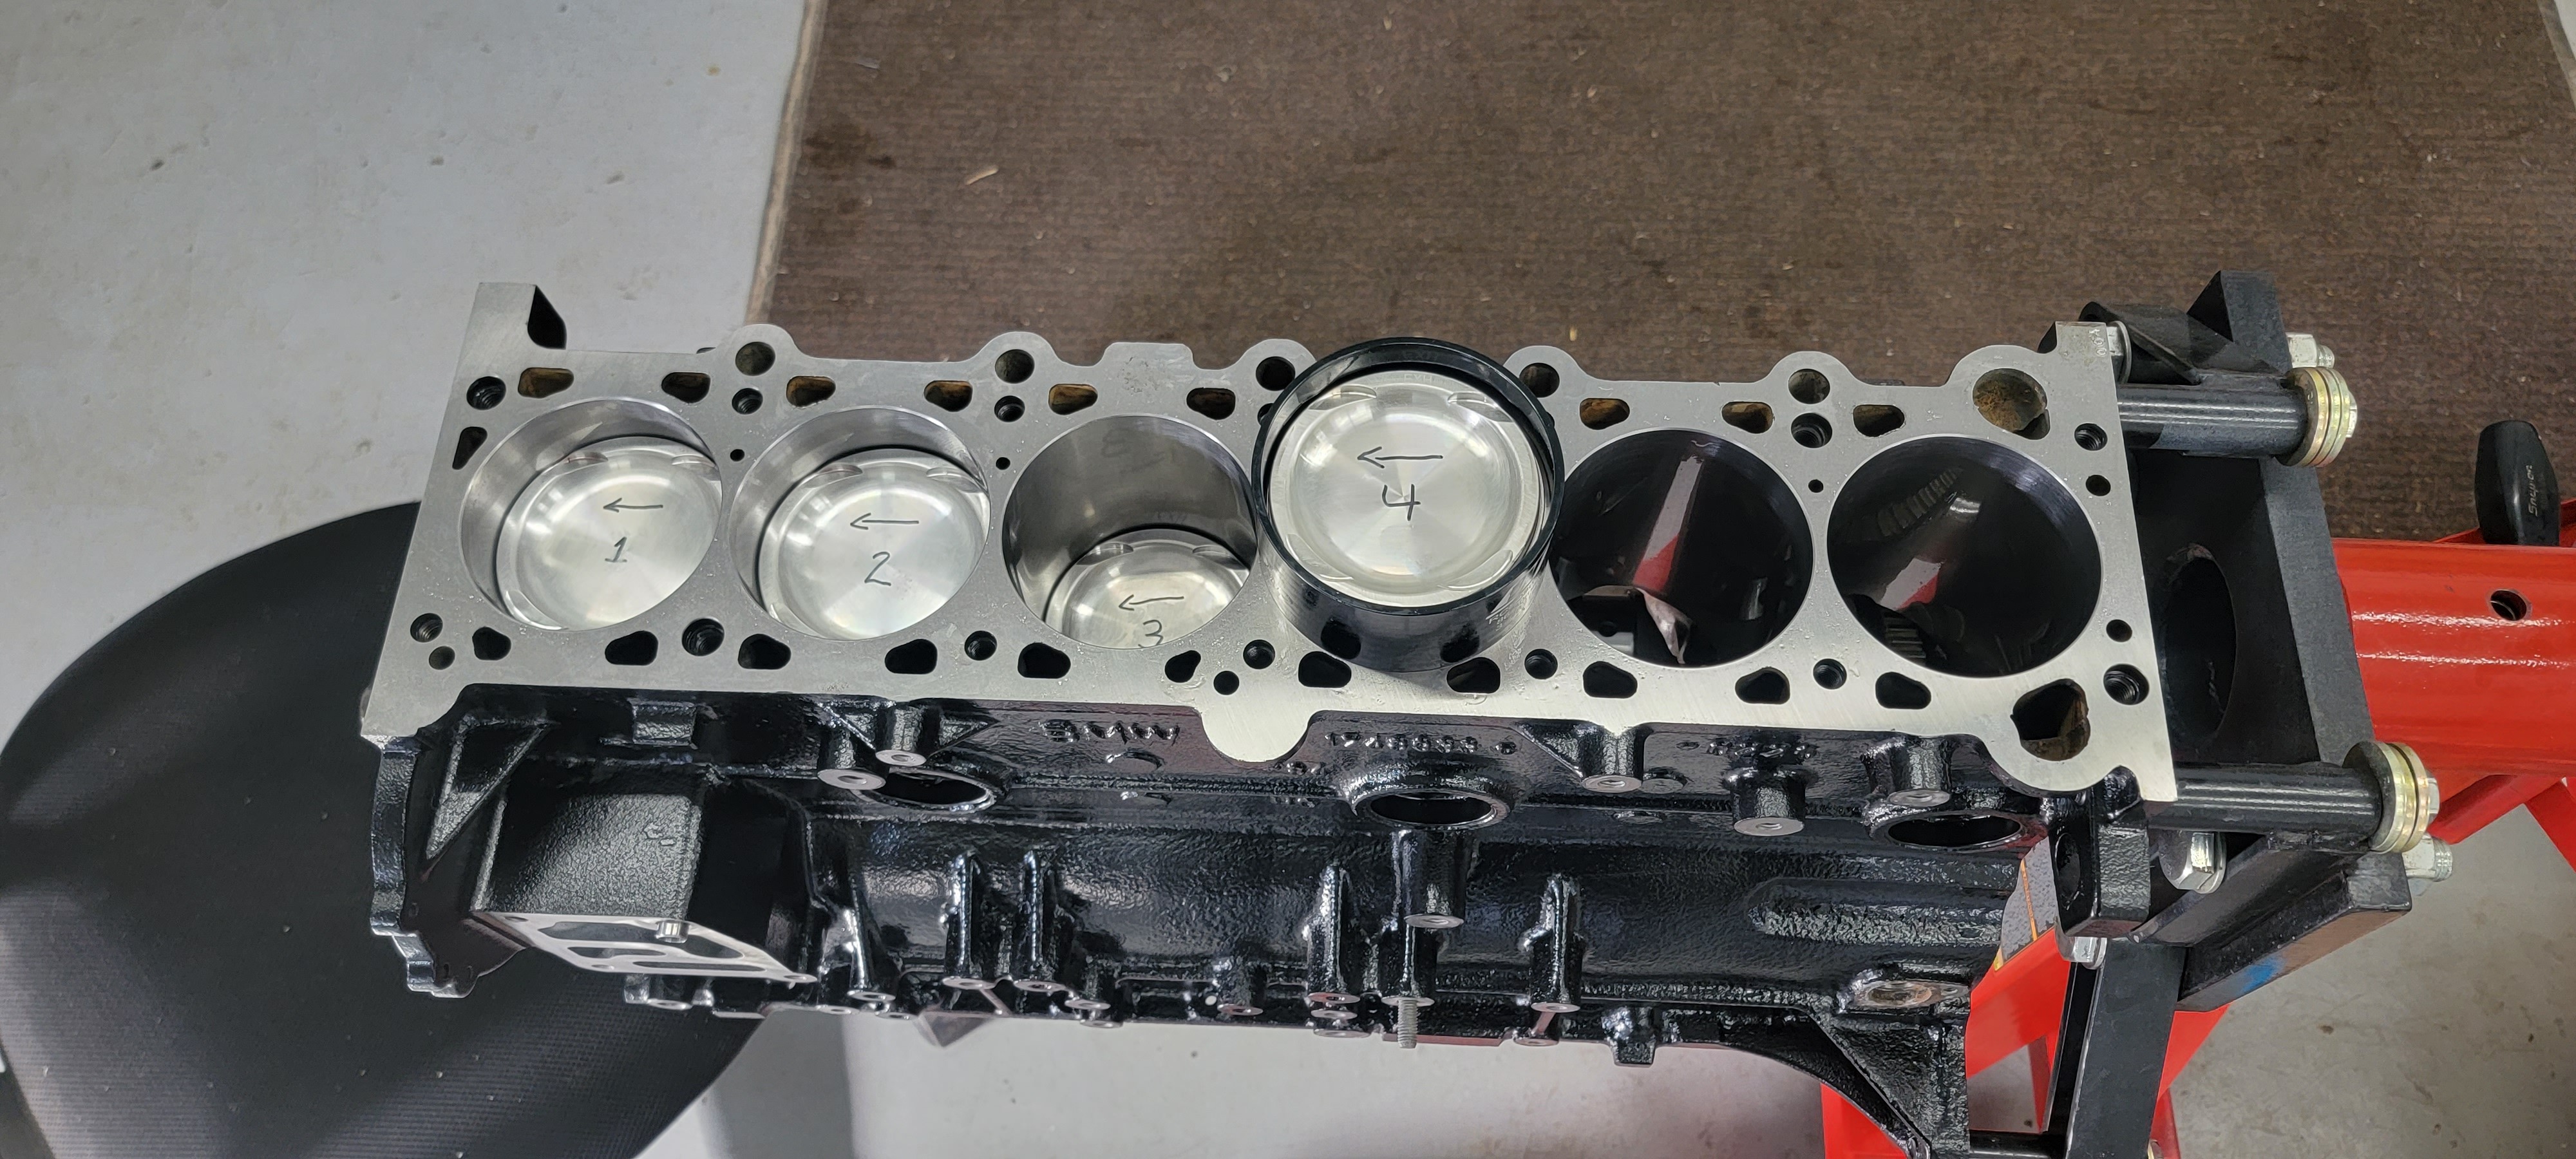
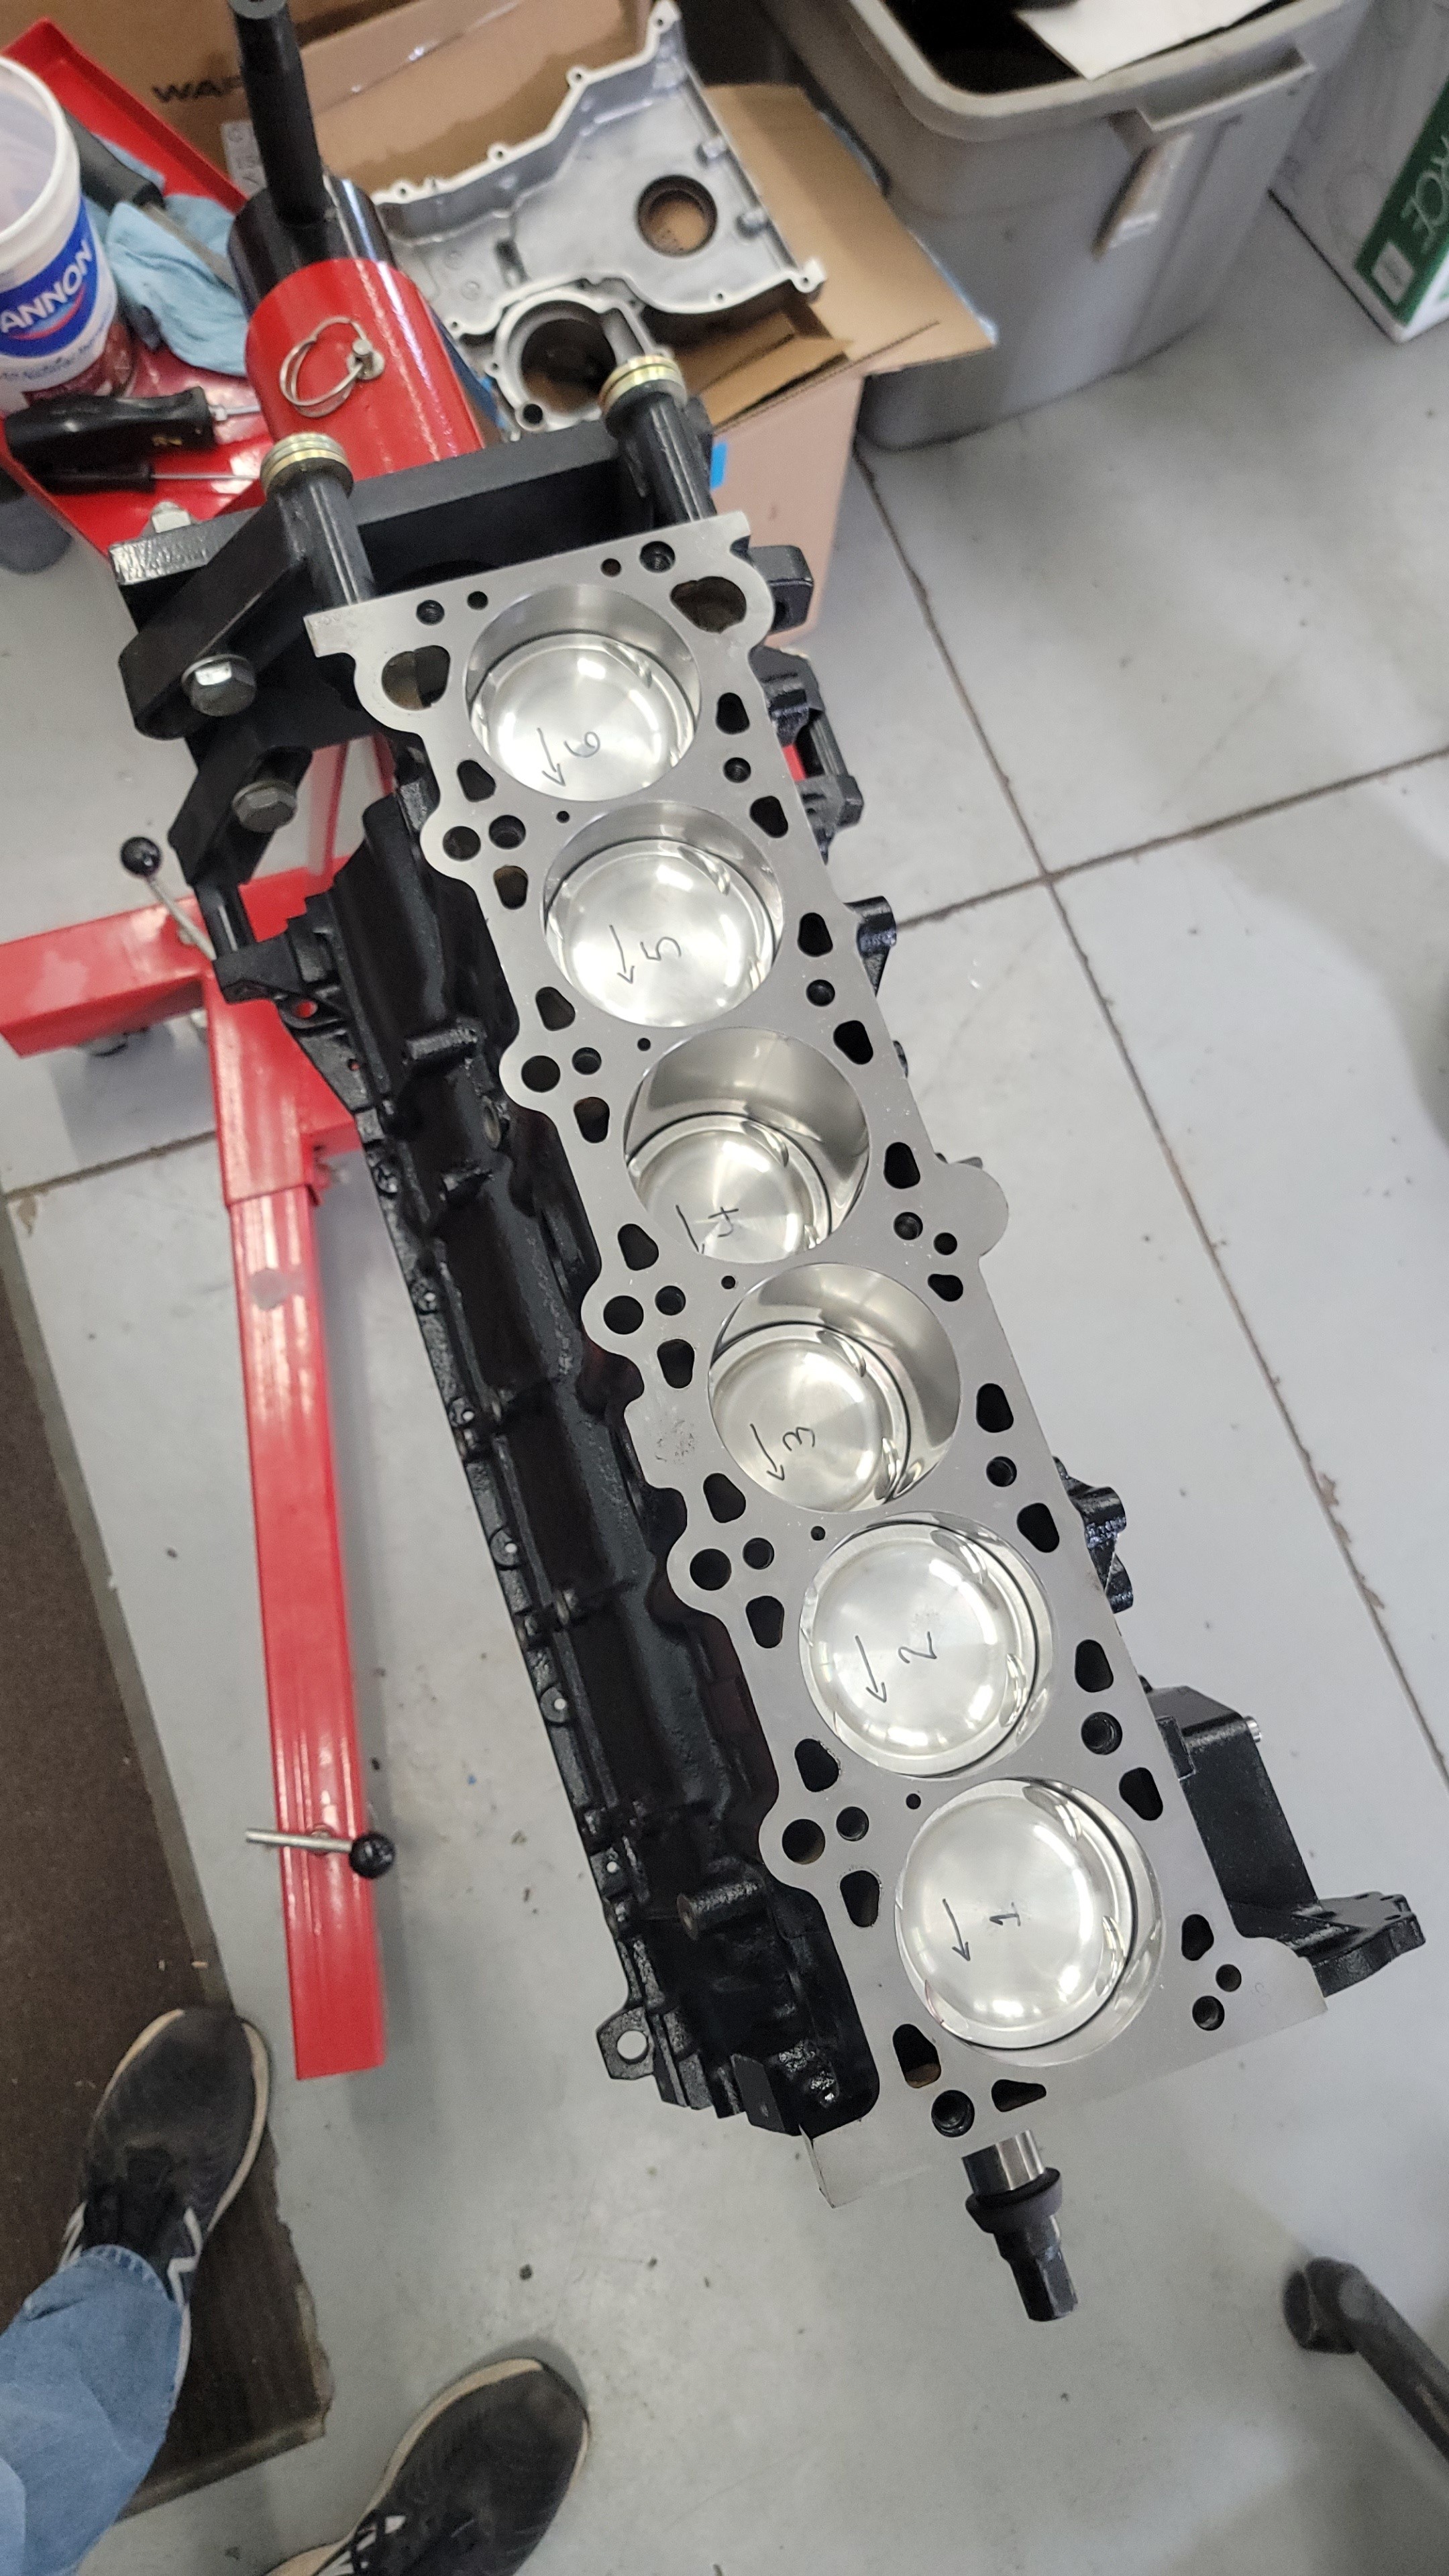
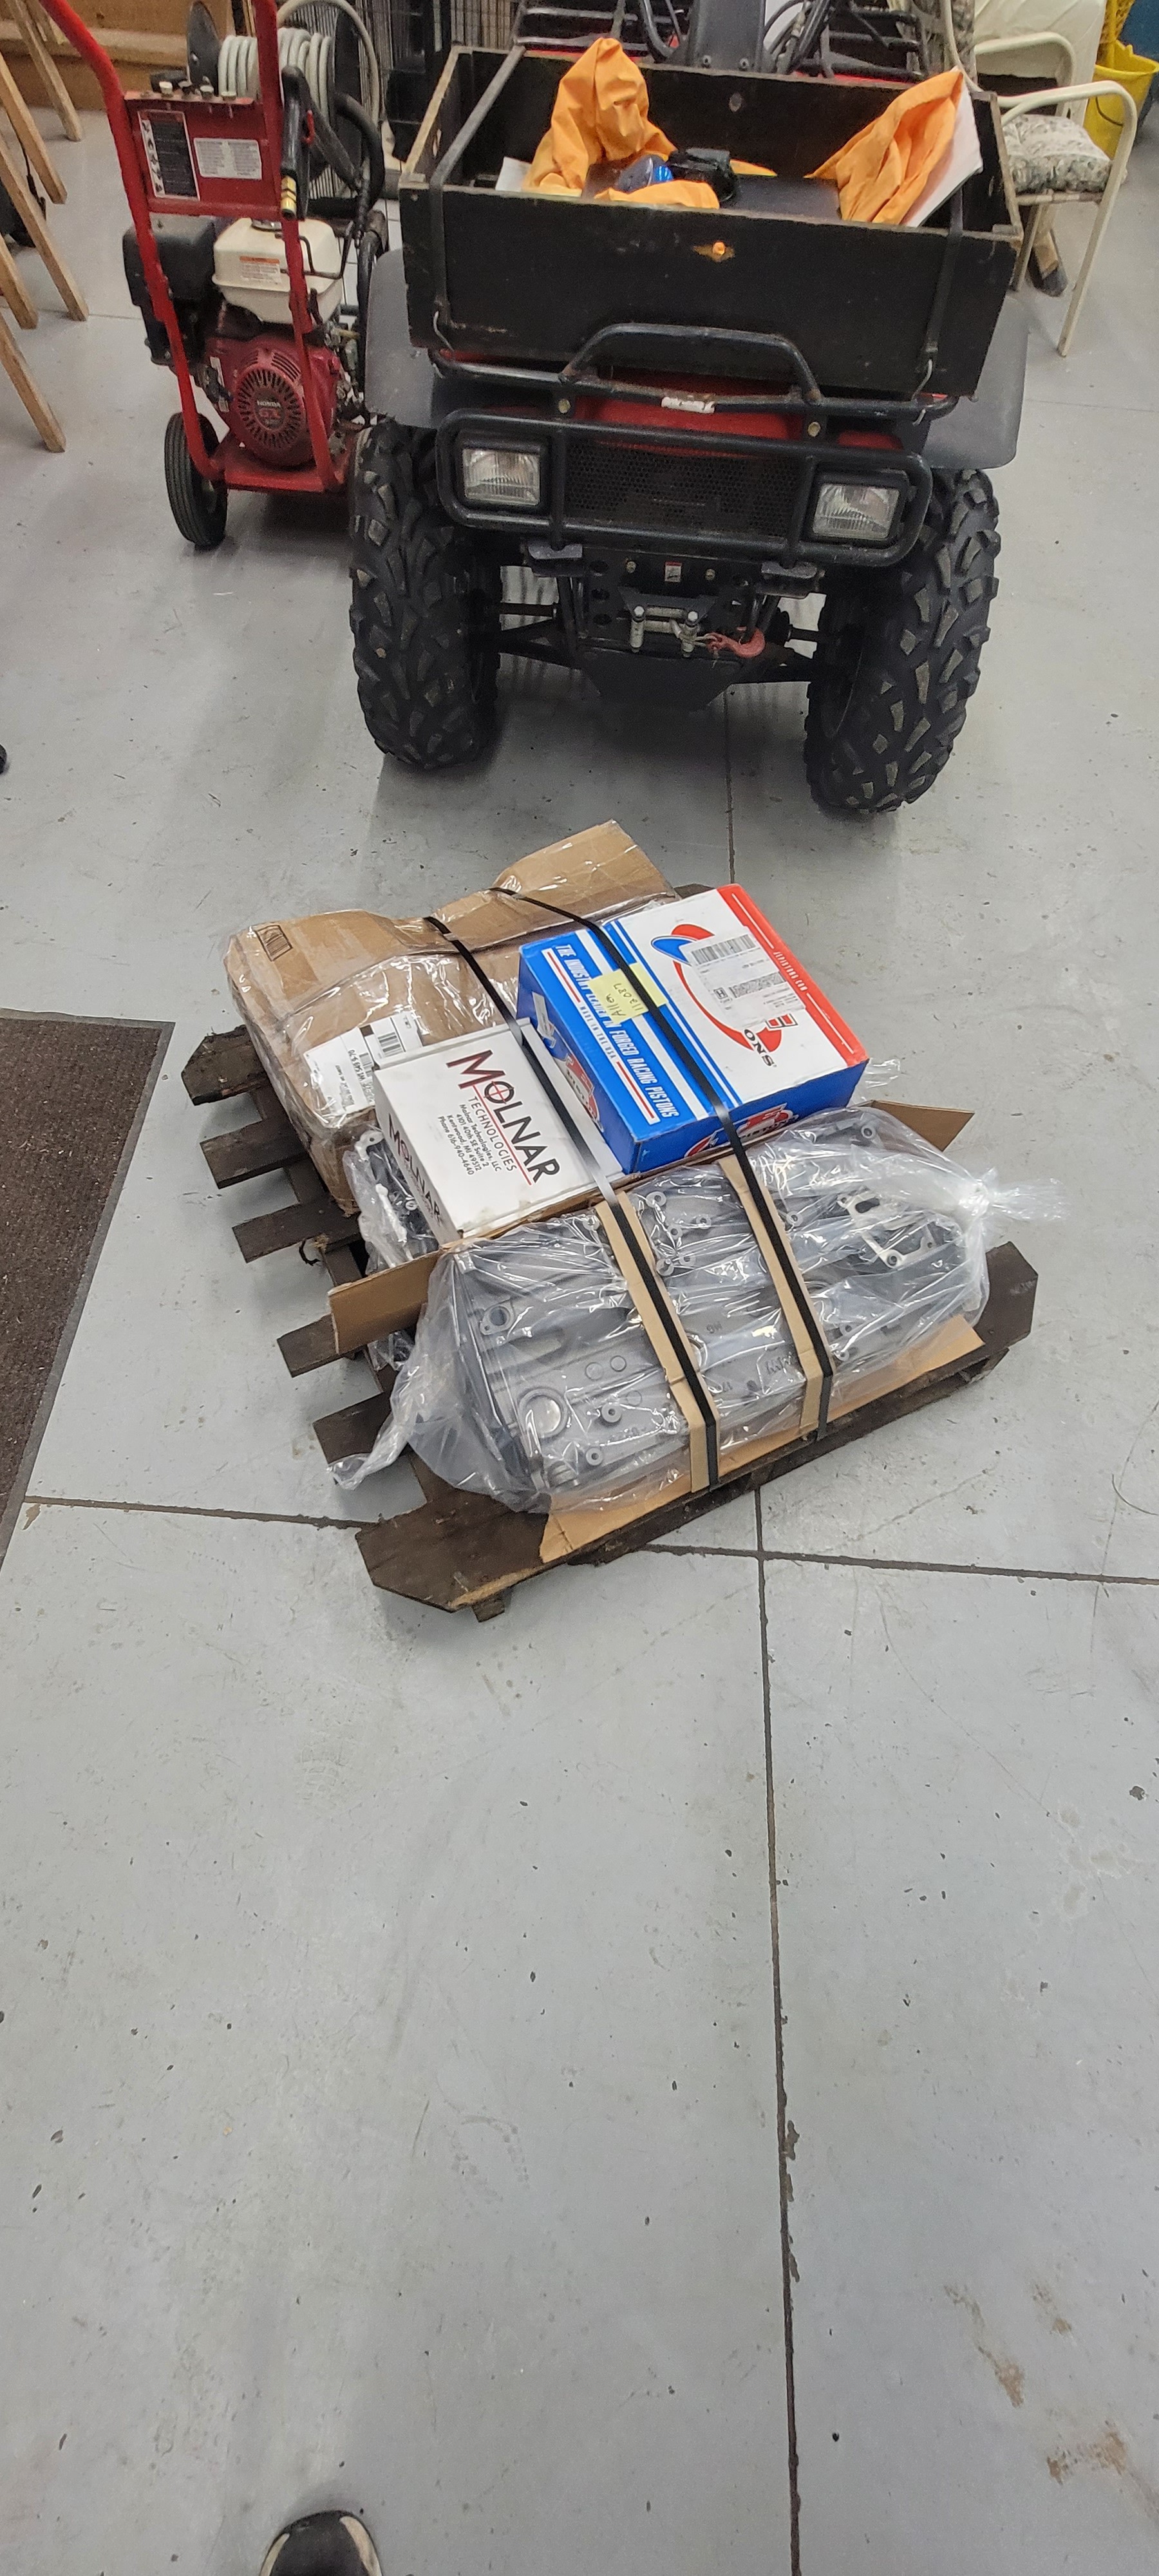
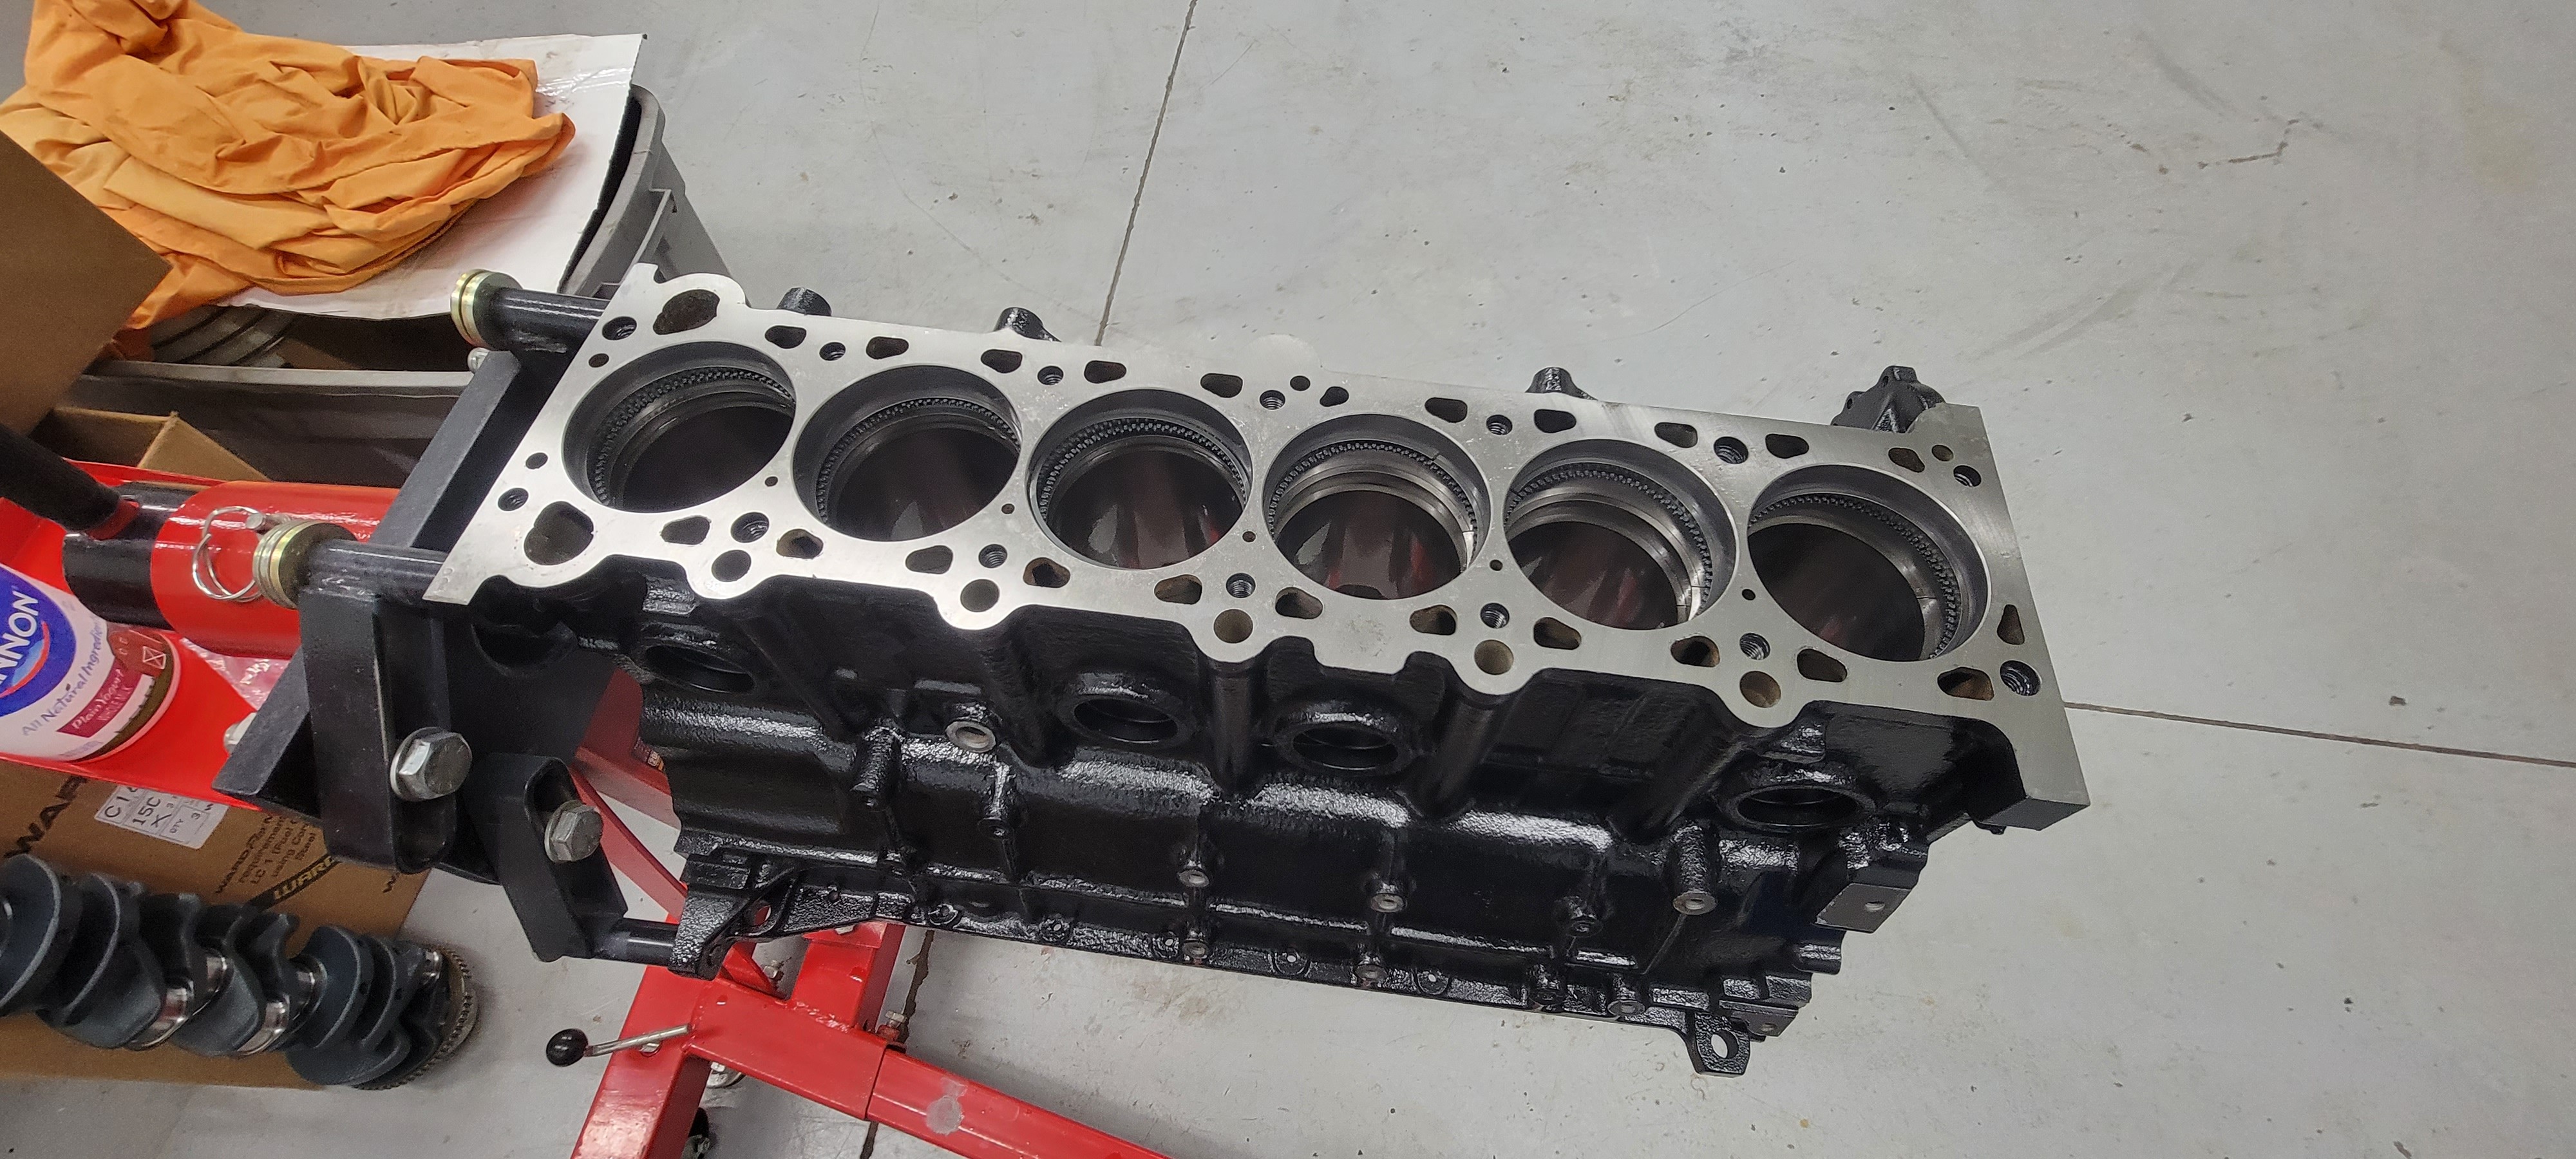
With that complete I moved on to assembling the connecting rods and pistons. For this setup I chose JE for my pistons and got them in a lowered 9:1 compression ratio. I plan to run this on a flex fuel setup so I wanted the extra room for pump gas. As for the connecting rods I chose a set of H beam rods from Molnar technologies. The fit and finish on these are very nice and will fit my power goals nicely.
Time to start dropping them in the block. In the past I've used an adjustable piston ring compressor for piston installs. There is a lot of headaches that come with using one of those and I wanted this to go nice and smoothly so I purchased a ring compressor specific to the bore spec. It was well worth the extra money spent as they made this part of the install a breeze! I also wiped all the cylinders, piston skirts and rings down with some marvel mystery oil prior to install as recommended from JE.
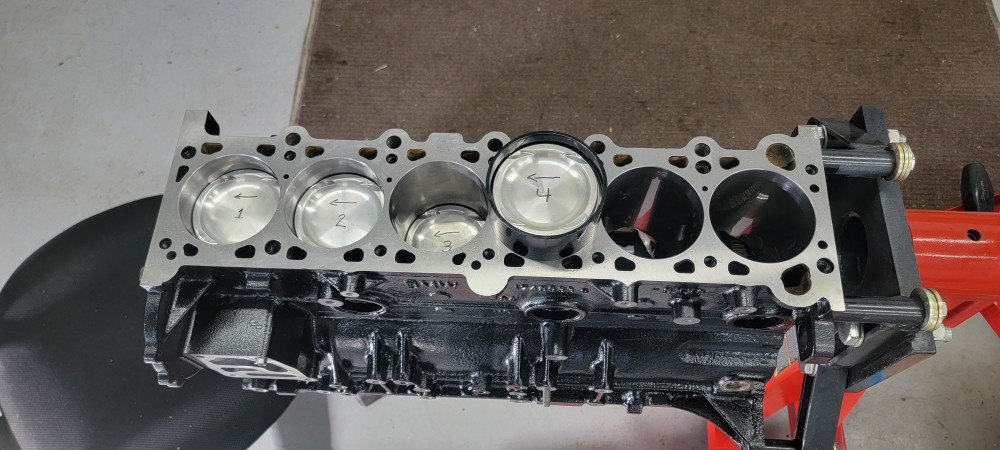
Checked my rod bearing clearances as I went a long and all six came in at .002 which was right in spec.
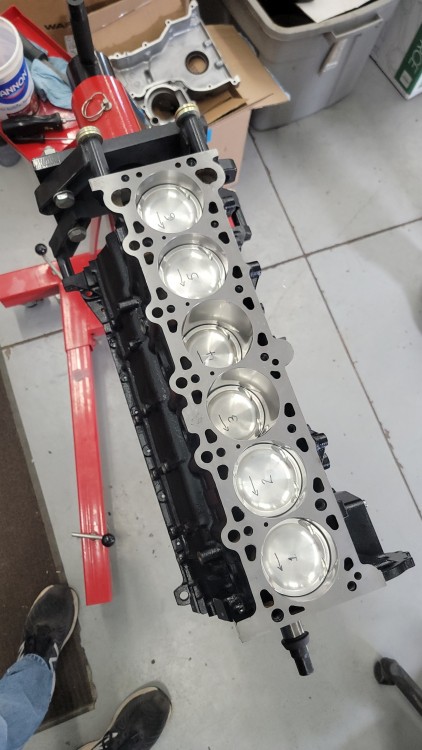
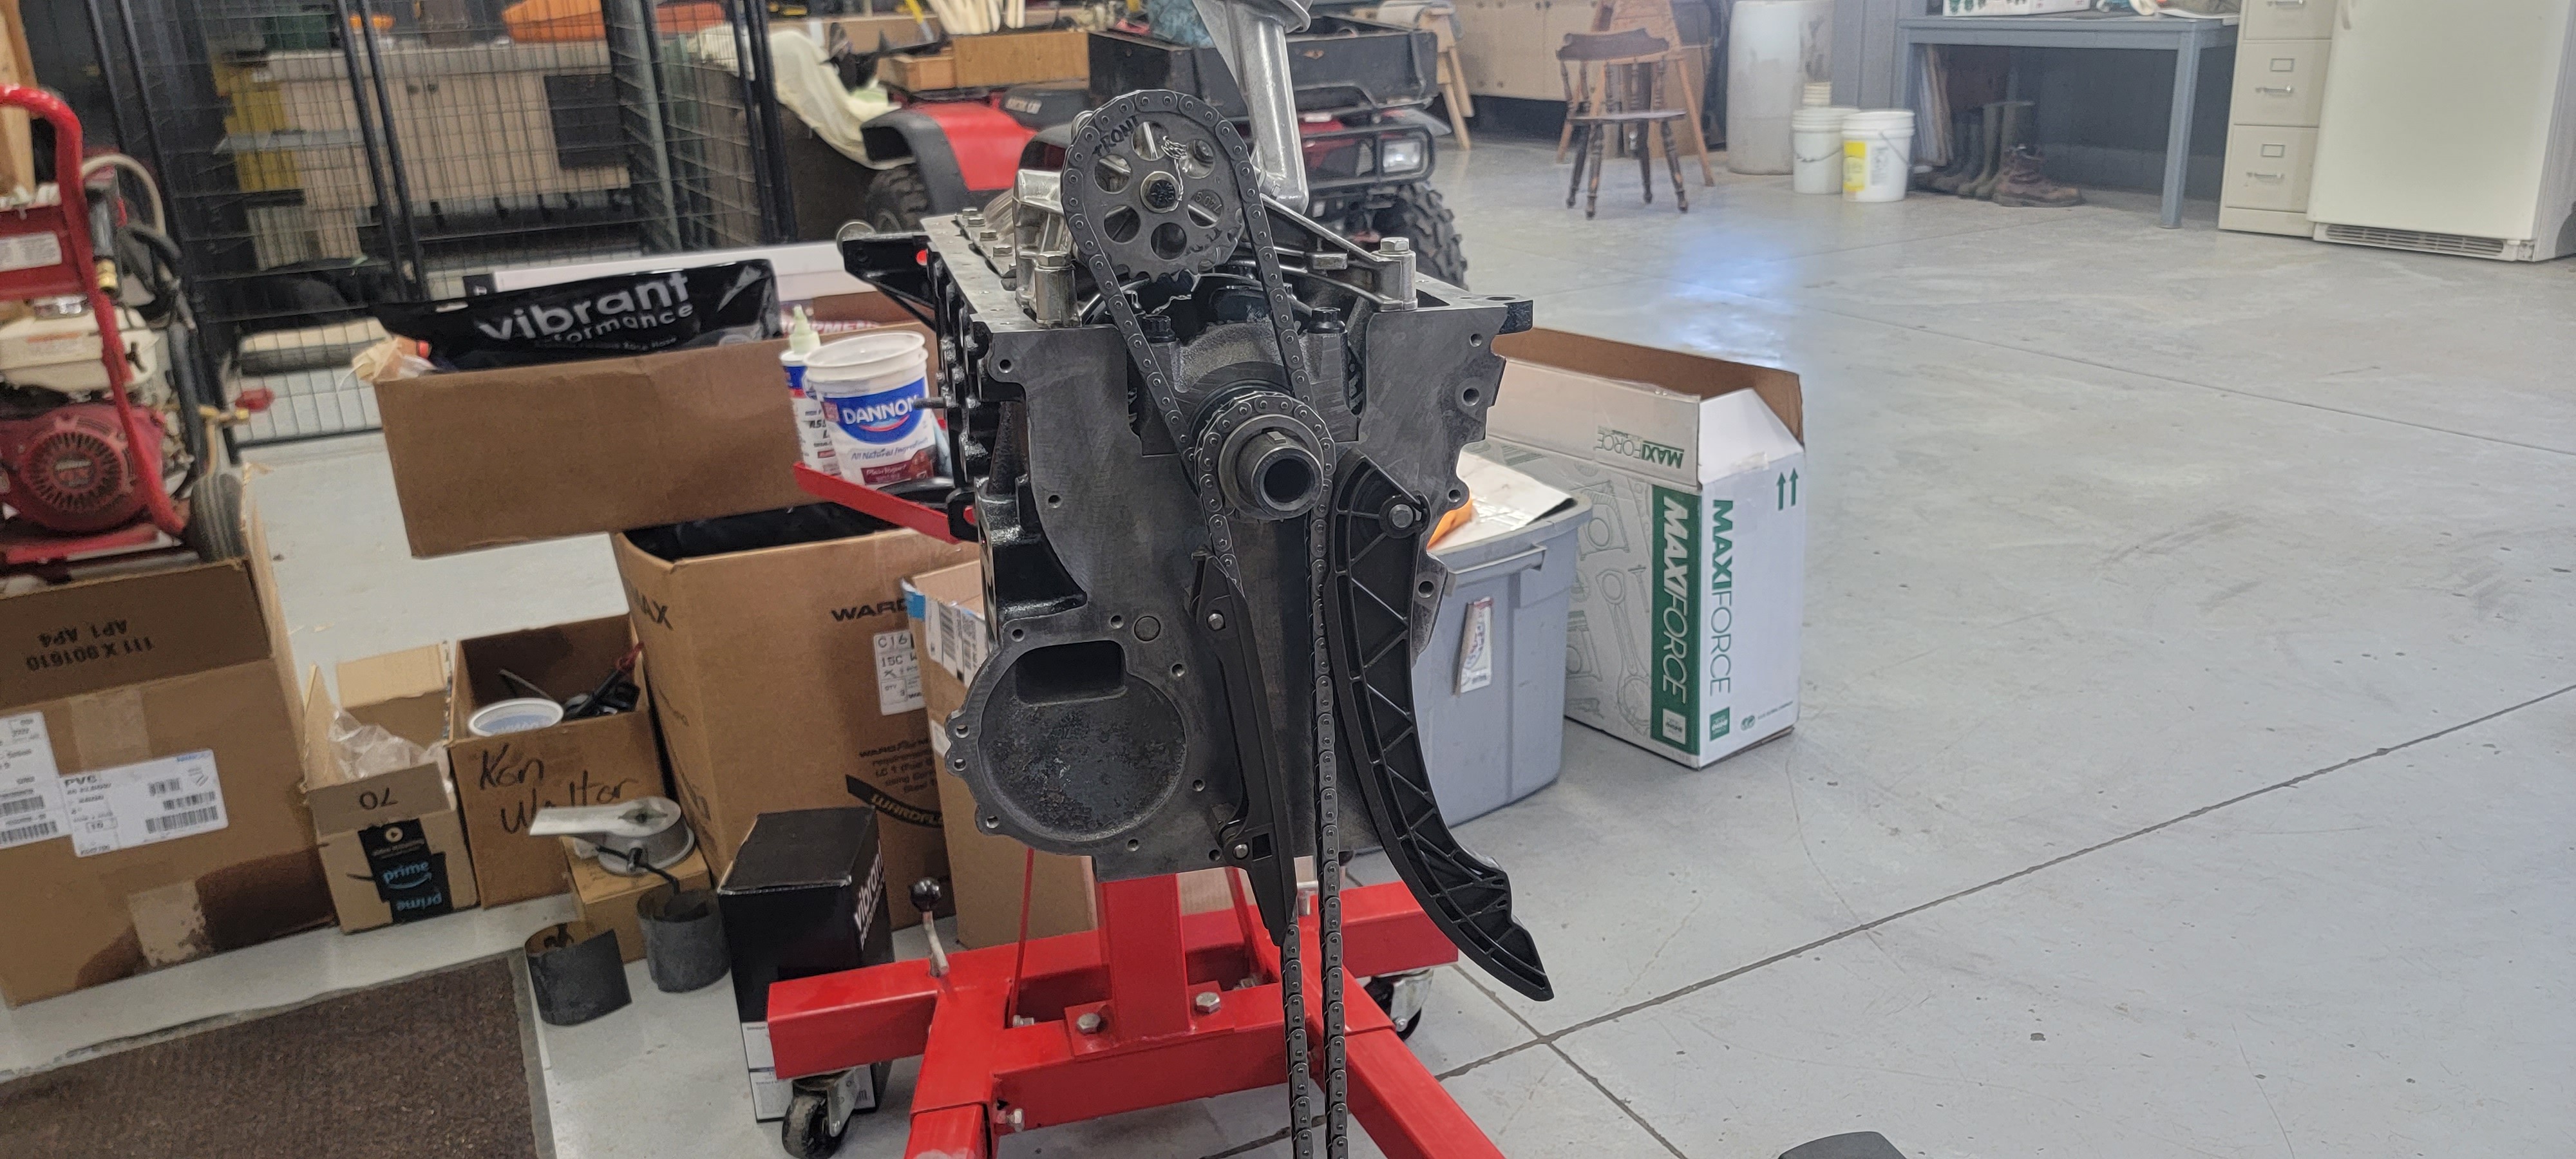
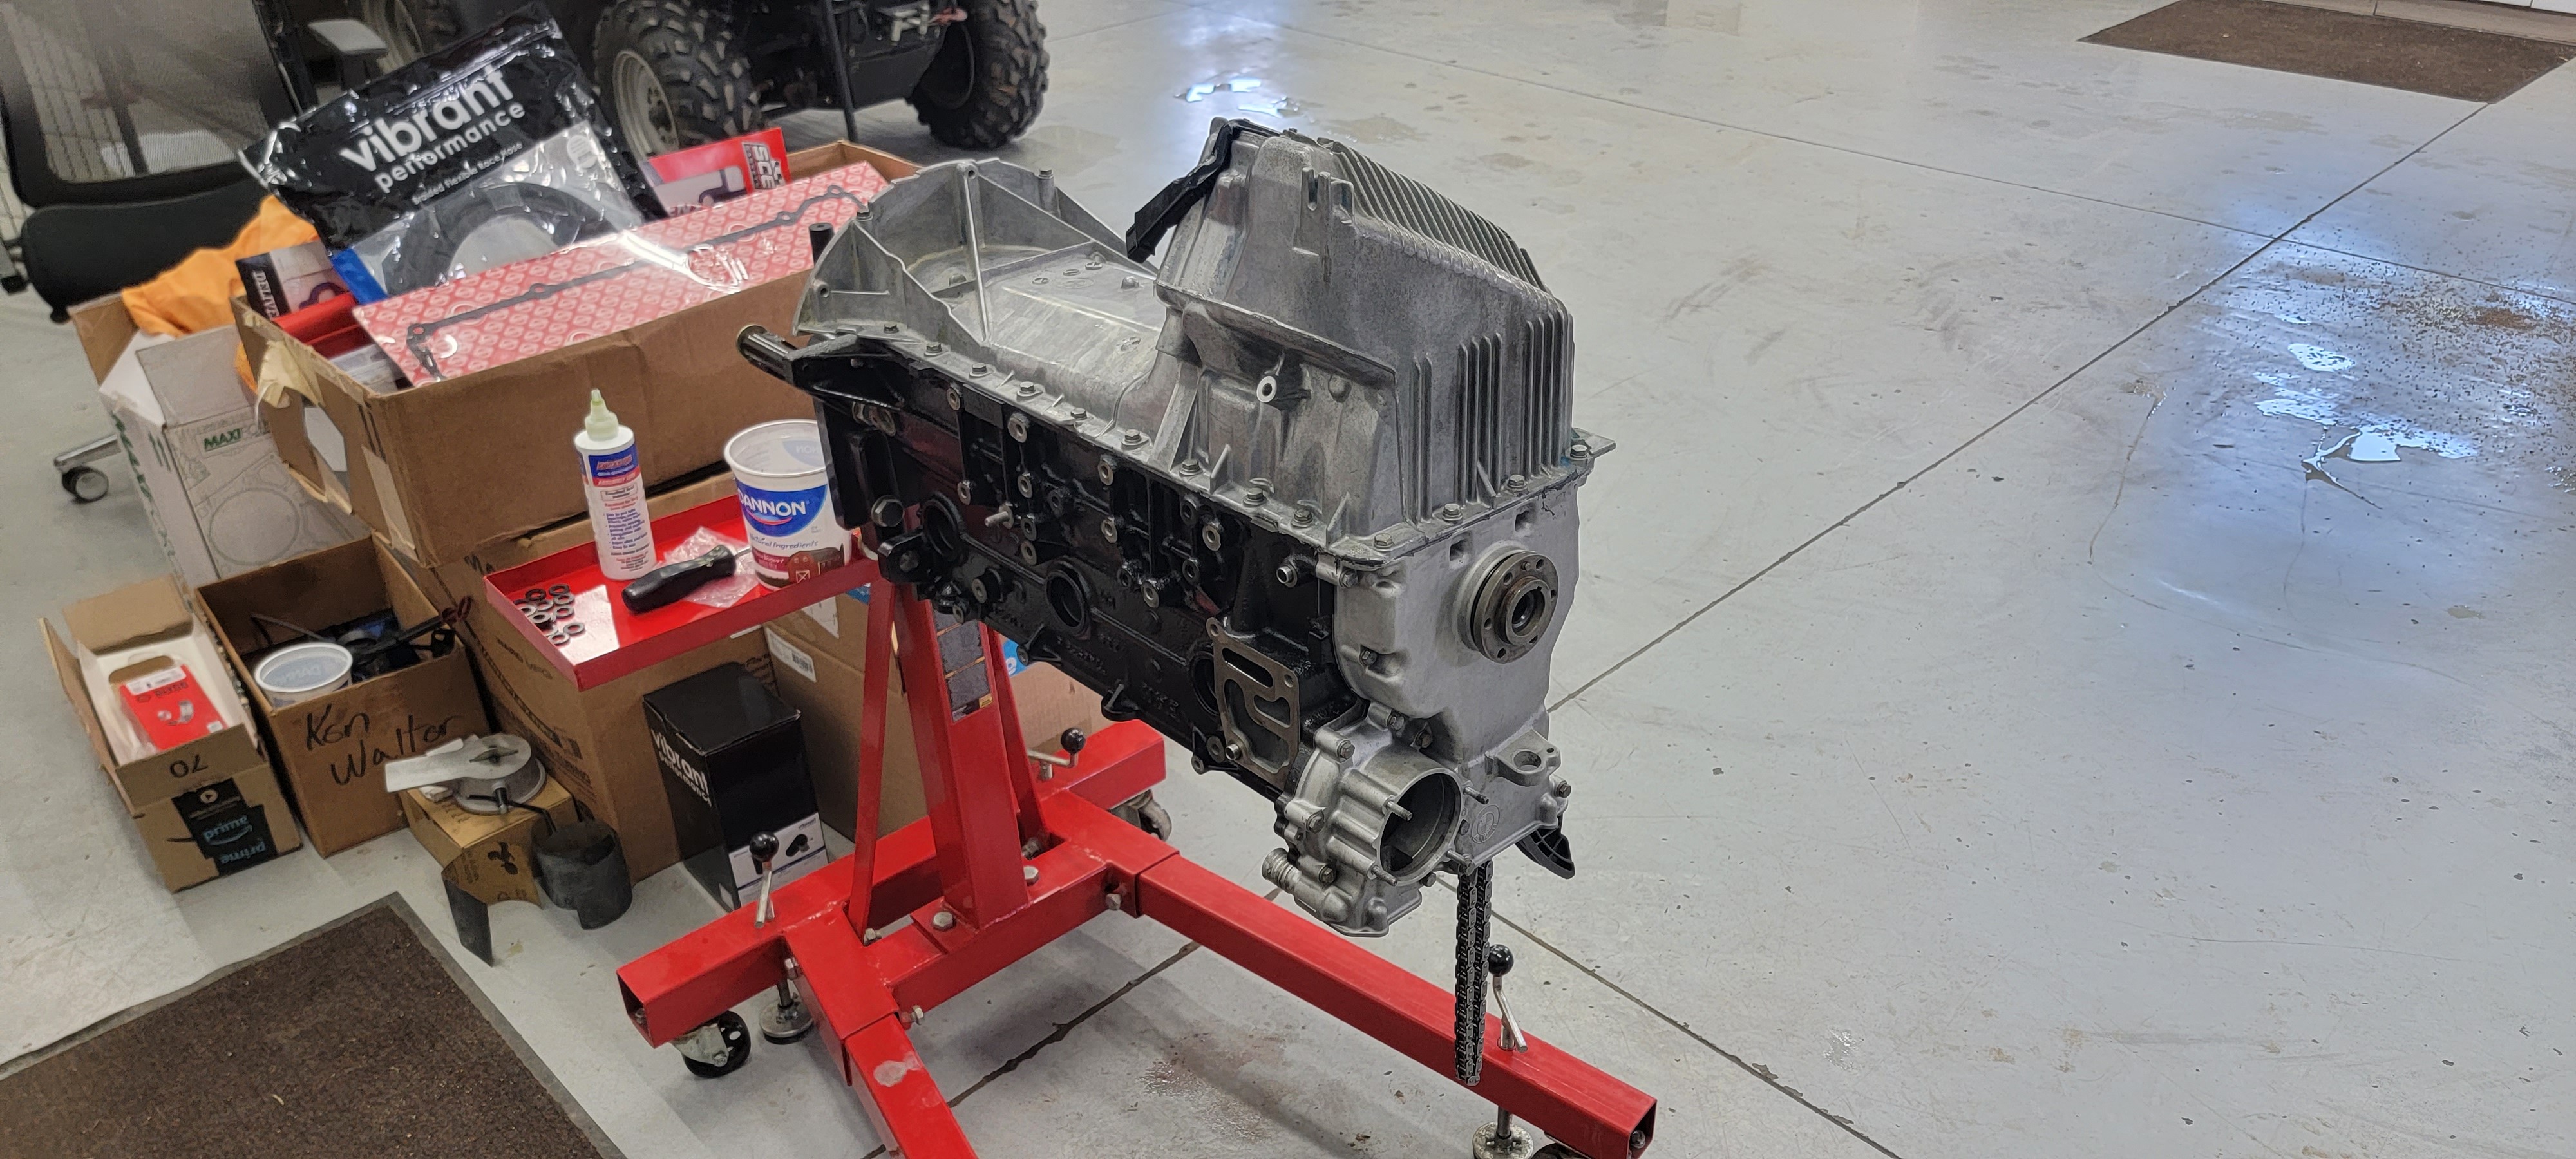
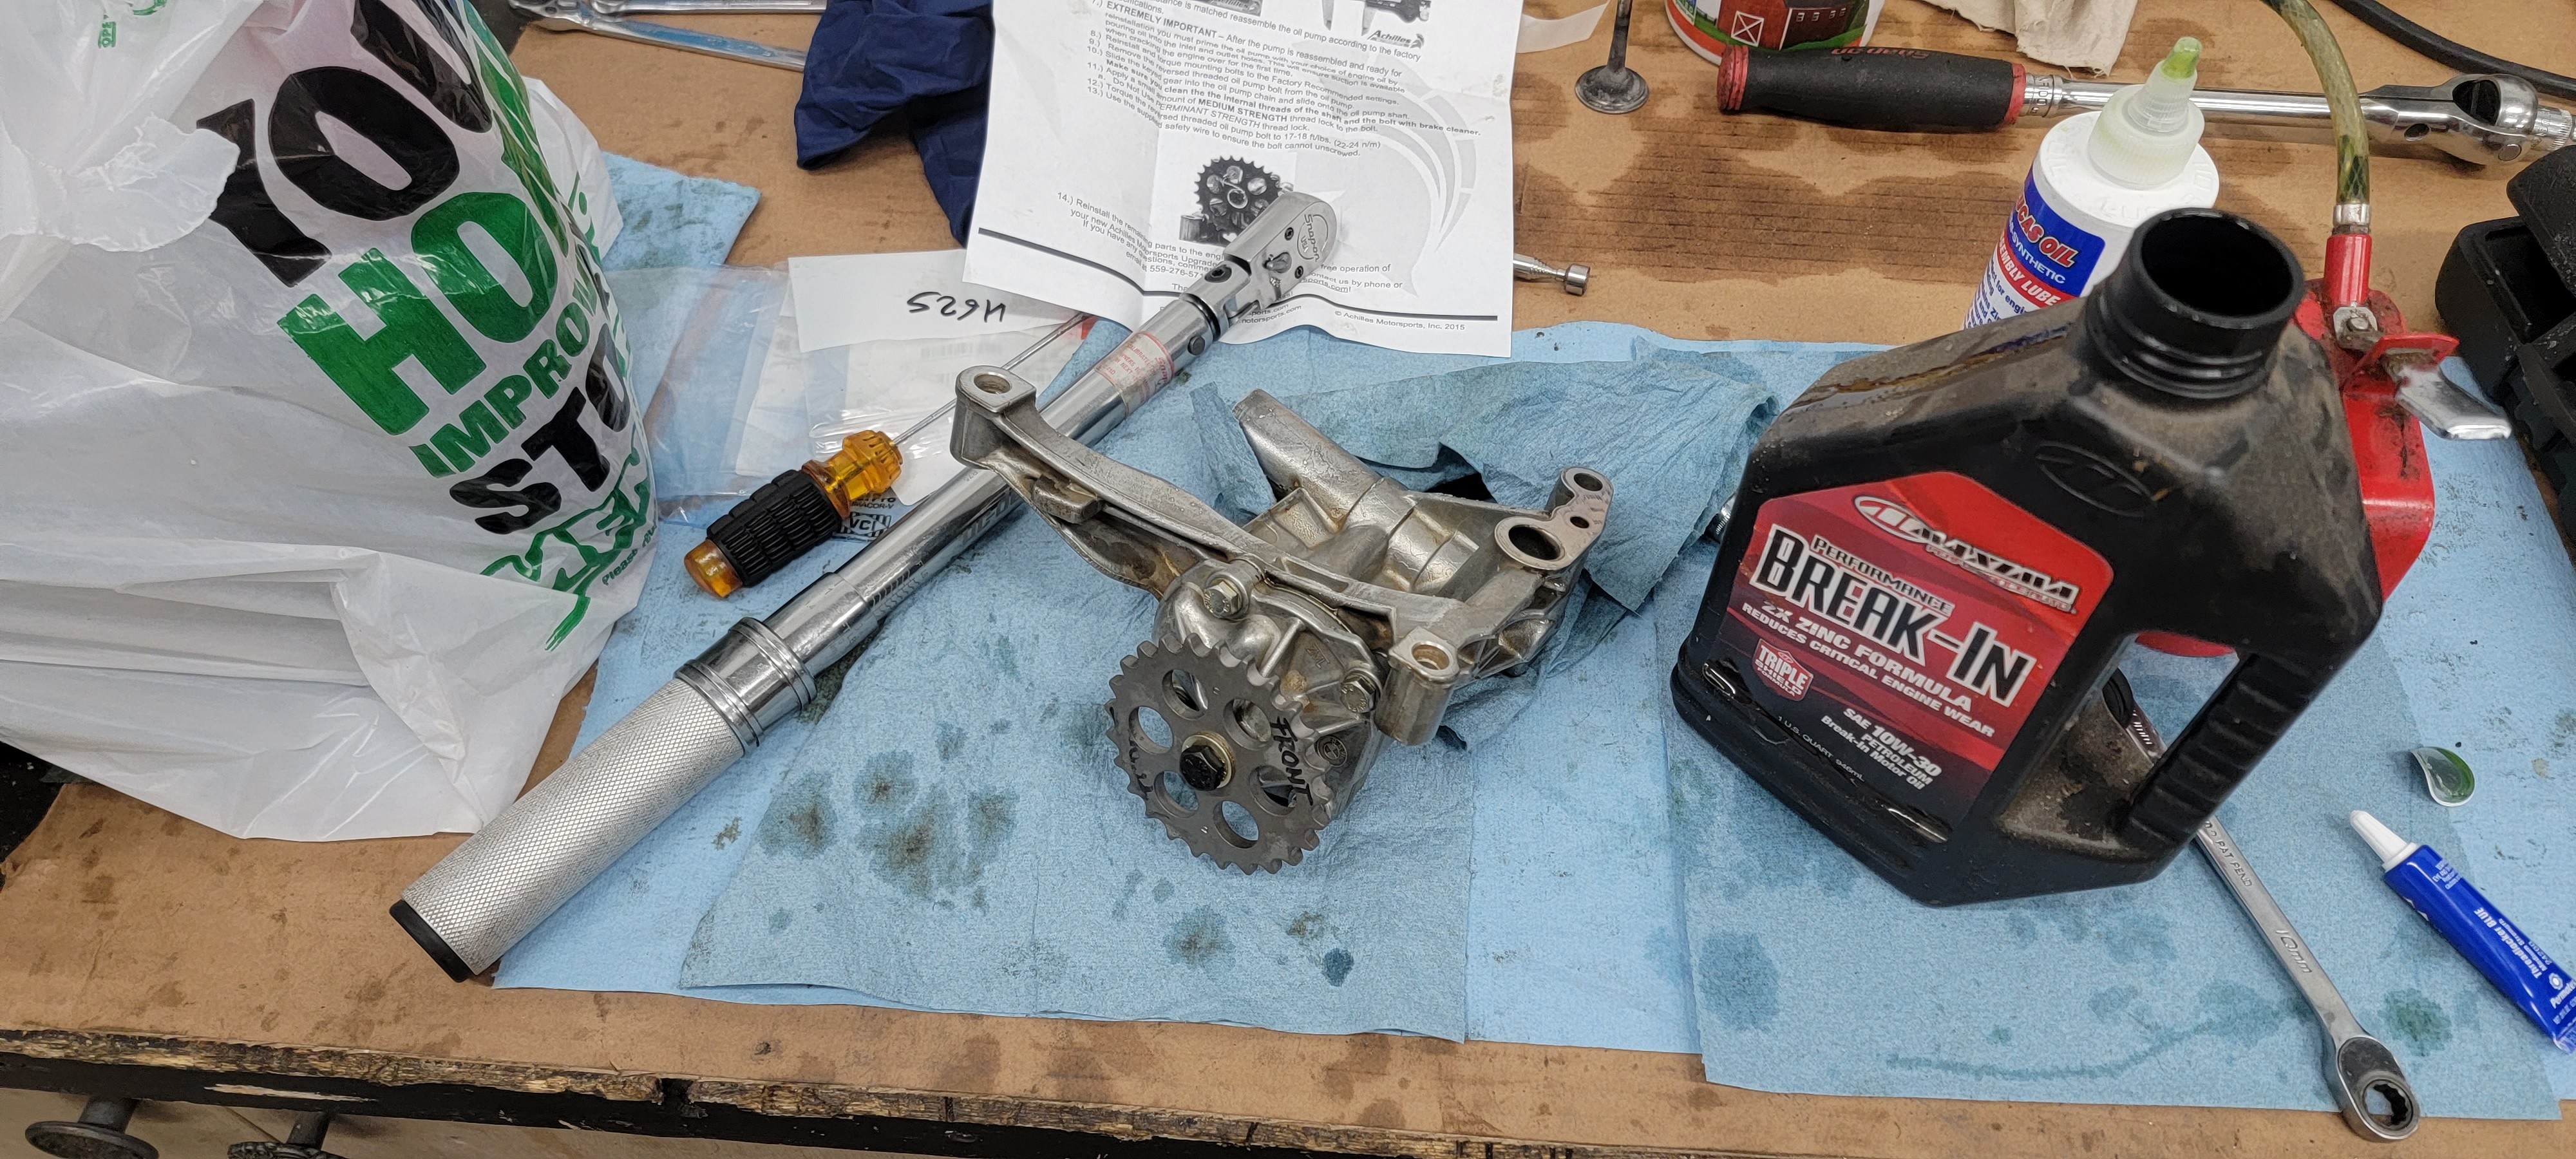
With that complete I moved on to installing the windage tray and oil pump. I got a new oil pump chain and crank sprocket which paired with the Achilles sprocket really tightened up the chain slack.
New guides and timing chain installed as well.
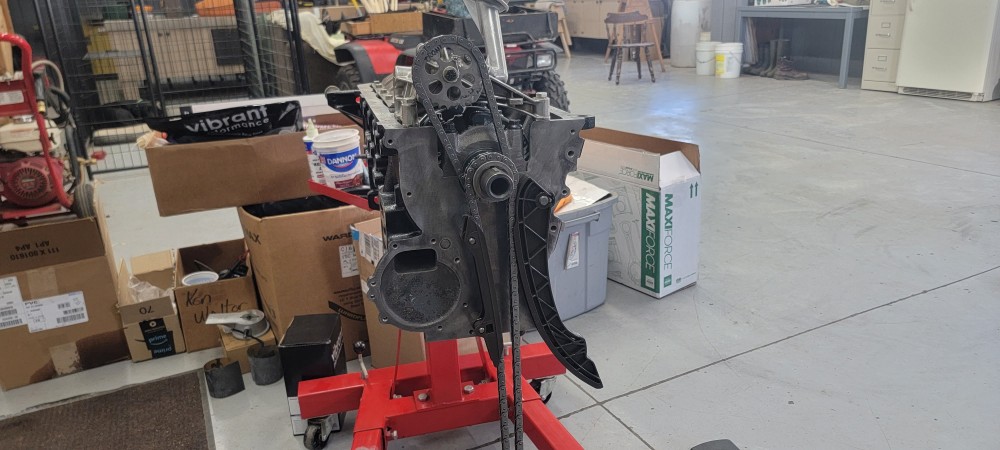
I got the timing cover installed as well as the rear main seal and all hardware for those torqued to spec.
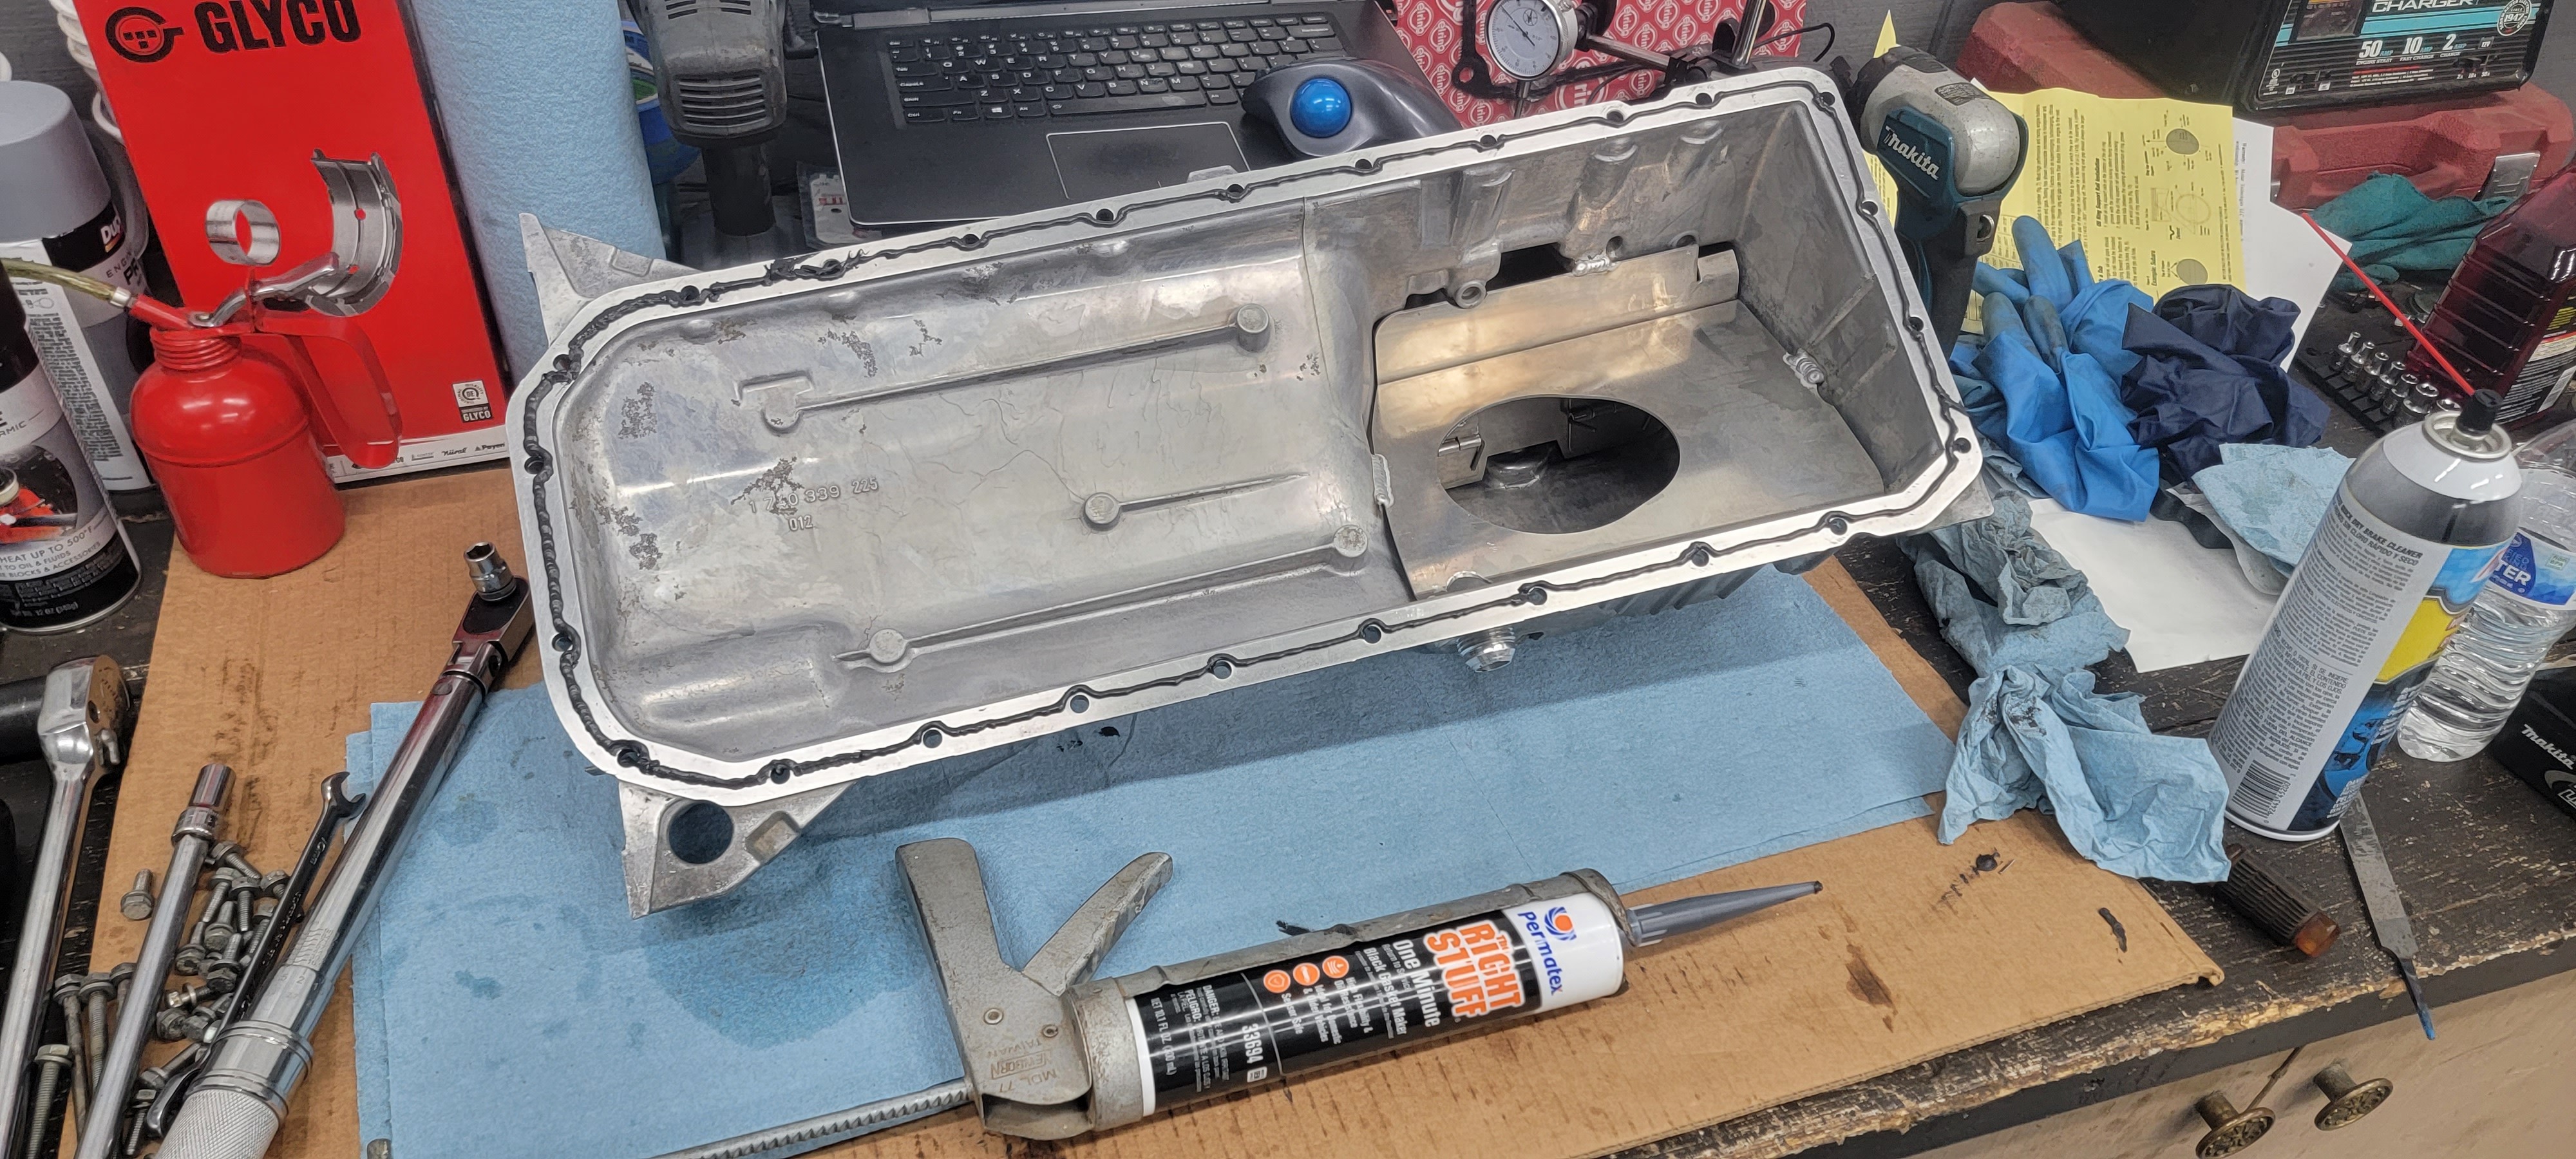
On the previous motor I had my fair share of oil leaks, especially around the pan gasket area. Unfortunately when I had the baffle and turbo oil drain bung welded on it slightly warped the pan gasket service. I figured this will most likely continue if I used an oem gasket again. Instead I decided to ditch the gasket all together and run a small bead of the right stuff gasket maker. I have used this stuff in the past and it works really really well and should help fill in areas where the services may not sit completely flat.
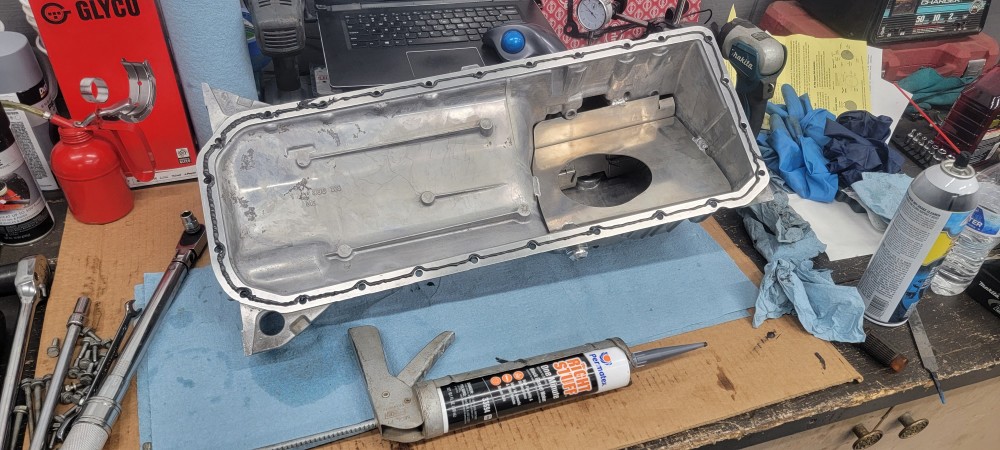
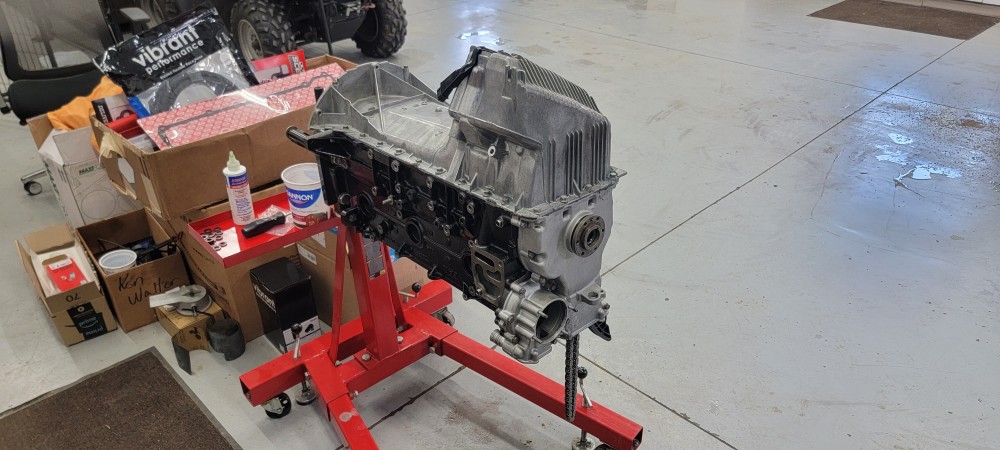
Next on the list. Start getting the head prepped and ready to be installed!
-
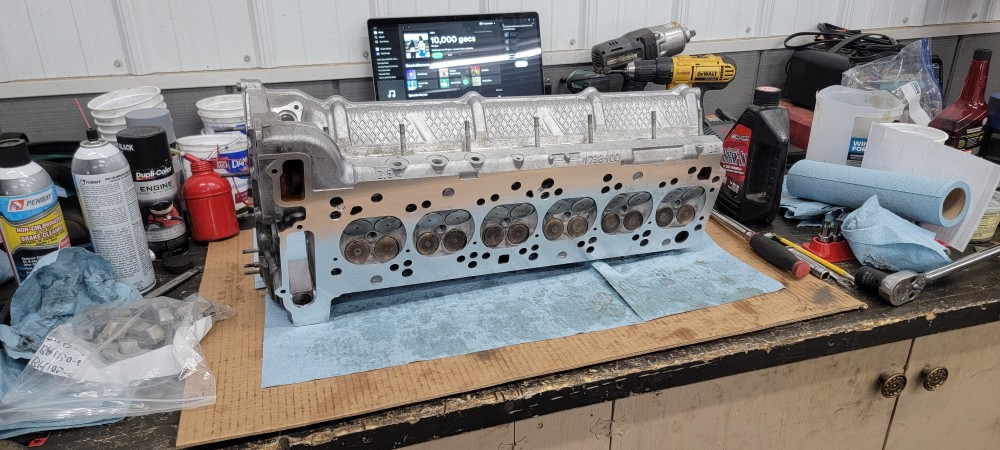
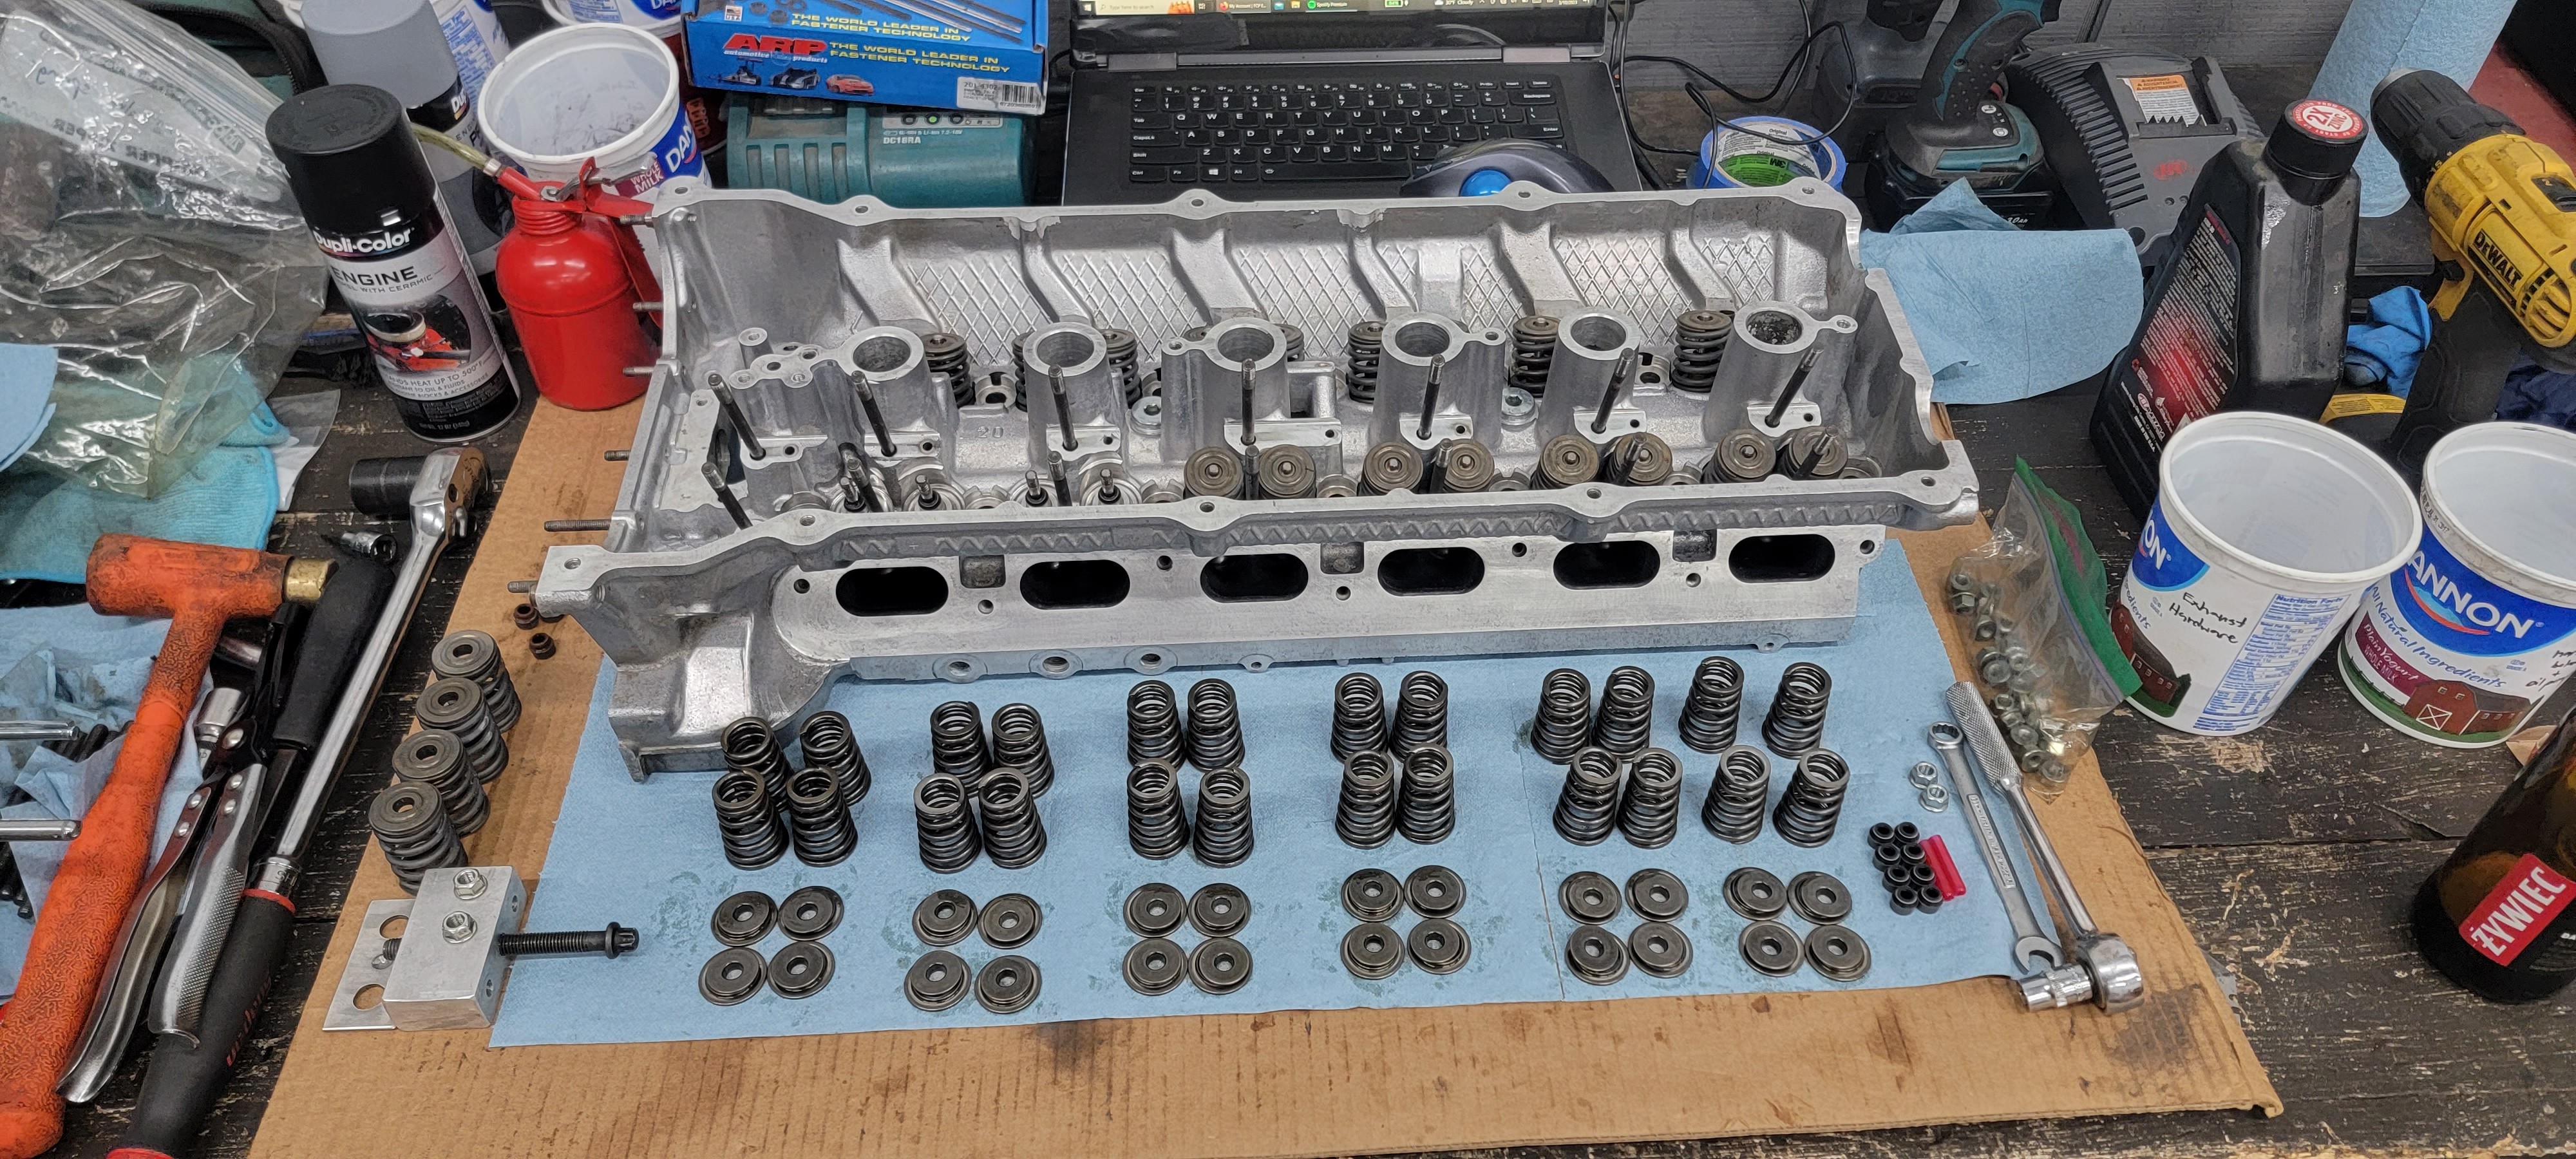
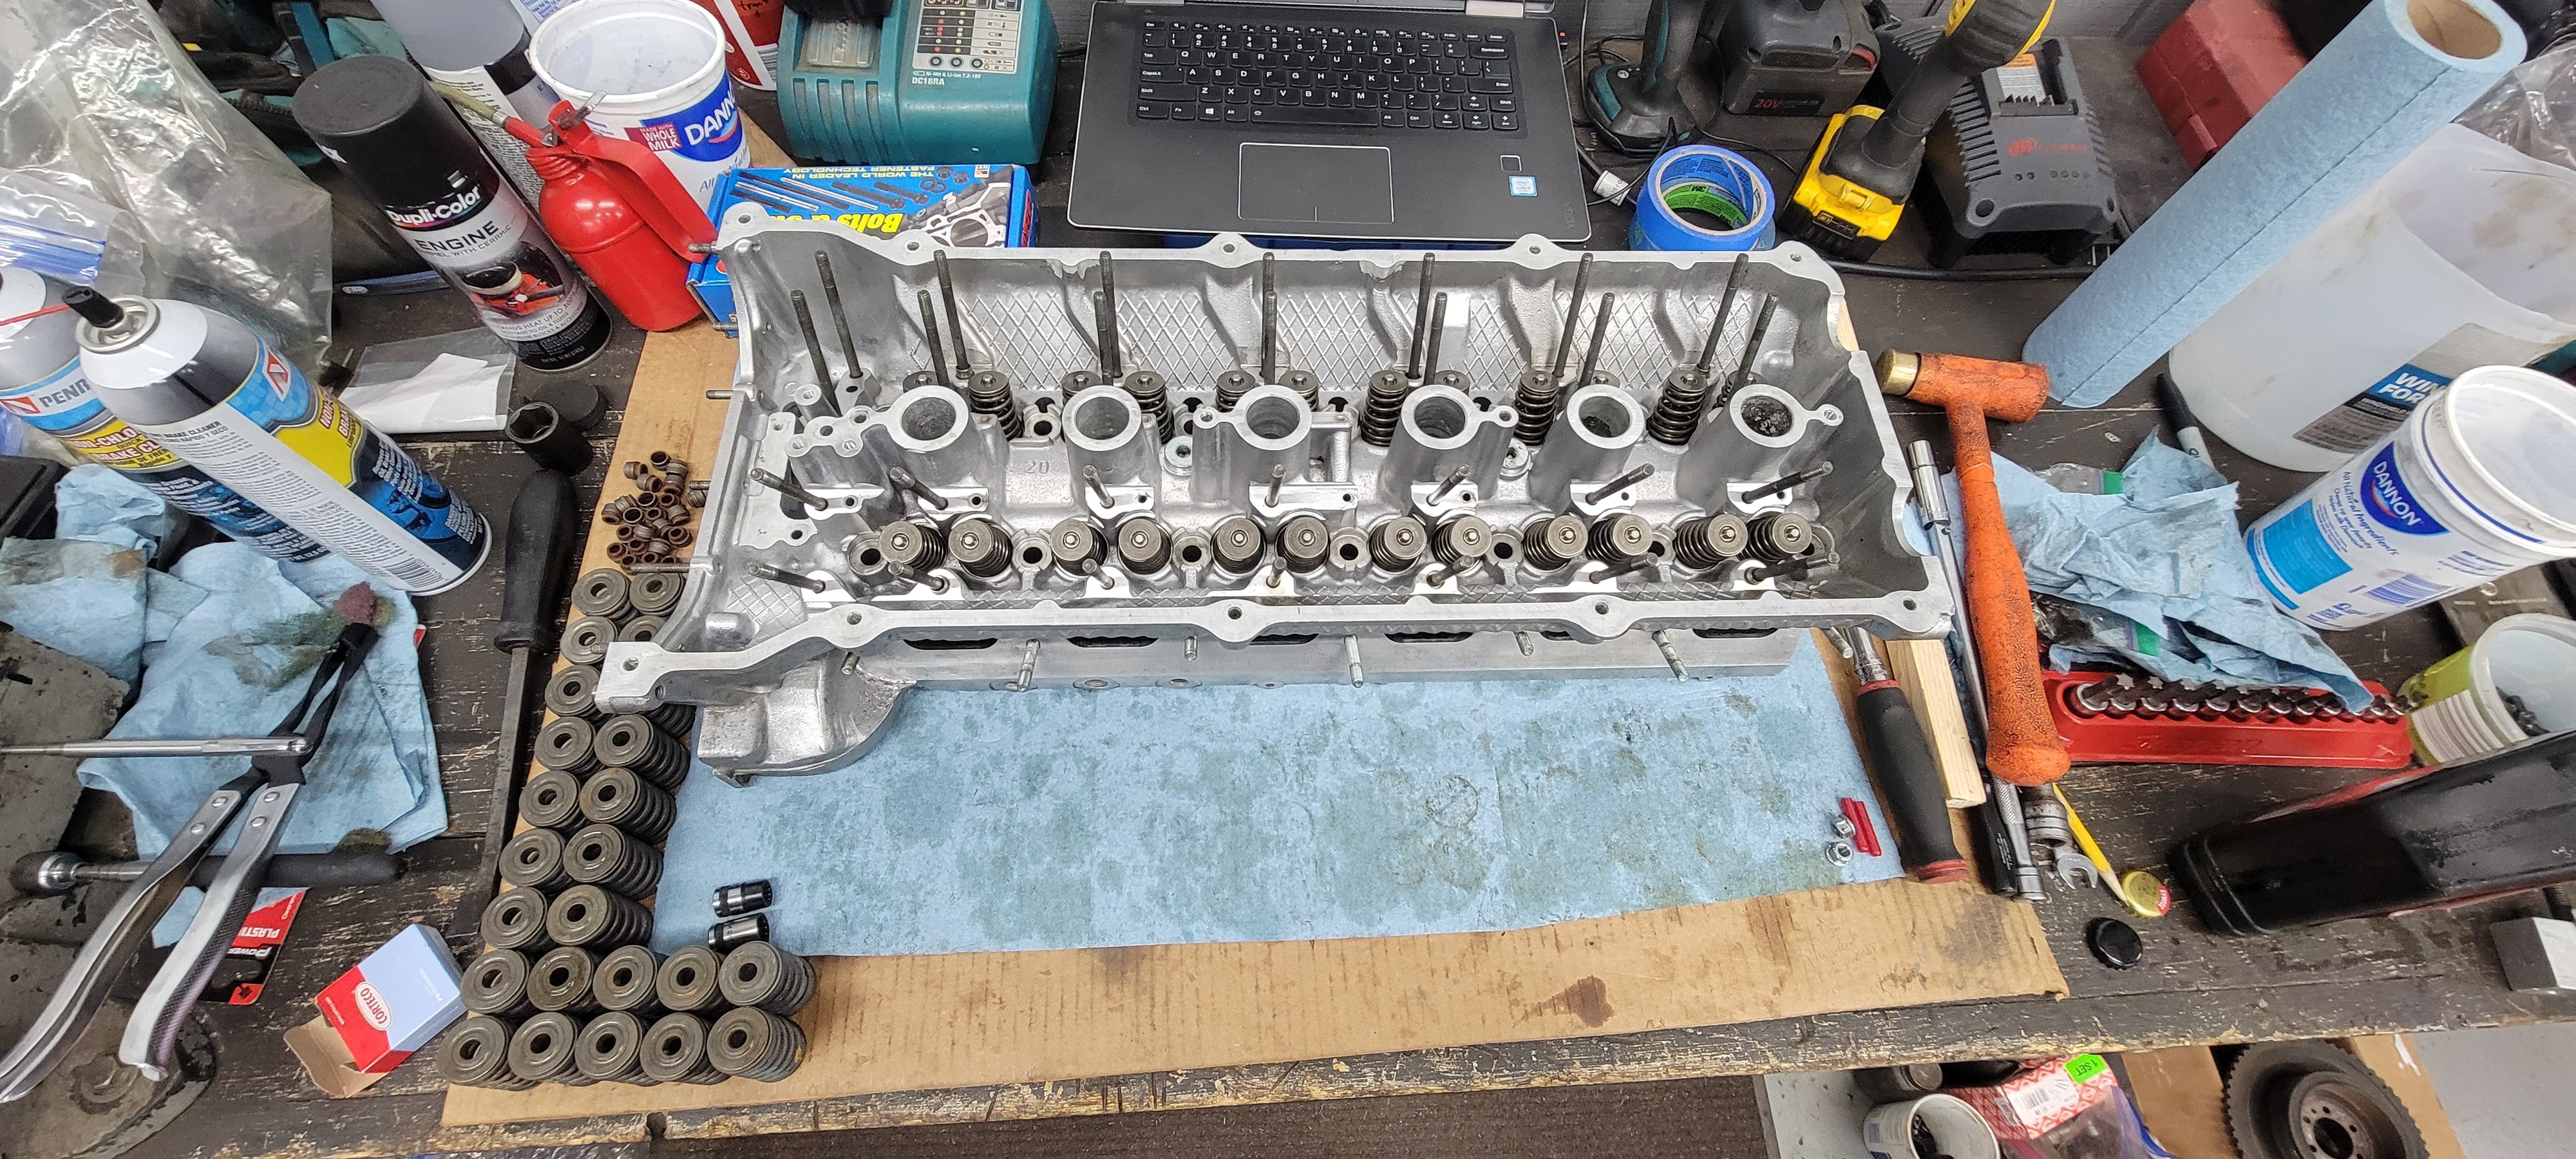
the one and only e30 s52 engine swapSo as far the head I decided on leaving it fairly stock. As for right now I don't have plans of revving past 7k so it should be safe just running the stock valve train. The head I'm using was originally from a M50 vanos. The only difference between the head from a s52 and a M50 non vanos were the springs and retainers. I kept the springs matched with the cams I was running which was from the s52 so I needed to swap those over. I went ahead and installed all new valve stem seals at the same time.
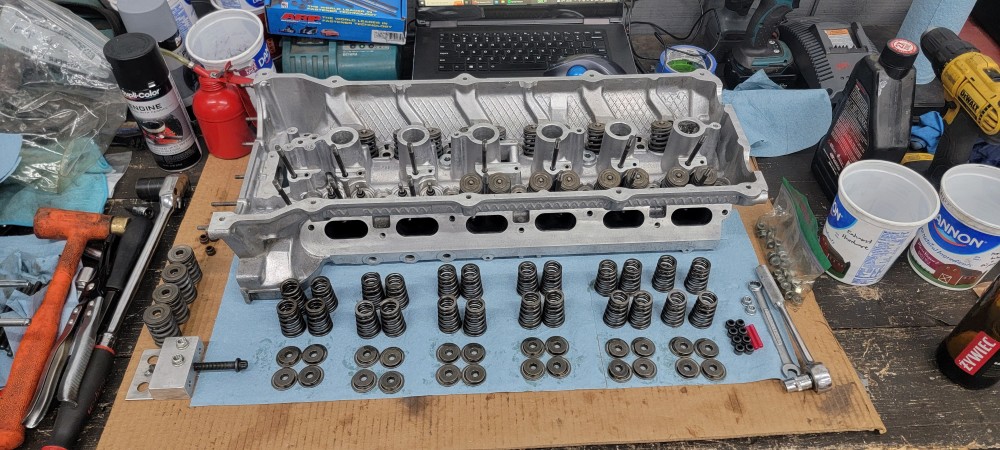
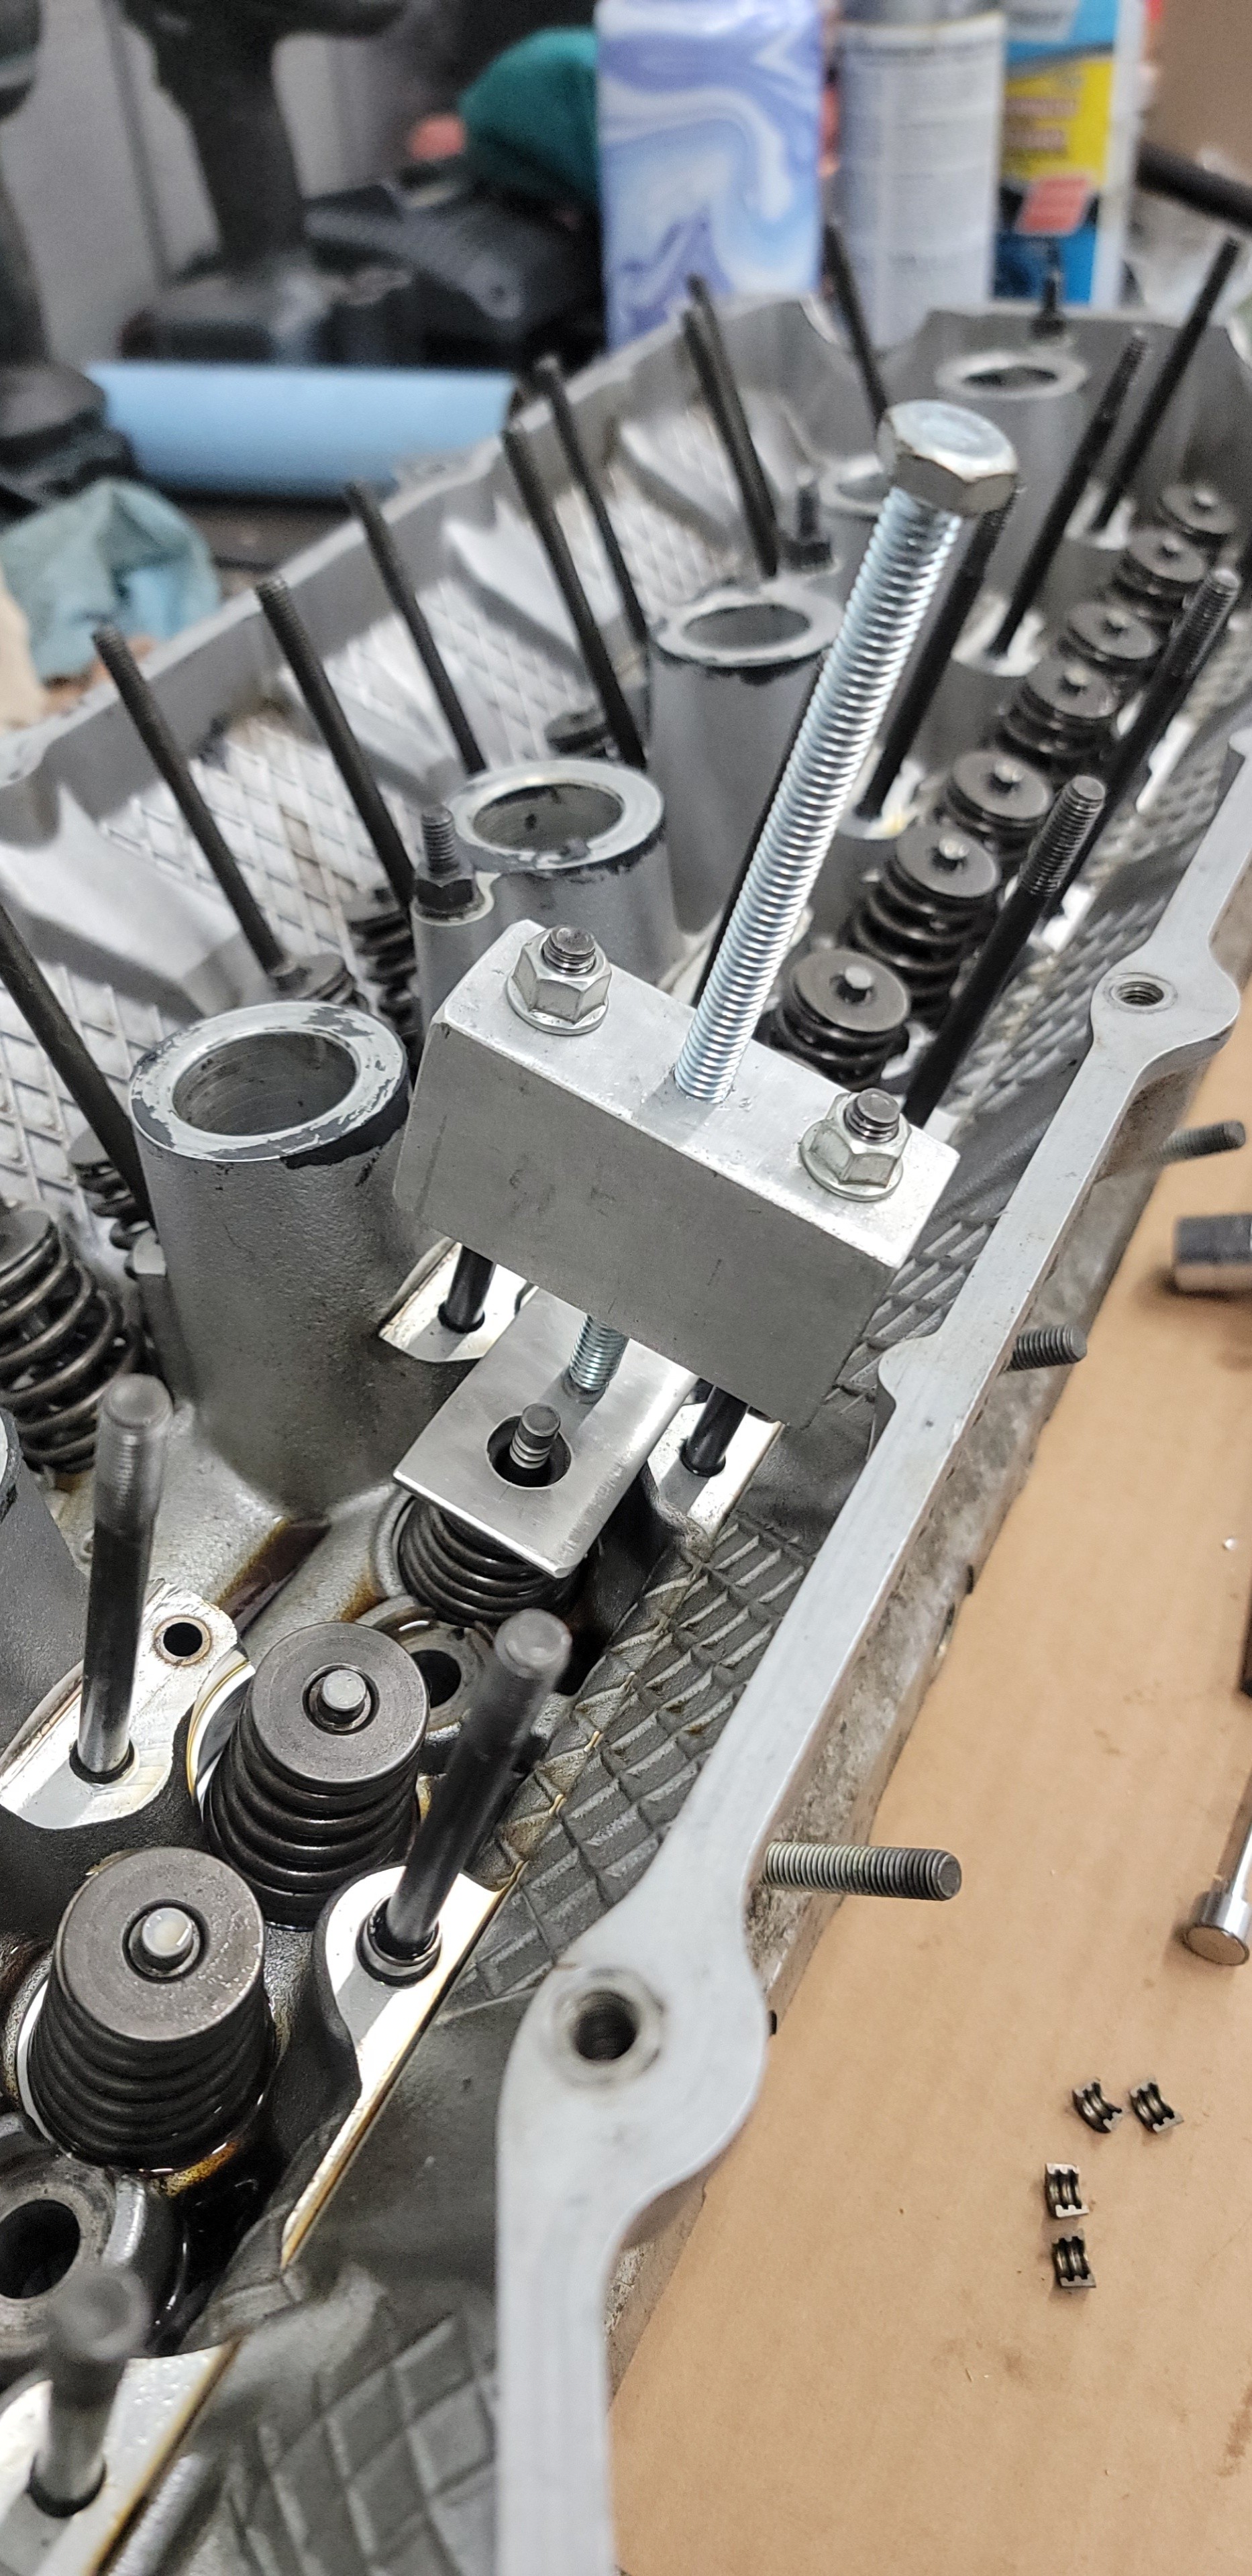
Made myself a little tool for spring removal and installation. Not quite as nice as some of the ones you can buy out there but it did the job well.
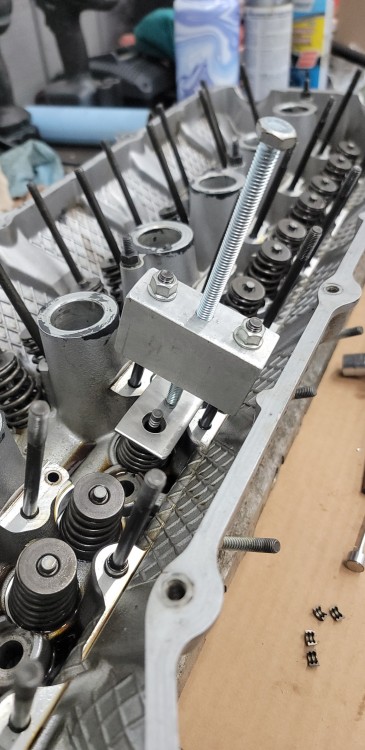
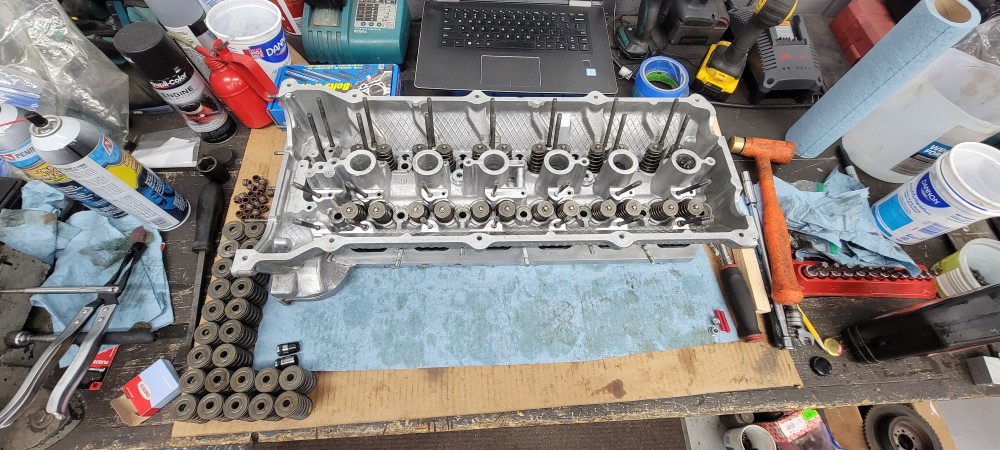
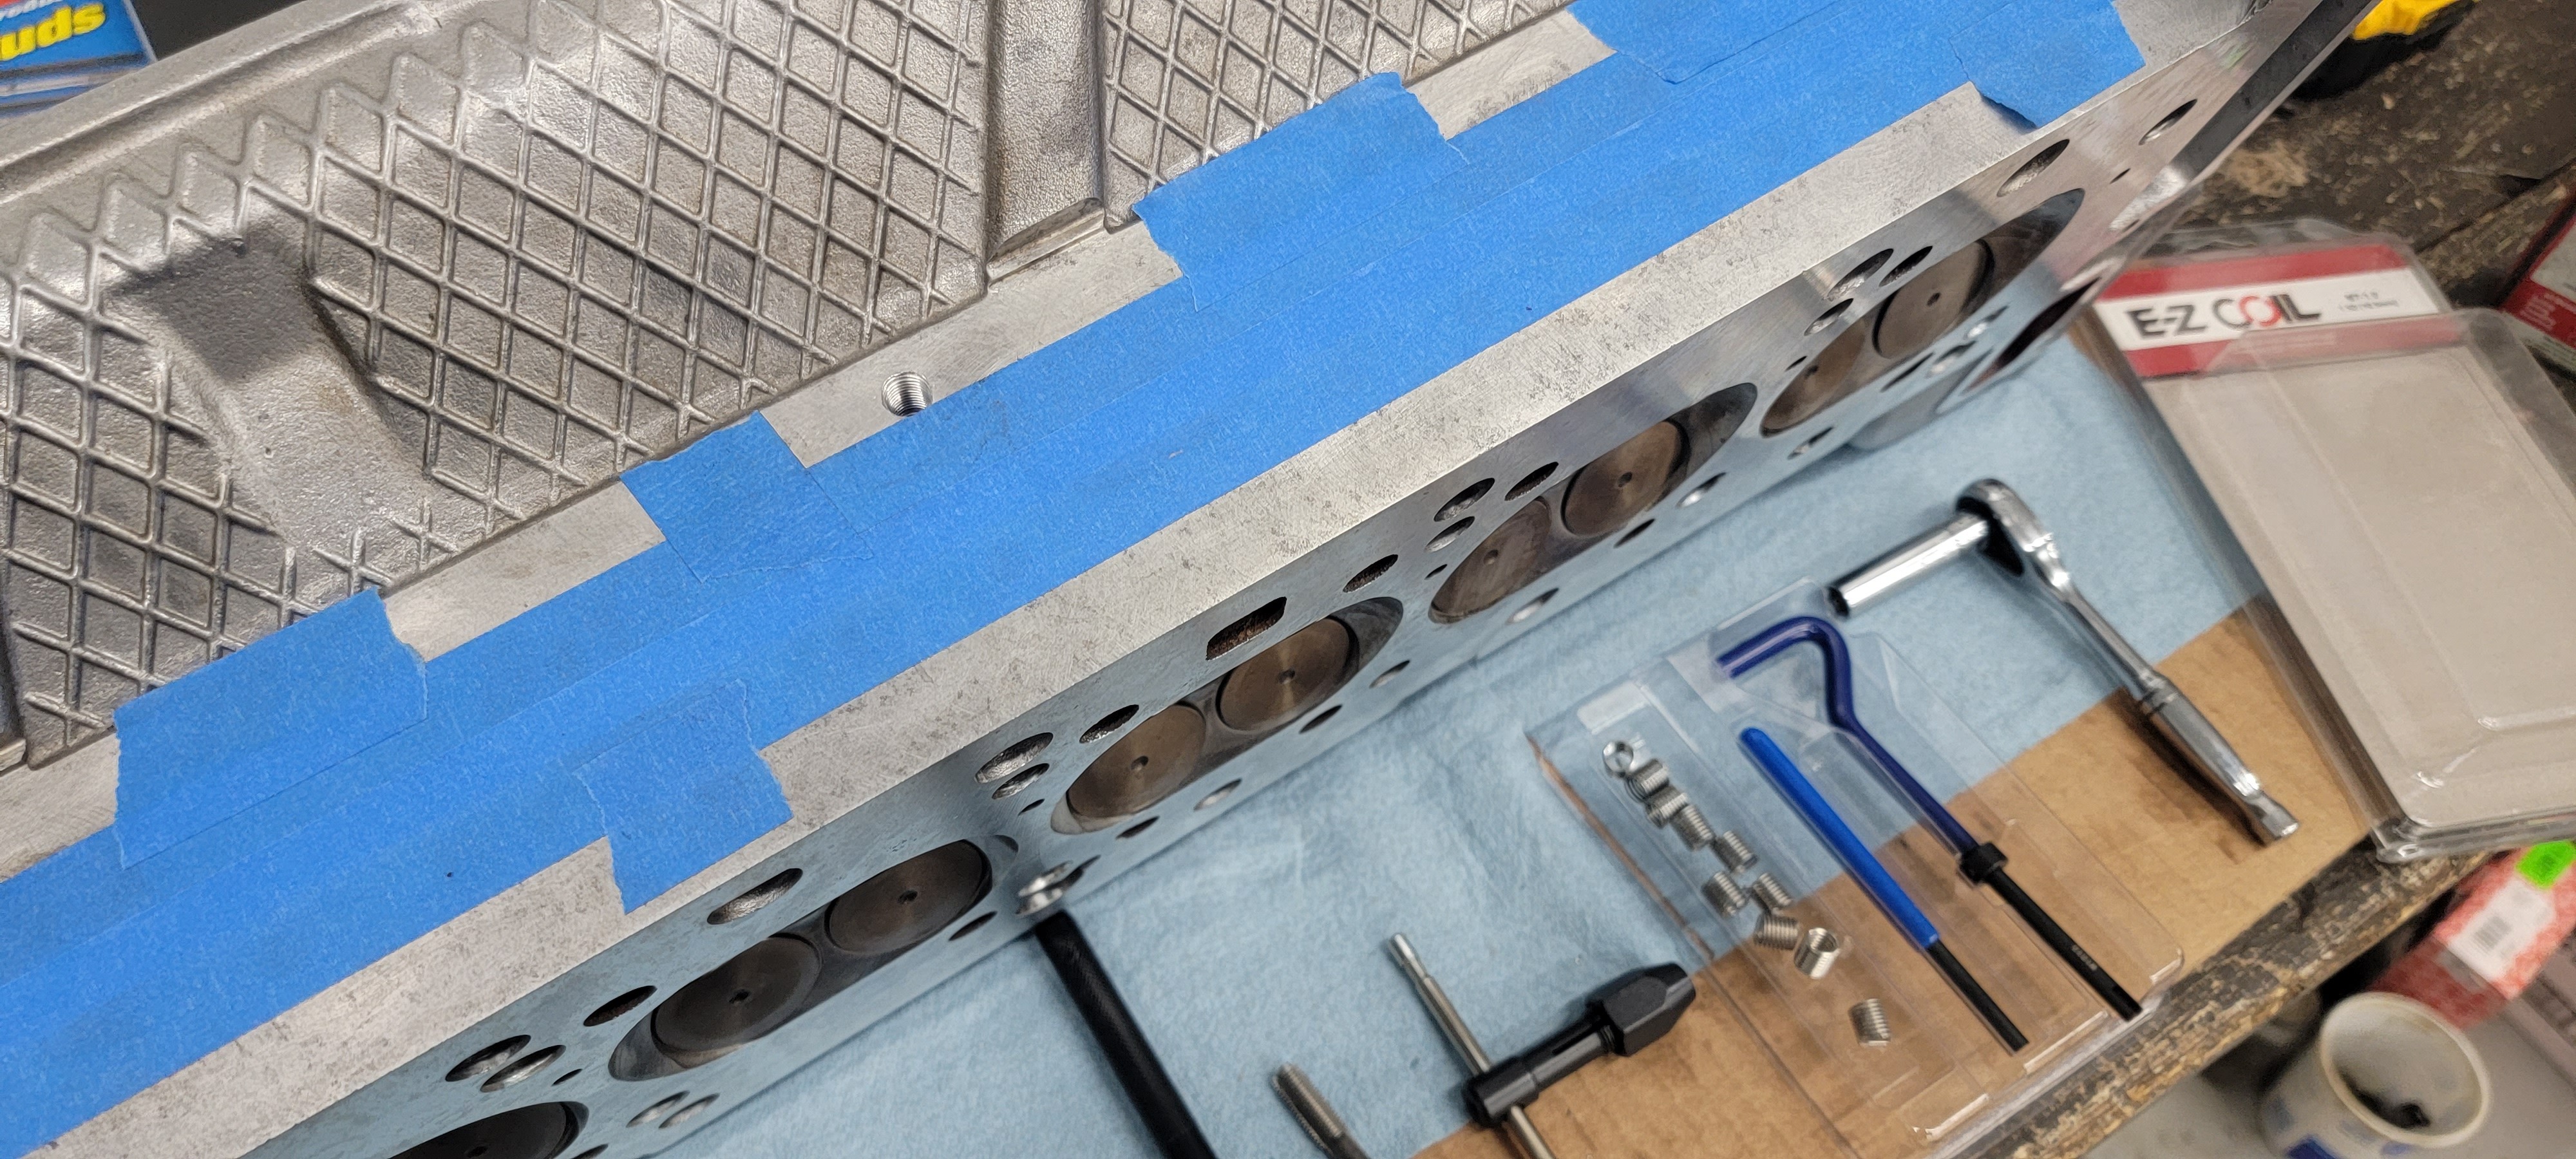
Once that was complete I began reinstalling the intake and exhaust studs. For the exhaust side I reused the N54 studs from the previous motor for ease of installation. After inspecting all the holes I noticed one of them was missing half the threads in it, wonderful. So out came the Heli-coil kit.
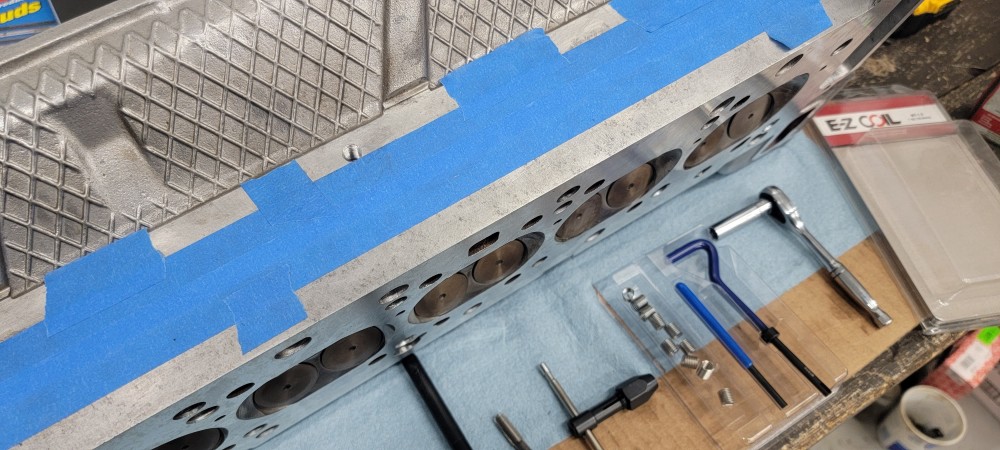
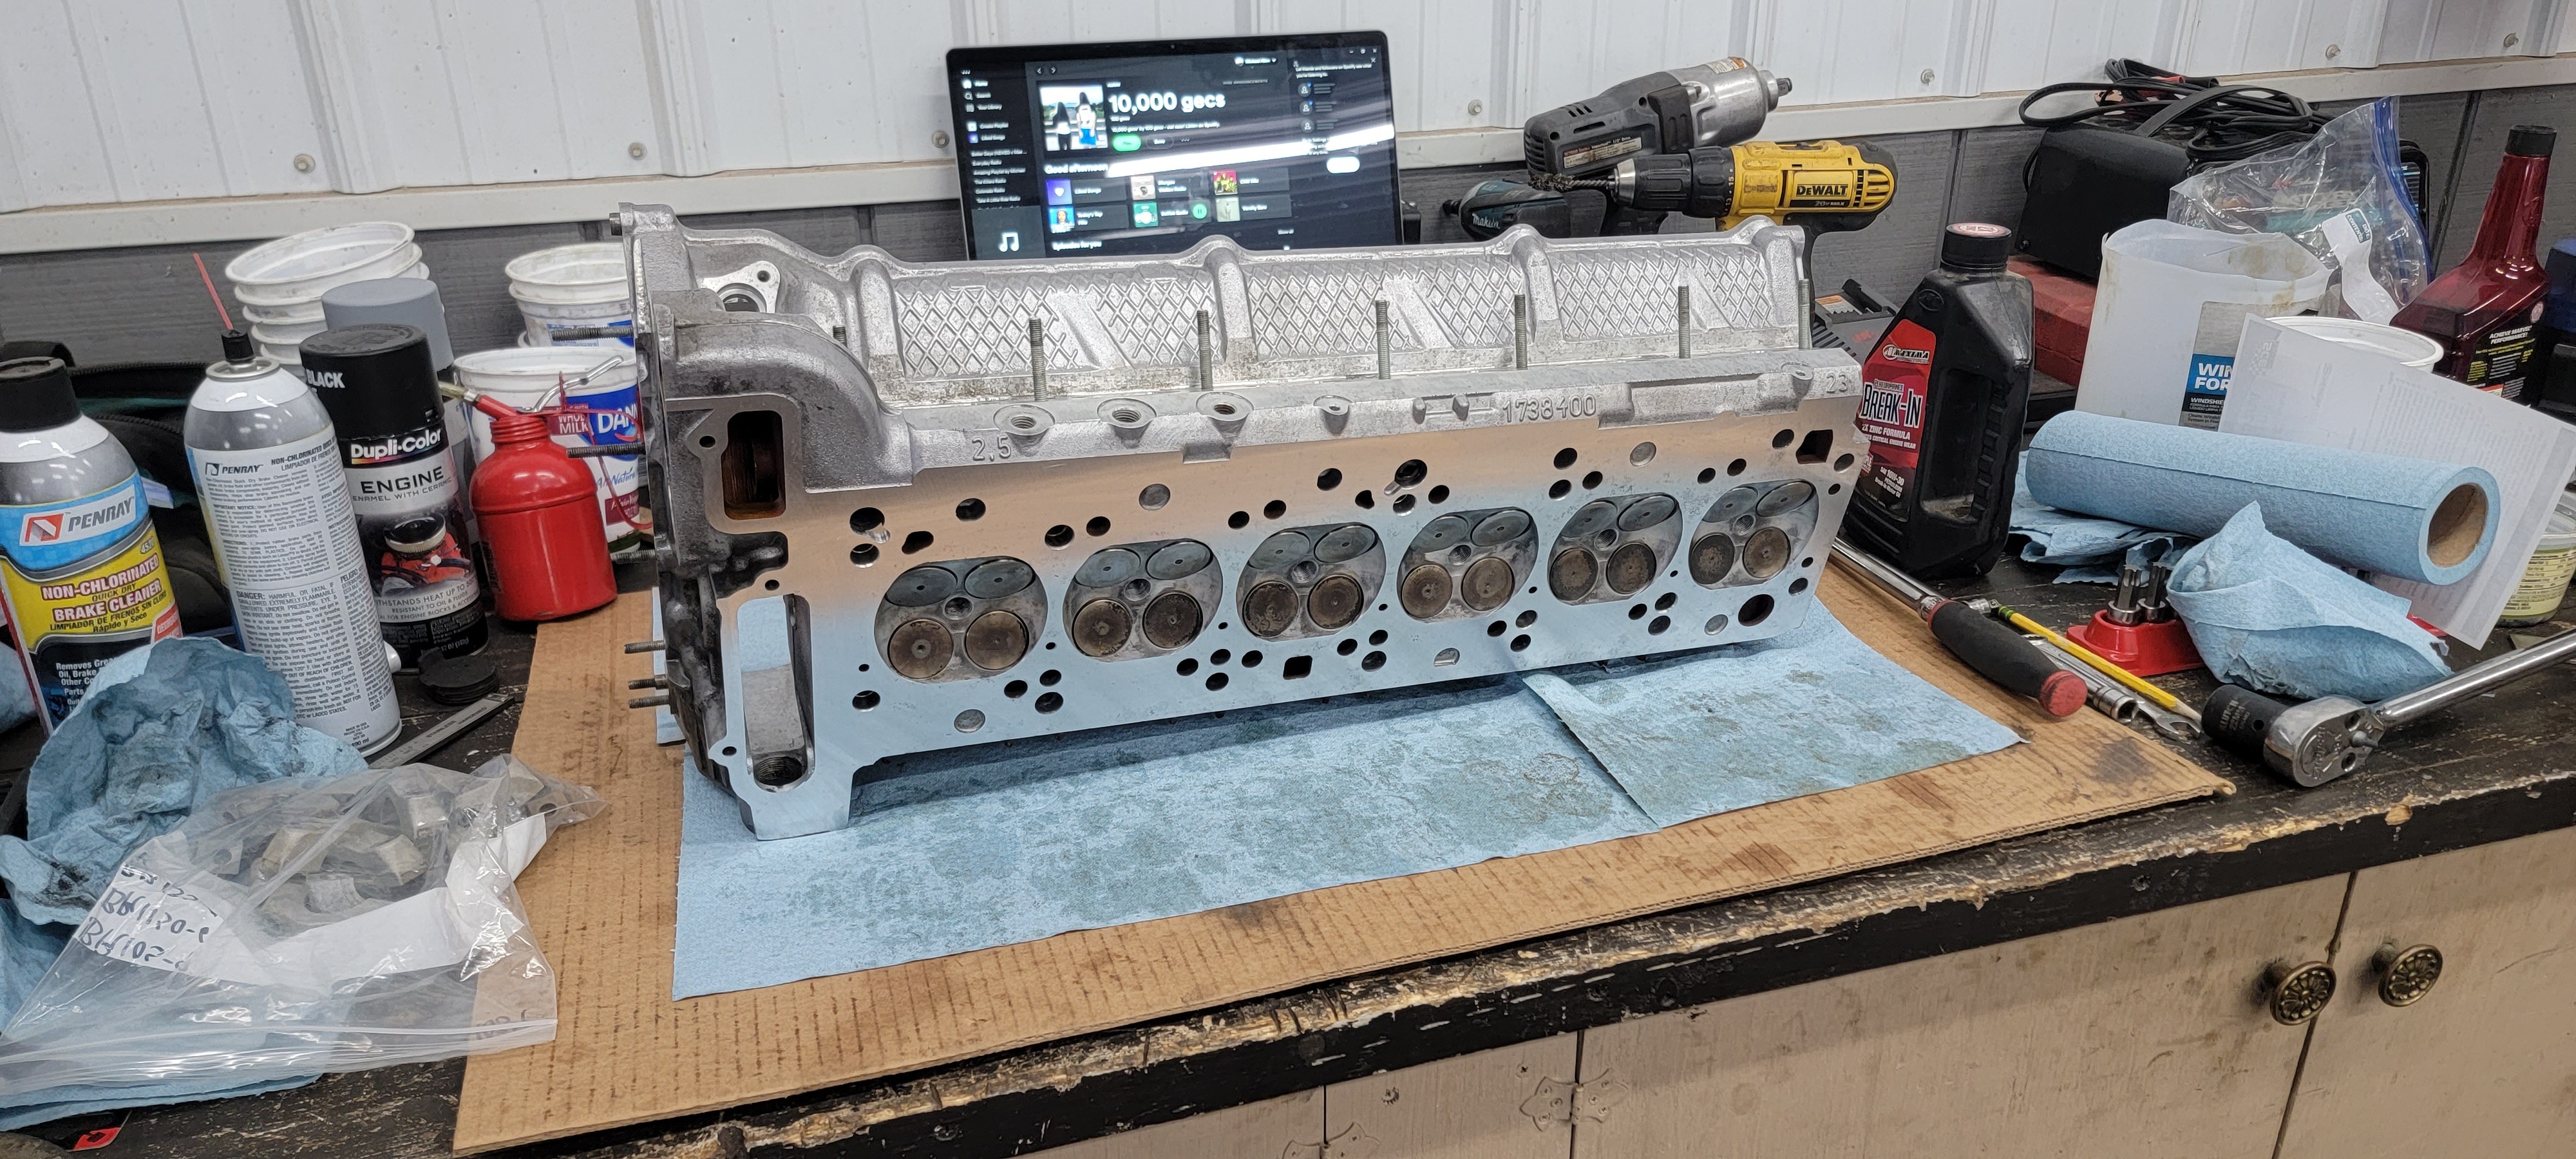
Springs and new valve stem seals were in. Studs were all installed. Time to go on the motor.
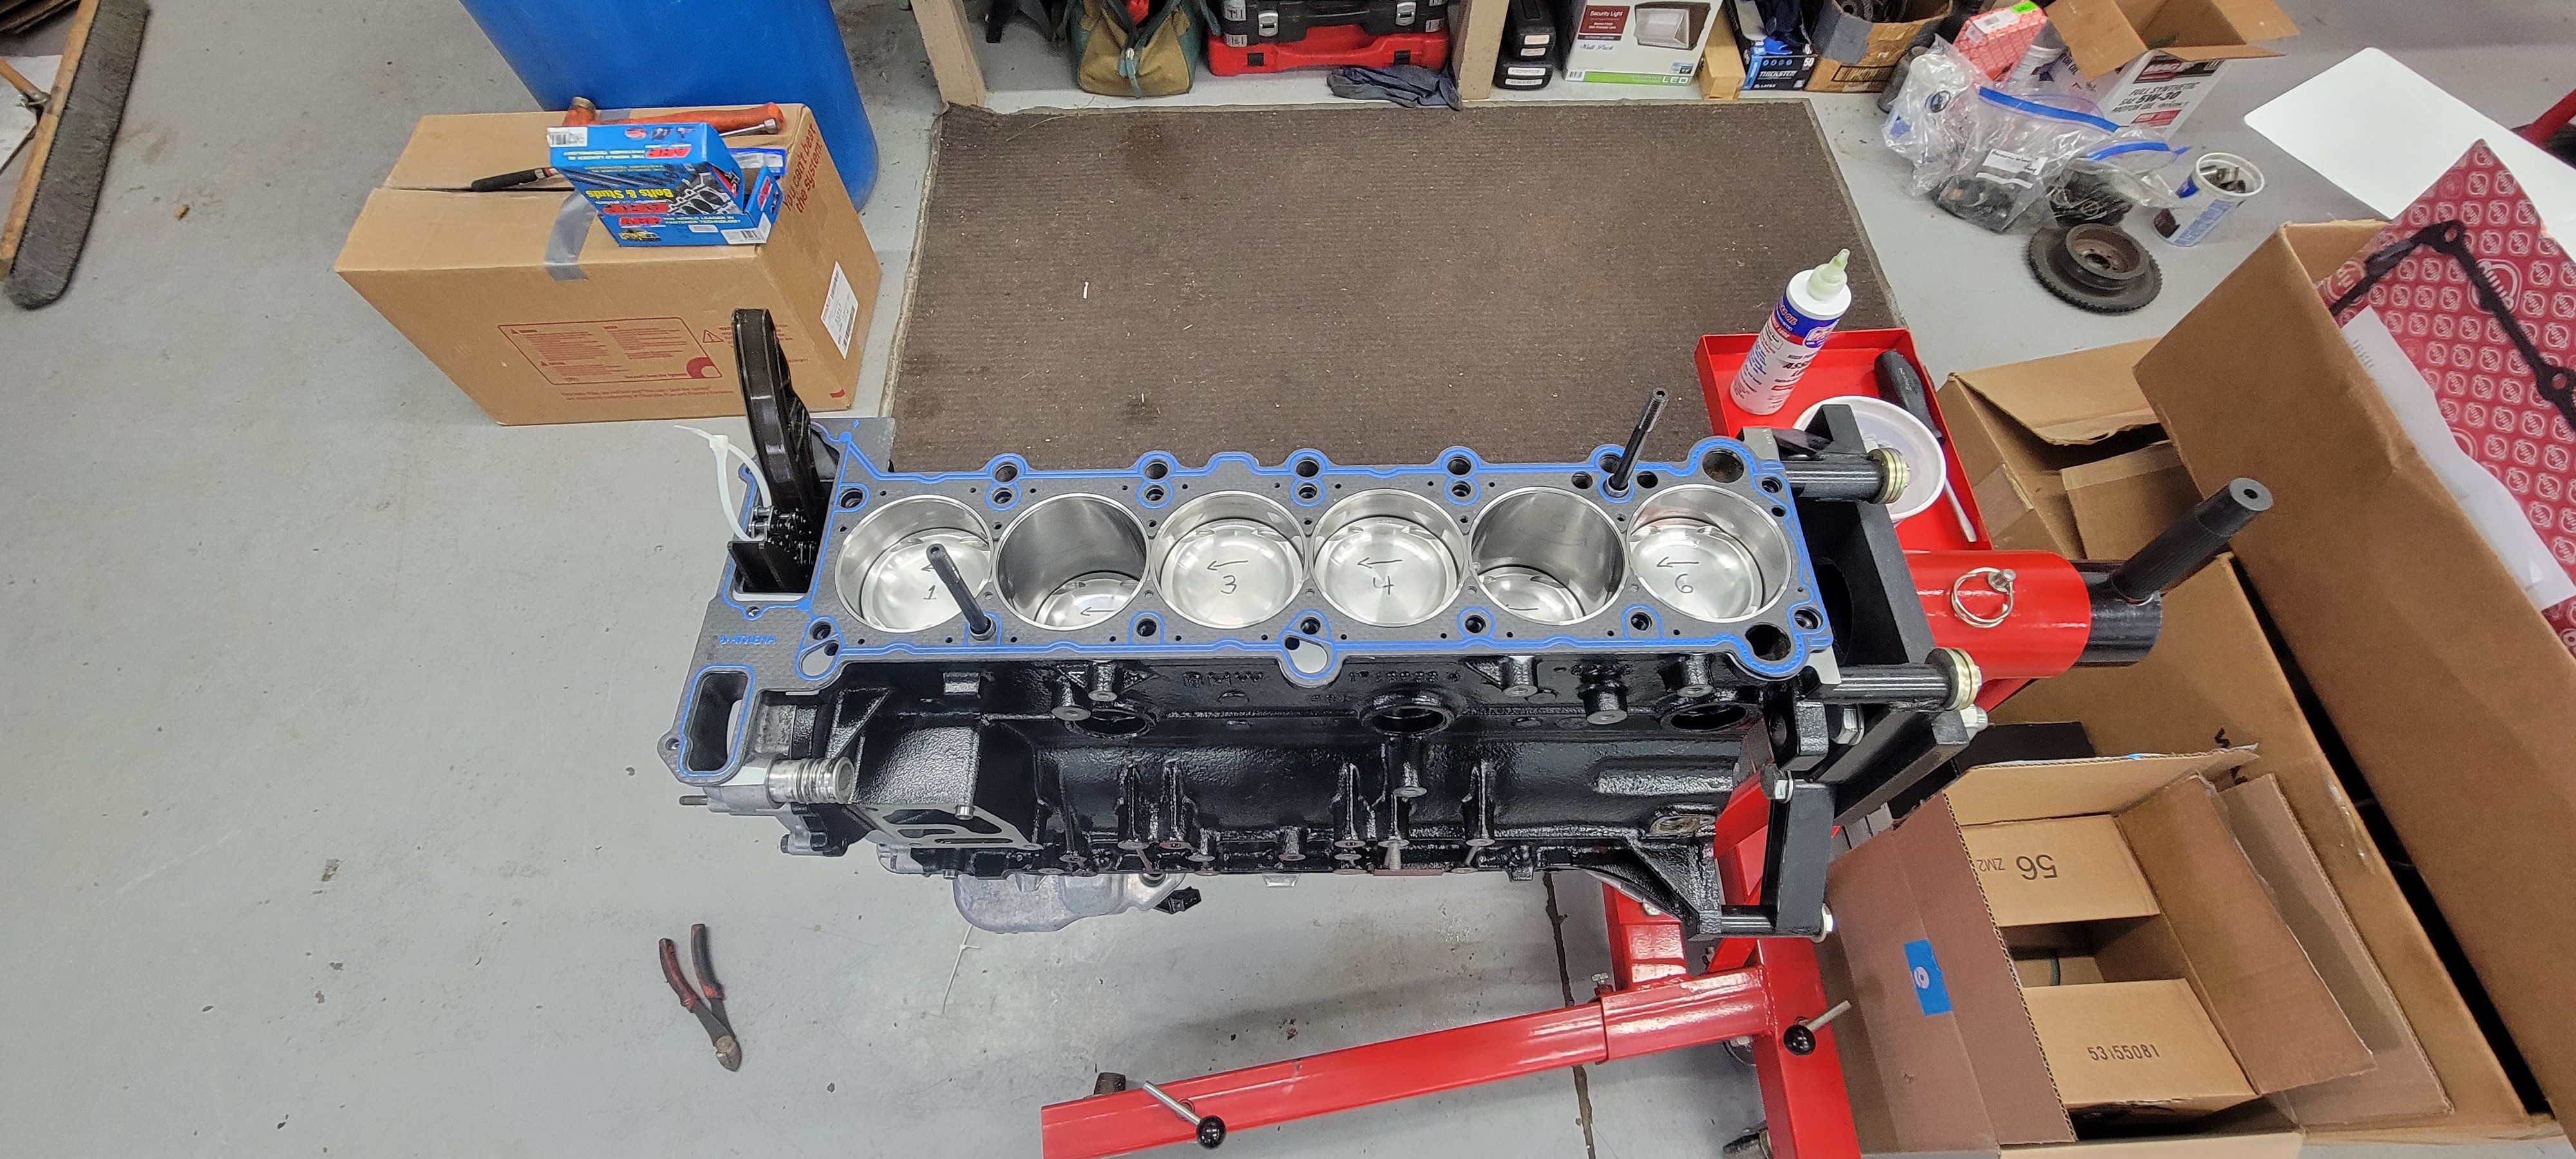
For the head gasket I went with a stock thickness 87 mm Athena cut ring headgasket. I tapped in some new dowels and then test fitted the gasket first to make sure everything cleared and all the cut rings fitted properly.
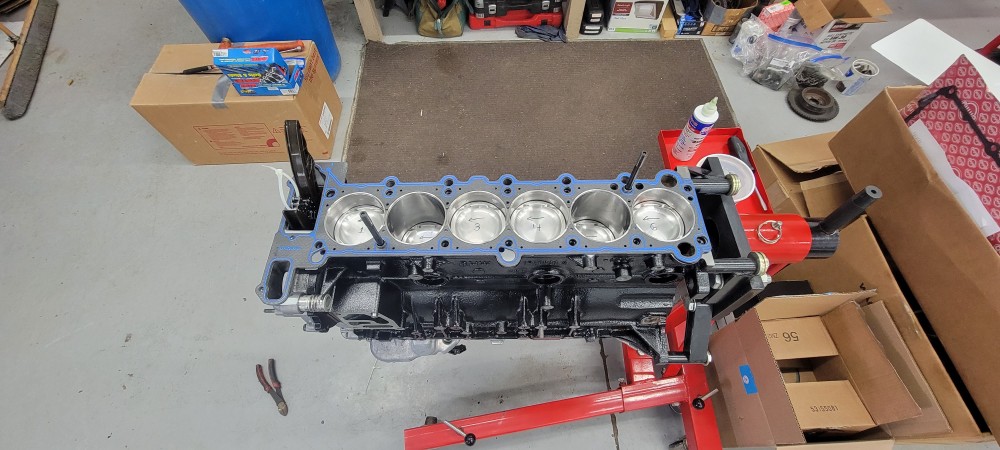
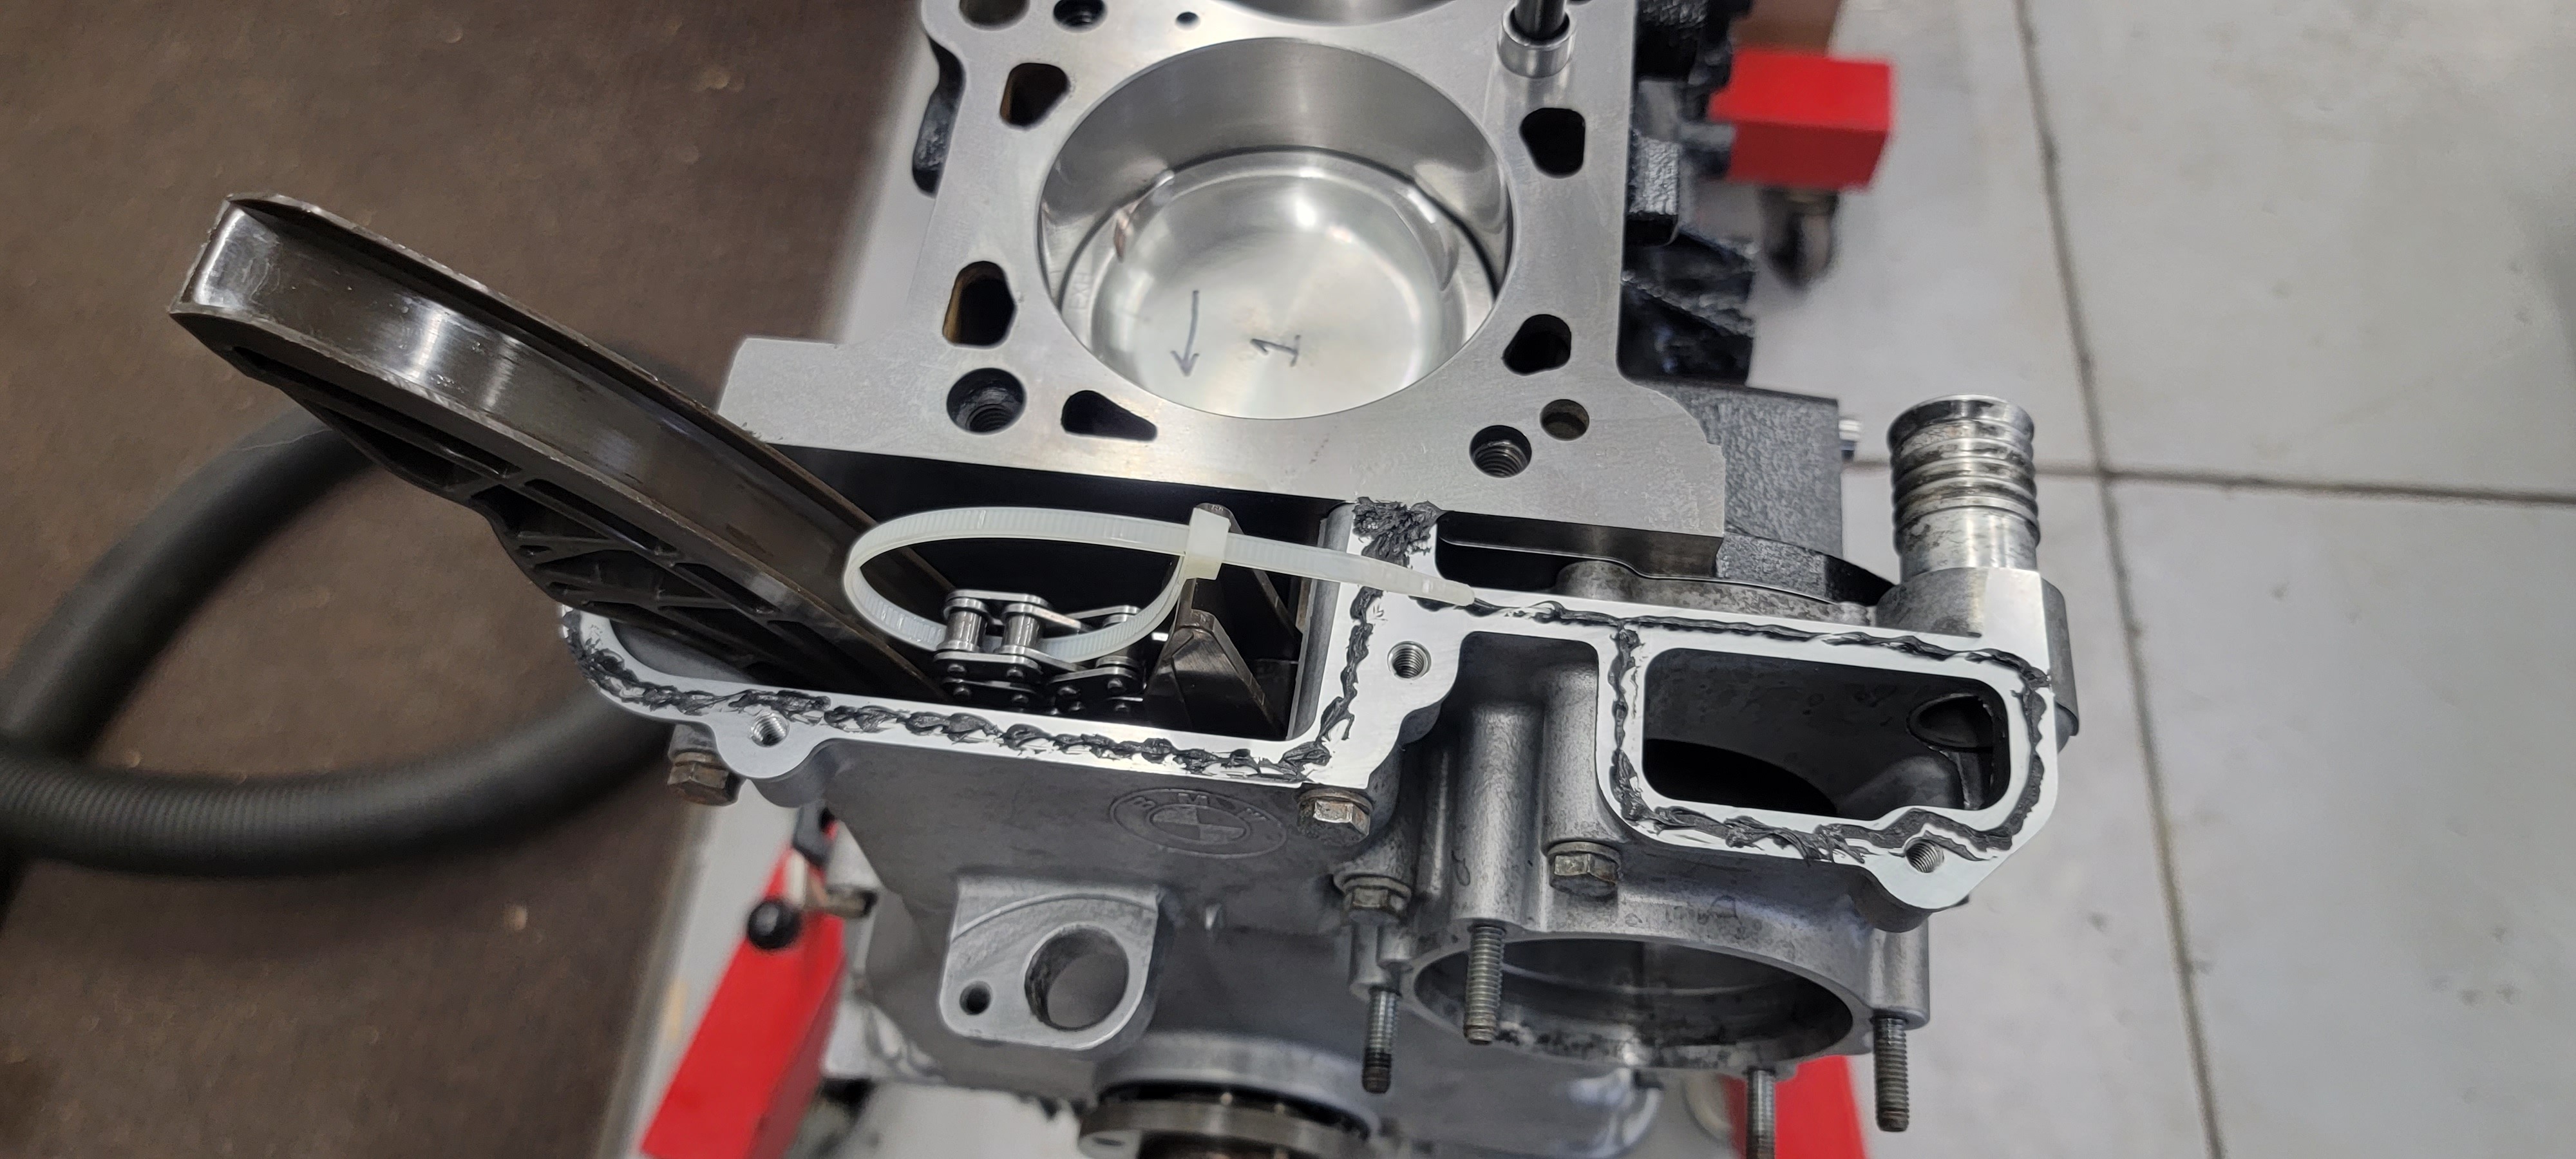
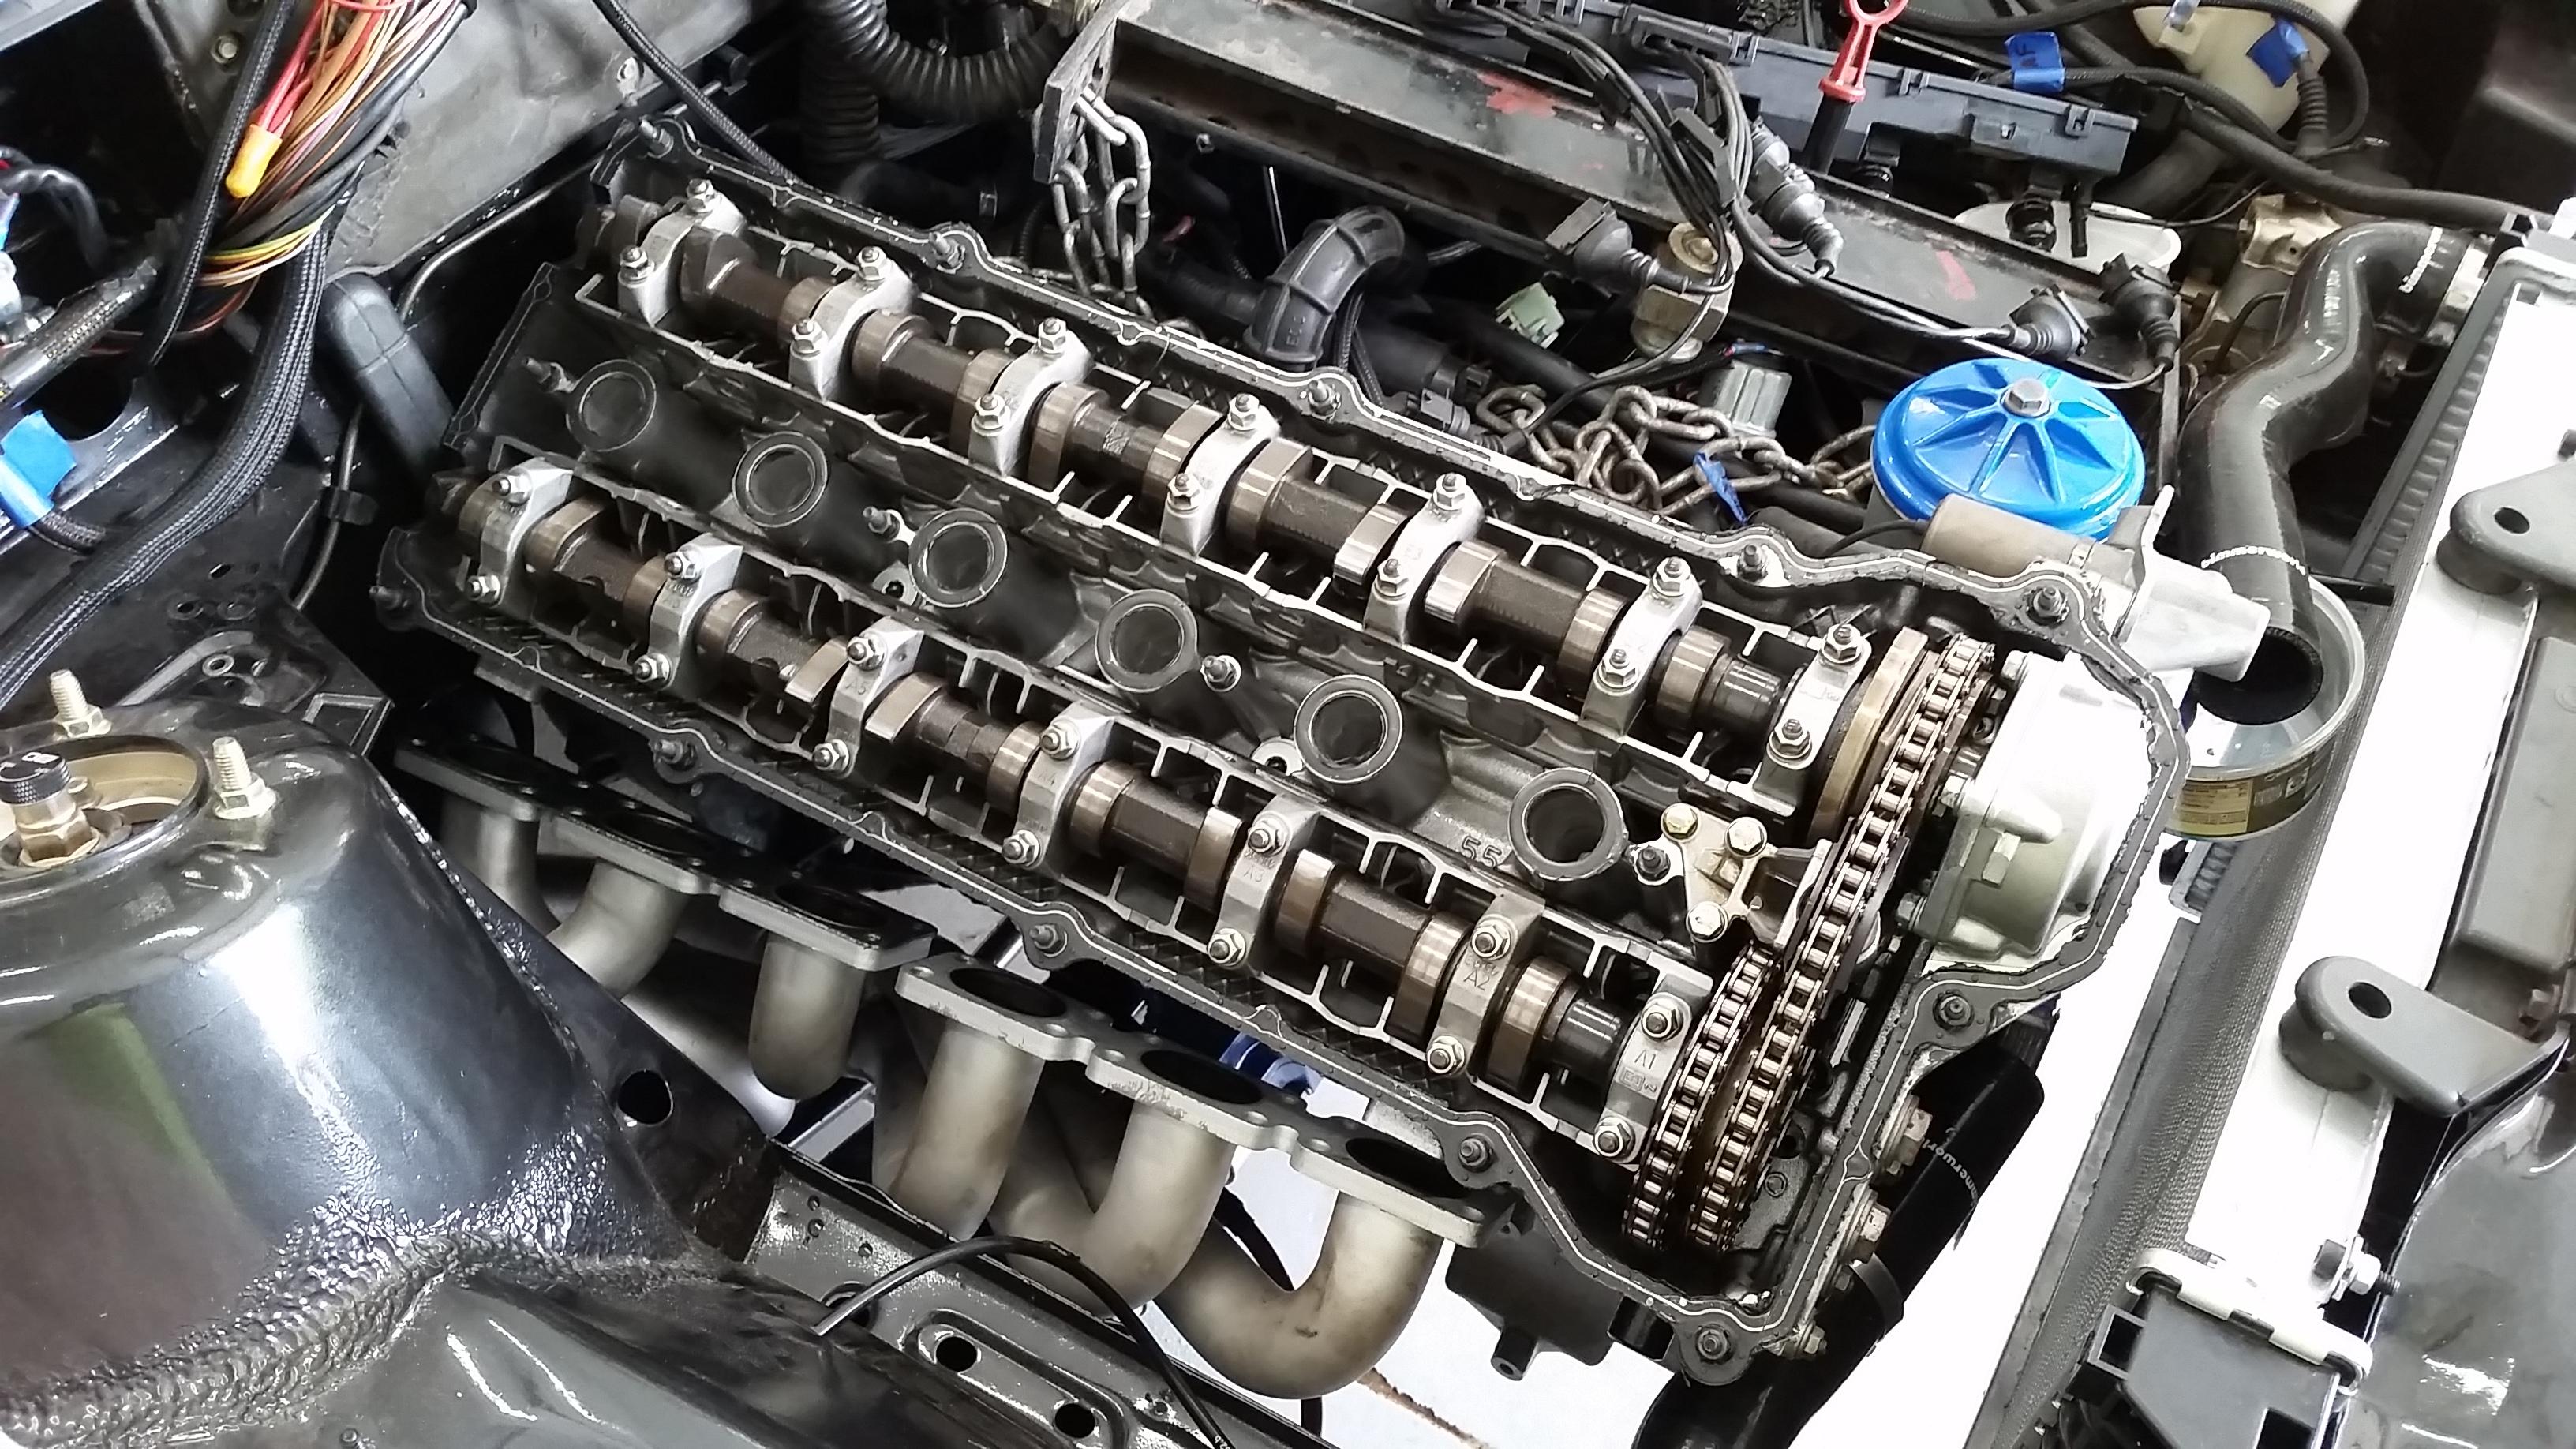
Everything checked out good on the HG so before installing the head I popped it back off and ran a small bead of the right stuff gasket maker around the entire timing cover area. Most say it is only necessary to dab a little where the cover meets with the block but I feared since there was only M6 bolts compressing the head down in this area there was still a chance it could possibly still leak. I should also note that before installing the head I made sure all the pistons were all shifted to as close to the center of the bore as I could to avoid any valves coming into contact when the cams are installed.
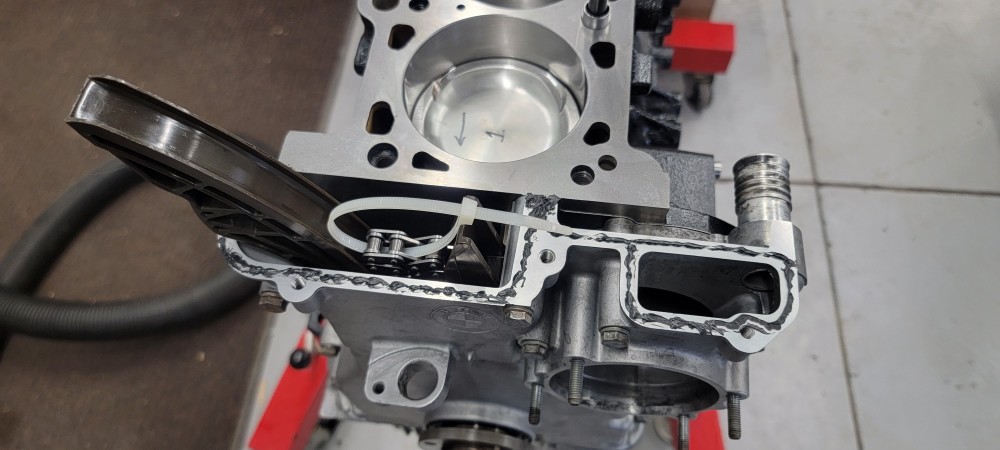
Once the head was on I threaded in the rest of the arp studs using the moly lube provided and torqued them in three equal steps to 75 ft lbs.
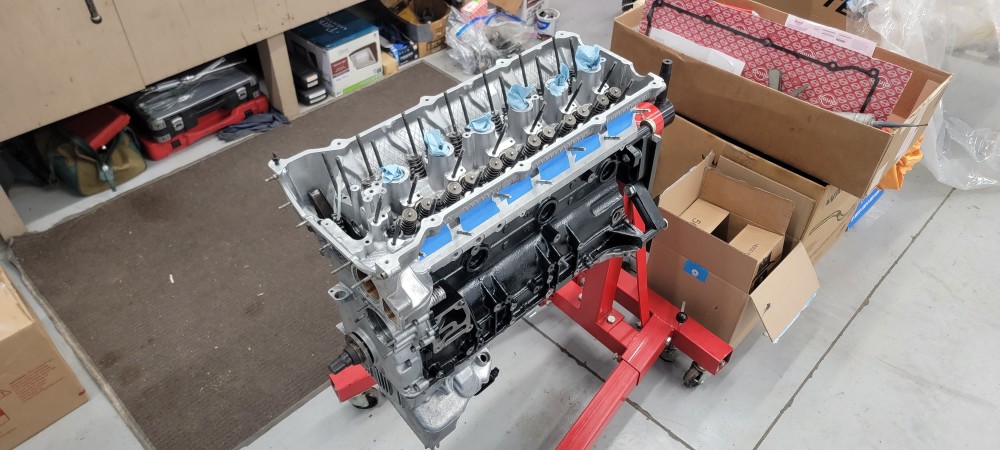
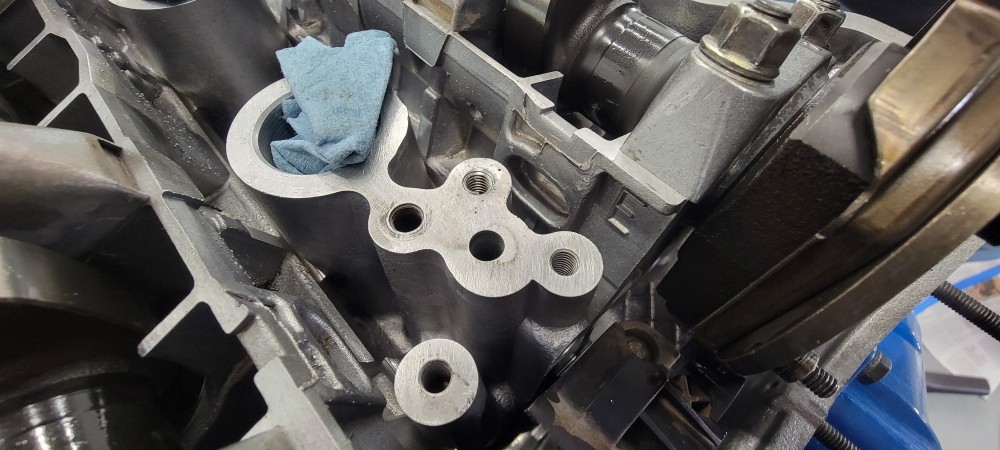
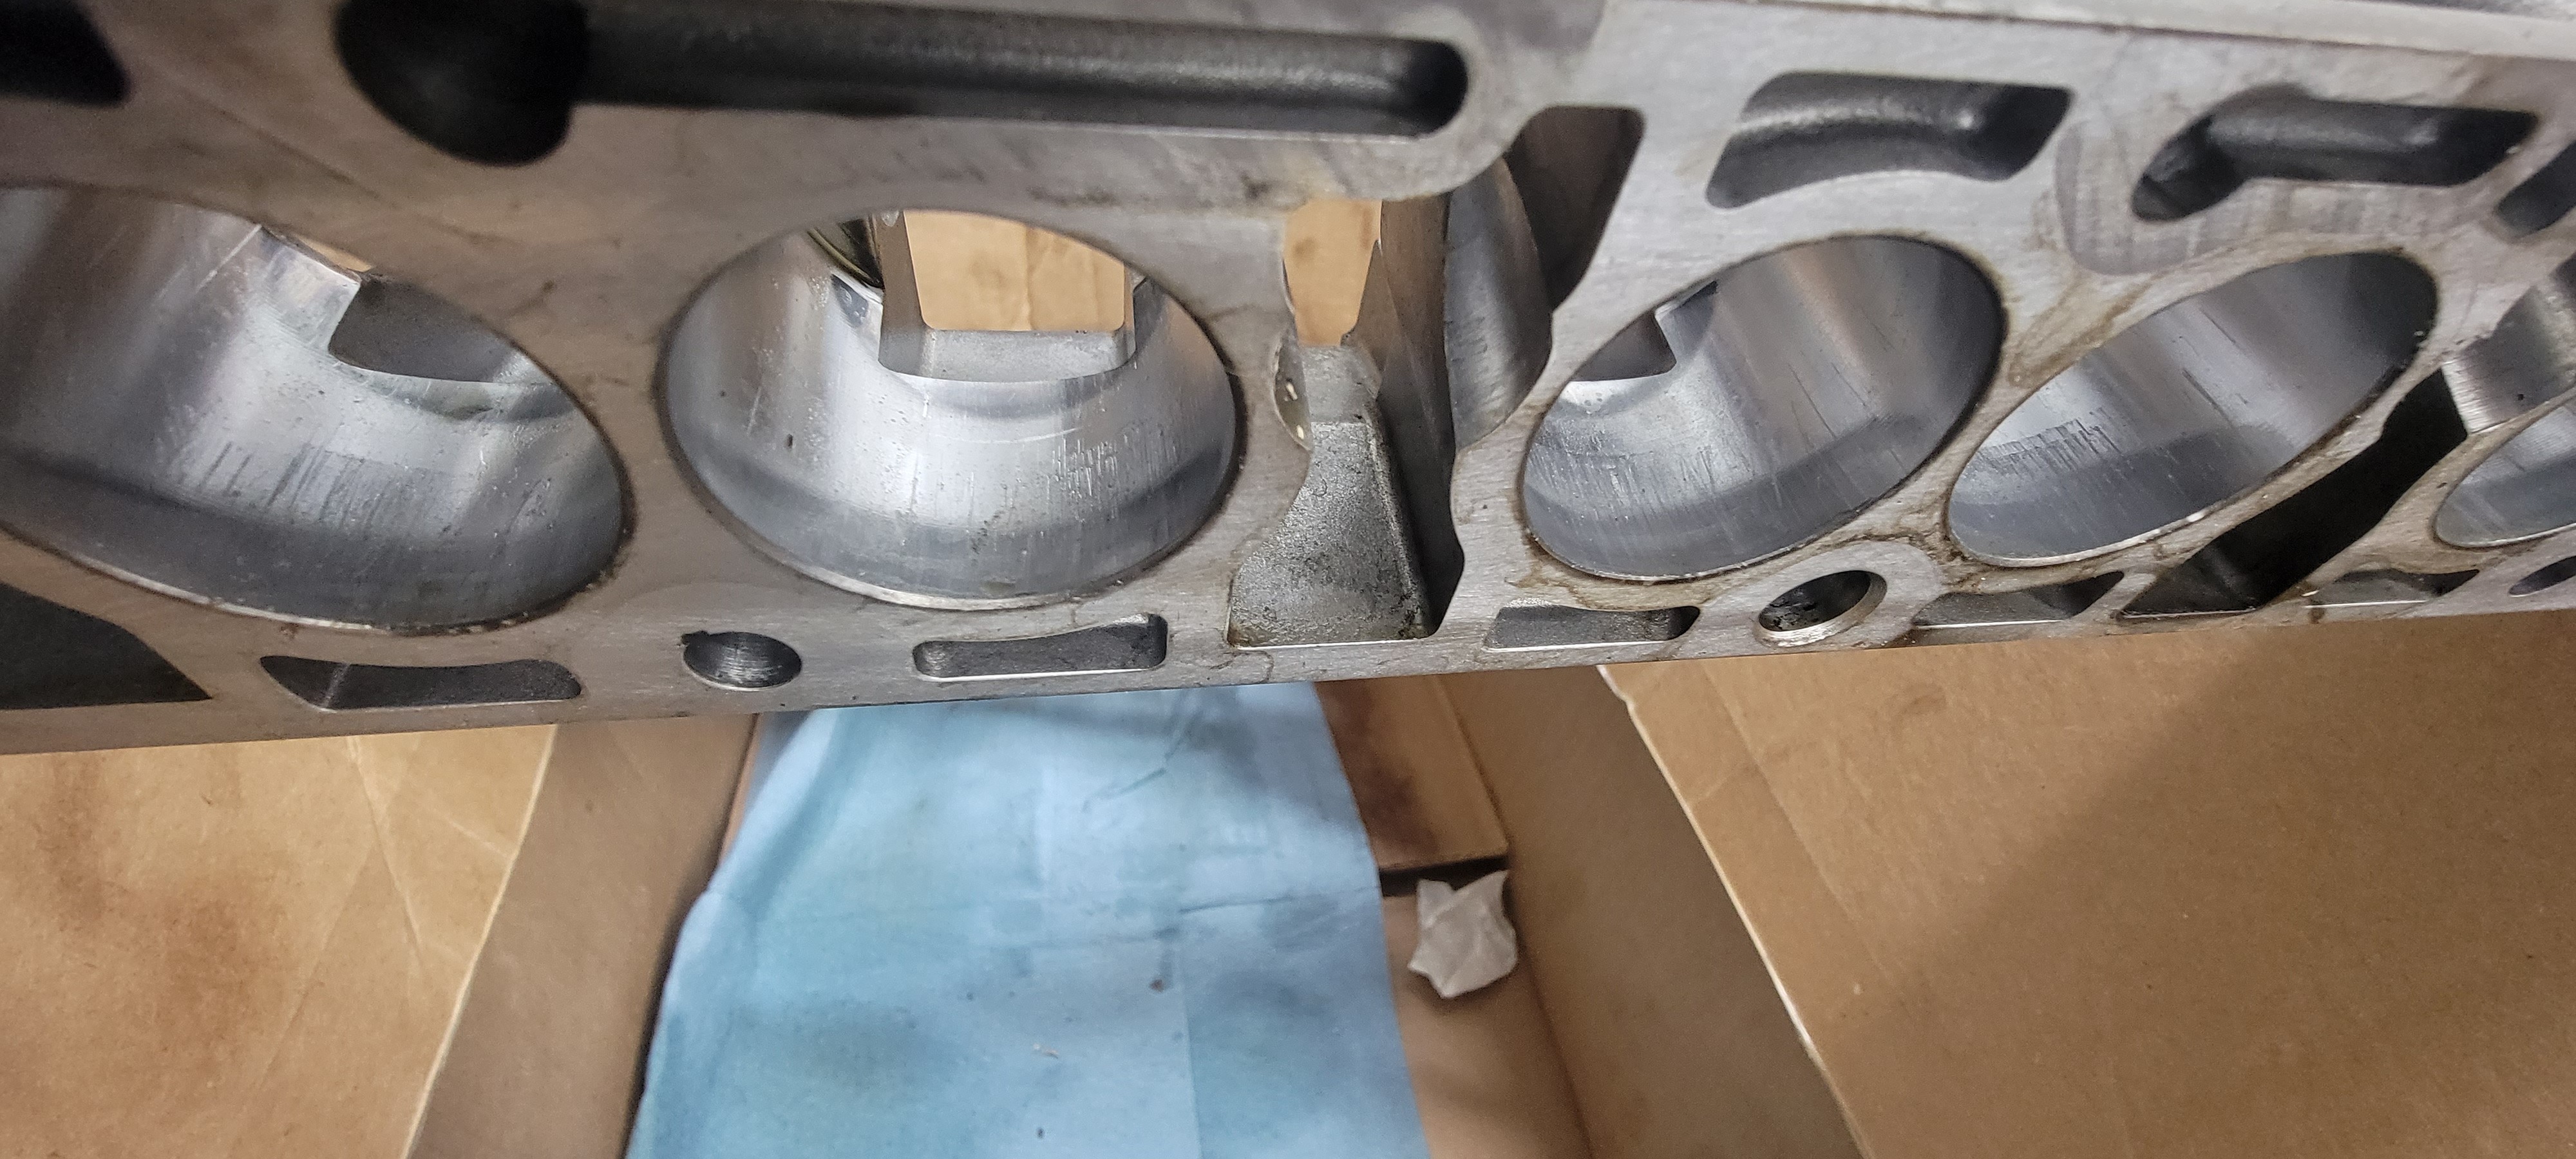
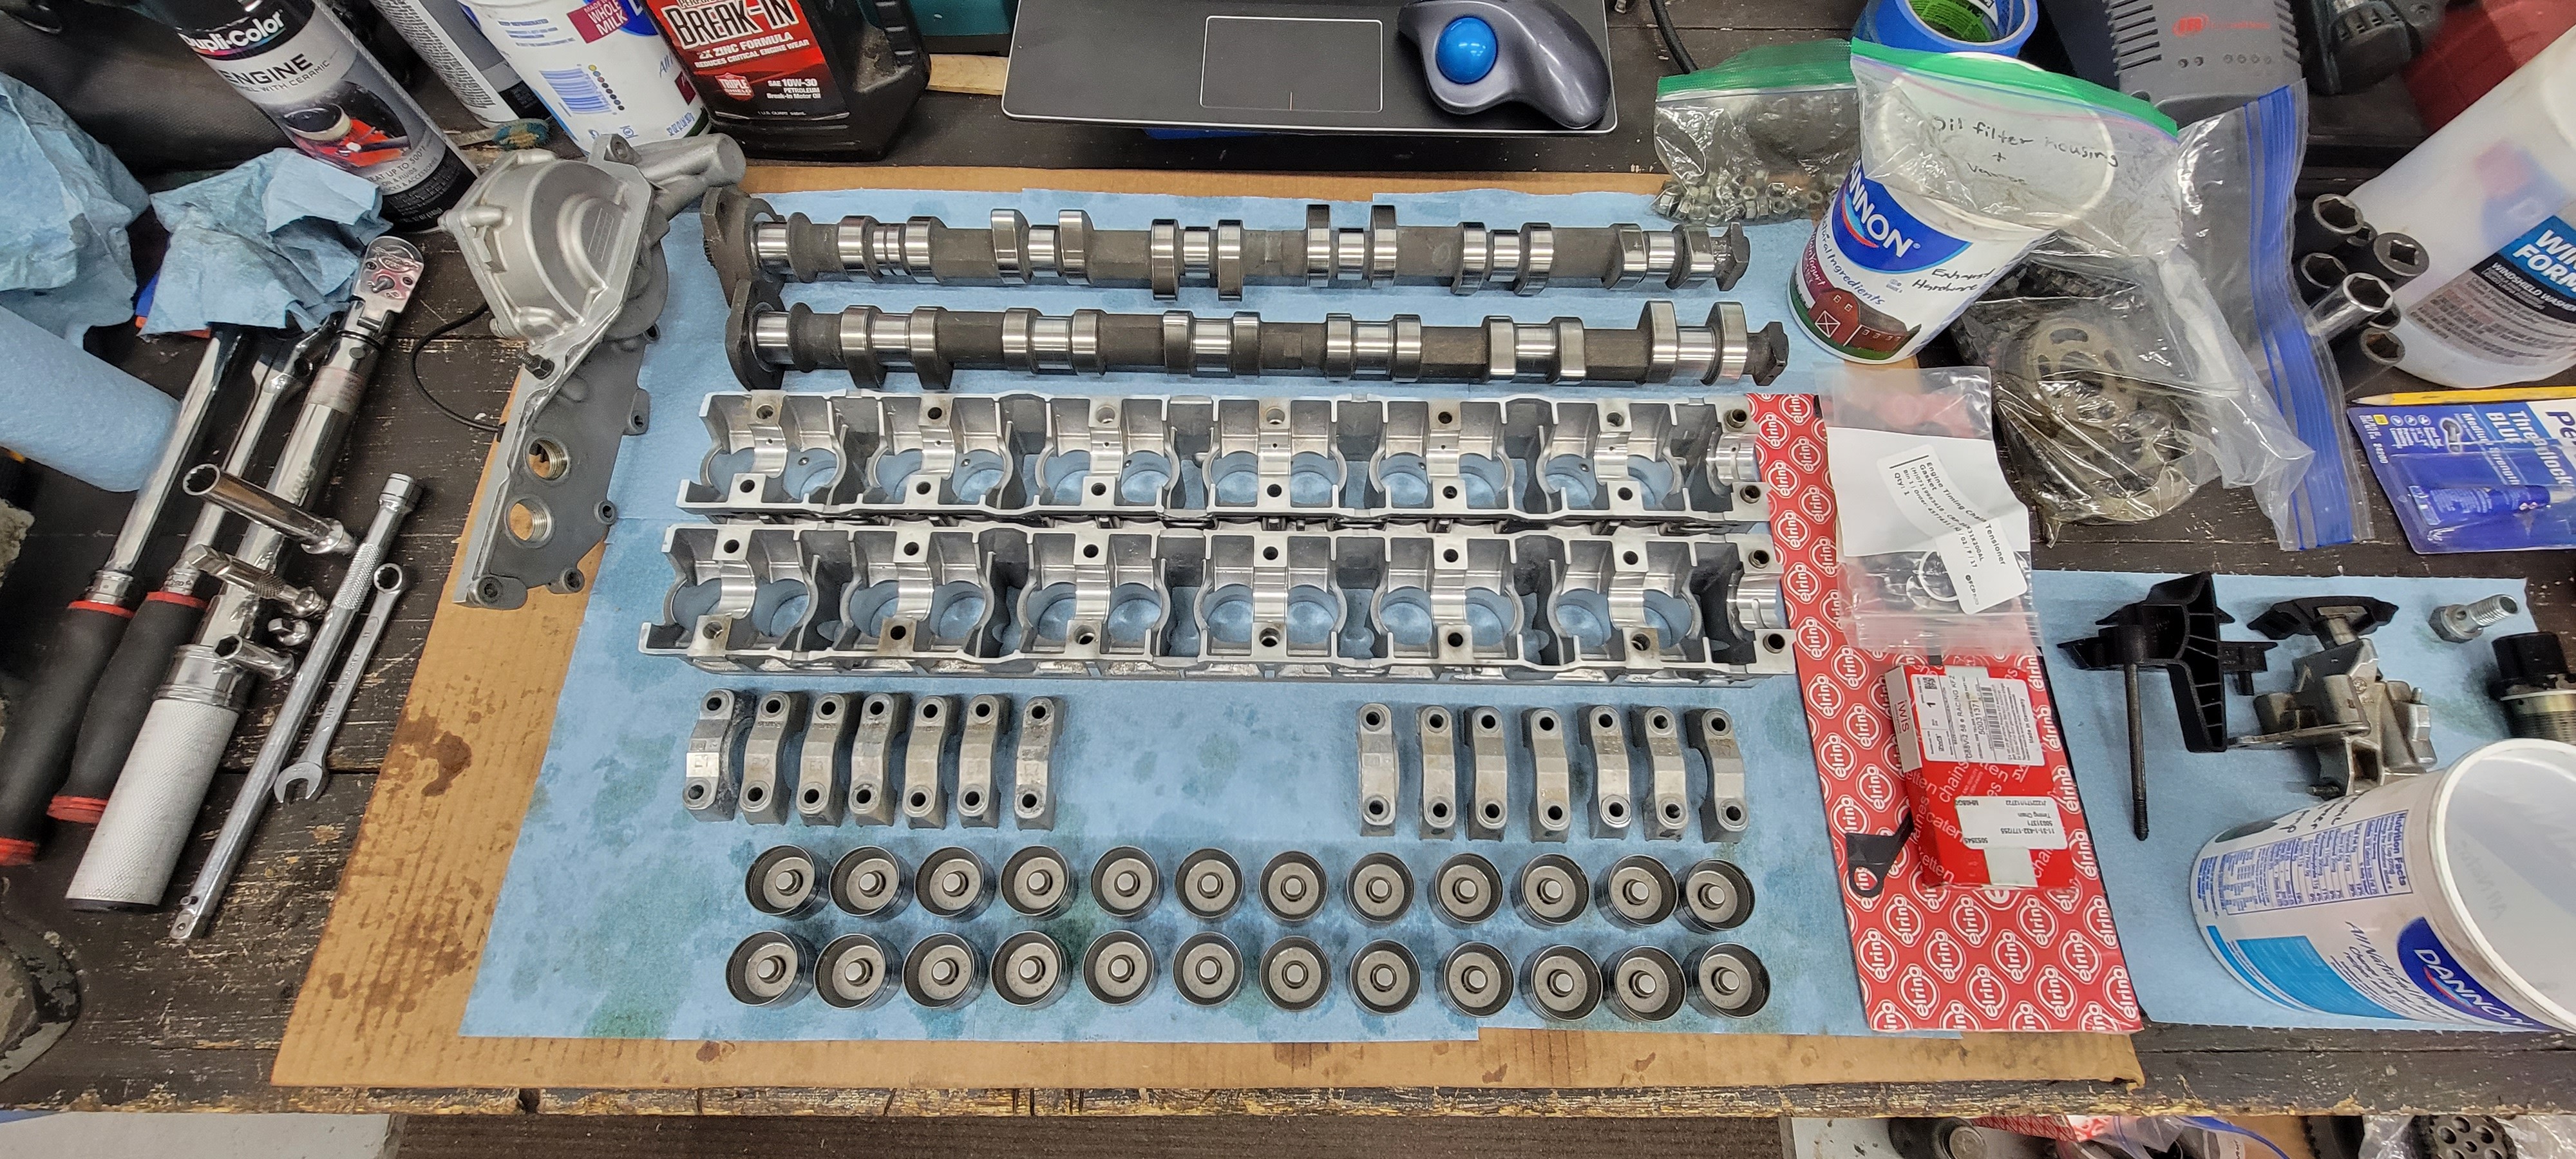
Trays and lifters were about ready to go in and then I noticed this in some of the bores on the exhaust tray
 .
.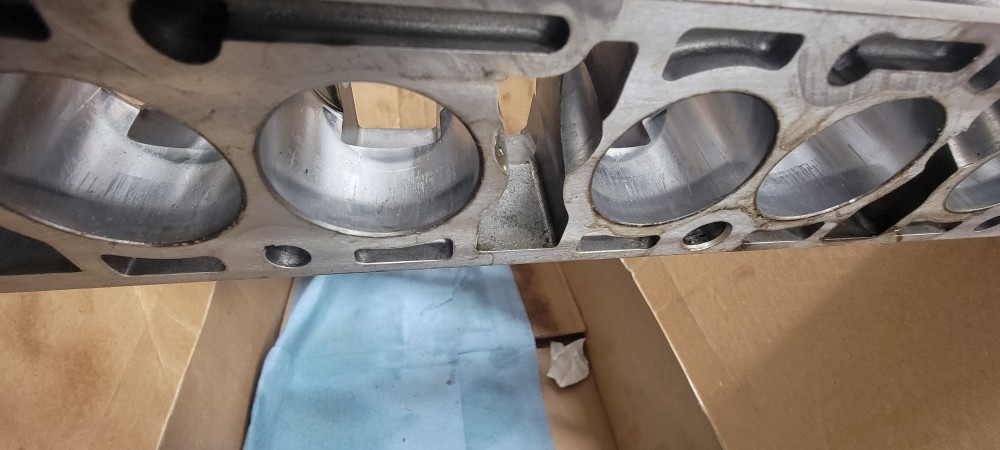
Some light scoring in these areas is typically normal but this was far beyond that which pretty much made them scrap metal now. Unfortunately the cam trays that I got with the M52 were different. One of them was for a M52 but the other was from a M50 non vanos head so that wasn't gonna work out either. Thankfully after some research I found that M52 and S52's actually use identical cam trays so I took a trip out to the local junk yard and luckily found an untouched M52 from a 98 528i with trays and caps that ended up being in great shape!
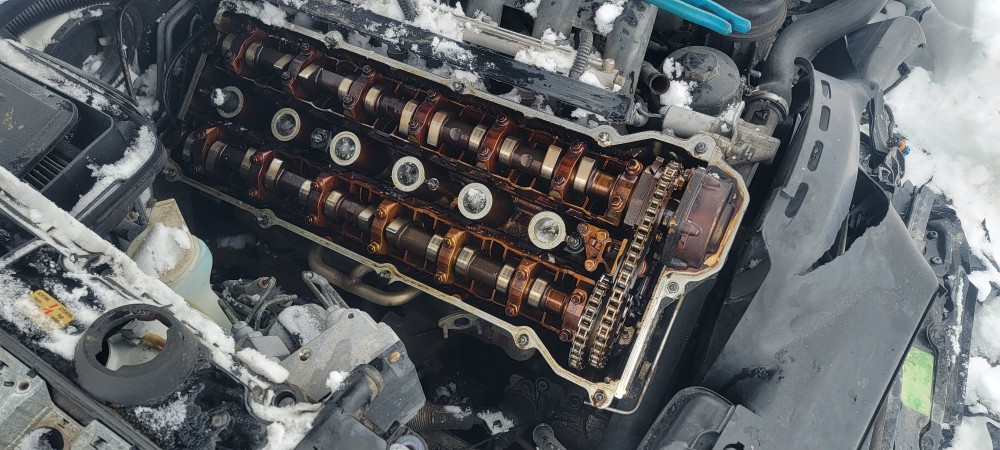
Since they were pretty heavily varnished I dropped them off at a local machine shop to run through a hot tank.
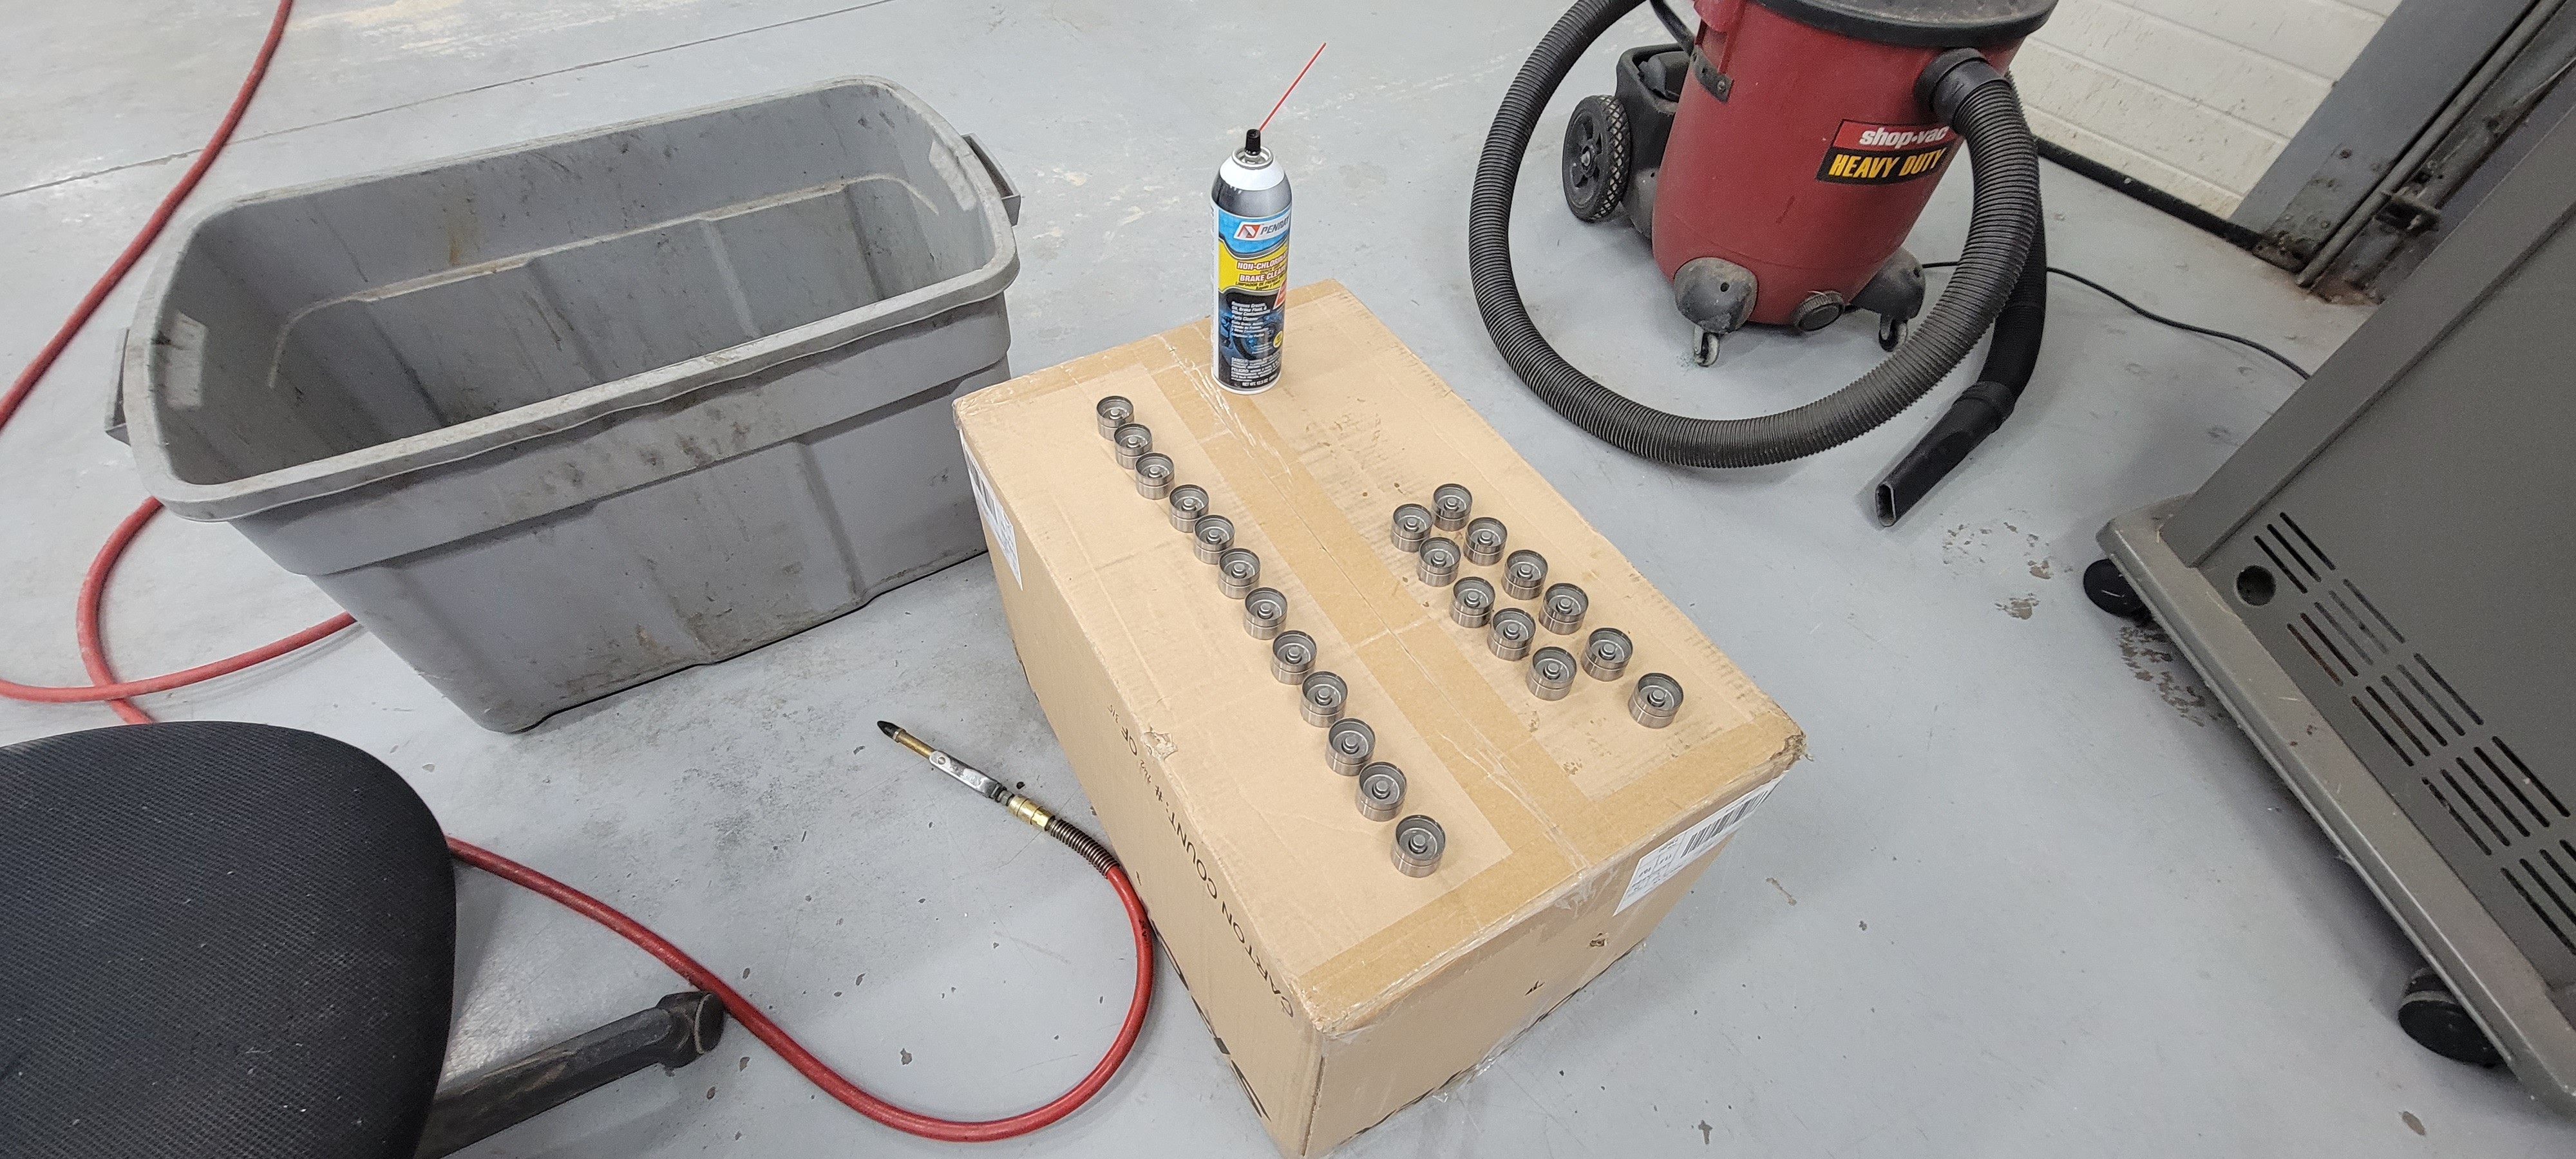
With those back and cleaned up I went through my two sets of lifters from the M52 and S52. The lifters from the S52 worked well for me in the last motor but they were also pretty scored up similar to the cam trays they were in and I was unsure about the ones from the M52 and how many miles were on them. So, instead of trying to clean those up and risking some of them still causing issues I resorted to just purchasing all new ones.
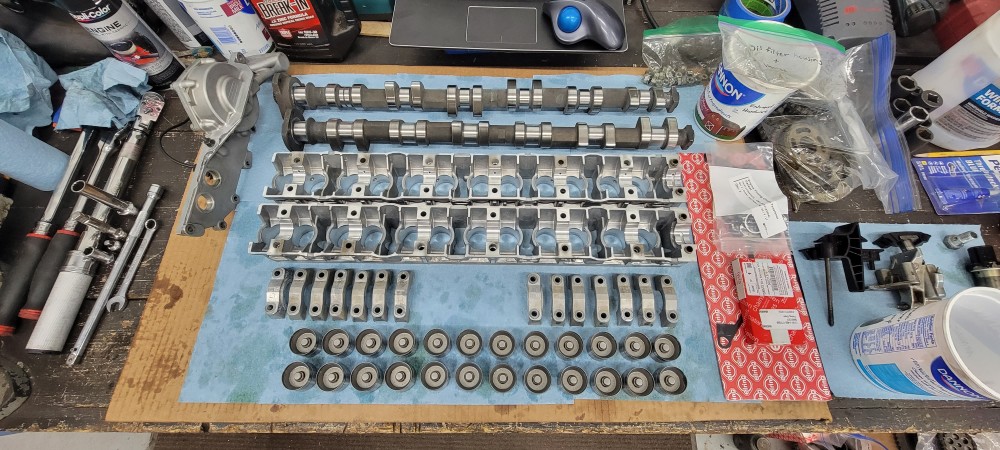
Sprayed all the new lifters down with some break cleaner and compressed air to remove the protective oil that they came covered in.
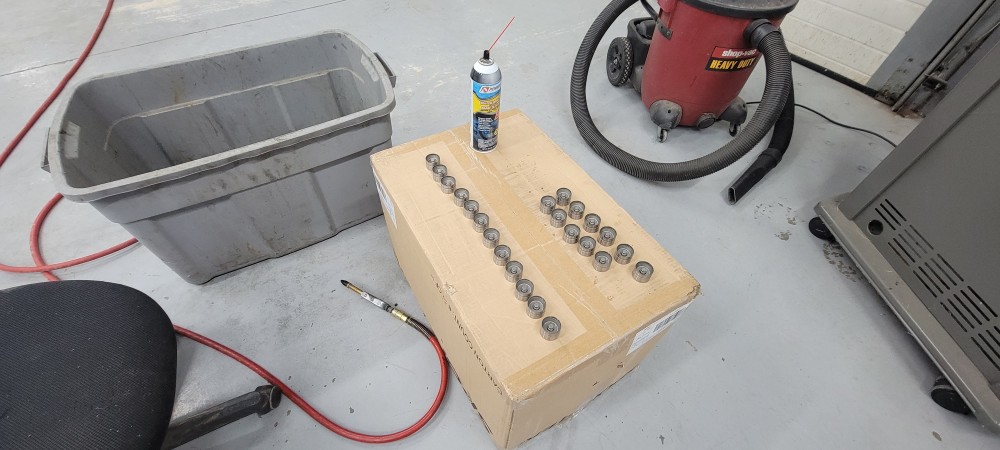
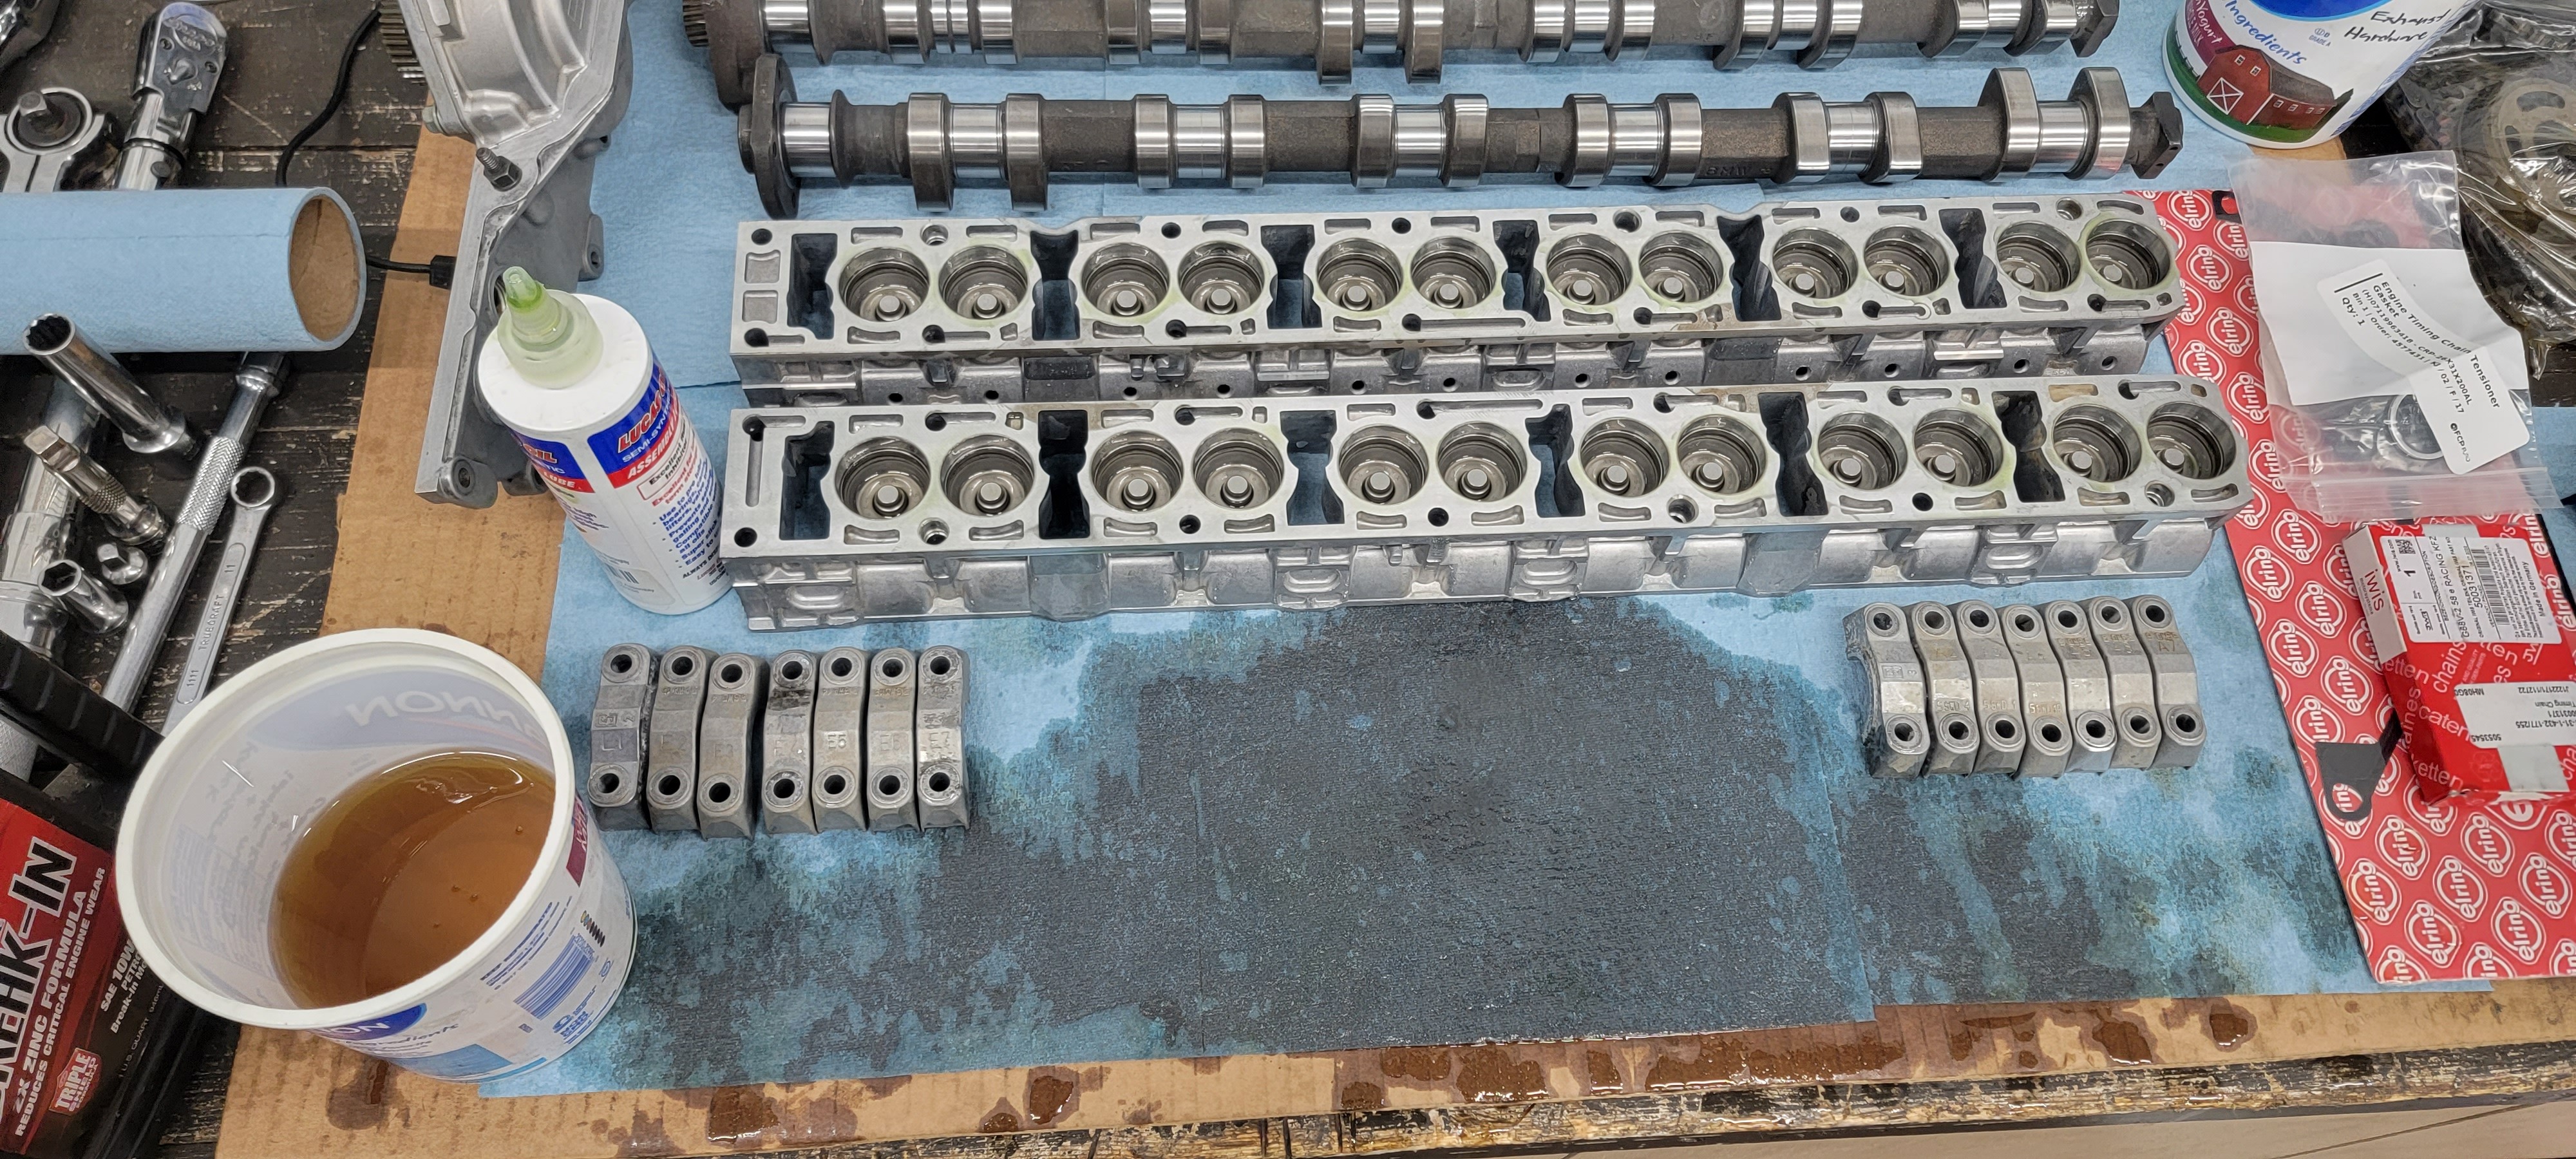
Before Sliding them in to the trays I dunked each lifter in some break in oil and compressed the inner piston a few times with my fingers tell the piston felt a little softer to compress. This was done to prime them with a little oil so they weren't dry on first start. After rubbing a little assembly oil in each bore of the trays I popped them all in.
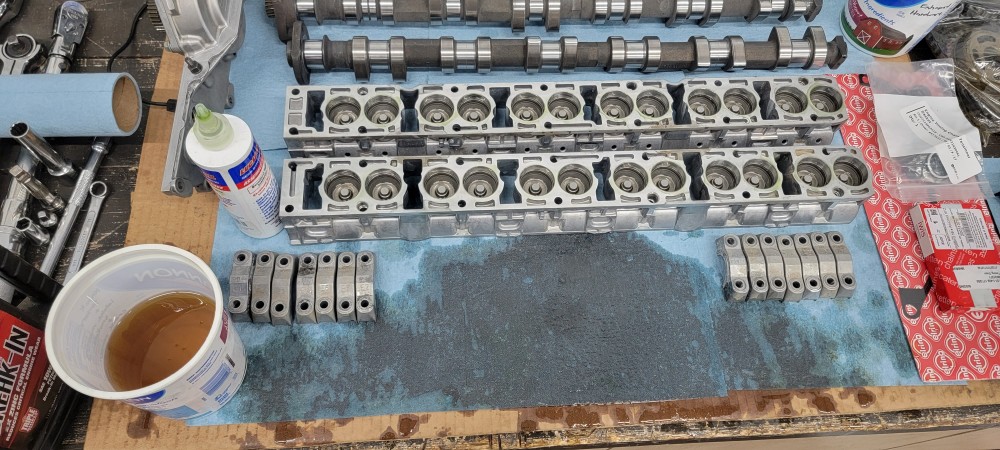
I didn't snap any pics of the next part but the install of the trays and cams went smoothly. I dropped some assembly lube on all of the lifter tops as well as on the cam caps and bearing locations on the trays.
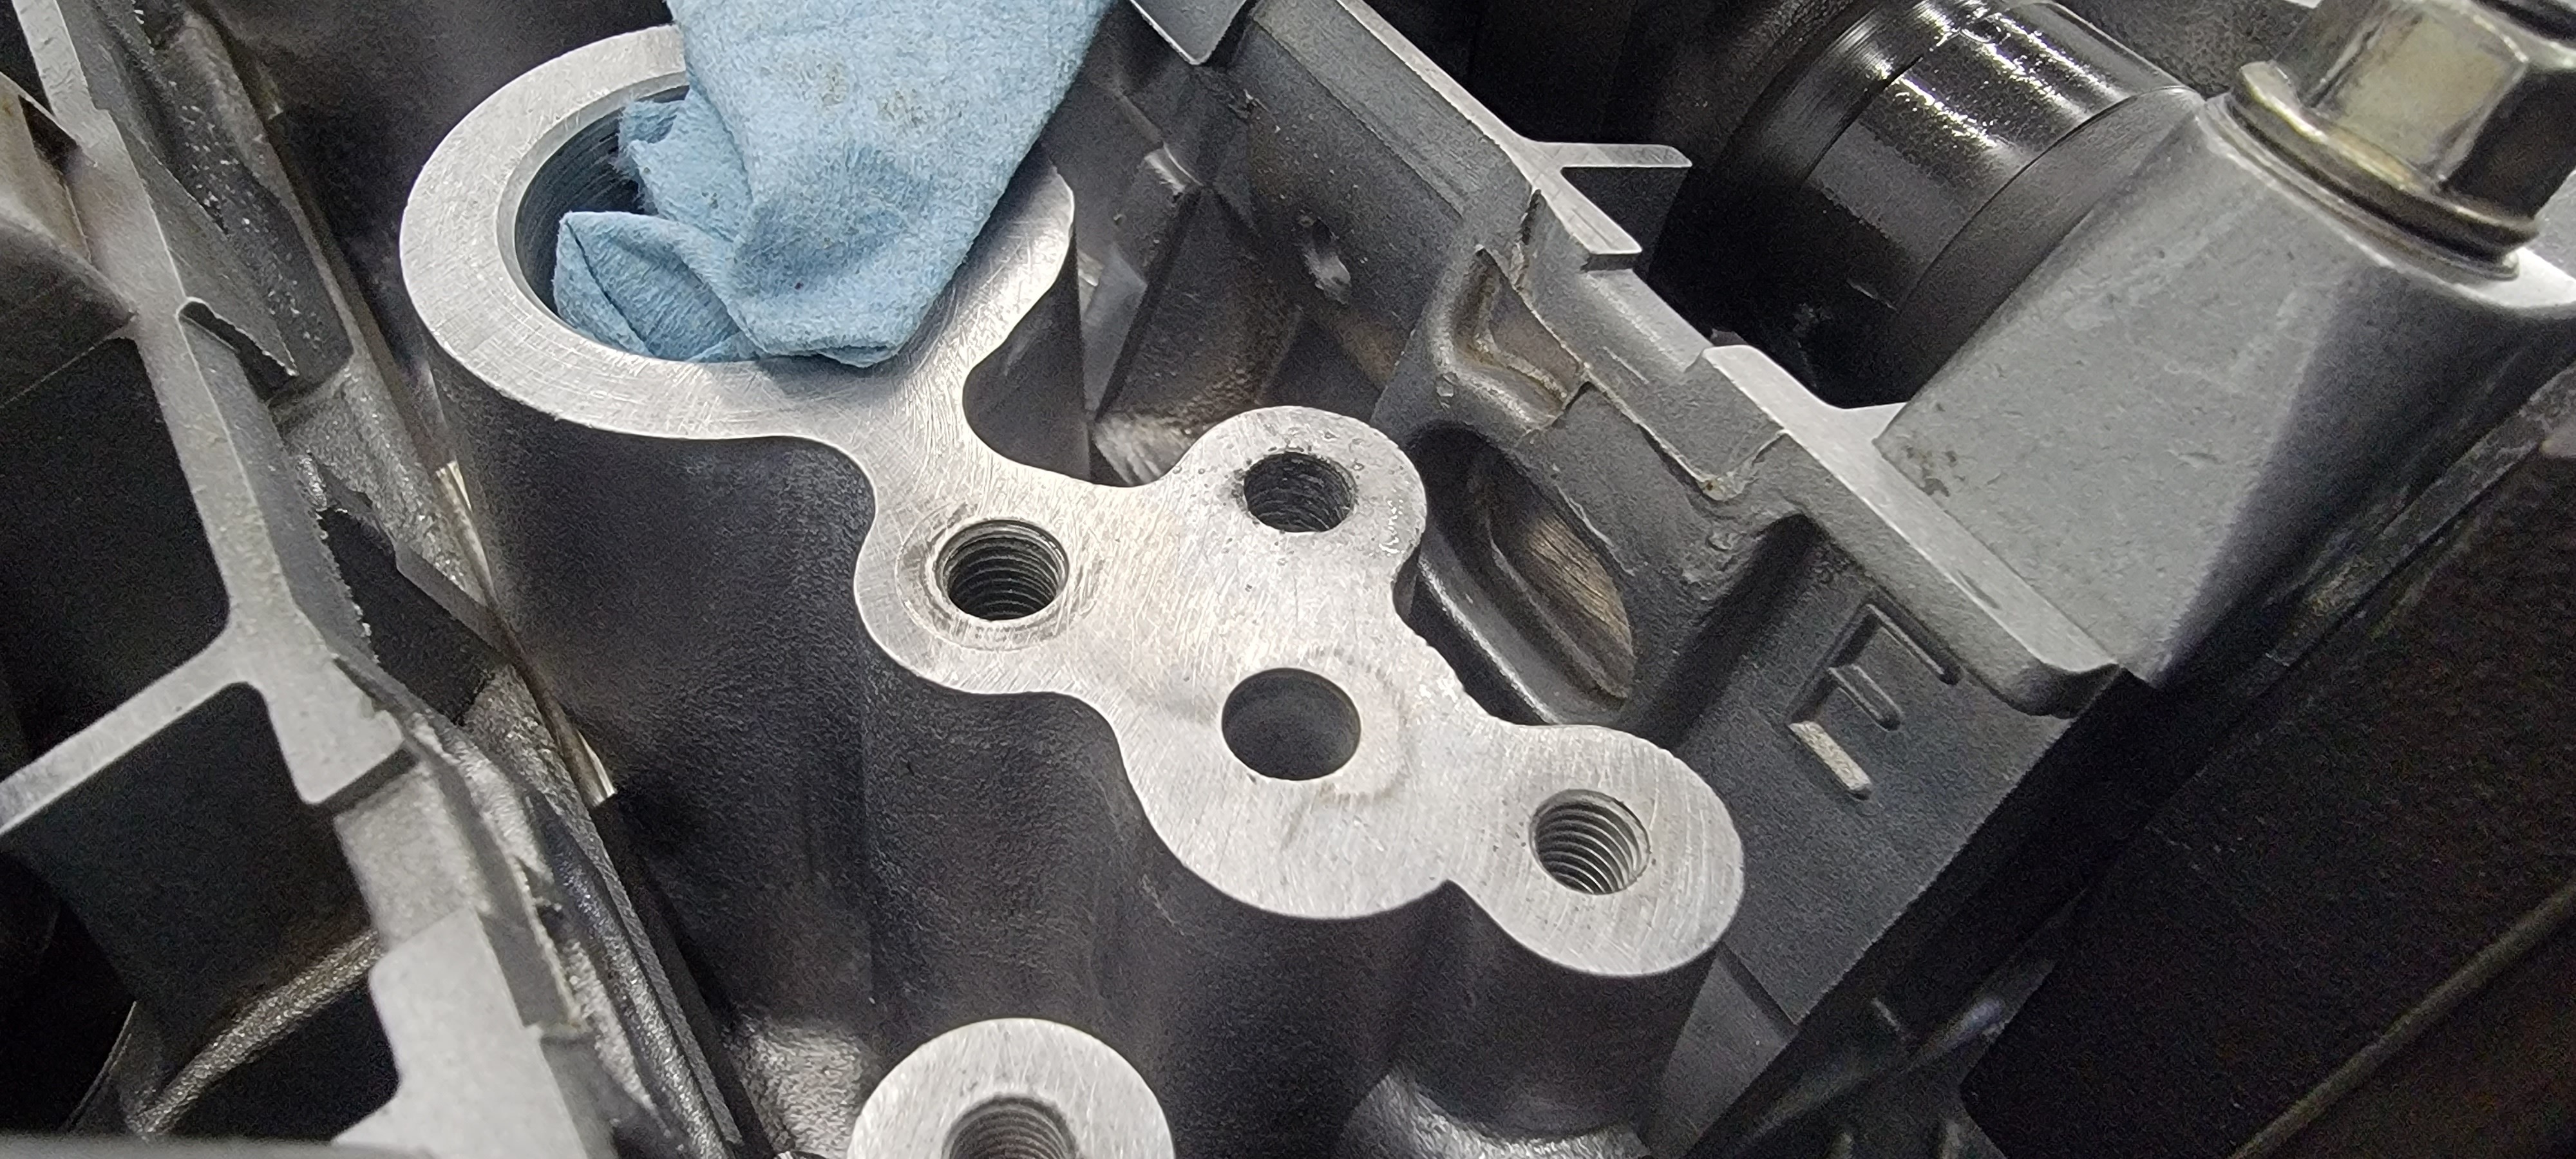
I then began installing all the upper timing components. When I was torquing down the four bolts that held the upper timing chain guide into place I was finishing up torquing down the last bolt on the back side to 10 NM when I felt that wonderful feeling of it come back lose again when I was just about torqued. Backed the bolt back out of the hole with broken pieces of threads attached to it. Out came the Heli-coil kit, again.
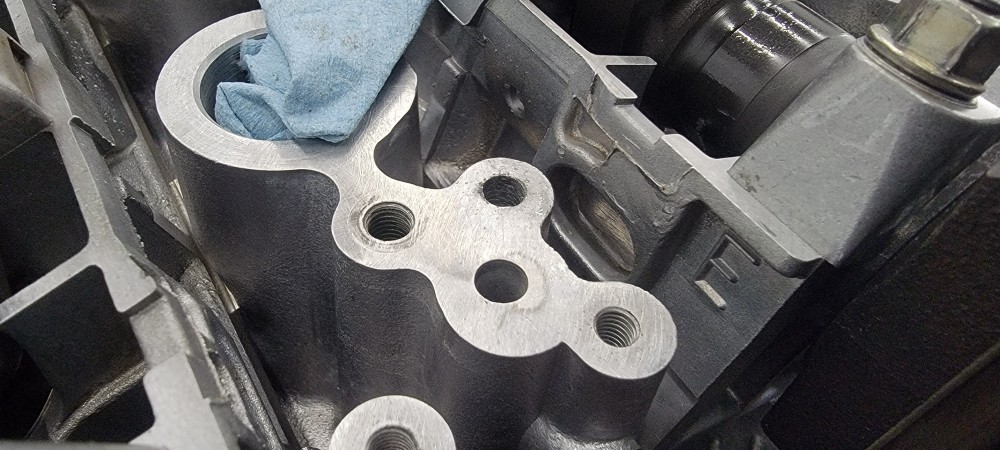
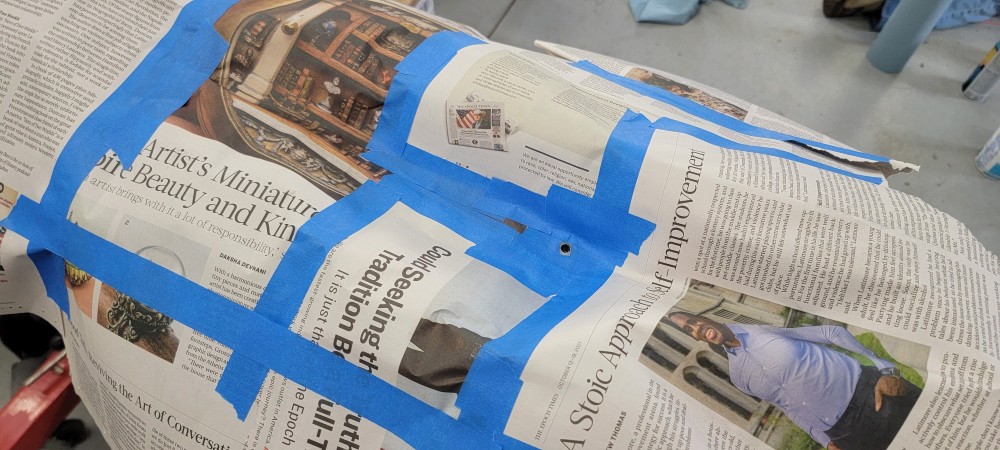
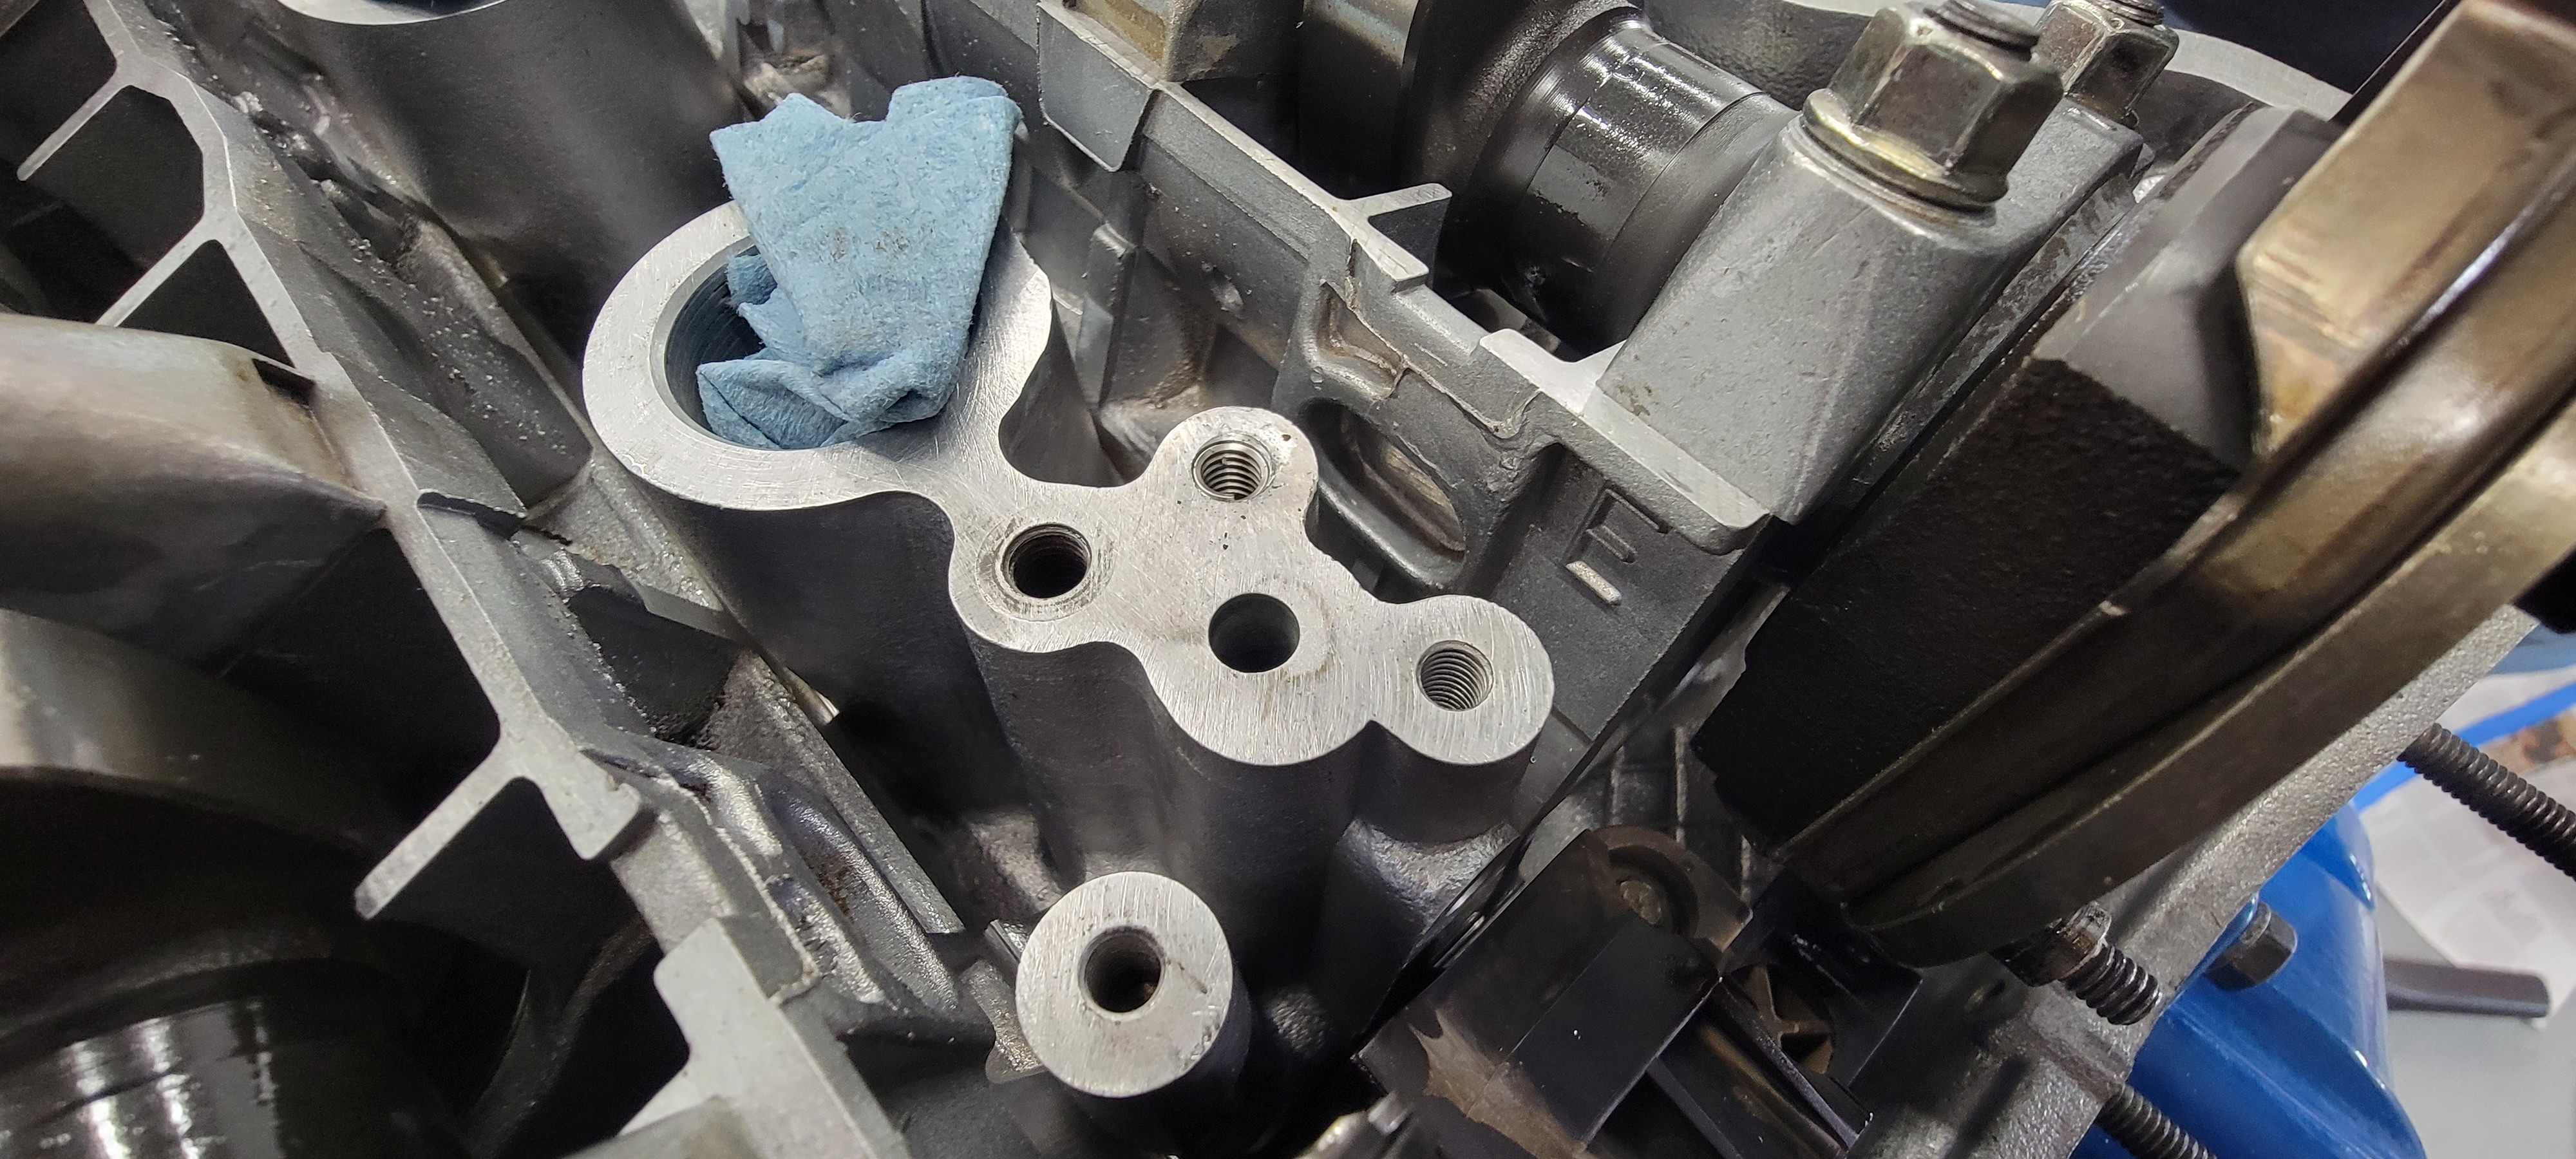
Covered and taped off all areas of the motor leaving only the hole exposed. While drilling and tapping the hole I had help with holding a vacuum right next to the hole to suck up any metal shavings.
New insert was installed and I got back to installing the timing components. This time everything was torqued down to the proper spec with no issue.
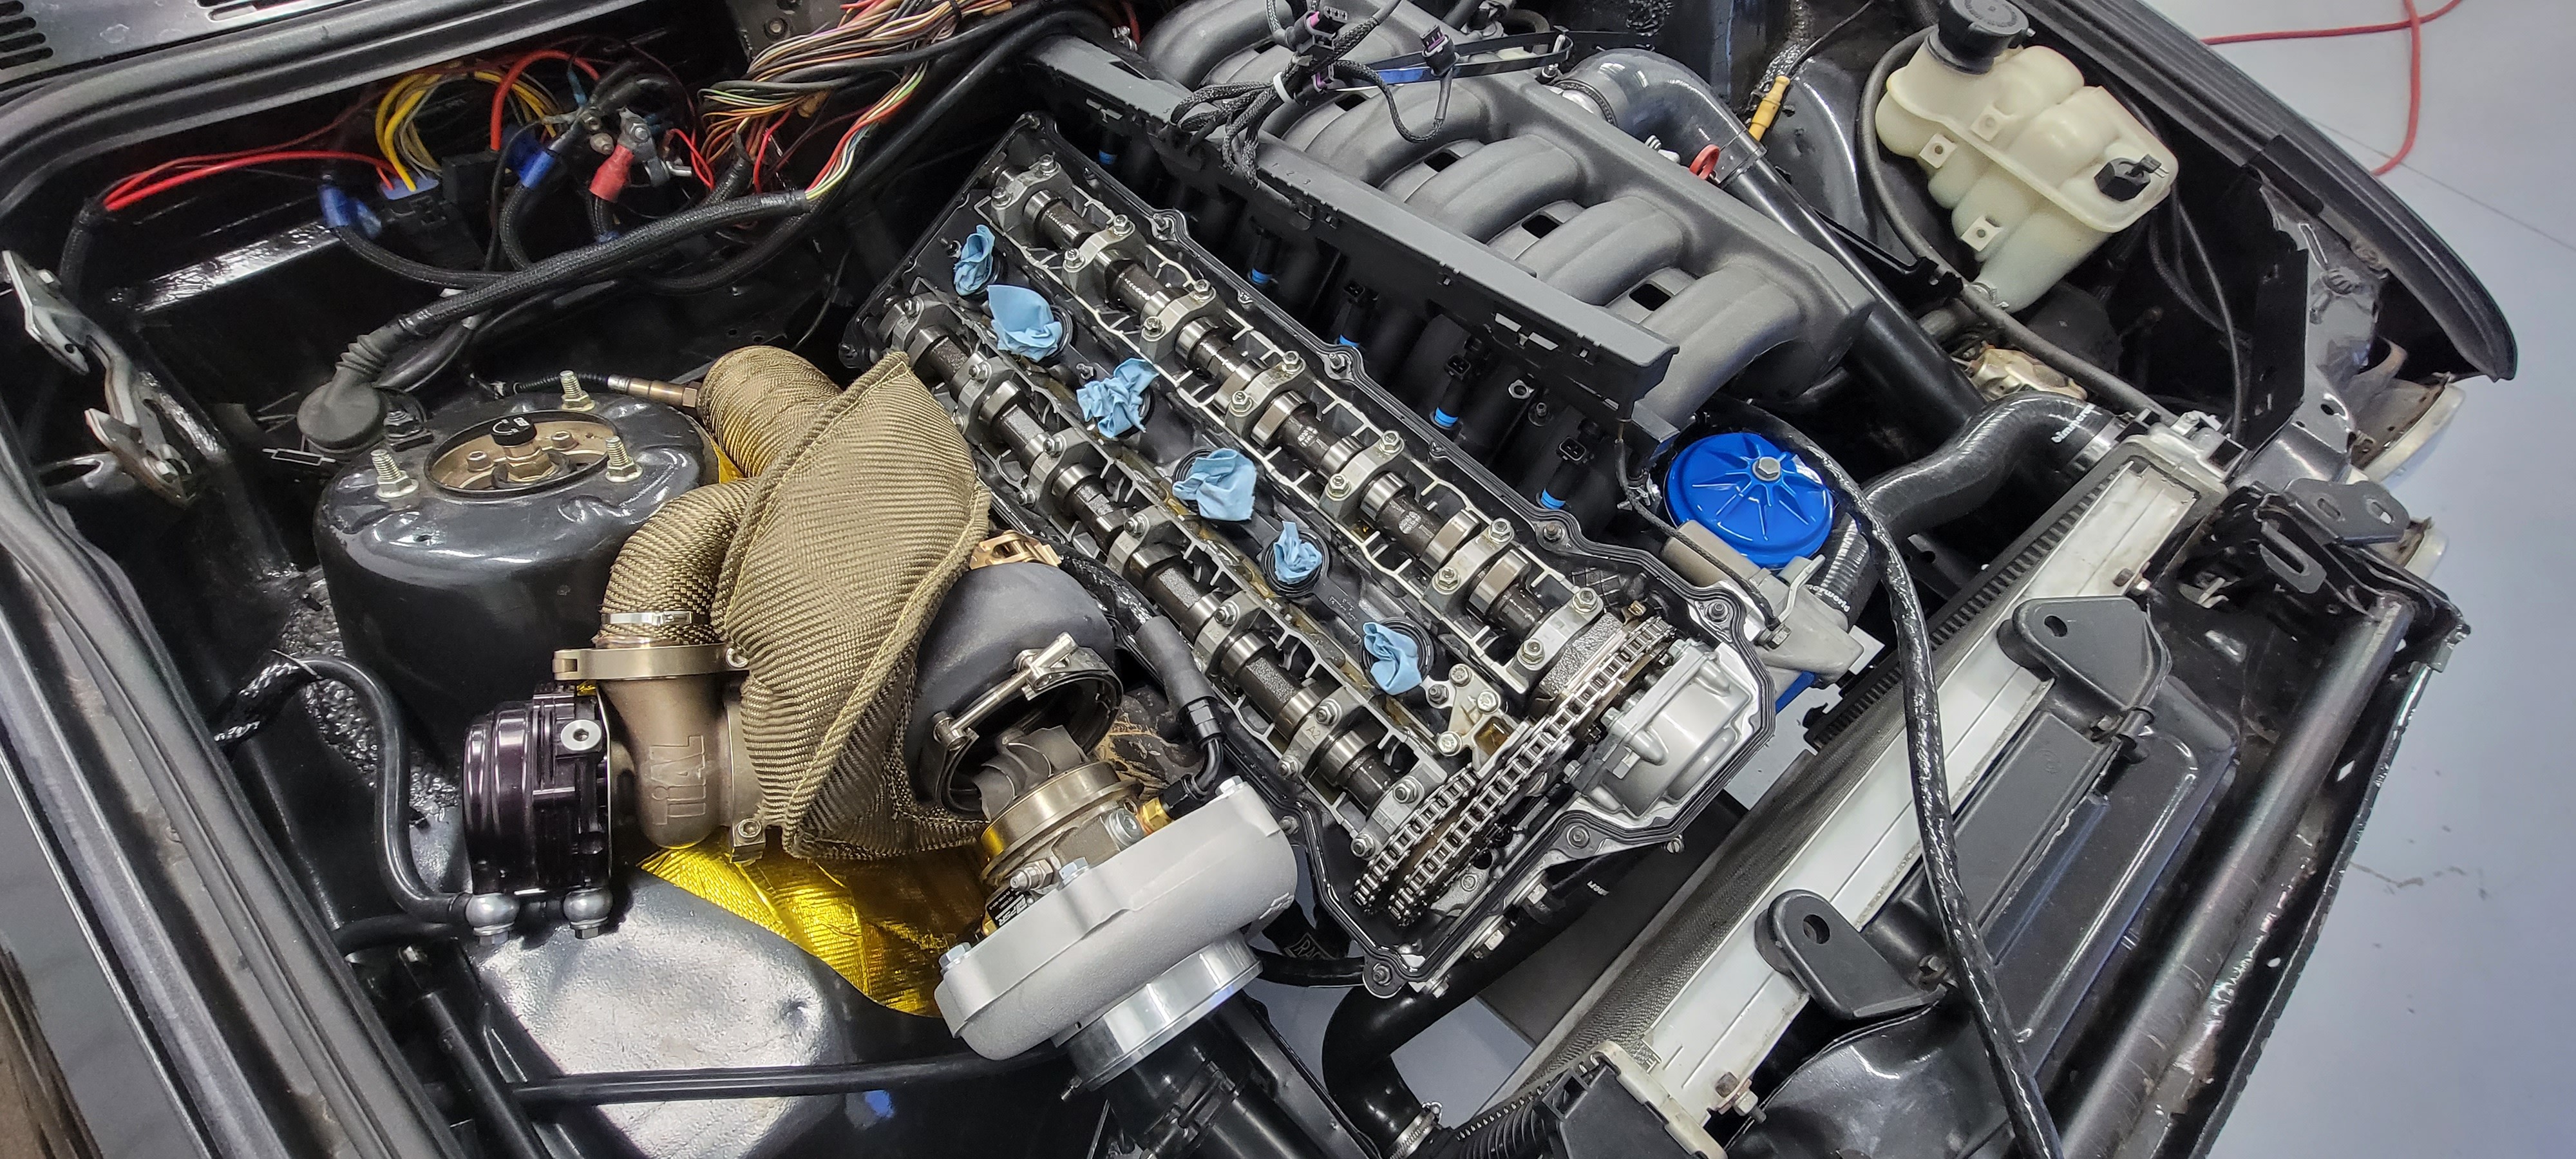
When installing the front cam sprockets a new upper timing chain was used. With everything timed correctly I got the vanos unit installed with a fresh oem gasket. Once that was all completed and all bolts were torqued down to spec I spun the motor around 720 degrees to make sure everything spun smoothly and nothing was interfering with each other.
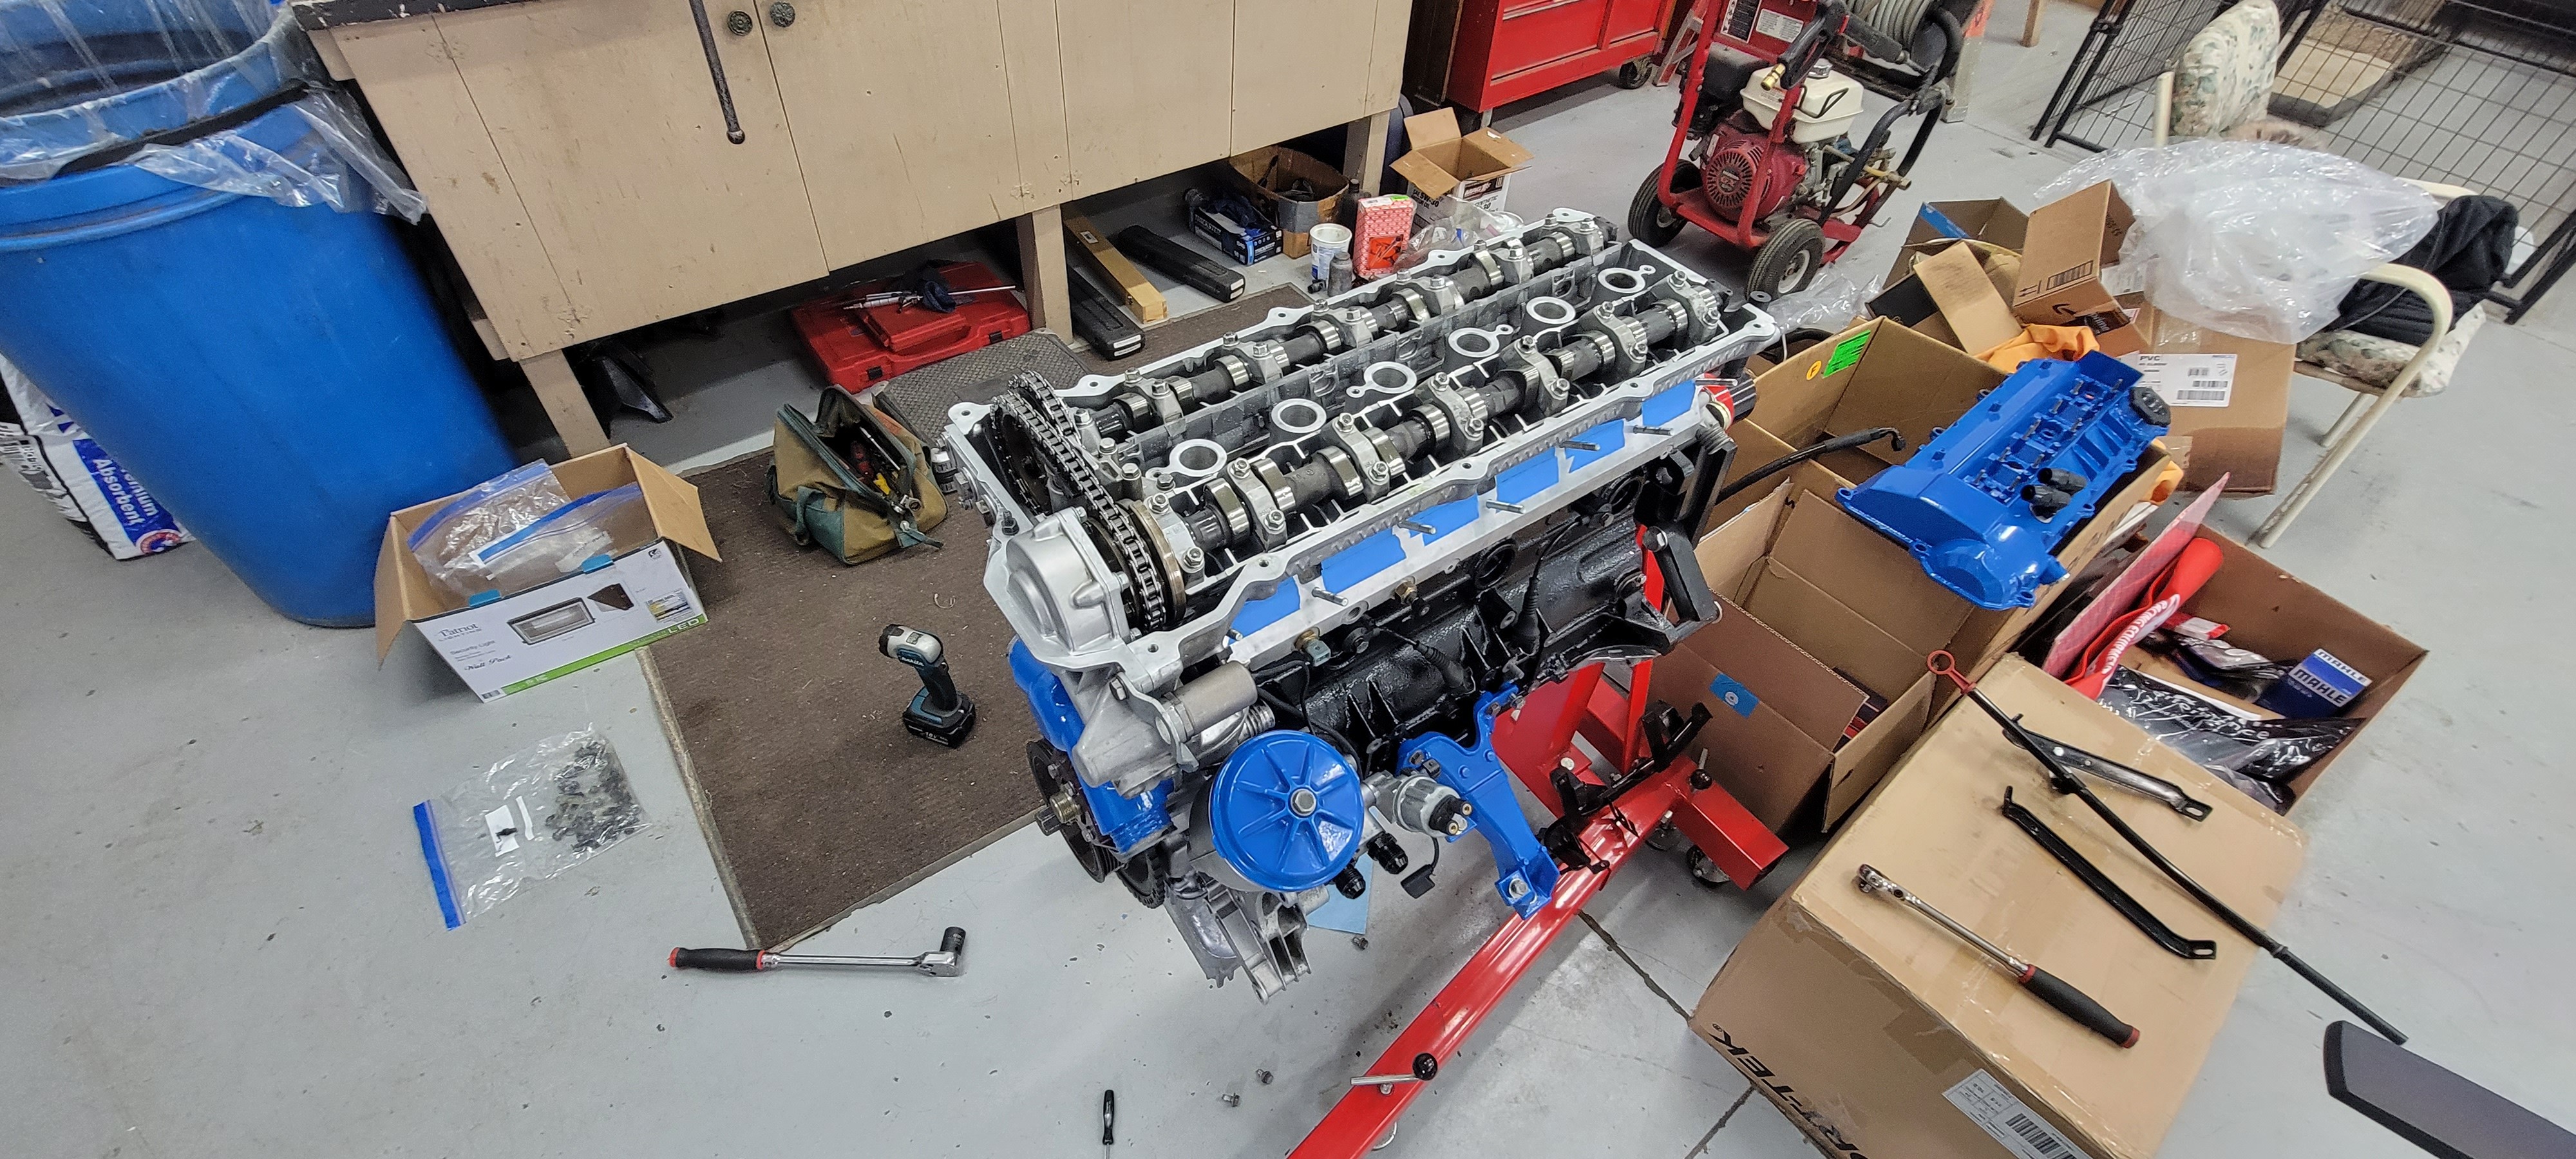
Onto installing the valve cover and getting this thing closed up.
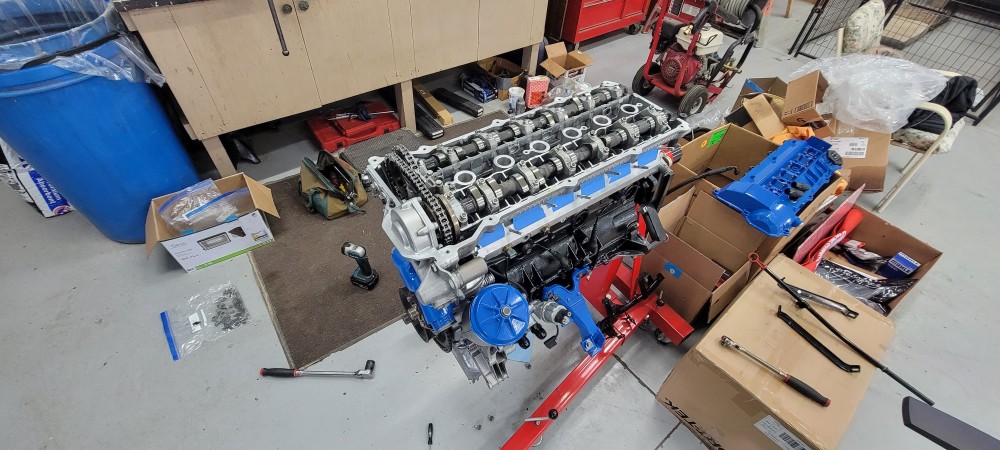
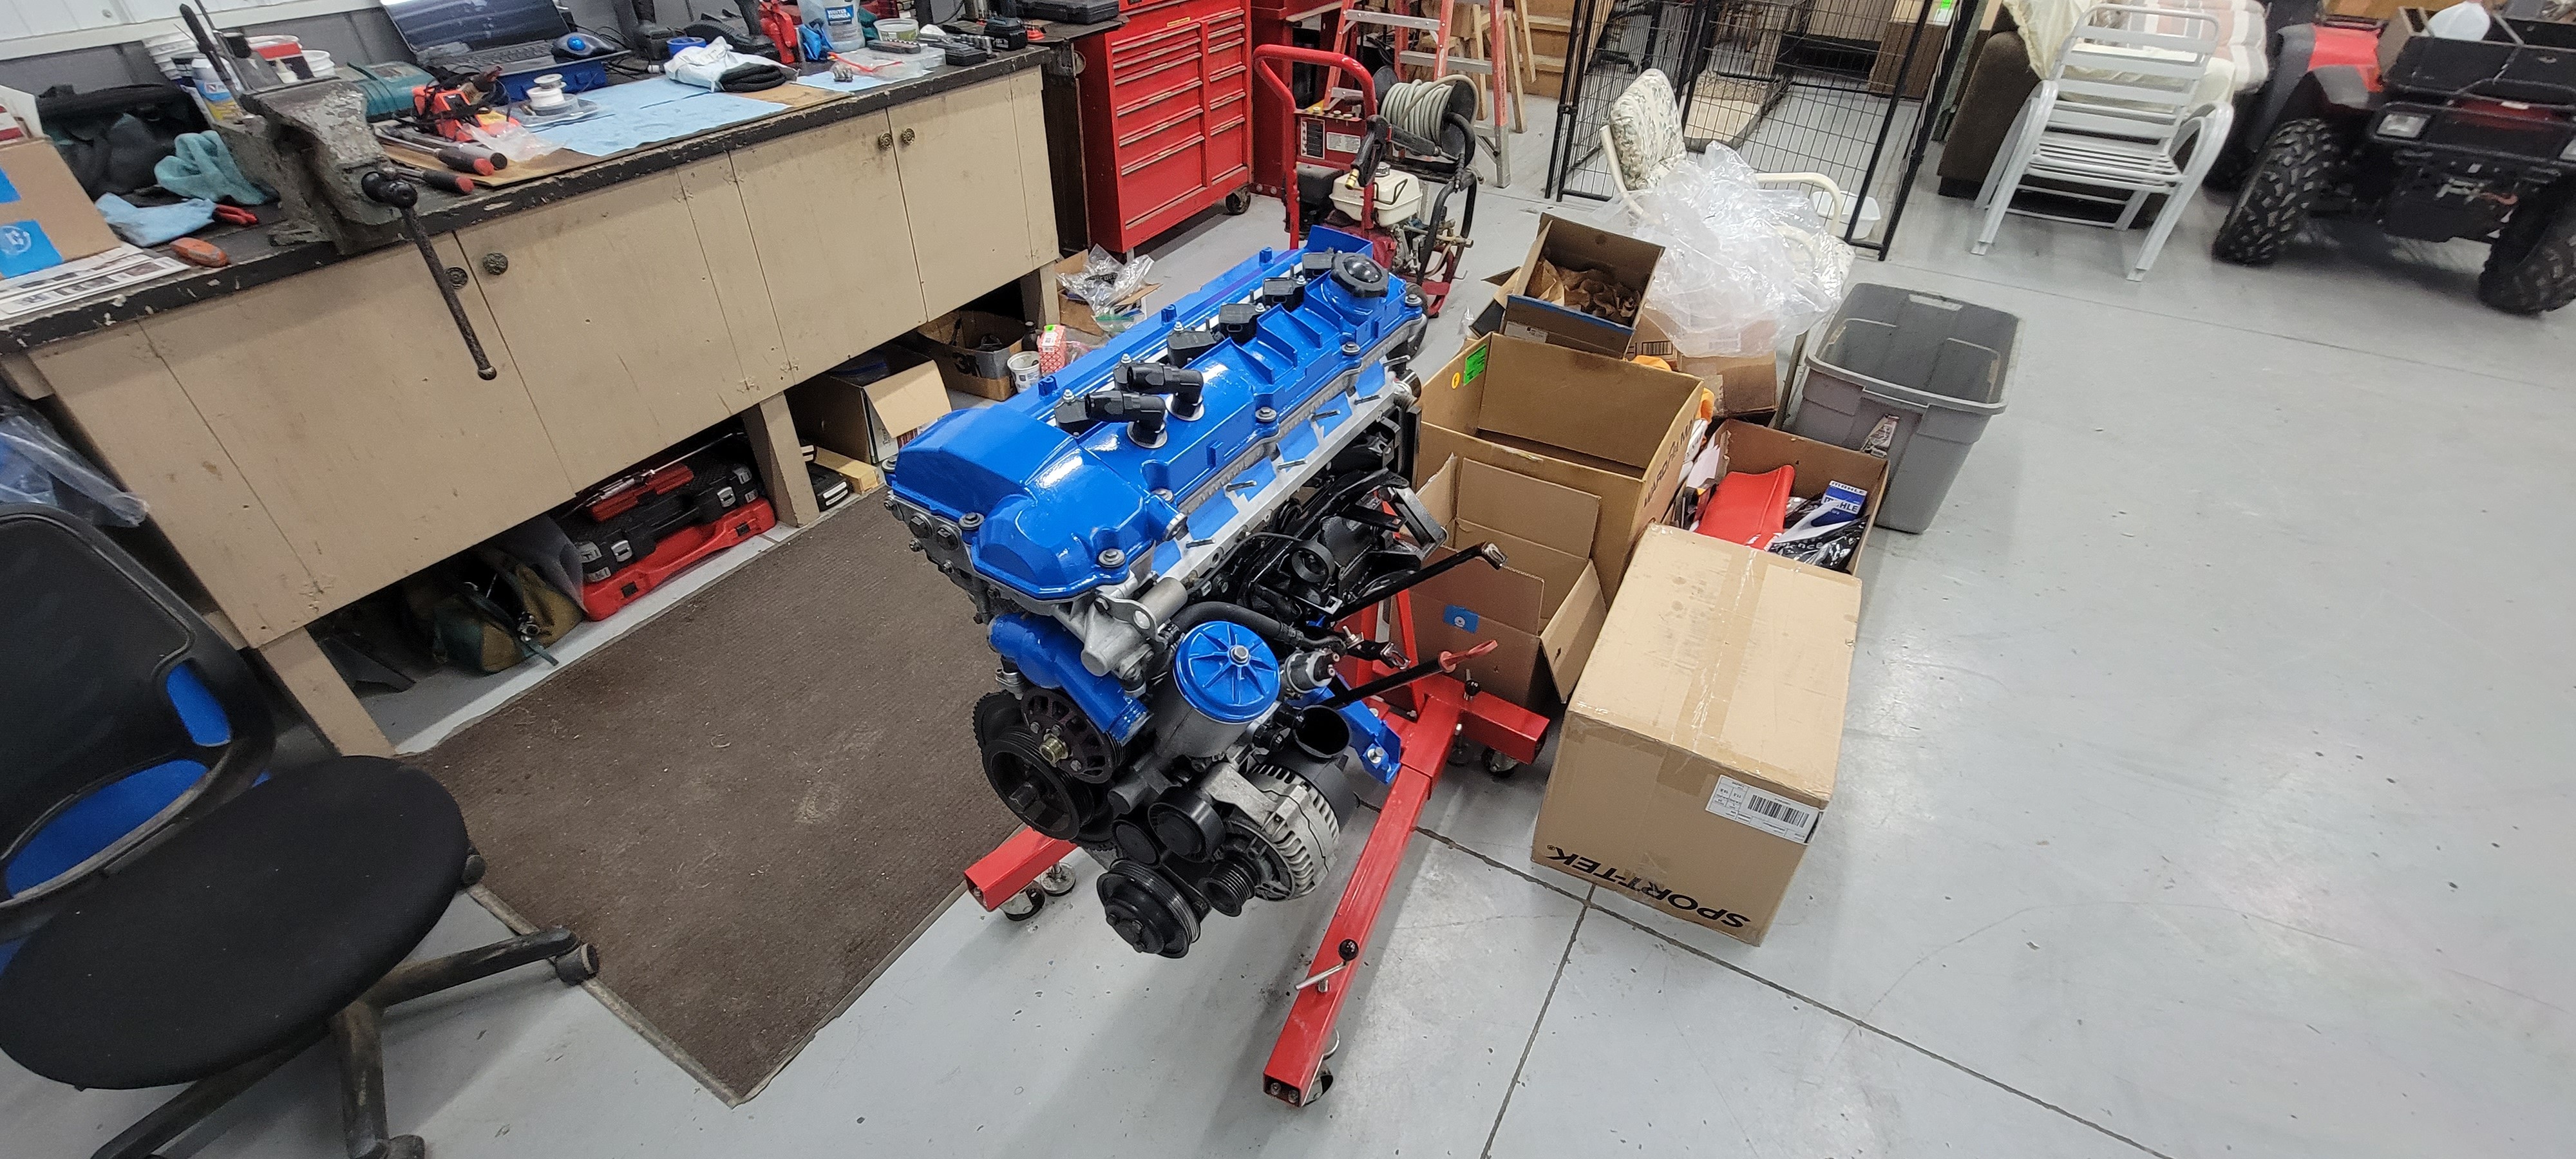
After the timing was complete I did start installing a lot of the outer parts and accessories as well.
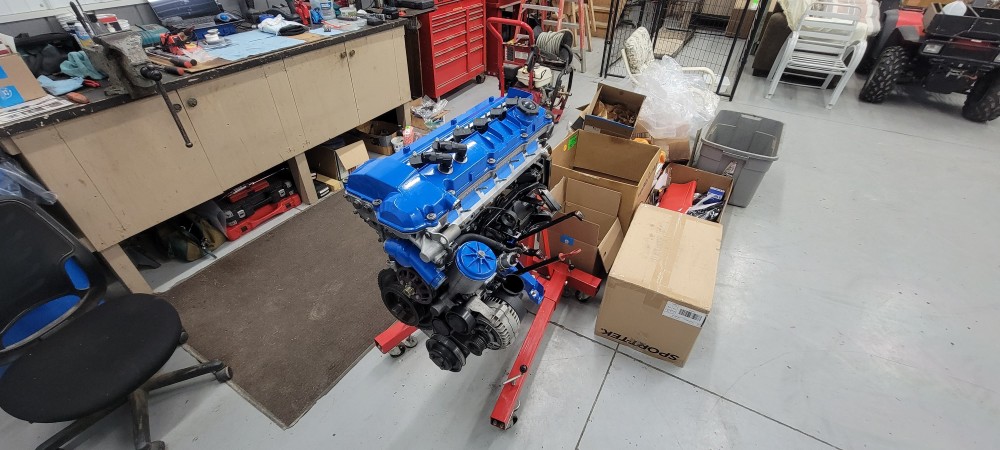
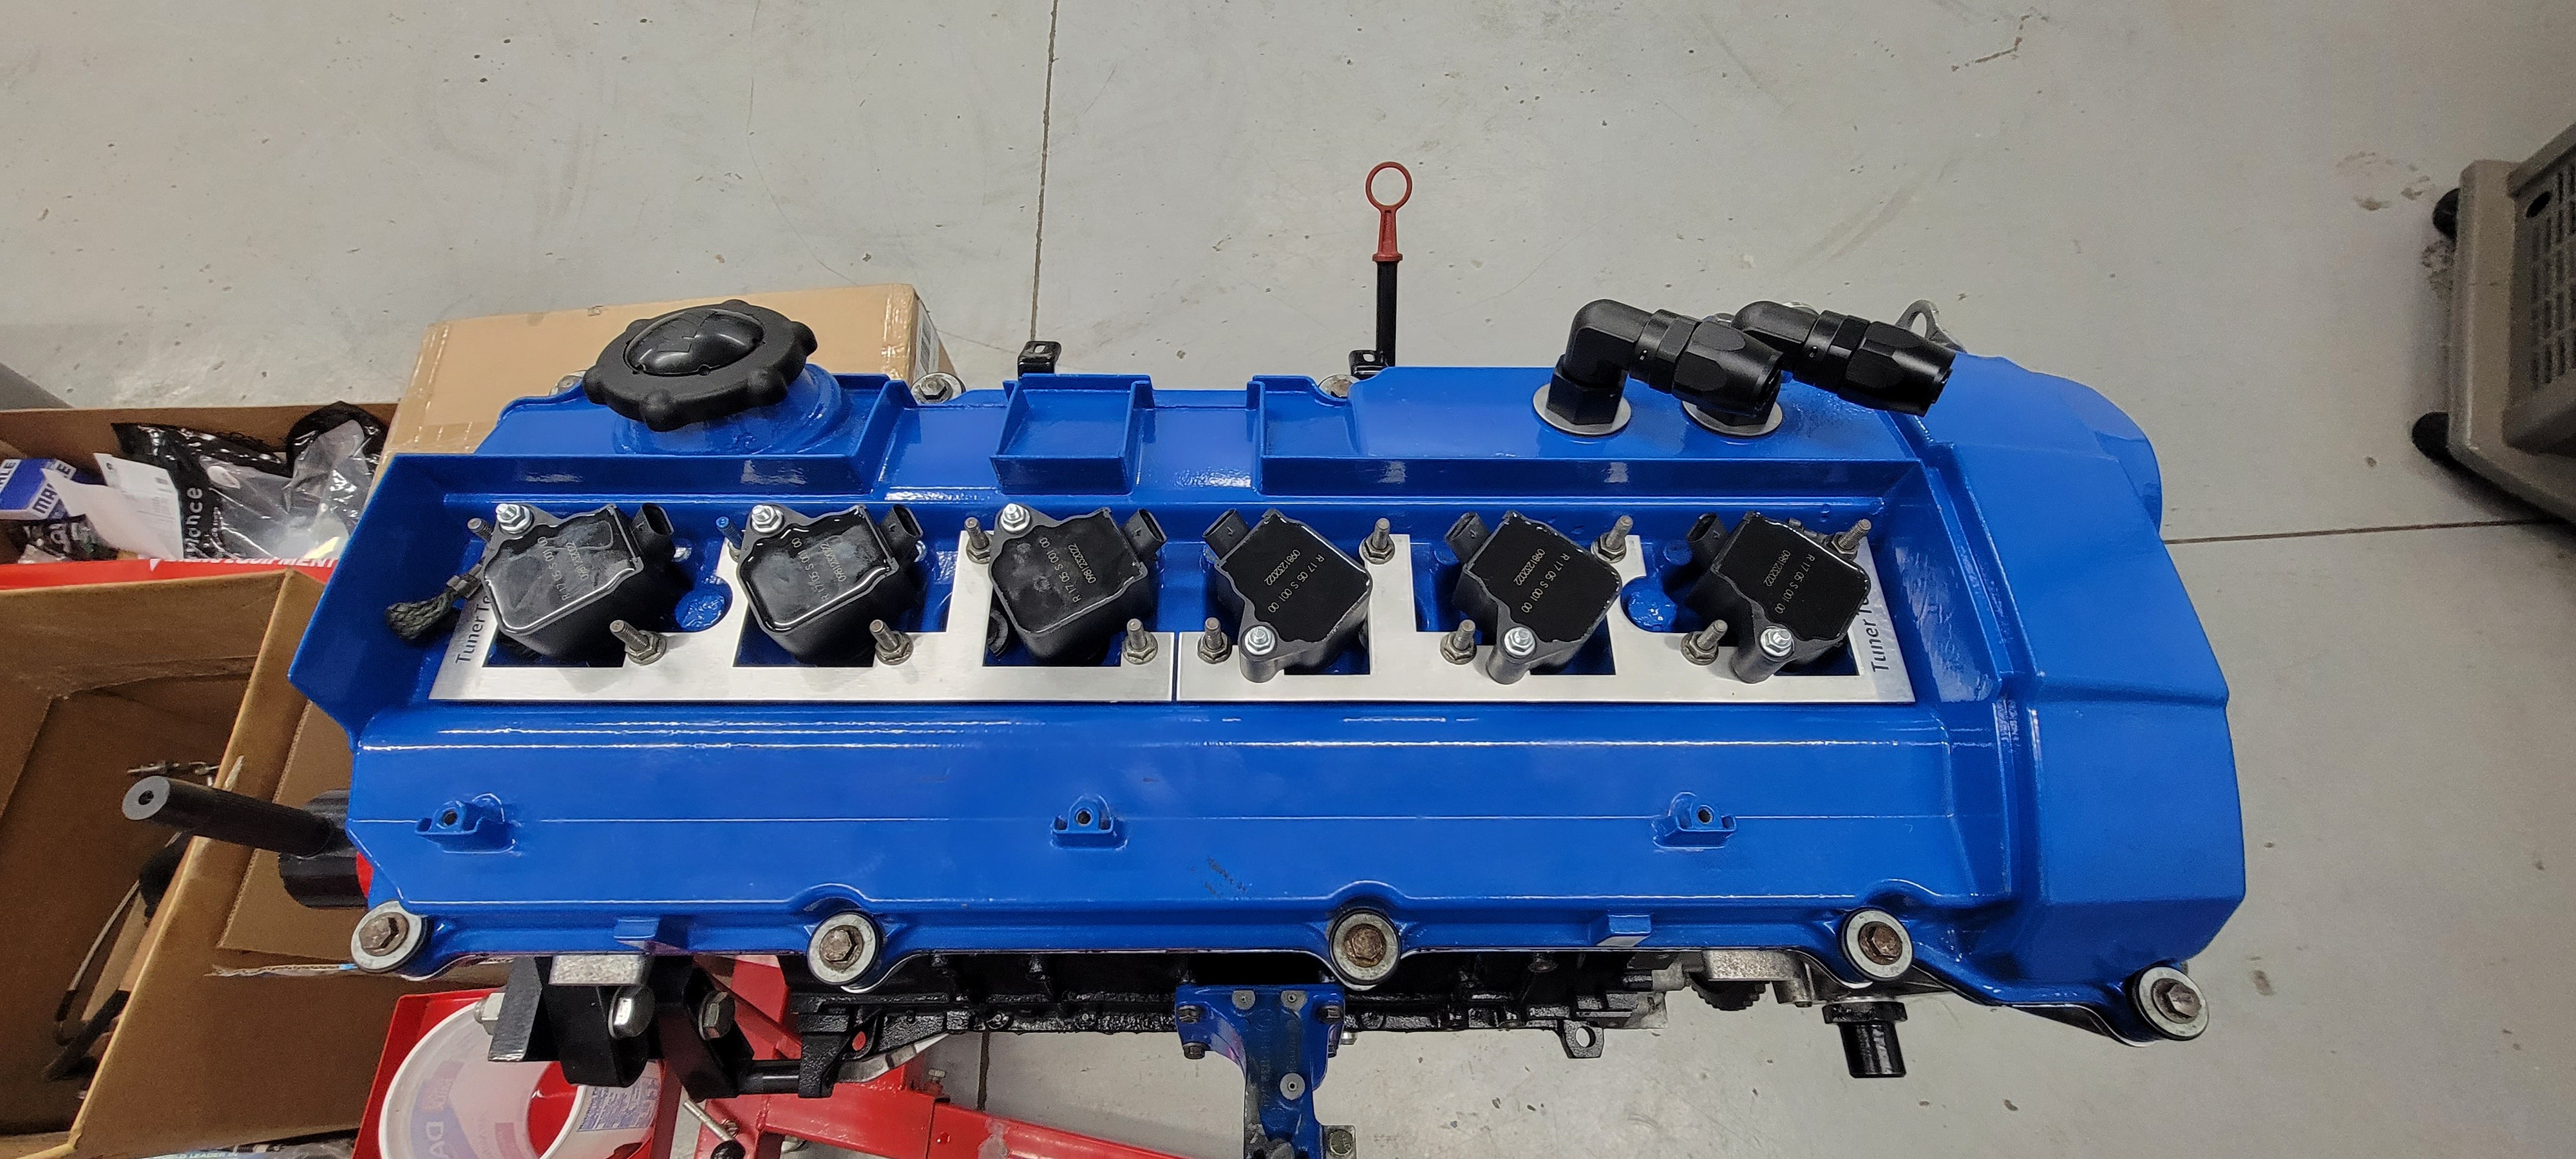
Two things I added from the old setup included an upgrade to my crankcase breathing setup. The single oem port I was using on the old setup I felt was just not gonna be adequate enough so I purchased the catch can kit offered by SLG. The kit is pretty slick and comes with all the drill bits and taps needed for modifying the cover and plugging the factory hole as well as all the necessary AN fittings to install for the new catch can lines.
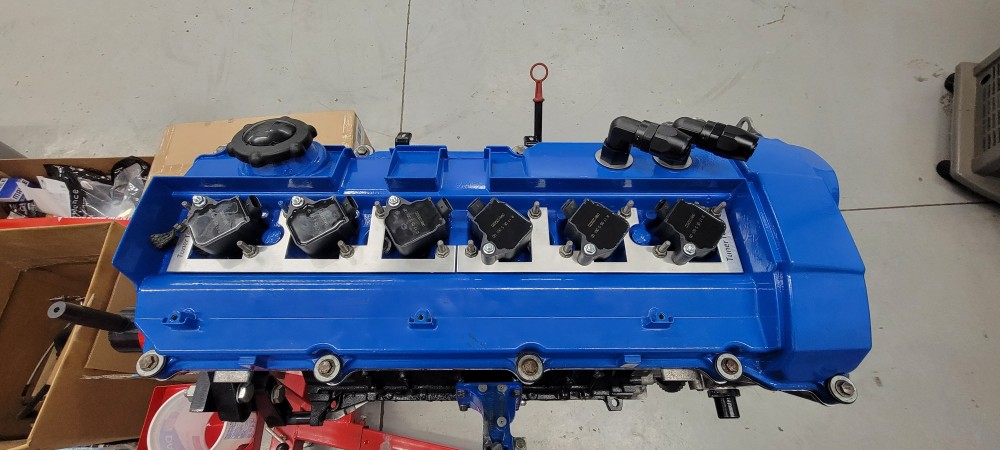
The other addition was the ignition coils. On the old setup I ran the original 20 year old obd1 coil packs. For the most part they worked just fine but they started showing their age when during an auto-x event they got heat soaked and caused the engine to misfire. Of course I didn't wanna run into that issue again so I either had to get a new set of oem ones or try something else. New set of coils would set me back close to $600 so I looked around to see what else was out there. Well sure enough I noticed quite a few other boosted e36 guys running coils out of a b58. I then came across a company called Tunertech that actually designed a full swap kit with custom brackets to fit the coils in the e36 valve covers and the necessary pigtails to splice into the harness to run em. The main advantages of running these coils were that they produce stronger spark energy over stock, allow you to run a looser spark plug gap resulting in smoother idle and the cost of the coils come in at around half the cost of the stock ones. Because of these advantages I figured it was worth the try. One other thing I really liked was the fact that these brackets position the coils away from the down pipe so I don't have to worry about any wires burning over time.
Up next:
Clean and prepare clutch, flywheel, and trans
Wiring for ignition coils
Re fabrication to the down pipe for new turbo
-
the one and only e30 s52 engine swapUpdates have been lacking as usual. A lot has happened in the last couple weeks so it's been tough for me to get enough motivation to finally type out an update and get yall caught up.
Enough with the blah... Yets go back to where we left off.
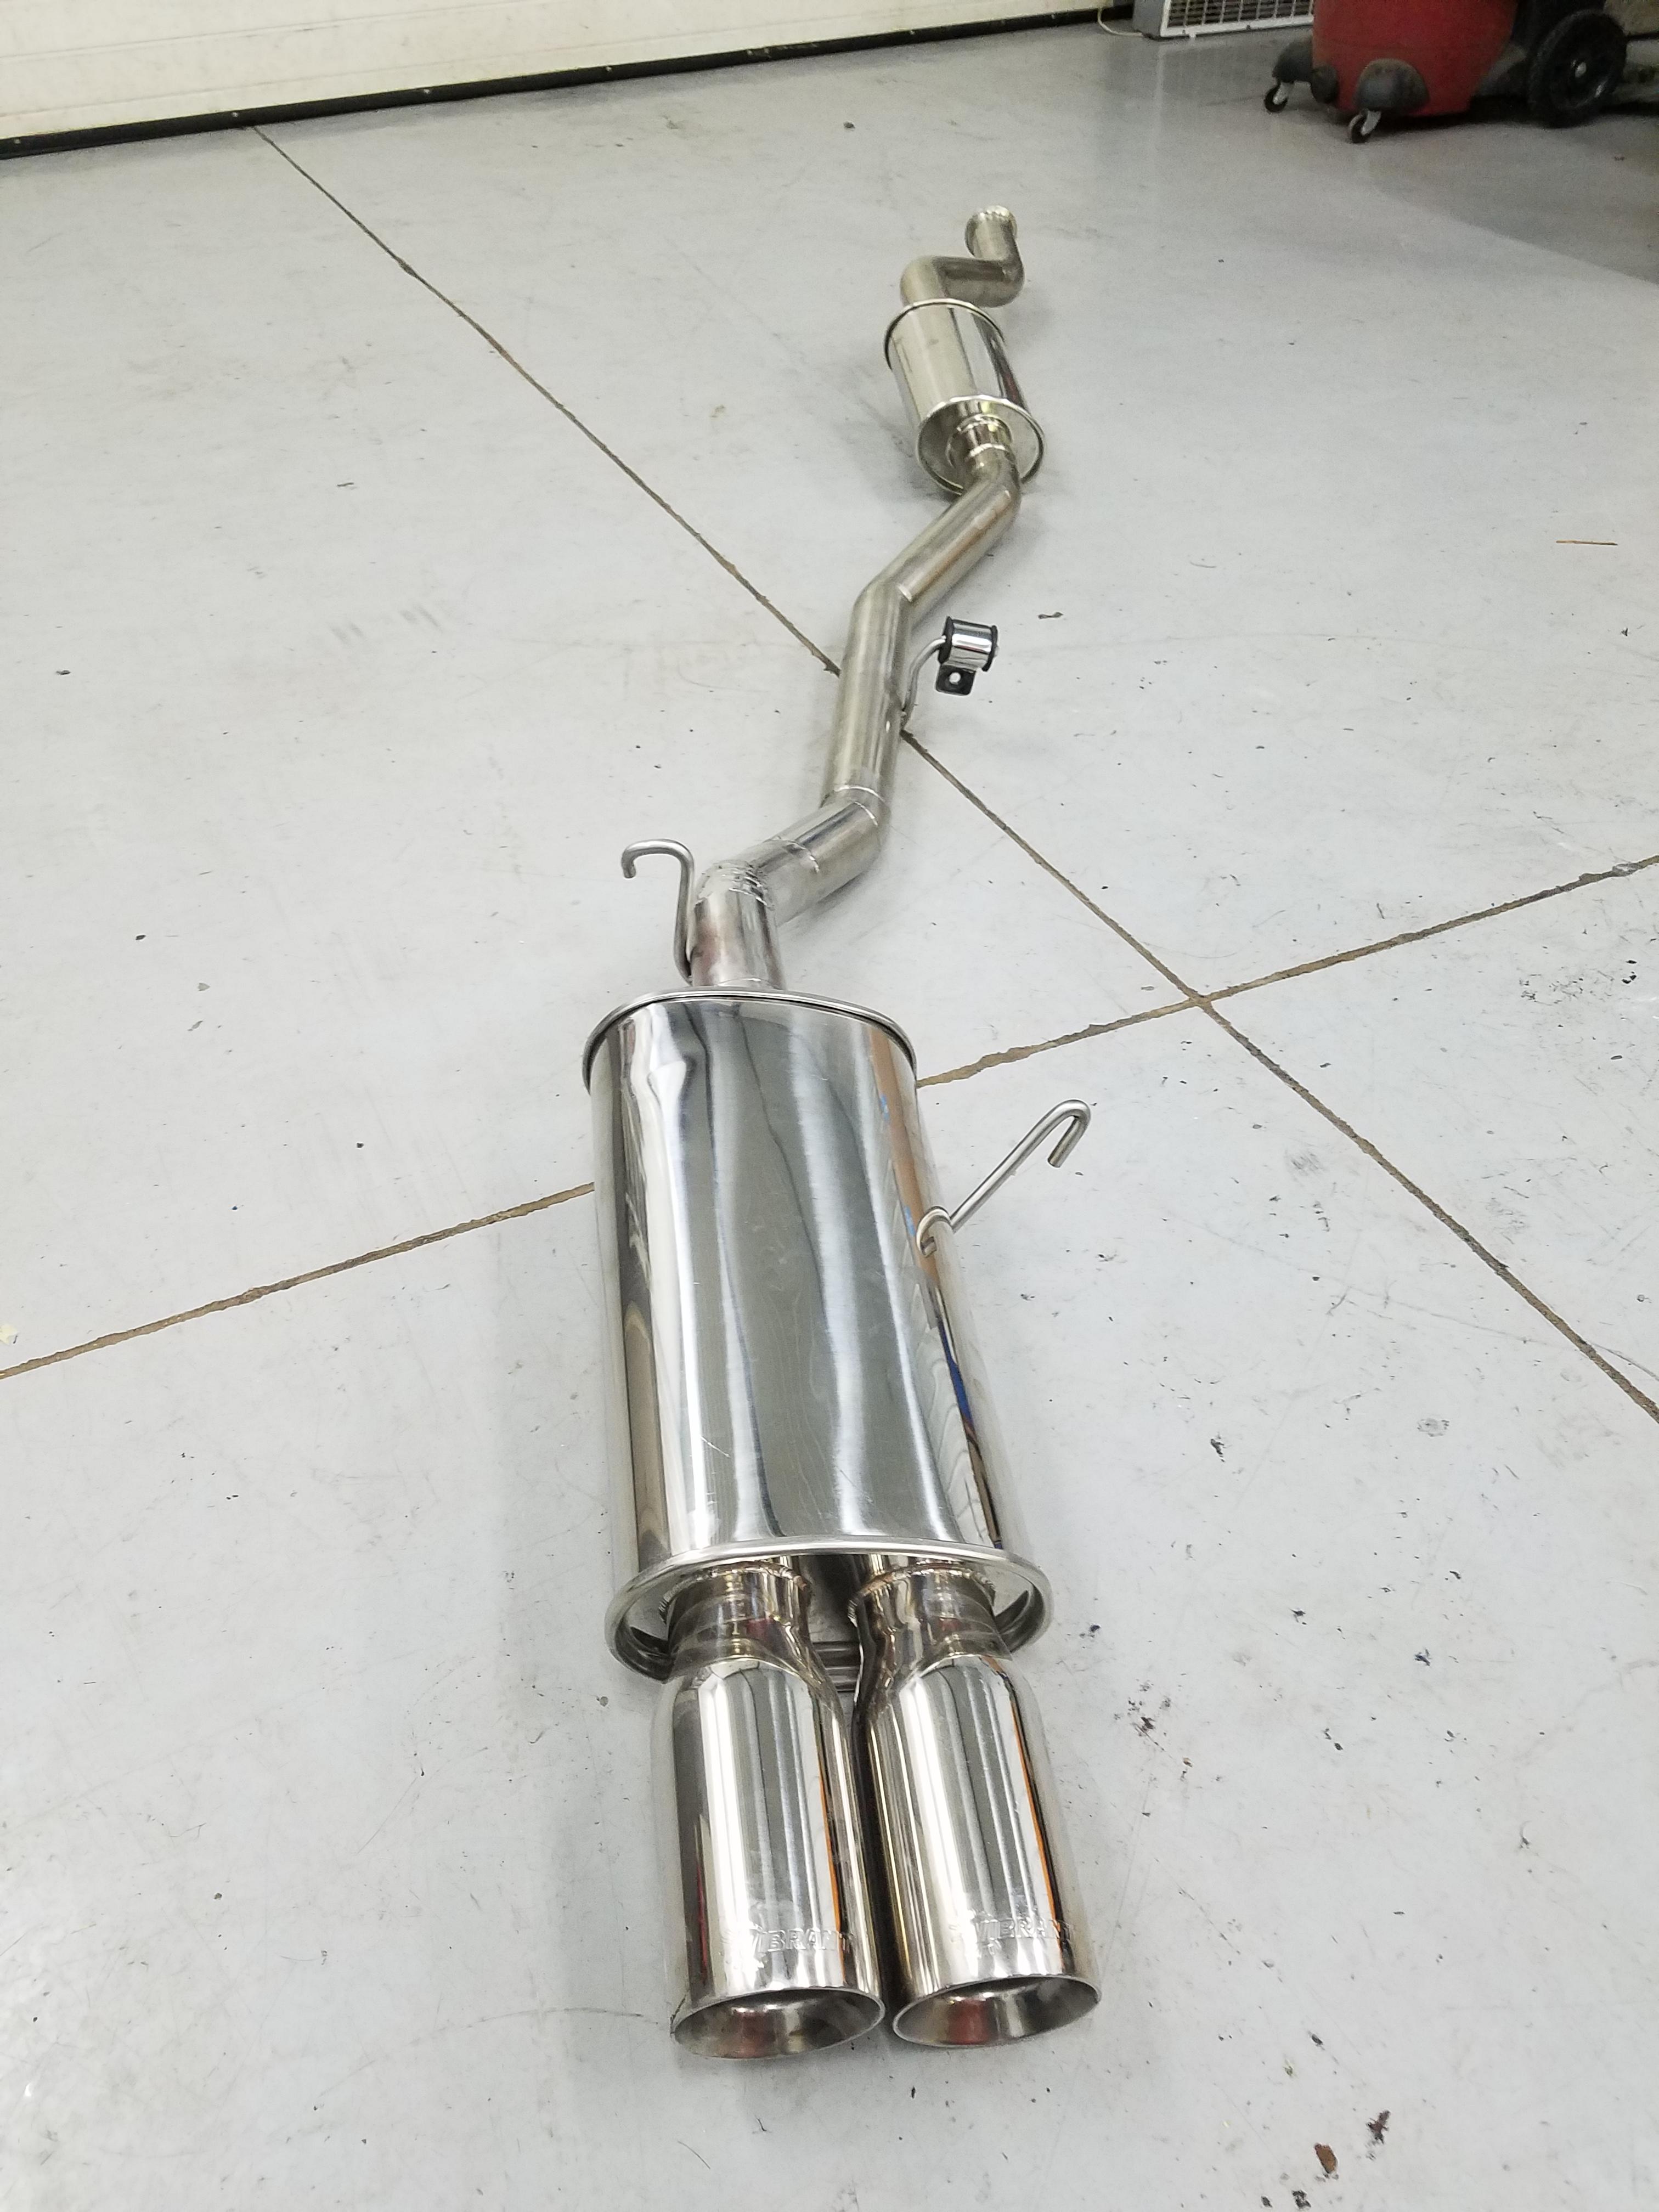
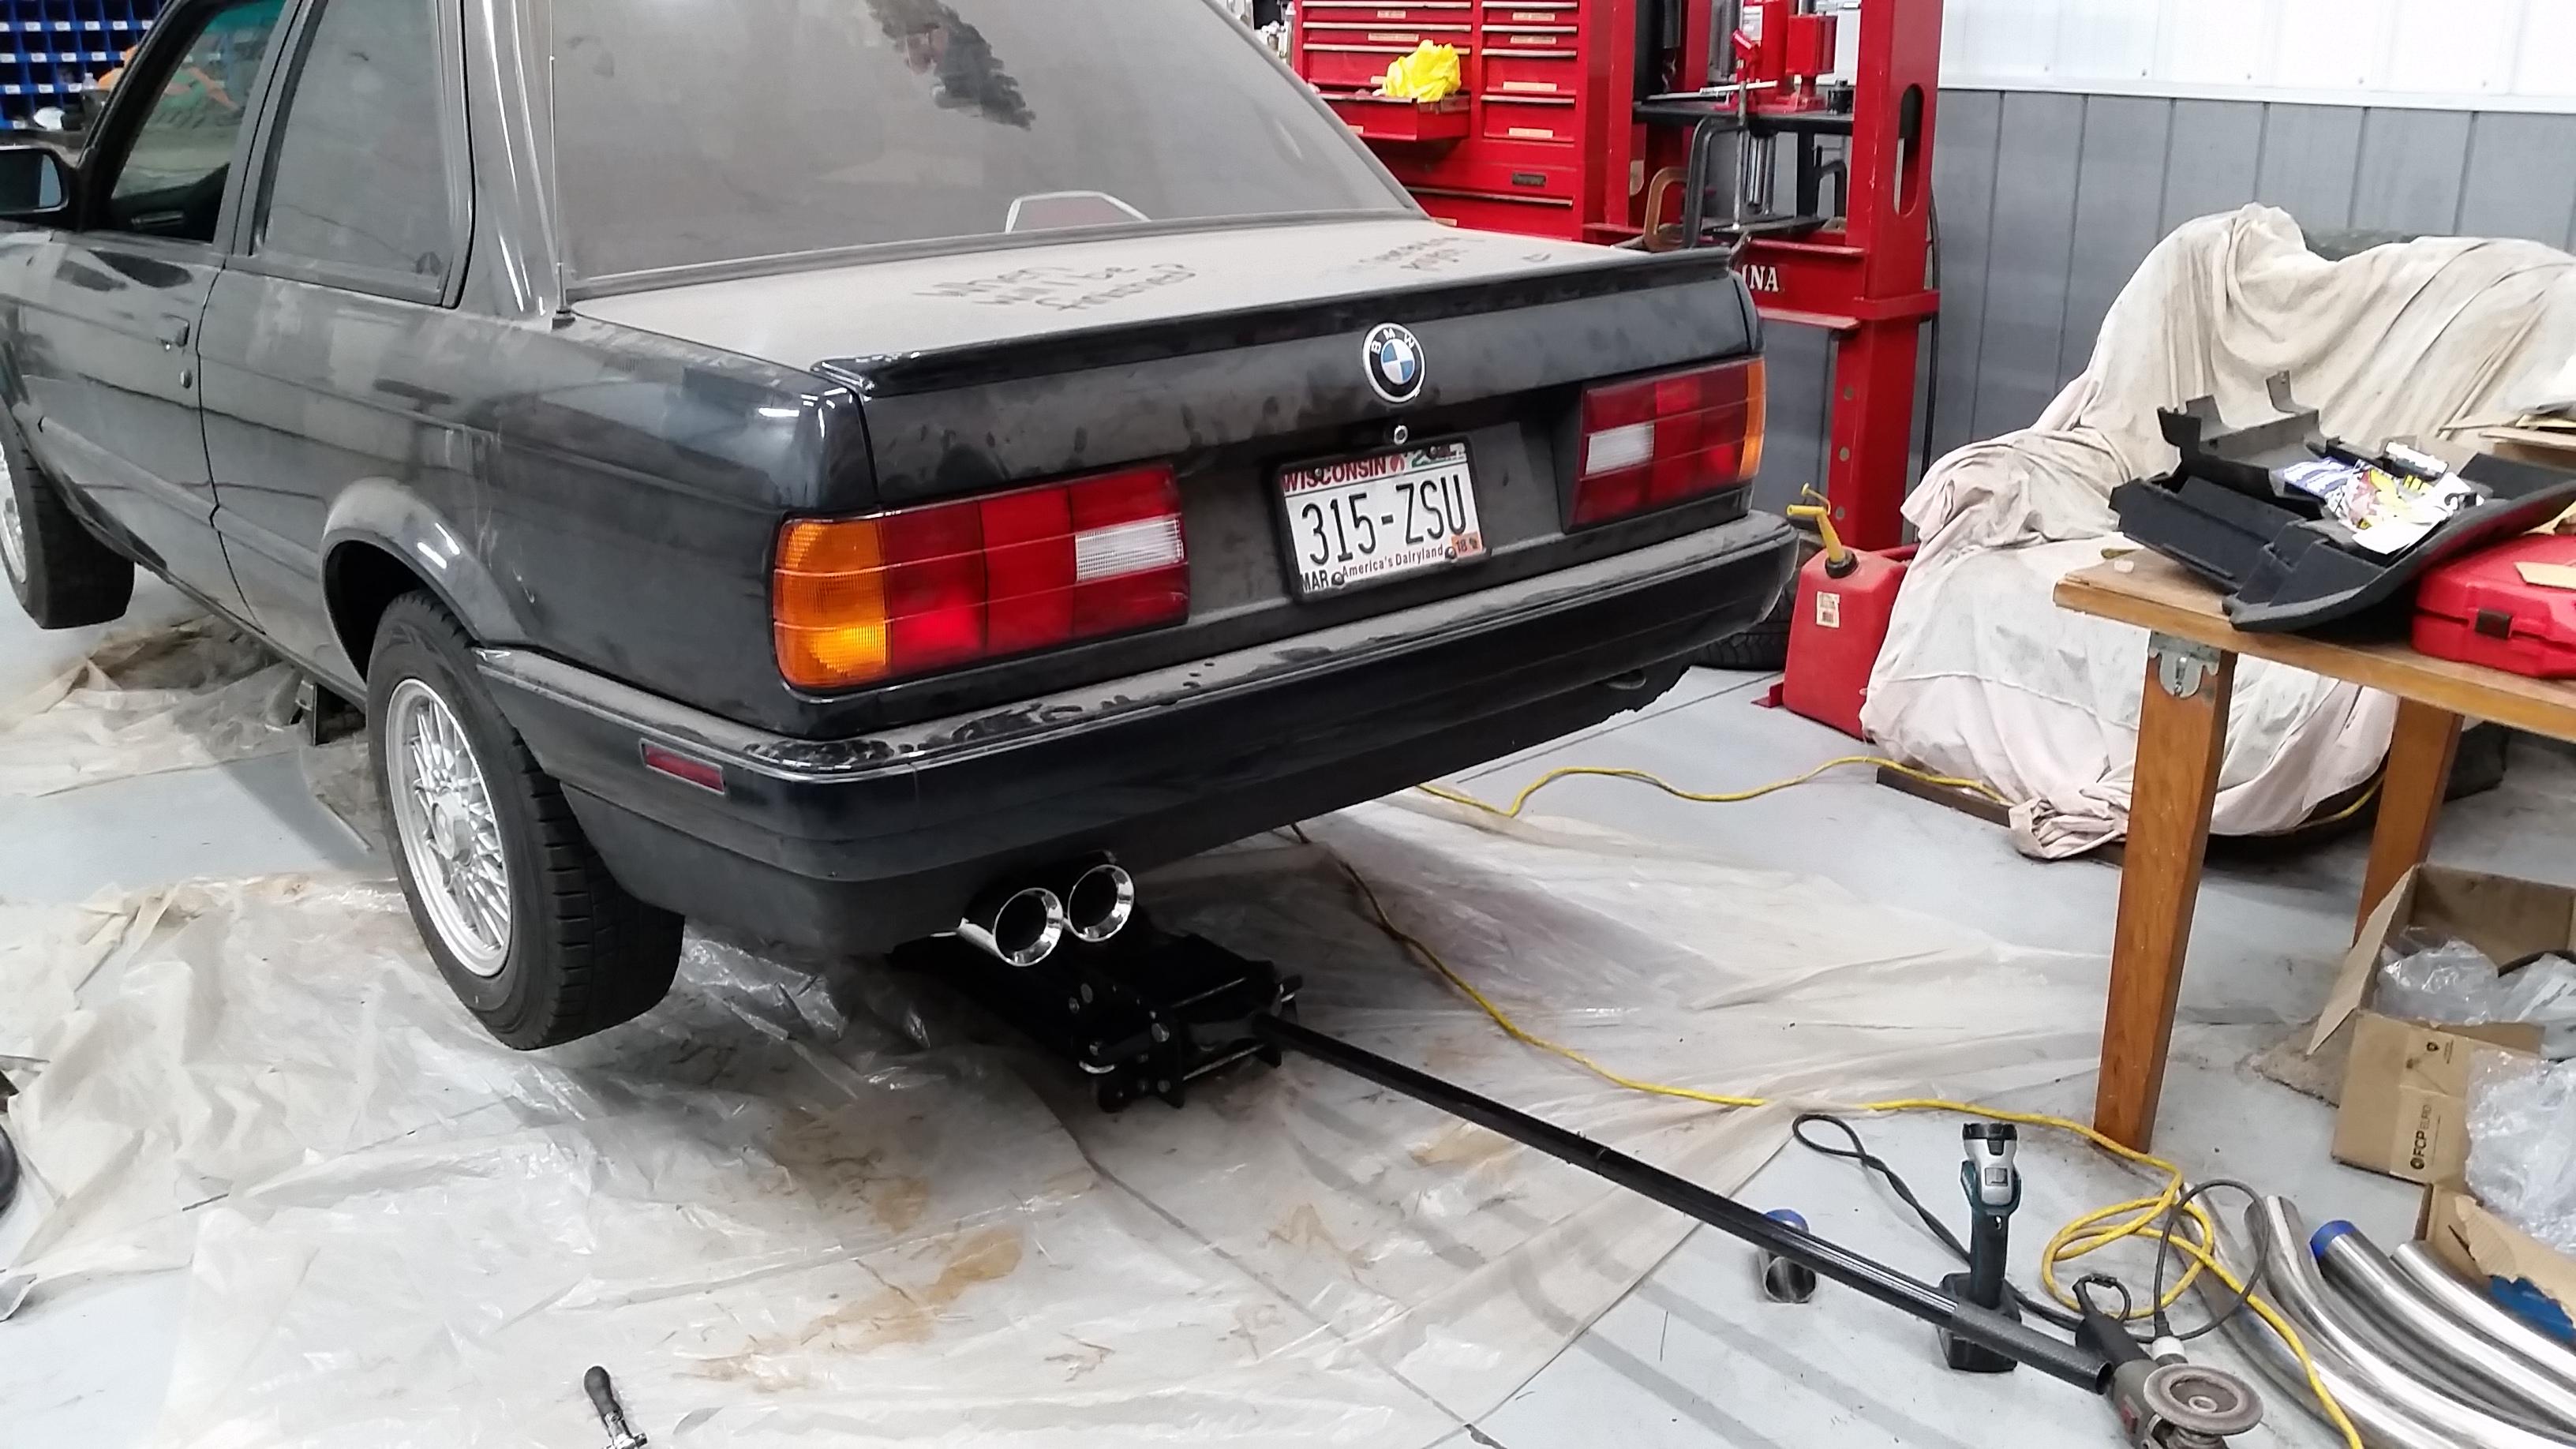
Muffler/exhaust finished up.
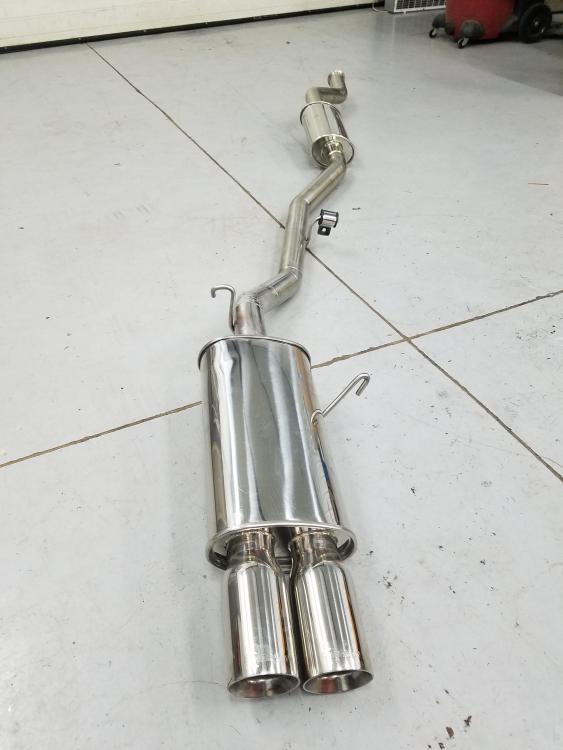
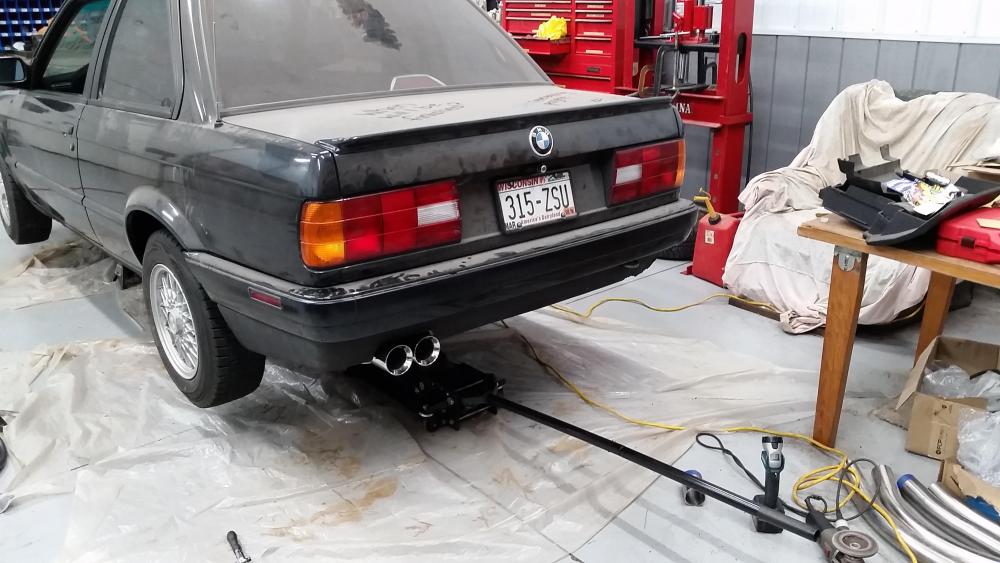
Couldn't be more happy with the final results and the sound is exactly what I wanted. Being that this was a 318, I did have to cut the exhuast hole on the rear valance larger so I could fit the two muffler tips through.
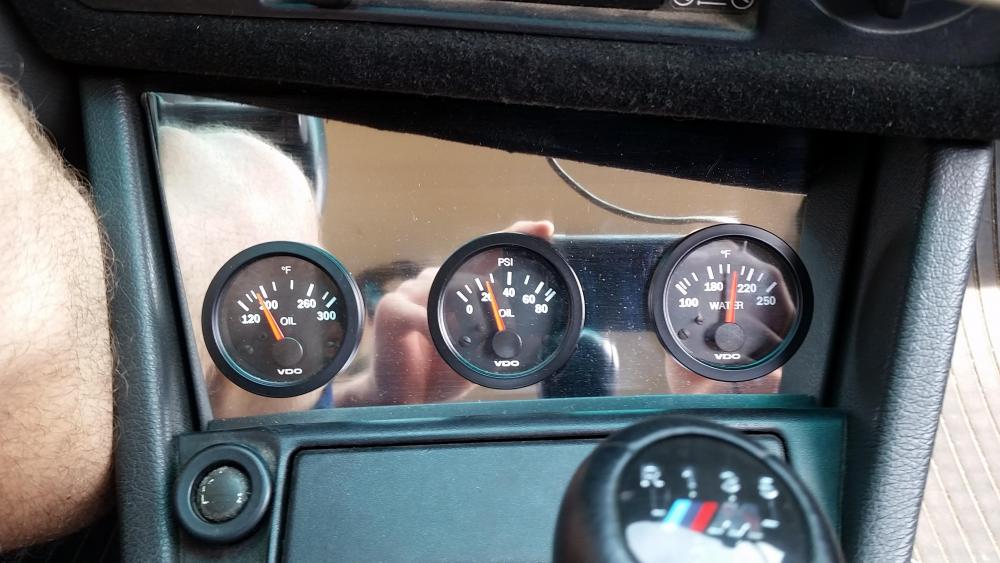
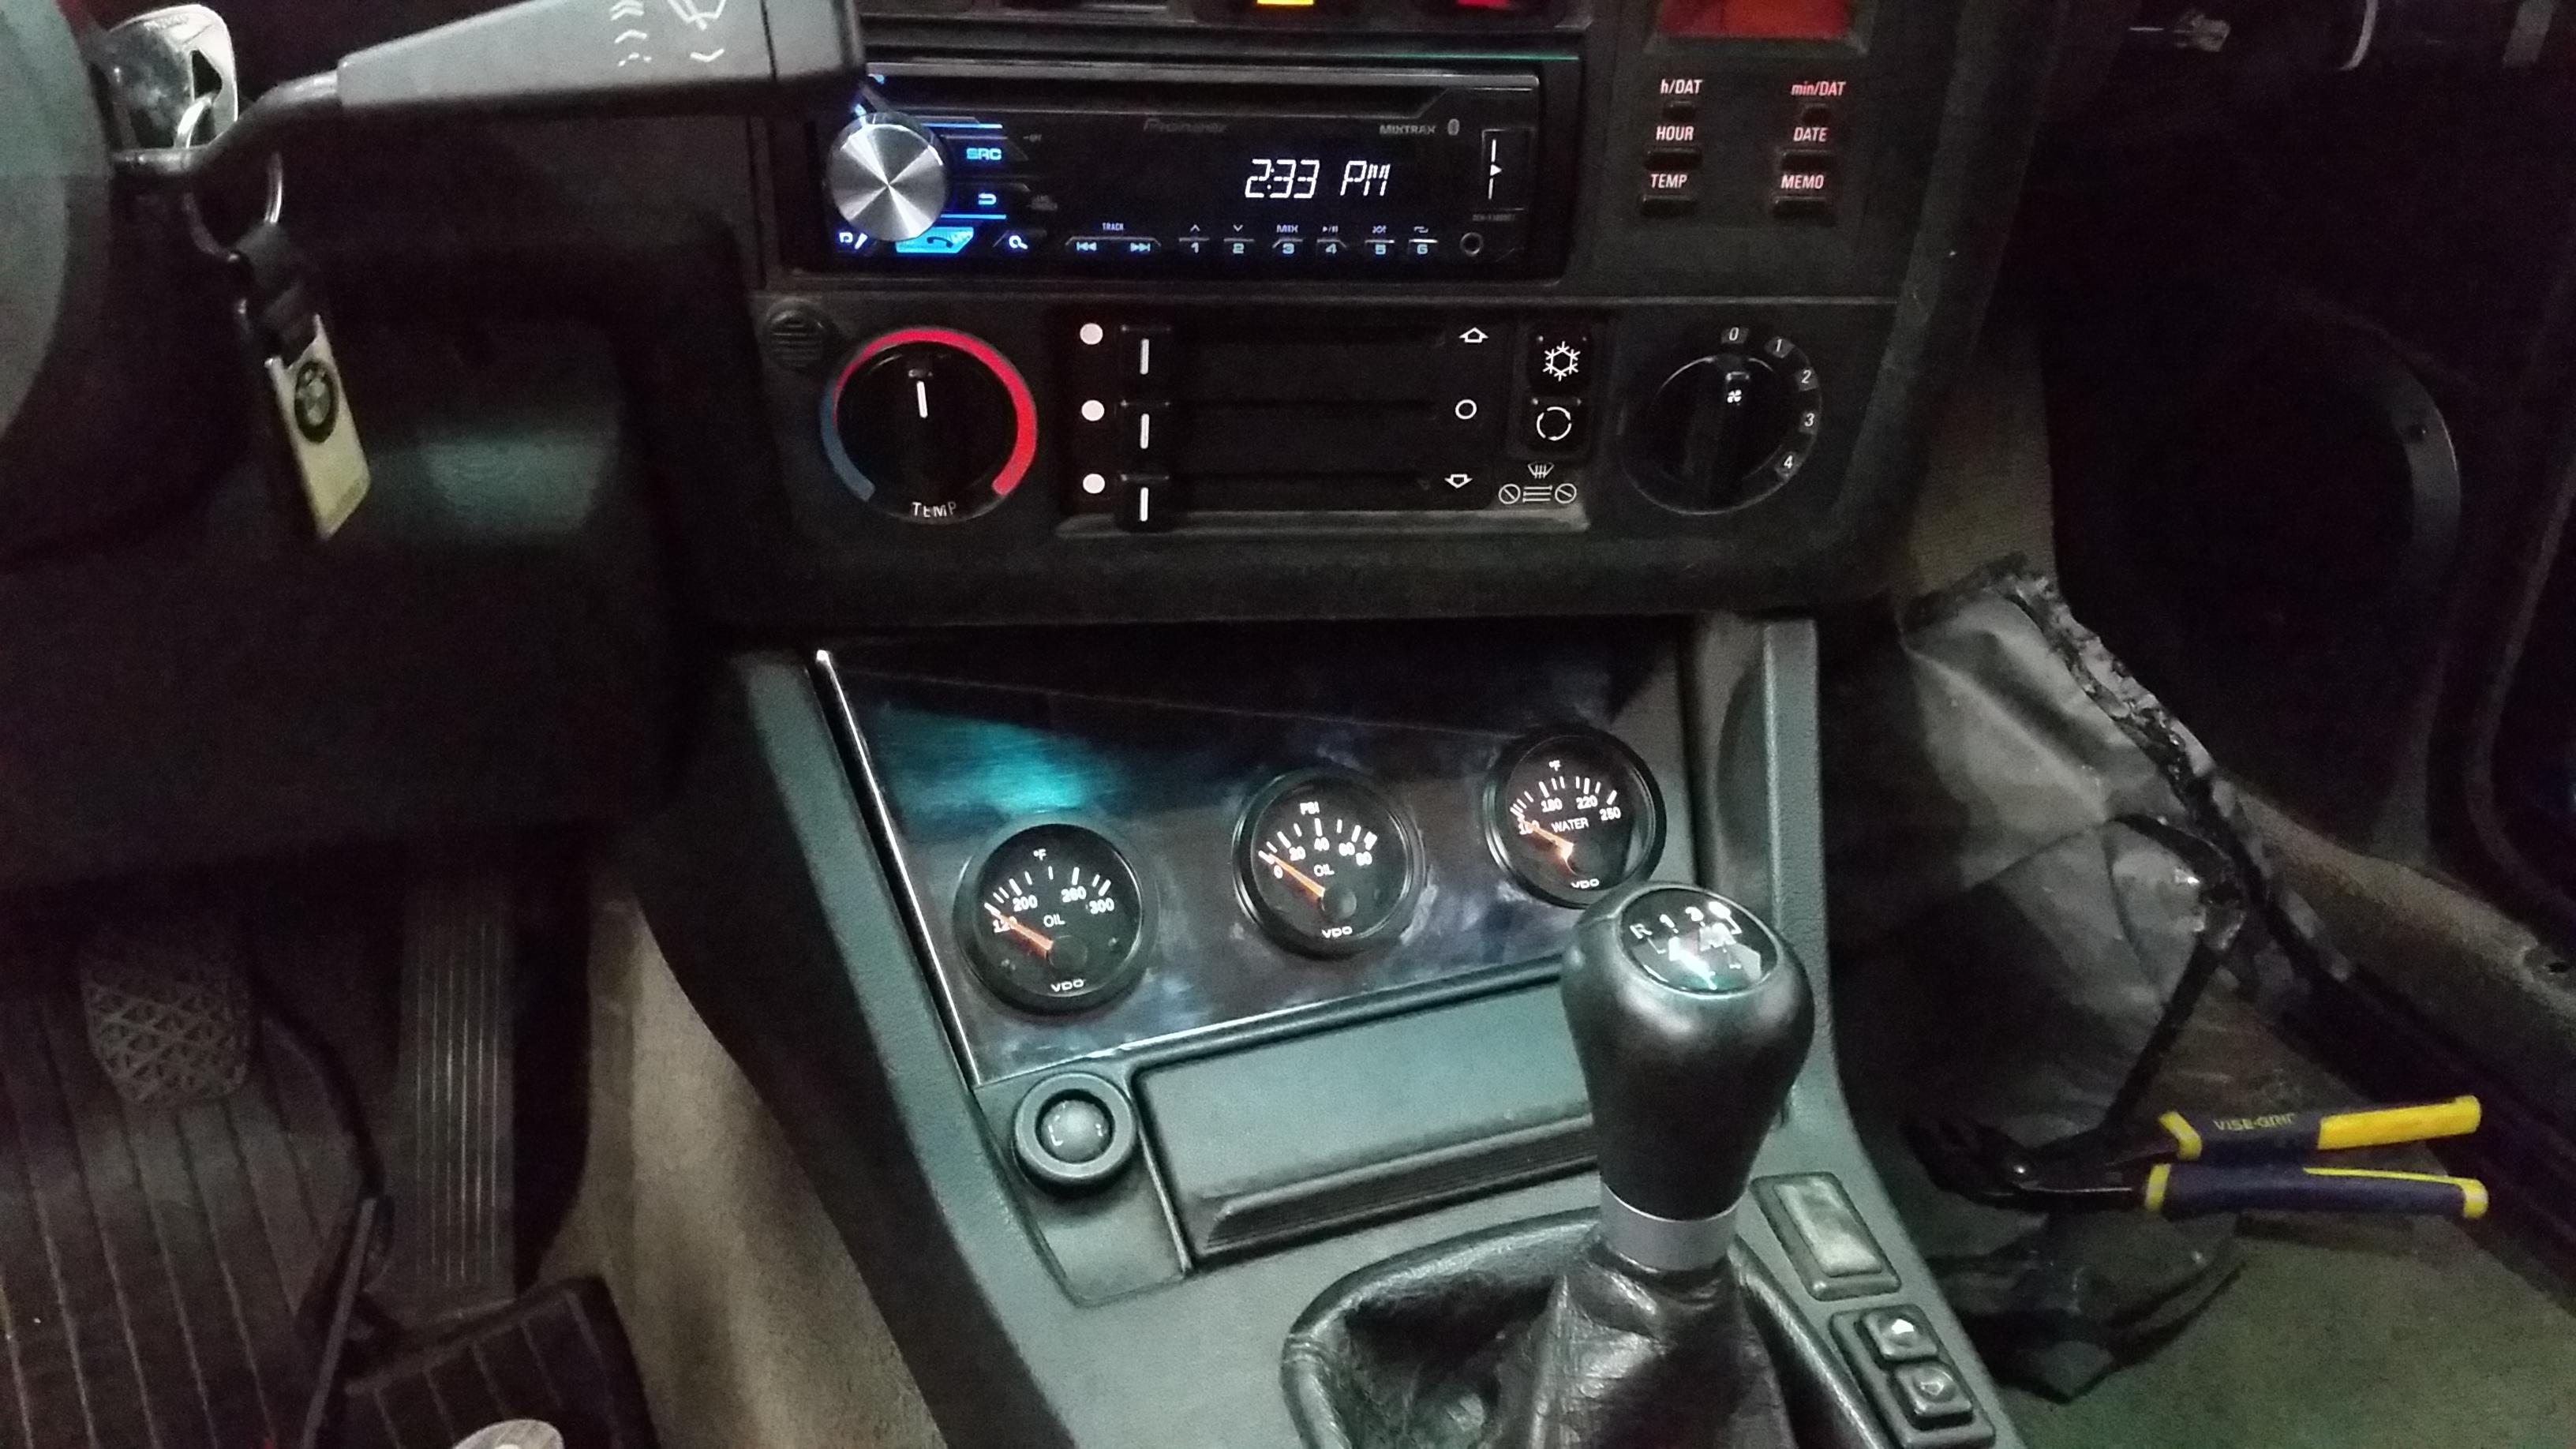
Gauges wired up and installed.
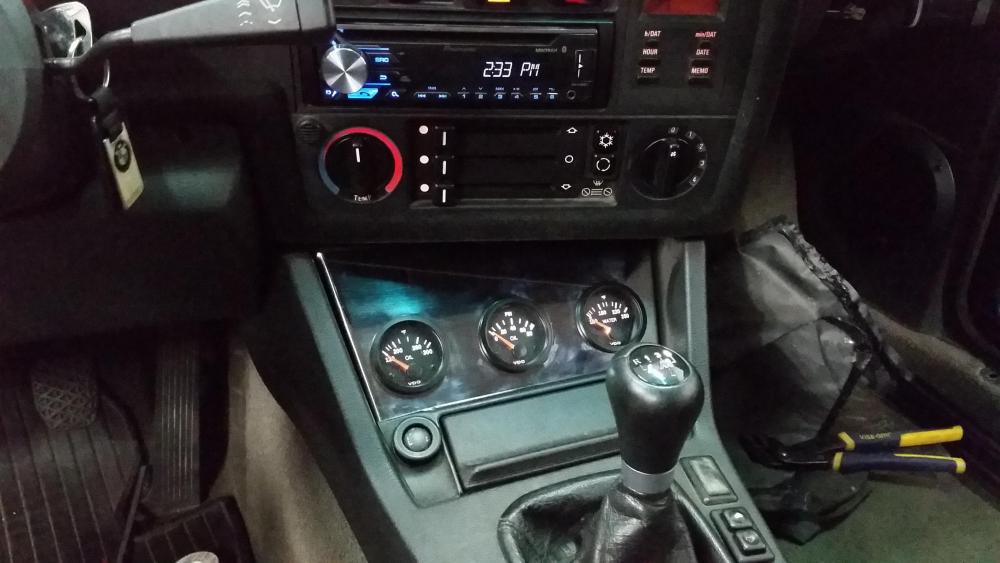
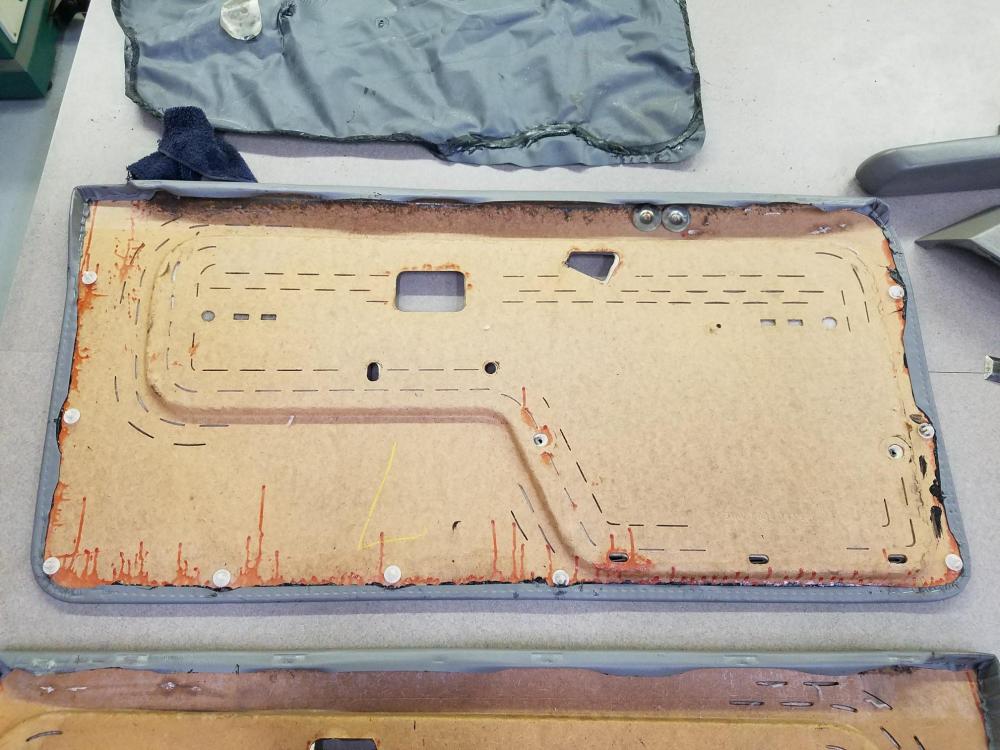
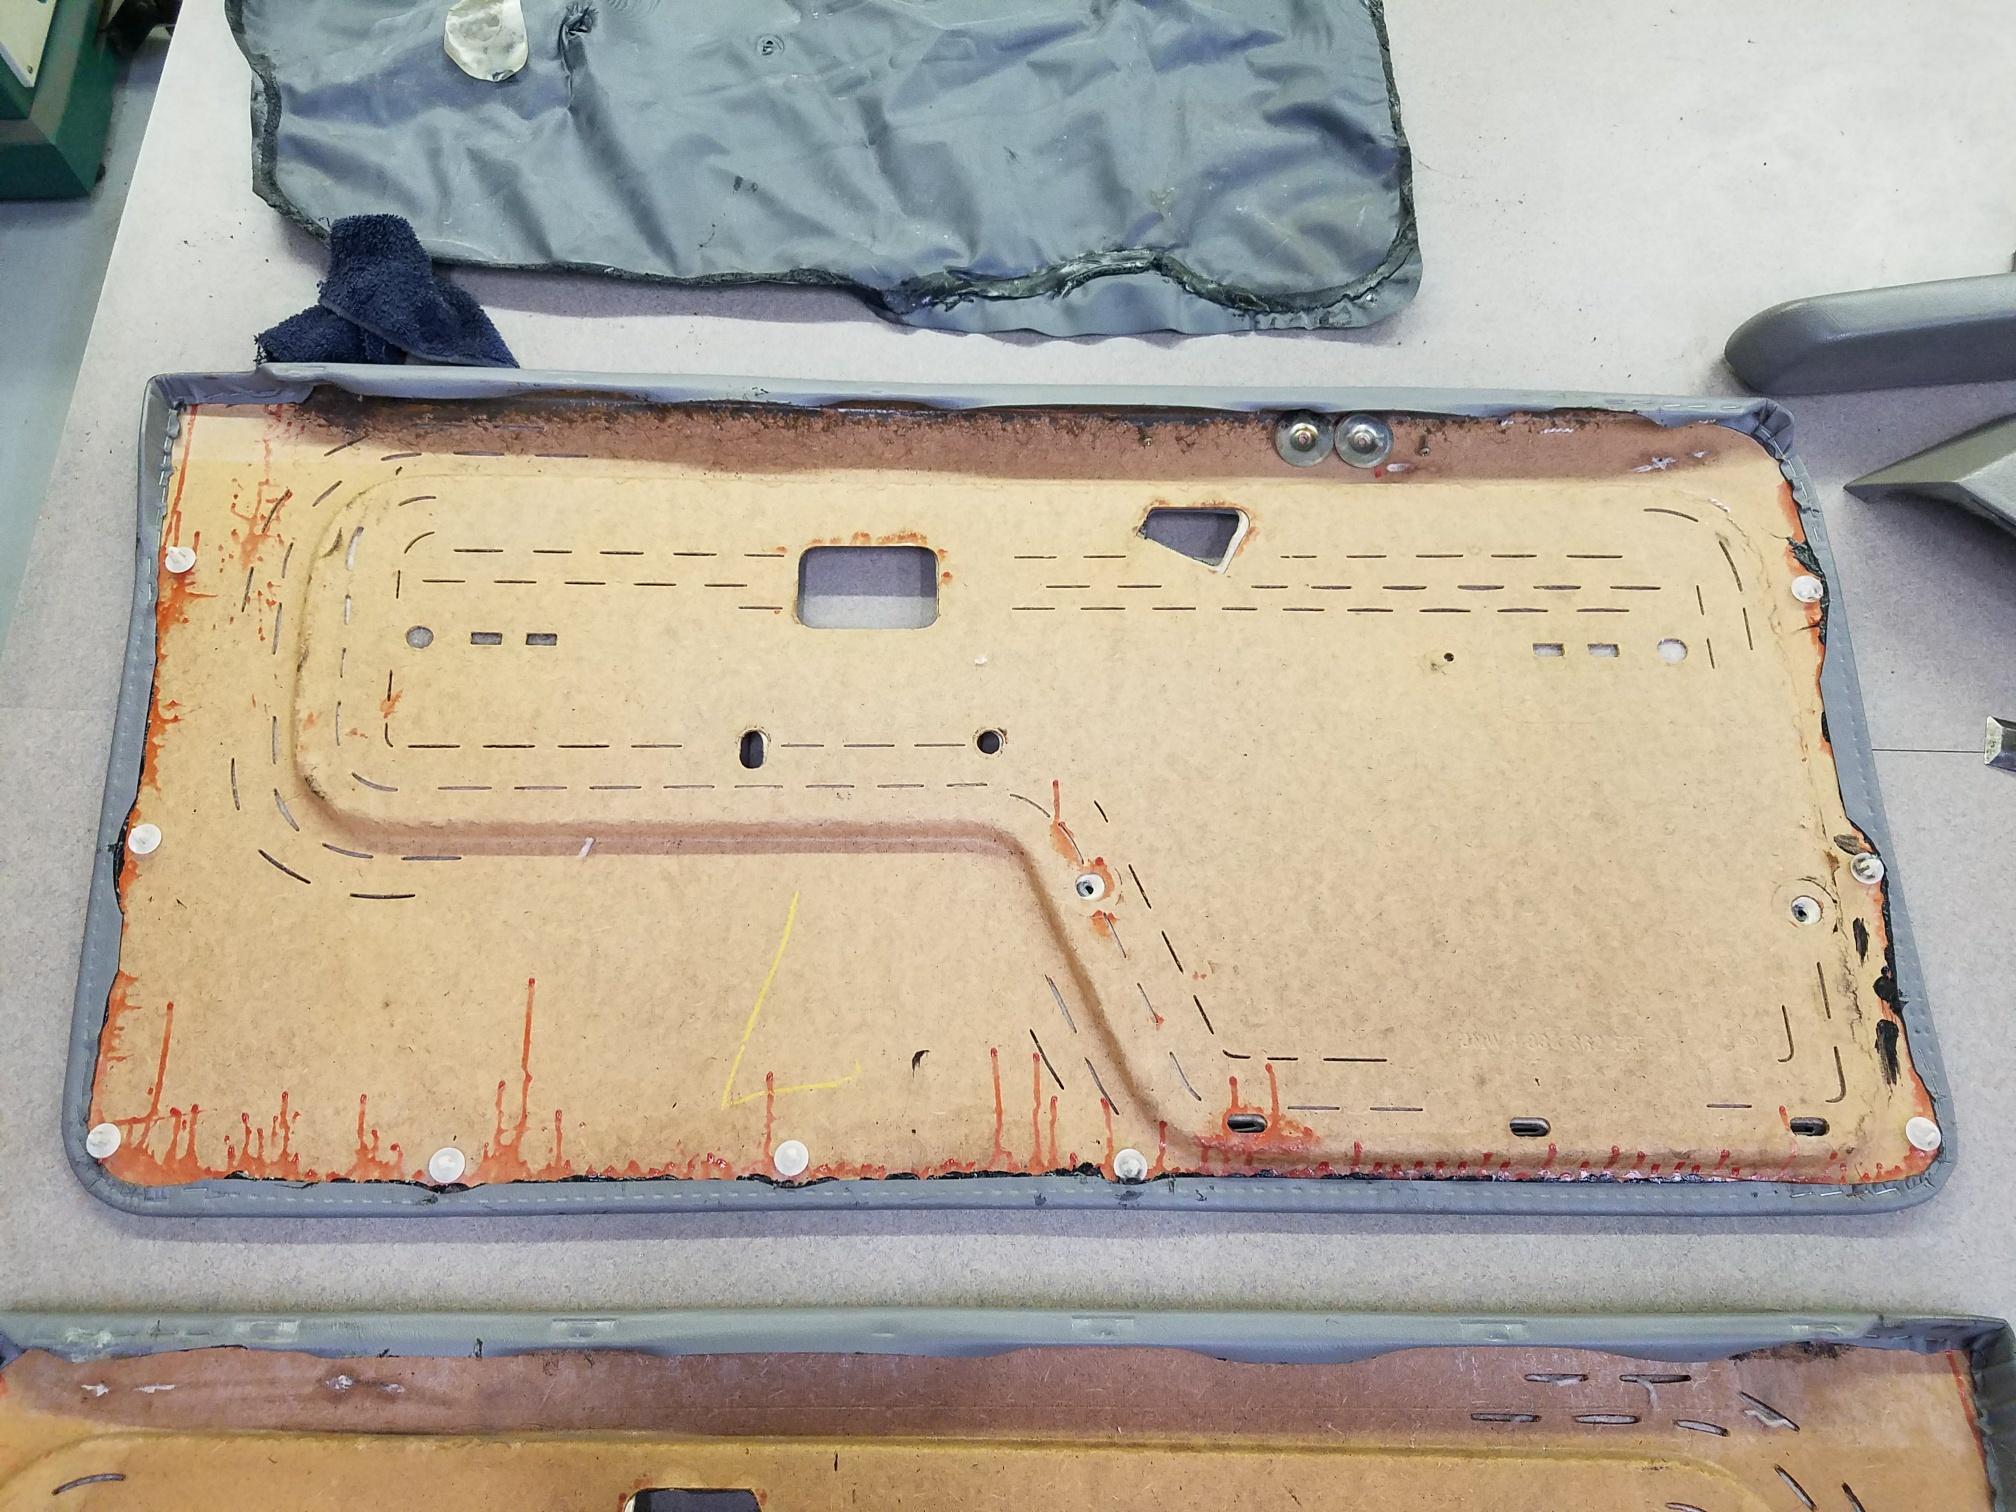
I did end up finding some 3m weatherstripping adhesive at my local auto parts store that I was recommended to try for the vinyl on the door cards and it worked perfect. The stuff is fairly expensive but it was well worth it, I don't see this stuff coming lose ever again now.
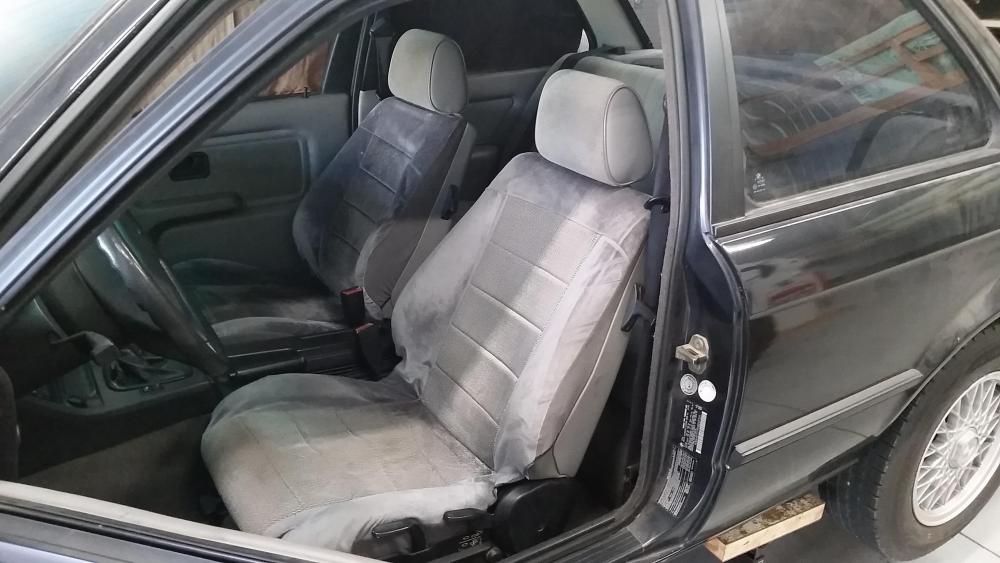
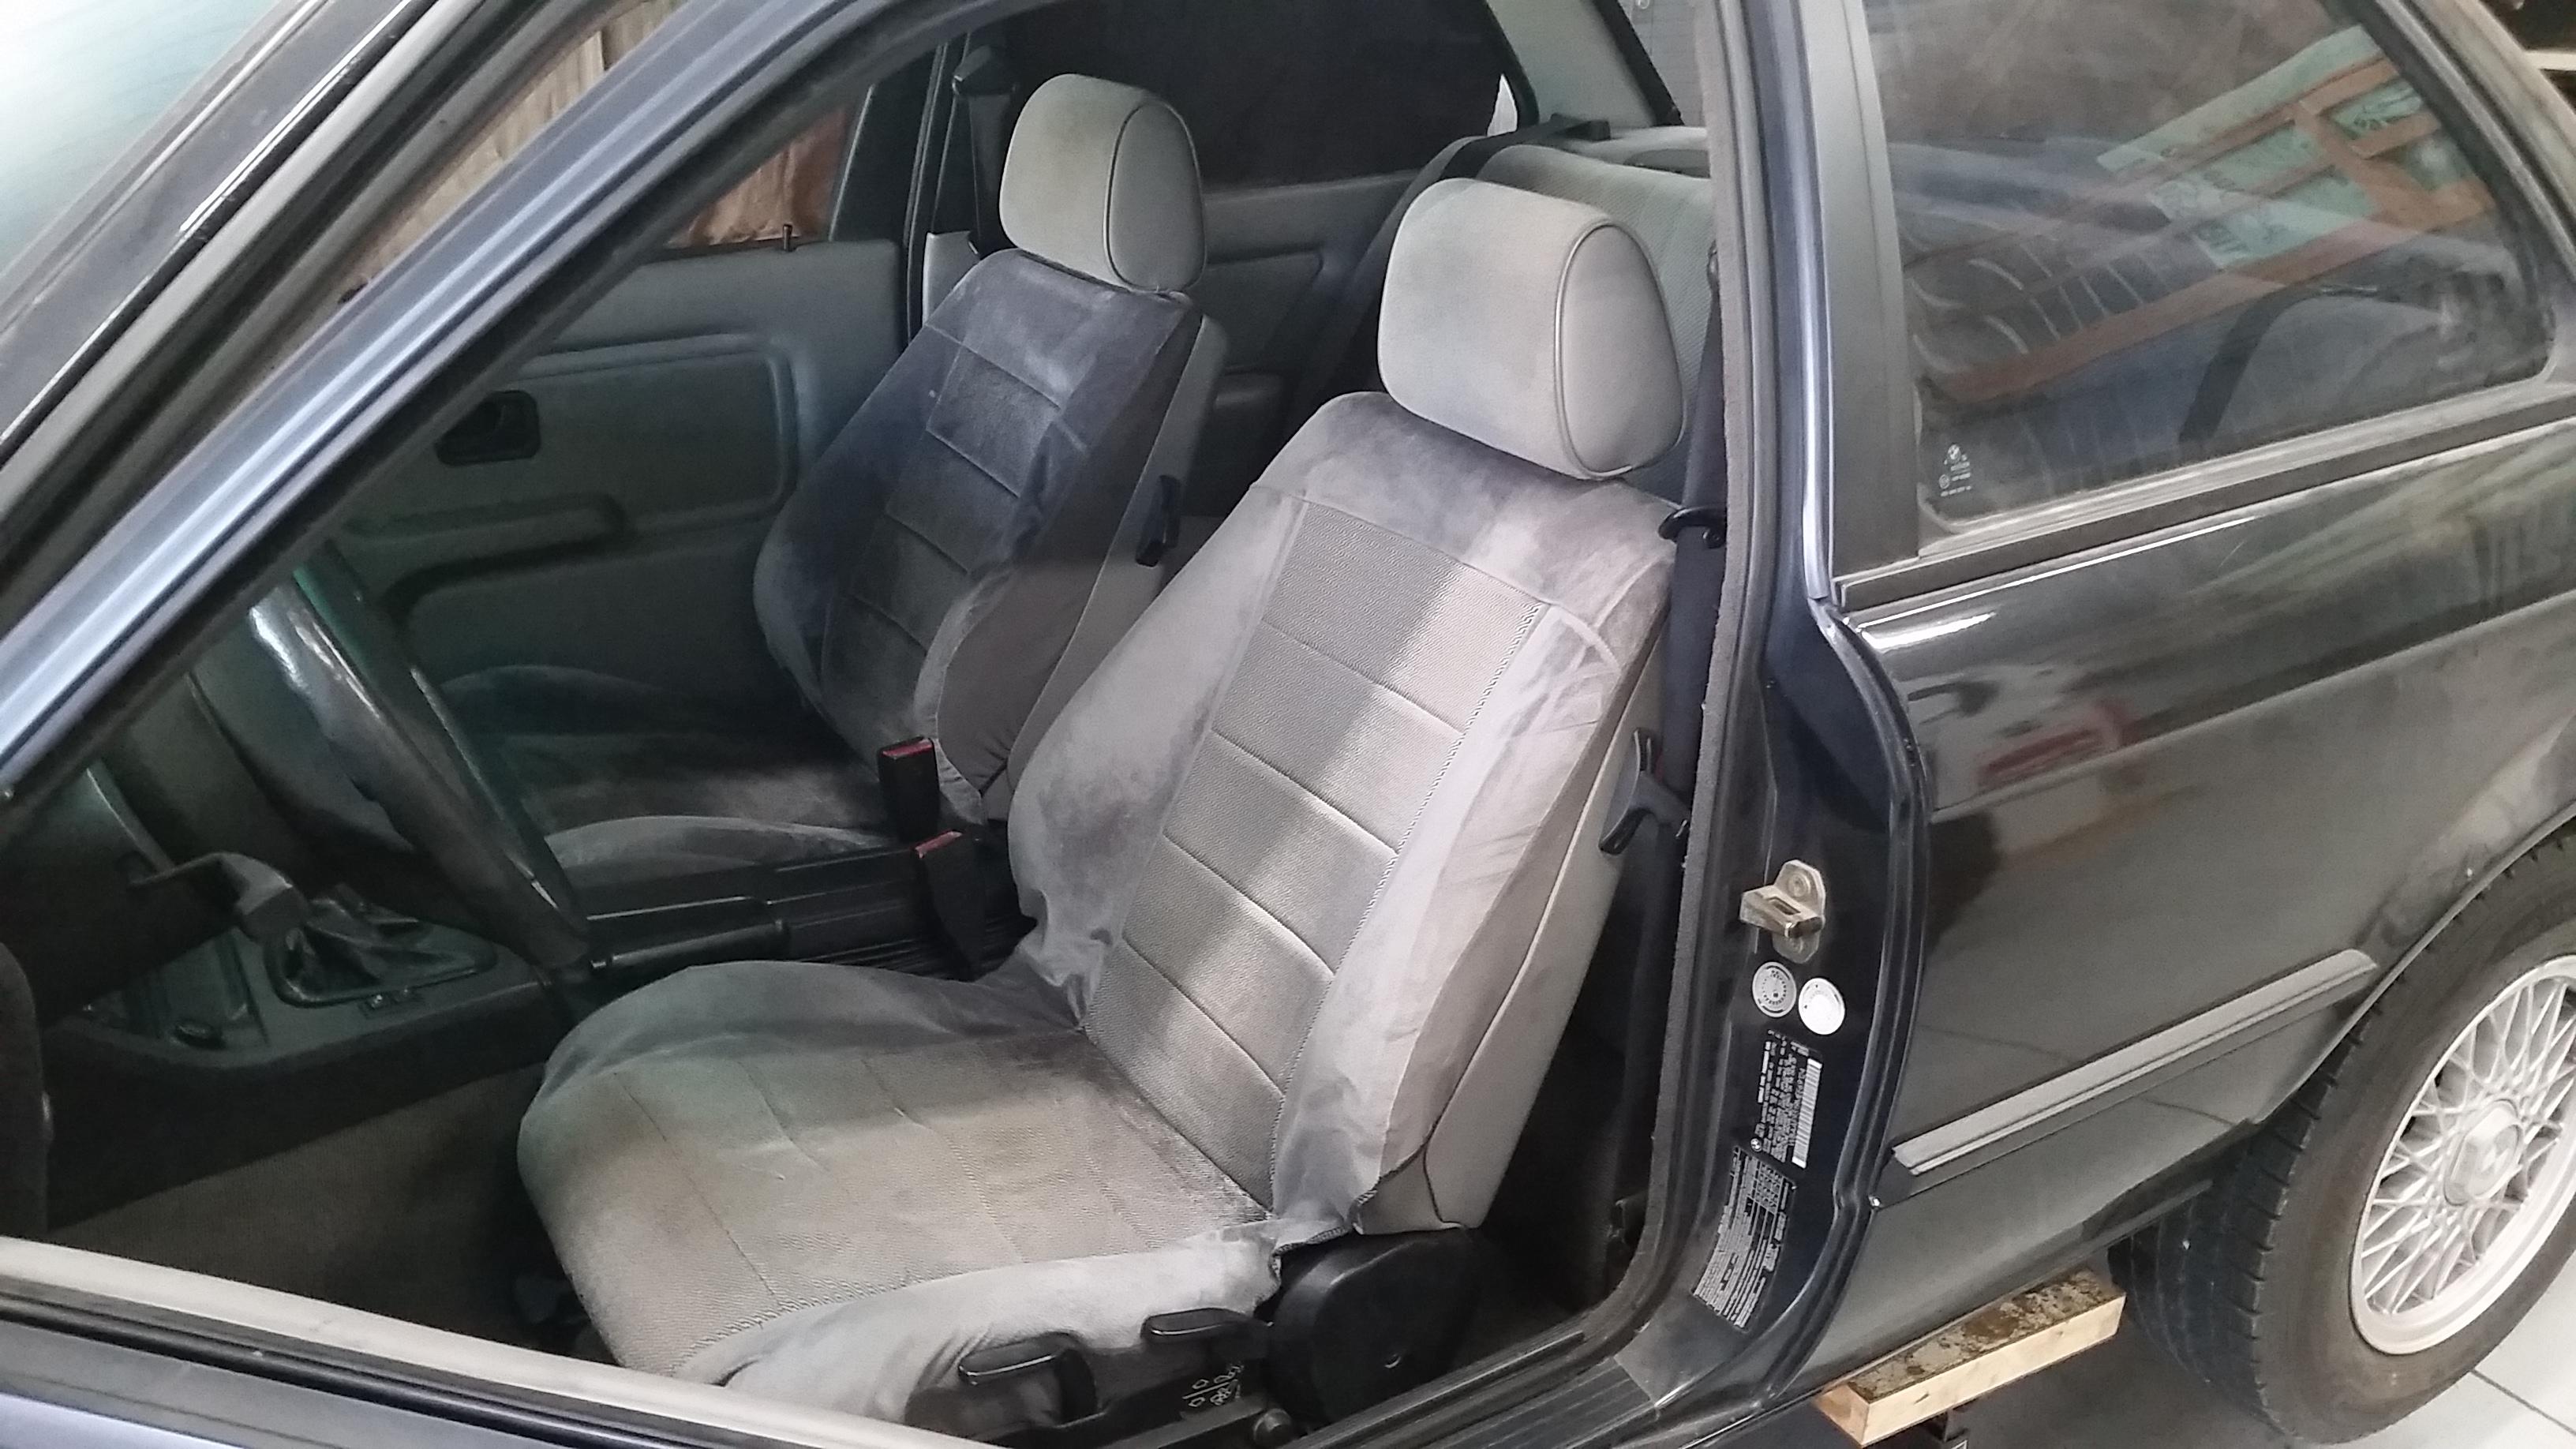
Seats covered and installed. Had to take some of the pieces off the old seats to make these ones fit in and make all the adjustments work properly. Not the best but it will do for now.
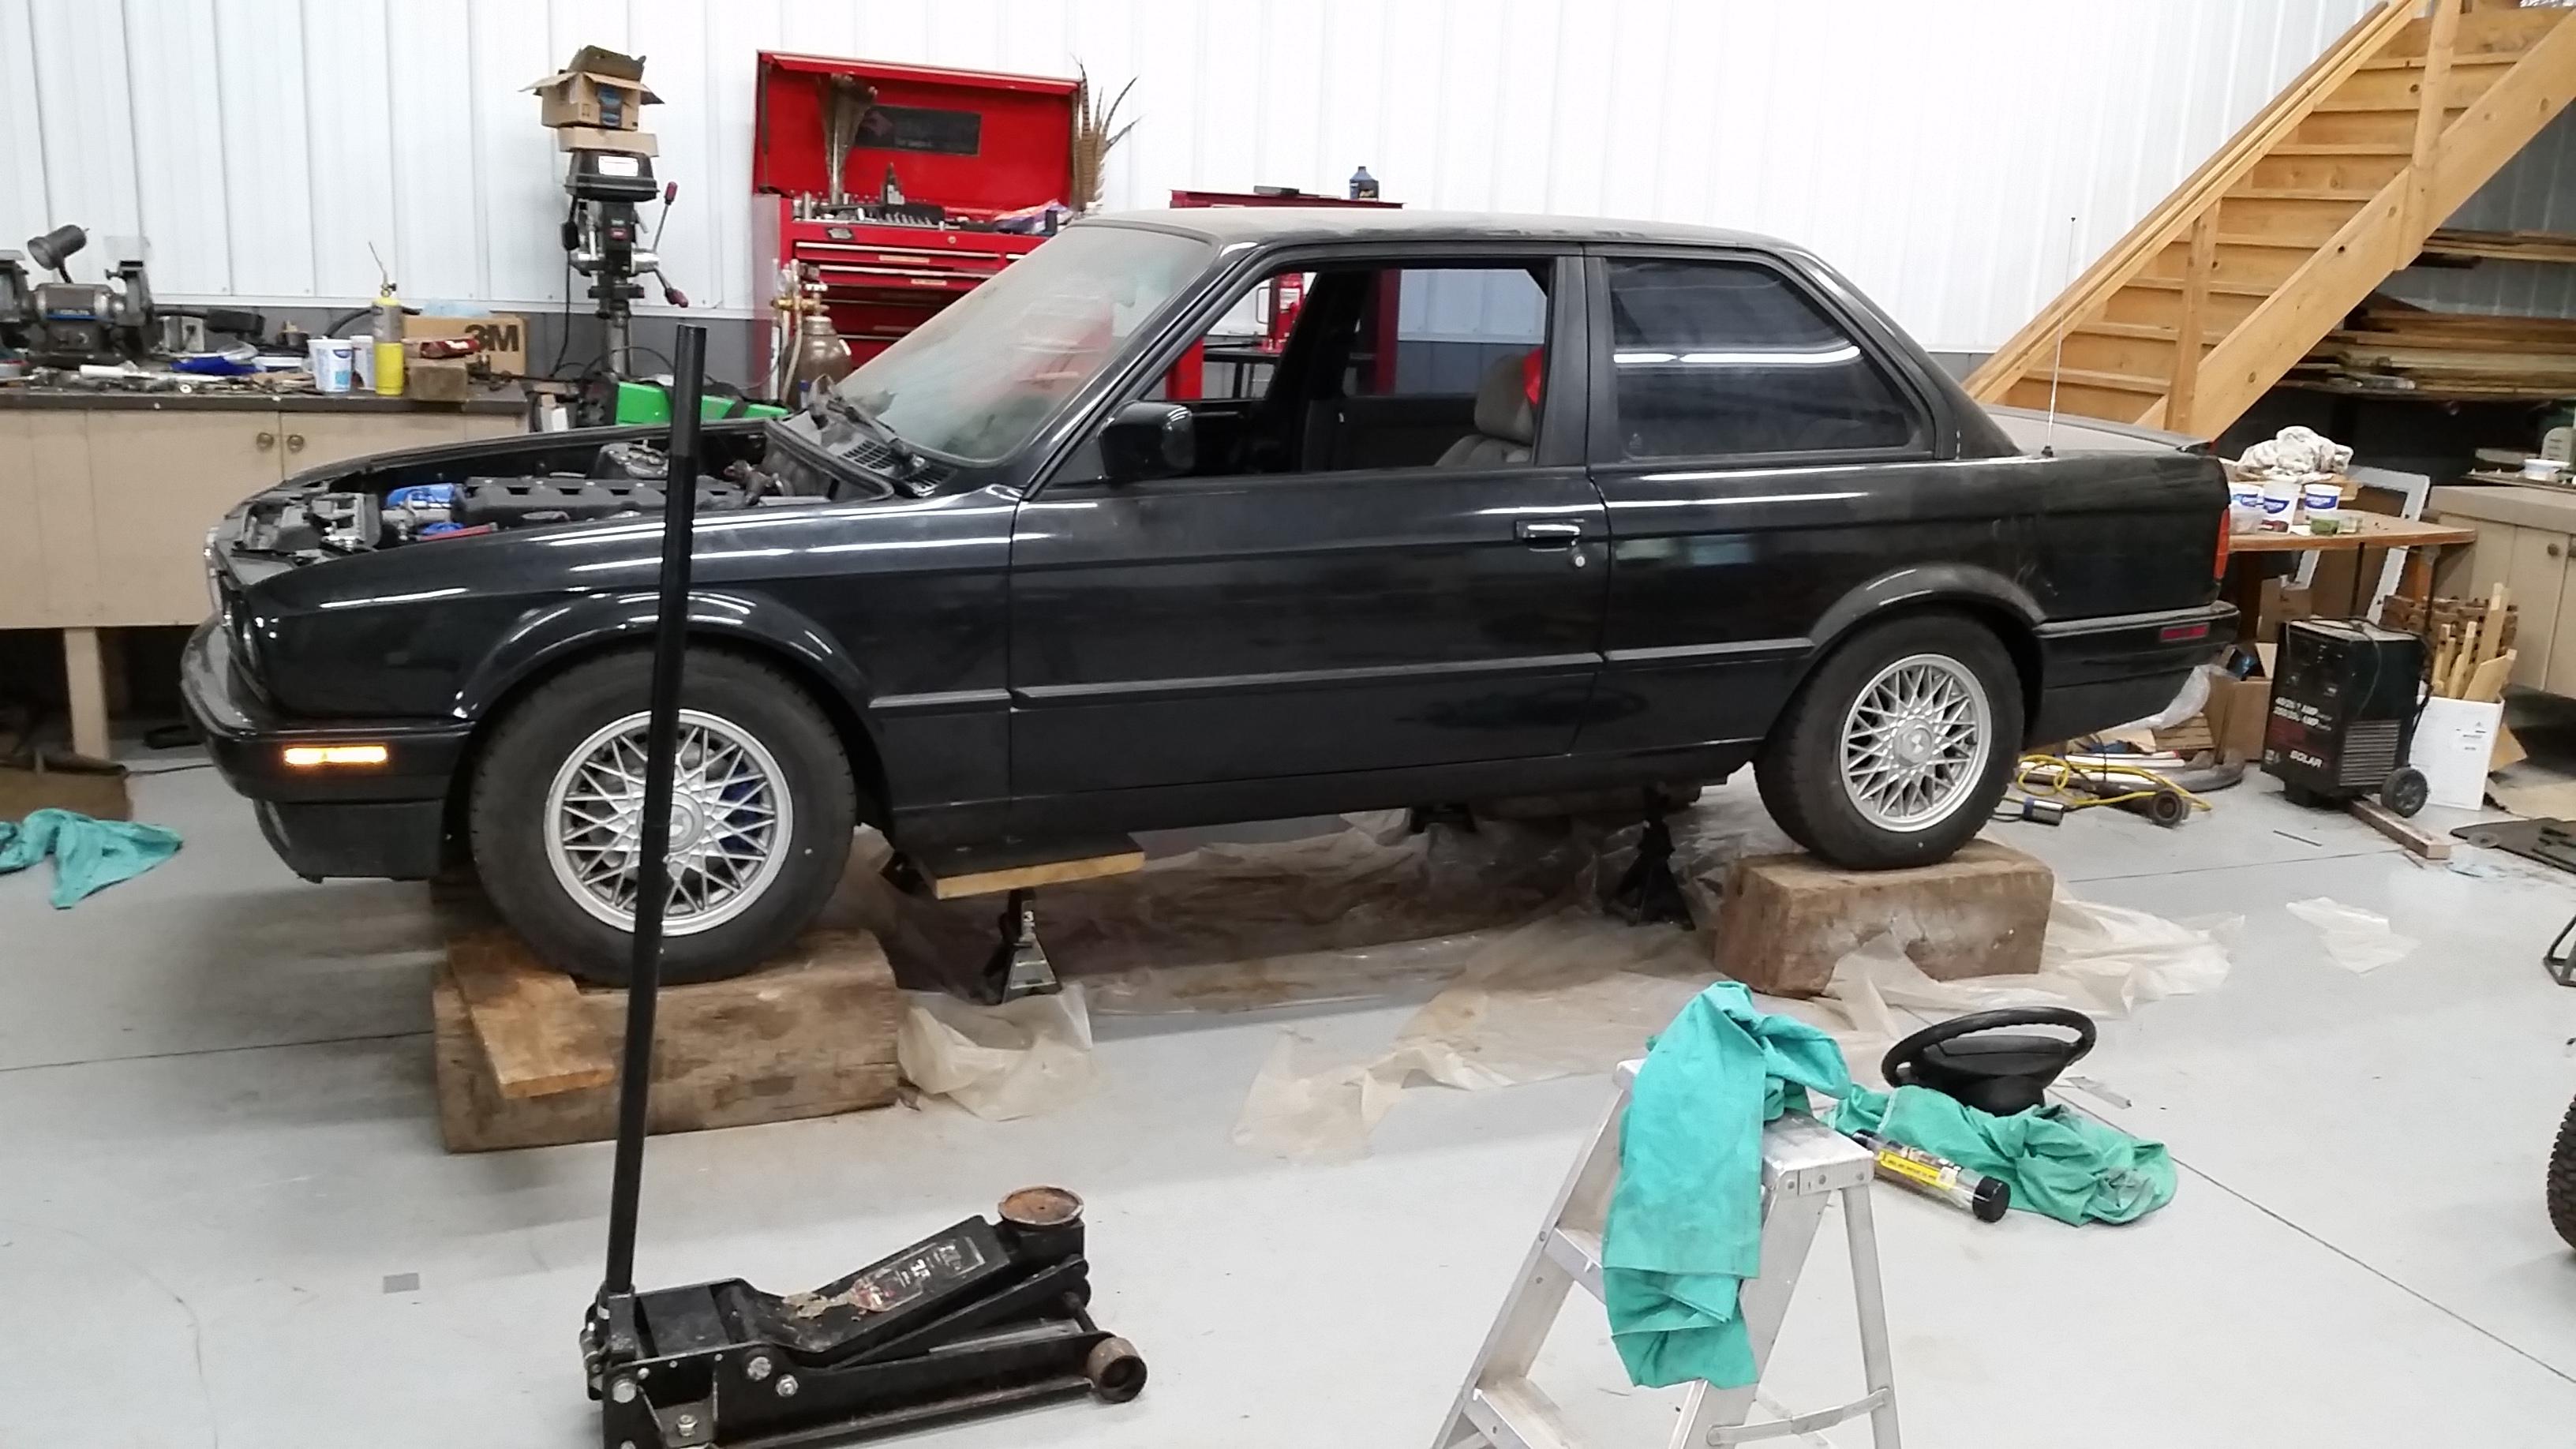
After installing the seats and exhaust I went ahead and placed the car on 4 wood blocks we had laying around the shop and set the pre-load on the swaybars.
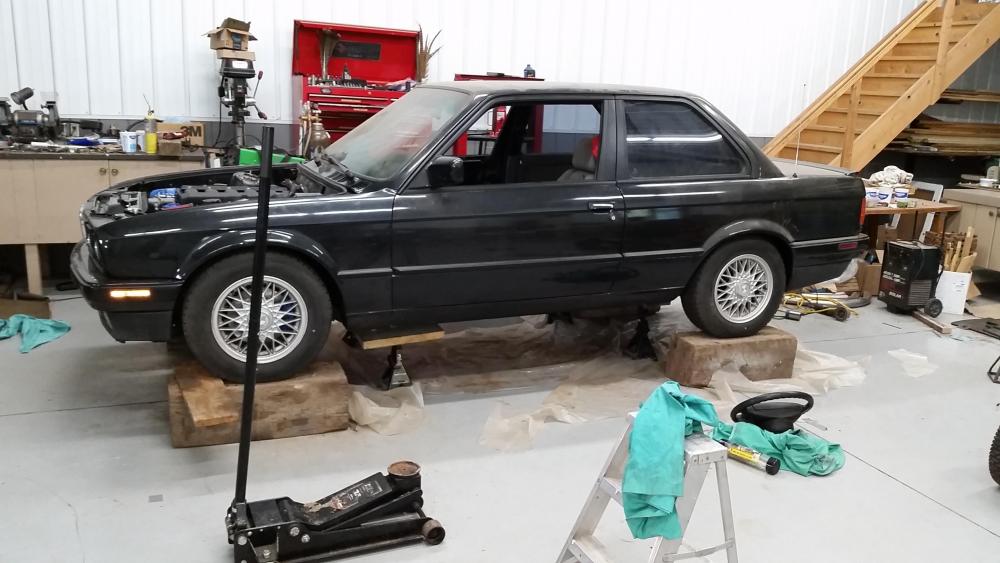
After pre-load was set I went ahead and placed it back on the ground and took it out for a little test drive around the block to break the motor in.
I ran it for two 25-30 minute sessions letting the engine cool down completely in between. Engine ran great both times and felt awesome! No I didn't baby it while I was driving it around and in fact did the exact opposite and did several strong pulls in 2nd and 3rd gear letting off the gas and letting the engine slow the car down to help pull the piston rings out and bed in properly. After the second session I gave my head gasket leak a good inspection, still leakin
So, out of frustration I took the following day off work and decided to get the dumb thing whipped out so I can put it behind me and move on to other things.
I started bright and early and began dissembling the engine to get ready to pull the head.
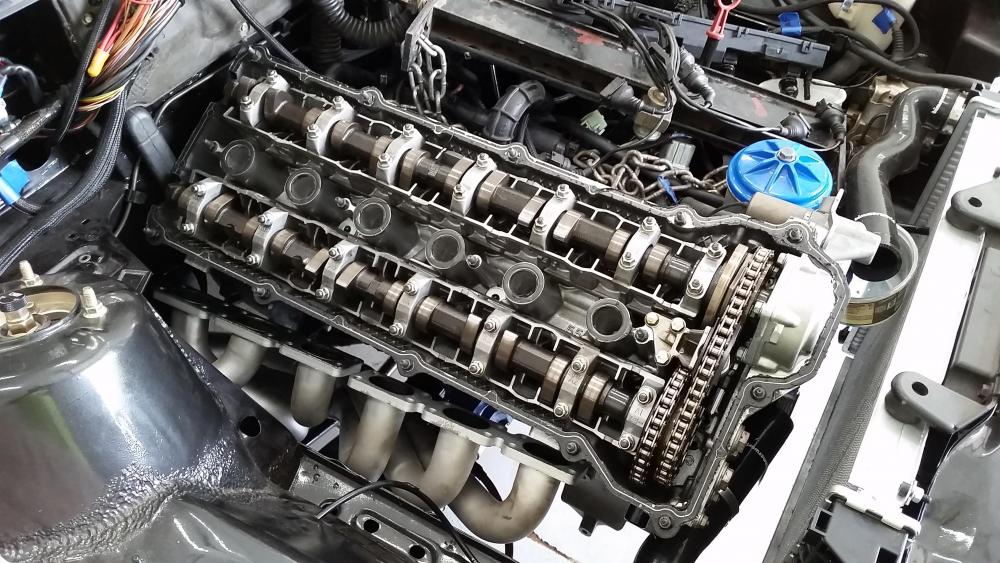
It took me tell about lunch time to get everything dissembled and ready for the head to be pulled off... and done.
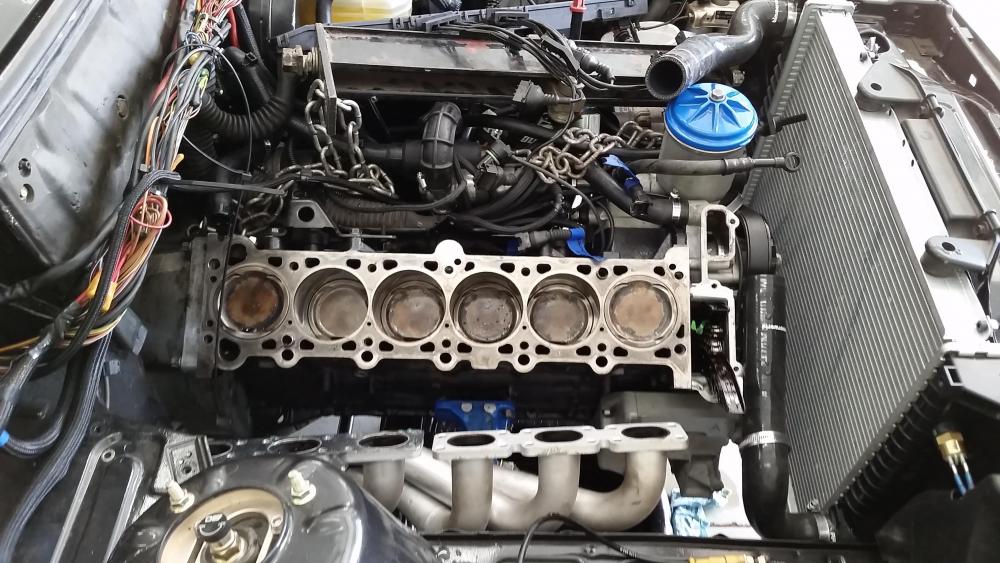
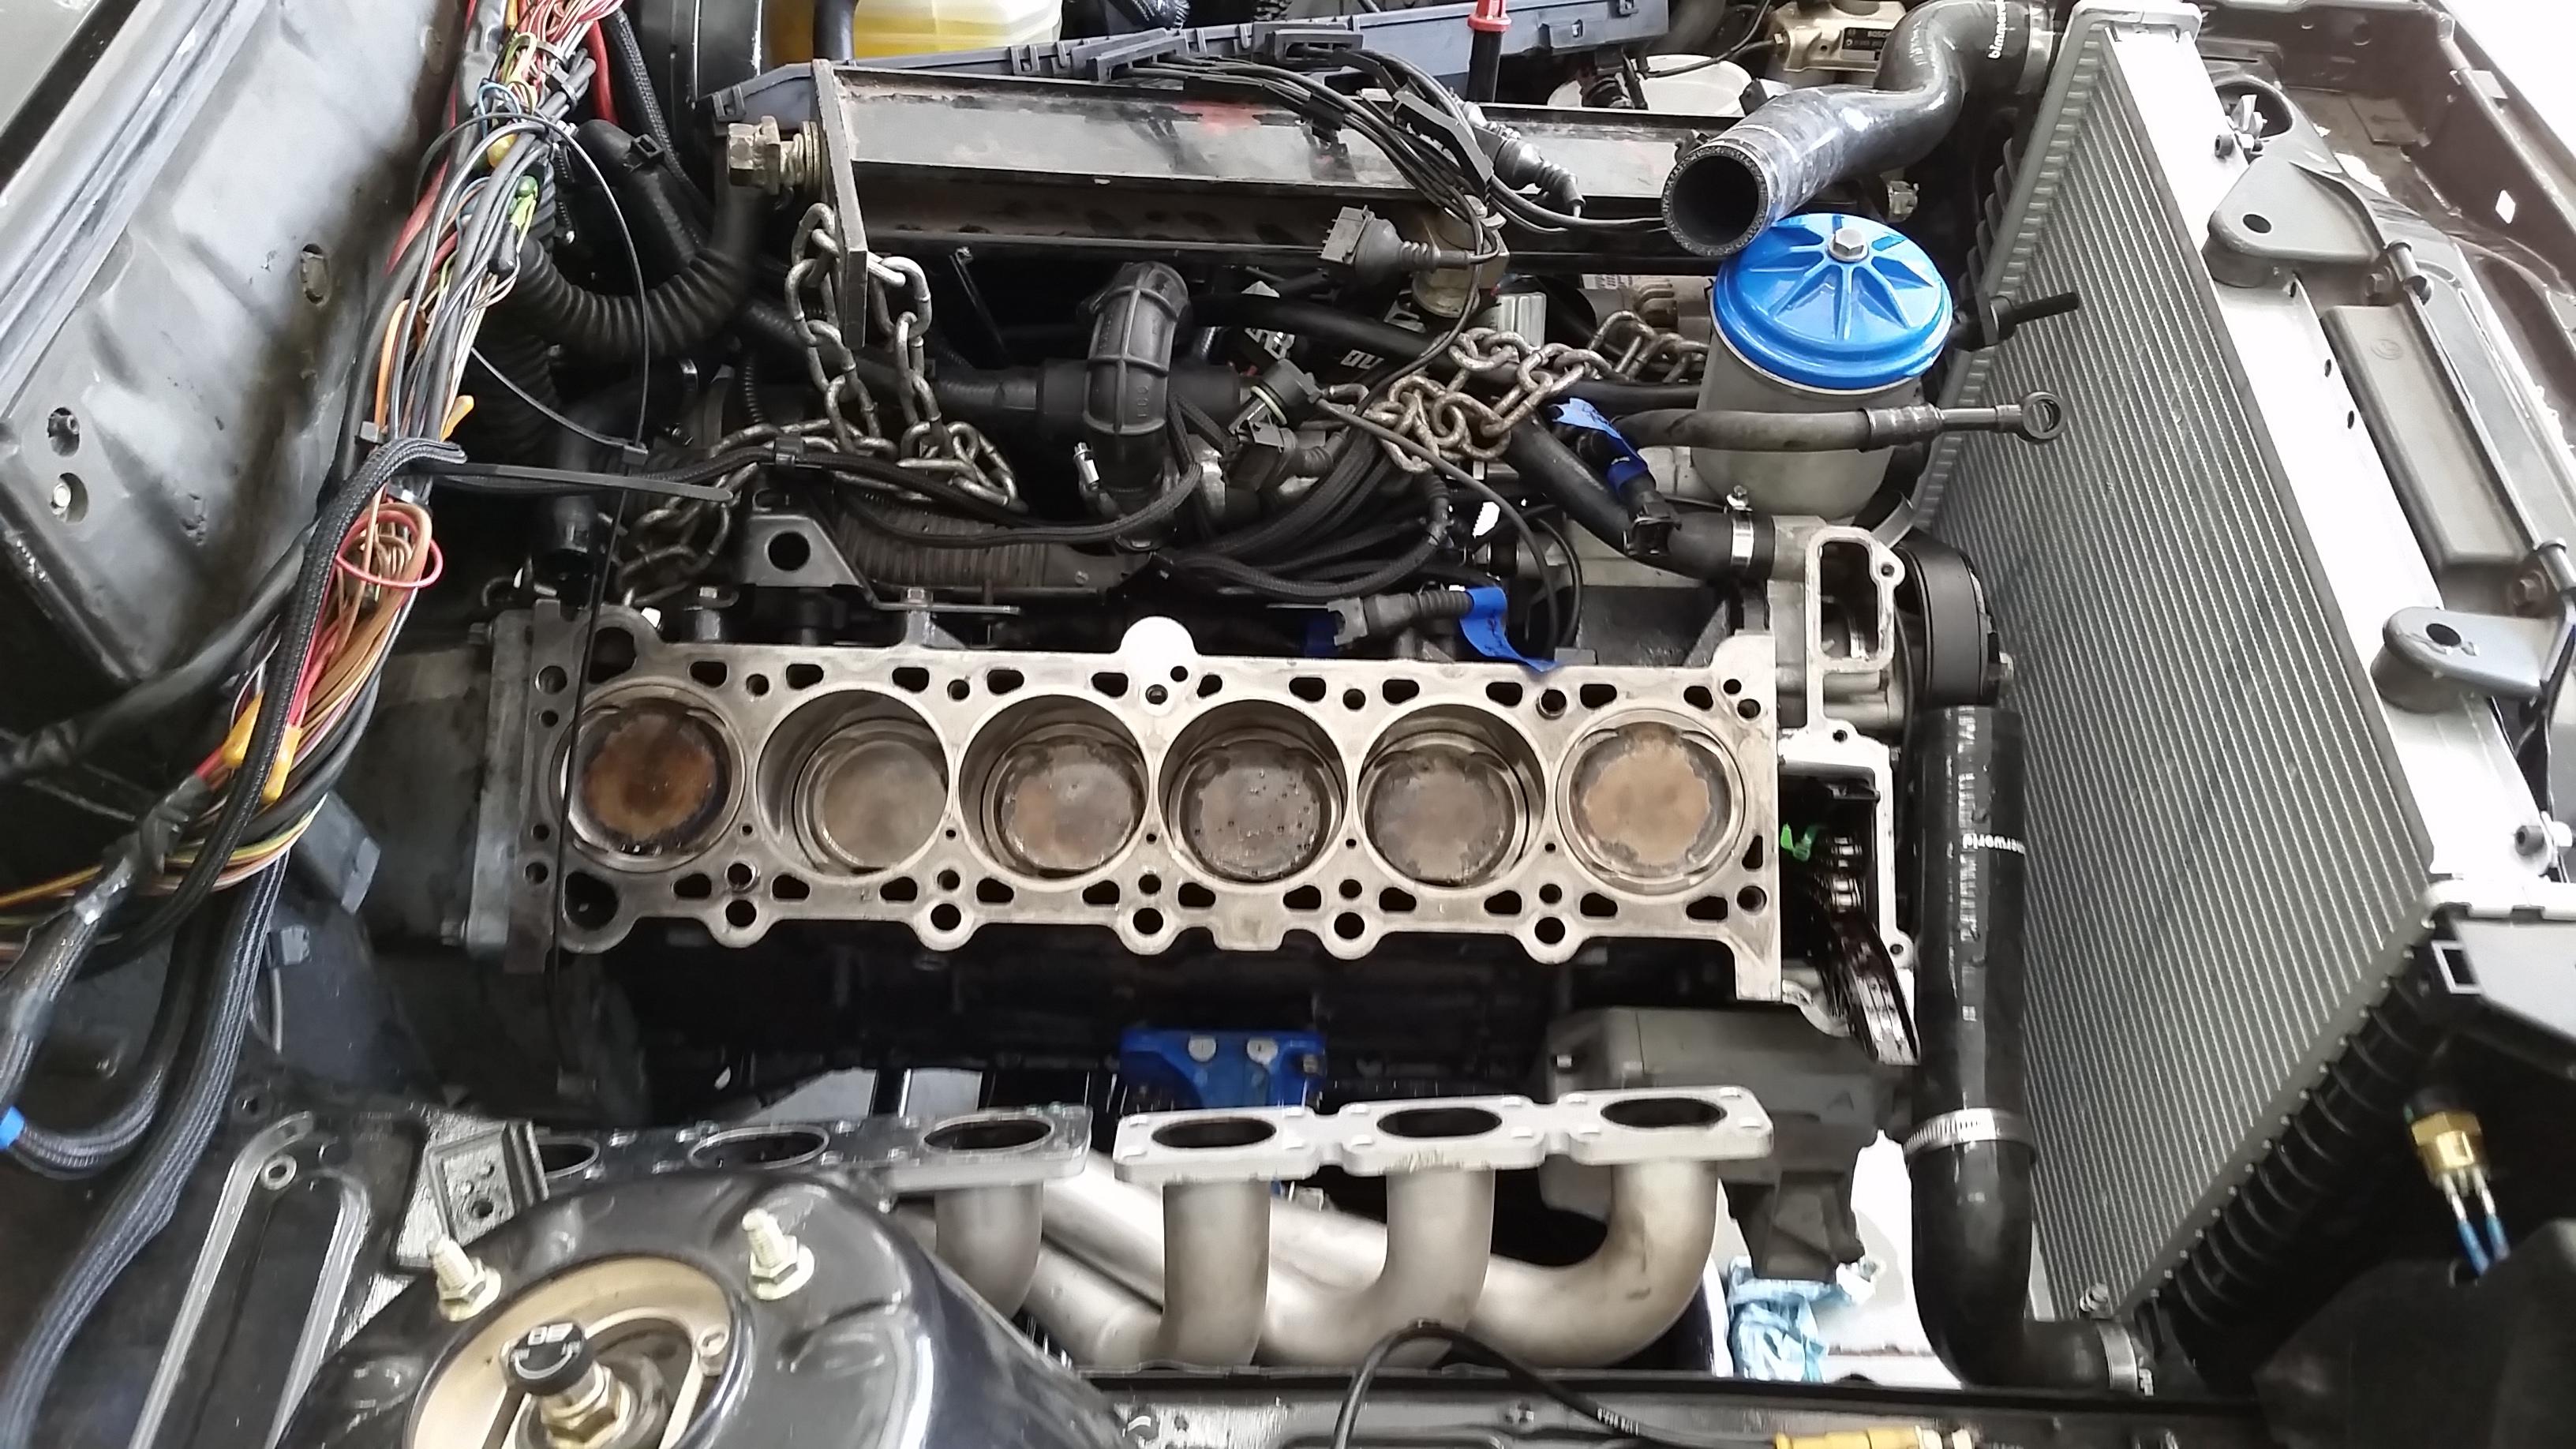
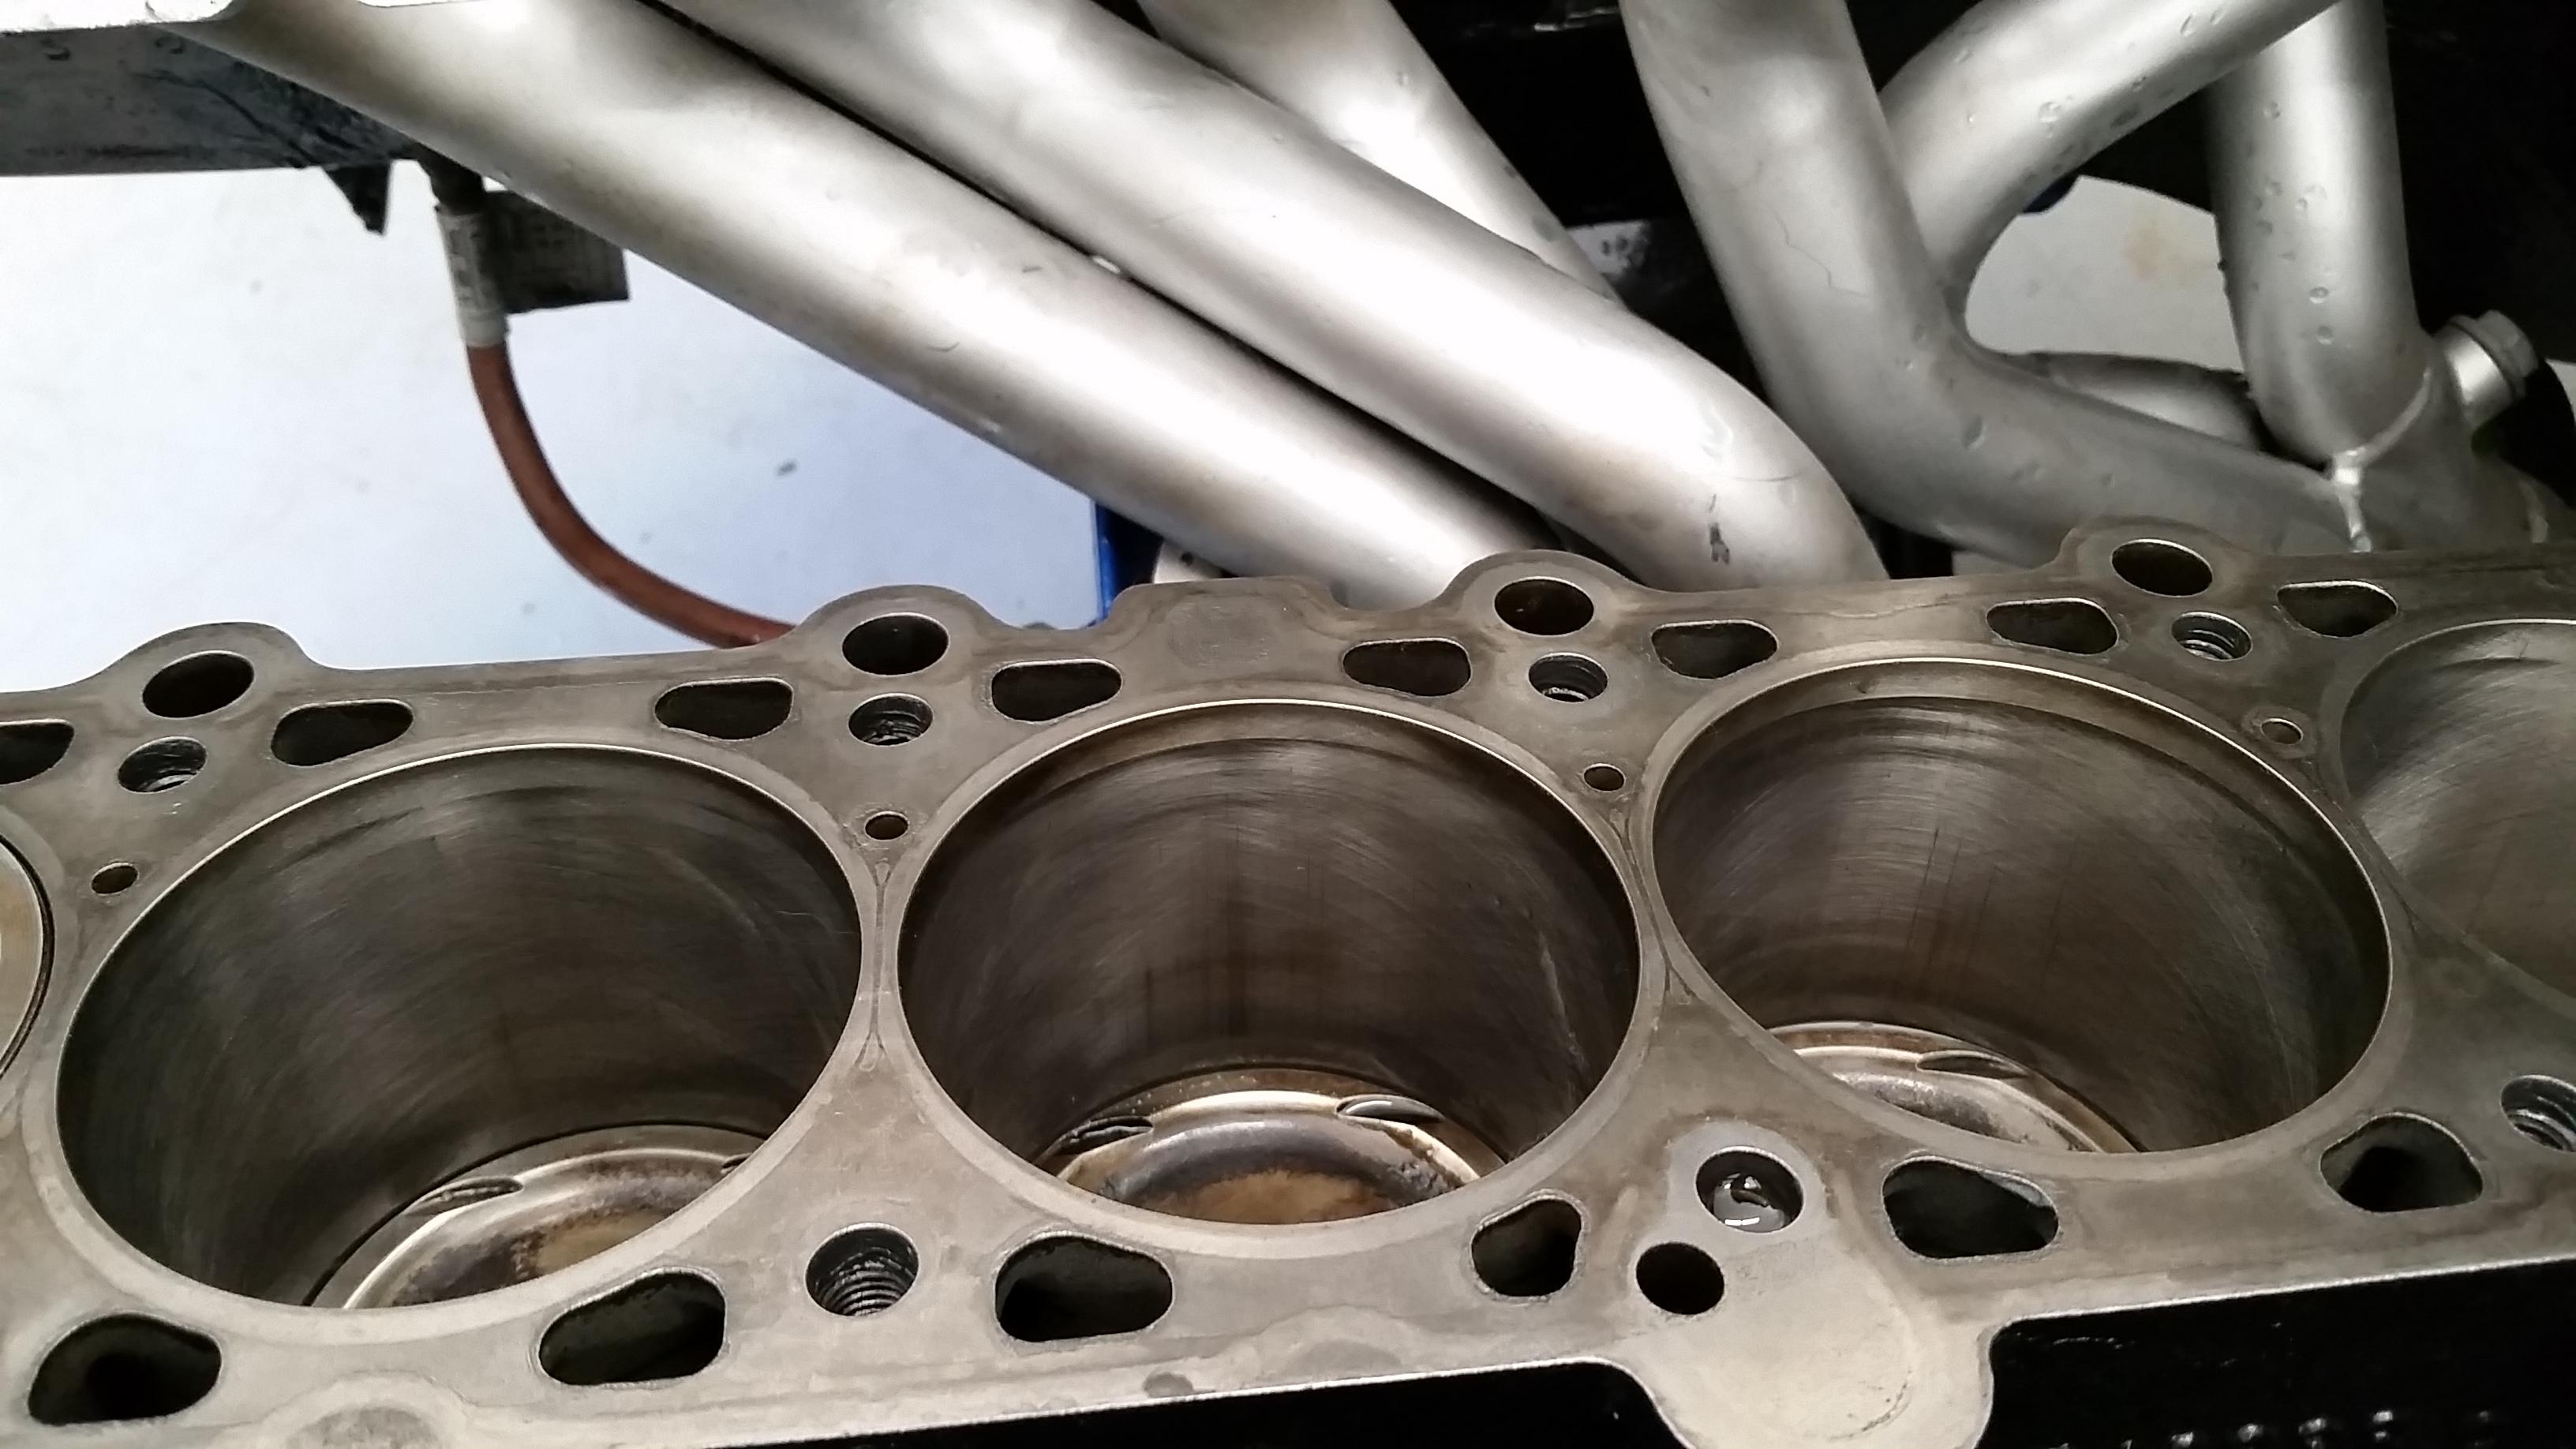
I took time to look over every cylinder and check for any odd stuff going on.
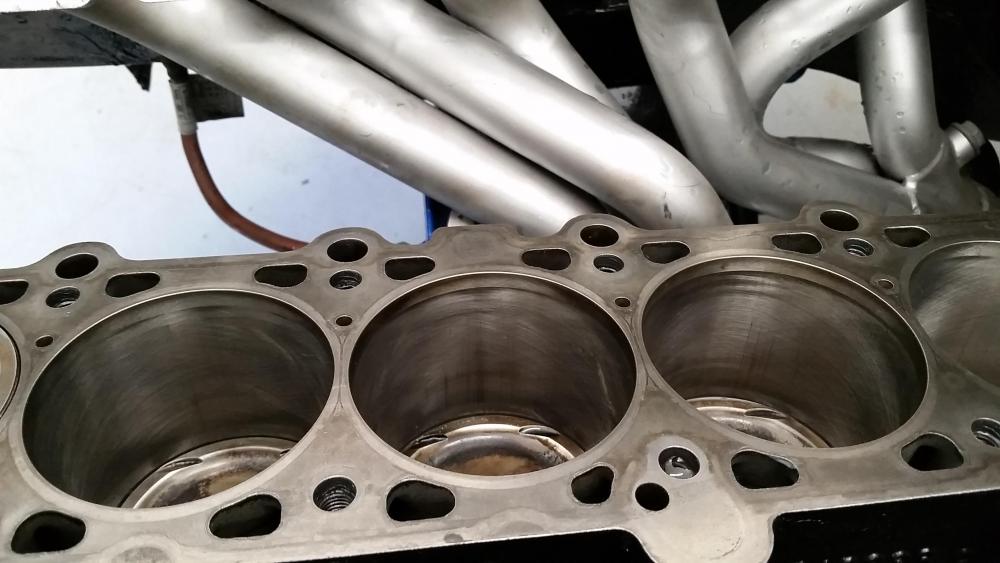
Nothing unusual was found. There was some light vertical scratching on all the walls though, I assume that's just from the rings bedding themselves in.After wiping down both surfaces with acetone, I laid down a fresh new head gasket with some rtv on the timing cover area to seal up that area where it was previously leaking and layed the head back on the block.
After re-torquing it to spec I went to the front to tighten down the front three m6 torque head bolts.
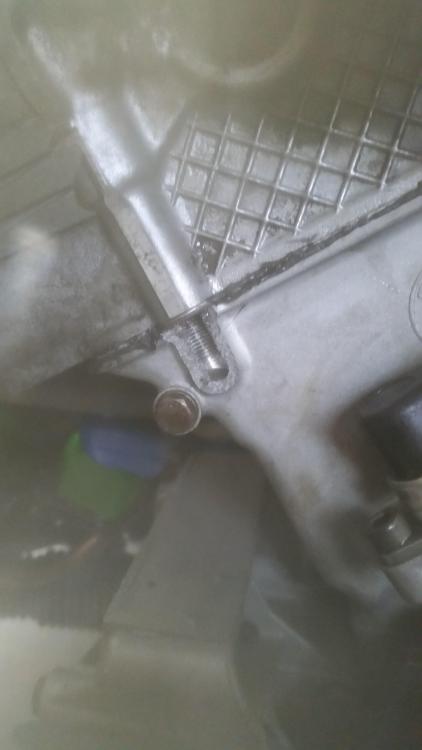
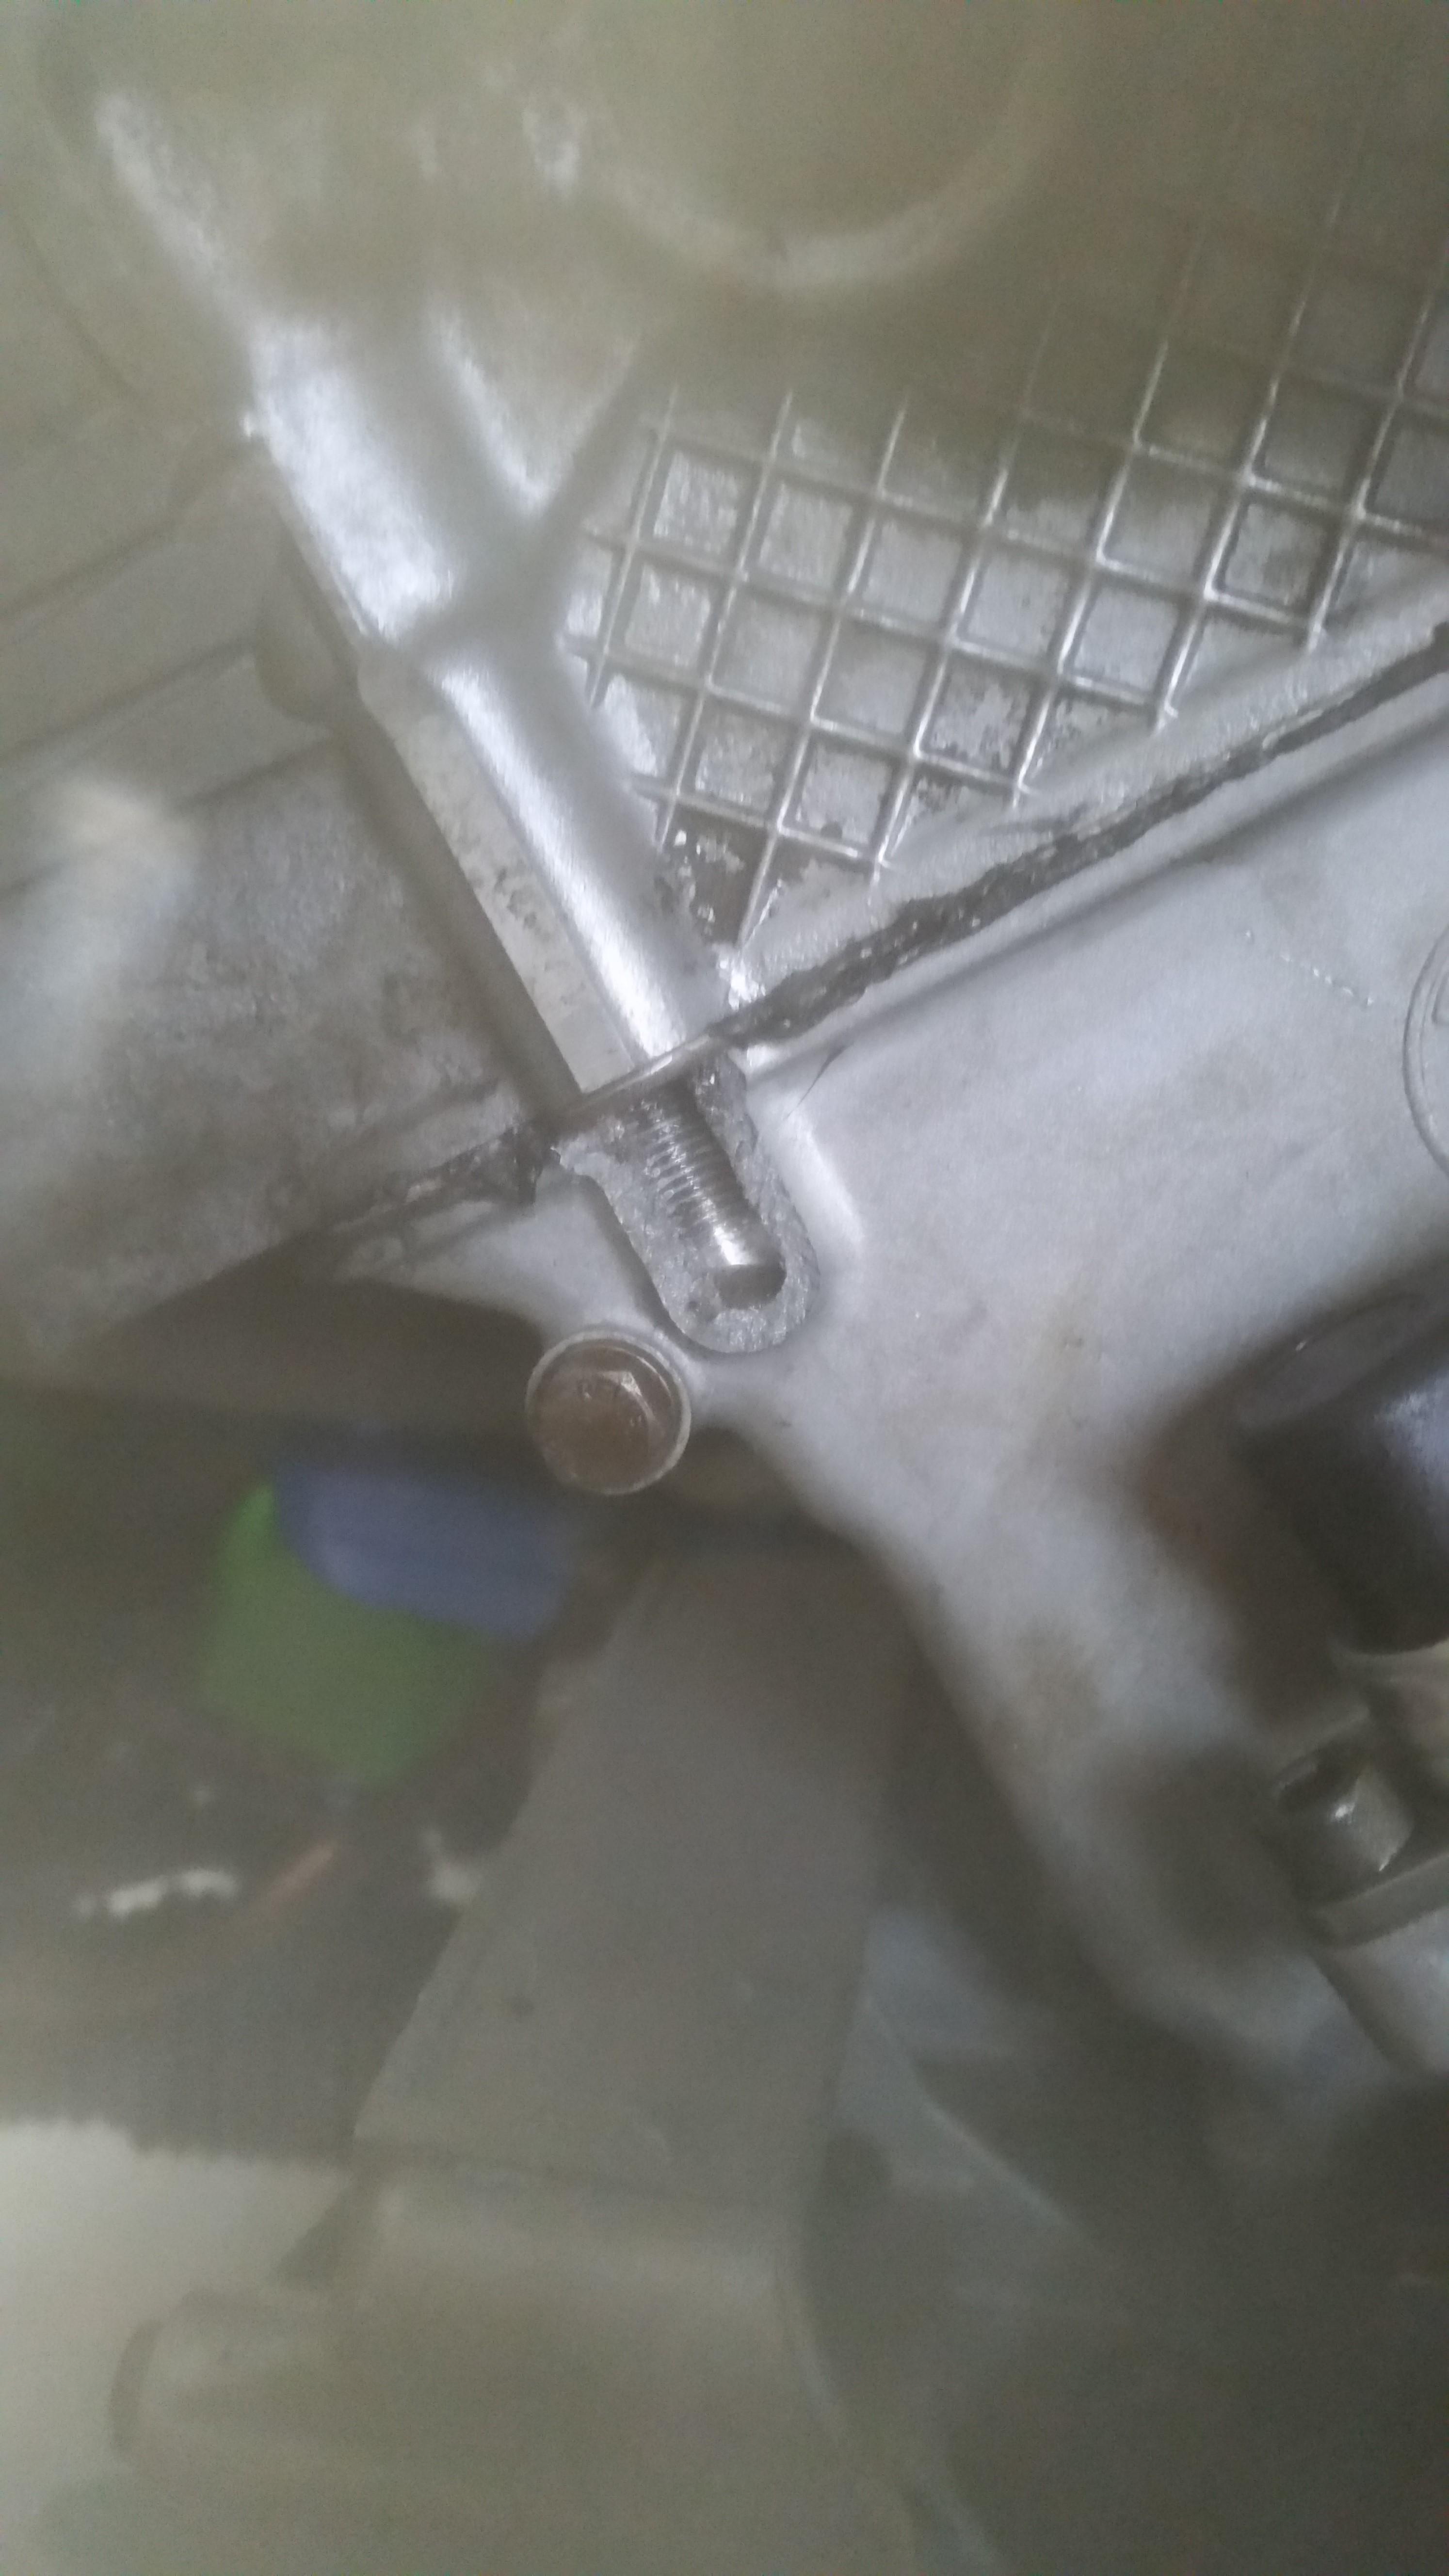
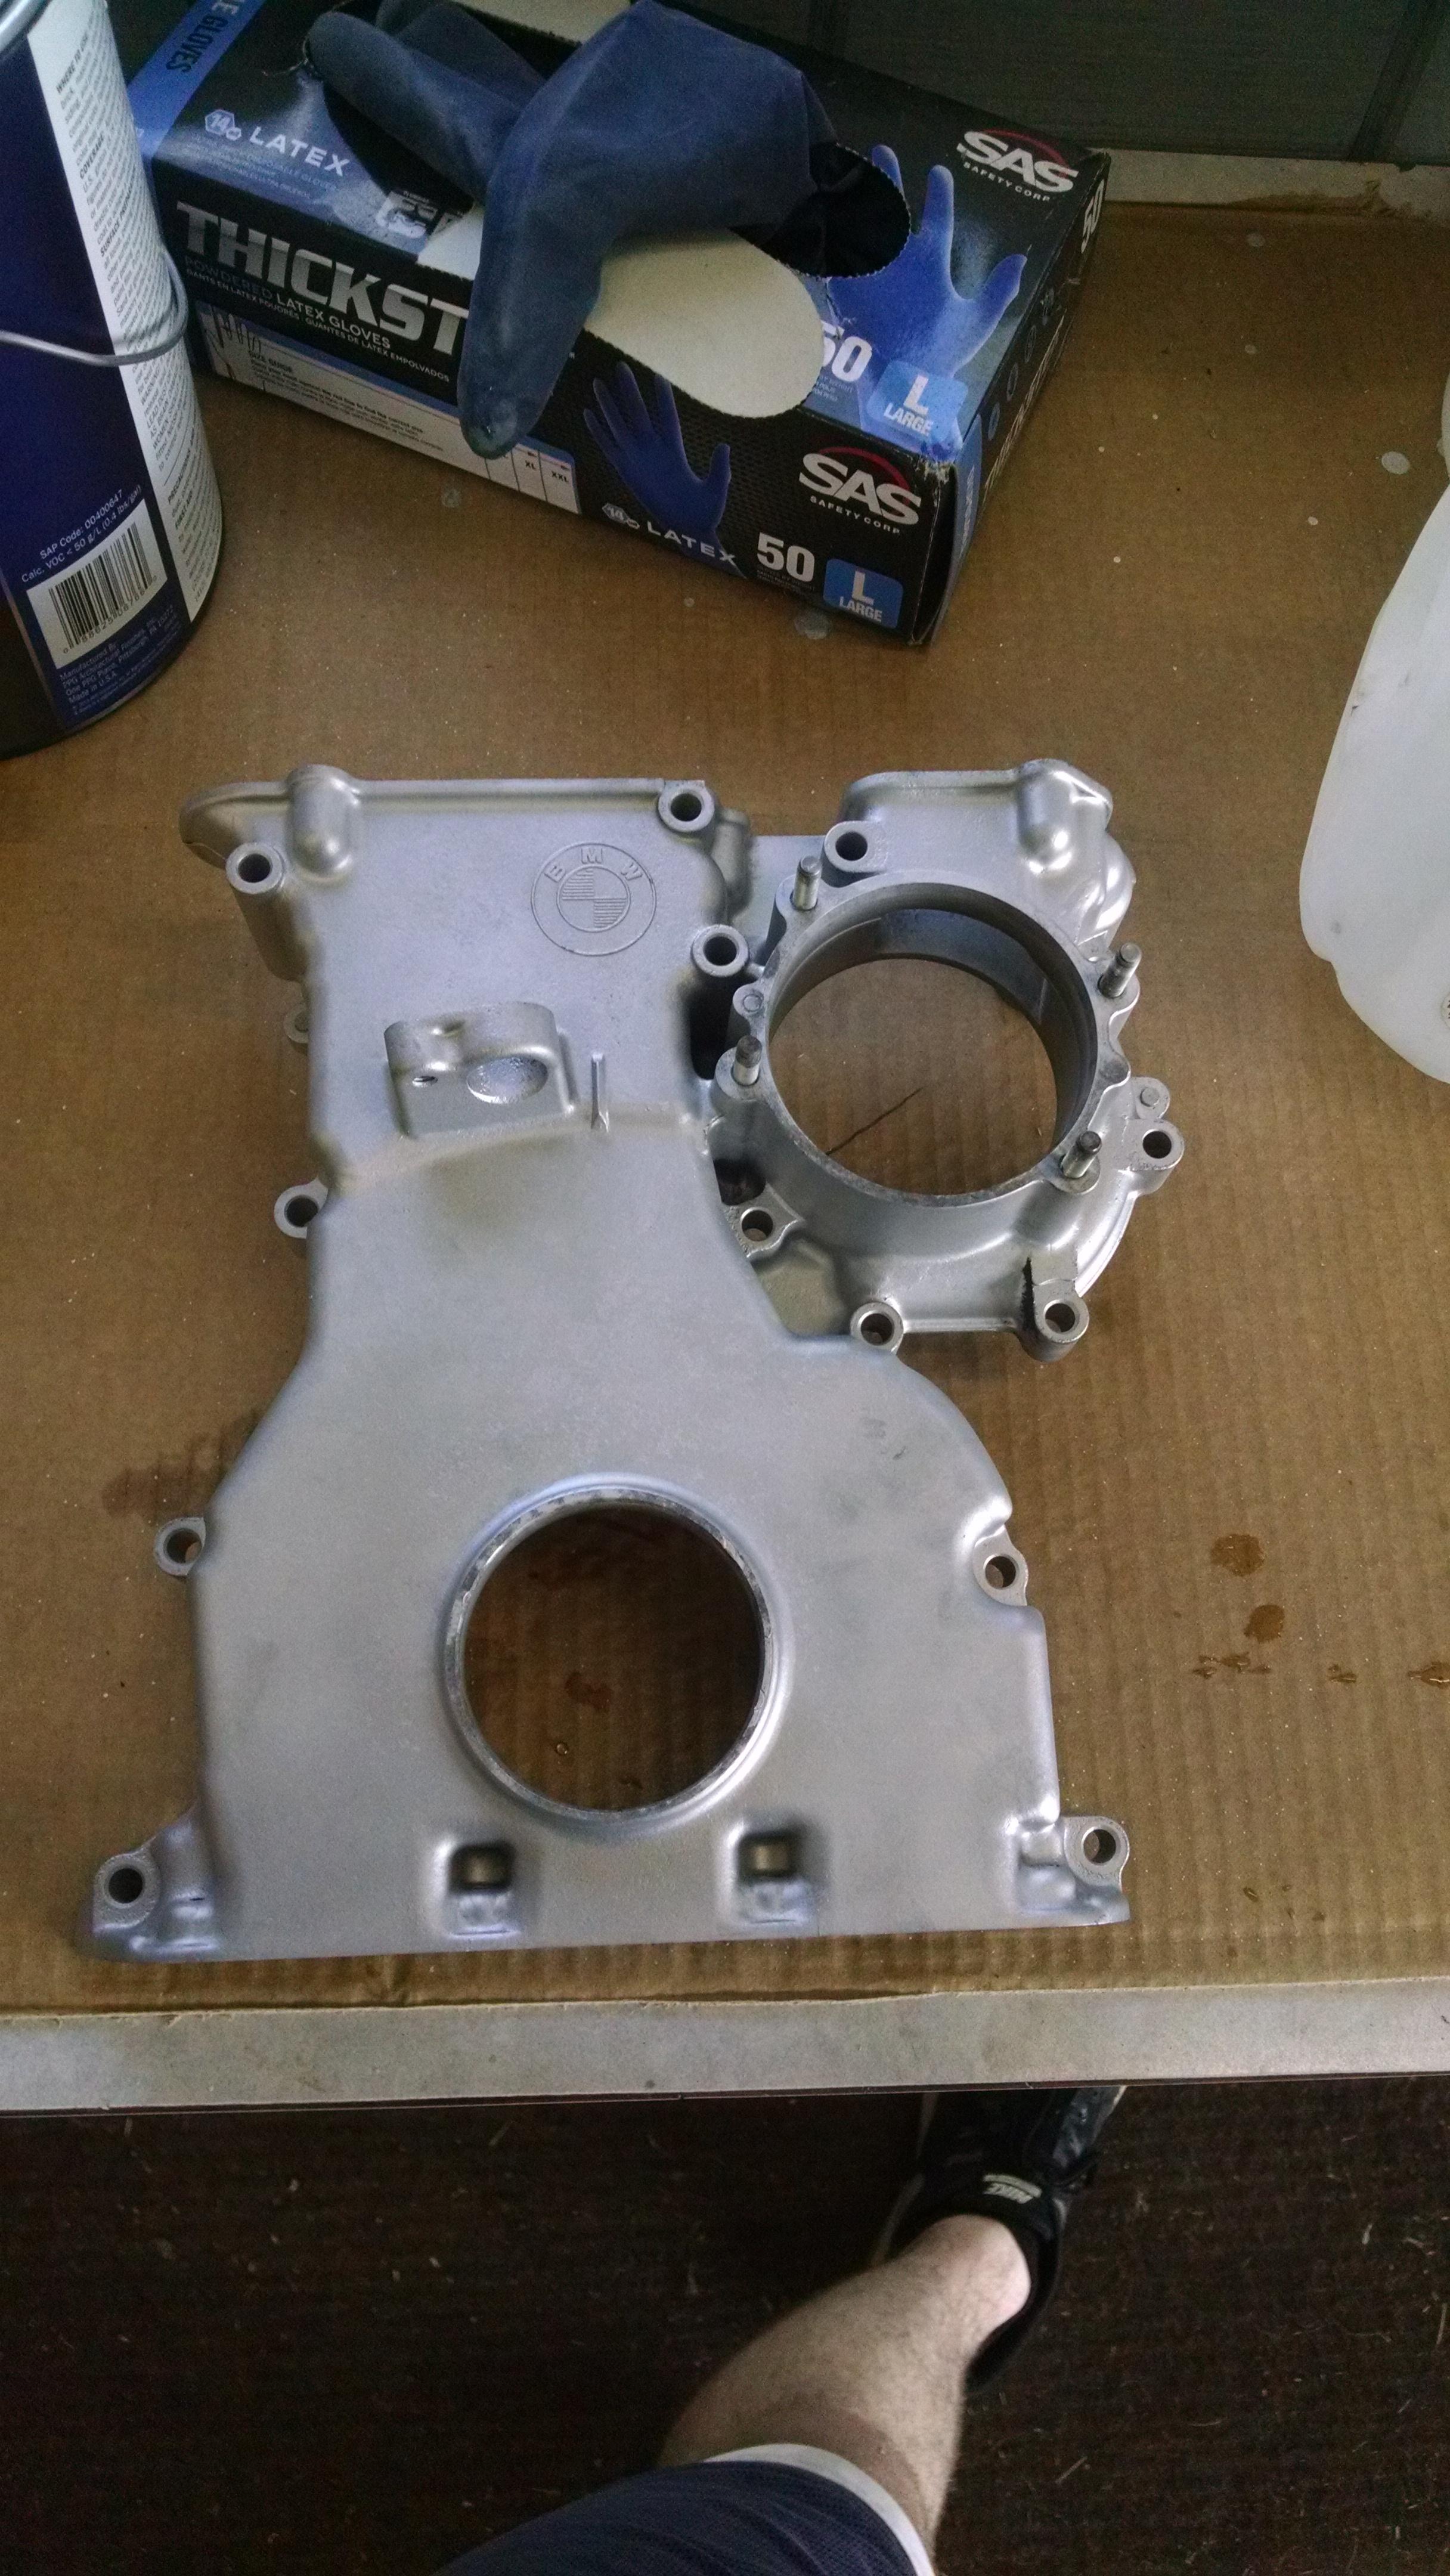
I pretty much just sat there kicking myself thinking of how I could have avoided this. After fighting myself for a while I decided to just take a break and let it sit for the rest of the weekend so I could clear my head. Monday rolled around and after getting out of work I went straight to Gibson's salvage yard and got myself another timing cover out of an M50. After thoroughly degreasing it I dropped the cover off at my buddies house who took it with him into work the following day and bead blasted it. During that time I went ahead and pulled the head back off the block, Removed the timing cover and started cleaning off all the old gasket material. Ordered fresh timing cover gaskets and another head gasket, may not have been totally necessary but its really not worth the risk of the other one potentially leaking after all this work.
Picked up the timing cover the following day.
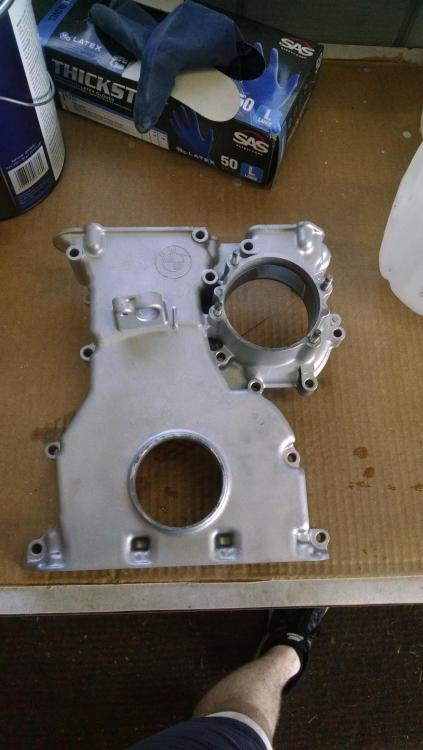
Right away I drilled out the center hole and heli-coiled the threads so I can avoid repeating what I had to deal with when I installed the head for the first time. I ran a tap through the outside holes to make sure the threads are clean, I believe the reason I broke the original timing cover was because some of the rtv I had put along the timing cover had squeezed into the hole and dried so when I went to thread the bolt in it caused resistance along the threads causing the cover to break.
Reinstalled the cover and then the cylinder head. After getting the head bolts halfway through the torque sequence I moved to the front and shined the light down each hole to make sure no gasket seeped down the hole. Each bolt got a dab of blue loctite and torqued to 6.5 ft lbs. After I got every bolt to spec I went ahead and torqued down the rest of the cylinder head. Now that the hard part was behind me I covered the motor up and finished installing the rest of the components the following day.
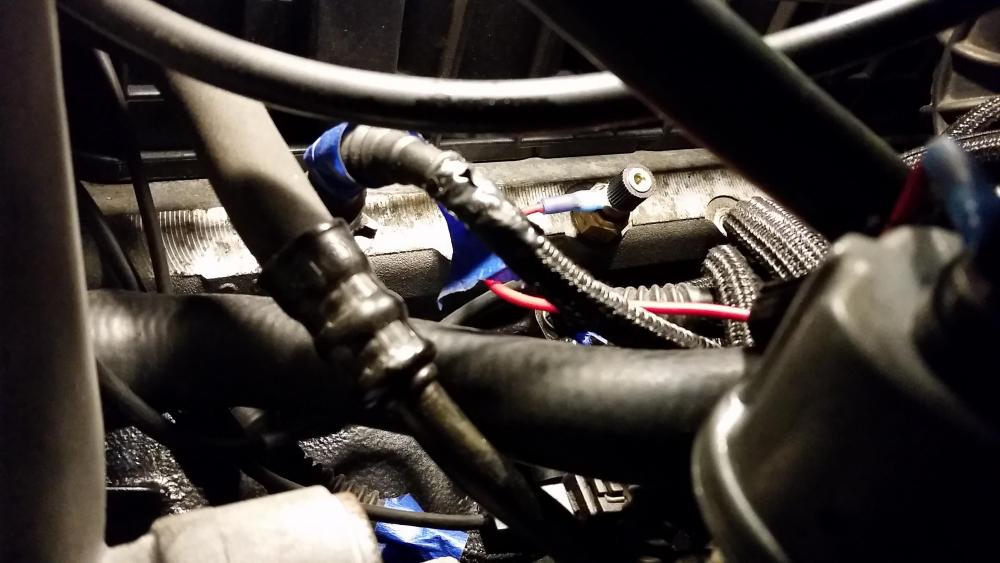
Before reinstalling the intake I swapped out the stock coolant sending unit for the cluster to the vdo unit for the water temp gauge. Much better.
(Ya the intake is already on in this pic, this is an after the fact shot as I forgot to snap a pic of it before)
Now that everything was hooked back up I dropped in 7 quarts of 10w-30 Quaker state oil, a bottle of Lucas oil zddp additive and a fresh mahle oil filter. Went ahead and cranked the engine over a few times to prime the oil pump, did the same with the fuel system. Plugged the fuel pump relay back in, hopped in the car, only took a couple cranks and she popped right off once again sounding just as good as before but this time, no leaks

I let the car reach temp keeping an eye on all the gauges which everything was looking perfect so I decided to take the car out for a short spin that night. Everything is working great, Engine was running awesome! I didn't take the car far as it was already late so I parked it back in the shop tell the next day.
The following day after work I cleaned up the shop and got the hood installed. After thoroughly looking over the whole car and drive line for any unusualness I brought the her home.
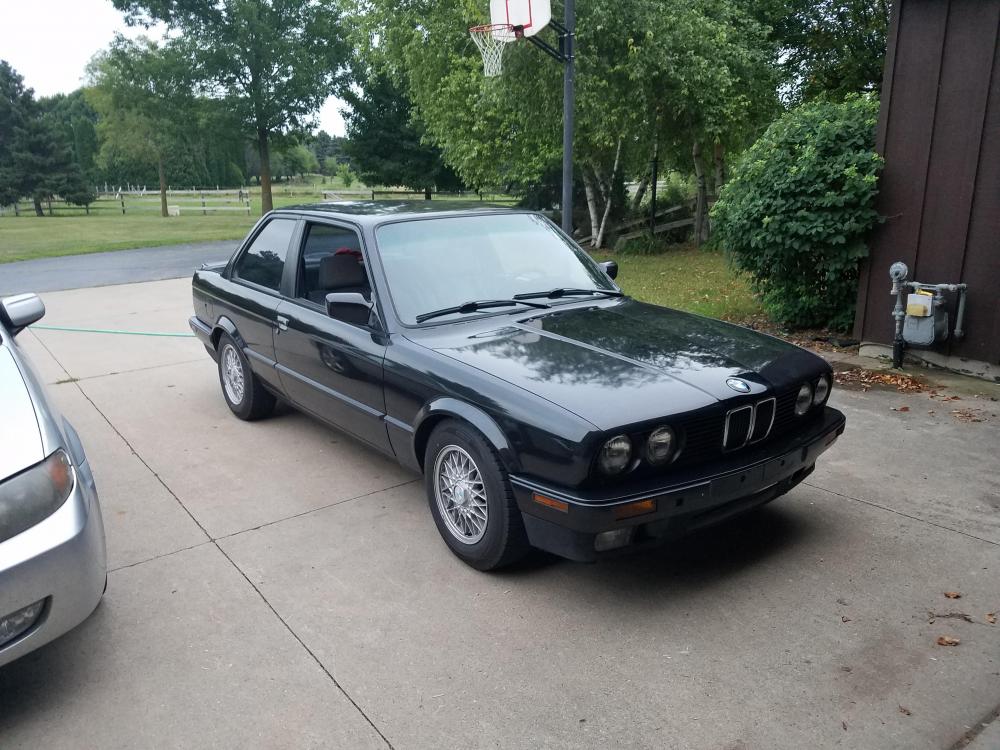
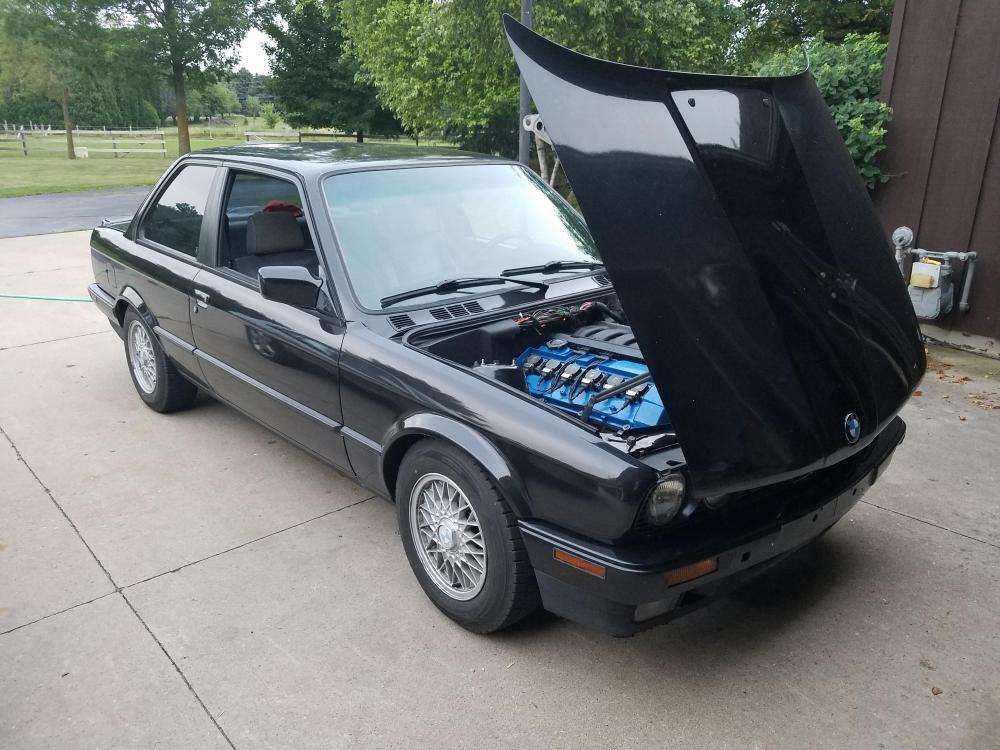
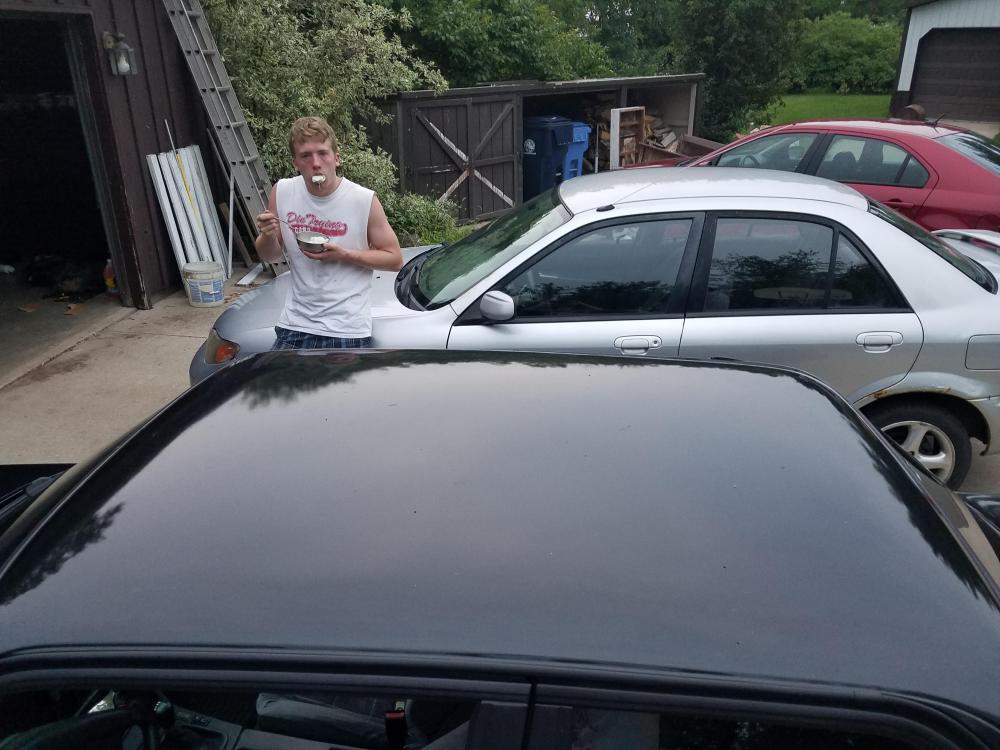
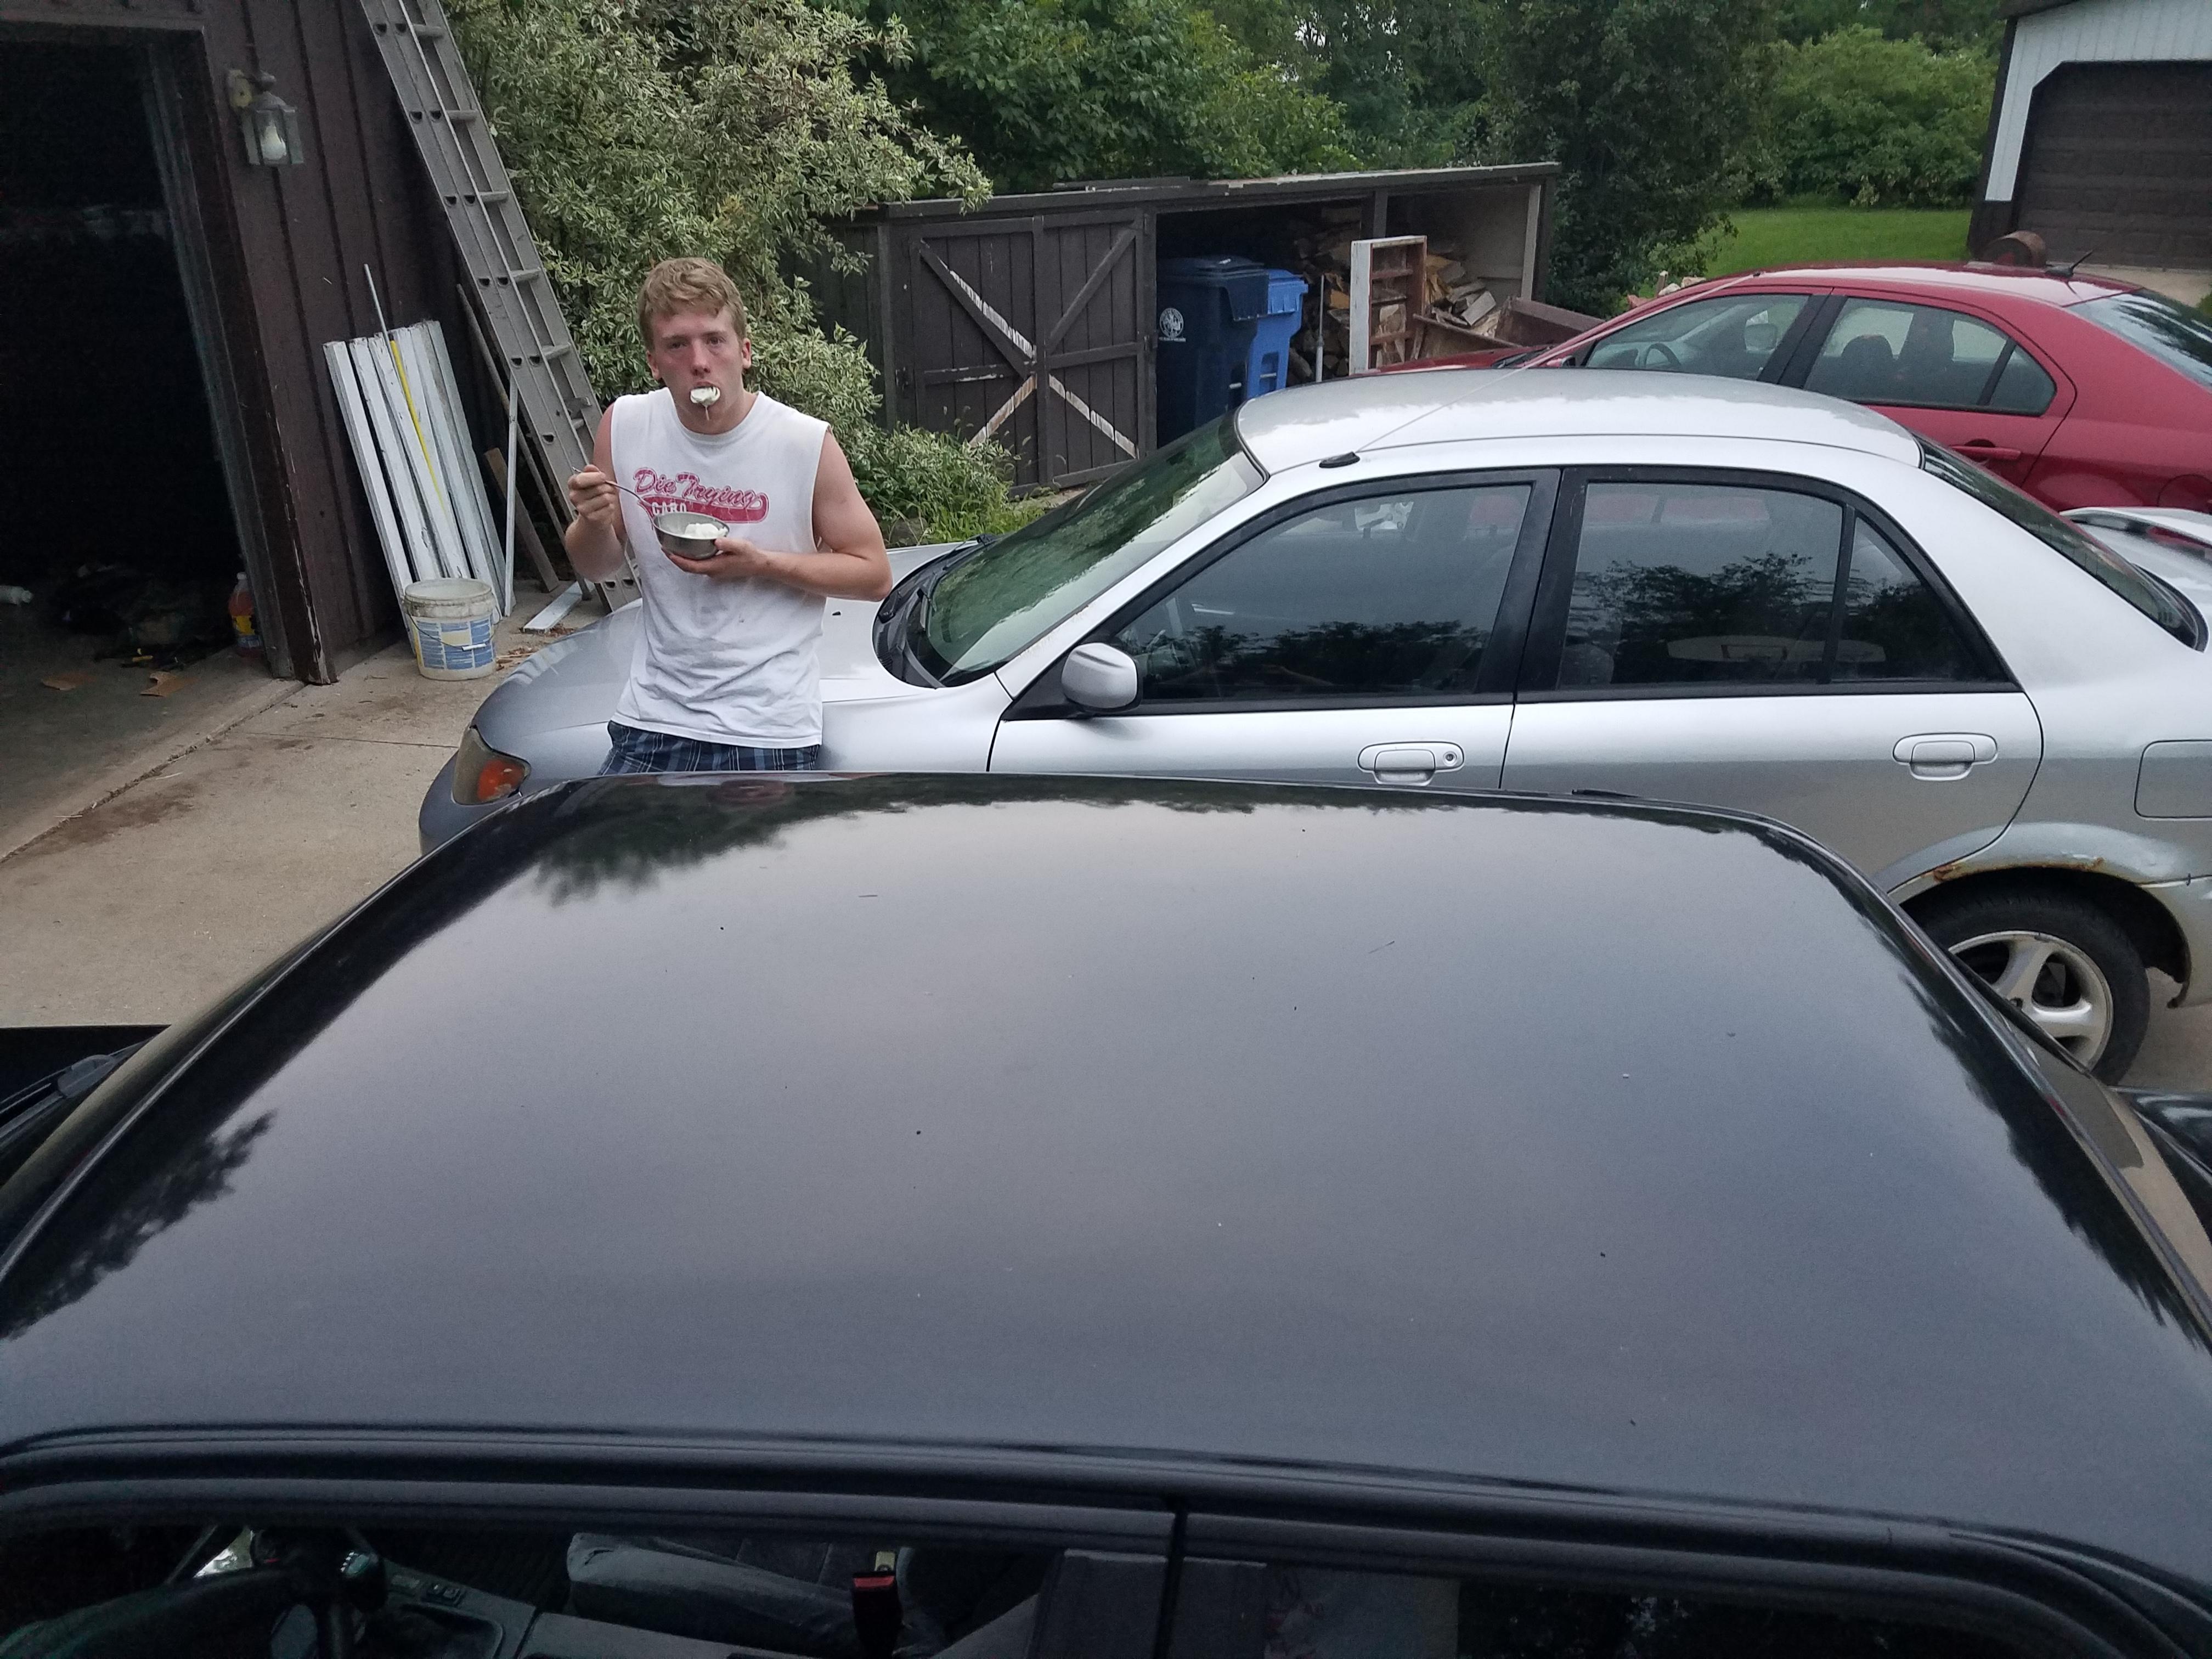
After taking time to enjoy the fact that it was finally home for good I went ahead and gave the car a good scrub down removing all that 8 month old dust. Once rinsed off I noticed that all the drawings and comments were still etched into the paint (as expected). so I grabbed some meguiar's medium cut buffing compound I had laying on the shelf, a polishing rag and some elbow grease and went at it. Took everything off really well and made the paint look quite a bit better.
Pic of the roof where most of the markings were. (Someone likes his creamy cucumbers, lol)
That following Friday I dropped the car off at accurate in Appleton to get a 4 wheel alignment and straighten up that steering wheel. Picked the car up after work the same day.
Saturday rolled around and I had planned to go up to our trailer with a few friends for a nice two days of swimming and cooking out. What better way to enjoy it then bringing the car along with me.
It's about a 50 mile drive there (just about an hour) and the car drove all the way up there and back like a champ. There are a few areas where the roads get twisty and it gave me a great opportunity to test out the z3 rack with fresh suspension and brakes. It was really quite a wonderful thing and gave me all sorts of goosebumps keeping a smile on my face the entire time.
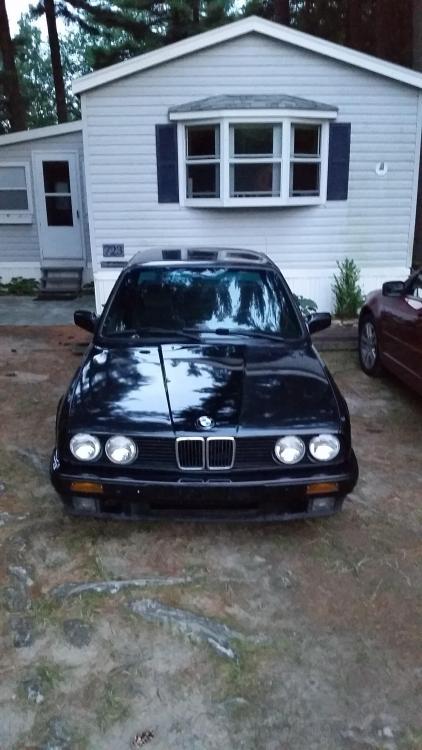
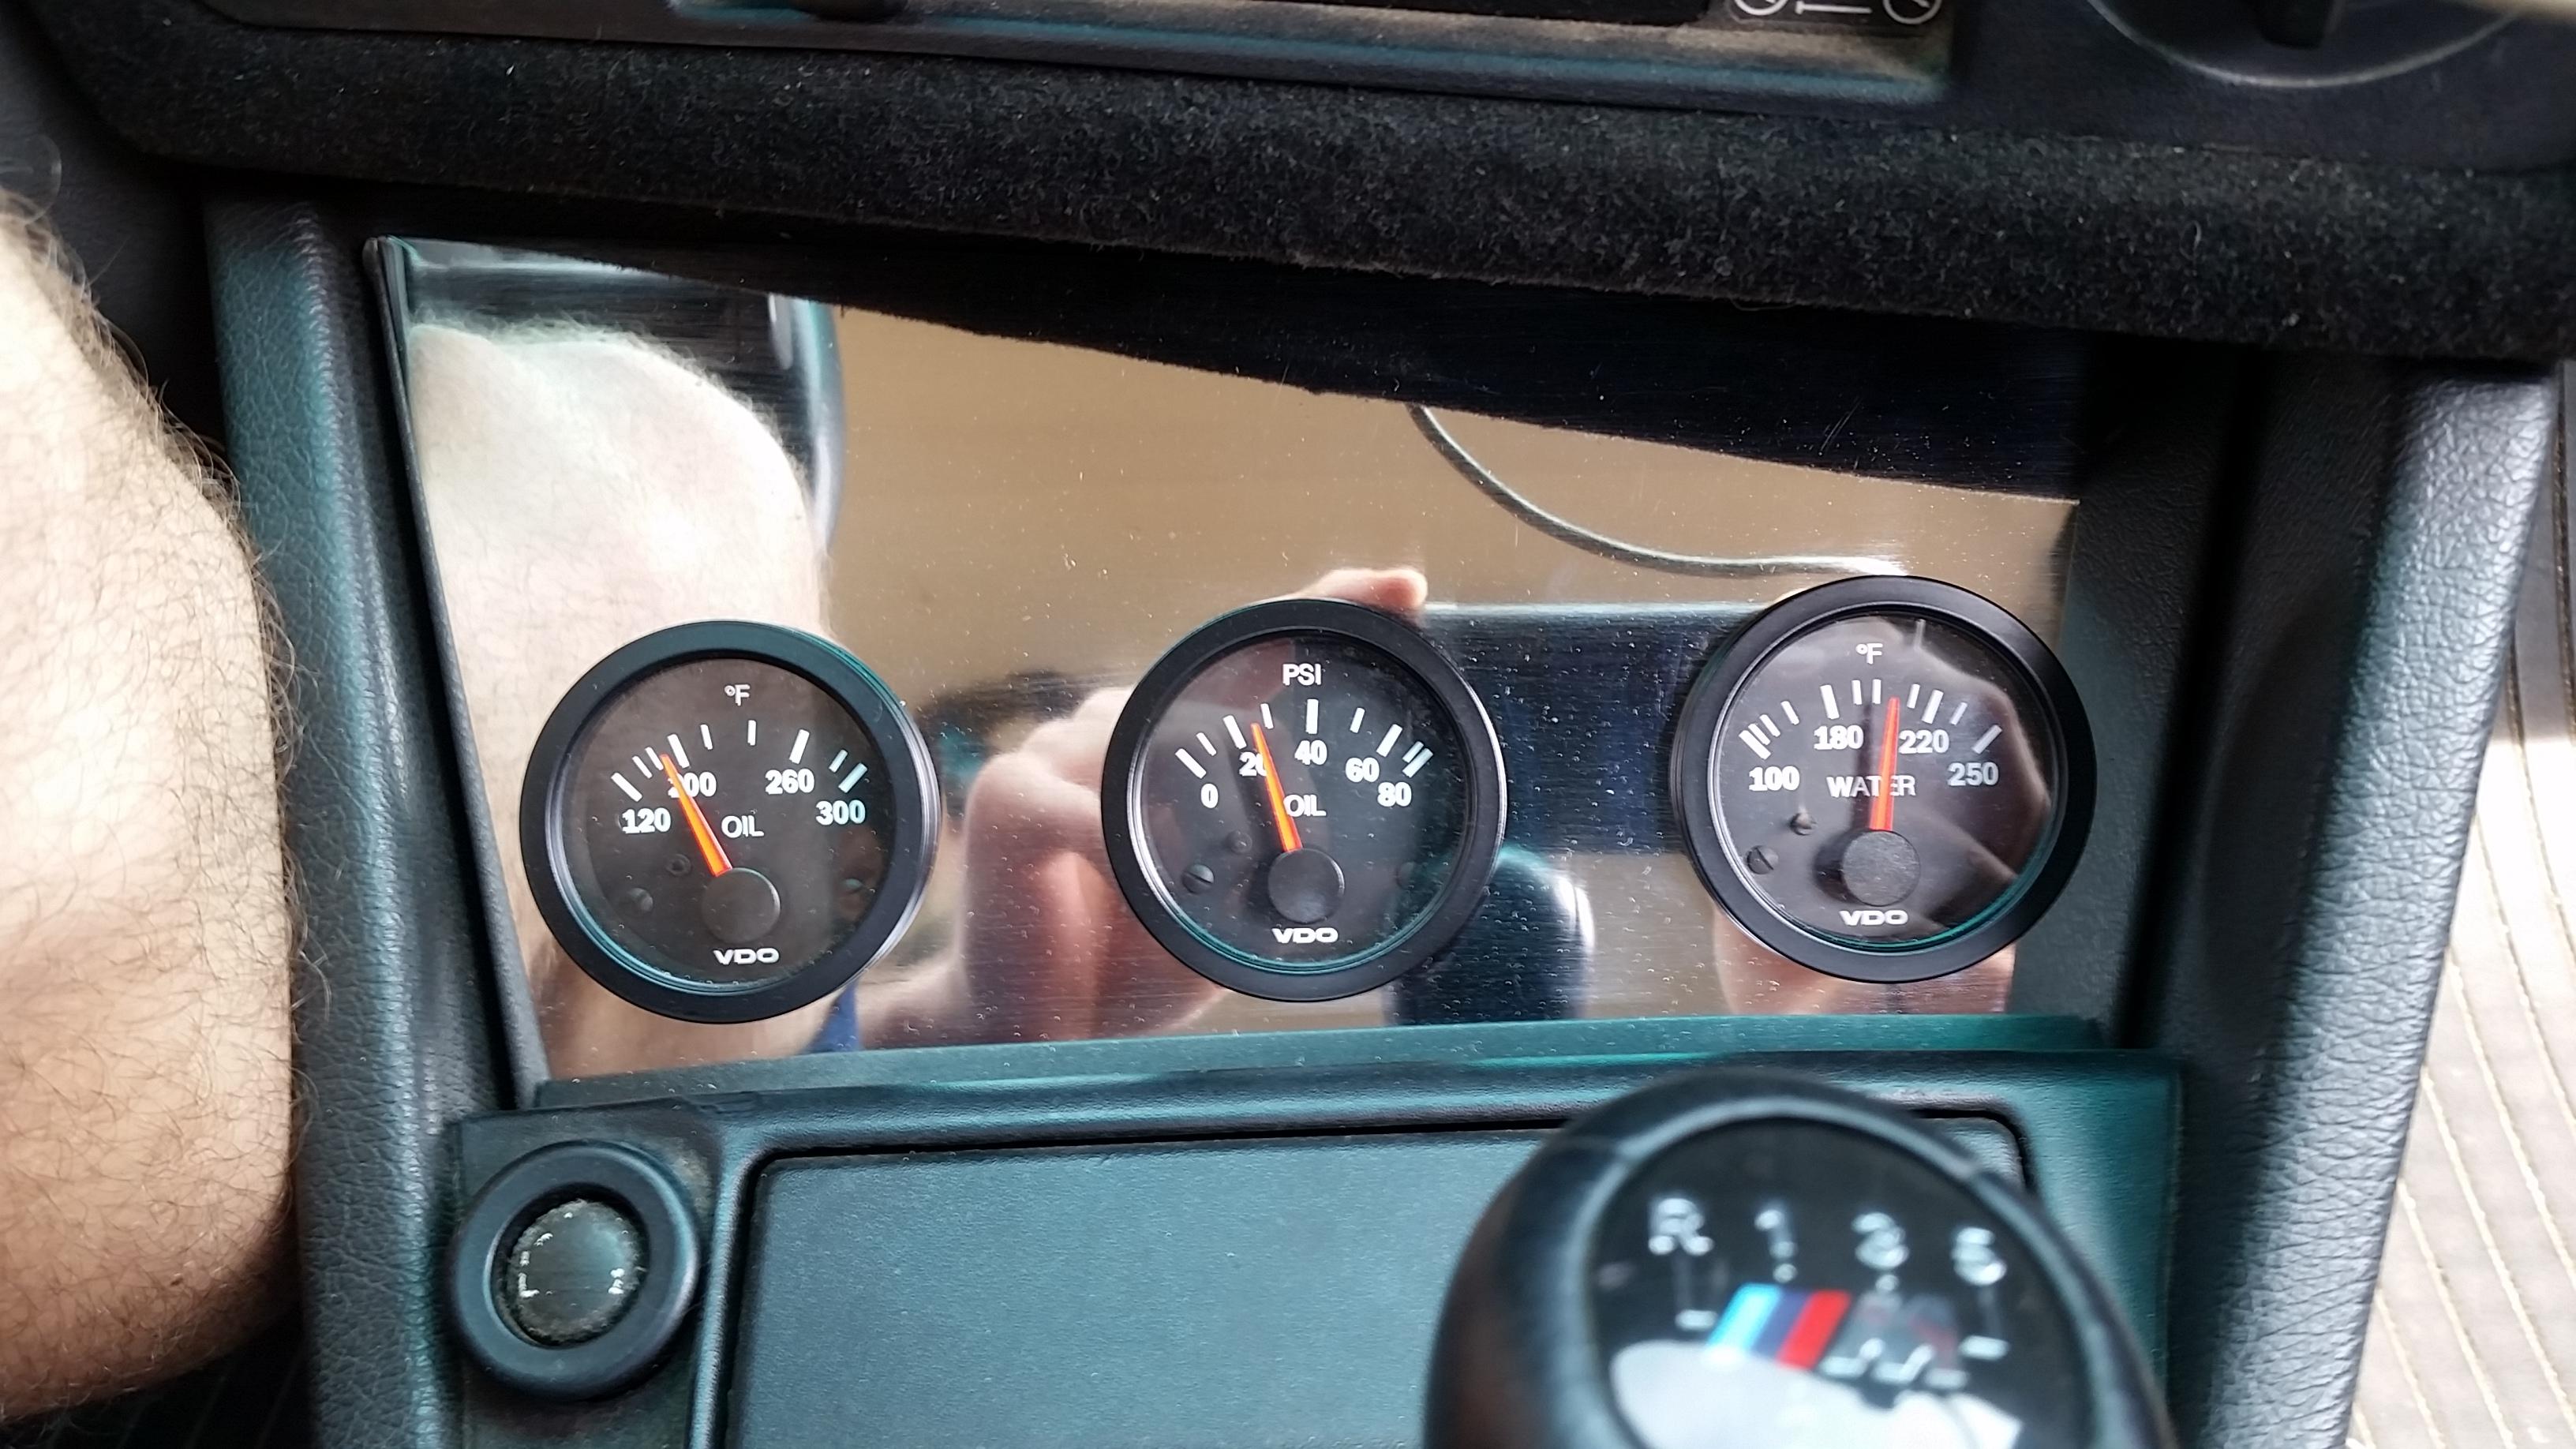
I was able to sneak a pic of the gauges during the trip up there. It seems the engine's happy temp is right around 200 degrees. (This was cruising right around 65 and it was just about 80 degrees out, it stayed right there for water temp when I started going a bit harder on it as well).
As far as I've read online 197 degrees is oem operating temp for the s52 so I assume I am okay. I am running a 88 degree Celsius thermostat though so I am curious if it should be lower then what it's at now.
Now, as for most engine swaps there are always some little things to tweak or fix. For me, I had a few slightly small issues that revealed themselves on the road trip to my trailer and back.
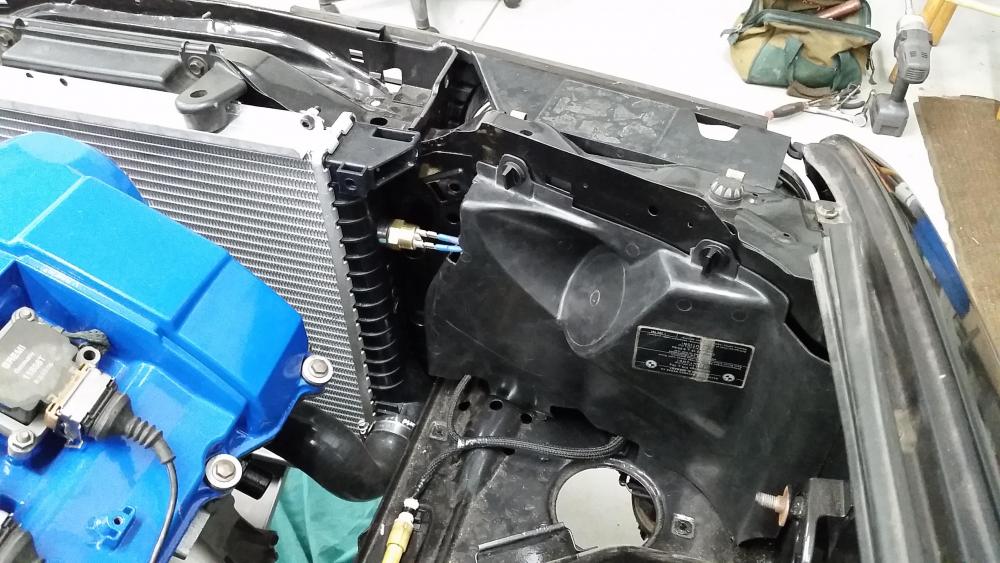
First off, the fan. It hasn't been running.
I know for a fact it's the switch. When I remove the two wires and jump them together the fan kicks on full power, no problem. I purchased the switch off a carpartsdiscount cite which was actually the only place I could find a 82 - 88 degree 2 prong coolant switch. The part number is 61-31-1-364-272-82. My only guess is that the switch is defective and I will have to find a replacement but where? Nobody seems to carry them anymore. Help on what others have done for this would be awesome!
I'm thinking I will probably wire up a toggle switch temporarily to those two wires for me to control tell I can find something else.
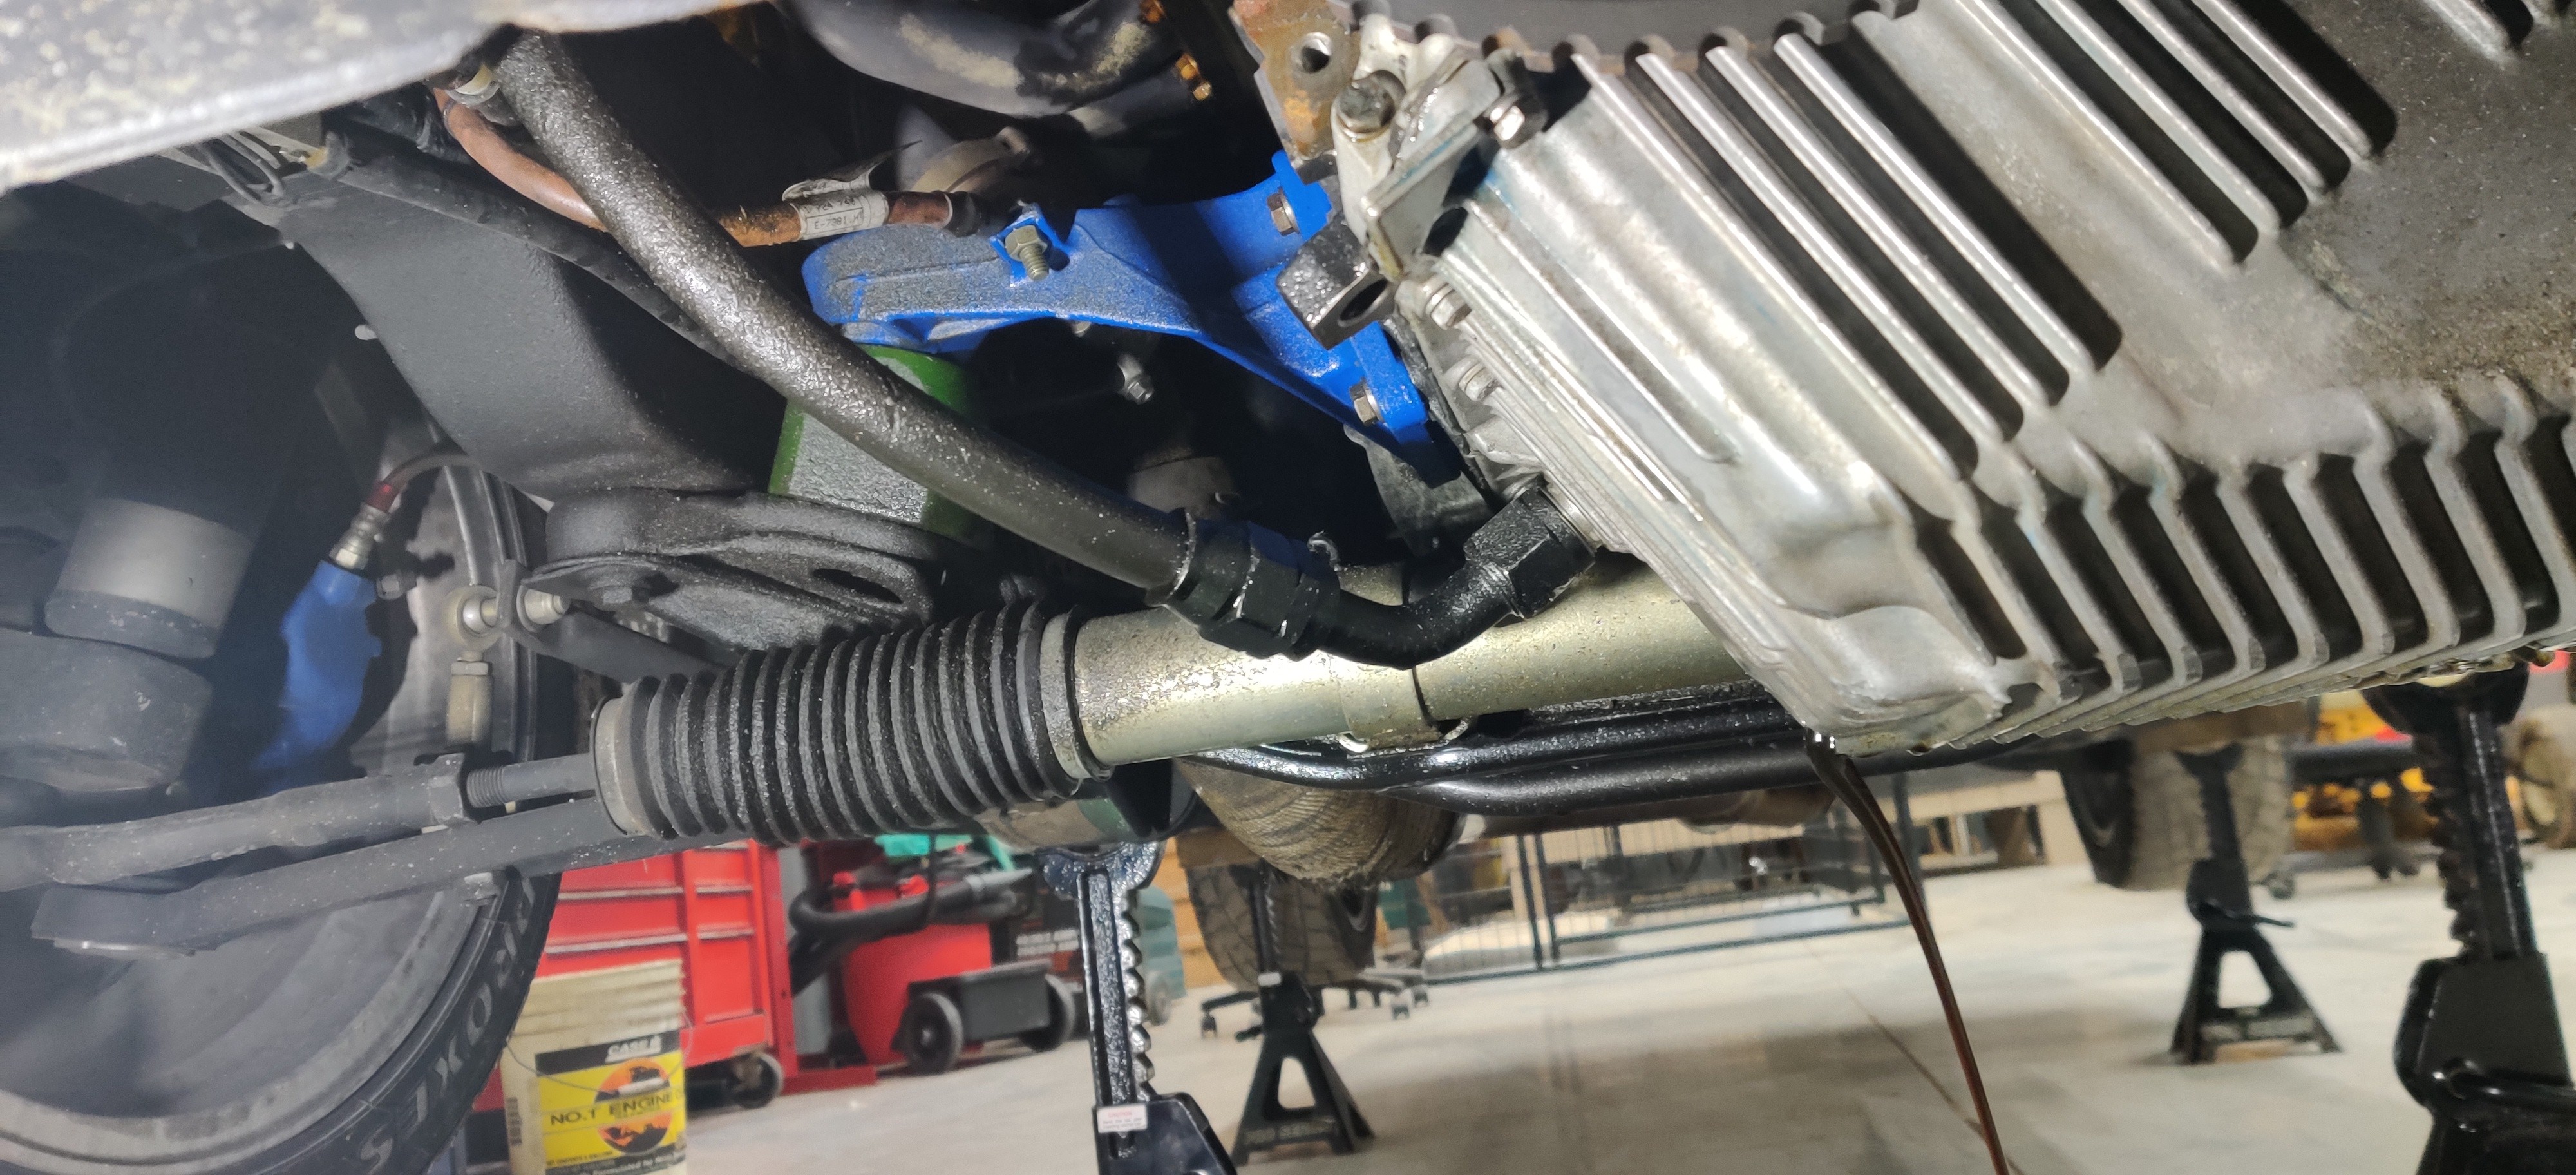
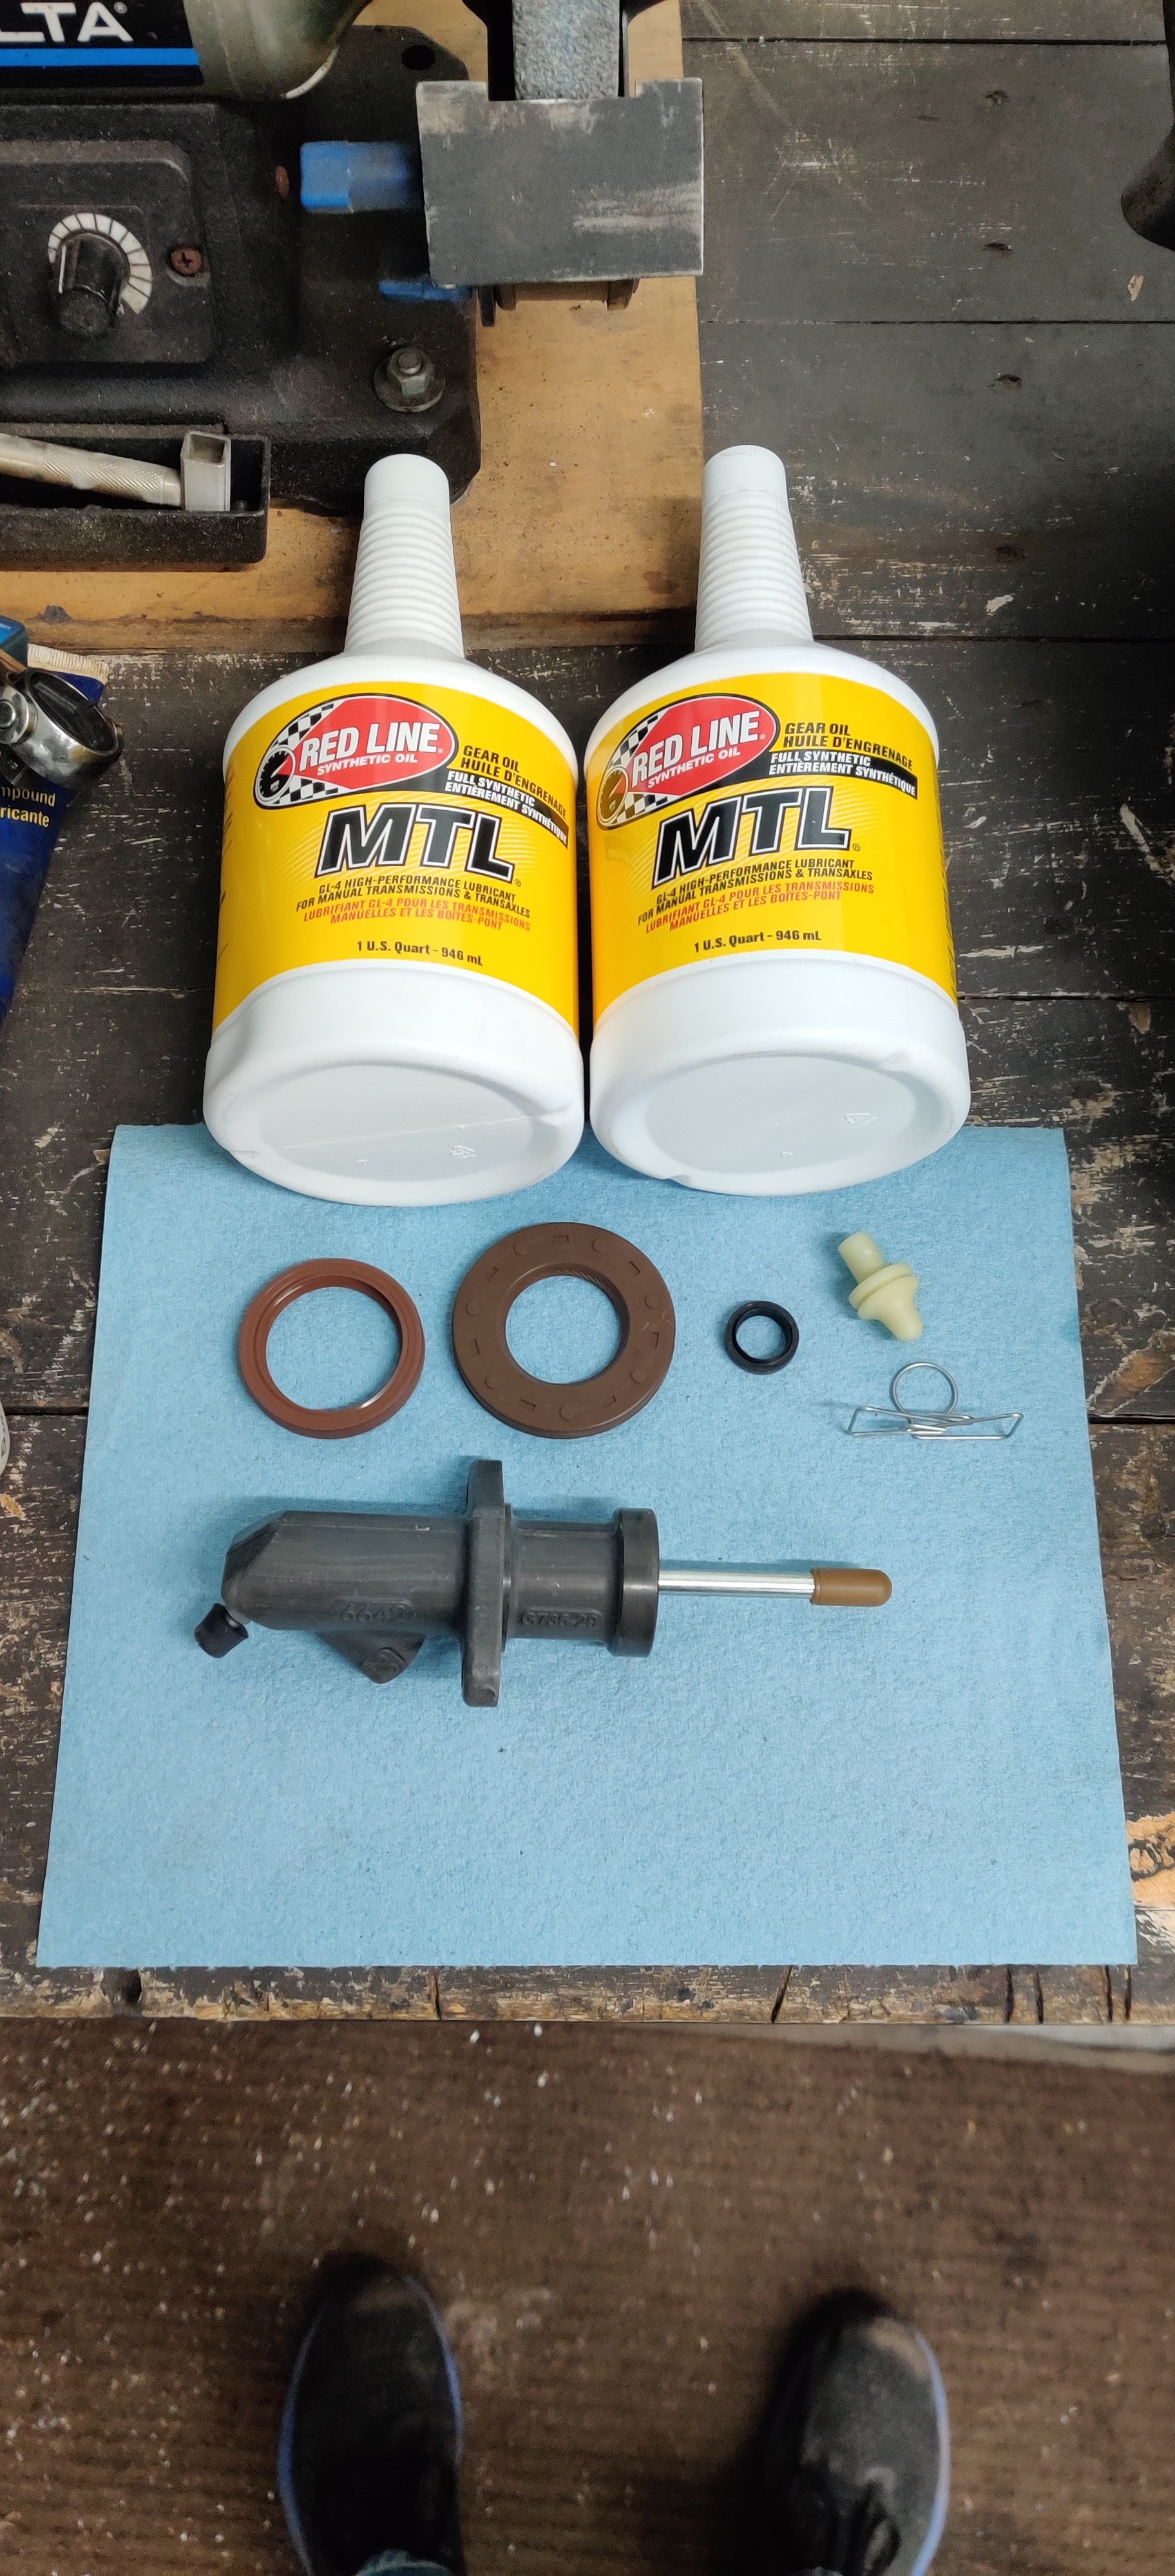
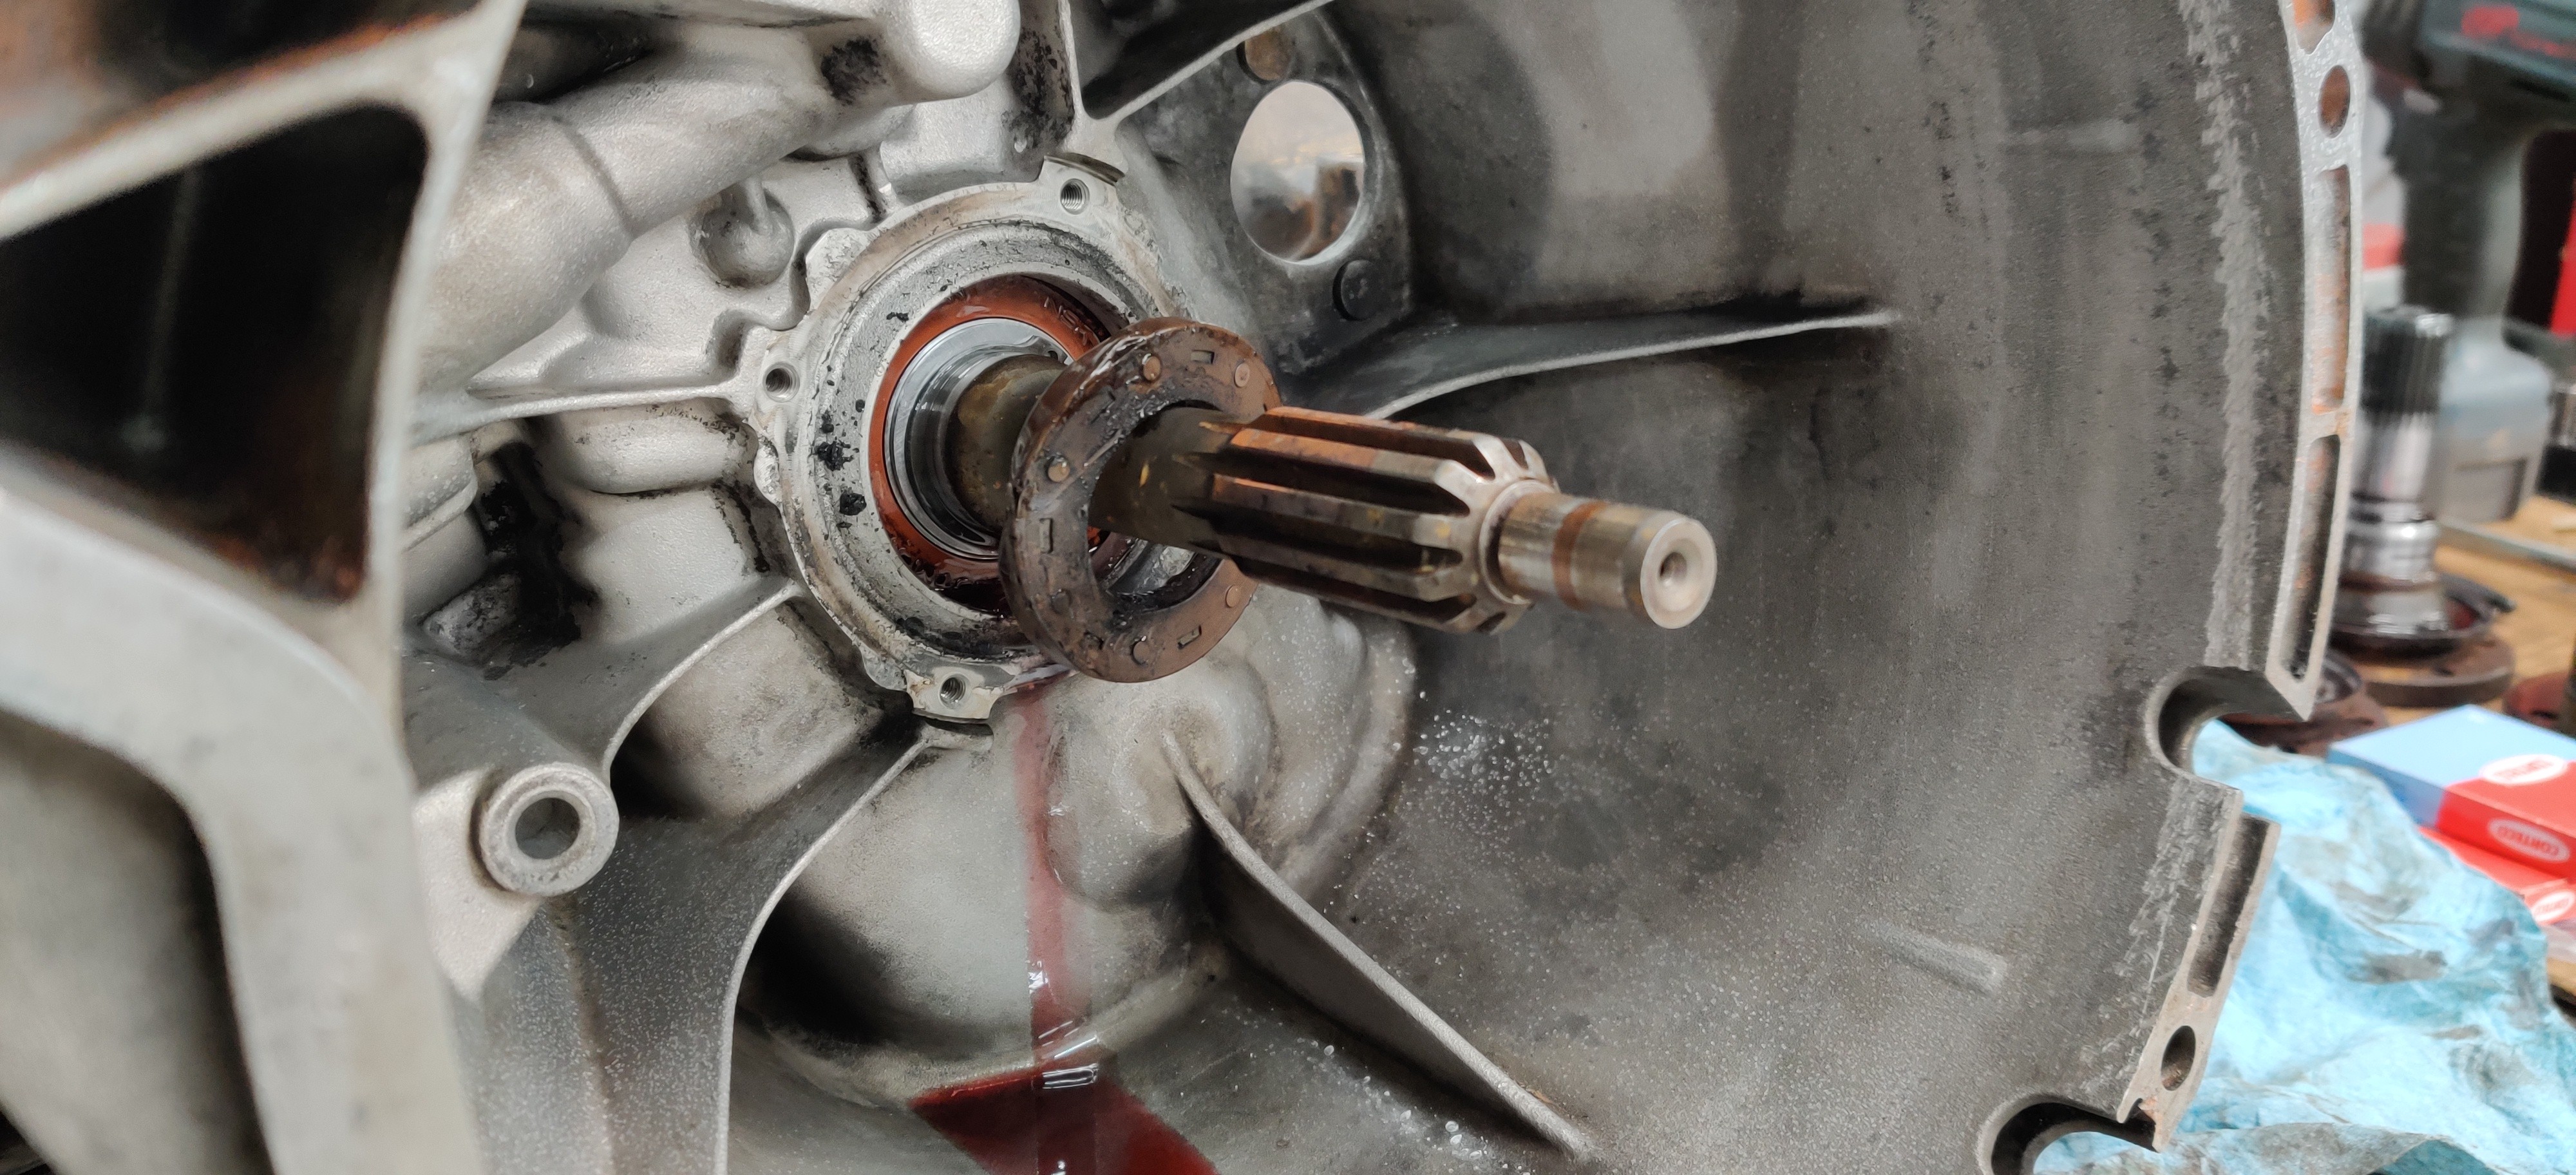
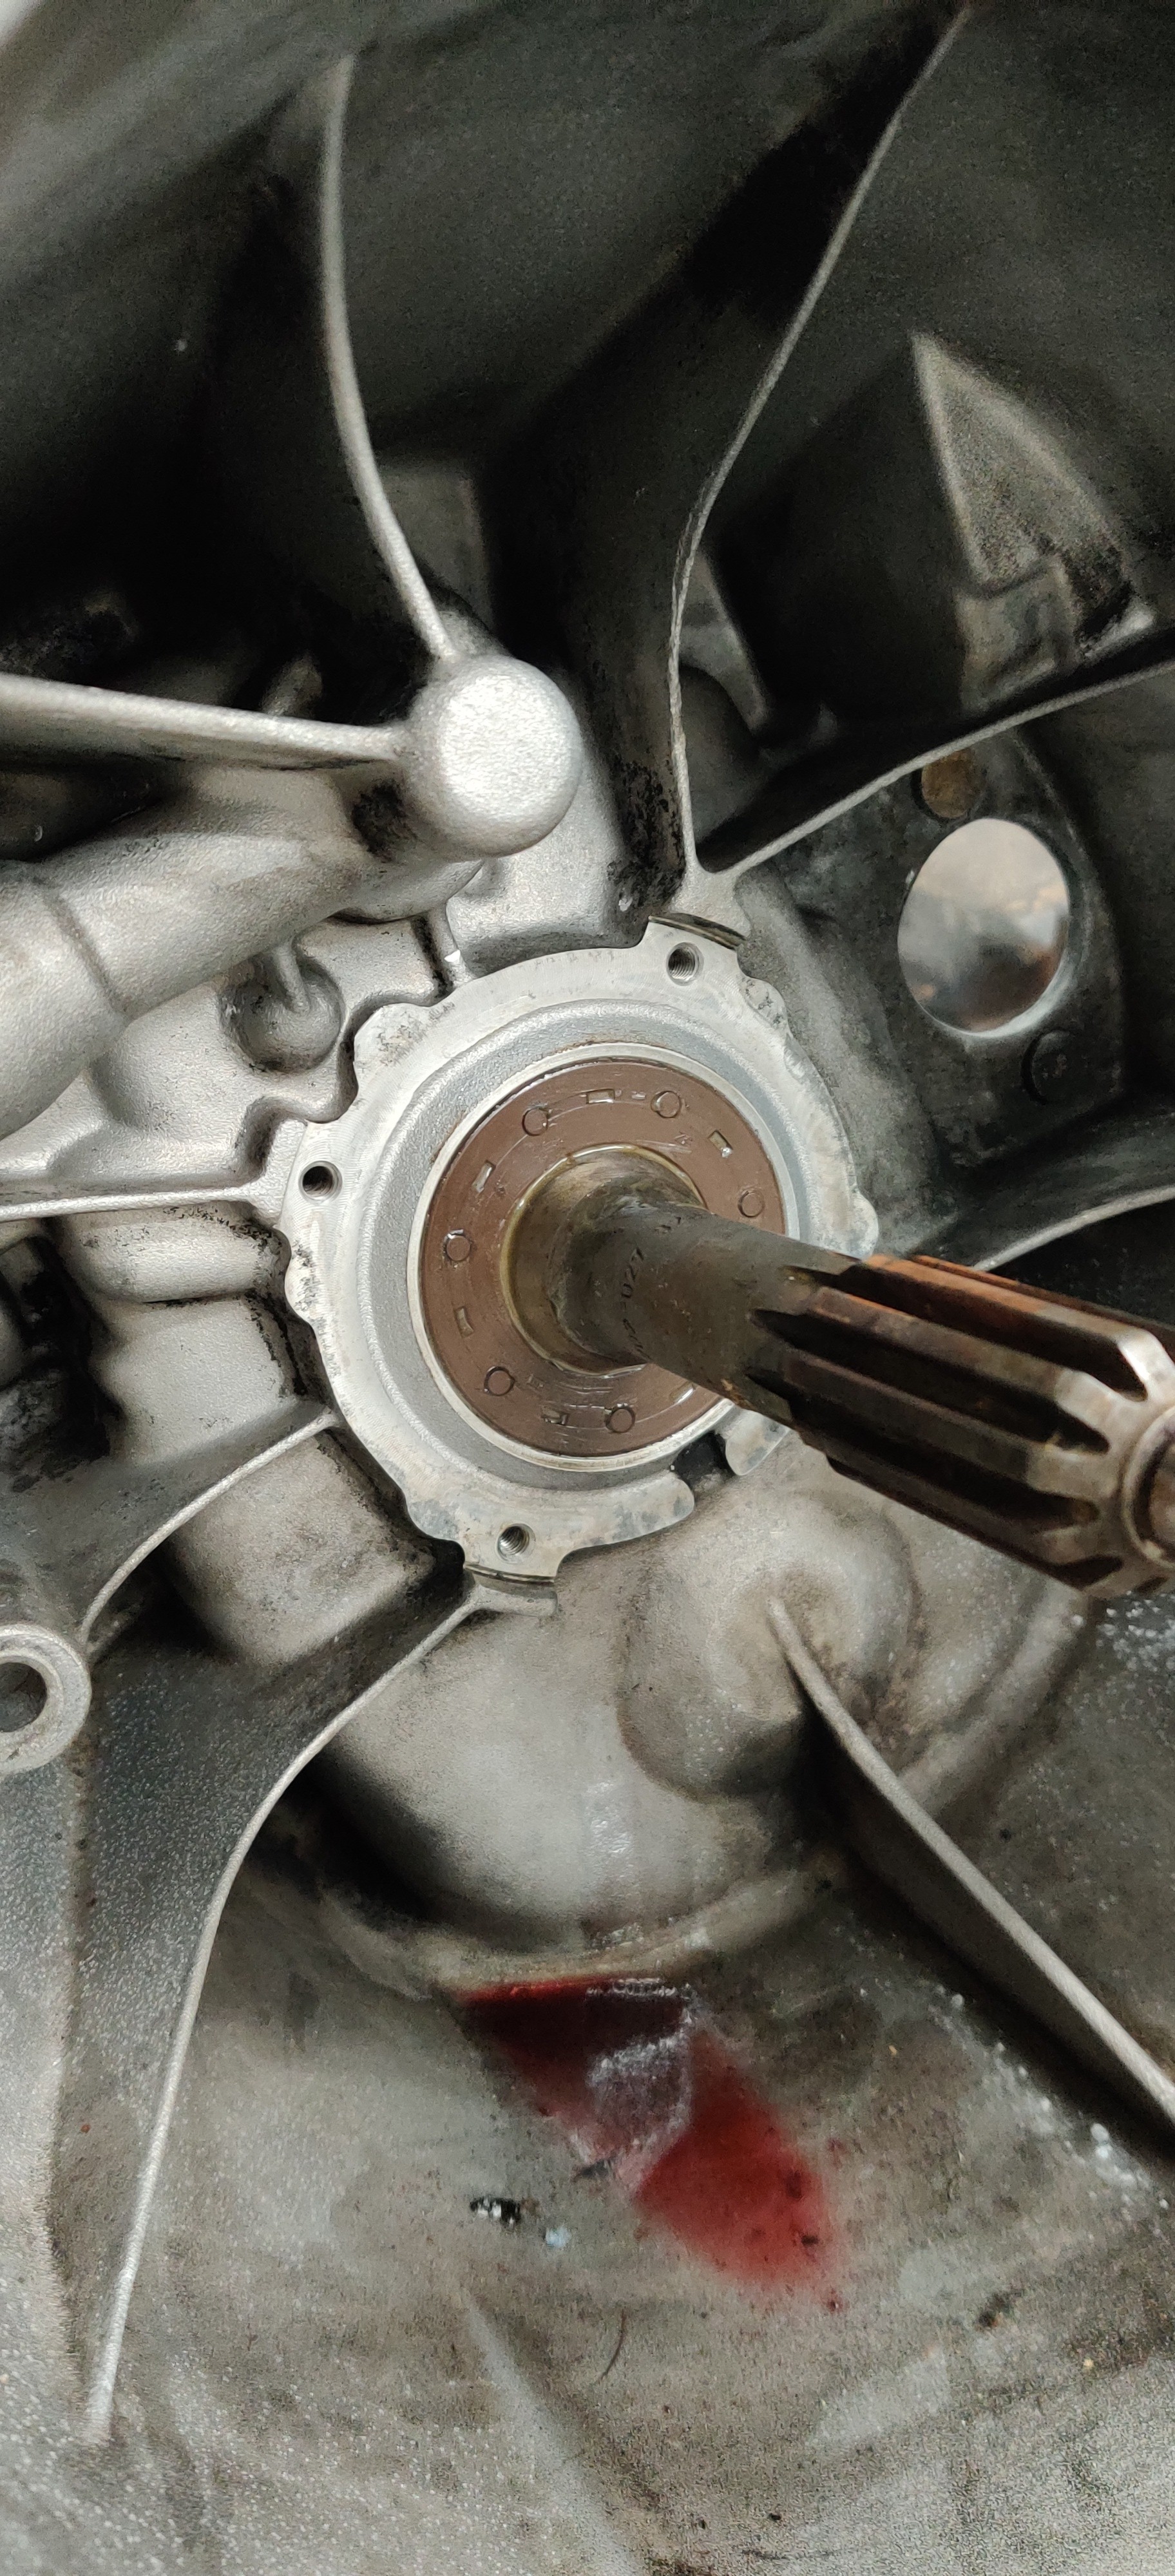
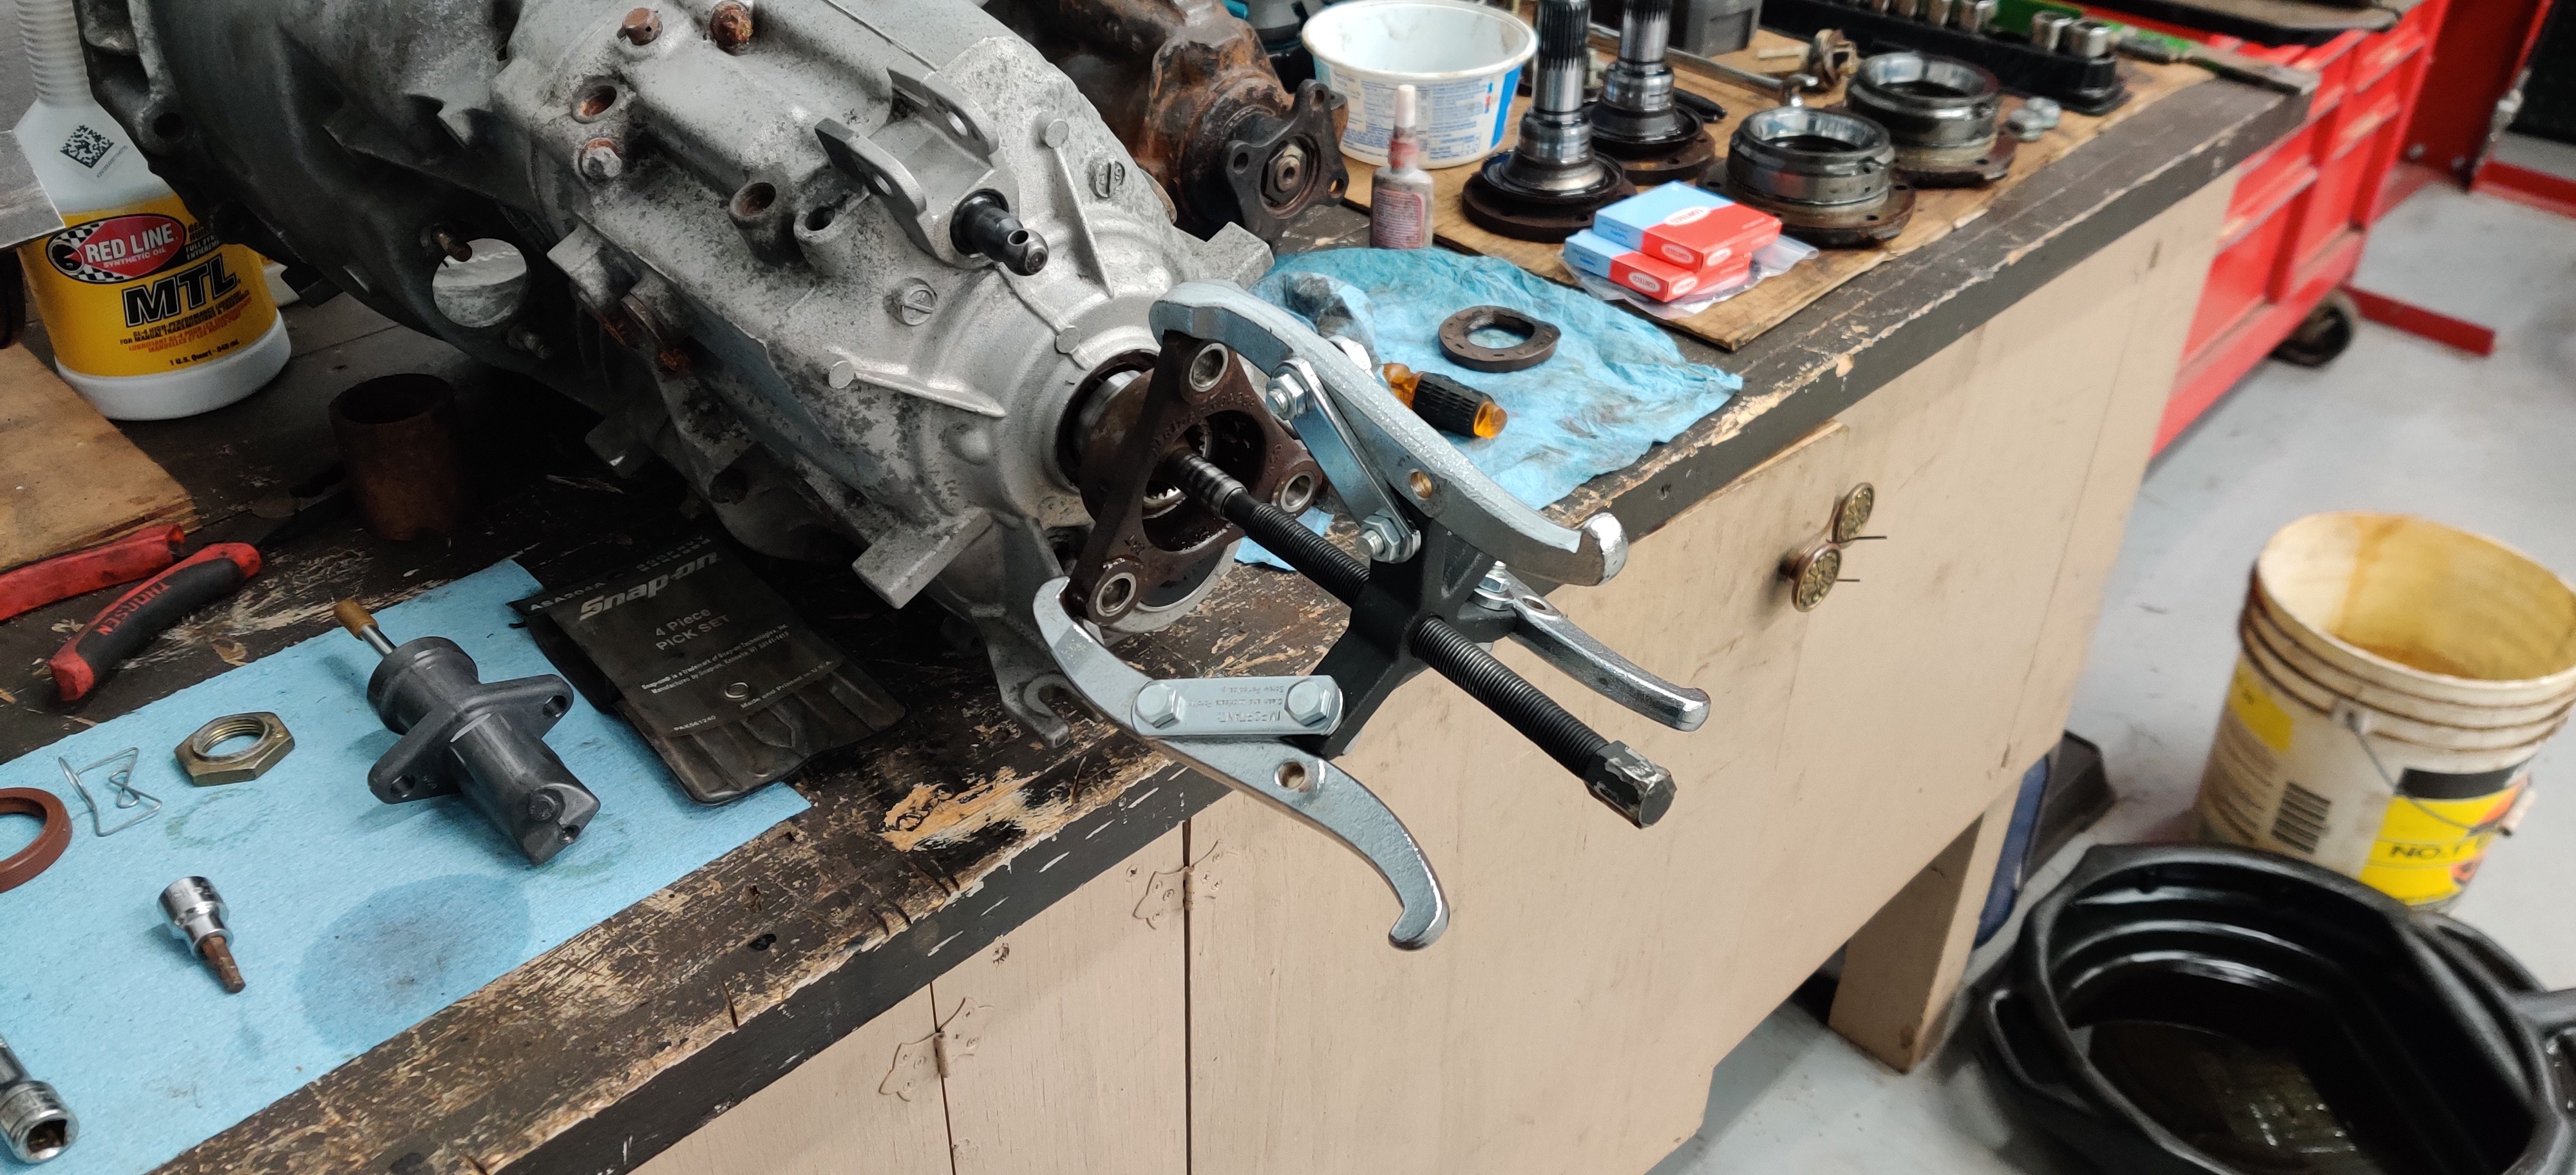
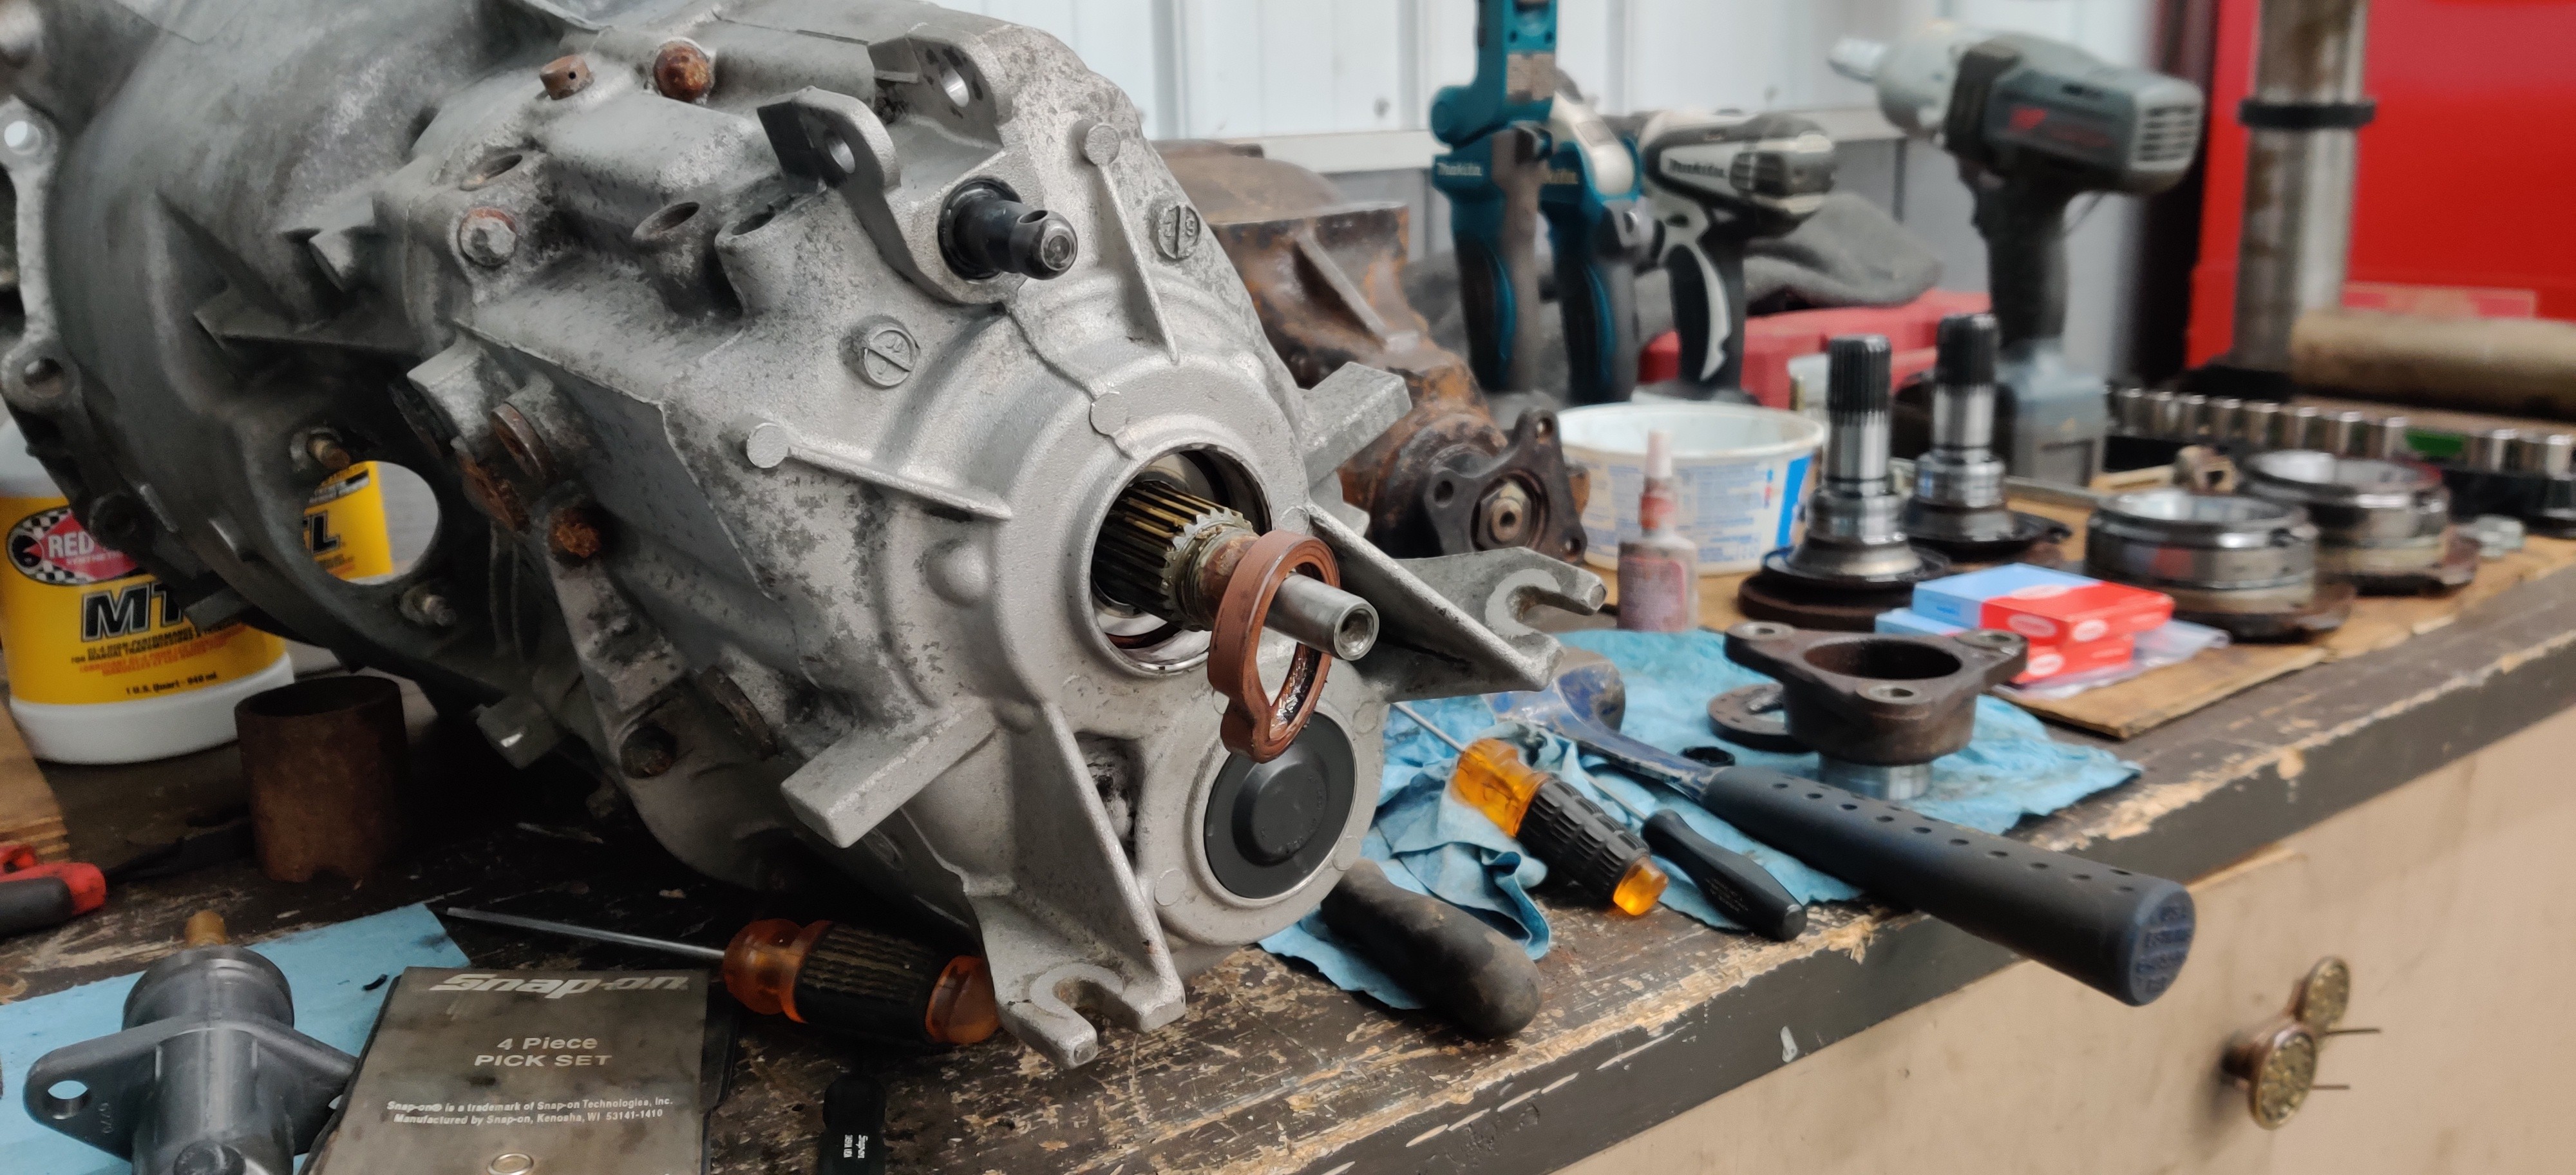
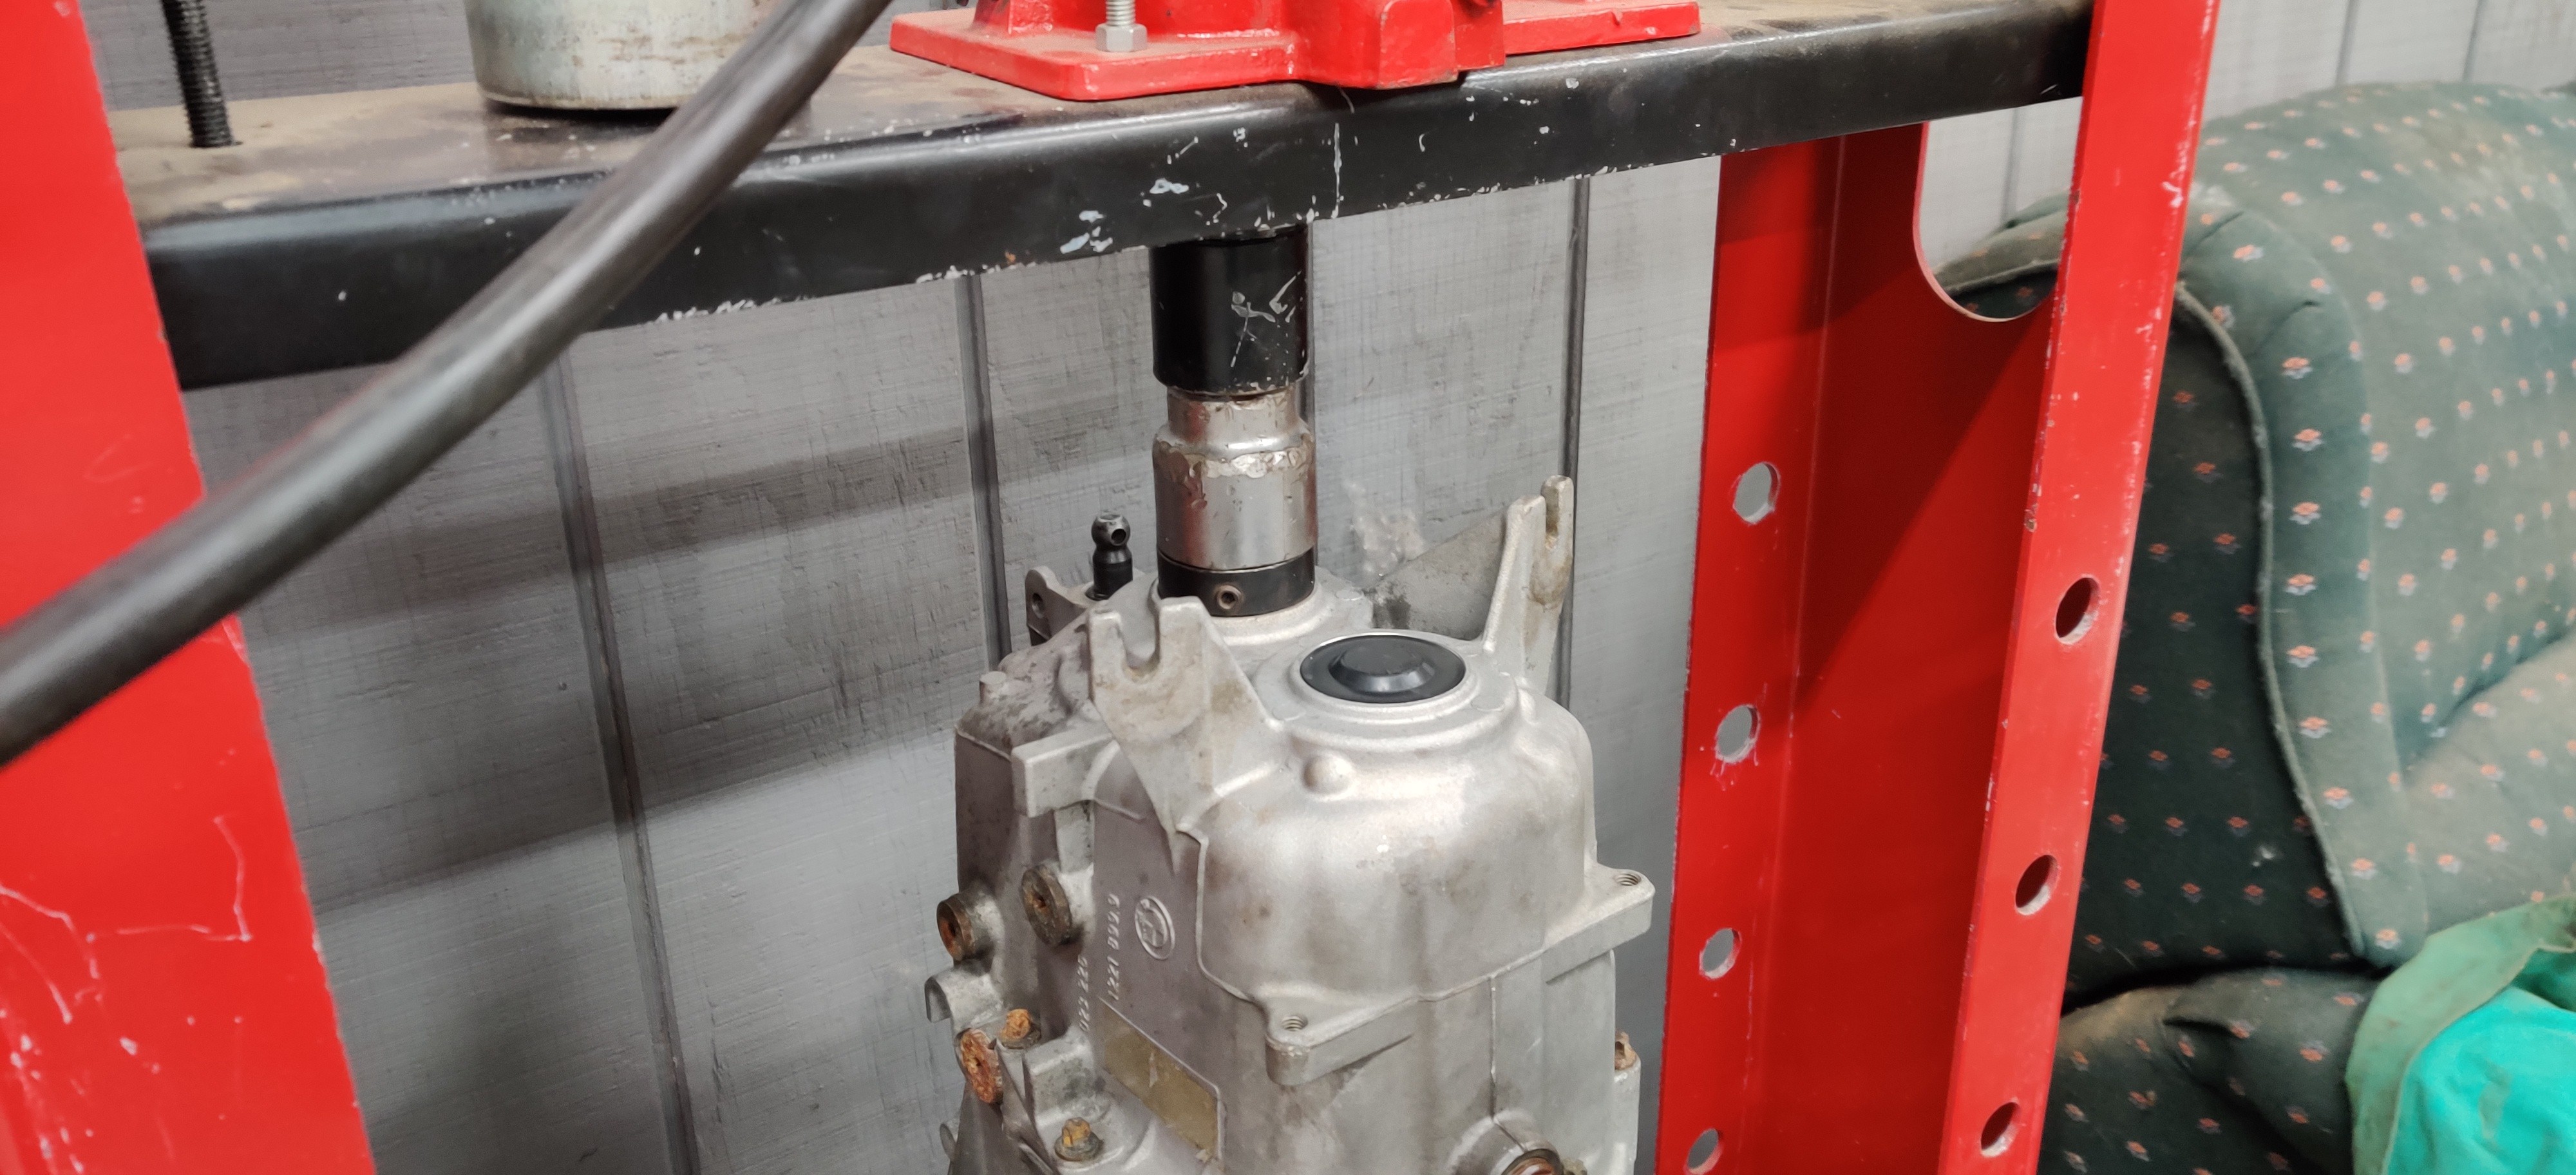
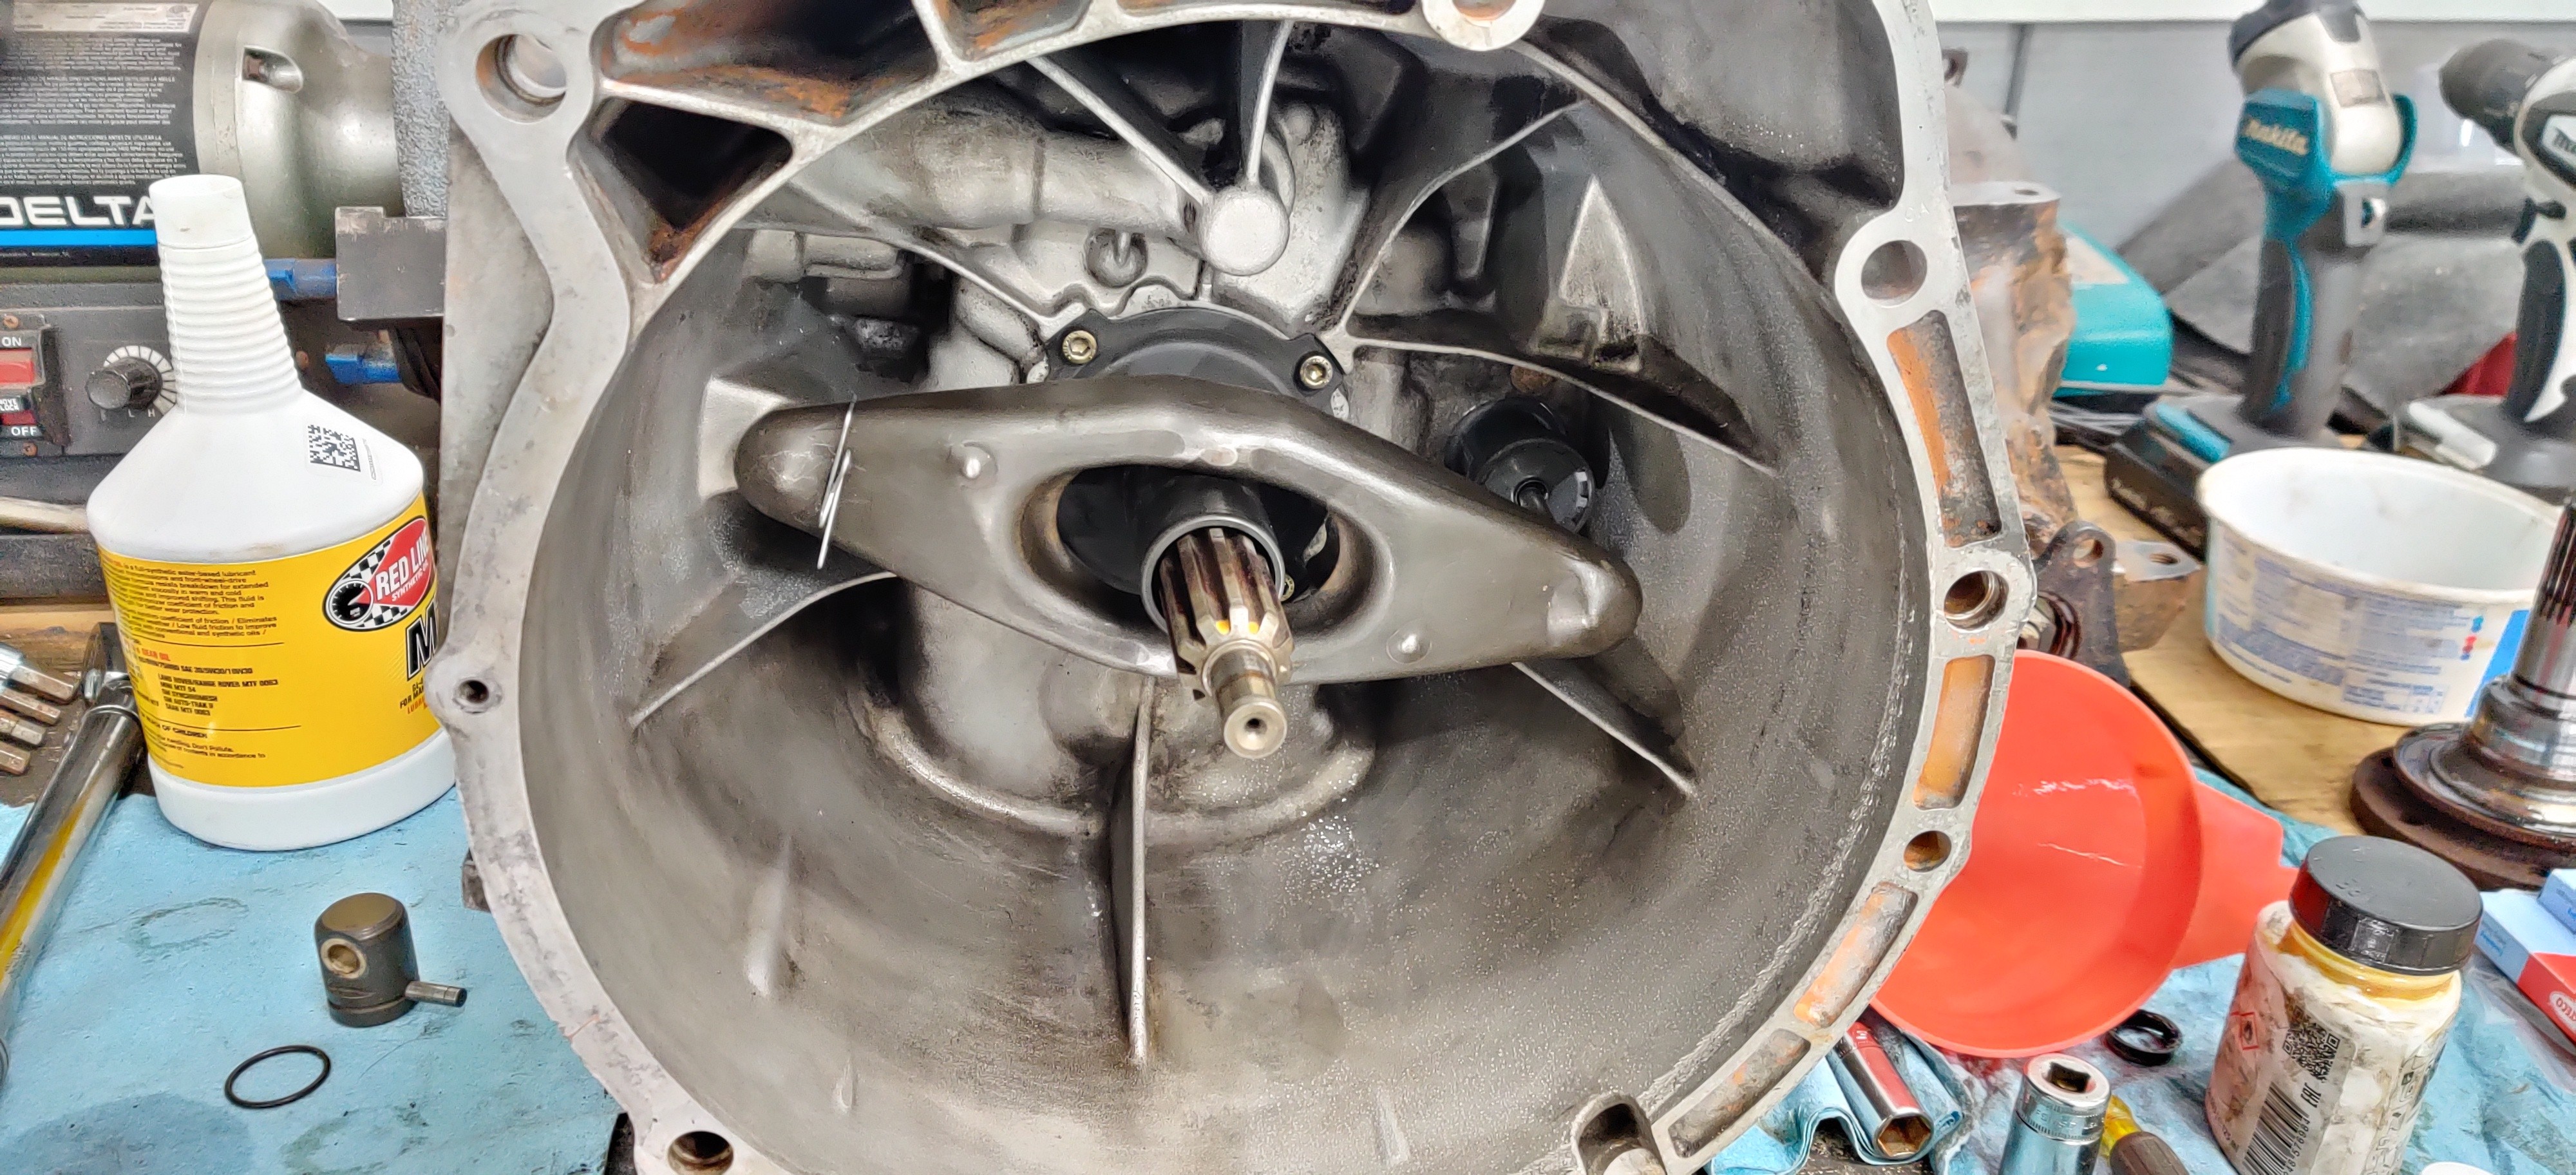
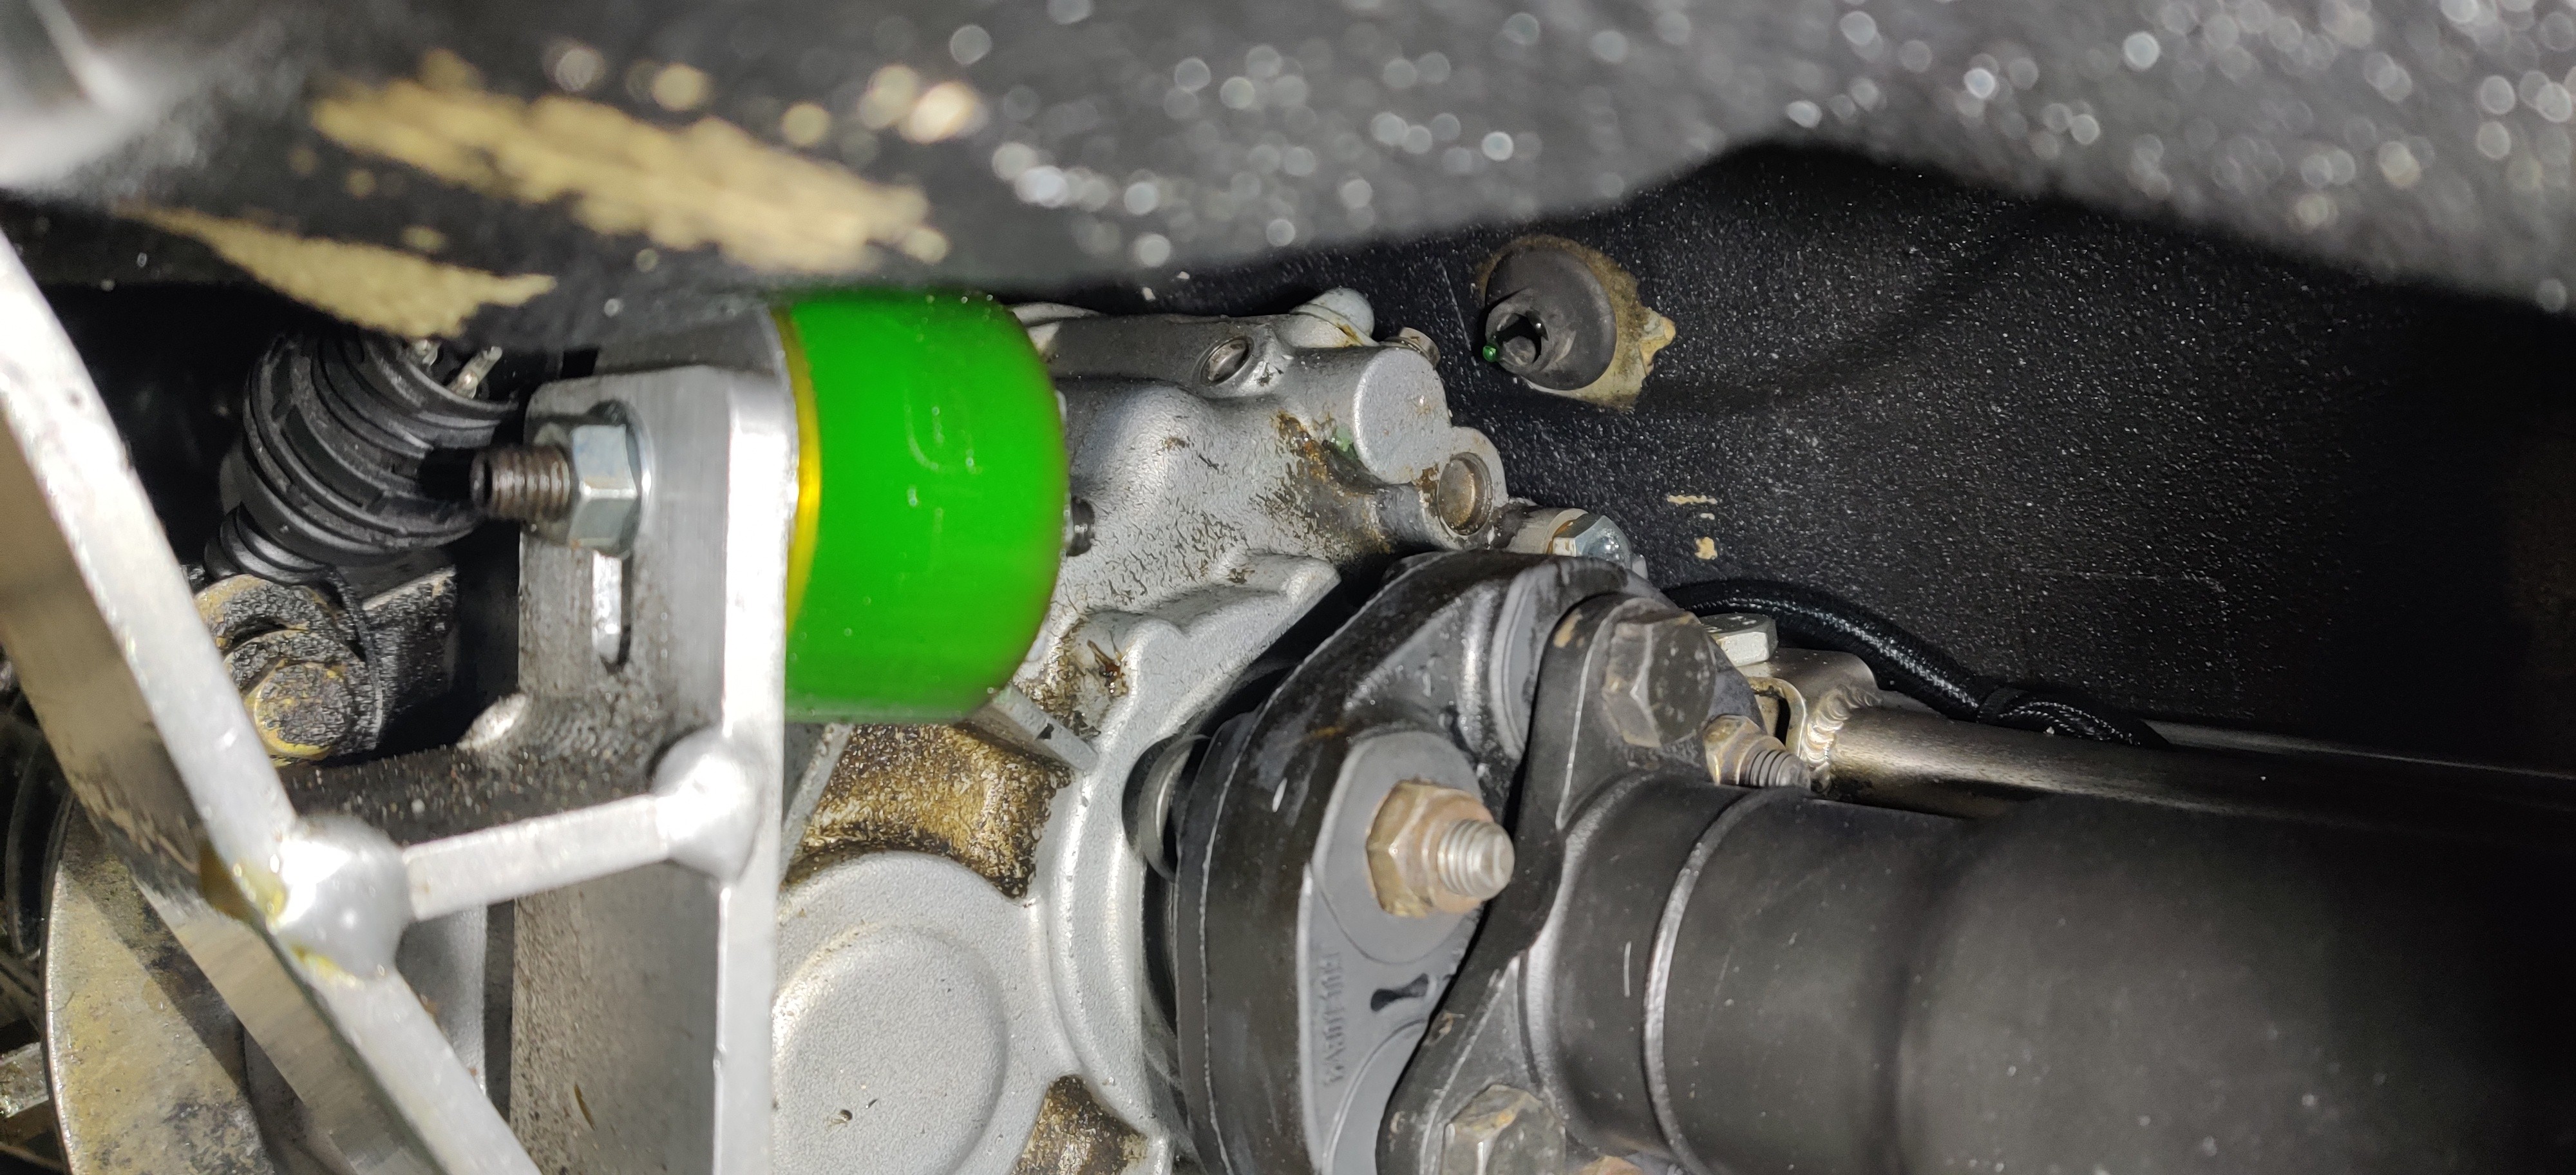
Next thing was the transmission. It seems that I have a pretty decent leak coming from the main output shaft seal. I am guessing when I had pulled the flange off originally to remove the dampener I had disturbed the seal. I know as for a preventative maintenance item I should have replaced all the seals on the trans but I had not and now I get to deal with it after the fact, yay. Monday I called the dealership and had them order me the output shaft seal which will be arriving tomorrow. Luckily I had ordered an extra quart of redline mt-90 gear oil way back when I originally put fresh fluid in the trans so I went ahead and checked the current level through the fill plug, level was a bit low as expected.
Lastly, The engine. I should mention that the flywheel gives off quite a bit of chatter at idle and between gears. Of course I new this was going to happen when I ordered it but wasn't quite sure what to expect. At first I sort of was getting annoyed by it but after the trip I had completely forgotten about it and it no longer bothers me. Sense I don't plan to daily this all that much I feel its worth it for the gains being made. Definitely would consider switching back to the stock flywheel though if it were a DD.
Took a little time to get use to the stage 2 clutch as it is quite a bit heavier then I'm used to but after driving it a bit I was already use to it's weight. That UUC shifter though... Sssssssoooooooo gggoooooooodddddd!!! I love every bit of it and feels awesome! I recommend it to anyone who is considering going with a short shifter, well worth the money spent!
Alright so the engine has an odd little quirk I have been noticing every once in a while during idle. The idle would stay steady and then begin to jump around for a few seconds returning back to a steady idle (800-1000 rpms). Not sure if maybe one of the few sensors I had used from the junk yard is on it's way out, maybe the MAF? Like I said its only once in a while and for a few short seconds so I'm fairly certain it wouldn't be any mechanical. I will see if I can get a video of it to post up. Also, every time I came to a stop bringing the trans to neutral and disengaging the clutch the engine would hop in rpms and back down to idle. Separate issues for sure but slightly odd. Any help on why either of these are happening would be greatly appreciated.
There are still a few little things I have to take care of in terms of aesthetics. Big goal right now is to take care of everything major.
Short little clip one of my friends took of me opening it up down a frontage road... Enjoy
-
the one and only e30 s52 engine swapI think It's about time I get a damn update on this thread.
Yet's rewind a few weeks lol.
@GunMetalGrey stopped by Thursday evening (valentine's day) with the MS3 pro and to give me a hand with the setup of the base tune and what not. After finagling around with it for about an hour or so we got it all set up and I gave her a go. There was a click, and then nothing, Terrific! I suspected that the grounding issue I once had before had returned so I hooked up a jumper cable, one to the mounting point on the alternator the other on the chassis ground bolt. Hopped in and gave it a go, not more then a second later after cranking she popped right off! The idle was quite rough and we only left it go for maybe 5 seconds before shutting it down and took a look at what they had pre-set for ignition timing on the base map, 31 degrees!? Not sure what the reason was for setting it that high but we tried bringing it down a bit to 18 degrees as well as tweaking with the warm up idle rpm and gave it another whirl. Much smoother, as we let the engine run for a bit and warm up the turbo started sounding very dry and quite loud. Immediately we shut it off, popped off the oil feed line, and after giving the engine a few cranks sure enough, no oil. After this was addressed I loosened up the vanos banjo bolt (being that the feed line and vanos line run off the same port on the filter housing) and once again gave it a few cranks, nothing. Seeing this I back tracked in my head remembering quite well that the oil pressure was sitting right below 60 psi so the motor had good pressure which also means that the port with the distribution block was getting oil but not the vanos one, I was quite confused on how that was possible and after another 15-20 mins of brainstorming on what the hell was going on we called her a night.
Following day while I was on lunch I figured there has to be only two reasons for the issue, somethings backwards or somethings clogged. After work I went straight to the shop and although feeling that it was very unlikely, I flipped the oil cooler lines around, propped the feed line in a cup and gave her a few cranks.
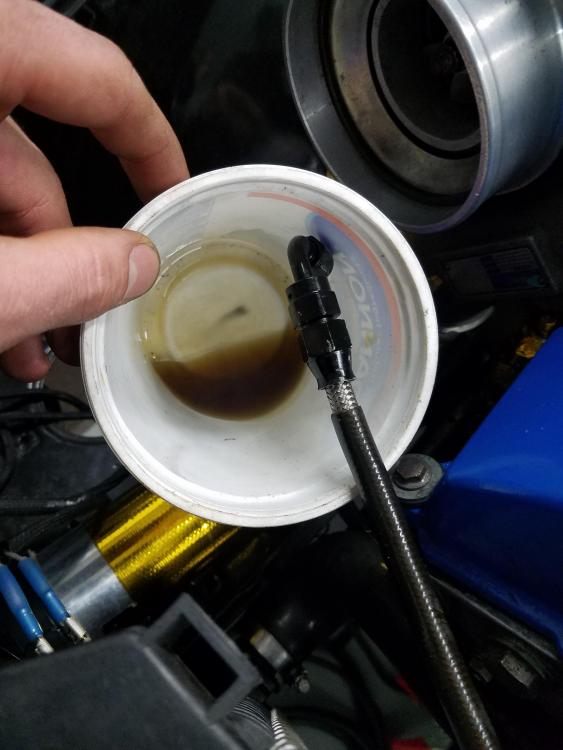
That was it! I still don't quite understand how this was possible other then the fact that the oil cooler must have only allowed flow of oil in one direction with some sort of valve. At that point I also took the liberty of figuring out my grounding issue which was quite simple. The powder-coat on the motor mount had caused an interference with it and somehow I've been lucky enough that it never made a fuss up tell now. Easy enough I removed one of the bolts and sanded away the coating covering that area.
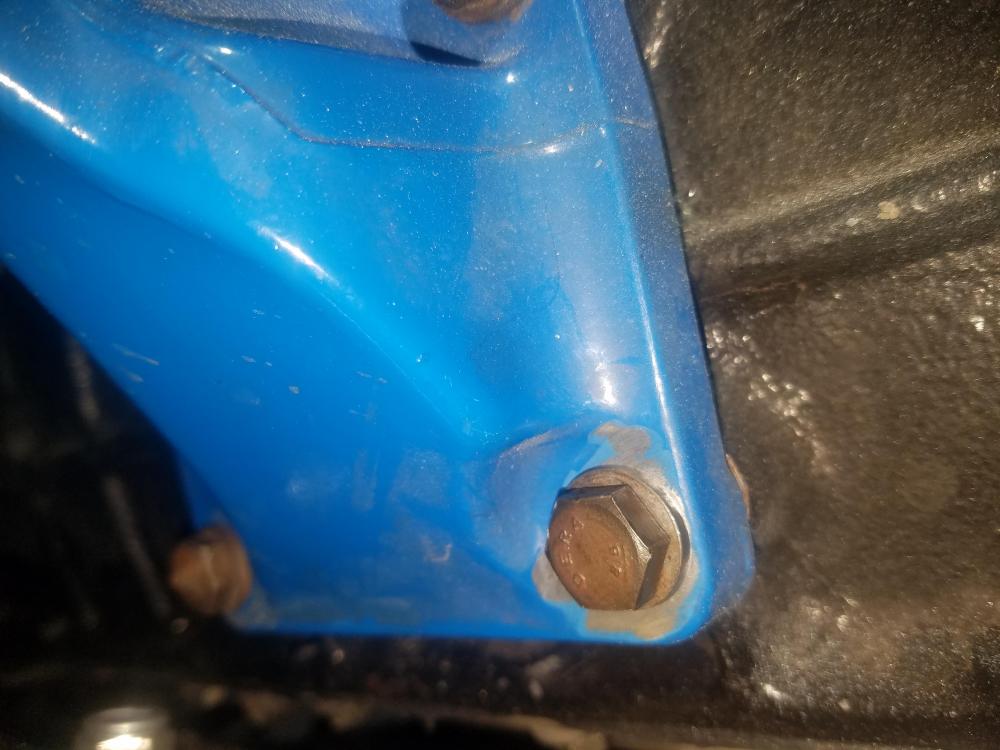
Hopped back in and it cranked right over and was running well once again. This time there was no funny noises coming from the turbo, Yay!
Didn't really tweak with anything else on MS3 (being that I have no idea what the hell I'm doing) other then just run and save data logs whenever the car was running.
With the car now at least running I had to park it over on the other side of the shop (cold side) for a while as per the deal with my grandfather so he could attend to a few projects of his own.
Fast forward to present day, hoping to get the car rolled back over come spring break (Week of March 17th - 24th) to get things finished up.
As for a to-do-list...
- Get another Driveshaft
- Get the exhaust installed. Unfortunately the hangers currently welded to it mount to spots on the car that I would rather not mention. Gonna go ahead and cut those out and make some up to mount to the stock locations.
- Bleed the clutch system a bit more
- Mess with the wiring for the headlights a bit (intercooler caused rerouting of the loom that comes across the front of the car causing them to be a bit short for reach)
- Wire up the boost controller
- Finish up wiring for the wide band and boost gauge and then get everything tucked back up underneath the dash
- Find another glove box
- Maybe find some different wheels and tires
- Get it tuned
Luckily there's not a whole lot to get done before she'll be ready to get back on the road.
-
the one and only e30 s52 engine swap -
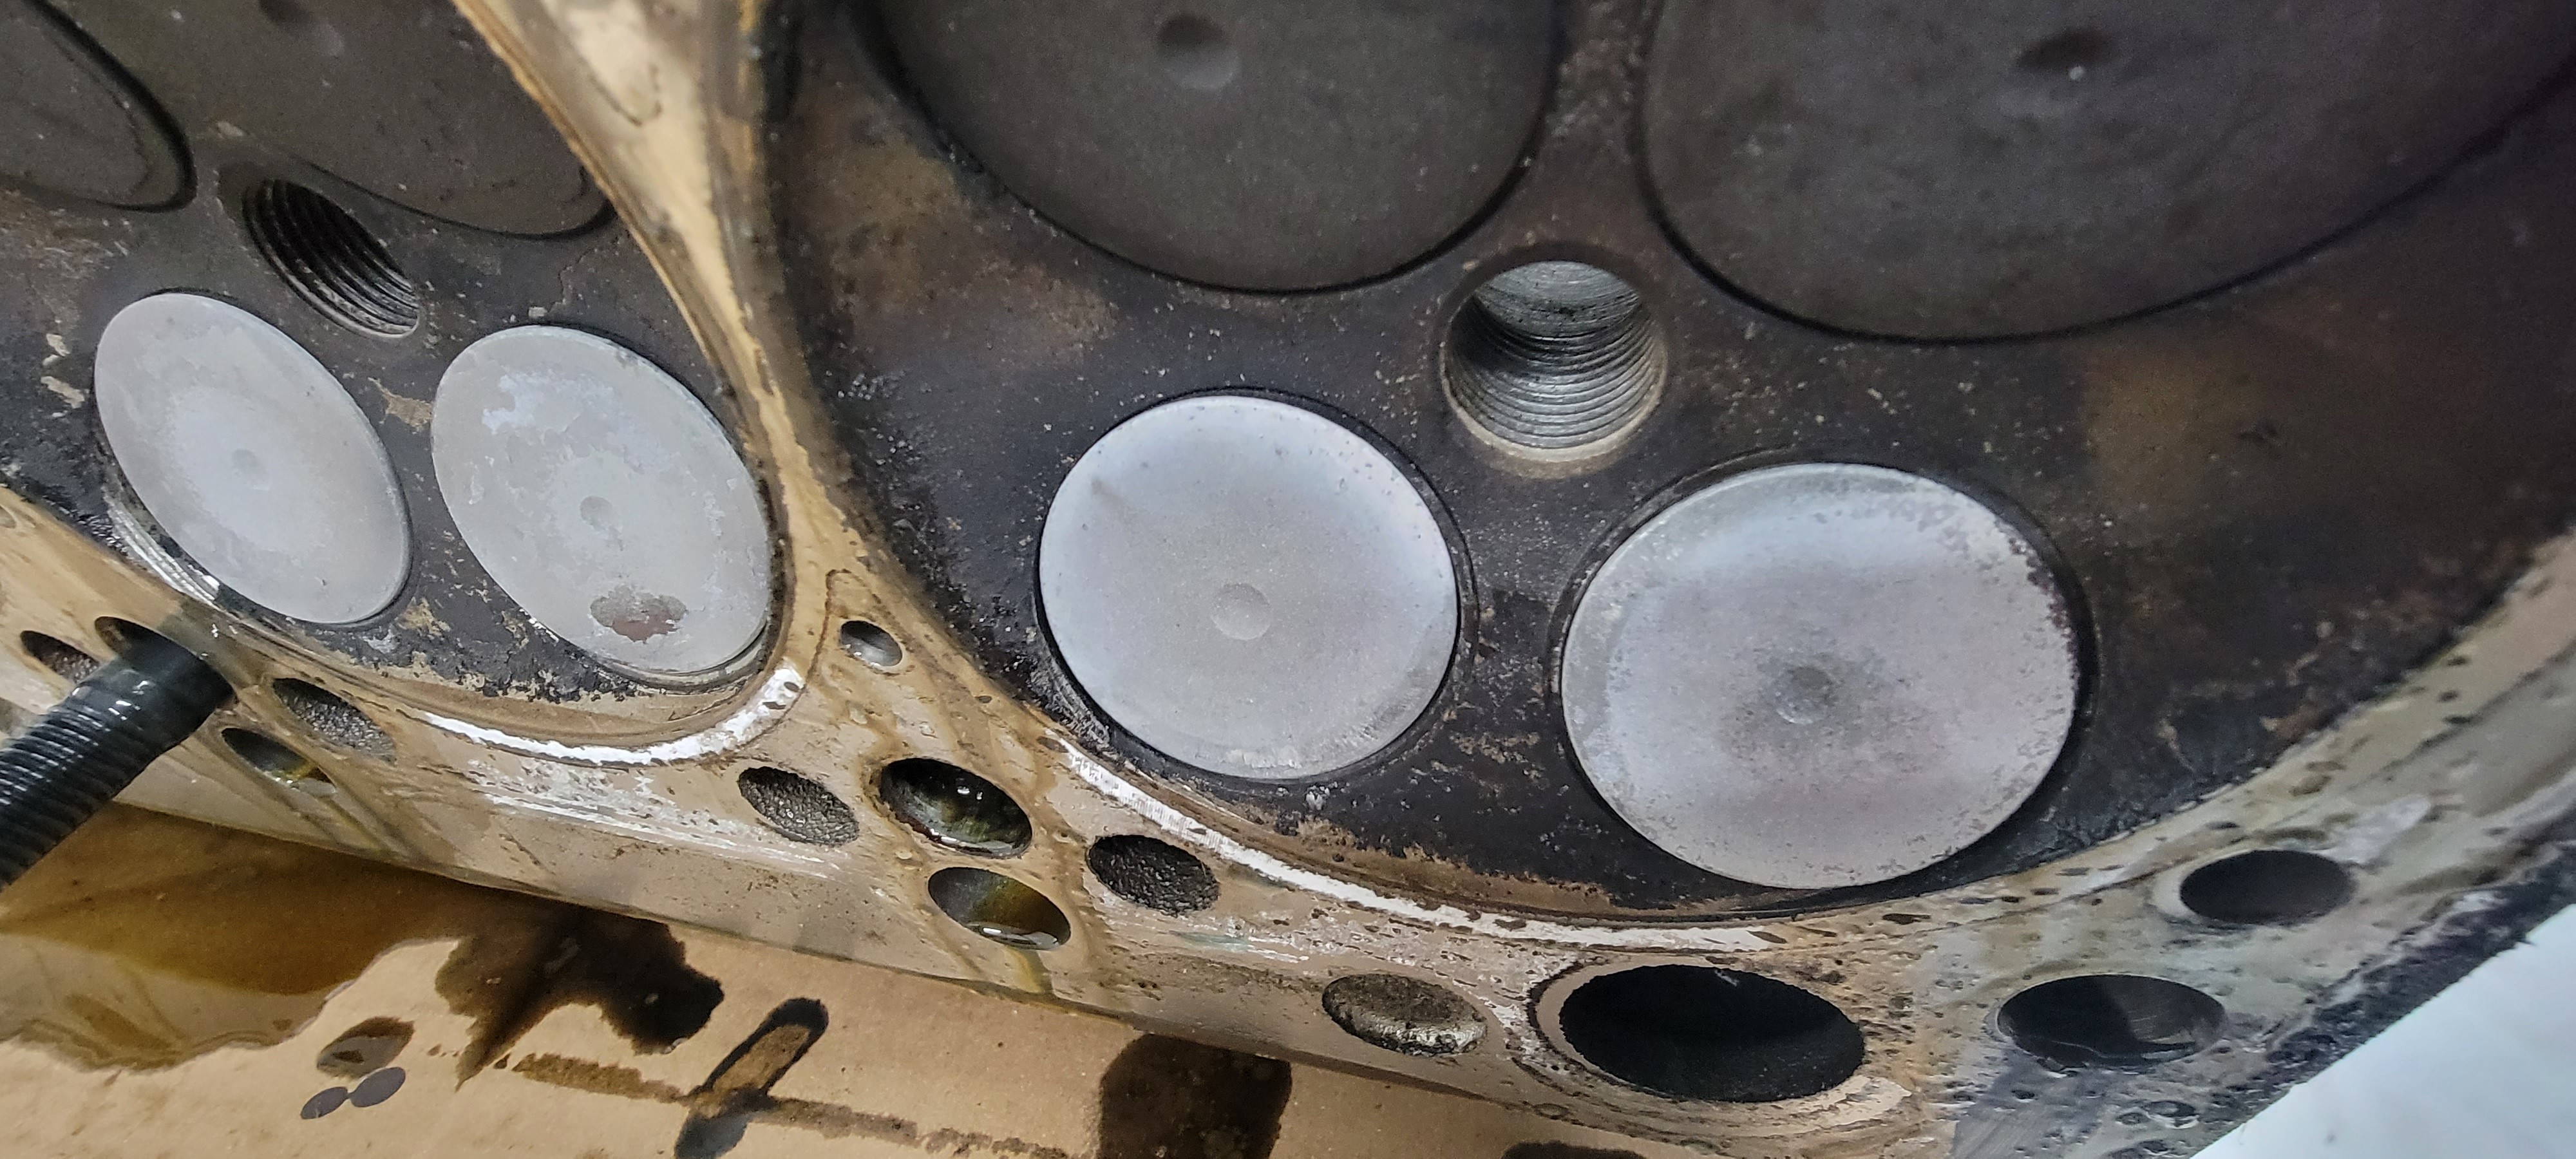
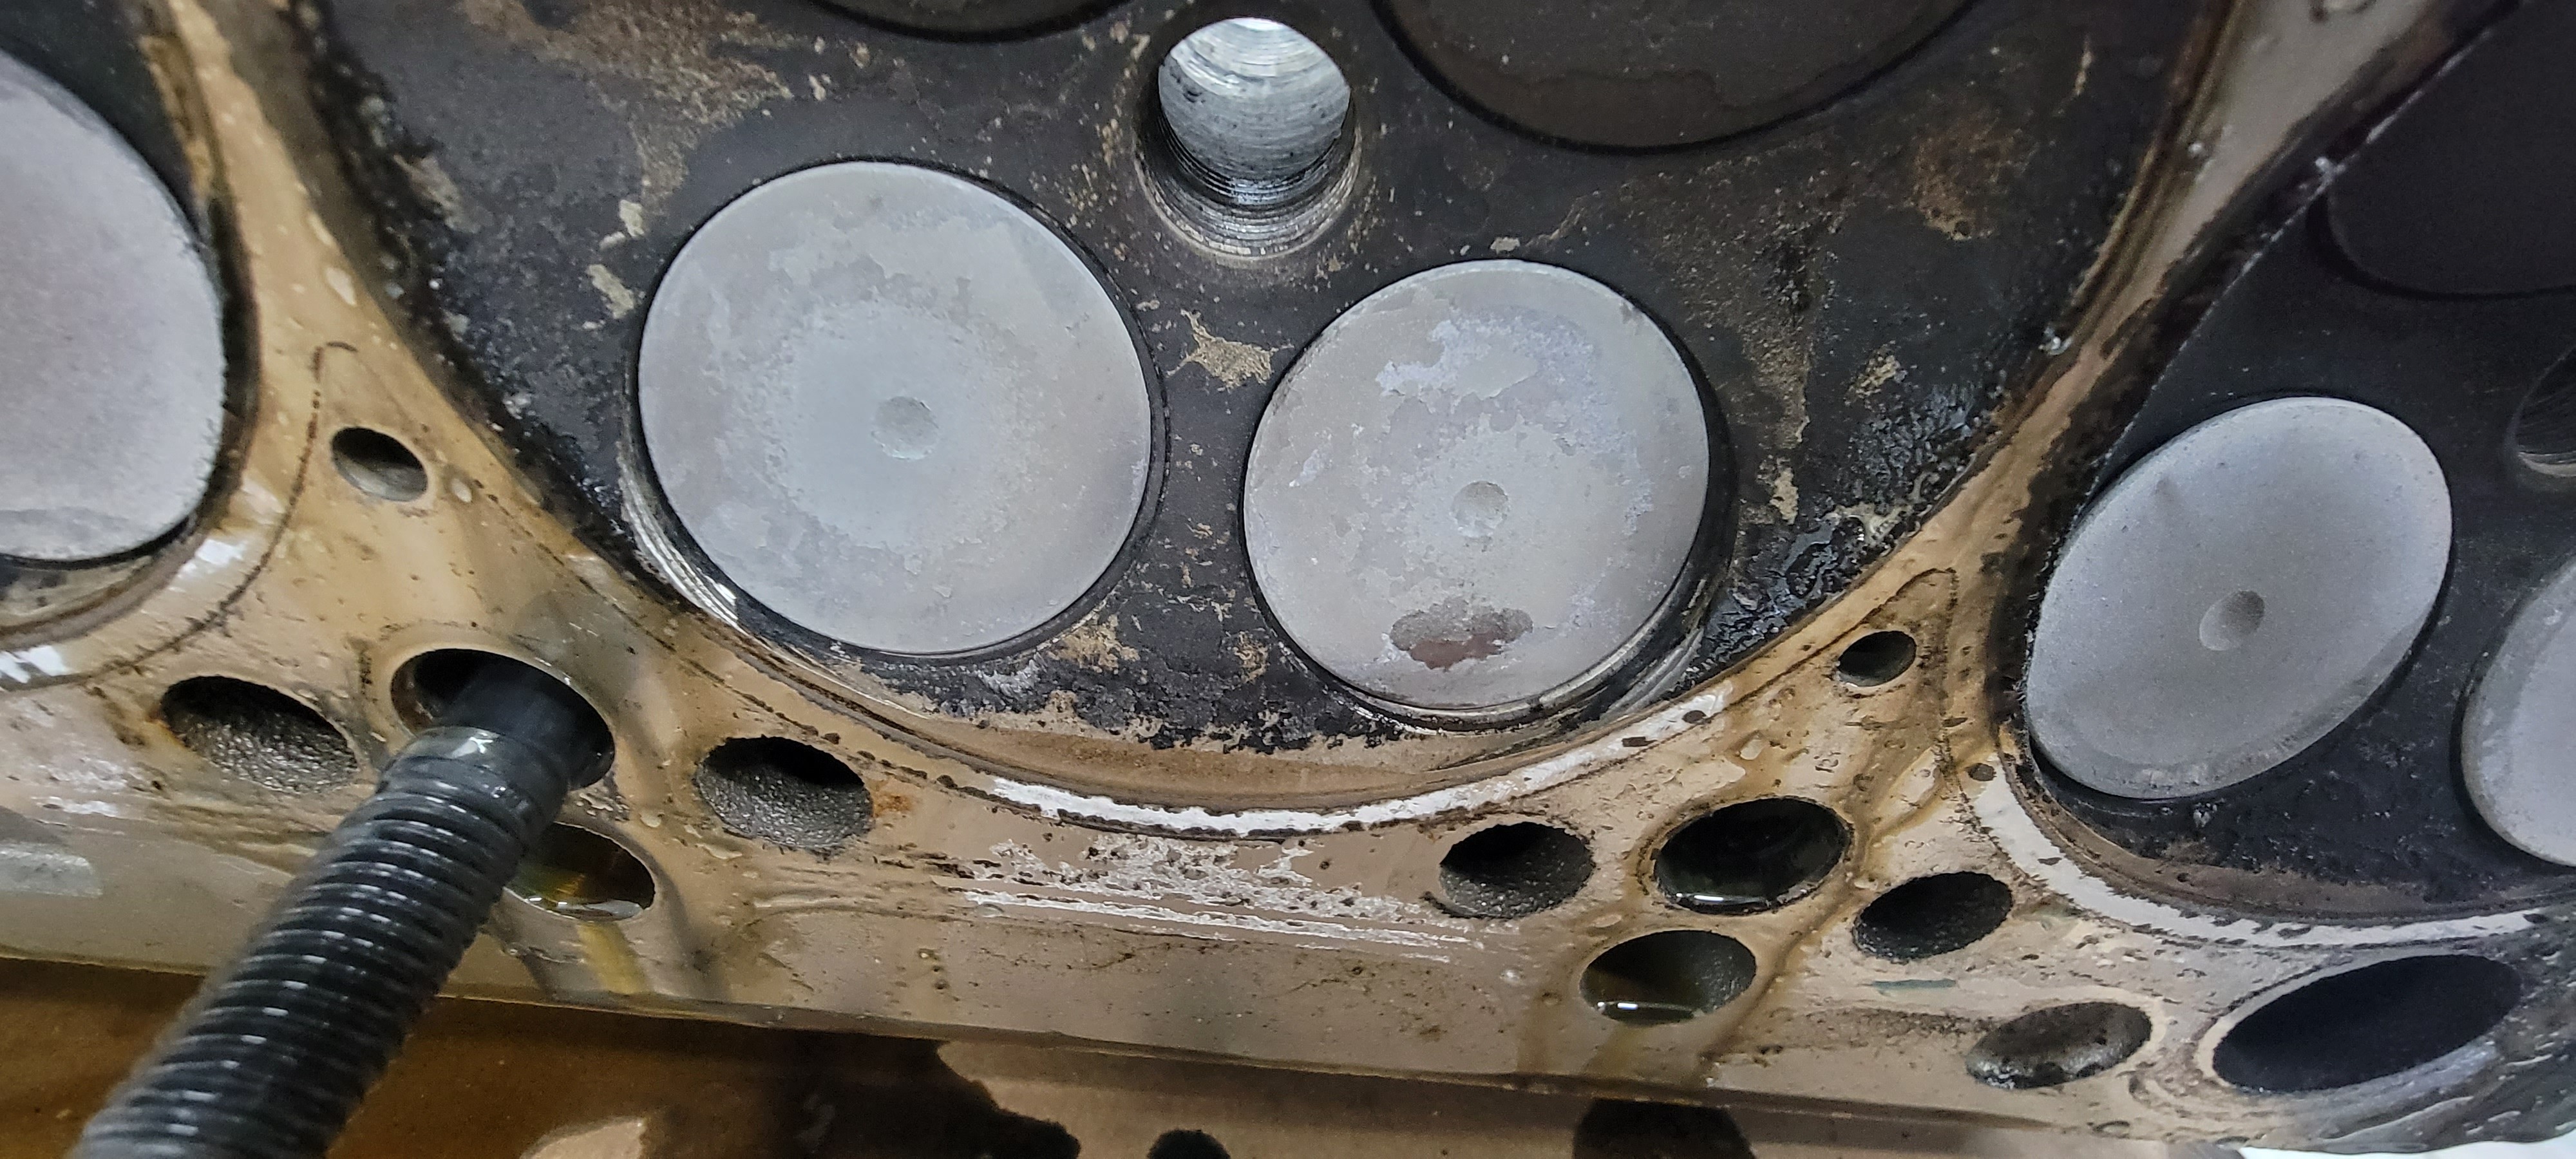
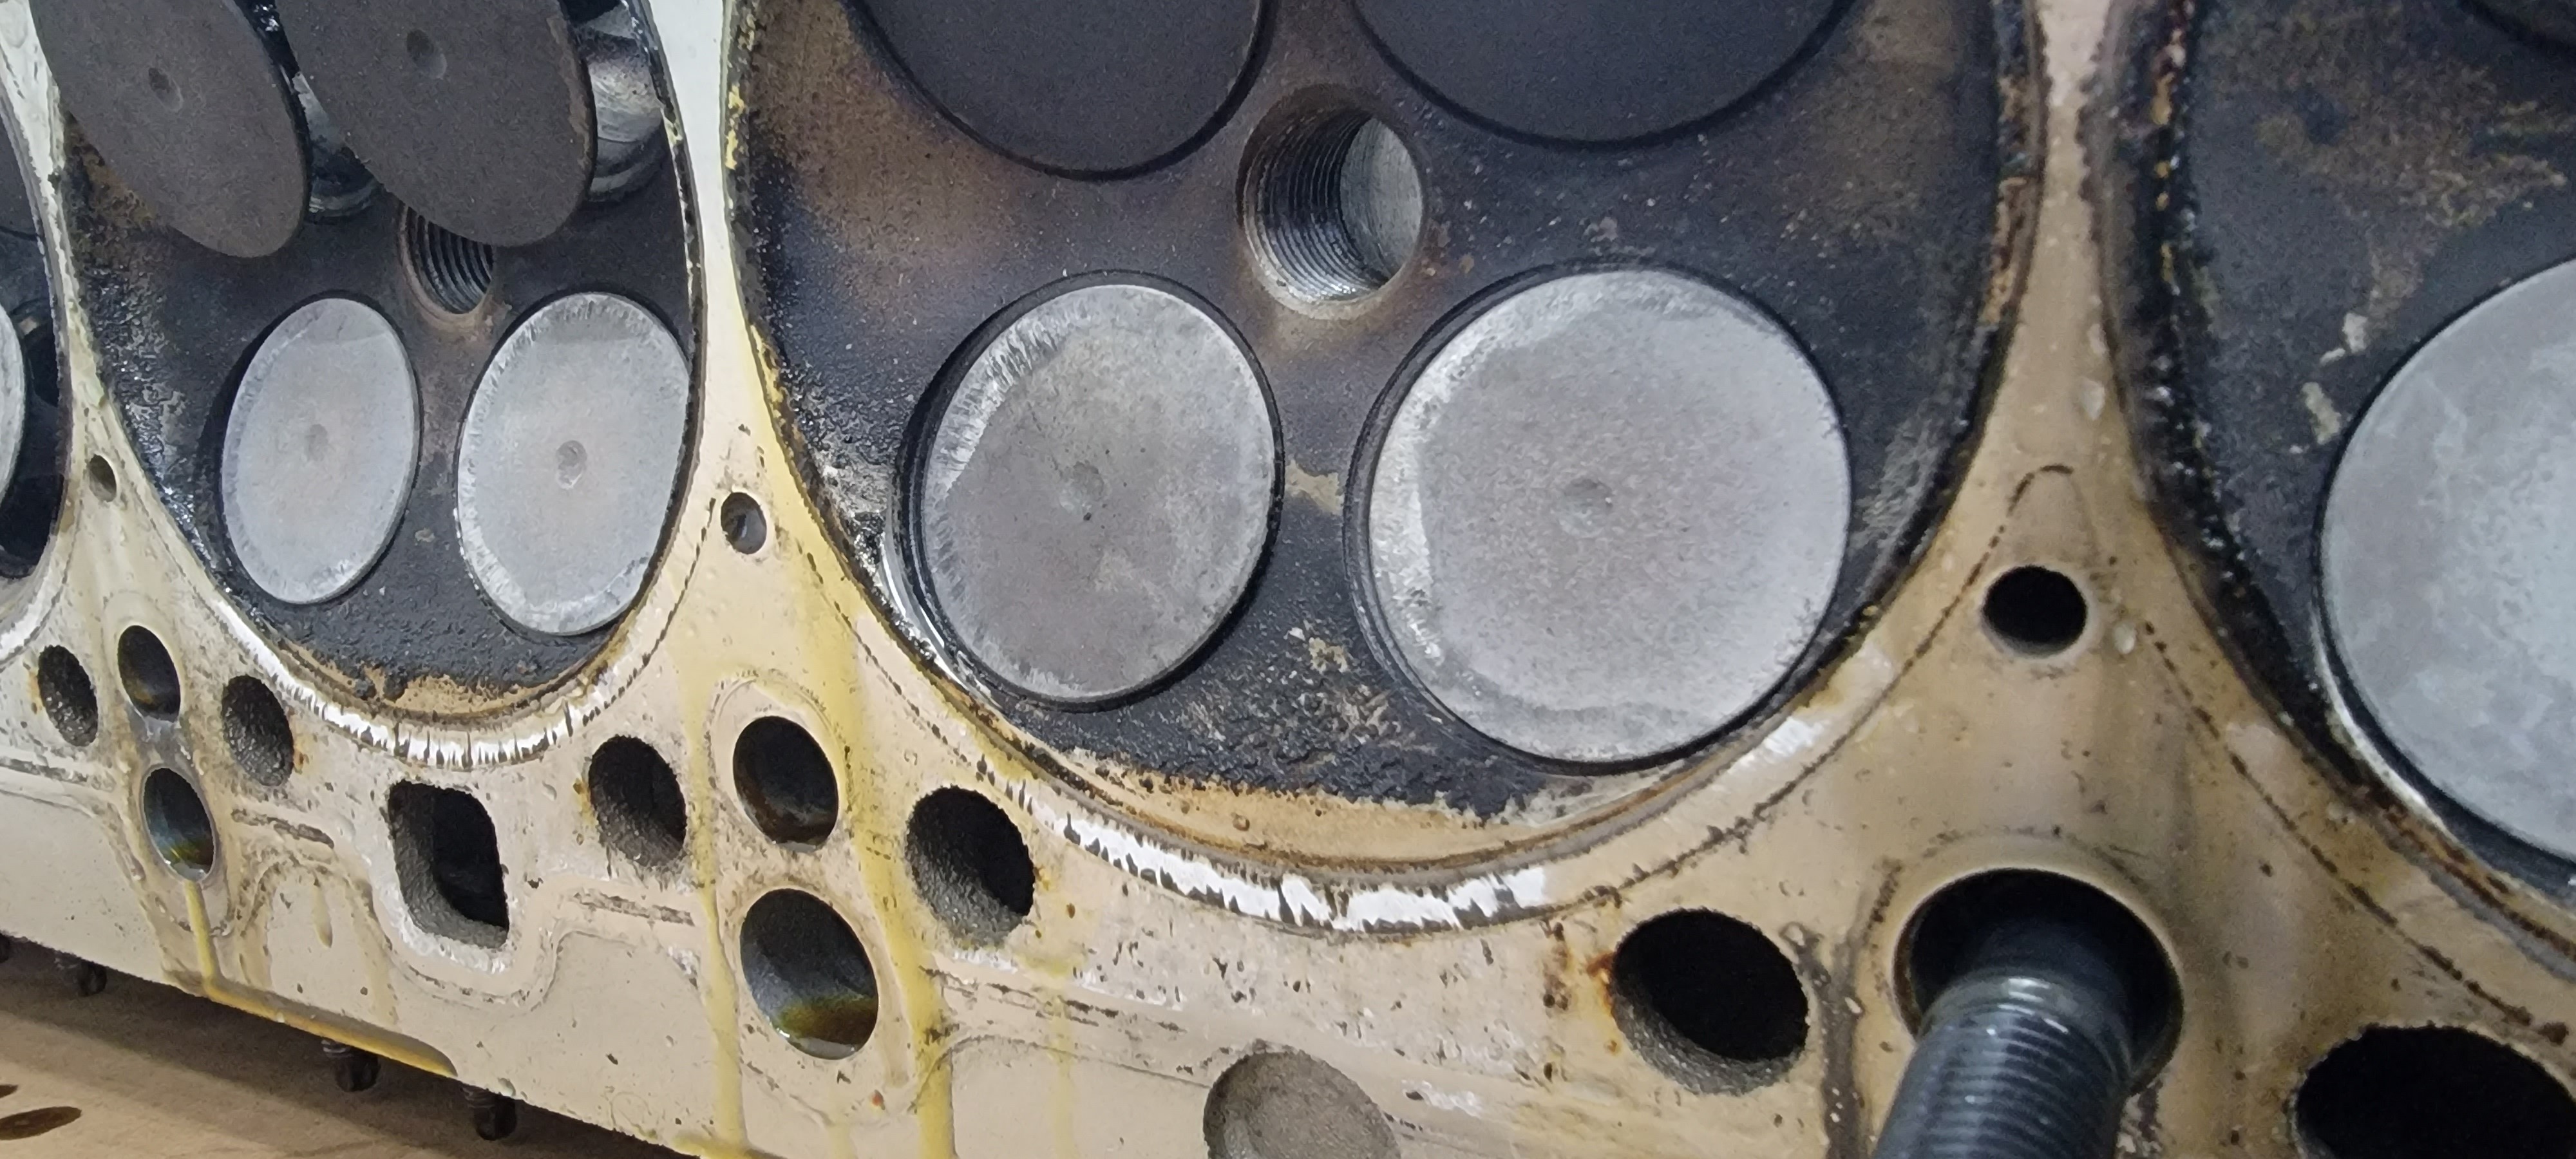
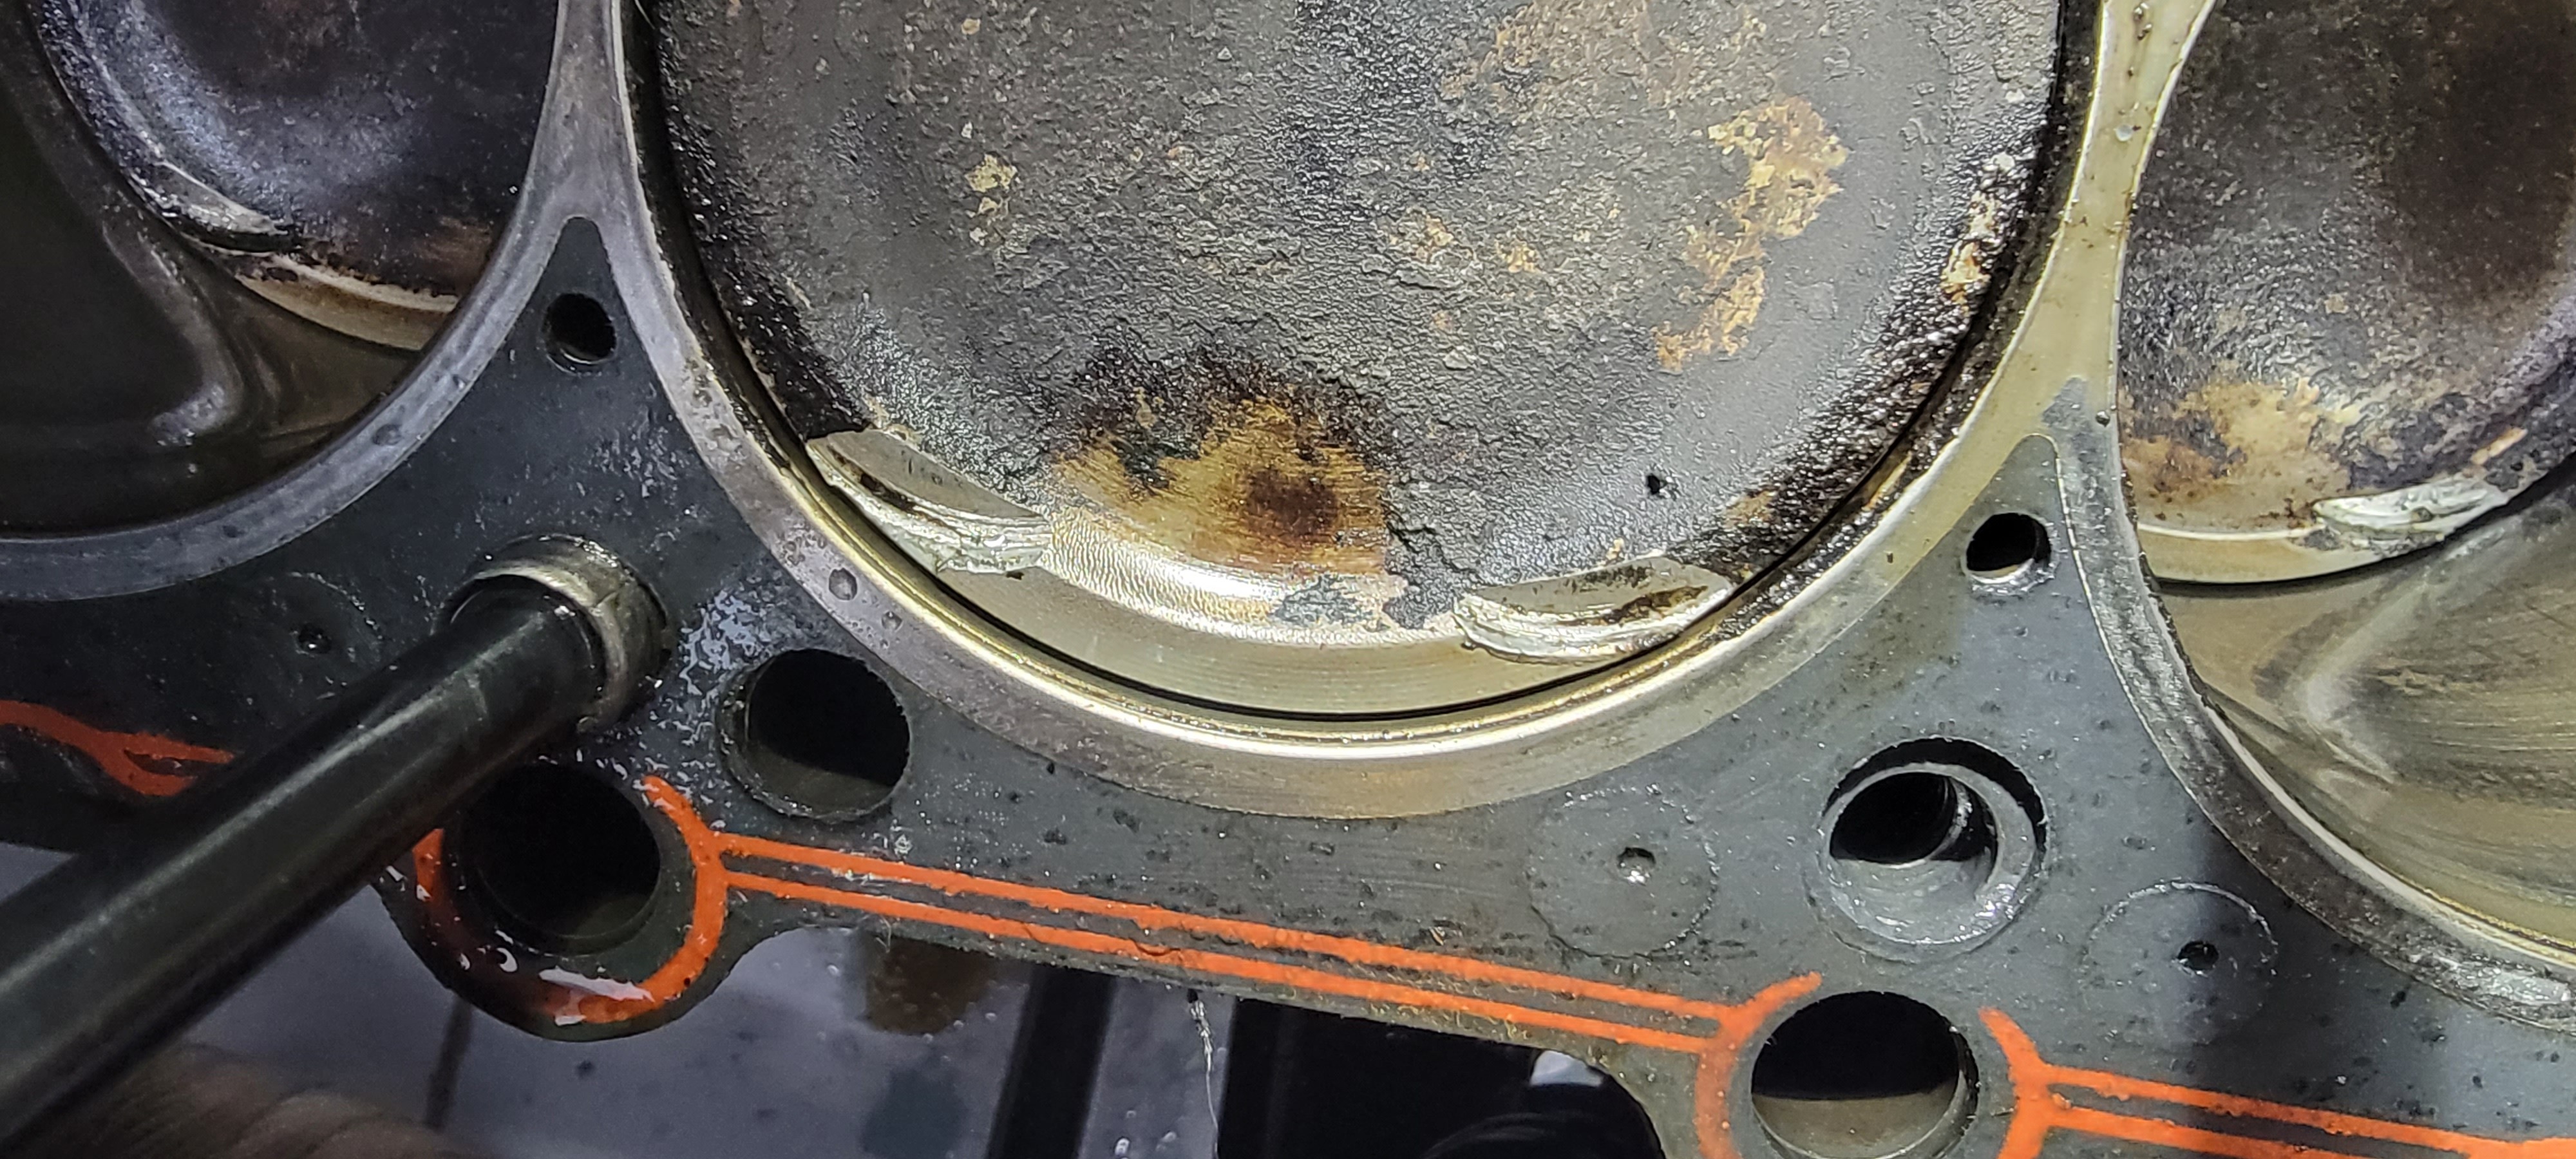
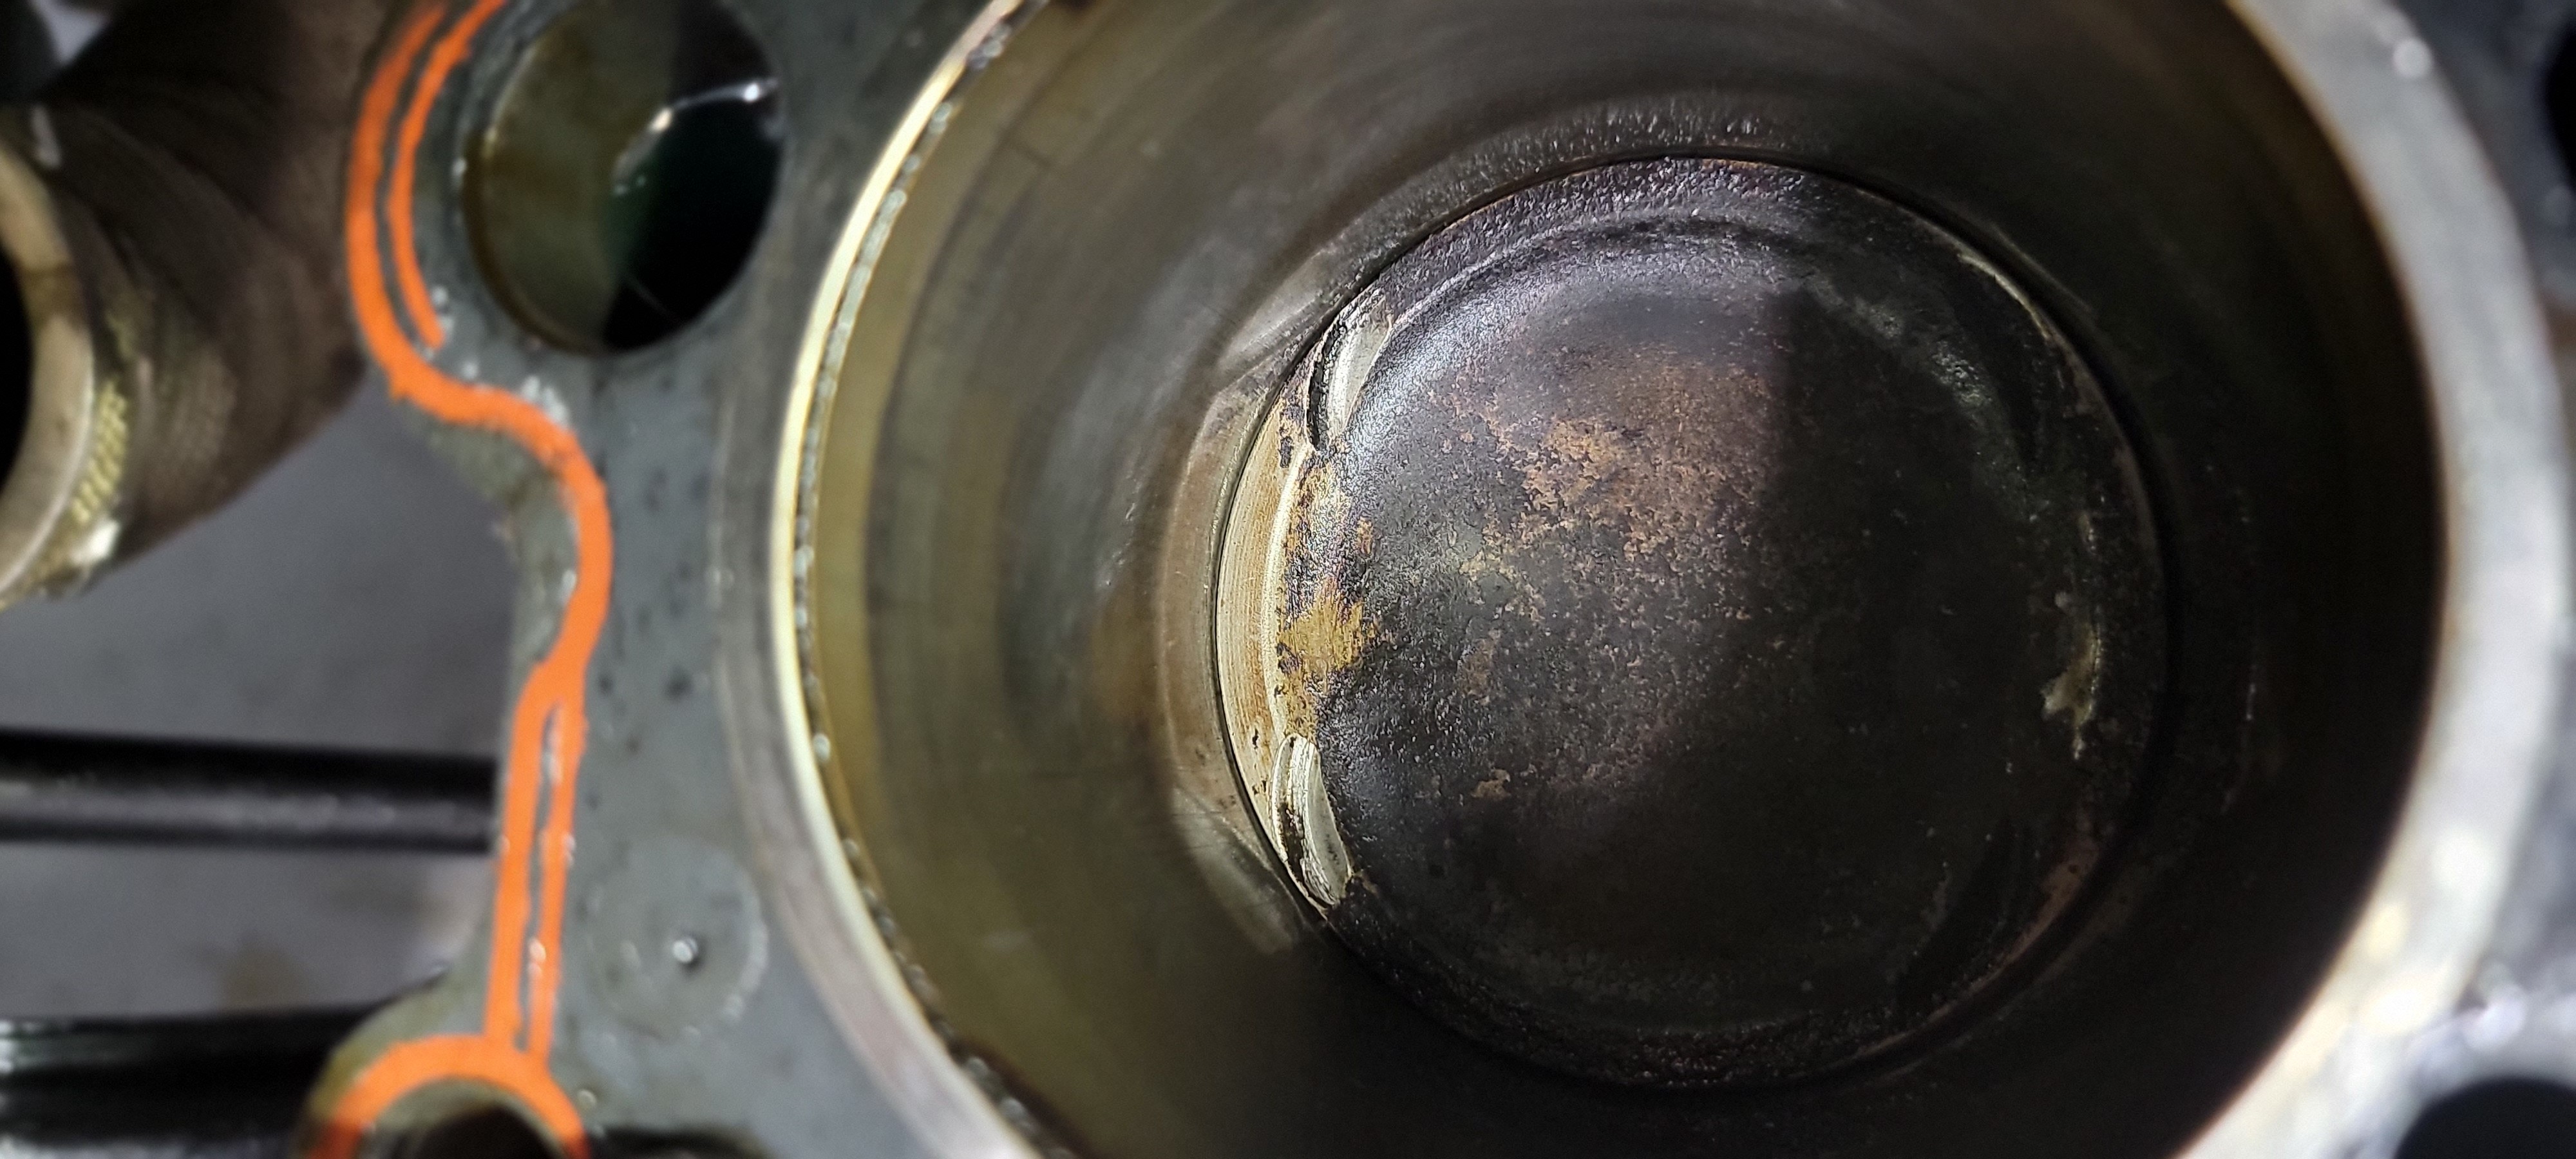
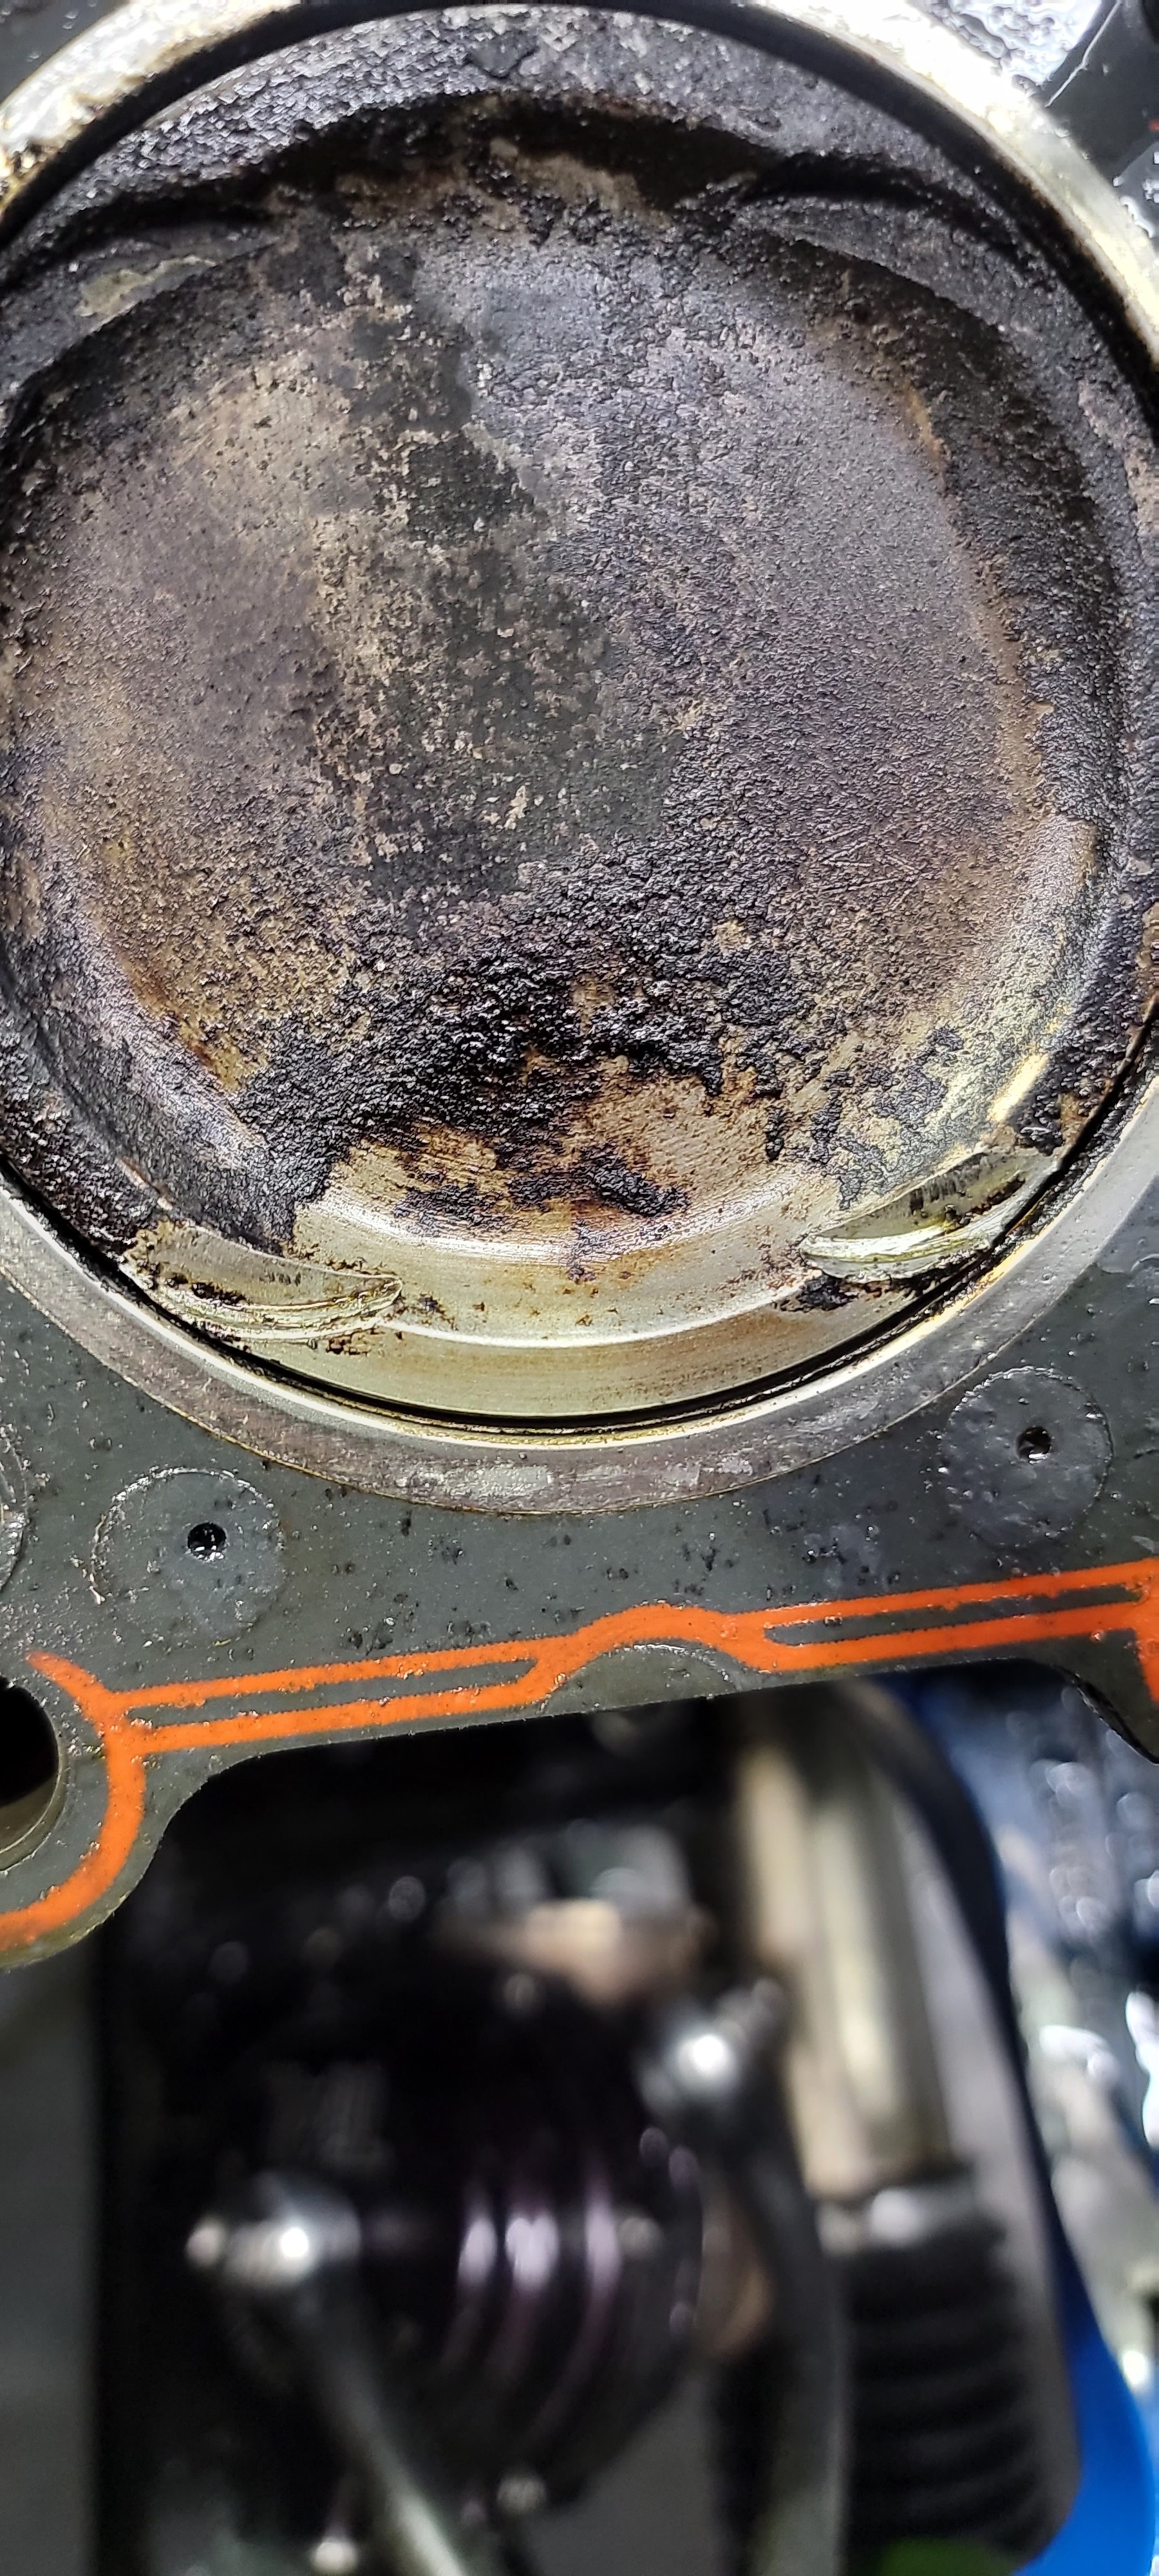
the one and only e30 s52 engine swapYup, six bent exhaust valves.
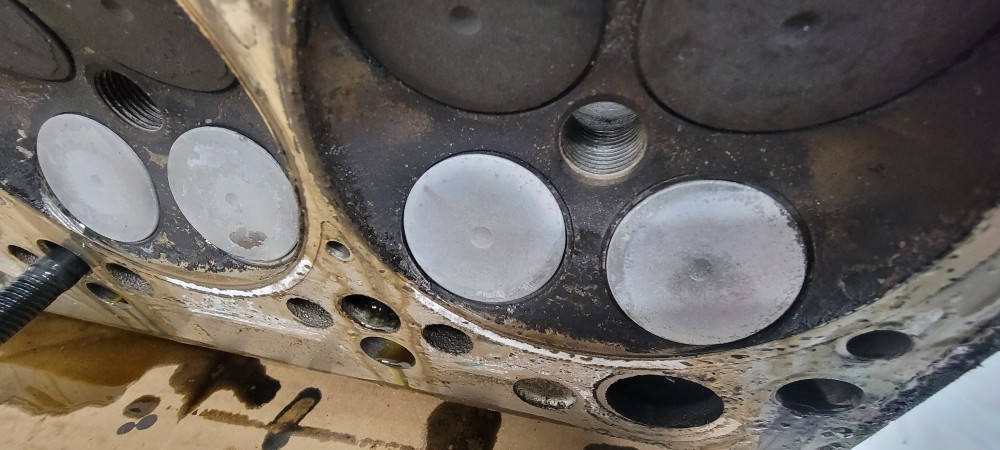
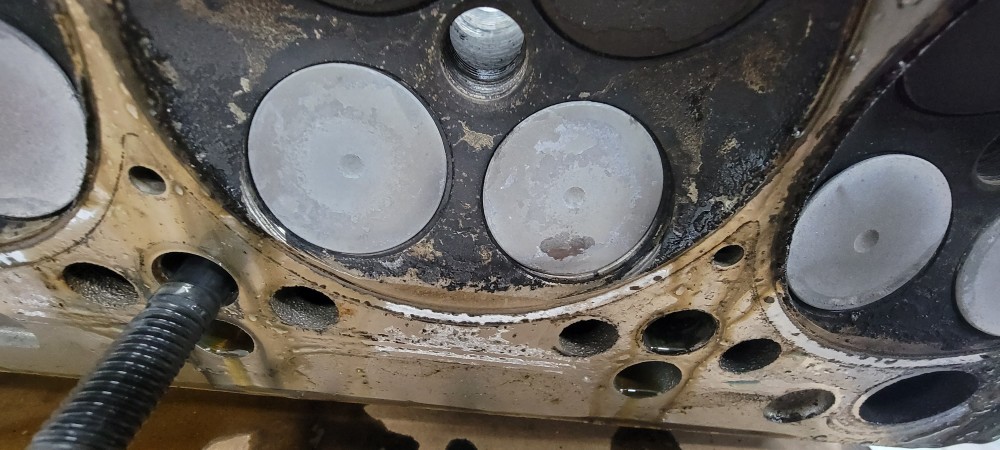
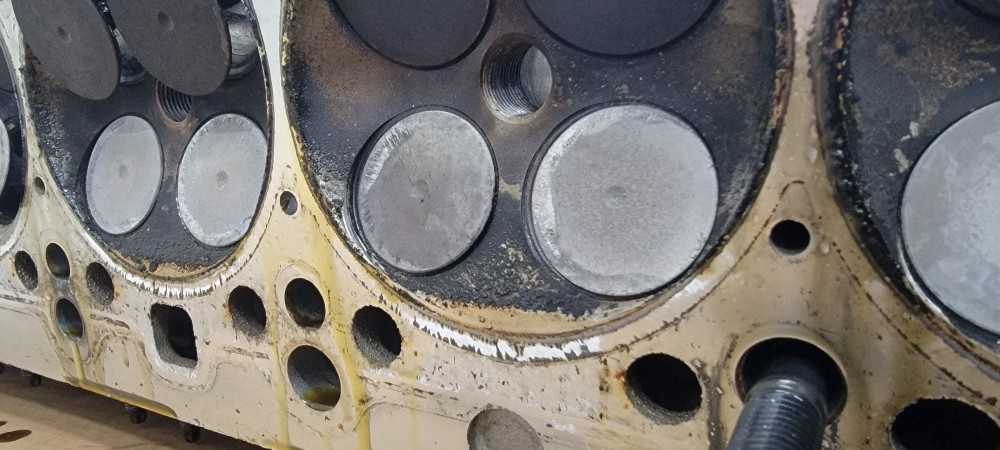
More concerning is the nicks in the pistons that I think are beyond salvageable.
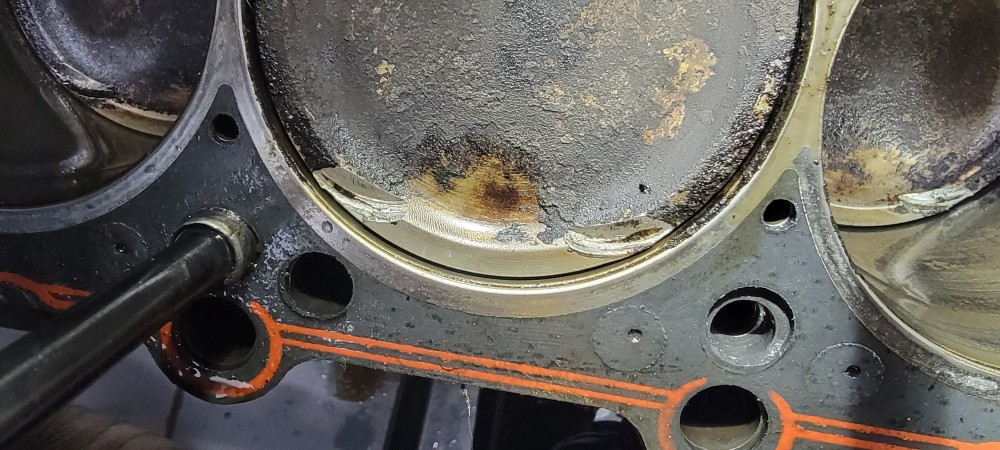
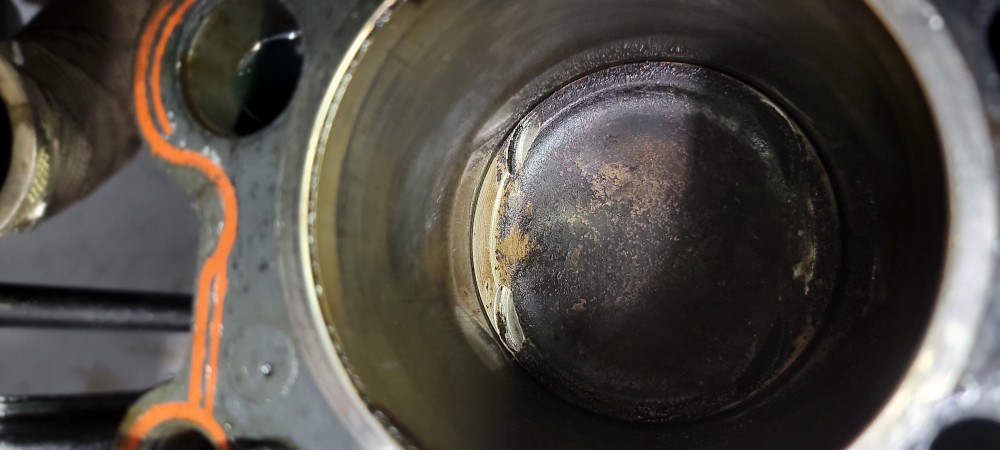
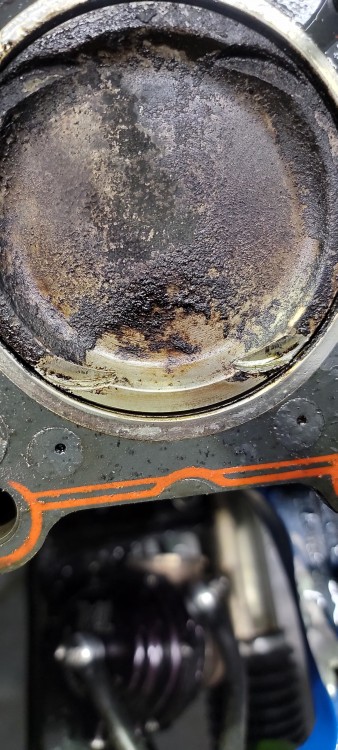
I'm afraid this rotating assembly is toast.
-
the one and only e30 s52 engine swapWell, got the break in oil dropped in and did a thorough look over of everything. I ended up using the old tune from the last setup for start up. Other then lower compression and different turbo this new setup wasn't much different from the old setup tuning wise. I figured it would probably run a little rich but still ok for idling and light throttle. Pulled the coils and plugs for ease of priming the motor and got a solid 15 psi of pressure shown on the gauge before re hooking up the fuel pump relay. Did another check over everything and then hopped in and started cranking...
Video was cut short as we noticed a coolant leak and shut it back off to correct that before letting it get up to temp. Once it was up to temp, I got the front valance re-installed and the car lowered on the ground. Being that the engine was running well and the afr's were looking good I wanted to get it out on the road and get some more load on the rings to break em in better. The tune obviously wasn't dialed in enough for this setup to see any kind of boost but some light to medium acceleration would be fine. Went down a few country roads near the shop and besides some trouble to stay idling at a few stops, the car ran really well!
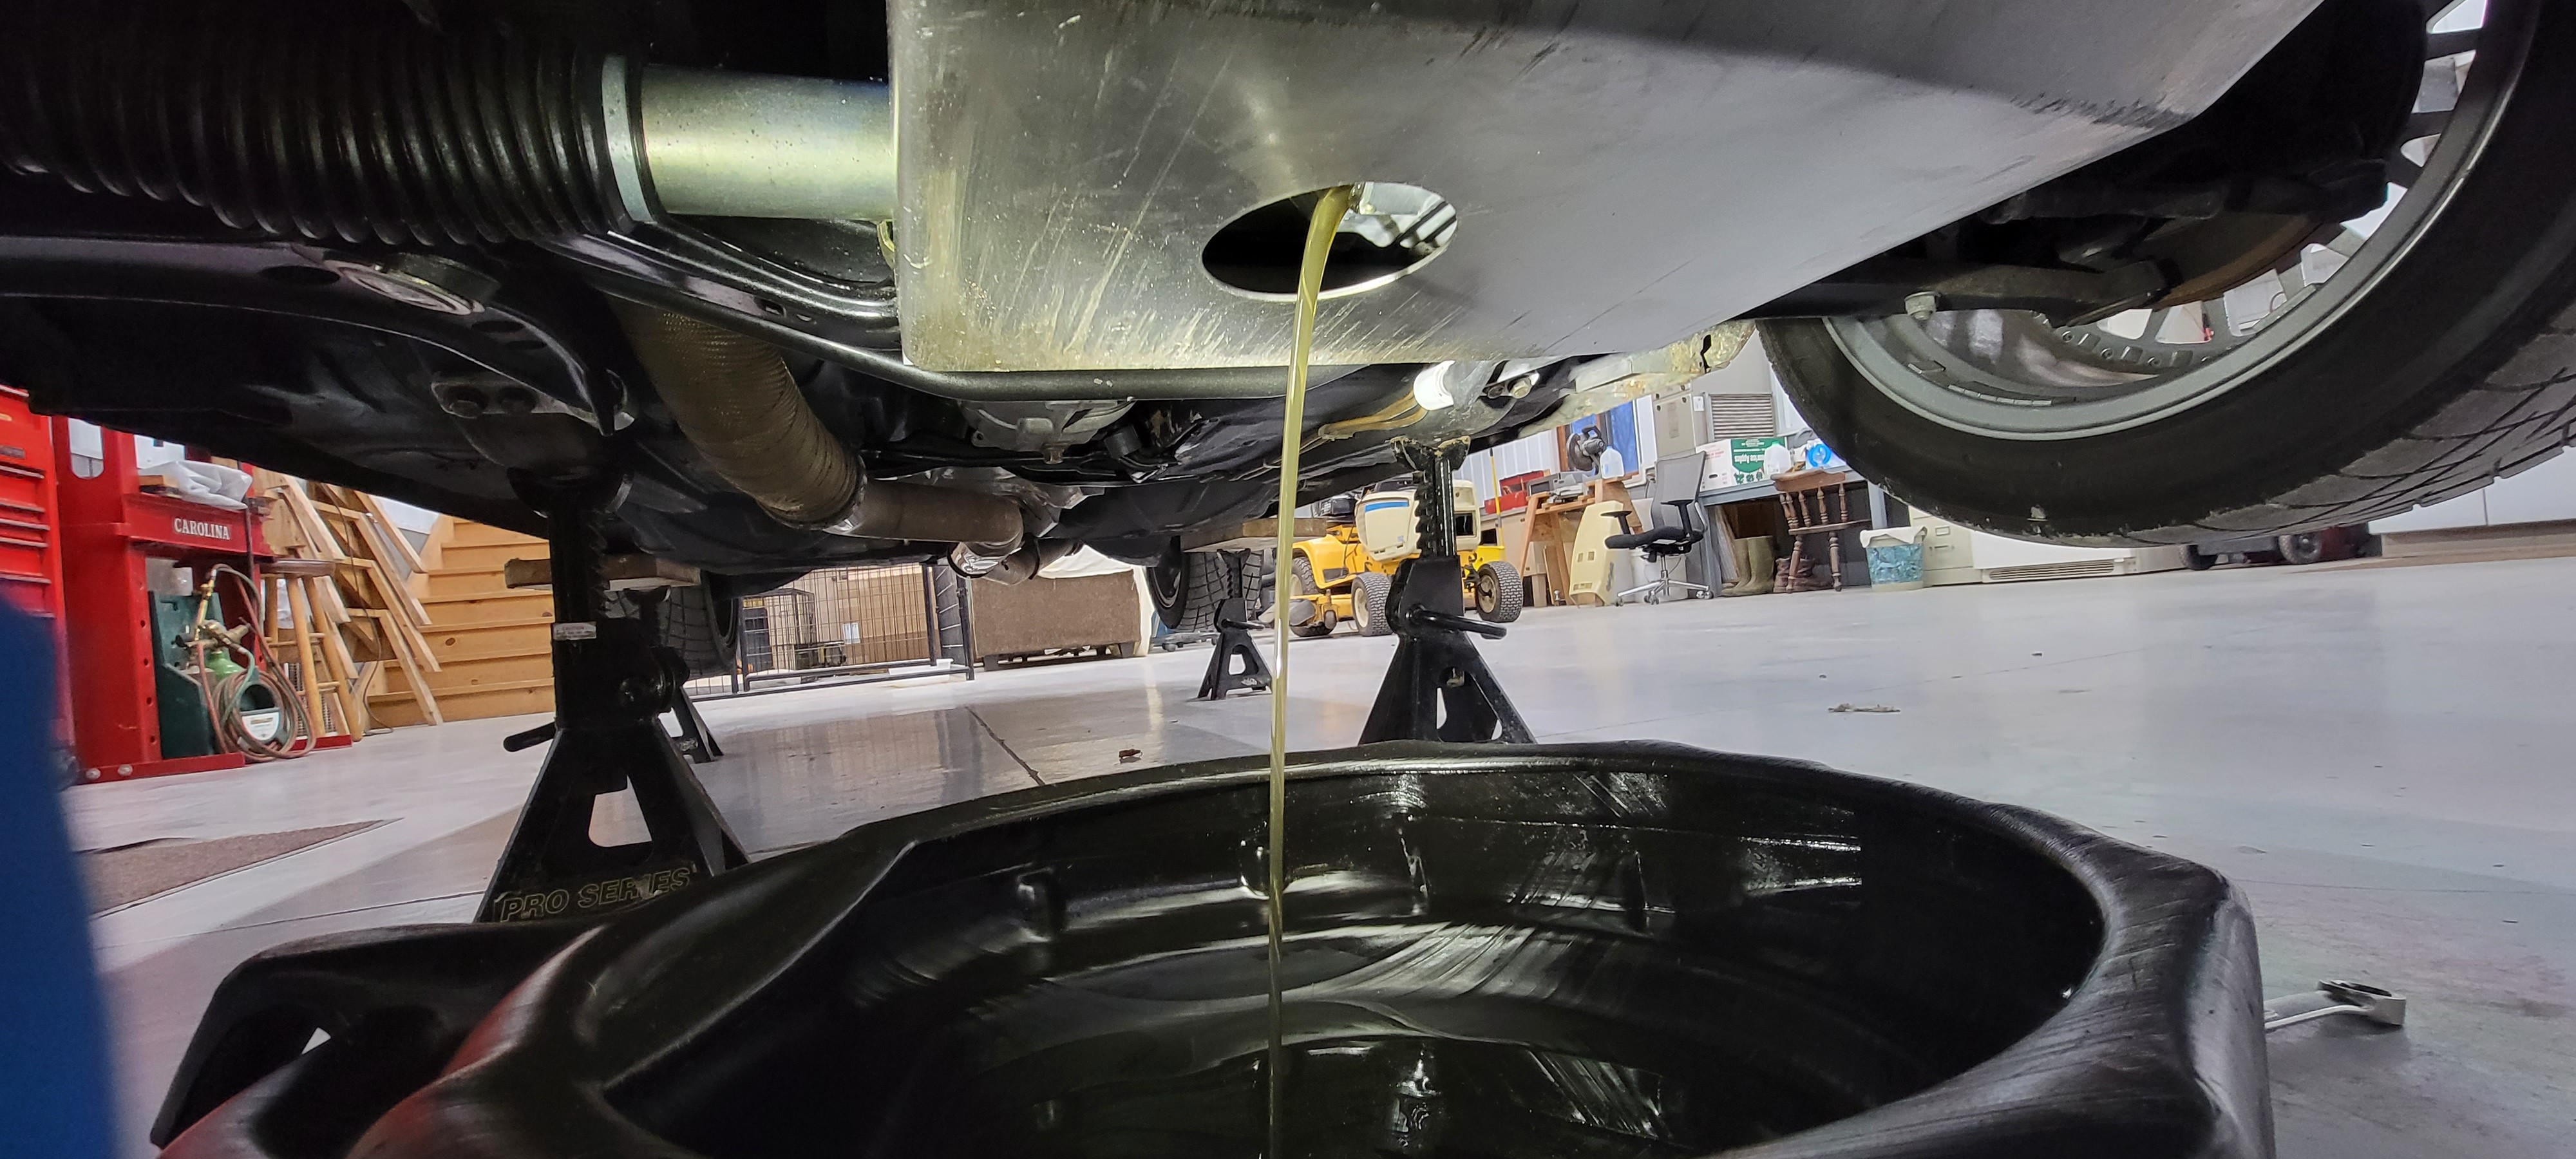
Drove it around about 15 miles before returning to the shop and draining the oil right away and changing the filter.
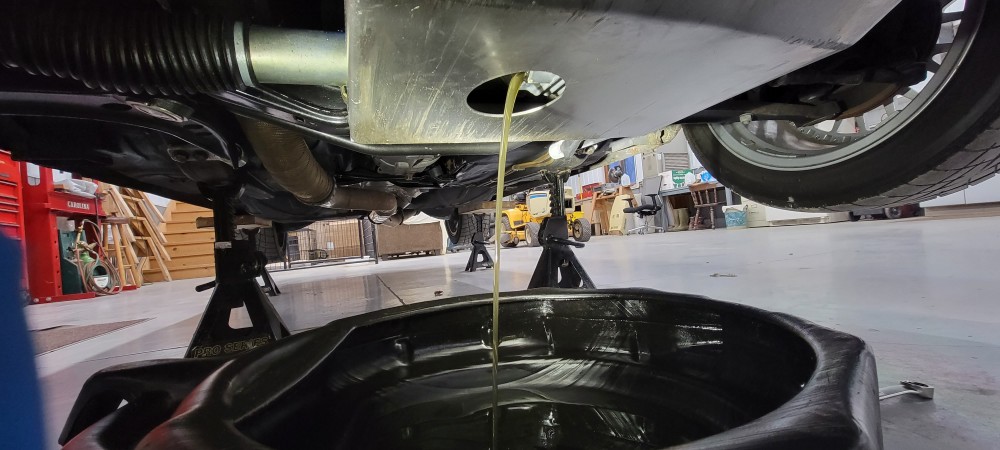
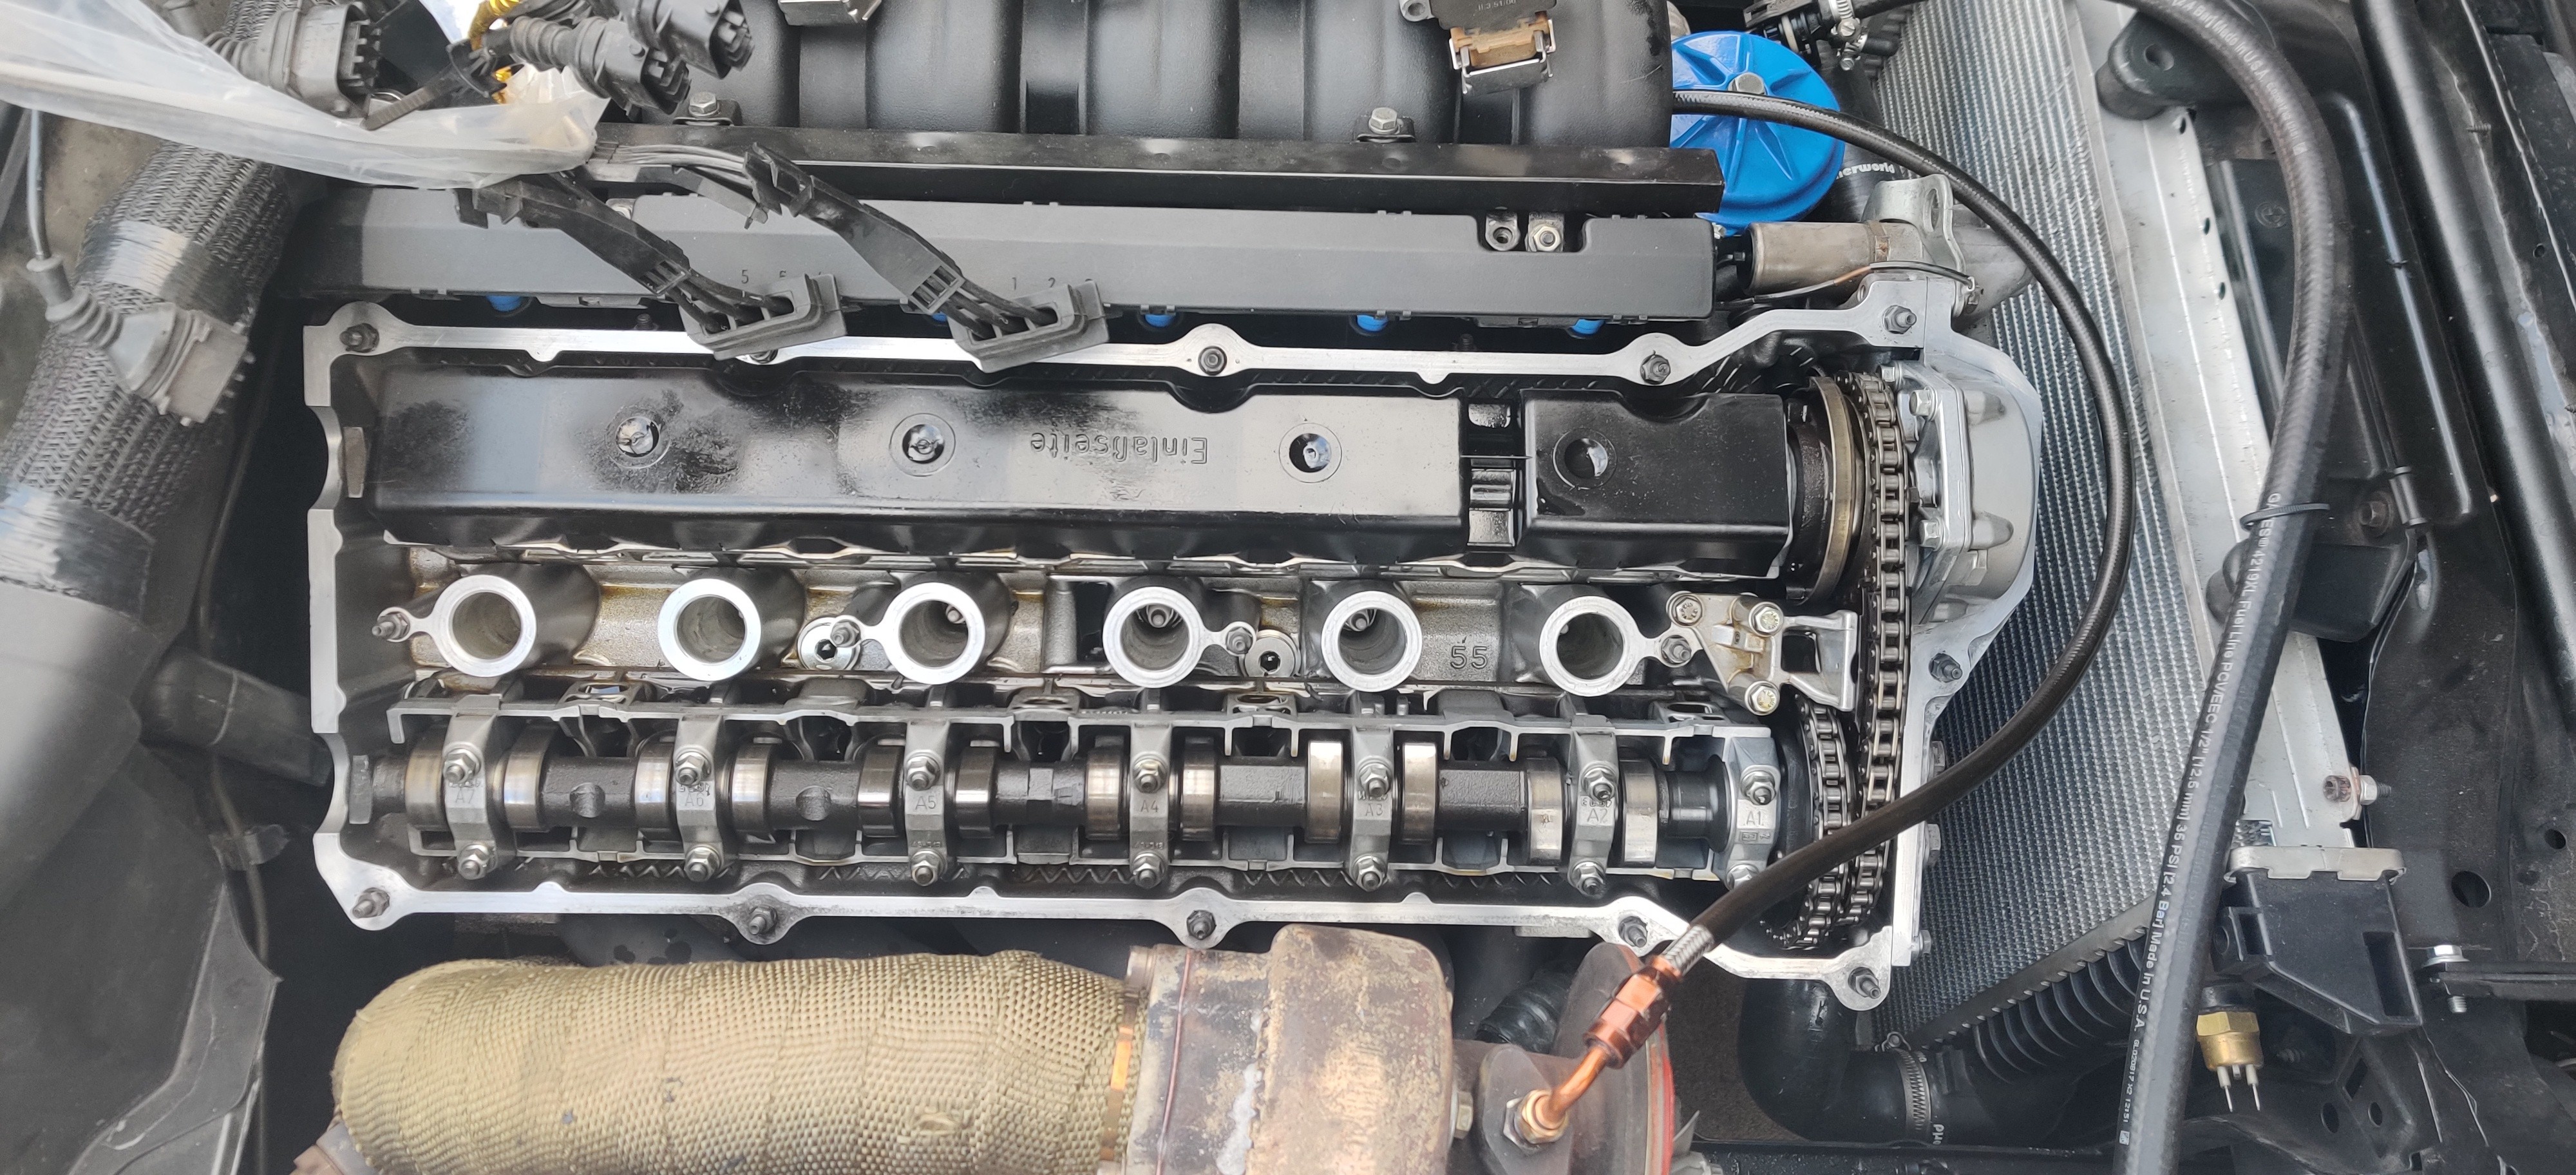
Also went ahead and popped the valve cover back off to re-torque the head studs. I did notice that the gasket had some coolant seeping out which was not ideal to see. I originally torqued the studs in three steps to 75 ft lbs as per arp's recommendations. I did some searching around and found that others had similar issues and followed ces motorsports recommendations of upping the final torque to 85 ft lbs to correct the issue. Re-torqued the head to 85 ft lbs and also checked the torque on all the cam caps before re-installing the valve cover.
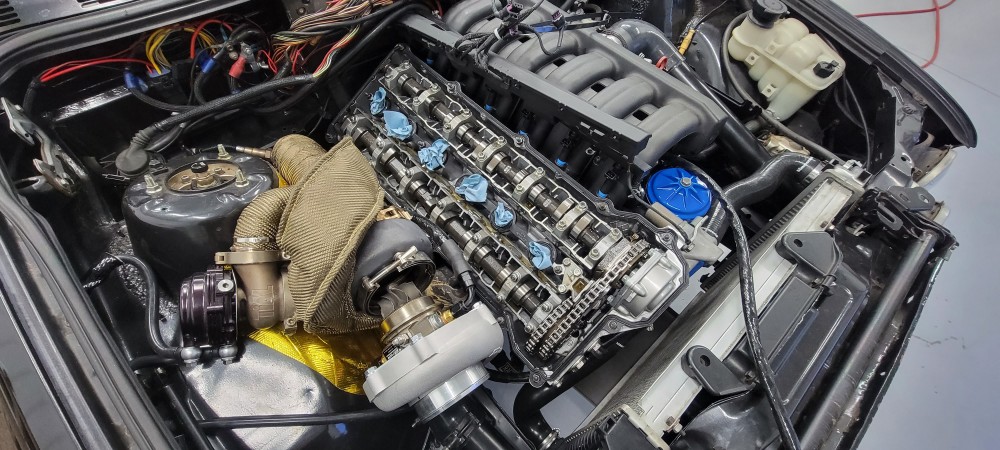
So not to much left besides wrapping the wires up and getting things buttoned up. Got my tuning date scheduled but unfortunately that's not gonna be tell June 30th. Wish it could have been sooner but by the sounds of it everyone is booked out atleast a month for dyno tuning. Gives me plenty of extra time to really go through things so it can be fully ready to go.
-
the one and only e30 s52 engine swapAnd the start of a new chapter begins...
After further consideration of my plans for putting back together the M52 I had picked up and throwing that in, I decided against it, rolled the car back into storage and let everything rest for the remainder of the year. Although the bottom end seemed alright to run as is, I felt foolish doing it and didn't want to go through all the time and effort of putting it back together just to possibly run into issues right away.
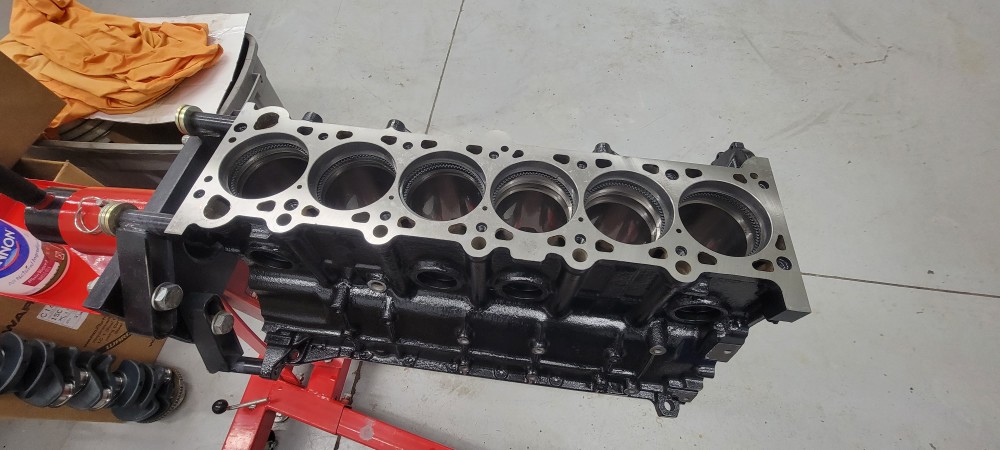
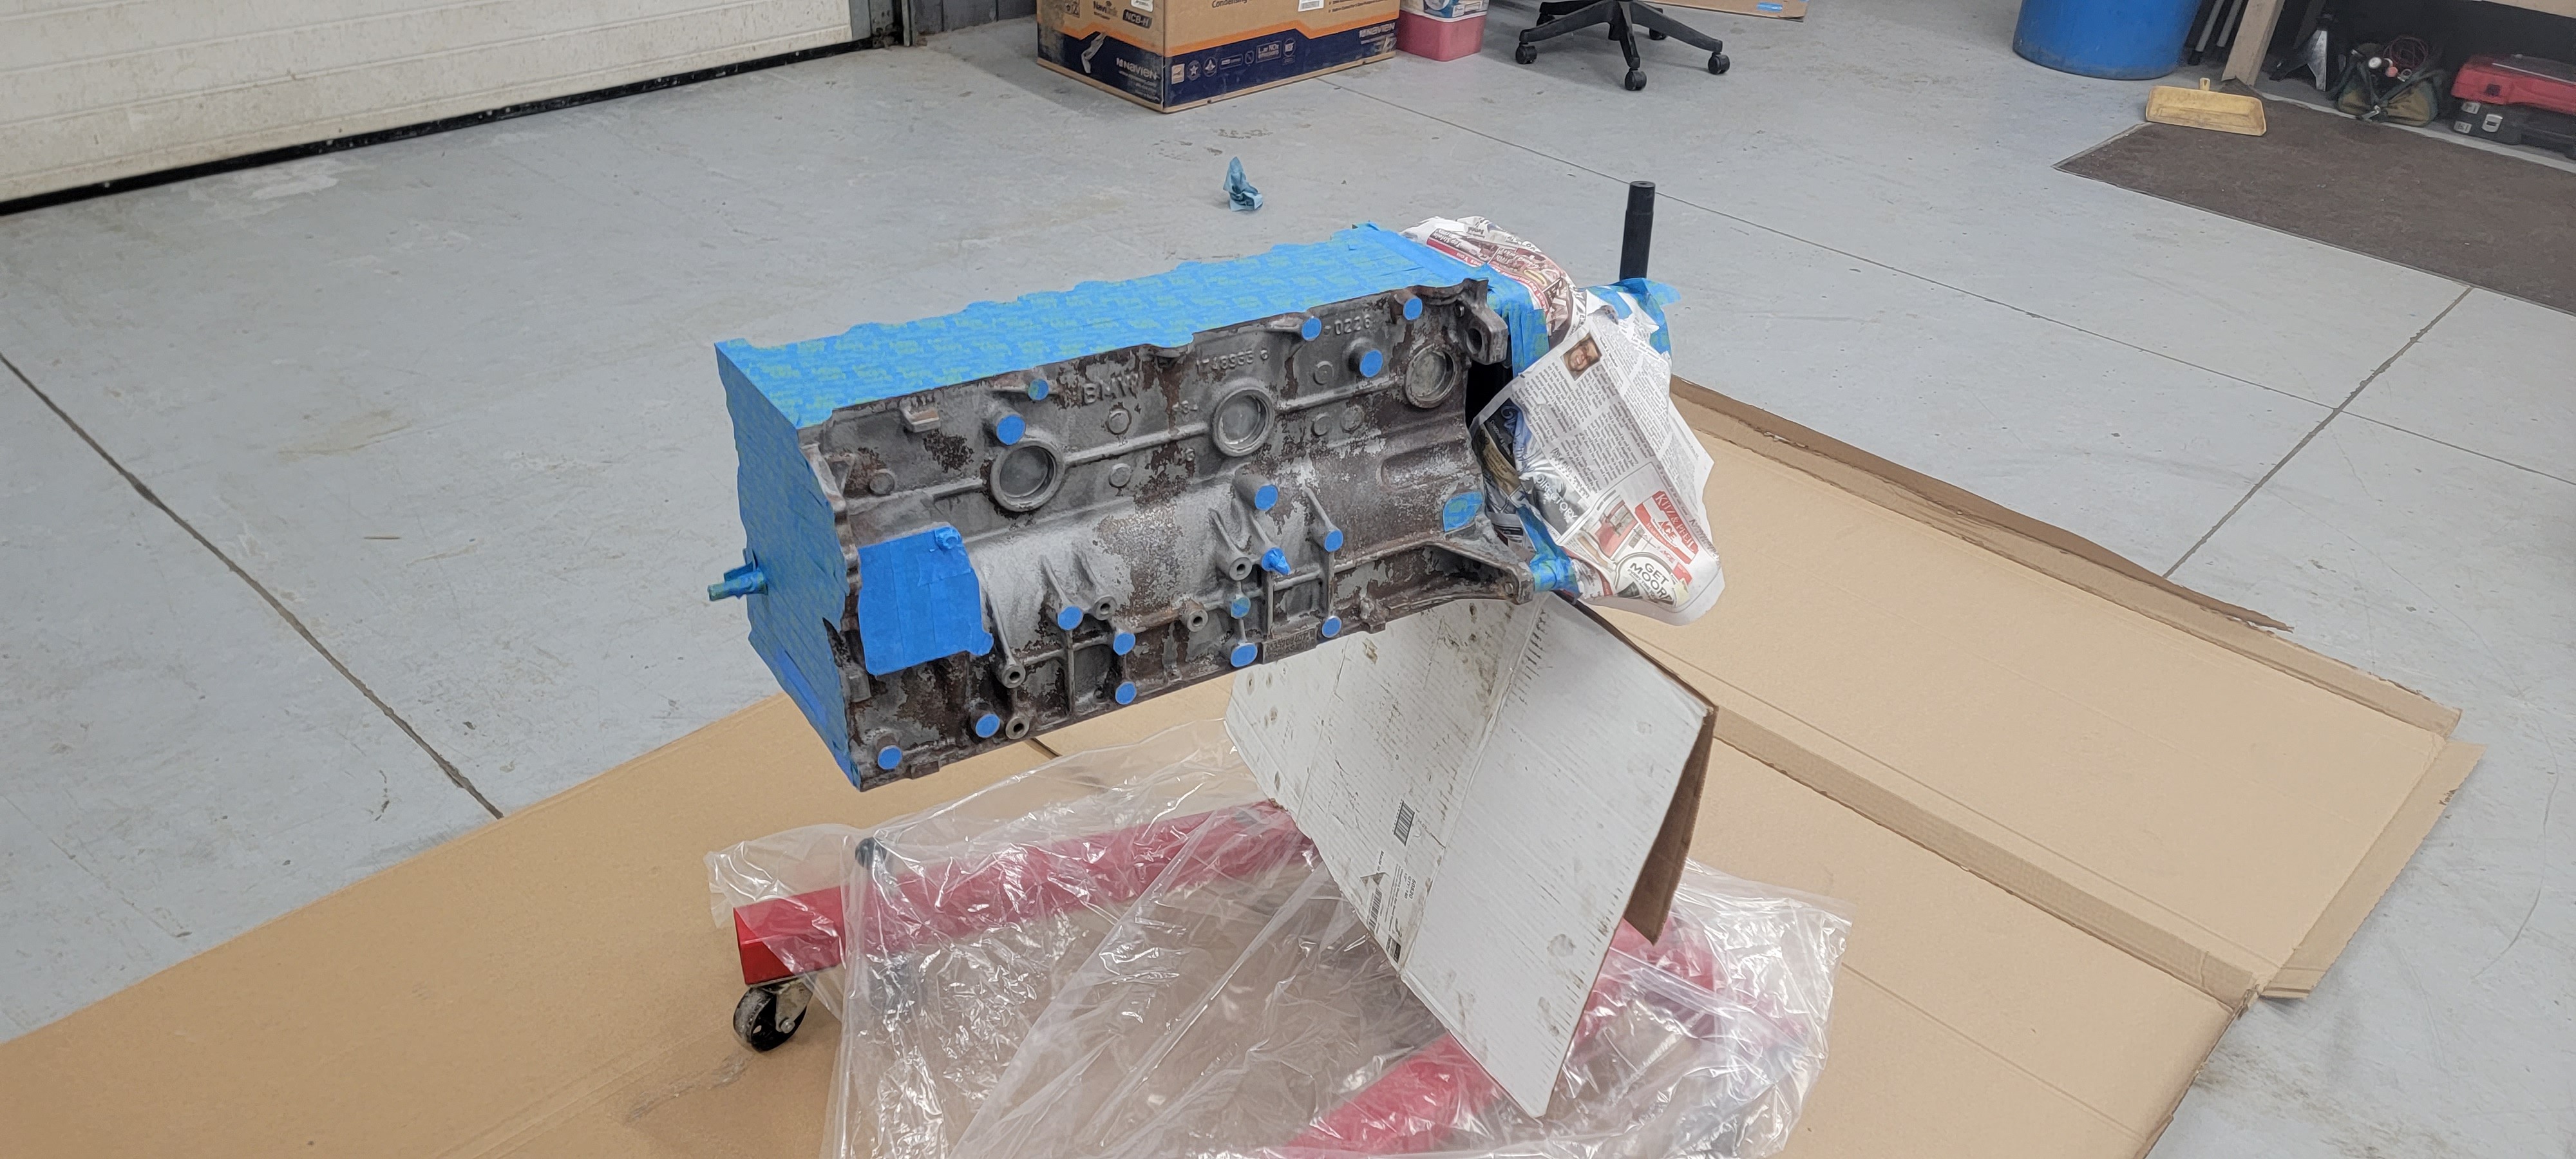
As things sat I slowly began acquiring parts needed for a full engine rebuild. I brought the old s52 block into a local machine shop to figure out what my options would be for piston size. After doing an inspection of the cylinder walls they said I would need to bore the cylinders 20 thousandths over which left me with going to an 87 mm piston. Initially I was good with this but after seeing possible issues with others having cylinder walls crack on them as well as not having any wiggle room with the cut rings on the HG and running into valve and piston head interference's I threw that block back up on the shelf and re-considered my options. Thankfully I had an M52 laying around now which gave me the option to run the piston size I wanted to so I landed on using that block for the rebuild.
Fast forward a few months and the block, pistons and rods were dropped off at the machine shop as well as an s52 crank that I purchased a few months prior. Unfortunately the crank main and rod journals were in rough shape and required a .010 grind and polish. I also had the machine shop do a re-balance of the entire rotating assembly. As for the block, it was bored out to 86.5 mm and honed with a torque plate installed afterwards. block was also decked with the timing cover attached and line honed for the upgraded arp main studs.
As for the cylinder head, I brought in the head that I got with the m52 and had the shop check the deck for straightness as well as vacuum testing it and pressure testing to see if it would need a valve job. Thankfully everything checked out good there. Had them run that through the hot tank to clean everything up.
Other machine work I had done included having the rod clearances checked and sized for the wrist pins and the cam shafts being polished up as they were a little scored up on the journals.
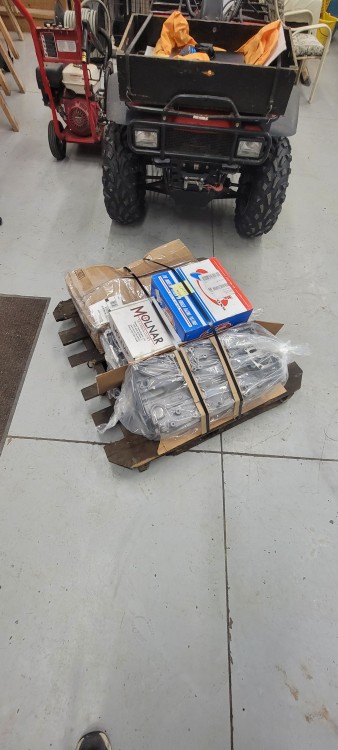
Everything when I got it back from the machine shop a few weeks later...
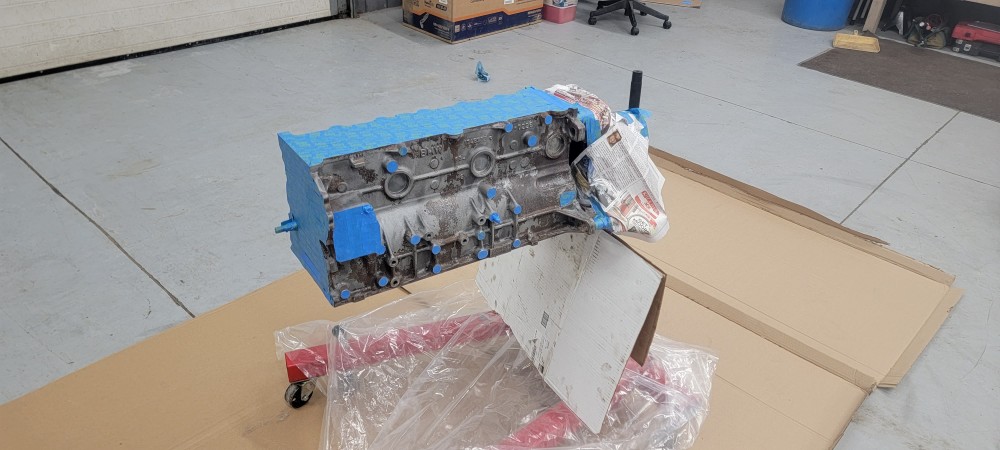
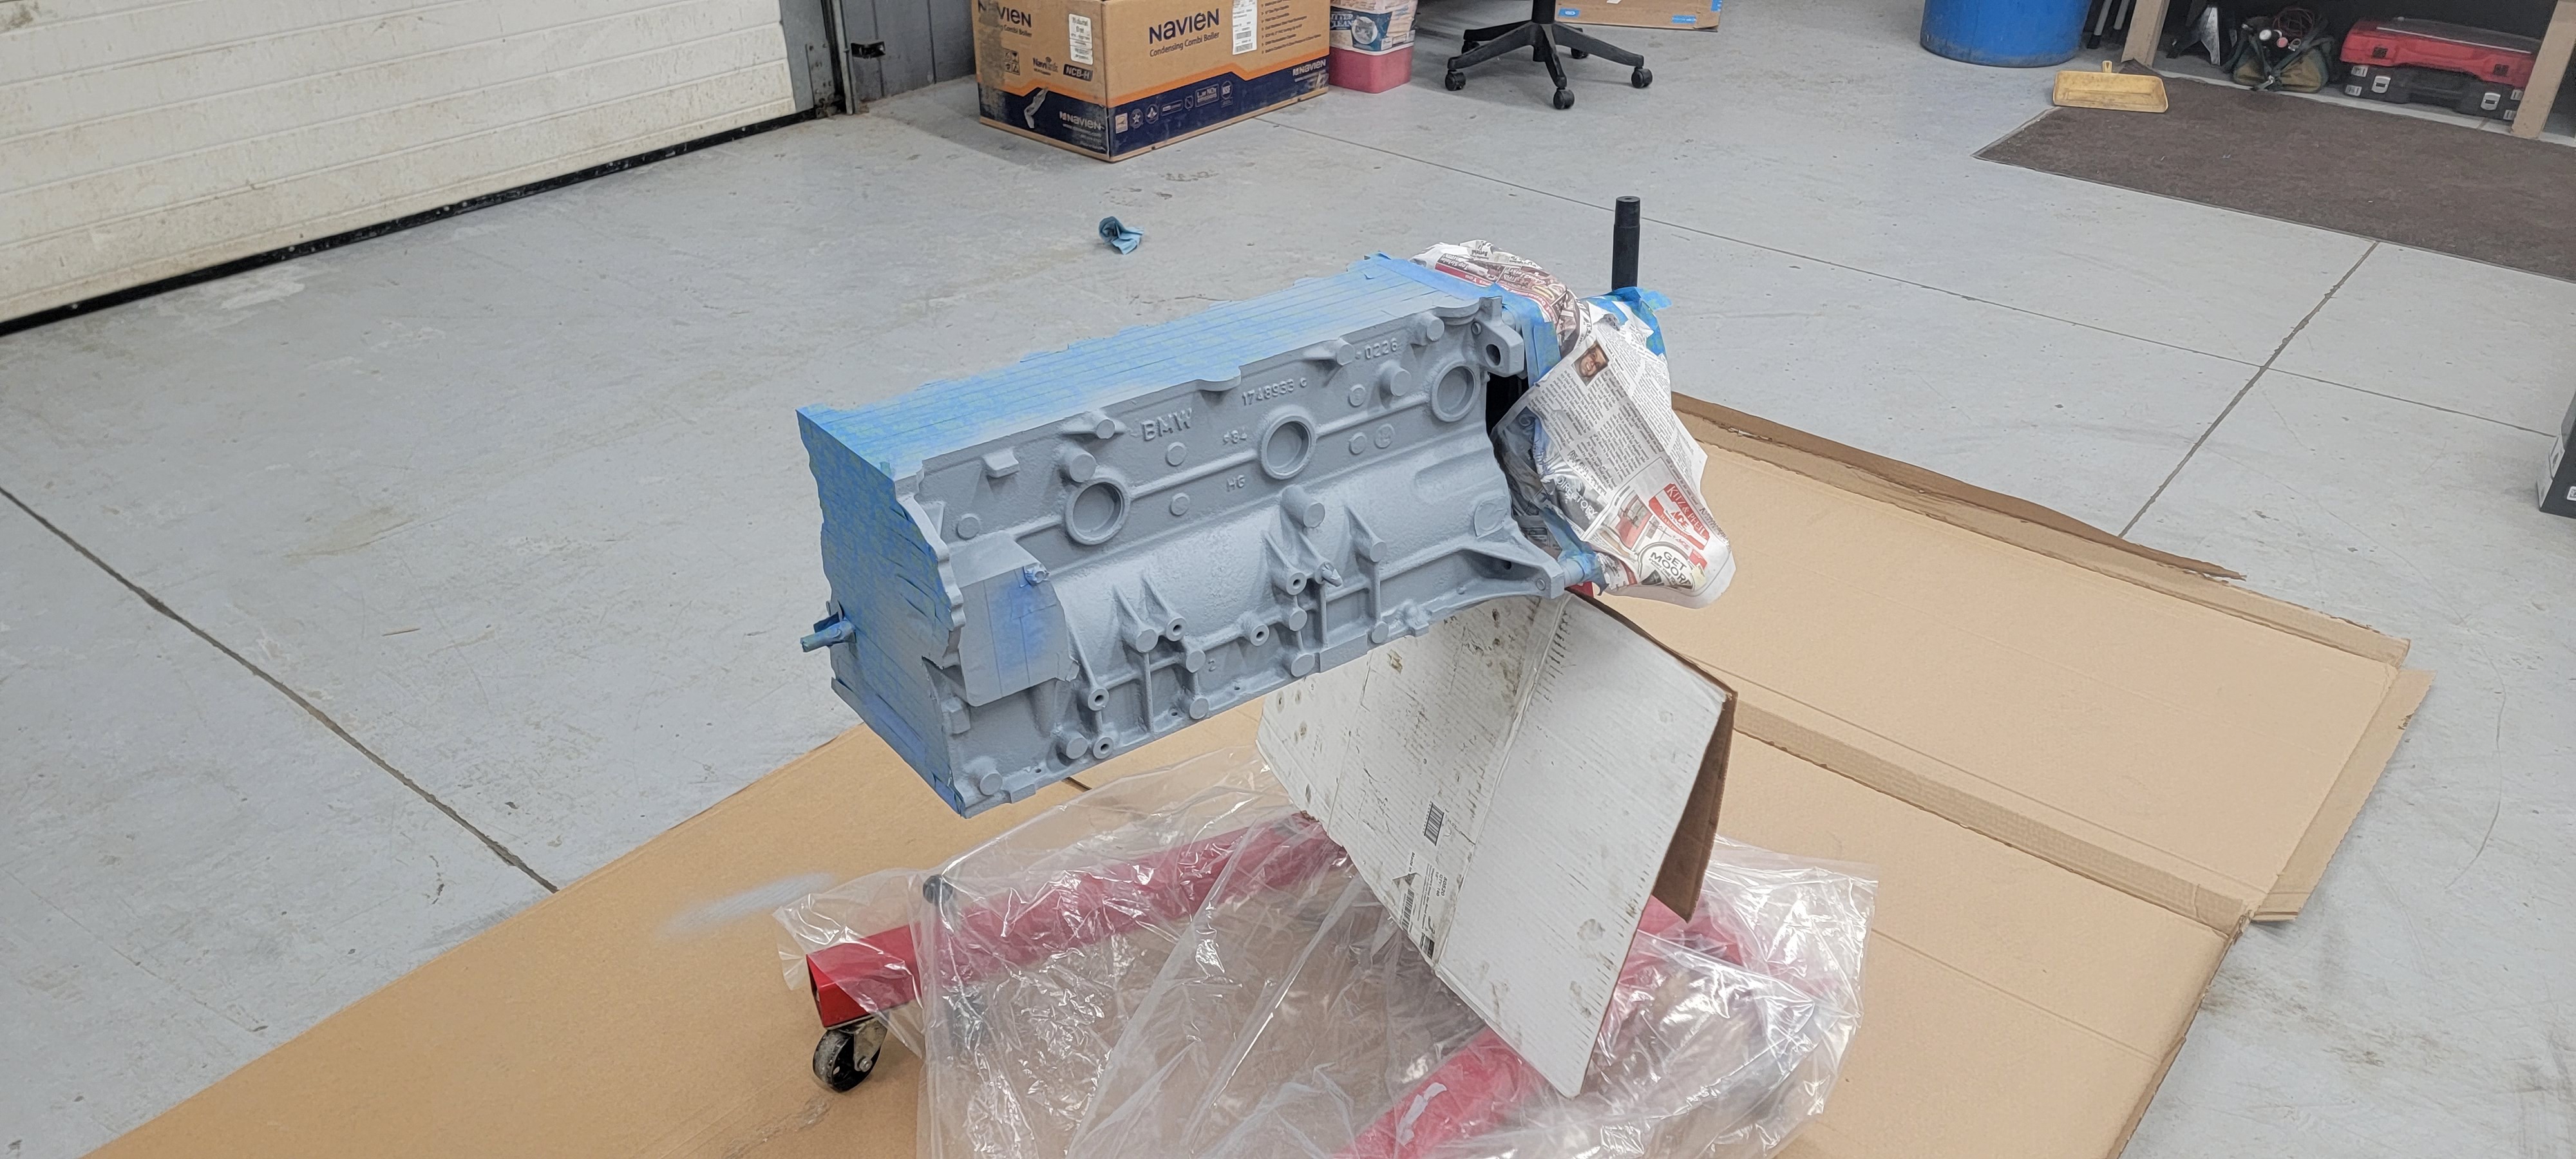
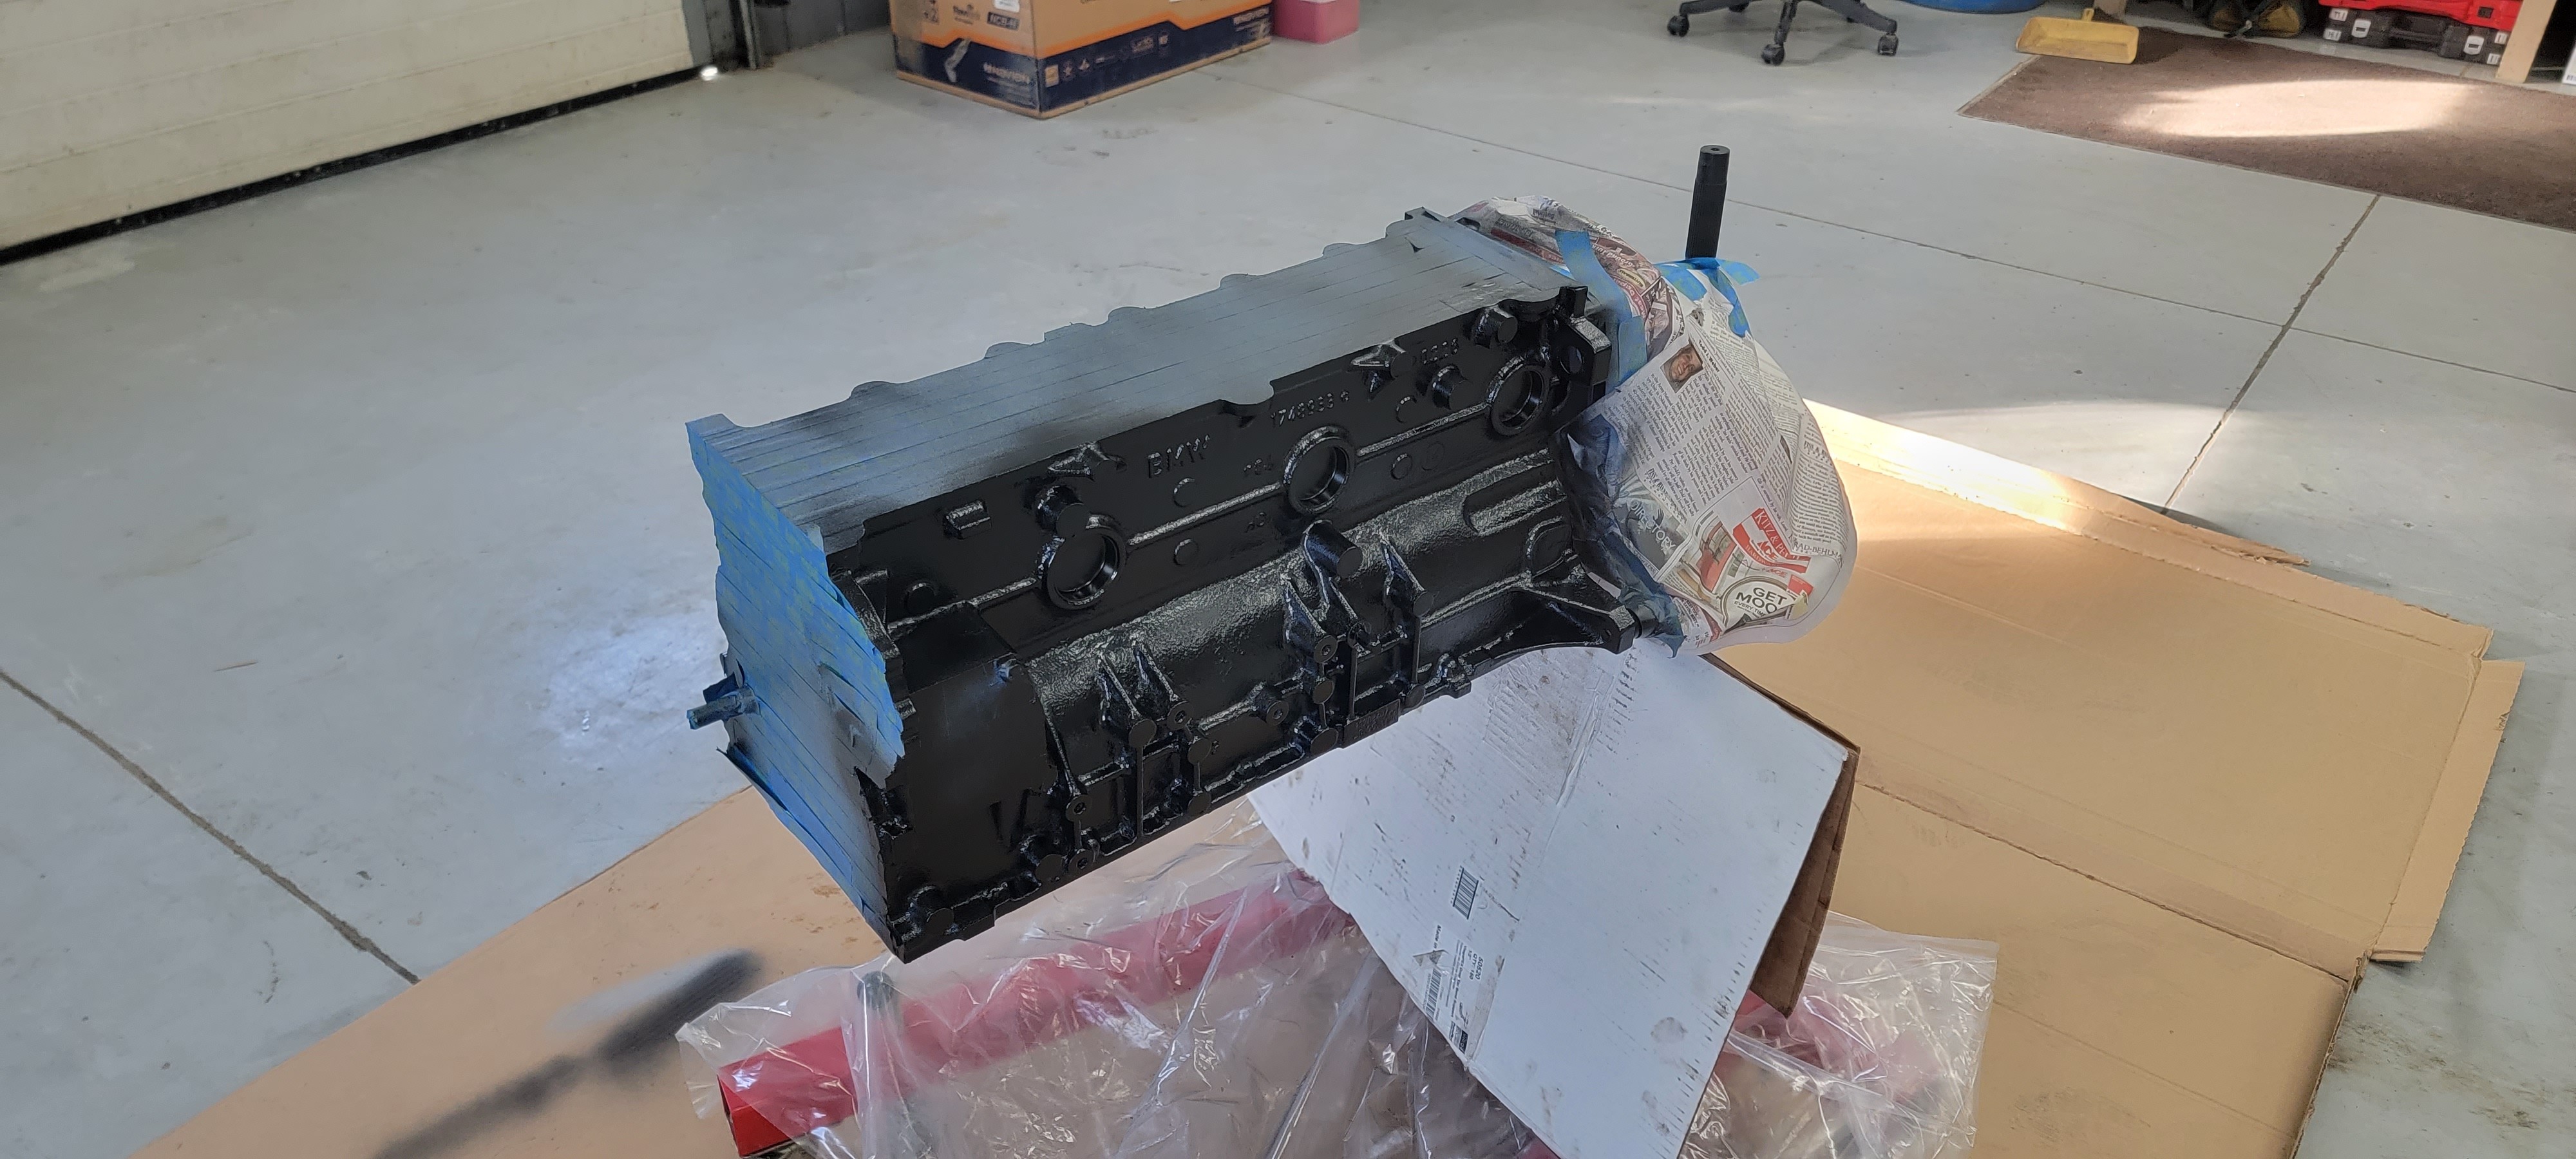
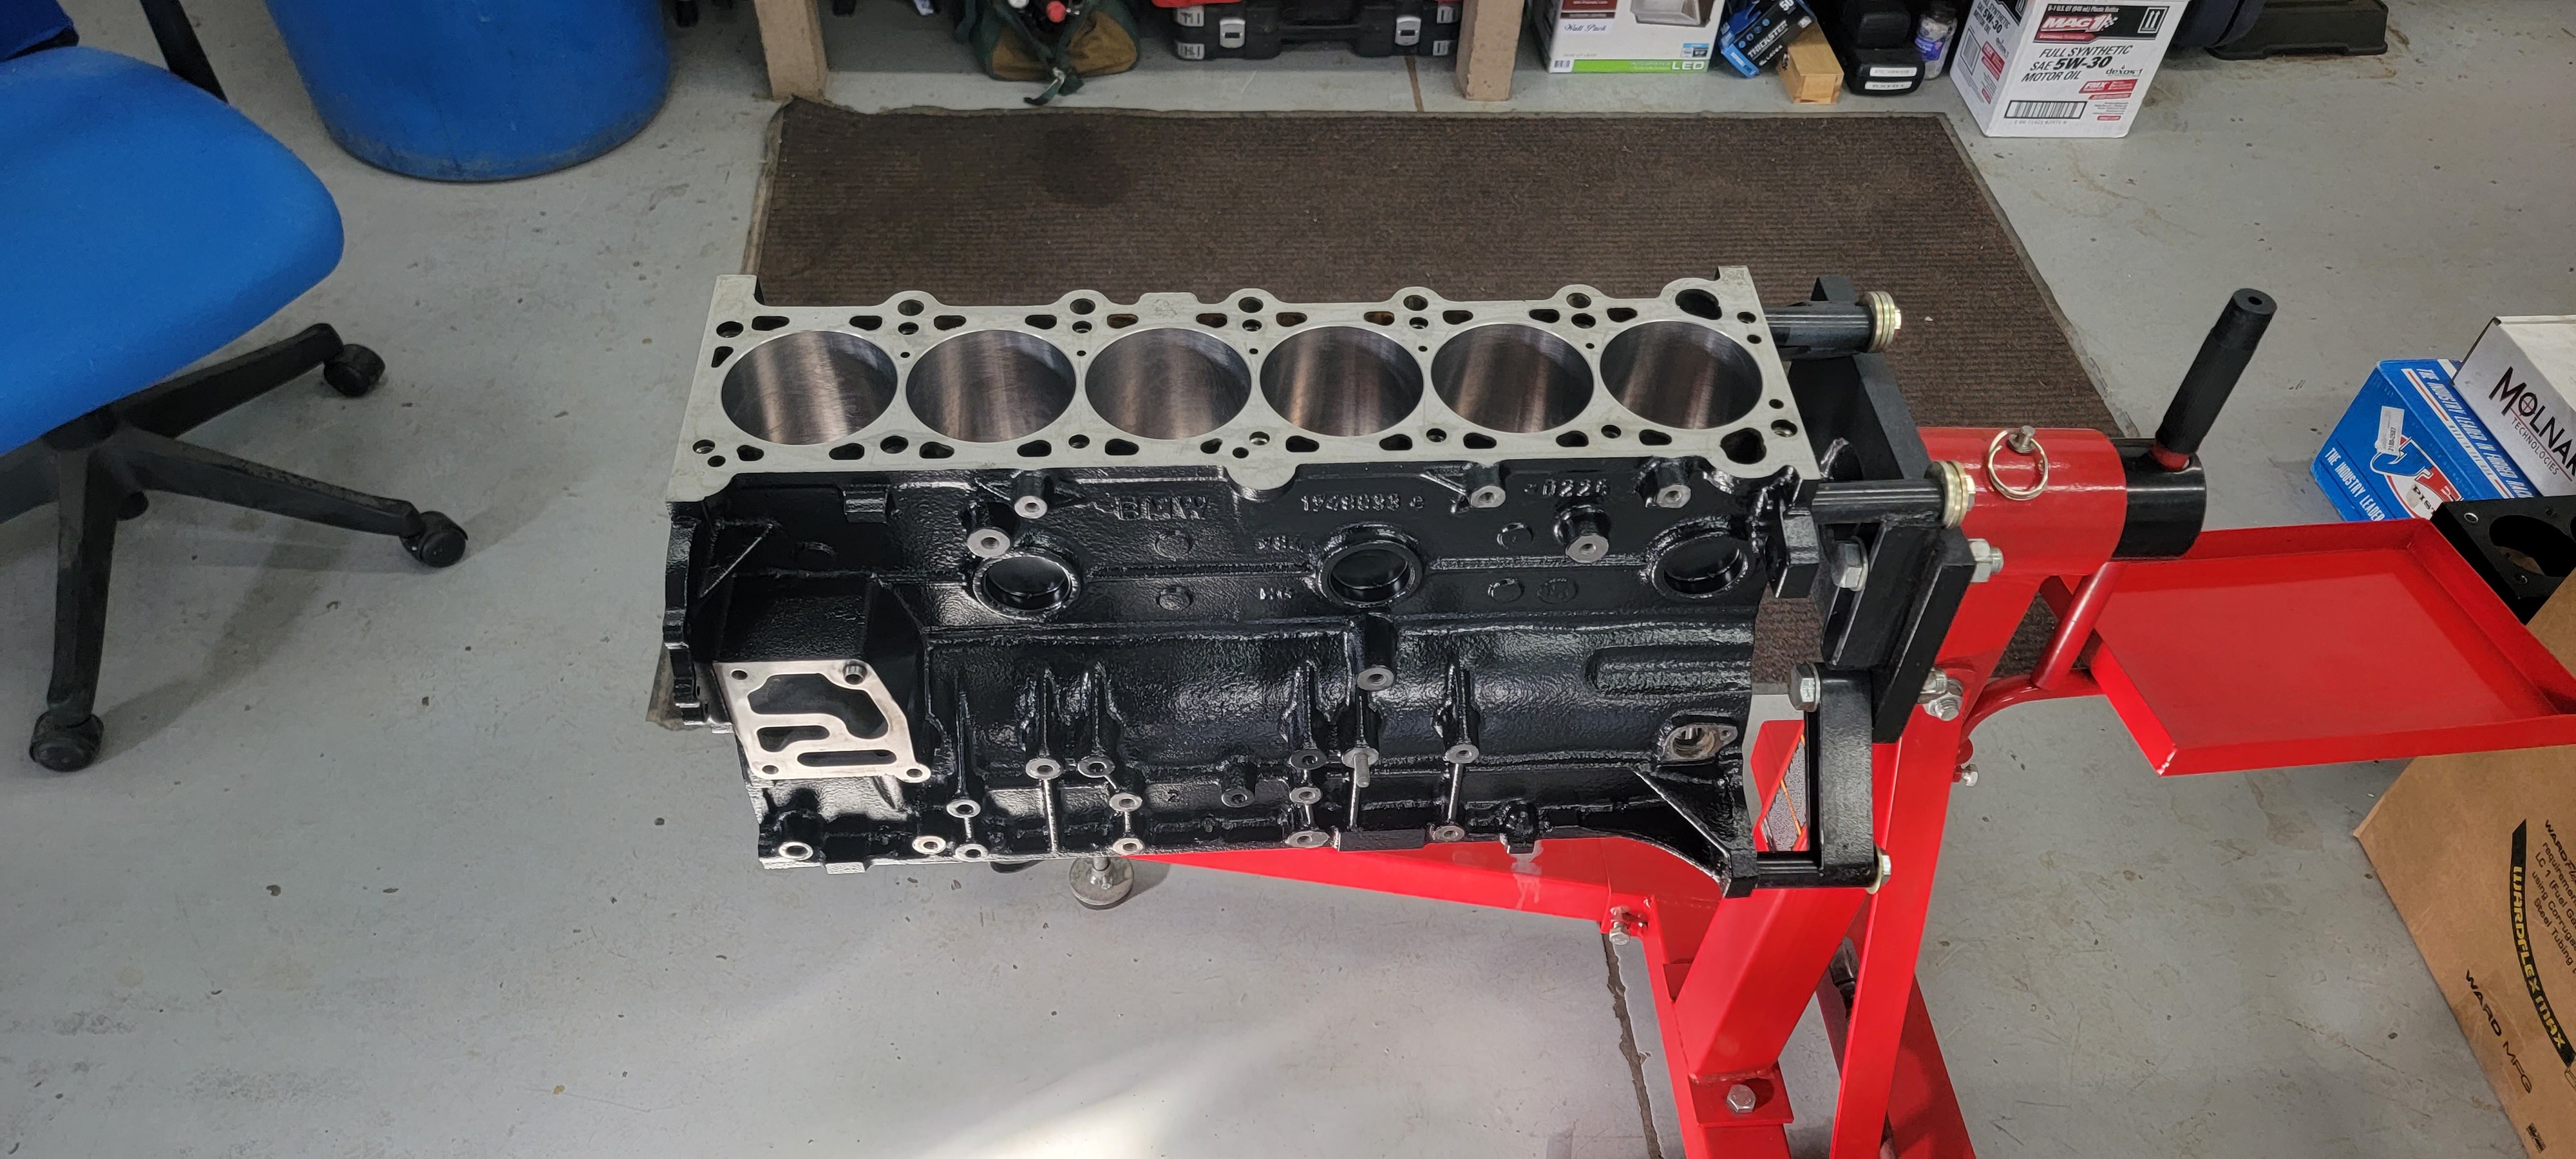
After spraying the entire block down with mineral spirits to remove all oils used for flash rush prevention it was time to paint the block
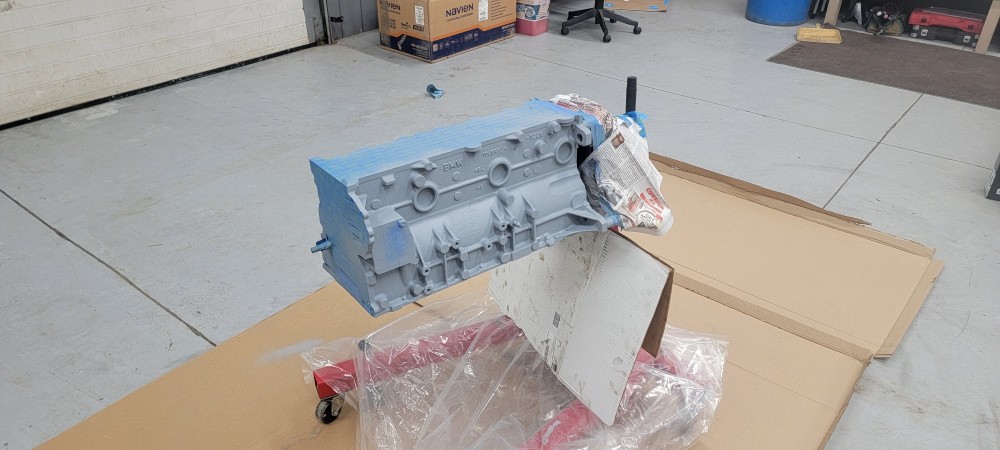
coat of primer first
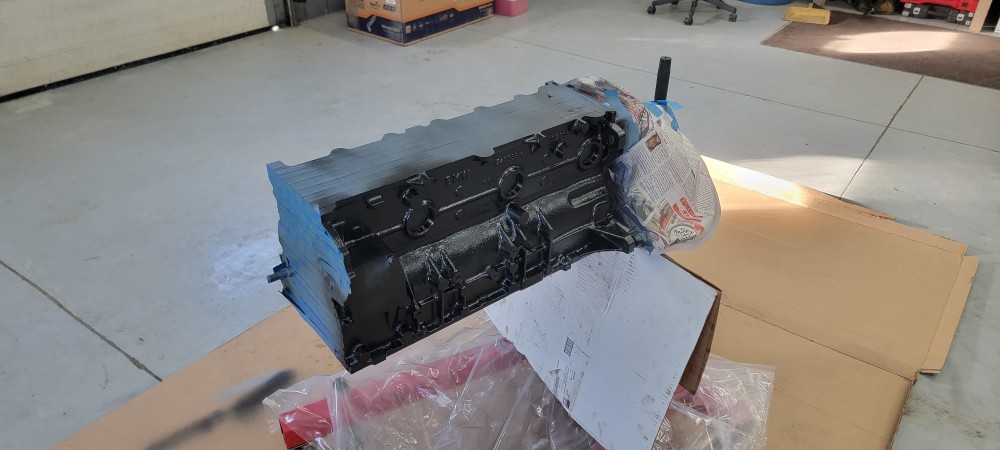
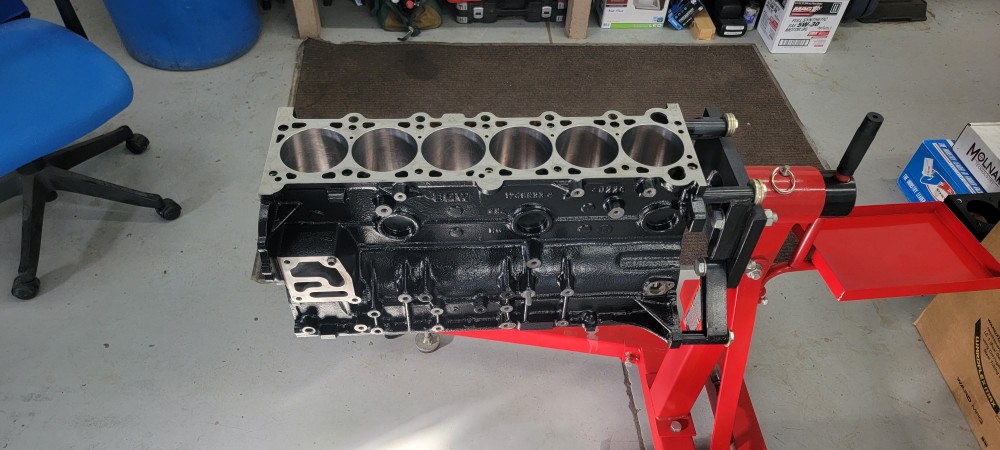
Was pretty happy with how that turned out.
Assembly time rolled around and I ran into a small road barrier right away. First thing on the list was installing the oil squirters. I went through the six squirters I had from the blown s52 and used a small pick to test the spring pressure on each one. All of them had very weak or no spring pressure. So I dug up the six that came with the m52 and tested those. I found four of them that seemed to have fairly good pressure while the other two were very weak. Instead of just replacing the two bad ones I just ordered a whole new set of six.
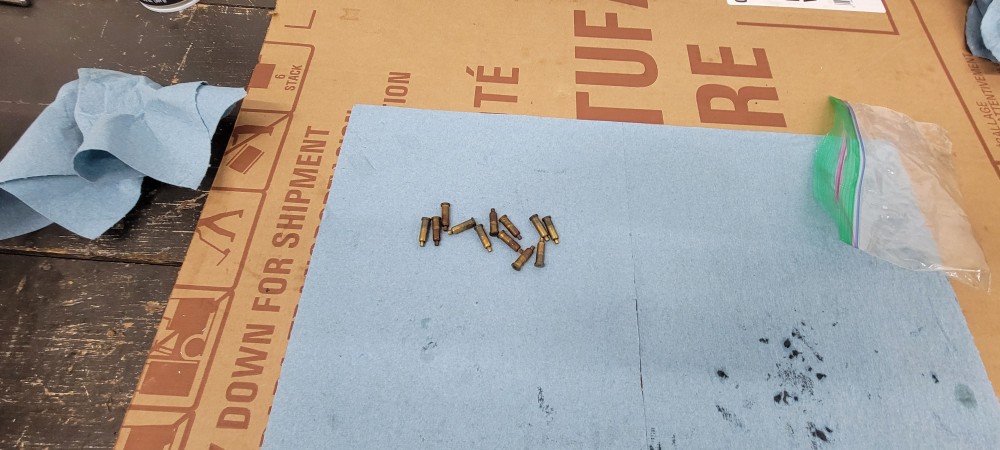
With the squirters on the way I went ahead and got the main bearings installed so I could get the clearances checked.
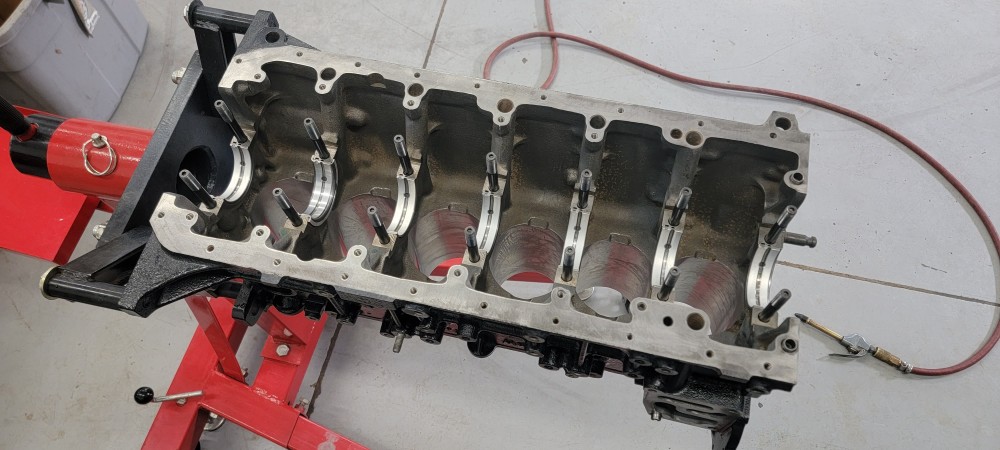
When I went to set the crank in the motor I noticed it did not want to slide into place and was getting hung up on the thrust bearing washers. Pulled the crank out to see if I was missing something but after pulling the bearing out and attempting to place it on the journal I found there was no way it was going in and was larger then the width of the journal surfaces by a good amount.
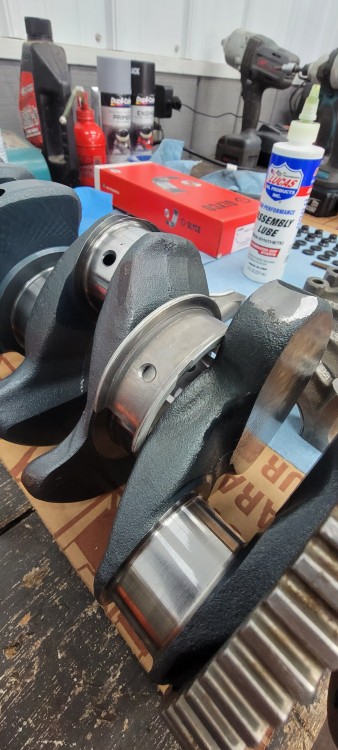
Gave the machine shop a call and found that they had not ground down the thrust washer surfaces as they were unaware that the thrust bearing was a one piece design instead of the more common multi piece style. The oem .25 mm undersized bearings I ordered also make the thrust washer area undersized instead of keeping it oem size. After some extensive researching I was unable to find a thrust bearing on the market that came undersized but held the oem thrust washer thickness. So the crank needs to go back into the shop so they can grind that up correctly.
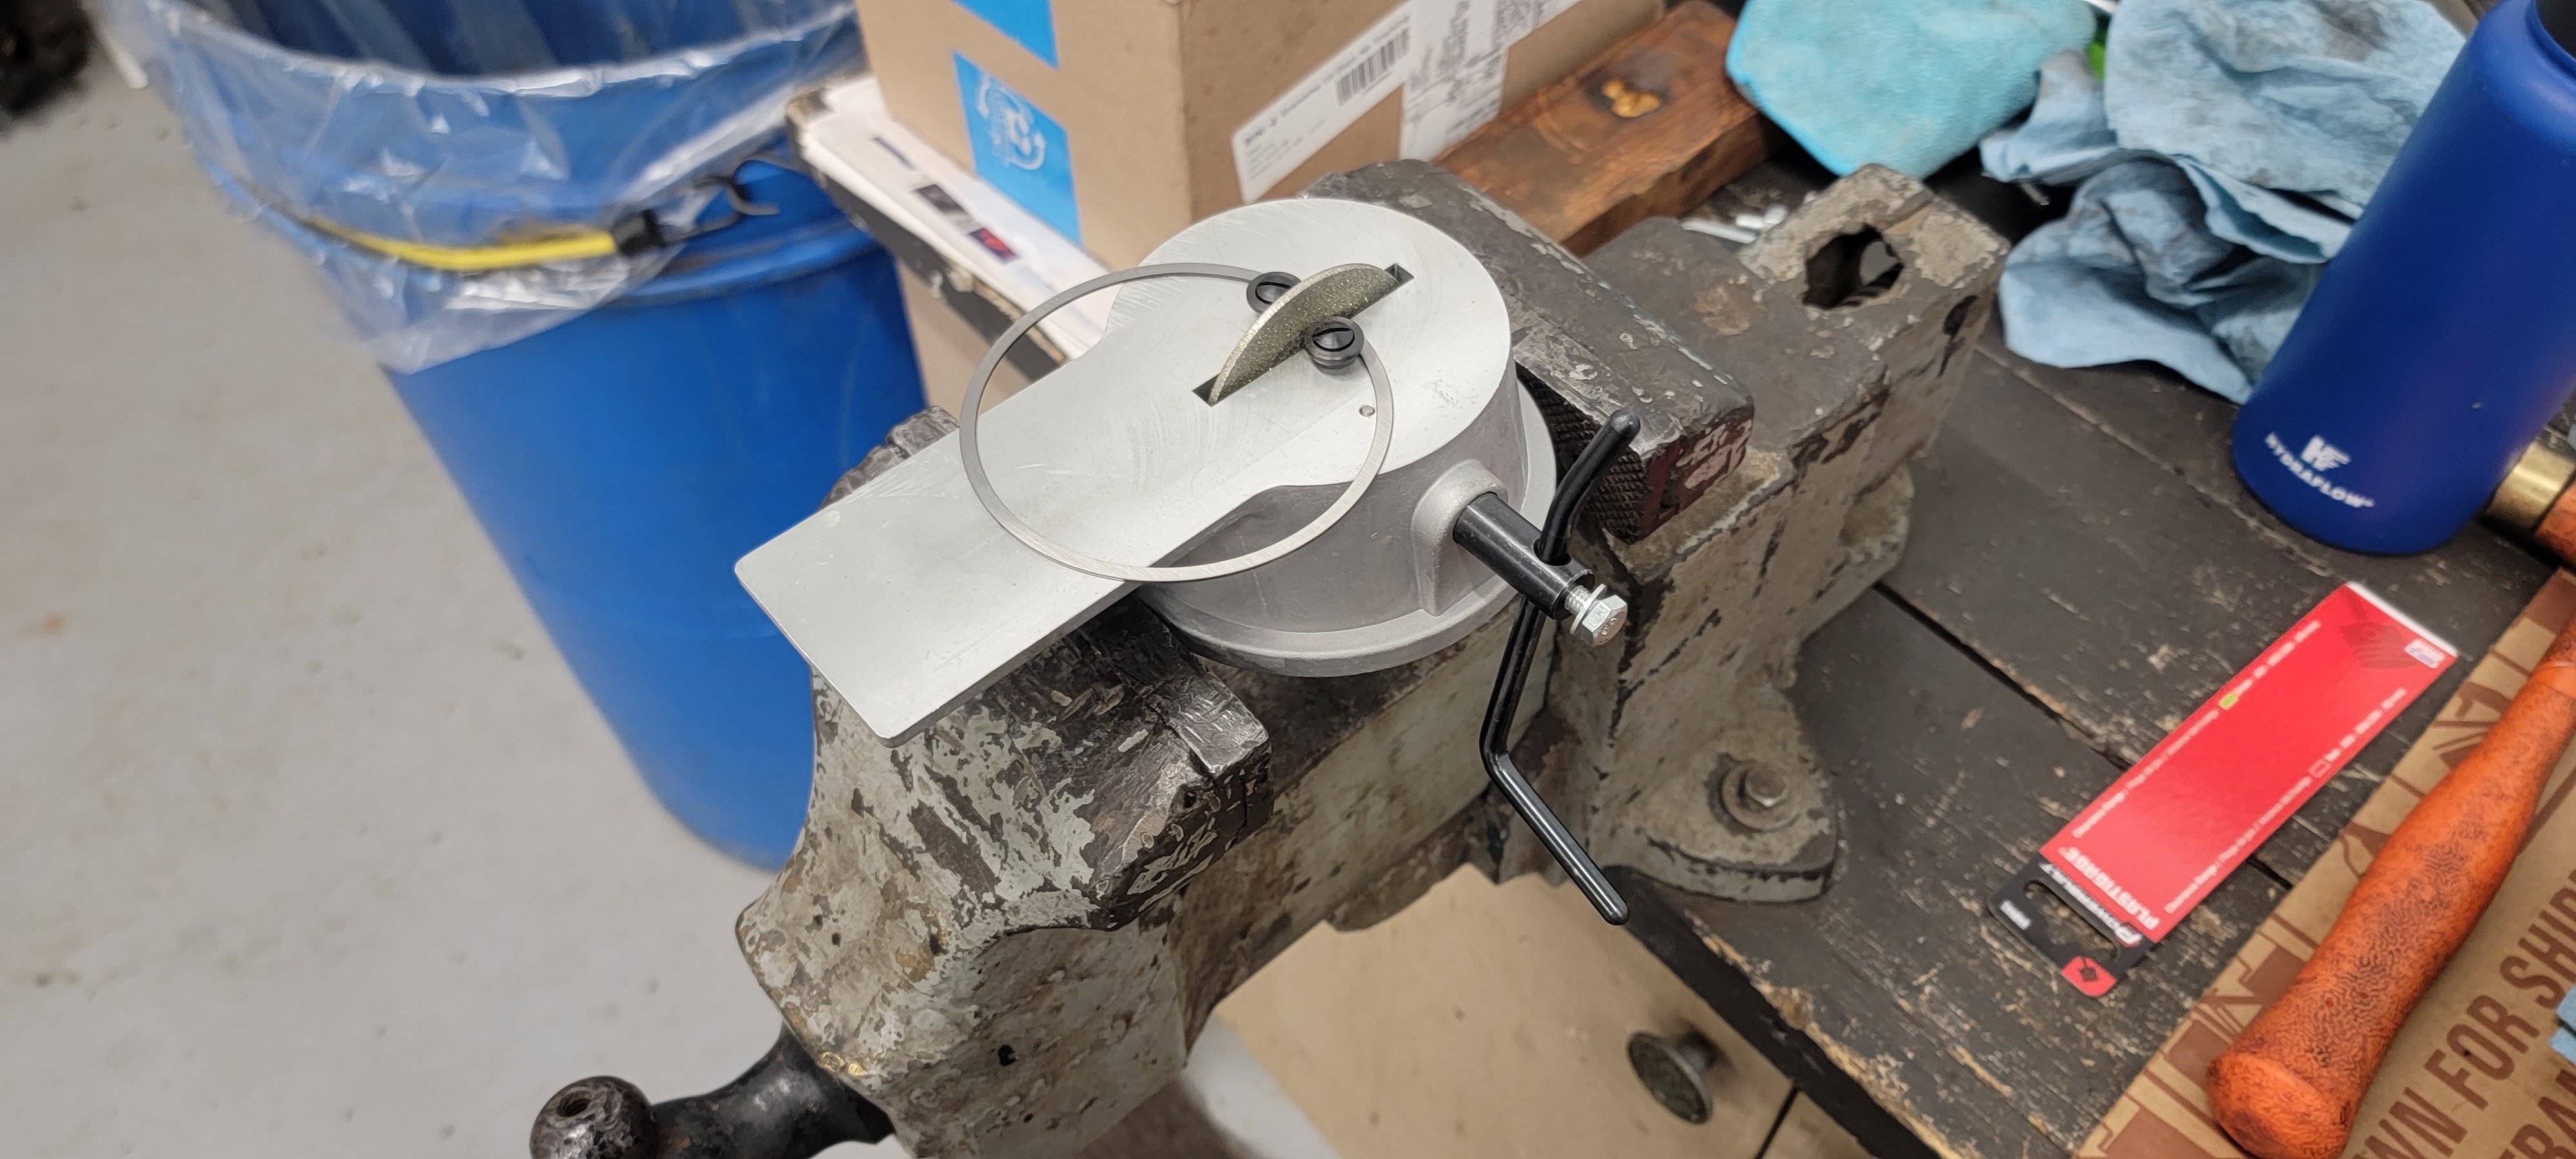
With me unable to do anything with the crank I switched gears and began the tedious process of gaping all my rings. Went with a slightly wider gap then oem spec for boost reasons.
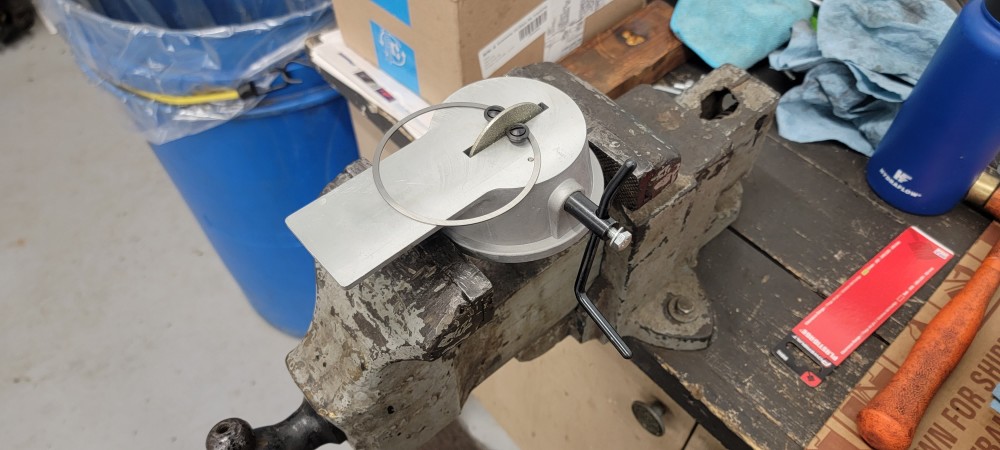
I did have a hard time with my newly purchased ring gaping tool and on my first go around I messed up a top ring for cylinder #1 leaving me with too wide of a gap requiring me to order another set for that piston. Thankfully another ring set was fairly inexpensive. After that one I got a feel for how fast it took off material and the rest of the rings went pretty well.
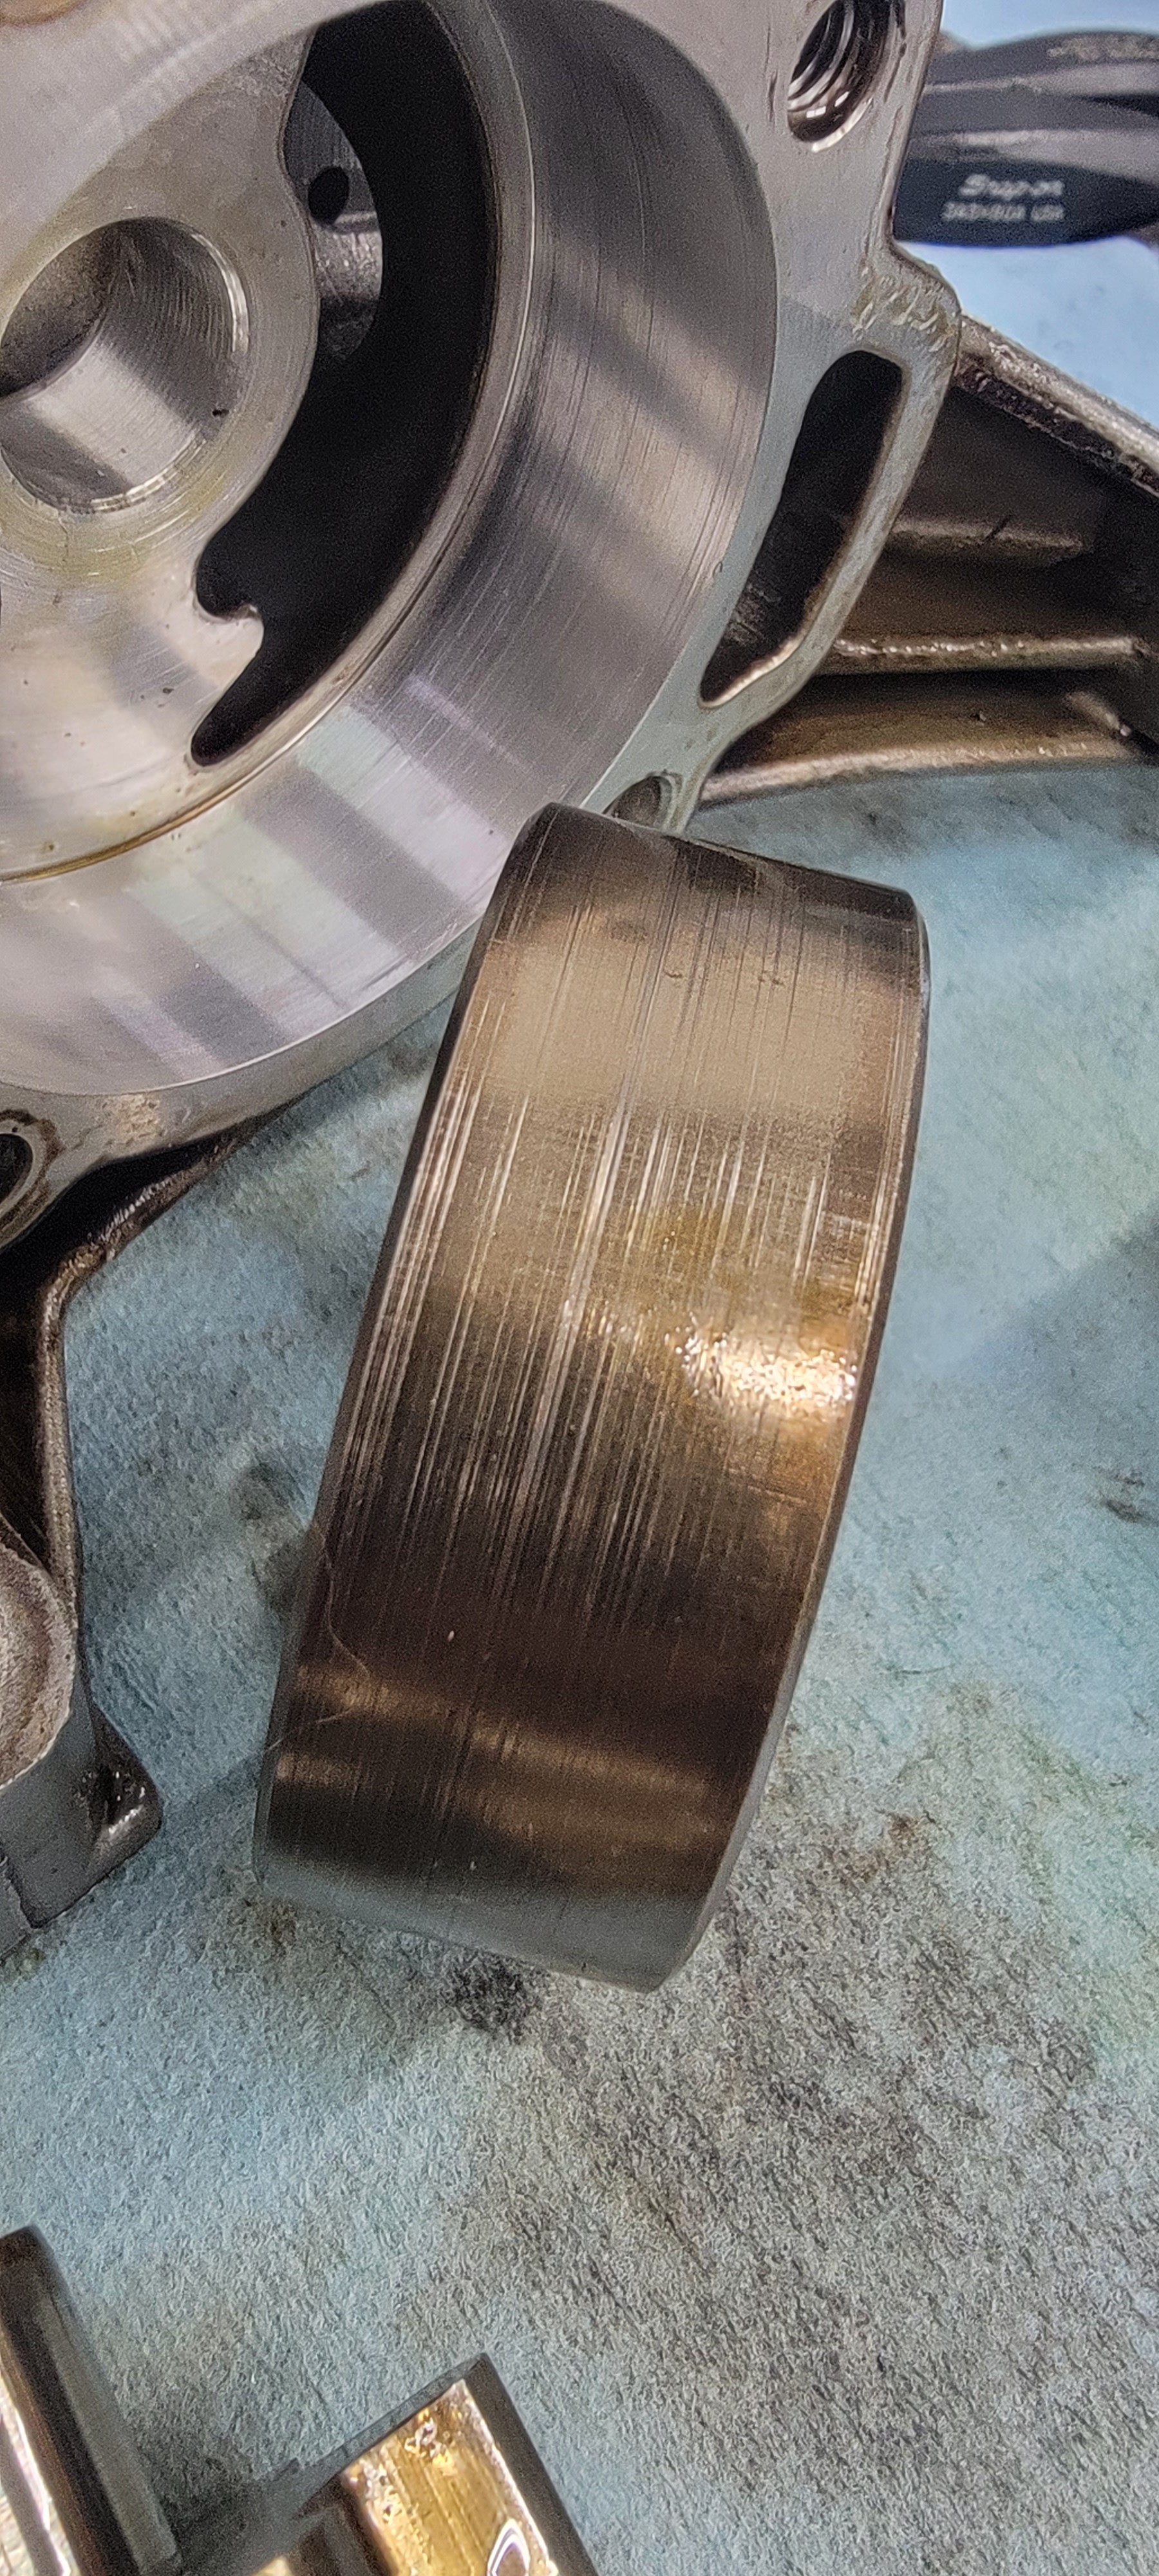
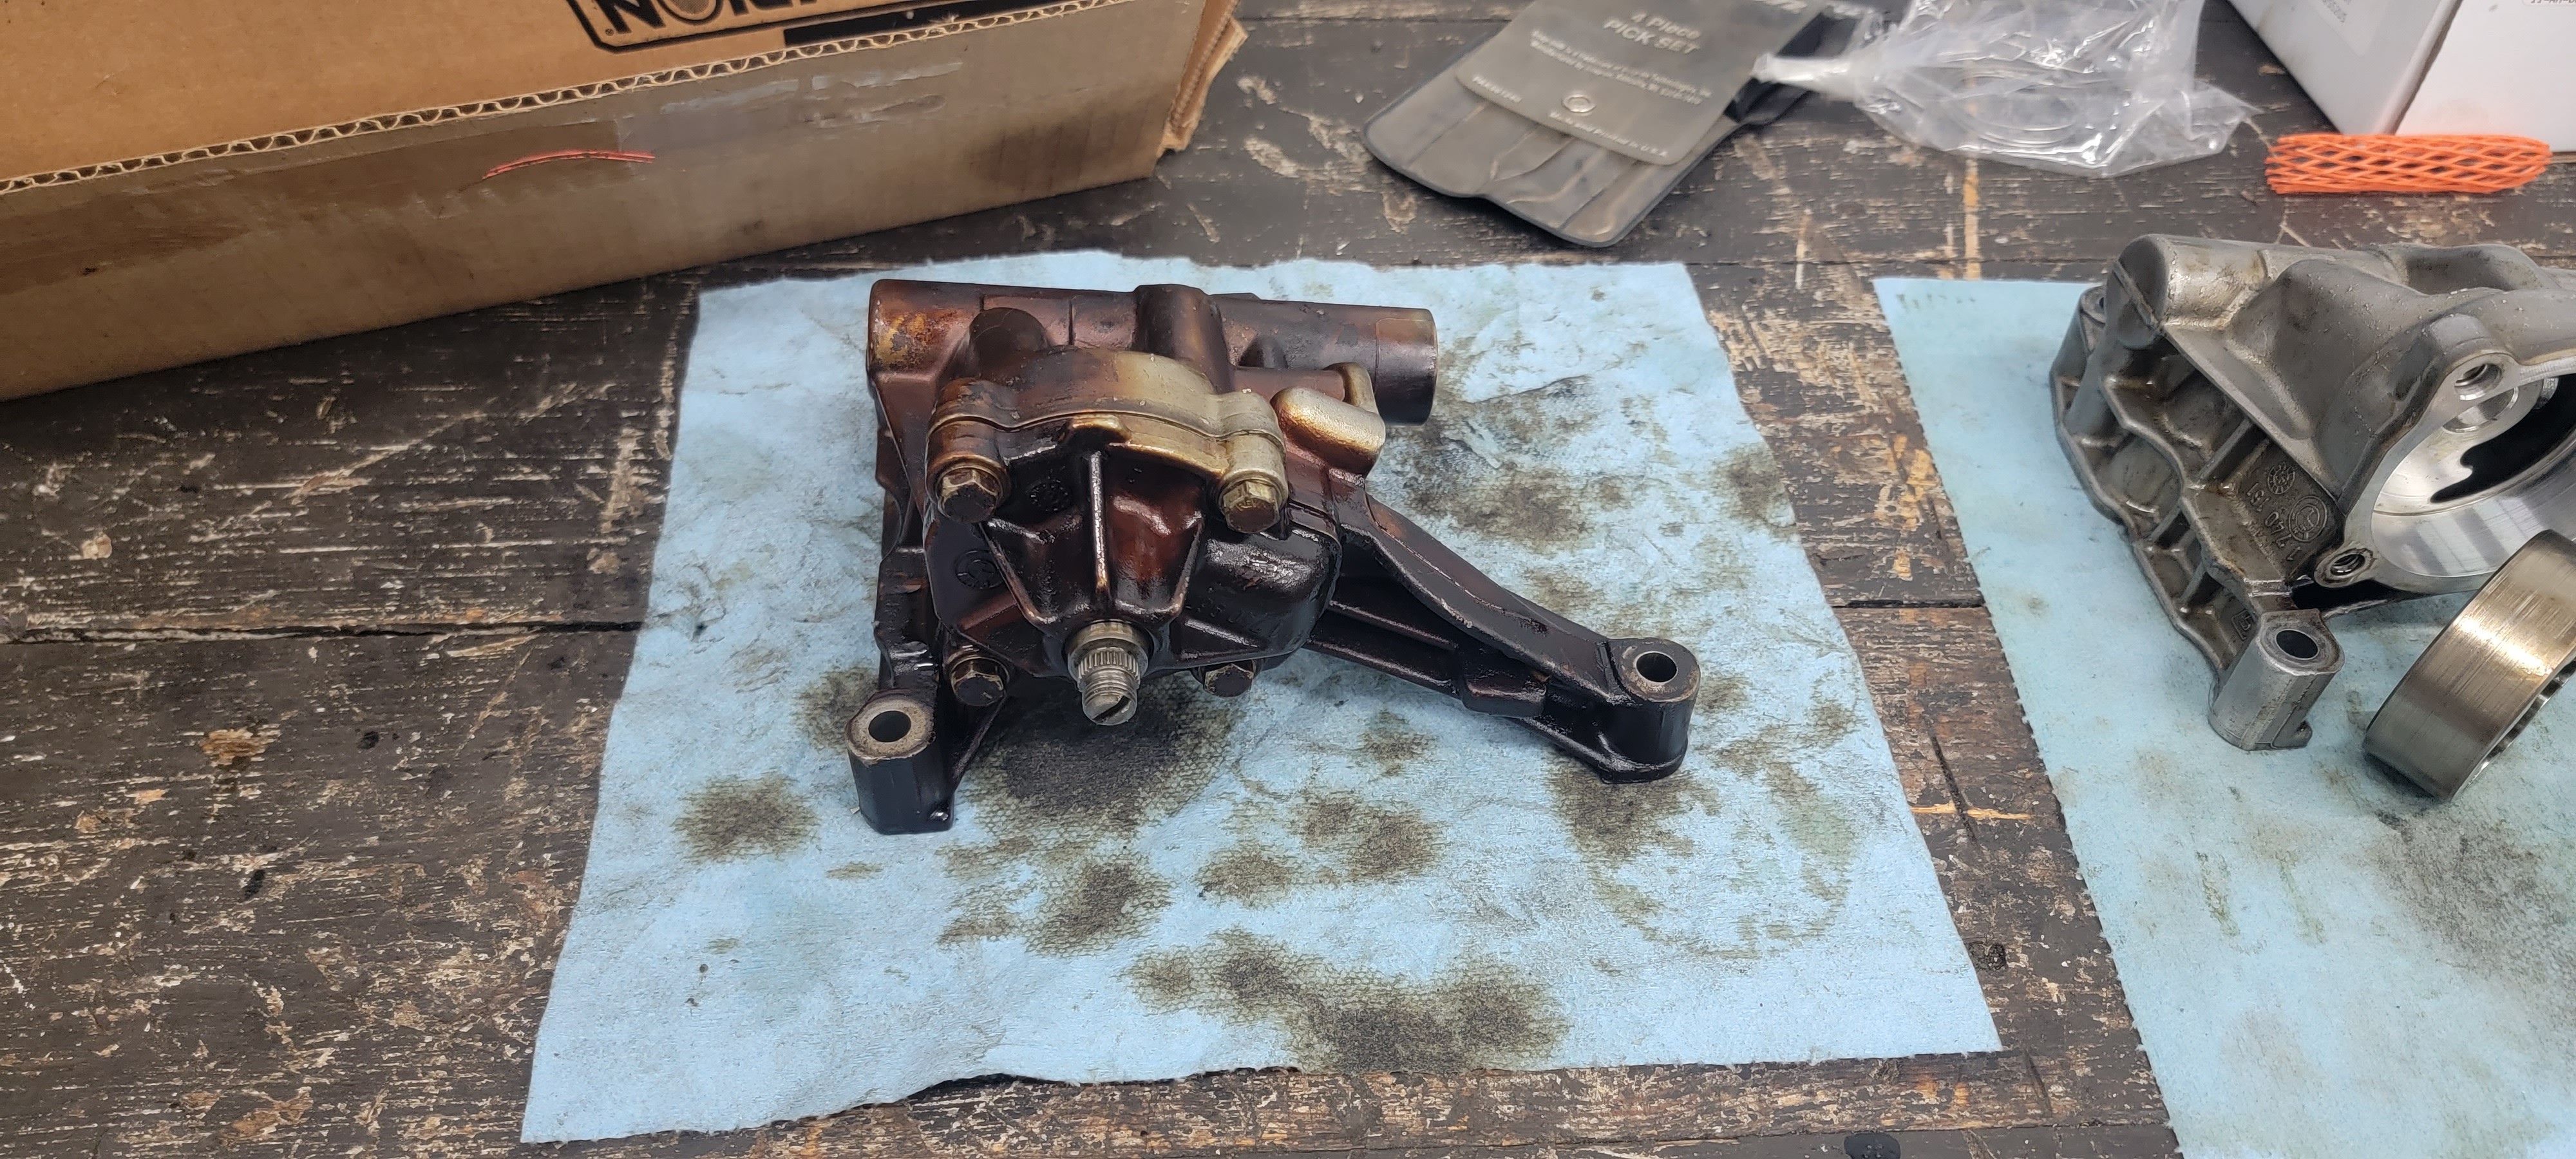
Afterwards I switched gears and worked on getting the oil pump ready to go. Original plan was to reuse the oil pump from the blown s52 but after pulling the rotor out I found there to be quite a bit of scoring on both surfaces making the pump unusable.
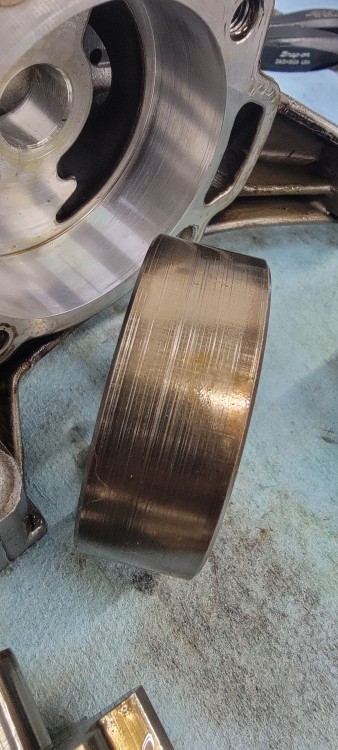
Dug out the oil pump from the m52 block and found everything to be in much better shape and score free!
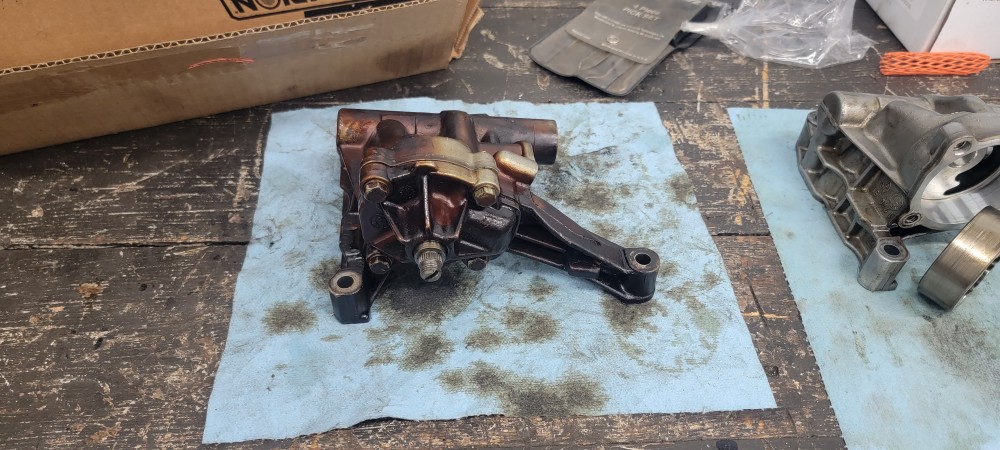
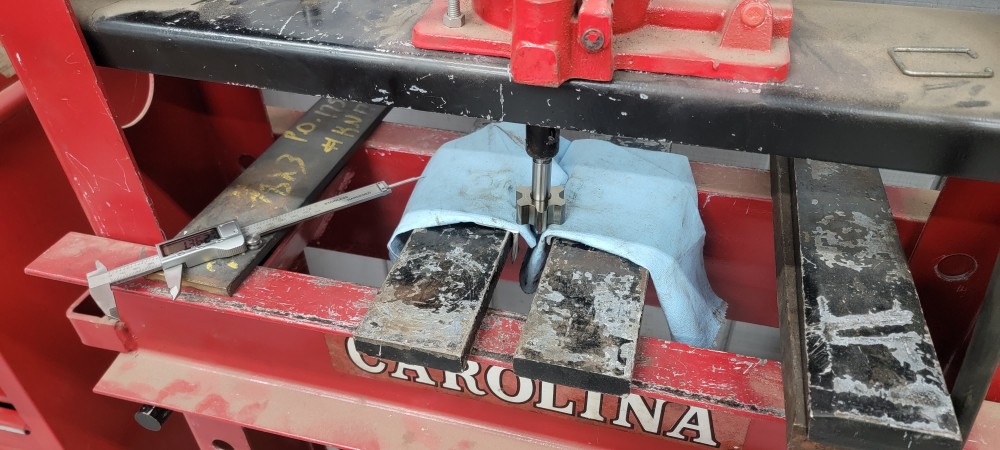
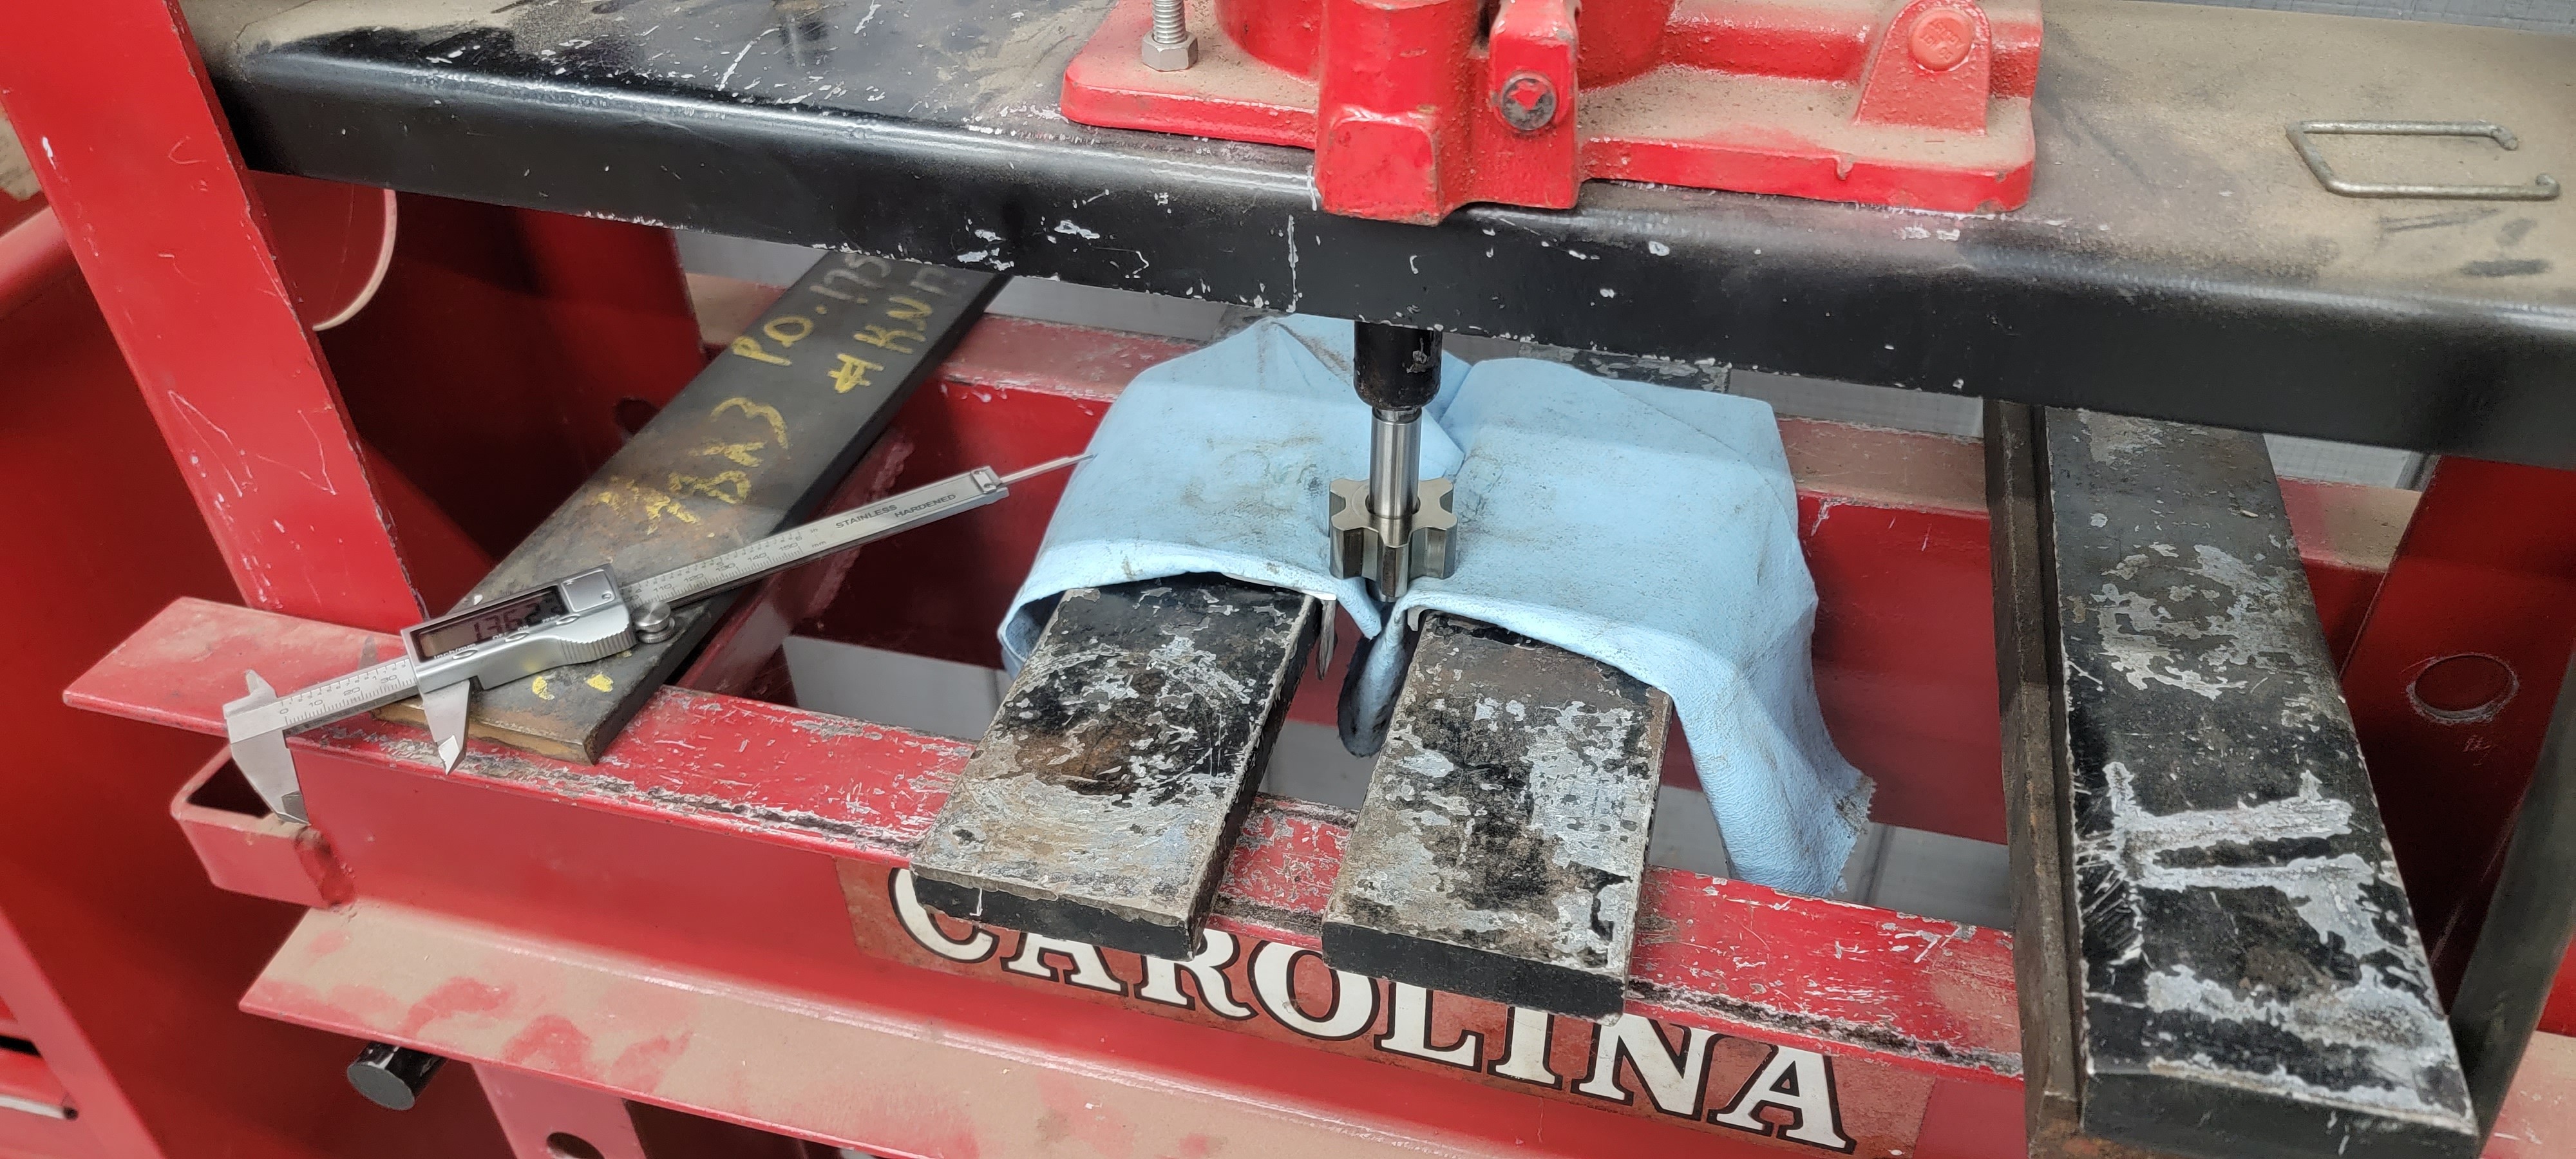
Purchased the Achilles upgraded oil pump shaft kit to go along with it. Went ahead and got the old shaft pressed out and the new shaft installed and set at the correct distance.
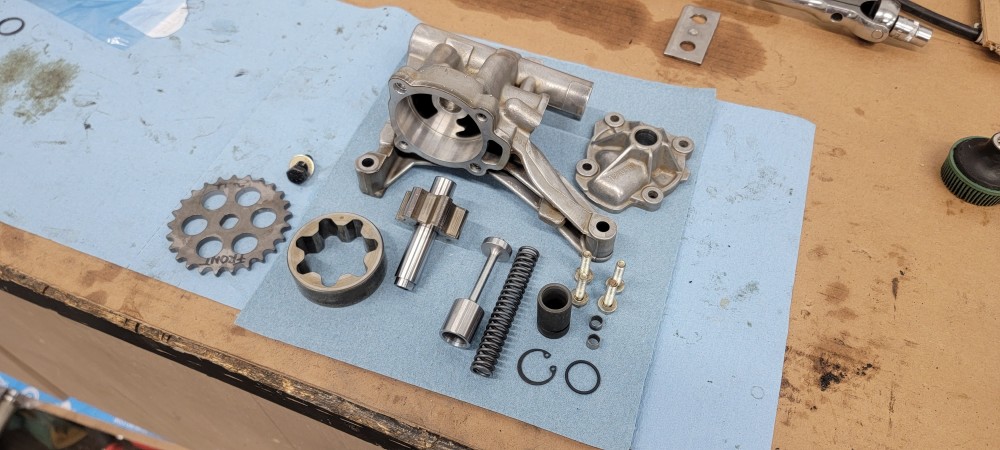
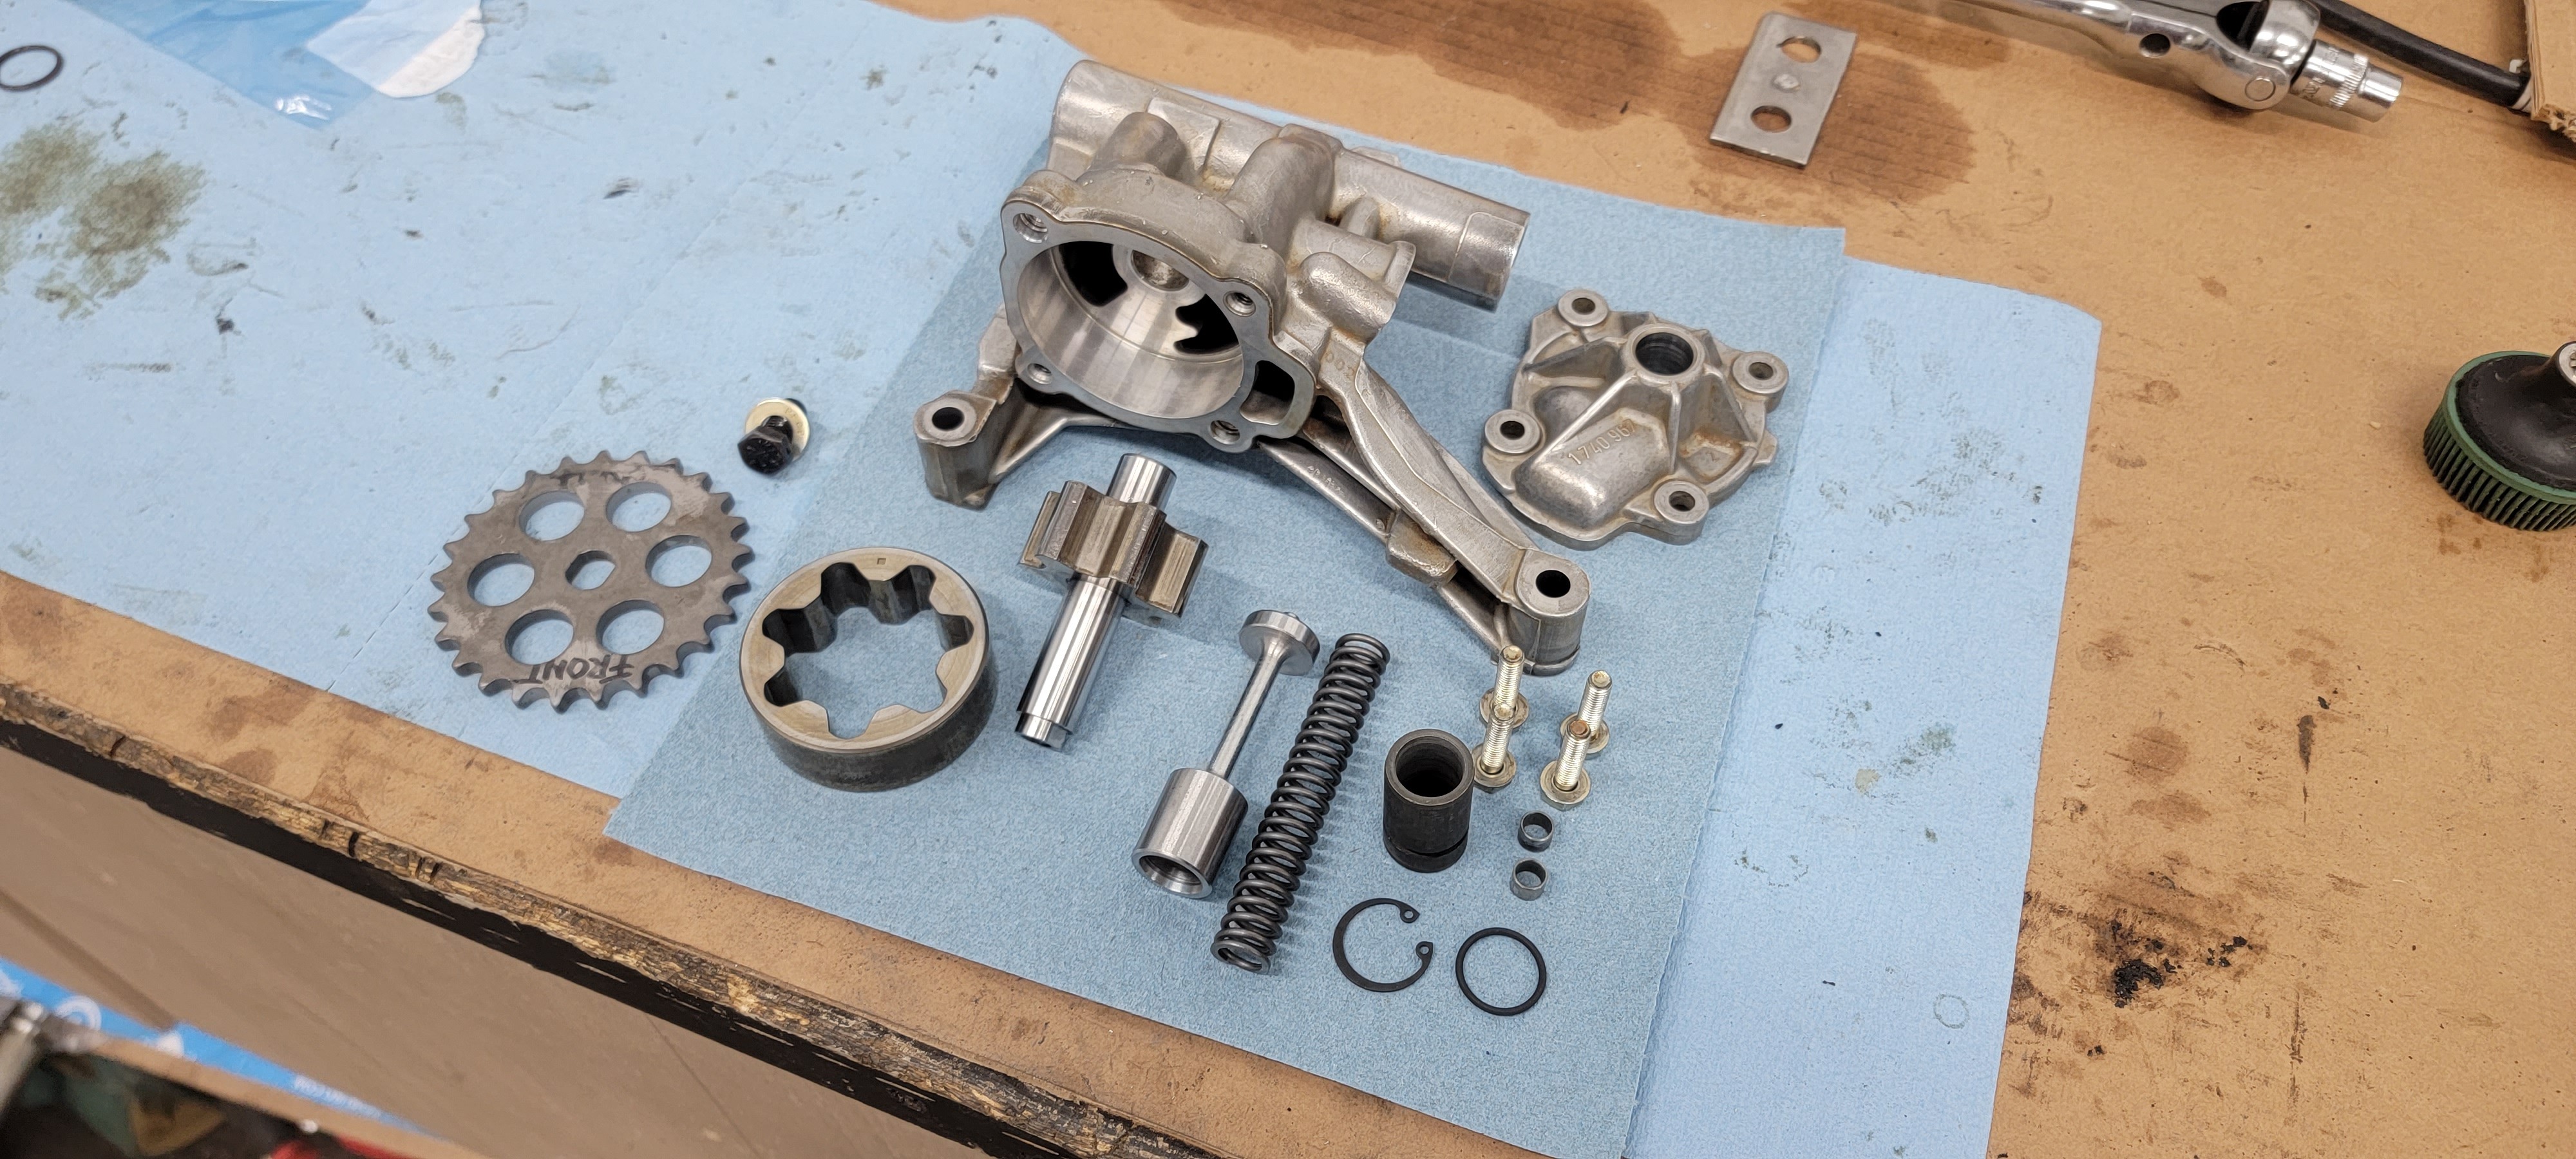
Also took the time to clean up the pump housing a bit and remove all the oil staining. Decided while I was in there I might as well do a full rebuild of the pump with an all new control valve, spring and rubber washer.
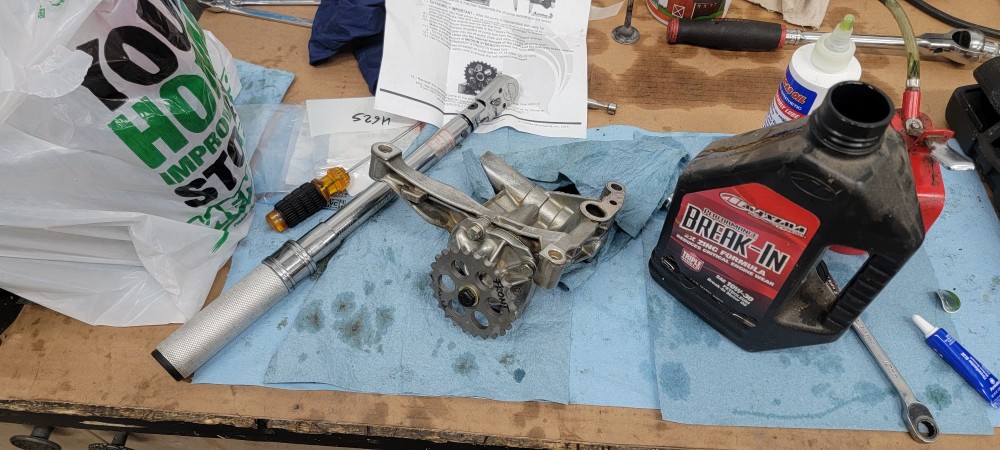
Once everything was lubed up and installed I got the pump primed and ready to go.
As for now that's all the progress I've managed to get done. Hoping to get the crank back to the machinist by Wednesday and maybe see it back by the end of the week or early next week so I can really get the ball rolling.
-
the one and only e30 s52 engine swapLast Wednesday I took a drive down to Chicago and finally picked up the car!
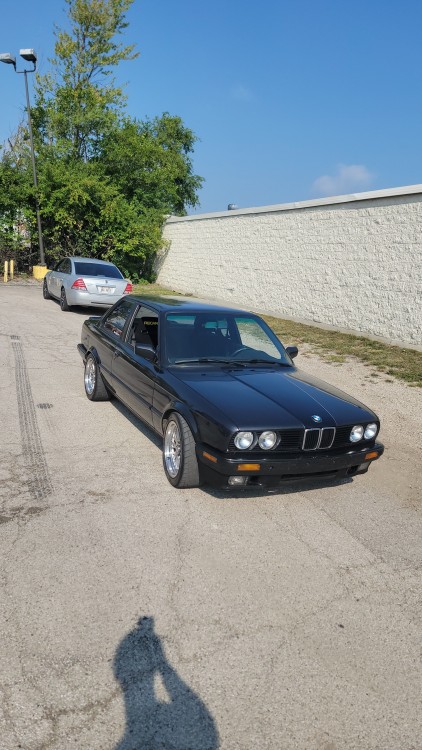
The dyno tuning had been done a week and a half prior to that but they wanted to further dial it in on the street and work out any little drivability issues it had. As for power numbers, on pump gas it made 401 whp (not sure on torque numbers for that). As for E85 though, the numbers were a bit more shocking... in a good way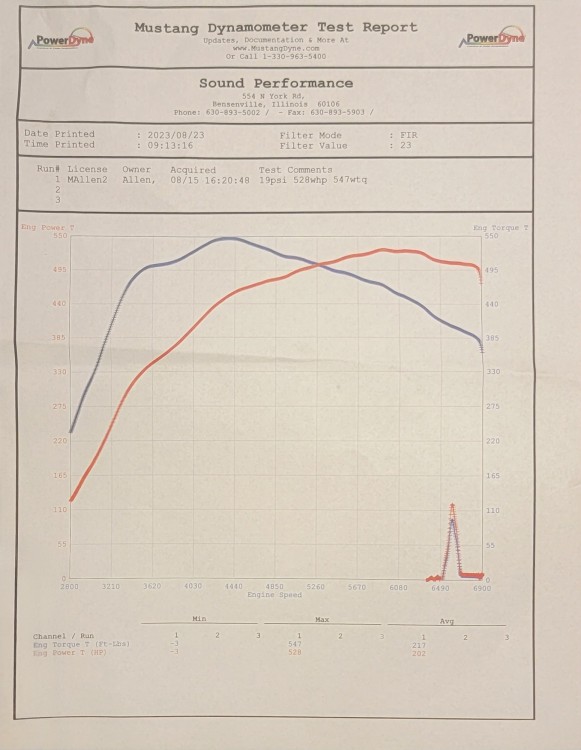
I did end up driving it back from Chicago and besides the 105 degree weather I baked in, it was a pretty enjoyable drive home. The car felt great and the engine didn't skip a beat. I will say though that the clutch is a little more difficult then it use to be. Especially when getting the car rolling in first gear. The one in there is technically only rated for like 480 lb ft torque so we'll see how far that gets me. There are a few things I wanna take care of on it like an oil change and address a few small things but other then that very excited to have the car back to enjoy the little bit of warm weather we have left.
-
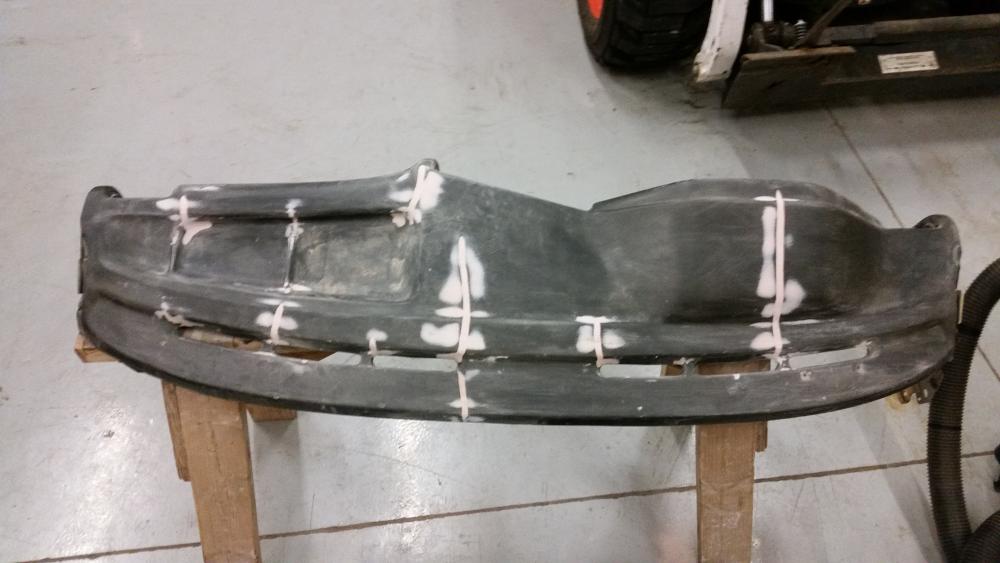
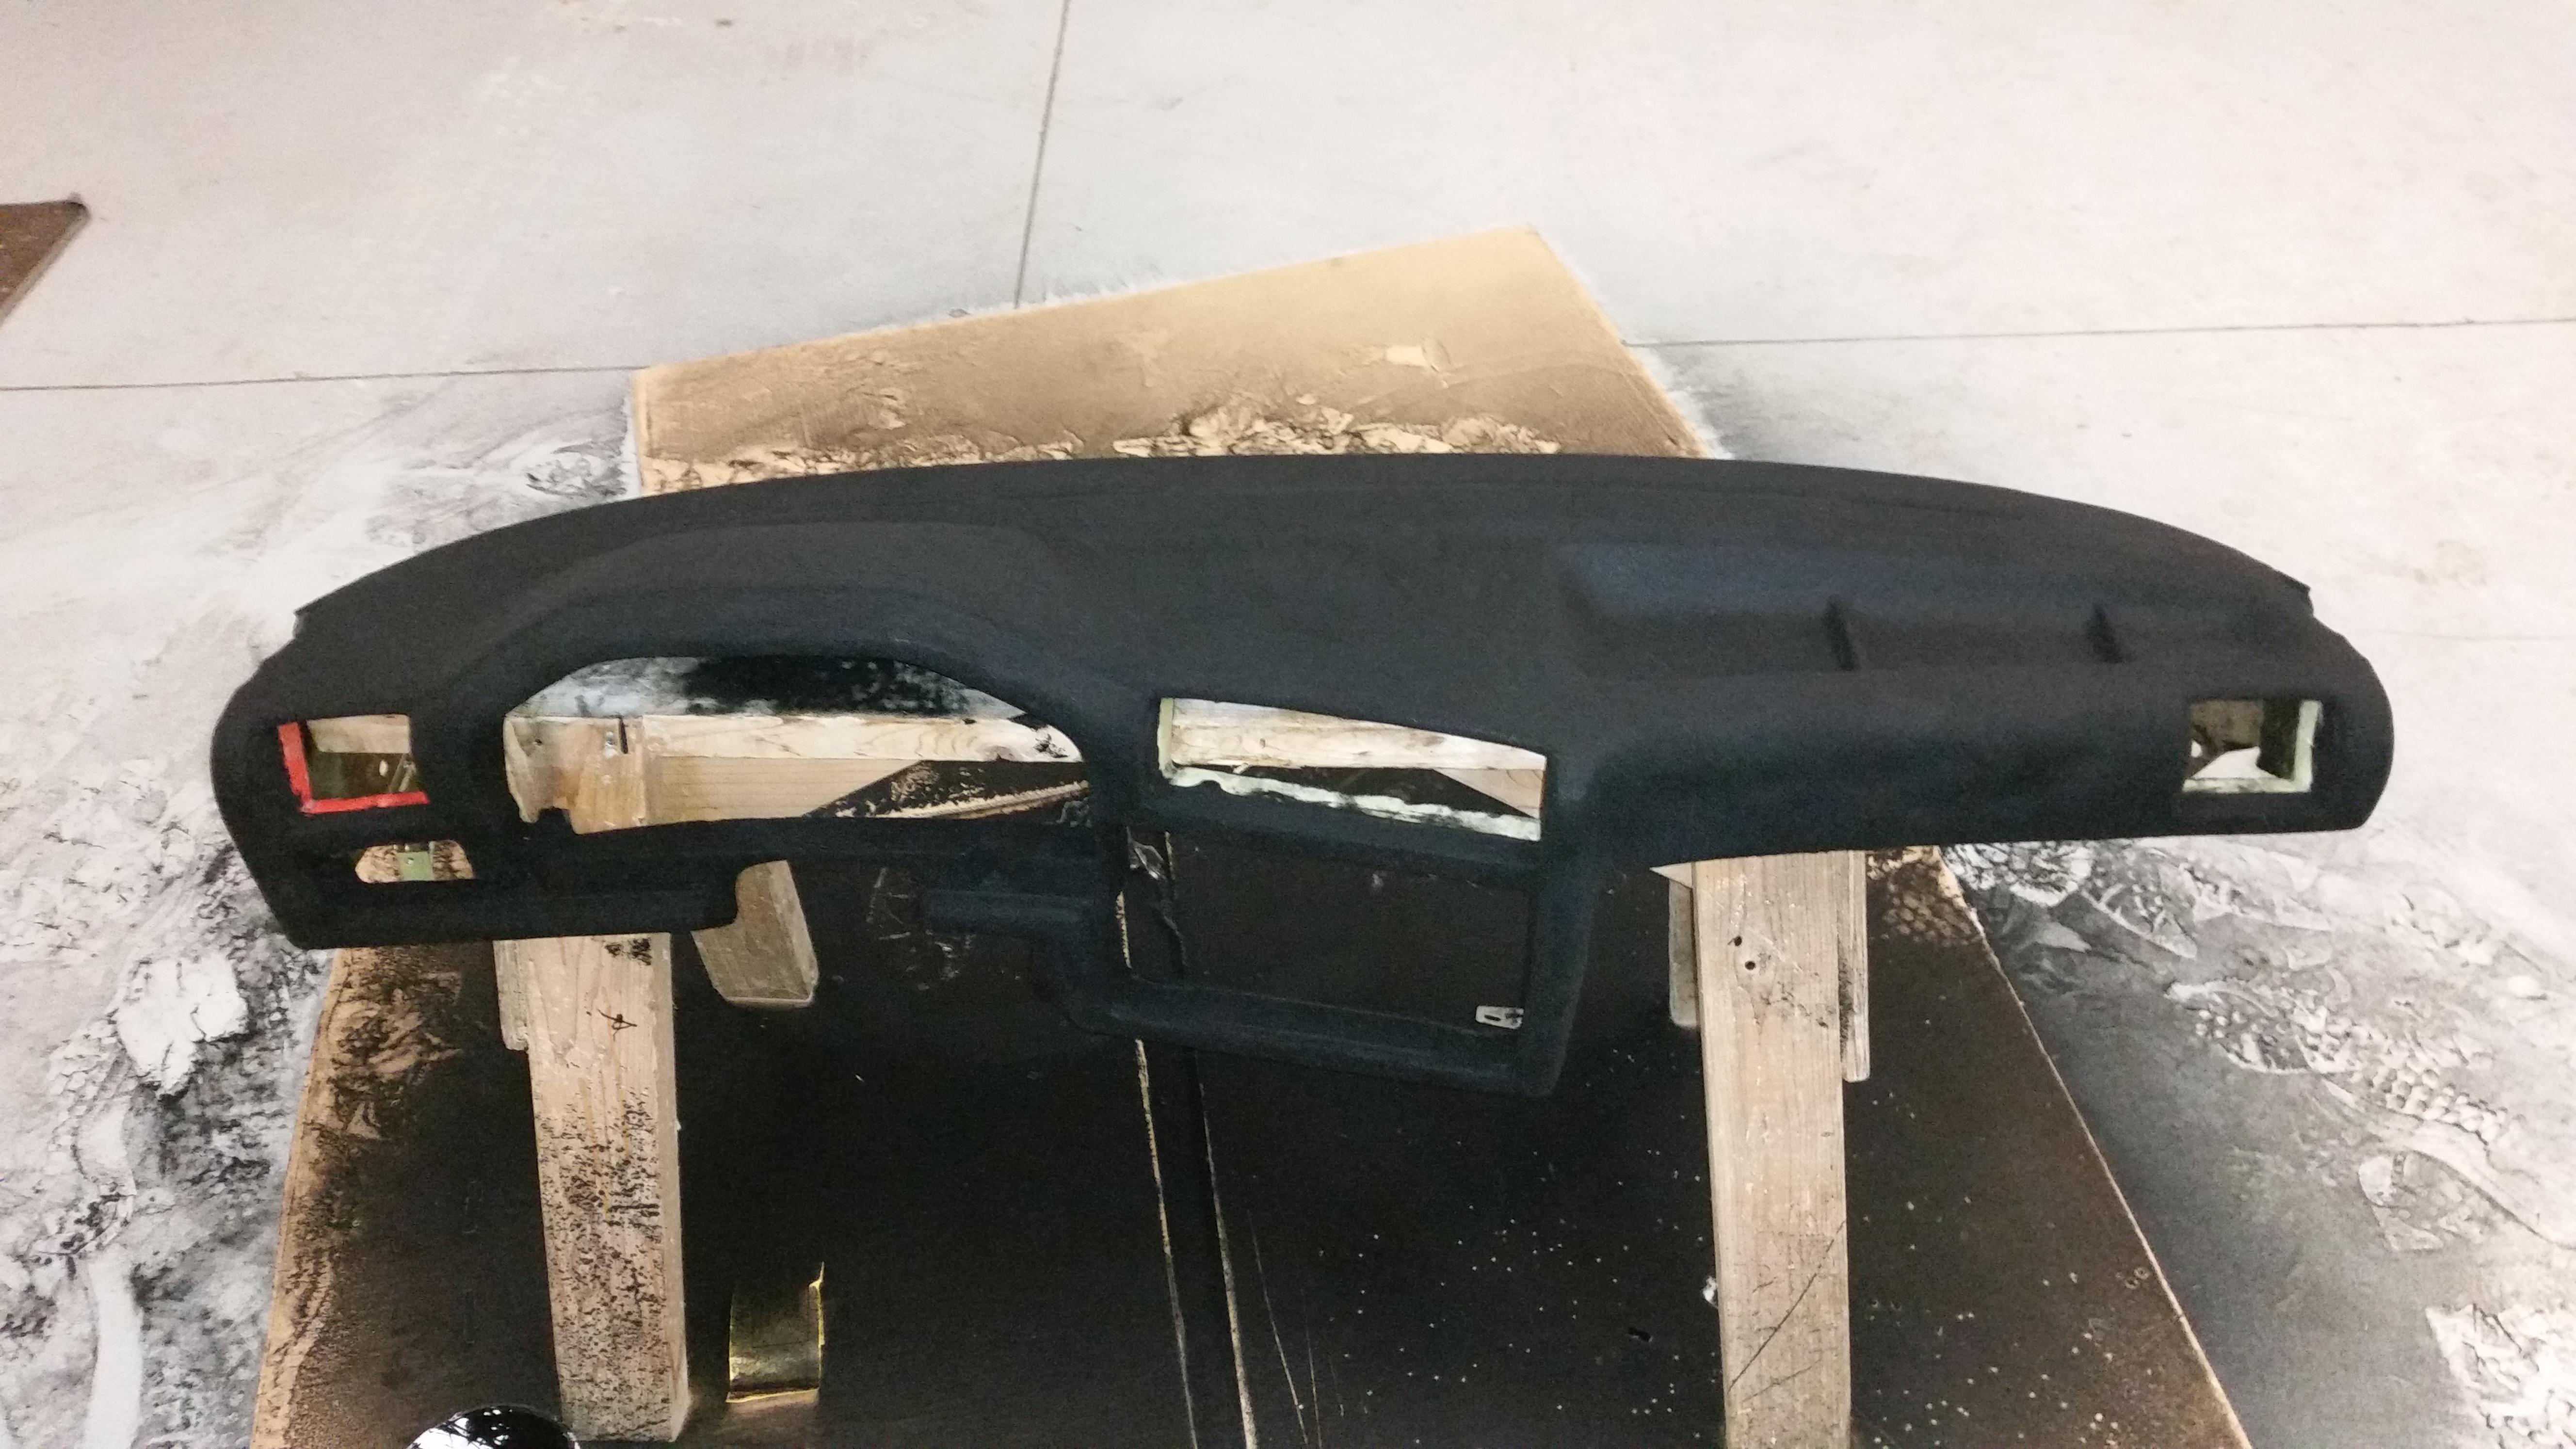
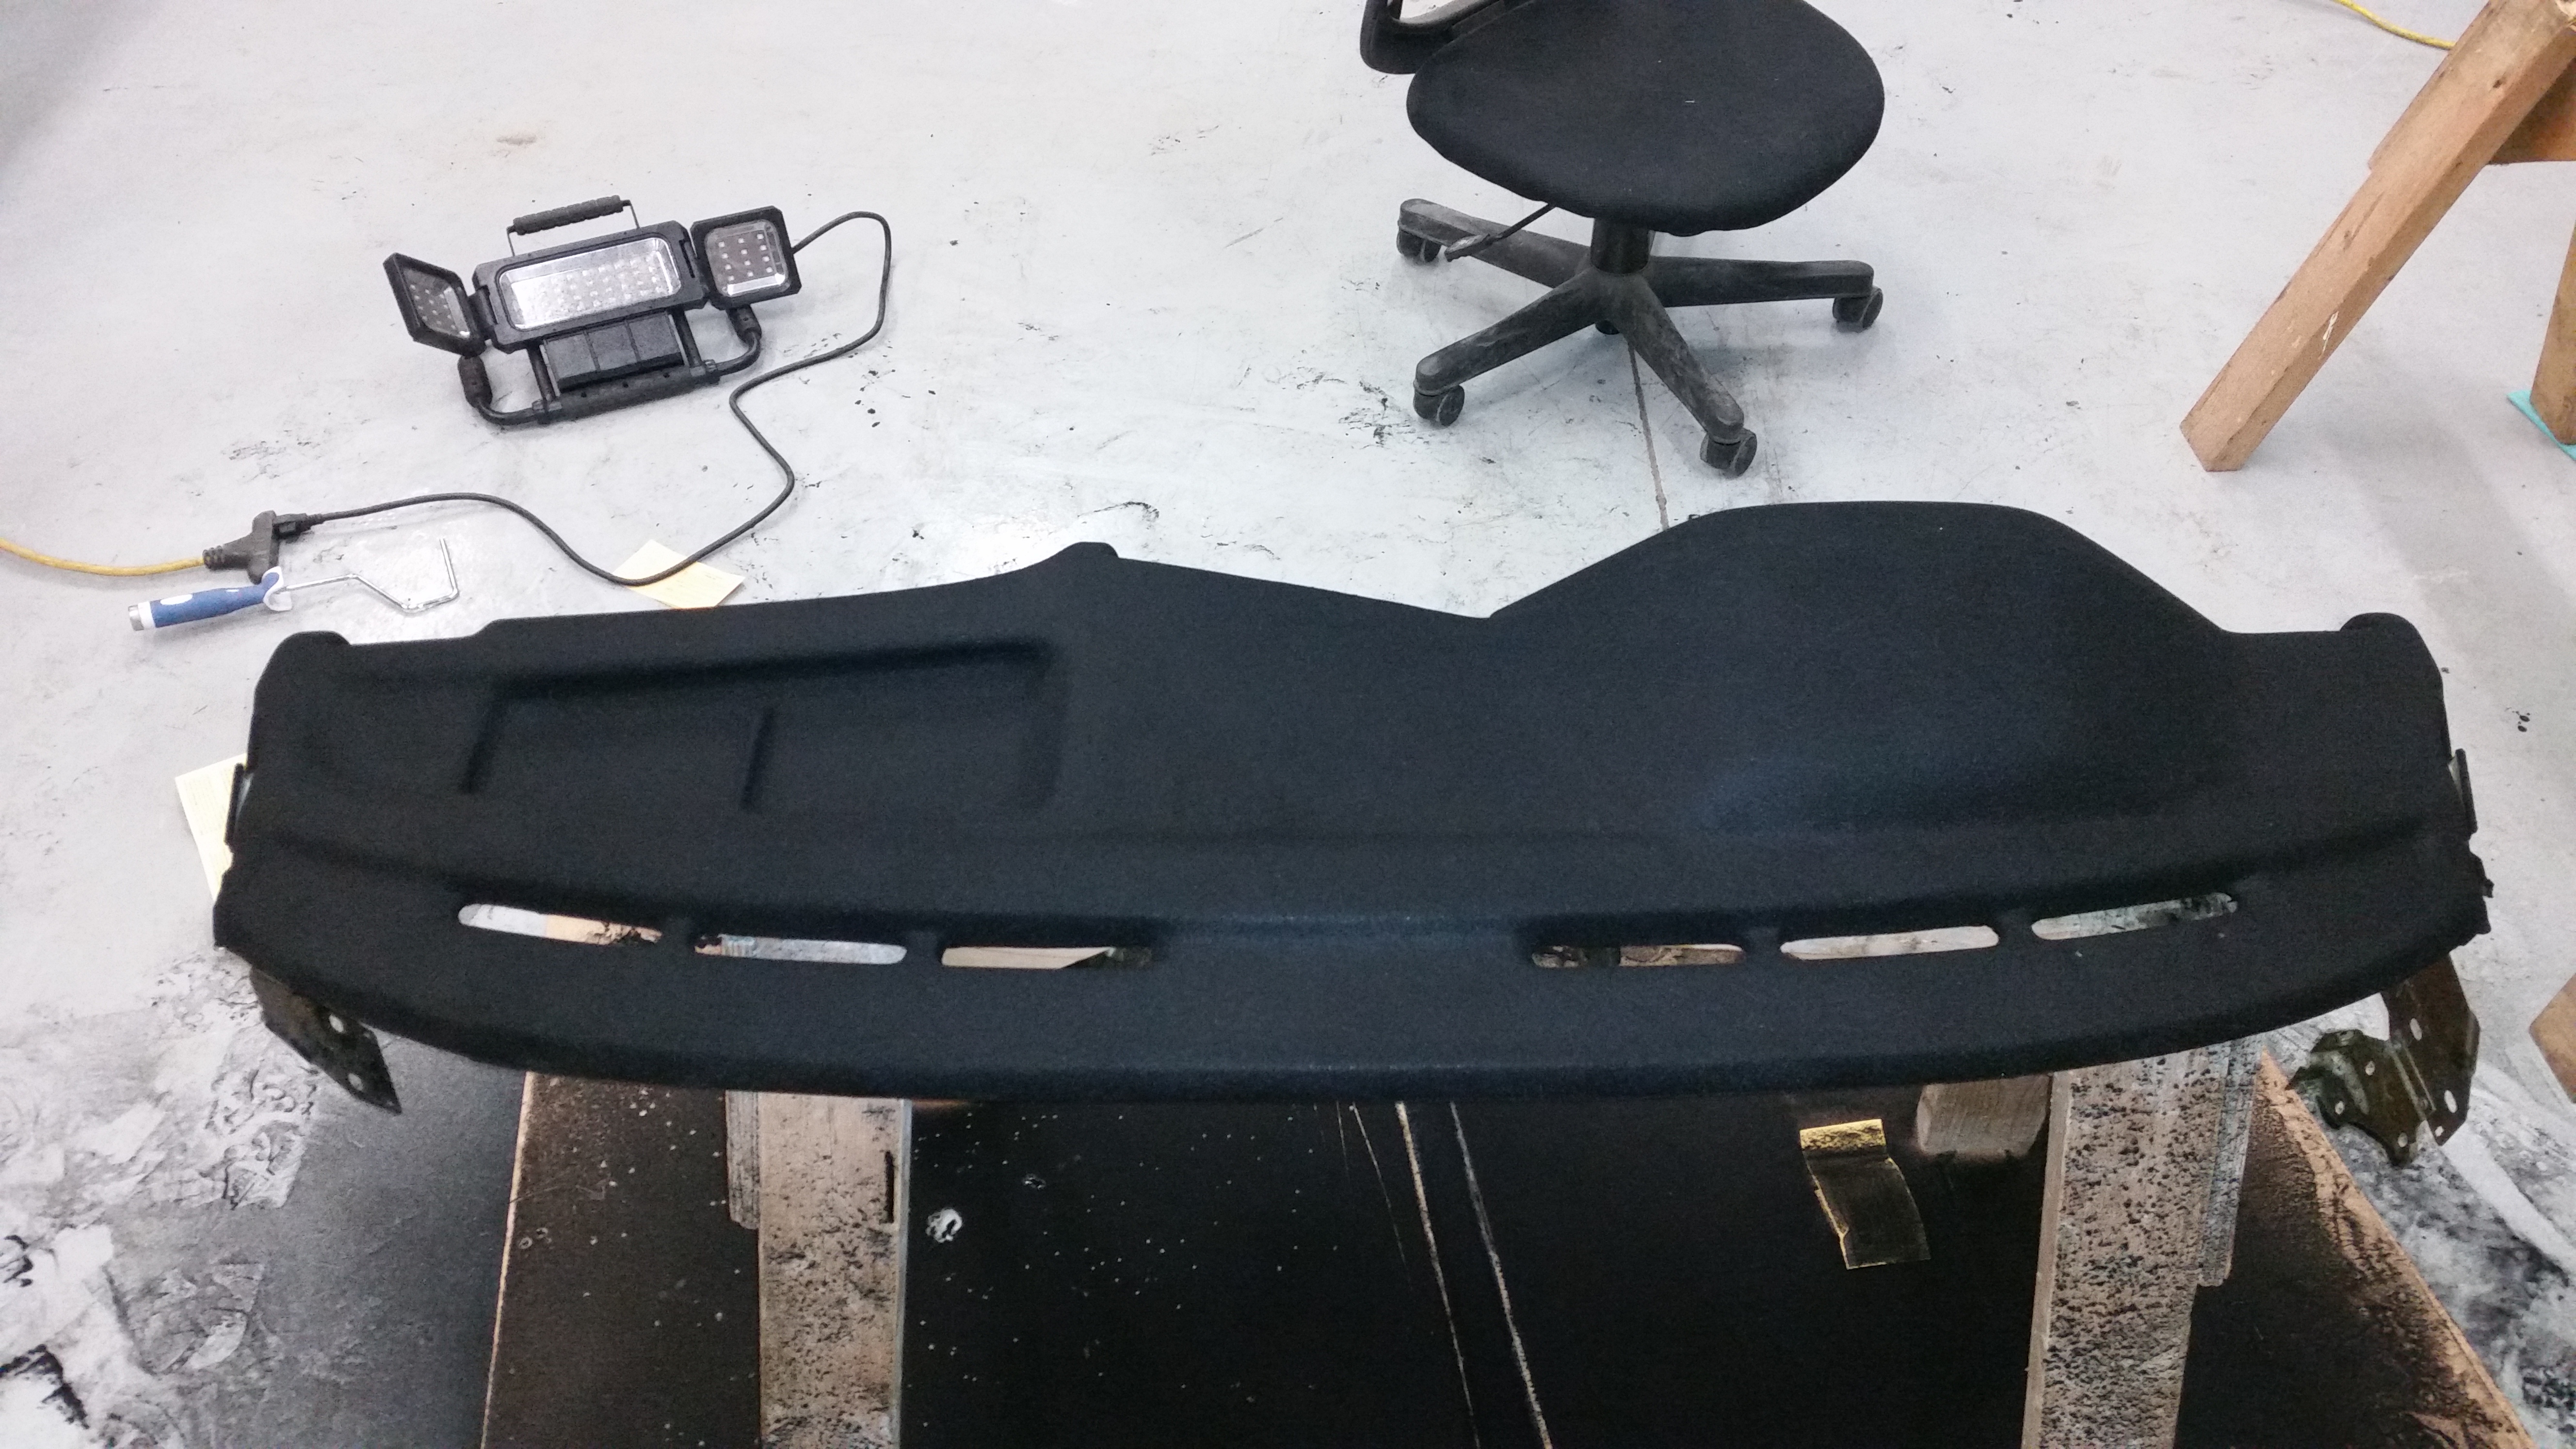
the one and only e30 s52 engine swapI'll start off right away by saying that dash repair, is not as easy as it seems. I spent right around 8 hours total body filling and sanding the shit out of this thing. Many times I came upon more small cracks I hadn't noticed before and had to go back and open them up and fix em. All in all it ended up turning out really great and I couldn't be more pleased.
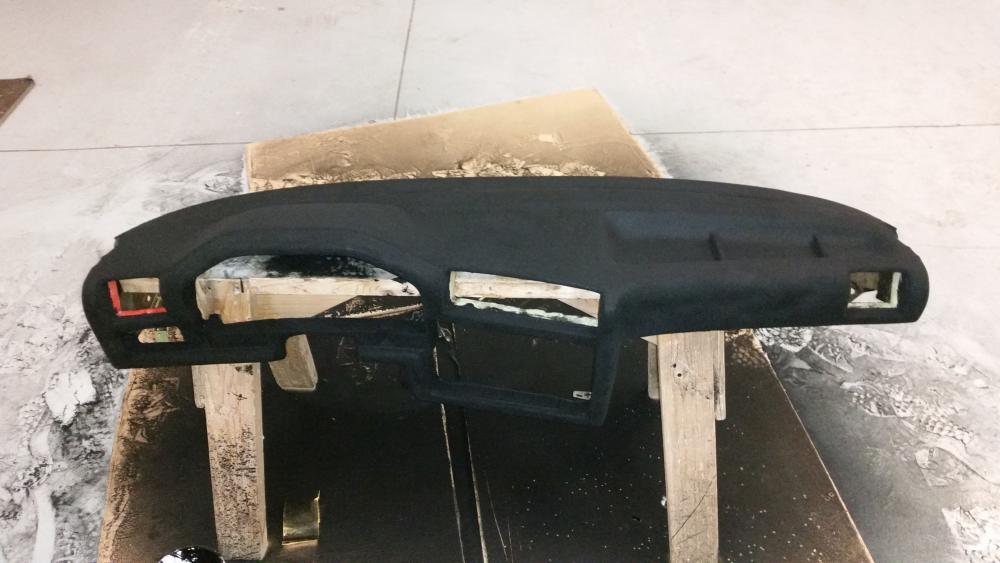
The dash flocking was pretty straight forward as there is a pretty well written instructions that comes with the kit. I would say the one and only struggle about the hole process was the amount of time I had to get it done. You get 15 minutes total to get the black undercoat and the fibers on. Luckily I had a friend help me with the painting and so it took us about 10 minutes to get the painting done and the last few minutes to frantically get the fibers blown on before the undercoat dried. I went overboard with the fibers as the kit advises u to in order to cover all the areas. The cure takes about 15 - 17 hours before u can shake the excess fibers off and another 72 hours to a week before u can install it back in the car.
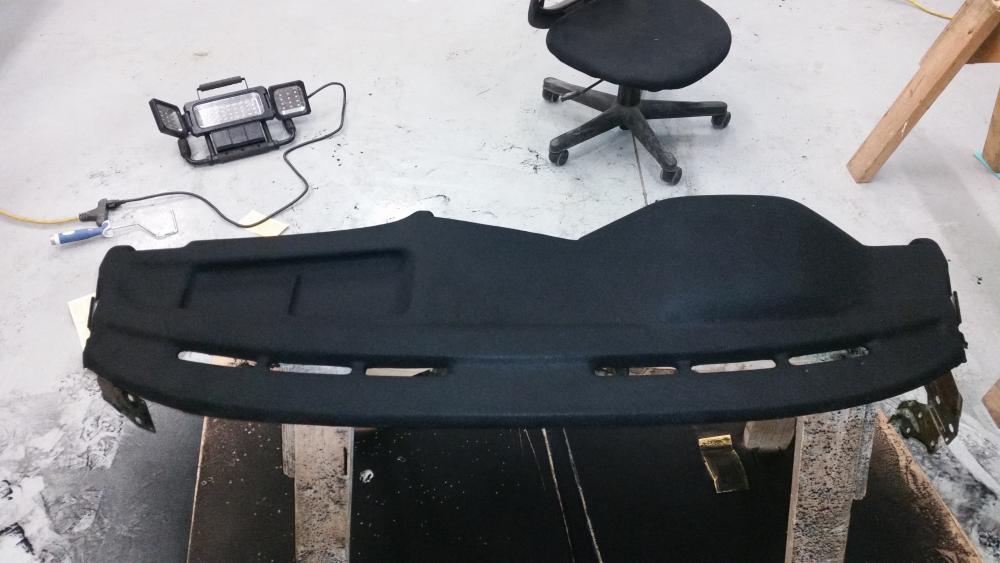
We'll see how she looks tomorrow once I shake it off.
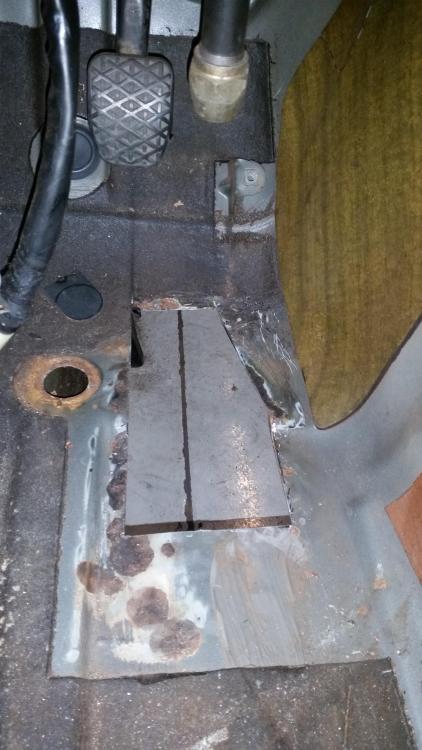
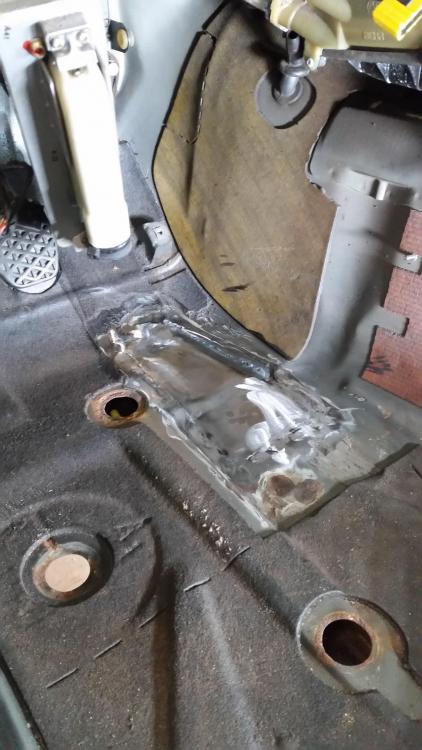
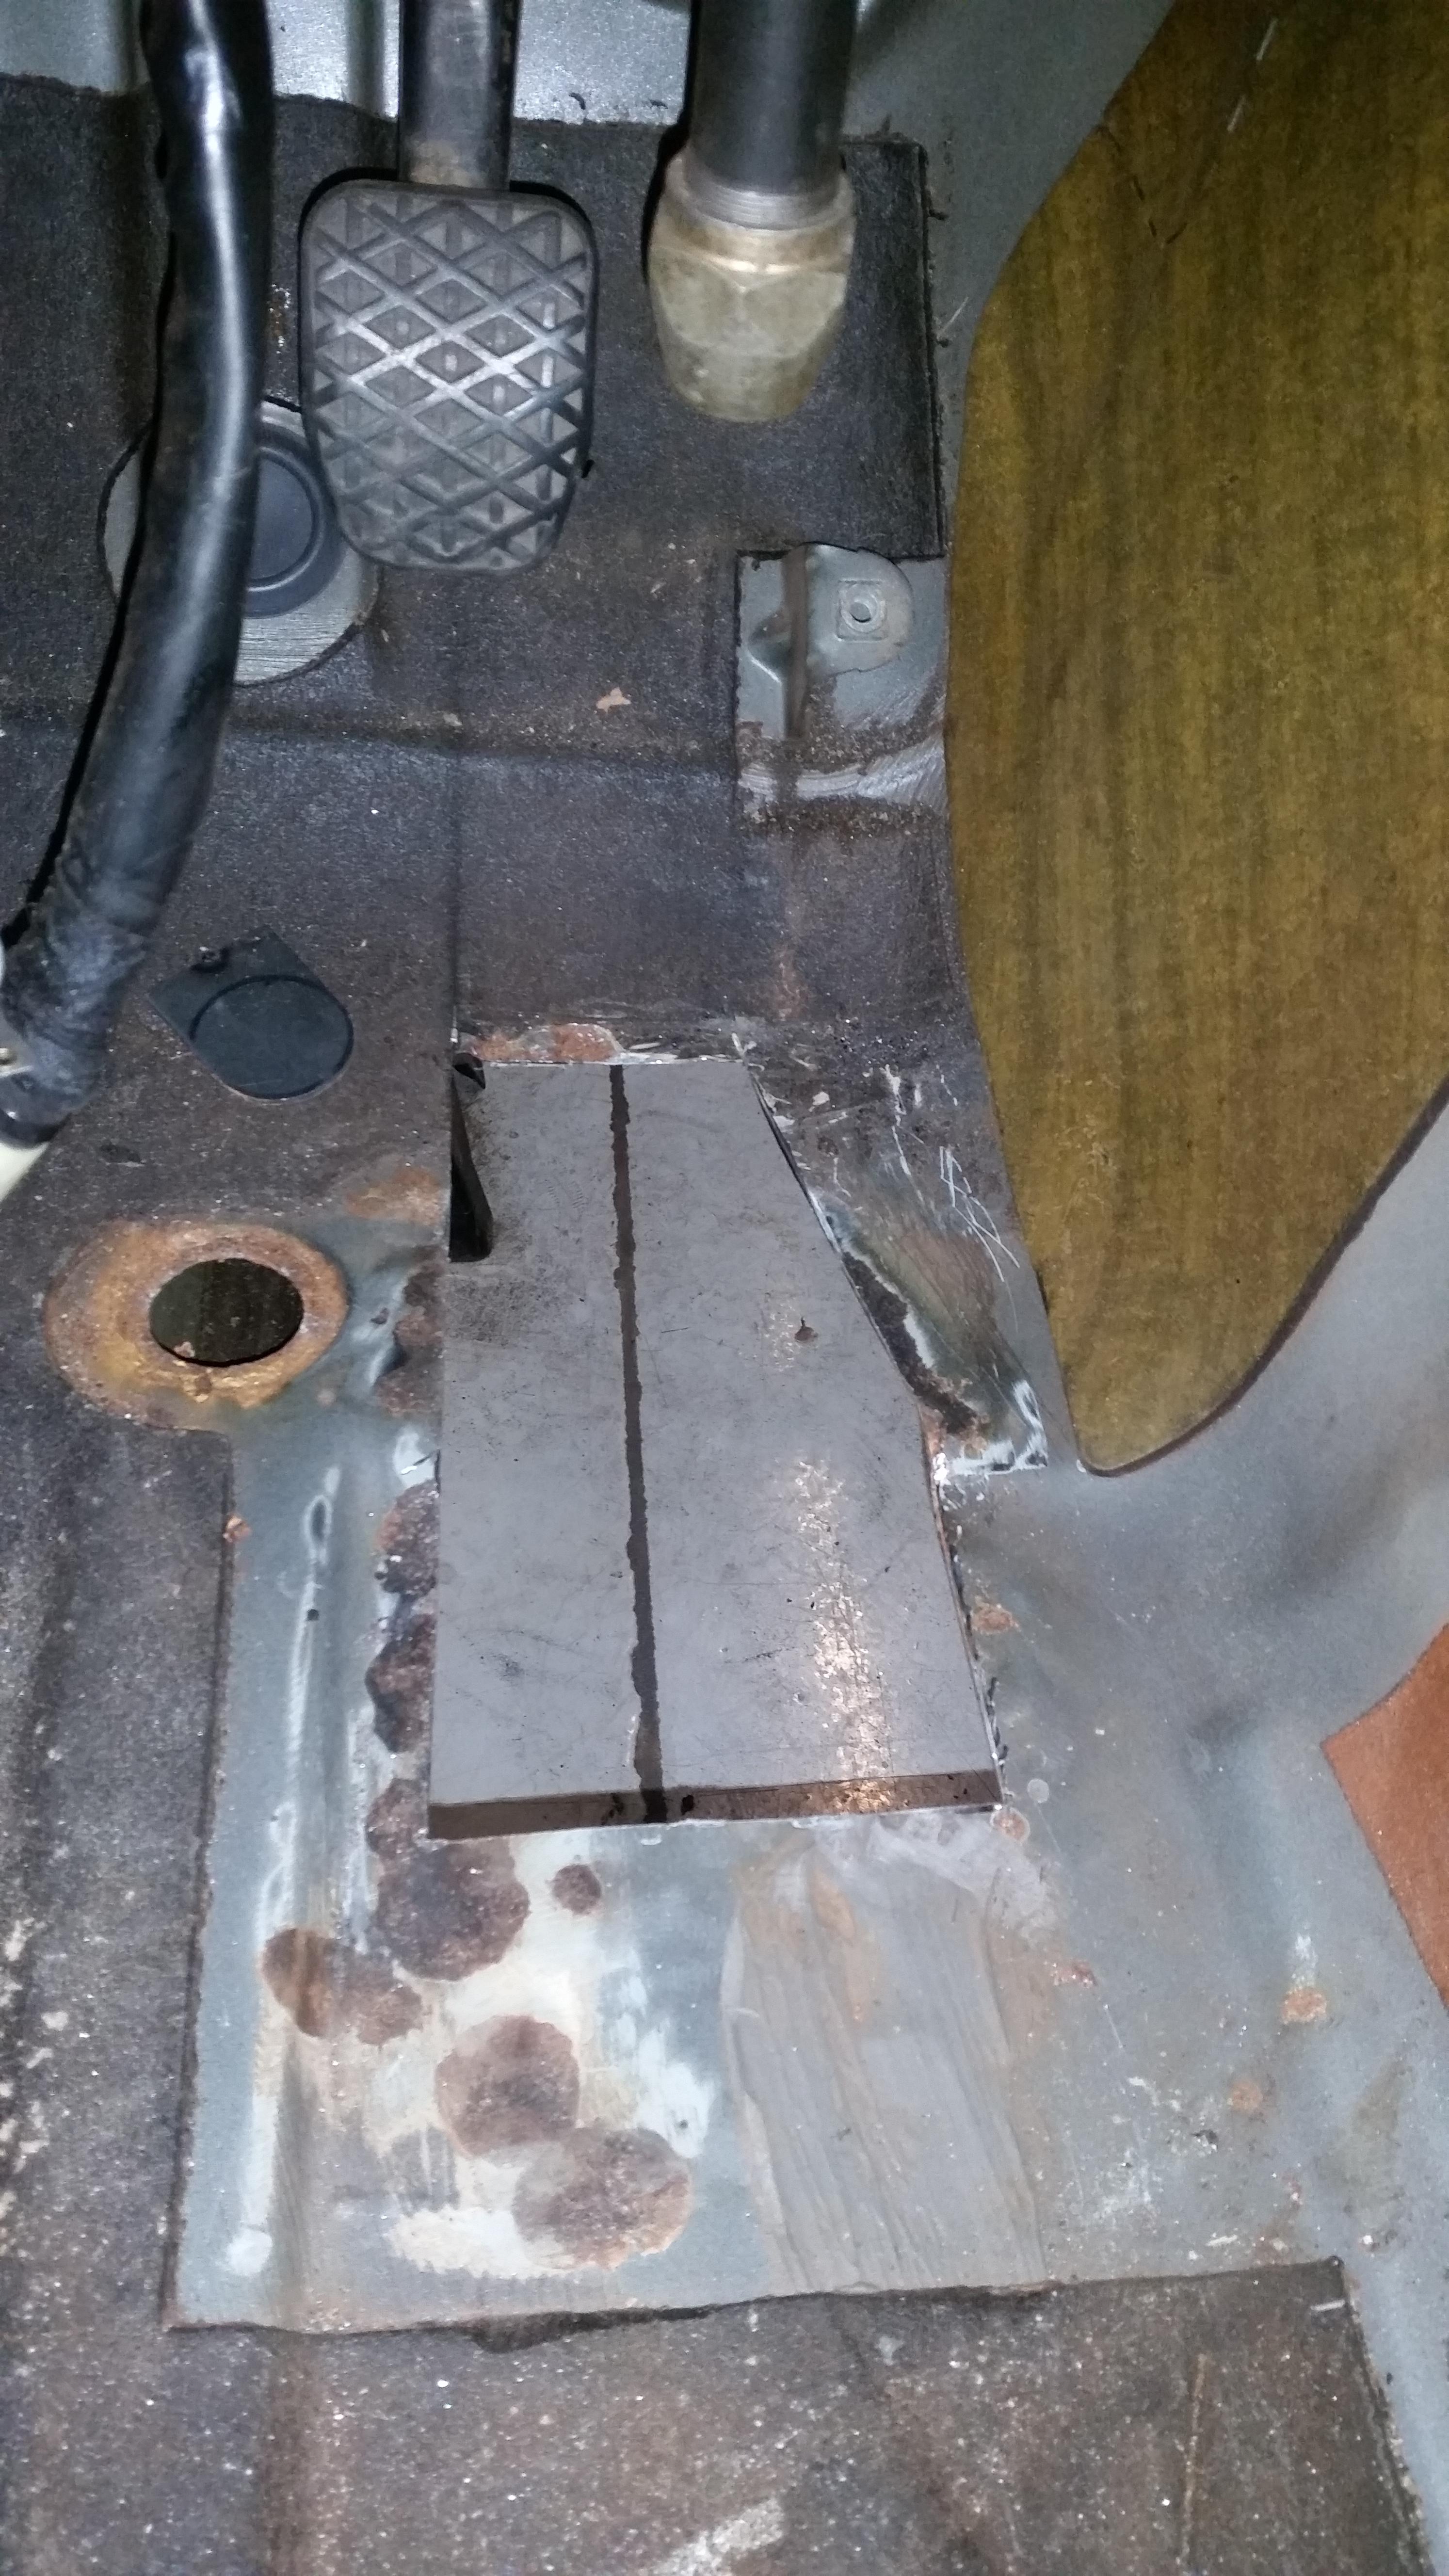
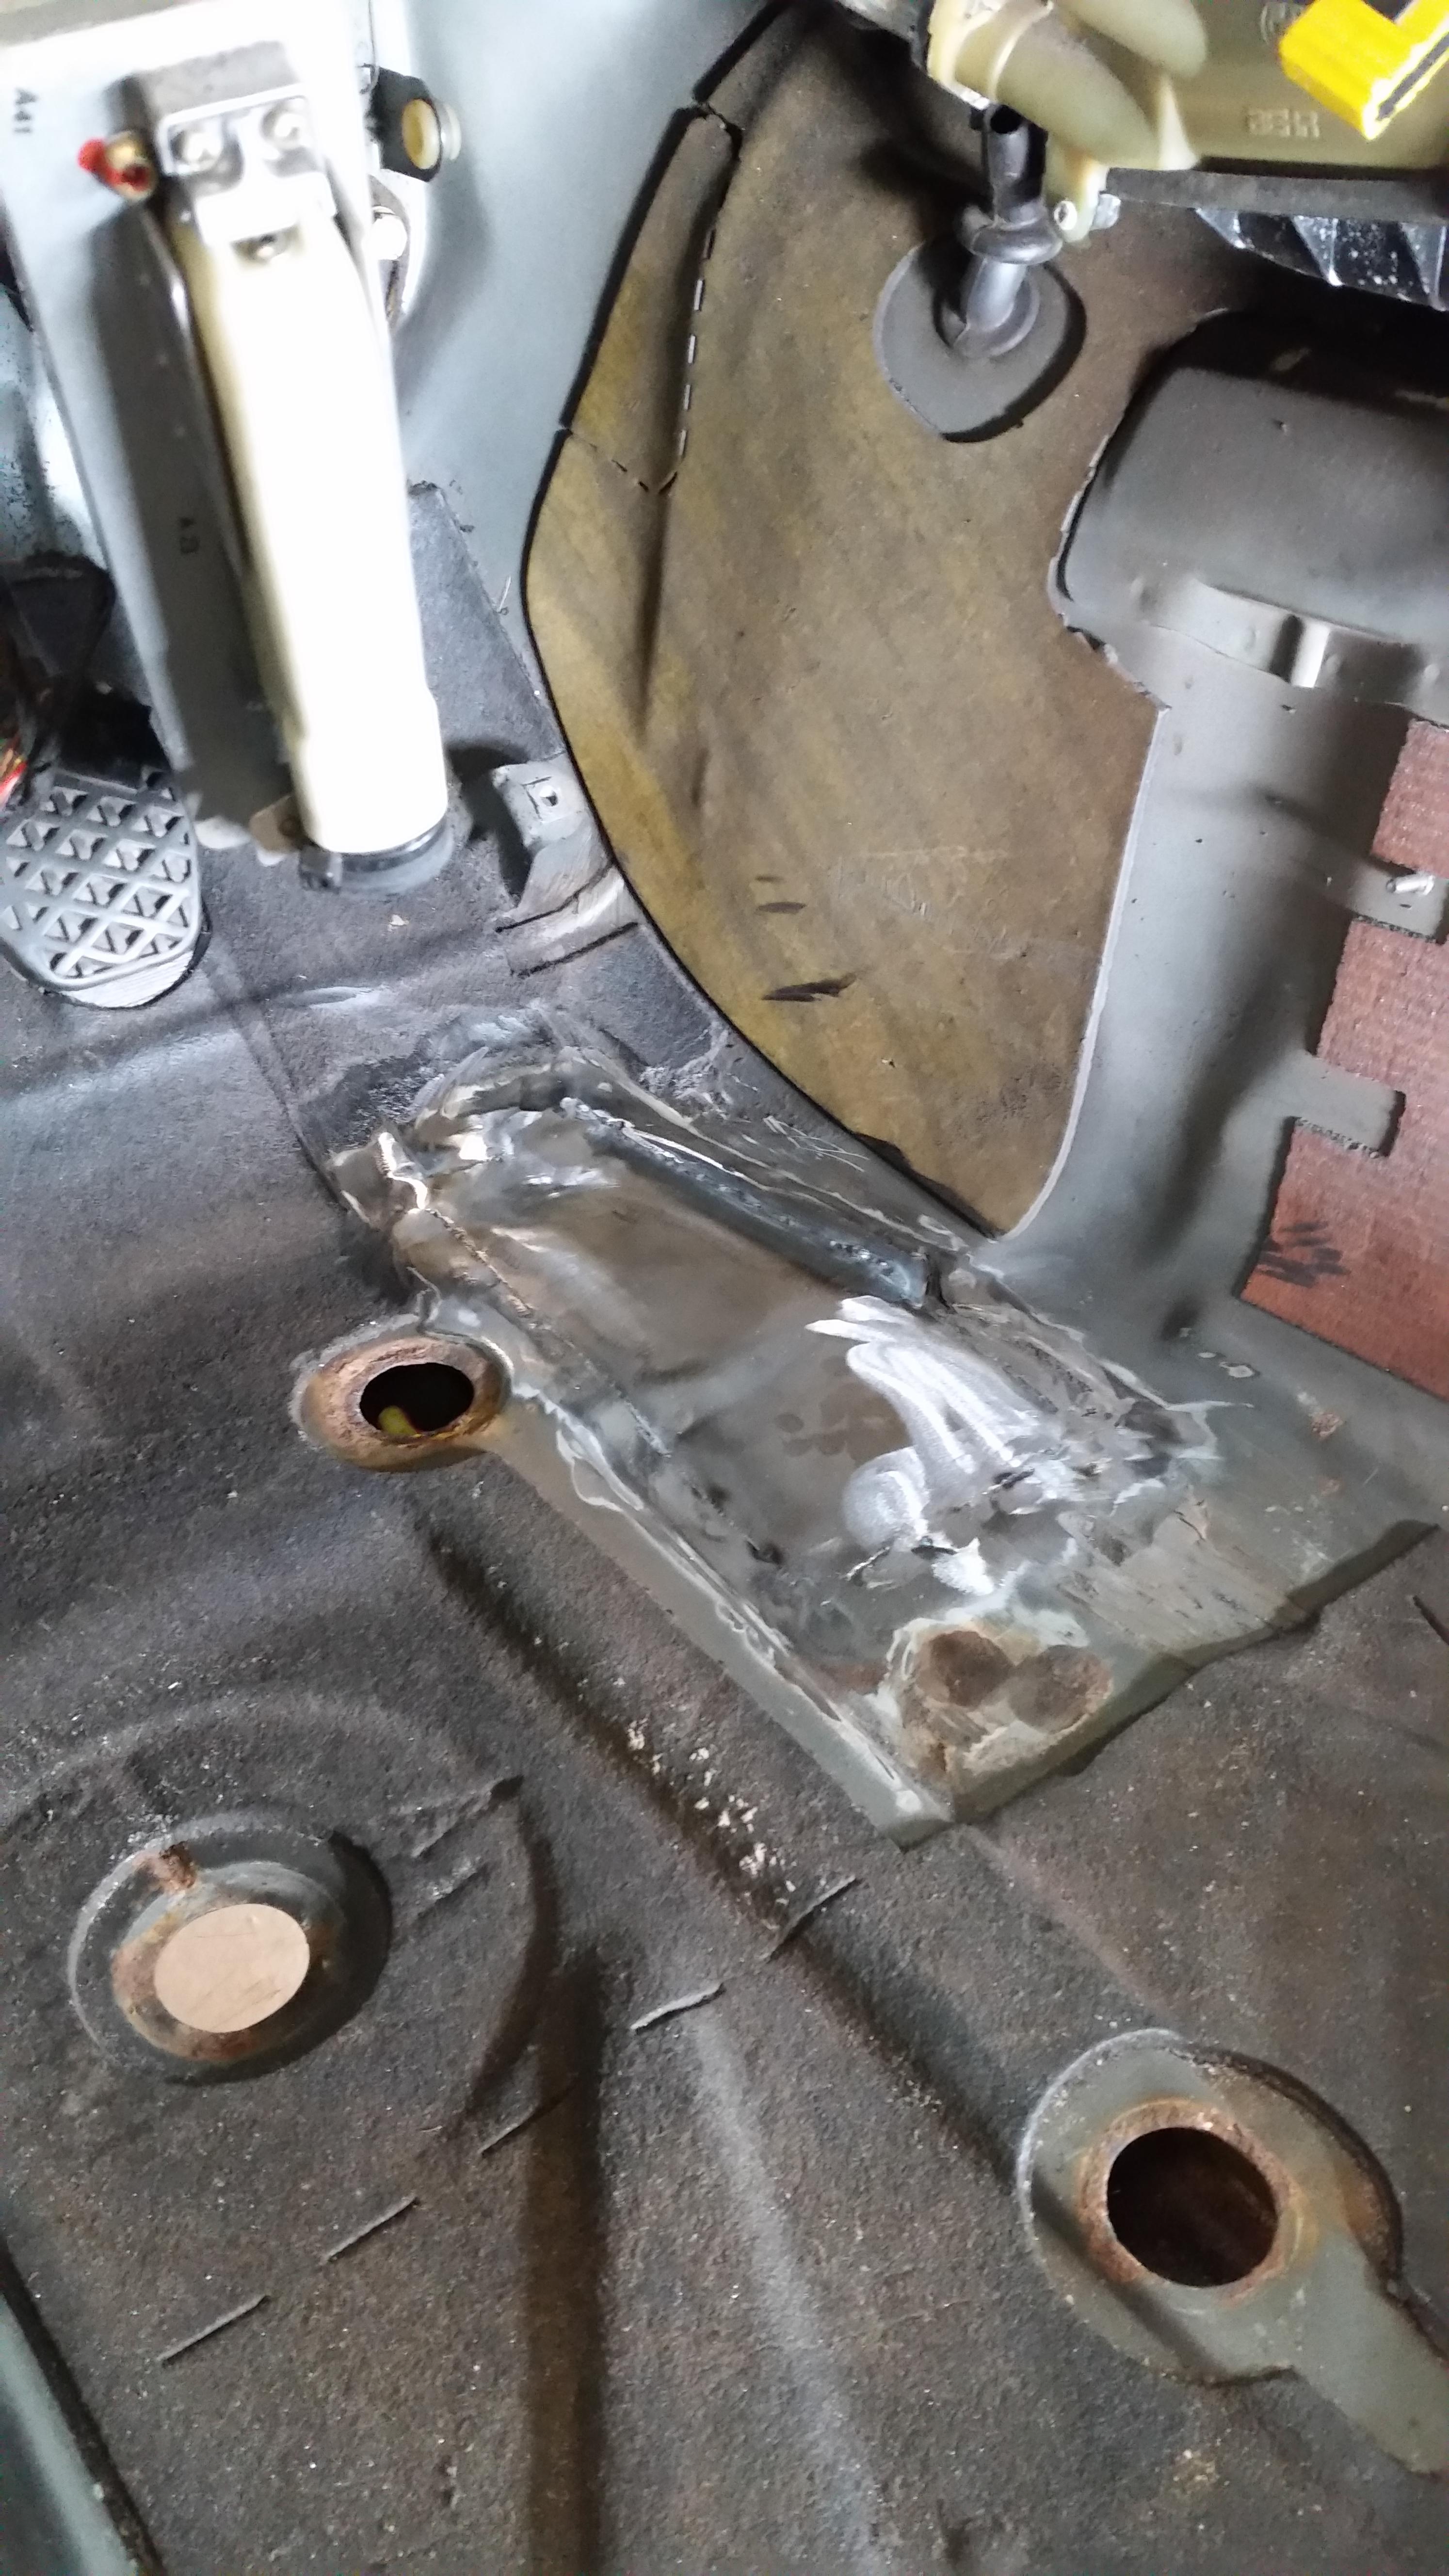
On another note, got the driver side rust hole fixed up, 16 gauge worked so much better and welded up with little issue.
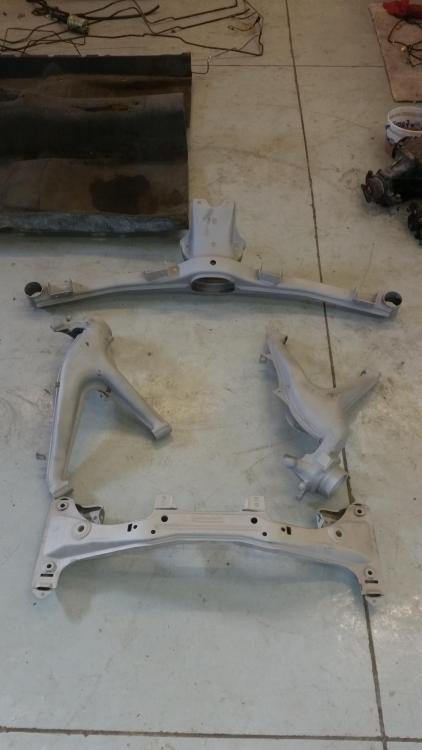
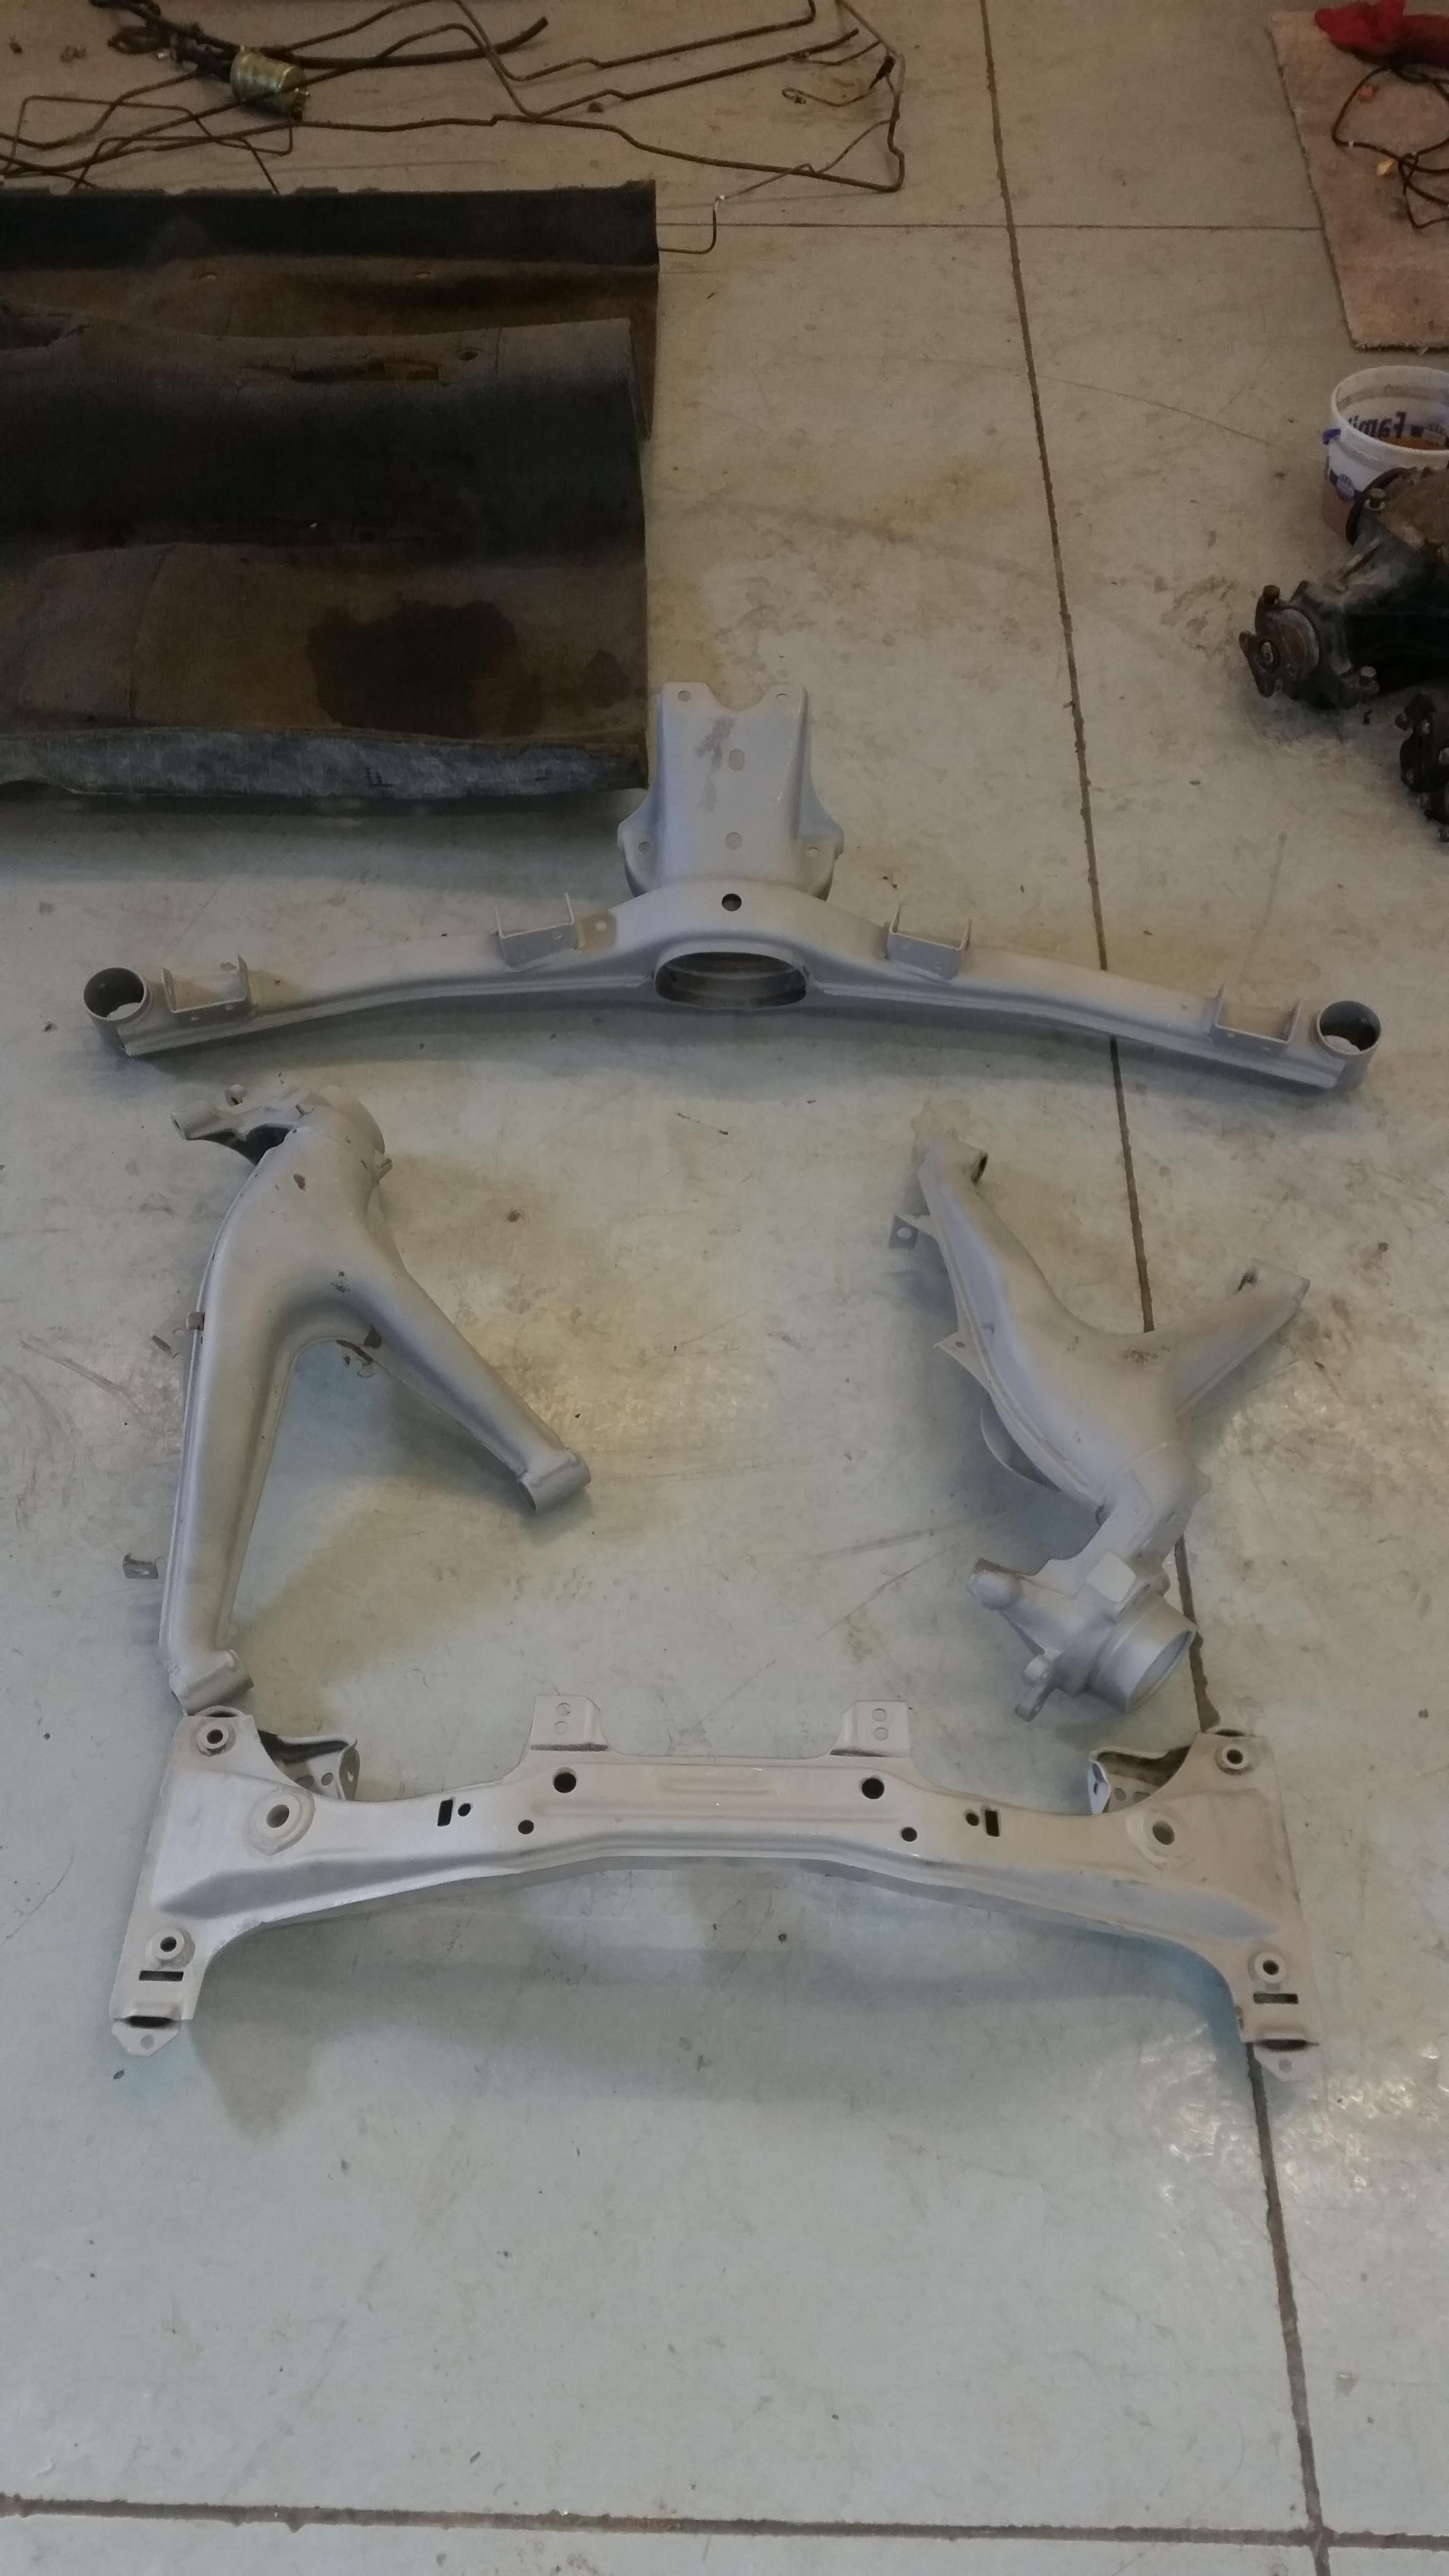
Subframes and trailing arms back from blasting!
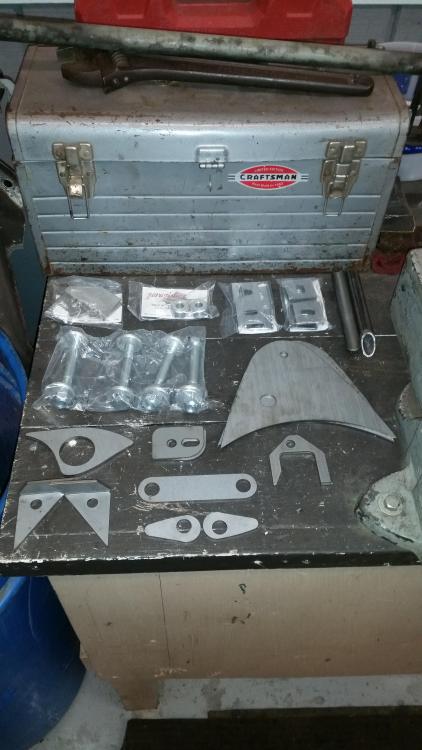
Reinforcement time...
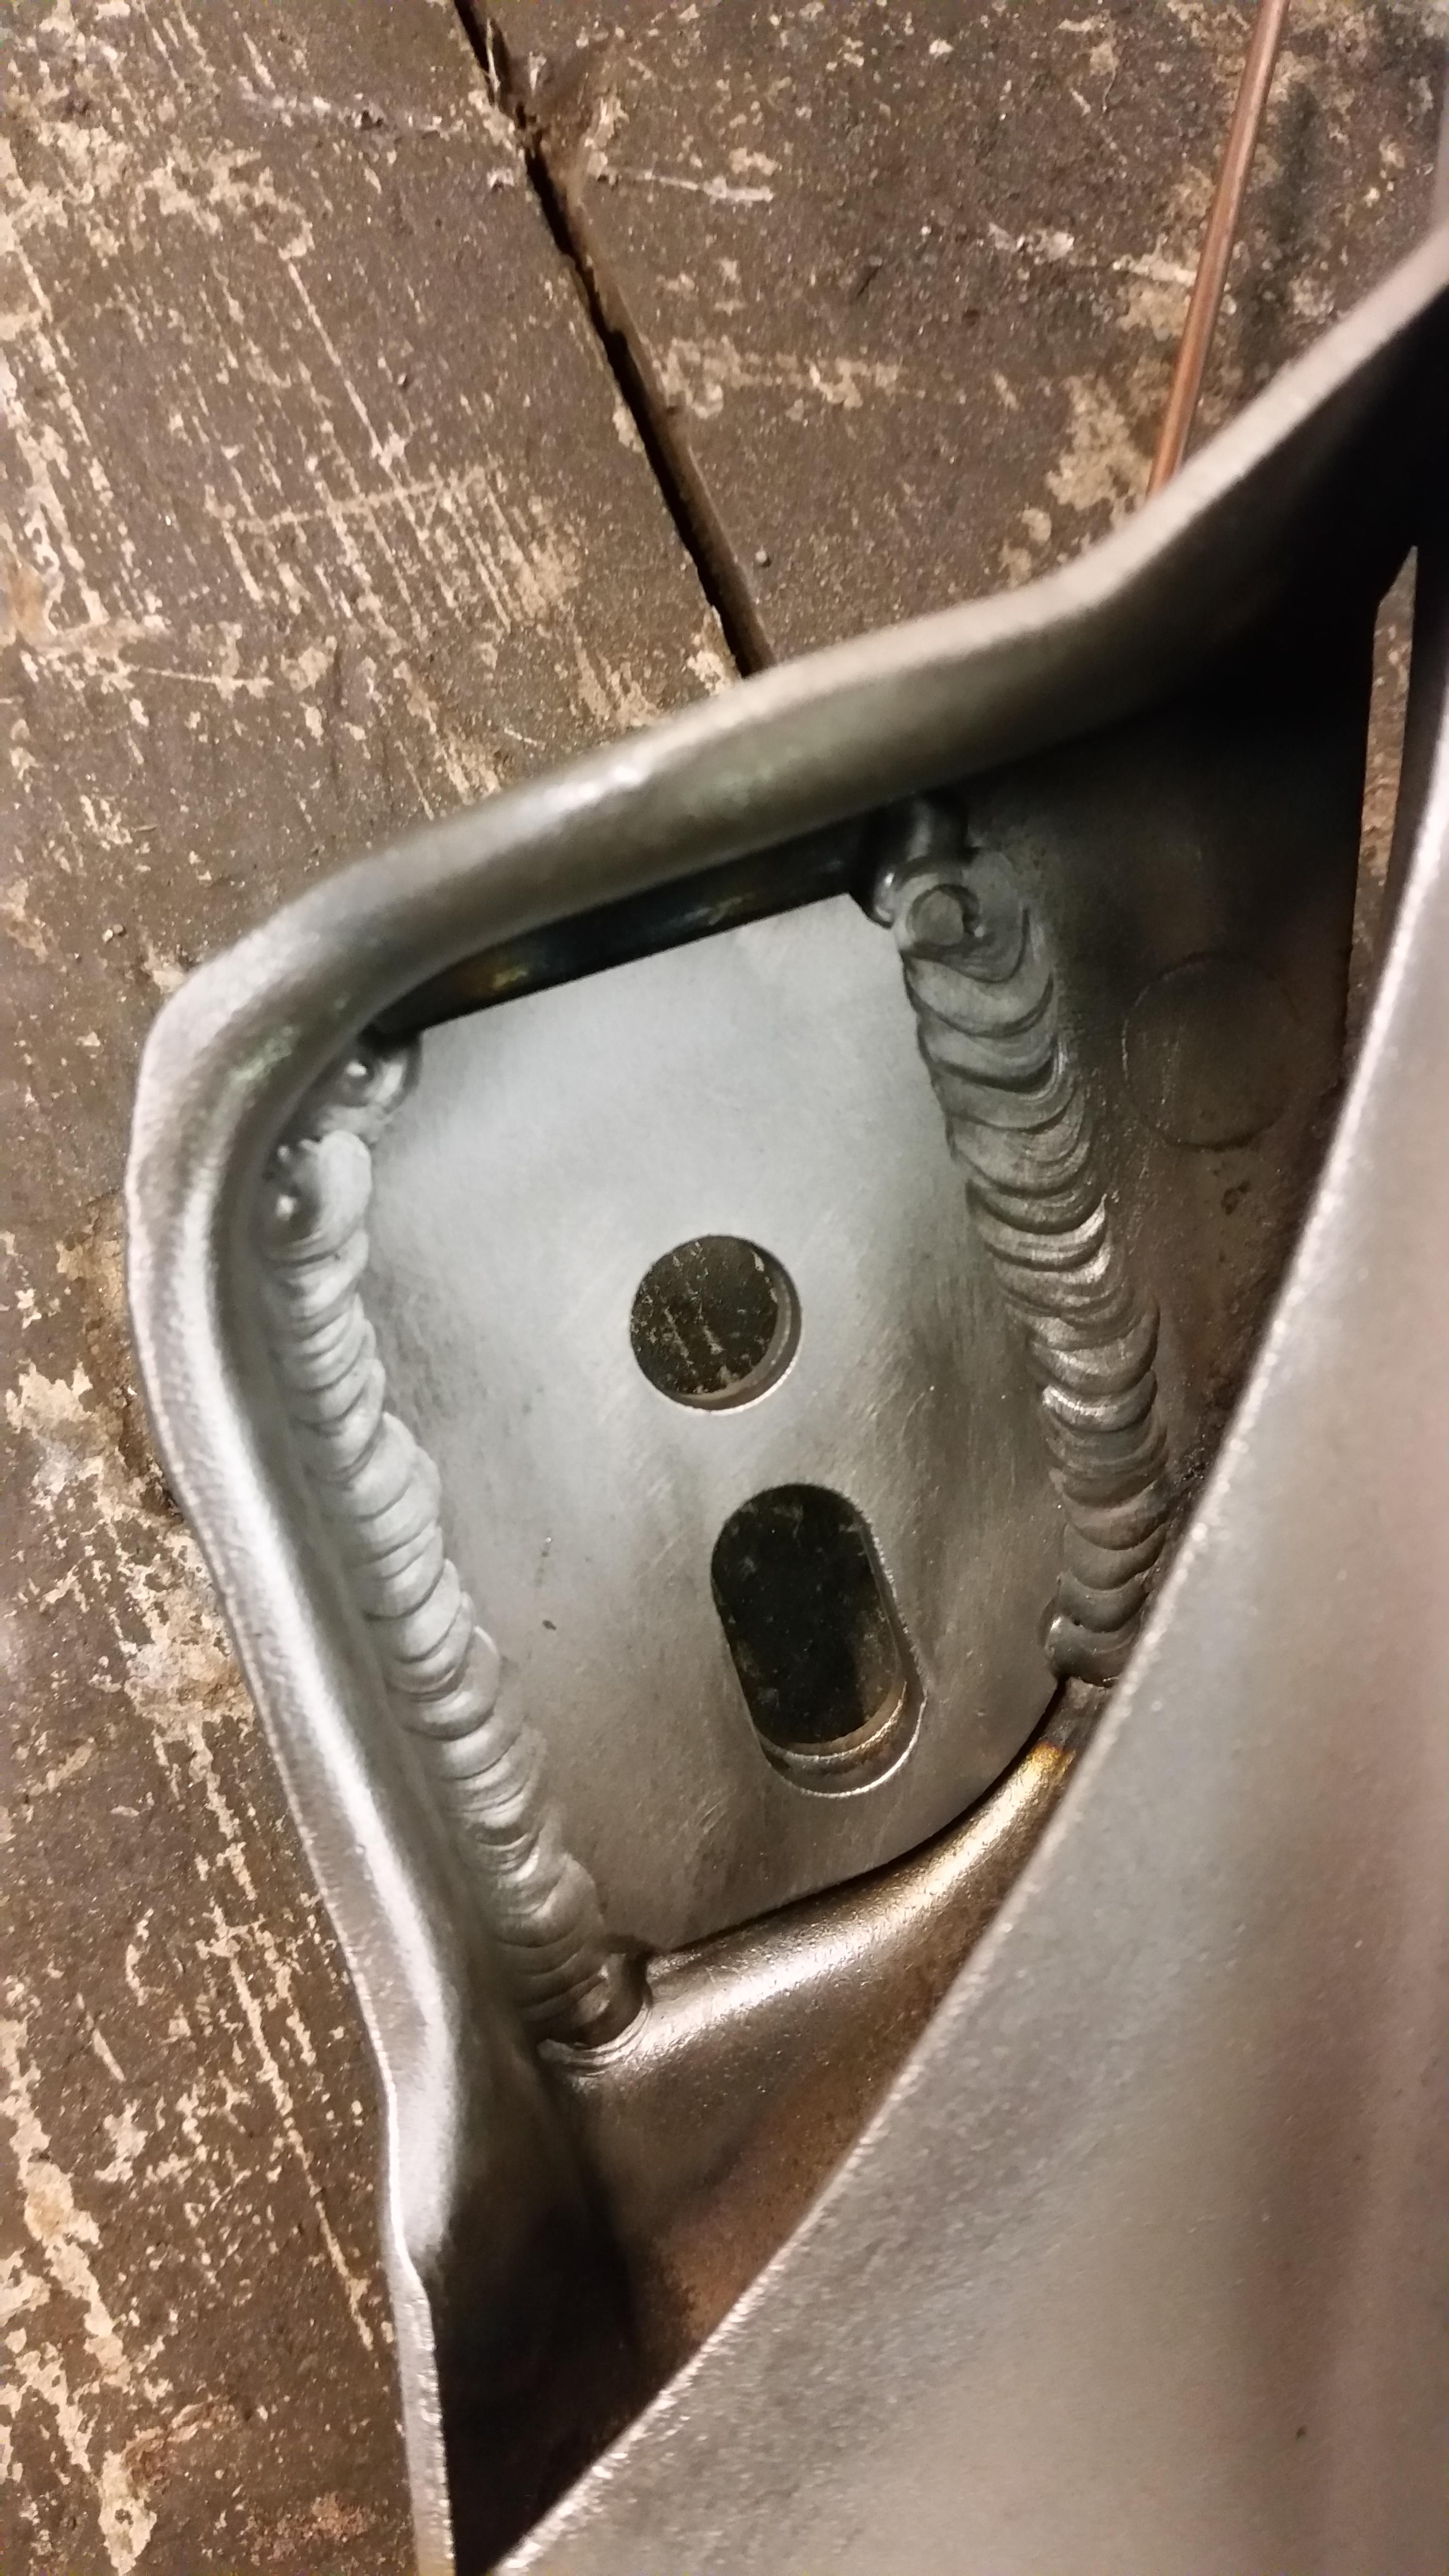
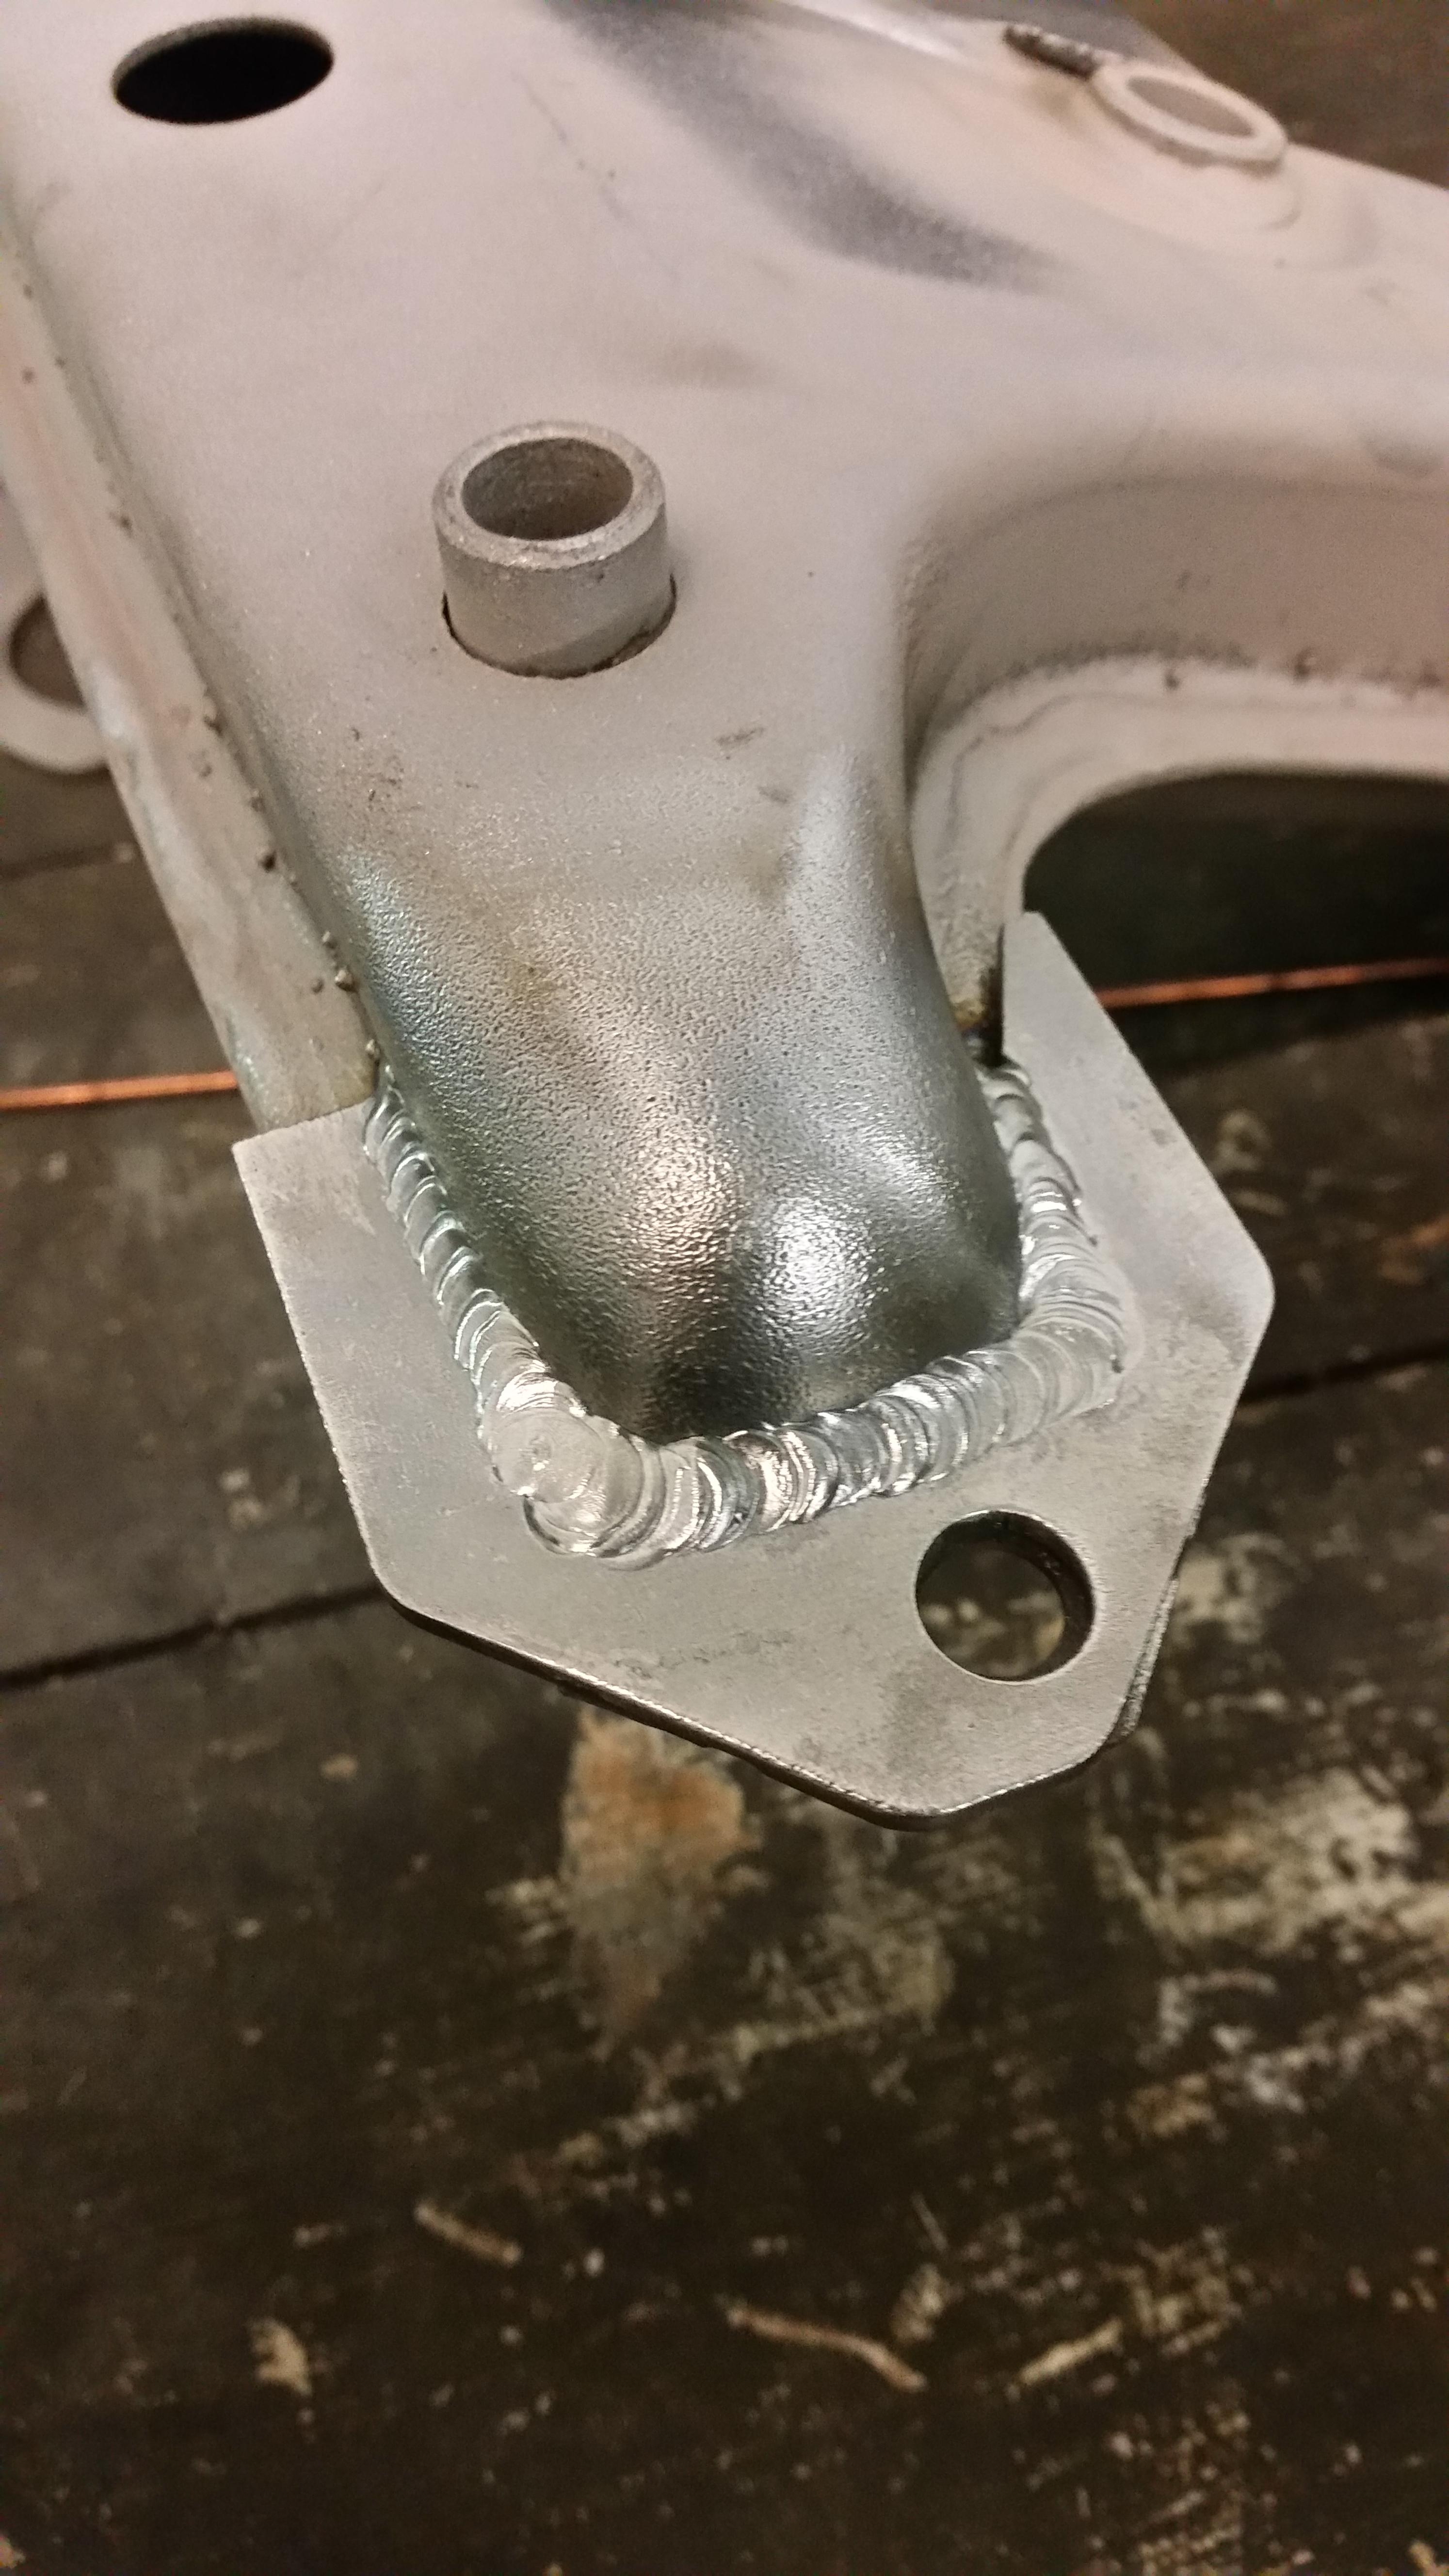
Front subframe all welded up before calling it quits tonight. All credit goes to my buddy Forrest and his master skills with a tig welder...
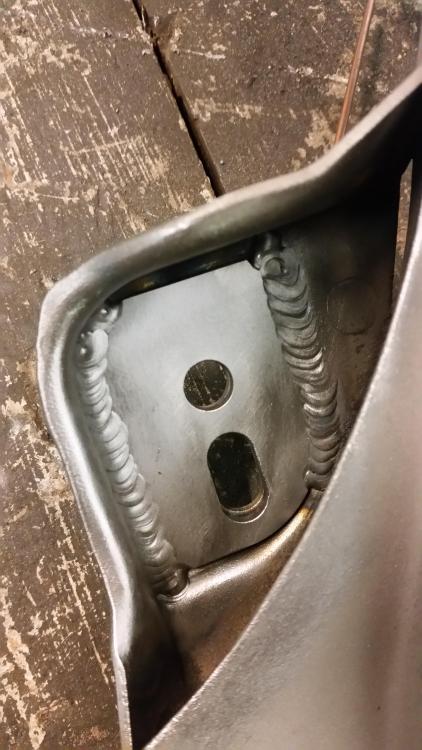
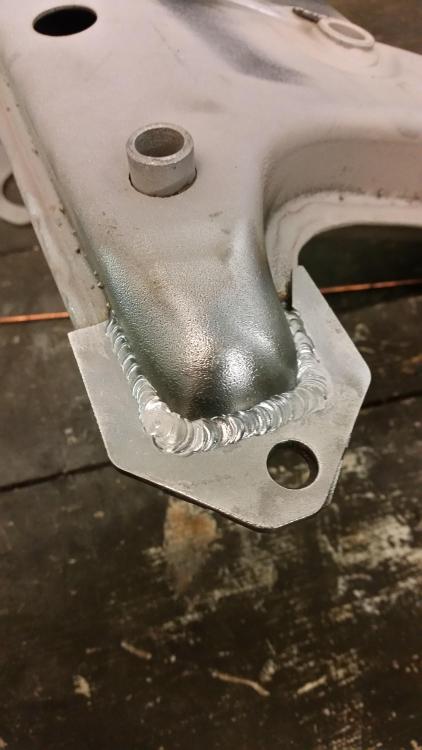
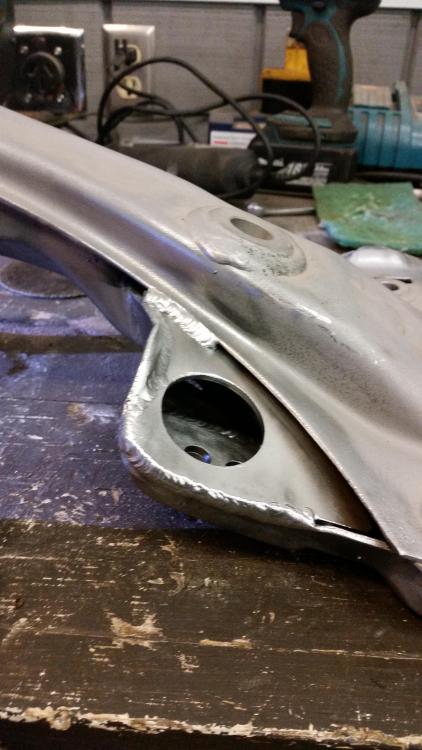
Gonna help finish up the reinforcement welding tomorrow as well as two other small rust holes on the passenger side that need to be cut out and welded up. Also praying that my parts show up from fcp so that I can get the timing cover back on the motor. Was suppose to get a few parts I was having powder coated back about week ago but it seems that their oven broke down and was unable to get it back up and running tell about a day ago, so once again, I wait.

-
the one and only e30 s52 engine swapAbout time for another update...
E brake dust plates are fixed. Originally my plan was to pull the wheel bearings and hub in order to replace with new until a friend a mine came up with an idea for just reinforcing the holes in order to save myself a lot of work of pressing in new bearings and what not. Simply just cut out 4 pieces with 14 gauge stainless to the shape of the inner con-caved area and cut a new shape for the holes where the pins come through. Welded them in and re-painted the area with por-15.
Before re-attaching the trailing arms I went ahead and pulled the RTAB's and re lubed them all.
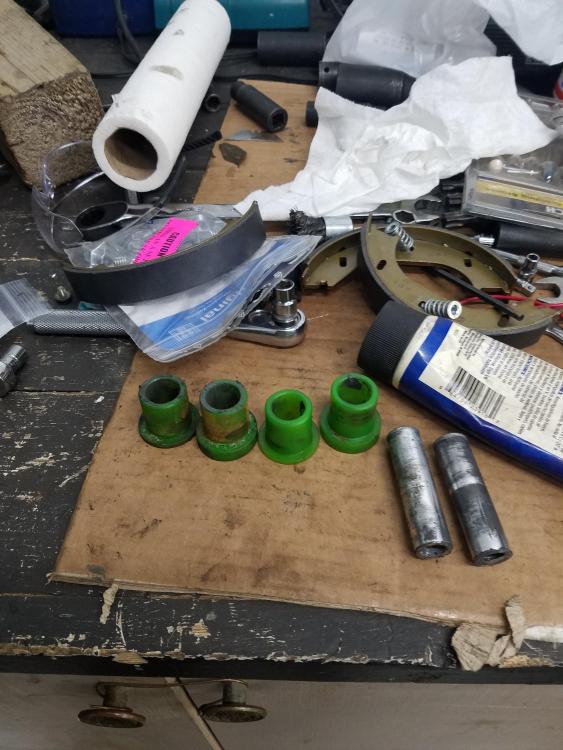
Keep them nice and quite.
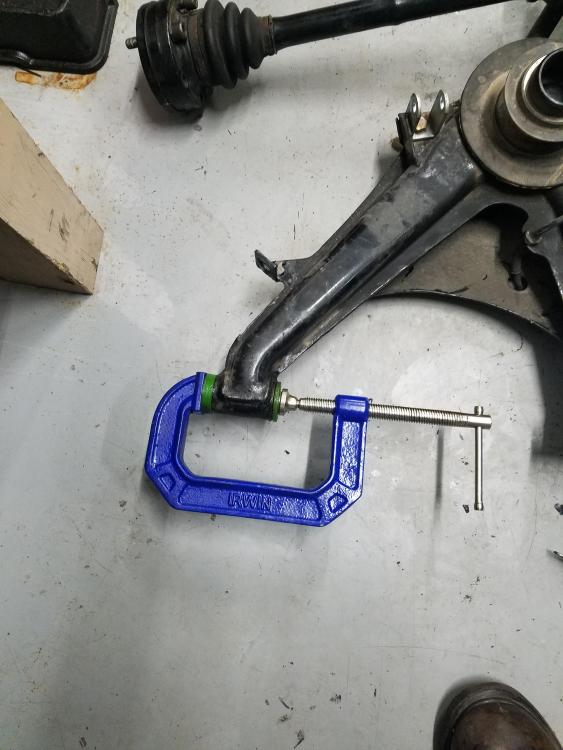
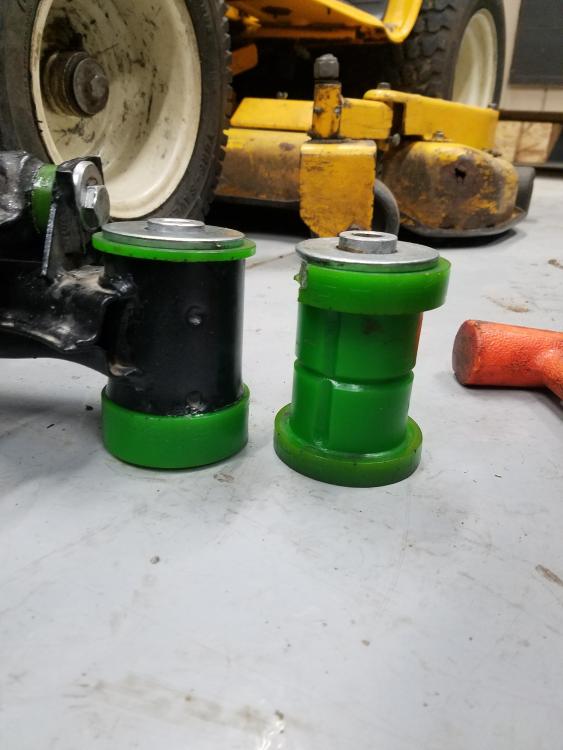
New modified sub-frame bushings lubed and pressed in as well as spacers for the differential.
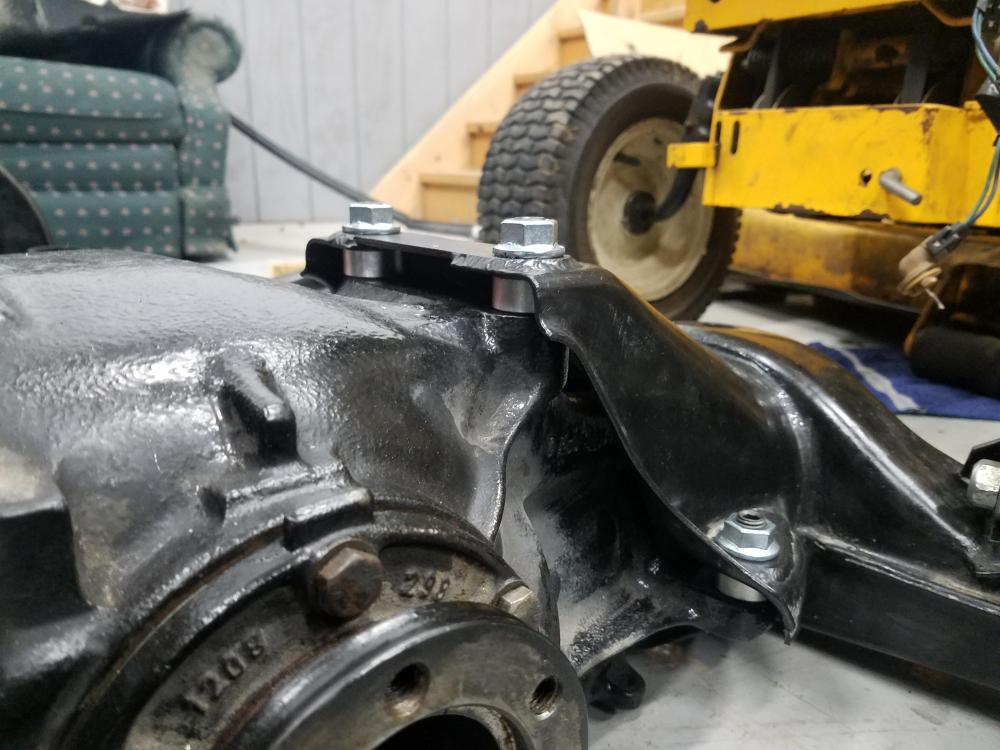
With a couple extra helping hands we got er popped back in.
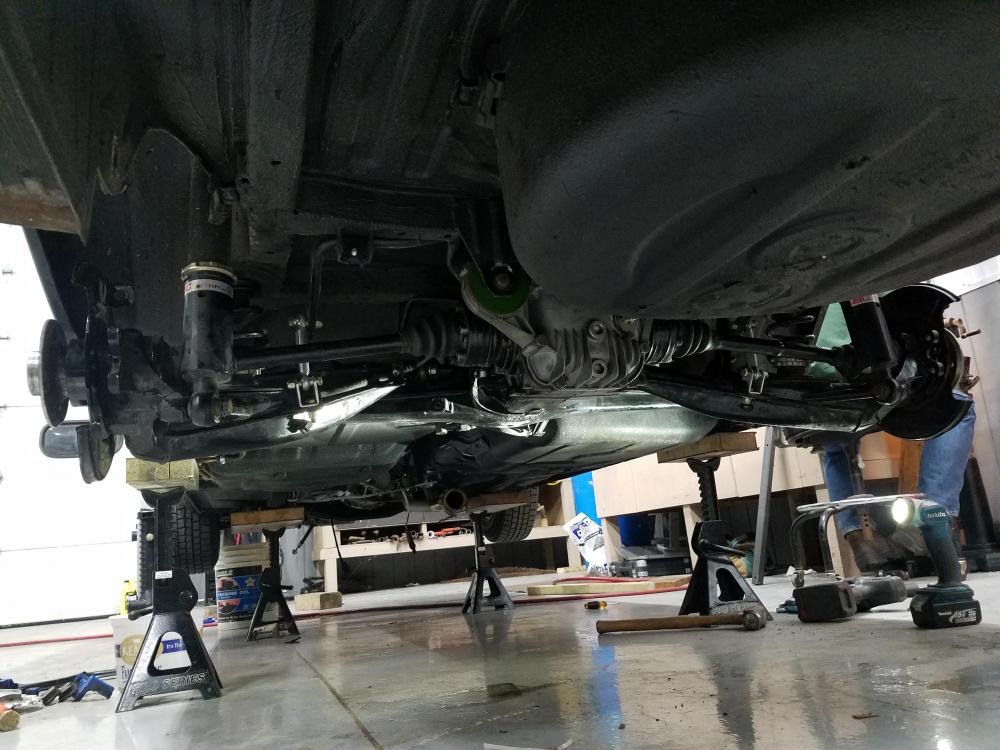
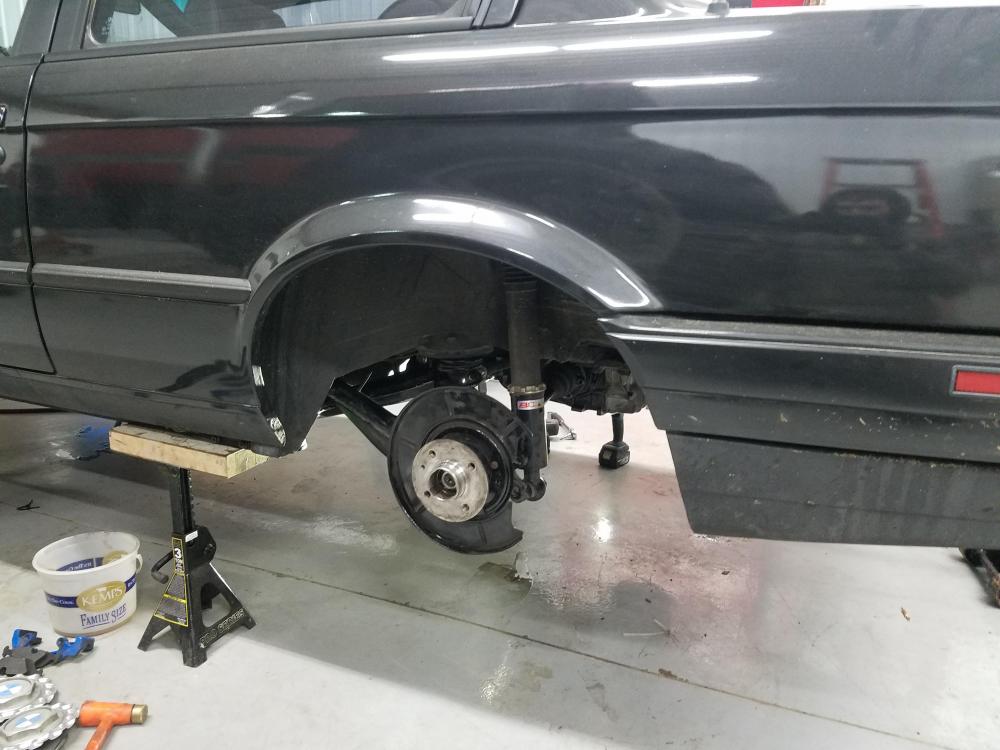
Super excited to see how she feels now that the eccentric hardware hopefully won't be walking all over the place and that I finally get my e-brake back.
Yup, that's about it.
O and one more thing... She's gettin a turbo

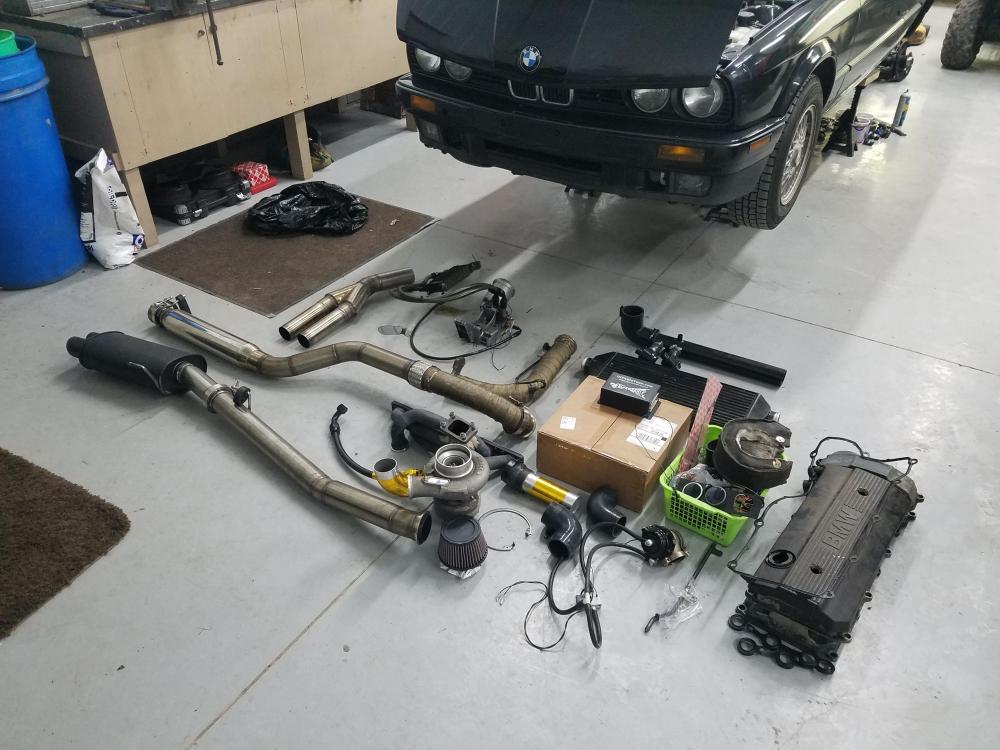
-
the one and only e30 s52 engine swapLast season was a blast! Car felt near bulletproof throughout the summer but there were a few issues that need tending to.
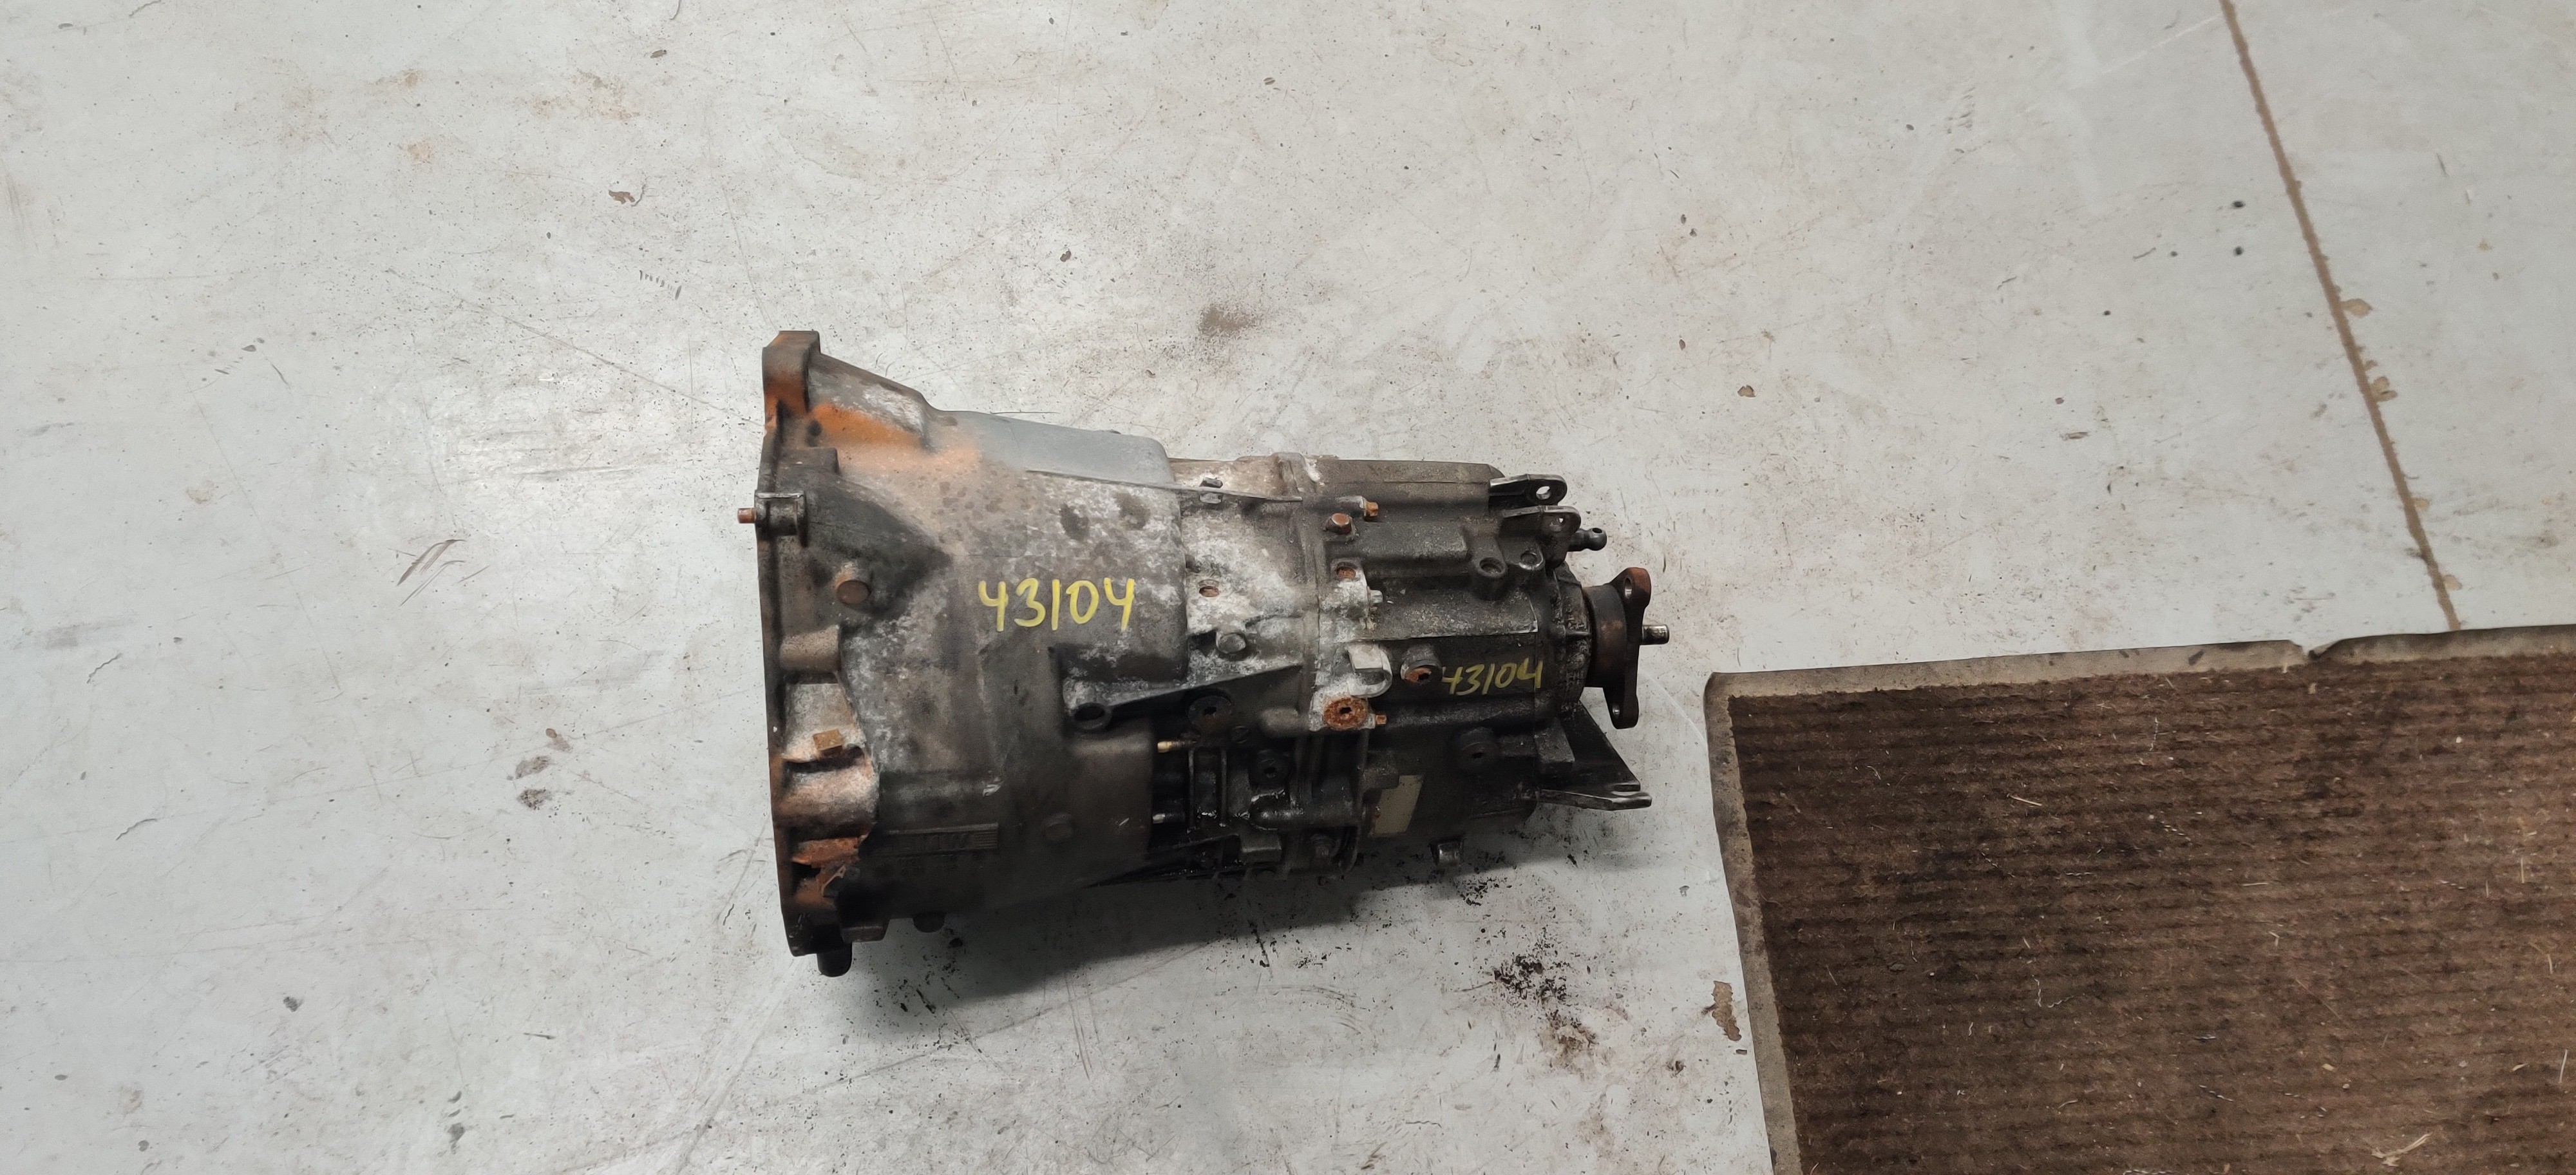
The transmission. G260 + Boost = Ticking time bomb. Also the gearing could be a little longer, So I'm switching it out for the zf trans.
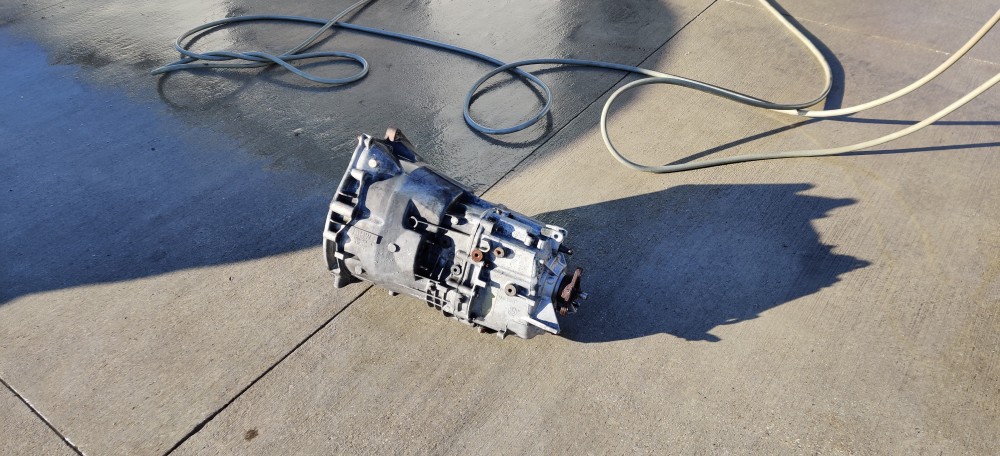
Picked up a zf trans from a local junkyard. Overall condition is not to bad. Trans was pulled from an e39 528i.
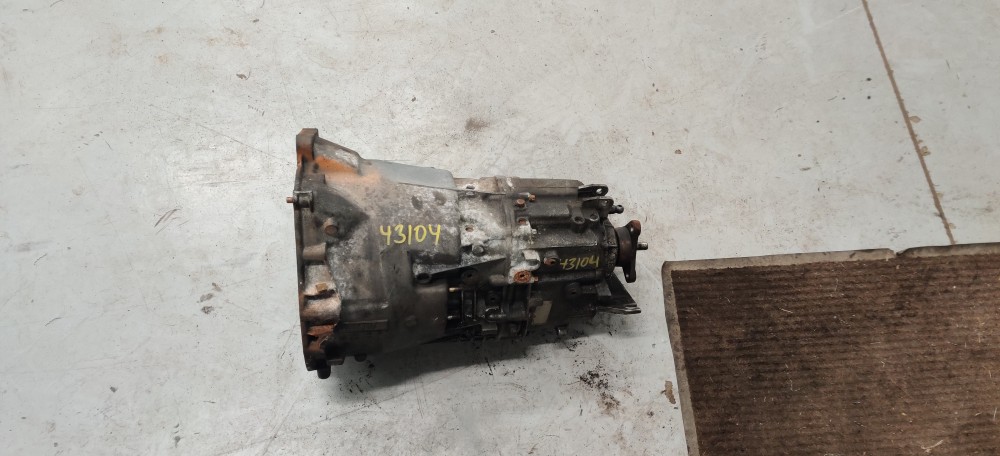
Also snatched up a 2.93 lsd diff to sit behind the zf. Hoping it should make for decent gearing for the power level I'm at. Plan is to rebuild it. It will be getting a 3 clutch disc upgrade to hopefully reach a little more lock up. (40 - 50% I believe)
Unfortunately ever since this car ran with the turbo the oil drain line fittings leaked from the back side caking oil all over parts of the engine, skid plate and car. Should have replaced it sooner buuuuutttt I was lazy so i put it off and now I get to deal with it now.
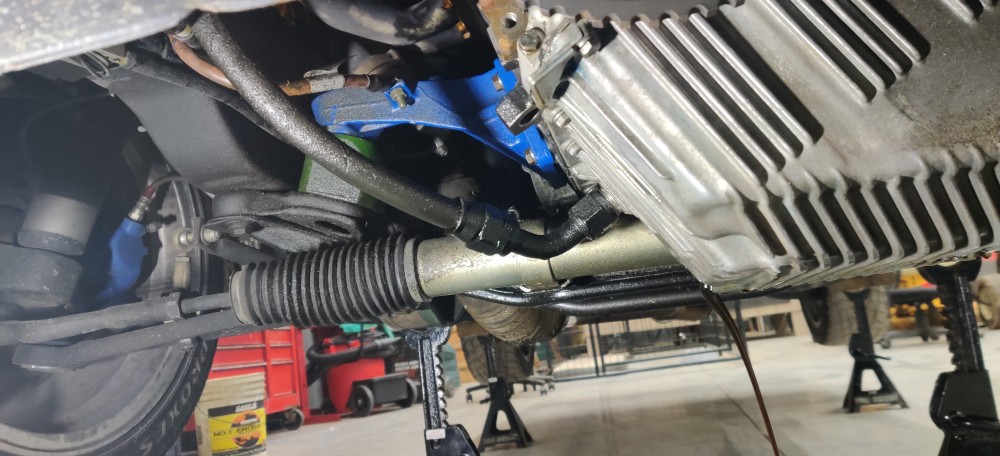
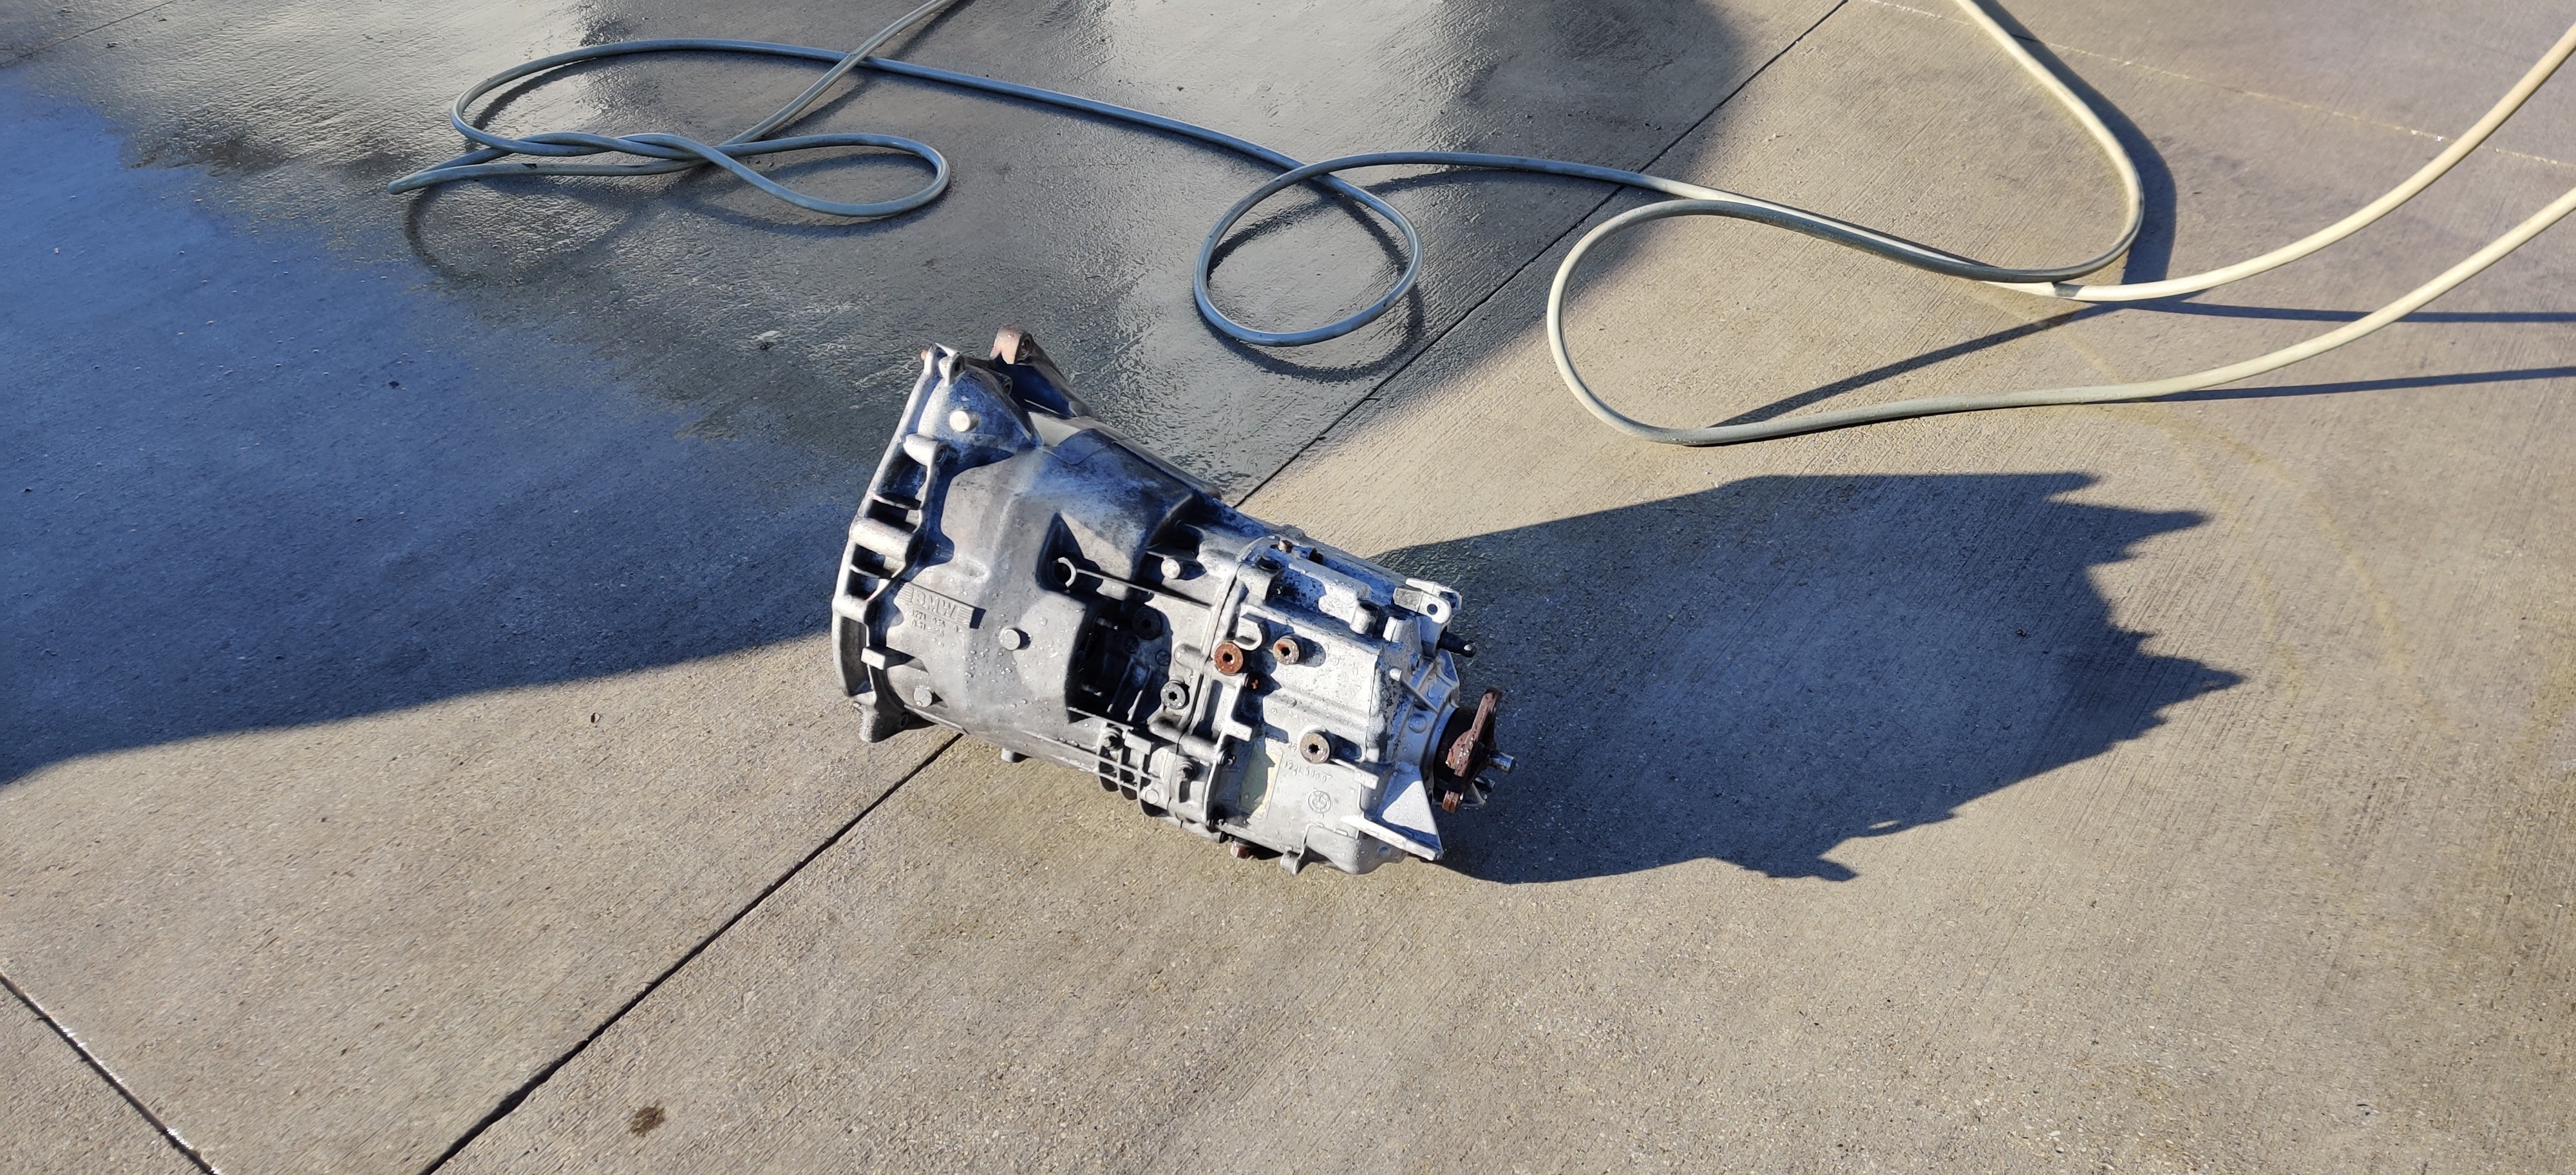
Luckily we hit a patch of warm weather for one day and I ripped out the pressure washer, de-greaser and a scotch brite pad and went to town on all the oil and grease on the transmission casing.
After a good cleaning I got right down to it and replaced a few things.
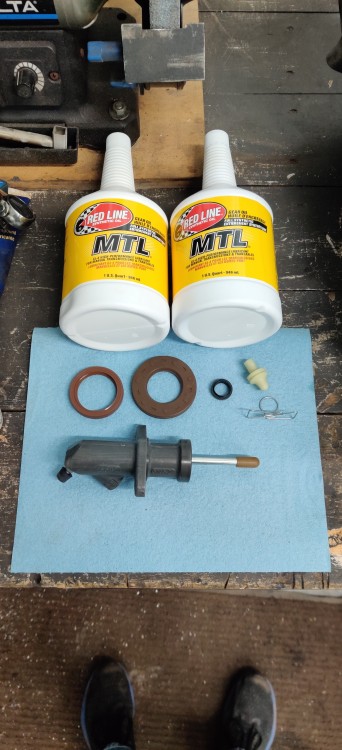
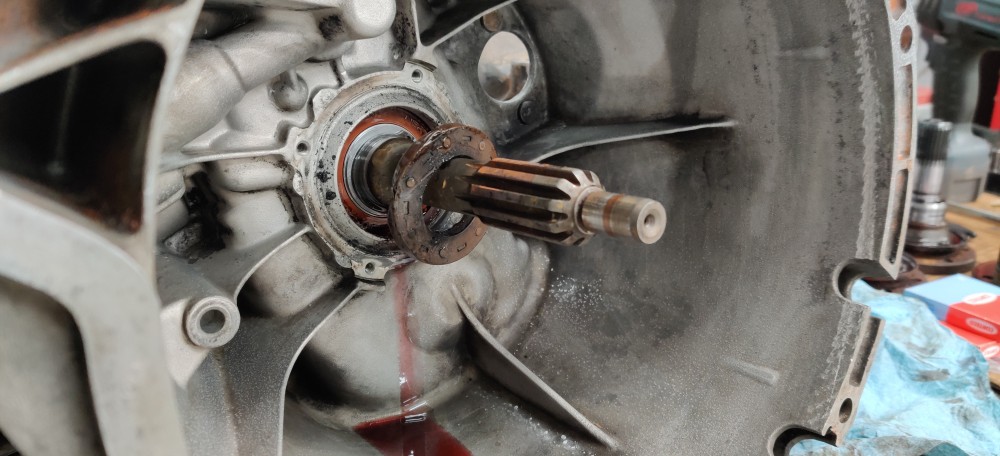
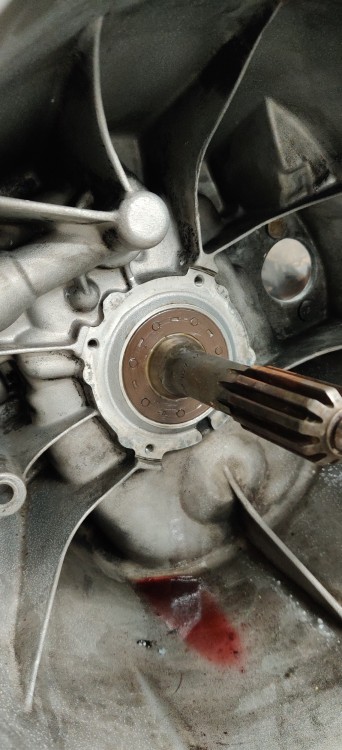
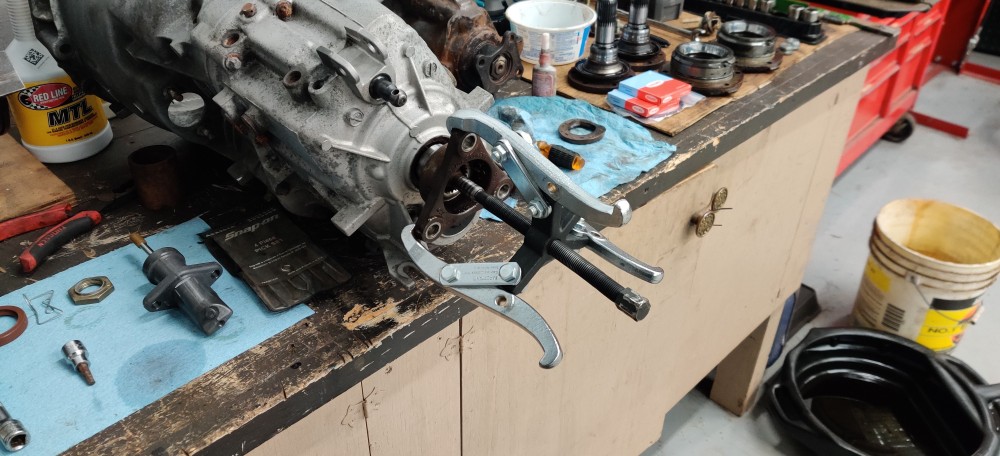
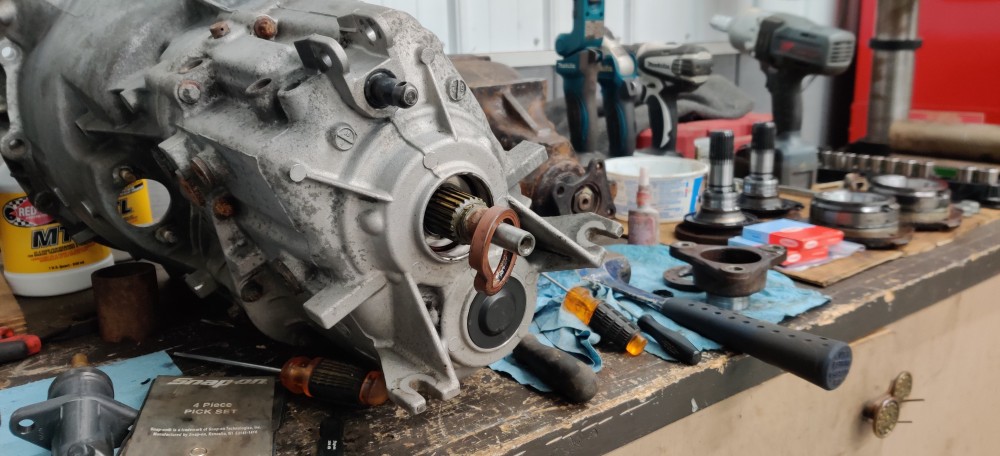
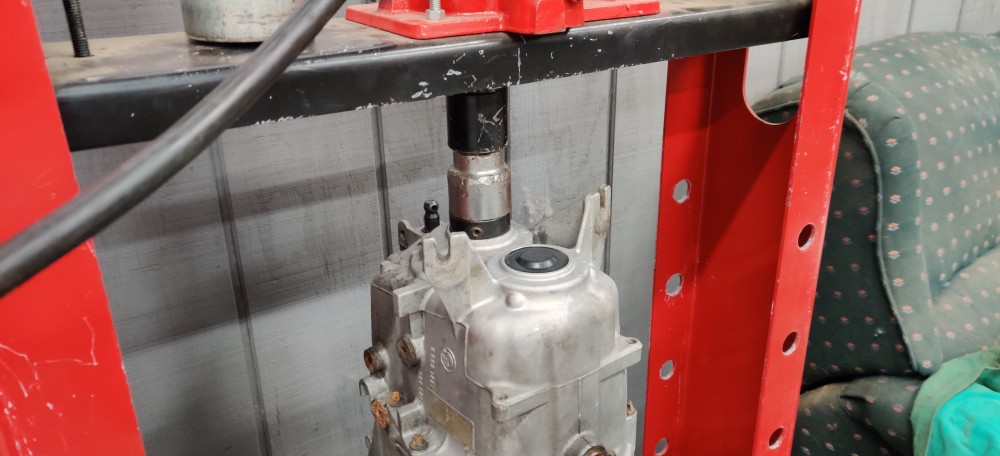
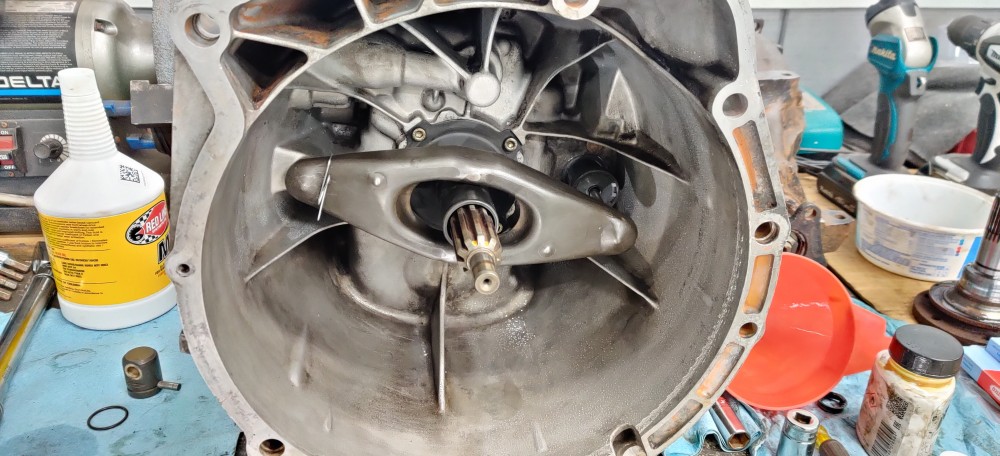
Seal replacement went really well with no major issues along the way and is now all ready to be installed besides the throw out bearing which I had forgotten to order but is now on its way.
As I started disconnecting the driveshaft and shifter linkages I noticed some blue coolant dripping from the drain ports from the heater core box, great. I had noticed that my coolant level had dropped a good amount over the season but I made sure it never completely emptied itself. Nevertheless I have added to the list to replace the heater core.
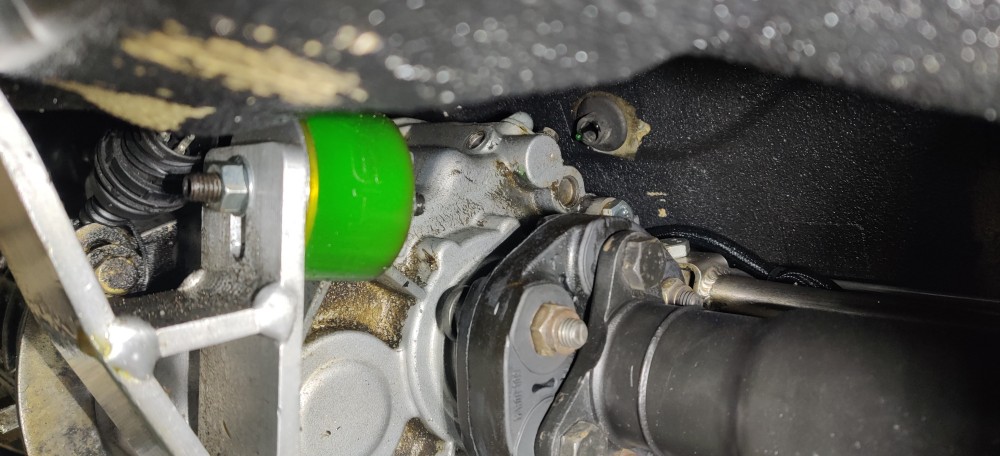
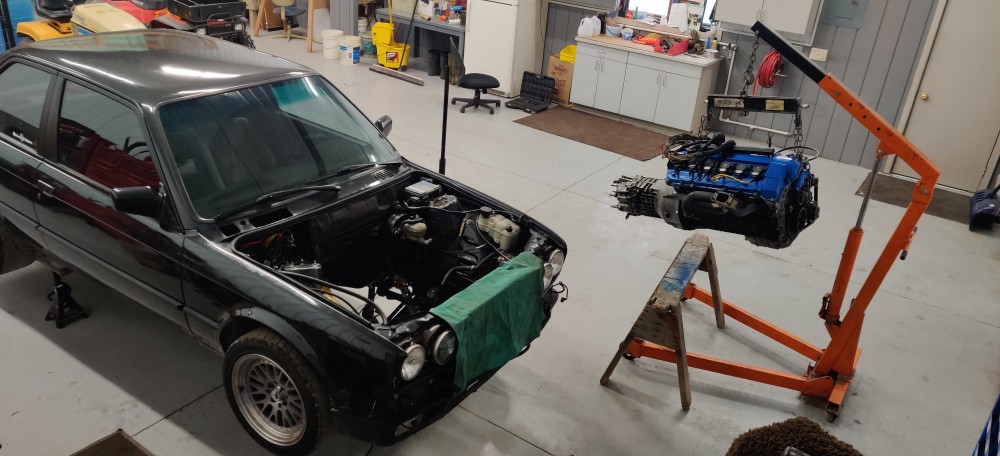
After a few more disconnections...
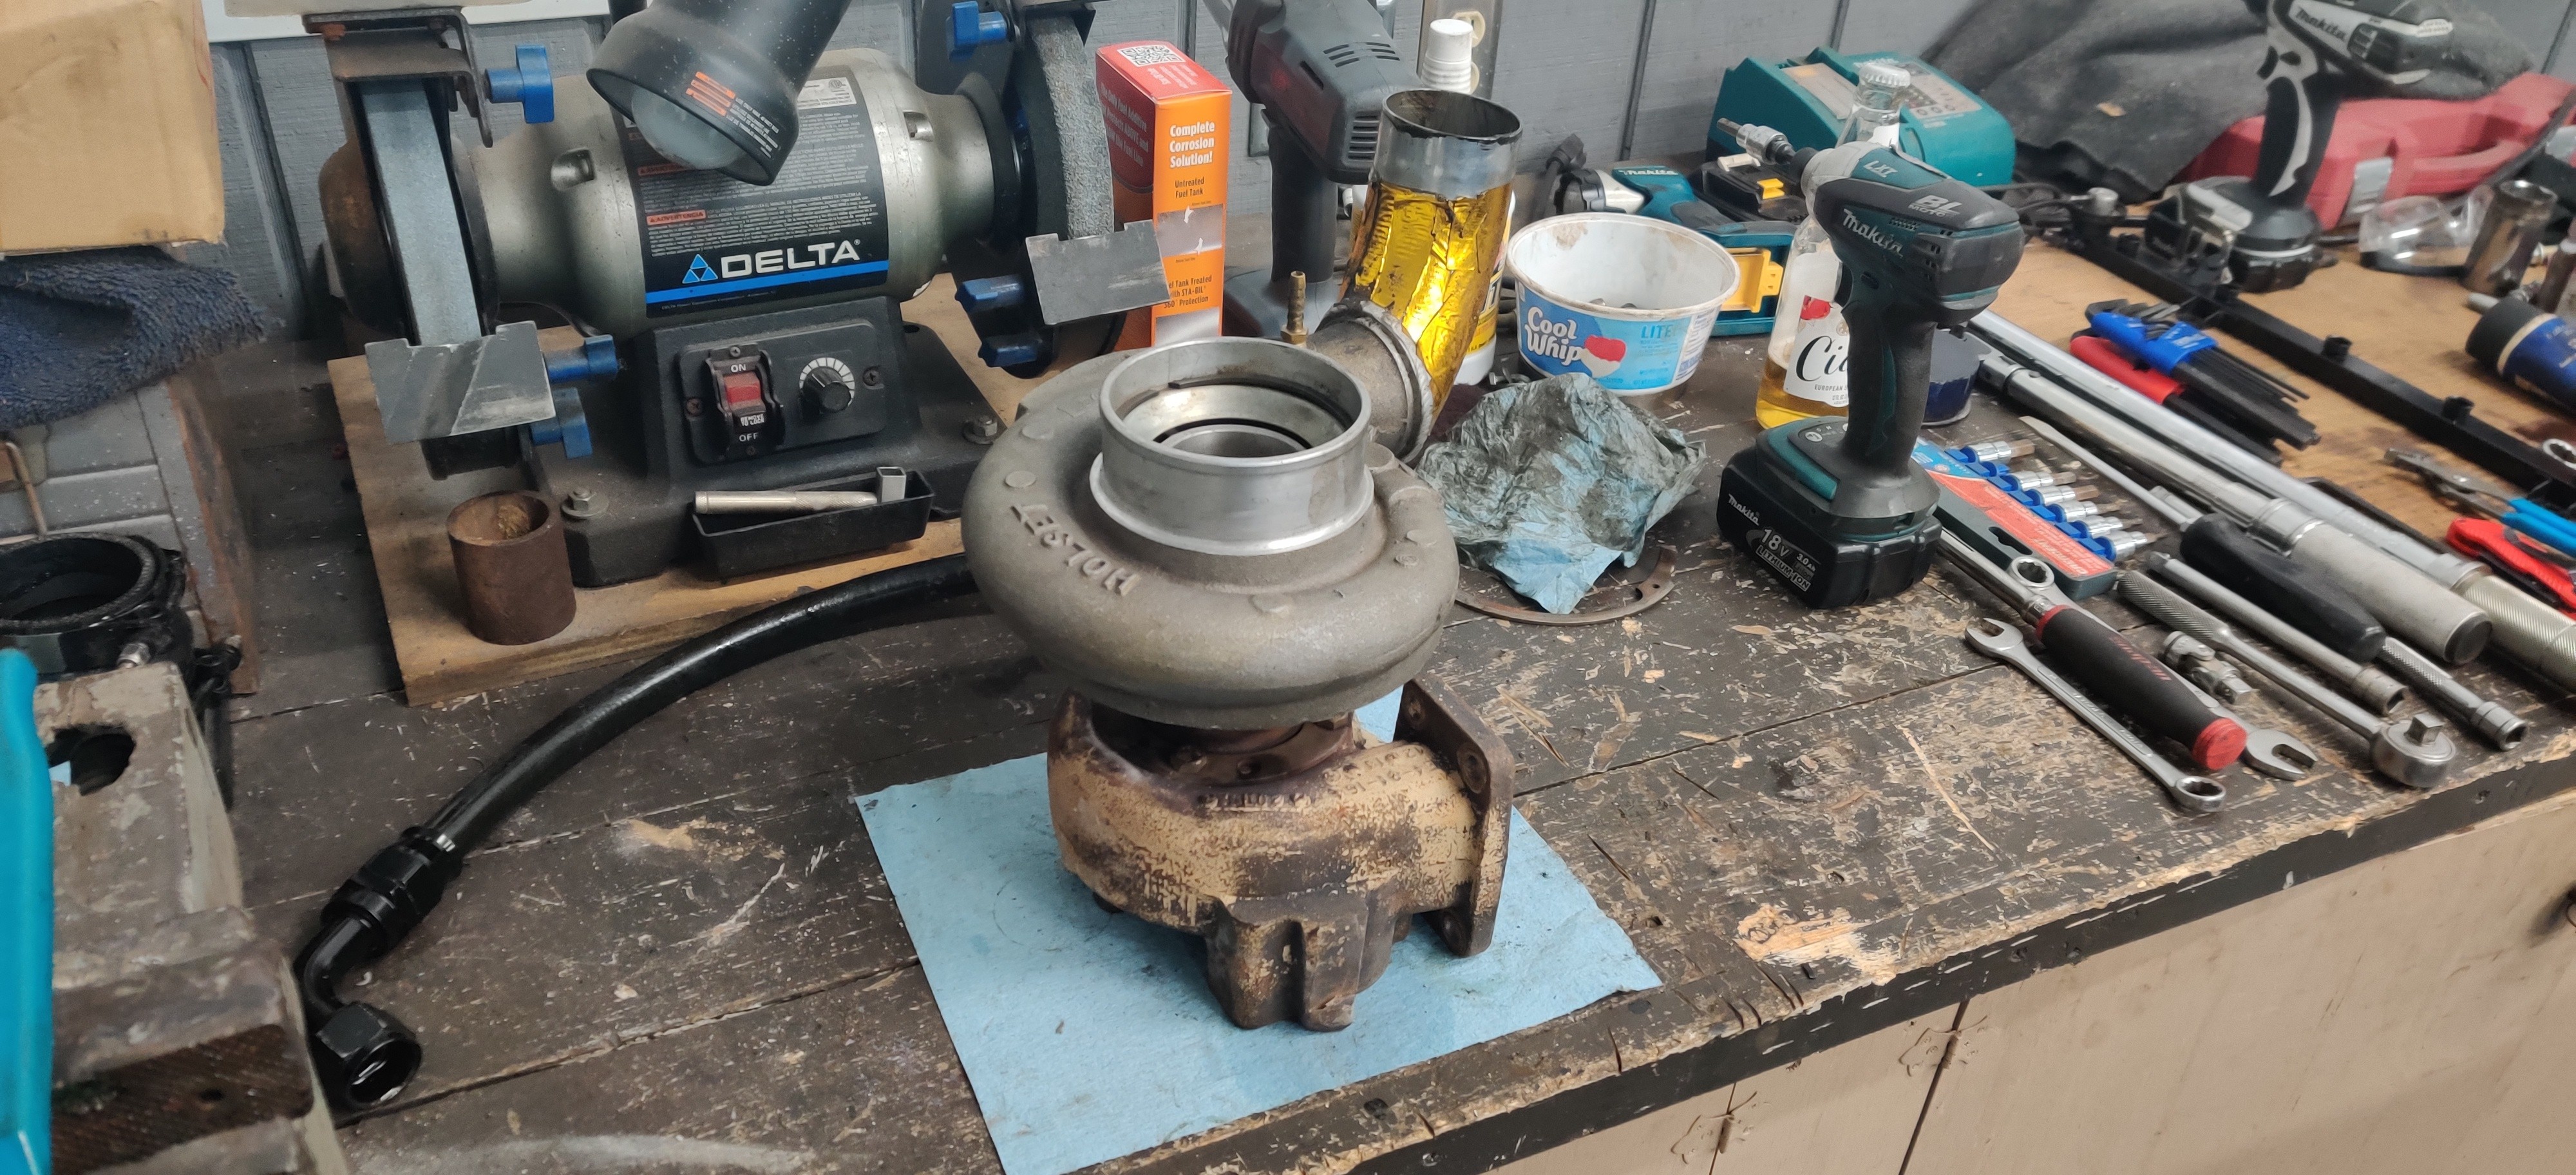
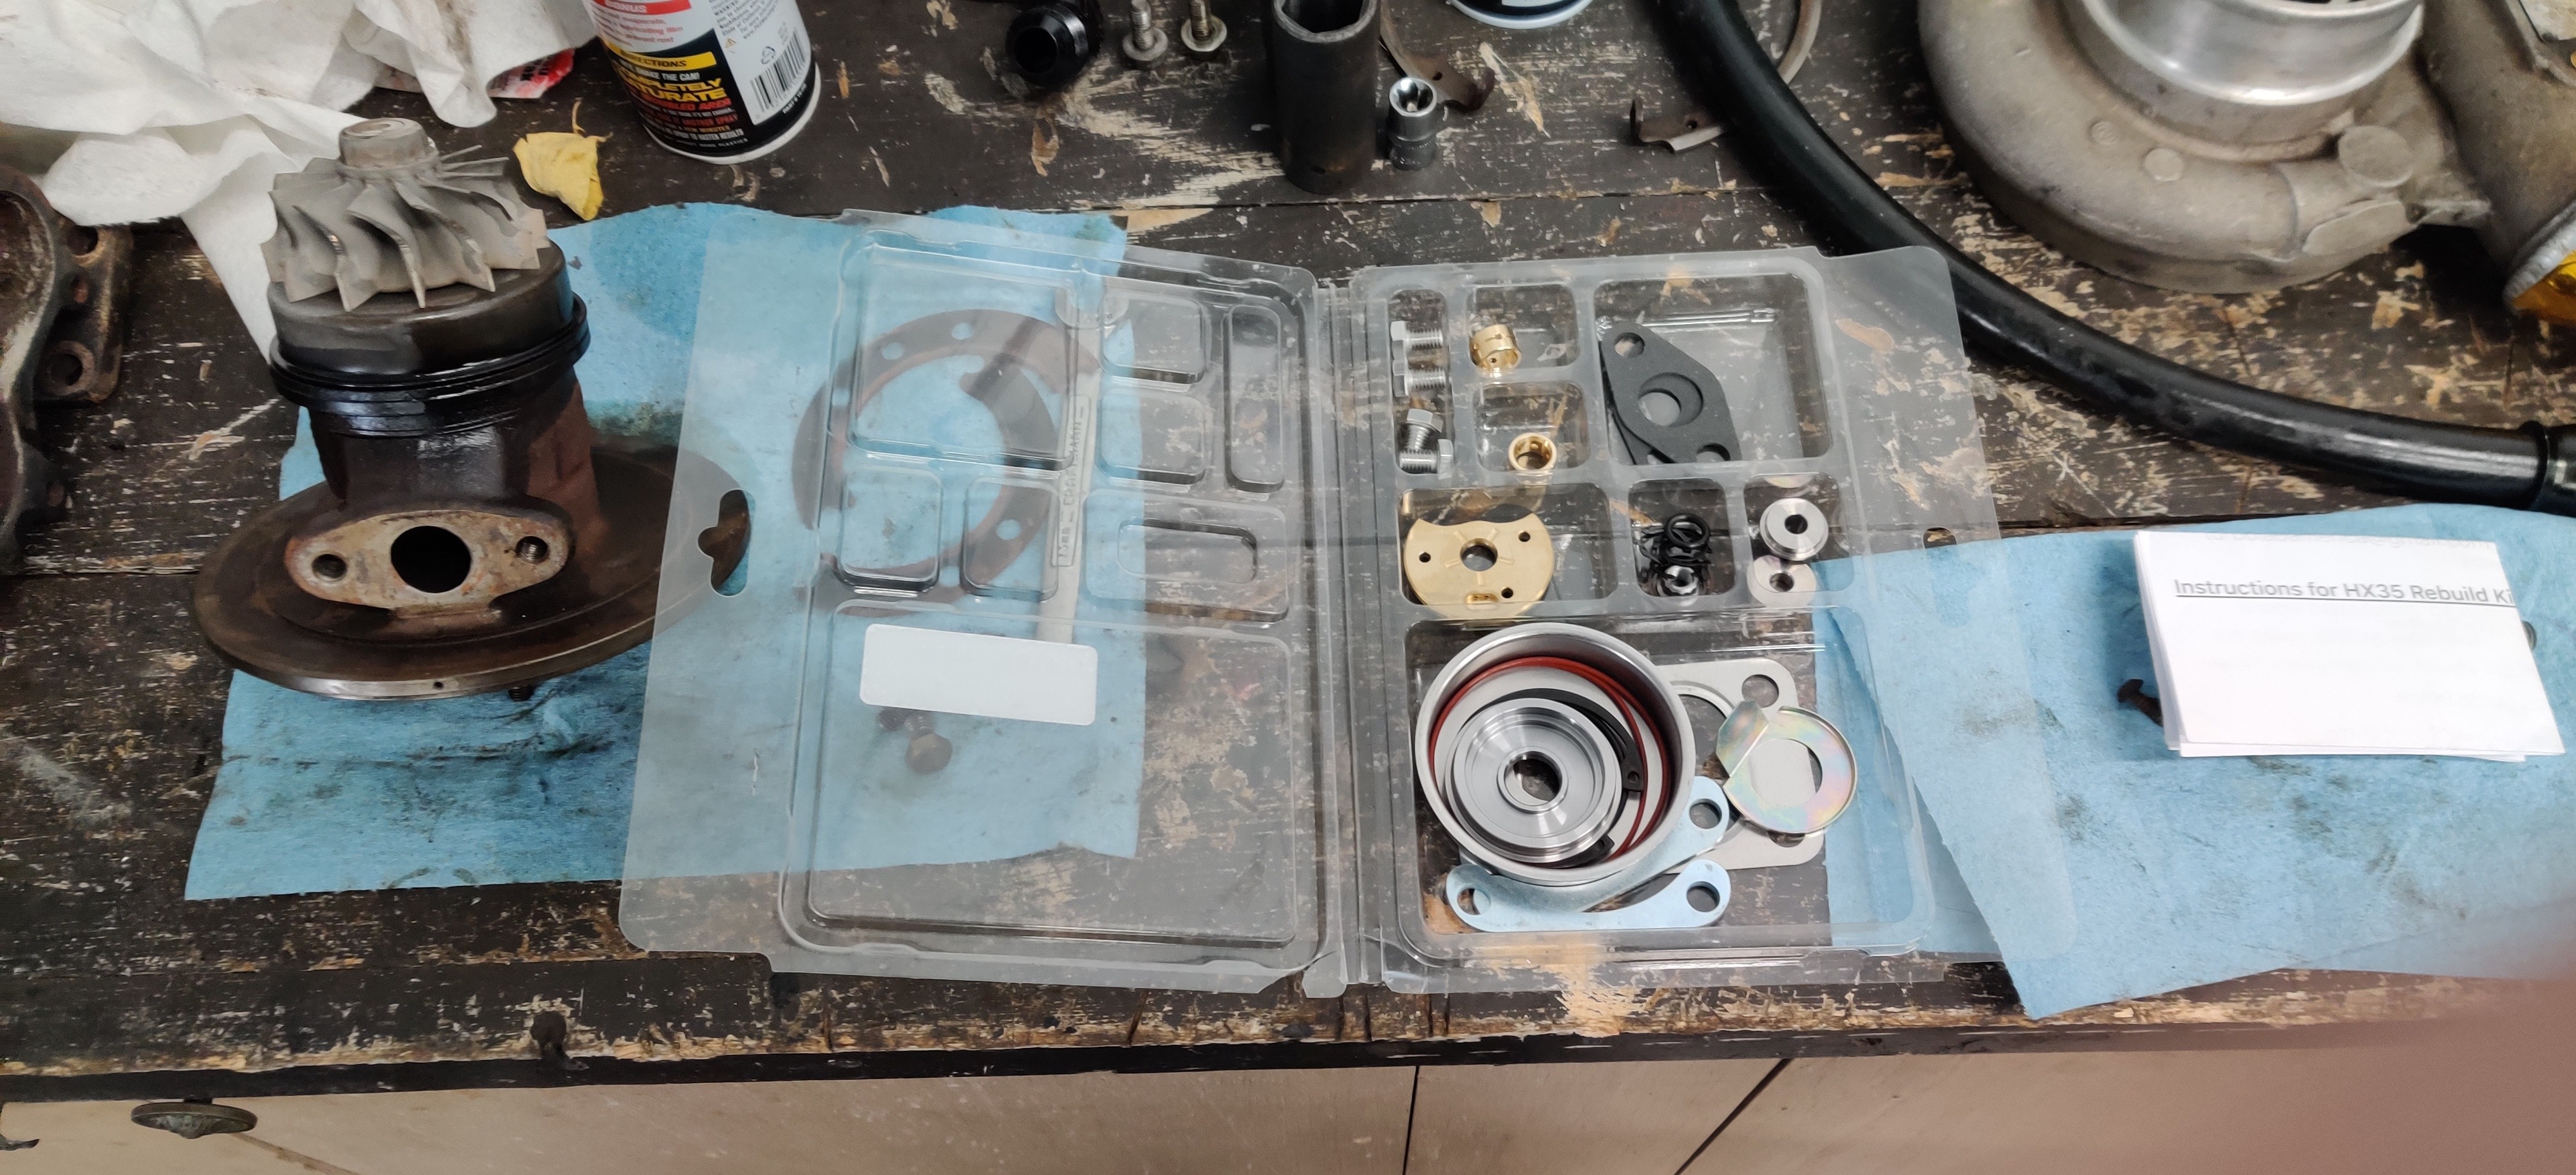
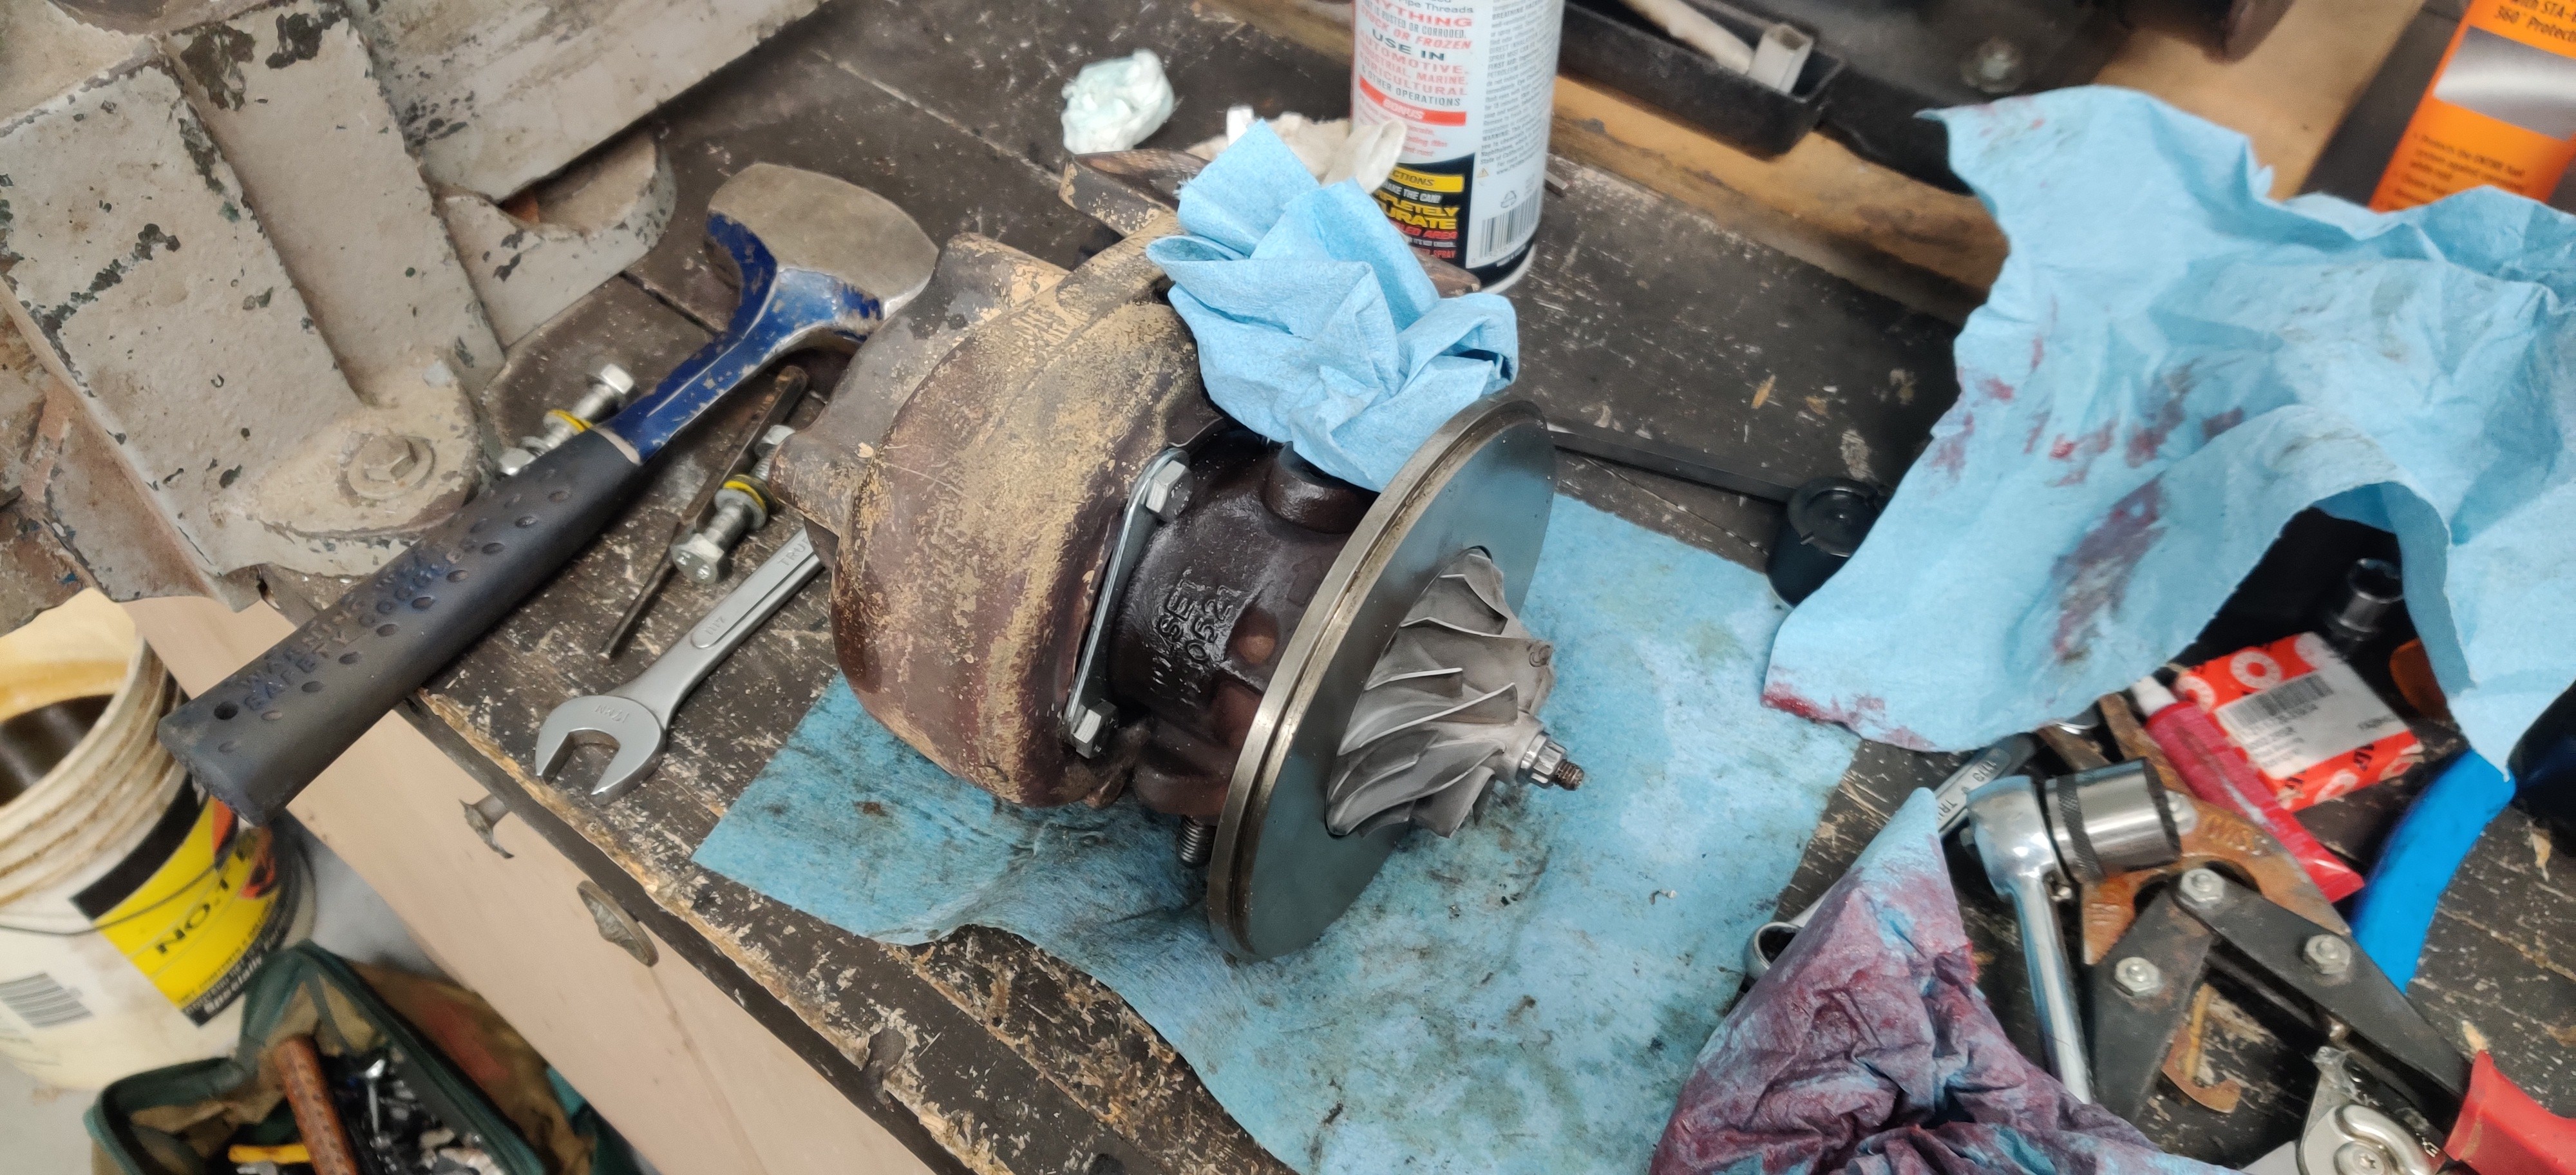
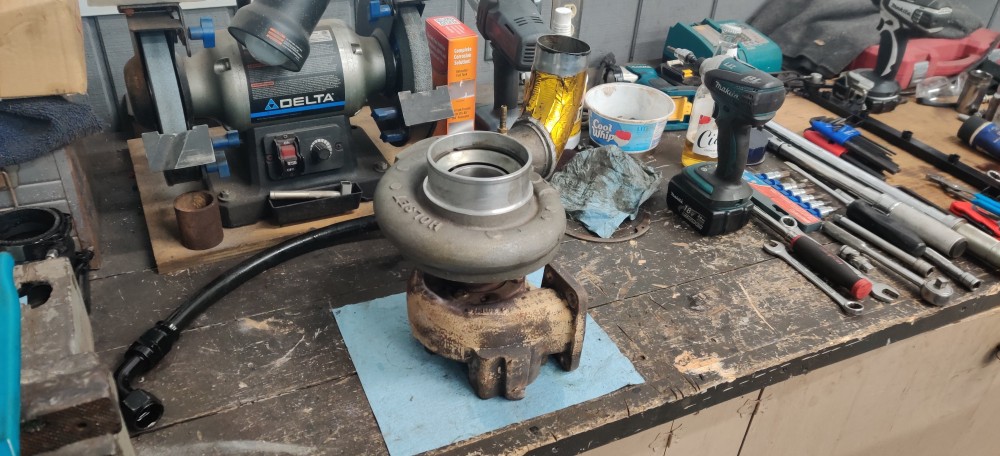
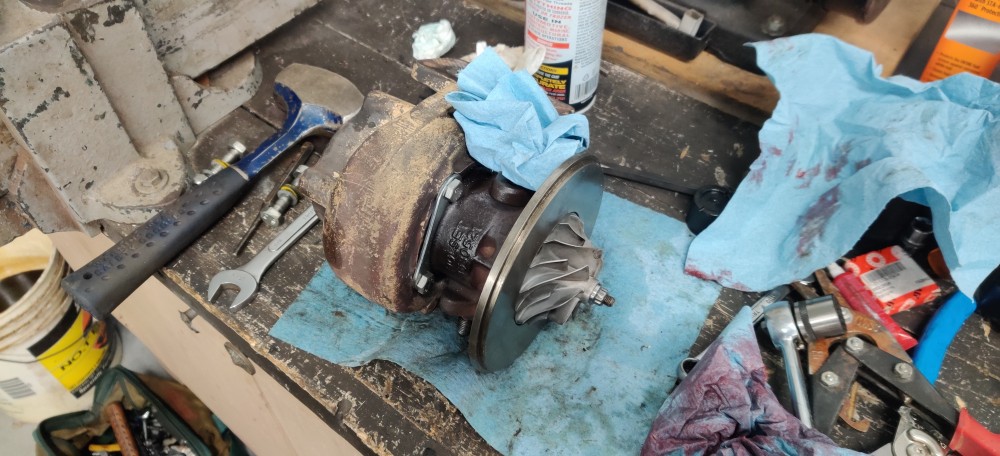
A while back I noticed quite a bit of shaft play on the turbo and thought it might be nice to go ahead and rebuild it.
I must say It is quite nice having a turbo with a very reasonably priced rebuild kit. I am also quite impressed with everything that it comes with as well. Kit was from turbo labs of America.
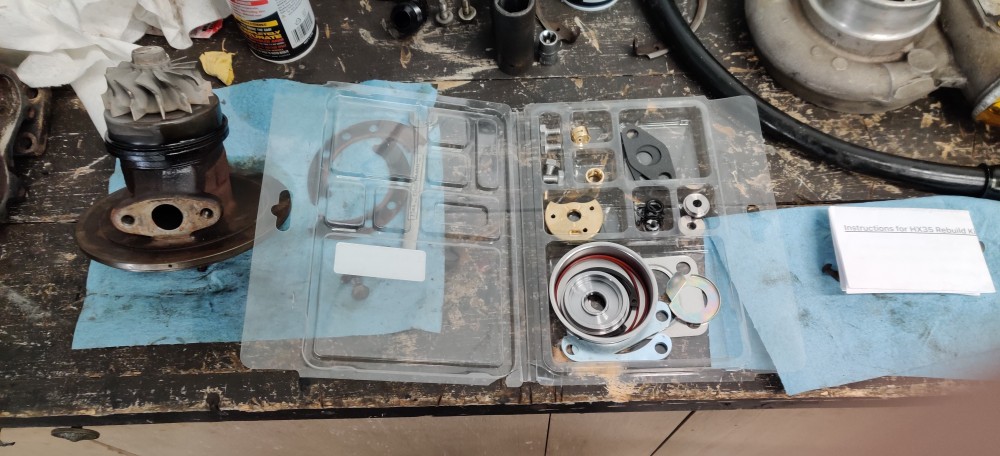
Rebuild process went very well. I was a little nervous at first but quickly realized how easy rebuilding one of these actually is, as long as you take your time. Only challenging part was the removal of the smaller snap rings that hold in the small thrust bearings but otherwise everything else came apart and went together no problem.
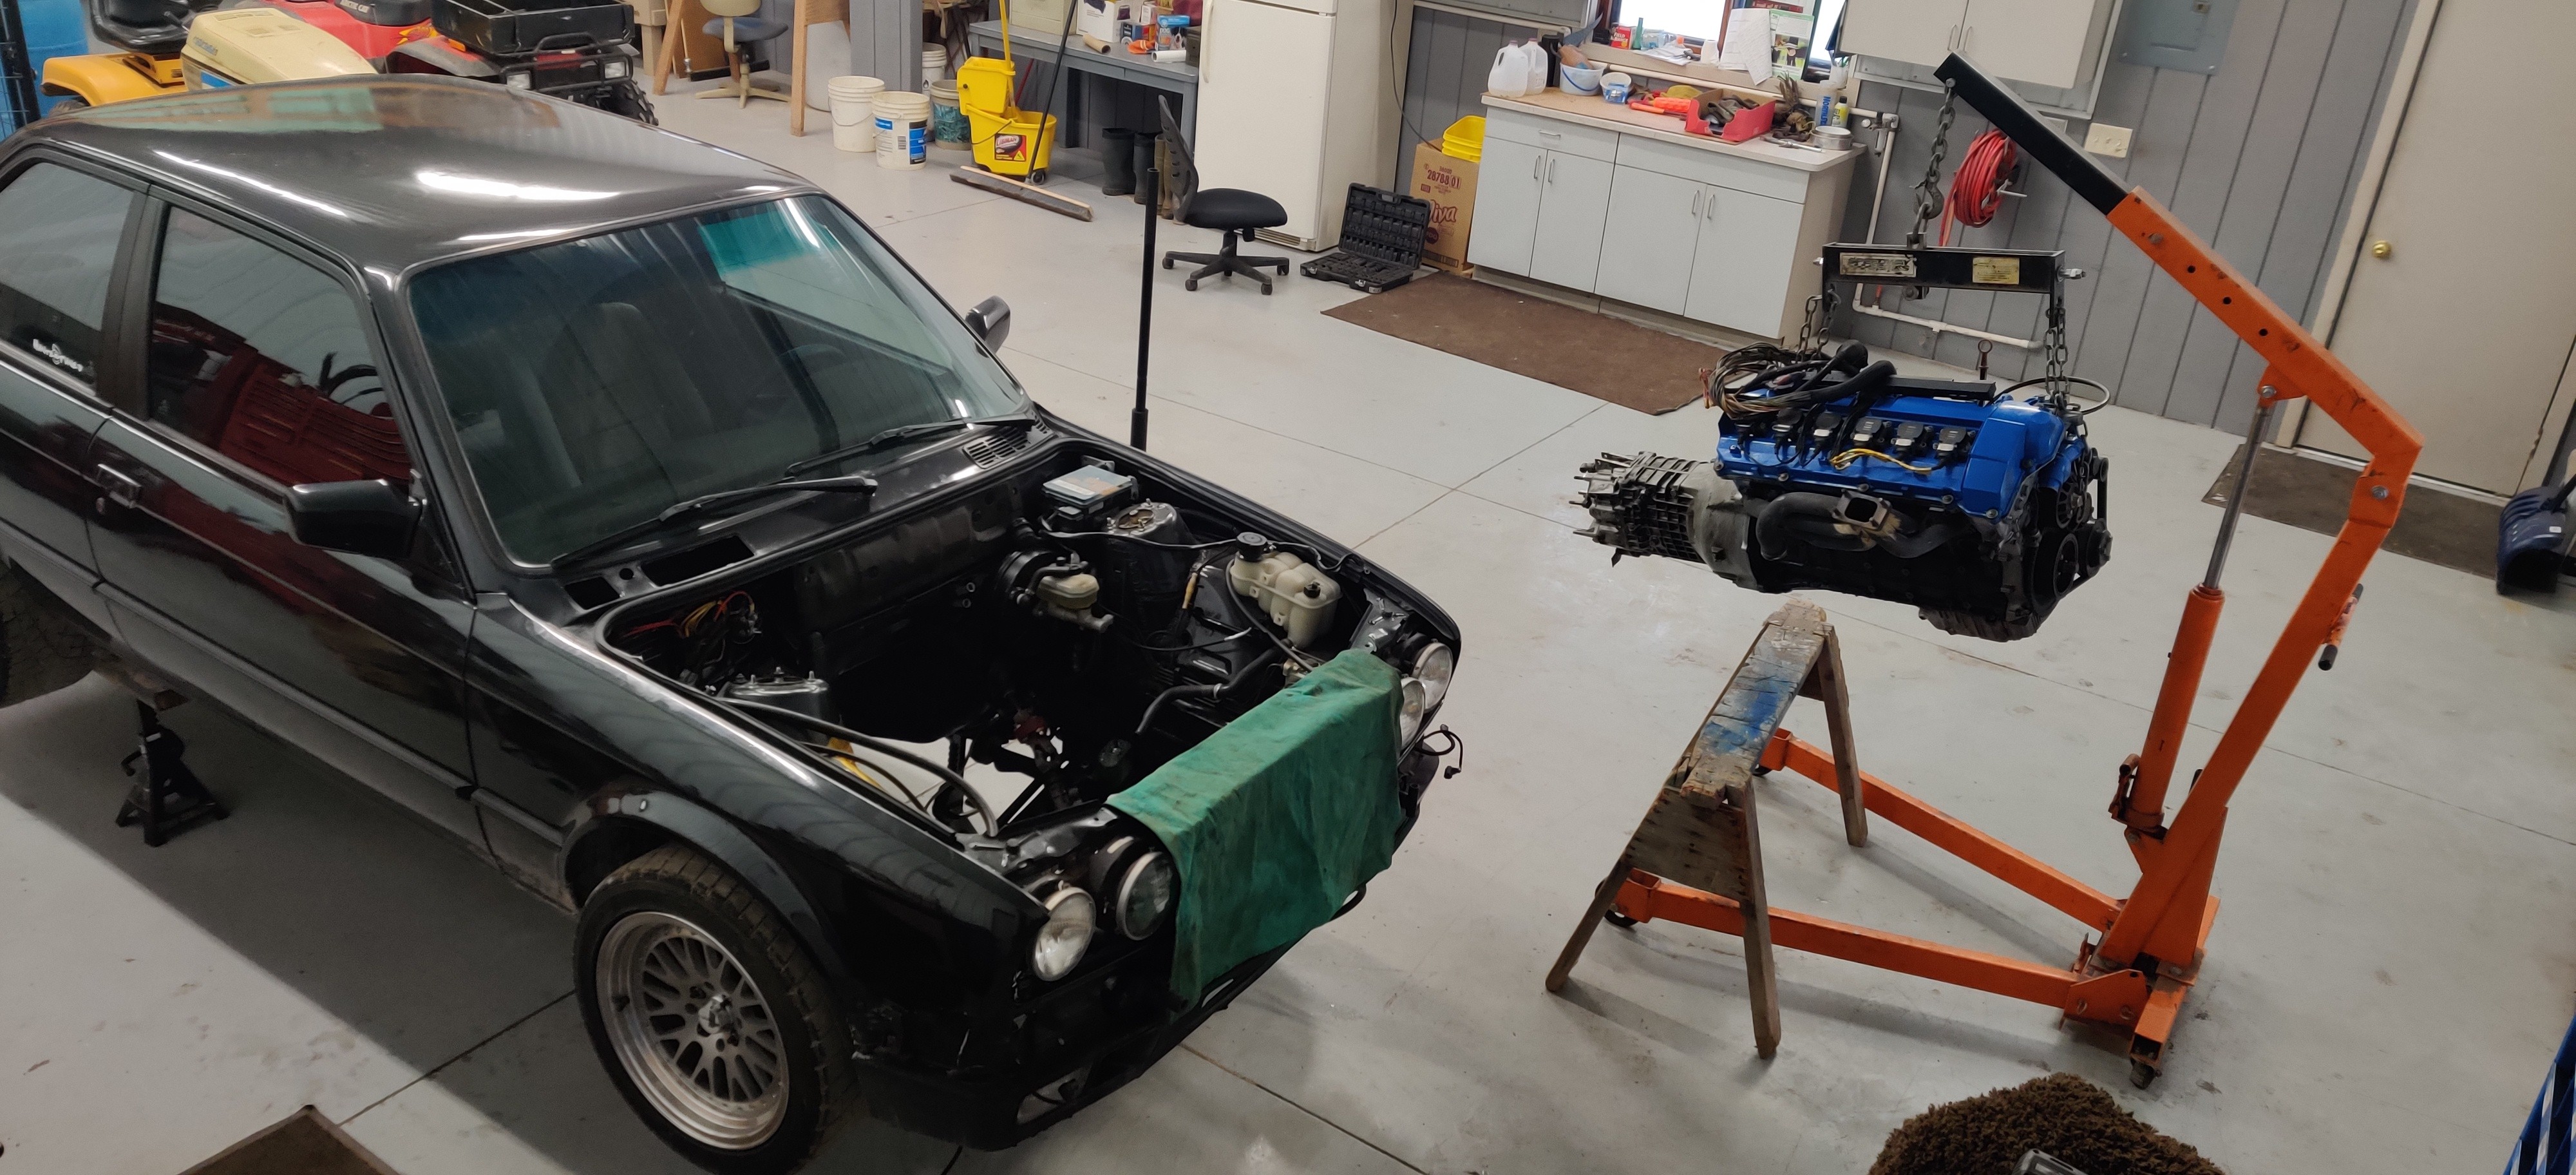
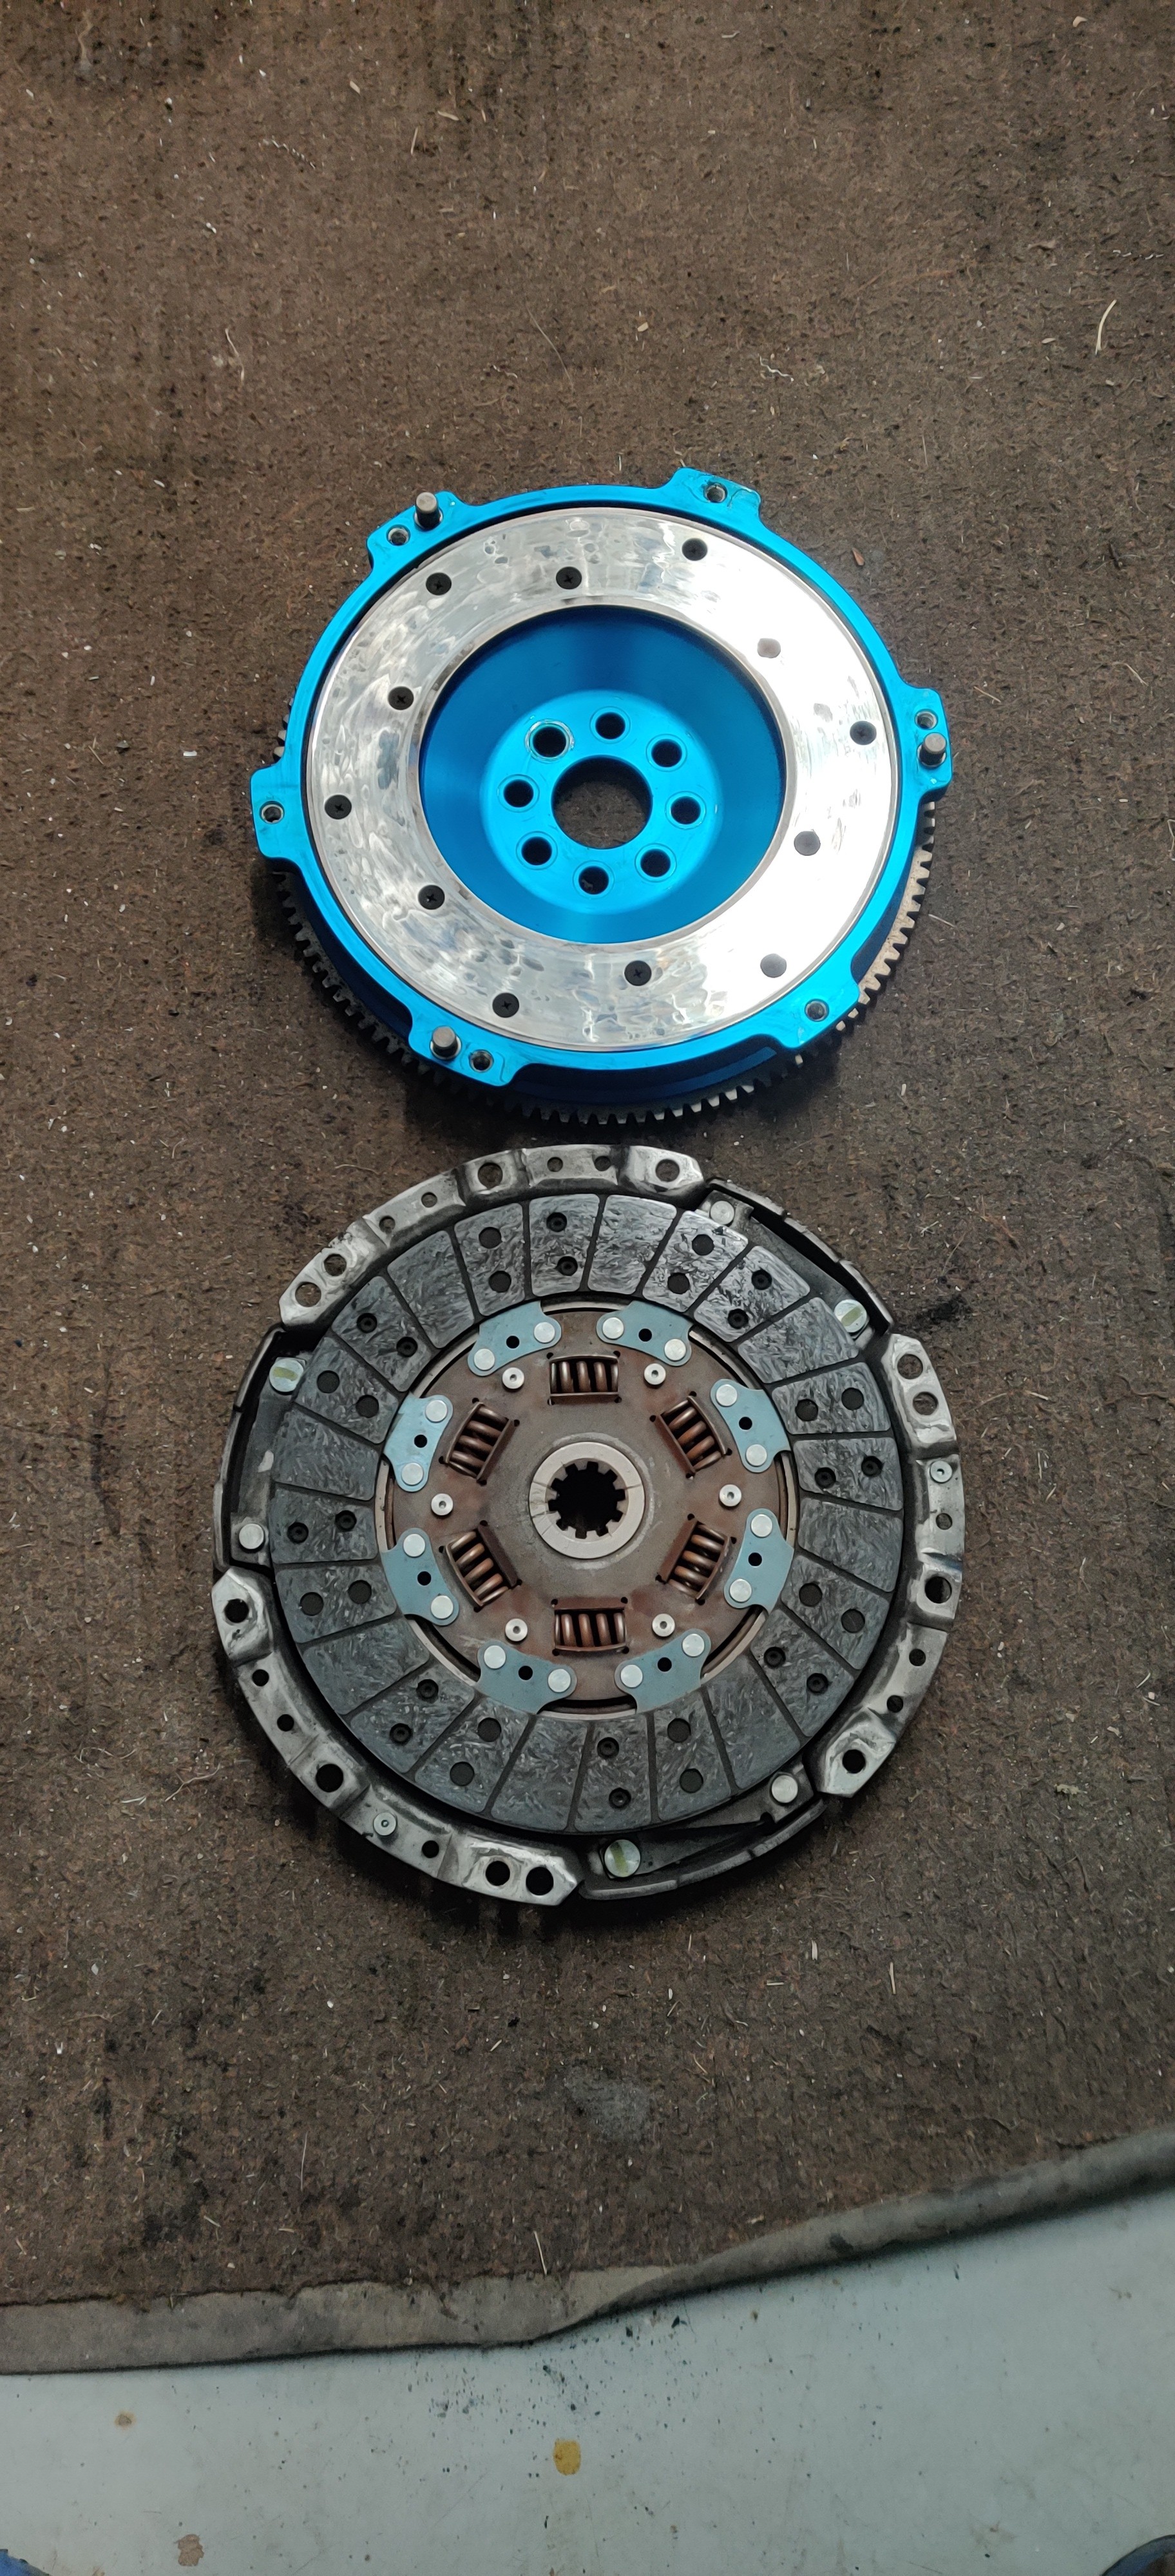
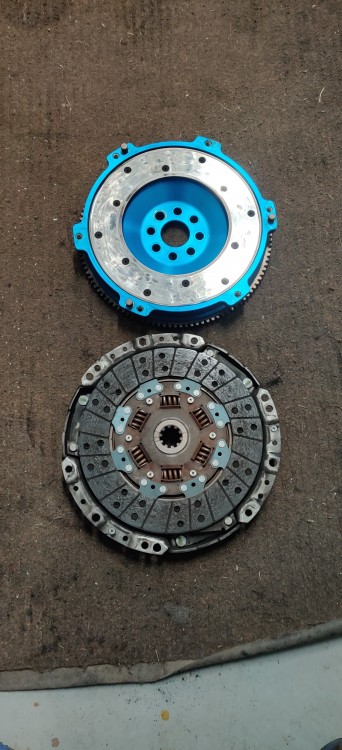
After pulling the g260 off the motor and clutch/flywheel. clutch disc still looks pretty good with no unusual wear. Even though it worked out well most of the time there was a few times during hard pulls from 3rd to 4th gear I could feel it slipping and truly it was at its max if not over what the max for what it was rated for. Luckily when I picked up all the turbo goodies way back when, there was a brand new stage 3 clutch and pressure plate thrown in with everything else as part of the deal so I will be using that as well as switching over to a chromoly flywheel that I am getting resurfaced by a local machine shop this week.
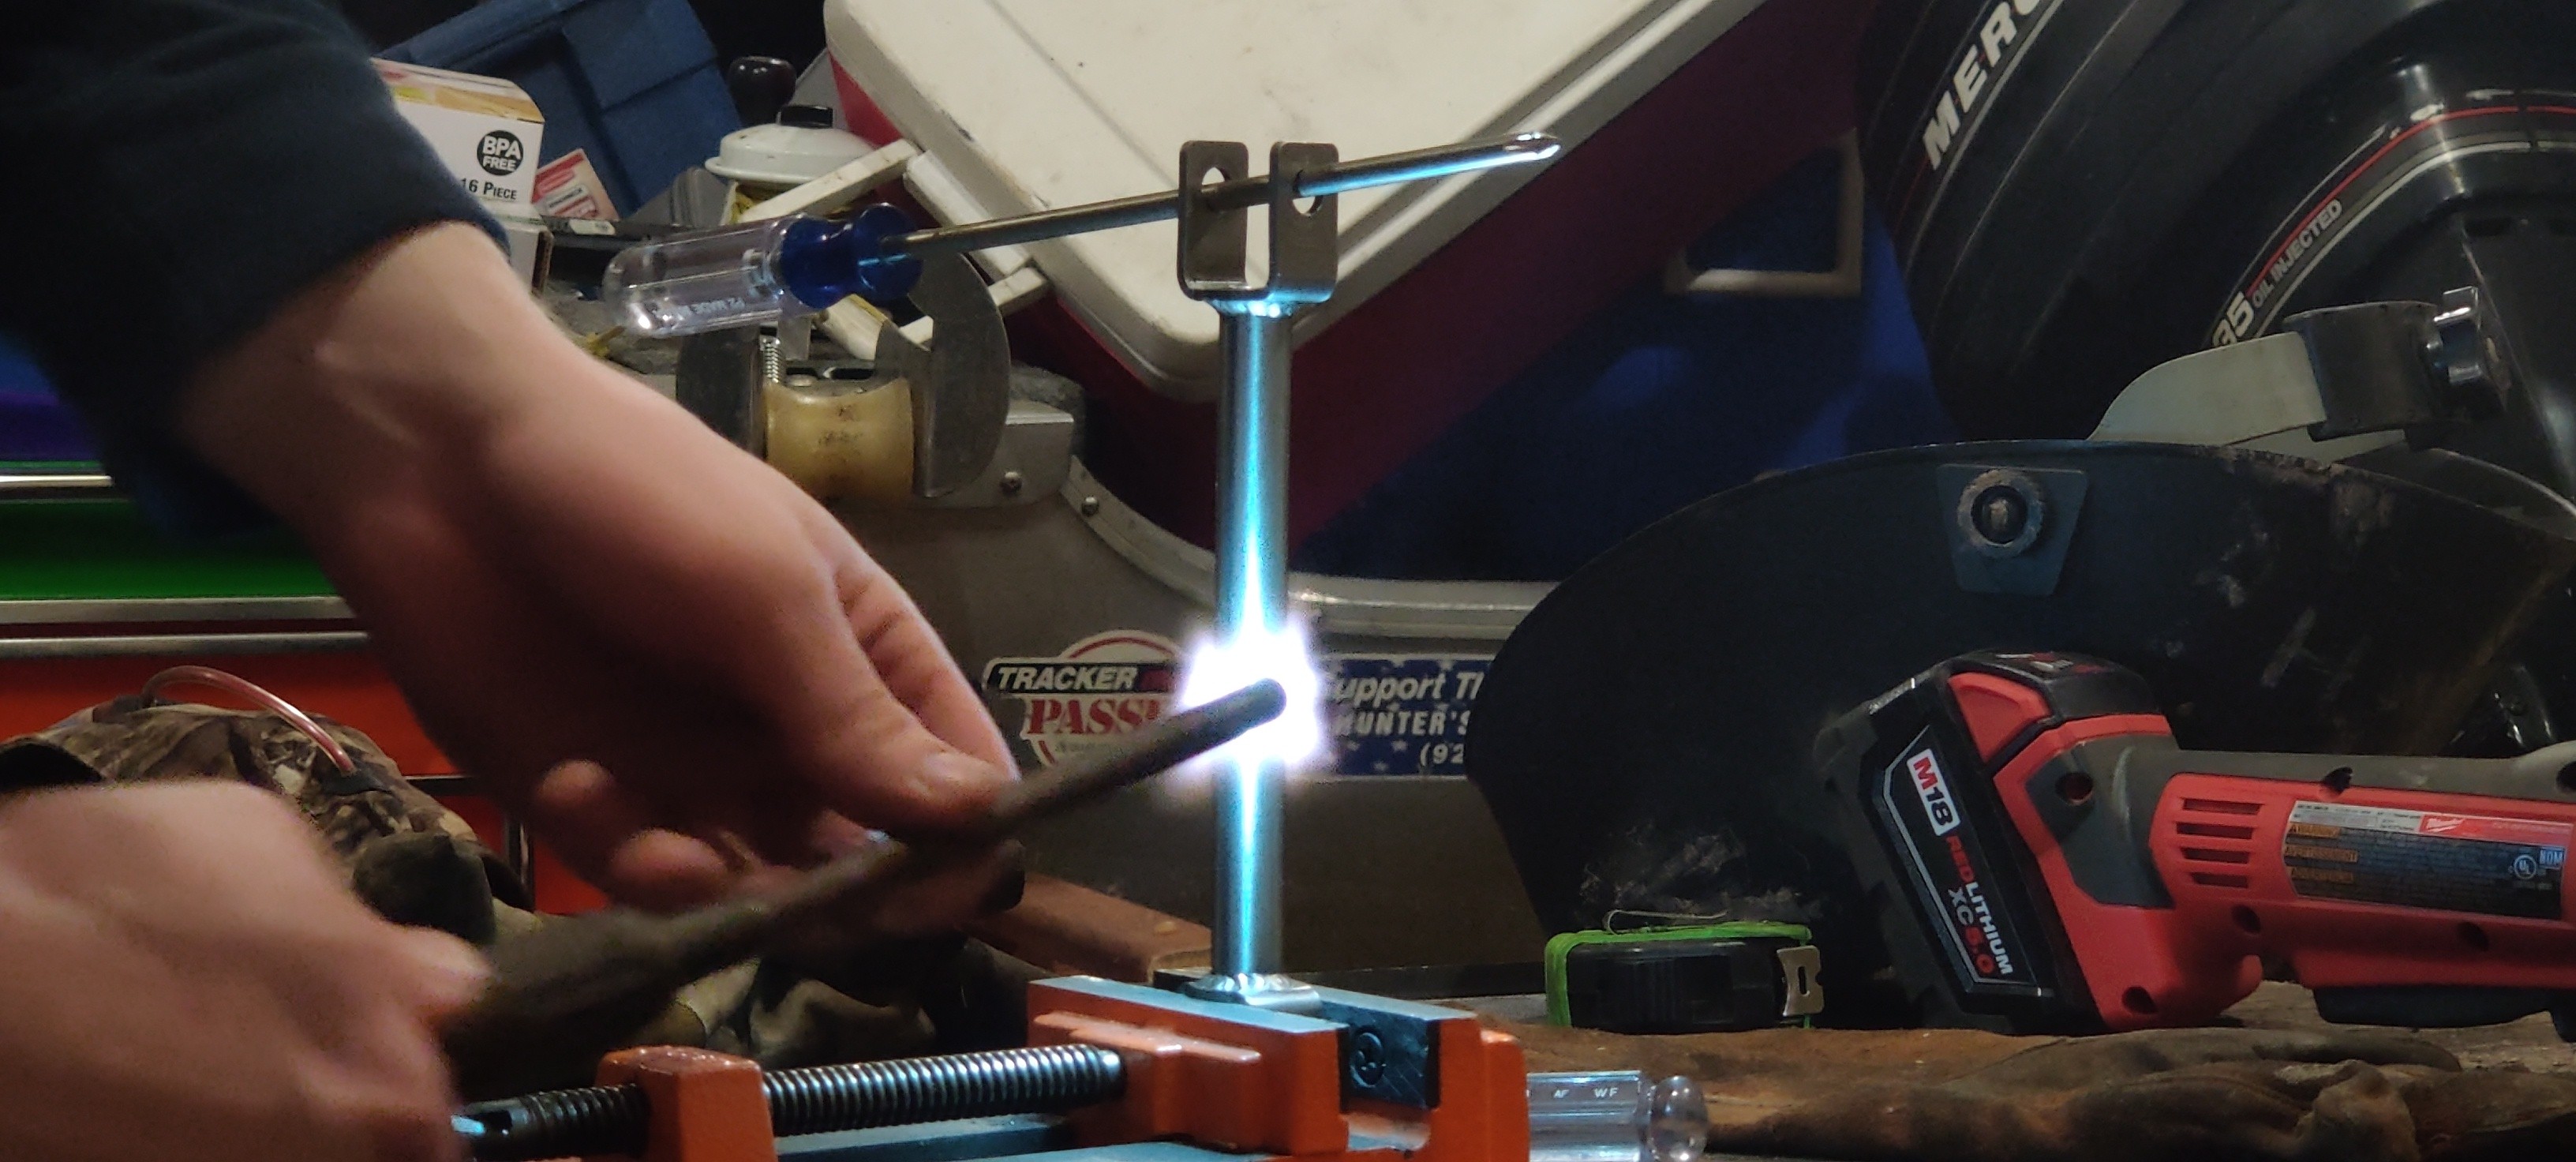
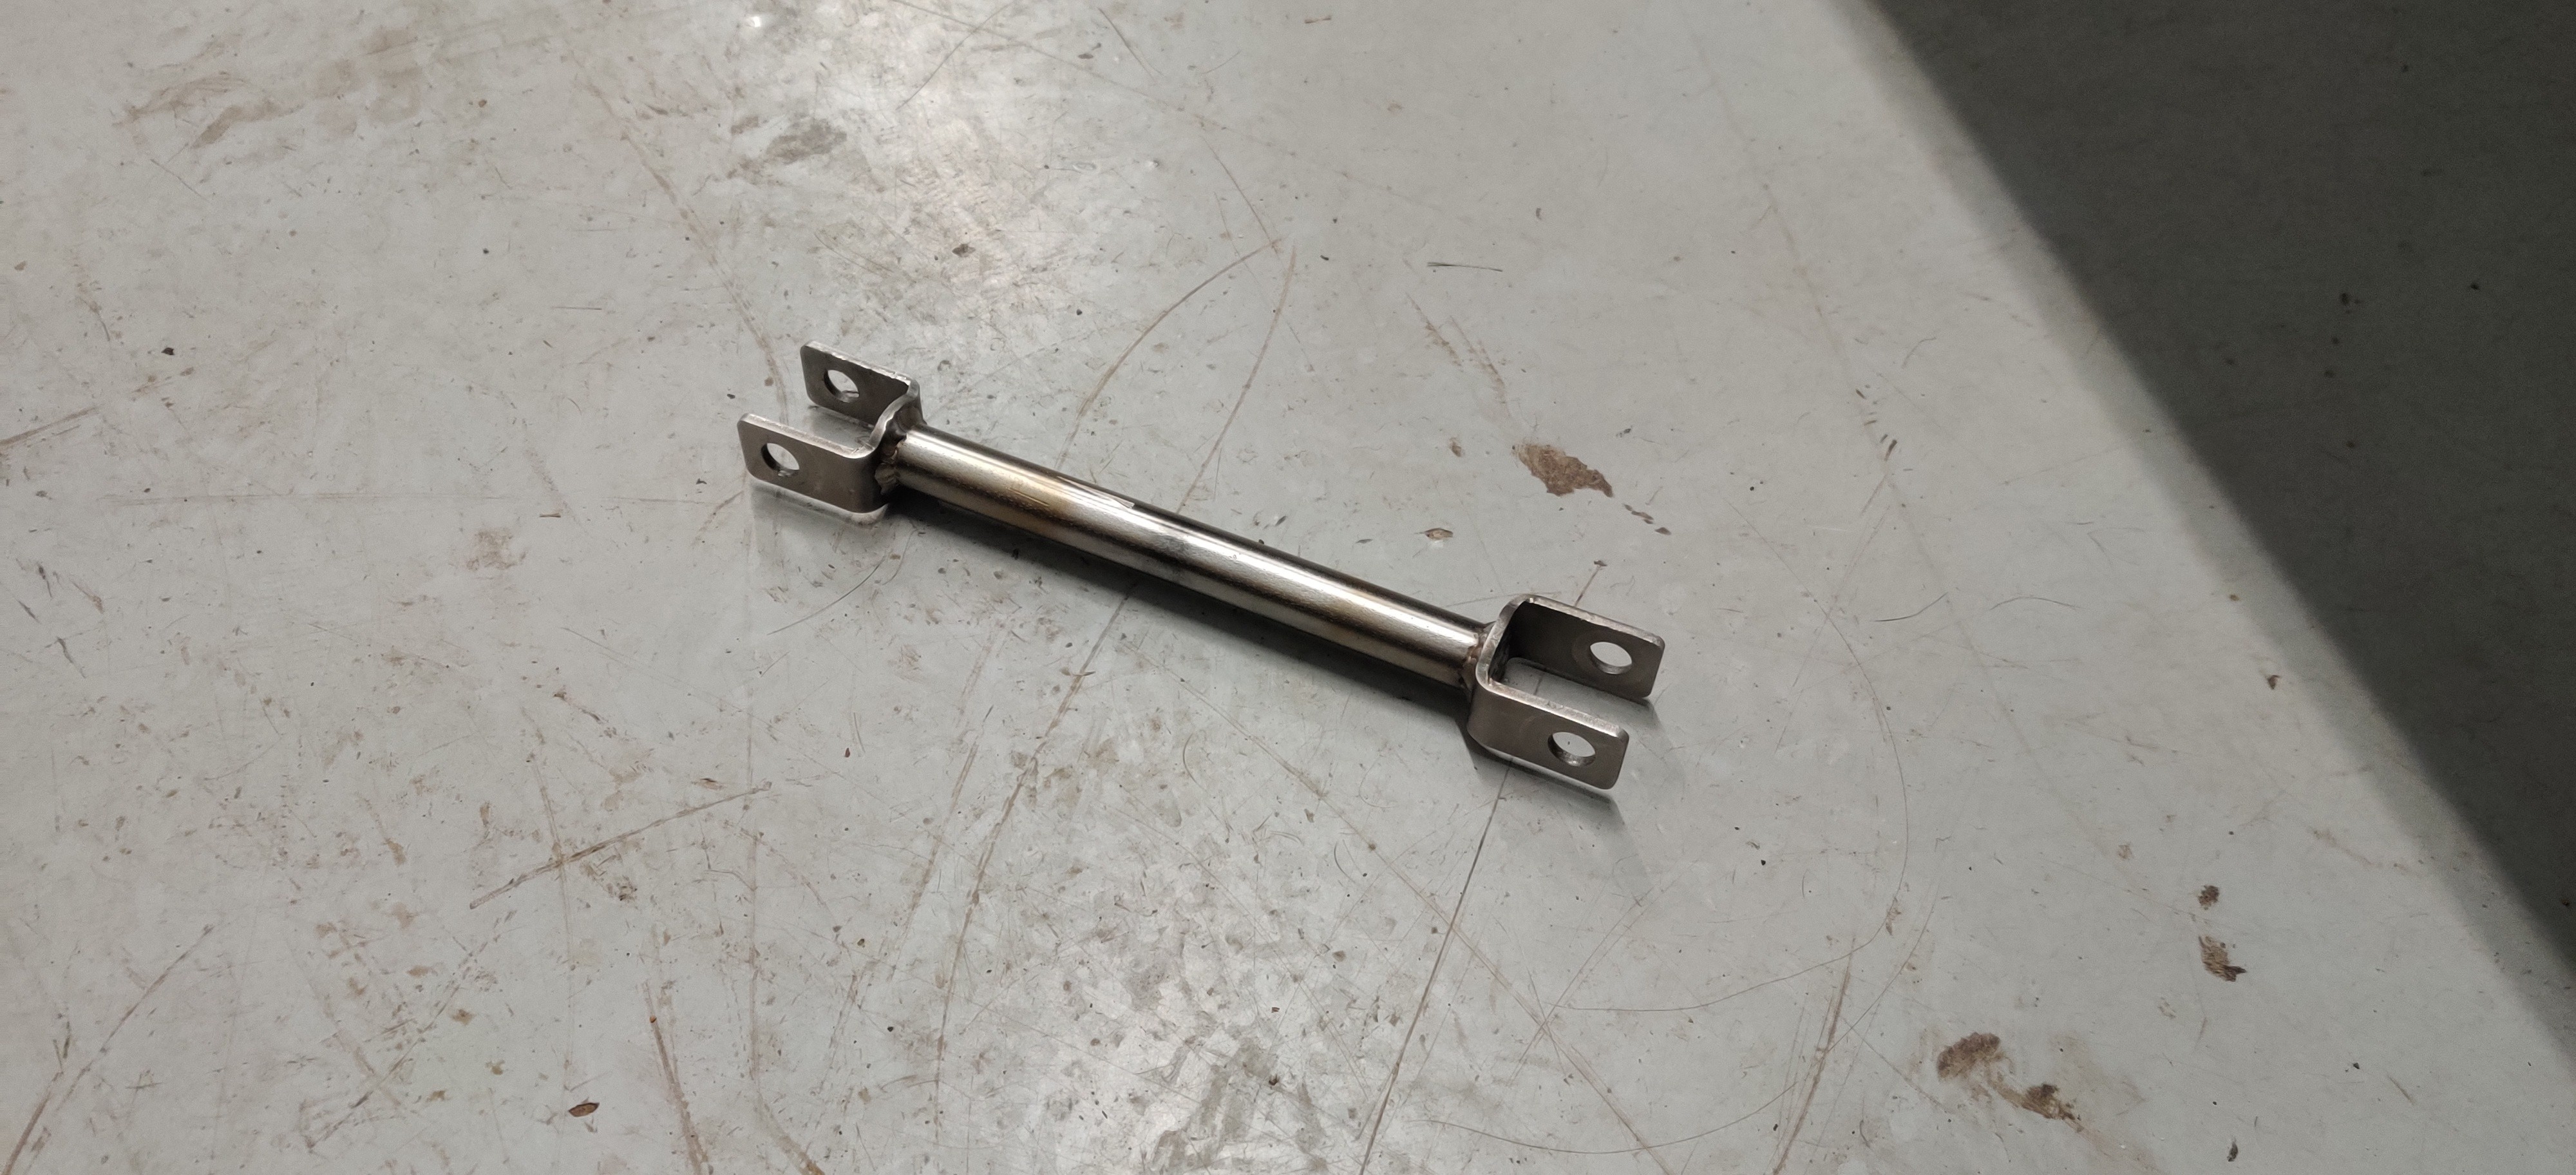
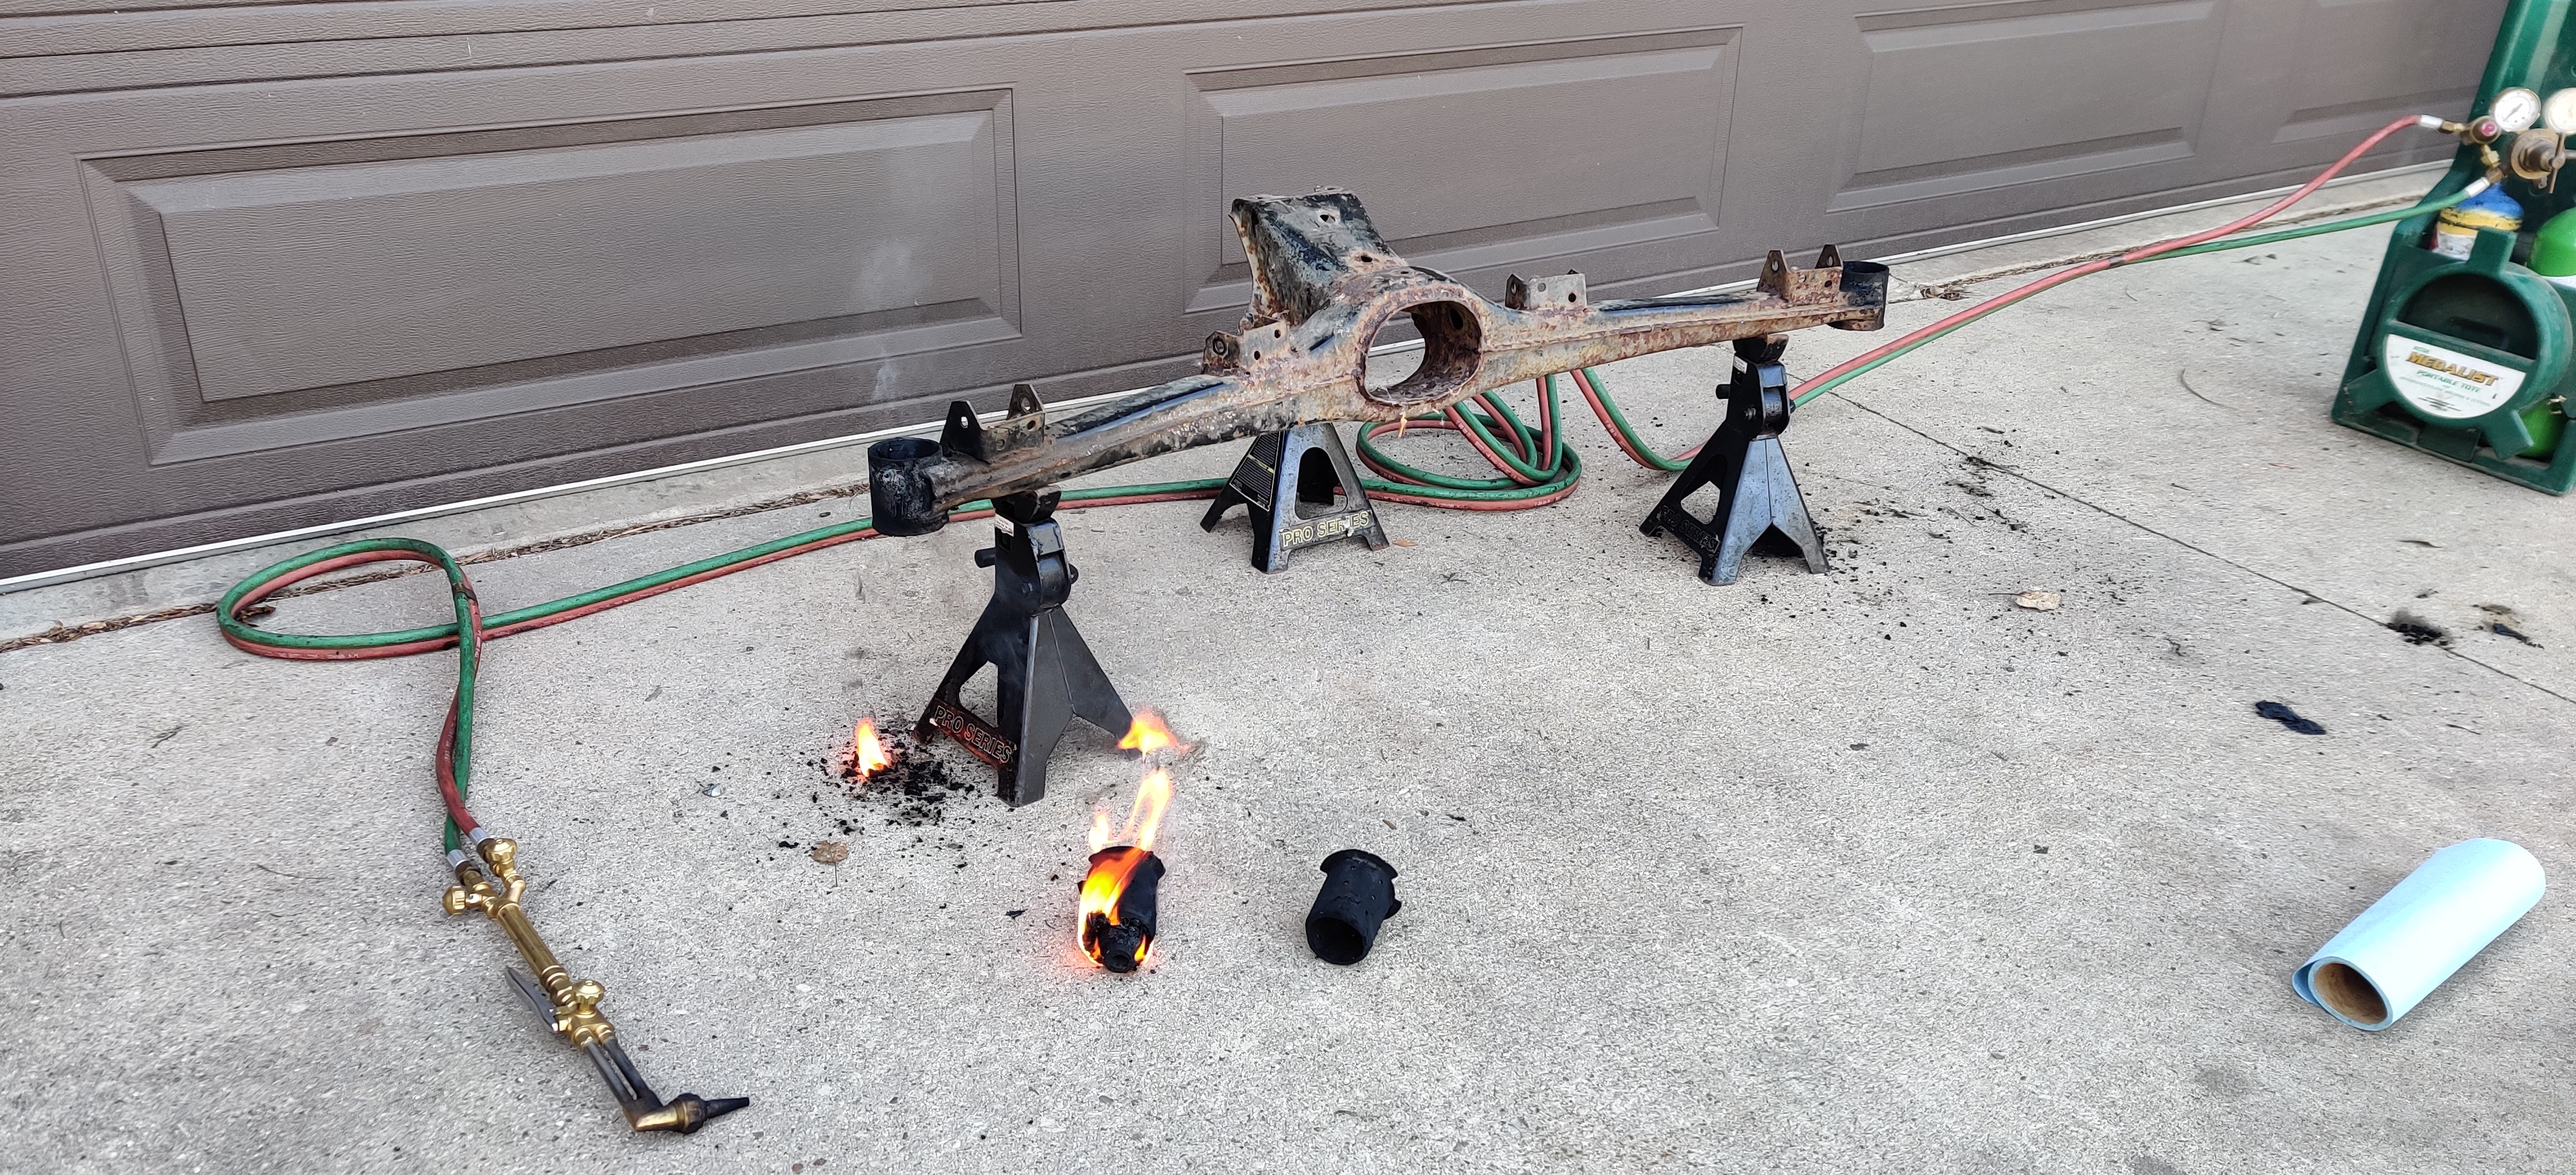
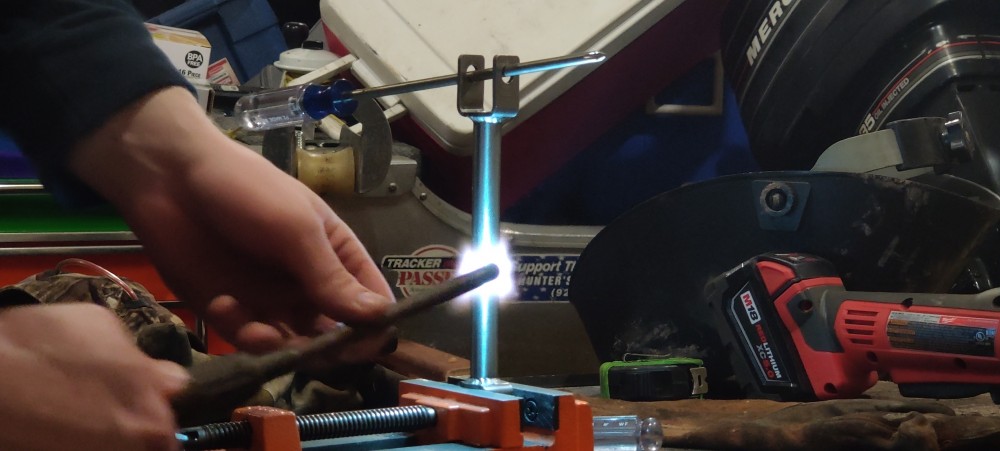
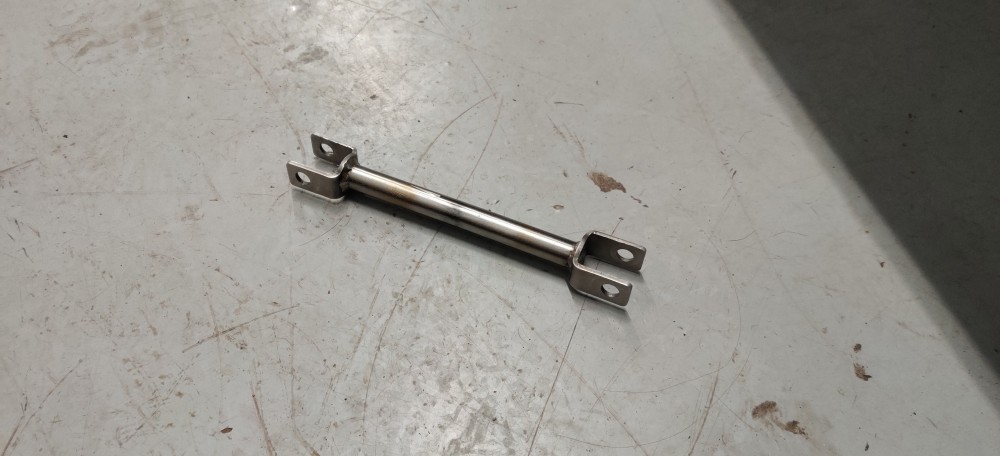
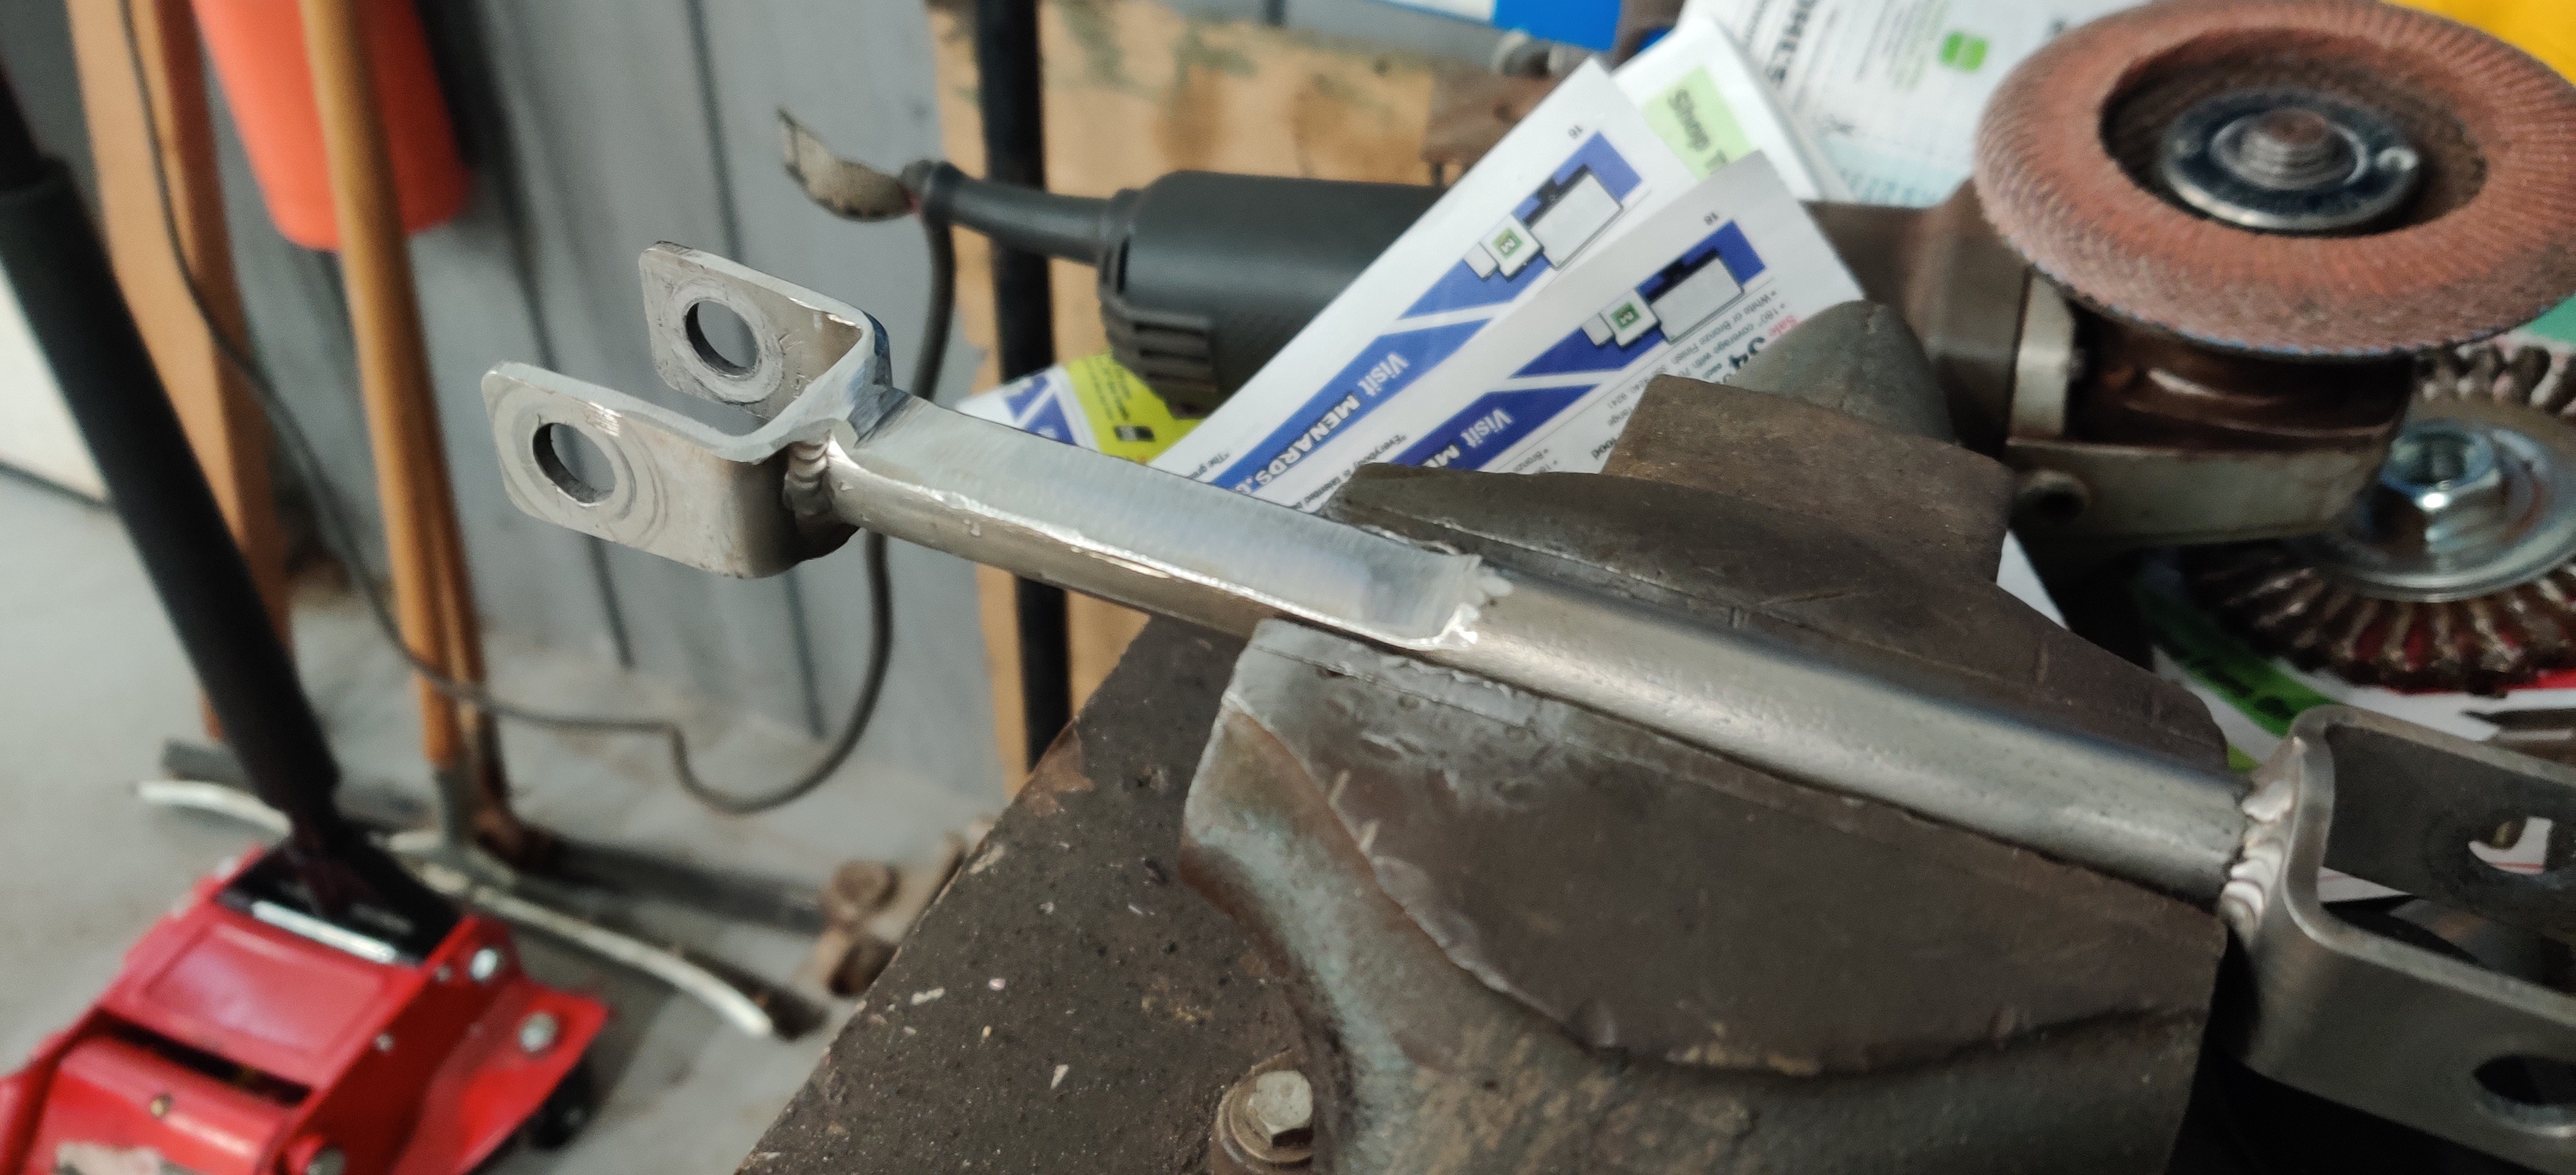
Now that the DSSR was all nicely welded up at 10 degrees it was time to turn it back. There was a few options to do this but I found it easiest to just heat it up red hot and twist it. Called up my buddy who had an oxy acetylene torch and he made that happen. we did figure out that even at red hot we were gonna need better leverage then a screw driver through the holes. A pipe wrench was used instead which worked terrific!
Did my best to polish it up afterwards with a scotch brite pad.
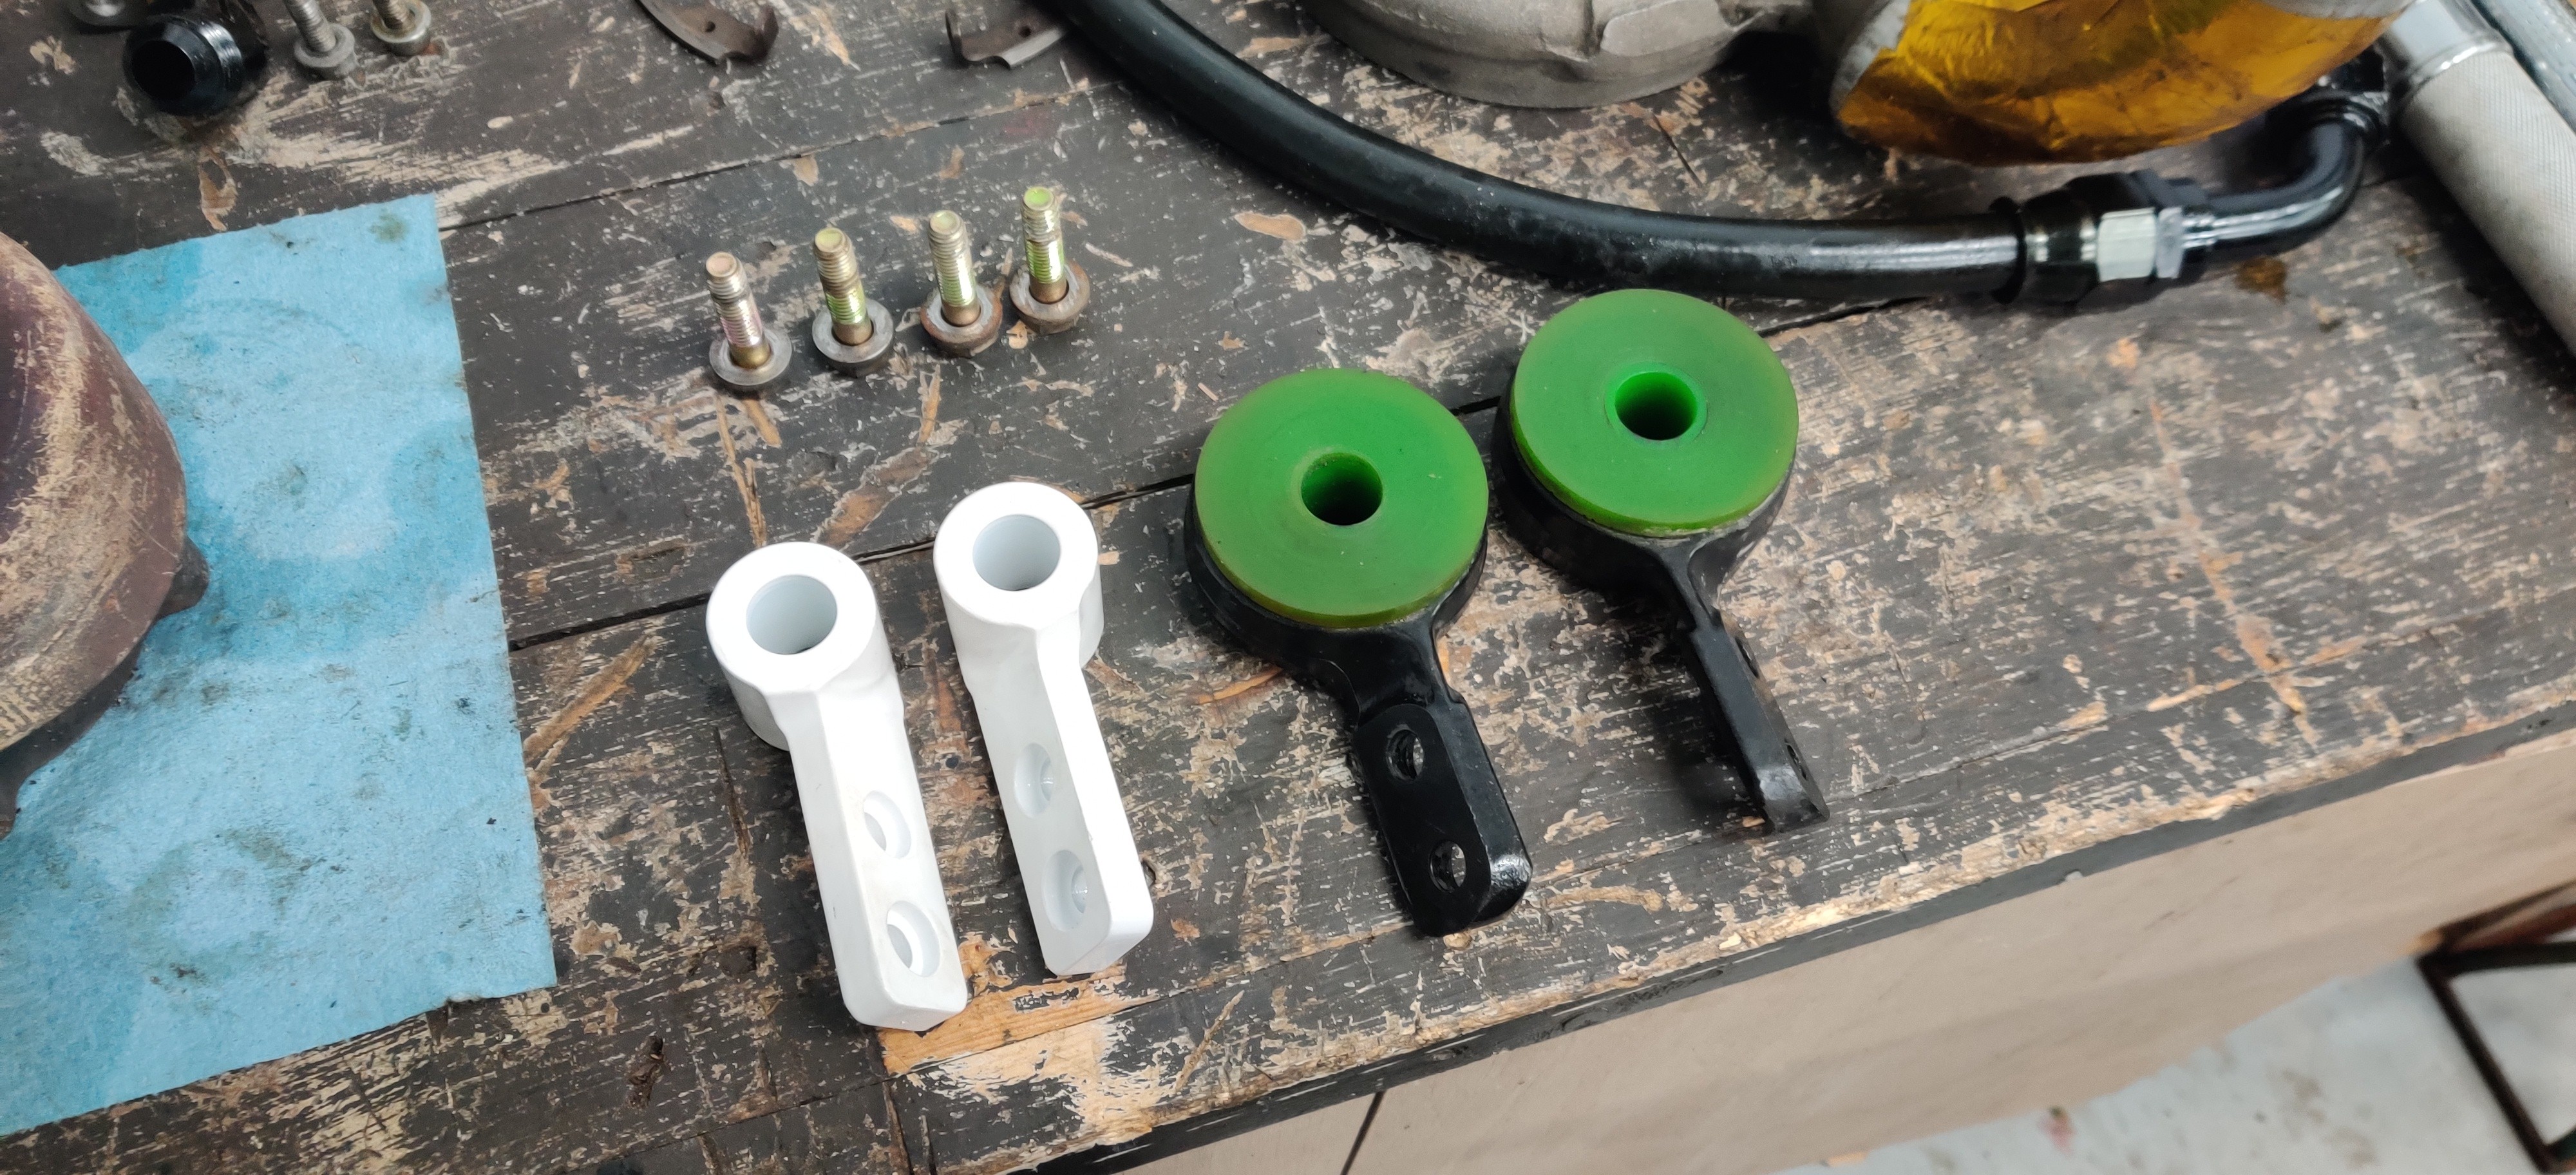
Lastly I picked up some solid control arm mounts from condor back during their black Friday sale. I wanted to try and get a bit more caster for the front wheels and I have heard really good things about these in terms of handling. Install was easier then changing a battery.
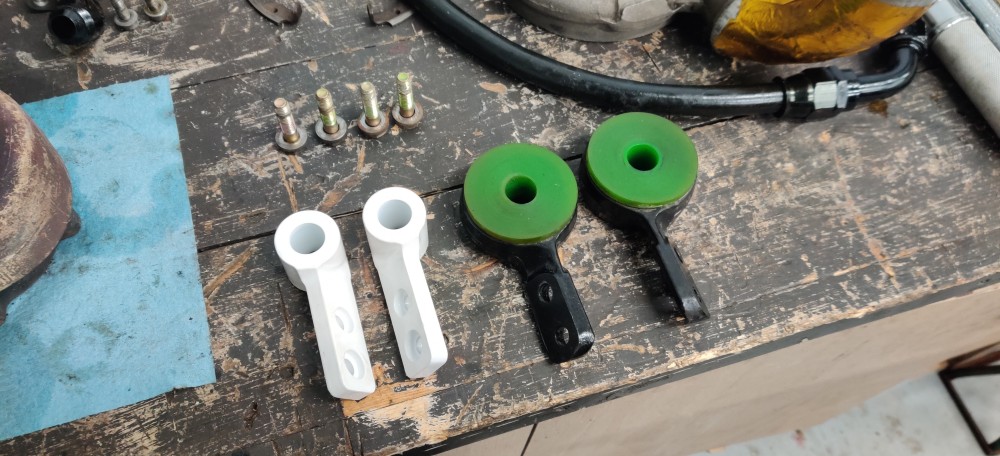
And that's what I have done so far. Ordered quite a few parts last Friday night that should hopefully be arriving sometime later this week. If all goes well I should be able to get the engine back in the car this weekend. Besides getting the diff rebuilt that will be it for drvietrain stuff, at the moment.
There are Couple other things on the check off list.
1. I plan on installing a flex fuel sensor. Come spring time I hope to get the car tuned to run on 91 octane. For the most part I do plan to continue running the car on E85 cause mo power! Its more for when I find myself in an area where E85 is less prevalent.
2. Make some holes where the eccentric hardware are located. With the subframe raised in the rear to fix excessive negative camber there is no longer any room to fit wrenches to adjust them. More to add to this later.
3. Front brake duct cooling kit
4. Different pads and rotors set up
5. Different seats. Still looking around at what I'd like to get, all I know is the seats I have currently have to go. I originally wanted to rebuild/re-upholster the seats but at this point I would rather run something different completely. Still hunting around though.
Maintenance to-do's before returning to the streets...
1. Oil change
2. Clean intercooler
3. Flush brake fluid
4. Swap out spark plugs
5. Replace air filter
6. Drain fuel
-
the one and only e30 s52 engine swapSo I fixed/improved a few things on this car a couple weekends back. Even though I had thought I had fixed it entirely with the turbo drain line I have still been having some oil leaking issues lately, Just couldn't pinpoint where it was coming from. After some close inspecting I had reason to believe my valve cover gasket was leaking. A few days later a new valve cover gasket appeared on my door step and I spent an evening swapping them out.
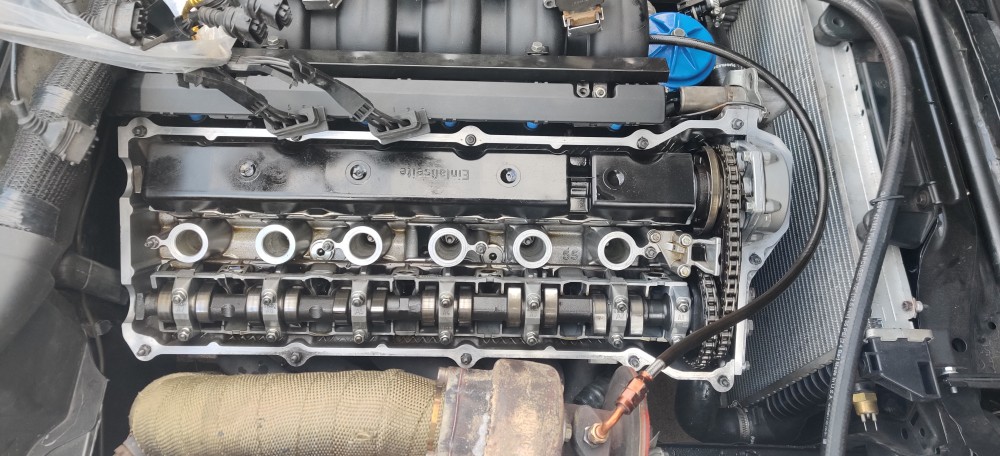
After that was finished I started the car up and began inspecting. That's when I noticed something after bumping the oil feed line for the turbo...
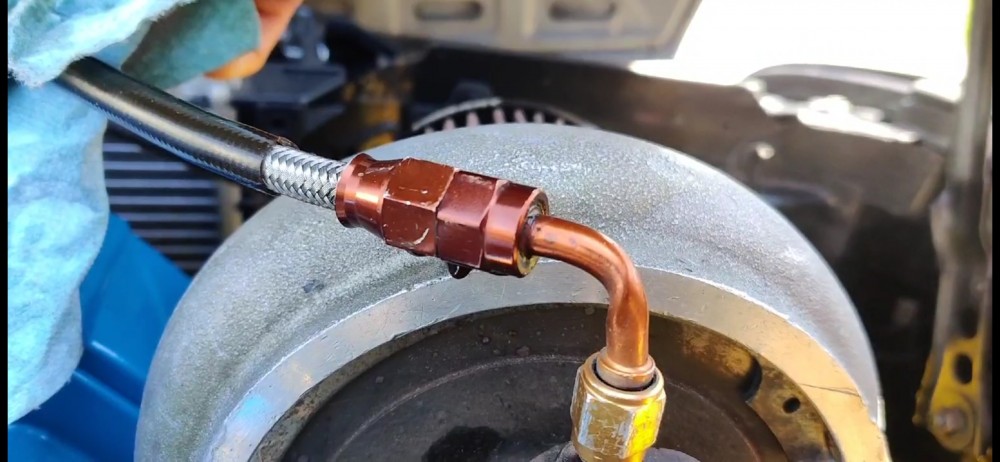
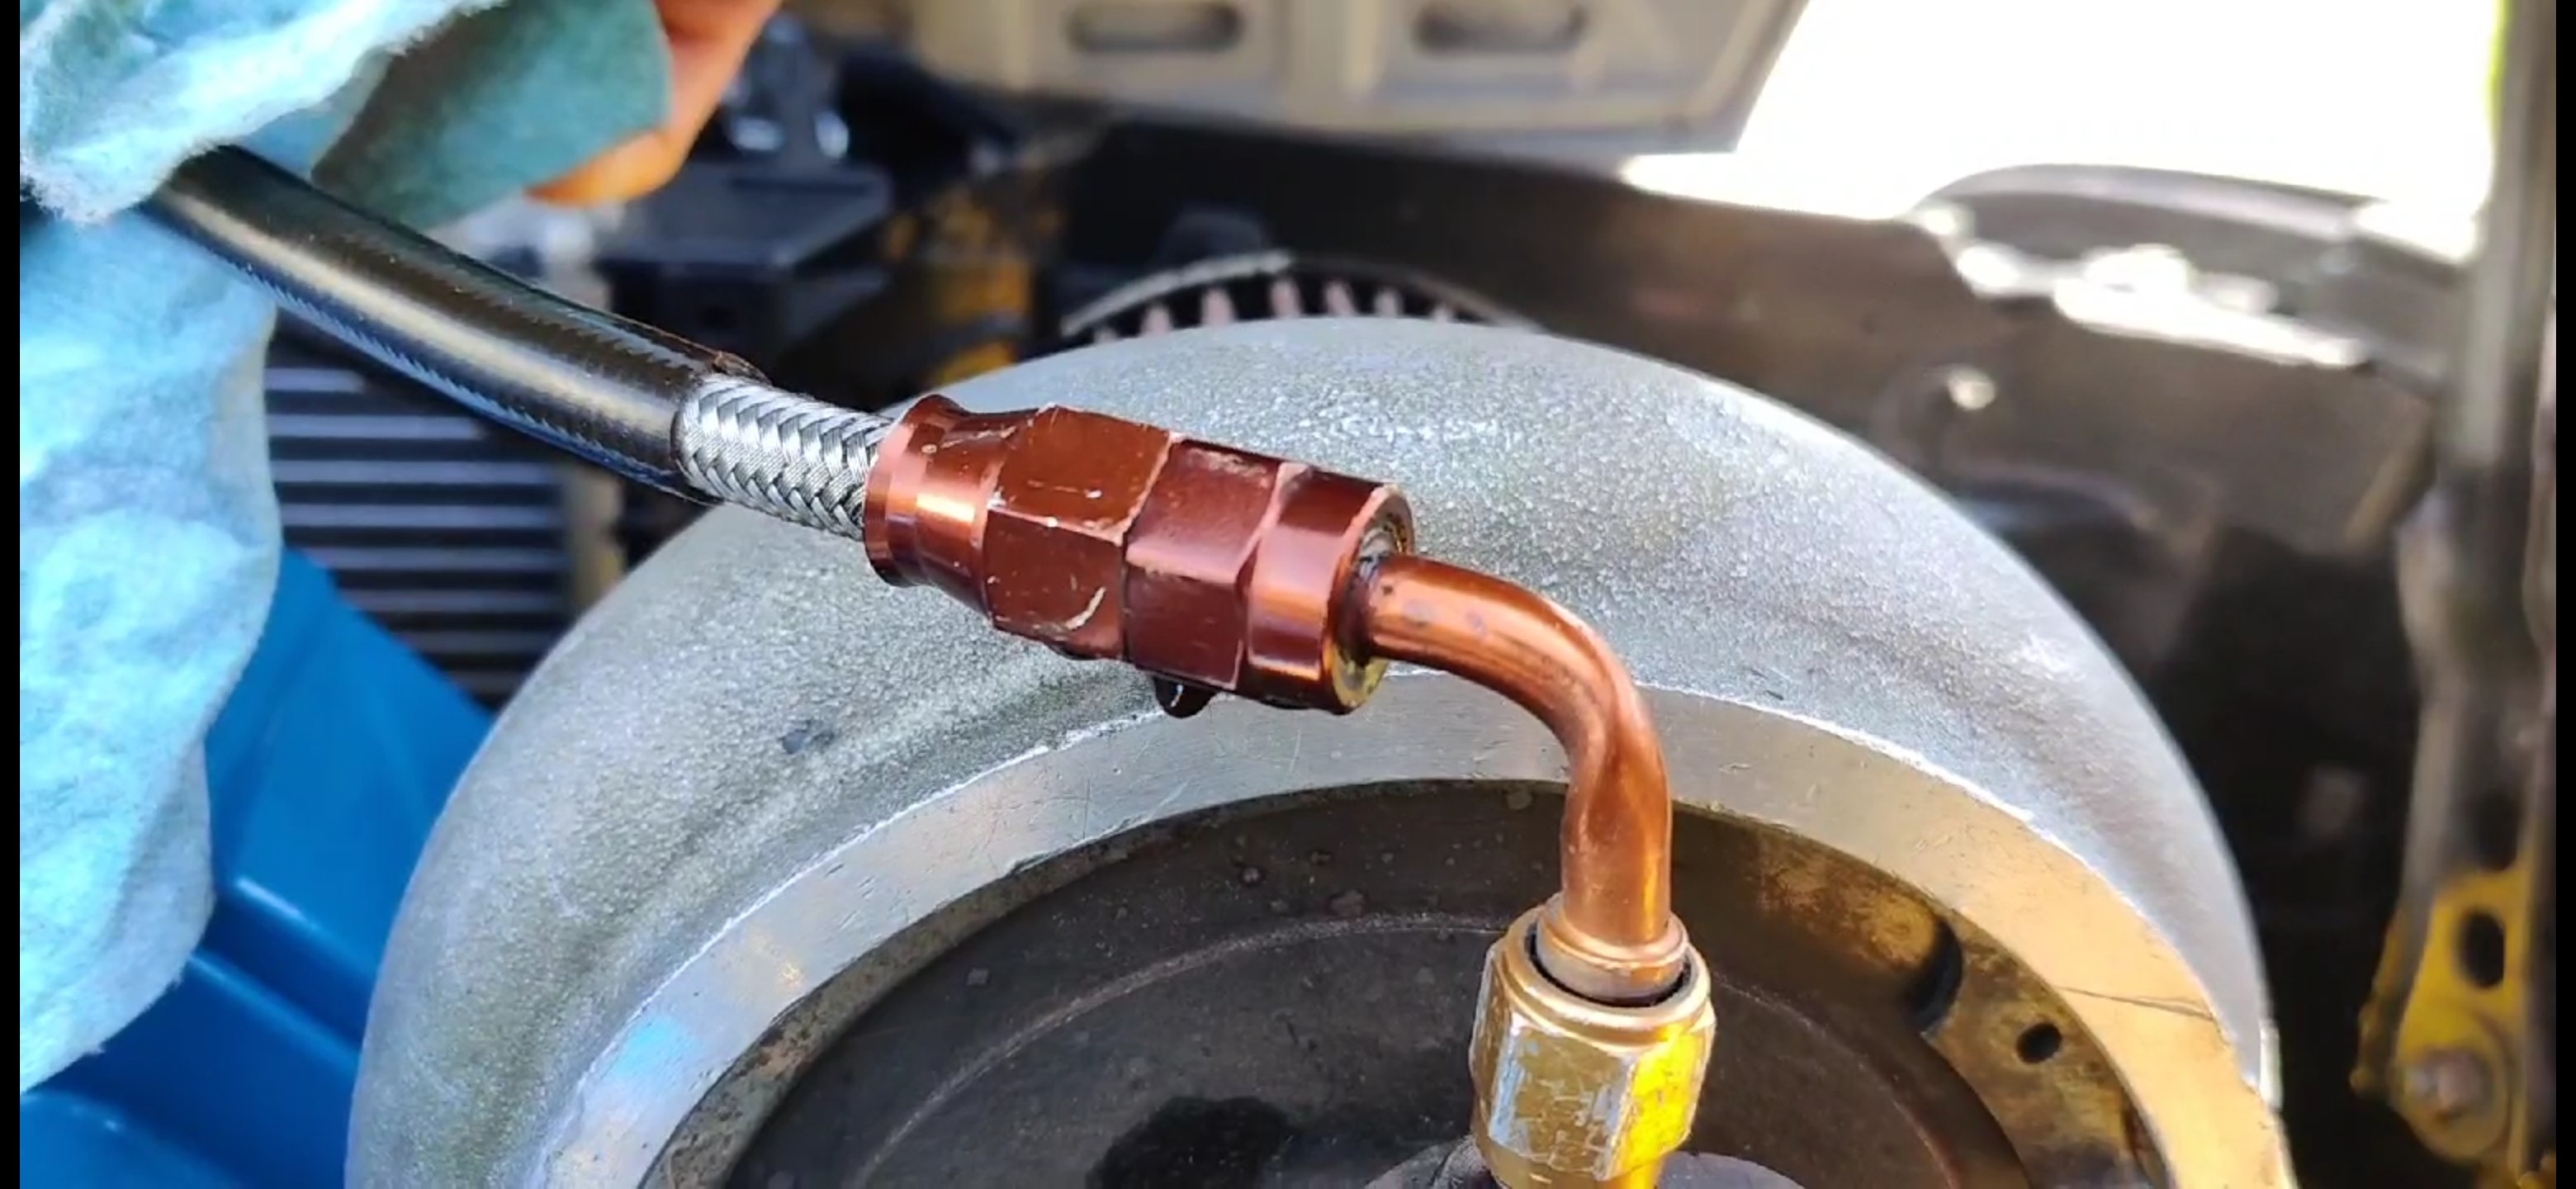
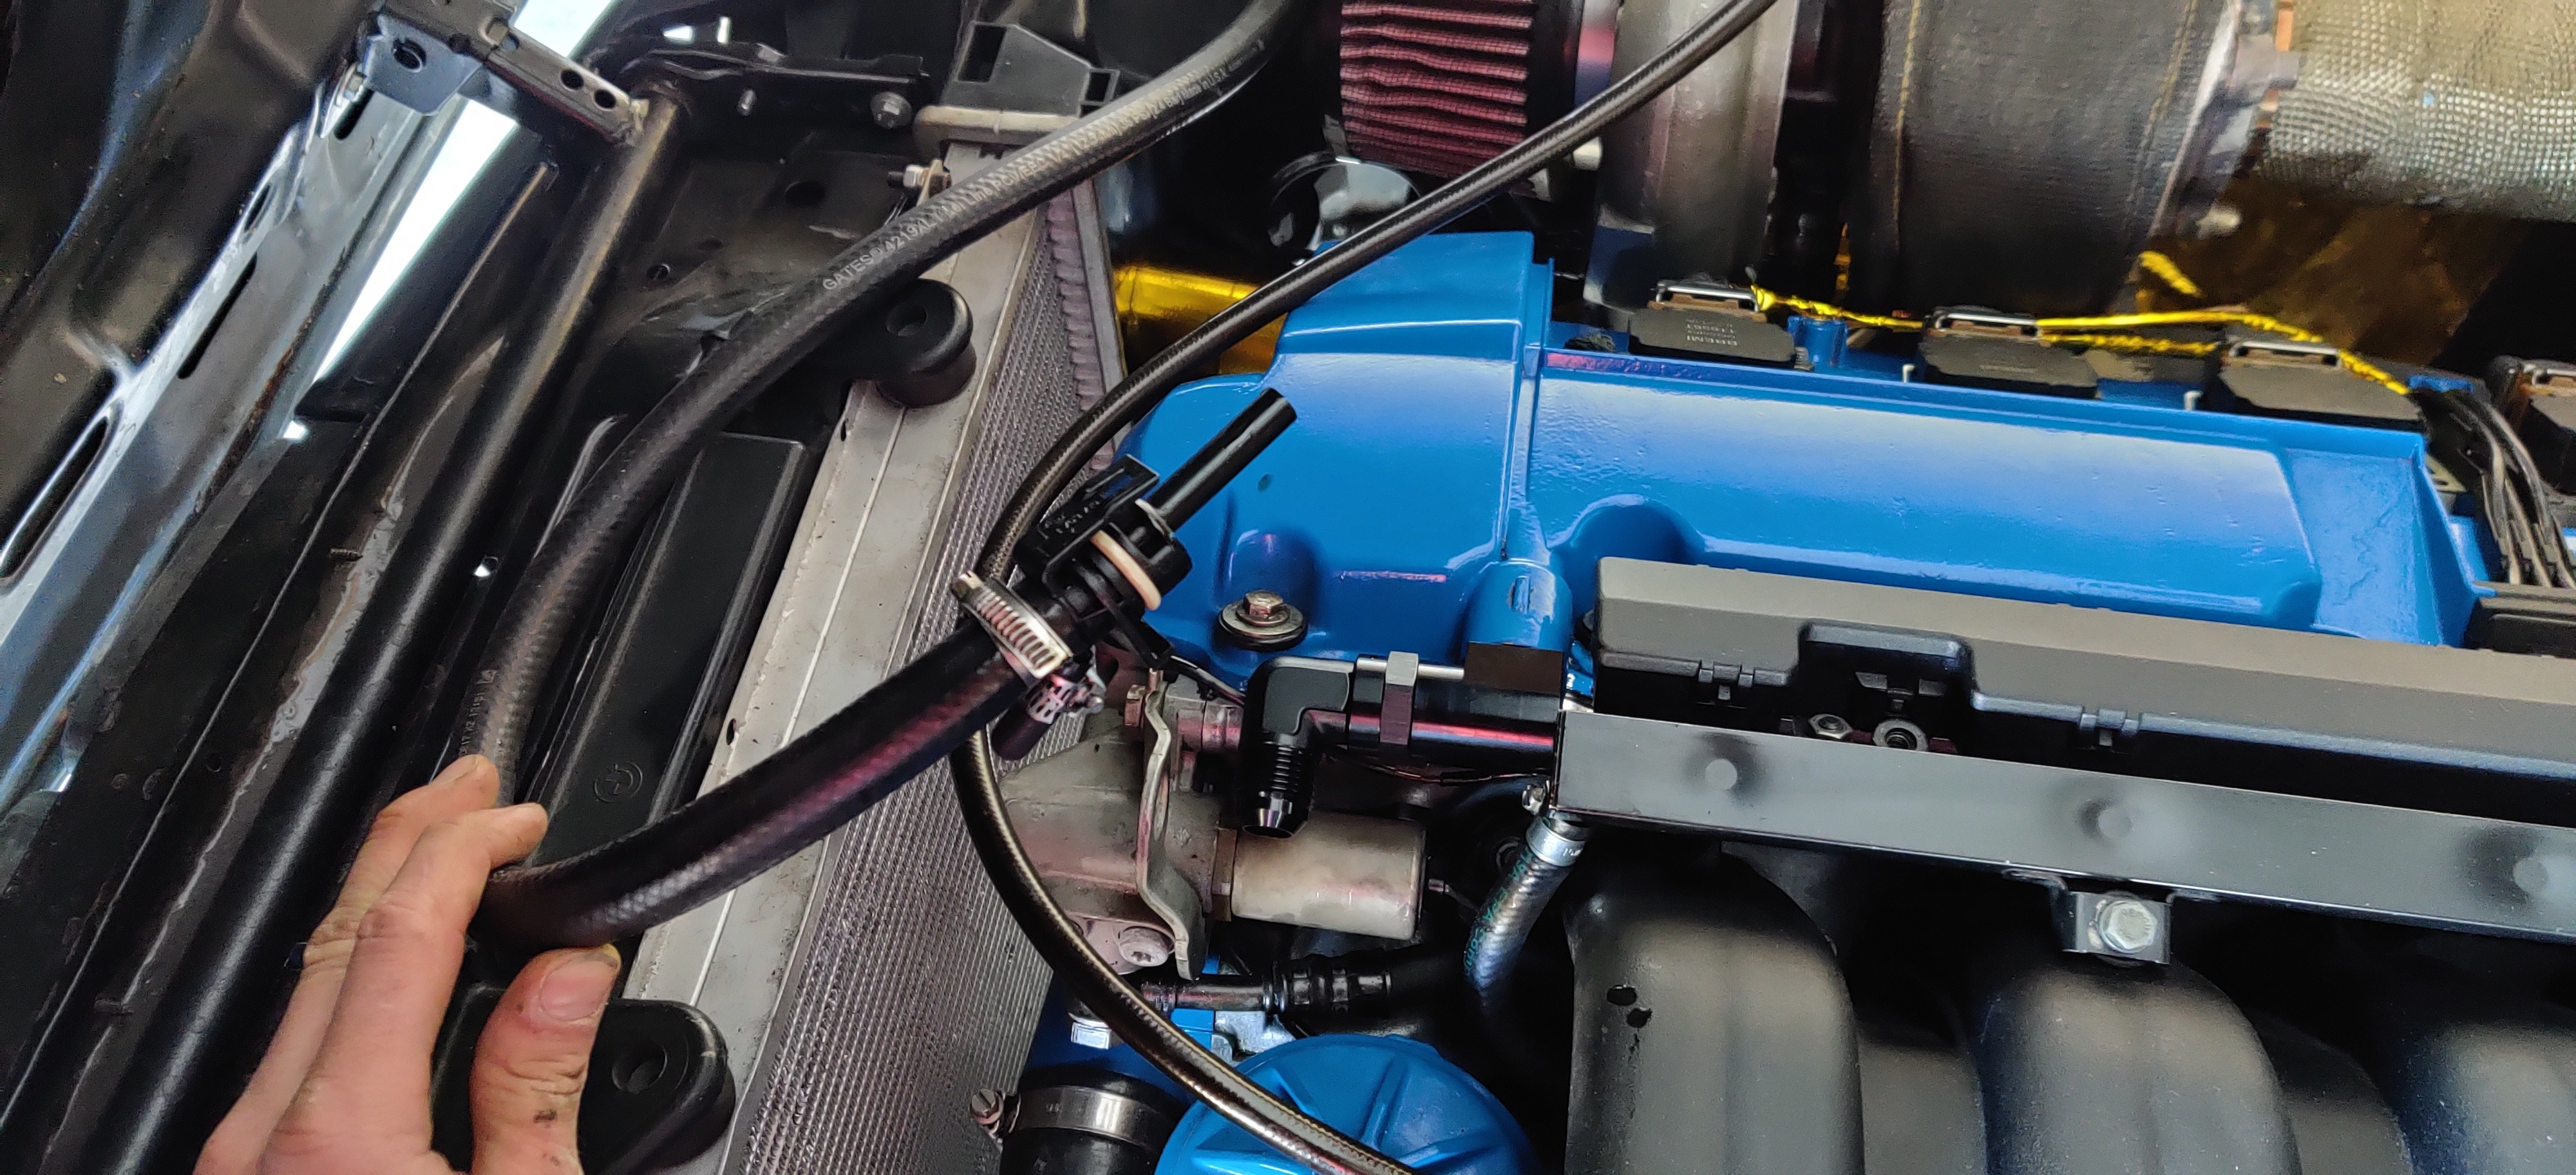
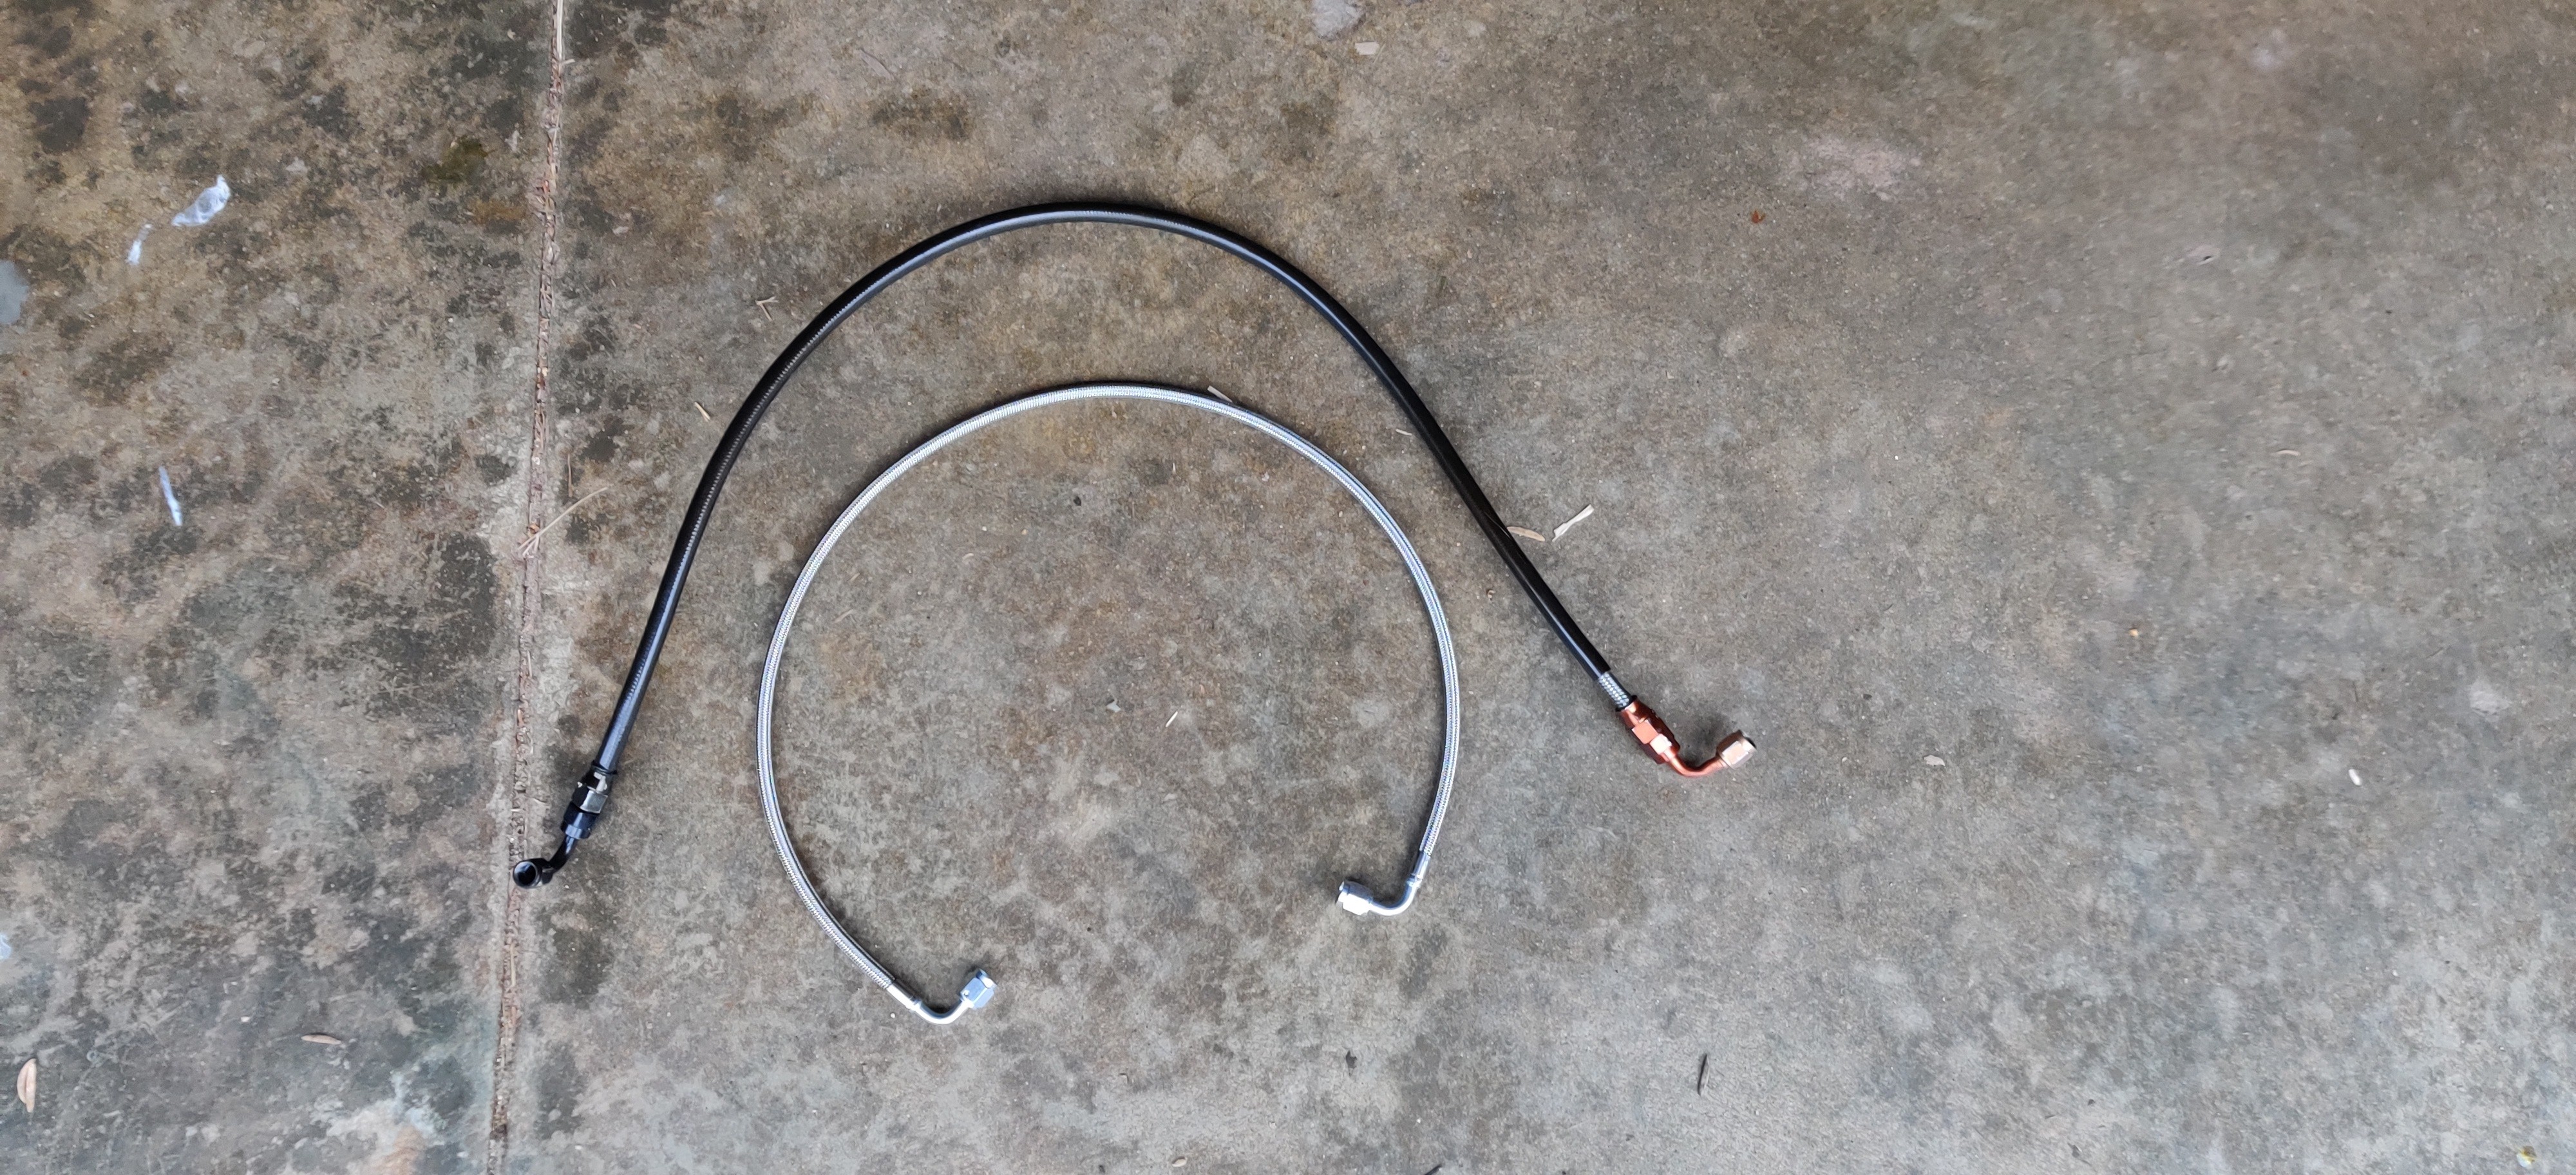
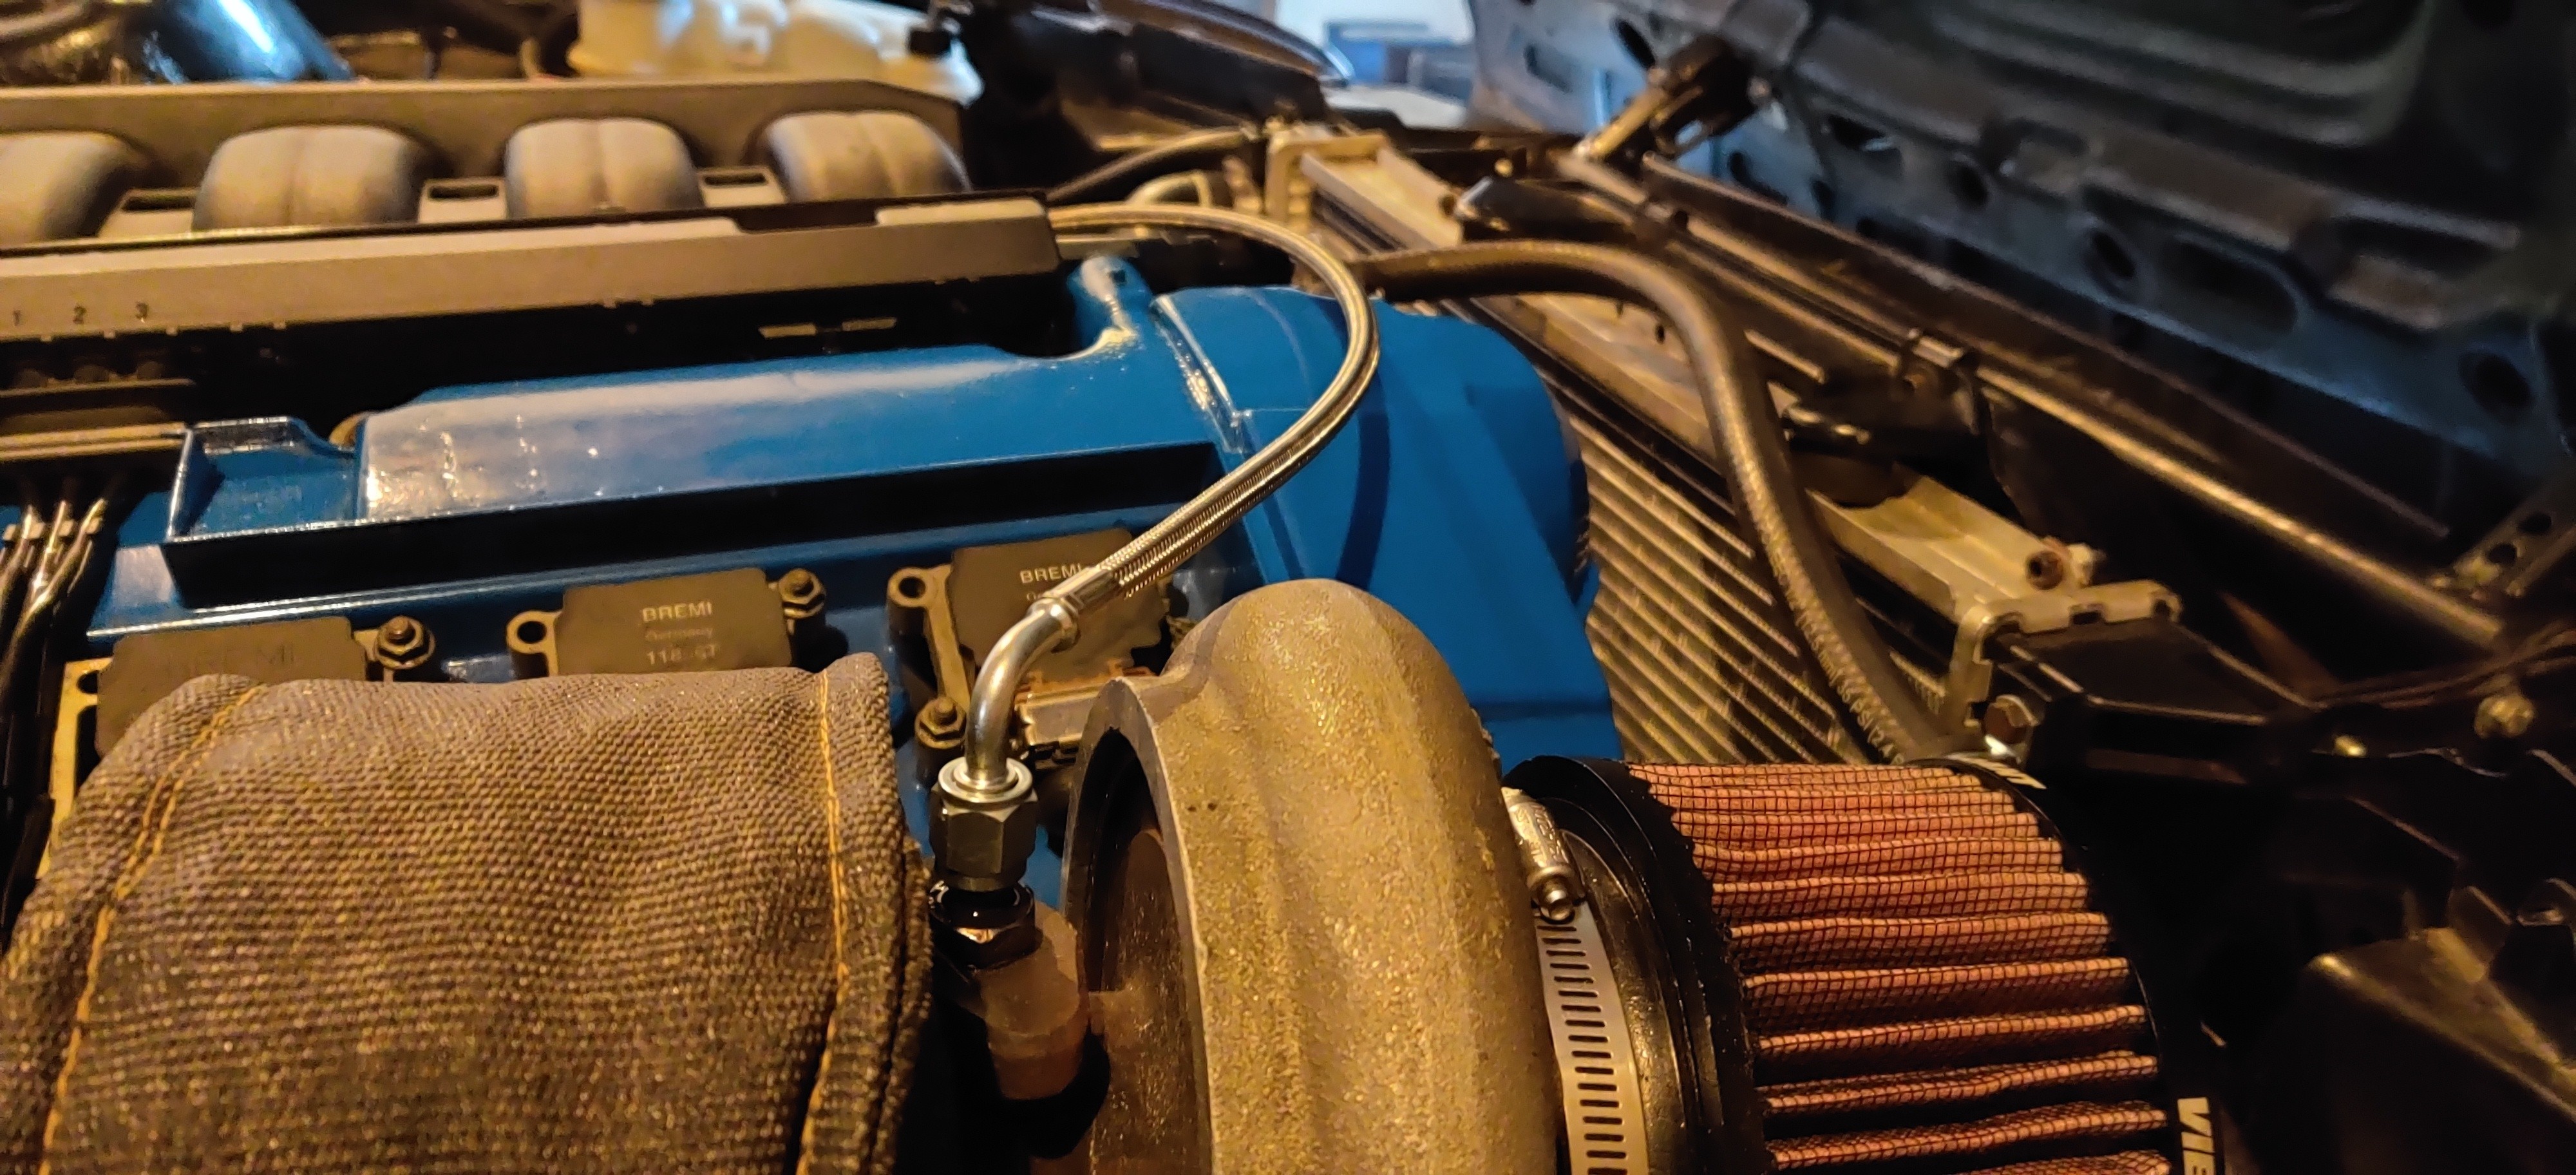
You can also see that the 90 on the -an fitting had been kinked. I knew about this prior to the leak but new that oil still flowed through it fine and kind of just put it off. well sure enough that's where the leak was all along. When I lifted the line ever so slightly it would begin dripping drastically. After spending a few hours searching around I ordered a new -4 an line from rally road. Also, after some more inspecting I found that the oem breather fitting coming out of the valve cover wasn't cutting it anymore and blow by was getting past the fitting and making an oily mess underneath. While on rally road's site I also found that they sold a fitting to fix this exact issue so I ordered that as well.
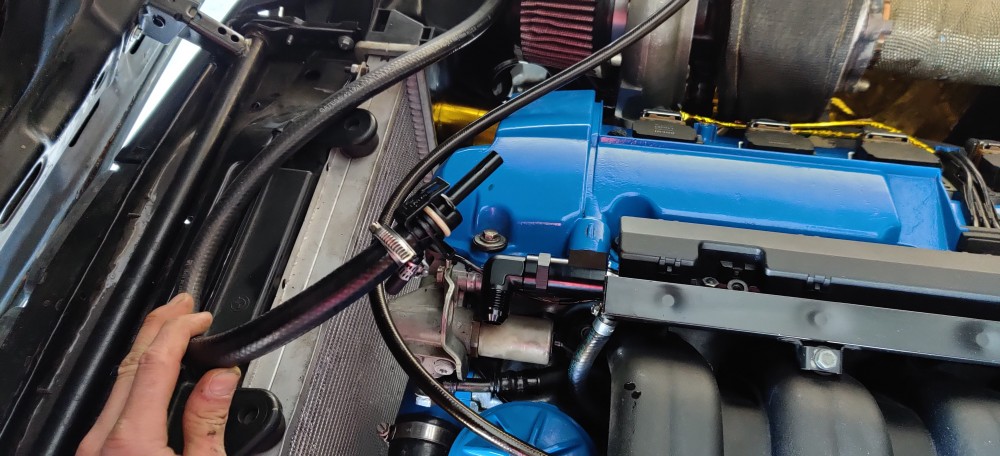
A week later or so and the fitting and line were here. The following day after work I got to installing the new pieces.
Old line vs. new
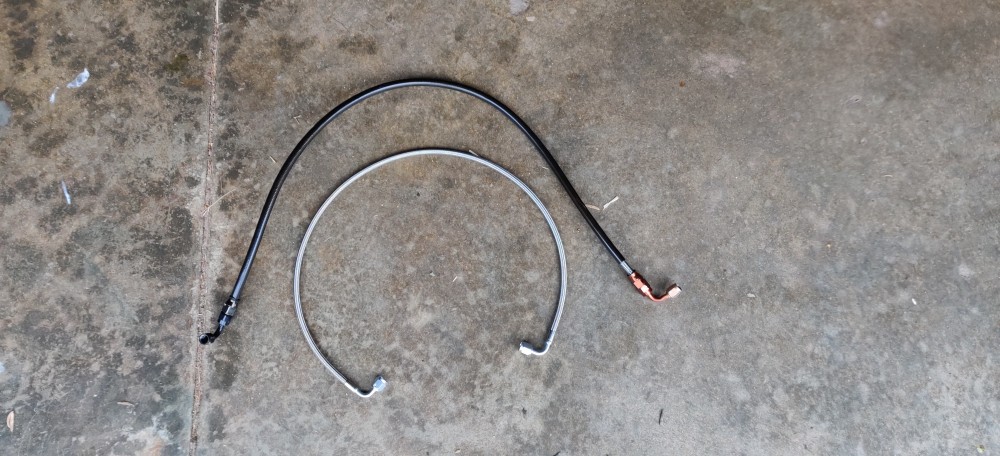
Unfortunately I could not find a -4 an line in black which would have been a little more ideal looks wise but it is what it is.
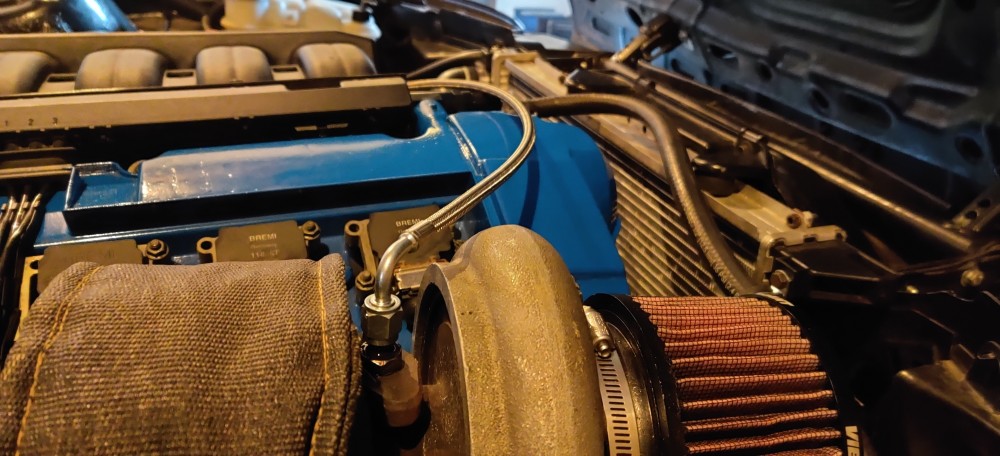
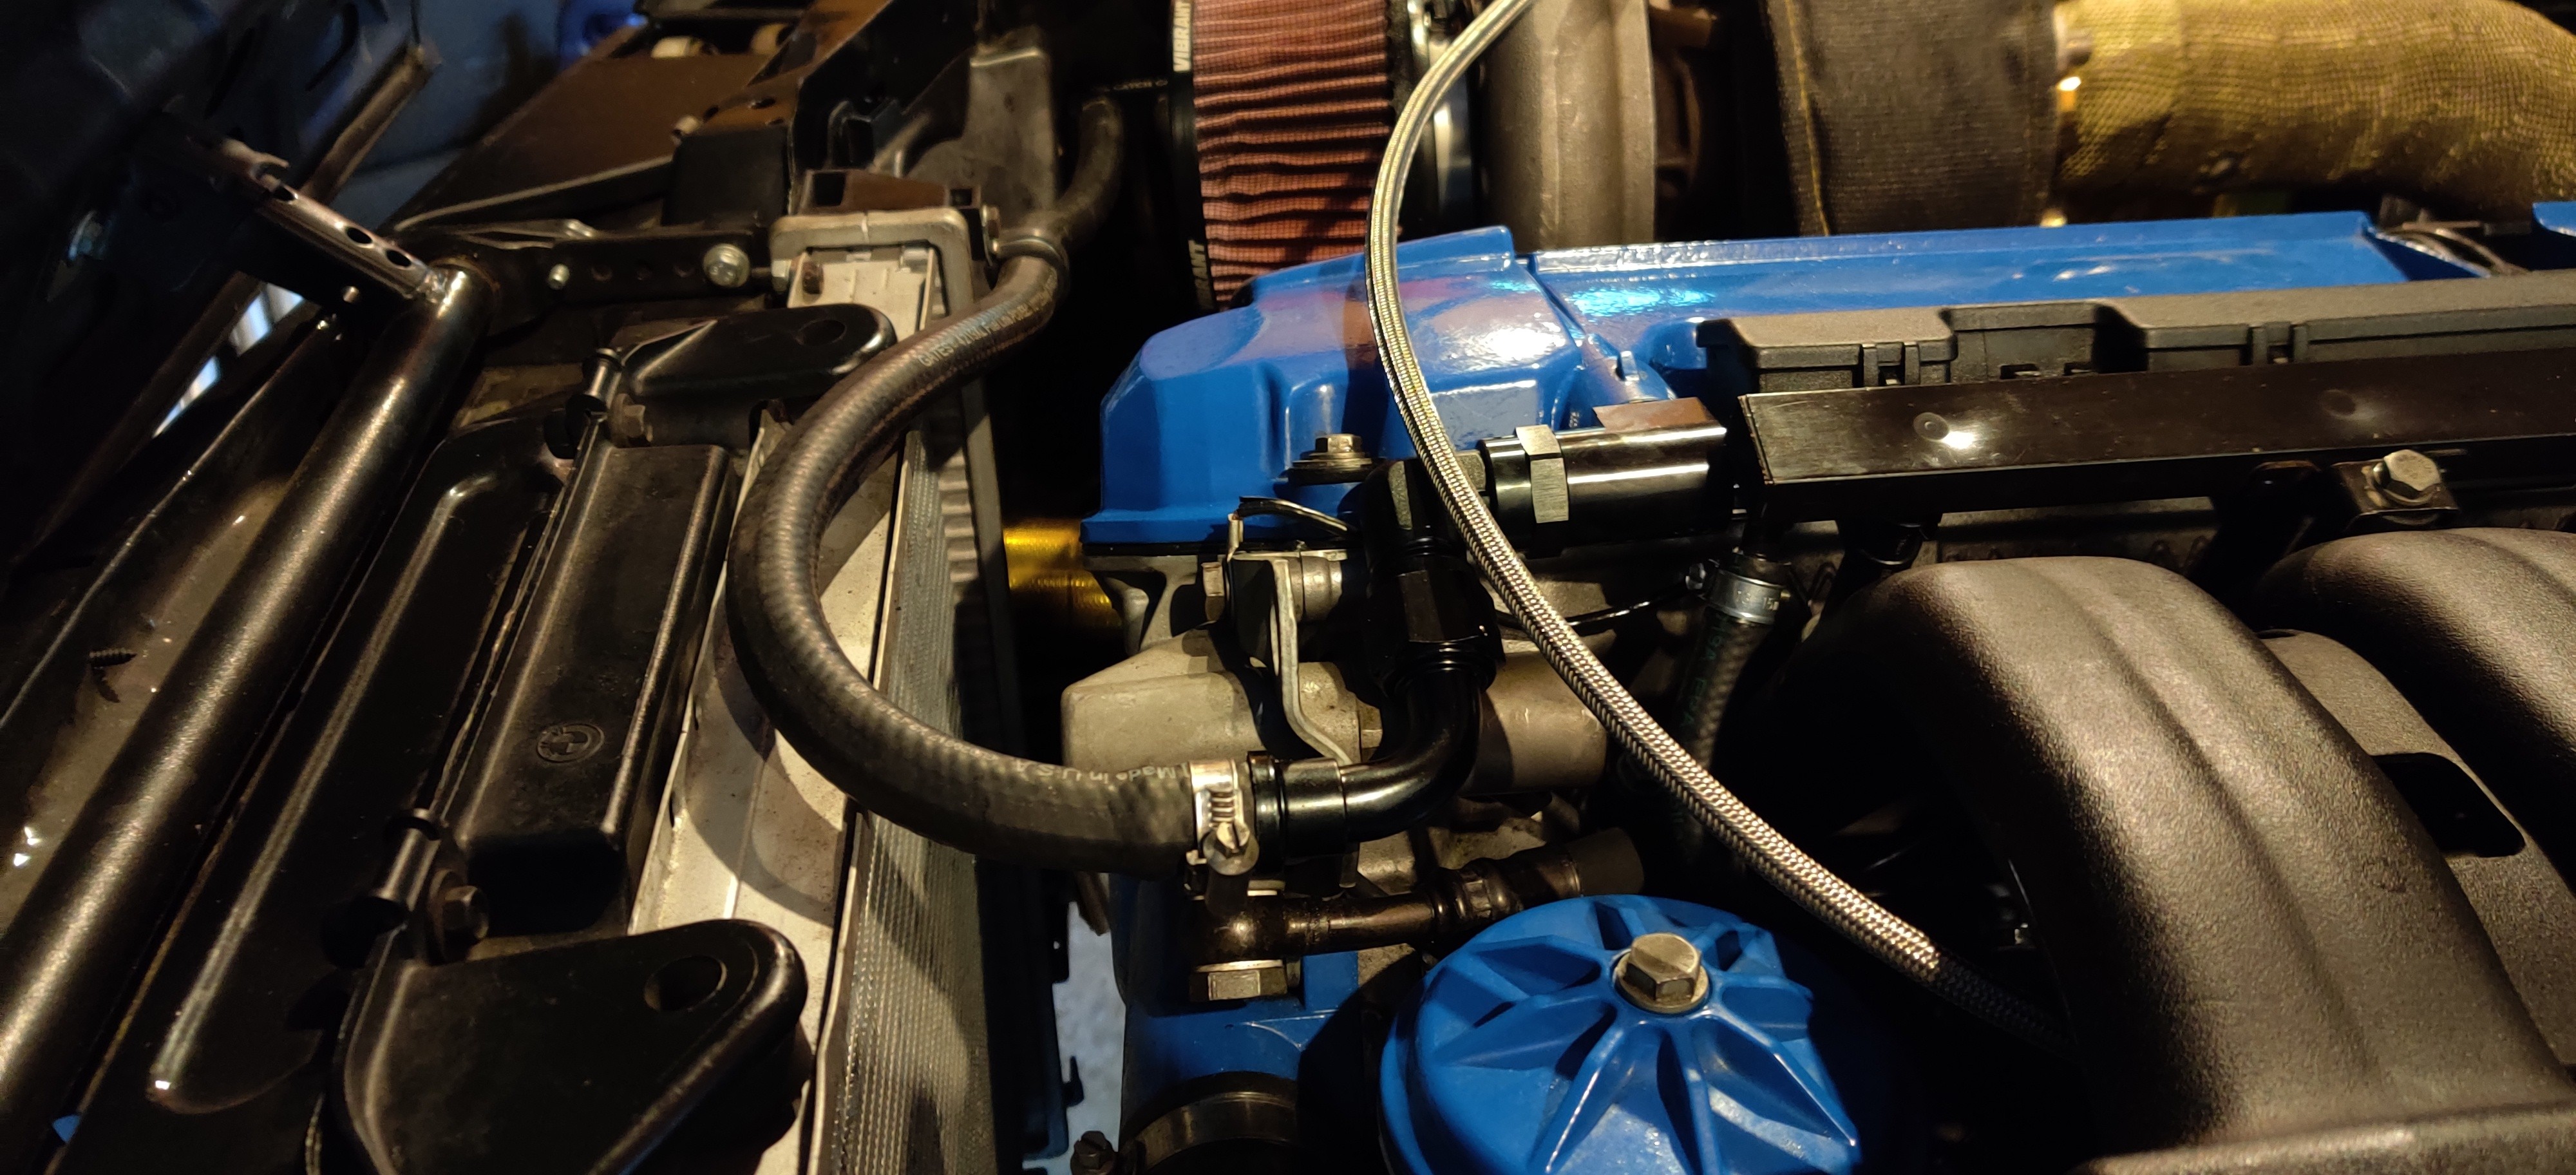
New breather setup installed.
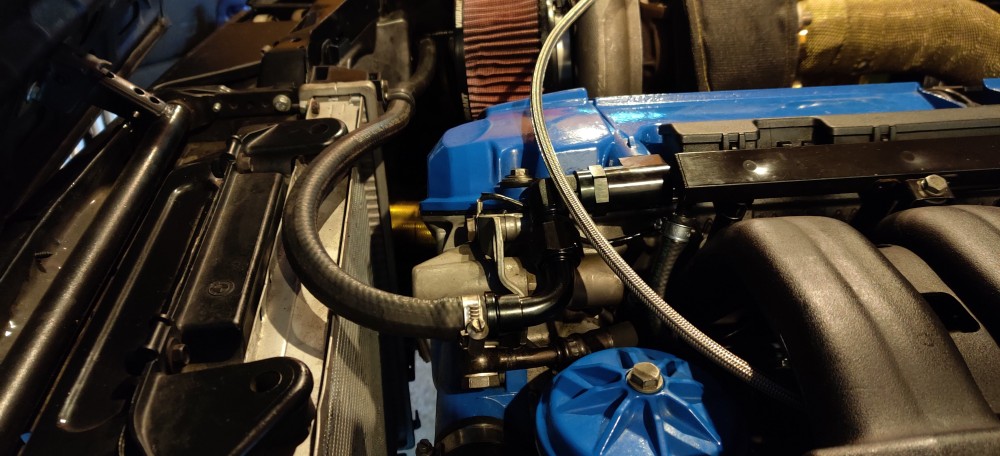
The rally road breather fitting was an awesome piece! It has two o-rings on the shaft that slides into the valve cover hole which sort of snaps into place, its a tight fit. Coming out of the other side is a -an fitting so I ordered a -10 an 90 with a hose barb on the other end to adapt to my rubber hose running to the catch can. I love the look of the new setup and best of all, no more leaks!
After all this was finished I figured it was also about time for an oil change as well. After some debating back and forth I figured it was time to switch over to synthetic. I had been running shell t4 15w-40 for the last 12,000ish miles with a zddp additive and I had been doing this partly because of engine break in reasons and the fact that if I switched to synthetic that the leaks would get worse. With the new fittings and valve cover gasket I felt much better about making the switch. I chose a t6 5w-40 full synthetic oil.
Underneath the car was an oily mess so after completing the change I pulled the skid plate and used about 4 cans of brake clean spraying down everything top to bottom. Two weeks later and no signs of oil leaks anywhere!
For the longest time I had been running stacked washers to space the nut out for the momo hub instead of buying the oem spacer. Well when i ordered the valve cover gasket I threw it in with and decided it was time to swap it out for the right part.
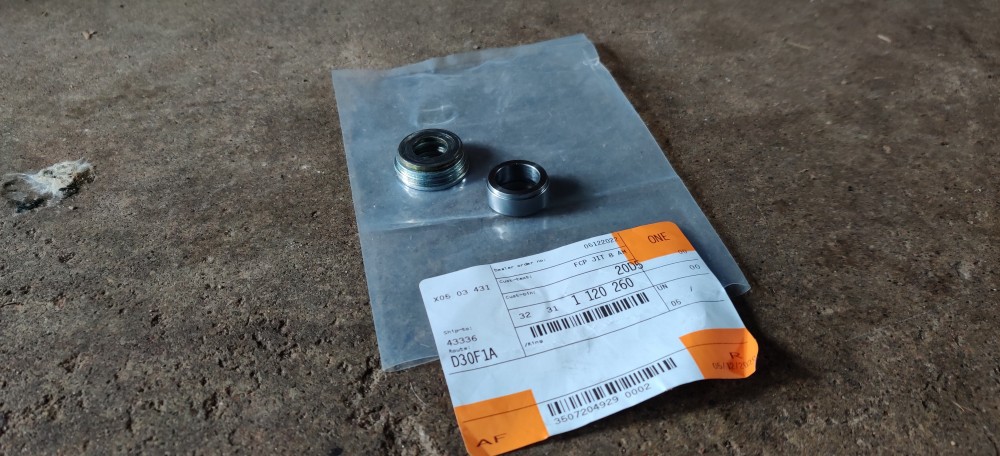
The spacer was a few mm longer then my washer stack and actually fixed a steering wheel squeak I had been dealing with sometime now so that was neat!
First auto-x of the season for me this weekend. Looking forward to seeing how the car feels on the track with the new gearing setup and a non-squeaky steering wheel.
-
the one and only e30 s52 engine swapWell I figured it was time I come back and update this thread lol. Last season was an absolute blast with this thing. I got a fair amount of seat time in and got a better grasp on controlling the car and it's power.
(FVSCC auto-x at the Waupaca airport last year)
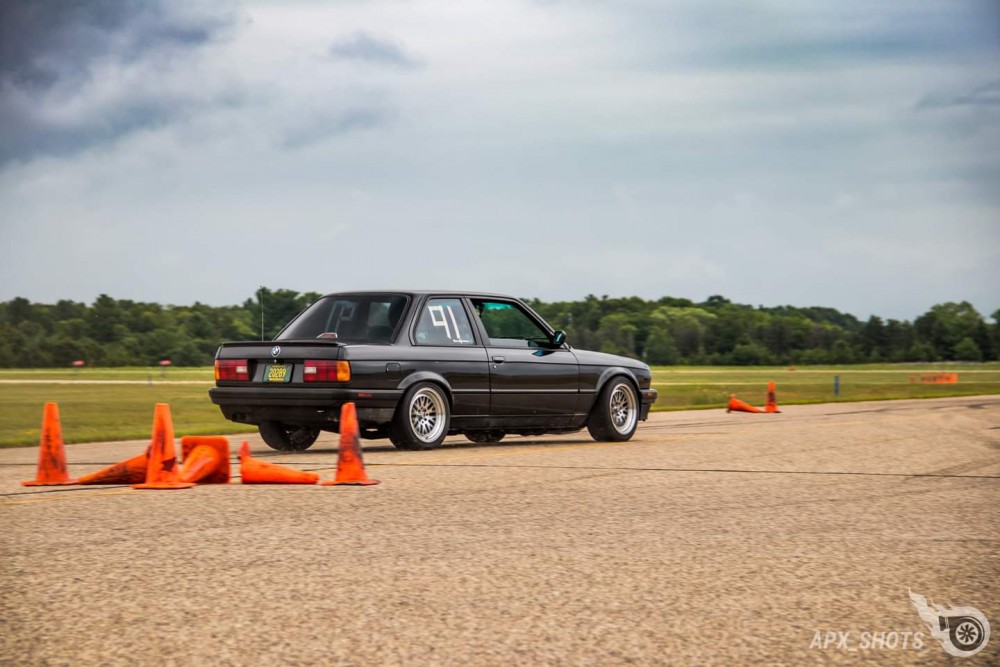
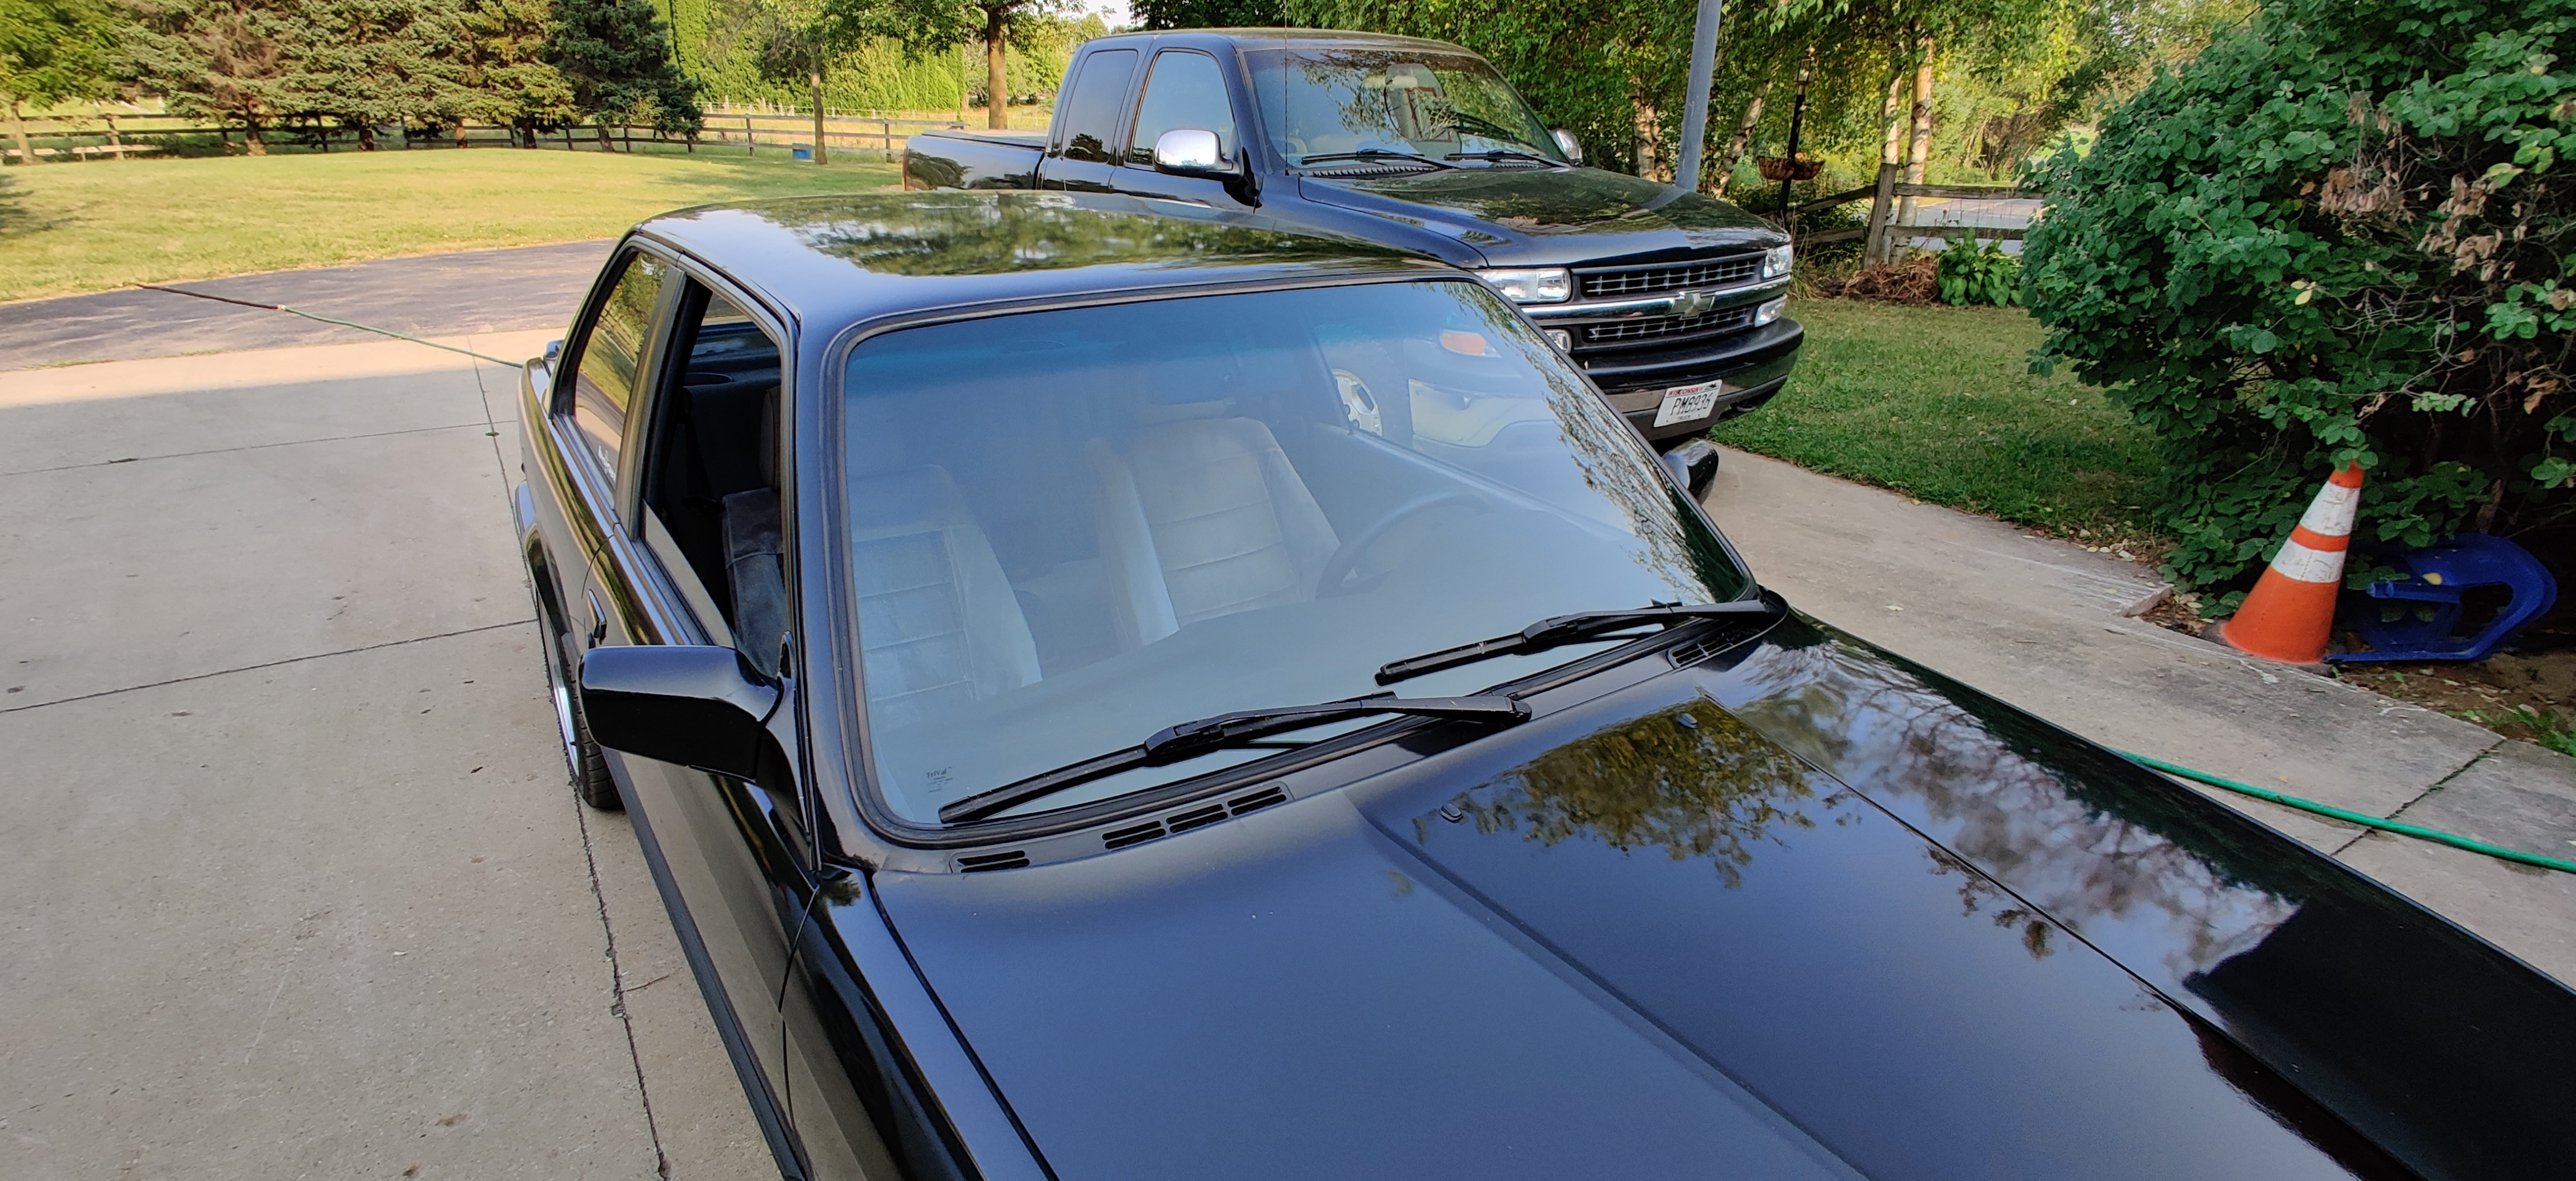
Other then regular maintenance and up keep I didn't do much to the car in terms of upgrades. However, I did end up having a stone hit the windshield causing a small crack on the lower passenger side. On top of the crack there were many scratches all over and it was beginning to become a pain to see through (it was the original one). So I set up an appointment and had it replaced by Tri City glass and door up in Appleton. They did an excellent job and I was very pleased with the finished product.
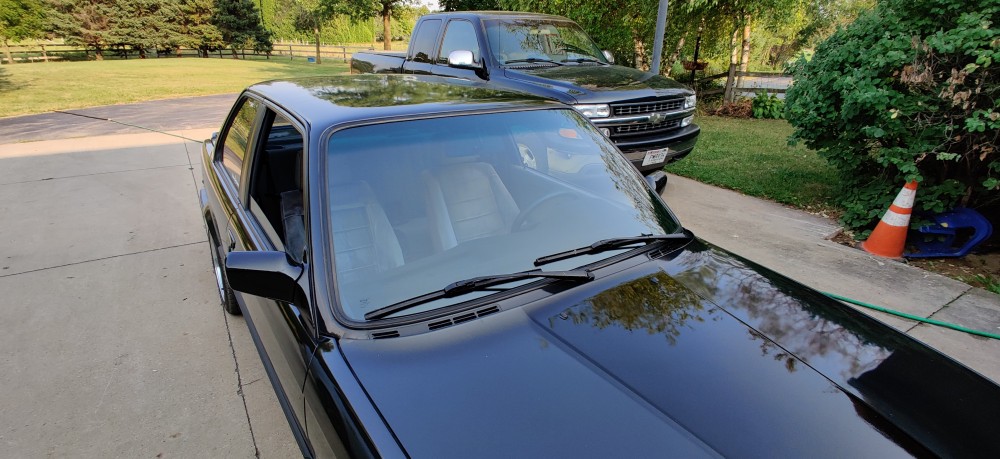
That was about it. After the last auto-x in October I enjoyed the car for another week or so and put it away in storage for the season. Unfortunately I was unable to gain access to my grandfather's shop over the winter to work on it and I had a lot of other things going on that I just wasn't gonna have anytime to work on it anyways. I shared a cold storage unit instead with my cousin where it sat for the winter.
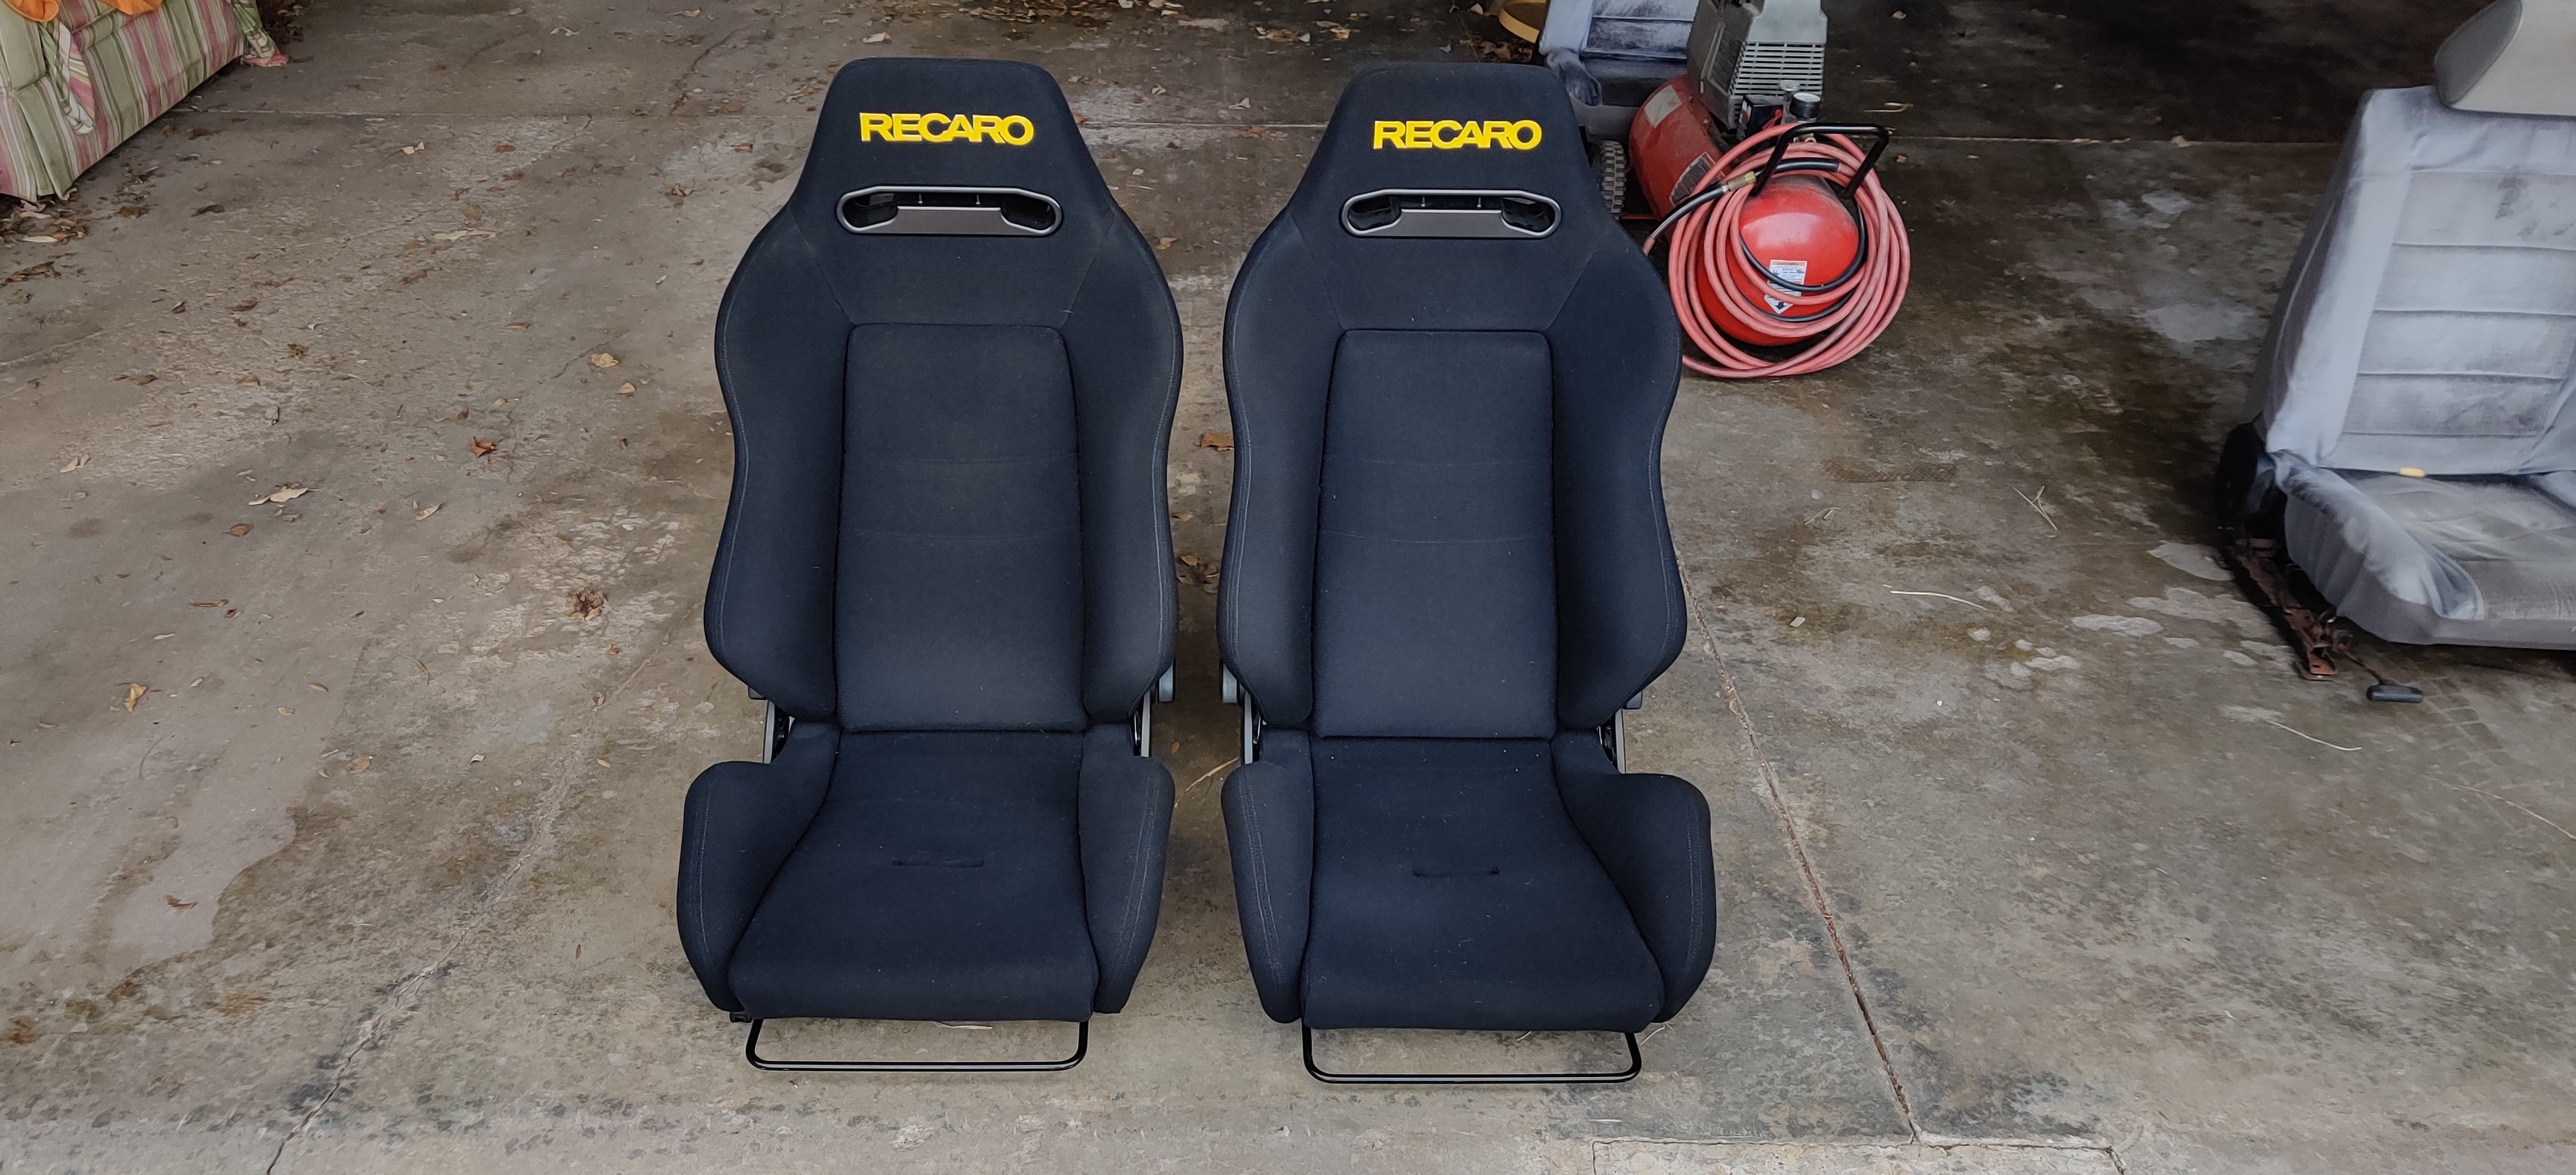
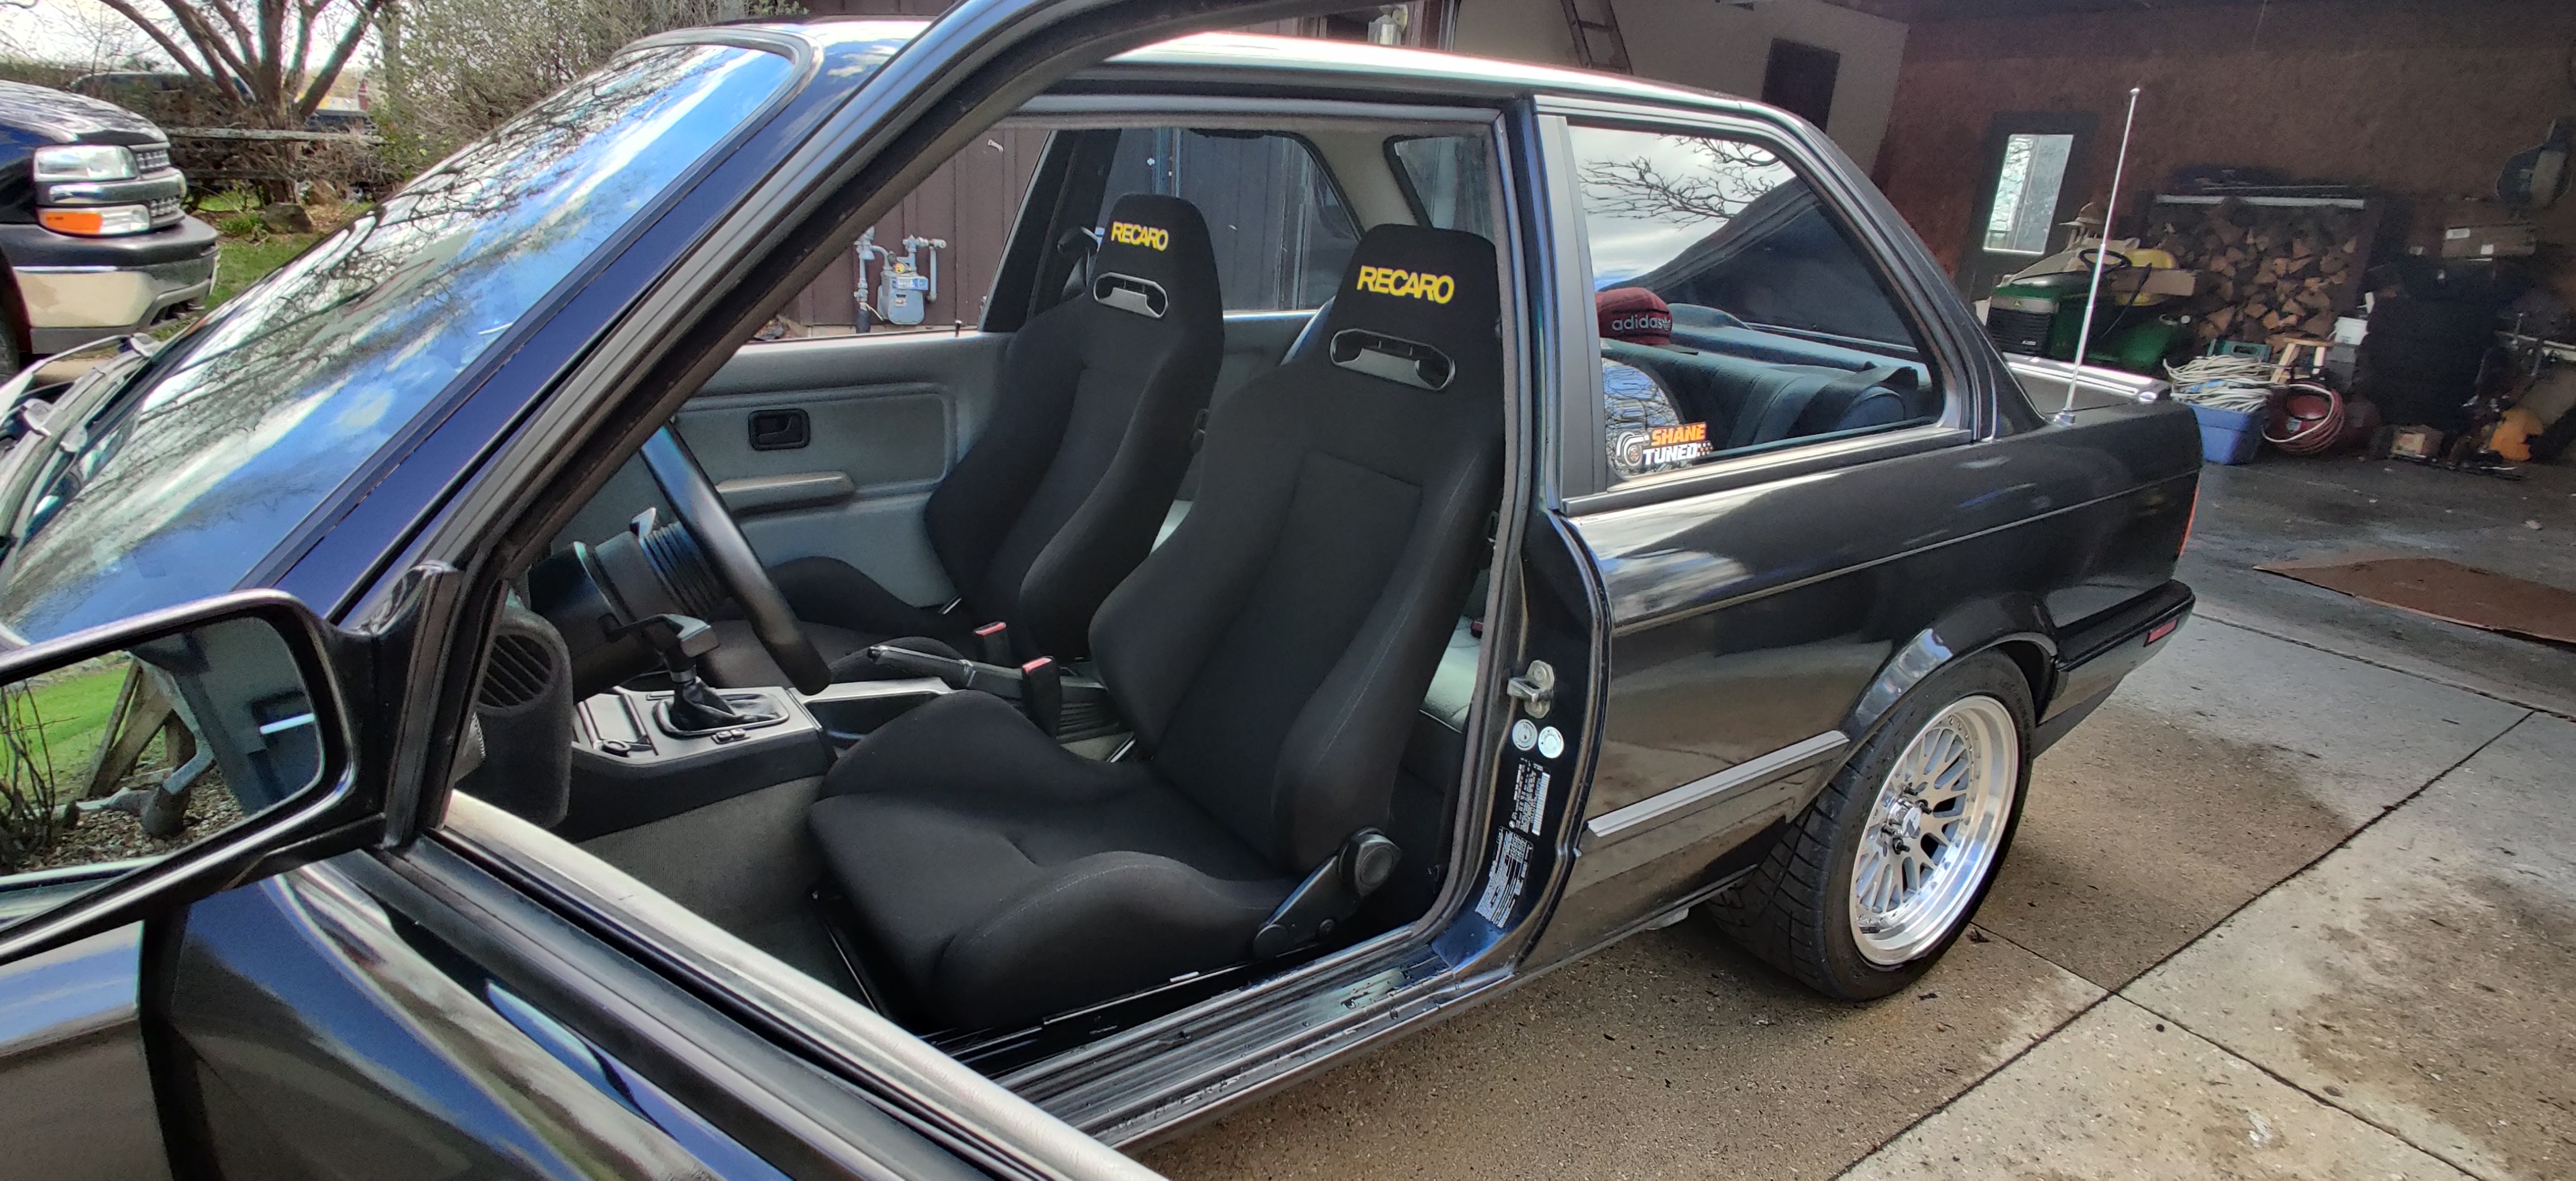
March rolled around and I started thinking about the upcoming warm weather and what I wanted to improve on the car before I started driving it again. Seats were the biggest thing on my mind as I still had the old ones that were getting pretty bad to drive in and I had a hard time getting comfortable in them. I was set on finding a set of Recaro srd's. I knew that was the set I wanted in the car and I did not want to compromise for anything else so worse comes to worse I was willing to drive with the old seats a while longer tell I found the right set. Well after several weeks of watching marketplace and other bmw pages/forums I came up with nothing. It seemed that the only sets that were going up for sale were selling within a few days and fetching to high of a price for the condition they were in. I gave up on looking in the midwest area and for shits and giggles started looking around the whole country to see what would pop up. Sure enough a set popped up In Denver, CO. The owner had them mounted in a mustang but sold the car so the seats had to go. I jokingly shared the ad to a friend of mine asking if he wanted to do a road trip to pick these up in which he replied "lets do it!" Over the following days since I had talked with him I thought it over while messaging the owner to see if he would be willing to hold them with money down tell I got out there. He agreed and that weekend my buddy and I made the 32 hour round trip to go pick these seats up.
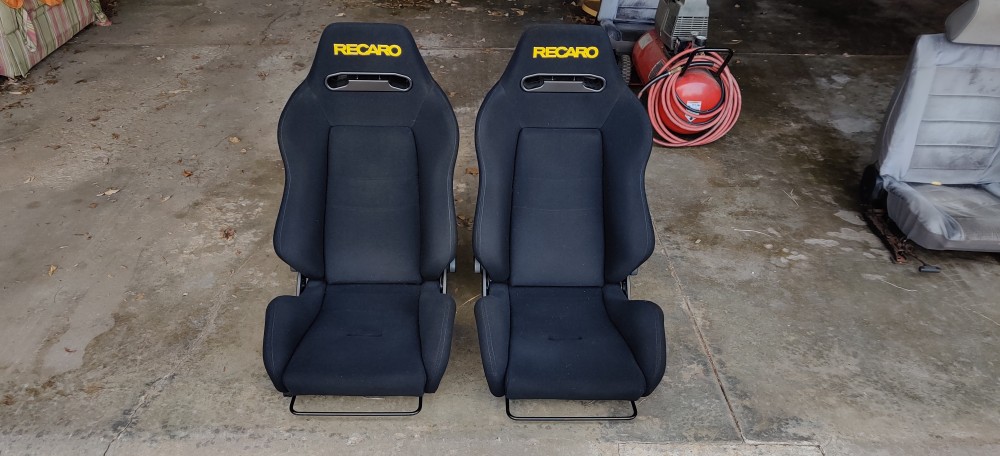
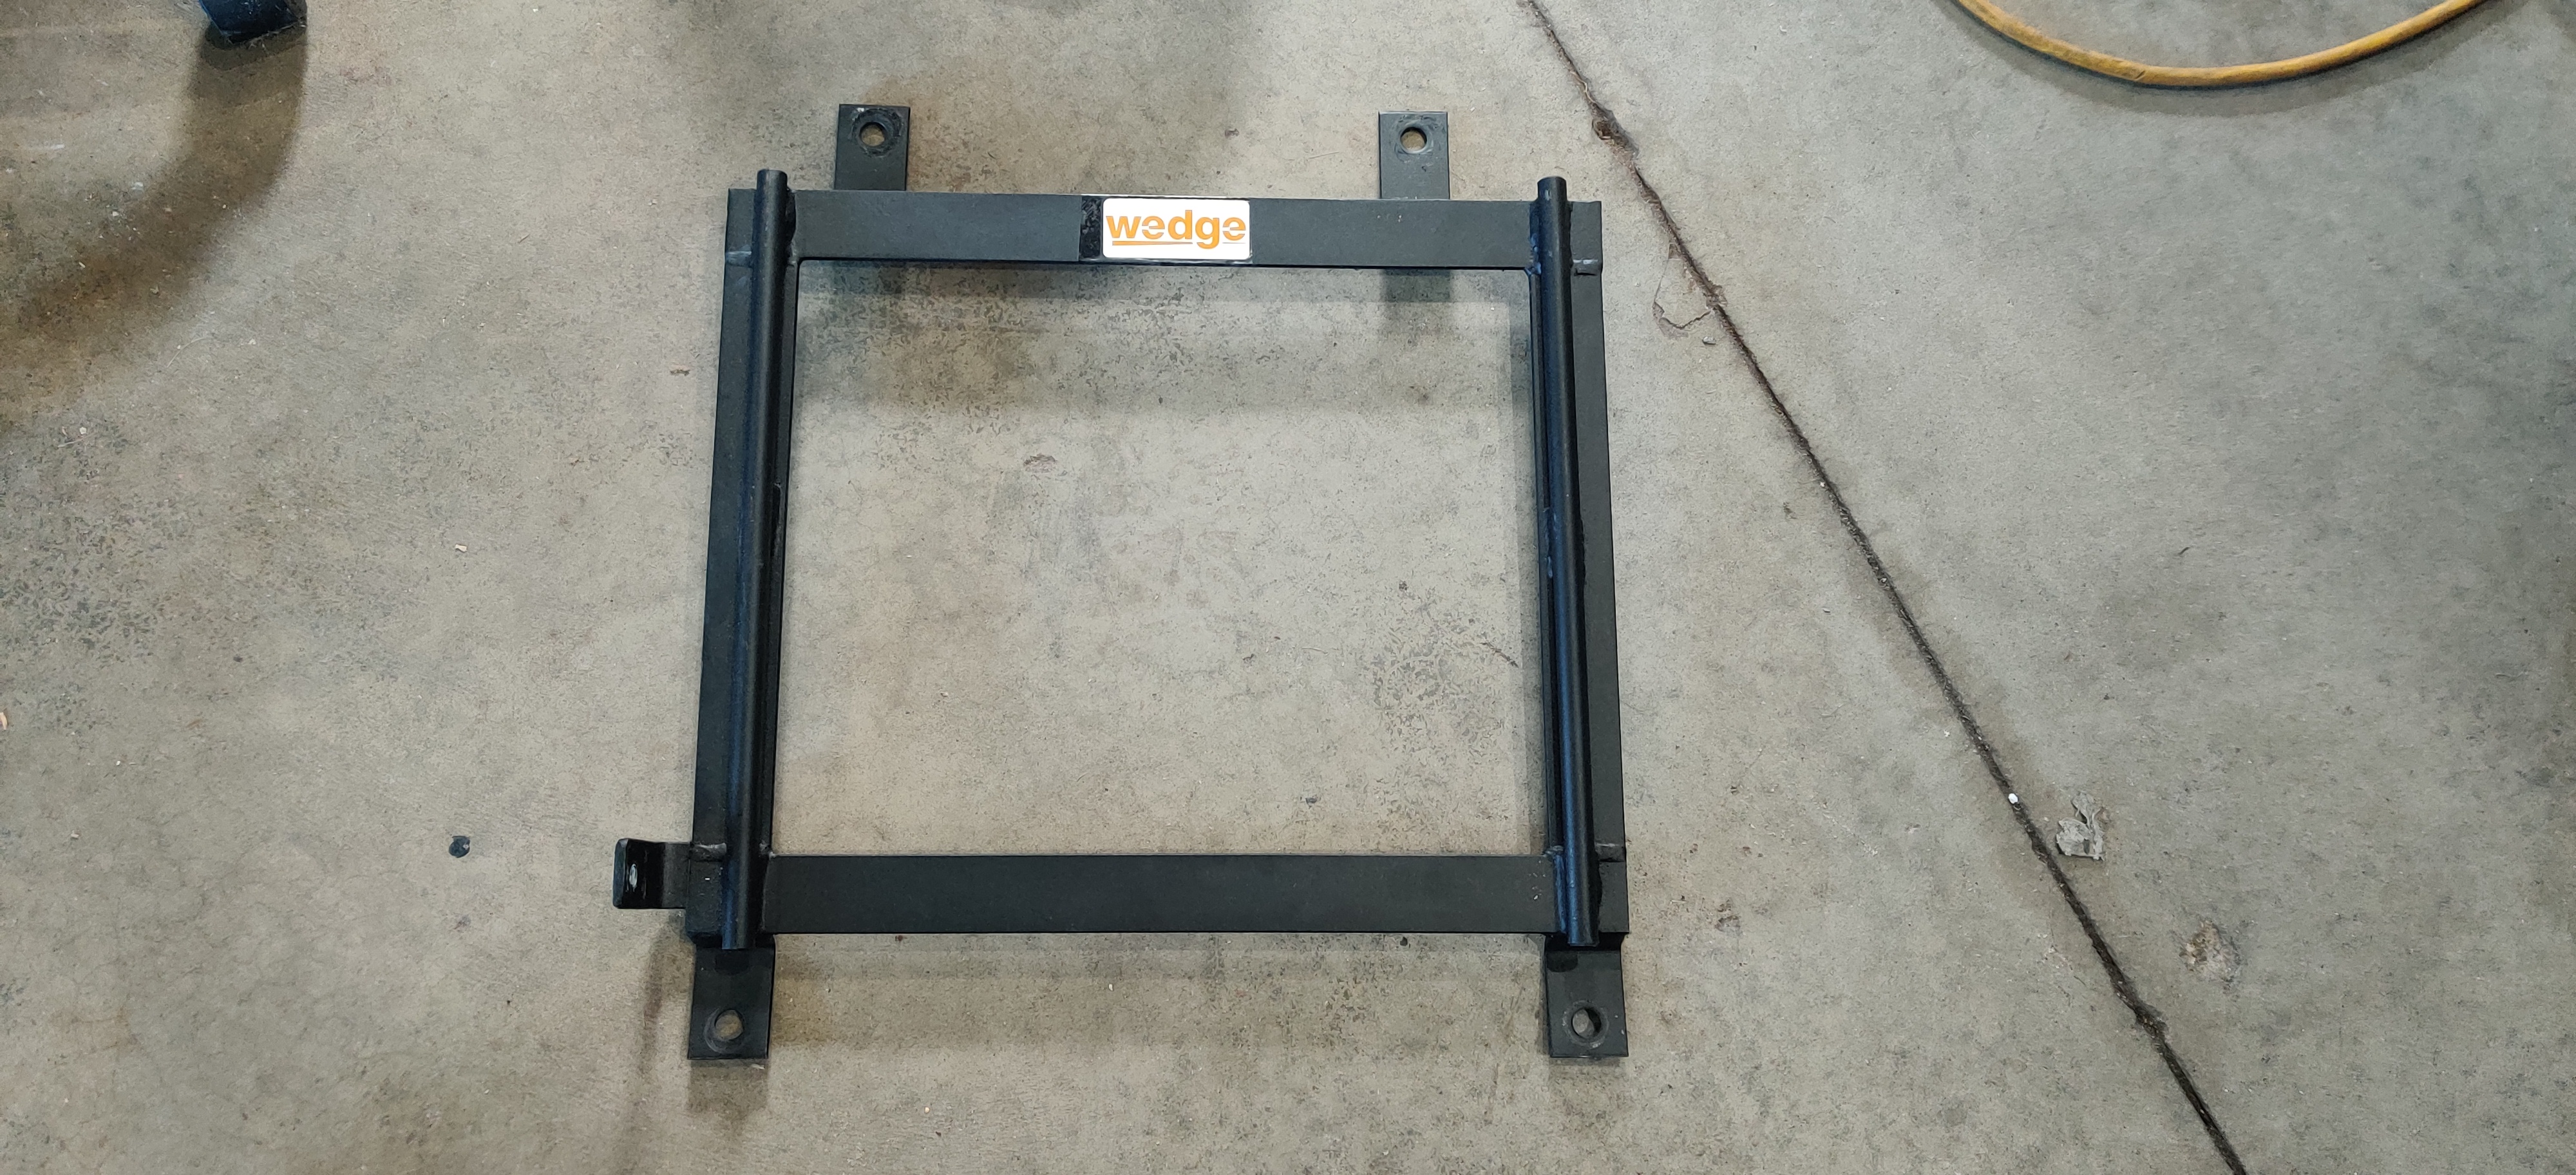
He was the original owner of this set and had taken very good care of them. On top of that he was including wedge brackets and sliders that he used to mount them in his mustang.
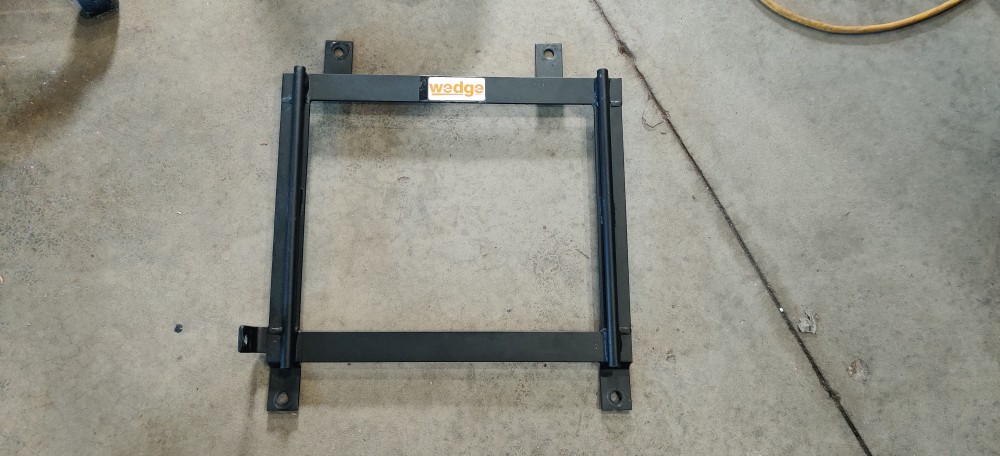
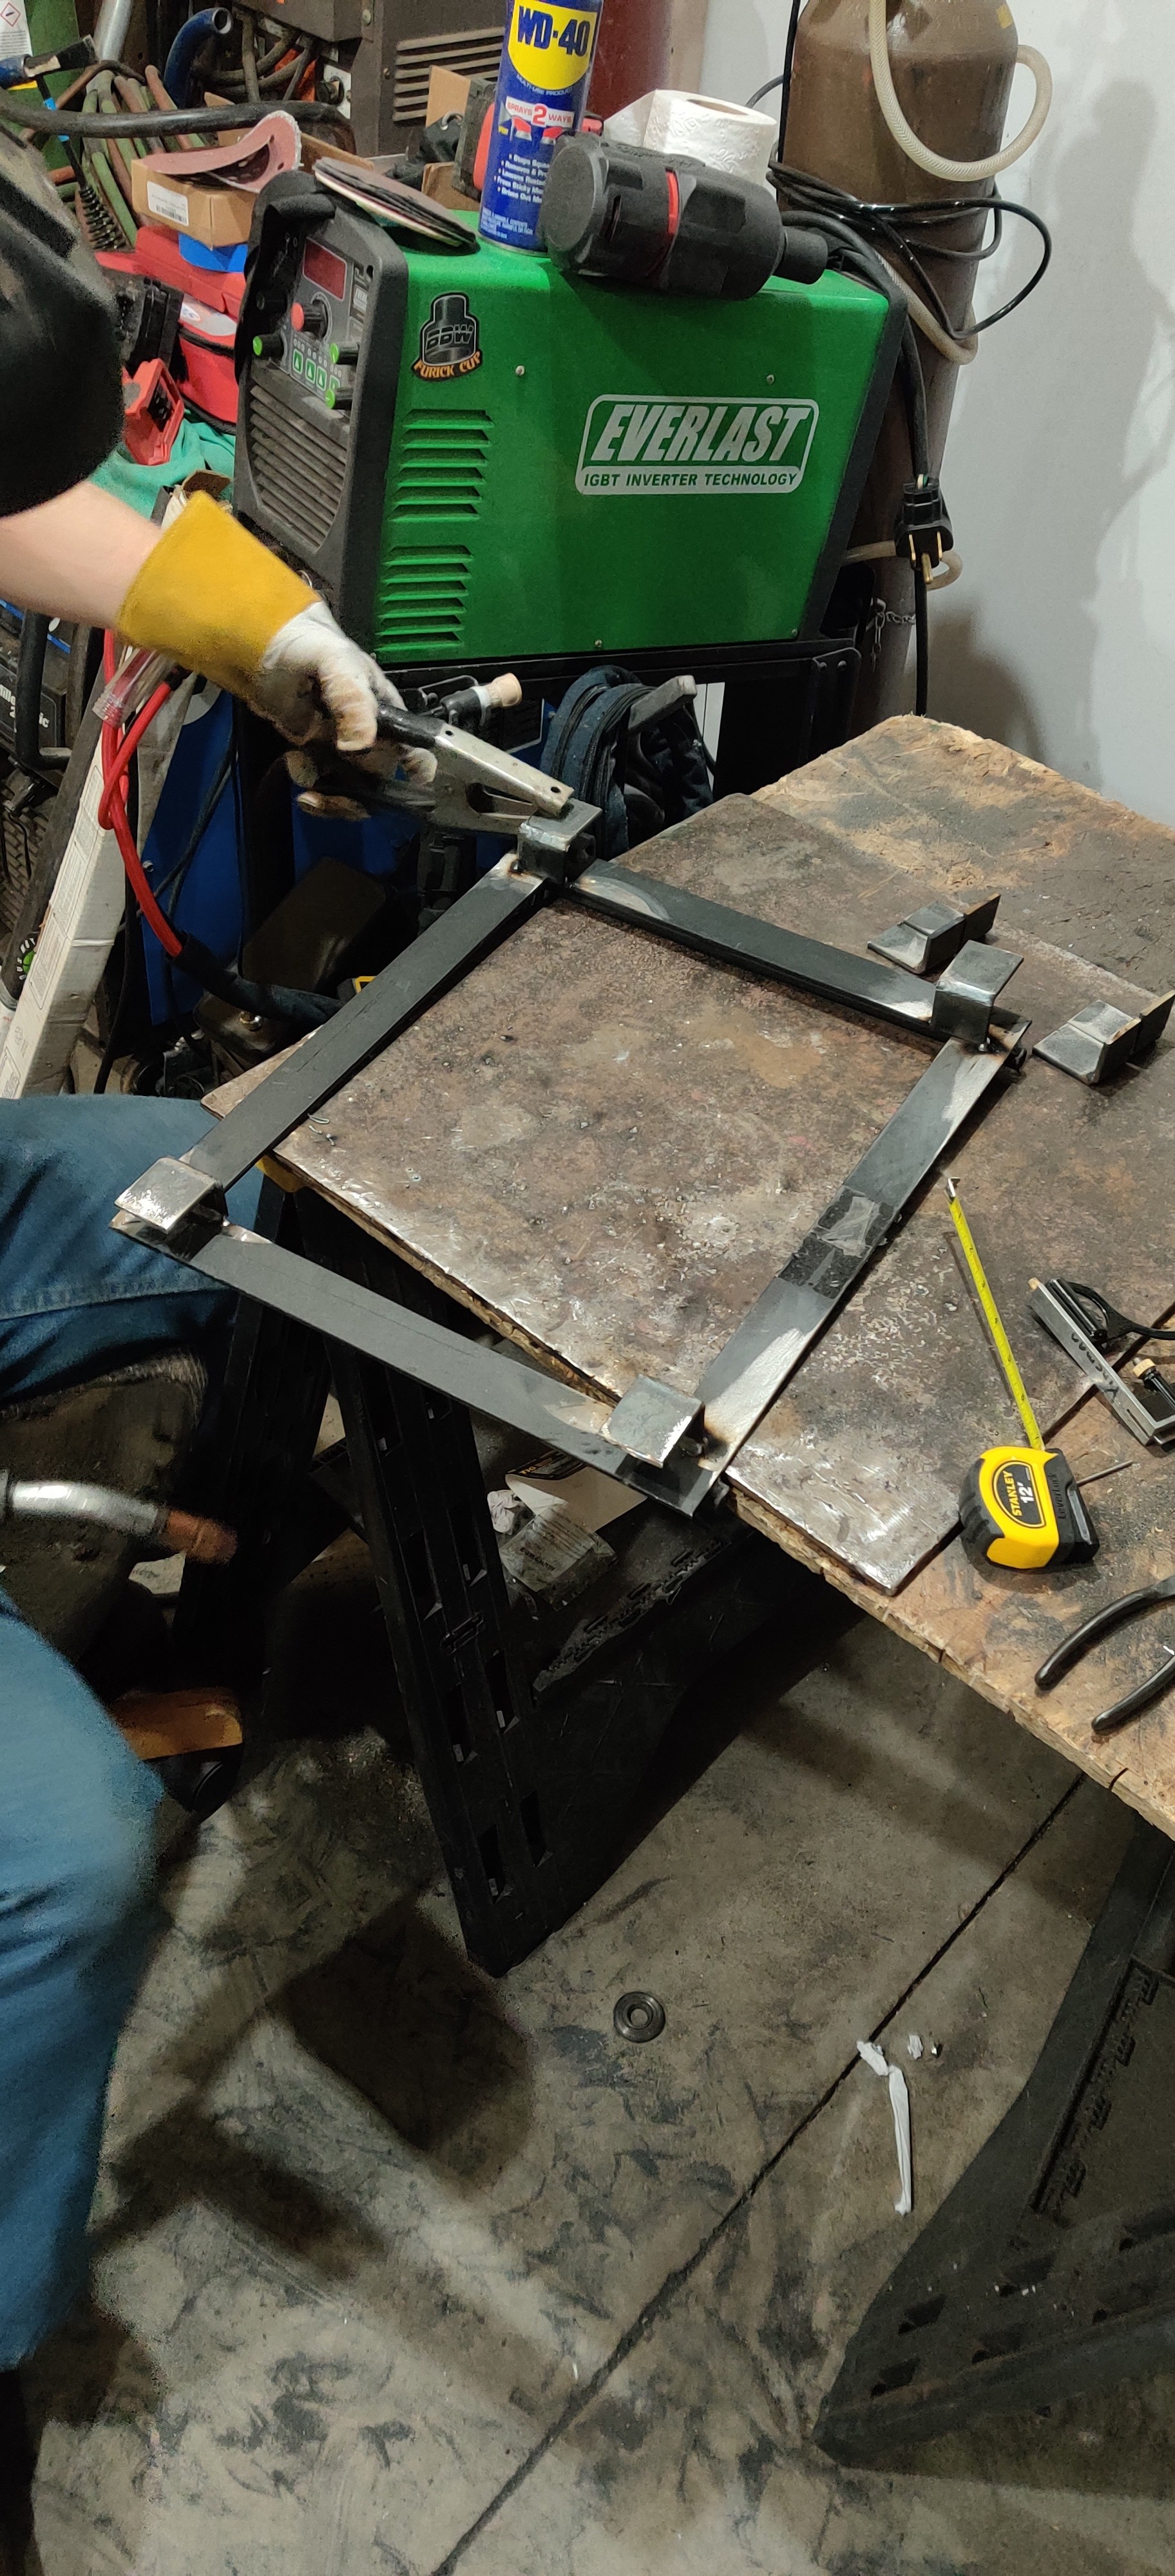
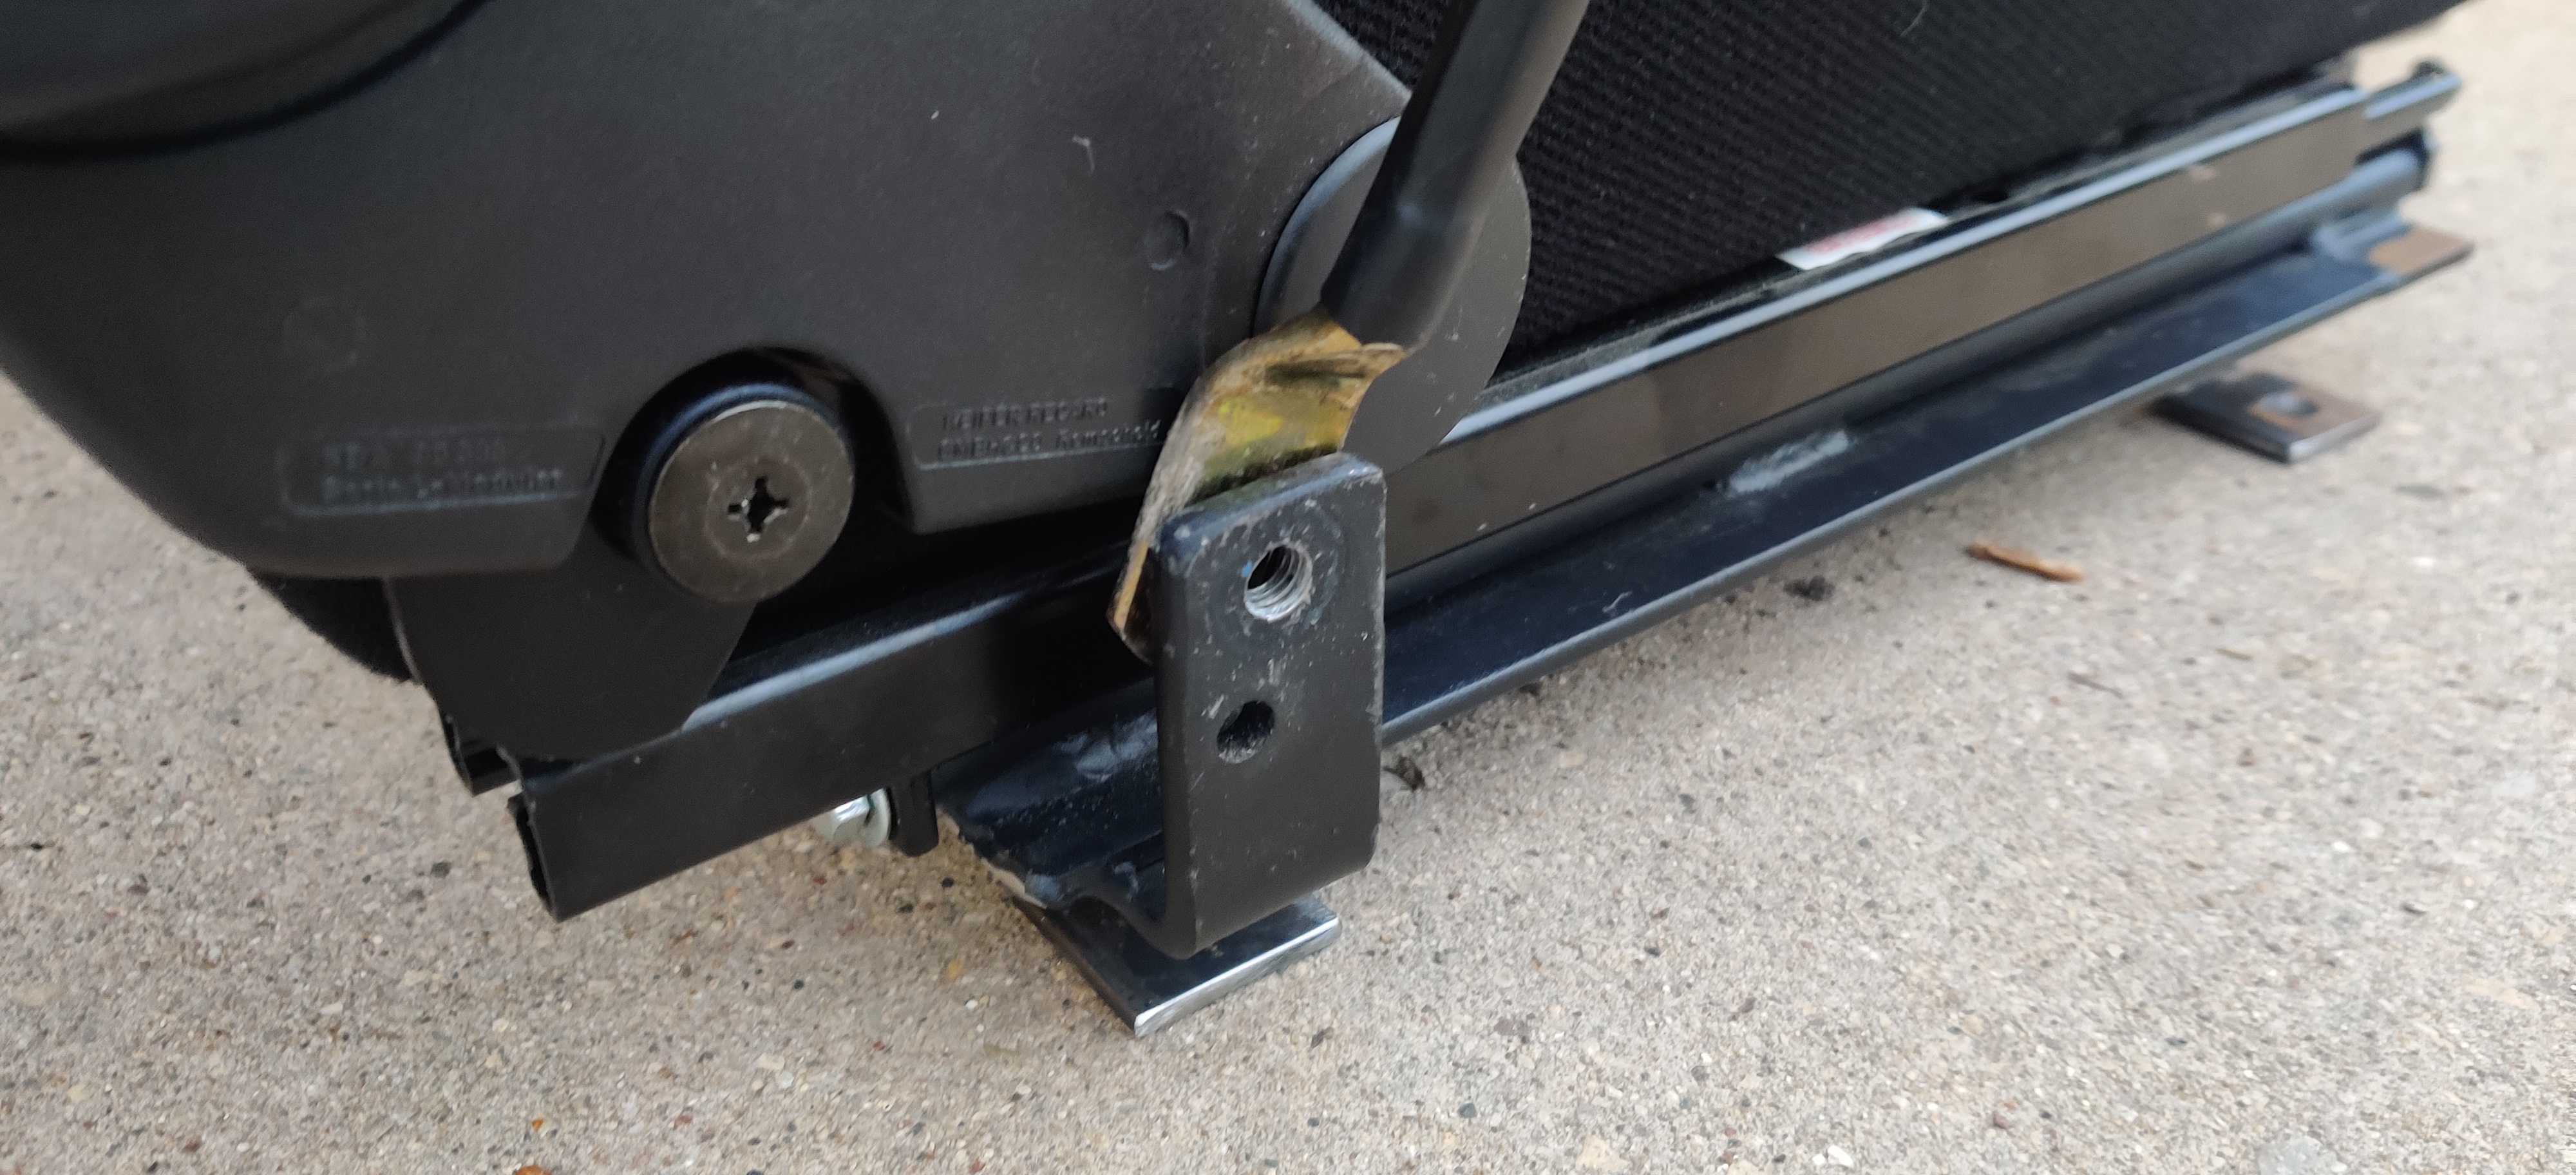
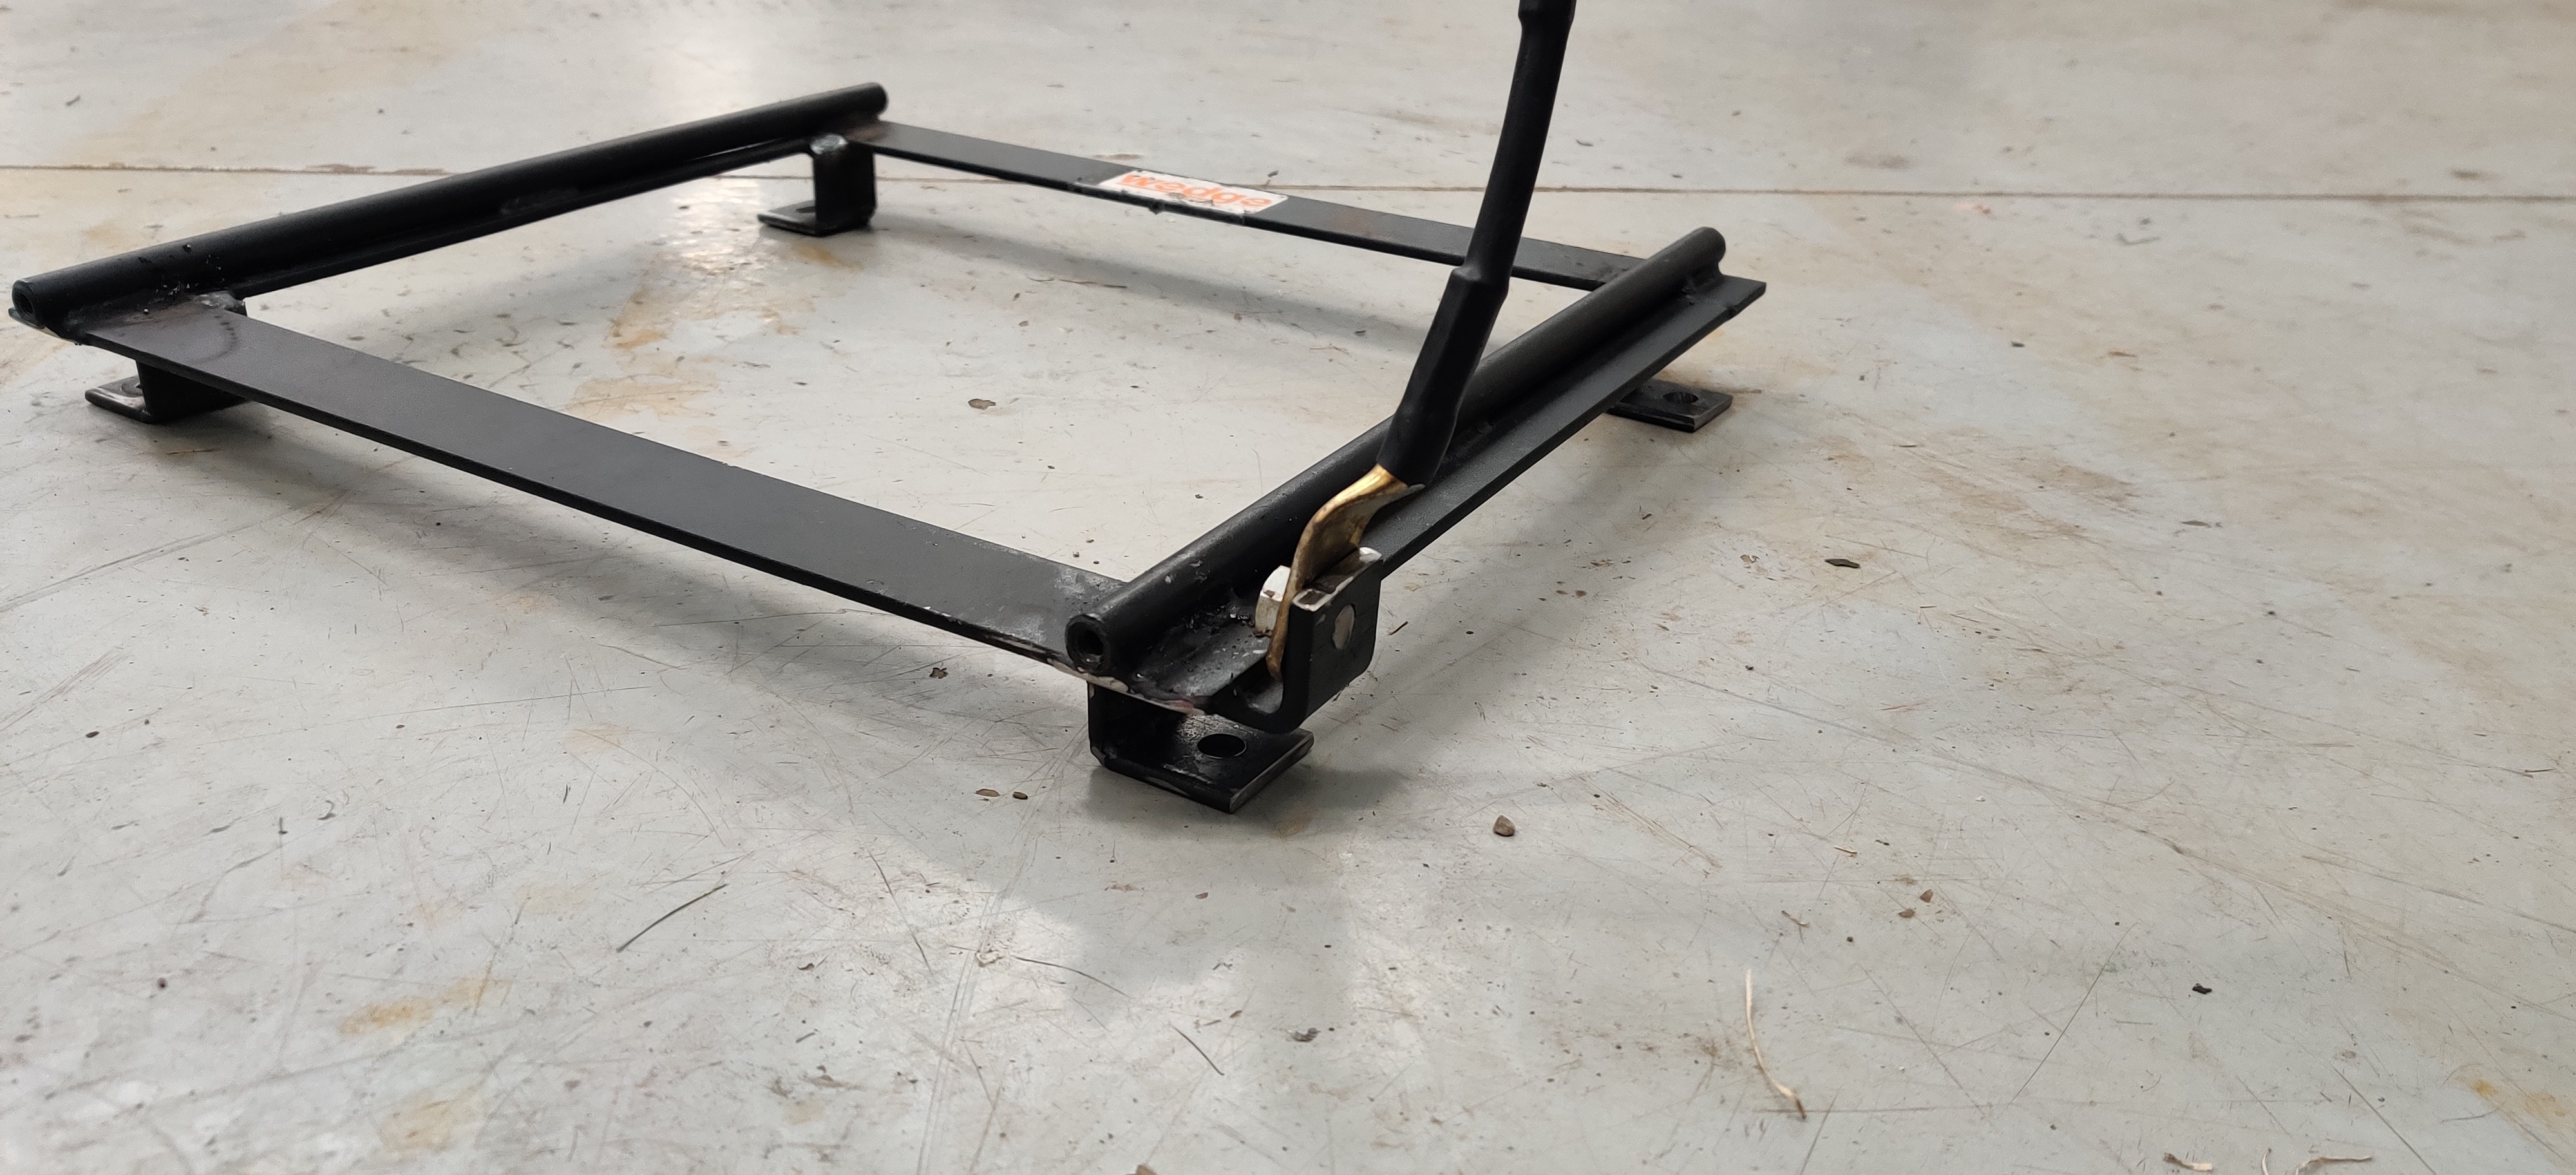
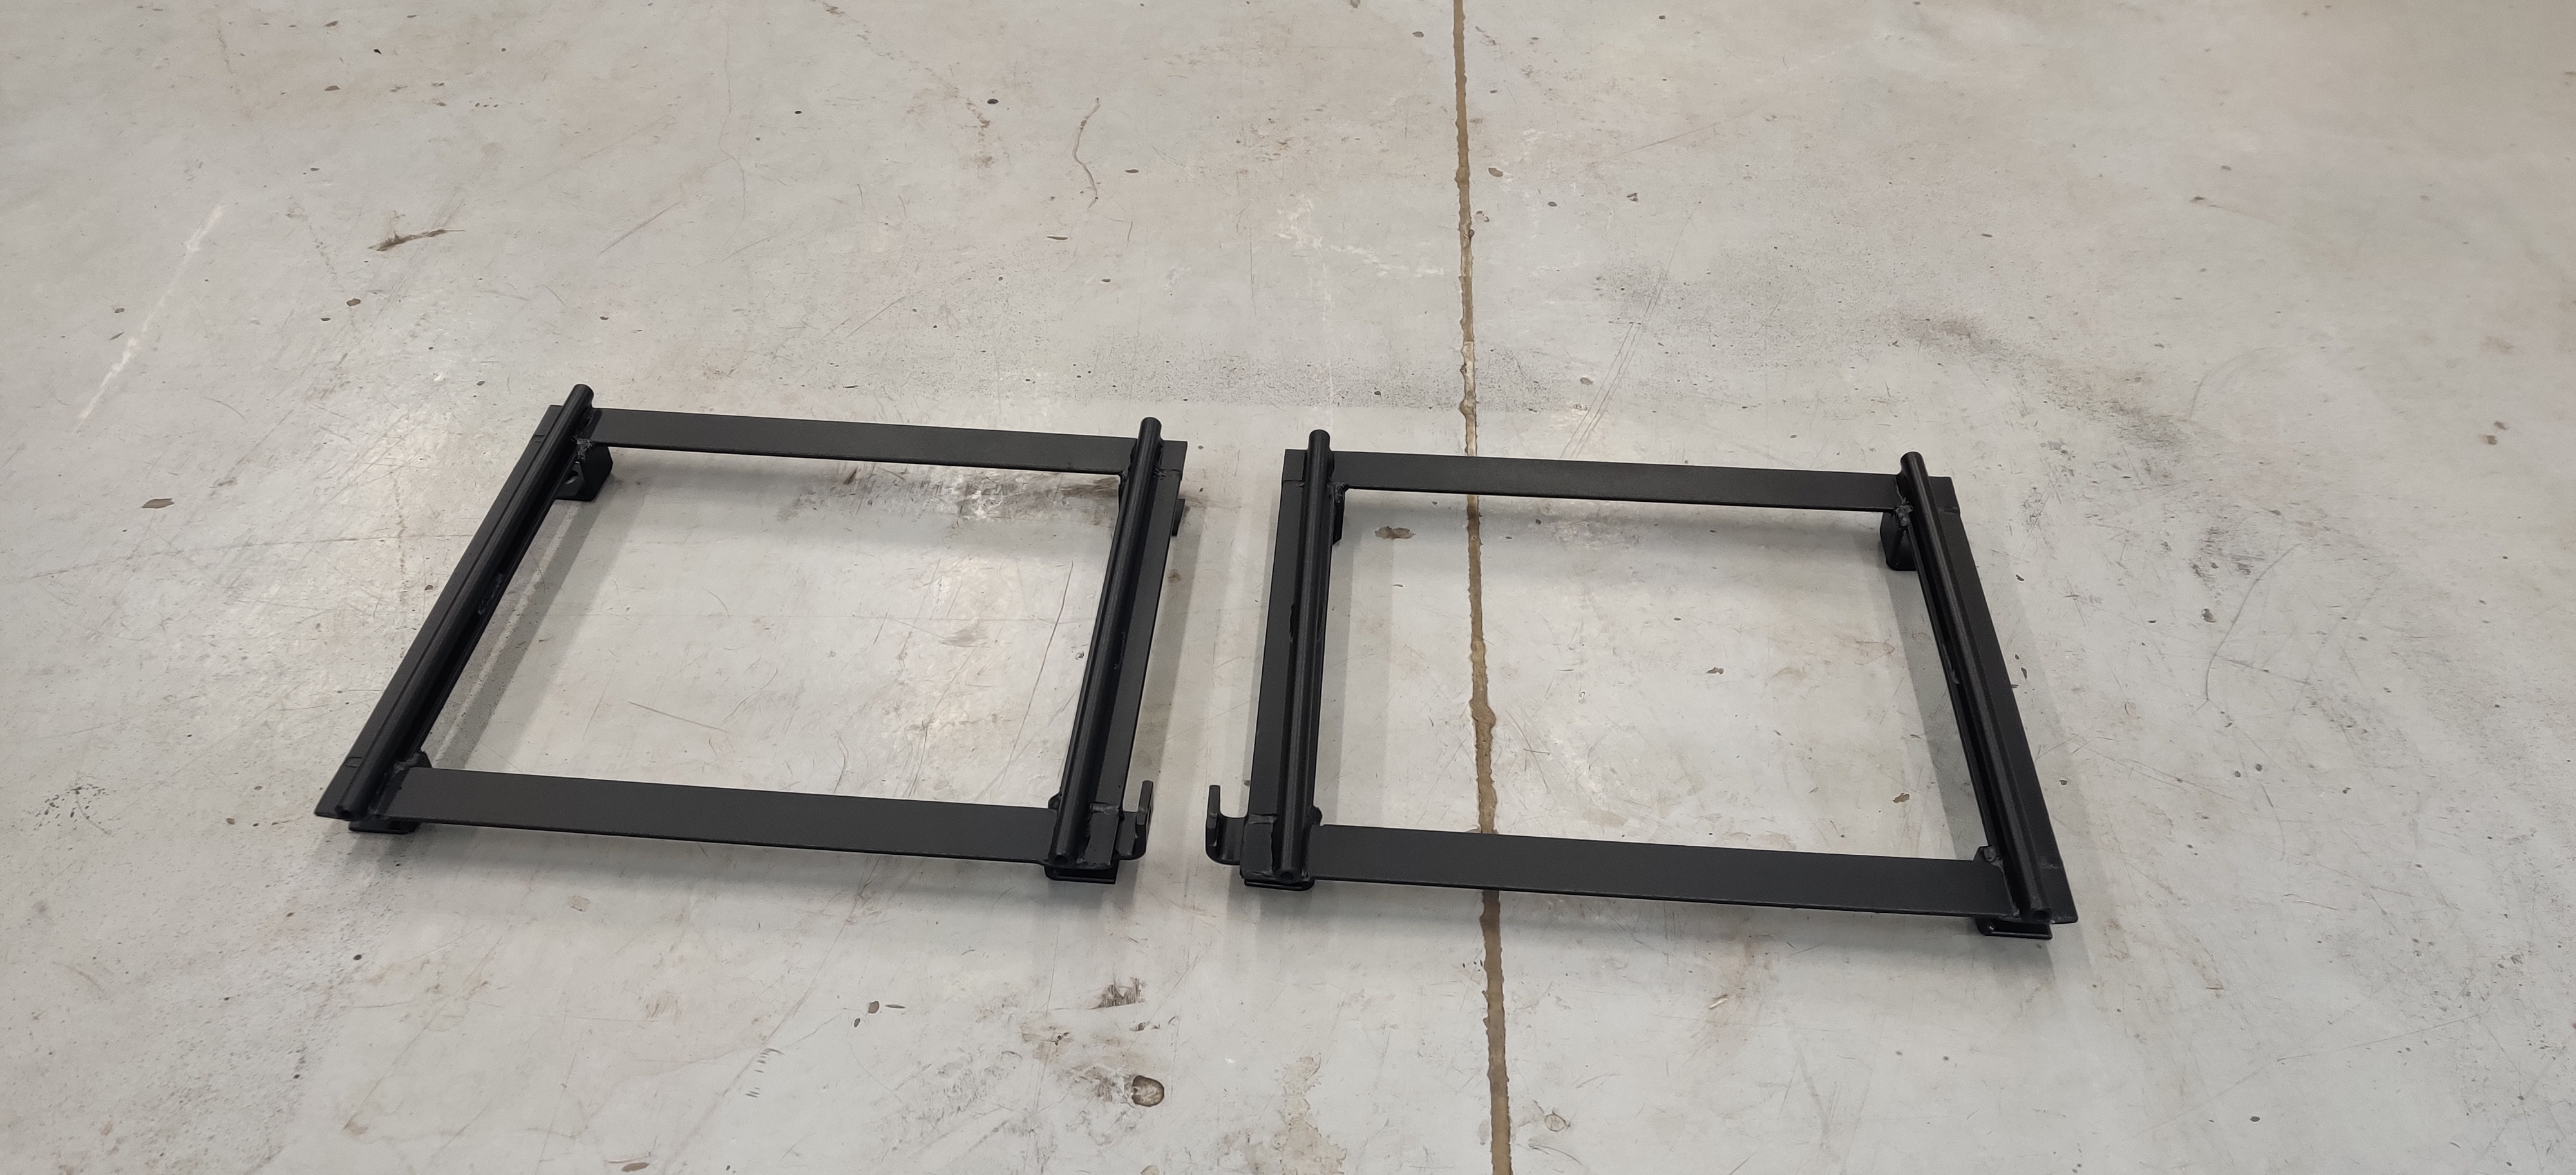
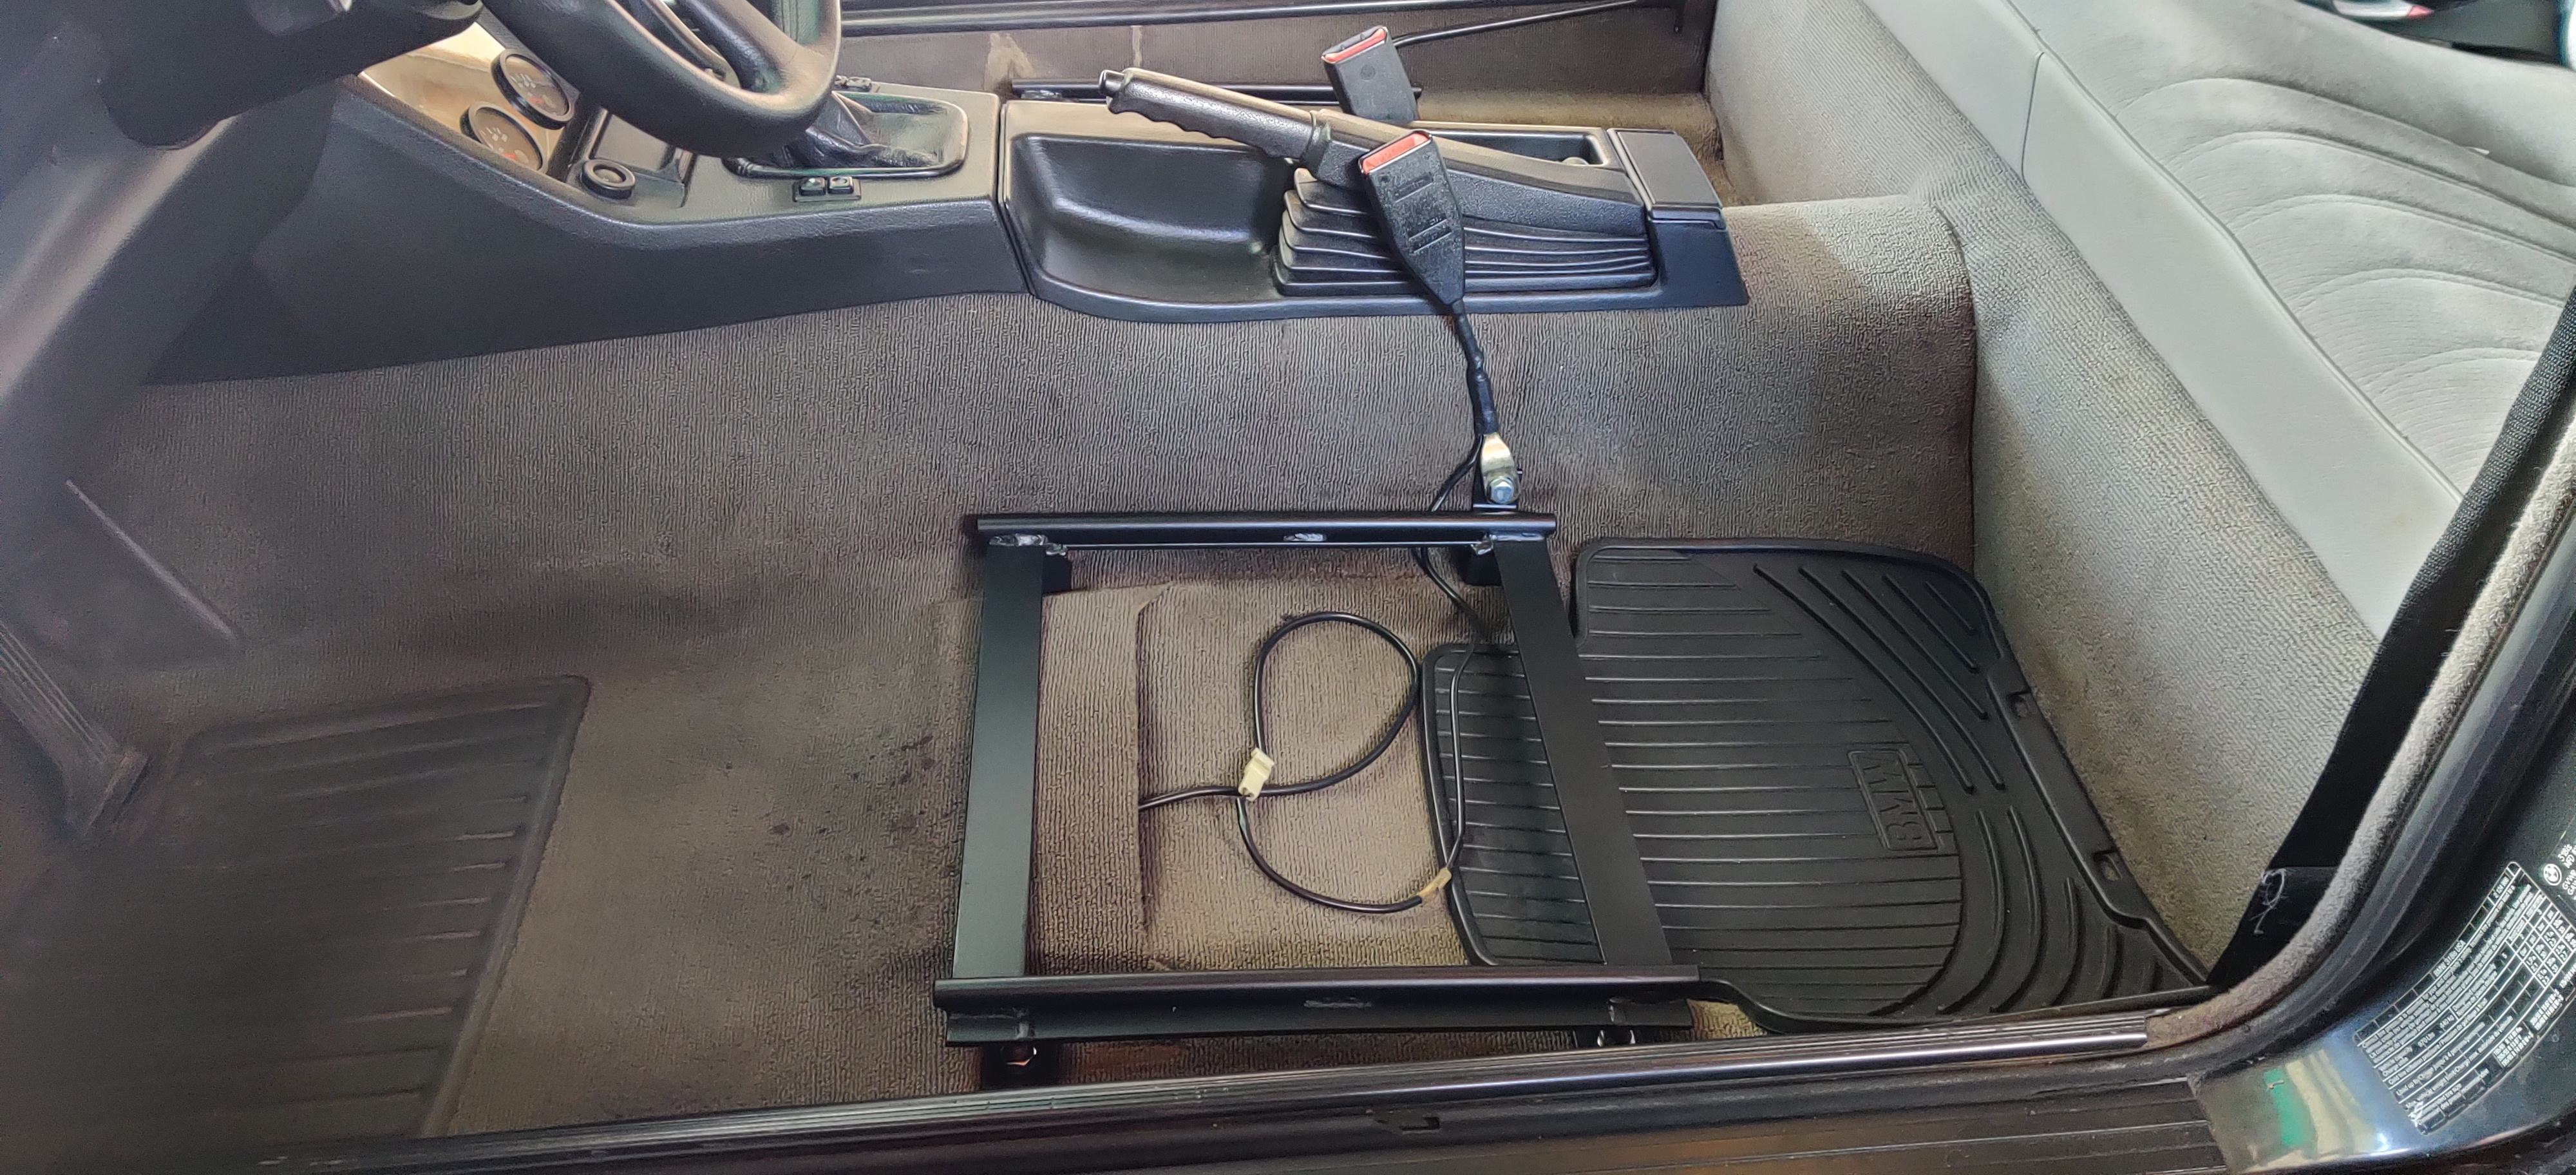
Being that a new set of brackets and sliders were gonna run me upwards of around four hundred bucks for both seats I wanted to see if I could make the mustang ones work first. I took some measurements of the bolt hole distances and what I would need to modify to get them to fit properly. The following day I took them over to a friends and we went at modifying the brackets to fit the car.
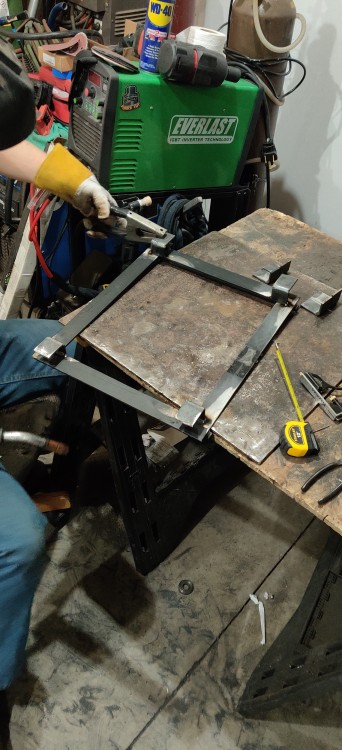
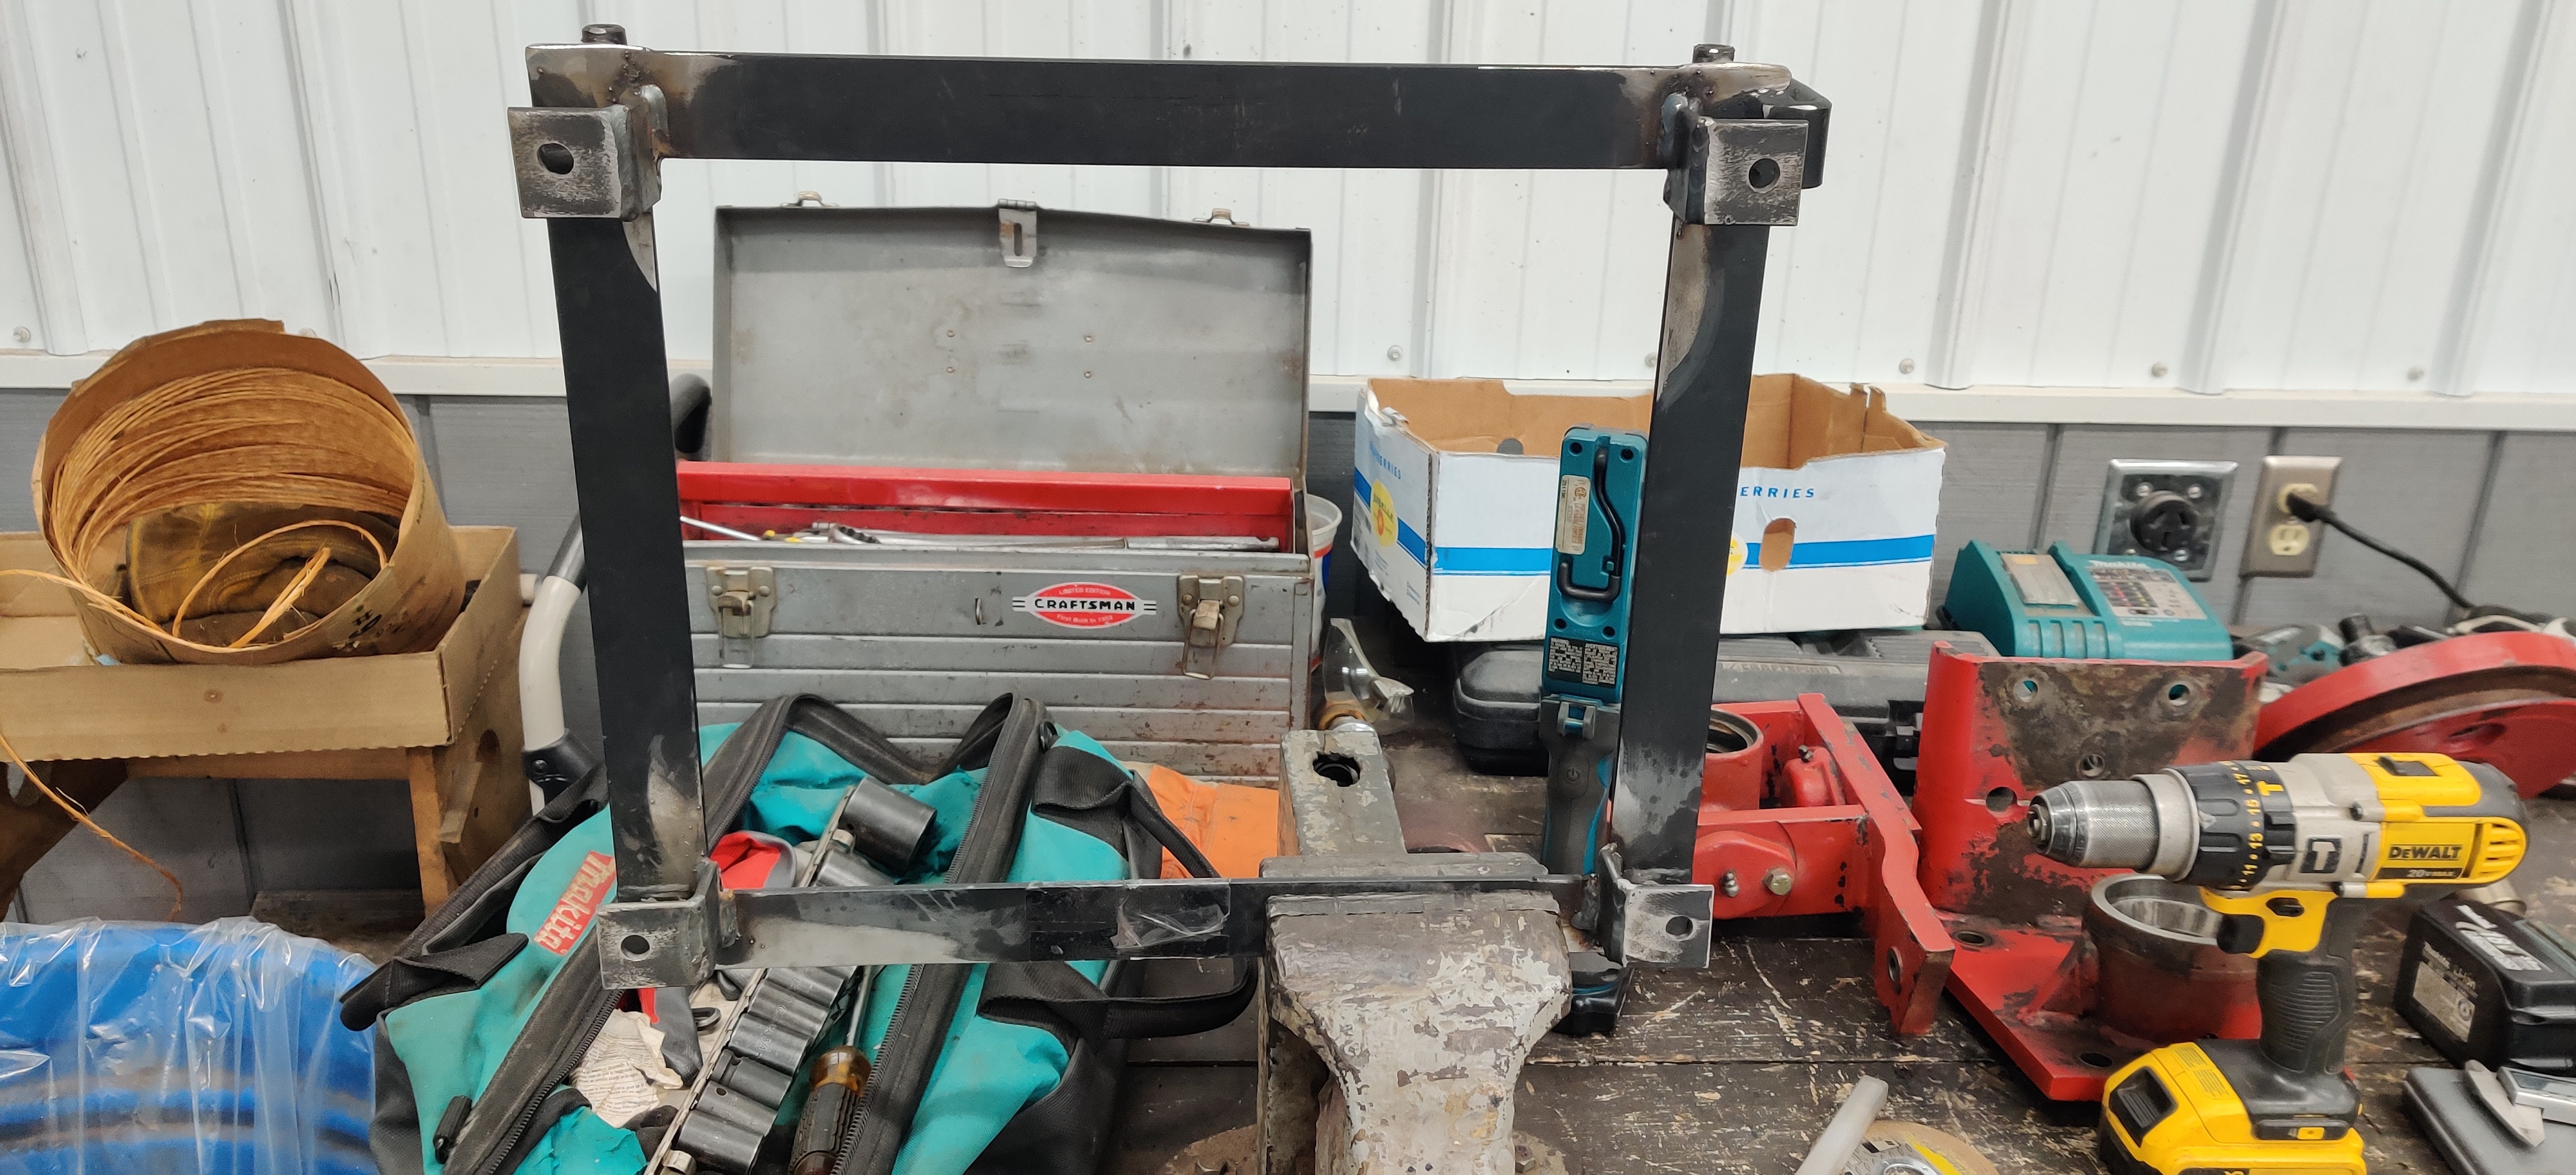
After they were all welded up I took them over to the shop and drilled and slotted the holes.
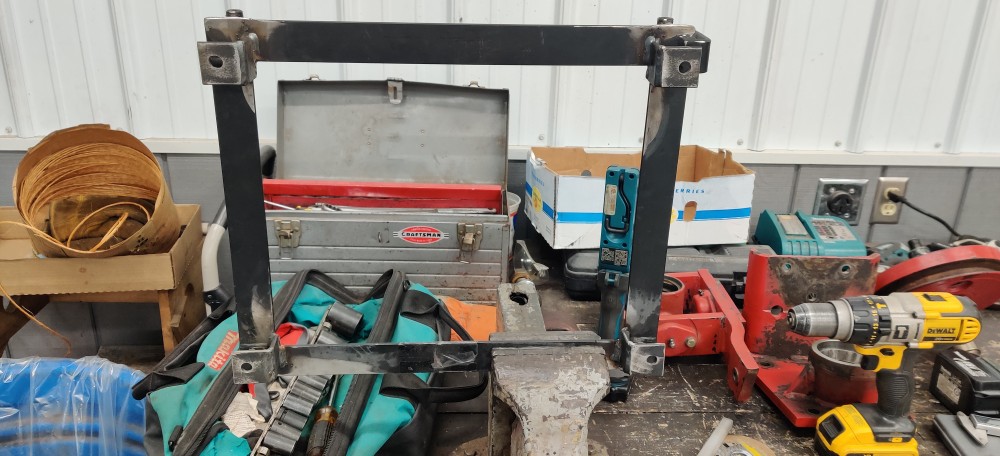
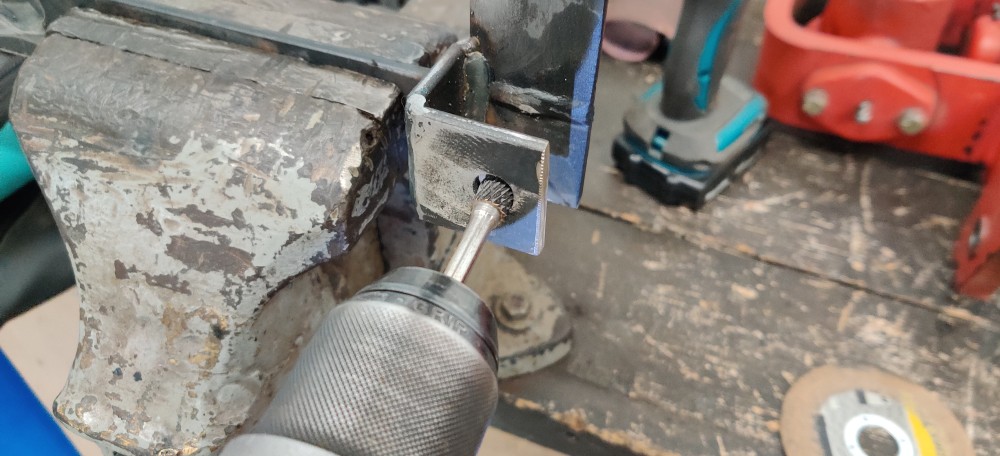
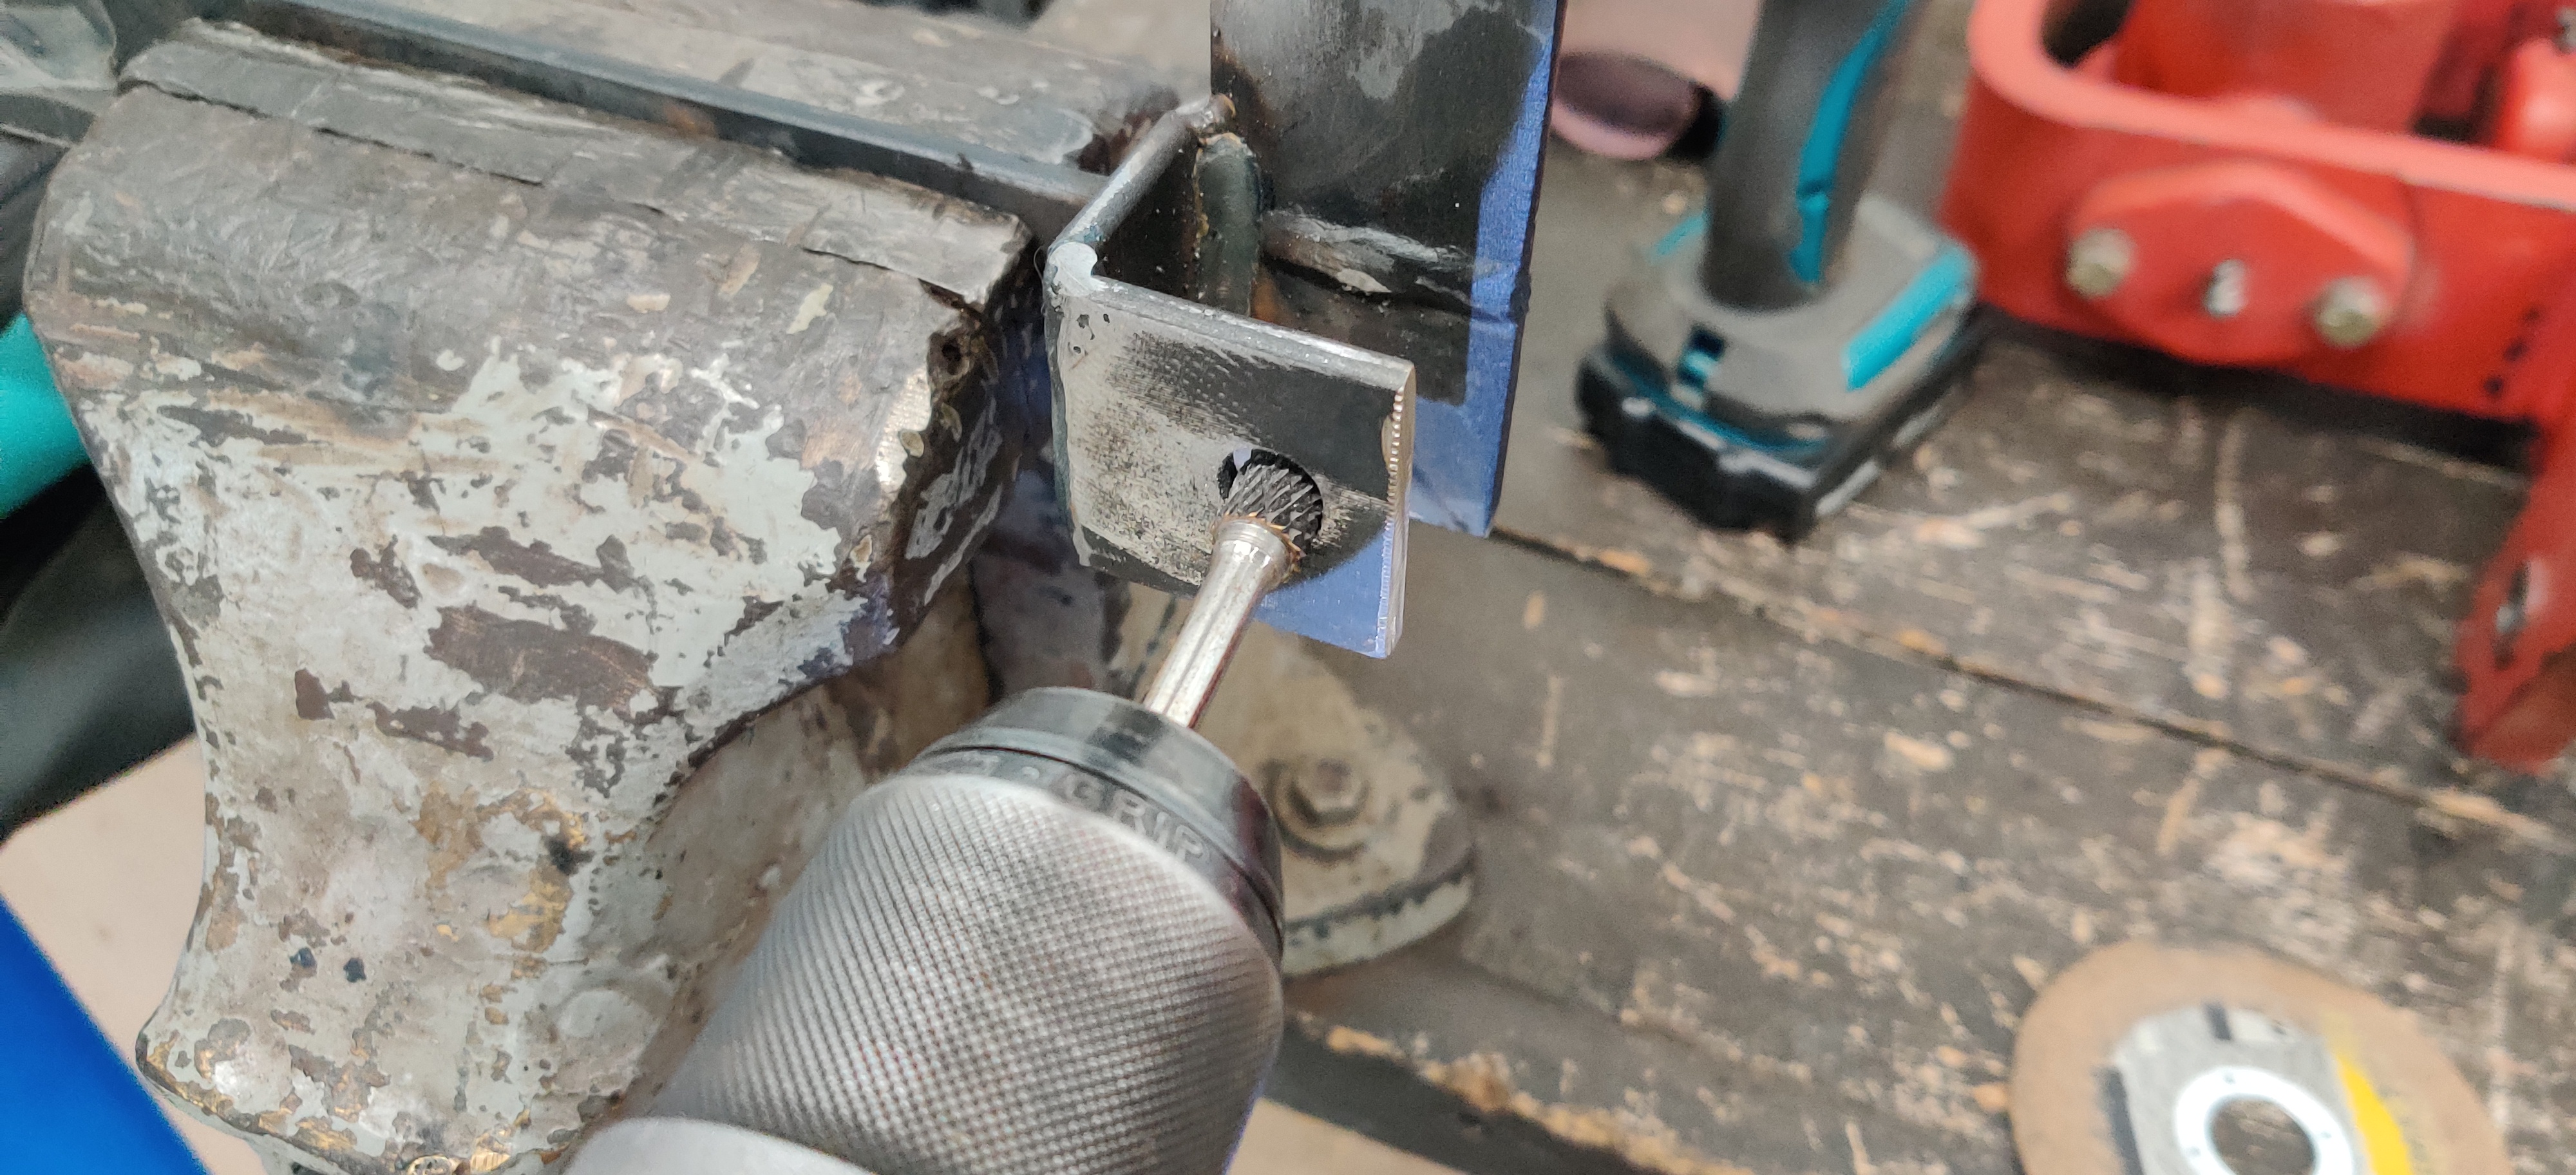
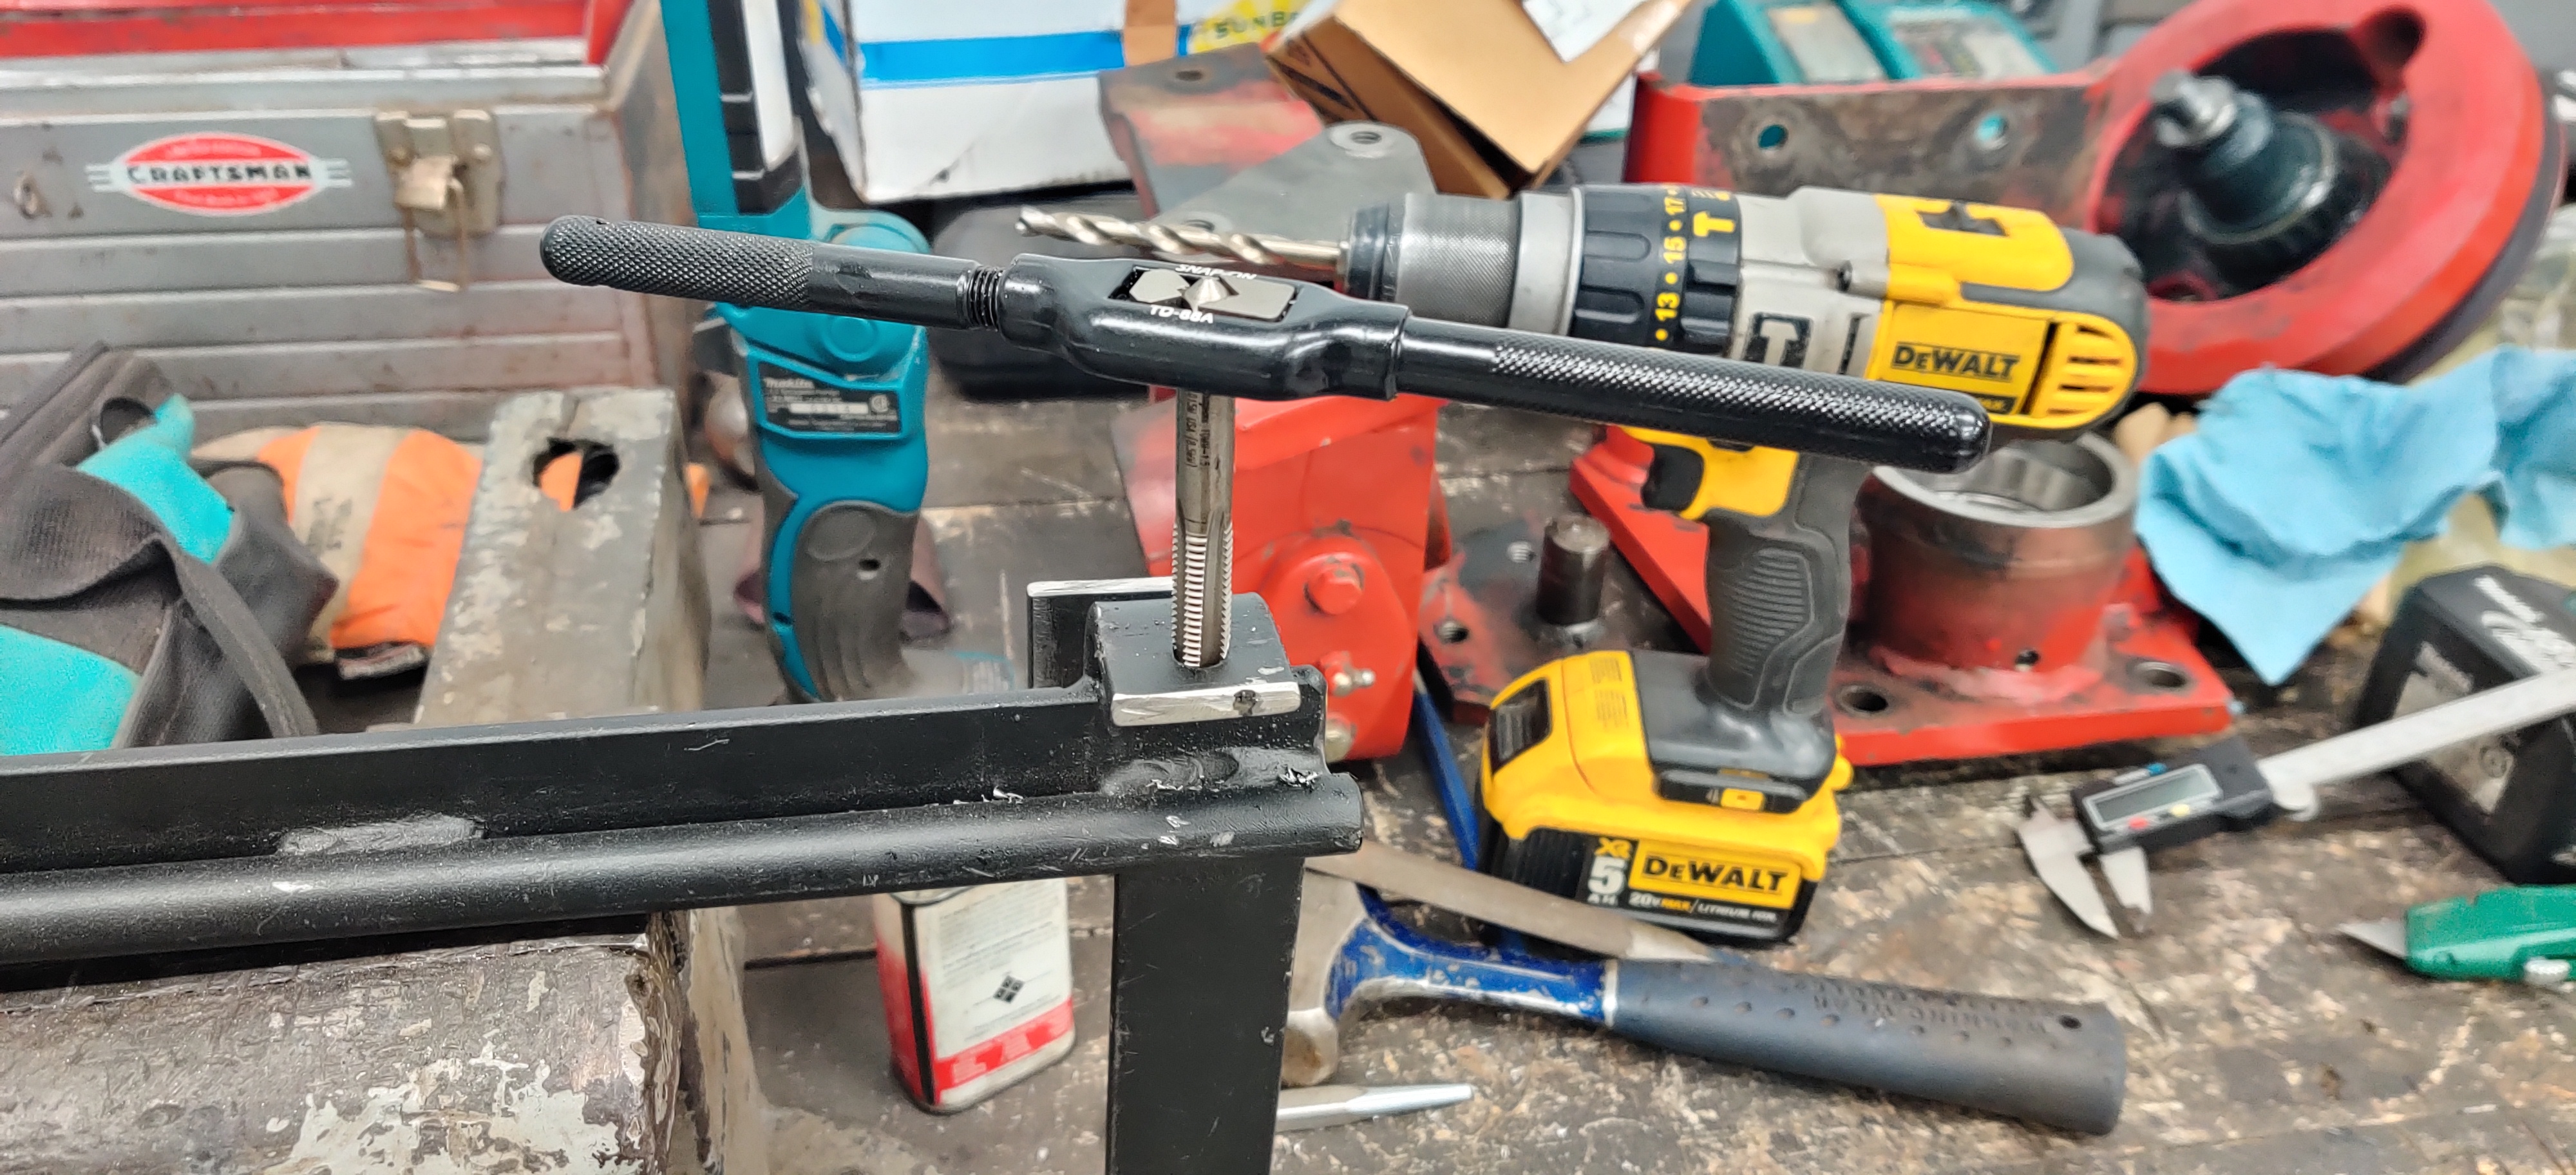
The next thing was to figure out how I was gonna get the seat belt buckles to mount. I liked where the mounts were originally but with the e30 buckles it was not gonna work. In order to keep the location and fit the buckles I cut down the vertical piece of metal in half and drilled and tapped a new hole for the bolt.
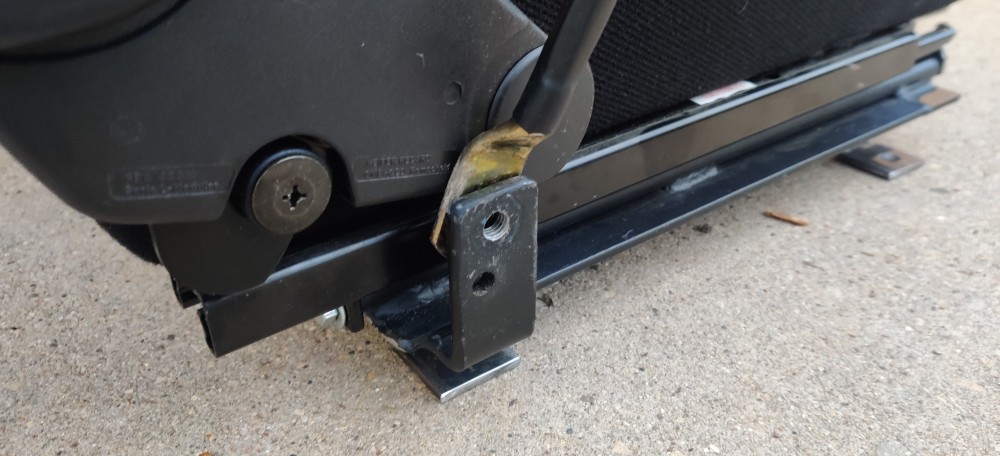
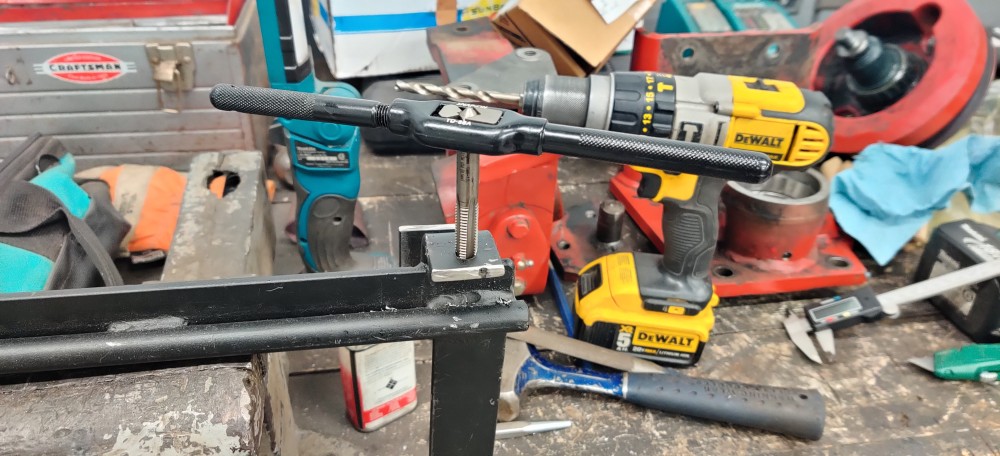
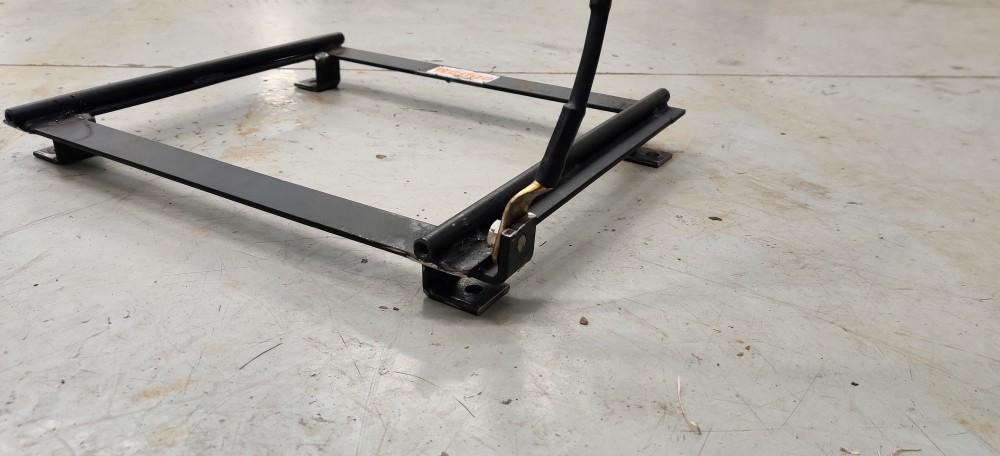
I ended up snagging some 5/8's size bolts from my grandfather's spare bolt bins at the shop and hacked them down so they were smooth without the outside surface. Worked like a charm and I mounted the seats back up to confirm there was no rubbing with the new set up. All that was left was to get them sand blasted and repainted.
I put one coat of etching primer and two coats of SEM black trim paint.
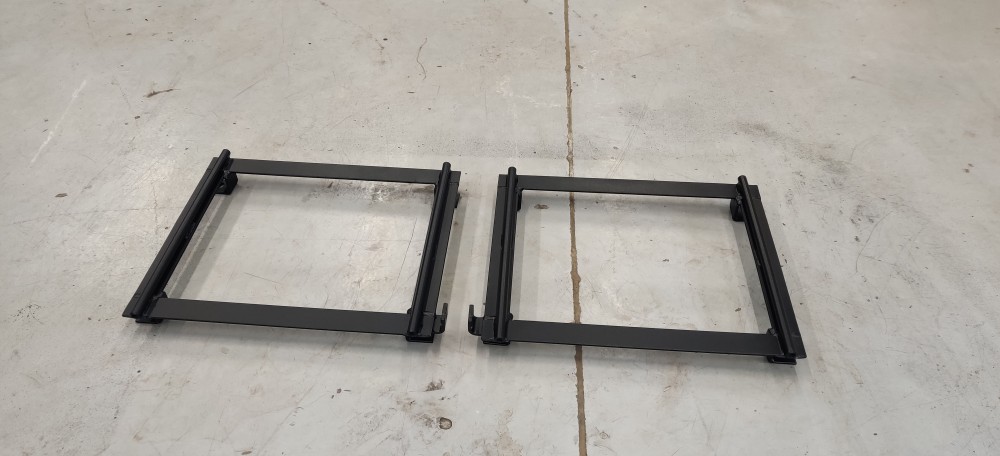
Purchased some new stainless hardware to bolt down the brackets to the car.
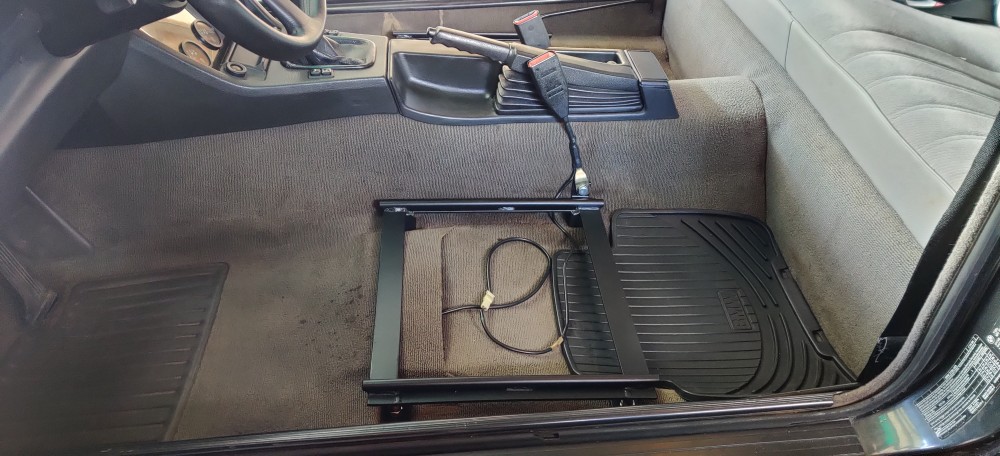
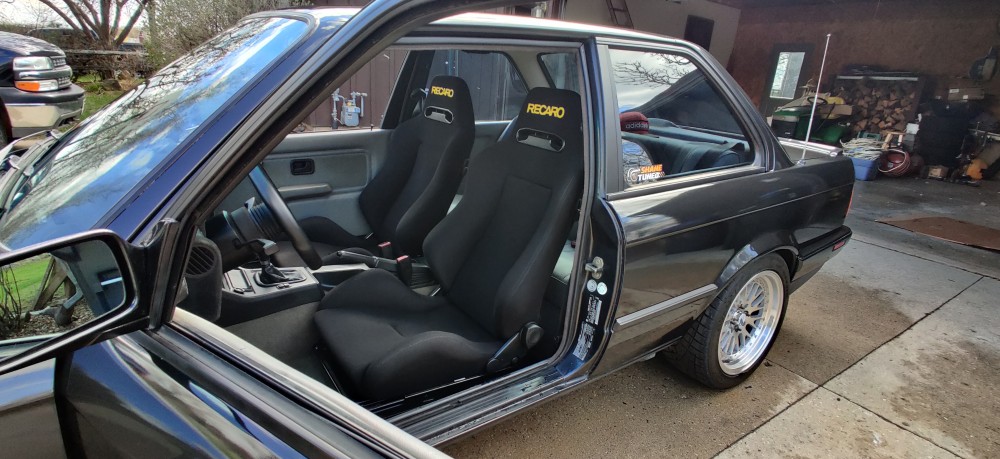
The fitment of the seats in the car was exactly what I had hoped for. The fact that I sat lower and could slide back further to get more comfortable and secure in the car was awesome! These definitely were a game changer for the cars comfort and secureness. I can't wait to put these to proper use!
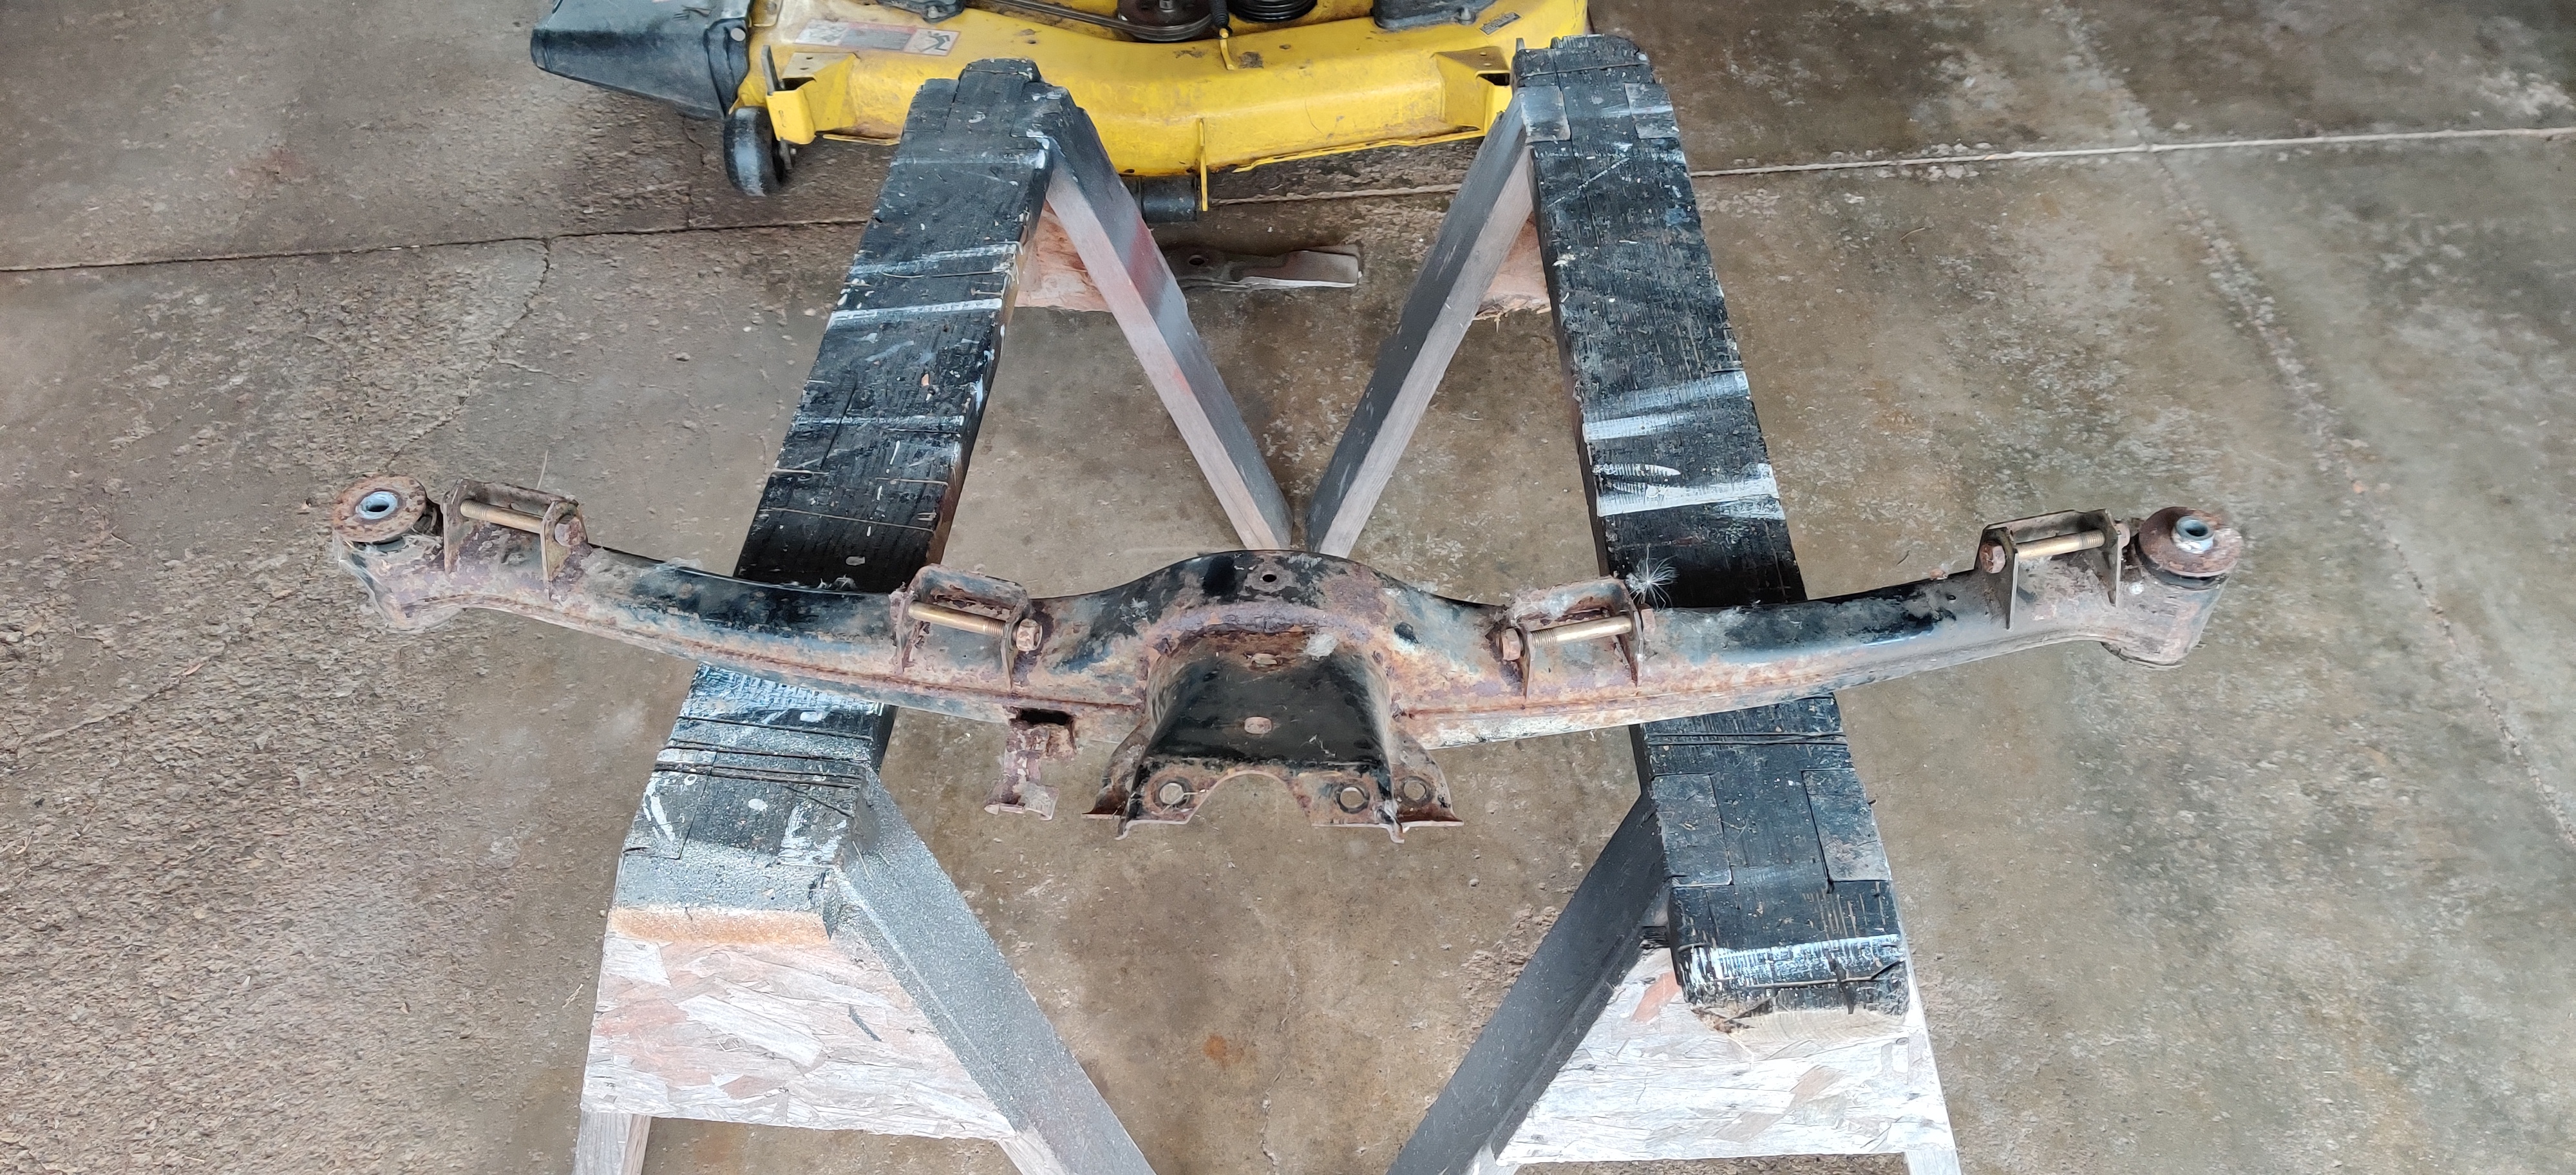
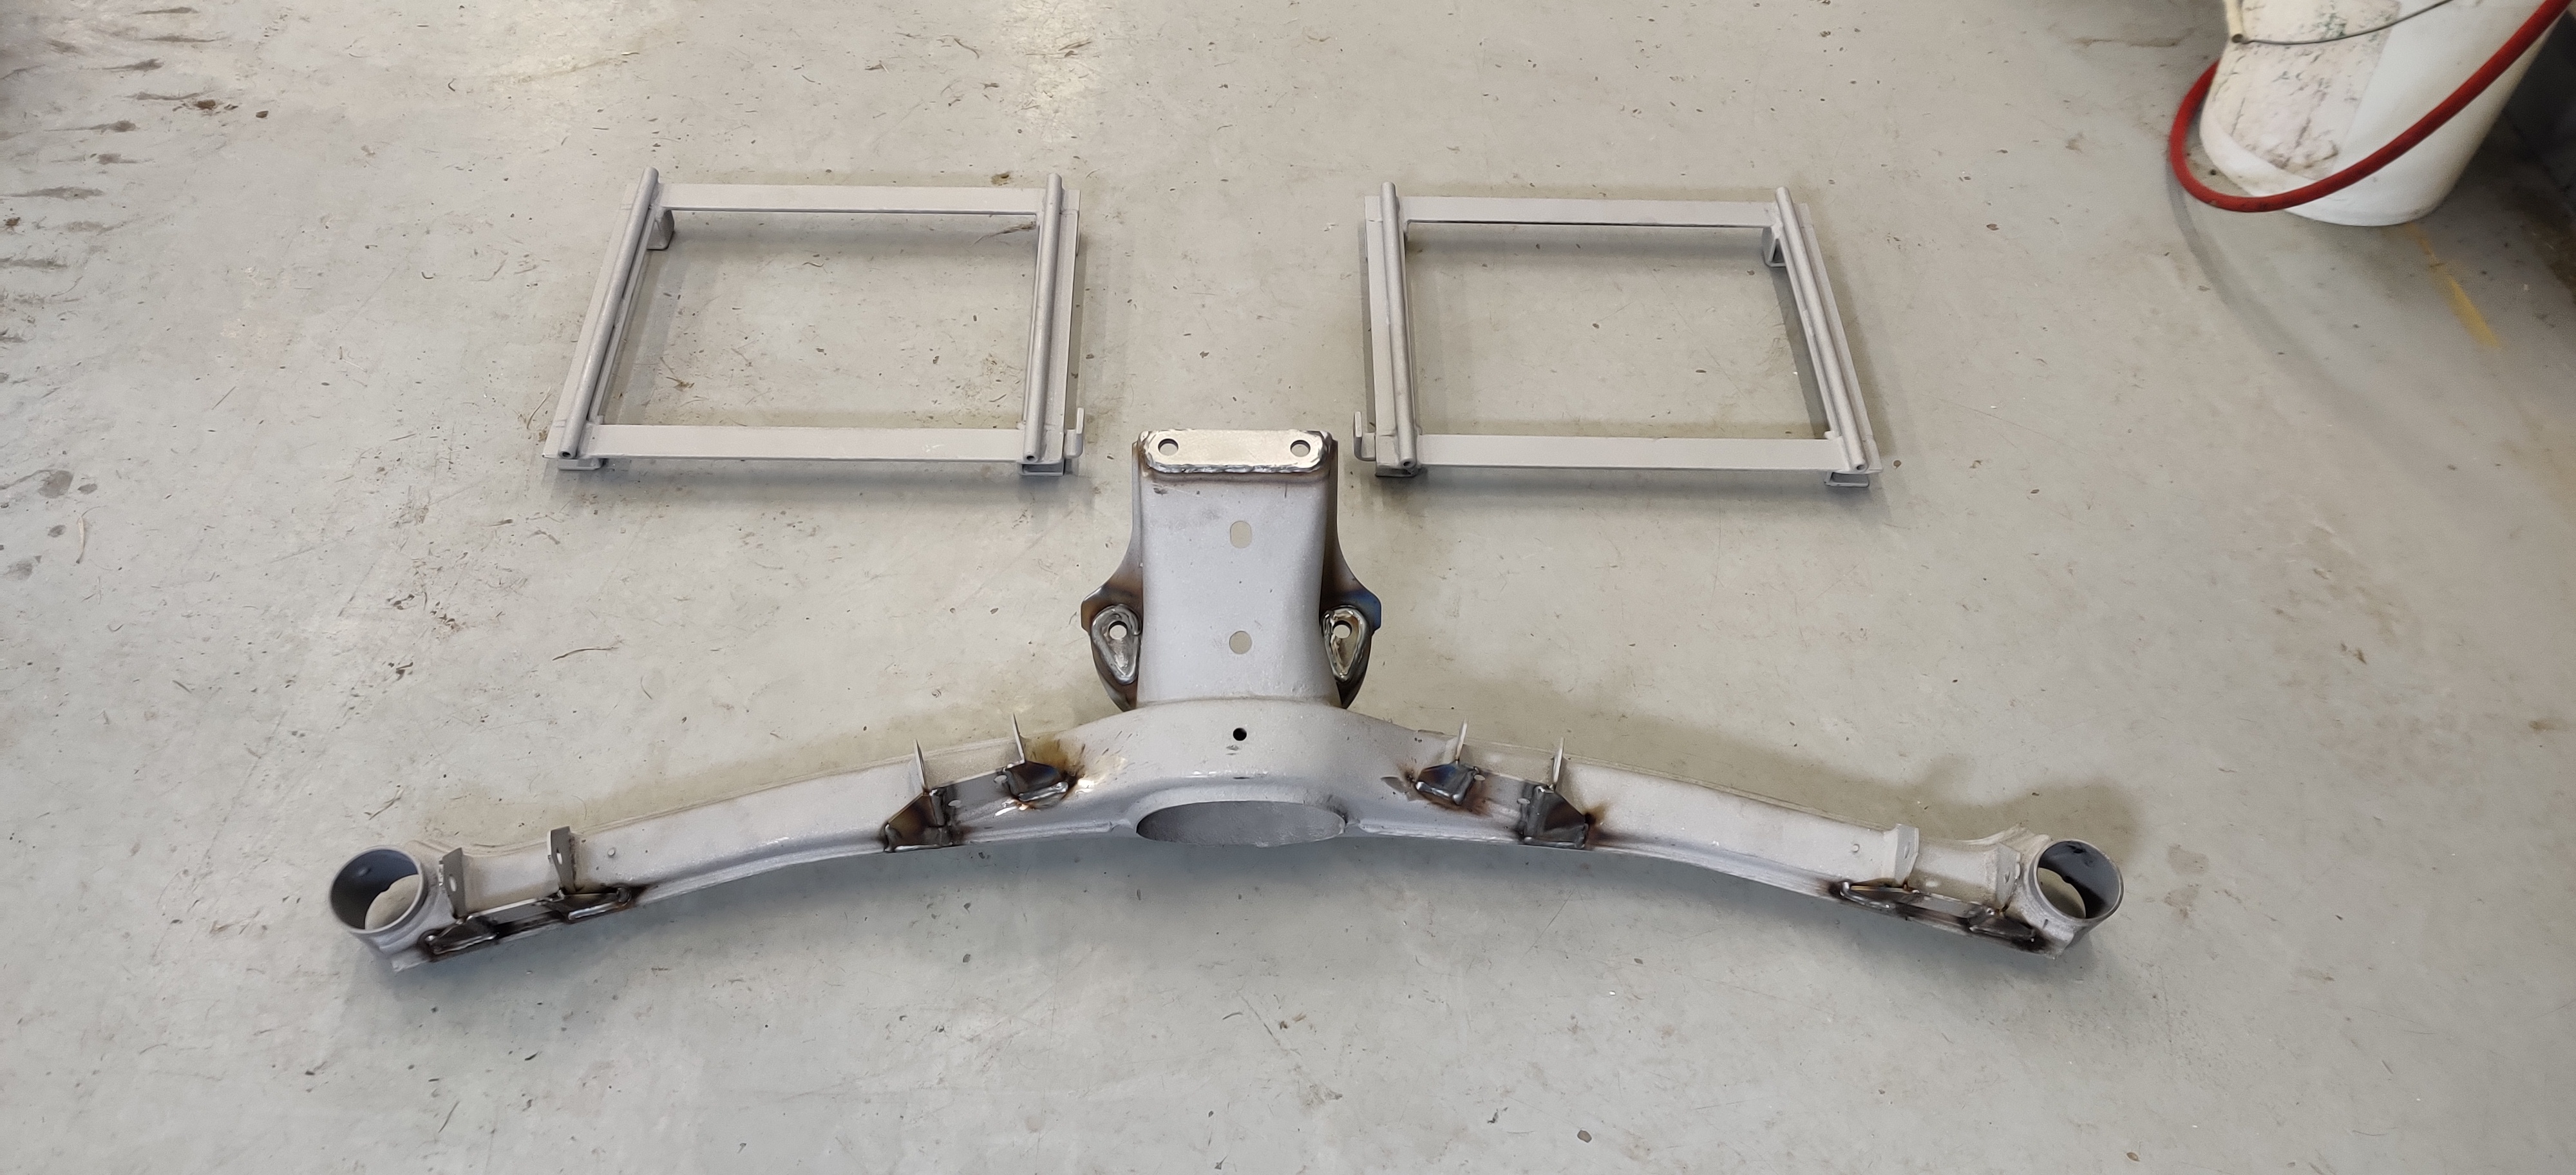
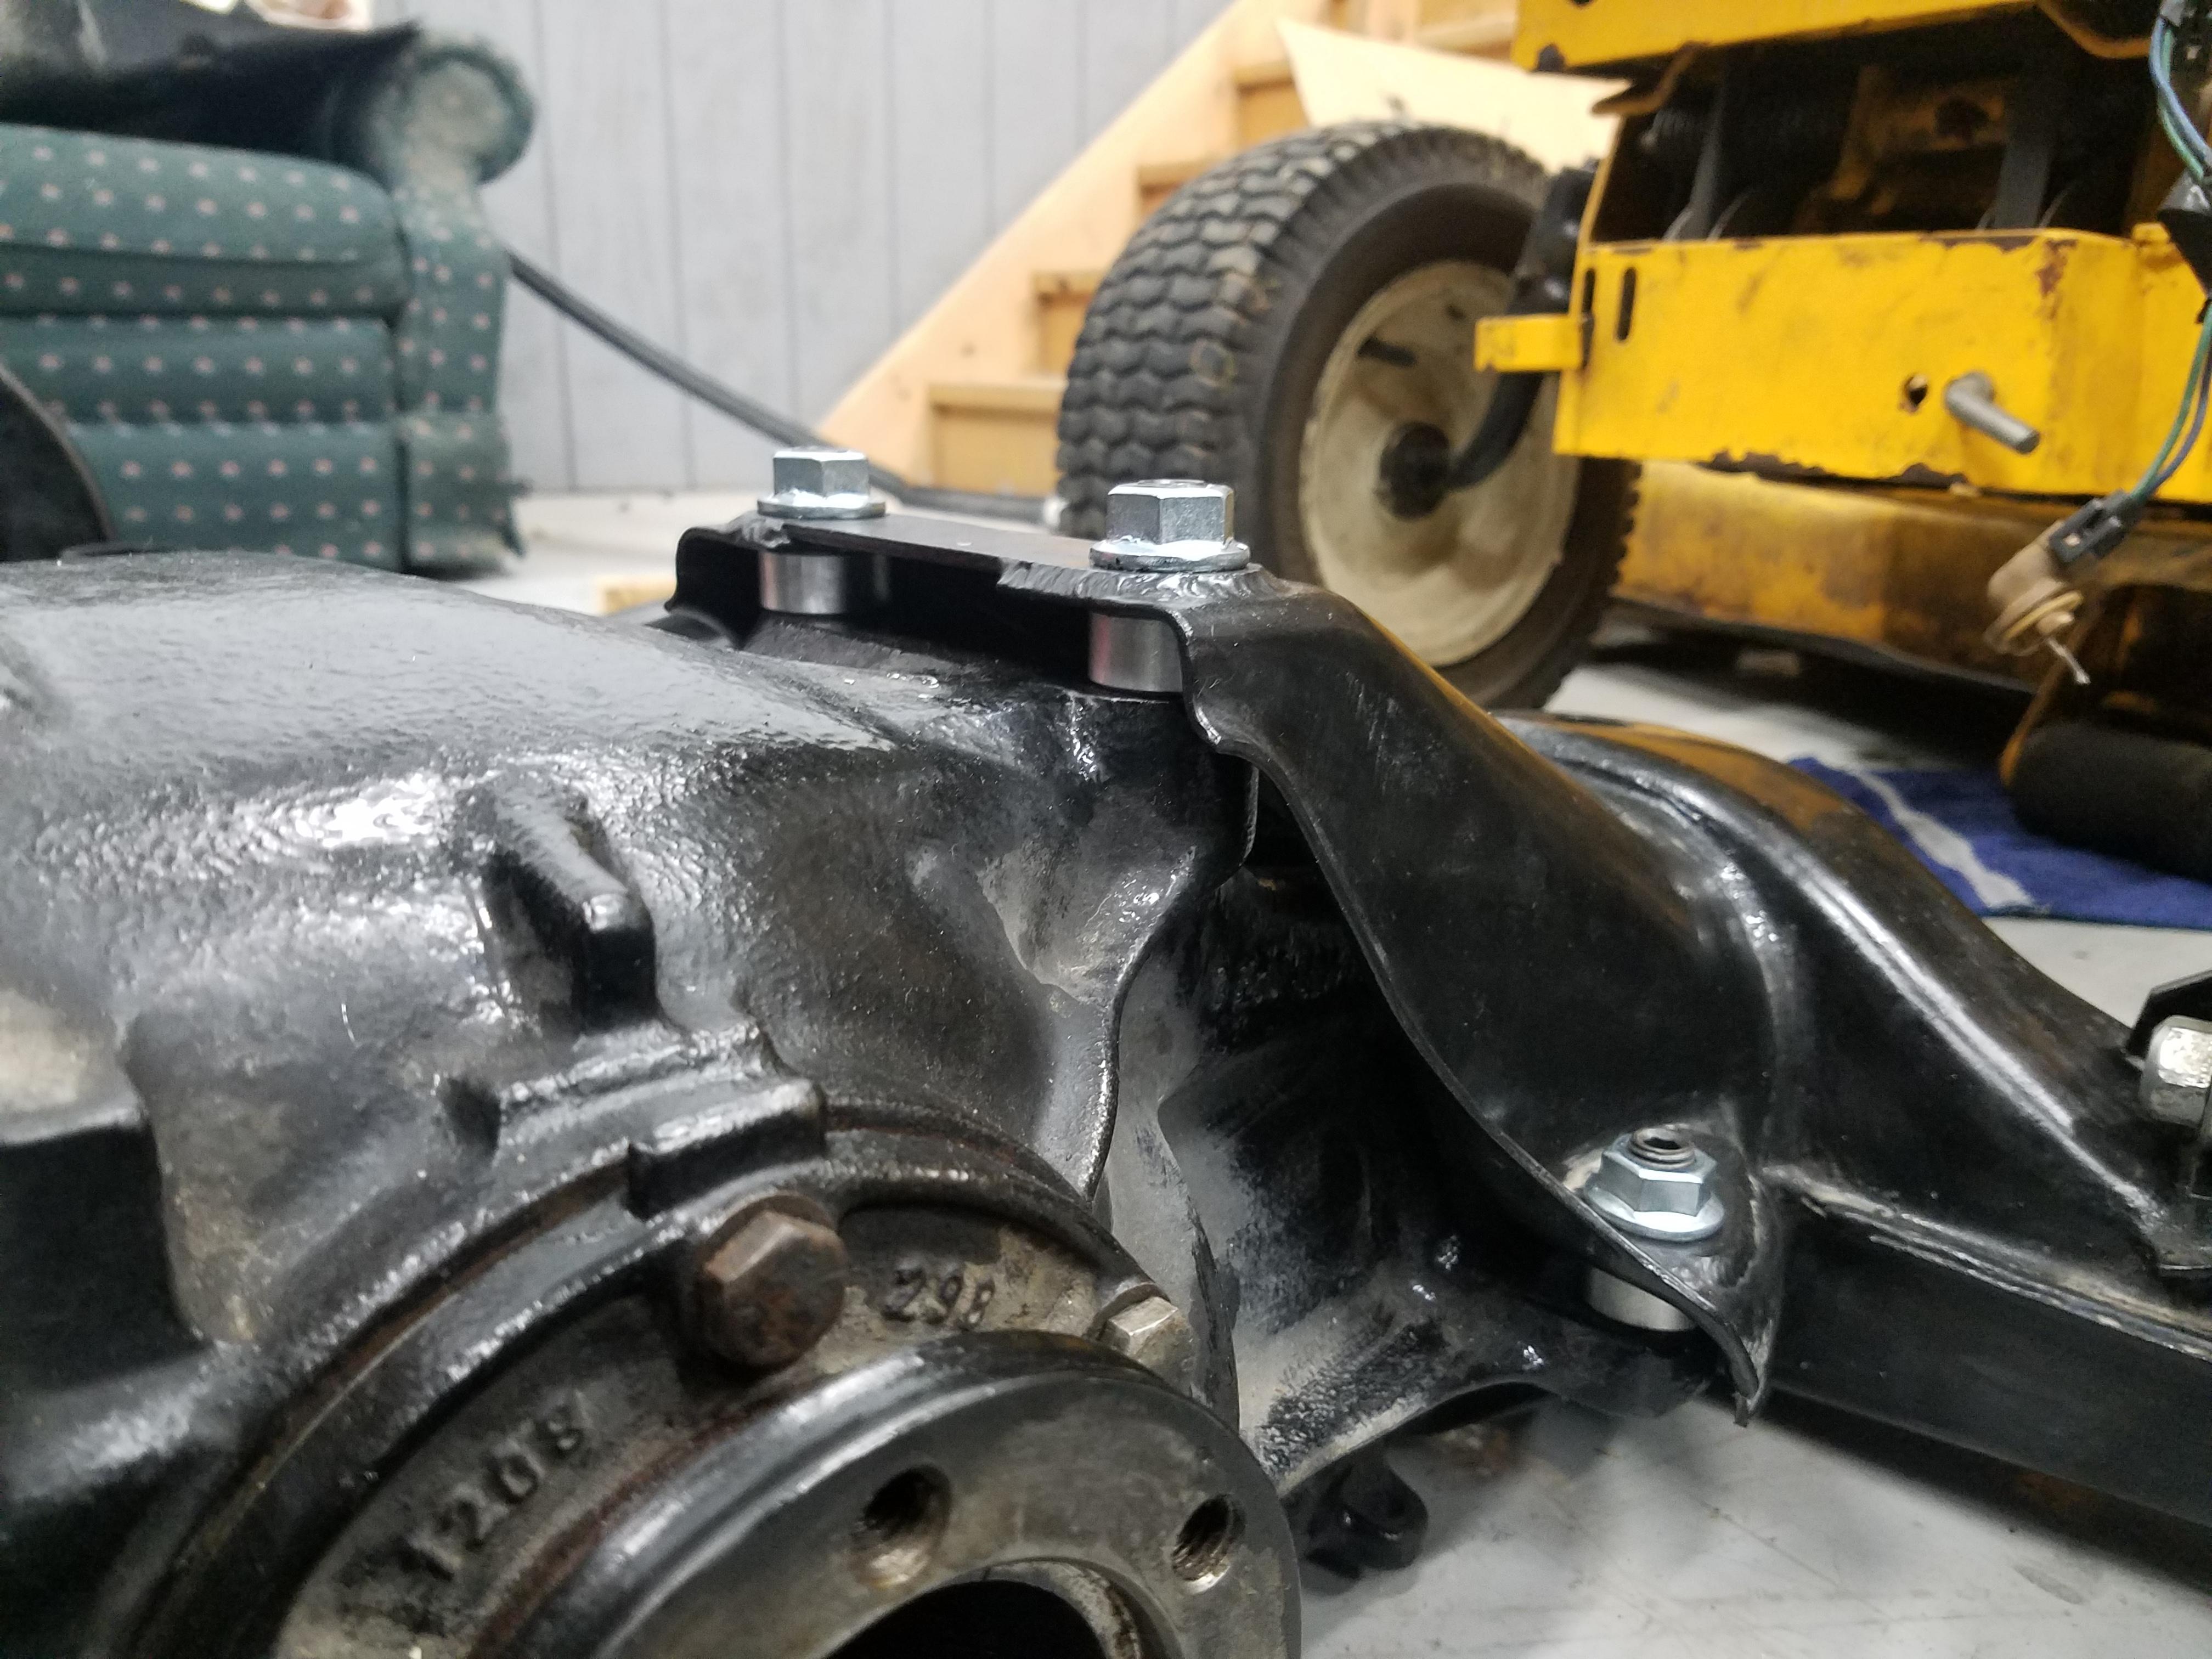
After I finished those up I switched gears and started working on a spare sub-frame I had bought the year before. After having enough trouble with not being able to adjust the eccentric bolts I had in the rear (because of the raised sub-frame bushings) and driving the car with something like 2 or 3 degrees of toe out on one side and 1 degree toe in on the other was nothing short of a headache. Same went for the camber adjustments in the rear. I came to the conclusion that I need to swap out the rear sub-frame all together for another one and do everything besides the adjusting bolts. The spare I had was pretty rusty and still had the old rubber bushings in it.
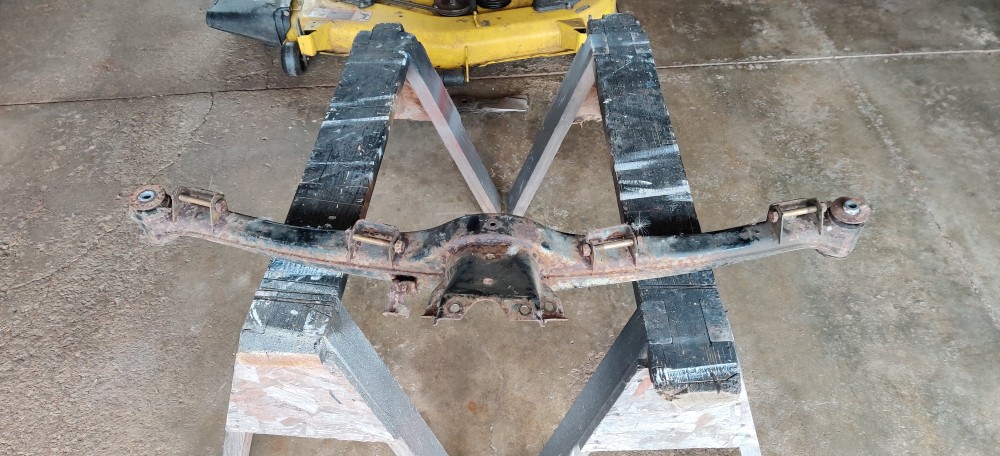
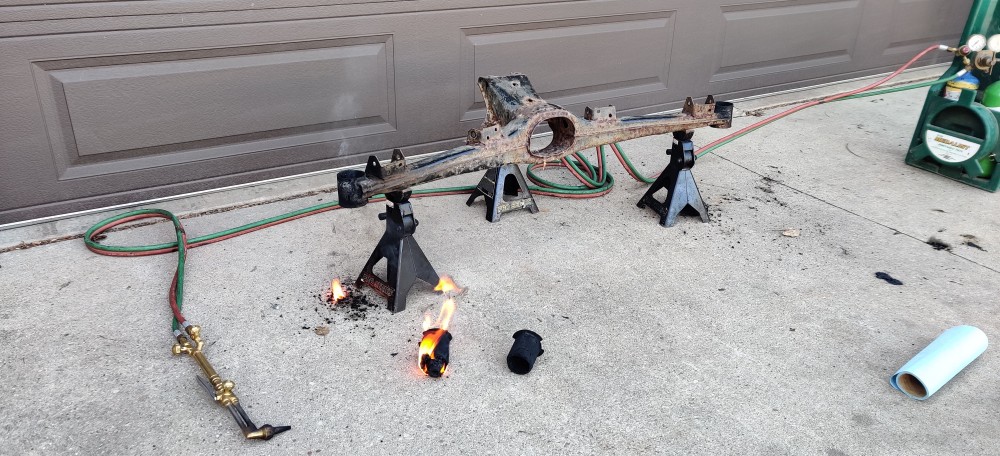
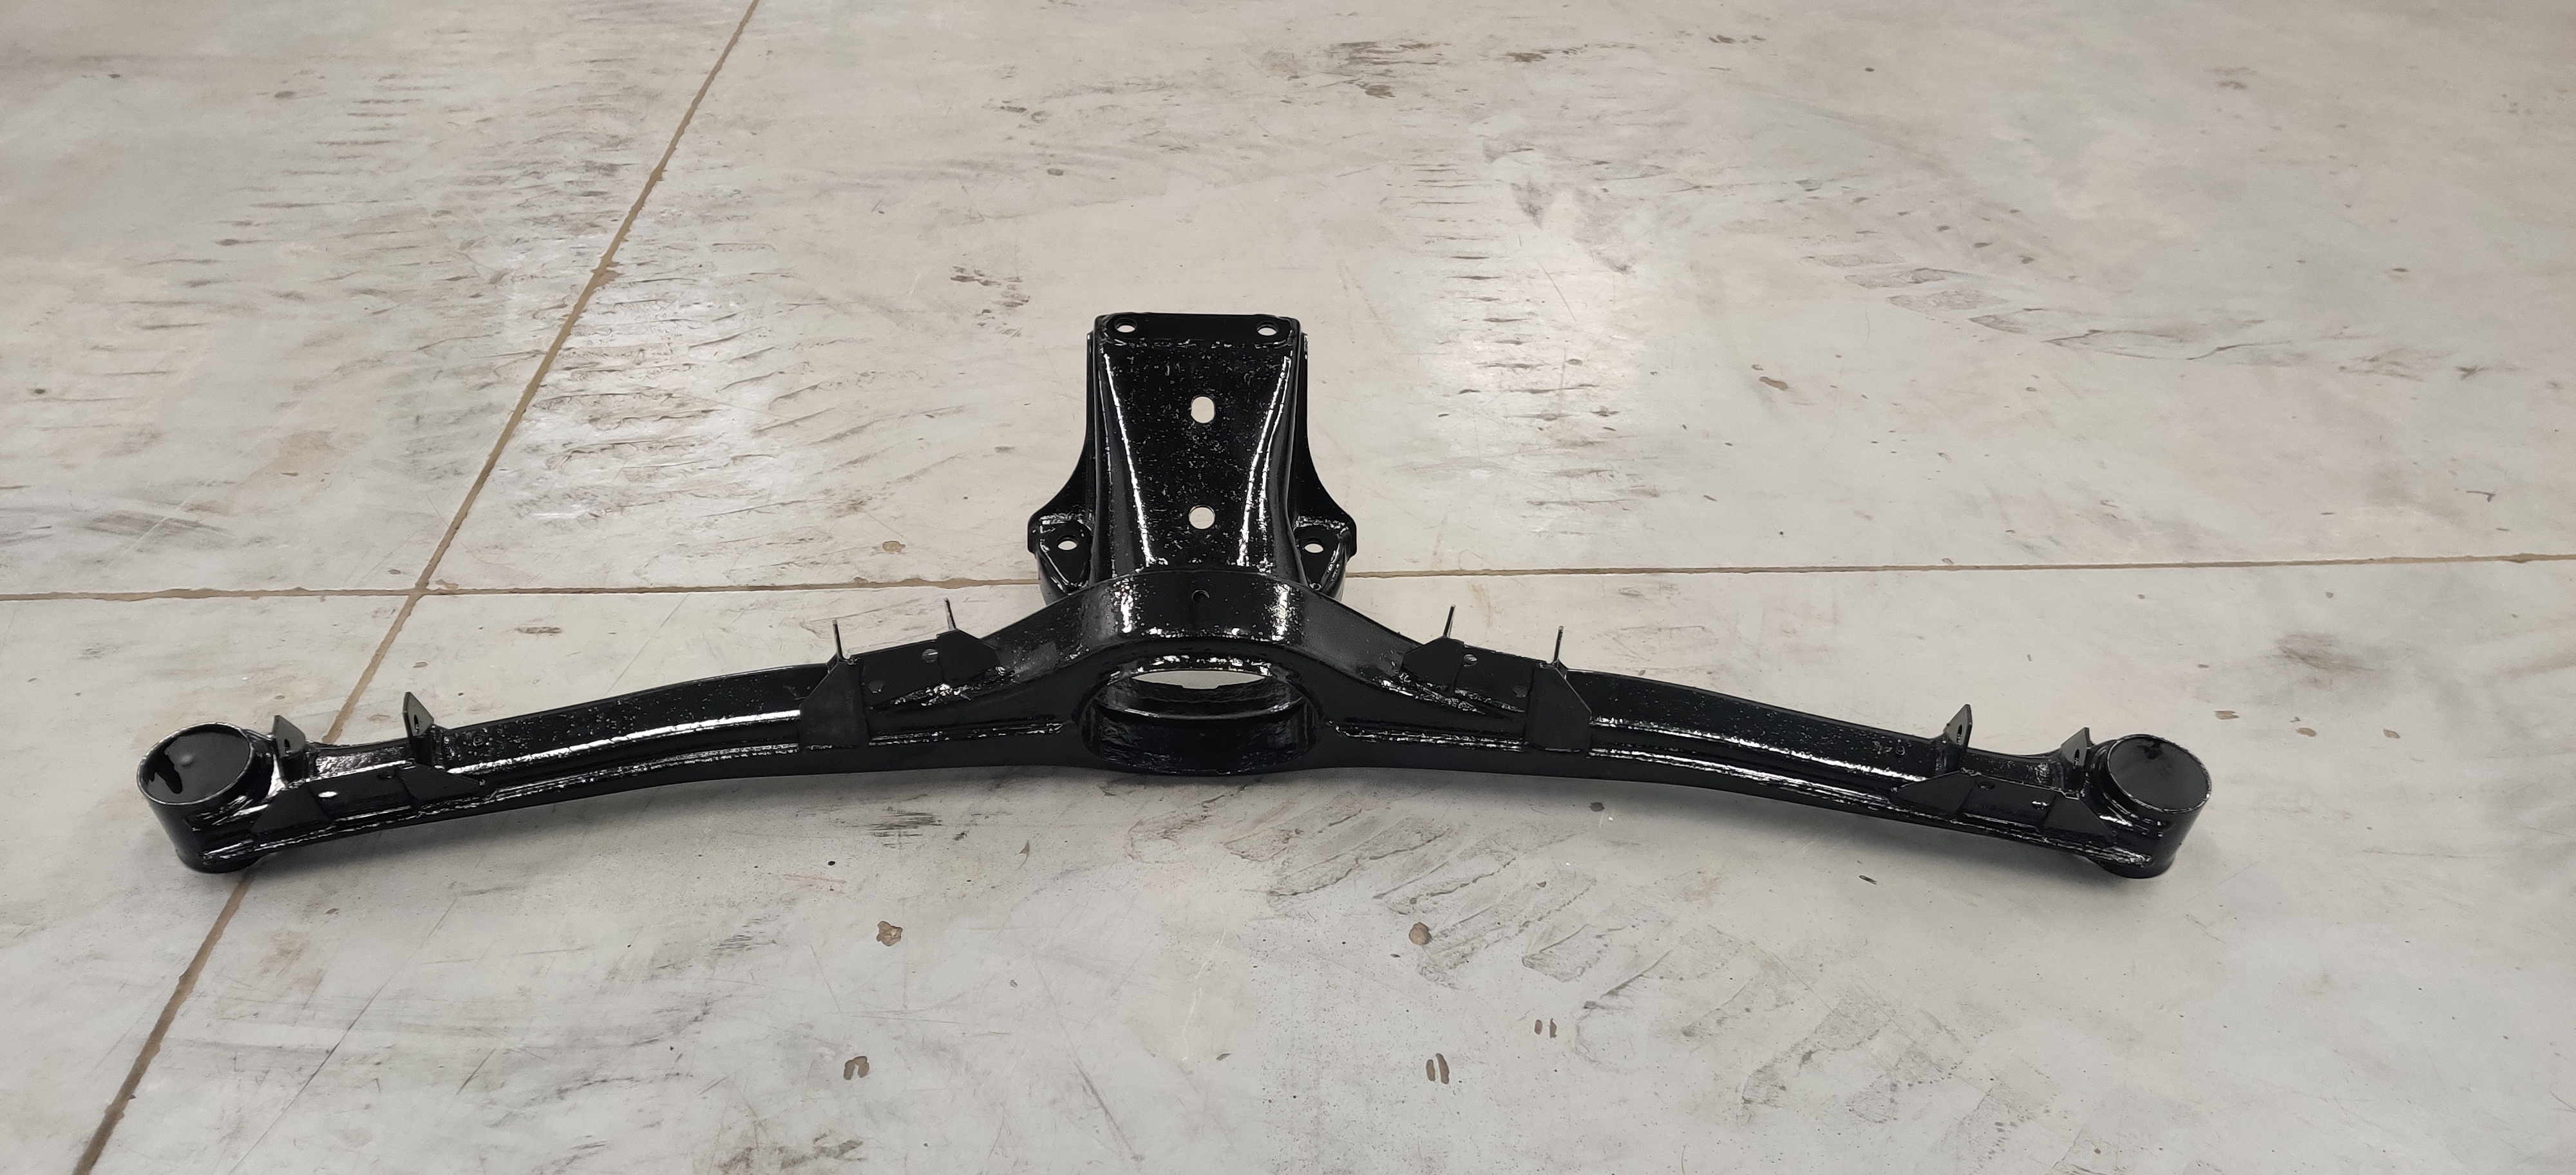
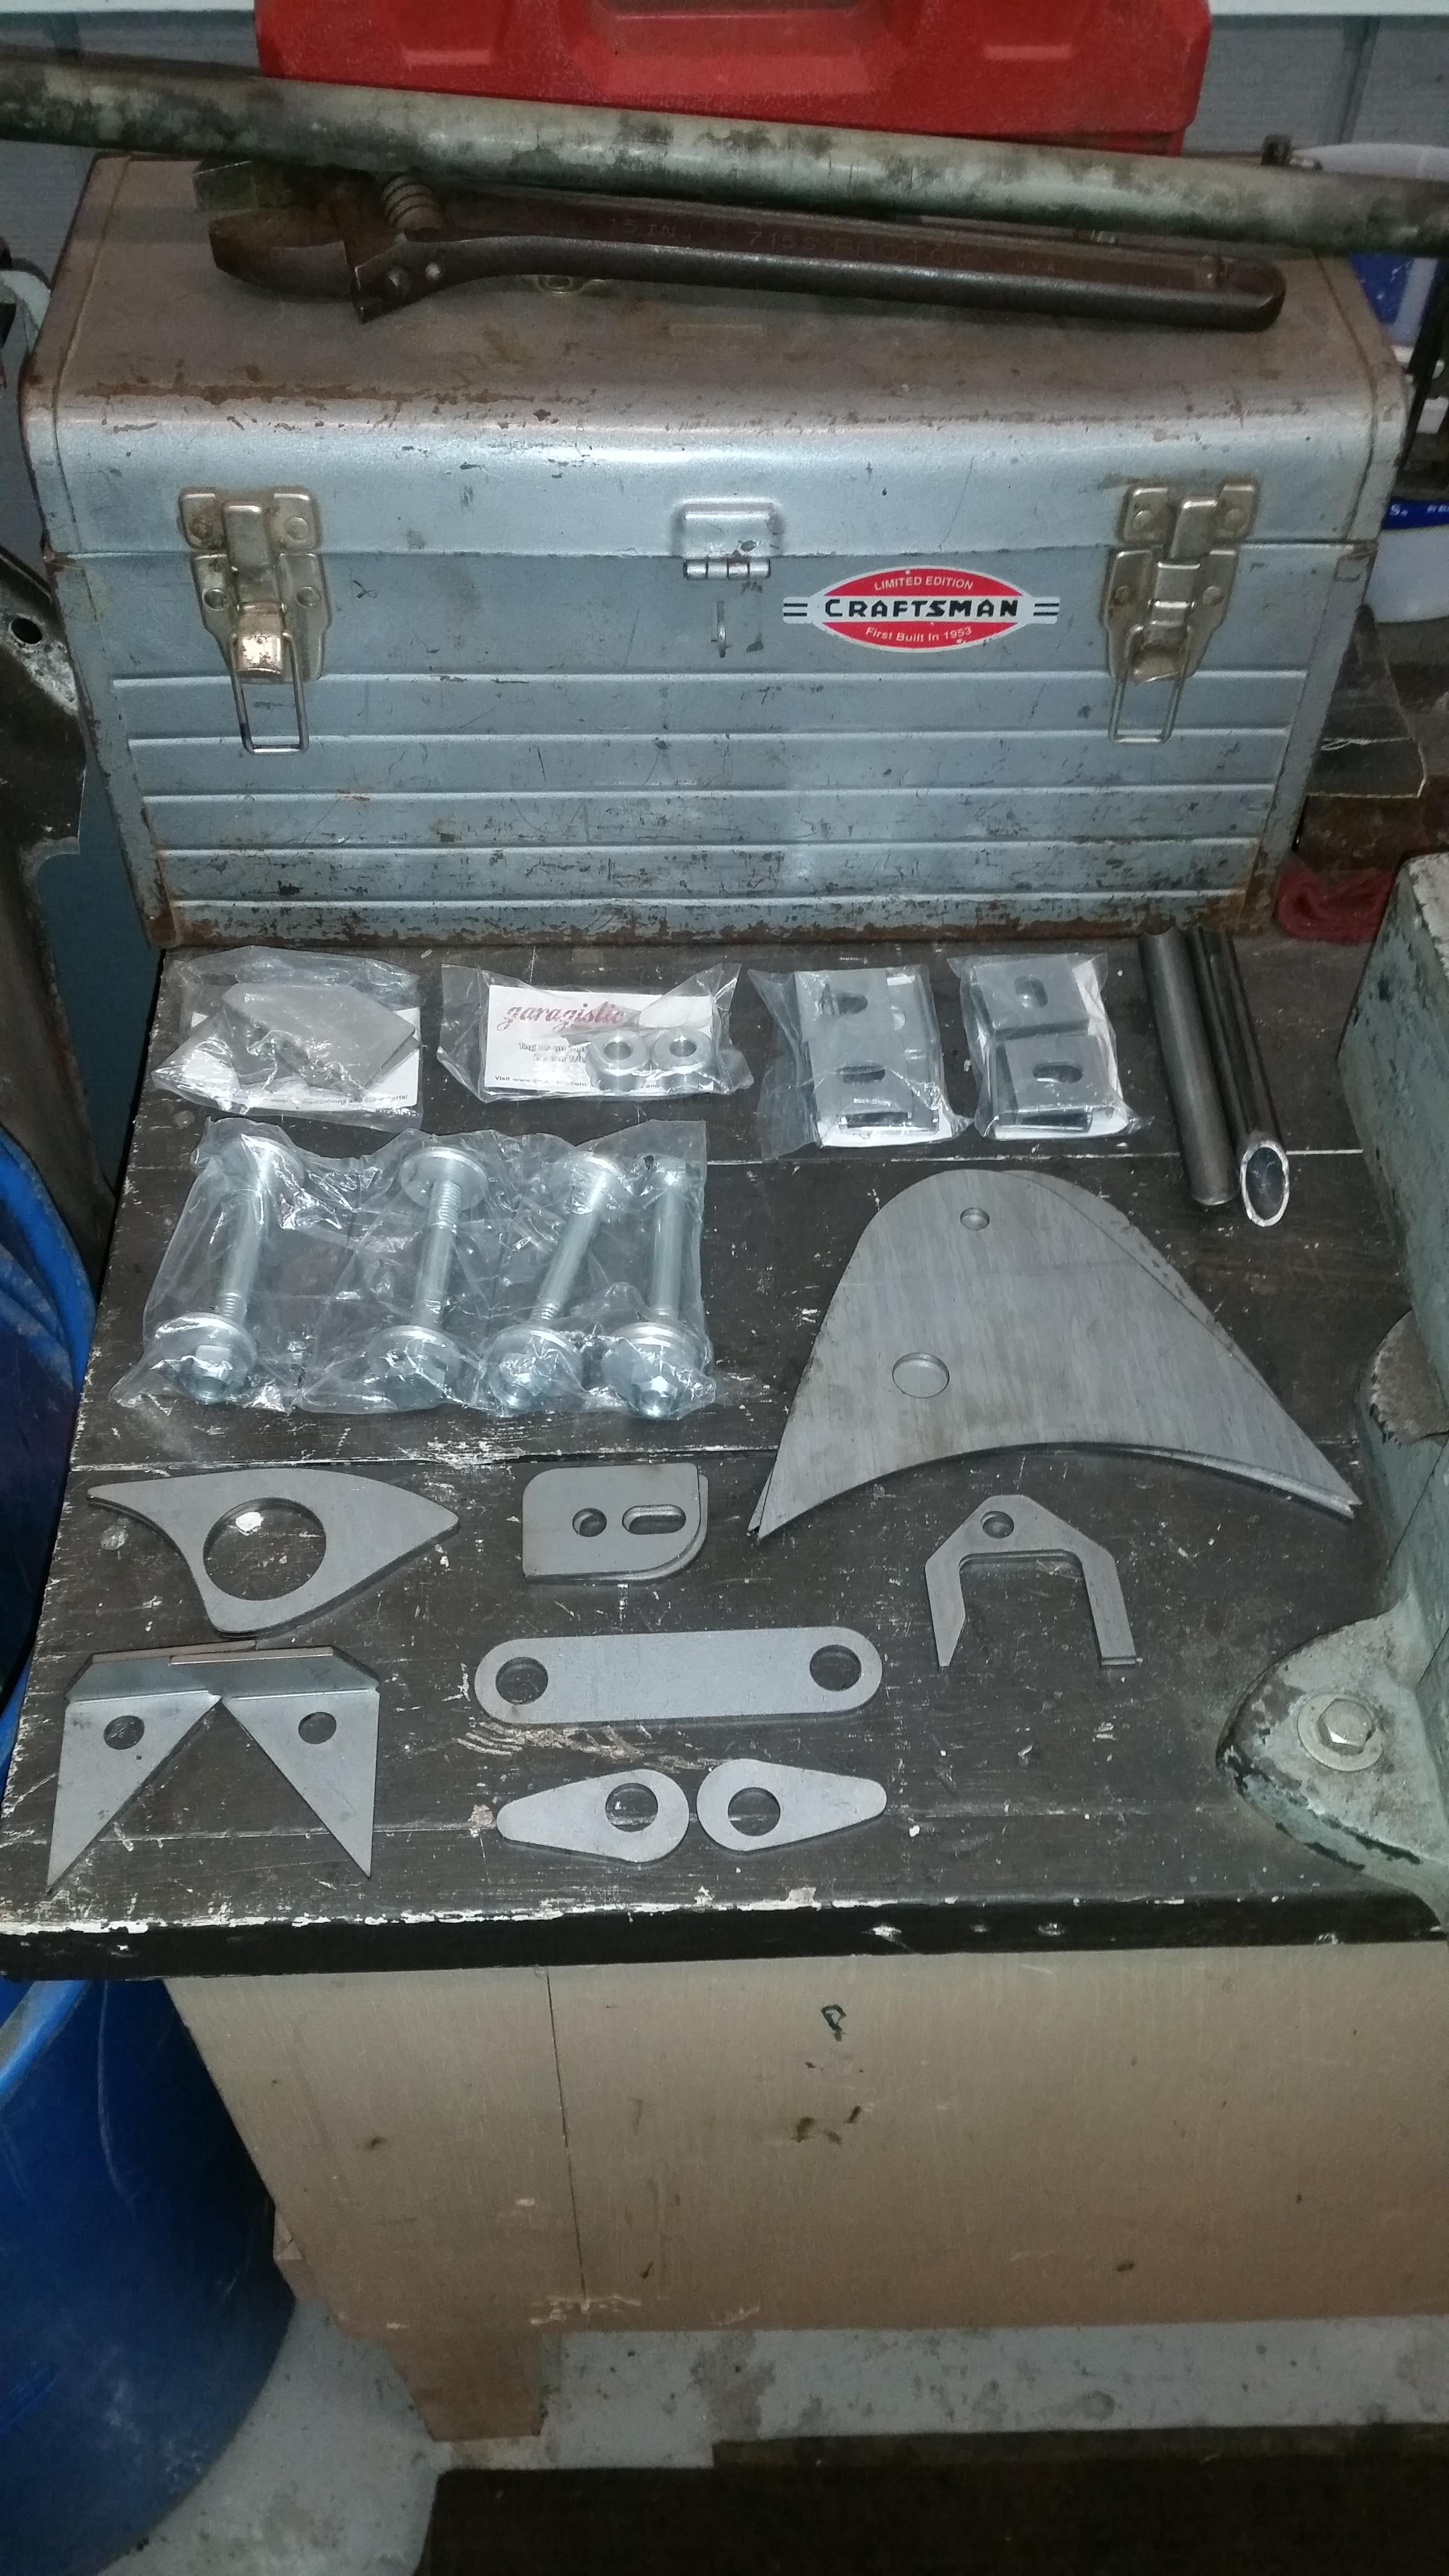
After taking an angle grinder and wire wheel to knock off most of the big chunks I sent it in to be sandblasted. I had ordered some new reinforcements for it from garagistic which included the differential mounting holes and trailing arm plates. Once I received the frame back from blasting I brought it over to my friend's place to get welded up.
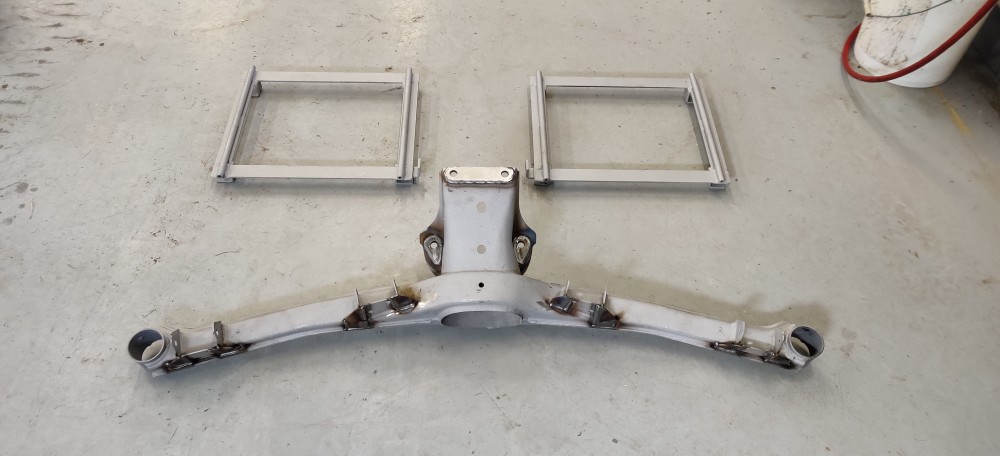
Time for a little por-15 for protection!
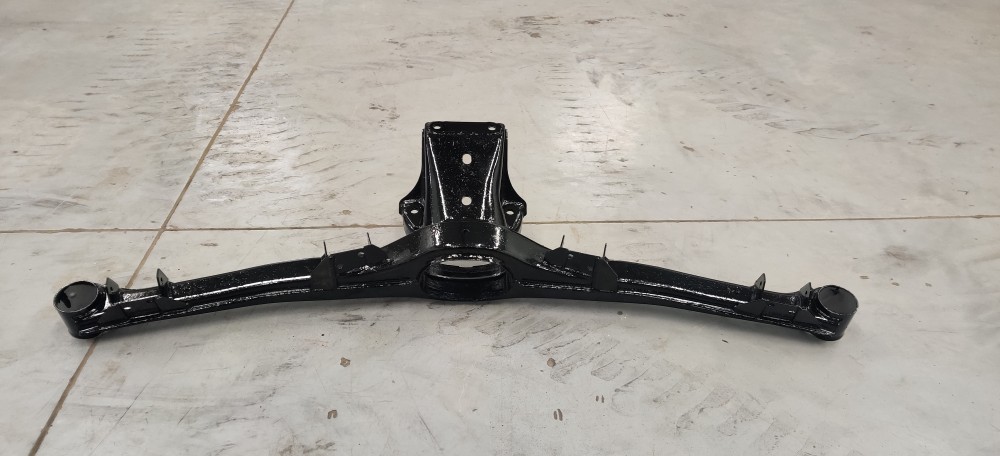
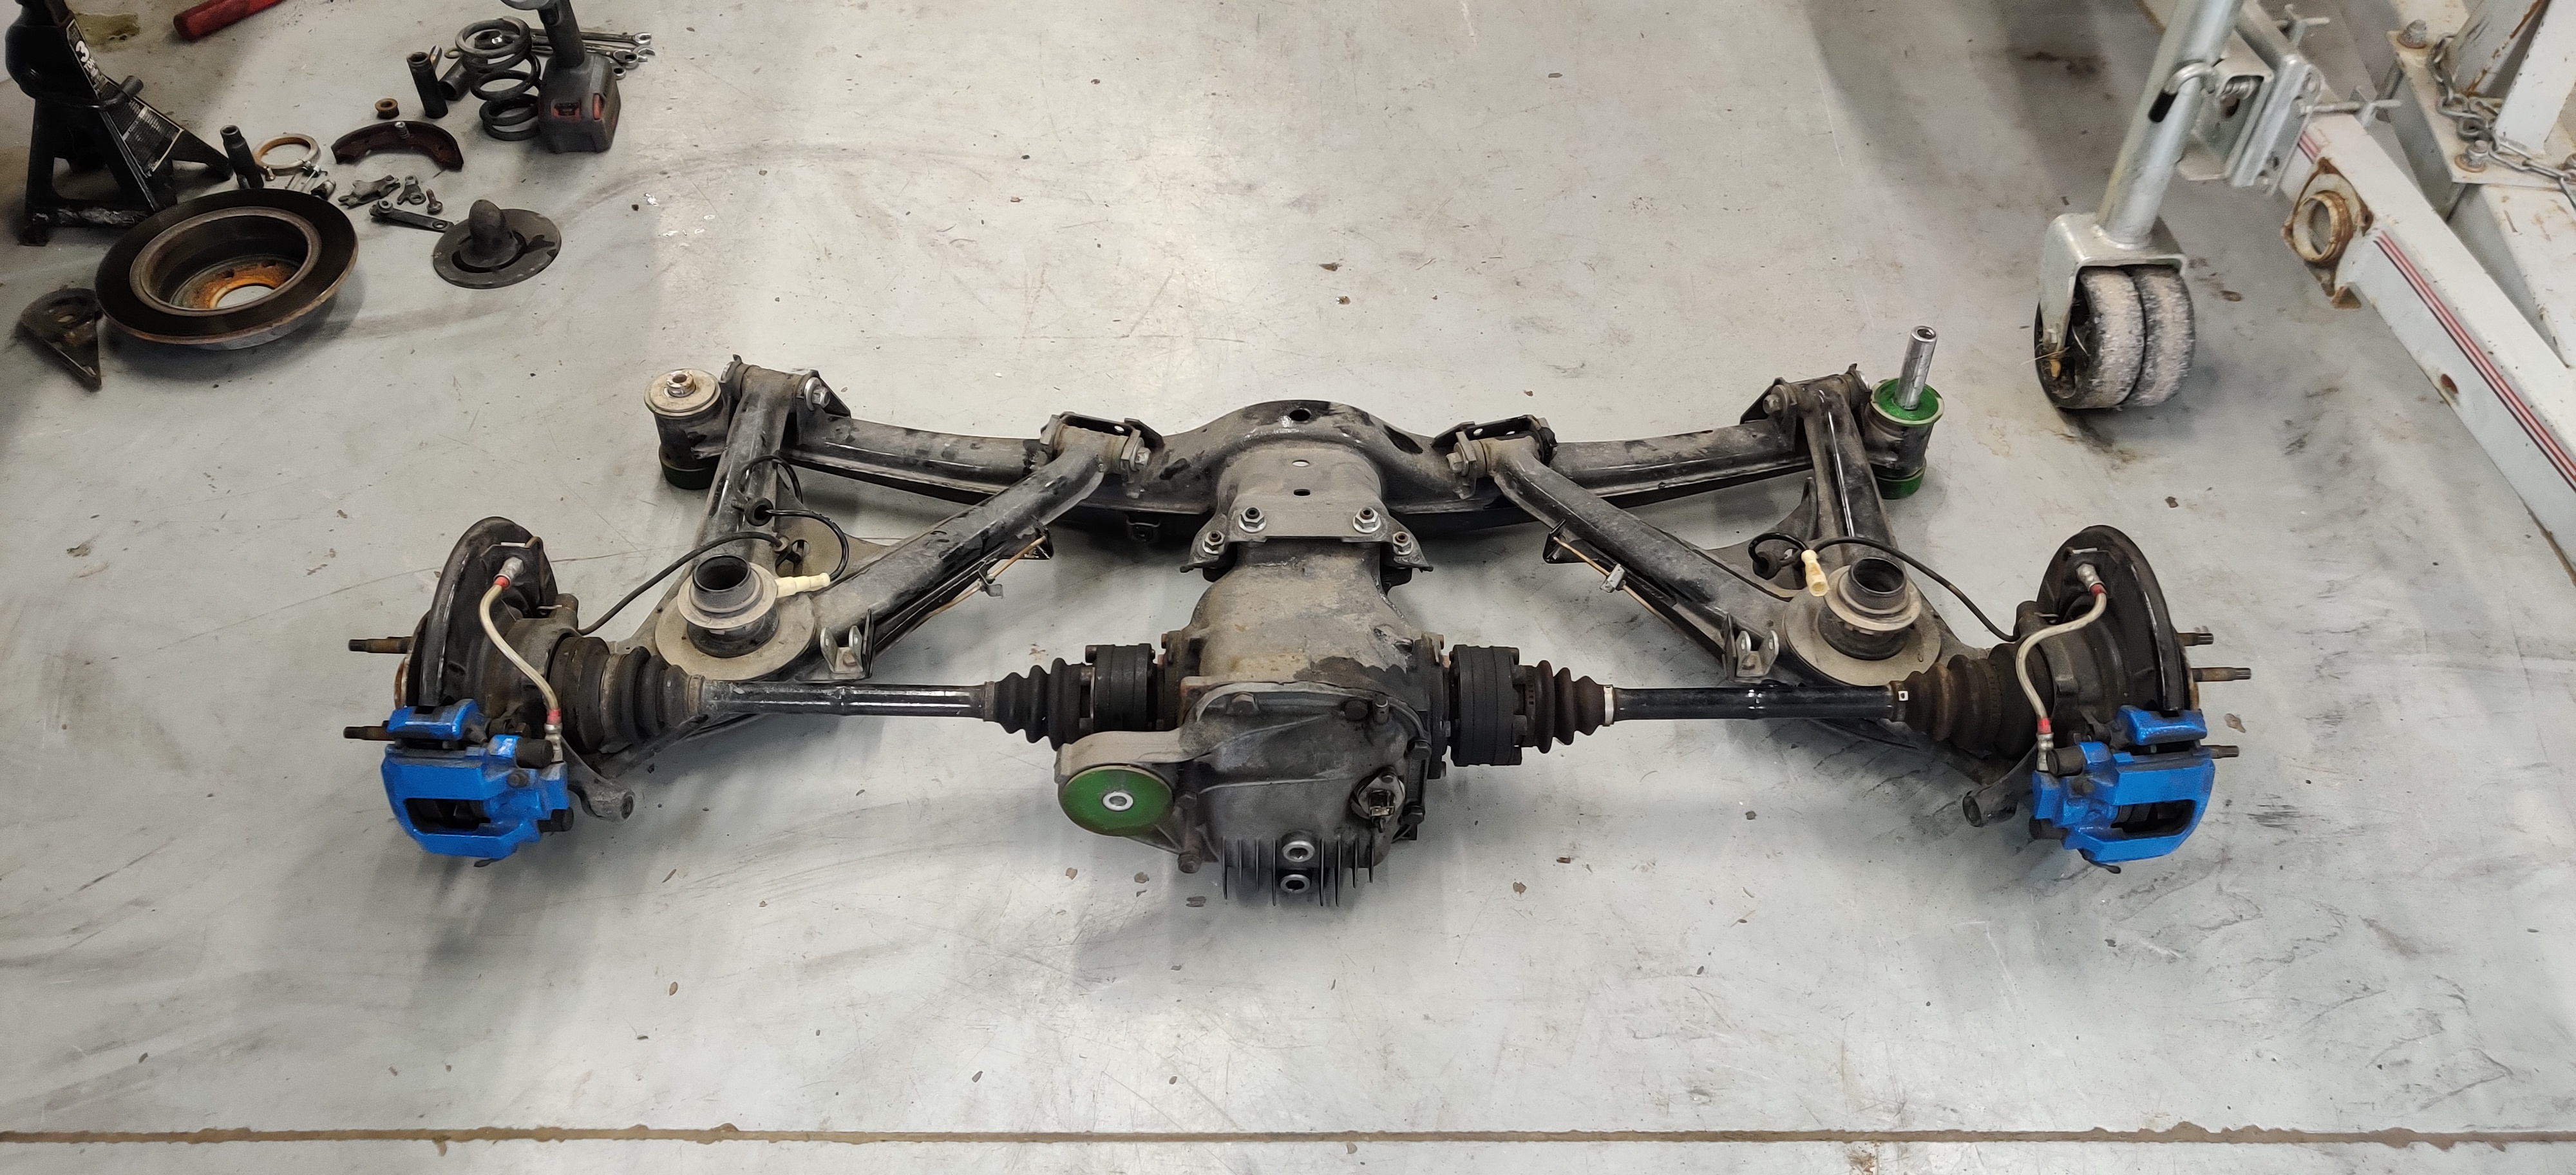
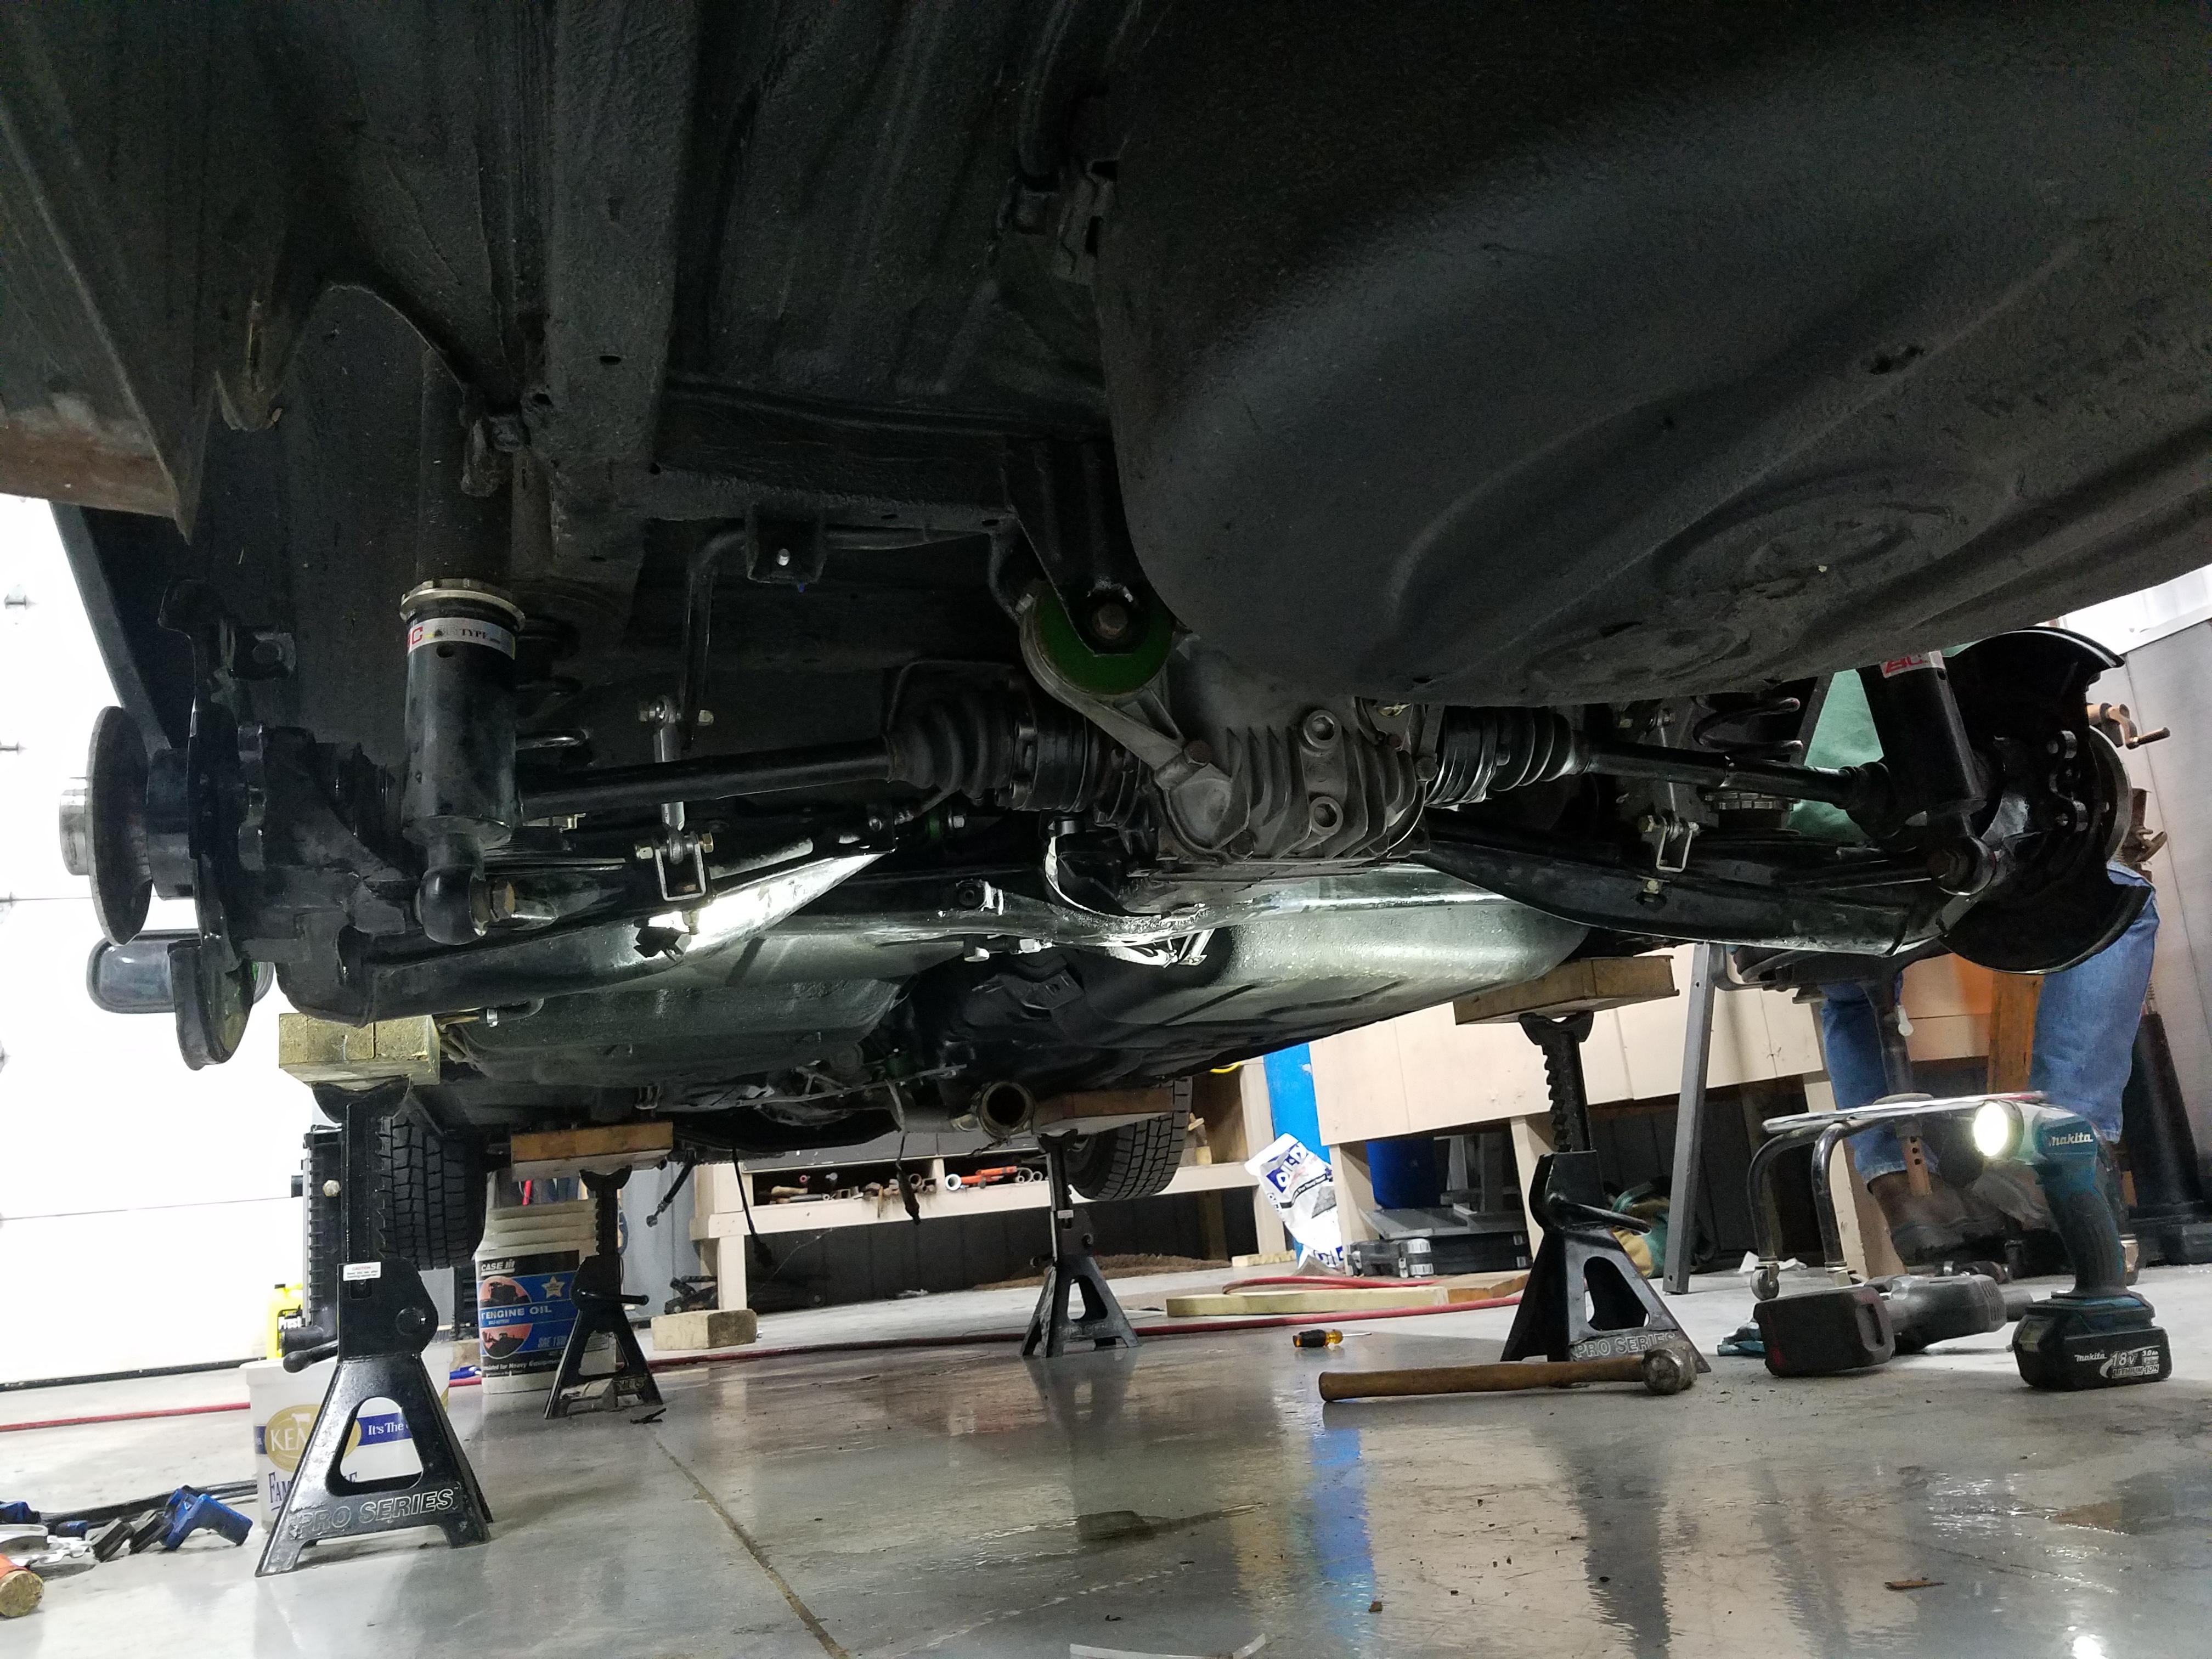
A few days later the car was brought to the shop and I went to work pulling the rear end out. Took me a whopping two hours to pull it all out. It sure is nice when things come apart nicely.
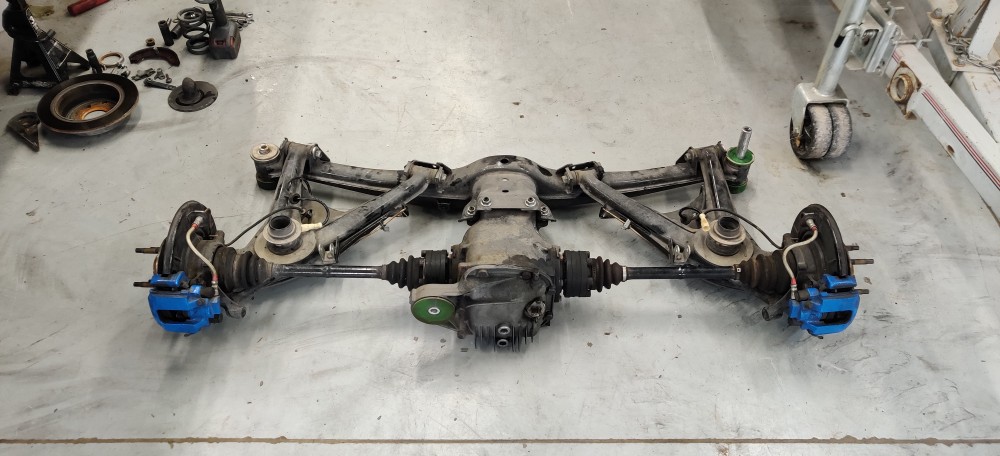
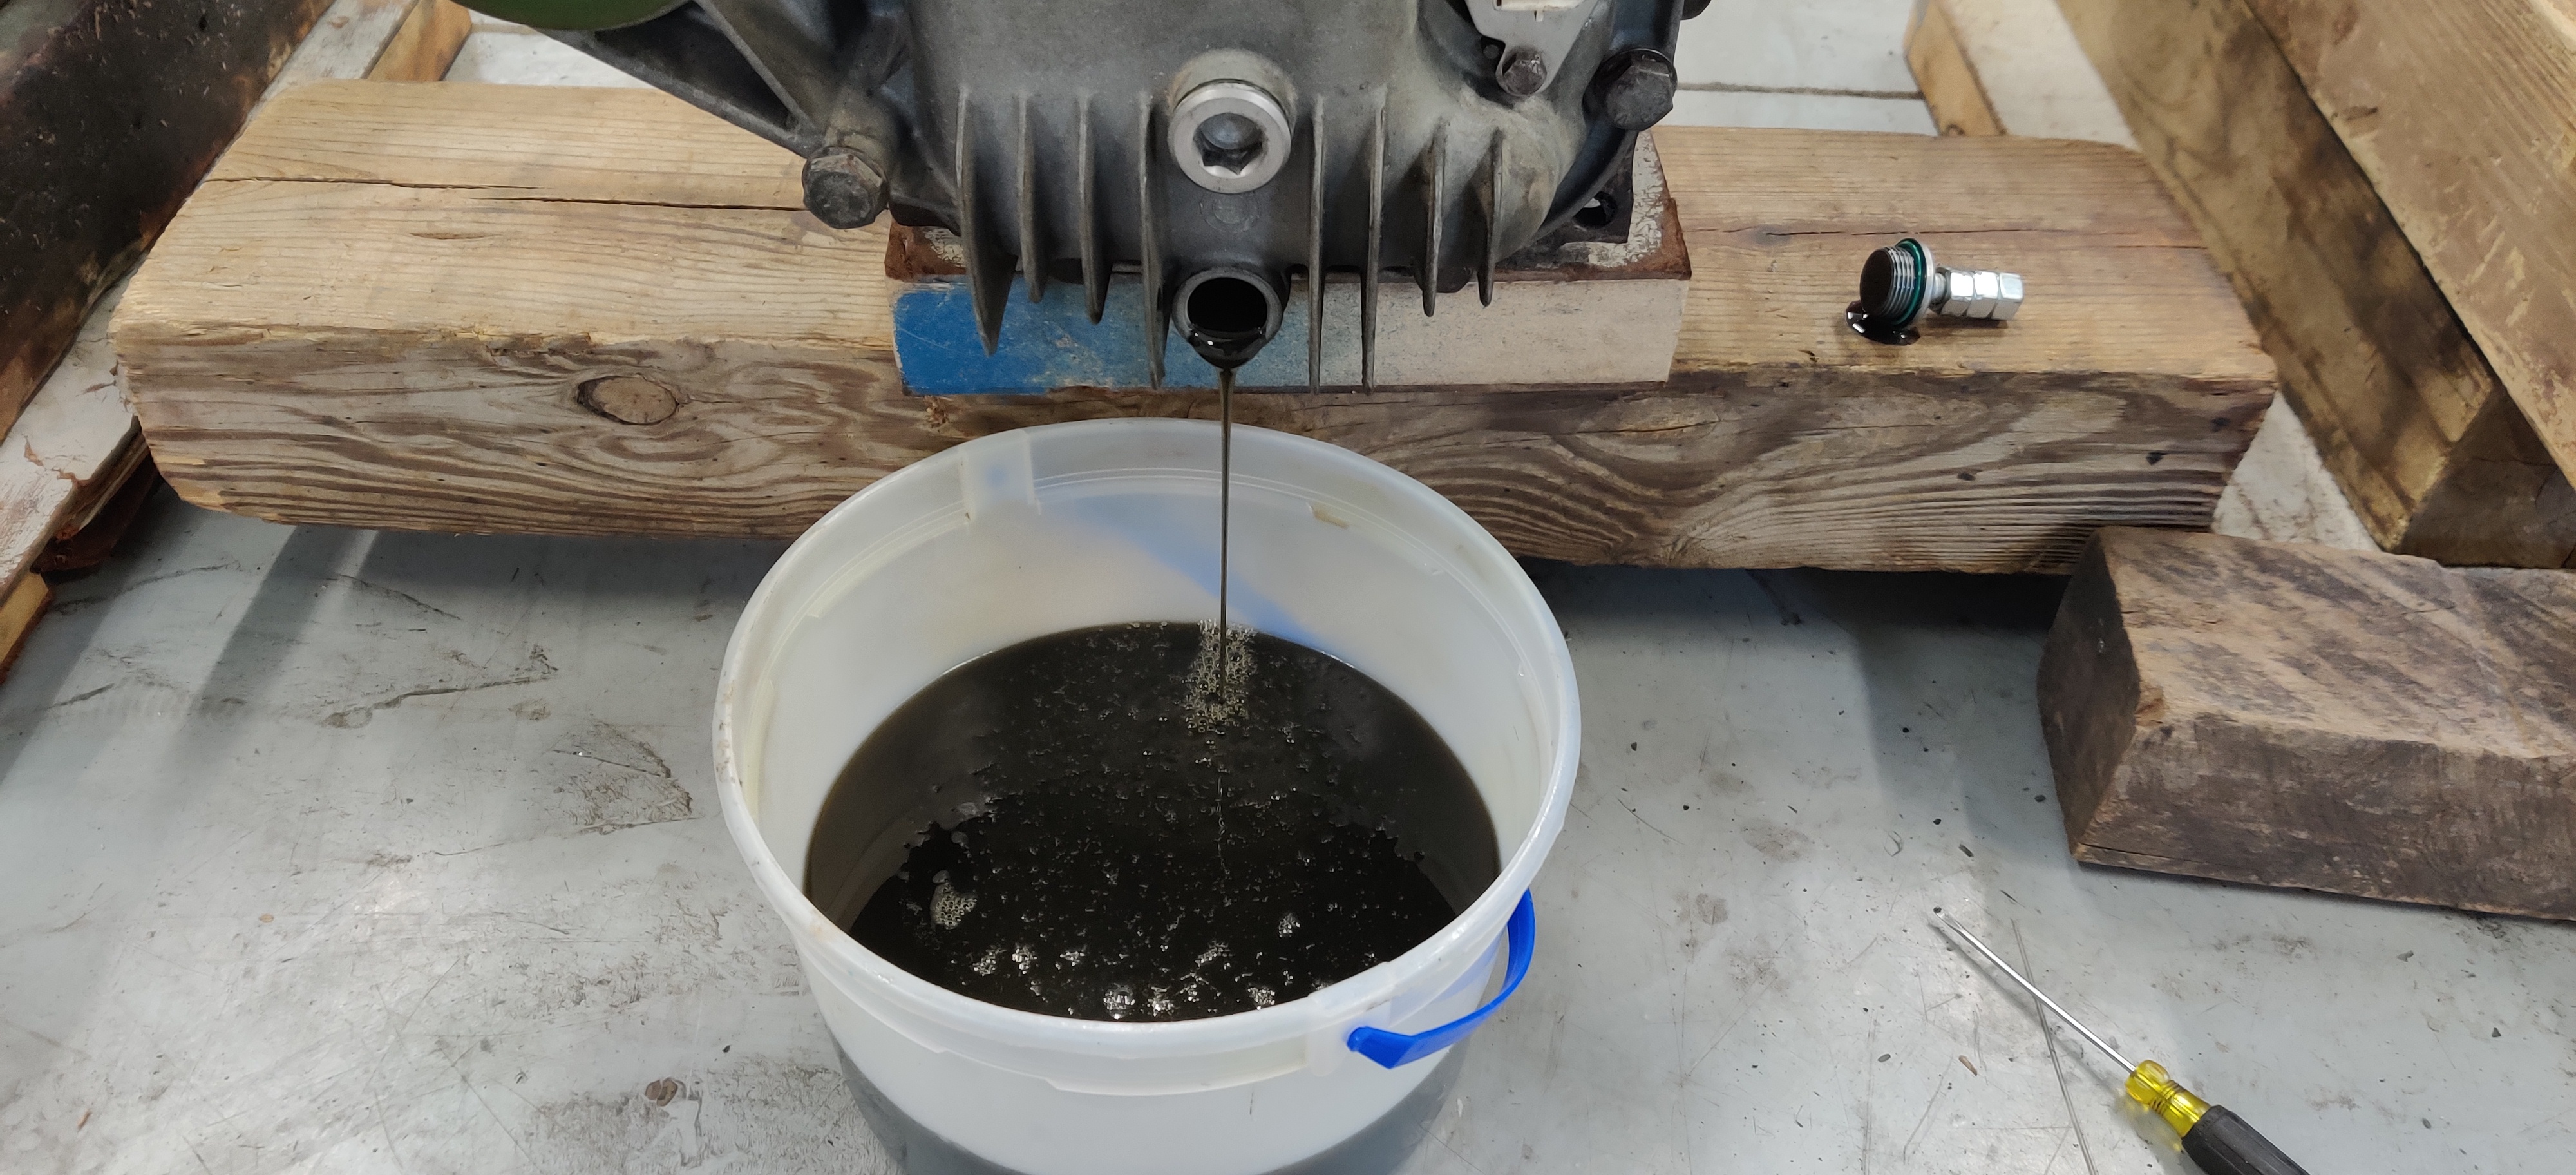
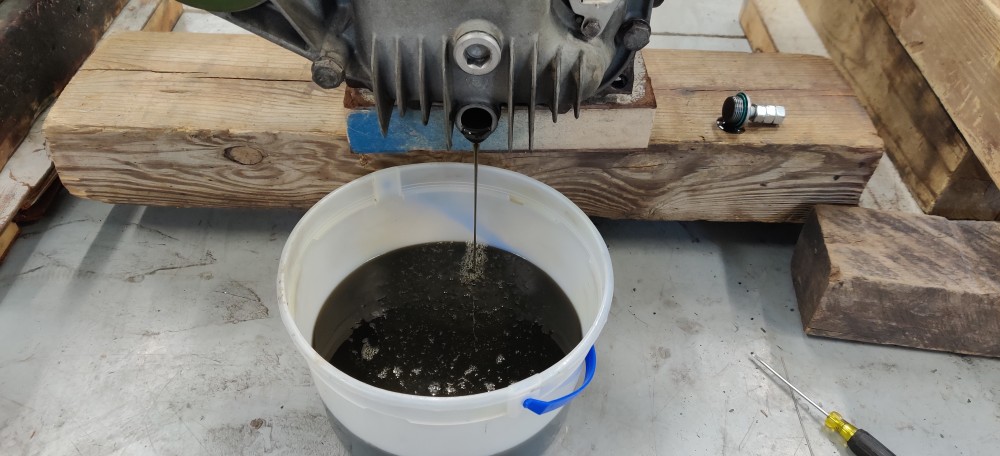
When I had everything apart I went ahead and re-greased the RCAB's and sub-frame bushings as they were already pretty dry from last season. Once the new sub-frame was bolted in and torqued down I went ahead and changed the diff oil out. Checked the old oil for any metal shavings or odd debris and then added some fresh Castrol Syntrax 75w-140.
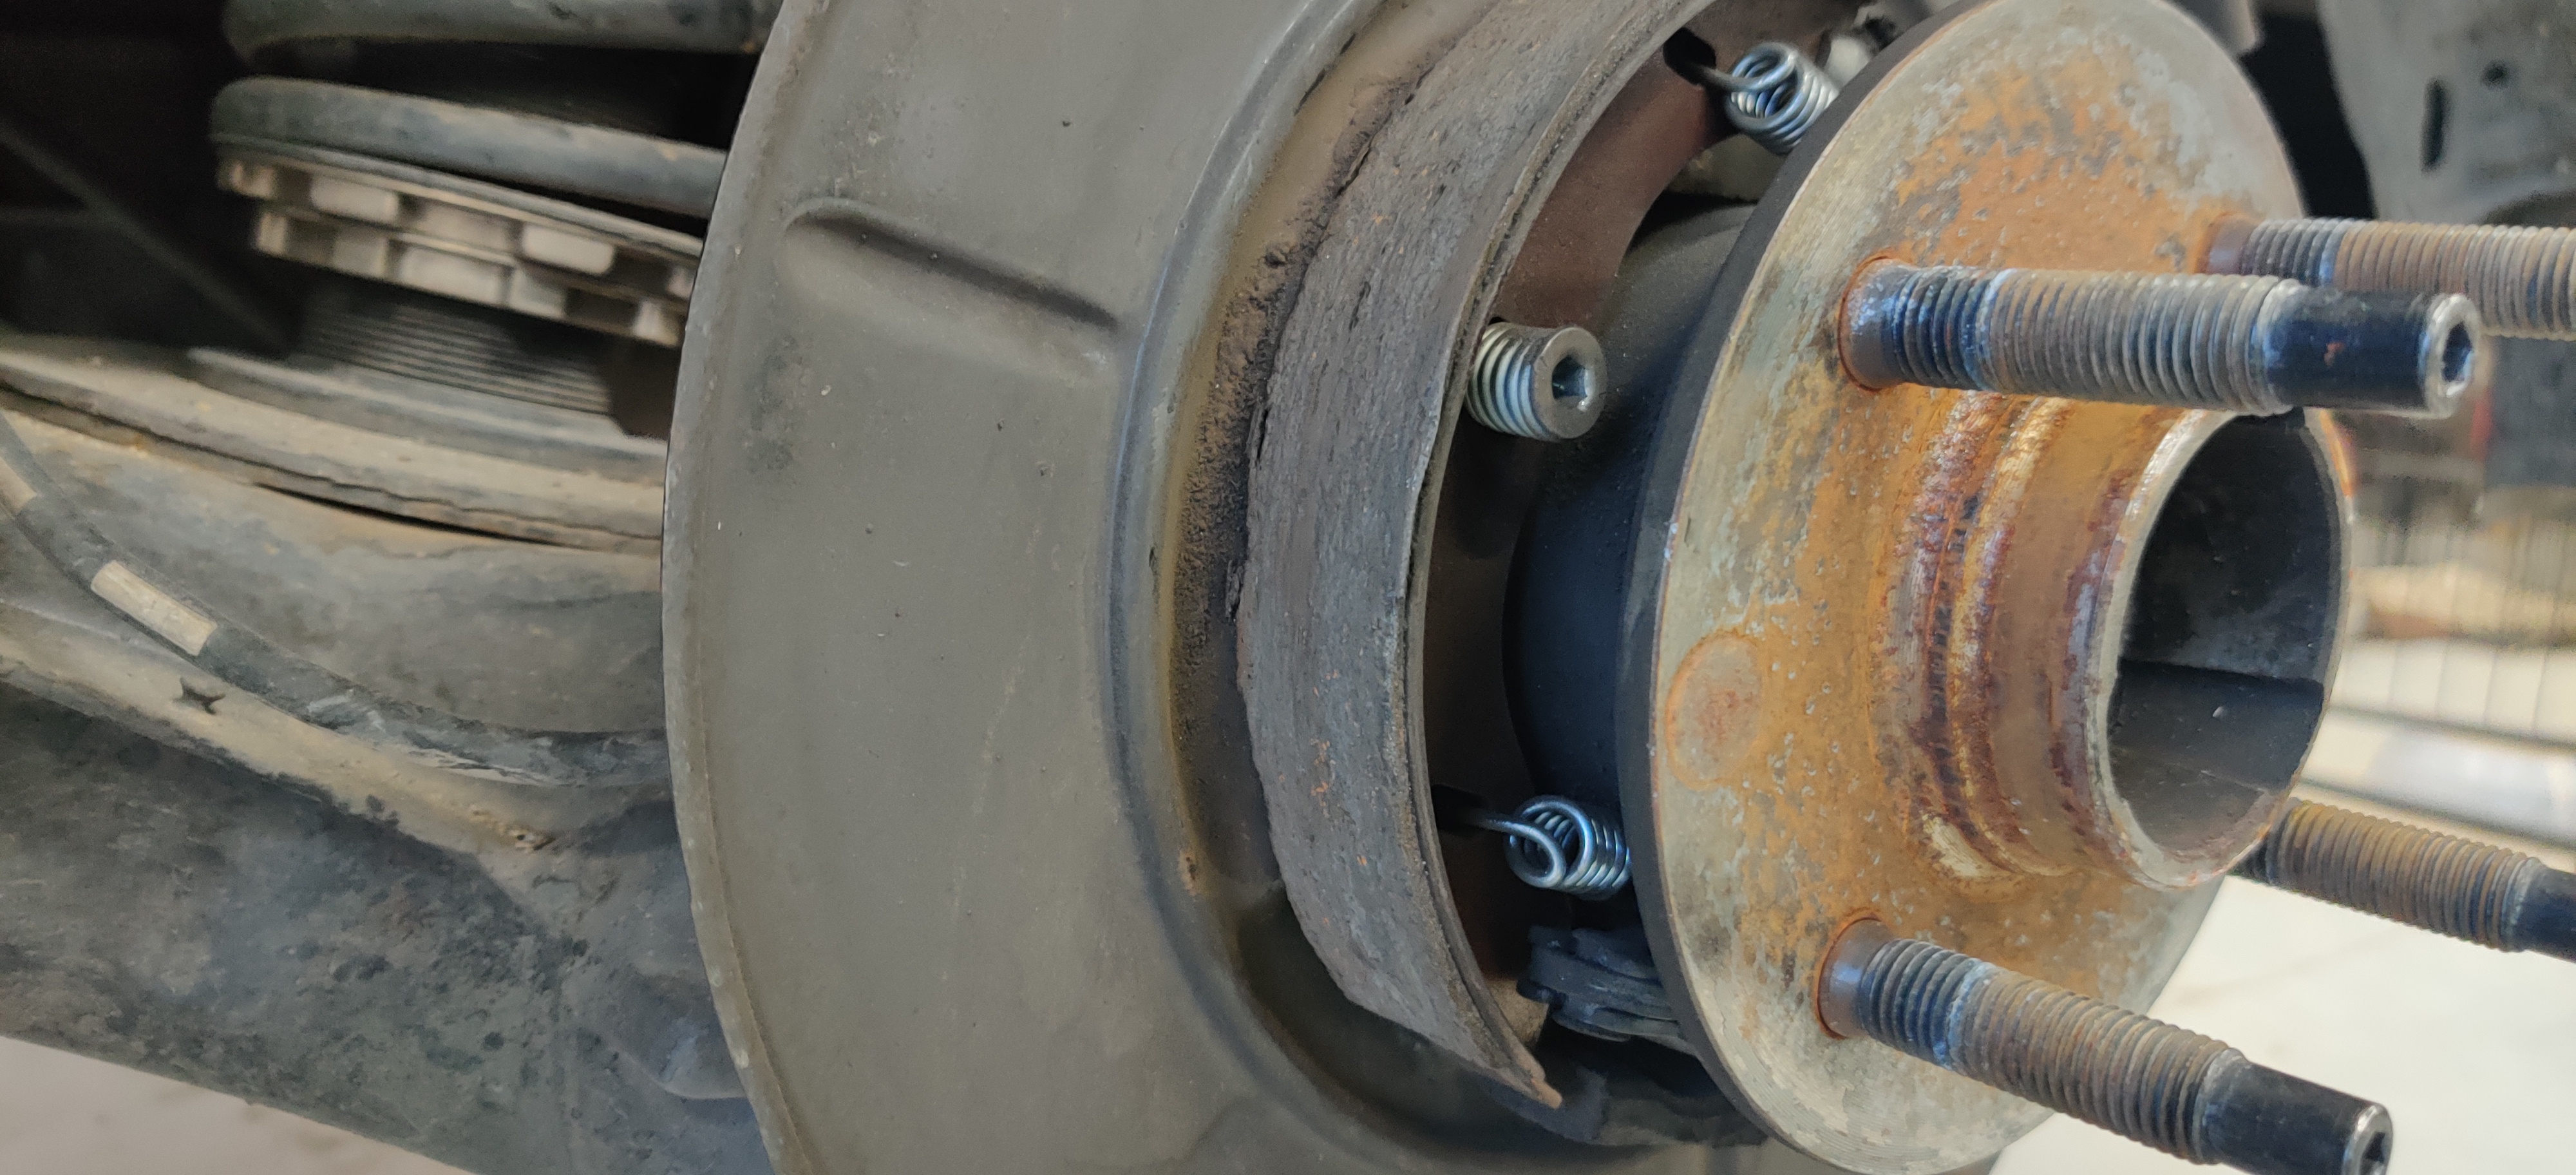
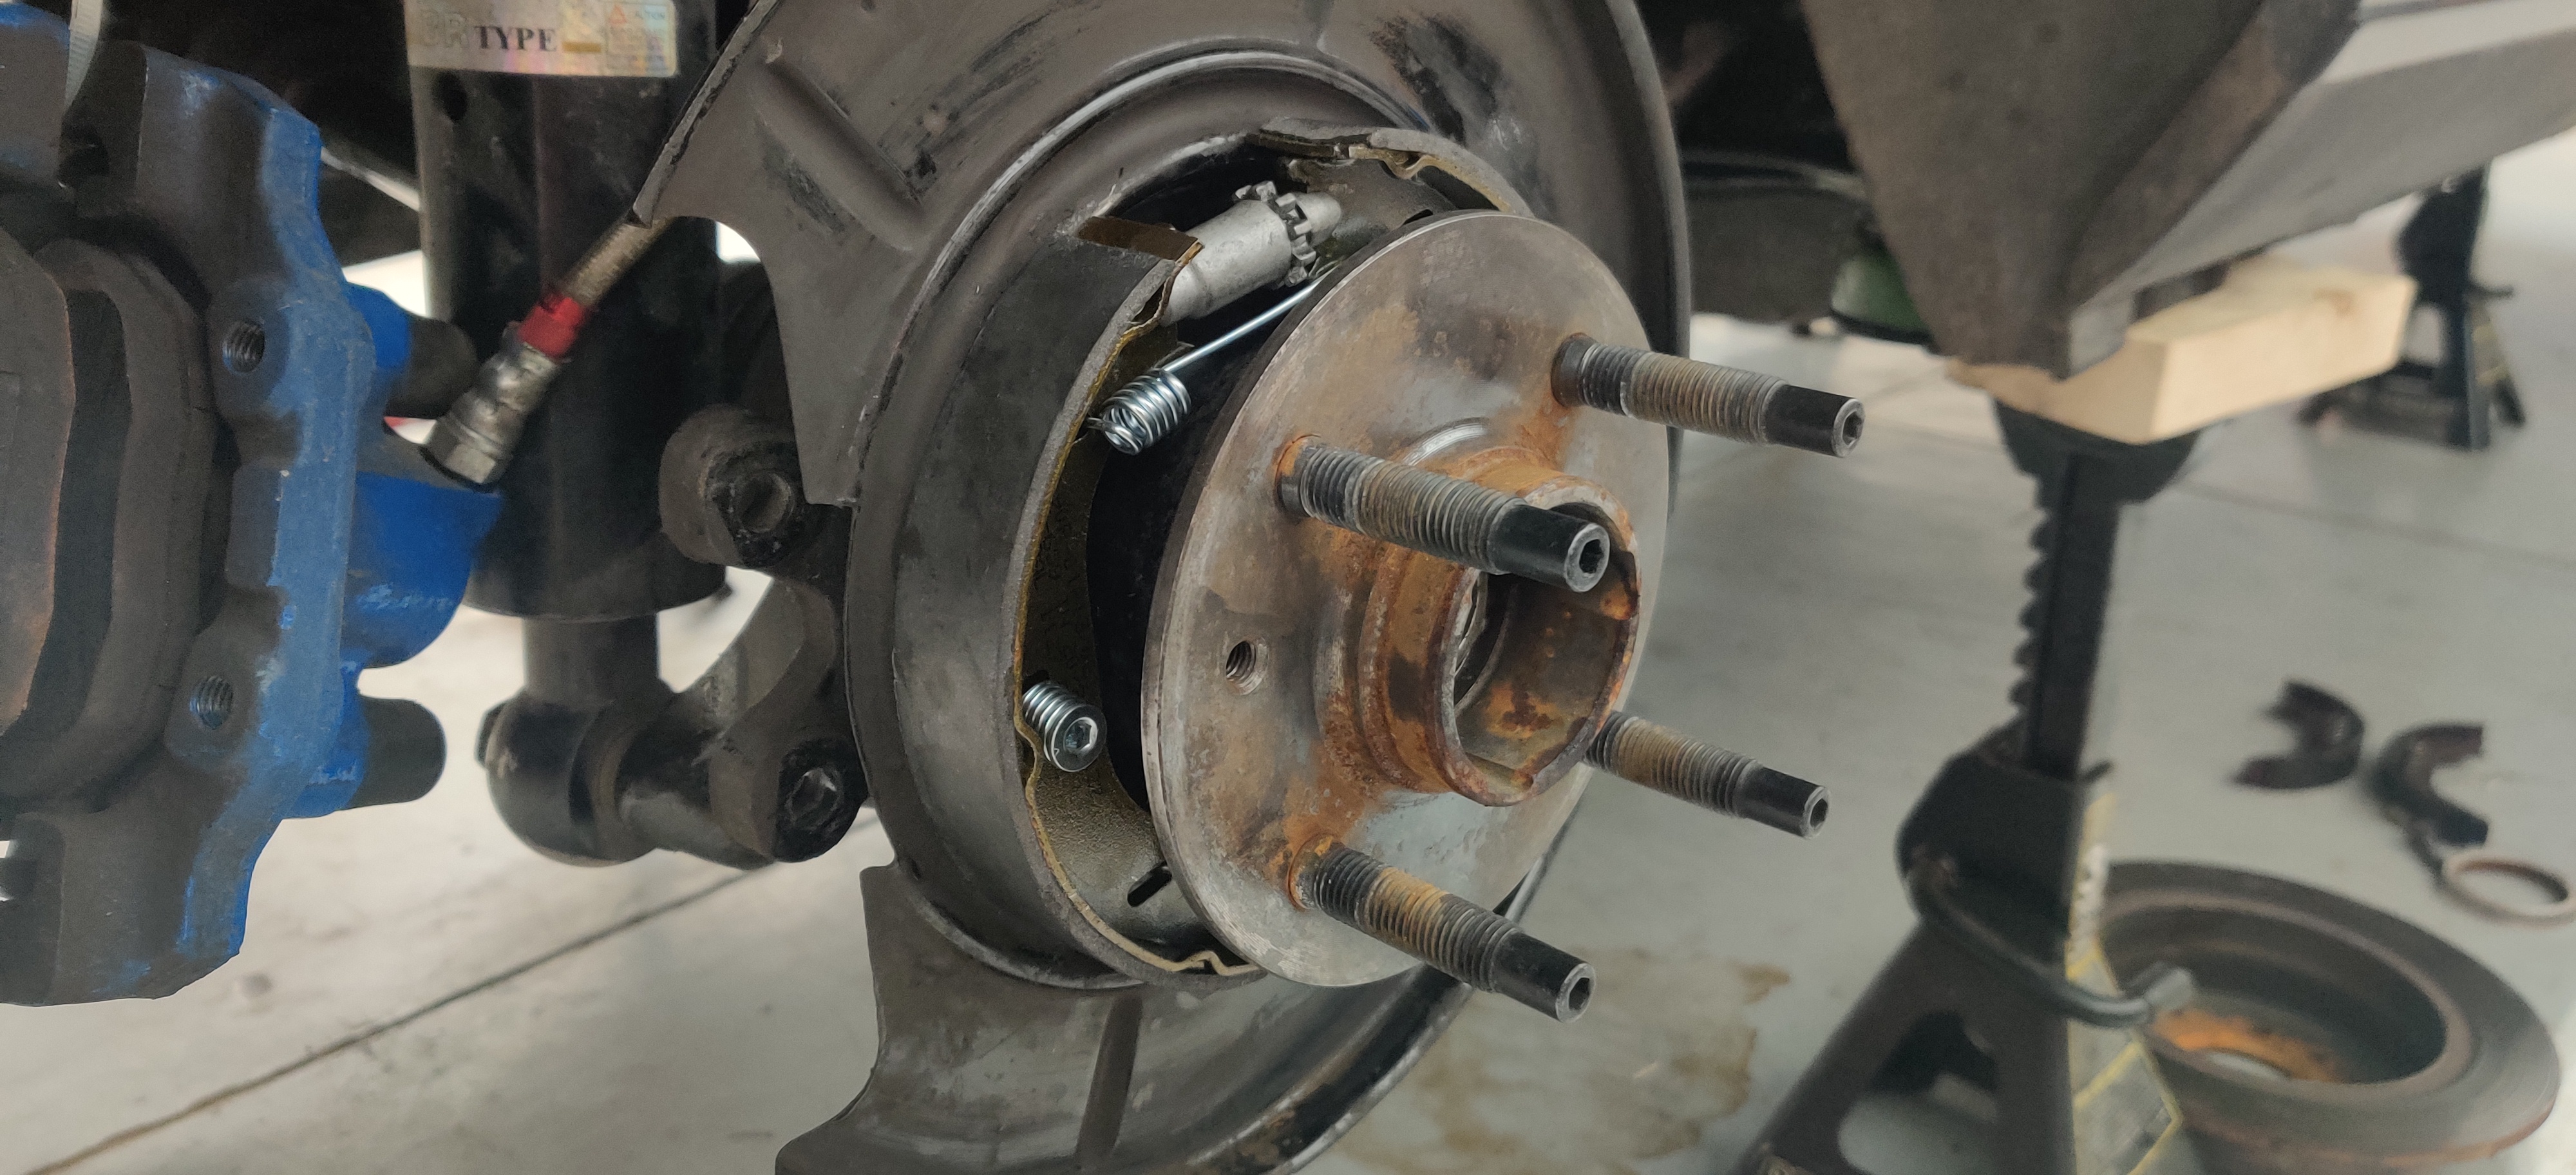
Rear end was popped back in the car afterwards and I swapped out the e-brake shoes and springs with some fresh ones.
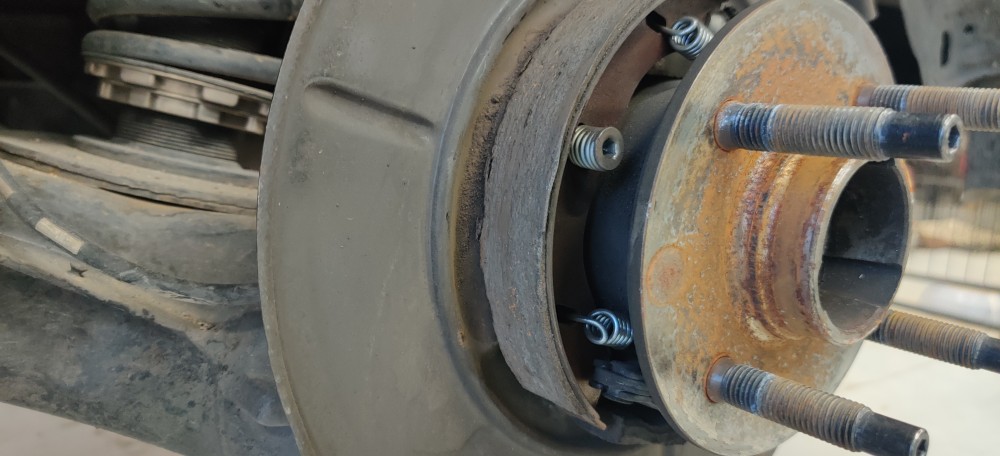
Over the summer last year the e-brake got left on by accident once or twice while driving the car. That just about roasted the shoe pads off to the point that it no longer could hold the car on a slant. Thankfully those parts were ordered through fcp euro so I went ahead and took advantage of that life time warranty.
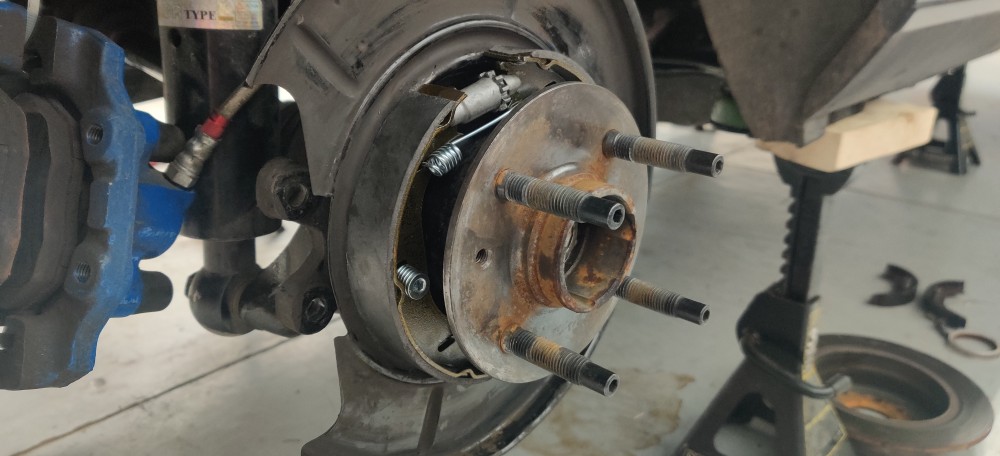
Once I was done torquing the rest of the bolts down holding the rear end in and inspected everything thoroughly I bled the brakes flushing out the system and added some fresh ATE typ 200 brake fluid.
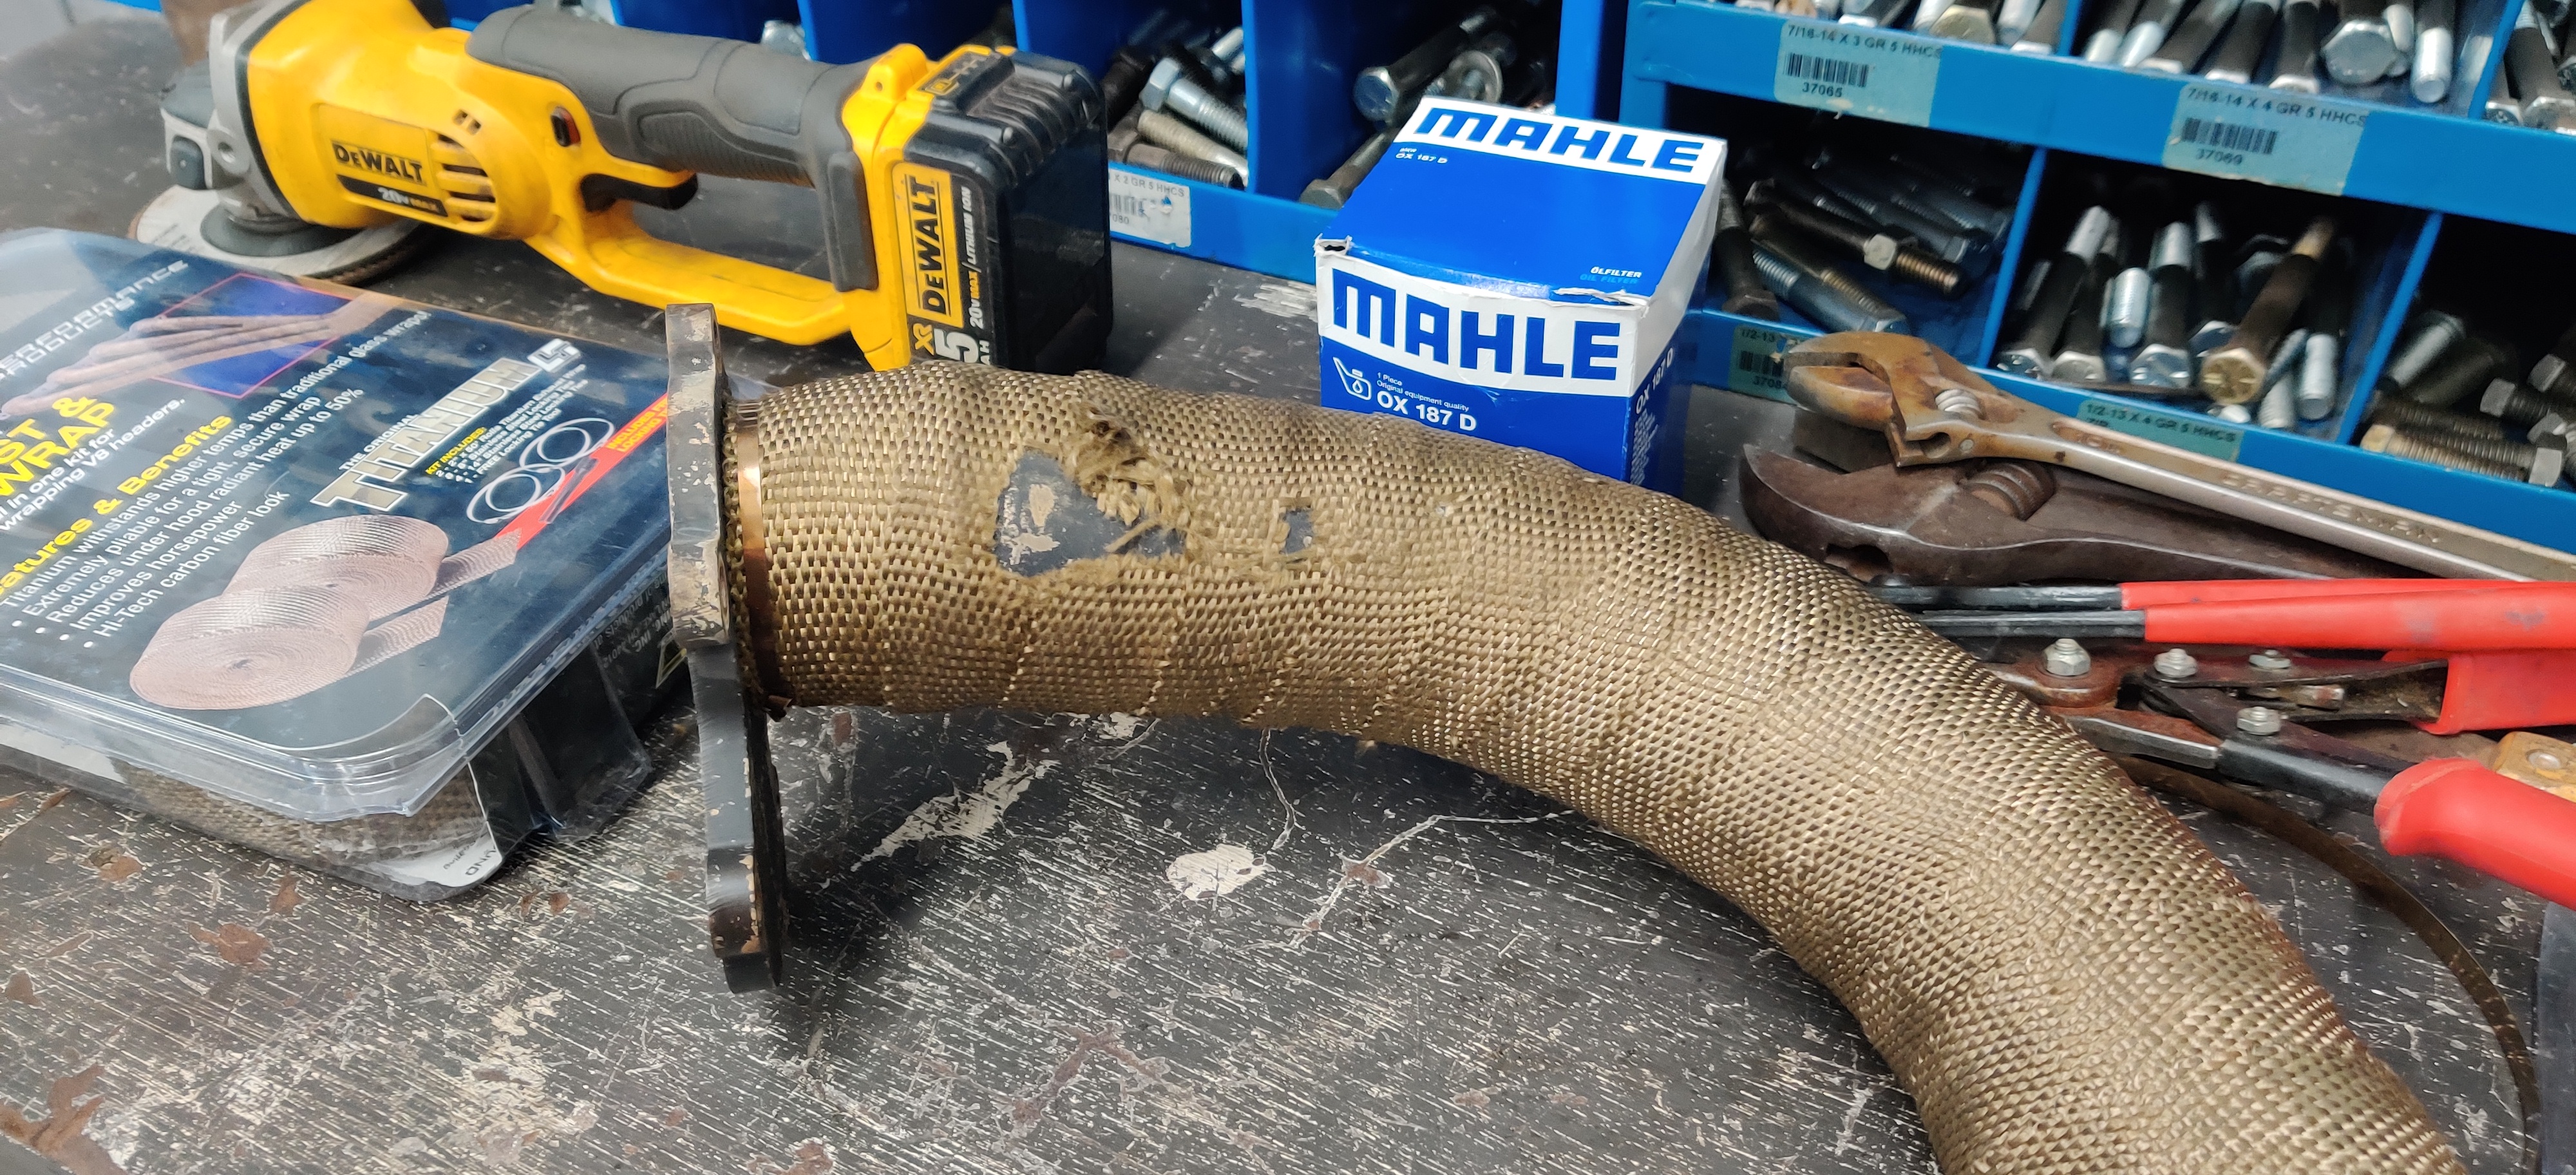
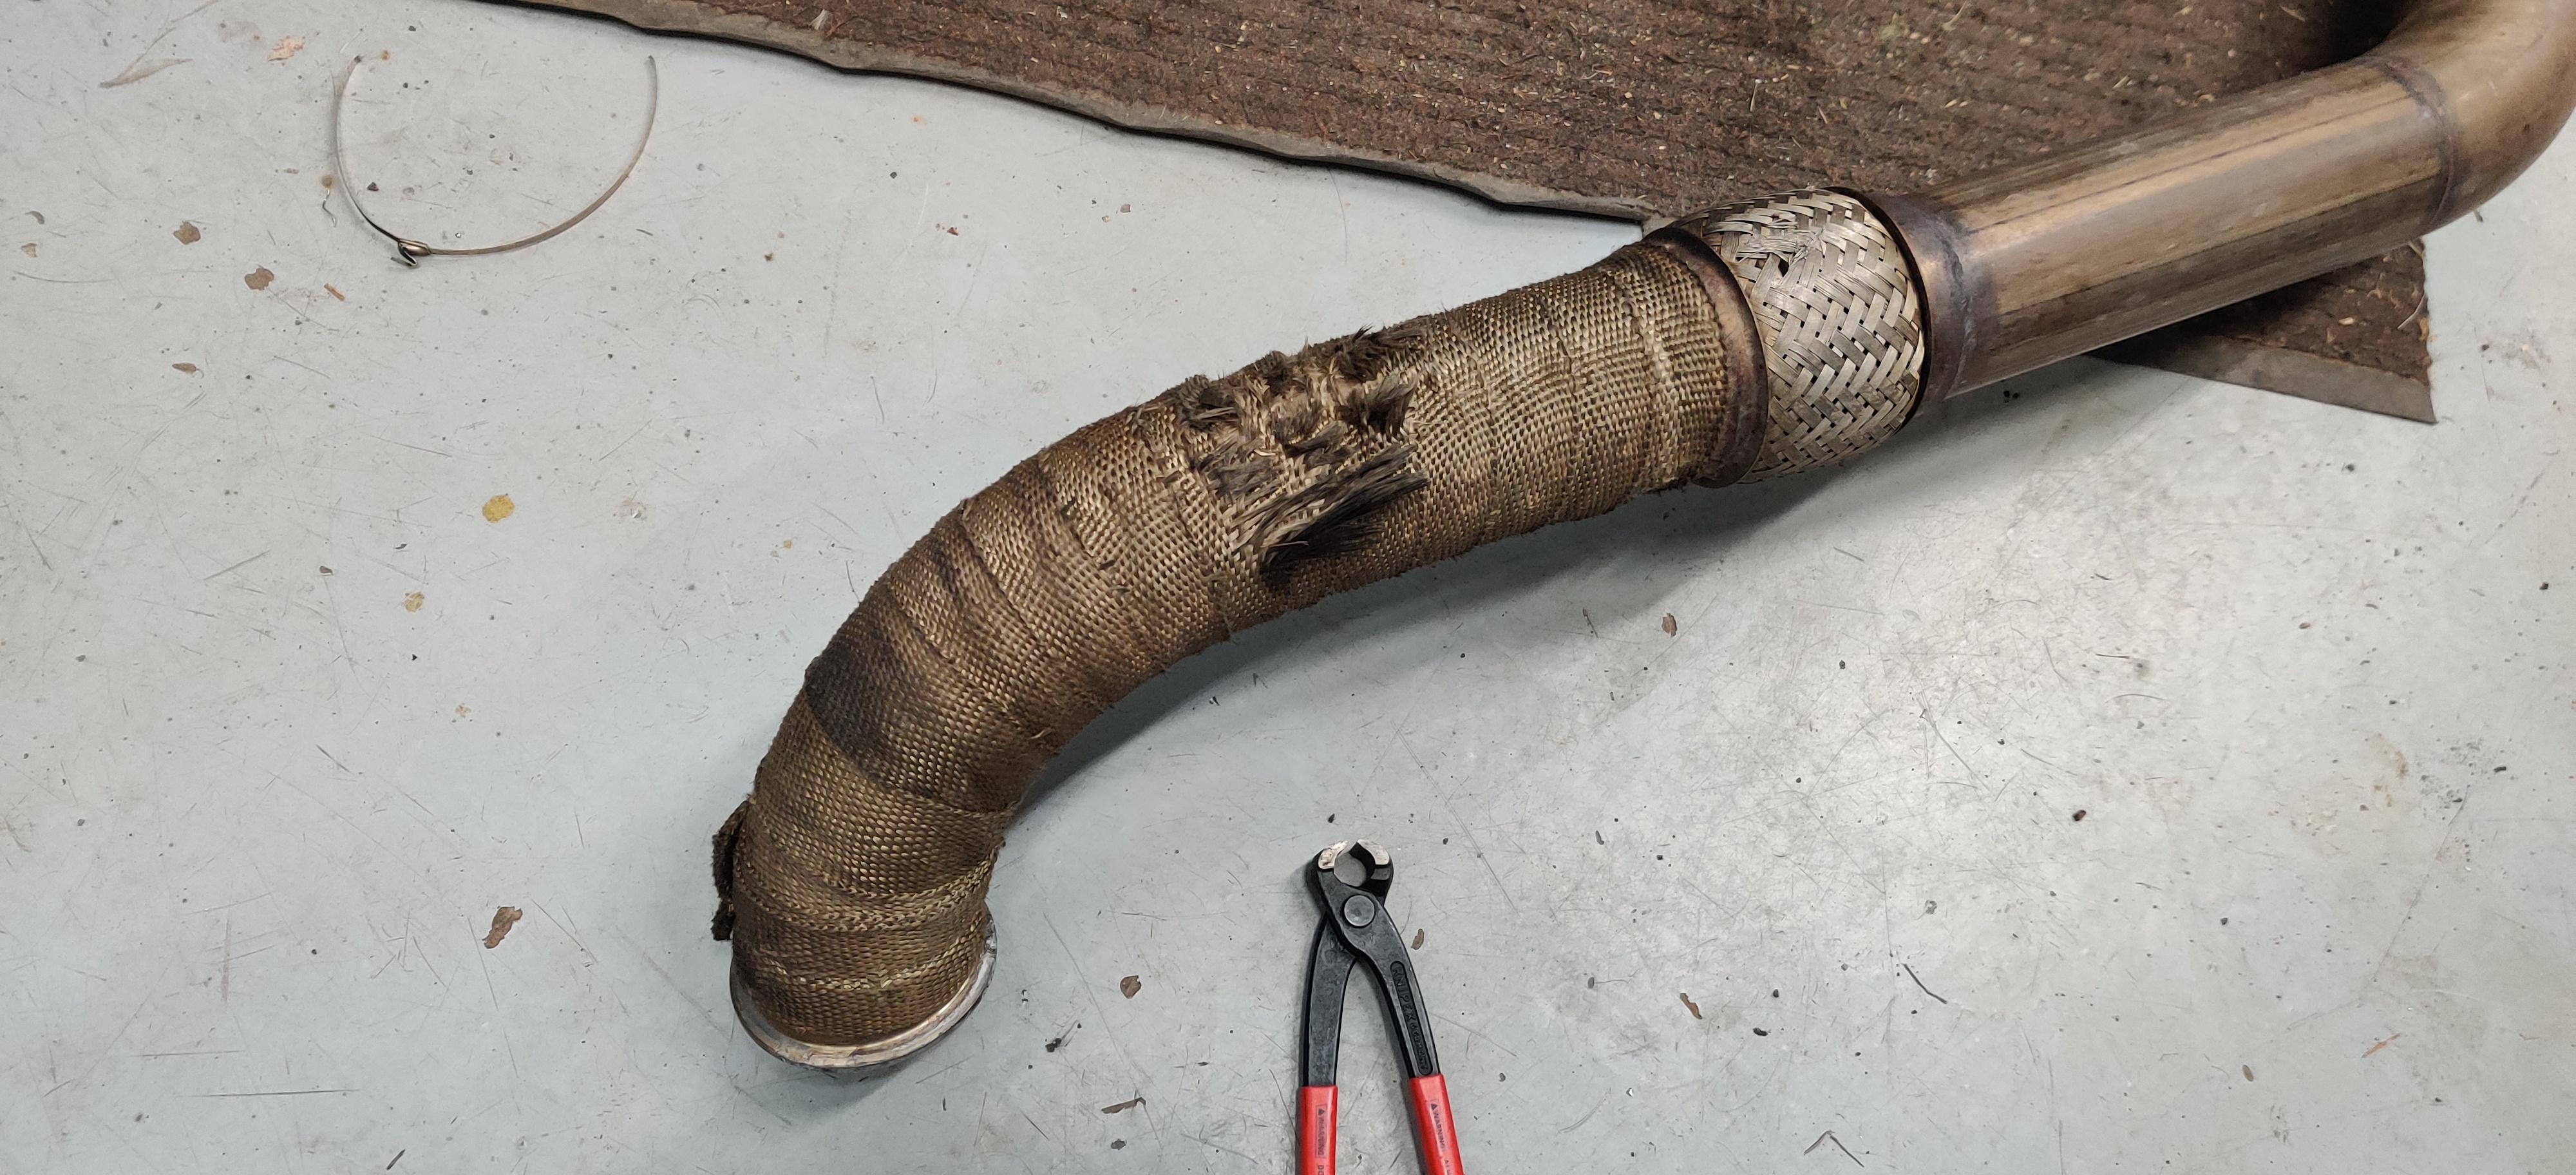
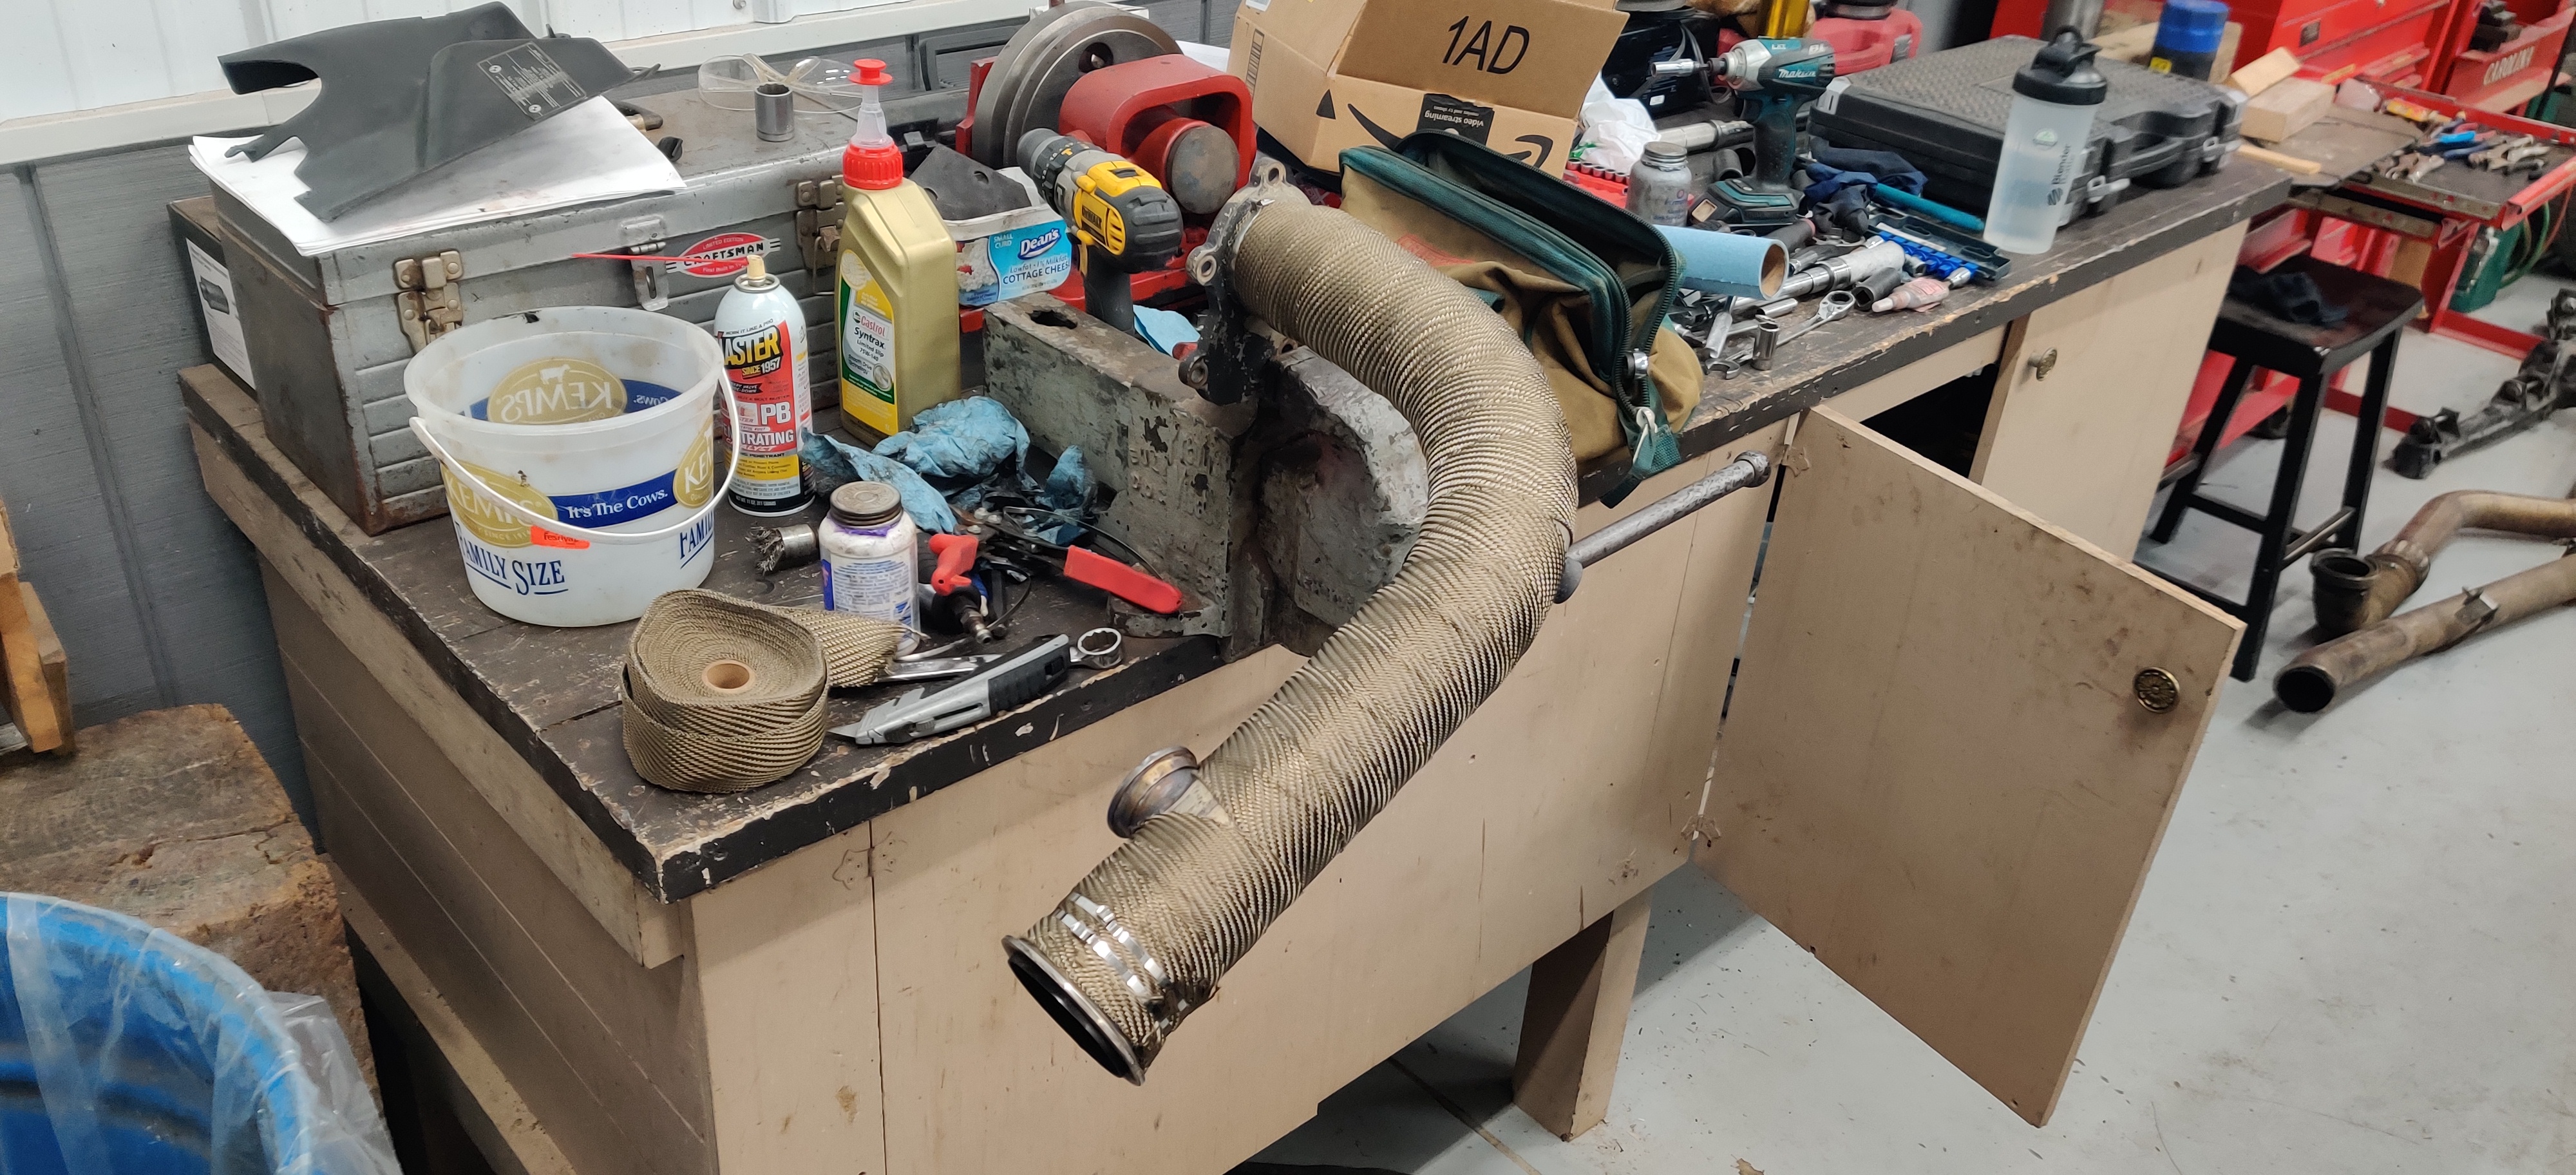
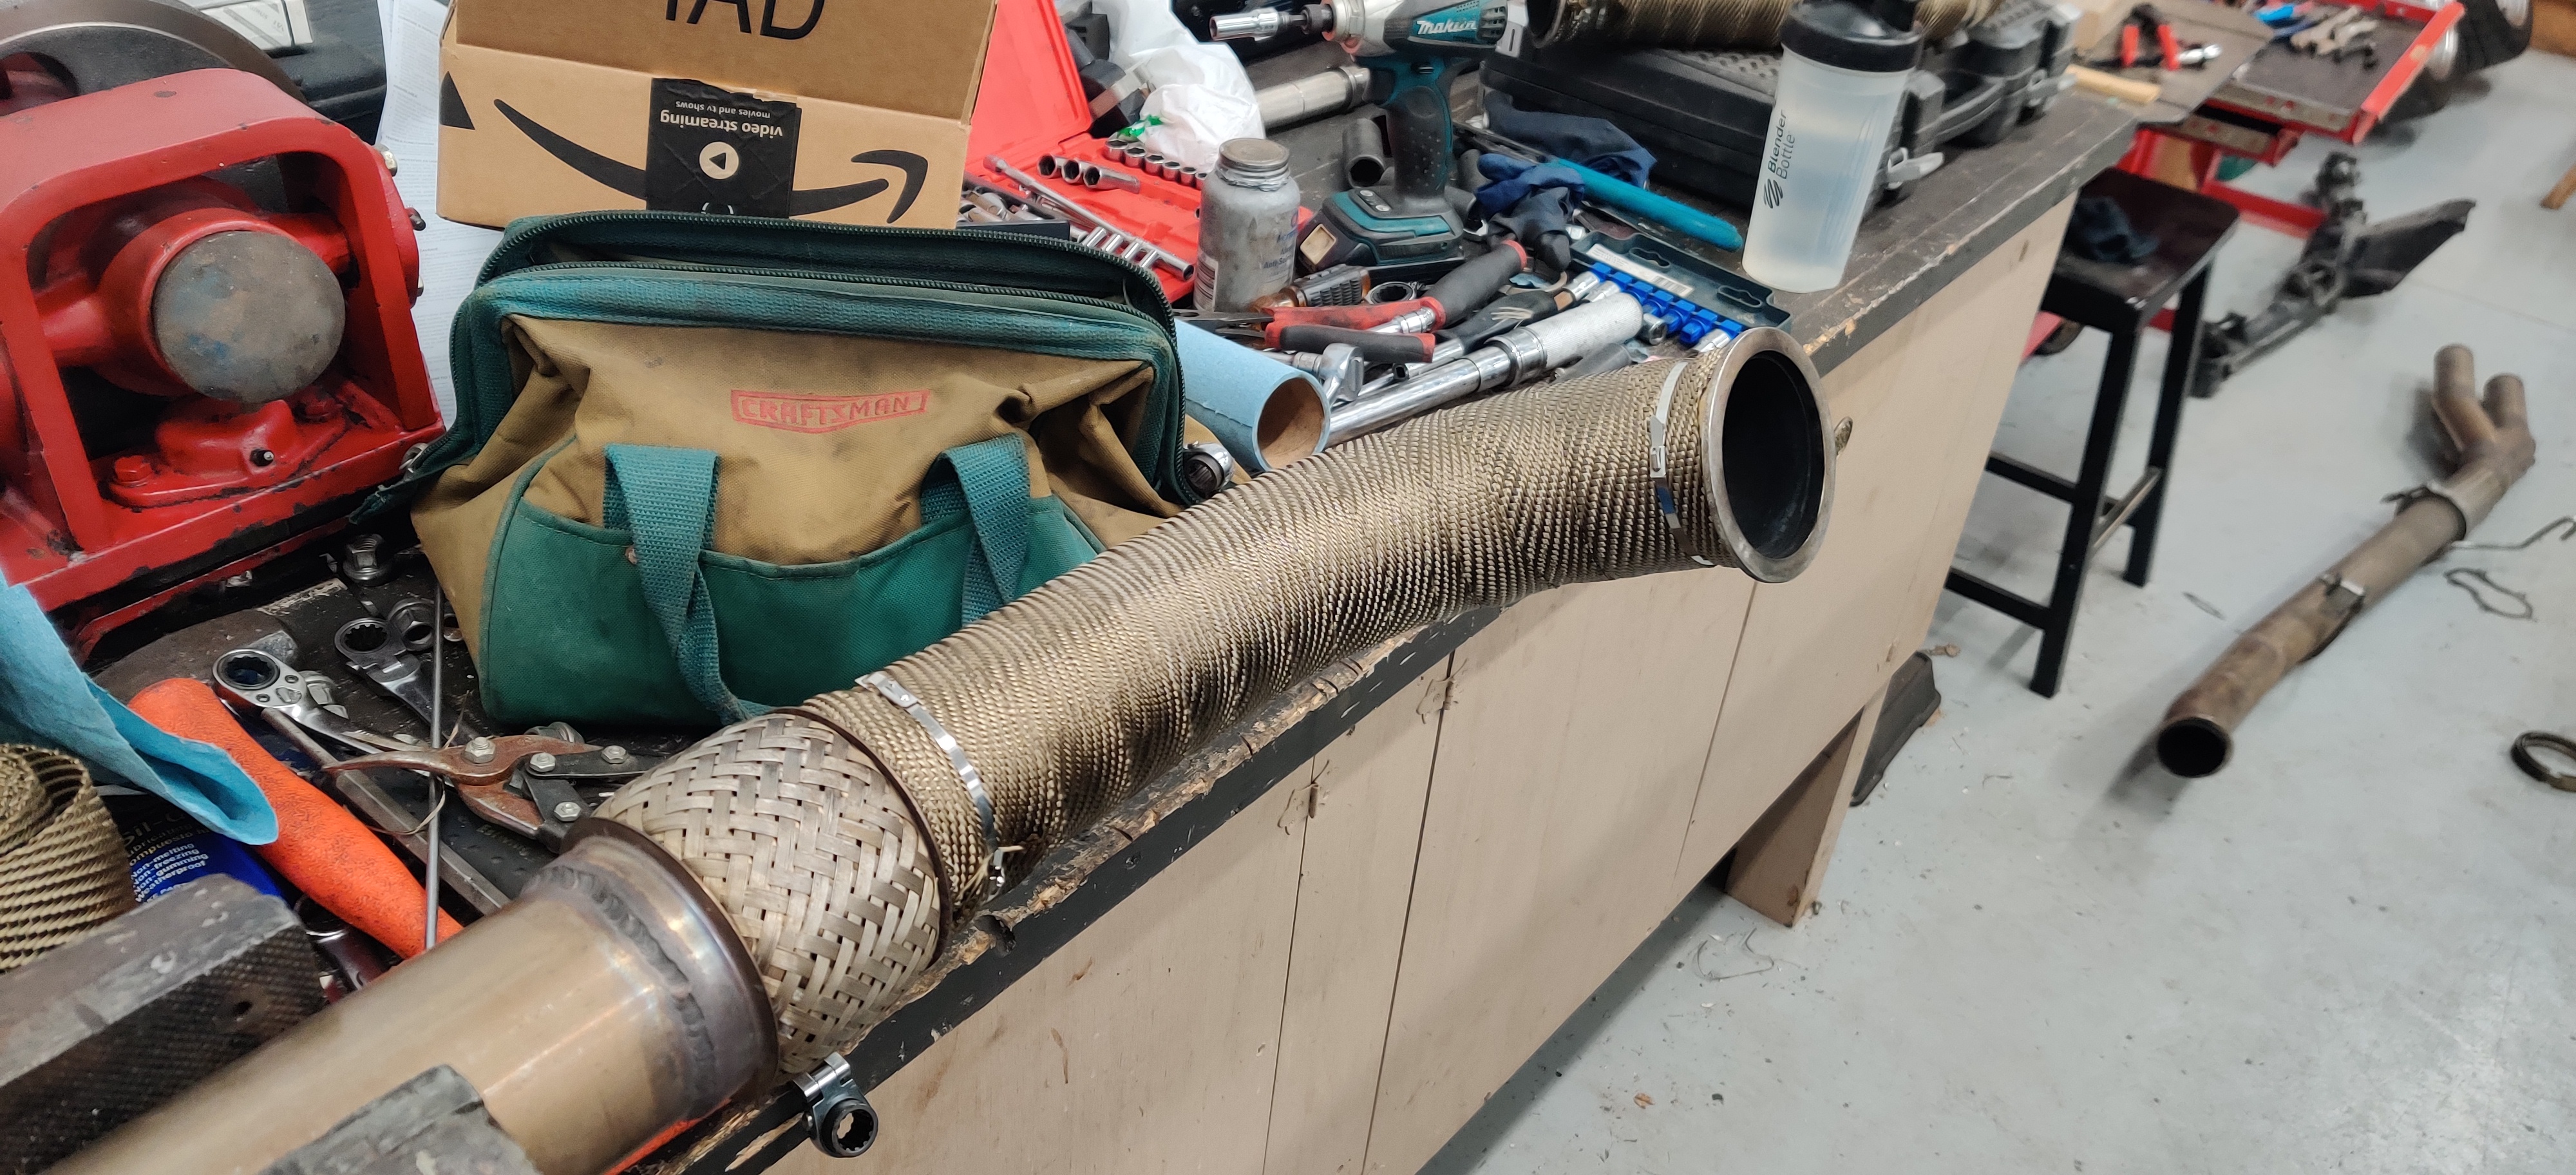
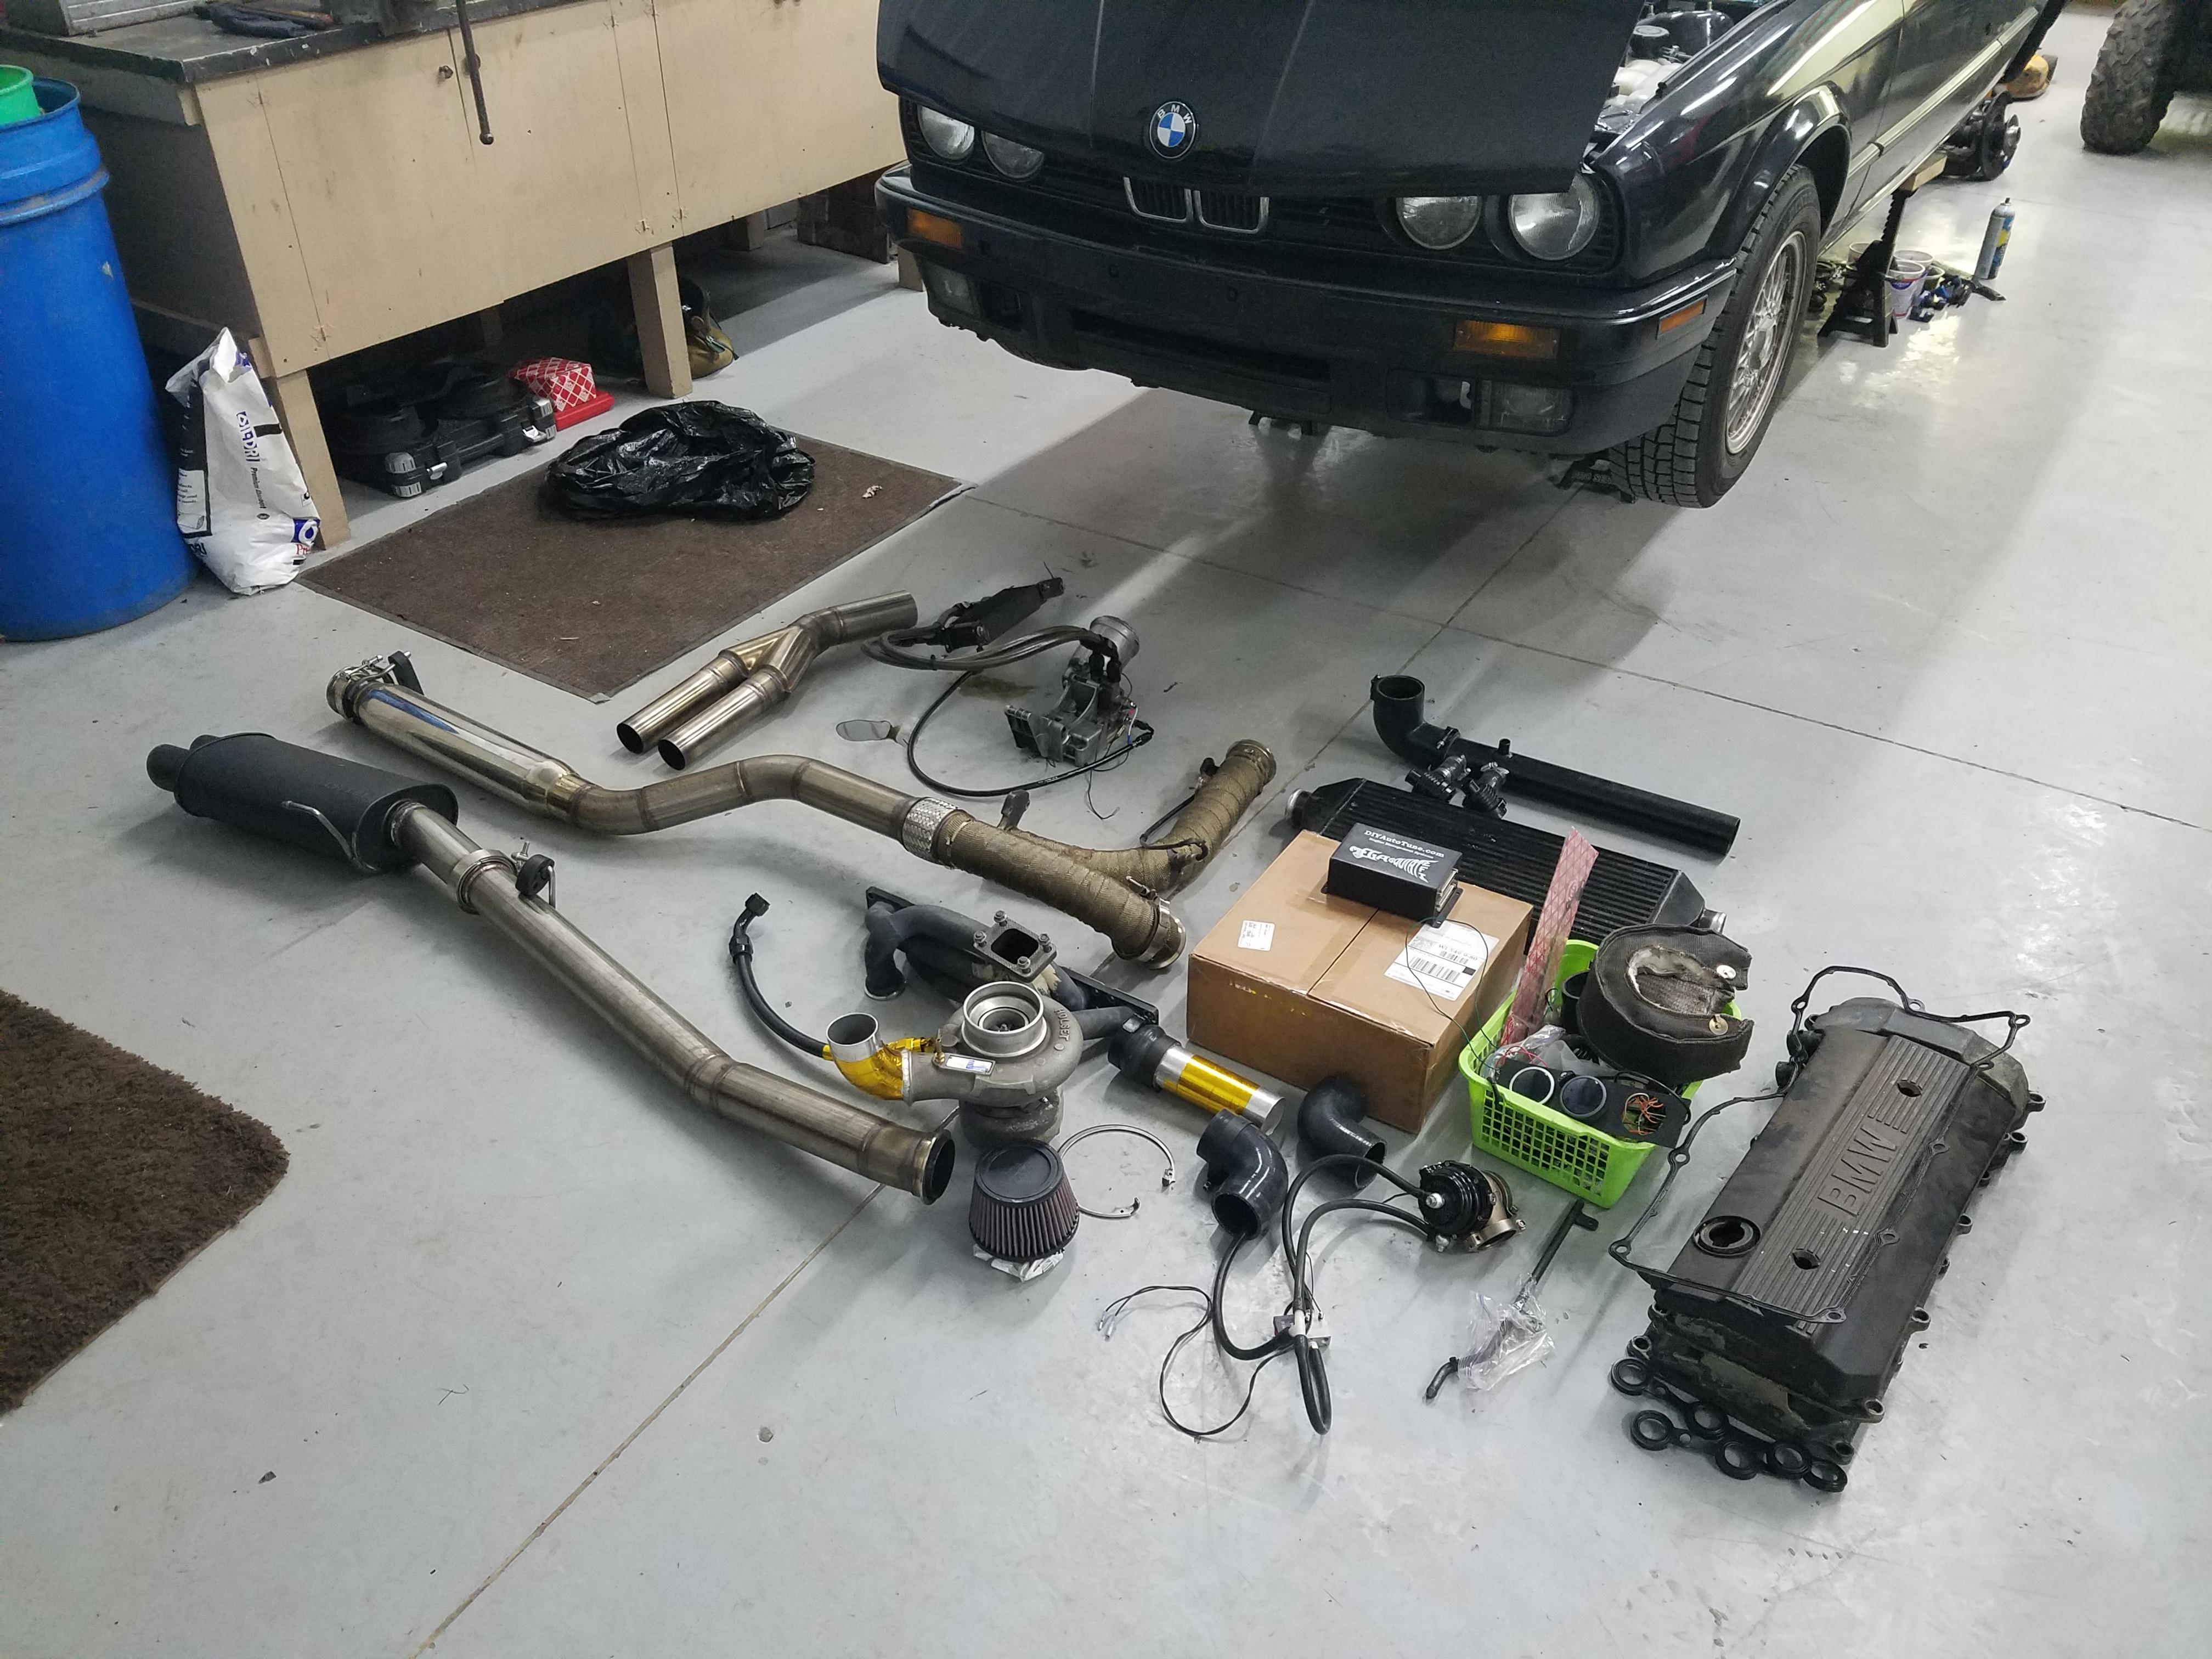
Switching over to the engine side of things I pulled apart the exhaust system and re-wrapped the down pipe and a section of the exhaust pipe. The old wrap had tore in a few places and wasn't looking to great.
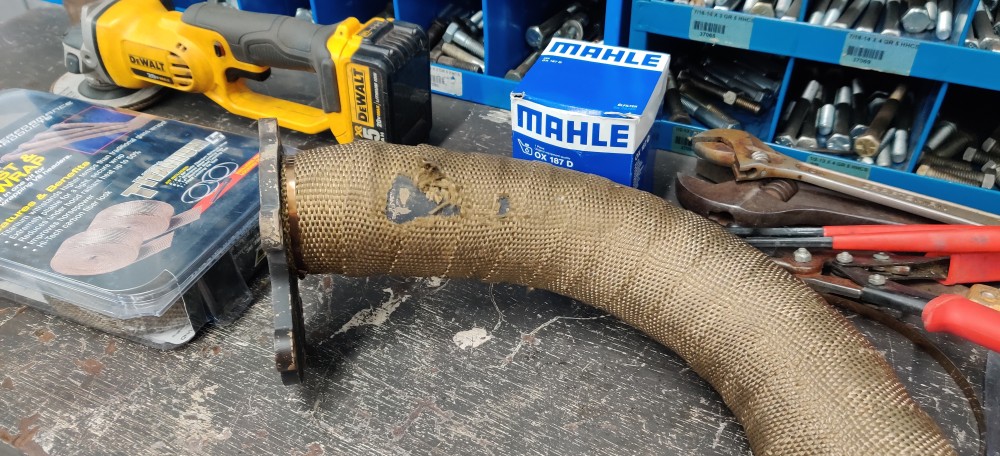
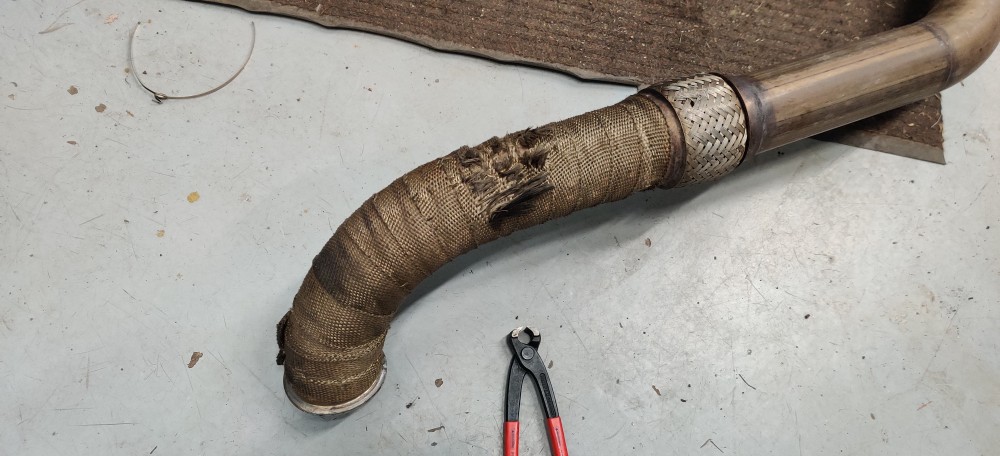
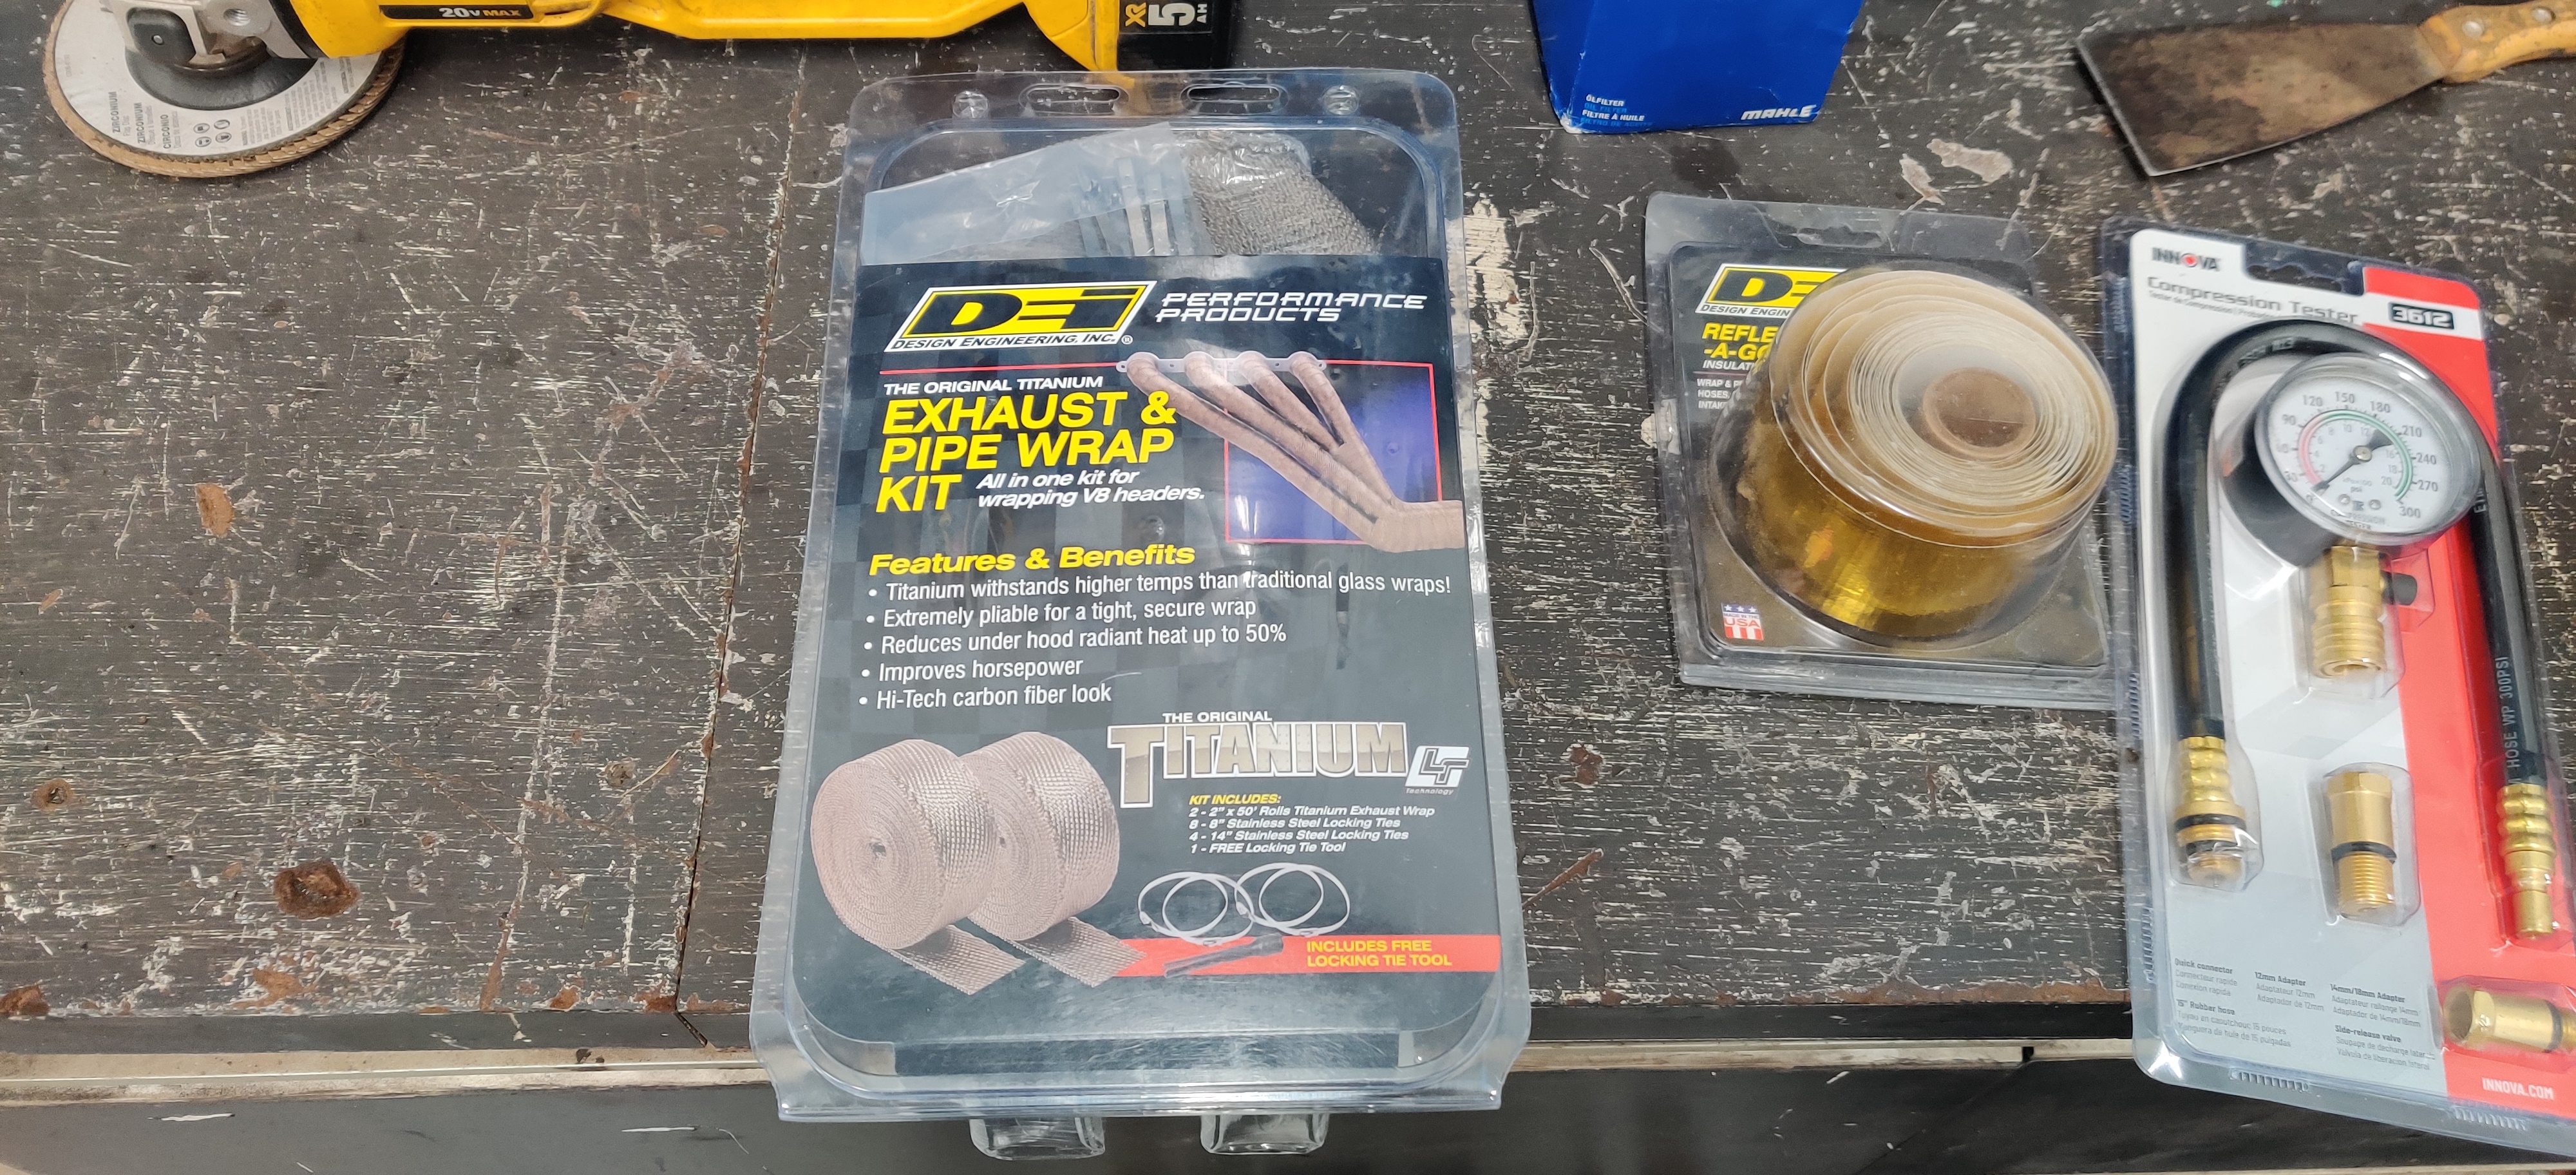
Ordered some Design engineering titanium wrap as a replacement hoping it will do a little better job at reducing exhaust temps in the engine bay.
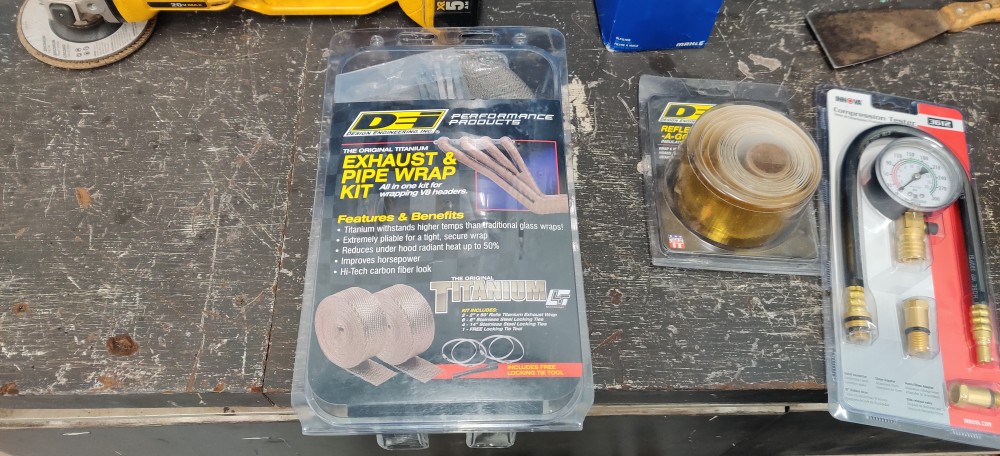
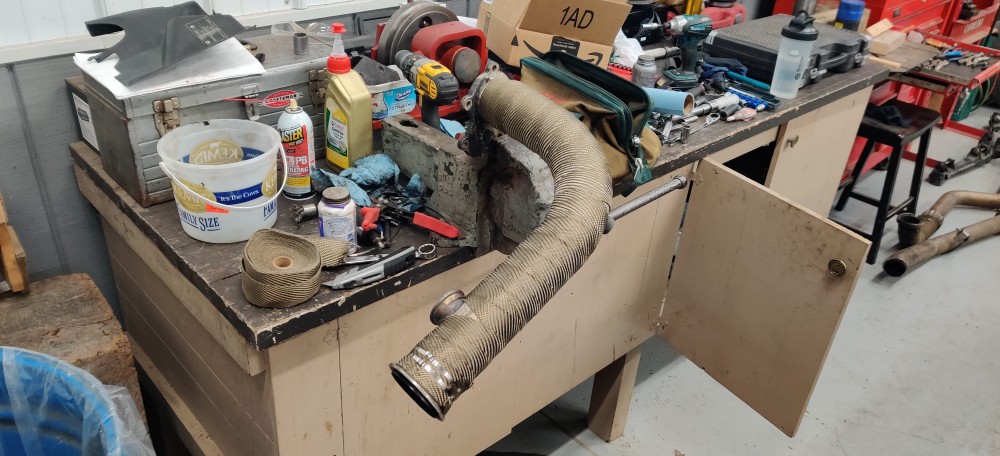
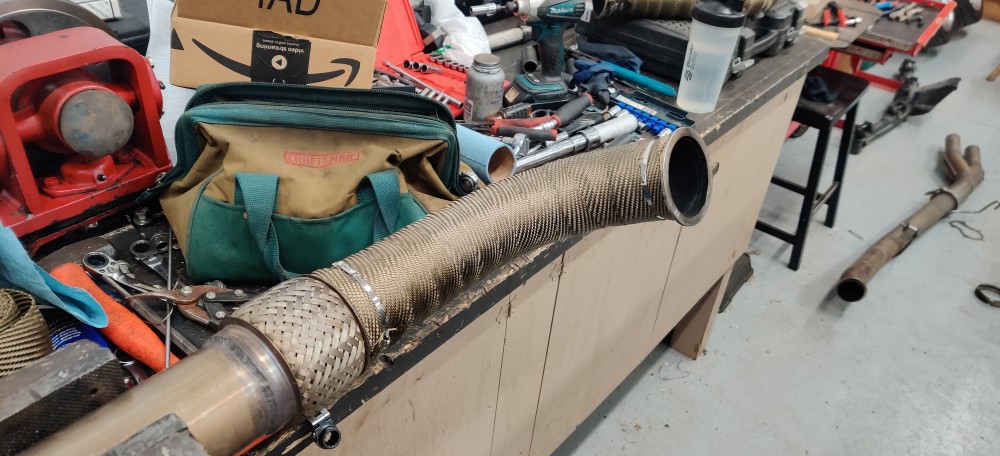
The kit I bought came with clamps and a tool for easily tightening them down. Unfortunately it took me a few to figure out how tight I could go before the clamp would break so that was a learning process but overall I was very pleased with the finished look.
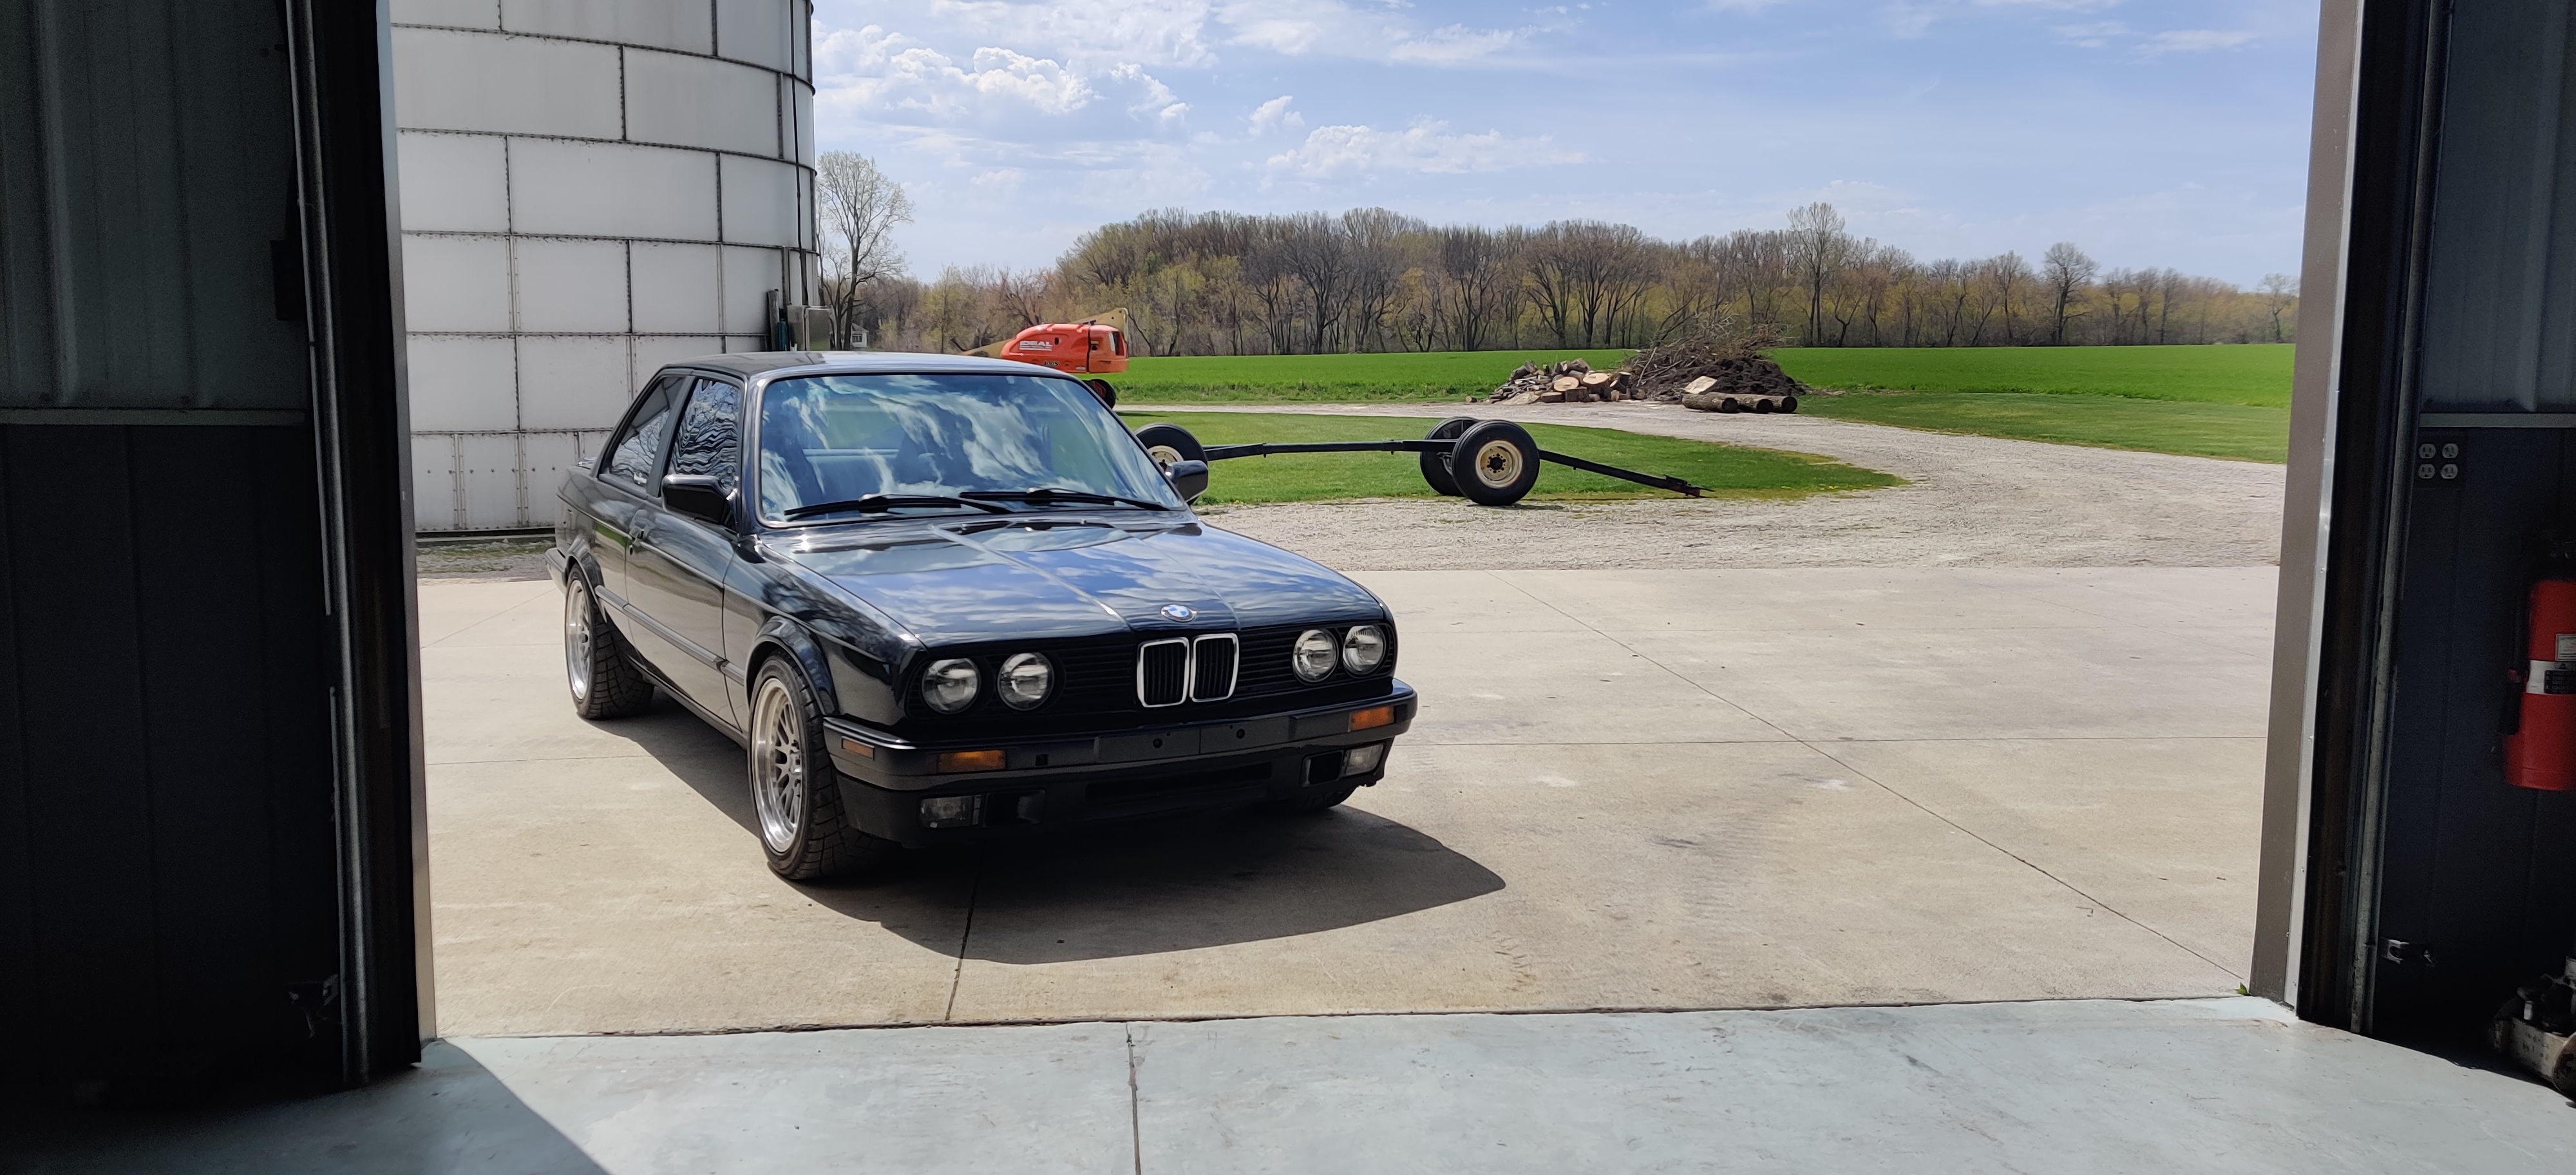
After that was back in and installed I did some maintenance related things: Changed the oil and filter, pulled the plugs and inspected/gapped them, and thoroughly cleaned the under side from oil and grease. The following day I took the car into town for a good wash and detail.
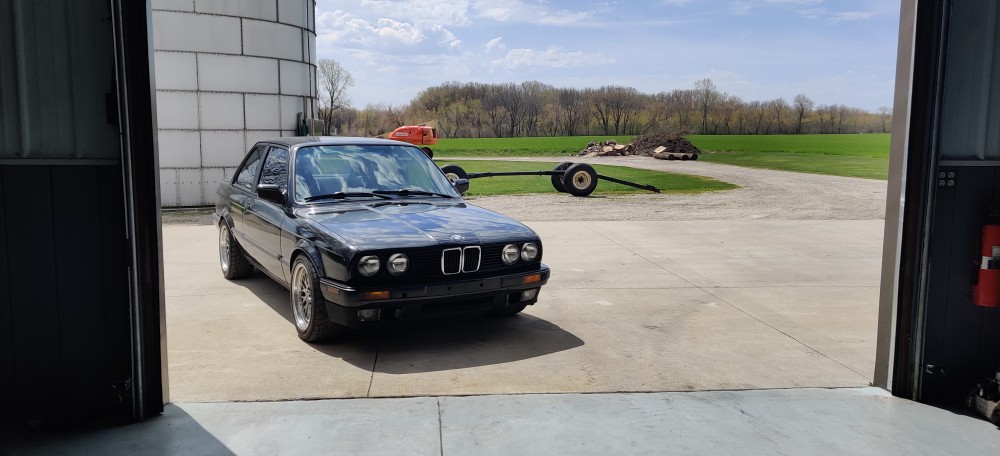
I am working on possibly ordering a new breather setup for my pcv system. The catch can I'm running on it currently is sort of a cheapo and is doing a lousy job at filtering out the fluids so I'm looking into something a little better. Also would like to get the car back to the tuner at some point and get a 93 pump gas tune made now that I have a flex fuel sensor in there.
Other then that the car is running great! Definitely looking forward to the upcoming season!
-
the one and only e30 s52 engine swapUpdate!
So last night I took the car over to a man by the name of Hunter Mulhollon (hunter tuned) who knows MS really well and messed around with my tune a bit to figure out why I was cutting out. Luckily he was able to get the car on the dyno the same night and got her dialed in really well.
First of all, before he did any tuning he went ahead and pulled a spark plug and checked the gap, it was .025. After informing him that I was running a 2 step colder plug and had gaped them all to .021 he pulled the other 5 and found that all of them were in the .025 to .027 range. It seems I was suffering from a bit of spark blowout. He brought them all down to .019 - .020 and popped em back in. After a few pulls he found that I was getting some pretty lean spots on the fuel table. Went through and cleaned that up making everything a bit more fat (rich) for safety and being that I'm running e85. After making some more adjustments else where he did one final pull and the car put down a whopping 400 hp! The crazy thing is the tune is still pretty conservative as I'm only at about 8 lbs (once in a while creeping to 10ish lbs) and running e85. There was actually room for even a little more power safely but unfortunately being that I only have the stage 2 clutch in there now she's about maxed out and he started to smell it slipping a little so he called her quits. The big thing is my cut out issue is now gone and she feels even more responsive! Driving it home I tried about every situation I could think of that would make the car cut out before and she just kept pulling. All in all amazing work from Hunter.
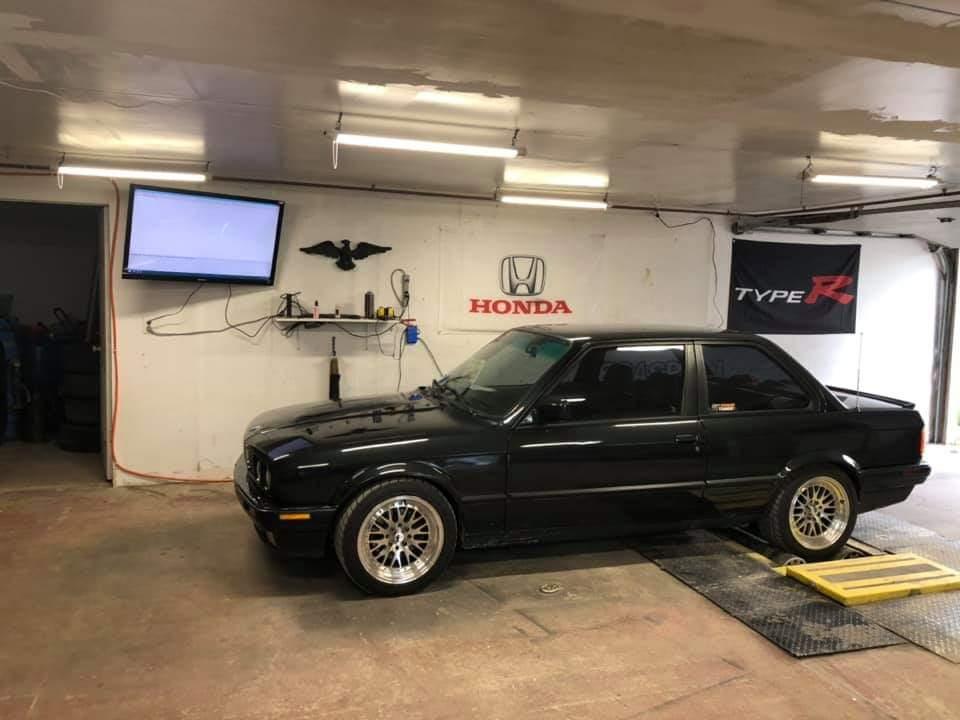
I also just wanna say that Shane at DB performance still did an awesome job on the car and I was very pleased with his work. I think that if my e85 ethanol content had been a little higher with the fuel that was in my tank some of my fuel map values may not have been as lean as they were and I may never had encountered any cut out issues. Overall, awesome job tuning from both Shane and hunter, this thing is a fuckin blast!
Pads and rotors should be here tomorrow!
Stay tuned!
-
Official-look-what-i-found-thread (craigslist, other-forums, etc)

 \
\
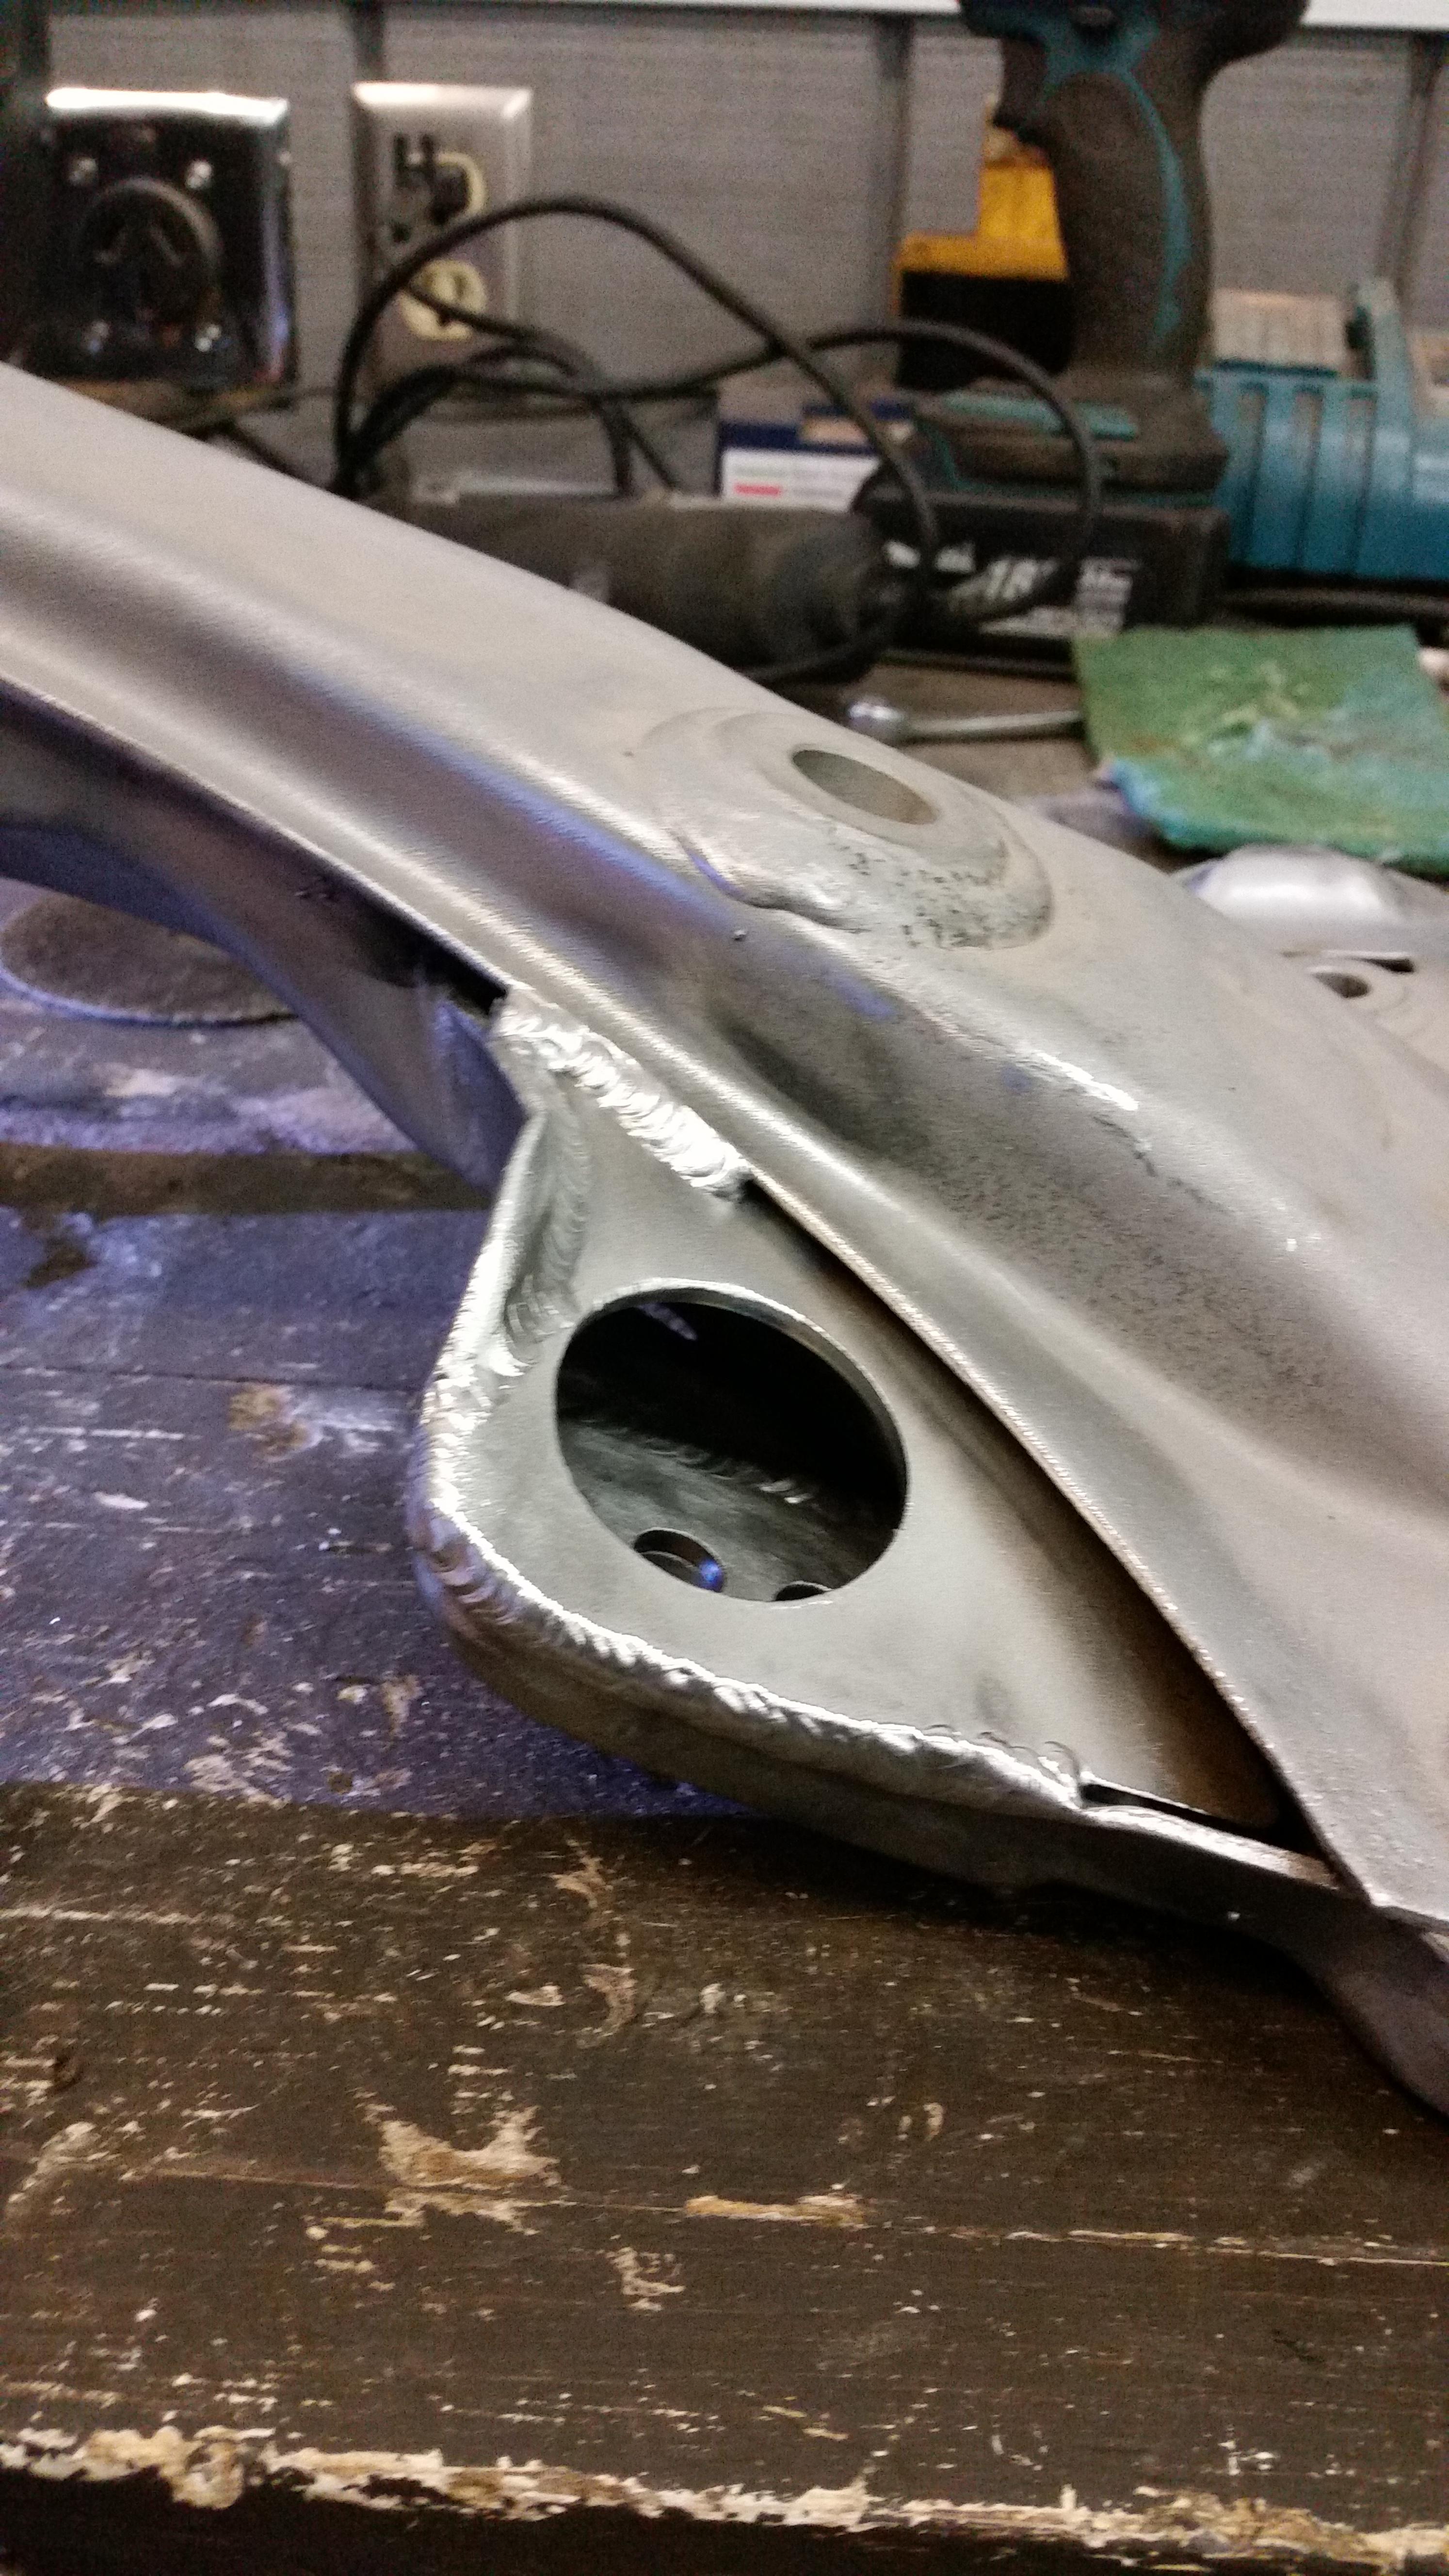
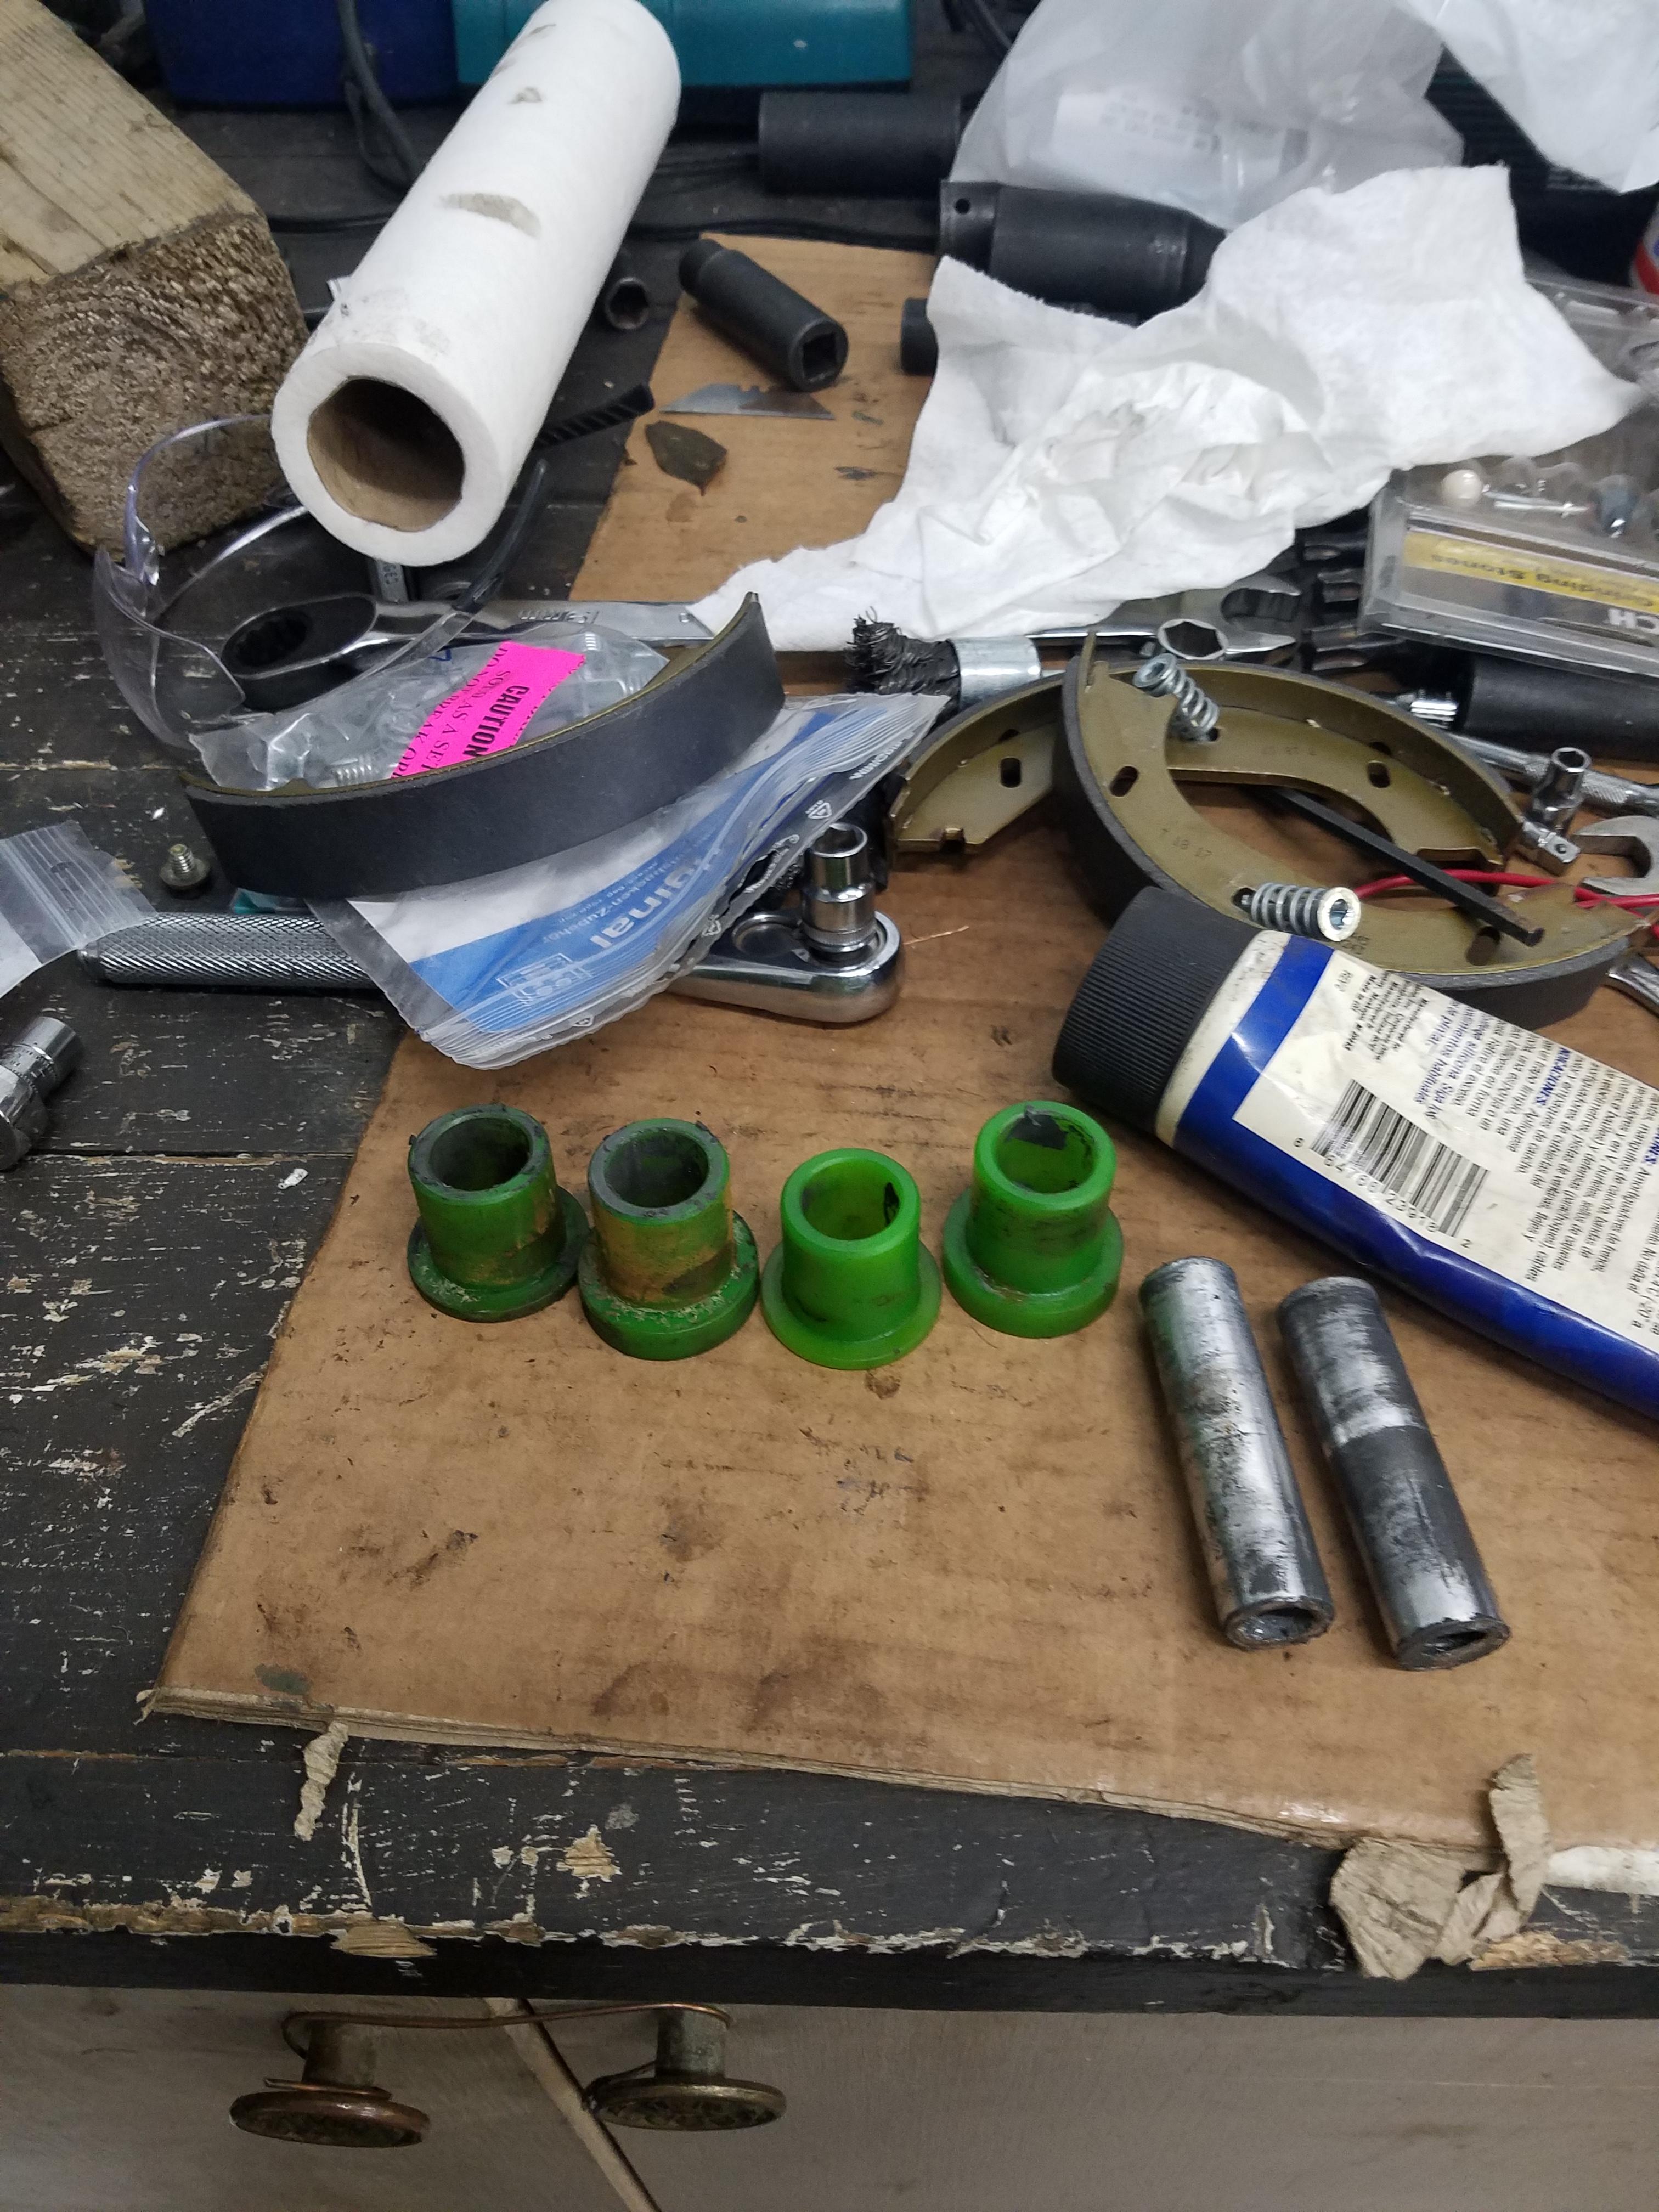
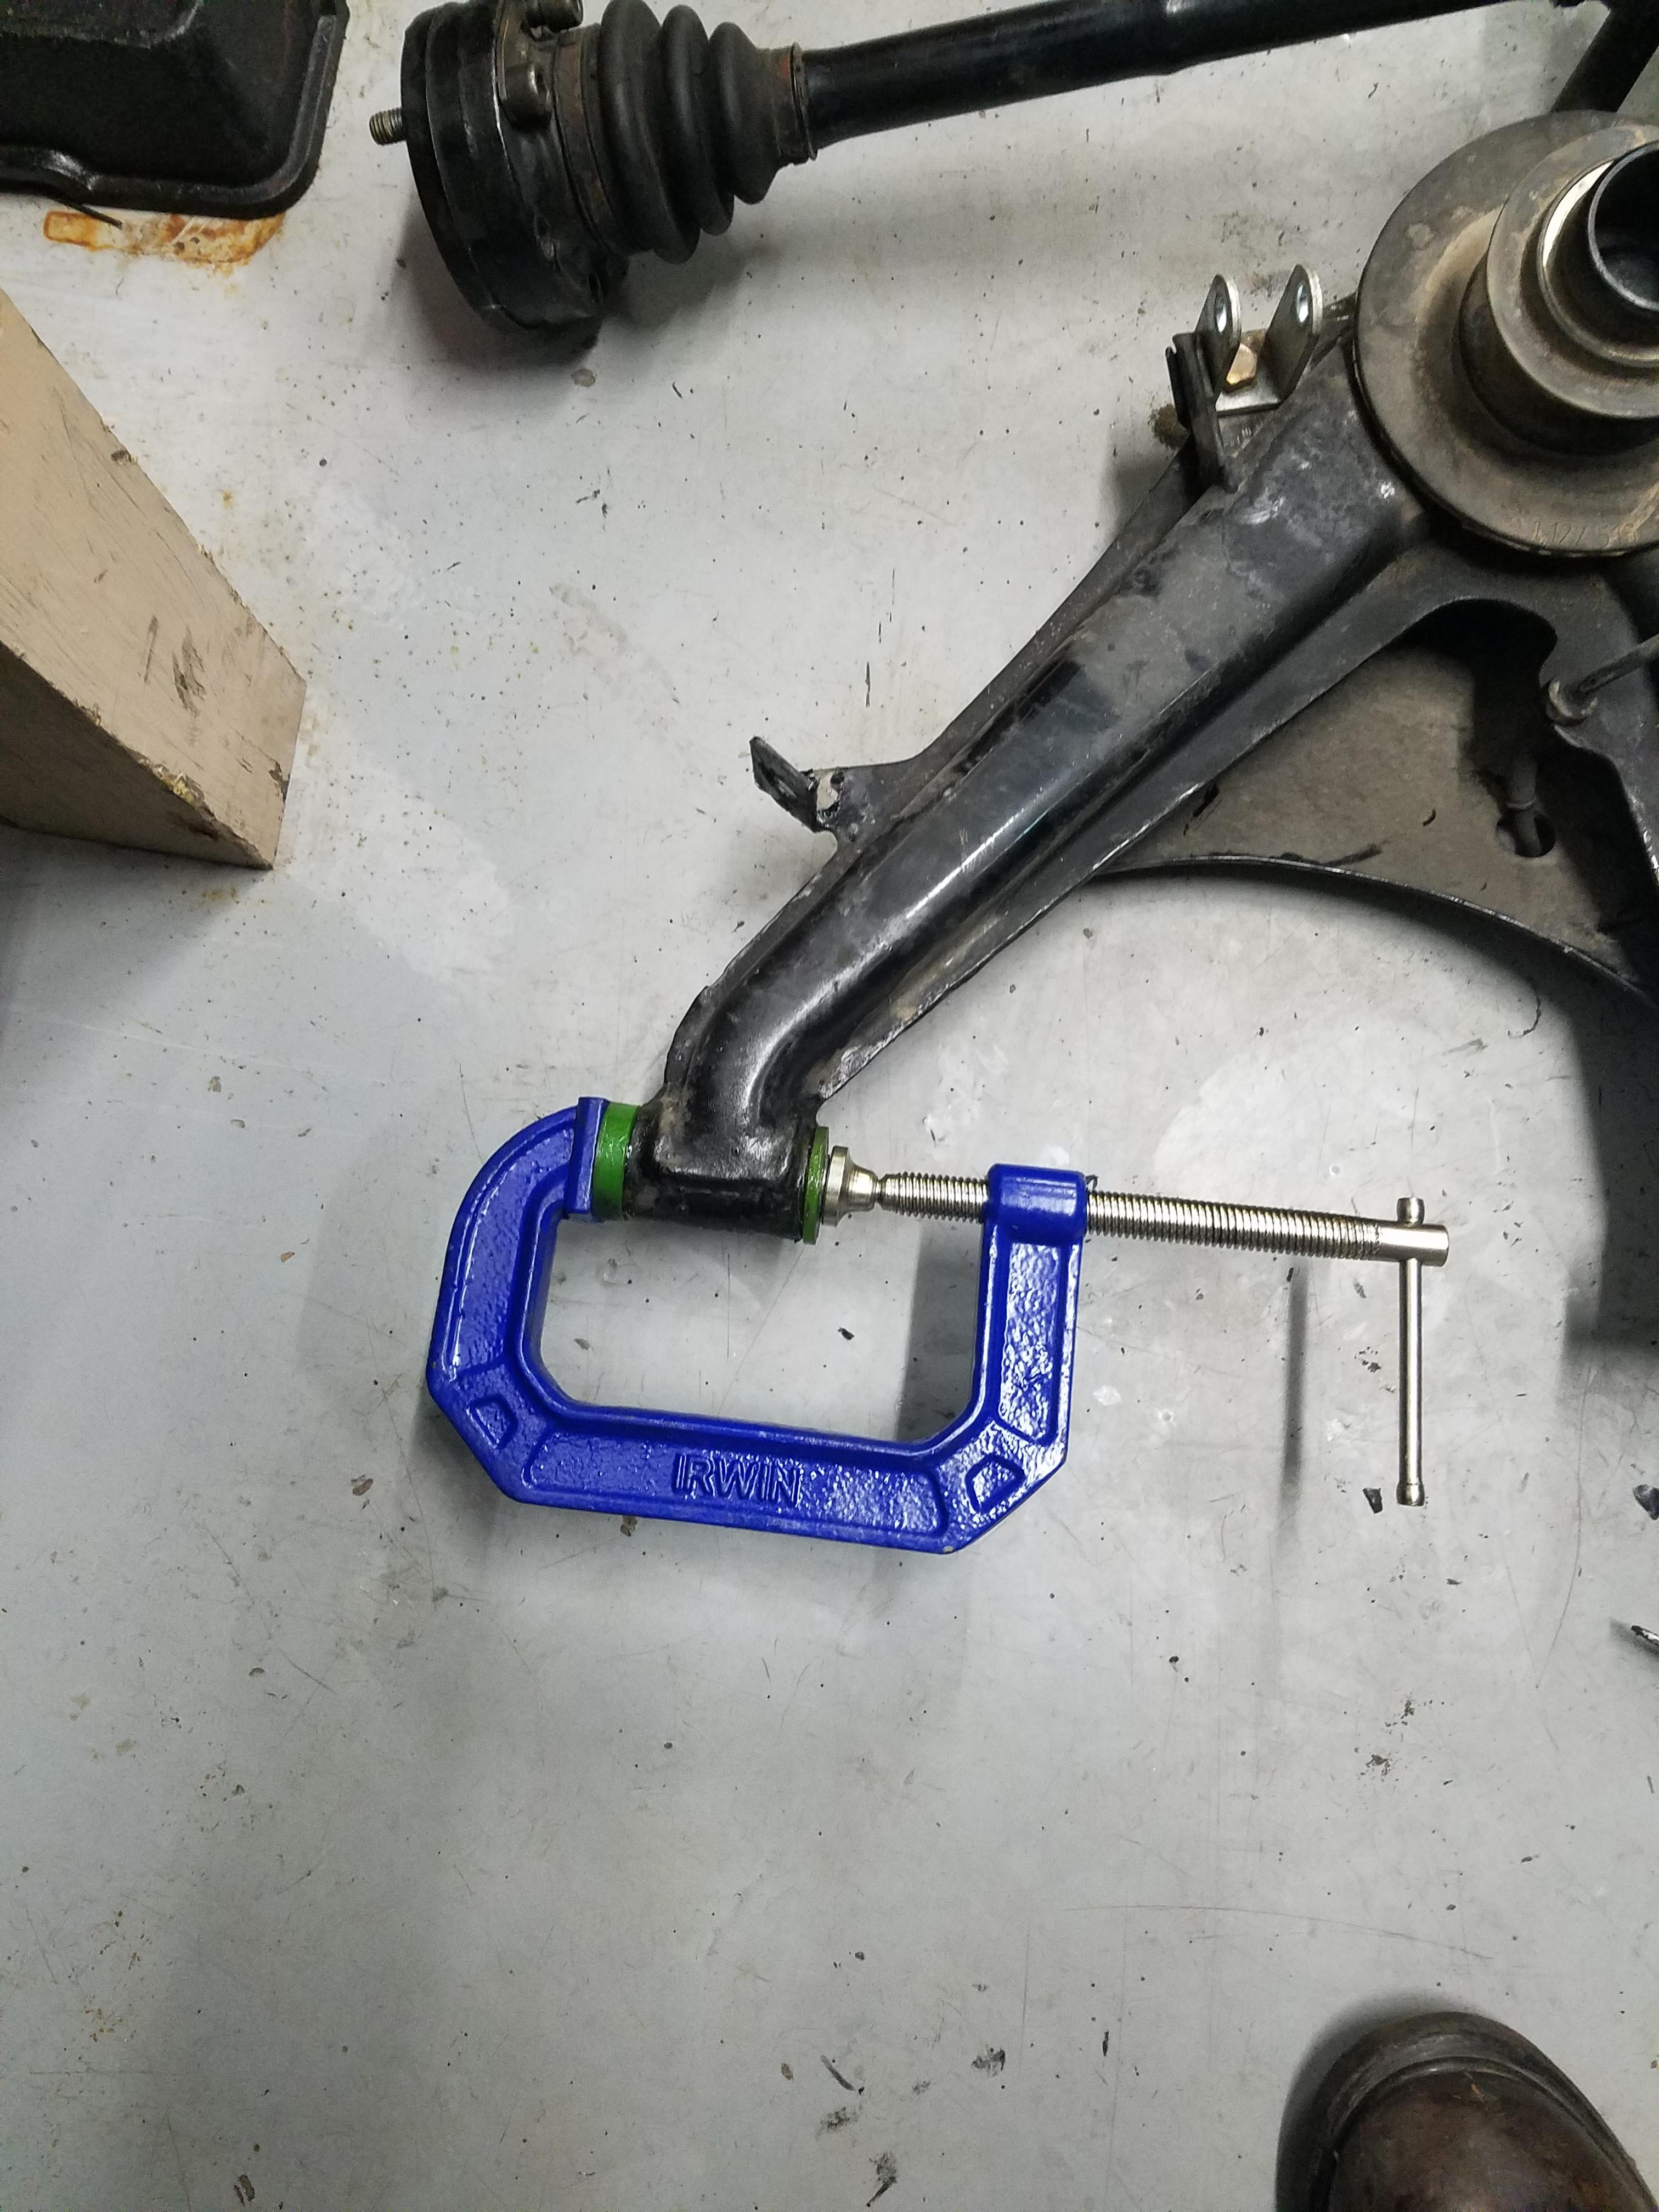
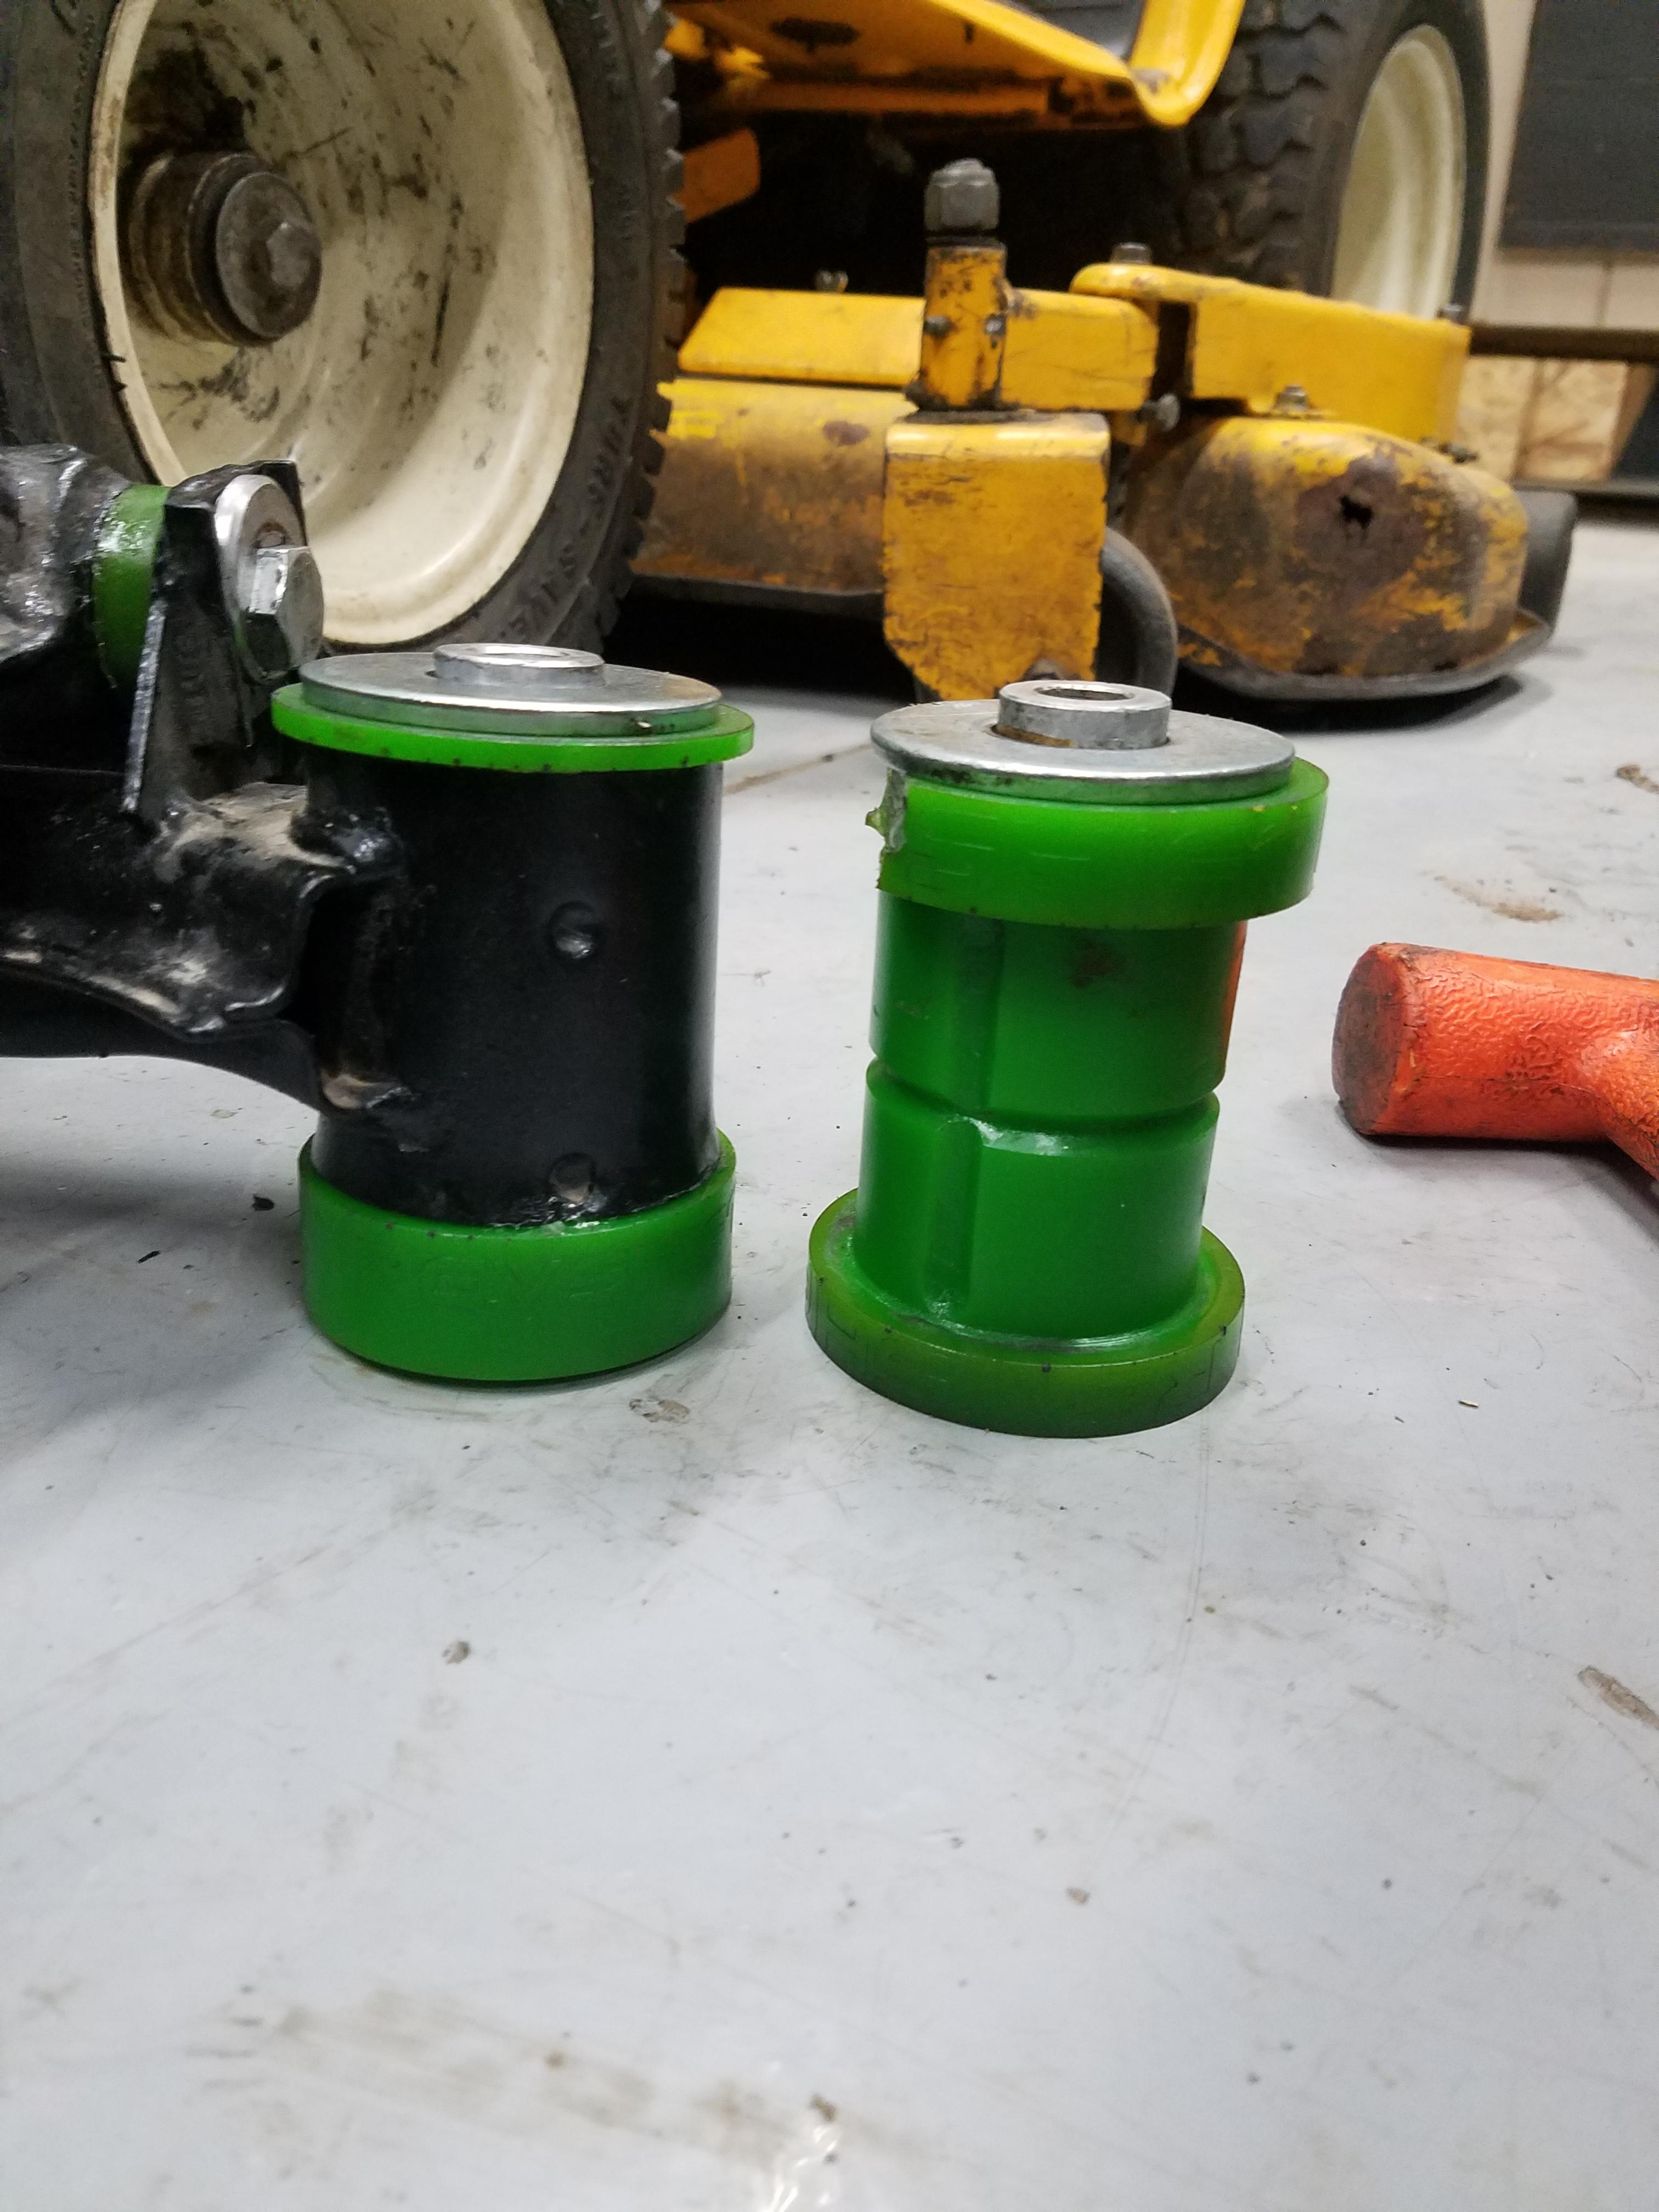
 i d
i d