Skip to content
  • Categories
  • Recent
  • Tags
  • Popular
  • Users
  • Groups
Skins
  • Light
  • Brite
  • Cerulean
  • Cosmo
  • Flatly
  • Journal
  • Litera
  • Lumen
  • Lux
  • Materia
  • Minty
  • Morph
  • Pulse
  • Sandstone
  • Simplex
  • Sketchy
  • Spacelab
  • United
  • Yeti
  • Zephyr
  • Dark
  • Cyborg
  • Darkly
  • Quartz
  • Slate
  • Solar
  • Superhero
  • Vapor

  • Default (No Skin)
  • No Skin
Collapse
WIBIMMERS logo

WIBIMMERS

  1. Home
  2. General Discussion
  3. Members BMWs
  4. Z3 Coupe content

Z3 Coupe content

Scheduled Pinned Locked Moved Members BMWs
123 Posts 14 Posters 0 Views 1 Watching
  • Oldest to Newest
  • Newest to Oldest
  • Most Votes
Reply
  • Reply as topic
Log in to reply
This topic has been deleted. Only users with topic management privileges can see it.
  • YoungCRY
    YoungCRY
    YoungCR
    wrote on last edited by
    #94

    Man that looks great! That glove box kit is a cool product.

    Chris Young
    BMWCCA #458972
    1986 528e/5  | 1994 530i/5 | 1995 540i/6 | 2013 X5 35d | 1998 C1500 Suburban | 1995 K2500 Suburban

    1 Reply Last reply
    1
    • Bassboy3313B
      Bassboy3313B
      Bassboy3313
      wrote on last edited by
      #95

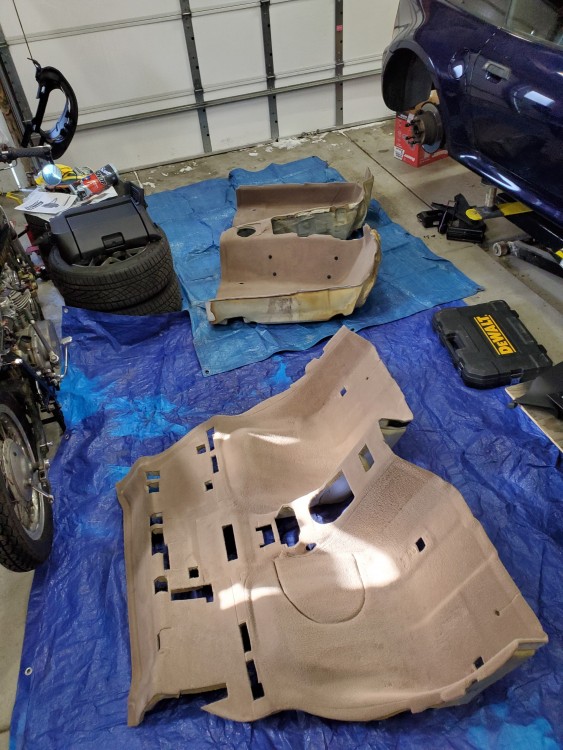
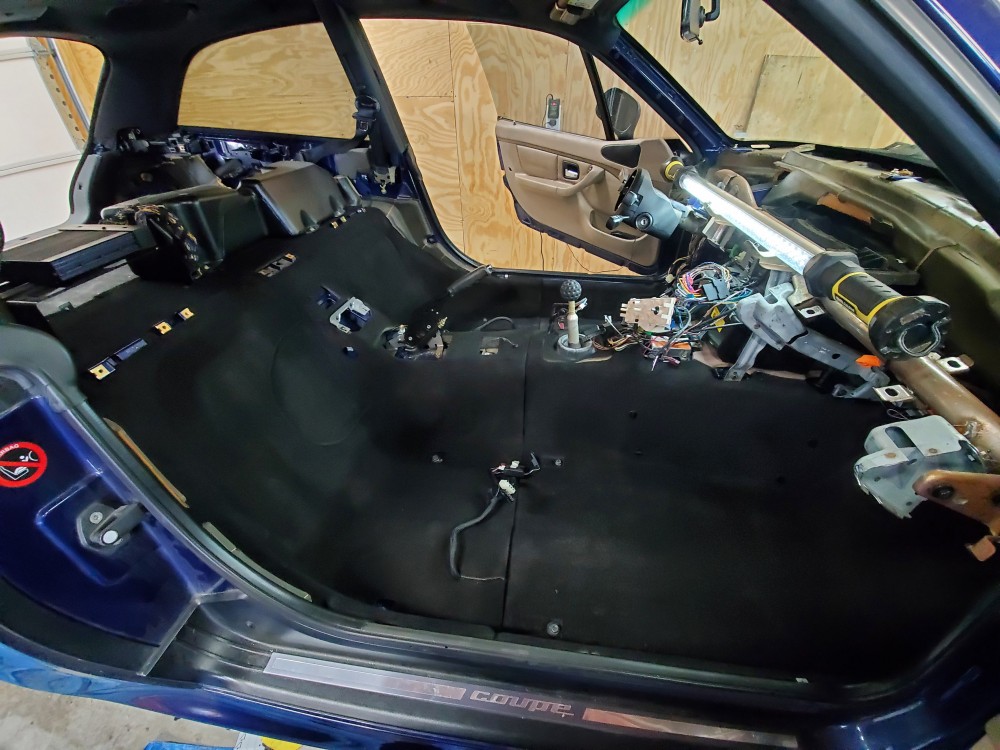
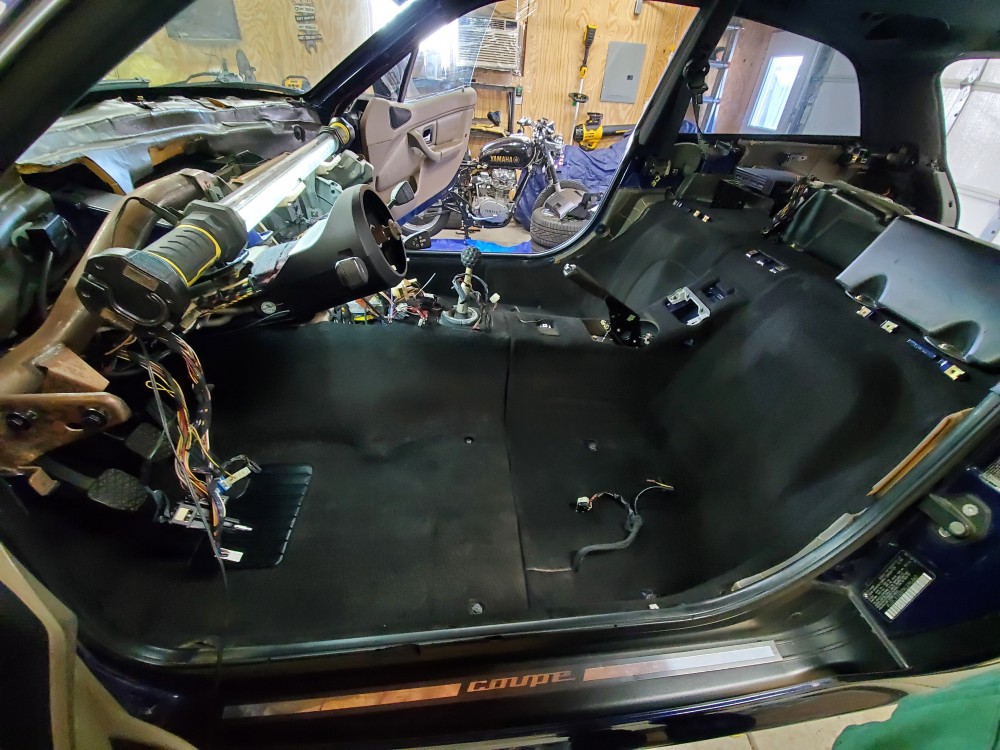
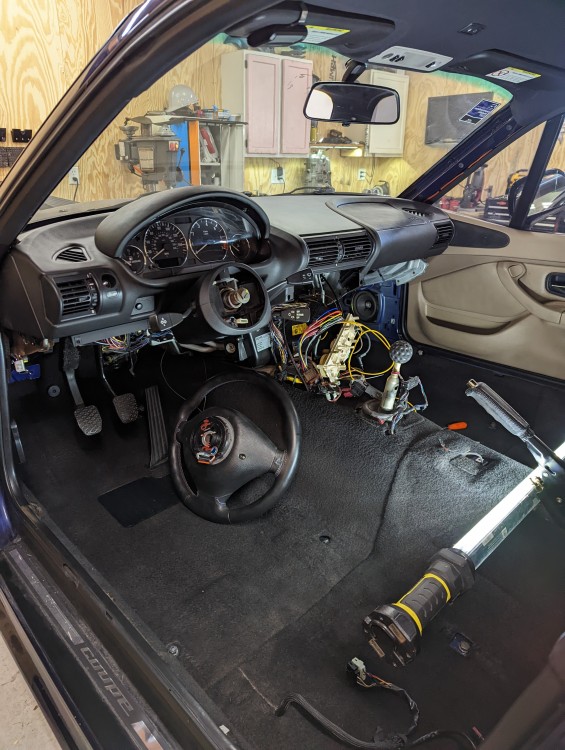
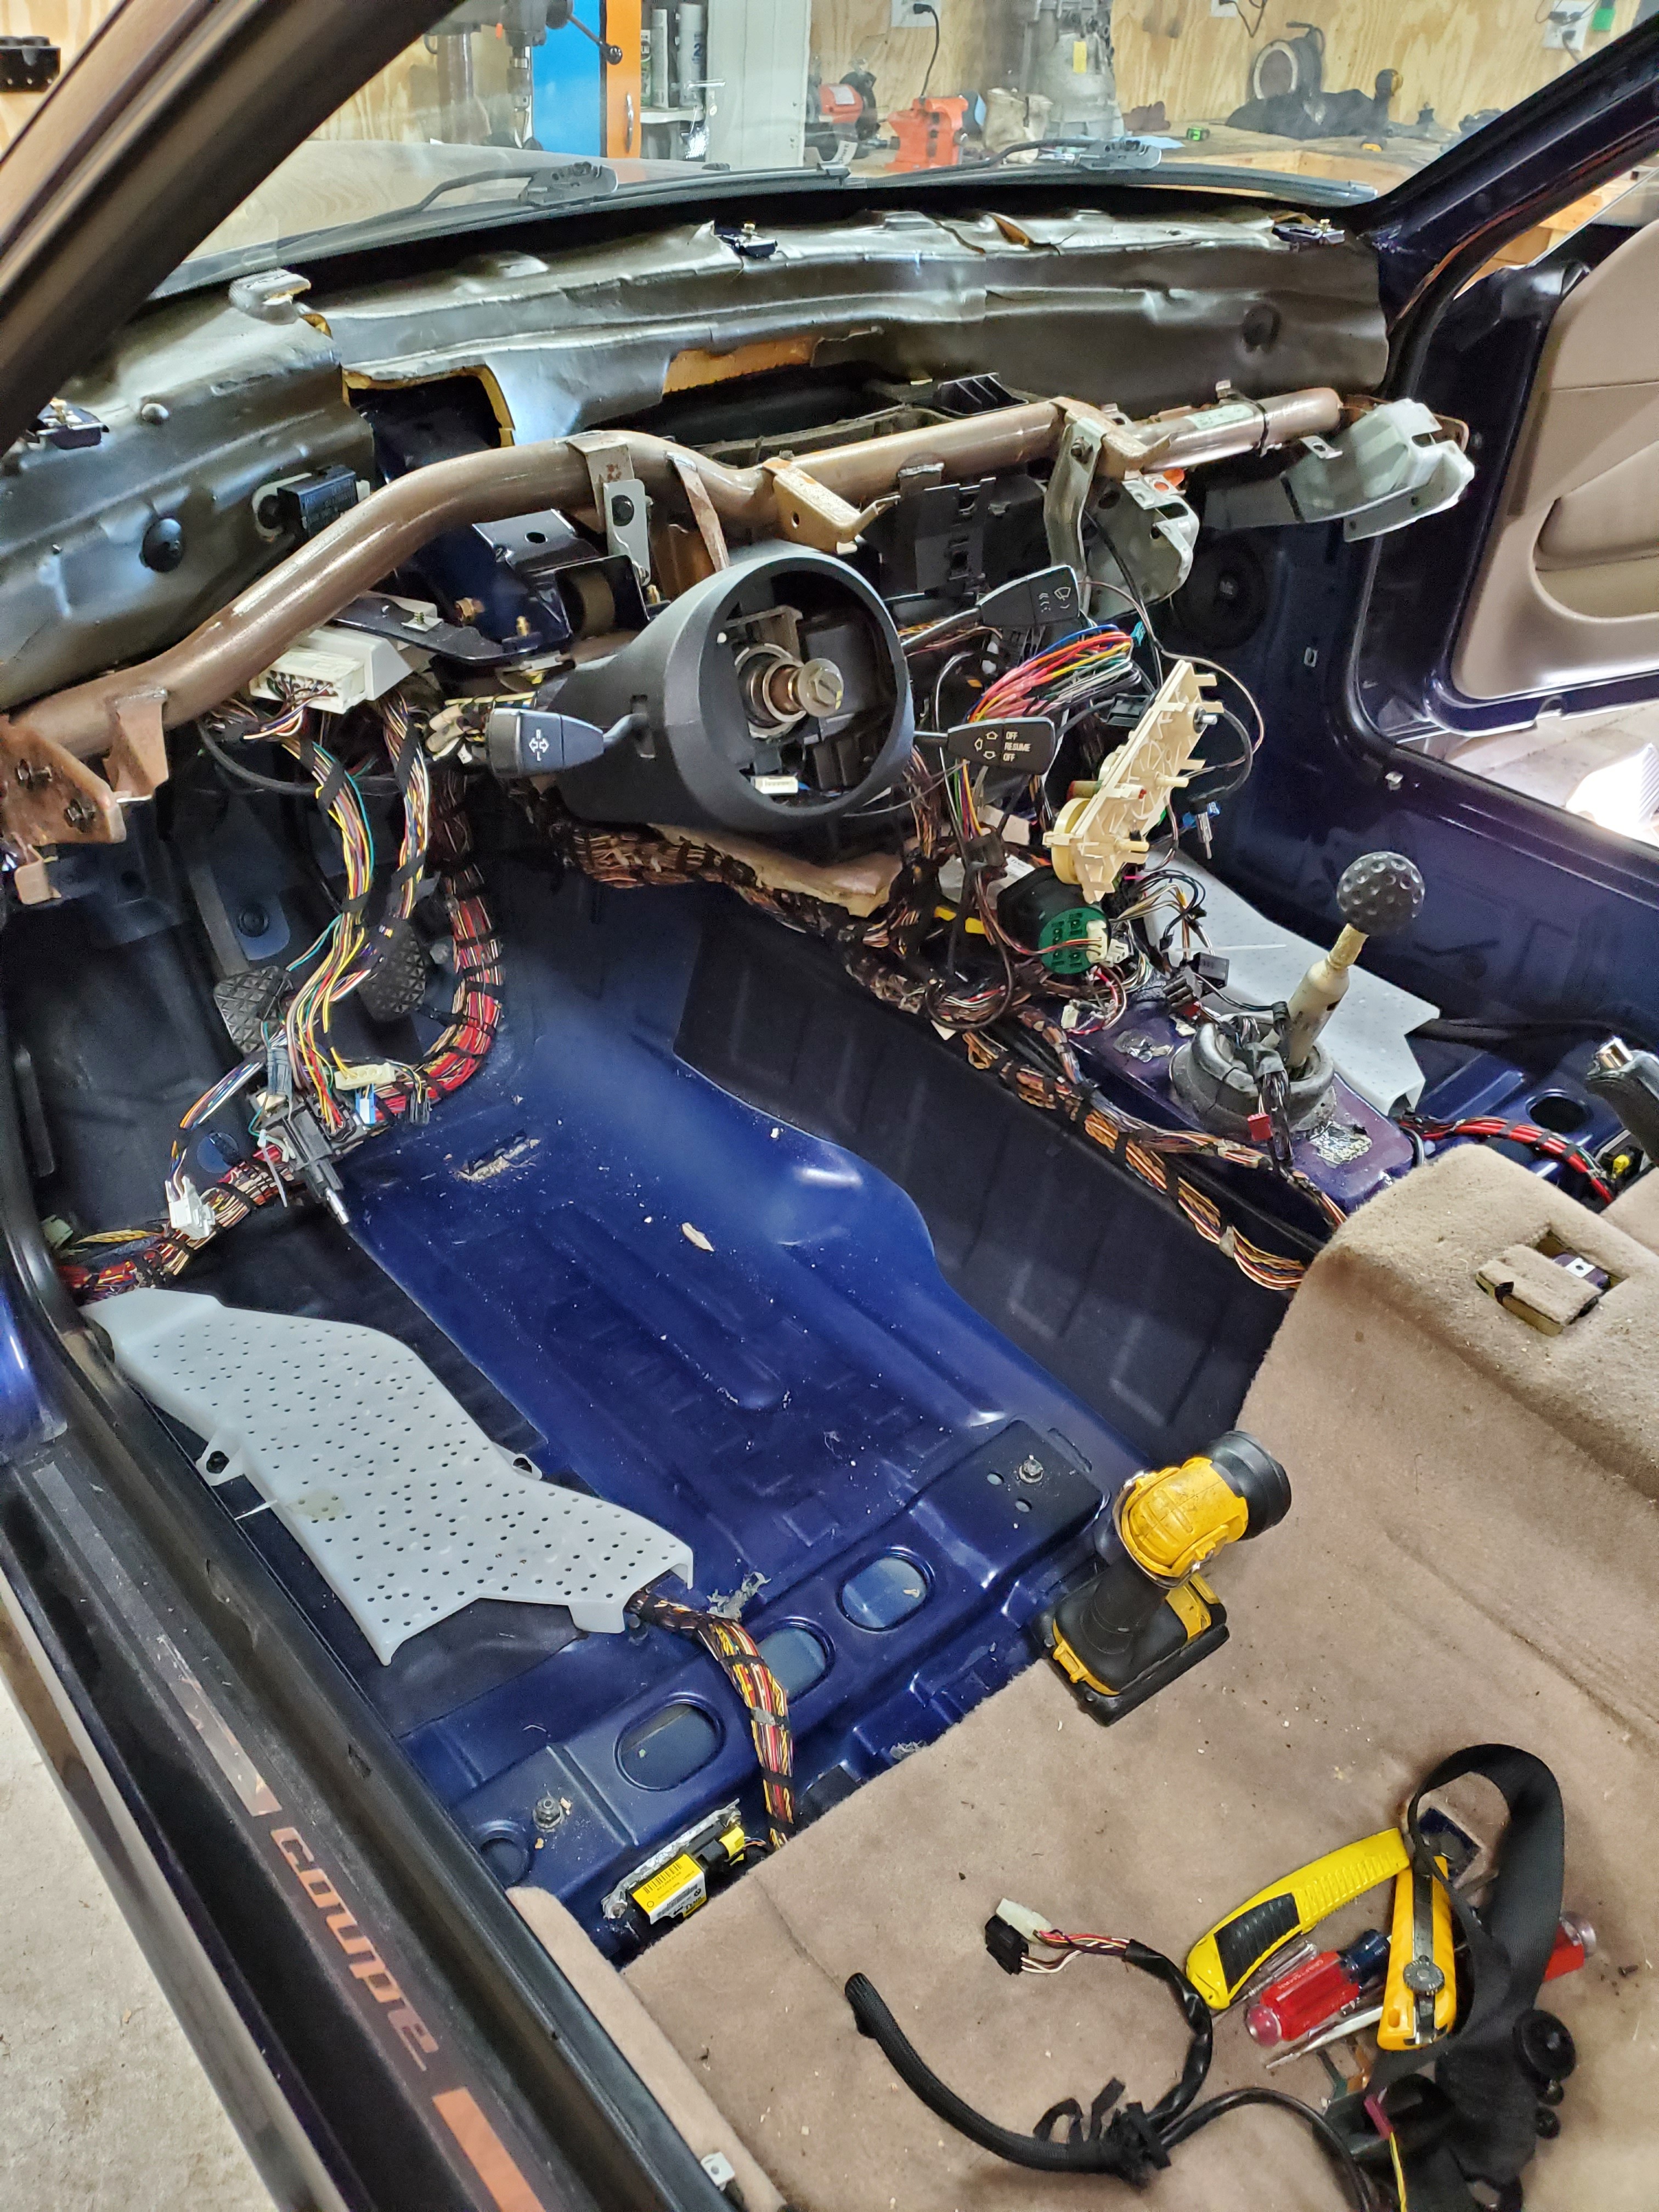
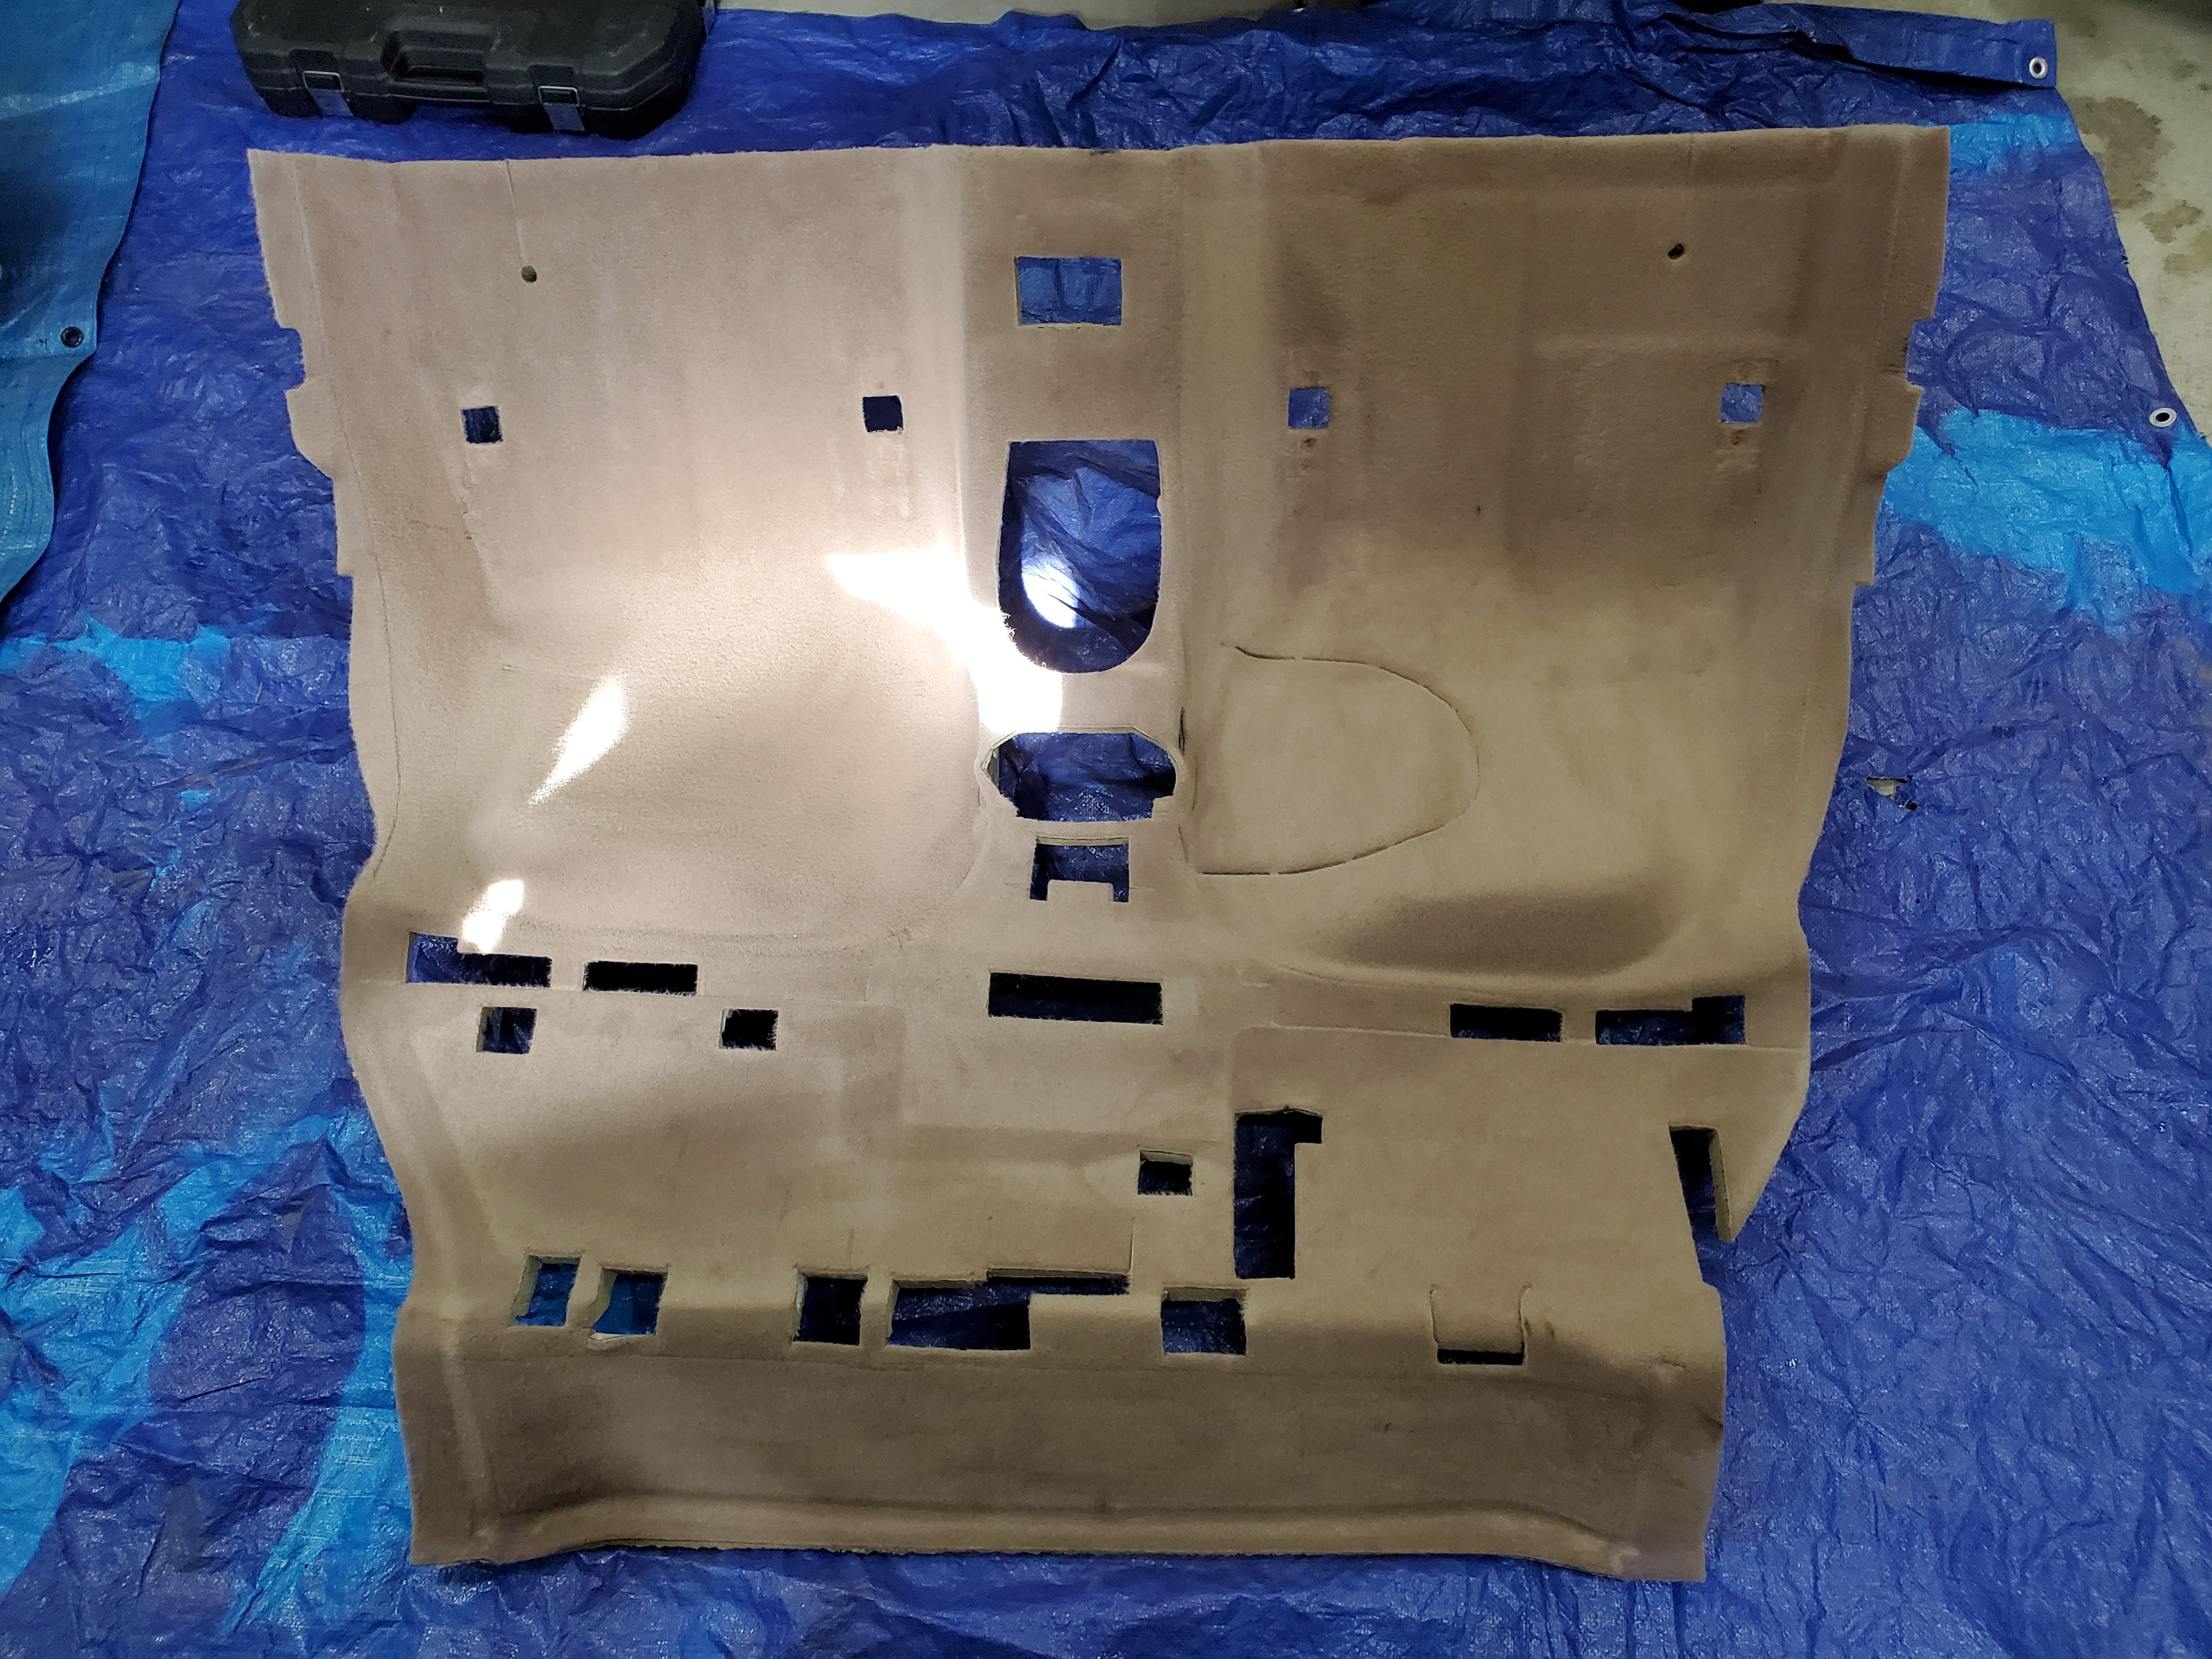
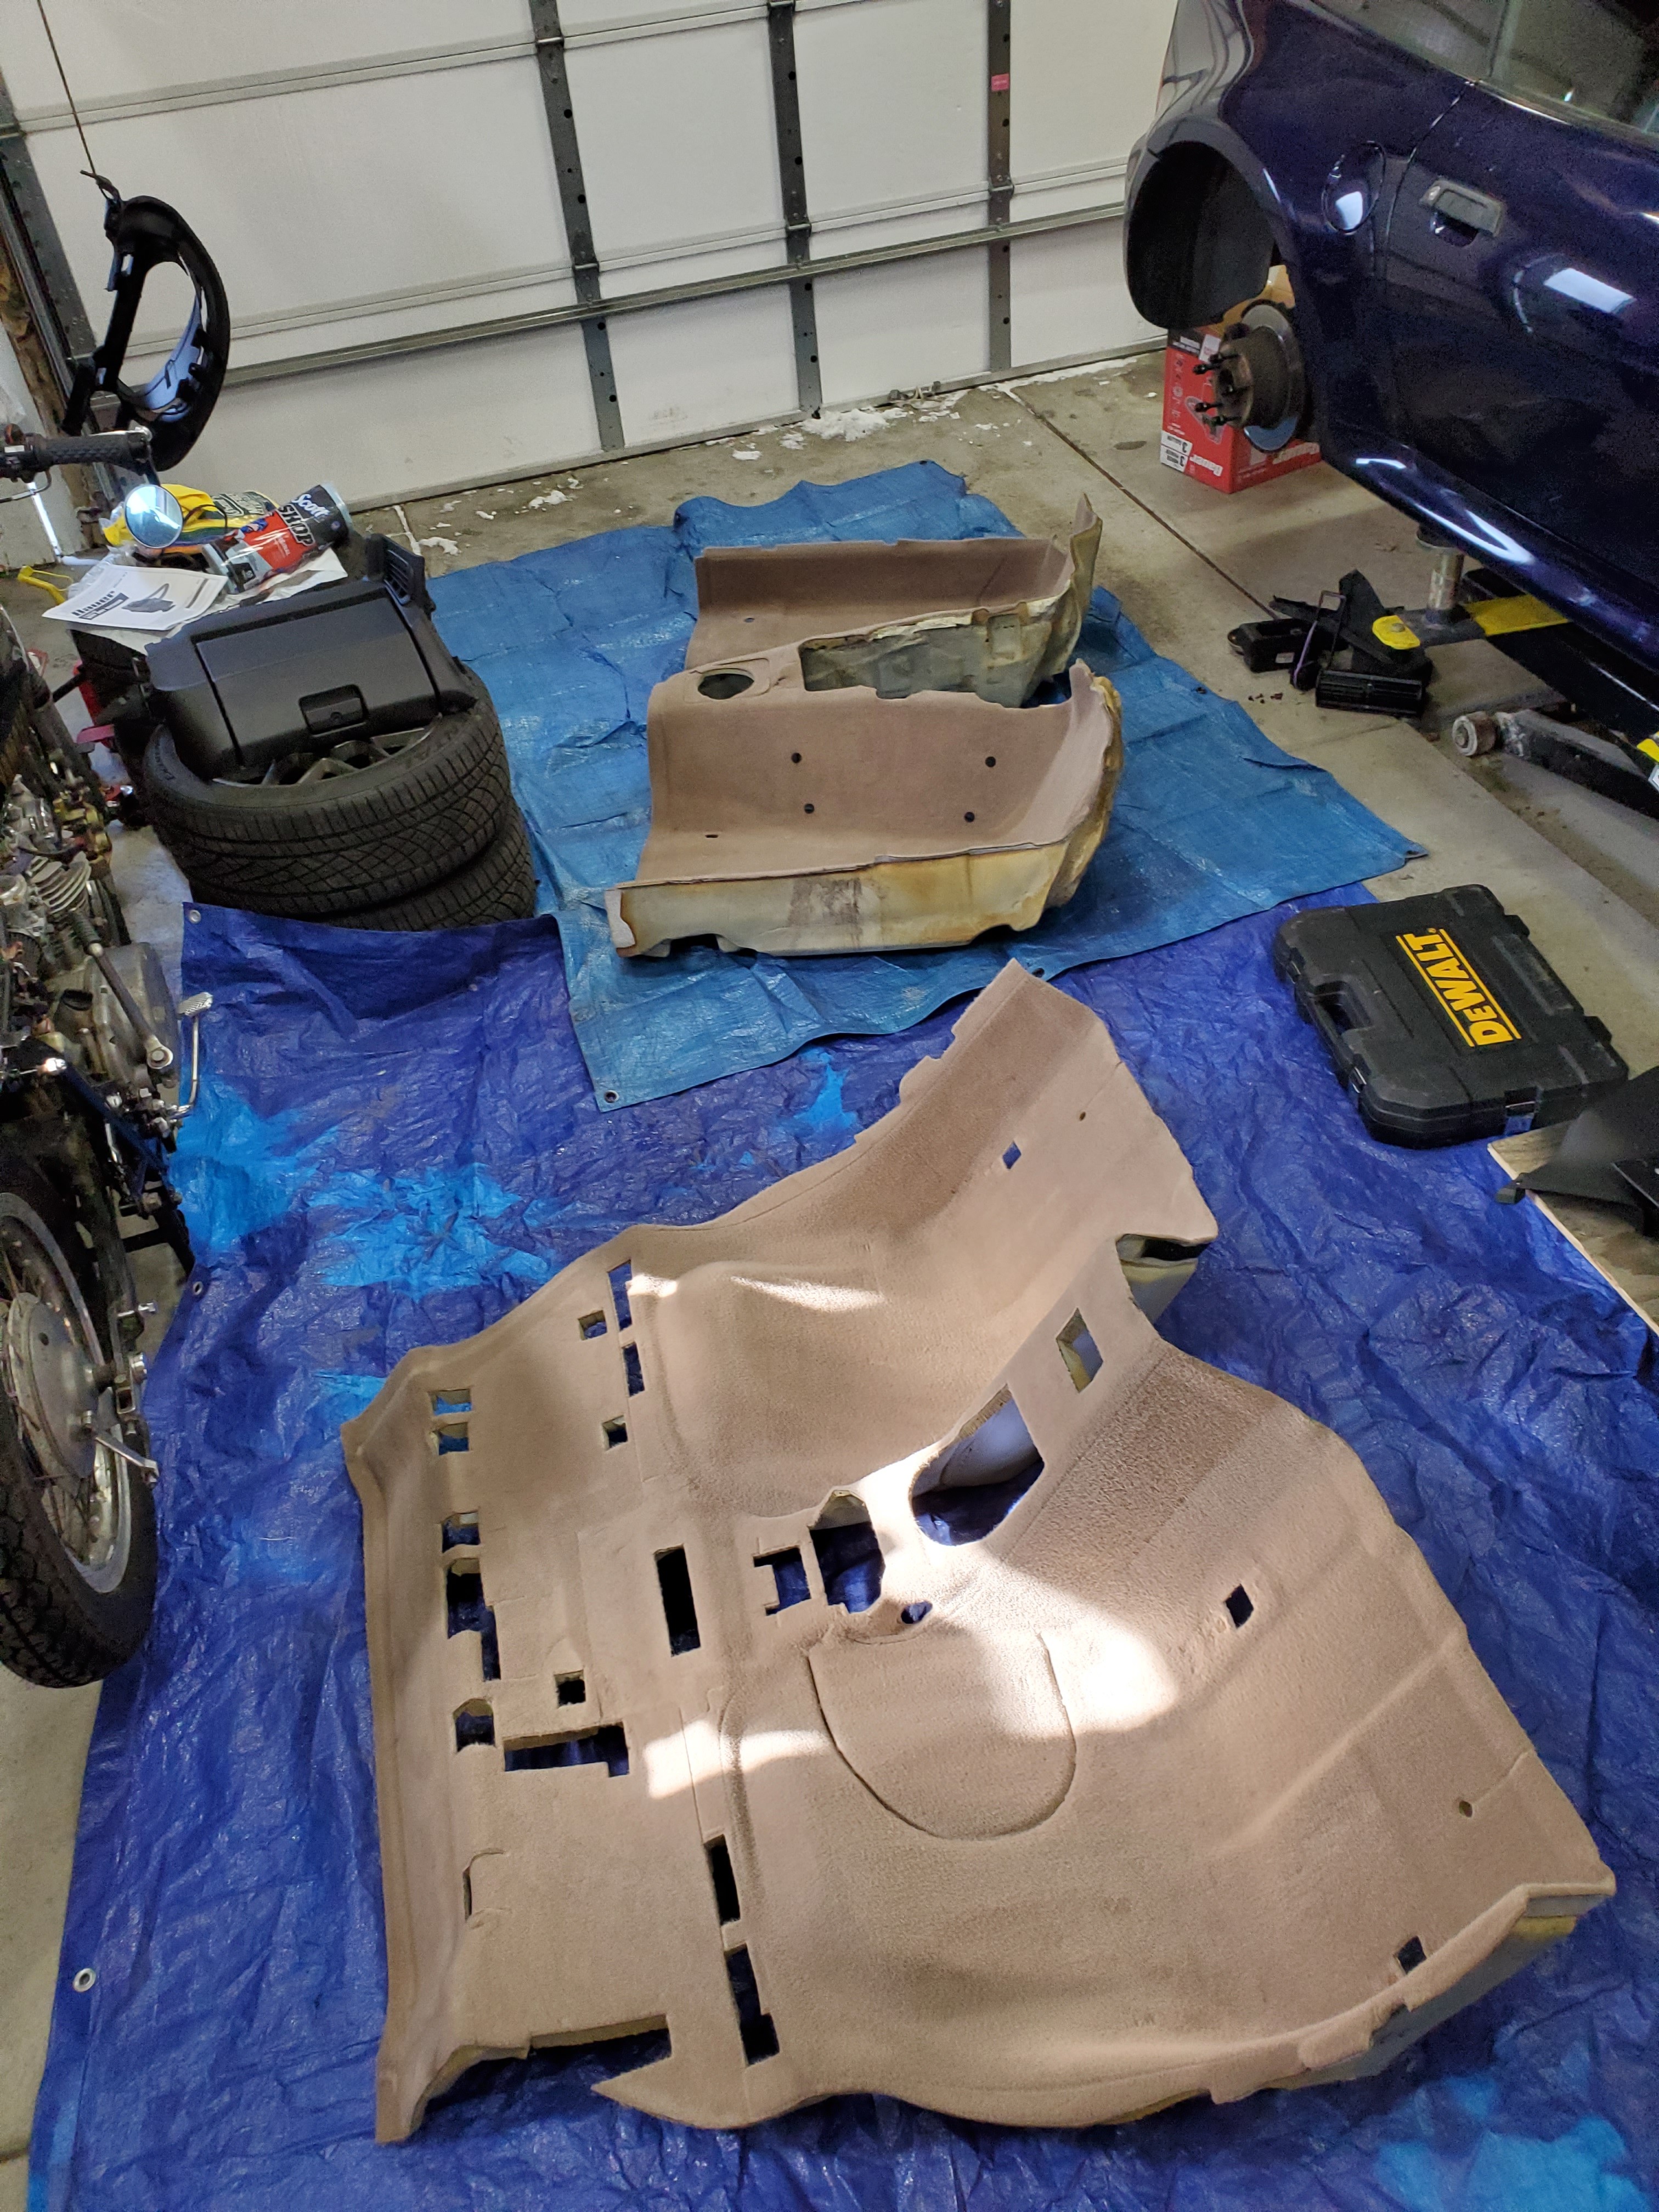
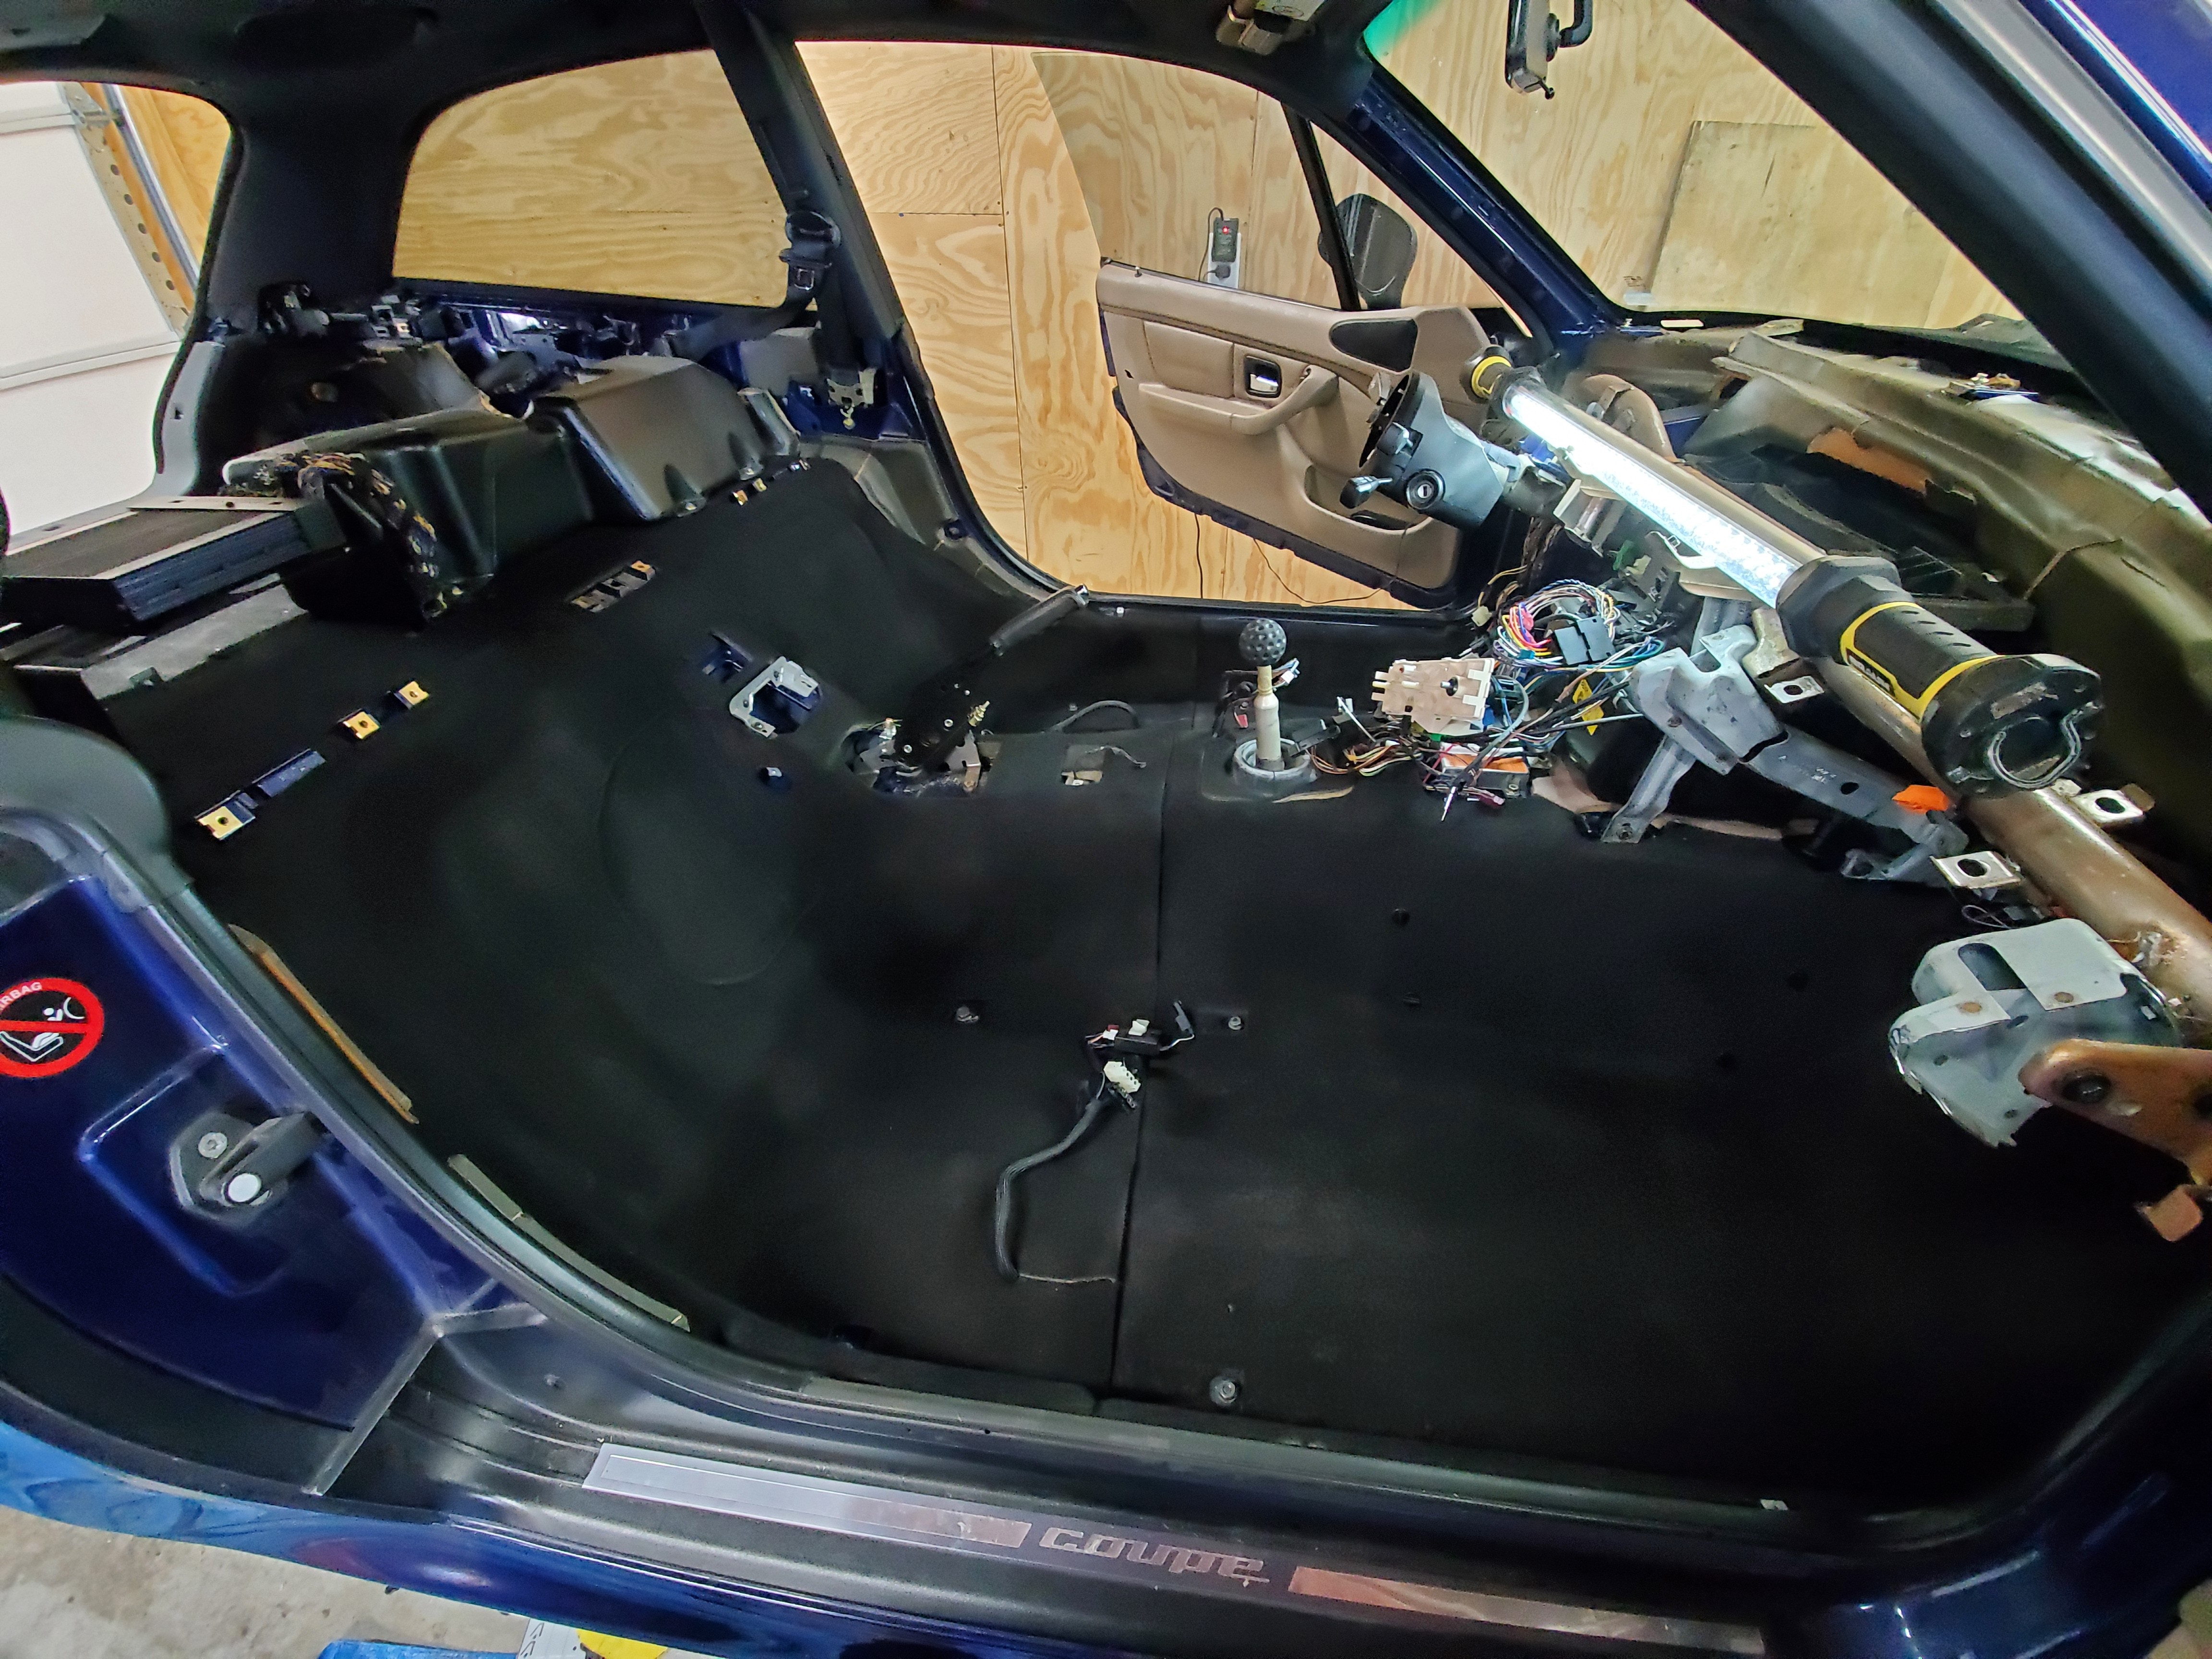
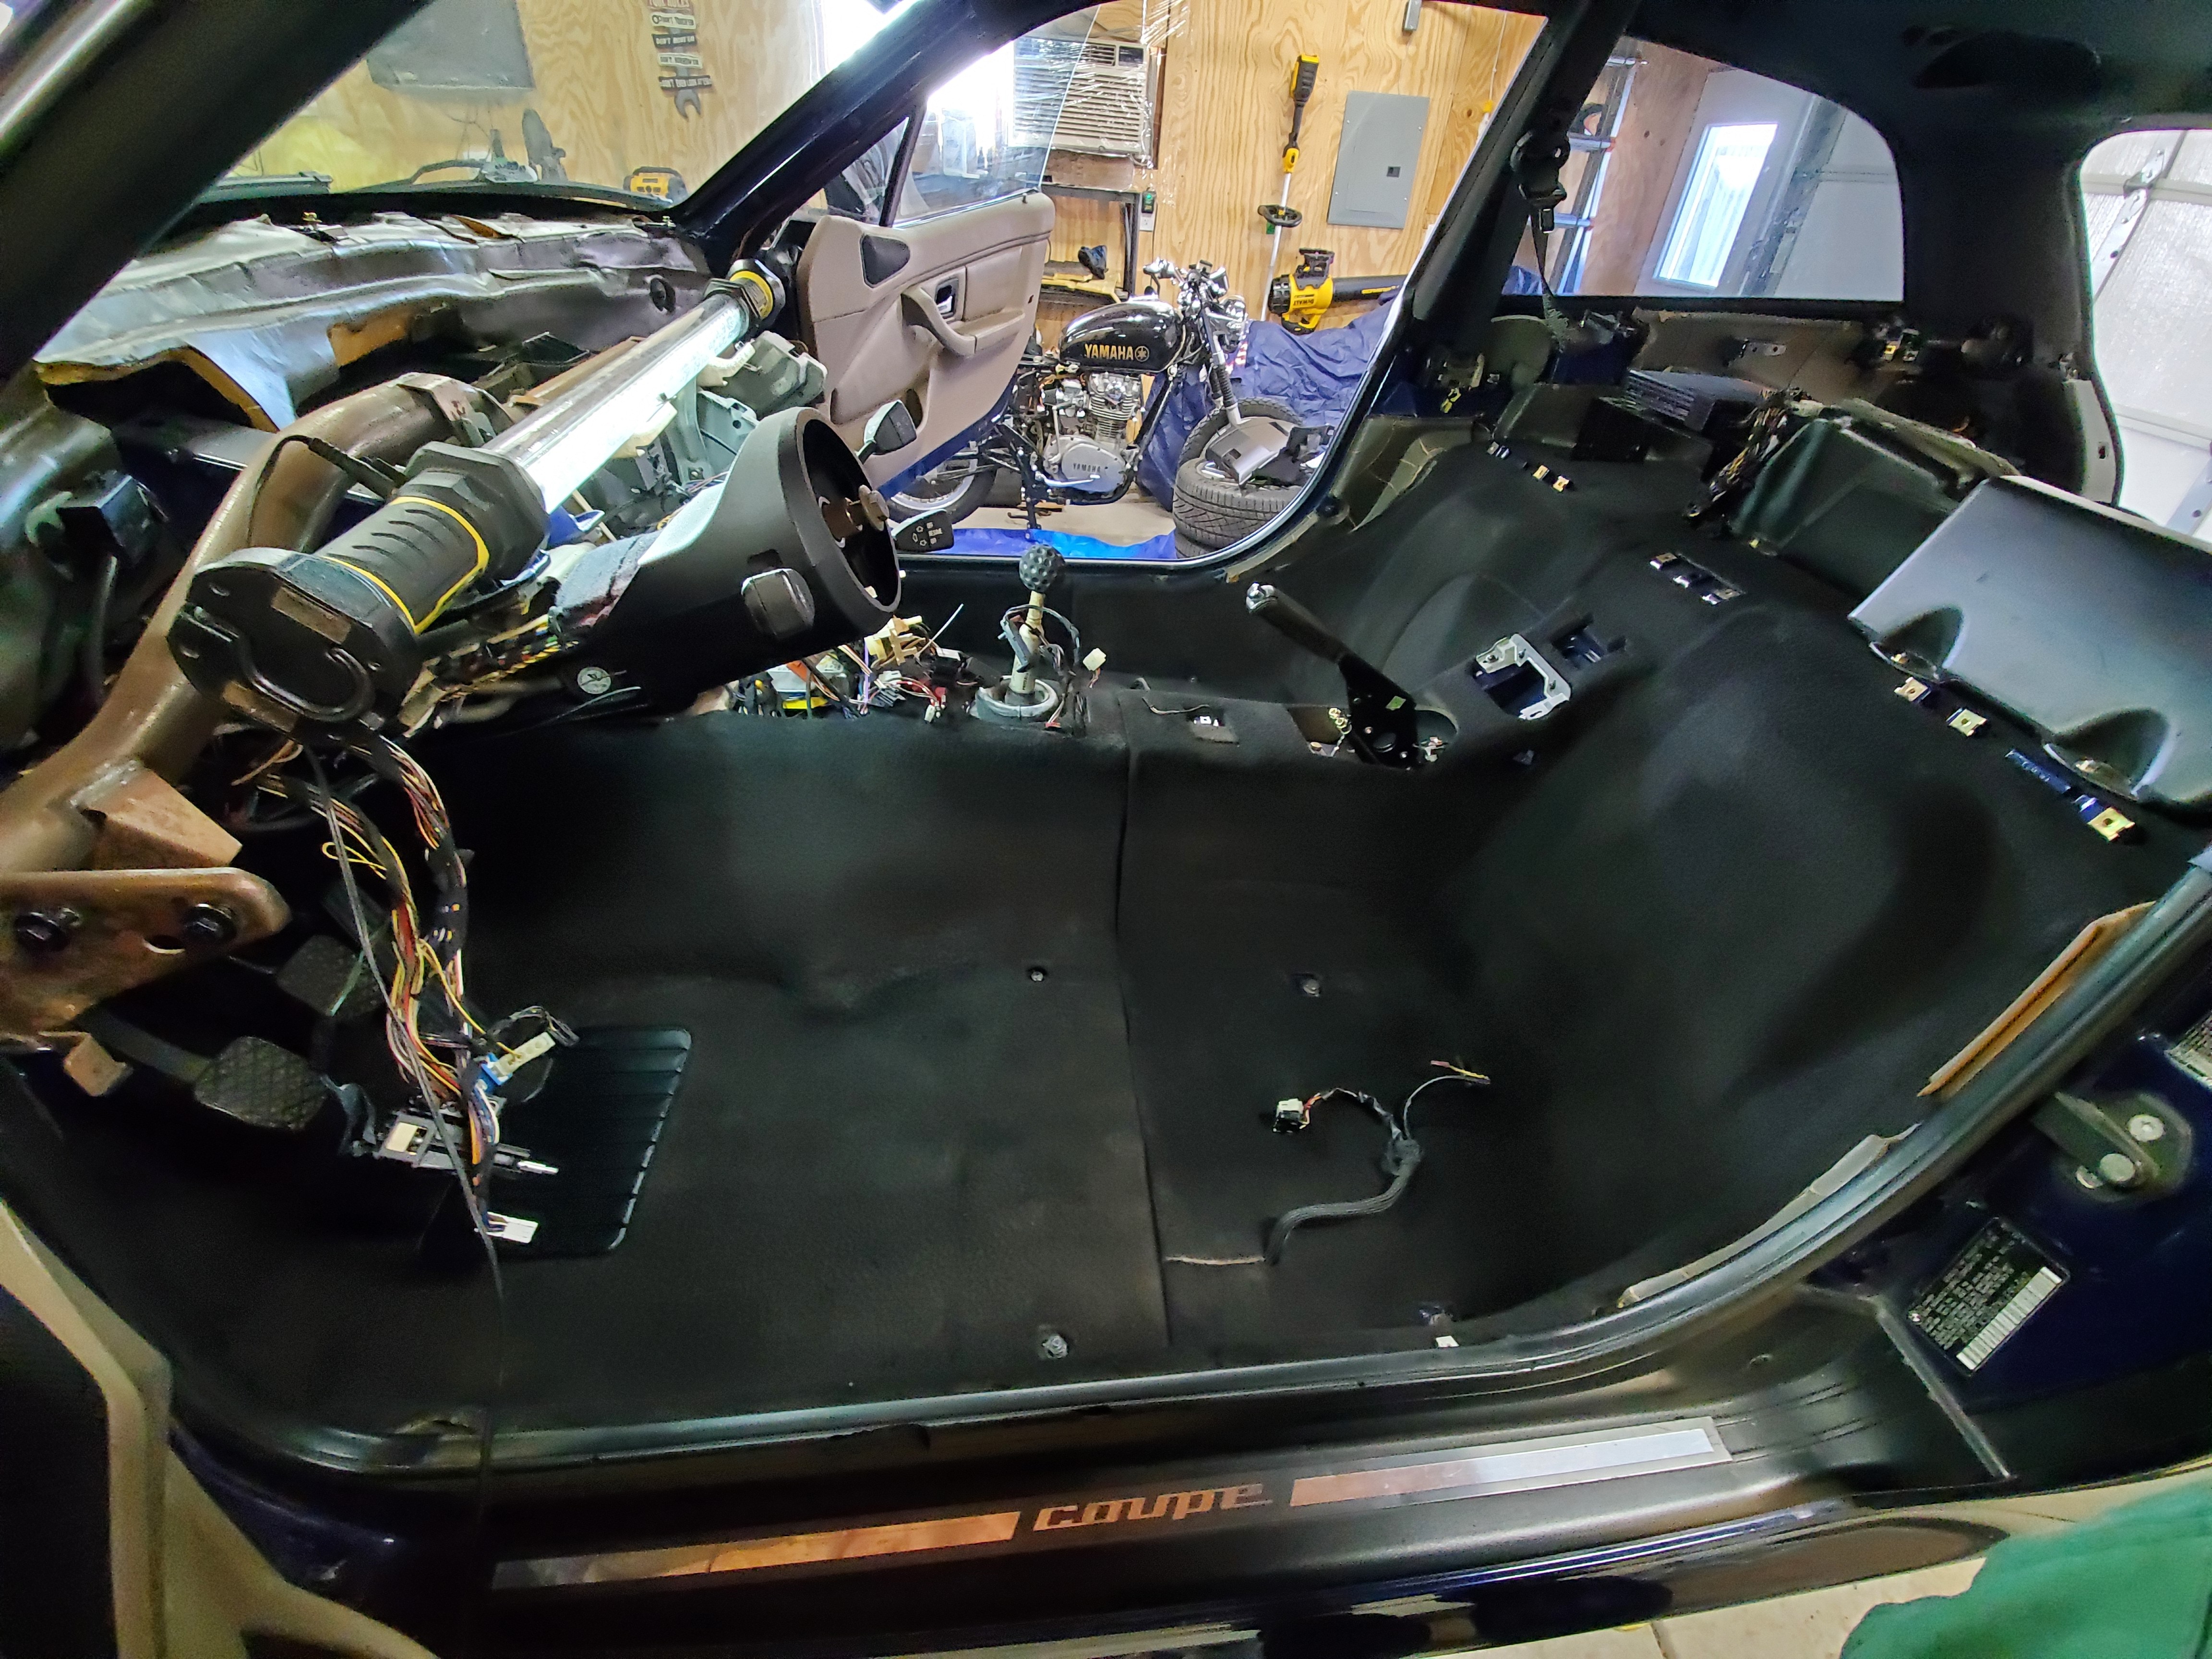
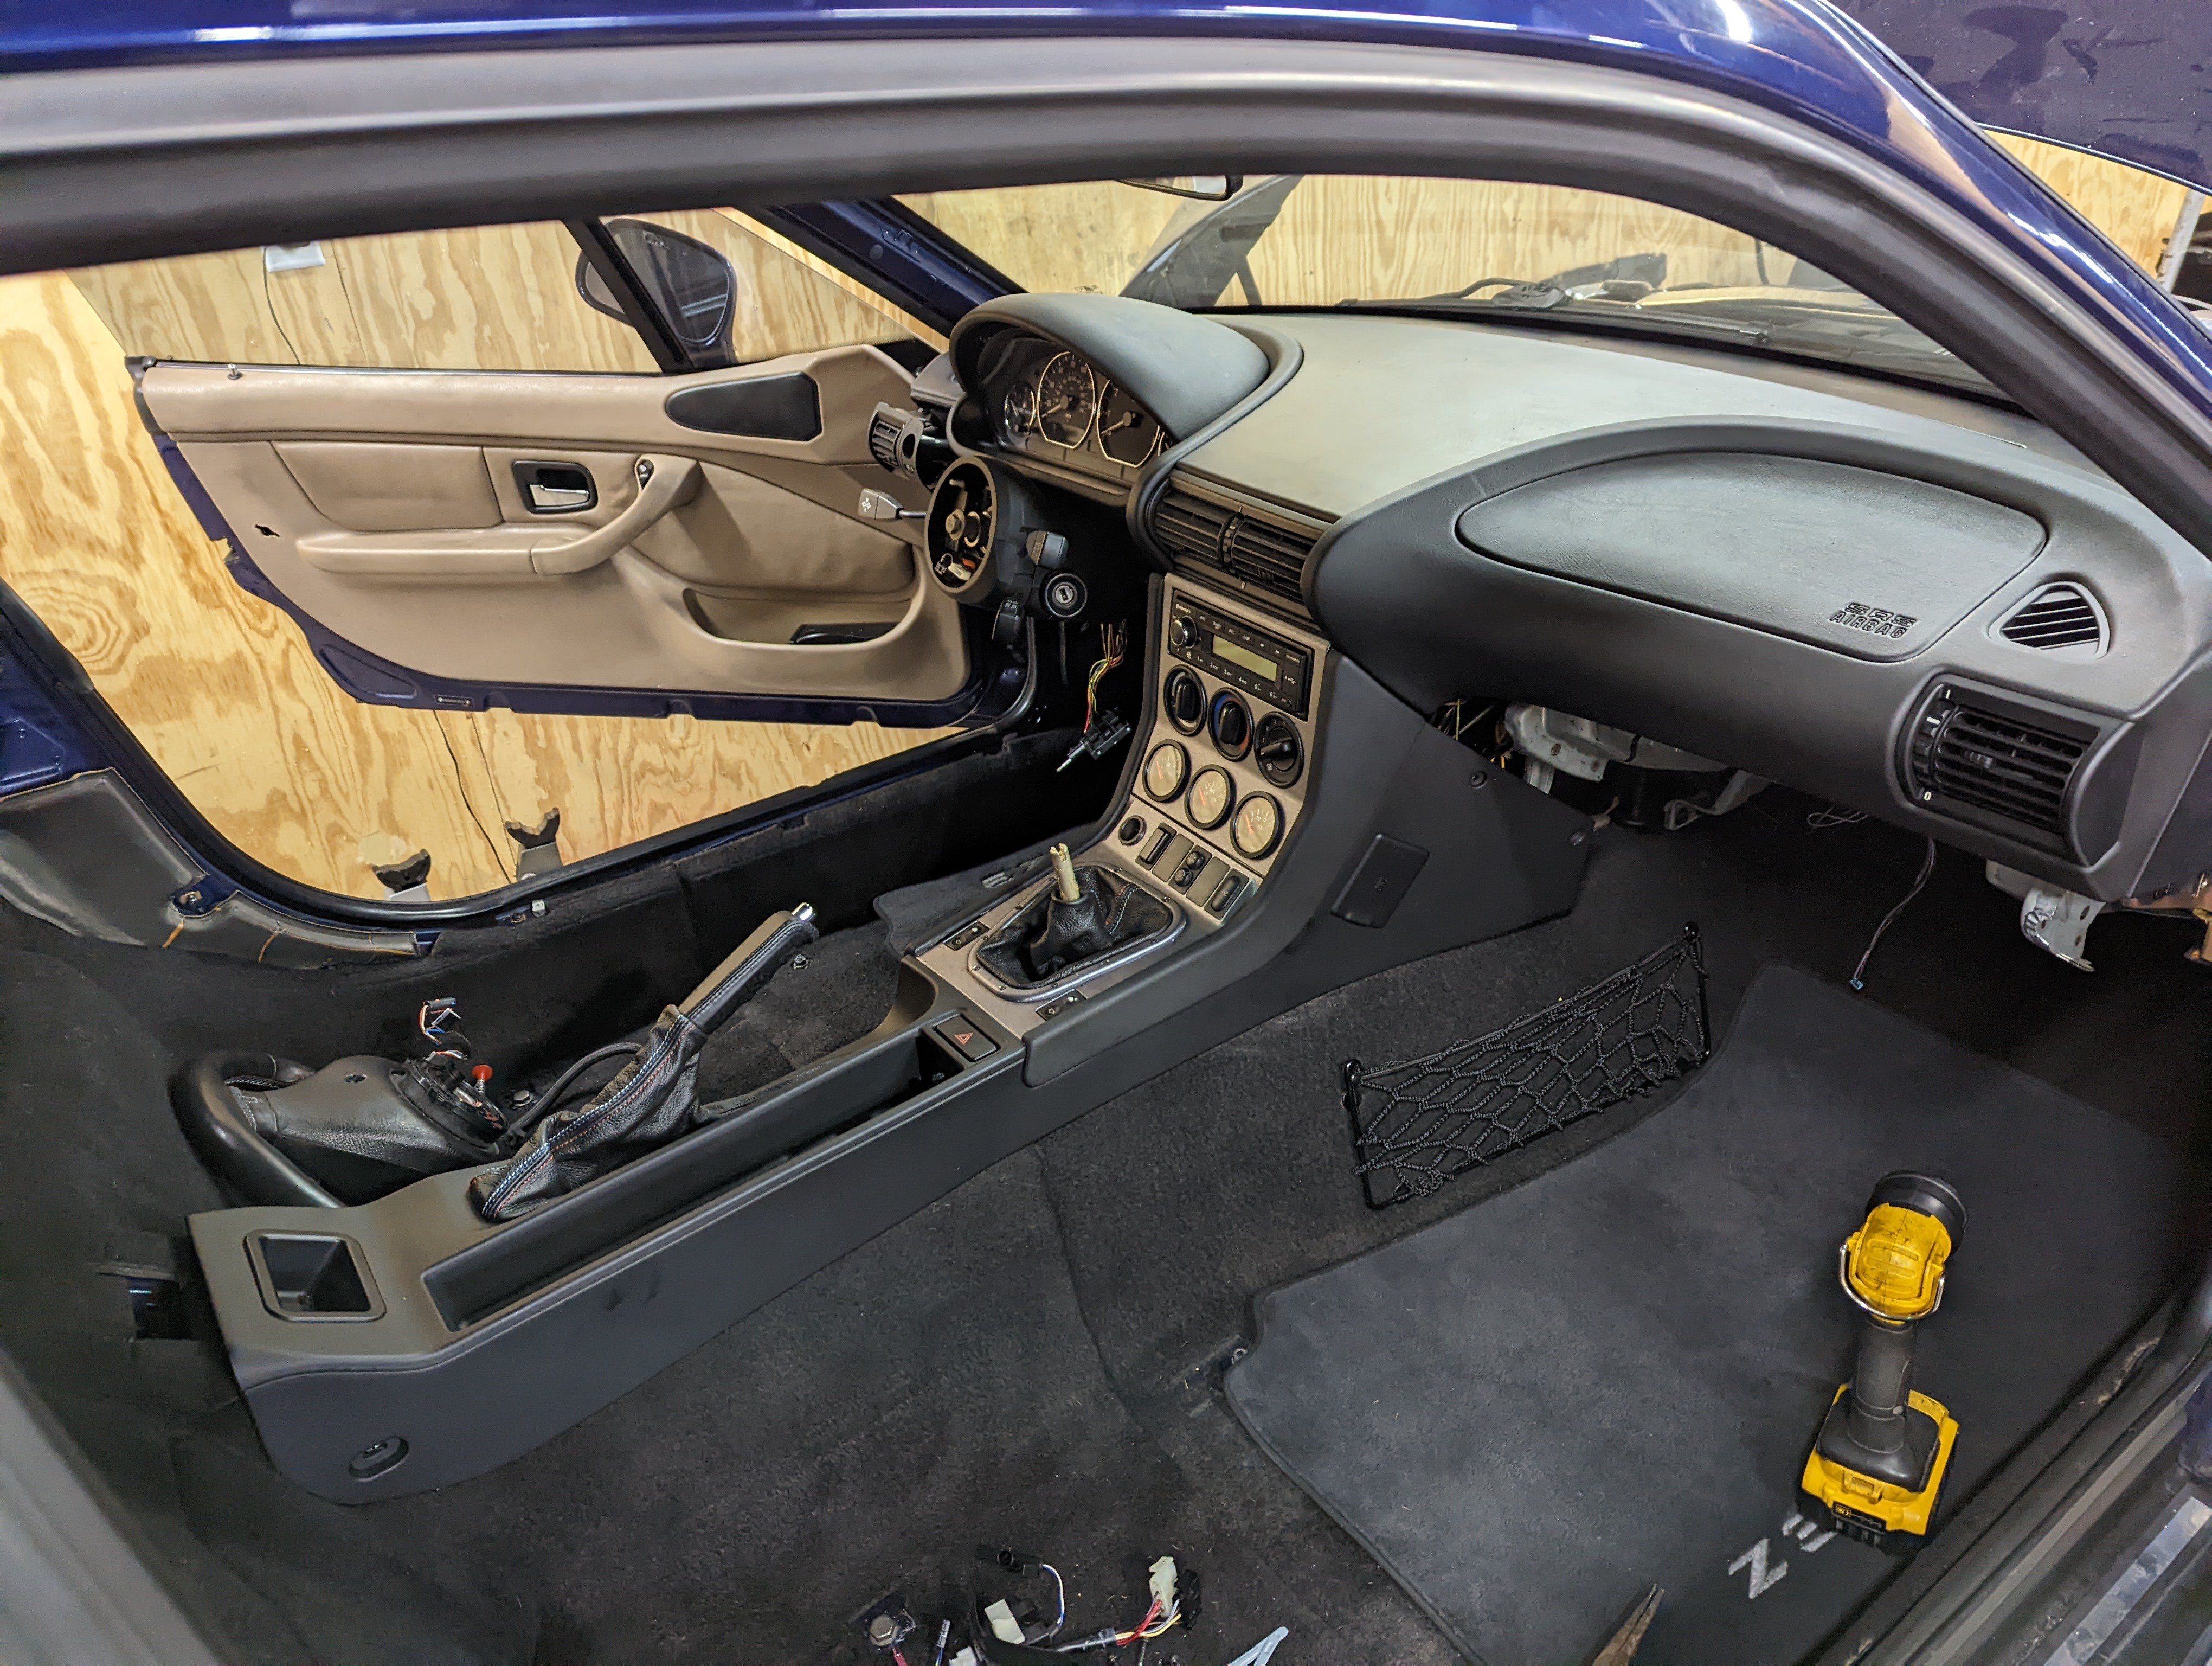
      Really got after it with the warm weather today. Dashboard and front half carpet removed. Dashboard was fairly straight forward and simple. The carpet removal would not have been purist approved. Had to cut it back behind center console otherwise the heater core and many other things would have to have been removed in order to get carpet out whole. Wasn't going to get that involved. Plus where I cut will never be seen when new carpet goes in. 
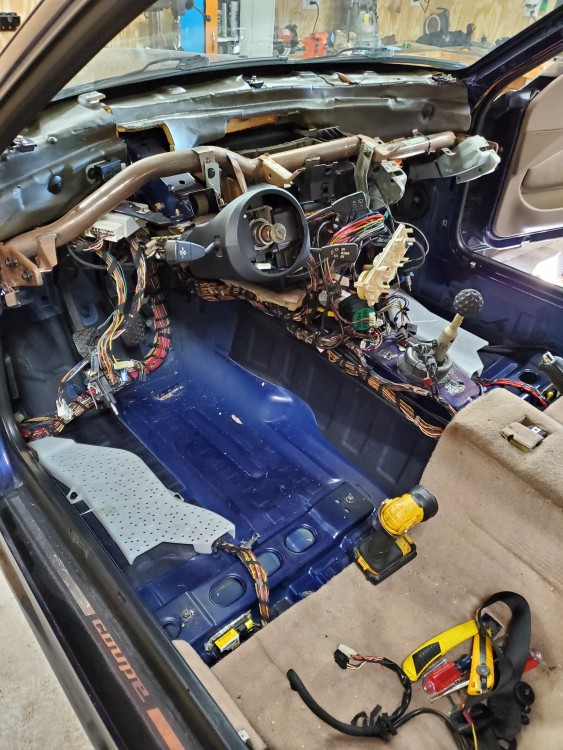
      20220220121148.jpg

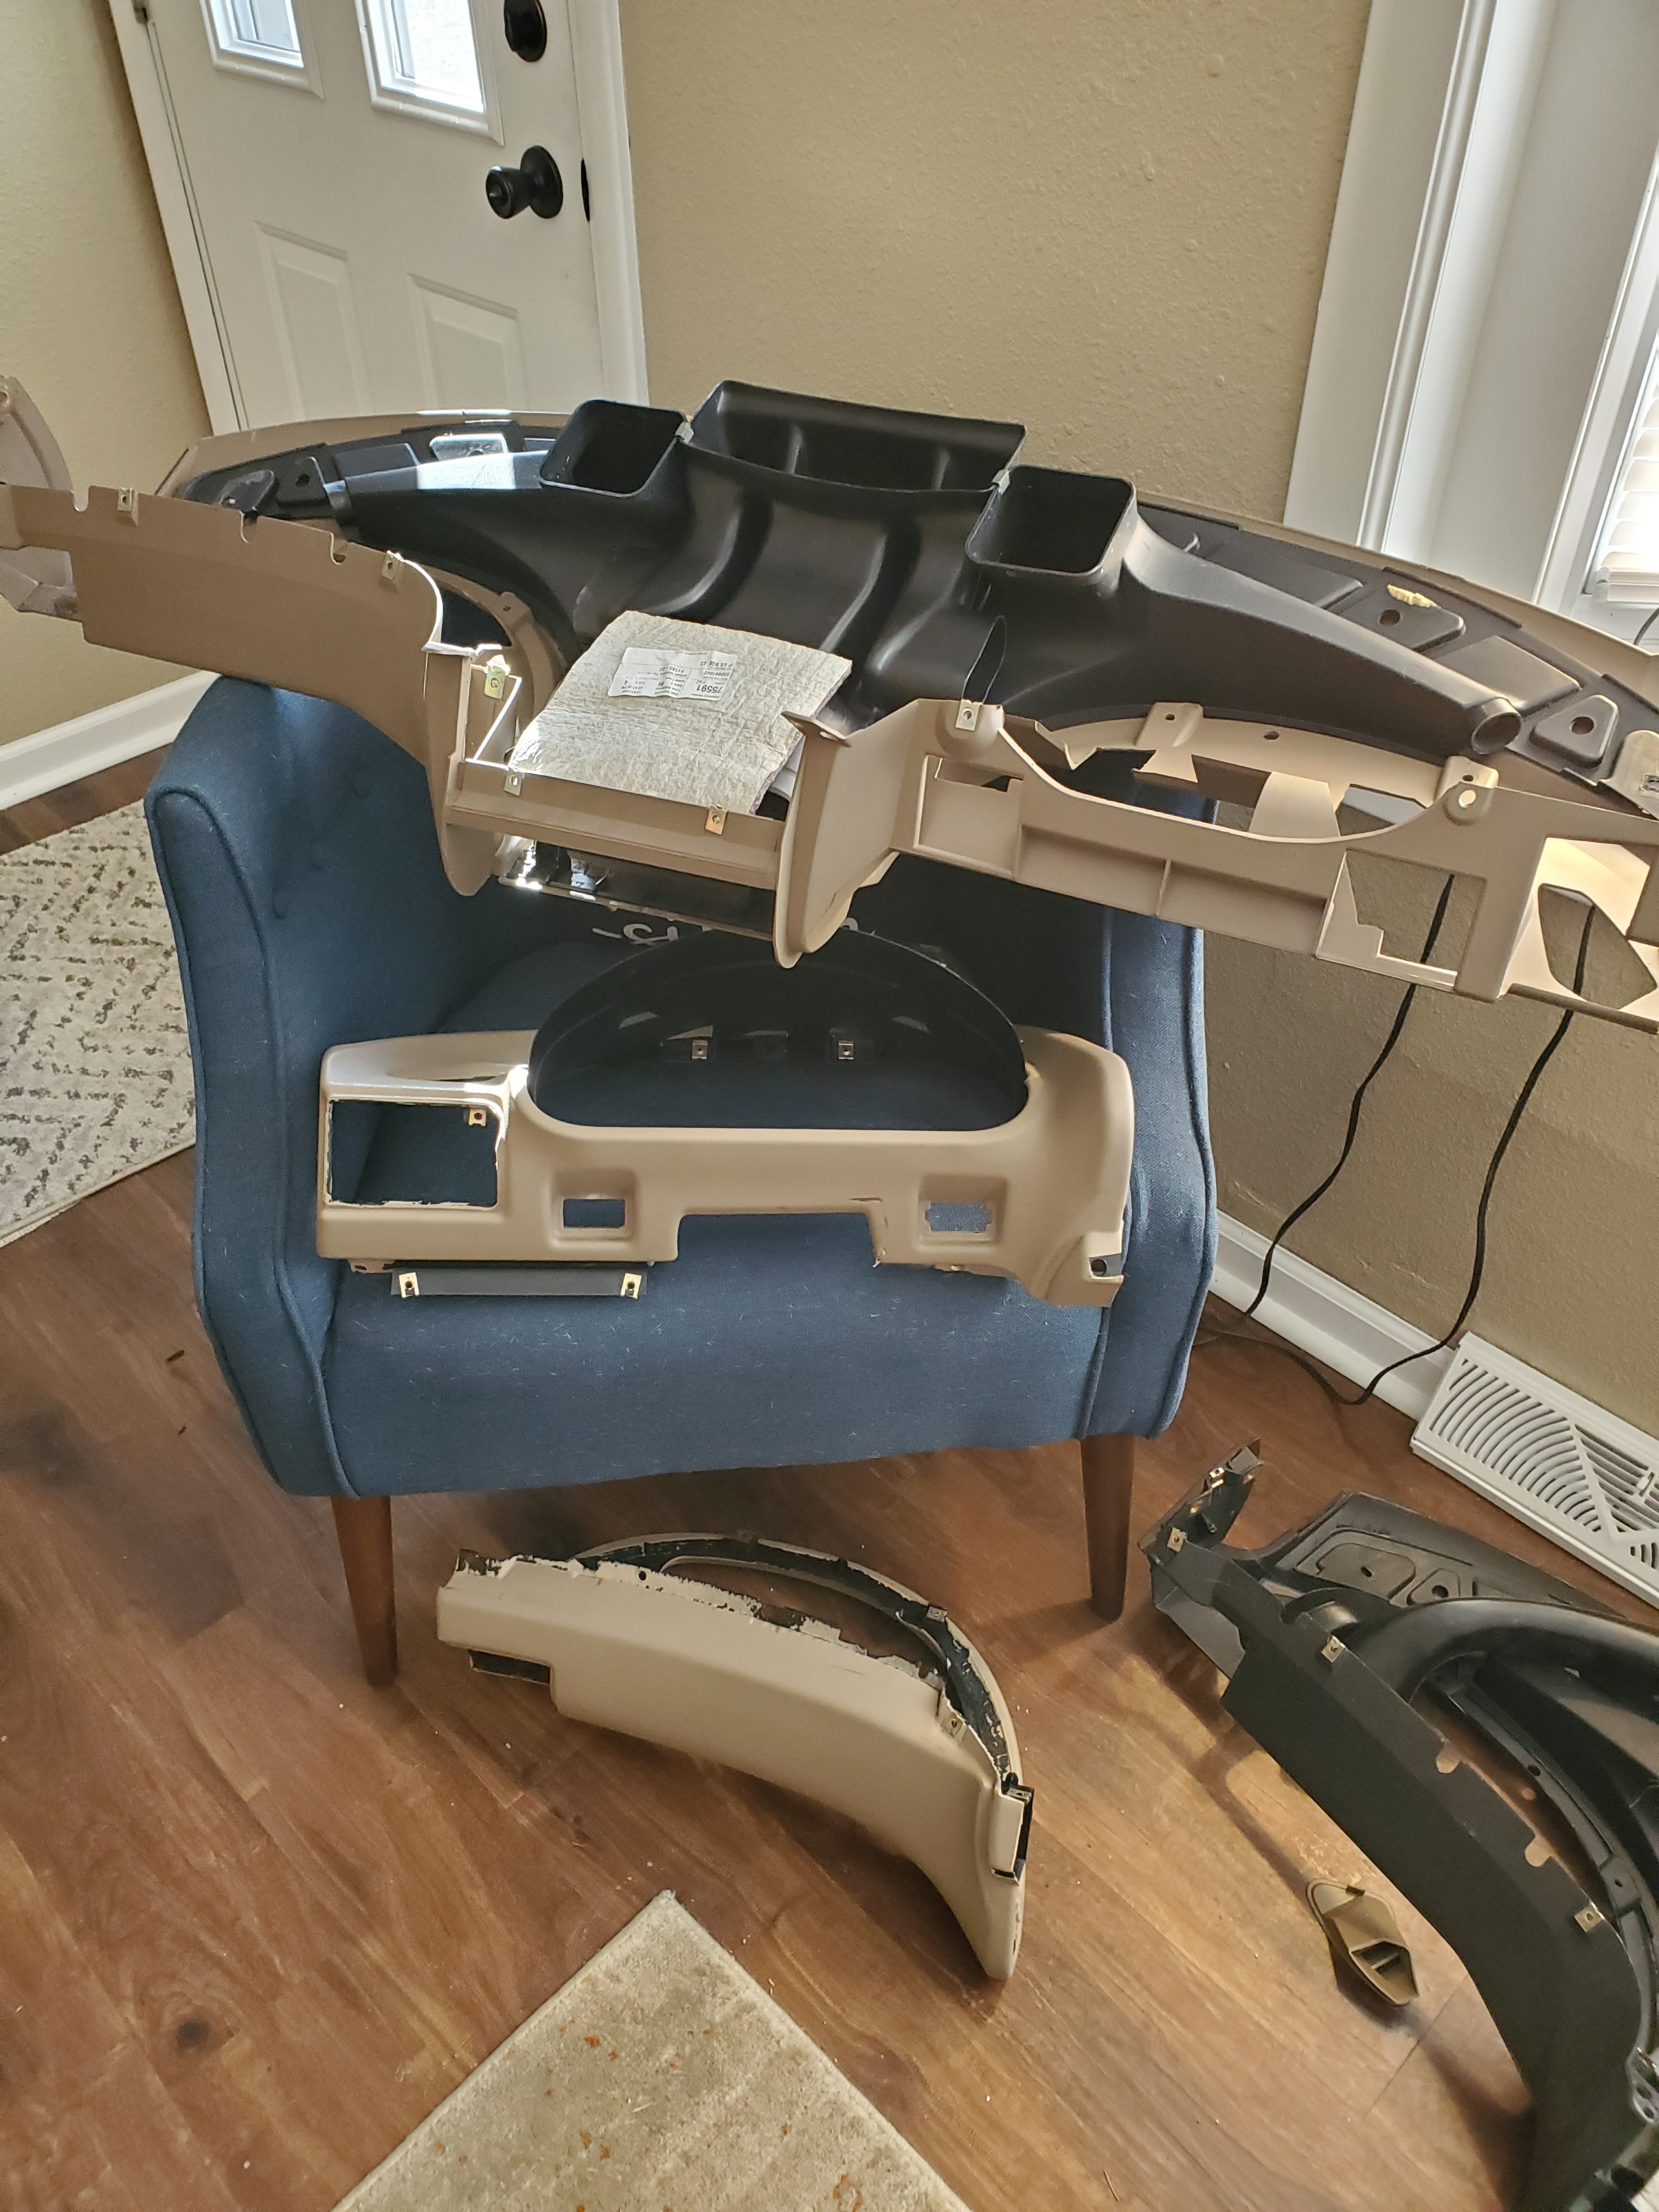
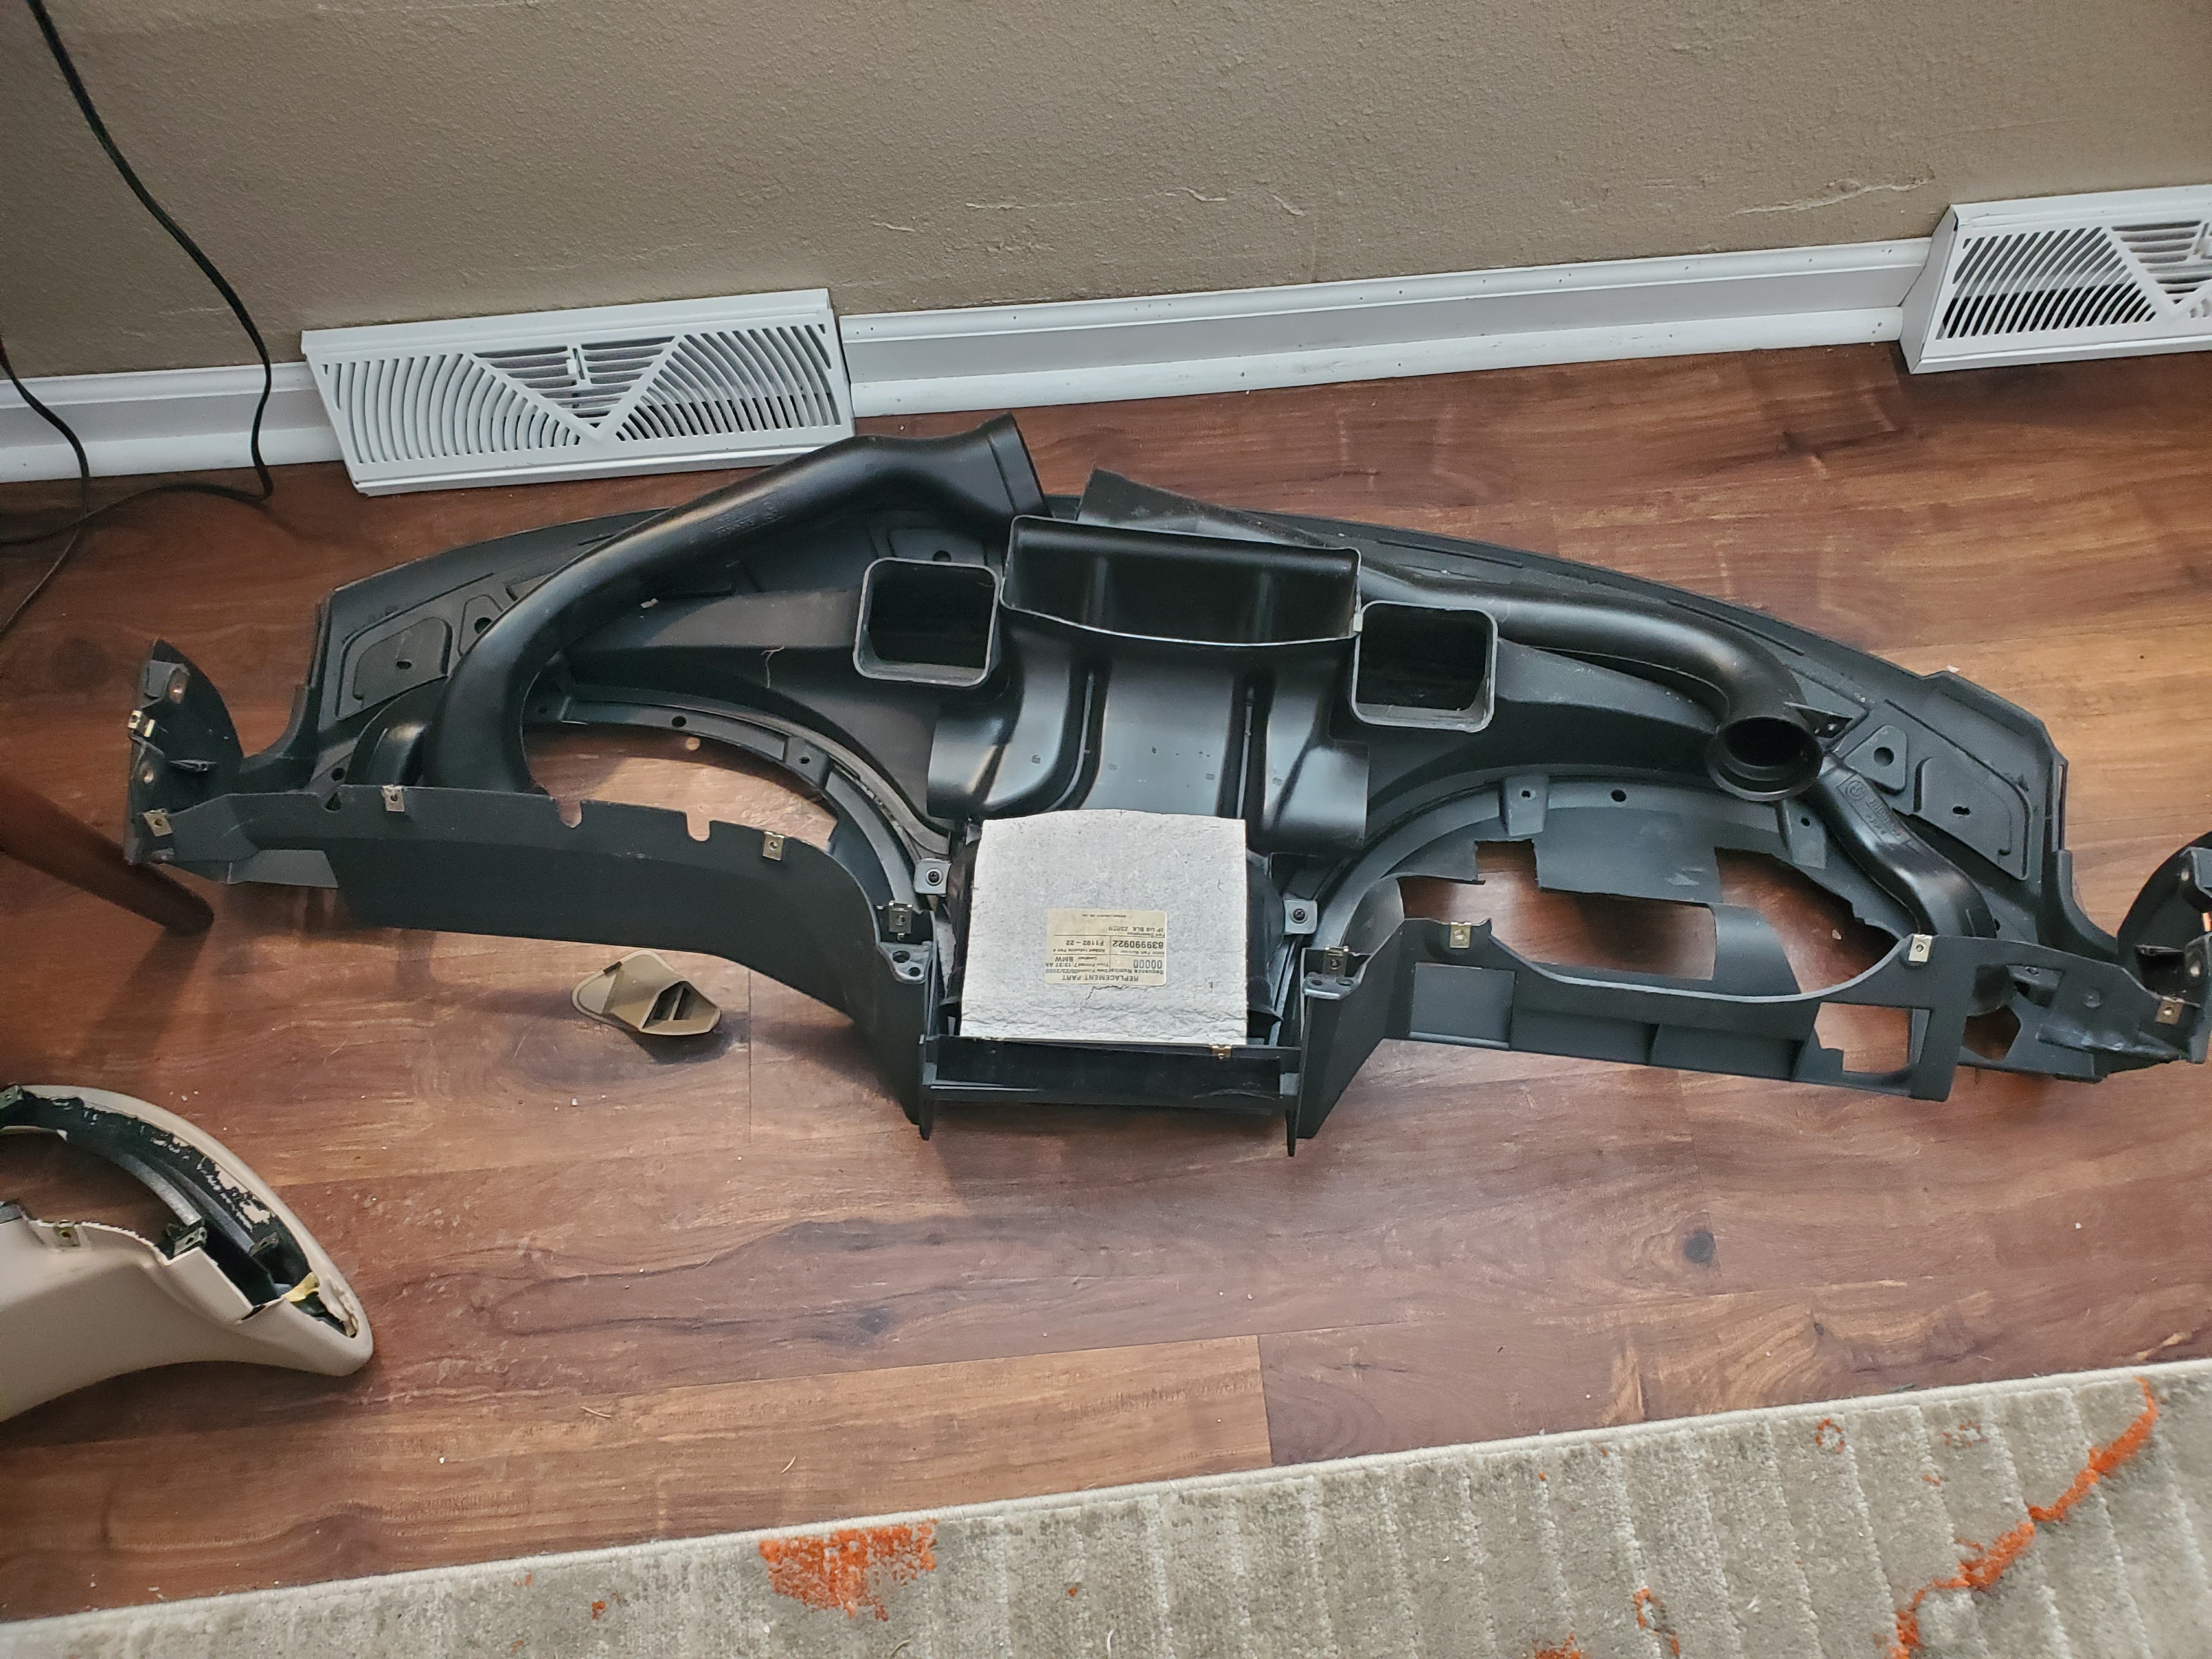
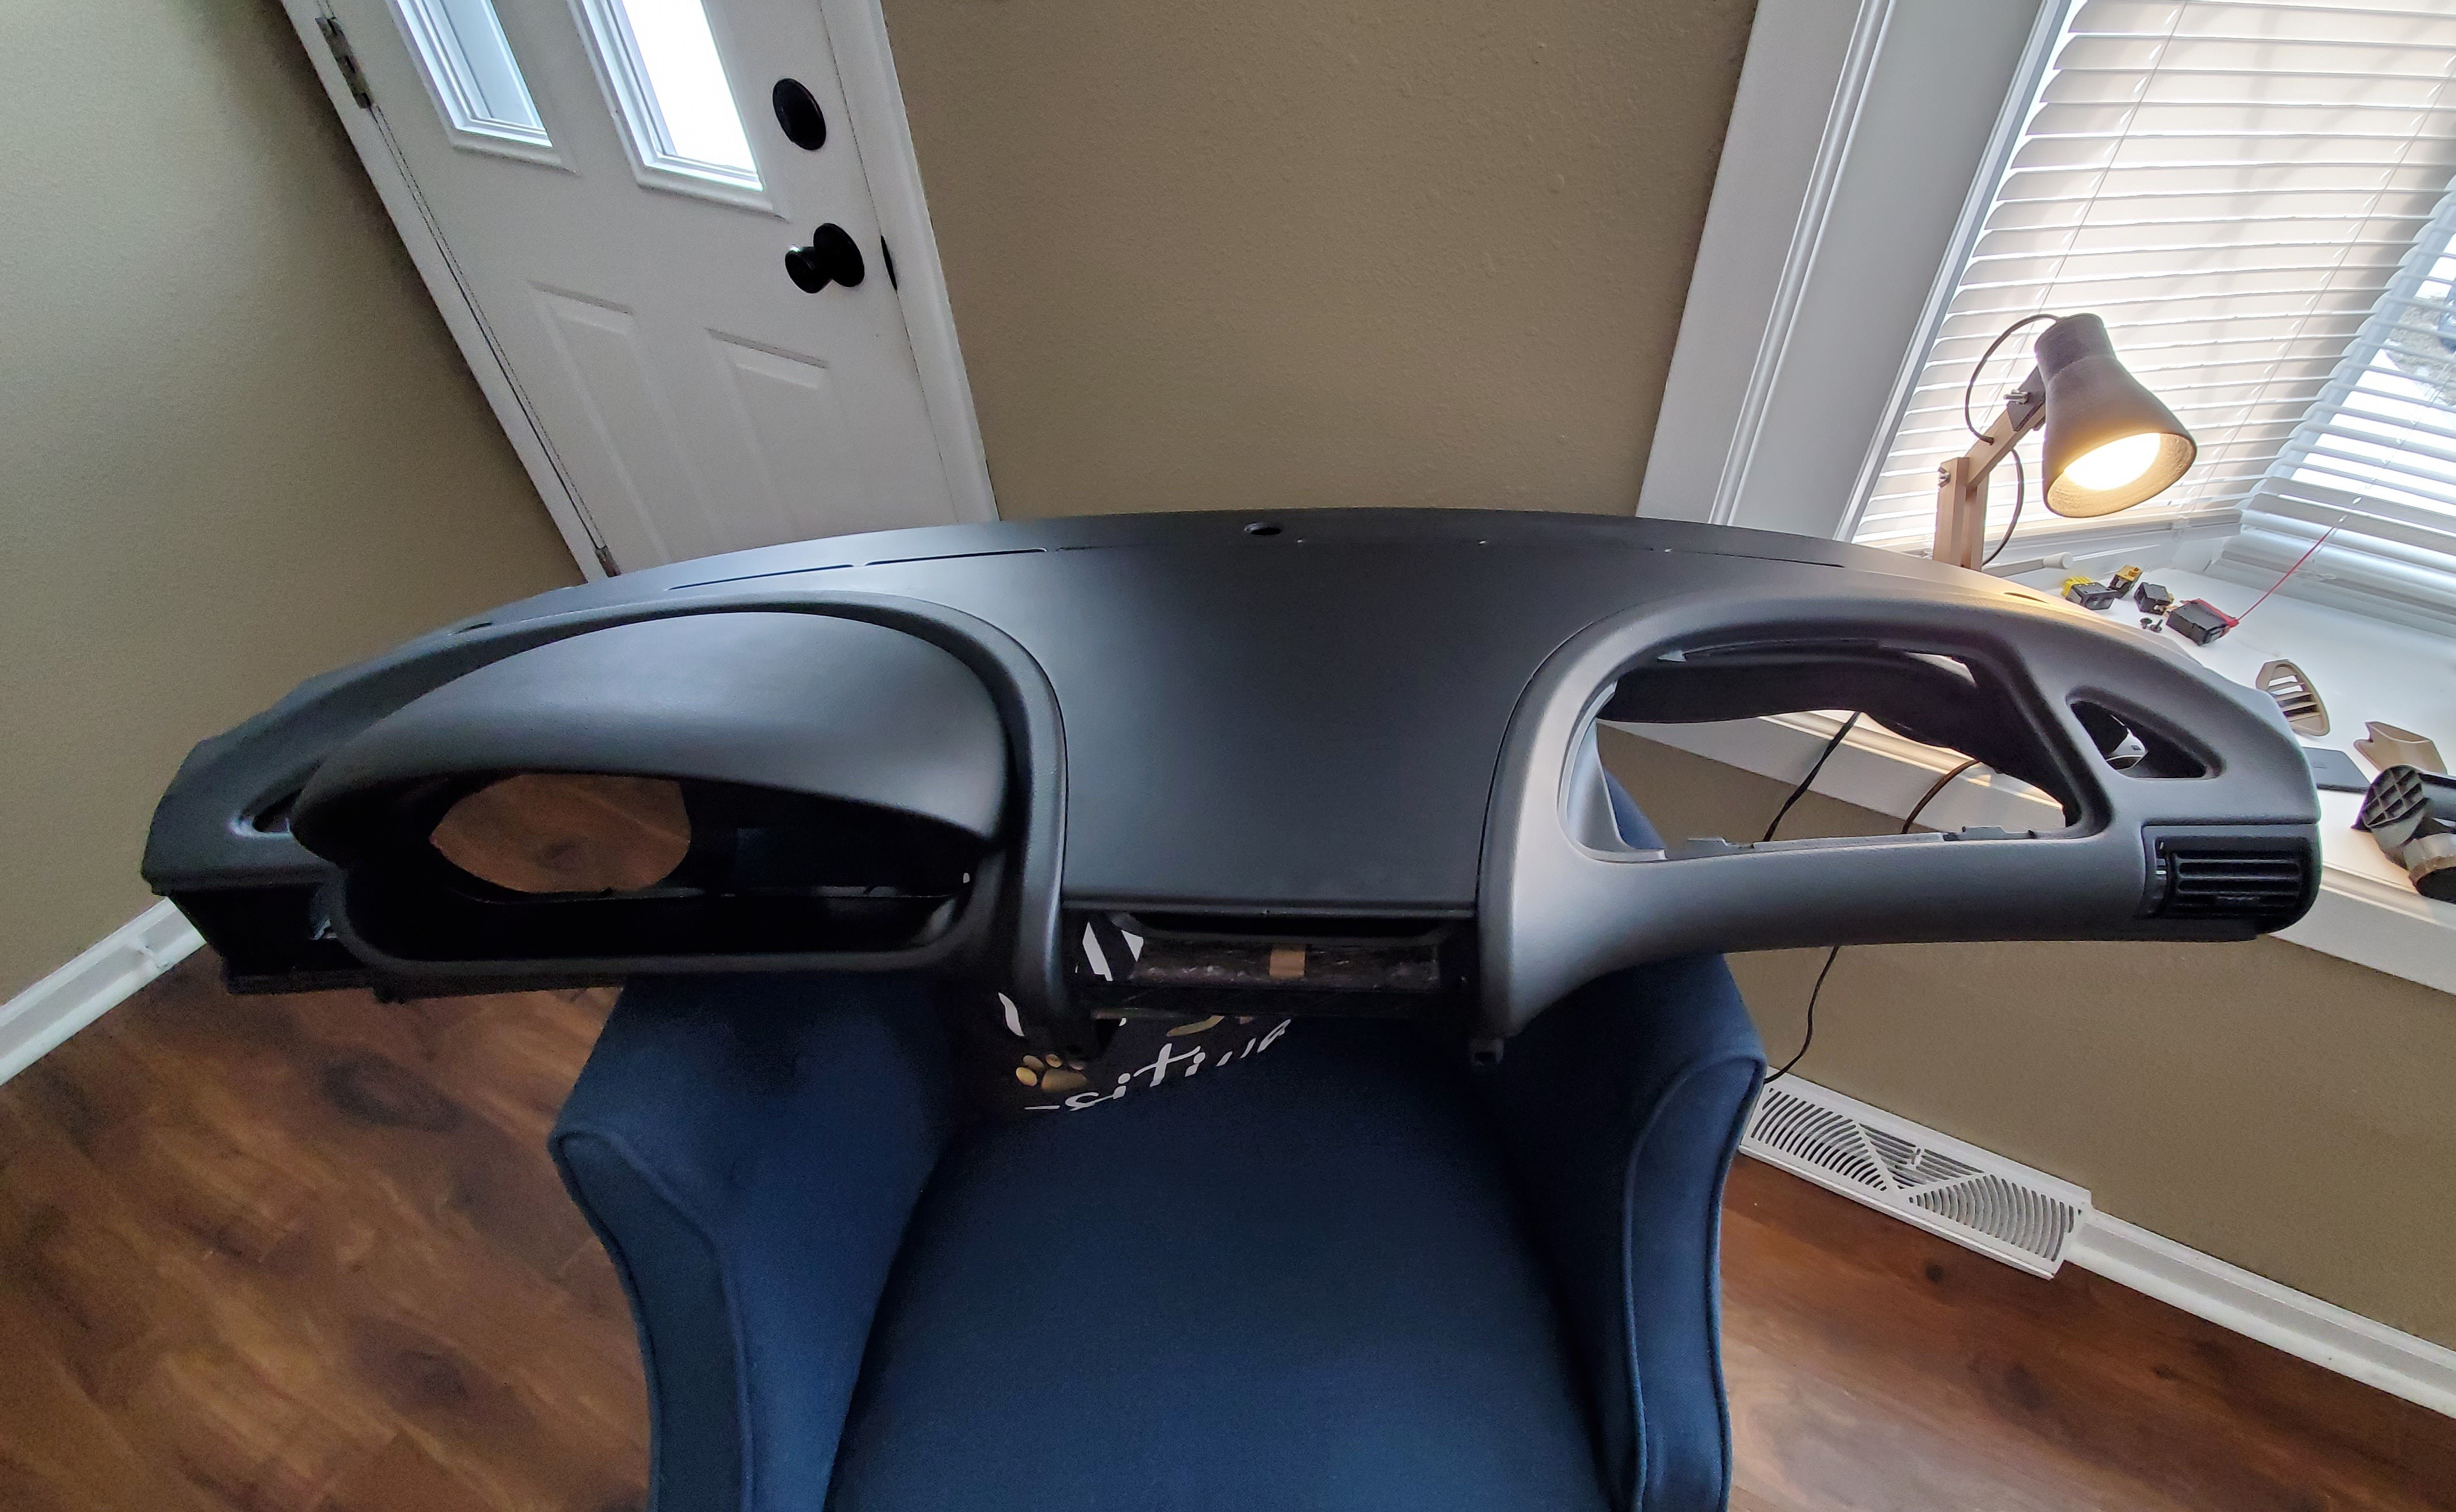
      Dashboard was disassembled and the "pods" were prepped for paint. Along with the kick panels too. New black dashboard didn't come with the "pods" and are near impossible/expensive to find.
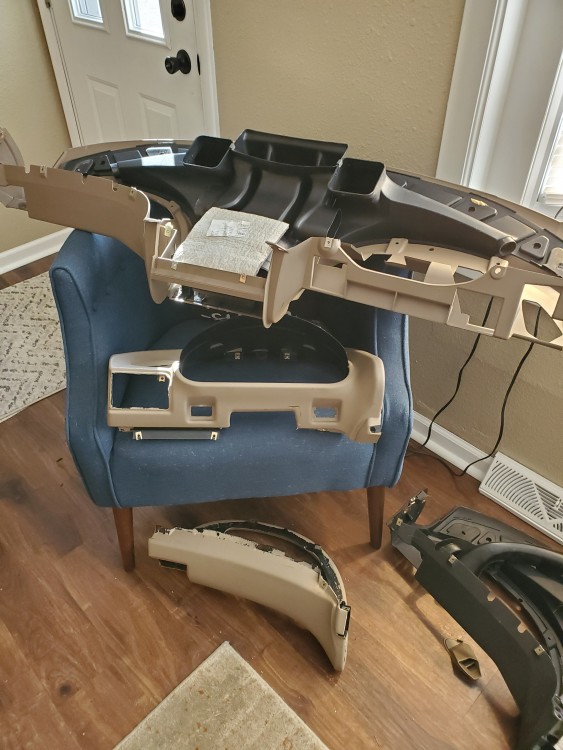
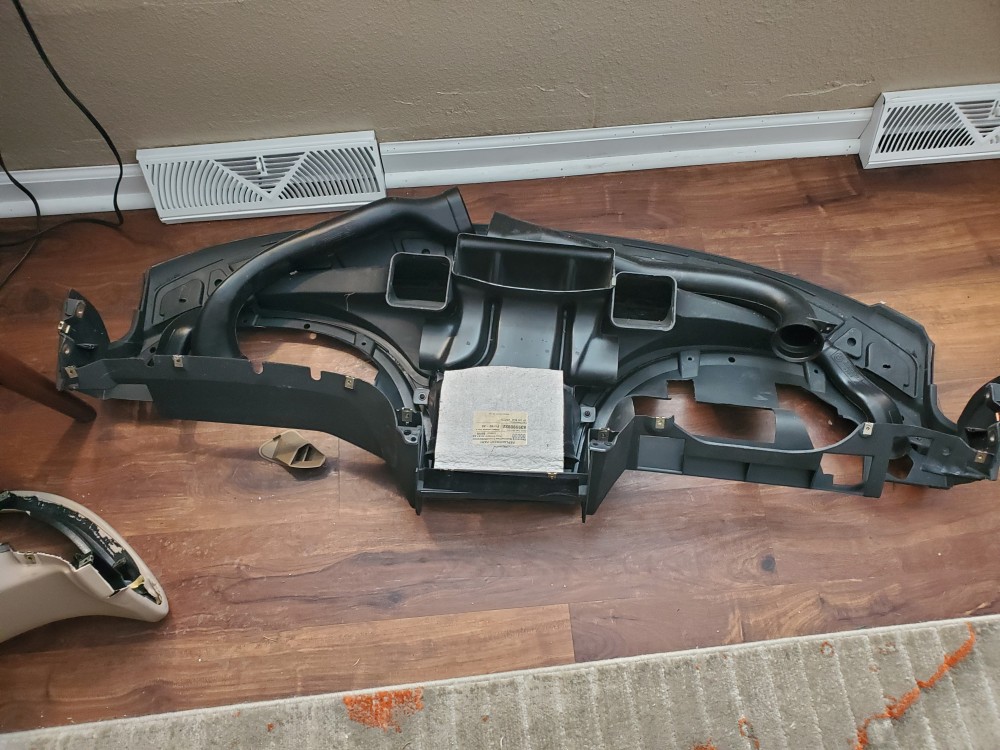
      20220220141040.jpg

      20220220141045.jpg

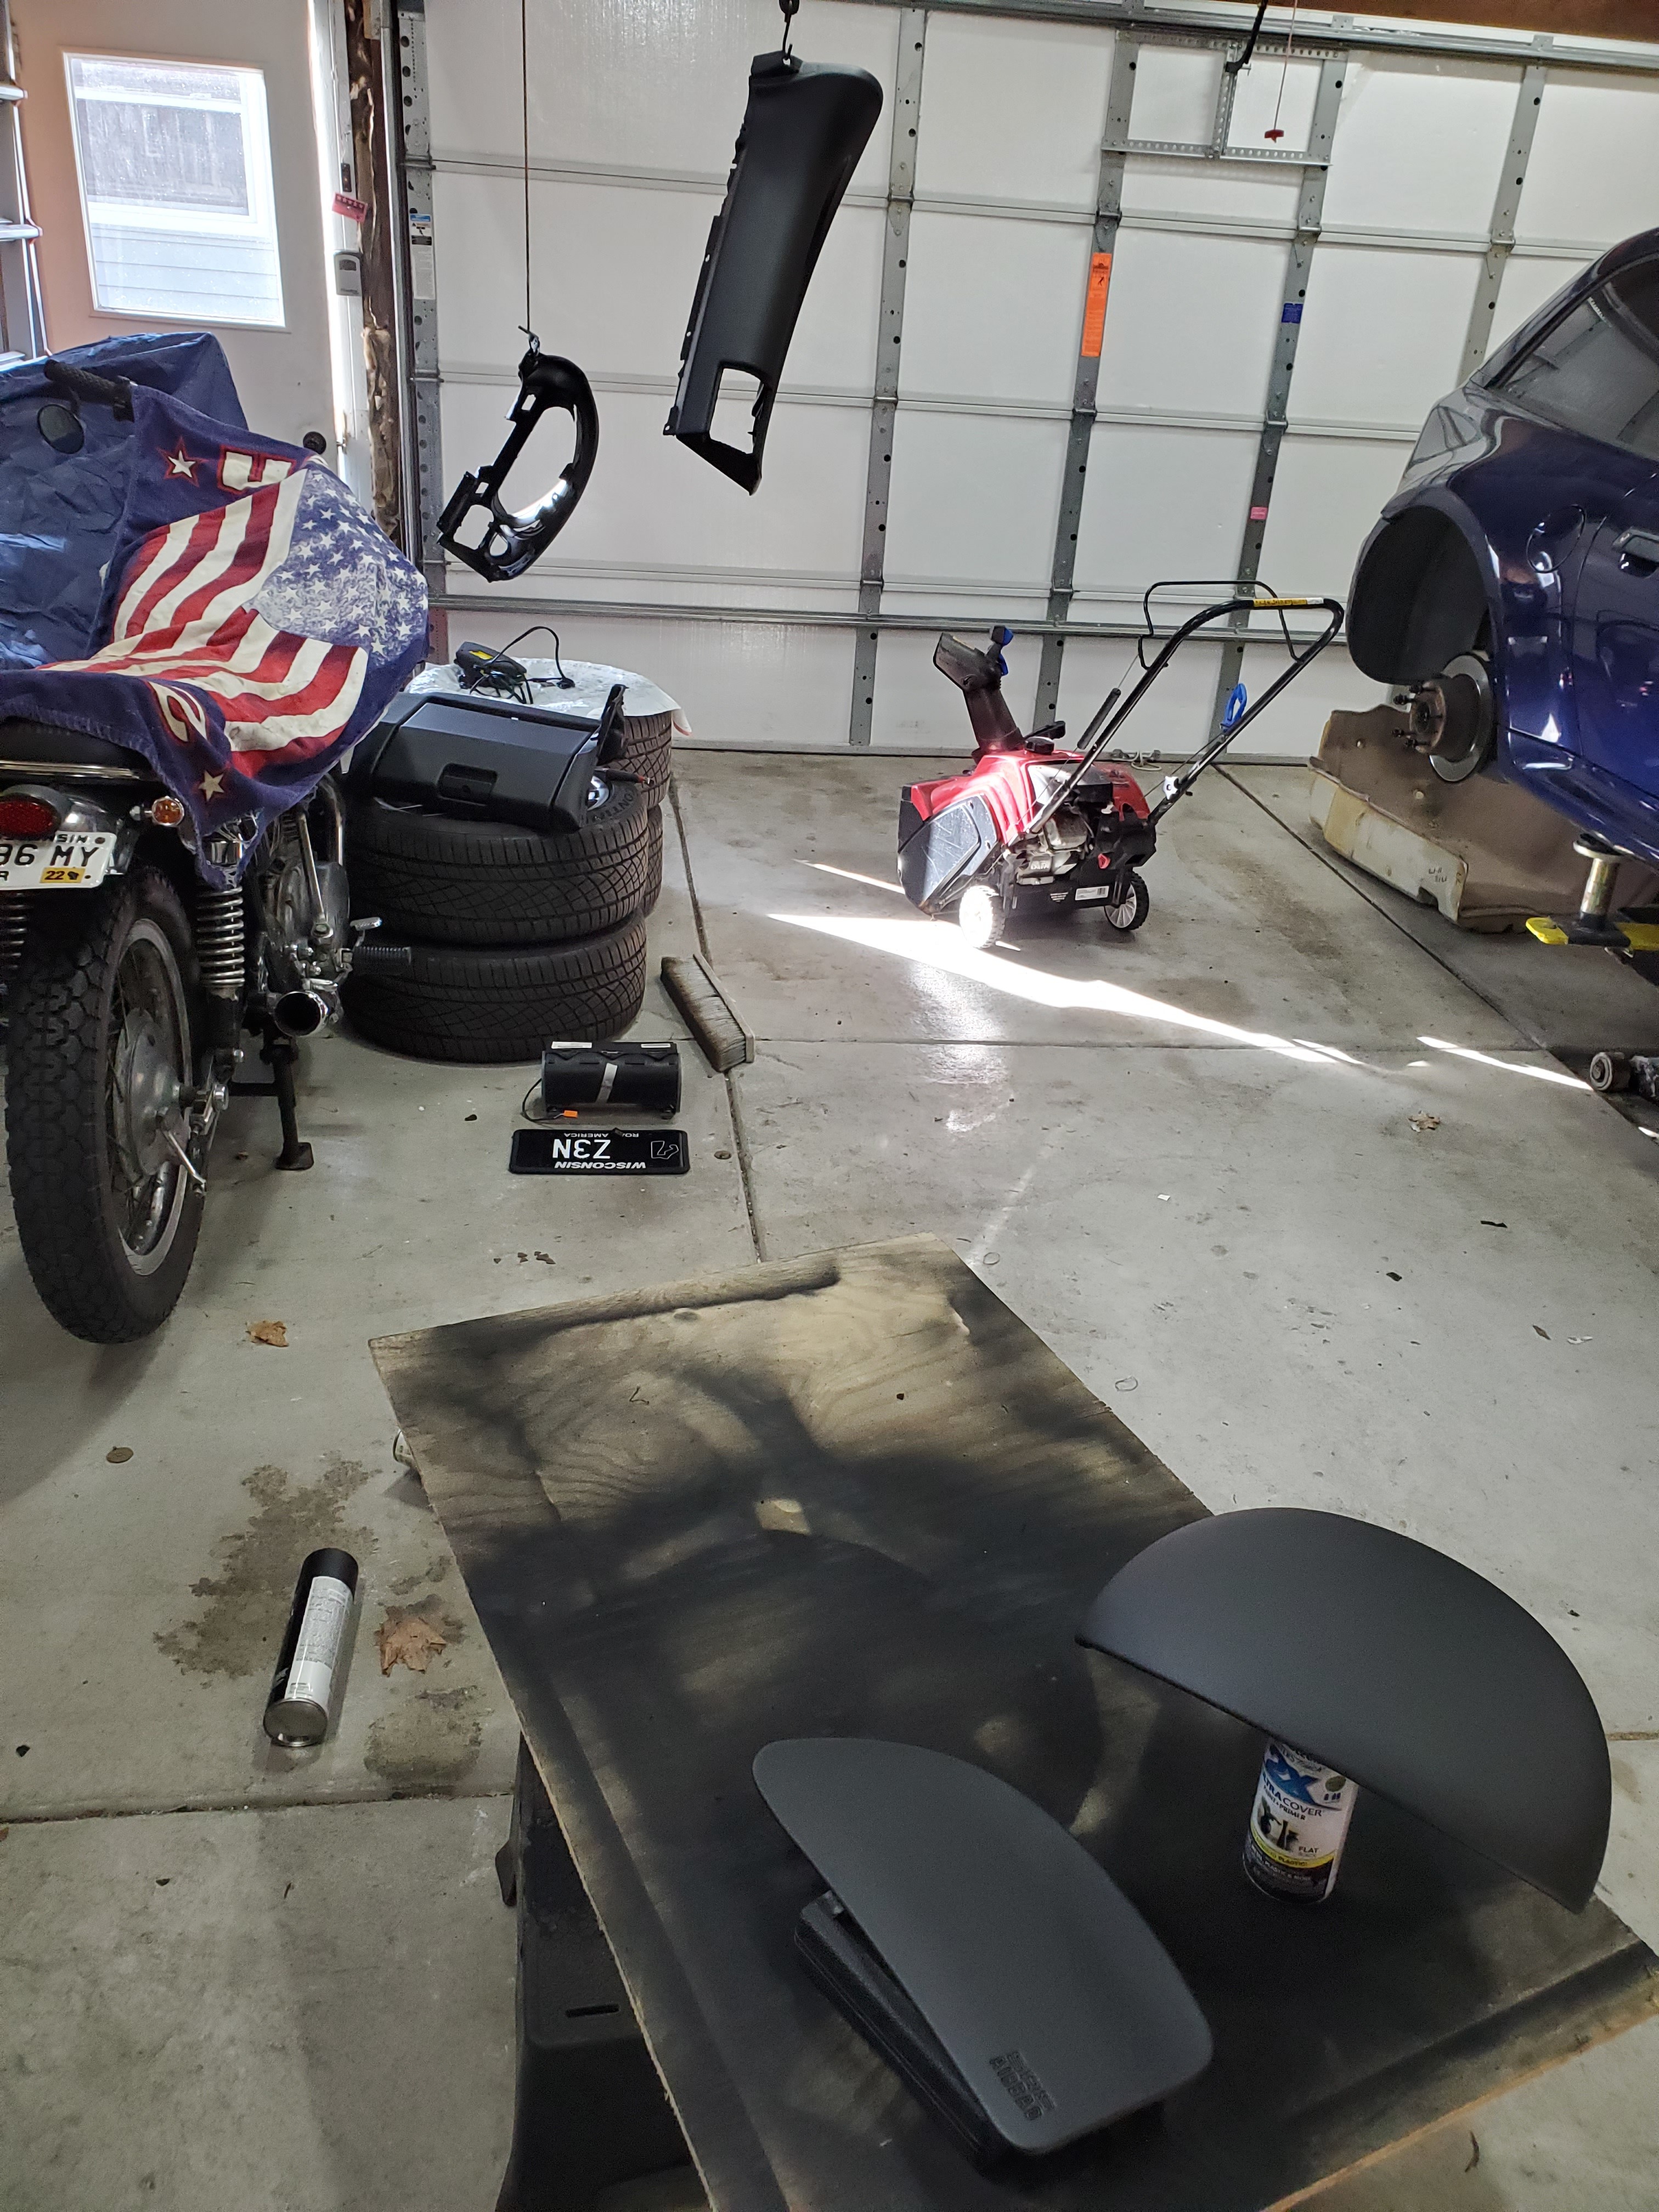
      LVP paint applied to all pieces. Need to get another can for final coats. 
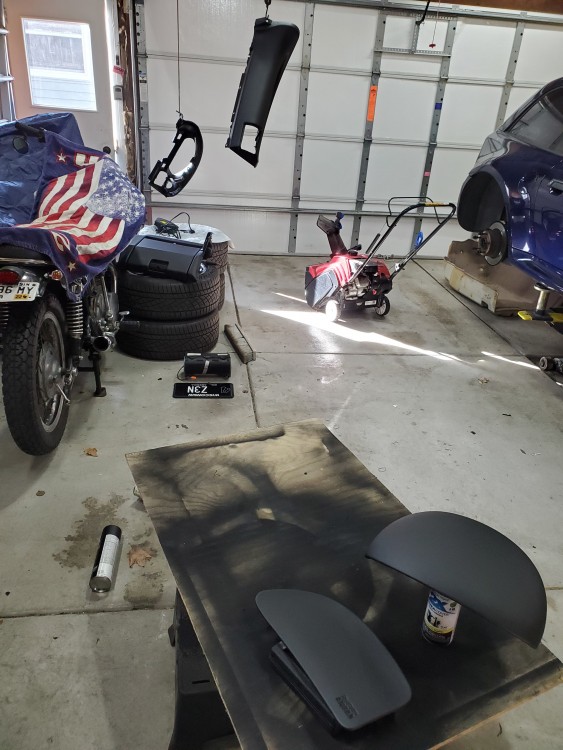
      20220220143720.jpg

      Once new front half carpet arrives in mail things can start getting reassembled again.

      CHECK OUT >>> RAGE DRIFT DESIGNS <<< FOR DECALS AND MORE!

      1 Reply Last reply
      6
      • Bassboy3313B
        Bassboy3313B
        Bassboy3313
        wrote on last edited by
        #96

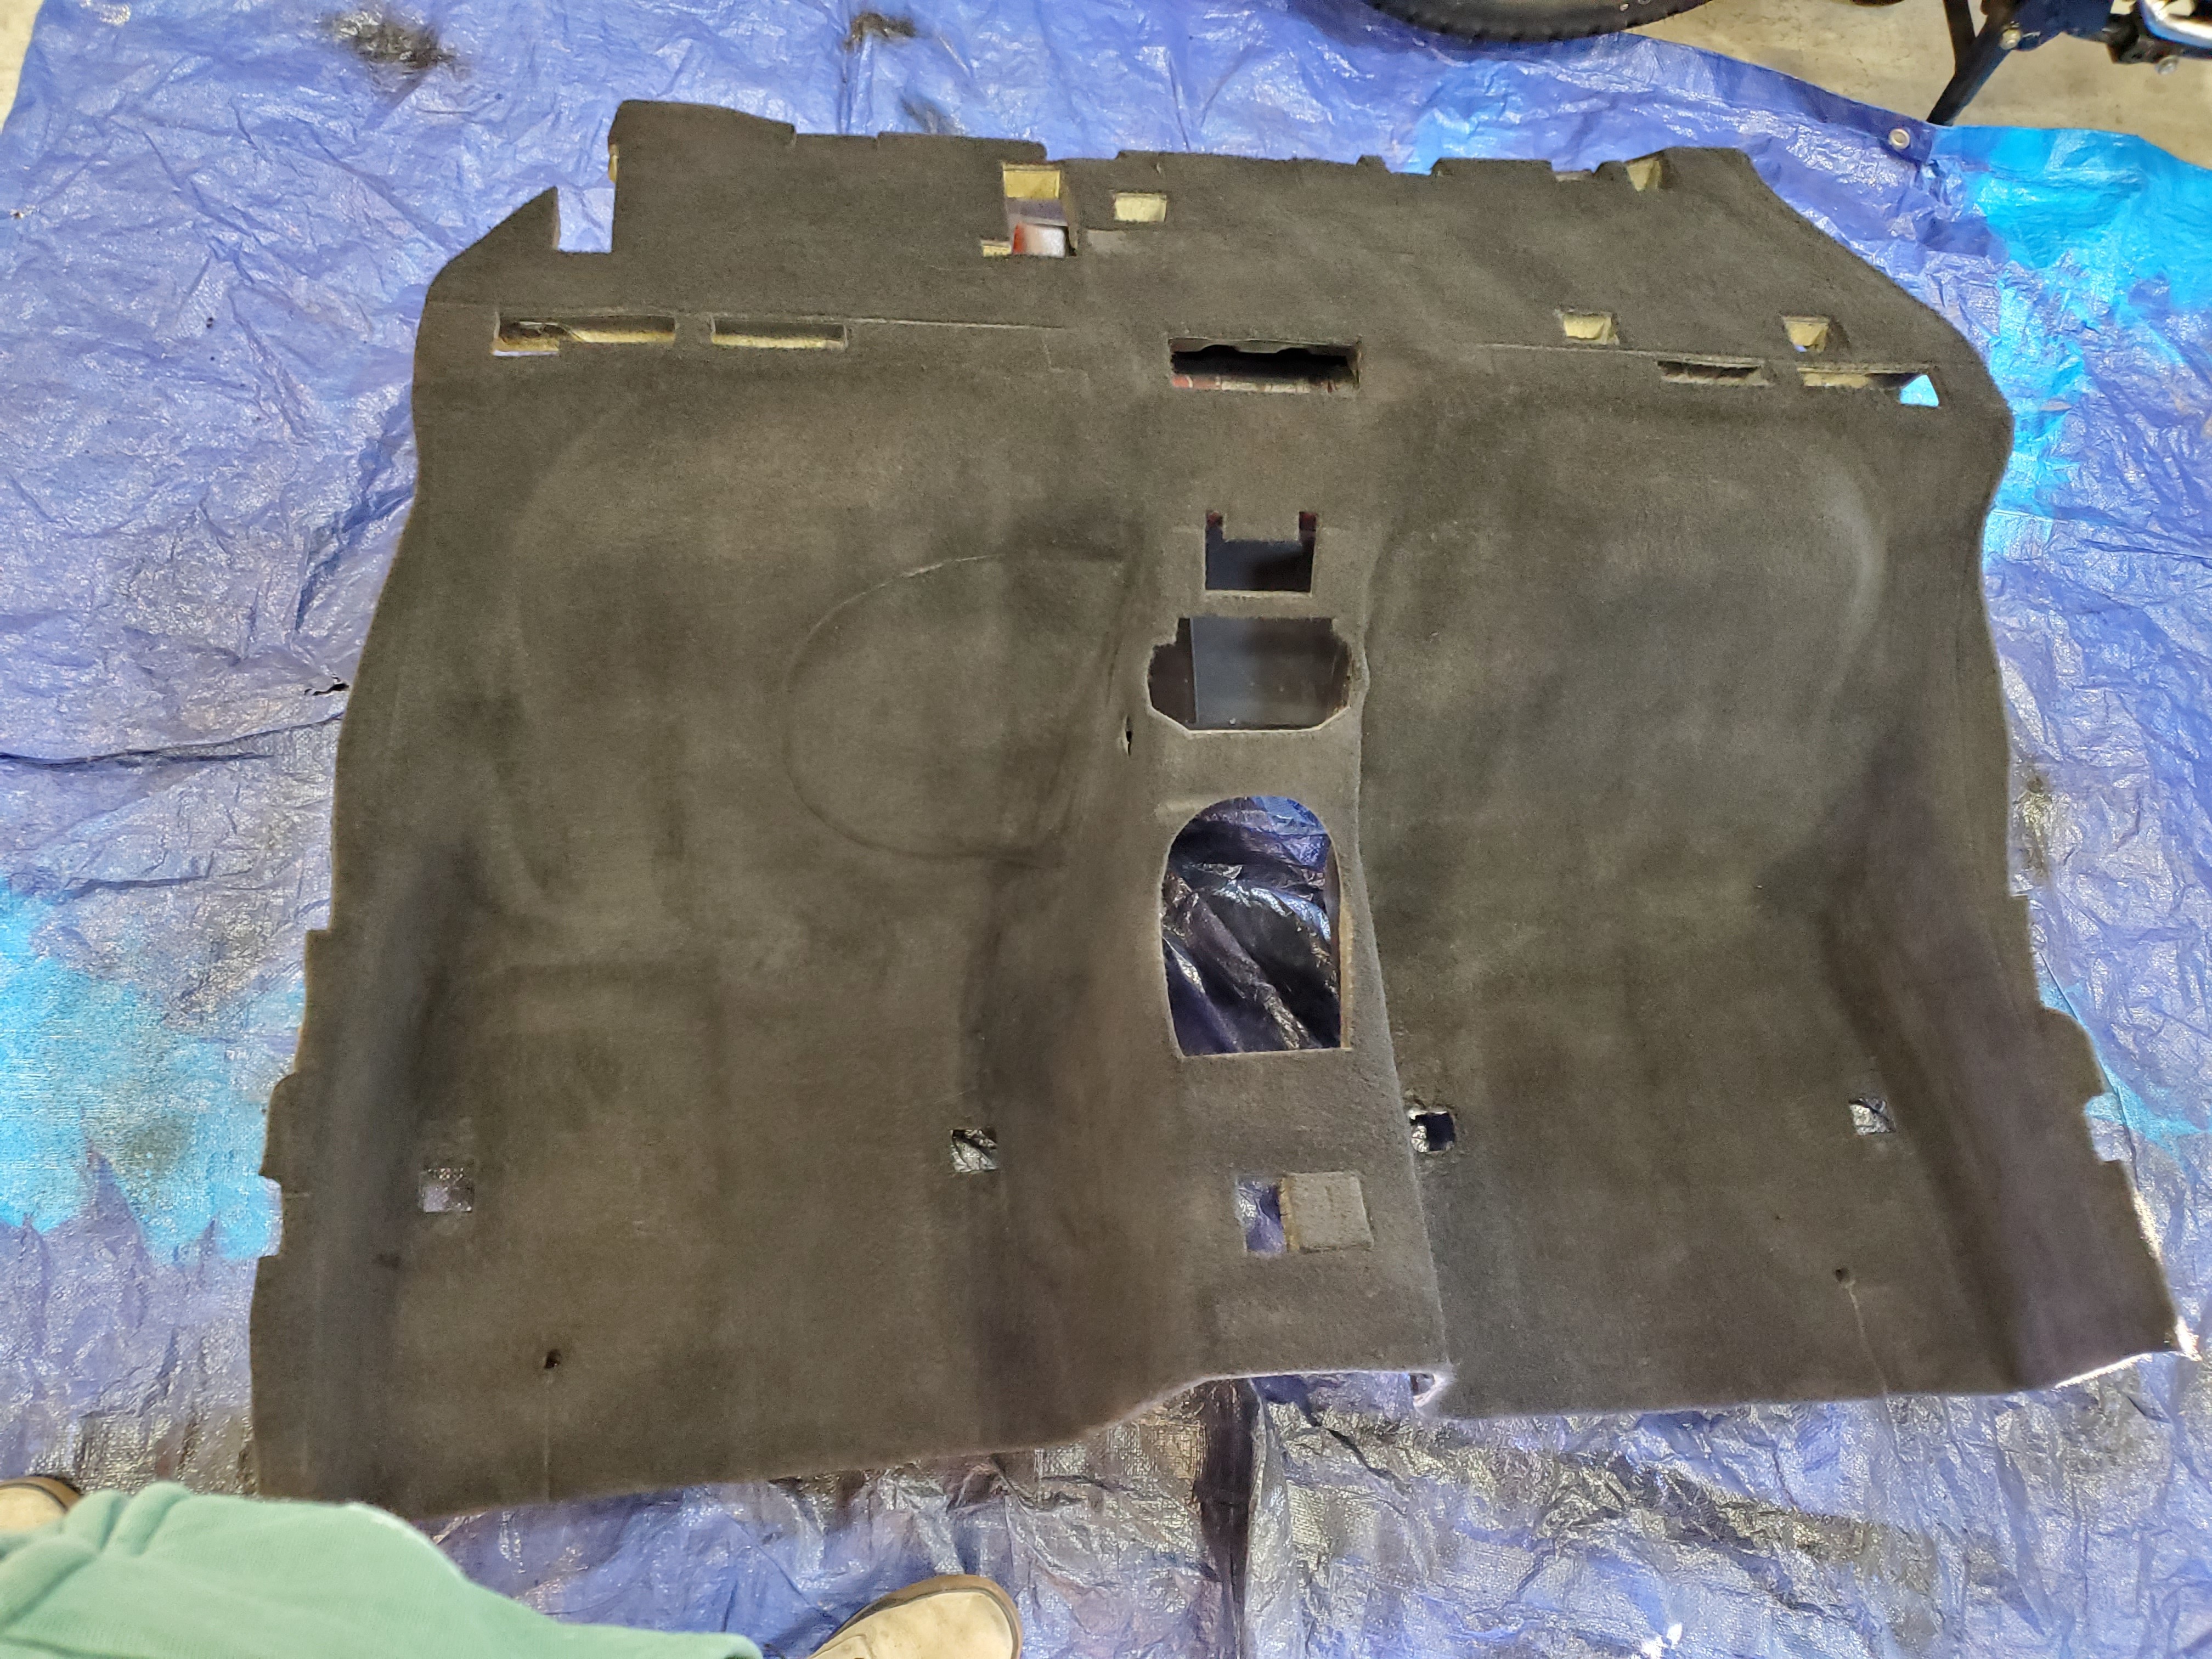
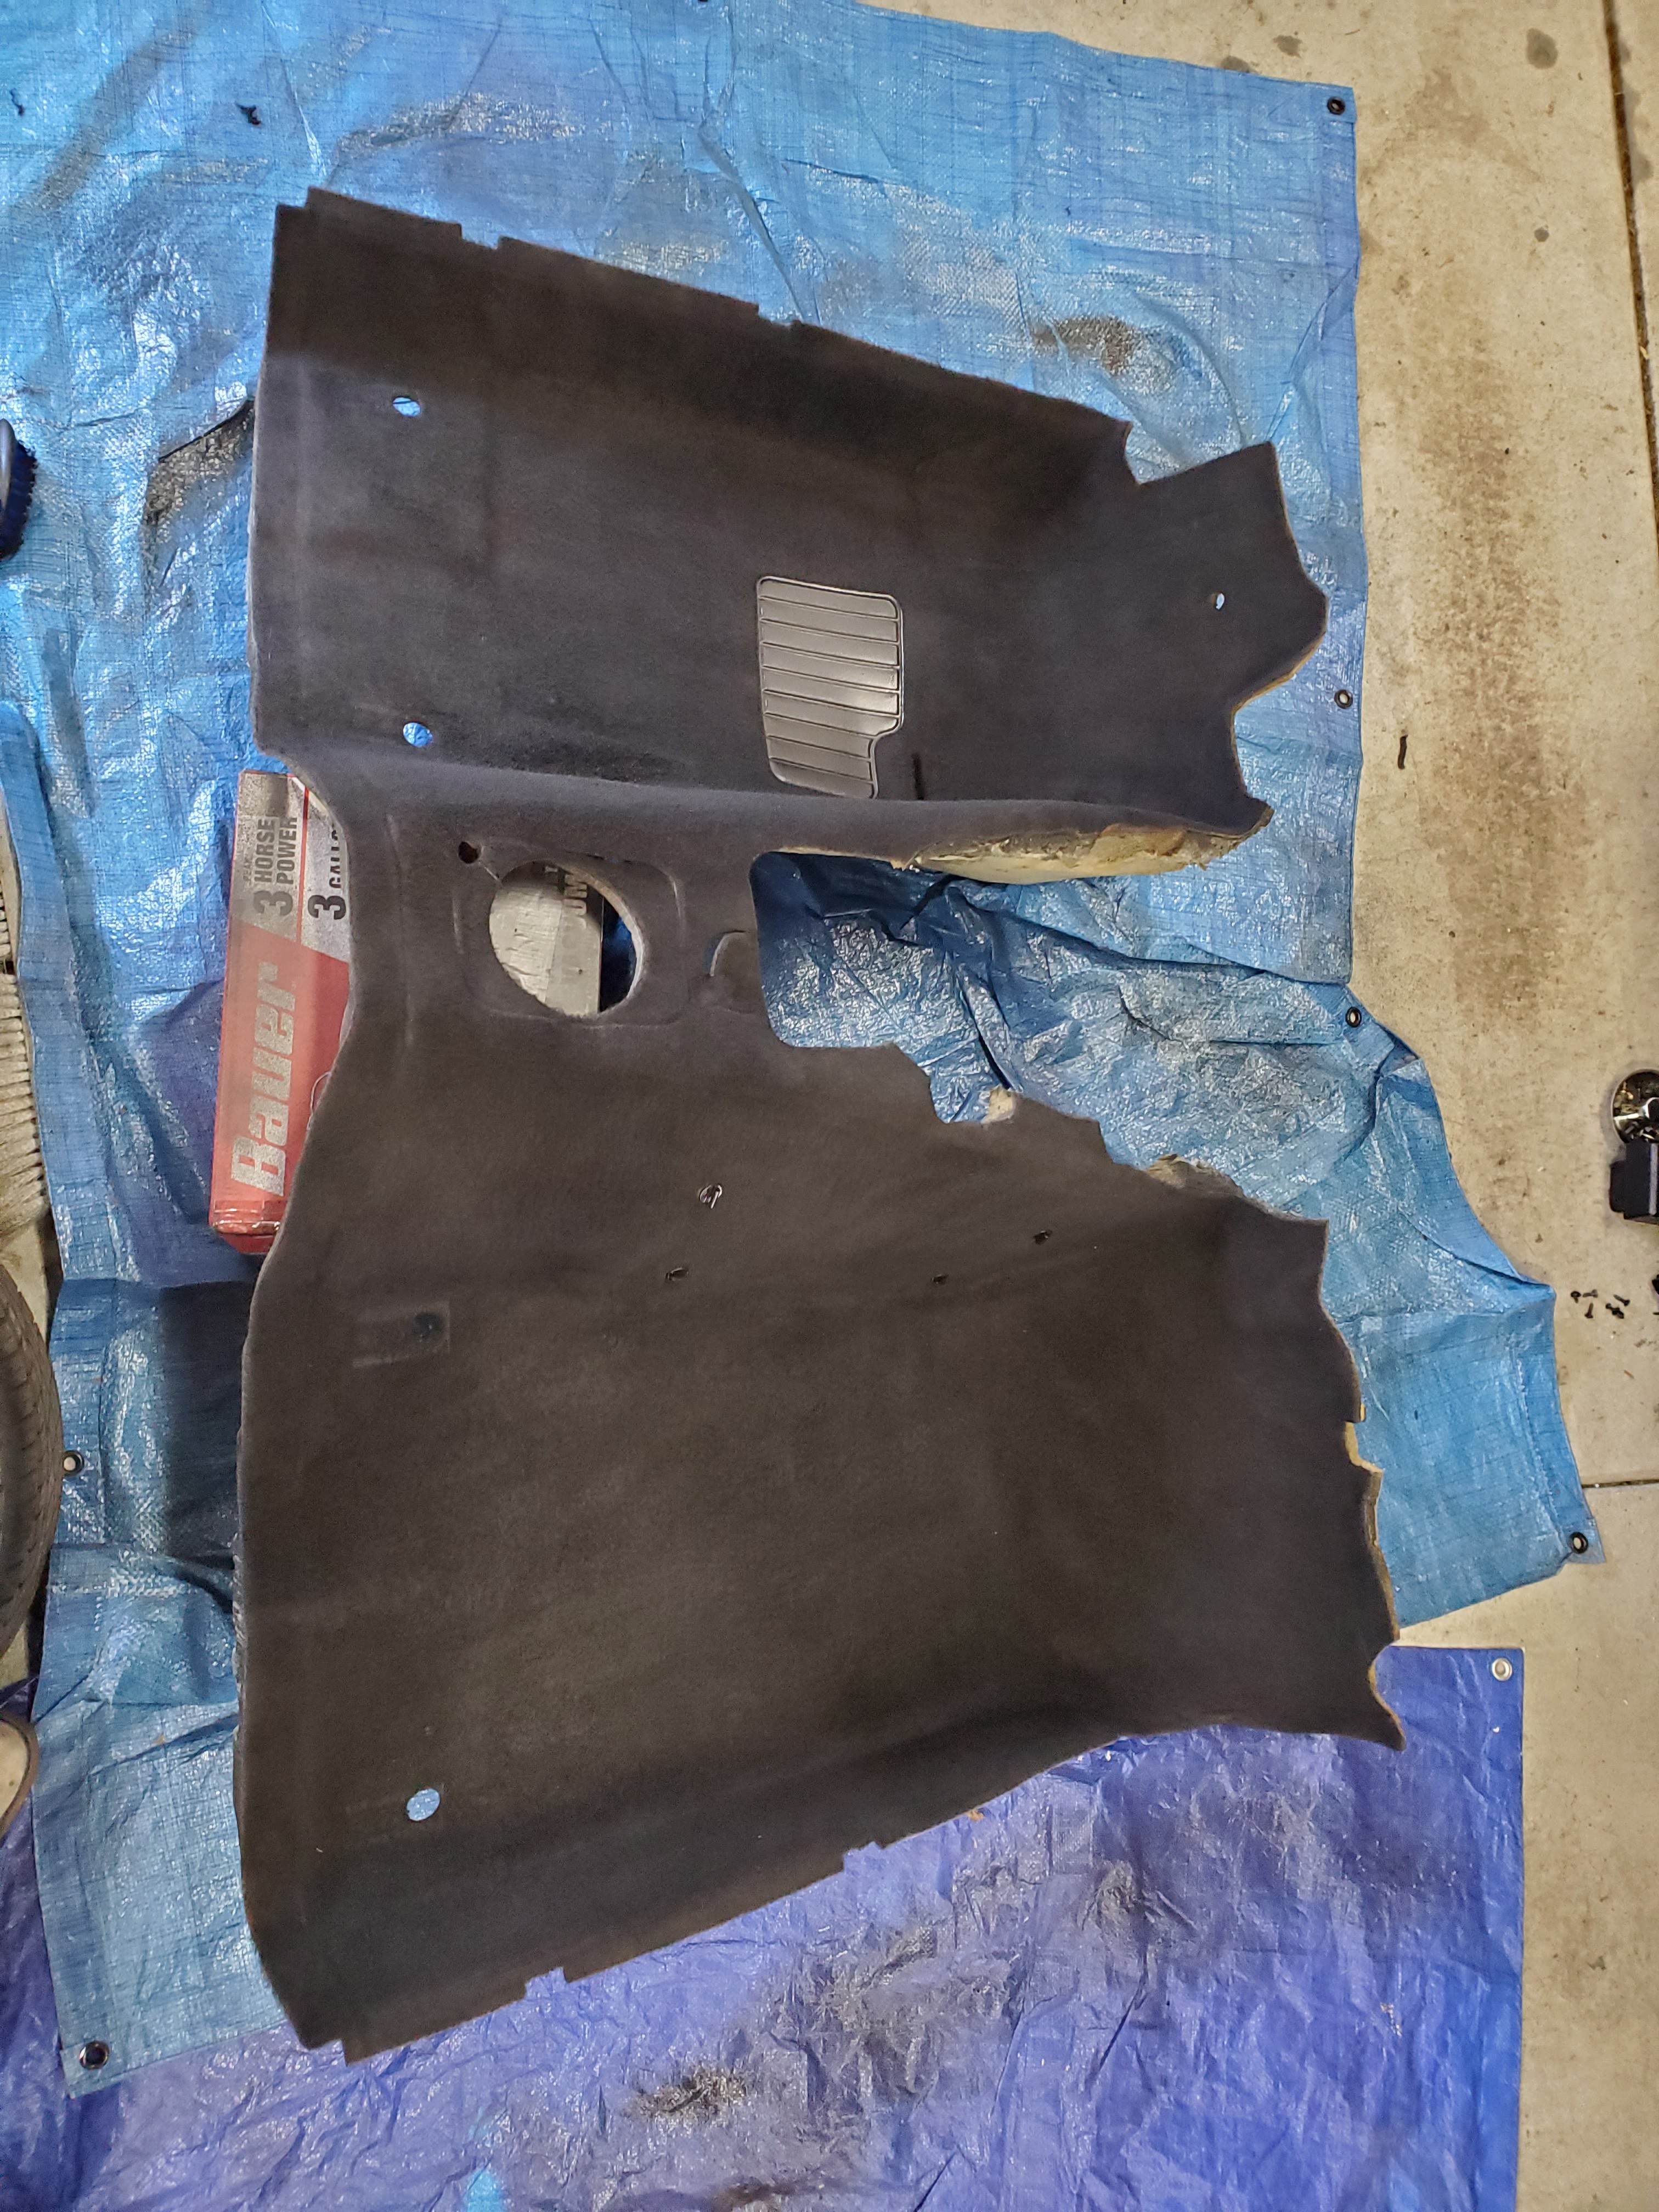
        So the douchebag on ebay I purchased the black carpet set from cancelled my order for no reason. Decided to try my hand at dying my existing carpet. Non of the purists will want it anyways after I strategically cut it to remove. So here goes nothing...

        I am terrible at taking pics while I'm in the zone, so these are all I have.

        After a vacuuming and cleaning
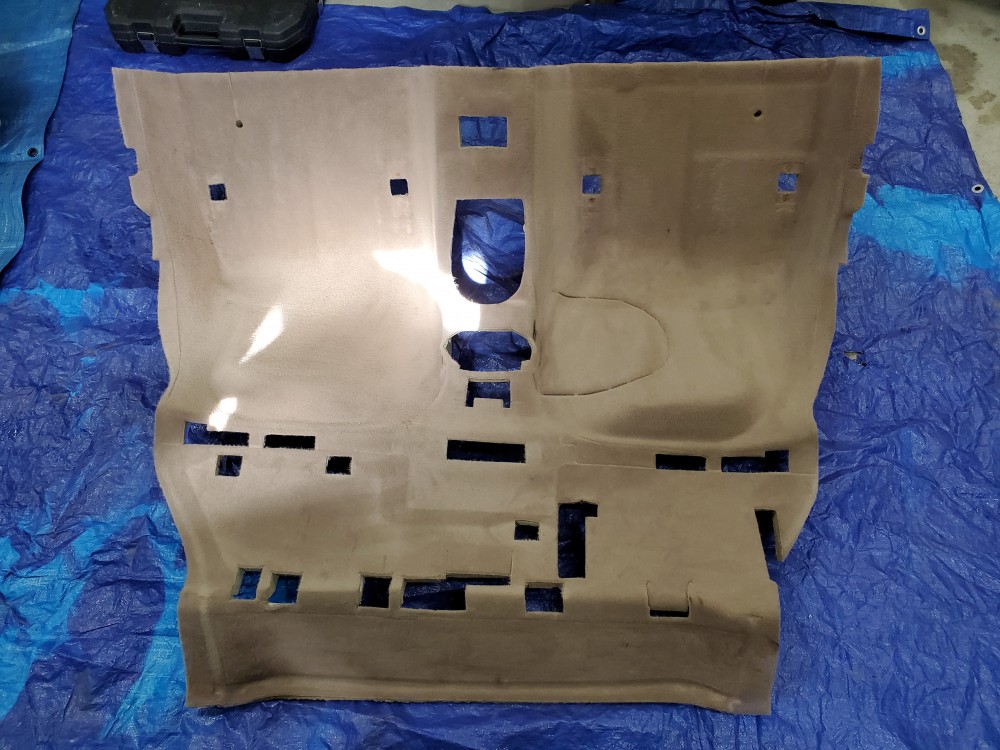
        20220226122240.jpg

        20220226122218.jpg

        And done. Was hard to get the color to show in the pics due to the lighting in garage. Trust me when I say it actually turned out pretty well with consistent dark black color. And still feels relatively soft.
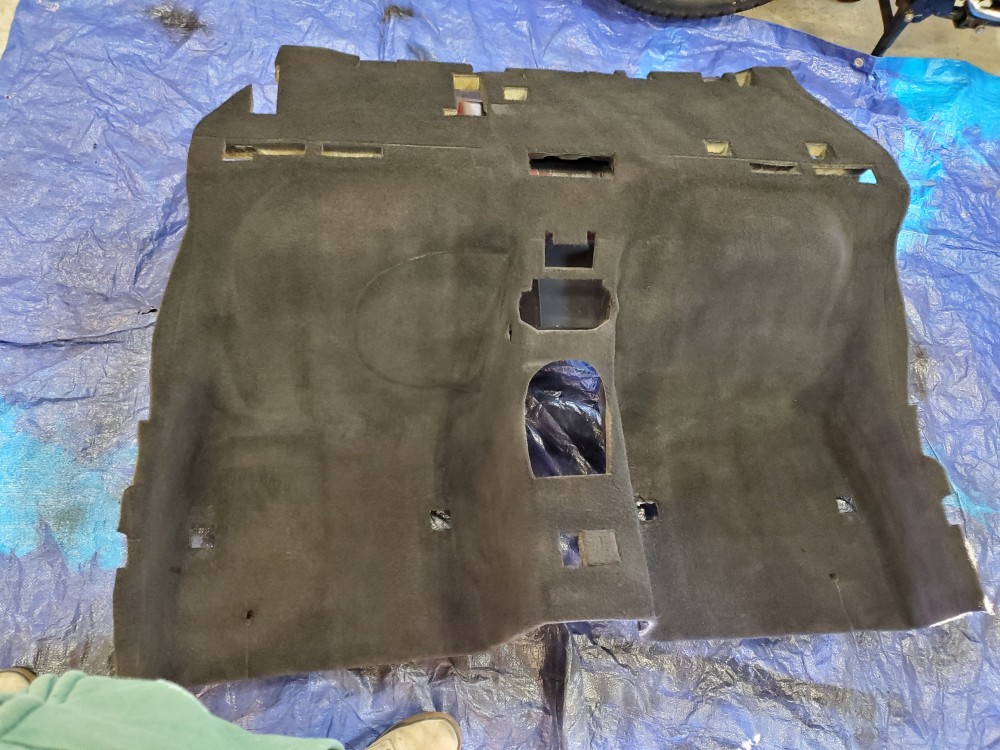
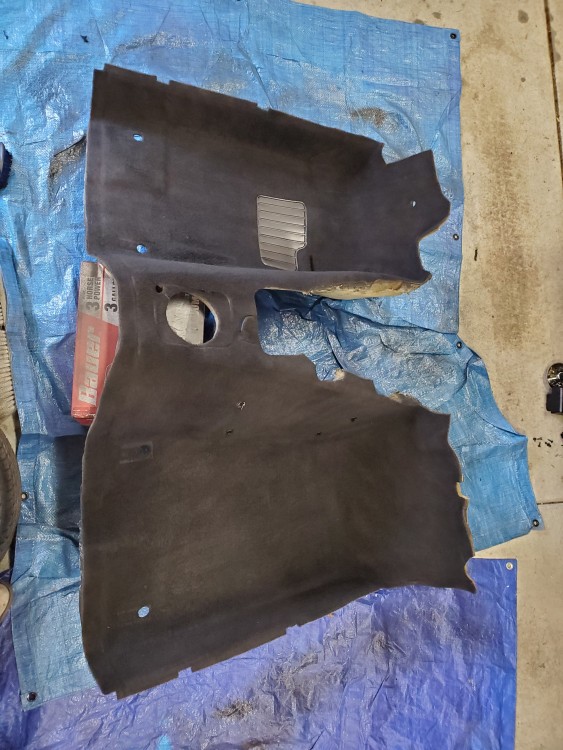
        20220226153524.jpg

        20220226153932.jpg

        I will be giving it one last light mist coat in the morning and throwing it back in the car. Then I can get the remainder of the interior back together as well.

        CHECK OUT >>> RAGE DRIFT DESIGNS <<< FOR DECALS AND MORE!

        1 Reply Last reply
        2
        • Bassboy3313B
          Bassboy3313B
          Bassboy3313
          wrote on last edited by
          #97

          And back in...

          20220227092415.jpg

          20220227092431.jpg

          CHECK OUT >>> RAGE DRIFT DESIGNS <<< FOR DECALS AND MORE!

          1 Reply Last reply
          5
          • Bassboy3313B
            Bassboy3313B
            Bassboy3313
            wrote on last edited by
            #98

            Dash starting to look complete once again
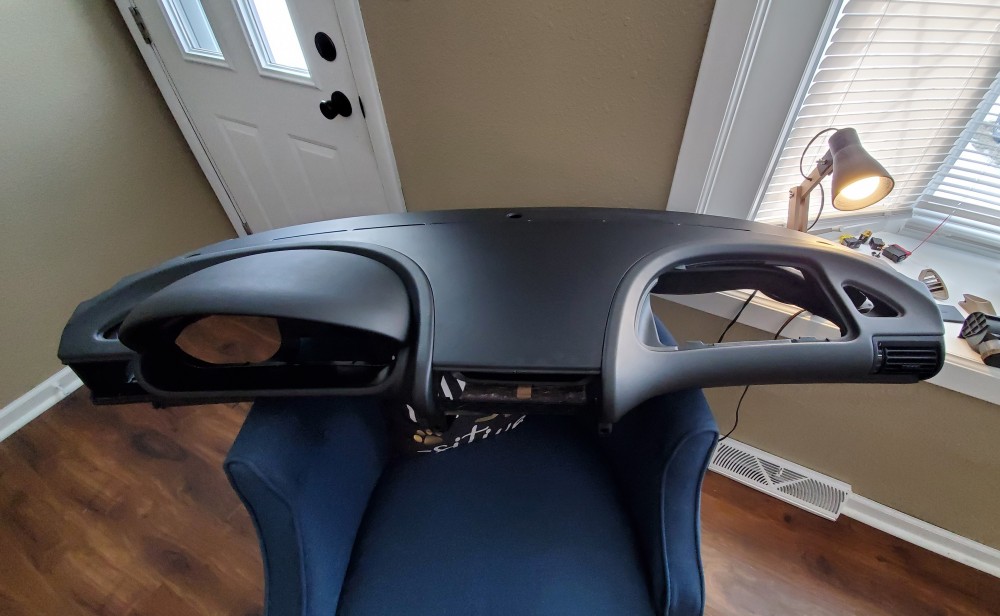
            20220227133453.jpg

            CHECK OUT >>> RAGE DRIFT DESIGNS <<< FOR DECALS AND MORE!

            1 Reply Last reply
            5
            • YoungCRY
              YoungCRY
              YoungCR
              wrote on last edited by
              #99

              All looks great in pictures

              Chris Young
              BMWCCA #458972
              1986 528e/5  | 1994 530i/5 | 1995 540i/6 | 2013 X5 35d | 1998 C1500 Suburban | 1995 K2500 Suburban

              1 Reply Last reply
              0
              • JdesignJ
                JdesignJ
                Jdesign
                wrote on last edited by
                #100

                Looks good from this side of the monitor!

                SumBunny.jpg

                https://www.instagram.com/_jdesigner_/                                          http://nevertoolow.tumblr.com/

                🥳SOLD BMW E24 633CSI - BMW M30B32                                          🧪SOLD HCH  ES9 - 1.3 LDA
                👽BMW E30 325IC - Toyota 1JZ-GTE                                                     ⏰ HONDA EF9 CIVIC SI - JDM B18C5
                ☠️BMW E36 318i - Ford 5.0 FE302                                                         🚴‍♂️ GT-Labomba - 26x2.75 Freeride
                🤹‍♀️SOLD BMW E36/7 Z3 - BMW M54B25                                                🧓SOLD BMW E10 2002 - BMW M10M05

                1 Reply Last reply
                0
                • RekpointR
                  RekpointR
                  Rekpoint
                  wrote on last edited by
                  #101

                  I am excited to see the whole interior put together!

                  1 Reply Last reply
                  0
                  • Bassboy3313B
                    Bassboy3313B
                    Bassboy3313
                    wrote on last edited by
                    #102

                    Thanks guys! I am happy with how it's turning out for sure.

                    CHECK OUT >>> RAGE DRIFT DESIGNS <<< FOR DECALS AND MORE!

                    1 Reply Last reply
                    0
                    • Bassboy3313B
                      Bassboy3313B
                      Bassboy3313
                      wrote on last edited by
                      #103

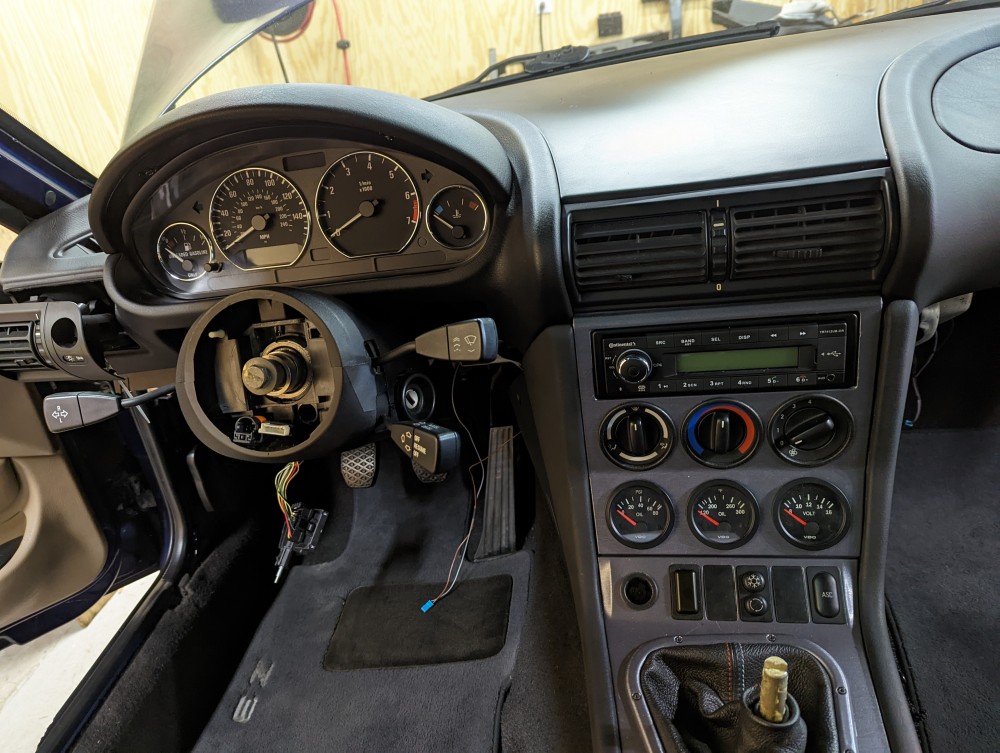
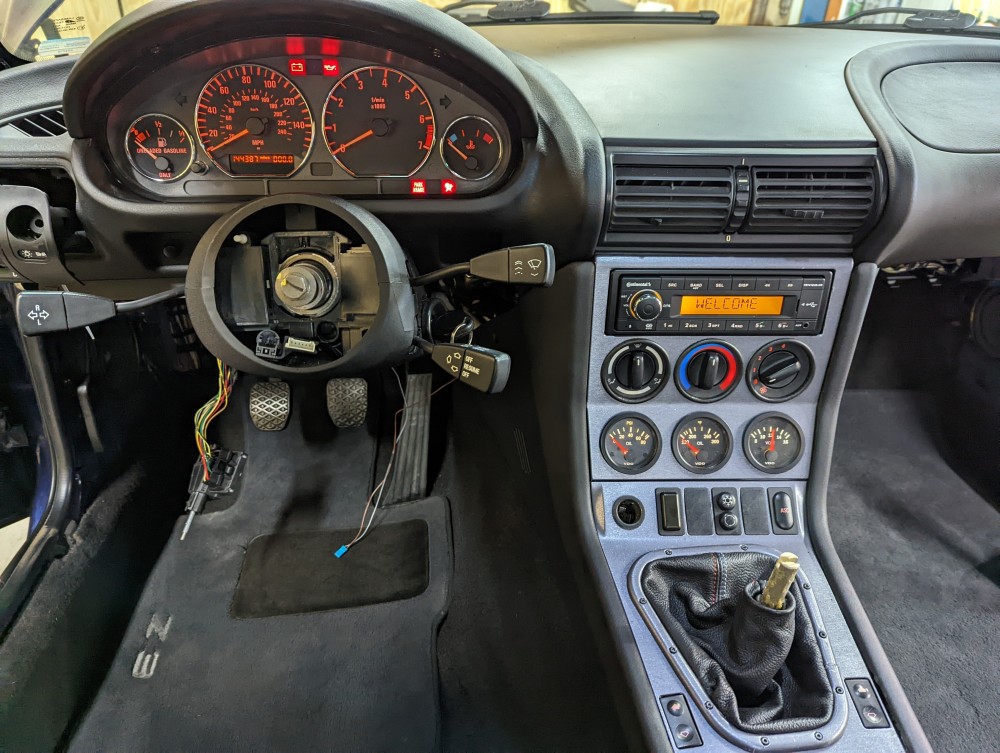
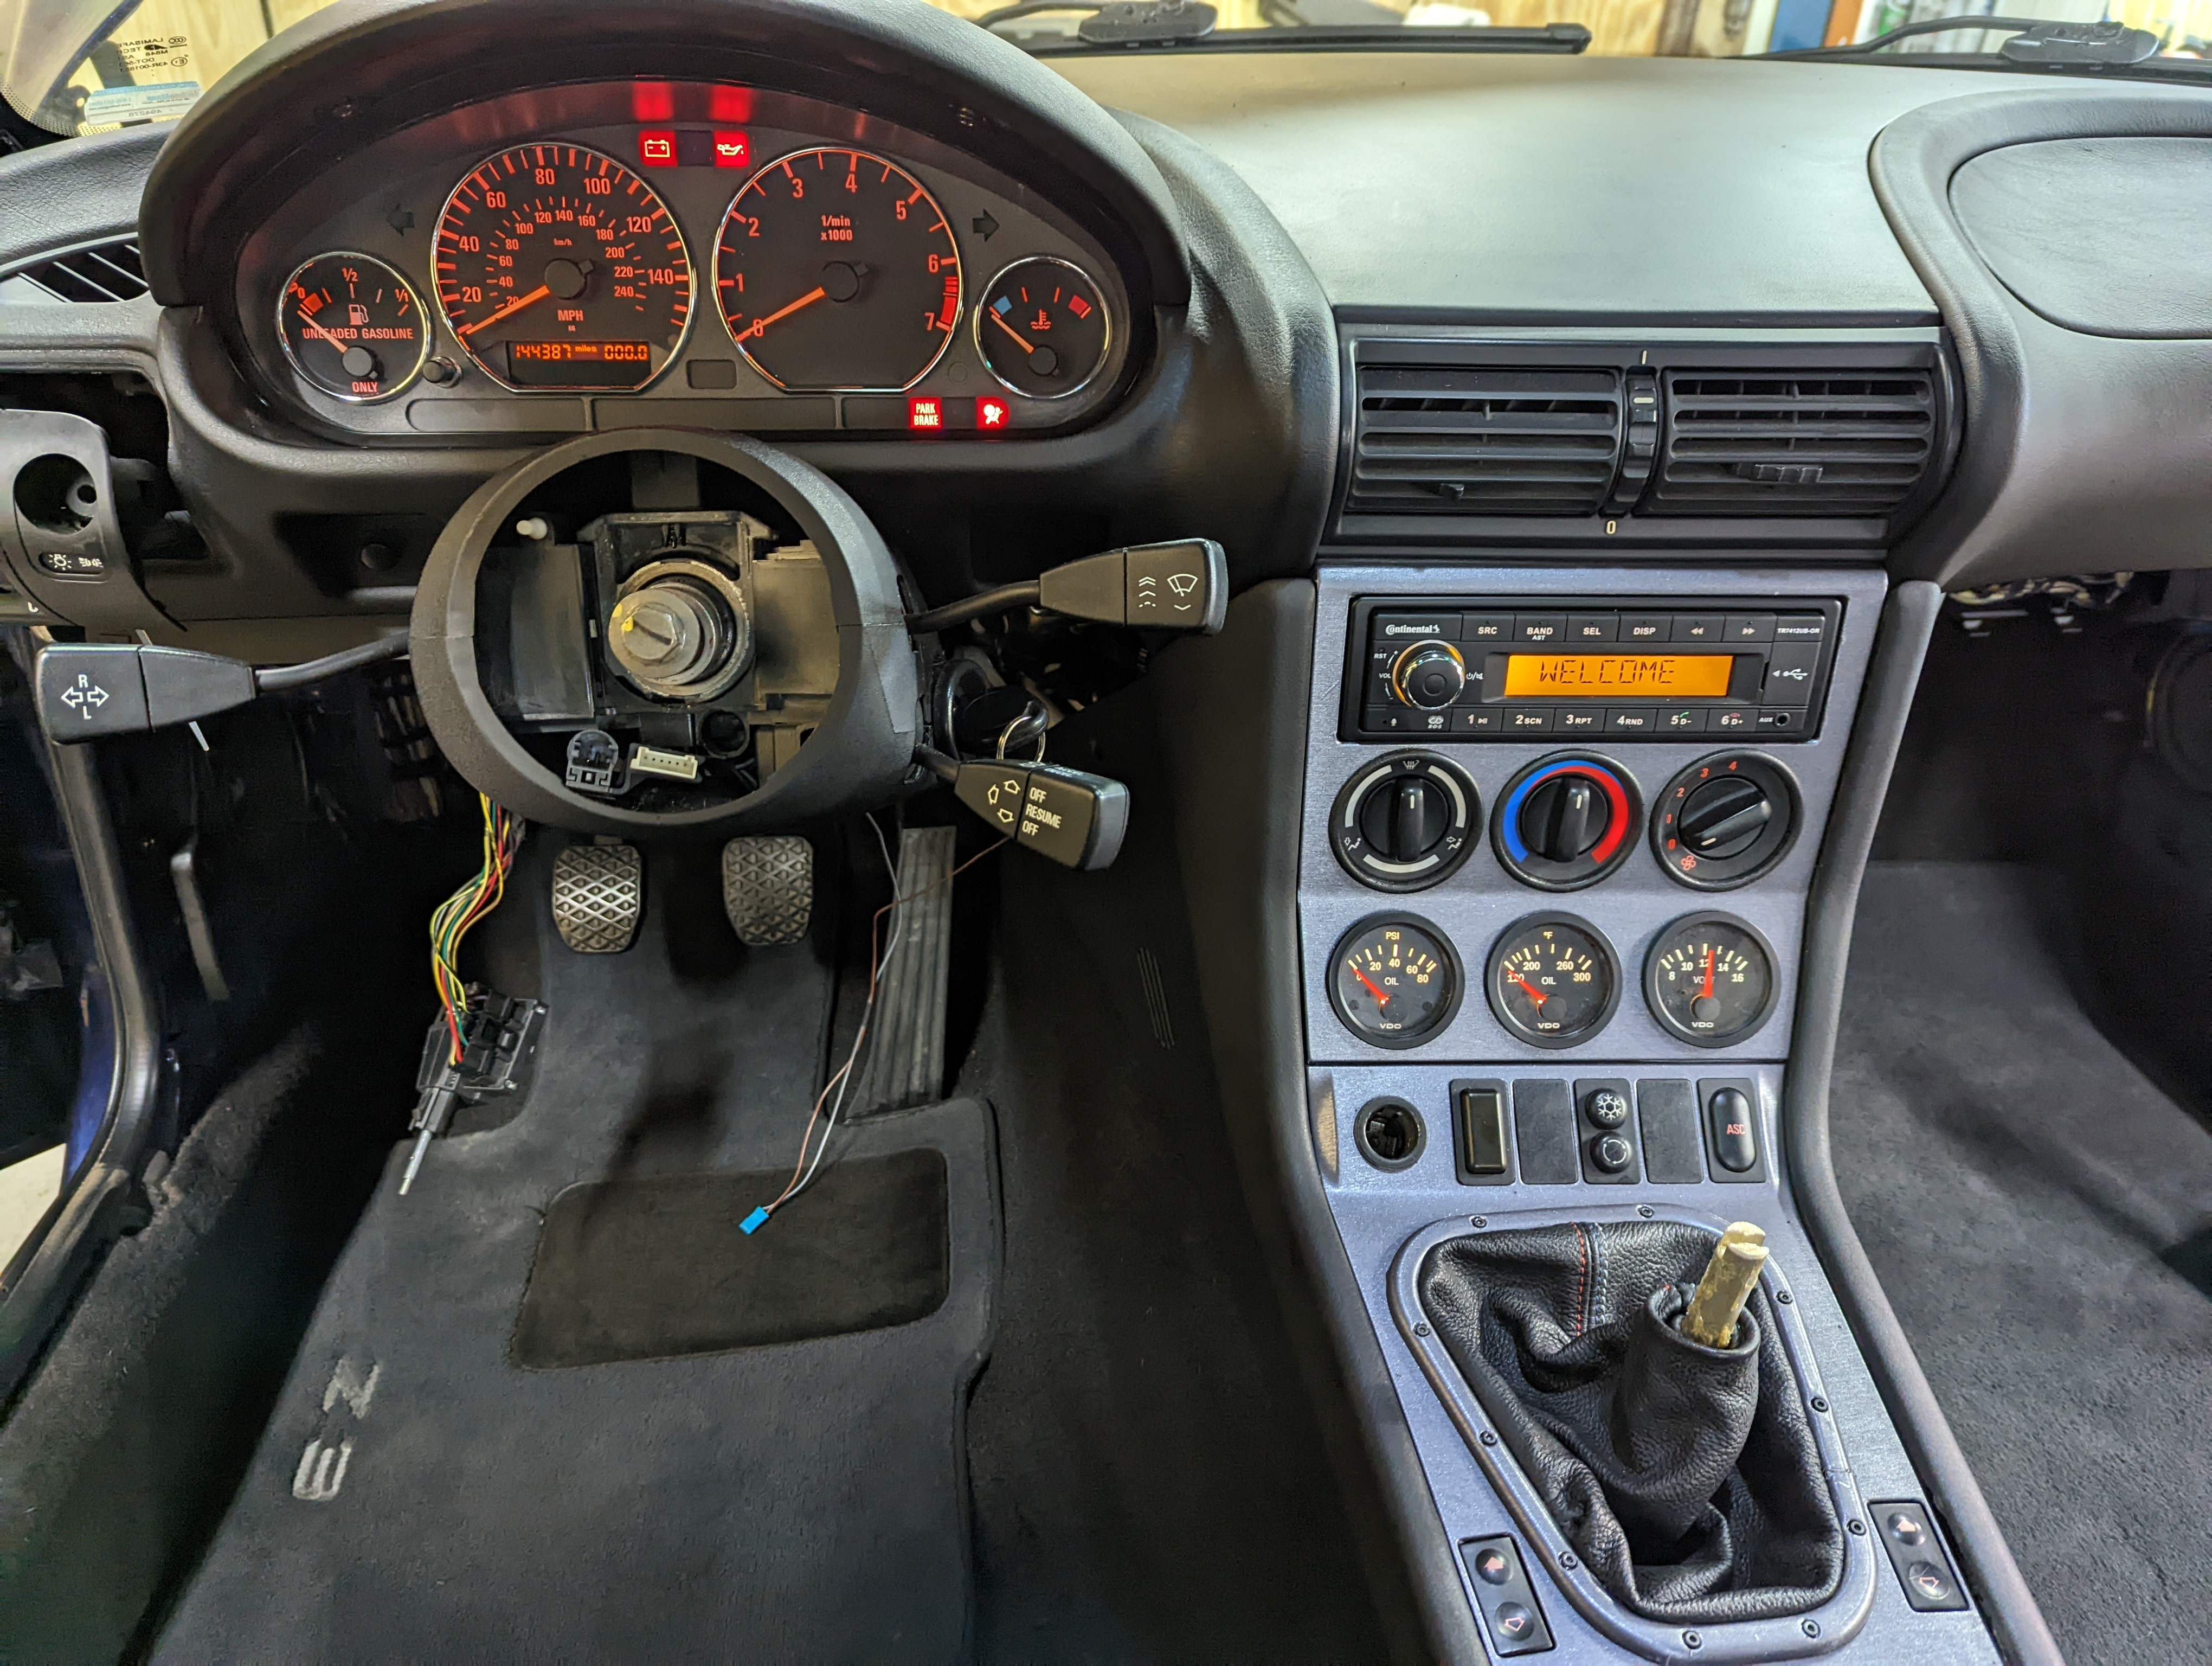
                      Dash and cluster back in.

                      PXL20220313160904442.jpg

                      CHECK OUT >>> RAGE DRIFT DESIGNS <<< FOR DECALS AND MORE!

                      1 Reply Last reply
                      1
                      • Bassboy3313B
                        Bassboy3313B
                        Bassboy3313
                        wrote on last edited by
                        #104

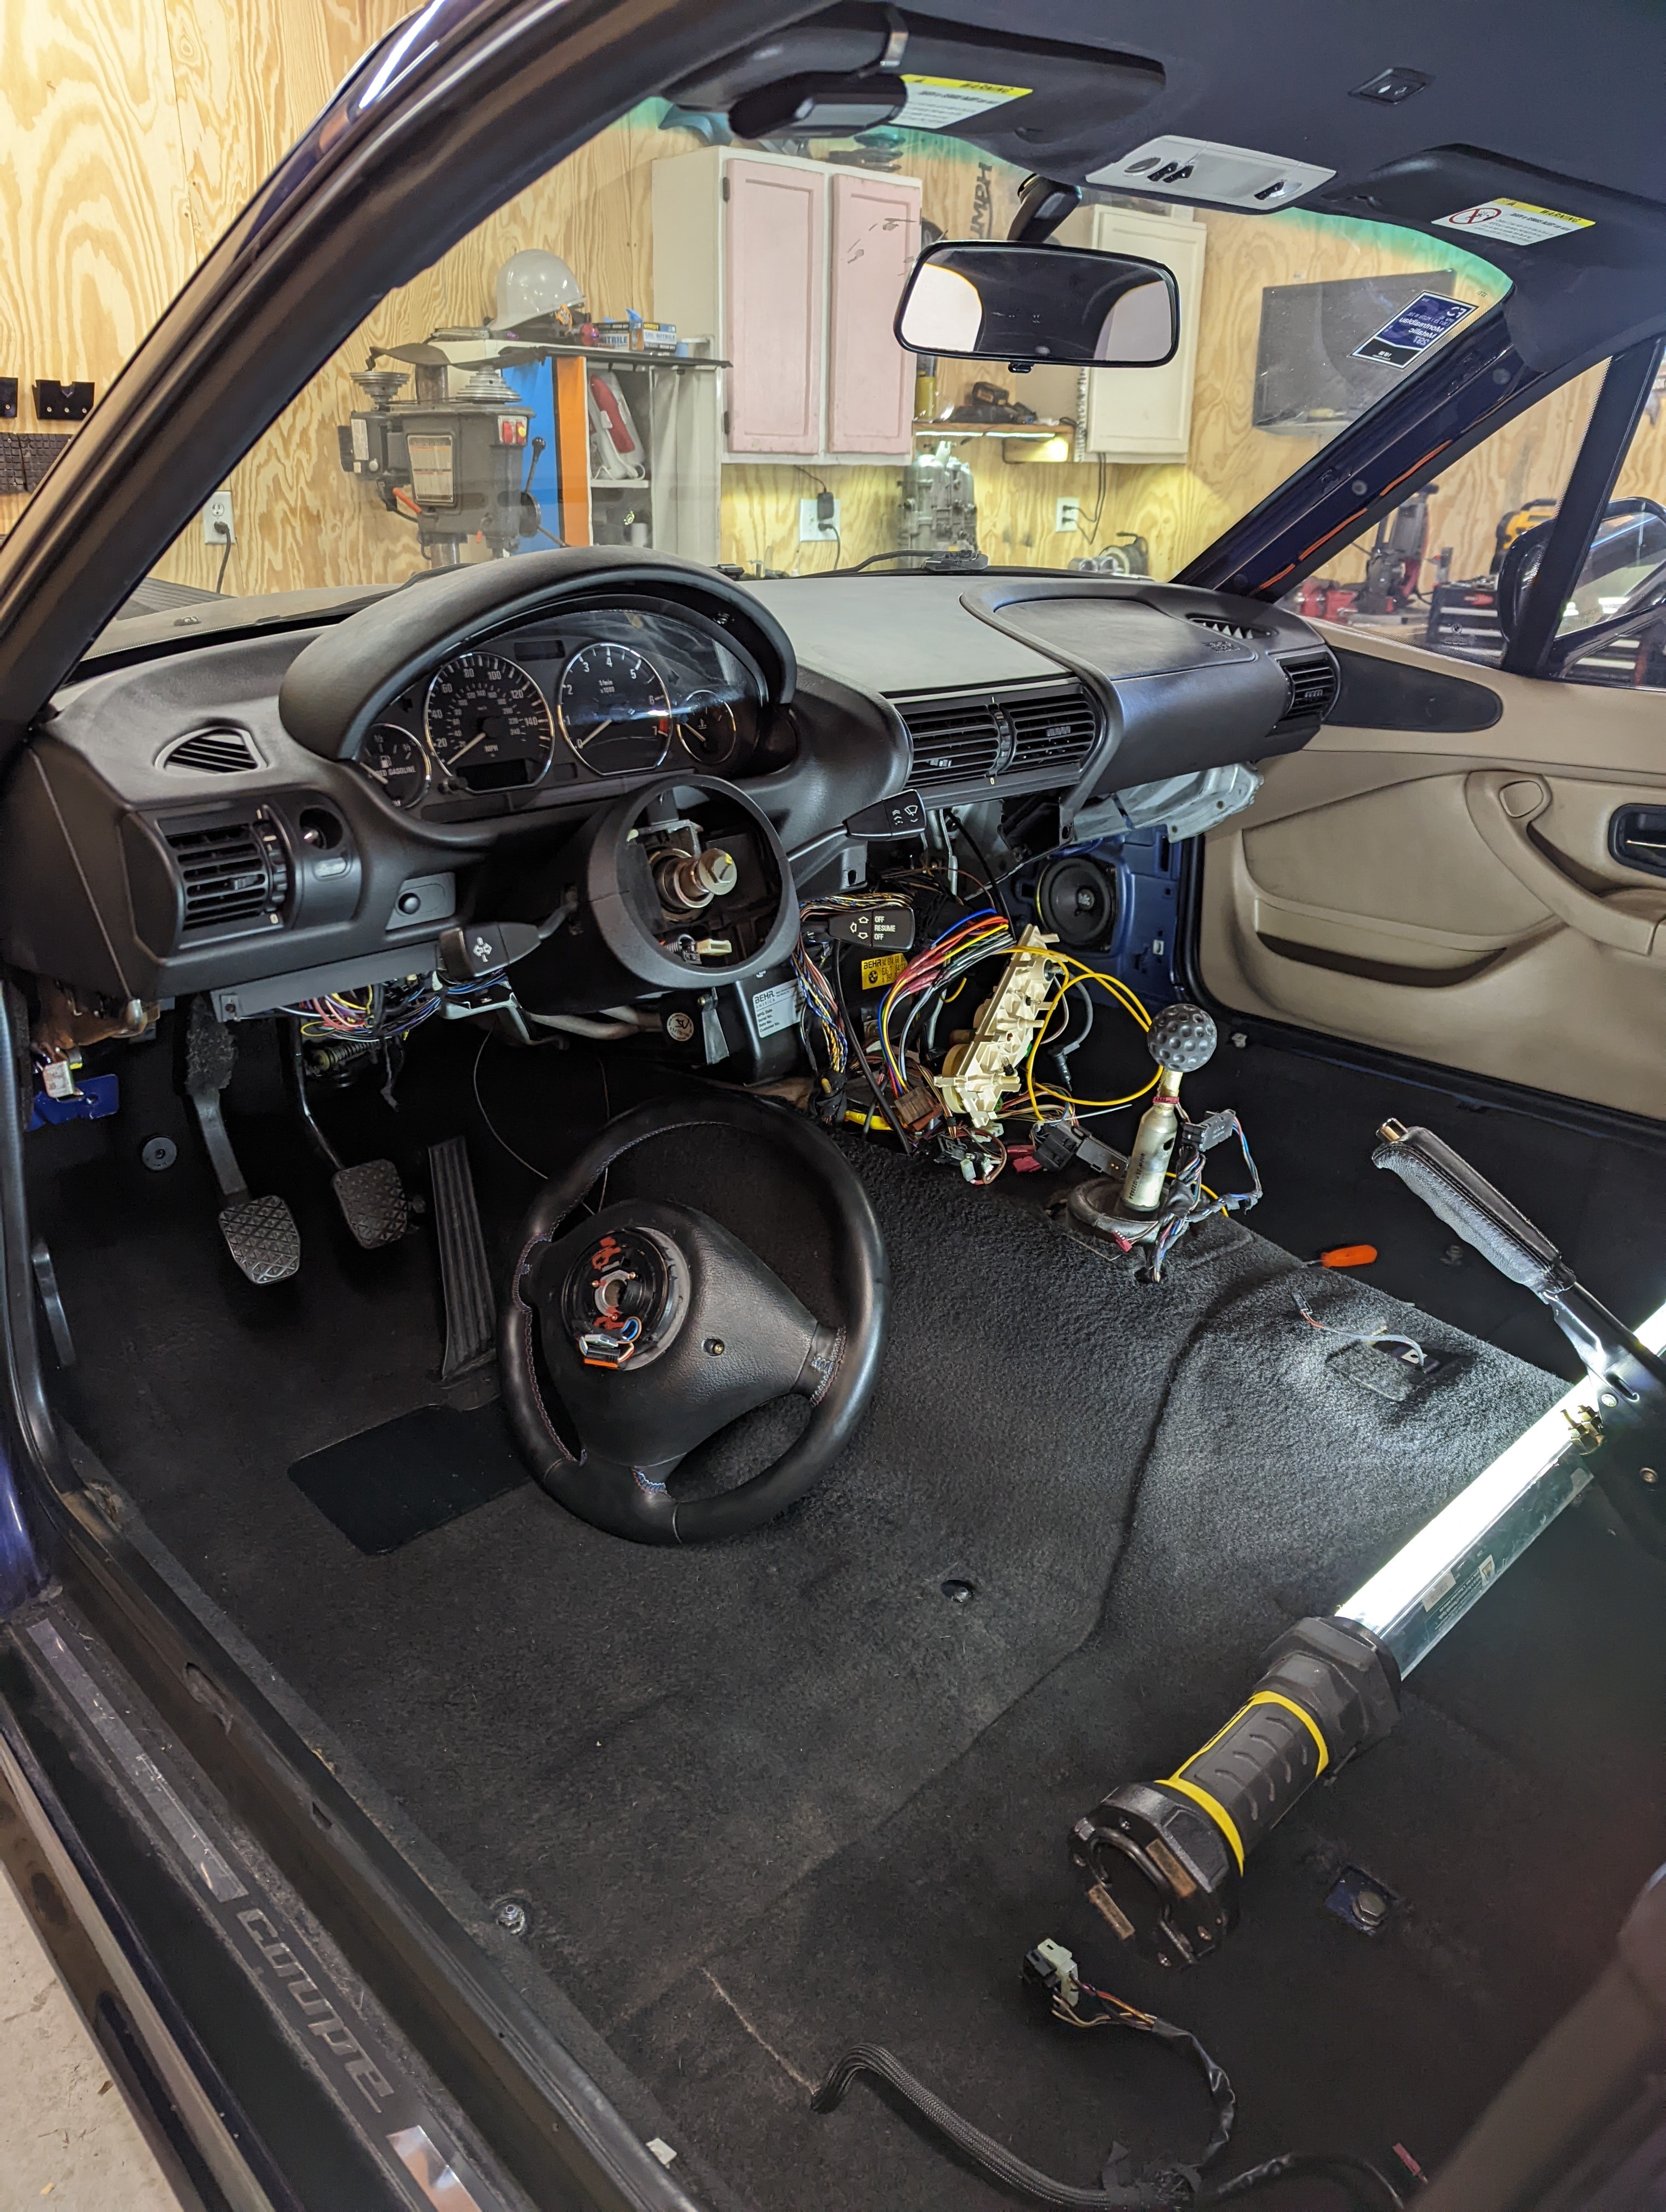
                        Went to wire up the center gauges and install center console, but ran into a whoops moment. While testing the interior dash lights, I bumped a couple terminals with my small pick tool and shorted it out. Dash lights immediately turned off and wouldn't work again.

                        Checked the fuses, radio fuse was blown. Good, easy fix. Nope wasn't the issue although probably part of it. Did some googling and came up with the rheostat inside the headlight switch that dims the dash lights easily fry apparently. 

                        One fix is jumpering some pins in the headlight switch to bypass the rheostat. Tried that and I was able to turn the entire car on by pulling the headlight knob out. Ummm, no thanks! Reversed that.

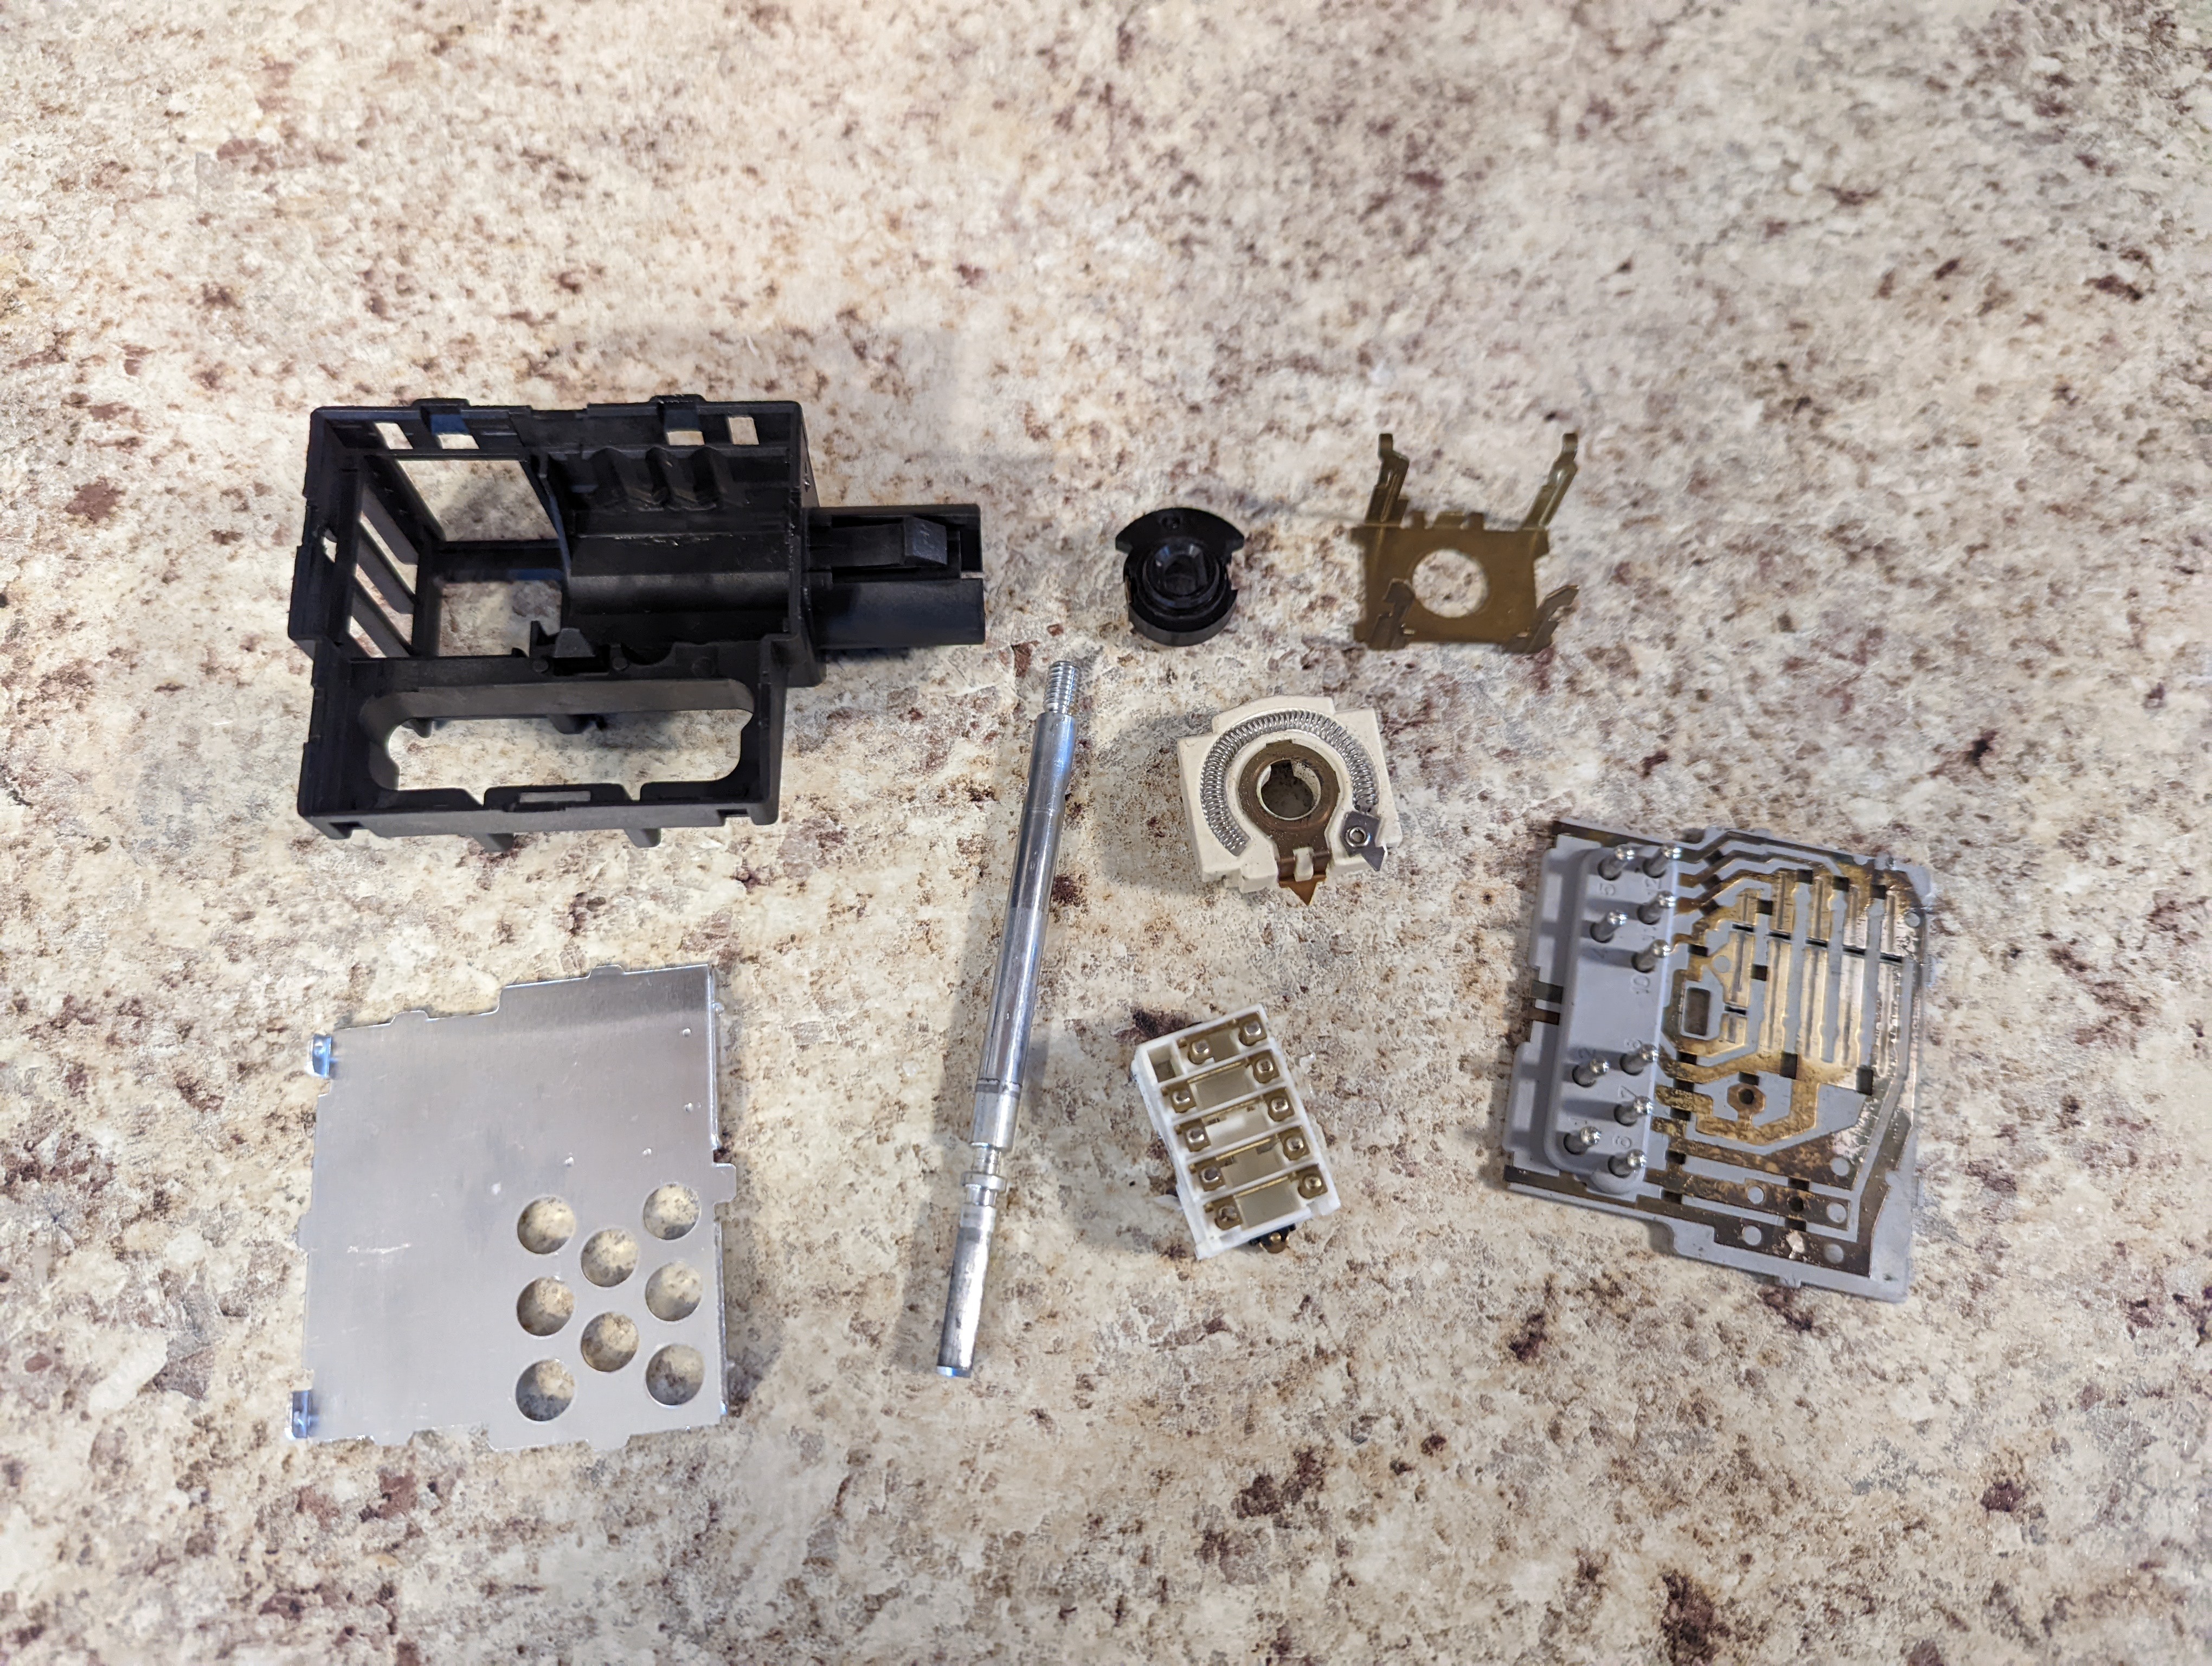
                        Another fix is completely disassembling the headlight switch to solder the broken area and everything should work as normal. Let's give it a try!

                        Disassembled the switch
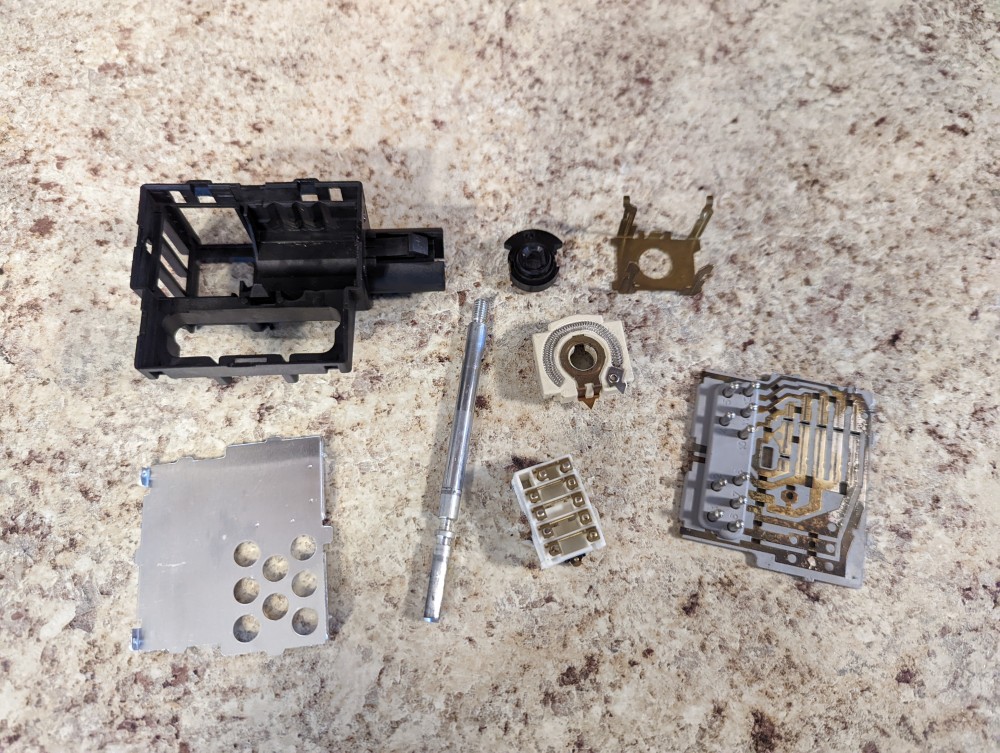
                        PXL20220320222149709.jpg

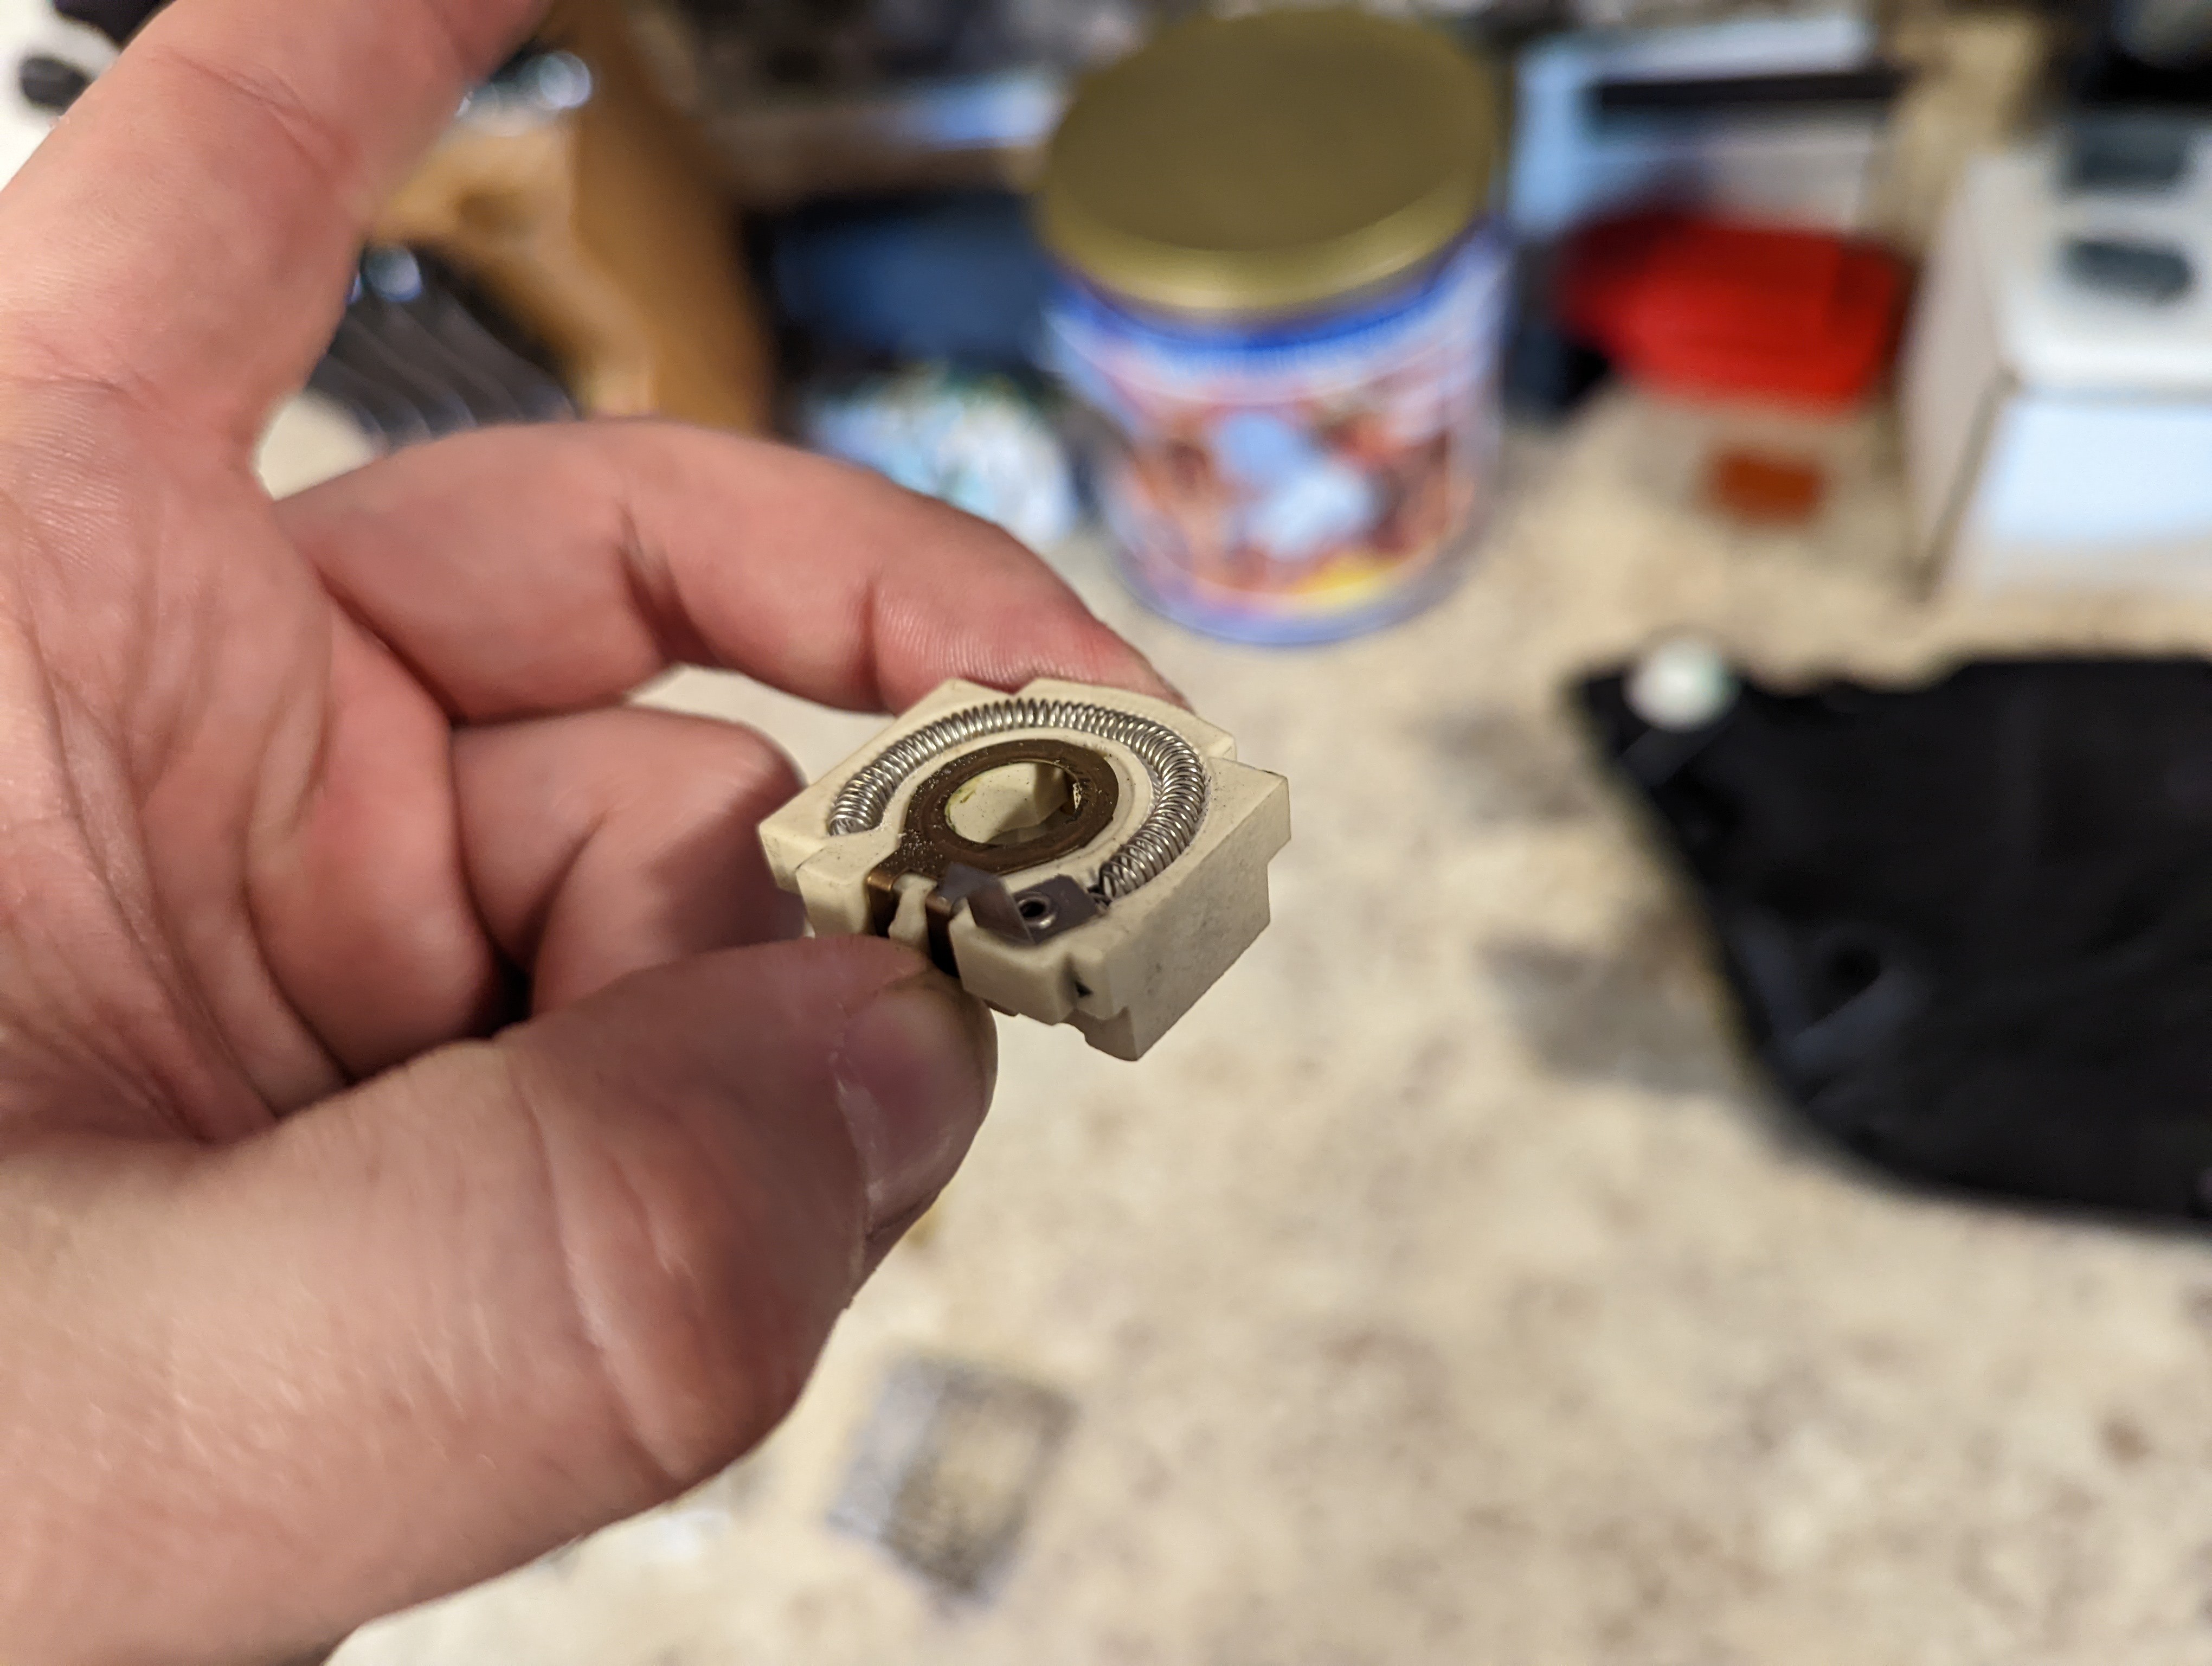
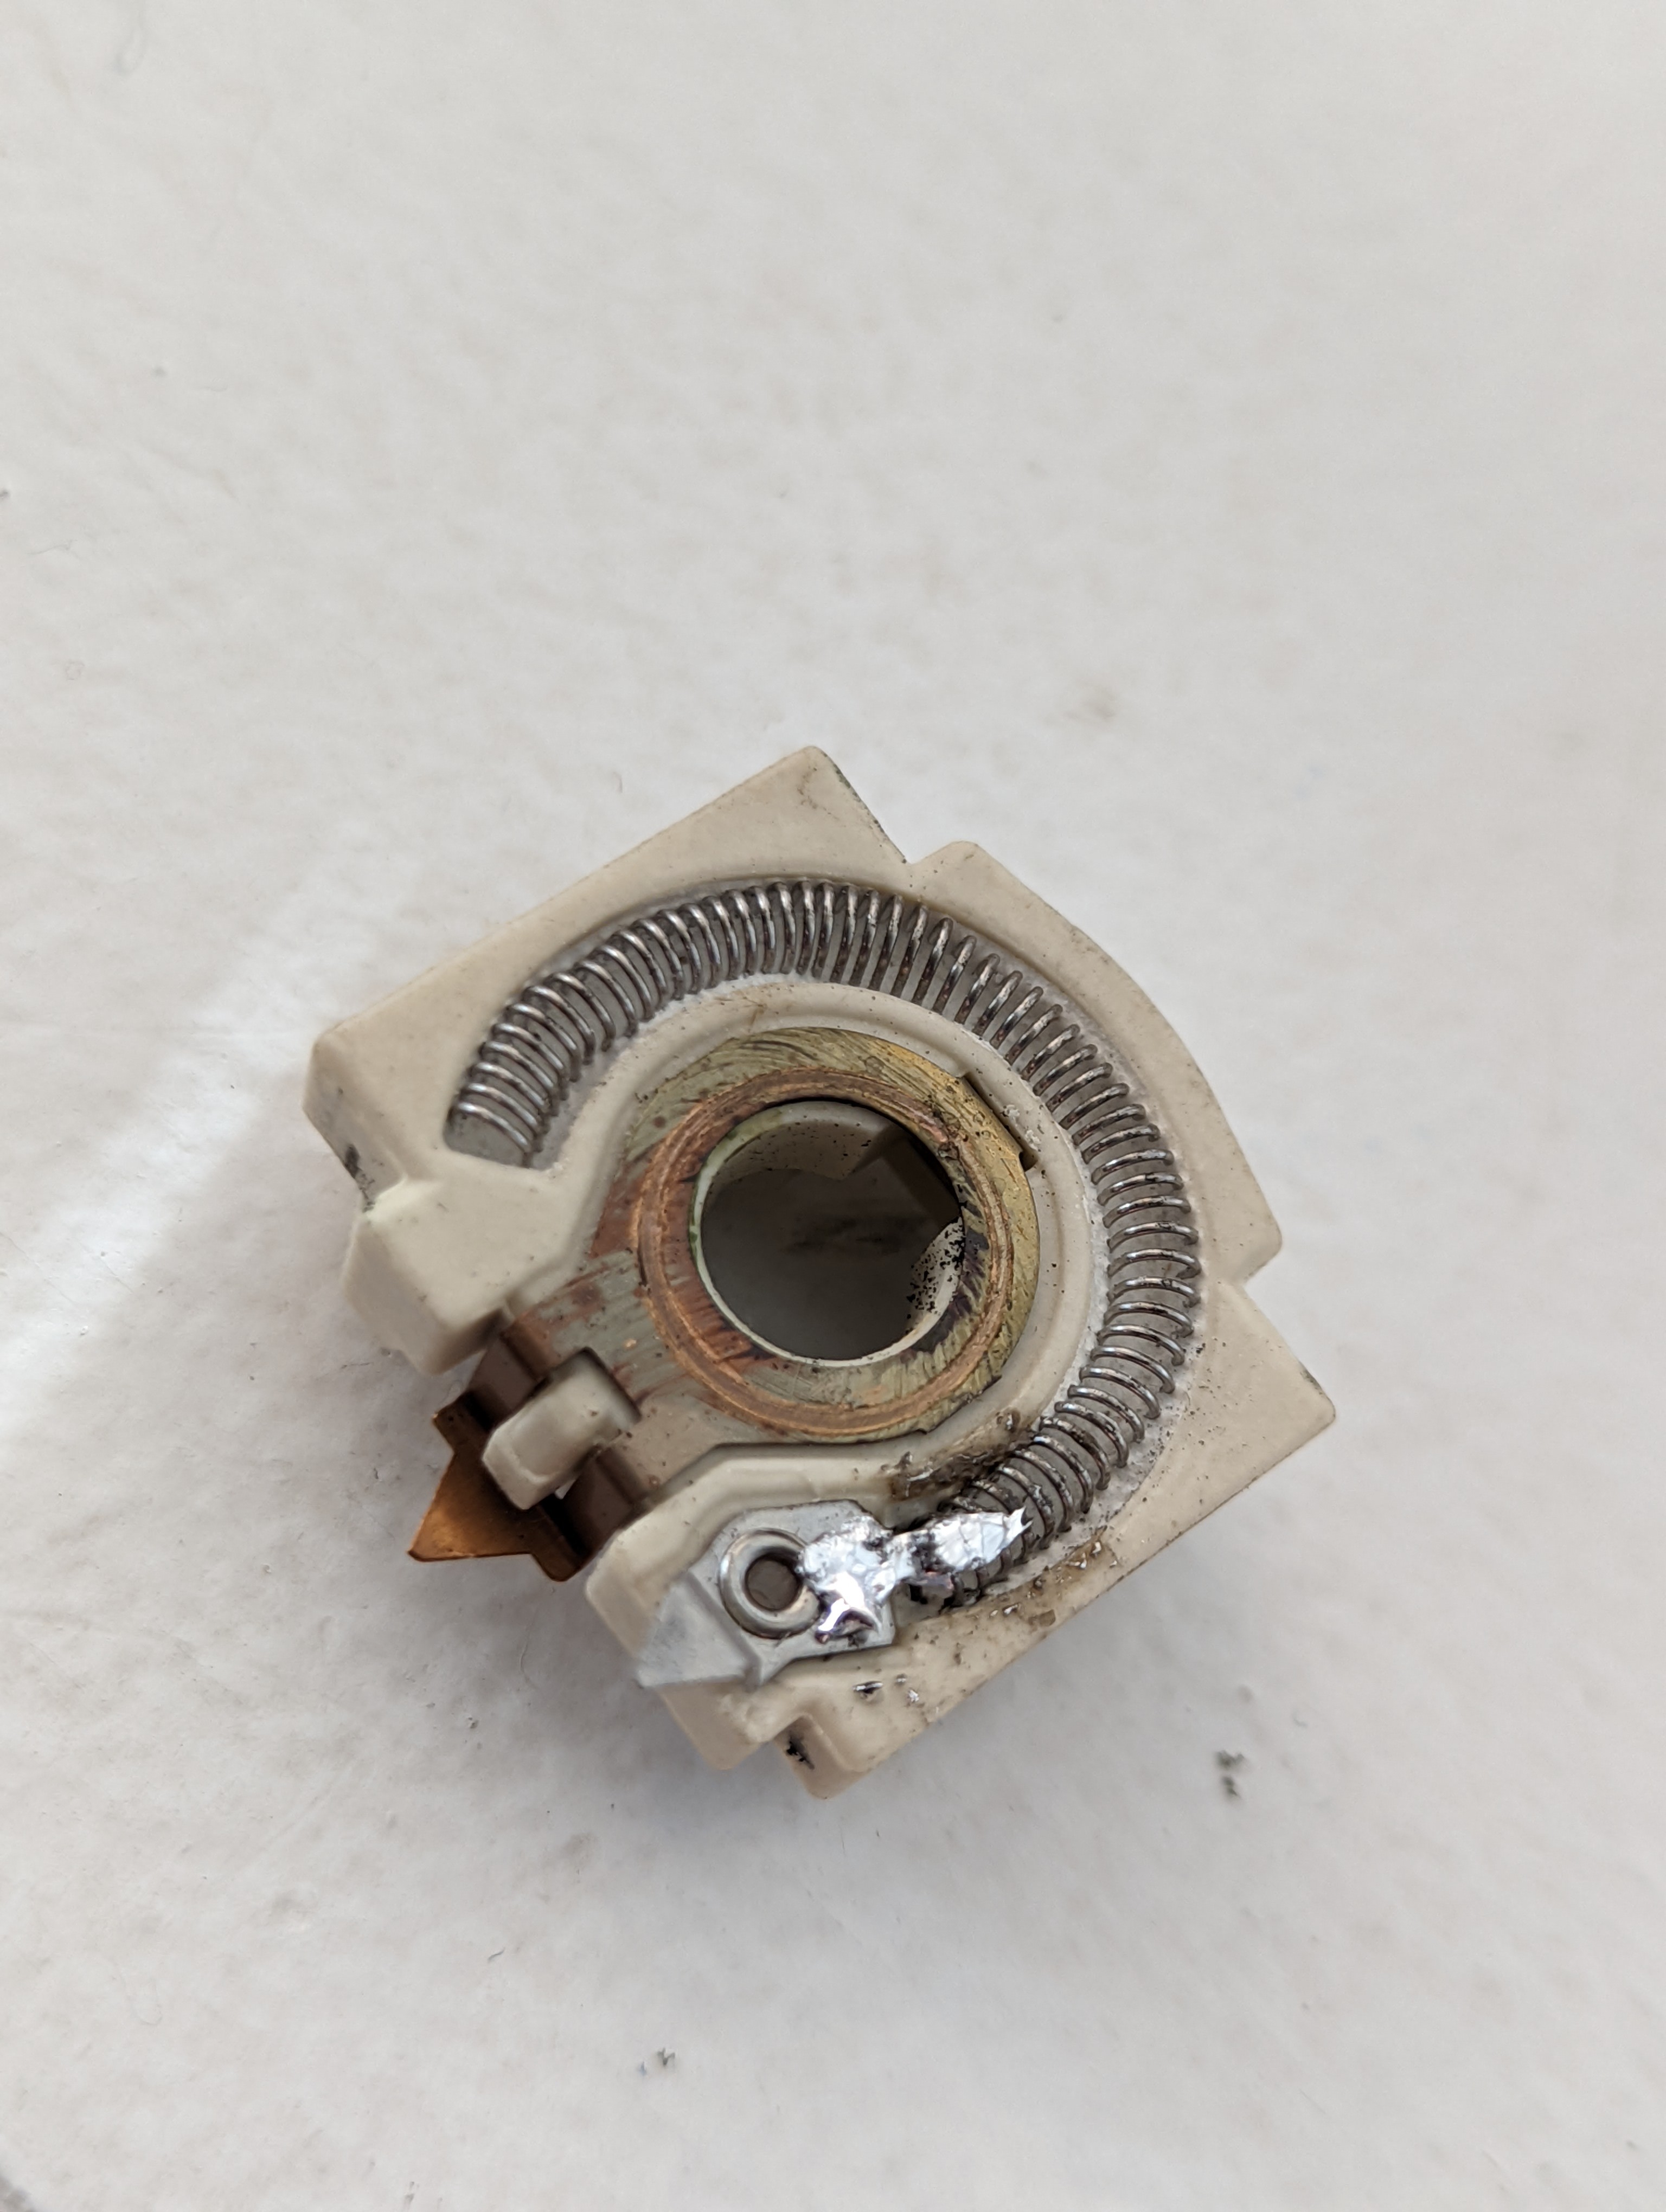
                        Found the spot on the rheostat that fried. Hard to see but it's the very first coil of the spring behind the silver tab.
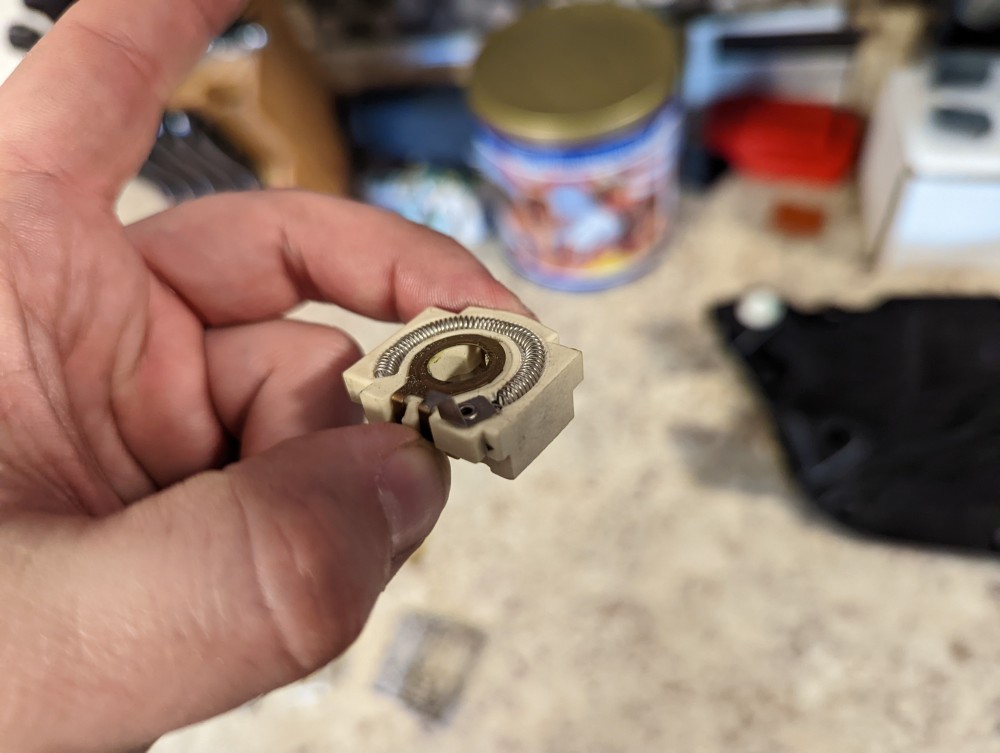
                        PXL20220320222219720.jpg

                        Soldering this small is nearly impossible for my giant solder gun, so big blob it is. 
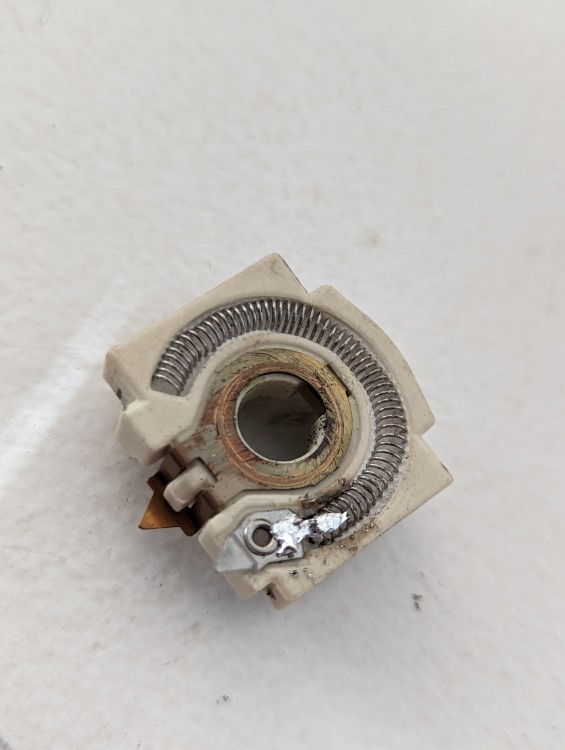
                        PXL20220320225125269.jpg

                        I tested the continuity between the end of the tab and the other end of the coil spring wire. Looks good to me. 

                        Threw it back together and into the car. All works as it should! Sorry no pics of that yet. Glad I was able to save some cash as every part of this car seems to be priced like gold. We shall see how long it lasts now.

                        CHECK OUT >>> RAGE DRIFT DESIGNS <<< FOR DECALS AND MORE!

                        1 Reply Last reply
                        4
                        • Bassboy3313B
                          Bassboy3313B
                          Bassboy3313
                          wrote on last edited by
                          #105

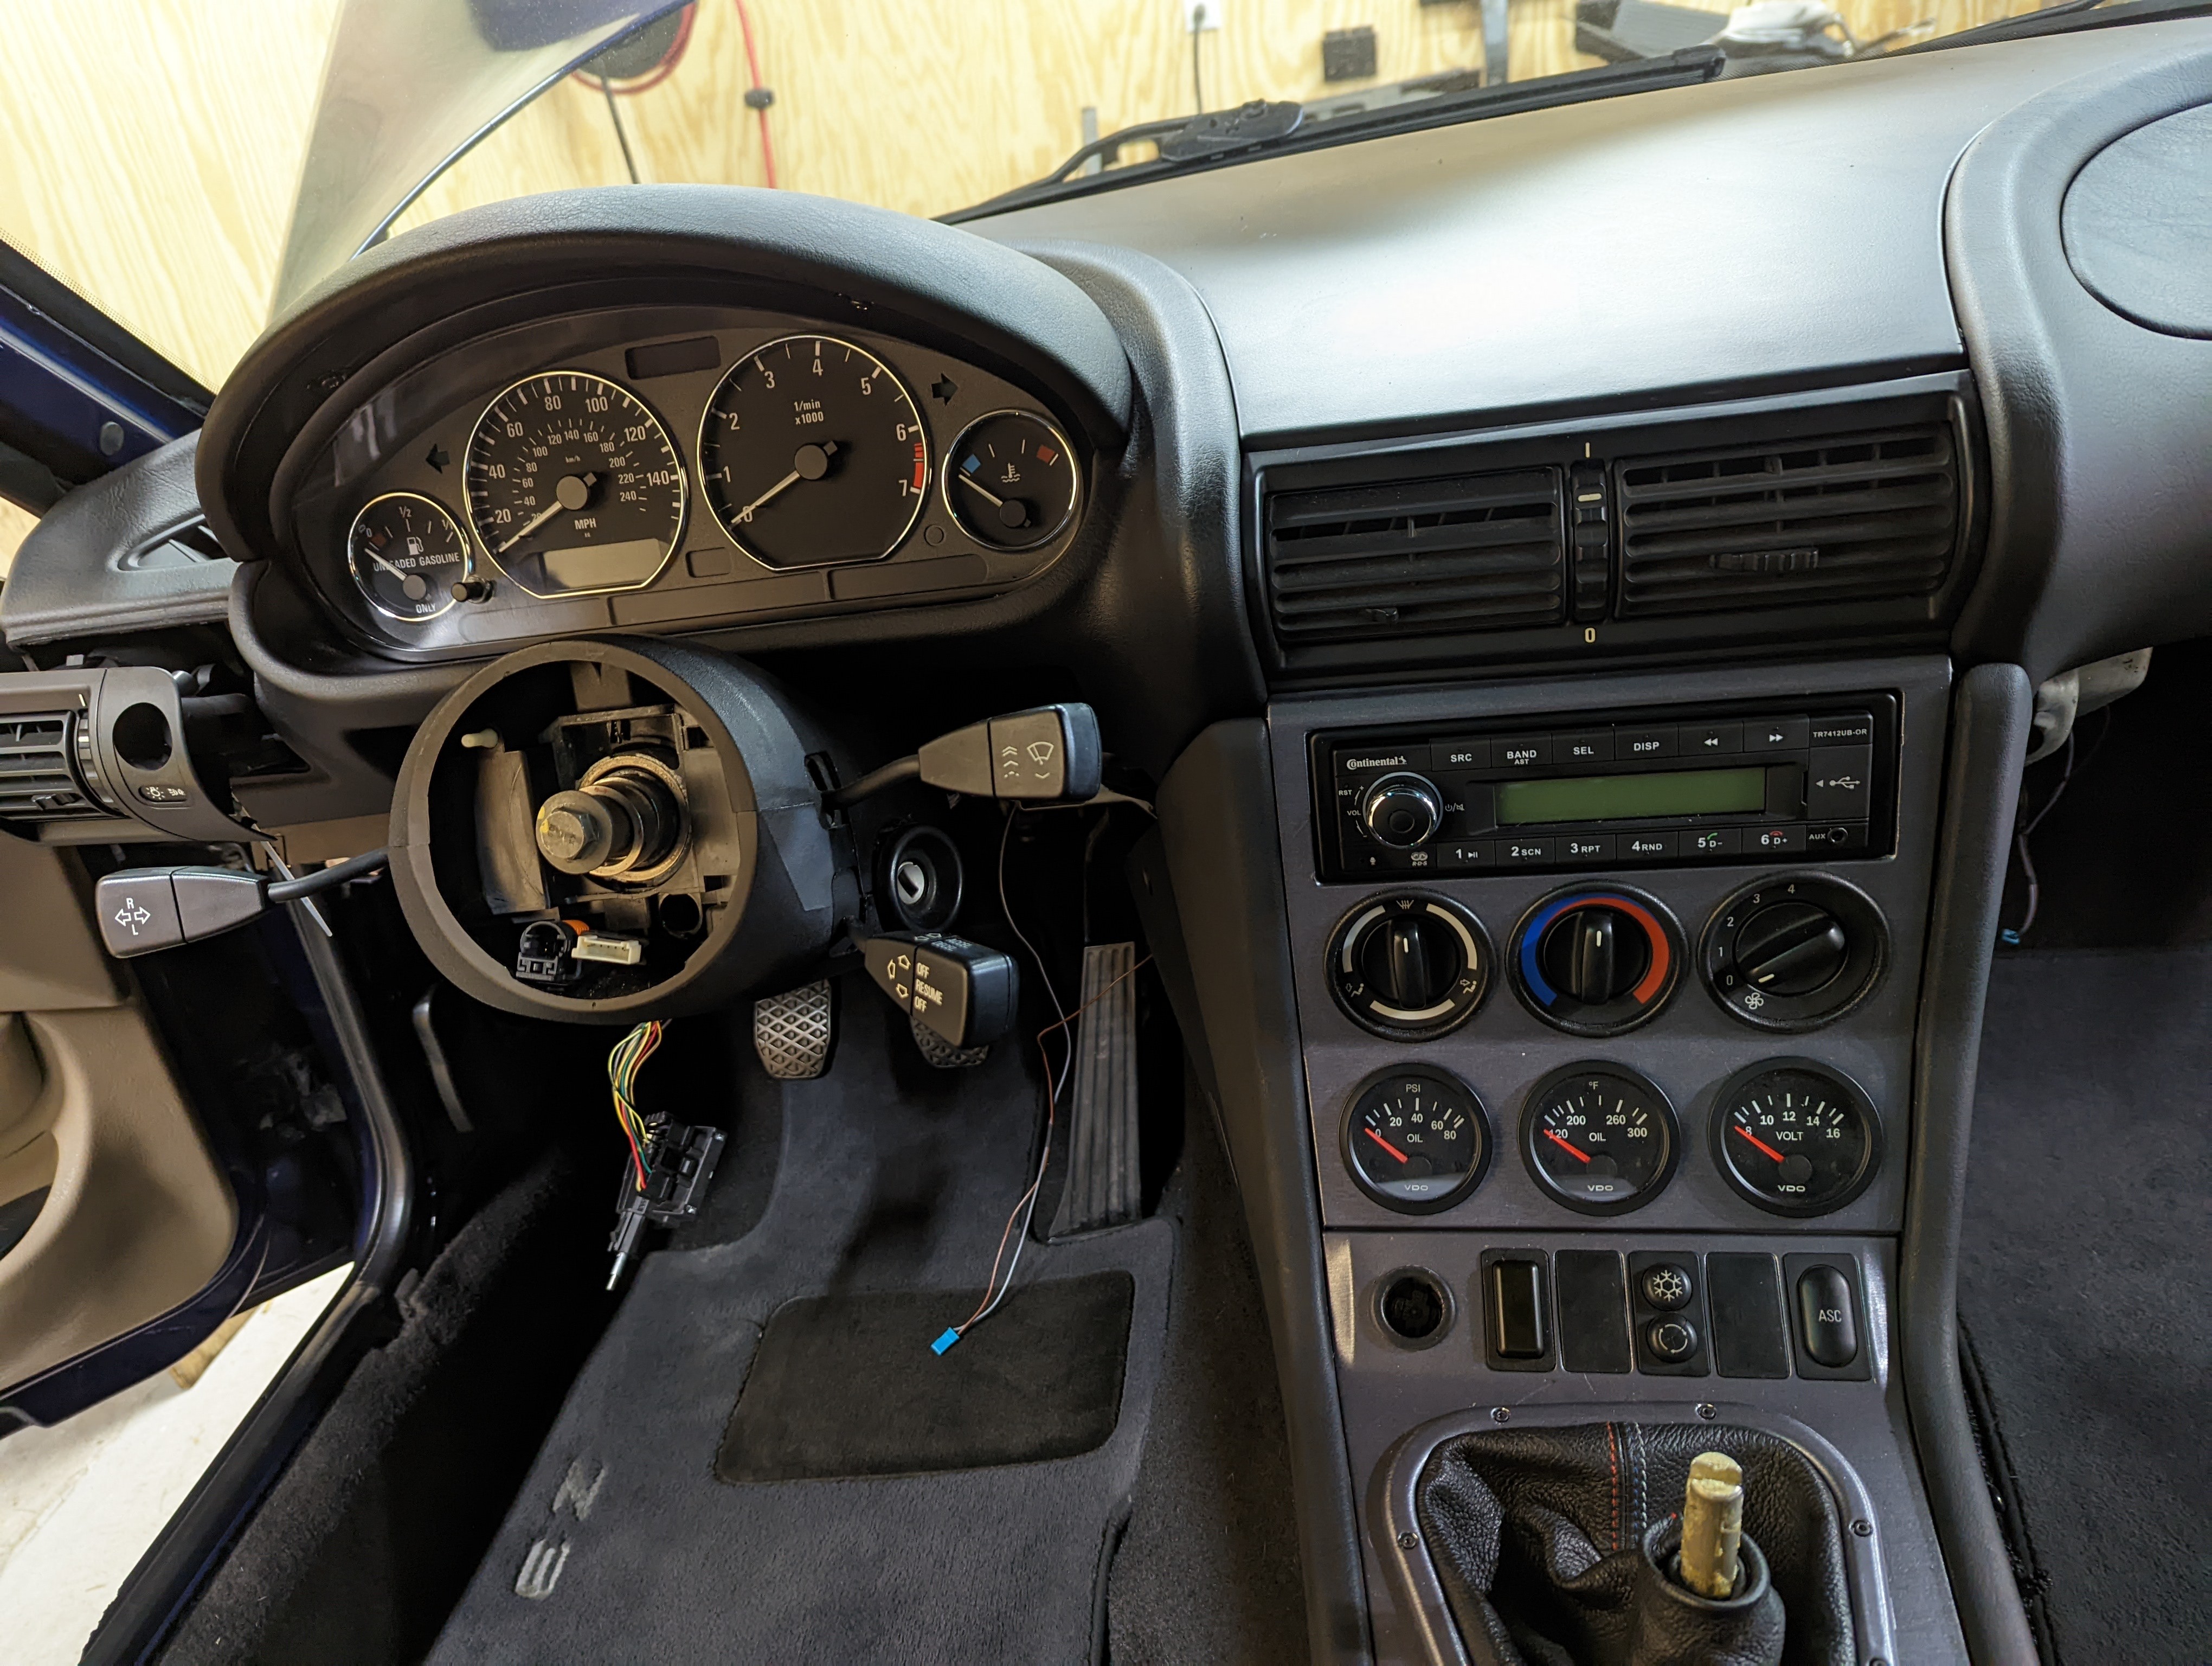
                          Got the center console in and everything hooked up. What a huge pain in the ass that was! Hooking things up with little to no space to put hand behind was super frustrating. Hopefully everything works as it should or it's gonna stay that way for awhile, lol. 
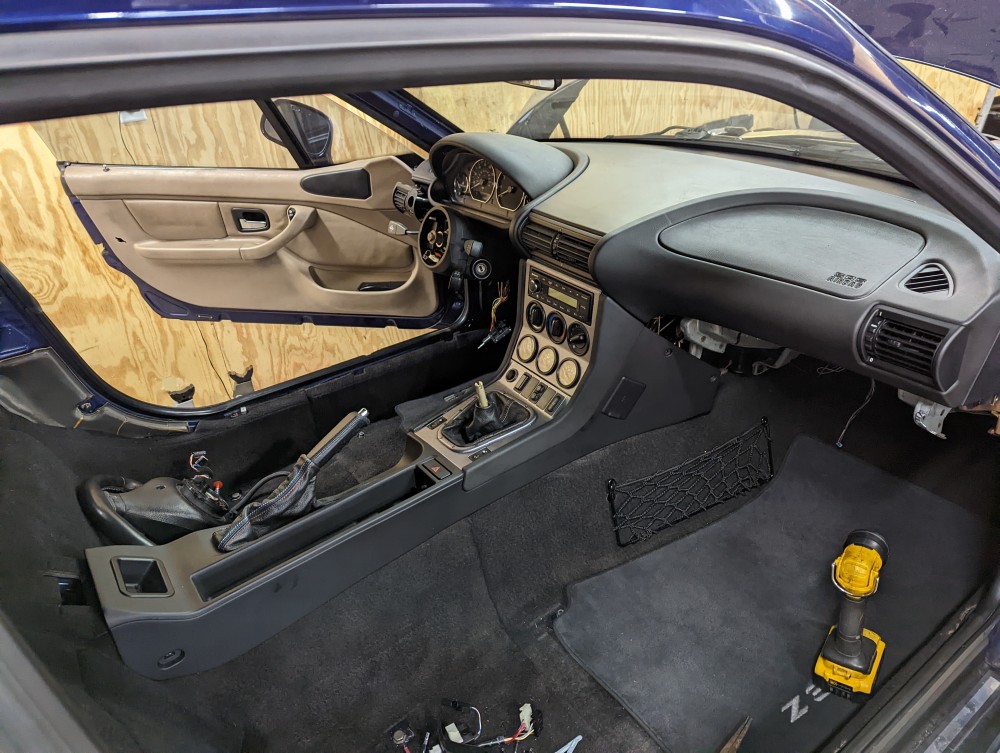
                          PXL20220403174721420.jpg

                          PXL20220403174749568.jpg

                          PXL20220403174834294.jpg

                          CHECK OUT >>> RAGE DRIFT DESIGNS <<< FOR DECALS AND MORE!

                          1 Reply Last reply
                          2
                          • Bassboy3313B
                            Bassboy3313B
                            Bassboy3313
                            wrote on last edited by
                            #106

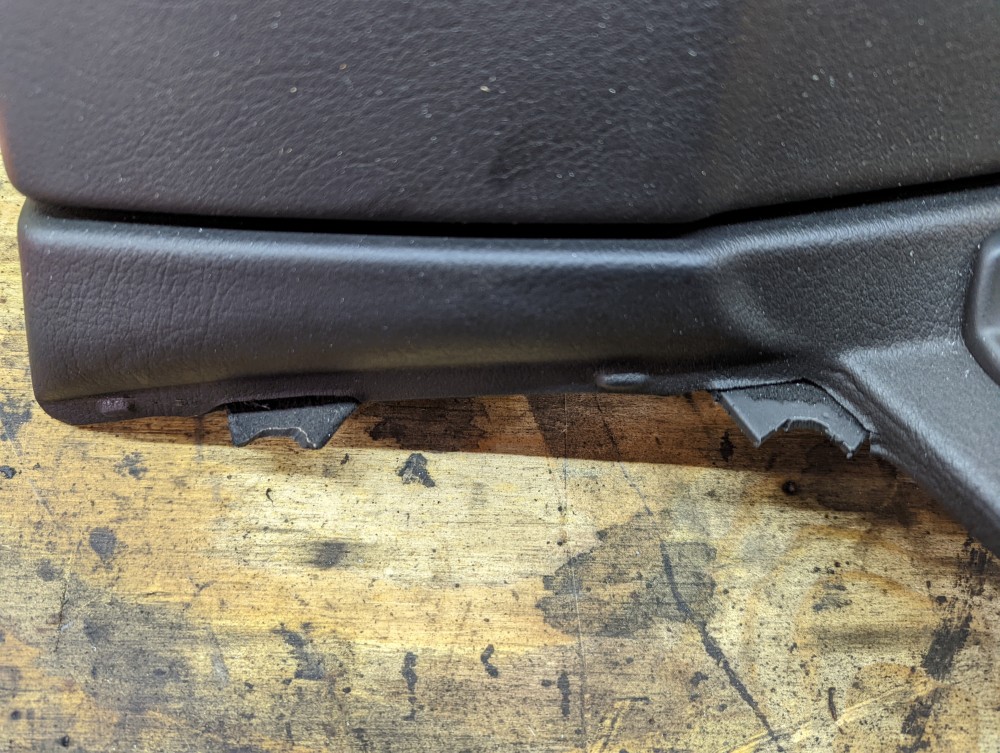
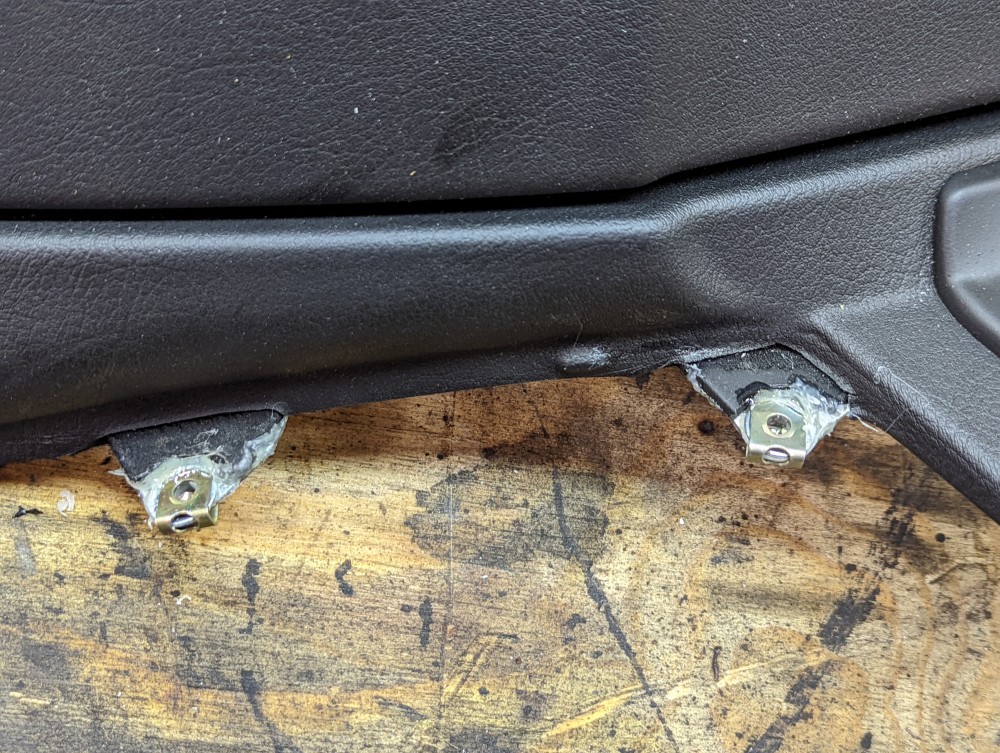
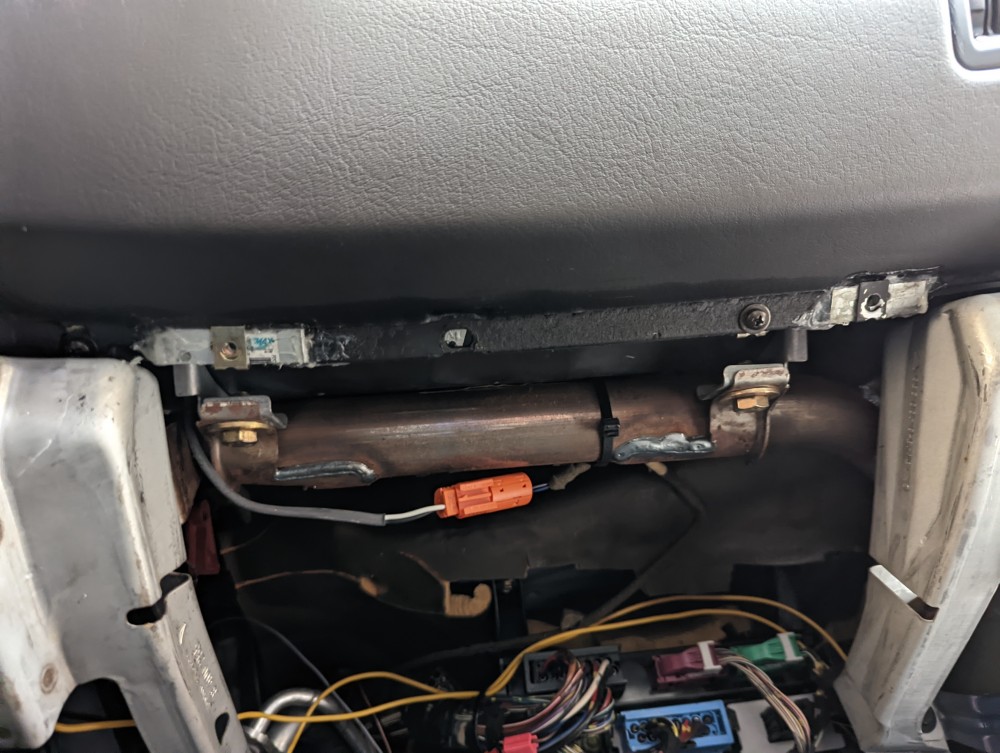
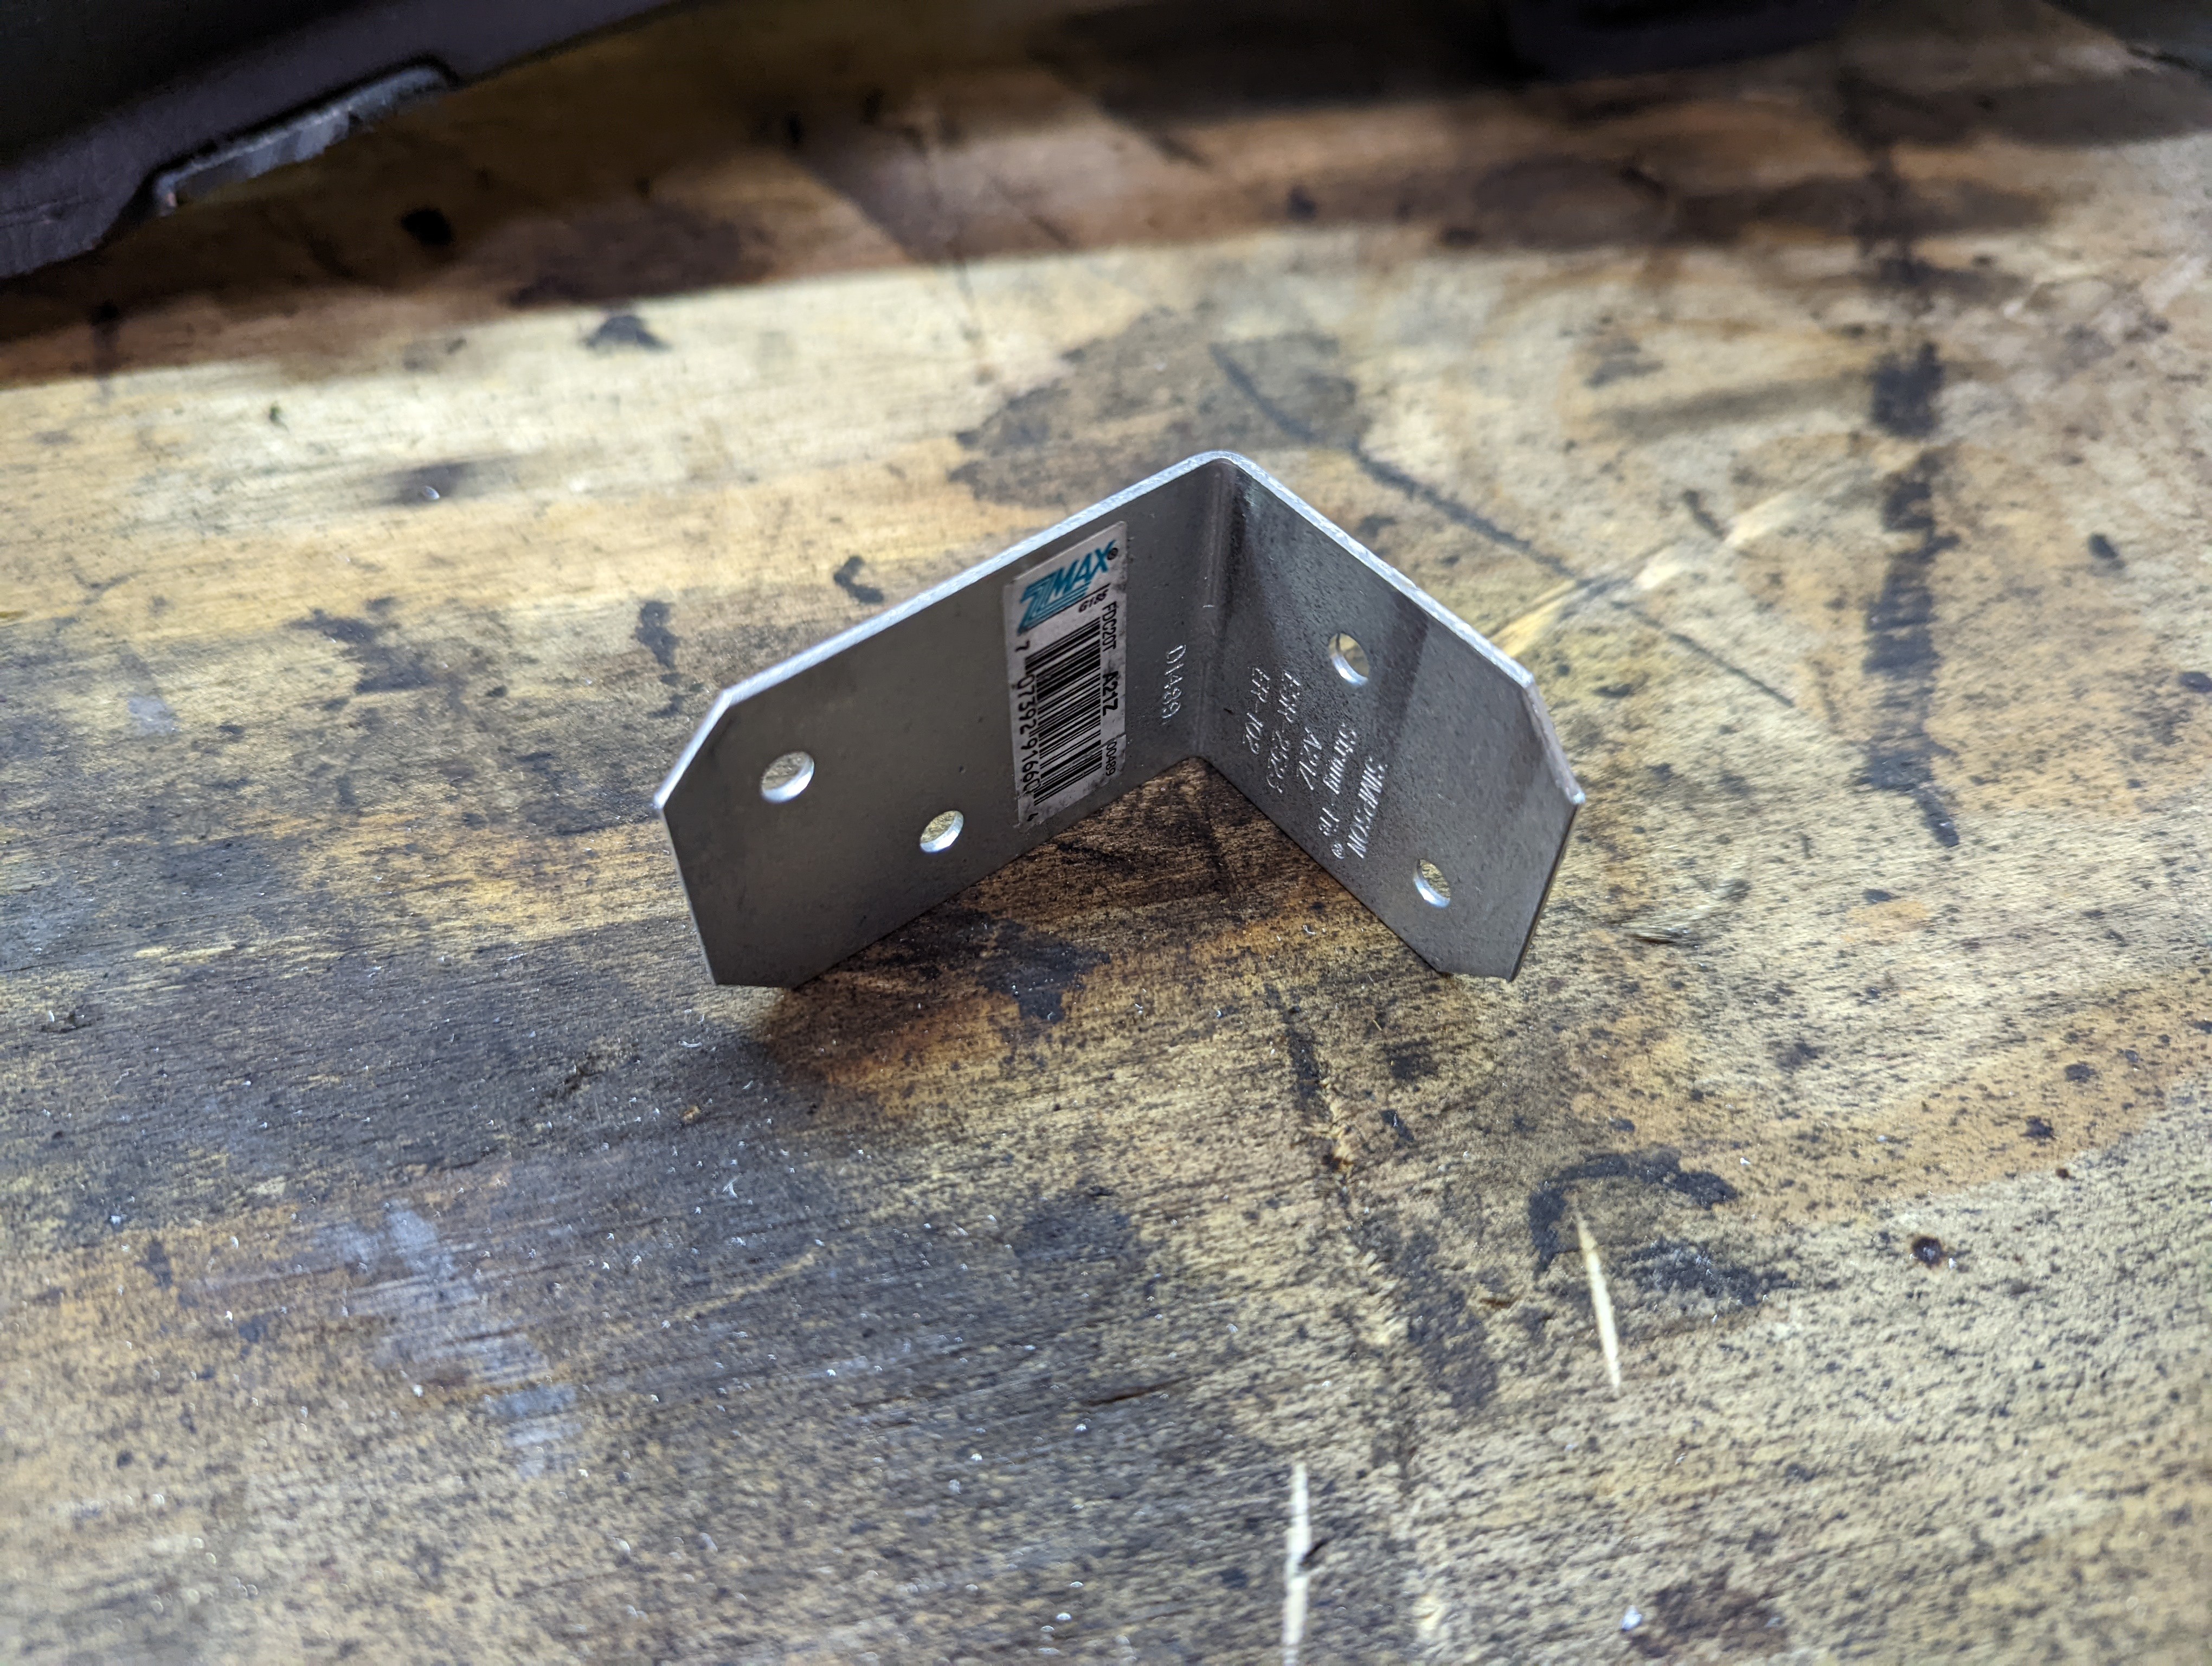
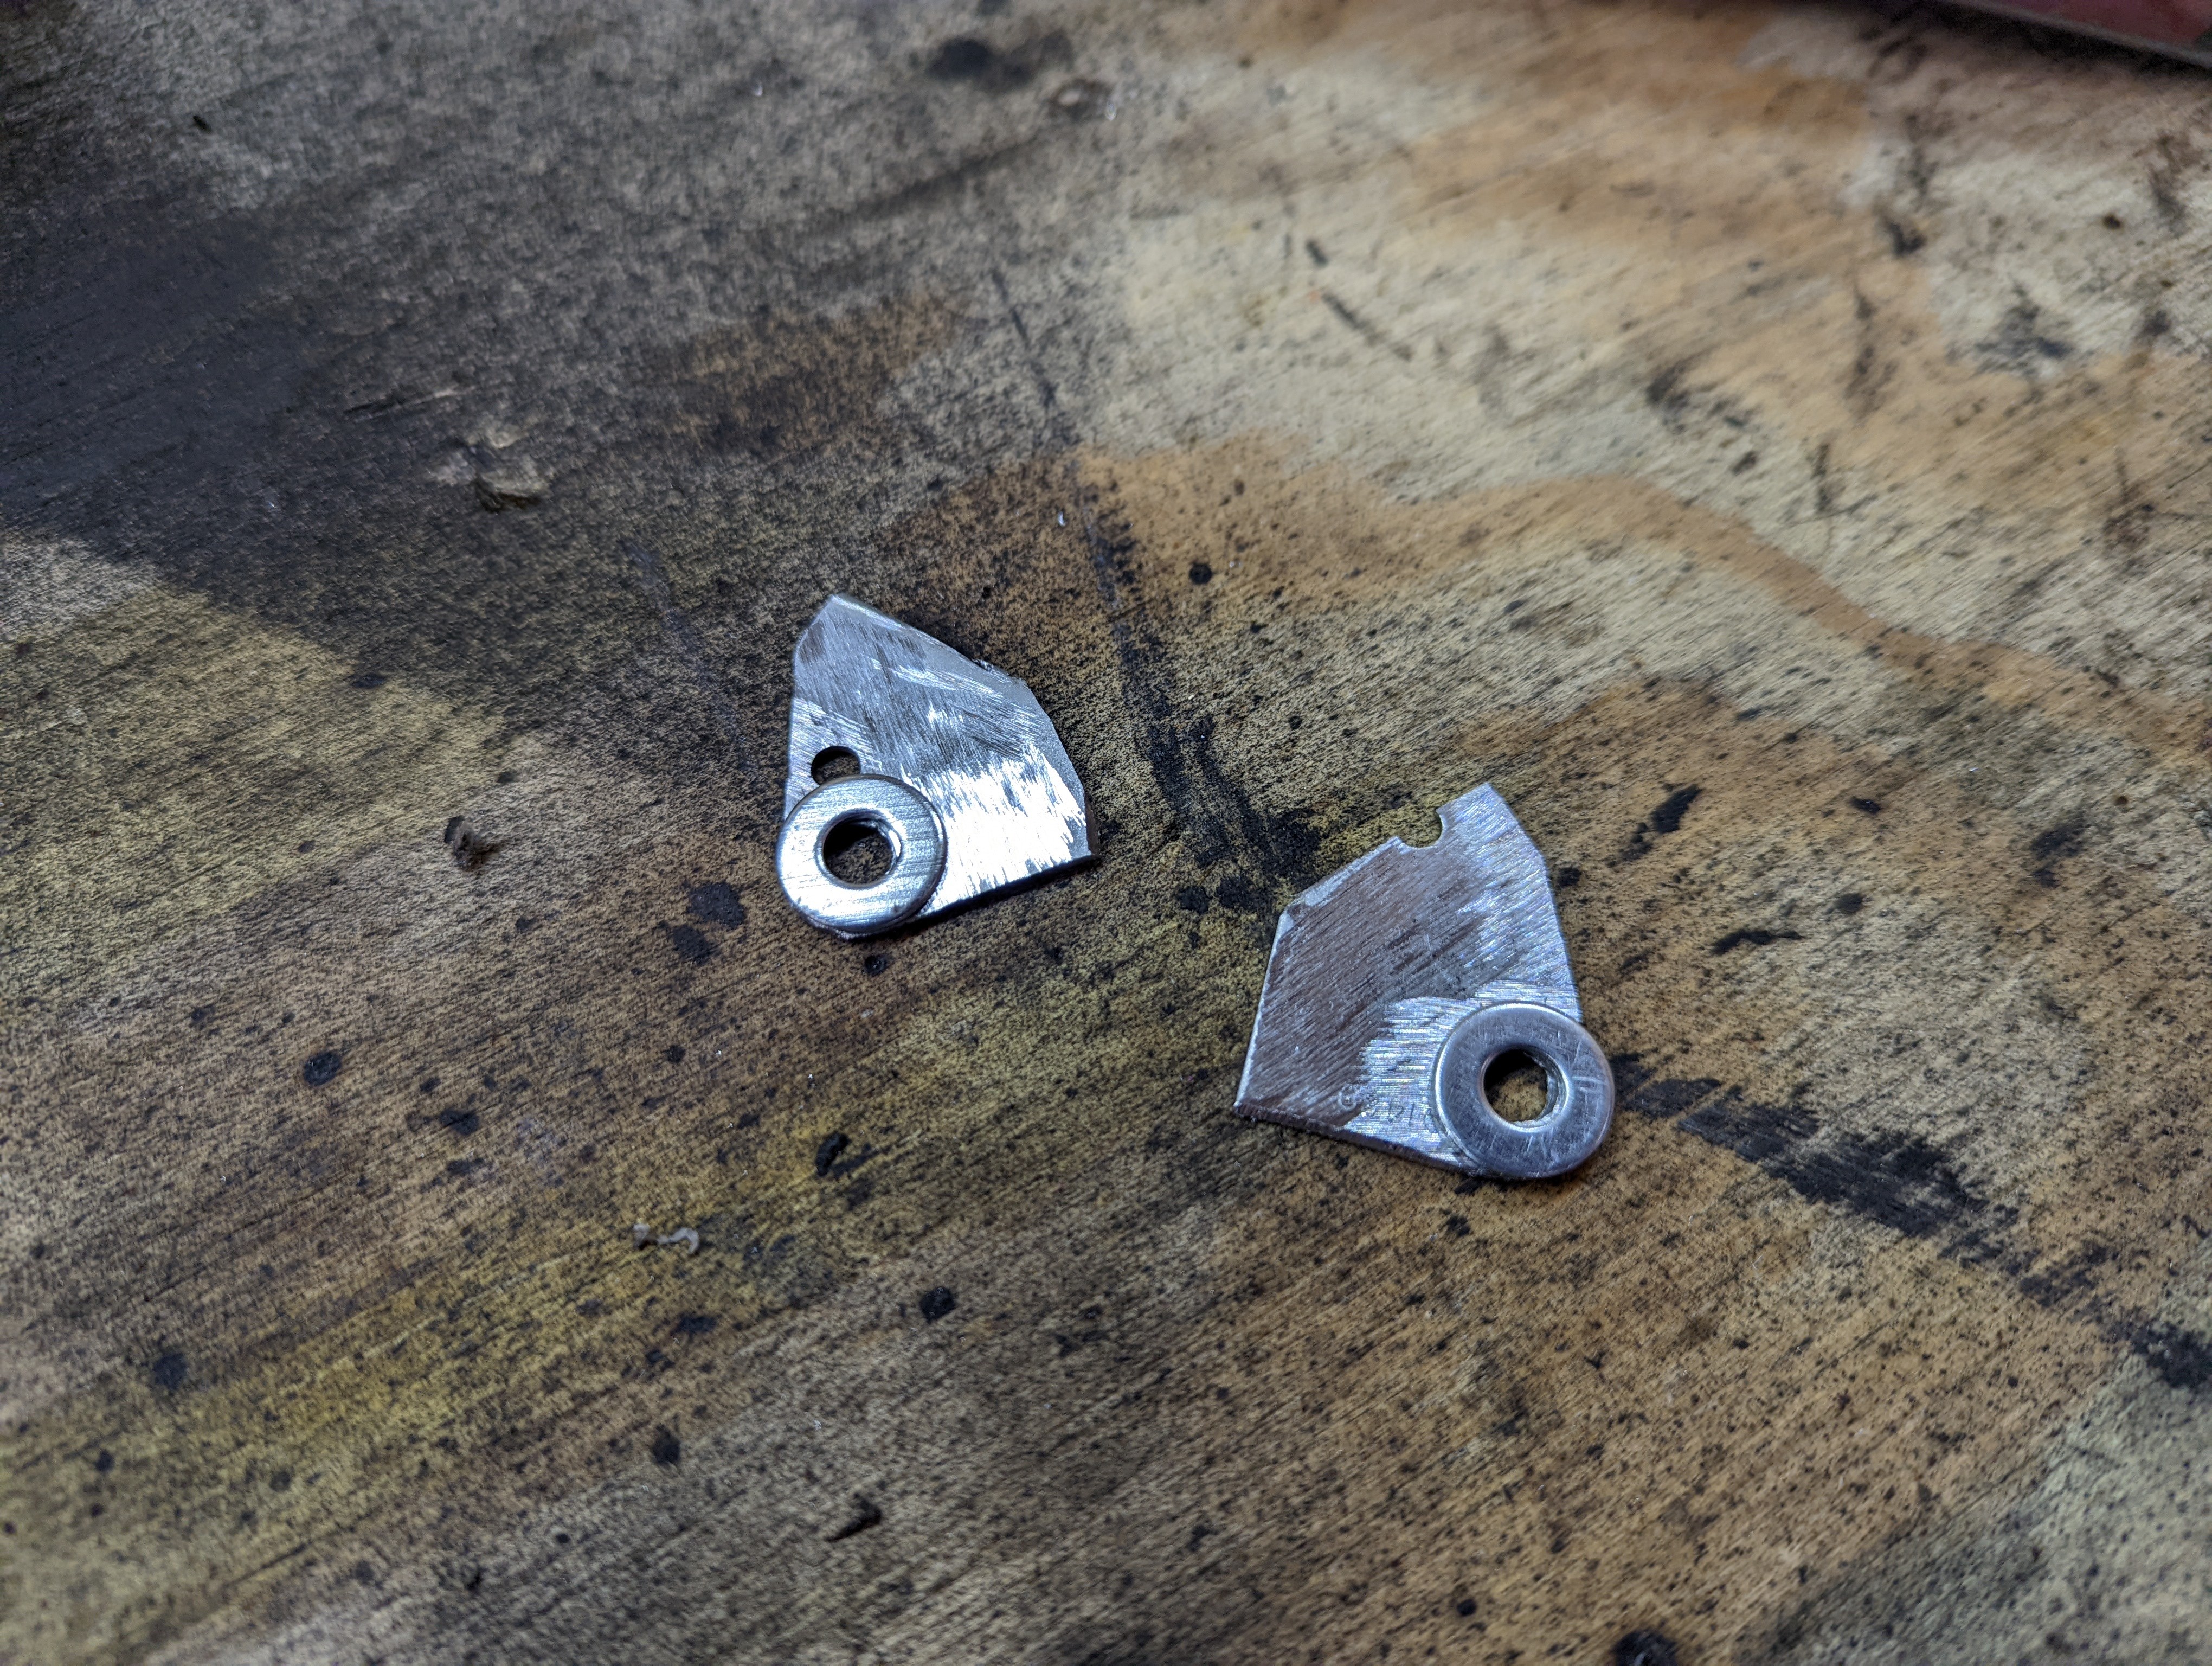
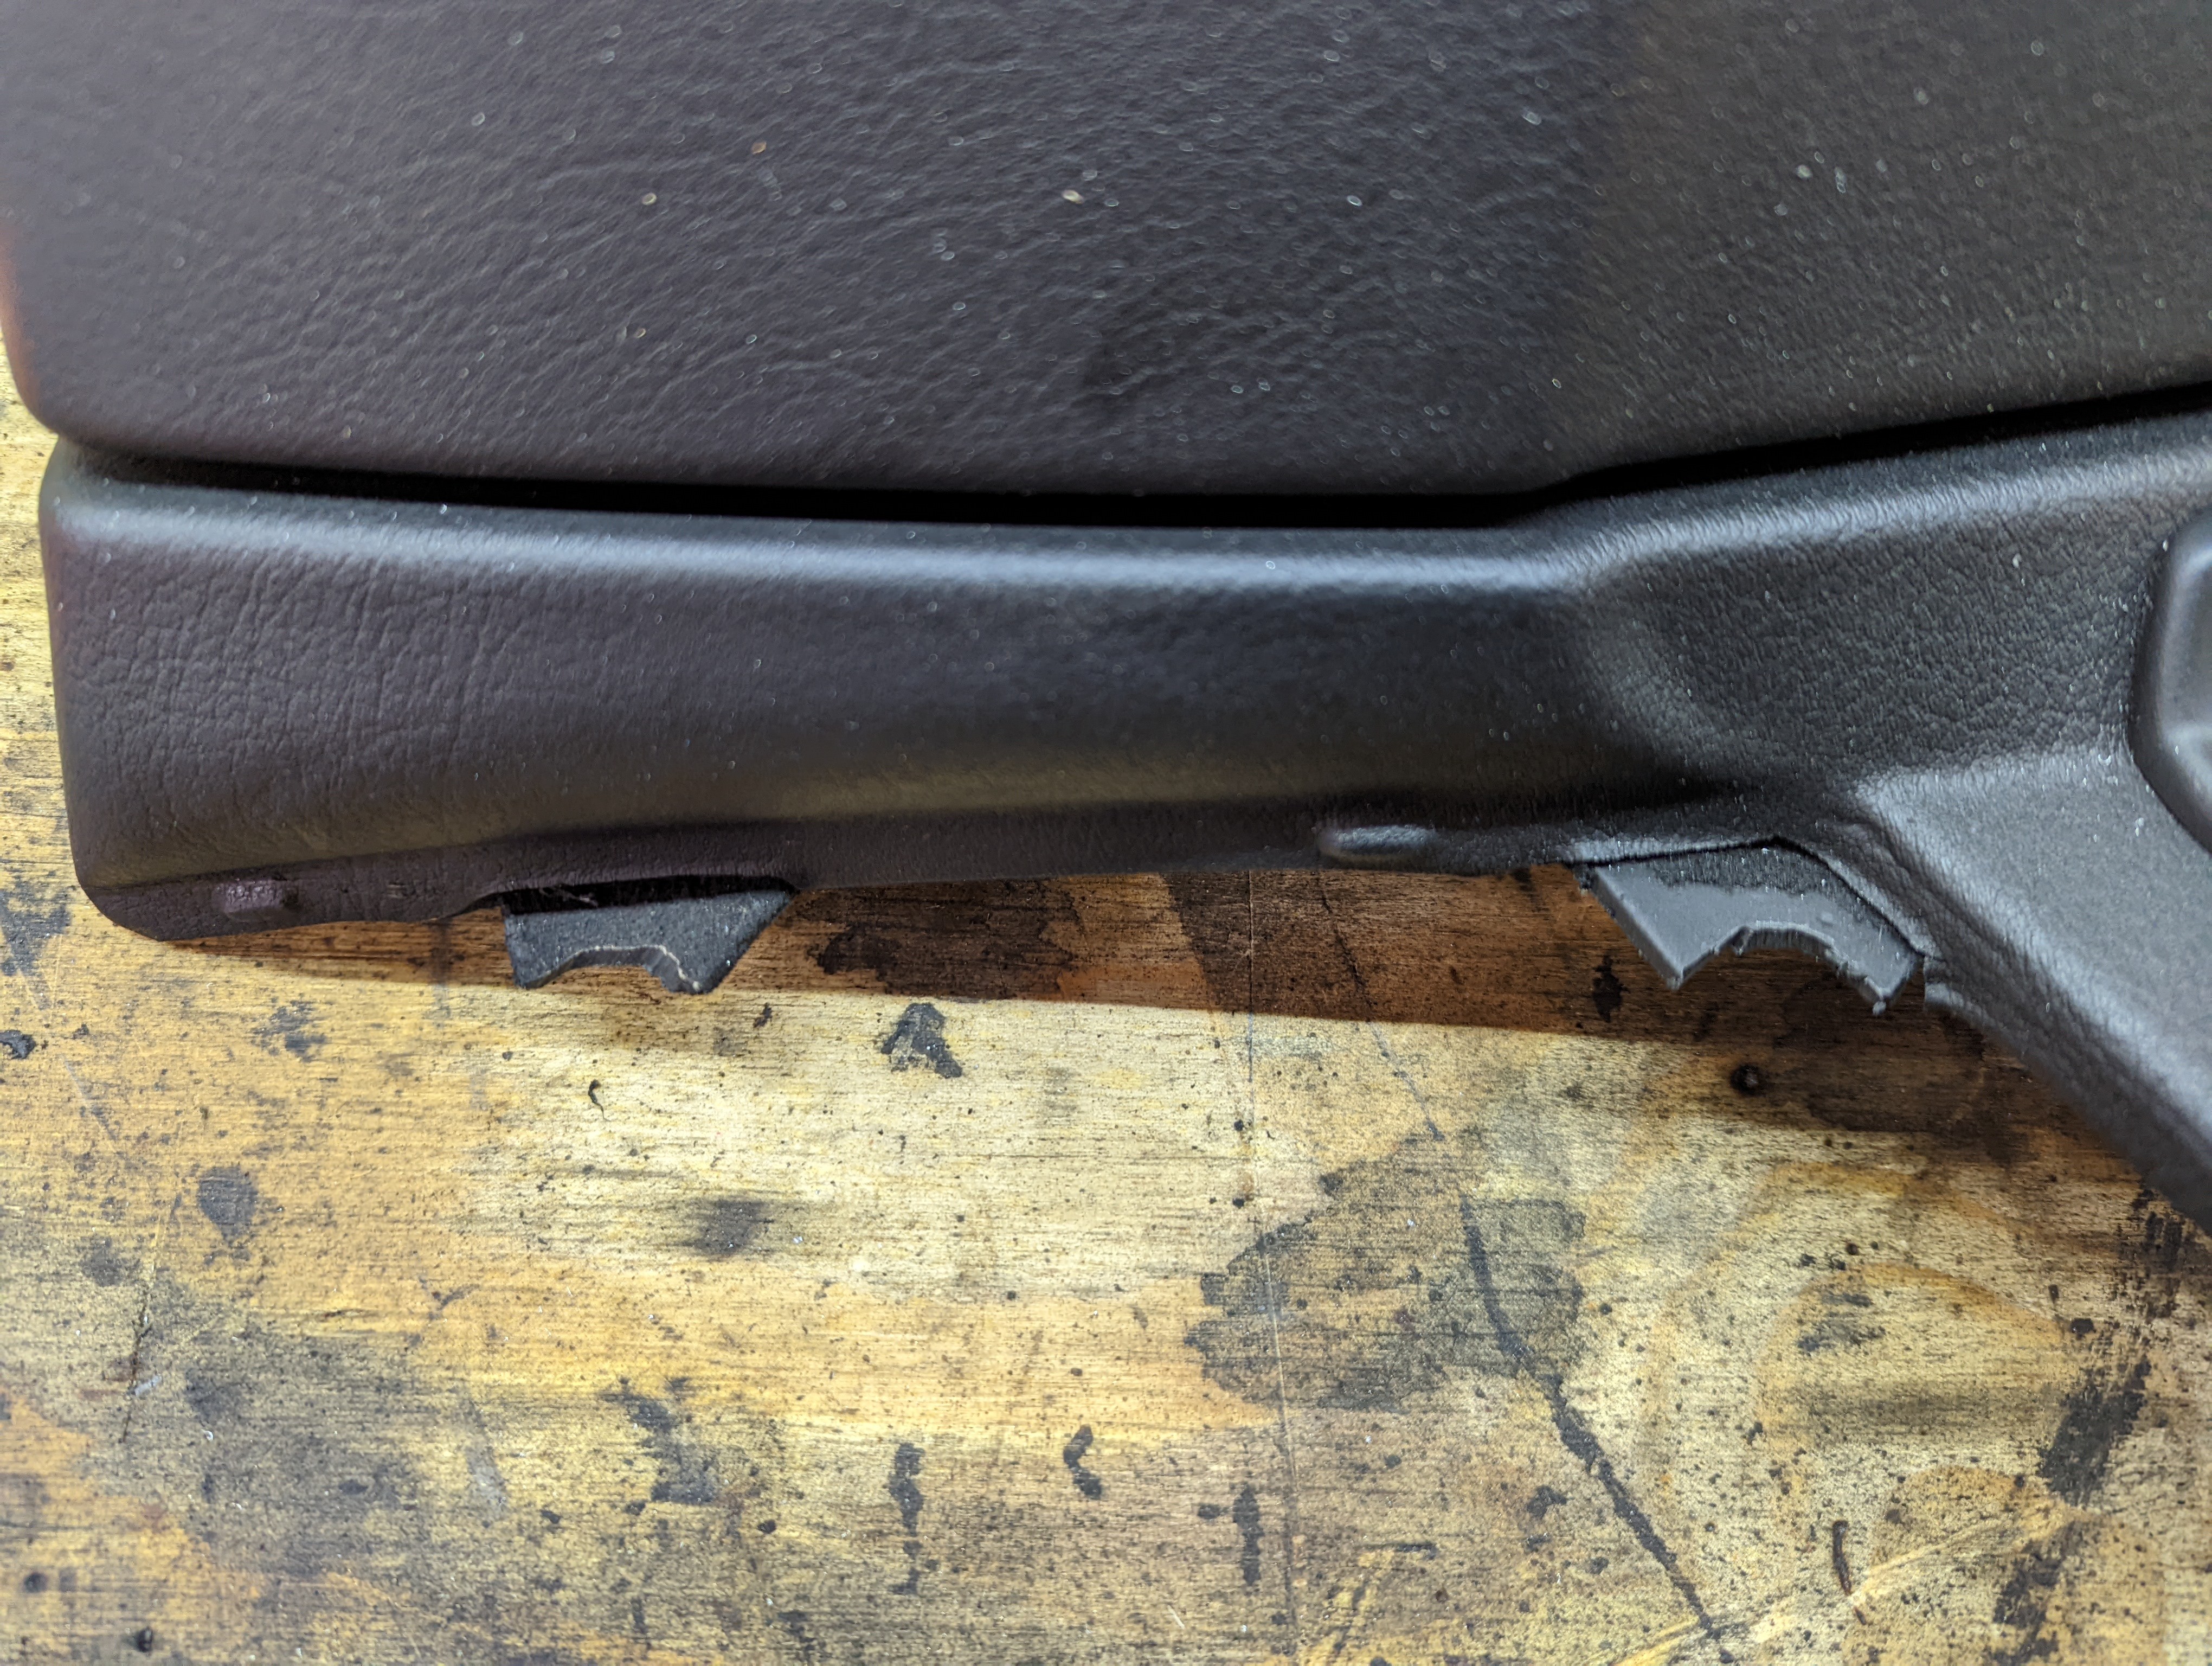
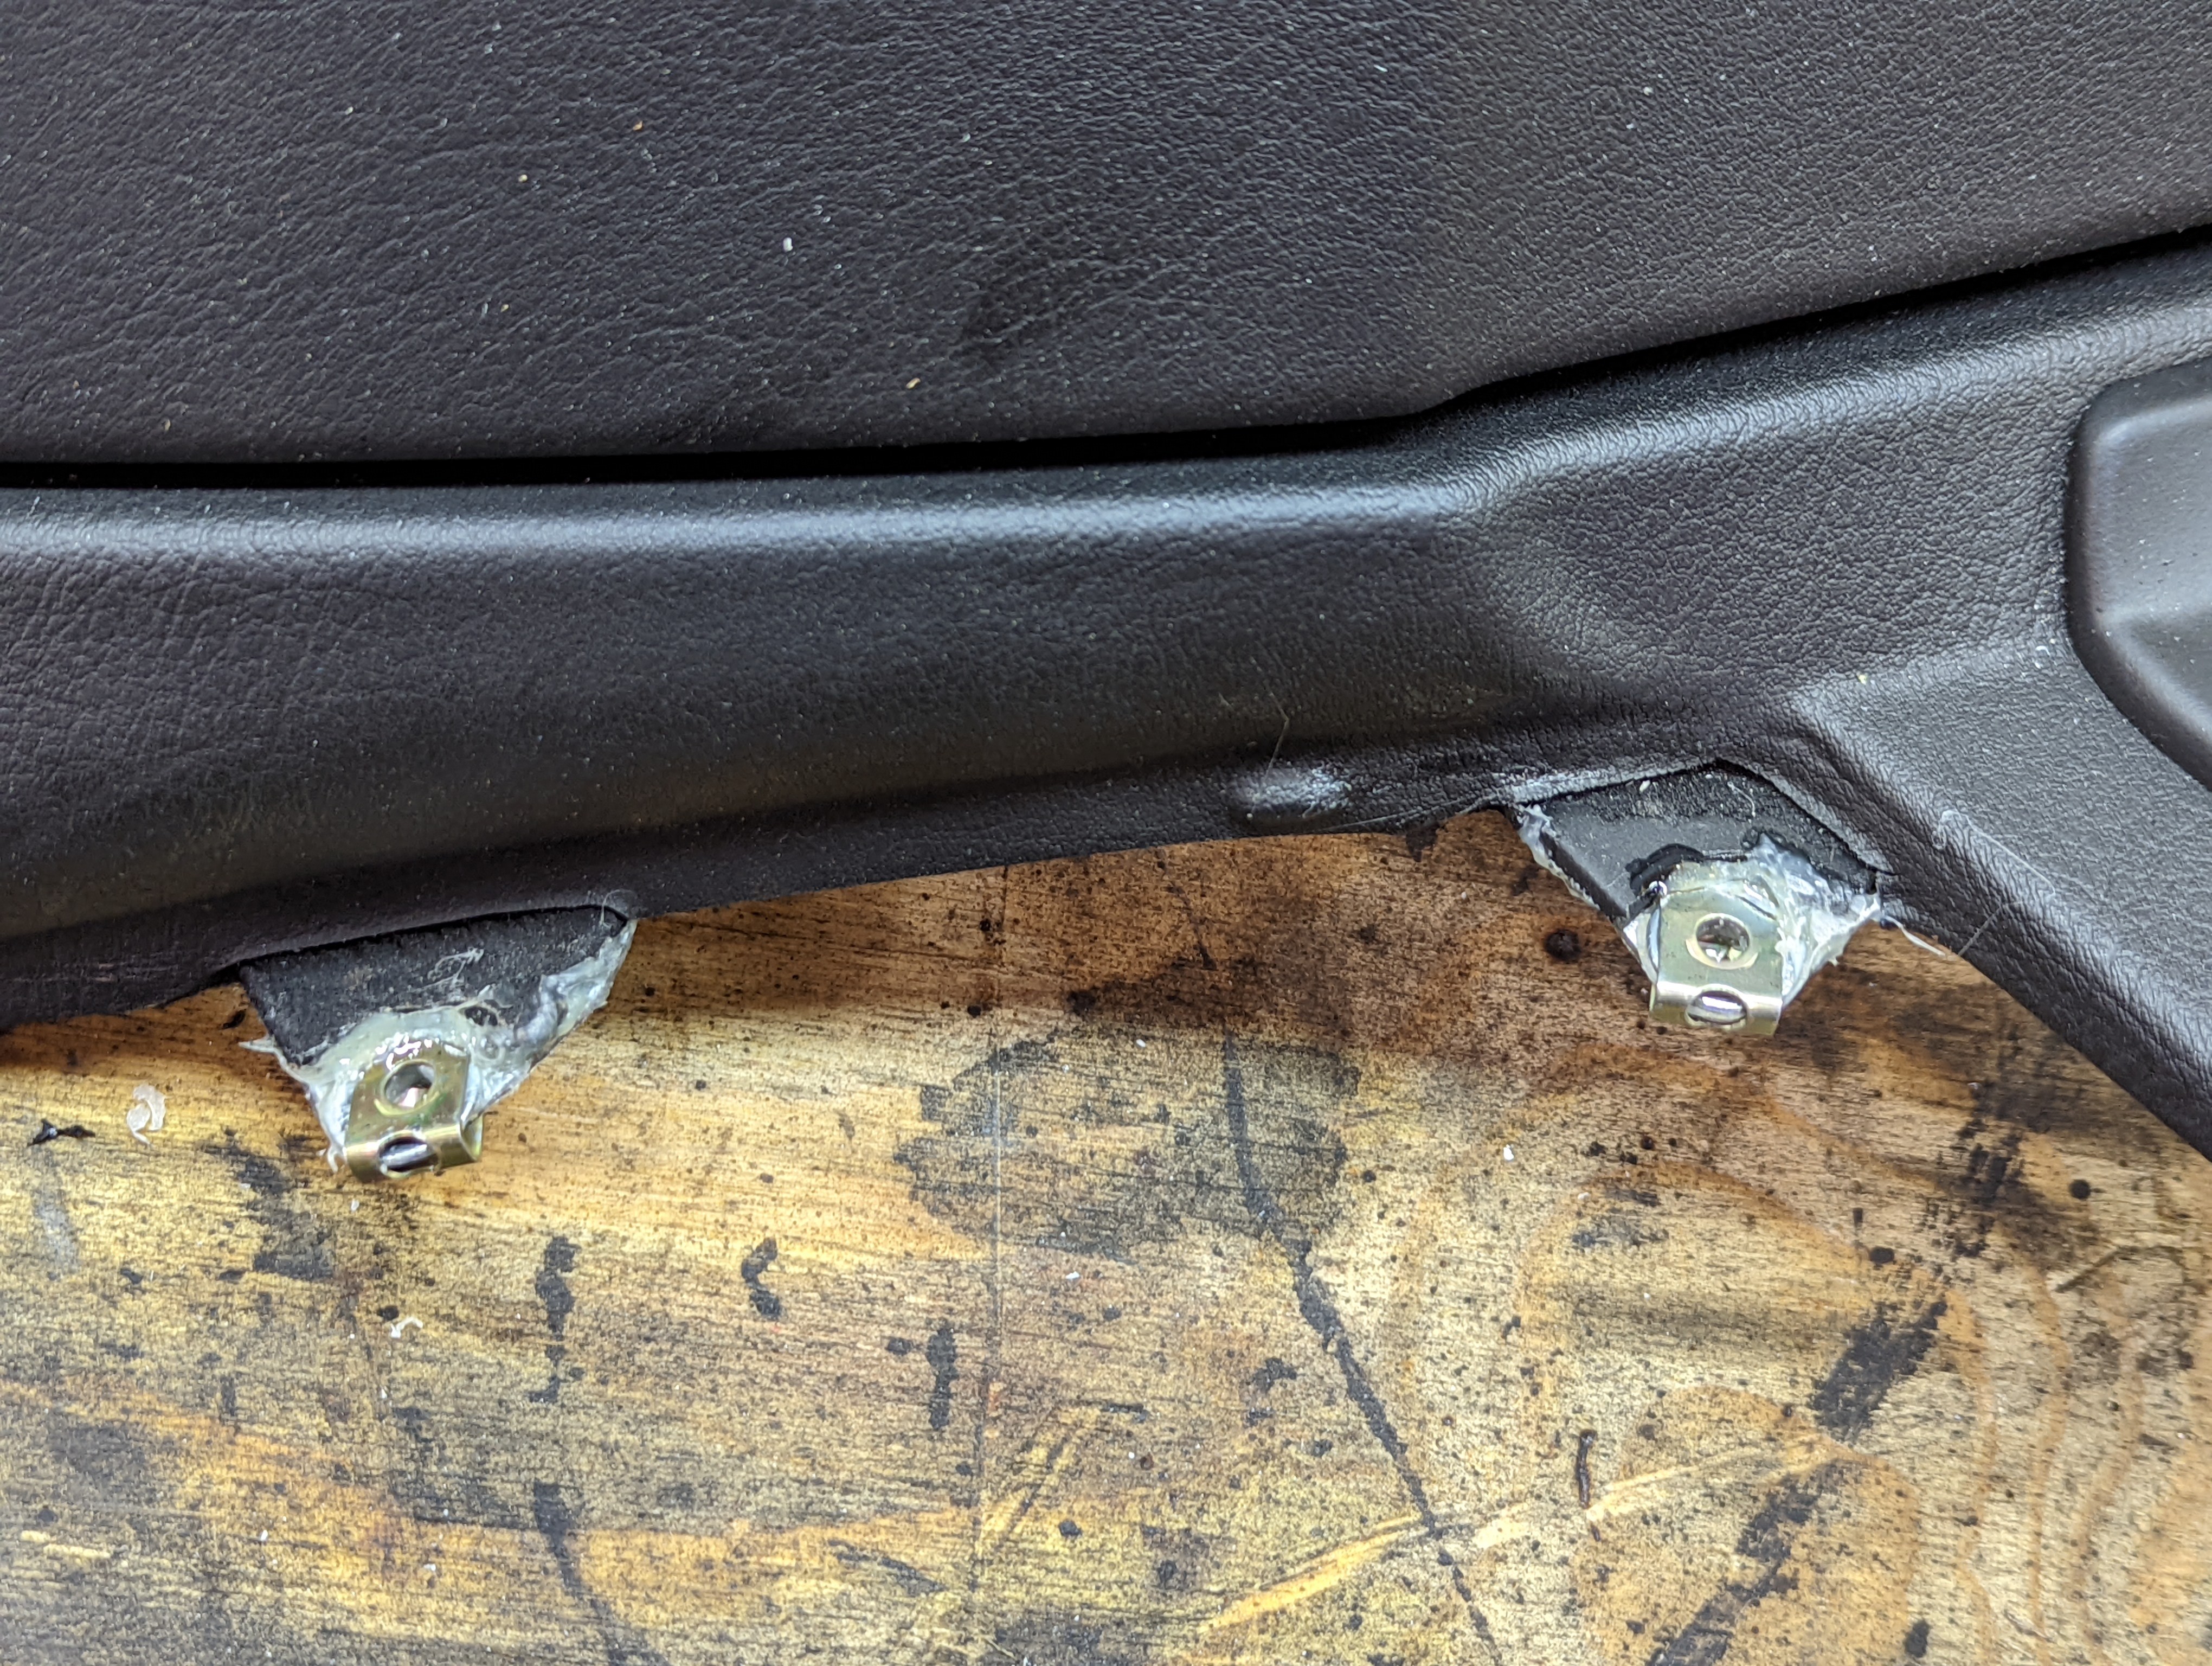
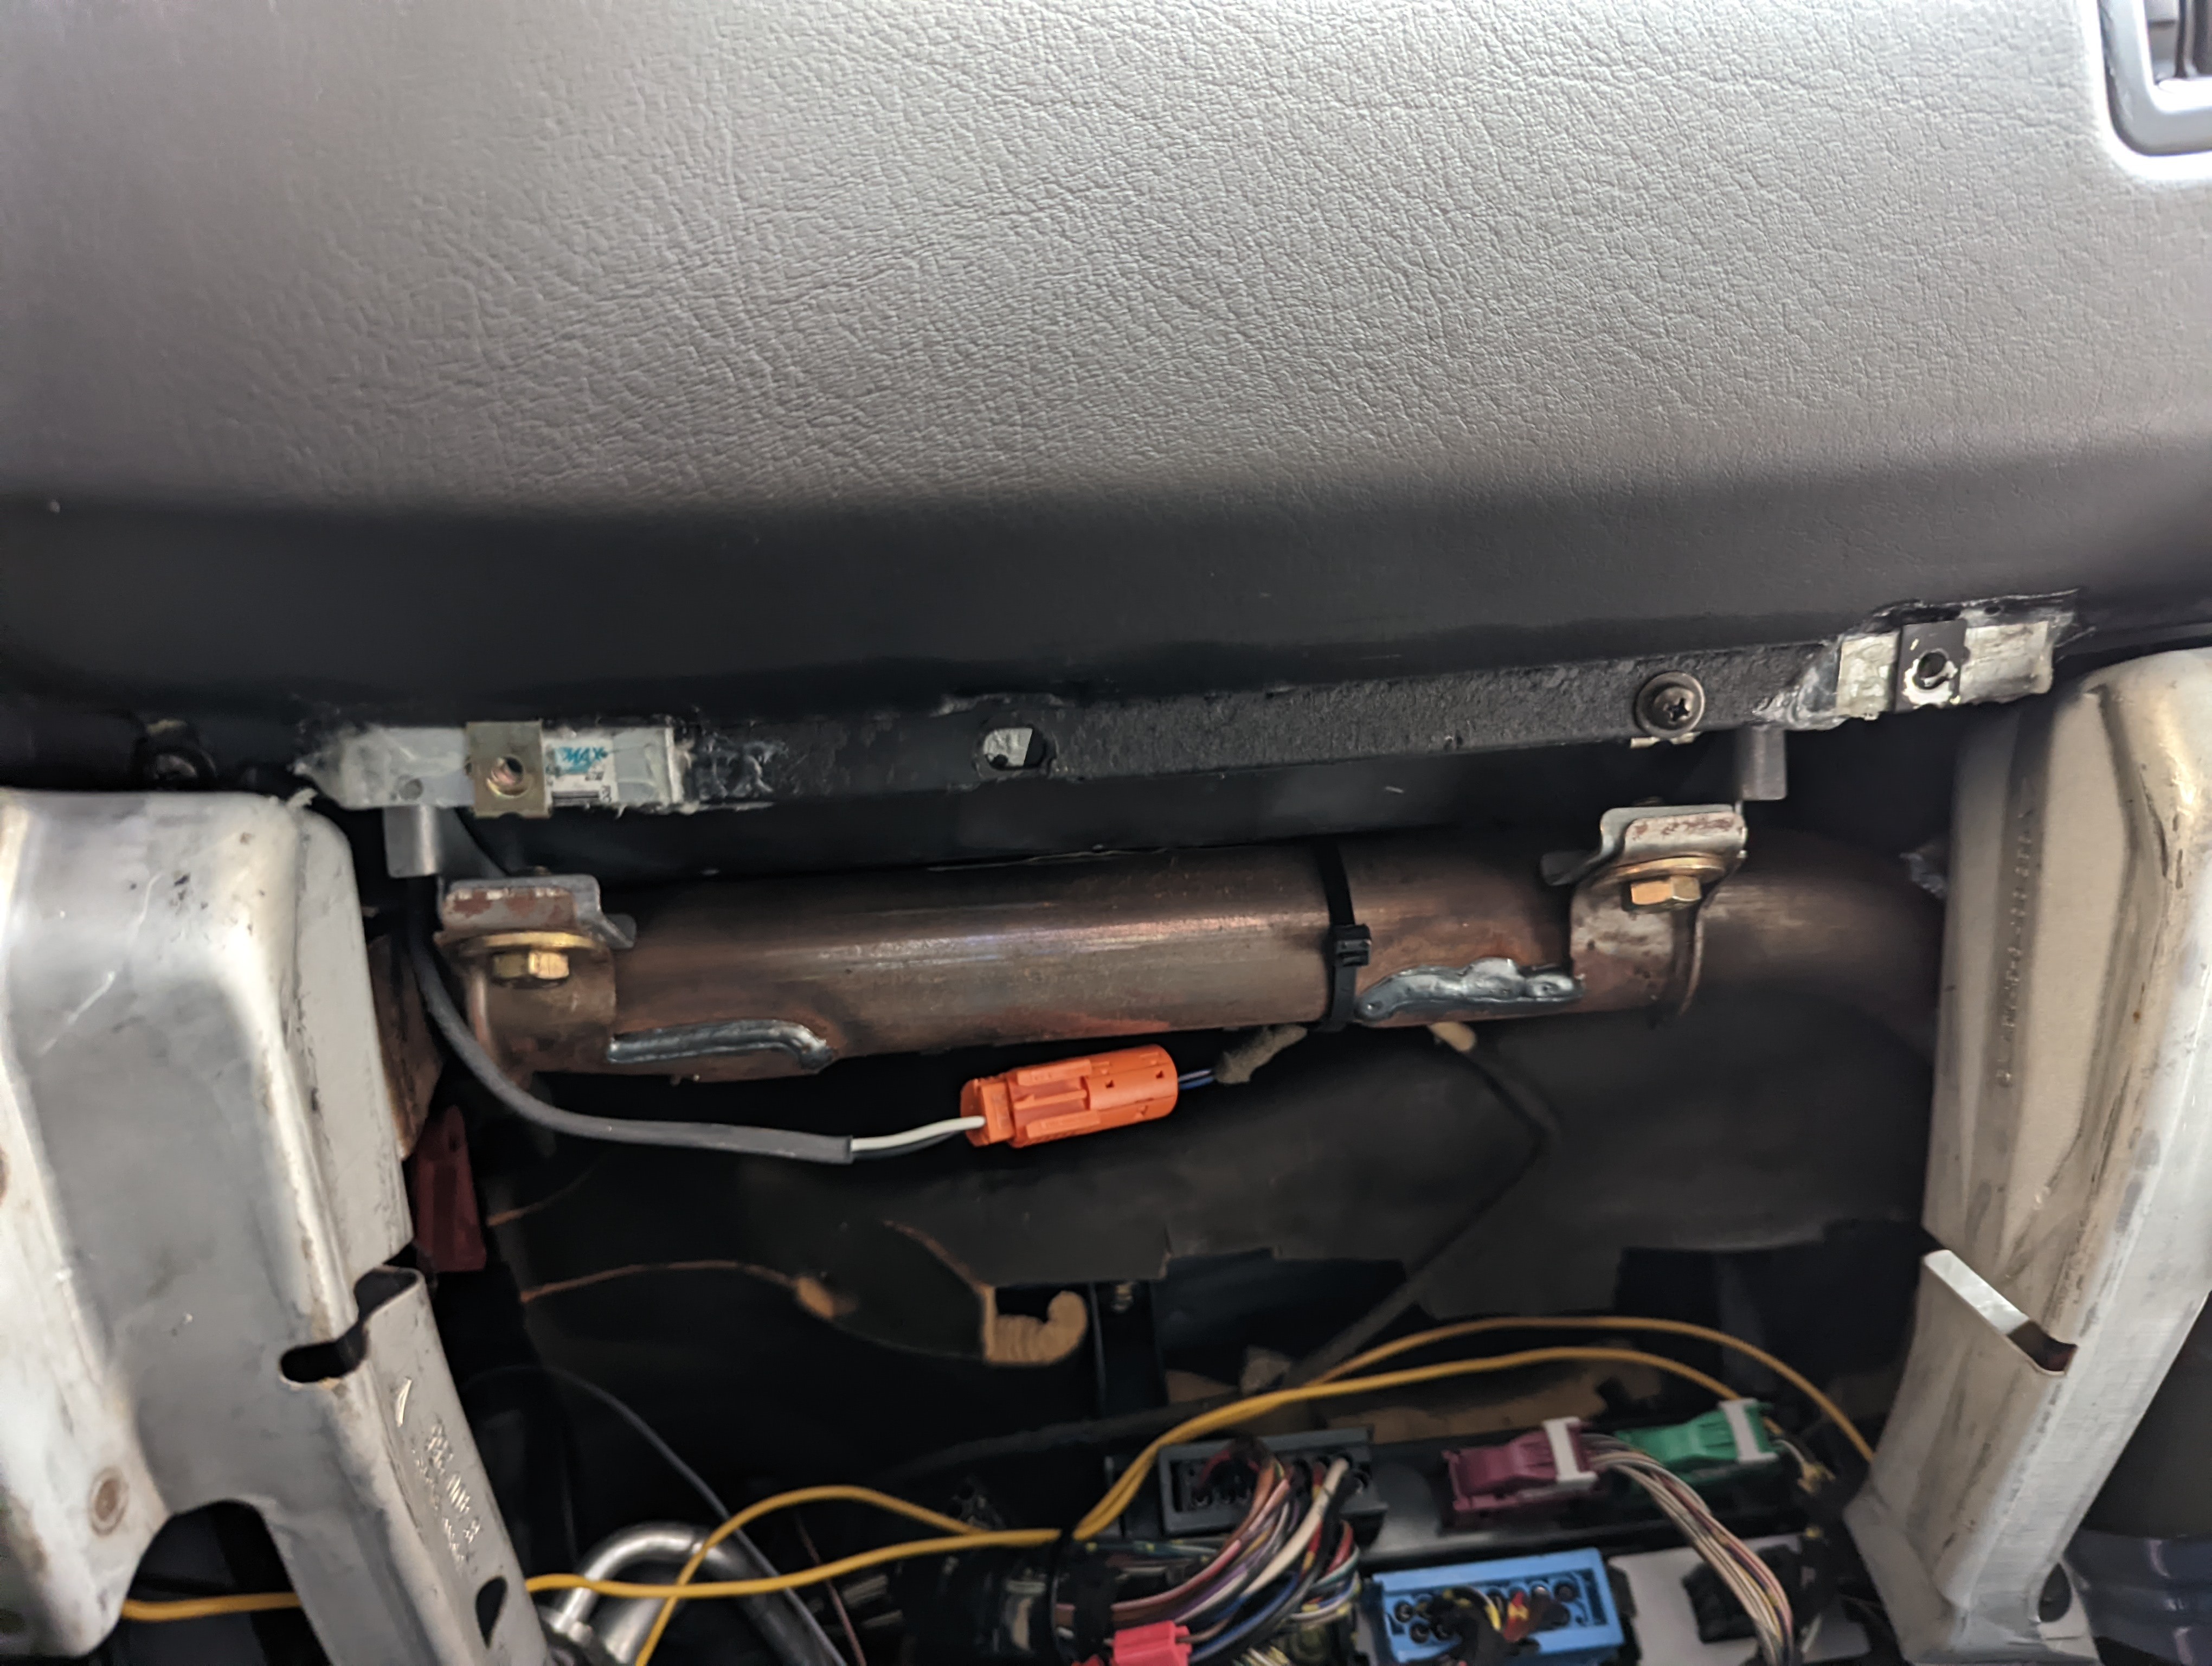
                            Started on some brittle plastic repair since any screw you remove from these cars seems to disintegrate the plastic. Glovebox mounting points were some of those. Used some metal brackets to cut up and epoxy on. Was skeptical at first and went a little heavy on the epoxy, but it actually turned out great. Super strong too. Call me impressed.
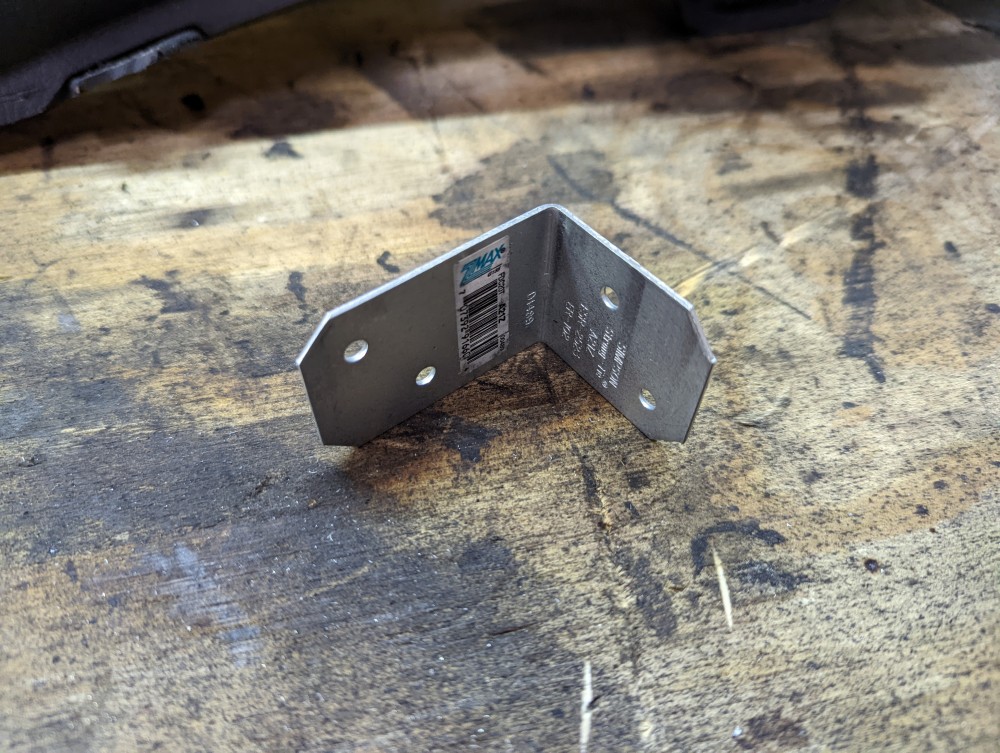
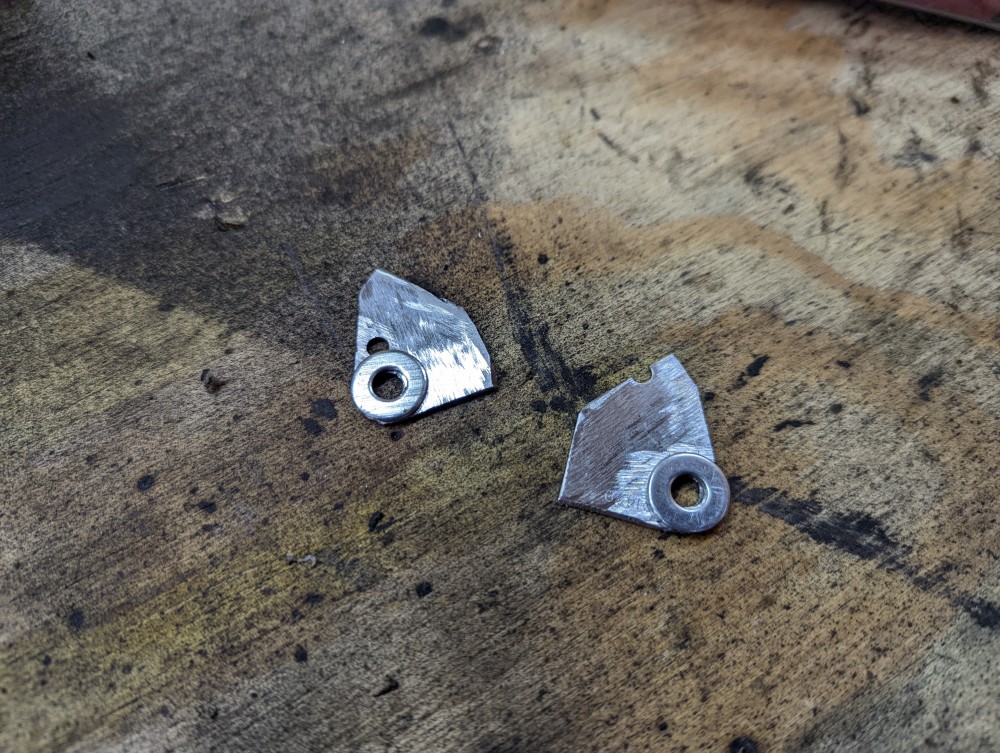
                            PXL20220411230730987.jpg

                            PXL20220411230819108.jpg

                            PXL20220411230708233.jpg

                            PXL20220411232844249.jpg

                            PXL20220416225832987.jpg

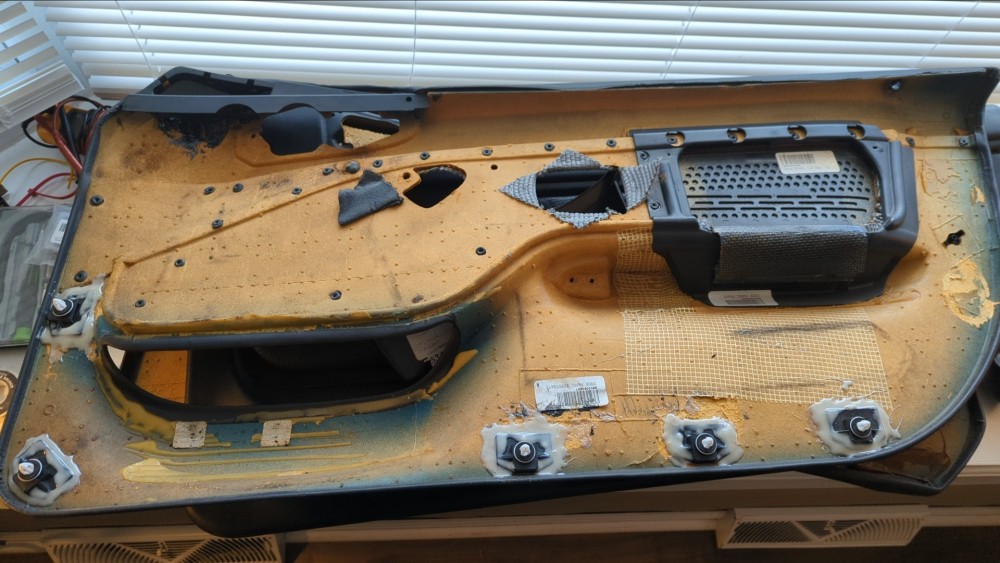
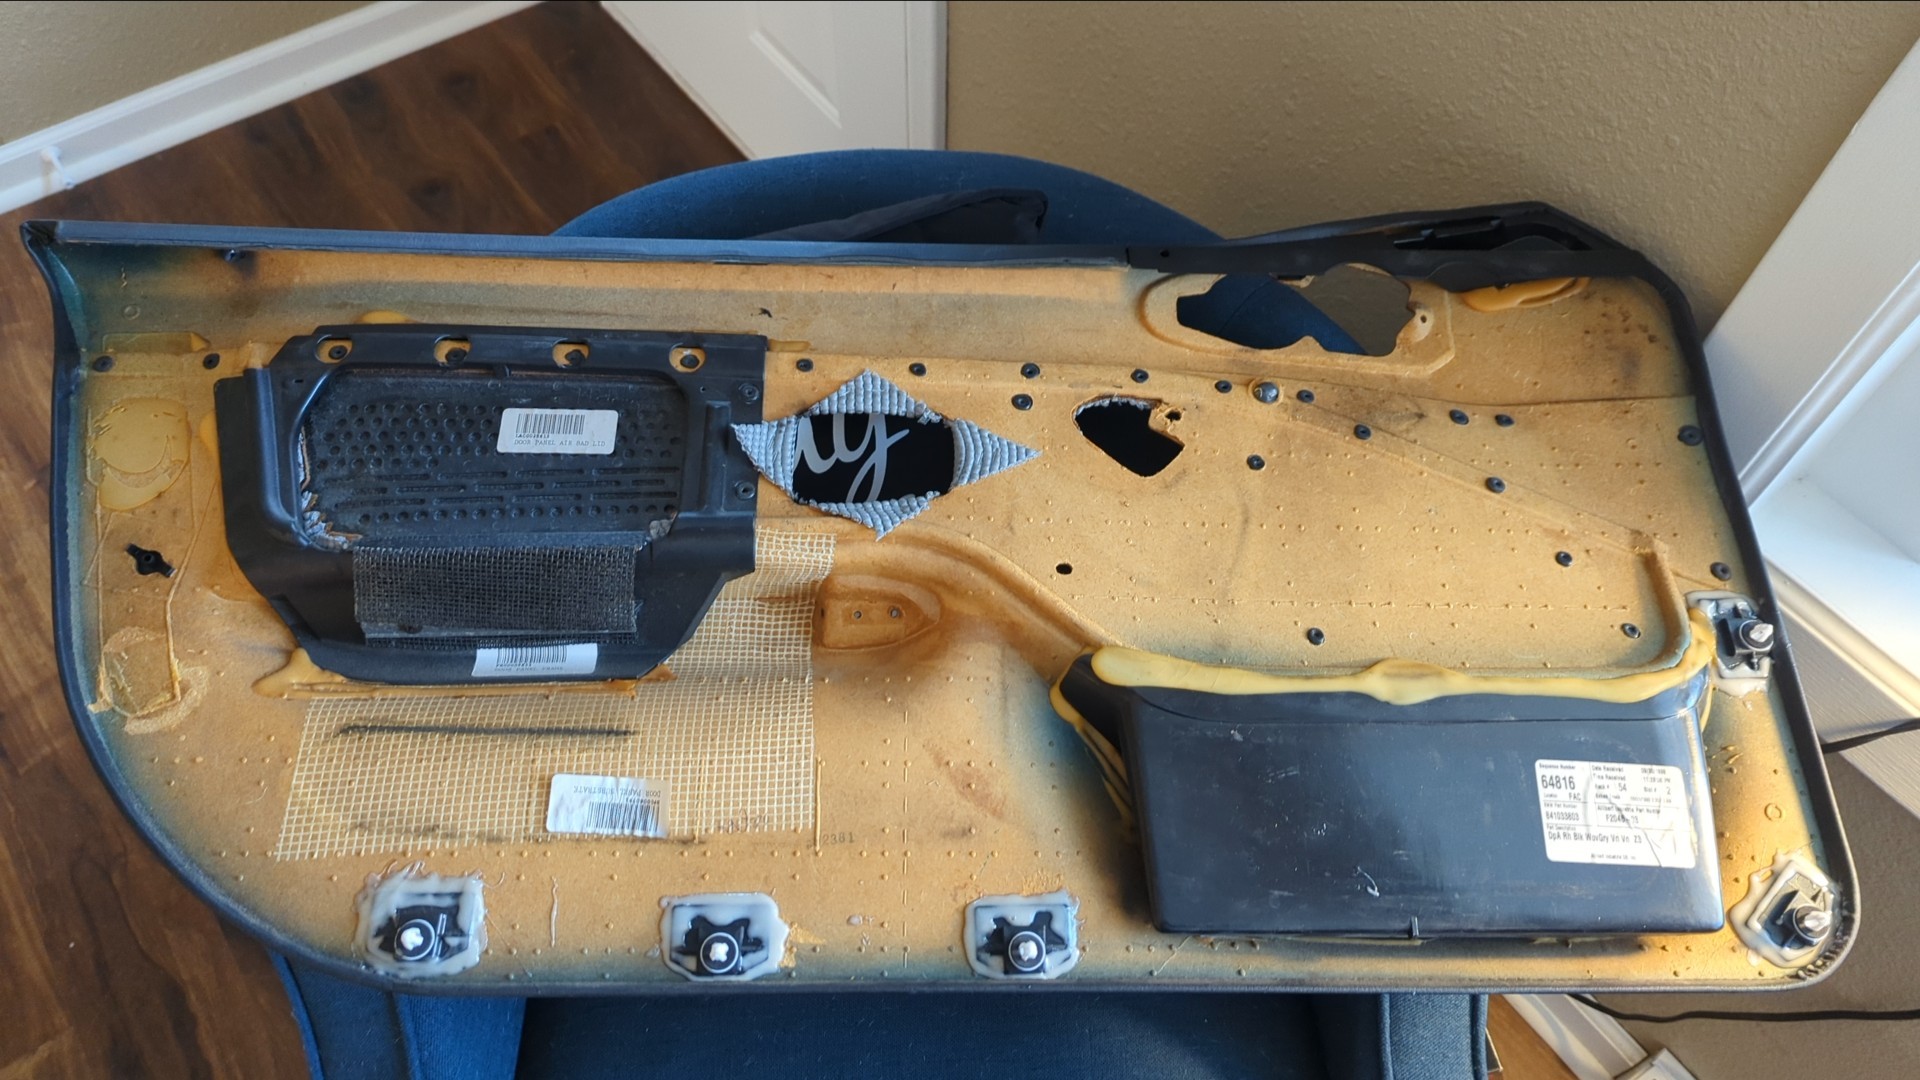
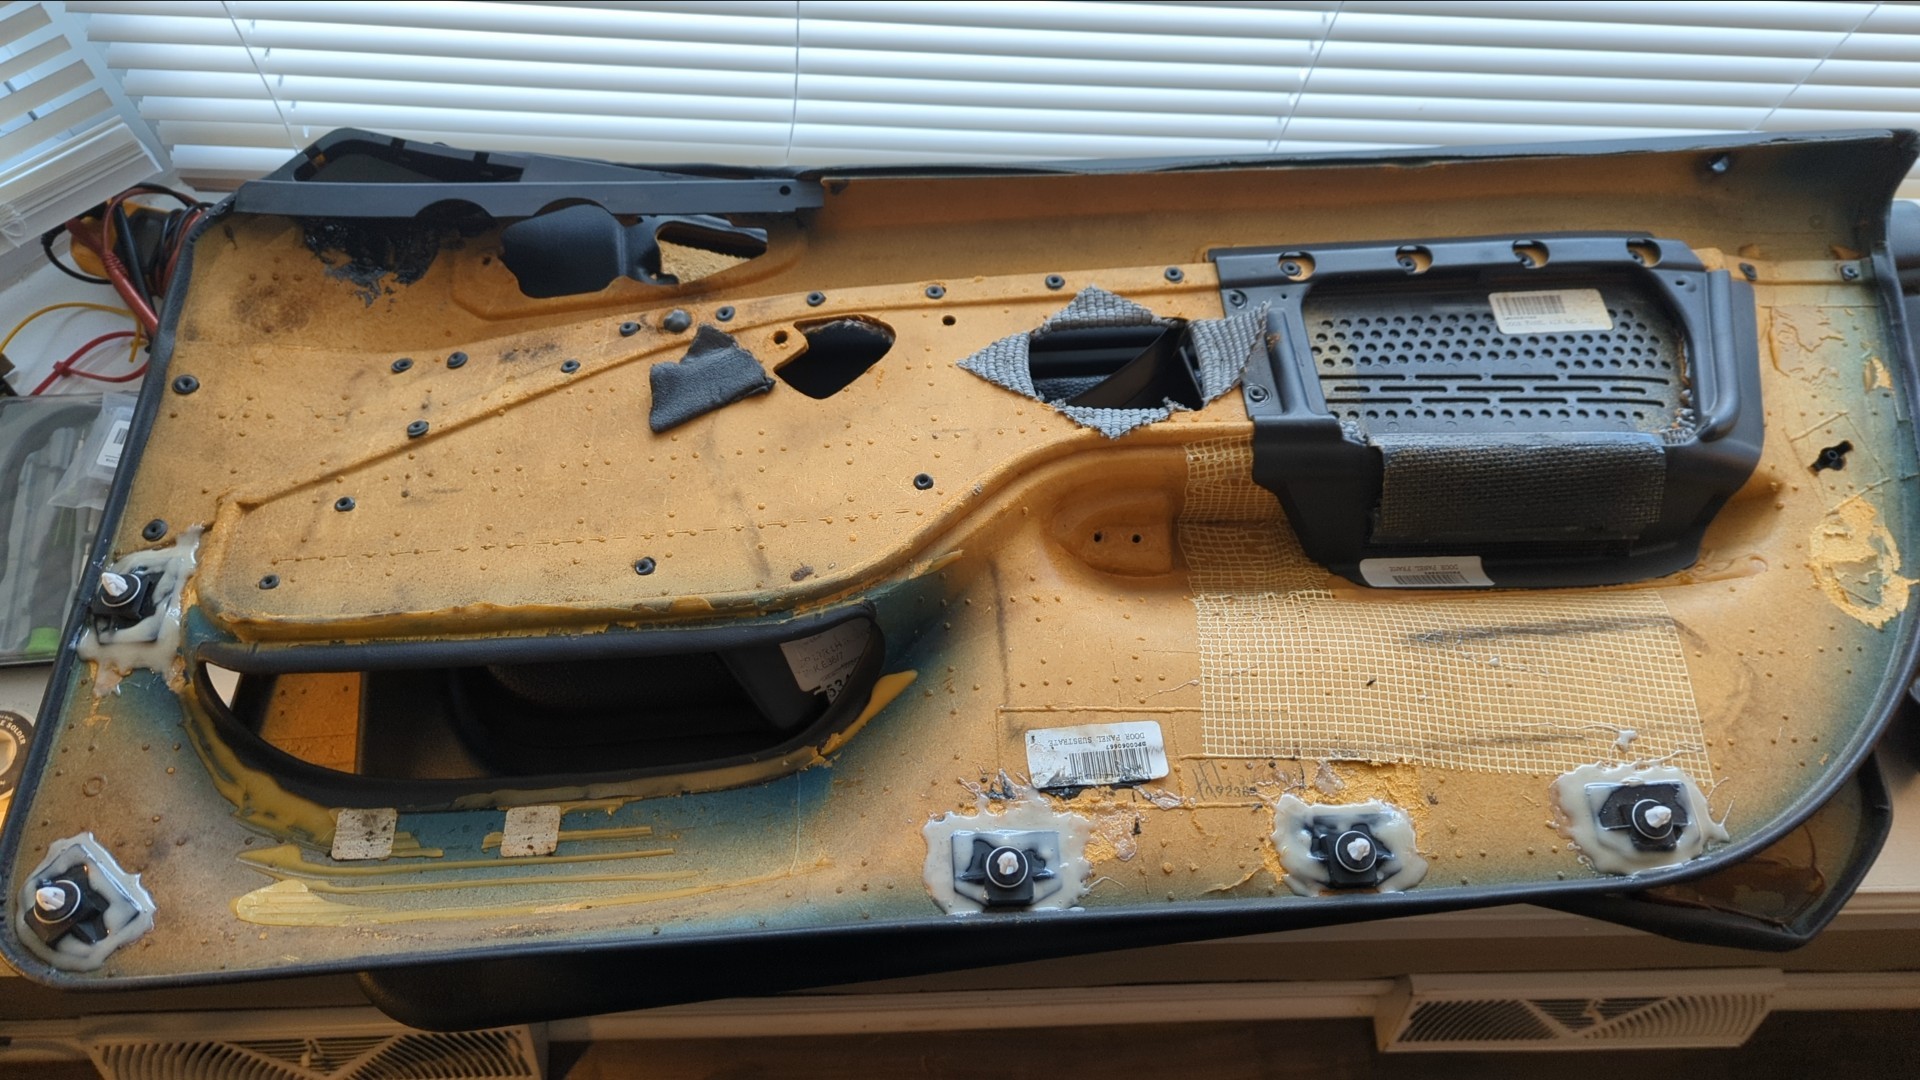
                            Also started repairing the new door panels I picked up. The mounts tend to tear away from the press board material that the panels are made out of. So I got some epoxy, 3d printed some new ABS mounts and secured them back on. 
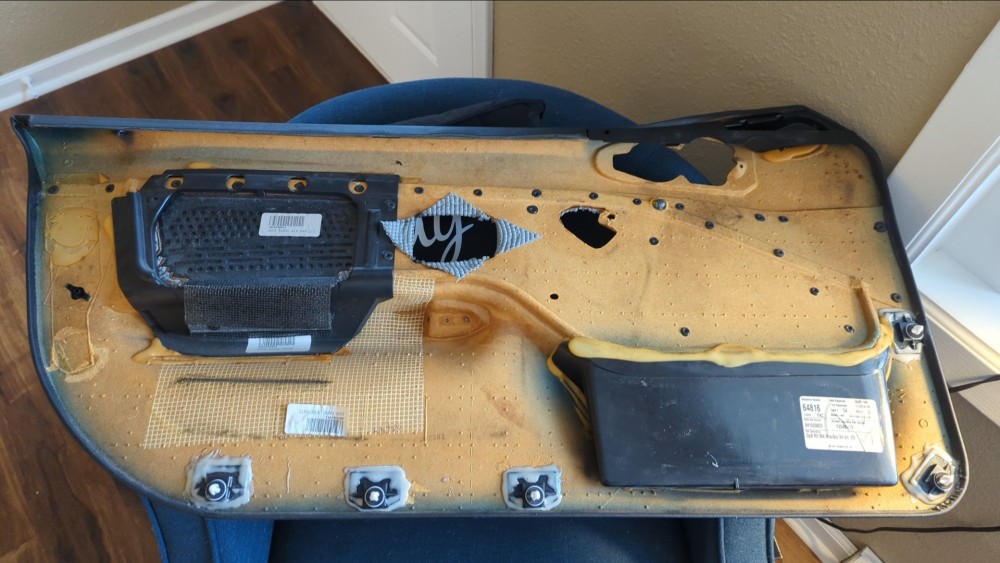
                            IMG2022041618045701.jpg

                            IMG2022041618045702.jpg

                            Just gotta do the same with the one map pocket that got detached and I can move onto customizing the door panel inserts to walnut brown for my interior color scheme.

                            CHECK OUT >>> RAGE DRIFT DESIGNS <<< FOR DECALS AND MORE!

                            1 Reply Last reply
                            1
                            • Bassboy3313B
                              Bassboy3313B
                              Bassboy3313
                              wrote on last edited by
                              #107

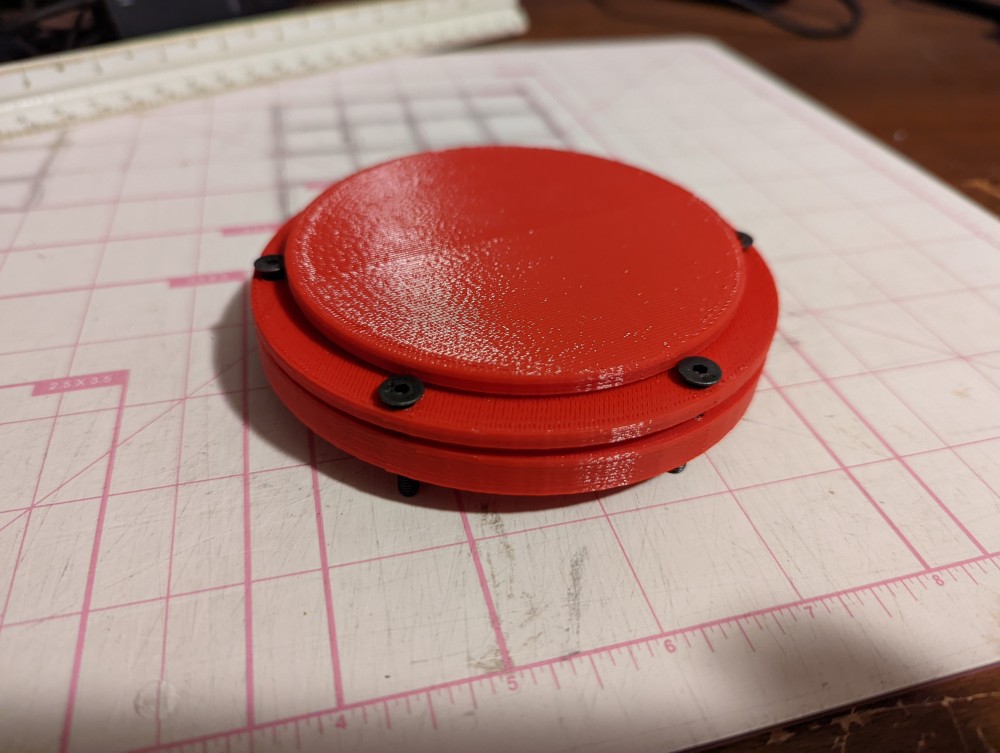
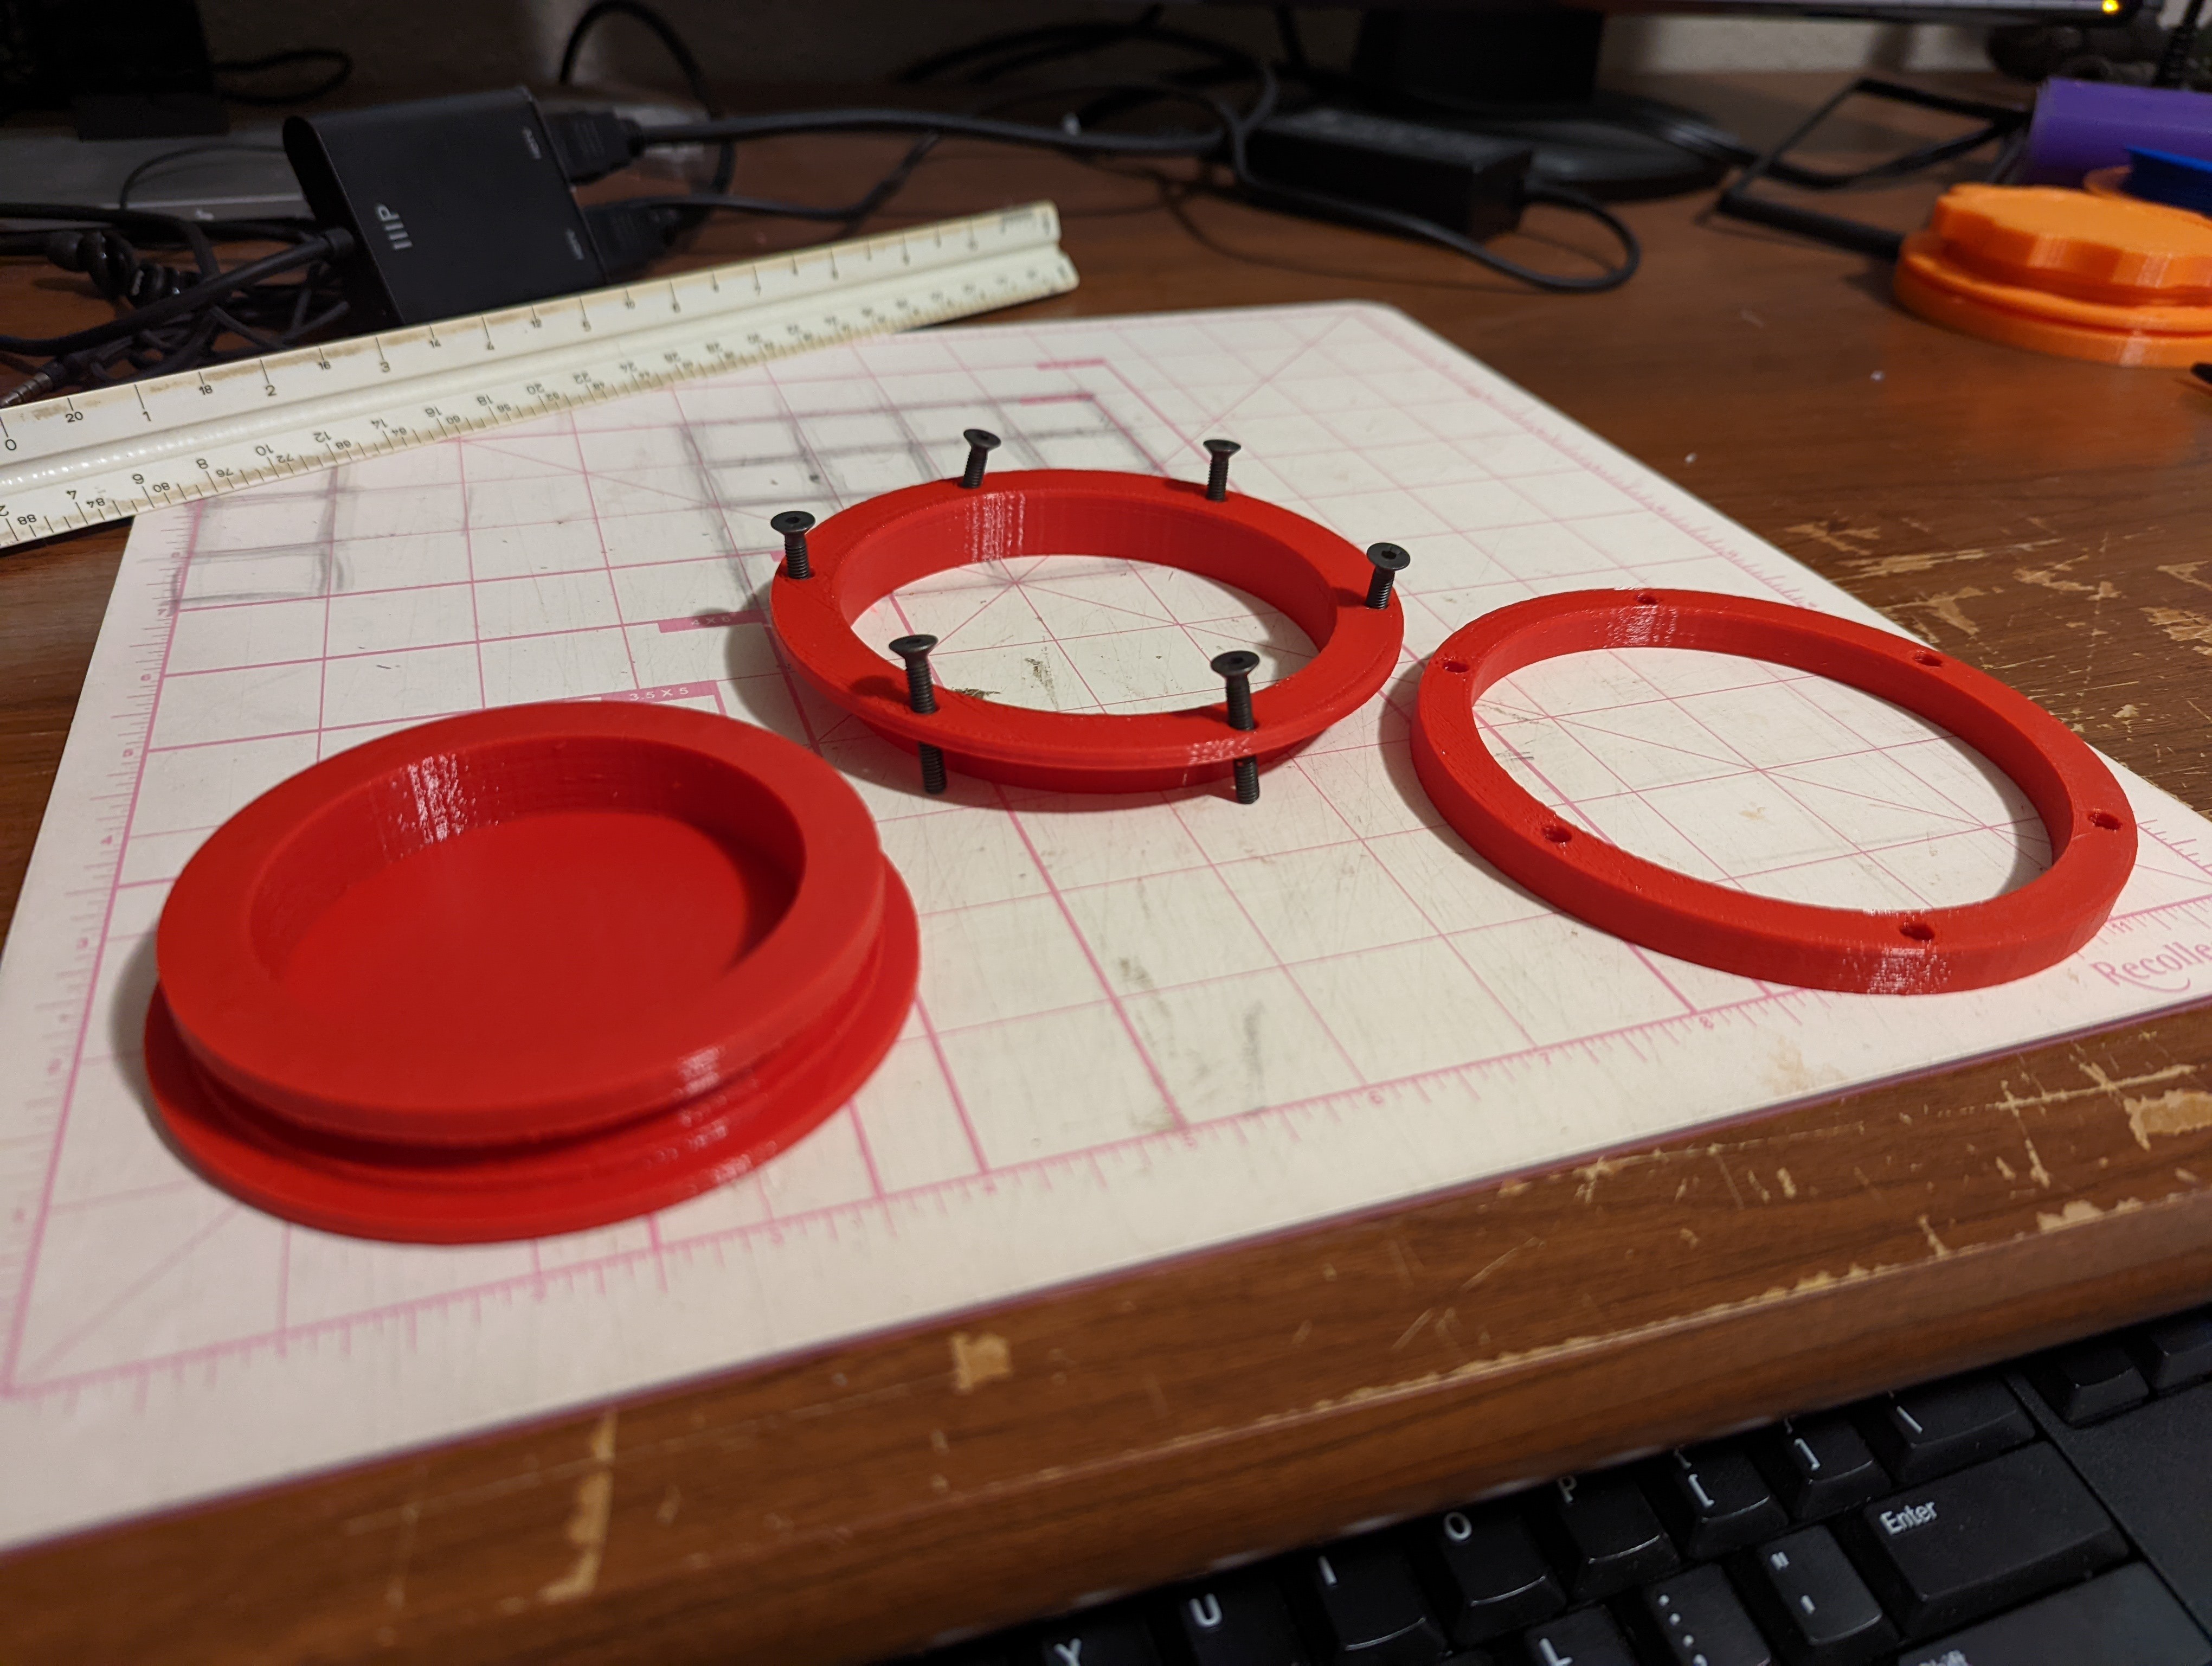
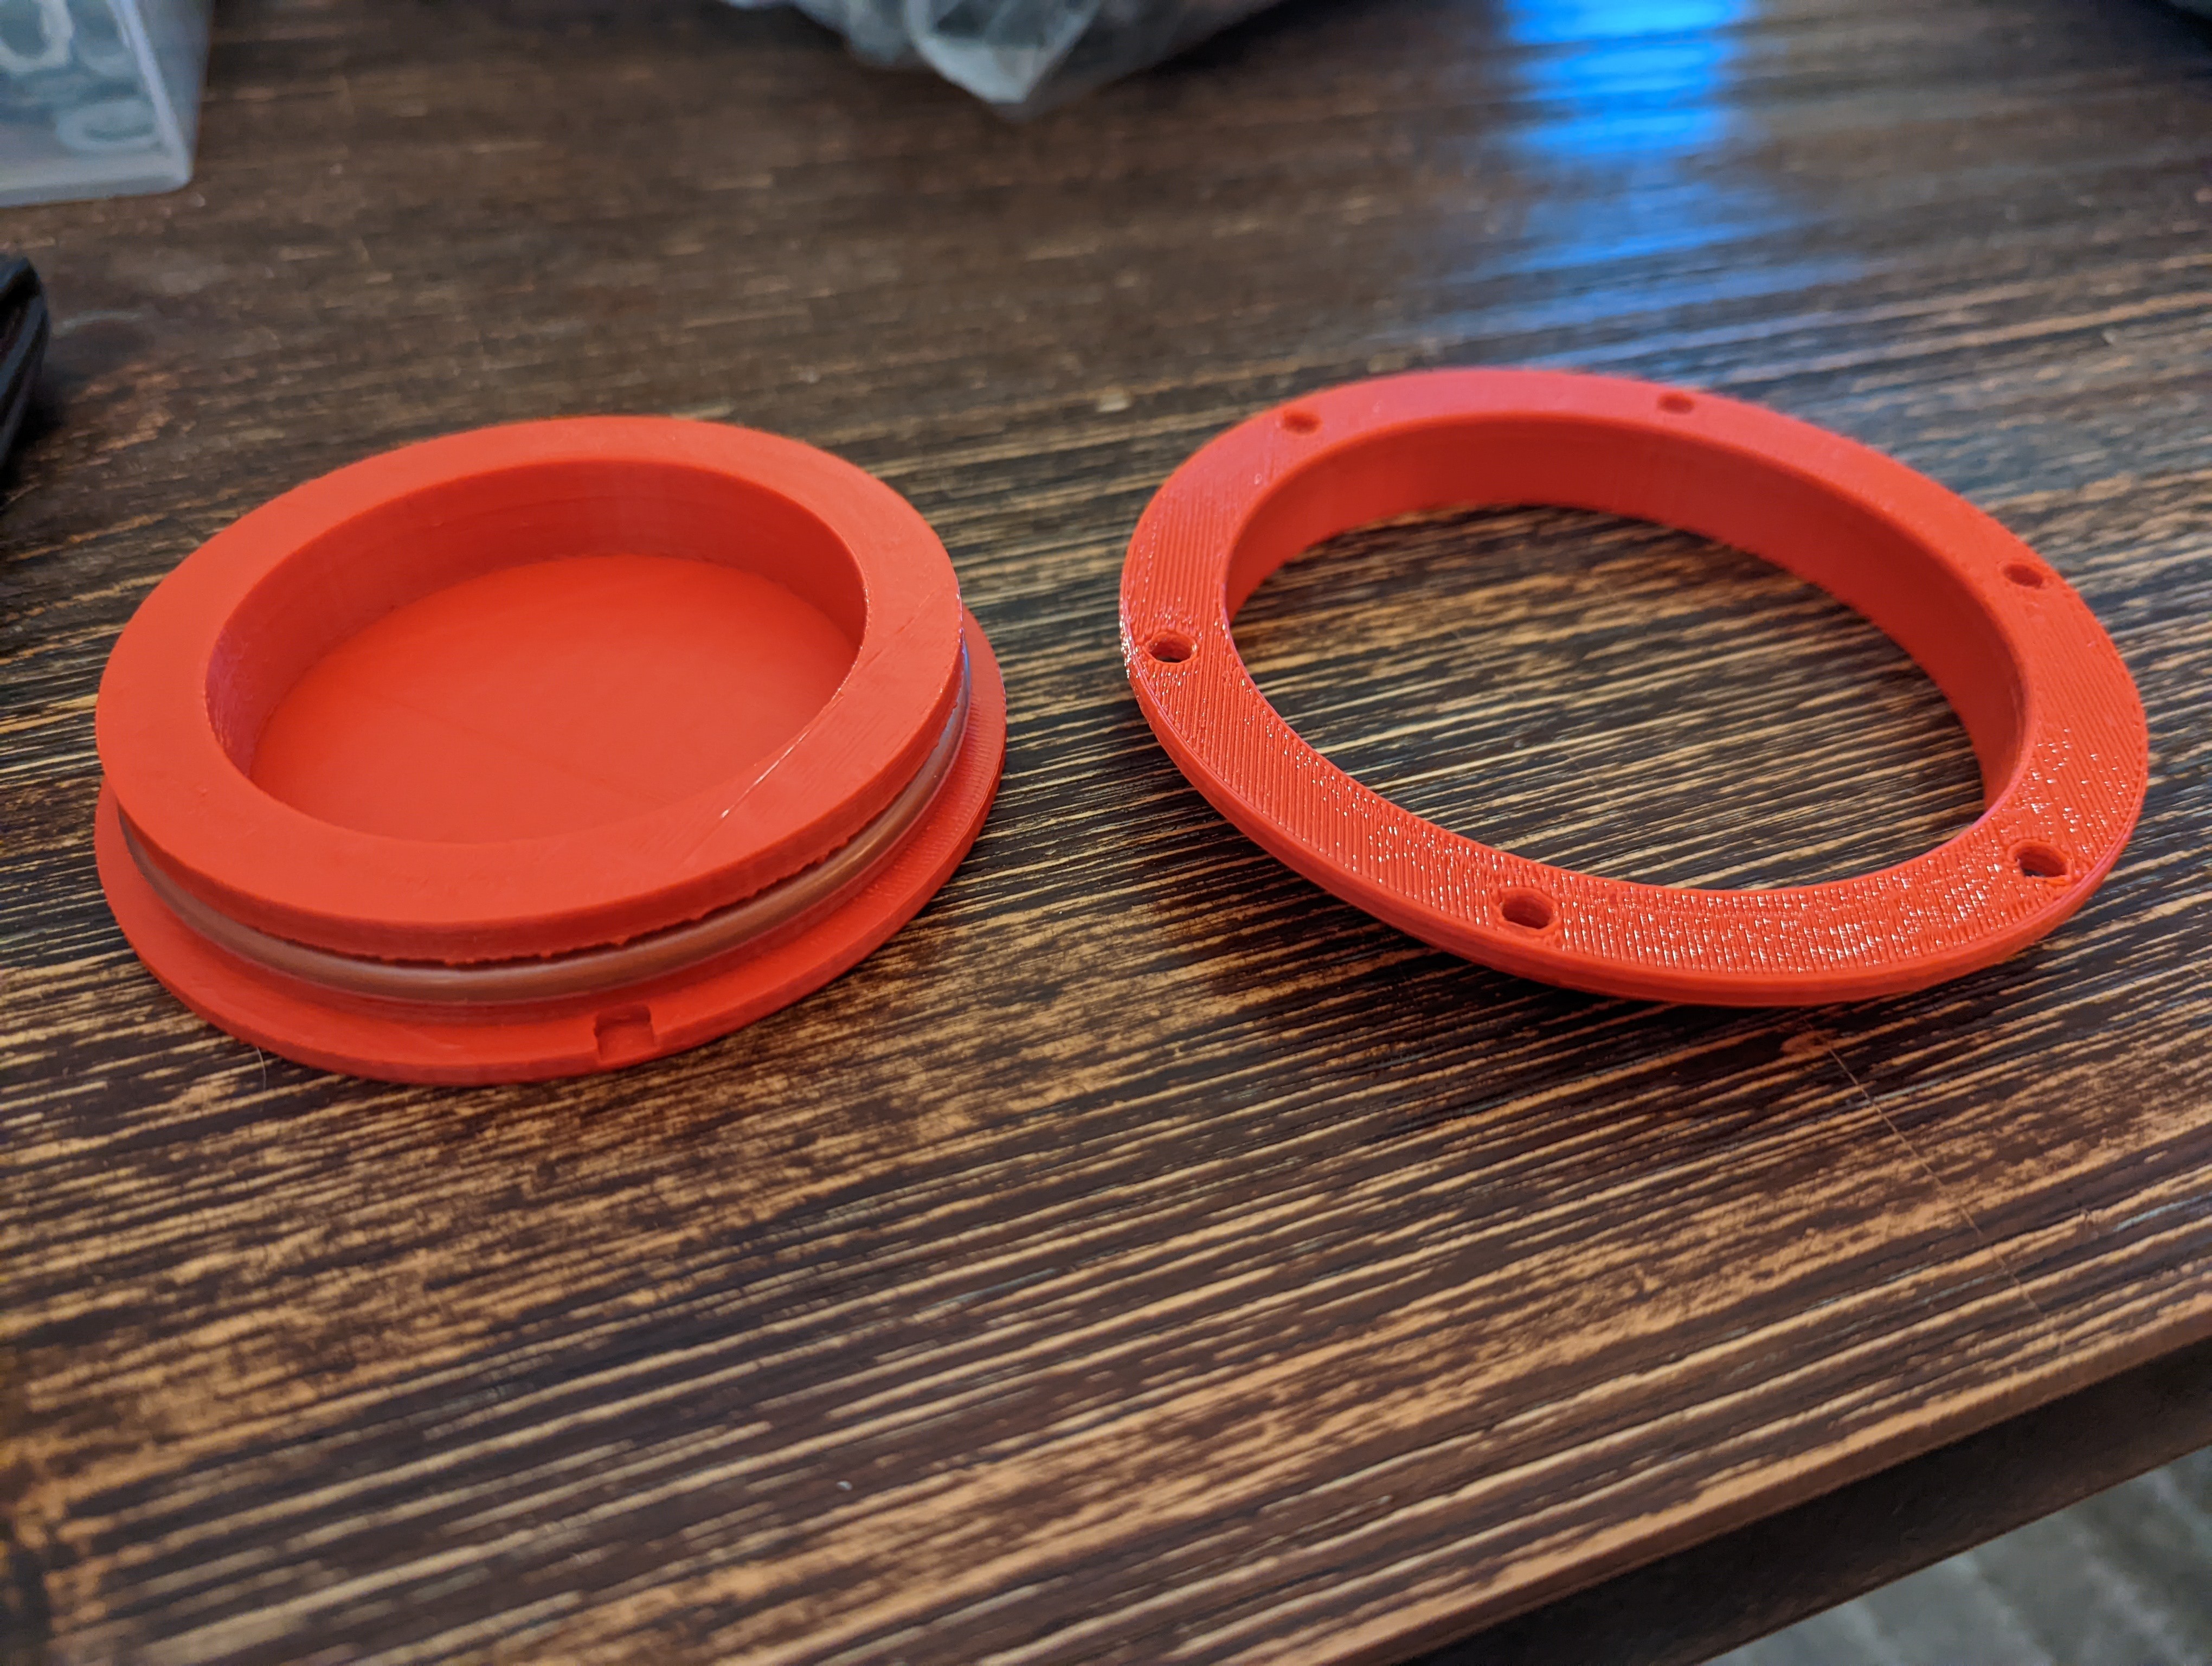
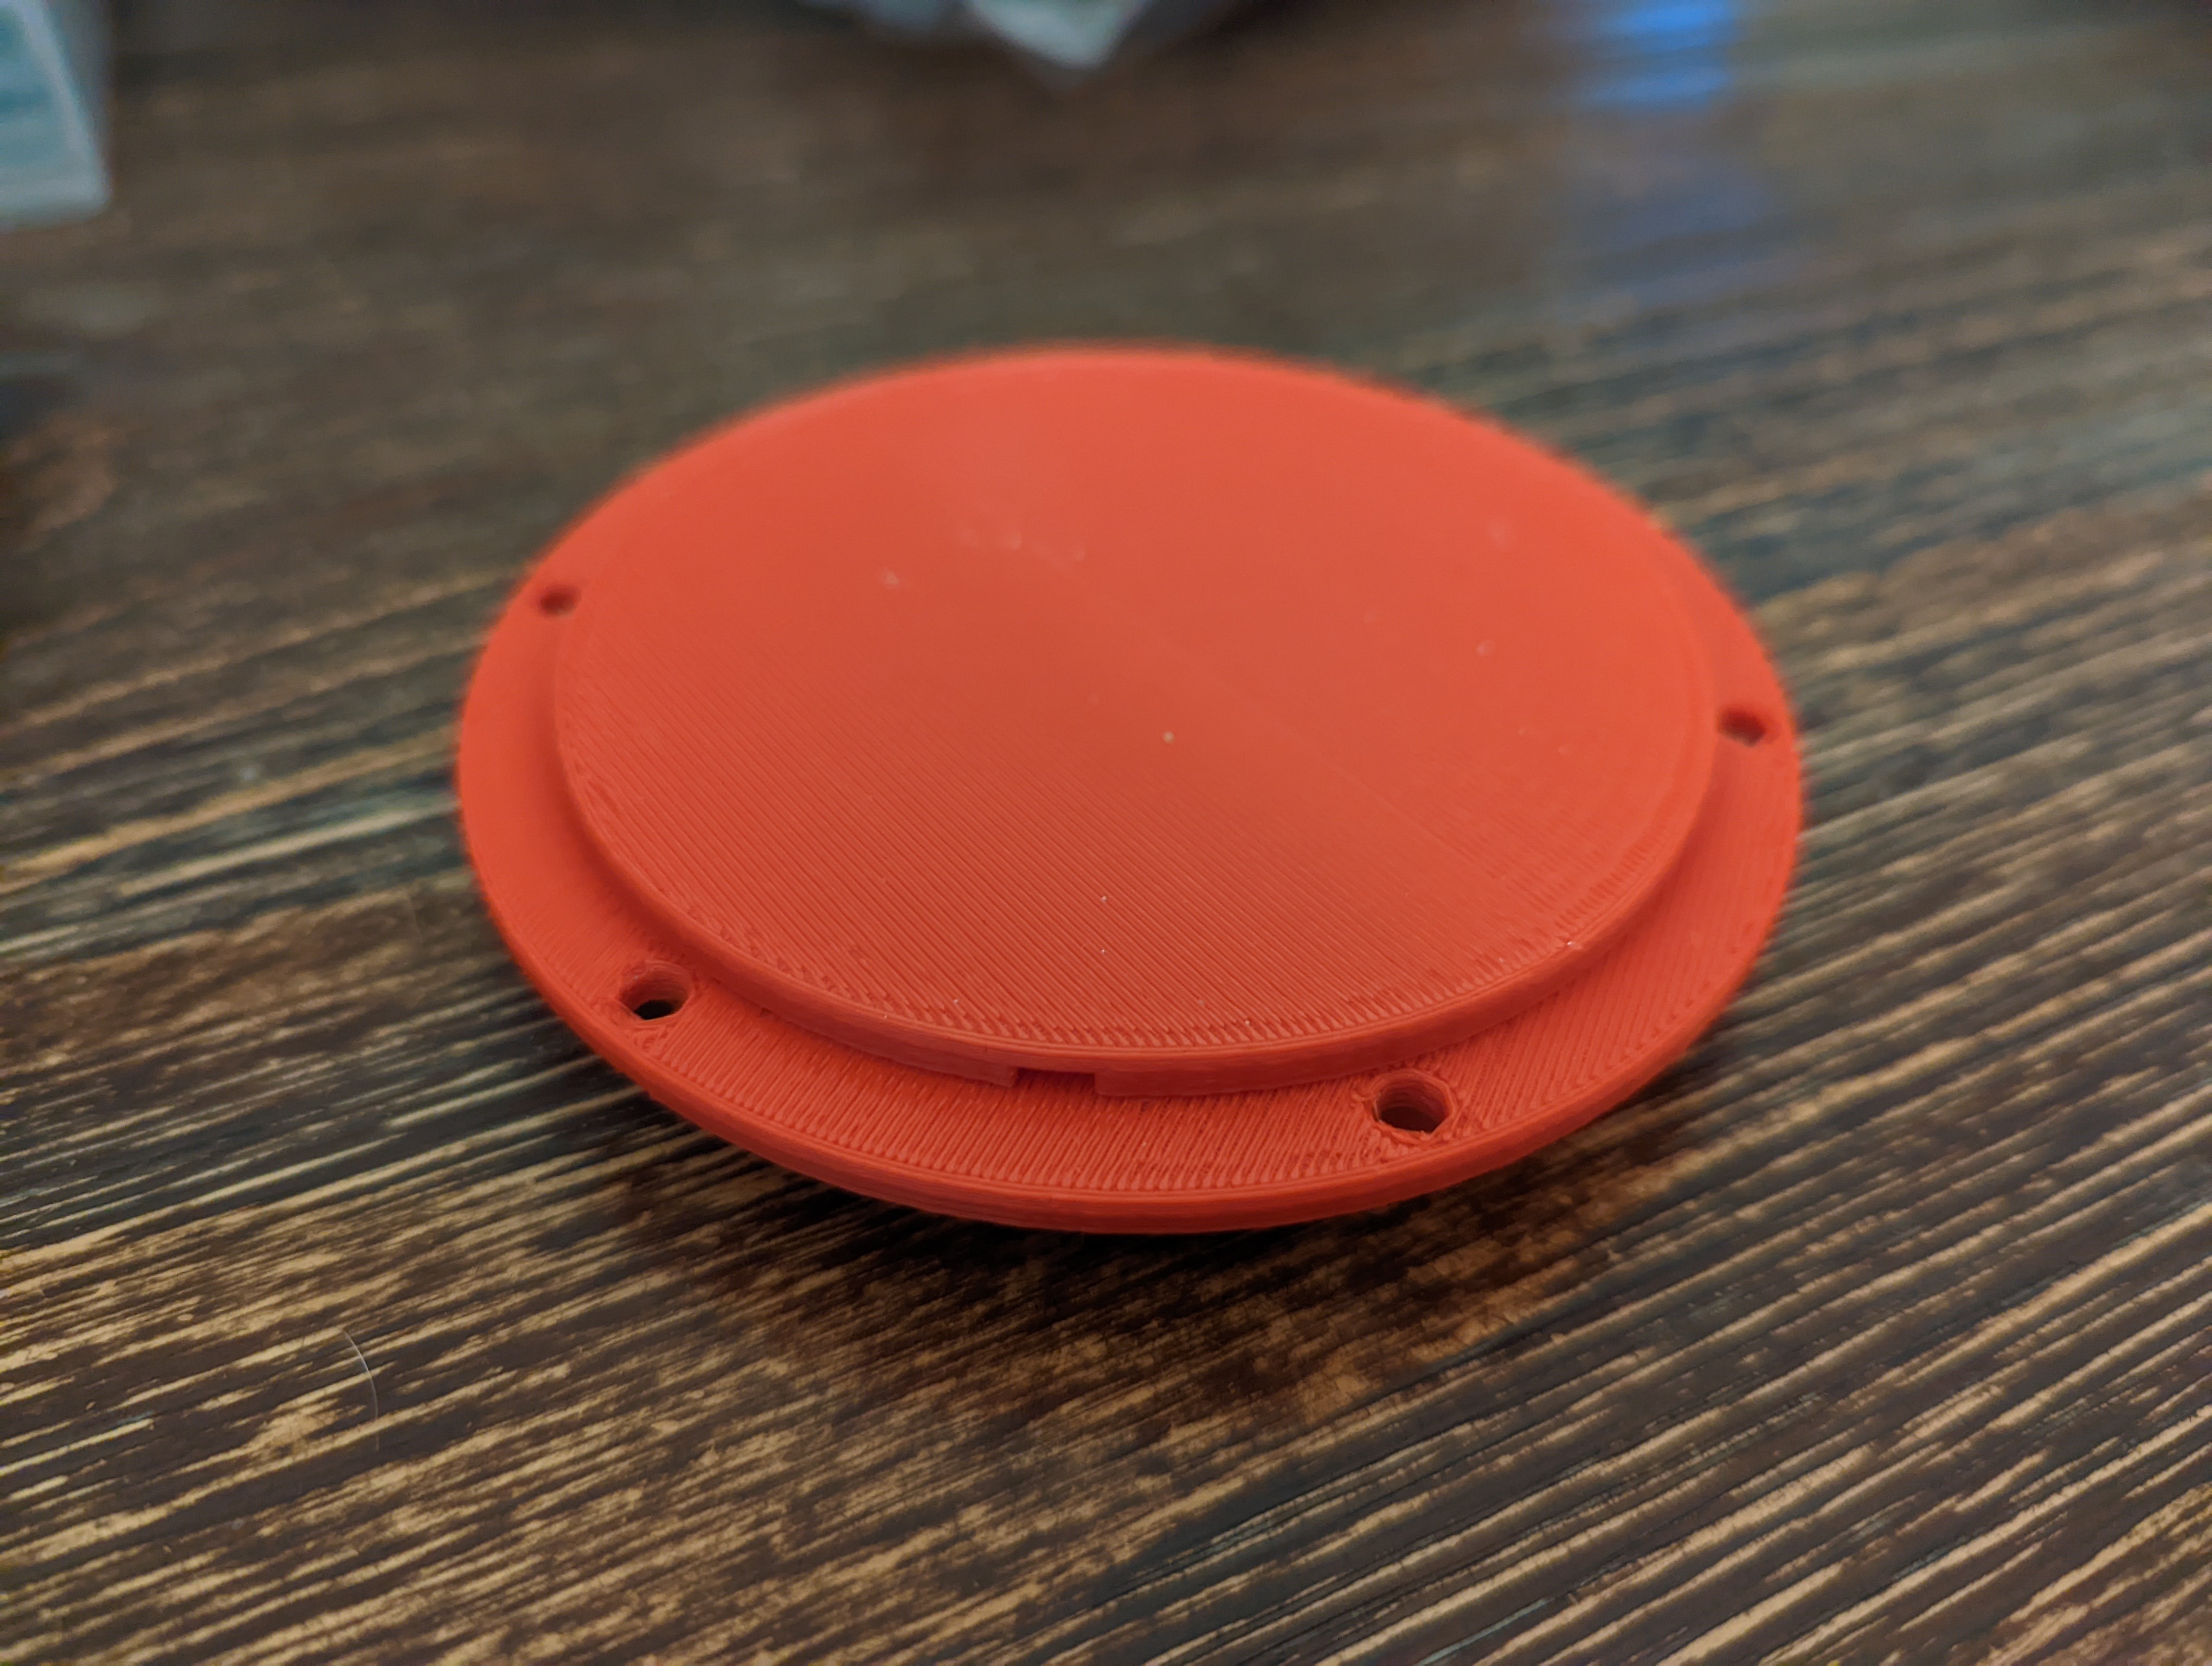
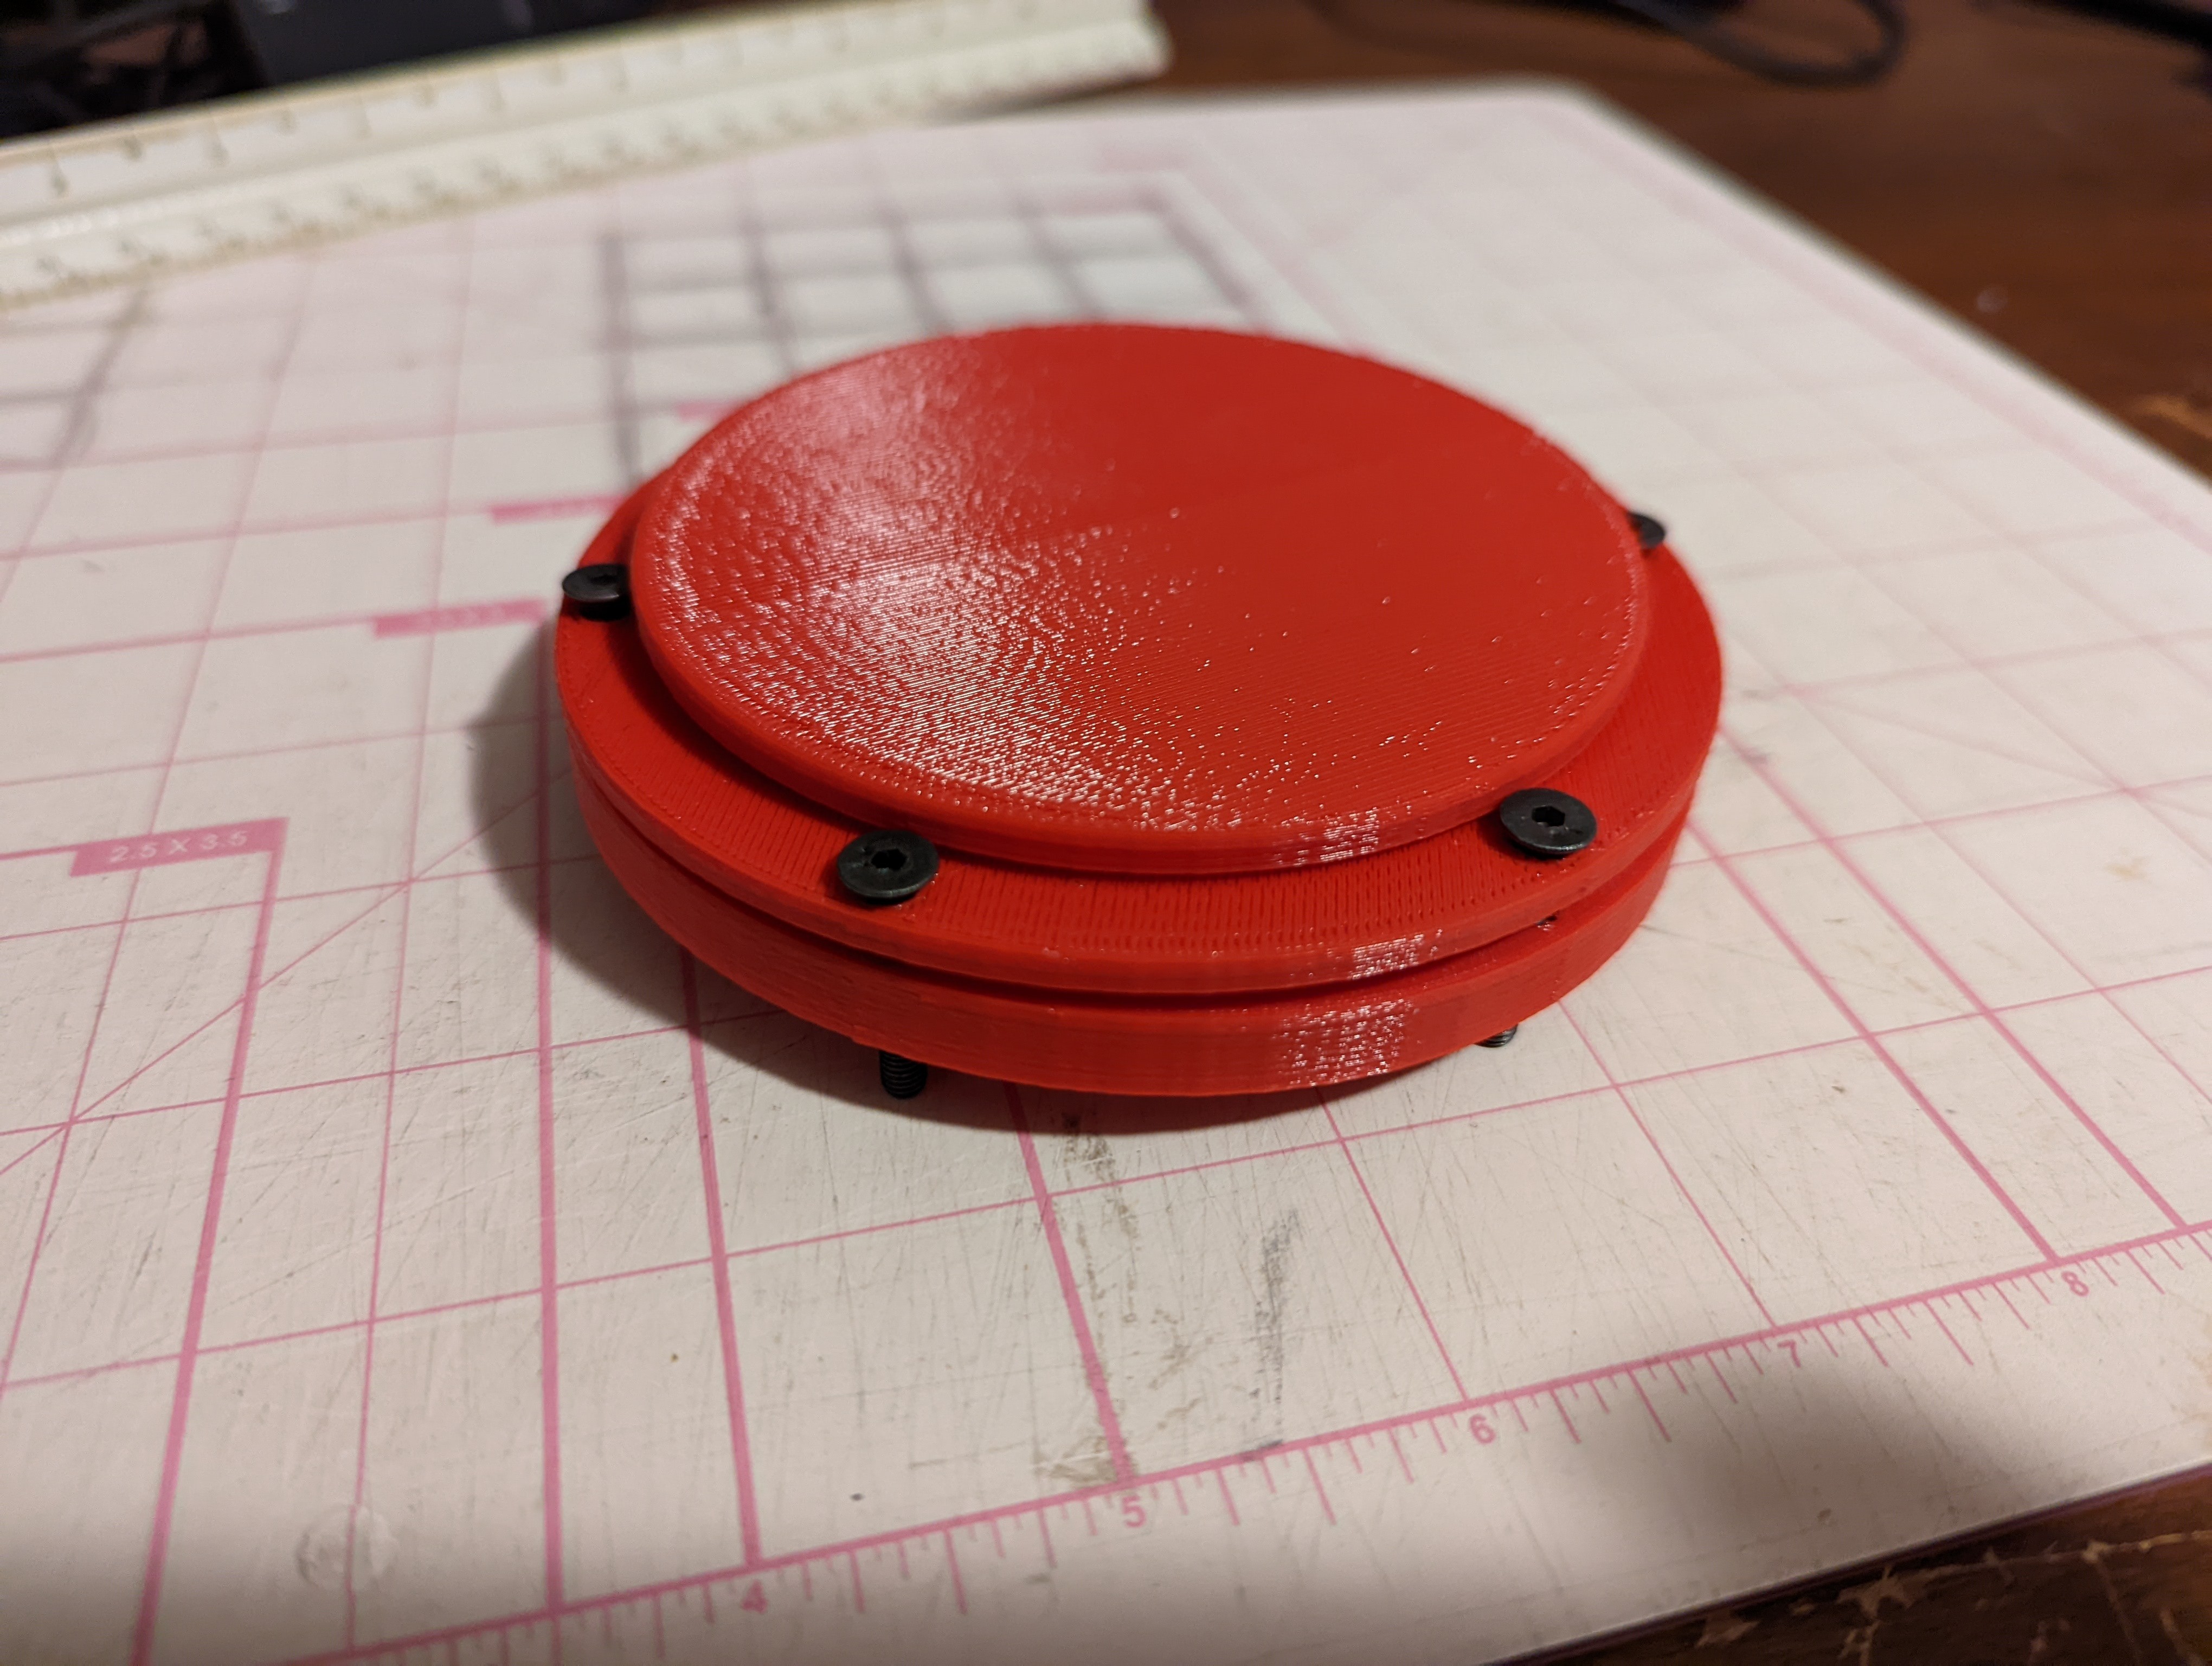
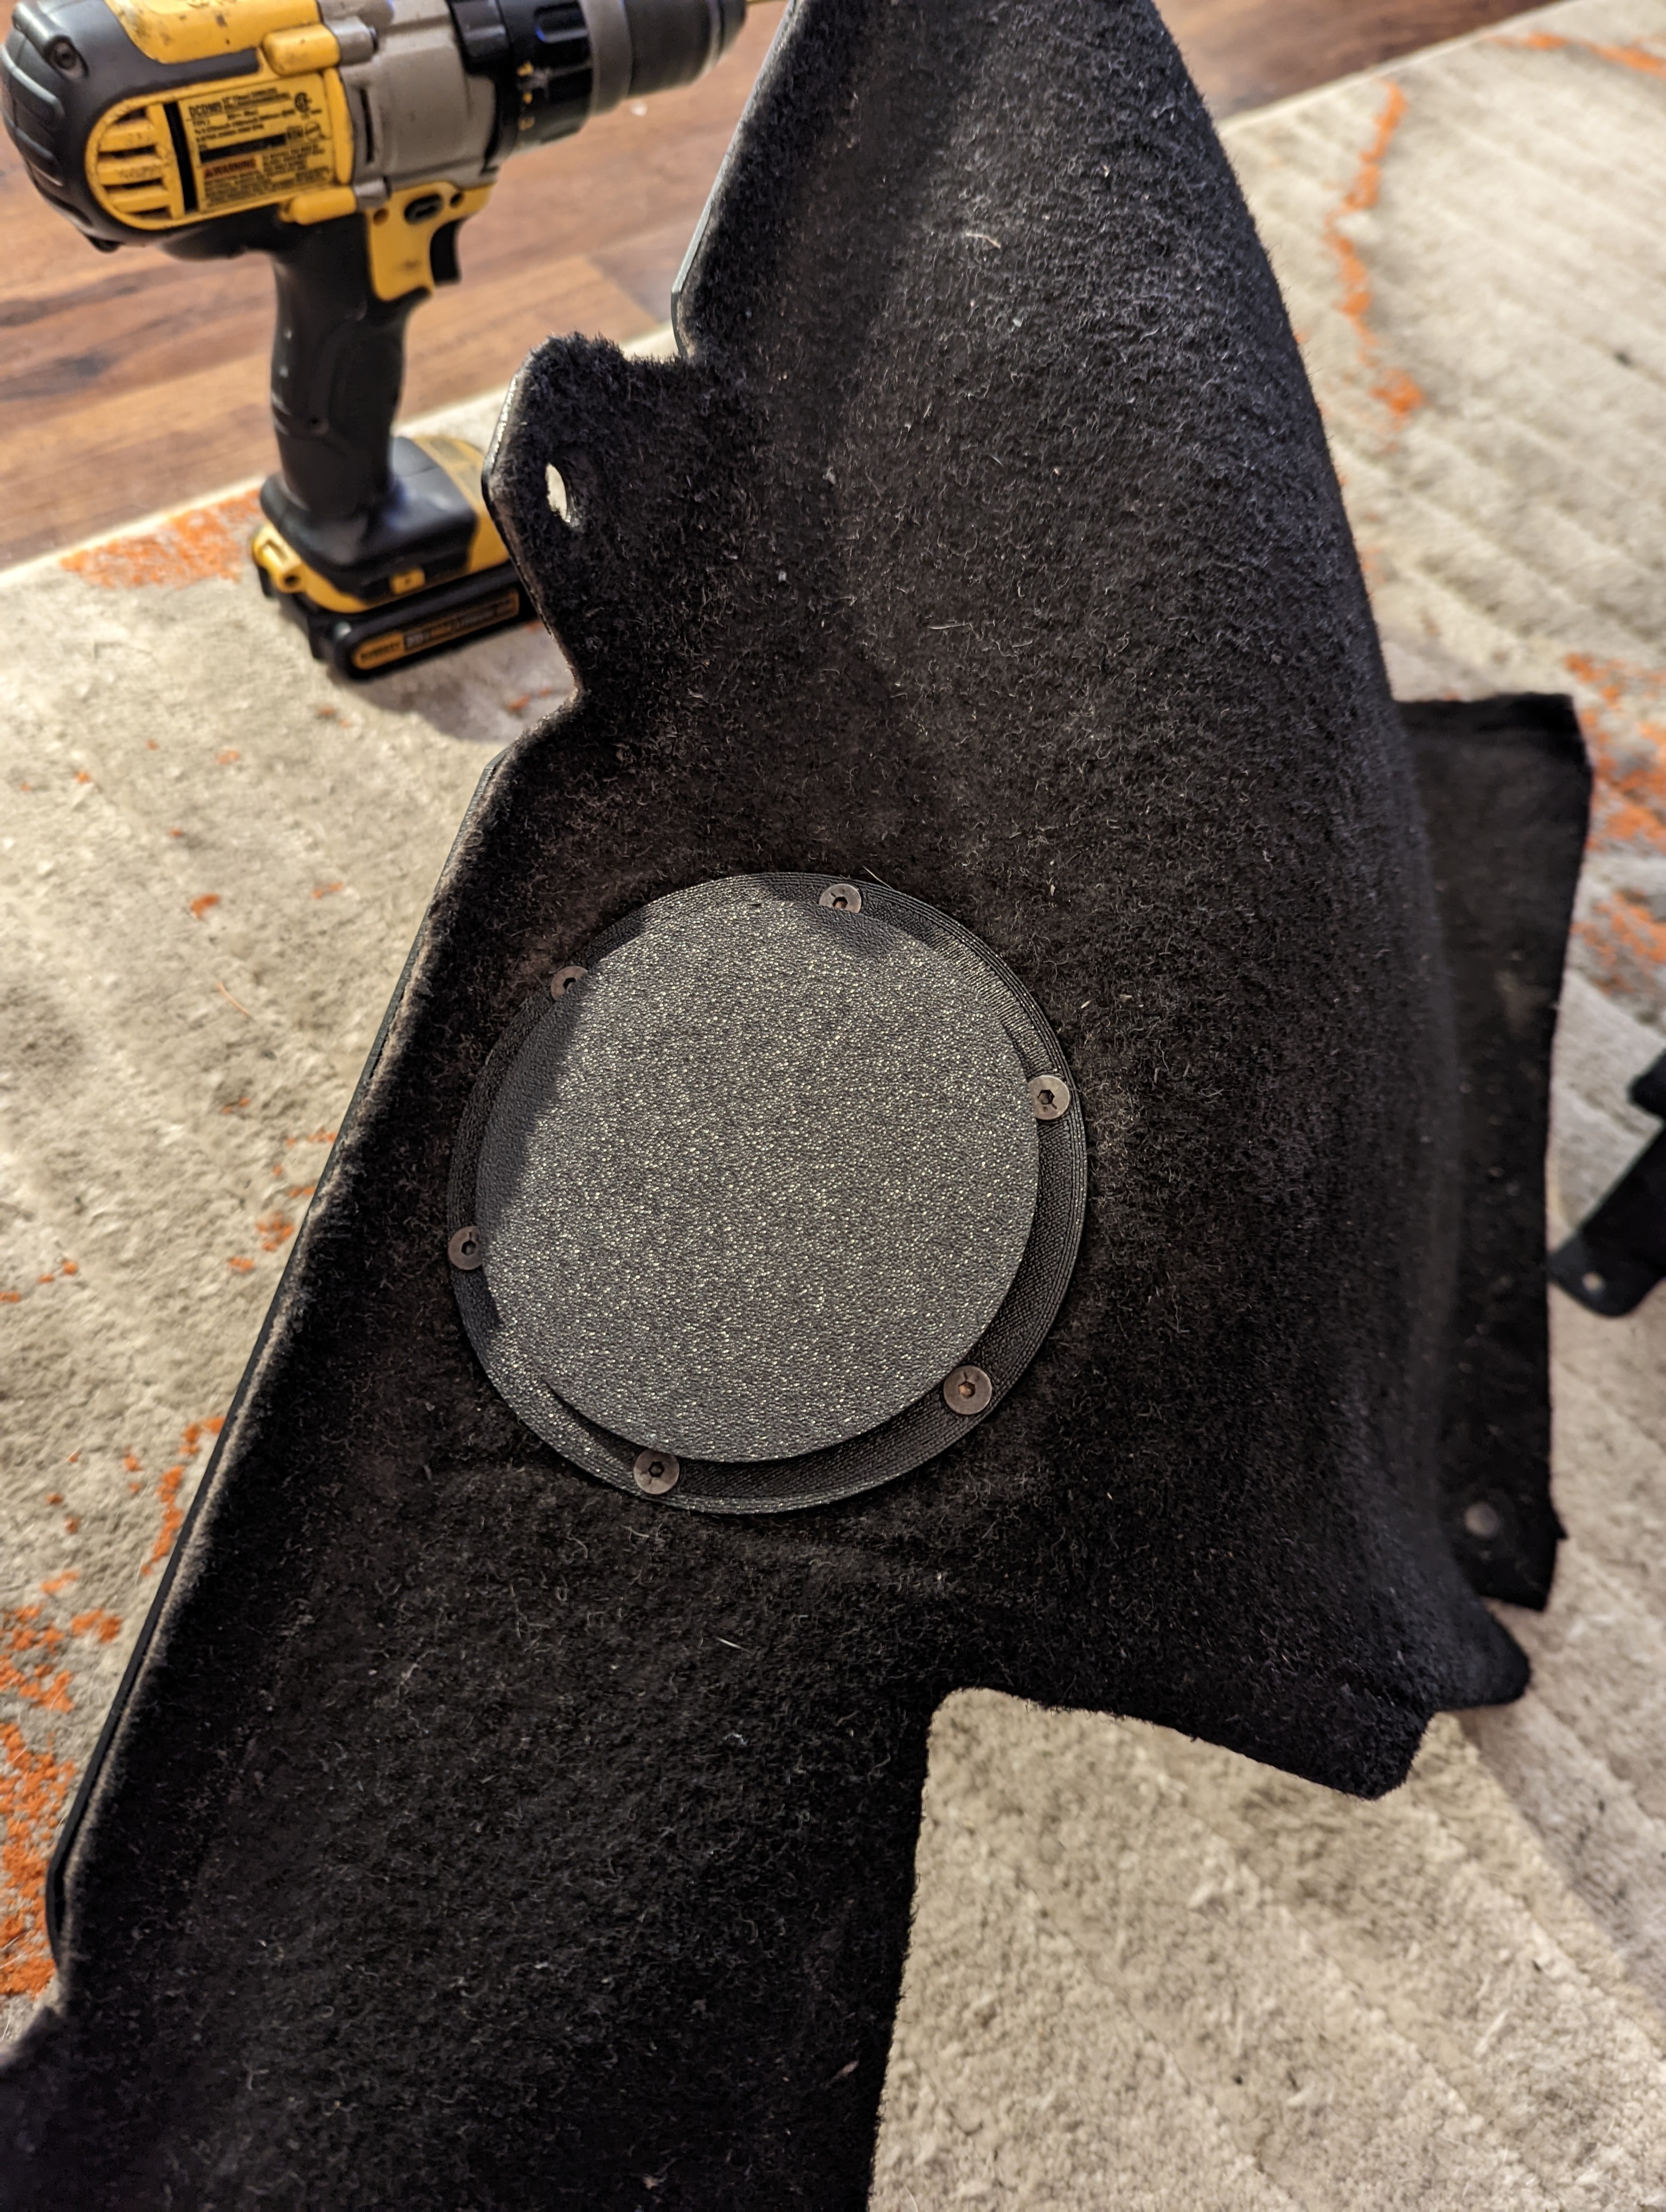
                              I've been working on a side project for the Coupe. Knowing that you have to remove the entire interior to access the top rear strut mounts, wasn't ideal for coilovers and dampening adjustments.

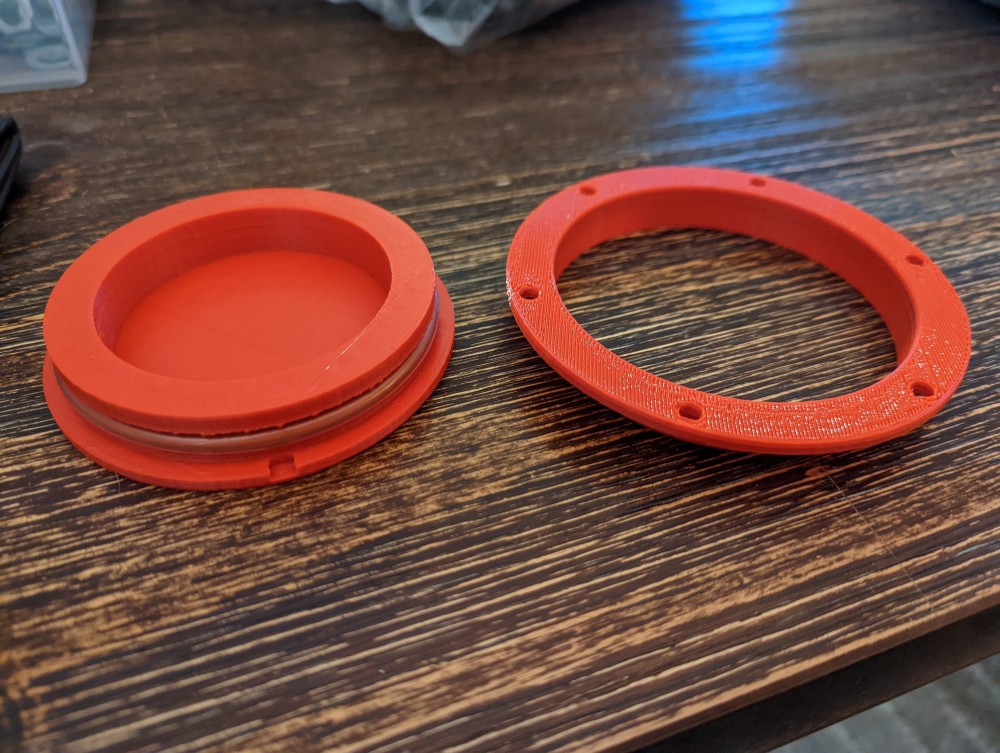
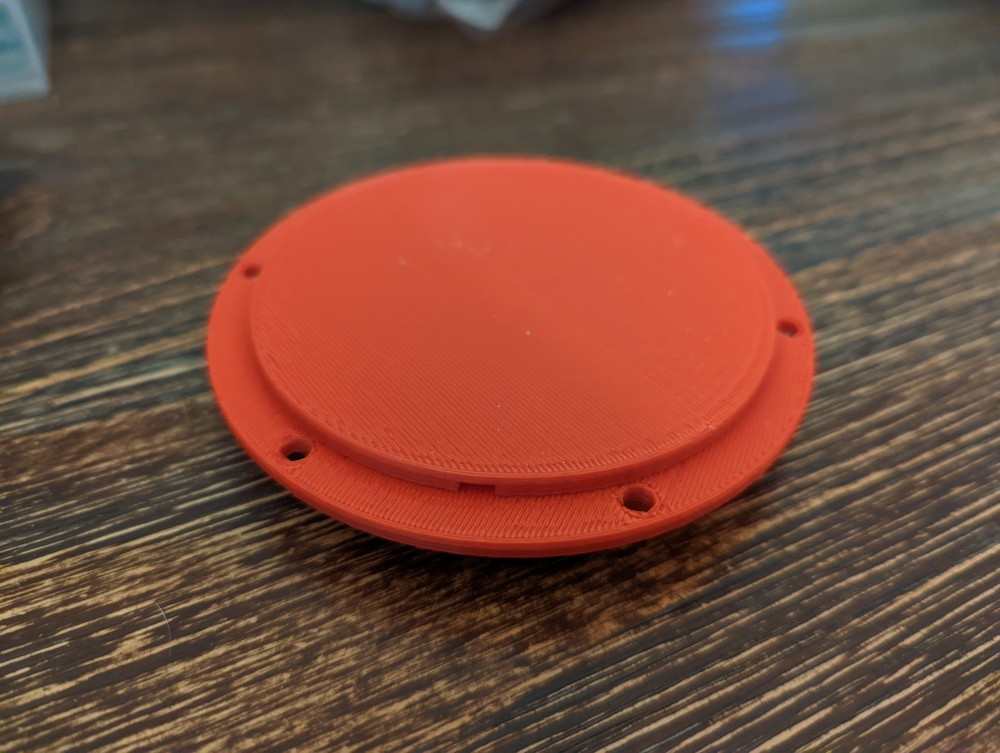
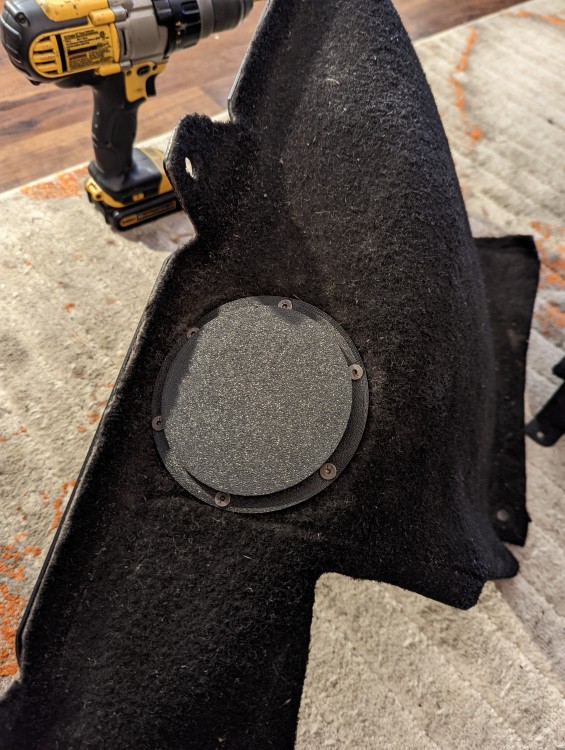
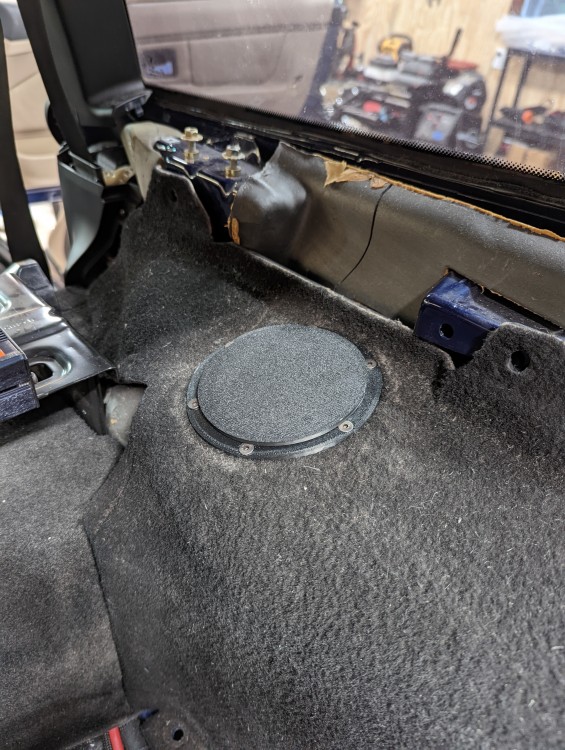
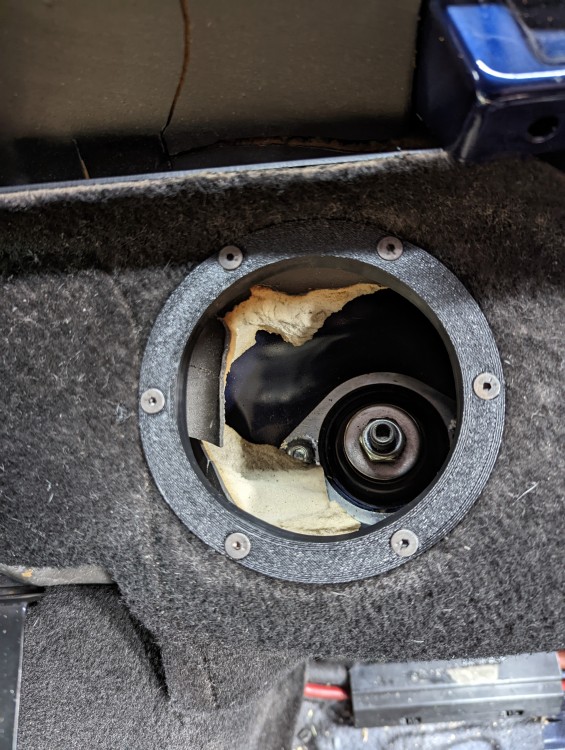
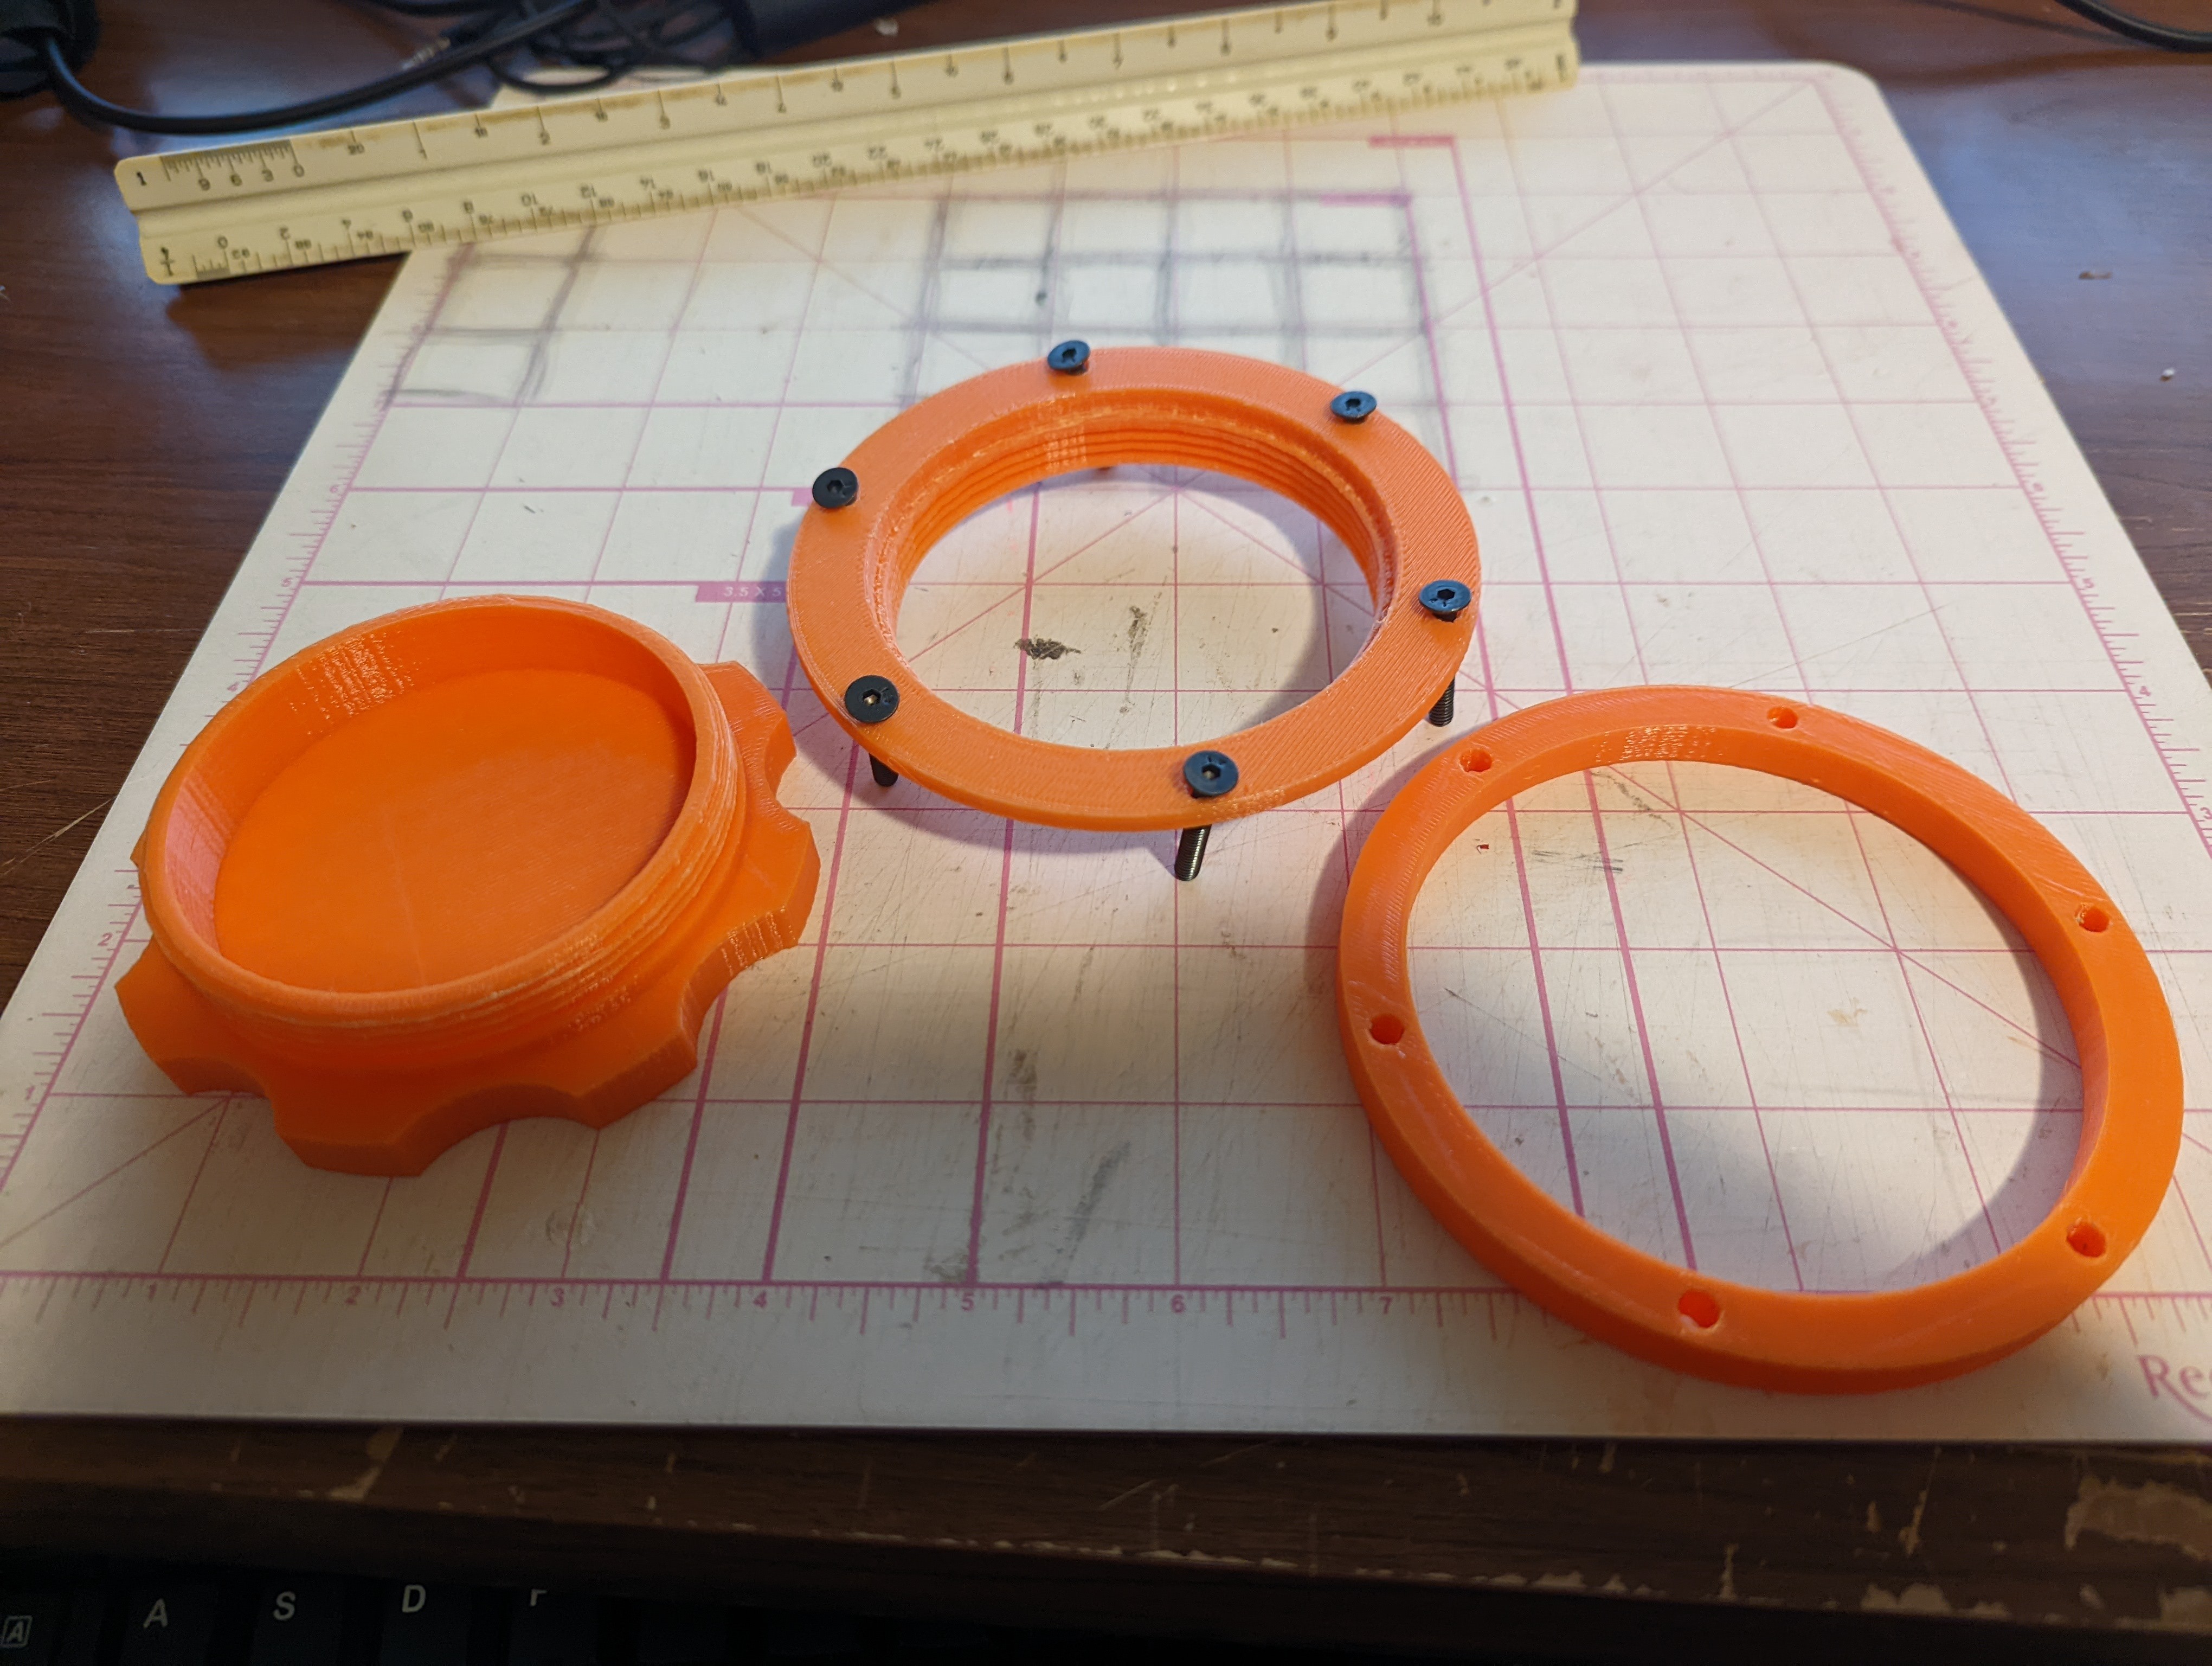
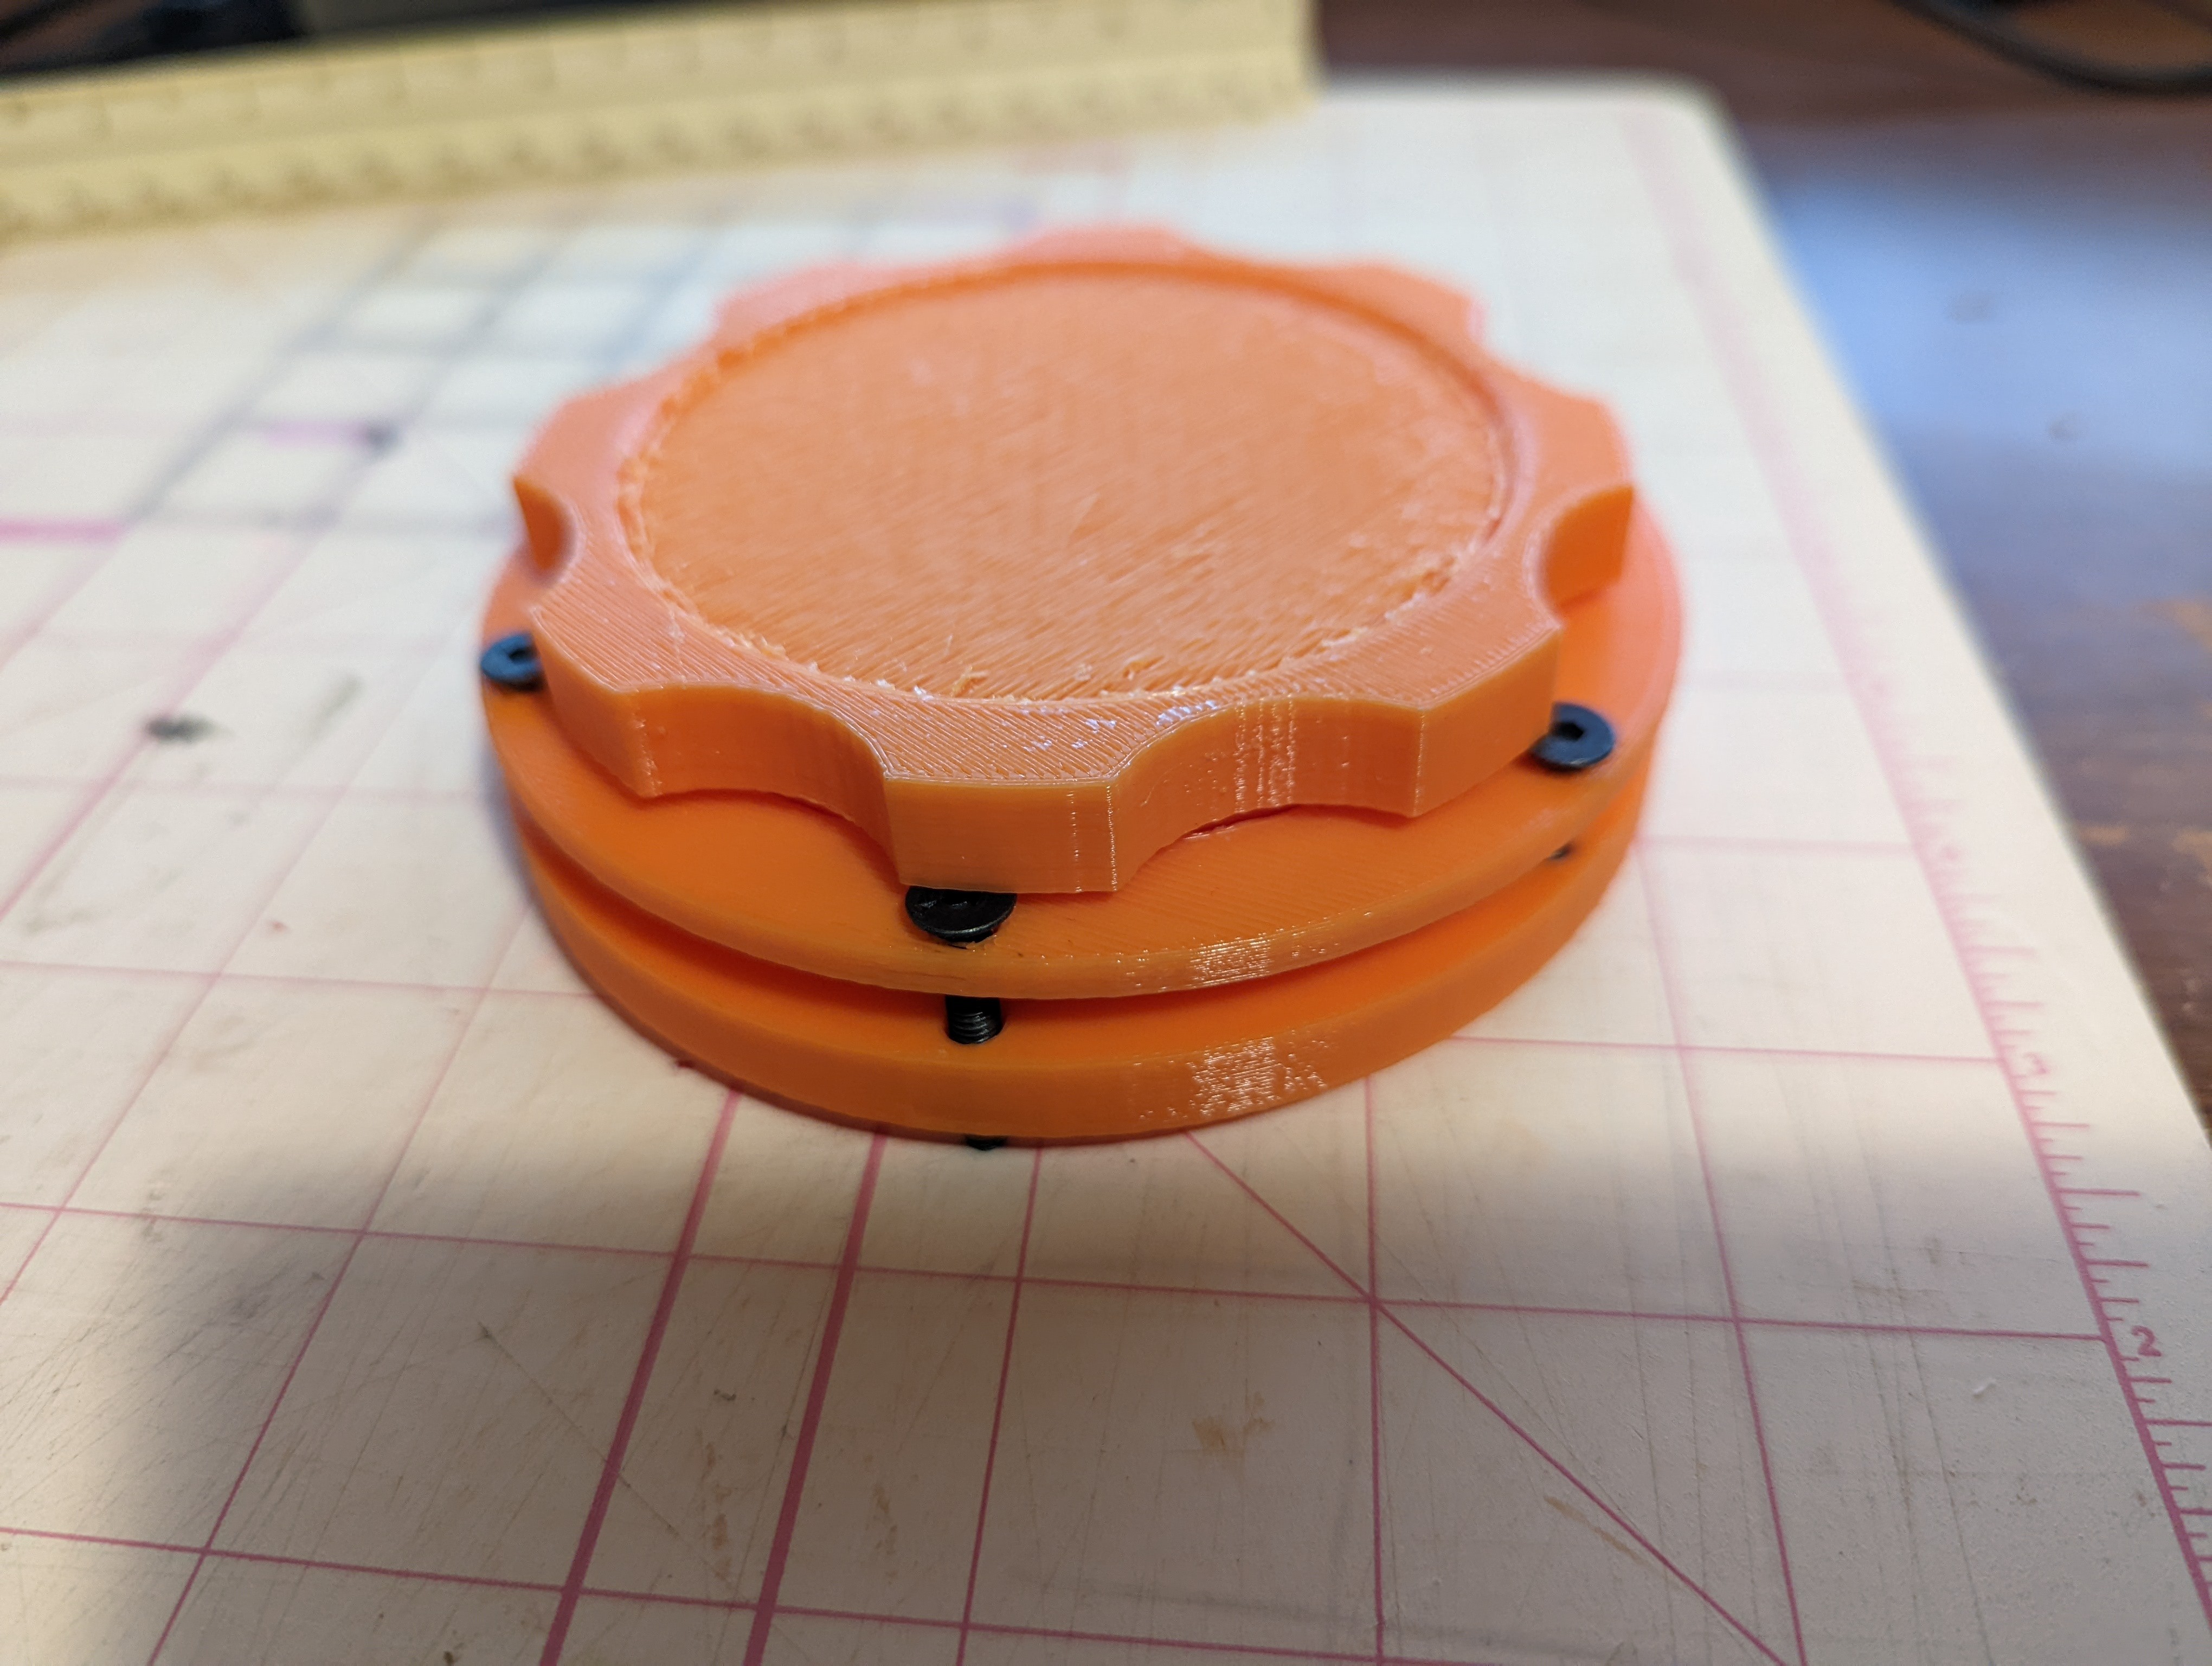
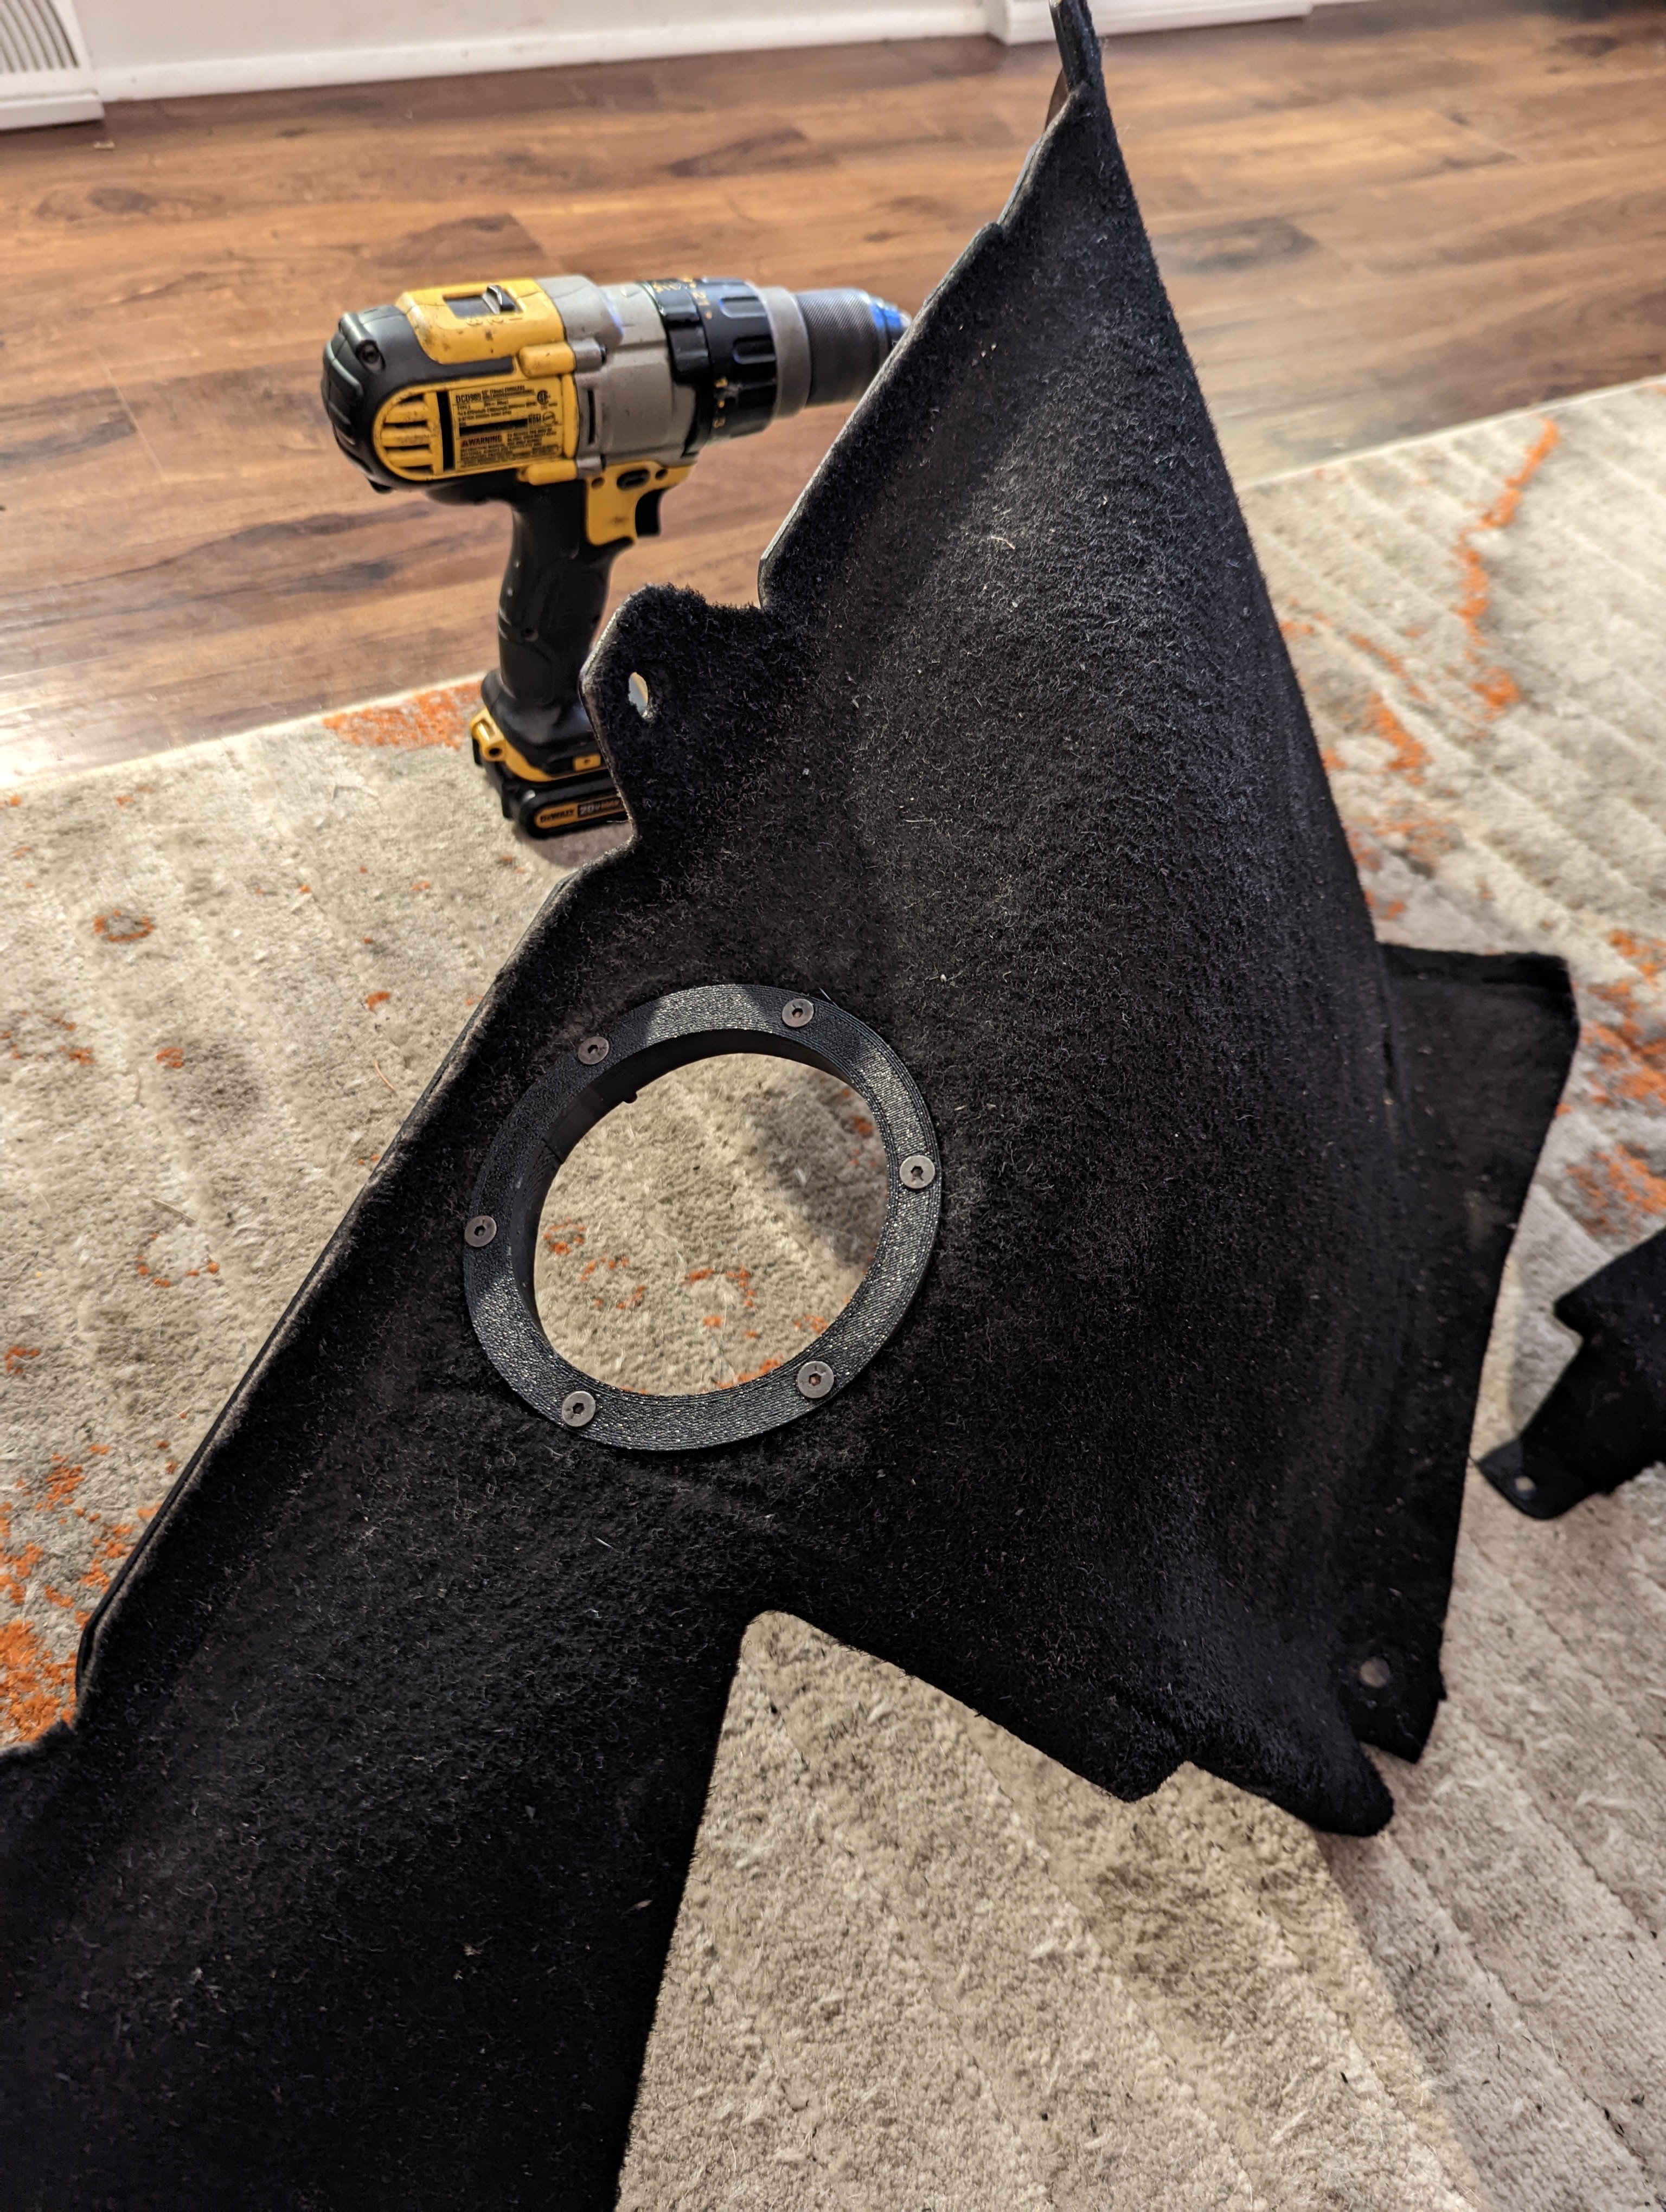
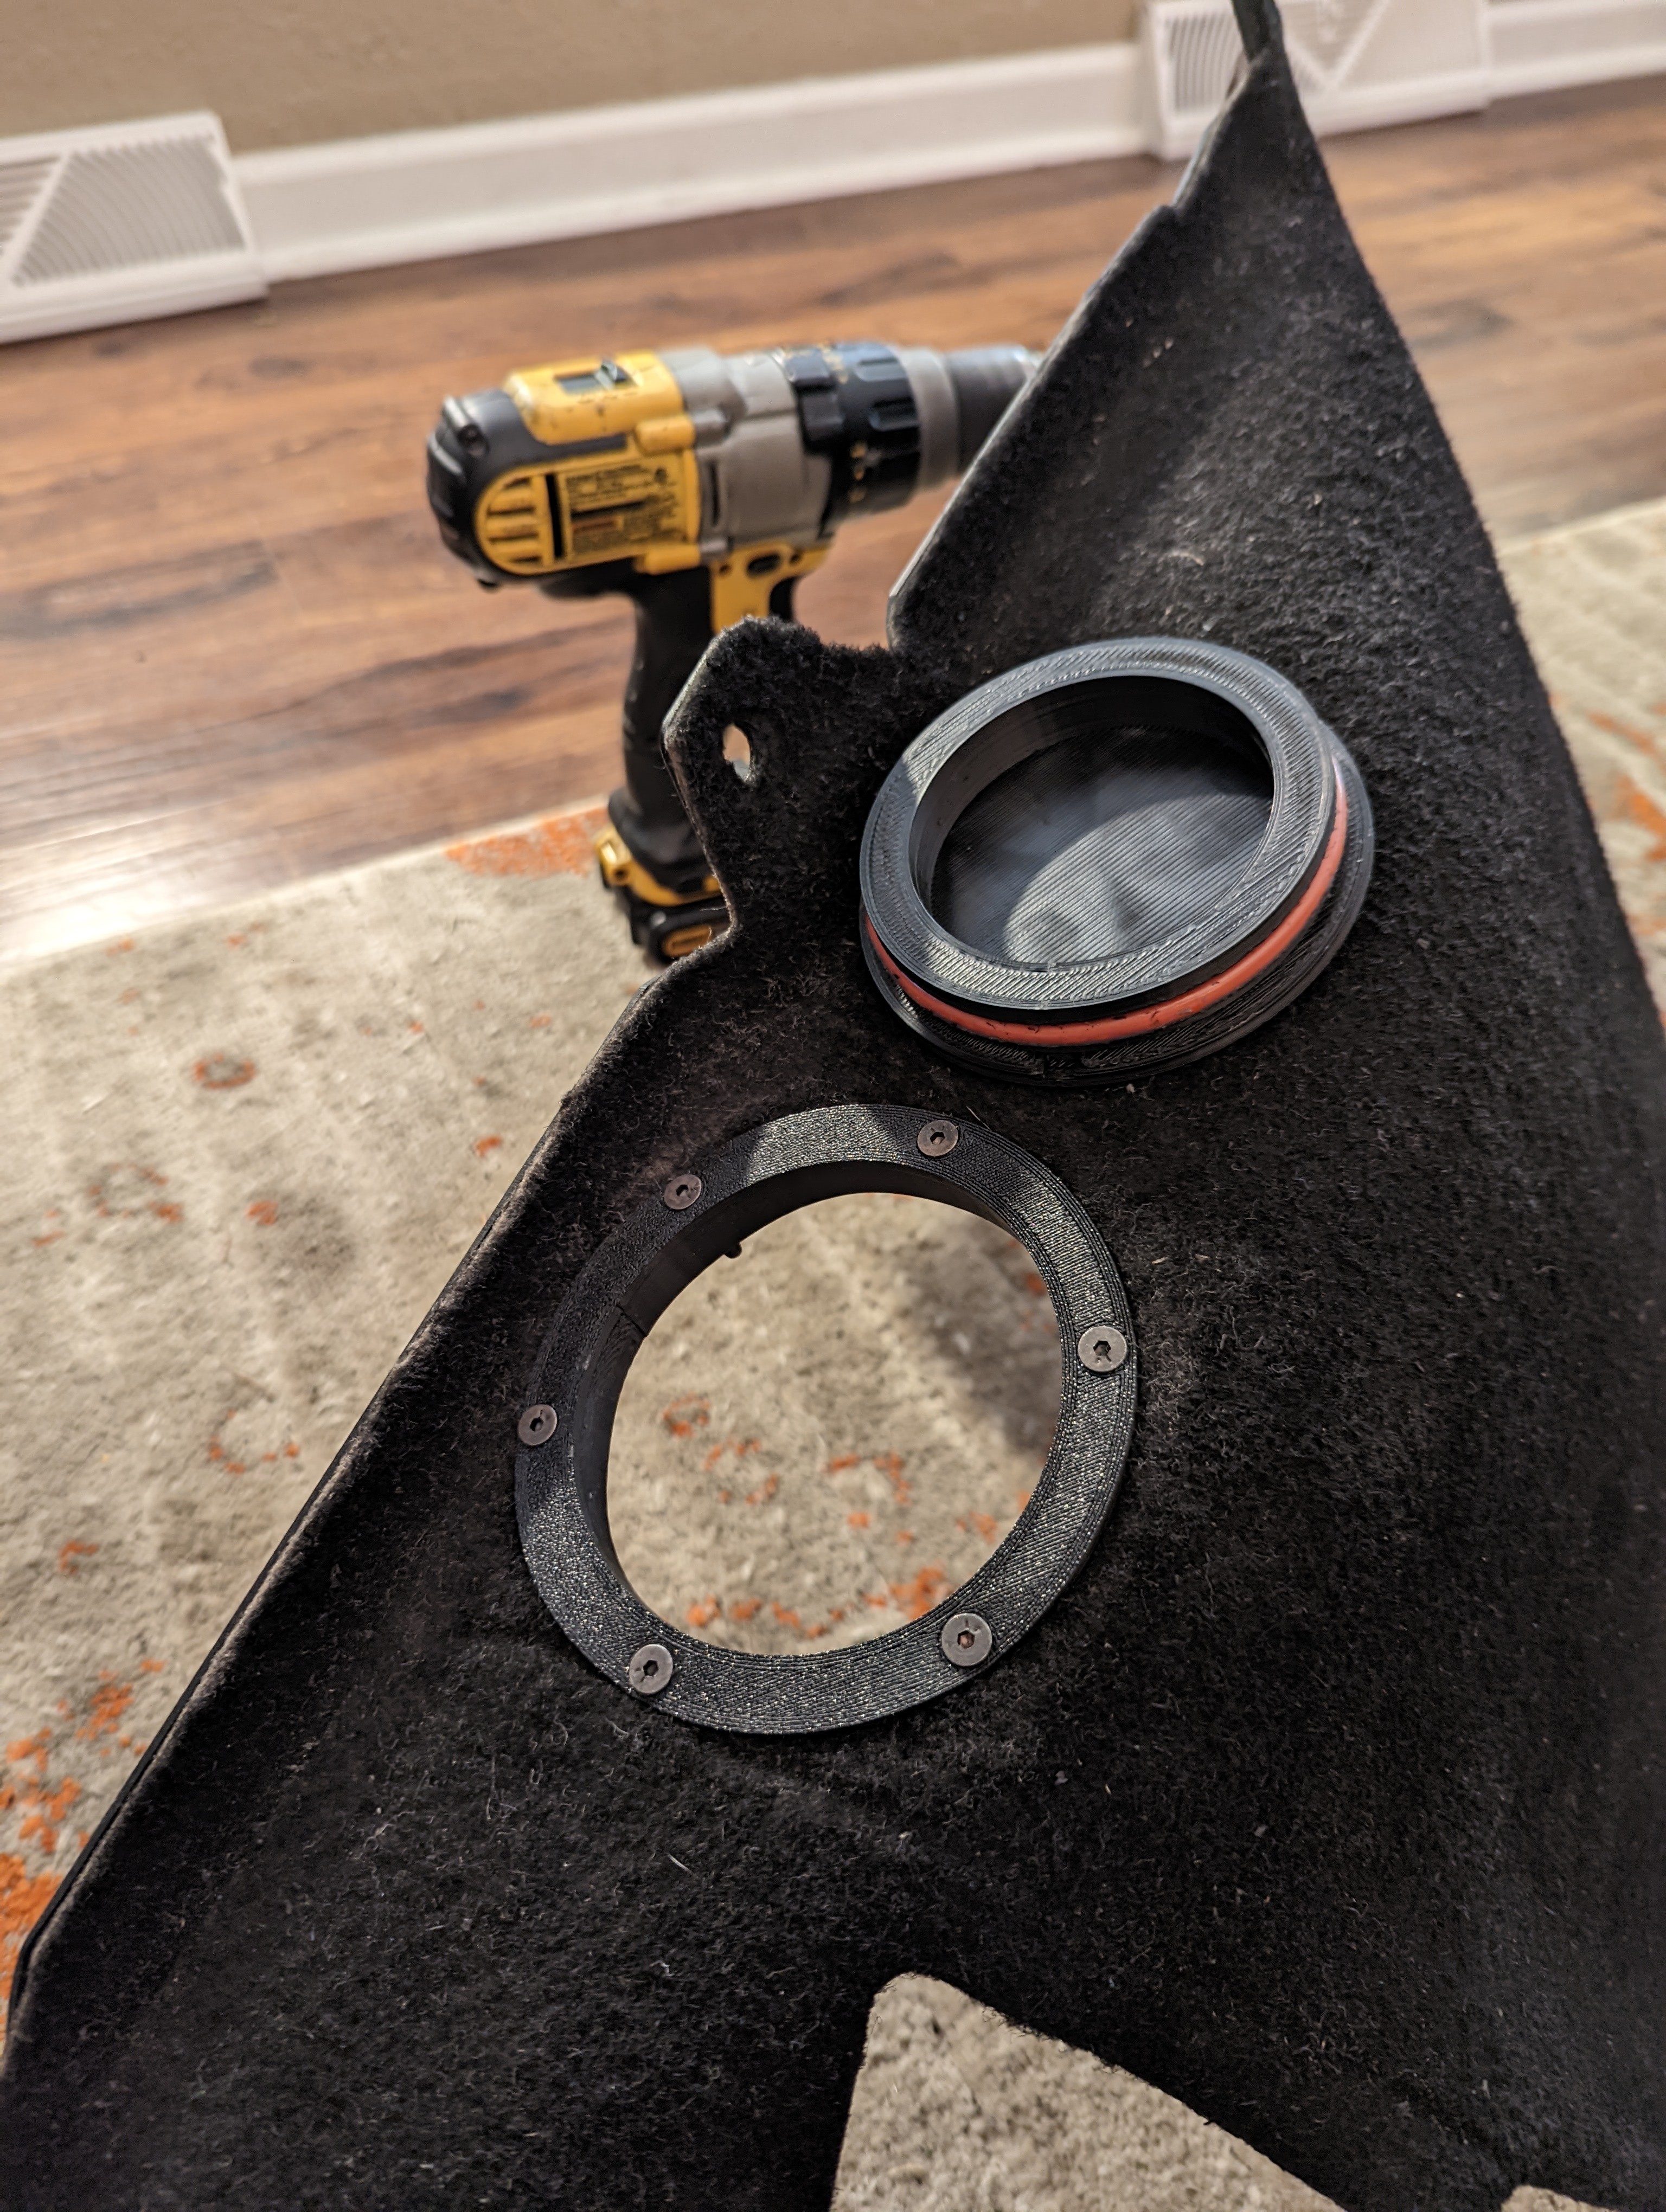
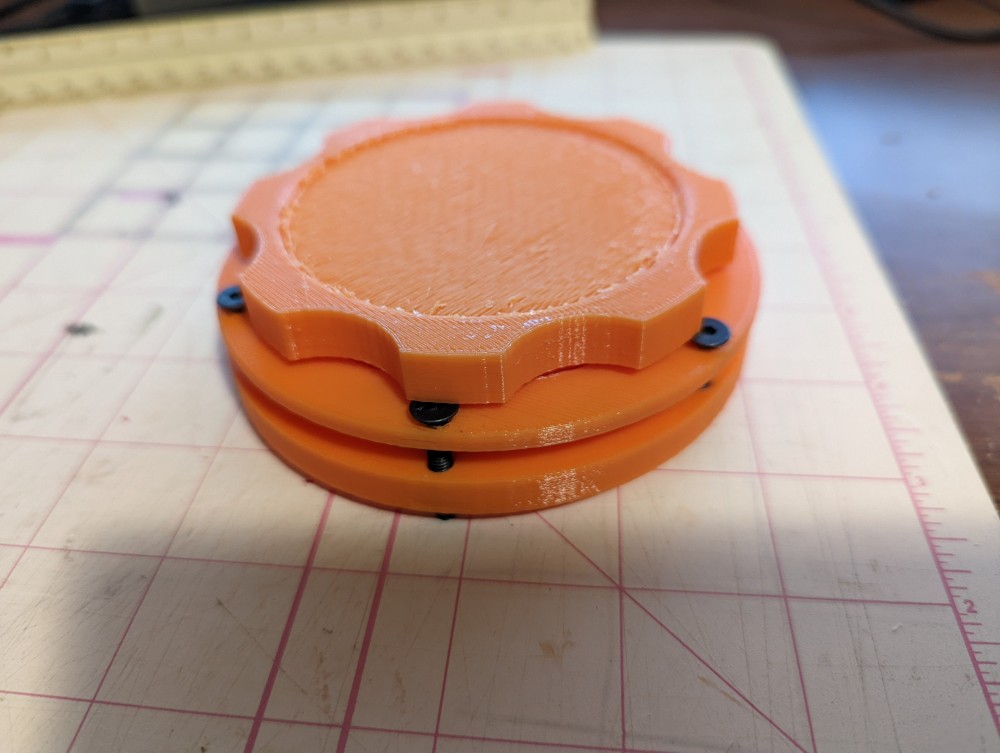
                              Took a chance to design some 3d printed access caps that can be installed in the carpet humps that cover the strut tops. Will allow dampening adjustments for coilovers or regular access to the strut tops for replacements or repairs without the need to remove the interior. 

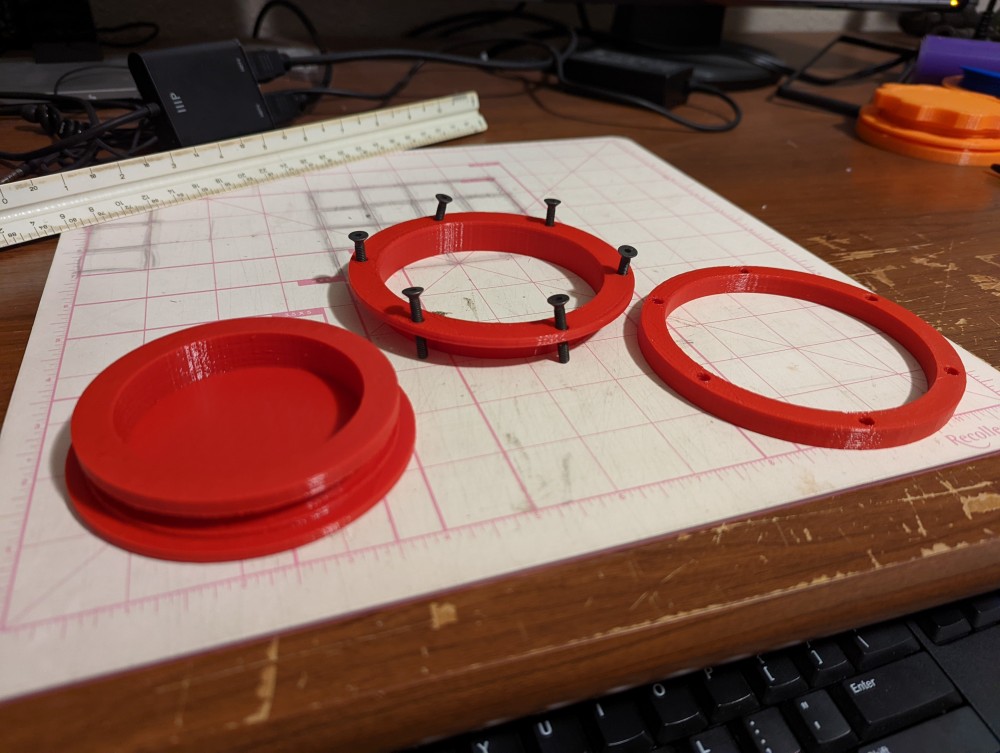
                              First go around was a little ambitious with a threaded cap into a flange set that sandwiches the carpet for mounting.
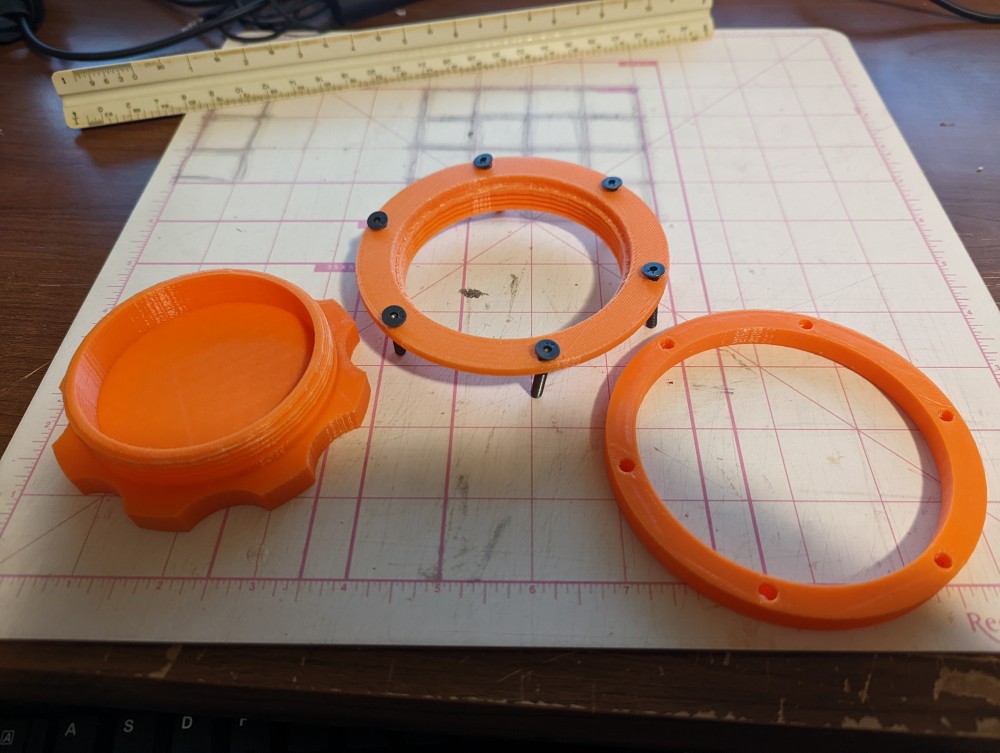
                              PXL20220414012512953.jpg

                              PXL20220414012446138.jpg

                              Got the opinion of a true mechanical engineer (aka Brian) who gave me the idea of making it a press fit with oring instead of threads. Made designing and printing easier. Also added a slot on the side for a flat head screwdriver to pry cap off when removing. Seems to work pretty well. 
                              PXL20220415024022092.jpg

                              PXL20220416010738742.jpg

                              PXL20220416010806409.jpg

                              PXL20220415024123040.jpg

                              Next up is test fitting to the carpet and if all is good, getting these printed in ABS for longevity and heat resistance.

                              CHECK OUT >>> RAGE DRIFT DESIGNS <<< FOR DECALS AND MORE!

                              1 Reply Last reply
                              5
                              • YoungCRY
                                YoungCRY
                                YoungCR
                                wrote on last edited by
                                #108

                                Great idea

                                Chris Young
                                BMWCCA #458972
                                1986 528e/5  | 1994 530i/5 | 1995 540i/6 | 2013 X5 35d | 1998 C1500 Suburban | 1995 K2500 Suburban

                                1 Reply Last reply
                                0
                                • m42b32M
                                  m42b32M
                                  m42b32
                                  wrote on last edited by
                                  #109

                                  That is a fantastic idea! Could apply to just about any car where you want to keep the trunk carpet too

                                  1991 318is, 1991 318i, 2022 Bronco

                                  1 Reply Last reply
                                  0
                                  • B
                                    B
                                    Boris3
                                    wrote on last edited by
                                    #110

                                    Agreed, great idea and would be useful for accessing the Koni's in my e46. Looking forward to see how this develops.

                                    1990 325i racecar (ITS, former Spec E30); 2004 330i ZHP

                                    1 Reply Last reply
                                    0
                                    • Bassboy3313B
                                      Bassboy3313B
                                      Bassboy3313
                                      wrote on last edited by
                                      #111

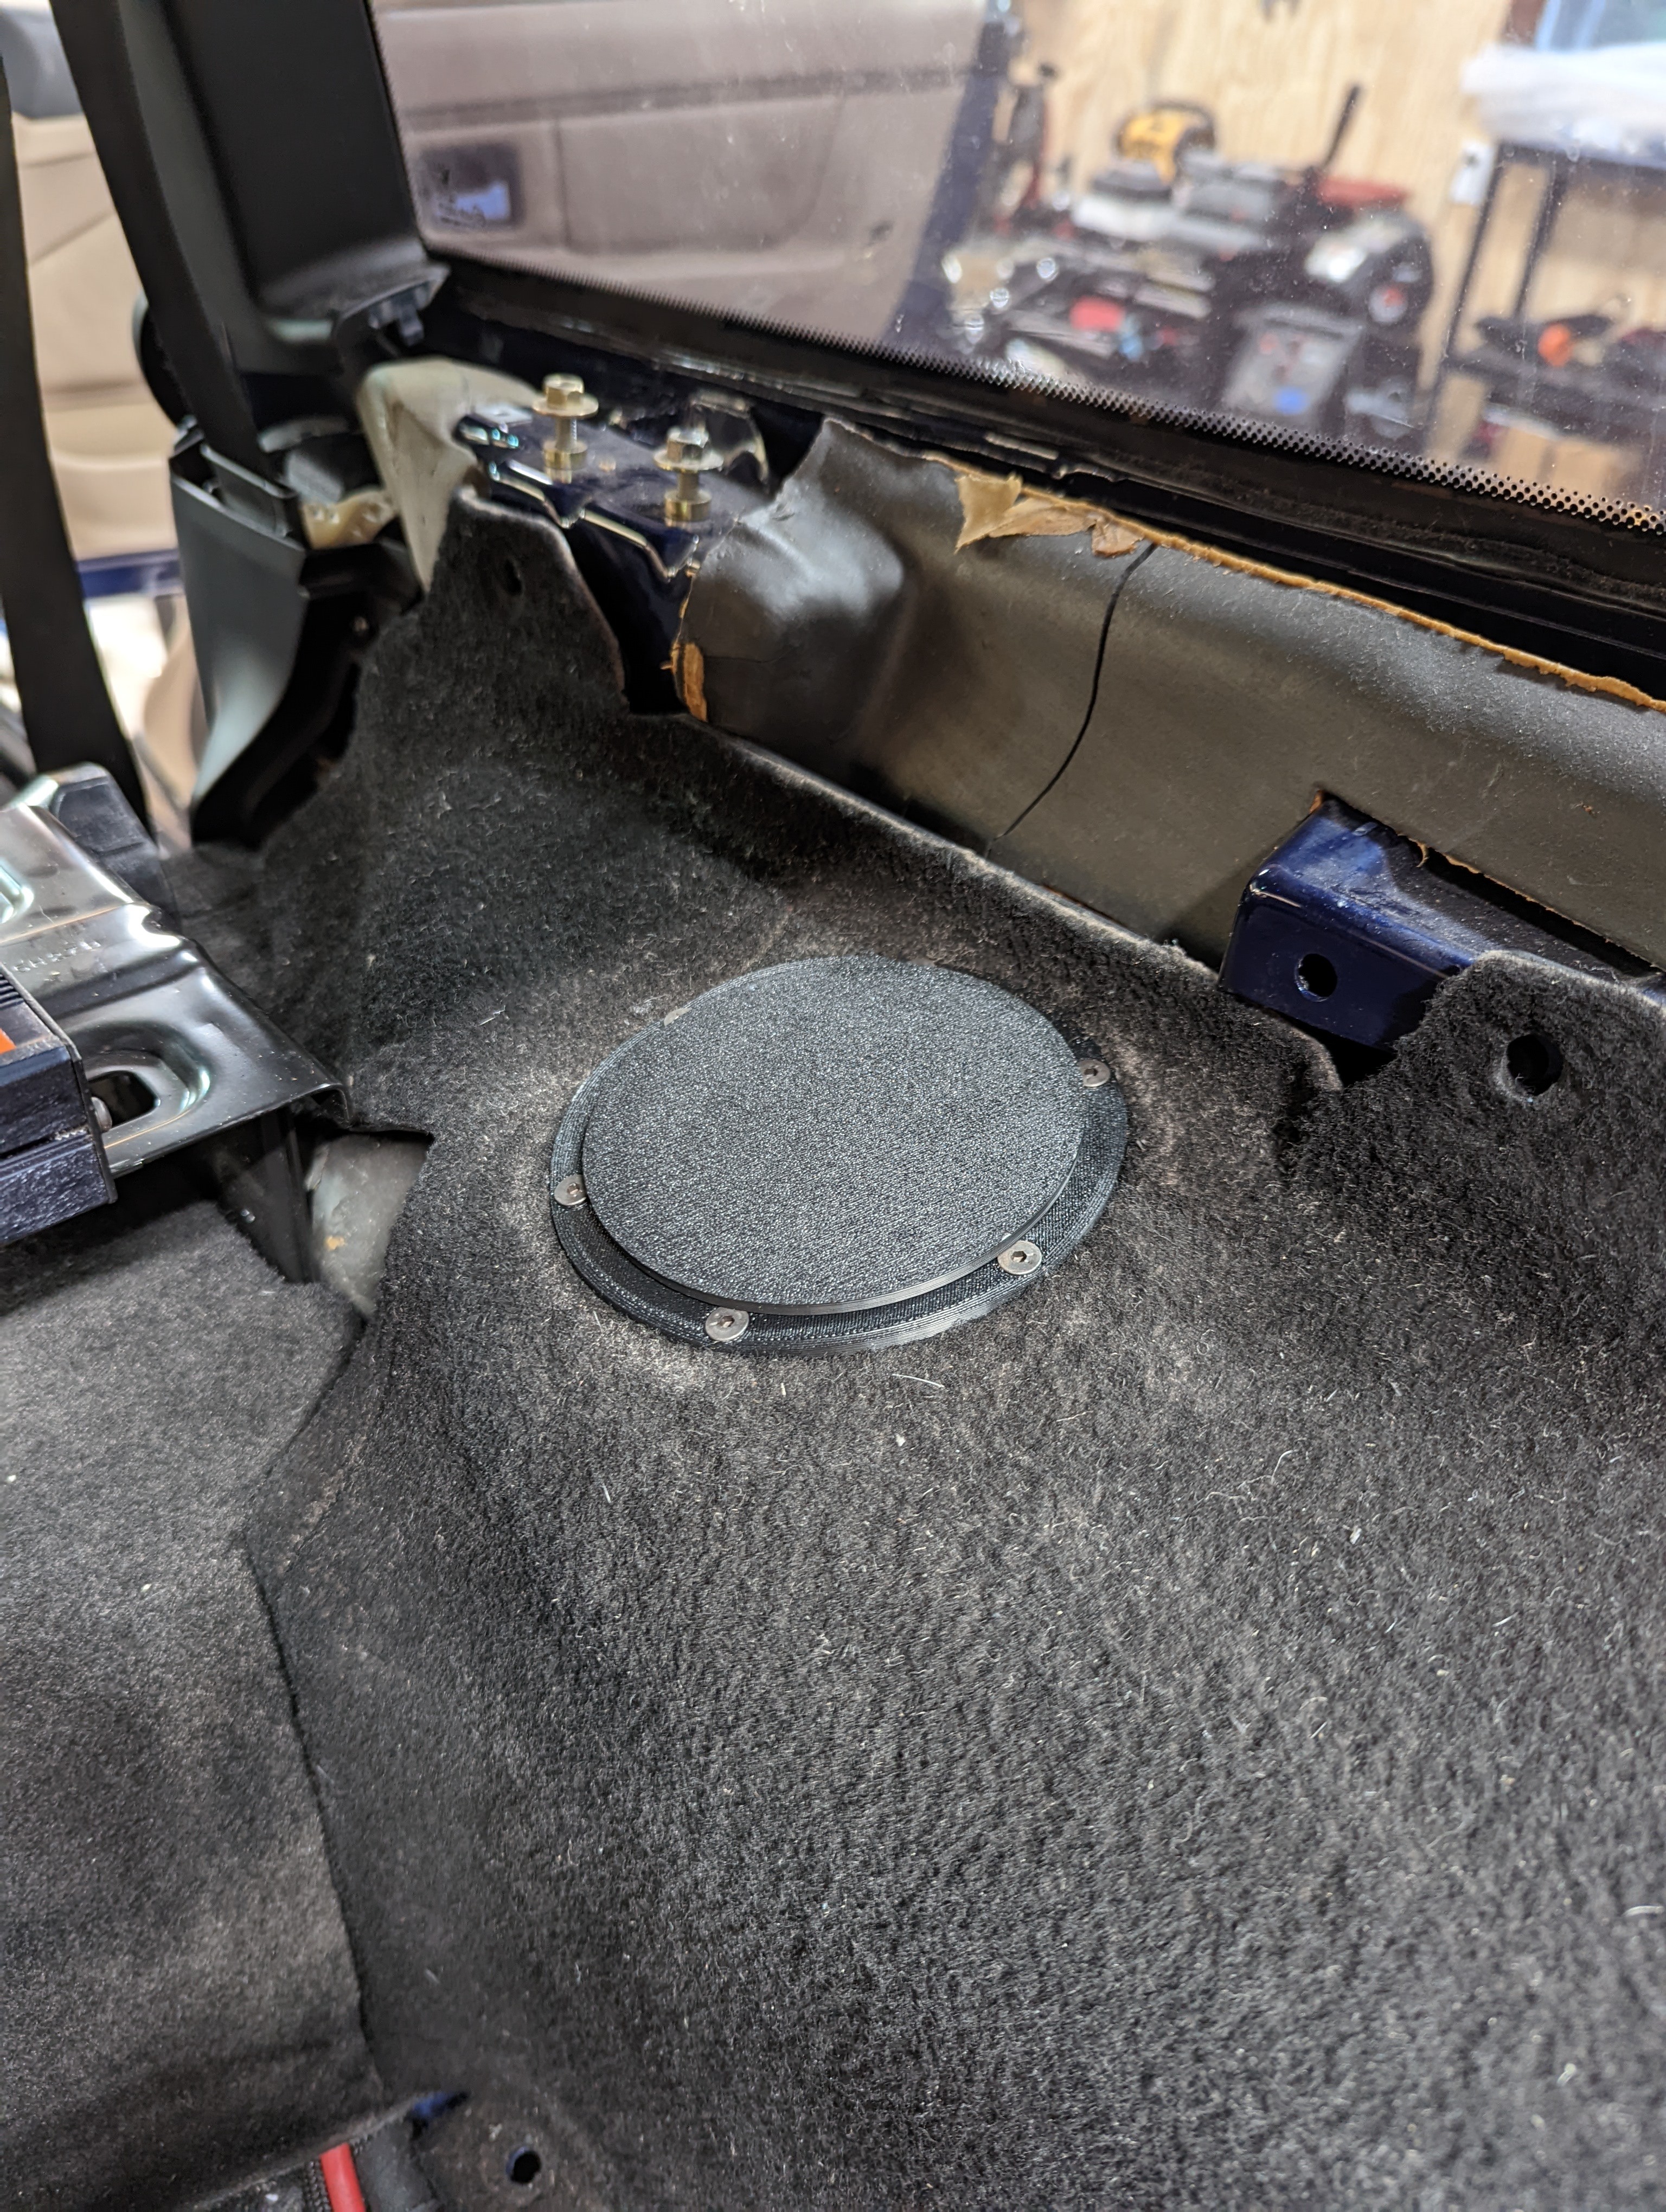
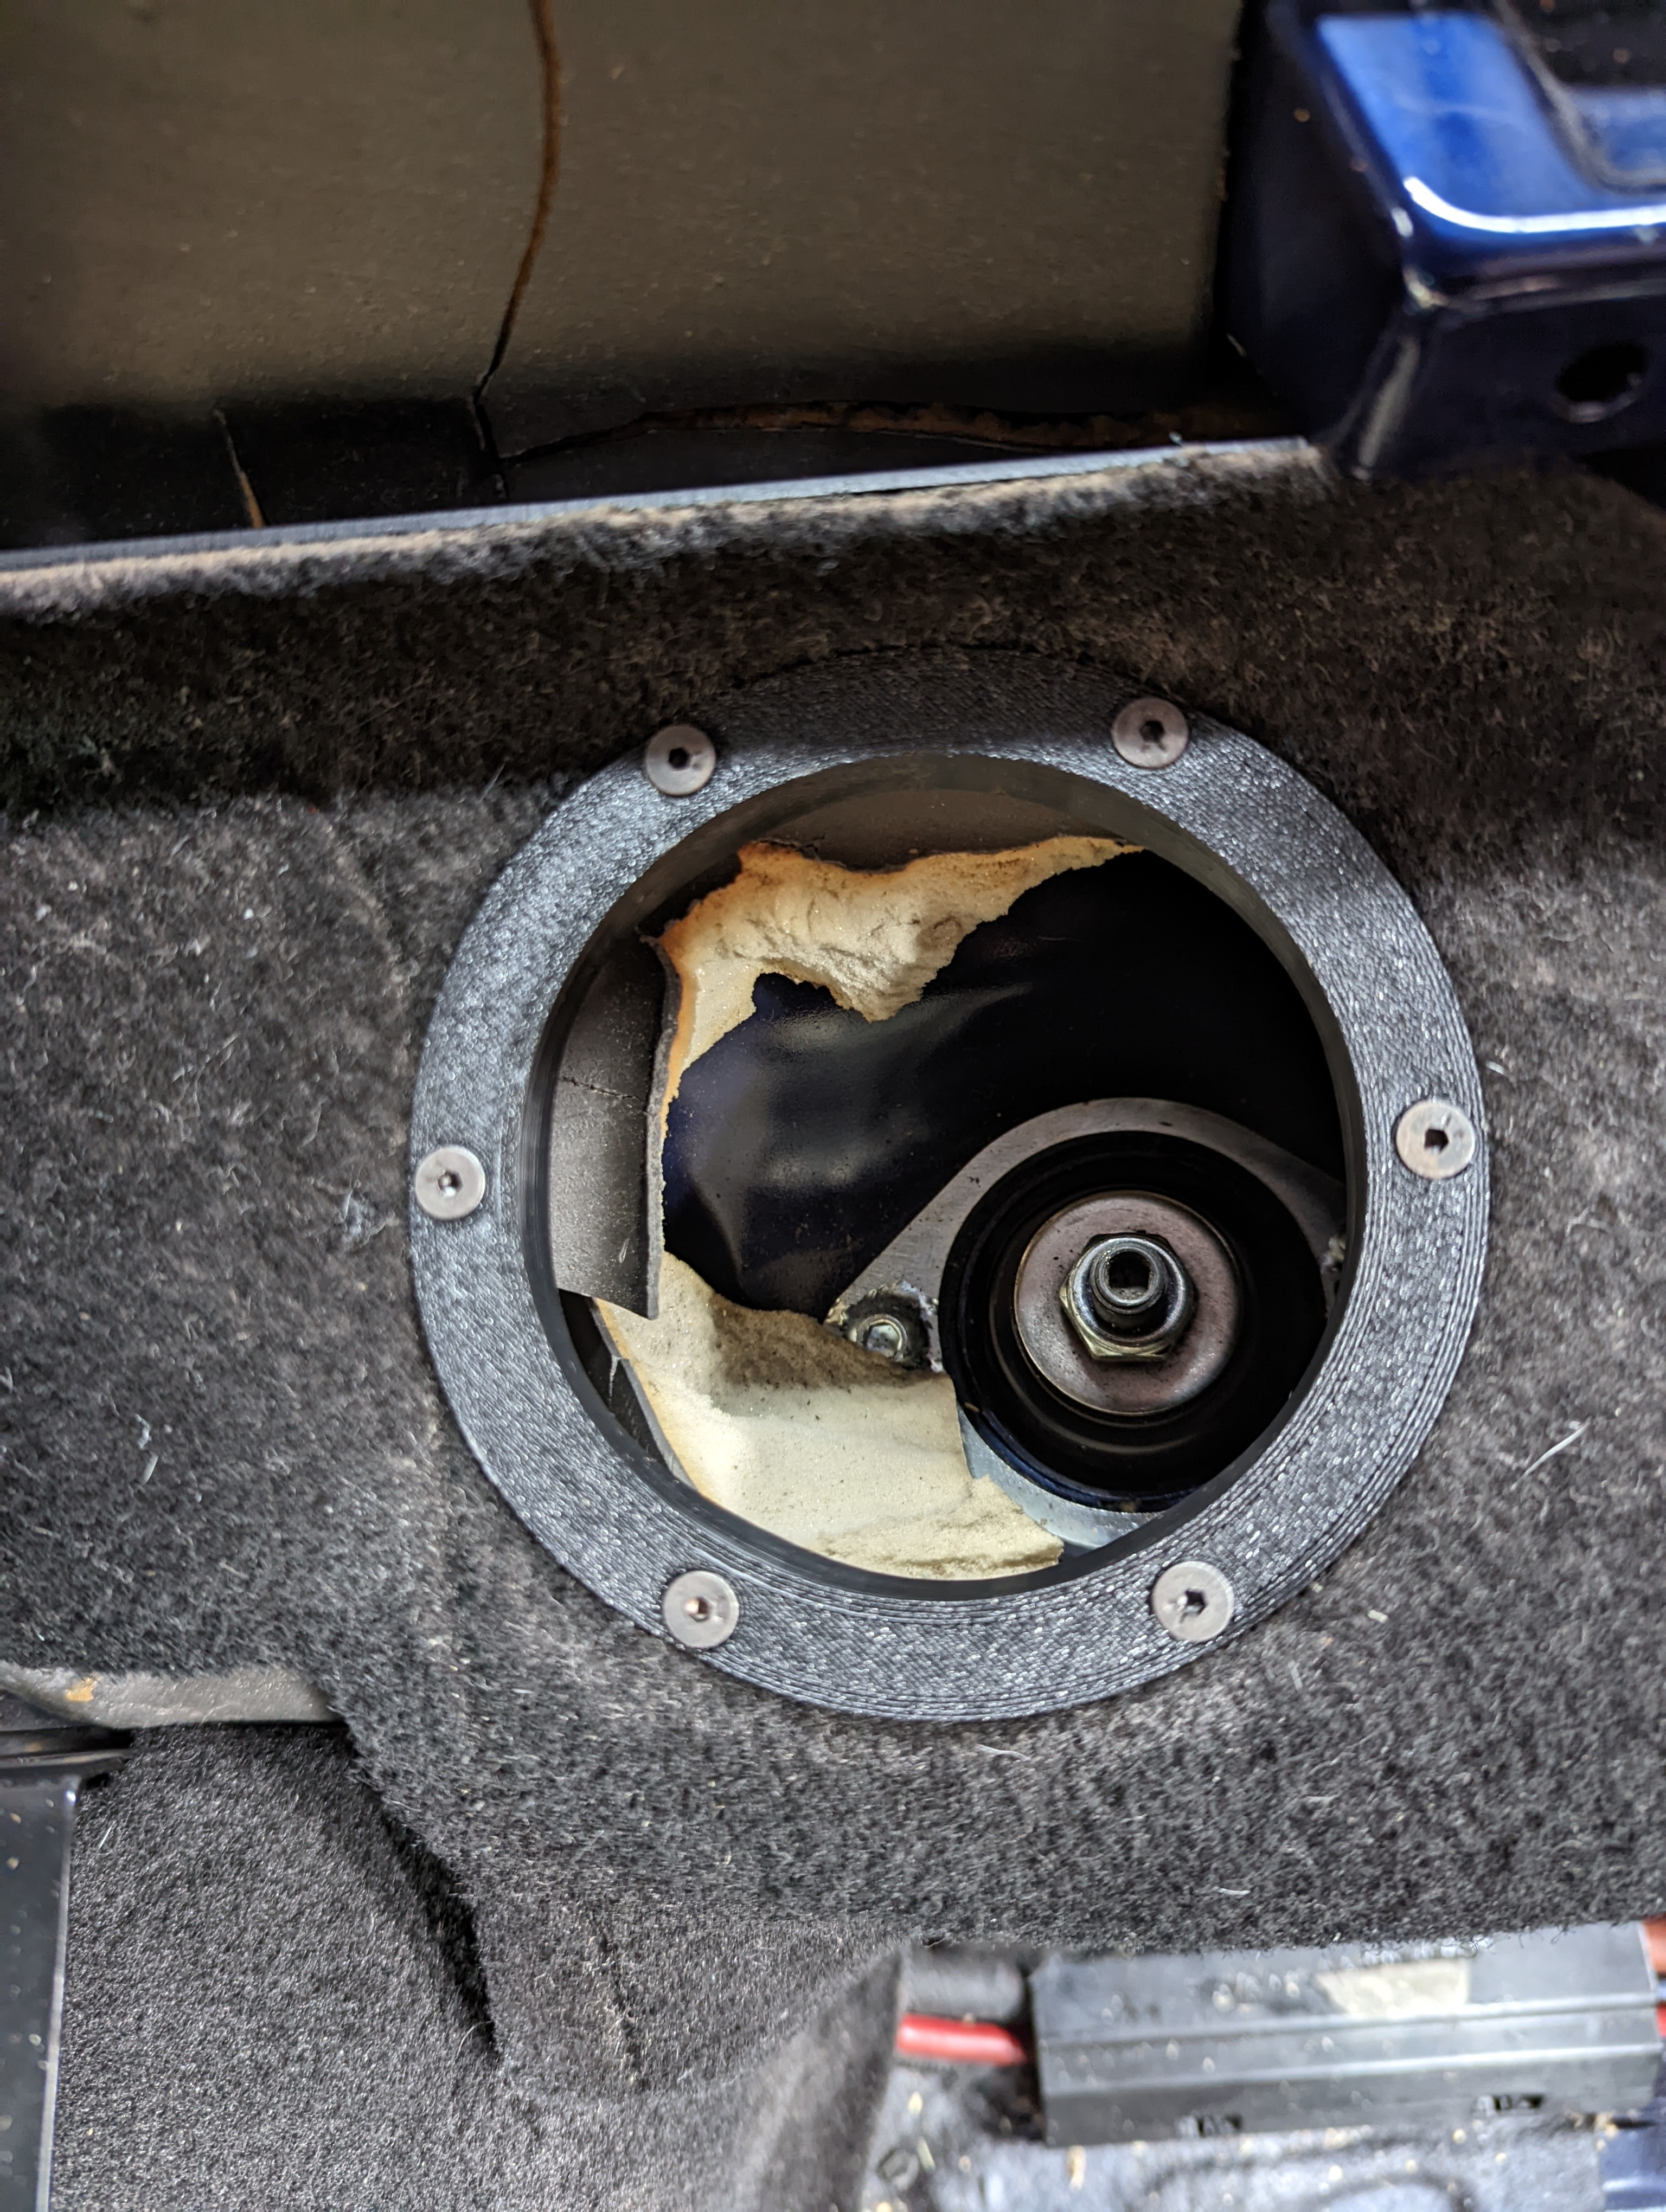
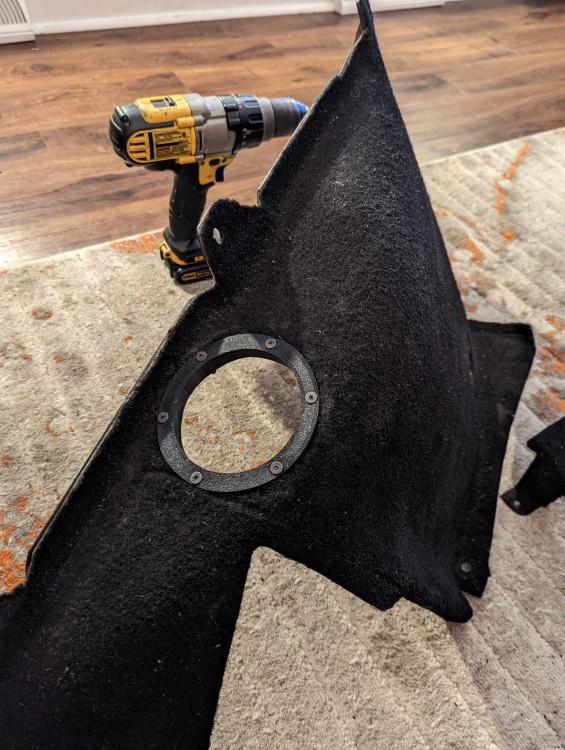
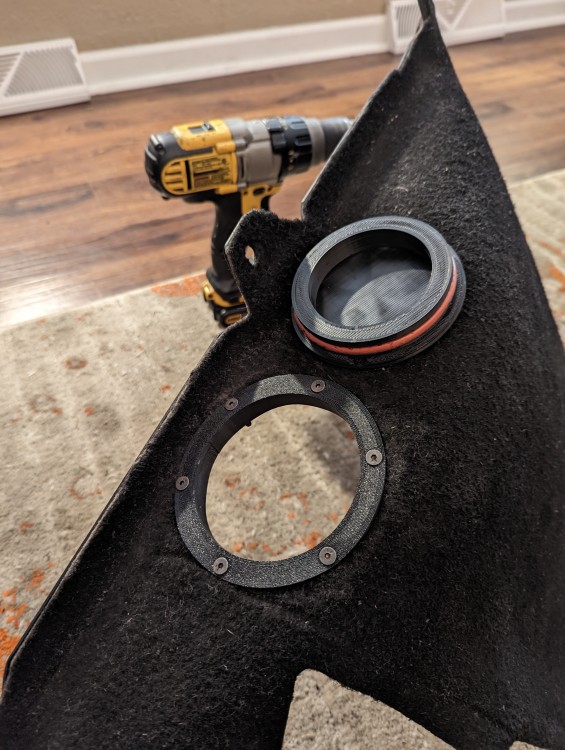
                                      Ended up finding a guy to 3d print my design in black ABS and just got them back. My 3d printer doesn't have an enclosure which is necessary for ABS due to warping if cooled too rapidly without one. Bought the o-rings from mcbastard and off I went.
                                      PXL20220512004531611.jpg

                                      PXL20220512004624229.jpg

                                      PXL20220512004647031.jpg

                                      PXL20220512005454308.jpg

                                      PXL20220512005519053.jpg

                                      I think it turned out pretty awesome. The angle of the last pic was off since I was on a step stool with car on the lift, lol. But it's centered over the strut and hole is big enough to fit your hand in and adjust comfortably. 

                                      The cap snaps in snug and pry's off with a small amount of force, which is perfect. I'm happy with it.

                                      CHECK OUT >>> RAGE DRIFT DESIGNS <<< FOR DECALS AND MORE!

                                      1 Reply Last reply
                                      5
                                      • Bassboy3313B
                                        Bassboy3313B
                                        Bassboy3313
                                        wrote on last edited by
                                        #112

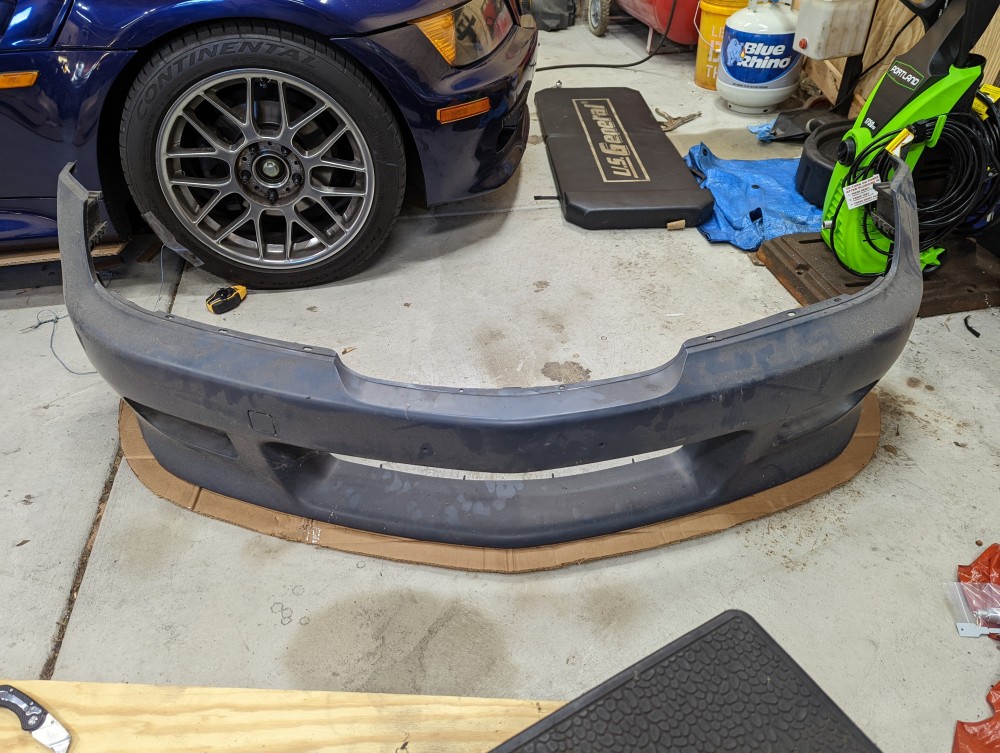
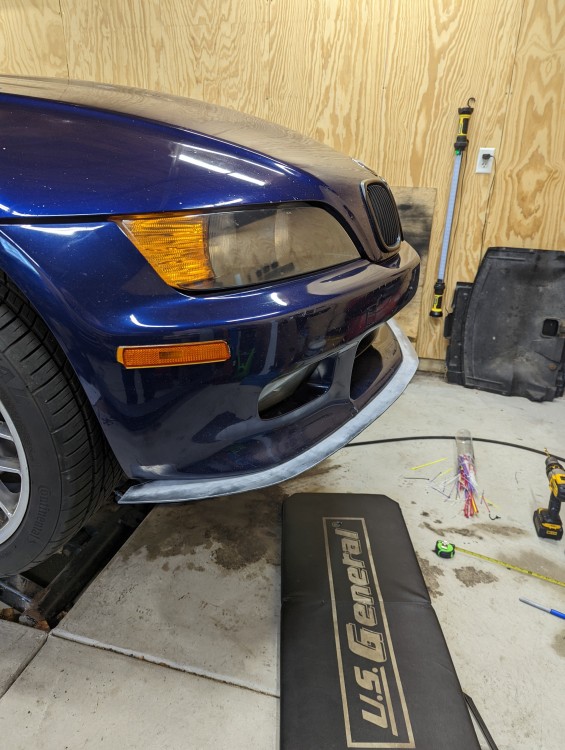
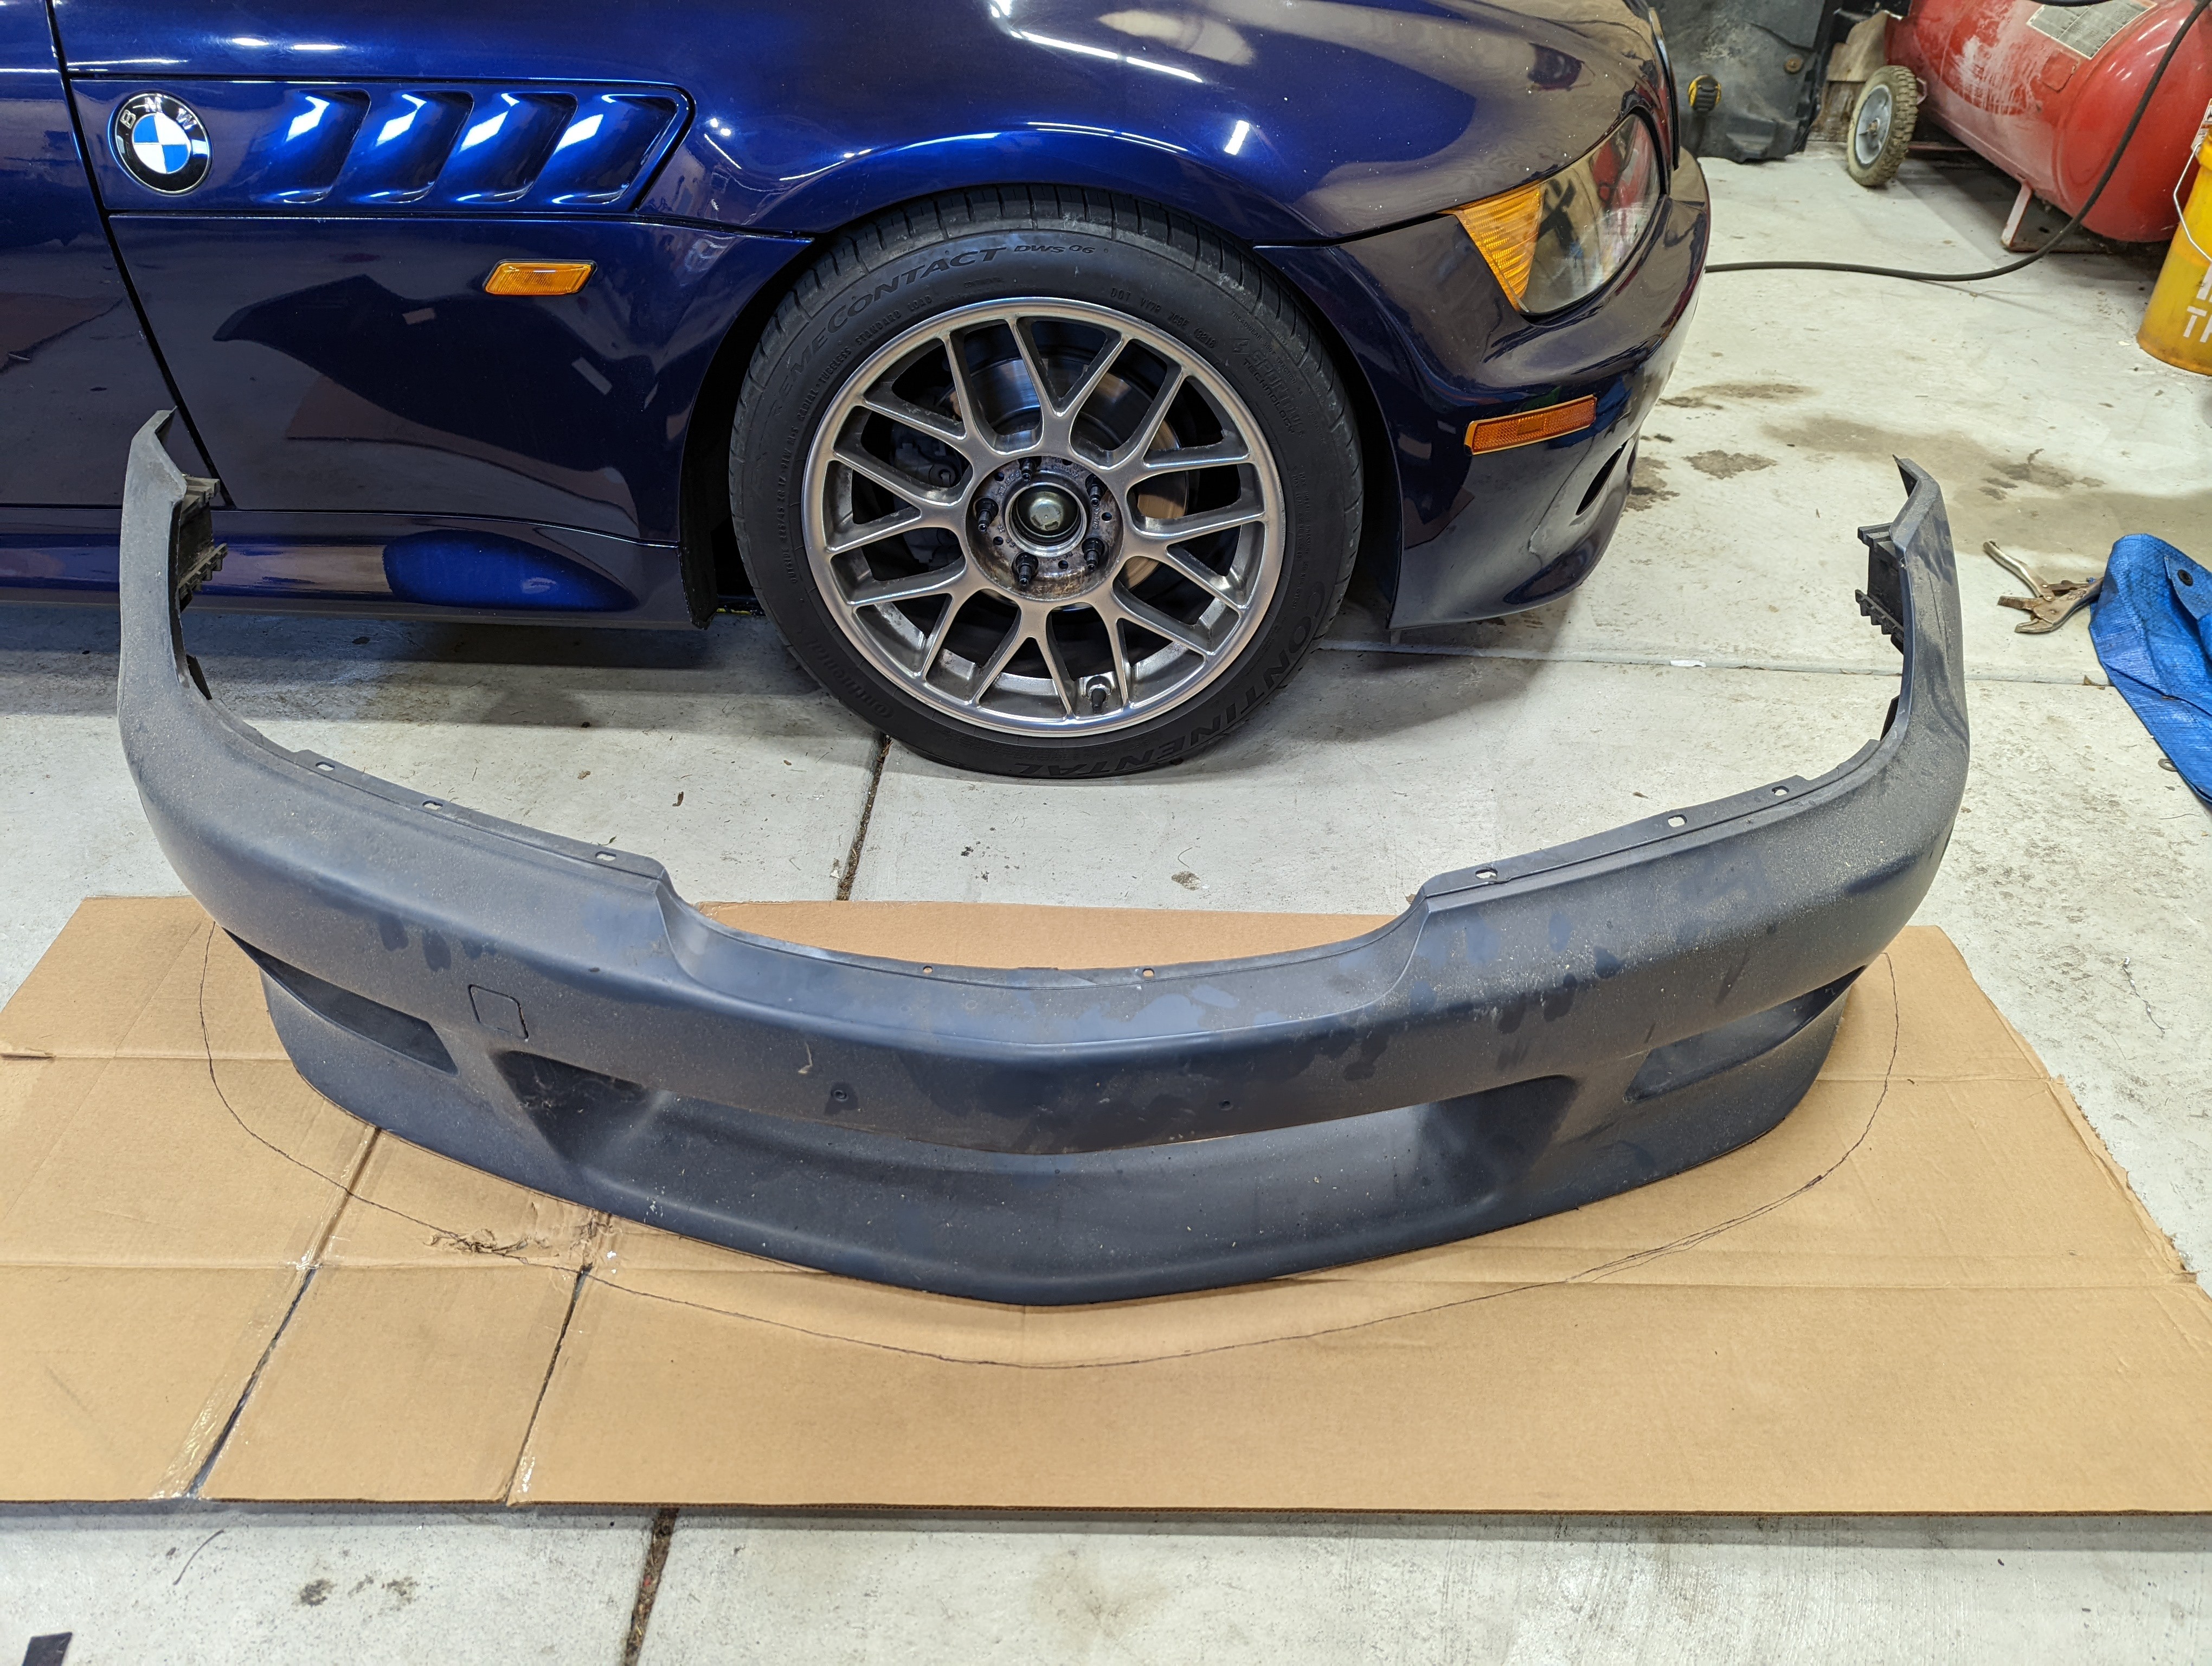
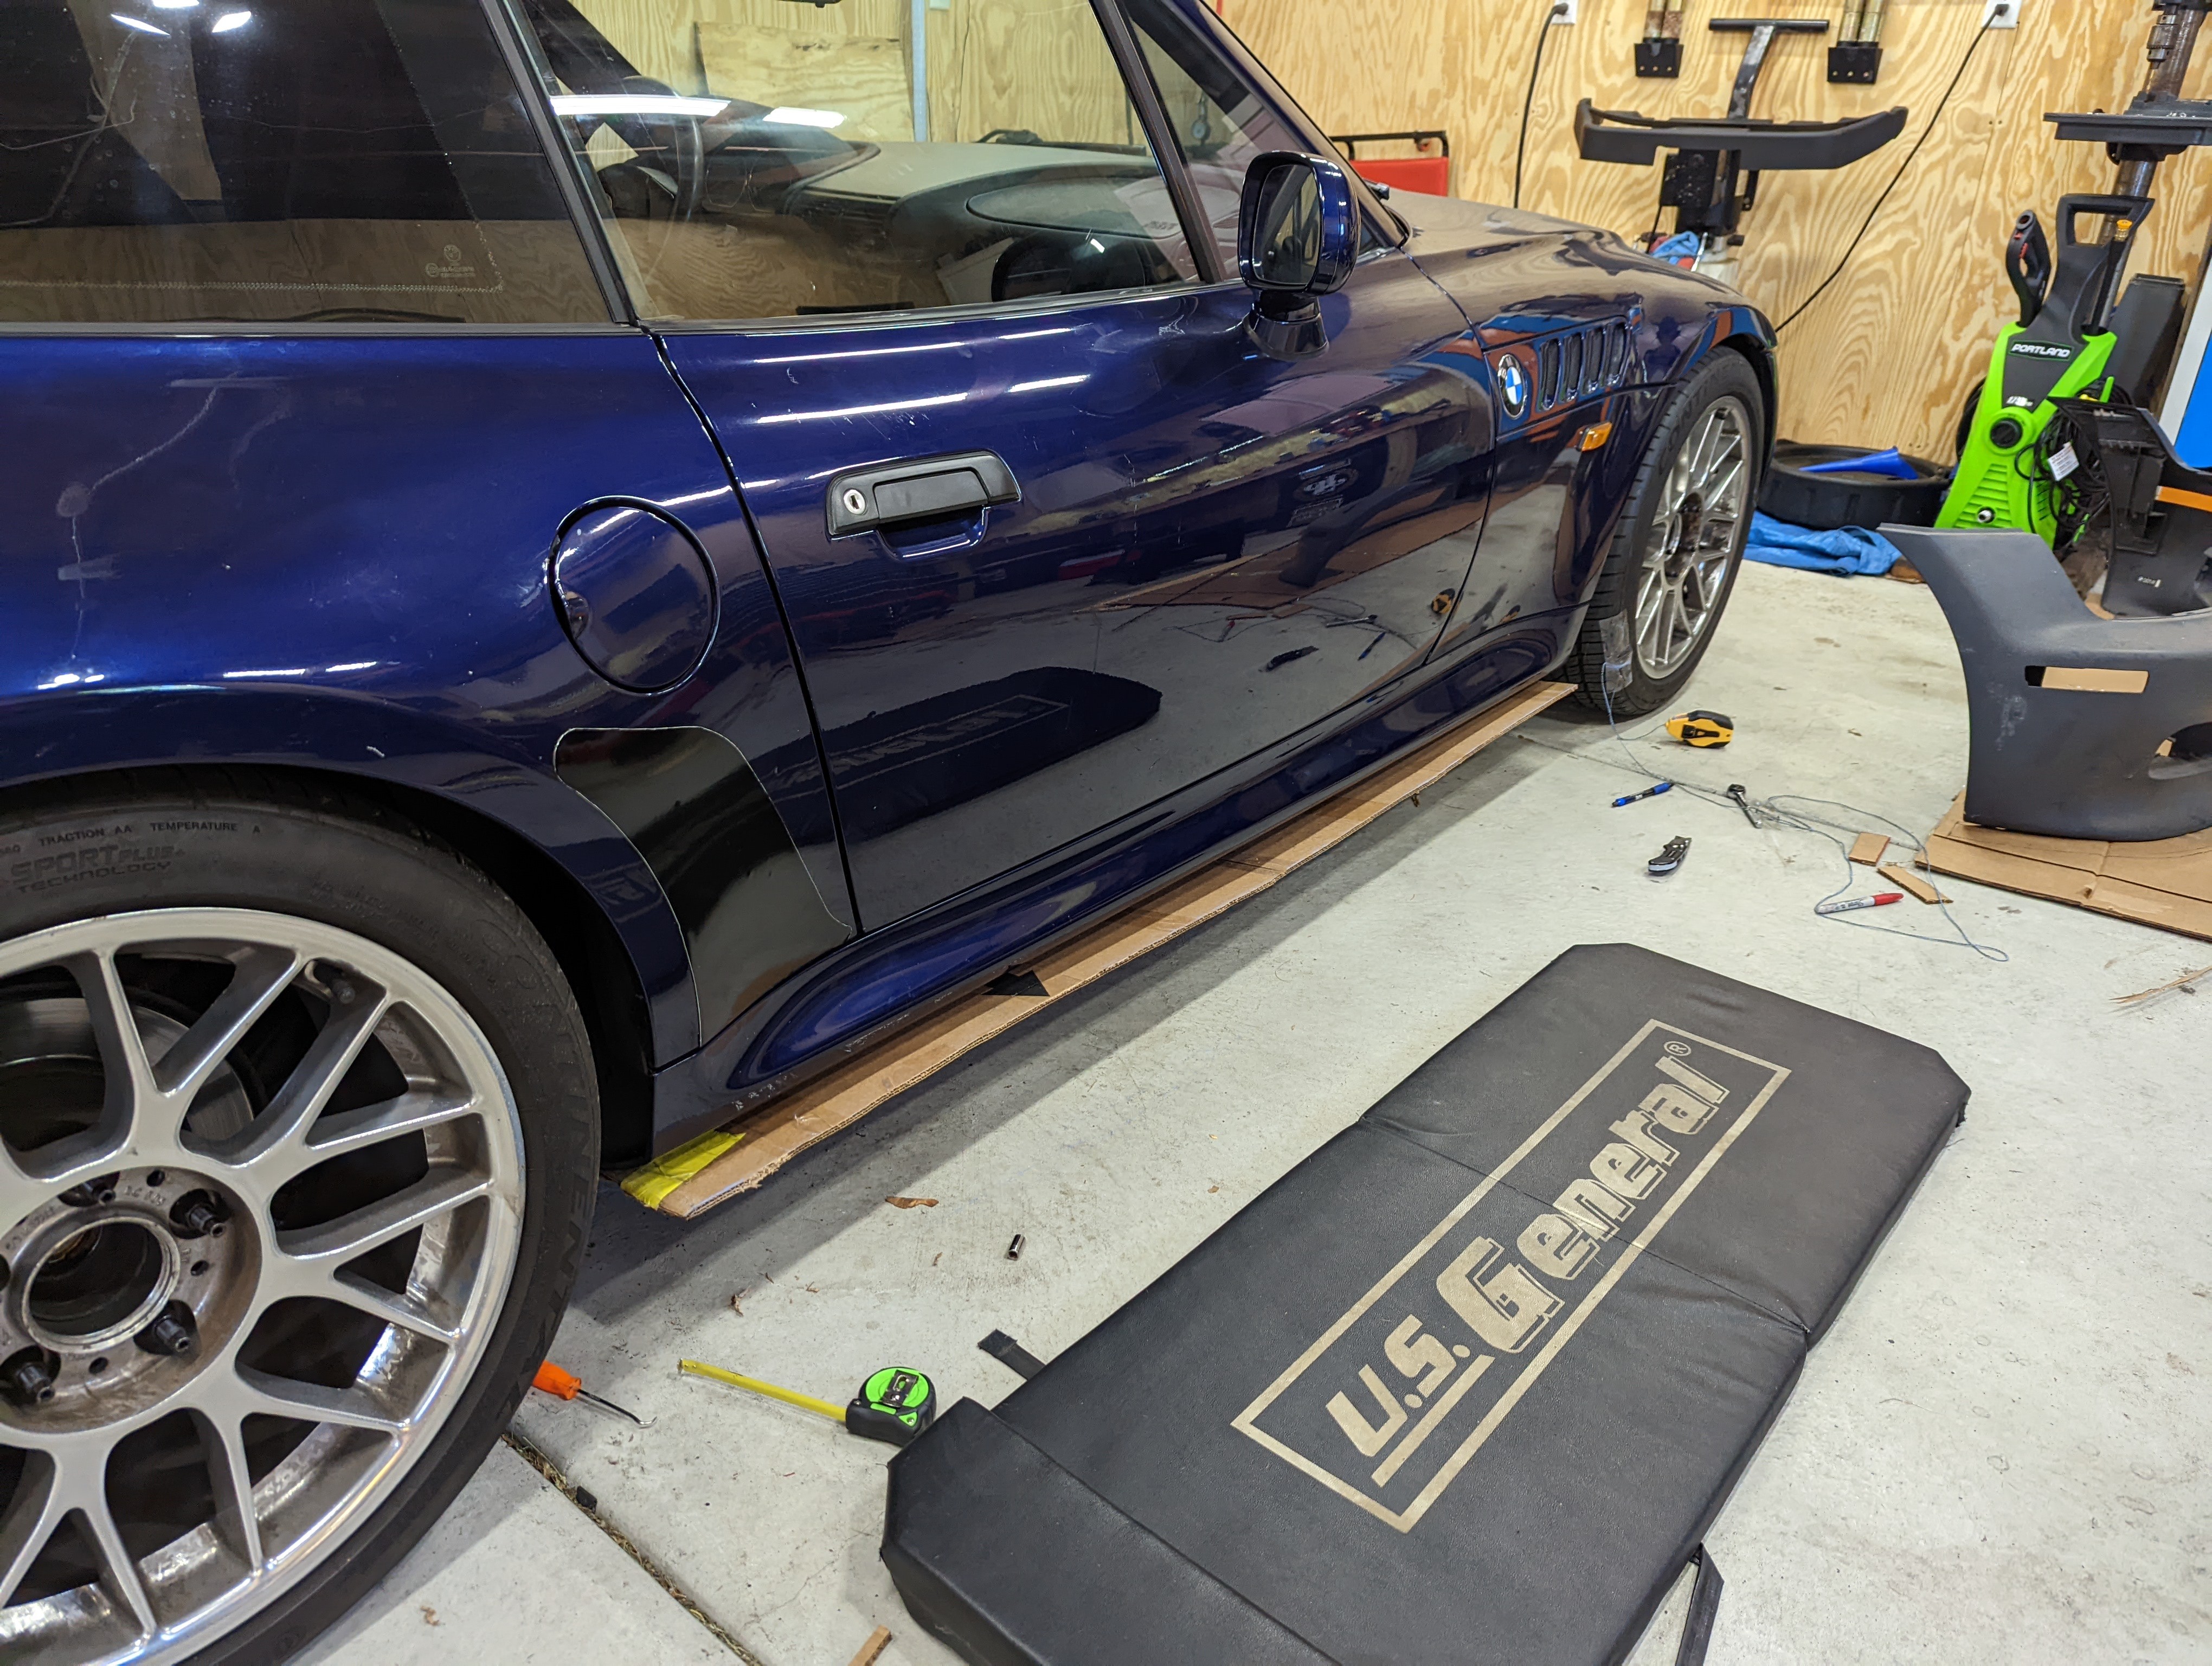
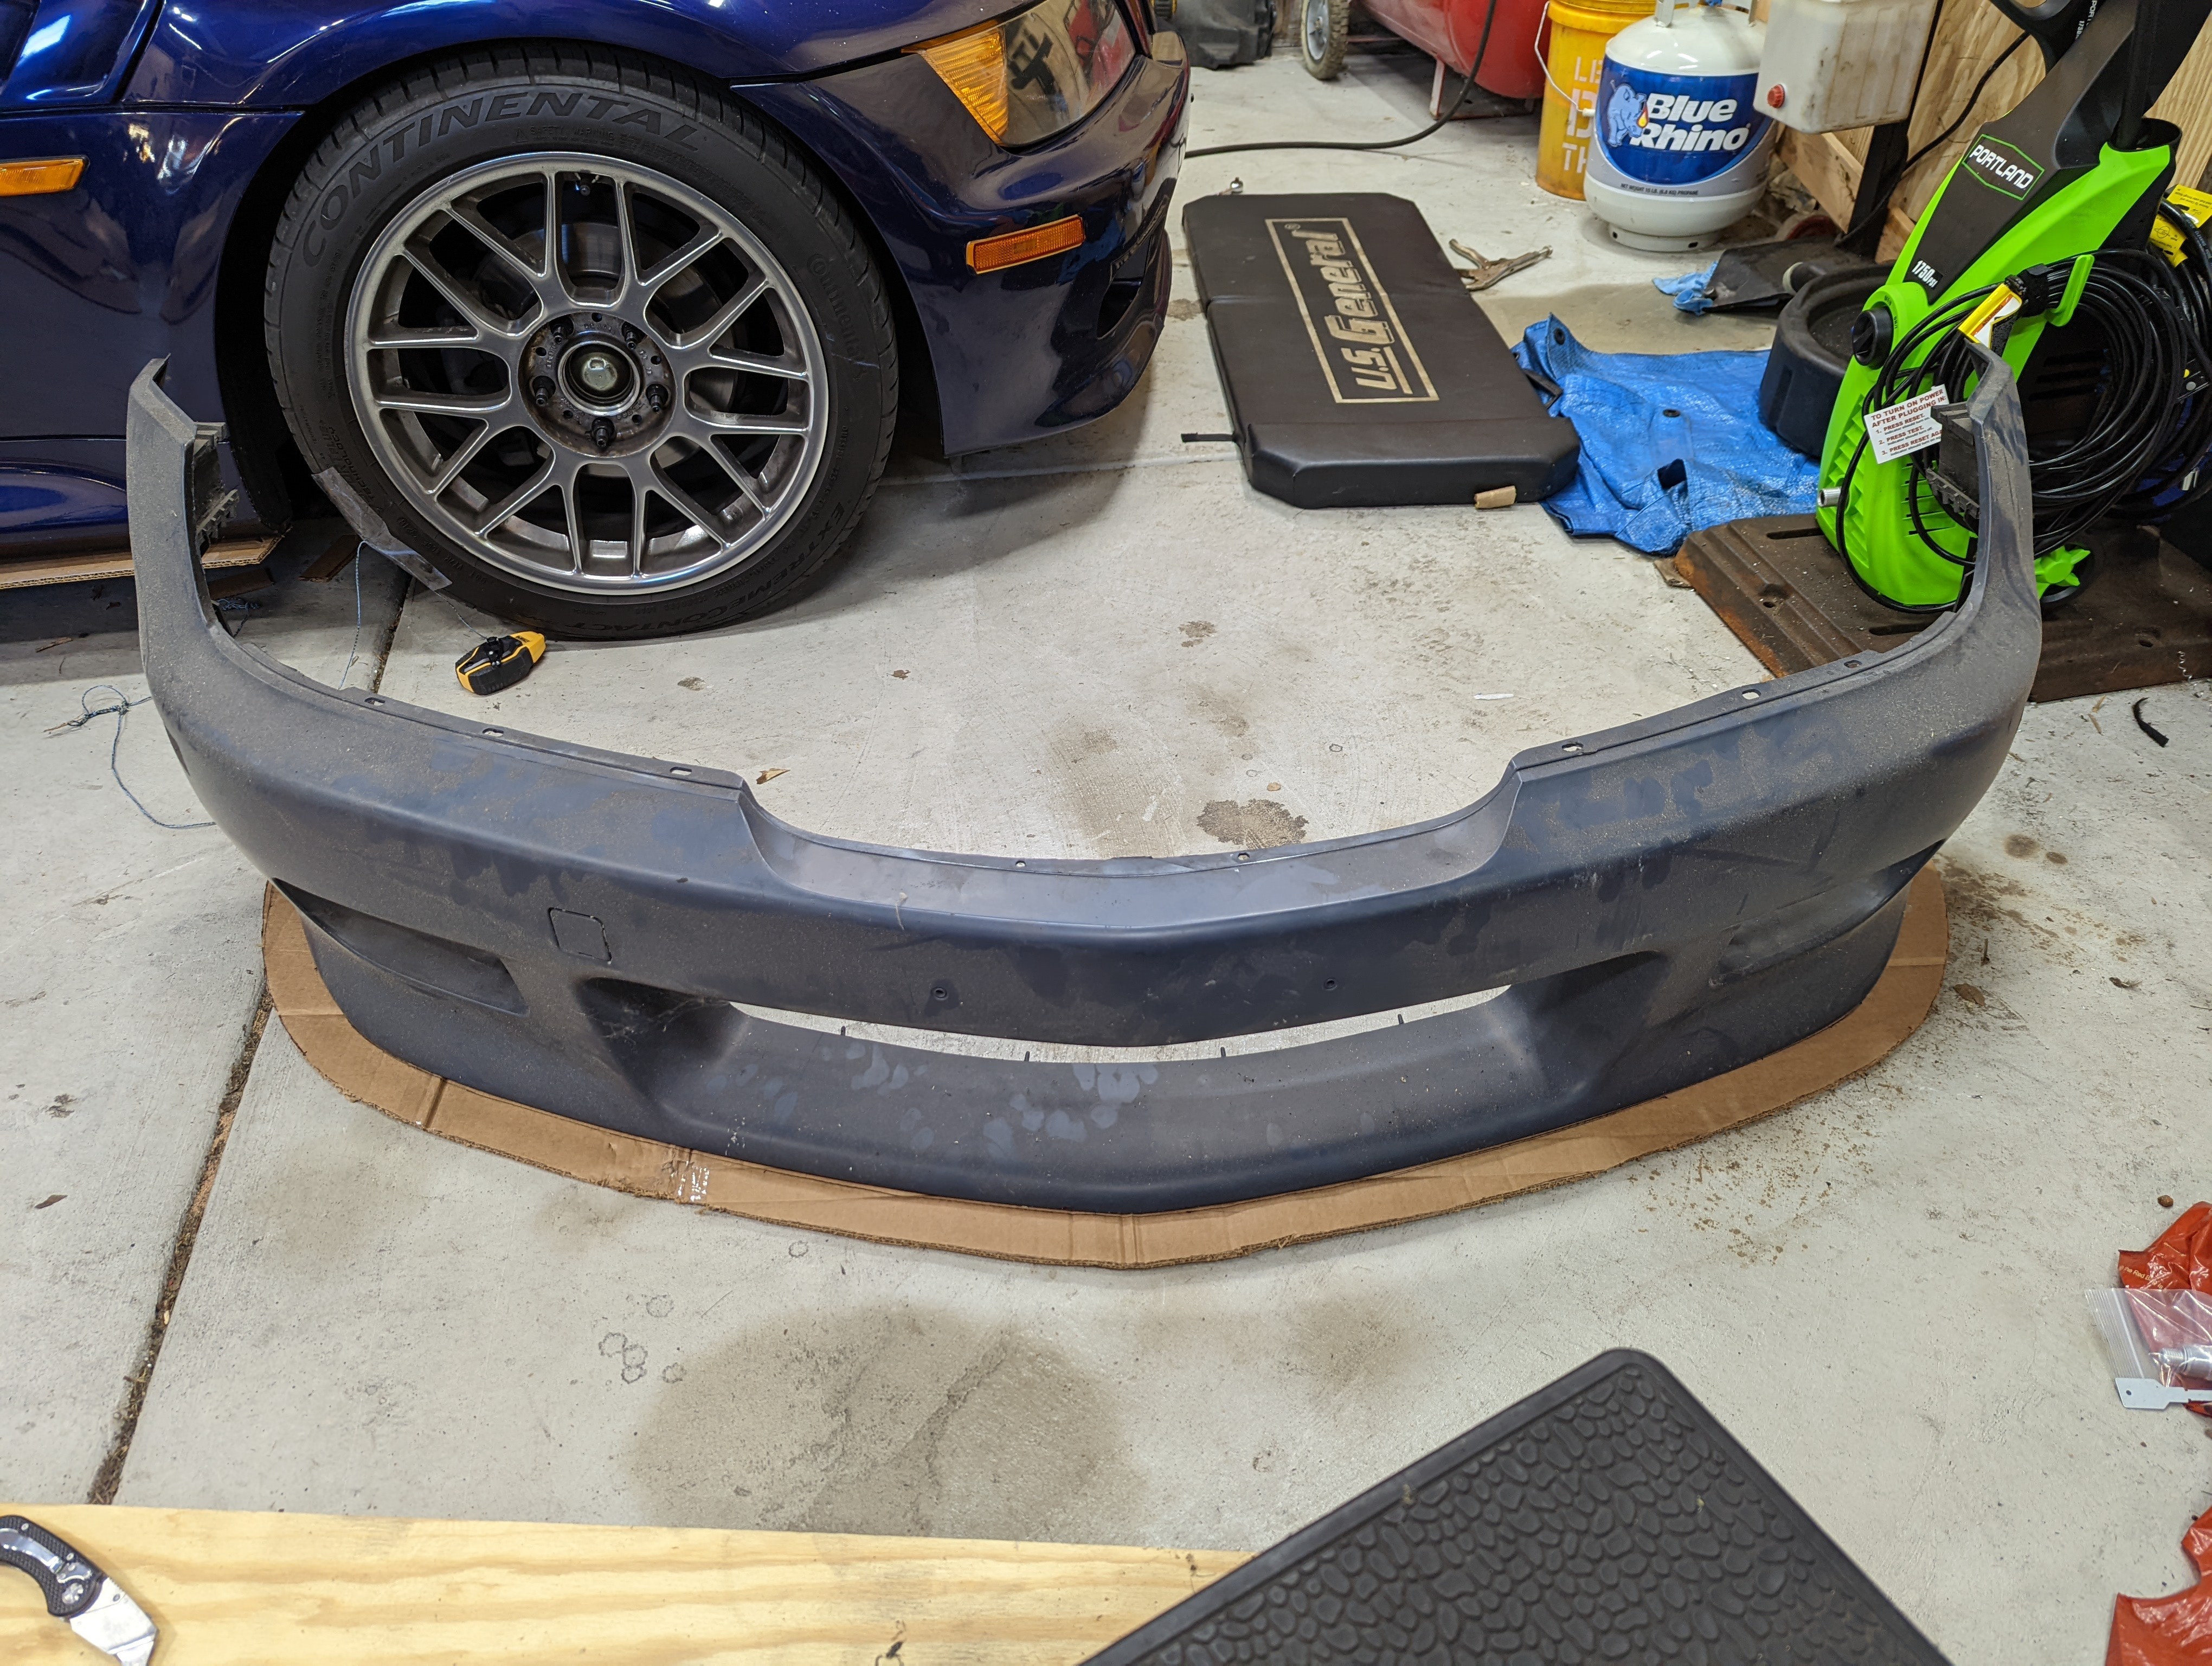
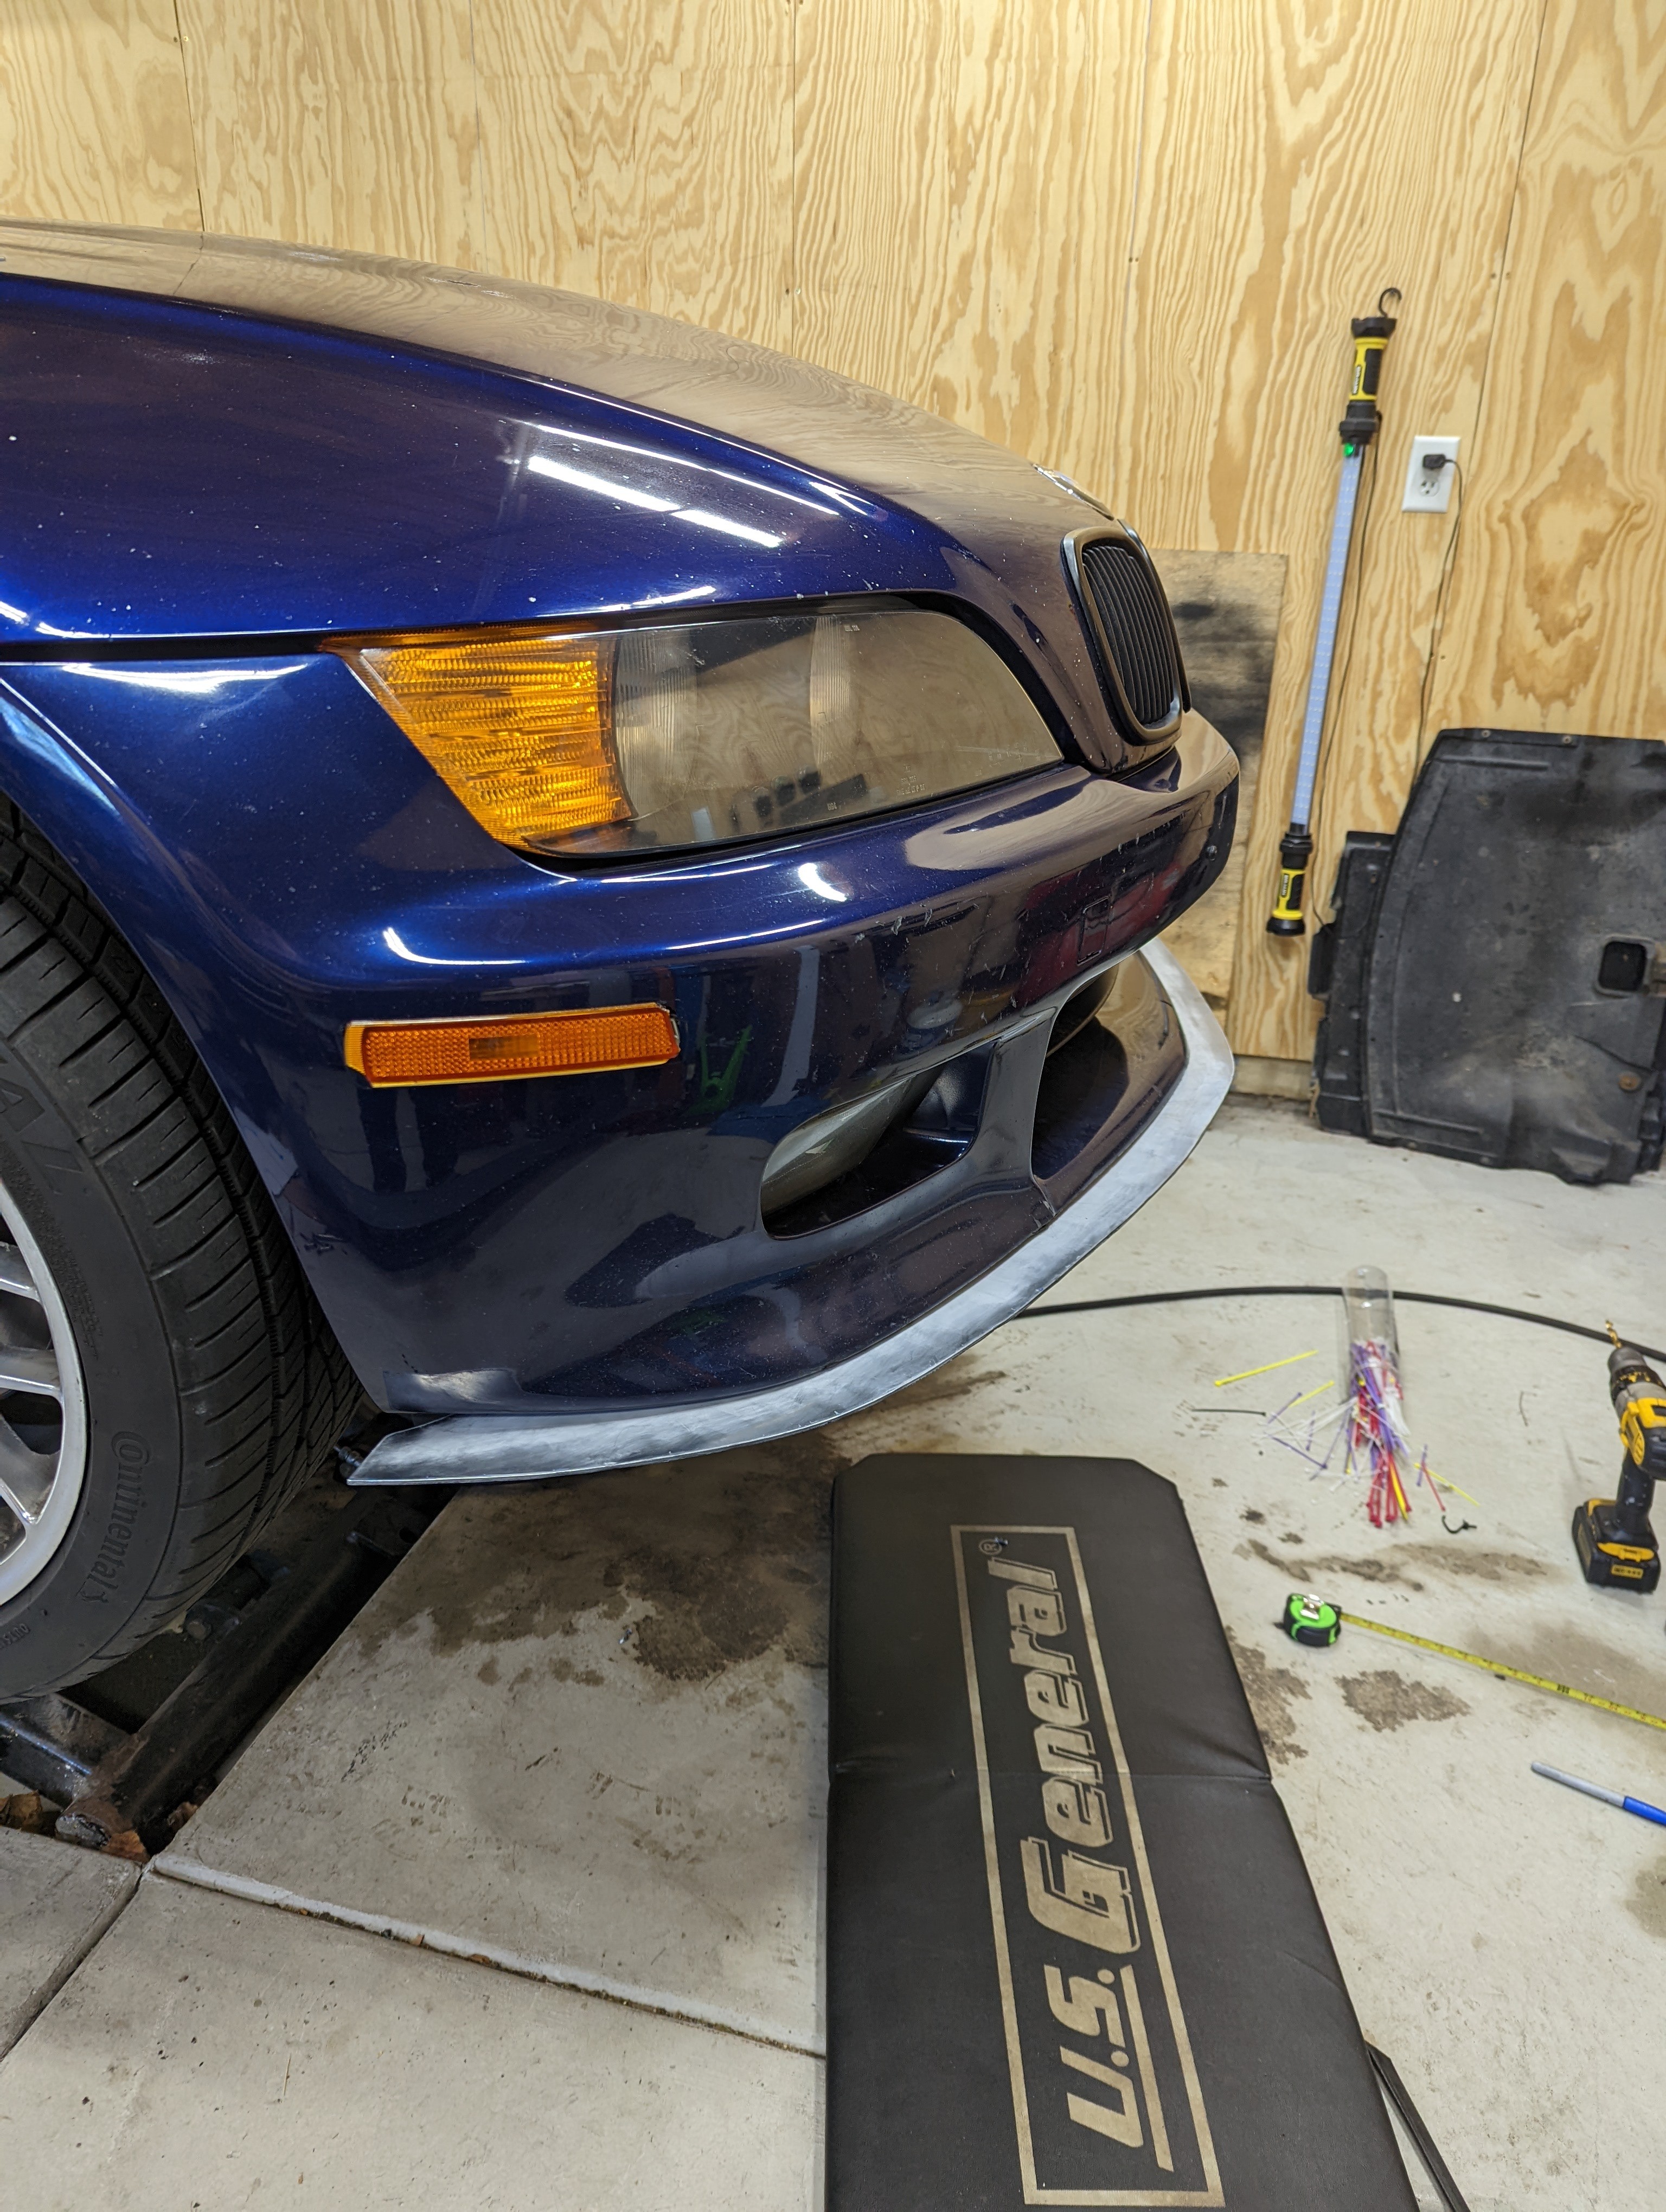
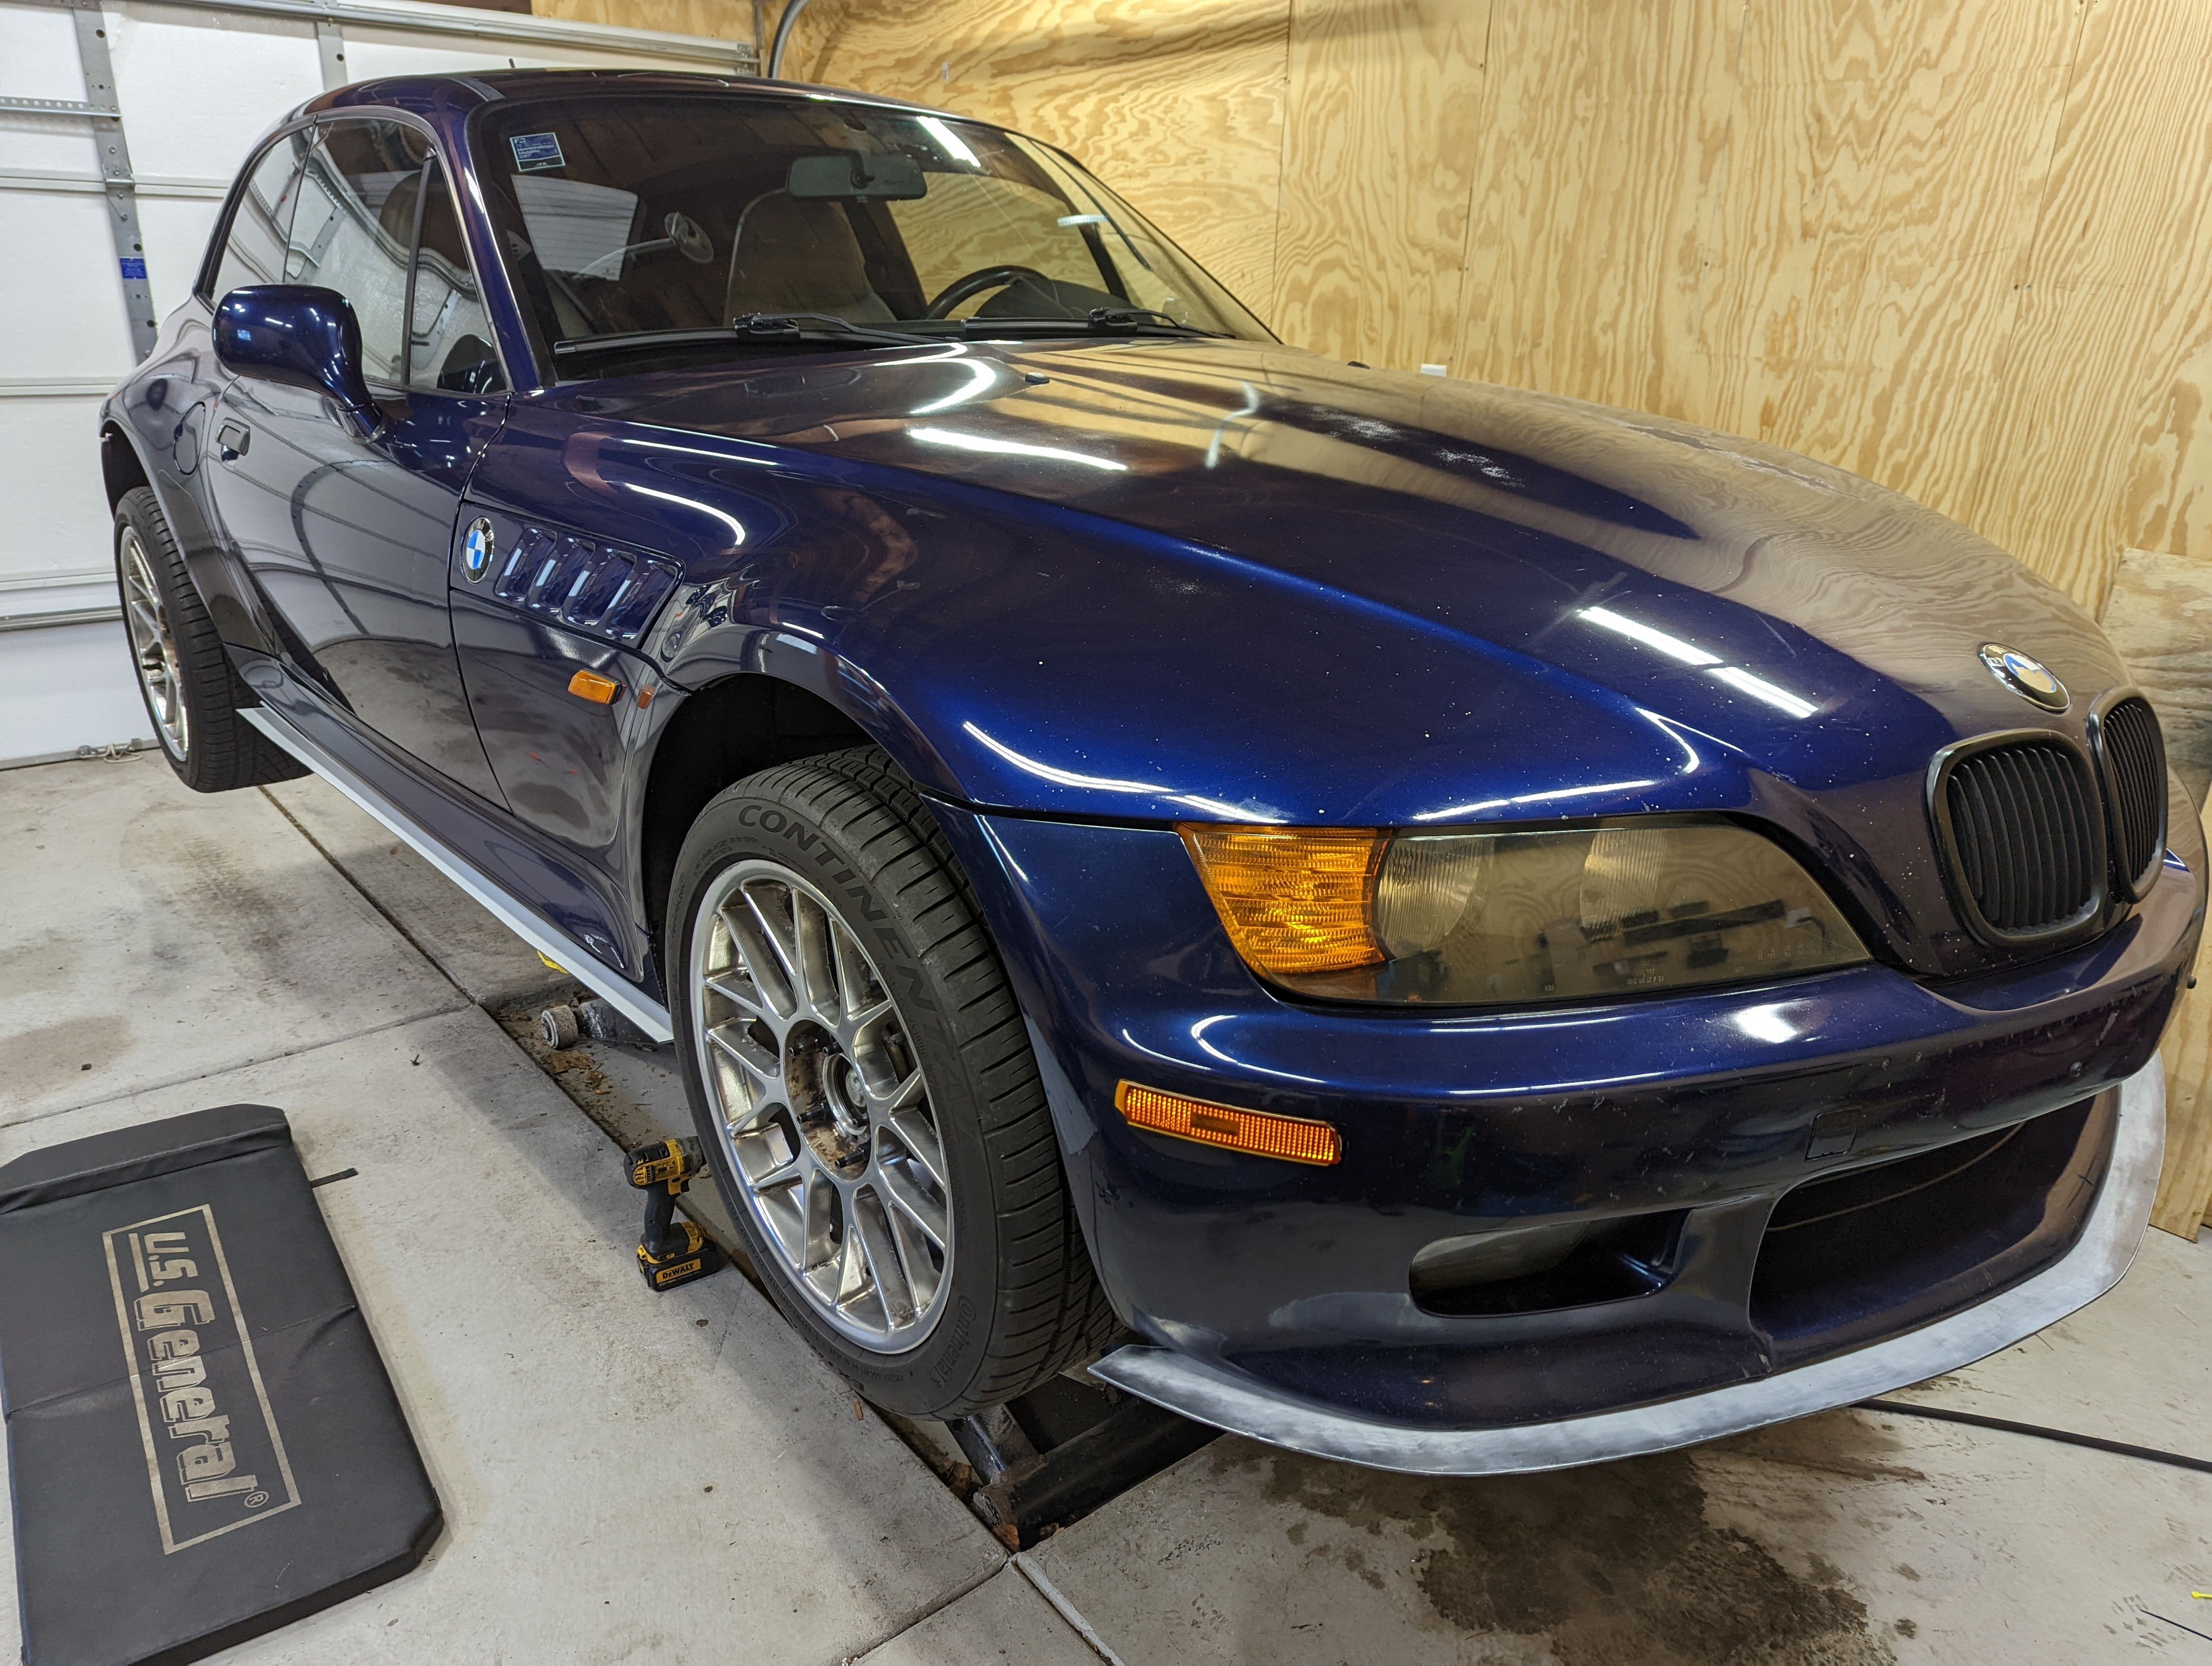
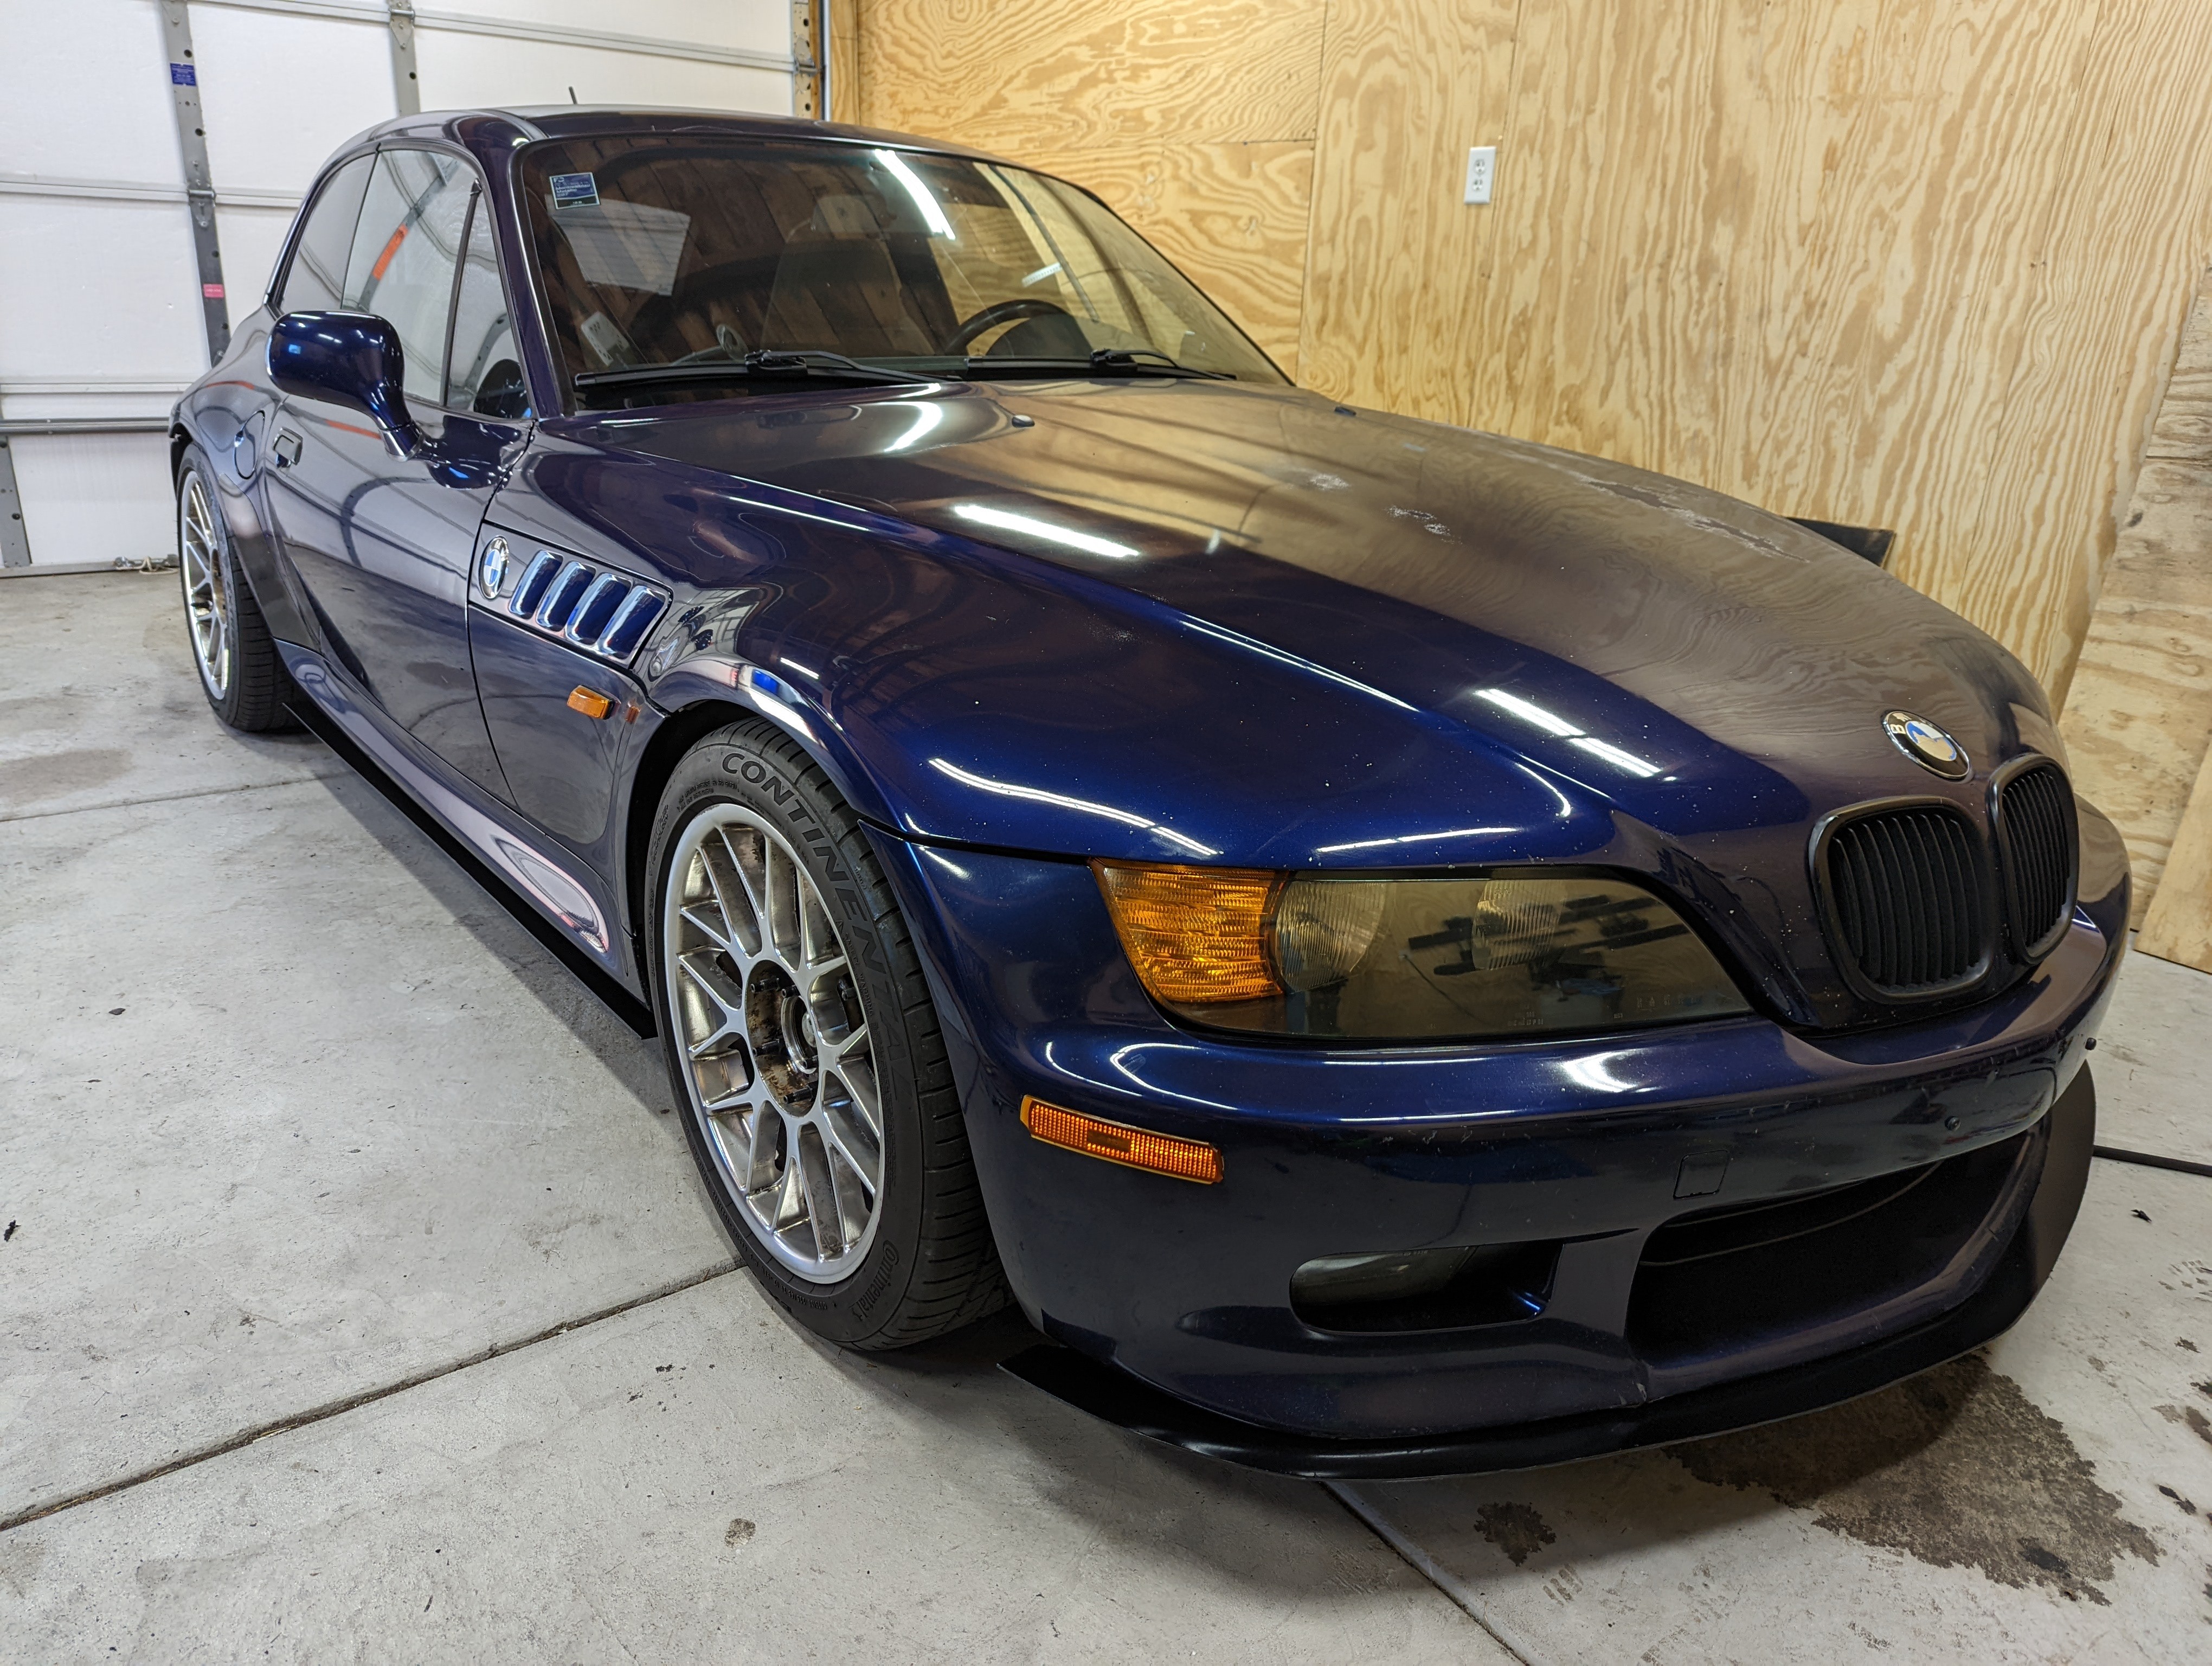
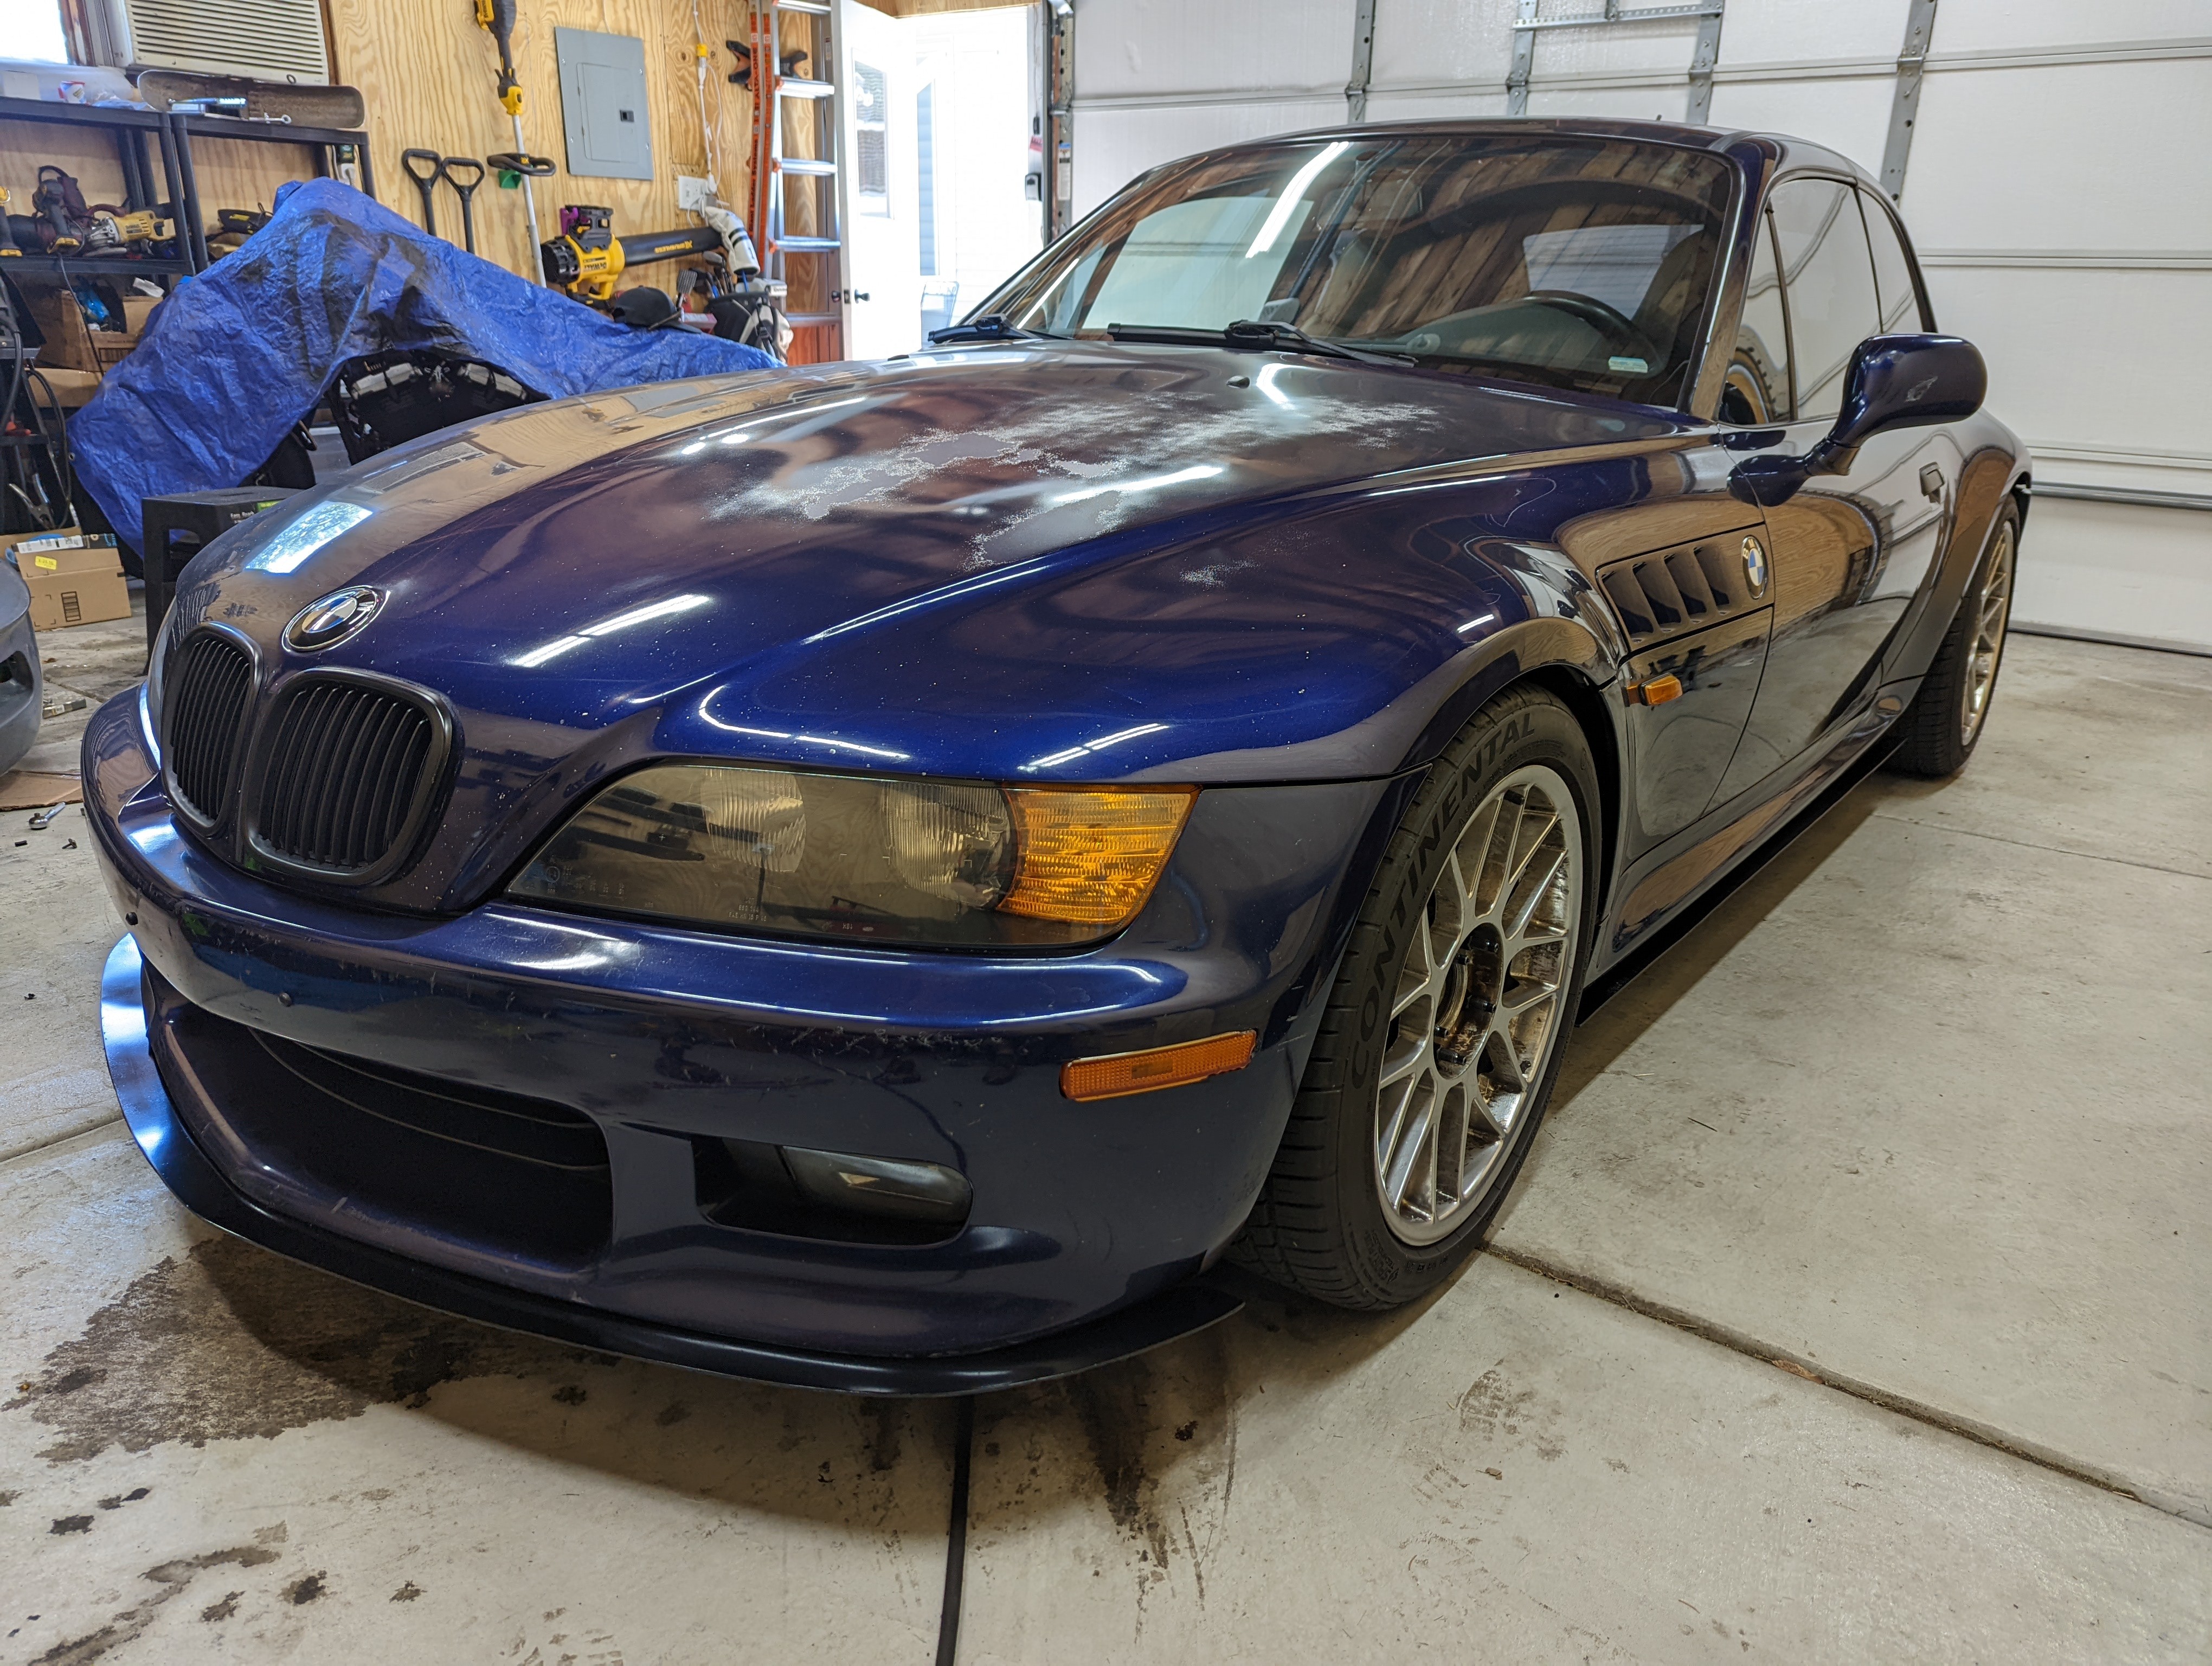
                                        Tried my hand at making a splitter and side skirt extensions. First made some cardboard templates that I fitted to the car and spare front bumper.
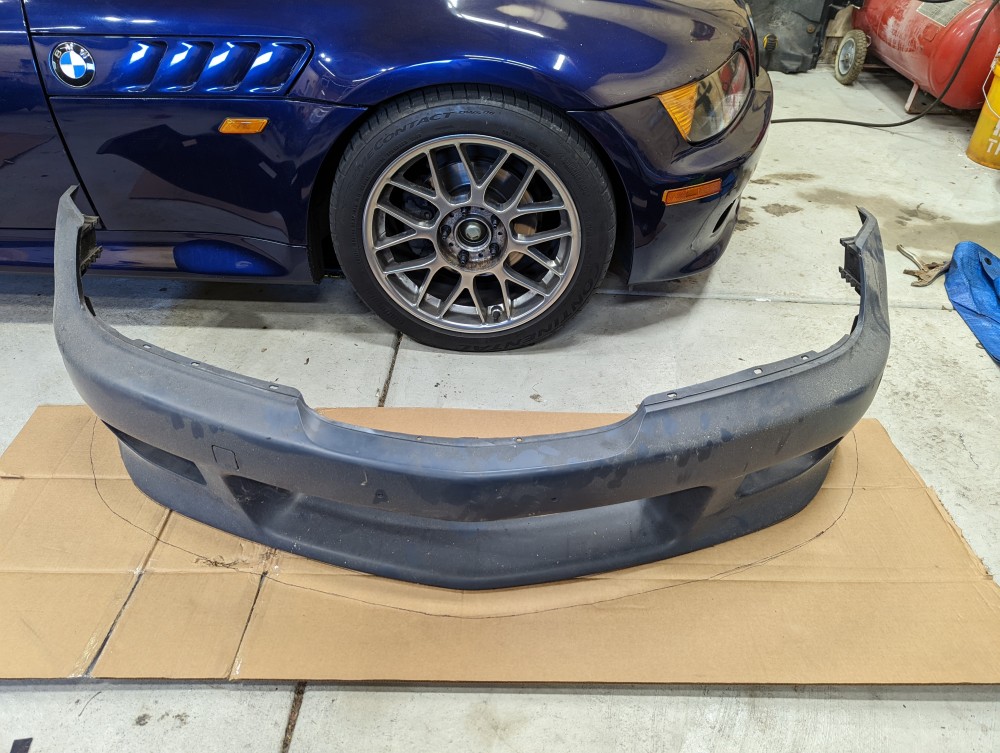
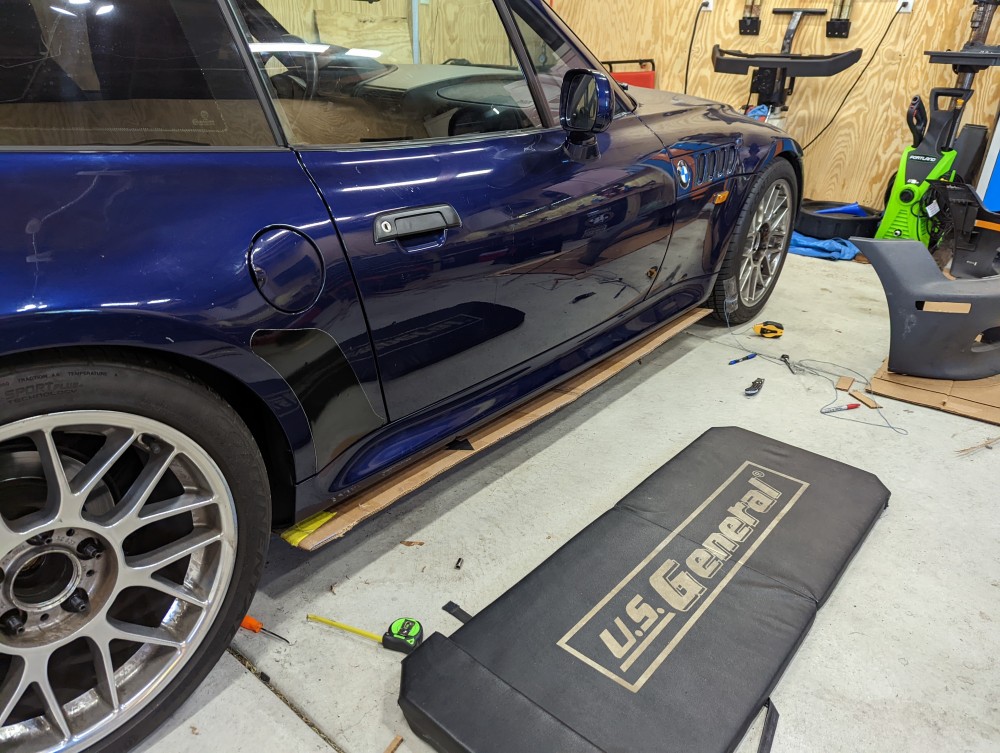
                                        PXL20220626173656459.jpg

                                        PXL20220629231904119.jpg

                                        PXL20220629234447706.jpg

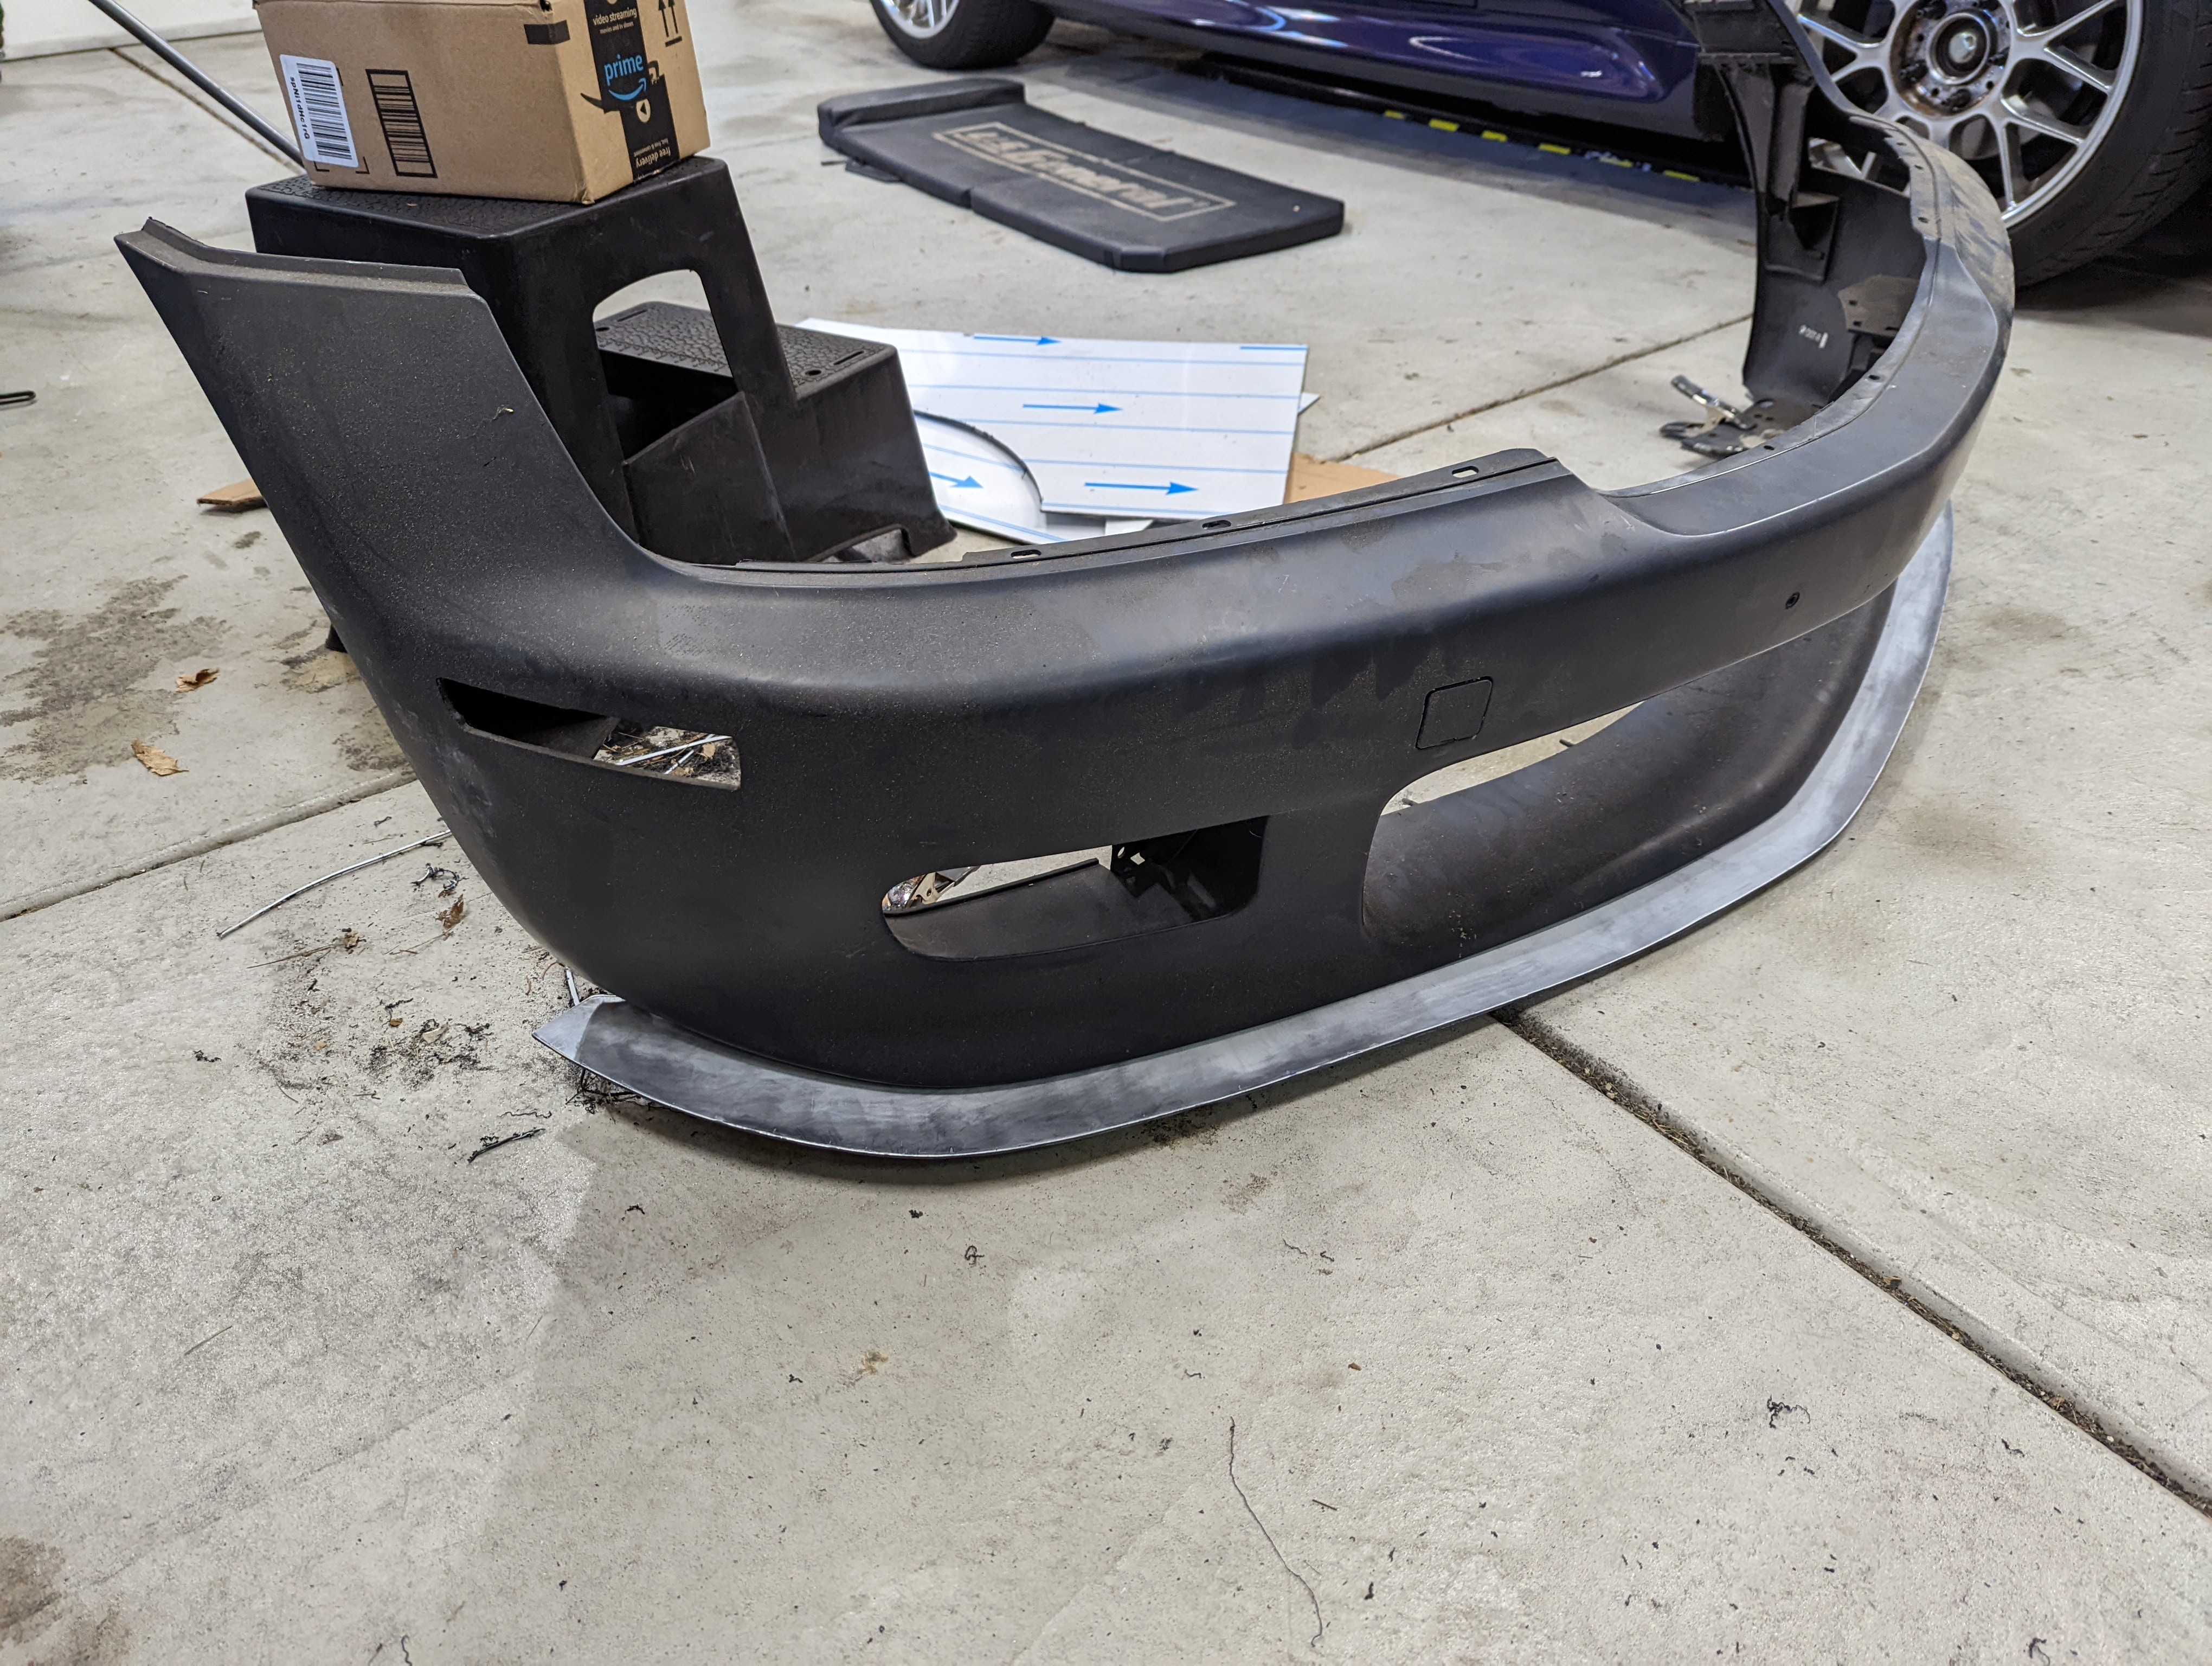
                                        Once I had it where I thought looked good, I went to a local sign shop in New Berlin and had them cut me some rough sized aluminum composite. Also know as poly-metal. It's two very thin sheets of aluminum with composite plastic sandwich led between them. Super lightweight yet strong and sturdy.

                                        I traced out the templates and cut the pieces out of the poly-metal with an oscillating tool.
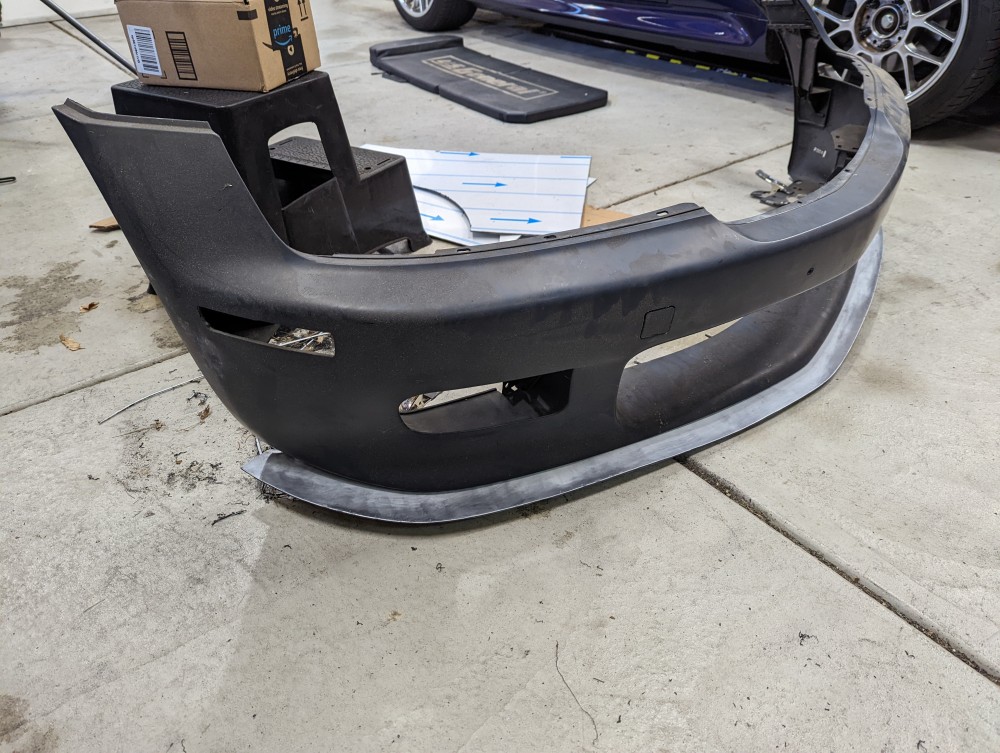
                                        PXL20220709155518010.jpg

                                        PXL20220709165931309.jpg

                                        PXL20220709173621165.jpg

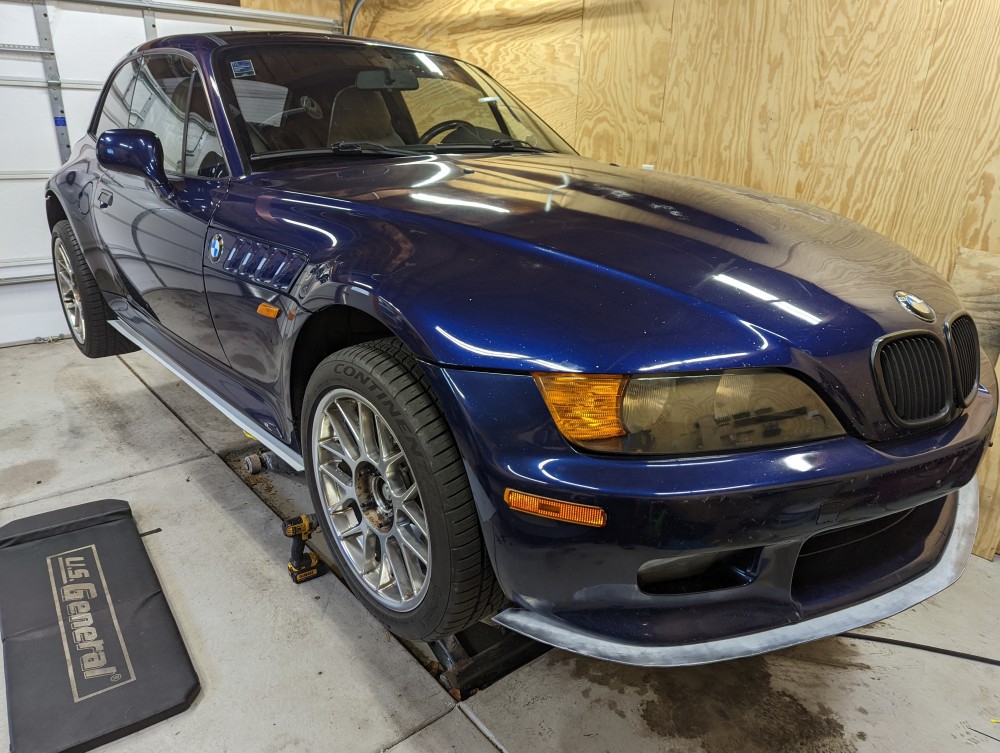
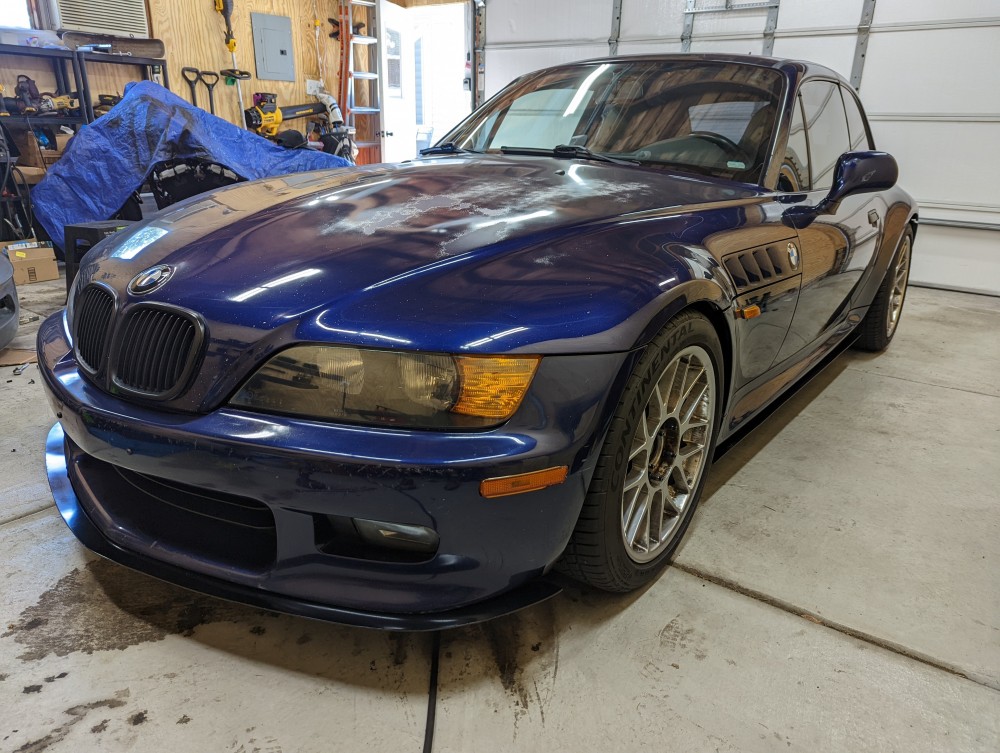
                                        I used the stock mounting screw locations to also secure the splitter pieces which worked out well. Sanded them down and gave em a coat of semi gloss black paint and done. 
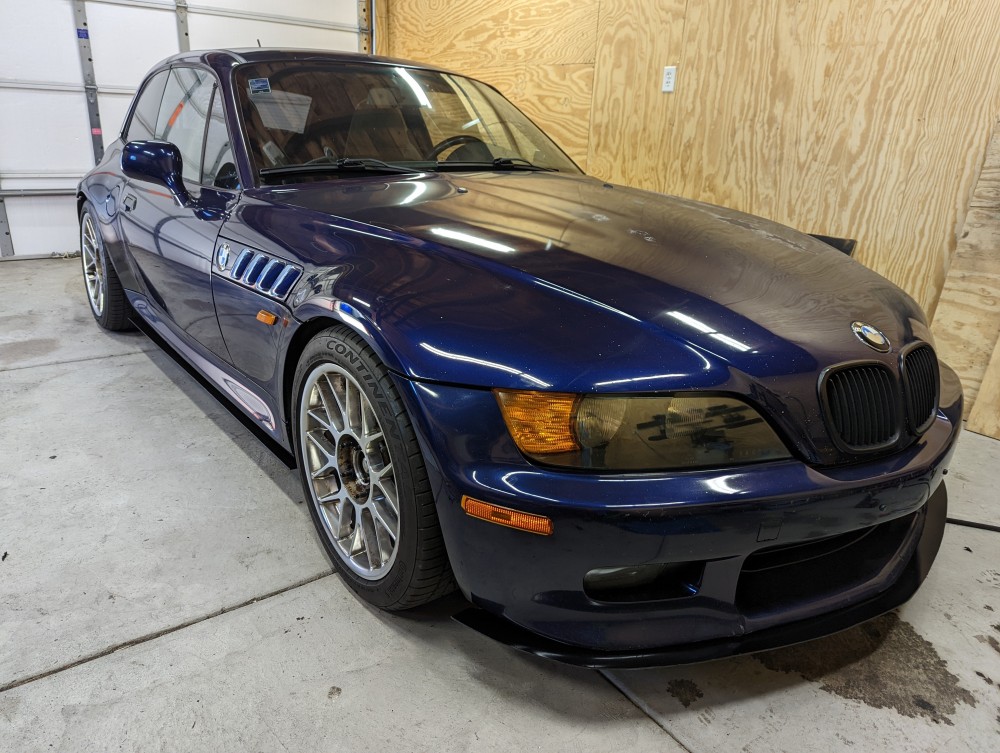
                                        PXL20220710201052495.jpg

                                        PXL20220710201117496.jpg

                                        Paint isn't perfect as the coating on the poly-metal was still uneven even after sanding. Good part is I can always unbolt it, sand again and repaint down the road. 

                                        I think it turned out nice. The subtle look goes well with the car I think. On to the next project, whatever that may be.


                                        CHECK OUT >>> RAGE DRIFT DESIGNS <<< FOR DECALS AND MORE!

                                        1 Reply Last reply
                                        5
                                        • RekpointR
                                          RekpointR
                                          Rekpoint
                                          wrote on last edited by
                                          #113

                                          Looks awesome!

                                          1 Reply Last reply
                                          1

                                          Hello! It looks like you're interested in this conversation, but you don't have an account yet.
                                          Getting fed up of having to scroll through the same posts each visit? When you register for an account, you'll always come back to exactly where you were before, and choose to be notified of new replies (either via email, or push notification). You'll also be able to save bookmarks and upvote posts to show your appreciation to other community members.

                                          With your input, this post could be even better 💗

                                          Register Login
                                          Reply
                                          • Reply as topic
                                          Log in to reply
                                          • Oldest to Newest
                                          • Newest to Oldest
                                          • Most Votes


                                          • Login

                                          • Don't have an account? Register

                                          • Login or register to search.
                                          Powered by NodeBB Contributors
                                          • First post
                                            Last post
                                          0
                                          • Categories
                                          • Recent
                                          • Tags
                                          • Popular
                                          • Users
                                          • Groups