Skip to content
  • Categories
  • Recent
  • Tags
  • Popular
  • Users
  • Groups
Skins
  • Light
  • Brite
  • Cerulean
  • Cosmo
  • Flatly
  • Journal
  • Litera
  • Lumen
  • Lux
  • Materia
  • Minty
  • Morph
  • Pulse
  • Sandstone
  • Simplex
  • Sketchy
  • Spacelab
  • United
  • Yeti
  • Zephyr
  • Dark
  • Cyborg
  • Darkly
  • Quartz
  • Slate
  • Solar
  • Superhero
  • Vapor

  • Default (No Skin)
  • No Skin
Collapse
WIBIMMERS logo

WIBIMMERS

  1. Home
  2. General Discussion
  3. Members BMWs
  4. E21 Project Thread - Part 2

E21 Project Thread - Part 2

Scheduled Pinned Locked Moved Members BMWs
813 Posts 31 Posters 0 Views 1 Watching
  • Oldest to Newest
  • Newest to Oldest
  • Most Votes
Reply
  • Reply as topic
Log in to reply
This topic has been deleted. Only users with topic management privileges can see it.
  • B
    B
    B C
    wrote on last edited by
    #757

    Hnng! those are amazing!

    1 Reply Last reply
    1
    • EarlE
      EarlE
      Earl
      wrote on last edited by
      #758

      Gonna look wicked=) This car needs the meat to look proper imho

      museum sig 2earl.jpg

      1 Reply Last reply
      1
      • Bassboy3313B
        Bassboy3313B
        Bassboy3313
        wrote on last edited by
        #759

        Thanks guys!

        Today I removed the driver door due to the surprise bondo work. Actually went super well considering all the nightmare stories of removing the door brake pin I've read and heard. I swapped all the odds and ends from the old door to the new and slapped it on. It needs to be slightly pushed towards front of car to be perfectly aligned, but it still closes fine. I figure it's good enough for now seeing that I installed it myself with no help which was a chore. Lol929b8f3f01dd8ead3dac799cd34a5151.jpg6cfb5ea82c99fc1a74f217865f60957a.jpg

        Sent from my SM-G950U using Tapatalk

        CHECK OUT >>> RAGE DRIFT DESIGNS <<< FOR DECALS AND MORE!

        1 Reply Last reply
        2
        • suspencefulS
          suspencefulS
          suspenceful
          wrote on last edited by
          #760

          Aligning body panels is never fun. Nice work!

          🎬 YouTube channel (60K+ subs): youtube.com/jakespence135
          📷 Follow me on Instagram: instagram.com/jakespence
          🏁 Shop BMW merchandise: bimmerstreet.com

          1 Reply Last reply
          0
          • Bassboy3313B
            Bassboy3313B
            Bassboy3313
            wrote on last edited by
            #761

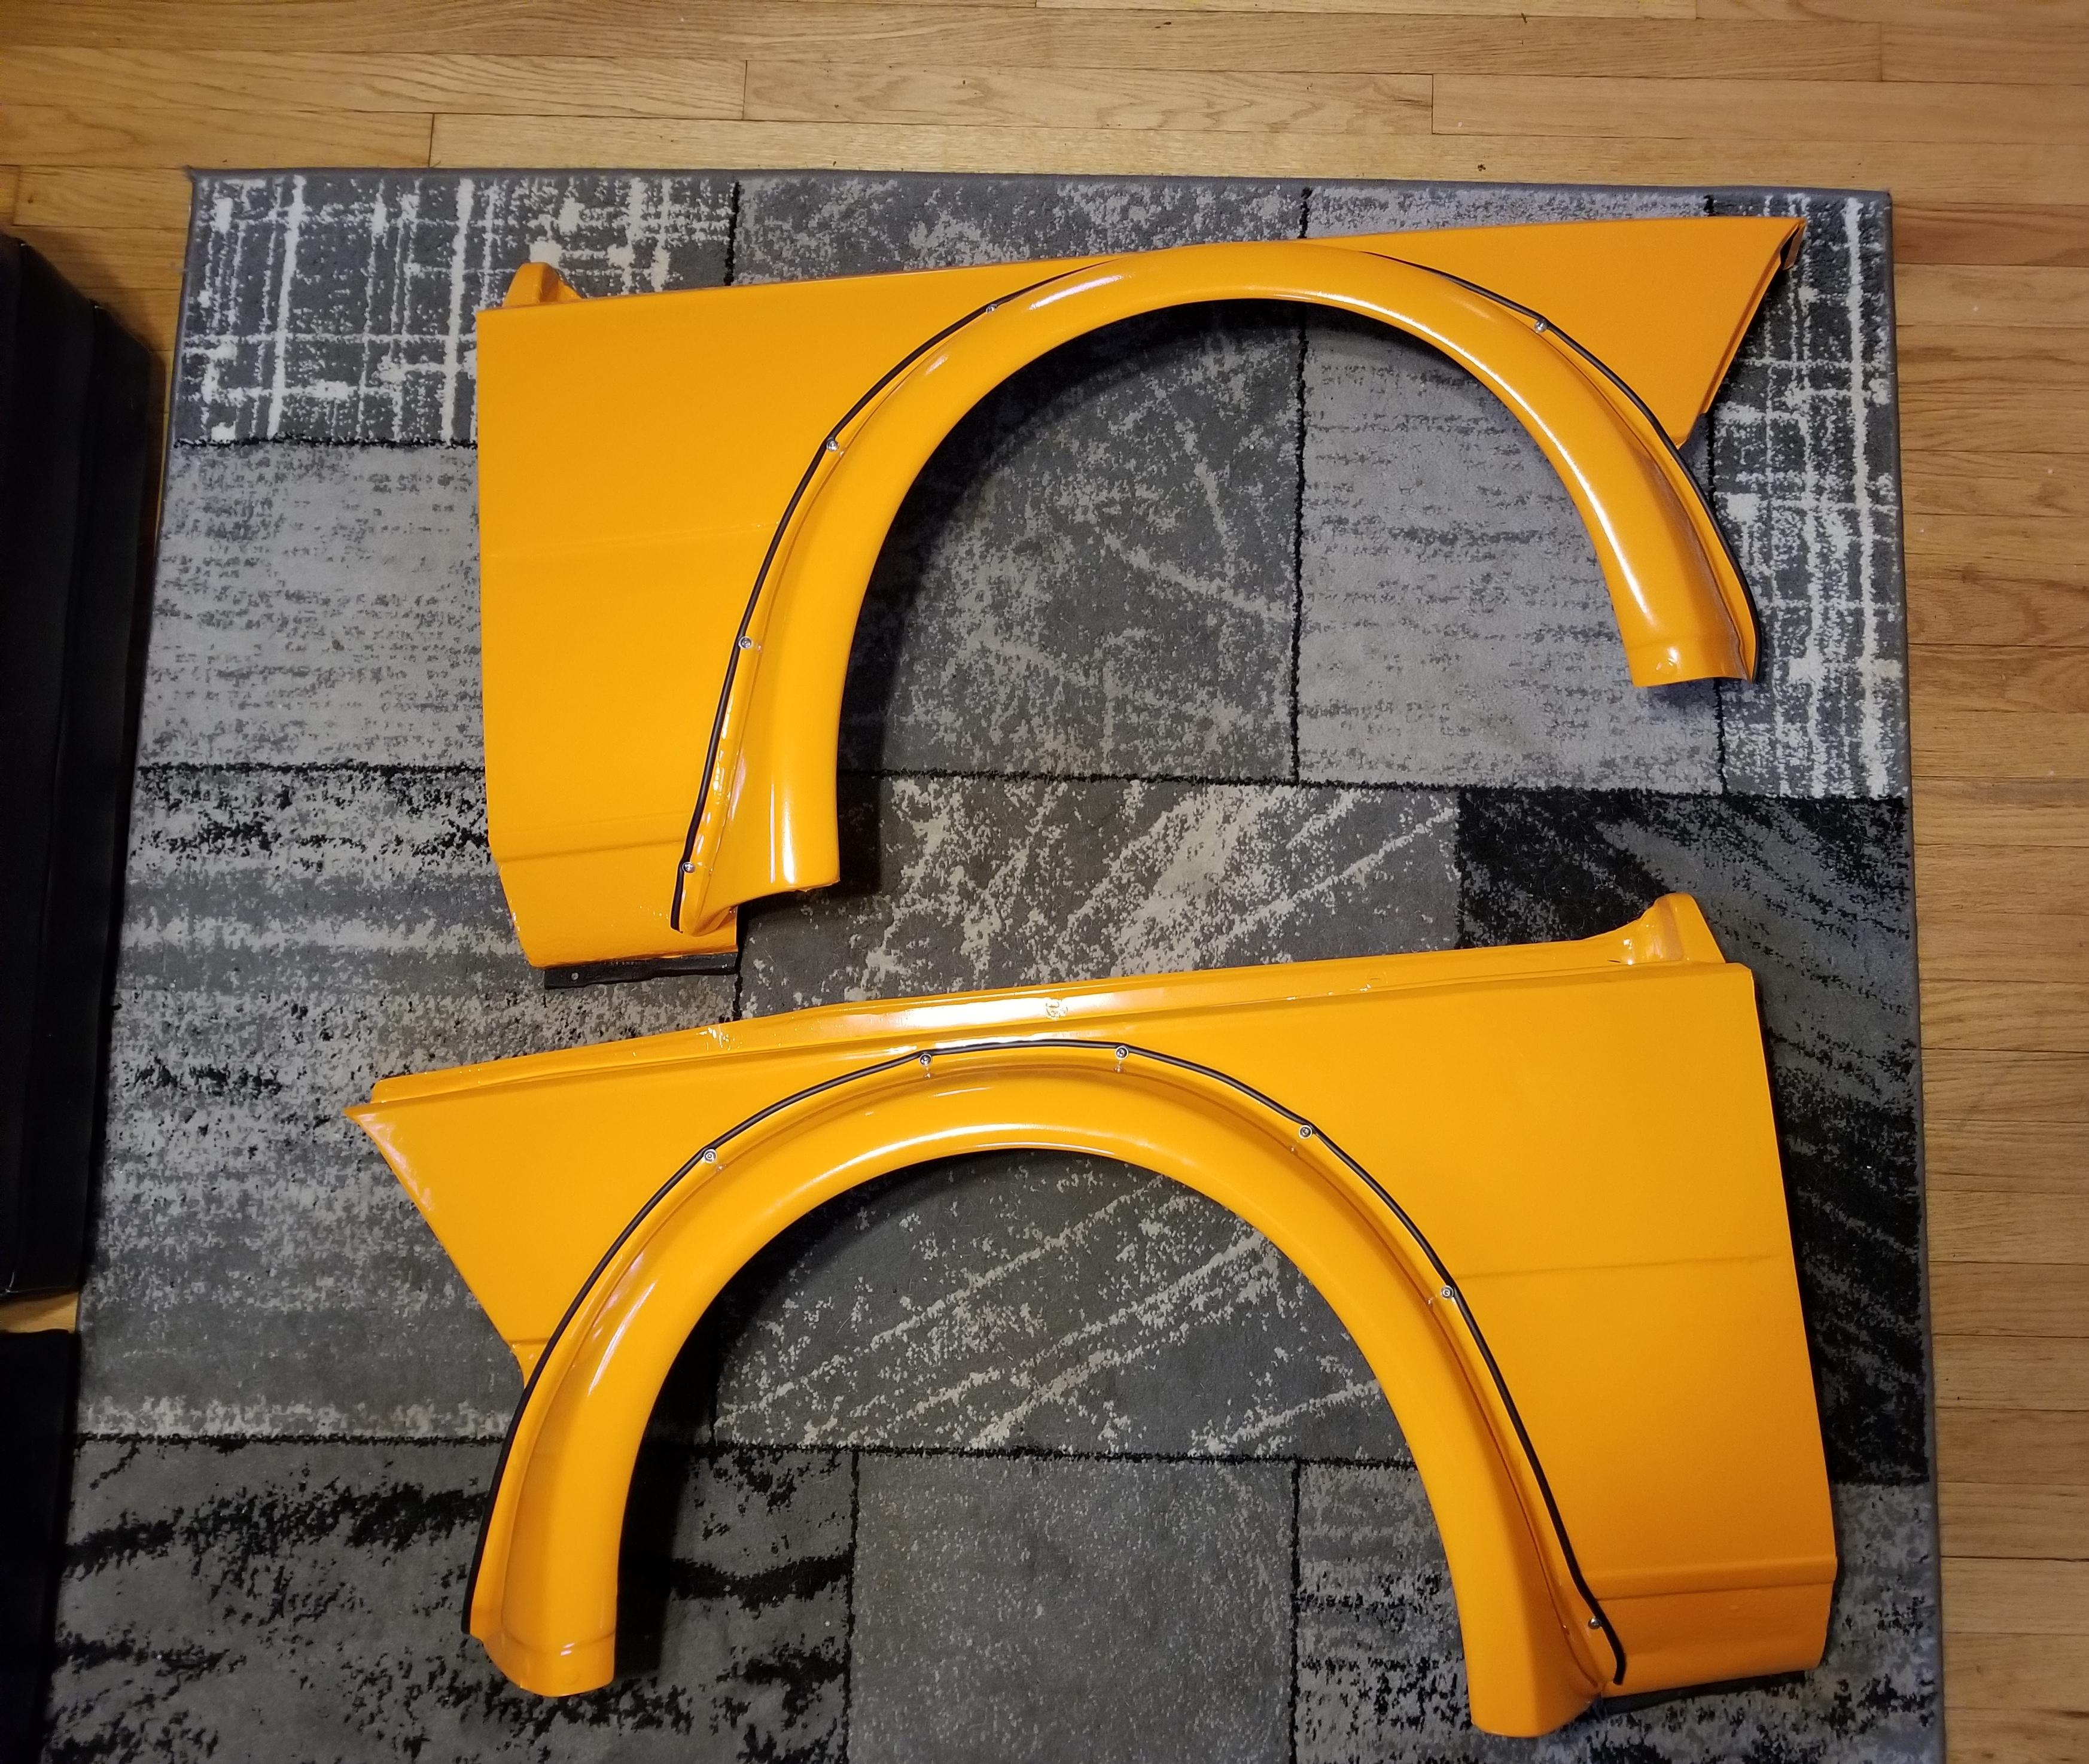
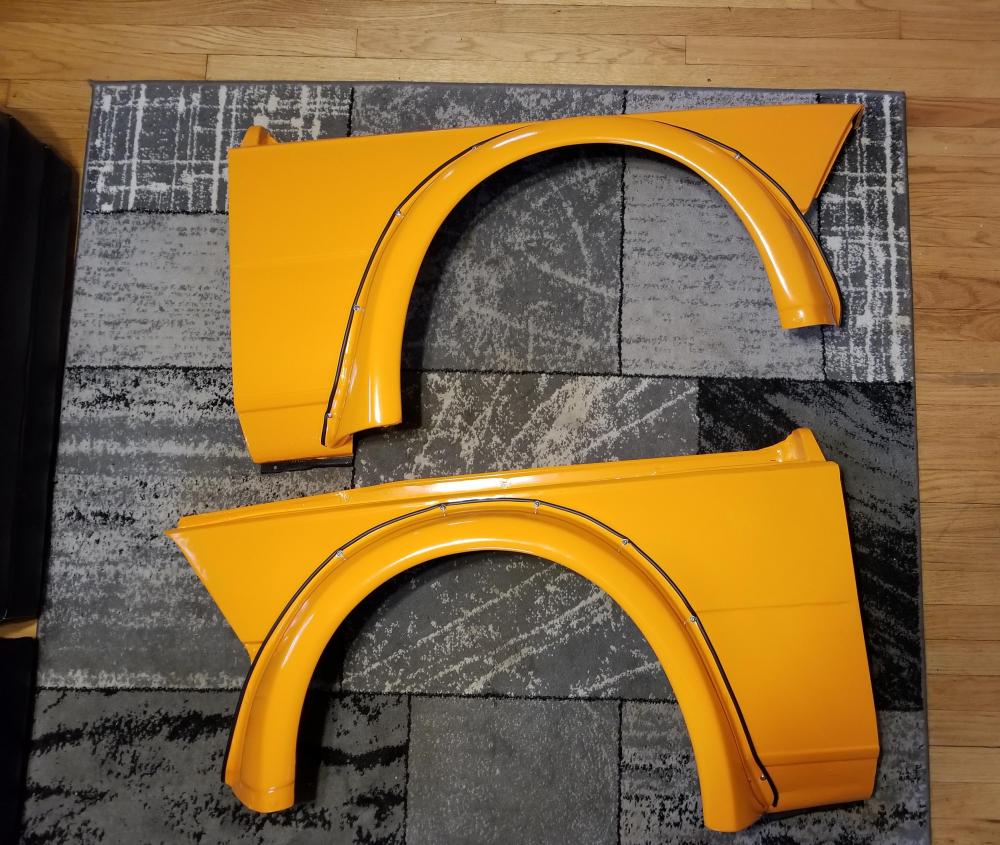
            Nothing fun for an update. Body work continues in prep for the vinyl wrap. Would be nice if the weather could stay above 50 for an extended period of time also. Ordered more 2K epoxy primer and also found some fender flare welting to try out. We'll see how it turns out.

            CHECK OUT >>> RAGE DRIFT DESIGNS <<< FOR DECALS AND MORE!

            1 Reply Last reply
            0
            • straight6pwrS
              straight6pwrS
              straight6pwr
              wrote on last edited by
              #762

              let me know if you need a hand with that door alignment

              Dan

              yajsYRL.jpg.e5f350b4dfe961d76ac8b32efce2e1a6.jpg

              1 Reply Last reply
              1
              • Bassboy3313B
                Bassboy3313B
                Bassboy3313
                wrote on last edited by
                #763

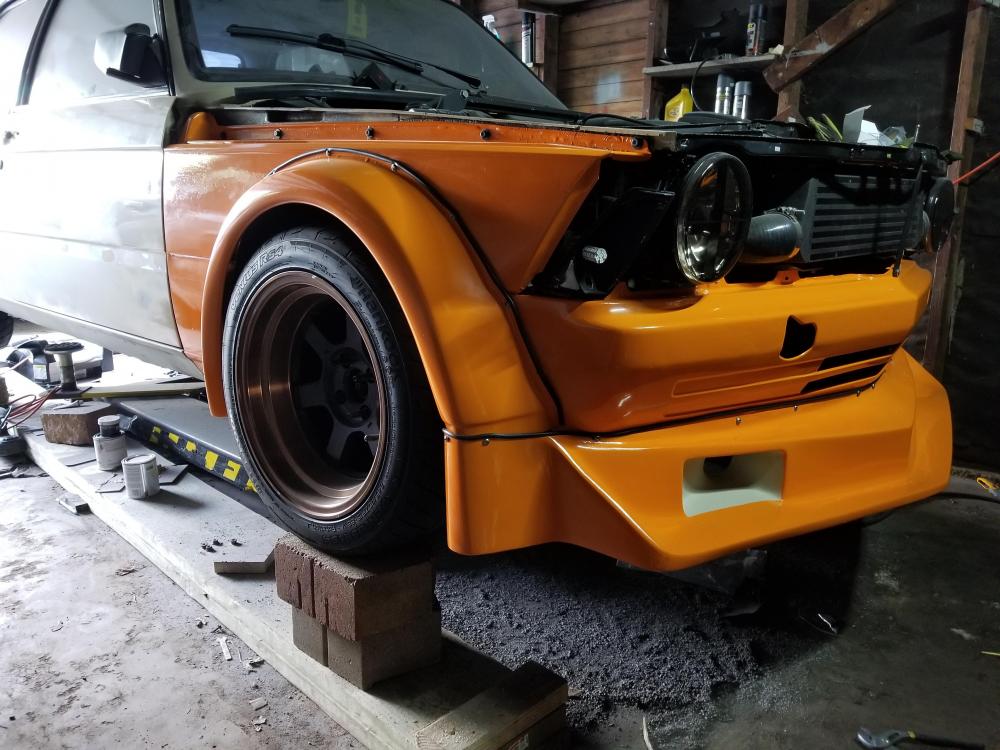
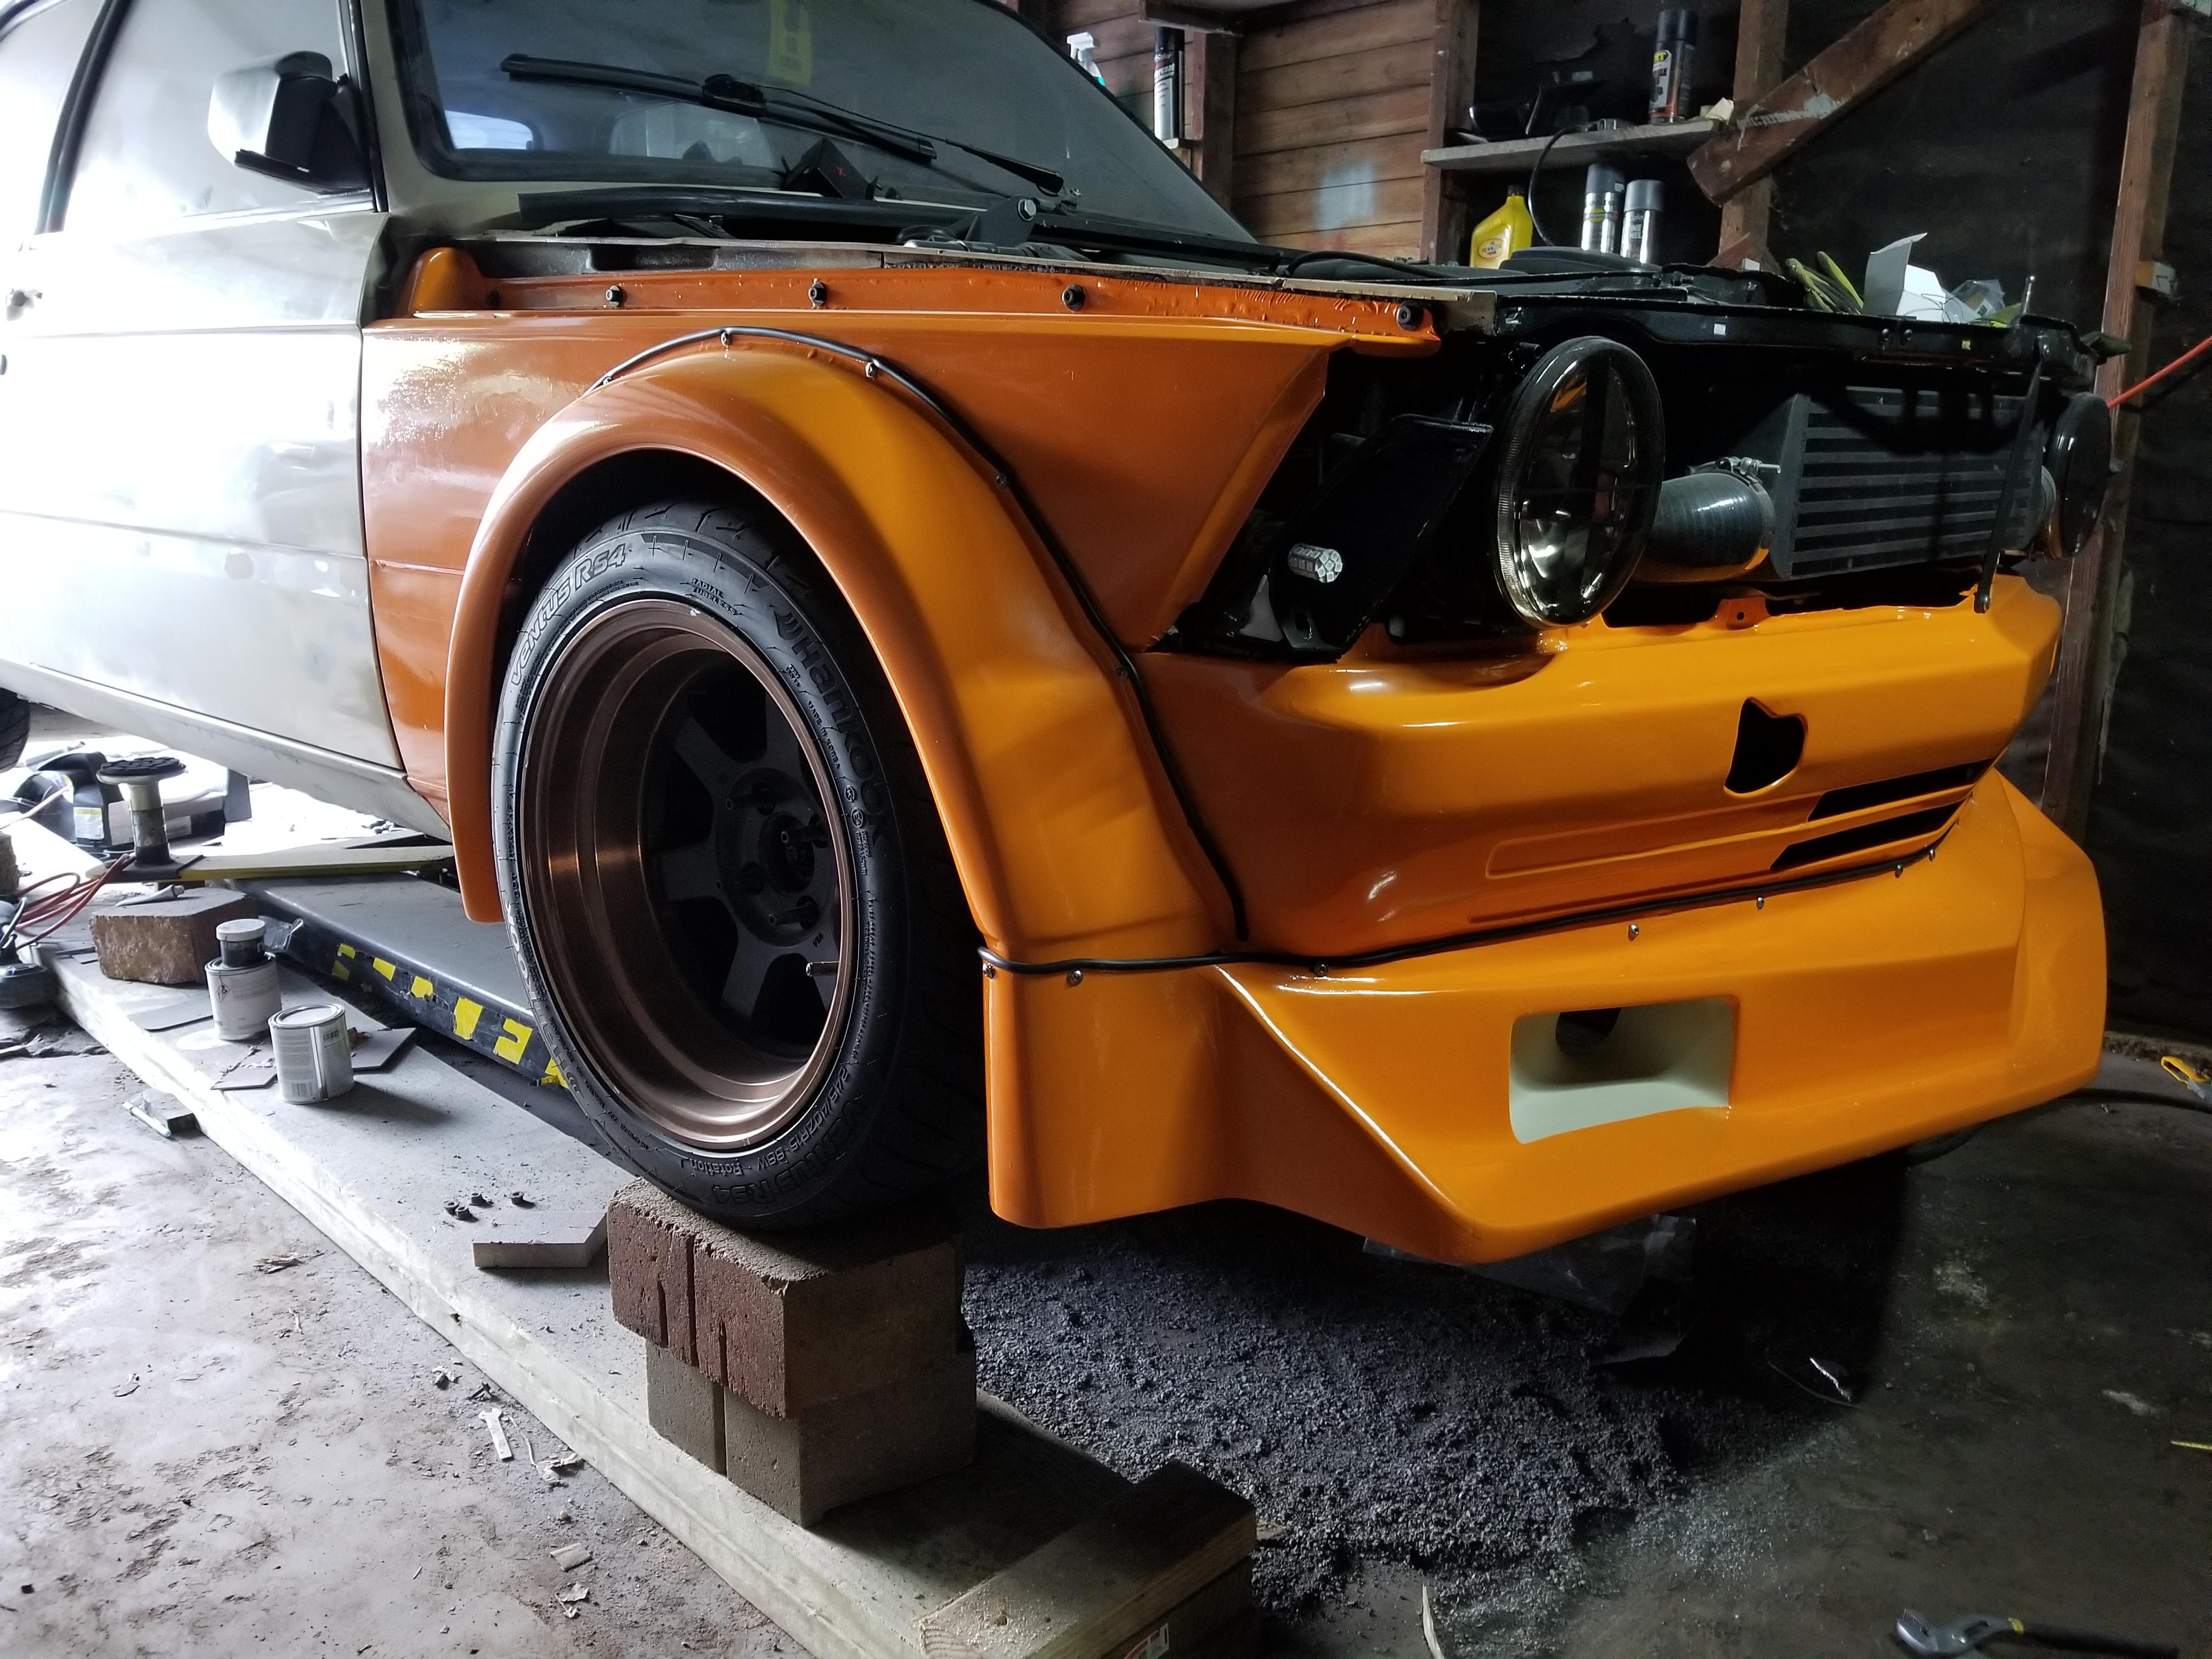
                Looks like the welting works pretty well...
                20180517192724.jpg

                CHECK OUT >>> RAGE DRIFT DESIGNS <<< FOR DECALS AND MORE!

                1 Reply Last reply
                7
                • Bassboy3313B
                  Bassboy3313B
                  Bassboy3313
                  wrote on last edited by
                  #764

                  One step closer

                  20180523184401.jpg

                  CHECK OUT >>> RAGE DRIFT DESIGNS <<< FOR DECALS AND MORE!

                  1 Reply Last reply
                  10
                  • m42b32M
                    m42b32M
                    m42b32
                    wrote on last edited by
                    #765

                    Bassboy3313 said:

                    One step closer

                    20180523184401.jpg

                    15166282.jpg

                    1991 318is, 1991 318i, 2022 Bronco

                    1 Reply Last reply
                    3
                    • P_RoloffP
                      P_RoloffP
                      P_Roloff
                      wrote on last edited by
                      #766

                      Mmm, I love the way it sits, in my opinion that’s just about the right amount of wheel gap. Definitely a fan of the meatier tire on there too, looks so good.

                      1 Reply Last reply
                      1
                      • YoungCRY
                        YoungCRY
                        YoungCR
                        wrote on last edited by
                        #767

                        Epic!!

                        Chris Young
                        BMWCCA #458972
                        1986 528e/5  | 1994 530i/5 | 1995 540i/6 | 2013 X5 35d | 1998 C1500 Suburban | 1995 K2500 Suburban

                        1 Reply Last reply
                        1
                        • Bassboy3313B
                          Bassboy3313B
                          Bassboy3313
                          wrote on last edited by
                          #768

                          Thanks guys! I got the passenger side and rear epoxy primered yesterday as well. It still definitely has its flaws, but I am building this car to drive, not to trailer. So I am fine with it.

                          CHECK OUT >>> RAGE DRIFT DESIGNS <<< FOR DECALS AND MORE!

                          1 Reply Last reply
                          0
                          • JdesignJ
                            JdesignJ
                            Jdesign
                            wrote on last edited by
                            #769

                            Man this looks stellar. Please finish this year! I need to swing by and check it out when Im in your area next!

                            SumBunny.jpg

                            https://www.instagram.com/_jdesigner_/                                          http://nevertoolow.tumblr.com/

                            🥳SOLD BMW E24 633CSI - BMW M30B32                                          🧪SOLD HCH  ES9 - 1.3 LDA
                            👽BMW E30 325IC - Toyota 1JZ-GTE                                                     ⏰ HONDA EF9 CIVIC SI - JDM B18C5
                            ☠️BMW E36 318i - Ford 5.0 FE302                                                         🚴‍♂️ GT-Labomba - 26x2.75 Freeride
                            🤹‍♀️SOLD BMW E36/7 Z3 - BMW M54B25                                                🧓SOLD BMW E10 2002 - BMW M10M05

                            1 Reply Last reply
                            1
                            • Bassboy3313B
                              Bassboy3313B
                              Bassboy3313
                              wrote on last edited by
                              #770

                              Been real busy so far this year with work and other stuff, but slowly getting more progress done. I have the a, b & c pillars wrapped on both sides along with a few other areas. I am ordering more vinyl today to finish the doors and roof. Then i have to cut the rear arches, weld, modify the flares and get them fitted. Then I can order the remaining vinyl for the quarters and rear.

                              CHECK OUT >>> RAGE DRIFT DESIGNS <<< FOR DECALS AND MORE!

                              1 Reply Last reply
                              0
                              • HipMFH
                                HipMFH
                                HipMF
                                wrote on last edited by
                                #771

                                Bassboy3313 said:

                                Then i have to cut the rear arches, weld...

                                Hahaha!

                                This can be a pain in the penis depending on how much of a perfectionist you are. Maybe it will be easier with your lift, but for me it was difficult to see what I was doing after I stuffed my head, weld shooter and hands all into the wheelwell, all while manuvering around the brake drum/suspension/etc.

                                Remember that the wheelwell holds the weight of the car as well. I'm assuming that the connection between the inner fenderwell and quarter panel is fairly important to the structure of the car. In hindsight, I'd like to investigate that area to see how many spot-welds there are, but Ben scrapped out all that metal for me....

                                It may not matter much, but if possible I'd recommend  angling the  filler pieces up from the quarter panel to the inner wheelwell, rather than making them a simple horizontal filler strip. CAD templates (cardboard-aided design) are your friend.

                                Good luck and godspeed.

                                1 Reply Last reply
                                0
                                • SteelBlueS
                                  SteelBlueS
                                  SteelBlue
                                  wrote on last edited by
                                  #772

                                  So apparently this thread has flown under my radar. This looks incredible.

                                  Street car or will these see track time?

                                  1 Reply Last reply
                                  0
                                  • Bassboy3313B
                                    Bassboy3313B
                                    Bassboy3313
                                    wrote on last edited by
                                    #773

                                    HipMF said:

                                    Hahaha!

                                    This can be a pain in the penis depending on how much of a perfectionist you are. Maybe it will be easier with your lift, but for me it was difficult to see what I was doing after I stuffed my head, weld shooter and hands all into the wheelwell, all while manuvering around the brake drum/suspension/etc.

                                    Remember that the wheelwell holds the weight of the car as well. I'm assuming that the connection between the inner fenderwell and quarter panel is fairly important to the structure of the car. In hindsight, I'd like to investigate that area to see how many spot-welds there are, but Ben scrapped out all that metal for me....

                                    It may not matter much, but if possible I'd recommend  angling the  filler pieces up from the quarter panel to the inner wheelwell, rather than making them a simple horizontal filler strip. CAD templates (cardboard-aided design) are your friend.

                                    Good luck and godspeed.

                                    Depending on how the inner and outer skins separate once cut, my plan of attack was to leave the inner a hair longer, pie cut it and bend up to meet outer skin. Then burn them in together. Any and all pics you have of this process would be great! If you don't mind sharing.

                                    CHECK OUT >>> RAGE DRIFT DESIGNS <<< FOR DECALS AND MORE!

                                    1 Reply Last reply
                                    0
                                    • Bassboy3313B
                                      Bassboy3313B
                                      Bassboy3313
                                      wrote on last edited by
                                      #774

                                      SteelBlue said:

                                      So apparently this thread has flown under my radar. This looks incredible.

                                      Street car or will these see track time?

                                      Thanks! This will mostly be a street car, but planning on attending some track days here and there.

                                      CHECK OUT >>> RAGE DRIFT DESIGNS <<< FOR DECALS AND MORE!

                                      1 Reply Last reply
                                      0
                                      • HipMFH
                                        HipMFH
                                        HipMF
                                        wrote on last edited by
                                        #775

                                        Bassboy3313 said:

                                        Depending on how the inner and outer skins separate once cut, my plan of attack was to leave the inner a hair longer, pie cut it and bend up to meet outer skin. Then burn them in together. Any and all pics you have of this process would be great! If you don't mind sharing. 

                                        That sounds like a good plan. No pics of mine sadly.

                                        1 Reply Last reply
                                        0
                                        • Bassboy3313B
                                          Bassboy3313B
                                          Bassboy3313
                                          wrote on last edited by
                                          #776

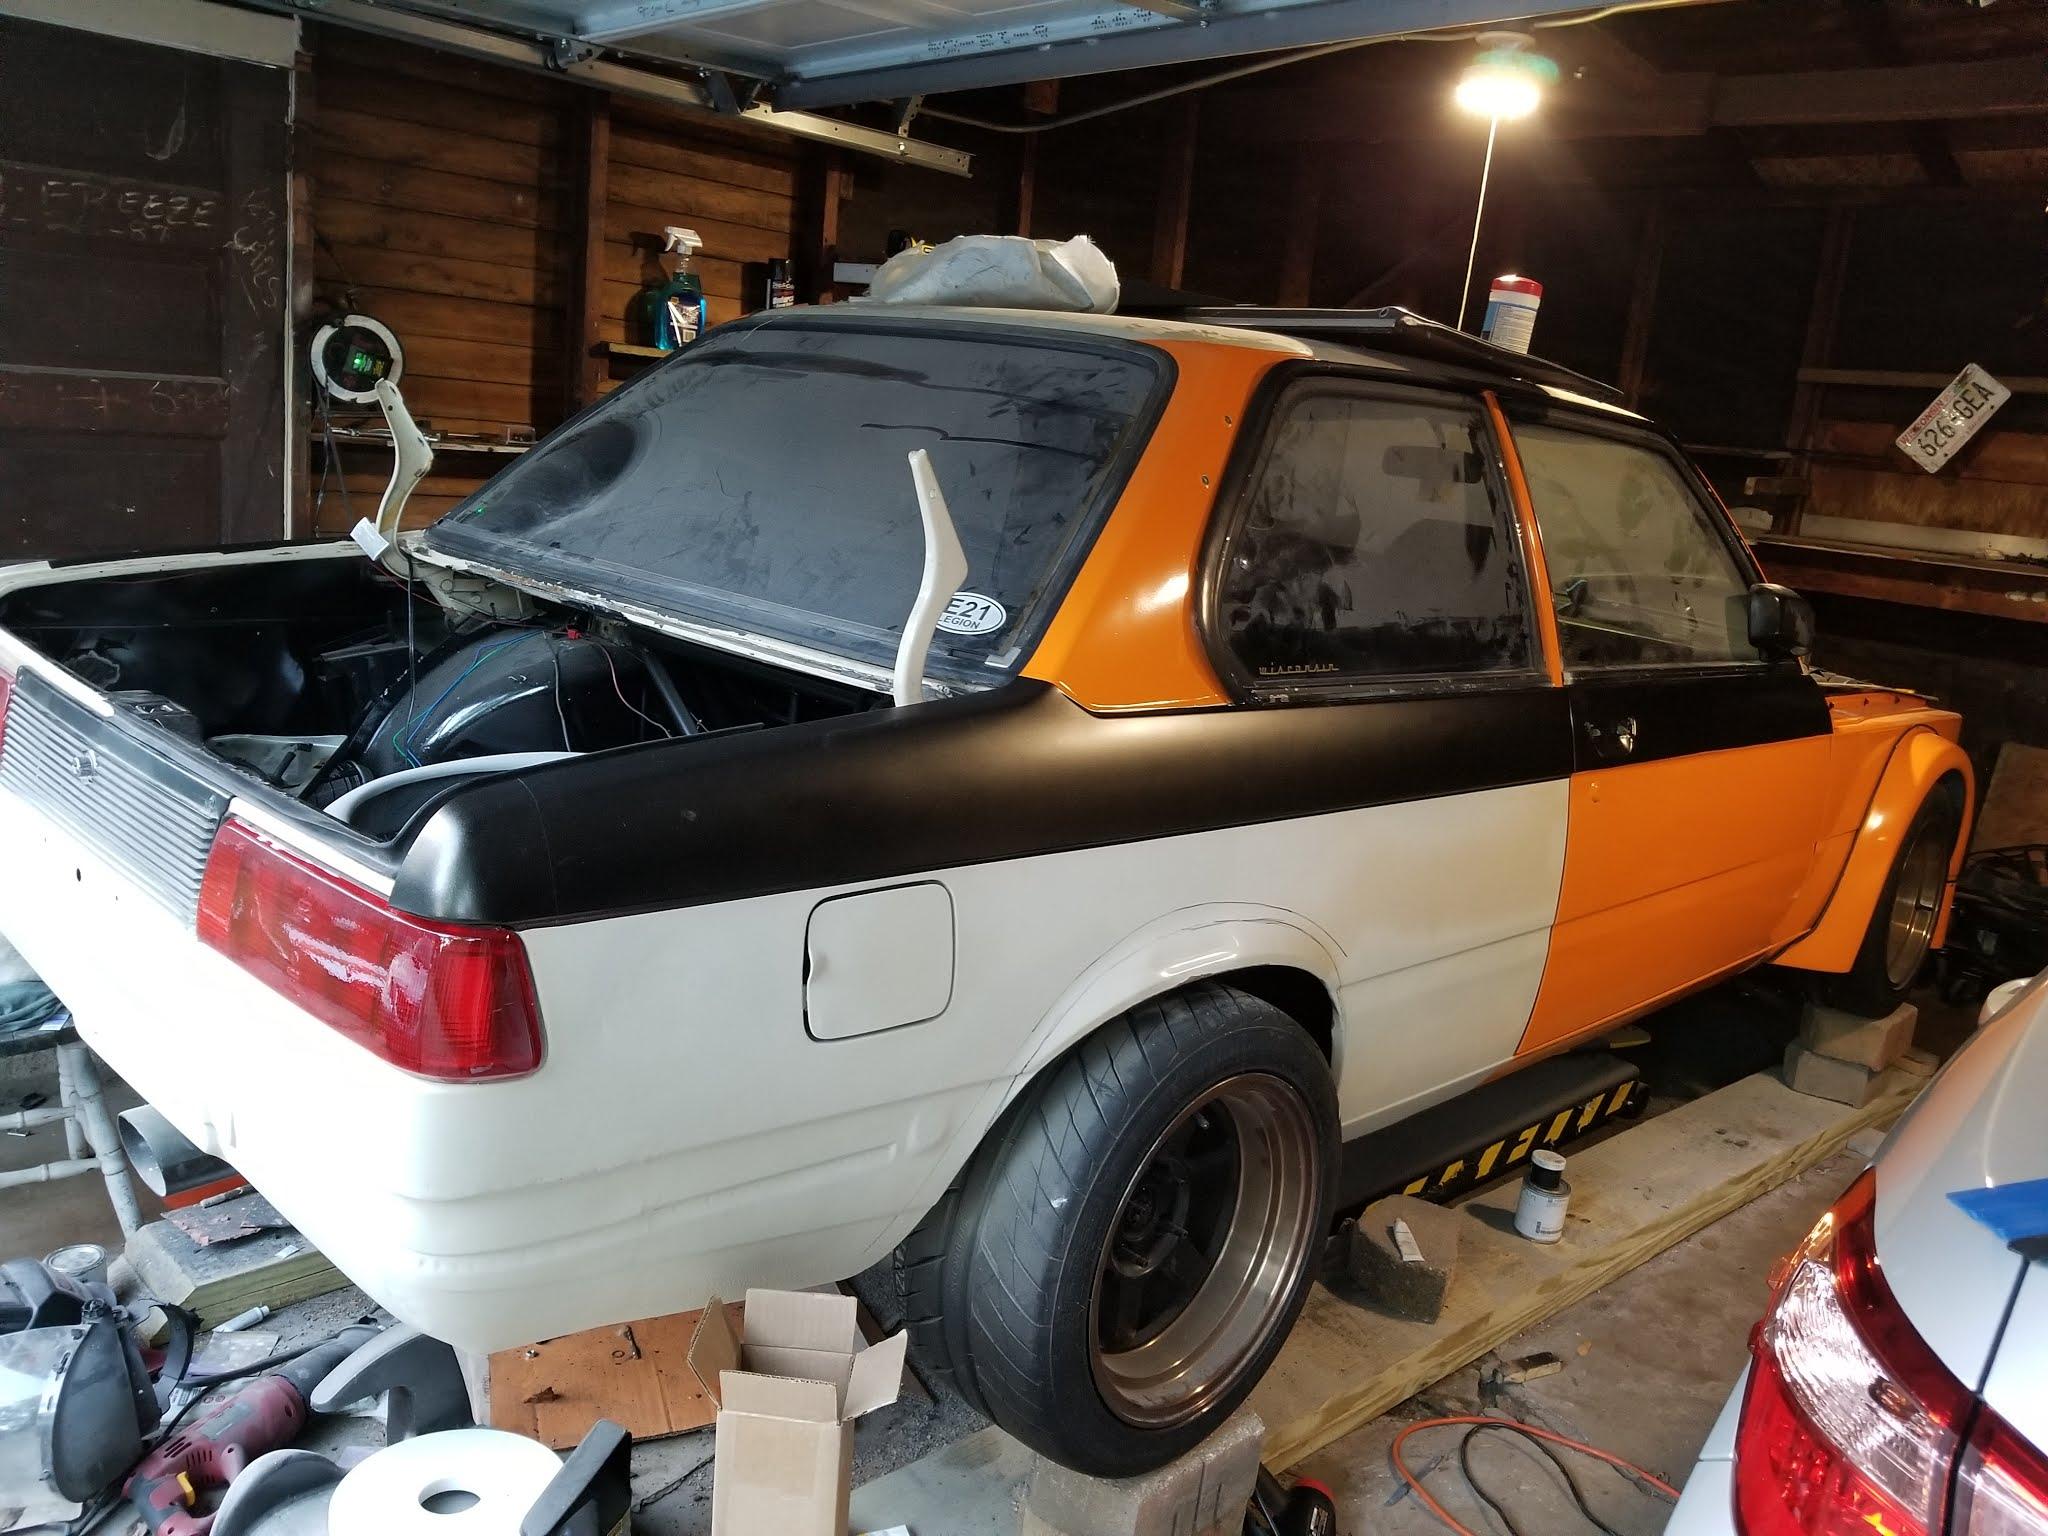
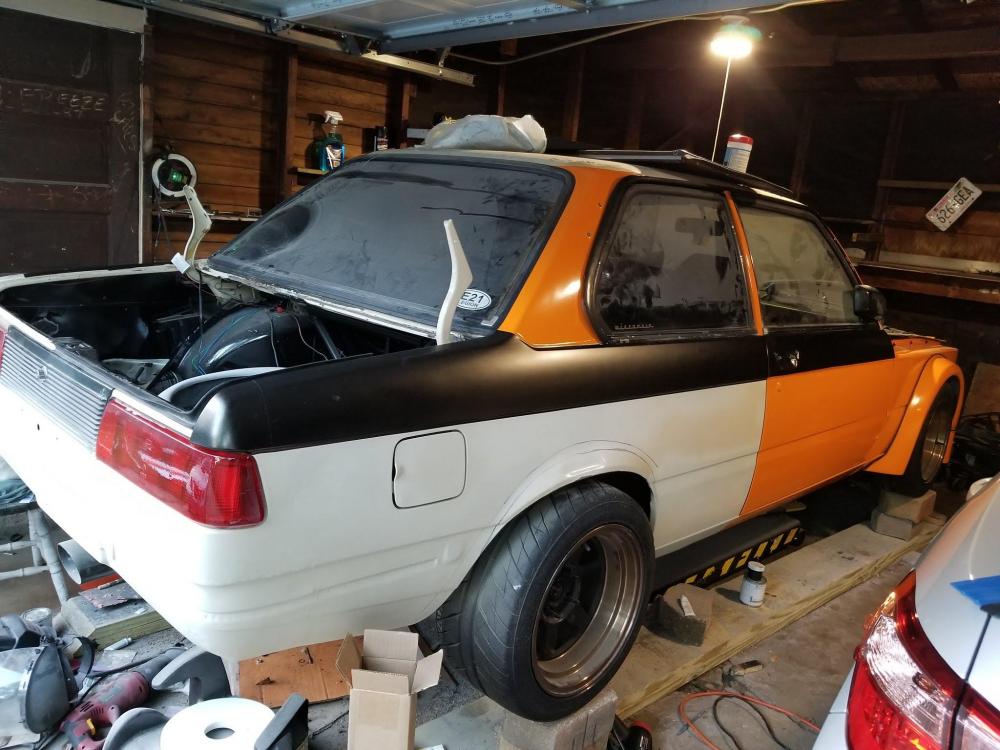
                                          Getting boring not being able to post pics of the car due to keeping the theme a secret. So, I say screw it. Some of you may recognize the livery design and possibly some may not. Either way, this is where the car stands as of today. 
                                          4684964773073432412.jpg

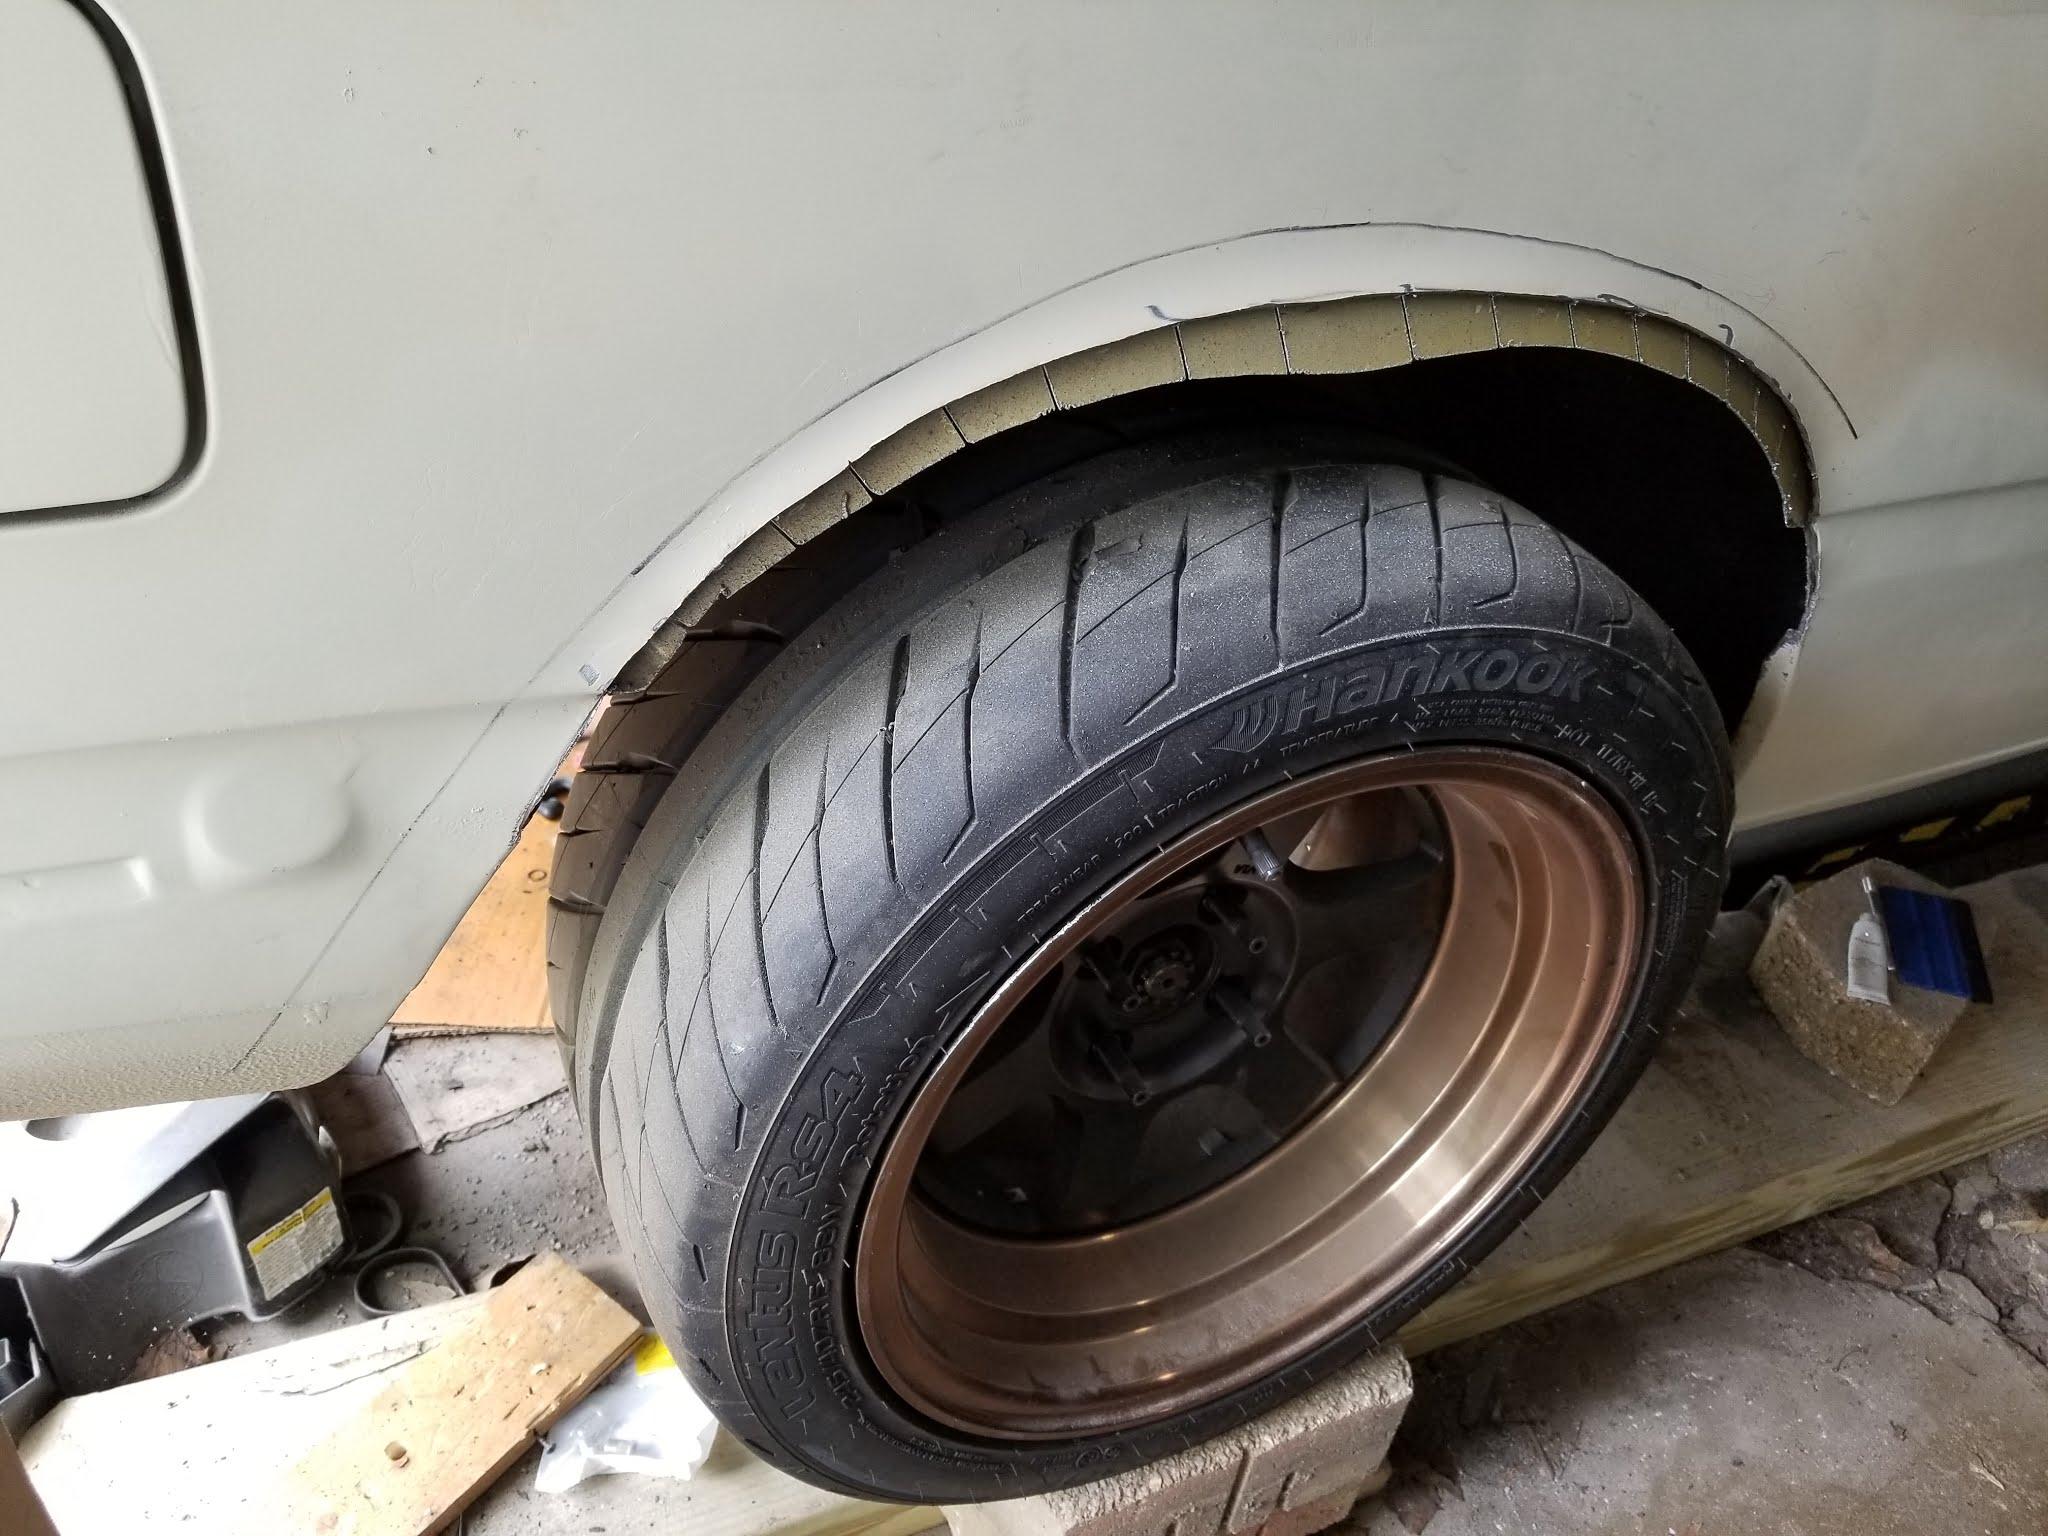
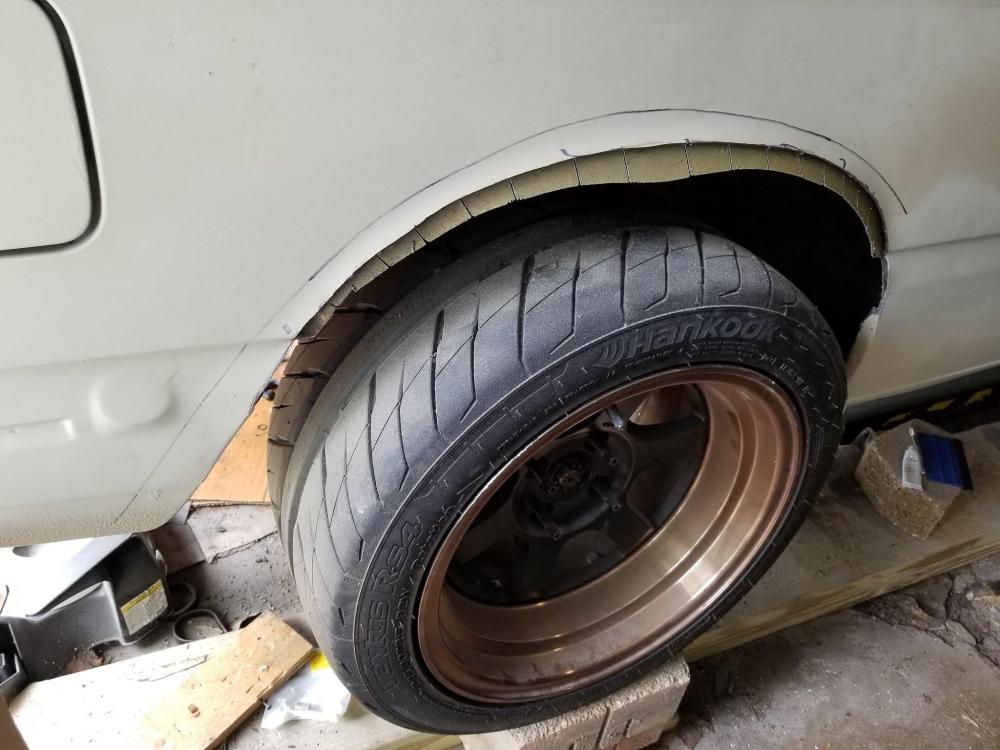
                                          Started with the rear flare modifications today. I first marked where the top of the flare will sit, then marked a line below that for where the body will be cut. Took the sawzall and cut about an inch below this line through both the inner and outer skin. I then used my air cut-off wheel and cut just the outer skin at the correct line. This left an inner skin lip that I pie cut. 
                                          874527690718586807.jpg

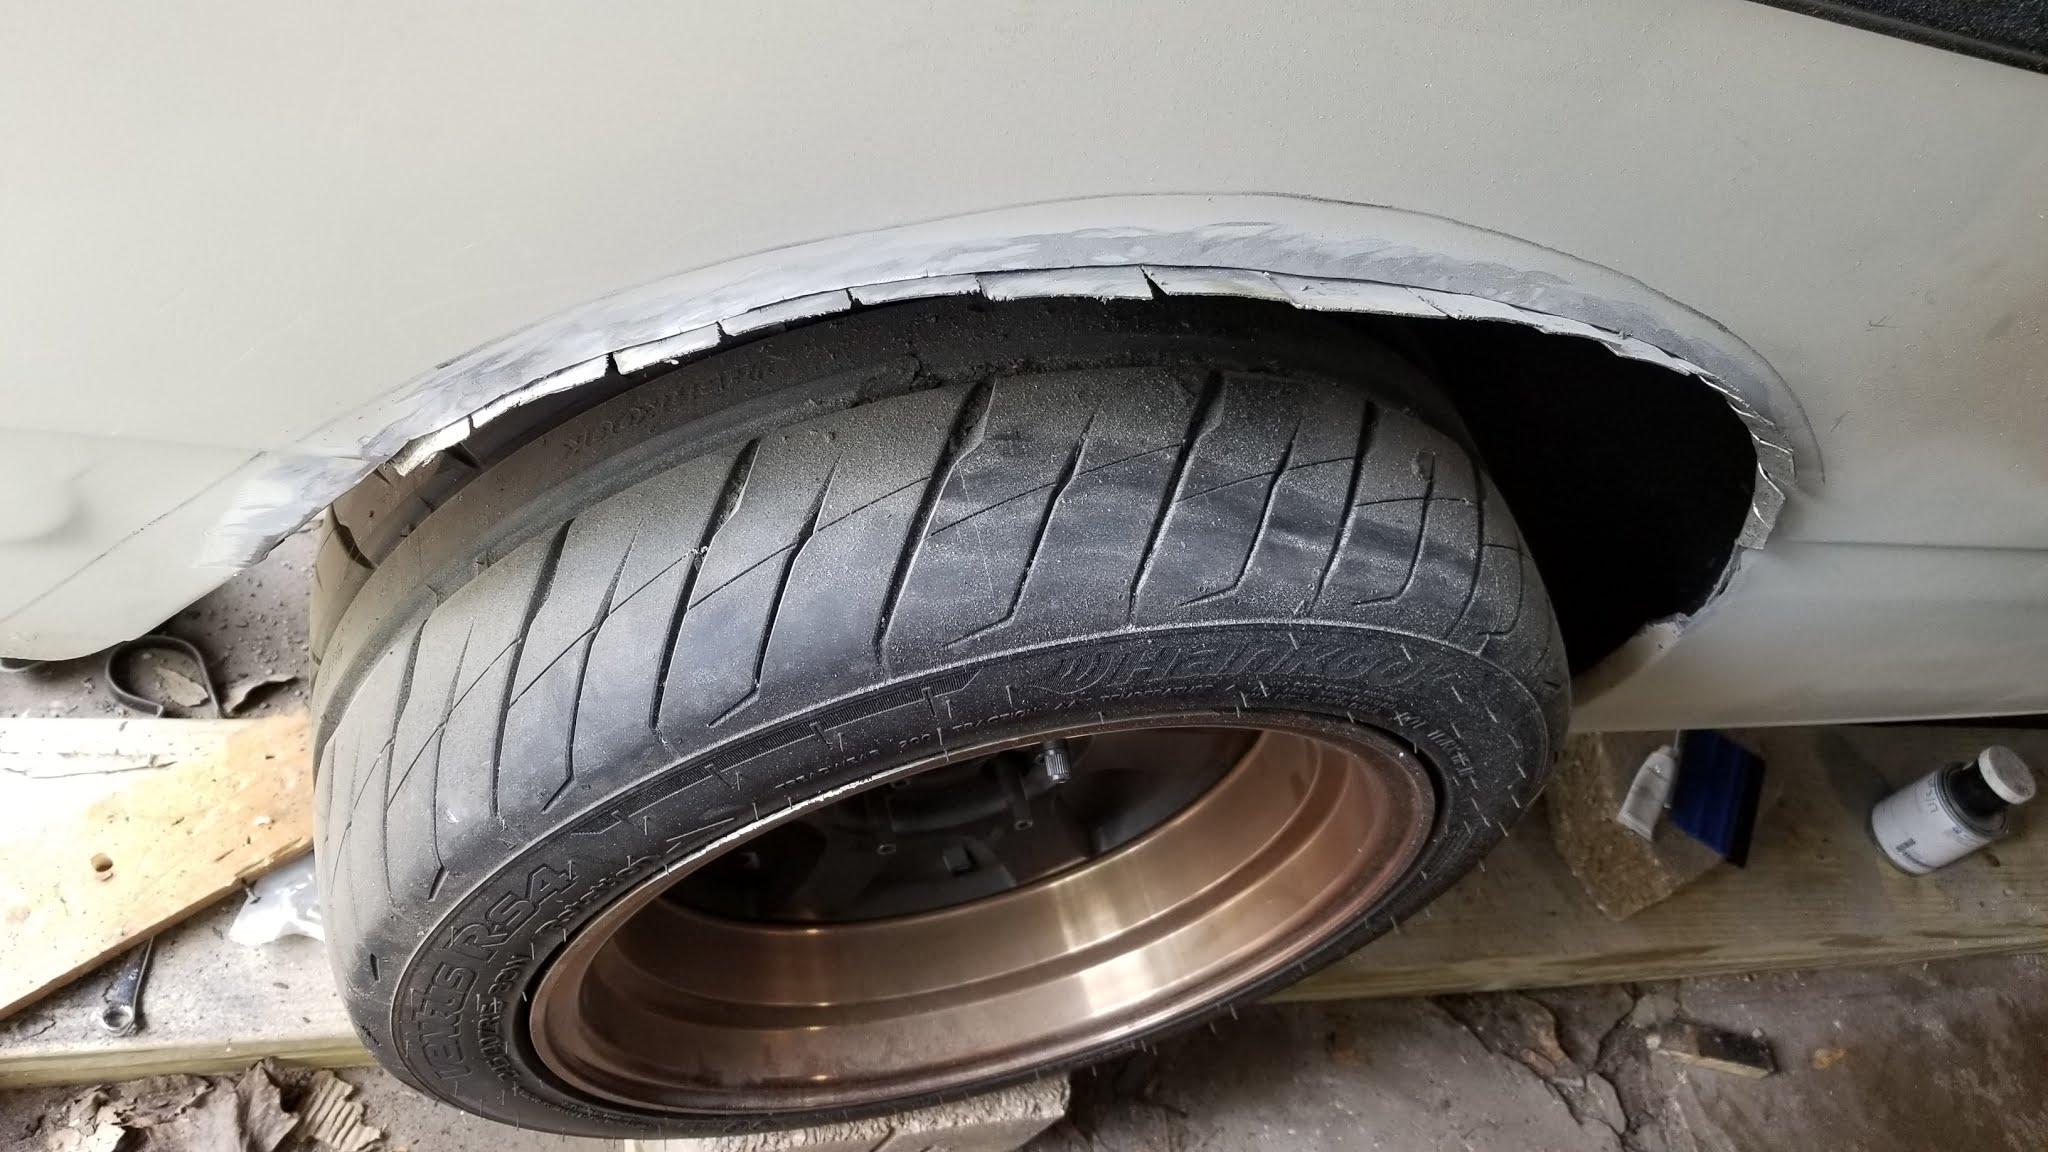
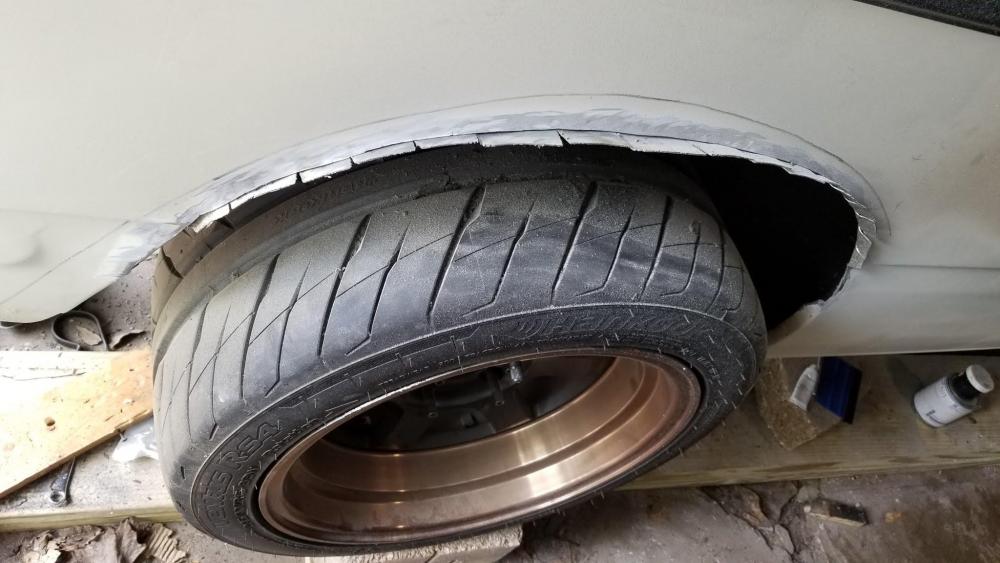
                                          Using a welders vise grips, I bent the pie cut pieces one-by-one up to the outer skin until they touched and flatten the underside with a hammer. I felt this was the safest/easiest way to reattach the skins back together. 
                                          1159464034289367353.jpg

                                          Next step is to weld the two skins together where they meet, cut off the excess outer skin lip, grind it smooth, weld up any gaps that remain, grind, and primer. I will then take cardboard to make a template to use on the other side and repeat. Once this is all done the remainder of the car gets wrapped. 😃

                                          CHECK OUT >>> RAGE DRIFT DESIGNS <<< FOR DECALS AND MORE!

                                          1 Reply Last reply
                                          4

                                          Hello! It looks like you're interested in this conversation, but you don't have an account yet.

                                          Getting fed up of having to scroll through the same posts each visit? When you register for an account, you'll always come back to exactly where you were before, and choose to be notified of new replies (either via email, or push notification). You'll also be able to save bookmarks and upvote posts to show your appreciation to other community members.

                                          With your input, this post could be even better 💗

                                          Register Login
                                          Reply
                                          • Reply as topic
                                          Log in to reply
                                          • Oldest to Newest
                                          • Newest to Oldest
                                          • Most Votes


                                          • Login

                                          • Don't have an account? Register

                                          • Login or register to search.
                                          Powered by NodeBB Contributors
                                          • First post
                                            Last post
                                          0
                                          • Categories
                                          • Recent
                                          • Tags
                                          • Popular
                                          • Users
                                          • Groups