
TehRaydarlover's AWD lover

-
It seems like wilwood and brembo use aluminum, I'm guessing 6160, but I could make it out of 400ss.
Yes, the pads have the same surface area but are .65" thick vs .80". They have the same piston area also.
Wheels are 5X120 using 135i hubs up front and Z4 hubs in the rear

-
Im assuming the calipers you are shopping are 2 or 4 piston and not a stock design sliding caliper. to me it seems the sliding caliper would create an undesirable moment on the aluminum adapter bracket but a piston on each side of the rotor will balance the forces.
If I were designing it, I would be allowing for 1/2" minimum clearance between spokes and calipers.
Are you going to run a square setup or staggered? Would a staggered setup make the transfer case grumpy?
-
The fronts are 6 pot and the rears are 4 pot, I was thinking more of the caliper twisting on the mount. The more I offset it the larger the moment arm?
Okay, yeah I was trying to imagine how much deflection there would be in the wheel when cornering. I'm thinking it's probably quite a bit. Trying to decide whether to design the adapters to the wheels I have or try and give myself some more room for a higher offset wheel.
They will be staggered, 17x8.5 front, 17x9.5 rear. The t-case is perfectly fine as long as they are the same diameter. Just can't have wheels spinning at different rpms. Good way to cook the VC.
-
So here is the T-case rebuild, I actually rebuild it back in January so the details are kind of foggy. If I missed something let me know! Thanks
Here is the list of parts I used:
27111224629 Qty(1) Transfer Case Breather Valve
27111224677 Qty(1) Transfer Case Gasket
07119981063 Qty(1) 8-BEARING-IX
27211224637 Qty(1) 8-NEEDLE CAGE
07119981047 Qty(1) Transfer Case Bearing
07119981047 Qty(1) Transfer Case Bearing
27211224636 Qty(1) Transfer Case Seal
27241224660 Qty(2) Front Transfer Case Output Seal
07119981724 Qty(2) 8-BEARING-IX
27211224632 Qty(1) Drive Shaft Seal
27211224634 Qty(1) Collar Nut
27241224662 Qty(1) Snap Ring
23711130502 Qty(1) Rubber Mount
07119963308 Qty(1) Gasket Ring
27111226467 Qty(1) Screw PlugA few of these items are NLA from BMW, such as some of the bearings, but you can still order them online from companies like Motion Industries.
You will also need a new or good used viscous coupling, see my rebuild a few pages back.
So first things first: Disassembly
I removed the rear output shaft nut, then used a large 3 jaw puller to pull off the output flange. There's a sealant used between the shaft and output flange that can make removal a little difficult.
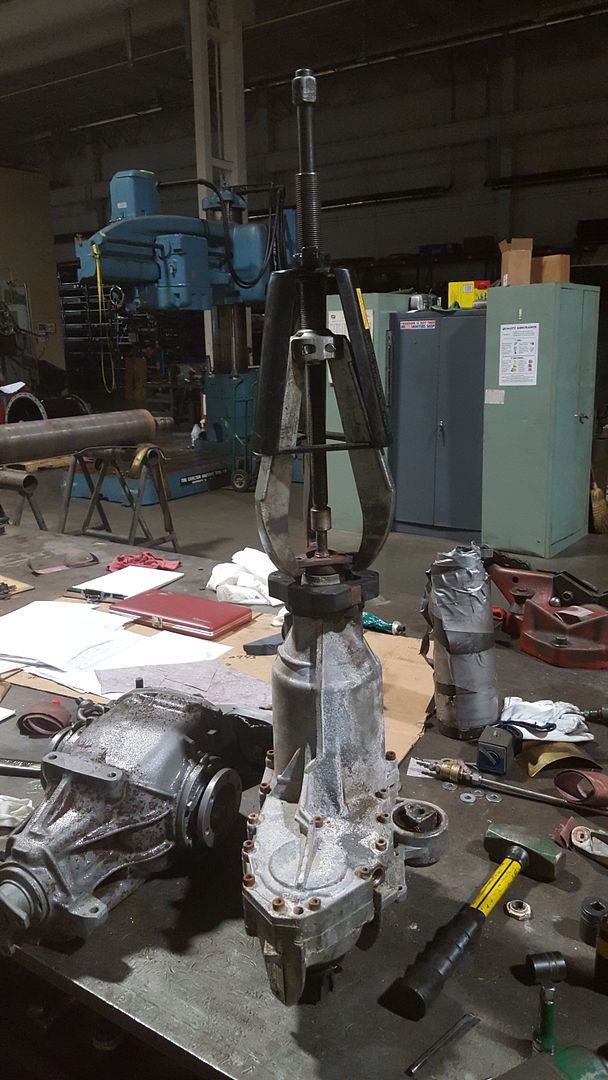
Next your going to remove all of the 6mm socket head cap screws.
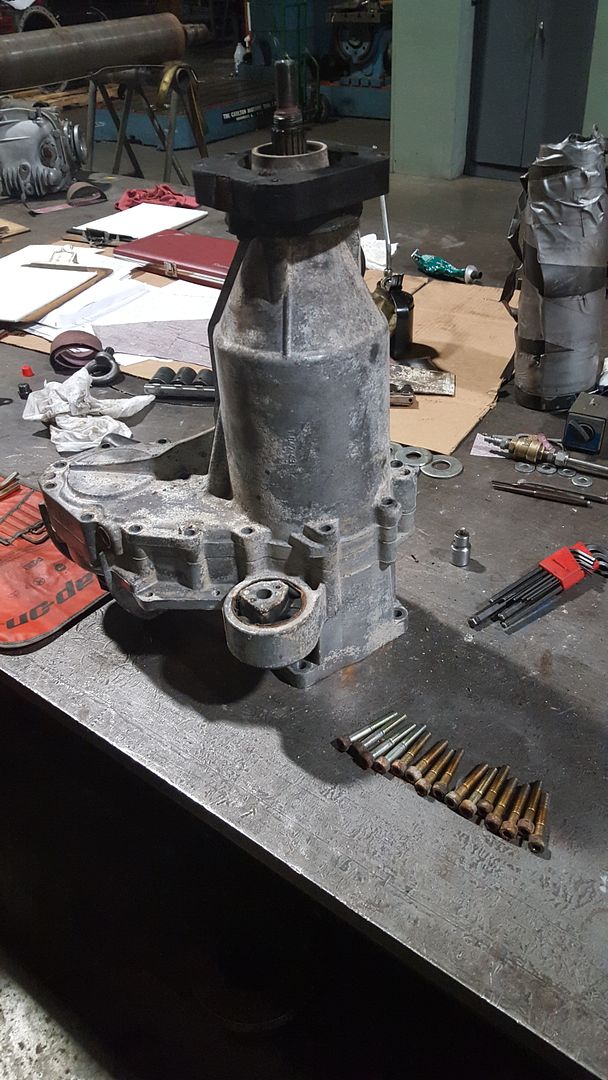
Separate the casing halves. There are two locating dowel pins in the casing. If the casing doesn't separate easily use flat face punch to tap out the dowel pins.
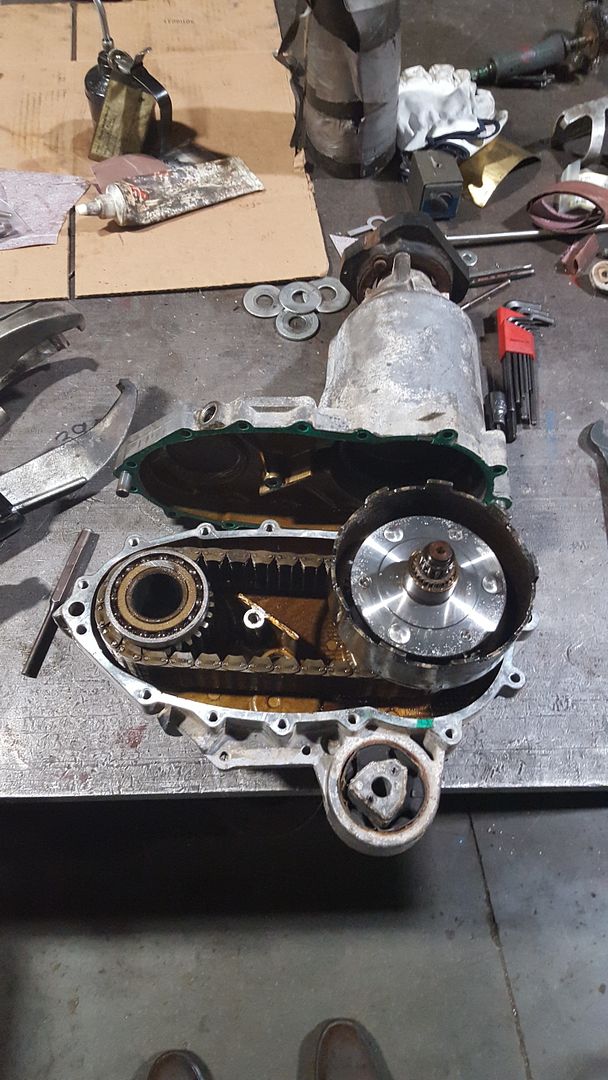
Now pretty much everything just slides apart. To avoid headaches during reassembly, be sure to take pictures and tag/bag all of the small shims, needle bearings, etc.
Use a pry bar to pull the input sprocket, chain, and front output assembly out of the casing.
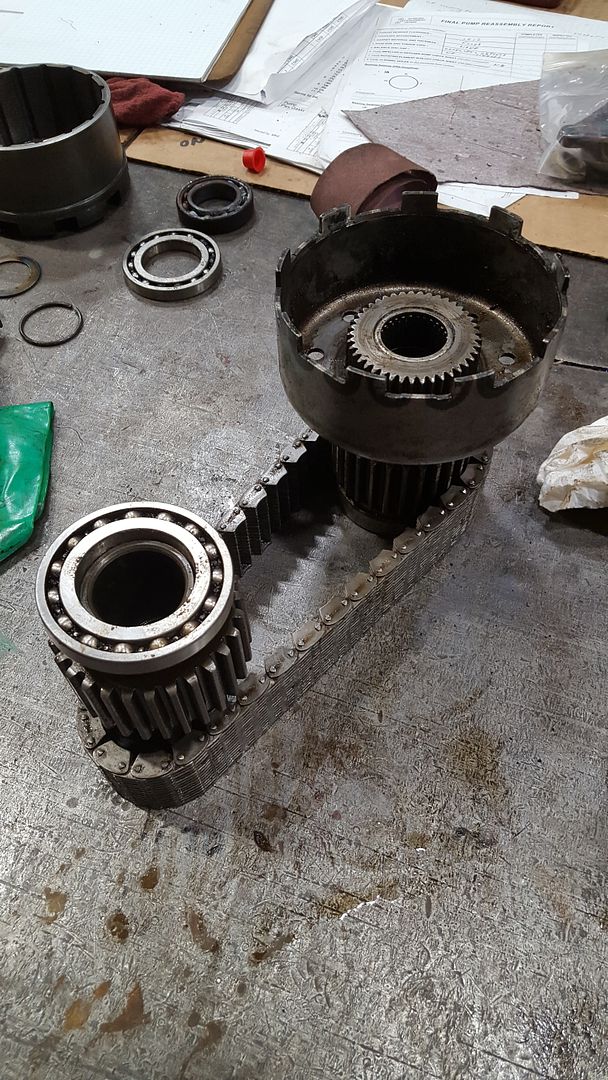
There is a small snap ring on the input shaft that holds the input shaft in the casing that must be removed. If I remember correctly you have to remove the bearing first before you can reach it, mine came out with the input sprocket.
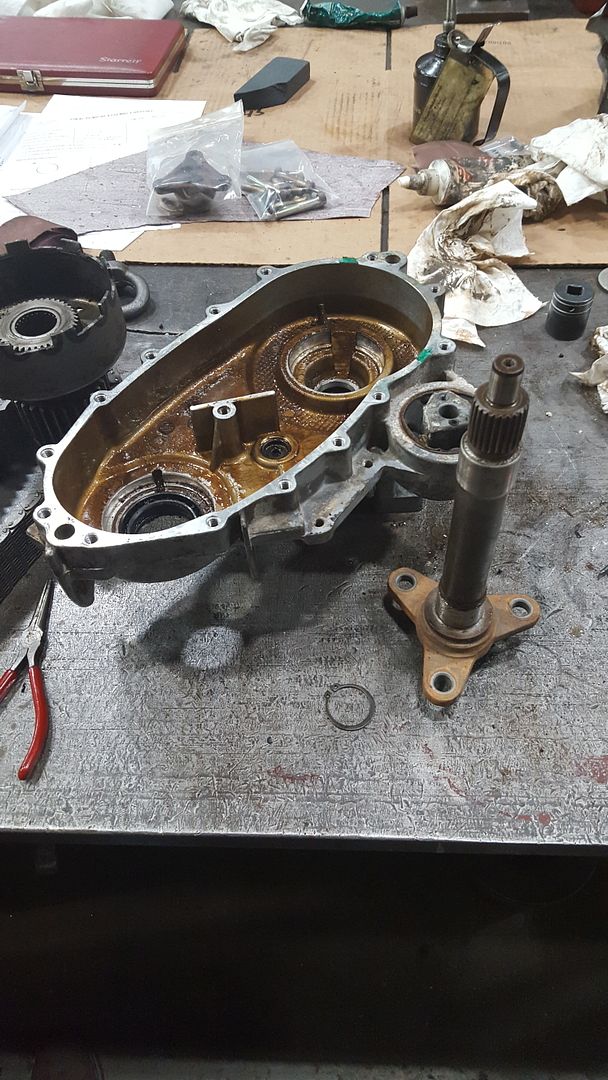
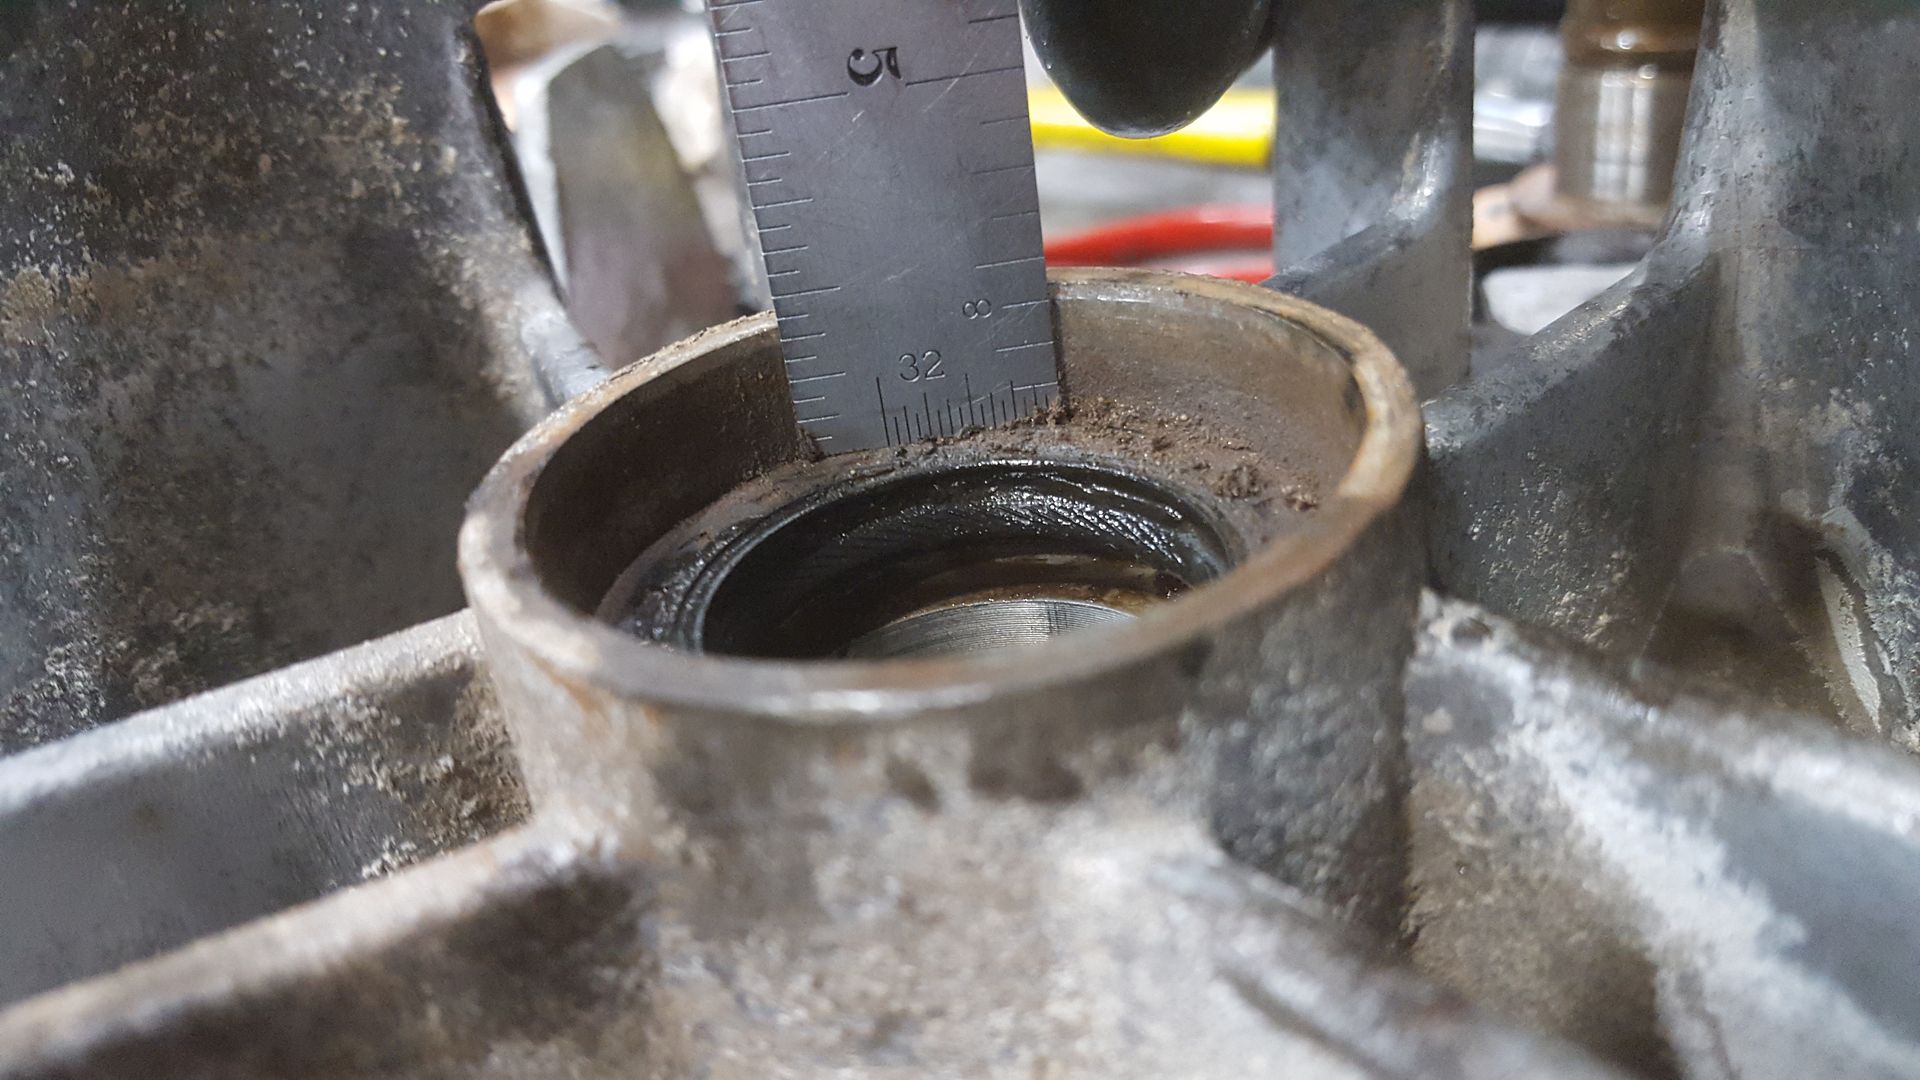
Its a good idea to measure and record the location of all of your shaft seals at this point.
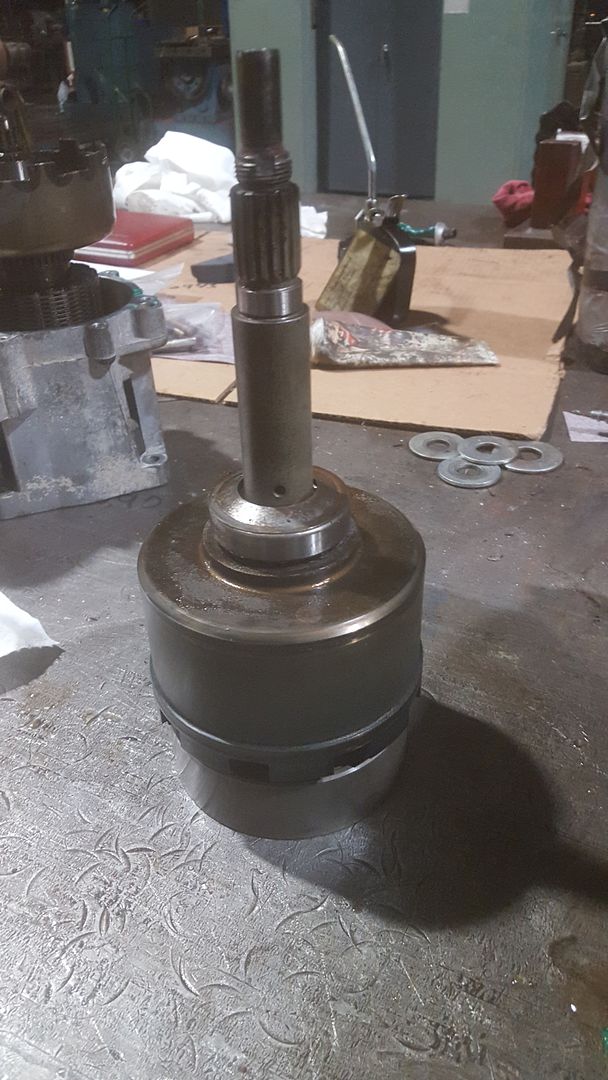
To remove the VC from the rear output shaft you have to remove this bearing. I had to heat mine to get it to come off. DO NOT loose the shim under the bearing, you need this lol. The thickness is likely going to be different between different transfer cases. As I understand it, the shim basically makes up for any differences in lengths between the rotor assembly and the casing stop faces, similar to the shim found in the rear diff for the pinion depth.
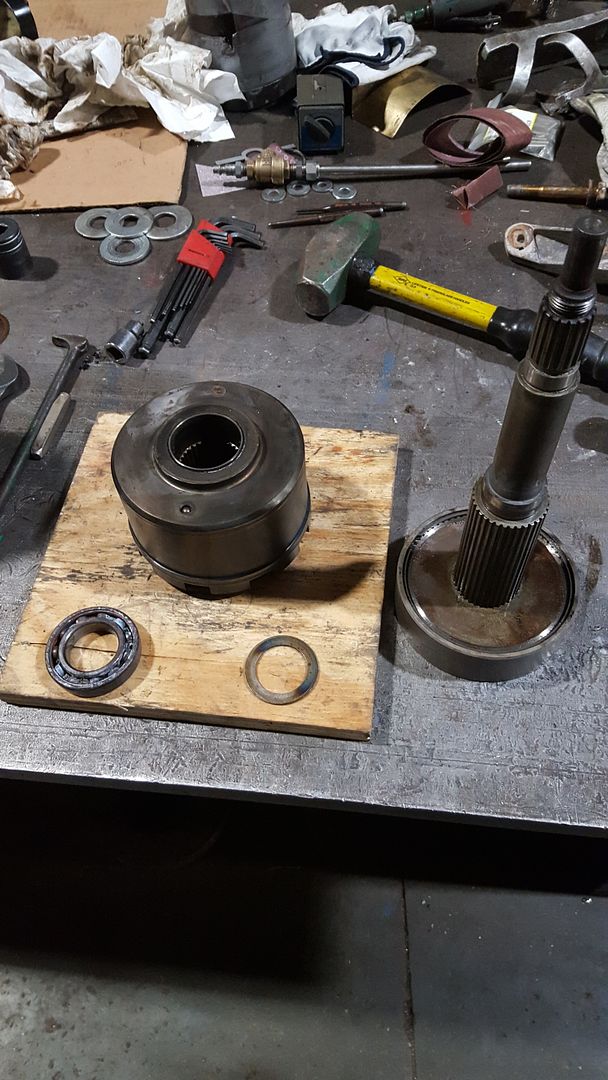
Everything should be disassembled by now, remove all of the bearings left in the casing or on the shafts, also remove all of the old shaft seals, be careful not to scratch the receiving bore. (I left the larger needle bearing in the input sprocket installed, couldn't source a new one)
-
Time for some inspection!
Take some time to clean all of the parts you will be reusing. Clean the casing inside and out, I pulled the breather and replaced it even.
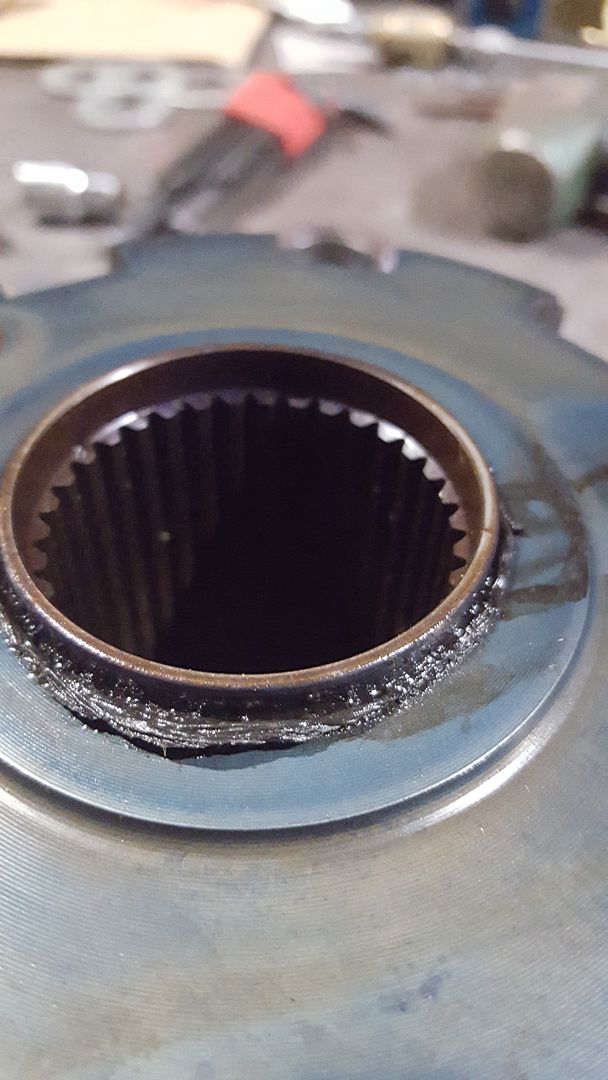
If your doing this its pretty safe to say your VC probably looks like this, o-rings blown out and nasty crap all over the inside of the t-case. Time to rebuild or source a replacement.
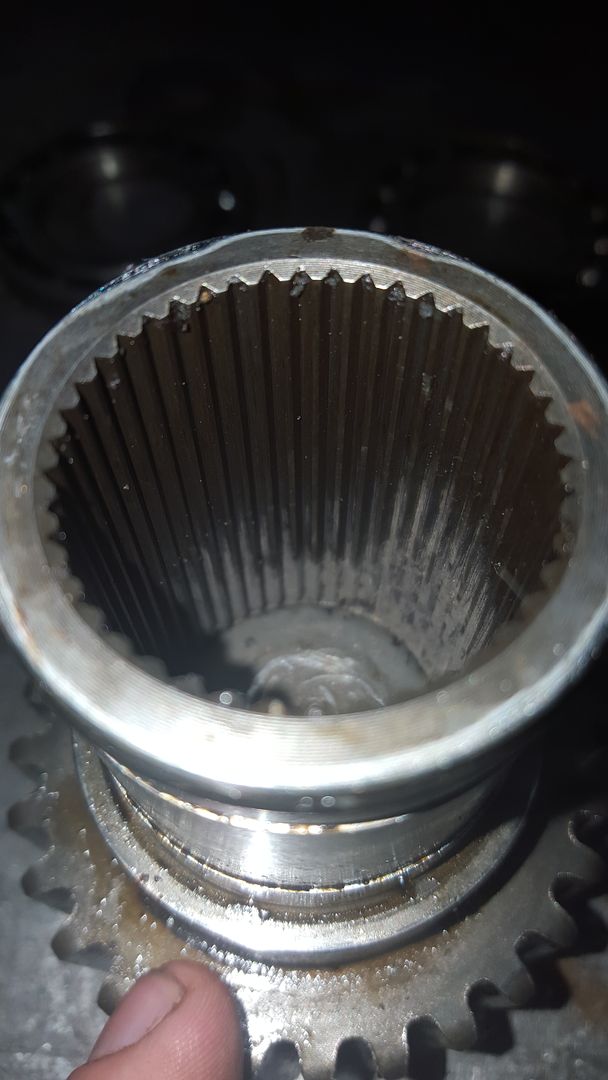
Hopefully you and your POs greased your front driveshaft splines like you should be doing. If your splines don't look like this its time to try and source a replacement :[
Check your chain for any excessive amounts of wear. Of the three I had to choose from, they all looked the same :dontknow: maybe I'm just lucky, maybe they're all junk. Maybe someone else can comment on what a junk chain looks like.
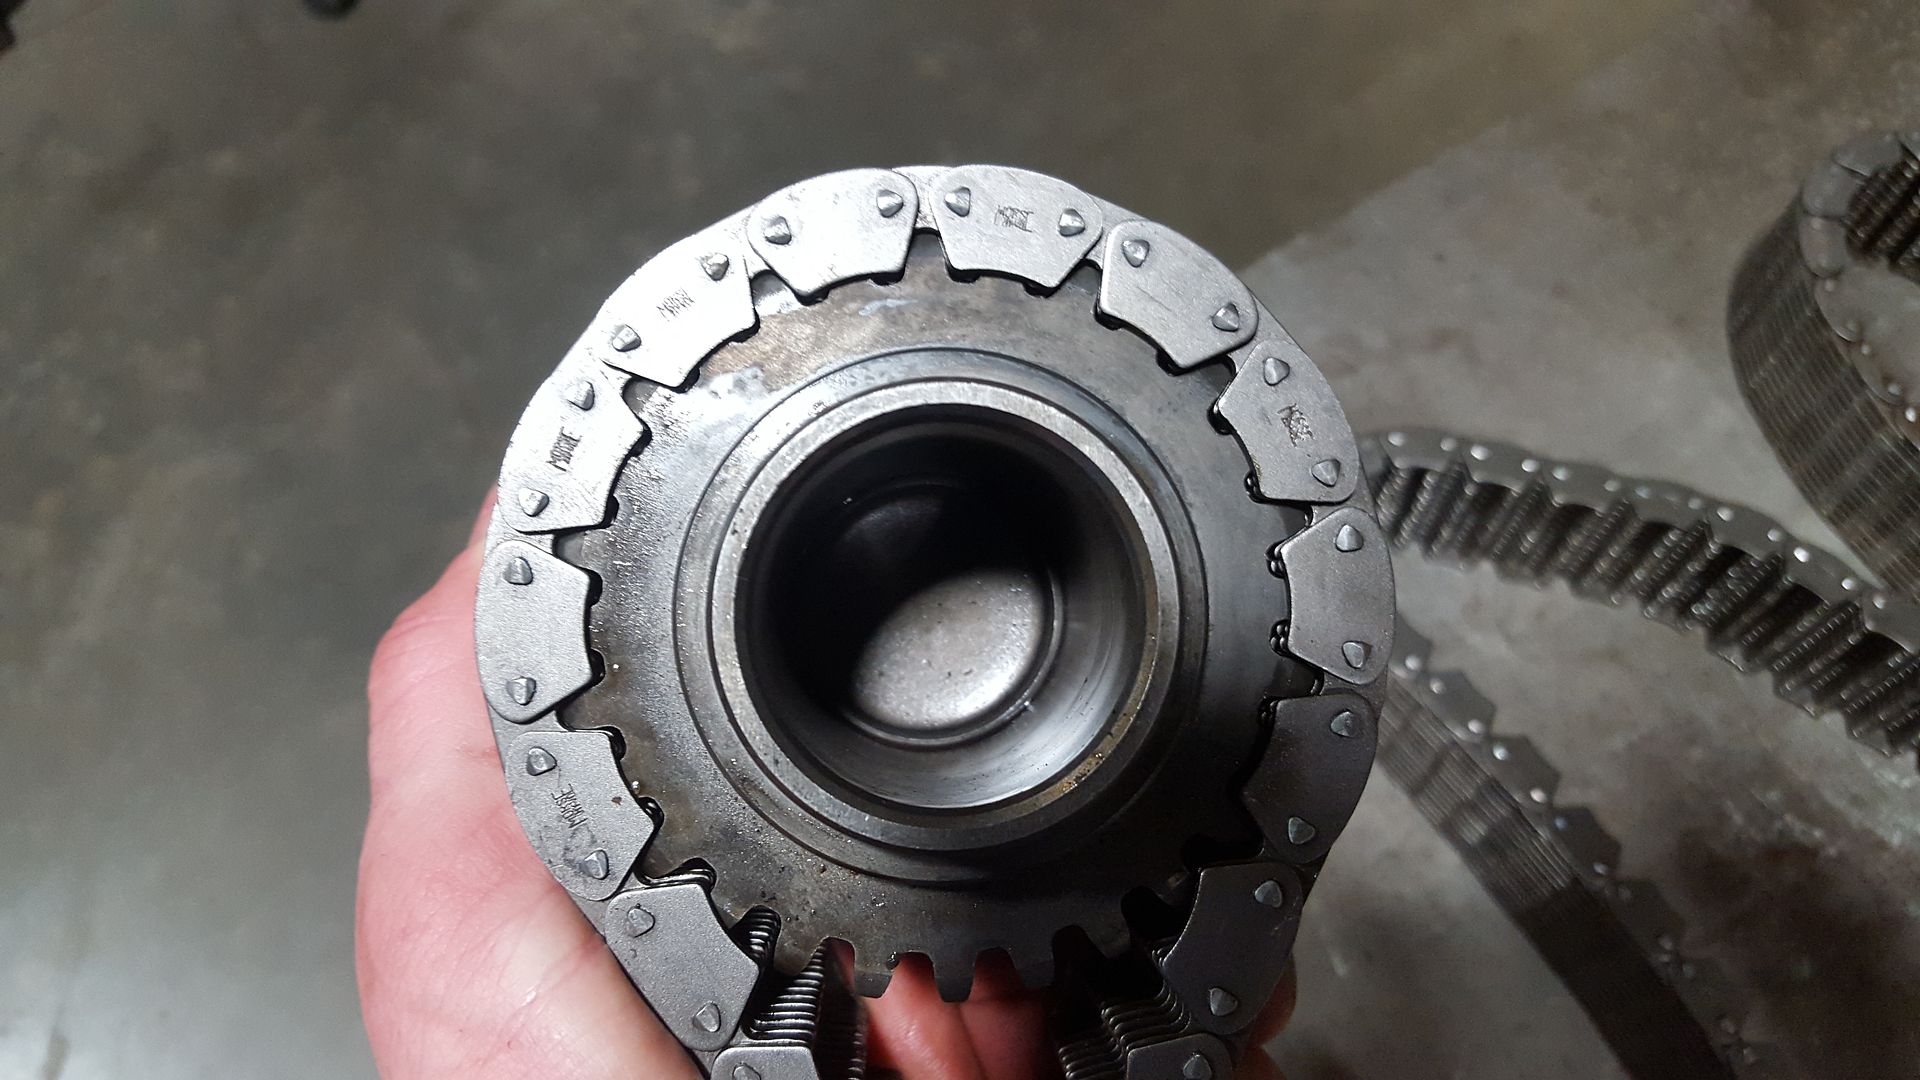
Check all of the sprockets, planetary gears, splines, and bearing fits for wear and damage. Replace as necessary.
-
Time for the reassembly!!
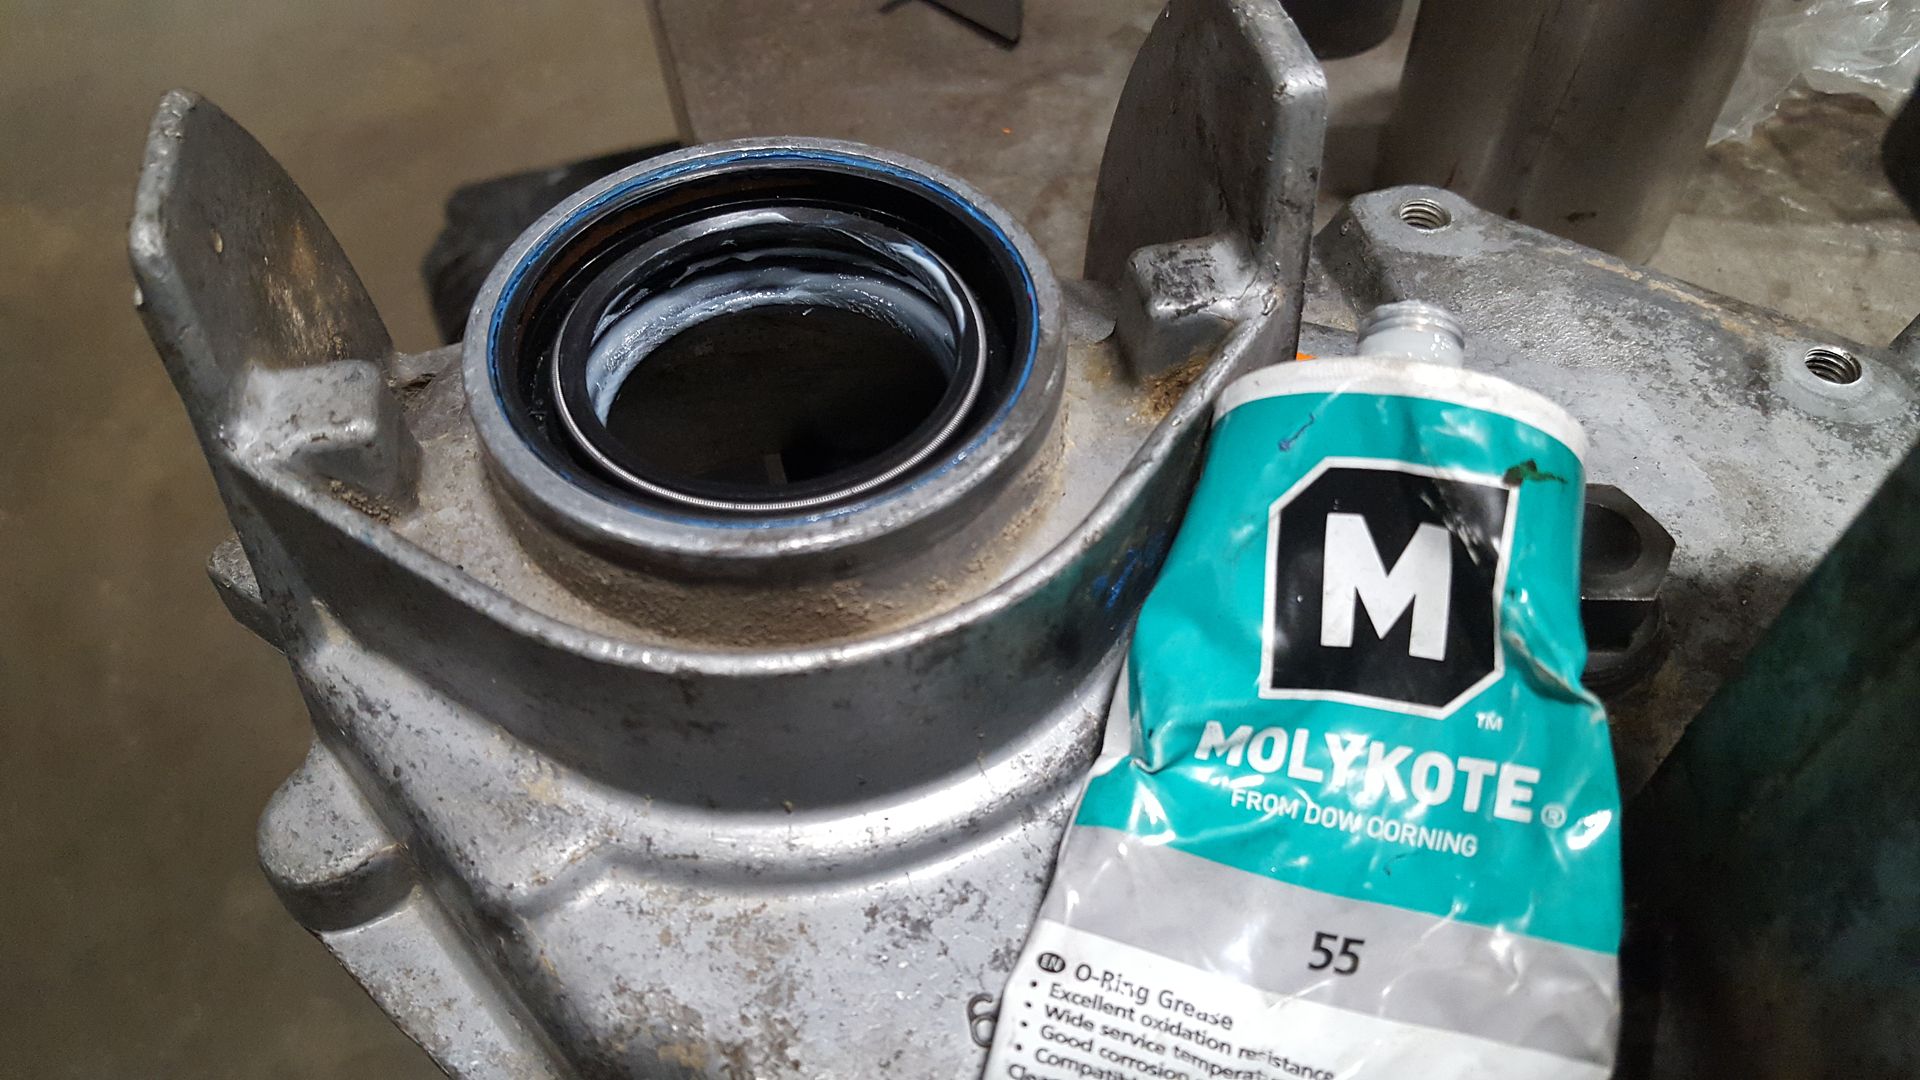
First things first, install the shaft seals into the front half of the casing. As I'm sure you noticed there are two seals installed face to face on the front output sprocket. It's kind of a pain in the a$$ to get the second seal, I think I found a socket or something with a slightly smaller diameter to knock it in with. Make sure they go in straight, and preferably on the first try! I like to lay a very thin coat of RTV in the receiving bore while installing the seals. The RTV lubricates the seal as it goes in and also helps fill any leak causing imperfections in the receiving bore, do as you wish. With both seals installed to the correct depth we can lubricate them with some o-ring grease.
Next we can install the input shaft and retaining ring. The shaft just slides right in and fits loose to the casing for now. Install the retaining ring to keep it from sliding back out.
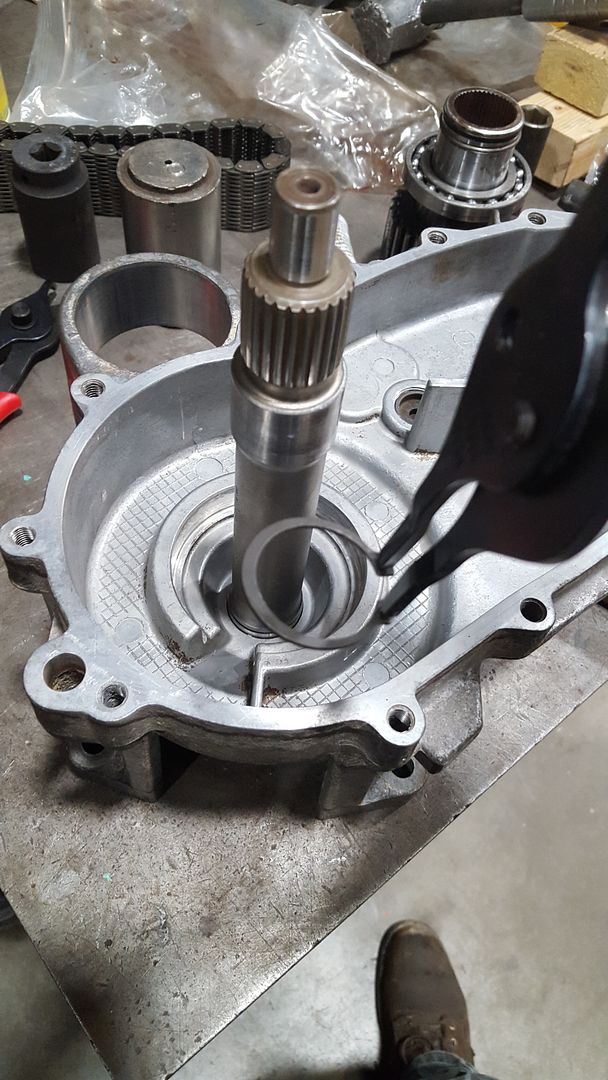
Next we can install the new bearing for the front output sprocket. Find something with a slightly smaller diameter and knock the bearing into place. Make sure it starts in straight.
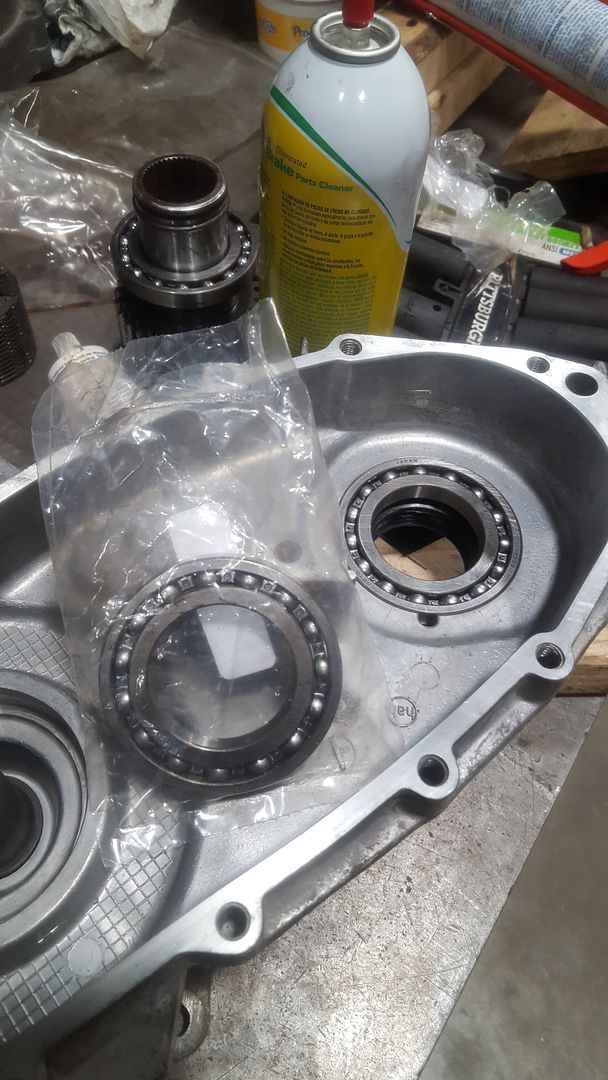
Install the new bearing for the input sprocket, same method as above.
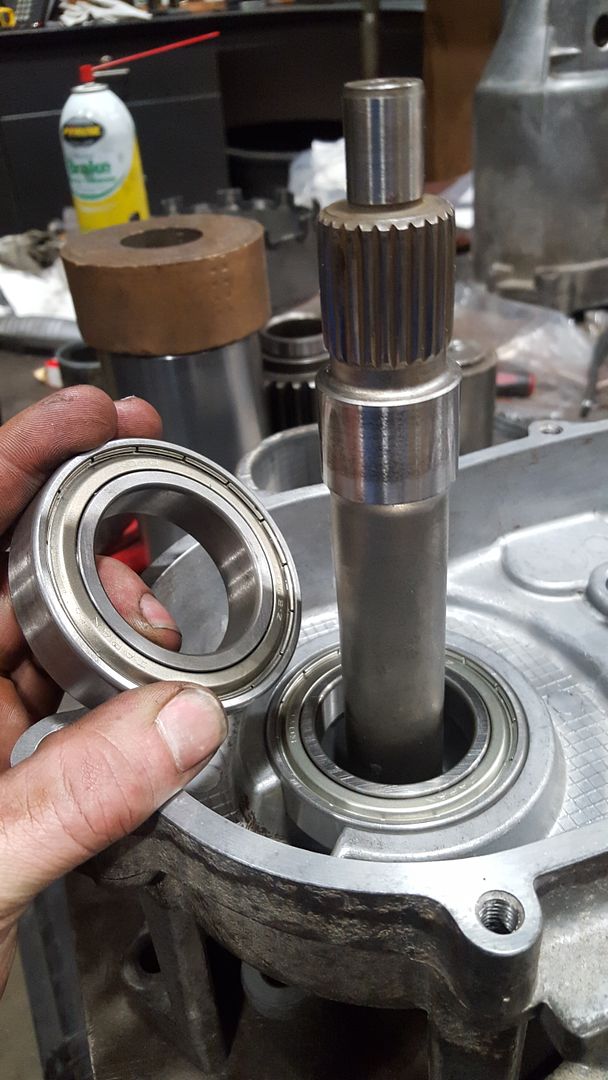
Now comes the tricky part, installing the input sprocket, chain, and front output sprocket. You have to first slide on the input sprocket onto the input shaft, with the chain on and front output sprocket loose in the chain. Then the sprockets need to be seated into the bearings at the same time. This is a pain in the a$$ because you have to get the front output sprocket through the two seals without it getting caught and damaging a seal. After my first failed attempt, I actually put some packing tape over the grooves to keep them from catching the seals.
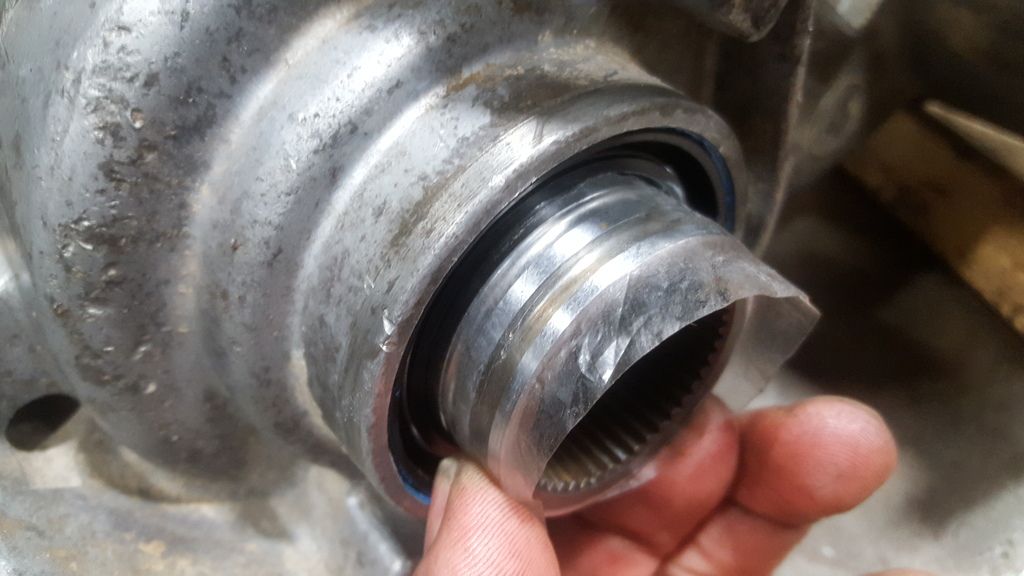
When you get everything started and looking good you can seat the sprockets into the bearings with a dead blow hammer. Now you can also install the planetary gears.
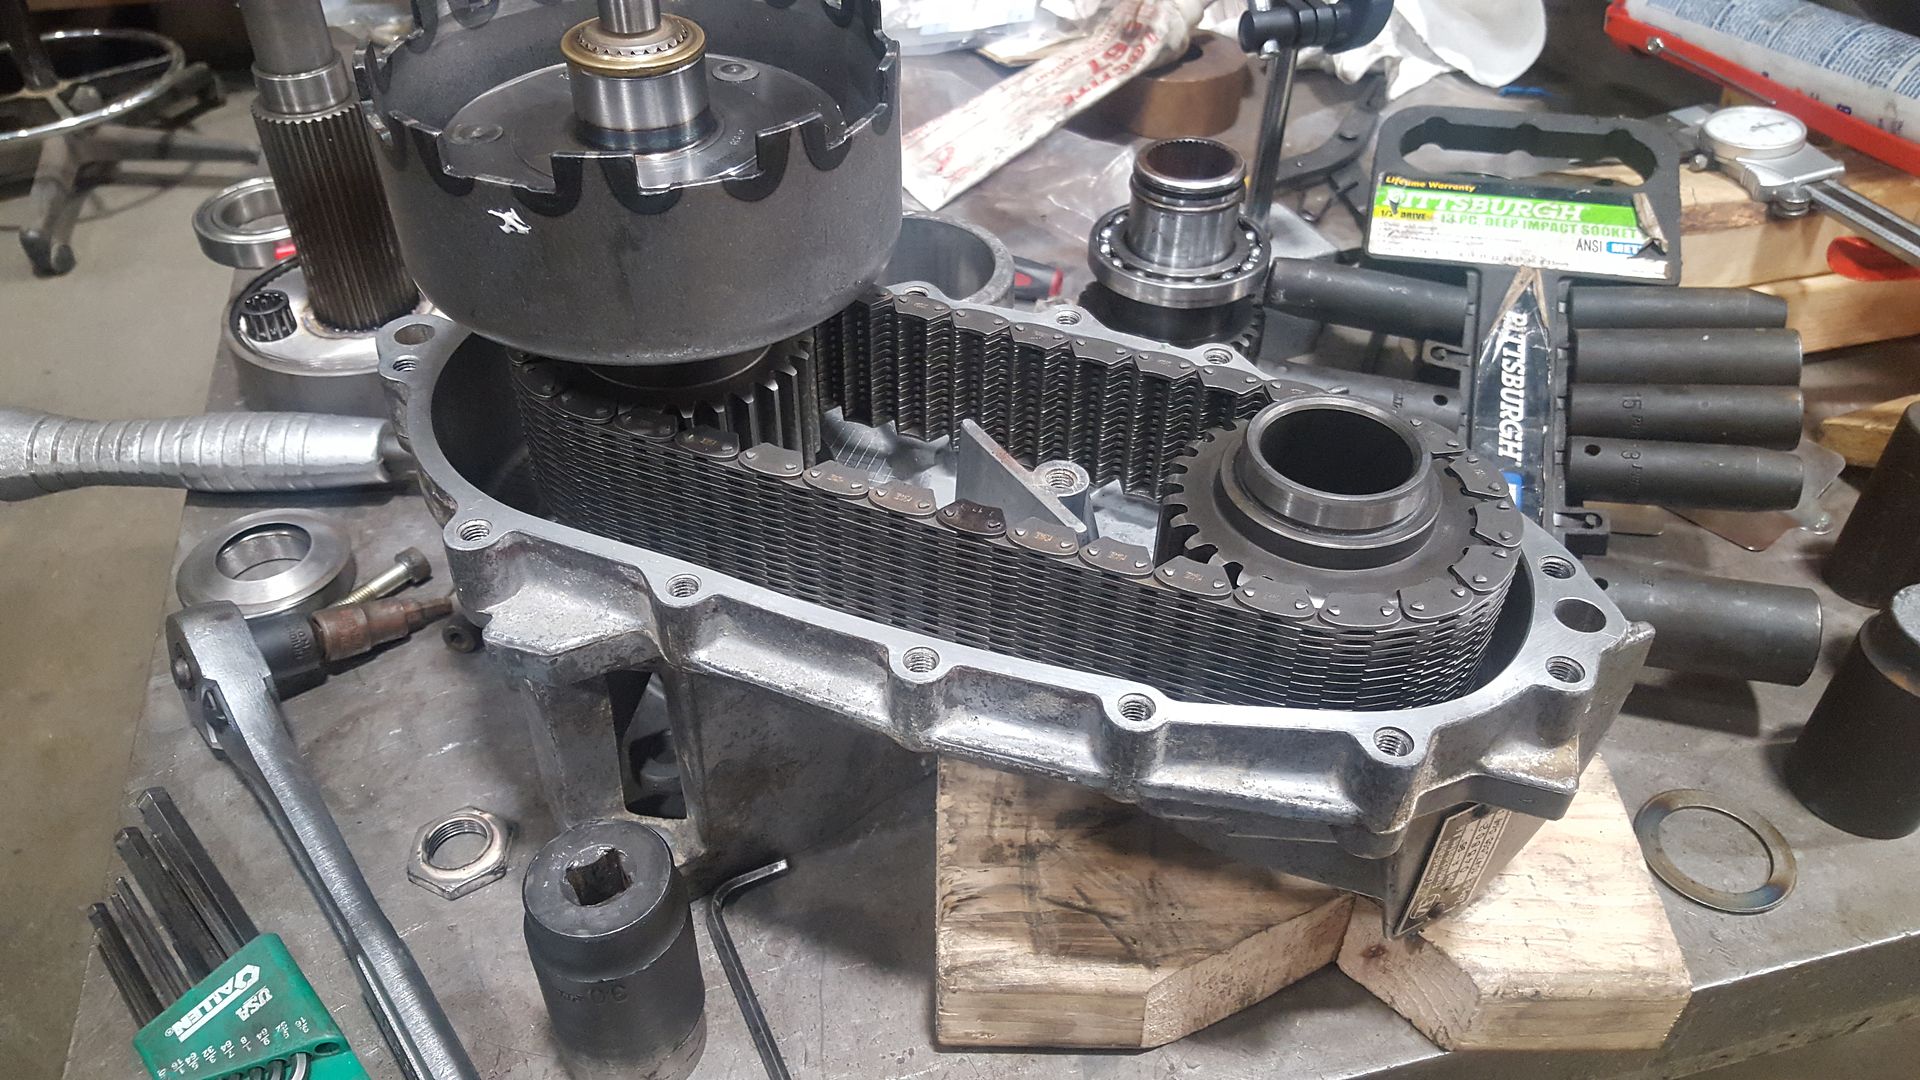
You can also install the little brass or bronze crush ring. I think this little guy just keeps input and rear output shafts from being sloppy in the casing, crushing as needed to fill up the space. They are NLA from BMW so I was forced to reuse.
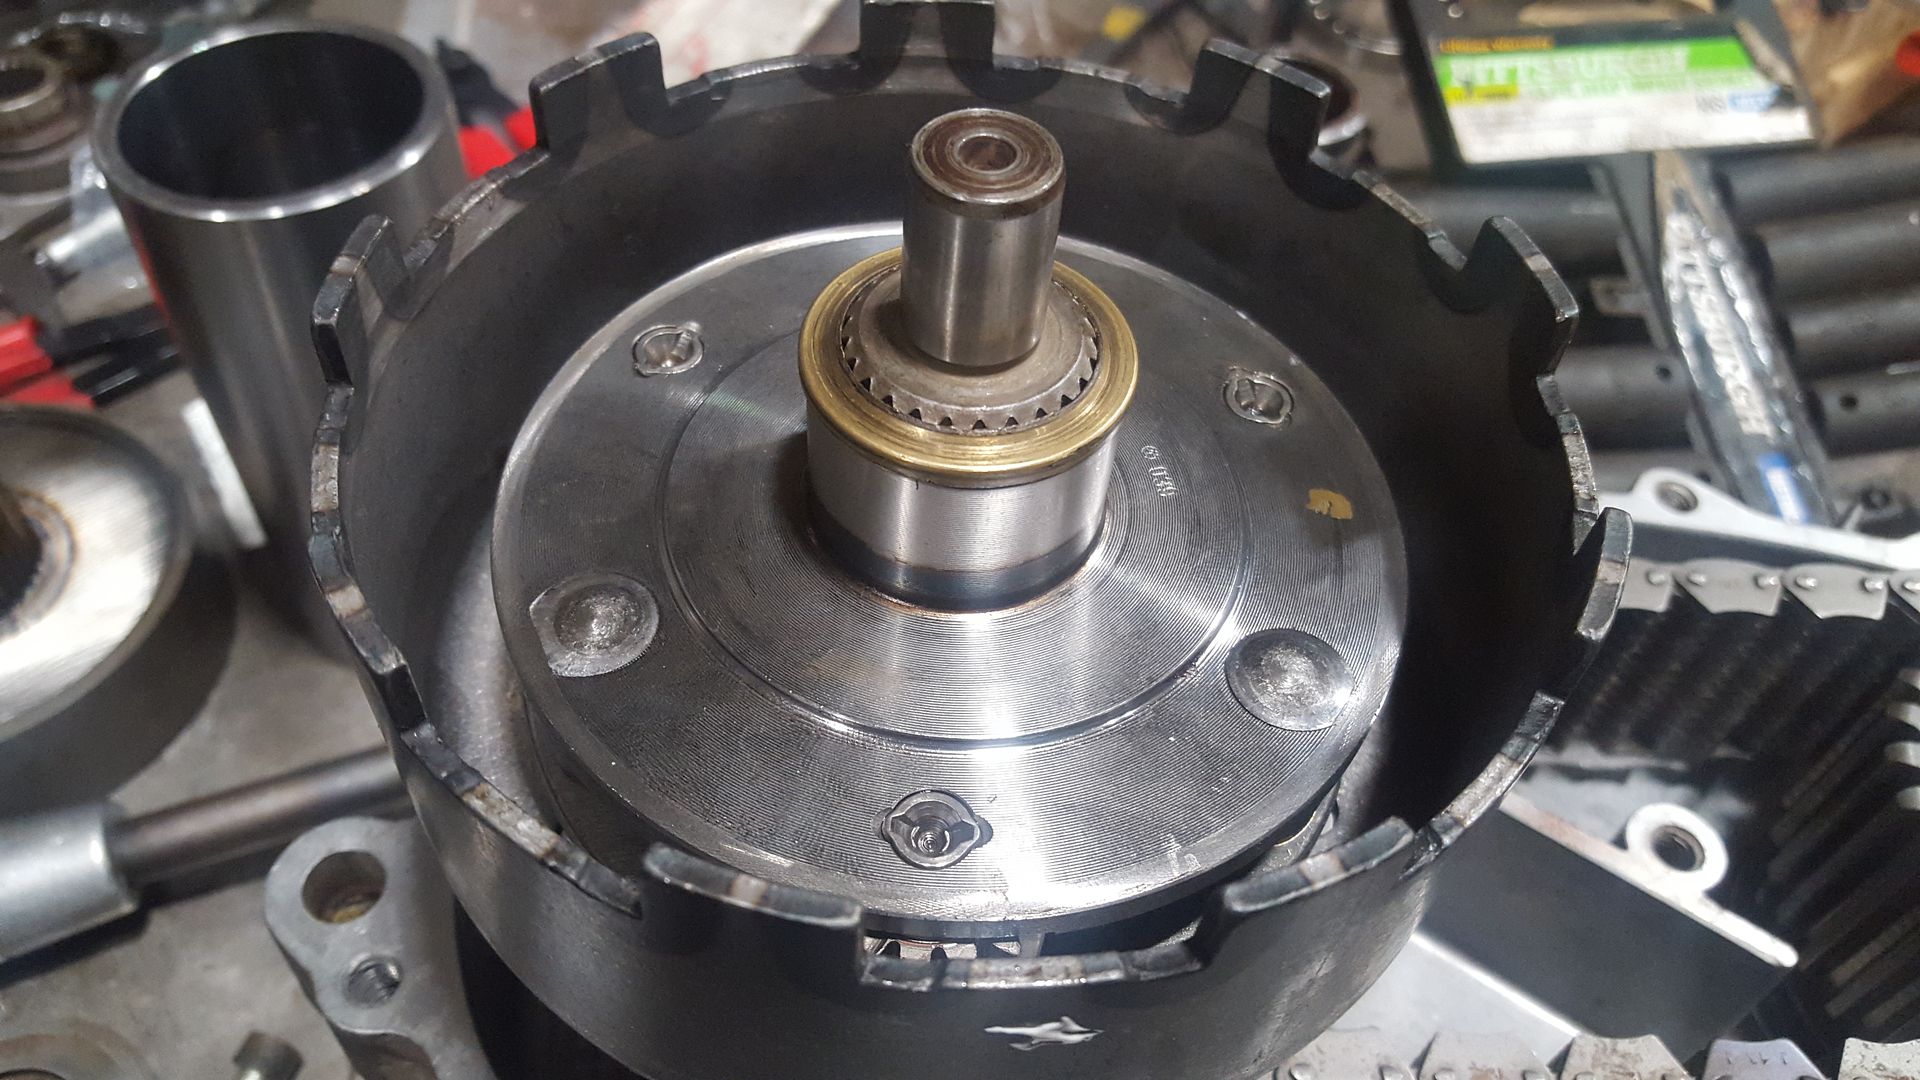
Now you can install the rear output shaft and your replacement or rebuilt VC onto the input sprocket. The gasket can also be set into place. When you order a t-case gasket from BMW it doesn't come with a gasket for the center hole. I just made one out of 0.015" gasket paper. I stuck a round file in the bolt hole to keep the gasket centered with installing the rear casing.
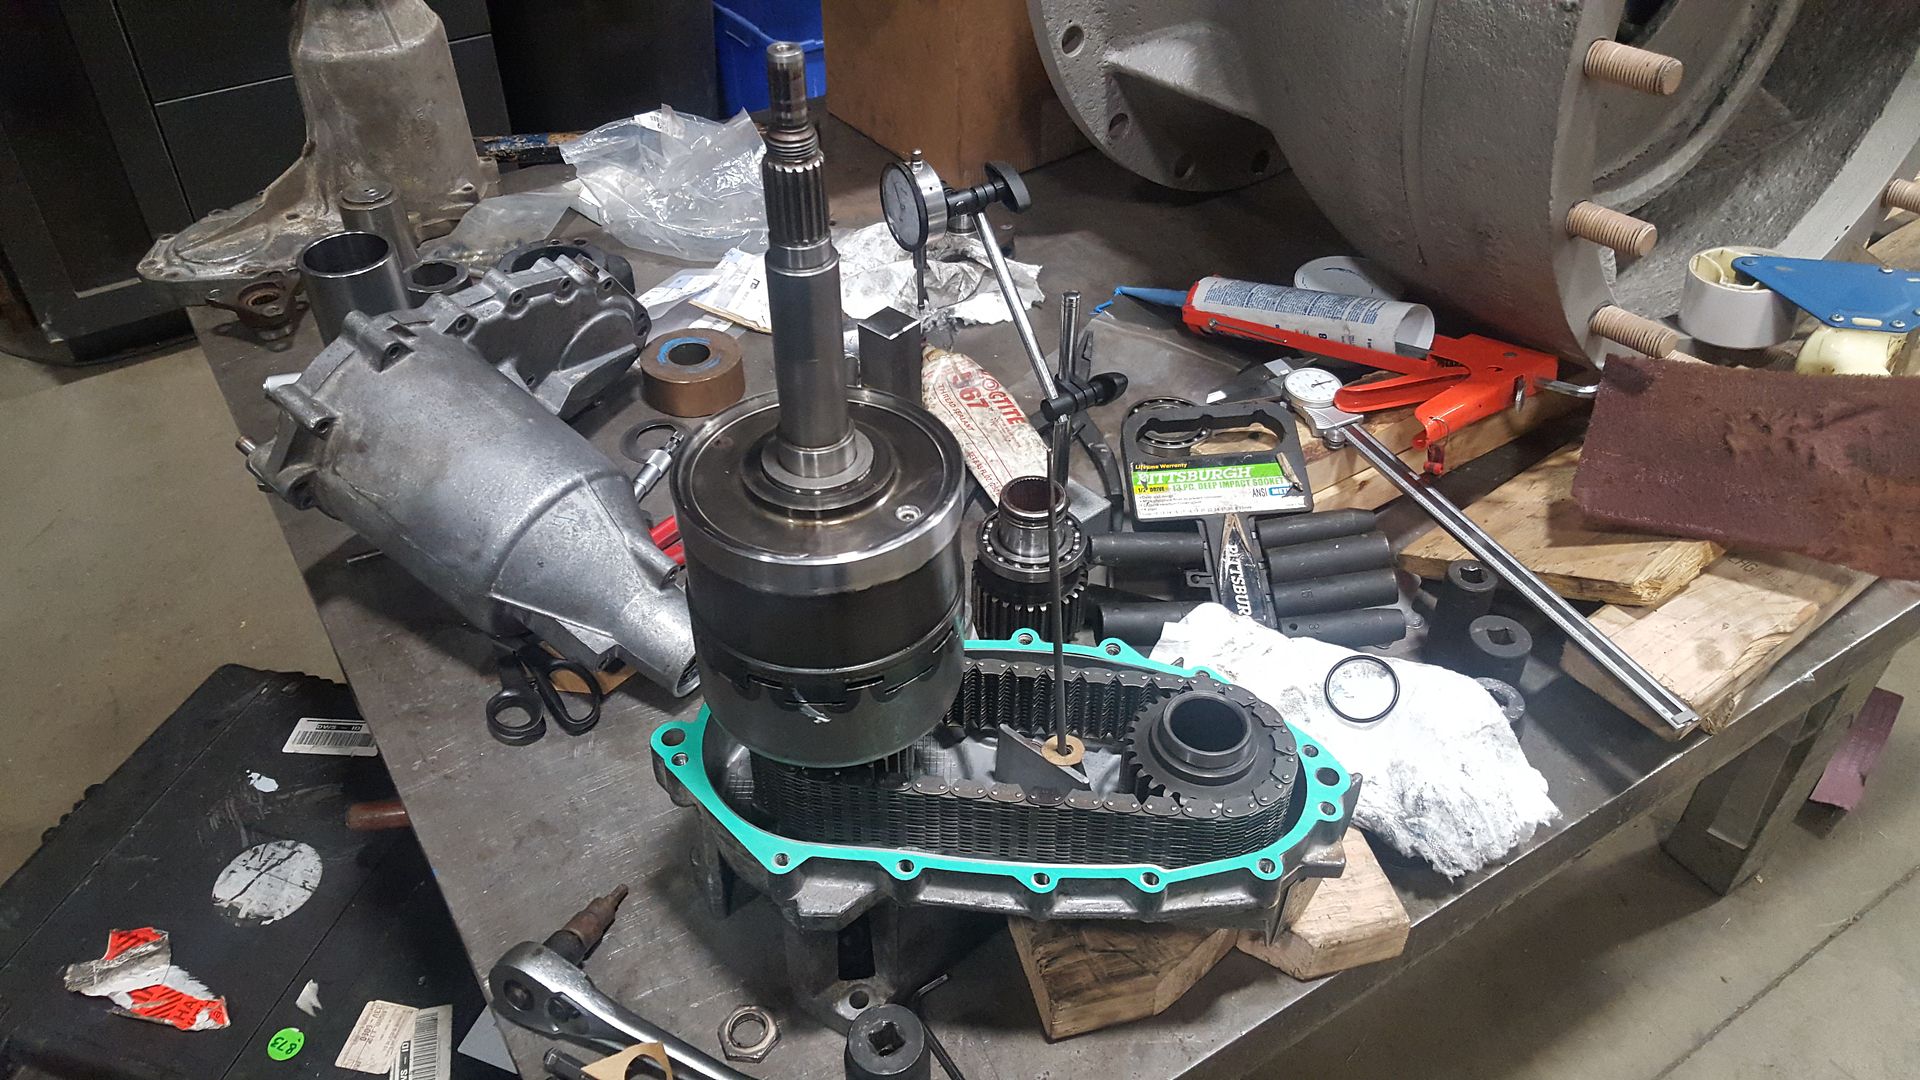
At this point apparently it was getting late and I stopped taking pictures, but its really pretty much done. The bearing shim, bearing, and shield thing can be installed on the rear output shaft, on top of the VC. Now we can install the new bearings for the front output sprocket and the end of the rear output shaft into the rear half of the casing. With the bearings installed the rear half can be installed. It may take a few tries to get the bearing and shield thing to align properly with the receiving bore but you'll get it eventually. Then all you have to do is torque the 6mm SHCS, install the rear output flange w/sealant on the splines, and torque the rear output nut.
Cheers!
-
As for the car I'm still working on the body. I rented a bigger garage to work in and bought a welder. I've been cutting out a lot of cancer and getting ready for new sheet metal.
The go fast parts have been coming in also
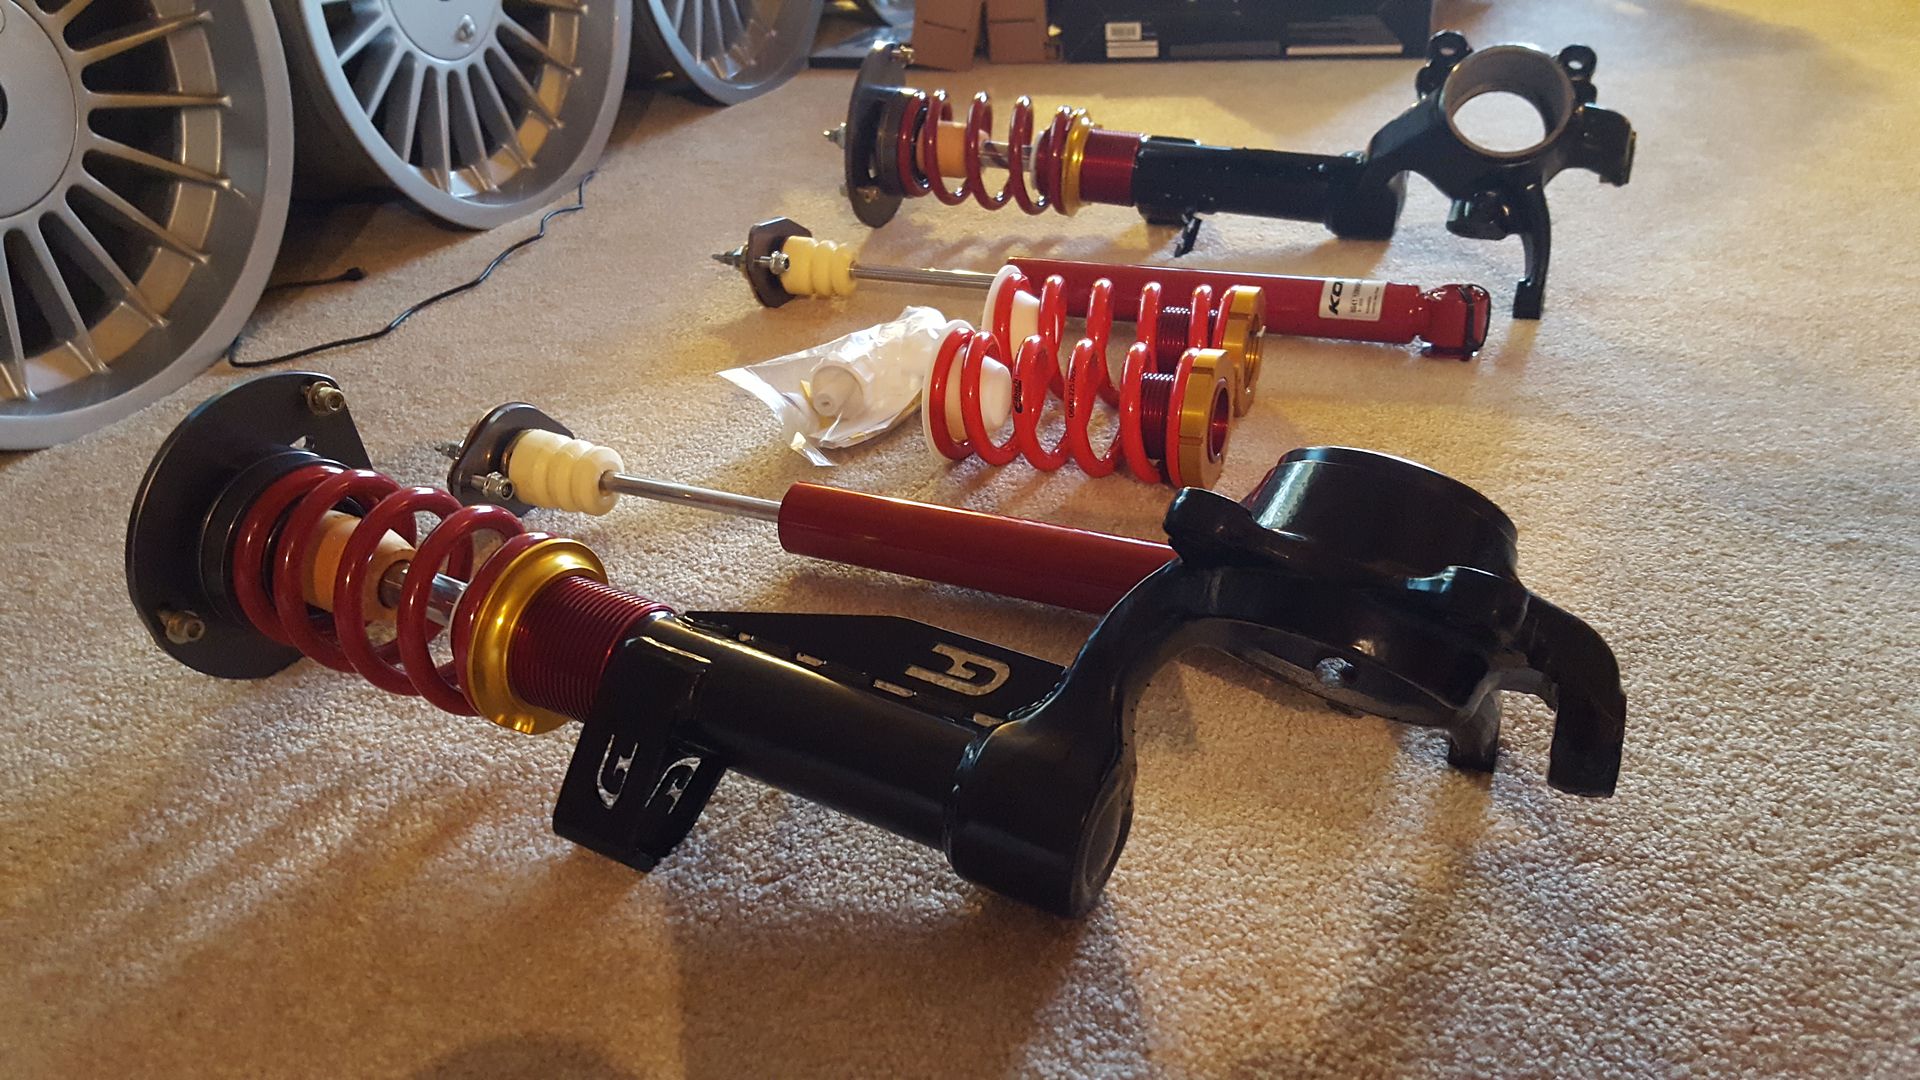
-
nice writeup on the t-case rebuilt. I had no idea they were chain driven!
also, i spy alpina goodness.
Dan

-
nice writeup on the t-case rebuilt. I had no idea they were chain driven!
also, i spy alpina goodness.
Thanks!
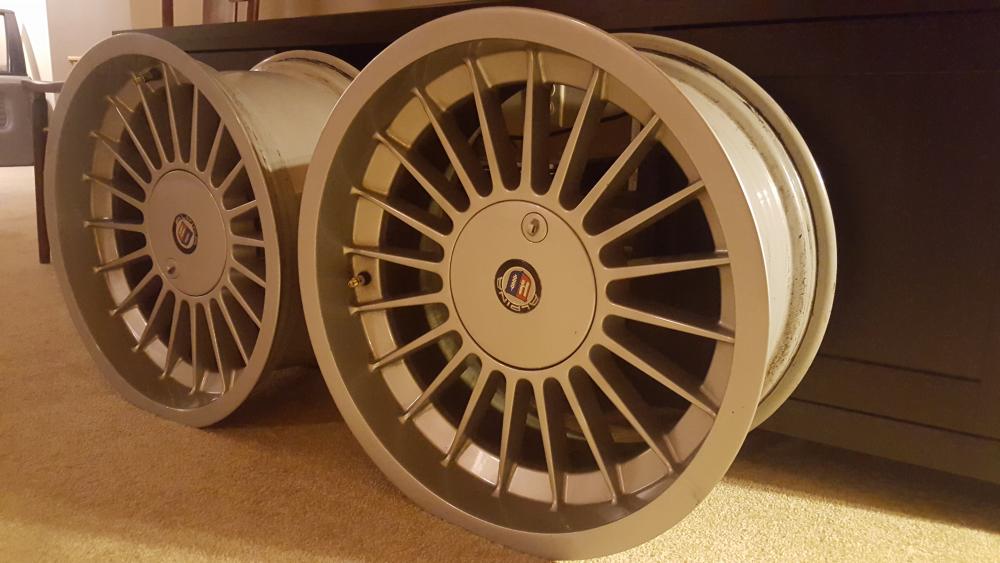
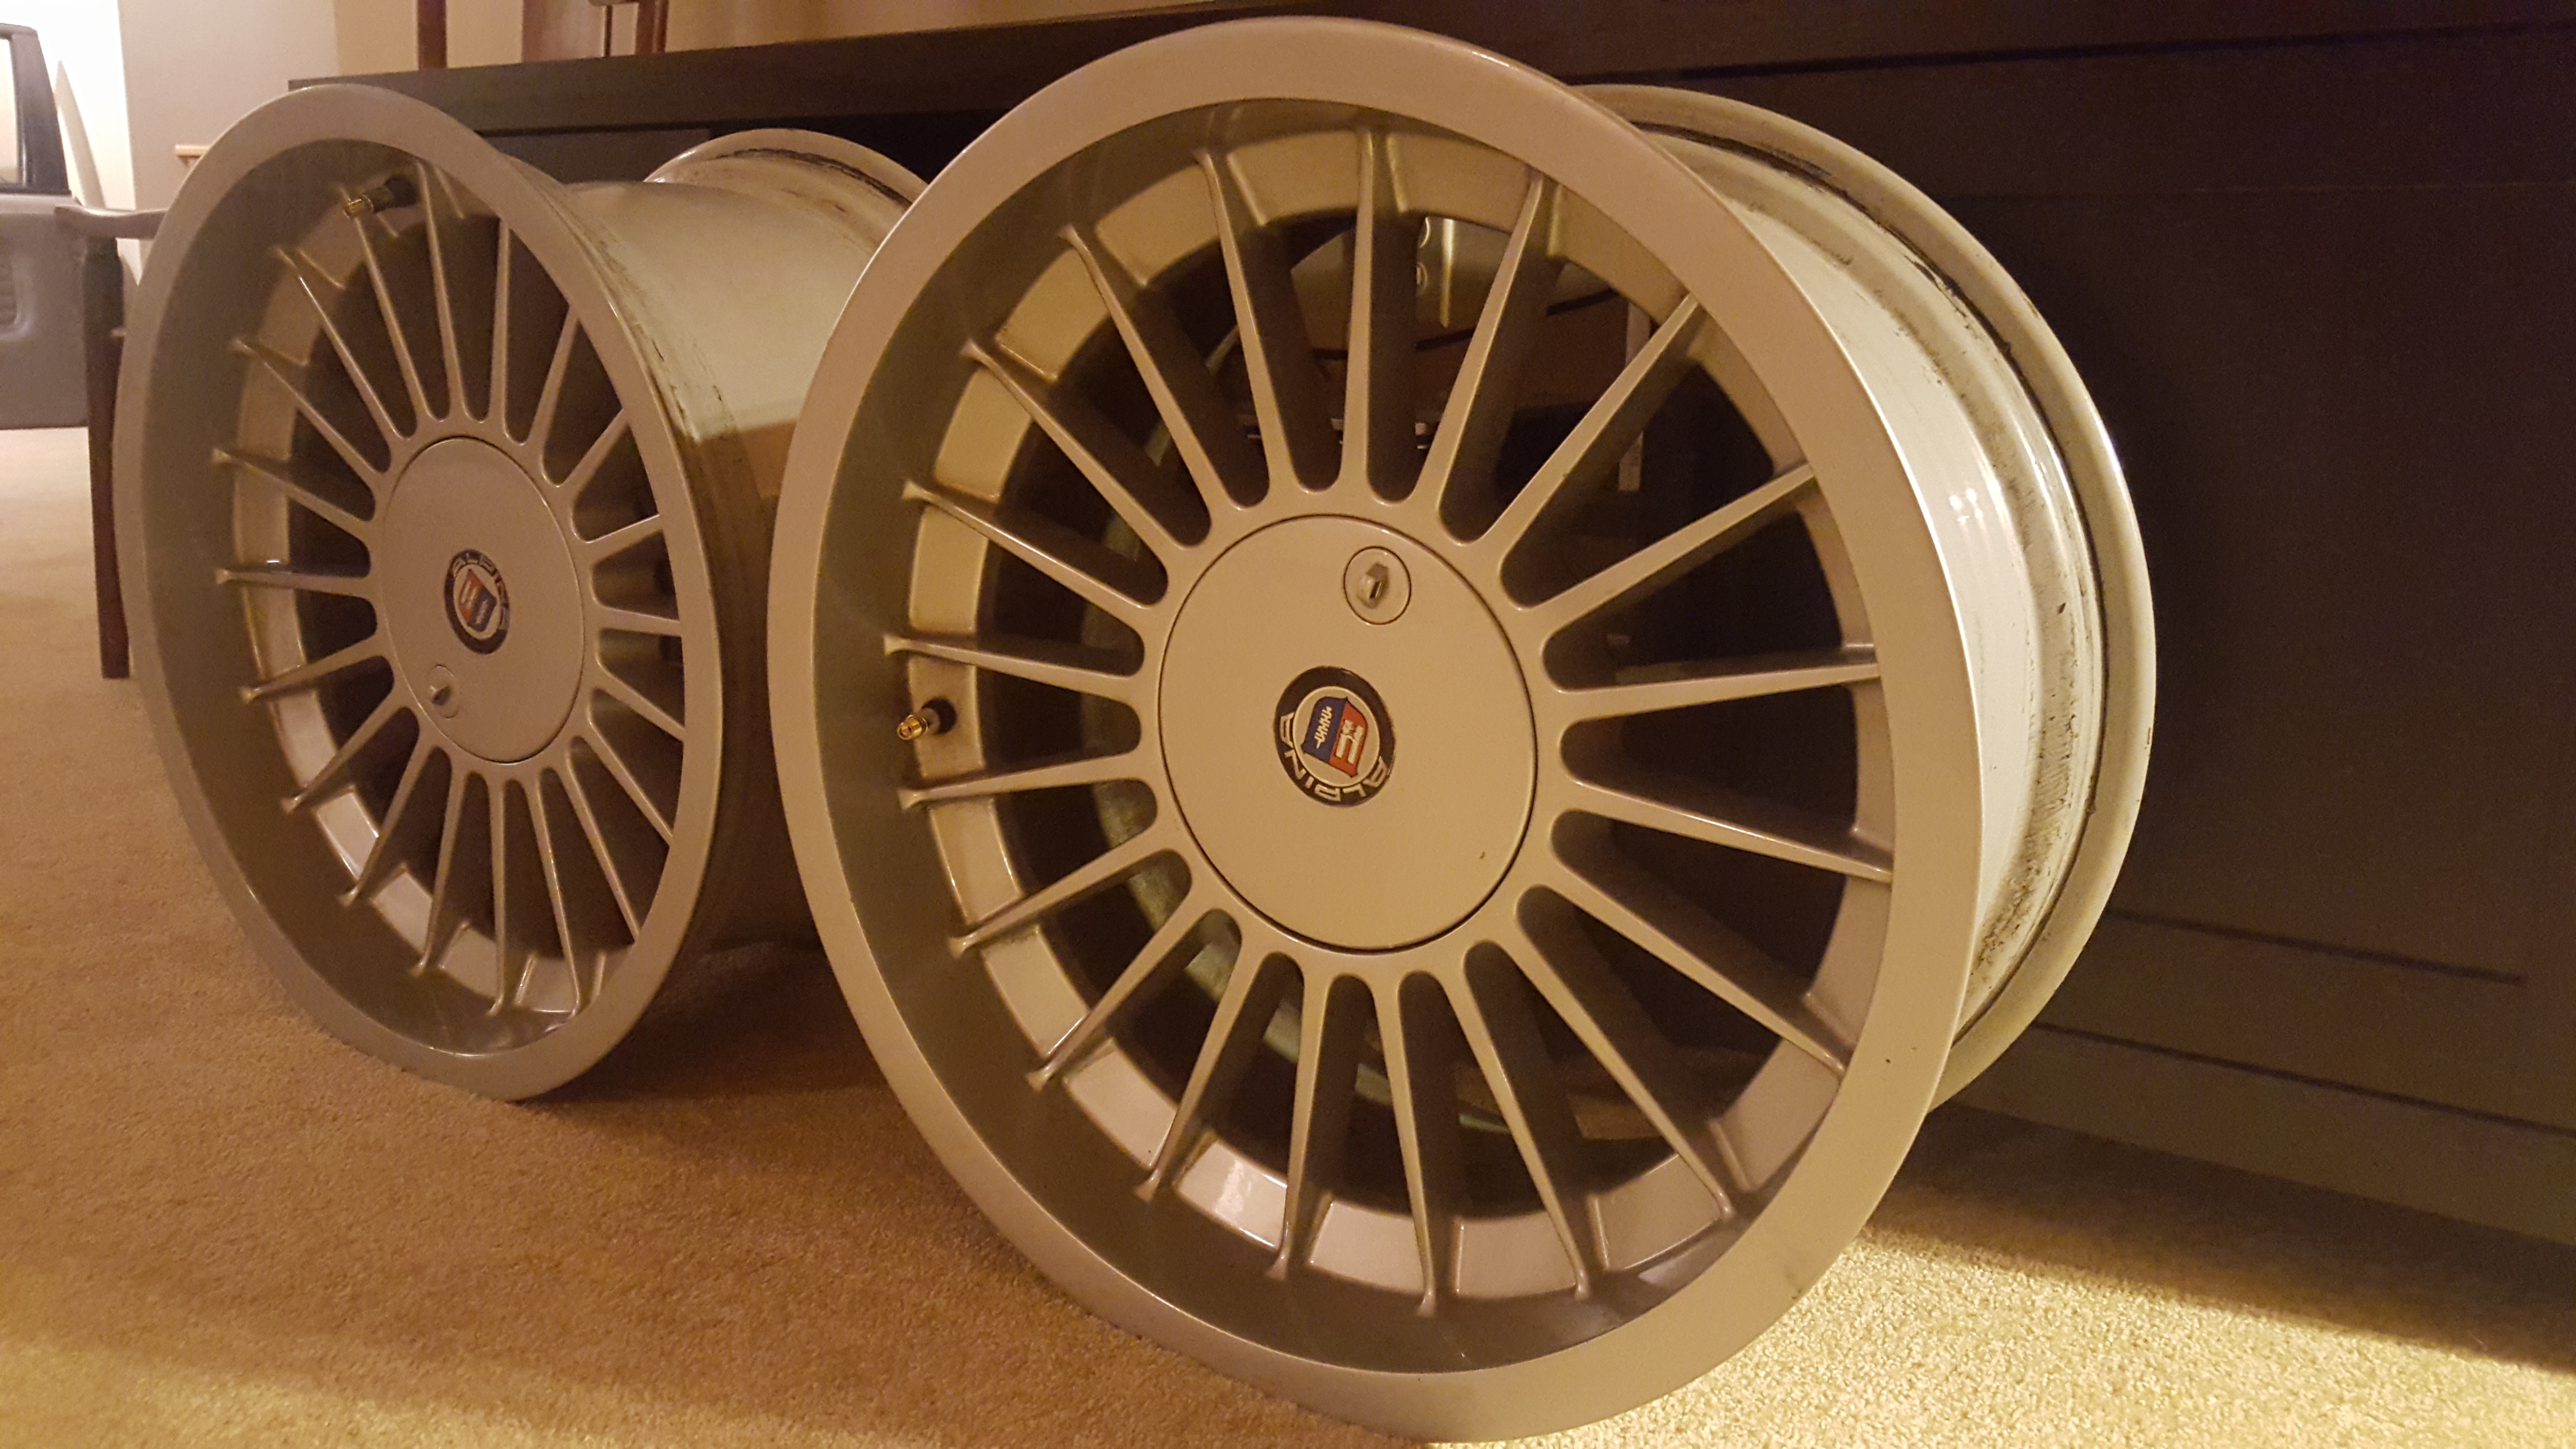
Yep! Special ones too! 17x8.5 front 17x9.5 rear from an e34 b10 biturbo.
-
will your 5x120 hub modifications let you run low offset wheels, or do you have fender mods in mind?
Dan
-
will your 5x120 hub modifications let you run low offset wheels, or do you have fender mods in mind?
The 135i hubs in the front are actually going to hurt me to the tune of 10mm. The z4 hubs in the rear are about 2.5mm wider than stock, but the rear wont be an issue. I do have some fender mods in the works, as Earl eluded to lol. Even then I think it might be a squeeze up front. I might have to pull a few tricks out of my a$$ but it'll fit!
When I finally get some time away from work I'll get the bearing and hubs pressed in. Then I can do some test fitting :]
-
Is the 135 front hub/bearing a bolt on unit? Or are you also working some magic with that?
Does it widen the track by 10mm, or reduce it by 10mm? -
Yep! The 1 series uses the same wheel bearing in the rear as an e30, and the ix uses the same bearing in the front as in the rear. BMW is kind of dumb though, the front and rear wheel bearings have different oem part numbers yet the FAG/SKF part number is the same, idk why the different OEM p/ns.
There are two different 1er hubs, one with a larger offset than the other, I have the shorter hubs. They have a 10mm/side wider track than a stock ix front hub. The wider track kind of sucks because fender clearance is already an issue for a stock ix, always have to run high offset wheels. I guess this is the best I can do without machining my own hubs. I'm kind of scared to test fit my wheels lol.
-
Drove the Tail of the Dragon today. It was pretty fun. Can say the Buick Regal RS I had for a rental car handled better than expected lol. Should be big time lolz to see the pictures once they post them.








Hello! It looks like you're interested in this conversation, but you don't have an account yet.
Getting fed up of having to scroll through the same posts each visit? When you register for an account, you'll always come back to exactly where you were before, and choose to be notified of new replies (either via email, or push notification). You'll also be able to save bookmarks and upvote posts to show your appreciation to other community members.
With your input, this post could be even better 💗
Register Login