
Skip to content
  • Categories
  • Recent
  • Tags
  • Popular
  • Users
  • Groups
Skins
  • Light
  • Brite
  • Cerulean
  • Cosmo
  • Flatly
  • Journal
  • Litera
  • Lumen
  • Lux
  • Materia
  • Minty
  • Morph
  • Pulse
  • Sandstone
  • Simplex
  • Sketchy
  • Spacelab
  • United
  • Yeti
  • Zephyr
  • Dark
  • Cyborg
  • Darkly
  • Quartz
  • Slate
  • Solar
  • Superhero
  • Vapor

  • Default (No Skin)
  • No Skin
Collapse
WIBIMMERS logo

WIBIMMERS

  1. Home
  2. General Discussion
  3. Members BMWs
  4. E46 Things

E46 Things

Scheduled Pinned Locked Moved Members BMWs
359 Posts 23 Posters 0 Views 1 Watching
  • Oldest to Newest
  • Newest to Oldest
  • Most Votes
Reply
  • Reply as topic
Log in to reply
This topic has been deleted. Only users with topic management privileges can see it.
  • YoungCRY
    YoungCRY
    YoungCR
    wrote on last edited by
    #209

    Is there a typical mileage they fail or just an age thing?

    Chris Young
    BMWCCA #458972
    1986 528e/5  | 1994 530i/5 | 1995 540i/6 | 2013 X5 35d | 1998 C1500 Suburban | 1995 K2500 Suburban

    1 Reply Last reply
    0
    • B
      B
      B C
      wrote on last edited by
      #210

      The internet is full of forum posts of people with vanos hub failures, cam bolt failures, and rod bearing failures on engines with as low as ~36k miles as well as original engines over 100k without an issue.

      General rule of thumb is to consider replacing rod bearings at 100k or sooner depending on use. Cam bolts are good once replaced, loctite applied, and  torqued correctly. VANOS  seals deteriorate fairly often. I hear that performance improvements can be felt in replacement where the seals were only a few years old.

      I feel fortunate that this car is a 2005 as it seems to help the odds with some of the issues a bit. Unfortunately these S54 issues last well into the final years of Z4M production and the bulletproofing onky happens in the aftermarket world. That said, plenty of important improvements have been made after 2003.5 including the oil pump pickup screen (known to fatigue and cause oil starvation) as well as rod bearing and rod bolt diameter changes (11mm to 10mm) and bearing clearance changes.

      1 Reply Last reply
      2
      • B
        B
        B C
        wrote on last edited by
        #211

        The “VANOS lockdown” has begun!

        To-do:

        -Replace problematic cam bolts with upgraded bolts + oil resistant loctite

        -Replace VANOS seals with new/improved Viton seals

        -Re-drill oil pump disk with smaller holes to prevent exhaust hub tab breakage

        -Install anti-rattle kit with new diaphragm springs

        -Install upgraded Nylatron upper timing chain guide 

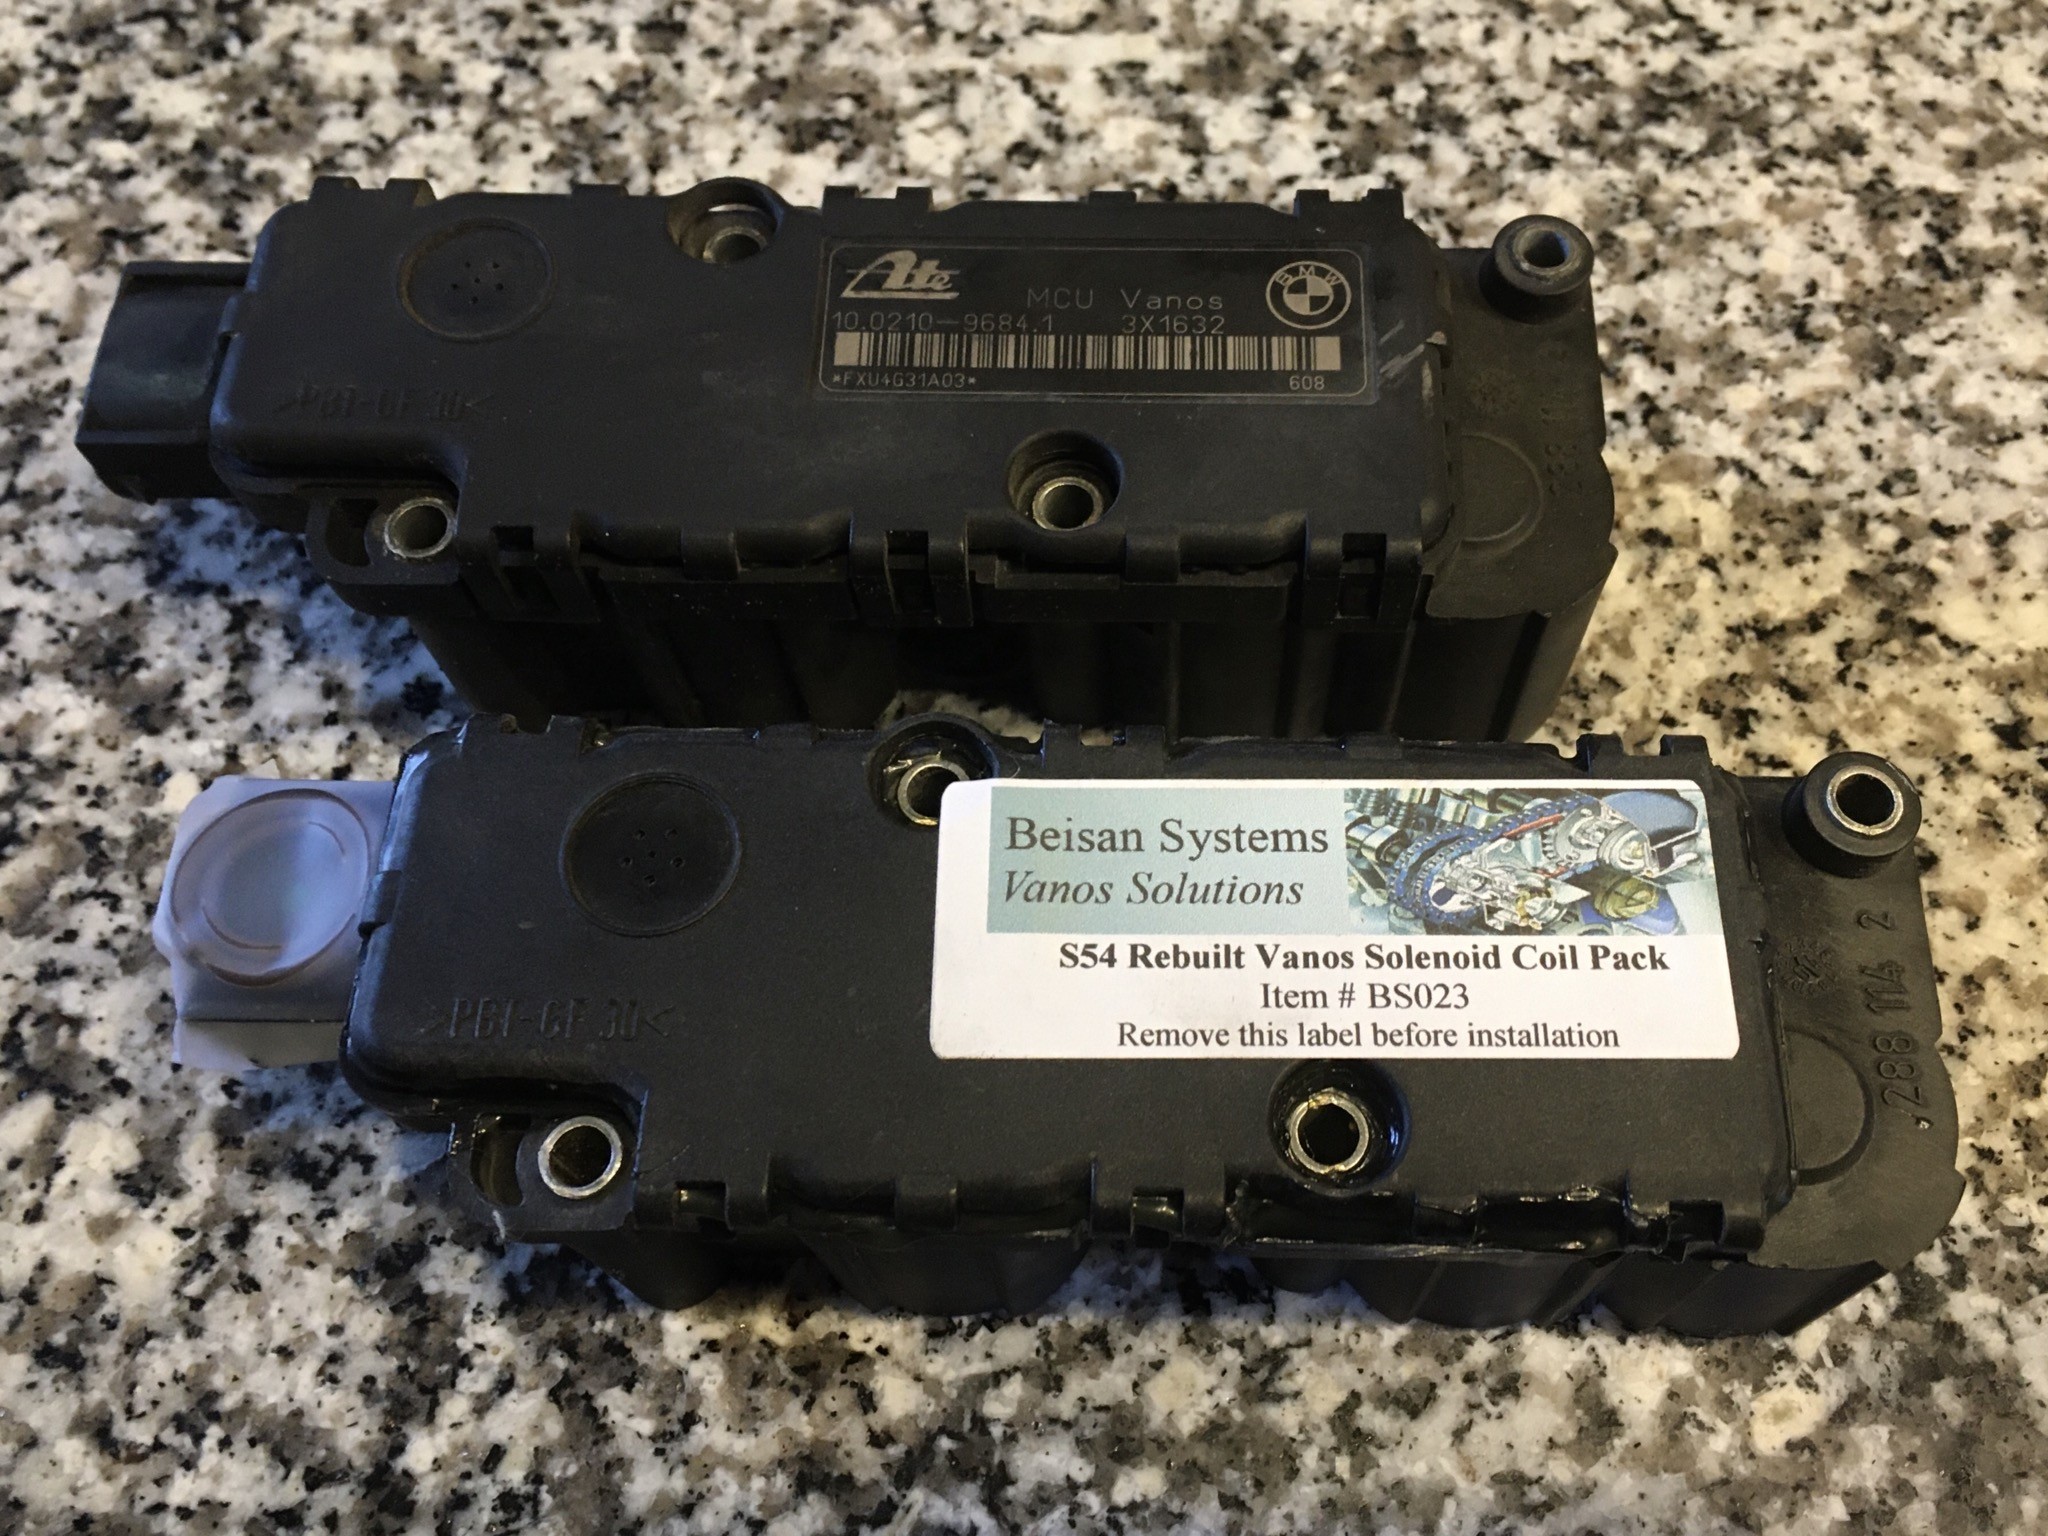
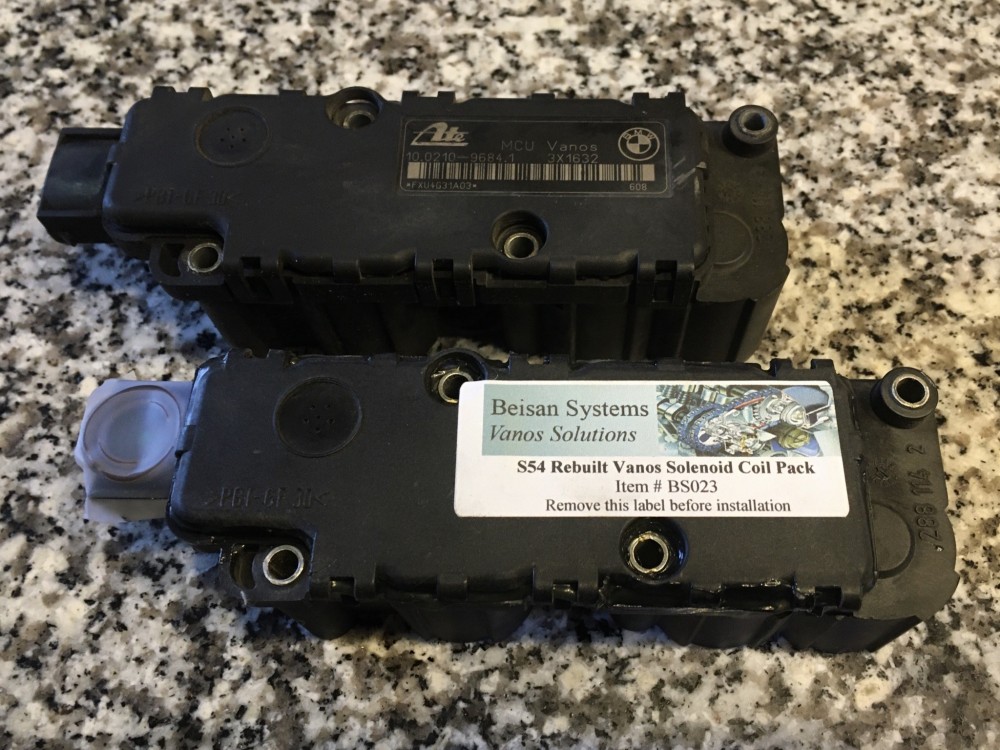
        -Replace VANOS solenoid with rebuilt Beisan Systems unit (incorporates a few preventative fixes to eliminate failures)

        I received most of the parts for this project today including the cam timing tools, crank  lock pin and valve adjustment shims. I forgot a couple small items but I am in no hurry.

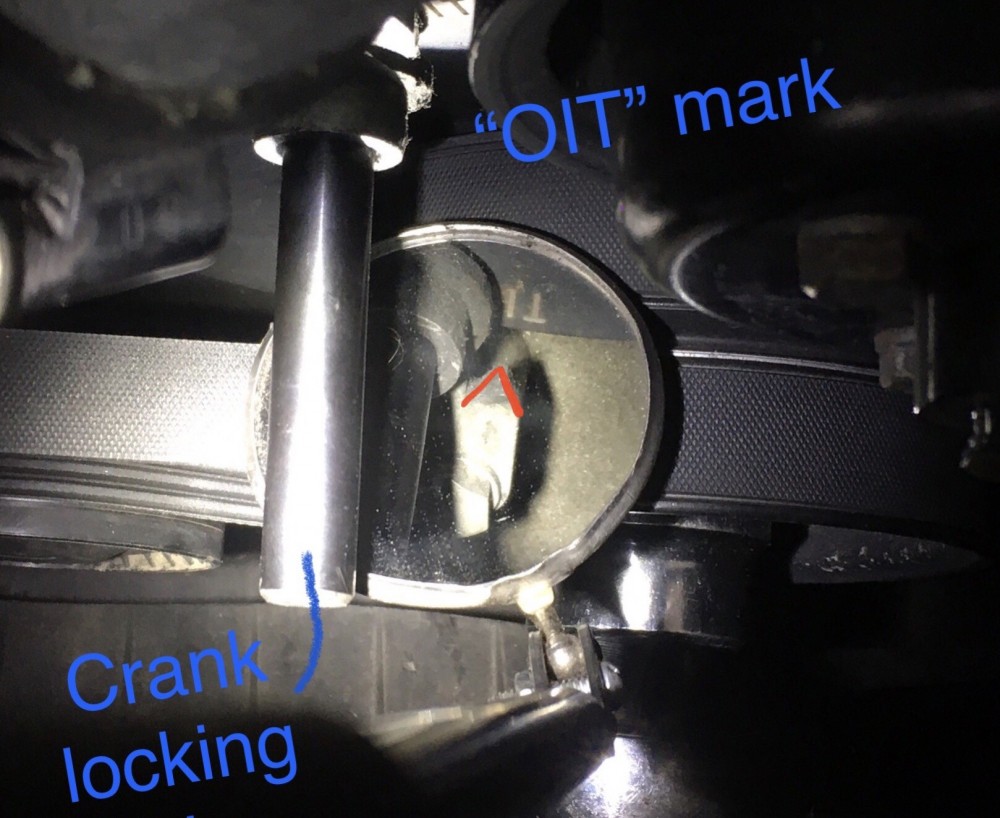
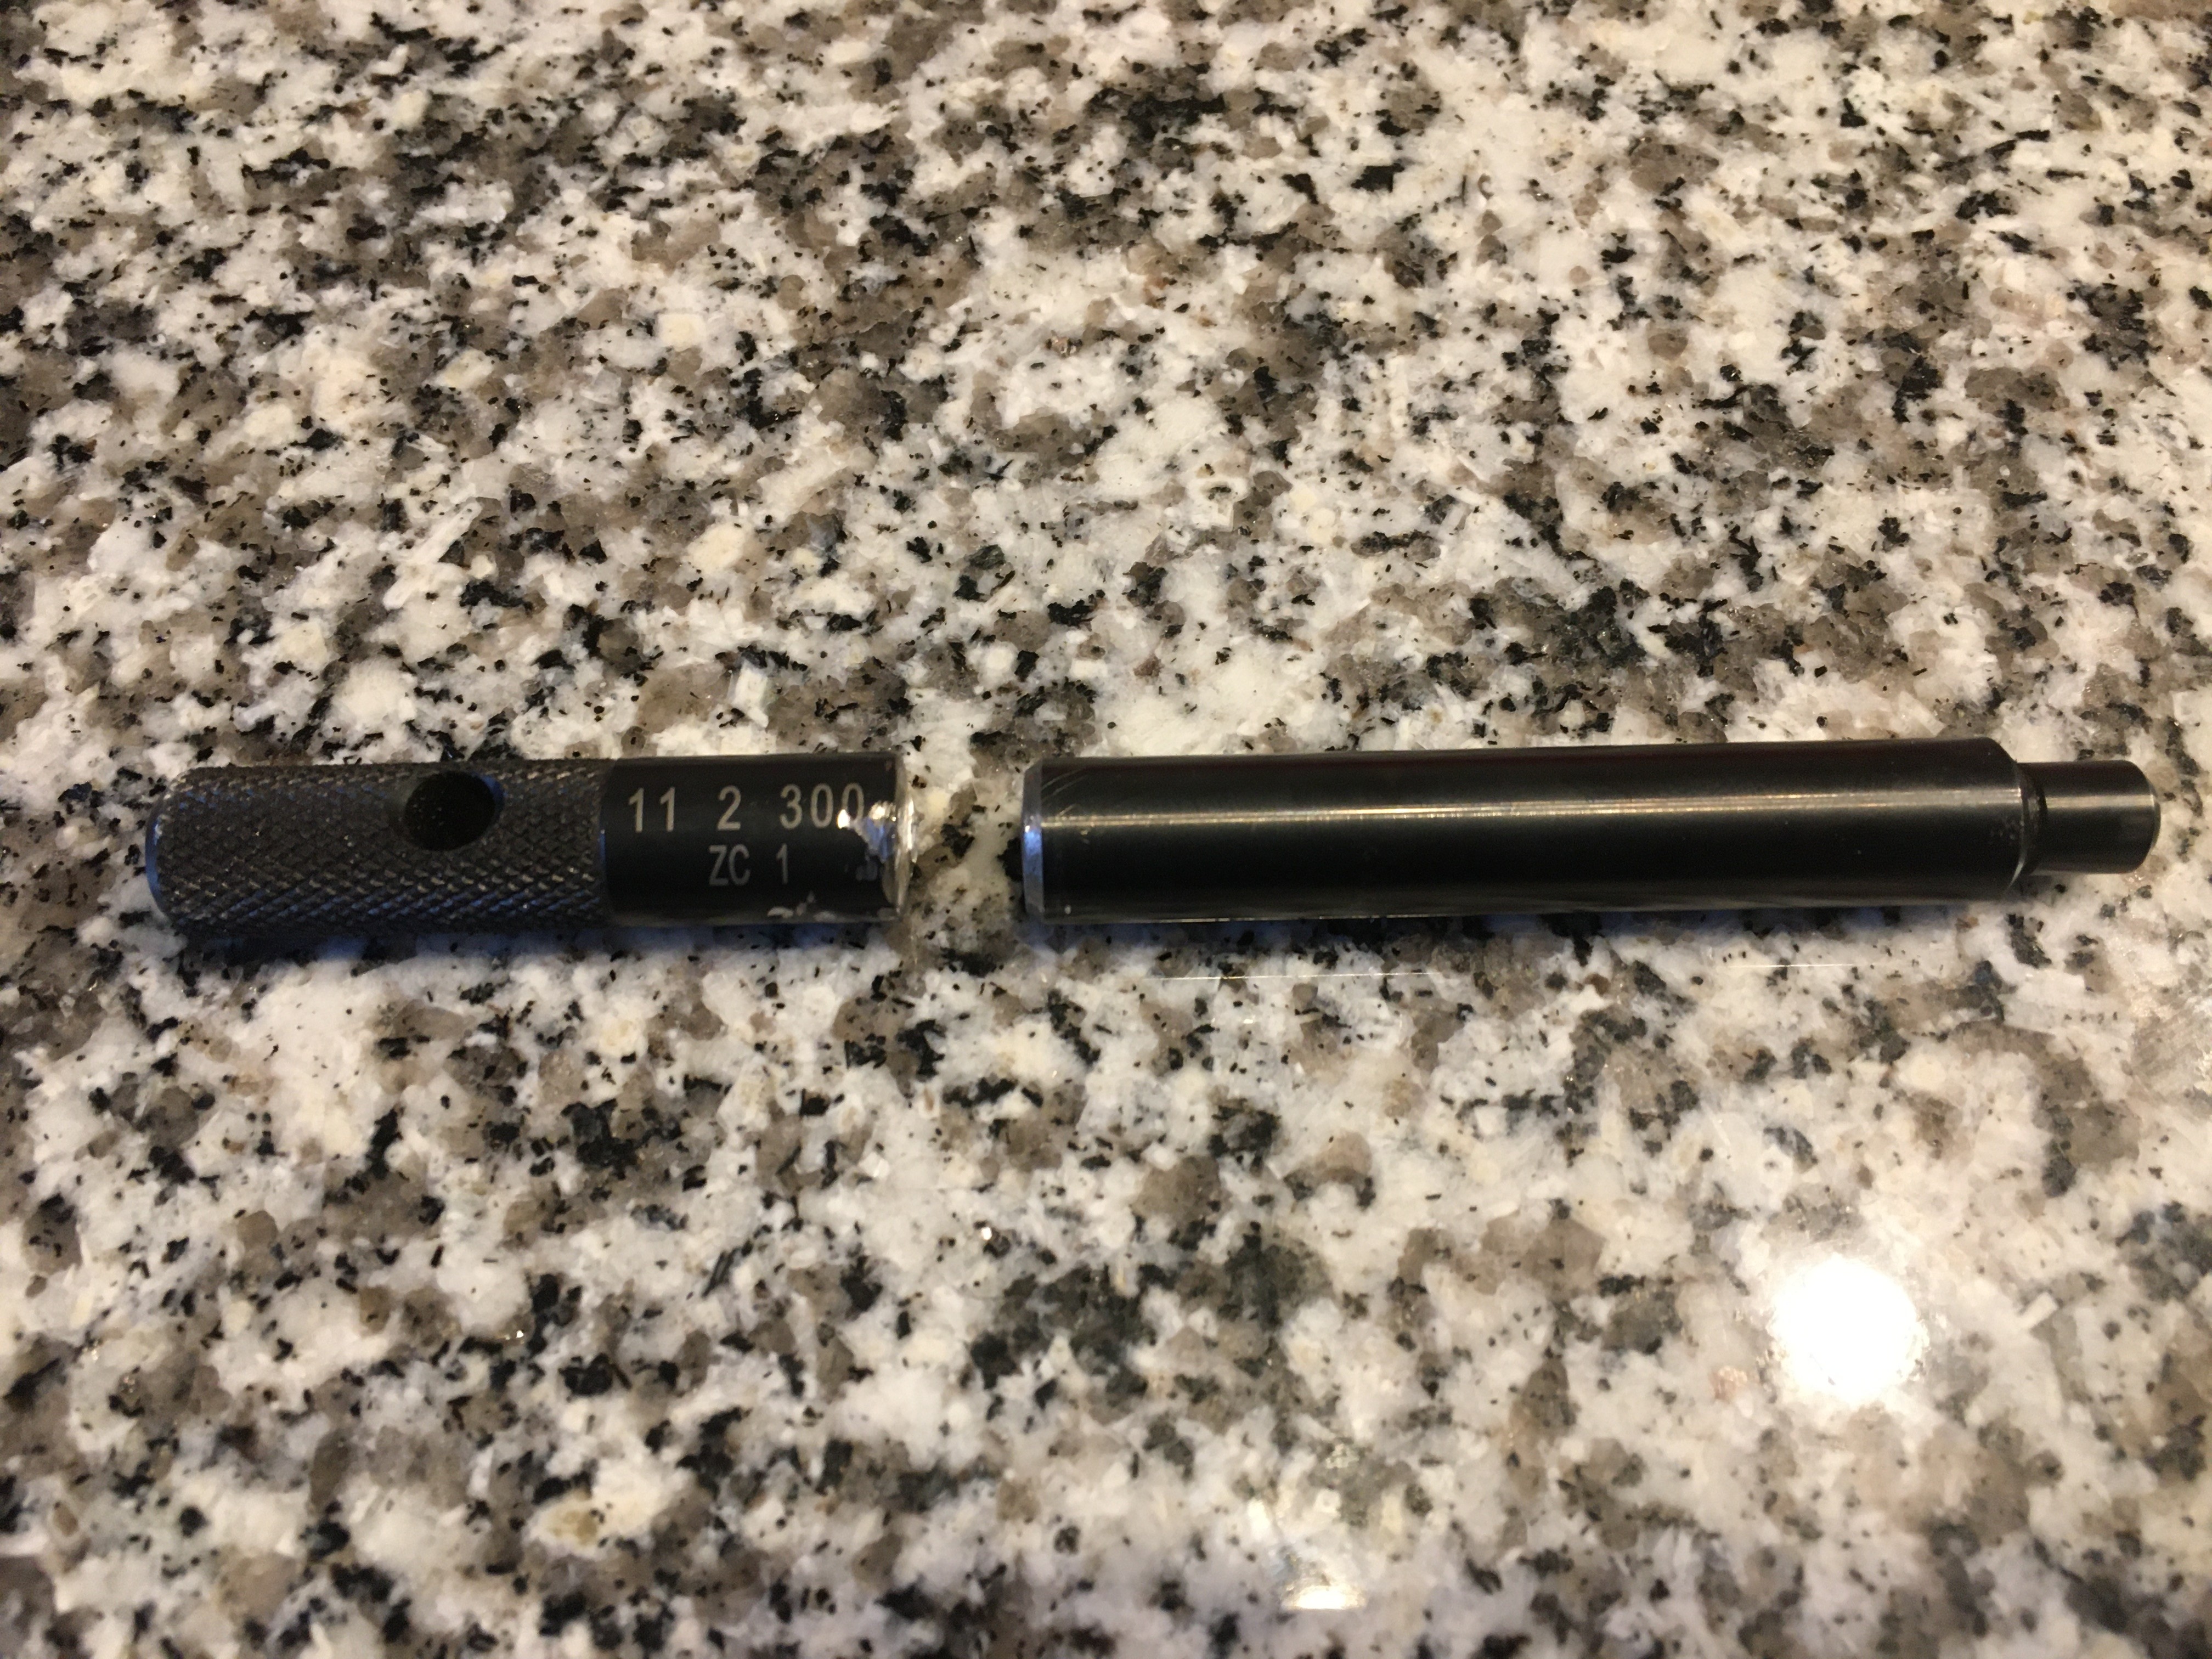
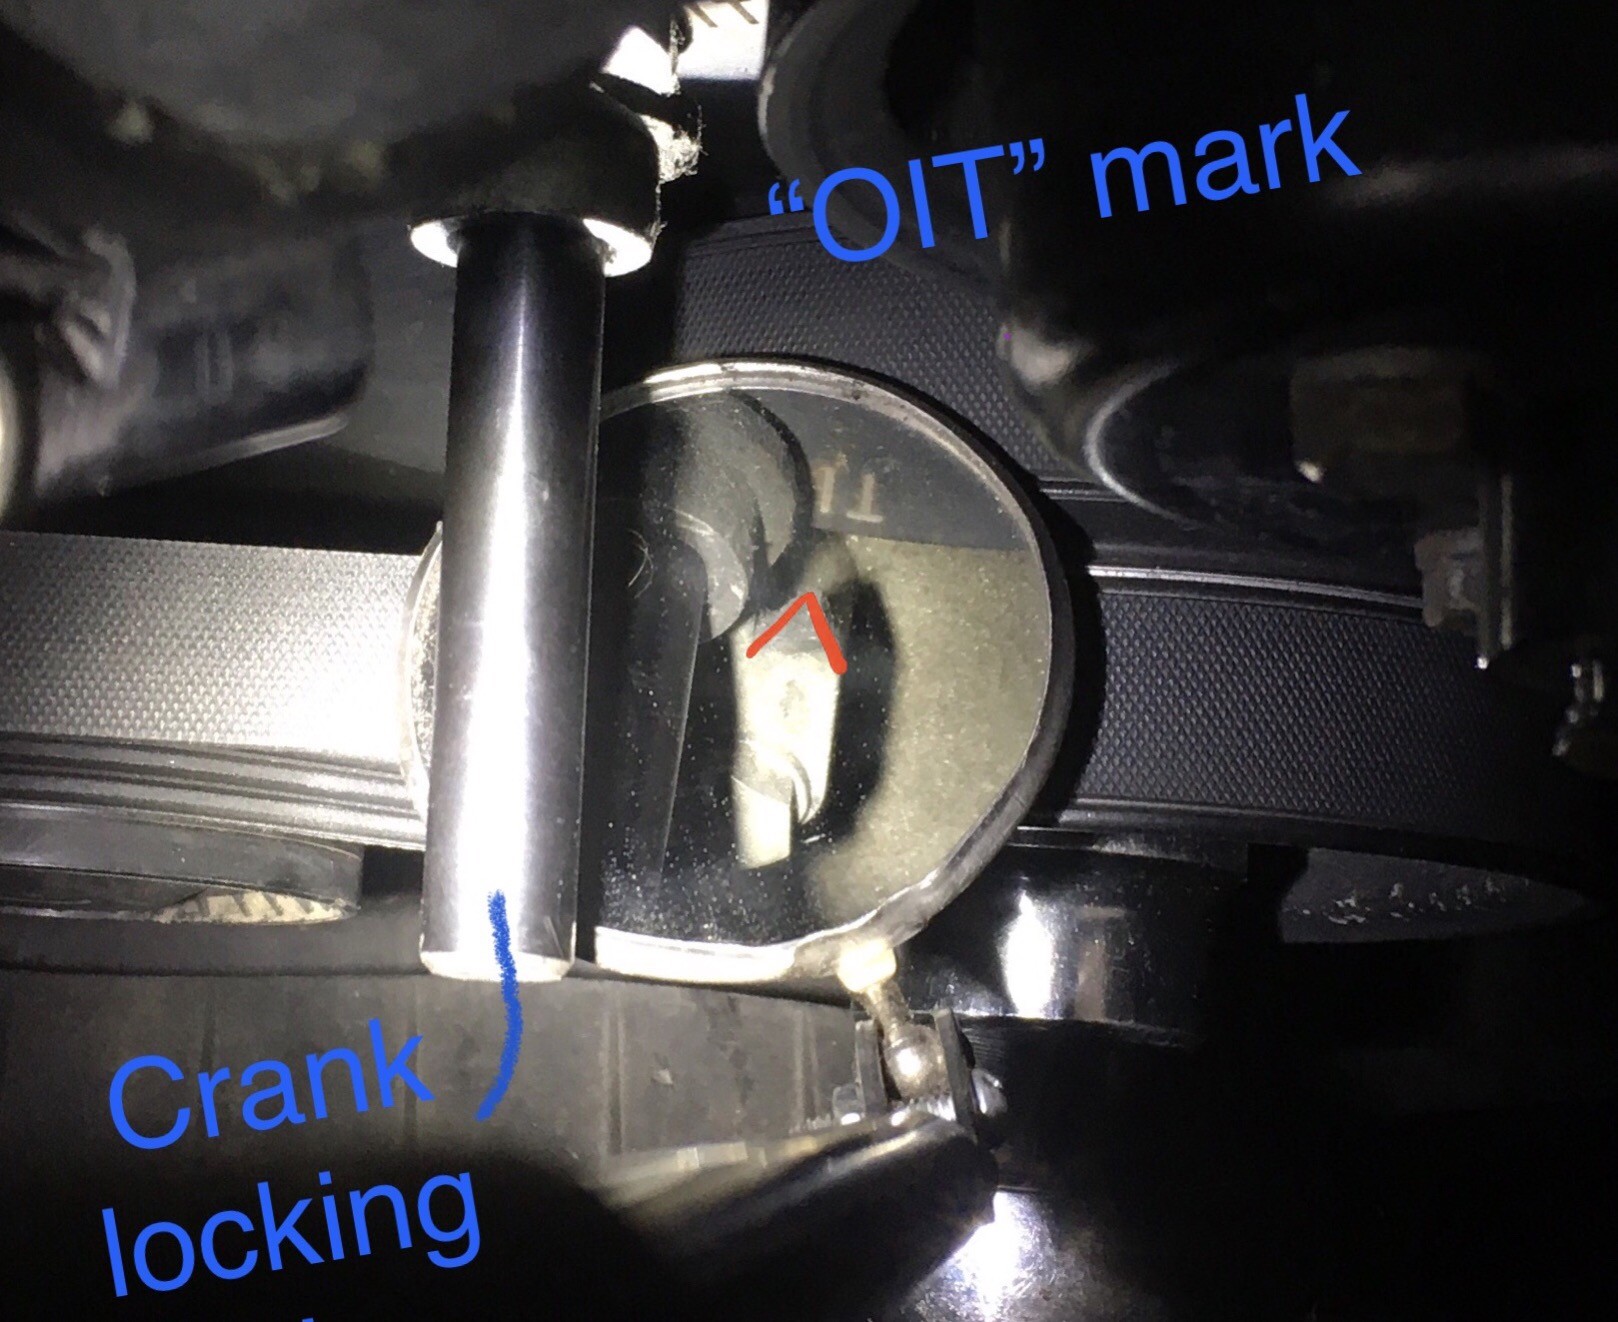
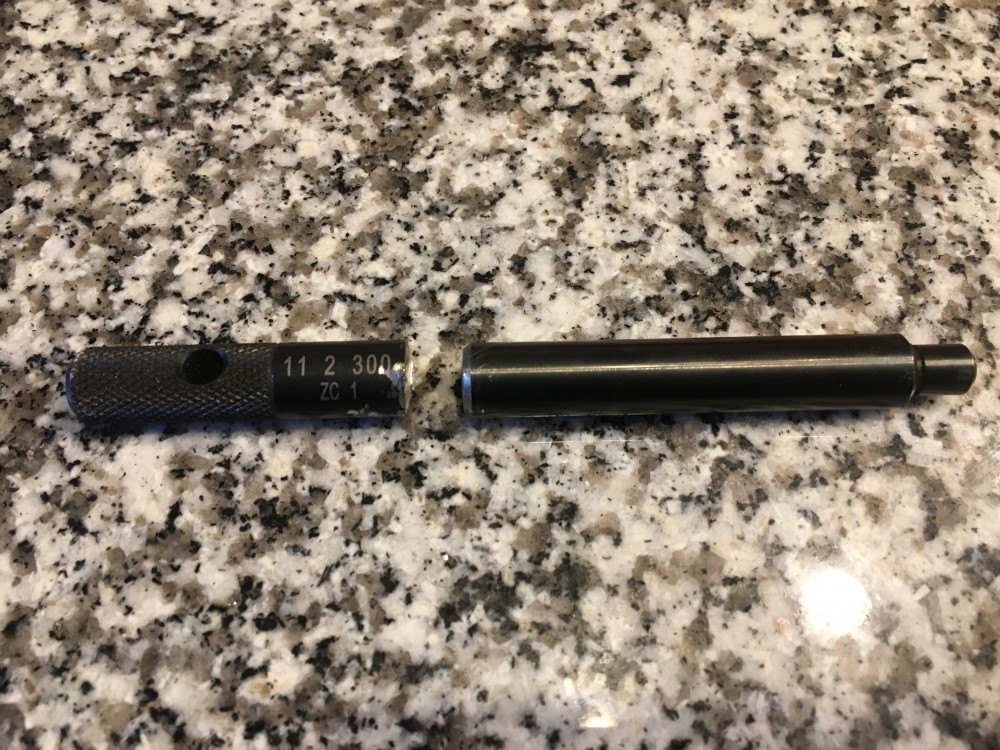
        I had read that the Z4M cant use the same crank locking pin as the M3. Now I know why: the Z has an electric fan instead of a mechanical fan. My M has an electric puller fan in lieu of the mechanical fan and it is not easily removable without removing the radiator or condenser since it  is mounted through the radiator fins with zip strips.  Since the crank locking pin is too long to fit in the hole with the fan in the way, I opted to shorten it. 
        2AF34EF1-6283-4EB6-9661-2284BD48A311.thumb.jpeg.8836508992f7fae76ee437b0dff53a02.jpeg

        All aligned at TDC:

        0651BBE9-FD8D-4585-A286-30EE25530540.thumb.jpeg.15e814eeb35078fe652c974e3294388f.jpeg

        The solenoid was removed, I got it shipped off to get my core $ back
        84B1CBB6-2927-47D9-A284-43F9367923EC.thumb.jpeg.443cac8b5a7d14ddbd15edf2ca53fc87.jpeg

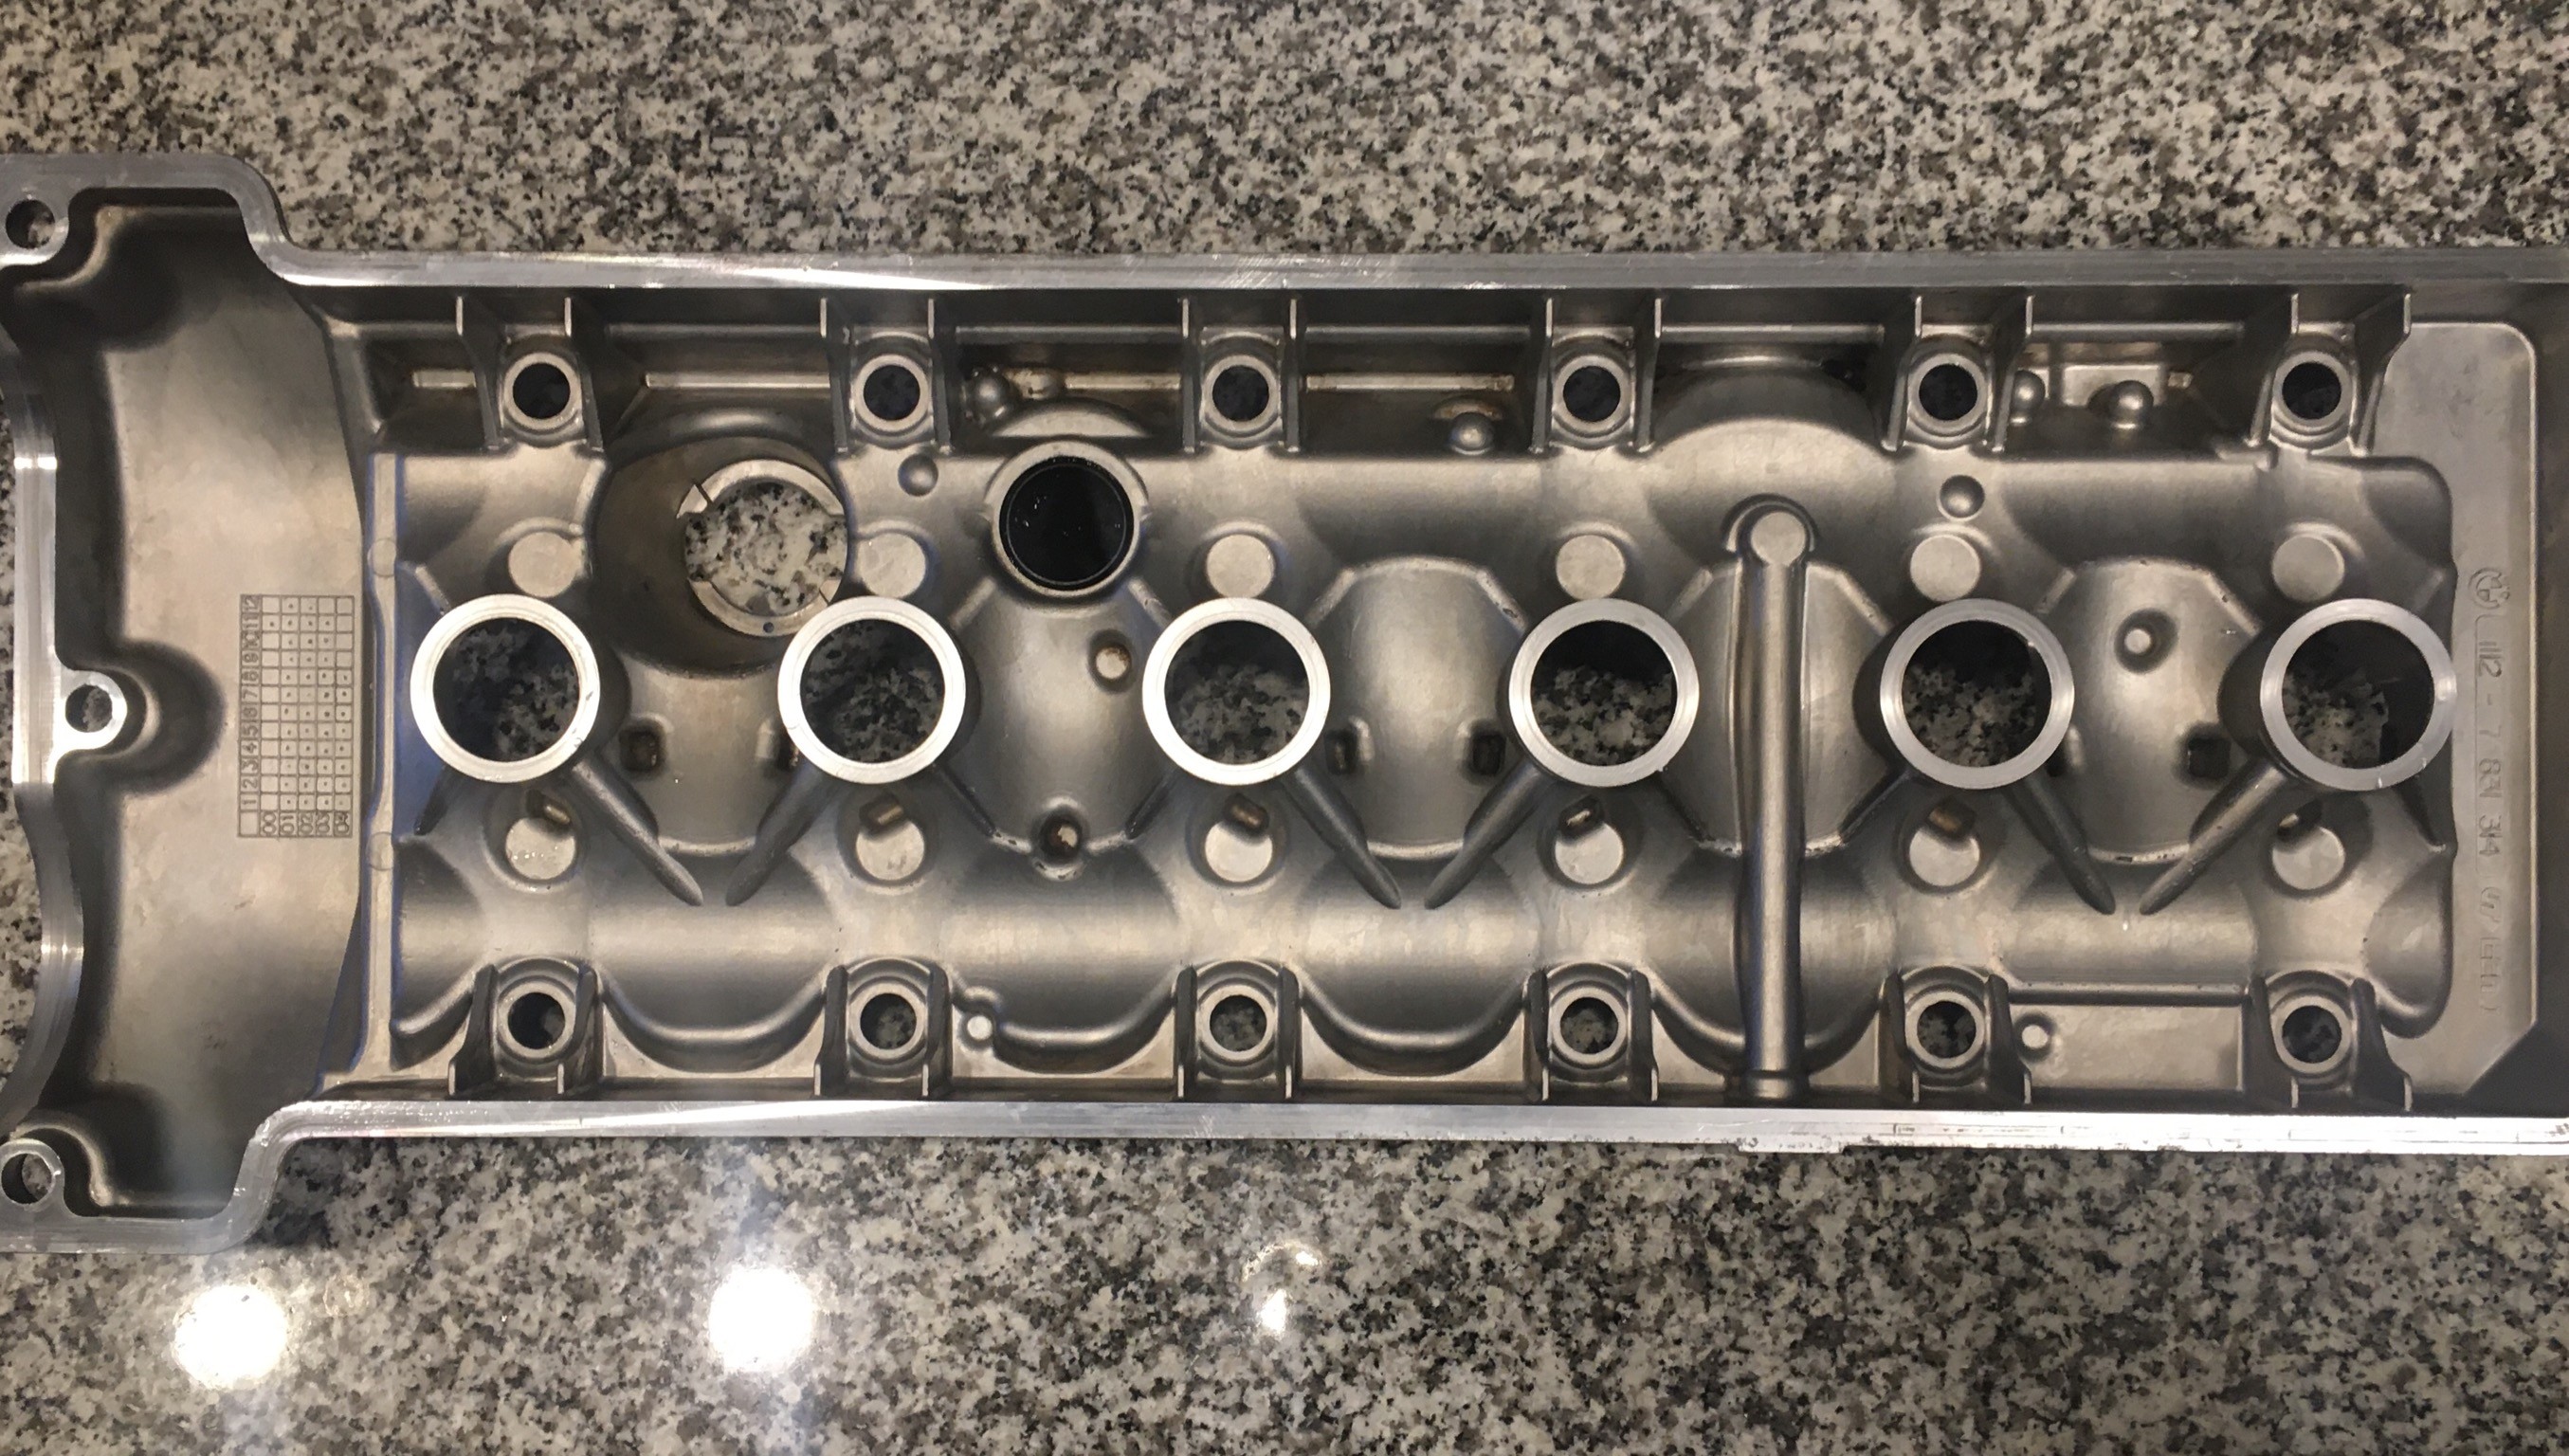
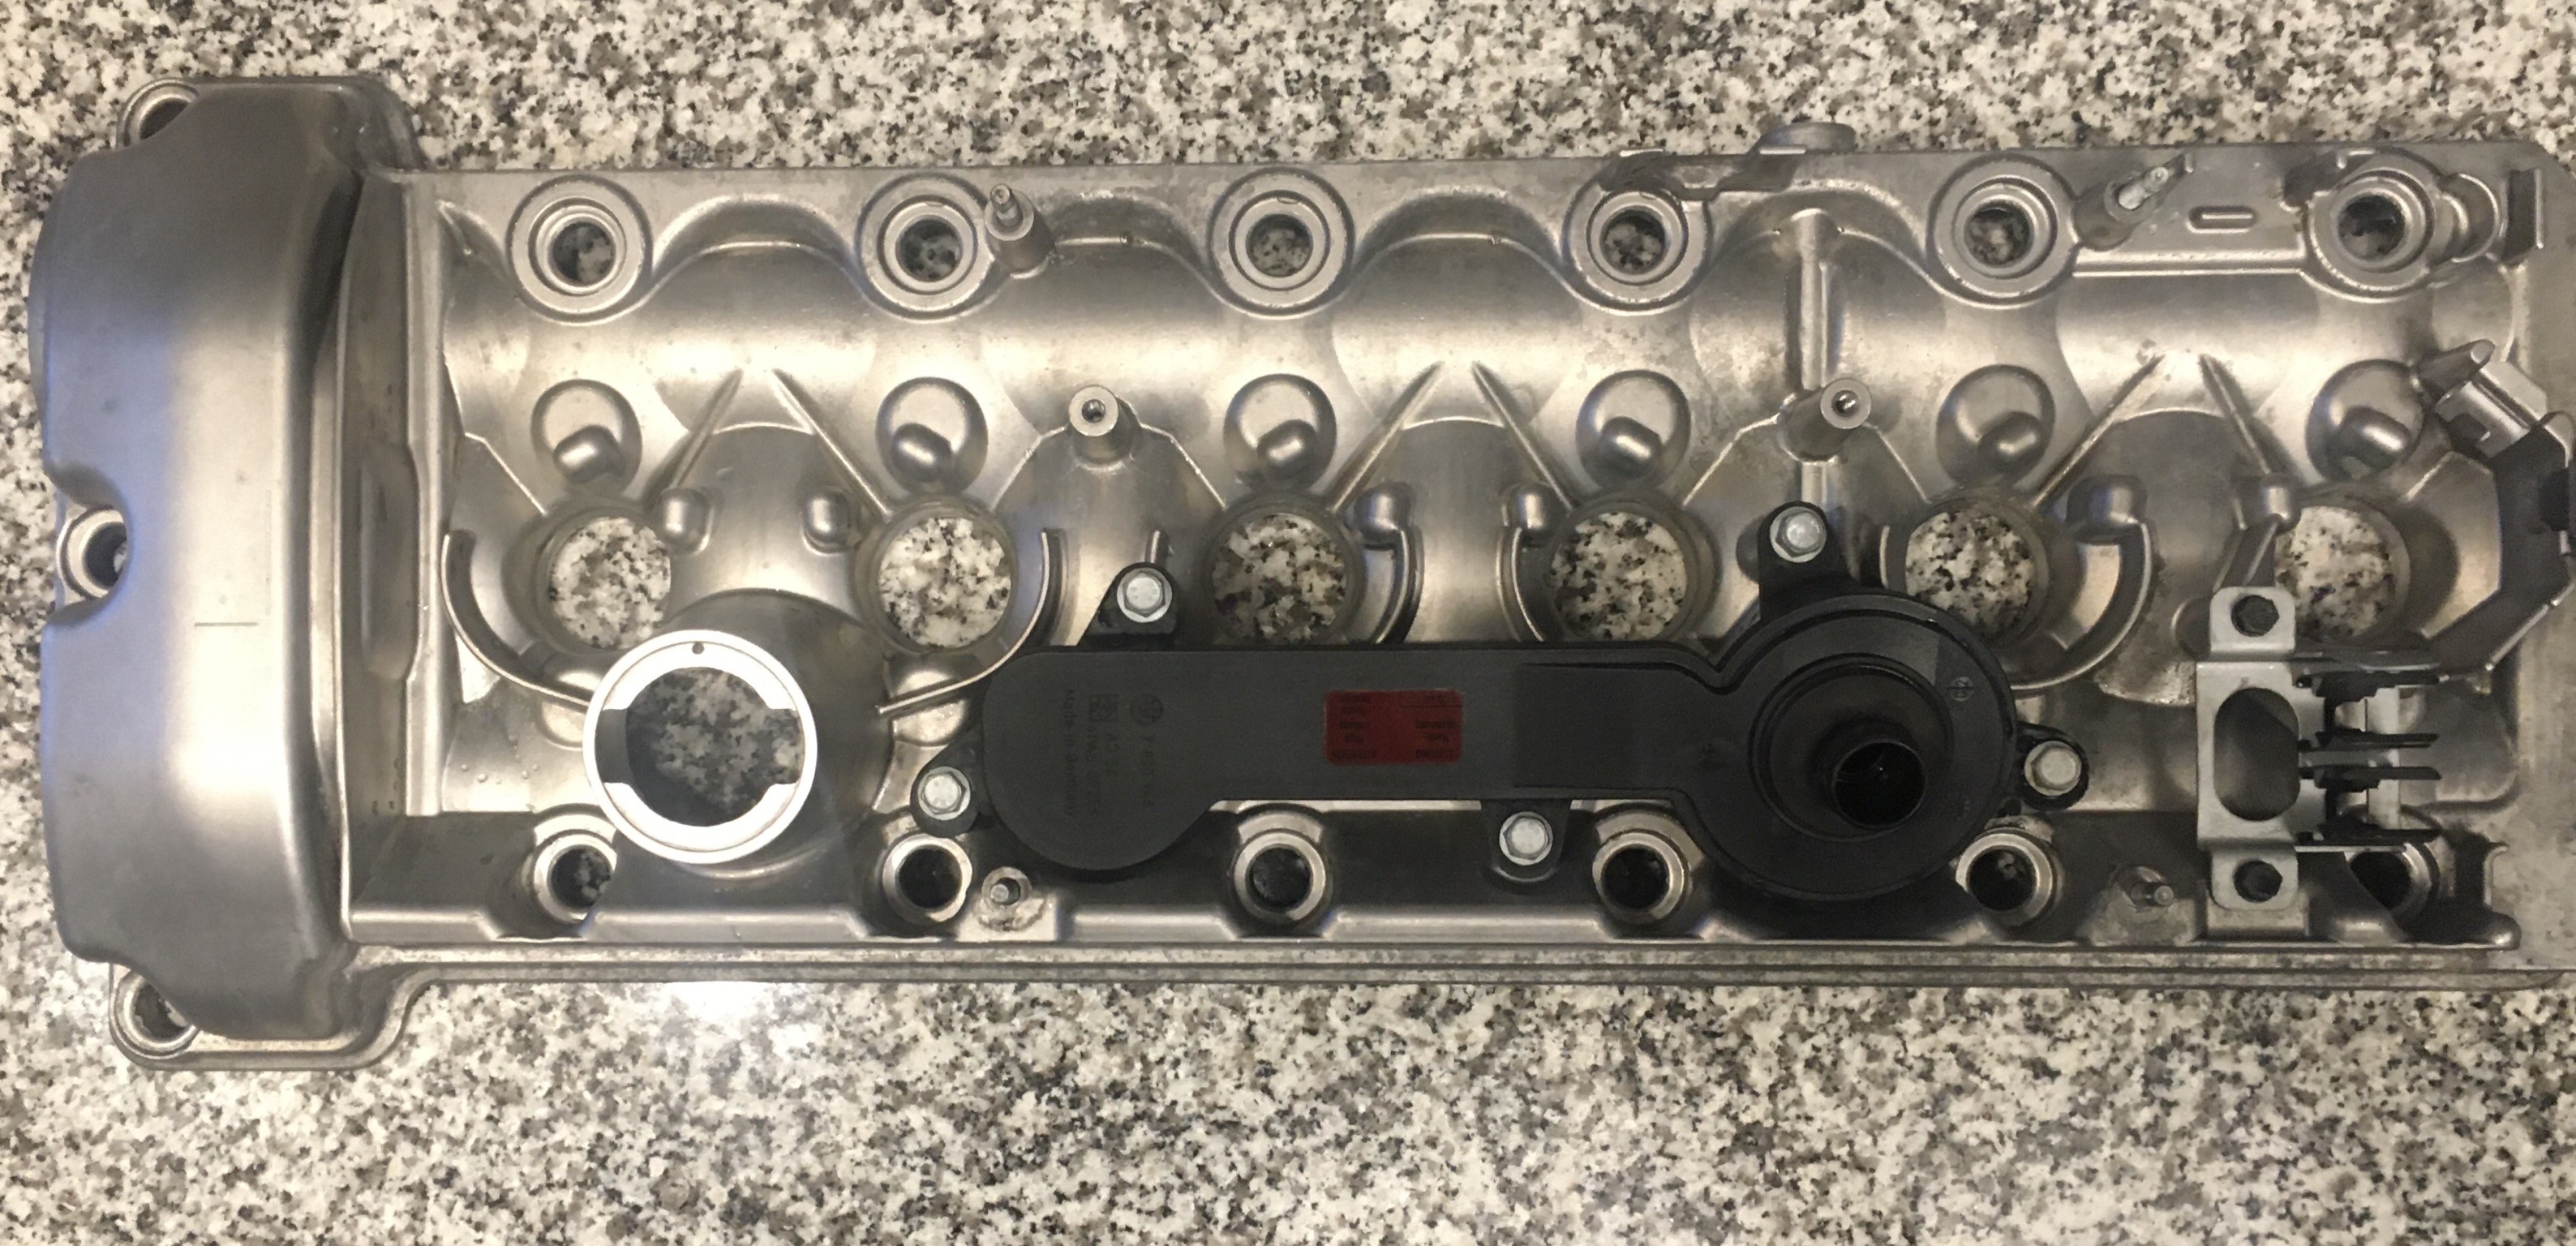
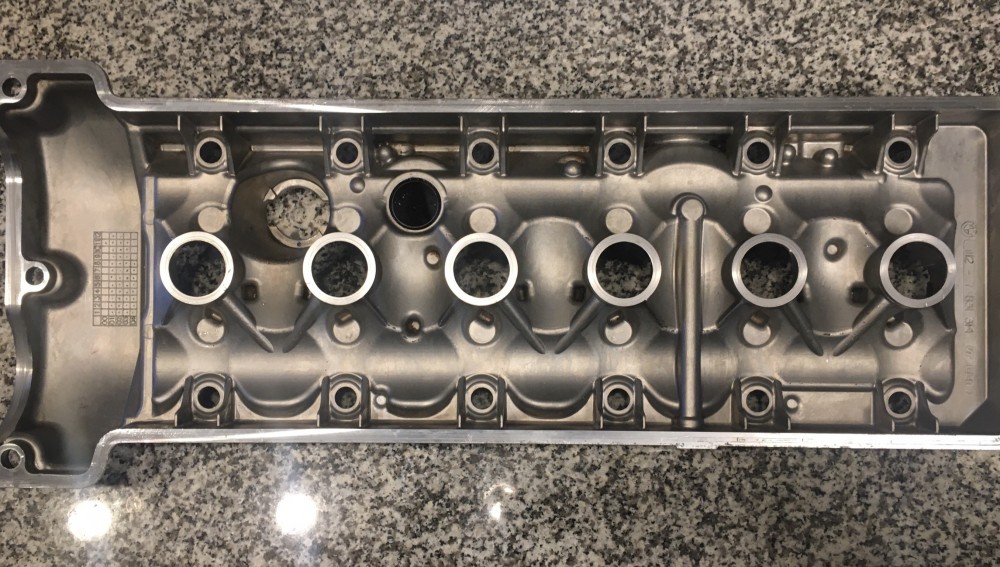
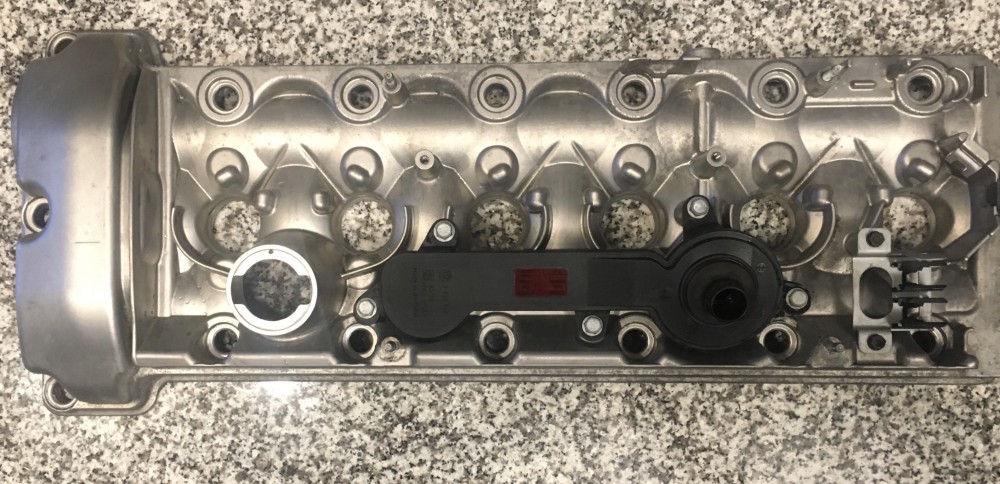
        This is one reason I could never be a mechanic for a living. I blow a lot of time cleaning things as I go. Here is the valve cover with all the varnish on the inside removed
        65B8A034-6DE3-4D82-B678-1C64A021CE94.thumb.jpeg.88c9a3a637cf3b7f9f26b66f36a1e10a.jpeg
         

        E8EC166A-B8B5-470E-8355-0D96308AA53E.thumb.jpeg.ee22147de56aa6b2f83afe303ffcf08d.jpeg

        1 Reply Last reply
        2
        • YoungCRY
          YoungCRY
          YoungCR
          wrote on last edited by
          #212

          It looks great though!

          Chris Young
          BMWCCA #458972
          1986 528e/5  | 1994 530i/5 | 1995 540i/6 | 2013 X5 35d | 1998 C1500 Suburban | 1995 K2500 Suburban

          1 Reply Last reply
          0
          • RekpointR
            RekpointR
            Rekpoint
            wrote on last edited by
            #213

            B C said:

            (Orders lots of parts)

            But honey! Its only the Christmas gifts that are coming in the mail!

            1 Reply Last reply
            1
            • B
              B
              B C
              wrote on last edited by
              #214

              B C said:

              Rekpoint said:

              But honey! Its only the Christmas gifts that are coming in the mail! 

              😄

              One time when I bought a set of wheels she said “Why do you need new wheels? Whats wrong with your old ones? Are they broken or something?”
              Very few significant others understand the automotive lifestyle.

              I certainly prefer to be the one that finds these large packages on the porch first.

              1 Reply Last reply
              5
              • RekpointR
                RekpointR
                Rekpoint
                wrote on last edited by
                #215

                B C said:

                😄

                One time when I bought a set of wheels she said “Why do you need new wheels? Whats wrong with your old ones? Are they broken or something?”
                Very few significant others understand the automotive lifestyle.

                I certainly prefer to be the one that finds these large packages on the porch first.

                High performance wheels need to be replaced every 5 years. For the safety of the driver and passenger. It was about that time.

                1 Reply Last reply
                0
                • B
                  B
                  B C
                  wrote on last edited by
                  #216

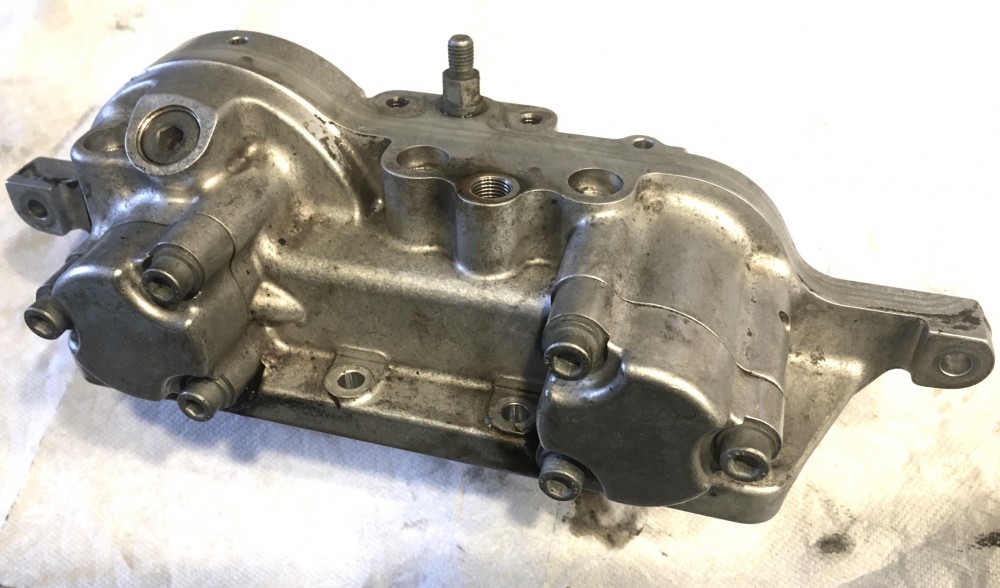
                  VANOS unit off.

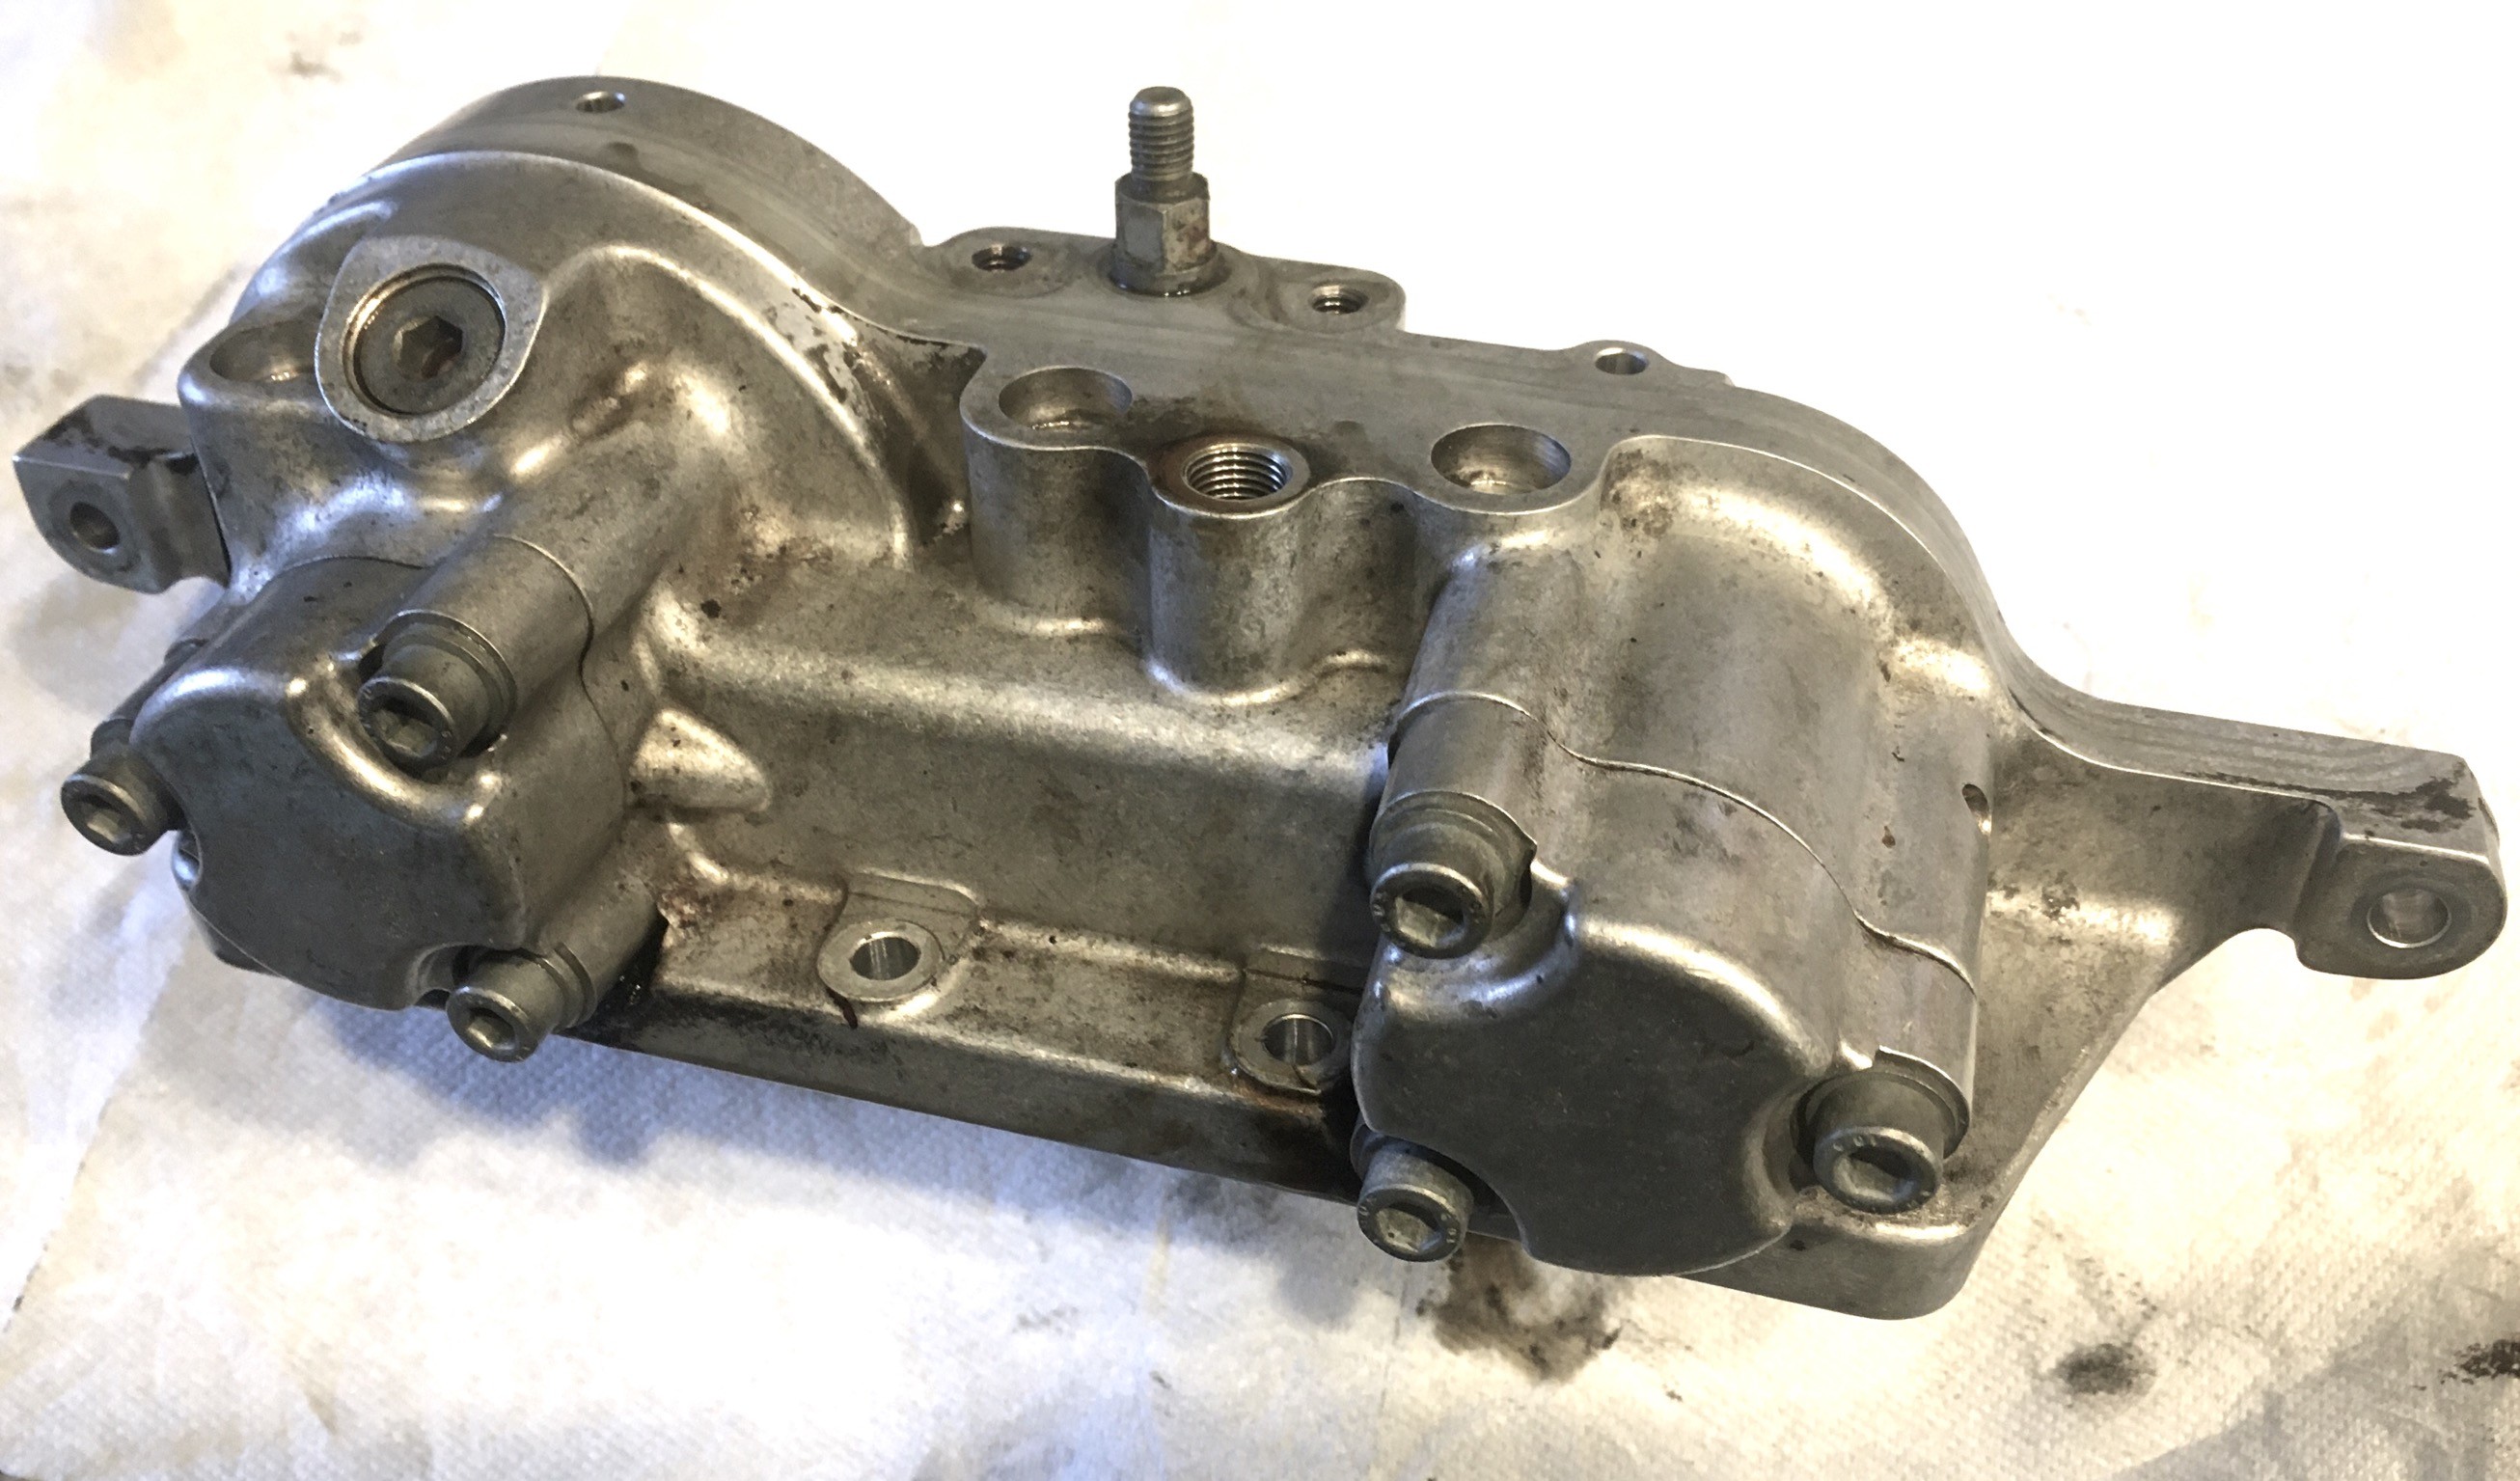
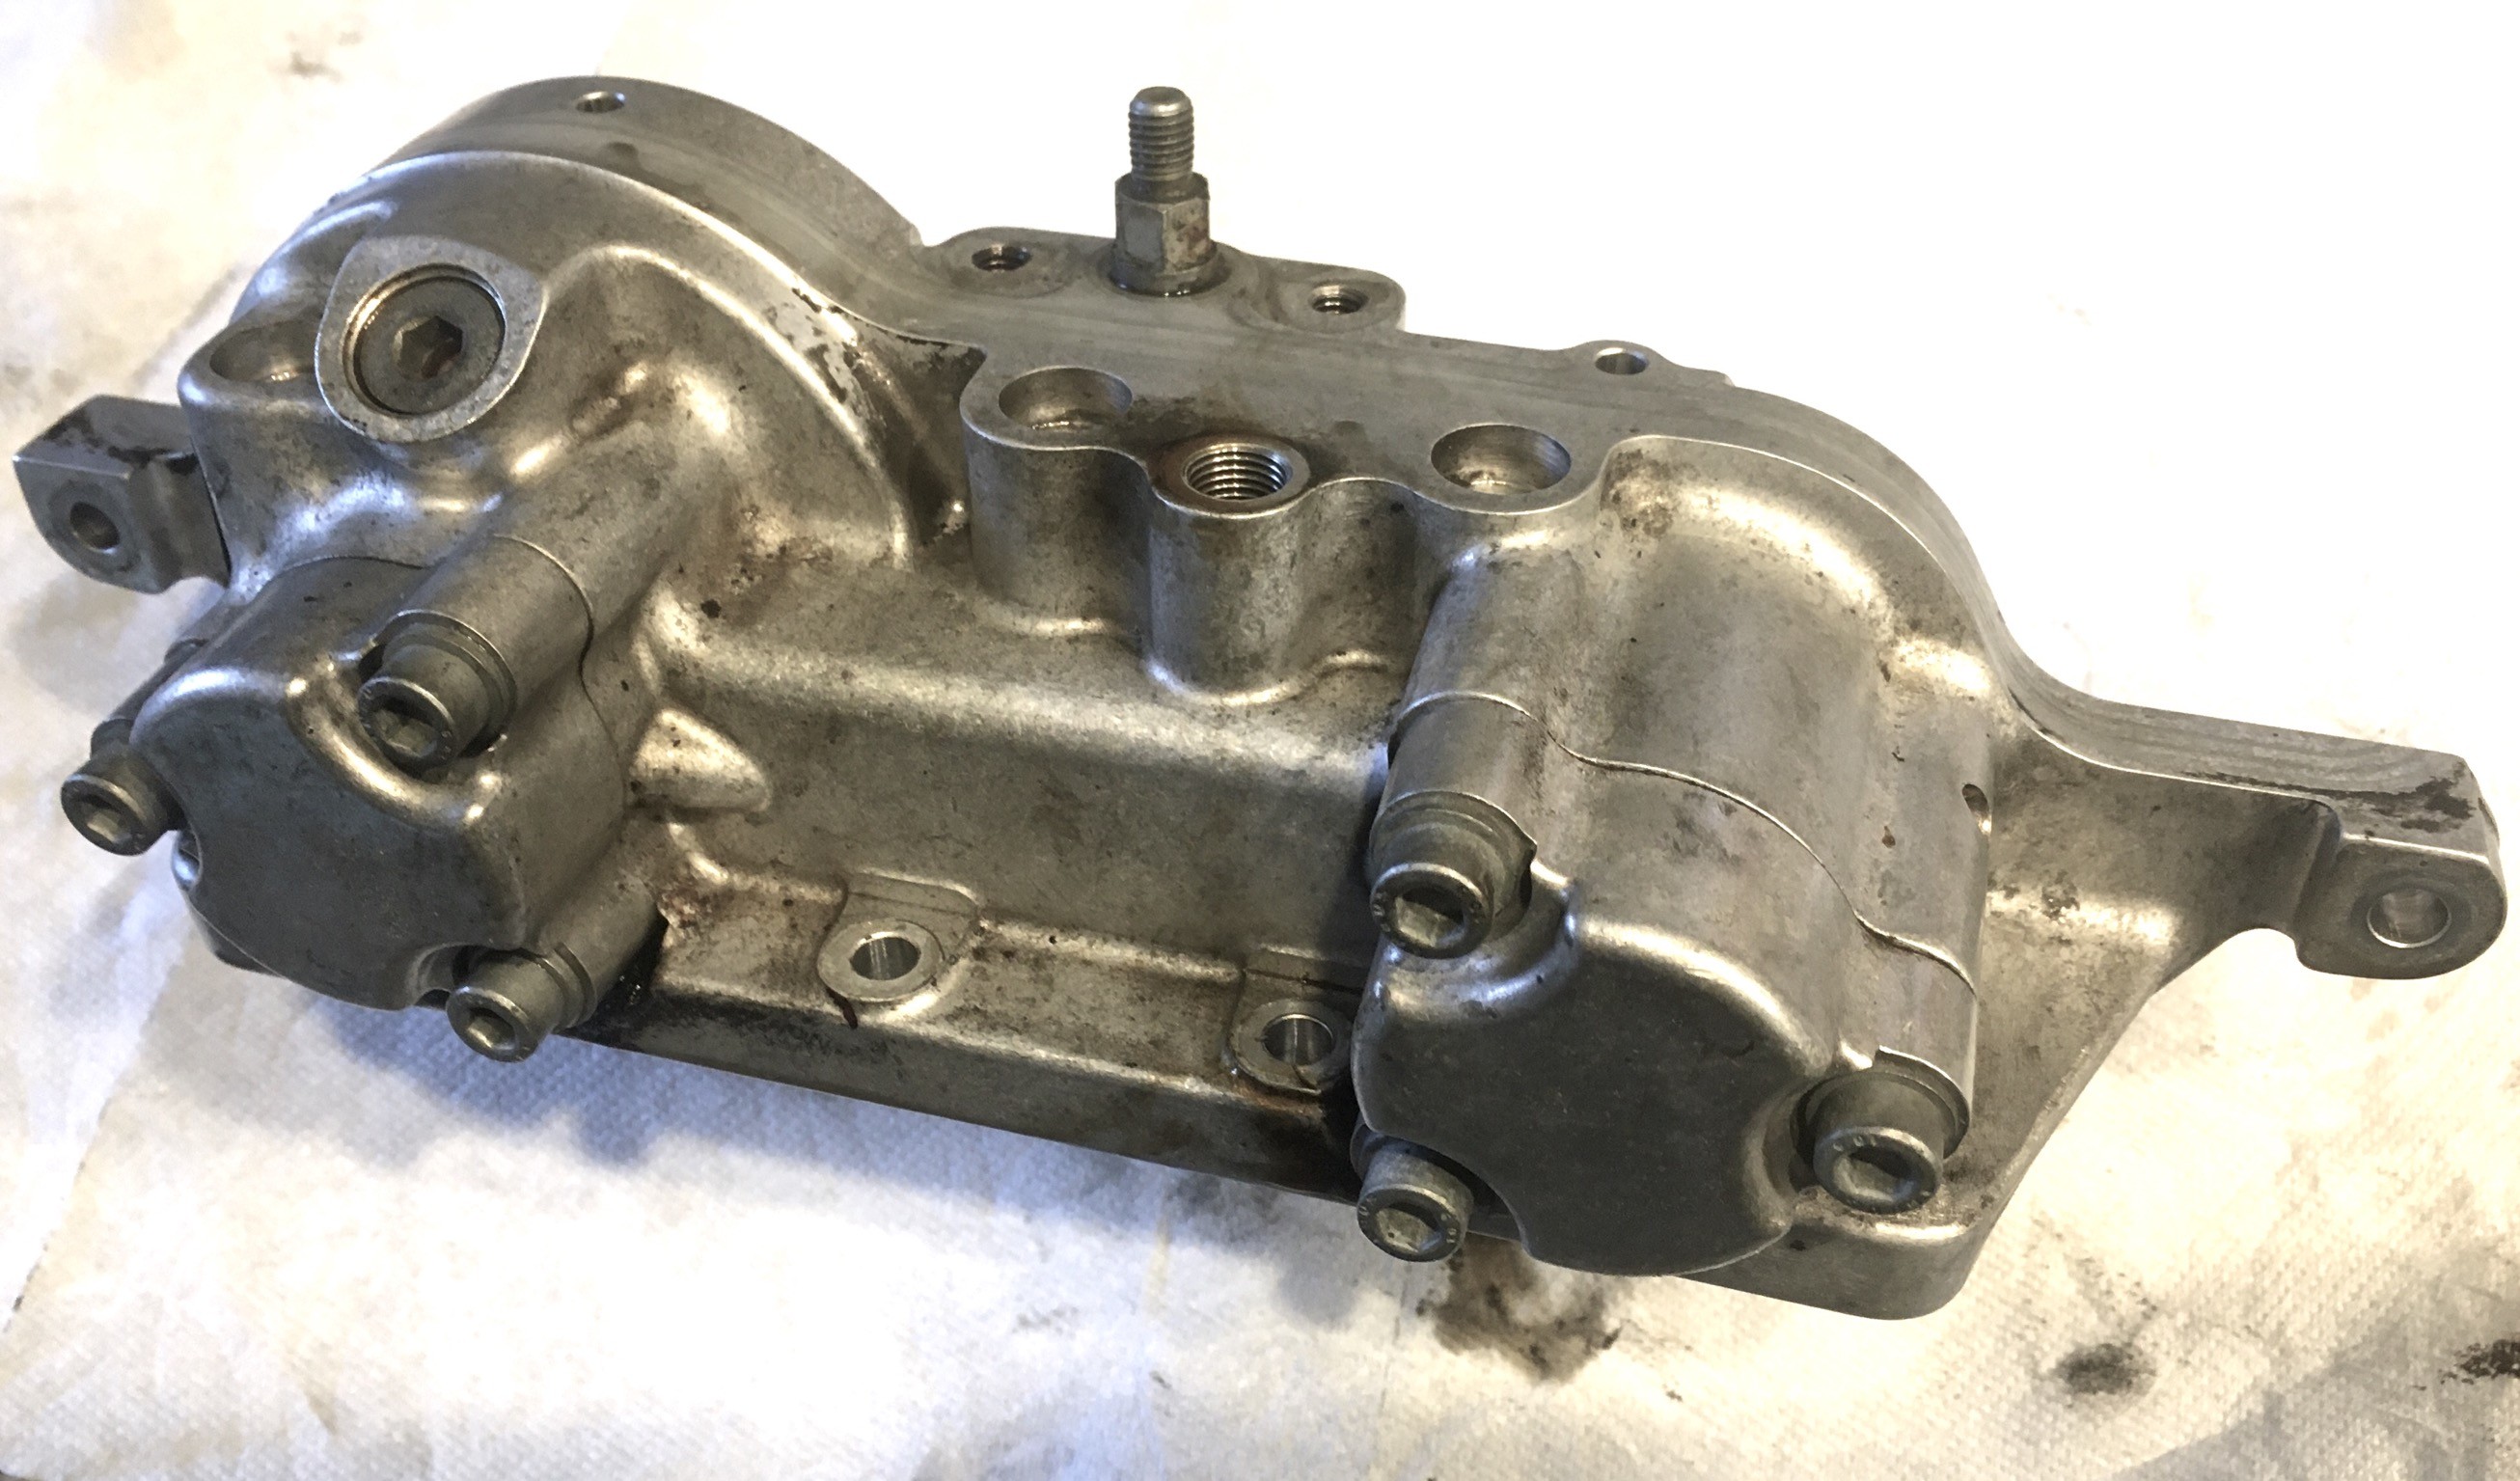
                  78827925-9E91-4832-B7EE-79ED03F480C9.thumb.jpeg.06f4cfd2c9f1322e3aa483891ca1cb64.jpeg

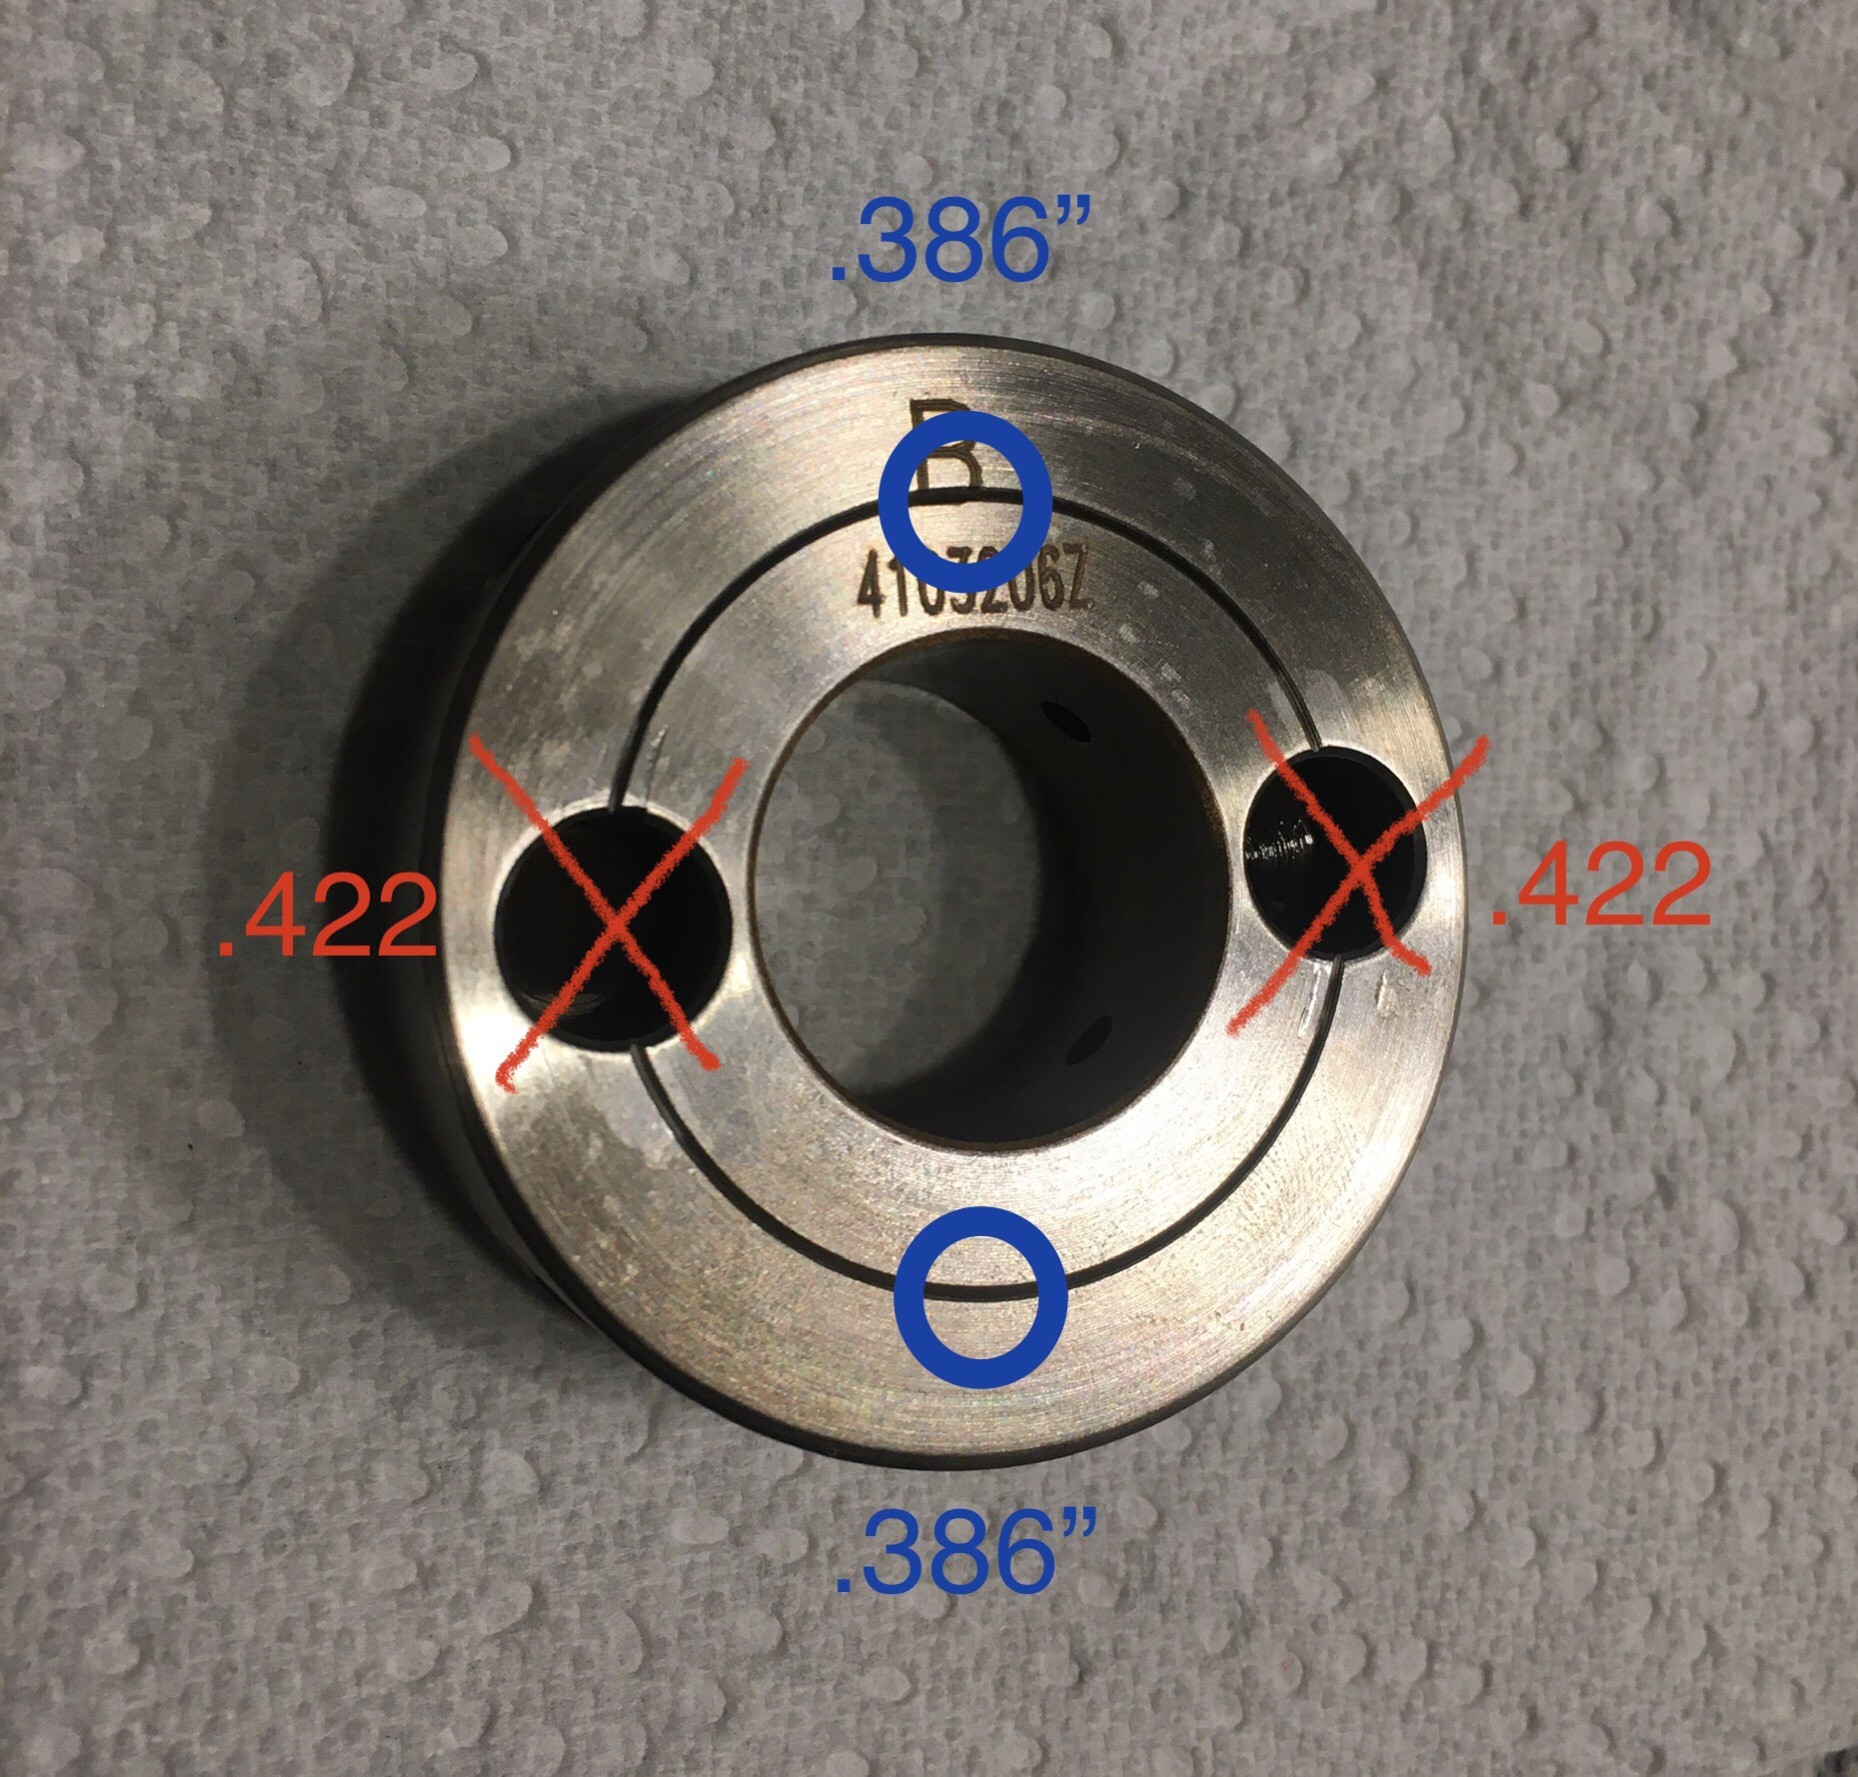
                  Oil pump disk removed. The tabs on the cam hub that often break off fit into the holes crossed off in red. It is the same design as the Euro S50B32 but the S50 has a tighter fit between the hole and the tab so the impact force is lower and tab breakage is not a problem there.

                  the options for preventing tab breakage  are to buy a one of the aftermarket higher strength hubs with larger tabs. Buy a cyro treated stock hub. Buy a redrilled oil pump disk. Or, be friends with a machinist and have them drill it.
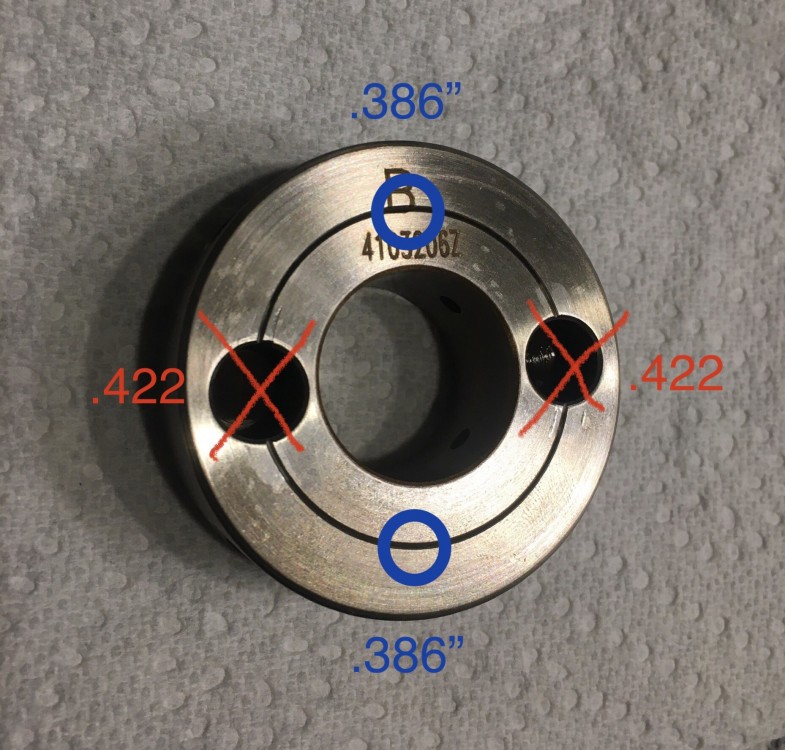
                  BDA65667-AAF2-40D0-ADFE-7216FD026BBD.thumb.jpeg.832cb8969d4a6a2420c6f39e5c1e1b82.jpeg

                  Mr. K Precision himself @Jeff will be adding the holes in blue above.
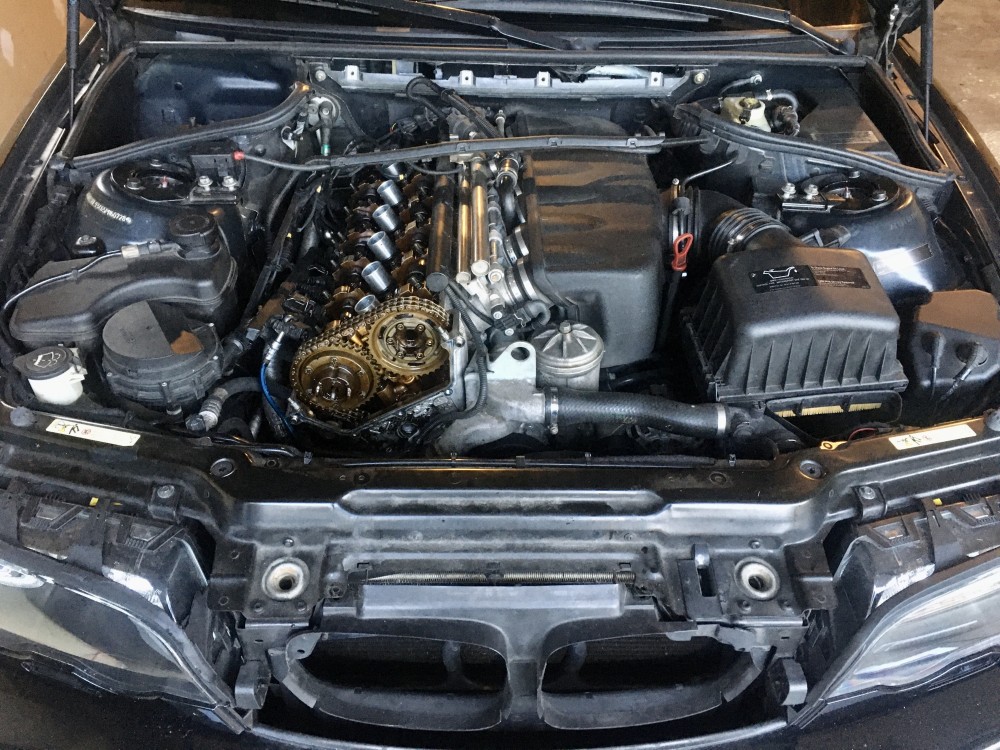
                  CB1325D5-C84A-4C84-ADB3-944DB1C26DCA.thumb.jpeg.19aee455be5a41da20f0a8d457fcbfdd.jpeg
                   

                  I checked the cam timing as it currently sits. The timing is not set correctly. The exhaust cam is about 2 degrees advanced, but it must have been within the acceptable range for adaptation since there were never any codes or issues. It will certainly not hurt anything to have a wider range of cam adjustment available once I reset it correctly.

                  1 Reply Last reply
                  2
                  • B
                    B
                    B C
                    wrote on last edited by
                    #217

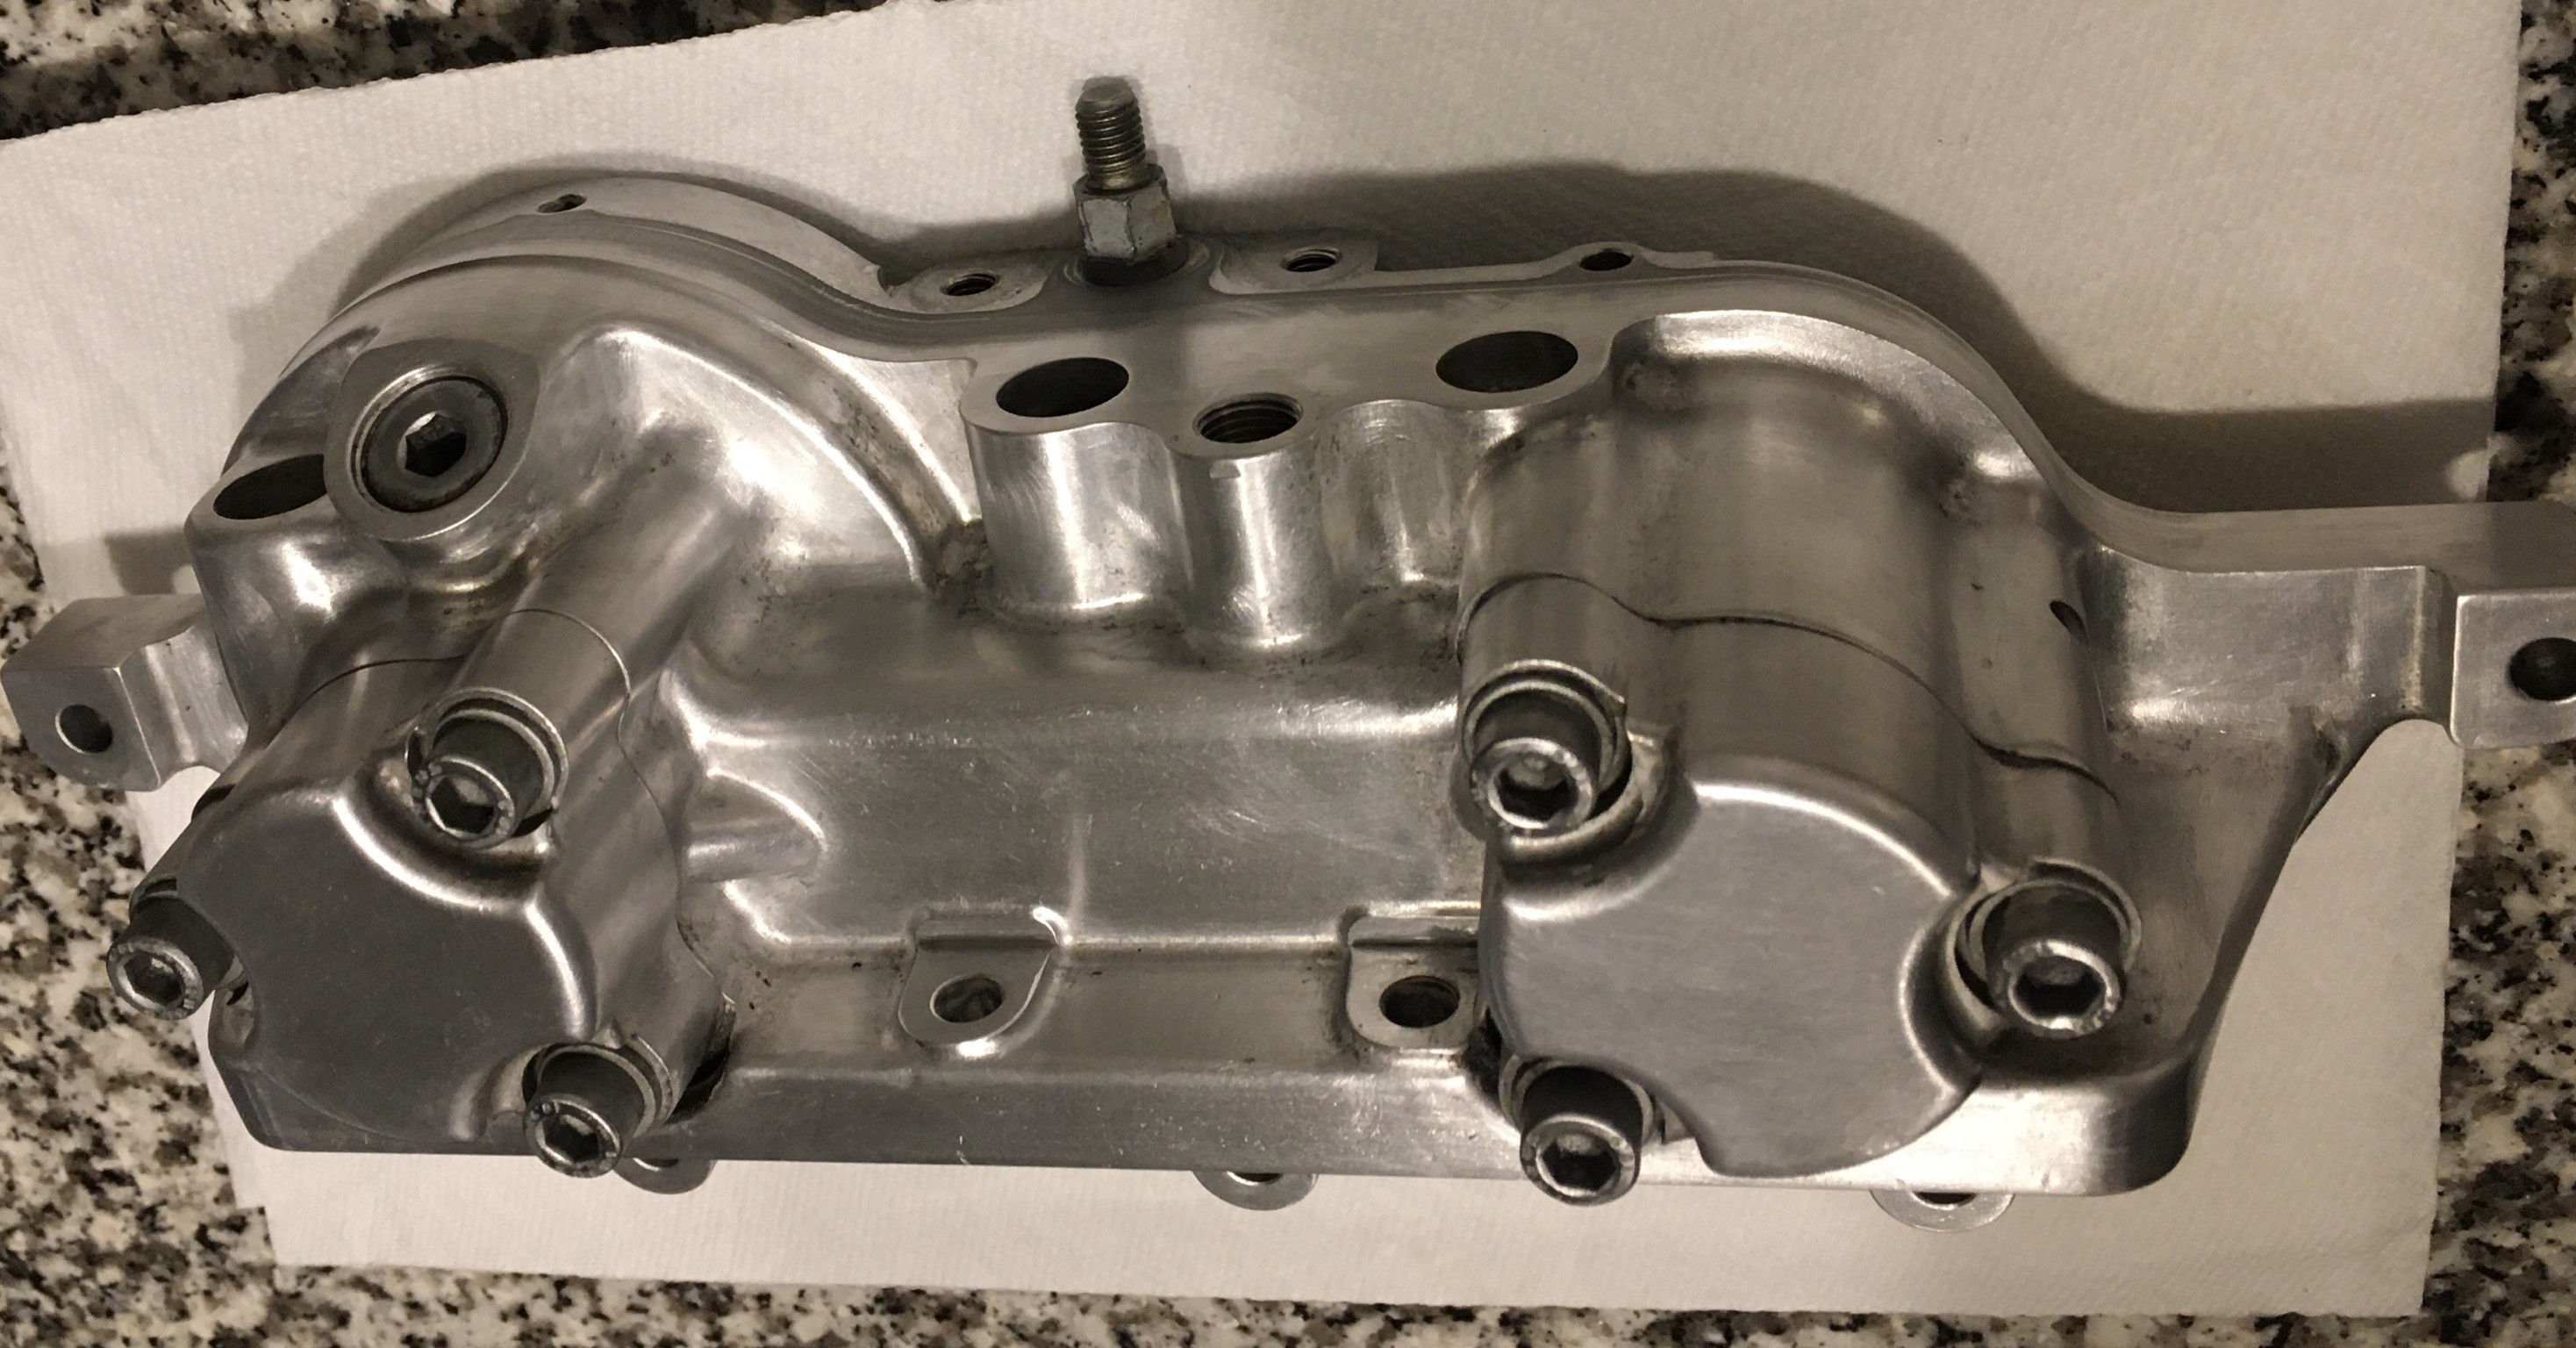
                    Housing cleanup

                    EB81EE94-5368-401A-A736-EF7D47927299.jpeg
                     

                    45B4D5B6-27BB-4D97-ABF9-6138AE4EC30B.thumb.jpeg.986531b193bc9db35ca46a39241565b4.jpeg

                    1 Reply Last reply
                    0
                    • wasnt m3W
                      wasnt m3W
                      wasnt m3
                      wrote on last edited by
                      #218

                      Earl would do it better.

                      m3sig-1.jpg

                      1 Reply Last reply
                      5
                      • B
                        B
                        B C
                        wrote on last edited by
                        #219

                        I installed the anti-rattle parts. There was no axial freeplay beforehand and no axial freeplay afterwards. Waste of money? Yes. The other piece of the anti-rattle solution is to use S62 diaphragm springs. They are stiffer. The only positive from this portion of the project was being able to clean the thrust bearings and housings. There was a little bit of crud built up.

                        ORIGINAL VANOS THRUST BEARING AXIAL FREEPLAY: JUST FINE
                         

                        All but 1 of the VANOS seals have been replaced. I am not a fan of how the teflon seals need to be stretched to fit and don't feel satisfied with the fitment of one so I ordered another and will wait a few days to get that last seal in. Visually, the old rubber seals were in decent condition and the teflon seals were not that worn or brittle. The exhaust side appeared to be worn the most/was the only side that seems like the new seals will give an improvement.

                        ORIGINAL VANOS SEALS: DECENT CONDITION

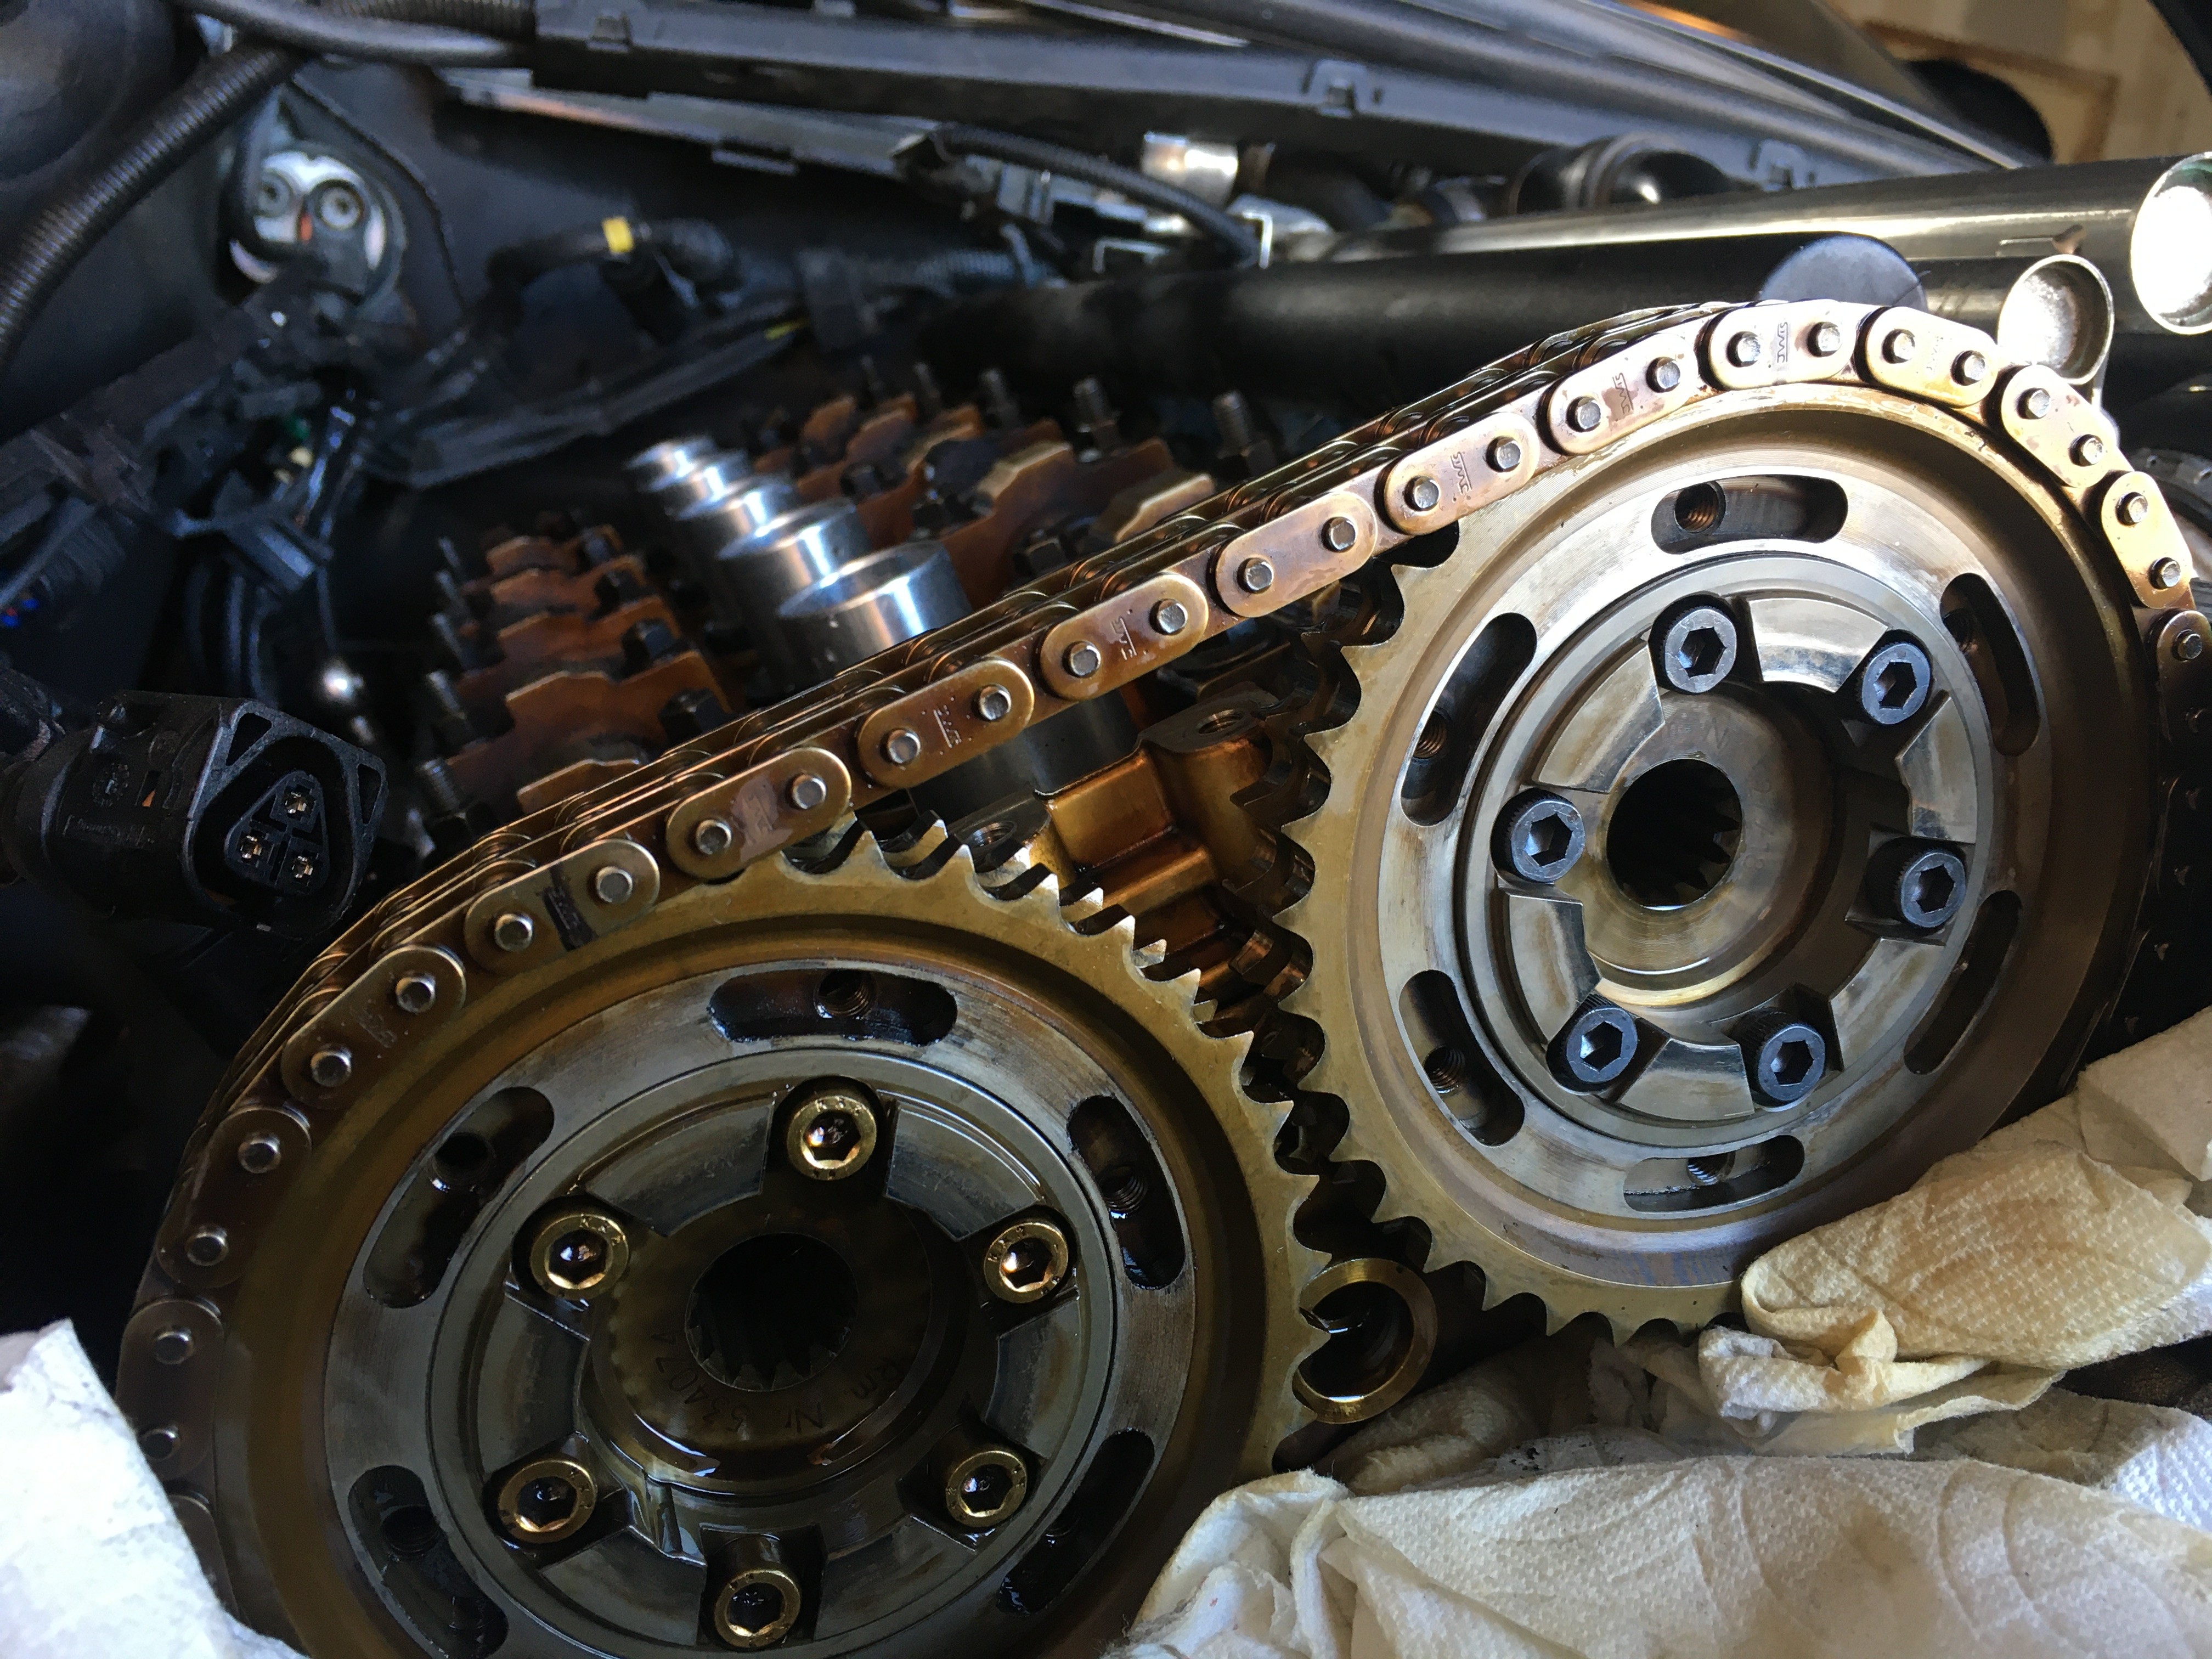
                        Next I replaced the cam bolts. They were the original 8.8 bolts (shown on the exhaust side) with no Loctite and none of them were loose, but new 12.9 hardware and Loctite 243 (shown on the intake side) will provide some peace of mind despite the originals likely never having any issue in the future based on their current track record.
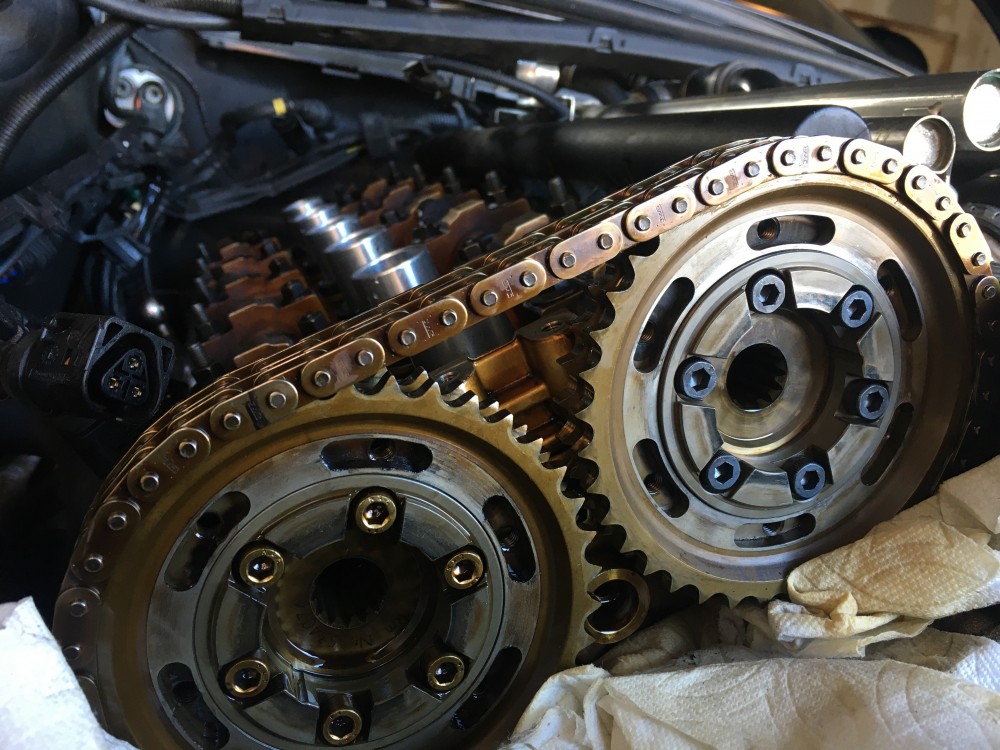
                        F73EA000-0B51-4C89-AE7C-501E76127AEA.thumb.jpeg.007764f1726a2617ee5250362972aa01.jpeg

                        ORIGINAL CAM  BOLTS: TIGHT AND UNBROKEN

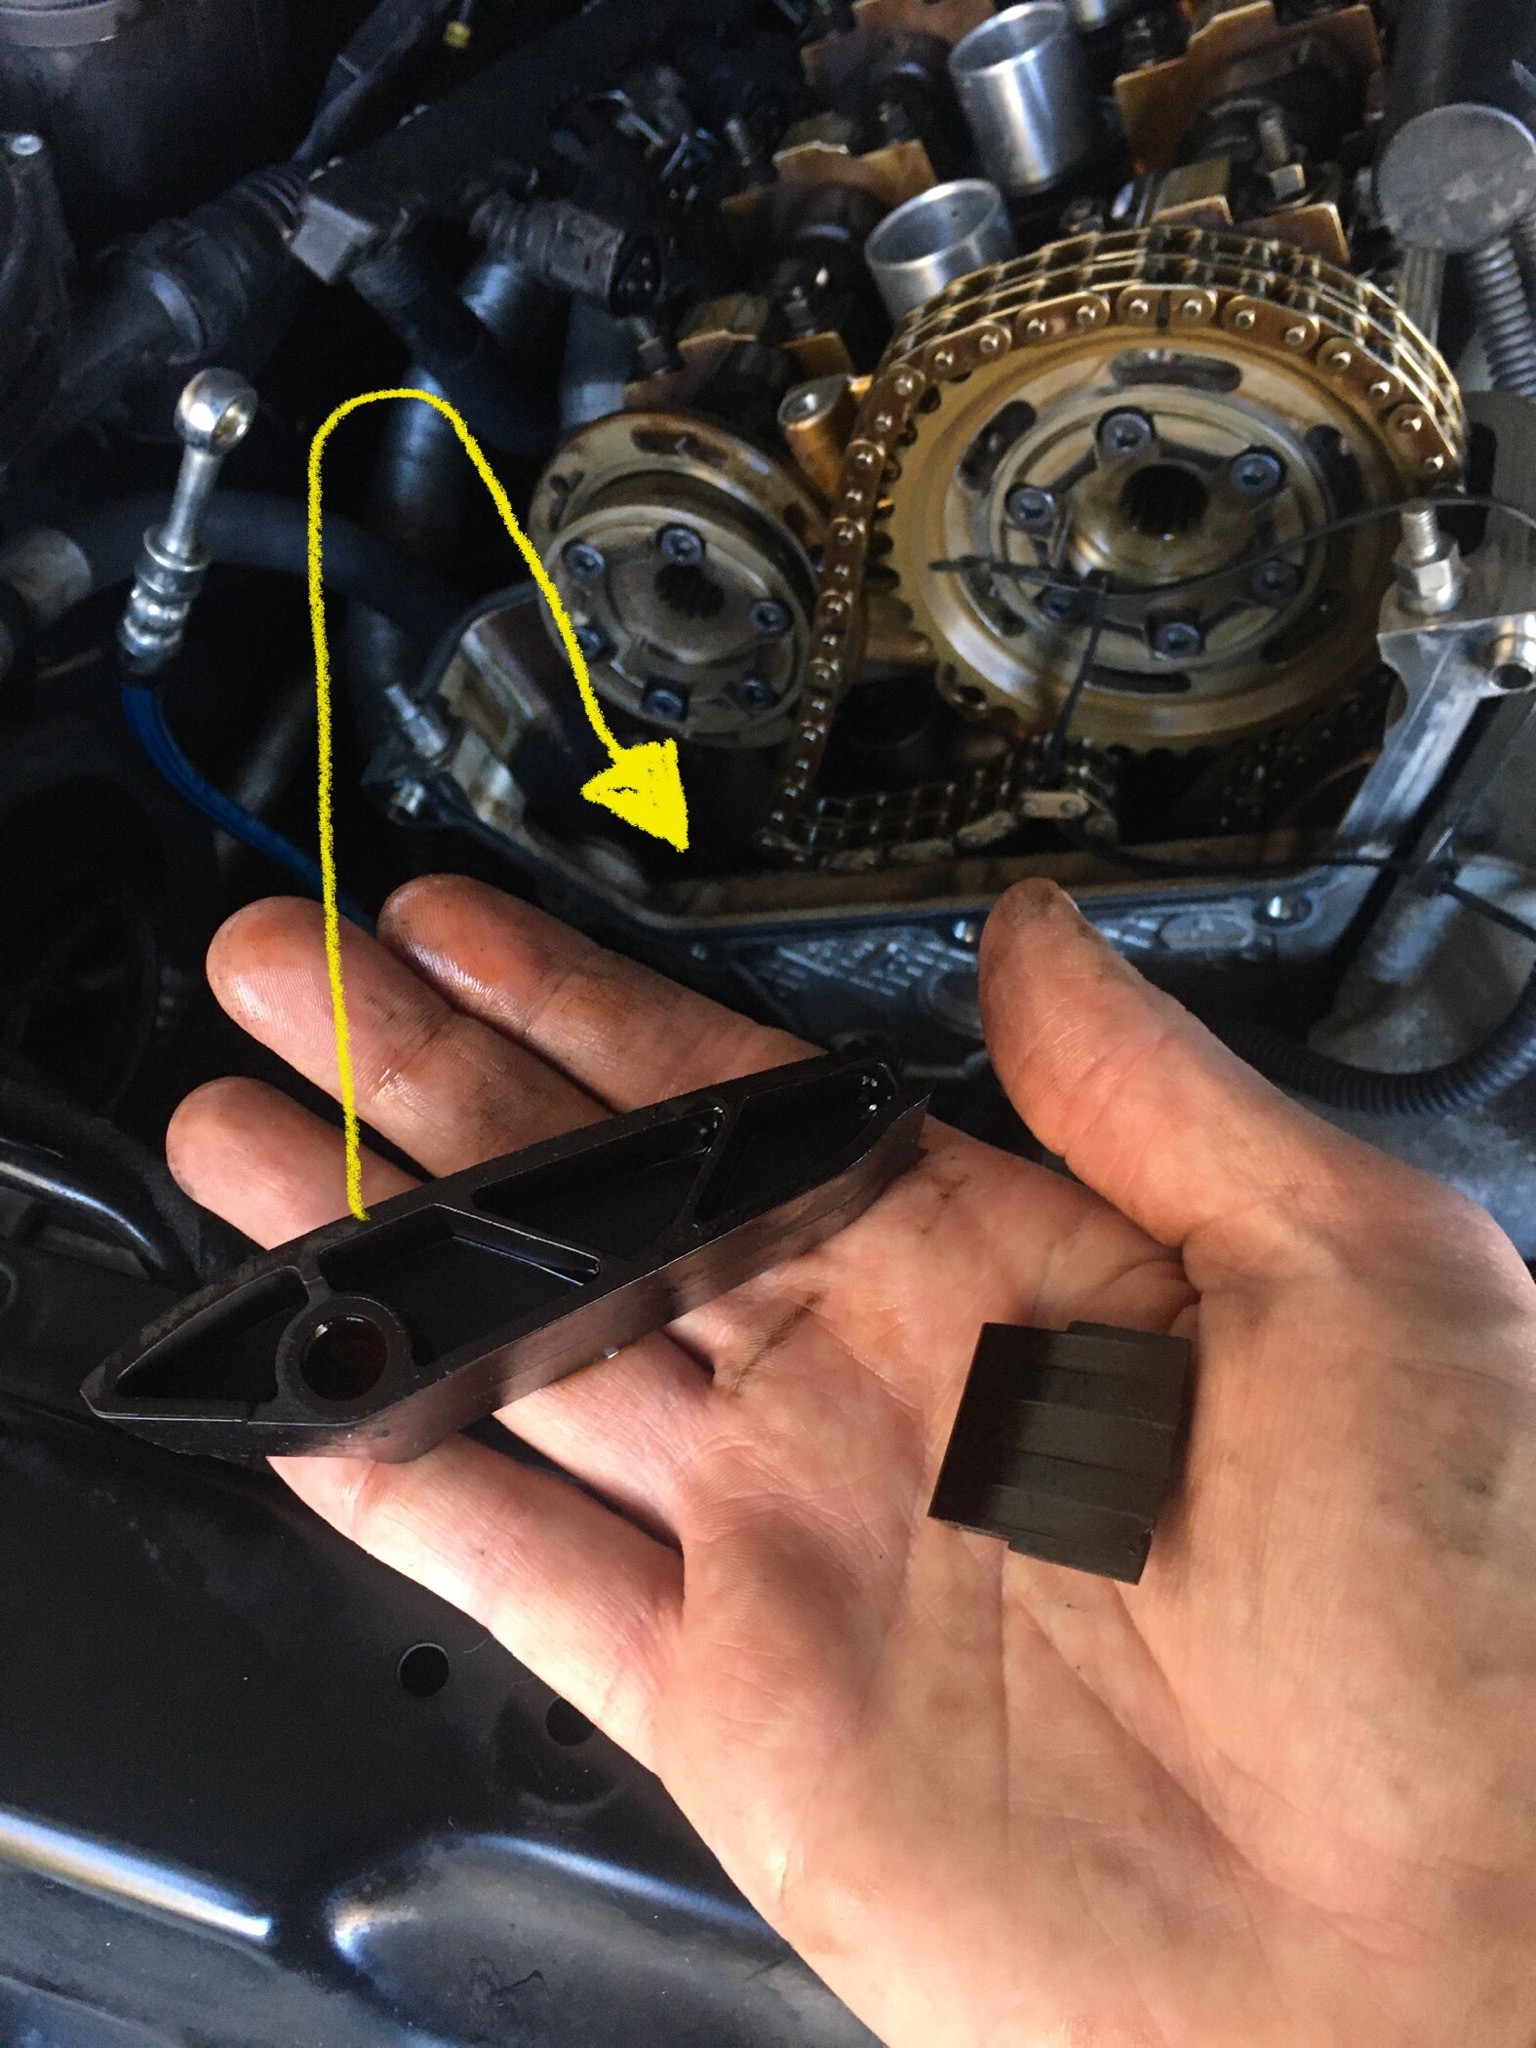
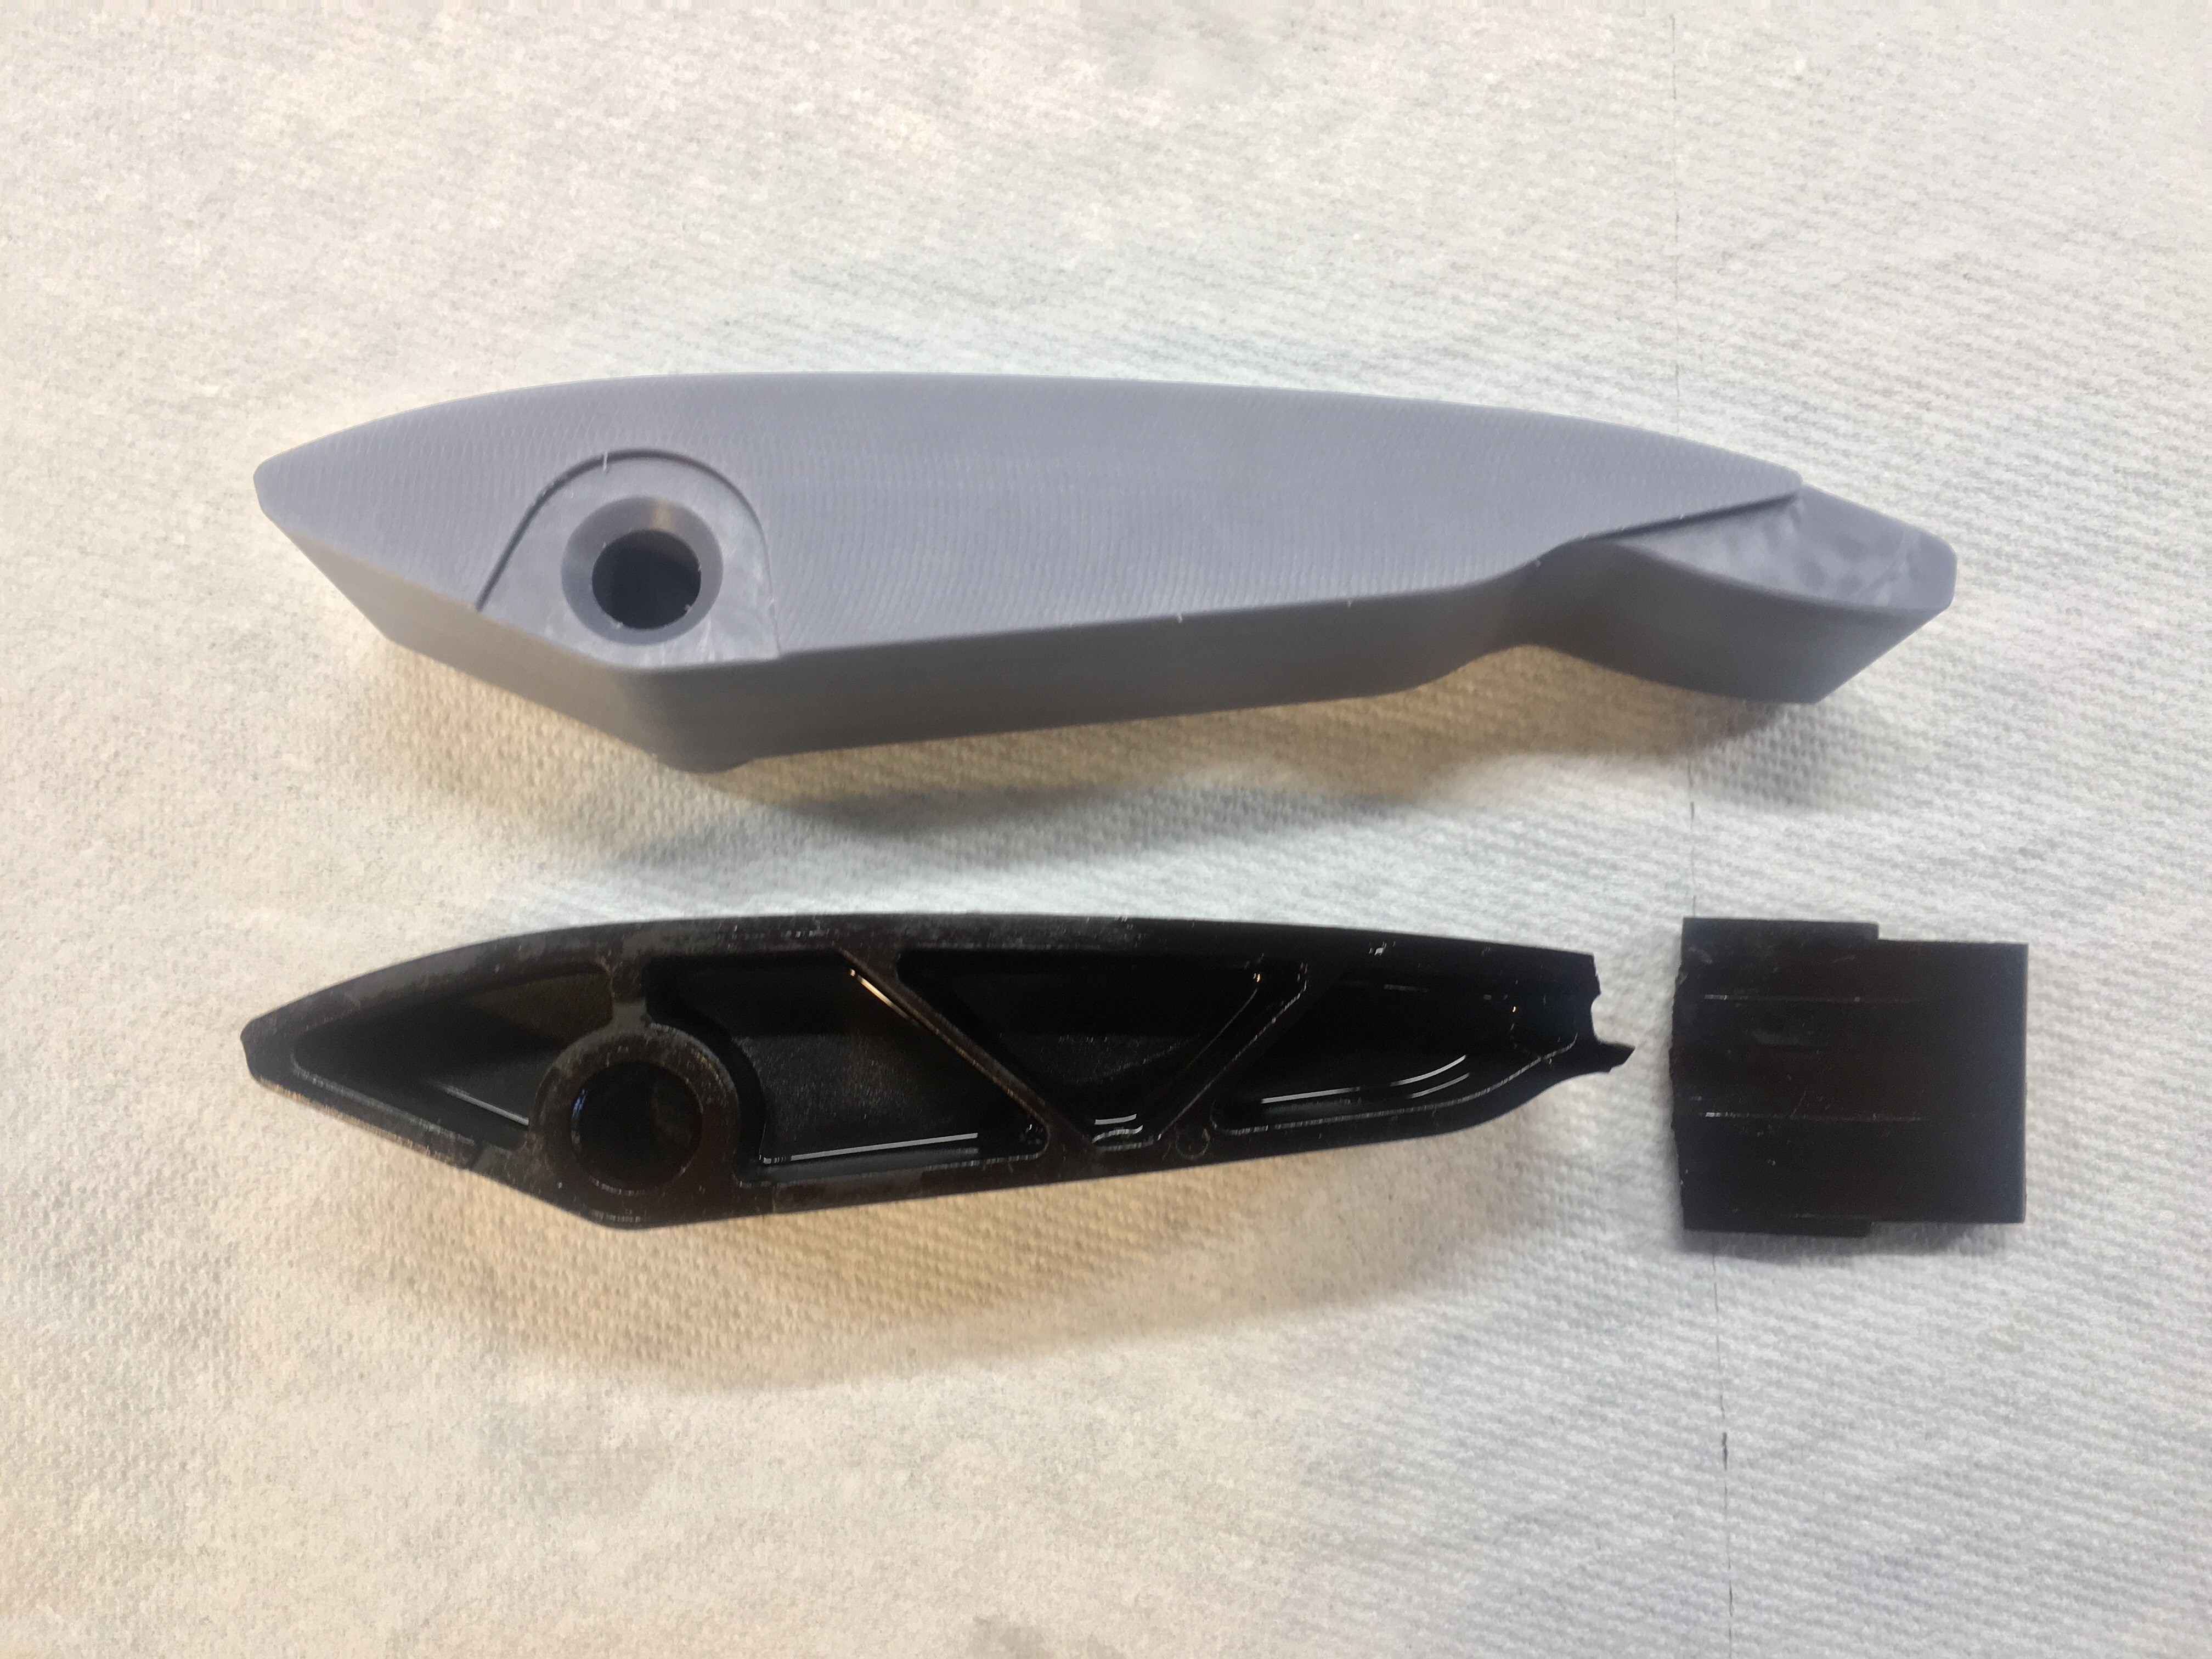
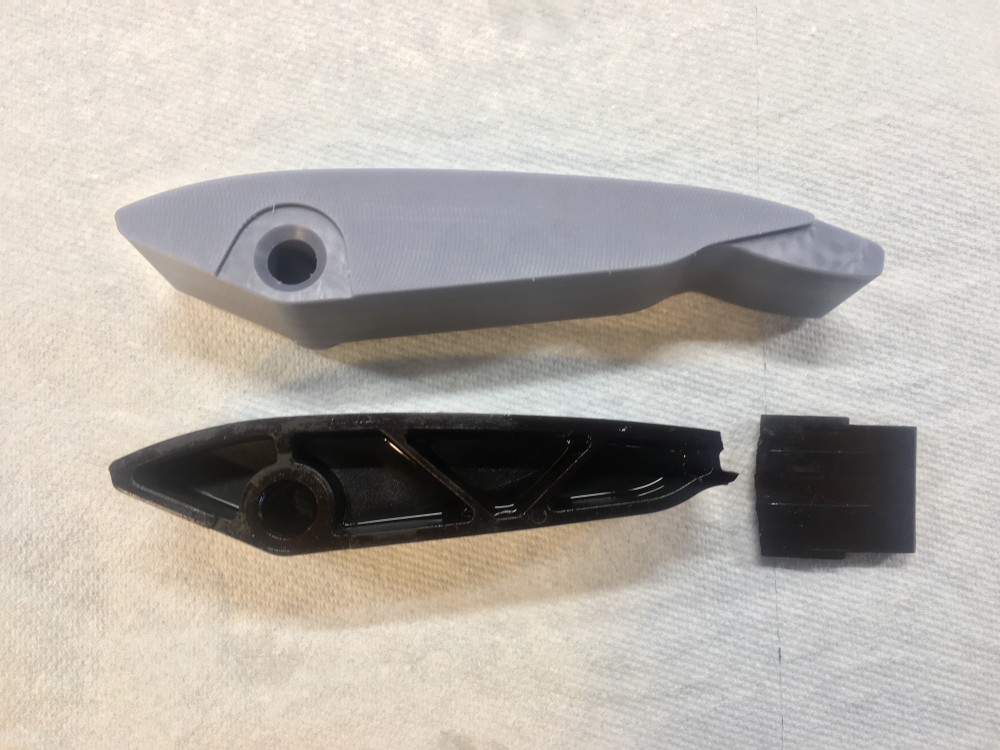
                        Yet another reliability upgrade/“while you’re in there” piece, the upper timing chain guide. This guy is known to break and wear out fast. HEY! MINE IS BROKEN!
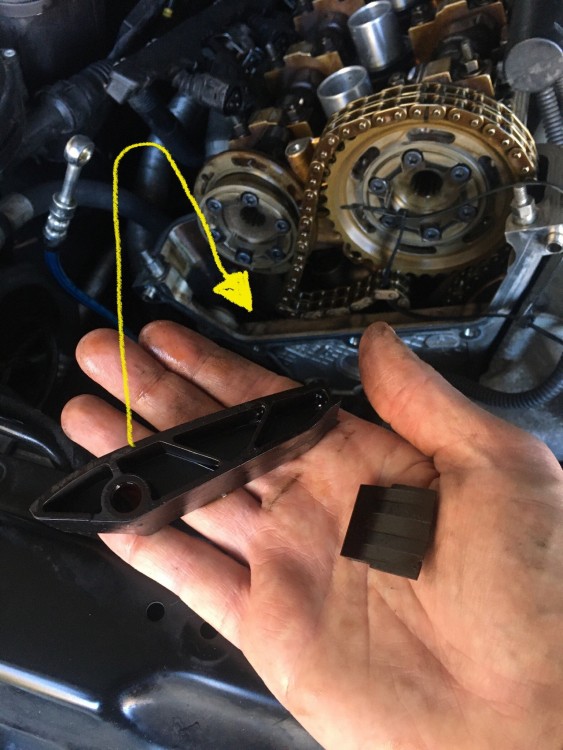
                        E42221BF-0801-47AE-958A-B41FE87BE57A.thumb.jpeg.838468b059a96723d481c529d06beda1.jpeg
                         

                        ORIGINAL TIMING CHAIN GUIDE: BUSTED!

                        Fishing out the broken piece without dropping it down the timing cover was a little nerve-racking. I even had a vacuum cleaner running to help try to catch the stray piece as i pulled it out with pliers

                        Here is the upgraded piece made from Nylatron, a material I use often in my engineering work. It has good friction properties and very good wear resistance for a plastic.
                        4657B4B4-C29E-44BA-9D0C-12E35E54FBD8.thumb.jpeg.c31b85632b491a1ad1f8acba08449d97.jpeg

                        Everything should be buttoned together later this week as long as I get the parts I need.

                        1 Reply Last reply
                        5
                        • JdesignJ
                          JdesignJ
                          Jdesign
                          wrote on last edited by
                          #220

                          Did you make or buy that Nylatron guide?

                          SumBunny.jpg

                          https://www.instagram.com/_jdesigner_/                                          http://nevertoolow.tumblr.com/

                          🥳SOLD BMW E24 633CSI - BMW M30B32                                          🧪SOLD HCH  ES9 - 1.3 LDA
                          👽BMW E30 325IC - Toyota 1JZ-GTE                                                     ⏰ HONDA EF9 CIVIC SI - JDM B18C5
                          ☠️BMW E36 318i - Ford 5.0 FE302                                                         🚴‍♂️ GT-Labomba - 26x2.75 Freeride
                          🤹‍♀️SOLD BMW E36/7 Z3 - BMW M54B25                                                🧓SOLD BMW E10 2002 - BMW M10M05

                          1 Reply Last reply
                          0
                          • B
                            B
                            B C
                            wrote on last edited by
                            #221

                            Jdesign said:

                            Did you make or buy that Nylatron guide?

                            purchased

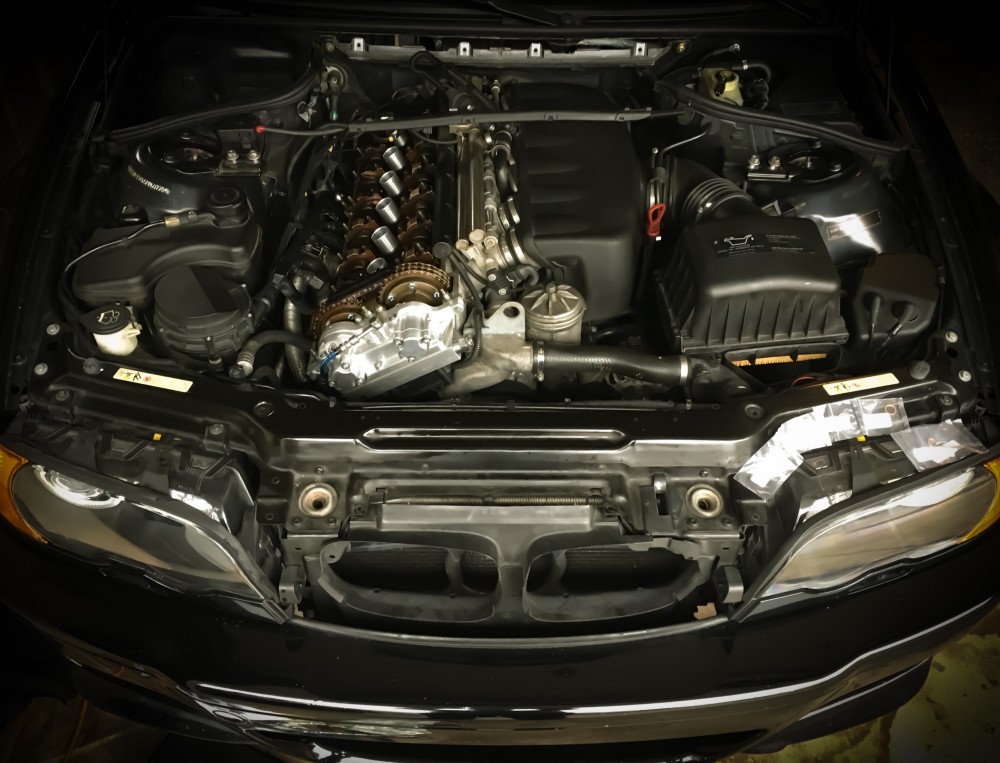
                            http://www.beisansystems.com/products.html

                            1 Reply Last reply
                            1
                            • B
                              B
                              B C
                              wrote on last edited by
                              #222

                              Two steps forward, two steps back.

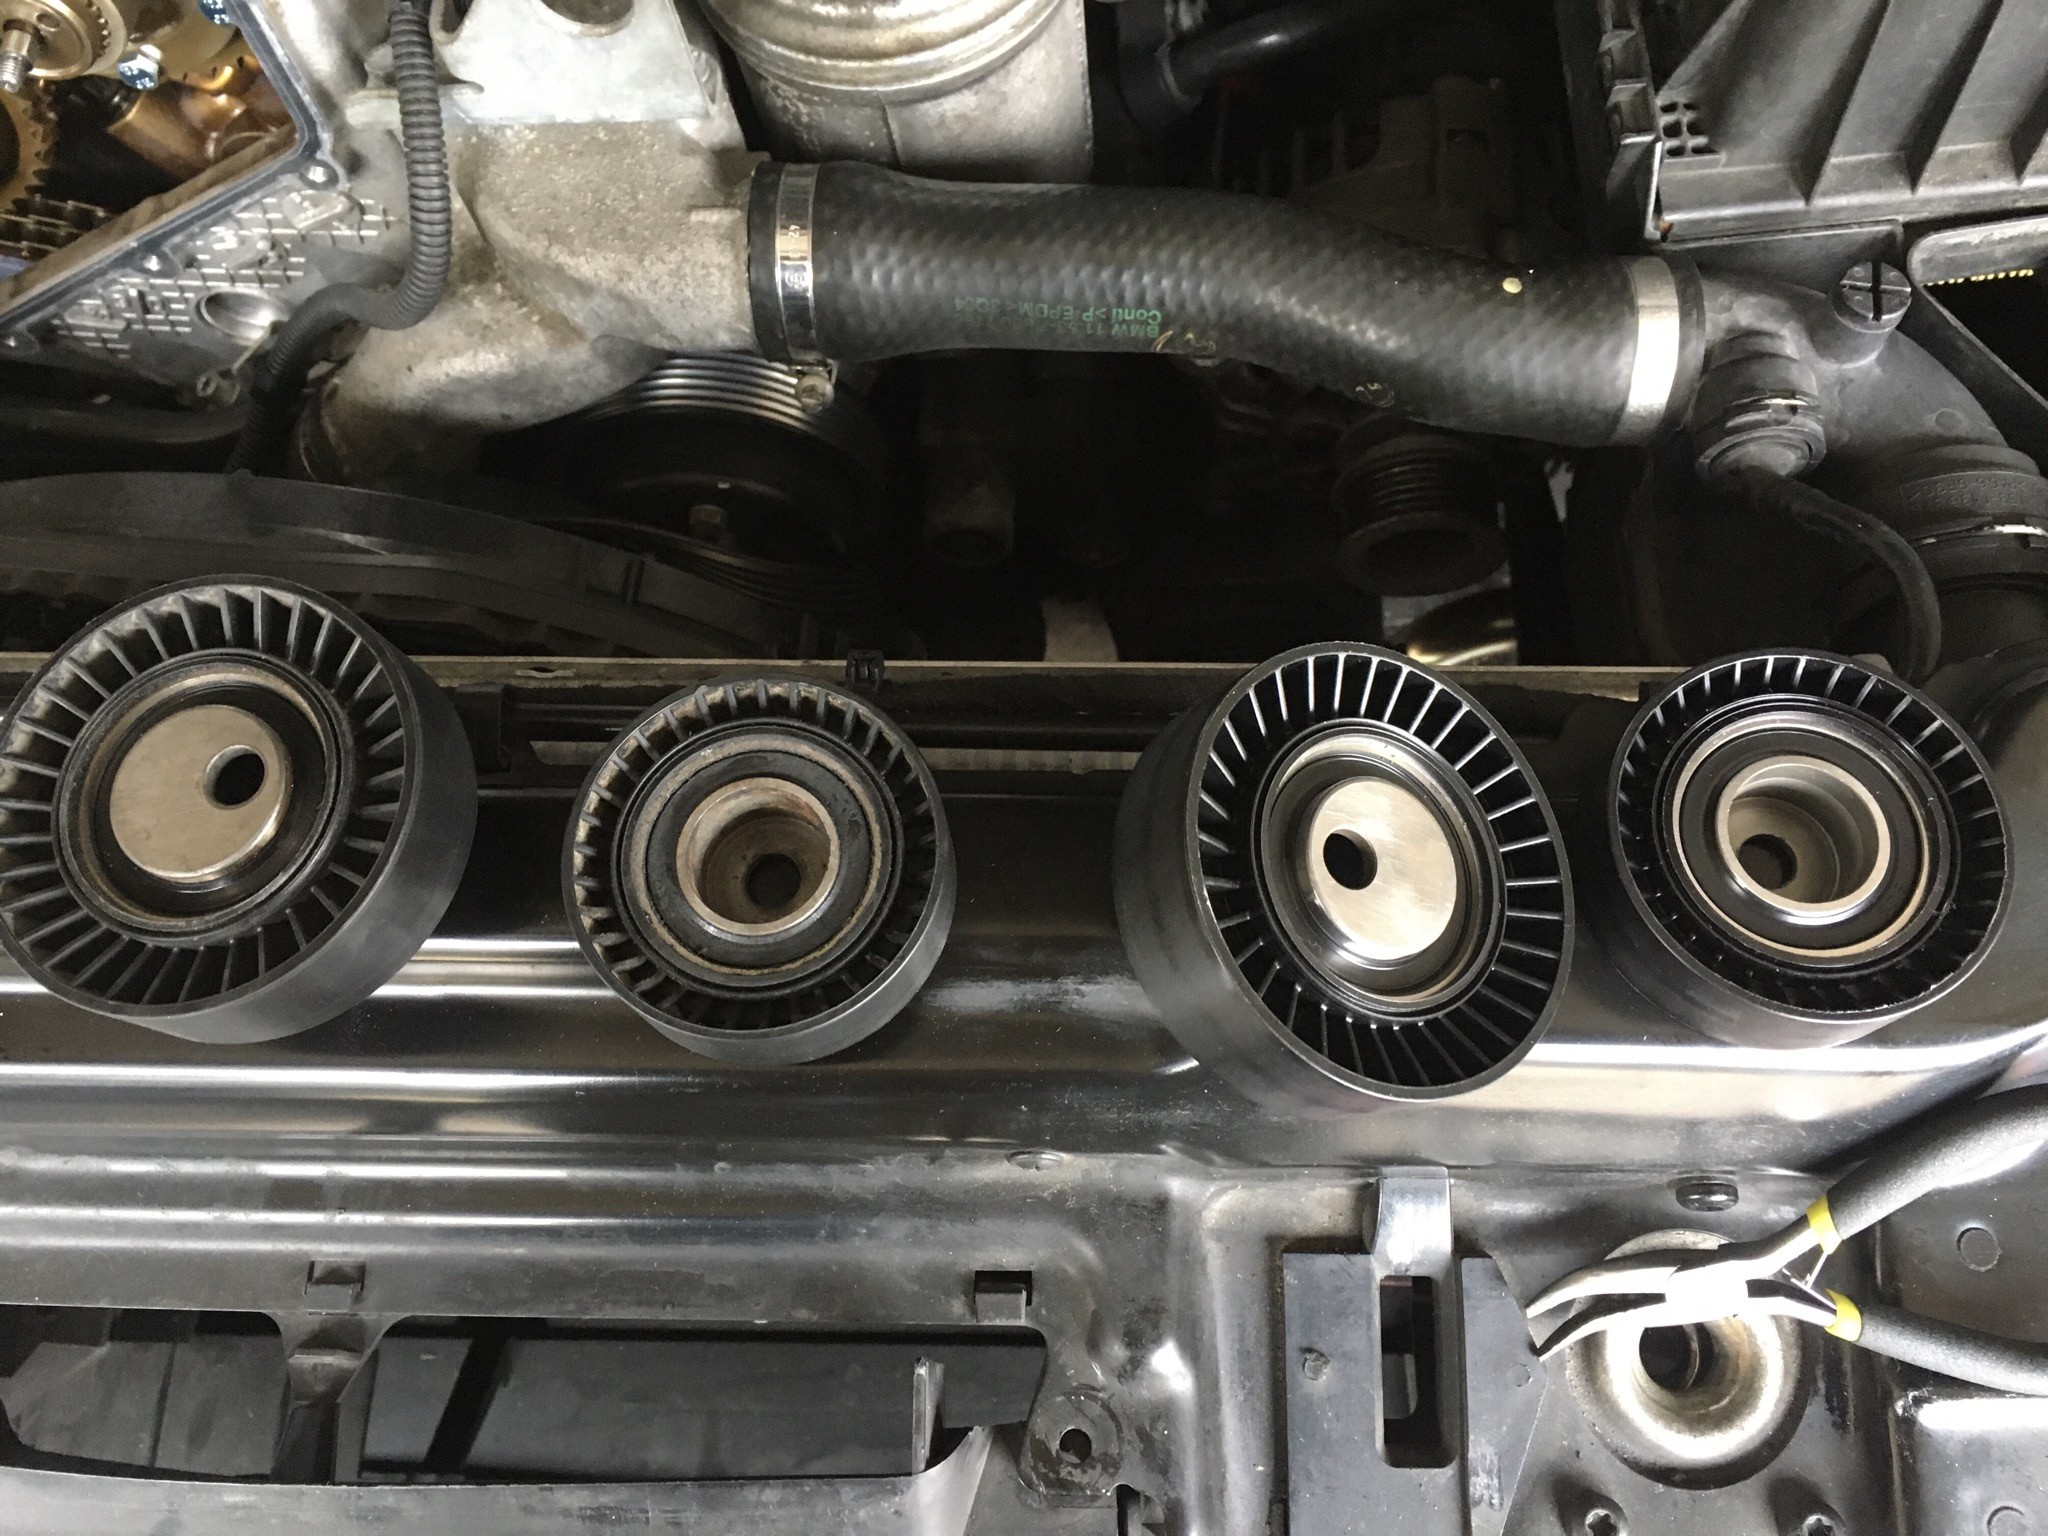
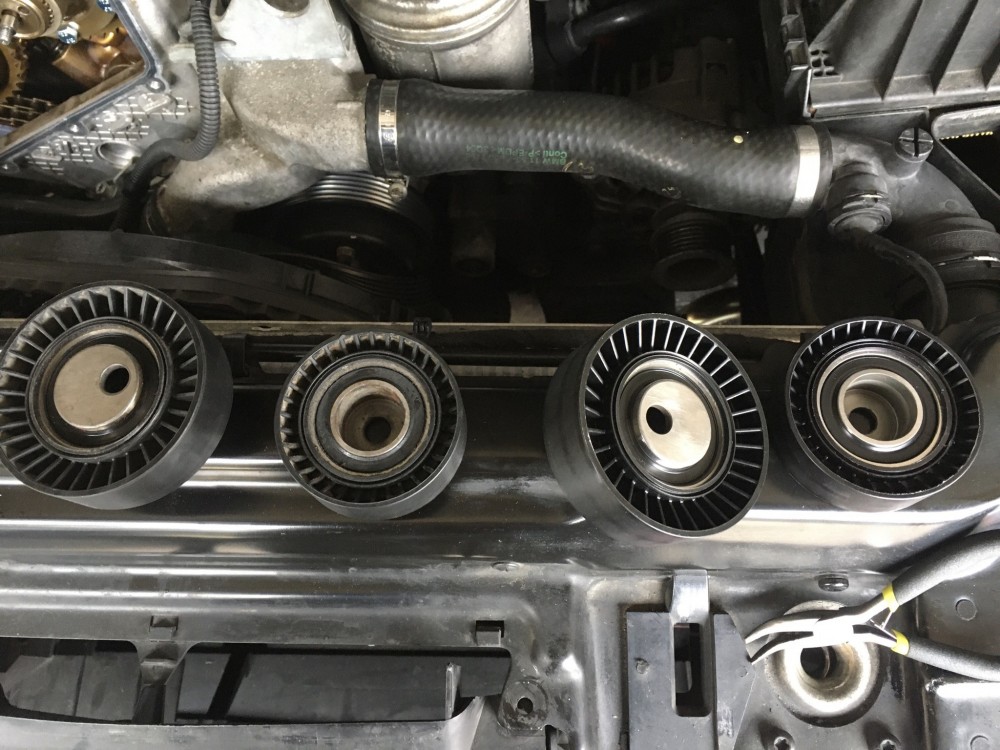
                              +1) Replaced the belt idlers that were beginning to sound like a tiny elephant with a kazoo.
                              2177A274-EE3B-48C0-9911-7C2B1E4AC9FE.thumb.jpeg.edadc695da0bbcacc7b93b98af56a573.jpeg

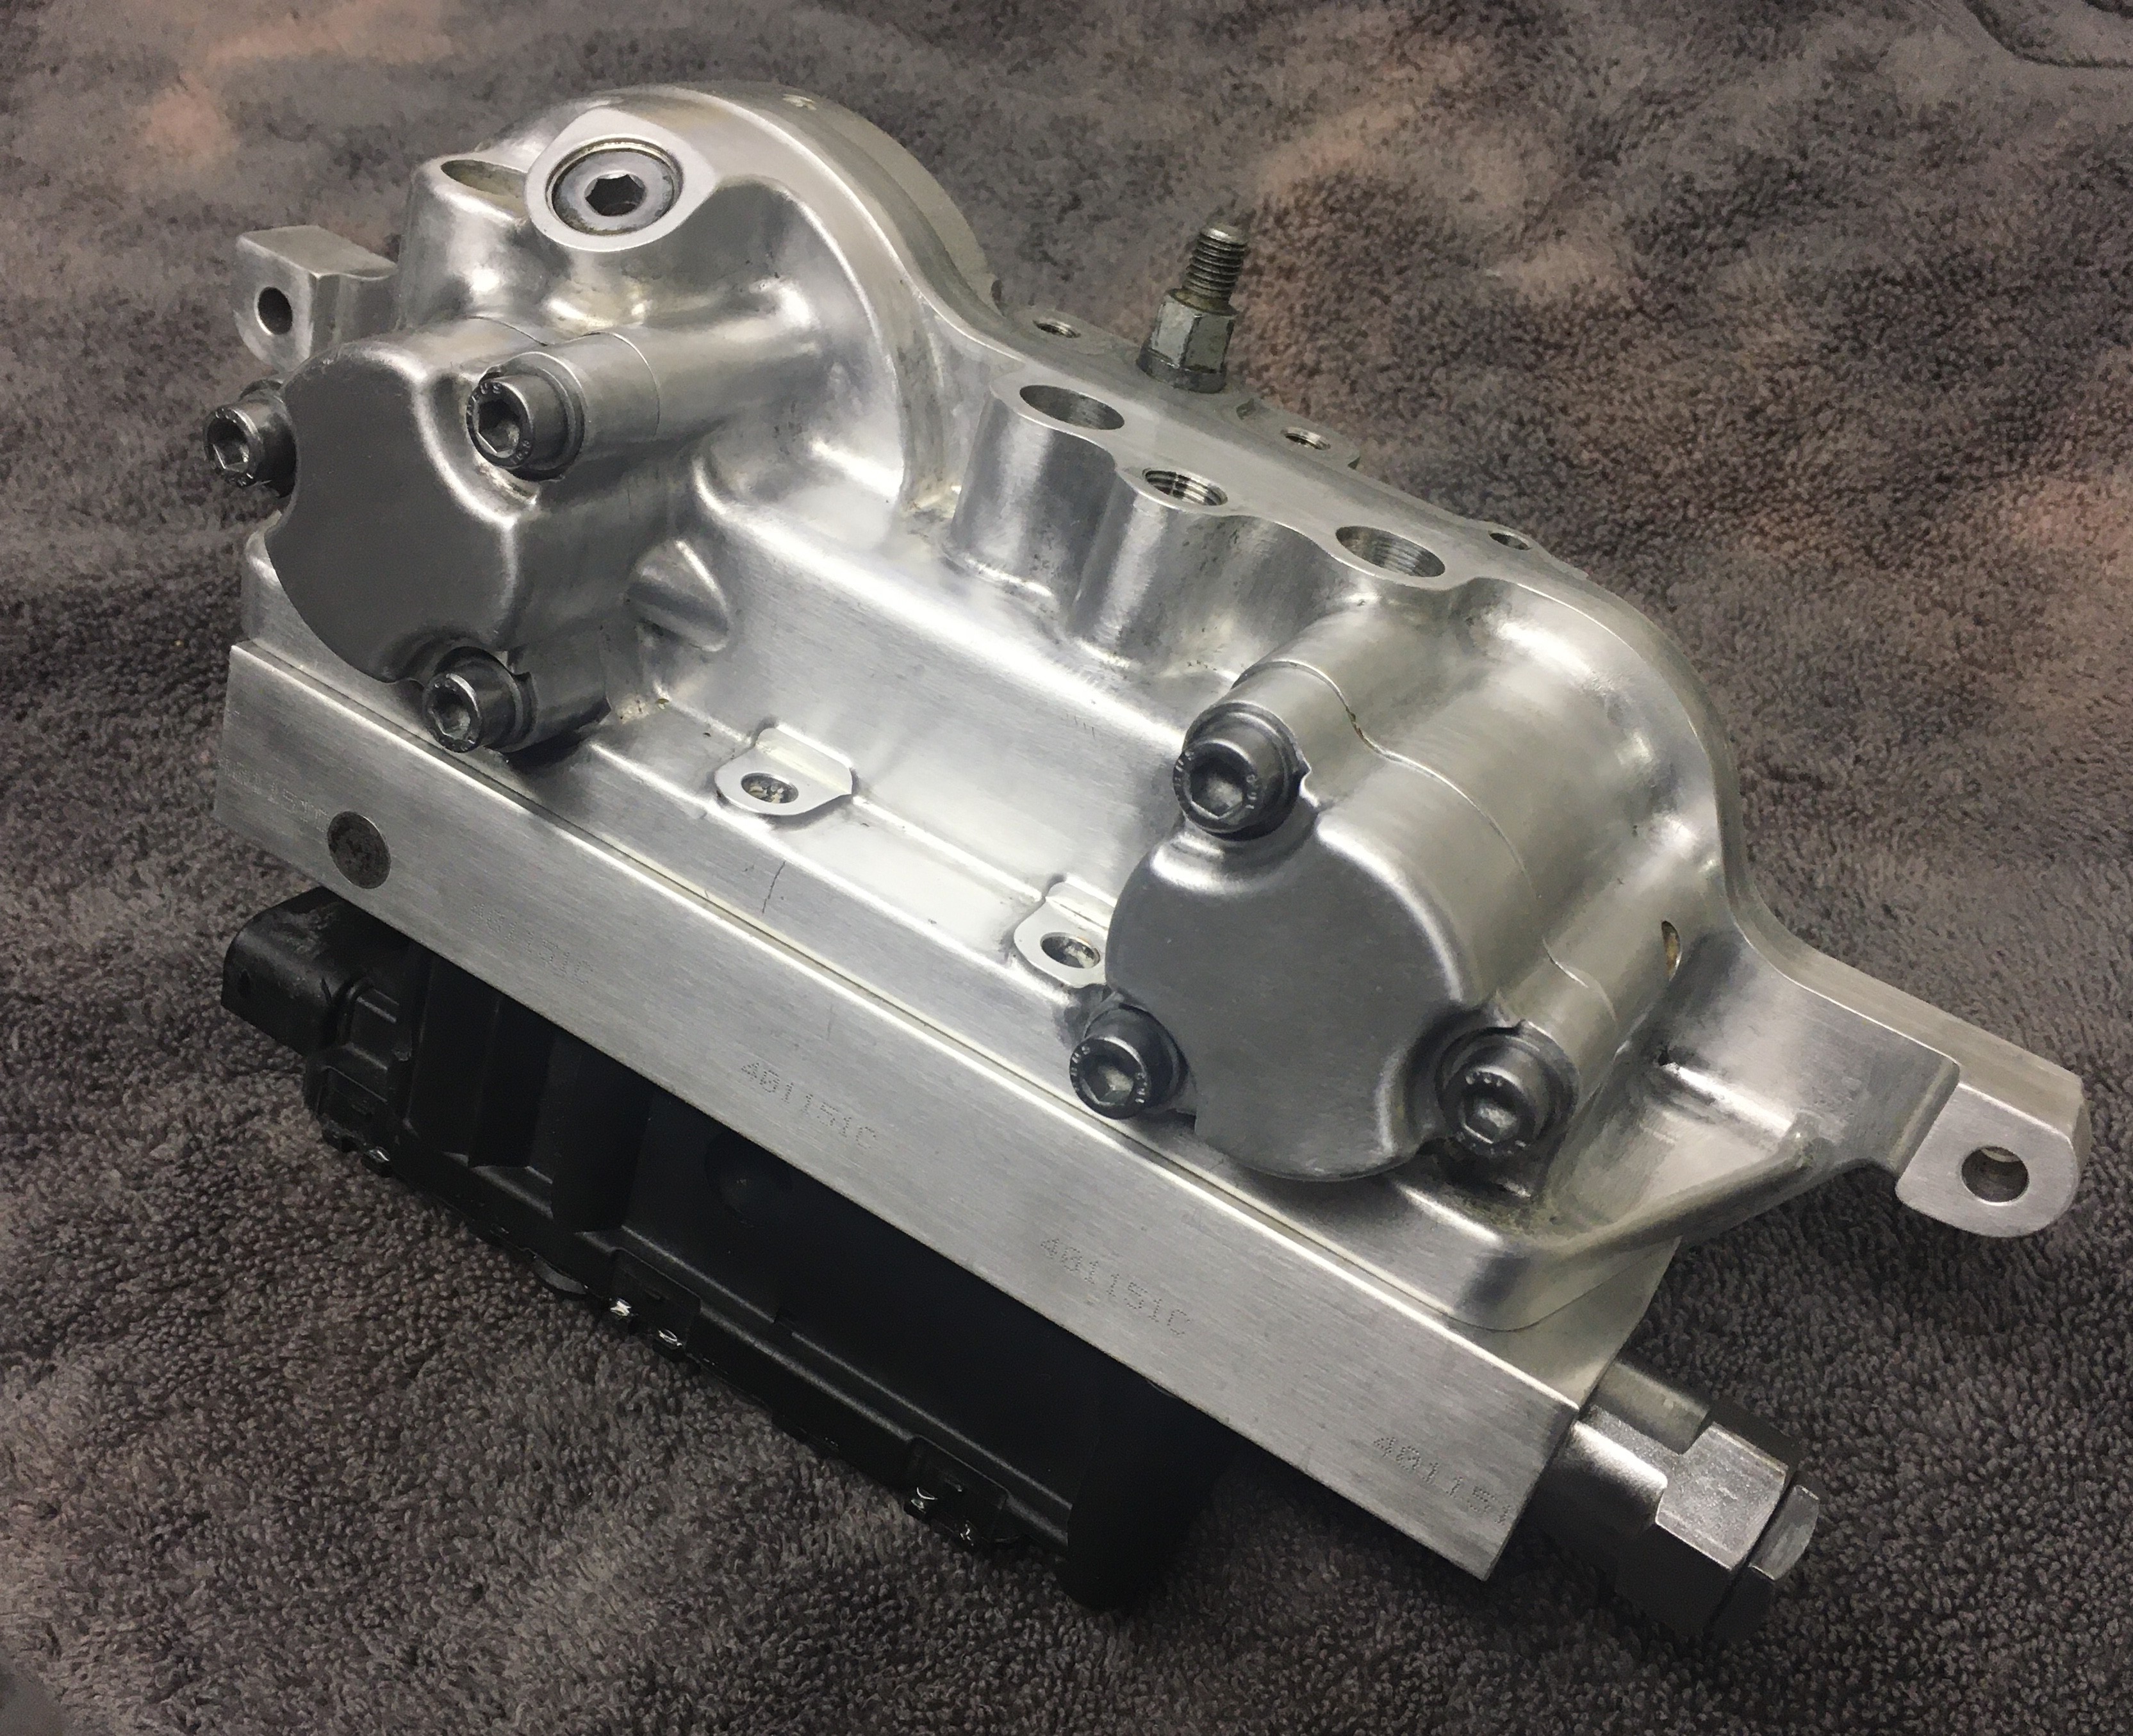
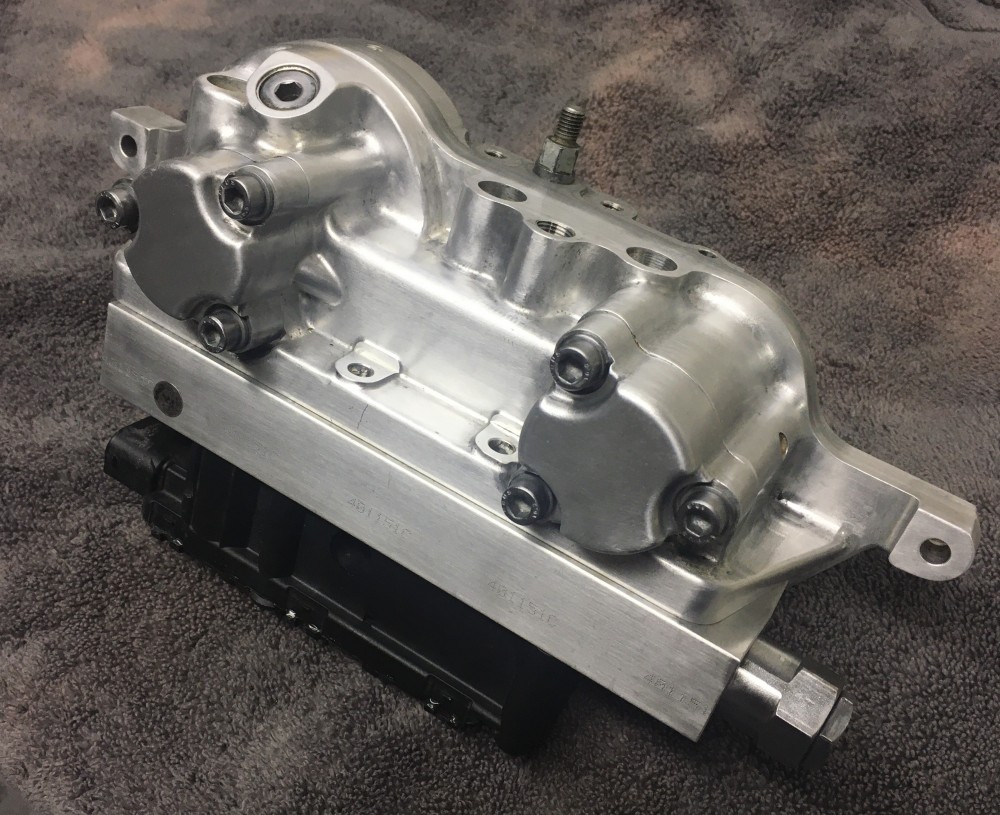
                              +1) Replacement o-ring and teflon seal arrived. VANOS rebuild is complete. Just waiting on oil pump disk to be machined before I continue re-assembly
                              59772DCA-E265-422A-B3E7-317E8E4B862A.thumb.jpeg.1a630d9950cda861d5e974cf164bdc30.jpeg

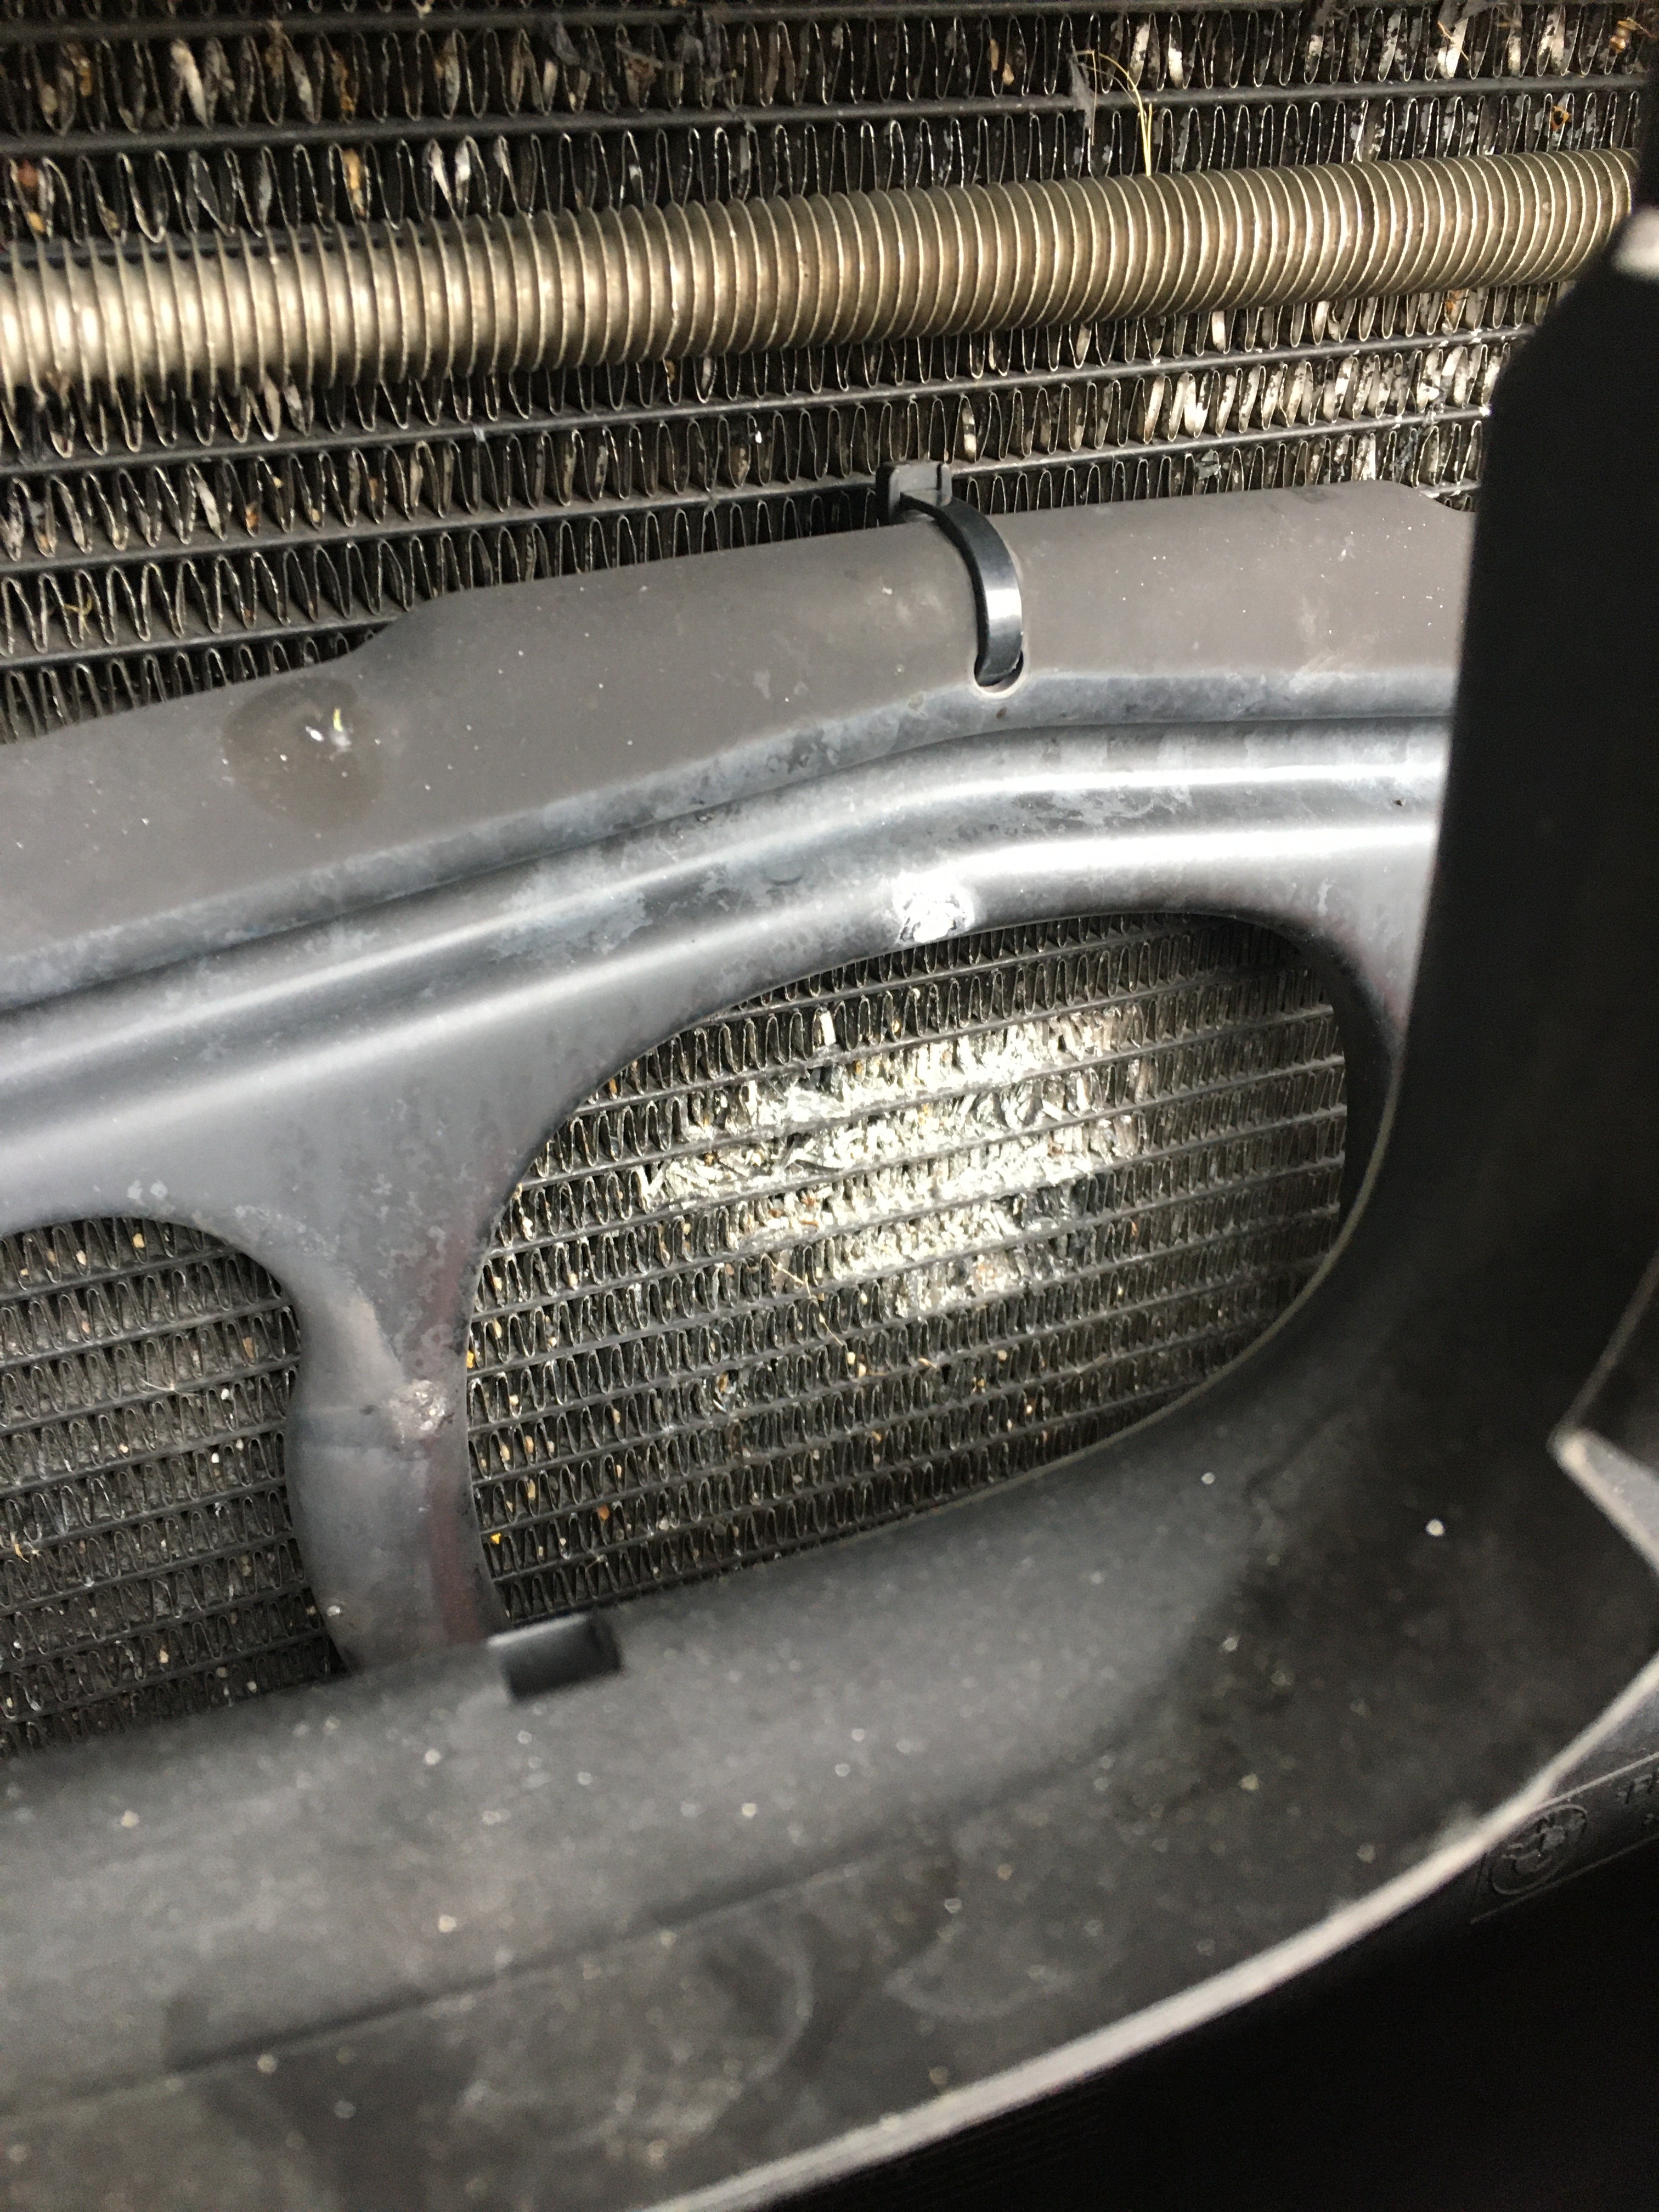
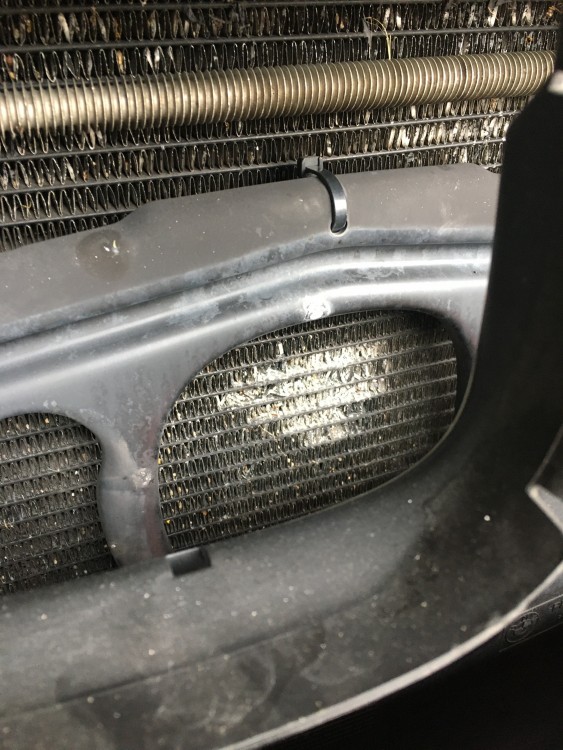
                              -1) The idler pulley bolt is so long that I couldn’t remove it without removing the electric fan which required permanent removal (see also breakage) of the fin mounted zip strips. While I was investigating whether I could run longer ones through the condenser+radiator to make future removal easier (im not going to drain the coolant and remove the radiator when I want to remove the fan) I noticed the AC condenser fins are almost entirely Aluminum Oxide instead of Aluminum. They fall off when you touch them, so a new condenser is in my future. I have never seen them so brittle before. I may see how corroded and brittle the front  side of the radiator tubes are and replace the radiator at the same time.
                              72CCB540-4722-4109-9CE2-D03BFE76764D.thumb.jpeg.b73b2b9ebd8169e1471e01e2cc0e1049.jpeg

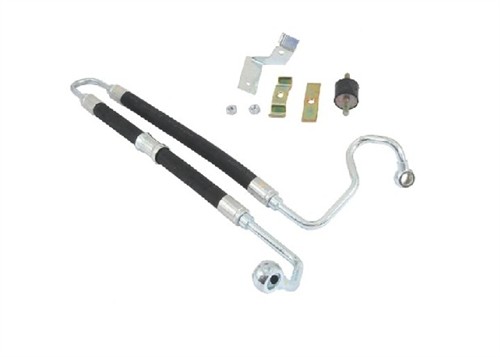
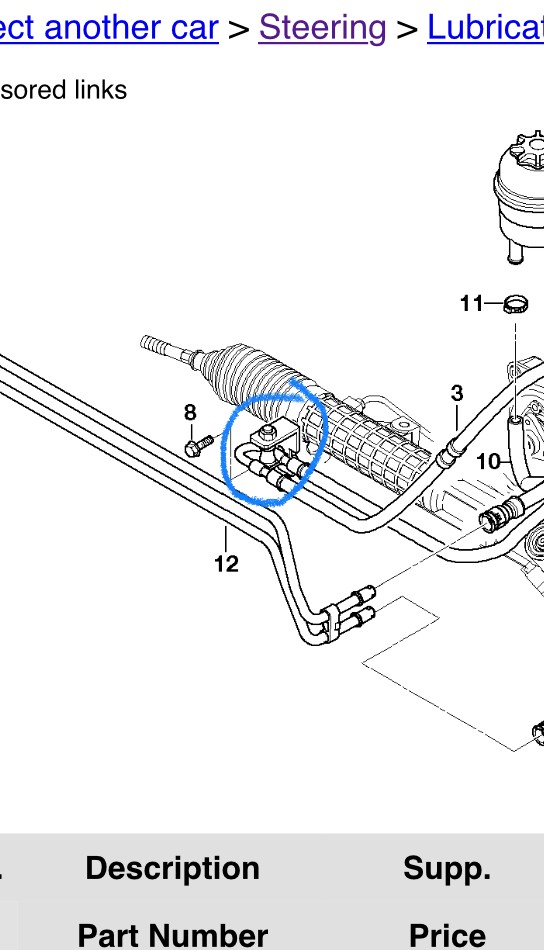
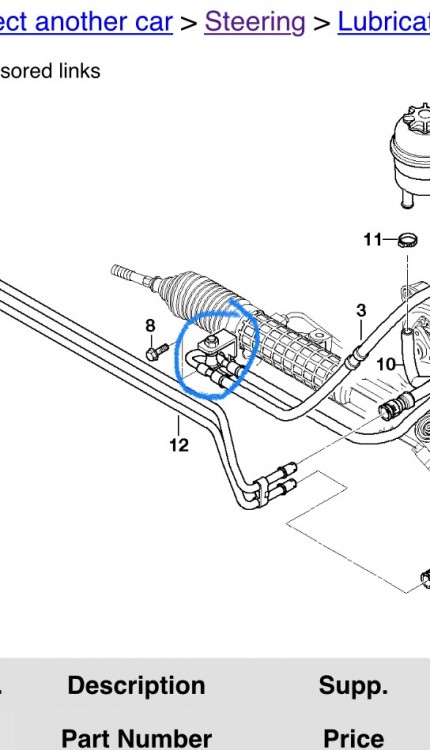
                              -1) I found a broken power steering line mounting bracket under the car. Very minor inconvenience. Looks like a transmission mount and is only sold with the hard line.

                              UPDATE: The part appears to be the same mount the secondary air pump uses so I have it on order.
                              255D53C0-3089-42D9-A775-5401E3064CCB.thumb.jpeg.f56538cfbc78fef9cfb59dfca4ef5629.jpeg0FACA855-41CF-4E3C-A04C-B872803CE71D.jpeg.009b45315414bbaa2a8b60425f256152.jpeg

                              1 Reply Last reply
                              0
                              • RekpointR
                                RekpointR
                                Rekpoint
                                wrote on last edited by
                                #223

                                God damn stroopwafels.

                                1 Reply Last reply
                                2
                                • B
                                  B
                                  B C
                                  wrote on last edited by
                                  #224

                                  Condenser fins crumble just the same

                                  1 Reply Last reply
                                  2
                                  • B
                                    B
                                    B C
                                    wrote on last edited by
                                    #225

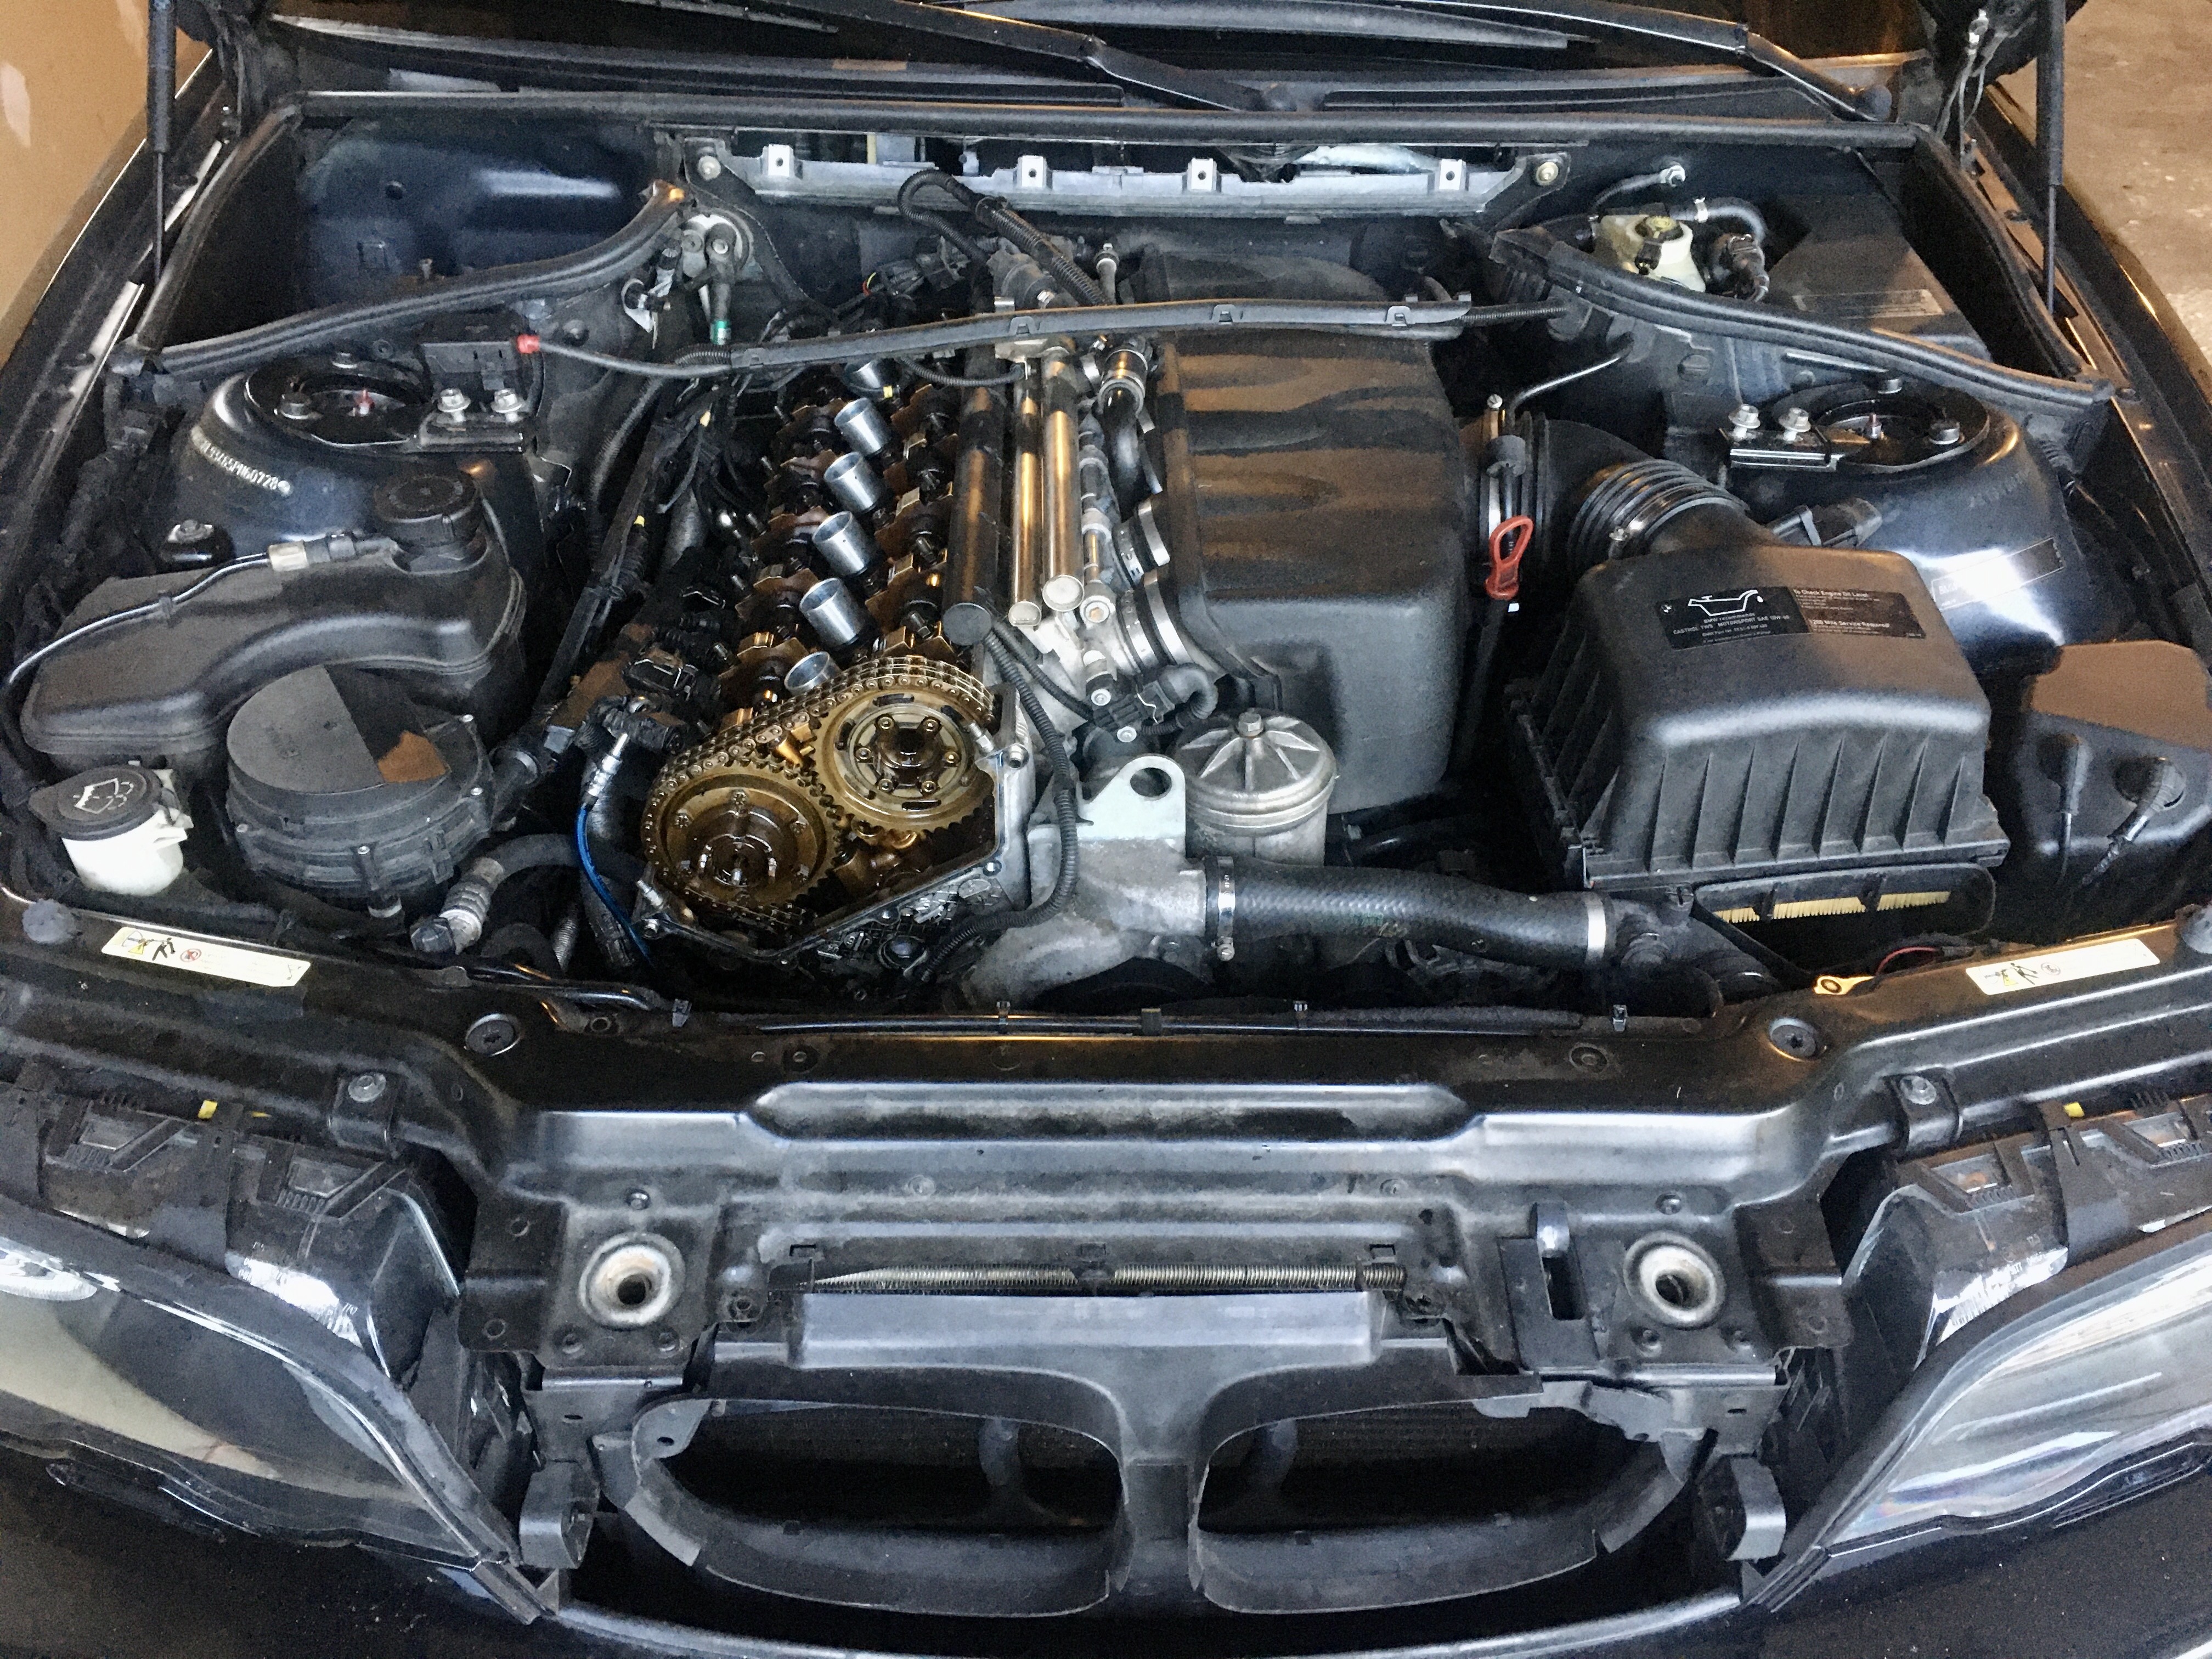
                                    VANOS installed.

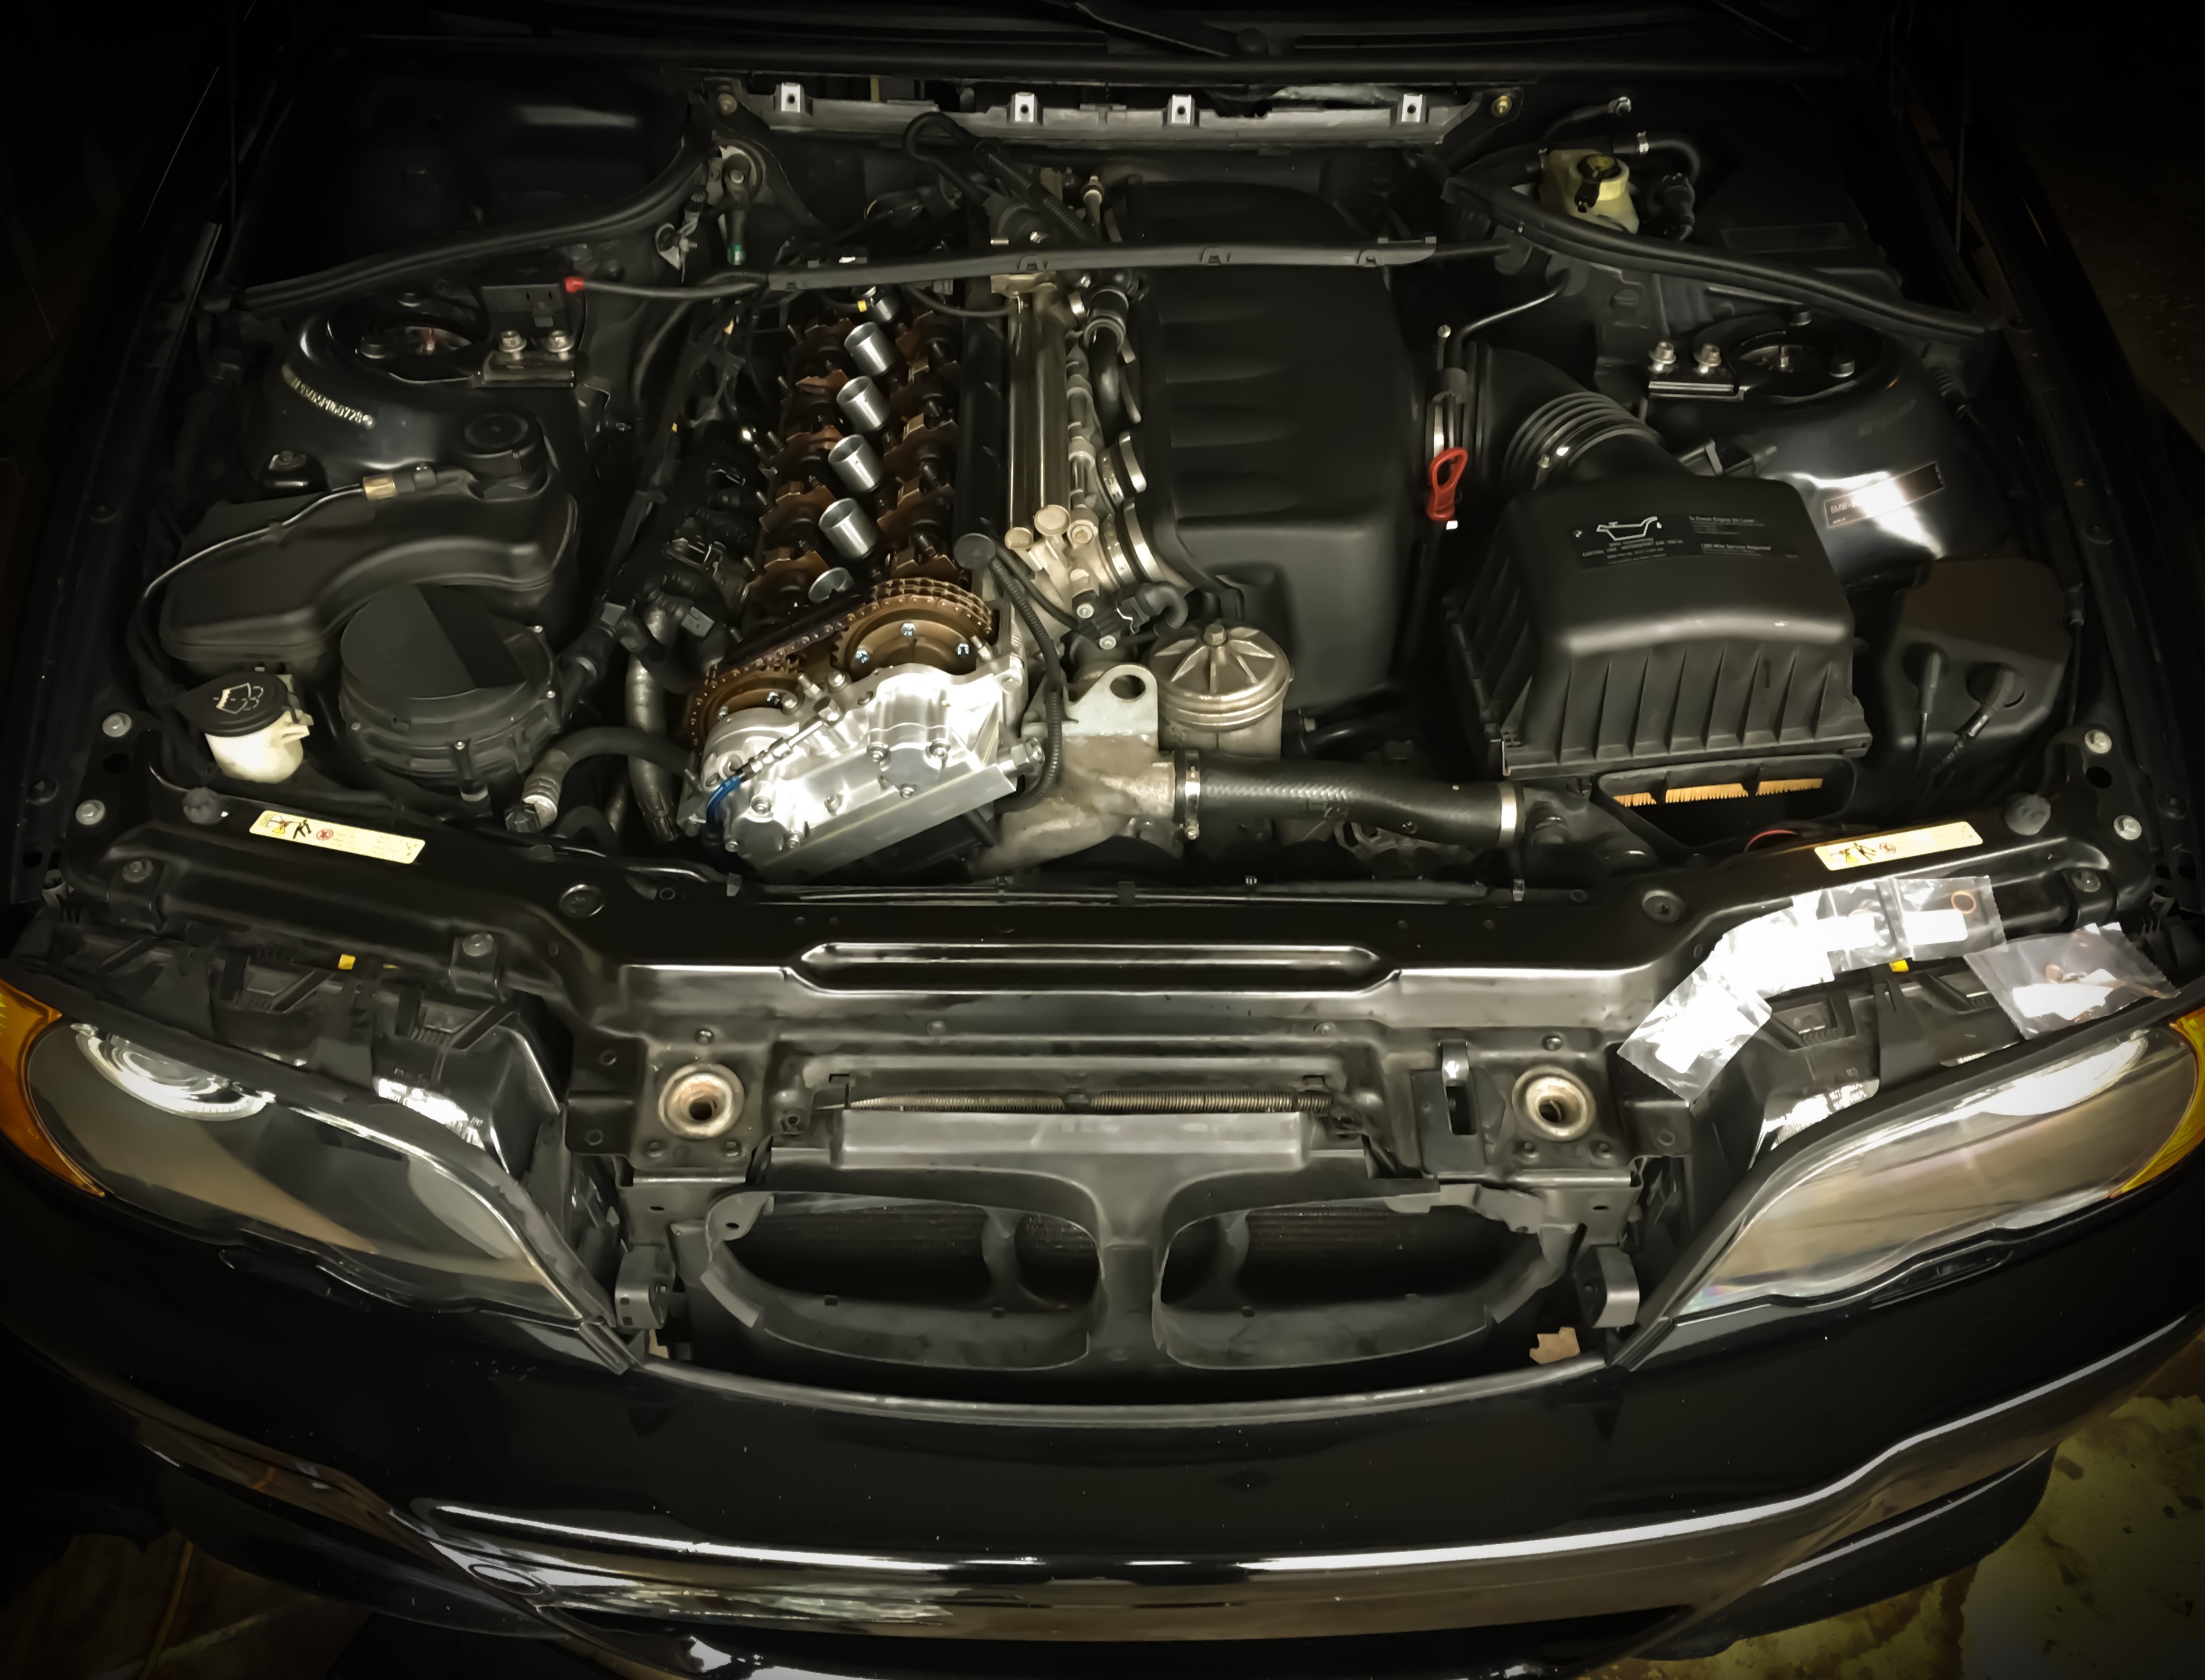
                                    Cams are timed perfectly.

                                    It took a few hours and some patience and a little bit of experimentation to make the timing perfect. I had it set within the acceptable range but it needs to be perfect because quite simply it’s an S54 and the S54 deserves it.

                                    What I believe prevents some people from getting it perfect is a slight advancement of the cams while tightening the sprocket hub bolts and the slightest bit of timing chain slack.  You can follow all the directions to the T but it can still be slightly off. There are plenty of forum threads where people had incorrect timing and error codes simply from using a non-BMW timing tool or by wrongly assuming they had it close enough. It is a fairly involved process and do not want to revisit this at a later time. It is as perfect as it can be. If by some chance it throws a code or is off, I will write myself off and quit working on cars.
                                    A1699975-22C7-4B1A-A777-CCD221FFCA16.thumb.jpeg.29ab1320b44255db7ef16fcaa8dd8b25.jpeg

                                    Later today I should get around to the valve adjustment and get it all put back together.

                                    1 Reply Last reply
                                    2
                                    • YoungCRY
                                      YoungCRY
                                      YoungCR
                                      wrote on last edited by
                                      #226

                                      That engine bay is marvelous. Great work.

                                      Chris Young
                                      BMWCCA #458972
                                      1986 528e/5  | 1994 530i/5 | 1995 540i/6 | 2013 X5 35d | 1998 C1500 Suburban | 1995 K2500 Suburban

                                      1 Reply Last reply
                                      1
                                      • B
                                        B
                                        B C
                                        wrote on last edited by
                                        #227

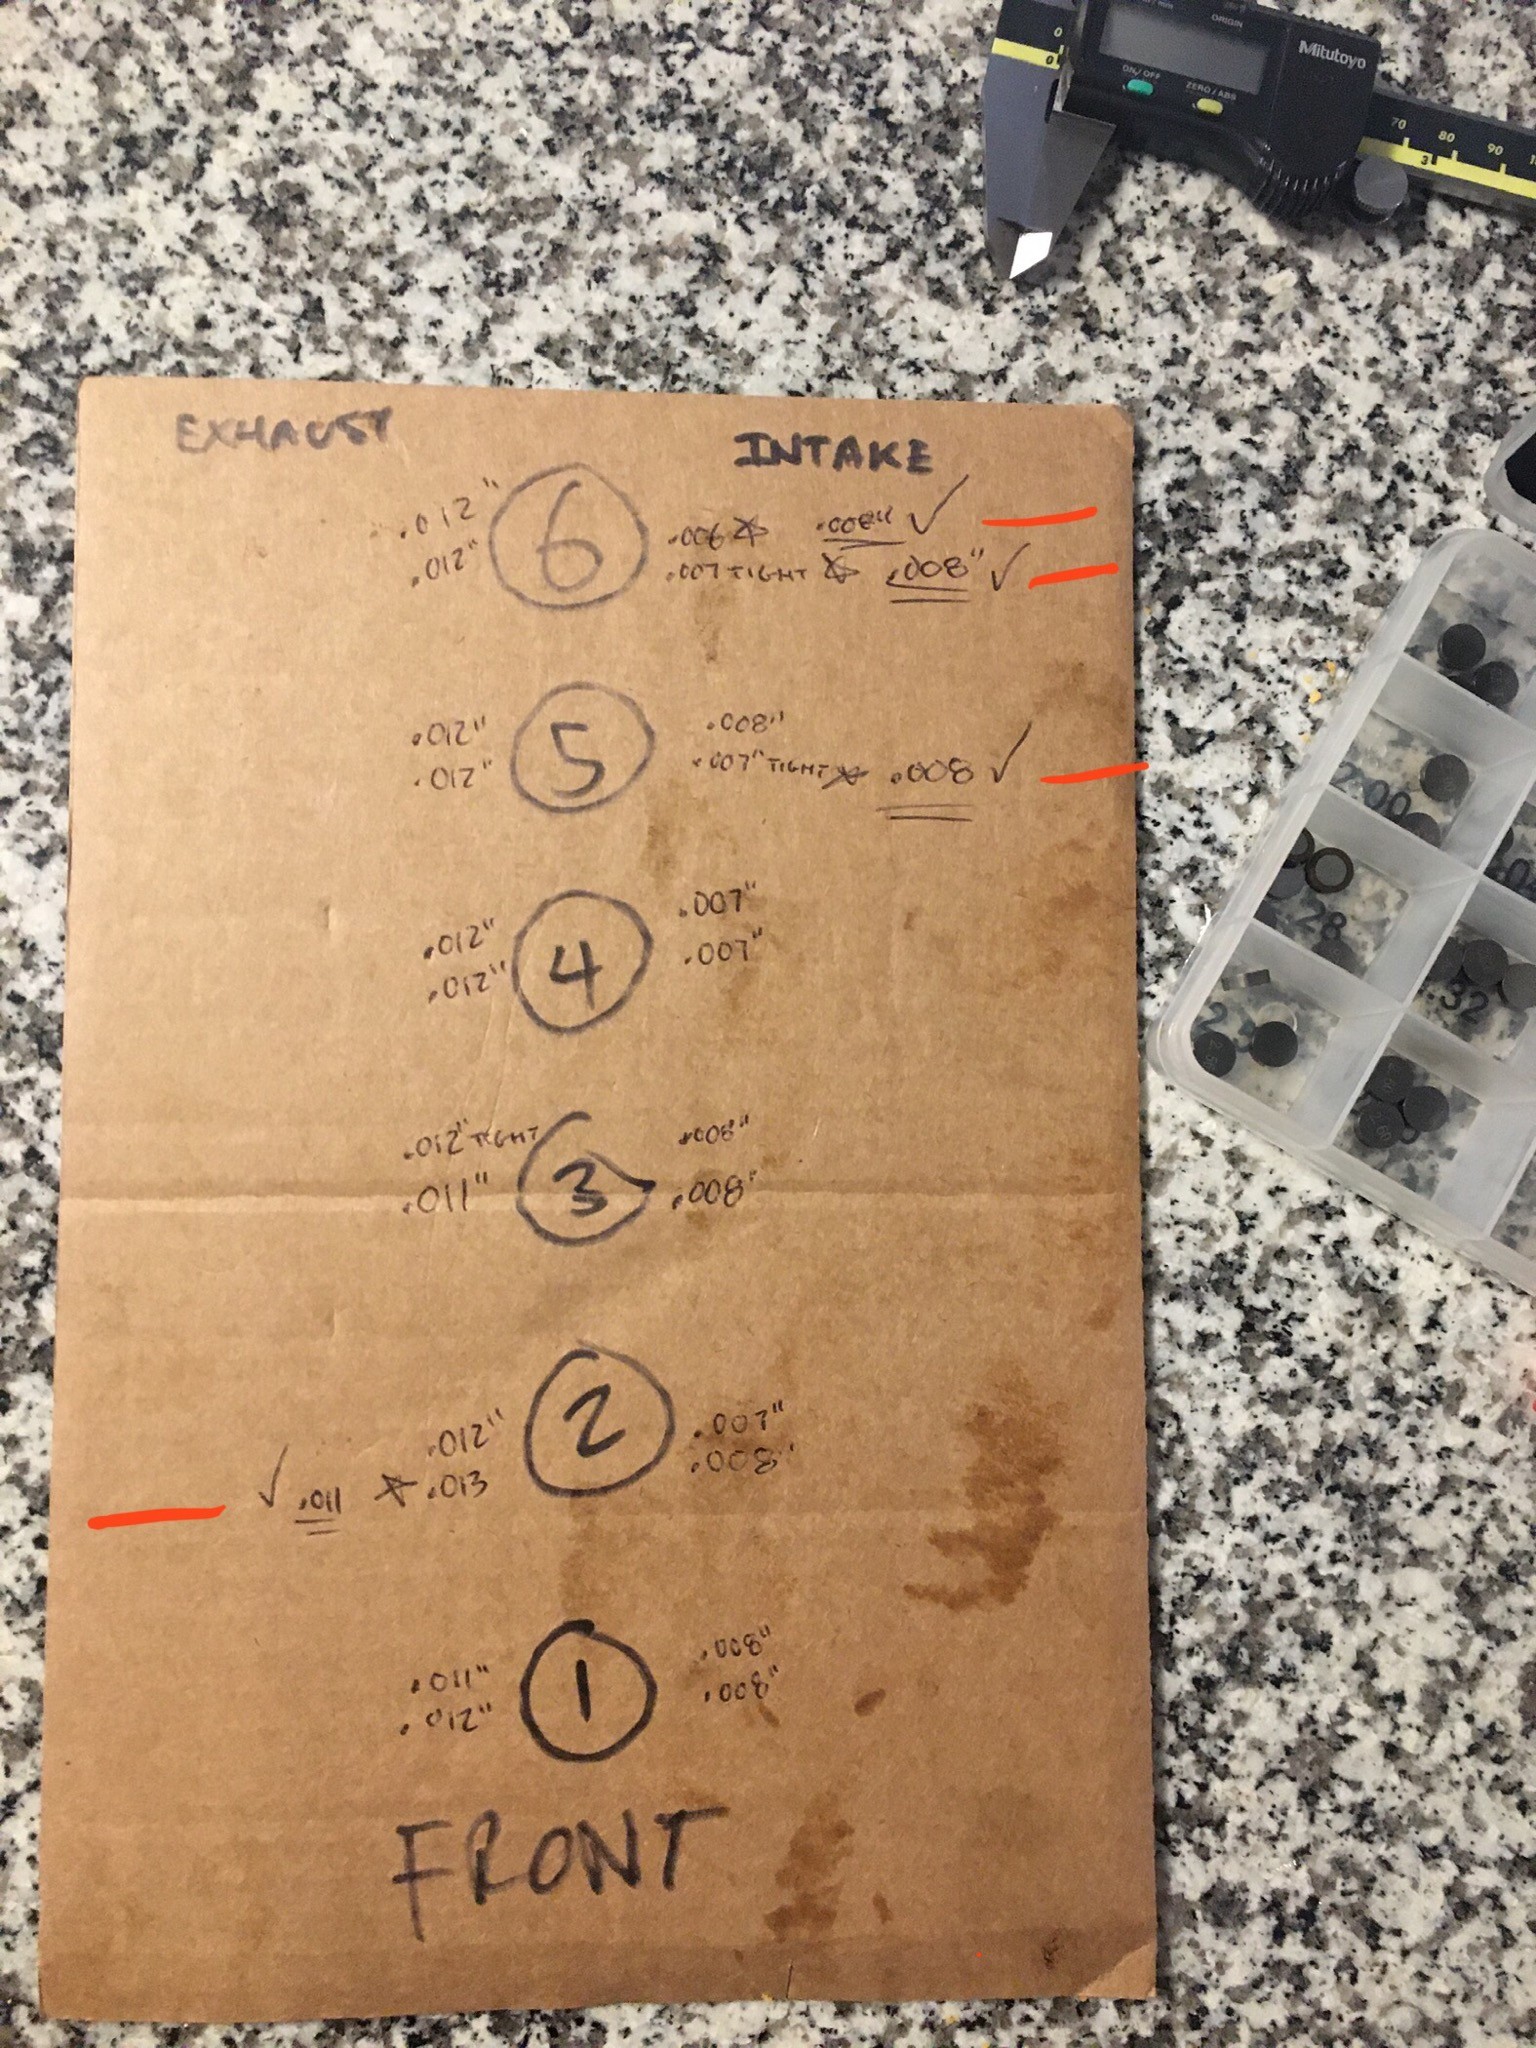
                                        4 valves adjusted.  Only 1 was out of spec, the other 3 were borderline. I like these adjustment shims more than the adjustable eccentrics that the M20 has.

                                        The allowable range is

                                        .007”-.009” intake

                                        .011”-.013” exhaust

                                        F3FCD7B3-A6ED-436C-9F26-1B8D60C268E1.thumb.jpeg.b9cb601a823ba6e4d7946fccbcb13706.jpeg

                                        1 Reply Last reply
                                        1
                                        • B
                                          B
                                          B C
                                          wrote on last edited by
                                          #228

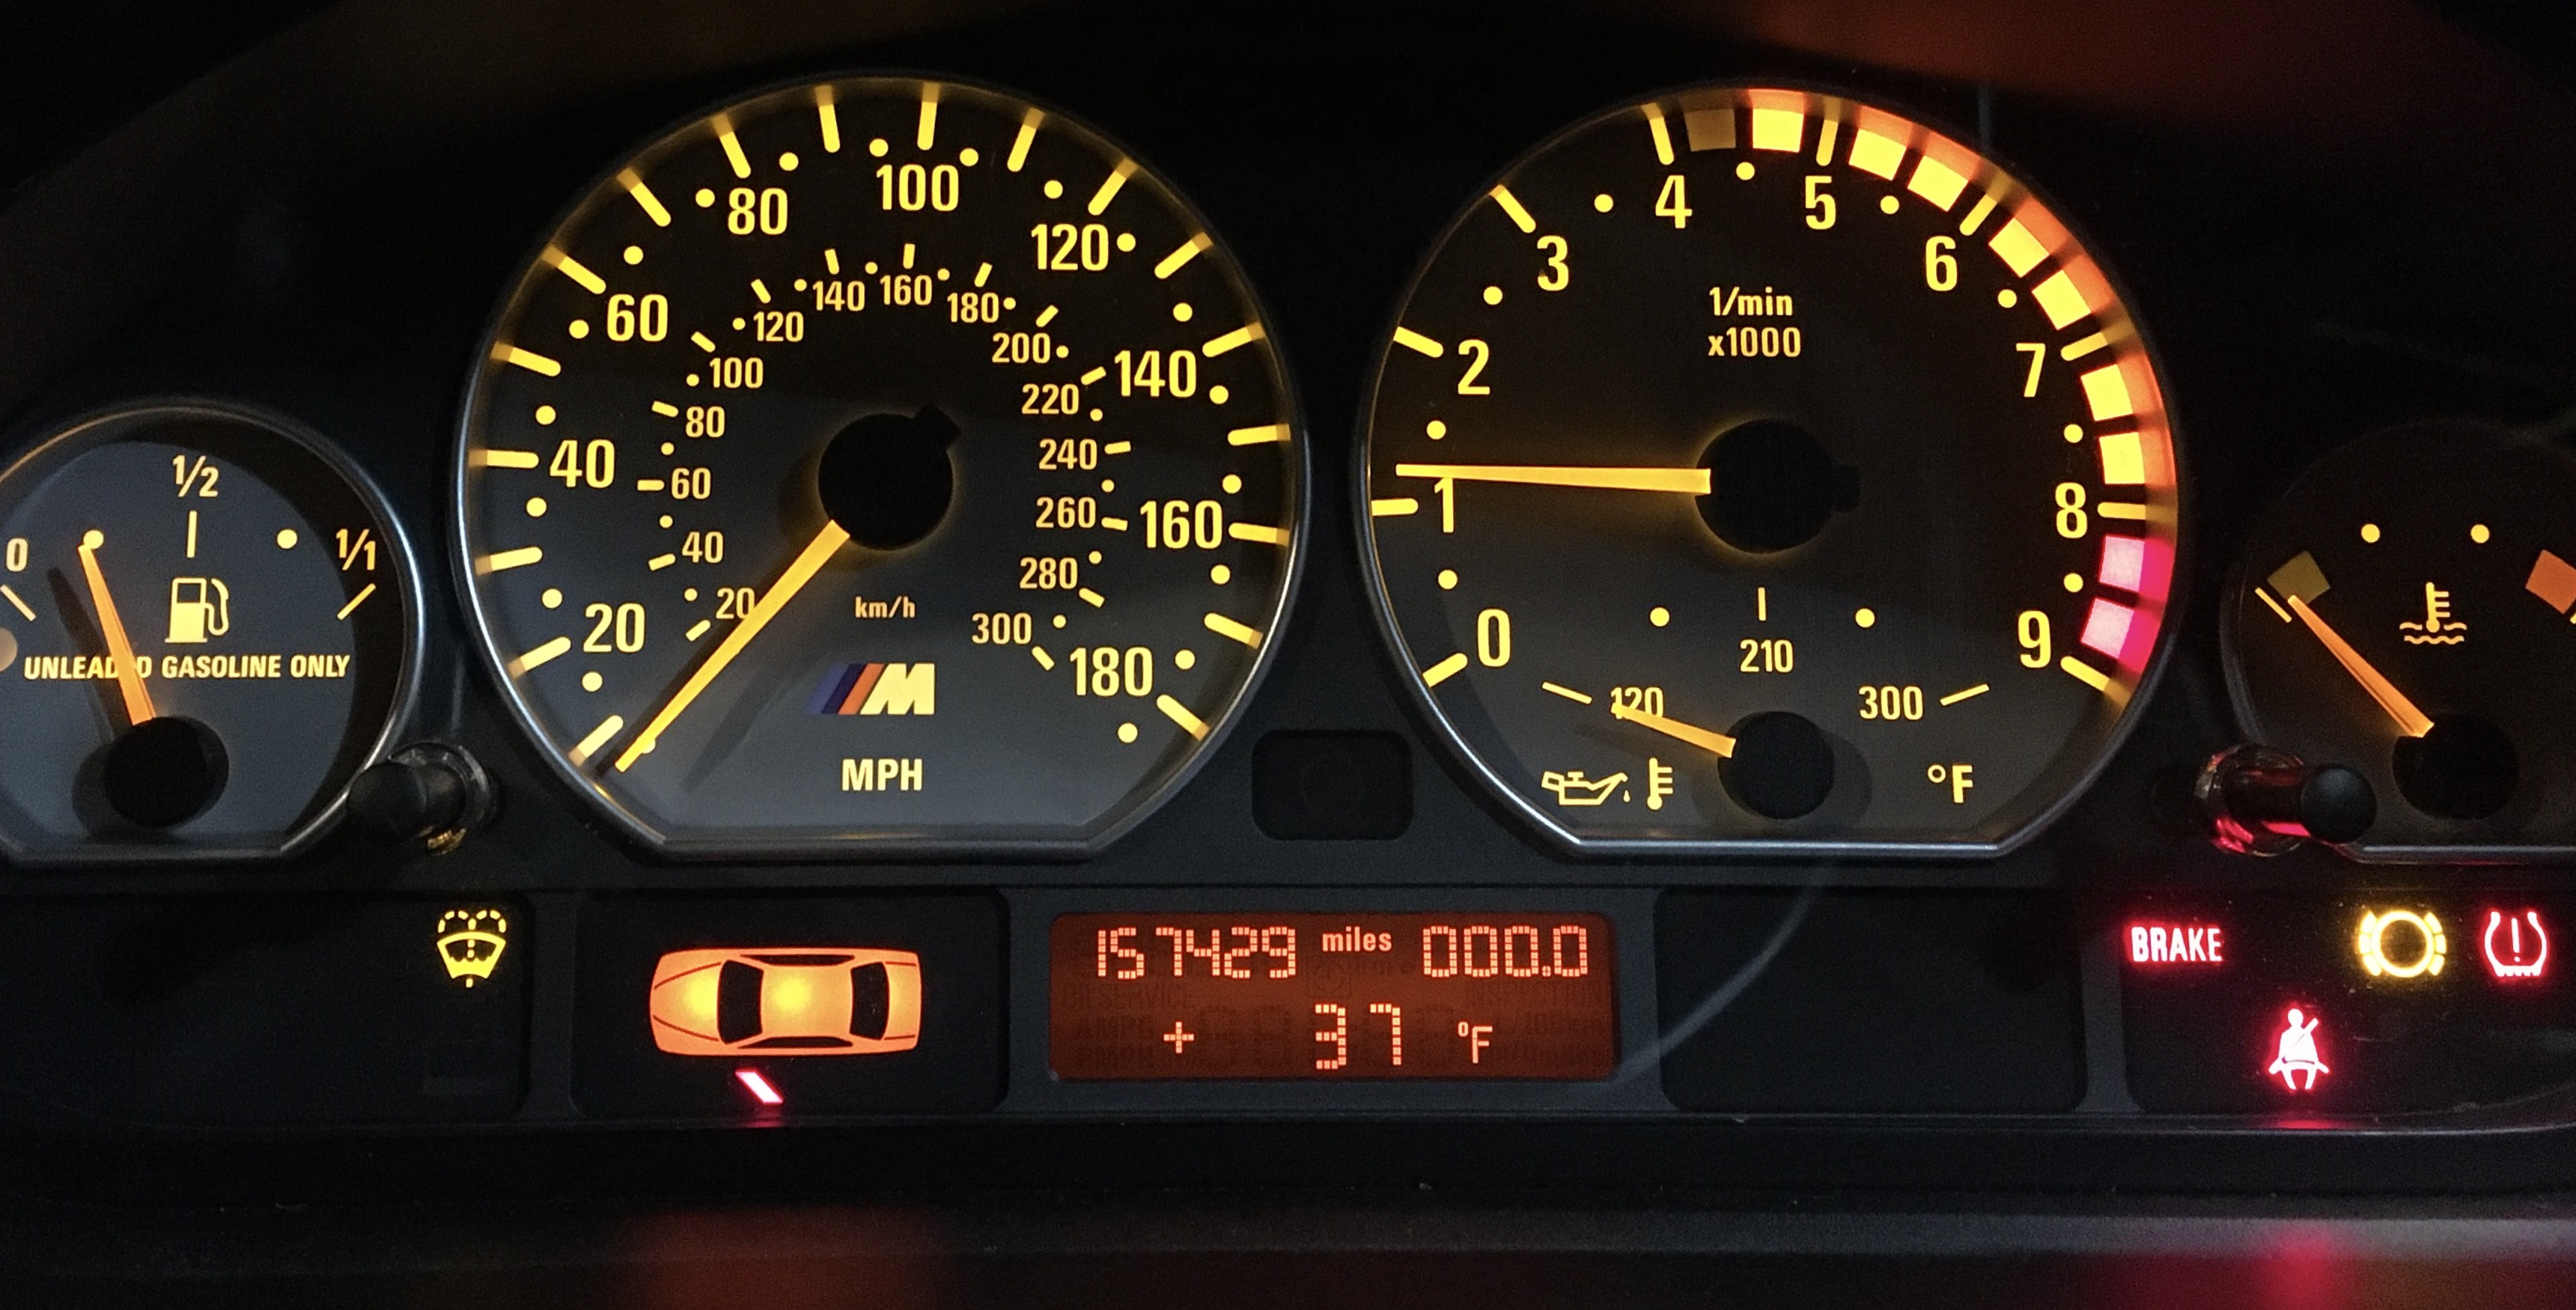
                                          Fired right up, smoother and quieter than before!

                                          6FEA2454-C090-469D-9A5F-89AB1EF8A44D.thumb.jpeg.14db867ac89bcf6855a1df23e2c7566c.jpeg

                                          On to the next project!

                                          1 Reply Last reply
                                          2

                                          Hello! It looks like you're interested in this conversation, but you don't have an account yet.

                                          Getting fed up of having to scroll through the same posts each visit? When you register for an account, you'll always come back to exactly where you were before, and choose to be notified of new replies (either via email, or push notification). You'll also be able to save bookmarks and upvote posts to show your appreciation to other community members.

                                          With your input, this post could be even better 💗

                                          Register Login
                                          Reply
                                          • Reply as topic
                                          Log in to reply
                                          • Oldest to Newest
                                          • Newest to Oldest
                                          • Most Votes


                                          • Login

                                          • Don't have an account? Register

                                          • Login or register to search.
                                          Powered by NodeBB Contributors
                                          • First post
                                            Last post
                                          0
                                          • Categories
                                          • Recent
                                          • Tags
                                          • Popular
                                          • Users
                                          • Groups