Skip to content
  • Categories
  • Recent
  • Tags
  • Popular
  • Users
  • Groups
Skins
  • Light
  • Brite
  • Cerulean
  • Cosmo
  • Flatly
  • Journal
  • Litera
  • Lumen
  • Lux
  • Materia
  • Minty
  • Morph
  • Pulse
  • Sandstone
  • Simplex
  • Sketchy
  • Spacelab
  • United
  • Yeti
  • Zephyr
  • Dark
  • Cyborg
  • Darkly
  • Quartz
  • Slate
  • Solar
  • Superhero
  • Vapor

  • Default (No Skin)
  • No Skin
Collapse
WIBIMMERS logo

WIBIMMERS

  1. Home
  2. General Discussion
  3. Members BMWs
  4. Non-BMW Stuff on a BMW Forum

Non-BMW Stuff on a BMW Forum
Scheduled Pinned Locked Moved Members BMWs
1.2k Posts 29 Posters 0 Views 1 Watching
  • Oldest to Newest
  • Newest to Oldest
  • Most Votes
Reply
  • Reply as topic
Log in to reply
This topic has been deleted. Only users with topic management privileges can see it.
  • G
    G
    gilber33
    wrote on last edited by
    #651

    Boris3 said:

    Just out of curiosity if you assemble the pieces without installing them in the trailing arm, like the garagistic picture above, does the sleeve fit flush?

    I'll try tonight. When I took them out of the packaging I noticed that with the bushings "installed" on the bench - not in the traling arm - the sleeve protruded out quite a bit. I thought it was weird but assumed that's how it was supposed to be.

    1 Reply Last reply
    0
    • straight6pwrS
      straight6pwrS
      straight6pwr
      wrote on last edited by
      #652

      so the bushings fit fine, but you've pulled one side out (and created that gap) to match it to the length of the metal sleeve?

      does the length of the metal sleeve match the gap between the subframe brackets?

      Dan

      yajsYRL.jpg.e5f350b4dfe961d76ac8b32efce2e1a6.jpg

      1 Reply Last reply
      0
      • G
        G
        gilber33
        wrote on last edited by
        #653

        straight6pwr said:

        so the bushings fit fine, but you've pulled one side out (and created that gap) to match it to the length of the metal sleeve?

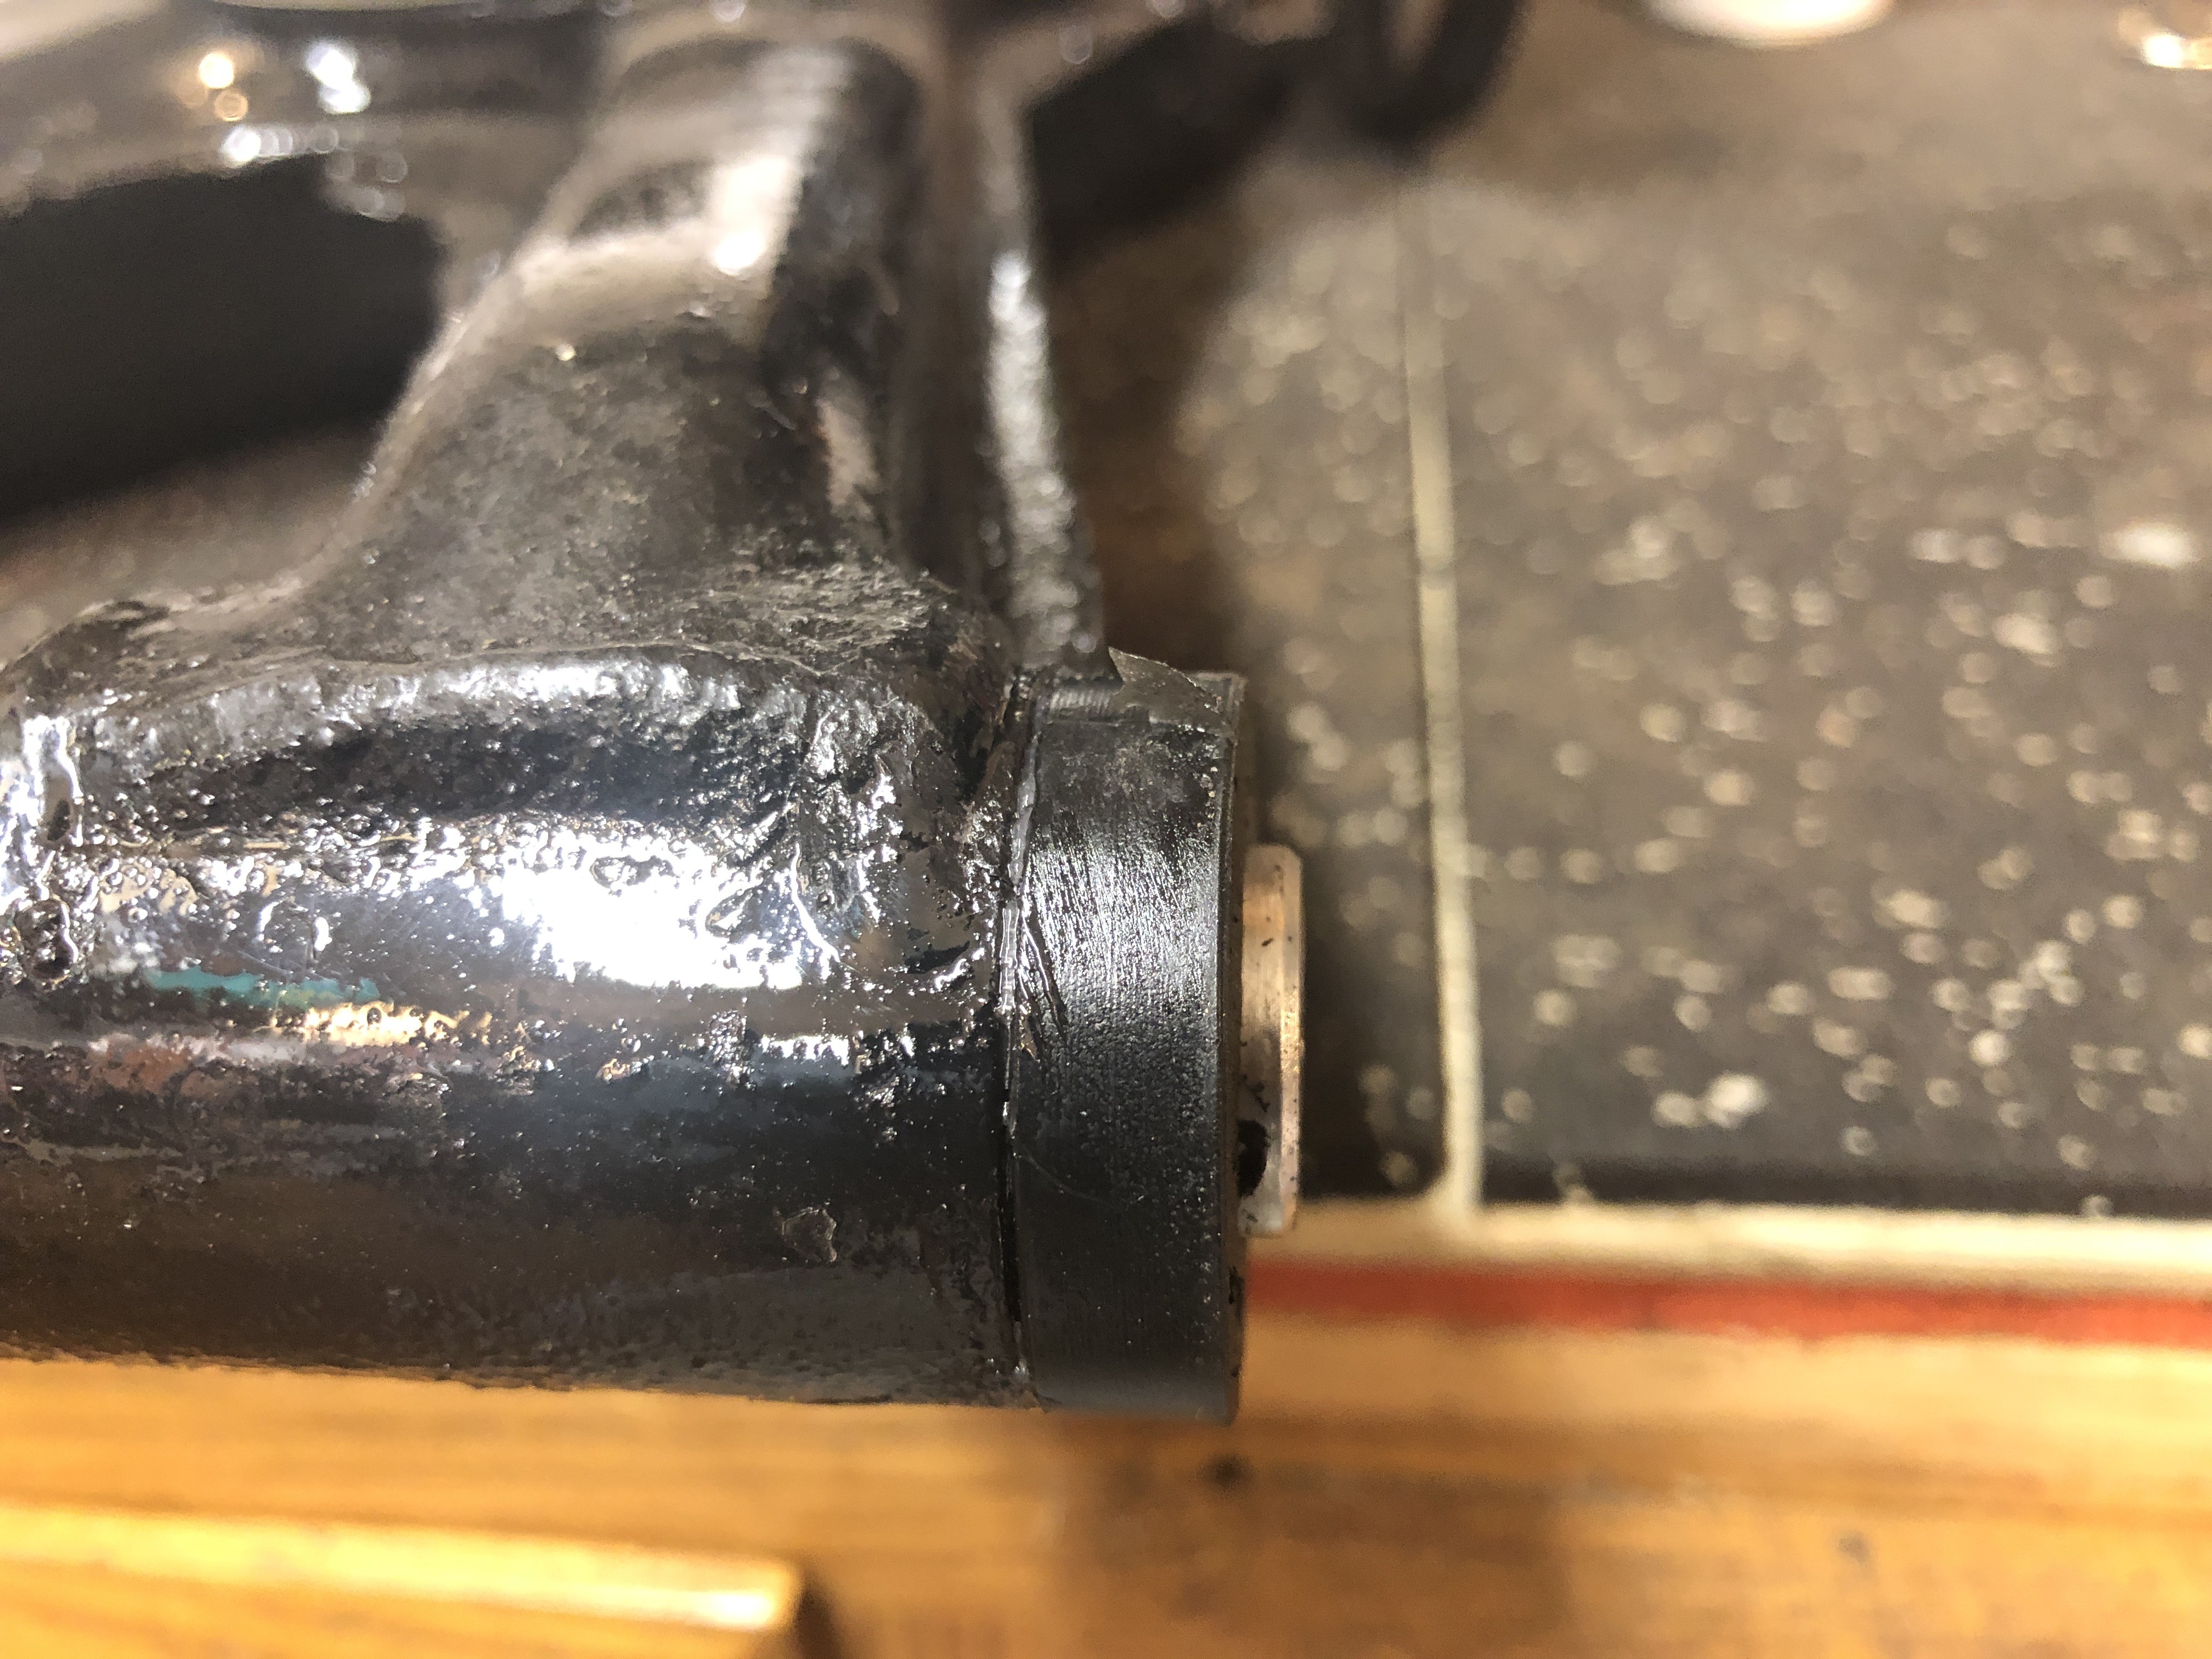
        Bushings fit into the arm fine. I installed both bushings flush. Pressed in the sleeve and it sticks out one side pretty significantly. The gap is shown between the arm and the lip of the bushing because they must have shifted around during install. I didn't intentionally create that gap there. I had installed the arms with the bushings flush against the arms and the gap at one side (as shown in my pic below). But the act of pounding them in must have created the gap where it is.  

        straight6pwr said:

        does the length of the metal sleeve match the gap between the subframe brackets?

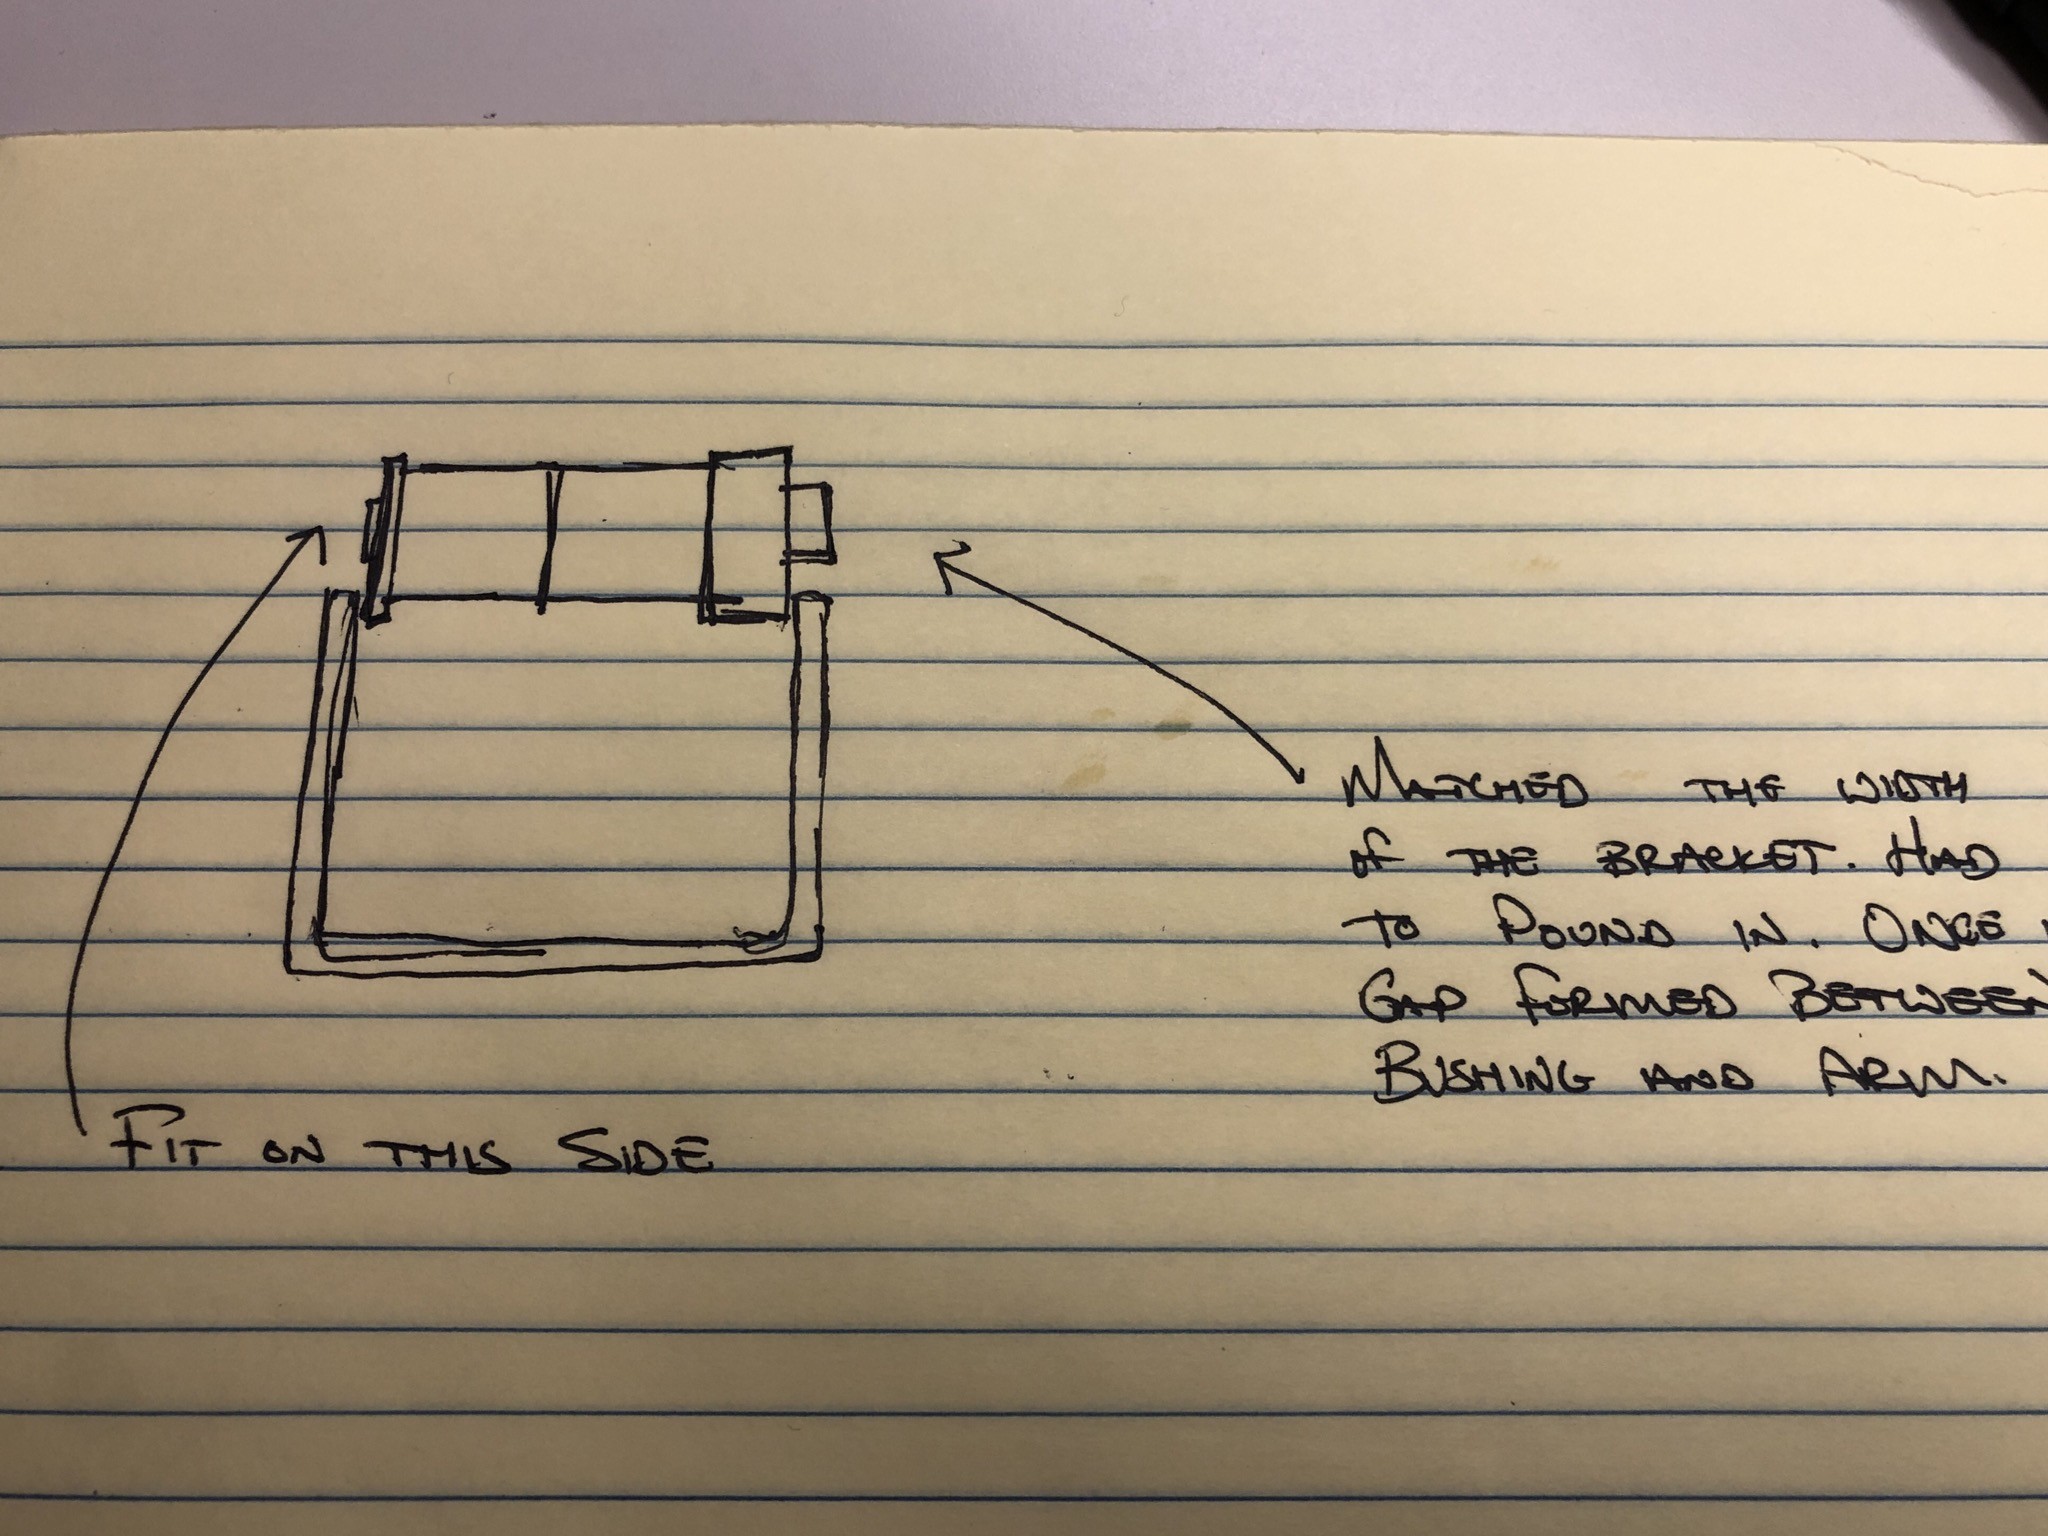
        Not at all. I needed to use a mallet to pound the trailing arms into the brackets. Here's a rough sketch to show the difference between the bushing and the bracket. 
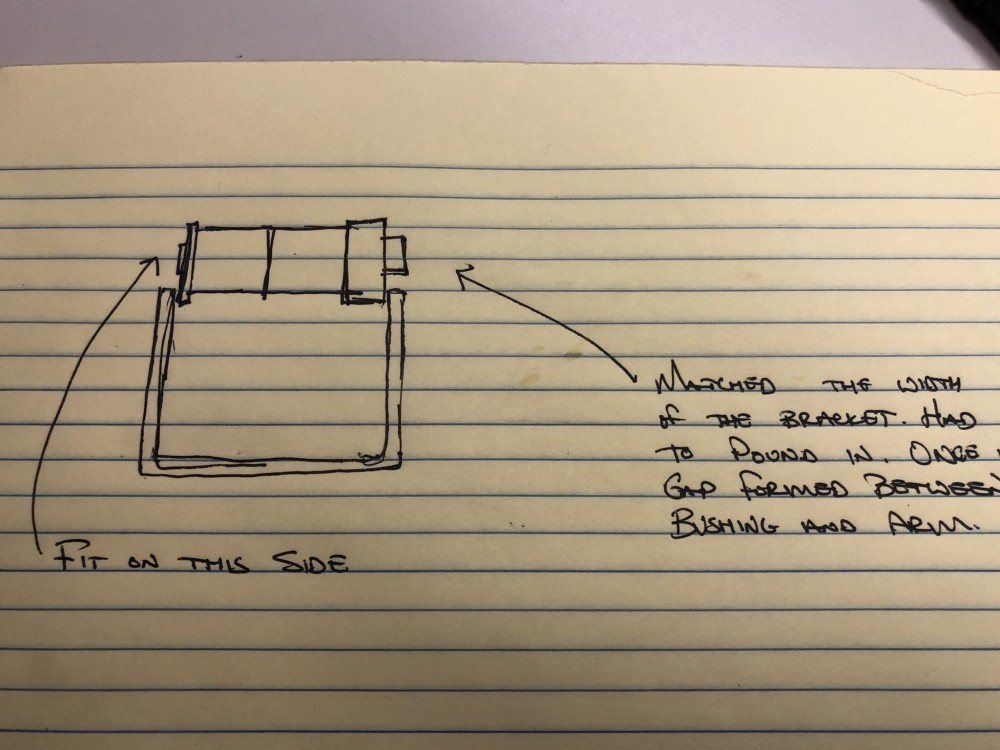
        8EDE1D4A-DF07-471A-85B5-5F62DD3AE5A2.jpeg

        Edit: I finally got a hold of someone at Revshift and they said that the small gap is to be expected. He said that their bushings and sleeve have a small amount of "play" in them to ensure they fit for variations in the size of the subframe brackets due to age of the car and inconsistencies in production of the car. He said that once everything is put together; springs, shocks, swaybars, etc., that little bit of gap will not affect anything. He did say he has had customers trim down the sleeve to fit their car better, but that you need to be careful doing that because you do not want to be tightening the subframe brackets against the bushings since the bushings need to rotate on the sleeve, and the not the control arm rotating on the bushings. 

        image.png

        Still a little skeptical. Part of me wants to toss in OEM rubber bushings and call it a day.

        1 Reply Last reply
        0
        • The Full BananaT
          The Full BananaT
          The Full Banana
          wrote on last edited by
          #654

          Looks like they've designed them to enhance snap oversteer for additional ditch trajectory.

          Tom - I have a few BMWs, an overworked Volvo 242, and now a YouTube channel called Drive, Revive, Tinker

          1 Reply Last reply
          4
          • JdesignJ
            JdesignJ
            Jdesign
            wrote on last edited by
            #655

            Just shave it down a hair and be done with it. you will find out later if it matters or not when you are winching the car from a ditch.

            SumBunny.jpg

            https://www.instagram.com/_jdesigner_/                                          http://nevertoolow.tumblr.com/

            🥳SOLD BMW E24 633CSI - BMW M30B32                                          🧪SOLD HCH  ES9 - 1.3 LDA
            👽BMW E30 325IC - Toyota 1JZ-GTE                                                     ⏰ HONDA EF9 CIVIC SI - JDM B18C5
            ☠️BMW E36 318i - Ford 5.0 FE302                                                         🚴‍♂️ GT-Labomba - 26x2.75 Freeride
            🤹‍♀️SOLD BMW E36/7 Z3 - BMW M54B25                                                🧓SOLD BMW E10 2002 - BMW M10M05

            1 Reply Last reply
            0
            • G
              G
              gilber33
              wrote on last edited by
              #656

              I'm taking them out and trimming the sleeves.

              1 Reply Last reply
              0
              • jc43089J
                jc43089J
                jc43089
                wrote on last edited by
                #657

                Maybe measure the length of the sleeves on the original bushings and trim these to match?

                2/94 325i Sedan, Arctic Gray: UUC LTW FW, EVO 3 and DSSR, +.020 Maxsil pistons, ASC delete, Eibach shocks/springs, 16" contour reps 238k
                3/93 325i Coupe, Schwarz 2, Sketchy stance action, ebay turbo, 300k
                '89 325i Vert, Alpine White: 5spd swapped, sold.

                '04 Toyota Sienna: 24V to 24V swap in progress

                '05 Volvo V70R, 6spd.  200k
                '85 Toyota LandCruiser: Lifted, gas hog. 205k
                '99 Nissan Maxima: 5spd, Rusty but trusty winter beater. 252k RIP.

                1 Reply Last reply
                1
                • G
                  G
                  gilber33
                  wrote on last edited by
                  #658

                  jc43089 said:

                  Maybe measure the length of the sleeves on the original bushings and trim these to match?

                  That is a really good idea had I not thrown the old ones away after I melted them.

                  1 Reply Last reply
                  1
                  • G
                    G
                    gilber33
                    wrote on last edited by
                    #659

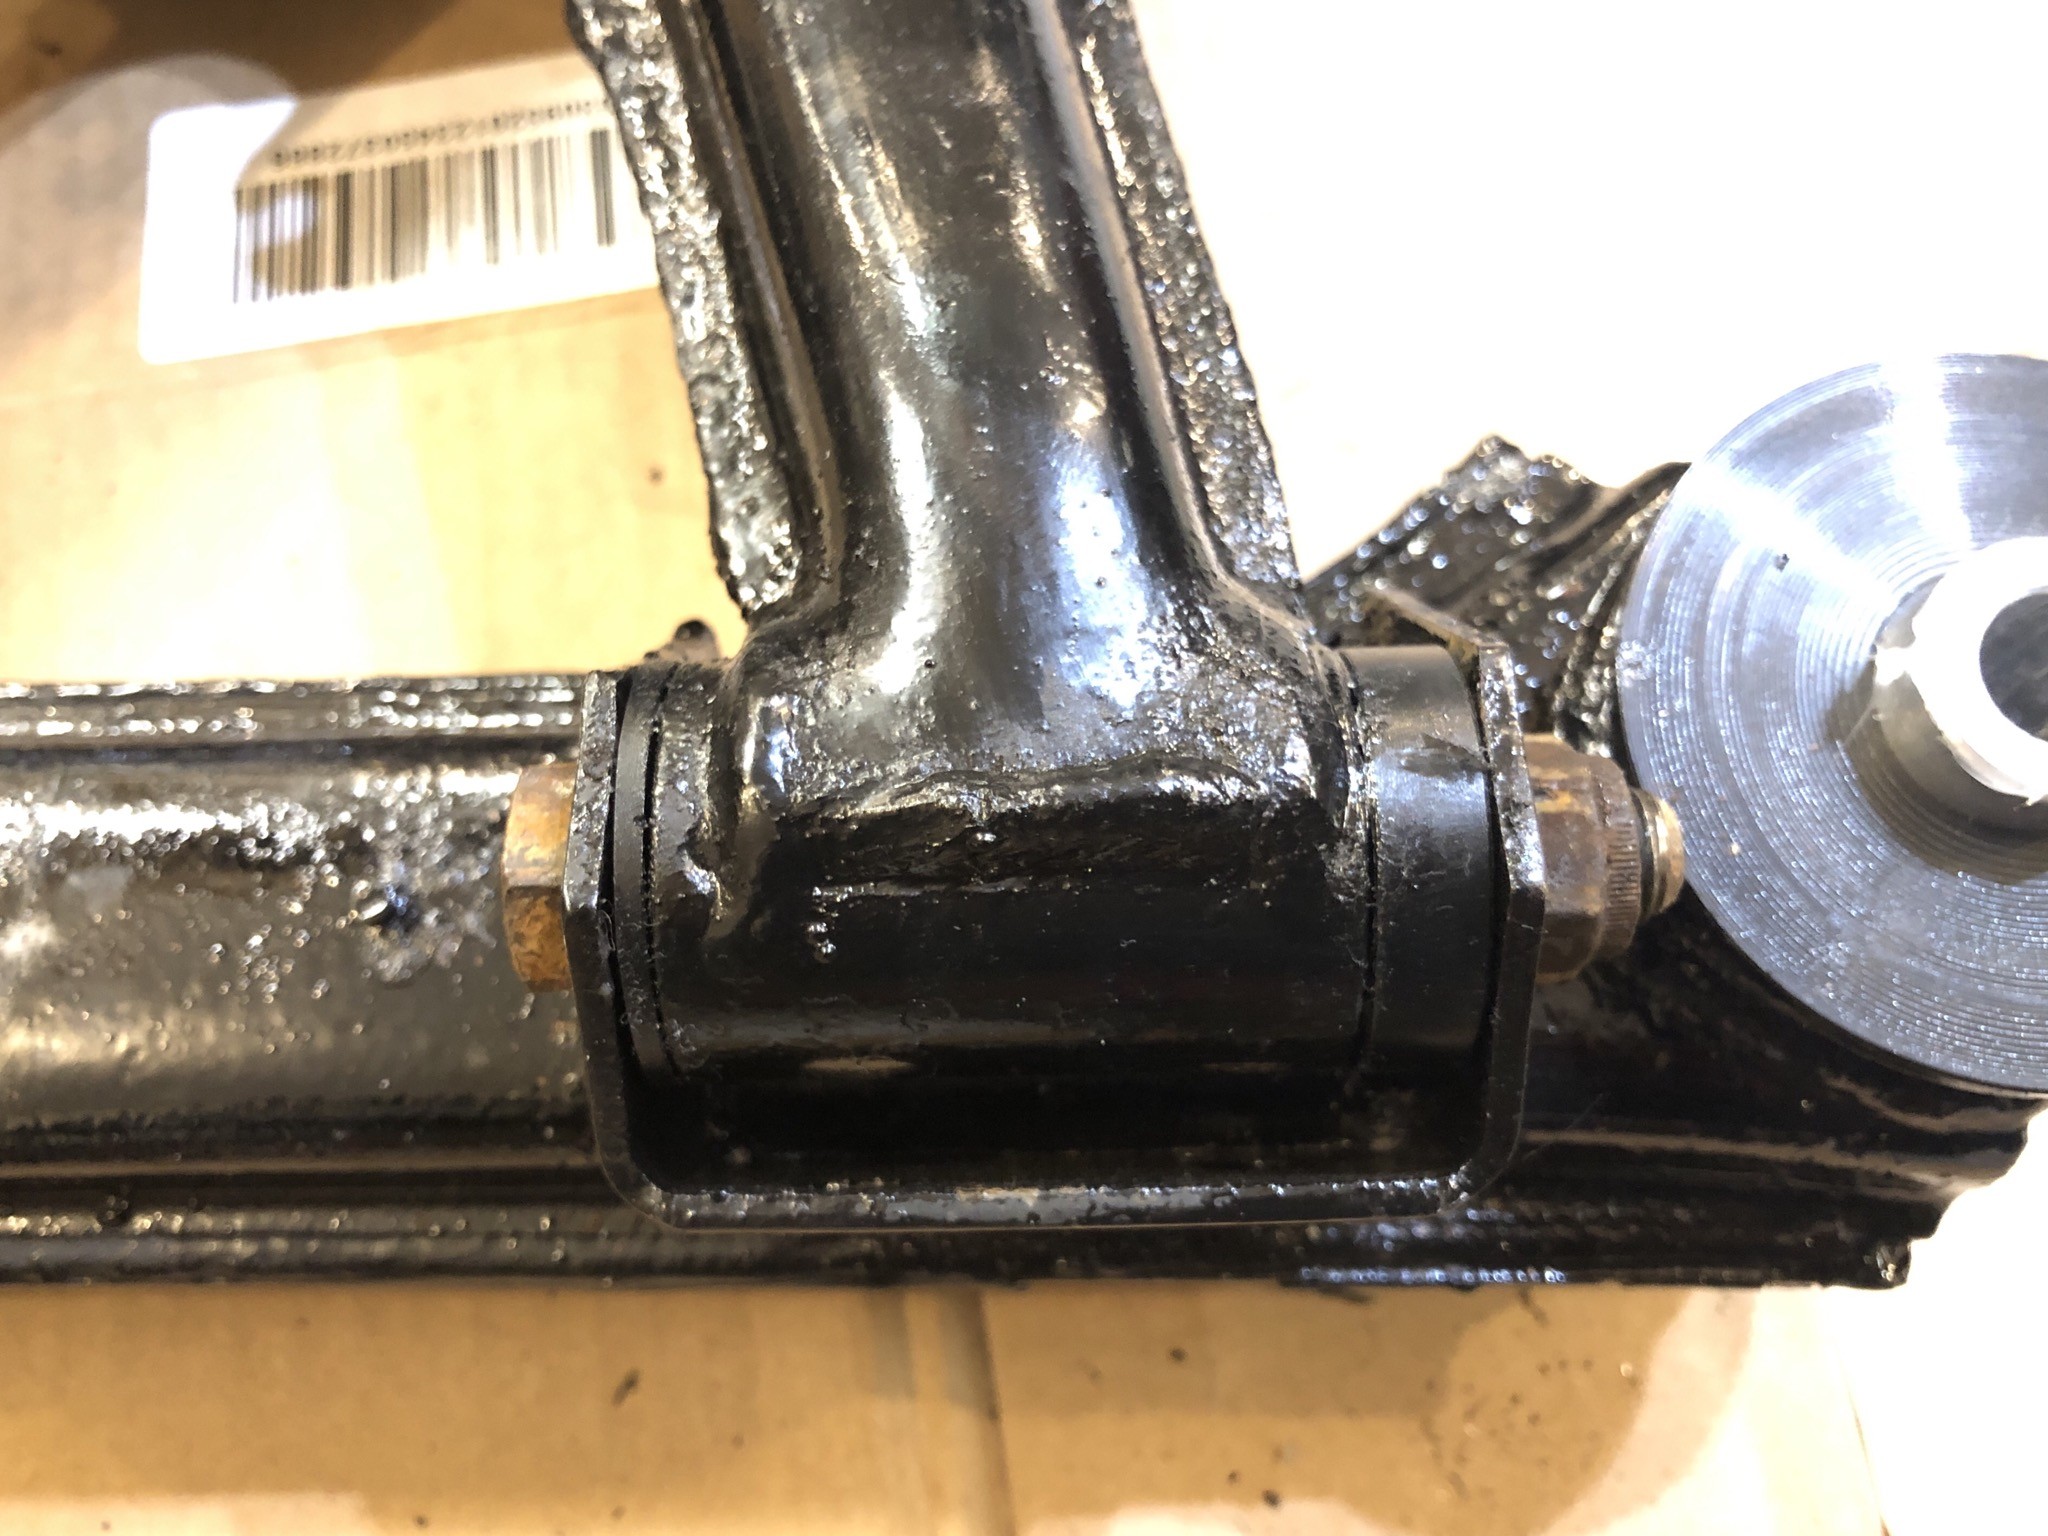
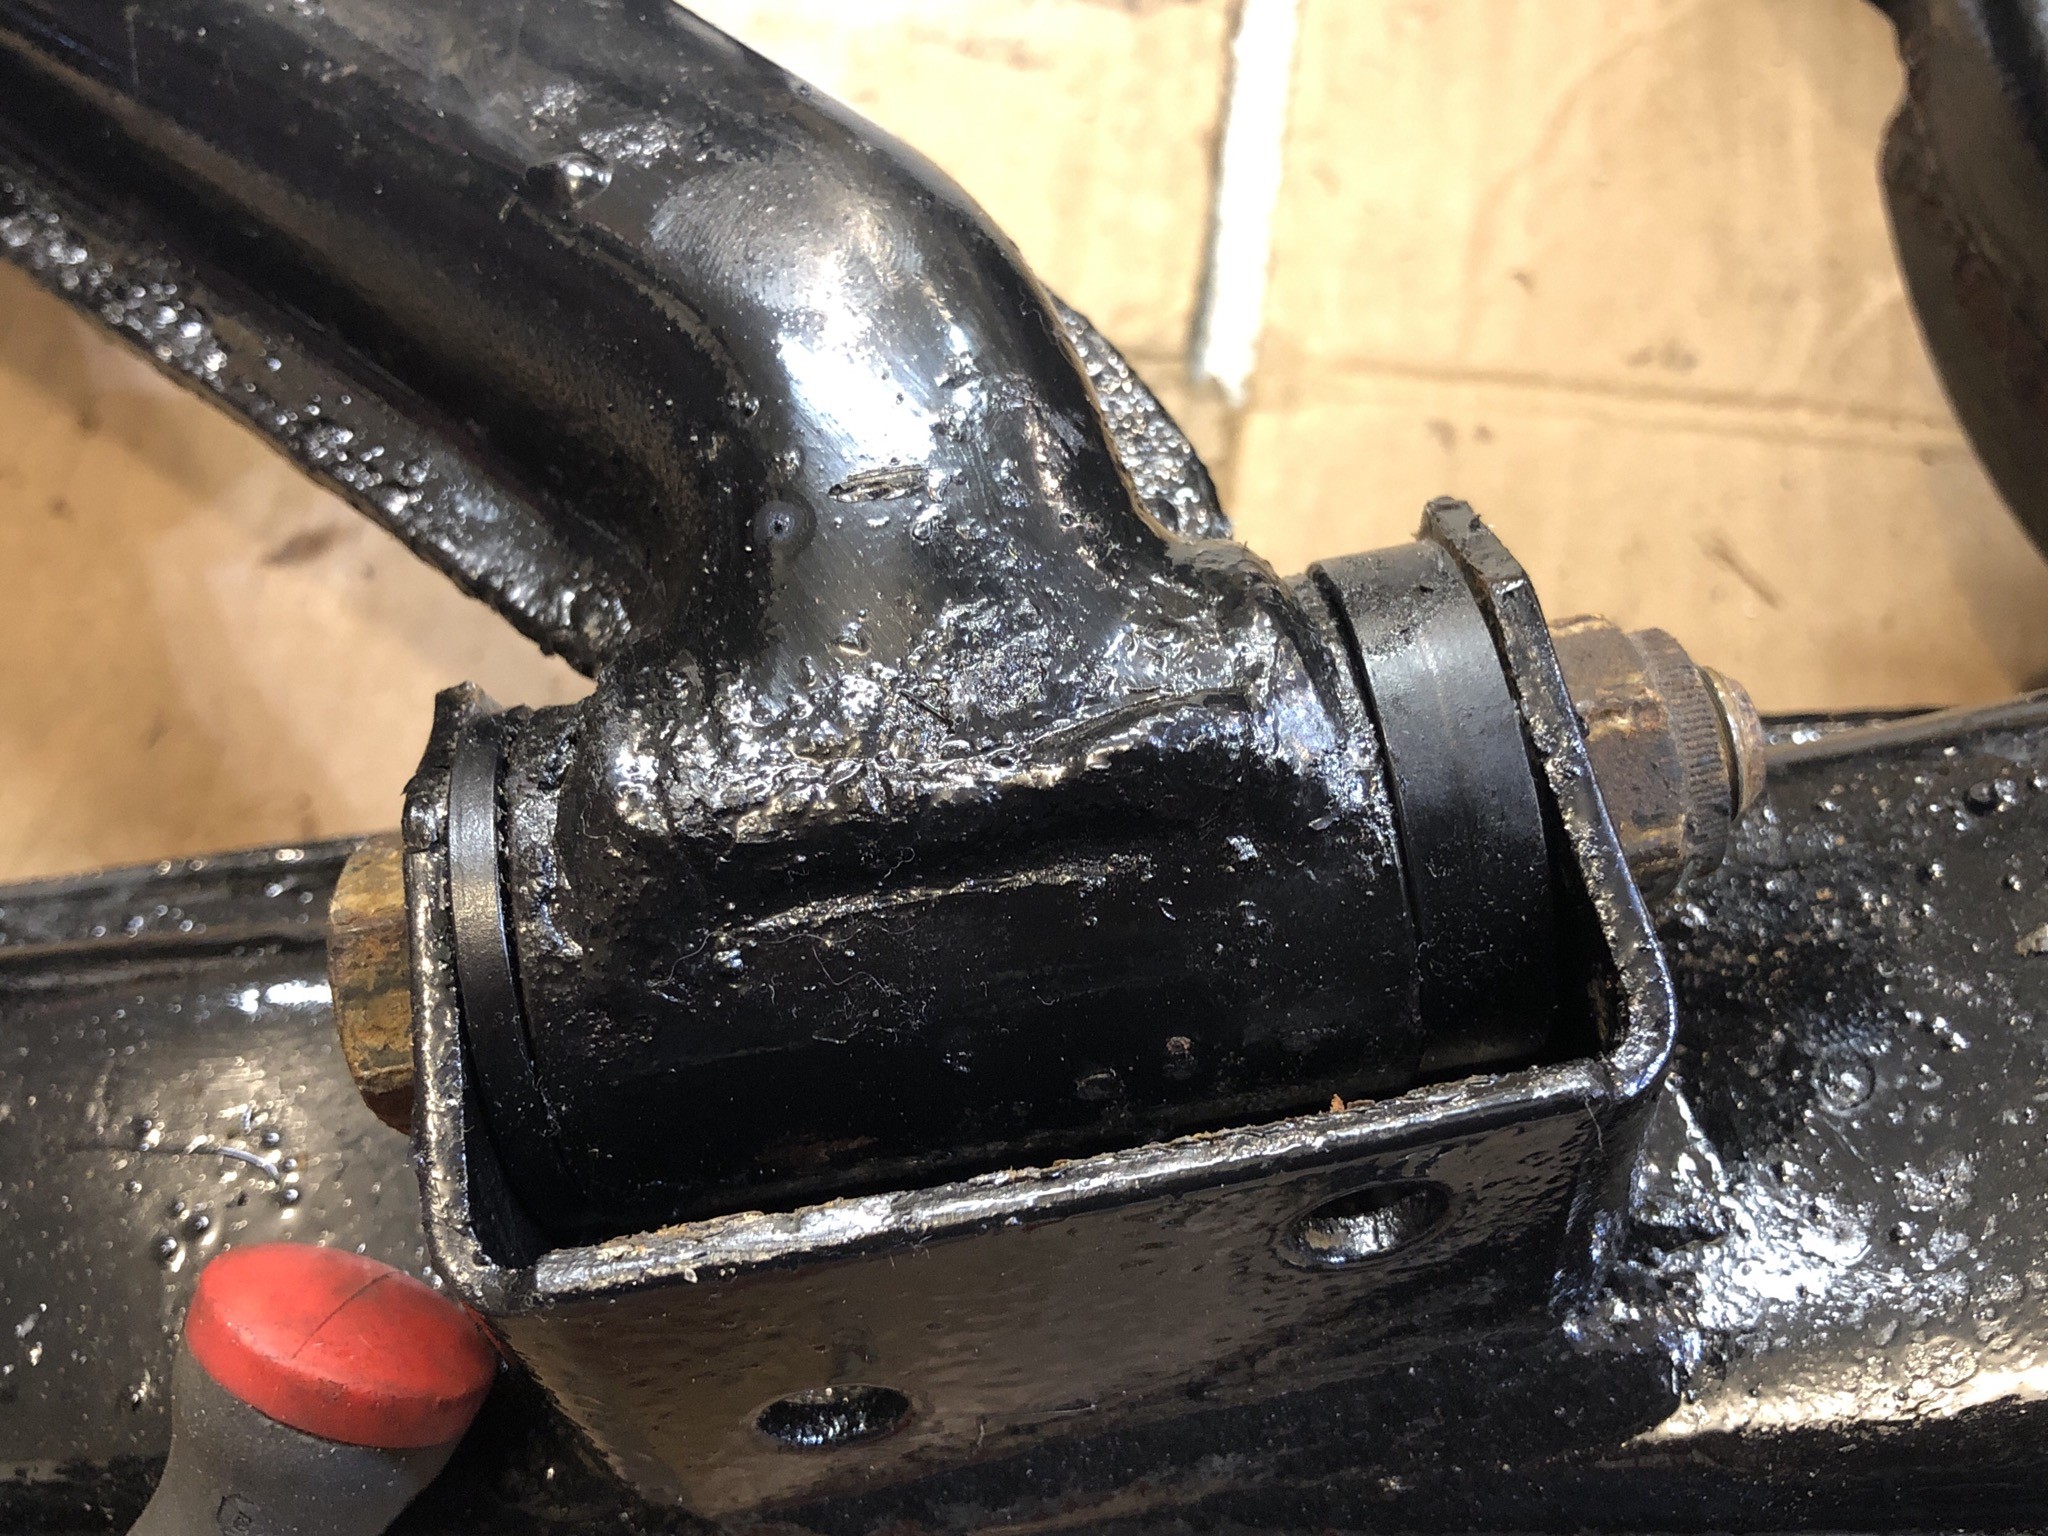
                    Bushings flush on the arm and the sleeve flush on one side. This is how much it sticks out. 

                    AAE83C14-D3D8-416D-81DA-99FD8489122A.jpeg
                     

                    Sleeves trimmed and test fitted. I have new poly grease coming from amazon to lube it all up. 
                     

                    33F5A060-E90C-4720-9132-A8E287094772.jpeg

                    589C3878-60A3-4233-915F-0ED45A8E50B9.jpeg

                    1 Reply Last reply
                    2
                    • straight6pwrS
                      straight6pwrS
                      straight6pwr
                      wrote on last edited by
                      #660

                      that looks better!

                      Dan
                      yajsYRL.jpg.e5f350b4dfe961d76ac8b32efce2e1a6.jpg

                      1 Reply Last reply
                      0
                      • G
                        G
                        gilber33
                        wrote on last edited by
                        #661

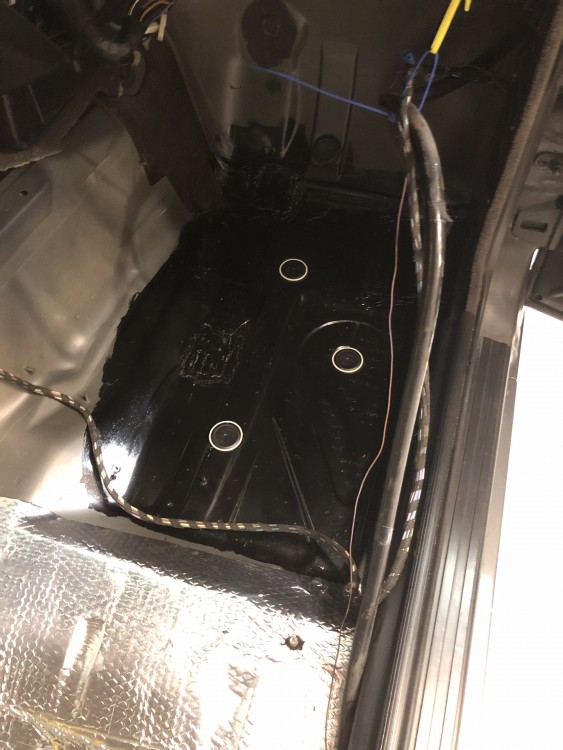
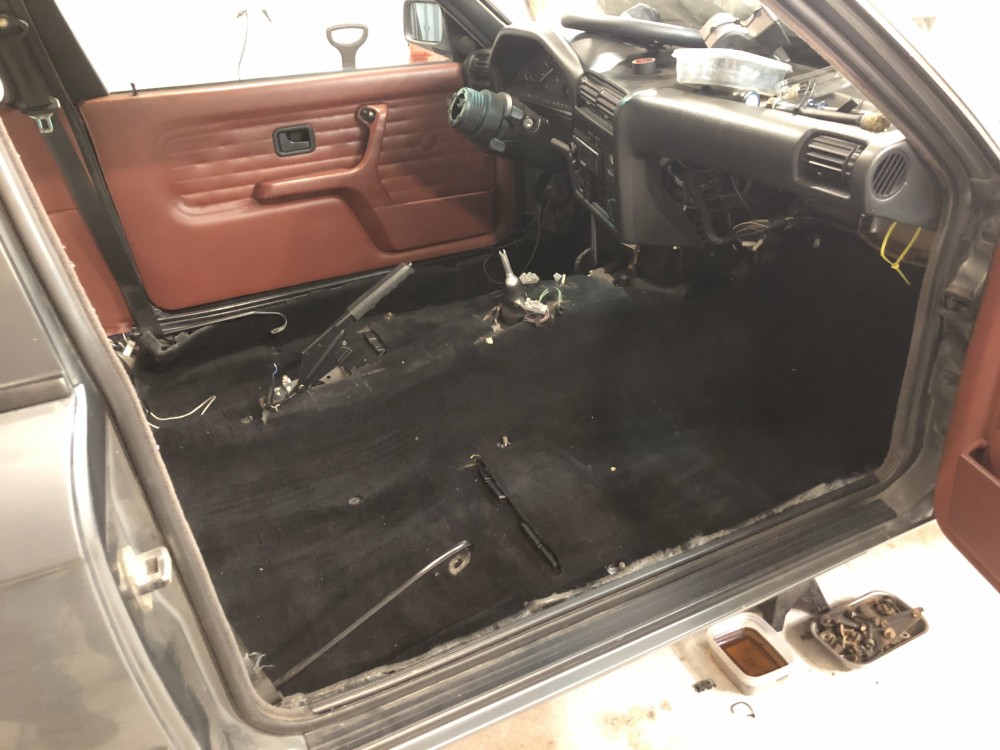
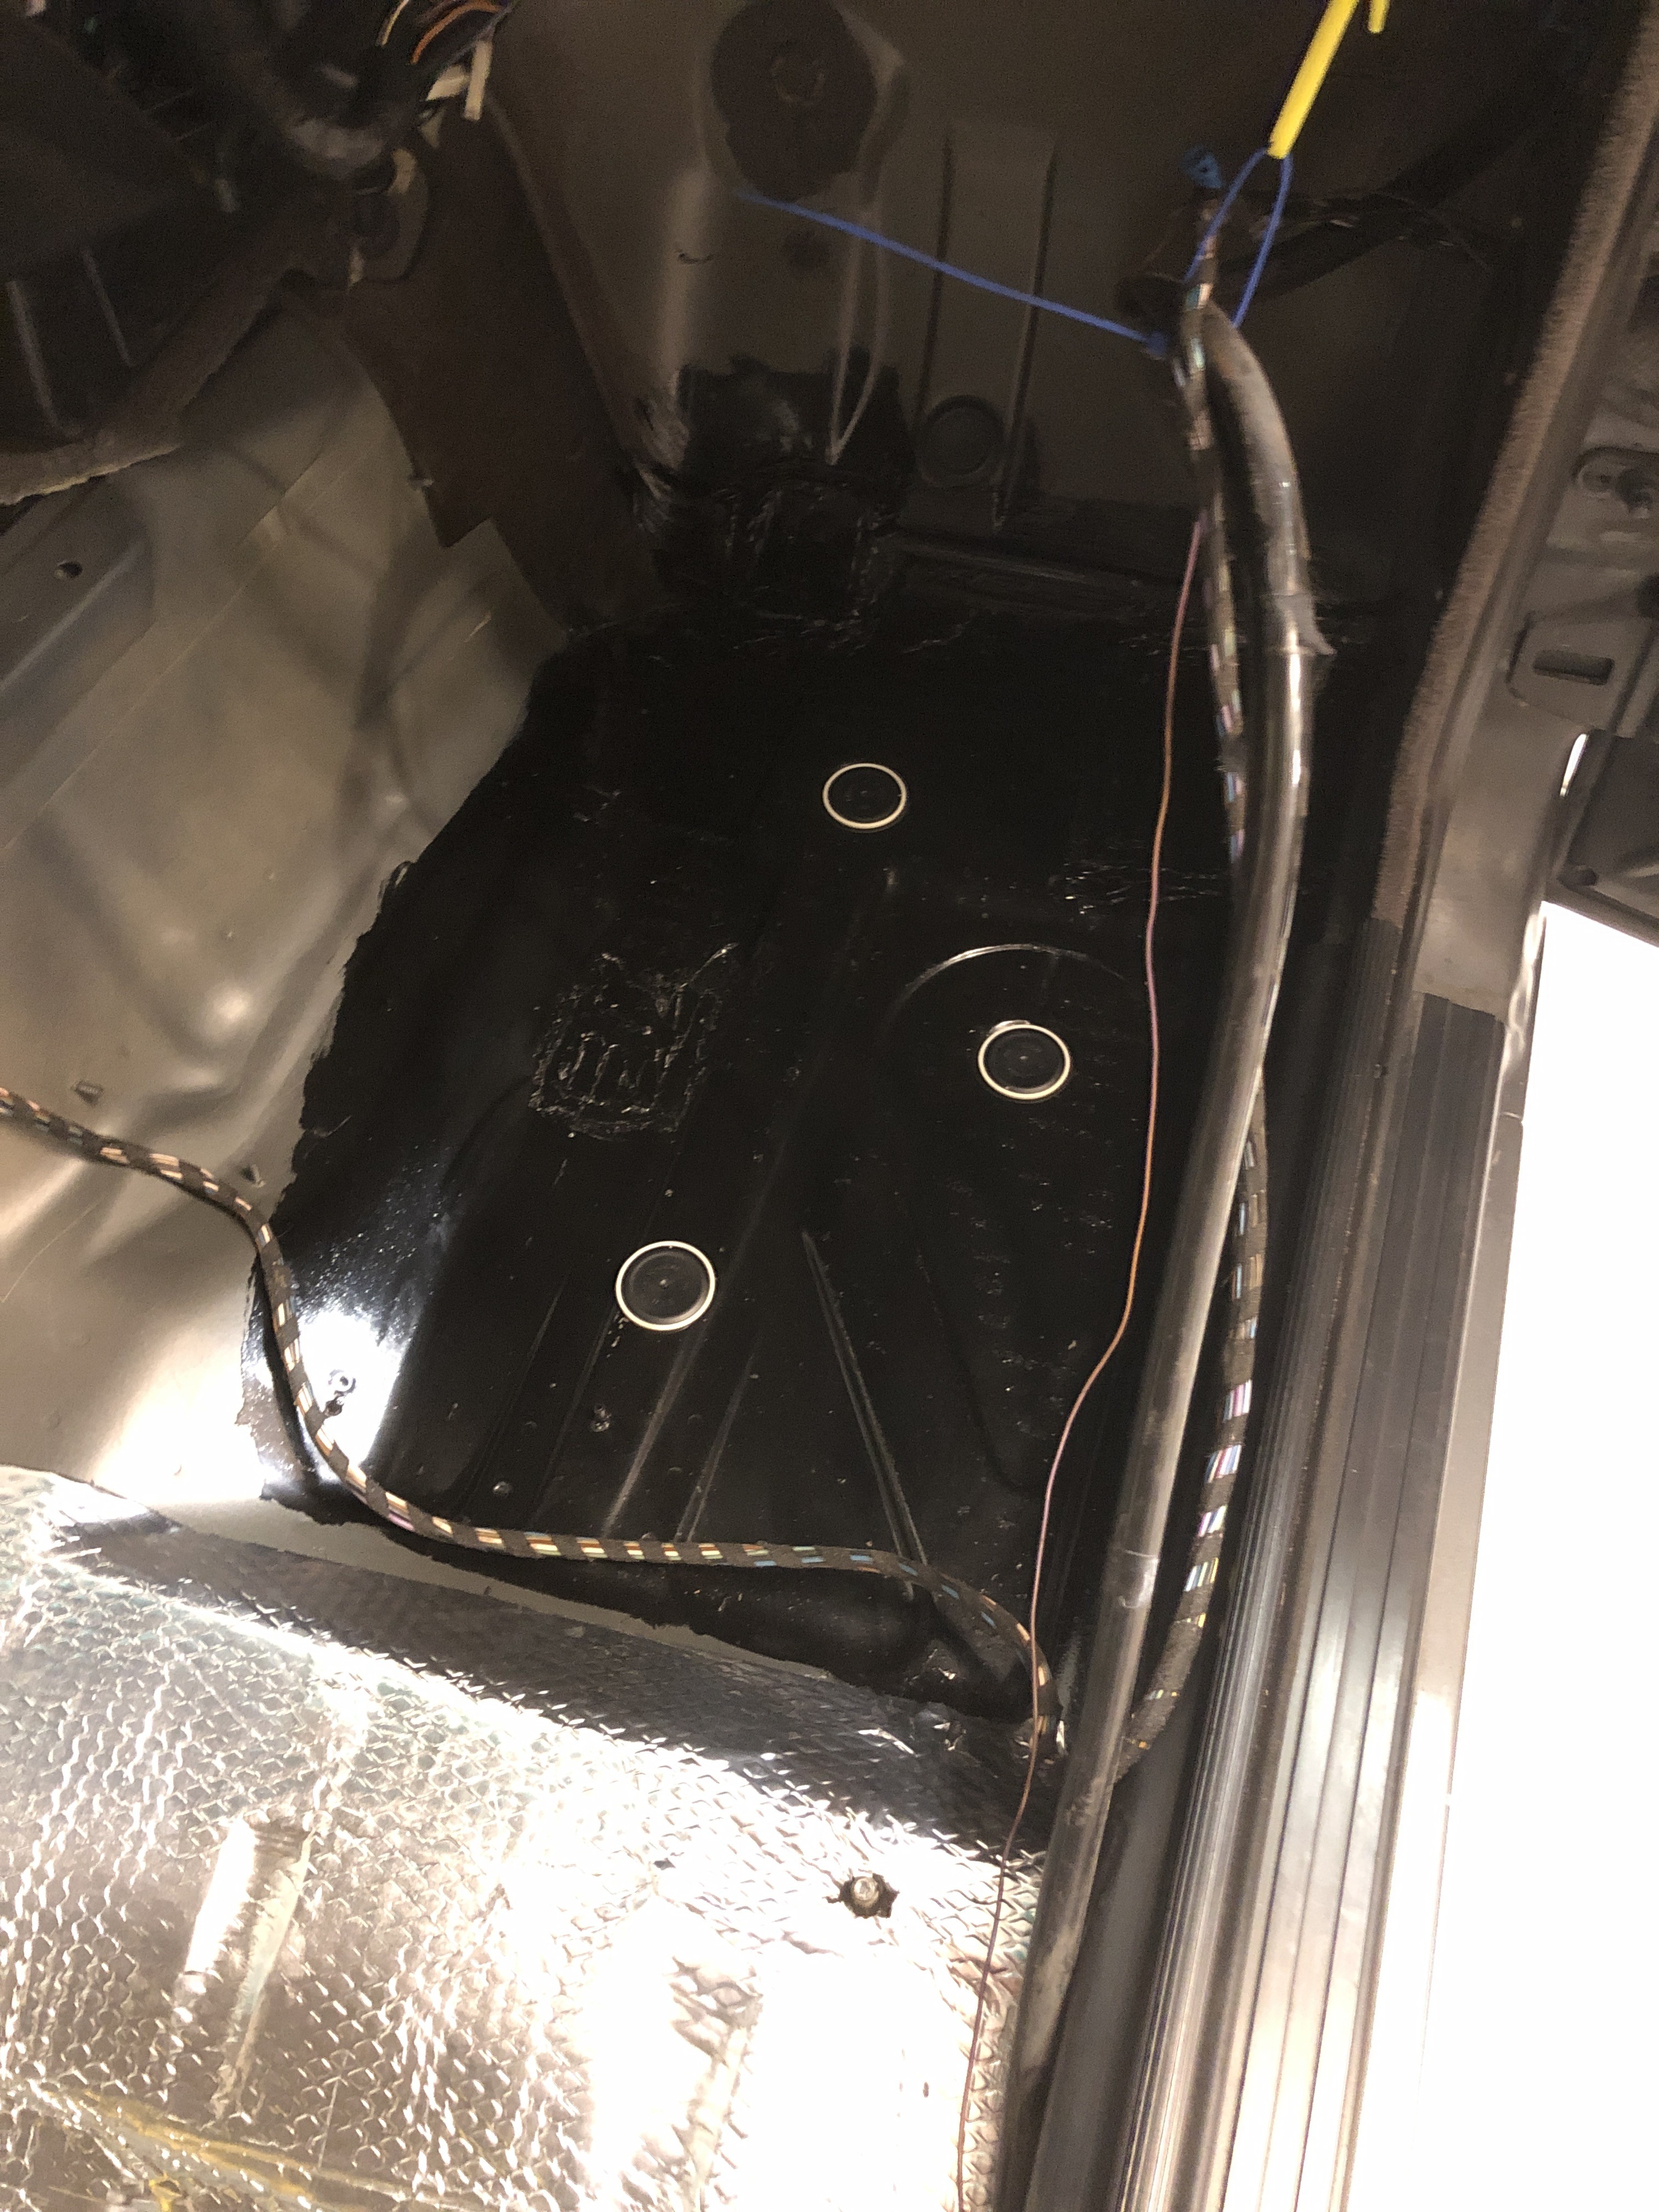
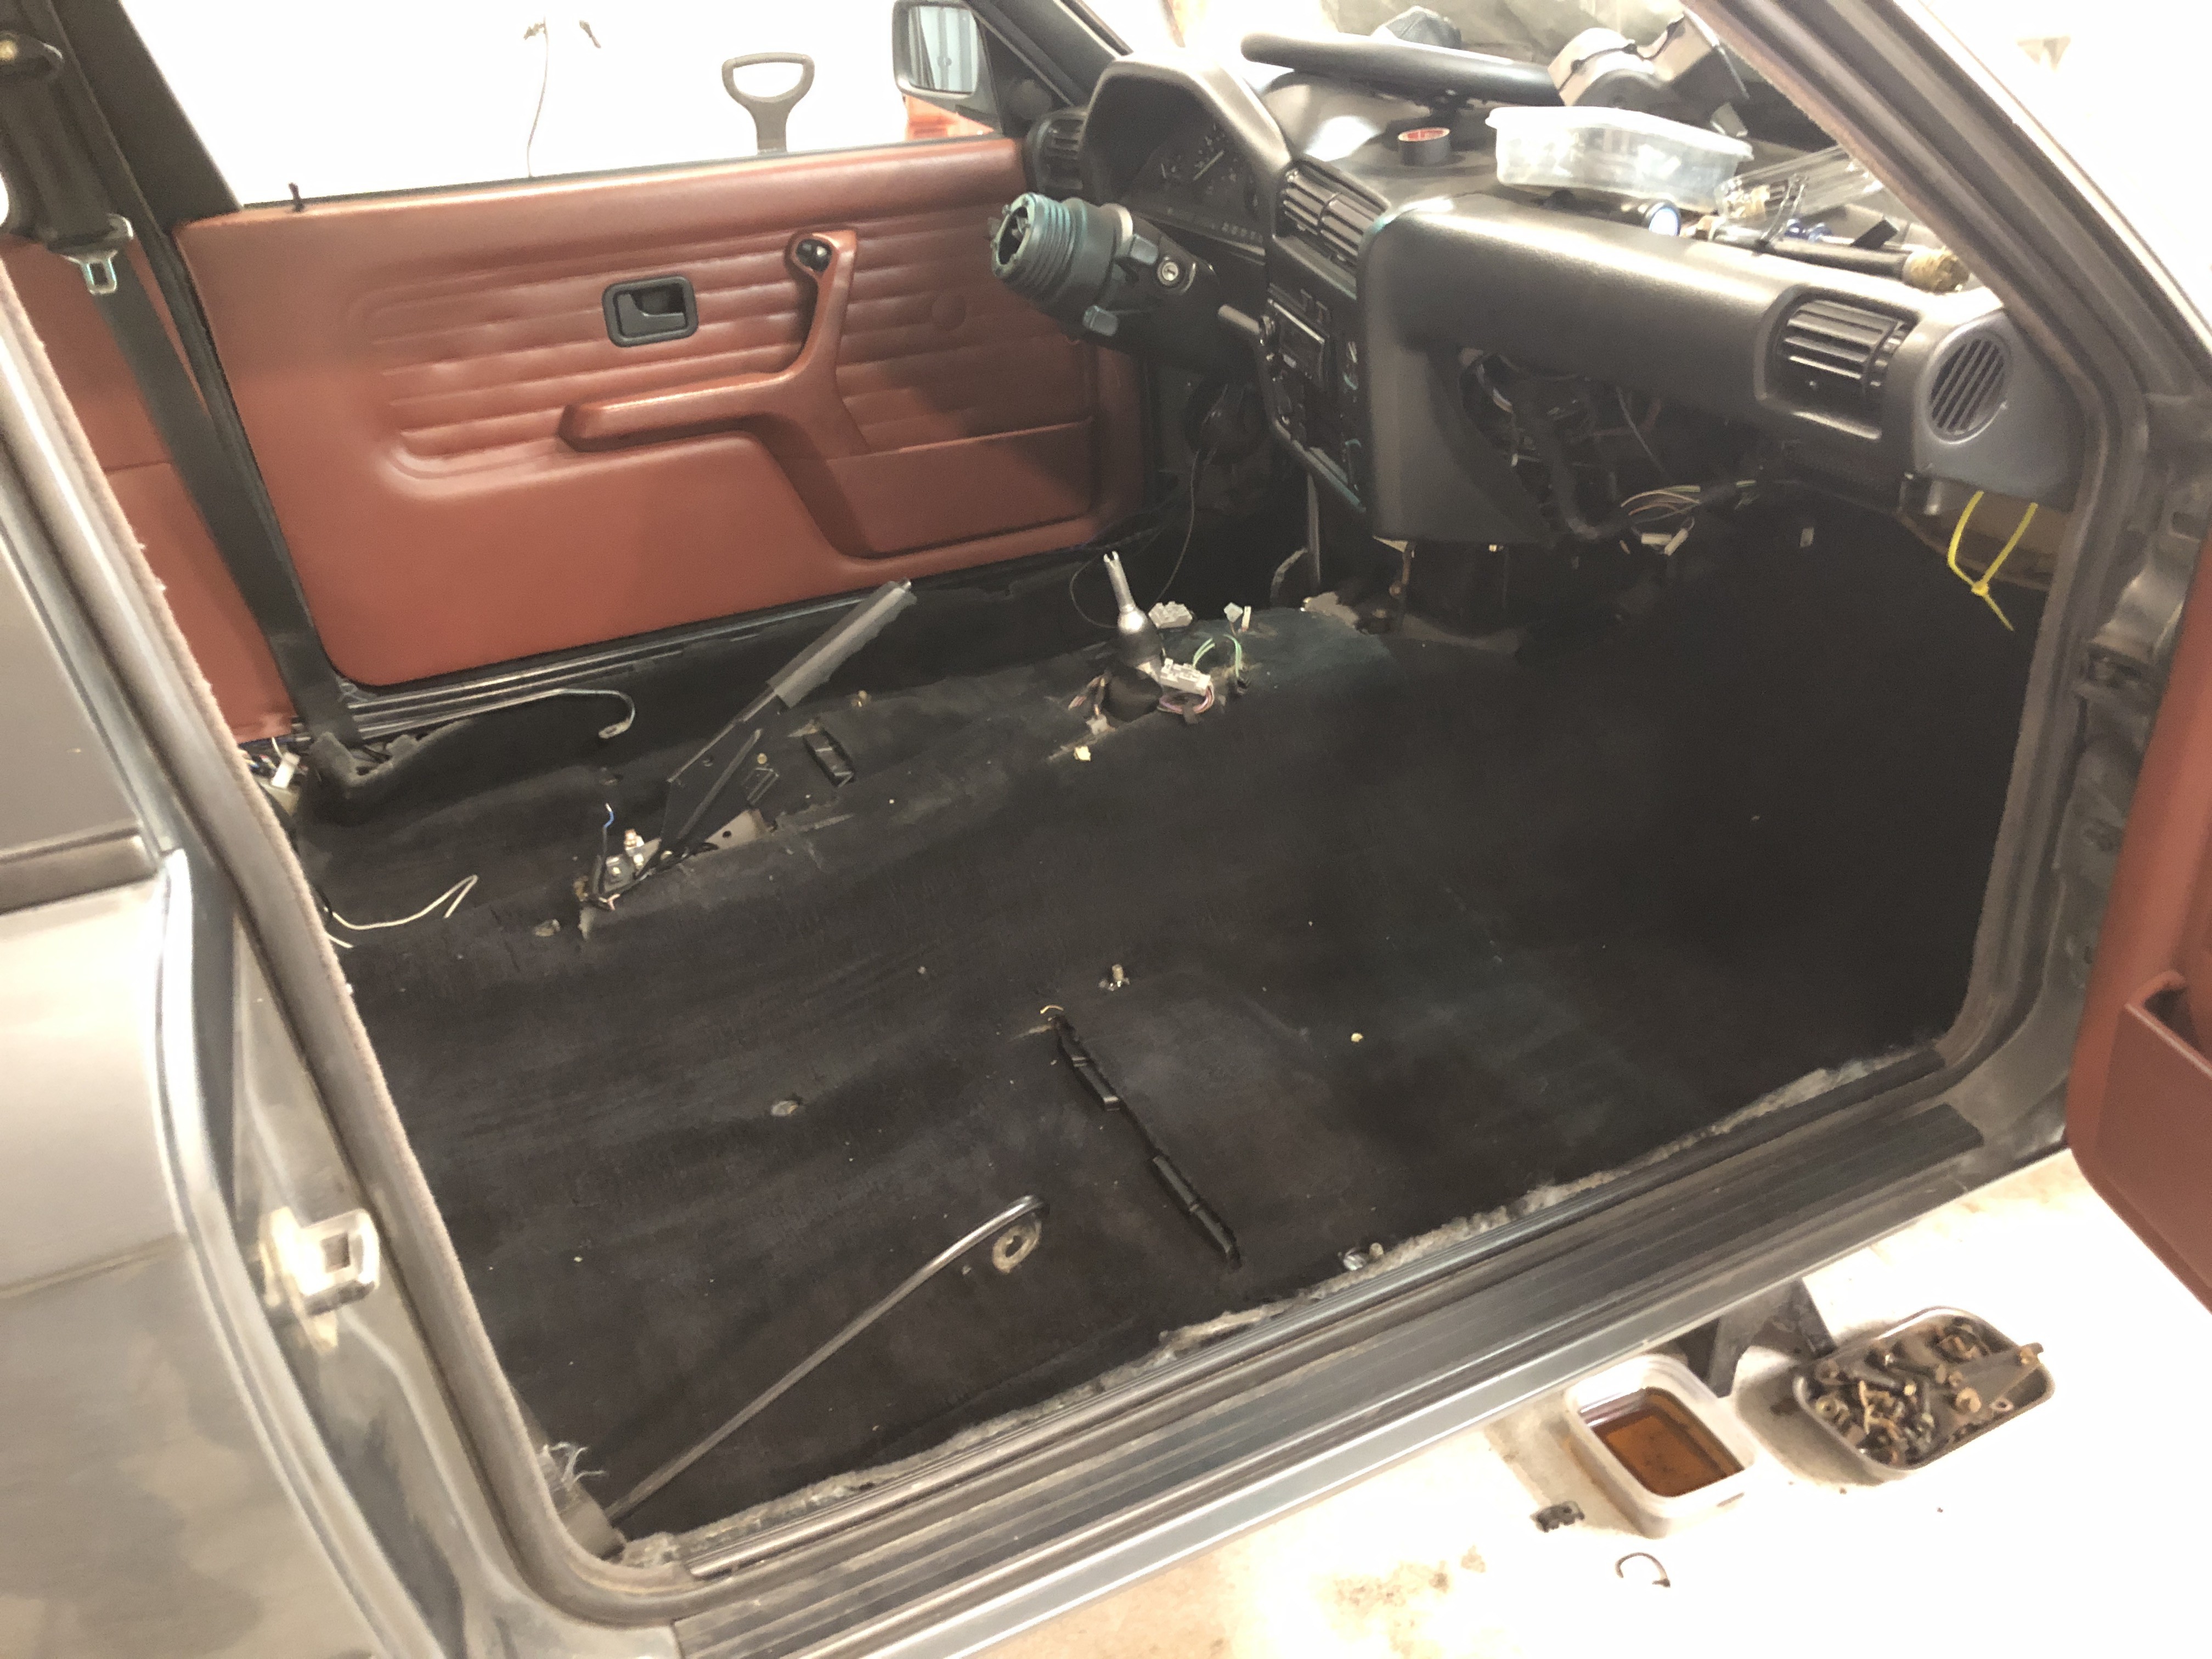
                        Passenger footwell done. 

                        5228DEFD-60A2-4CB3-B9C8-89906EB41F4C.jpeg

                        6EDA2C61-E413-4EB8-A1C3-DEACADBD8EE4.jpeg

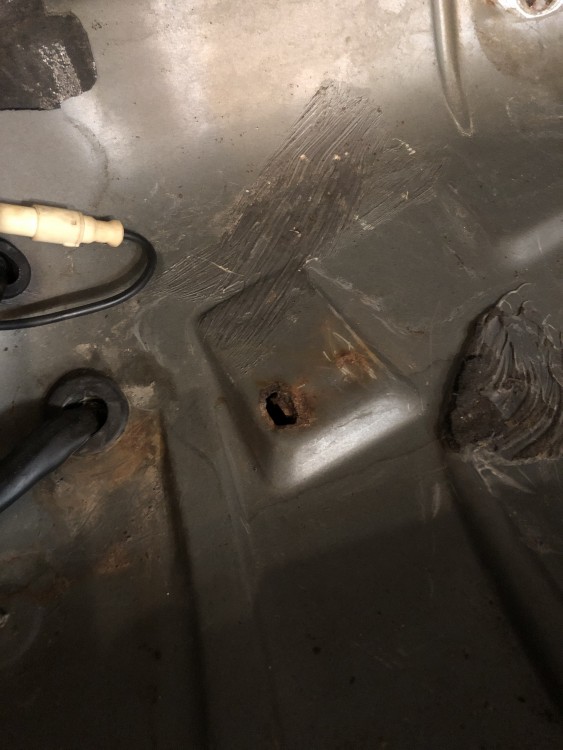
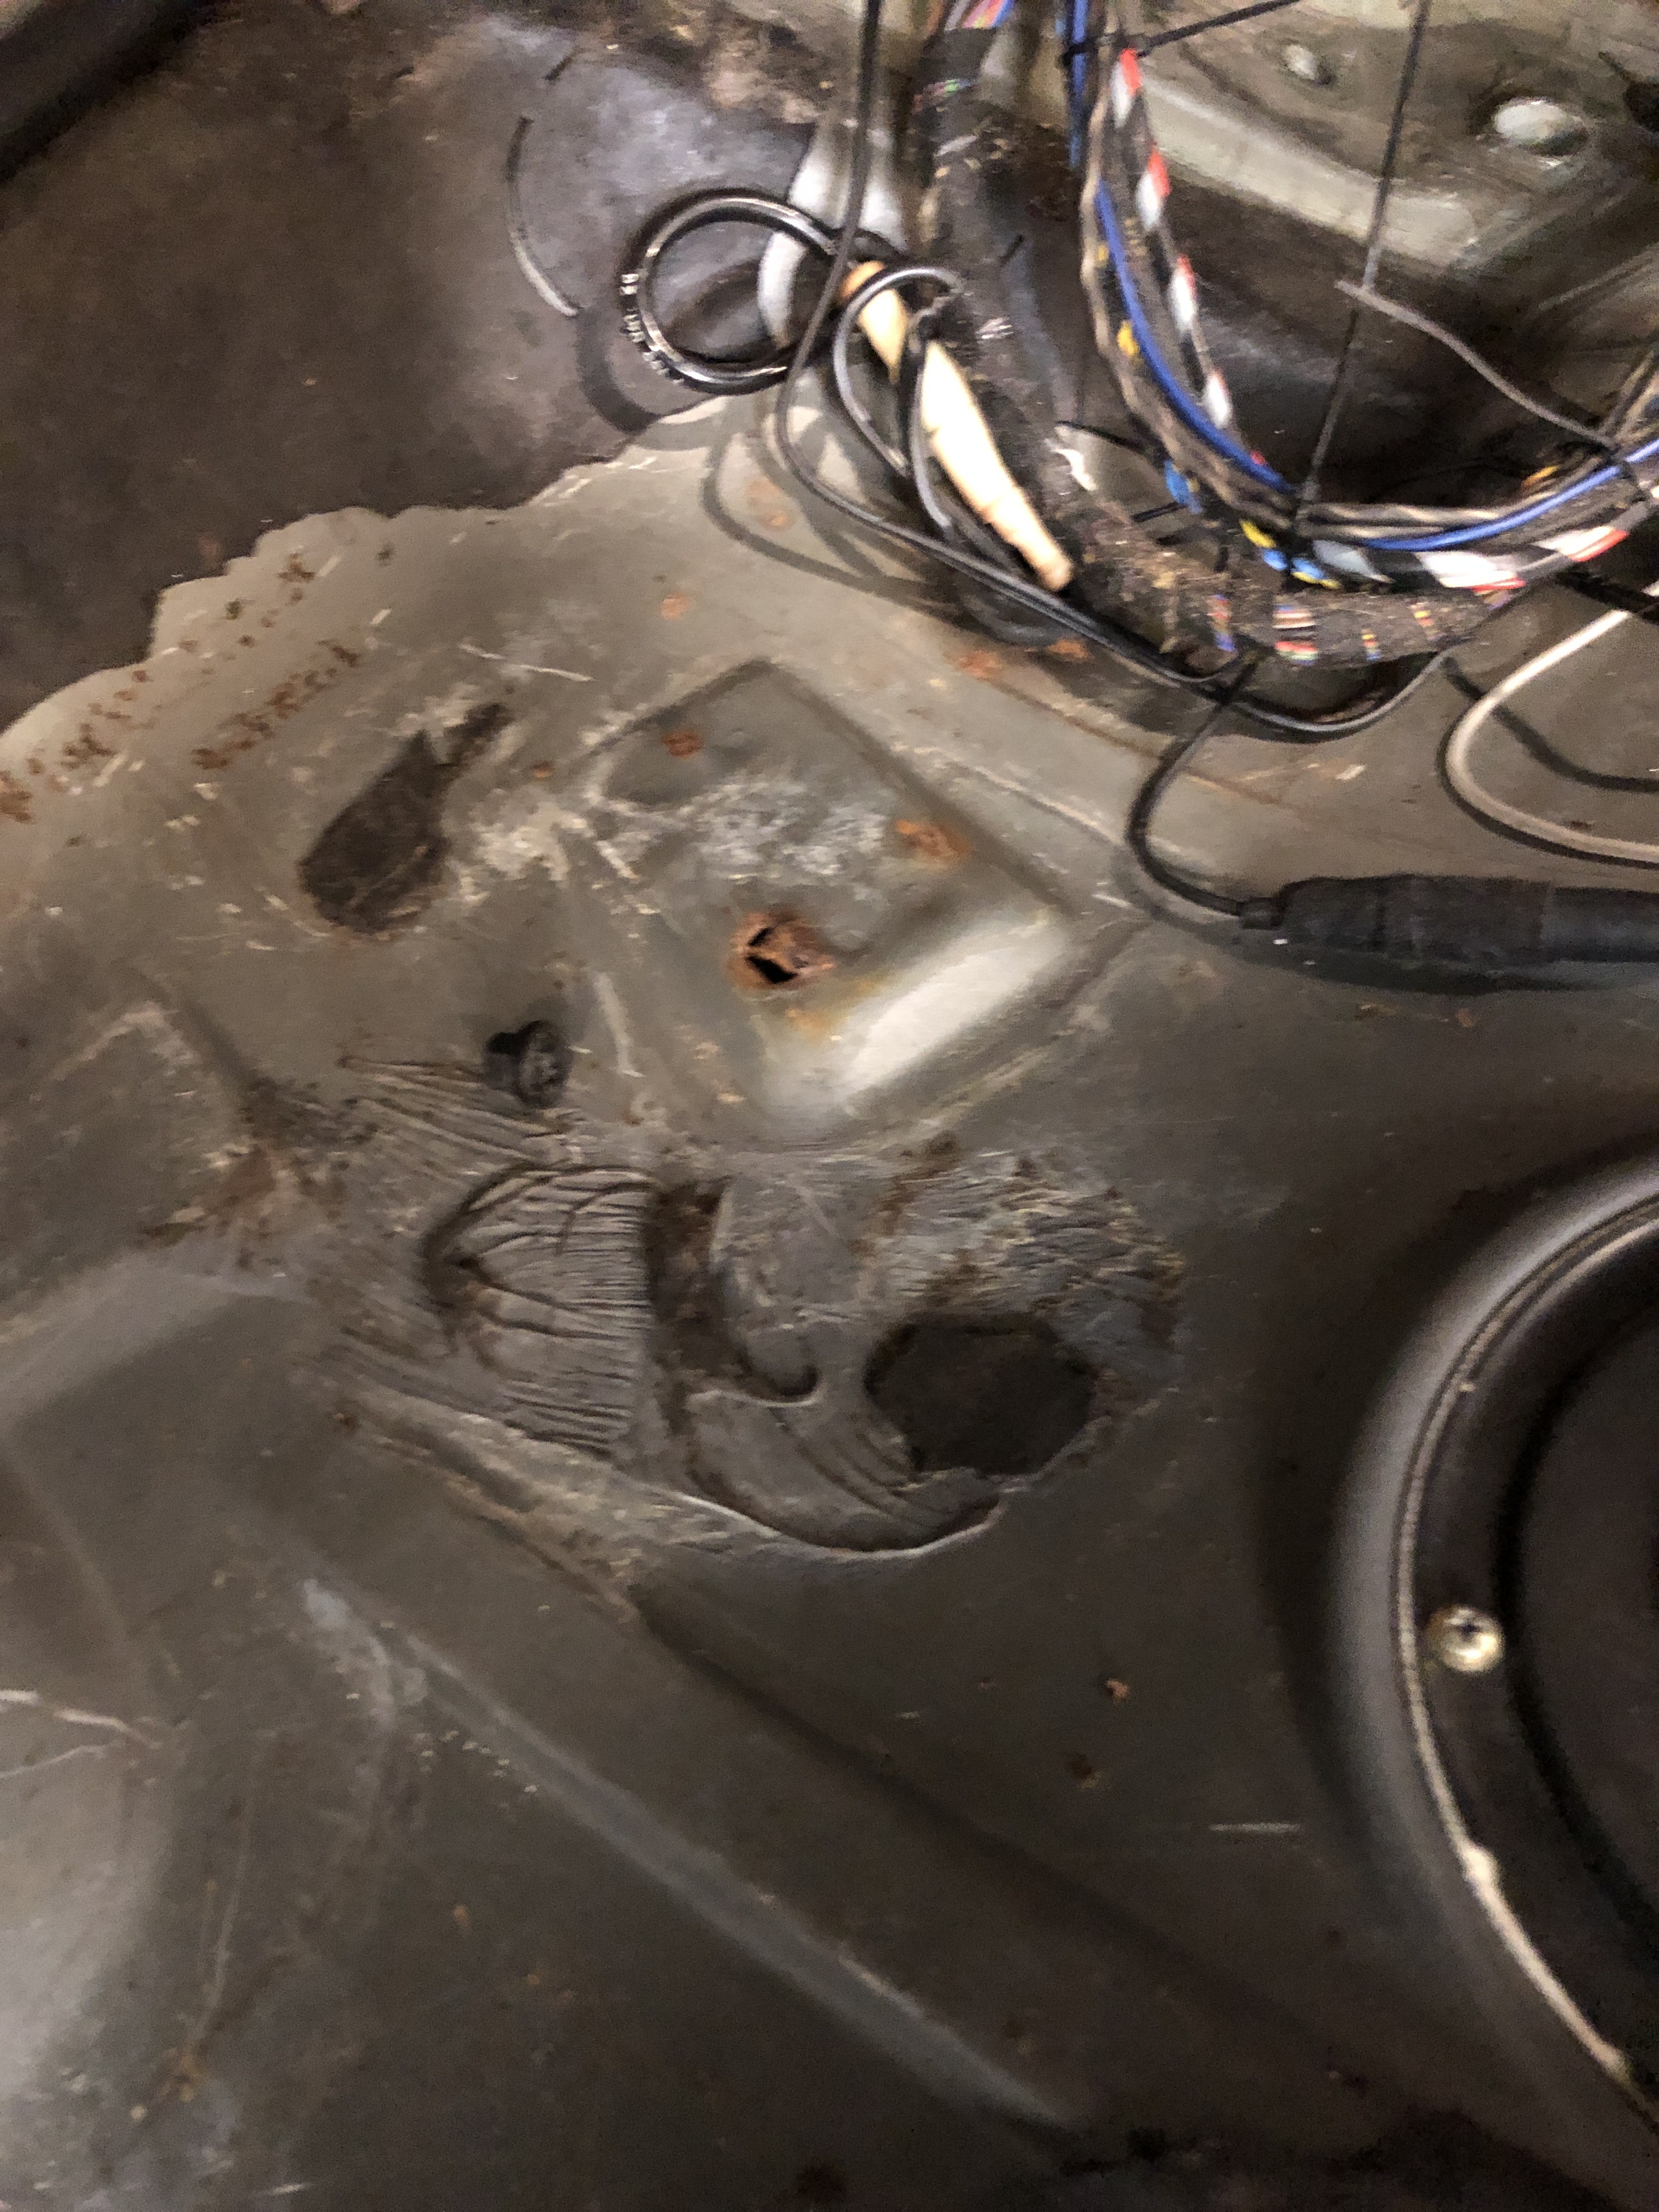
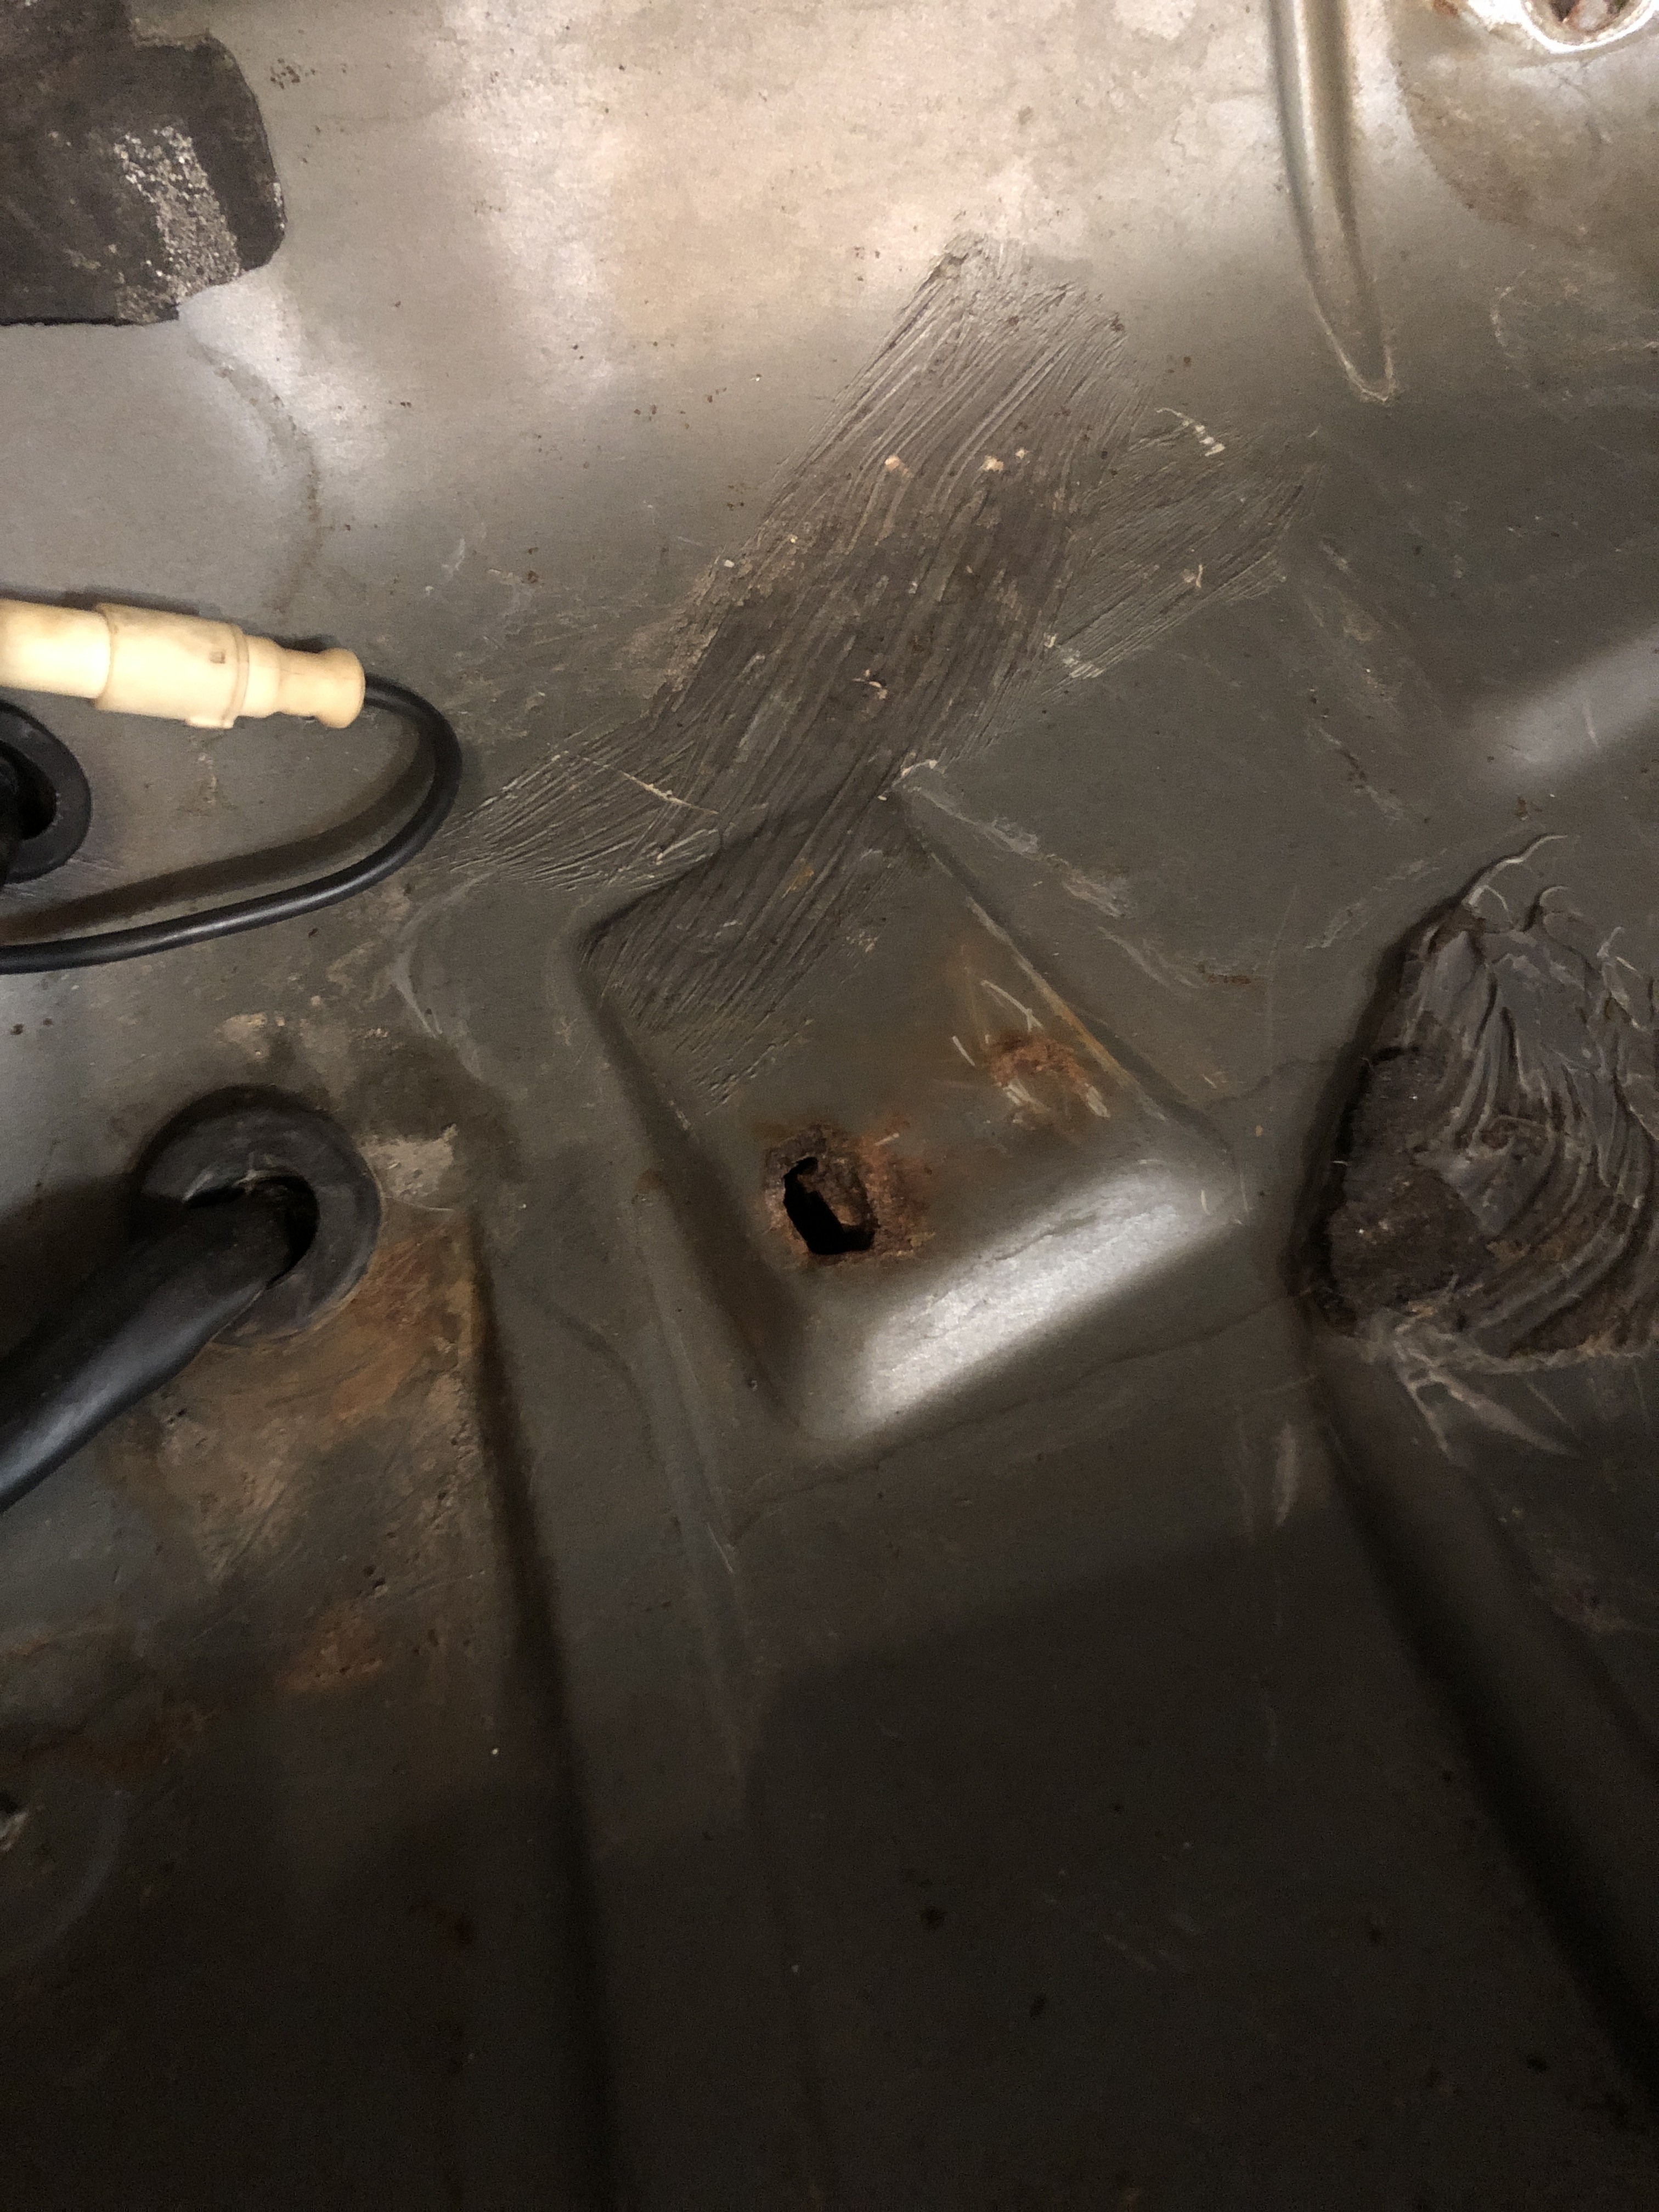
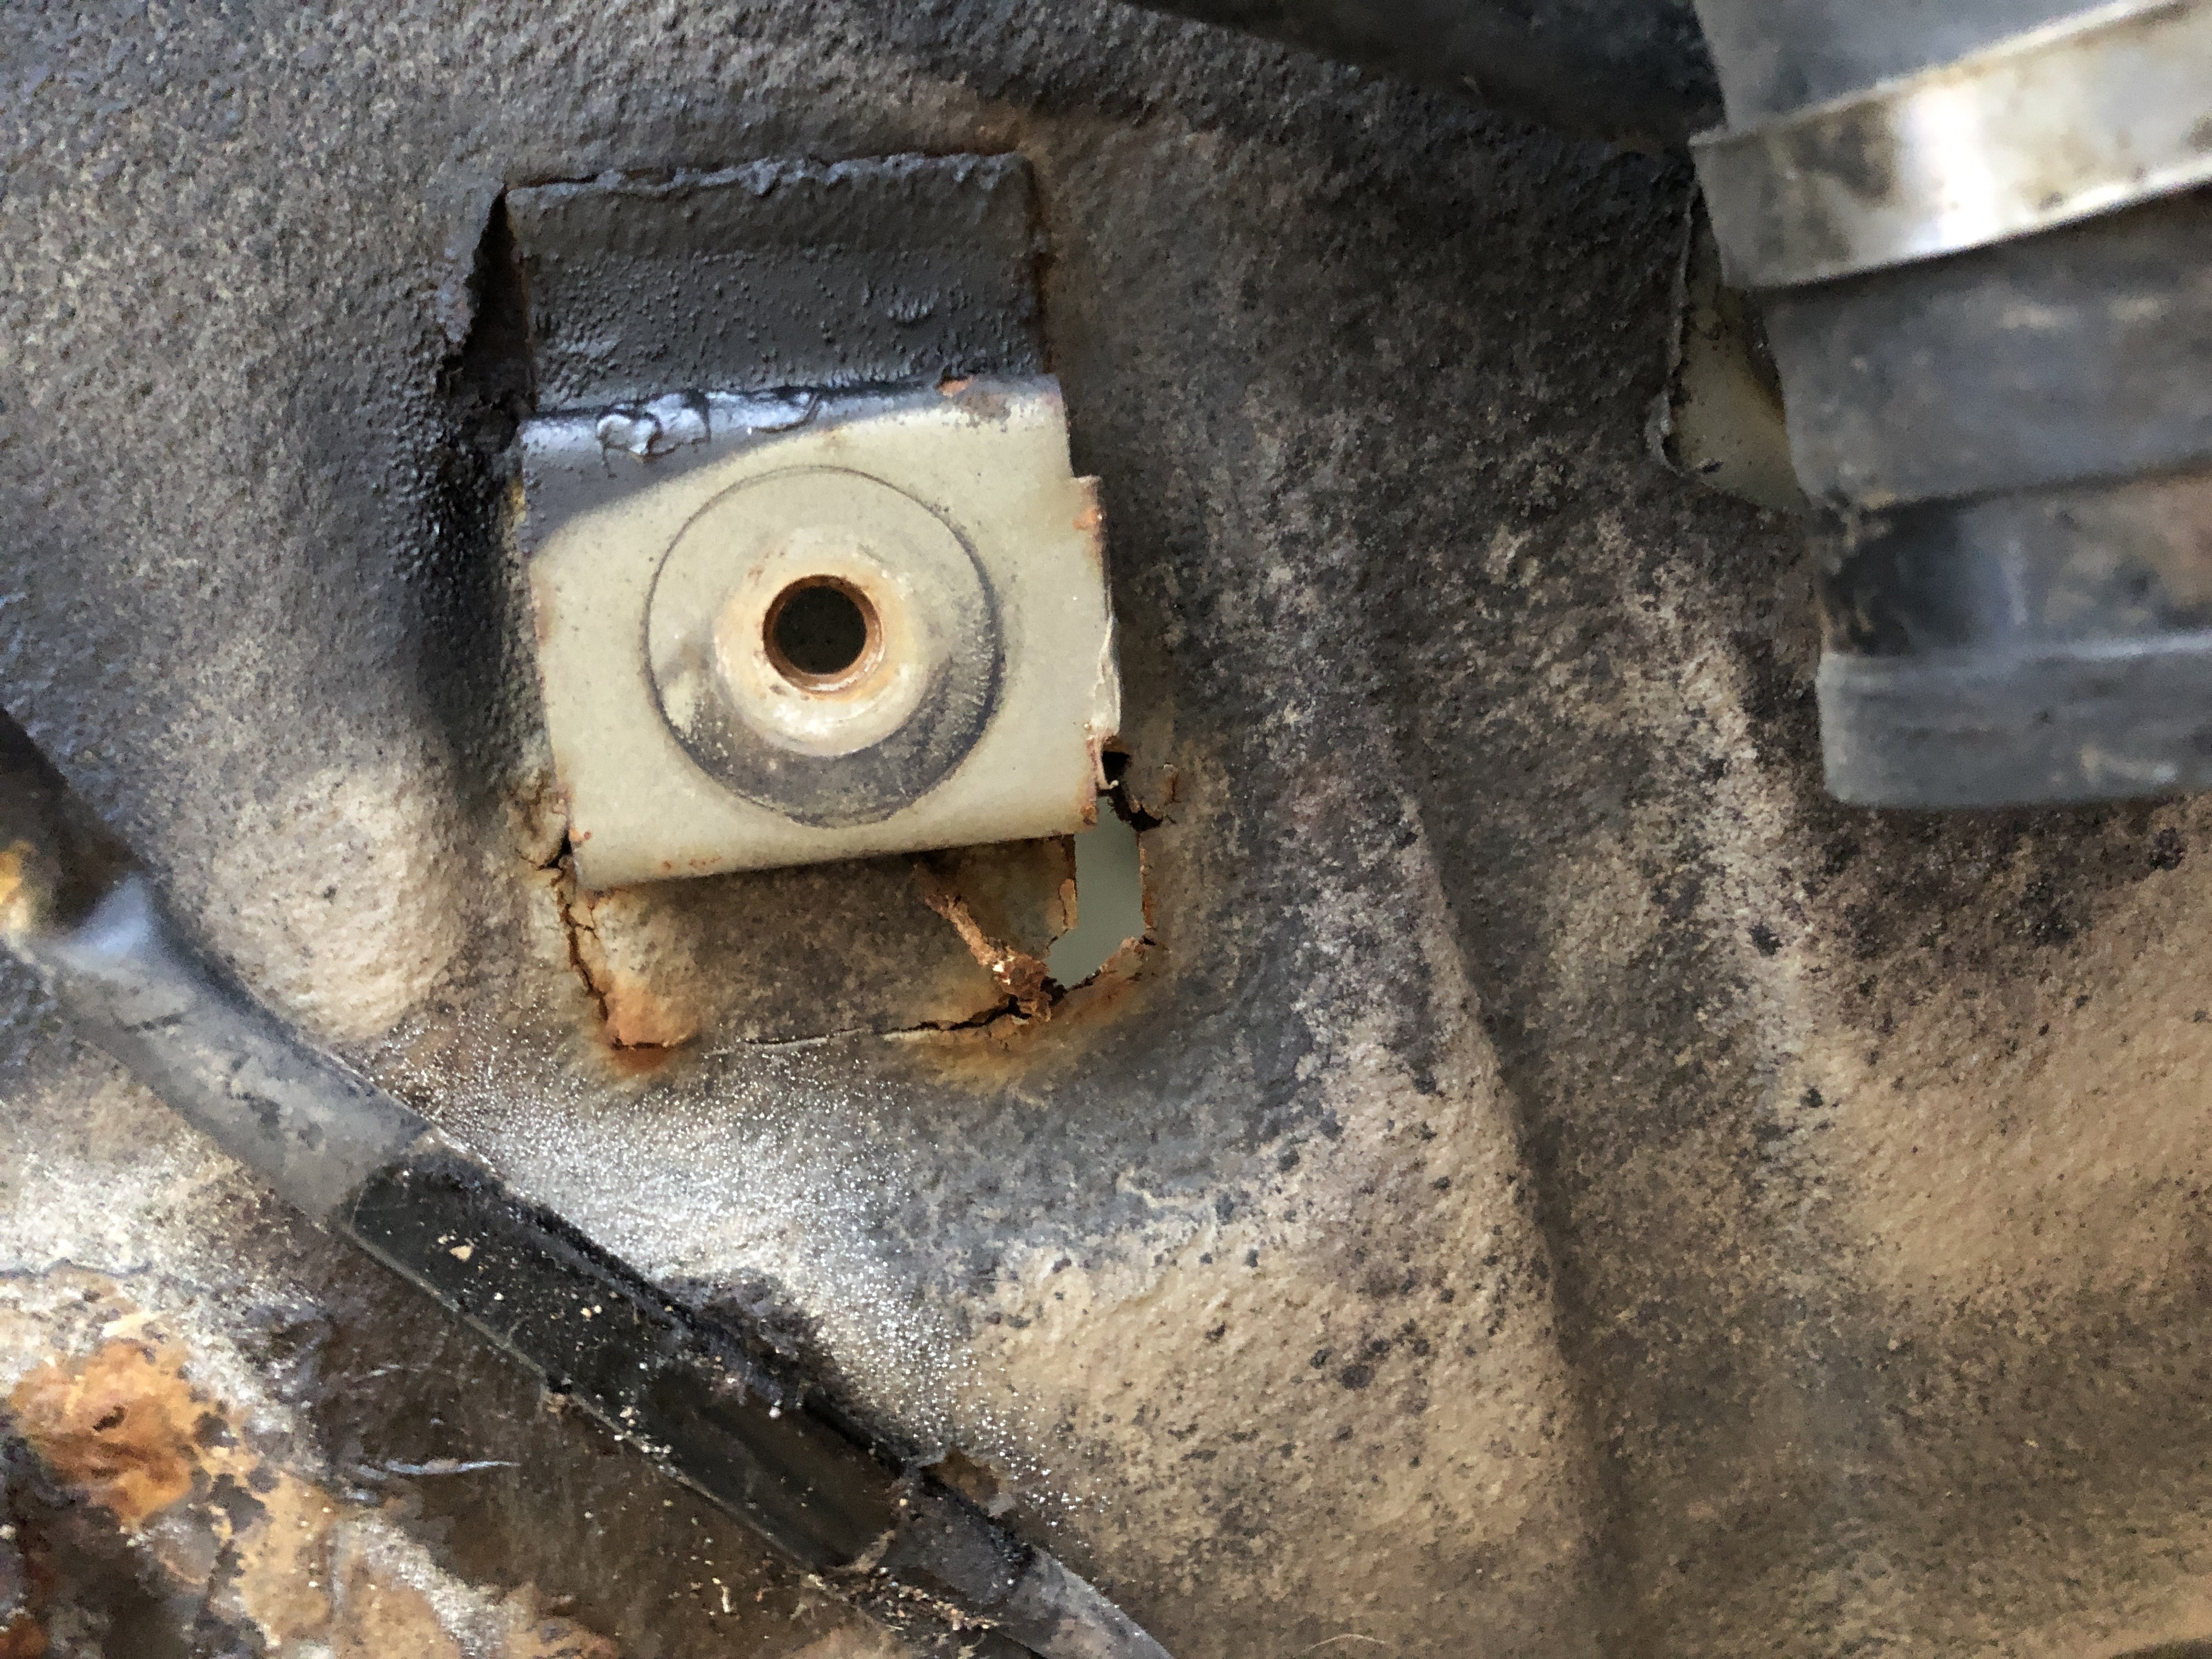
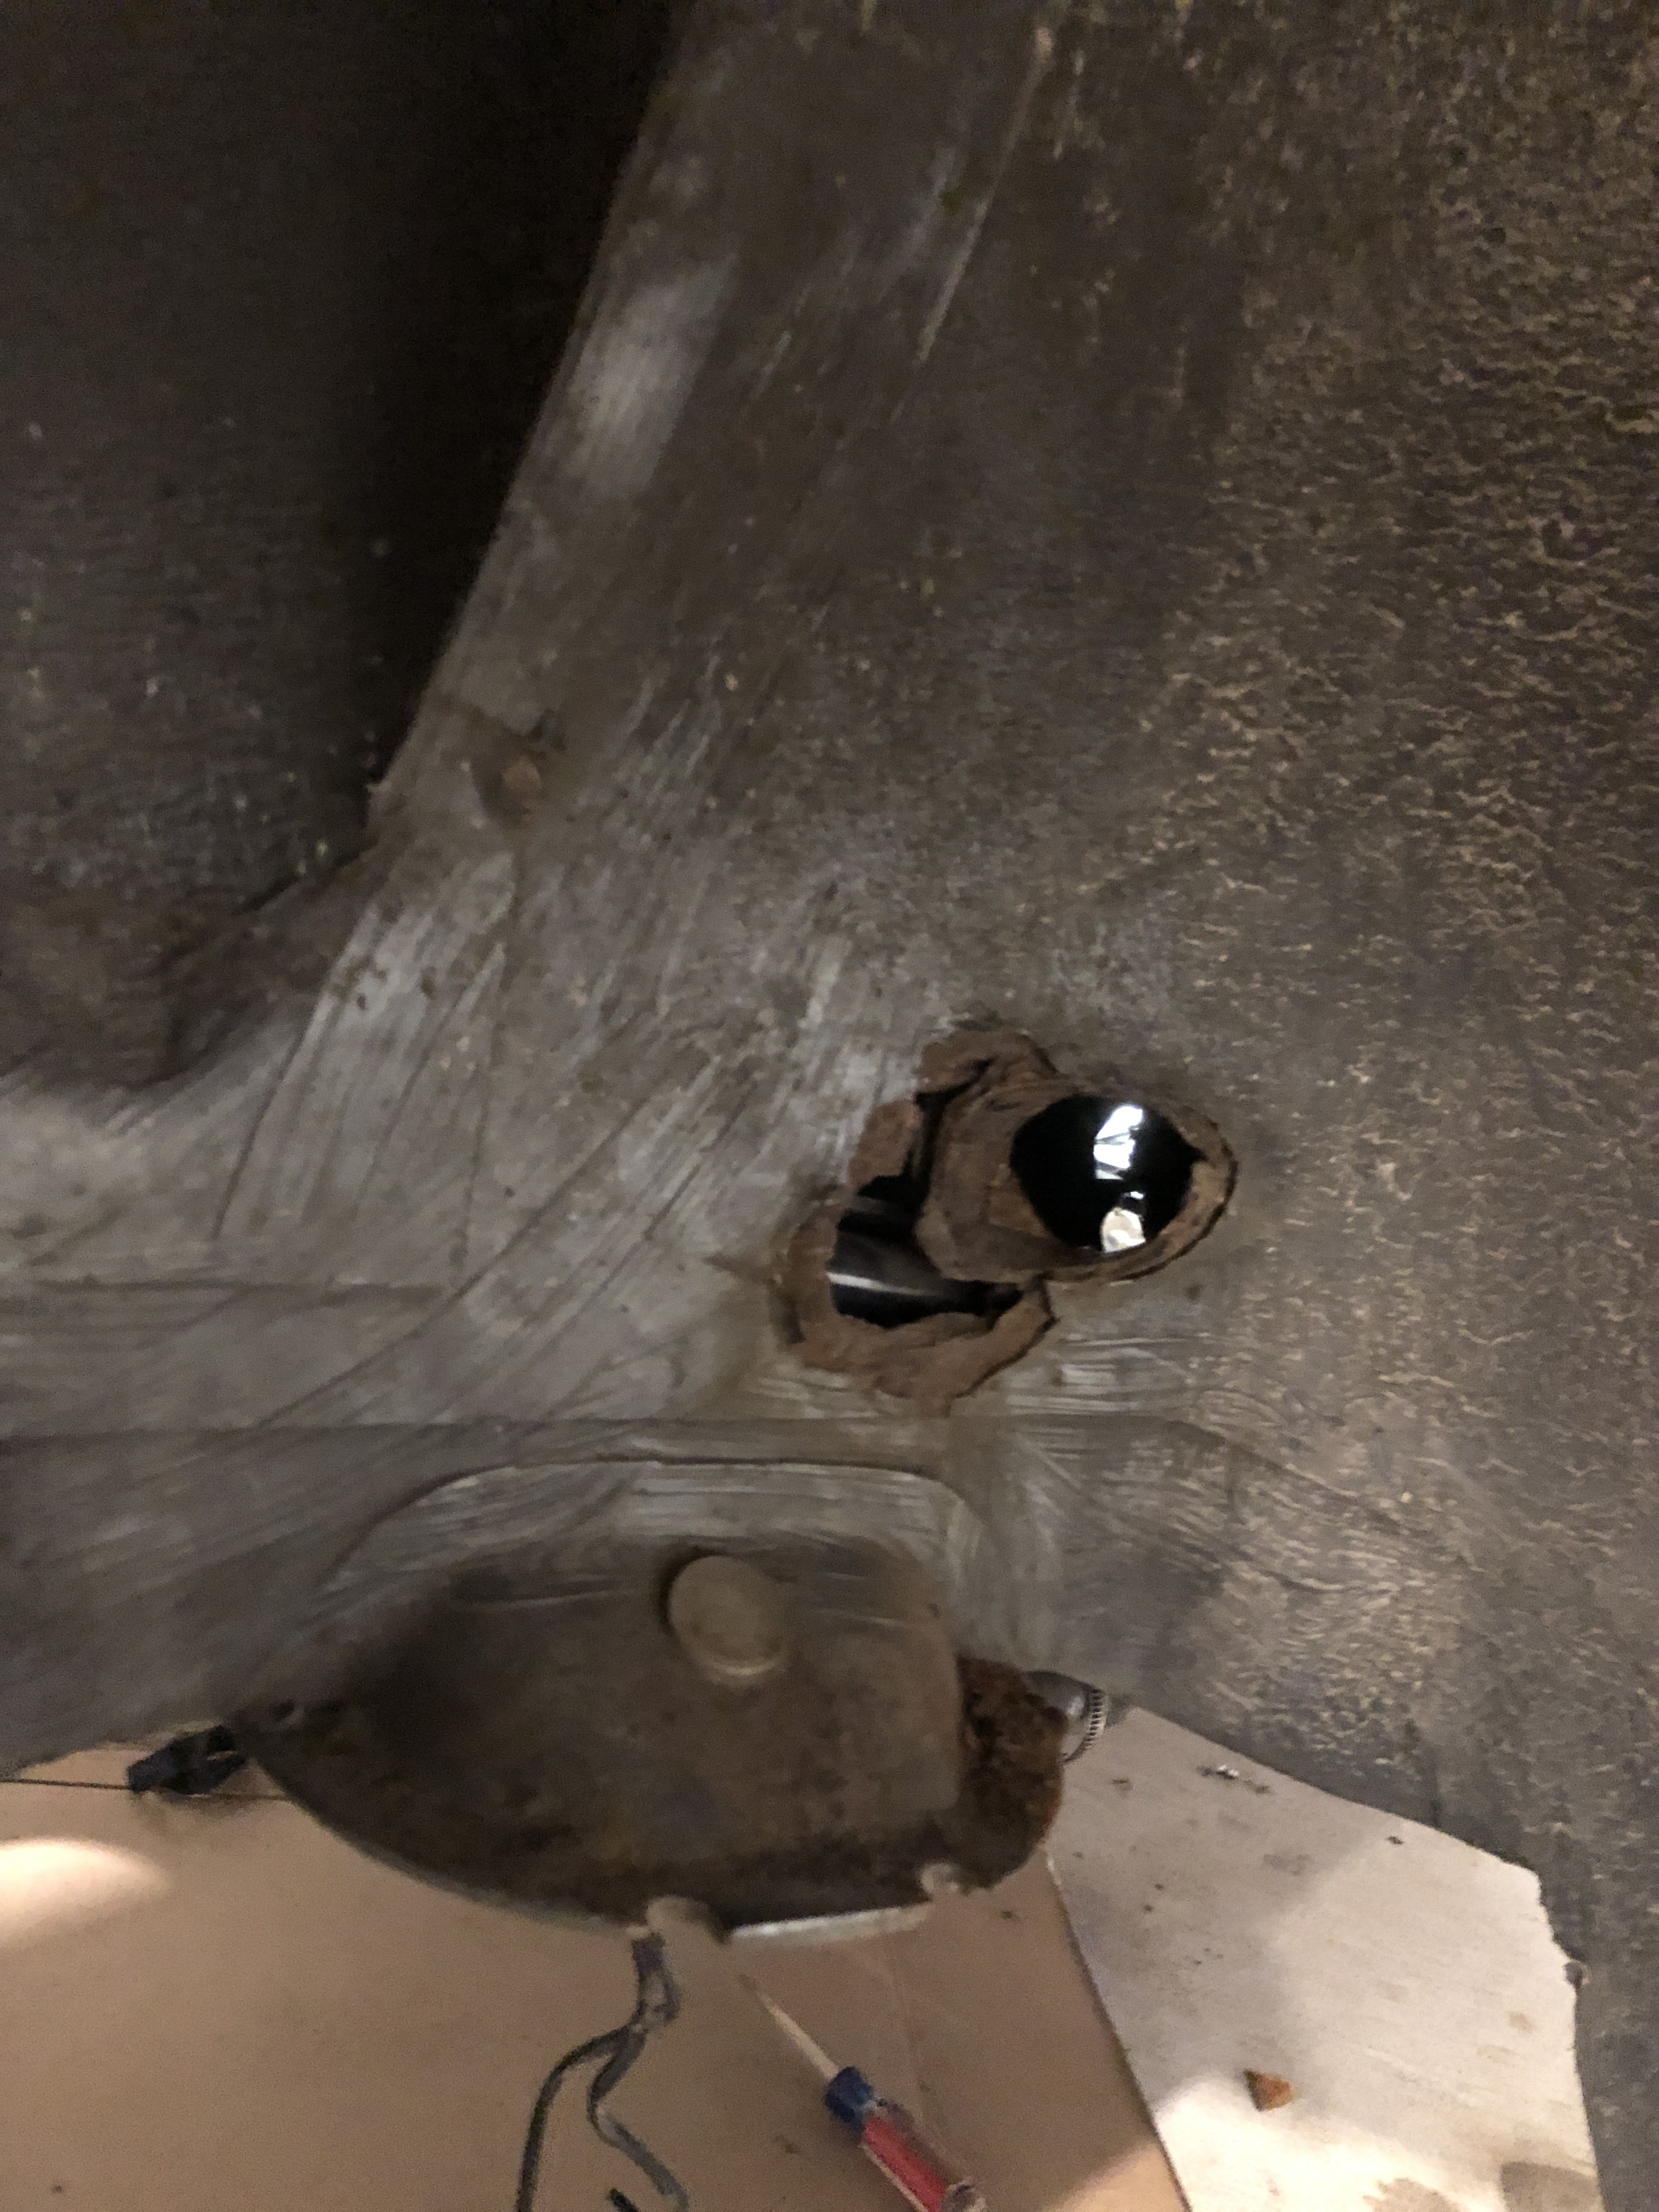
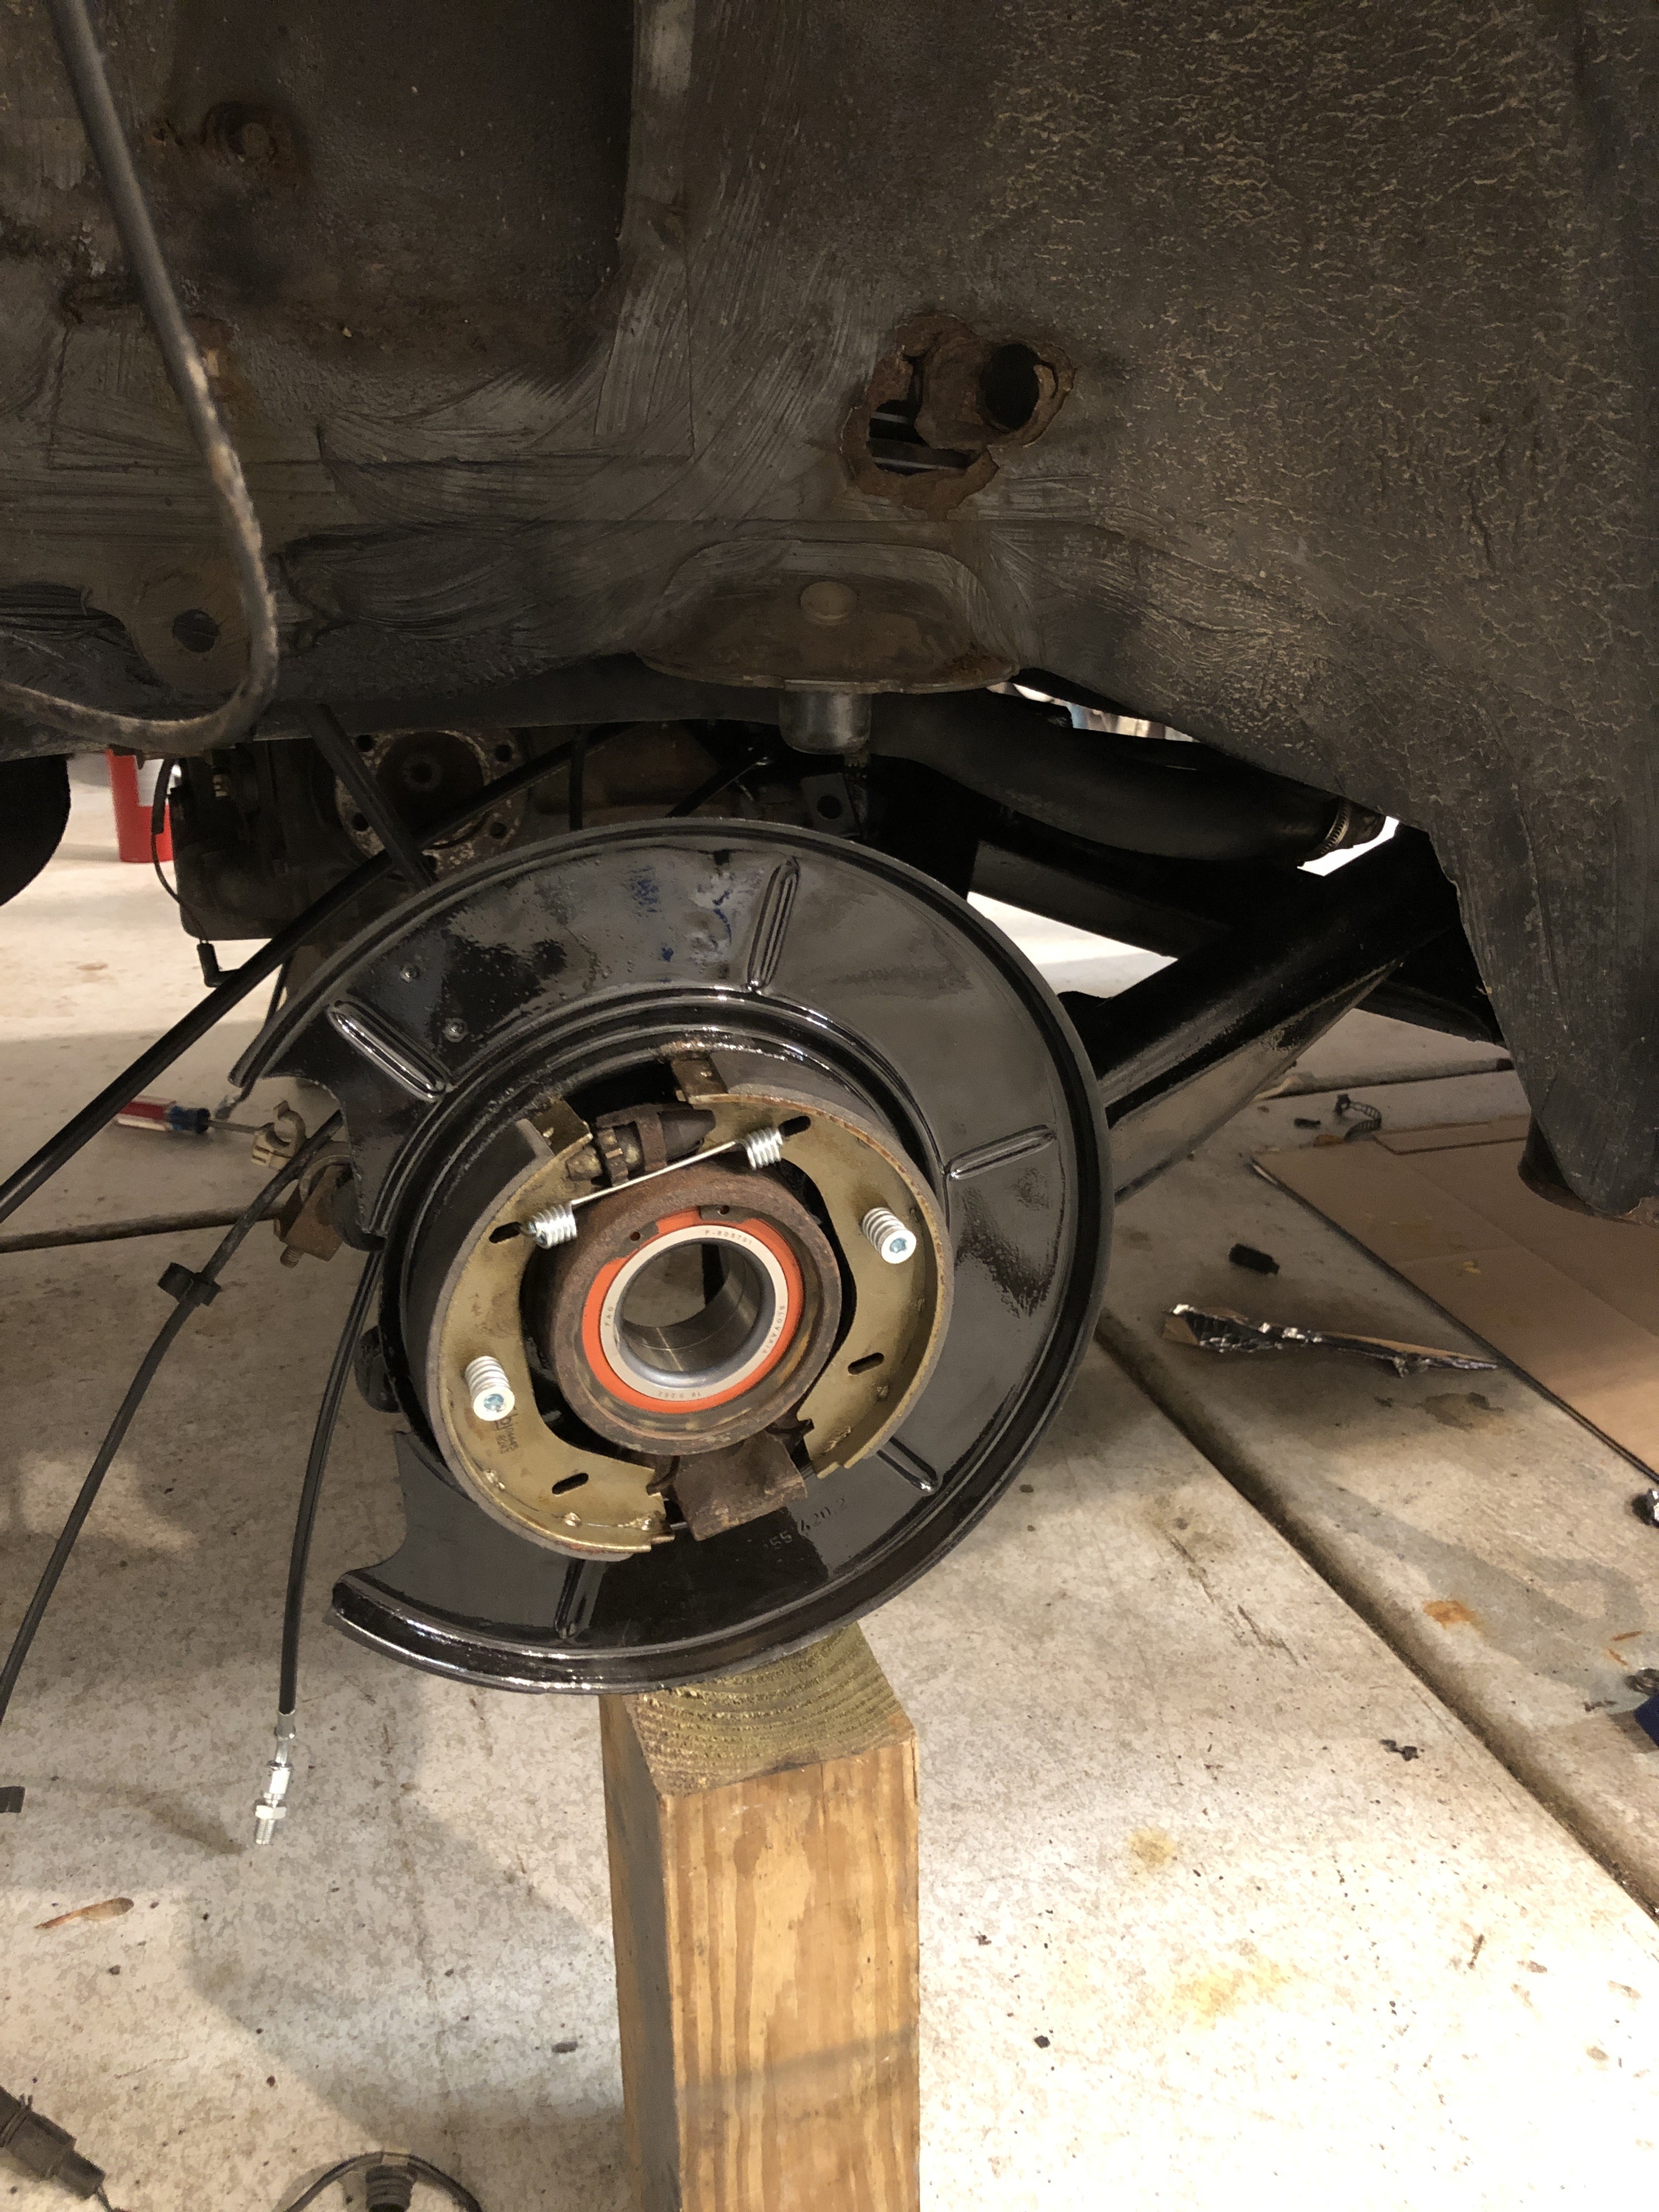
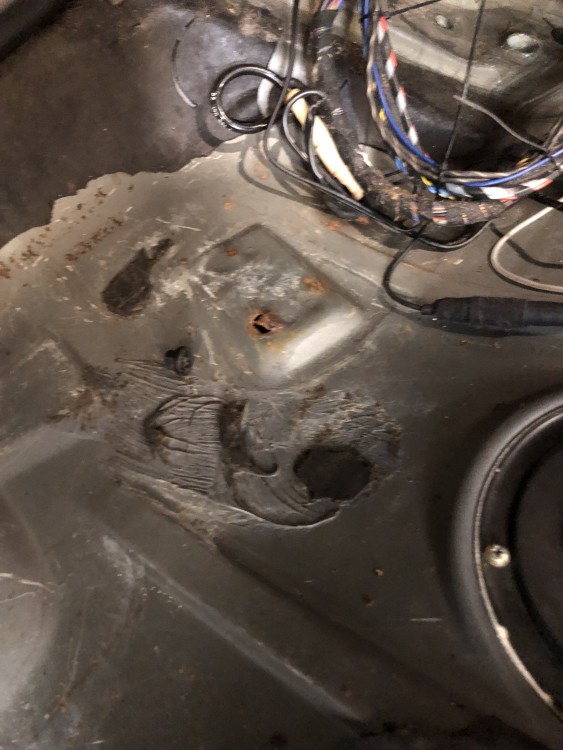
                        Found these two little rust holes under the rear seat. Anyone know what’s right there? Both sides have a small hole in the exact same place. 
                         

                        CA0DC3A0-D0E2-4D52-86CB-82D8622366A5.jpeg

                        872C42A4-FDD0-48F3-B406-BF4DBF82F608.jpeg
                         

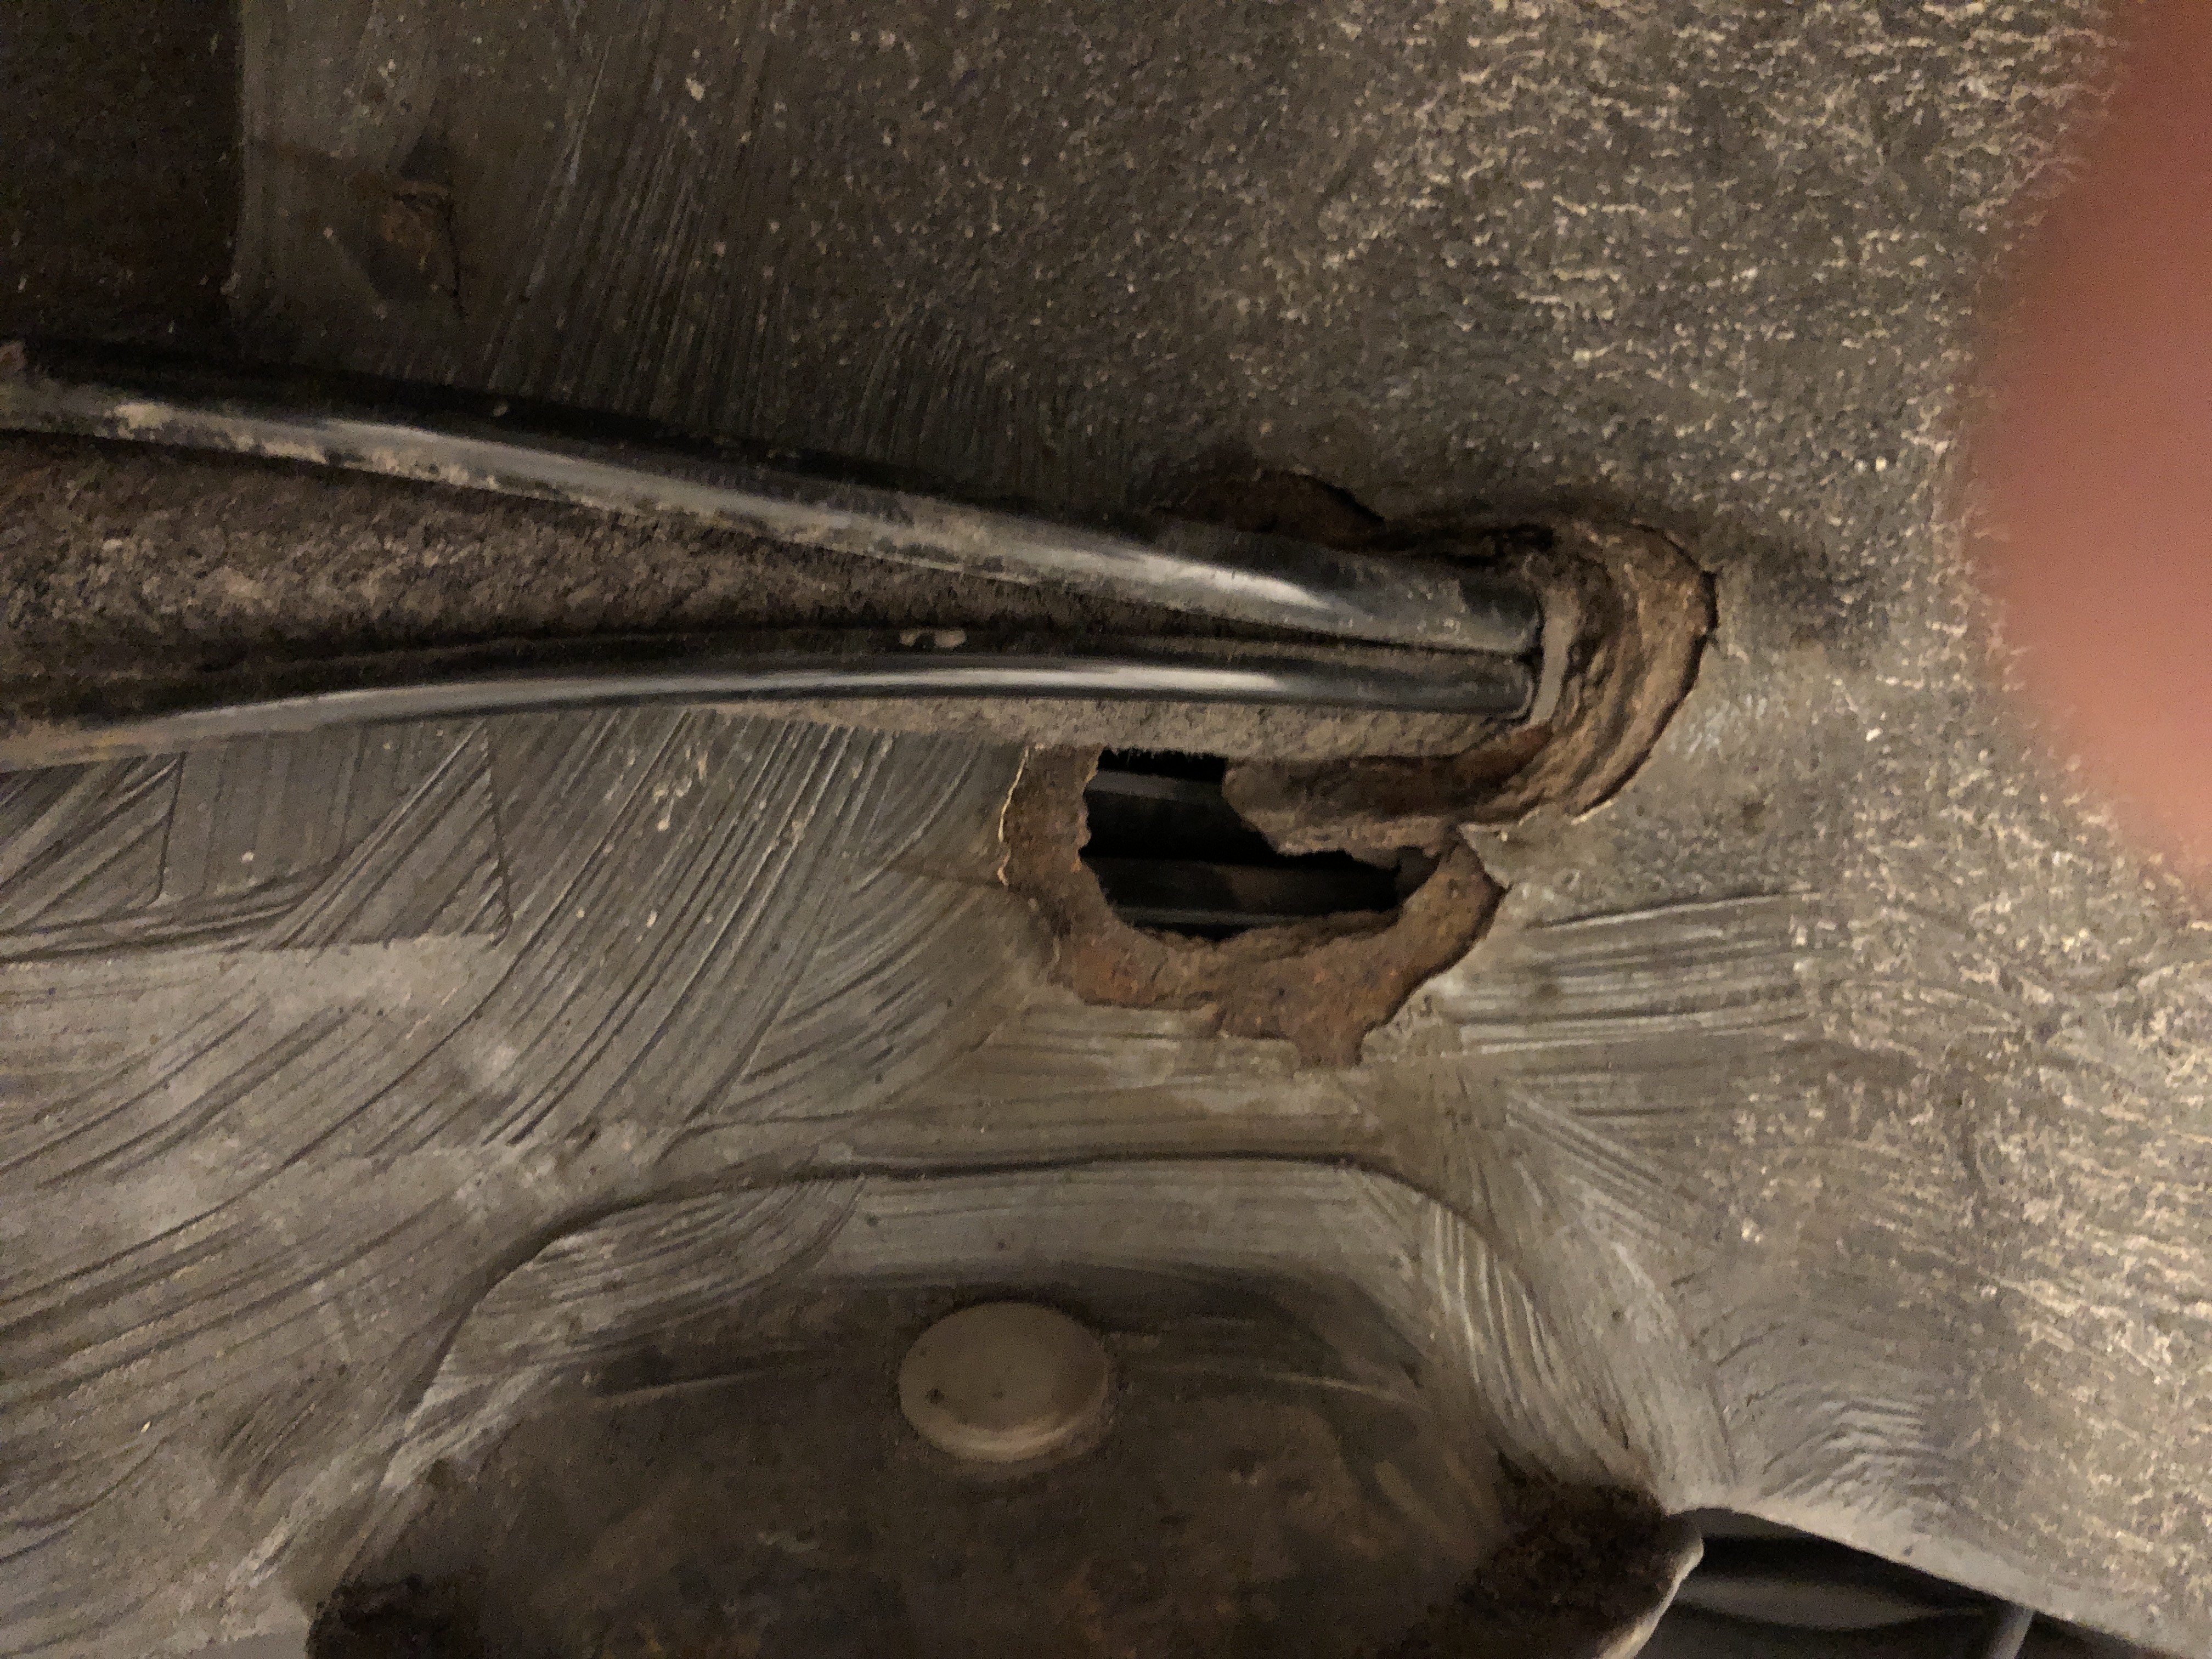
                        I found this other rust hole. Any suggestions on fixing this one? Removing the battery cable to make access would be easy, but the rest of the hoses are fuel vent lines, correct? And they look like they would be rather difficult to move out of the way. 
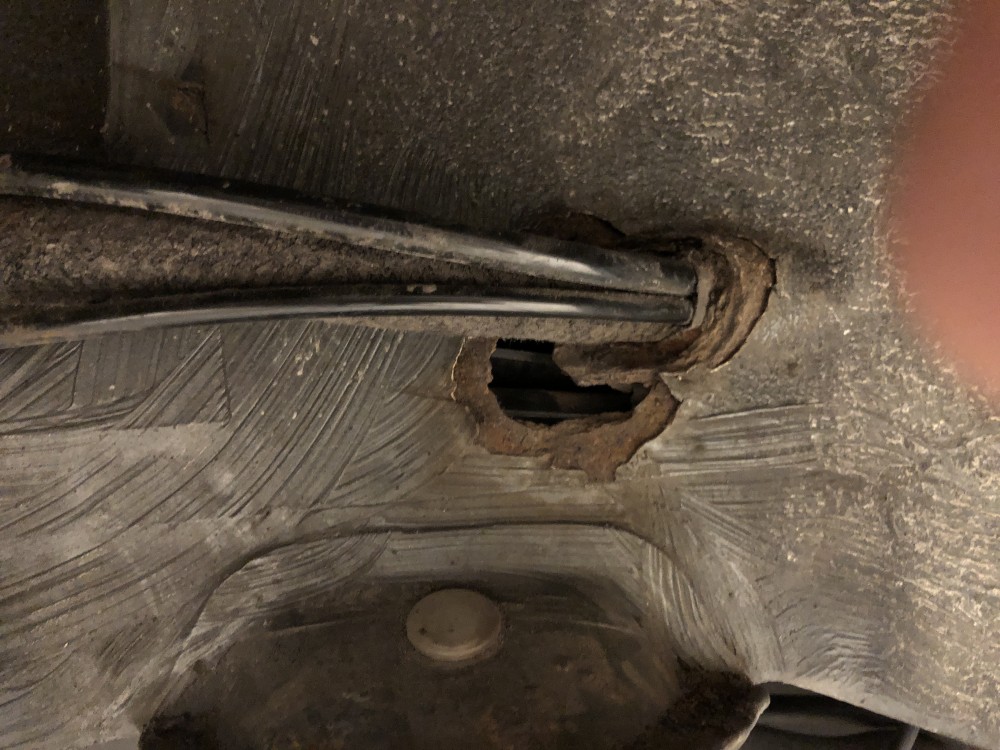
                         

                        742C0FBD-9E2B-4C9B-9B8F-96C94353F4DD.jpeg

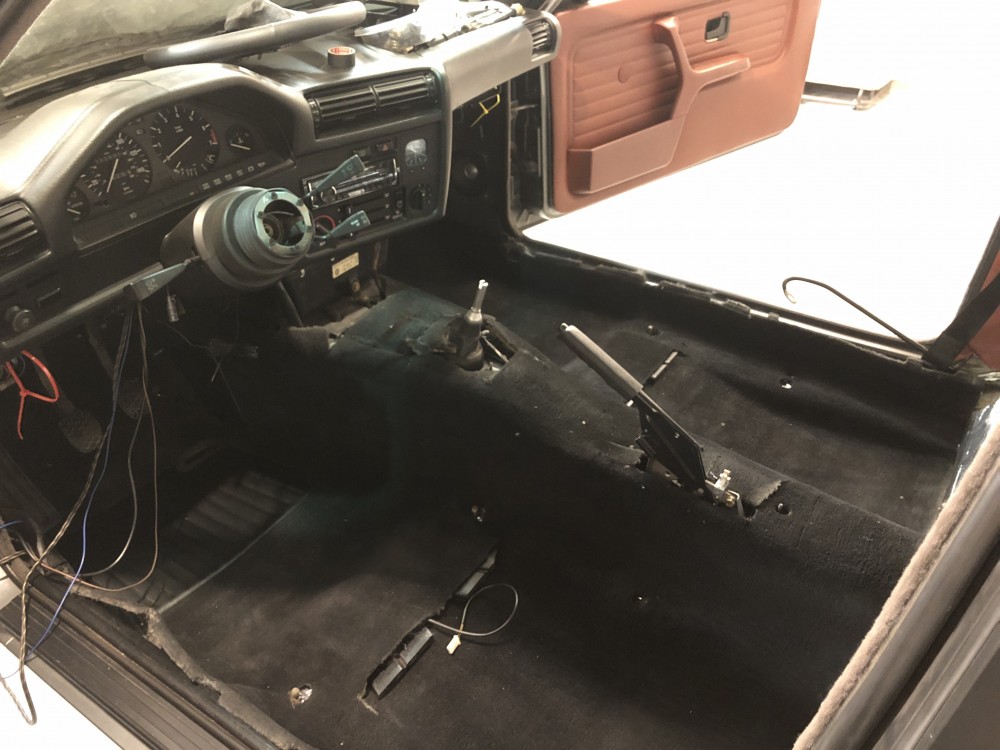
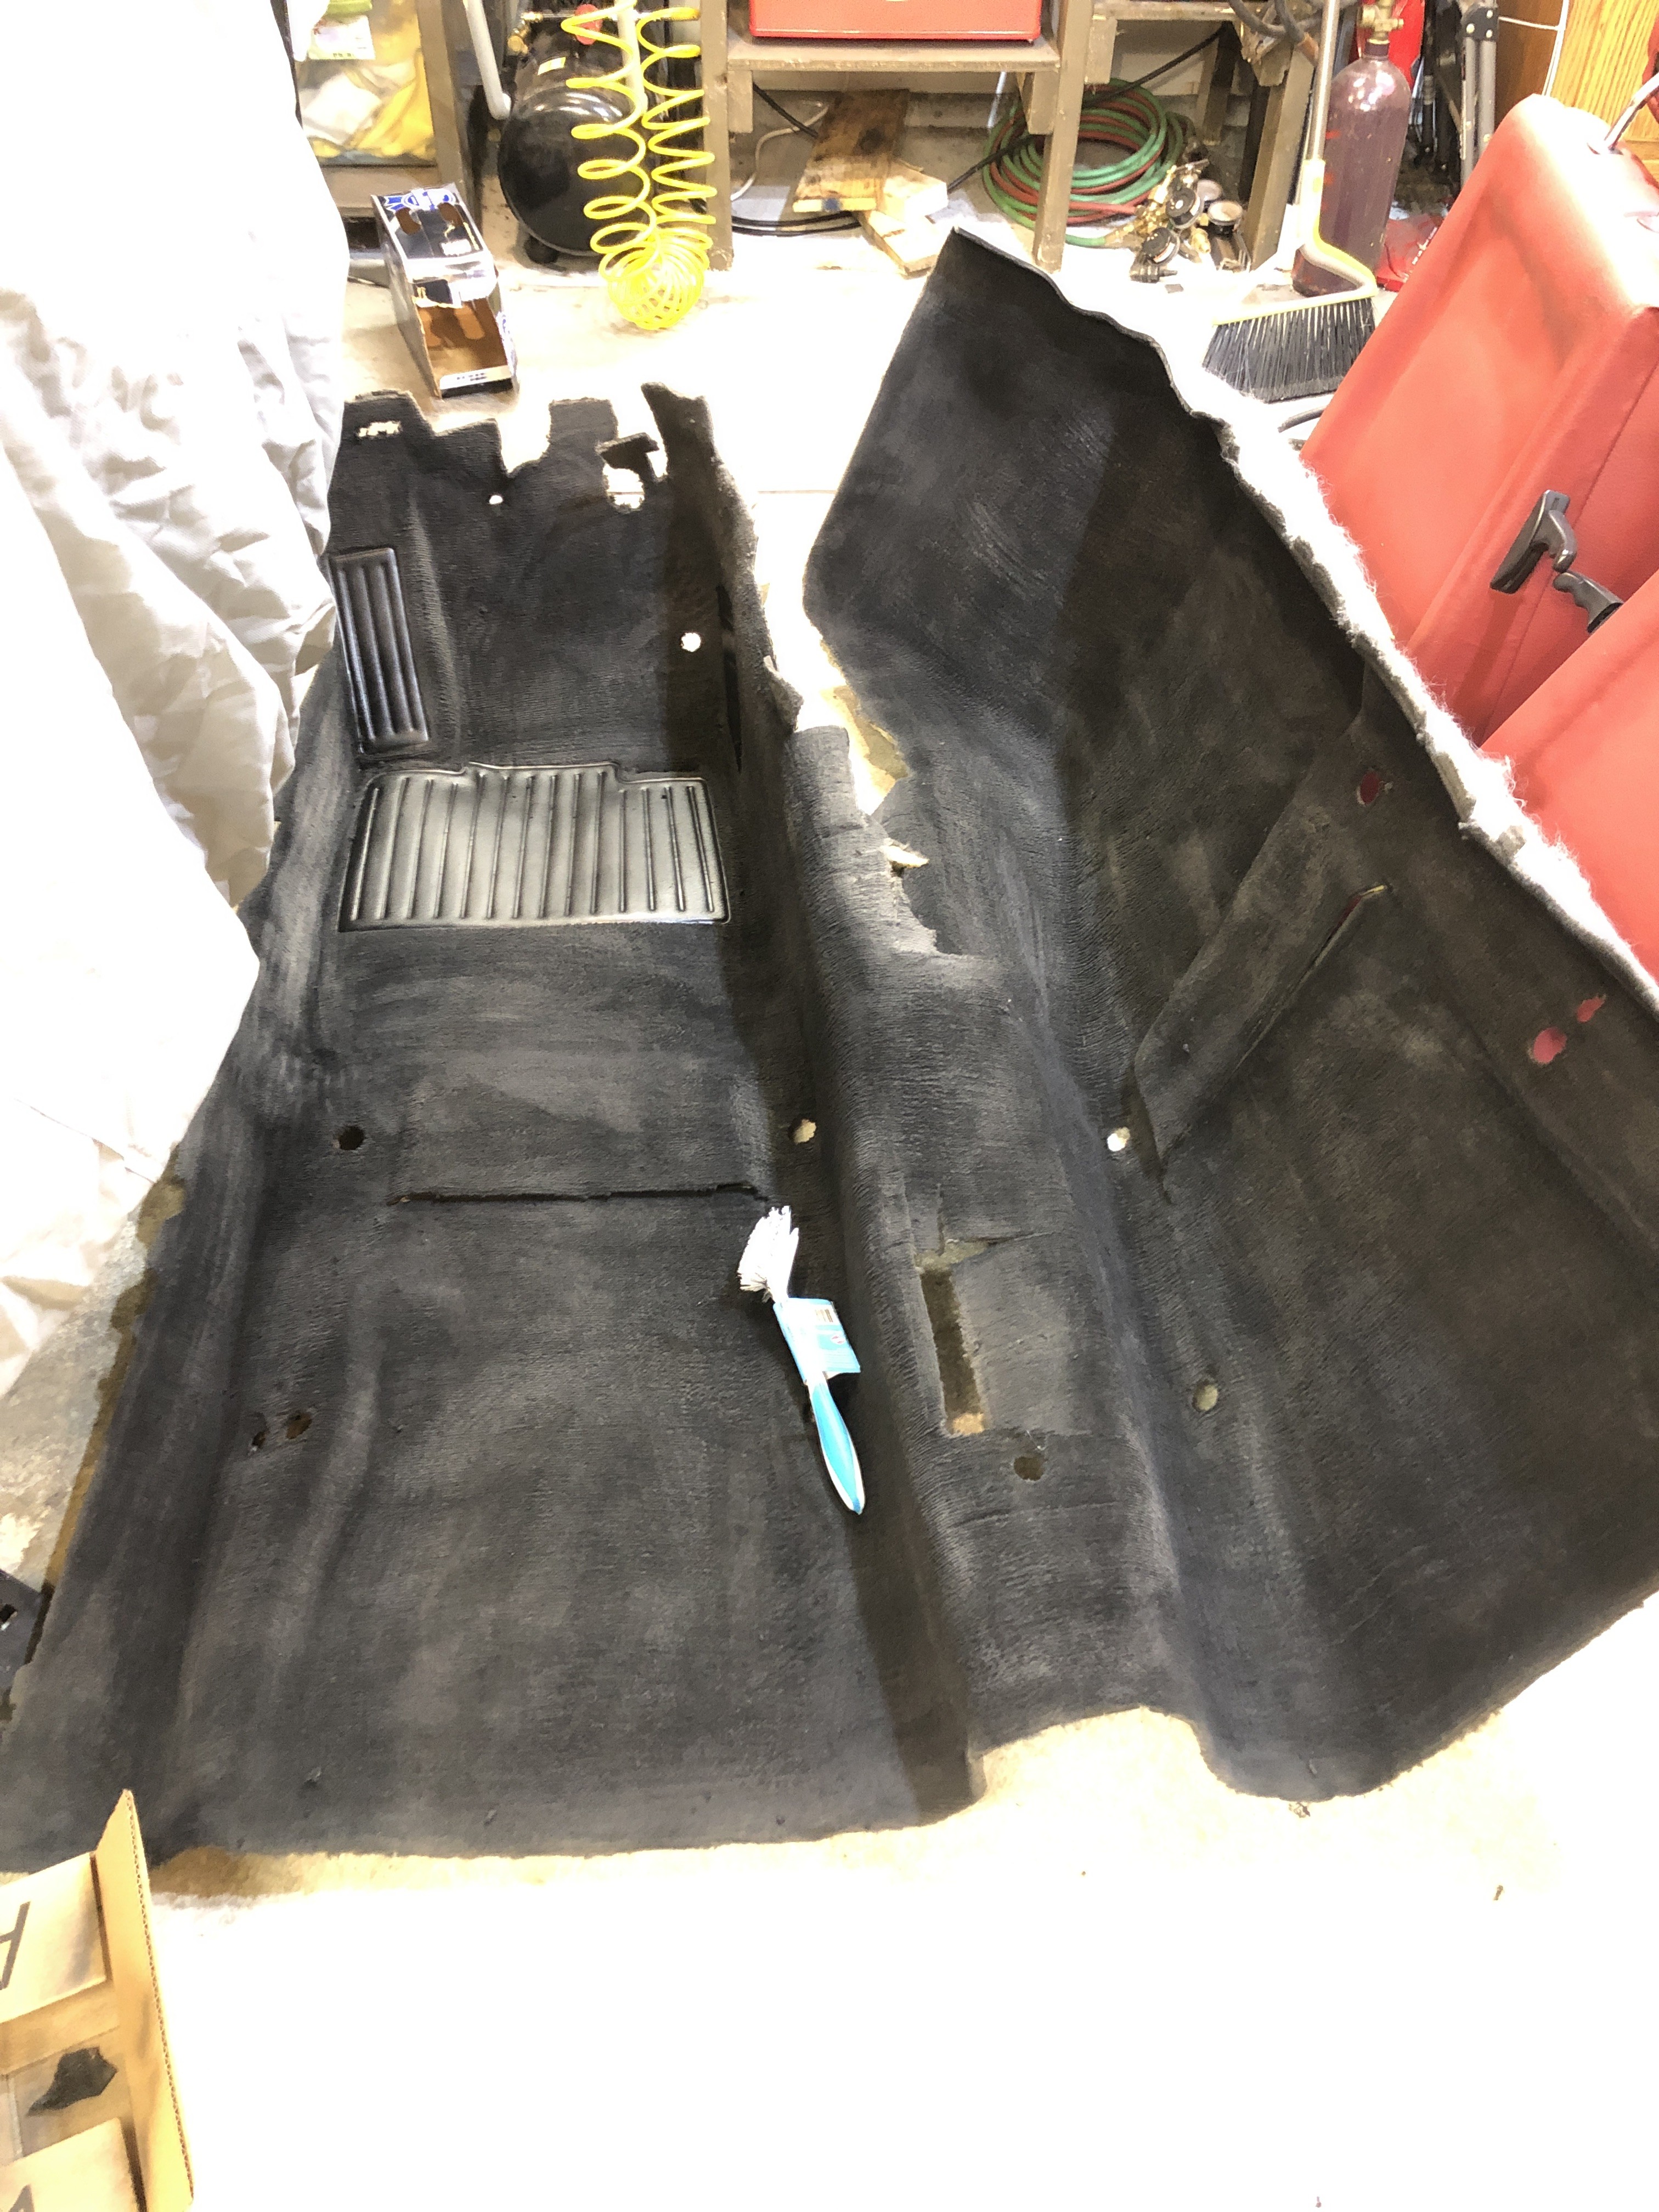
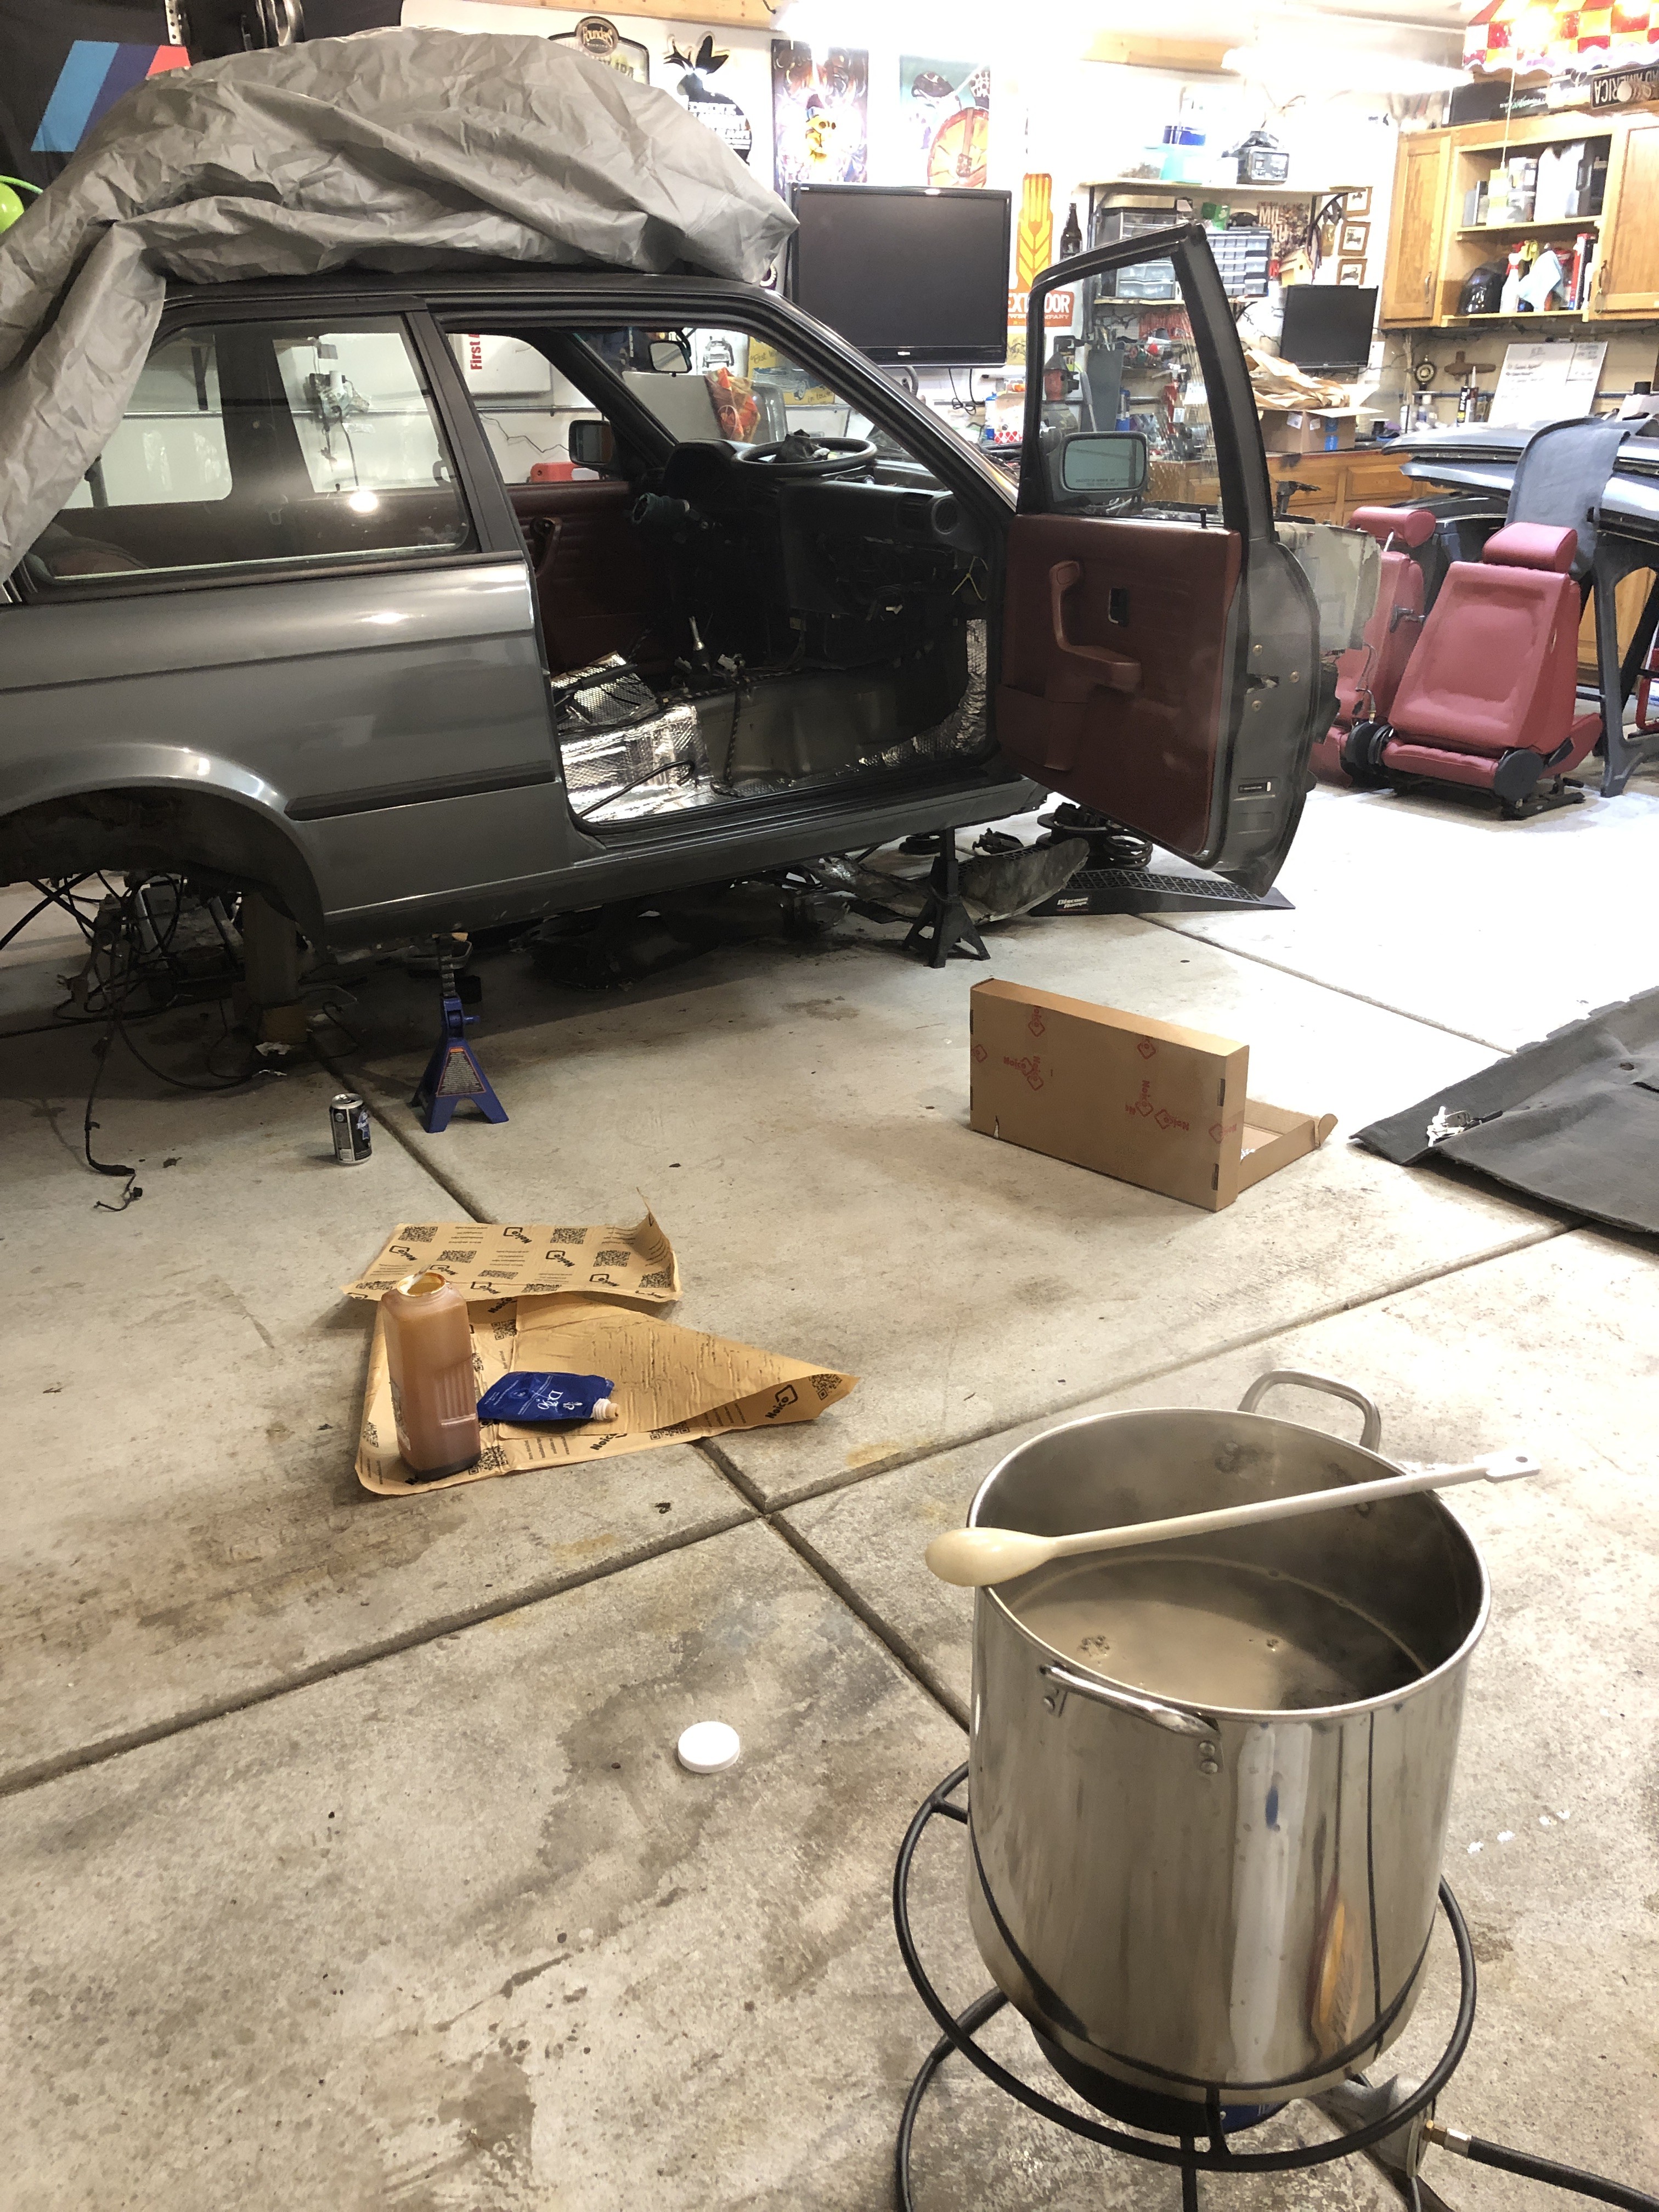
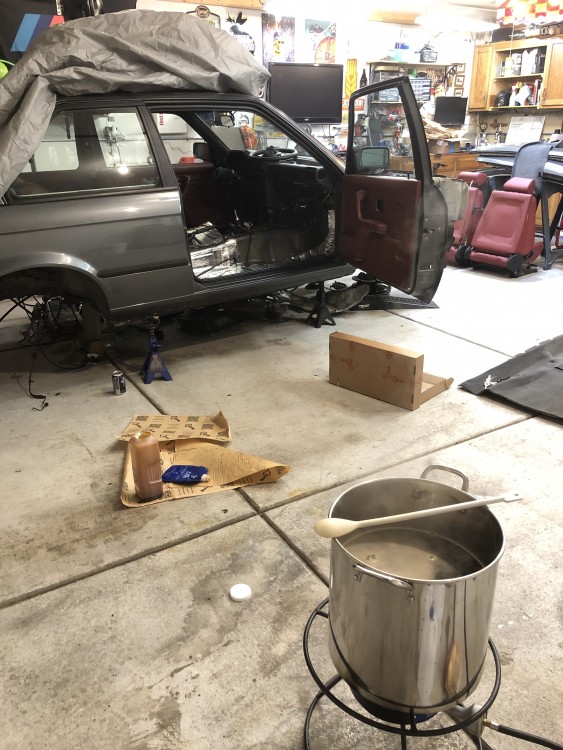
                        And needs a couple more coats, but the carpets are getting there. They look stripey because after each coat I have been brushing it in. It’s dry this morning and looks significantly better. 
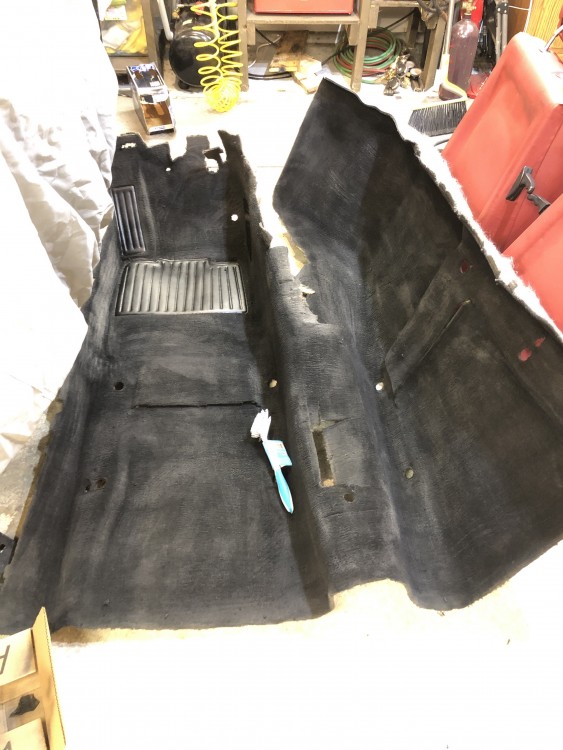
                        444EADB3-8C8D-4371-8627-CF24D596CA1E.jpeg
                         

                        Also had some beer going while I was working tonight. 
                         

                        236FDC59-22CE-497A-8928-7044054809B6.jpeg

                        1 Reply Last reply
                        3
                        • straight6pwrS
                          straight6pwrS
                          straight6pwr
                          wrote on last edited by
                          #662

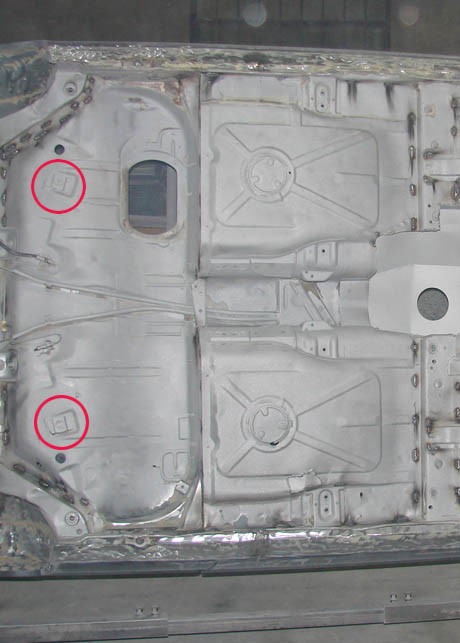
                          not 100% sure, but the brackets for the two rear gas tank mounting bolts might be hung under those square sections. I've never had the gas tank out of an e30, so I do not know for sure.

                          this under chassis  picture leads me to believe they are, and the three rust spots you're seeing on them are the spot welds that hold that bracket on.
                          rotisserie03.jpg

                          Dan
                          yajsYRL.jpg.e5f350b4dfe961d76ac8b32efce2e1a6.jpg

                          1 Reply Last reply
                          2
                          • G
                            G
                            gilber33
                            wrote on last edited by
                            #663

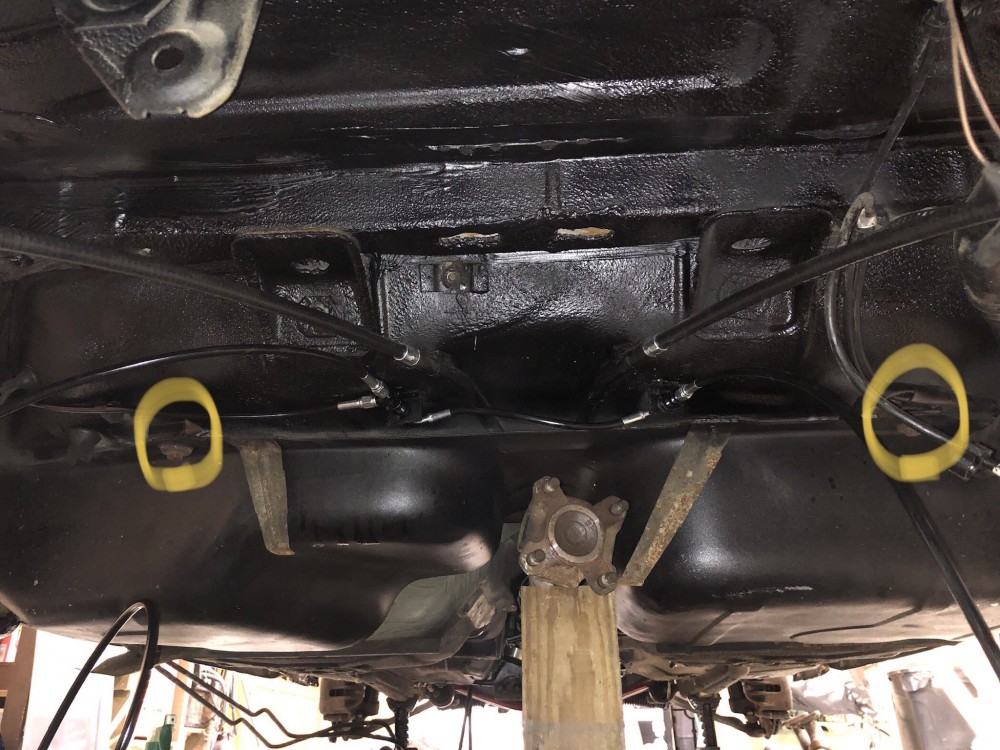
                            I believe you are correct. I looked at my posts earlier of under the car and those brackets seem to line up when comparing them to the grommets where wires pass through the floor. I was going to just do a topical patch with seam sealer, but I need to pull all the tank vent lines to fix that hole in the wheel well, so it might just make sense to pull the tank out and properly fix those two spots. They’ll be easy ones to fix. 
                            34CB0307-ACF1-4386-9436-3921AC5161F5.jpeg

                            1 Reply Last reply
                            0
                            • G
                              G
                              gilber33
                              wrote on last edited by
                              #664

                              Confirmed tank mounts are what’s rusted out. 

                              89EBC727-9106-4747-9BBD-E333A207F0AE.jpeg

                              9FED3456-1436-4AFD-87A2-41D6AD53735E.jpeg

                              1 Reply Last reply
                              0
                              • straight6pwrS
                                straight6pwrS
                                straight6pwr
                                wrote on last edited by
                                #665

                                glad you caught this now instead of later when your tank would be riding on top of your driveshaft!

                                Dan
                                yajsYRL.jpg.e5f350b4dfe961d76ac8b32efce2e1a6.jpg

                                1 Reply Last reply
                                0
                                • G
                                  G
                                  gilber33
                                  wrote on last edited by
                                  #666

                                  straight6pwr said:

                                  glad you caught this now instead of later when your tank would be riding on top of your driveshaft! 

                                  I didn’t even think about that since these are the only two brackets on the backside of the tank. 😬

                                  1 Reply Last reply
                                  0
                                  • G
                                    G
                                    gilber33
                                    wrote on last edited by
                                    #667

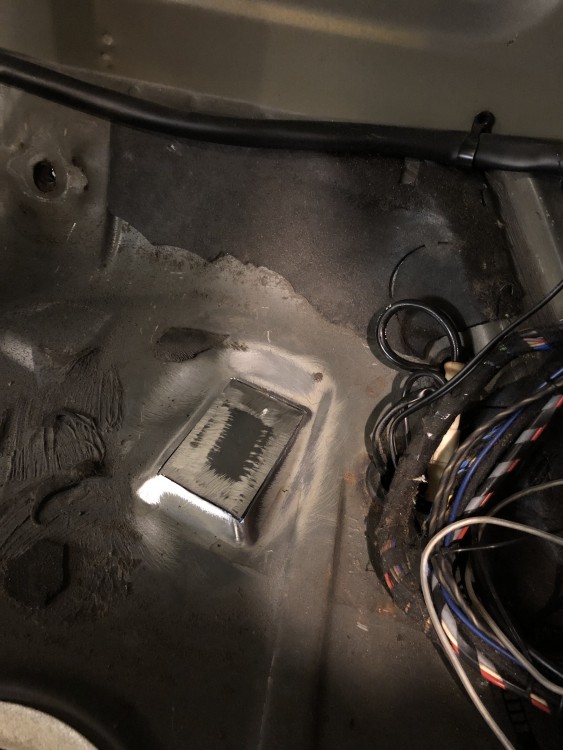
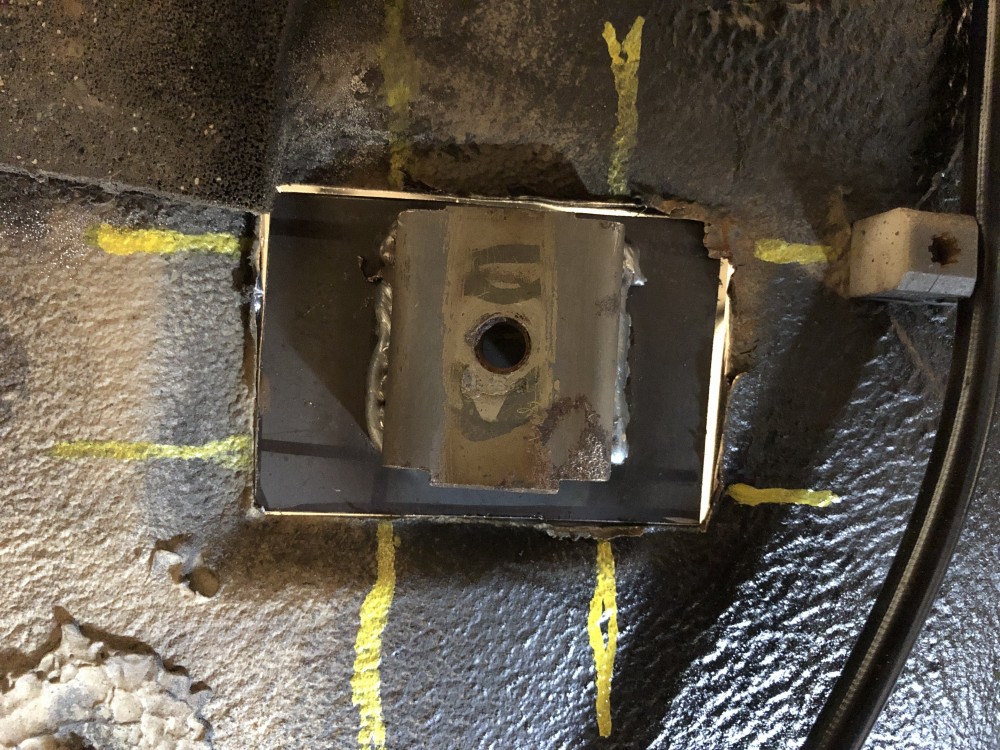
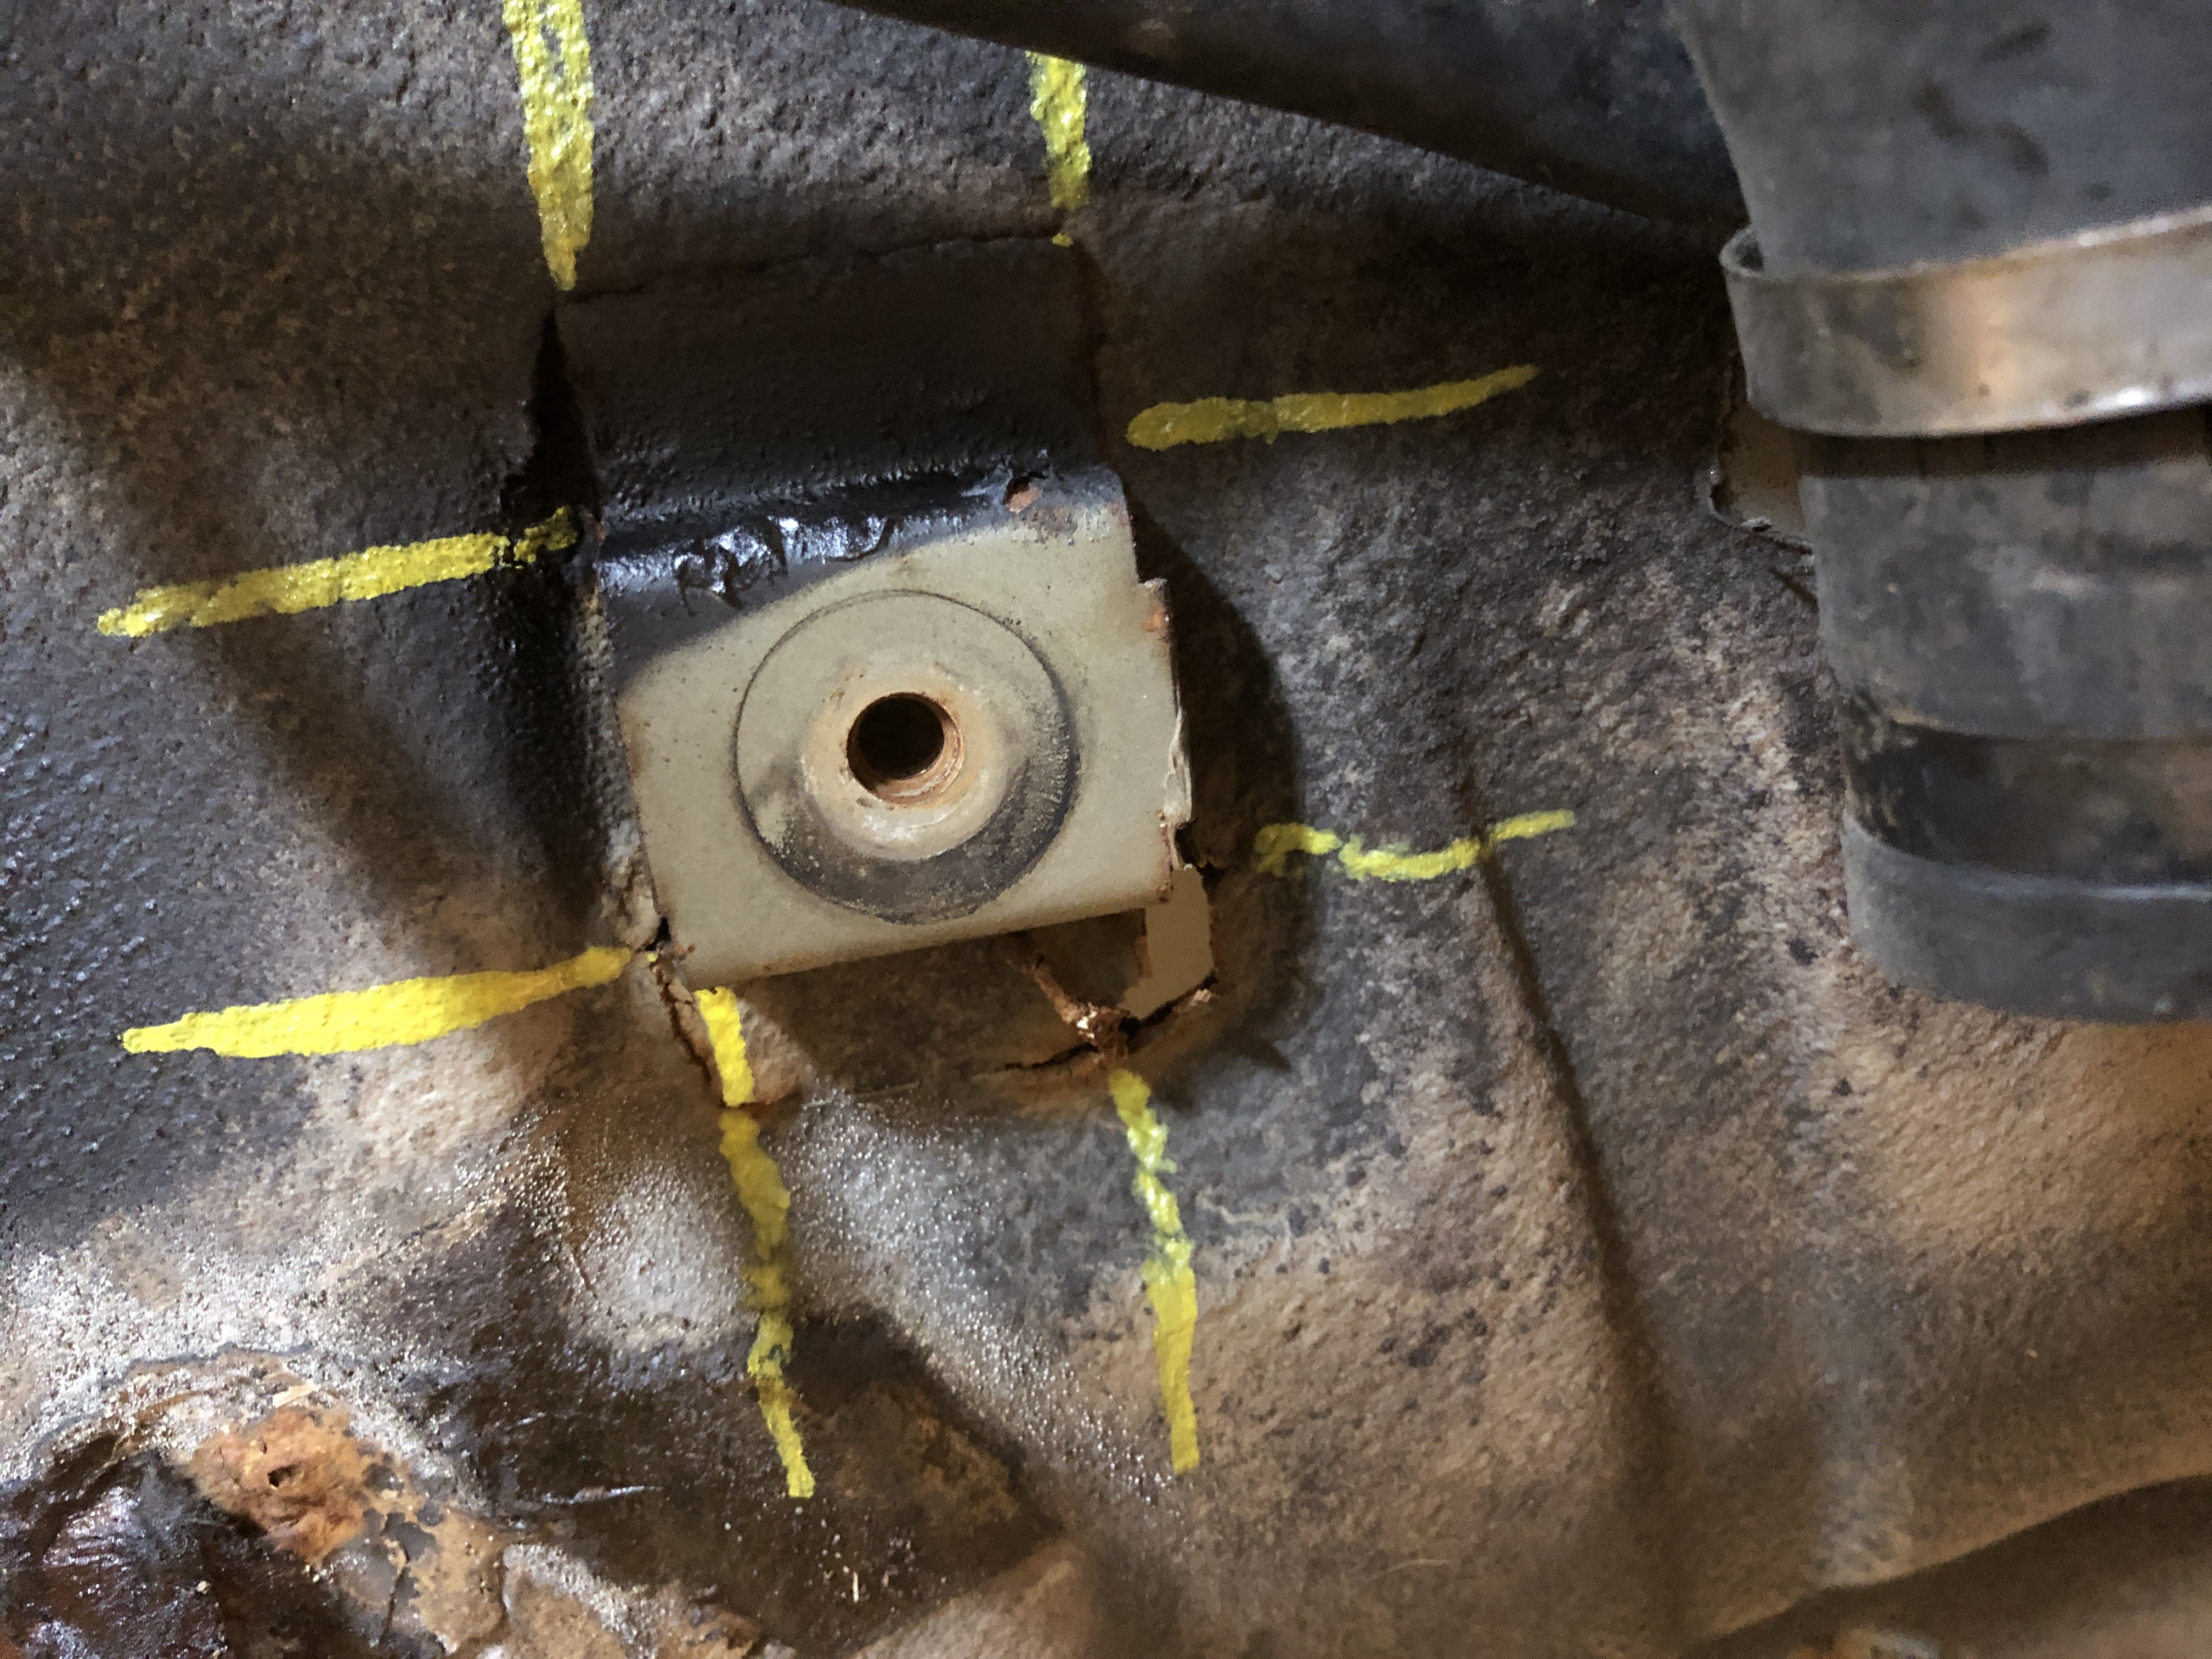
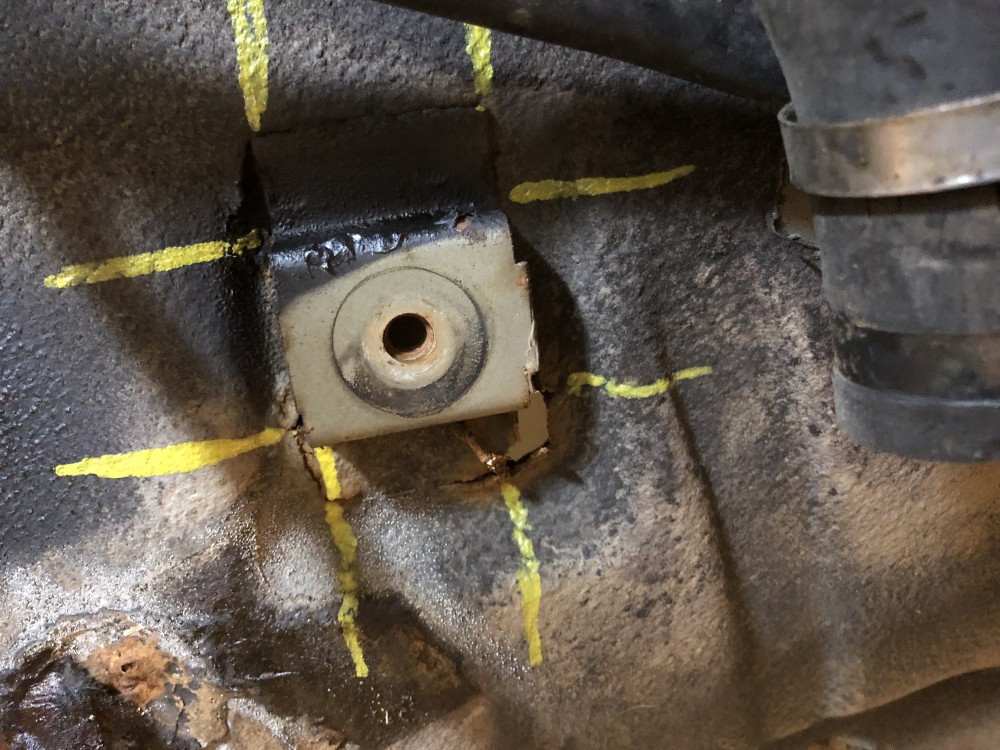
                                    One down. Marked some guidelines for the mount.
                                    14203B7B-17F7-4A9B-8260-146A65823773.jpeg

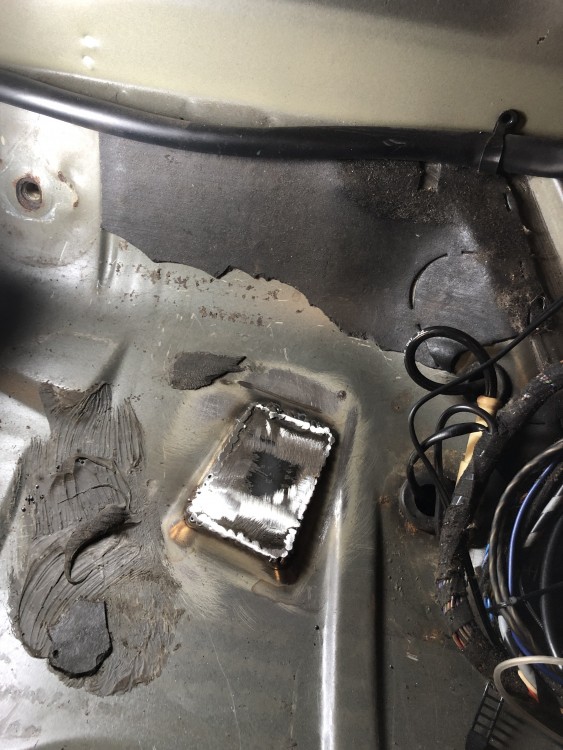
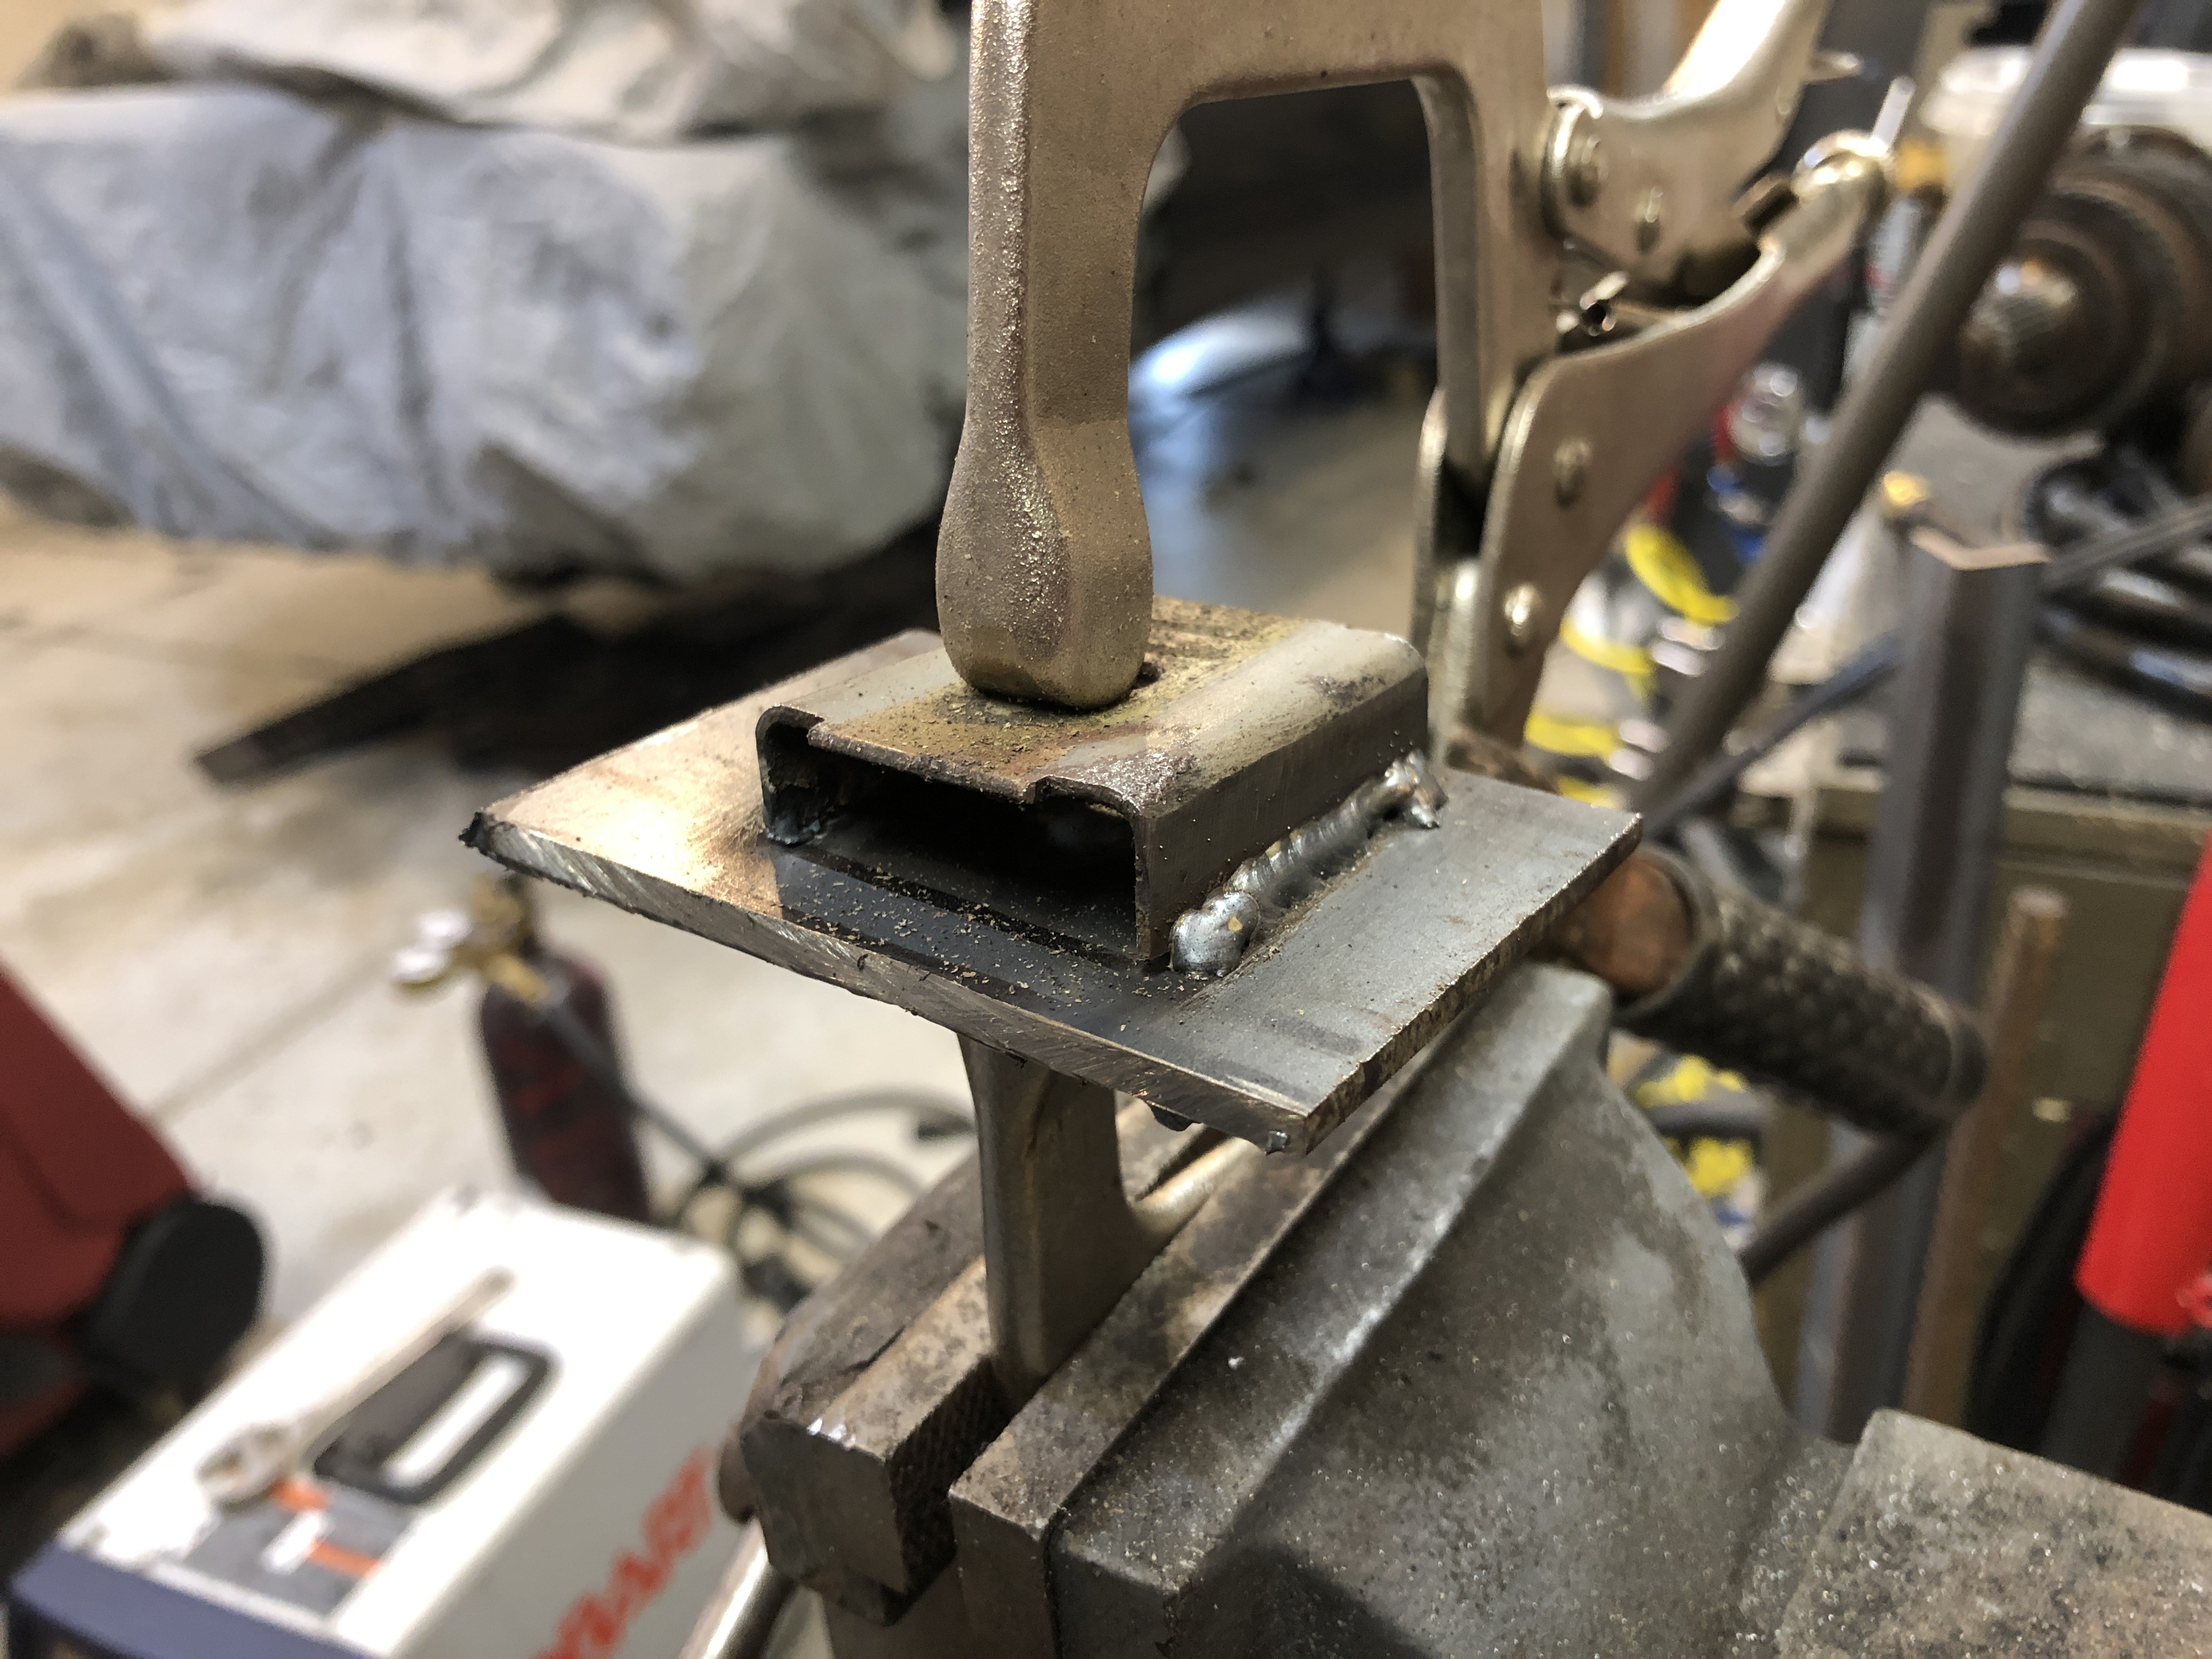
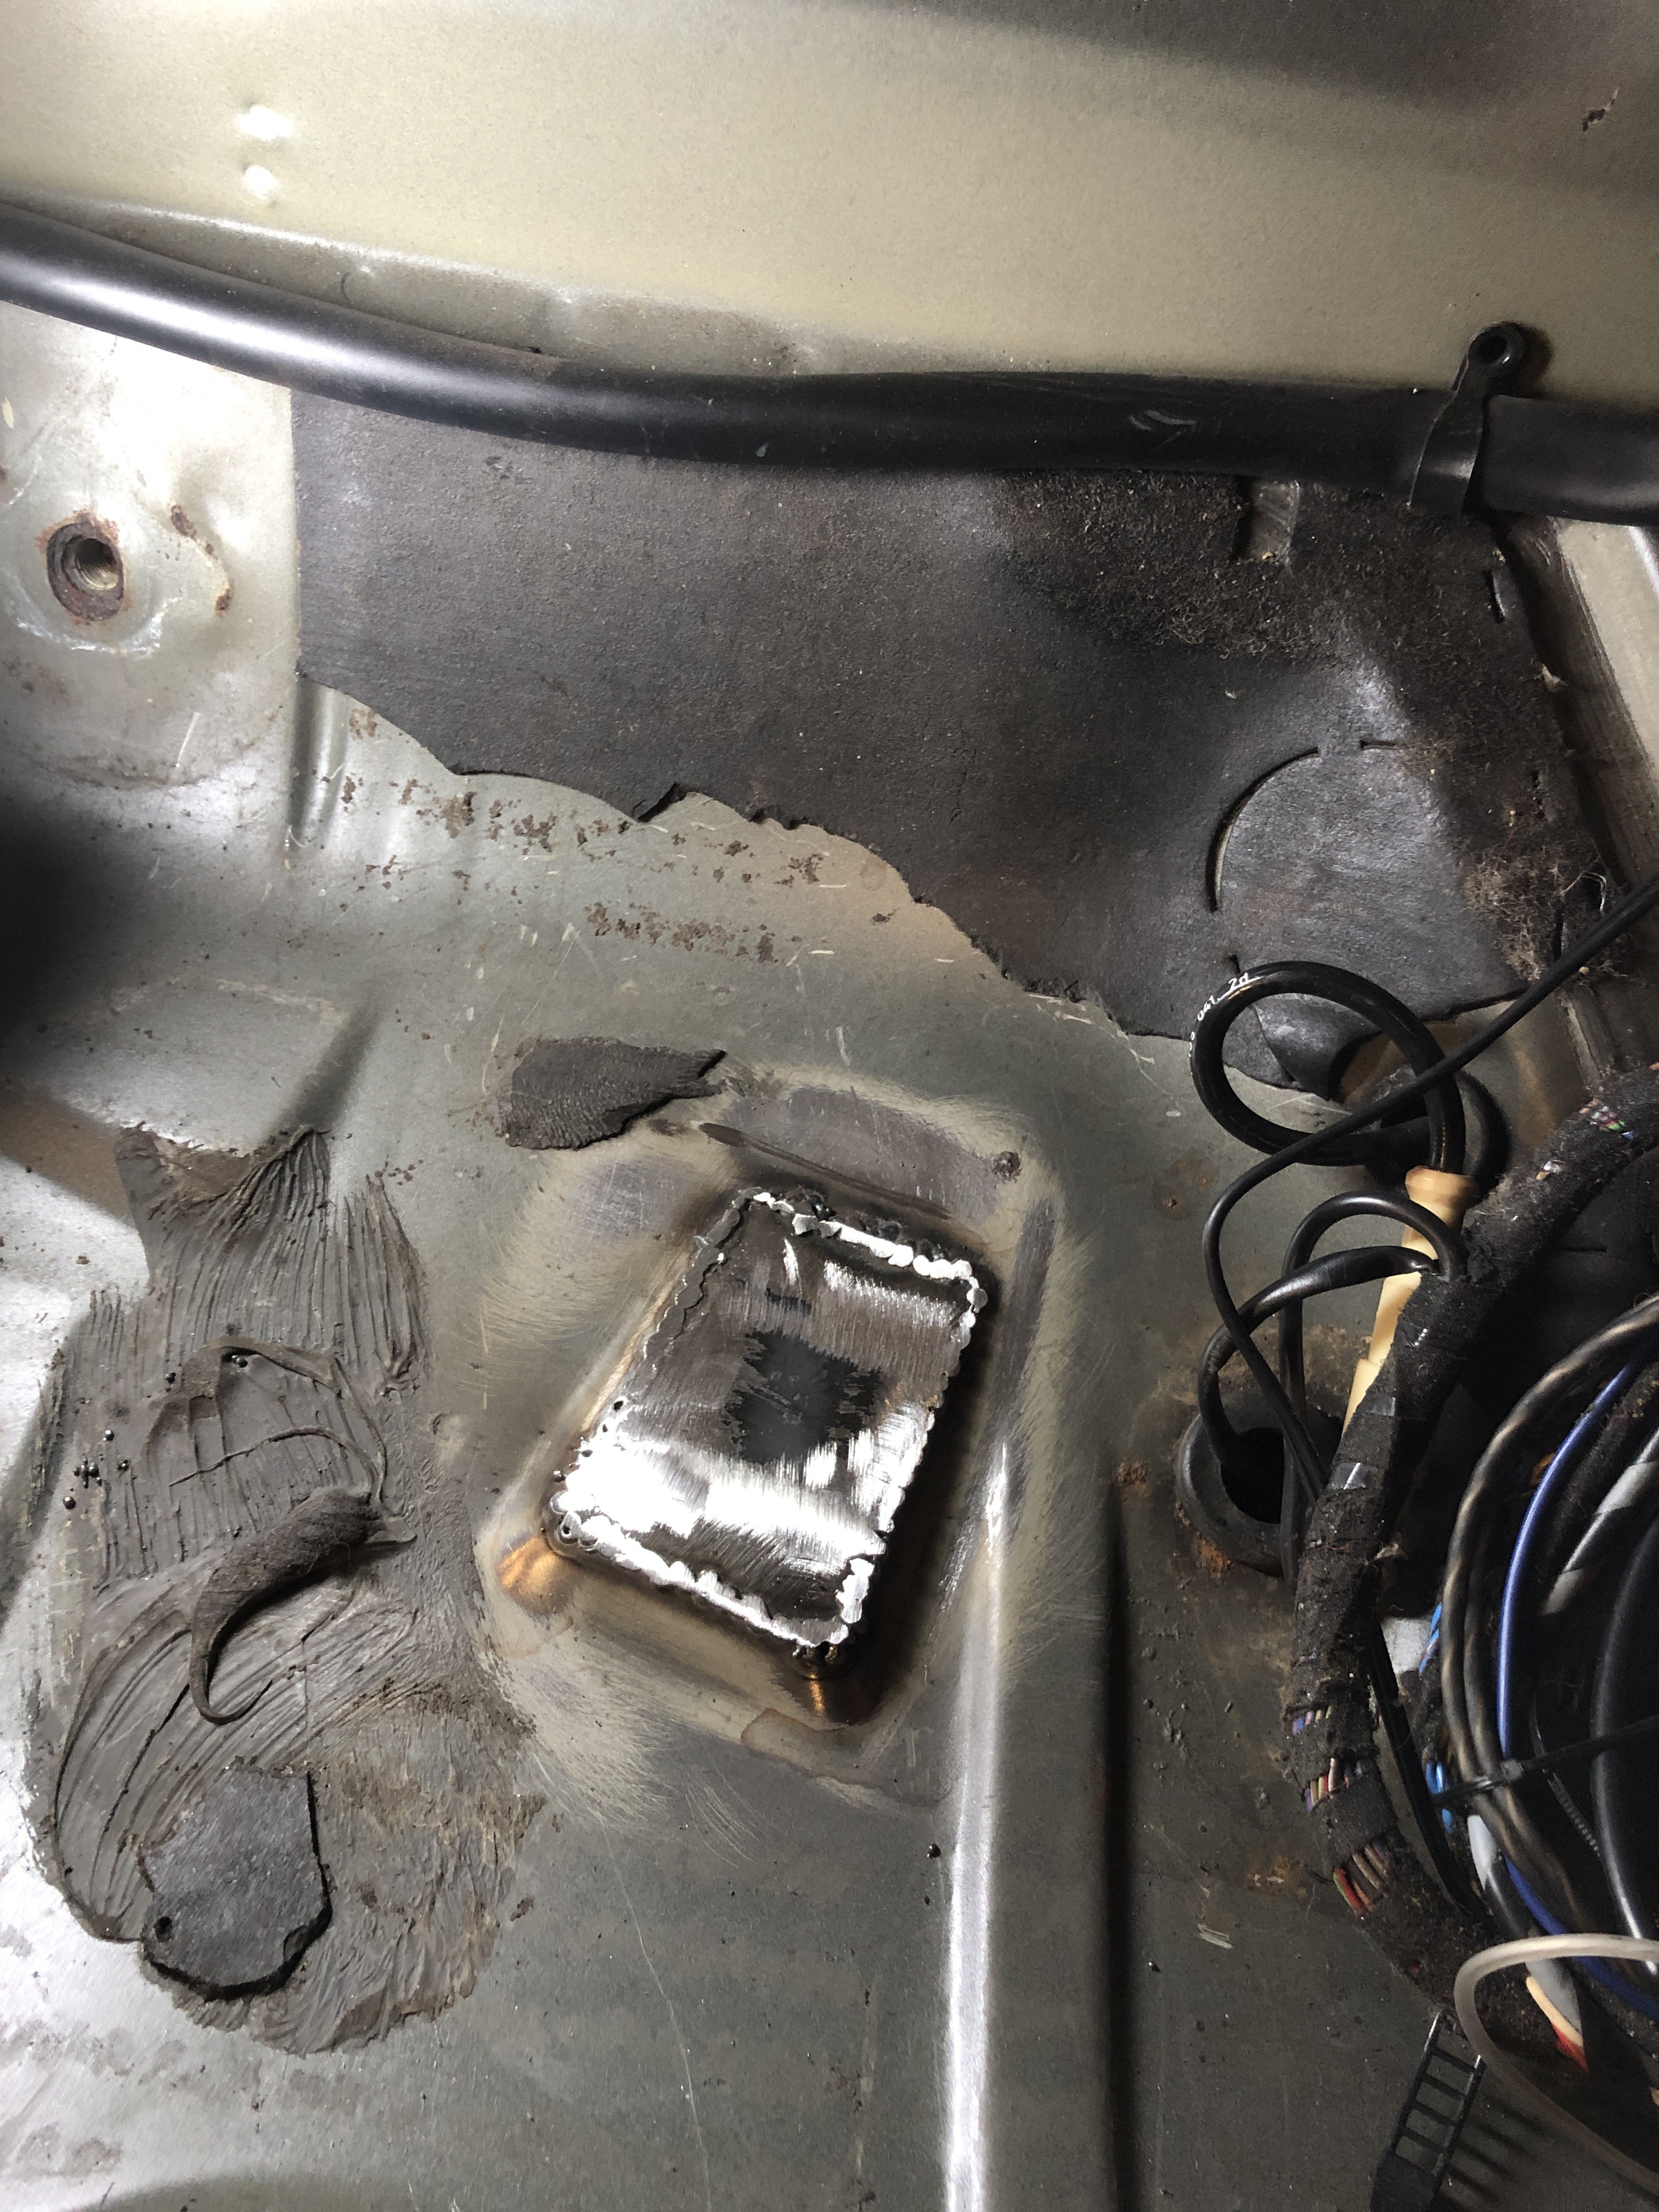
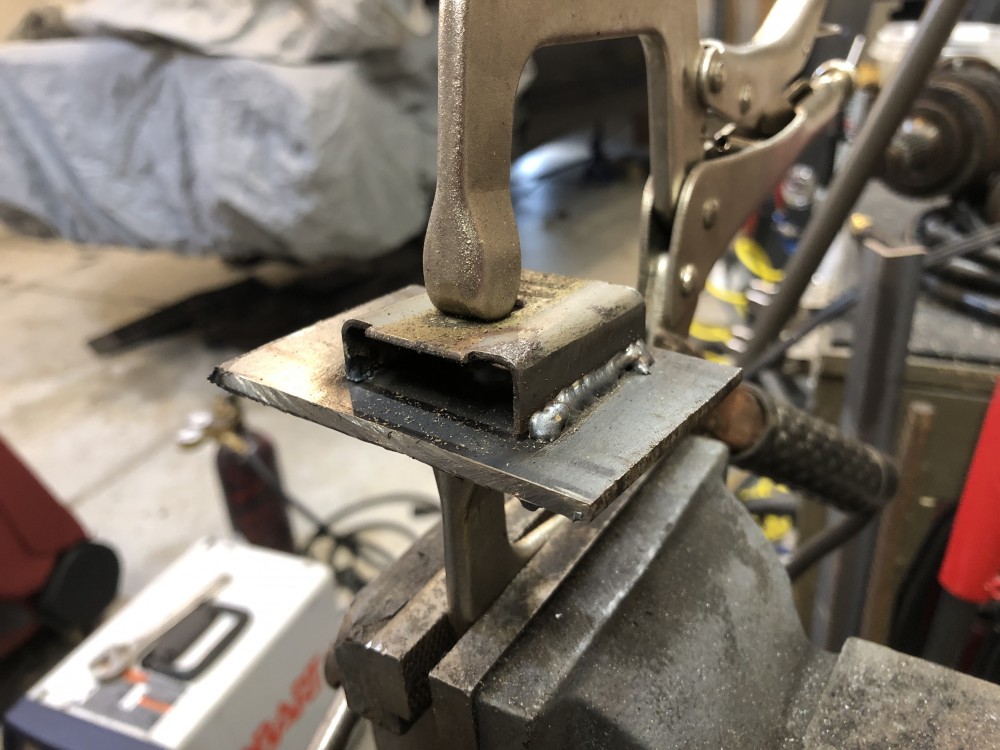
                                    Cut it out. Then cut a patch piece and used the mount cut out from the car for some guidelines on the patch. Cut off the actual mount and welded it on to the new metal.
                                    02B8174A-0FBE-4BFF-A922-C09F01066FD9.jpeg

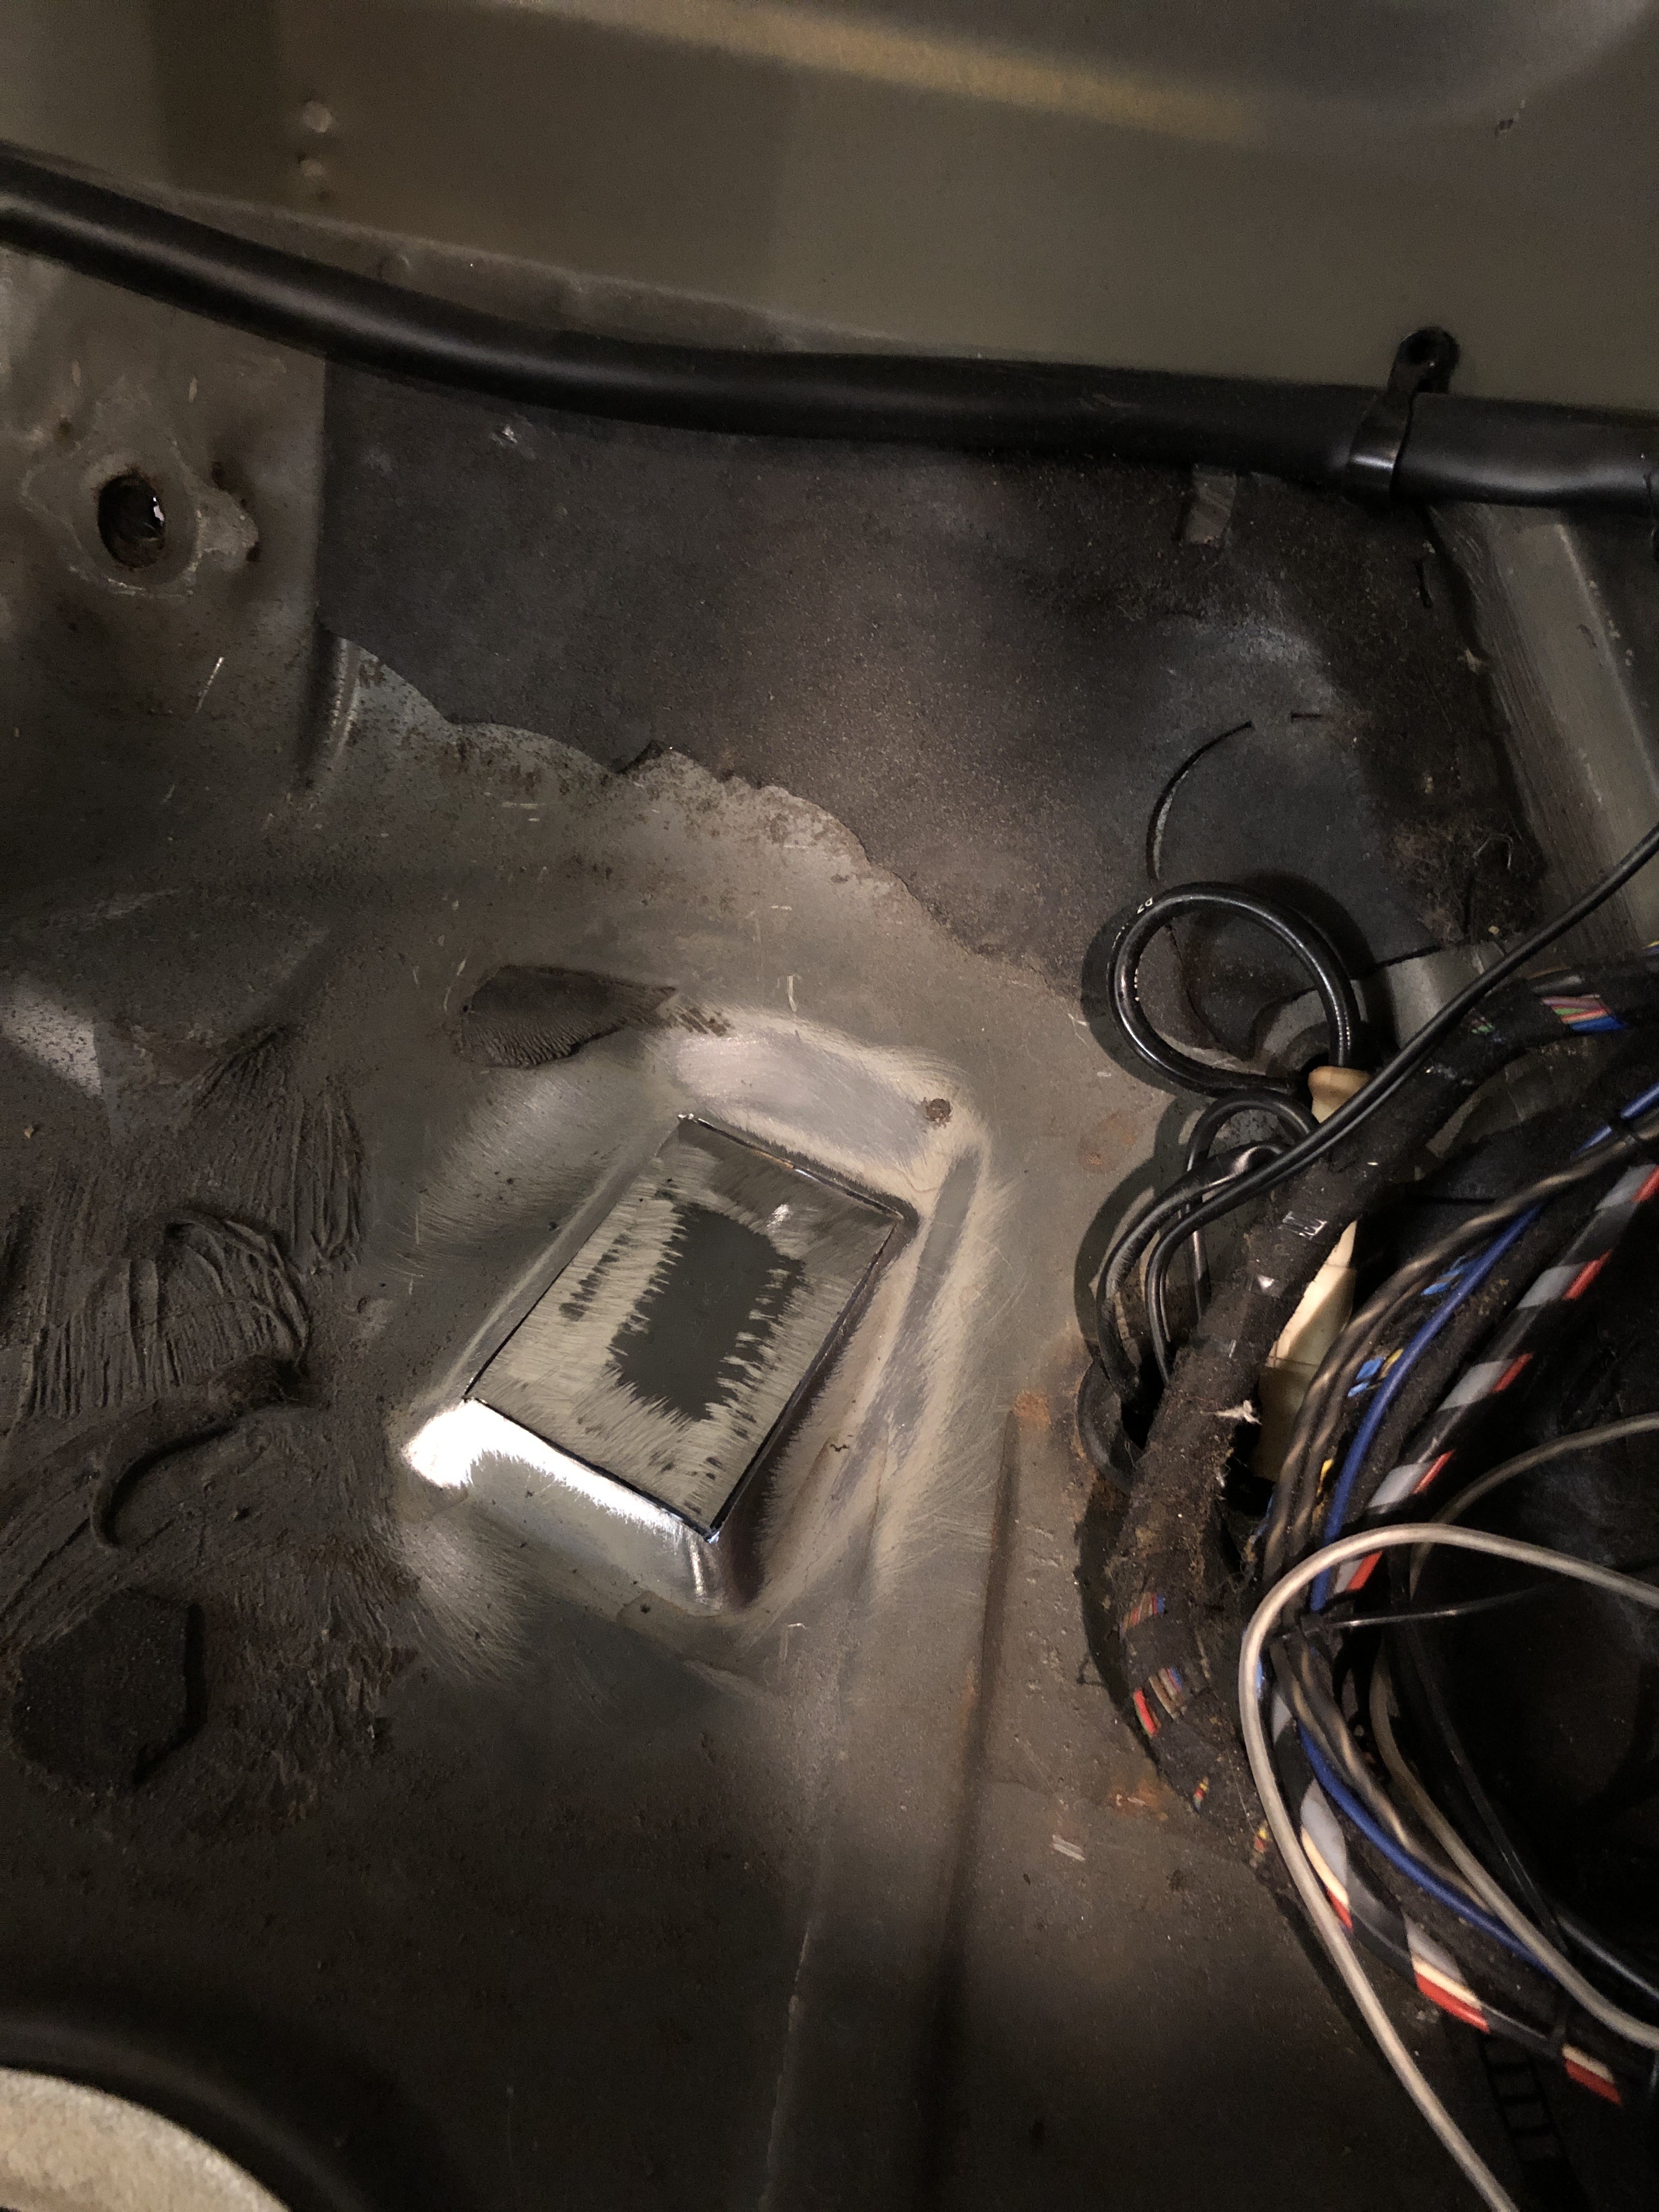
                                    And then welded that into the car. 

                                    BF03D0AB-7535-4E96-8497-1D7C7E10A222.jpeg

                                    9B23AC07-0A8B-48FC-9C27-C0021B964FAE.jpeg

                                    8E331402-2F36-4E9F-8268-297EA7B2FECA.jpeg
                                     

                                    Coated the seams with seam sealer and then will do the same as the footwells and coat it with Por15.

                                    1 Reply Last reply
                                    4
                                    • jc43089J
                                      jc43089J
                                      jc43089
                                      wrote on last edited by
                                      #668

                                      Nice work!

                                      2/94 325i Sedan, Arctic Gray: UUC LTW FW, EVO 3 and DSSR, +.020 Maxsil pistons, ASC delete, Eibach shocks/springs, 16" contour reps 238k
                                      3/93 325i Coupe, Schwarz 2, Sketchy stance action, ebay turbo, 300k
                                      '89 325i Vert, Alpine White: 5spd swapped, sold.

                                      '04 Toyota Sienna: 24V to 24V swap in progress

                                      '05 Volvo V70R, 6spd.  200k
                                      '85 Toyota LandCruiser: Lifted, gas hog. 205k
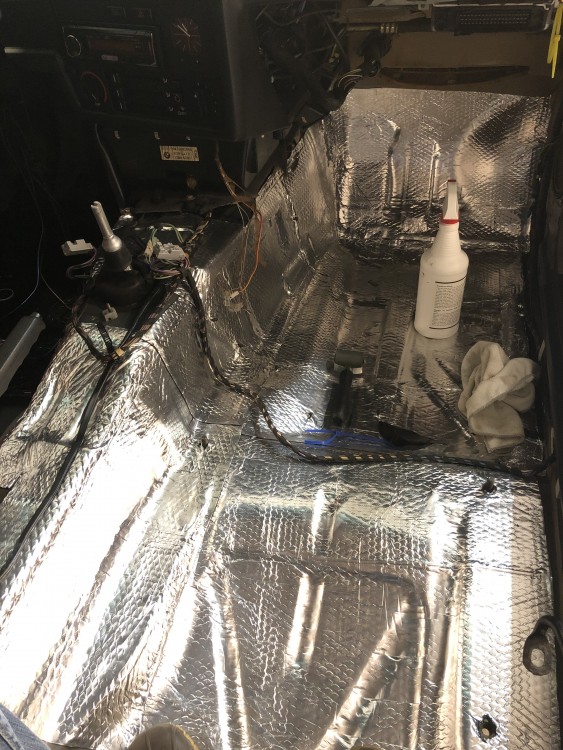
                                      '99 Nissan Maxima: 5spd, Rusty but trusty winter beater. 252k RIP.

                                      1 Reply Last reply
                                      0
                                      • G
                                        G
                                        gilber33
                                        wrote on last edited by
                                        #669

                                        jc43089 said:

                                        Nice work!

                                        Thank you! 
                                         

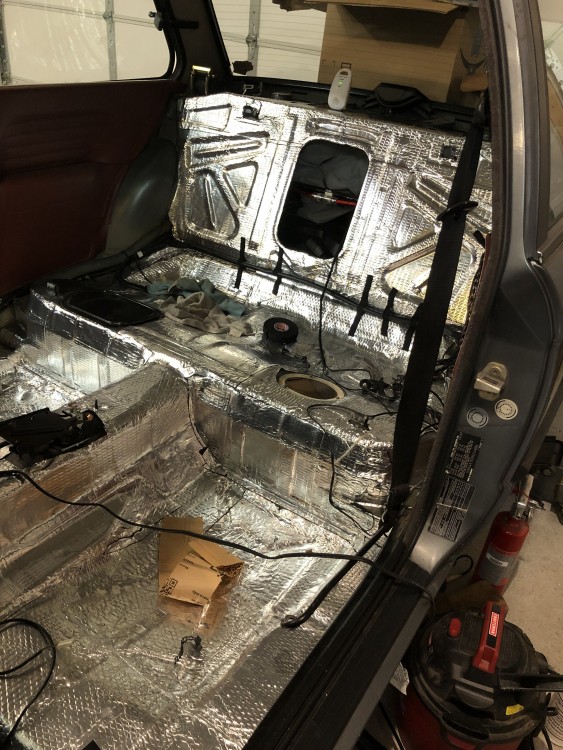
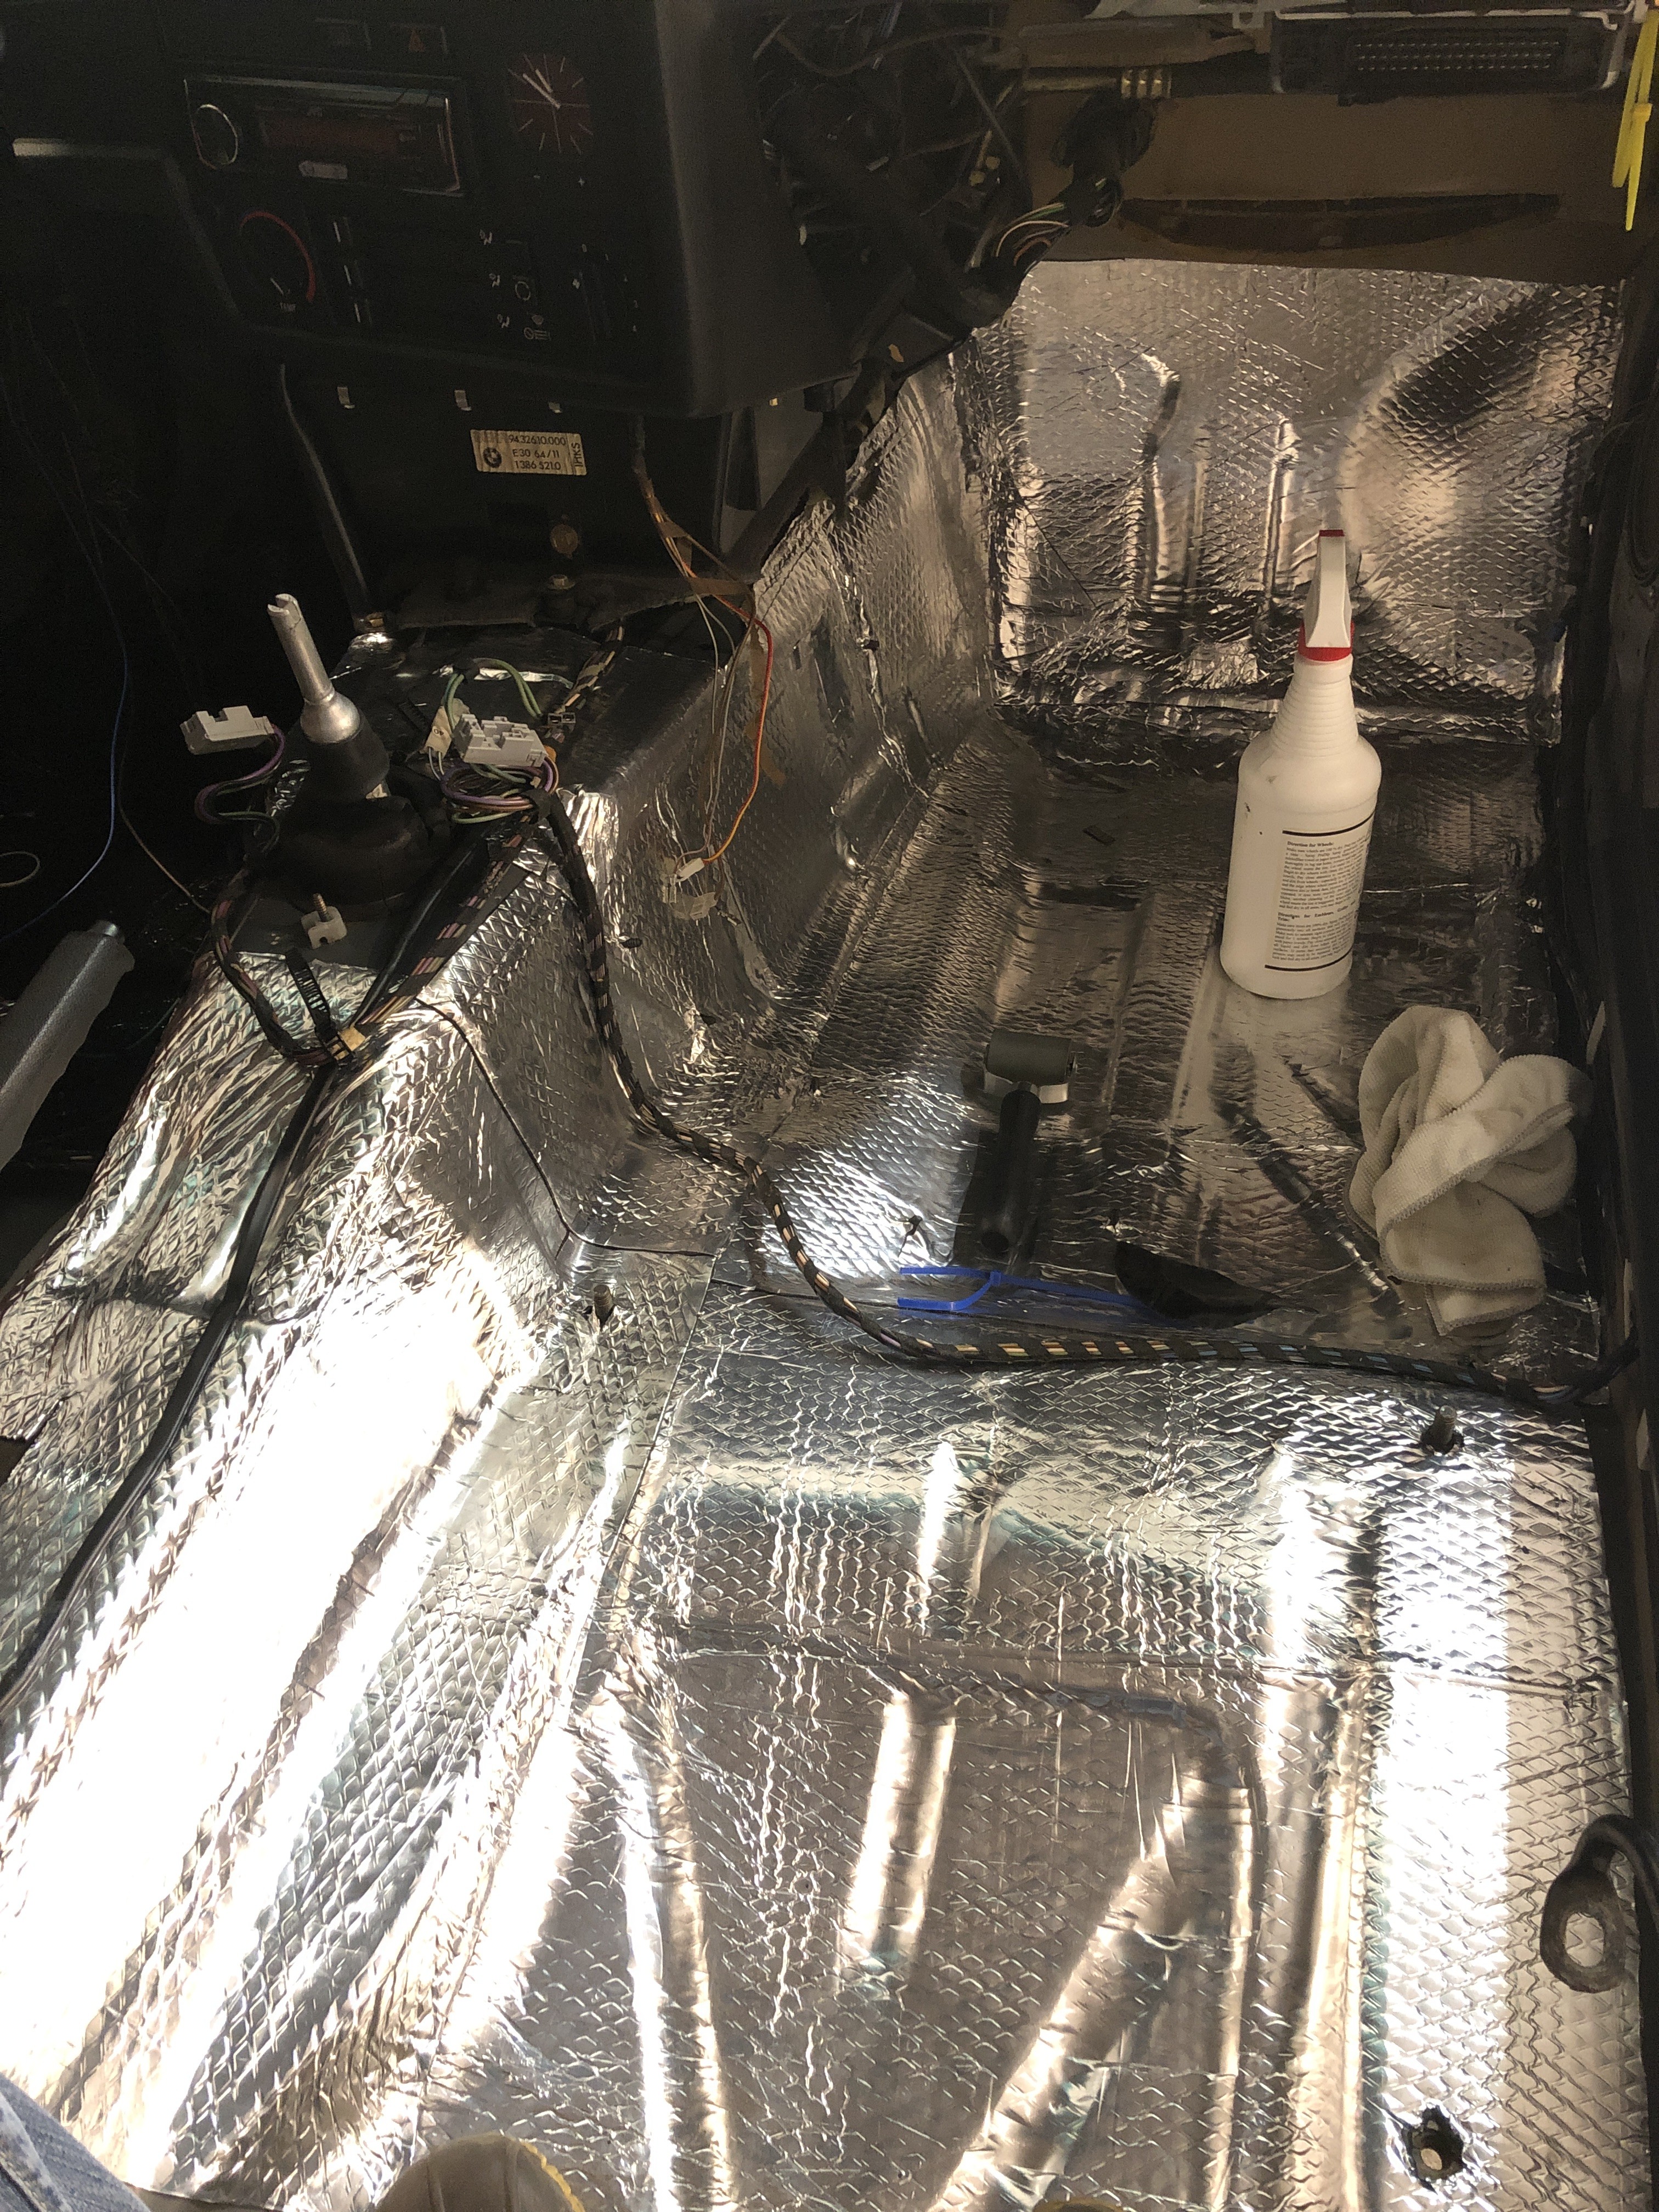
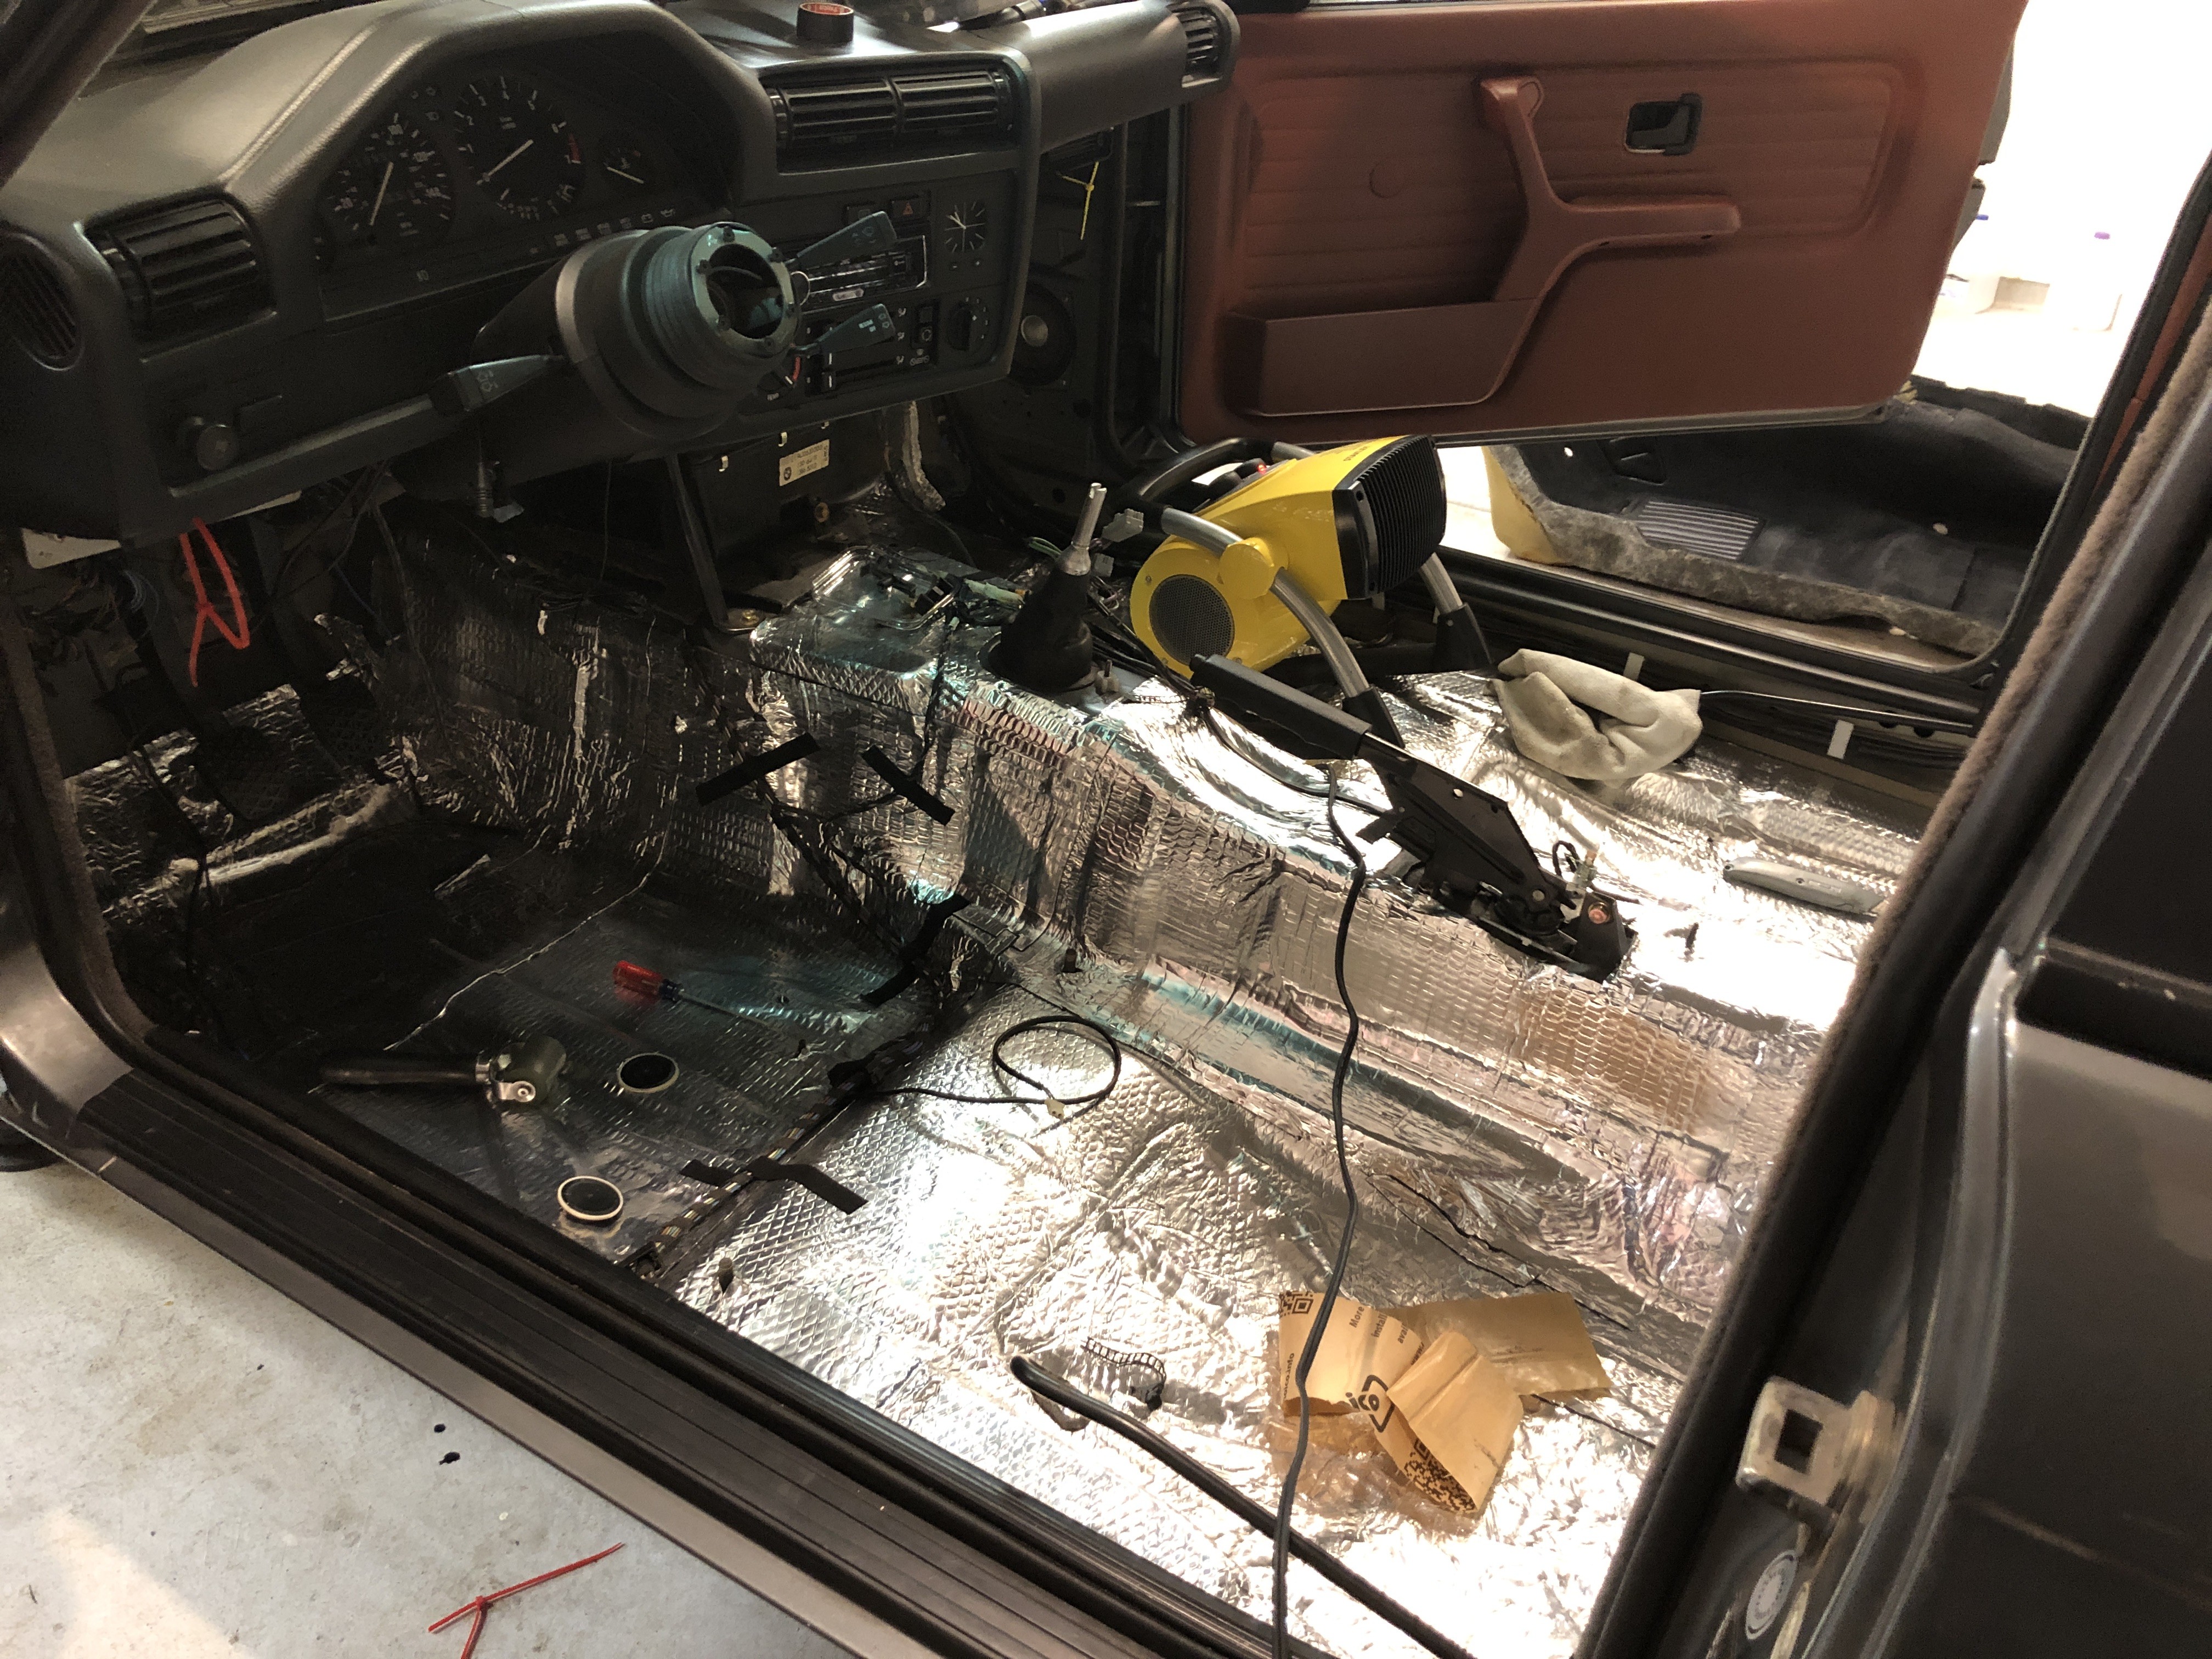
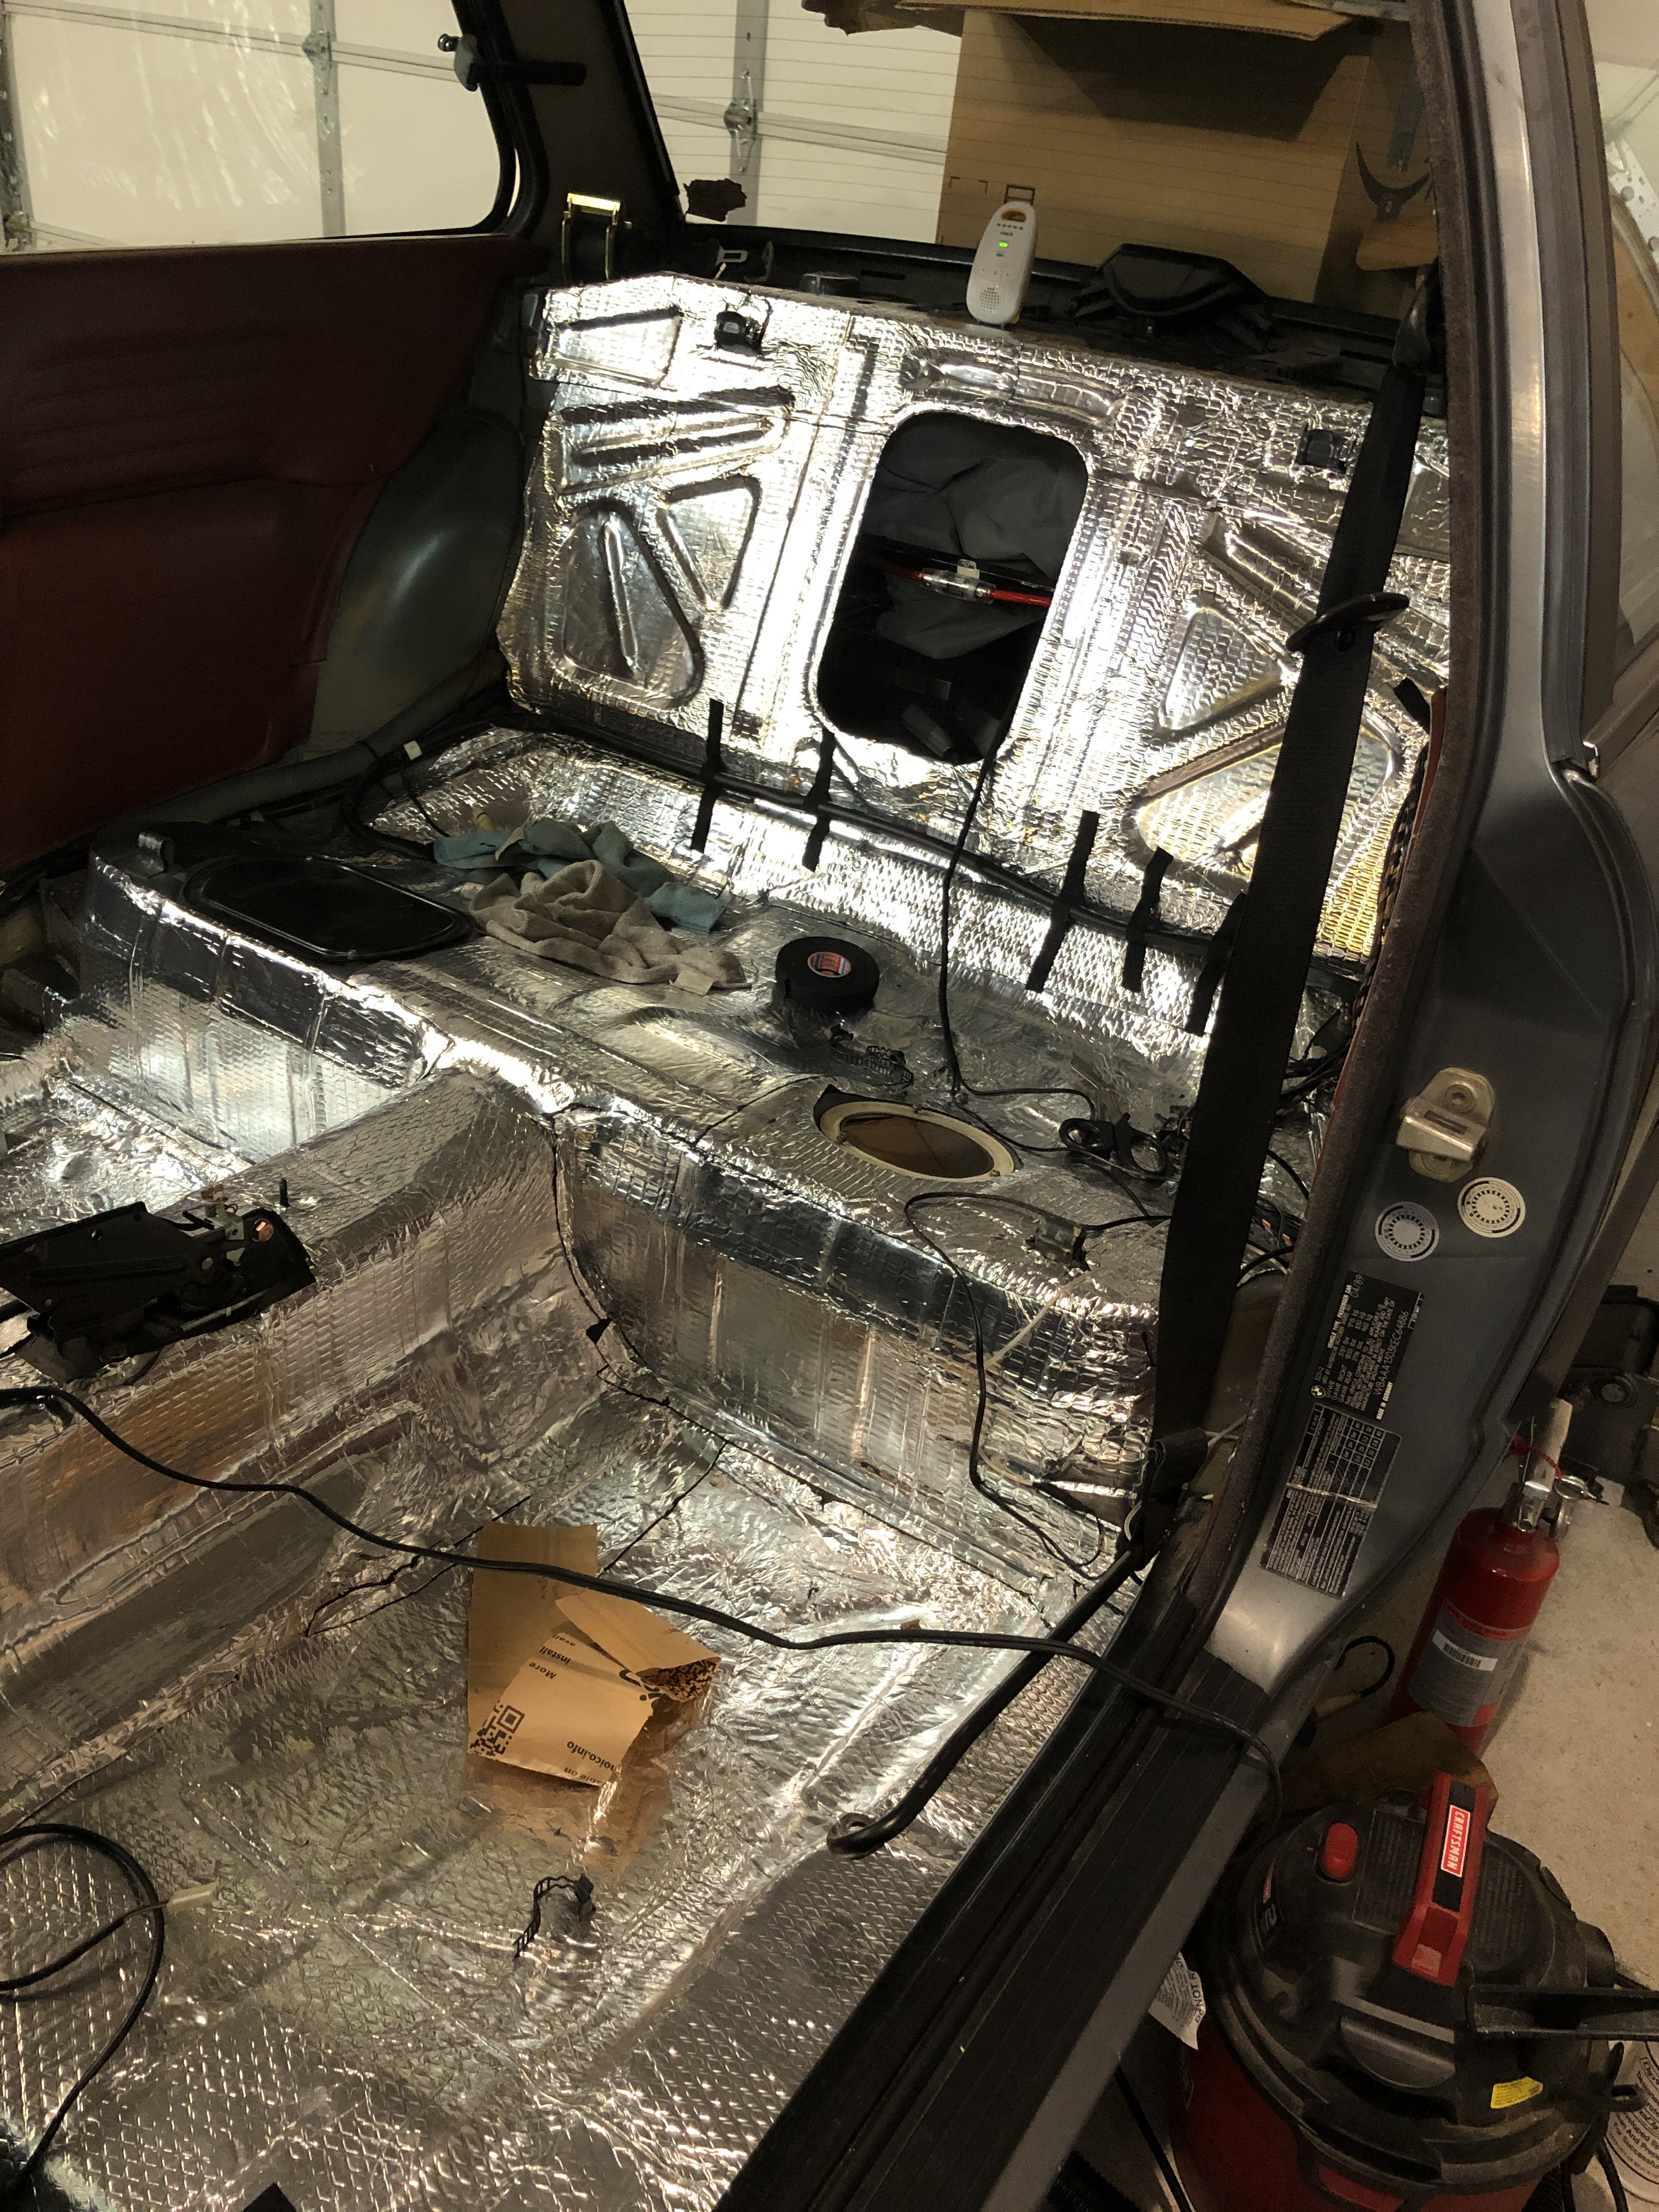
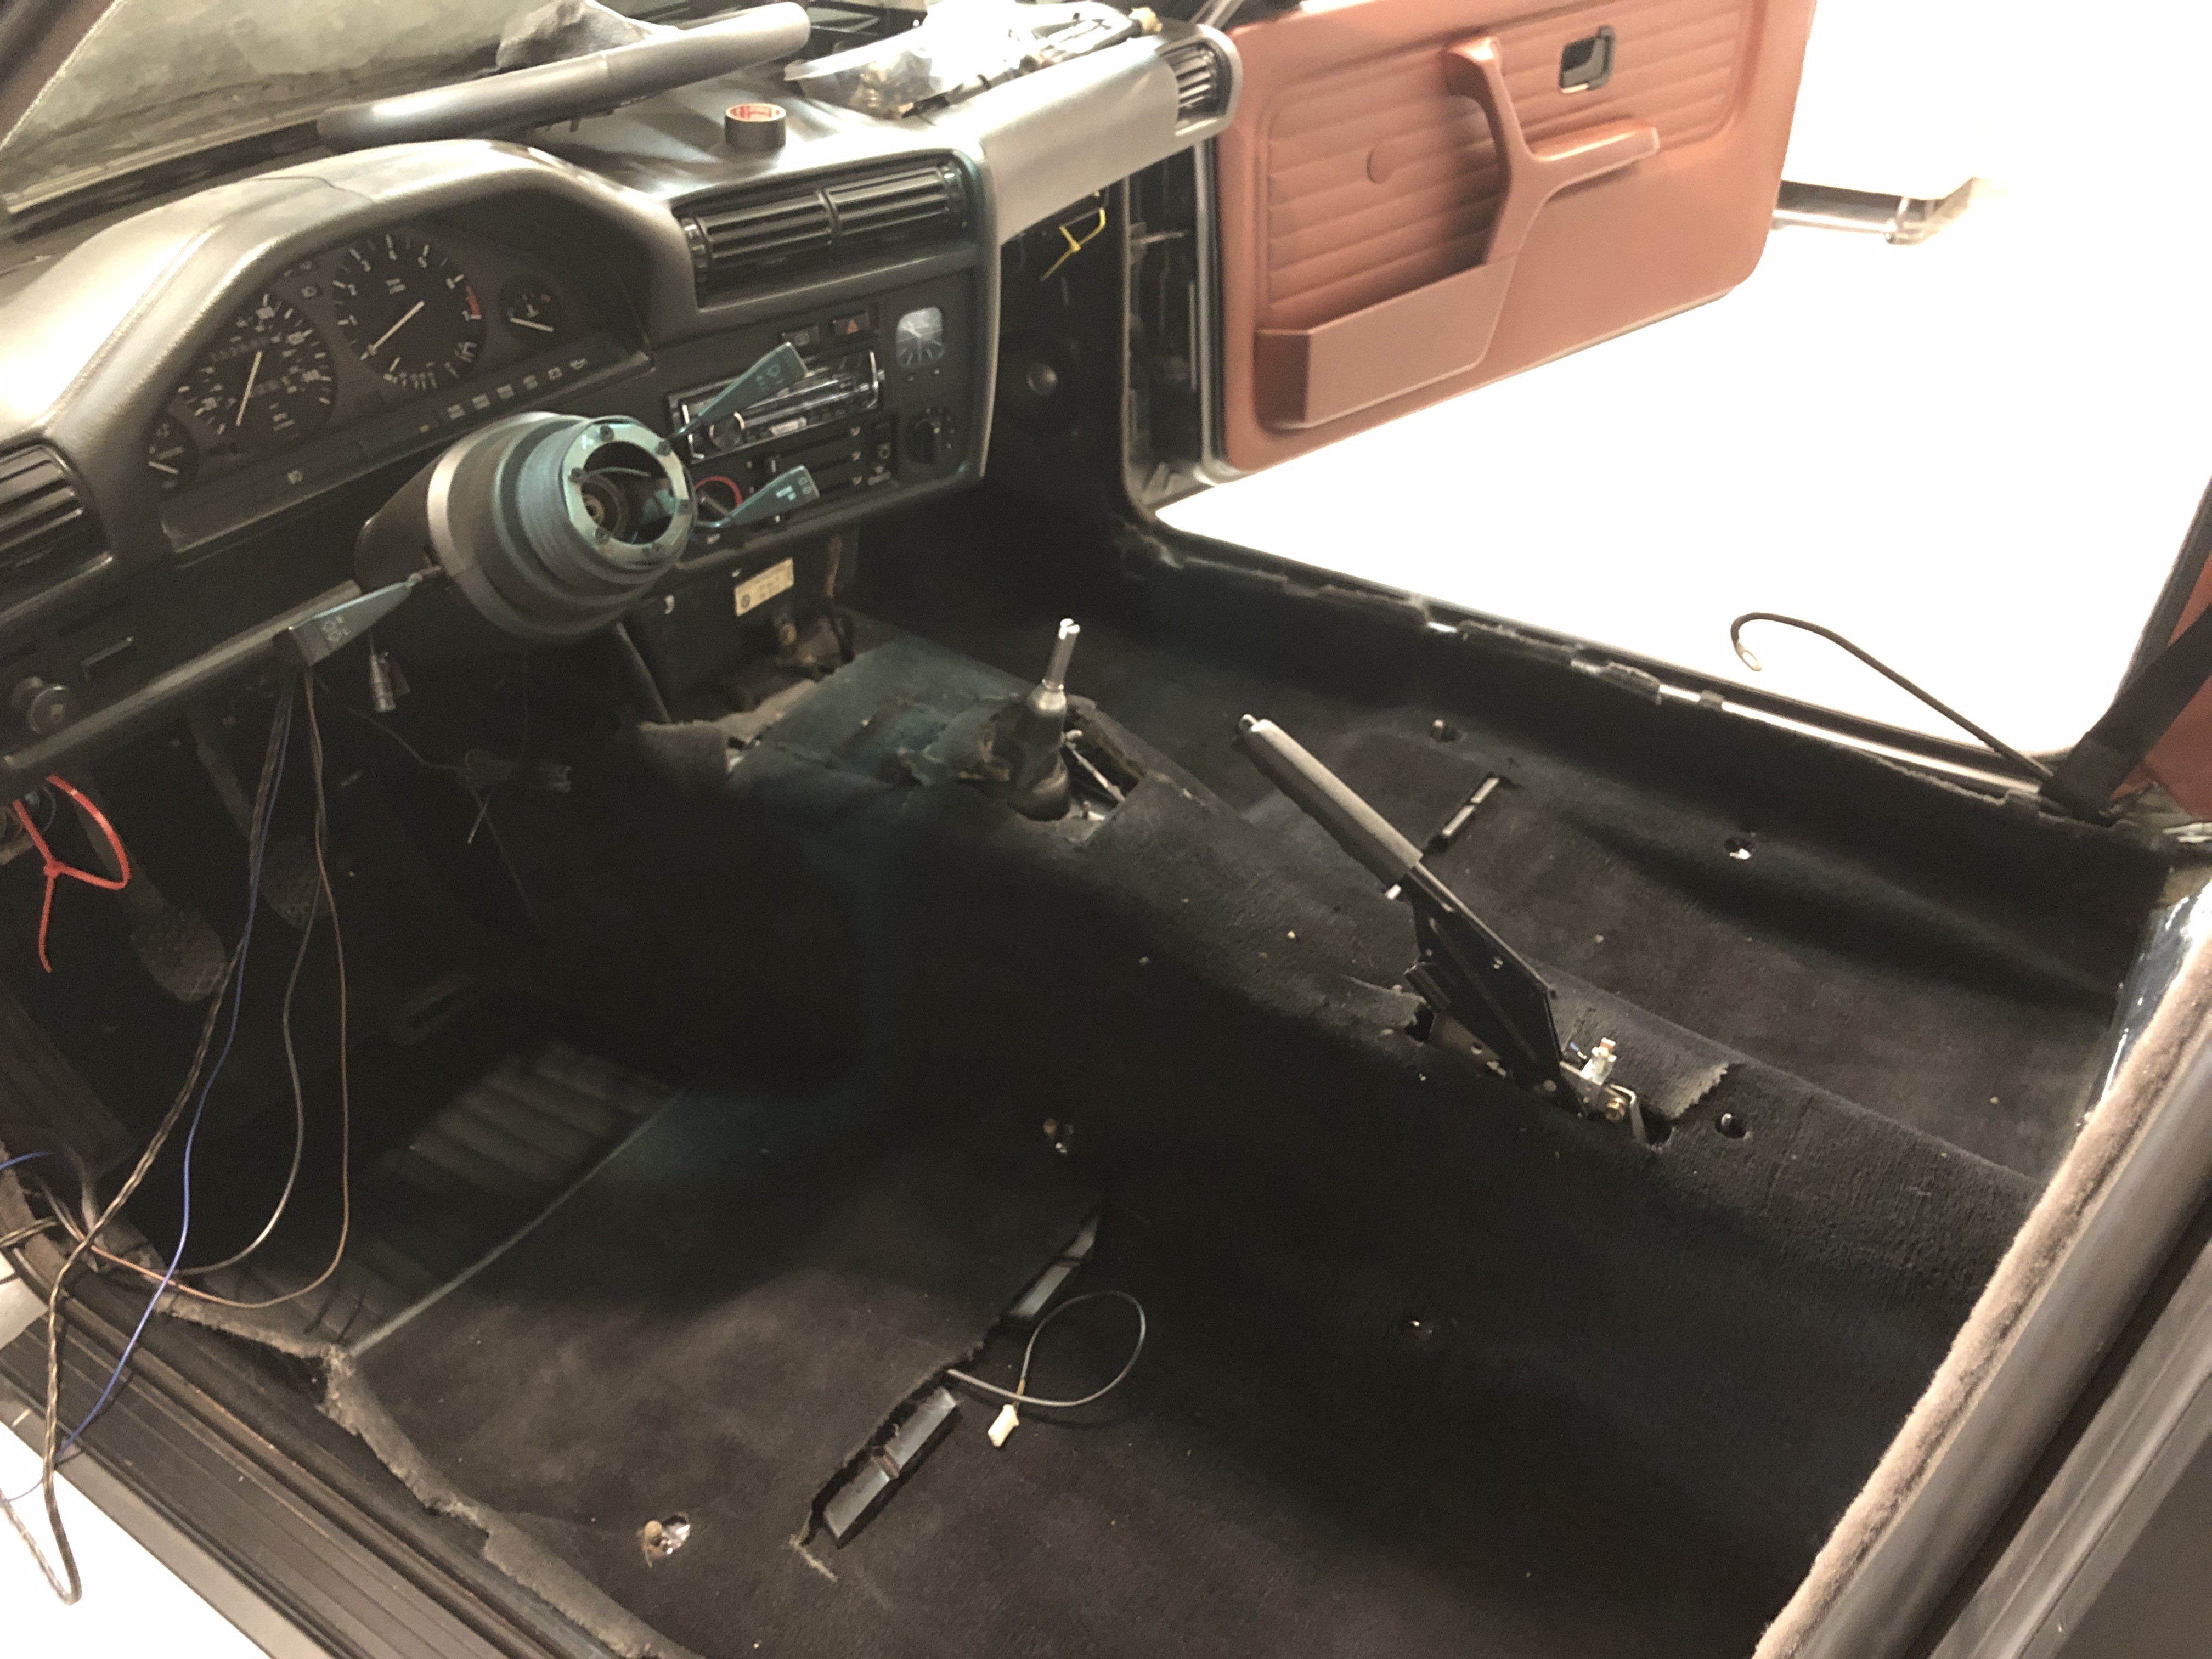
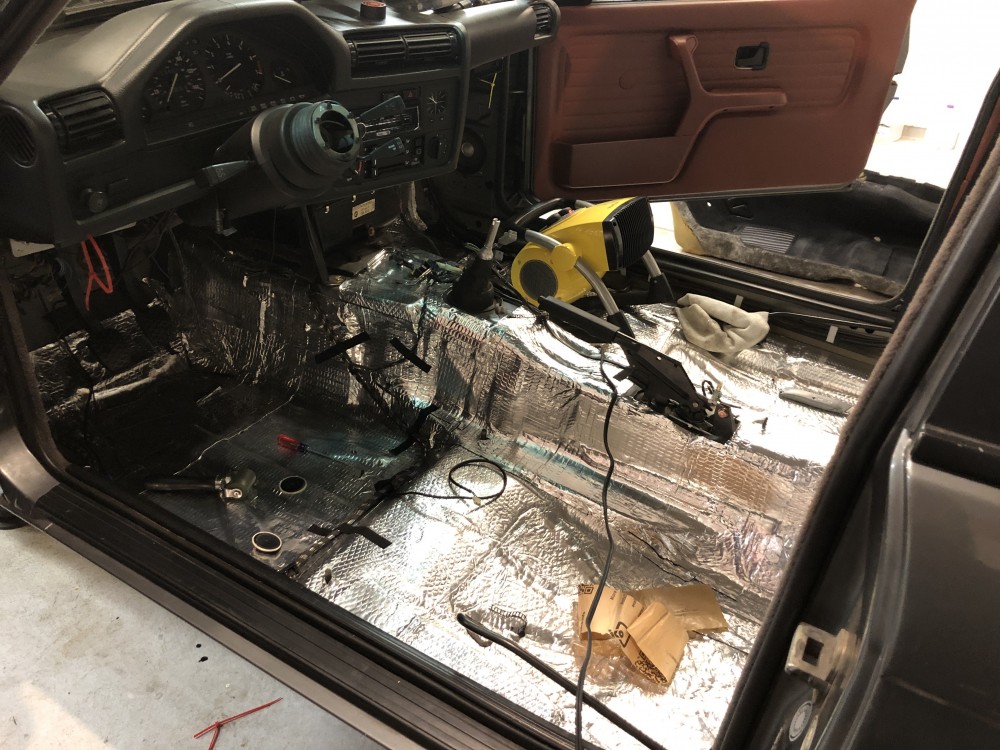
                                        Got the rest of the interior matted and carpet back in. 
                                         

                                        906C2D2B-C3E1-43F9-A4F5-69DEA6FE1F89.jpeg

                                        8BFA1B41-5AE0-4998-8BF8-32D3E72E85FA.jpeg

                                        156008CF-3219-491A-8D92-20B636F16DC2.jpeg

                                        EEFB0C46-9791-40CF-ABD7-5239BE3B1488.jpeg

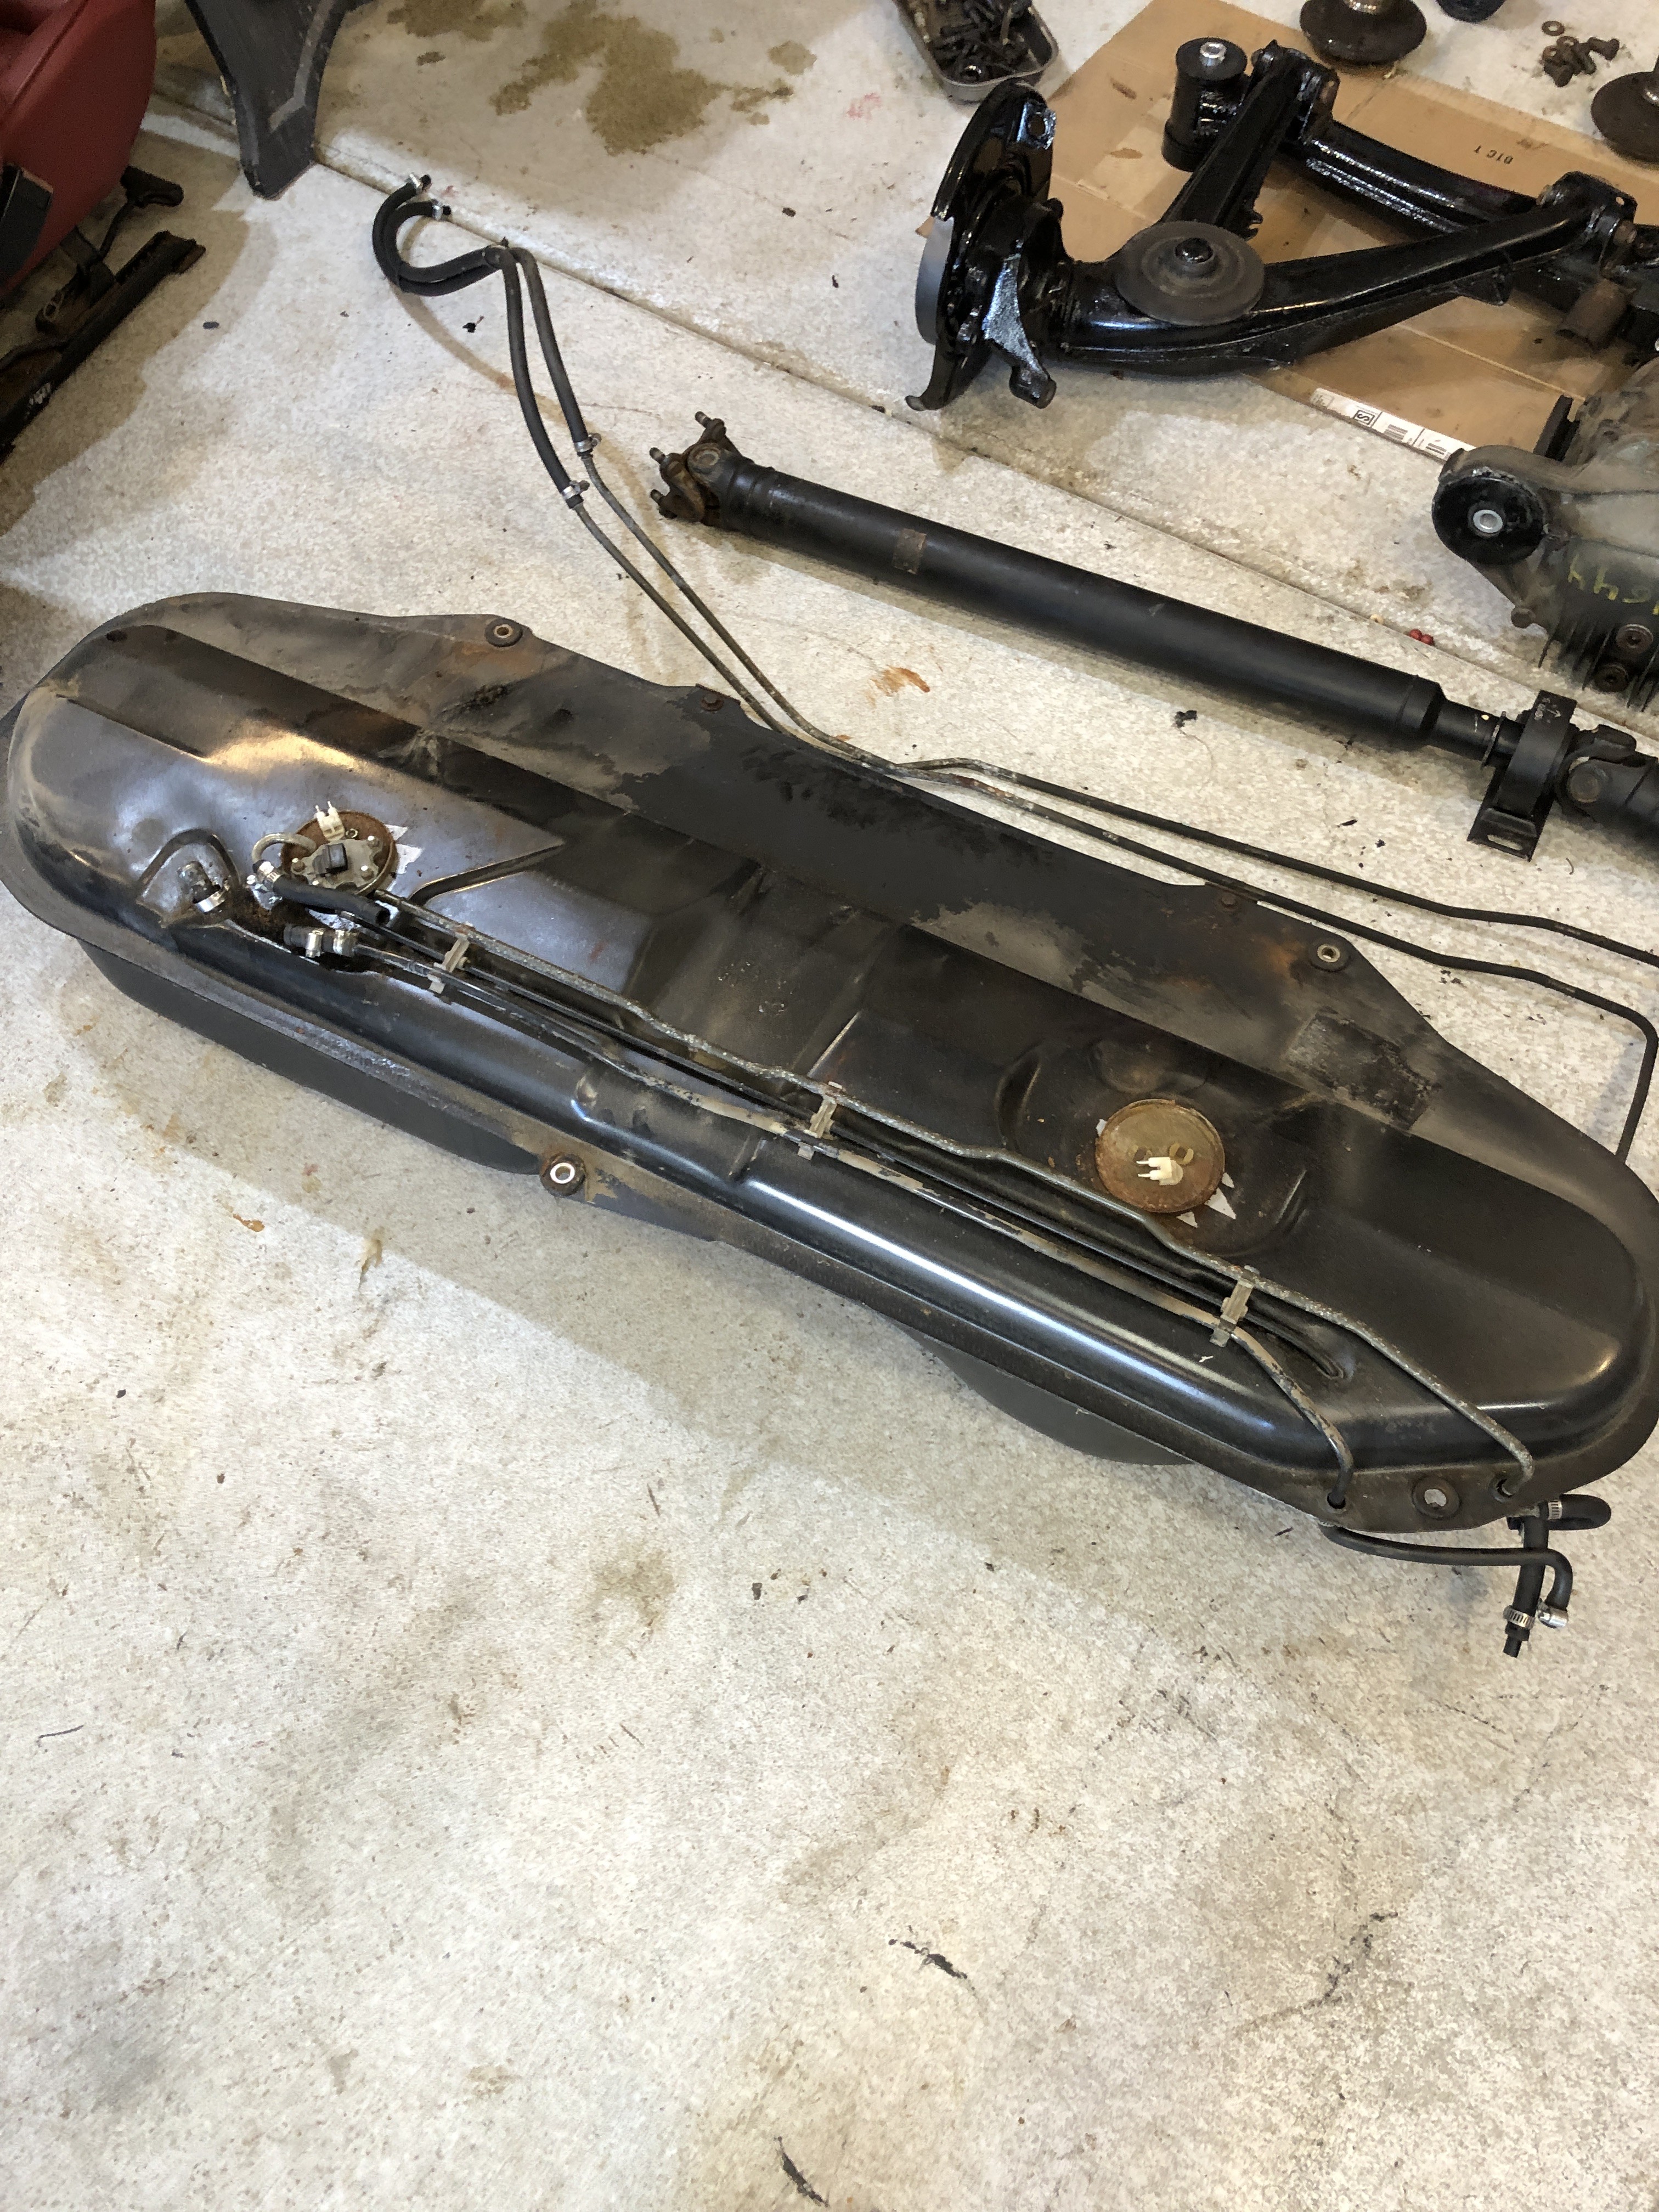
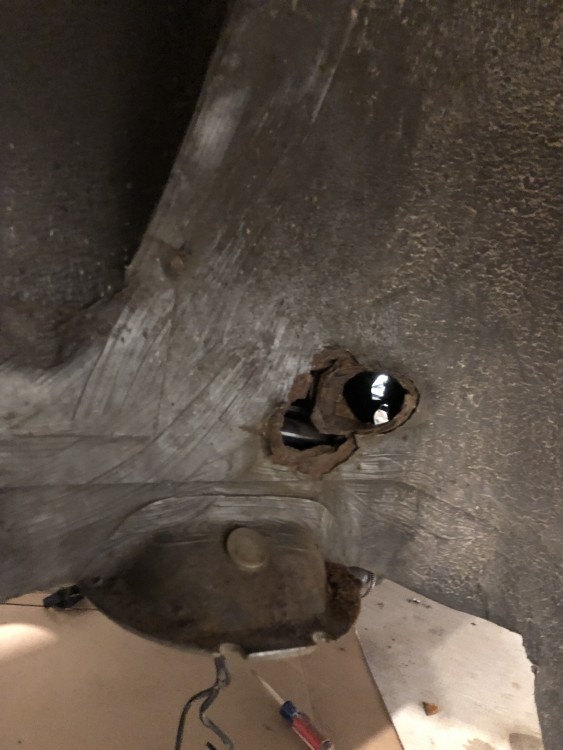
                                        I also pulled out all the vent hoses. I will need to cut down the pass through pipe in the car as the end of it was rotten. 
                                         

                                        D73D02A4-ED8D-45FC-A88F-7E7E91A9B38F.jpeg

                                        My goal now is to start getting things back on the car: rear subframe, interior, gas tank, etc. I need to free up space to get my wife’s car back in the garage and I have struts and shocks for the wagon to do.

                                        1 Reply Last reply
                                        0
                                        • G
                                          G
                                          gilber33
                                          wrote on last edited by
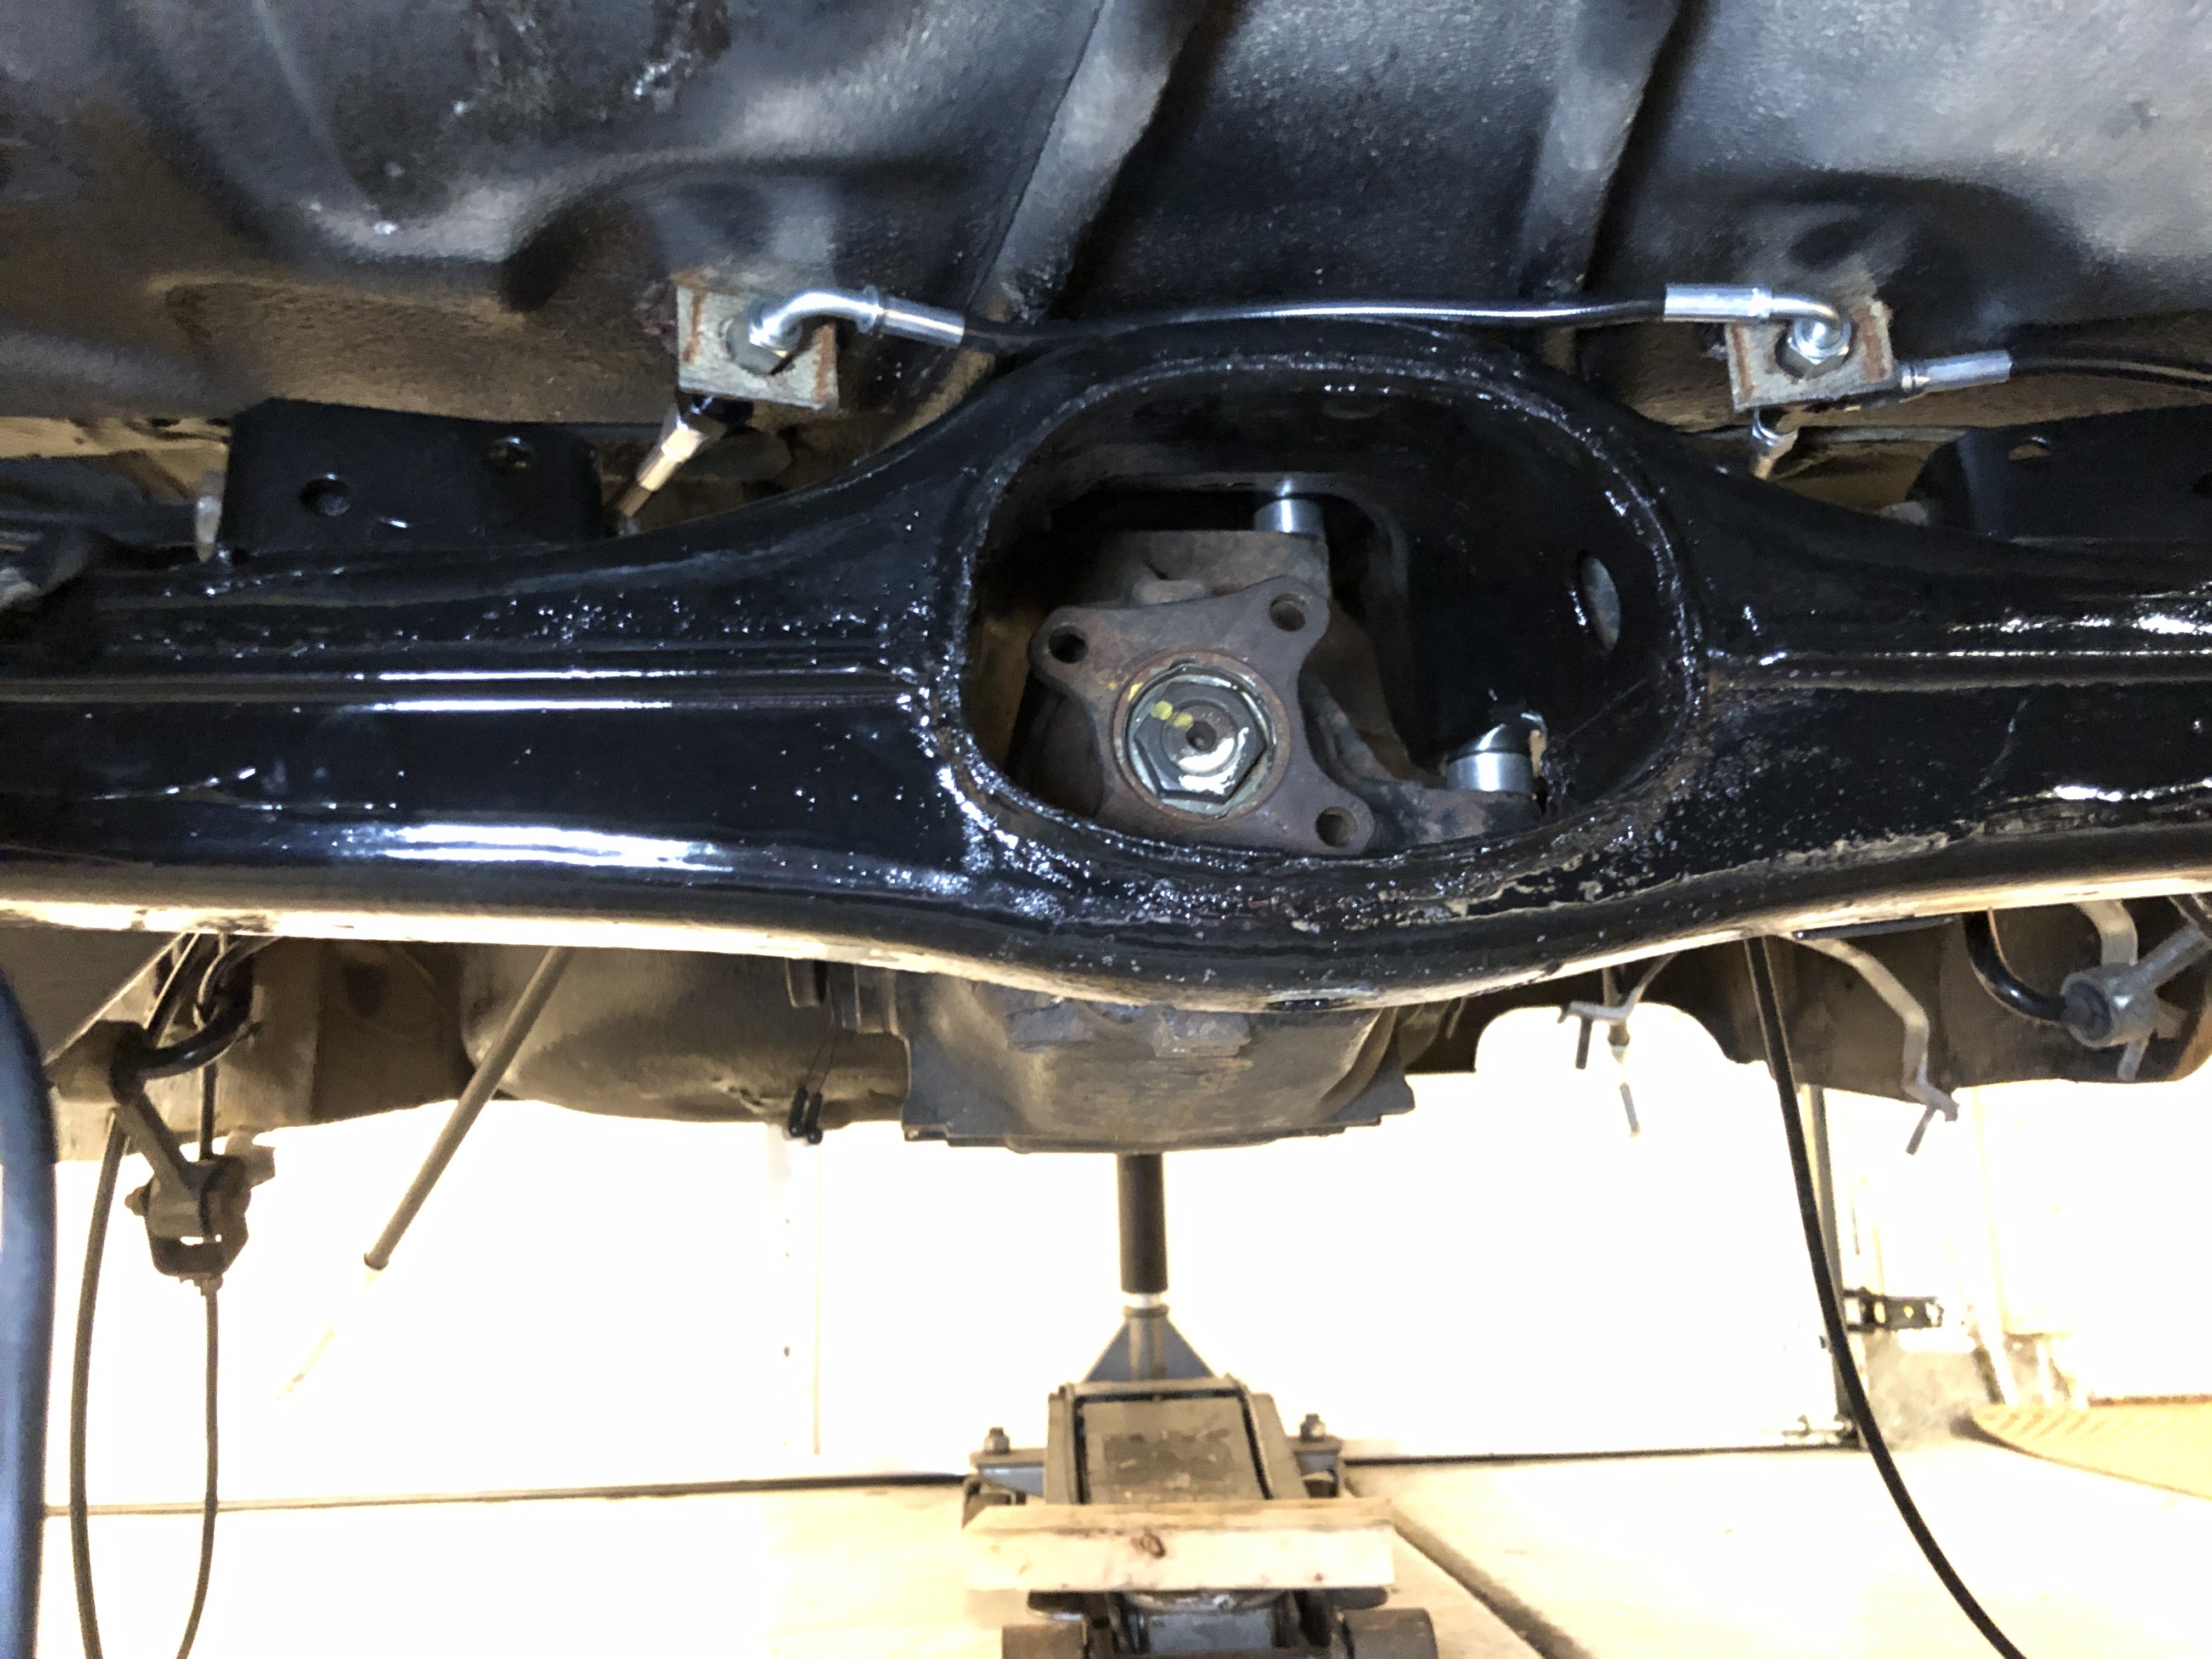
                                          #670

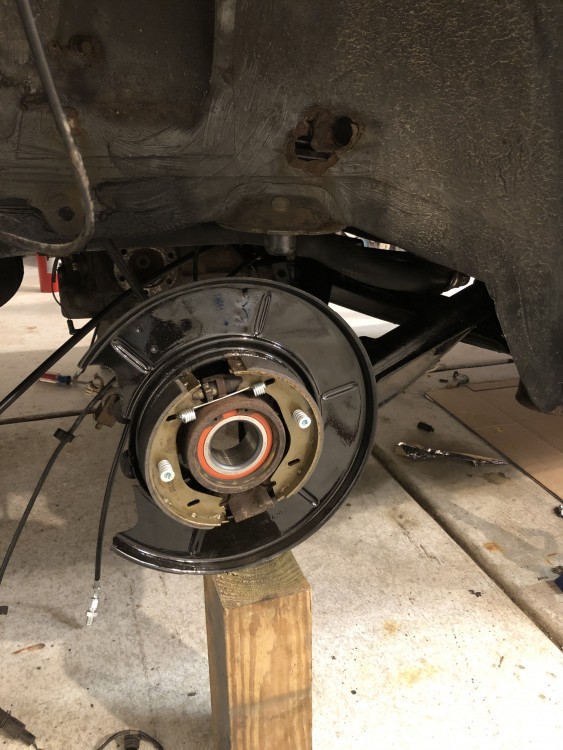
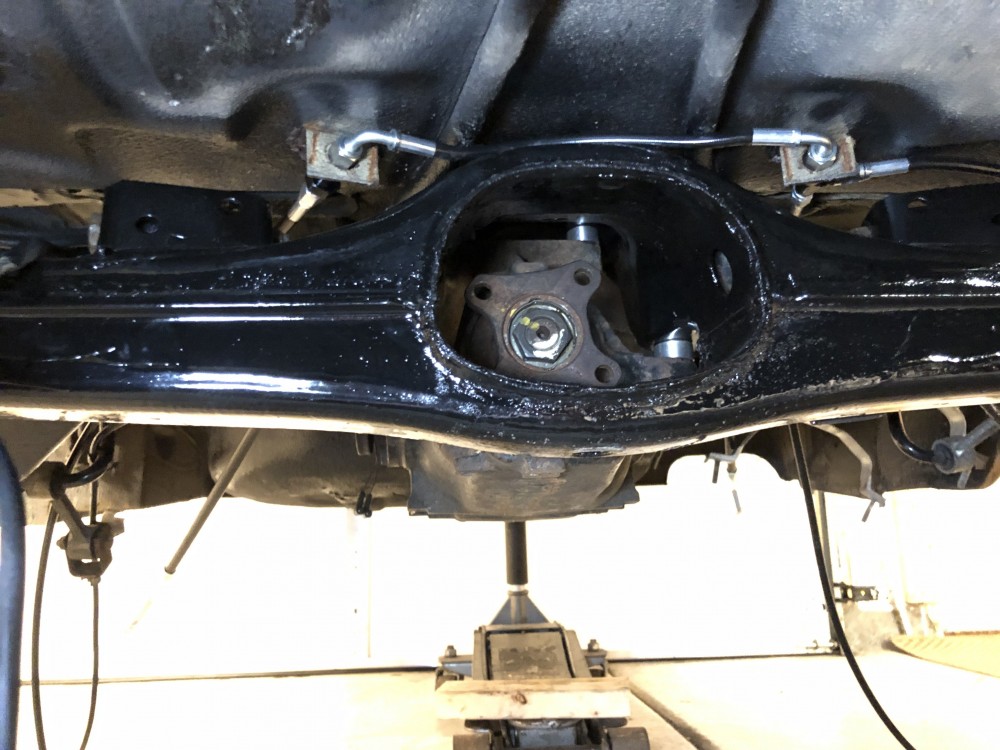
                                          Got the rear subframe back in (more like resting back in its place)! It was kind of annoying how difficult it is to get back in if it’s not completely straight. But it is one less thing on the floor. 
                                          71D3B555-C677-48BA-A1E6-AAFDFFF6F691.jpeg

                                          440B9024-DE42-4682-9498-47AEE767881A.jpeg

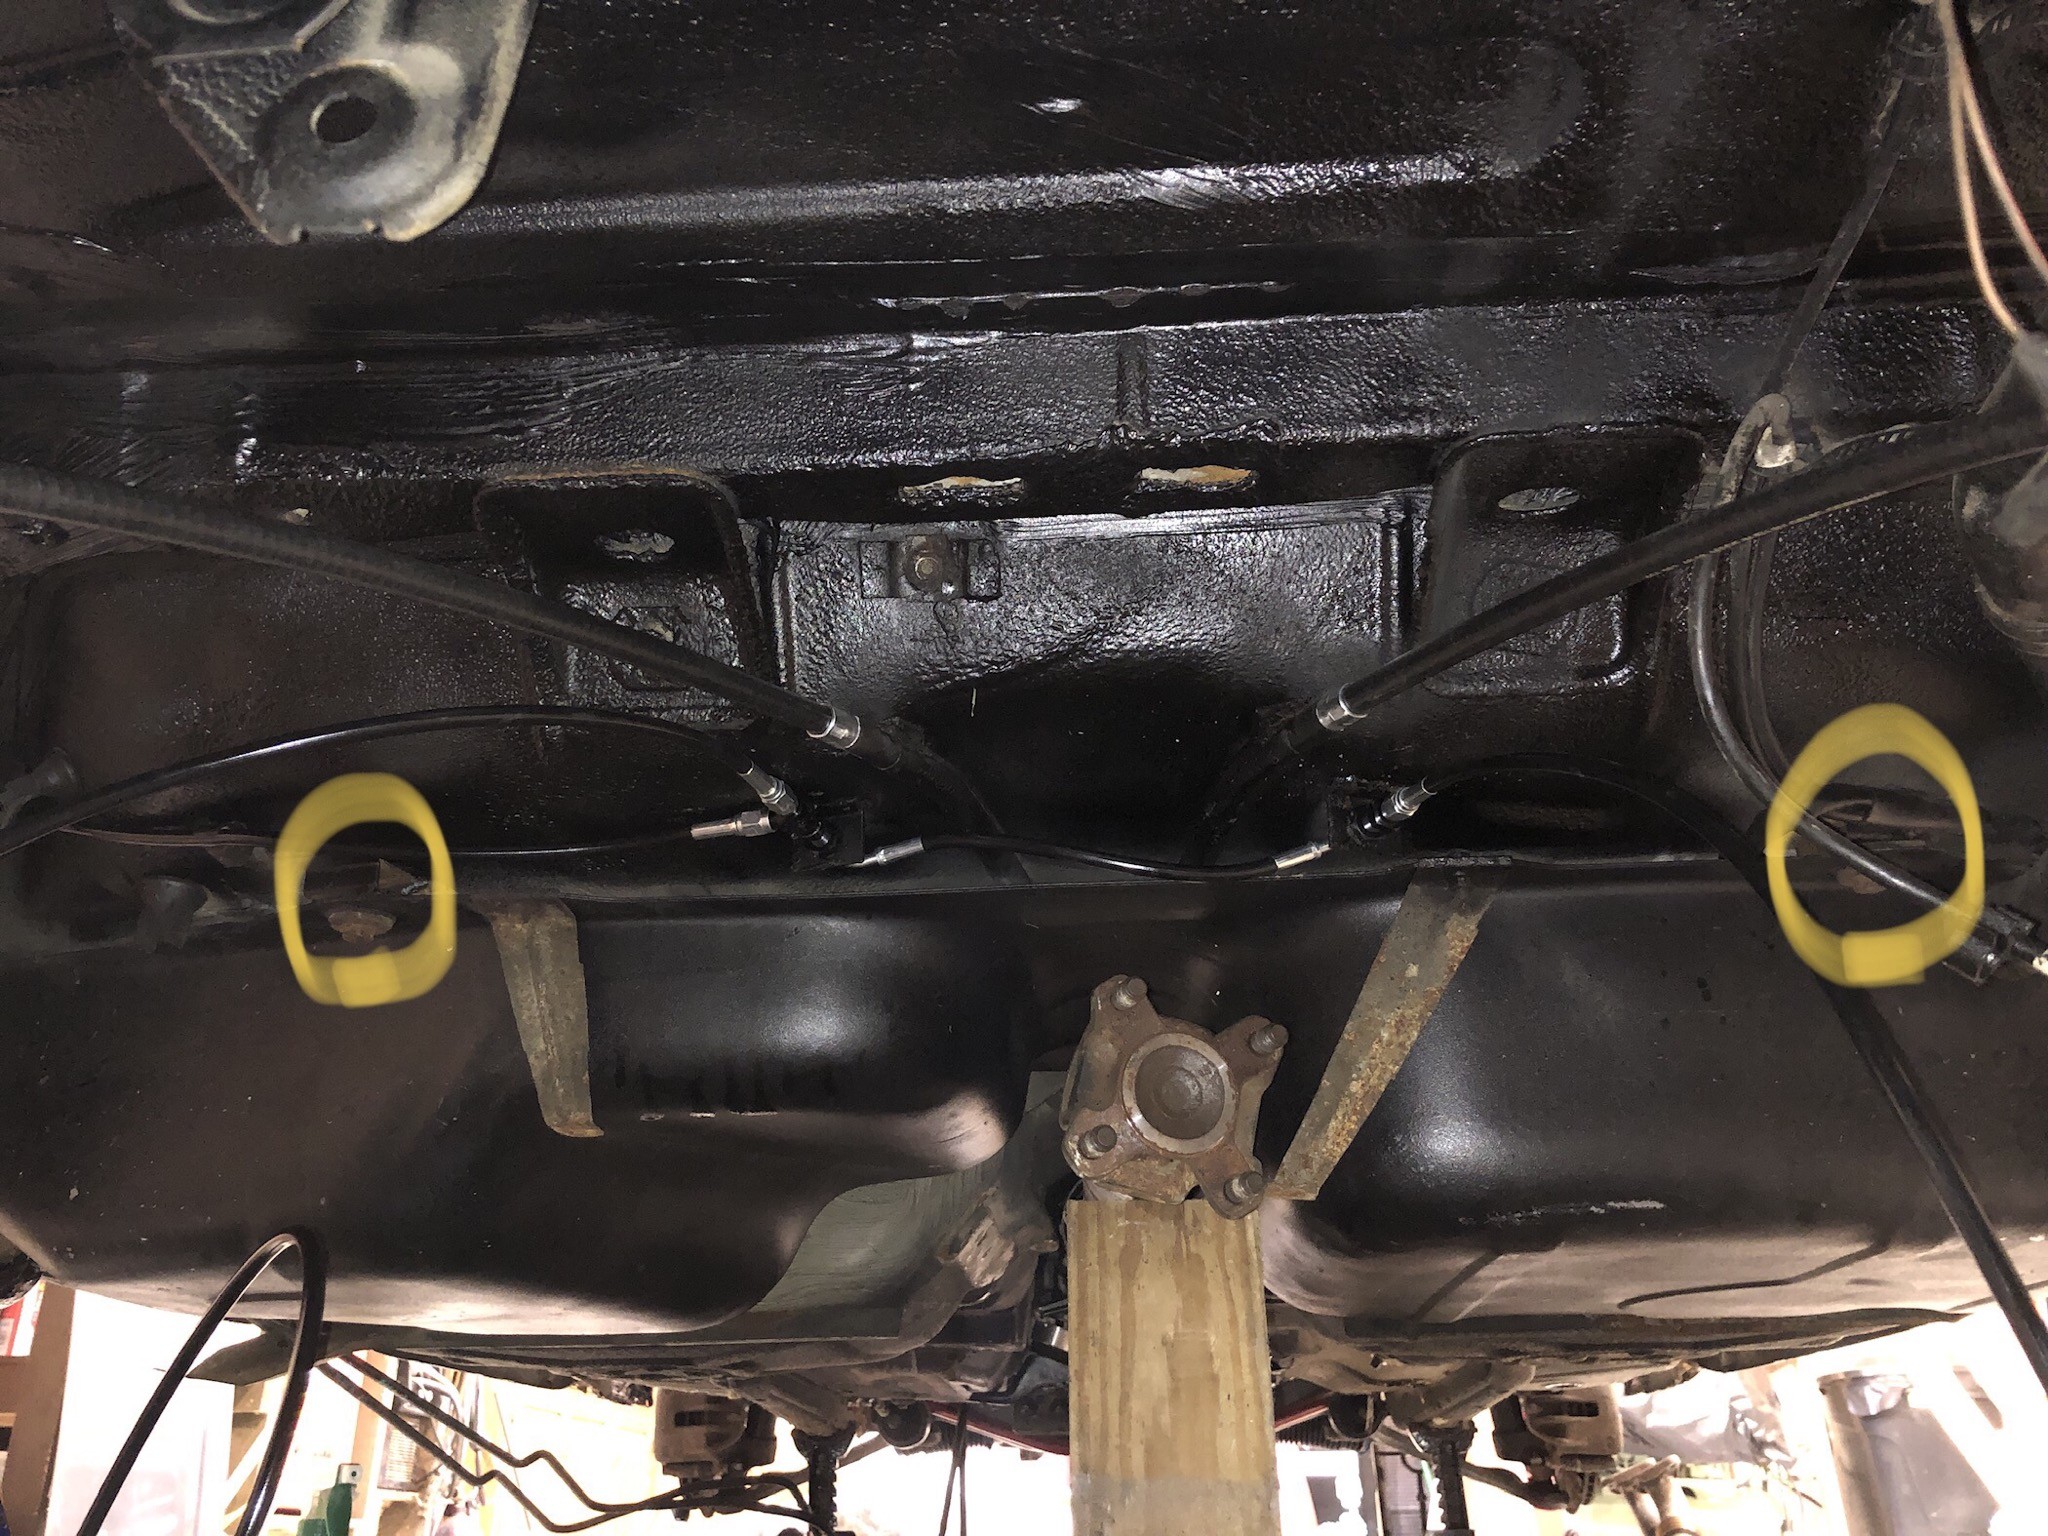
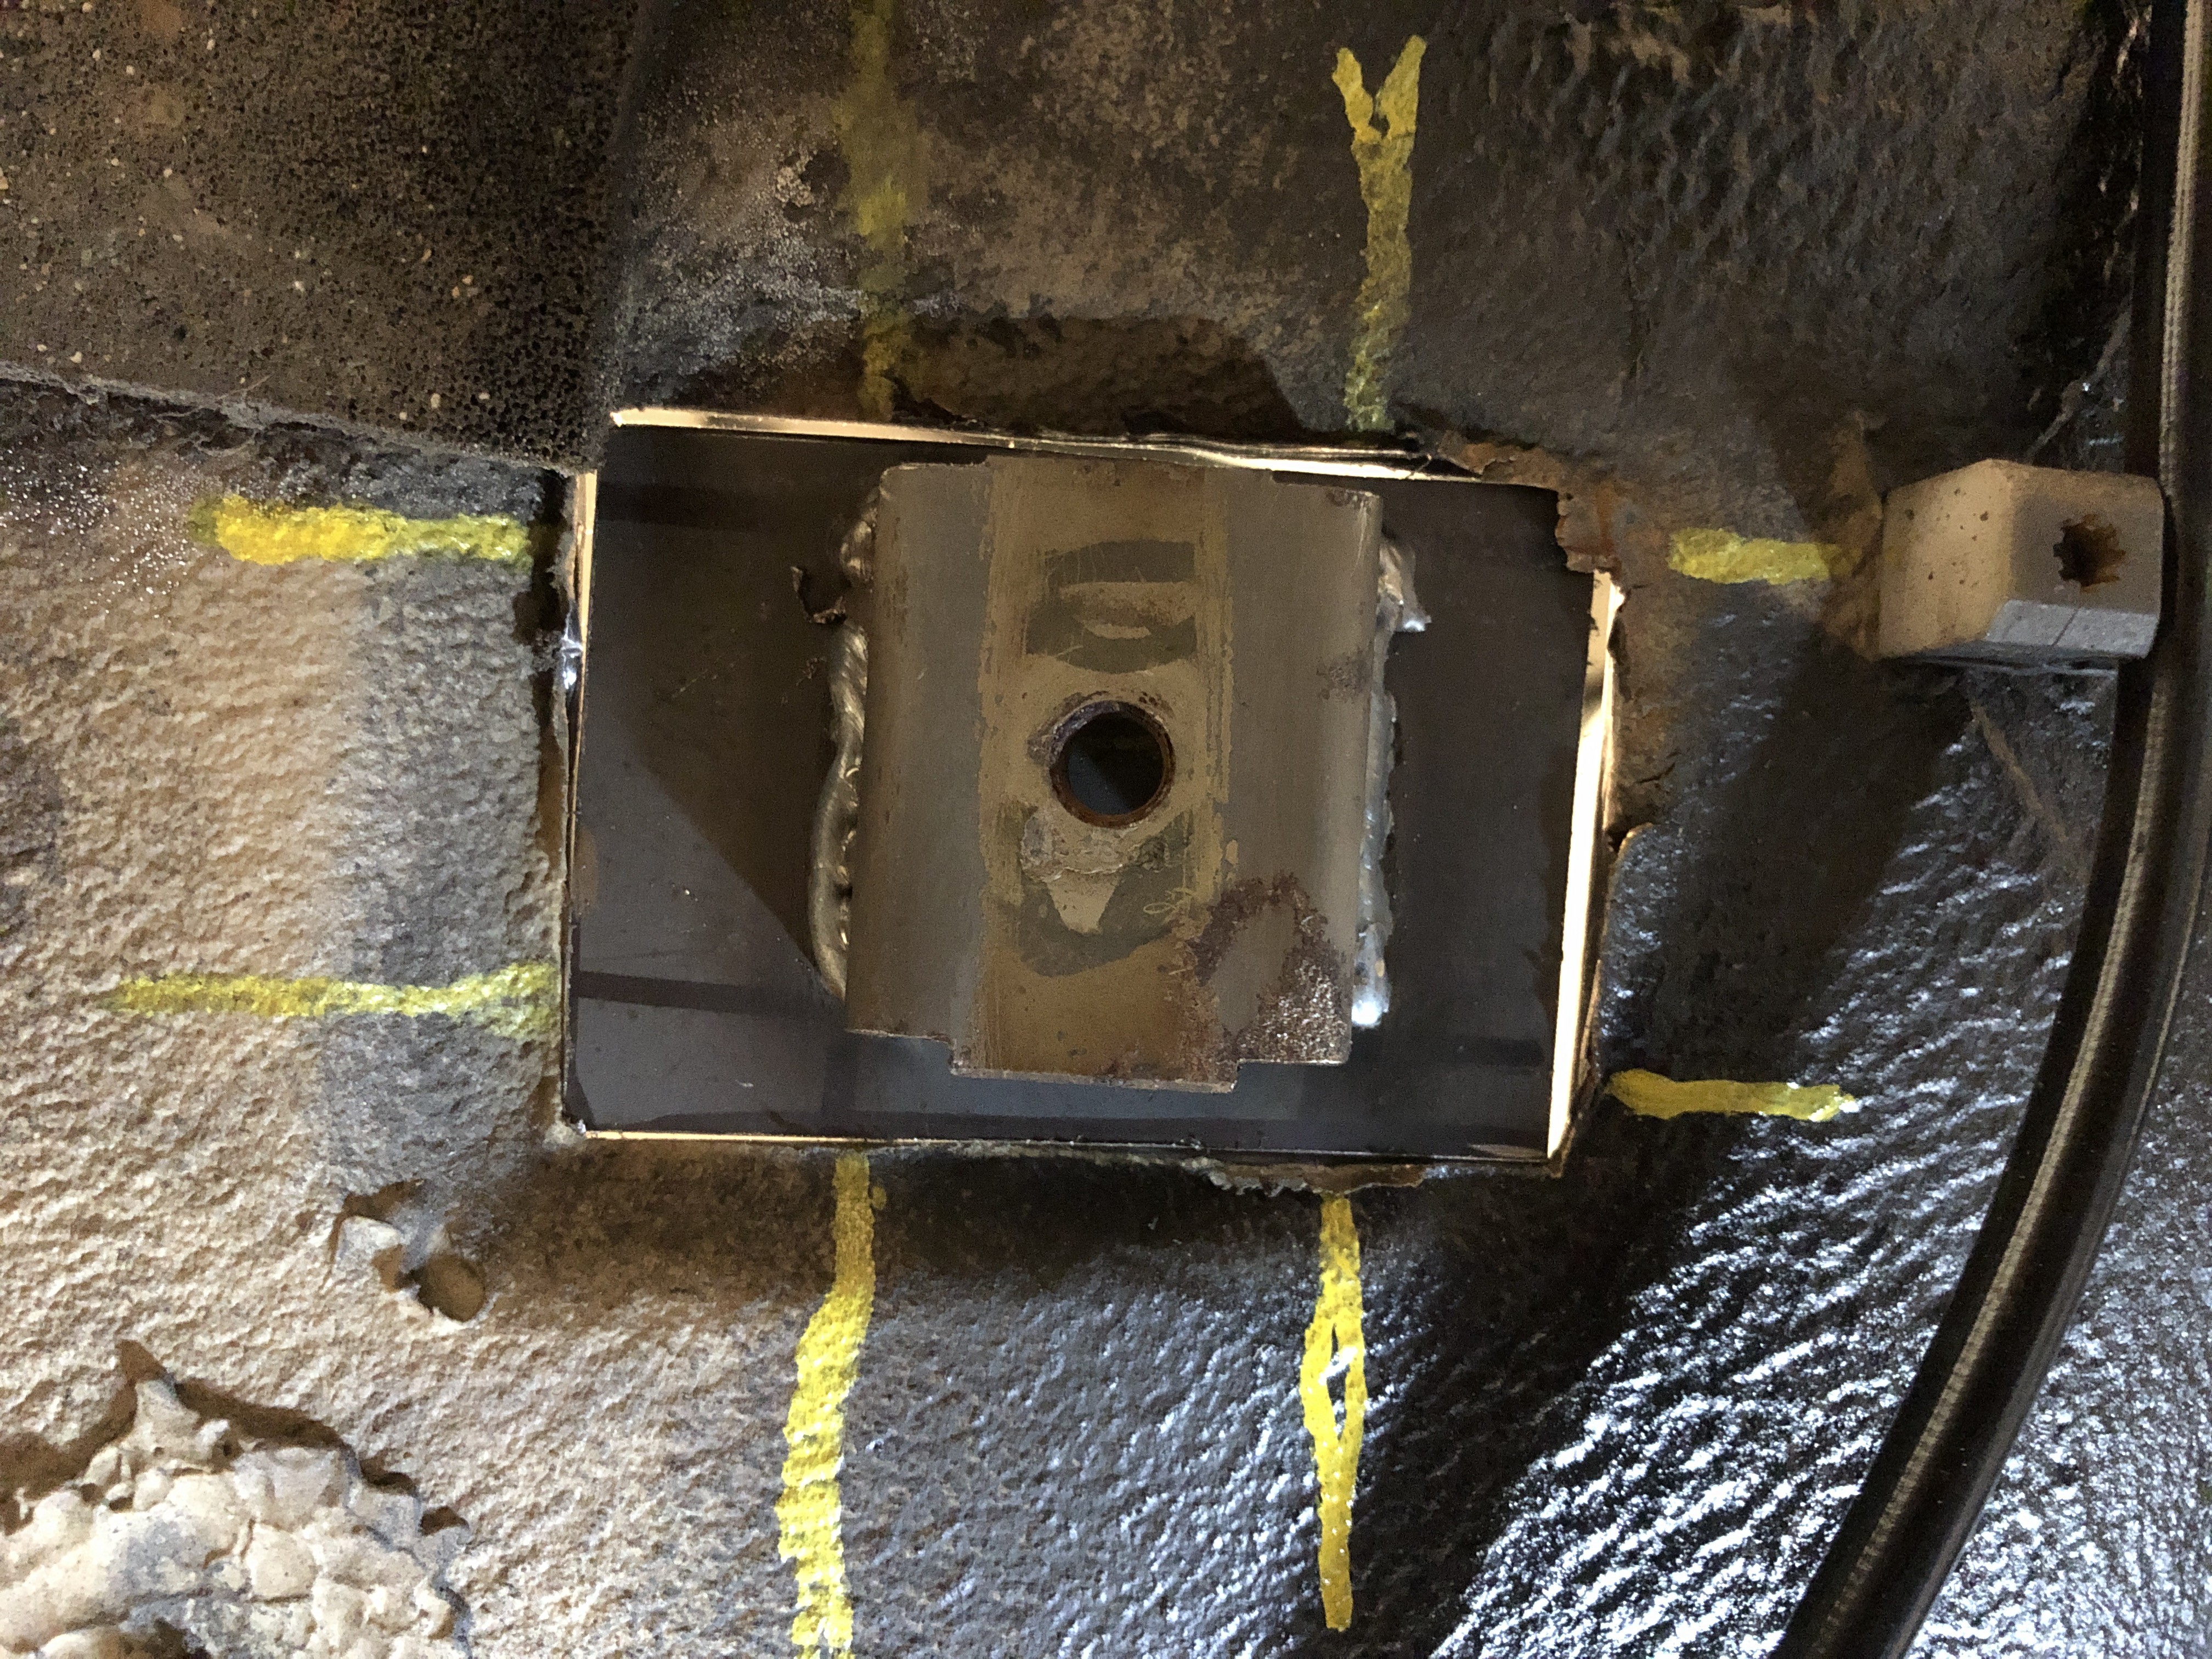
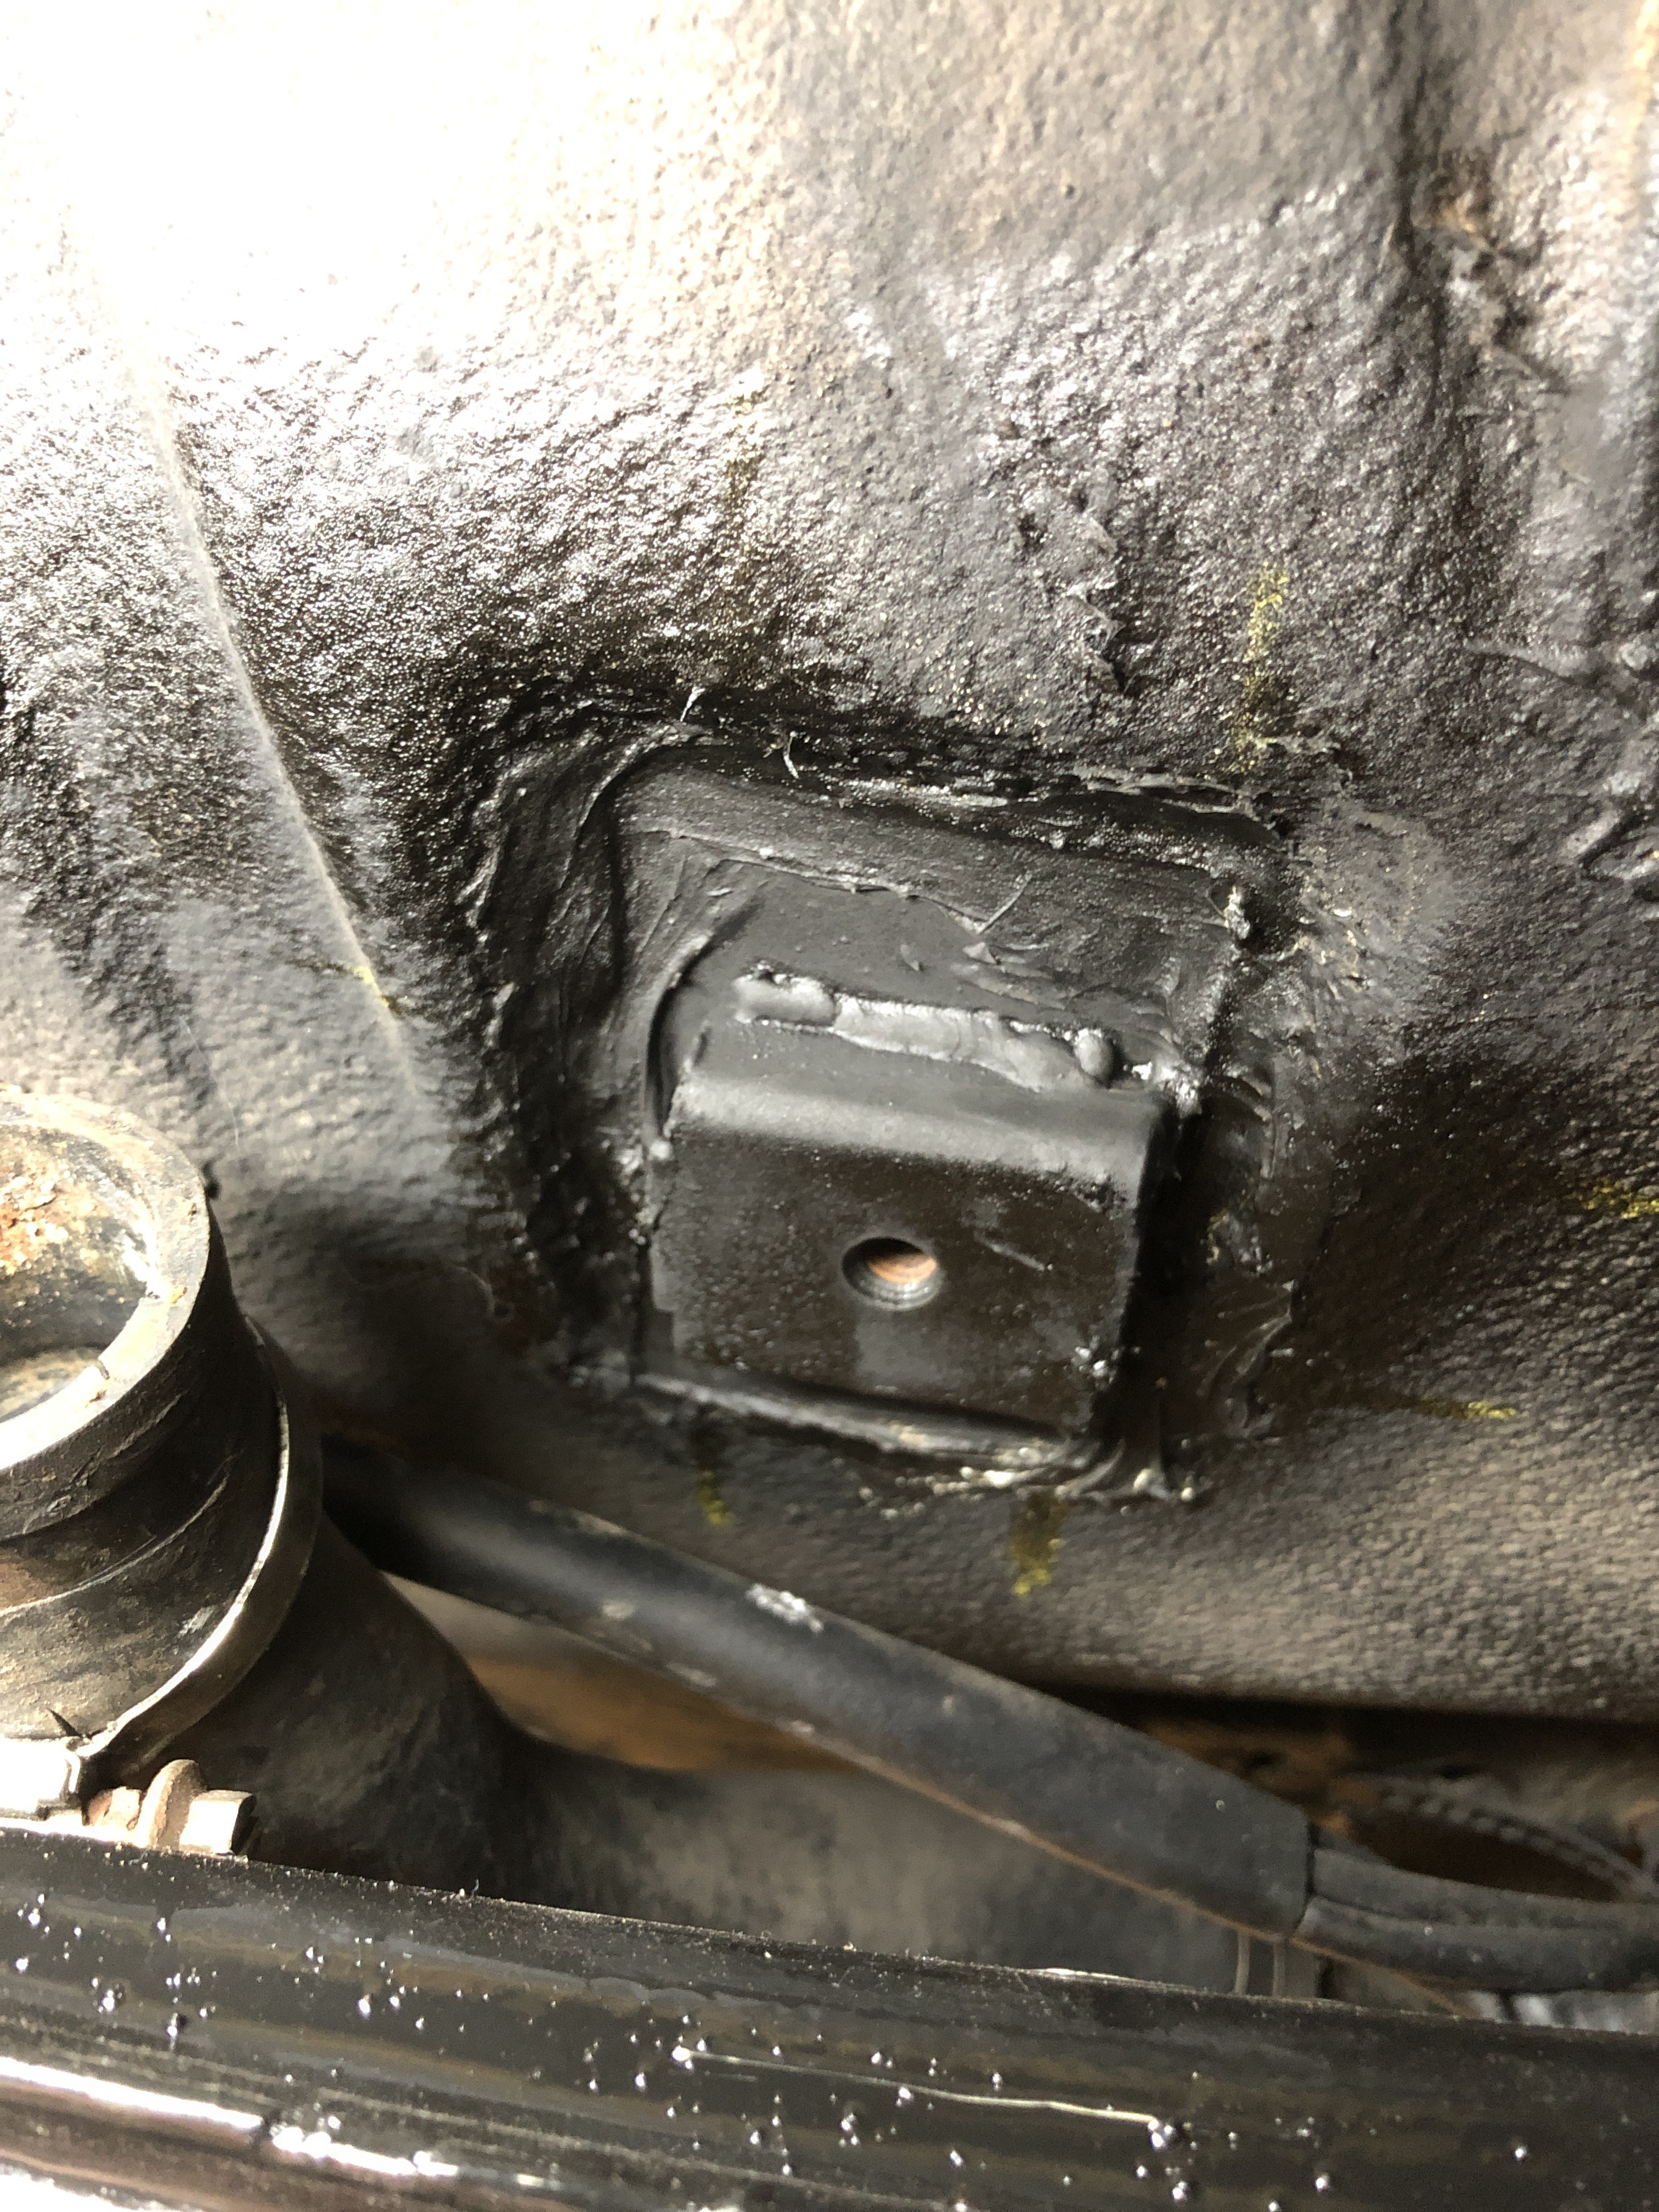
                                          And the underside of the new fuel tank mounts. The seams have seam sealer, Por15, and then underbody coating  
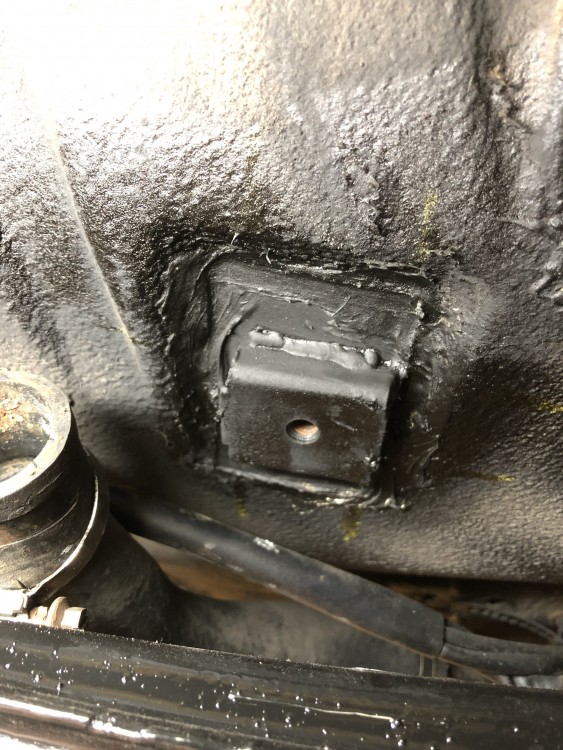
                                          888EB320-133A-48CE-8934-58BB54EB78E5.jpeg

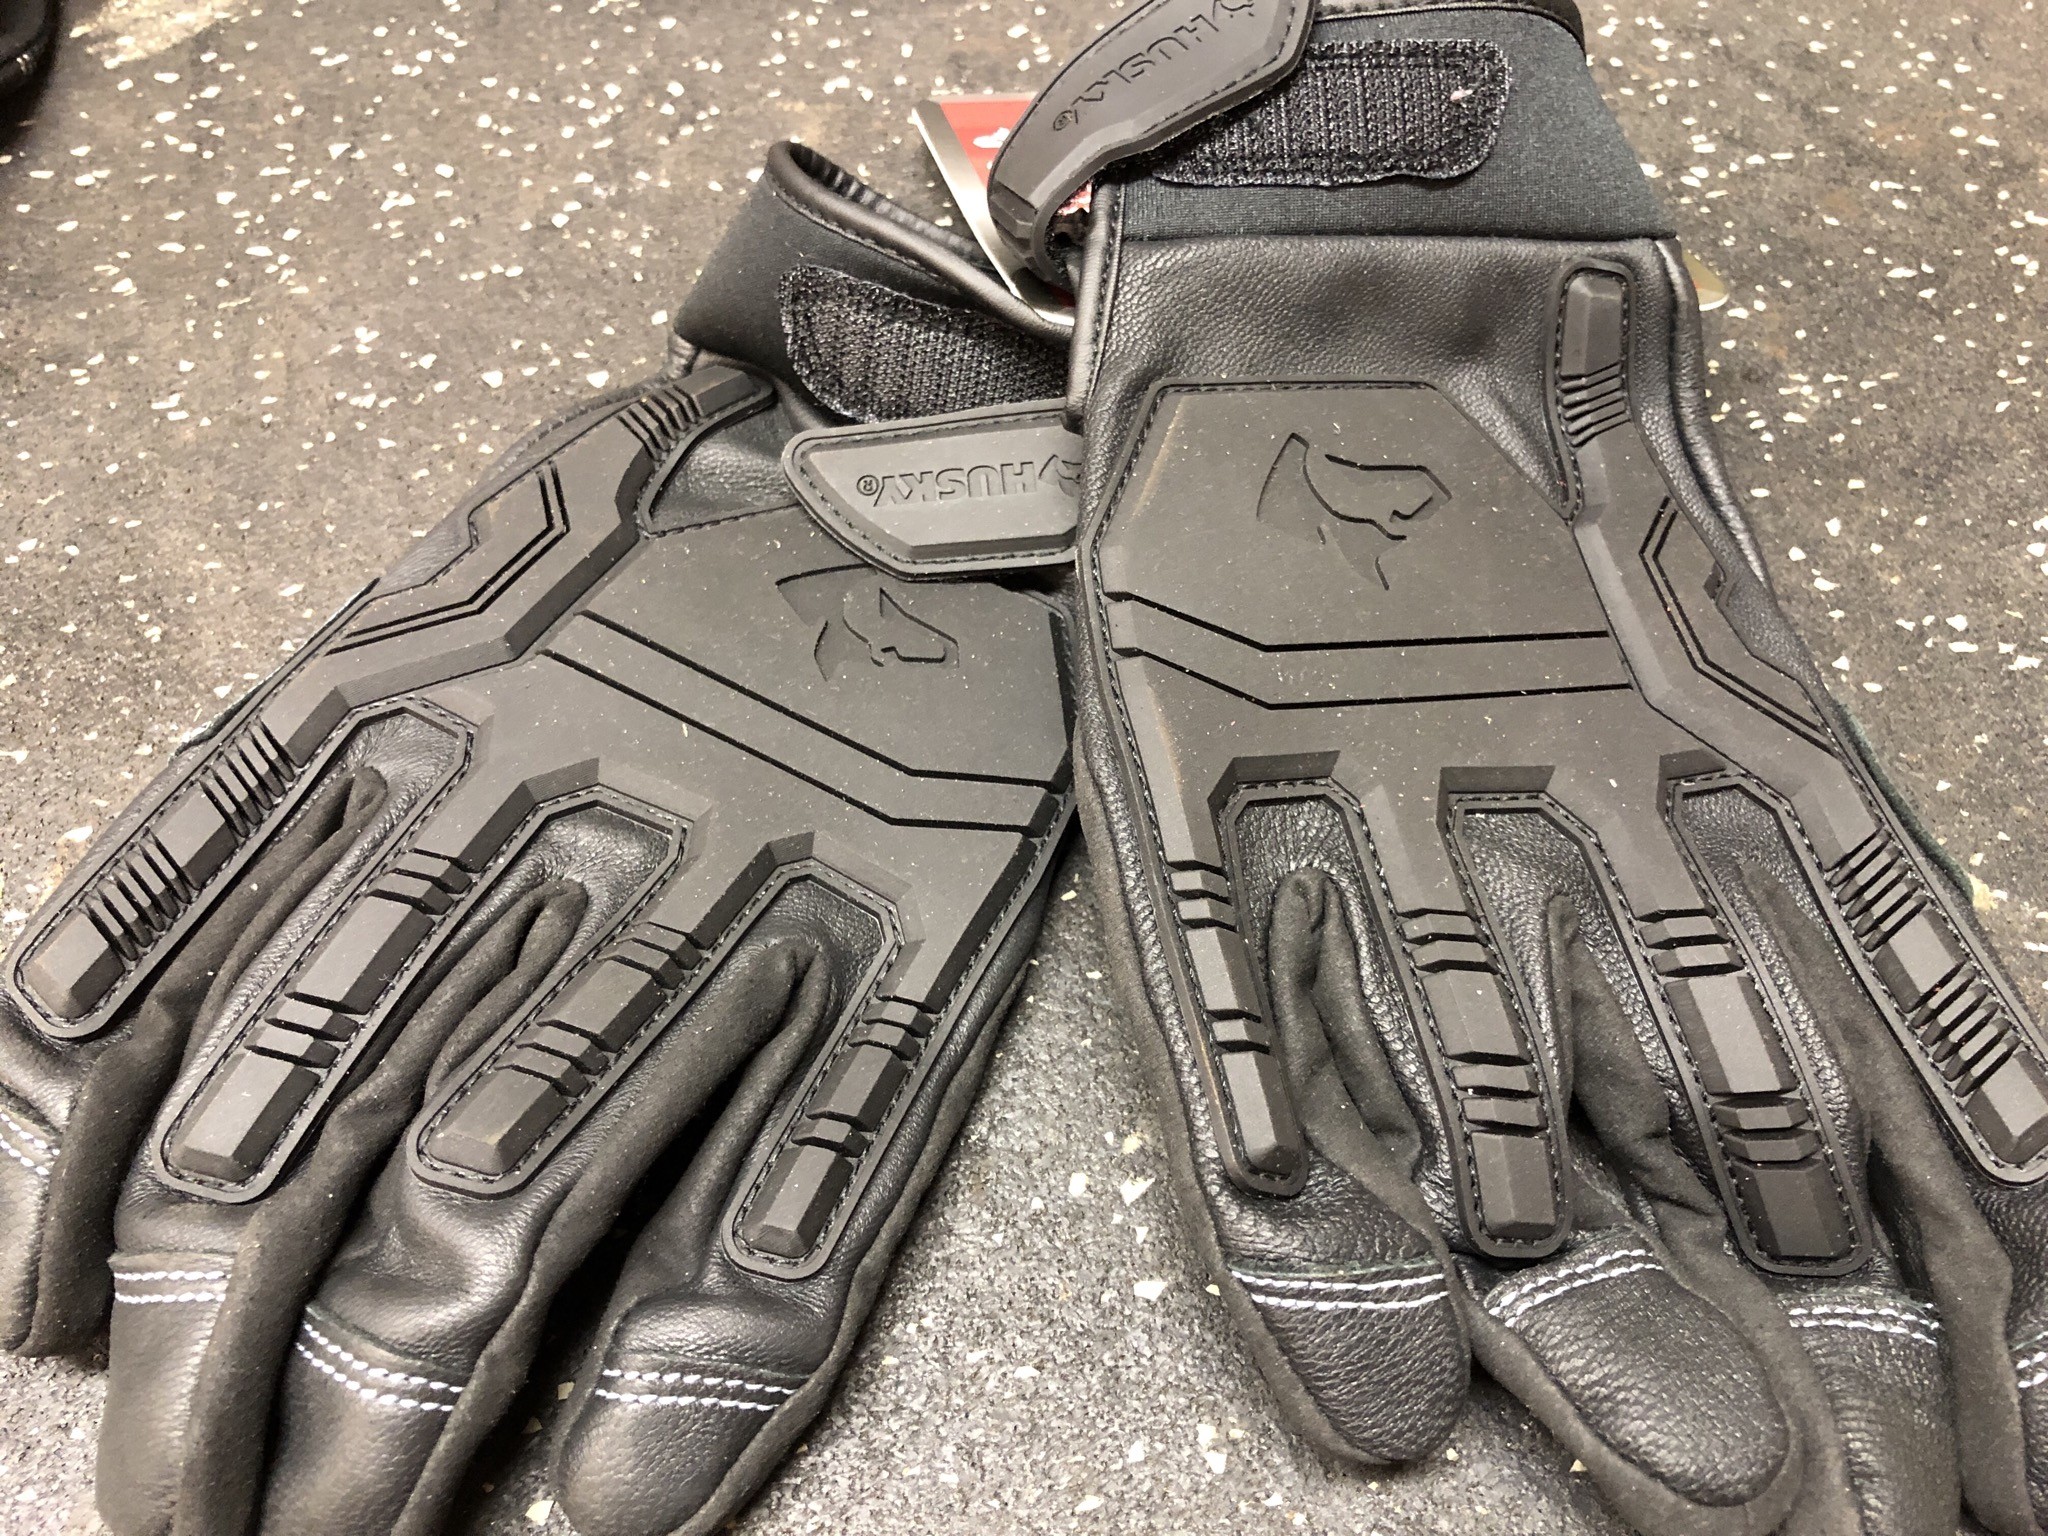
                                          Went to Home Depot for Black Friday and got a new pair of work gloves and a Husky 650 ft lb pneumatic impact. I had the grinder with a flap disc slip and go through a thin pair of work gloves and fillet the top of my finger. I’m always going to  some type of reinforced glove going forward. 
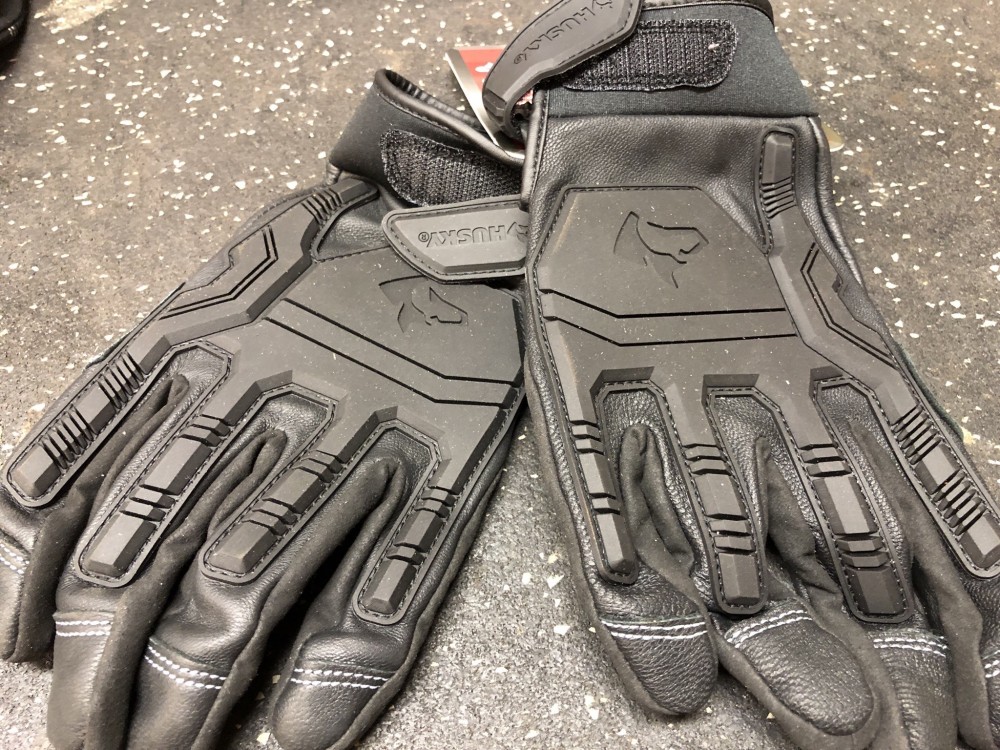
                                          4ACA79F5-5F32-414A-830C-C626FA1D51BC.jpeg

                                          1 Reply Last reply
                                          1

                                          Hello! It looks like you're interested in this conversation, but you don't have an account yet.

                                          Getting fed up of having to scroll through the same posts each visit? When you register for an account, you'll always come back to exactly where you were before, and choose to be notified of new replies (either via email, or push notification). You'll also be able to save bookmarks and upvote posts to show your appreciation to other community members.

                                          With your input, this post could be even better 💗

                                          Register Login
                                          Reply
                                          • Reply as topic
                                          Log in to reply
                                          • Oldest to Newest
                                          • Newest to Oldest
                                          • Most Votes


                                          • Login

                                          • Don't have an account? Register

                                          • Login or register to search.
                                          Powered by NodeBB Contributors
                                          • First post
                                            Last post
                                          0
                                          • Categories
                                          • Recent
                                          • Tags
                                          • Popular
                                          • Users
                                          • Groups