Skip to content
  • Categories
  • Recent
  • Tags
  • Popular
  • Users
  • Groups
Skins
  • Light
  • Brite
  • Cerulean
  • Cosmo
  • Flatly
  • Journal
  • Litera
  • Lumen
  • Lux
  • Materia
  • Minty
  • Morph
  • Pulse
  • Sandstone
  • Simplex
  • Sketchy
  • Spacelab
  • United
  • Yeti
  • Zephyr
  • Dark
  • Cyborg
  • Darkly
  • Quartz
  • Slate
  • Solar
  • Superhero
  • Vapor

  • Default (No Skin)
  • No Skin
Collapse
WIBIMMERS logo

WIBIMMERS

  1. Home
  2. General Discussion
  3. Members BMWs
  4. Non-BMW Stuff on a BMW Forum

Non-BMW Stuff on a BMW Forum
Scheduled Pinned Locked Moved Members BMWs
1.2k Posts 29 Posters 0 Views 1 Watching
  • Oldest to Newest
  • Newest to Oldest
  • Most Votes
Reply
  • Reply as topic
Log in to reply
This topic has been deleted. Only users with topic management privileges can see it.
  • straight6pwrS
    straight6pwrS
    straight6pwr
    wrote on last edited by
    #1062

    gilber33 said:

    • Get rid of the garbage Garagistic solid gear selector rod joint. 

    A question about a general clean up of the engine bay. I wouldn't be going for full a fully shaved bay, but I would take a grinder to it to clean up the surface. Are there any negative affects that would come from smoothing out the seam sealer to an extent that would allow me to  effectively prep the surface for paint?

    do expound on the Garagistic part, please.

    given your car is no longer seeing daily or winter use, i dont see removal/reduction of seam sealer being a problem. i have no idea if the 30 year old seam sealer will give you a nice finish if you start grinding/sanding it though. 

    there is definitely someone here that has shaved their e30 engine bay though, Sam with the drift car I think?

    Dan

    yajsYRL.jpg.e5f350b4dfe961d76ac8b32efce2e1a6.jpg

    1 Reply Last reply
    0
    • G
      G
      gilber33
      wrote on last edited by
      #1063

      straight6pwr said:

      do expound on the Garagistic part, please.

      It appears they now have a Version 2: 
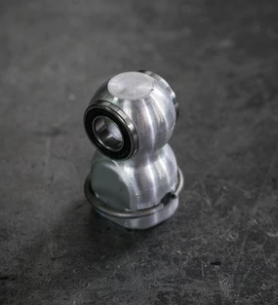
      image.png

      @The Full Bananaand myself went in on the preorder for when they first made them and the first version, the bearing is flush with the housing. On this one it protrudes. So after you install it in the DSSR, the bearing doesn't do shit. Plus - they made it about a mm thicker than the oem one, so I had to file down the DSSR for it to fit in it. Basically ruining it if I want to replace the selector joint. I will be replacing the joint with an OEM piece and get a new DSSR from anyone else. I don't need anything else from Garagistic anymore. 

      straight6pwr said:

      given your car is no longer seeing daily or winter use, i dont see removal/reduction of seam sealer being a problem. i have no idea if the 30 year old seam sealer will give you a nice finish if you start grinding/sanding it though. 

      there is definitely someone here that has shaved their e30 engine bay though, Sam with the drift car I think?  

      Is the seam sealer intended to provide some structural rigidity to the body or is purely for keeping the seams sealed from moisture/rust?

      But valid point on the quality of finish after it's sanded. Someone posted pictures in this thread a while back. I'll have to go back and check them out. Is the seam sealer solid if it is sanded down or does it stay kind of gummy?

      1 Reply Last reply
      0
      • G
        G
        gilber33
        wrote on last edited by
        #1064

        GunMetalGrey said:

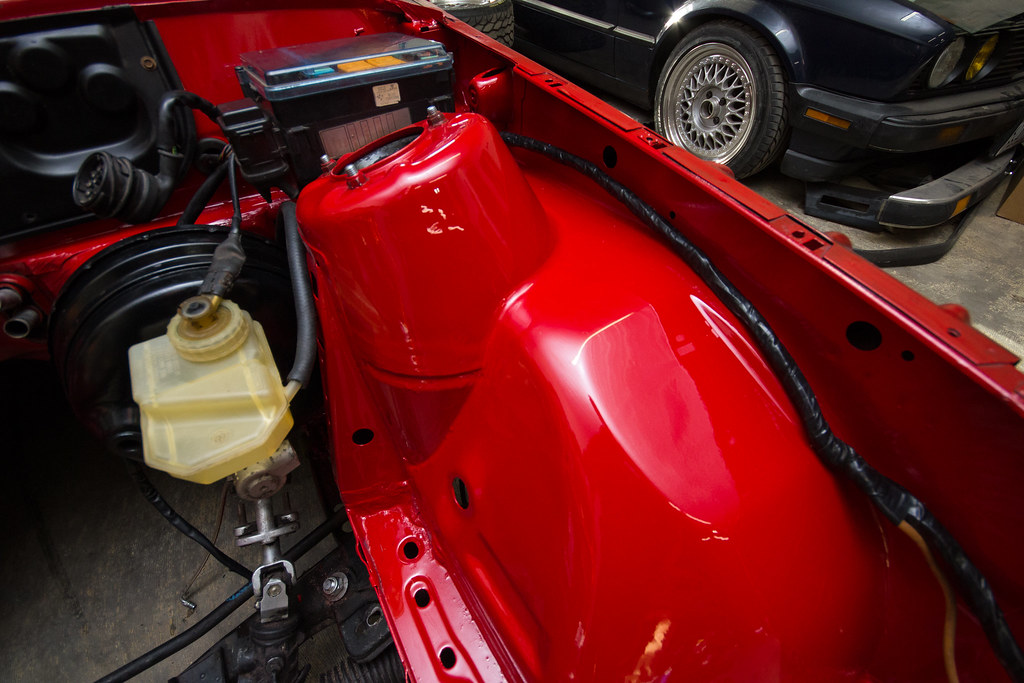
        I know I'm late to the party on the comments, but my engine bay had been shot with a home depot HVLP, and a 10 gal craftsman air compressor. 
        The only large difference is that I didn't have large flat areas that I had to worry about air consistency as much. Using an inline water trap, and a water trap right at the gun makes the largest difference. 
        Painting is something I always wanted to spend more time with, but takes time and space!

        Engine bay for reference. 

        Ben's E30 PaintBen's E30 Paint

        Here it is. @GunMetalGrey can you share what you did the clean up the seam sealer?

        1 Reply Last reply
        0
        • KaiserRollsK
          KaiserRollsK
          KaiserRolls
          wrote on last edited by
          #1065

          I saw those selector joint things when they had the first release. Passed because garagistic lol

          1 Reply Last reply
          1
          • The Full BananaT
            The Full BananaT
            The Full Banana
            wrote on last edited by
            #1066

            Can confirm, the garagistic selector joint is total bullshit. How they decided to release that is beyond me.

            Tom - I have a few BMWs, an overworked Volvo 242, and now a YouTube channel called Drive, Revive, Tinker

            1 Reply Last reply
            0
            • jc43089J
              jc43089J
              jc43089
              wrote on last edited by
              #1067

              Seam sealer will not sand.  it It is soft and turns to melted shreds and smears if you use a wire wheel on it too.  It's very difficult to remove.  It's about like working with the undercoating.  After my experience messing with it I would recommend leaving it alone lol.

              2/94 325i Sedan, Arctic Gray: UUC LTW FW, EVO 3 and DSSR, +.020 Maxsil pistons, ASC delete, Eibach shocks/springs, 16" contour reps 238k
              3/93 325i Coupe, Schwarz 2, Sketchy stance action, ebay turbo, 300k
              '89 325i Vert, Alpine White: 5spd swapped, sold.

              '04 Toyota Sienna: 24V to 24V swap in progress

              '05 Volvo V70R, 6spd.  200k
              '85 Toyota LandCruiser: Lifted, gas hog. 205k
              '99 Nissan Maxima: 5spd, Rusty but trusty winter beater. 252k RIP.

              1 Reply Last reply
              0
              • G
                G
                gilber33
                wrote on last edited by
                #1068

                jc43089 said:

                Seam sealer will not sand.  it It is soft and turns to melted shreds and smears if you use a wire wheel on it too.  It's very difficult to remove.  It's about like working with the undercoating.  After my experience messing with it I would recommend leaving it alone lol.

                I’m not opposed to that. Given it’s texture, I would be concerned I wouldn’t be able to clean it well for paint to stick to it. But maybe since it’s so textured paint will stick to it really well. 
                 

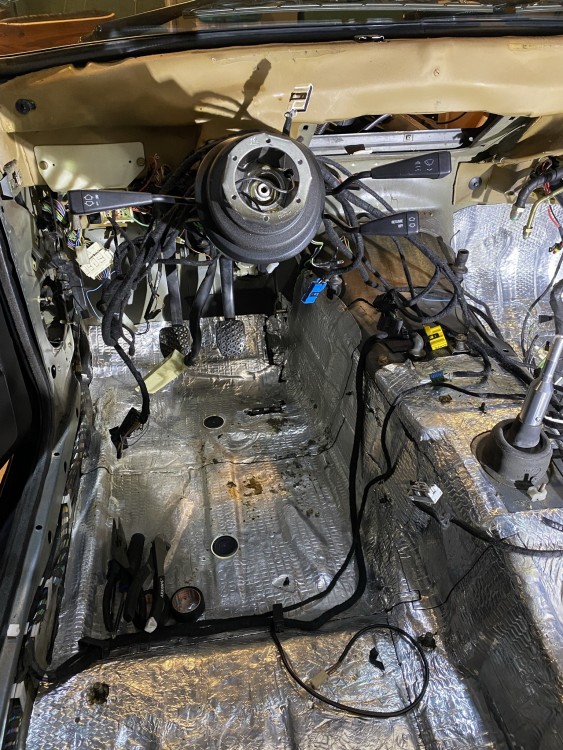
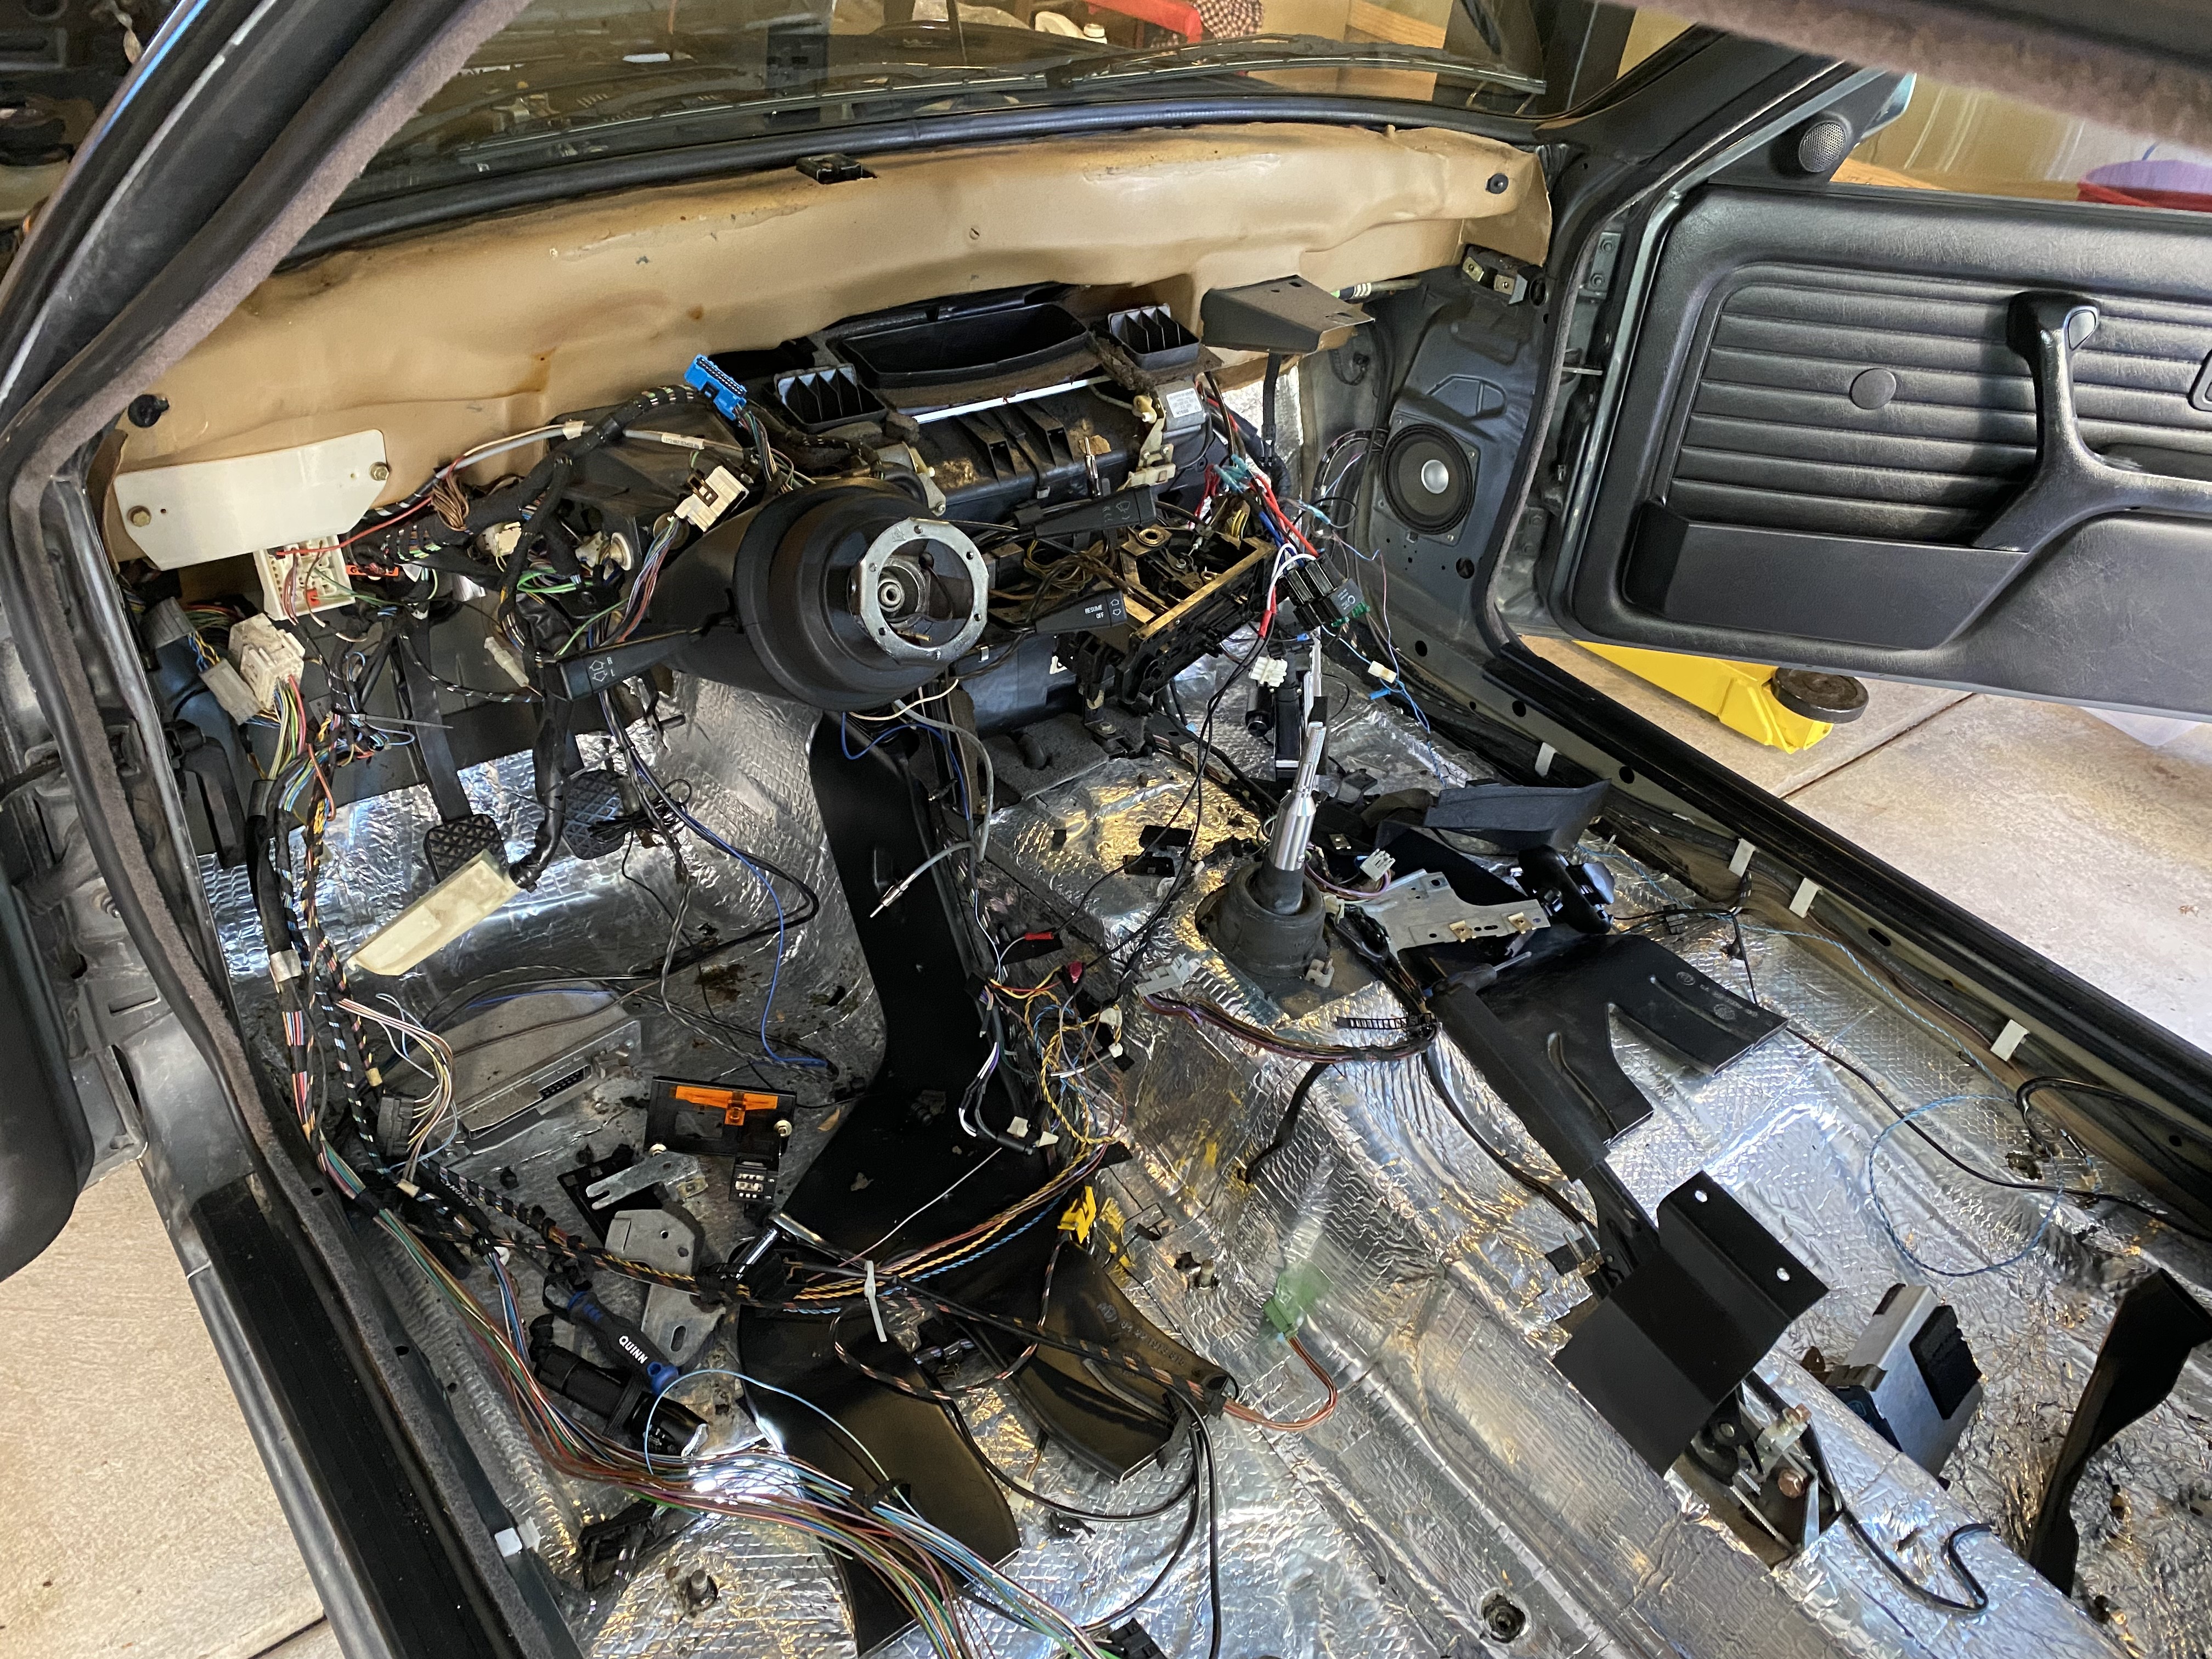
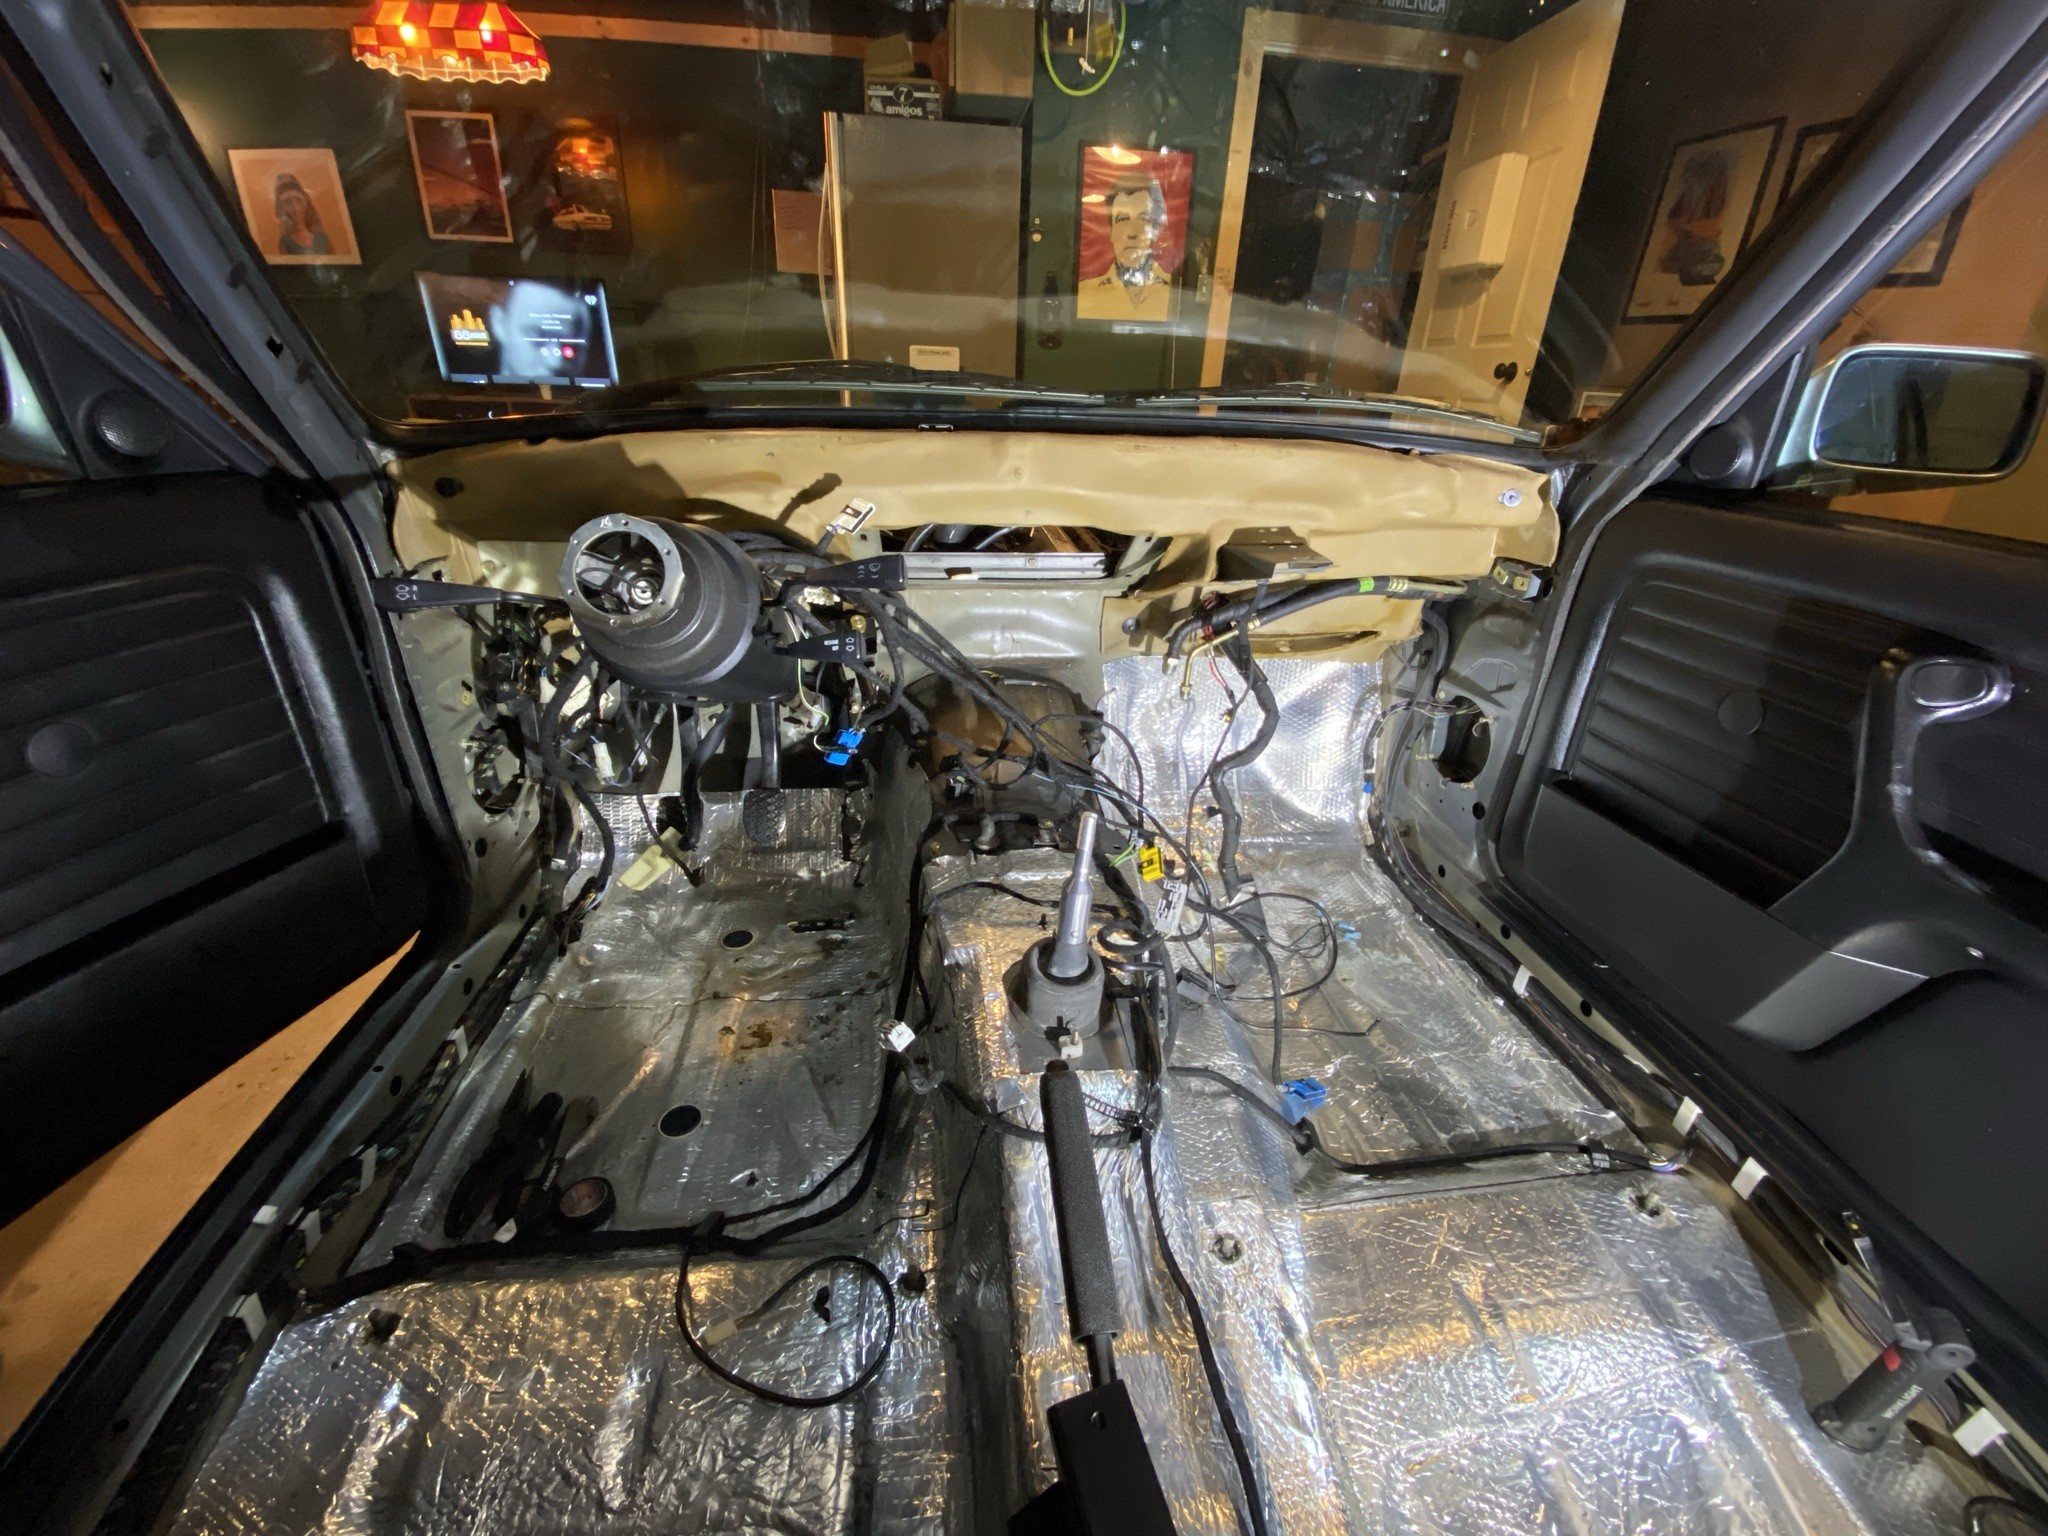
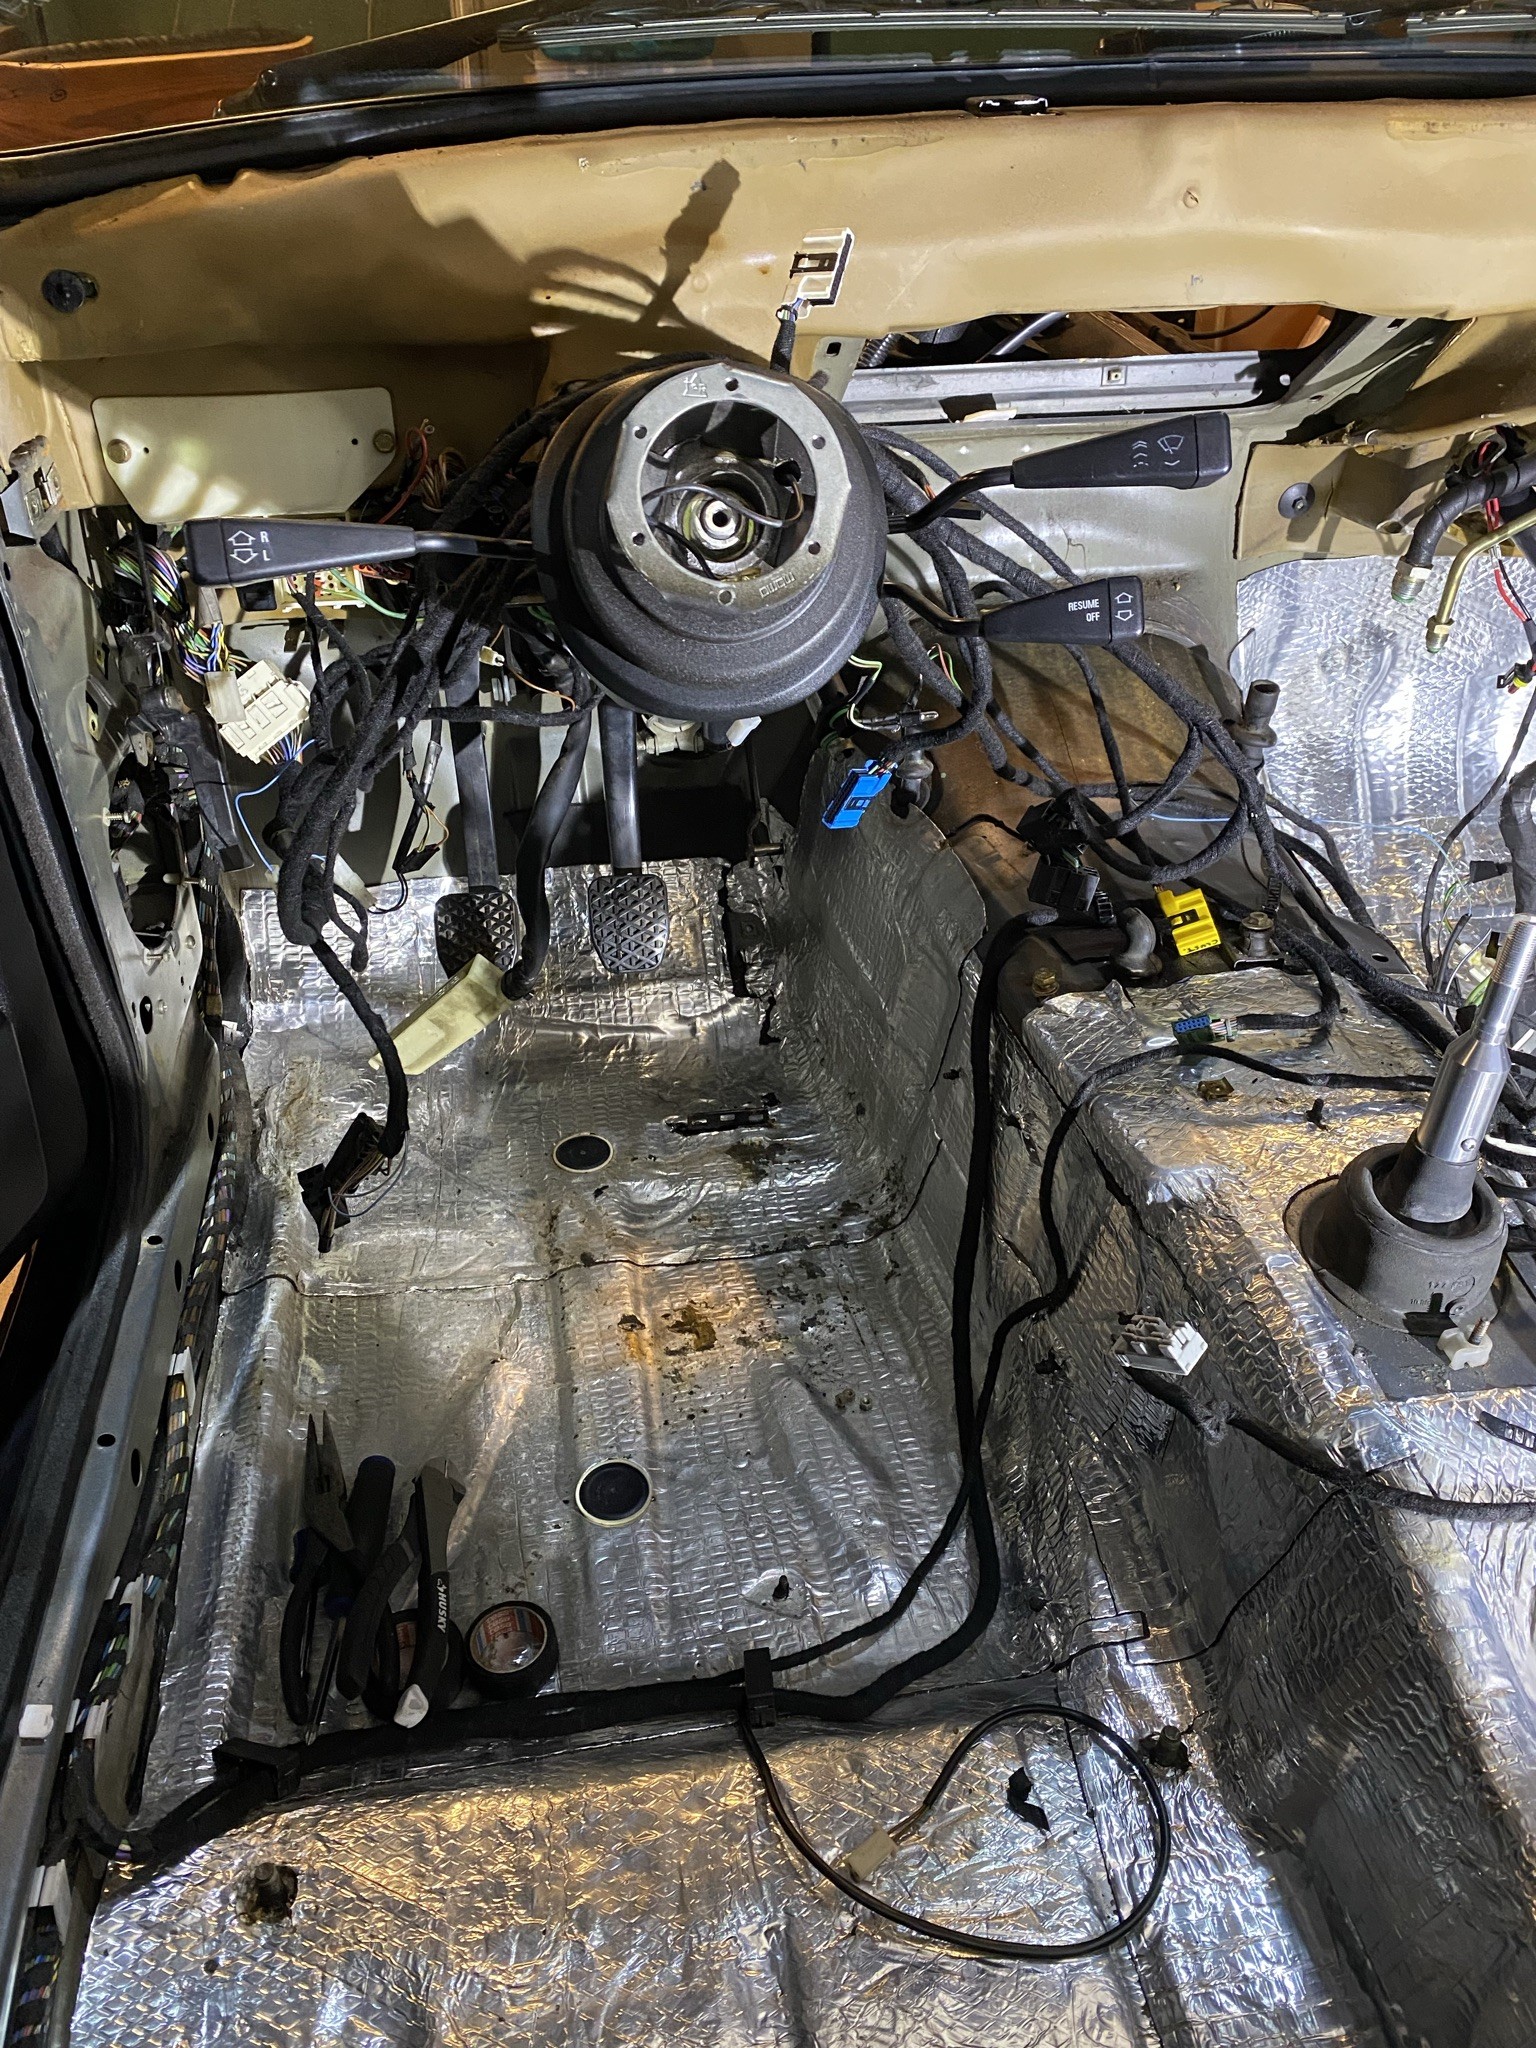
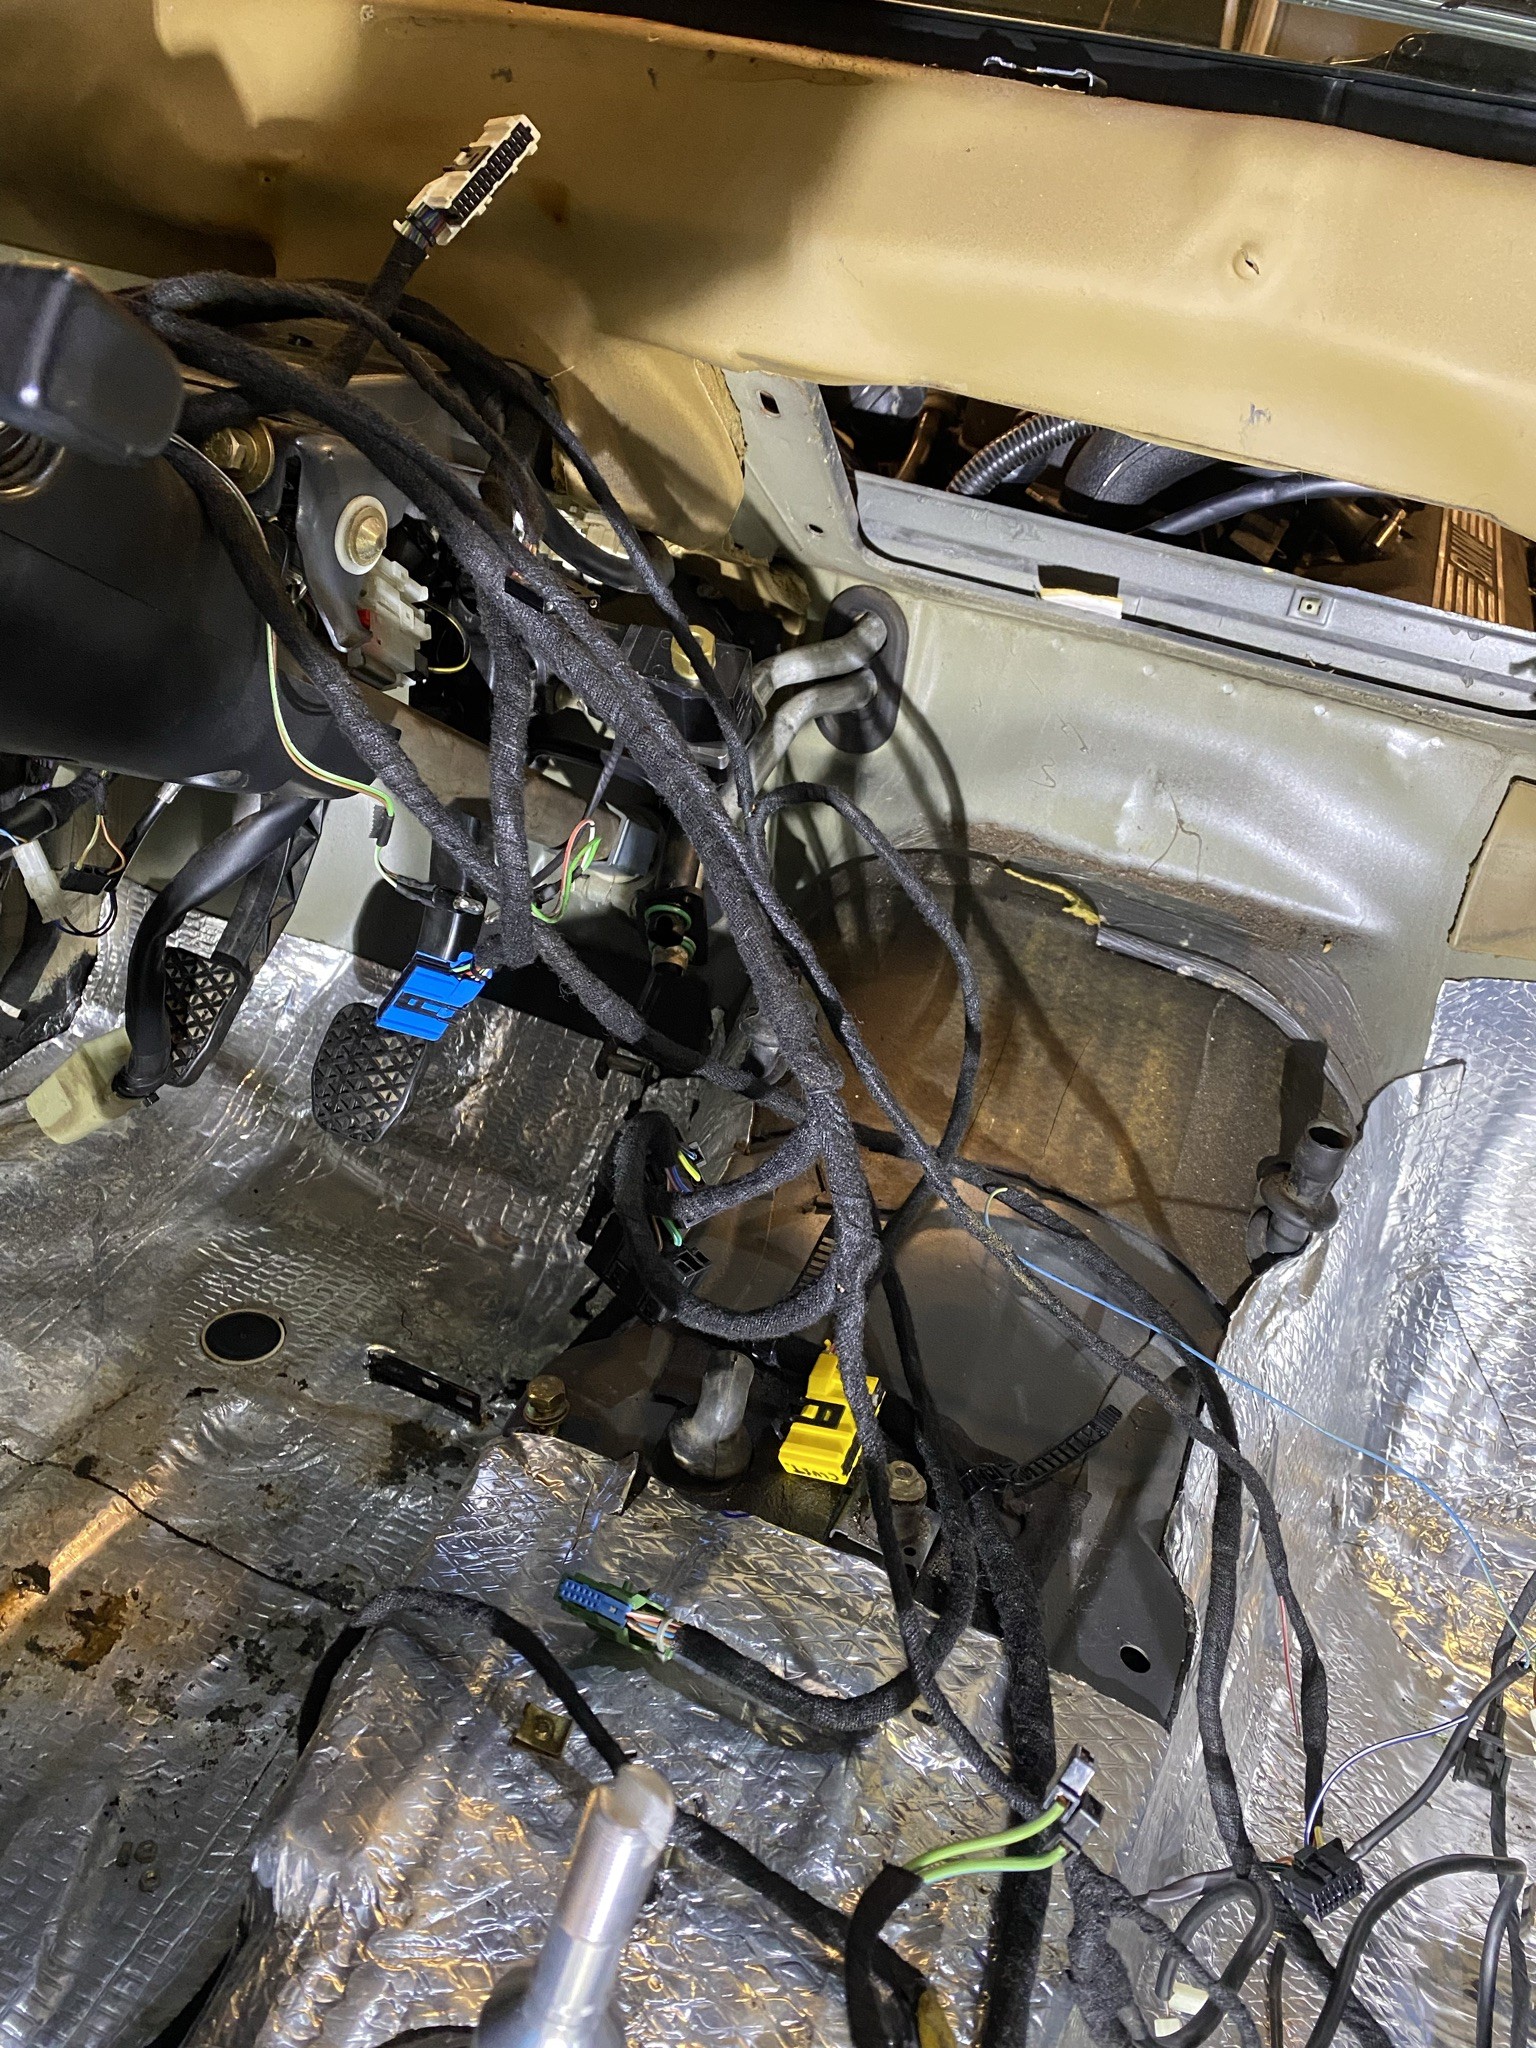
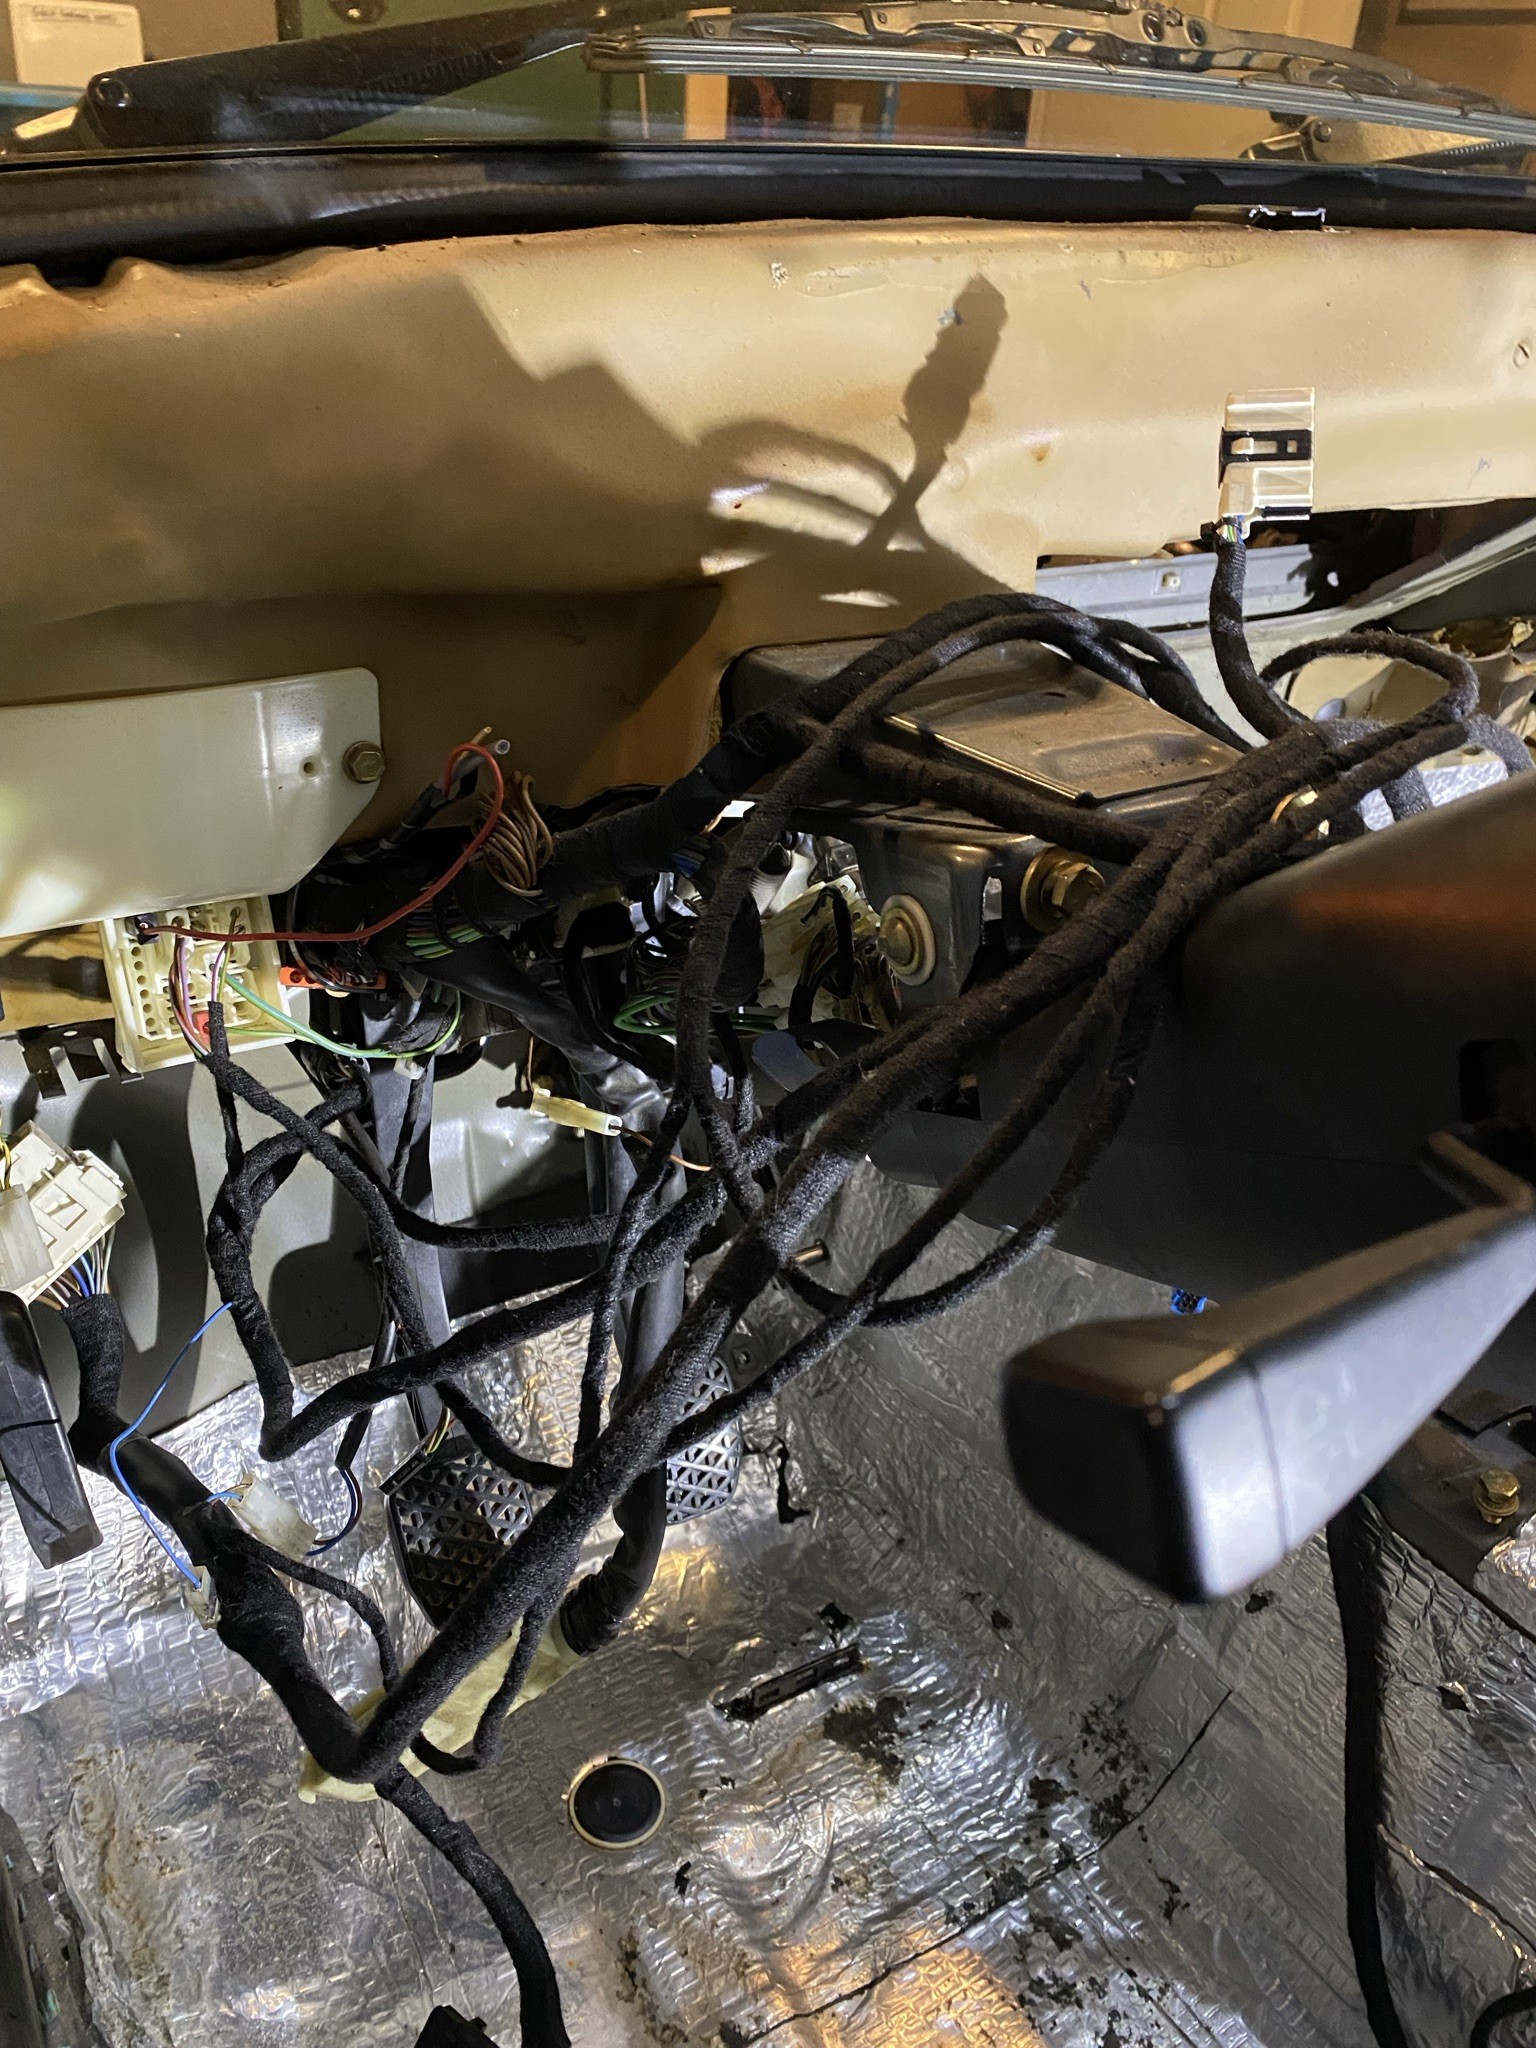
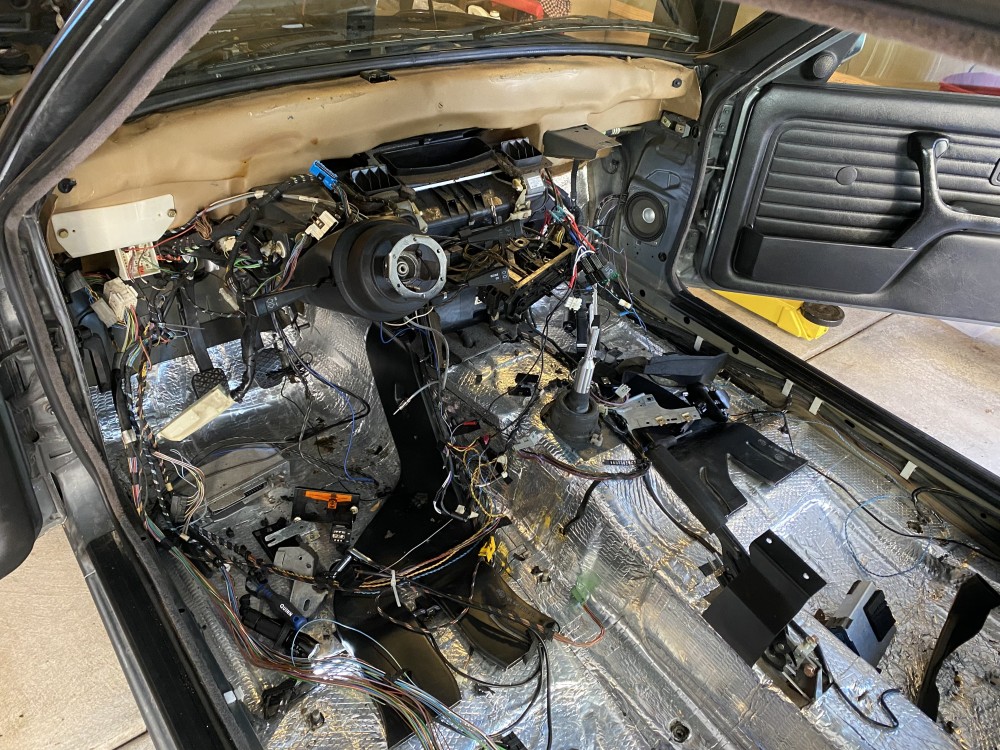
                Removed the dash  today, was pretty straightforward other than the write up failing to mention all of the wire harnesses pass through the ducting on it. 
                5809AB10-8E12-4B7B-948F-4F298751AE48.jpeg

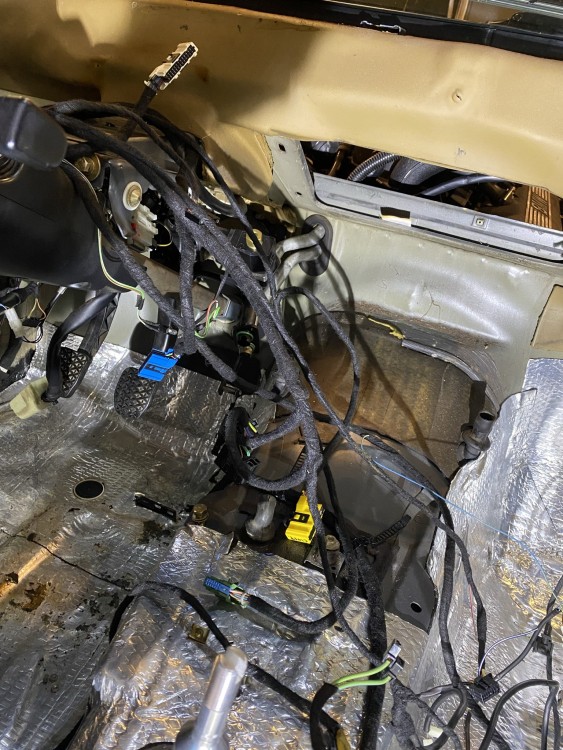
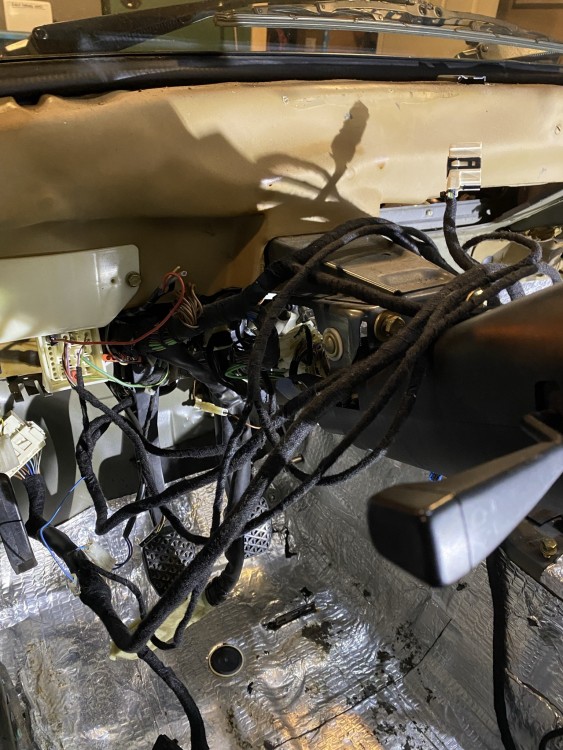
                I’m going to work on cleaning up all the wiring. I’m going to remove most of the stereo stuff since I’m going to do an amp and new speakers and will reroute all the wires a cleaner way. Also taping everything and probably use the wire loom I used in the engine bay in here too. 
                 

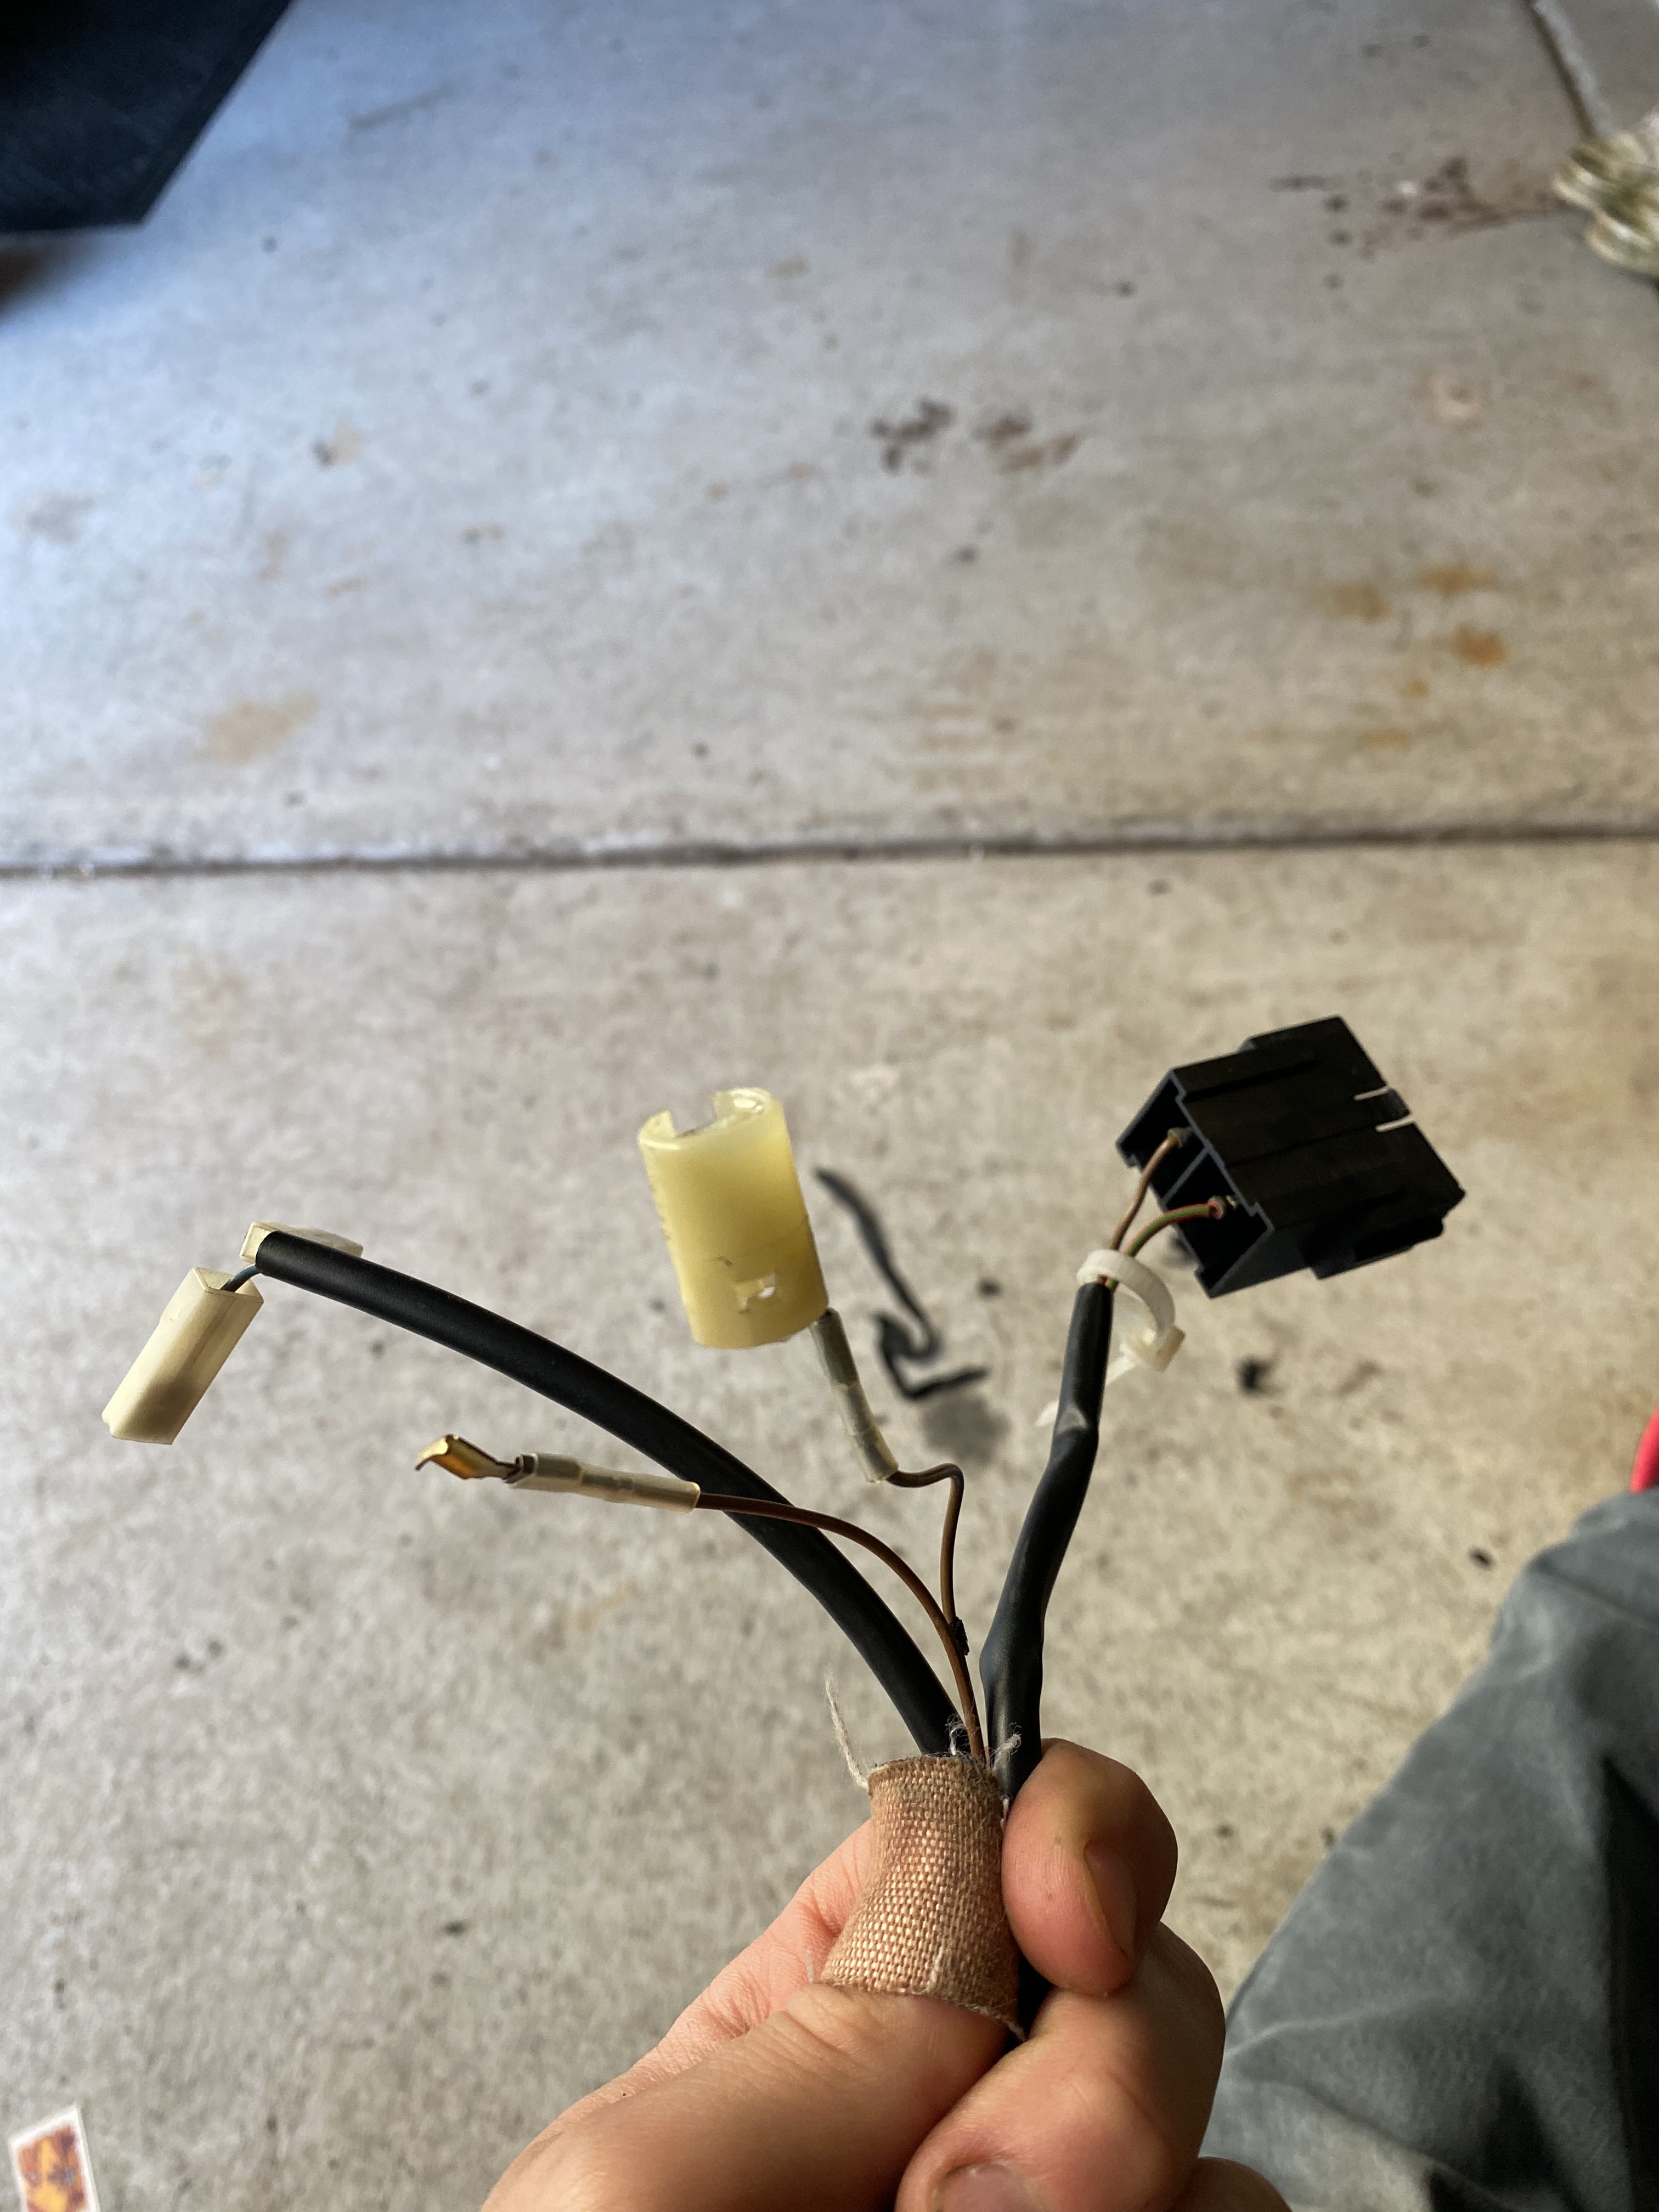
                All of this stuff running over to the glovebox area I never used. Would it be safe to just snip them  off and heat shrink the ends? The only purpose of that would be to clean and simplify things. 
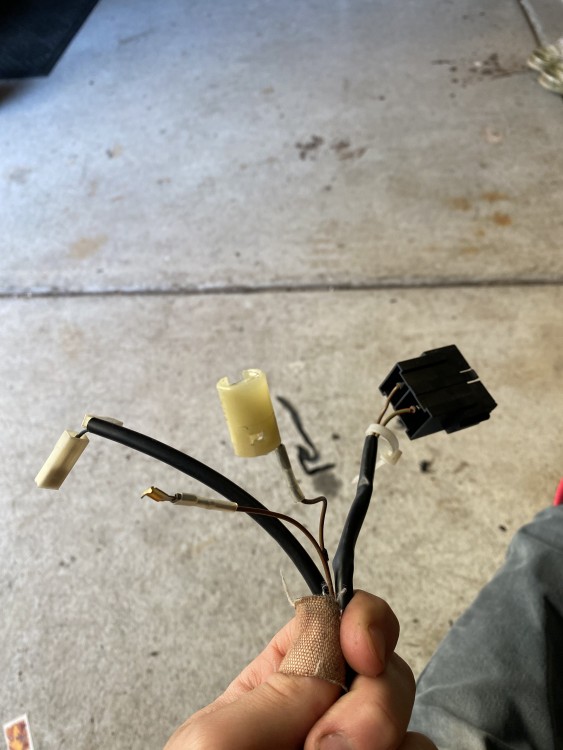
                 

                E7E7C3D4-85C7-4A8B-9CB9-3473FF43F2AE.jpeg

                1 Reply Last reply
                0
                • G
                  G
                  gilber33
                  wrote on last edited by
                  #1069

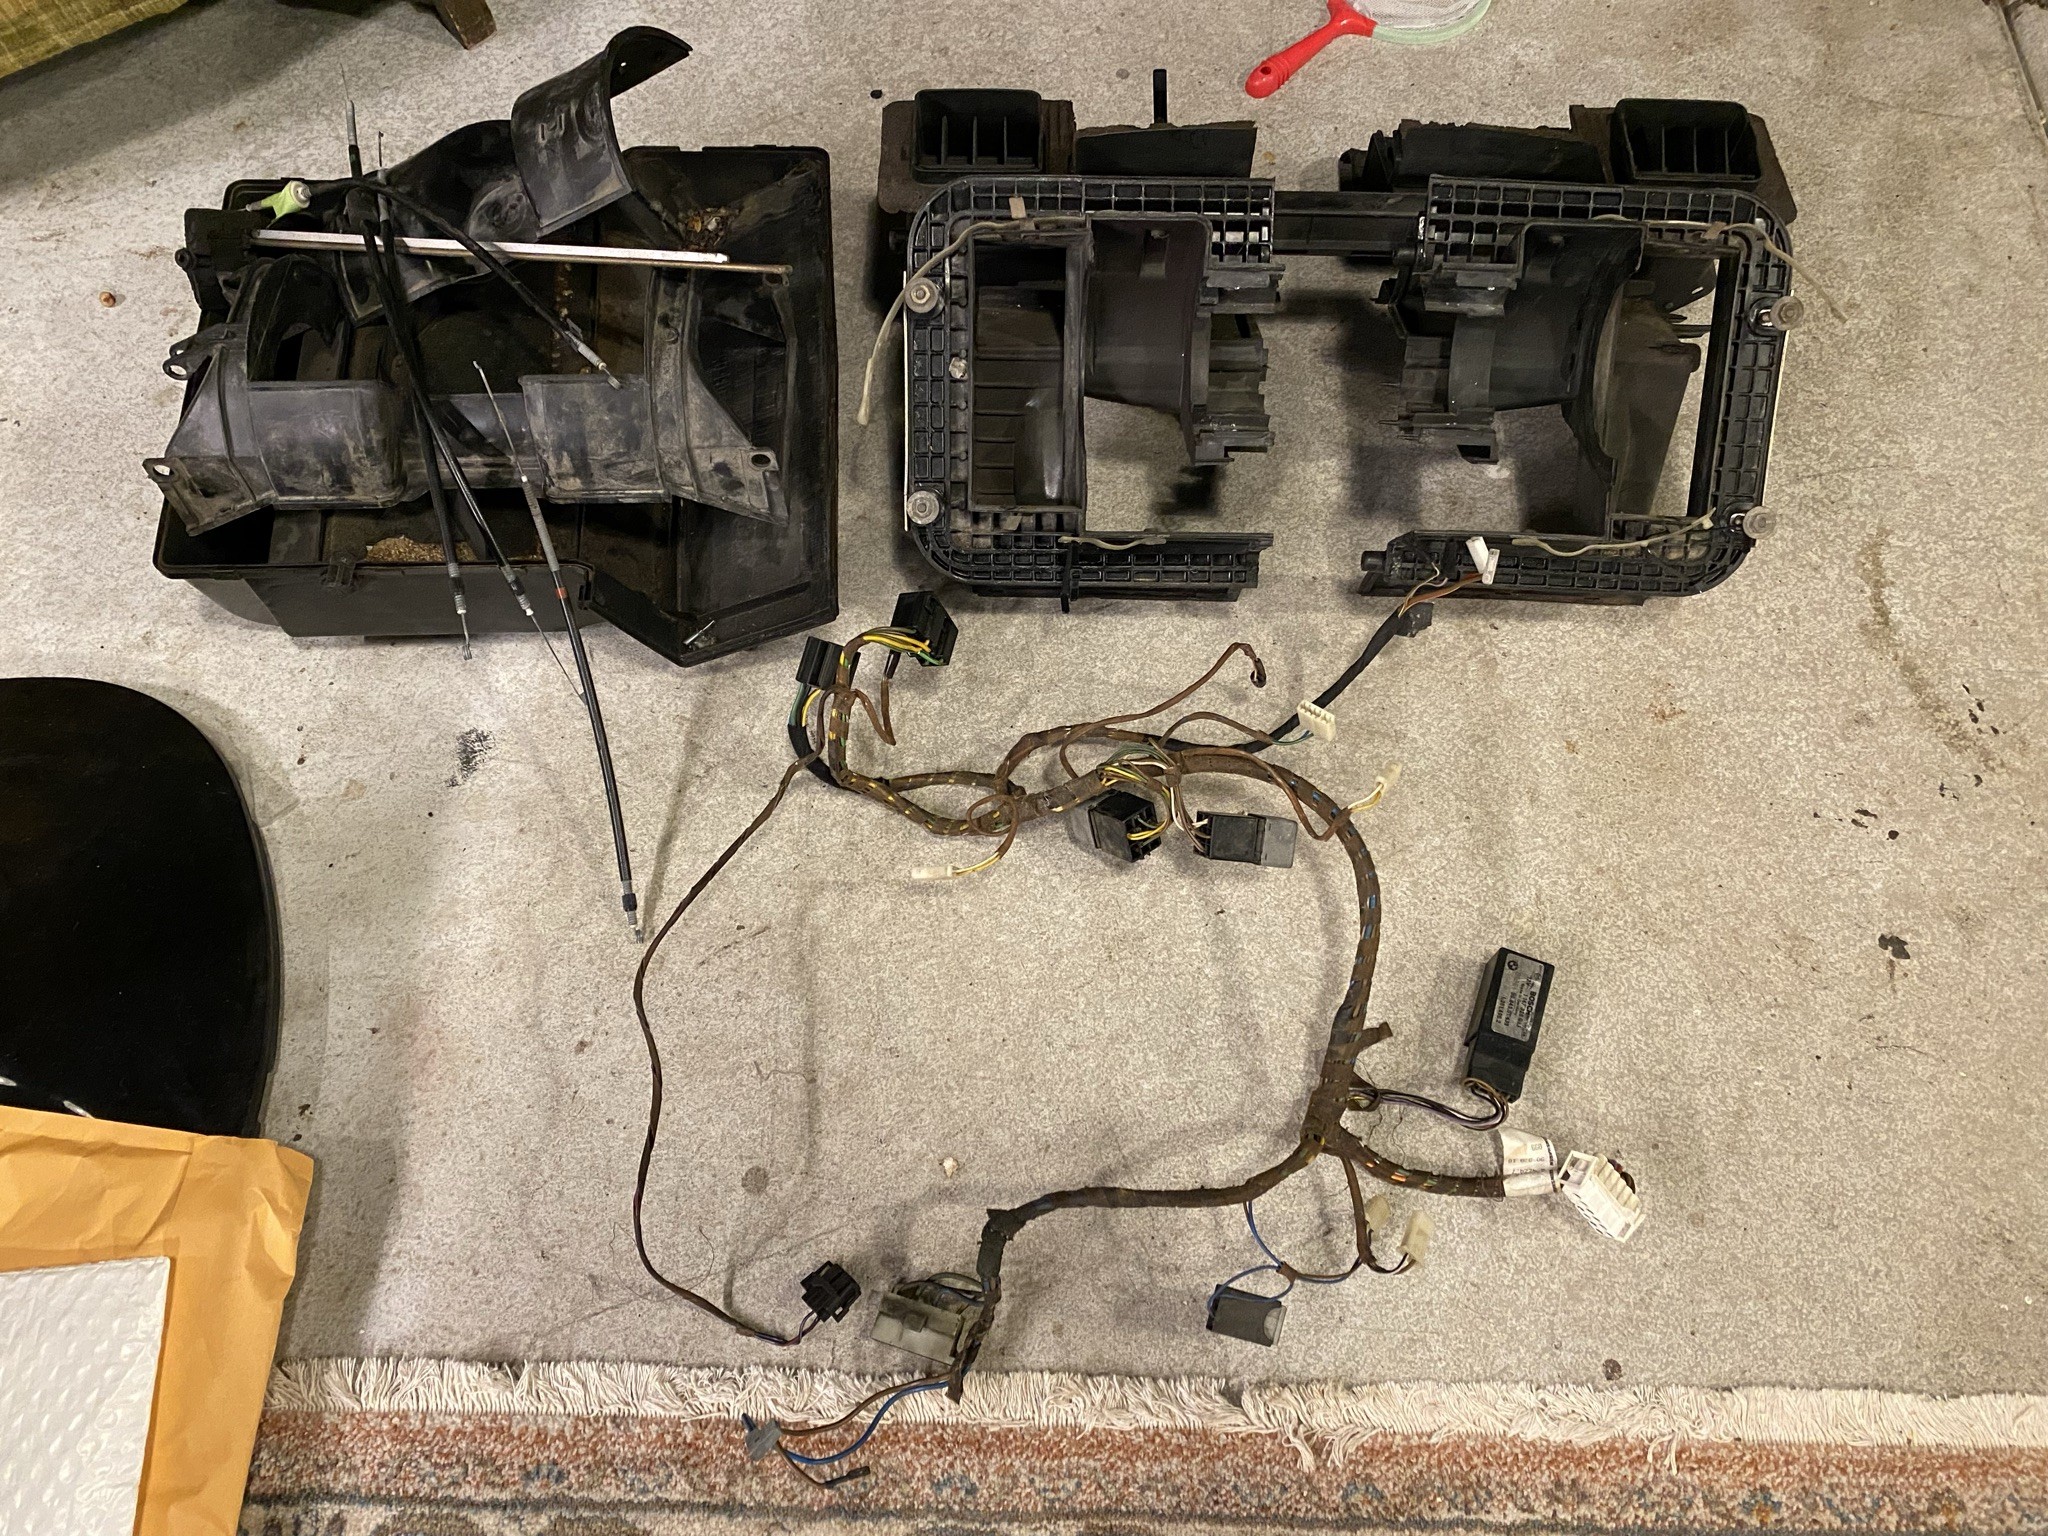
                  Got the heater box out today. It was pretty simple. Foam was of course very deteriorated. It's really neat how simple cars actually are when you break them down into all of their separate systems. 
                   

                  B72D3112-21BF-4563-A7DE-D1590D2247F6.jpeg

                  1 Reply Last reply
                  0
                  • YoungCRY
                    YoungCRY
                    YoungCR
                    wrote on last edited by
                    #1070

                    @jc43089 would a needle gun be gentle enough to chip the existing paint off the seam sealer but not smash it like play dough? Even then I'd recommend that tool for most of the paint/rust removal as well. It's great for any scaly rust areas and harbor freight has 2 sizes available.

                    Chris Young
                    BMWCCA #458972
                    1986 528e/5  | 1994 530i/5 | 1995 540i/6 | 2013 X5 35d | 1998 C1500 Suburban | 1995 K2500 Suburban

                    1 Reply Last reply
                    0
                    • jc43089J
                      jc43089J
                      jc43089
                      wrote on last edited by
                      #1071

                      YoungCR said:

                      @jc43089 would a needle gun be gentle enough to chip the existing paint off the seam sealer but not smash it like play dough? Even then I'd recommend that tool for most of the paint/rust removal as well. It's great for any scaly rust areas and harbor freight has 2 sizes available.

                      Not sure, I would guess poor results but maybe it would work.

                      2/94 325i Sedan, Arctic Gray: UUC LTW FW, EVO 3 and DSSR, +.020 Maxsil pistons, ASC delete, Eibach shocks/springs, 16" contour reps 238k
                      3/93 325i Coupe, Schwarz 2, Sketchy stance action, ebay turbo, 300k
                      '89 325i Vert, Alpine White: 5spd swapped, sold.

                      '04 Toyota Sienna: 24V to 24V swap in progress

                      '05 Volvo V70R, 6spd.  200k
                      '85 Toyota LandCruiser: Lifted, gas hog. 205k
                      '99 Nissan Maxima: 5spd, Rusty but trusty winter beater. 252k RIP.

                      1 Reply Last reply
                      0
                      • G
                        G
                        gilber33
                        wrote on last edited by
                        #1072

                        YoungCR said:

                        @jc43089 would a needle gun be gentle enough to chip the existing paint off the seam sealer but not smash it like play dough? Even then I'd recommend that tool for most of the paint/rust removal as well. It's great for any scaly rust areas and harbor freight has 2 sizes available.

                        I forgot about those. Would make cleaning up the frame rails a lot easier - which are the main spaces I need to clean up, closer to the firewall. 
                         

                        There was one spongy spot under the washer fluid reservoir that I could push my finger through if I wanted to.

                        1 Reply Last reply
                        0
                        • G
                          G
                          gilber33
                          wrote on last edited by
                          #1073

                          jc43089 said:

                          Not sure, I would guess poor results but maybe it would work.

                          Is there a special primer I could use that would adhere to the painted surfaces better if I couldn’t fully prep the seam sealer surface?

                          1 Reply Last reply
                          0
                          • G
                            G
                            gilber33
                            wrote on last edited by
                            #1074

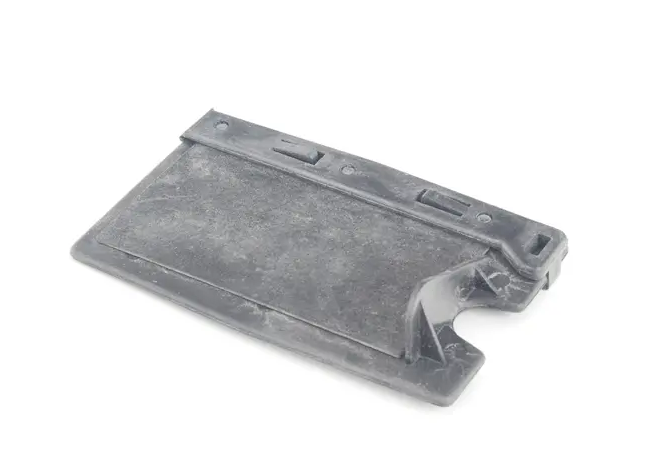
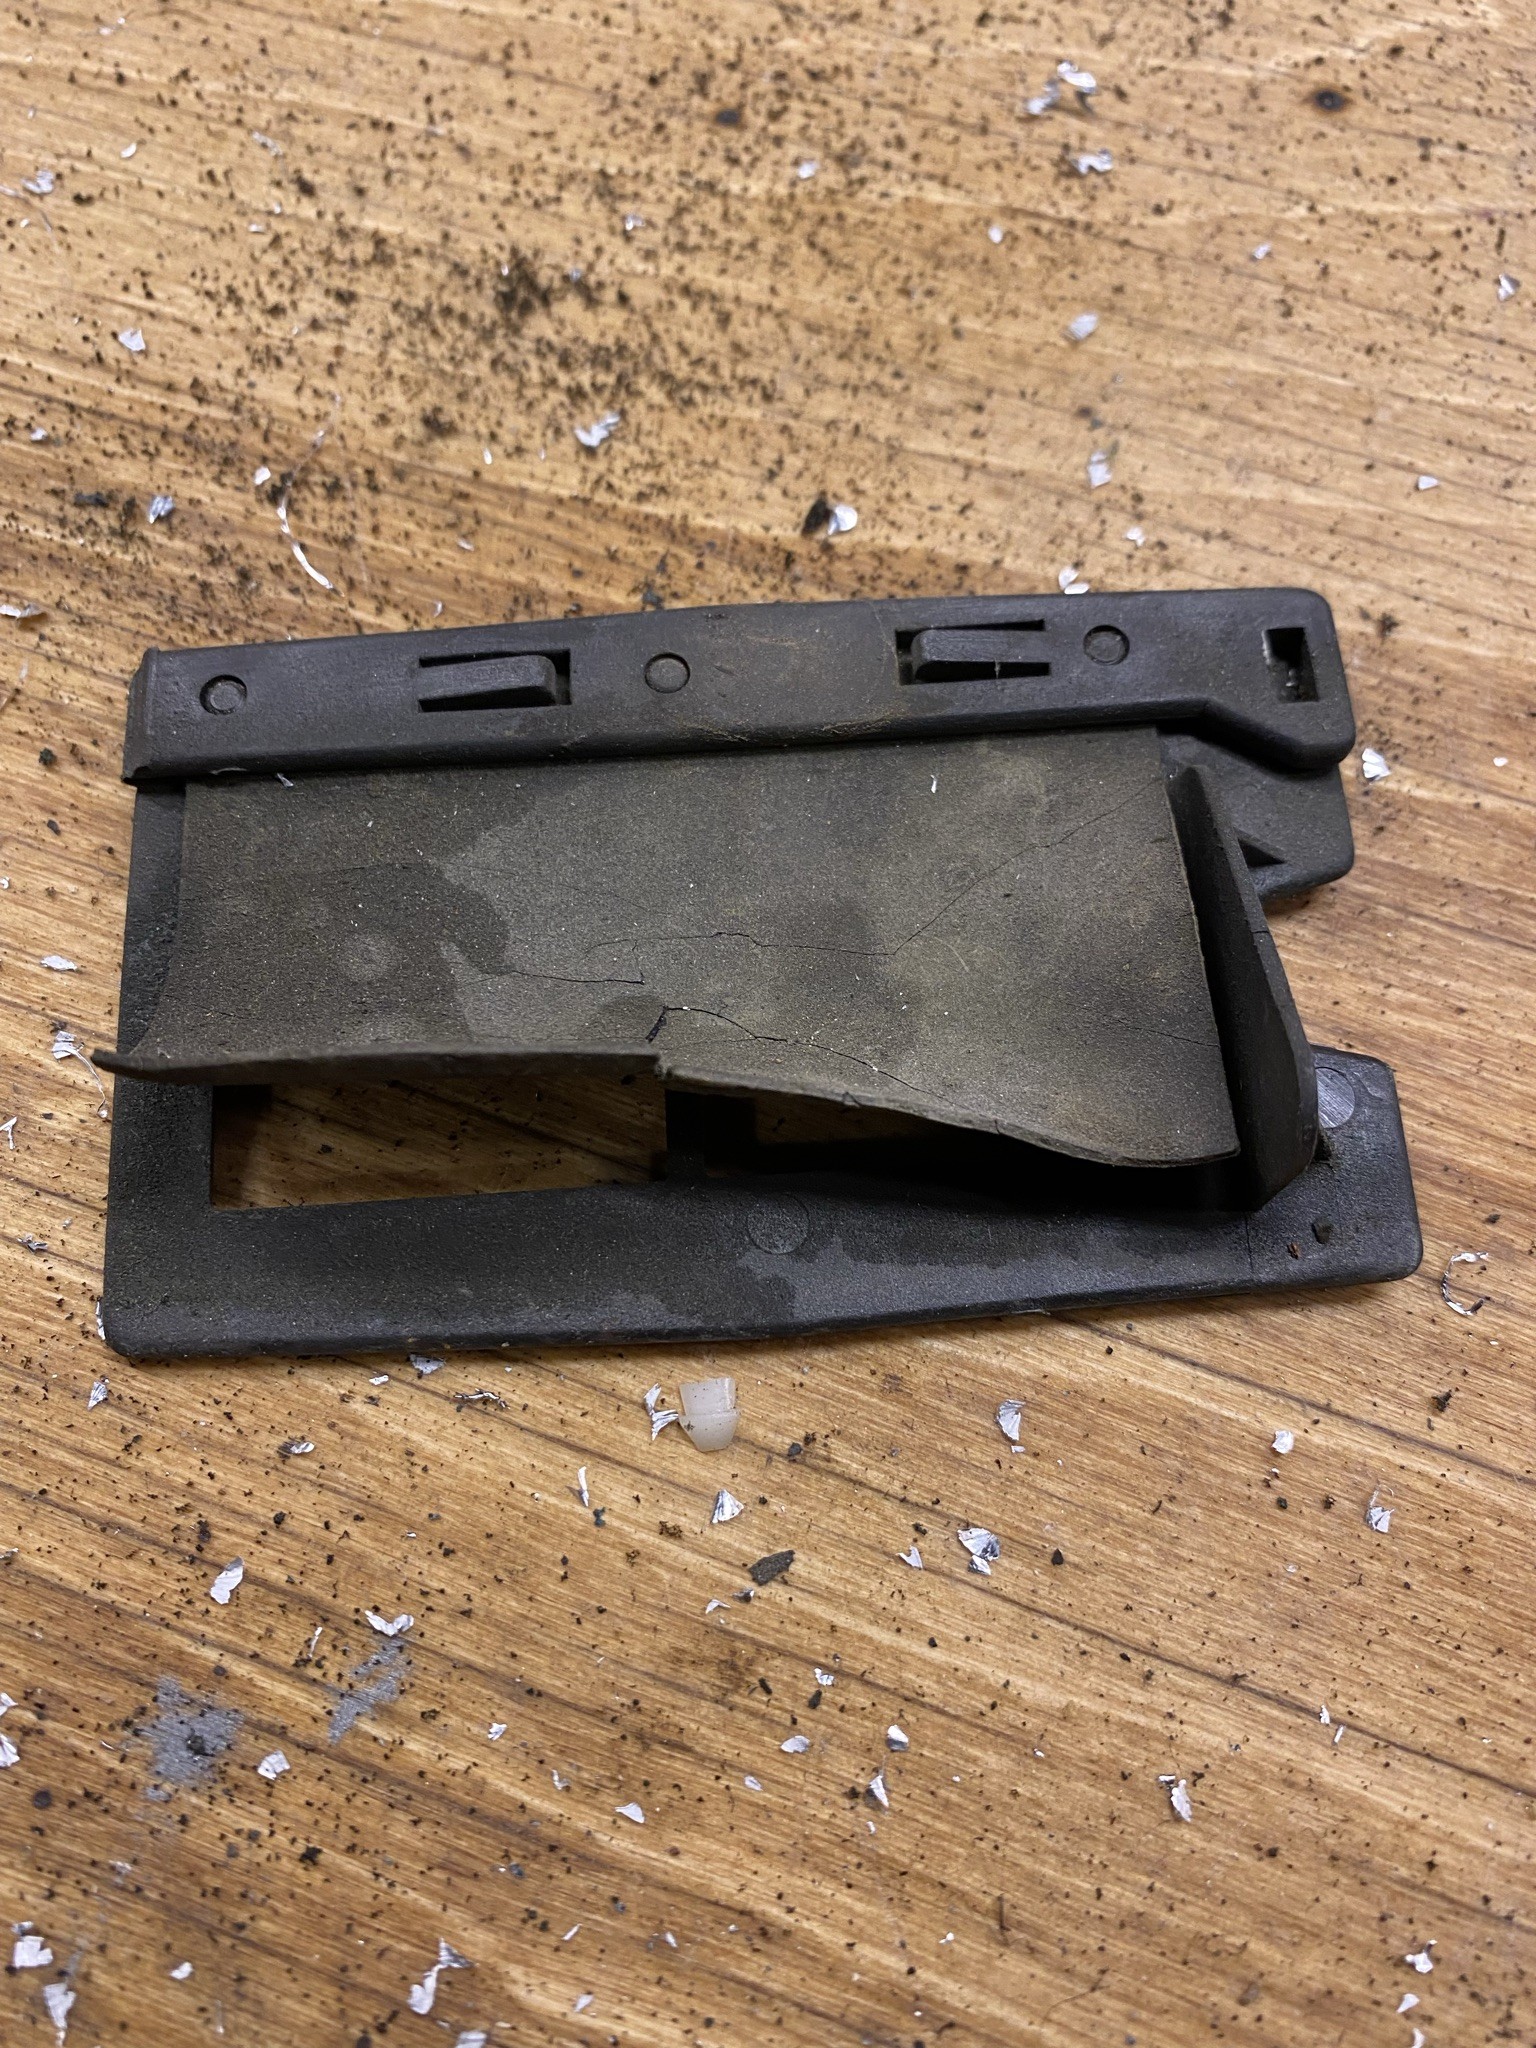
                            I suspect I may need to get somewhat creative with the non-return flap found in the HVAC box. It's this: 
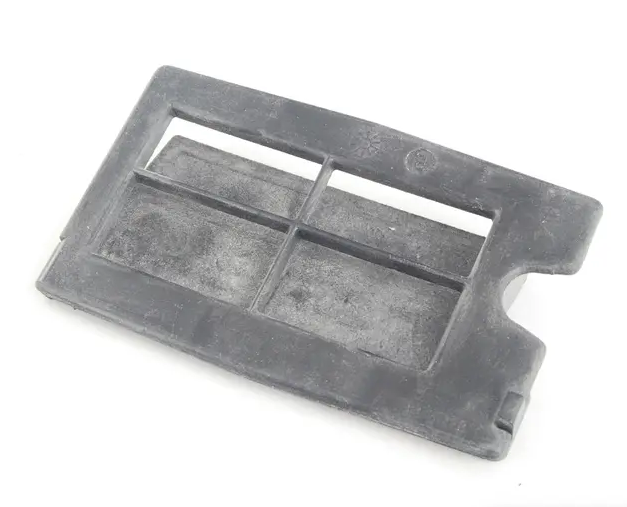
                            image.png

                            image.png

                            It looks like I could open the "clip" at the top and swap in a new piece of rubber. Other than roaming the isles of Menards looking for a suitable material that I could cut up, does anyone have any suggestions of a comparable material I could use? It's just rubber. 

                            I ordered this and the blower motor cover straps from ECS and they were both about two weeks out and I just received an email that they are now 3-5 weeks. My fear is at 5 weeks they email again and say they're another 3-5 weeks out or unobtainable. BMW of North Milwaukee had the straps in their system and those will be here in a few days, but this flap is coming from Germany. It doesn't appear to be available on any of the other online stores.

                            1 Reply Last reply
                            0
                            • KaiserRollsK
                              KaiserRollsK
                              KaiserRolls
                              wrote on last edited by
                              #1075

                              https://www.amazon.com/SPAL-30130012-Replacement-Rubber-Shroud/dp/B019XDLULW
                               

                              rubber flaps for radiator shroud pass throughs might be the right “weight/thickness”

                              1 Reply Last reply
                              0
                              • G
                                G
                                gilber33
                                wrote on last edited by
                                #1076

                                KaiserRolls said:

                                https://www.amazon.com/SPAL-30130012-Replacement-Rubber-Shroud/dp/B019XDLULW
                                 

                                rubber flaps for radiator shroud pass throughs might be the right “weight/thickness” 

                                Exactly what I was looking for. Thanks!

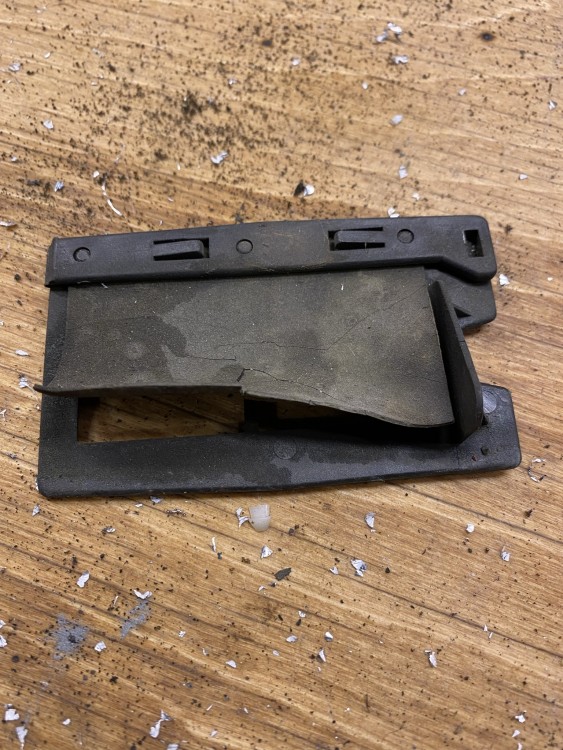
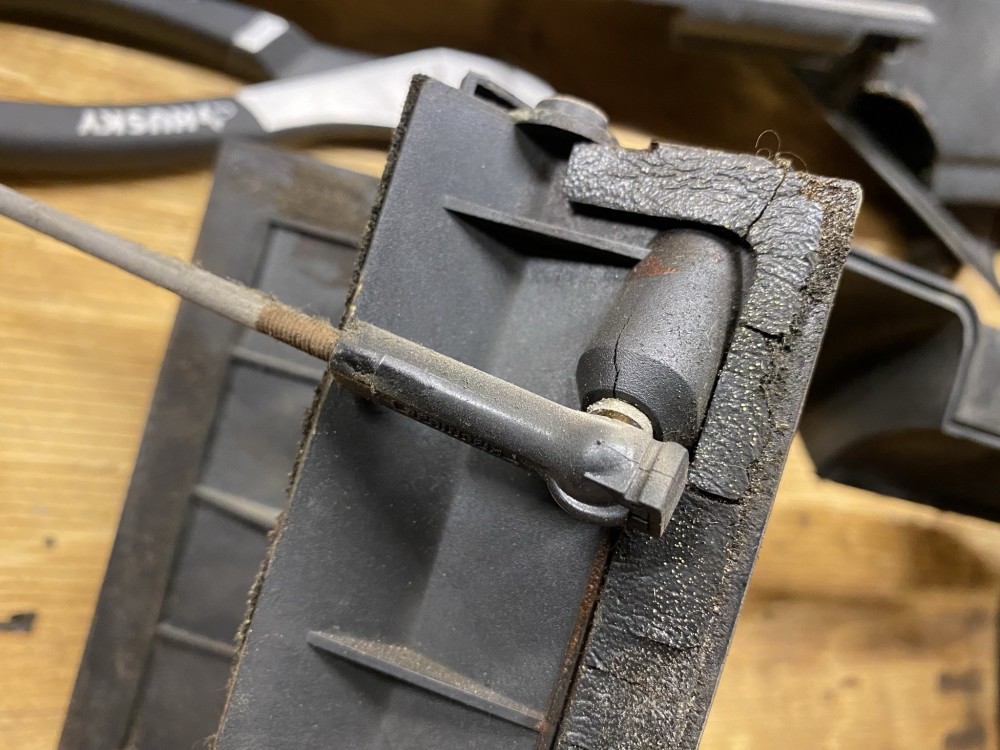
                                Got the HVAC box completely apart last night so I can clean it out and replace all the foam on it. It is pretty disgusting. Lots of dead bugs inside of it. I guess that's what happens when they didn't come with filters. 
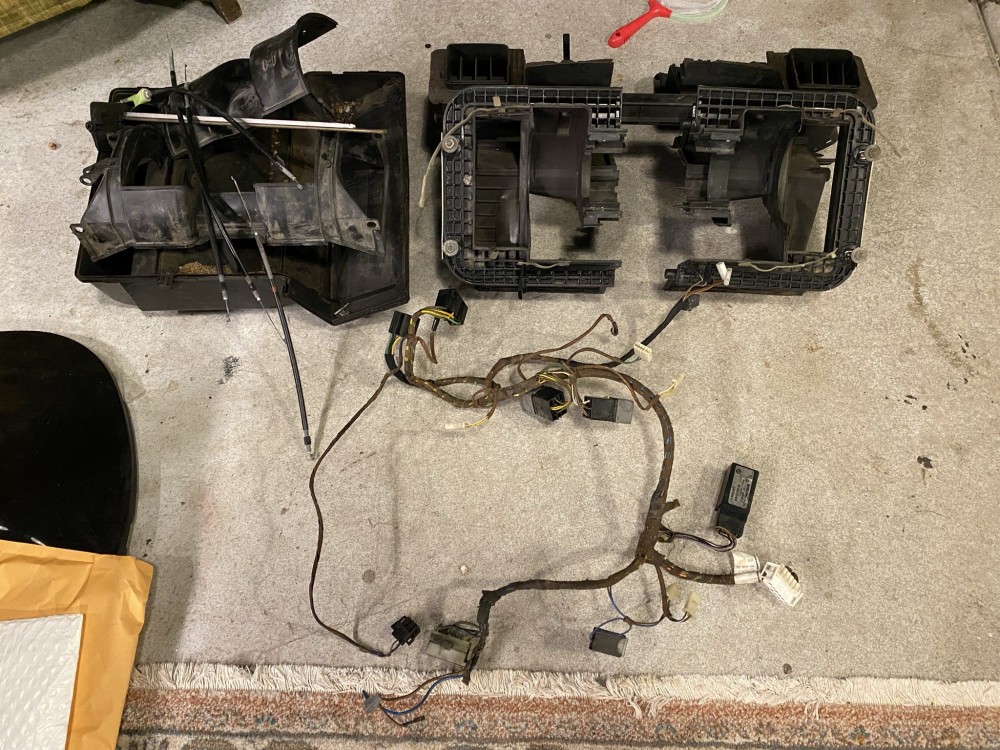
                                IMG4619.JPEG

                                Crusty "non-return" flap:

                                IMG4620.JPEG

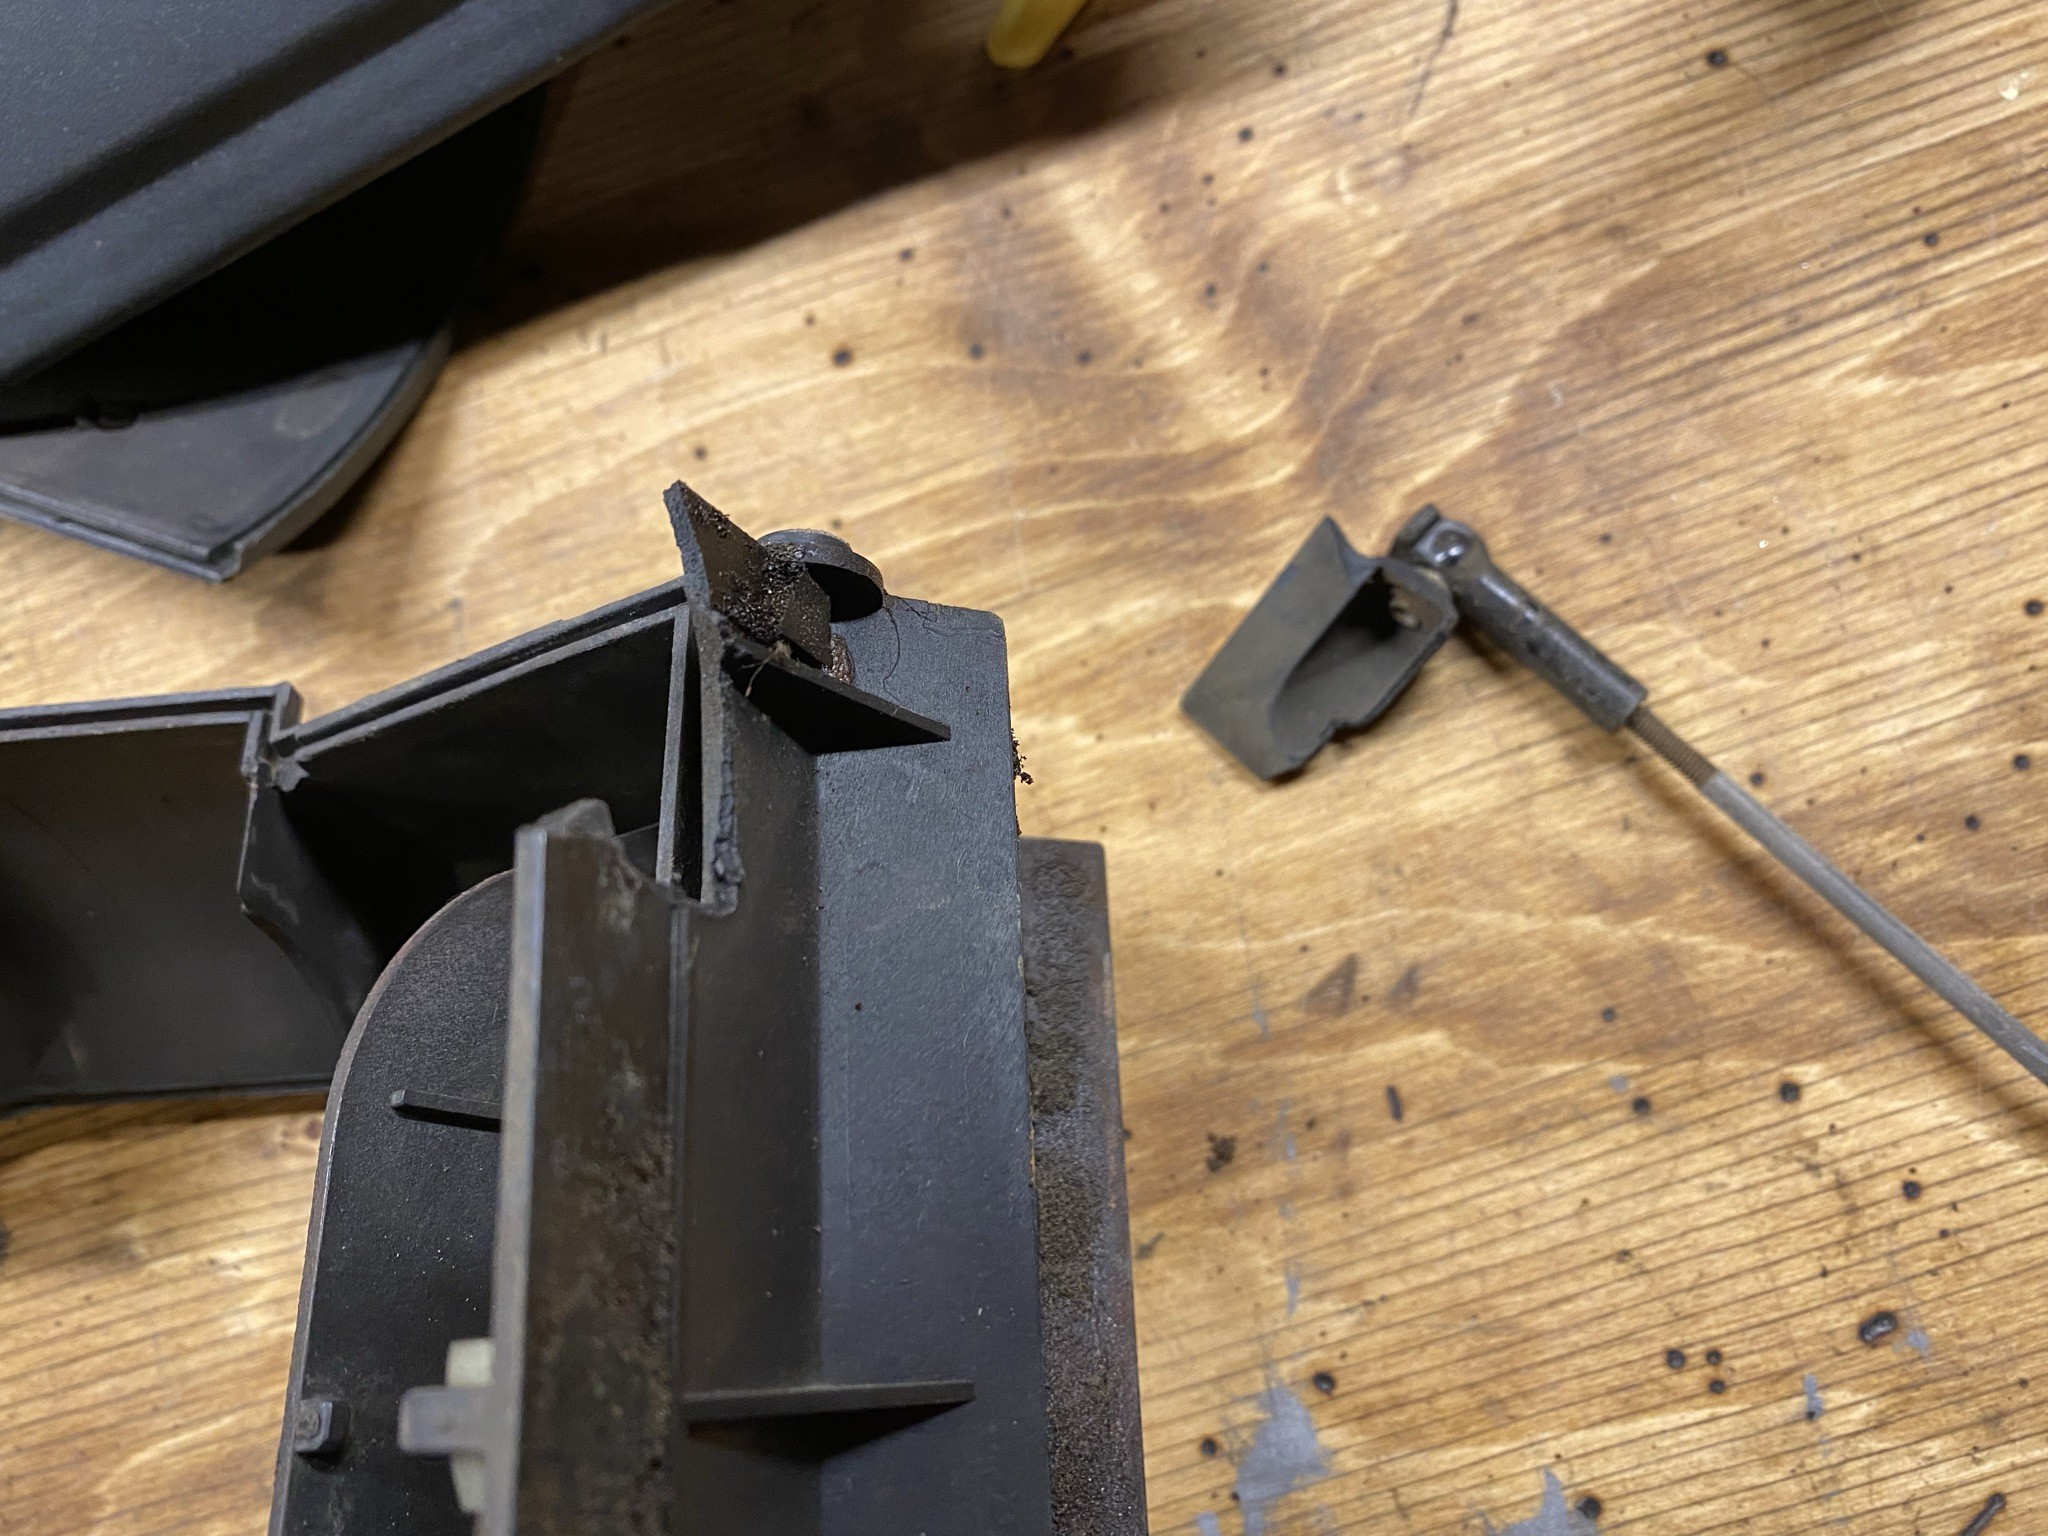
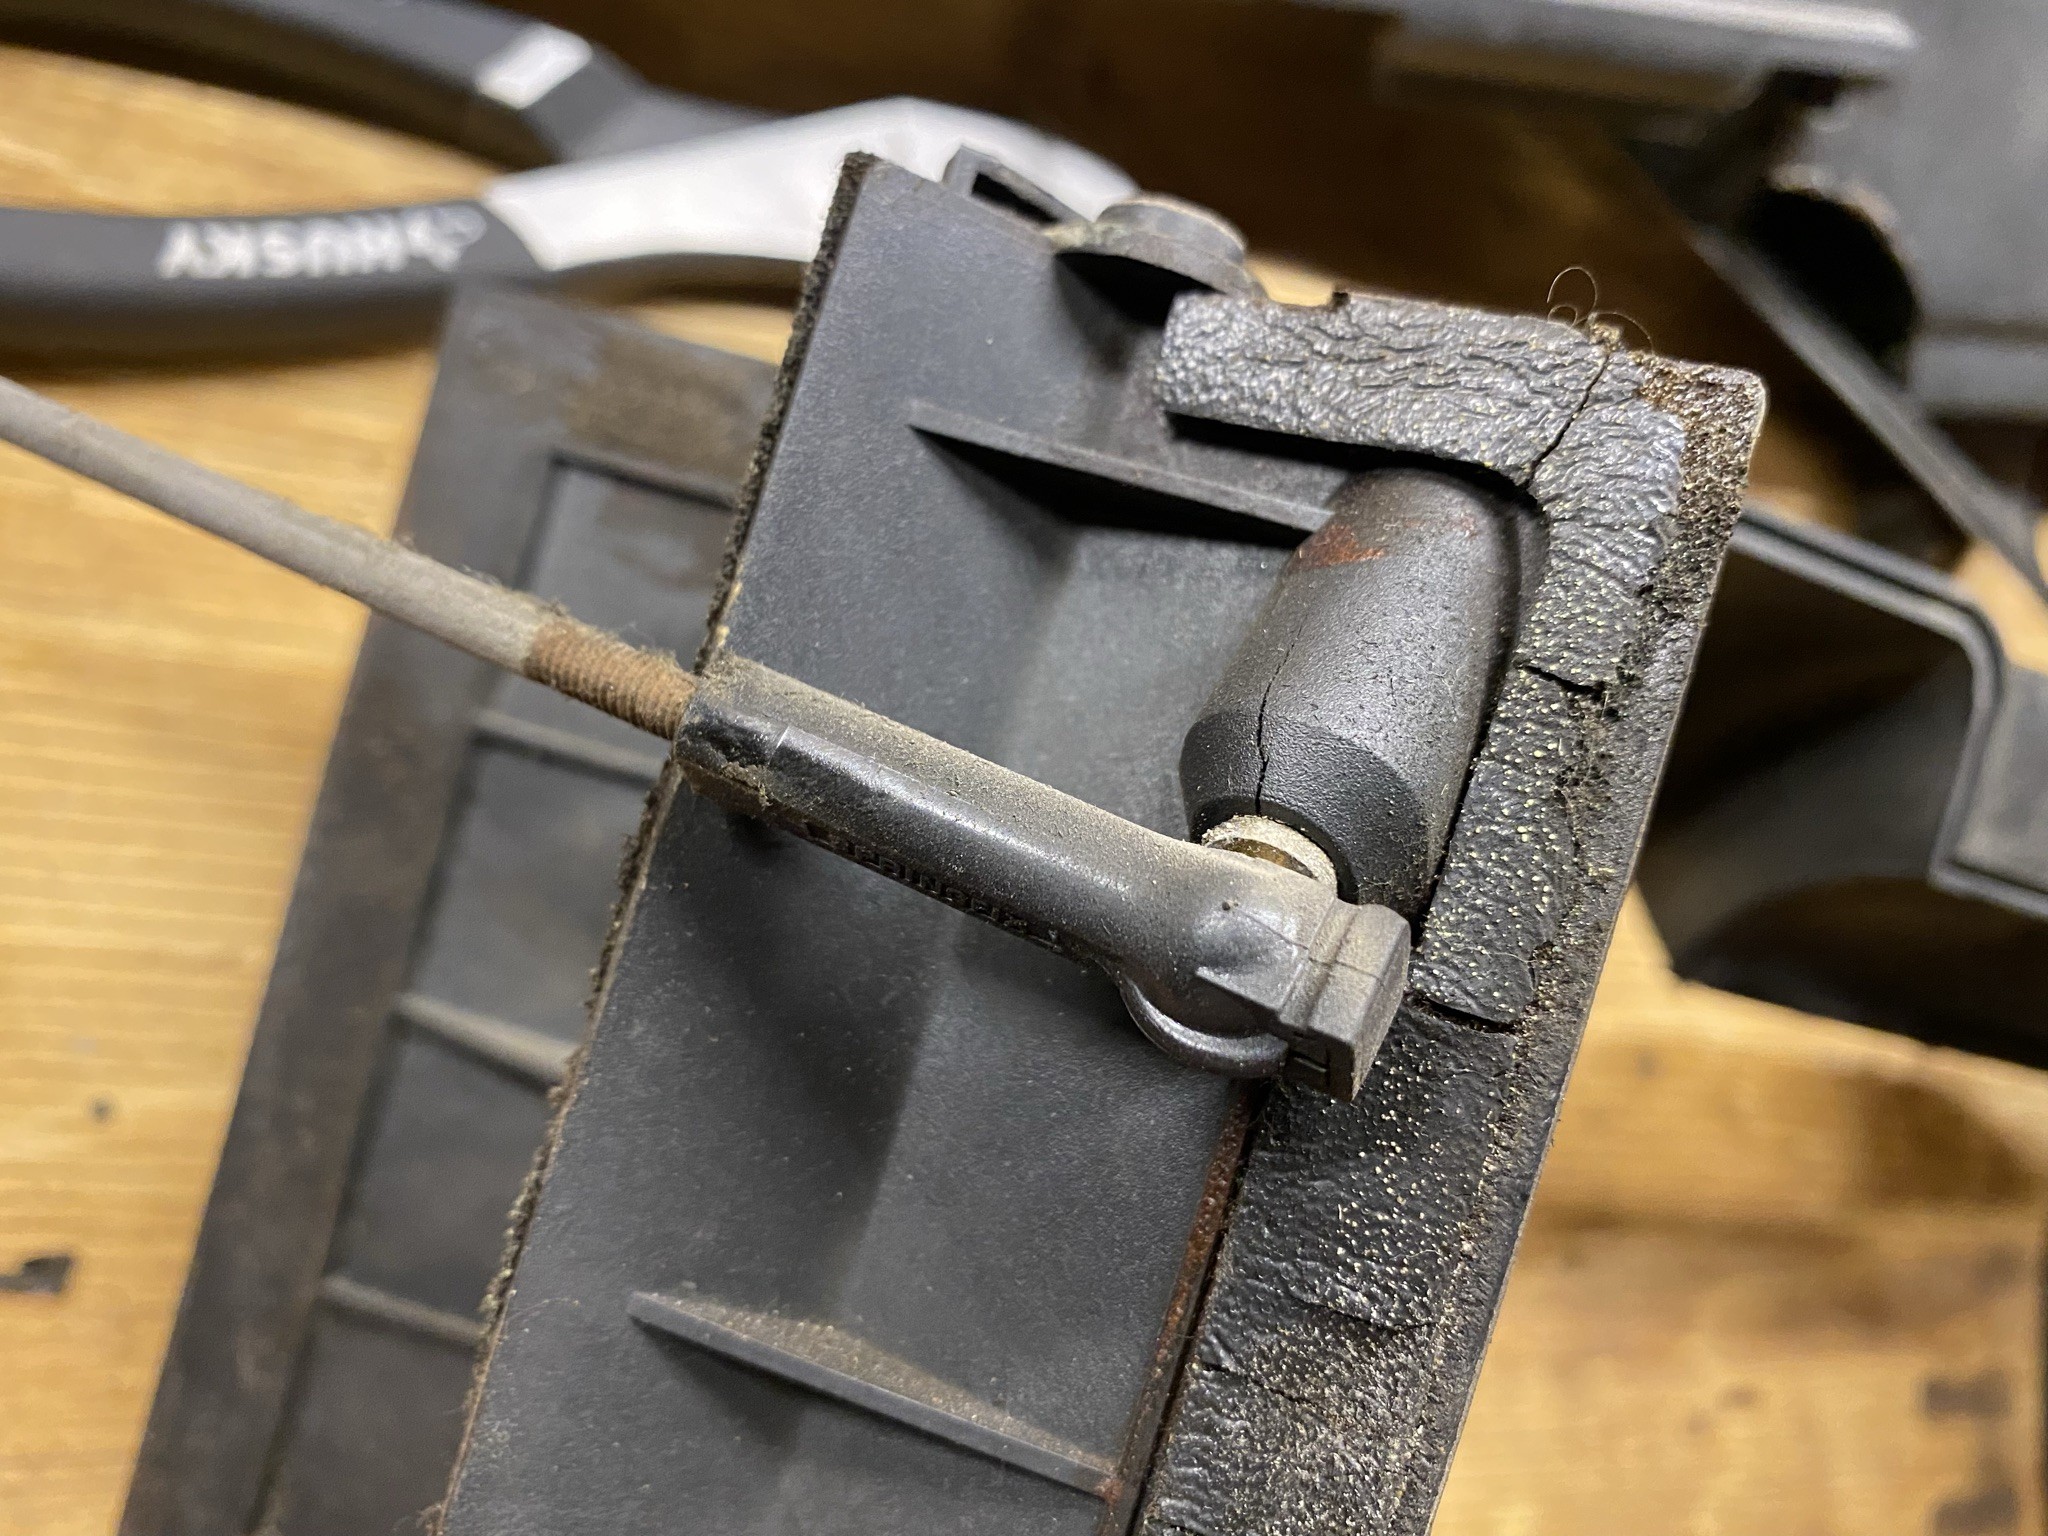
                                Broken recirc flap and the other one starting to crack:
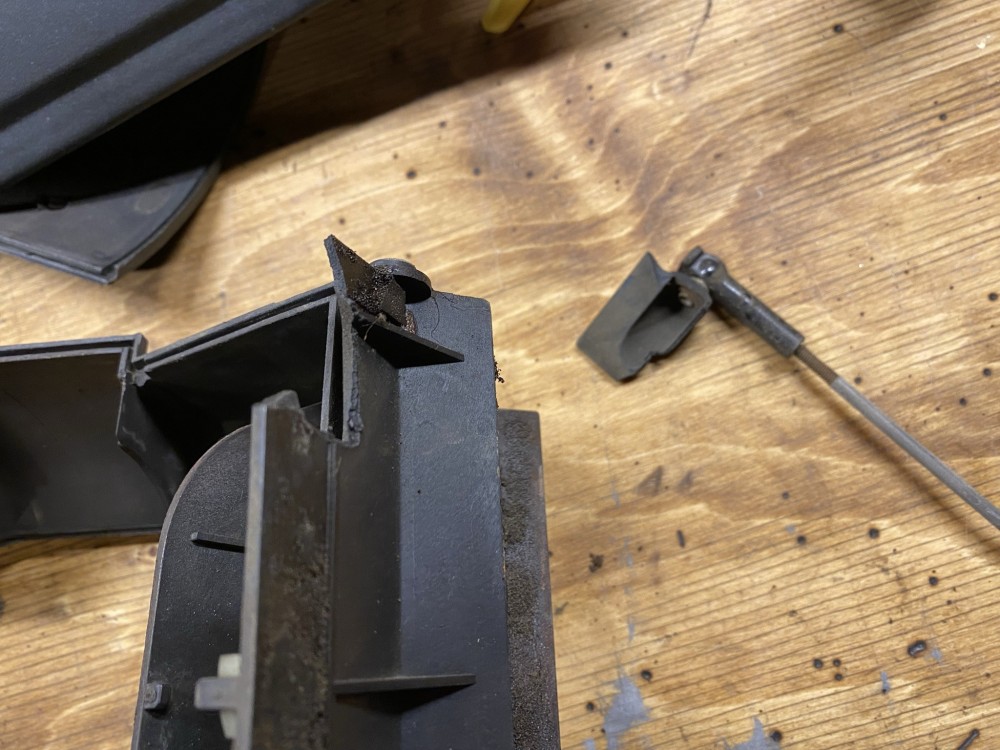
                                IMG4592.JPEG

                                IMG4593.JPEG

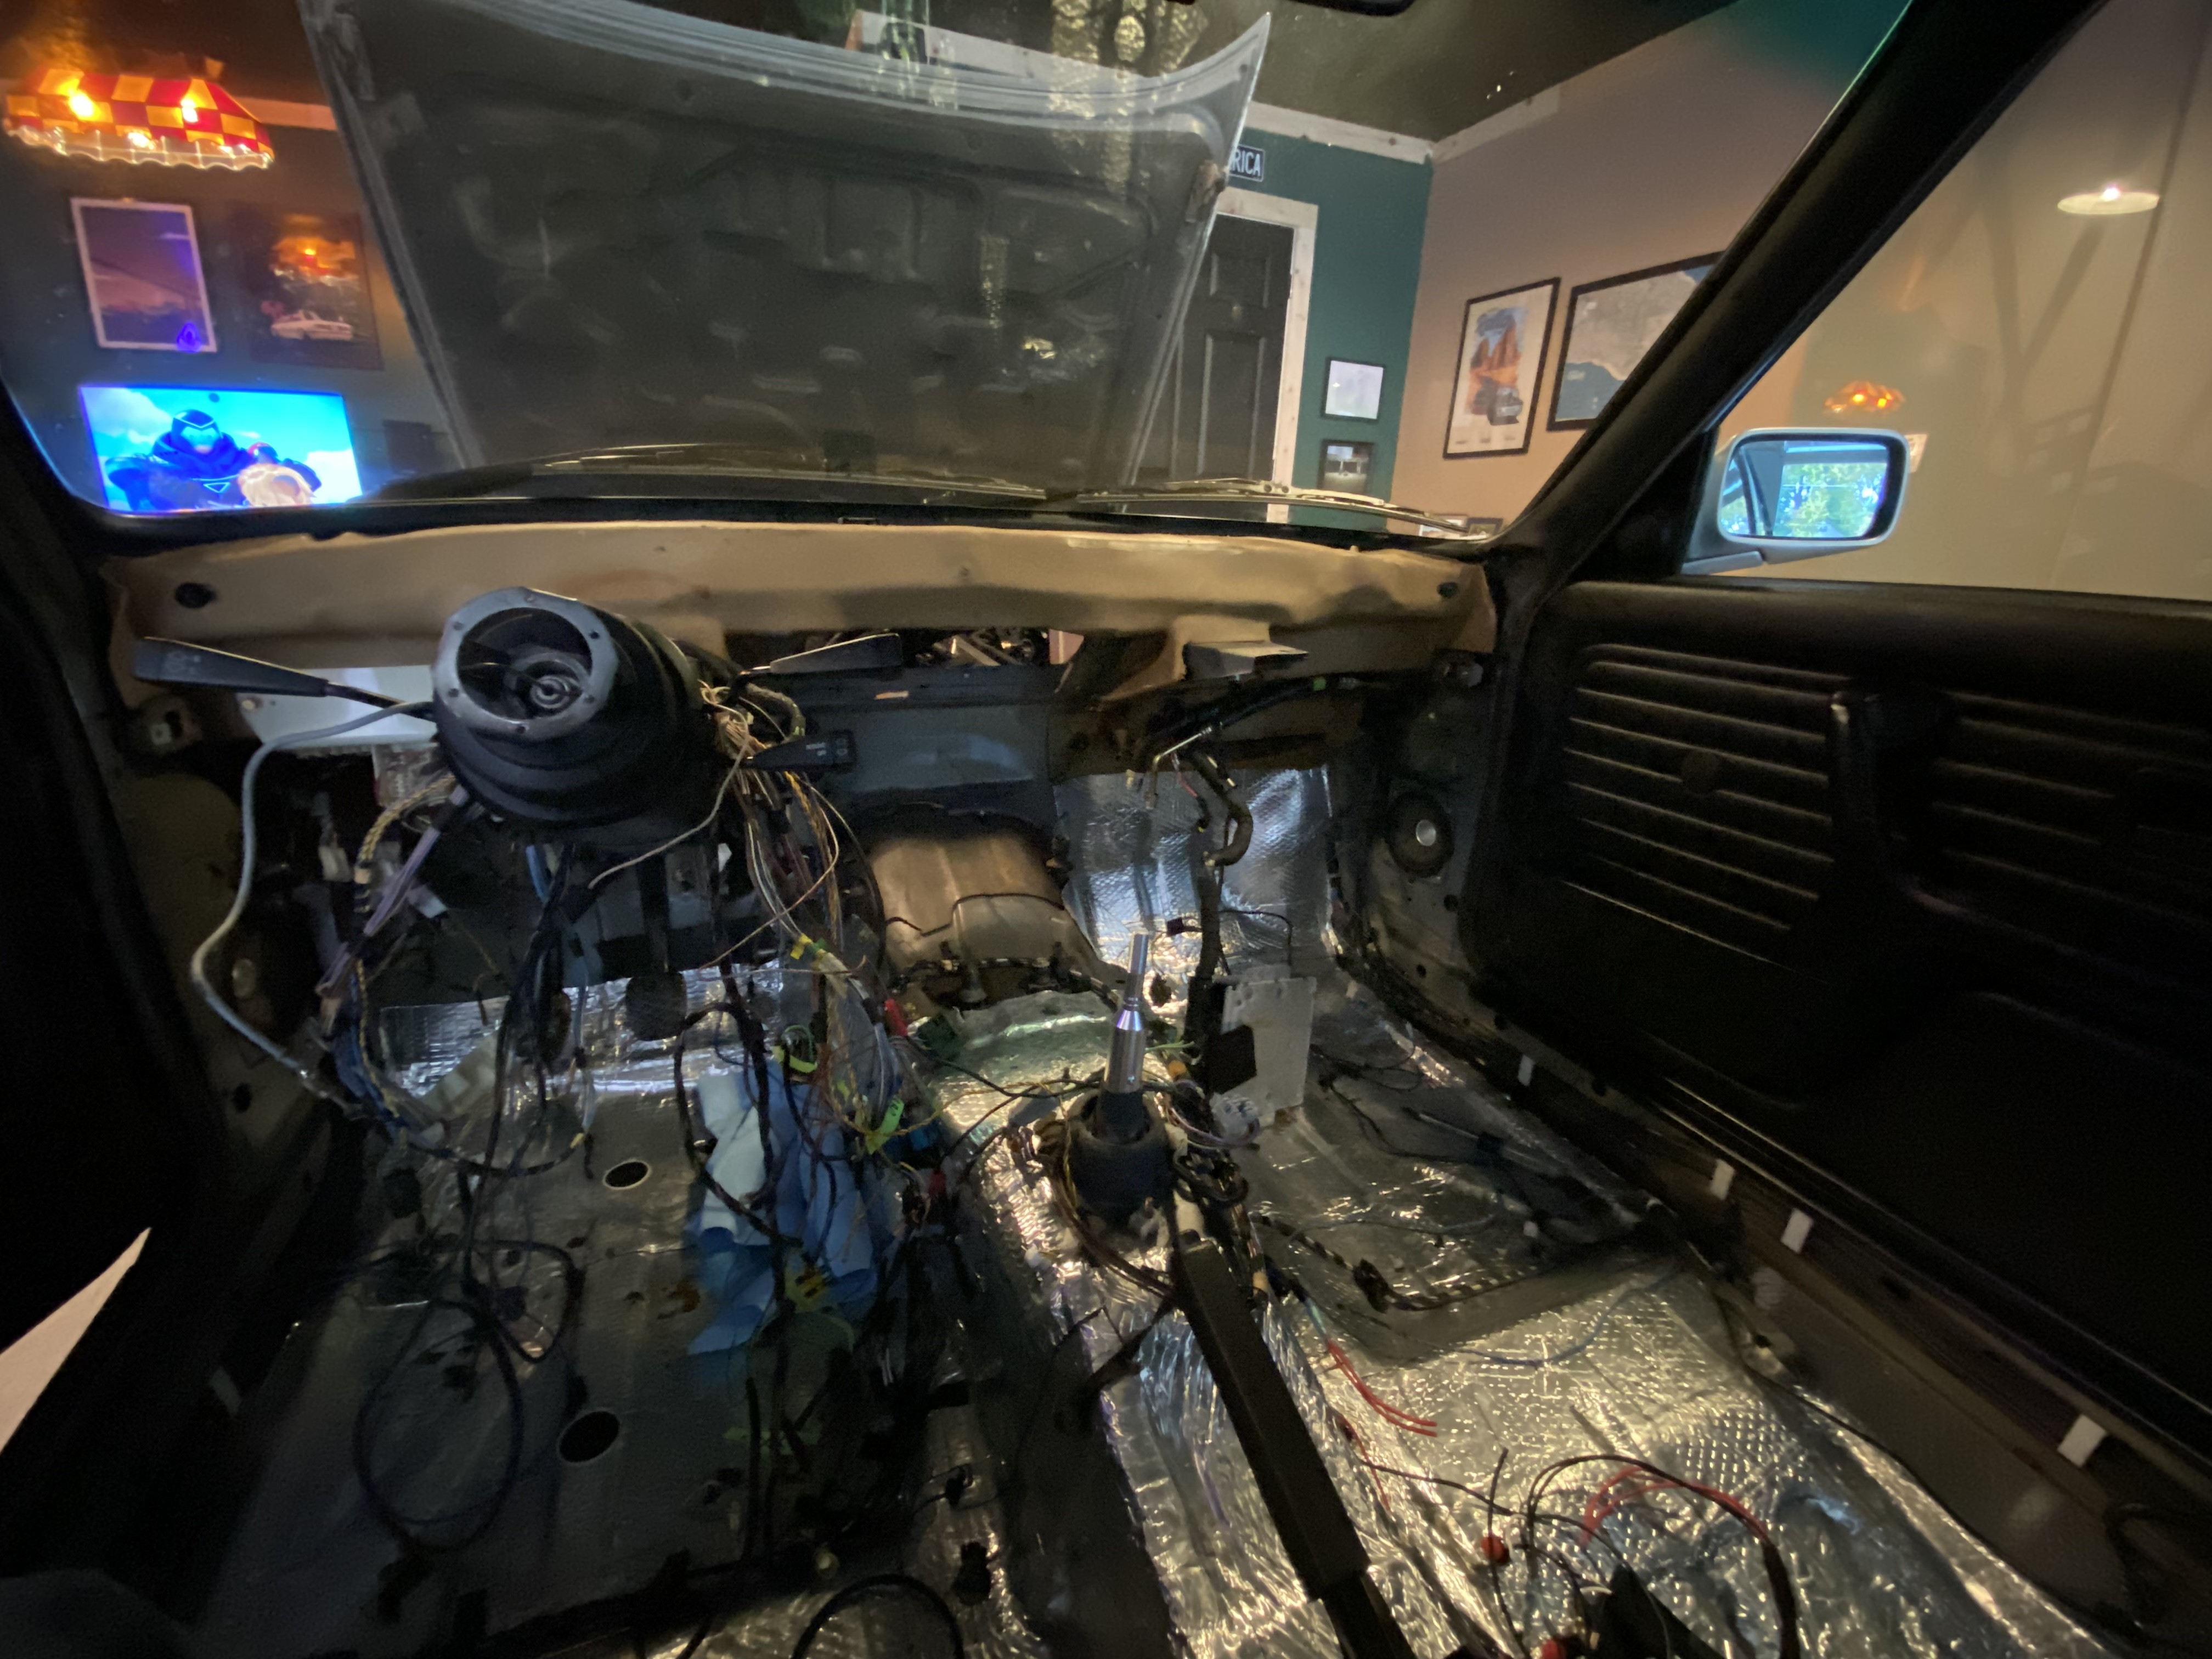
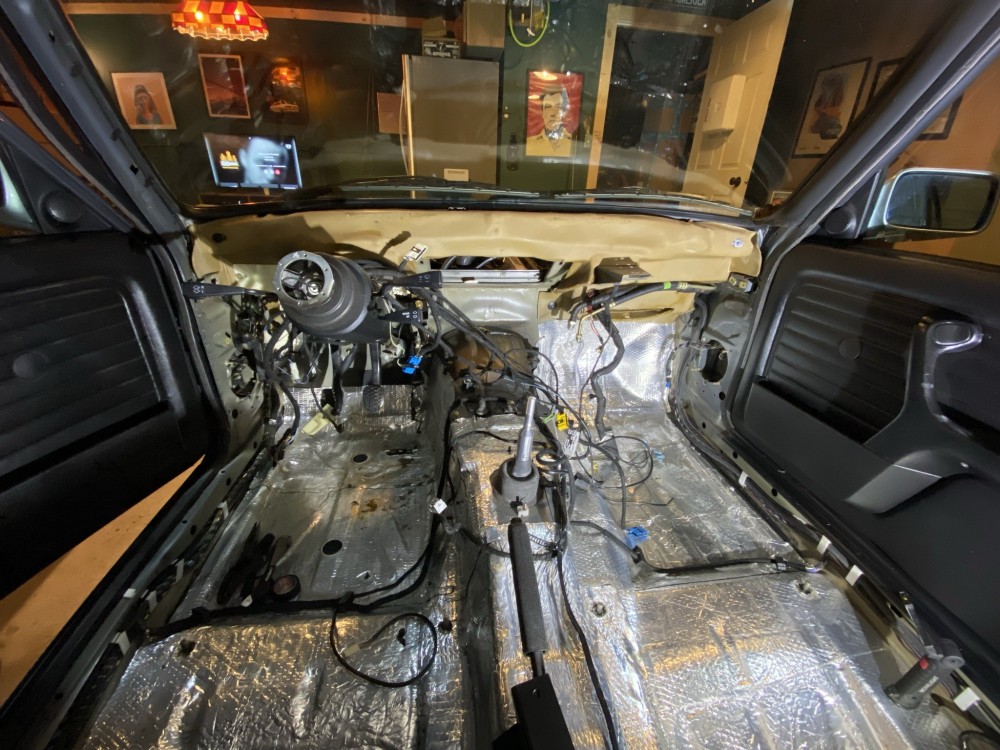
                                Interior wiring all cleaned up. Re-loomed all the wire harnesses. Speaker wire and RCA cables coming today and then I can run all the stereo wires to the trunk and put the carpet back in. IMG4614.JPEG
                                IMG4617.JPEG

                                IMG4615.JPEG

                                IMG4616.JPEG

                                I was really considering doing more insulation inside the car to reduce road noise but I read quite a few reviews of the sound deadening mat and other insulations (some specifically being used in an e30) that explained how the results were negligible at best. So rather than spend the couple hundred bucks on more insulation, I'm just going to leave it and turn up the music instead.

                                1 Reply Last reply
                                1
                                • GunMetalGreyG
                                  GunMetalGreyG
                                  GunMetalGrey
                                  wrote on last edited by
                                  #1077

                                  gilber33 said:

                                  Here it is. @GunMetalGrey can you share what you did the clean up the seam sealer? 

                                  Man, I want to do another engine bay like that again, I appreciate you bringing up the photos again!
                                  I believe I used a wire wheel to strip the seam sealer off. I used Eastwood seam sealer with lacquer thinner on my finger to smooth the new seam sealer. 
                                  Very therapeutic activity when it goes properly haha

                                  ...

                                  1 Reply Last reply
                                  0
                                  • G
                                    G
                                    gilber33
                                    wrote on last edited by
                                    #1078

                                    GunMetalGrey said:

                                    Man, I want to do another engine bay like that again, I appreciate you bringing up the photos again!
                                    I believe I used a wire wheel to strip the seam sealer off. I used Eastwood seam sealer with lacquer thinner on my finger to smooth the new seam sealer. 
                                    Very therapeutic activity when it goes properly haha 

                                    Do you recall how removing the seam sealer went? Was it a shit show? Did gum up or with the wire wheel did it come off pretty easily? 

                                    Your engine bay was much cleaner and, I'm assuming because of the swap, has much less stuff in it than mine does. So I'm not even sure if the extra work to remove the seam sealer would be noticeable.

                                    1 Reply Last reply
                                    0
                                    • HipMFH
                                      HipMFH
                                      HipMF
                                      wrote on last edited by
                                      #1079

                                      A wire wheel on a grinder will take off seam sealer. On a drill it probably won't do much. Wear a full face shield. Also check clothing for little bits of wire that will stab you later. Can't say much about painting over it. Good so far, but my car doesn't get used...

                                      Seam sealer as a structural component is an interesting thought. I suspect that the flexibility of the seam sealer would allow the two panels to move slightly relative to each other before it resisted. Since the panels are spot-welded together, they won't be able to move, so the force would be transferred through the weld without the seam sealer doing much. Could be wrong, but that's the best I got.

                                      1 Reply Last reply
                                      0
                                      • G
                                        G
                                        gilber33
                                        wrote on last edited by
                                        #1080

                                        After taking off the intake yesterday I noticed I still had some oil getting into the throttle body...

                                        Figured that out.

                                        1 Reply Last reply
                                        0
                                        • G
                                          G
                                          gilber33
                                          wrote on last edited by
                                          #1081

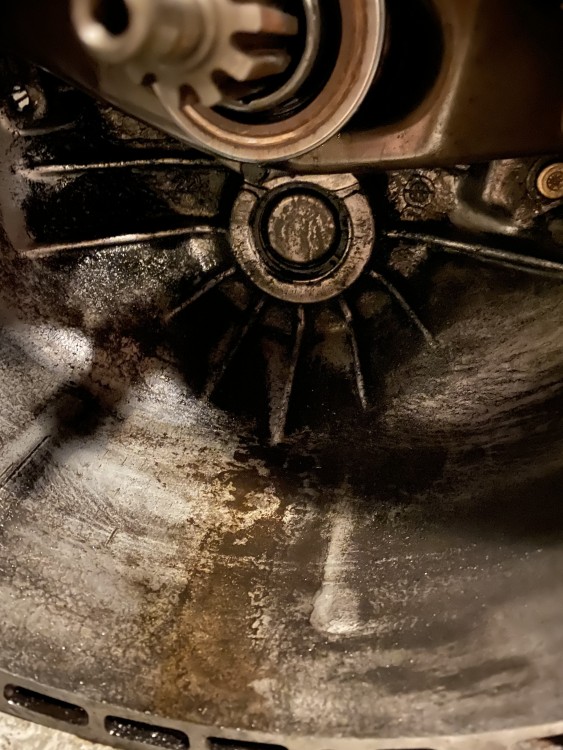
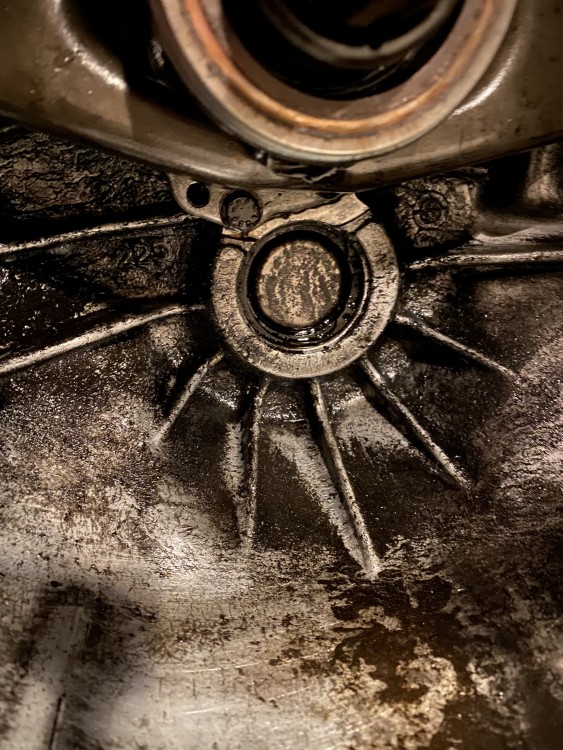
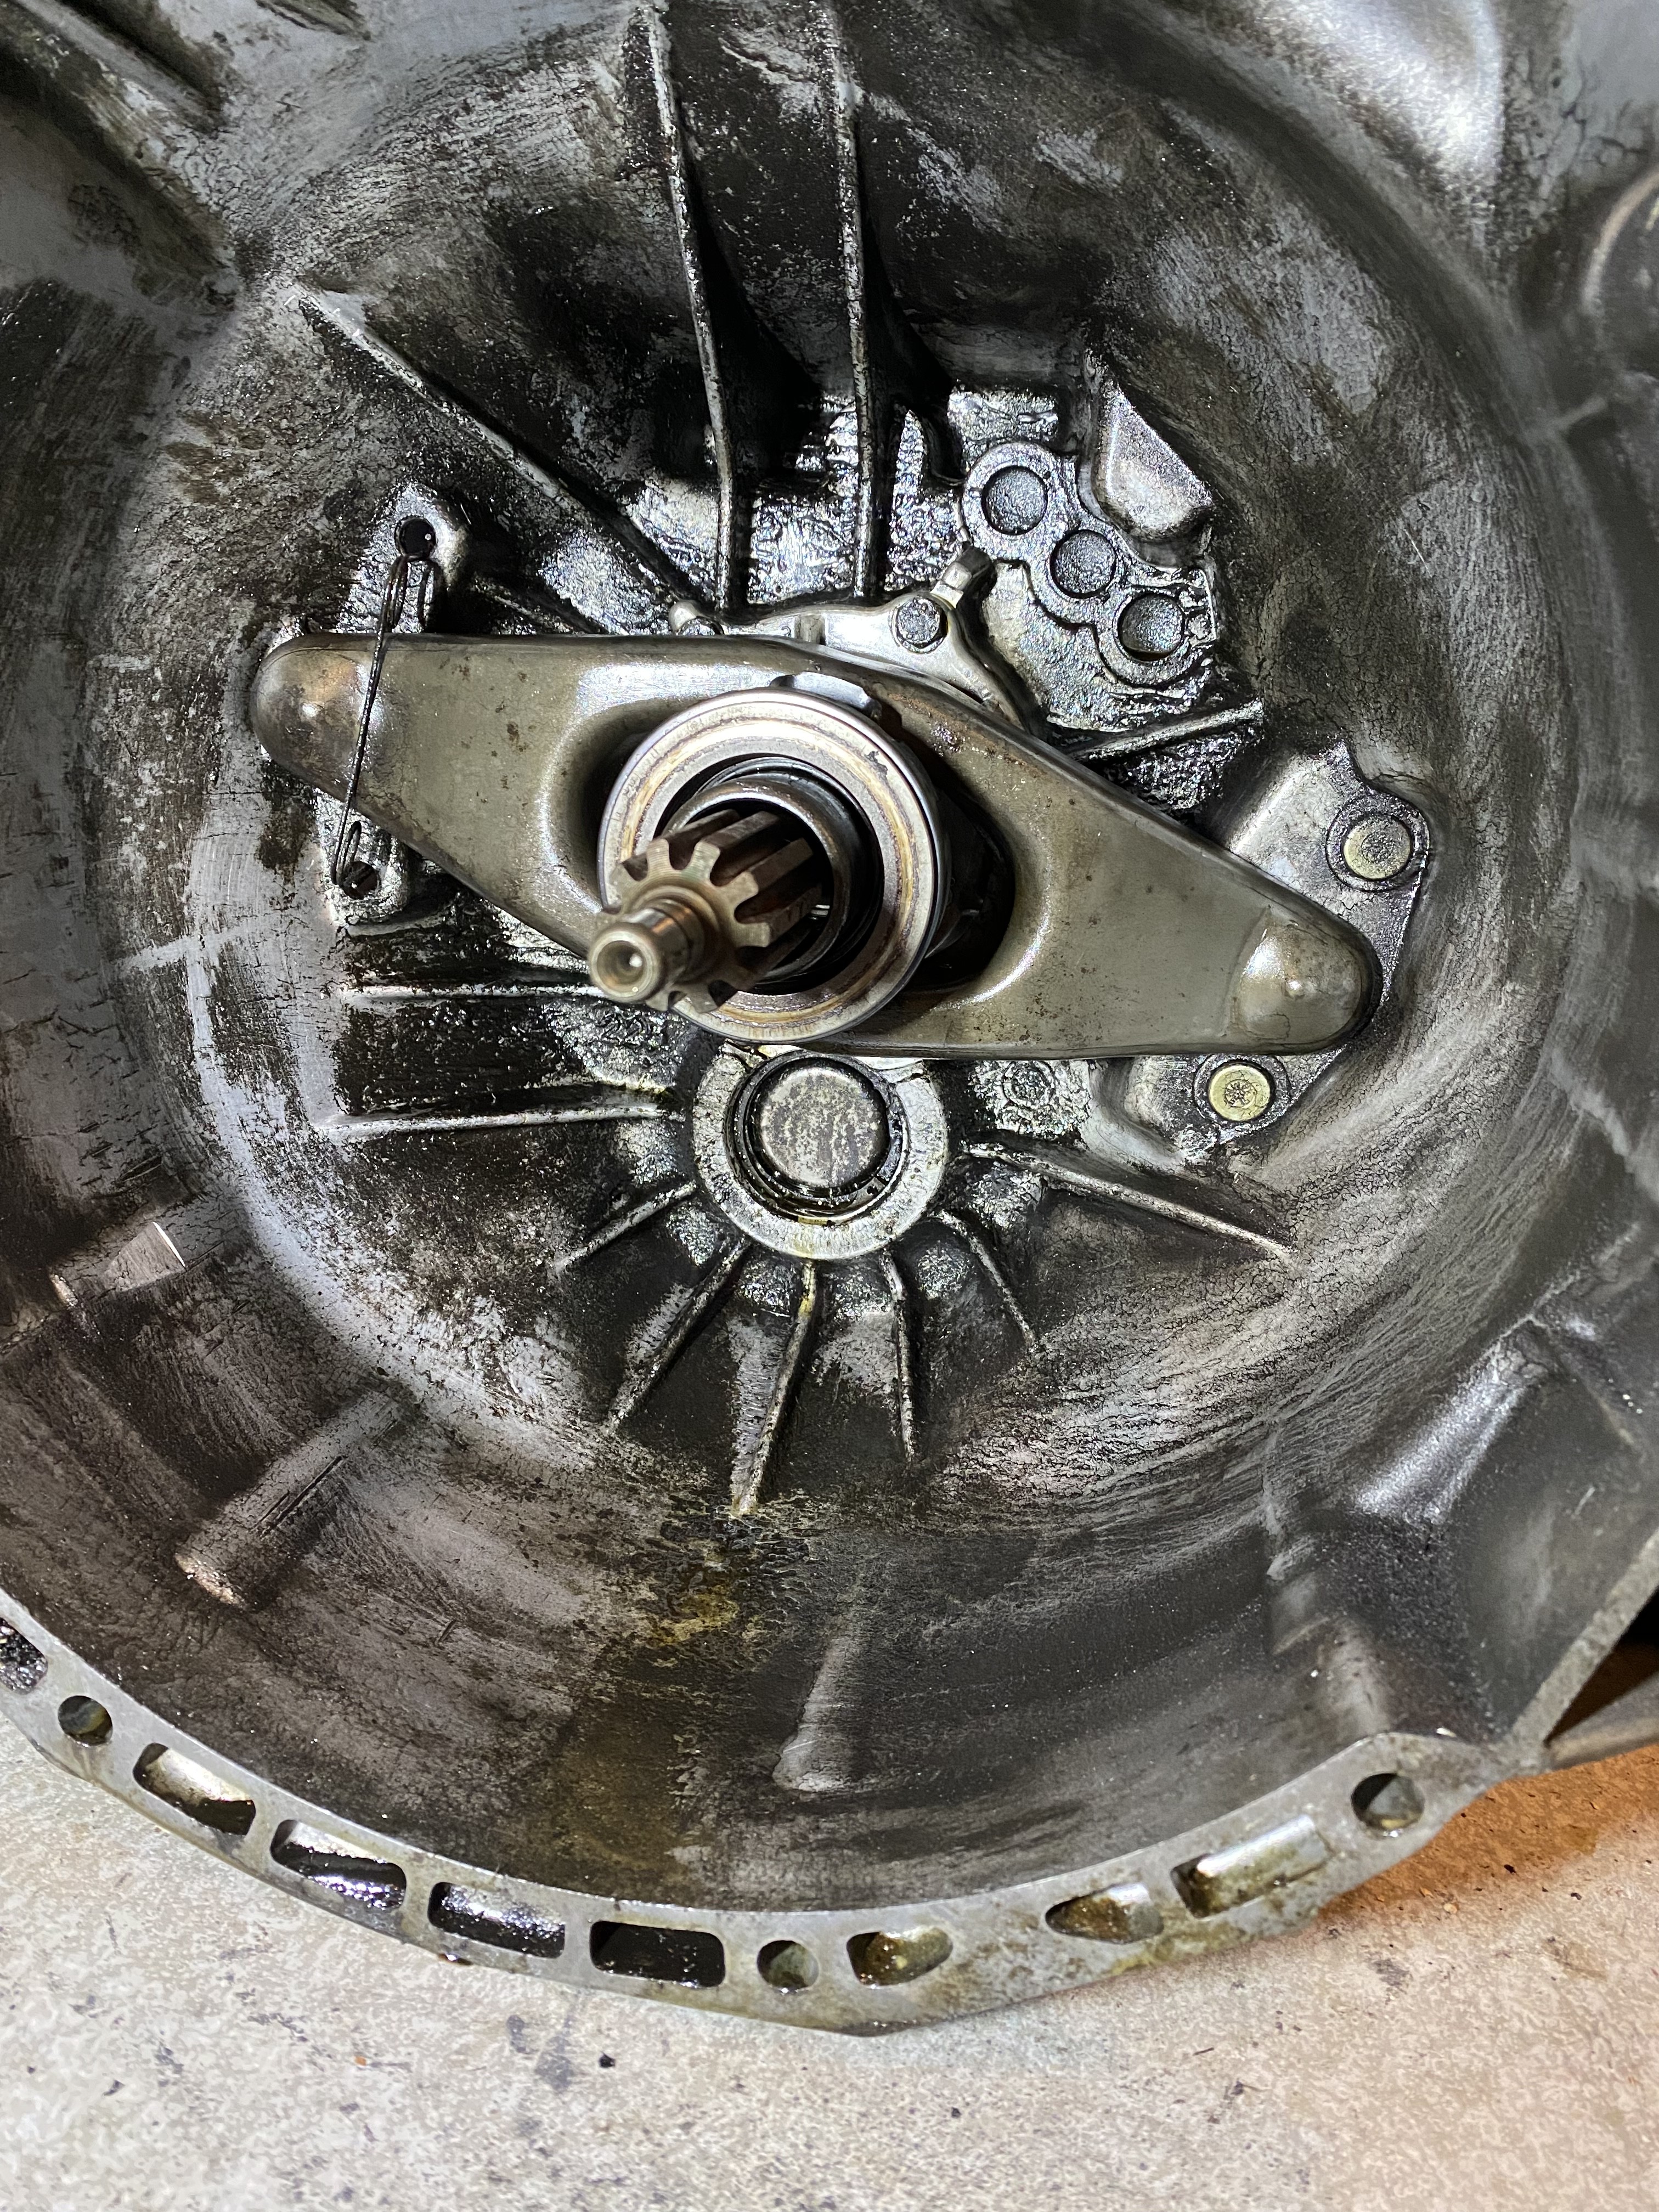
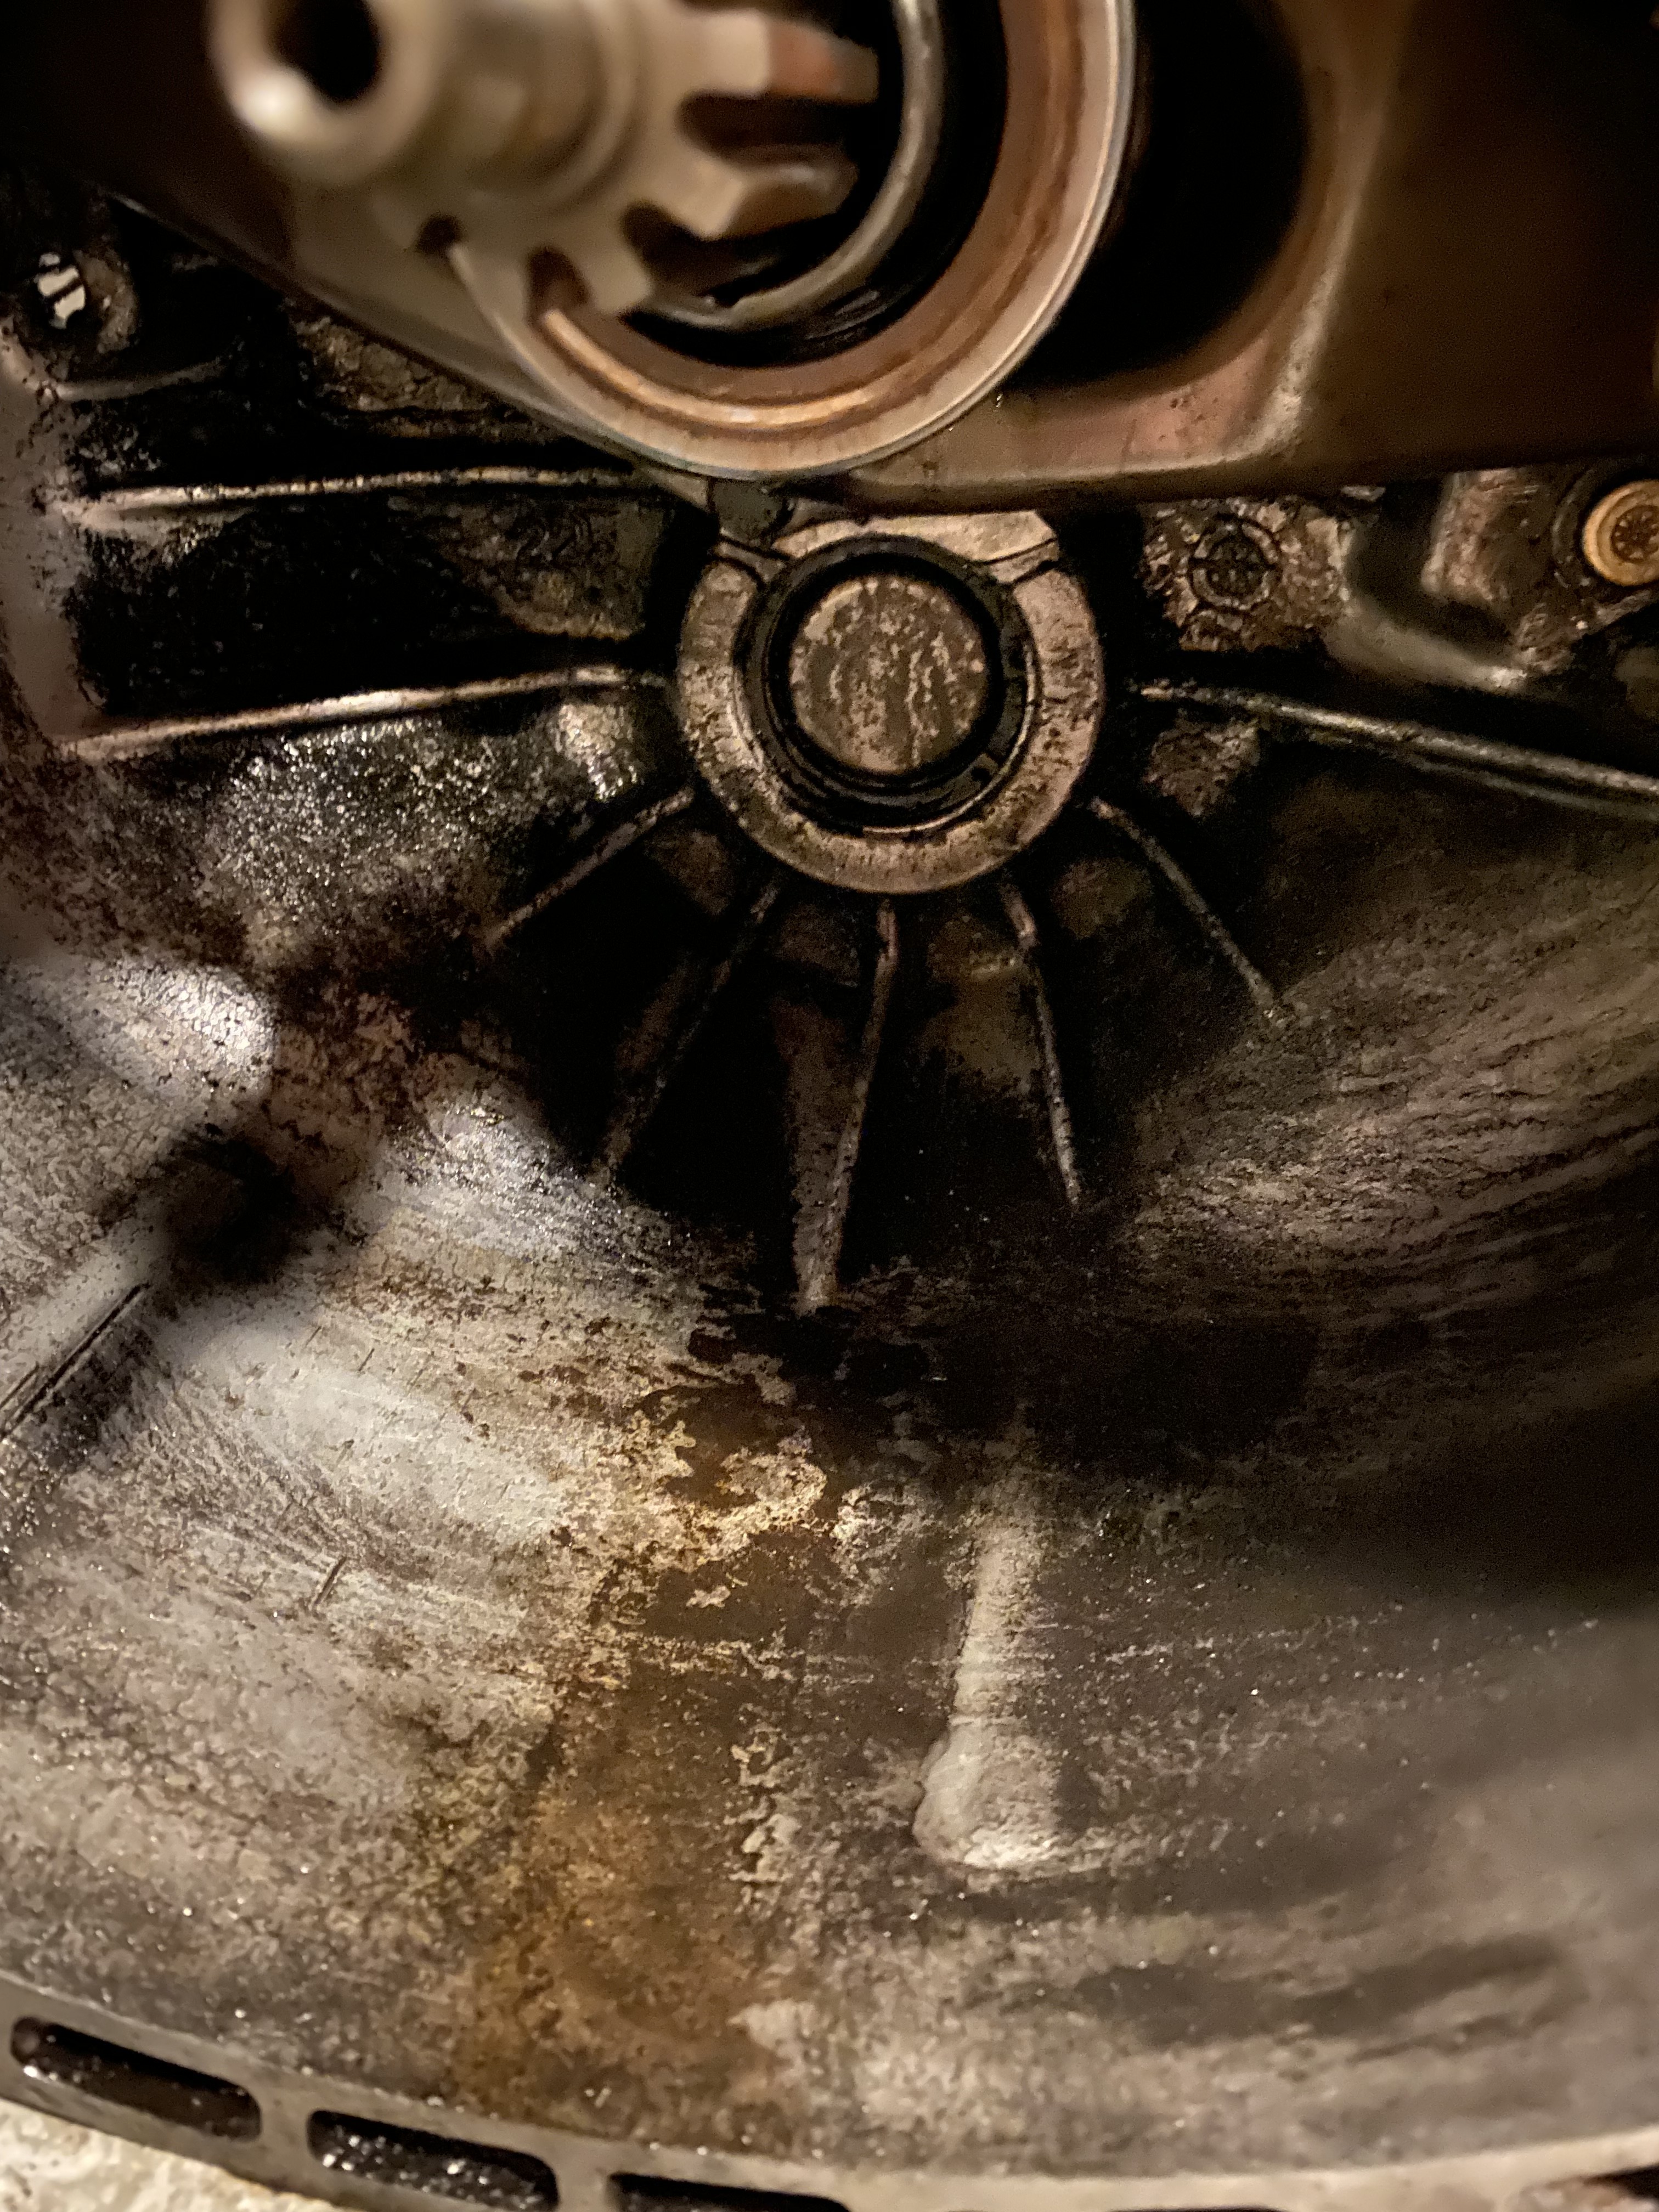
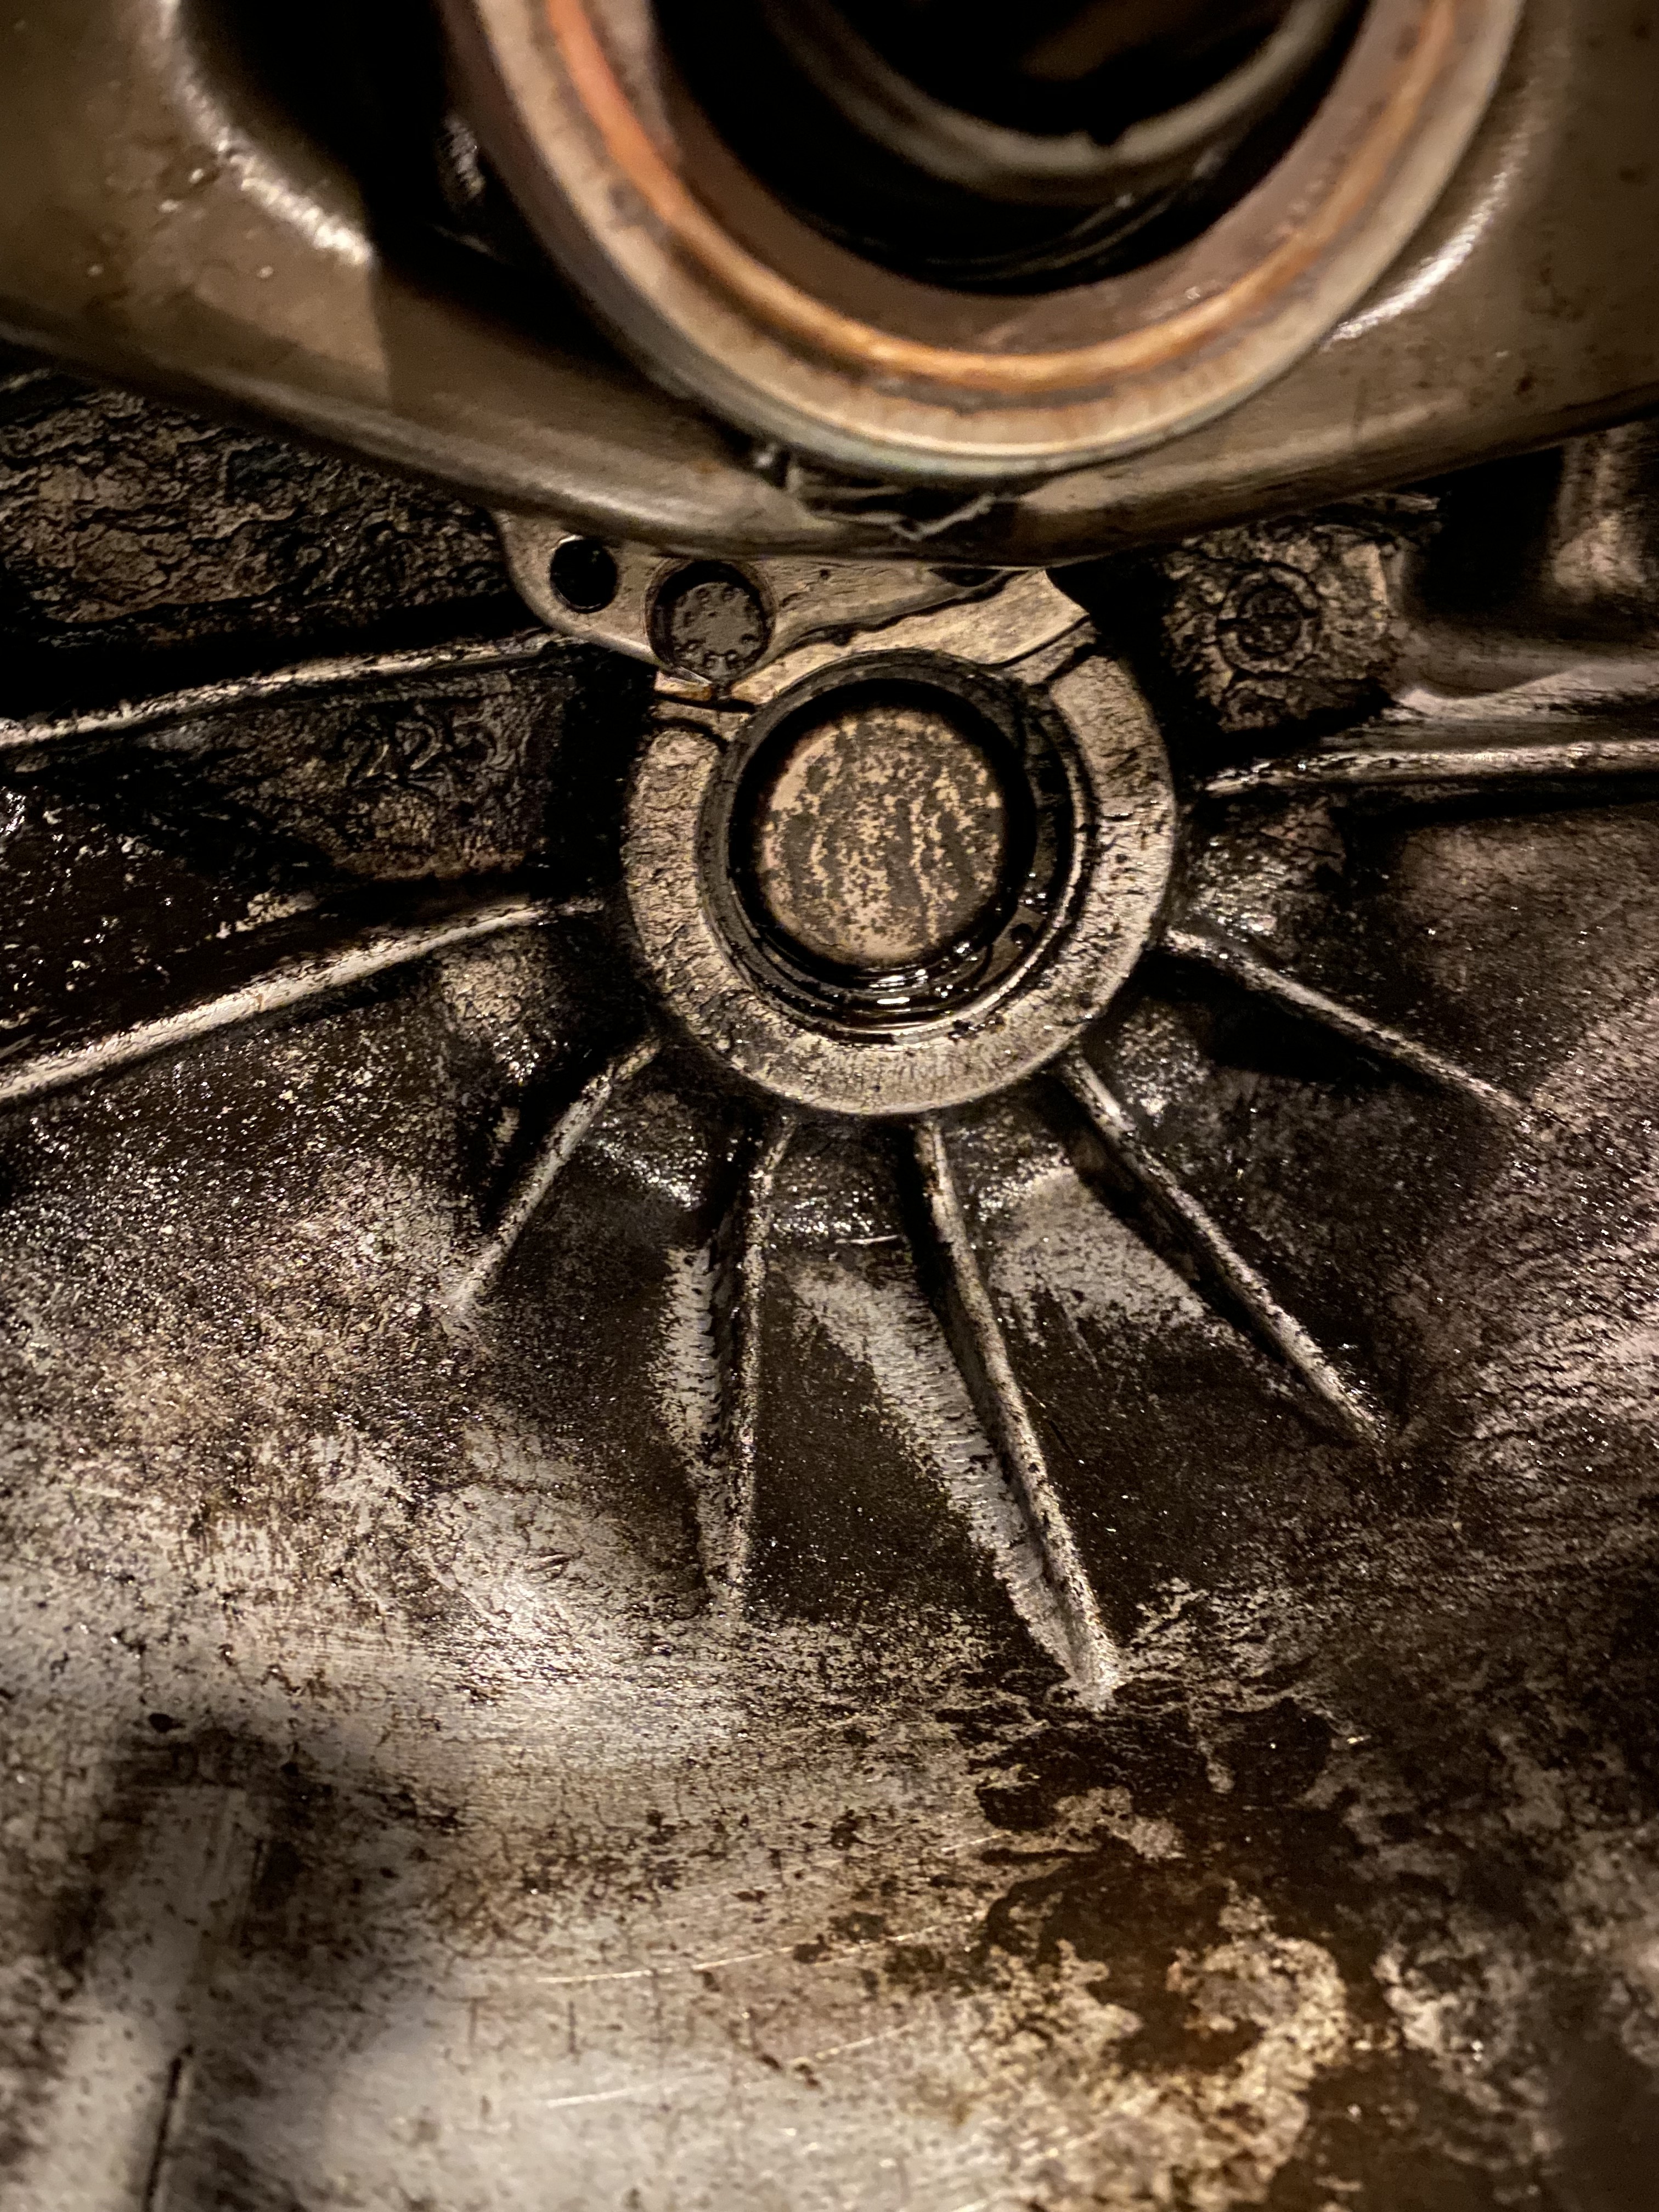
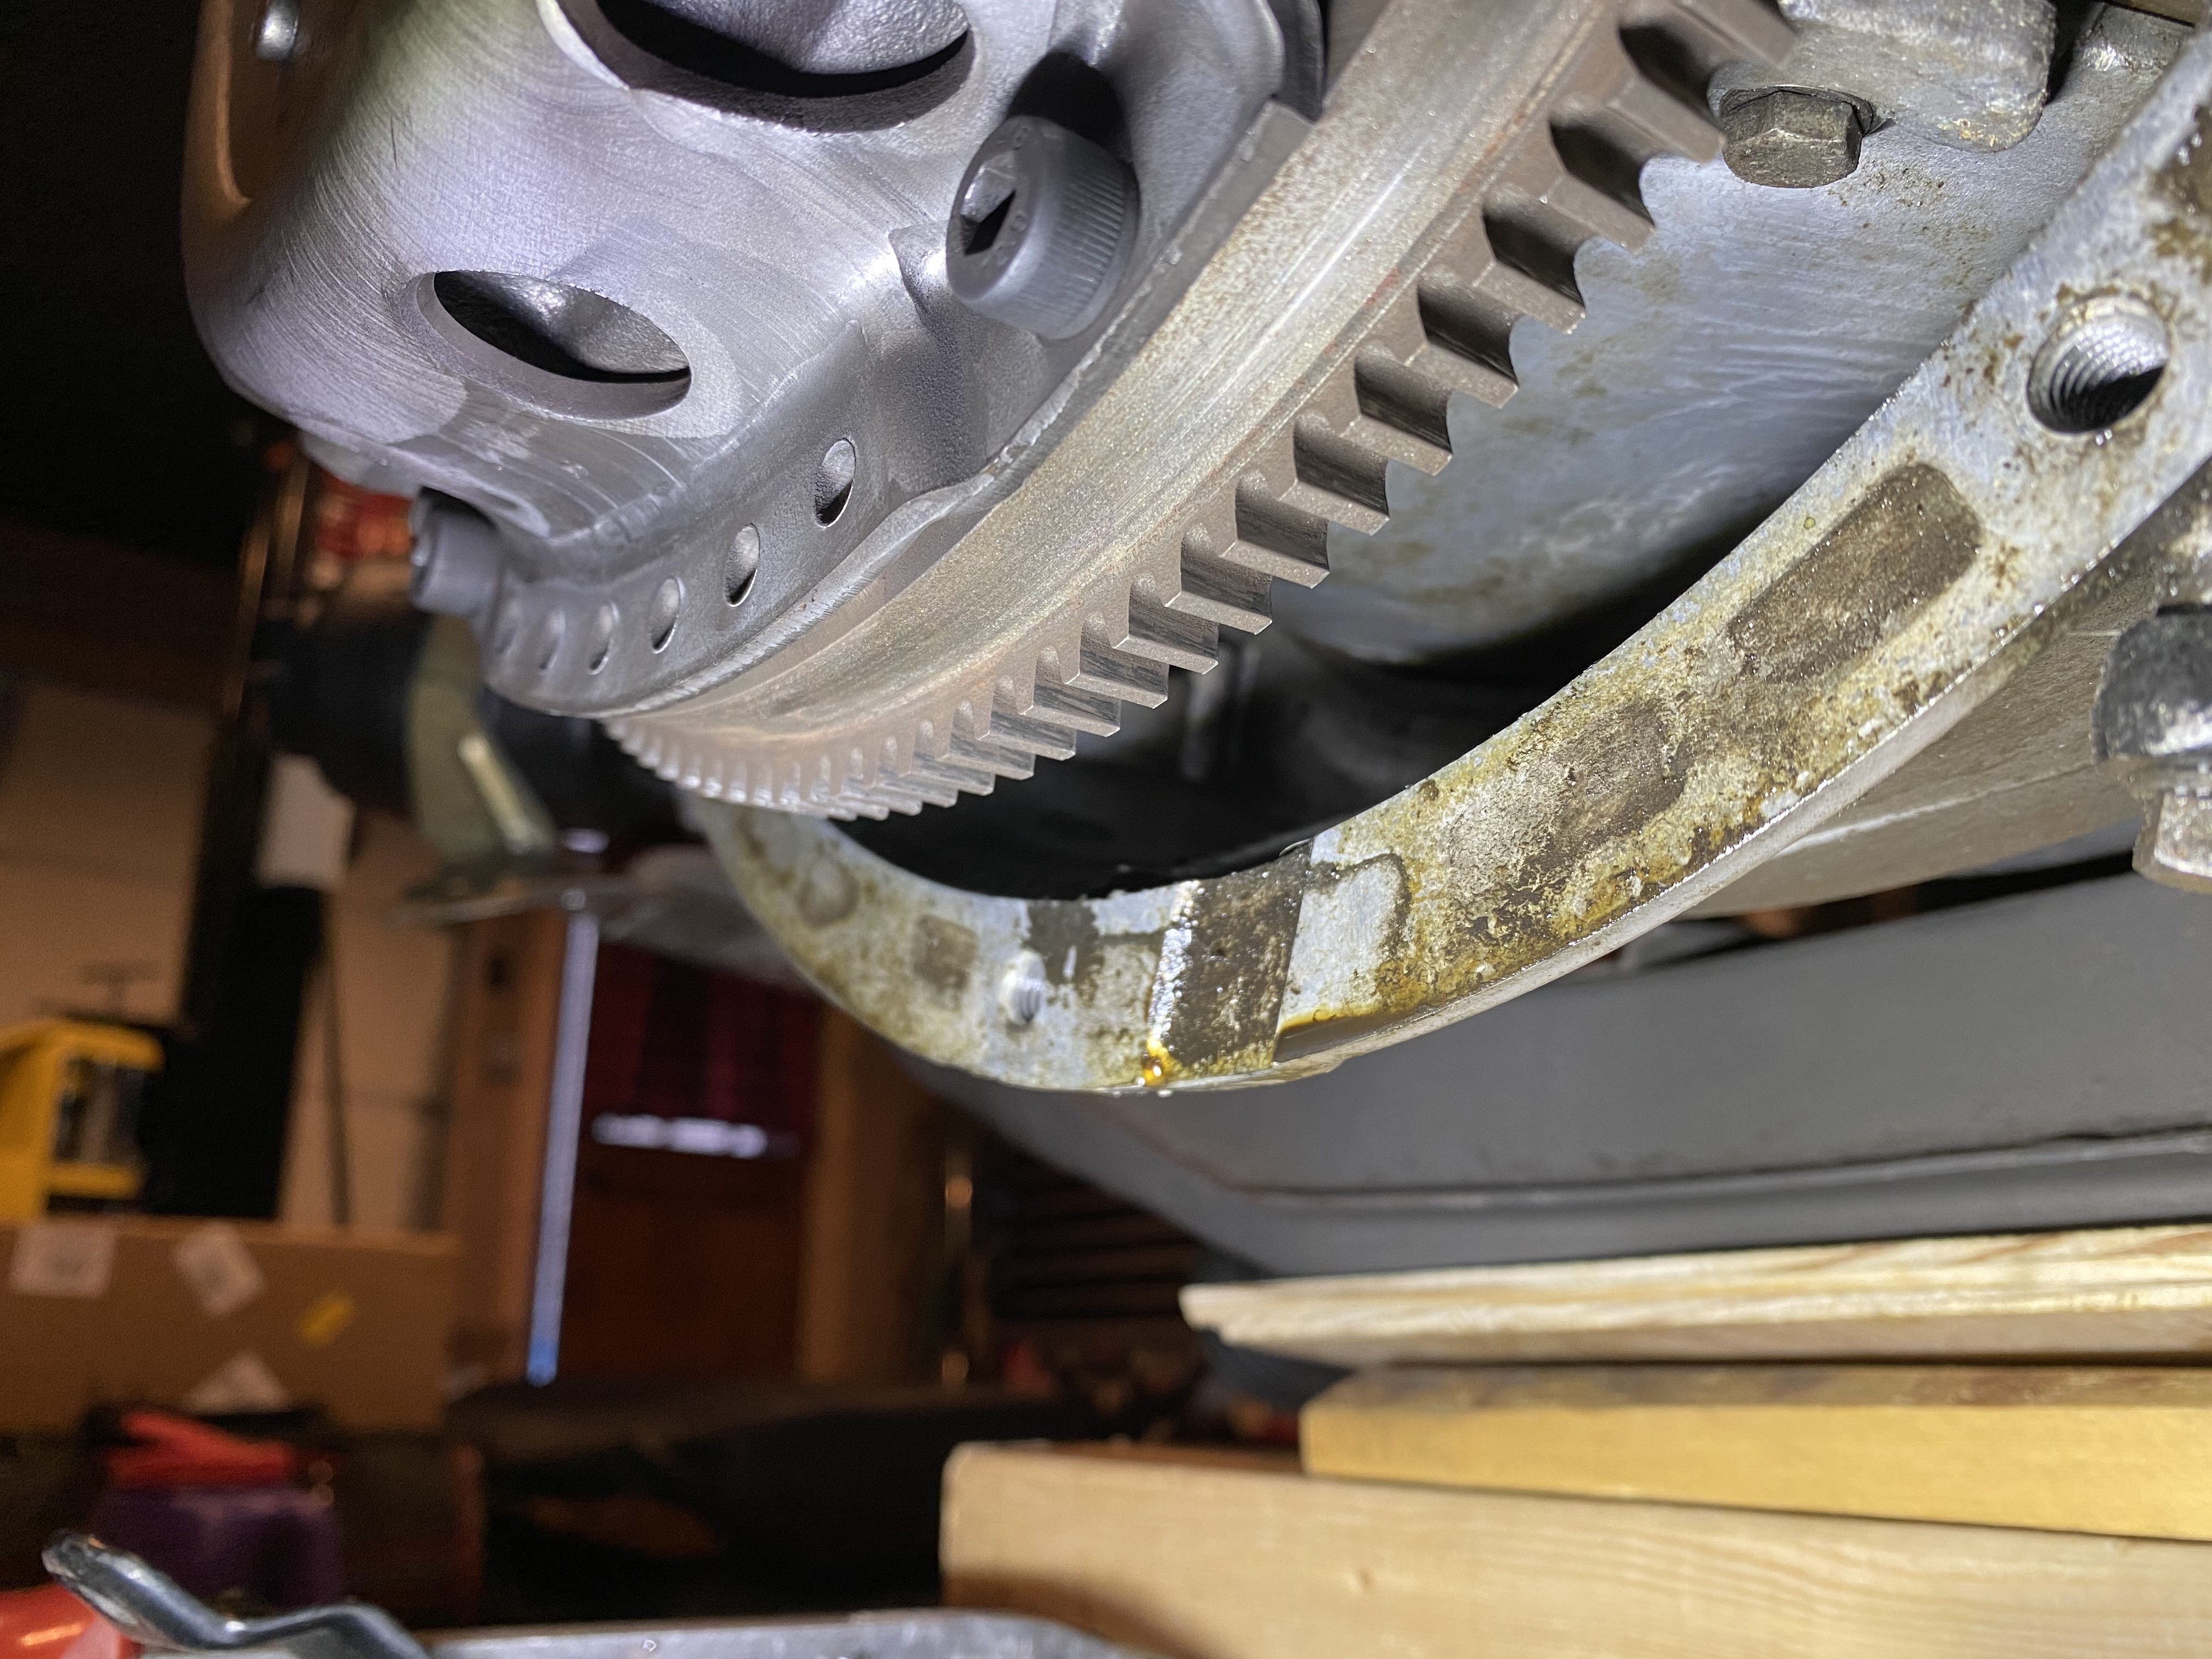
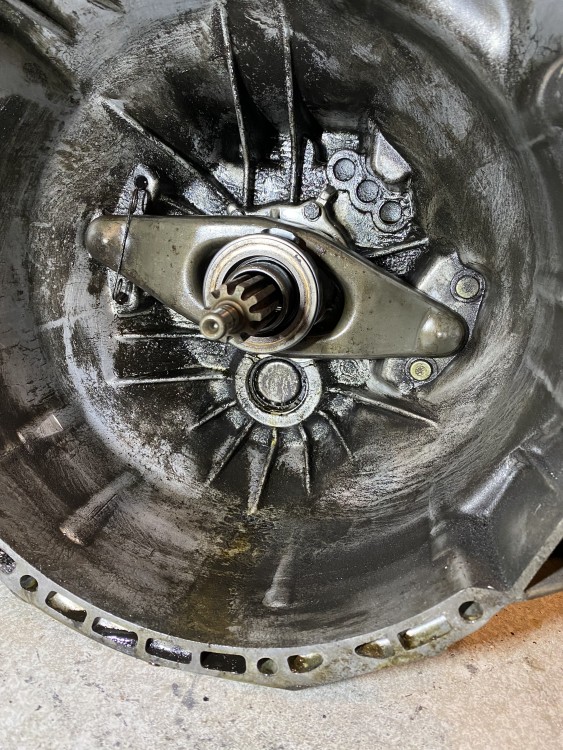
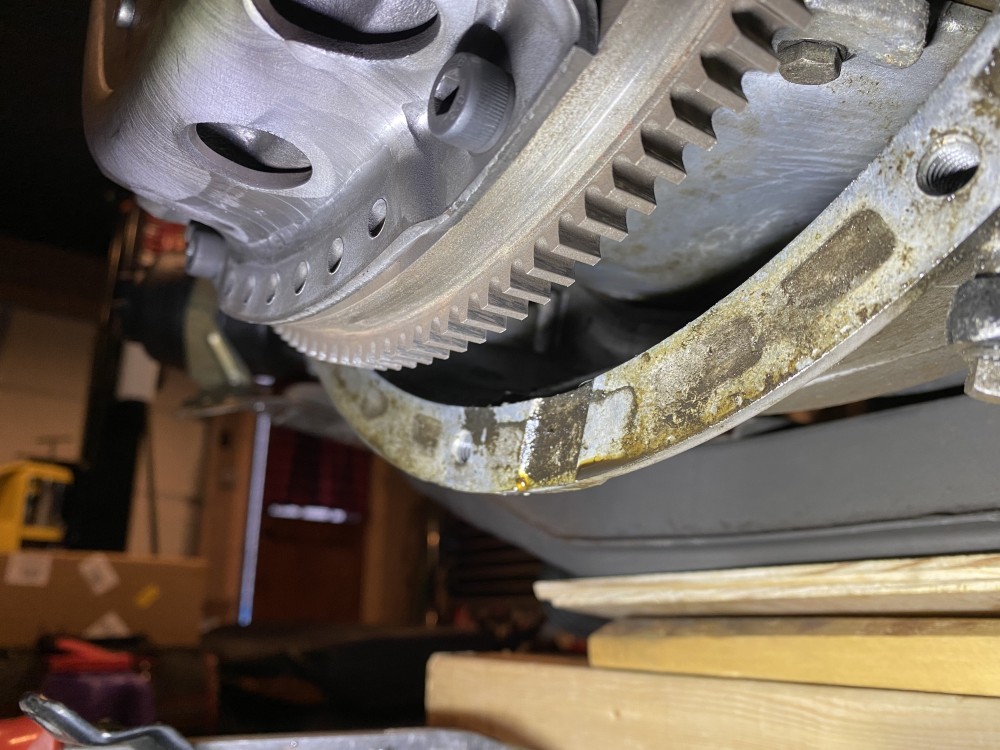
                                          I think my RMS is totally fine. Looks like the leak from the bottom is coming from transmission. All of the lower transmission bolts smelled like transmission fluid (disgusting). I have ATF PTSD from a 240 I bought from @The Full Banana a long time ago that had a leaking transmission pan gasket and it took several attempts to get it sealed and that meant laying in ATF on a cold parking garage floor each time. It was awful. 

                                          Anyways - the area behind the clutch was totally dry, but the transmission was soaked and it looks like there's a little trail where fluid looks like it's leaking from whatever this thing is: 

                                          Edit: After looking at realOEM that circle thing does not appear to be any type of seal. It must be leaking down from the input shaft seal and making it look like that's where it's leaking from. 
                                          958E60FD-2497-4990-982D-1C2674477FE7.jpeg

                                          36D1738E-6EEE-4258-B5F4-90E046F7A4D1.jpeg

                                          2F2B23BB-E793-488F-98A2-706F627287E7.jpeg

                                          Behind the clutch is completely dry:
                                          3980A554-0036-49DE-A460-25A80EB197D3.jpeg

                                          1 Reply Last reply
                                          0

                                          Hello! It looks like you're interested in this conversation, but you don't have an account yet.

                                          Getting fed up of having to scroll through the same posts each visit? When you register for an account, you'll always come back to exactly where you were before, and choose to be notified of new replies (either via email, or push notification). You'll also be able to save bookmarks and upvote posts to show your appreciation to other community members.

                                          With your input, this post could be even better 💗

                                          Register Login
                                          Reply
                                          • Reply as topic
                                          Log in to reply
                                          • Oldest to Newest
                                          • Newest to Oldest
                                          • Most Votes


                                          • Login

                                          • Don't have an account? Register

                                          • Login or register to search.
                                          Powered by NodeBB Contributors
                                          • First post
                                            Last post
                                          0
                                          • Categories
                                          • Recent
                                          • Tags
                                          • Popular
                                          • Users
                                          • Groups