Skip to content
  • Categories
  • Recent
  • Tags
  • Popular
  • Users
  • Groups
Skins
  • Light
  • Brite
  • Cerulean
  • Cosmo
  • Flatly
  • Journal
  • Litera
  • Lumen
  • Lux
  • Materia
  • Minty
  • Morph
  • Pulse
  • Sandstone
  • Simplex
  • Sketchy
  • Spacelab
  • United
  • Yeti
  • Zephyr
  • Dark
  • Cyborg
  • Darkly
  • Quartz
  • Slate
  • Solar
  • Superhero
  • Vapor

  • Default (No Skin)
  • No Skin
Collapse
WIBIMMERS logo

WIBIMMERS

  1. Home
  2. General Discussion
  3. Members BMWs
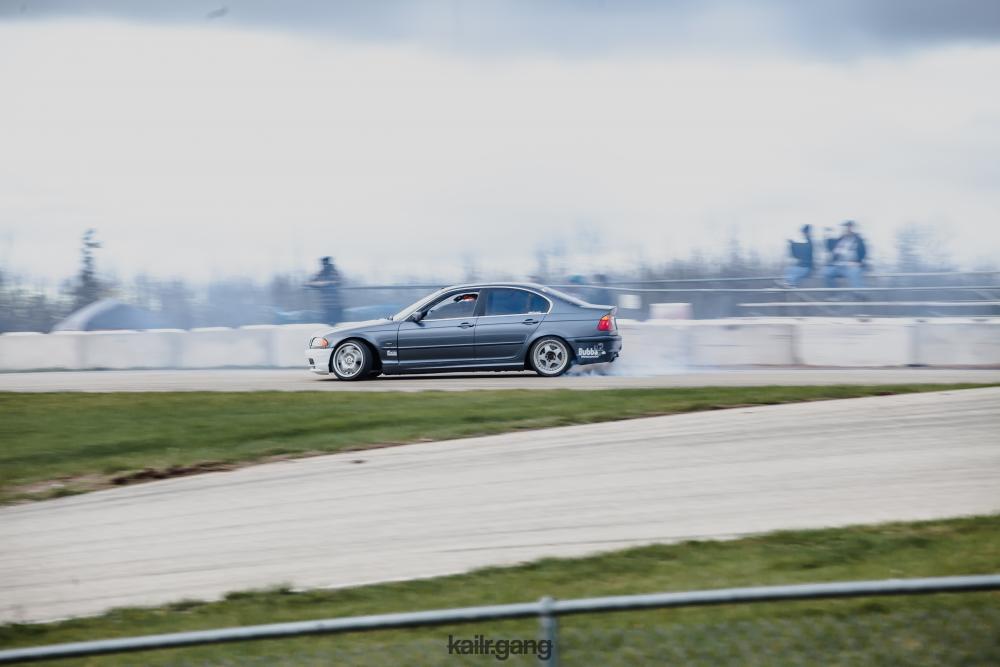
  4. A purists nightmare - E46 drift build

A purists nightmare - E46 drift build
Scheduled Pinned Locked Moved Members BMWs
400 Posts 25 Posters 0 Views 1 Watching
  • Oldest to Newest
  • Newest to Oldest
  • Most Votes
Reply
  • Reply as topic
Log in to reply
This topic has been deleted. Only users with topic management privileges can see it.
  • wasnt m3W
    wasnt m3W
    wasnt m3
    wrote on last edited by
    #288

    I've dealt with a handful of e46s with blower motors inop, every time it was the resistor.

    m3sig-1.jpg

    1 Reply Last reply
    1
    • TkuhnT
      TkuhnT
      Tkuhn
      wrote on last edited by
      #289

      wasnt m3 said:

      I've dealt with a handful of e46s with blower motors inop, every time it was the resistor.

      Welp atleast I'll have a new motor and resistor and know it's good for awhile lmao. Just threw me off since there was power at the motor. Based on all my other experiences. I went to school for automotive mechanic and now I'm a diesel tech. Been wrenching for almost 1p years now so I was like oh easy. Lol but bmw outsmarted me 😂

      1 Reply Last reply
      0
      • TkuhnT
        TkuhnT
        Tkuhn
        wrote on last edited by
        #290

        Update 

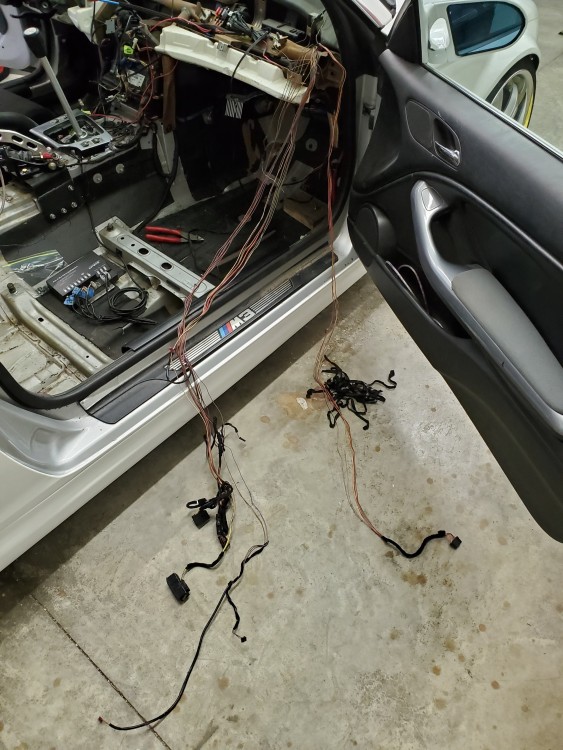
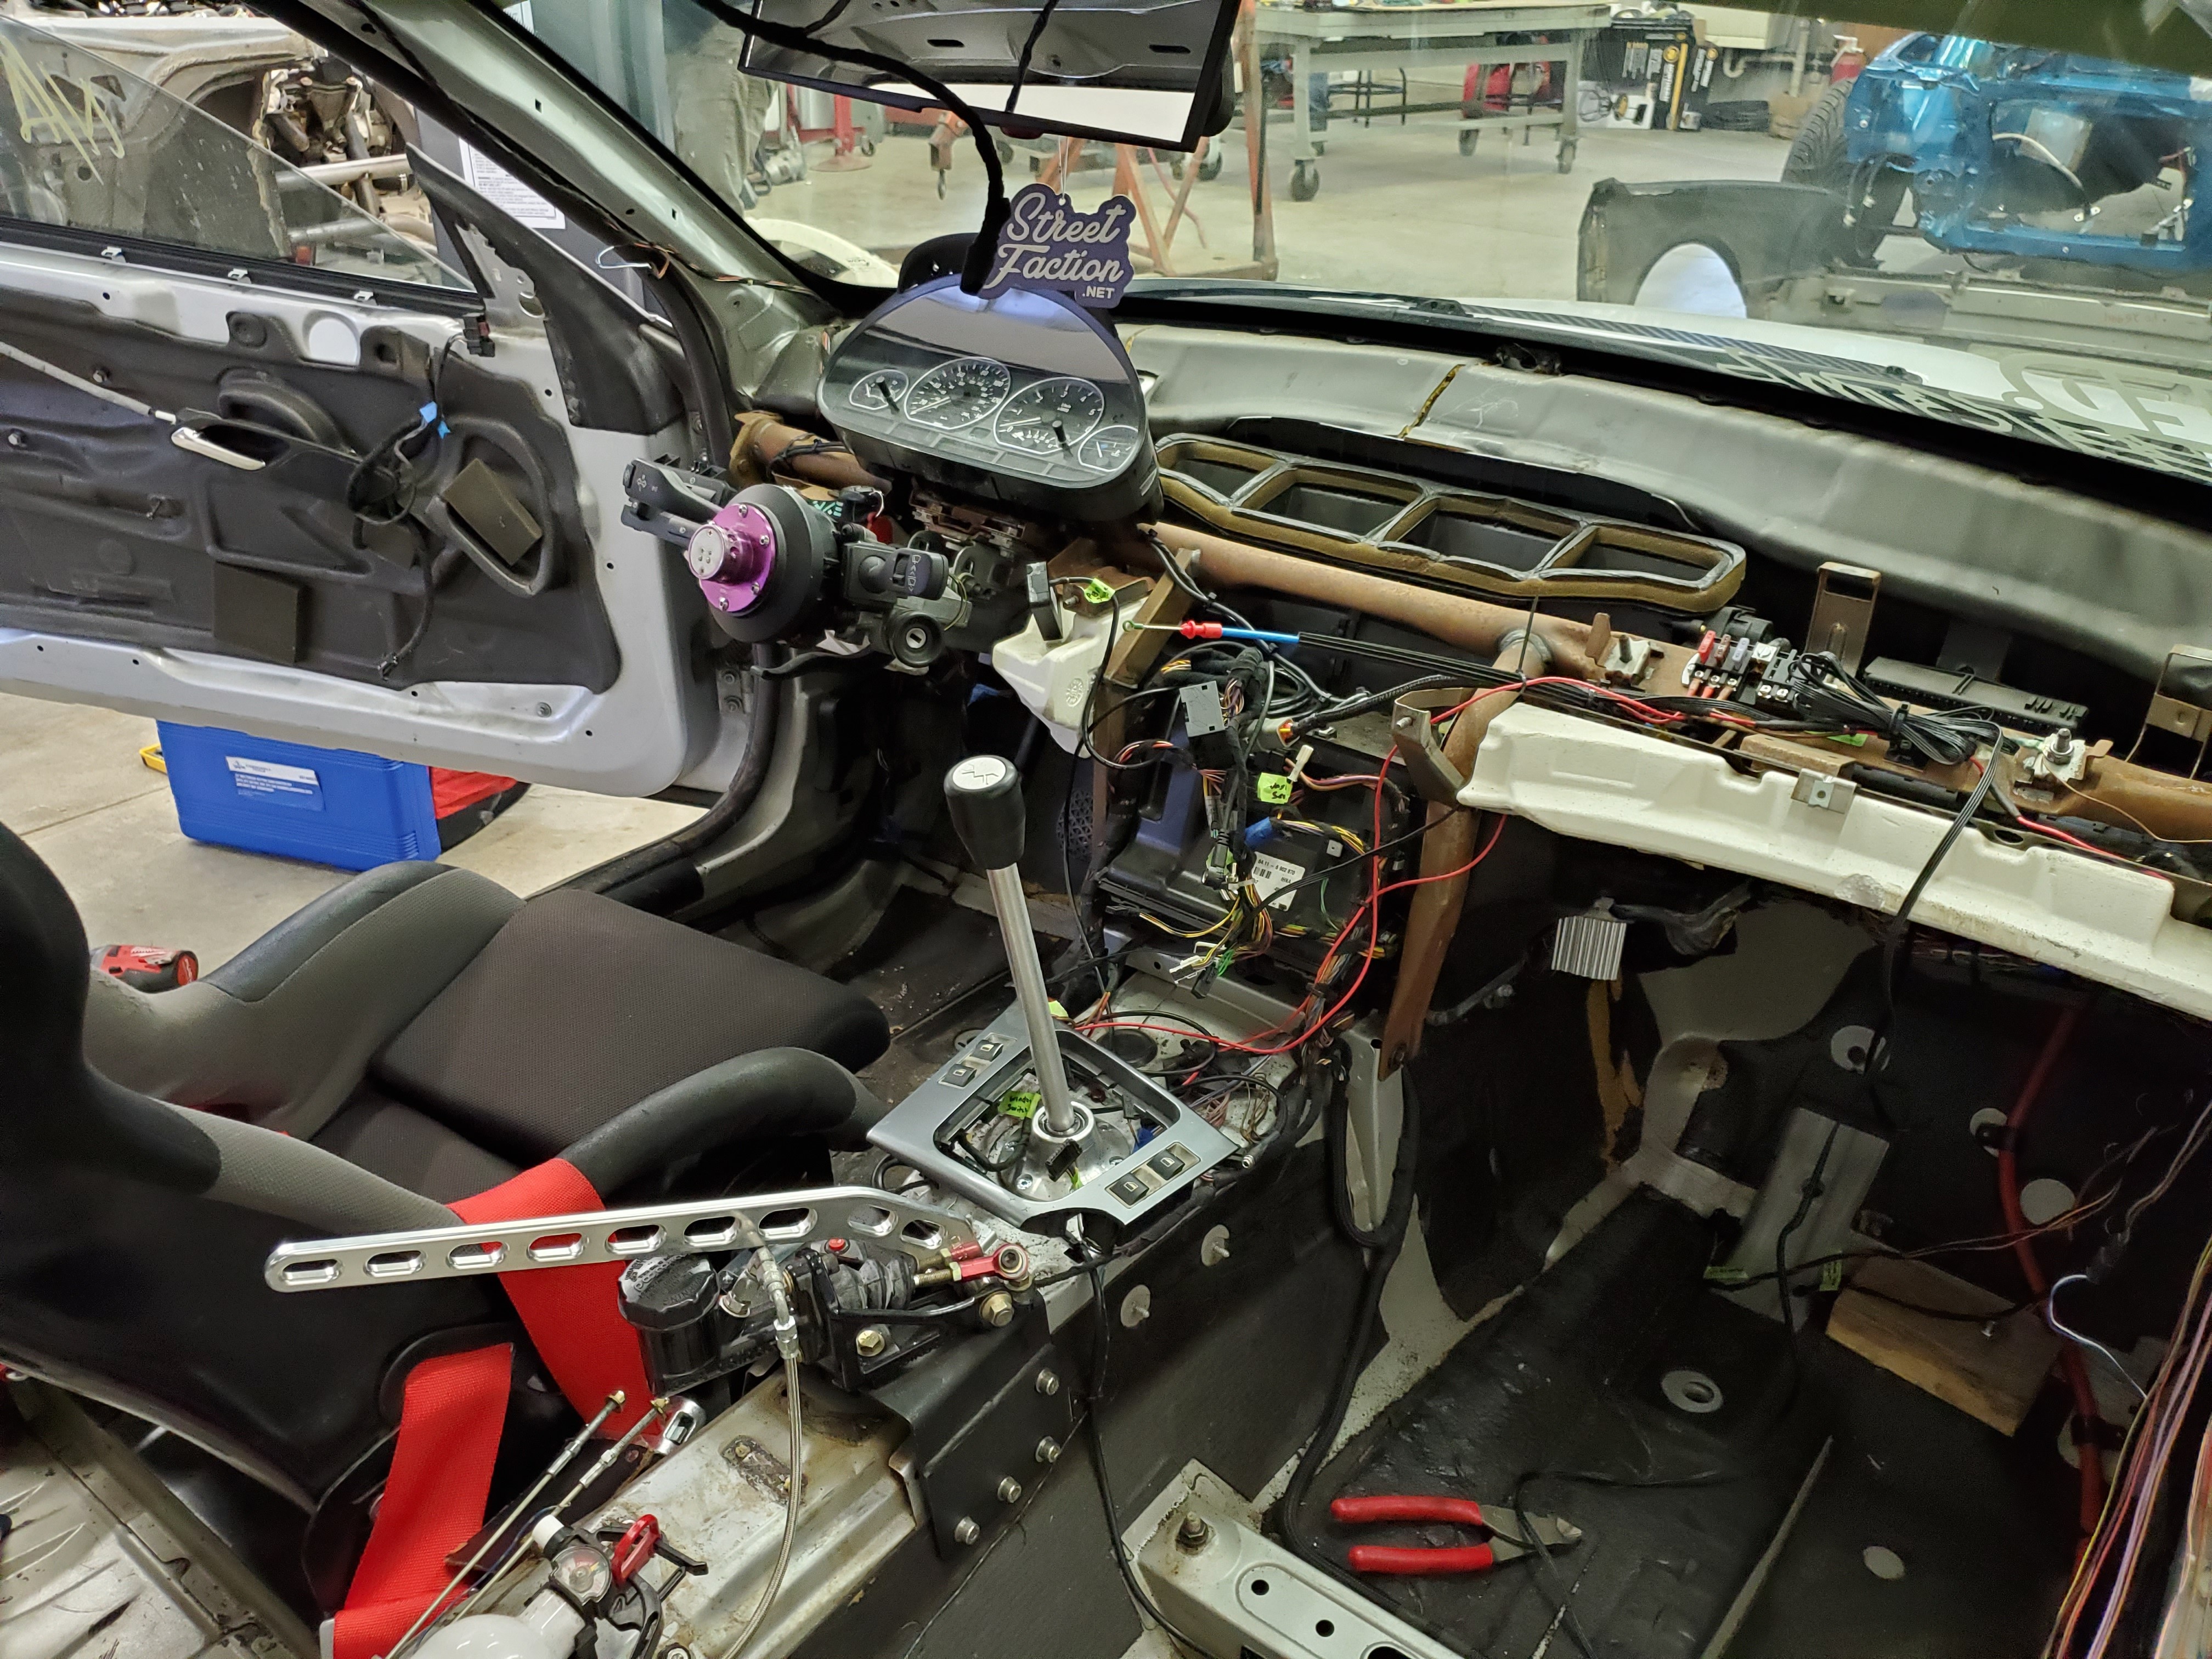
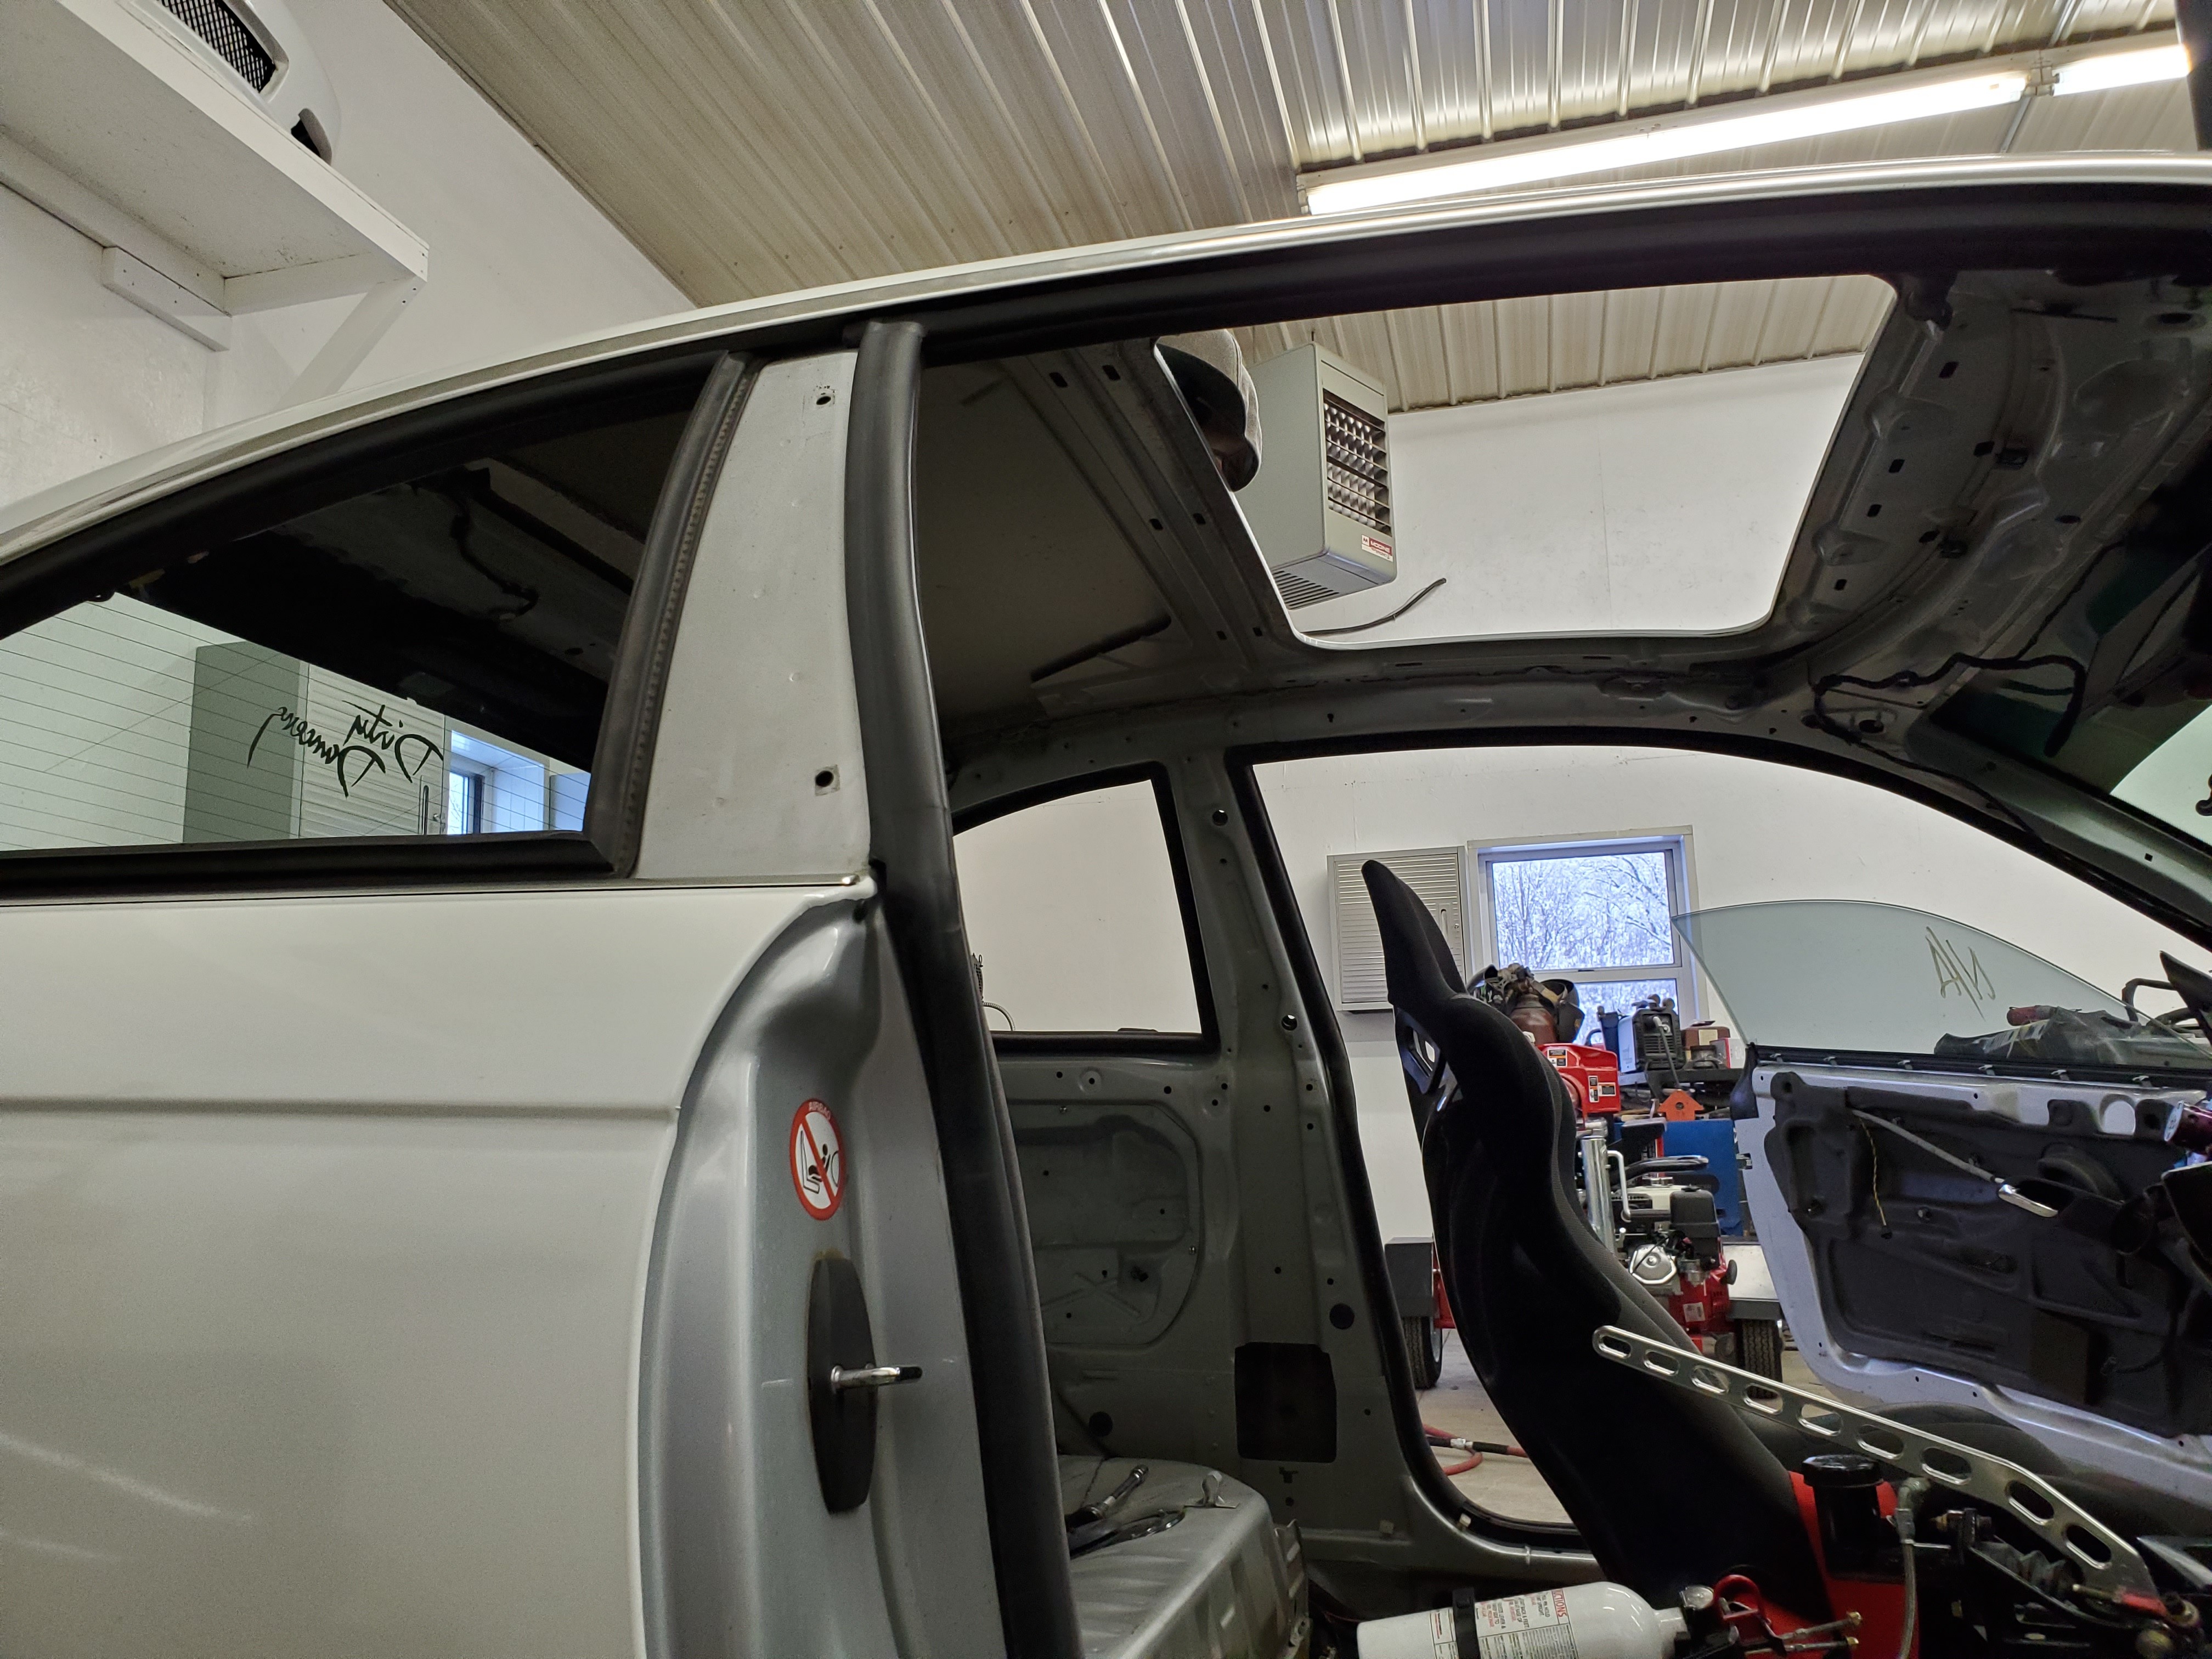
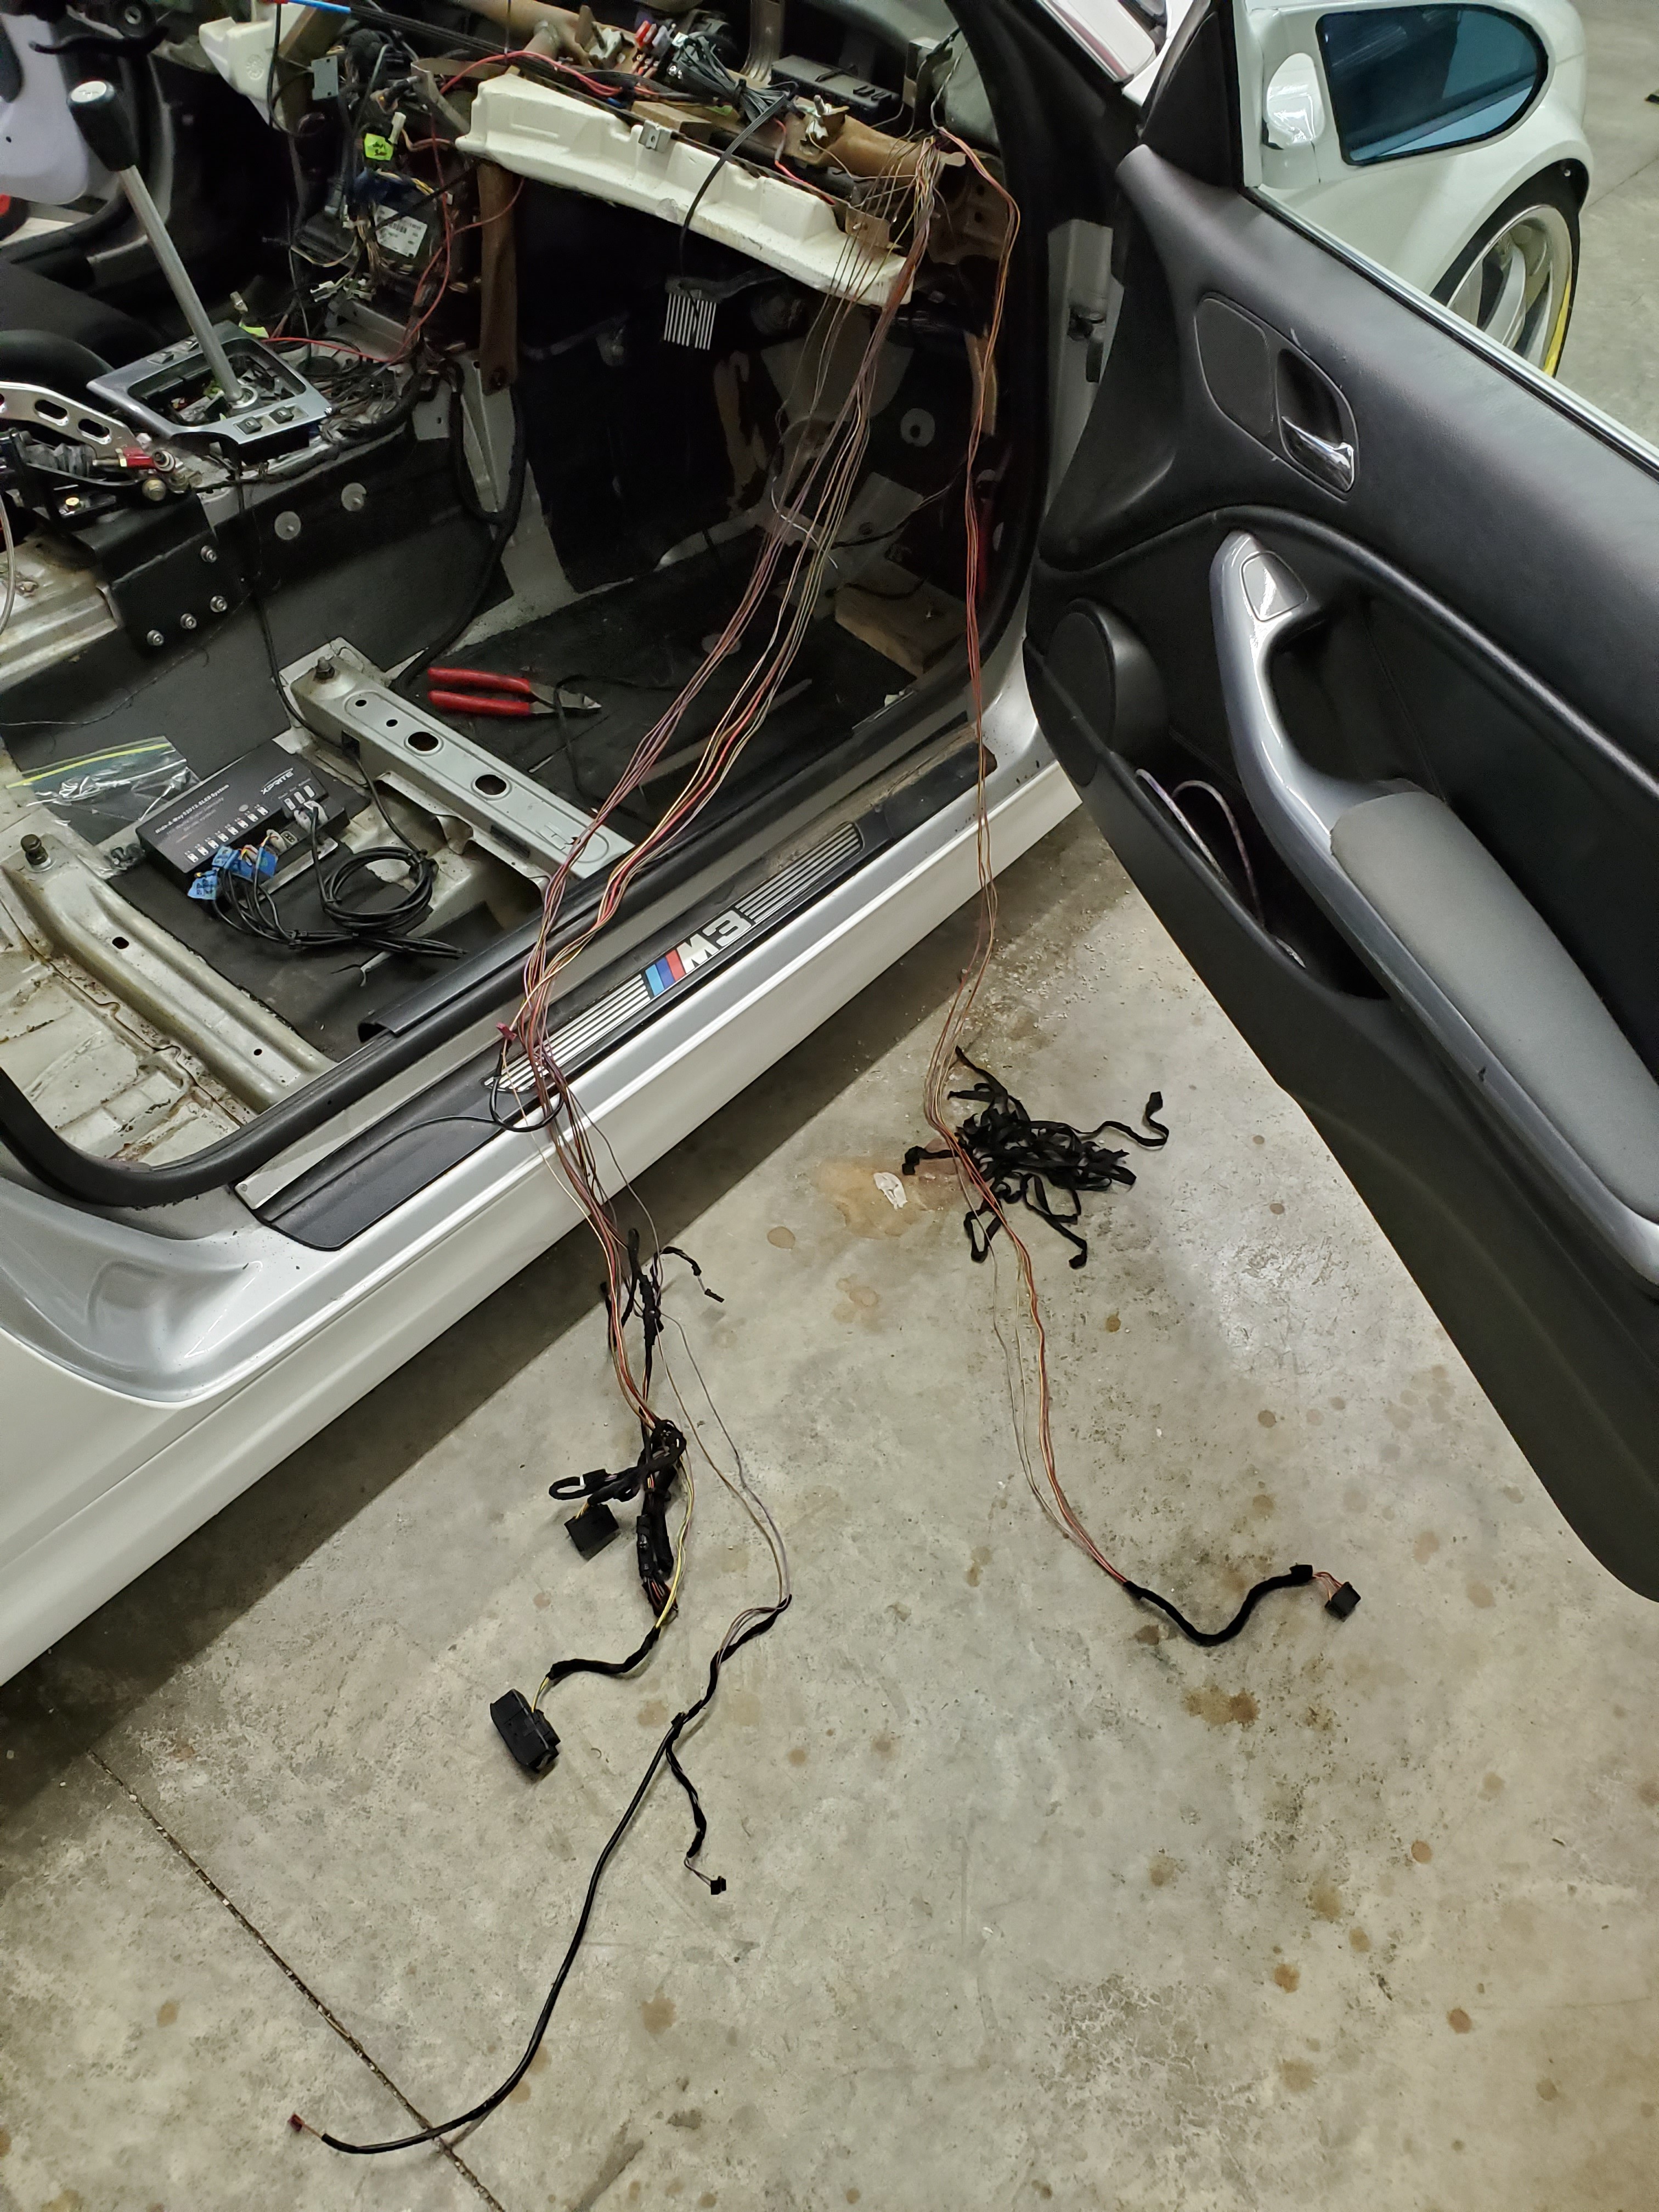
        Finished pulling the dash out of the car after some conversations about the cage placement. Pulled the sunroof and then pulled all the wiring down to separate it. Only going to be running the done light wiring back up after the cage is done.
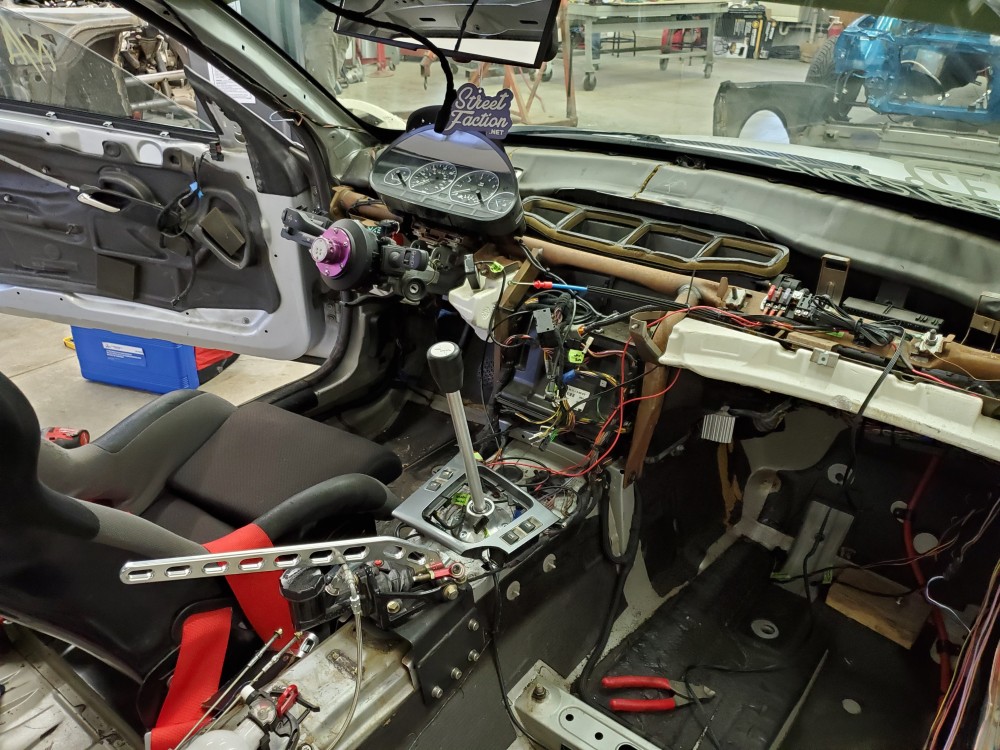
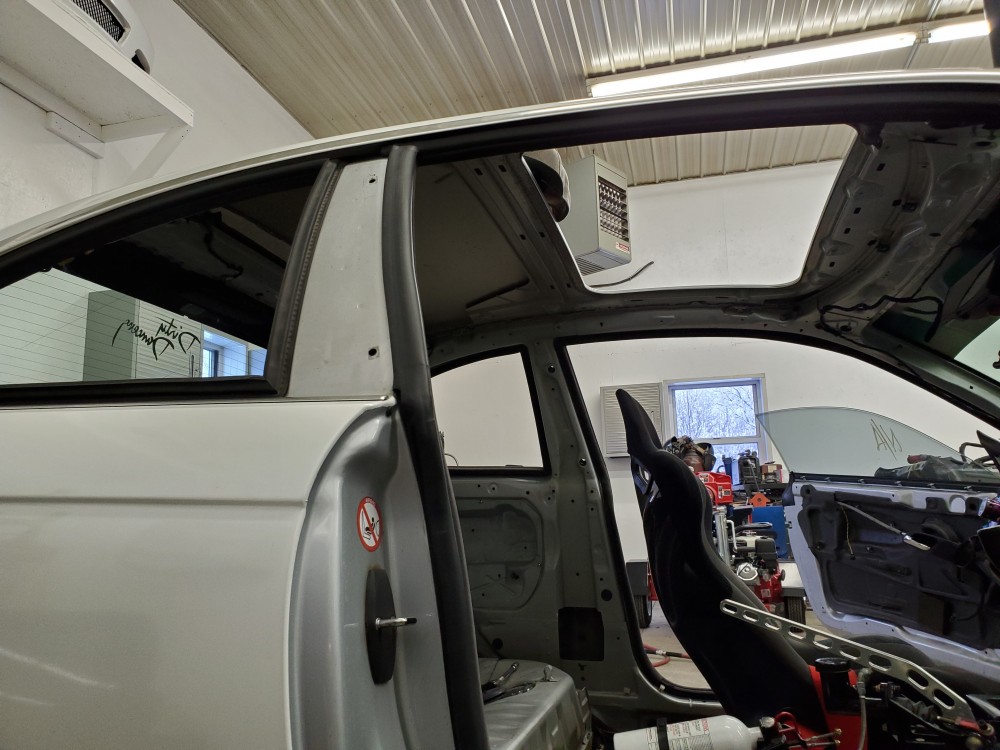
        20200125160355.jpg

        20200125160405.jpg

        20200125160346.jpg

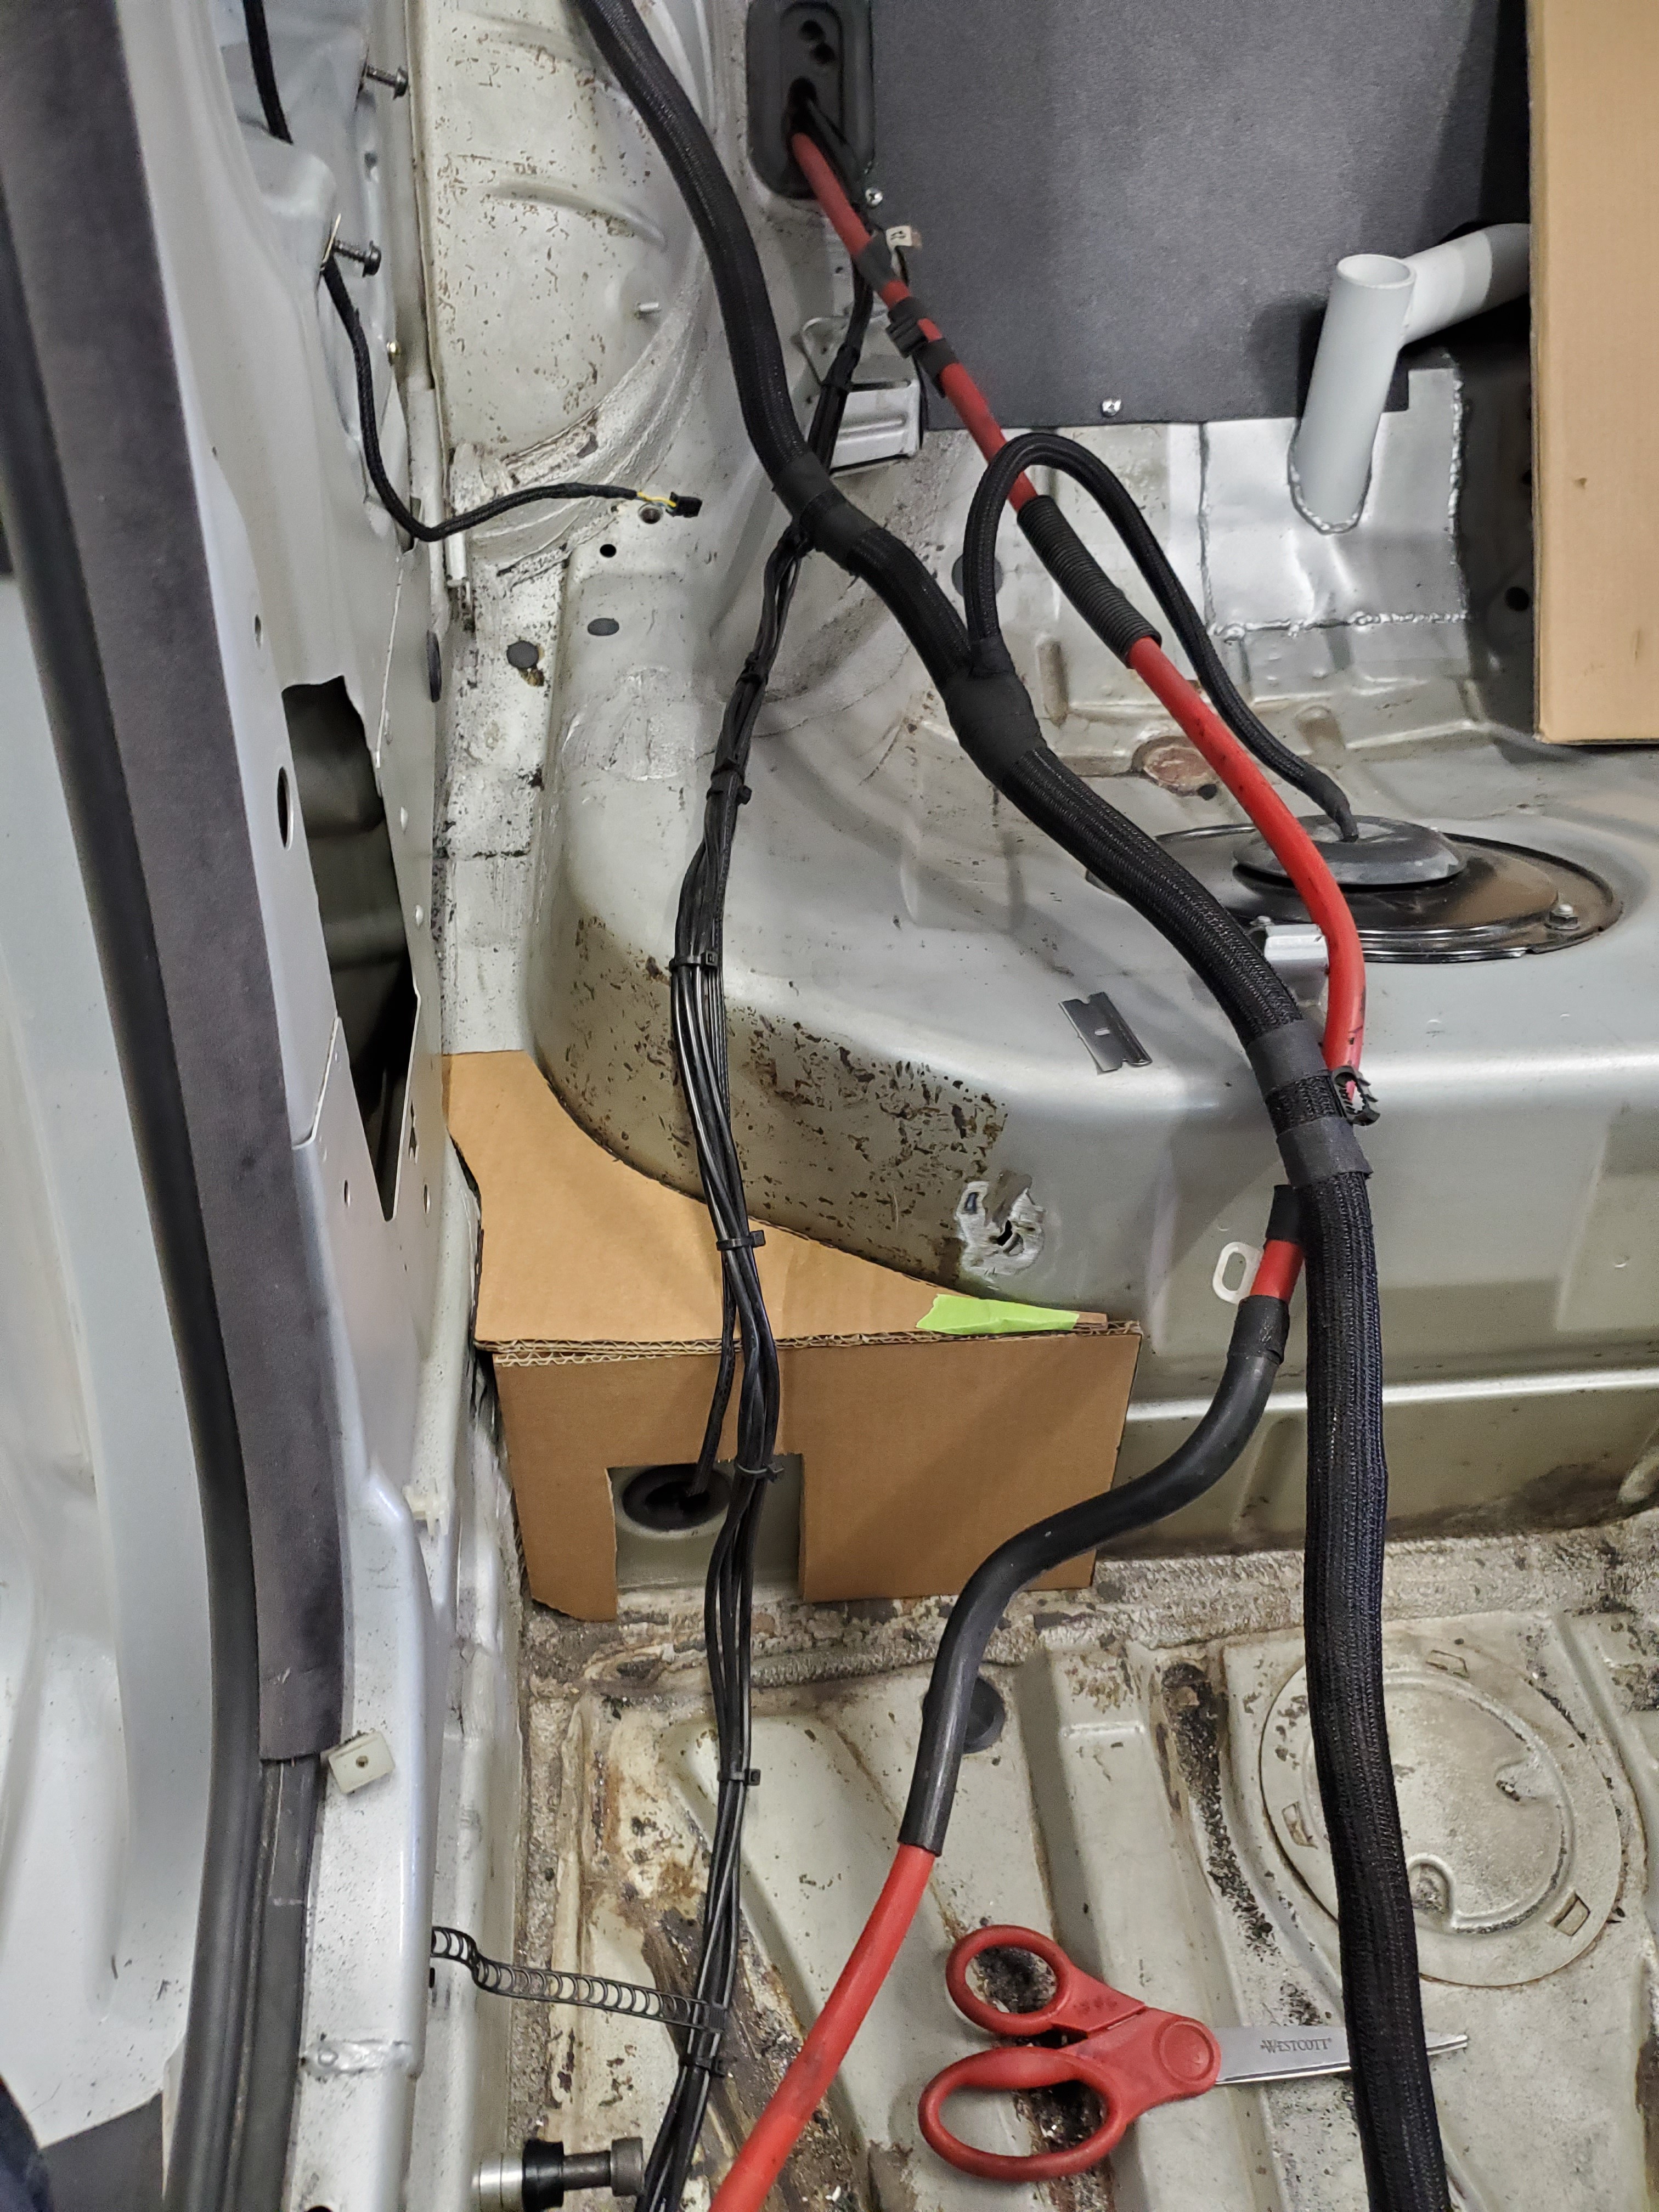
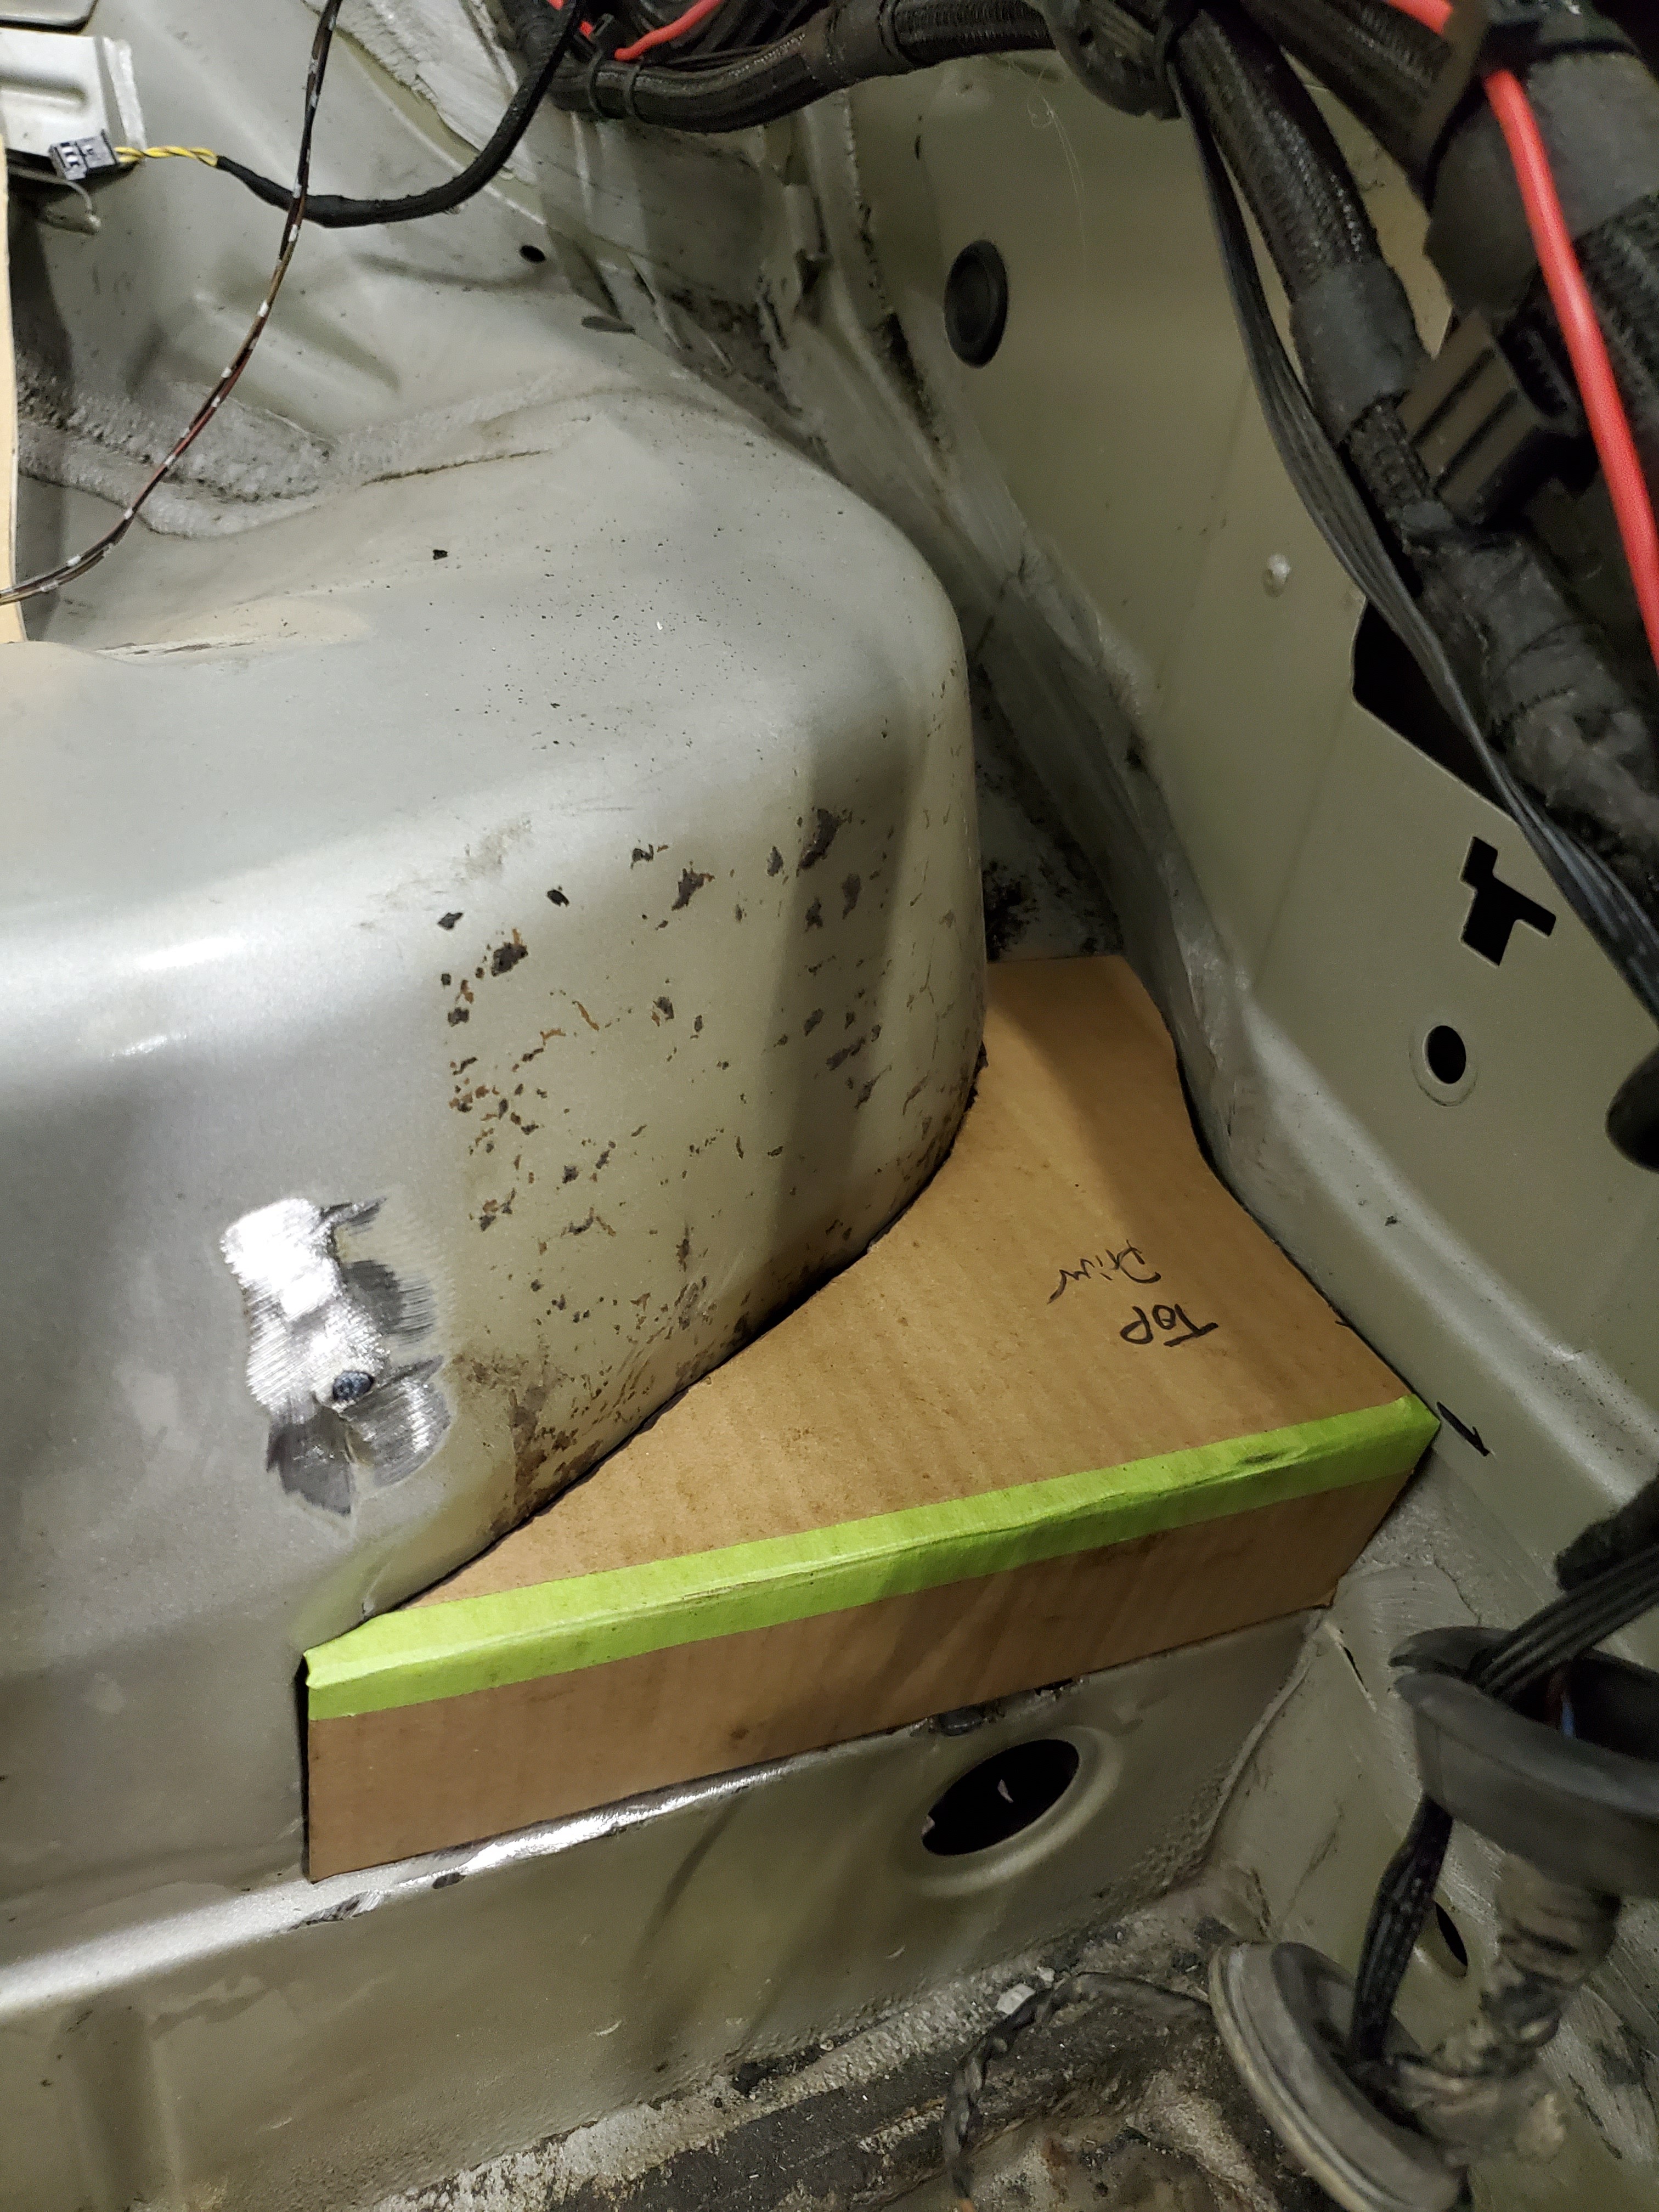
        Now that the tube is ordered it's time to really prep for the cage.

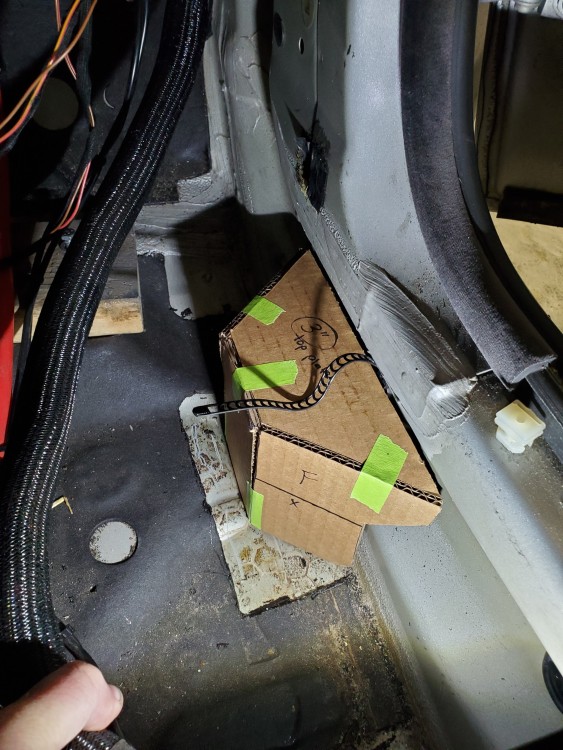
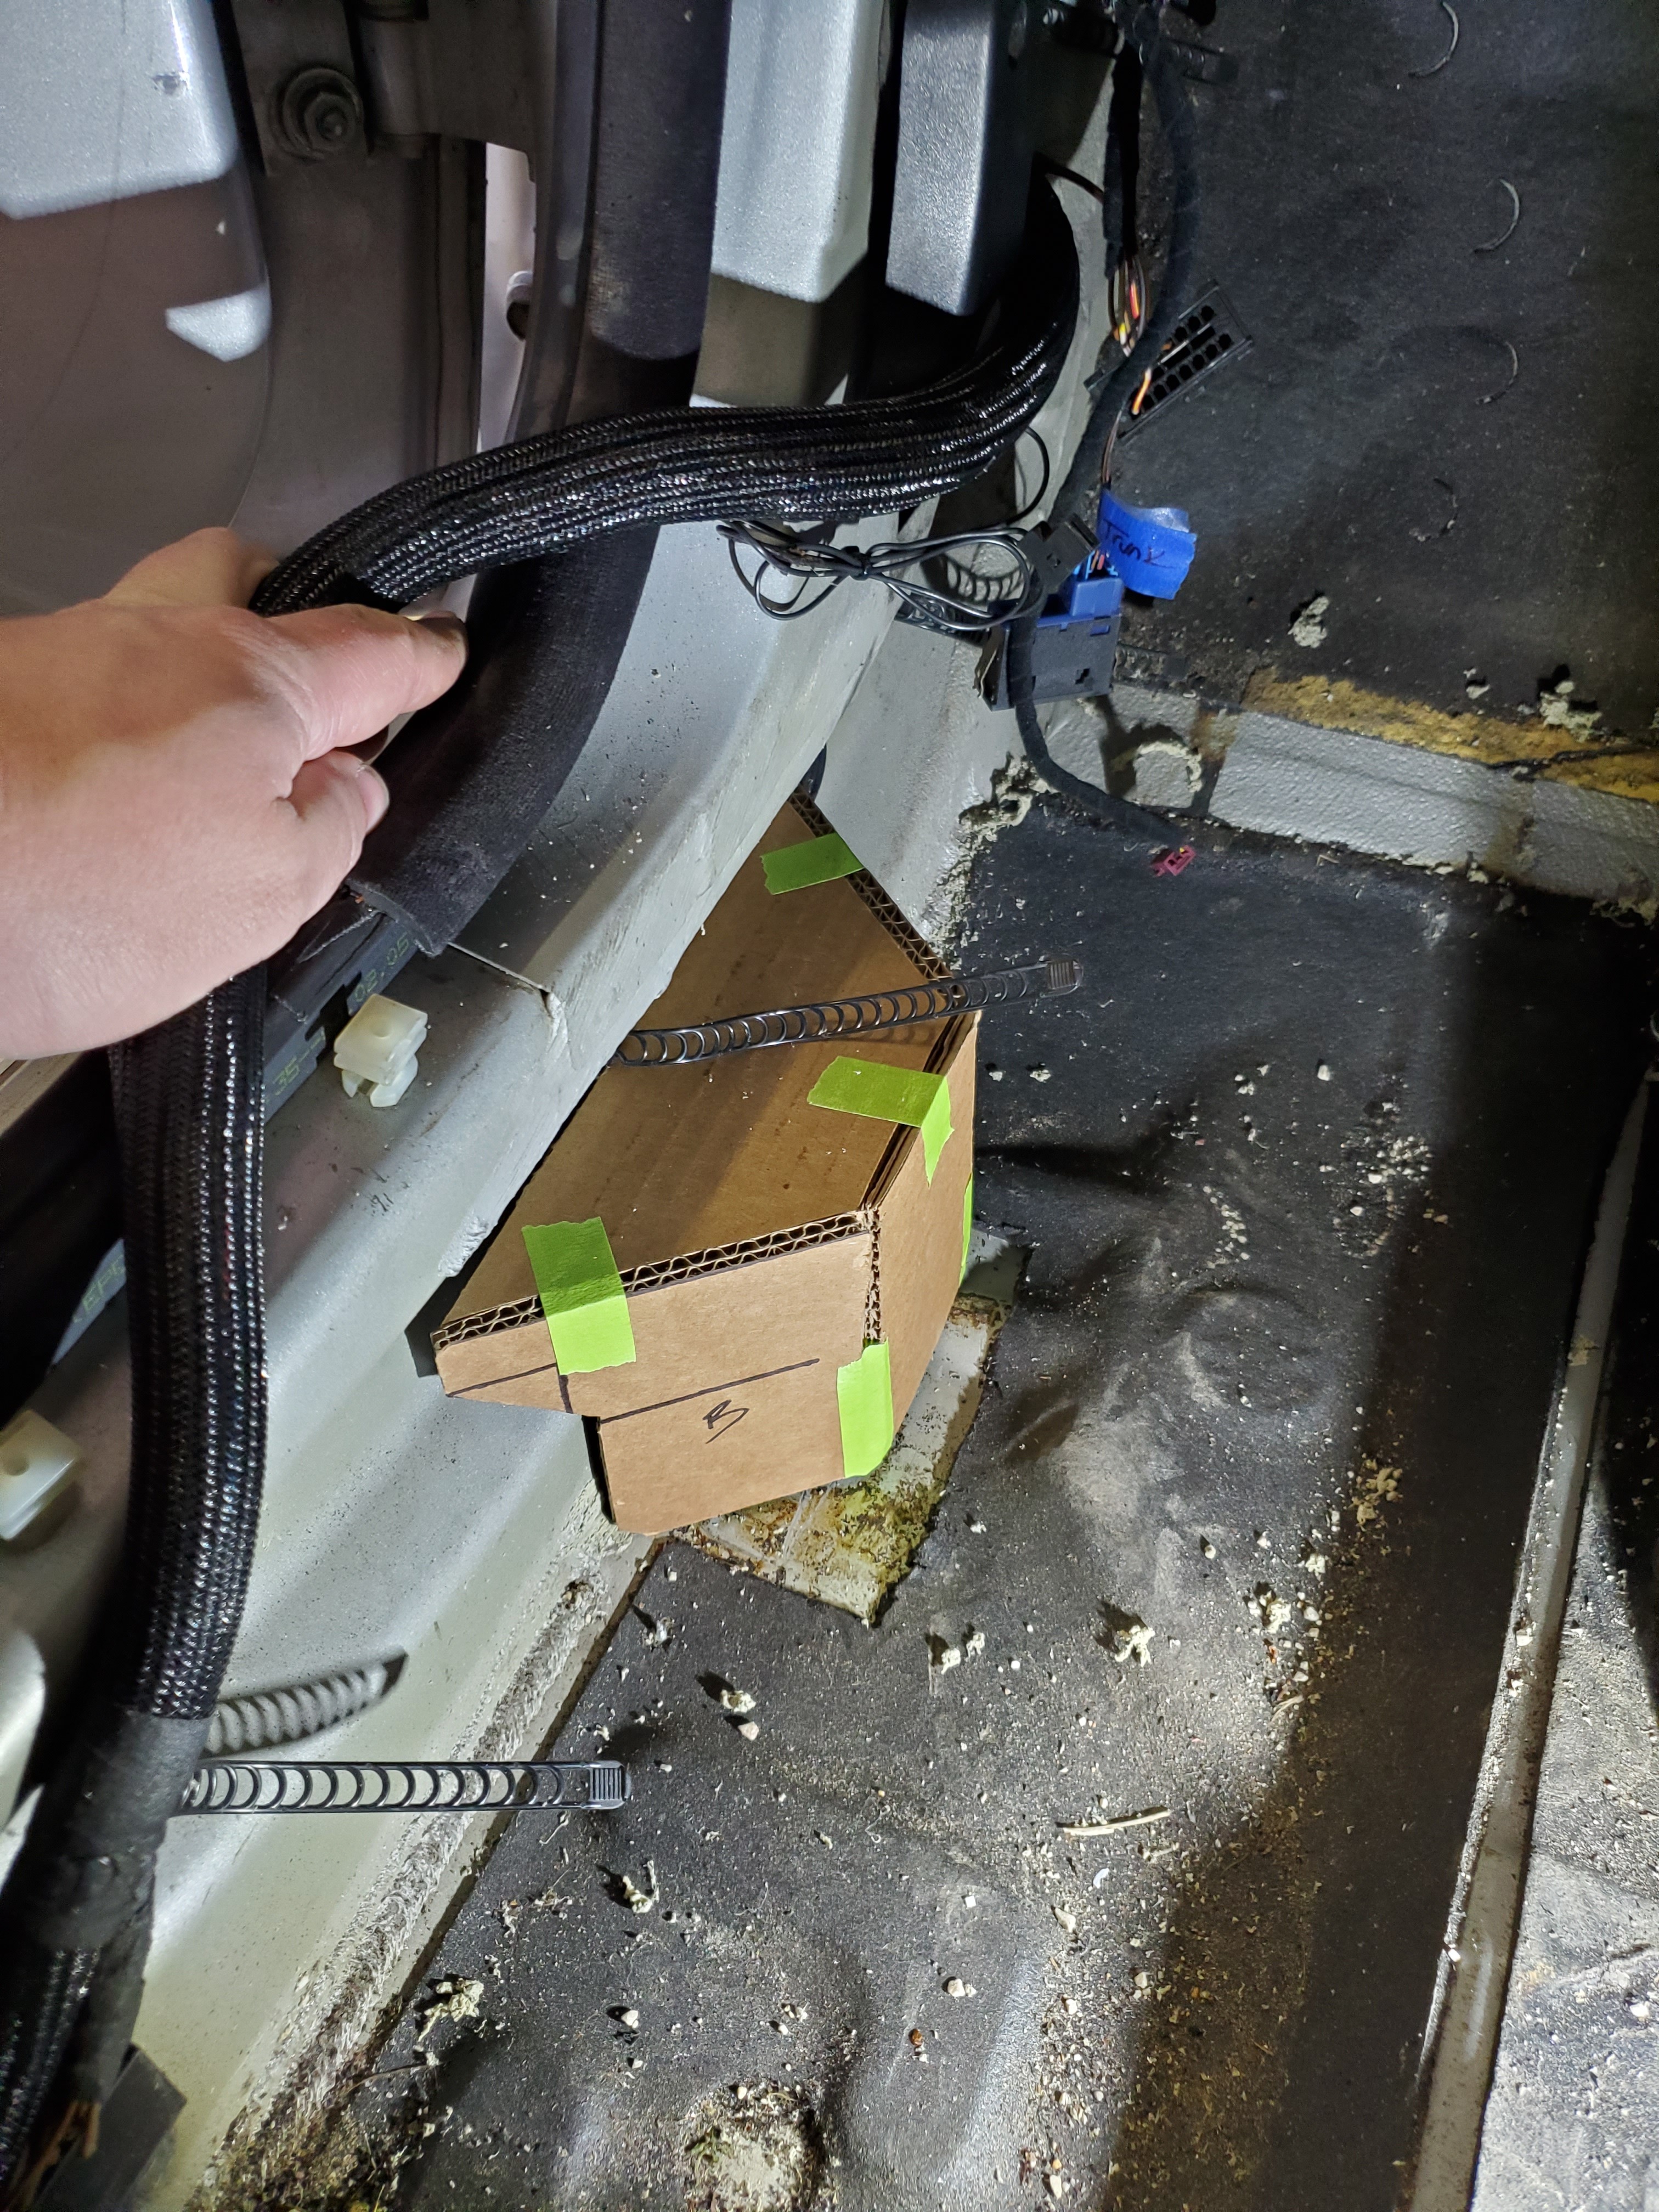
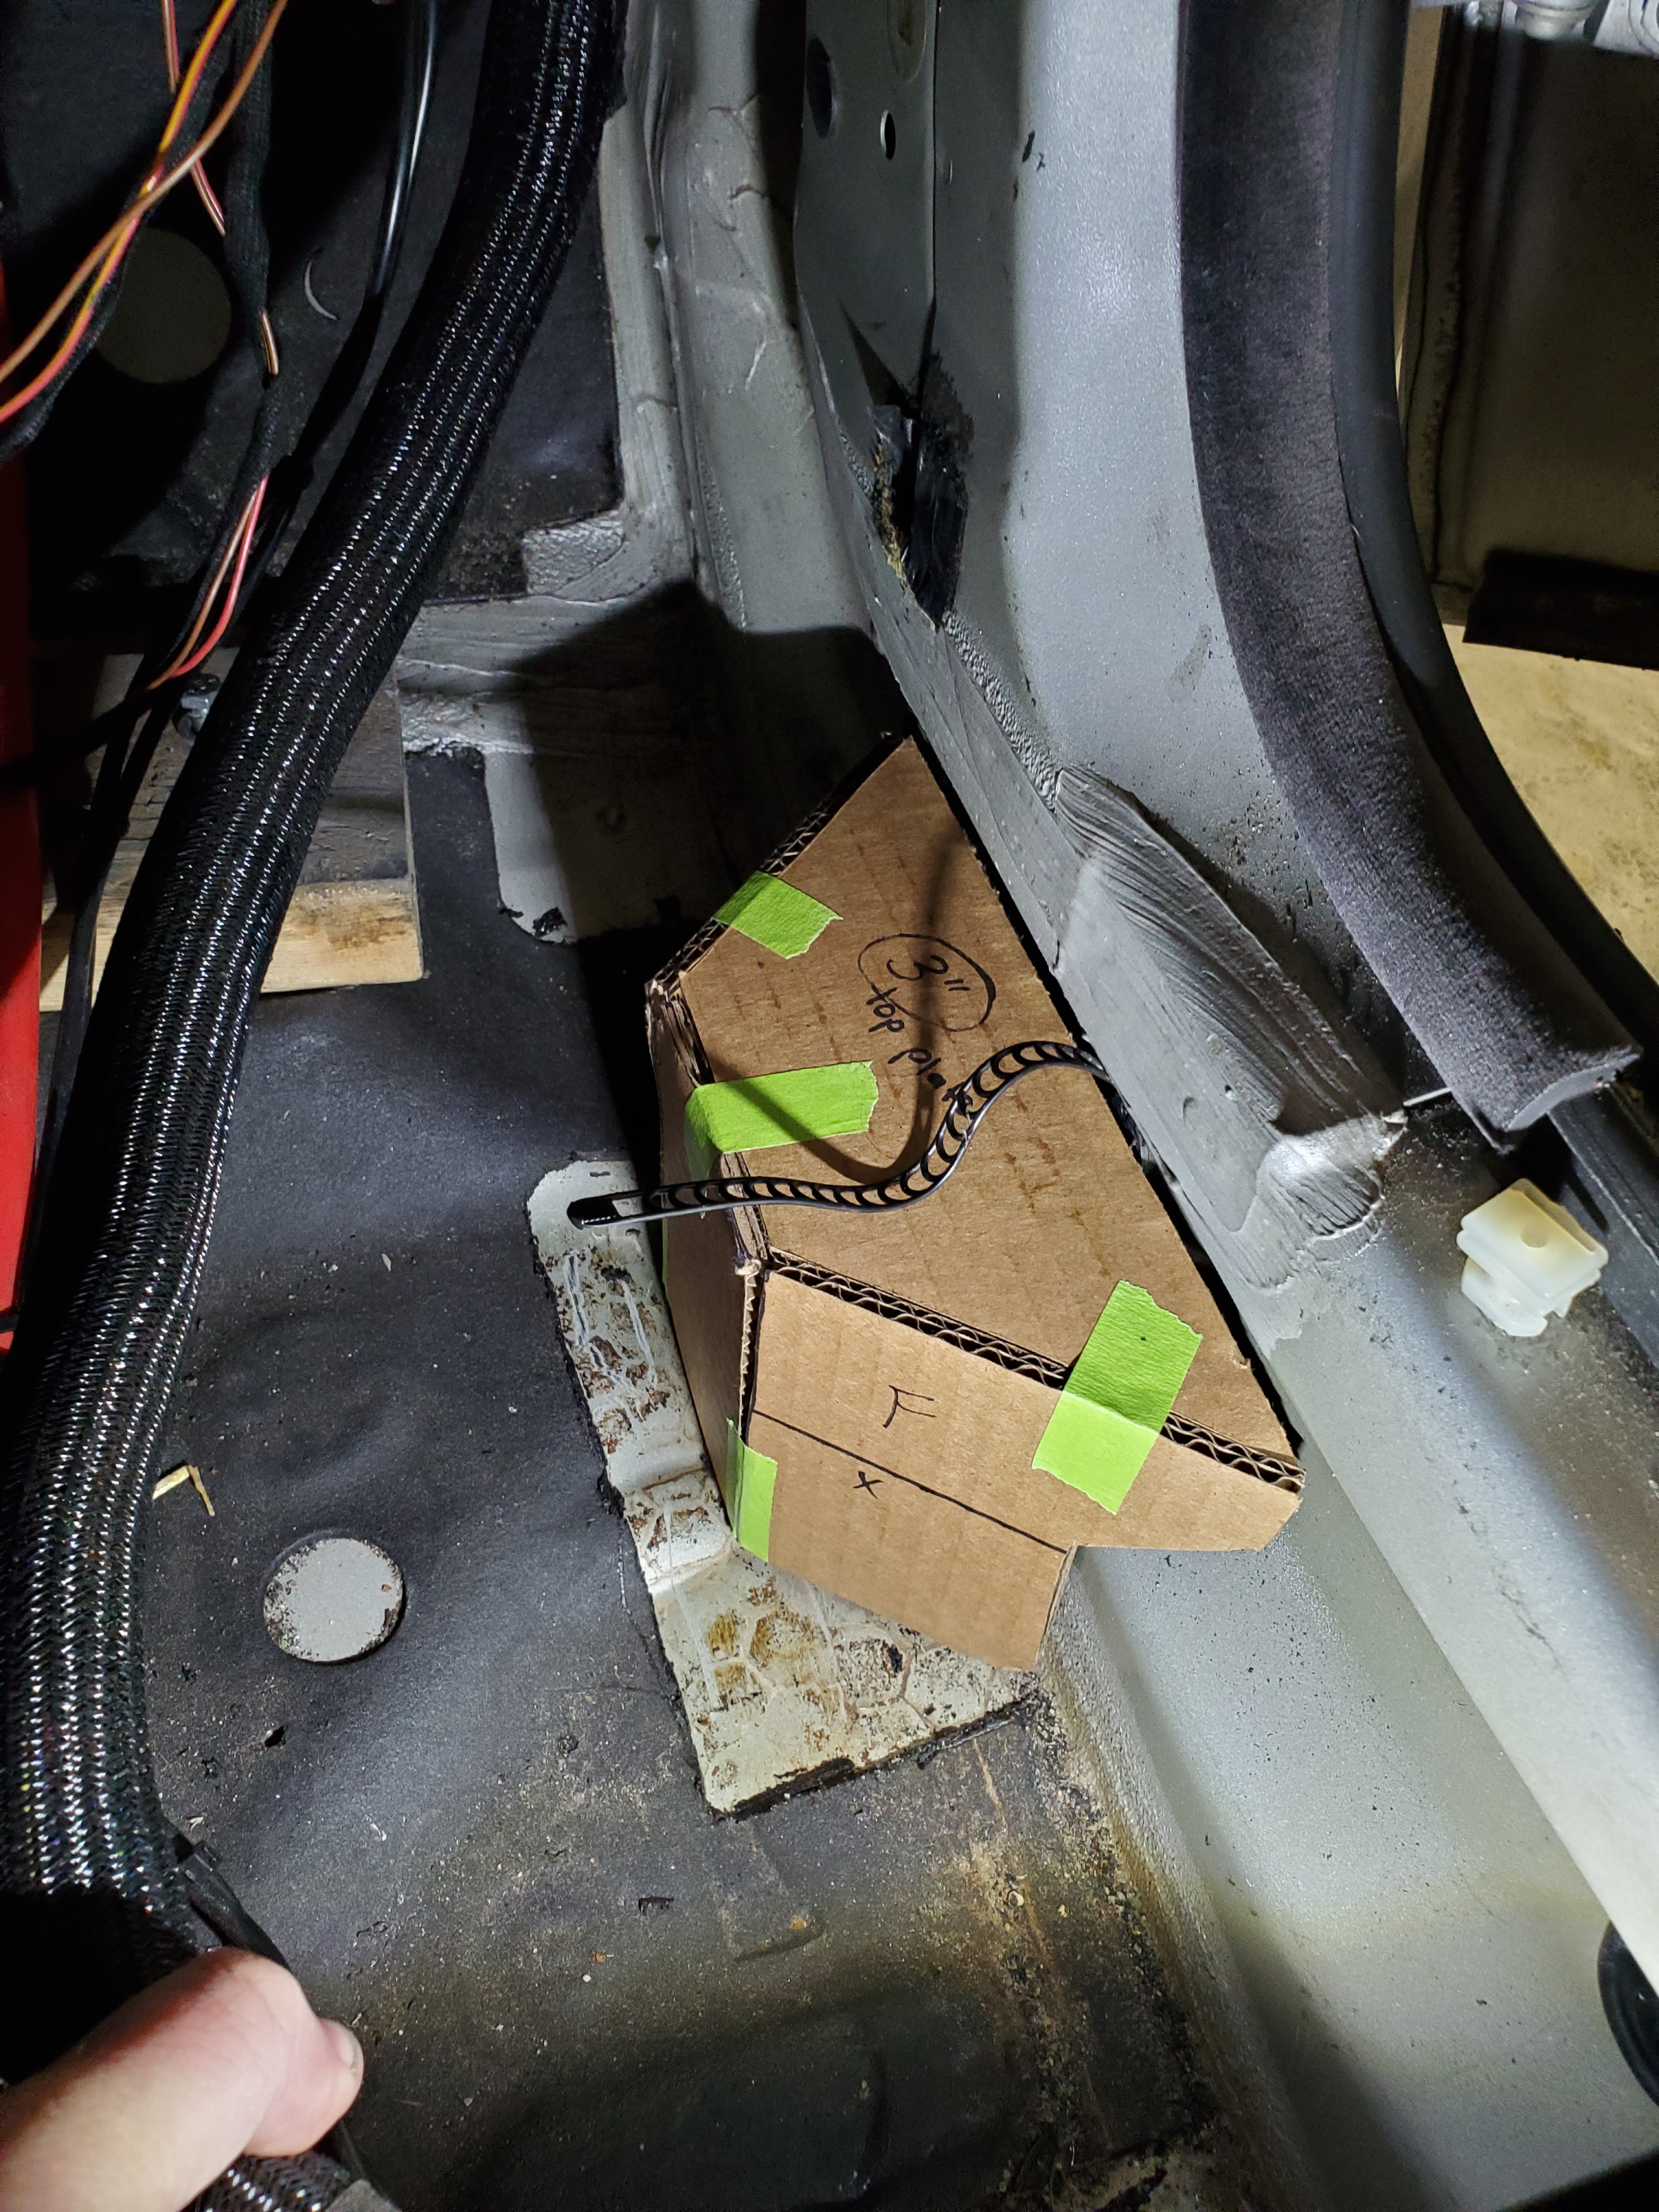
        Made what I like to call a "CAD" design for the front rocker boxes.

        Driver side.
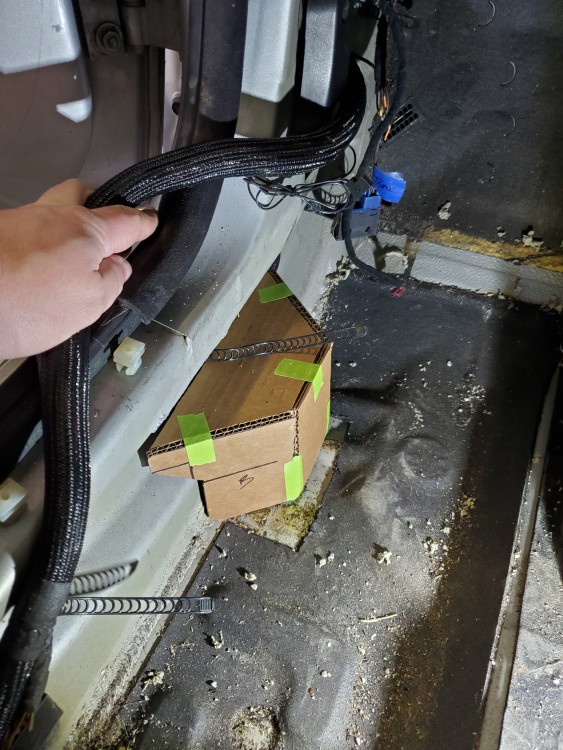
        20200126114053.jpg

        Passenger side

        20200126124239.jpg

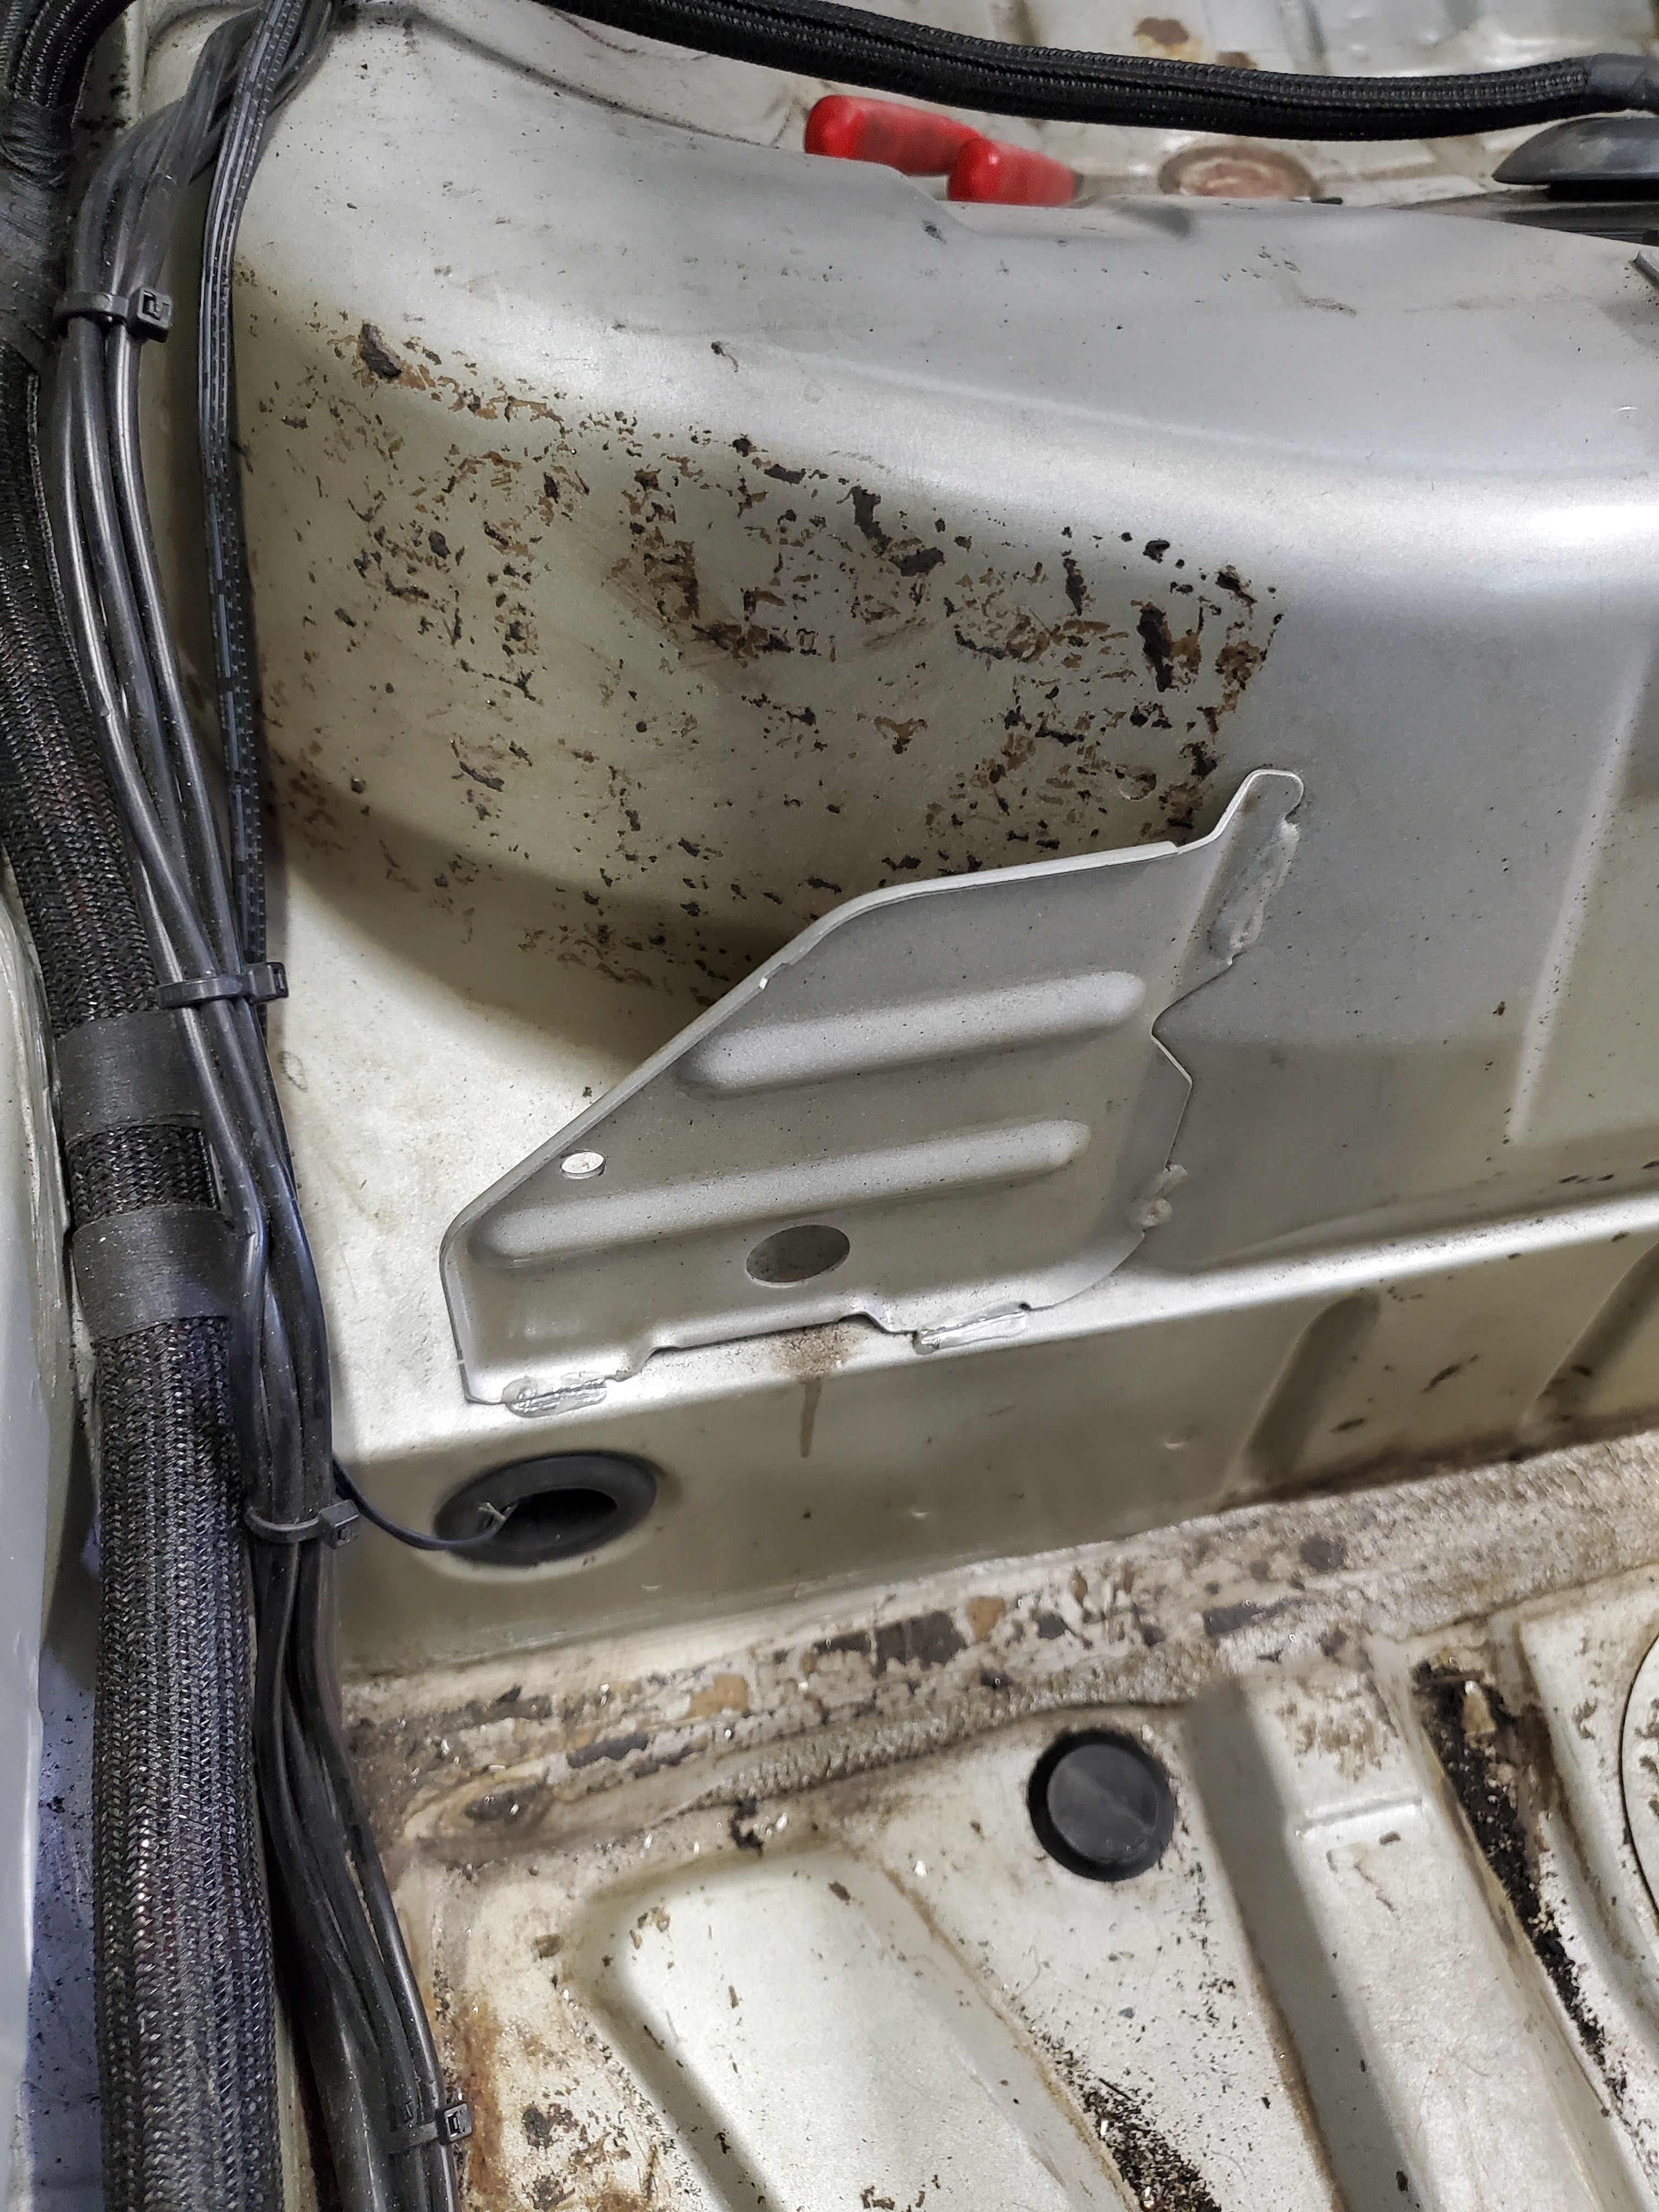
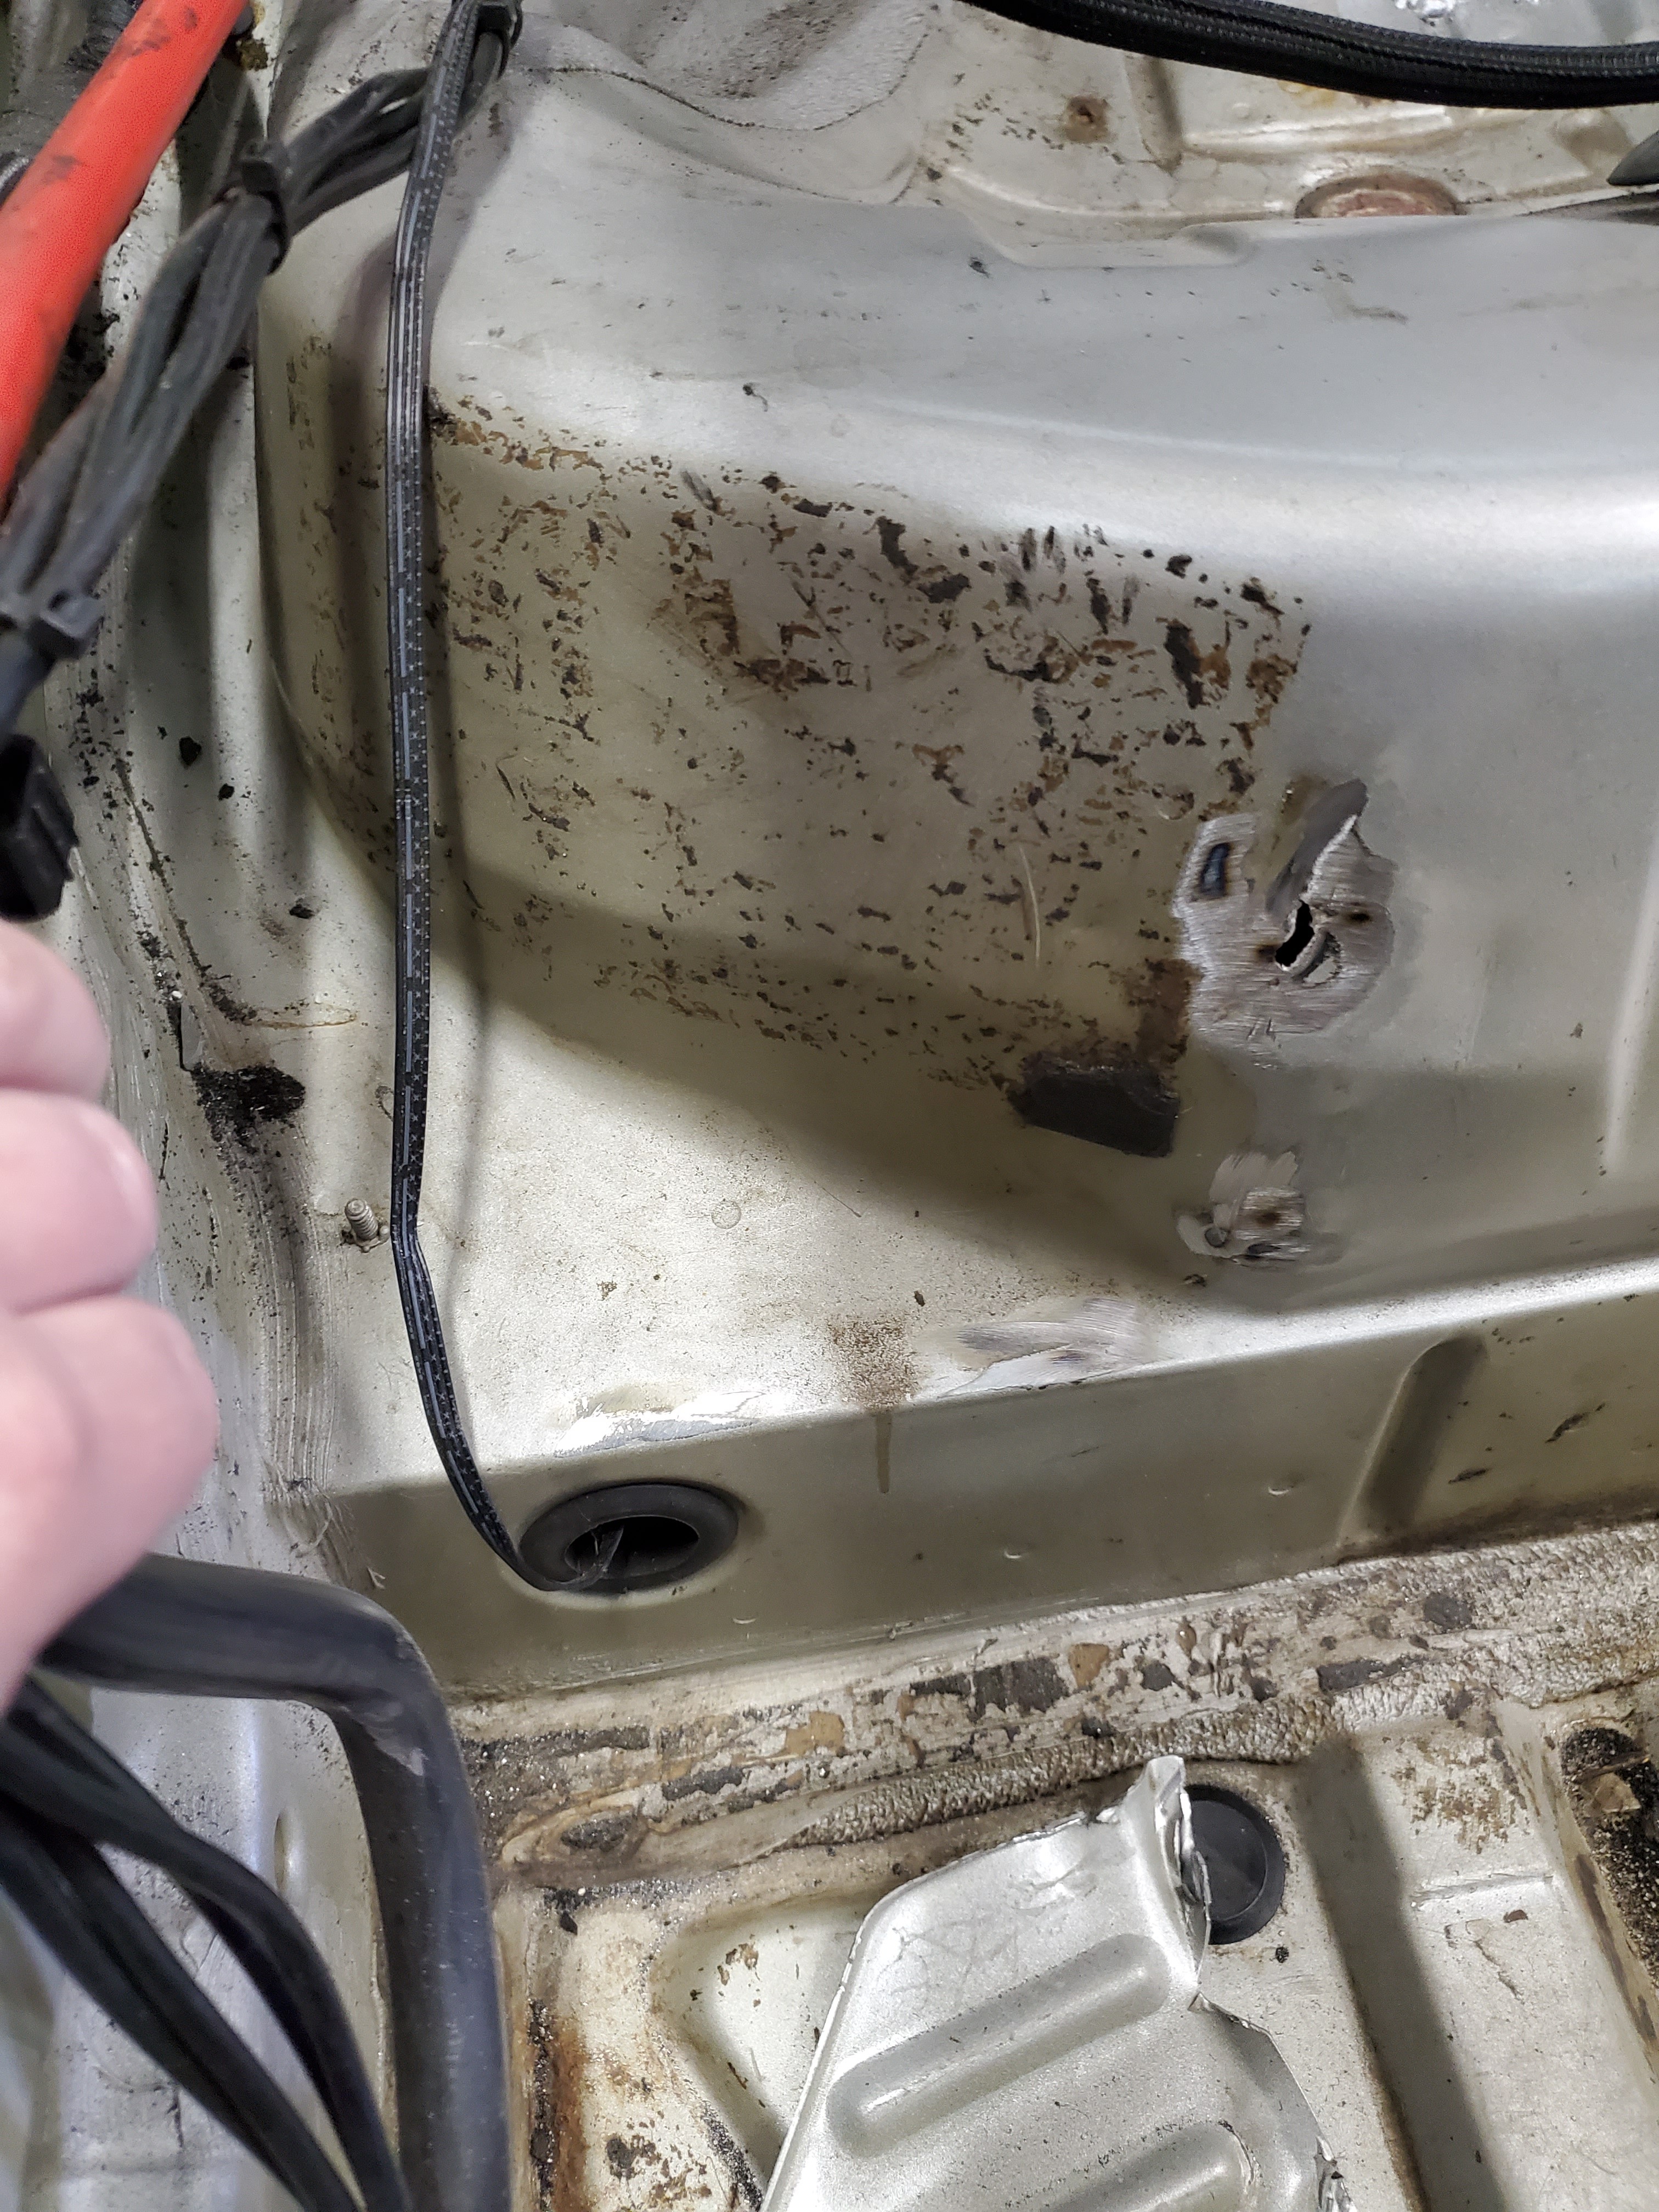
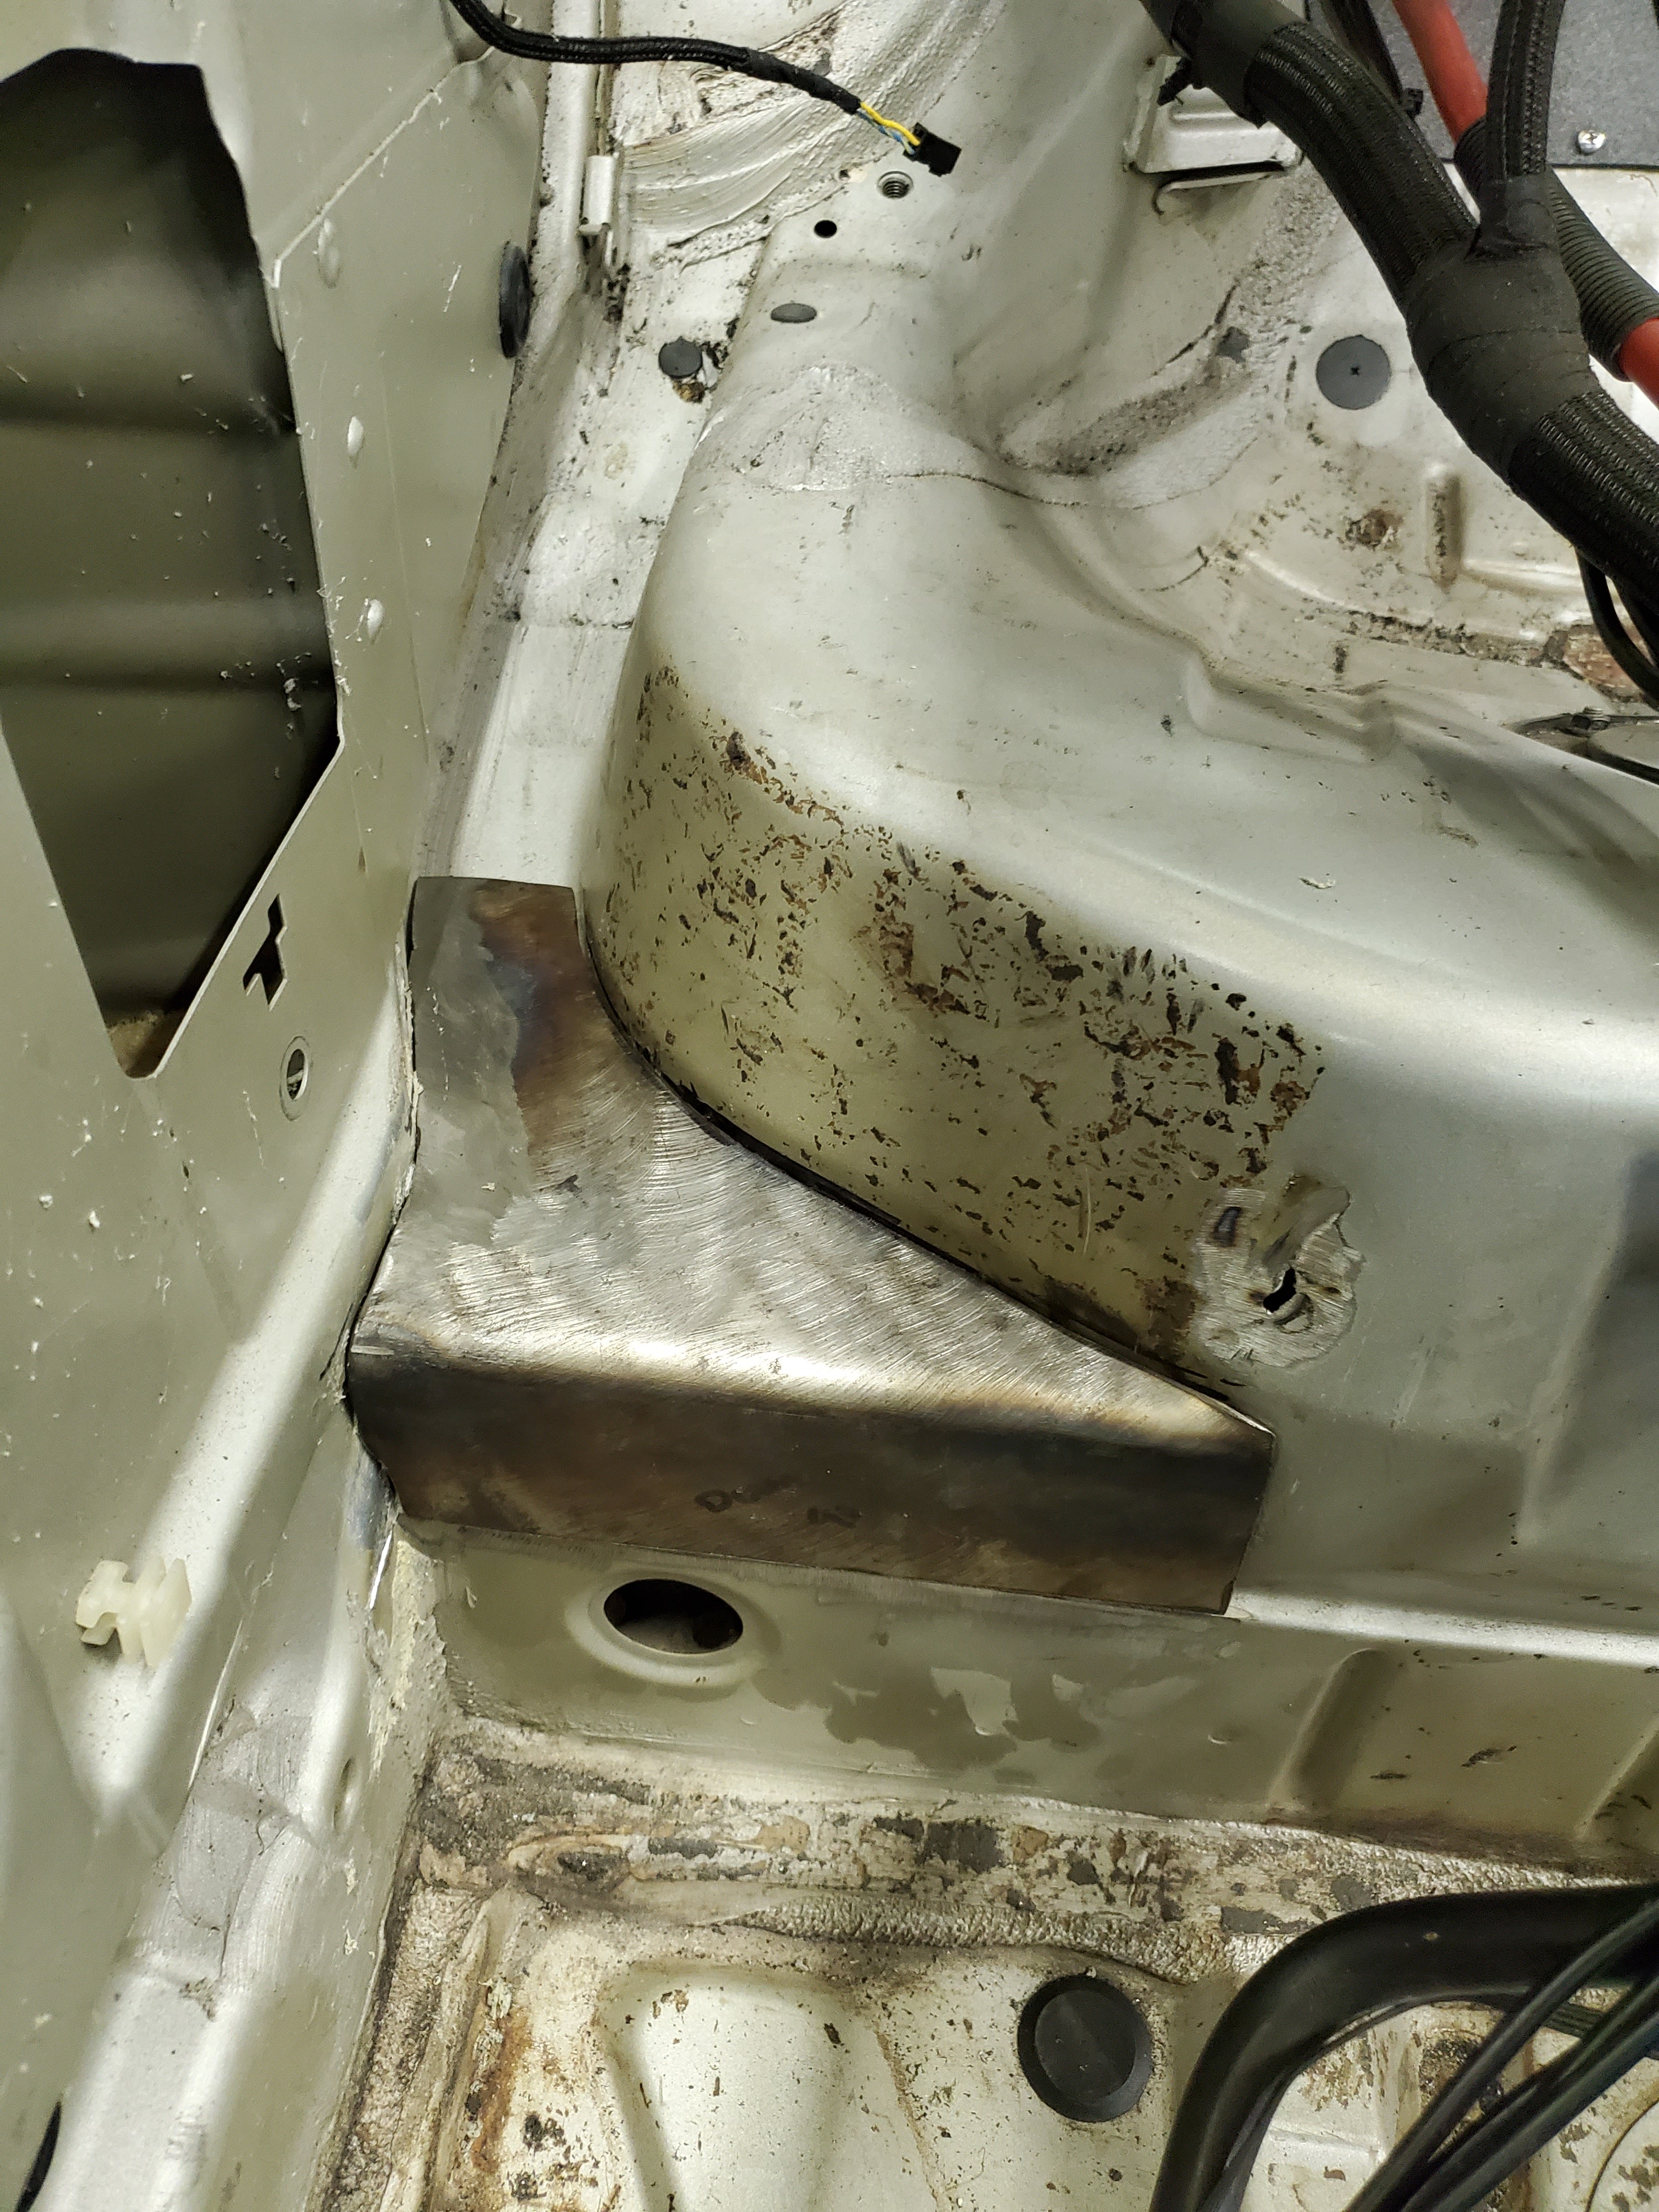
        And then I removed some of the rear panels that will be in the way of the rear boxes, not really sure what to call them.
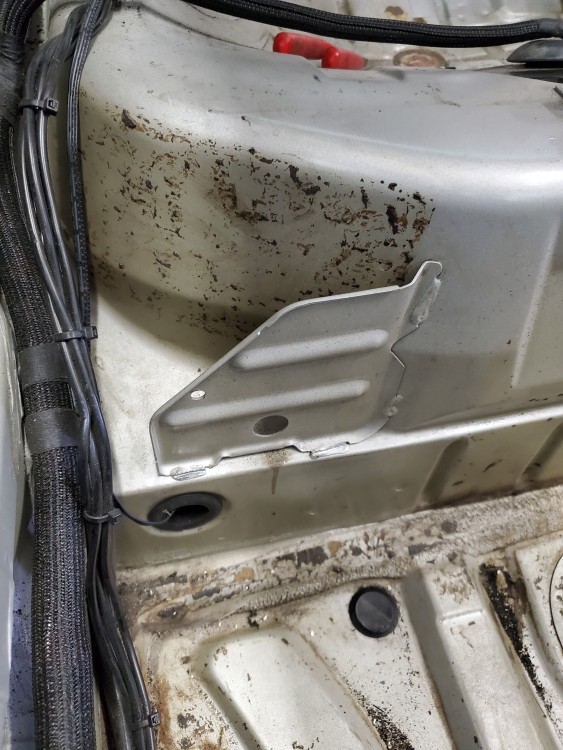
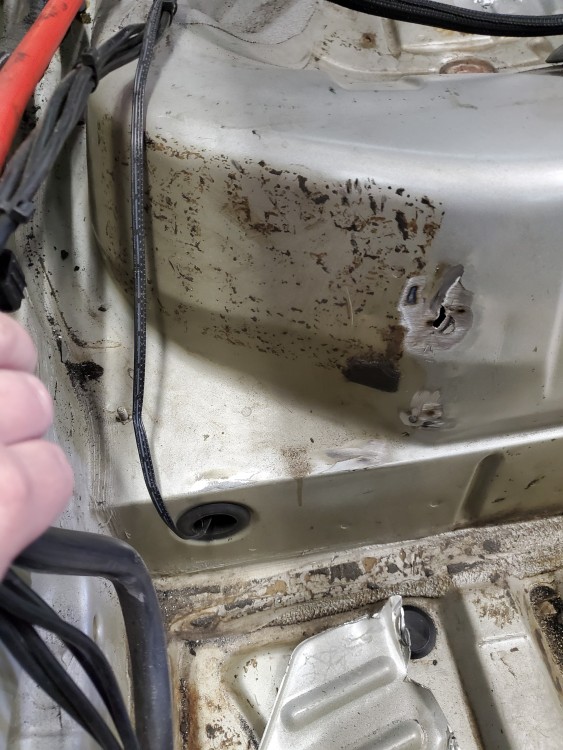
        20200126125317.jpg

        20200126131430.jpg

        Kinda blew a hole where one of the welds were but easily fixable.

        And then I made up templates for the passenger box but called it quits for the weekend after this one. Still a rough design.
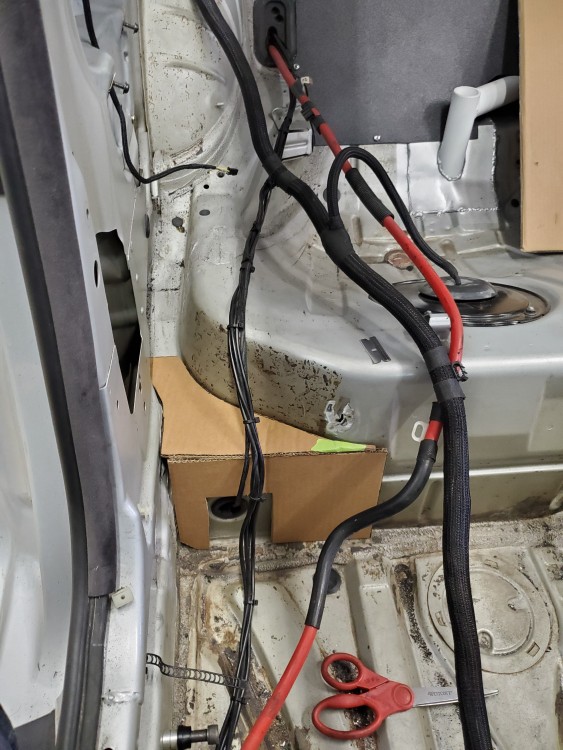
        20200126134218.jpg

        1 Reply Last reply
        1
        • straight6pwrS
          straight6pwrS
          straight6pwr
          wrote on last edited by
          #291

          "CAD" cardboard aided drafting 😂

          Dan
          yajsYRL.jpg.e5f350b4dfe961d76ac8b32efce2e1a6.jpg

          1 Reply Last reply
          1
          • JdesignJ
            JdesignJ
            Jdesign
            wrote on last edited by
            #292

            straight6pwr said:

            "CAD" cardboard aided drafting 😂

            I was going to say "Cardboard Aided Design"

            SumBunny.jpg

            https://www.instagram.com/_jdesigner_/                                          http://nevertoolow.tumblr.com/

            🥳SOLD BMW E24 633CSI - BMW M30B32                                          🧪SOLD HCH  ES9 - 1.3 LDA
            👽BMW E30 325IC - Toyota 1JZ-GTE                                                     ⏰ HONDA EF9 CIVIC SI - JDM B18C5
            ☠️BMW E36 318i - Ford 5.0 FE302                                                         🚴‍♂️ GT-Labomba - 26x2.75 Freeride
            🤹‍♀️SOLD BMW E36/7 Z3 - BMW M54B25                                                🧓SOLD BMW E10 2002 - BMW M10M05

            1 Reply Last reply
            1
            • TkuhnT
              TkuhnT
              Tkuhn
              wrote on last edited by
              #293

              Jdesign said:

              I was going to say "Cardboard Aided Design"

              Yes that's why I put it in quotes lmao. I've always called it cardboard aided design too

              1 Reply Last reply
              0
              • TkuhnT
                TkuhnT
                Tkuhn
                wrote on last edited by
                #294

                Update.

                Revised the front cage box design, measurements only so not much to show there.

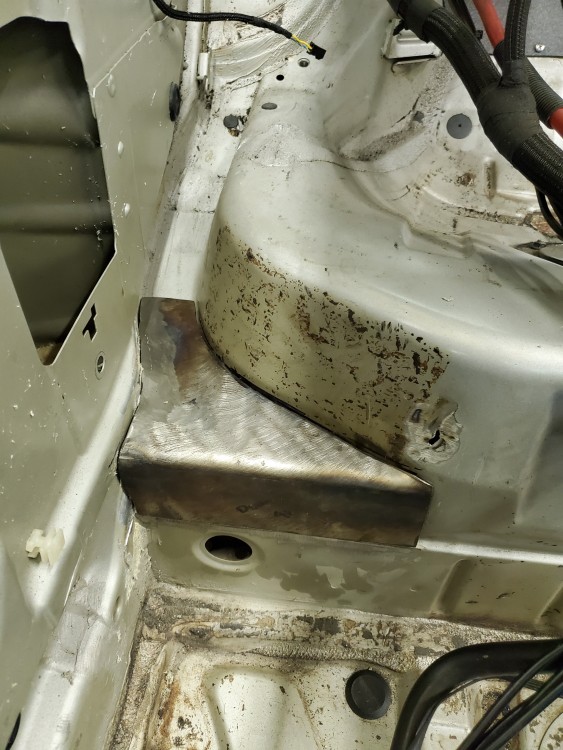
                Also revised and finished the rear cage boxes.
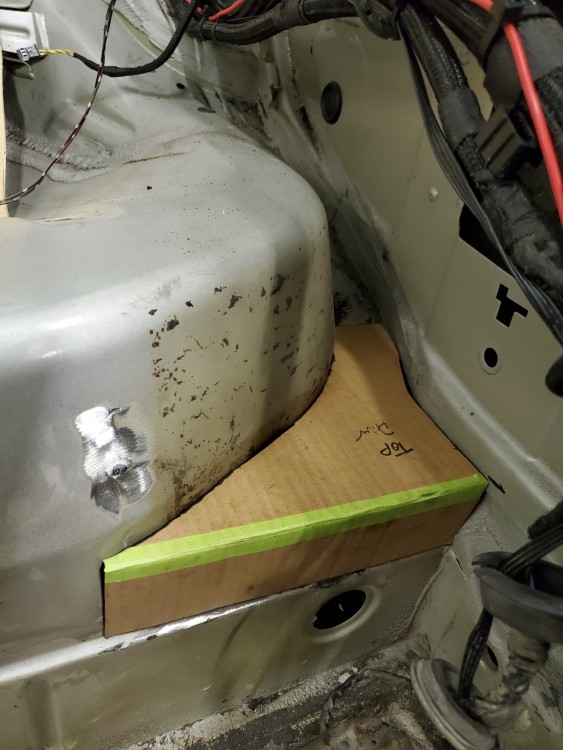
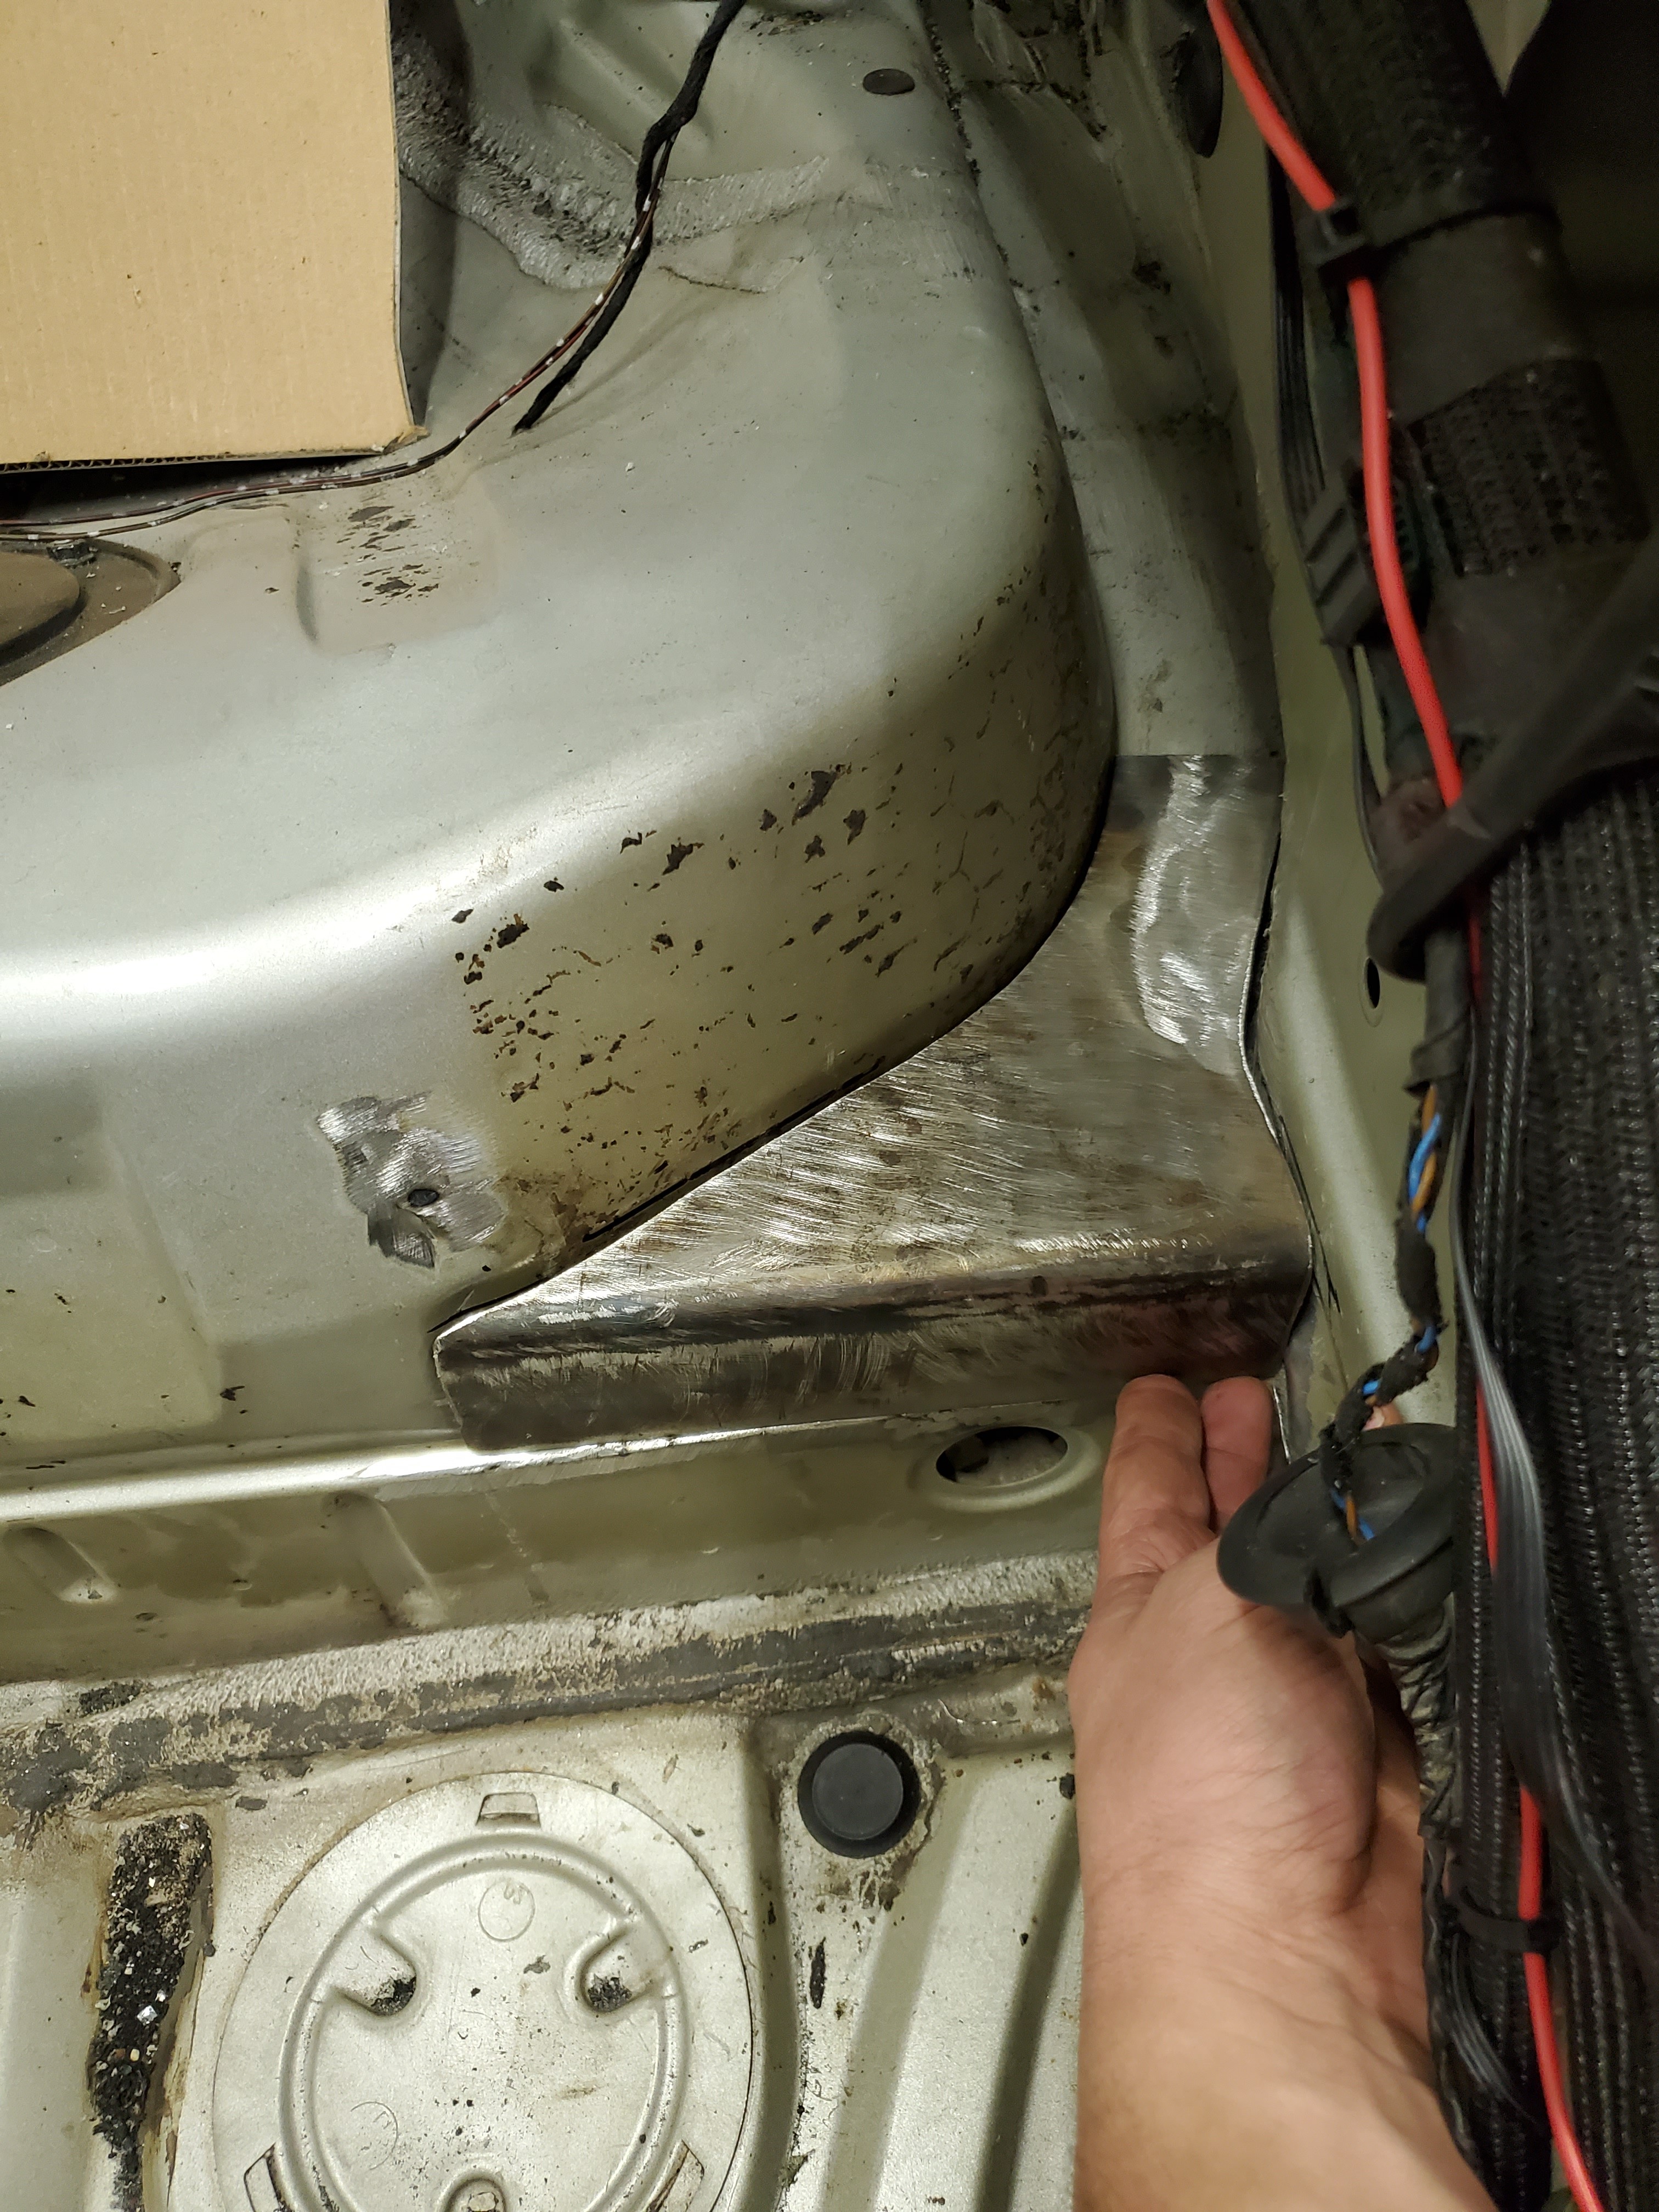
                20200201163411.jpg

                Then we cut, bent and did ALOT of trimming to get the rear boxes to fit as snug as possible.
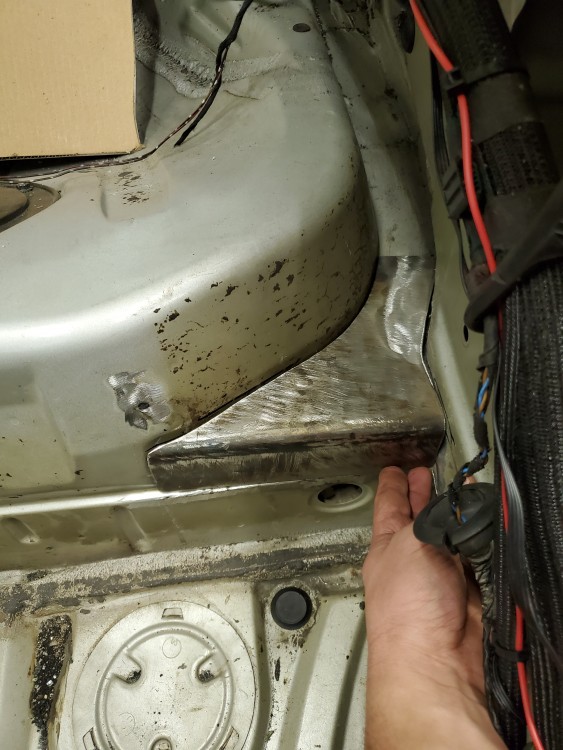
                20200201184347.jpg

                20200201184406.jpg

                Still might need a little more trimming but pretty happy with it.

                The cage will most likely be mig welded just because we dont have the torch time to do tig. I have never learned to tig, and I'm ok at mig.

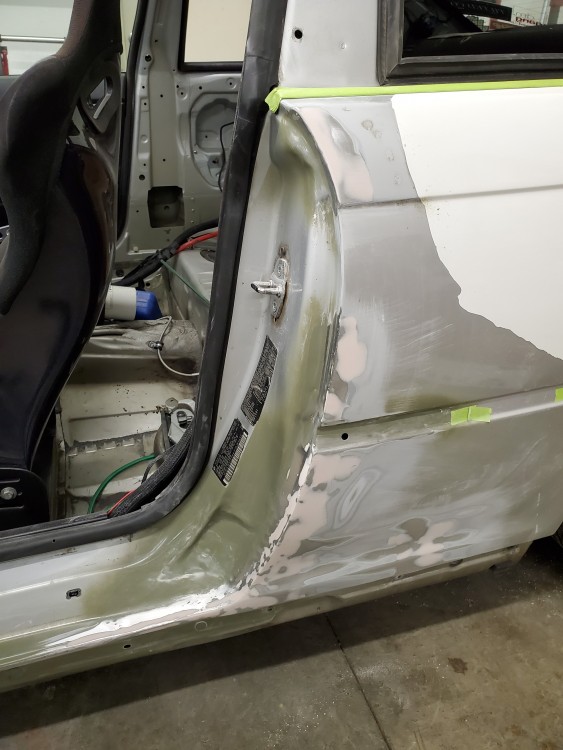
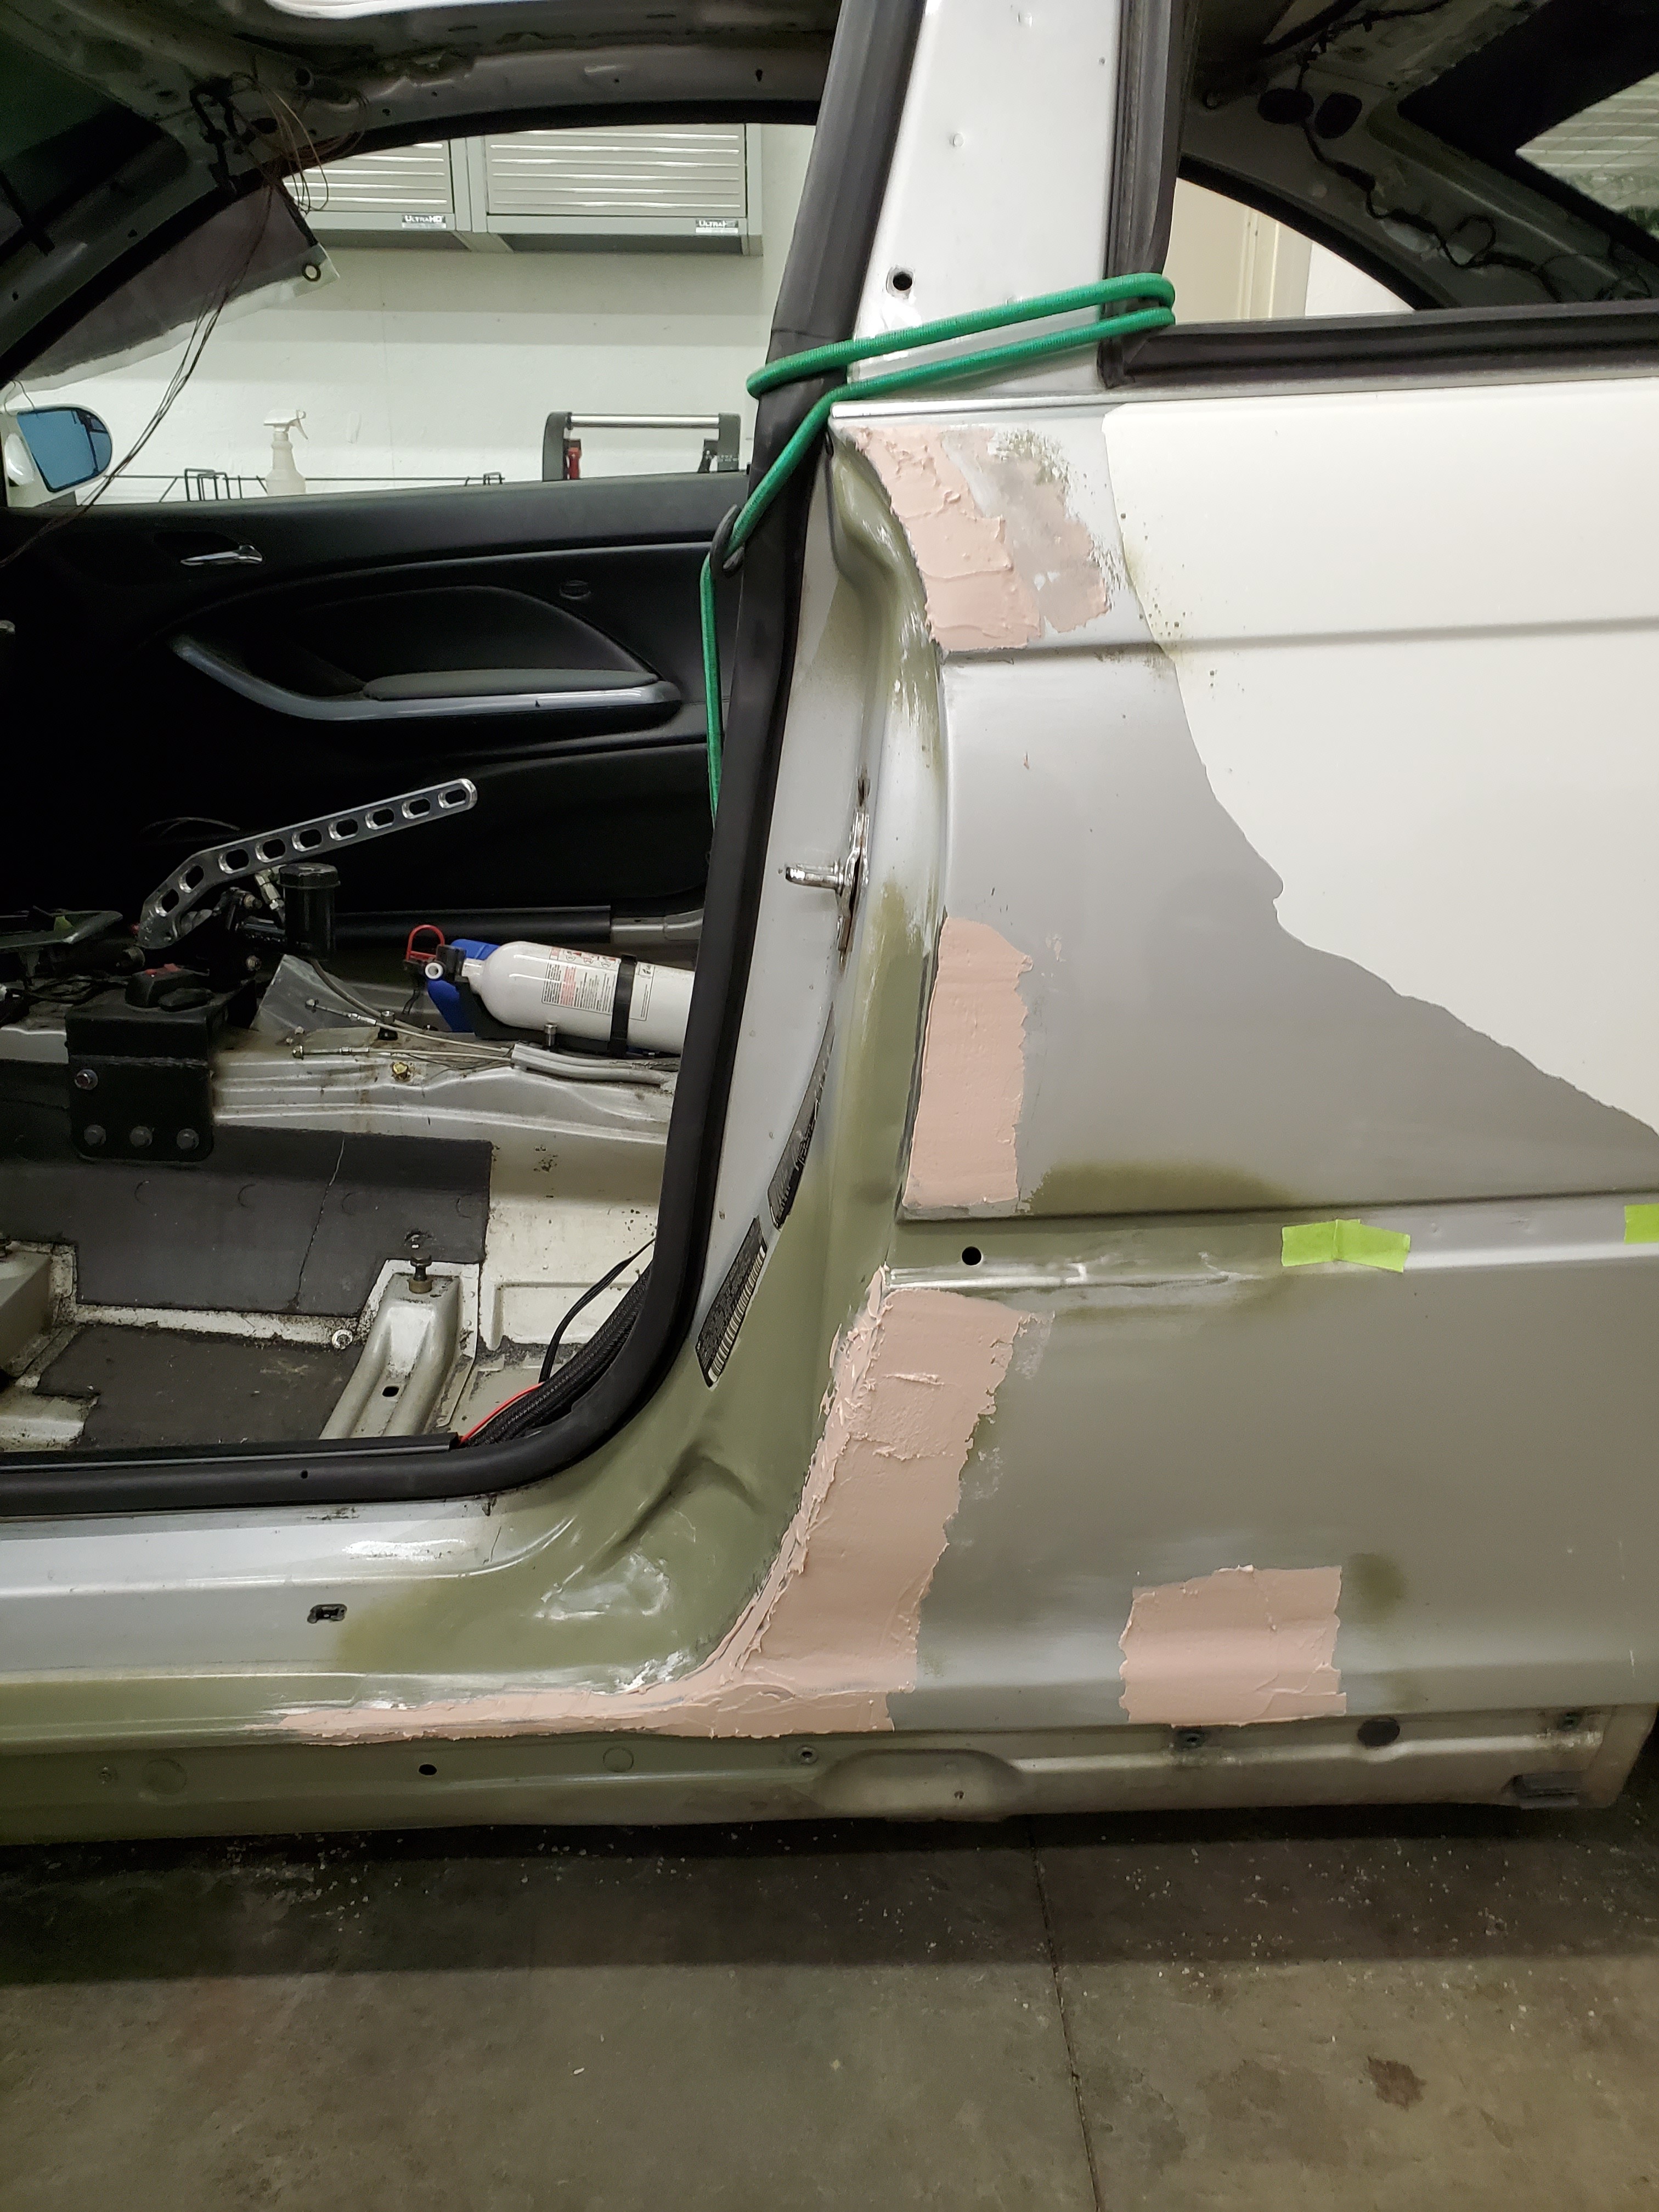
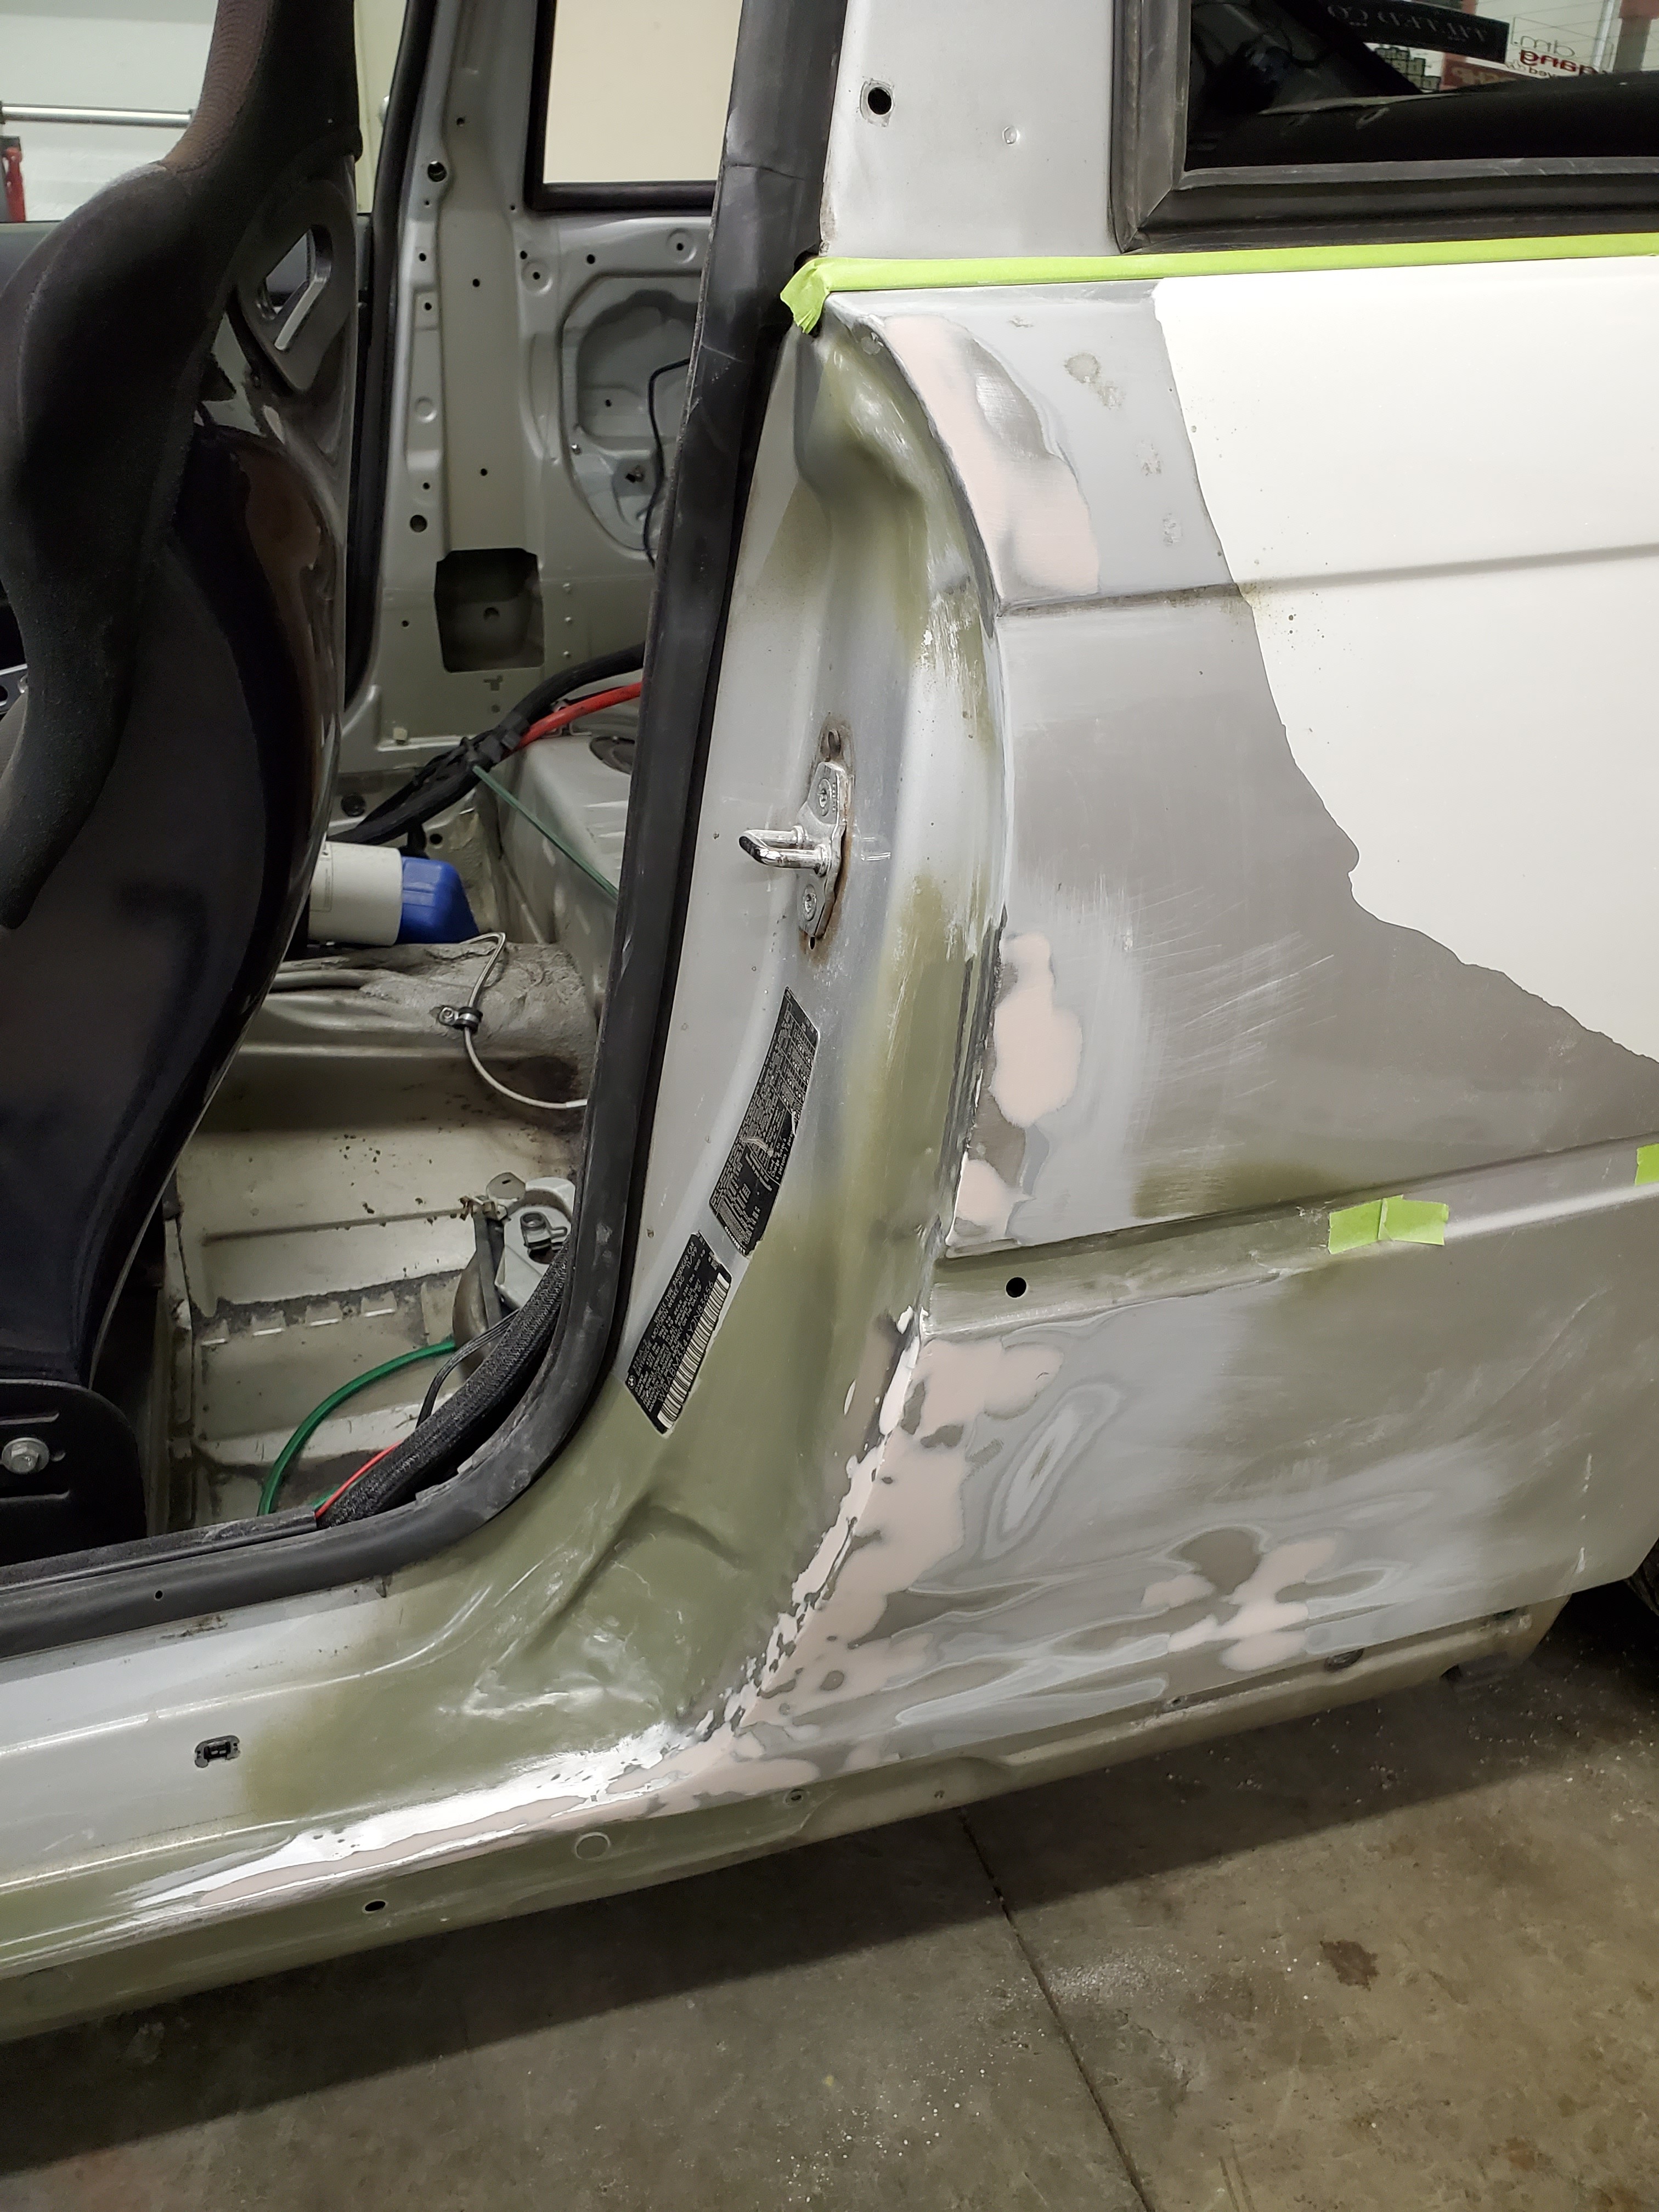
                Moved on to starting to clean up the body work from the dent being pulled.

                Layed down some filler.
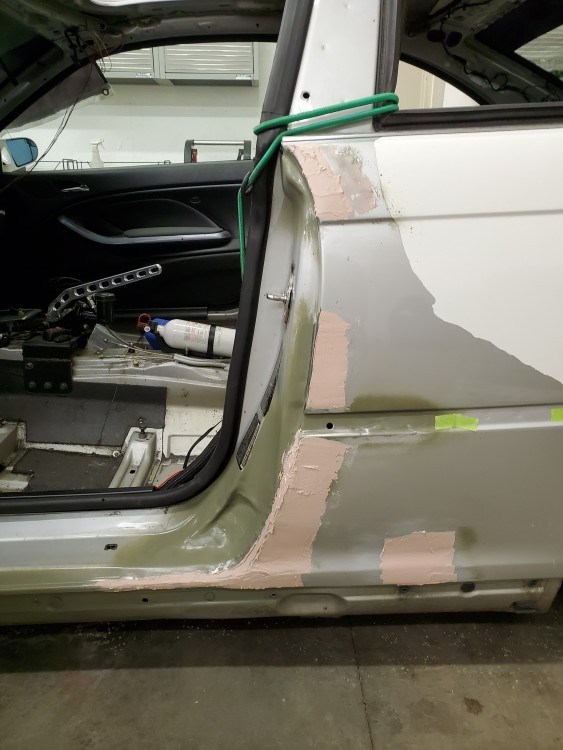
                20200201193643.jpg

                And then sanded.

                20200201210937.jpg

                ALOT more detailed filler work and sanding is ahead but it's a start!

                1 Reply Last reply
                0
                • TkuhnT
                  TkuhnT
                  Tkuhn
                  wrote on last edited by
                  #295

                  Not a whole lot of progress this weekend but got something done that I've been meaning to do since I first built the car.

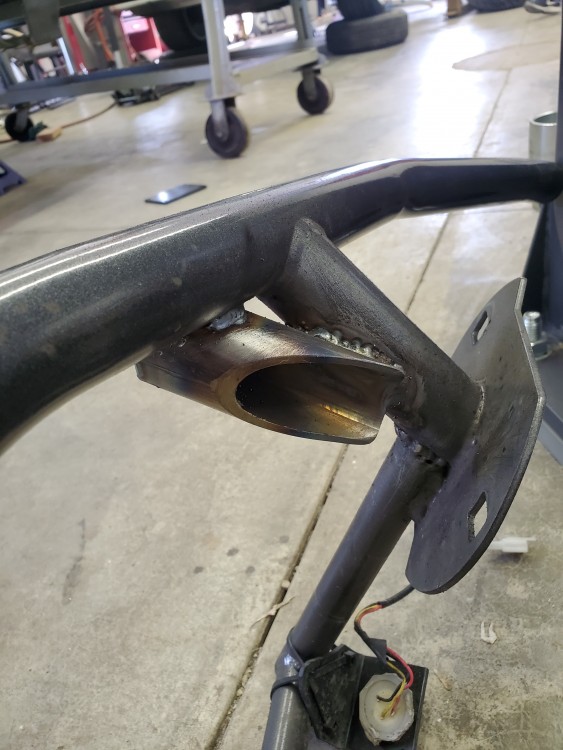
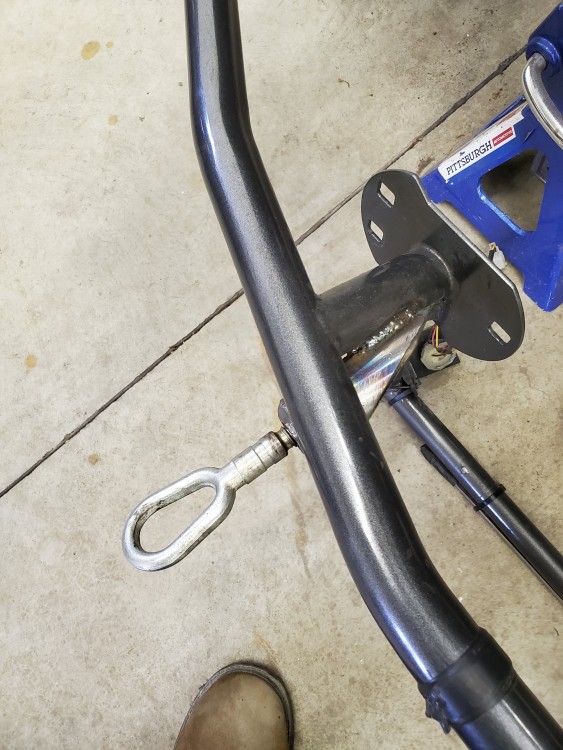
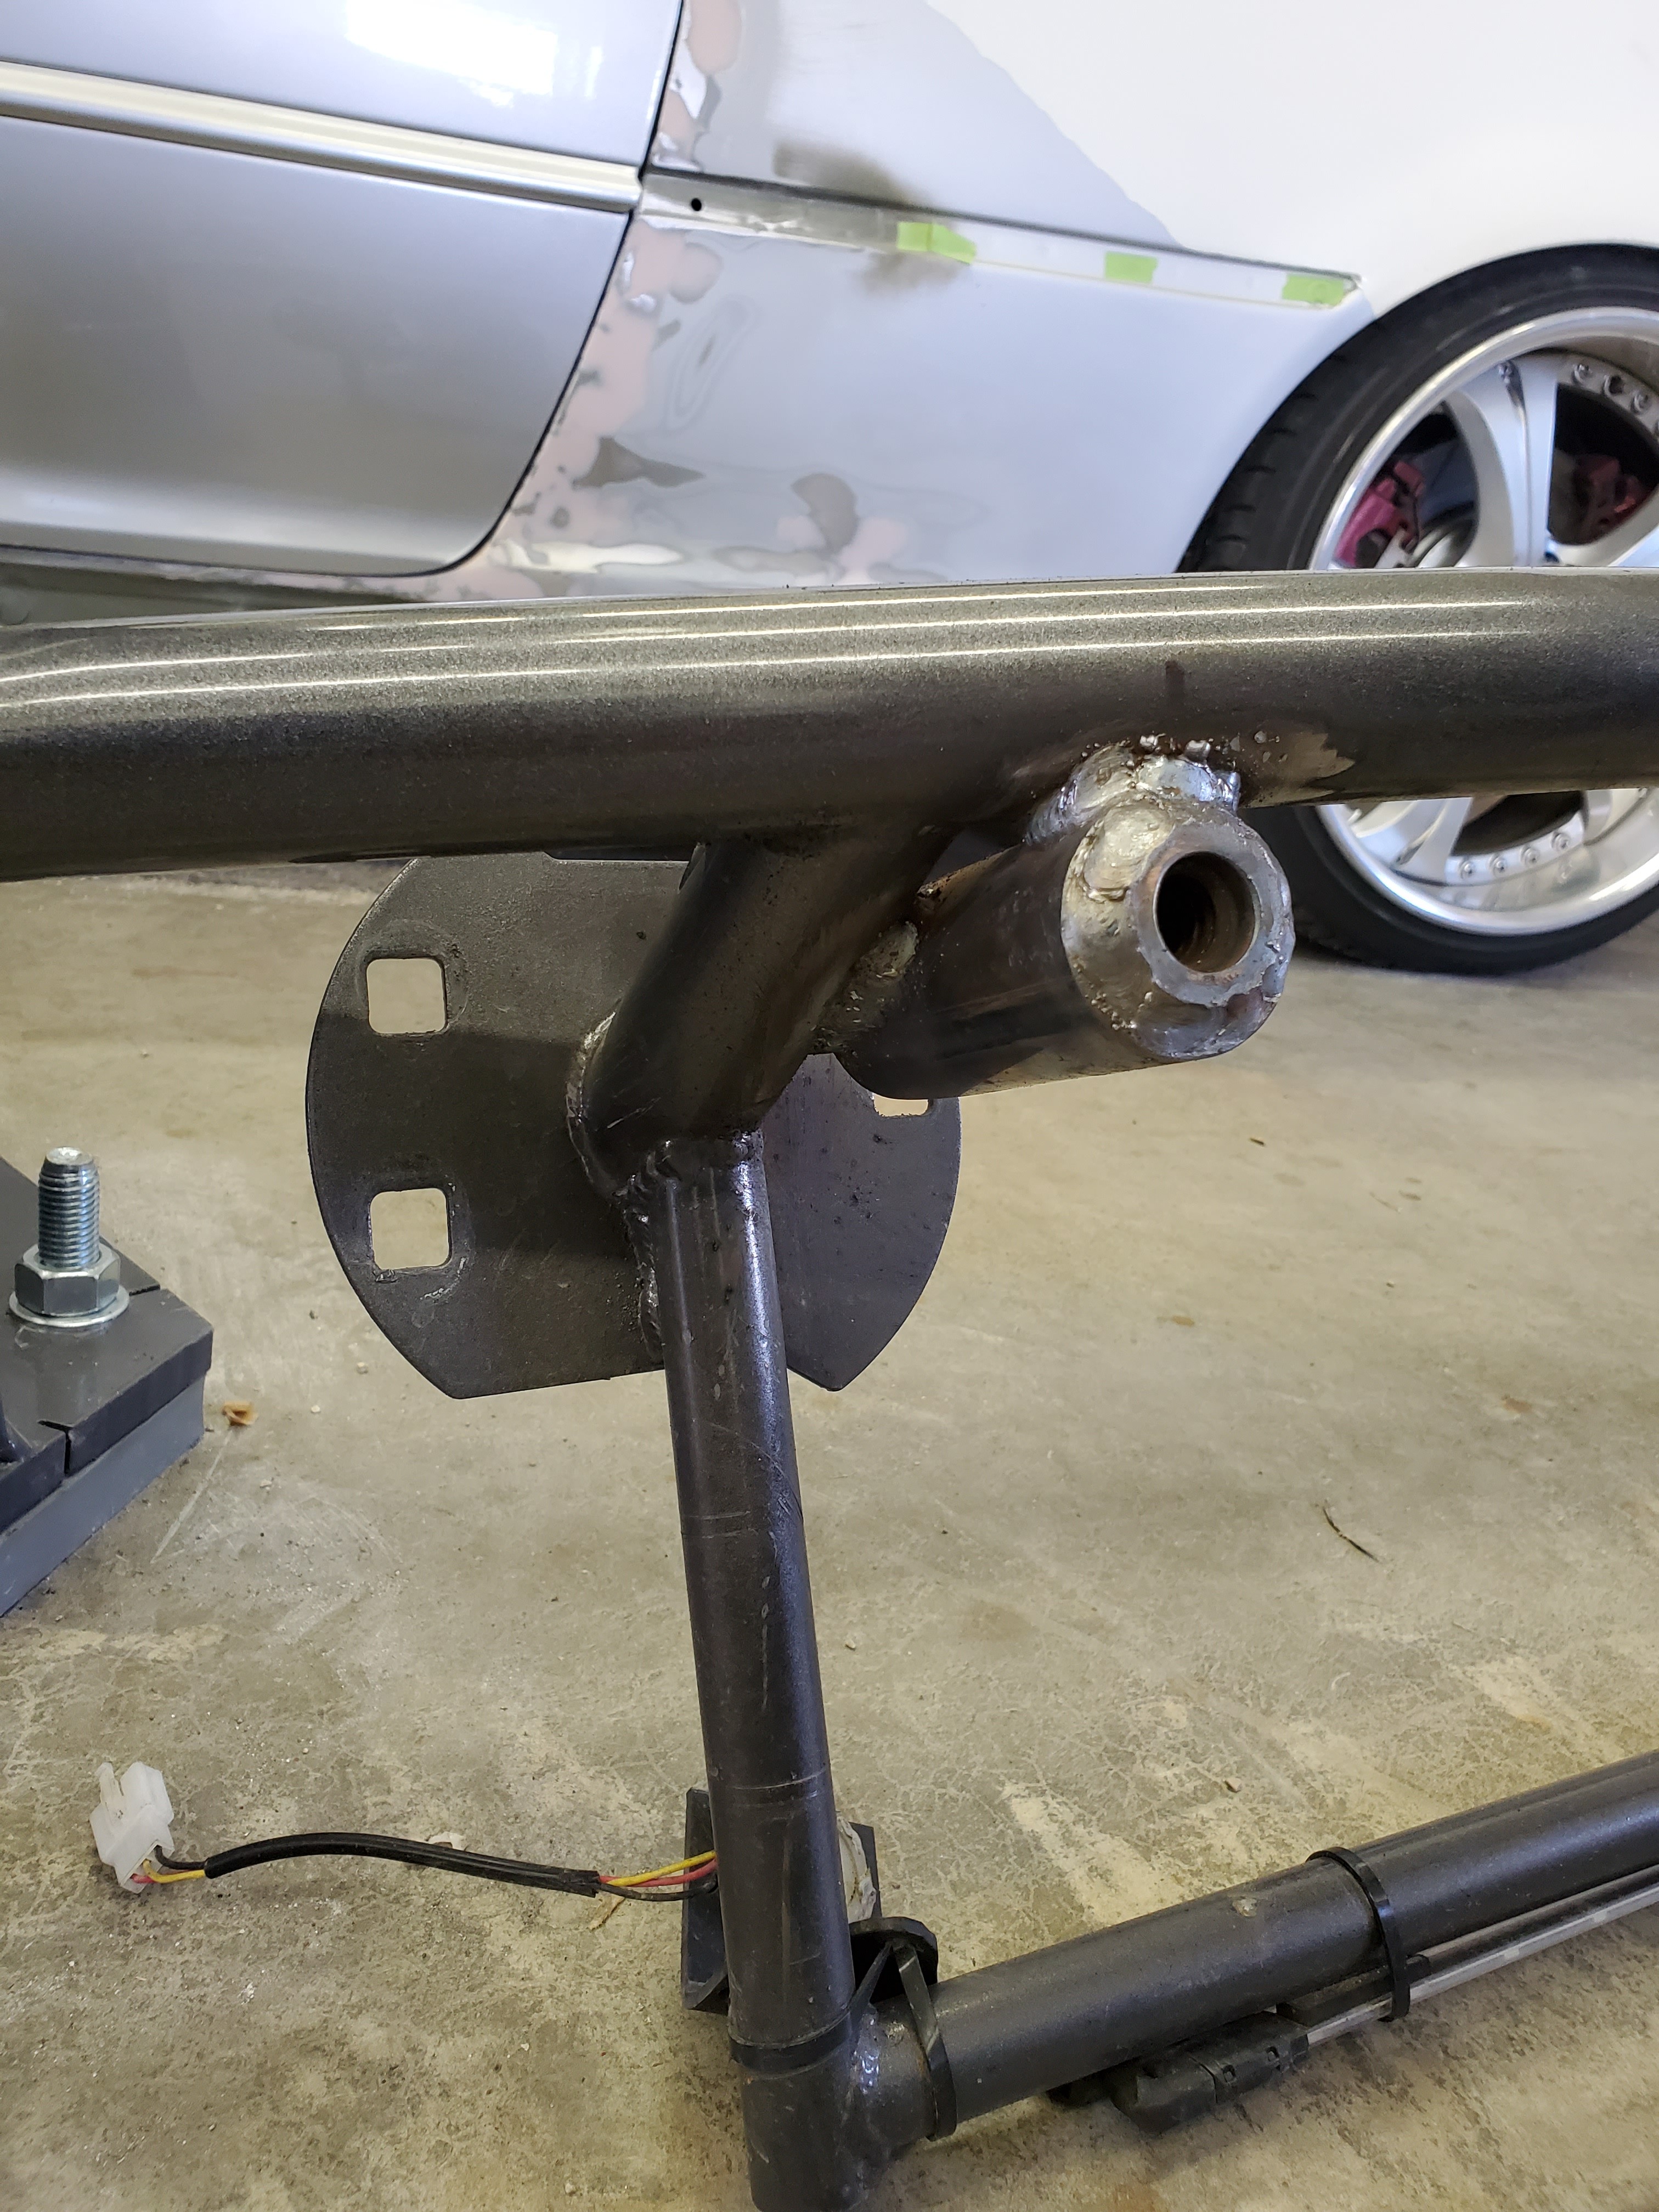
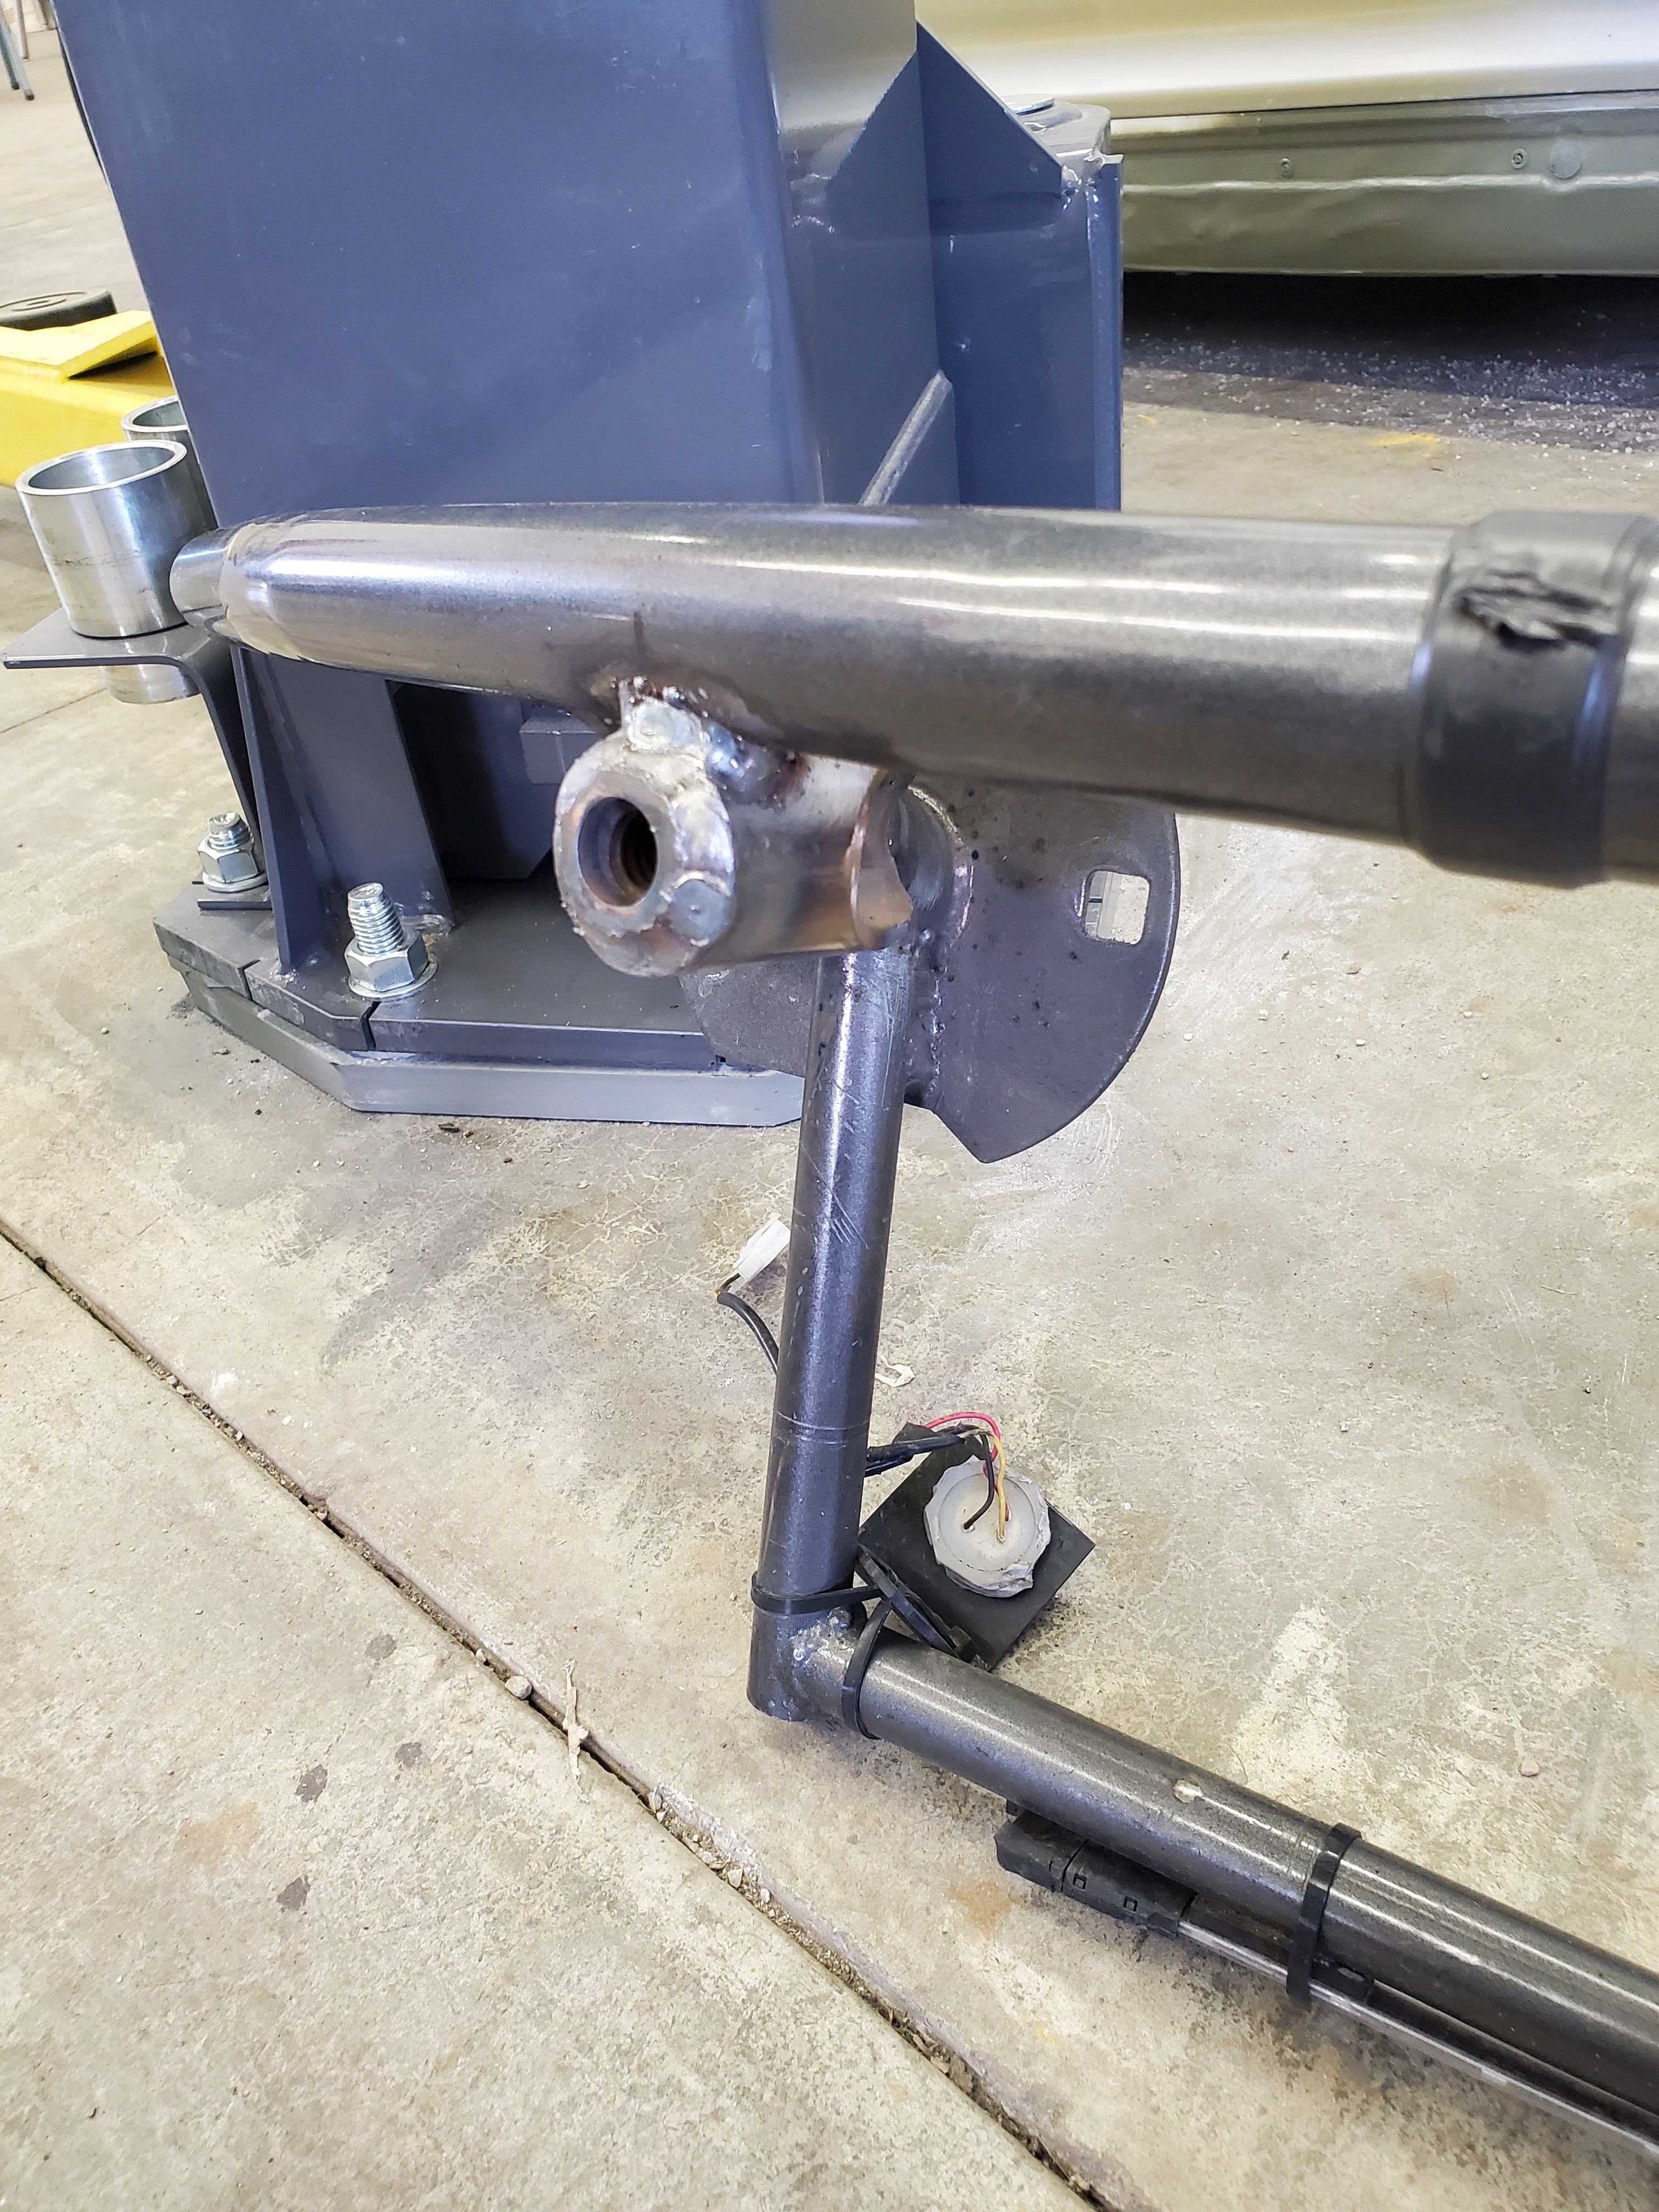
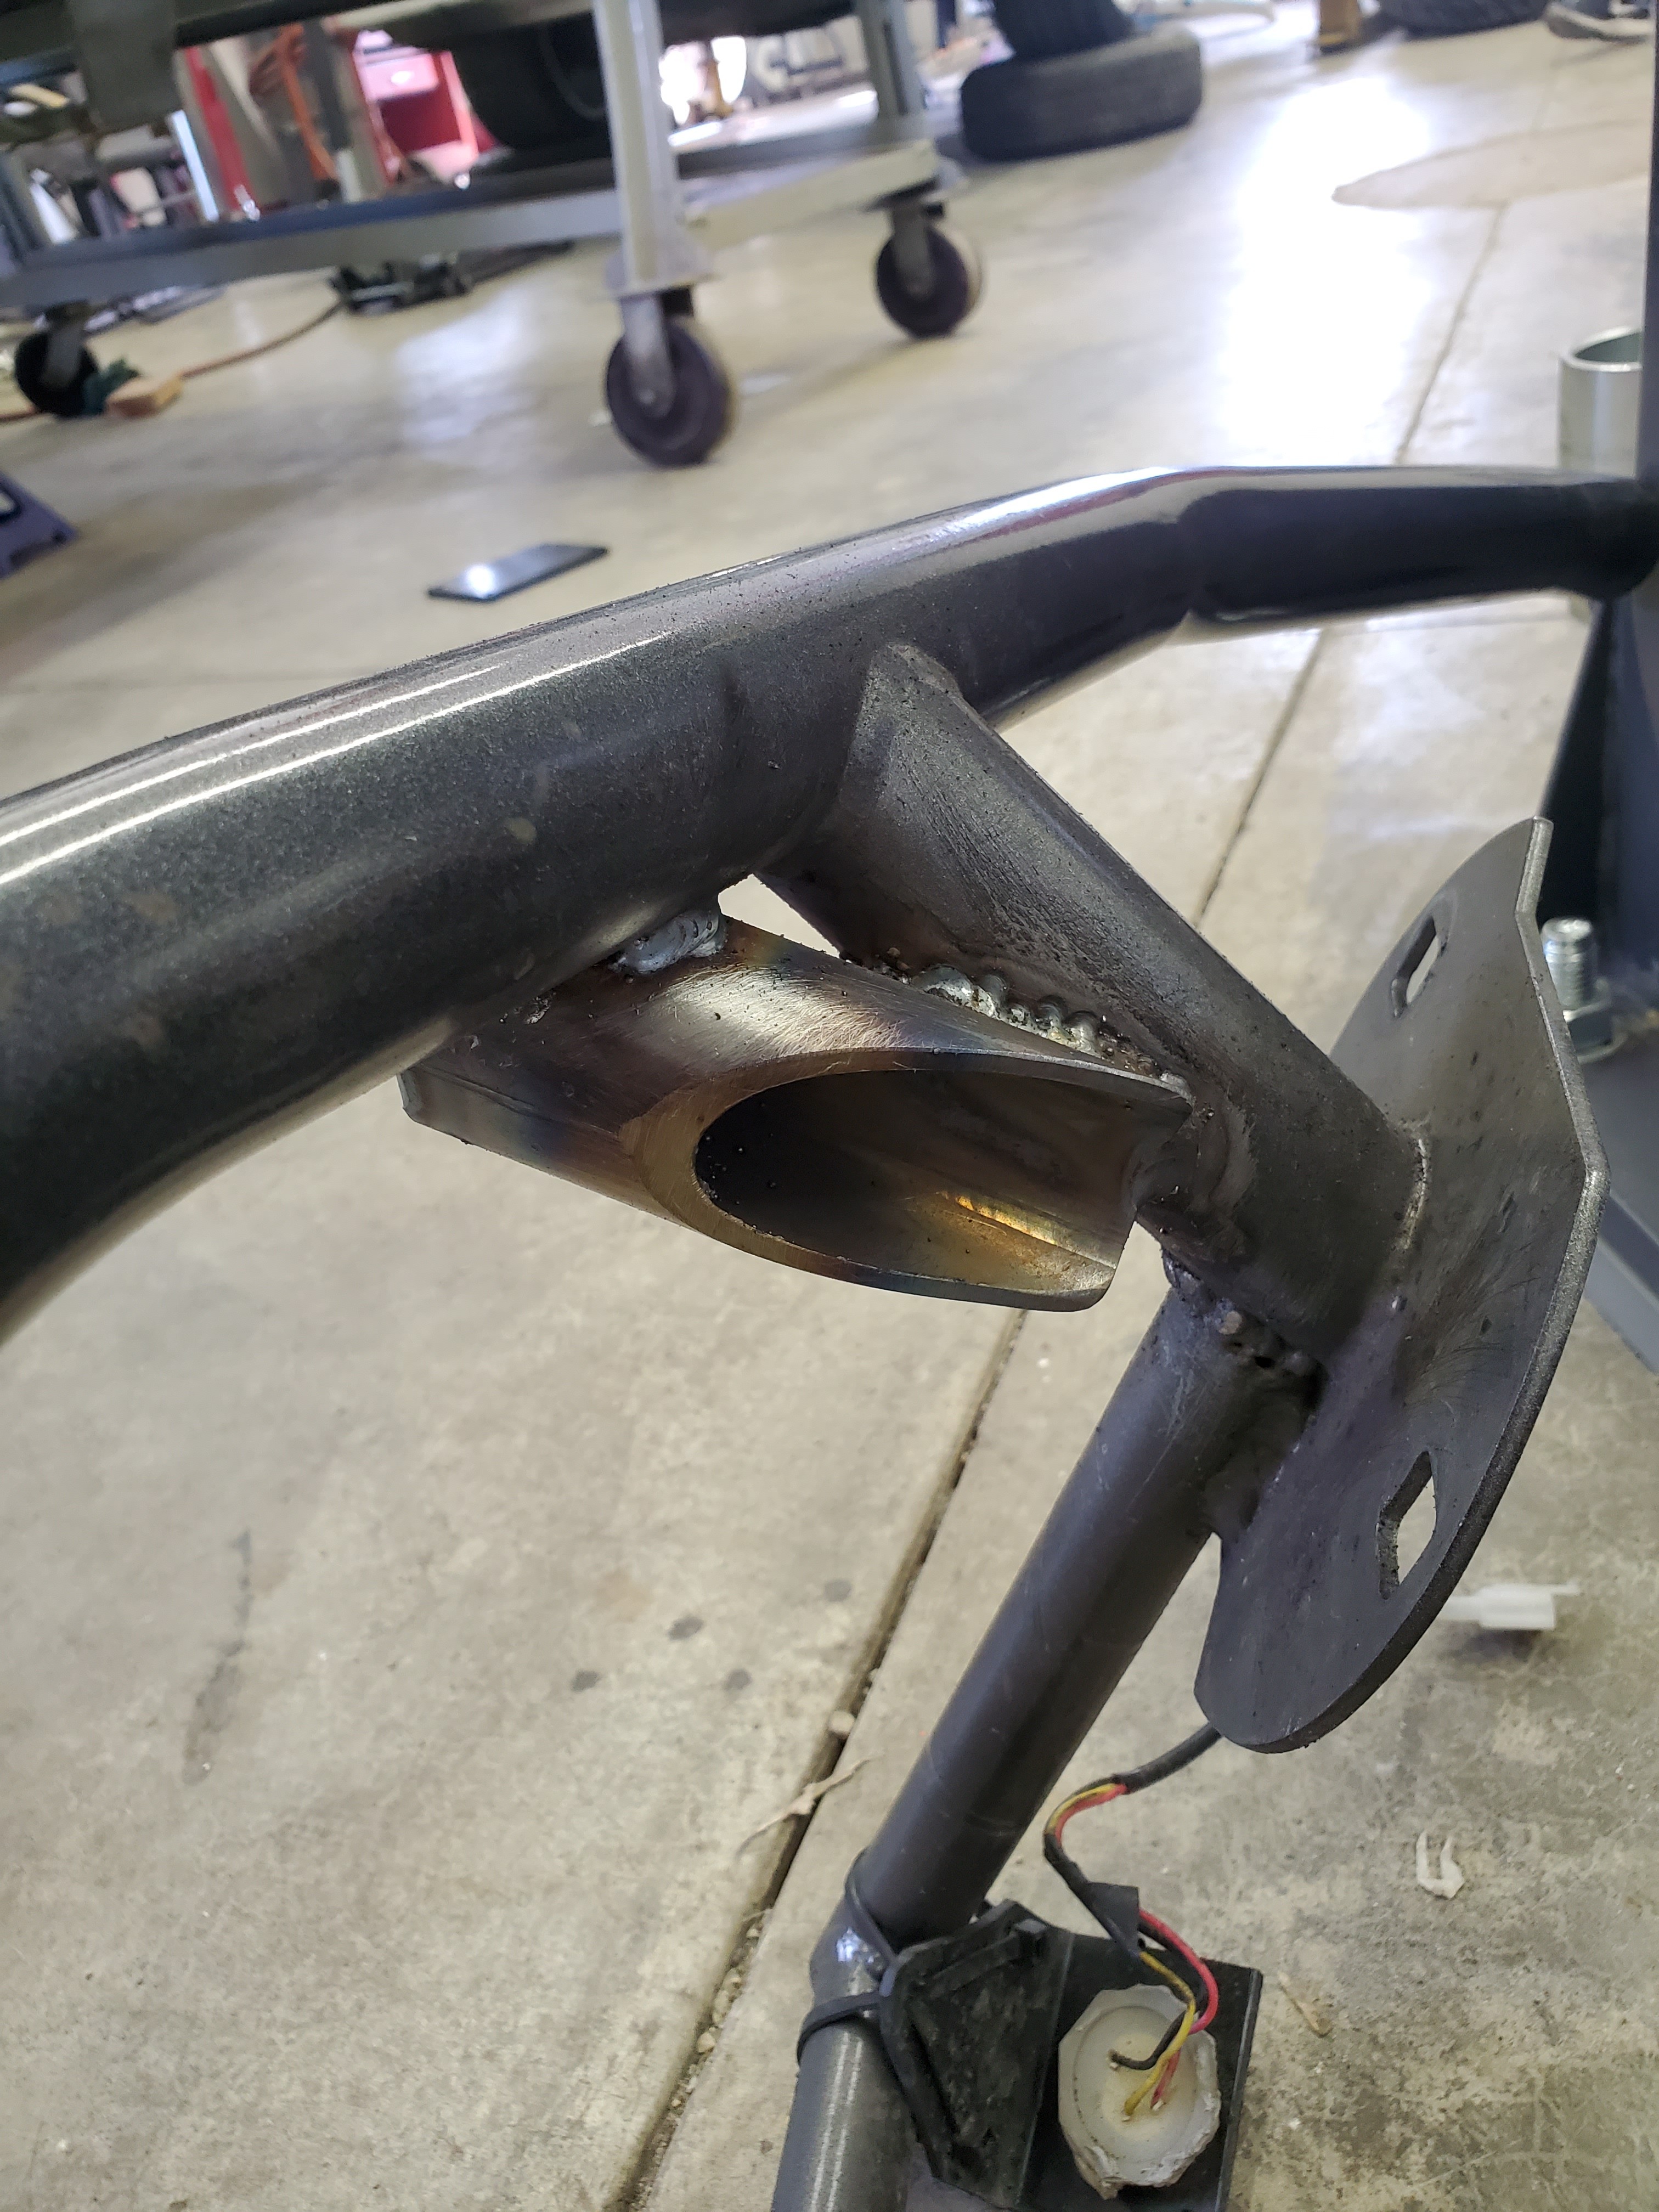
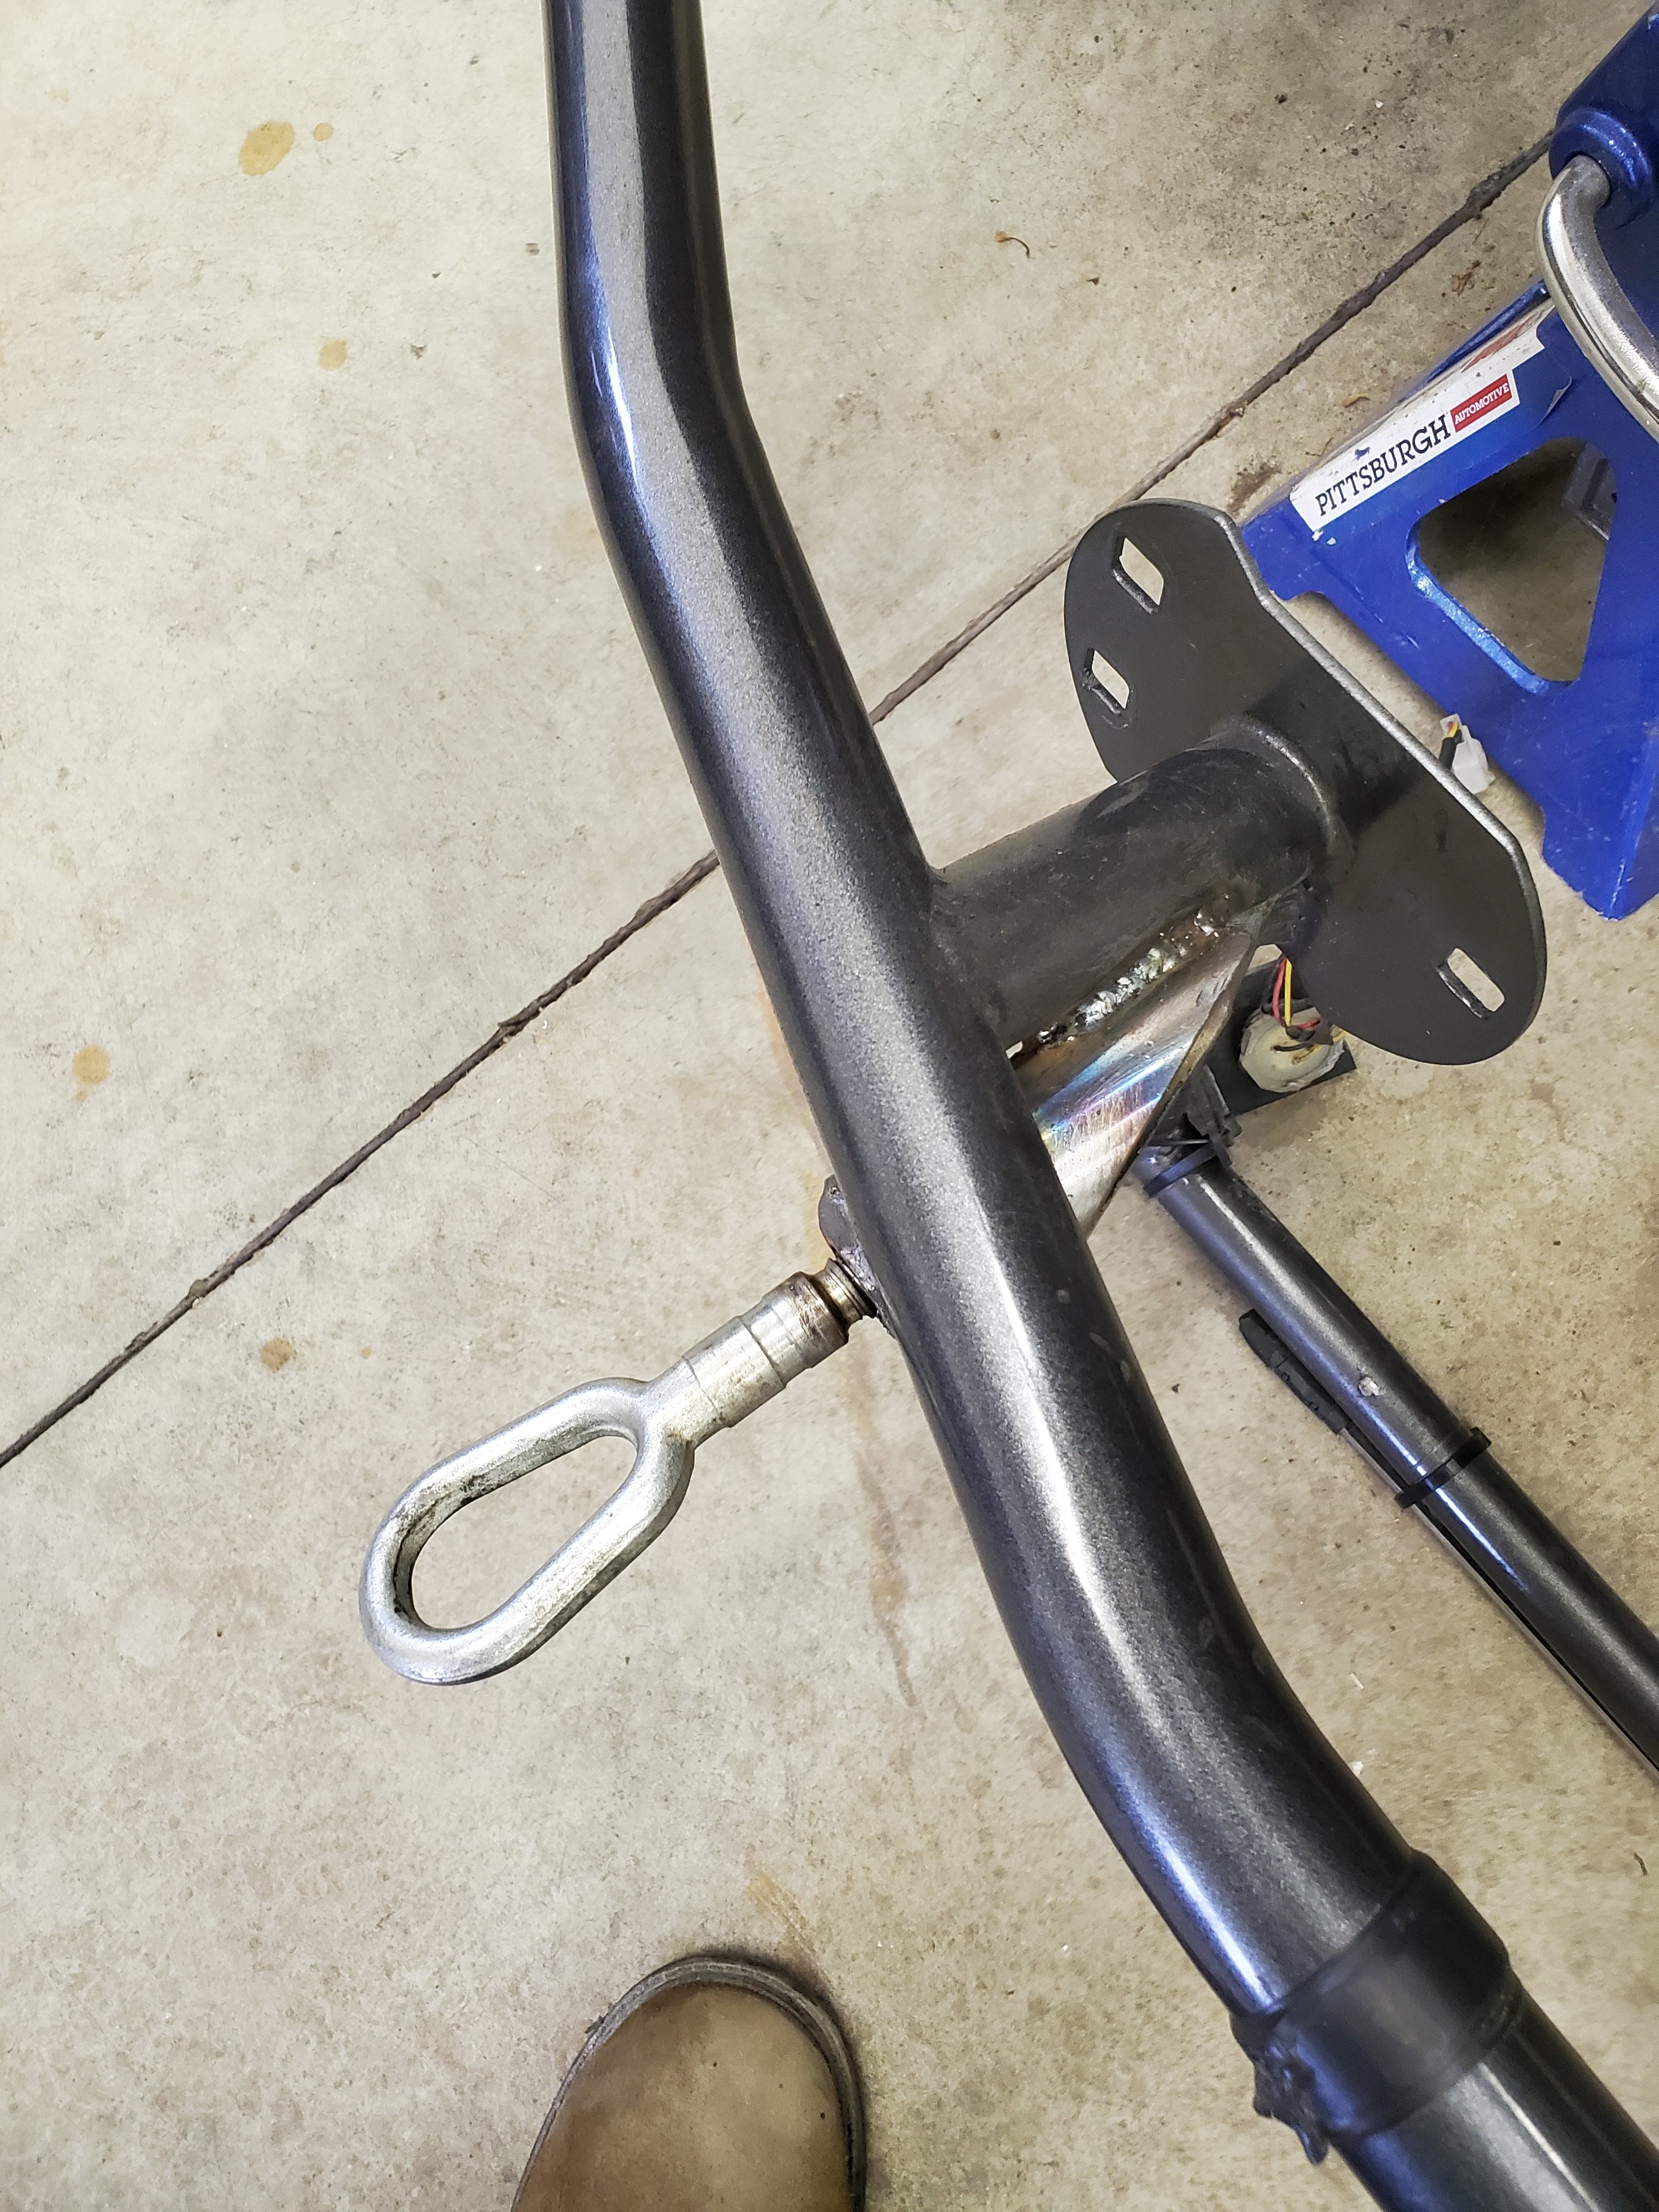
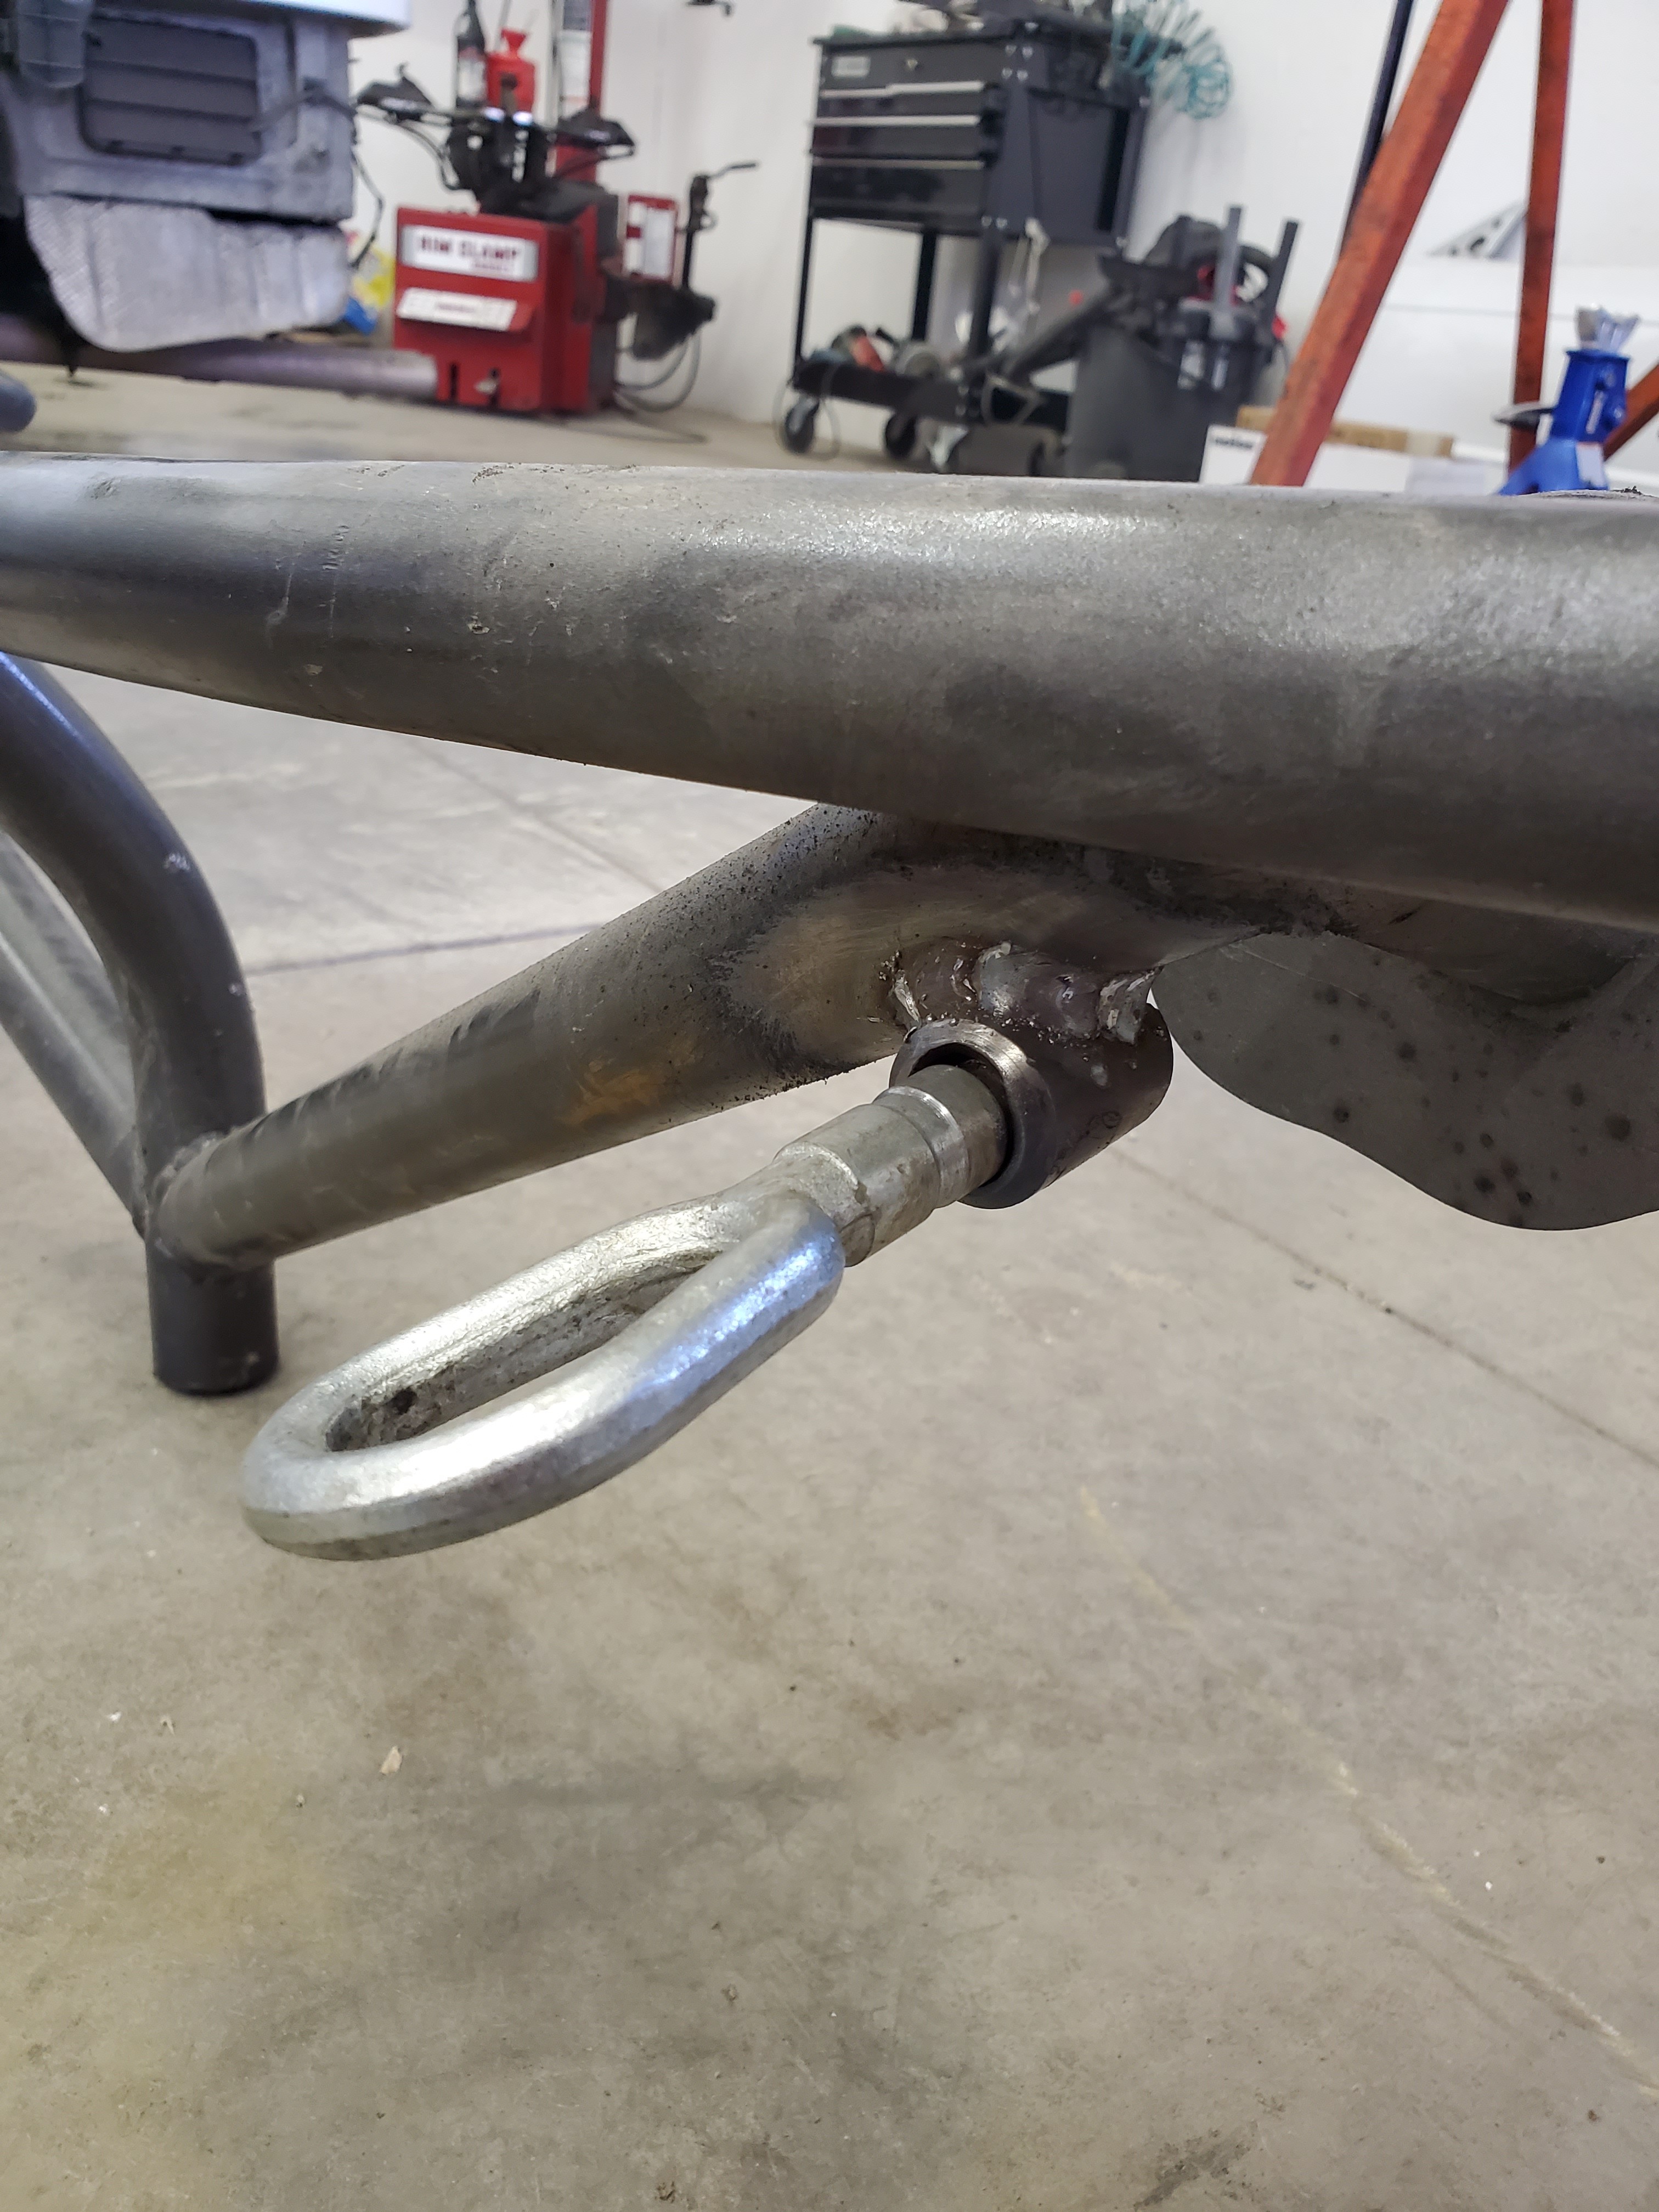
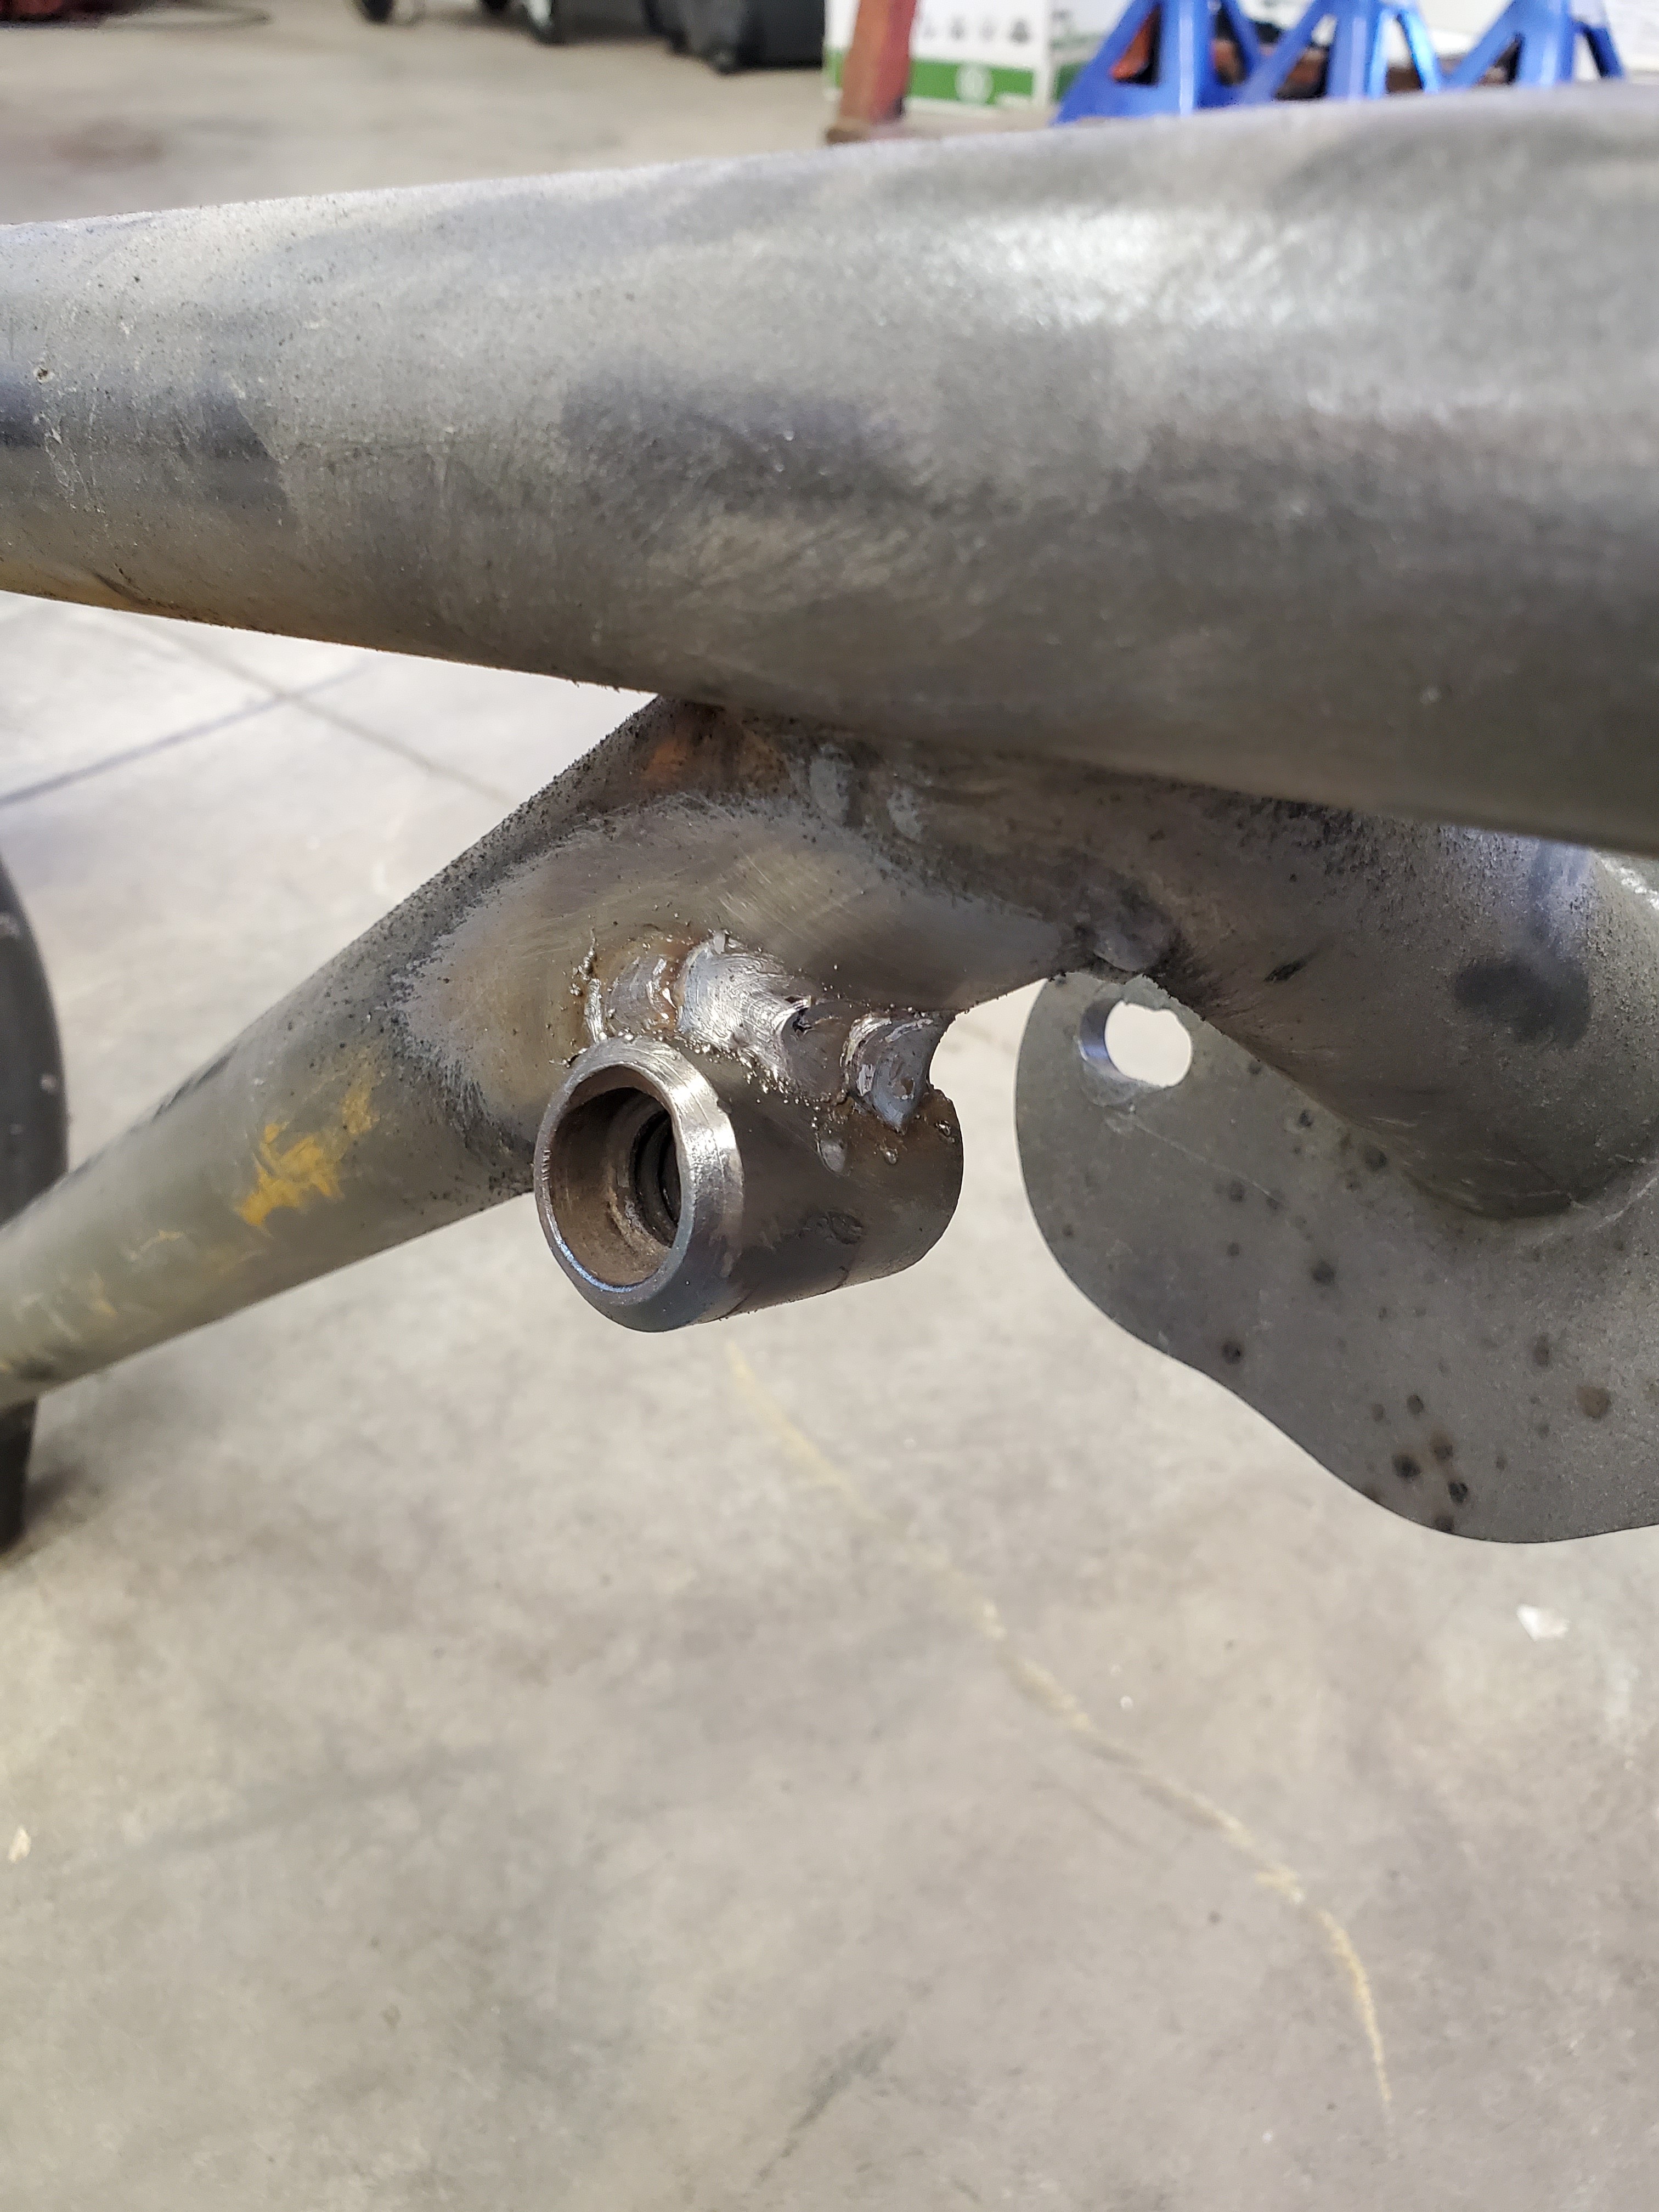
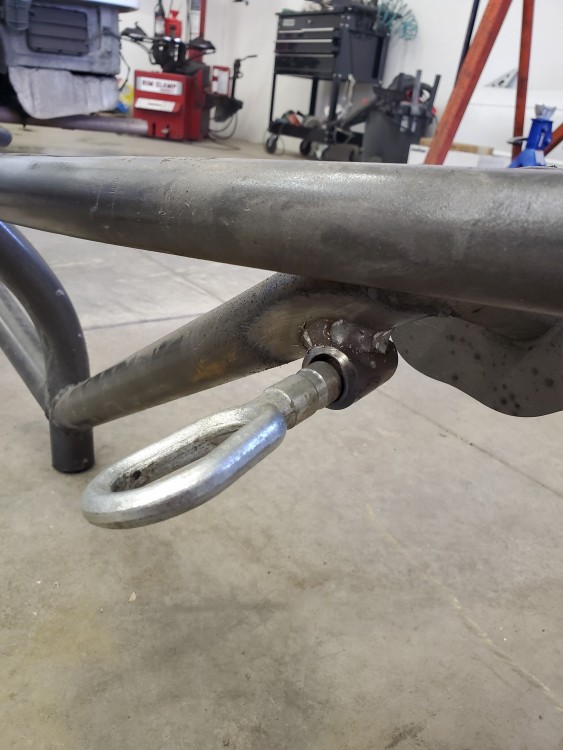
                  Before I scrapped the stock bumper and bumper supports I cut off the tow hook threads, finally got around to welding them to the bash bars.

                  Here's the front. I welded the threaded chunk into a piece of tube then to the bar. Worked out really well.
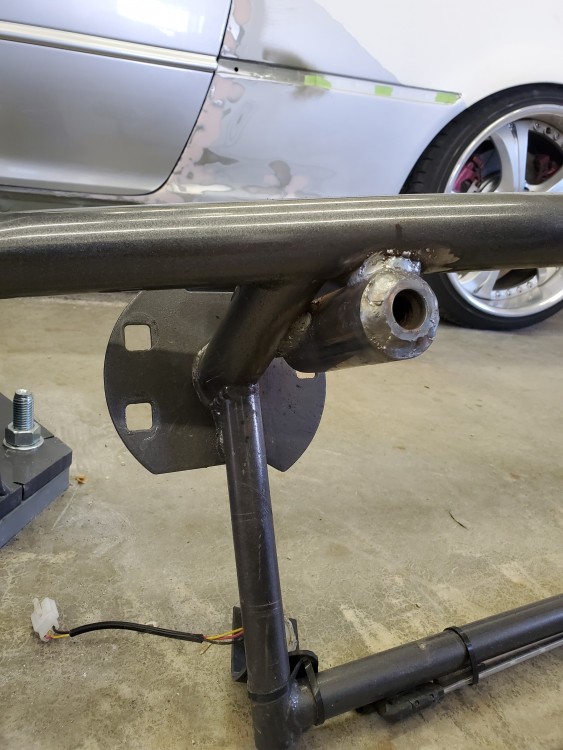
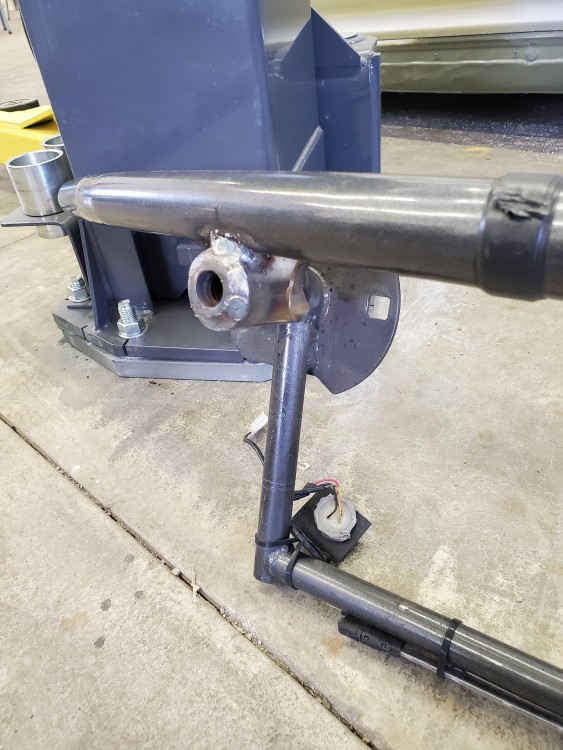
                  20200208143604.jpg

                  20200208143616.jpg

                  20200208143626.jpg

                  20200208162033.jpg

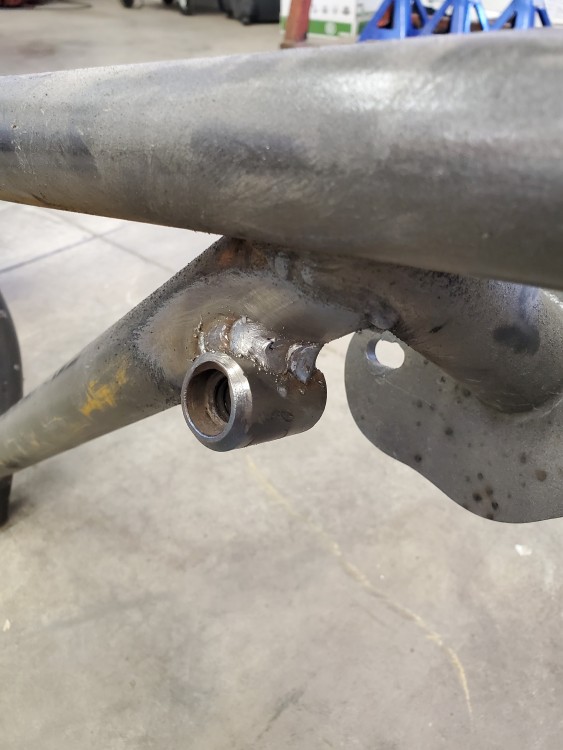
                  The rear was alot simpler since I had added the jack point last spring. Lined up perfect so all i had to do was burn the piece right to the bar.
                  20200208143649.jpg

                  20200208143724.jpg

                  little thing that wont be noticed really but it felt good to get it done. Both just need some paint and are complete.

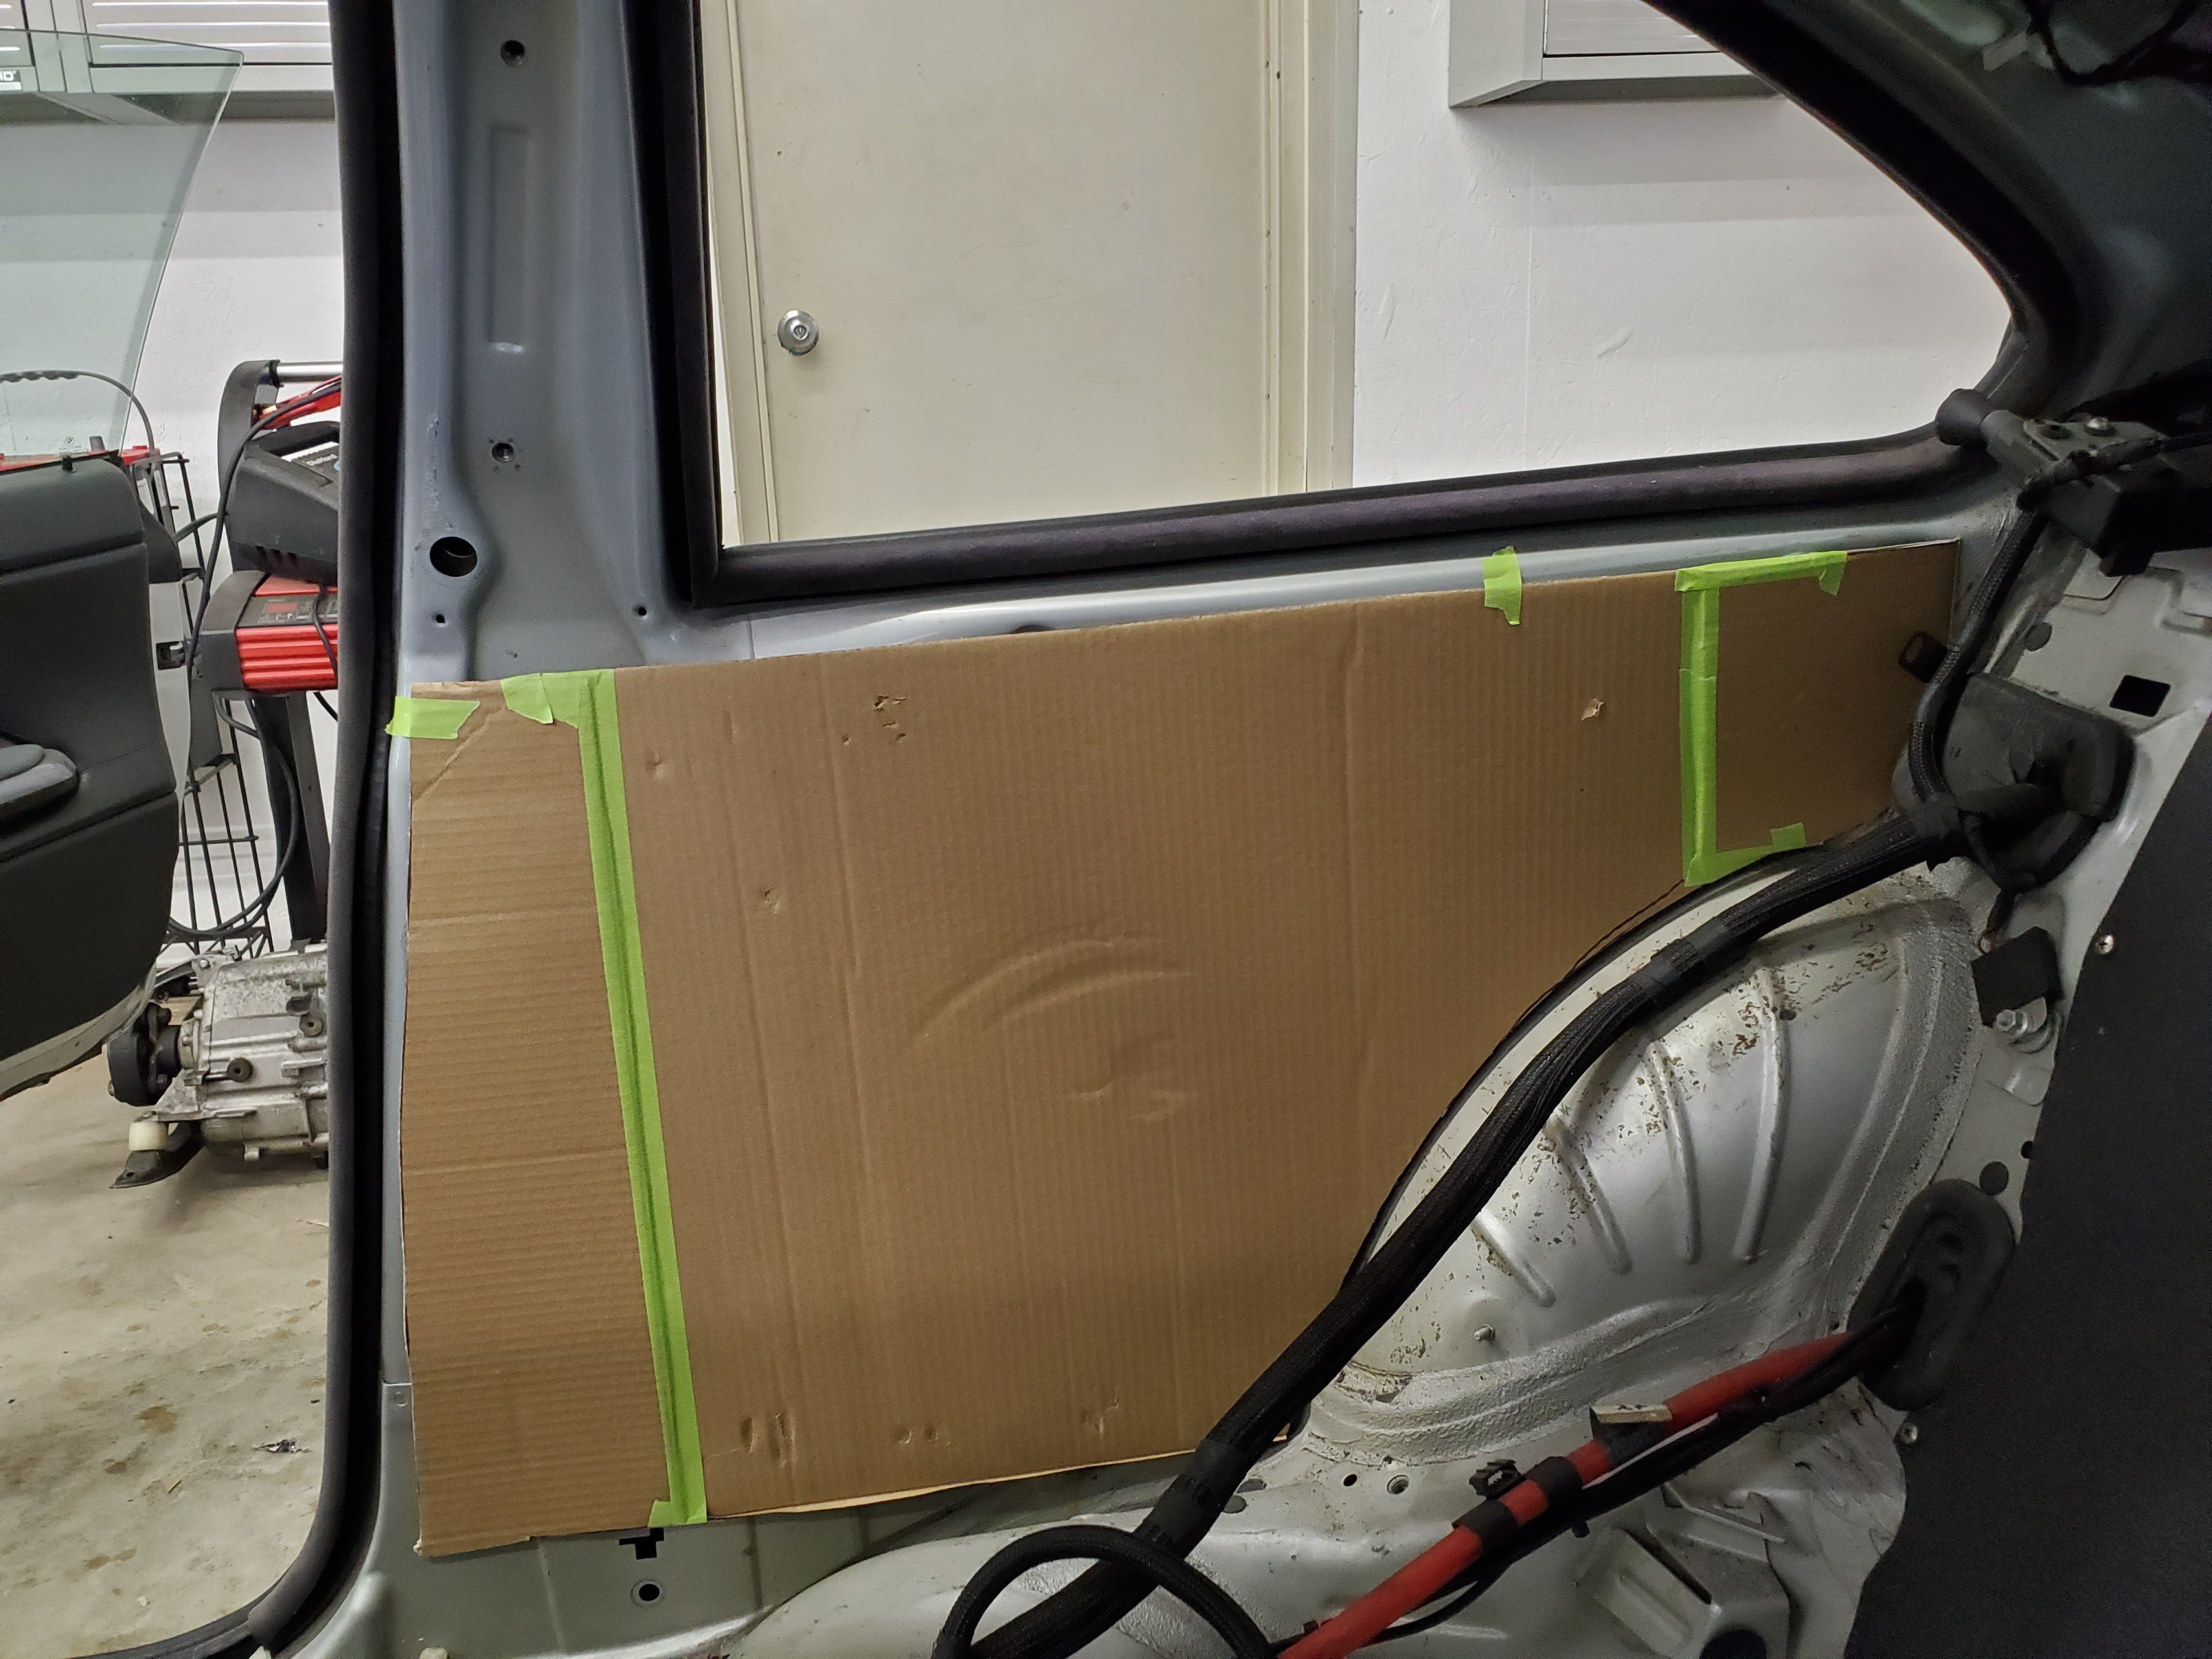
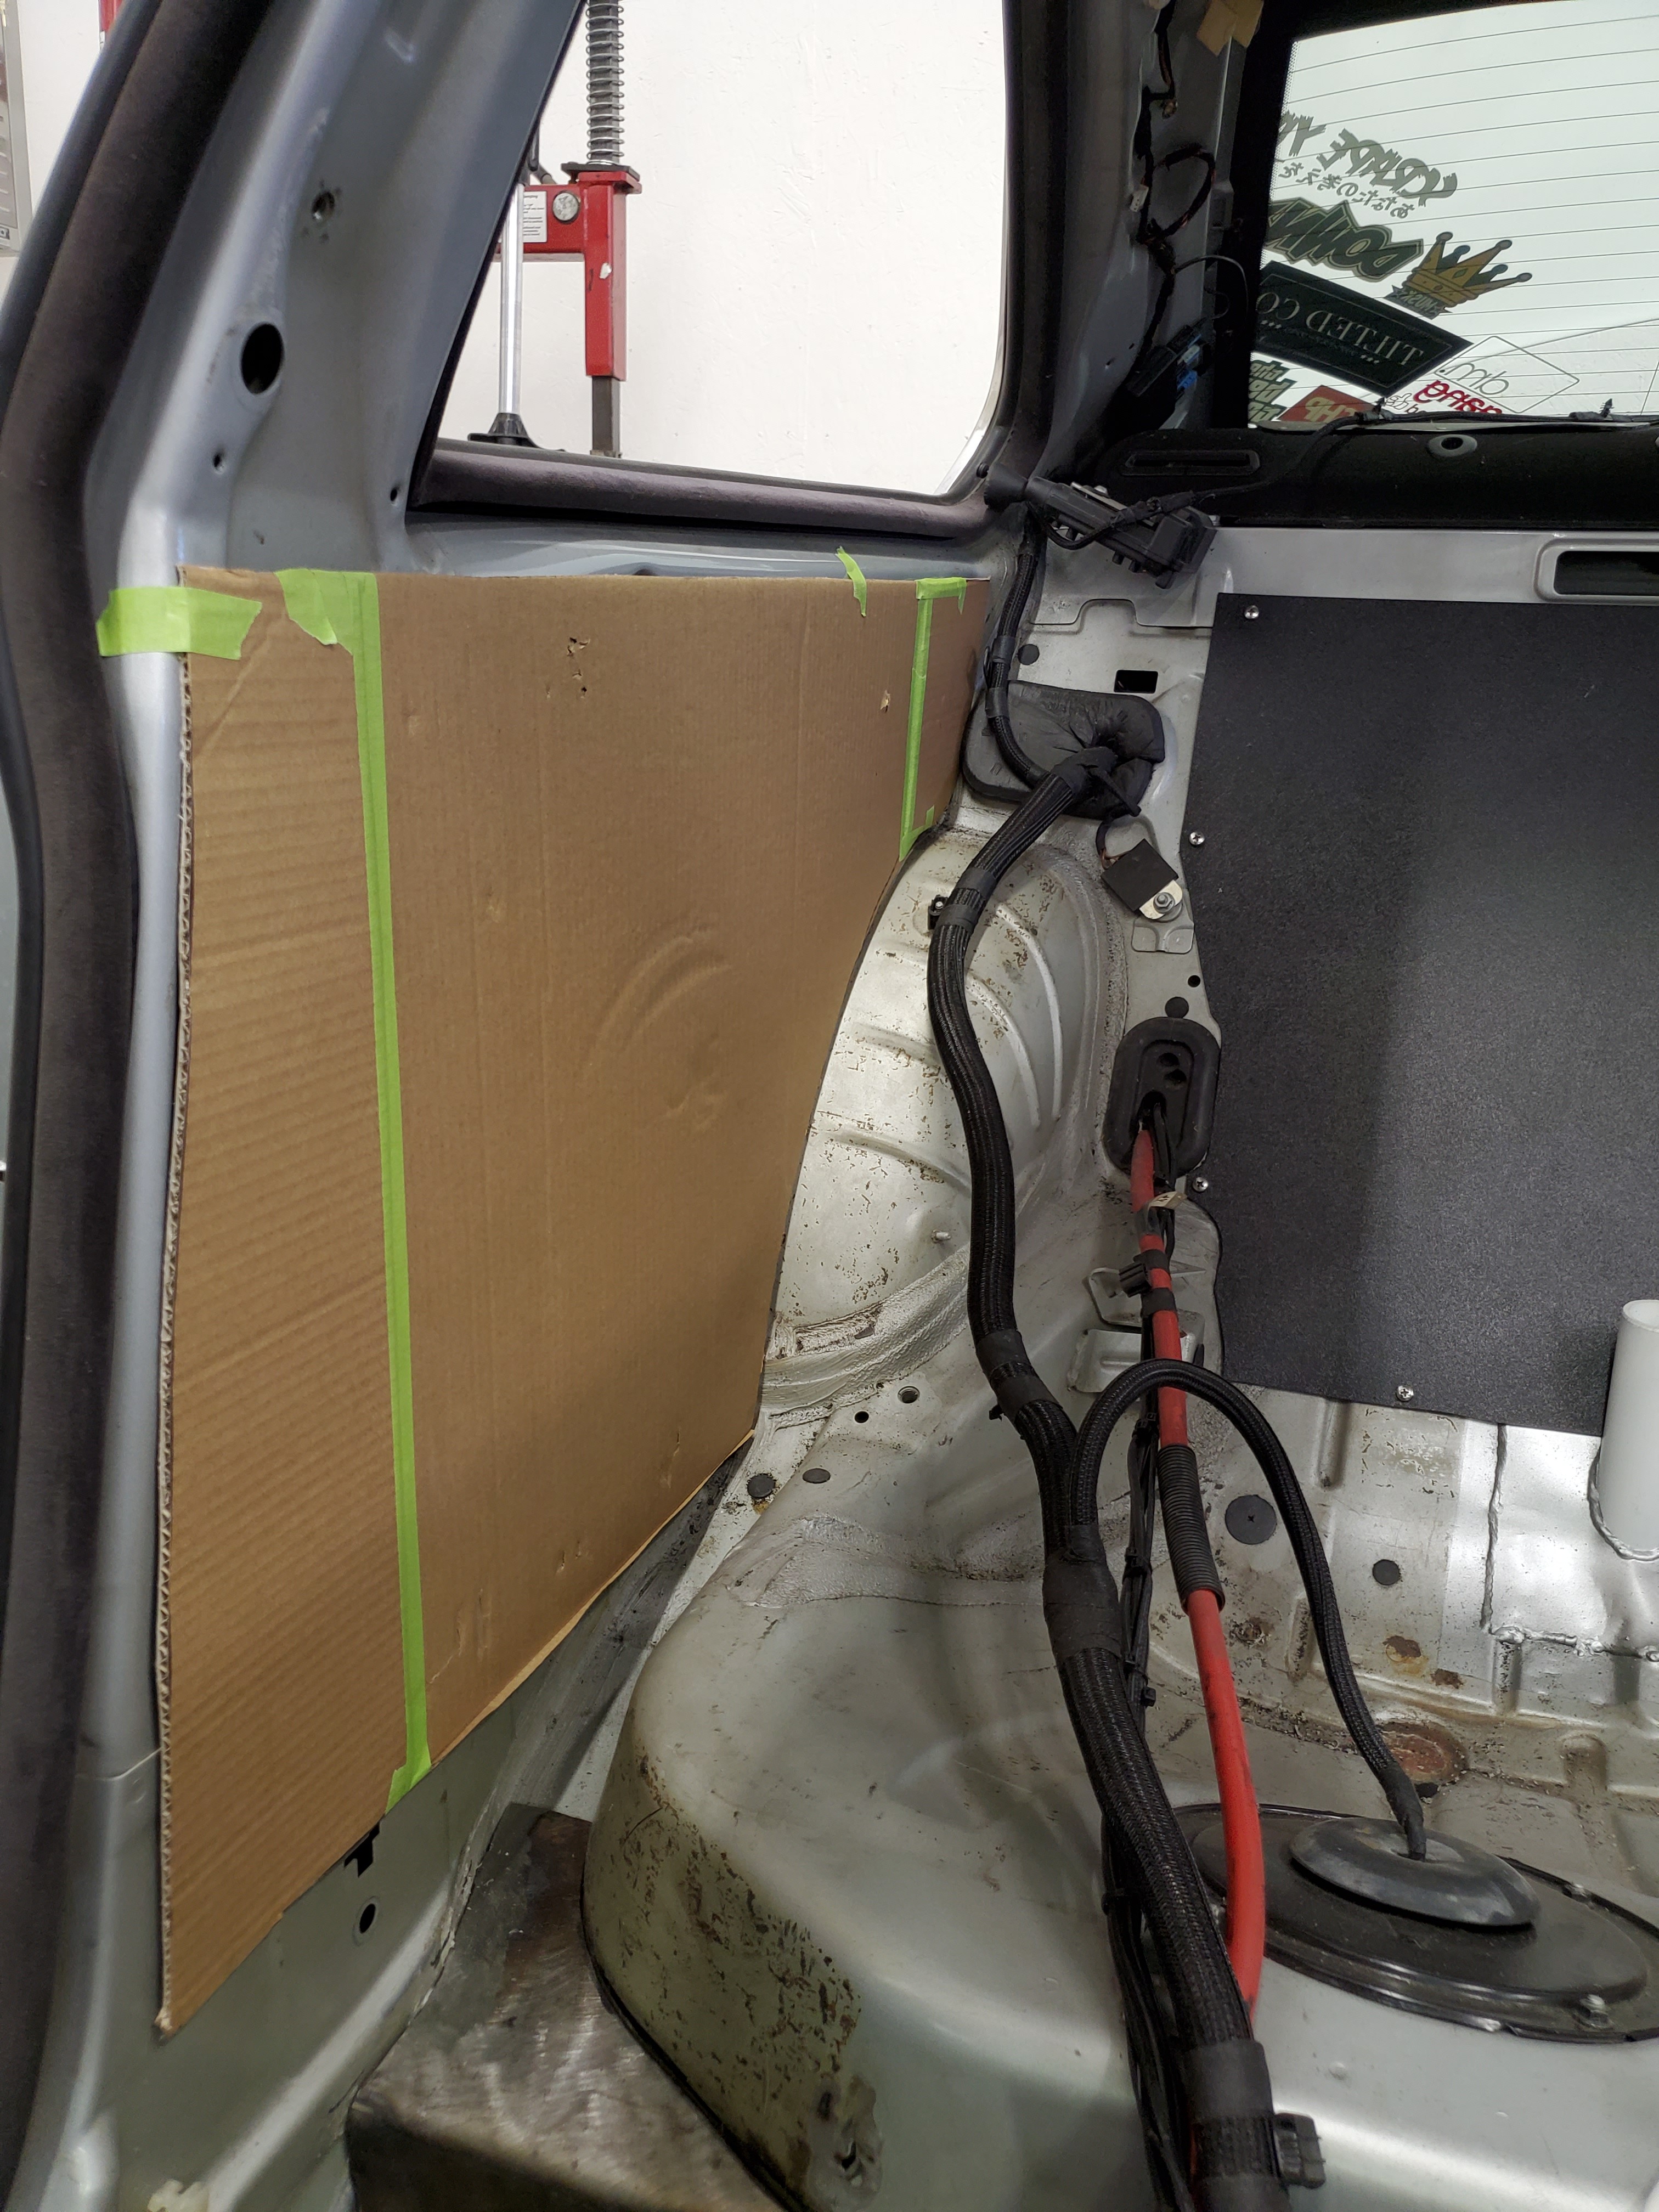
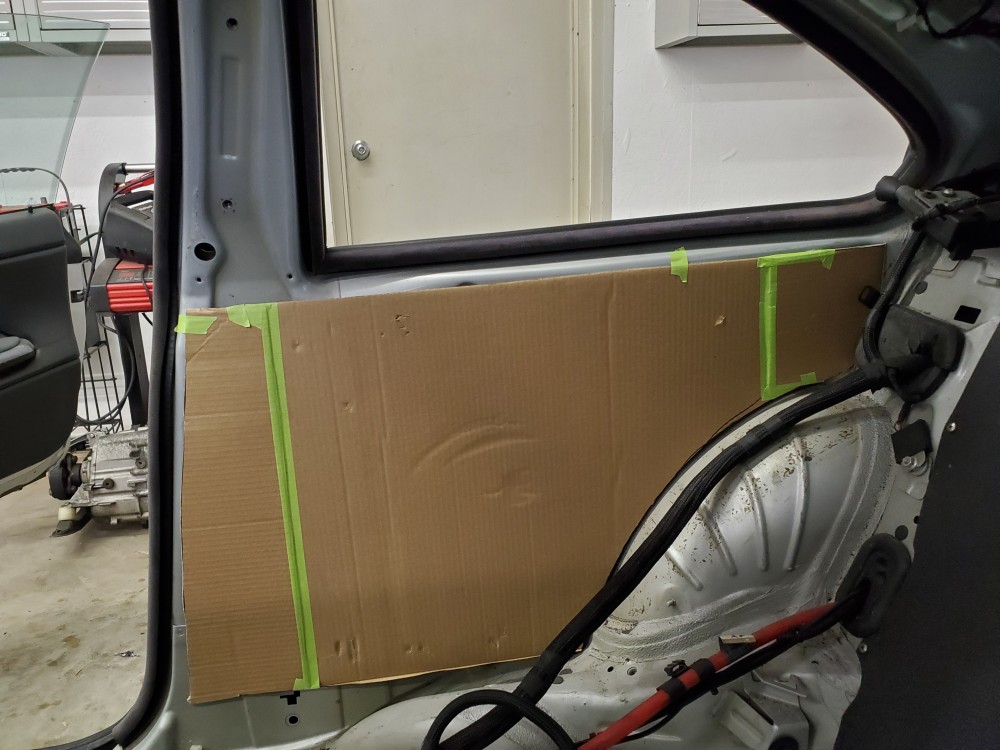
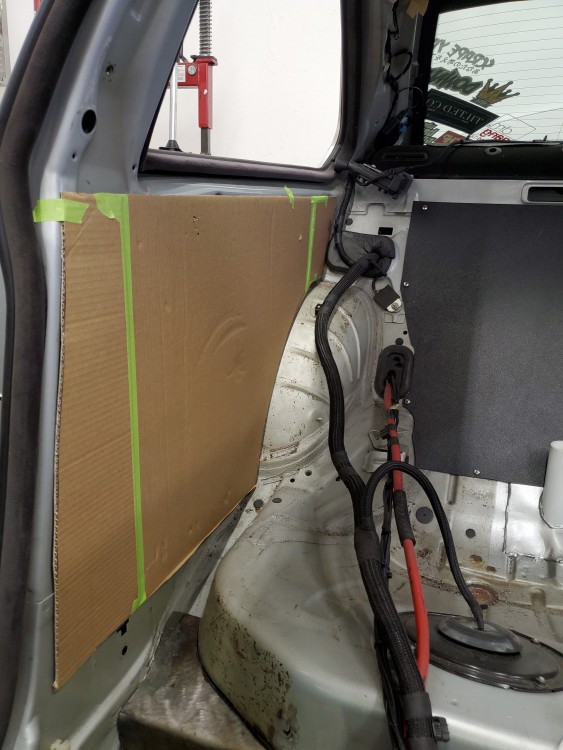
                  I also made some "CAD" templates for the rear door panels once the cage is in. I wont be able to fit the stock panels with how we are doing the cage so I'll be cutting them out of the same ABS that I made the bulkhead out of and then using nutzerts and some nice hardware to secure them.
                  20200208152520.jpg

                  20200208152547.jpg

                  1 Reply Last reply
                  3
                  • B
                    B
                    B C
                    wrote on last edited by
                    #296

                    CAD = Cardboard And Duct tape?

                    1 Reply Last reply
                    0
                    • TkuhnT
                      TkuhnT
                      Tkuhn
                      wrote on last edited by
                      #297

                      B C said:

                      CAD = Cardboard And Duct tape?

                      Cardboard aided design hahah but that's a good one too!

                      1 Reply Last reply
                      2
                      • patsbimmer1P
                        patsbimmer1P
                        patsbimmer1
                        wrote on last edited by
                        #298

                        I like this every time it's updated

                        2011 e90 M3 - DCT, Borla exhaust, BMW Performance Black Grille, ECS Painted Corners, Ziza Angel Eyes

                        07 335i Stella - sport package, BMS DCI, zhp knob, TMS cf parking brake lever, VRSF downpipes, MHD tune, H&R race springs, other stuff *SOLD*

                        97 328i Lola - sport package, m50 intake manifold, m50 manifold.com install kit, custom CAI, K&N filter, Borla exhaust, FK silverline coilovers, 25.5mm front sway bar, Powerflex front sway bushings, Turner Radiator, fan delete *sold*
                        95 325is *sold*
                        93 nissan 240sx KA-T *sold*

                        BMWCCA #473306

                        Instagram @patsbimmer1

                        AKA- HALLWAY PAT

                        "burnouts bring babes and babes dont have time for bushings" - Kaiser Rolls

                        1 Reply Last reply
                        1
                        • TkuhnT
                          TkuhnT
                          Tkuhn
                          wrote on last edited by
                          #299

                          patsbimmer1 said:

                          I like this every time it's updated

                          I do my best! Honestly alot of the reason I update even on the littlest things is for myself. When I built my civic over the 8 years I had it I barely updated the build thread I did have, which was so much work. And sometimes the little stuff is informational and might help someone else too!

                          1 Reply Last reply
                          1
                          • TkuhnT
                            TkuhnT
                            Tkuhn
                            wrote on last edited by
                            #300

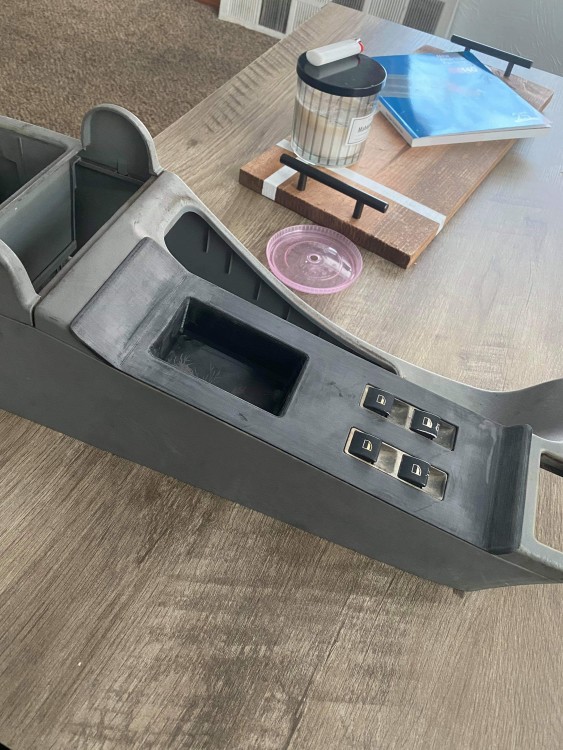
                            So I've wanted to change my orientation of the handbrake for awhile now. I've seen a few people run the pull back style on the left of the shifter and use/make the window switch slot larger to accommodate for the throw of the handle.

                            Now that chase bays makes a pull back reverse mount handbrake I thought it was time to make it happen. Still need to order the brake but we have begun planning. 

                            My biggest issue with what I want to do is most people just let the window switches hang. Which I'm not cool with lmao.

                            Of course this project began with some Cardboard Aided Design, I didnt take any photos of that.

                            But then @Sam_Holzmann went full design boi on it for me.

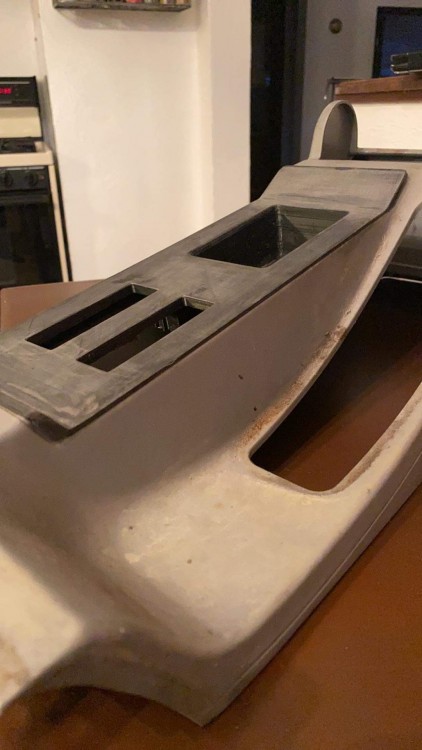
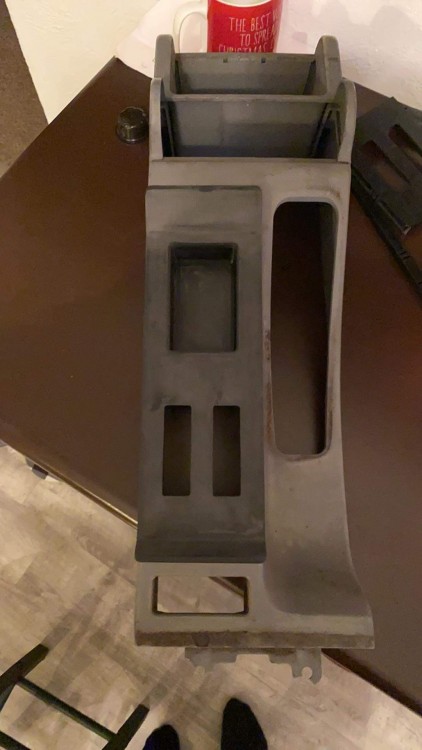
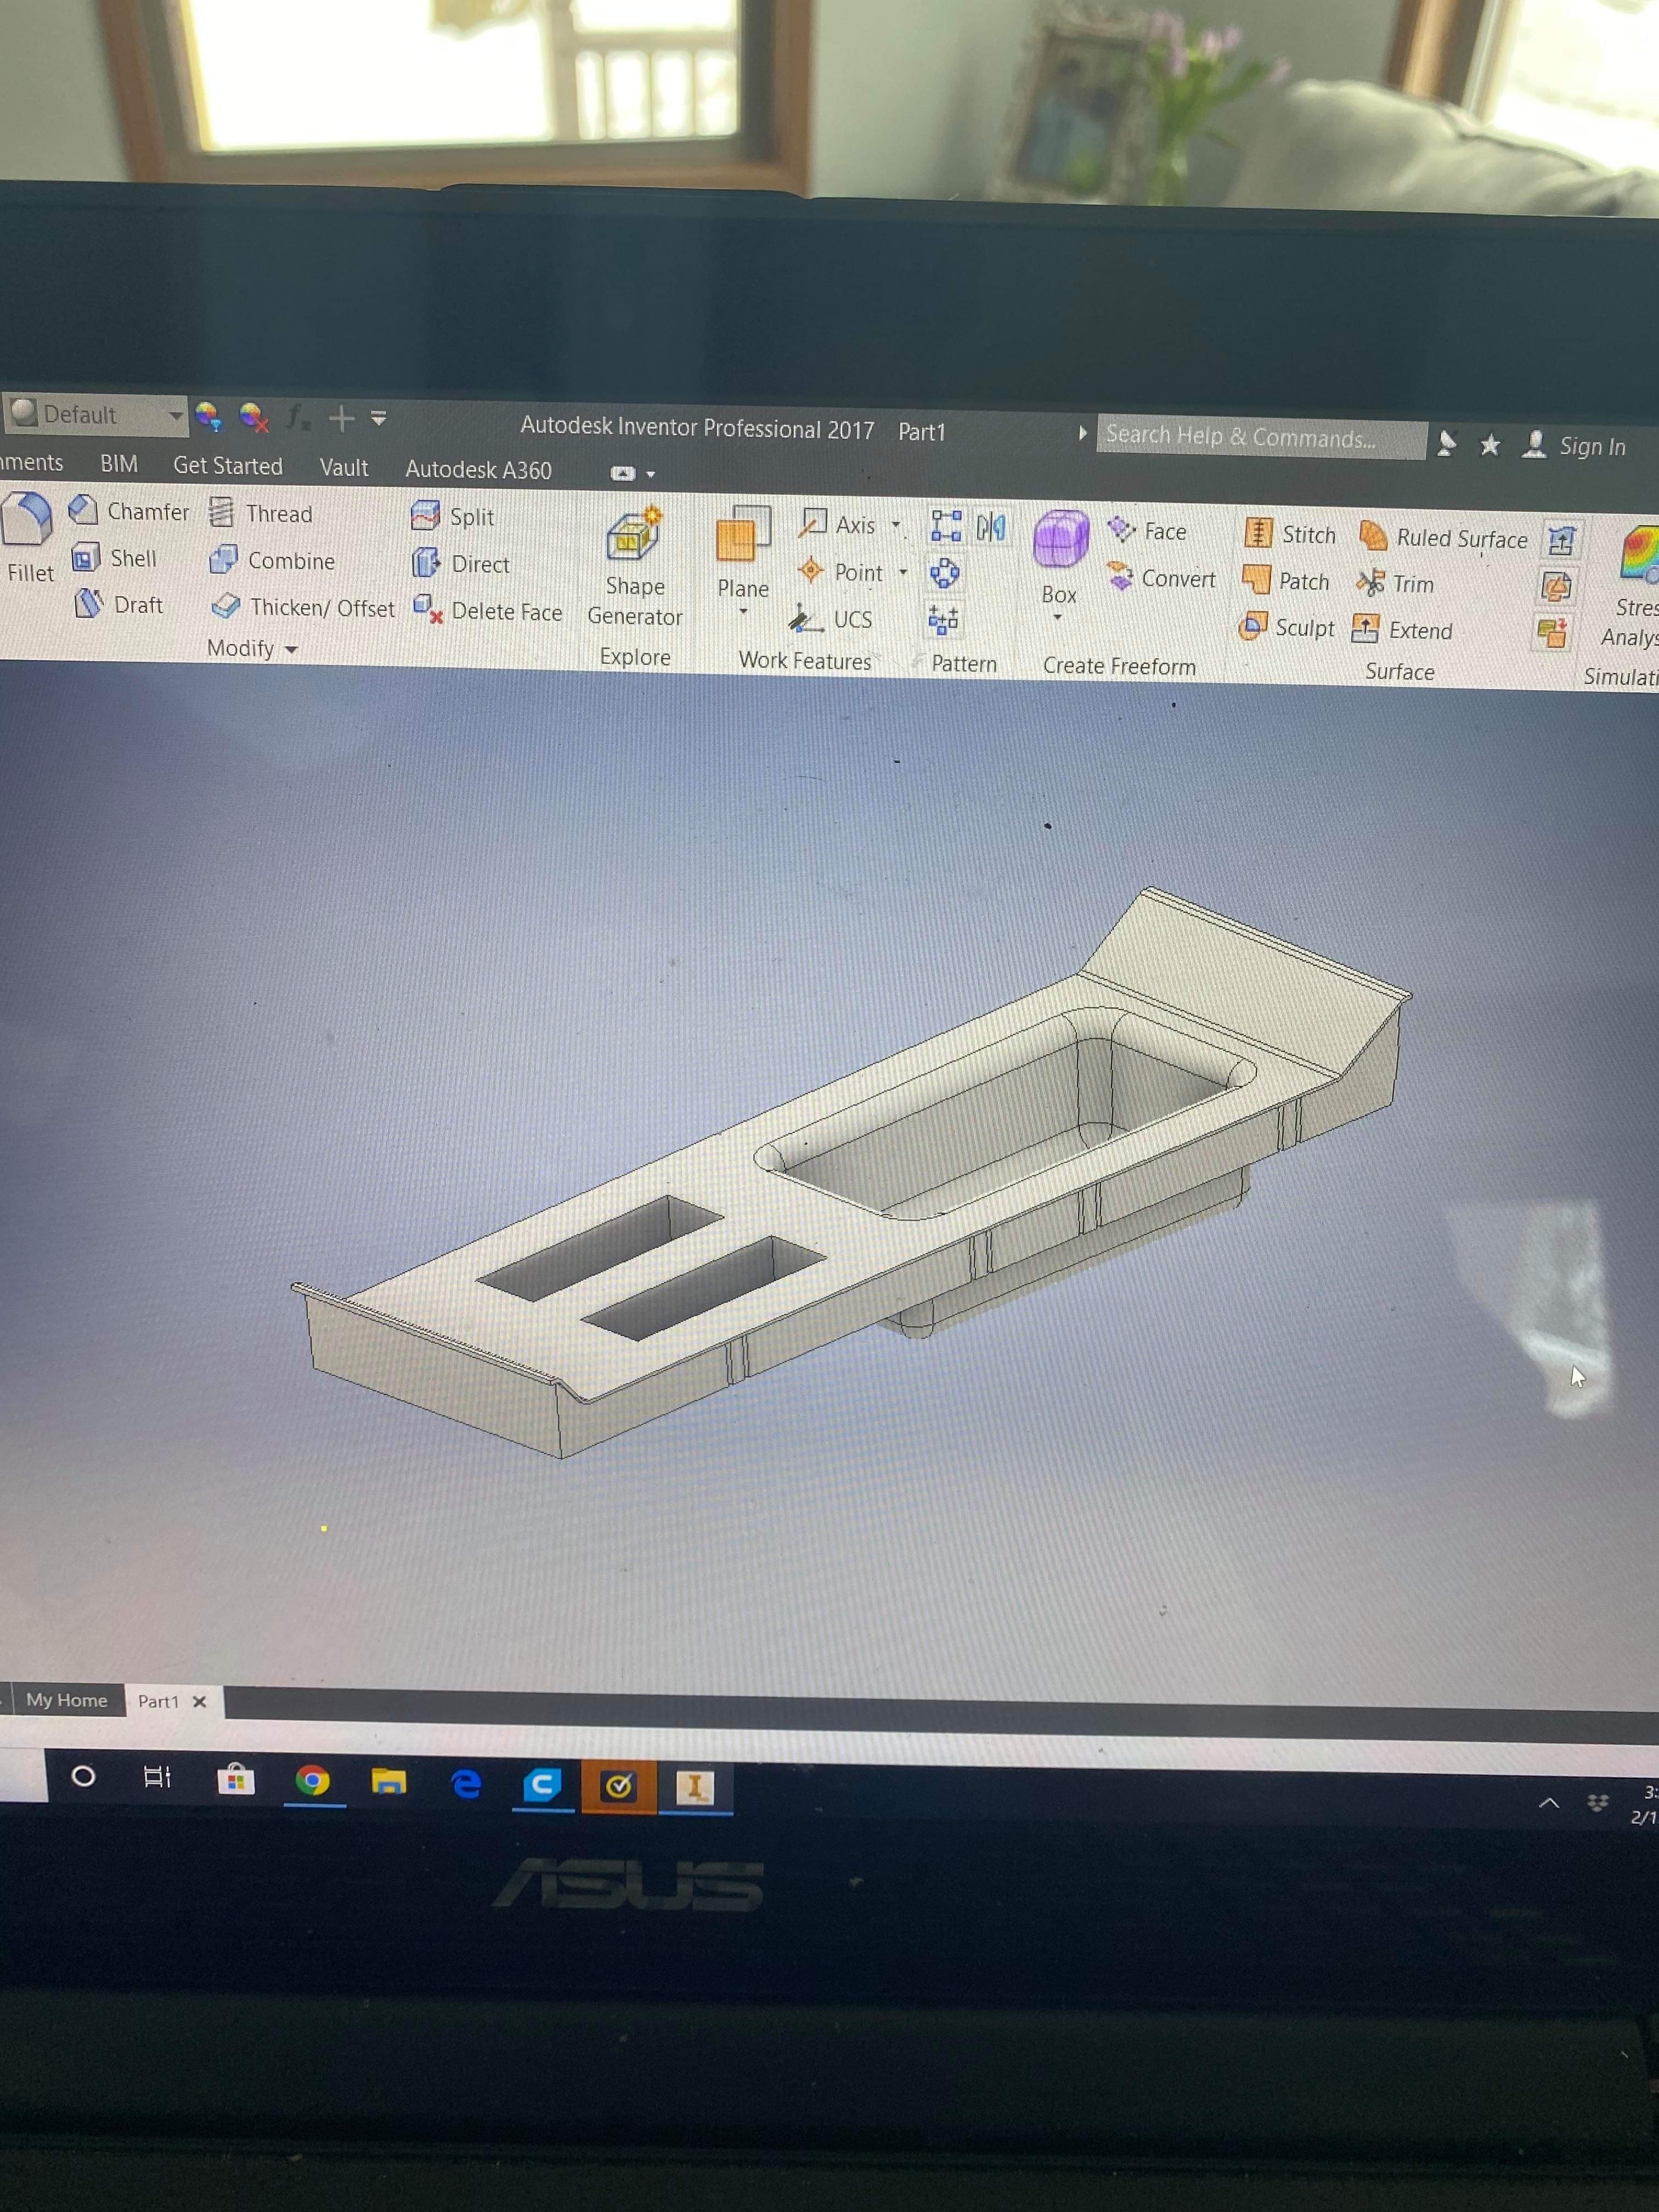
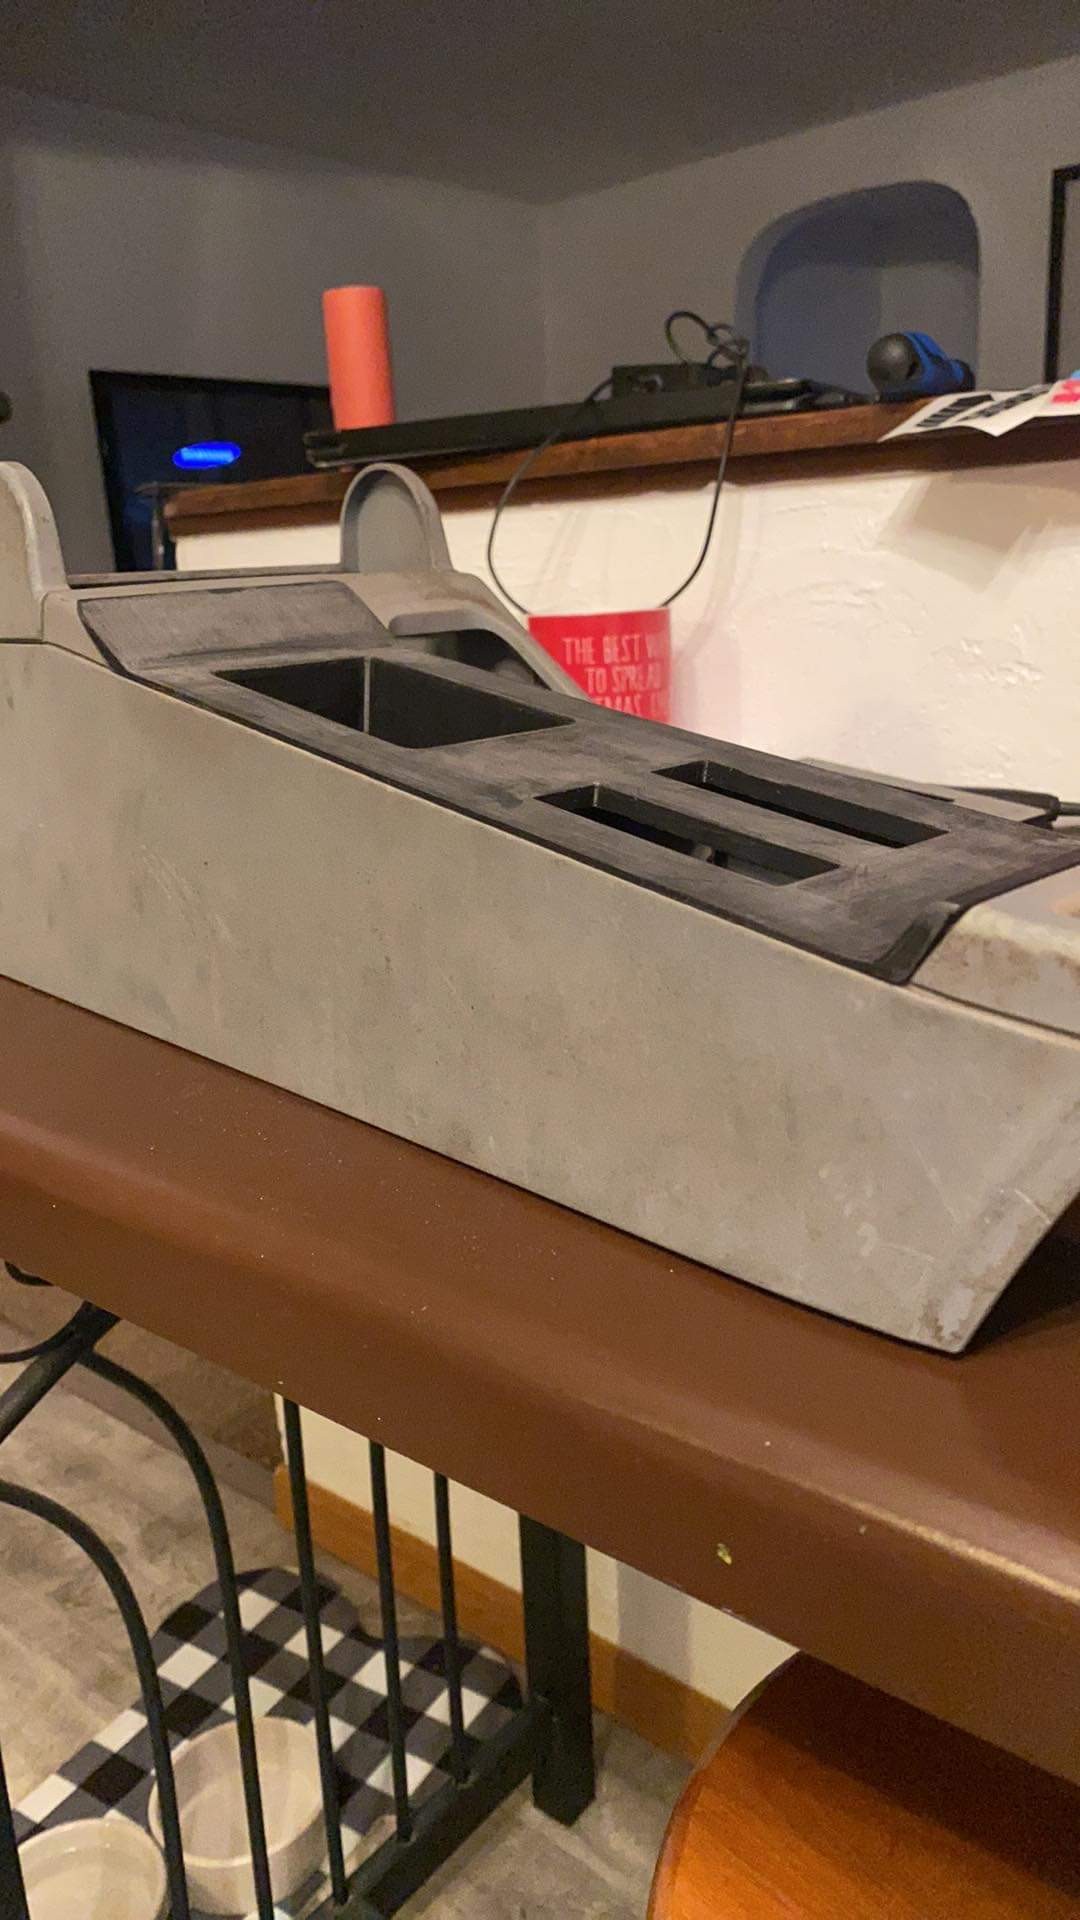
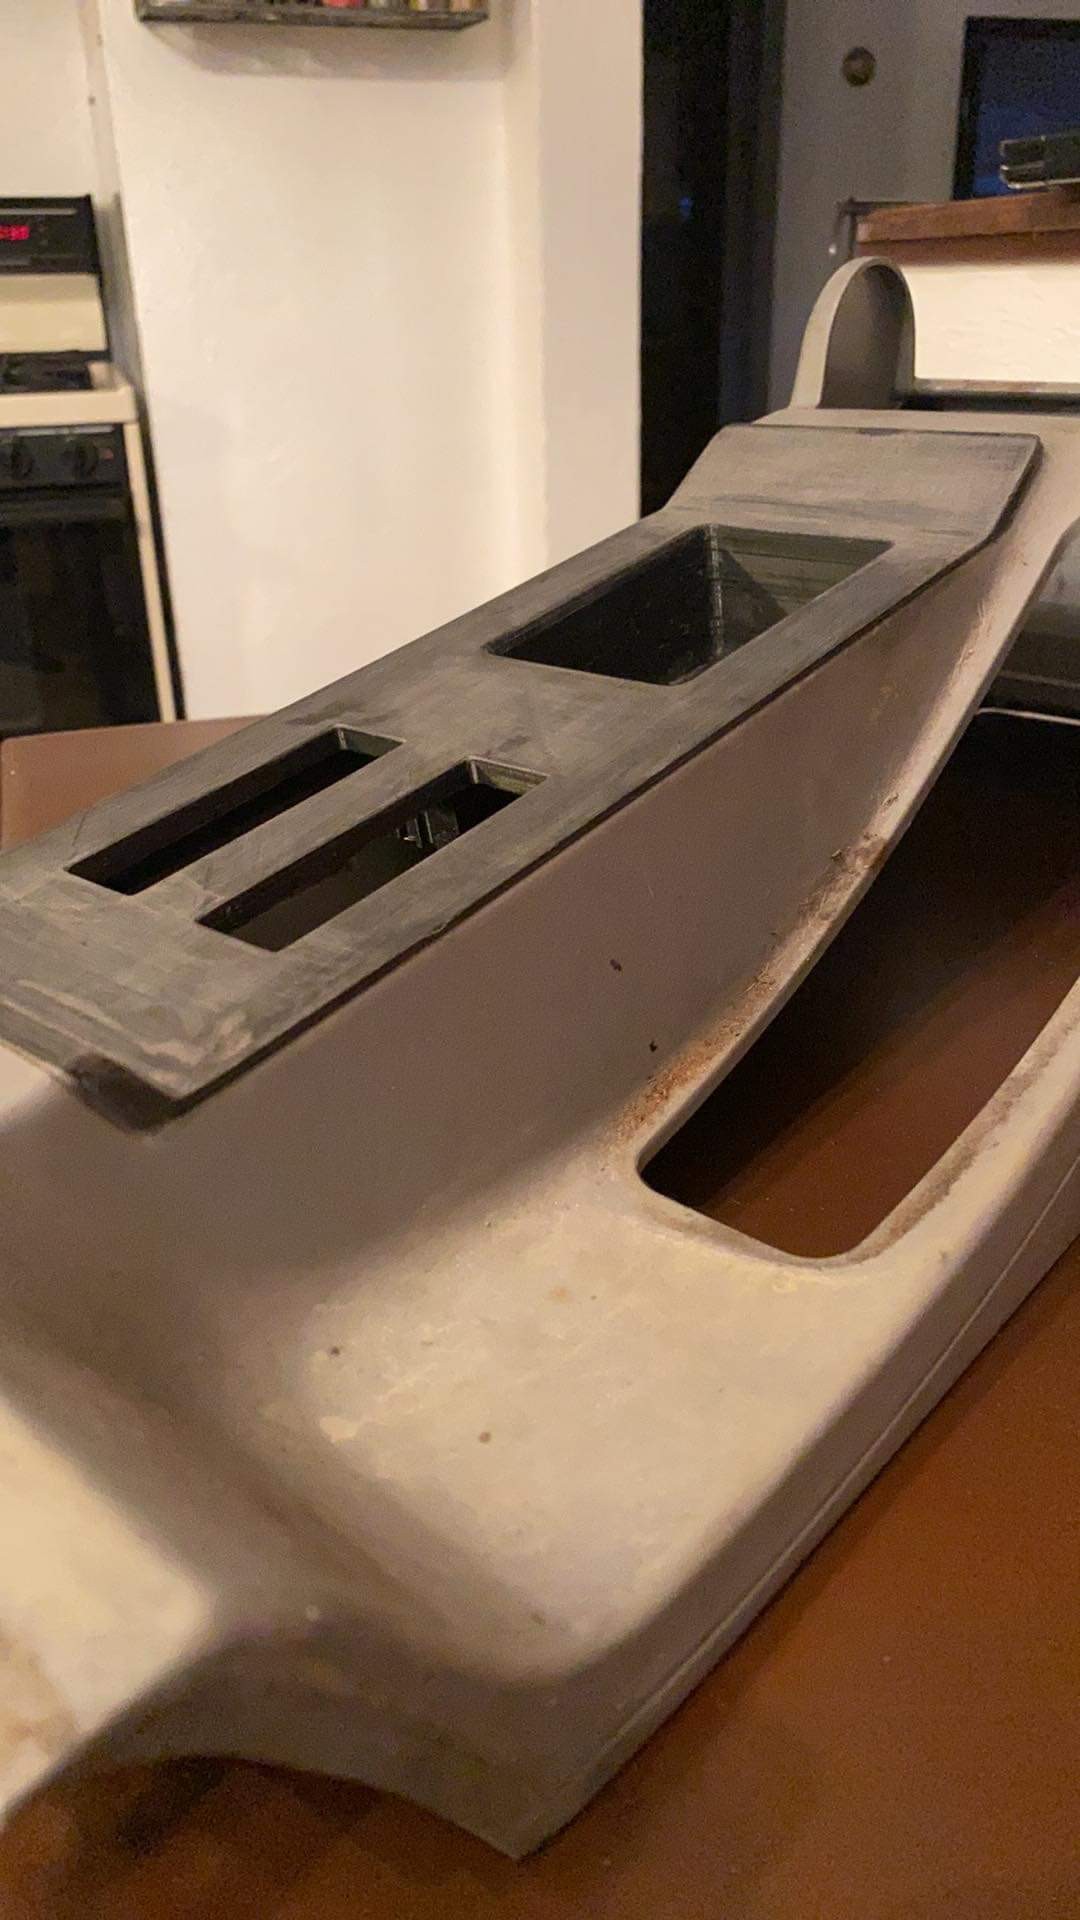
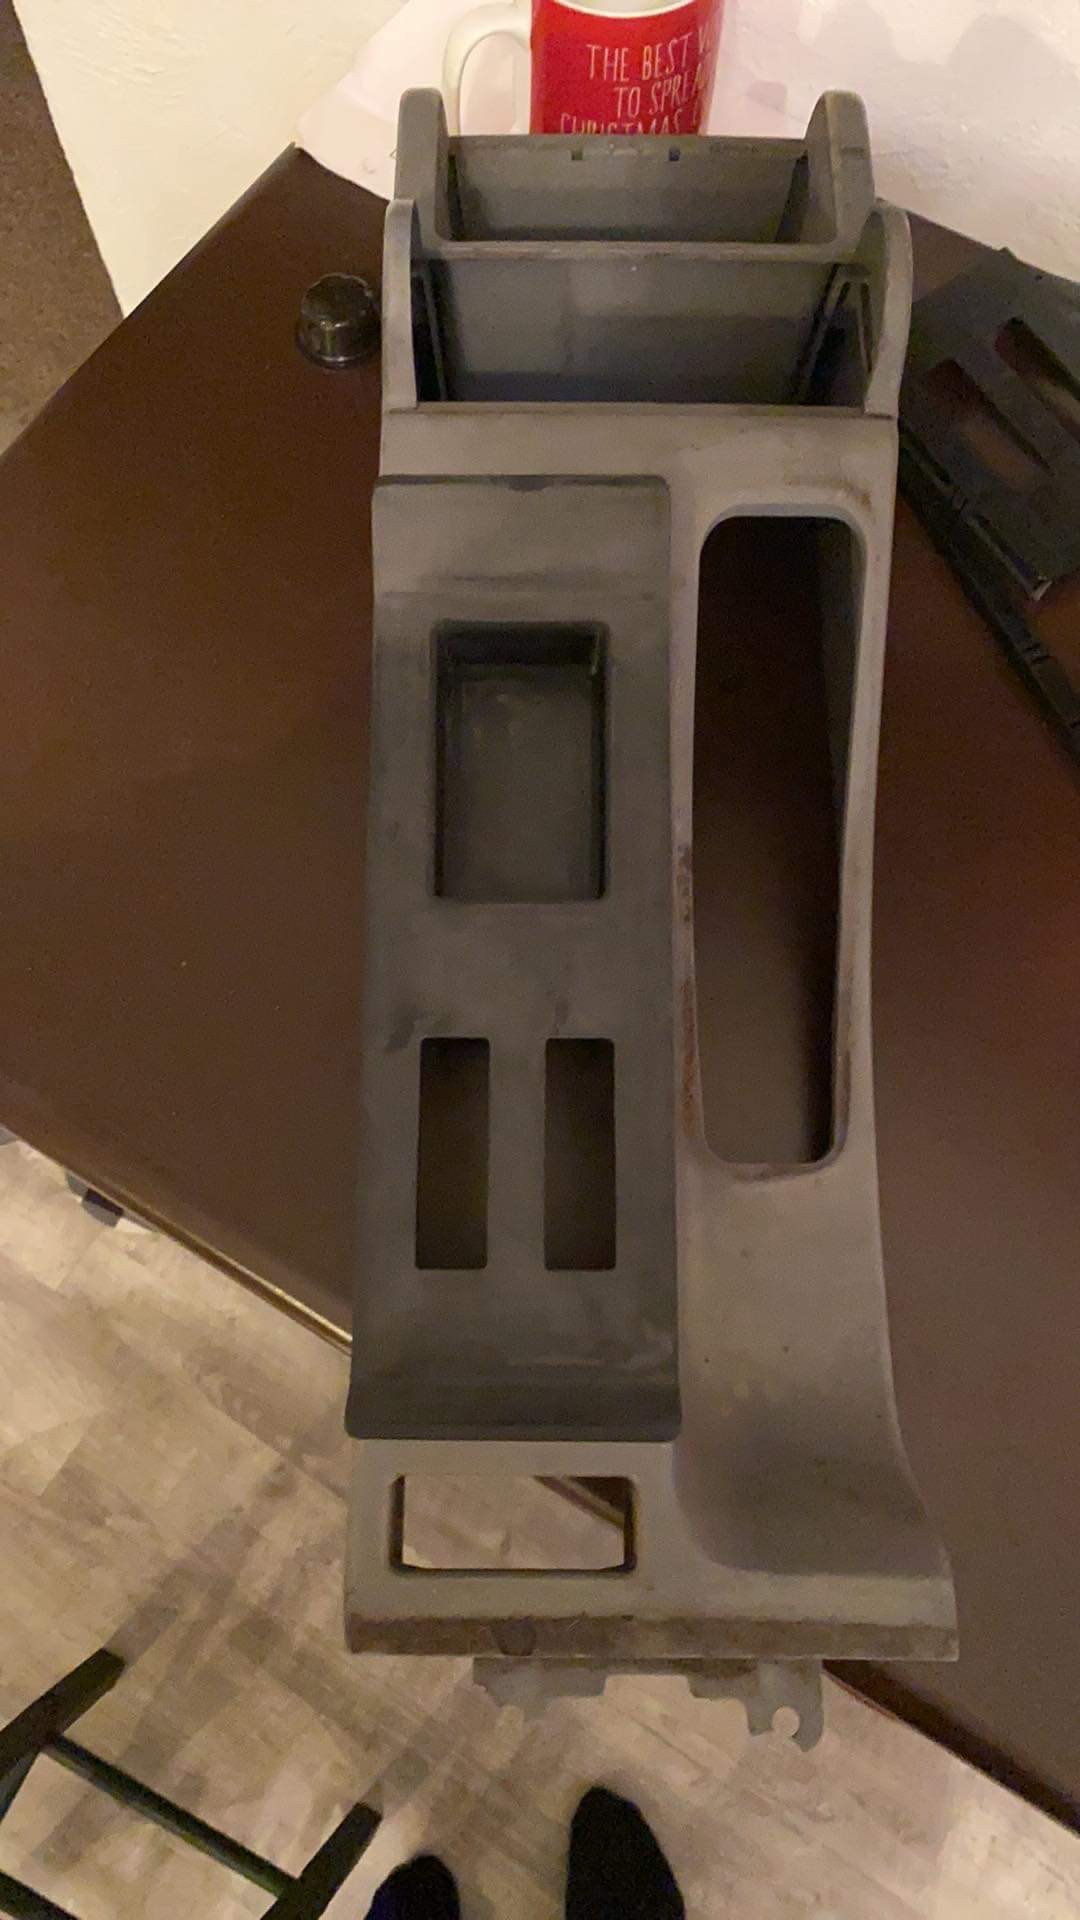
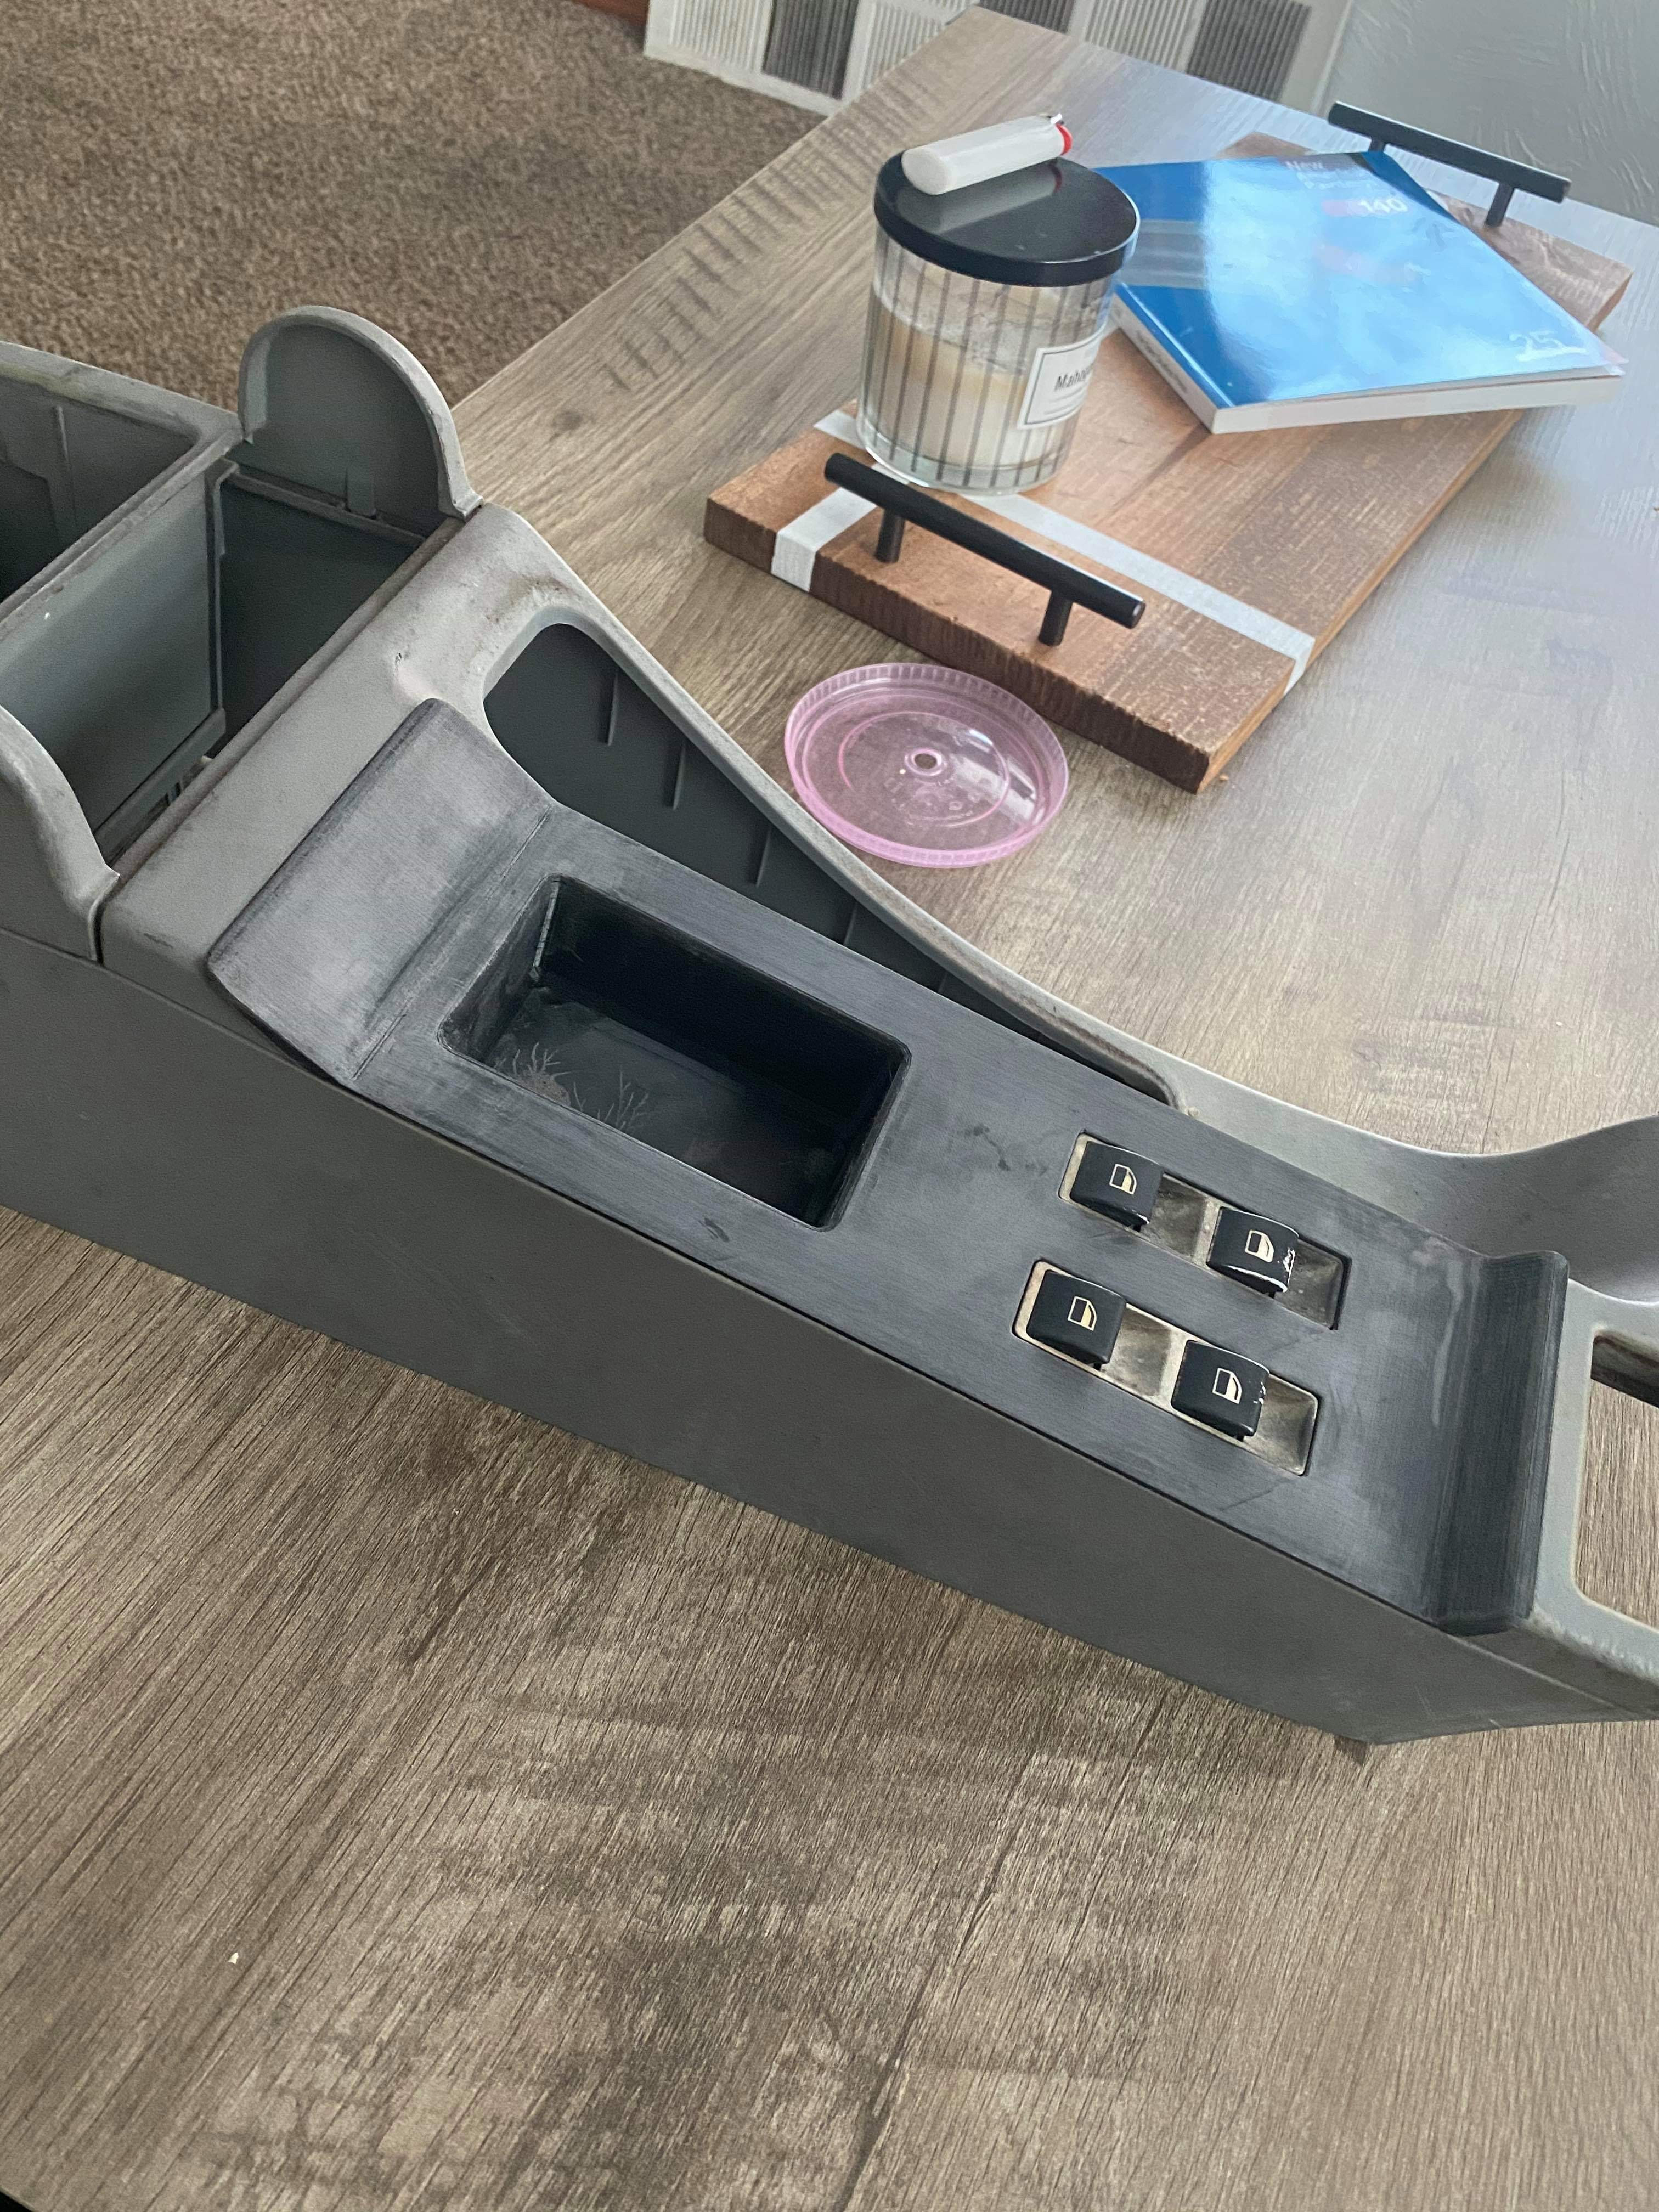
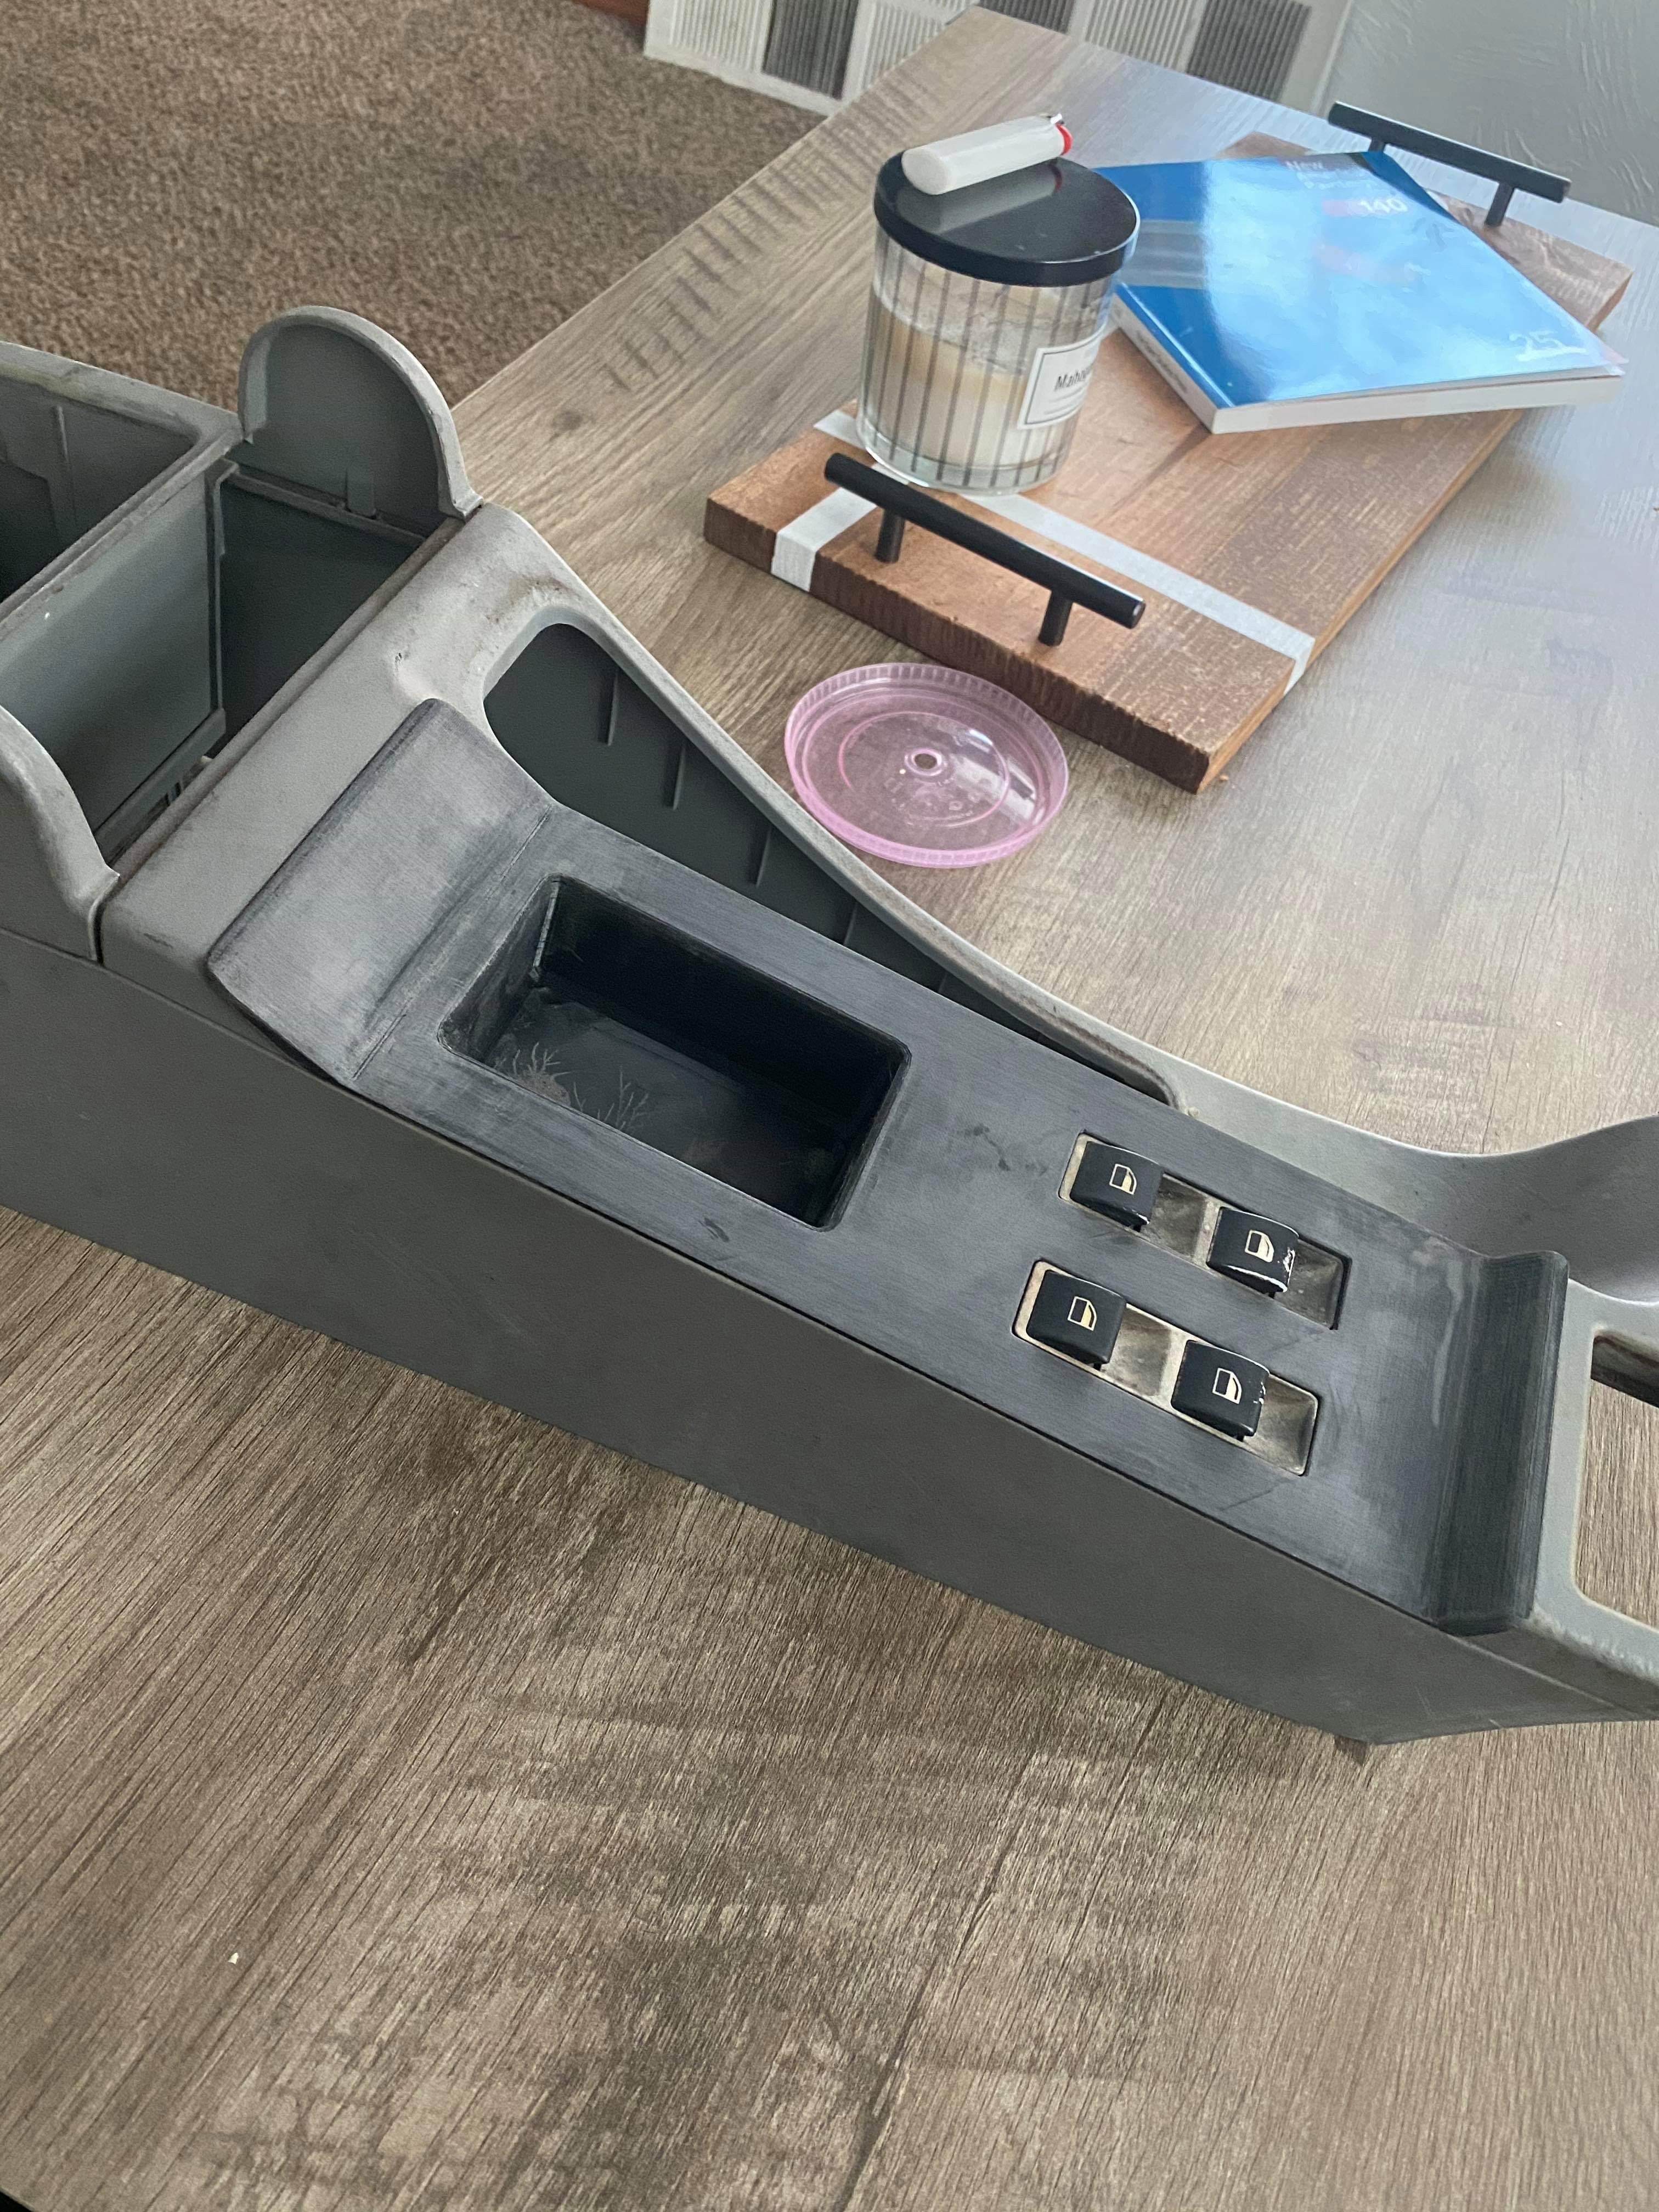
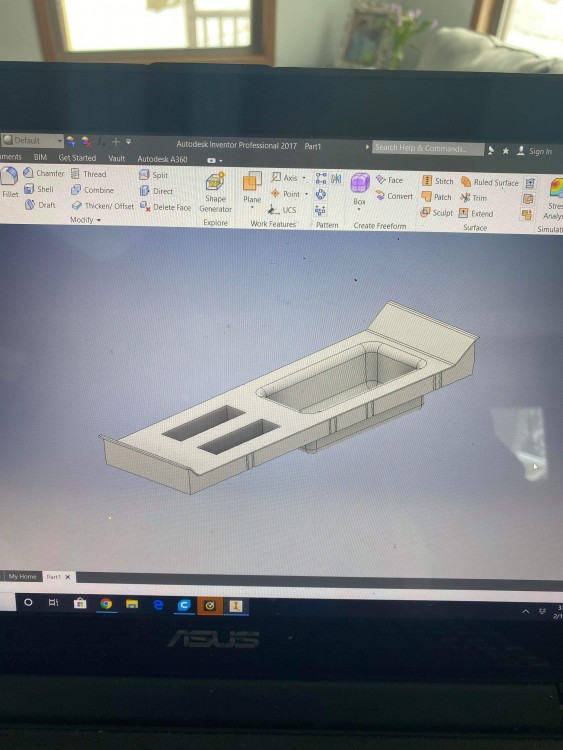
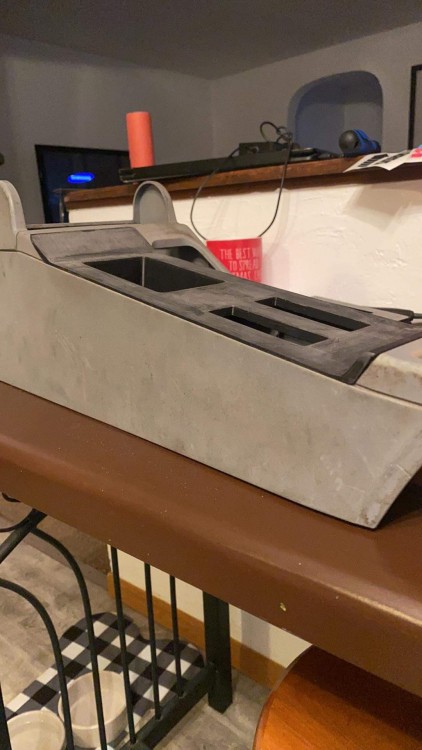
                            The window switches are both being relocated to where the cup holder/slider thing normally is in the center console. And then a small cubby added. Mostly because it would be dumb to not have anything else there.

                            Actual computer design.
                            received495335771405086.jpeg

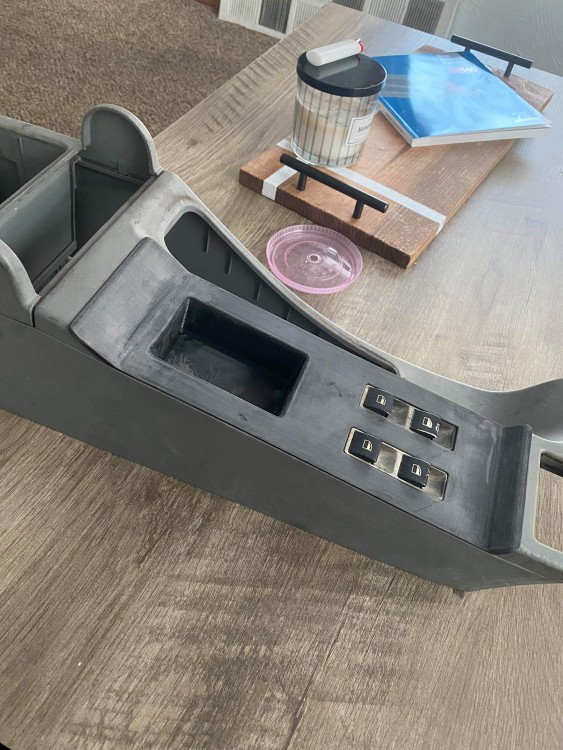
                            And the first print. Which took 44 hours.
                            received801976366874636.jpeg

                            received1125926721089277.jpeg

                            received486713585339567.jpeg

                            received1126746087668265.jpeg

                            As of now he is going to make some tweaks for the hopeful final print. I'm super hyped for this one off piece! I cannot thank Sam enough for this one, it will be so much nicer than anything I could have made out of an ABS sheet.
                            received1126746087668265.jpeg

                            1 Reply Last reply
                            0
                            • JdesignJ
                              JdesignJ
                              Jdesign
                              wrote on last edited by
                              #301

                              Tkuhn said:

                              So I've wanted to change my orientation of the handbrake for awhile now. I've seen a few people run the pull back style on the left of the shifter and use/make the window switch slot larger to accommodate for the throw of the handle.

                              Now that chase bays makes a pull back reverse mount handbrake I thought it was time to make it happen. Still need to order the brake but we have begun planning. 

                              The window switches are both being relocated to where the cup holder/slider thing normally is in the center console. And then a small cubby added. Mostly because it would be dumb to not have anything else there.

                              Actual computer design.

                              That looks great!

                              Any pictures of the handbrake set up that you are referring to? Is it like this?

                              Image result for E46 Handbrake setup

                              SumBunny.jpg

                              https://www.instagram.com/_jdesigner_/                                          http://nevertoolow.tumblr.com/

                              🥳SOLD BMW E24 633CSI - BMW M30B32                                          🧪SOLD HCH  ES9 - 1.3 LDA
                              👽BMW E30 325IC - Toyota 1JZ-GTE                                                     ⏰ HONDA EF9 CIVIC SI - JDM B18C5
                              ☠️BMW E36 318i - Ford 5.0 FE302                                                         🚴‍♂️ GT-Labomba - 26x2.75 Freeride
                              🤹‍♀️SOLD BMW E36/7 Z3 - BMW M54B25                                                🧓SOLD BMW E10 2002 - BMW M10M05

                              1 Reply Last reply
                              0
                              • TkuhnT
                                TkuhnT
                                Tkuhn
                                wrote on last edited by
                                #302

                                Jdesign said:

                                That looks great!

                                Any pictures of the handbrake set up that you are referring to? Is it like this?

                                Image result for E46 Handbrake setup

                                Yes! Except the master is reverse so it faces forward.

                                1 Reply Last reply
                                1
                                • TkuhnT
                                  TkuhnT
                                  Tkuhn
                                  wrote on last edited by
                                  #303

                                  UPDATE!

                                  Exciting weekend at the shop.

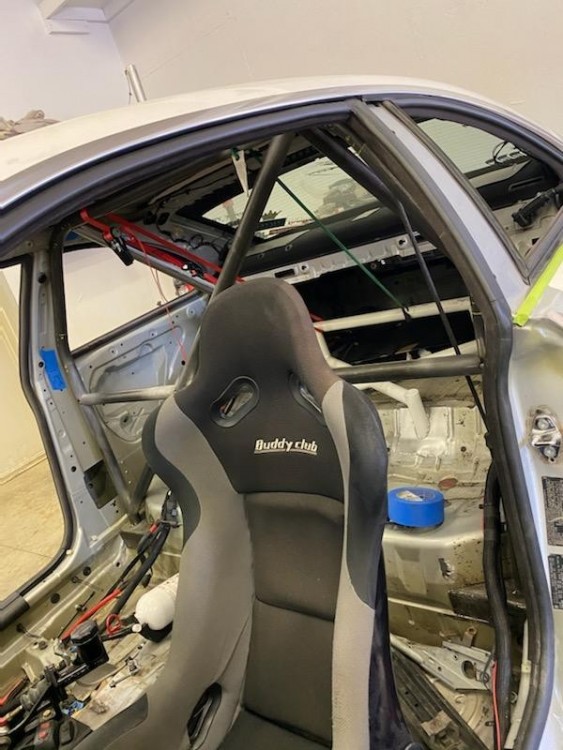
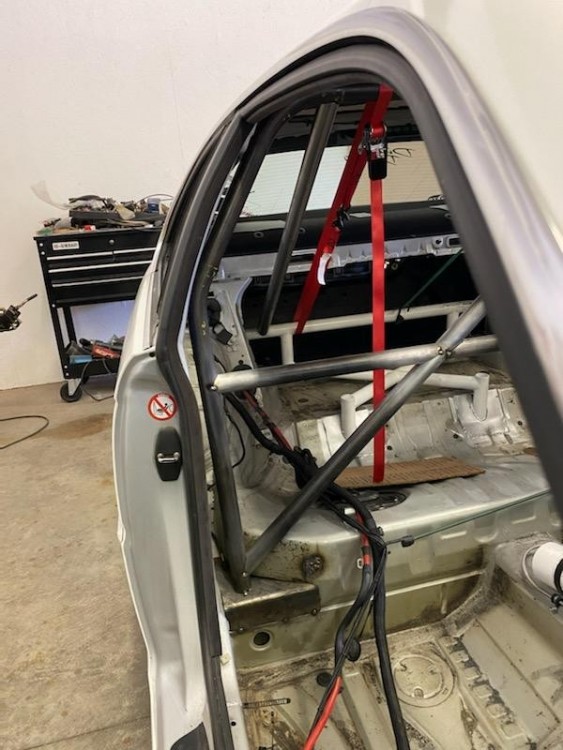
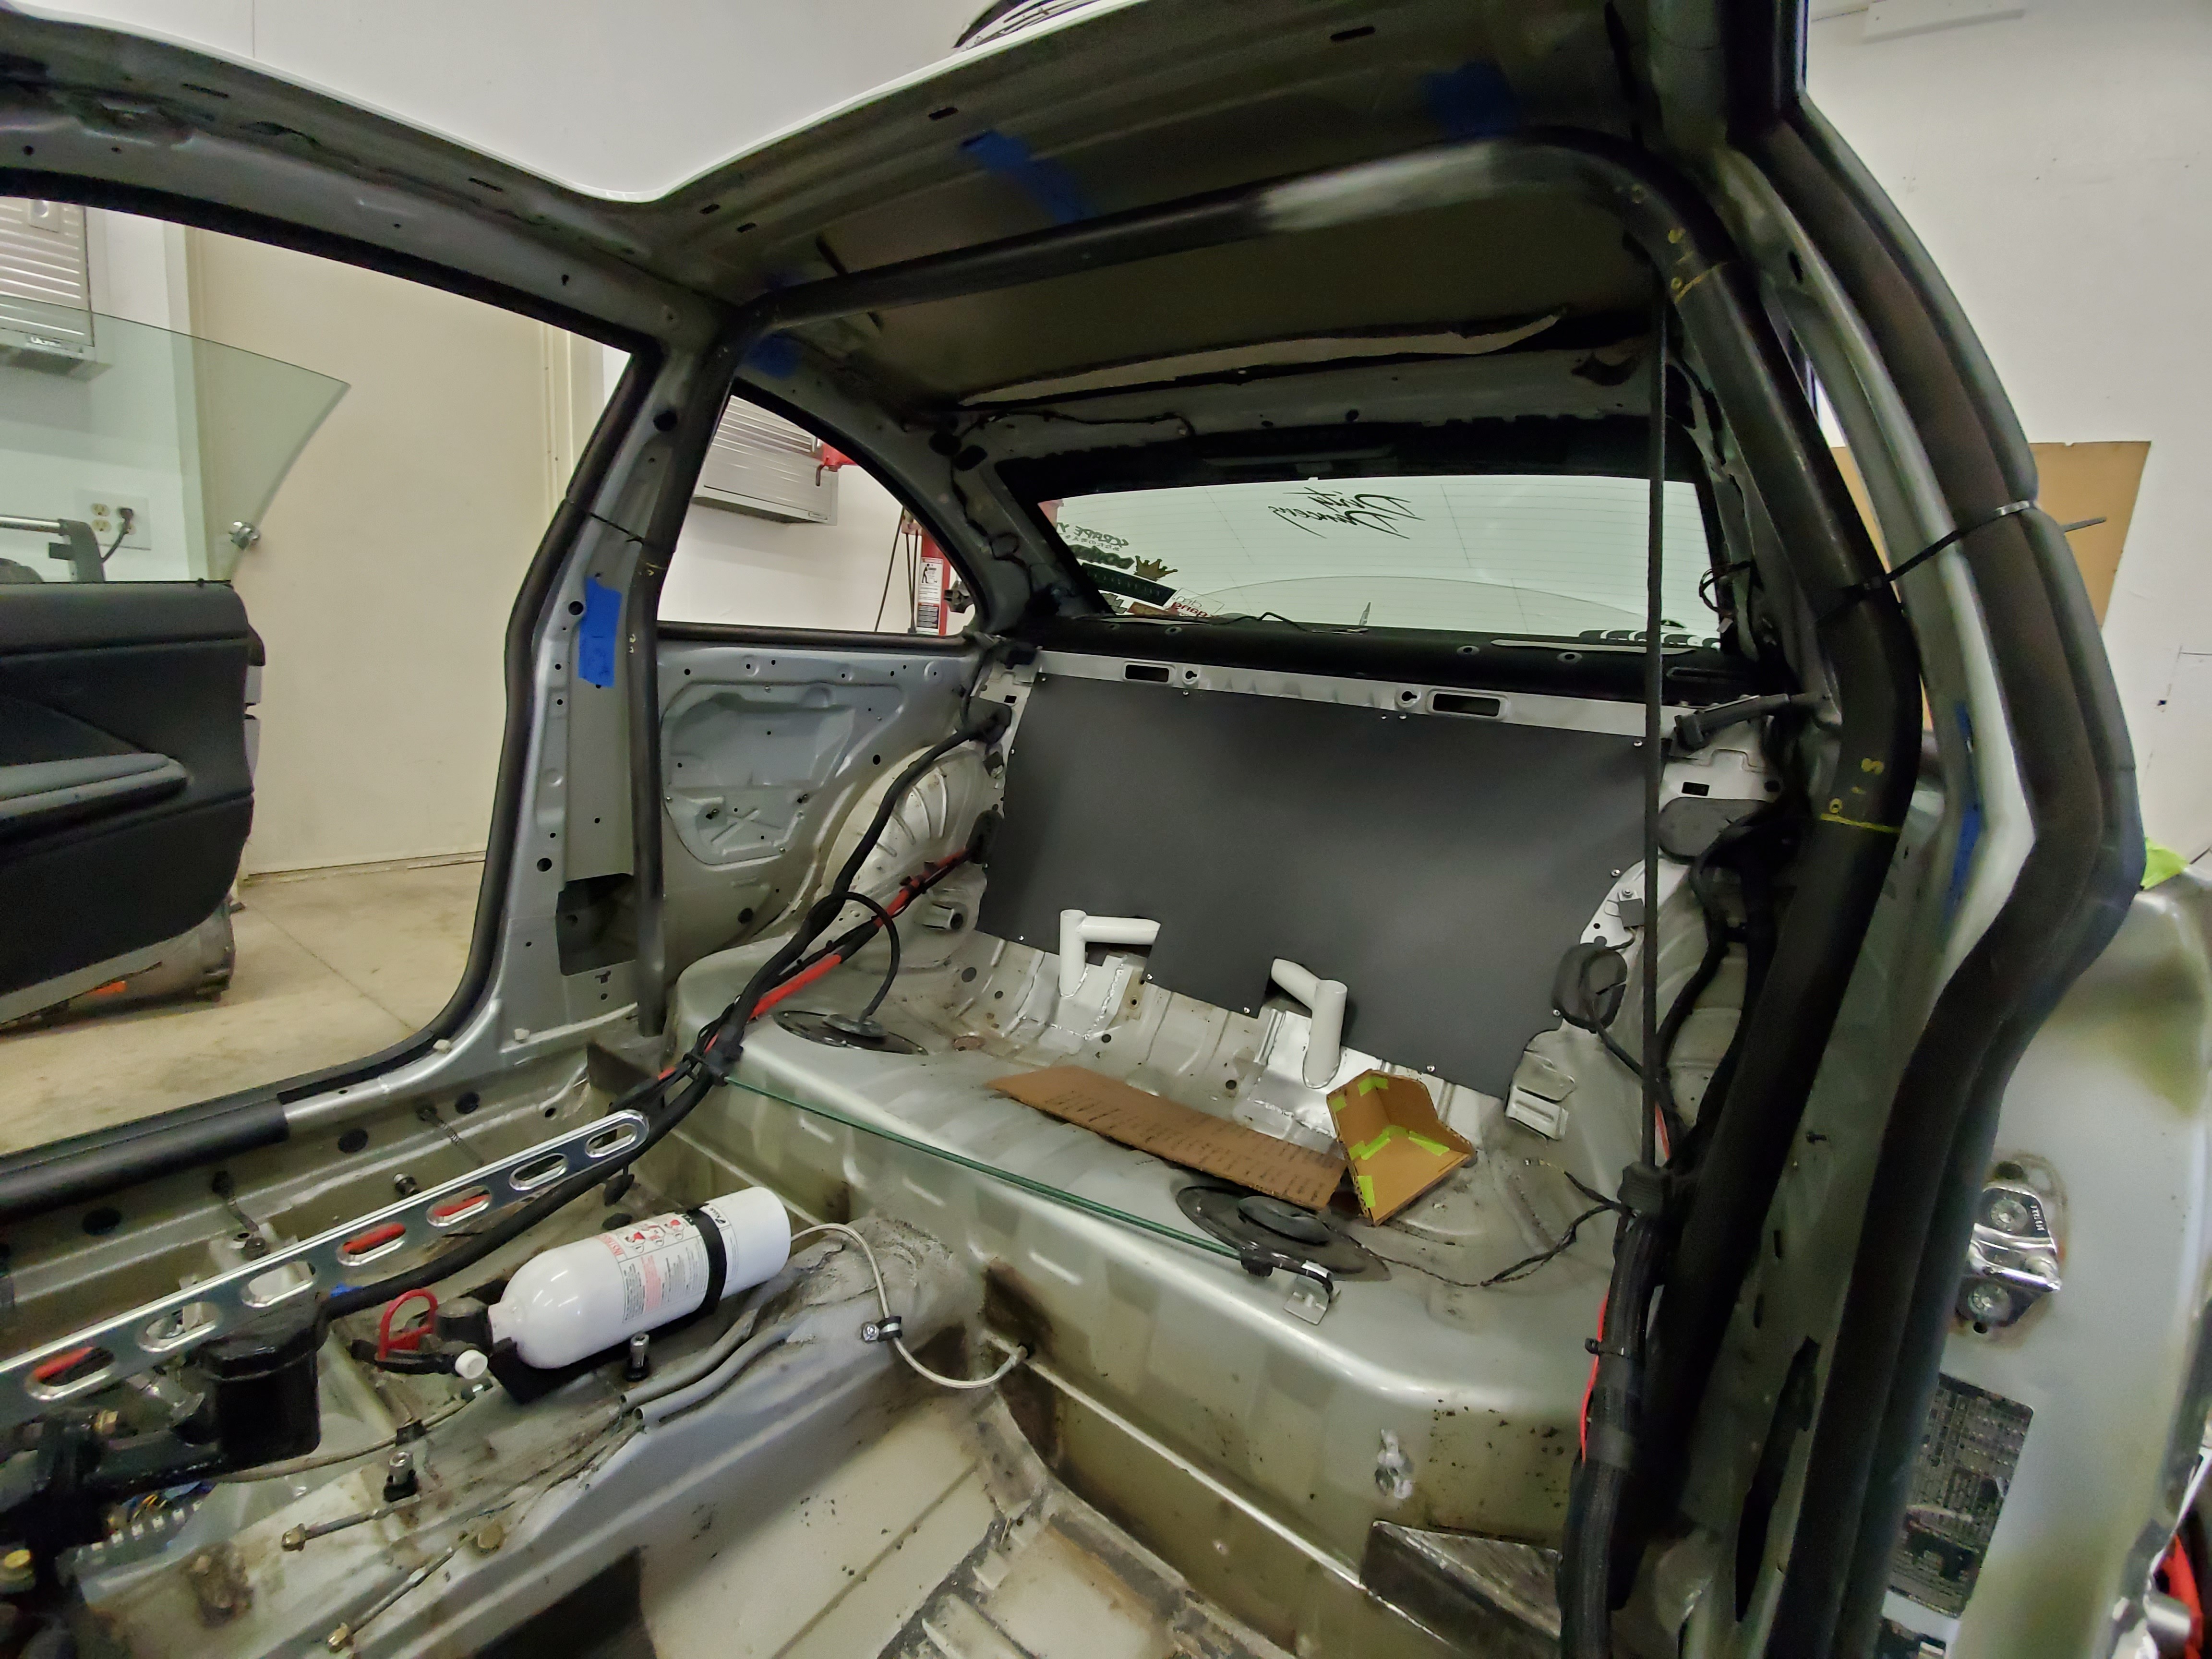
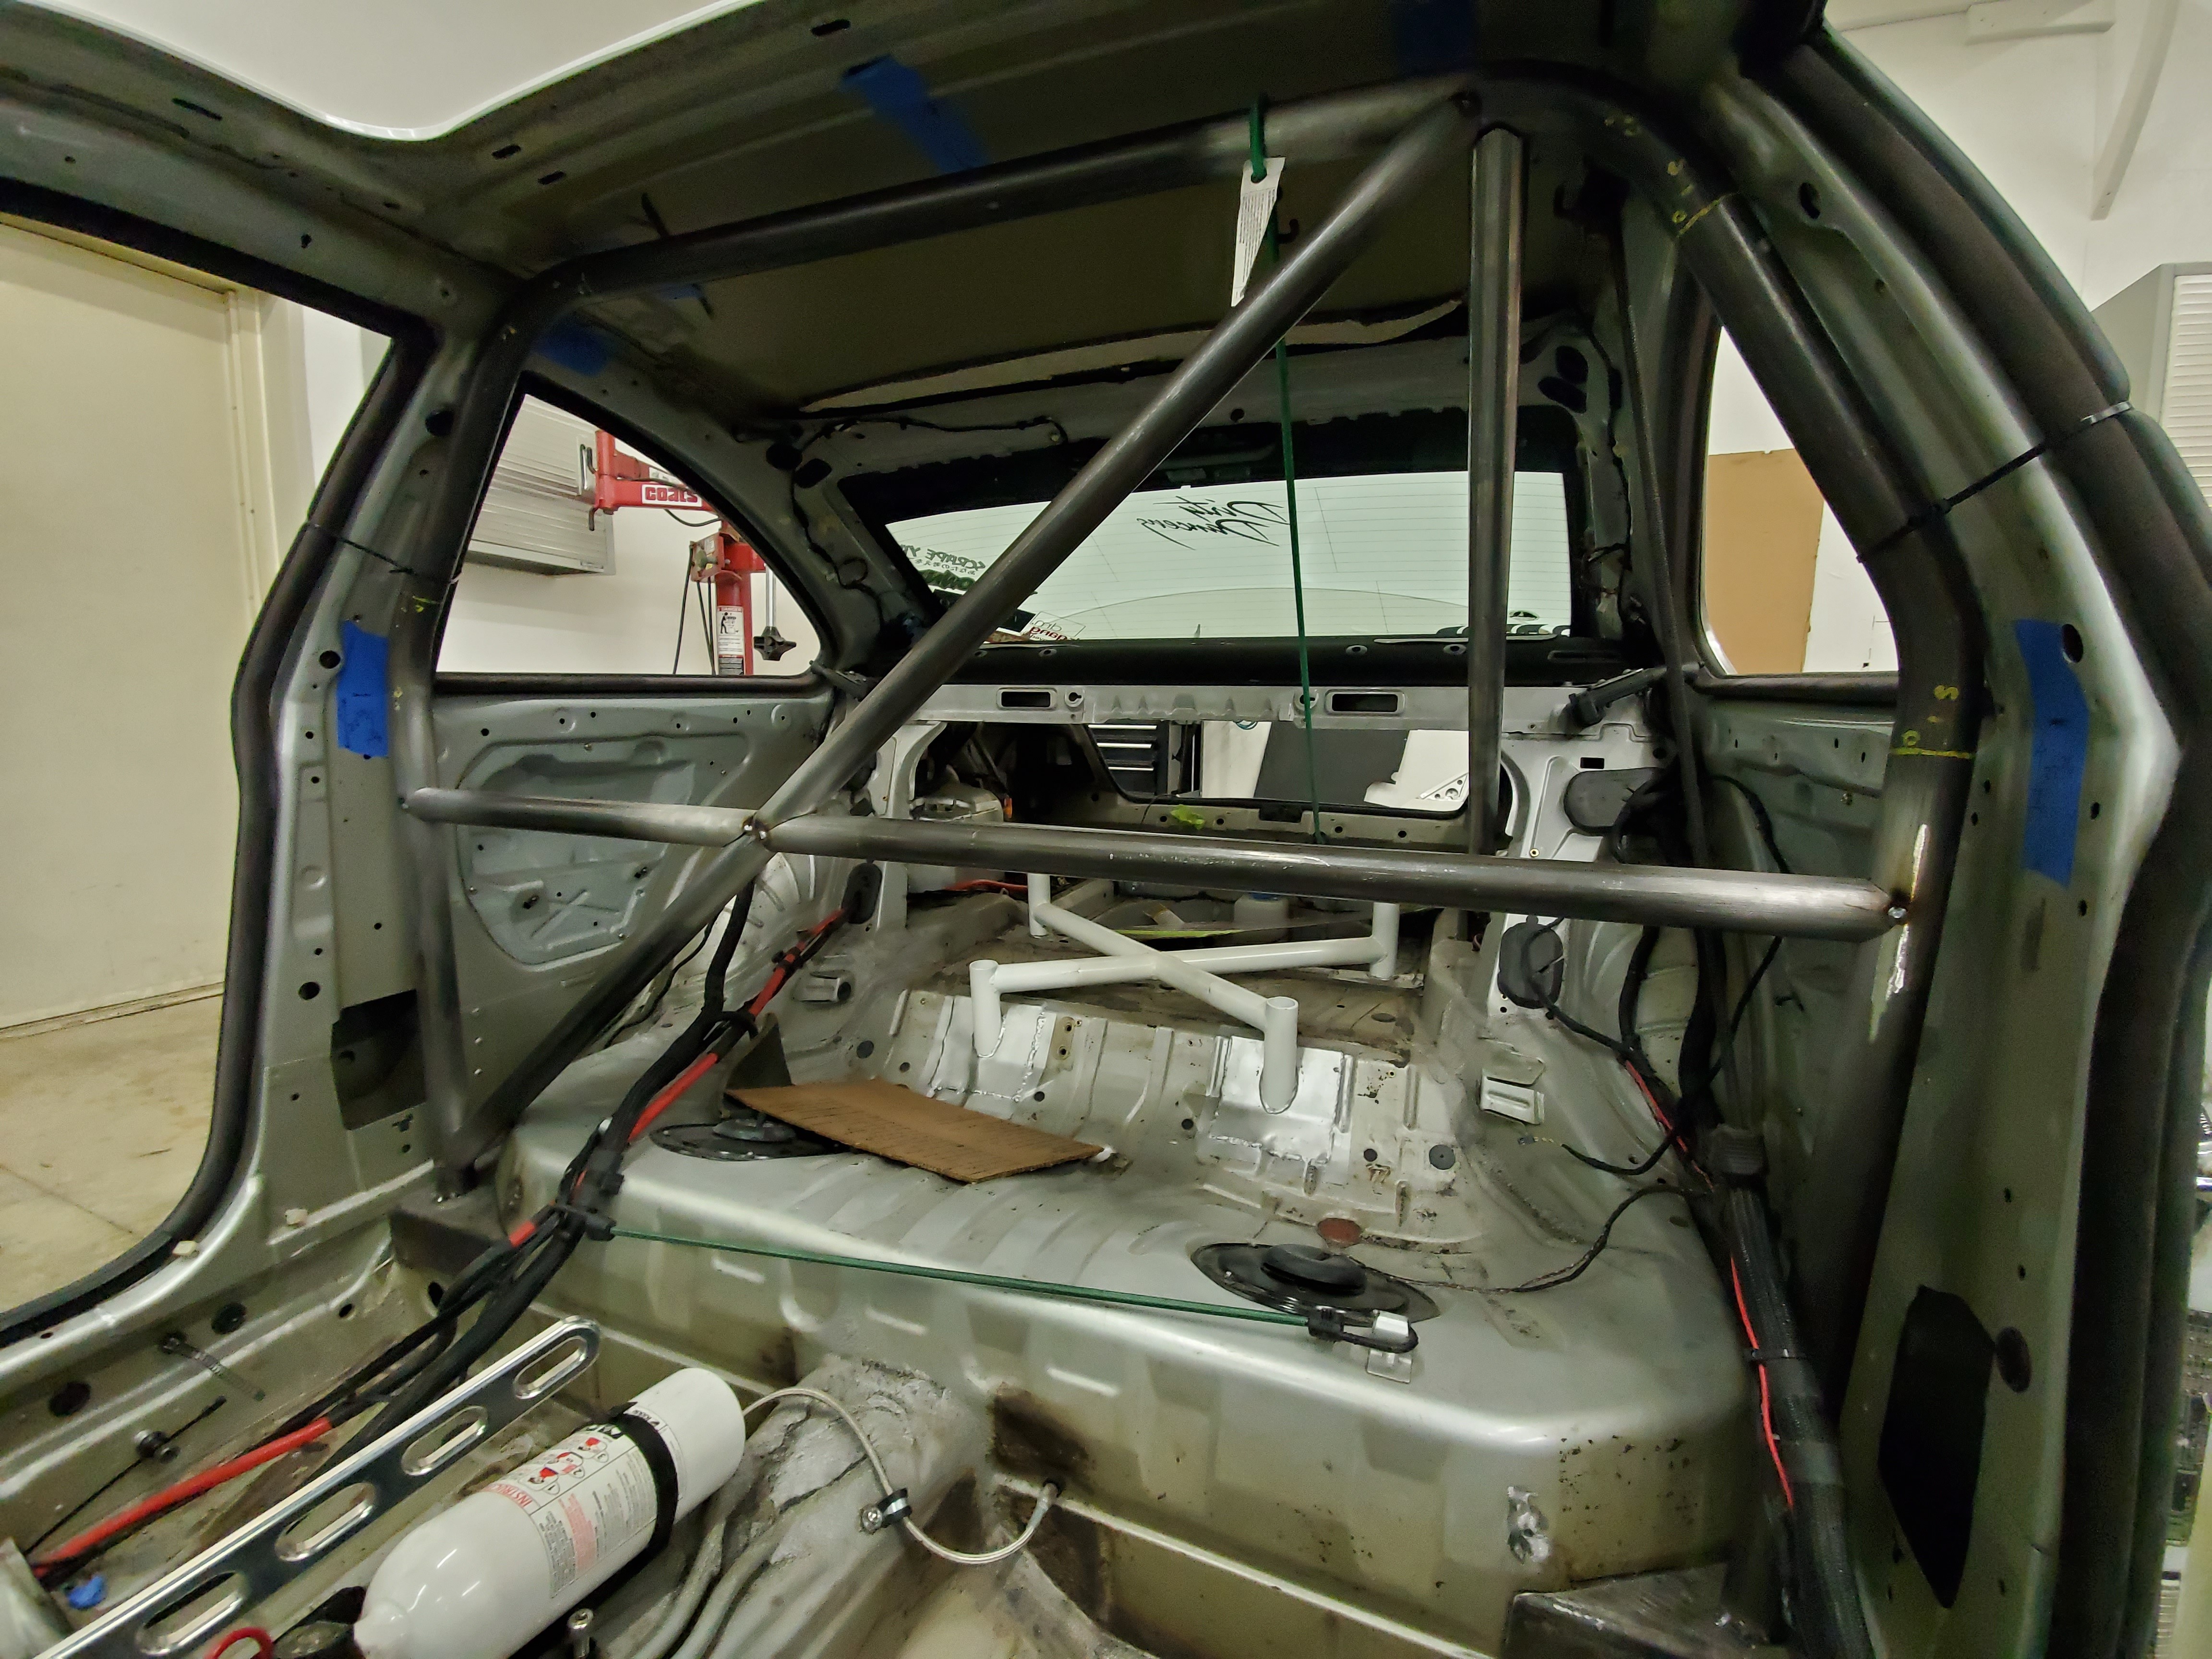
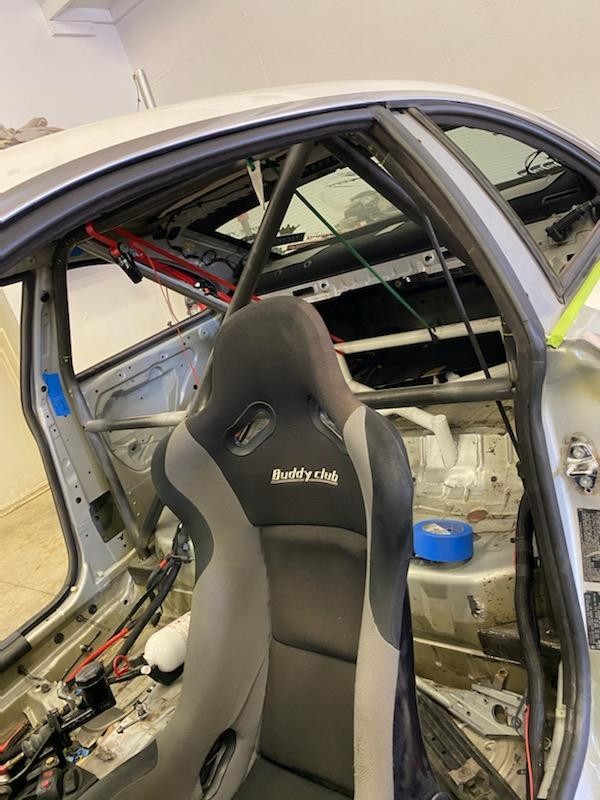
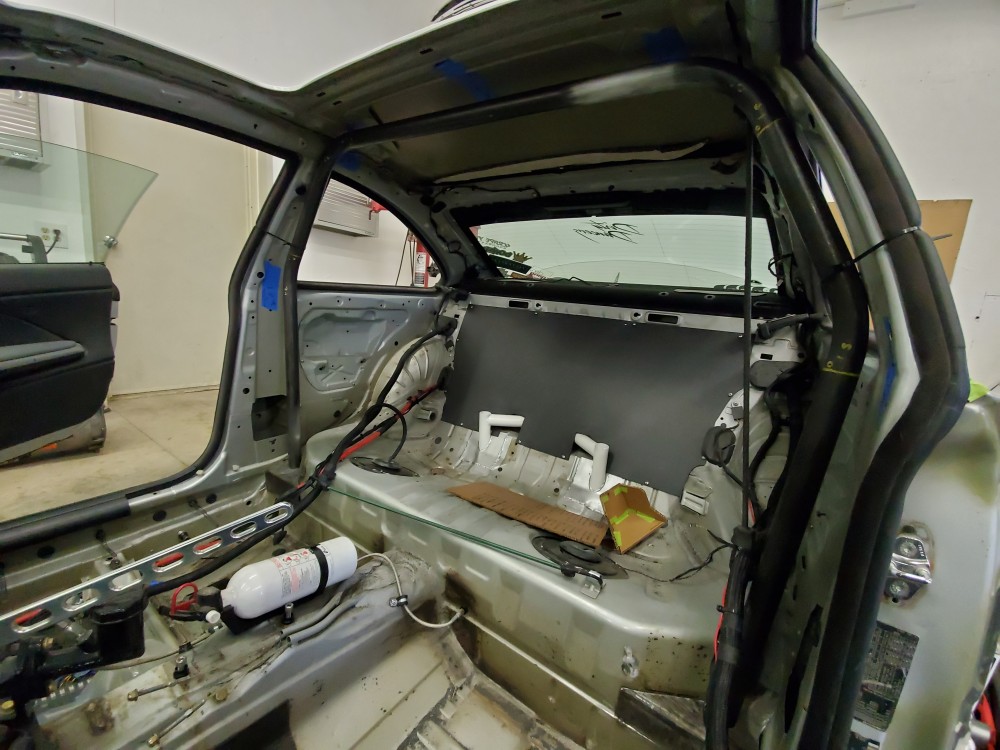
                                  We started on the cage. So thankful for the help that Sam has given me already. 

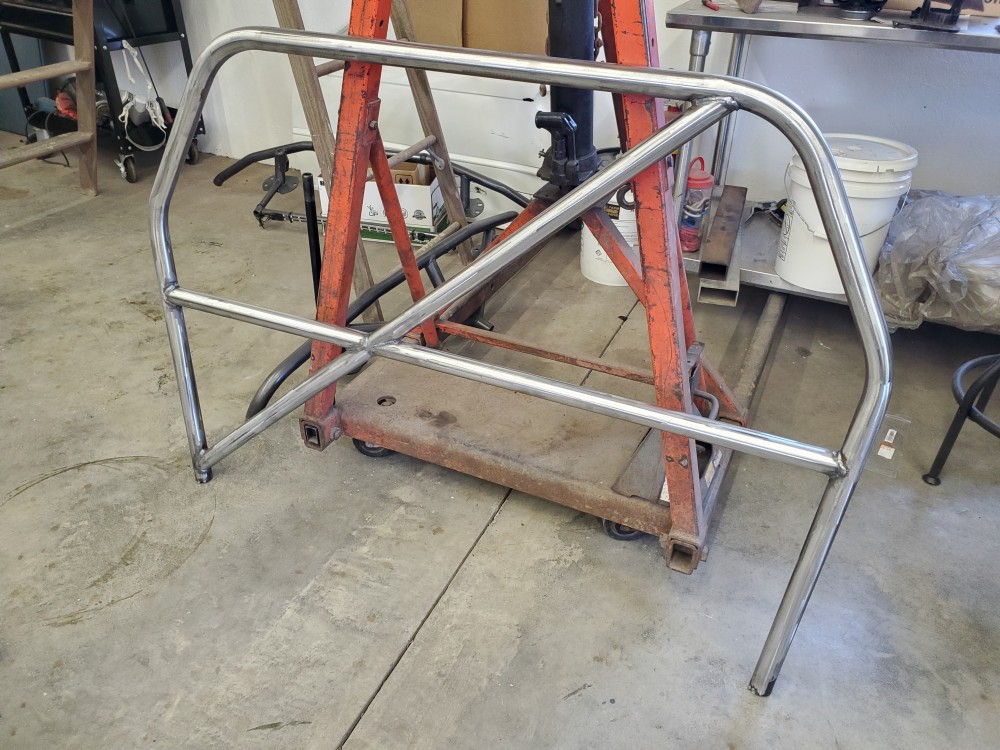
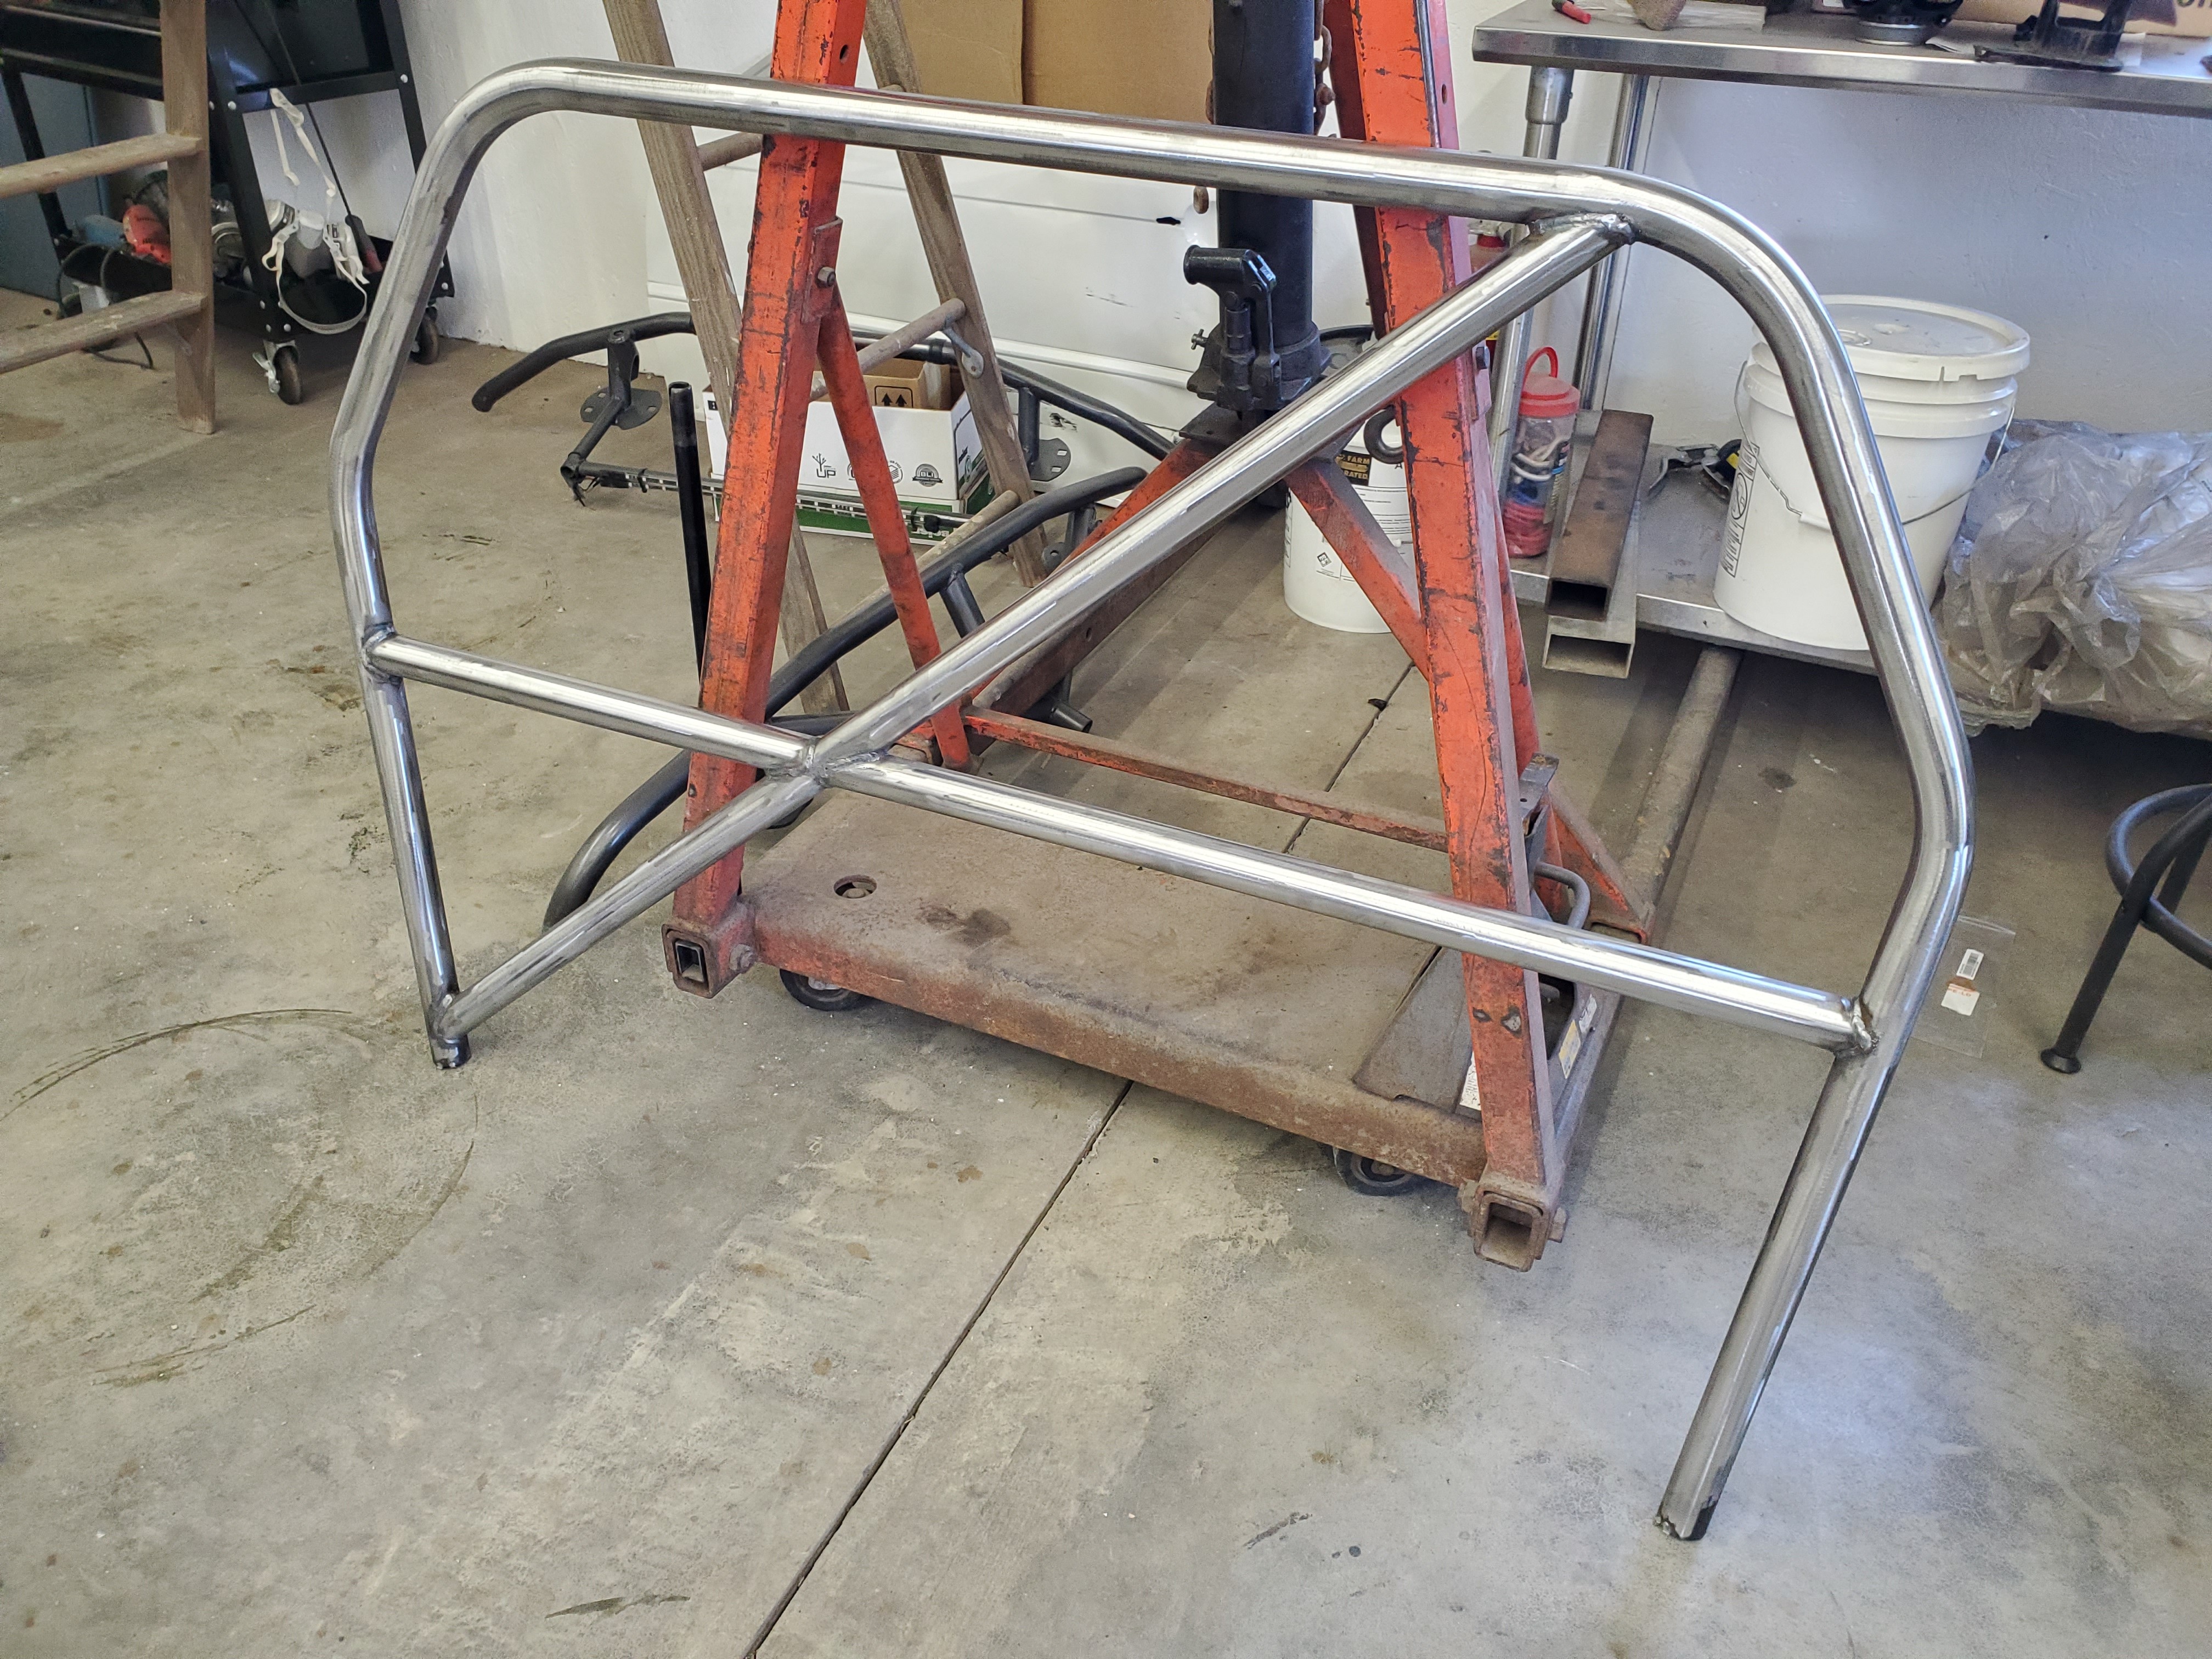
                                  Main hoop fits nice and tight thanks to the added ability of Sam with solidworks to be as precise as possible.
                                  20200222163636.jpg

                                  And then we were able to get the cross bar with the harness bars situated in the right spots for harness angle.
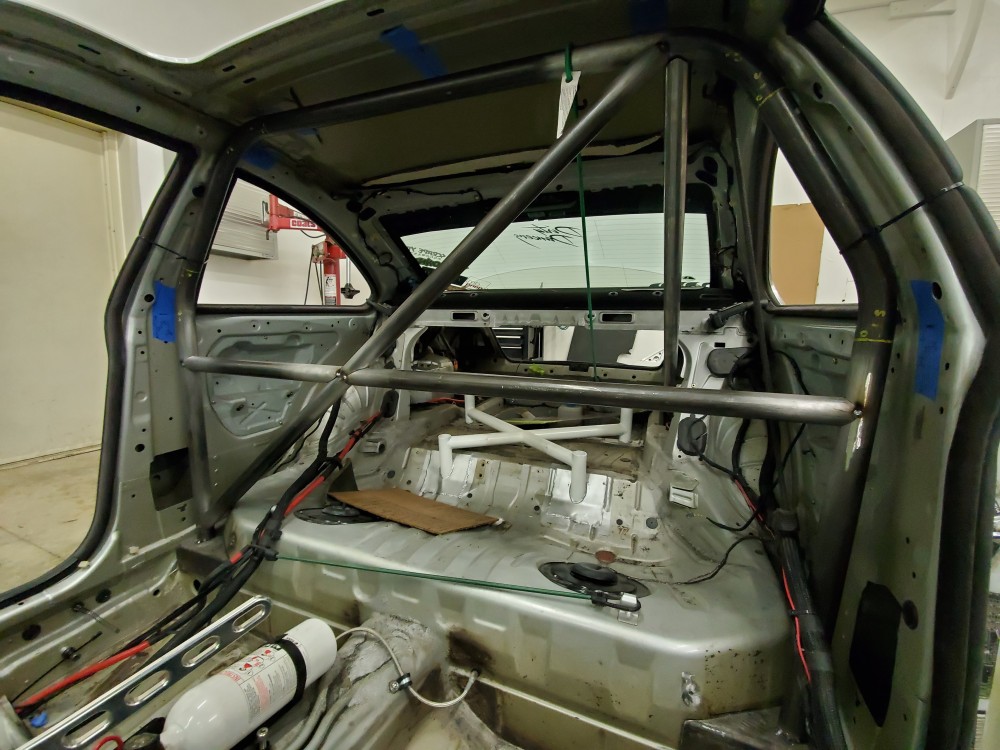
                                  20200222230706.jpg

                                  Then the downbars for the rear. Kinda hard to see with the straps holding the main hoop up.
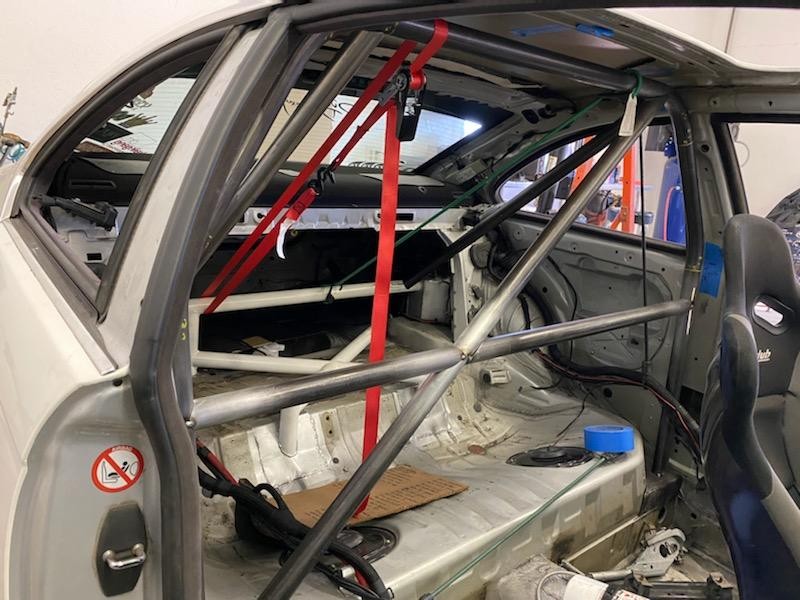
                                  IMG0252.jpg

                                  IMG0255.jpg

                                  IMG0257.jpg

                                  Super excited to continue the process of getting this thing done!

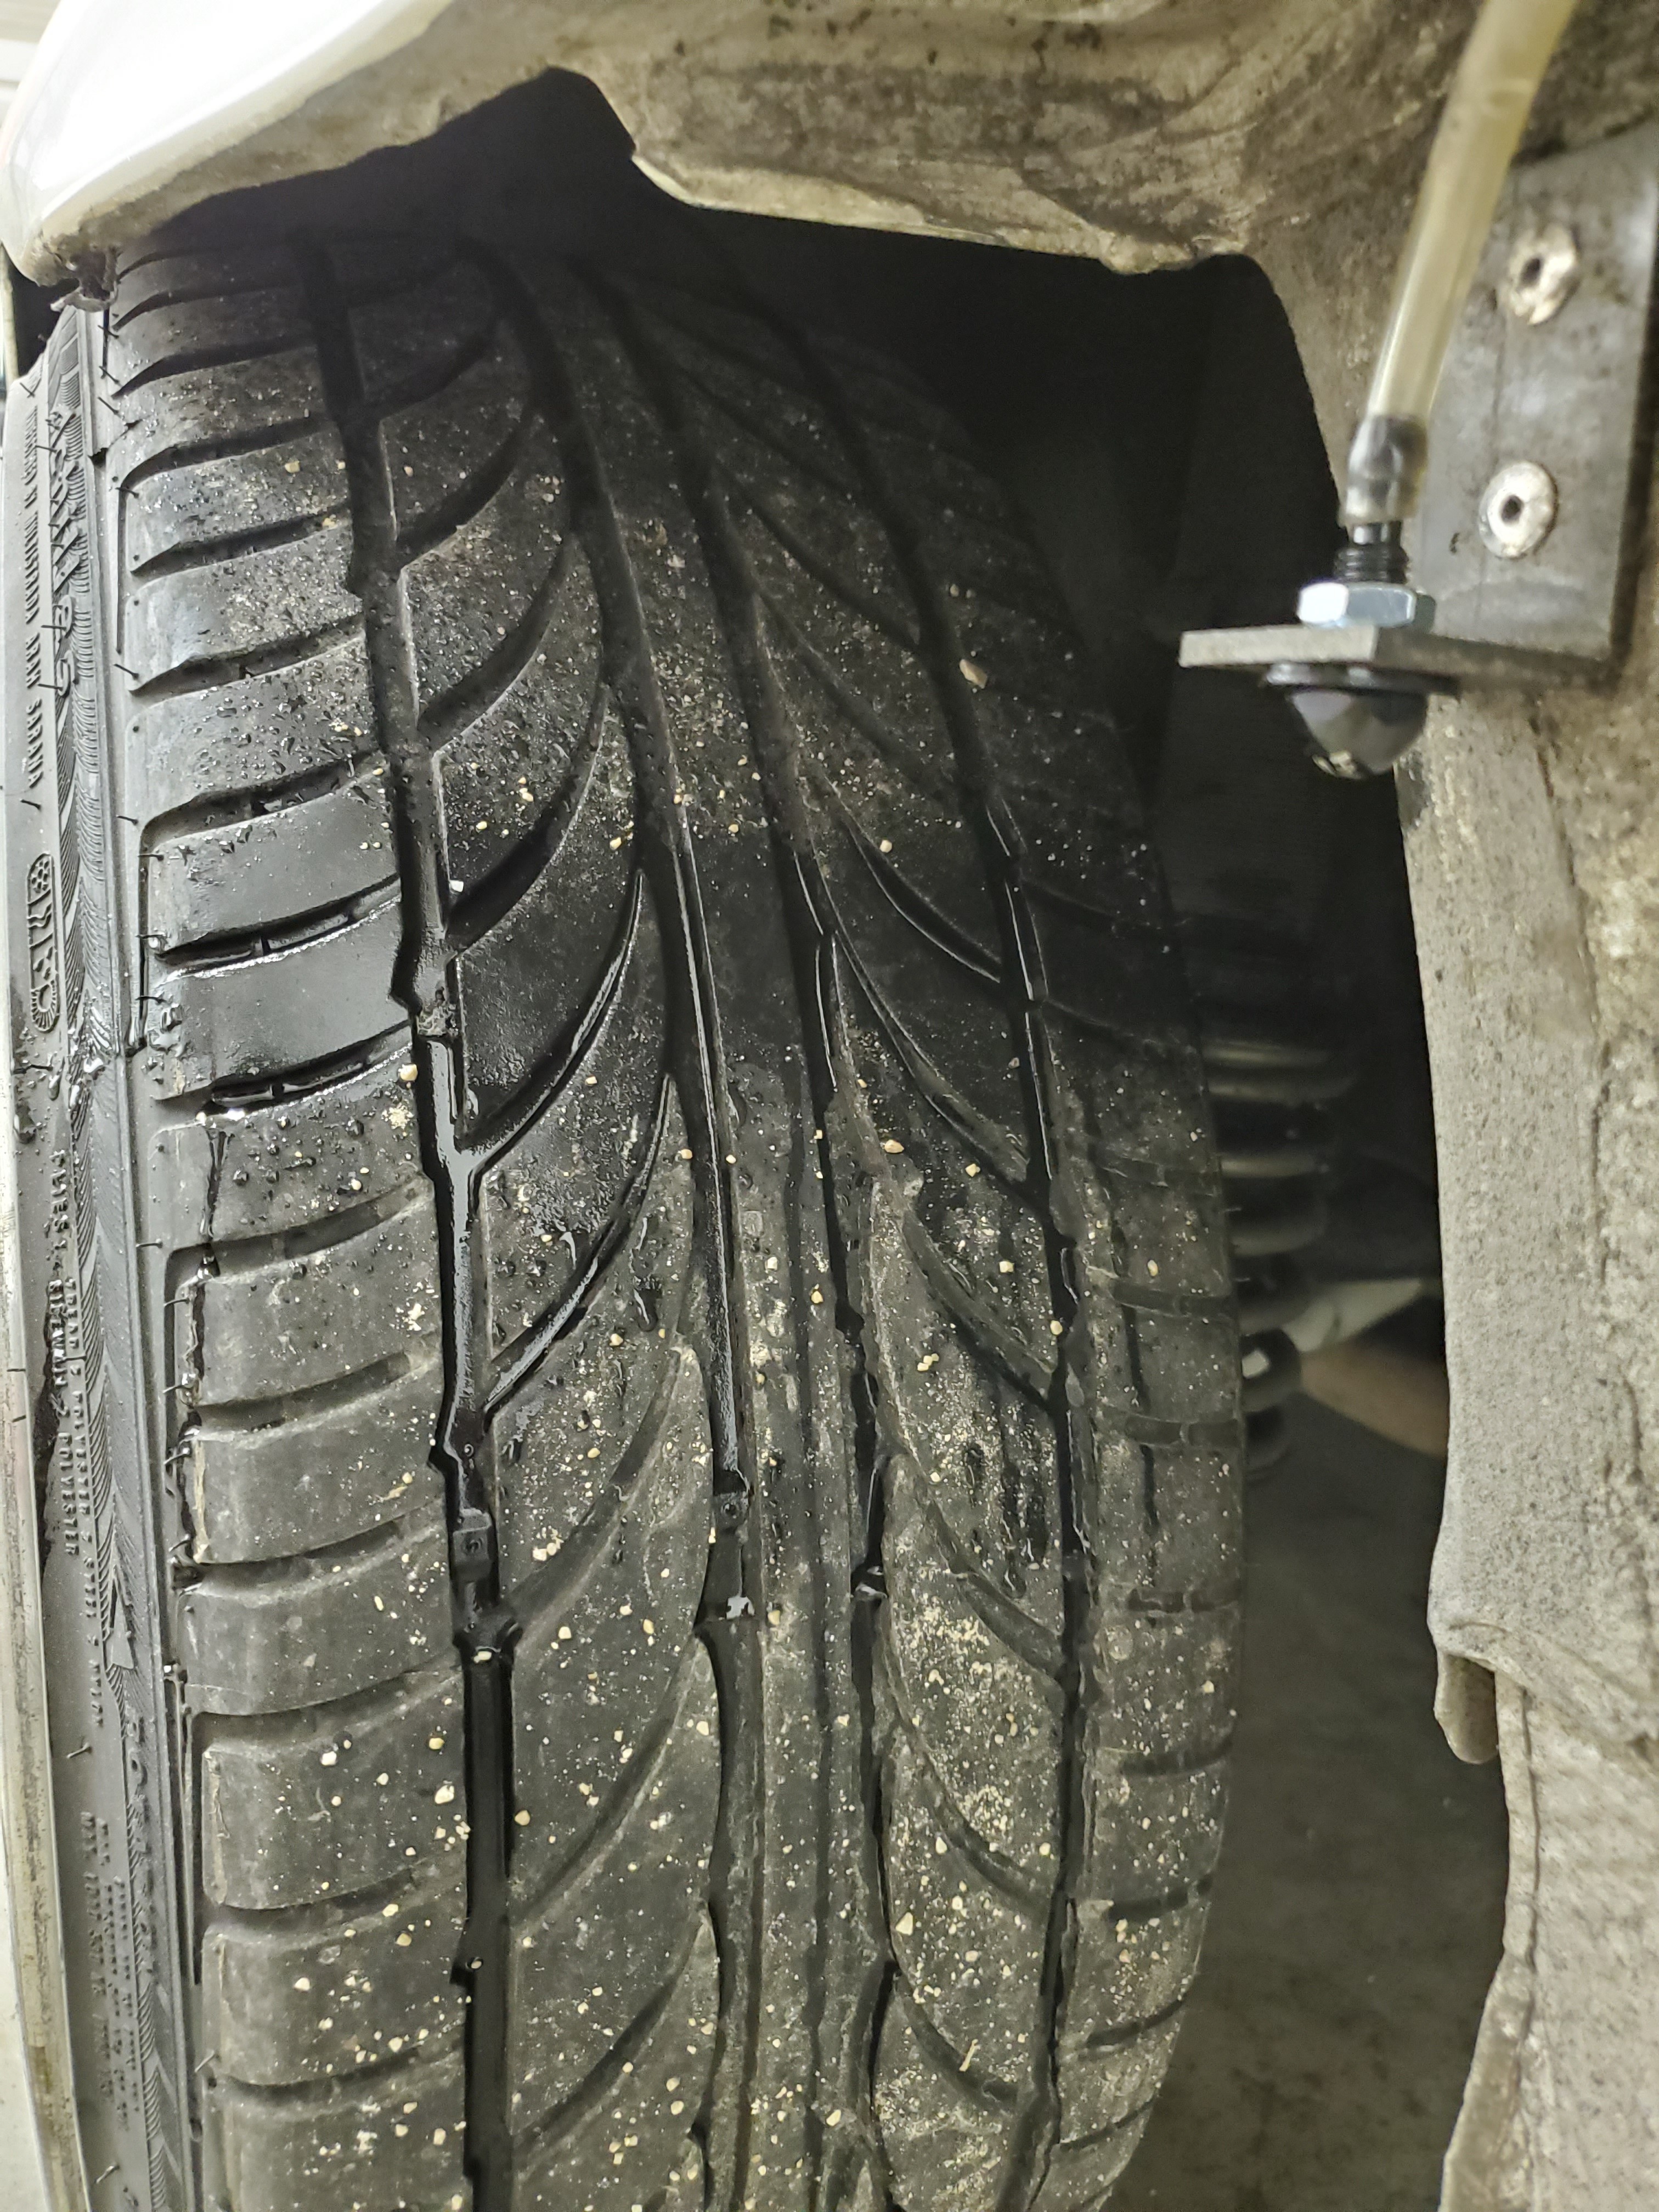
                                  Oh and on a side note I also bought some new windshield washer sprayers for my tire sprayer set up to keep the tires cool after each run, the spray pattern gets the whole tire now instead of only 2 spots.

                                  Here's a pic of the spray pattern.
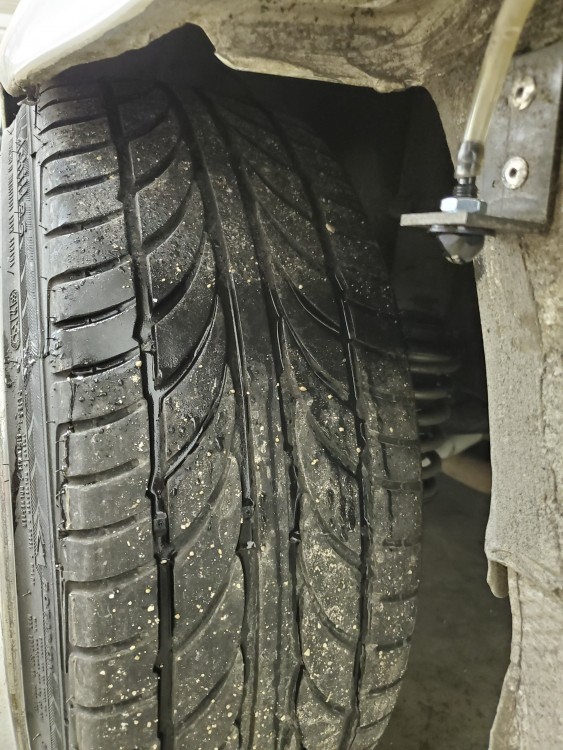
                                  20200221180436.jpg

                                  1 Reply Last reply
                                  3
                                  • TkuhnT
                                    TkuhnT
                                    Tkuhn
                                    wrote on last edited by
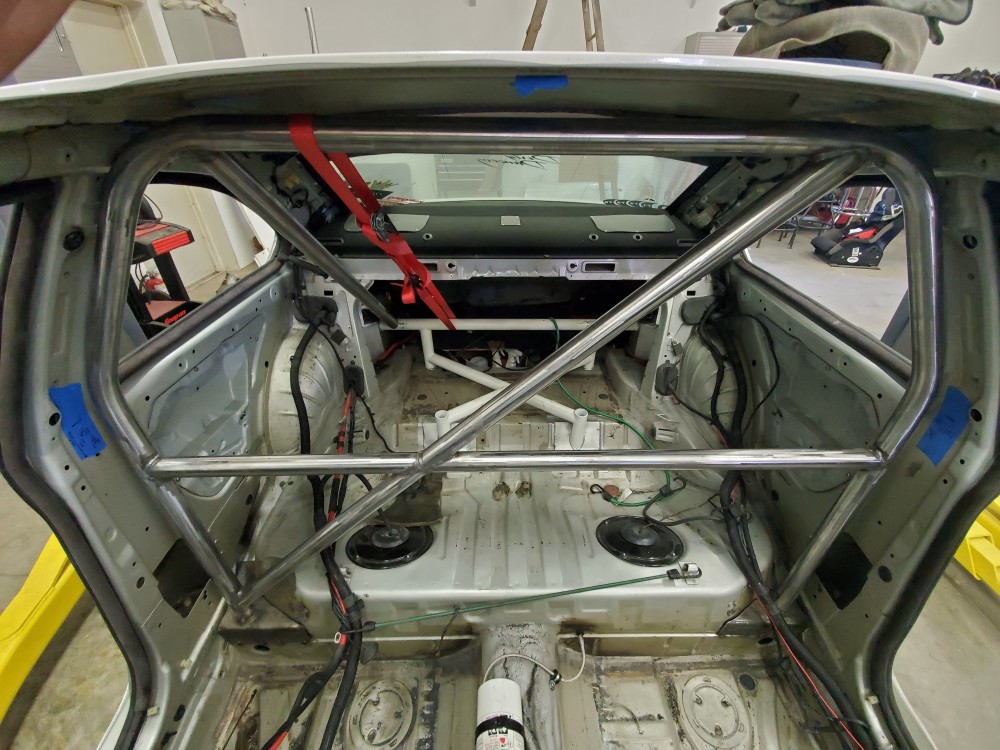
                                    #304

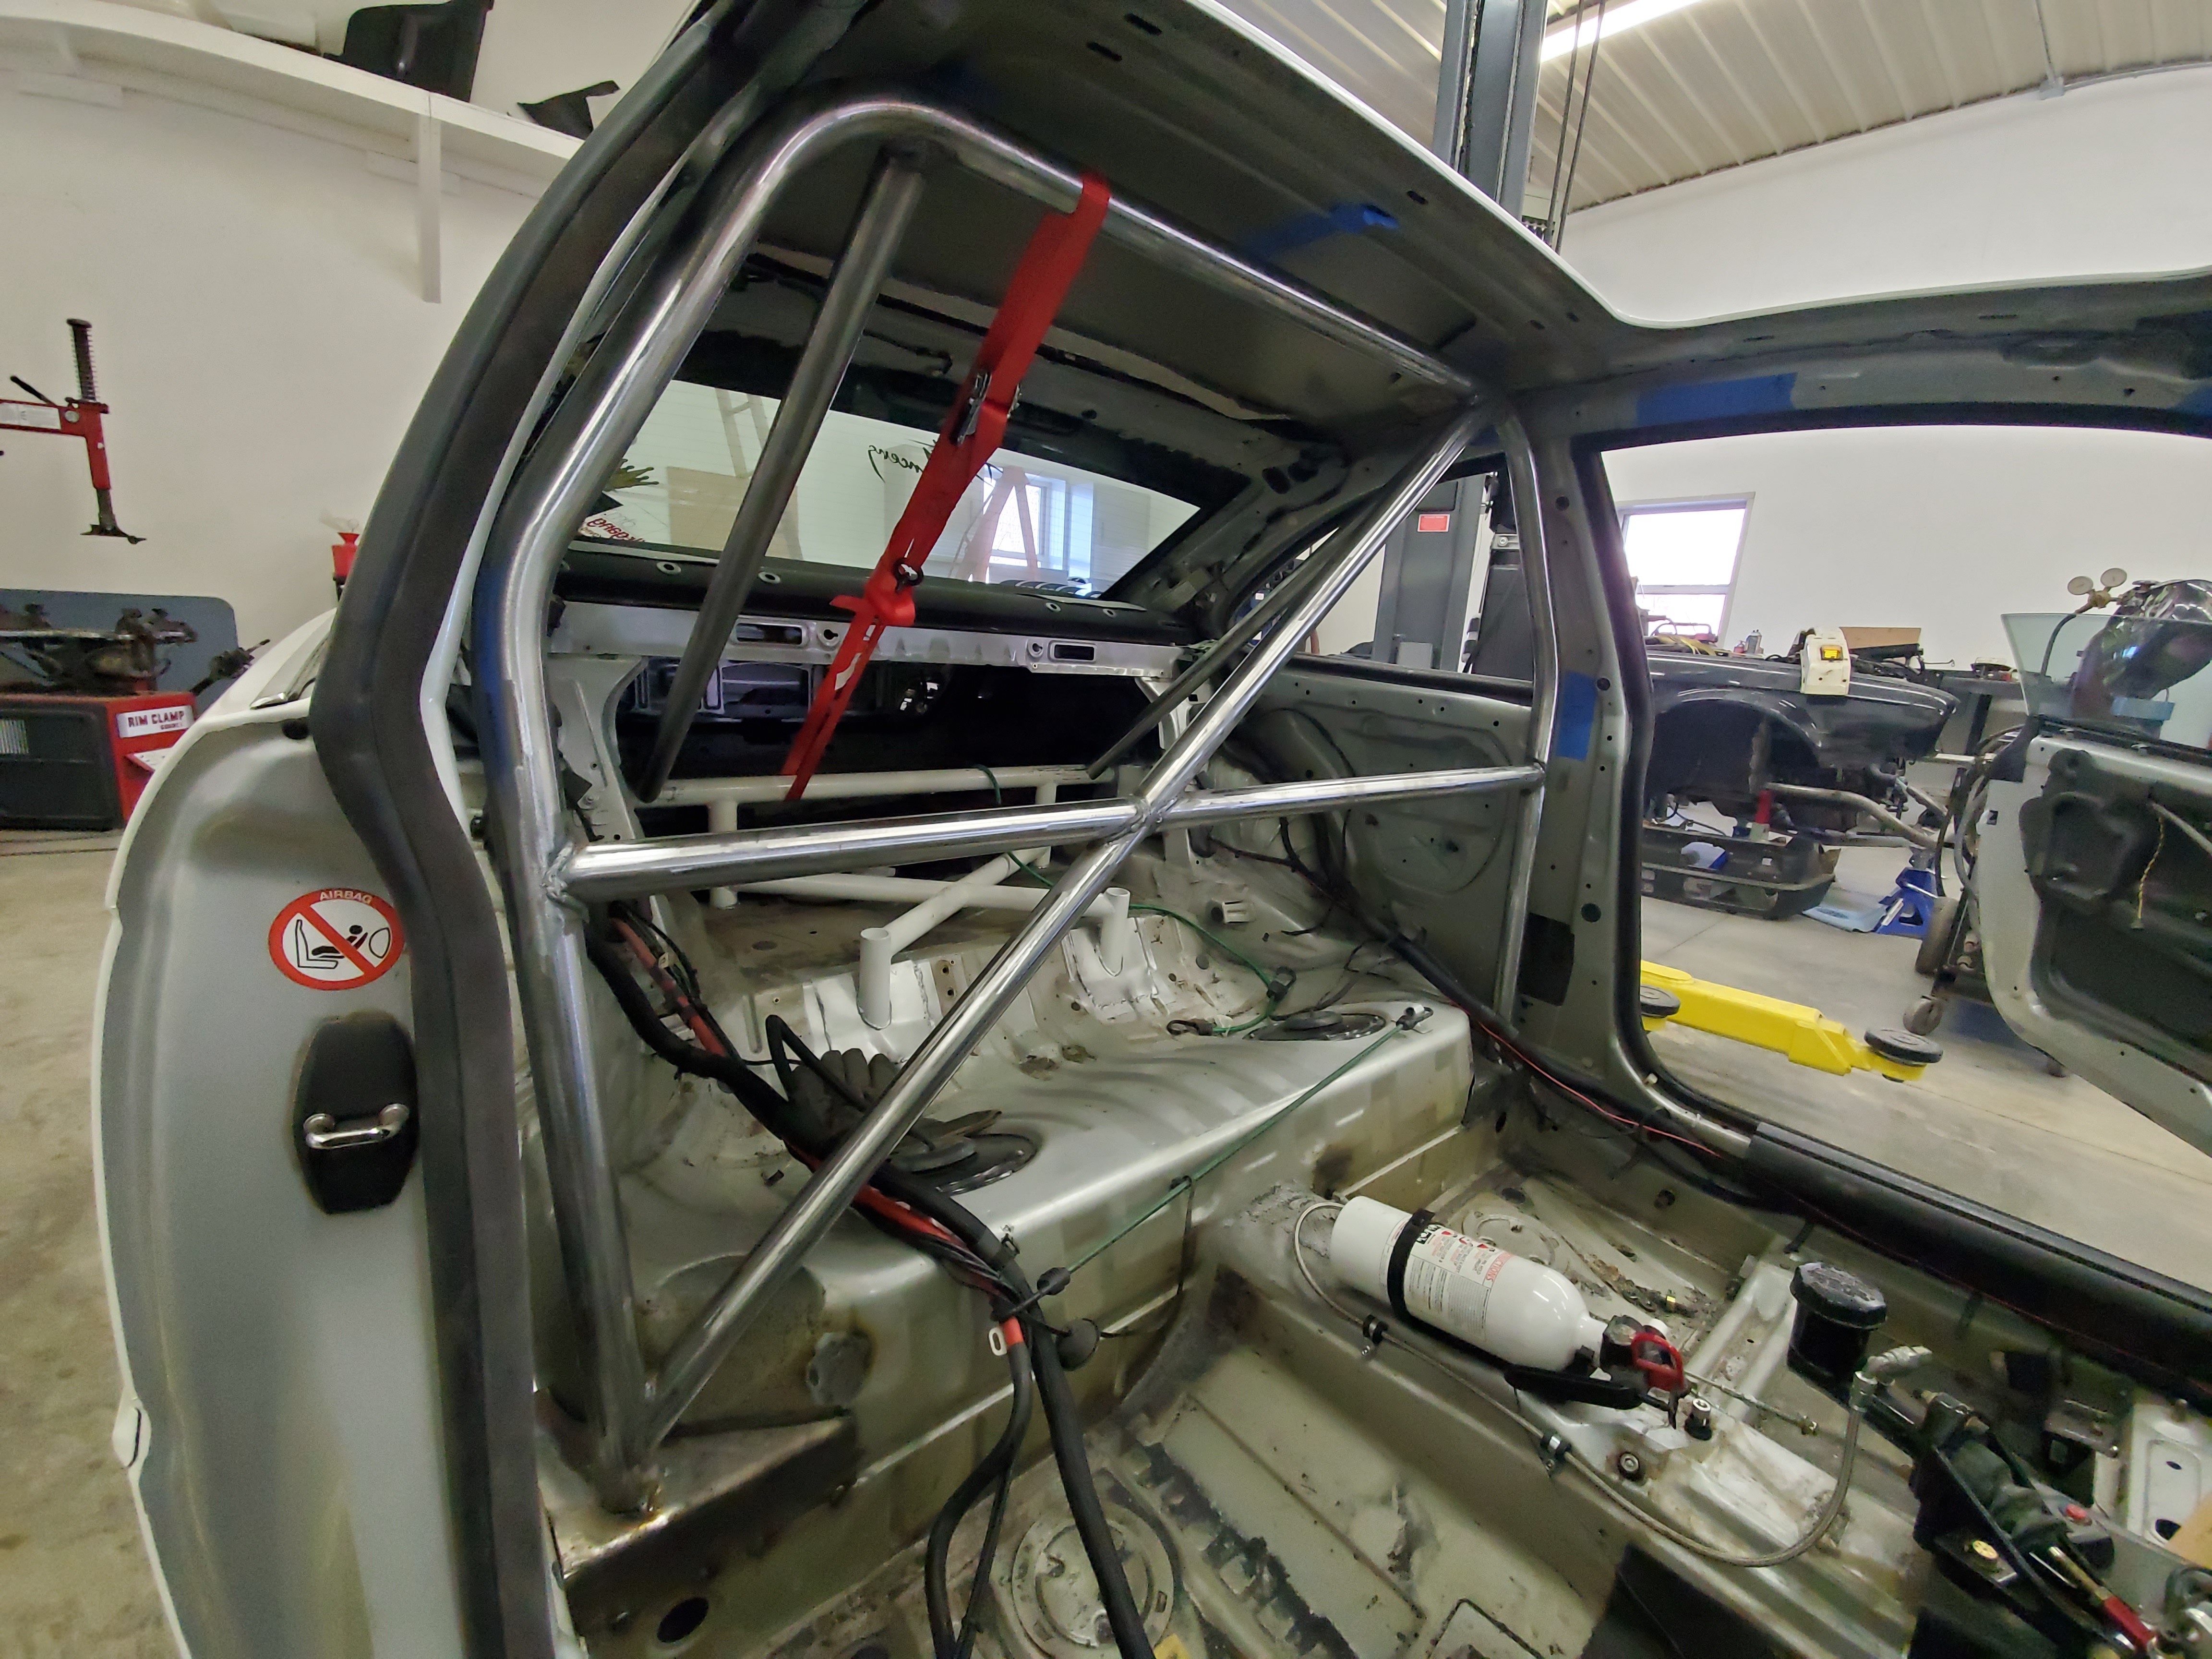
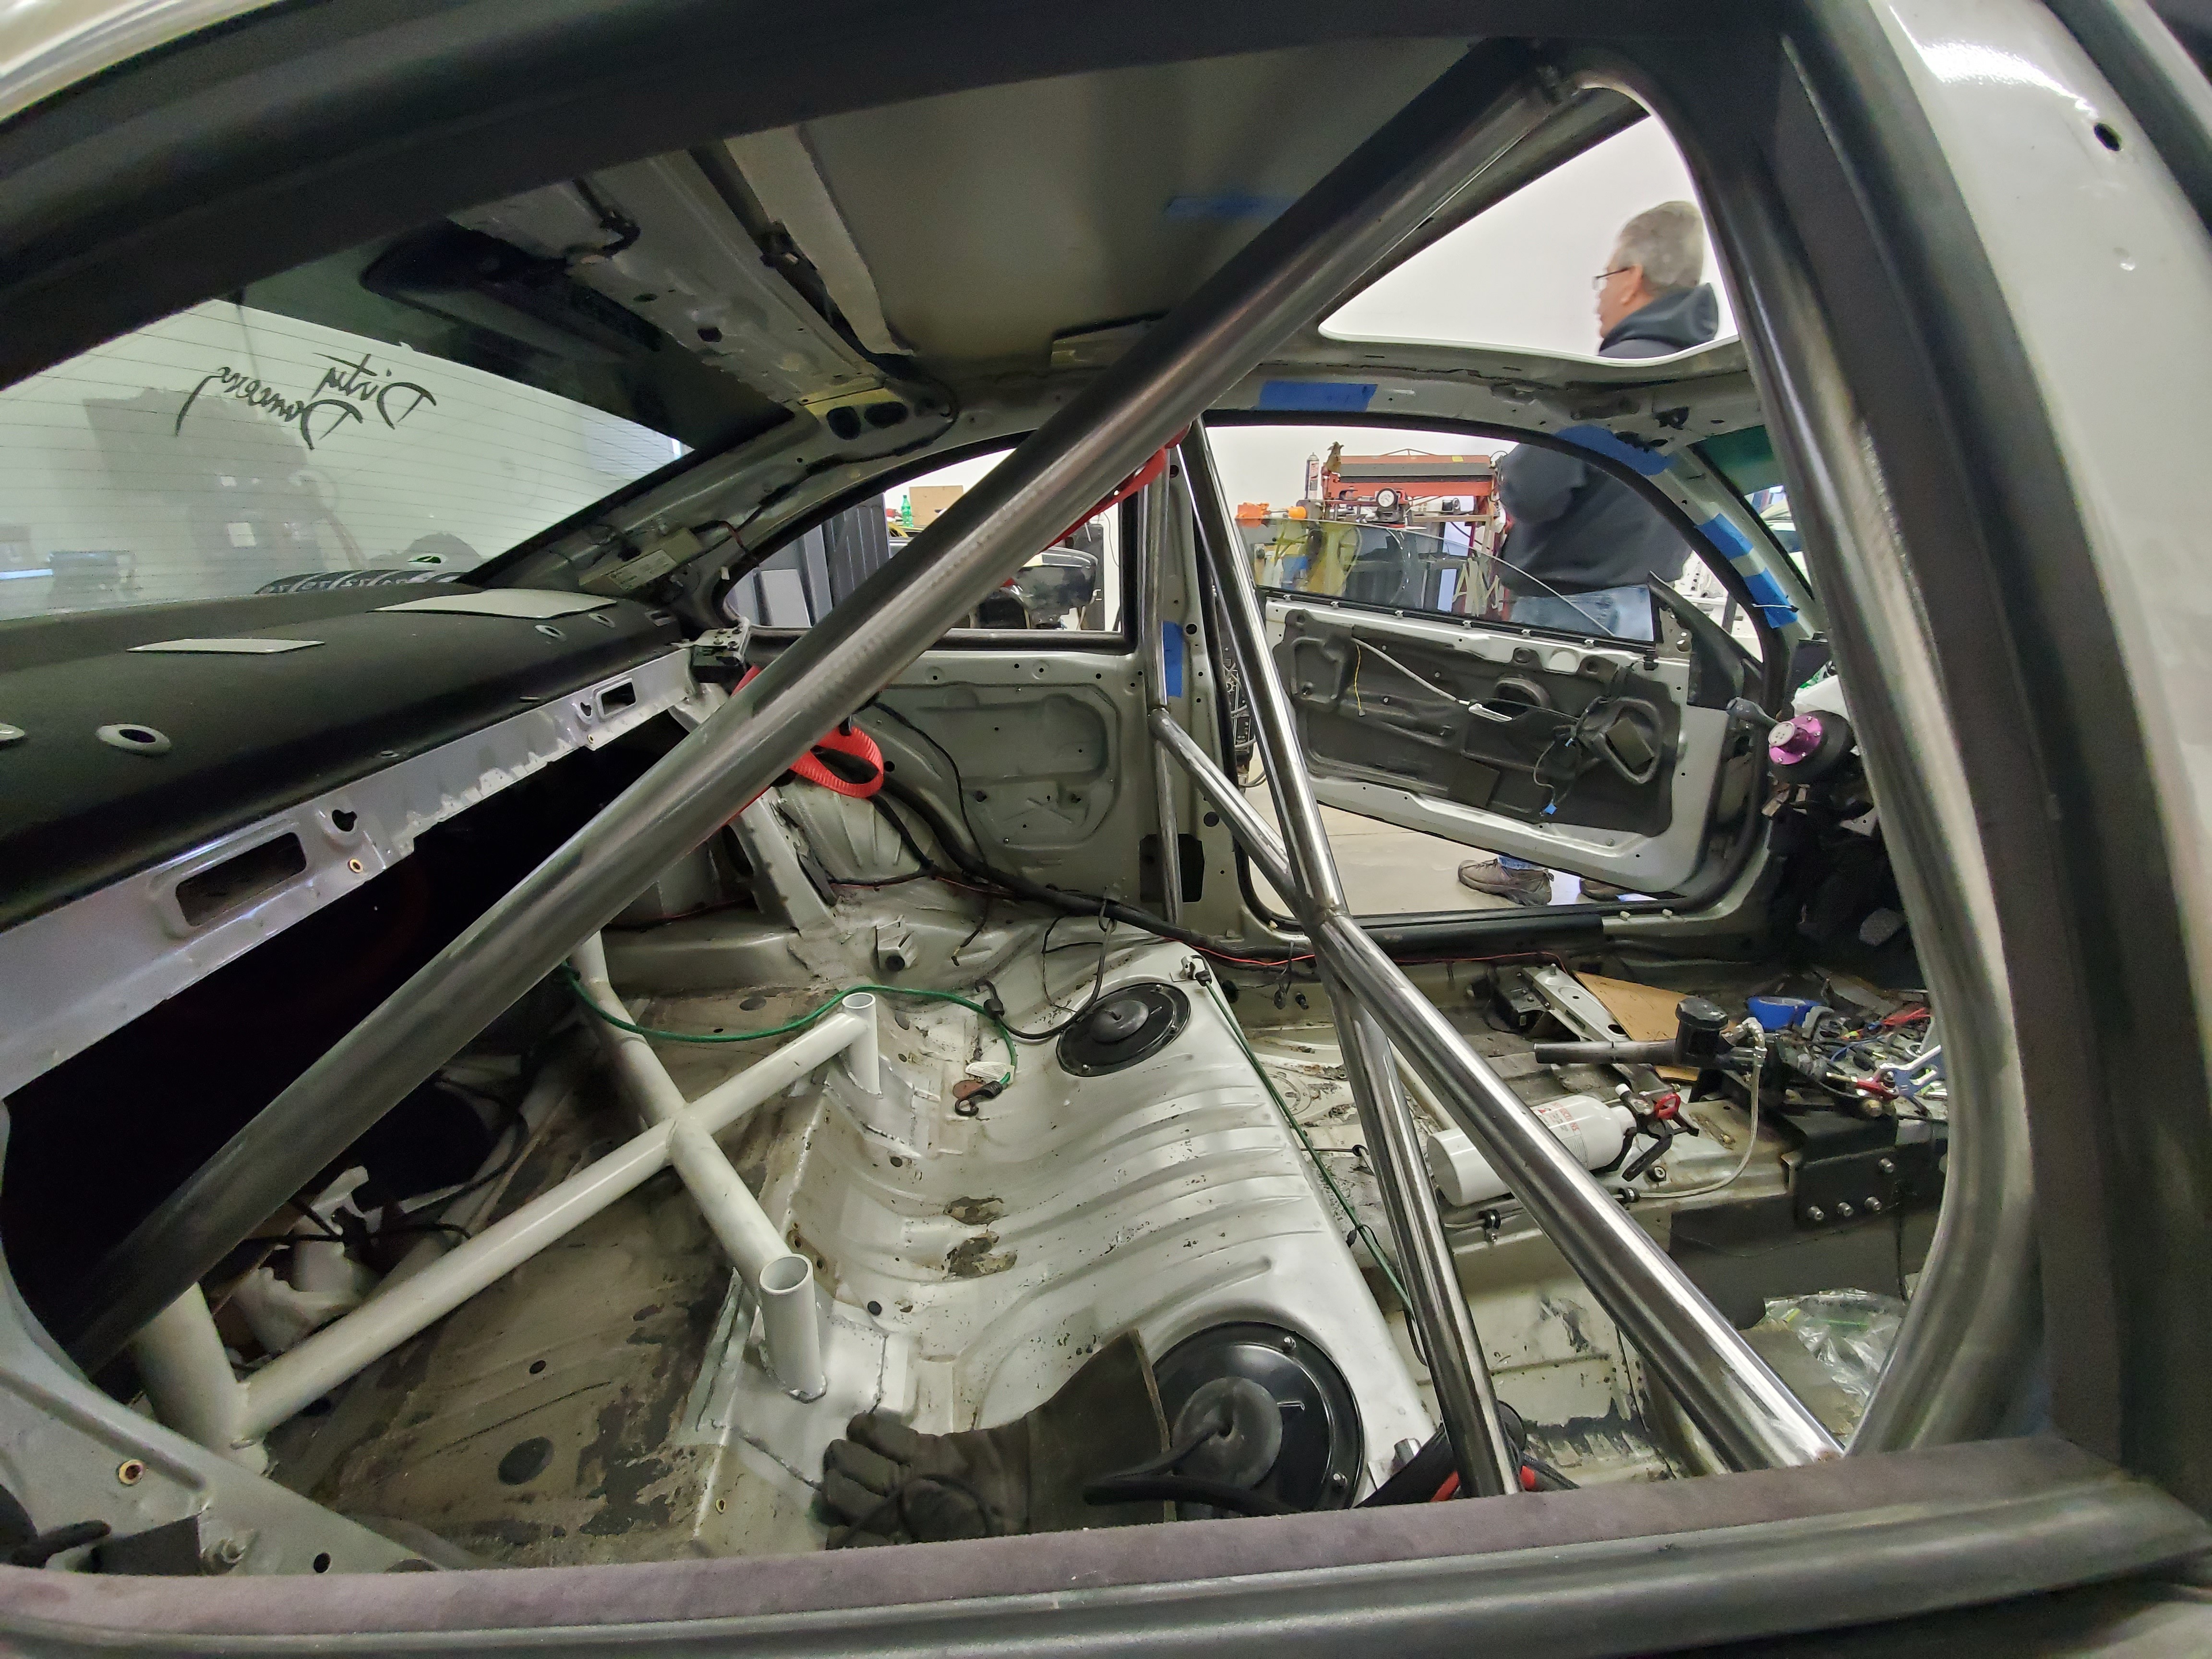
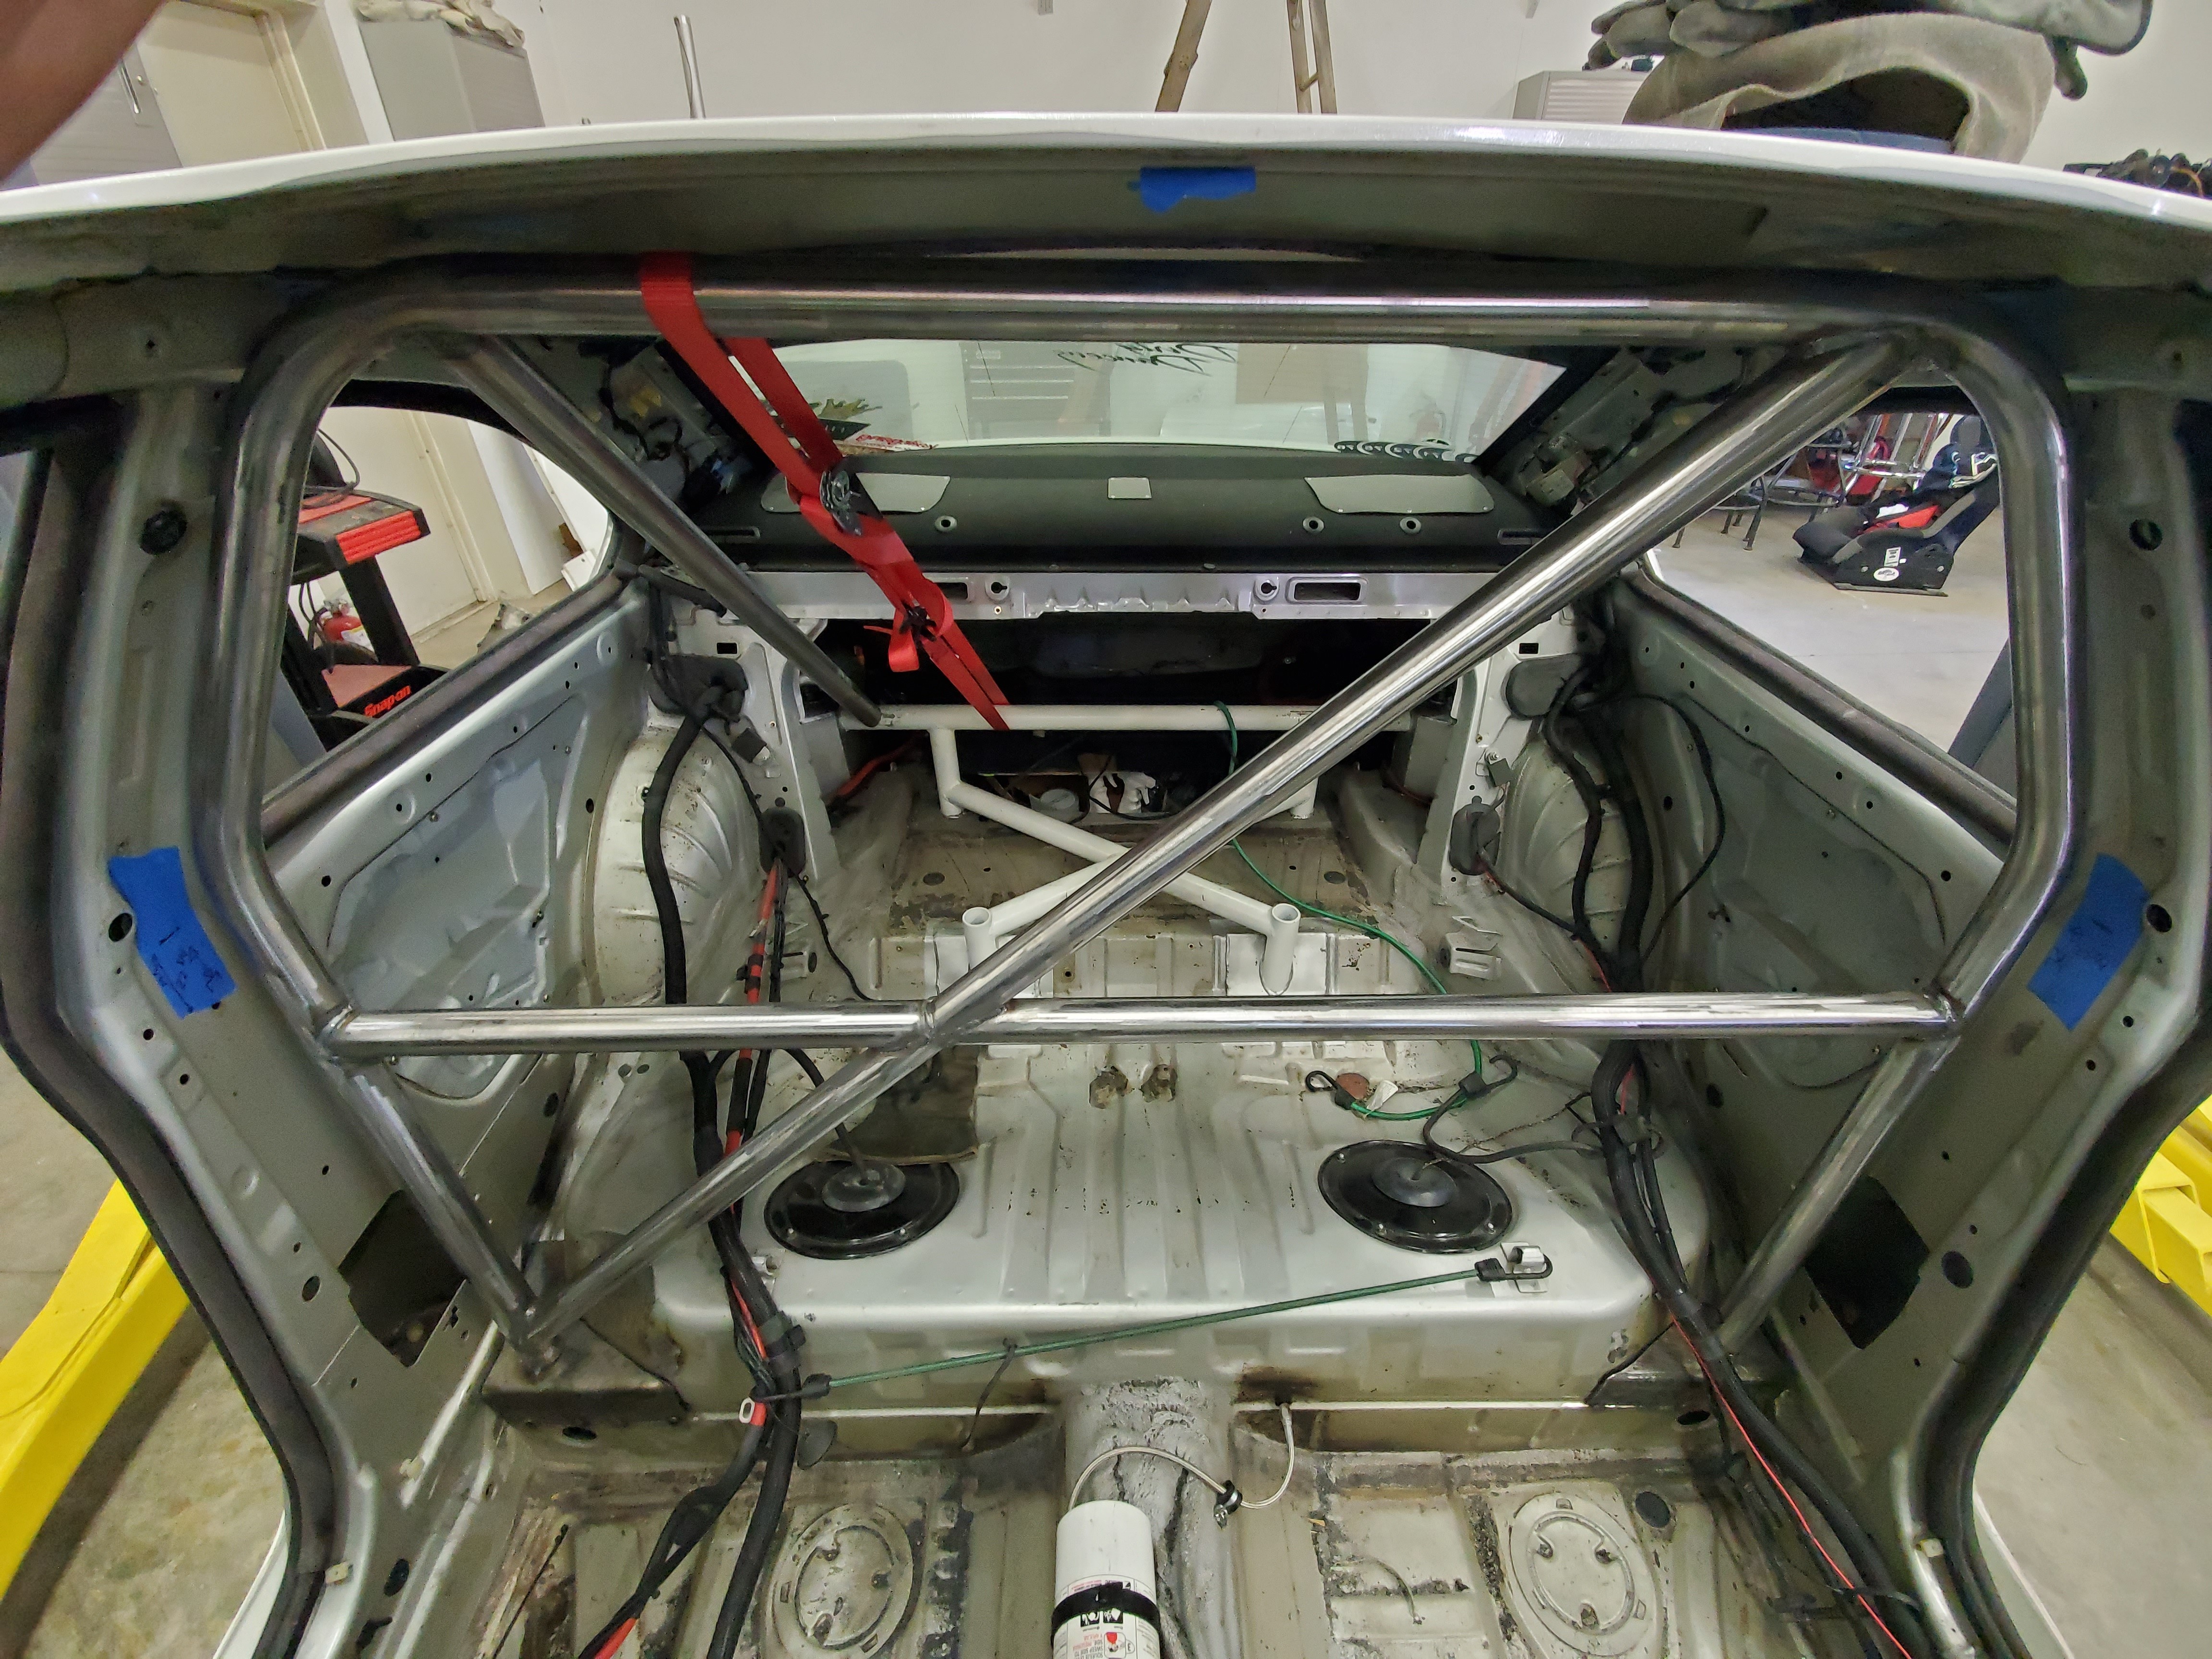
                                    Update.

                                    Been busy with some personal stuff but finally got some time to get to the shop.

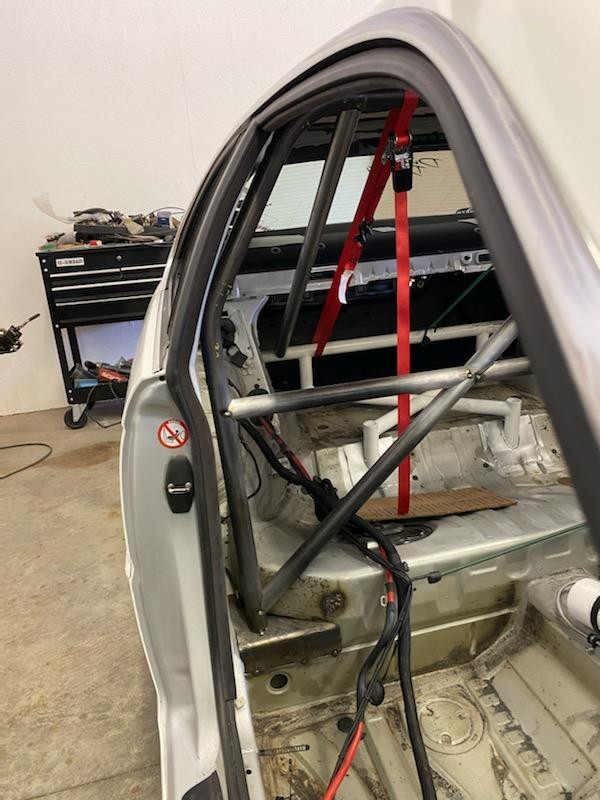
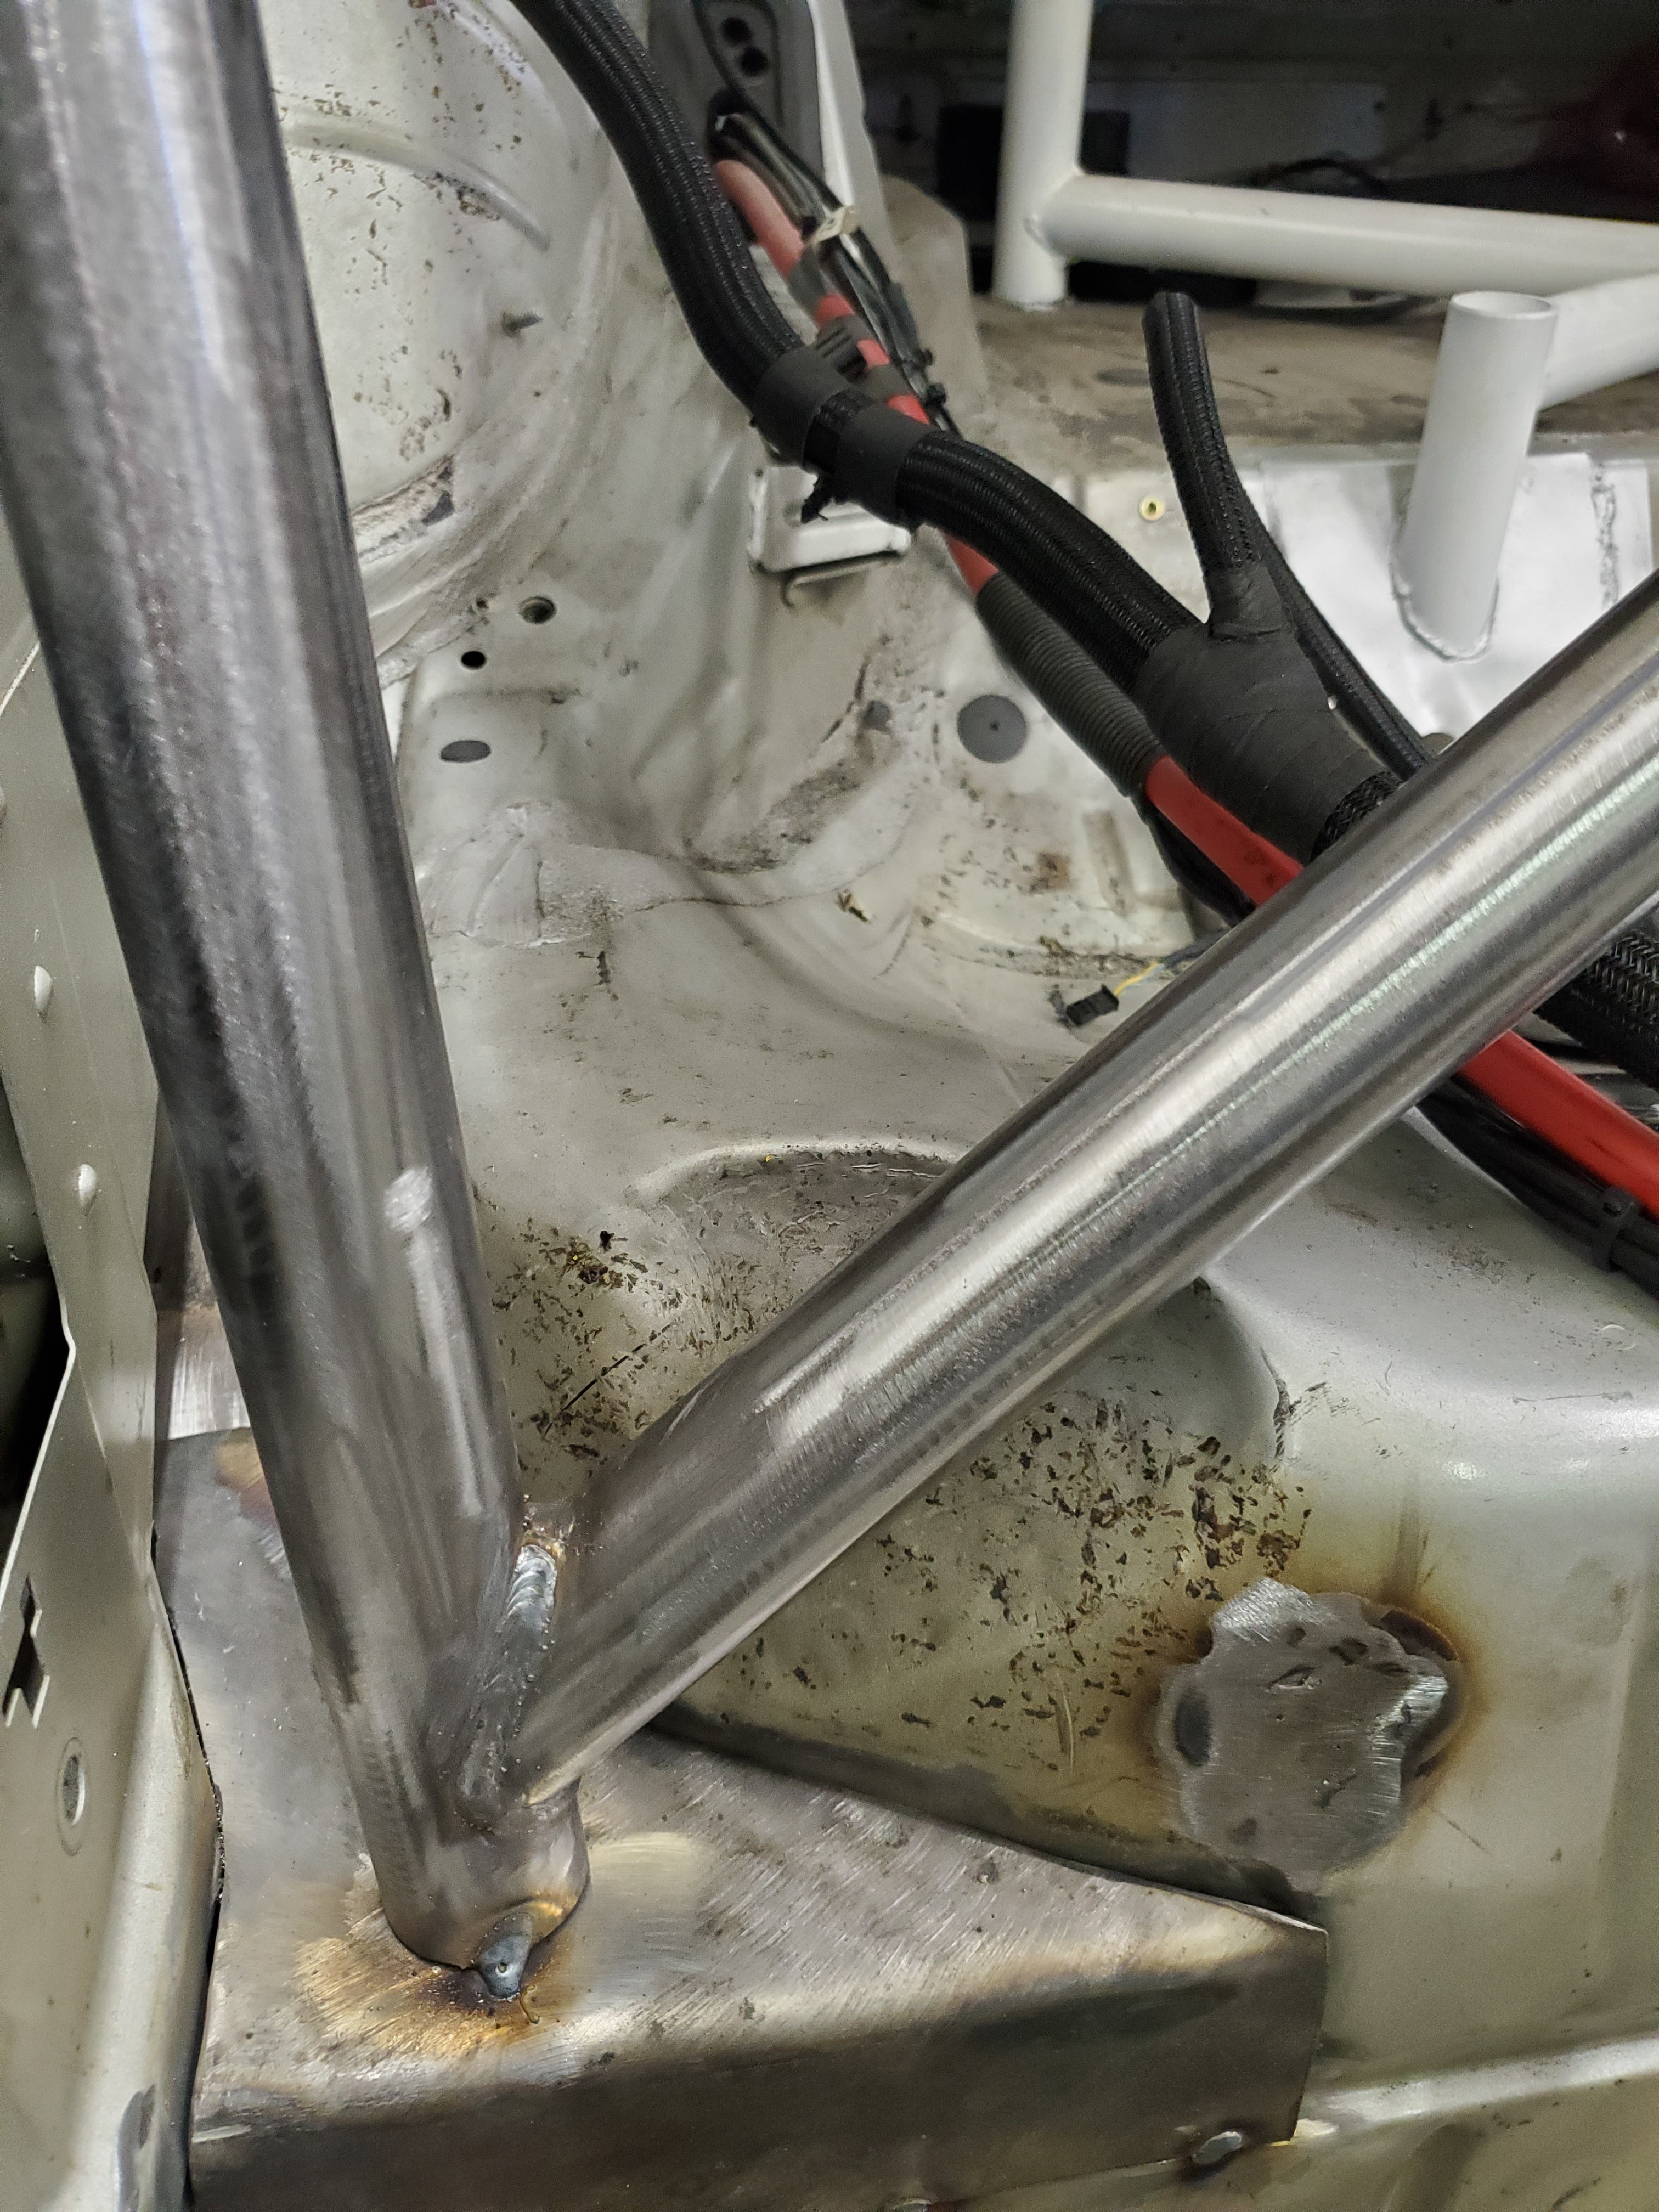
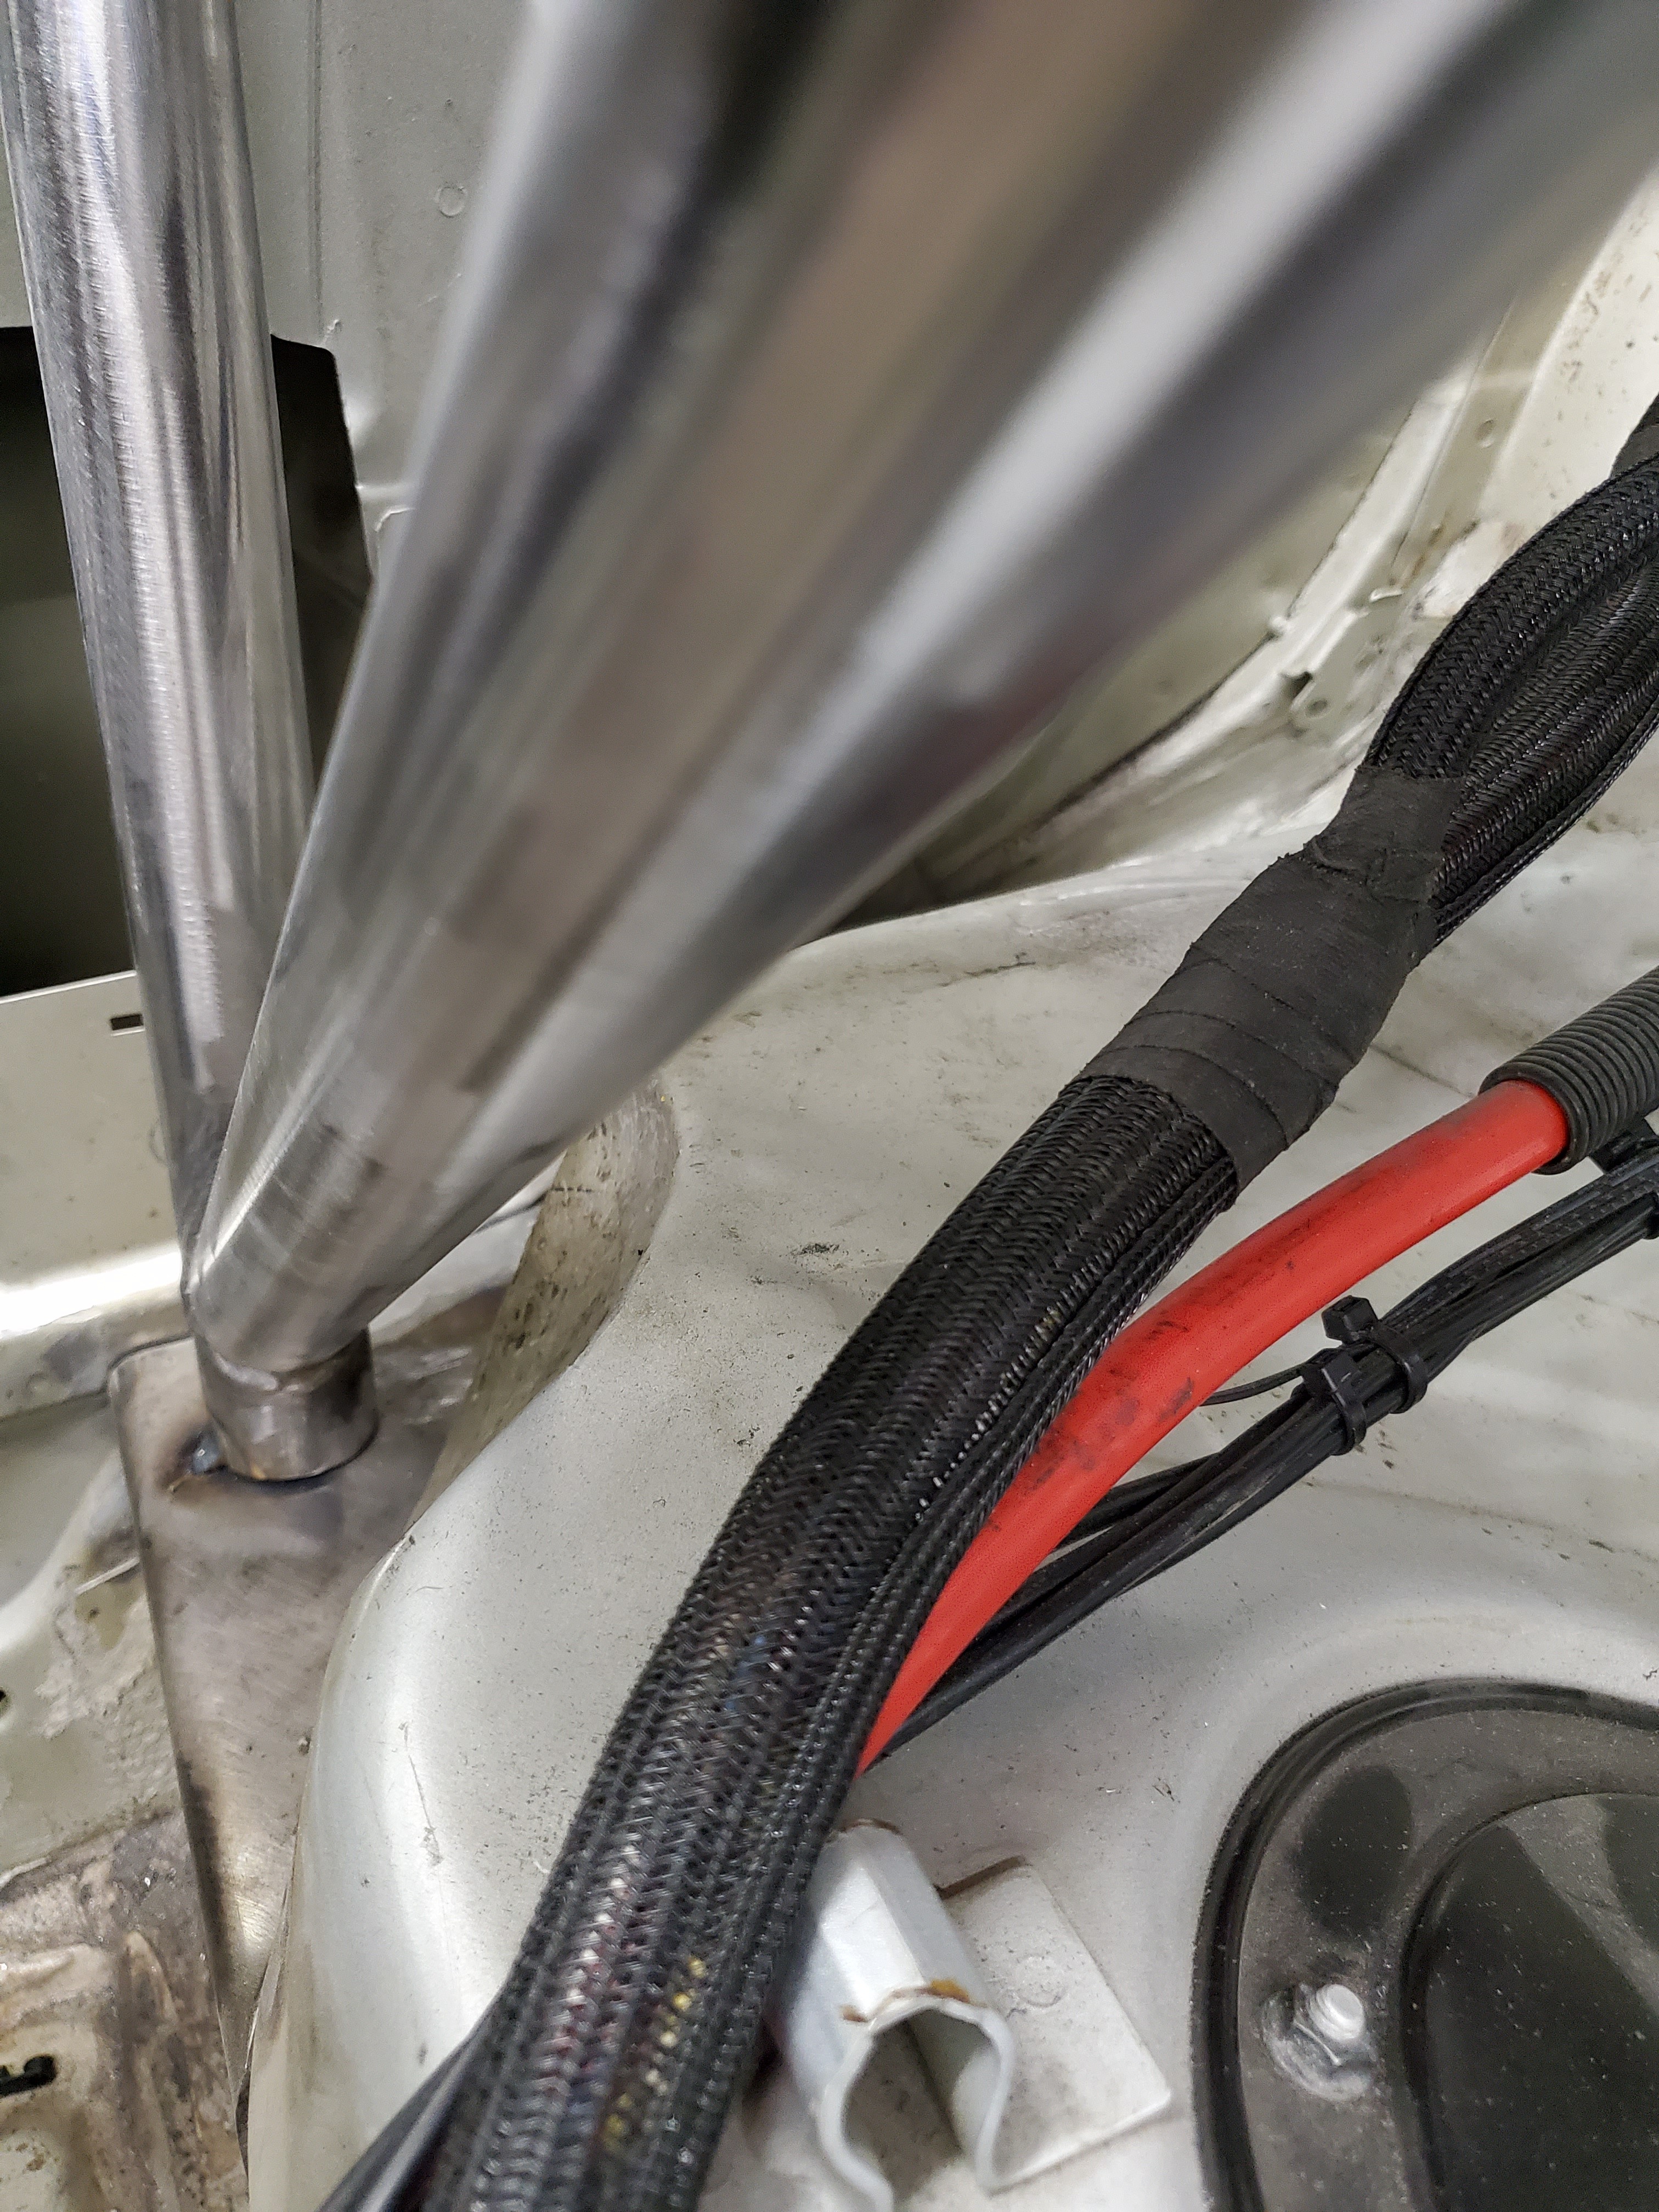
                                    Pulled out the main hoop and got it completely welded. 

                                    Which was a daunting task for me leading up to it. I can weld and do fab work but when it came to something this permanent I got nervous about my welding skills.

                                    But it went well 😊 so confidence re-instilled.

                                    20200308133422.jpg

                                    Then I cleaned up all the seam sealer under where the rear box plated for the main hoop will be and re-tacked them in. Forgot to take a pic but it wasnt much of anything exciting.

                                    Before putting the main hoop back in we "clearanced" the rear seat area with the good ole attitude adjuster. Aka hammer. The idea was to make room for the chassis harness to slide back down next to the bottom of the main hoop. Really excited on how that little detail turned out.
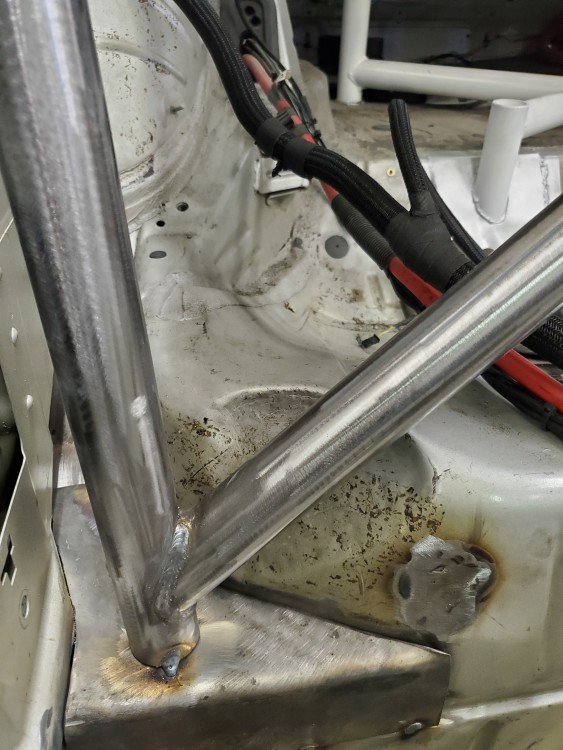
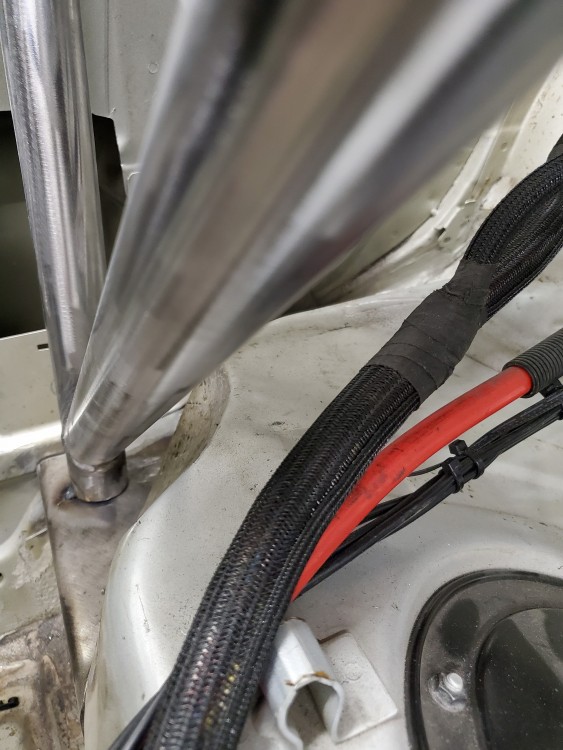
                                    20200308161131.jpg

                                    20200308161119.jpg

                                    Next we threw in the main hoop and tacked it in place again, then I got the rear down bars properly aligned and squared up and did a final weld on them to the main hoop.
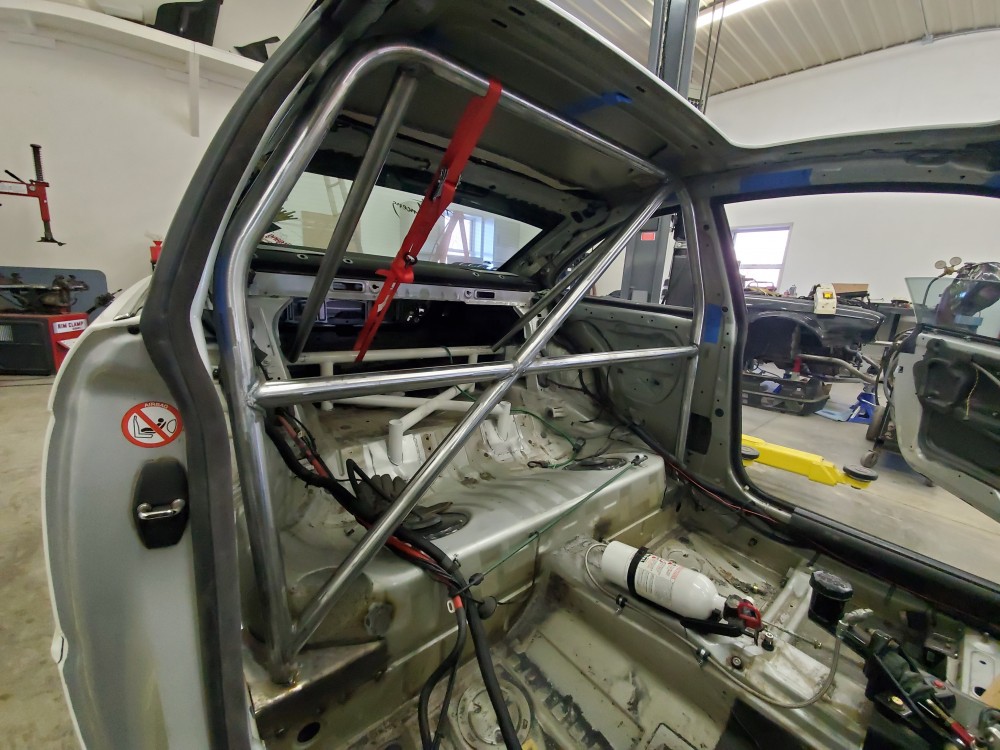
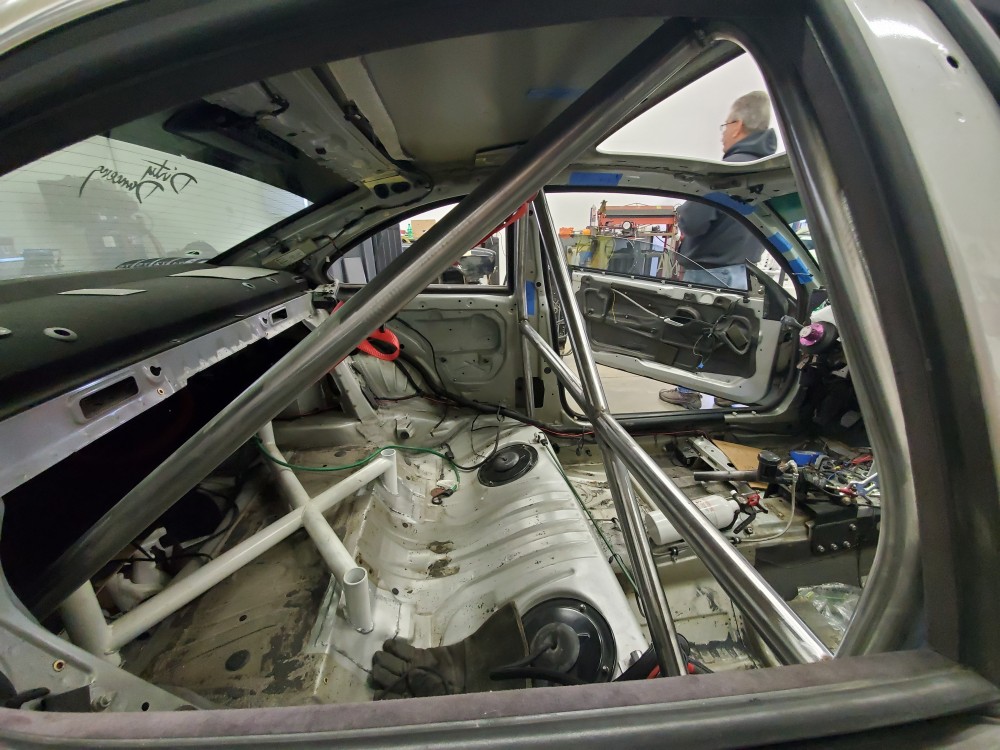
                                    20200308160952.jpg

                                    20200308161011.jpg

                                    20200308161044.jpg

                                    Hoping to make more progress next weekend!
                                    1 Reply Last reply
                                    4
                                    • YoungCRY
                                      YoungCRY
                                      YoungCR
                                      wrote on last edited by
                                      #305

                                      Fitment looks perfect 👍

                                      Chris Young
                                      BMWCCA #458972
                                      1986 528e/5  | 1994 530i/5 | 1995 540i/6 | 2013 X5 35d | 1998 C1500 Suburban | 1995 K2500 Suburban

                                      1 Reply Last reply
                                      2
                                      • B
                                        B
                                        B C
                                        wrote on last edited by
                                        #306

                                        Very nice fab work

                                        1 Reply Last reply
                                        1
                                        • TkuhnT
                                          TkuhnT
                                          Tkuhn
                                          wrote on last edited by
                                          #307

                                          YoungCR said:

                                          Fitment looks perfect 👍

                                          B C said:

                                          Very nice fab work

                                           Thanks guys! Cant take all the credit for myself but we definitely are striving for getting as tight a fit as we can.
                                          1 Reply Last reply
                                          0

                                          Hello! It looks like you're interested in this conversation, but you don't have an account yet.

                                          Getting fed up of having to scroll through the same posts each visit? When you register for an account, you'll always come back to exactly where you were before, and choose to be notified of new replies (either via email, or push notification). You'll also be able to save bookmarks and upvote posts to show your appreciation to other community members.

                                          With your input, this post could be even better 💗

                                          Register Login
                                          Reply
                                          • Reply as topic
                                          Log in to reply
                                          • Oldest to Newest
                                          • Newest to Oldest
                                          • Most Votes


                                          • Login

                                          • Don't have an account? Register

                                          • Login or register to search.
                                          Powered by NodeBB Contributors
                                          • First post
                                            Last post
                                          0
                                          • Categories
                                          • Recent
                                          • Tags
                                          • Popular
                                          • Users
                                          • Groups