
DIY floor mounted short shifter
-
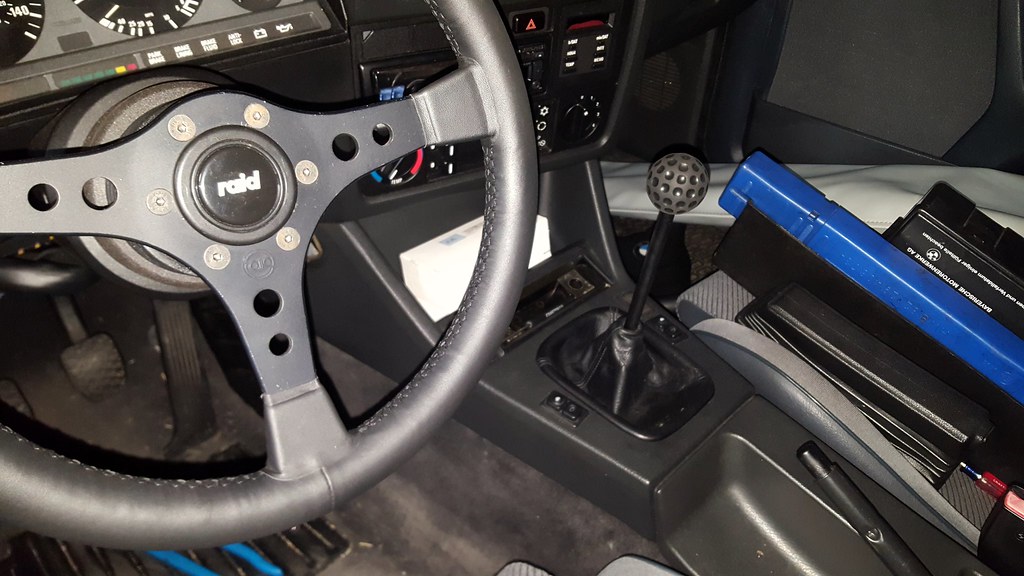
Here is a parts list and DIY for the floor mounted shifter I built for my e30. It is similar to the Bimmerworld race shifter or the AKG stage 2 shifter (not as pretty, but also not nearly as expensive).
Parts list:
Spherical bearing: FK bearing WSSX12T, x1
Bearing weld cup: FK bearing CPW12, x1
Bronze Bushings: McMaster 5448T5, x2
1/2x13 Coupling Nut: McMaster 90264A485, x1
High Misalignment Spacers: 3/4" to 1/2", x1 pair
1/2x13 stainless nut, x1
1' 1/2x13 Steel Threaded Rod, x1
1' 1/2 Steel Rod, x1
3/4" OD, 0.51" ID, 0.12" Wall steel tubing, short piece. x1
16 gauge steel plate, x1
5/8" square tubing, x1
1/4-20 x 1.5" bolts, x4
1/4-20 stainless nylock nuts, x4
1/4" stainless washers, x4
Total parts cost: $90, though I used stainless hardware and bought the metal at Lowes so it can definitely be done cheaper. This doesn't include the BMW parts to rebuild the rest of the linkage.
First, I drilled out 1/3 of the threads on the coupling nut with a 1/2" drill bit, ground off the zinc plating, and welded it to the 1/2" steel rod. I cut a 17mm piece of the 3/4" tube (Critical that this part does not exceed 17mm, a little under is ok), and welded it to a 5" piece of threaded rod after grinding off the plating on the rod near the welded area.
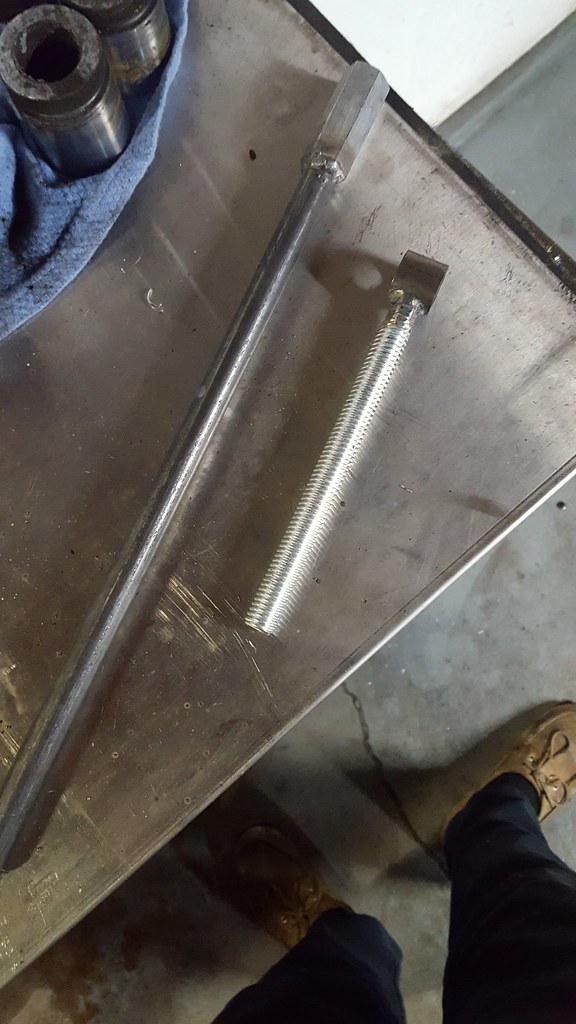
On the round tube, you will need to open up the ID slightly to 13mm so that the bushings are able to slide into place. You do NOT want to press the bushings into the tube as they will compress and no longer fit over the shaft on the selector rod.
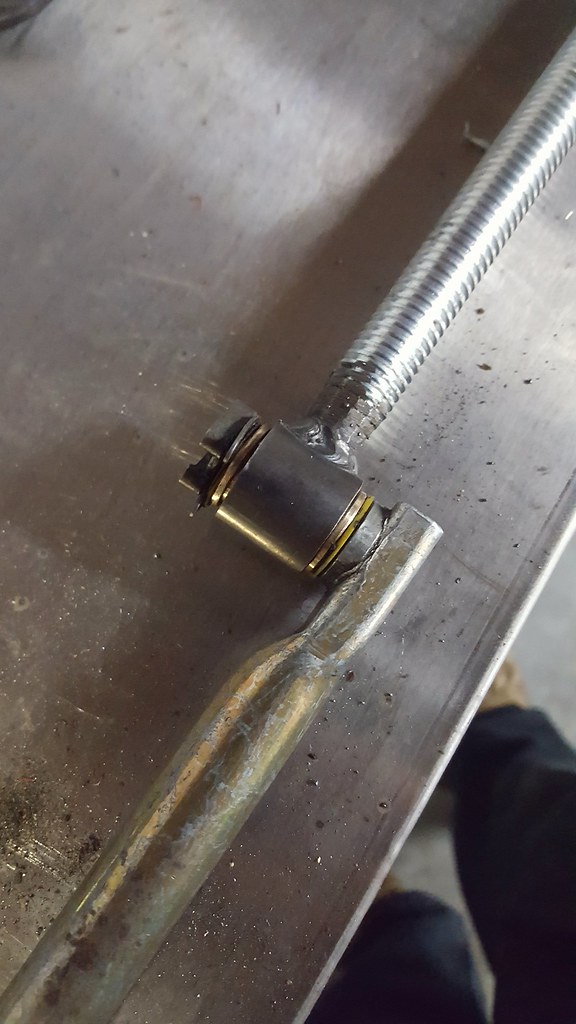
You'll notice that the high misalignment spacers don't match the ball in the spherical bearing, they will have to be ground down (or put in a lathe if you have access to one) to bring the flange down to below the size of the bearing.
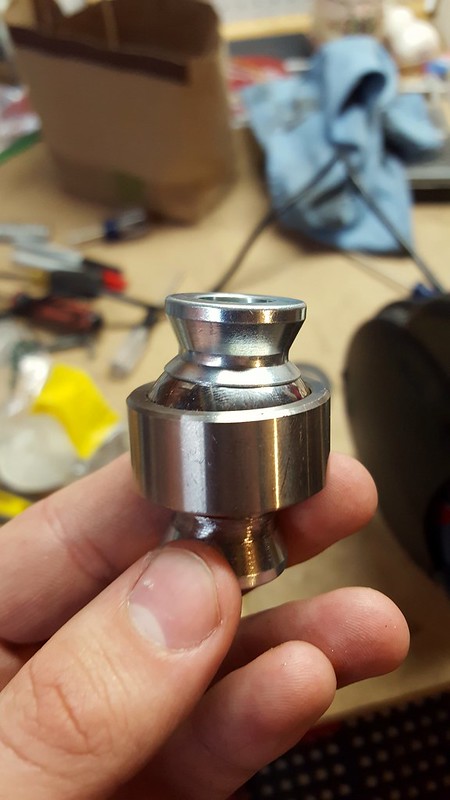
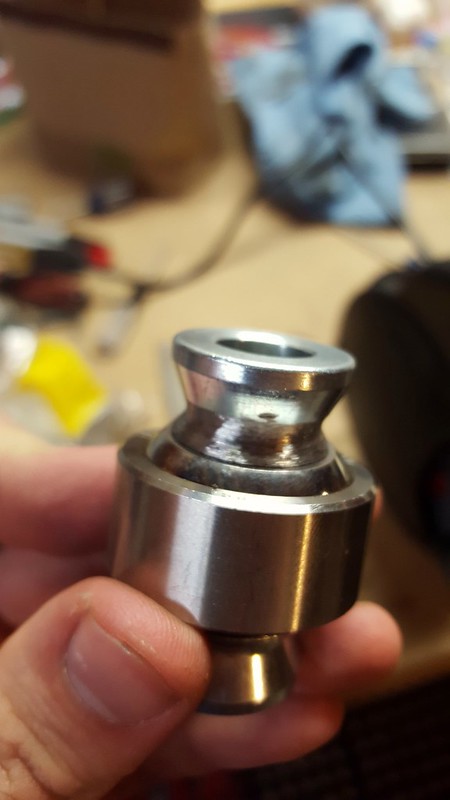
Moving on to the shifter mount. Cut a 1-3/4" hole in the steel plate to fit the bearing weld cup. I used a metal hole saw but you could also drill a smaller hole and file it to size. Weld the bearing cup facing upright into the hole with about 1/4" sticking out from the bottom of the plate. Pay attention to the heat from the welder to avoid warping the cup. Once the cup is welded in place, measure the size of the hole in the trans tunnel on your car, and cut the plate so that it is about 1/2" larger in diameter.
Here is the shifter assembled to this point:
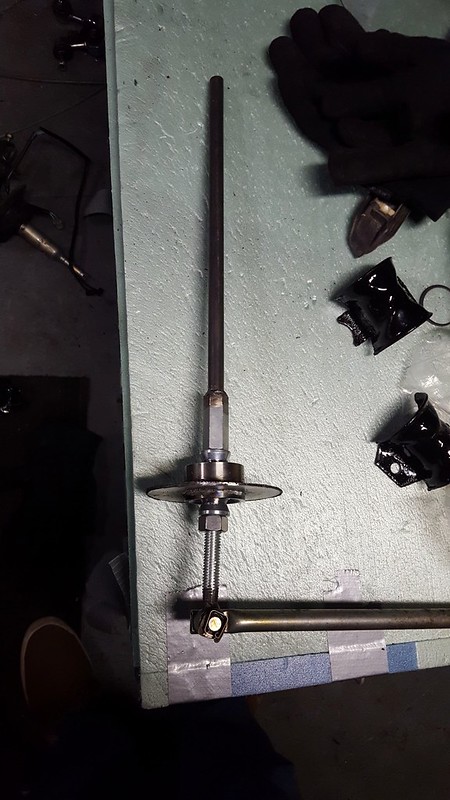
To affix the base to the car, drill 4 1/4" holes at the corners of a 2" square centered around the bearing cup. Put the 1/4-20 bolts through the holes from the top and weld the heads to the plate to fix them in place.
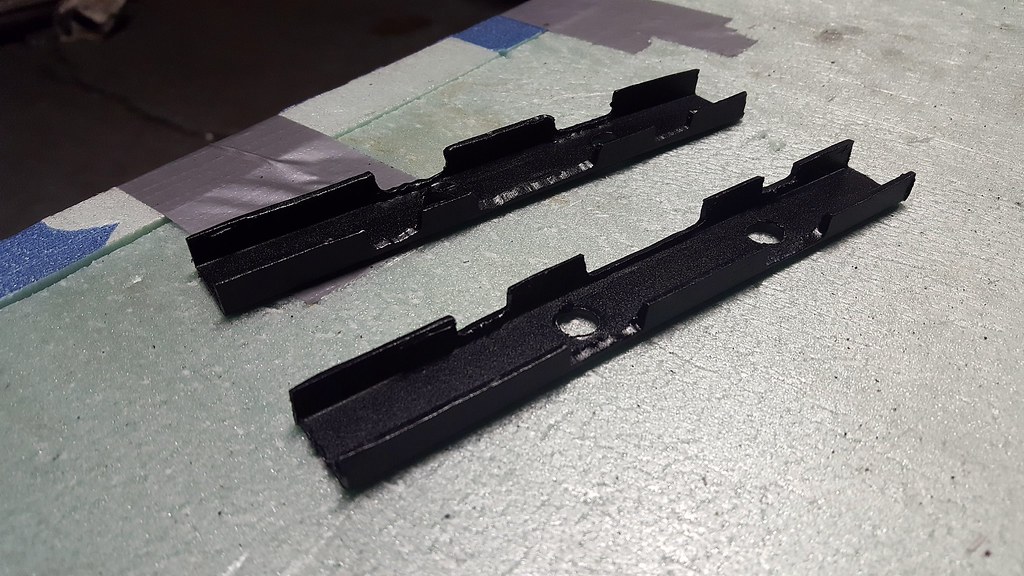
Cut a 5" piece of the square tube and split it evenly in half along the length. Underneath the car, mark where the flange of the shifter hole pass by the bars and cut back the tube so it fits over them. You may also need to clearance them for the bottom of the weld cup. Match up the bolts on the base to the two pieces you just made and drill the respective holes to 3/8".
This is what the final pieces should look like (after paint)
Assembled in the car with lock nuts:
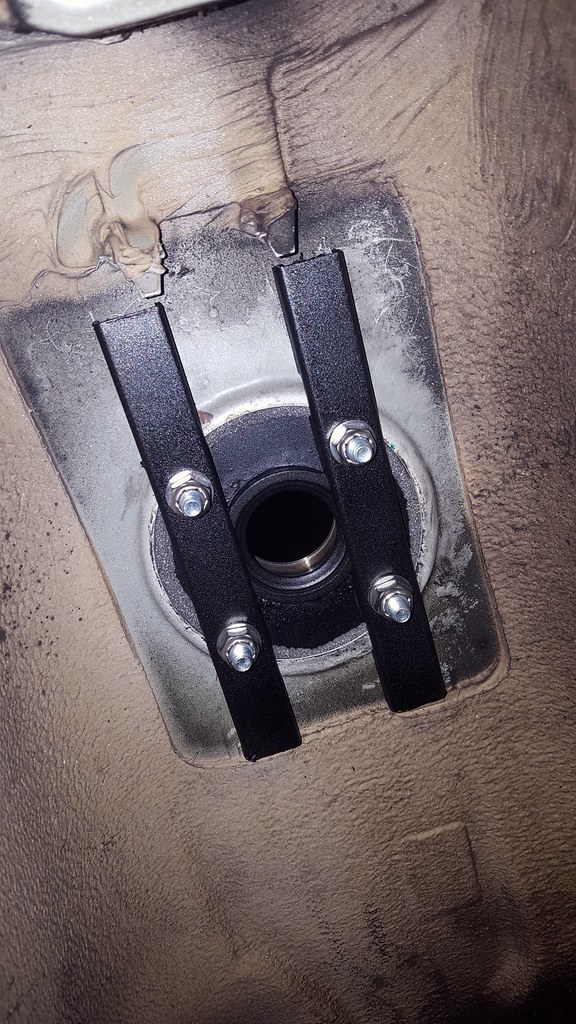
Note: when painting the parts, do not get paint on the inside of the bearing weld cup.
Currently, the height of the lever is very tall, and the shift throws are extremely short. With the shifter mounted in the car, mark where you would like the final height of the knob to be, and then remove and cut the upper half to size. Re-mount the shifter into the car and connect the selector rod. Test the shift pattern, it will likely be extremely short and require a lot of force to get into gear. Lengthening the throws will reduce the force needed to change gears. Shortening the bottom half of the shift lever will lengthen the throws. Remove 1/4" to 1/2" from the top of the threaded rod and reinstall to test the shift throw. Repeat this step until you have the desired throw. Don't go too far, or you will have to re-make the bottom half of the lever. ]
Once you have the shift height and throw exactly how you want it, paint all the parts and re-assembled tightly with loctite:
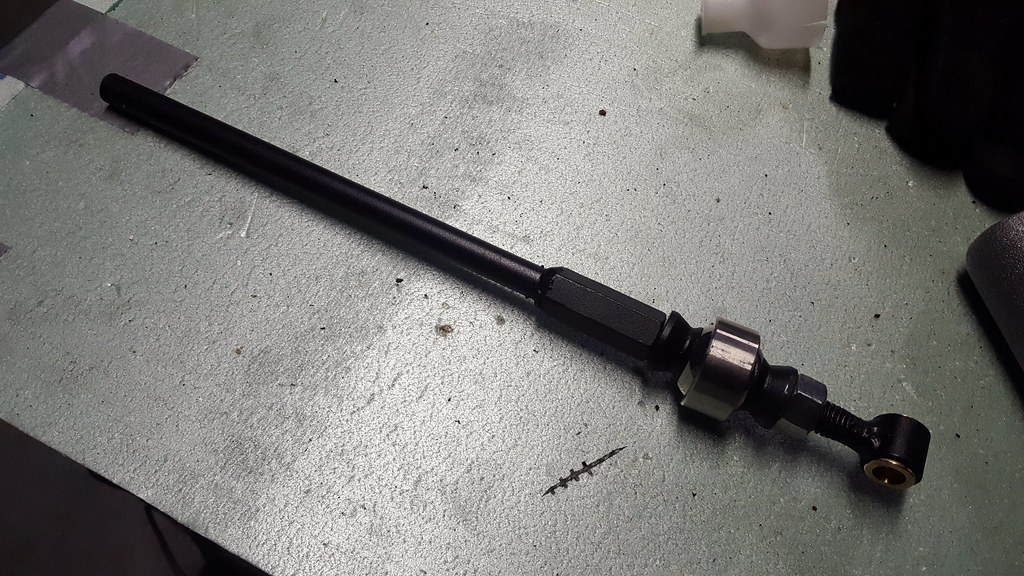
Install the shift lever into the base and insert the bearing retainer circlip.
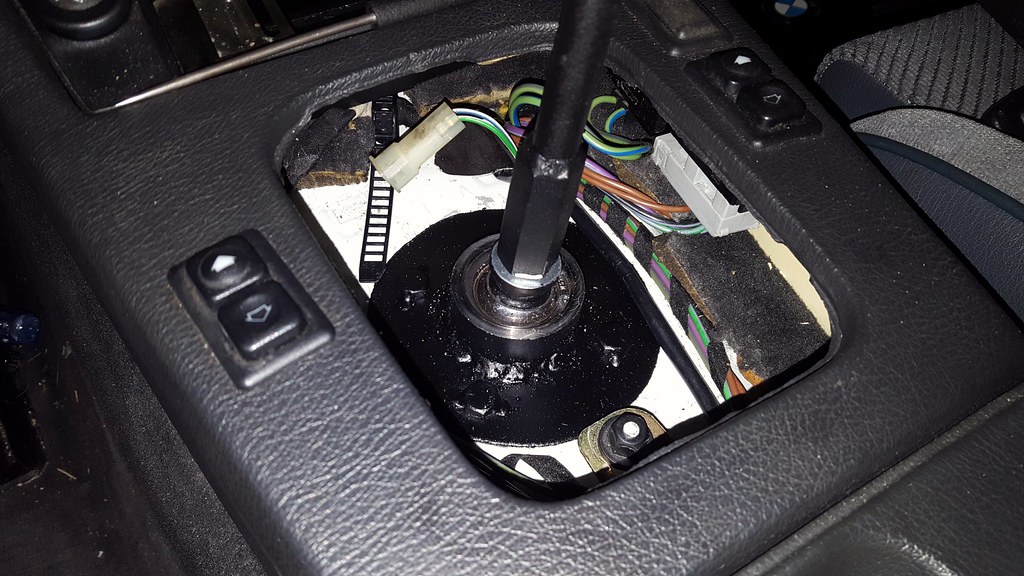
Connect the selector rod (now is a good time to replace the selector rod joint, shift shaft seal, and the yellow washers on the selector rod).
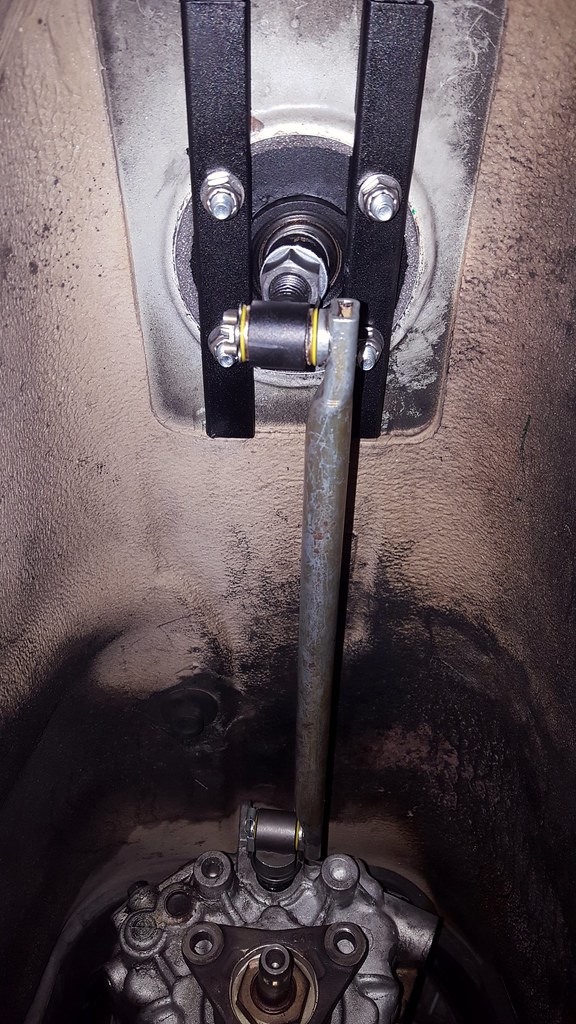
Make sure you are able to get into all gears without binding, and you are ready to go!
Another thing to note: I designed mine to accept the BMW motorsport golfball shift knob which presses onto the shaft. You could also use a die to cut m12 threads into the top of the rod to use one of the many available thread-on shift knobs.
-
-
This is awesome. Thanks for making this thread!

https://www.instagram.com/_jdesigner_/ http://nevertoolow.tumblr.com/
🥳SOLD BMW E24 633CSI - BMW M30B32 🧪SOLD HCH ES9 - 1.3 LDA
👽BMW E30 325IC - Toyota 1JZ-GTE ⏰ HONDA EF9 CIVIC SI - JDM B18C5
☠️BMW E36 318i - Ford 5.0 FE302 🚴♂️ GT-Labomba - 26x2.75 Freeride
🤹♀️SOLD BMW E36/7 Z3 - BMW M54B25 🧓SOLD BMW E10 2002 - BMW M10M05 -
Thanks! It was a fun project so I was happy to share what I learned. I updated the first post with a video showing the shift throws into each gear and the play in 1st and 2nd. I didn't want to bang it into gear while the car wasn't running/moving so the shifts look like they take more effort than they actually do.





Hello! It looks like you're interested in this conversation, but you don't have an account yet.
Getting fed up of having to scroll through the same posts each visit? When you register for an account, you'll always come back to exactly where you were before, and choose to be notified of new replies (either via email, or push notification). You'll also be able to save bookmarks and upvote posts to show your appreciation to other community members.
With your input, this post could be even better 💗
Register Login