
My name is Earl, and I have a Stainless Steel bolt fetish =)
-
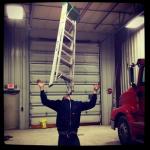
funniest part was when i was outside and you said "hey john, can you take a picture of me planking?" i had a confused look on my face, but then i realized that it was earl who asked the question.
-
I got another little chunk of work done yesterday. I wanted to smooth out all of the old bracket mounting points. I grabbed a 120 grit flap wheel and went to town.


I then got most of the seam sealer finally removed from the corners. Some of it is still in that very tight corner. I think I'll need to use a pick to get that out.


I then put the subframe bushings in.


I went to put the trailing arm bushings in and ran into a snag. I got the end with the sleeve pressed in with the help of a hammer, but I could not get the other end to come in any farther than pictured=( I didn't happen to have a c clamp handy, so I will be using one today to get them fully seated.

I will be going to the shop today after work, and also on Sunday. I'll post the updates Monday=)
-
nice!
-
excited to see this thing in one piece!
-
comfort and performance can co-exist. Just because something stiffer exists doesn't necessarily make it better or higher performance. The main goal is to keep the trailing arms from going toe-out under braking and decel. You would have to be tracking the car pretty hard / competitively to complain about toe-out problems with good stock bushings.
-
What it really needs is to be finished.
fixed it for you!!
-
I got some work done on Thursday and Sunday, but I only took one picture=/
Lets start off with the trailing arm bushings. I figured out why they will not seat. I simply installed them incorrectly. You are supposed to insert each poly piece, and then run the sleeve through the middle. I ran the outer pieces in, with the sleeve in. When I put the inner pieces in, it trapped air. This kept them from fully seating, and is now keeping me from taking them out. All I can think of now is to drill a small hole in each one to let the air escape, and then install a zerk fitting so I can grease them in the future. I will let you know how this works after Wednesday.
Now for work that actually got completed. I got sick of seeing the firewall/trans tunnel insulation just dangling there, so I finished tugging the rest of it out.

Other than that, I finished removing all of the seam sealer that I could find and also finished smoothing out the mounting points for the old ABS brackets. The next step for the bay is to weld the seams to keep any filler used from cracking. I wish I could fill every imperfection in the bay with metal, to stay away from having to use filler. That would take a whole lot of time and I would still need filler in the end to smooth it all out. Hopefully I will just need a light skim coat to fill small indents and to smooth all of the welded seams out.








Hello! It looks like you're interested in this conversation, but you don't have an account yet.
Getting fed up of having to scroll through the same posts each visit? When you register for an account, you'll always come back to exactly where you were before, and choose to be notified of new replies (either via email, or push notification). You'll also be able to save bookmarks and upvote posts to show your appreciation to other community members.
With your input, this post could be even better 💗
Register Login