
Alpine e30 progress/build thread
-
-
Those flame less torches are great.
-
works better than a torch?
Heats as well without melting everything around it!
-
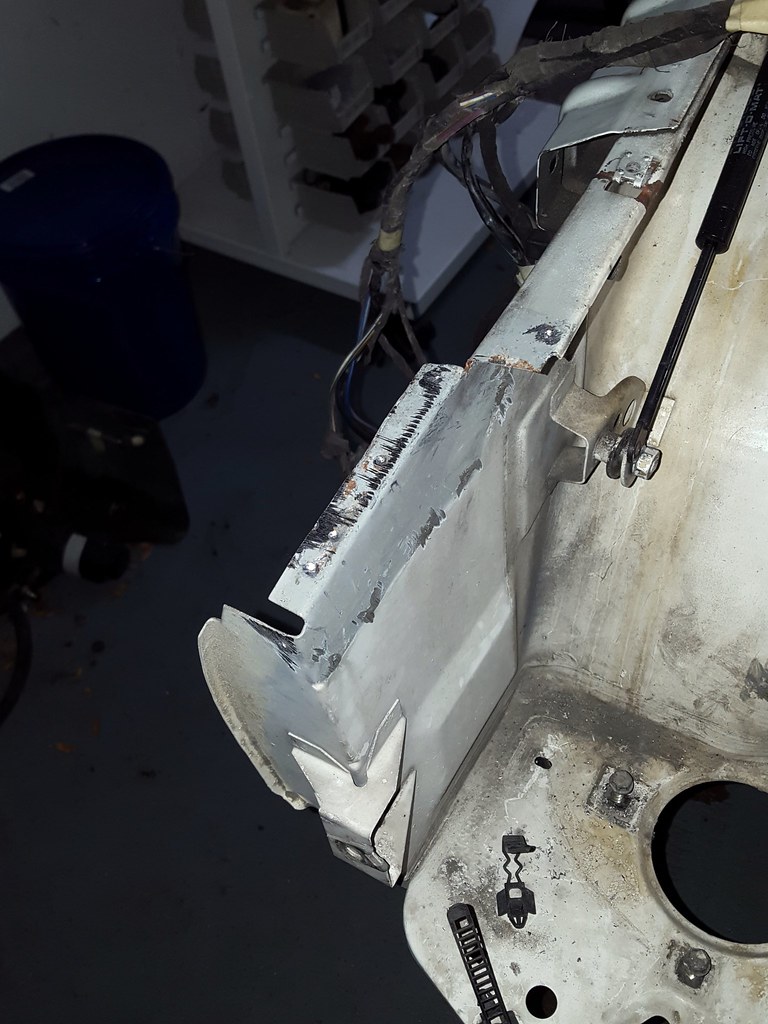
Continued work on removing the old core support, got the two upper and one lower connection points cut out and roughly cleaned up:
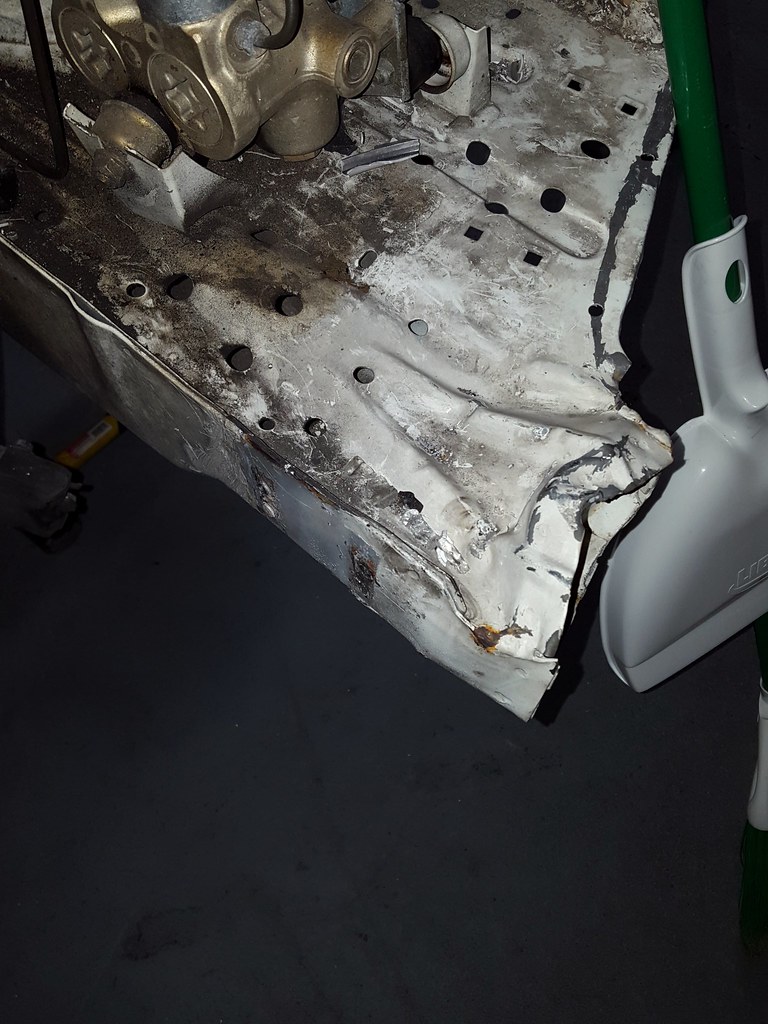
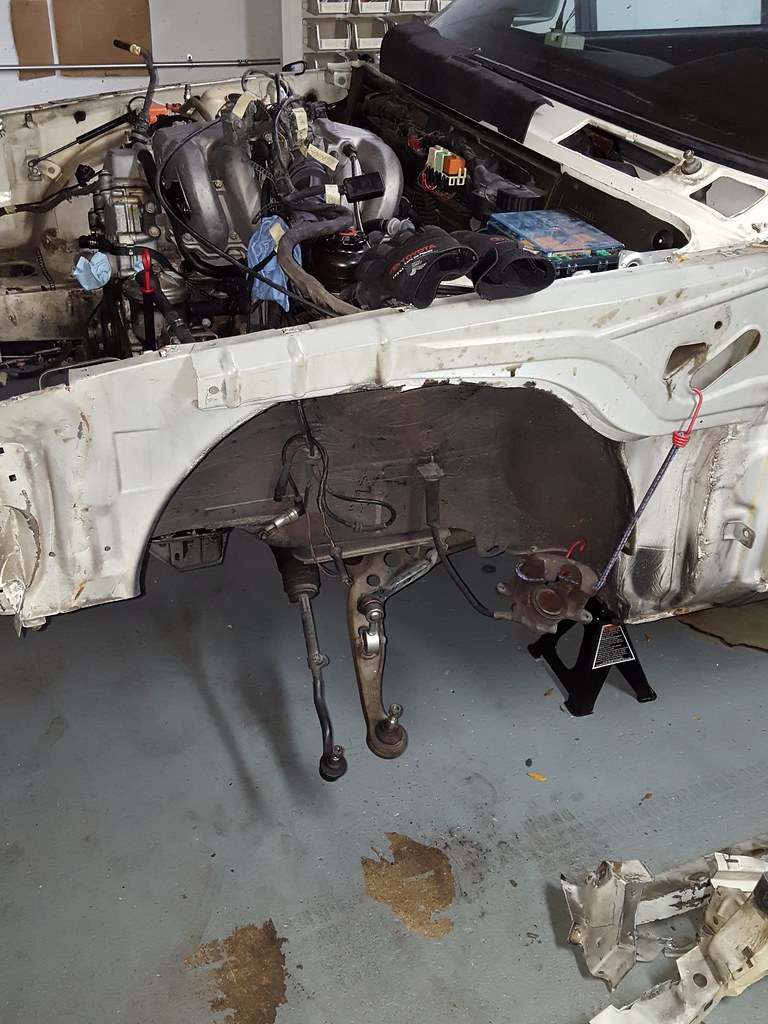
Also started dropping the front suspension, got the front struts removed after work today. I'll will be swapping the billies and vogtlands over to the M3 strut housings once I get them all cleaned up. Don't worry about the stress on those rubber brake lines, they're being replaced and I just wanted them out of the way.
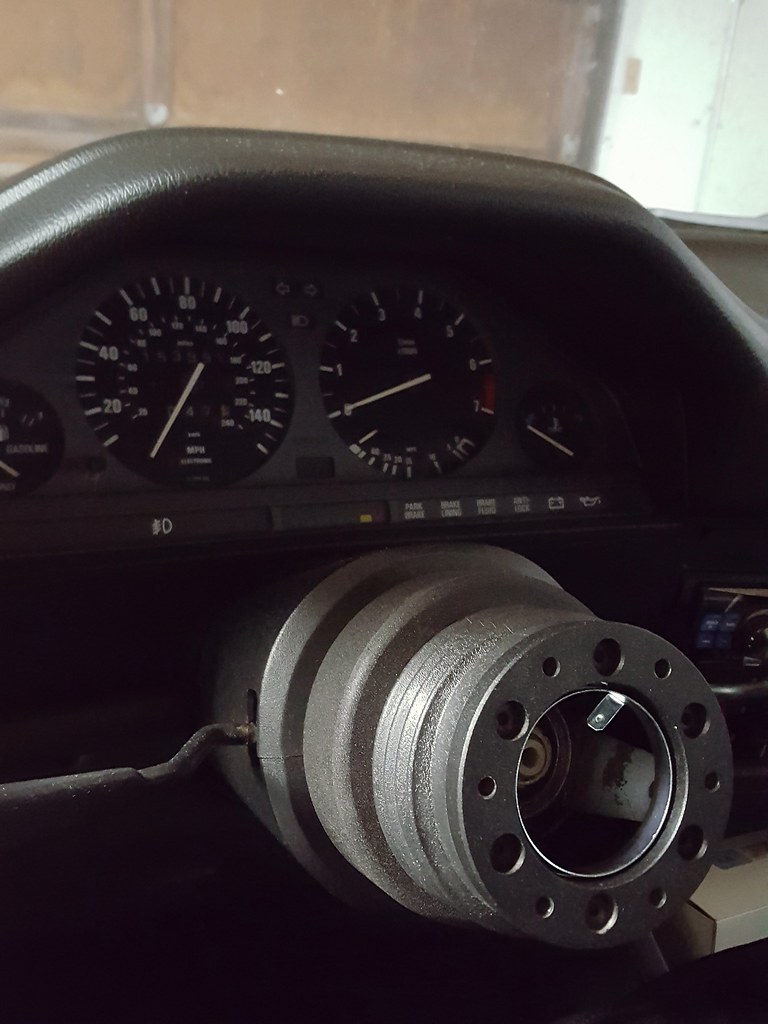
I installed a momo hub and a bolt pattern adapter from Crowder's (Highly recommended for all your steering wheel adapter and spacer needs, its well made and the black textured finish hides it nicely since I didn't want shiny aluminum visible) in preparation for a new wheel that should be arriving next week.
-
Got all the AC parts removed up to the connections that pass through the fire wall, exhaust is out up to the header, got the front subframe out:
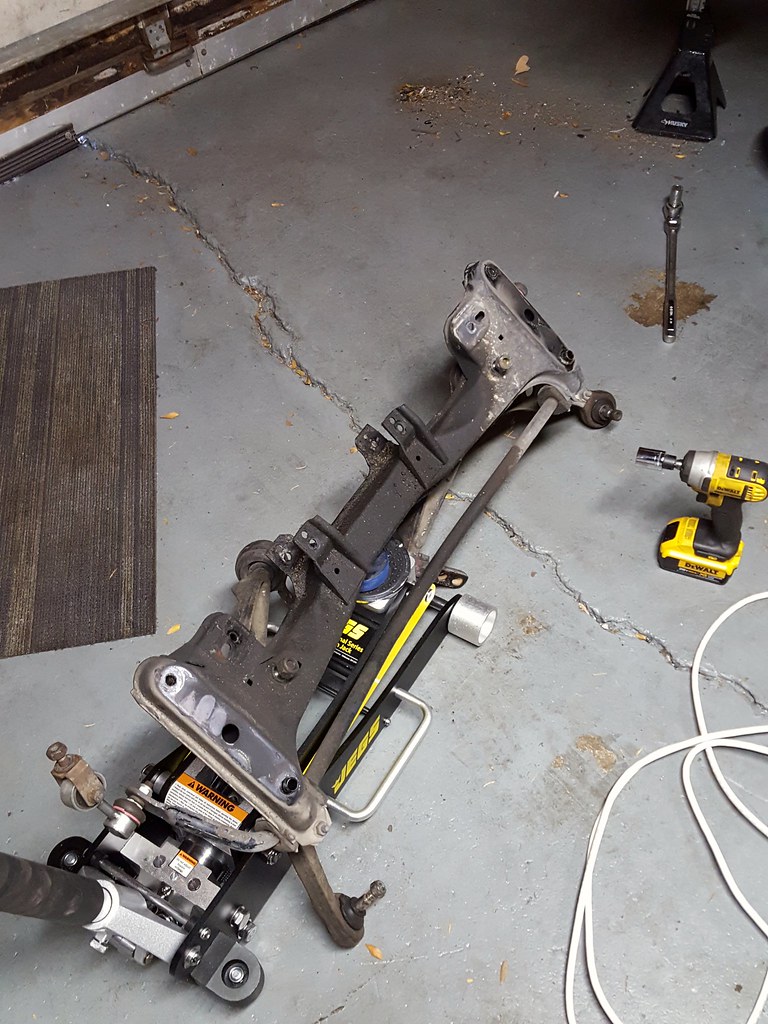
Started cleaning it up (its nasty) and preparing to weld in sway bar and engine mount reinforcement plates.
Then went and pulled the steering rack:
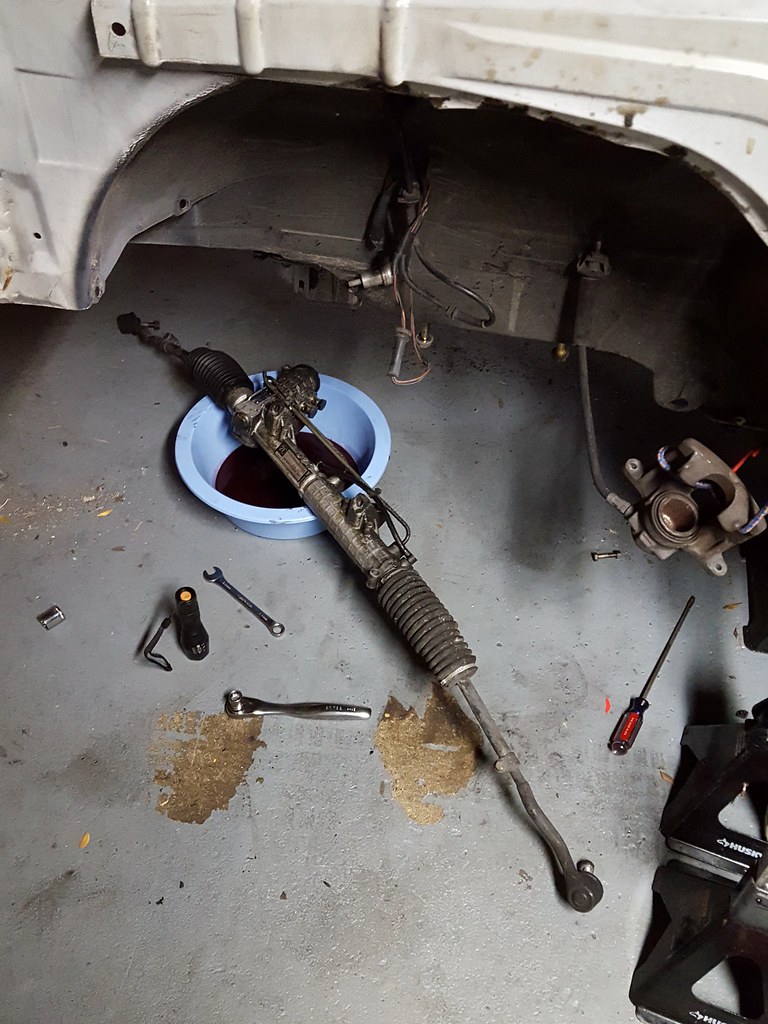
I'll be swapping to either a standard e36 rack (linear 3.4 lock to lock) and deleting the power steering, or swapping in an e46 zhp rack (linear 3.0 lock to lock) and keeping power steering. Haven't decided which yet though.
Disassembled the old struts to swap everything over, just need to paint the new housings and I'll be ready to start bolting things back together in the front.
I also worked out a way to disassemble brake calipers easily without the use of an air compressor and turning your piston into a missile.
I compressed the pistons as far as they would go to remove as much fluid as possible, this way you minimize any spray when the piston pops out.
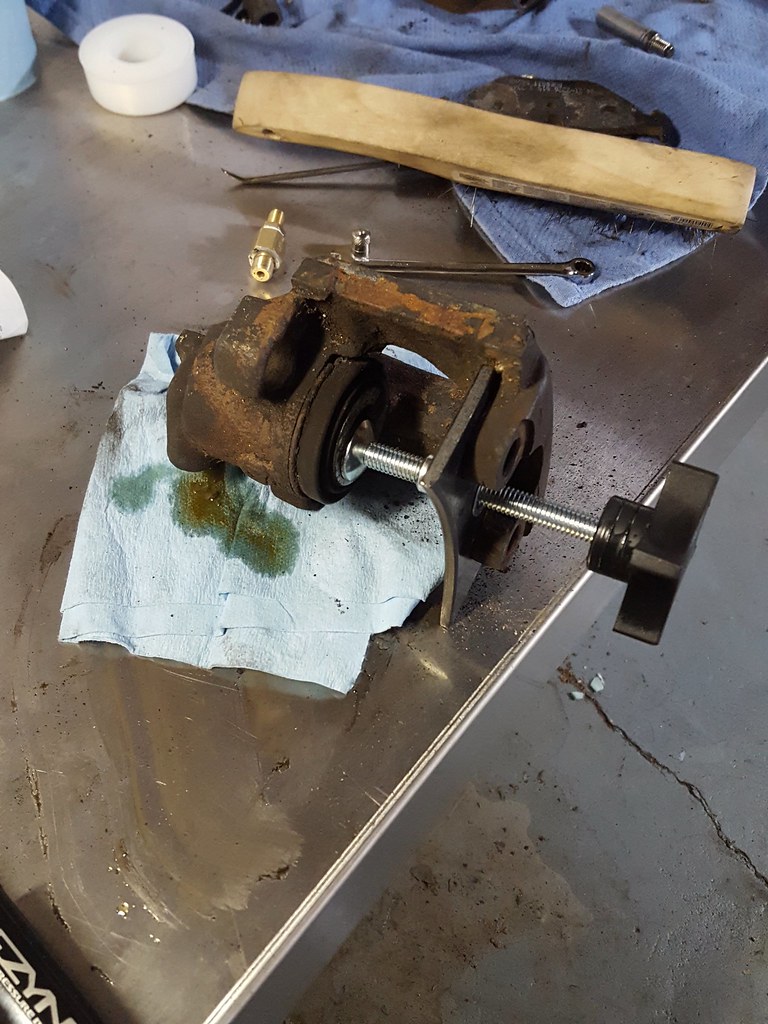
I ordered an M10x1.0 (brake line thread pitch) to 1/8 NPT adapter and a 1/8 npt schrader air tank valve on ebay. This threads into the caliper housing (with the bleed screw installed) and allows you to connect a hand bike pump.
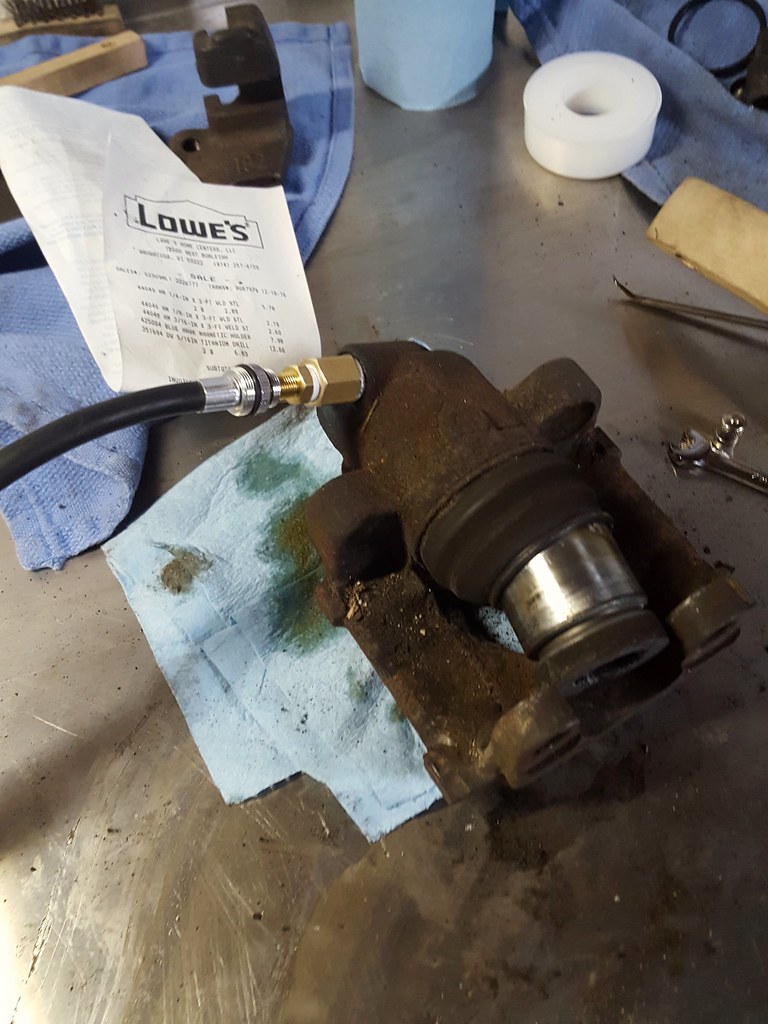
It only took a single pump to push the piston all the way out and it came free with a light pop, no missile or fluid spray.
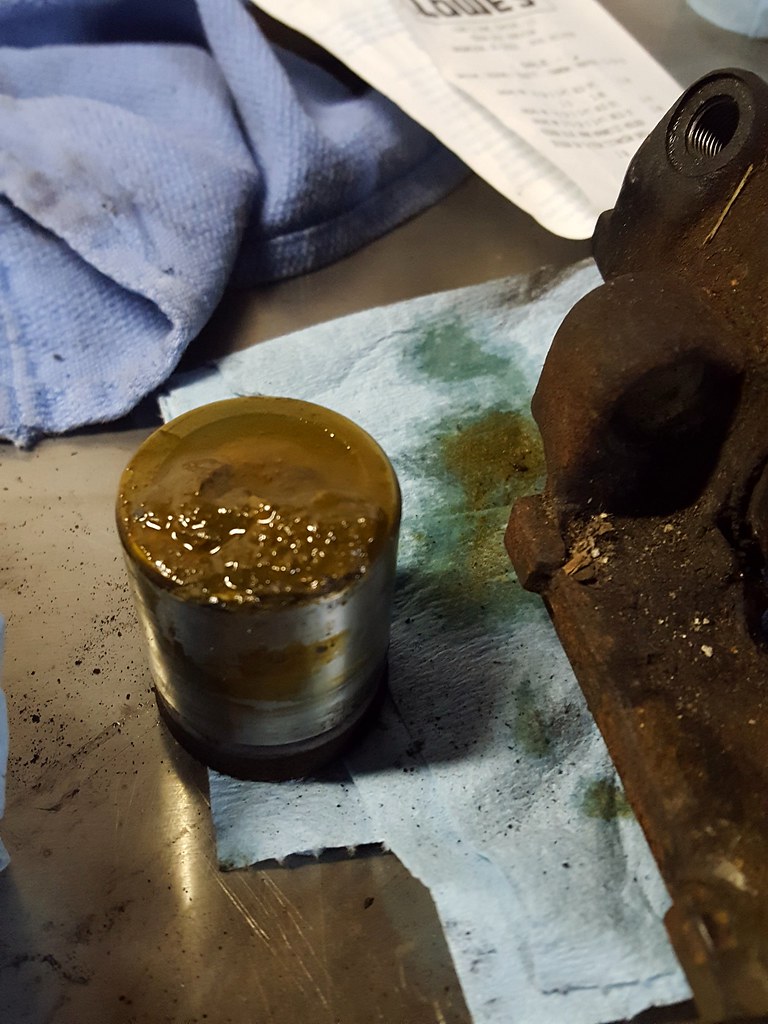
I'm glad I decided to rebuild these instead of just cleaning them up, they were full of muck, fortunately no rust on anything internally though:
Things are progressing nicely!
-
Why a zhp rack versus a z3 rack may I ask? I had talked to Rich from Rack Doctor about this when I bought my z3 rack and he stated this when I told him that I saw the zhp rack was said to be quicker.
"I'm not sure where this information is coming from but I have heard this a few times lately and it is inaccurate. The Z3 is a faster ratio rack. It is more expensive true but it is also a better rack. The unit it self is steel body so it tends to be more durable. Forums can be a good thing and a bad thing. You have to weed out the good, the bad, and the ugly. People often talk about ratios and this changes from vehicle to vehicle because it is a trigonometry equations that will change from vehicle to vehicle based on wheel angle and turns. This is why we simply go by turns. The Z3 rack is 2.7 turns. Thr ZHP is 3.0 turns. In the simplest terms, you're cutting a quarter turn off the rack. The rack you currently have is 3.4 turns. So almost the same amount from that to the ZHP as the ZHP to the Z3. Most mechanical things are simple but people like to make them difficult maybe to enhance their ego. I guess I am too old LOL"
-
I know you will, but Check the subframe super closely. When I did the weld-in stuff, my old subframe had some cracks that were hard to spot until I cleaned the entire thing, the new one that got welded checked out fine. Are you going with the garagistic plates?
IIRC, I also had these areas welded up

Also keep power steering. Yes driving without it is fine, you won't notice it cruising or driving regularly. Parking lots are whatever, but holy crap it is nice for autox. This is why I'm reinstalling it lol
-
Why a zhp rack versus a z3 rack may I ask? I had talked to Rich from Rack Doctor about this when I bought my z3 rack and he stated this when I told him that I saw the zhp rack was said to be quicker.
"I'm not sure where this information is coming from but I have heard this a few times lately and it is inaccurate. The Z3 is a faster ratio rack. It is more expensive true but it is also a better rack. The unit it self is steel body so it tends to be more durable. Forums can be a good thing and a bad thing. You have to weed out the good, the bad, and the ugly. People often talk about ratios and this changes from vehicle to vehicle because it is a trigonometry equations that will change from vehicle to vehicle based on wheel angle and turns. This is why we simply go by turns. The Z3 rack is 2.7 turns. Thr ZHP is 3.0 turns. In the simplest terms, you're cutting a quarter turn off the rack. The rack you currently have is 3.4 turns. So almost the same amount from that to the ZHP as the ZHP to the Z3. Most mechanical things are simple but people like to make them difficult maybe to enhance their ego. I guess I am too old LOL"
I have seen the same info from rack doctor, the main reason is it is quite a bit cheaper compared to the z3 rack, on rack doctor with the core charge the z3 is $509 and the ZHP is $350. I also want to avoid the twitchiness of a rack that tight since I expect a decent amount of freeway driving once the car is done. From Kaiser's response, it looks like a power steering delete isn't worth it for auto cross so I will most likely be keeping p/s and going with a tighter rack.
I know you will, but Check the subframe super closely. When I did the weld-in stuff, my old subframe had some cracks that were hard to spot until I cleaned the entire thing, the new one that got welded checked out fine. Are you going with the garagistic plates?
IIRC, I also had these areas welded up
Also keep power steering. Yes driving without it is fine, you won't notice it cruising or driving regularly. Parking lots are whatever, but holy crap it is nice for autox. This is why I'm reinstalling it lol
Yeah I have the garagistic plates, I was disappointed by the quality, they look like they were cut out by a 5 year old. I know they were pretty cheap and I'm welding them on but still... Good call on welding those gaps though, I hadn't thought of that but it makes sense to do. I started cleaning it up but didn't get too far, I found a little deformation on the driver's side motor mount (bowing up a little where the mount bolts down), so I'll have to flatten that out and check for cracks.
Thanks for the info on the power steering too, I am planning to auto-x this so that is really good to know. I am leaning towards keeping it now based on what you've said and what I have seen on r3v, etc., deleting it was mostly a cost driven idea and the couple hundred saved might not be worth it.
-
Garagistic leaves something to be desired almost always. I had to mess with the ear shaped engine mount reinforcement plates to get them to sit so the bolt hole lined up and there was enough contact between plate and subframe for welding. Rear trailing arm reinforcements were the same way. It was annoying.
-
AKG wasn't much better for me on the front subframe reinforcement. They required a lot of bending and grinding to fit right and I know my m42 didn't tweak the subframe=P lol
Edit: I also figured it was more-so for the cost. Snap has a z3 rack and could tell you how it feels. I know finding a second hand one isn't all that easy but you can get them for $150-$250.
-
Edit: I also figured it was more-so for the cost. Snap has a z3 rack and could tell you how it feels. I know finding a second hand one isn't all that easy but you can get them for $150-$250.
Didn't think of looking for a used one since I never see them come up for sale on r3v or anywhere, everyone just says go to rackdoctor. I did a quick search on ebay and after some digging, I ended up finding a rack from an '02 non-m z3 with only 60k on it for a really fair price! Looks like i'm going the z3 rack route after all
-
IIRC I am running e36 inners and outers. They are a few mm beefier
Edit: I have a random e36 rack
-
IIRC I am running e36 inners and outers. They are a few mm beefier
Edit: I have a random e36 rack
I had bought all the parts (inner and outer tie rods, boots, clamps, etc) to do tie rods before I went down the "change everything" path. I have heard the e36 setup is stronger but since I already have the parts I'll just run with the e30 bits.
Anyone know if the e30 locking plates work on a z3 rack? I looked on realoem and there doesn't seem to be any locking system for the inner tie rods.
-
Anyone know if the e30 locking plates work on a z3 rack? I looked on realoem and there doesn't seem to be any locking system for the inner tie rods.
I ran into a similar issue using E90 stuff on an E30 rack, as no lock plate is large enough to fit the E90 end. I started looking into it and lock plates are no longer used. I went with the locktite route.
-
After a month of waiting for my new steering wheel to show up, it finally arrived! It is a vintage RAID wheel freshly re-wrapped in leather. It's a 360mm so it will be an improvement over the 385mm mtech1 wheel it is replacing. I have more room for my knees and its still large enough that it doesn't cut off my view of the gauges entirely.
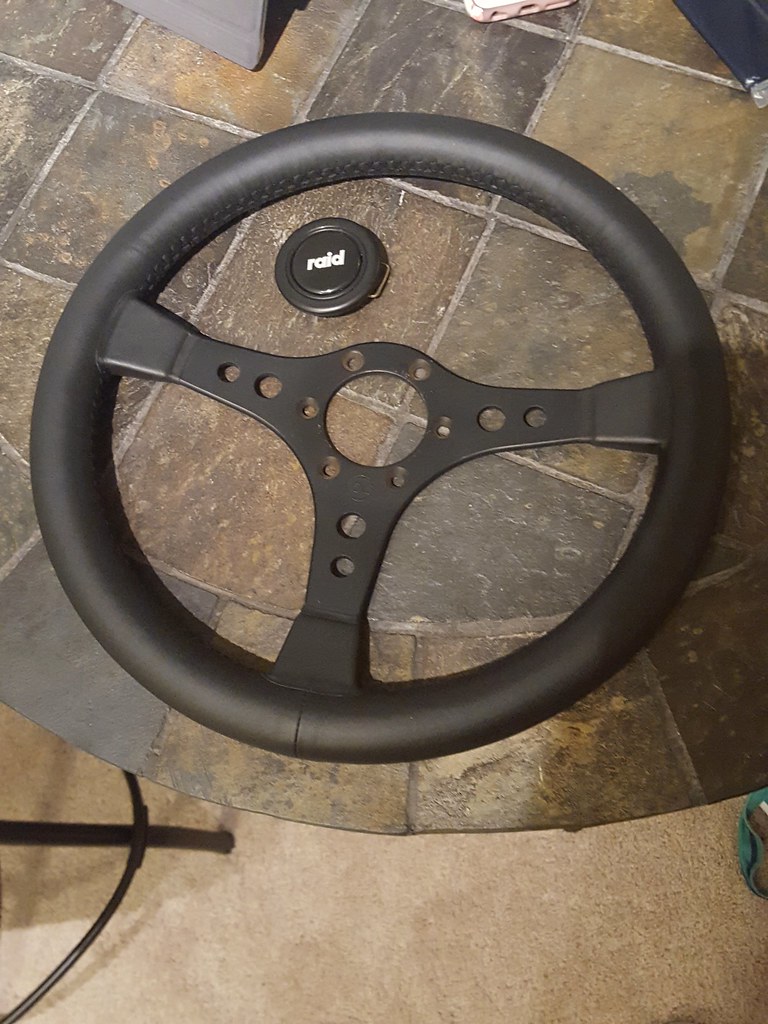
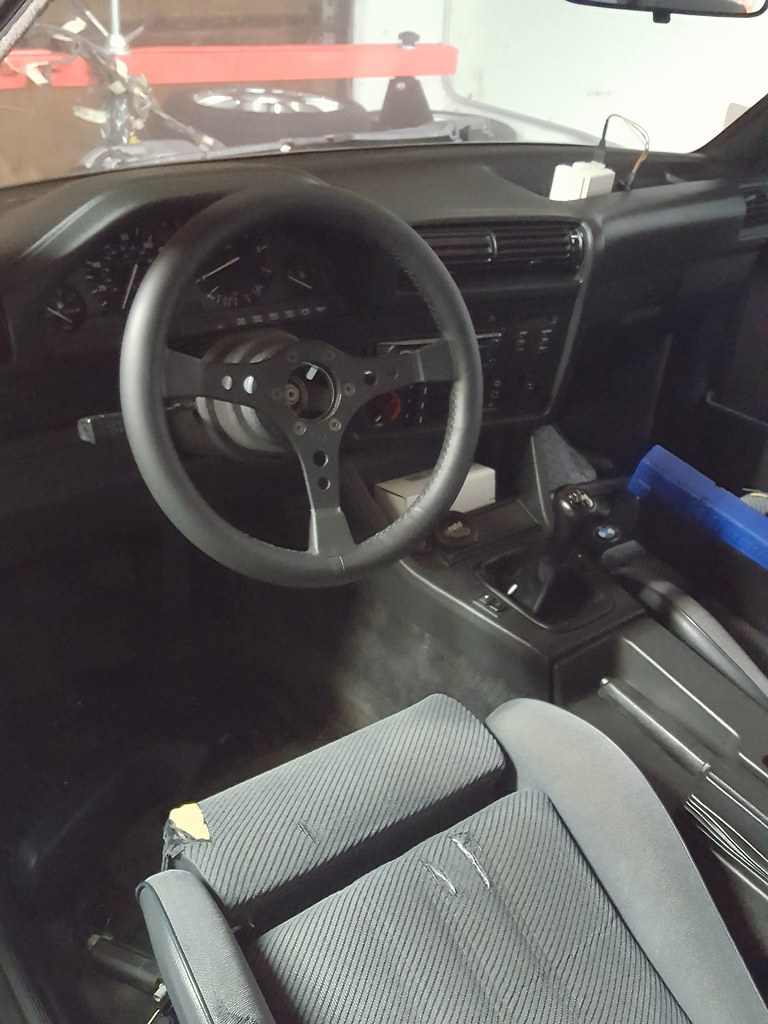
Got it installed in the car this afternoon, already loving how it looks. The horn button doesn't fit right (looks like it was modified, I wish the seller would've told me), so I am going to have to rig something up or get a different button.
Z3 rack also showed up today, the tie rod ends look to be in great shape (no play and the boots are all good) so I will probably just run it as is. I can always swap to the e30 ones if there are issues.
-
After buying dans old wheel from him, it's amazing how much better the driving position feels. Looks good too
-
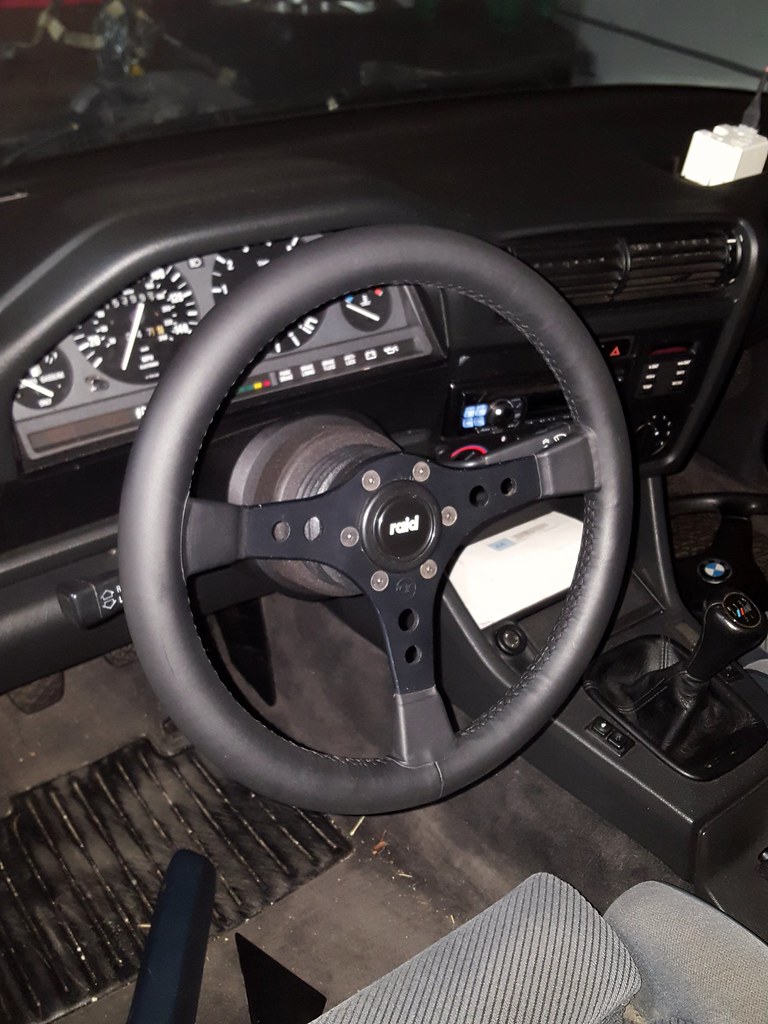
Modified the momo horn button retainer to mount between the steering wheel and adapter, and then shortened the ring that holds the horn button to keep it flush with the wheel. Since the original raid horn button had already been modified I didn't feel too bad shaving down the mount points to fit into the momo retainer. Made a little harness to connect the ground of the raid button to the momo ground point. 4 hours of work later...the horn button fits and stays in place:
I cleaned all the grease and grime off the front subframe and started welding in the reinforcement plates:
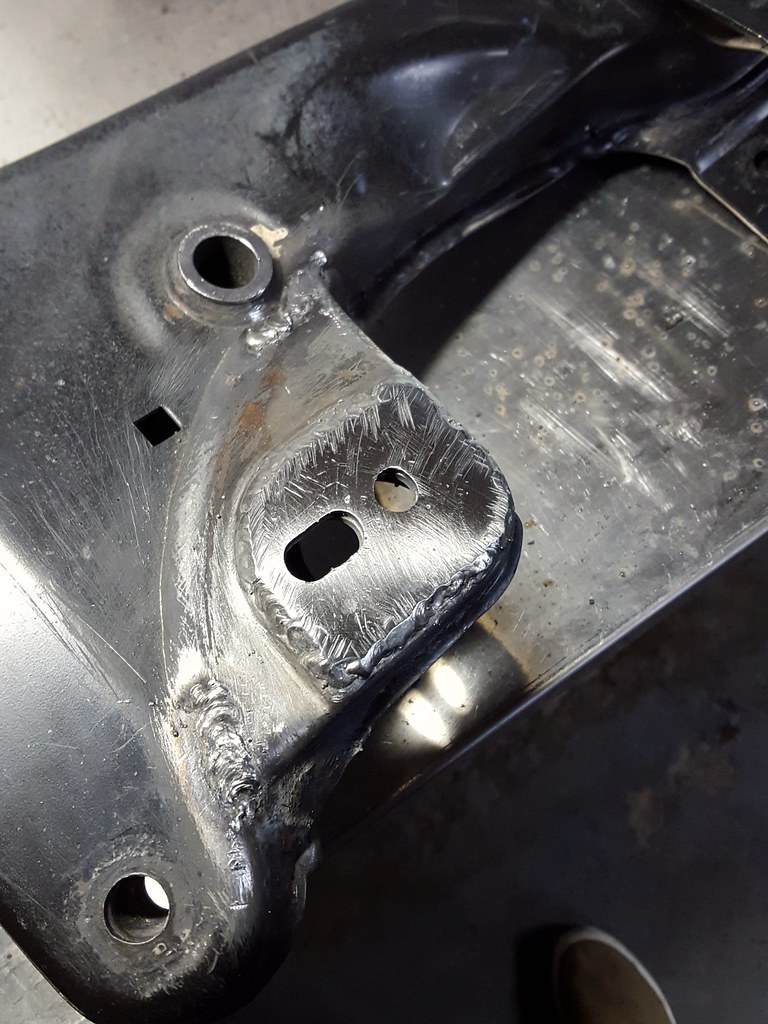
Welded the motor mount plates to the top of the subframe to raise the engine and gain a tad more clearance for the bottom of the oil pan. Also welded in the lower motor mount reinforcements:
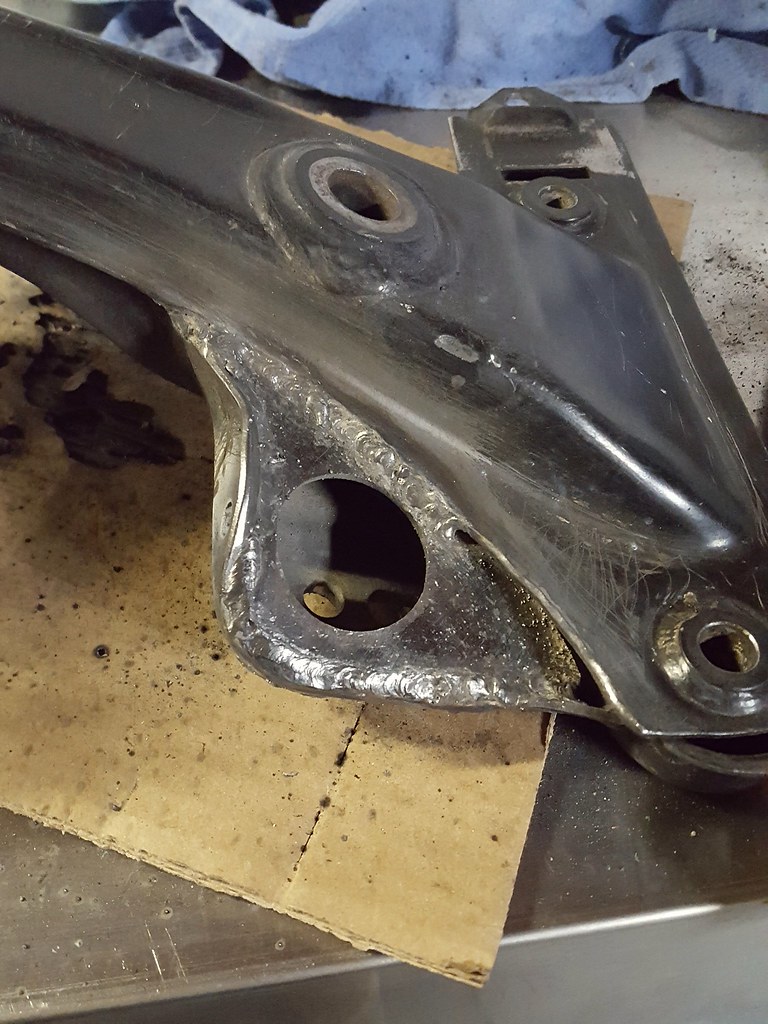
The welds aren't super pretty but the penetration is good, not bad for the first beads with the new welder. Did everything in 1/2" segments spaced around the plates with some time to cool in-between to minimize warping. The Garagistic sway bar tabs have the holes about 1/8" off from where they should be so I wasn't able to get those on unfortunately, going to have to slot the holes or something.
-
Dumb question, did you try flipping them? Or changing from side to side? This probably won't make a difference...but I remember I had to mark mine with "drivers side" and "pass side" because they only seemed to fit one way. IIRC, one of the two "stems" is cut at an angle??
***will try and find what I mean, one sec off to the internets









Hello! It looks like you're interested in this conversation, but you don't have an account yet.
Getting fed up of having to scroll through the same posts each visit? When you register for an account, you'll always come back to exactly where you were before, and choose to be notified of new replies (either via email, or push notification). You'll also be able to save bookmarks and upvote posts to show your appreciation to other community members.
With your input, this post could be even better 💗
Register Login