
1999 M3 daily driver running log
-
My cassette tape adapter stopped working so I decided to modify my C43 head unit to add an auxiliary input. I wanted to retain the oem look so I didn't want to use a more modern head unit.
I followed a few of the DIY's online and tapped into the audio out on the tape deck. The first attempt I used a headphone cord with very thin wires
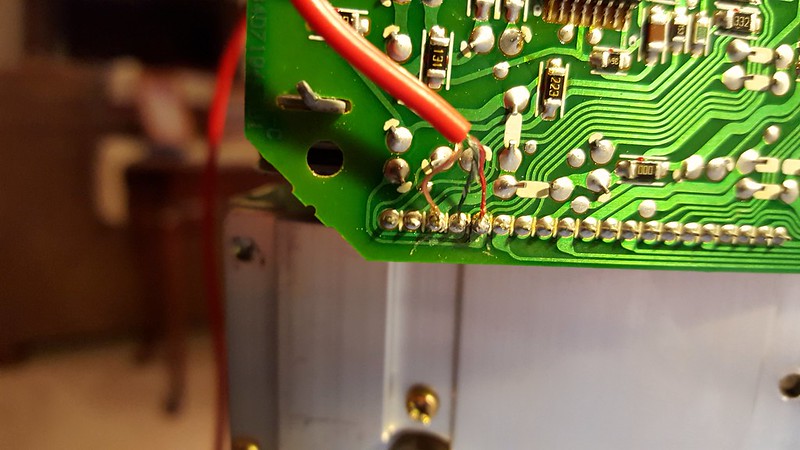
This worked initially, but the leads soldered to the 3.5mm female plug were extremely fragile and one cracked and I lost the left channel while installing the radio back in the car. I tried again with much more durable 20 gauge wire and it worked beautifully
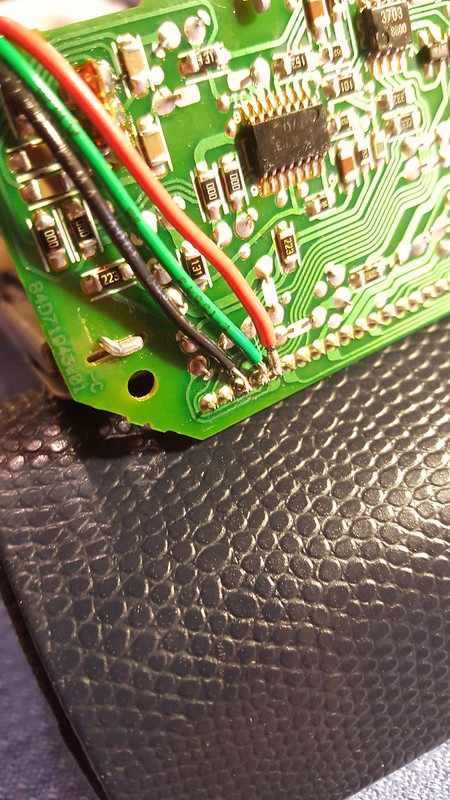
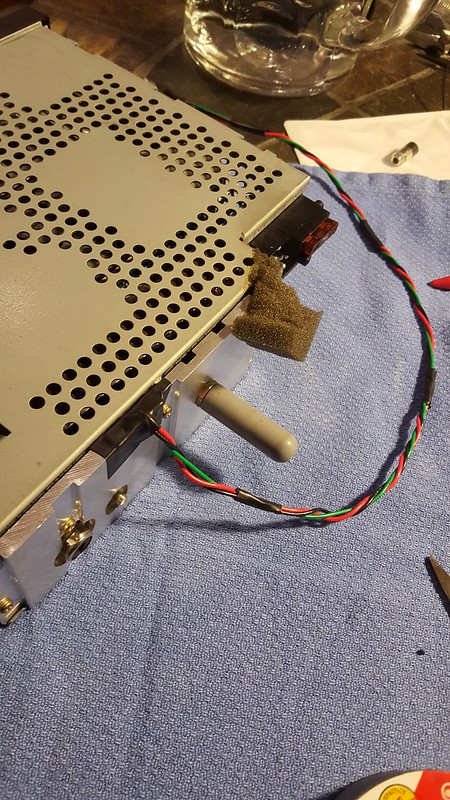
I ran the wires out a gap in the back of the radio chassis, protected the wires from abrasion, and fixed them in place to stress relieve the soldered joints
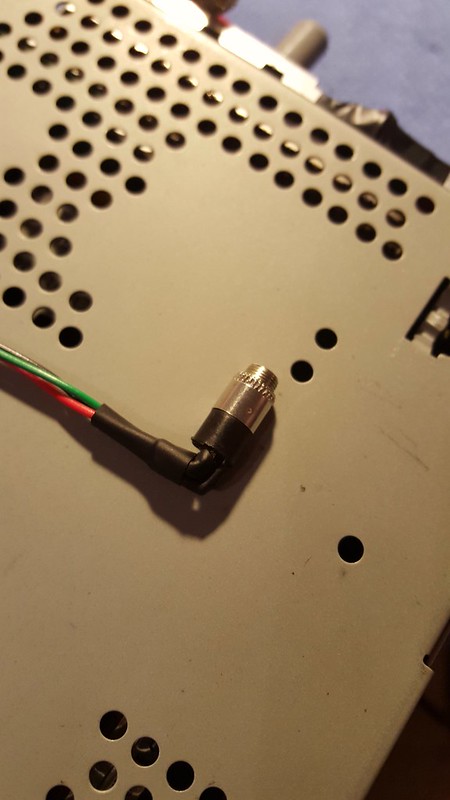
There was very little room behind where I wanted to mount the input jack (as I found out after the first attempt) so I attached the wires at 90 degrees
I mounted the input in the back of the storage tray under the OBC as I wanted it out of sight with the cord removed, yet still easily accessible
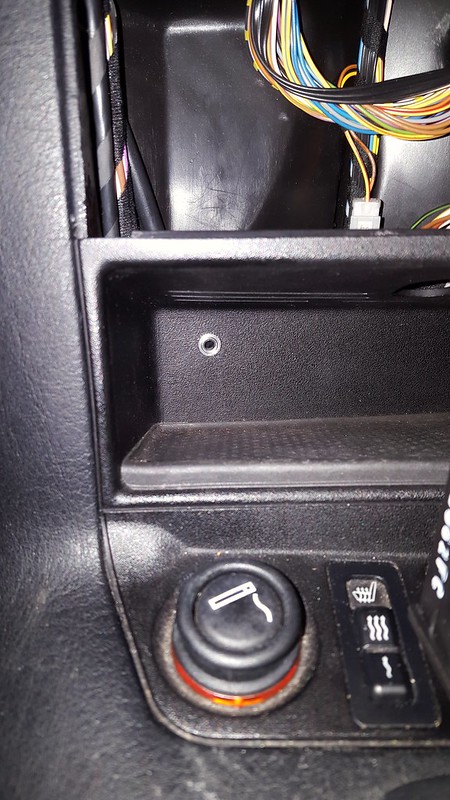
I gutted the old cassette adapter to be used to trick the head unit into playing the new audio input and it works beautifully! I had heard many complaints about the sound being very muddy and quiet with this mod, and that was the case with my first attempt. I figured out that this can be caused by the Dolby noise reduction filter on the tape deck and can be corrected by hitting preset 6 while in tape mode to switch it off. The sound quality is excellent and I am very pleased with the results!
-
nice work on the stereo hack!
just an fyi for the inner ball joints, and I know this because almost every one I've done had the same thing happen as you, you can put pressure on the bottom of the joint to keep it from spinning. I usually get a jack stand in place and lower the cars weight onto it.
Dan

-
nice work on the stereo hack!
just an fyi for the inner ball joints, and I know this because almost every one I've done had the same thing happen as you, you can put pressure on the bottom of the joint to keep it from spinning. I usually get a jack stand in place and lower the cars weight onto it.
I shouldve done that from the start haha, that's what I get for rushing... There was rust and dirt that got caught in the threads and basically seized the nut to the threads. I didn't have the joint supported on the first side and the force I was using to try and turn the nut popped the joint free. Once that happened, I put a strong arm underneath it (basically holding up the entire car) and it was still spinning so I had to split the nut with a cut off wheel and chisel it off. On the other side I used the strong arm from the start and was able to get it off with just that and a lot of heat
-
Links to the head unit mods? I've been wanting to do this with a e34 head unit.
http://www.bimmerforums.com/forum/showthread.php?1886405-DIY-E36-Aux-in-with-C43-headunit
Here is the one I used, really simple mod actually. Only hard part was the fairly fine soldering
-
the hard part is differences between units. unless someone has done your specific unit, or you are an electrical engineer, its pretty much a crap shoot. I imagine Chris's e34 doesn't have a CD43. For my e30, I had to buy a tape deck (there are like 50 versions) that someone had already figured out that model. I couldn't get my slightly different unit to work with the same DIY.
Dan
-
the hard part is differences between units. unless someone has done your specific unit, or you are an electrical engineer, its pretty much a crap shoot. I imagine Chris's e34 doesn't have a CD43. For my e30, I had to buy a tape deck (there are like 50 versions) that someone had already figured out that model. I couldn't get my slightly different unit to work with the same DIY.
I was lucky enough that the unit I have (C43) had that really good DIY, I believe the C43 can be adapted to quite a few cars as it is a standard size and they usually go for fairly cheap compared to a CD43.
-
Picked up a set of wheels that I am super stoked about:
18x8 et35 BBS RE 847
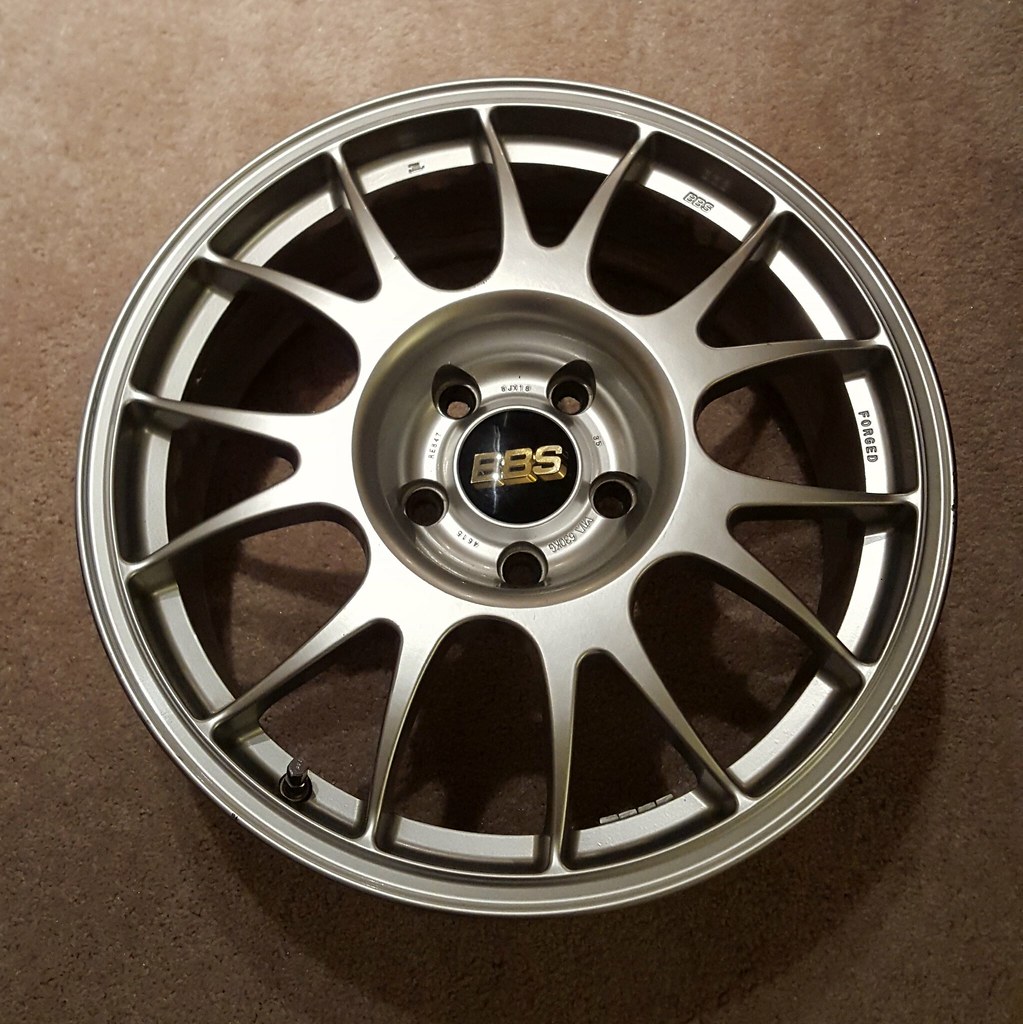
They were used as winter wheels so the paint is bubbling a bit in a few places but the rest of my car is the same story so it doesn't bother me, down the road a light refinish and they will be good as new.
-
Nice score!
-
Picked up a set of wheels that I am super stoked about:
18x8 et35 BBS RE 847
They were used as winter wheels so the paint is bubbling a bit in a few places but the rest of my car is the same story so it doesn't bother me, down the road a light refinish and they will be good as new.
Nice! What did you end up paying for those? Craigslist find?
-
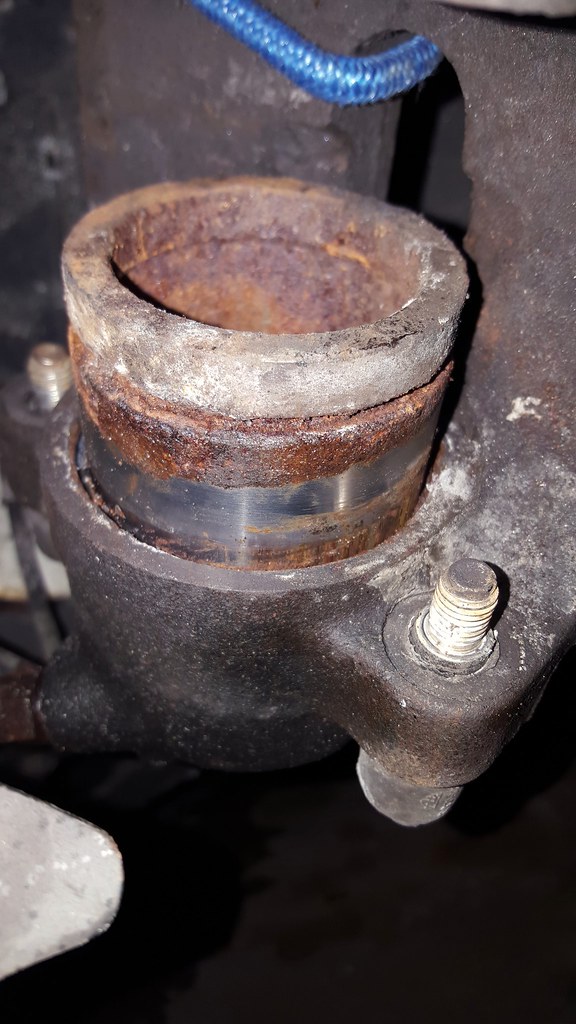
Driver's side caliper seized up on me and got so bad I had to park the car last Thursday until the brake parts I had ordered the day prior showed up. When they arrived in the middle of the week, I was hoping to rebuild the calipers and get back on the road. I got everything apart and attempted to use the pressure of the braking system to push out the caliper but I soon realized they weren't worth rebuilding even though they looked alright on the outside:
I bought a pair of calipers (remanufactered ones from WBR) and was able to get everything installed this weekend.
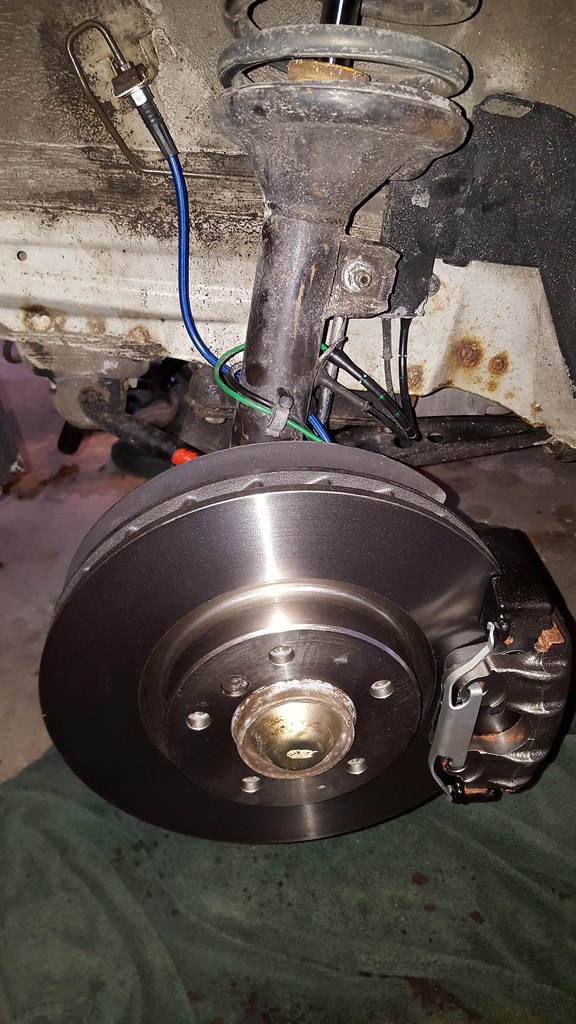 '
'I replaced the rotors, pads, calipers, pad wear sensor, upgraded the lines to UUC braided stainless ones, and flushed the system with Ate Type 200 fluid.
I will note that I was a bit disappointed in UUC's lines, as the fitting that meets the hardline was too small and was able to pass through the mount on the body. I had to drill out a washer to fit snugly over the line to get it to secure in place properly.
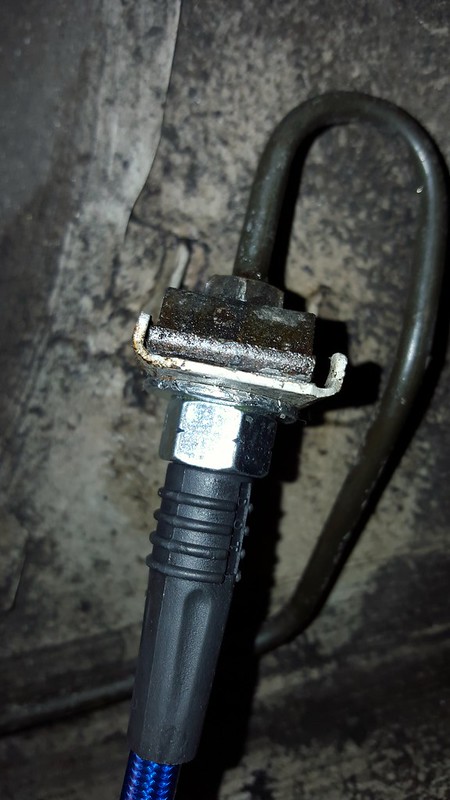
You can see the washer just underneath the white bracket in the middle.
-
Did this today:
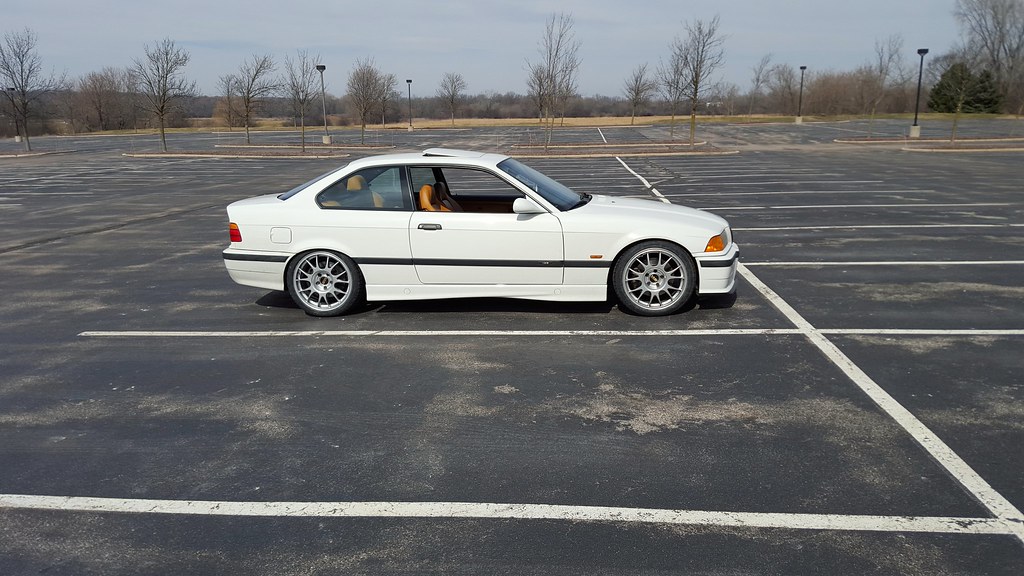
Wrapped them in Continental ExtremeContact DW's, really impressed with this tire so far! Also put on a 5-speed ZHP knob and it definitely helped smooth out the shifts.
I am having some minor vanos rattle and it's driving me crazy... so I ordered the Beisan systems single vanos seals and anti rattle kits, as well as all the related gaskets and the upper timing chain tensioner. Hoping to get to that job next weekend
-
That looks great!
-
Thanks guys!
This evening finally got around to installing my AKG delrin clutch and brake pedal bushings.
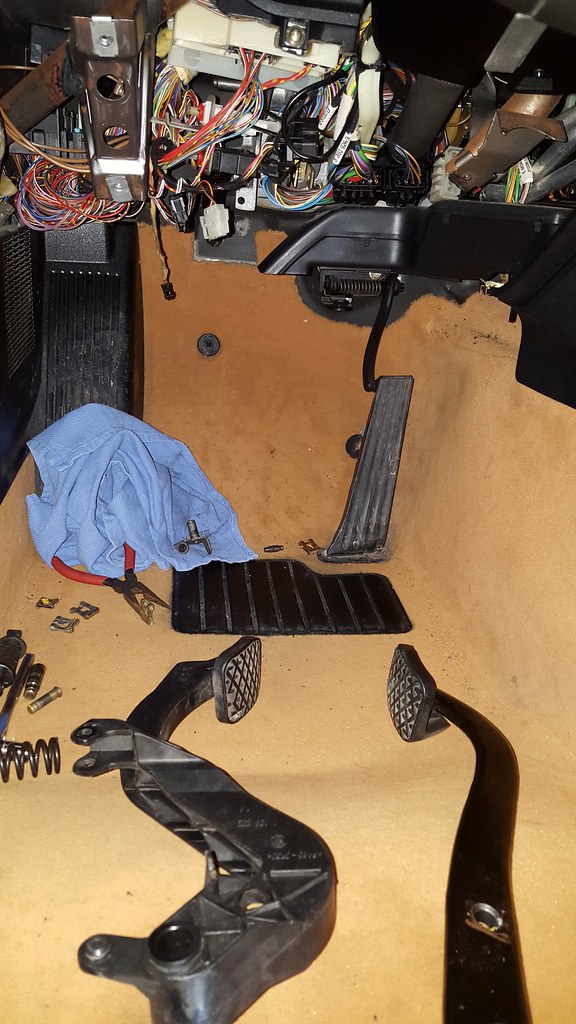
The clutch pedal had quite a bit of slop and was bent to the left pretty badly. The brake pedal was more or less fine but I did it anyway because I was in there already. Now they are both really solid, and the clutch pedal is just about back to where it is supposed to be. I cleaned up and re-lubed everything as I re-assembled it too. The effort needed to push the clutch is a lot less than before so that is an added bonus.





Hello! It looks like you're interested in this conversation, but you don't have an account yet.
Getting fed up of having to scroll through the same posts each visit? When you register for an account, you'll always come back to exactly where you were before, and choose to be notified of new replies (either via email, or push notification). You'll also be able to save bookmarks and upvote posts to show your appreciation to other community members.
With your input, this post could be even better 💗
Register Login