
Helmut the e21
-
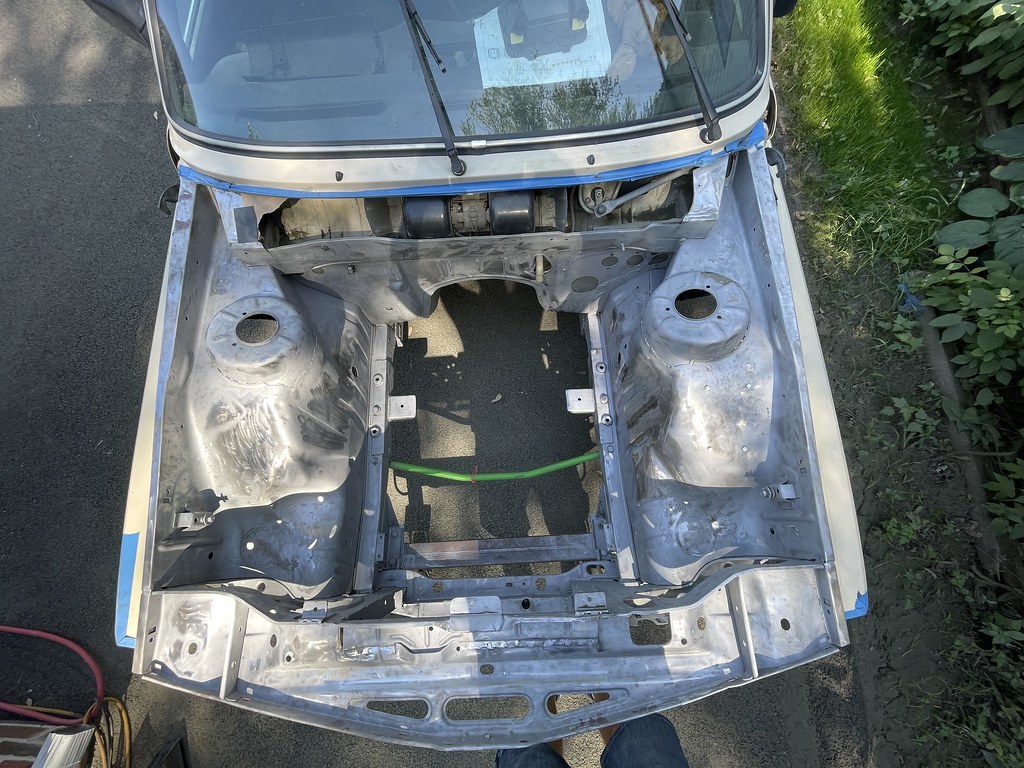
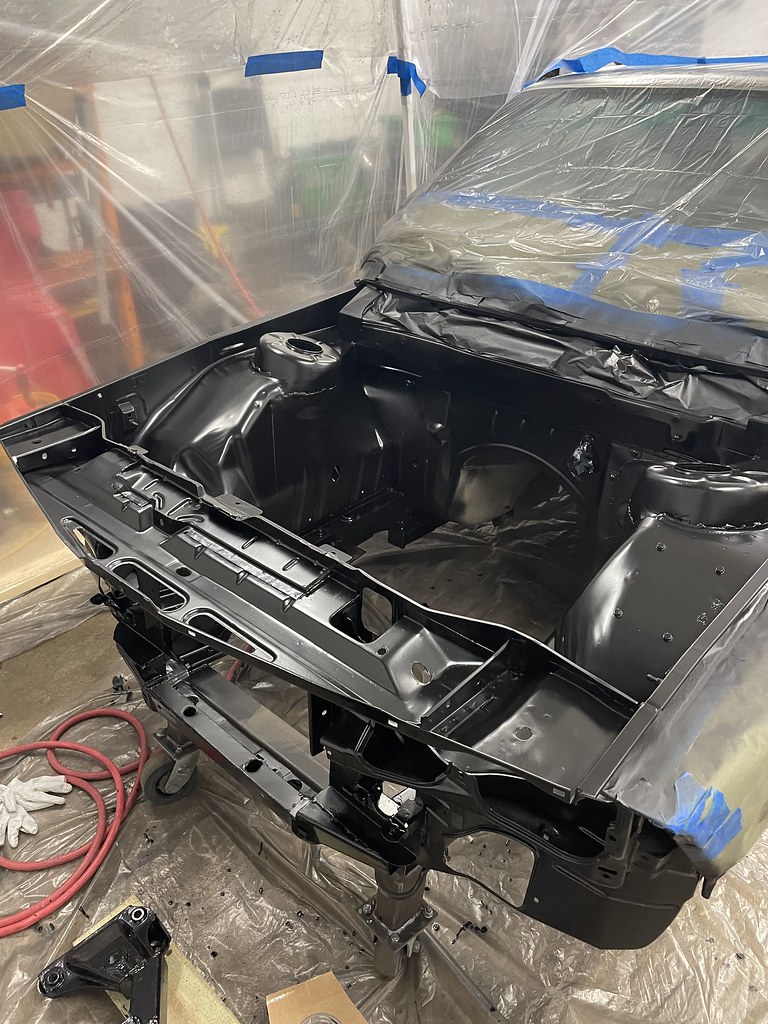
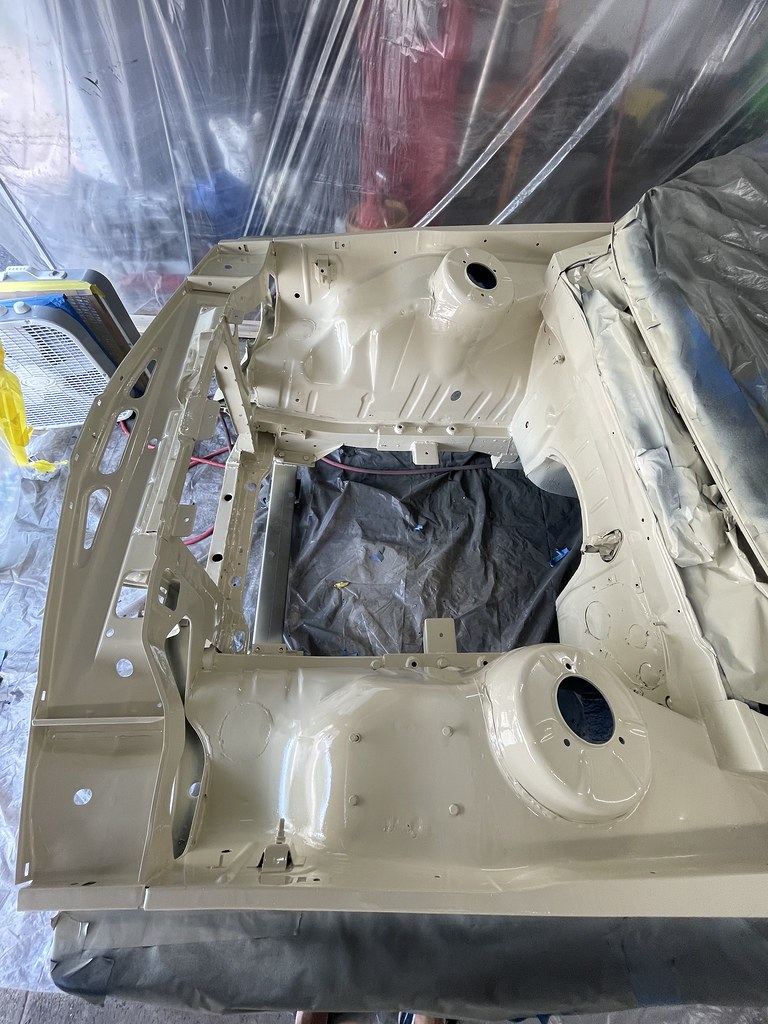
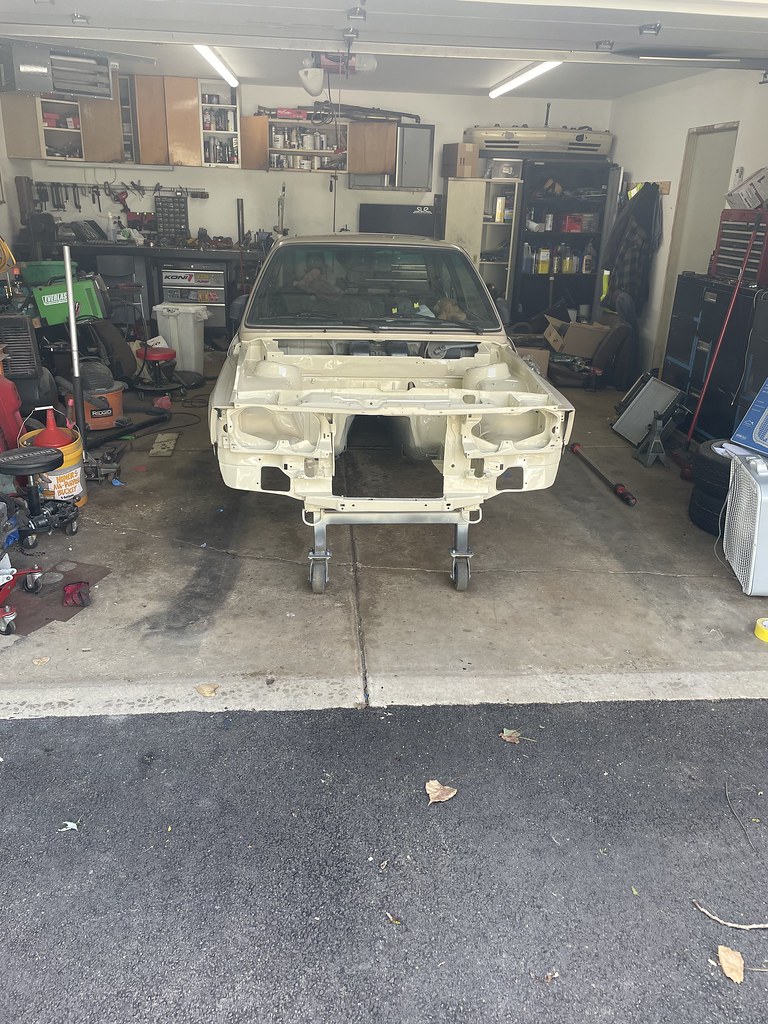
After couple of weeks of engine bay paint prep. I am ready to paint it. I build a beautiful spray booth in my garage with two box fans and shoot some epoxy primer followed by some seam sealer and more epoxy. Today i will finish it with single stage urethane in original safari beige.
I got the intercooler figured out. Wiring is next on the list.


-
Using an easy up as a paint booth frame is a great idea.
It certainly is. I'm really annoyed that I spent the time and money building one when I have one.
-
I were going to build one then i figured that I can set up the canopy thing outside but I got some stupid neighbors who would certainly call code enforcement cops so decided to move it inside.
Paint came out great. Engine bays are not my favorite thig to spray. There are bunch of angles, crevices and spots that are hard to get. I got couple of spots with that dry spray texture. I did not bother using a tack cloth after I preped the bare metal so there is bunch dust spots. Its good enough tho for the engine bay.
The floor around the drivers side torque box rusted out so this will get fixed next. I need to paint the driveshaft center bearing supports and diff mounts. Also will get the rear fender lips touched up since they cracked pretty badly when I pulled the fenders.


-
Pedals are done.
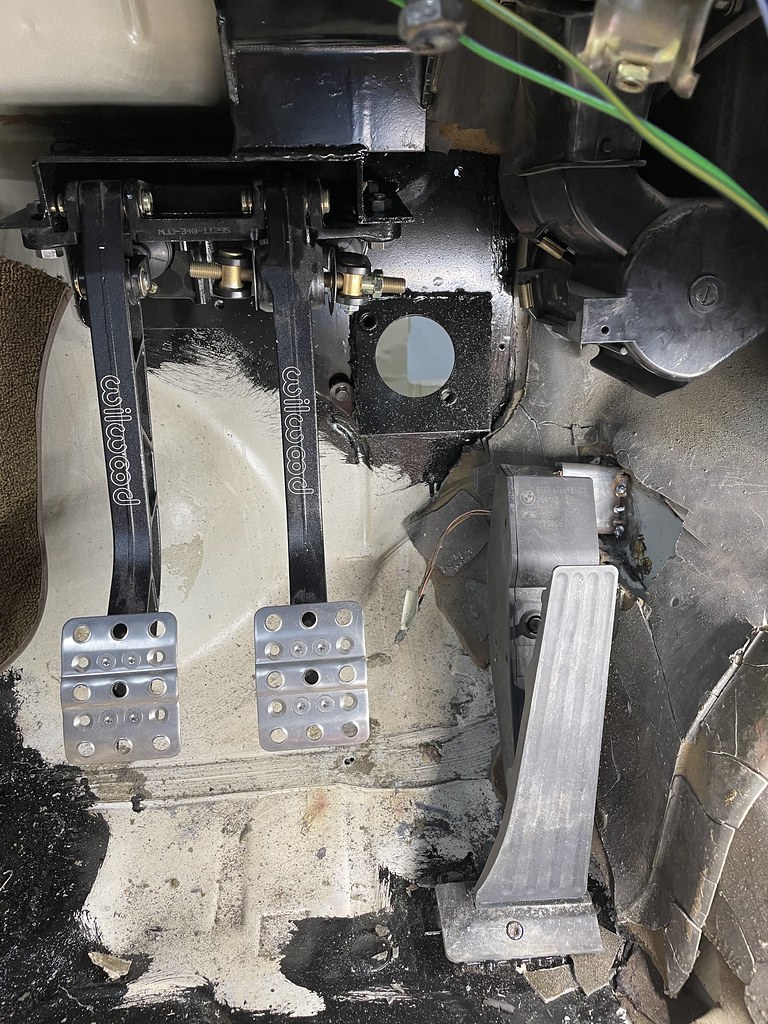
Dual master ready to be plumbed. I am using stok e36 325i front brakes and stock 528i e28 rears. Front master is tilton 0.7" and rear is .75". Clutch is wilwood .75" I must say that Tiltons look much beefier and beter quality than wilwoods.

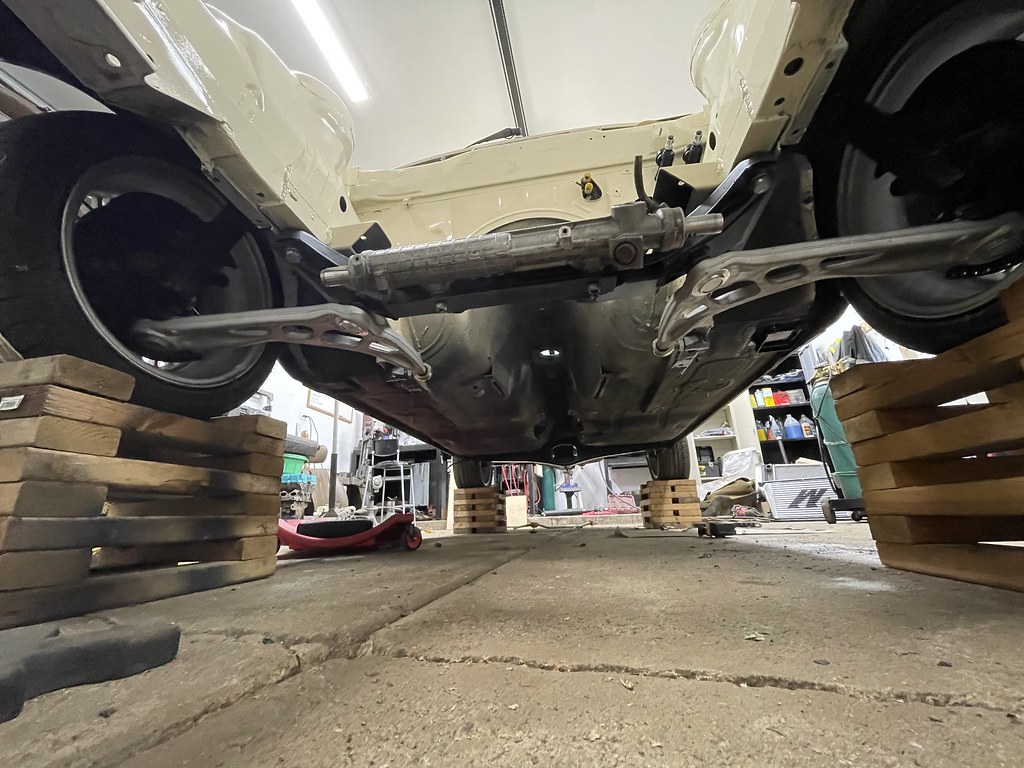
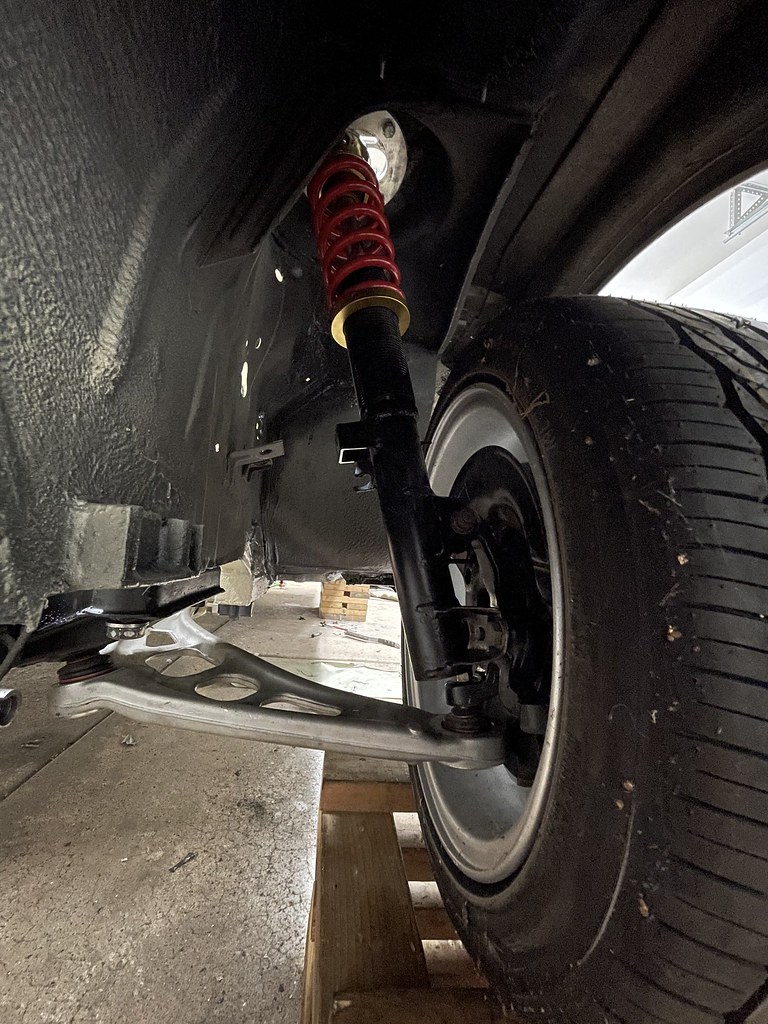
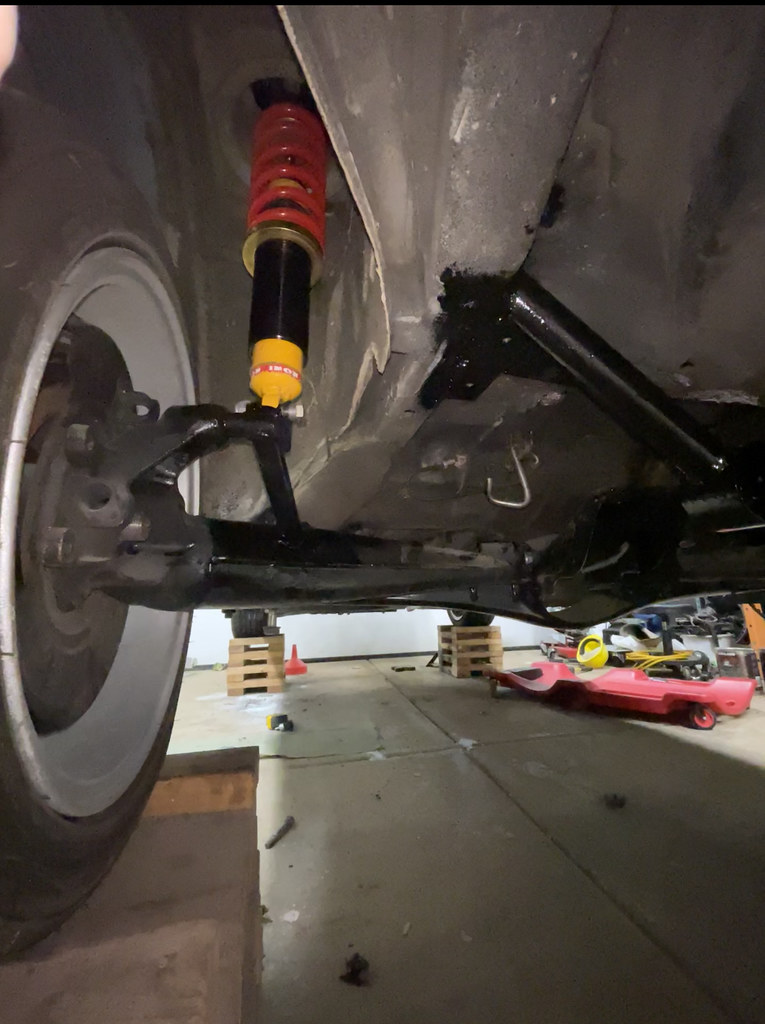
I bolted front and rear suspension and set the car on jenga blocks. I need to order new brake line flaring tool since cheapo amazon one crapped out on the second try.

-
This is the same one Eastwood sells and I highly recommend it, perfect flares every time. There are few other brands listed on amazon with the same thing a well and available with prime shipping but I got the K Tool years ago.
-
This is the same one Eastwood sells and I highly recommend it, perfect flares every time. There are few other brands listed on amazon with the same thing a well and available with prime shipping but I got the K Tool years ago.
Yup just ordered it from amazon it is a TGR brand but otherwise looks the same.
What is the preferred way of doing fuel lines?
I got enough -6AN PTFE hose to run both supply and return but I thought that maybe going with stainless hardline would be a better option.
-
h my that is what happen when you have 4 other projects ehm ehm. kids, wife and house and poor bimmer had to wait again. Oh well I got a bit of motivation so I will try to keep the momentum going. Vintage 2023 I am coming

It is wiring time. I ordered bunch of tefzel wire a while ago but could not get myself to start the wiring process.


And of course when i started checking circuits and what wires I will need I found that I forgot to order roughly 20-30% of needed wires.
I fixed that and I am getting the remainder tomorrow.Since I could not continue wiring for about a week focused on other things. Fuel tank was partially modified (read cut but not welded), so i tackled that. I will run just the right side tank (measures roughly 7.5 gallons). Range will be amazing escpecially on e85. Space left after the left tank will be occupied by the exhaust.
Don't mind my ugly welds it doesn't leak and its temporary until I get the fuel cell

I also got the main power feed done. It is 1/0 splitting into 3x 4 gauge. Black thingy is the main 70A relay that will power up the "run" bus of the fusebox

I painted front calipers black and inspected rear e28 calipers that I sourced from the lemons e28. Rears will need rebuild which will be done as soon as I get my rebuild kit from rockauto.
This week I will try to finish fuel lines (6AN ptfe for that corn juice power) and continue the wiring challenge.
-
Electrical work is progressing well. I decided to abandon the Littlefuse integrated fusebox and build my own using TE fuseboxes. It allowed me to bus the power to the components the way I wanted.
I left the original rear harness and terminated it with the 20 pin deutsch connector. It will connect to the front harness.
Body harness is 90% complete. Almost everything under the hood is done. I am still adding some wires under dashboard for gauge power, glovebox lights or radio power and finishing up some grounds. It should be ready this week.
I get the set of cheapo rock auto parts e28 axles , brake discs and some pagid brake pads. I also got the gasket set for the m42.I got a set of cheapest VAG coils of amazon to see how they fit. I think i will whip something to retain the coils. Once that thing moves out of garage under it own power and suspension aligns I will replace all el cheapo parts with something of better quality.
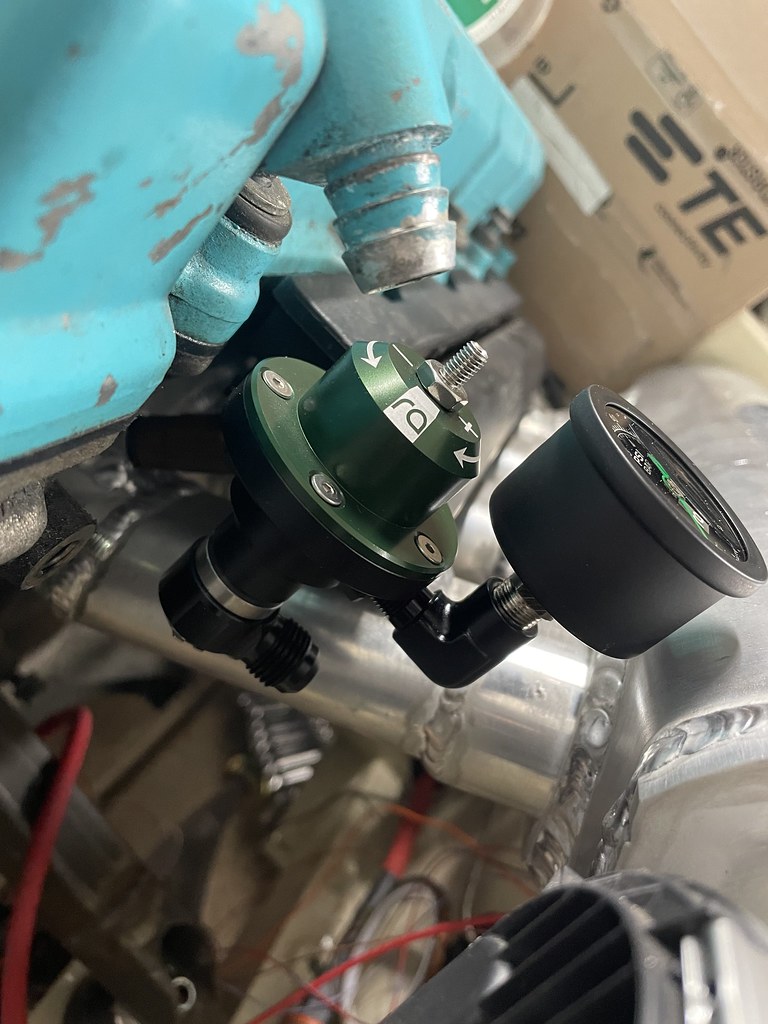
I spent some bucks on the Radium FPR and it fits beautifully with the nuke fuel rail.
Next:
Finish the fuel system: I got PTFE lines and fpr AND now its time for Flex fuel sensor and some AN fittings
Finish the steering: I ordered woodward u-joints and will need to whip a steering shaft. I still have to mount the column in final position. And lastly will need to sort the tie rod situation. I am thinking shorted e90 inners and e36 outers?
Engine: I have a second m42 which was sitting (covered) outside for almost 3 years. Damn squirrel lived in that thing for two years before I chased her out of there and sprayed 2 cans of pb blaster into the motor. It made very interesting, kind of crunchy noises when turning so I am pretty sure that it will work great. I got a gasket set for it and I am ready to dingleberry the shit out of the cylinders if needed and re-ring the pistons.
Who knows maybe it will make it to the Vintage
Beginning of the new fusebox

New fusebox

And the guts : power first

And the outputs

Radlok for incoming power: This thing is well........... very rad. Possibly best power connector I've seen so far


Finished product with chassis harness attached. Still need to shrink the boots but first will need to test and verify all circuits. I already found horn connected to the radiator fan output and vice versa. Hooooooonk you overheated


FPR. works really well with Nuke rail. Looks like this part was meant for m42 with my manifold

Chinesium coils


-
Chassis harness is done and 99% functioning. There are small things to correct, like fogs and low beams control wiring is wrong and I need to move some pins around in the bulkhead connectors.
Fuel lines, flex sensor etc is done i just need to mount the fuel filter.
ECU is mounted and one of the bulkheads is terminated.
Will finish second bulkhead and engine harness sometime this and next week. The goal is to start the engine this month.
I cleaned the motor, slapped new gaskets including a headgasket and it should be ready to go. This thing sat for 4 years behind my shed. Damn chipmunk lived in the motor and stored bunch of chipmunk food in the head port.
Hopefully everything cleaned fairly ok. I will pull this motor anyway and drop some forged goodies over the winter.
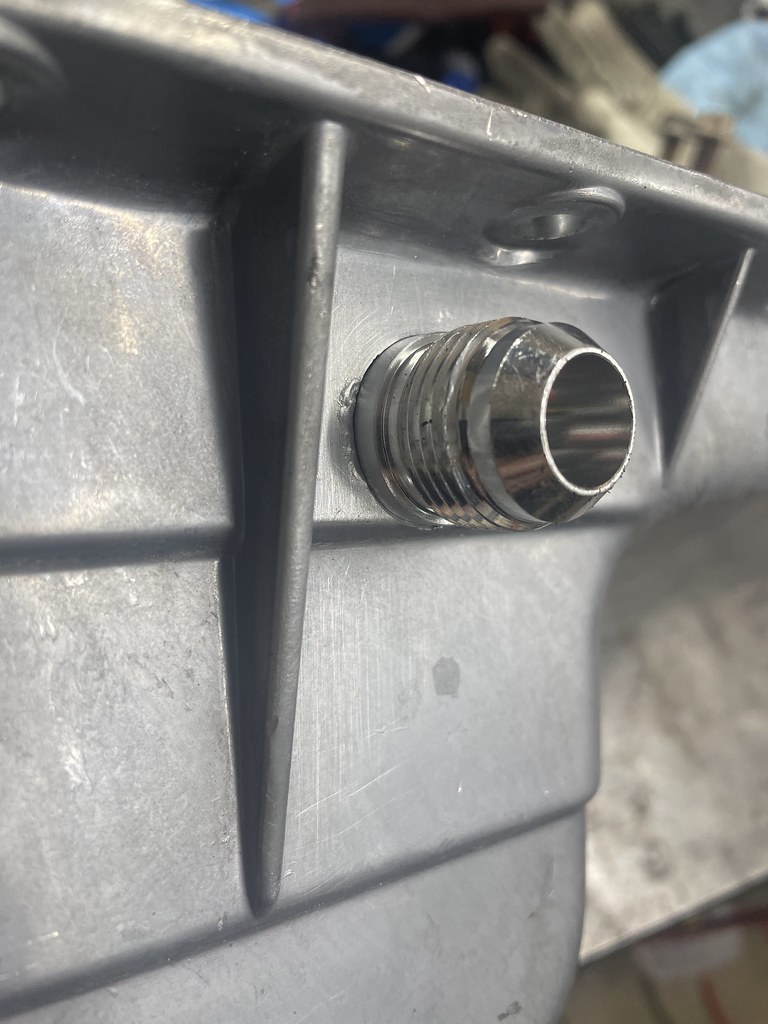
I welded drain plug and turbo drain and oil pan is now ready to go.
My arp flywheel bolts from bmw m10 are a bit too short. I will need to replace with 28mm bolts.
Also the tilton hydraulic throw out is 2mm too long and I will need to swap the TO piston for the shorter one.
I got the steering shaft mocked up with some woodward u-joints. Will finish it once i get the e36 column in final position.
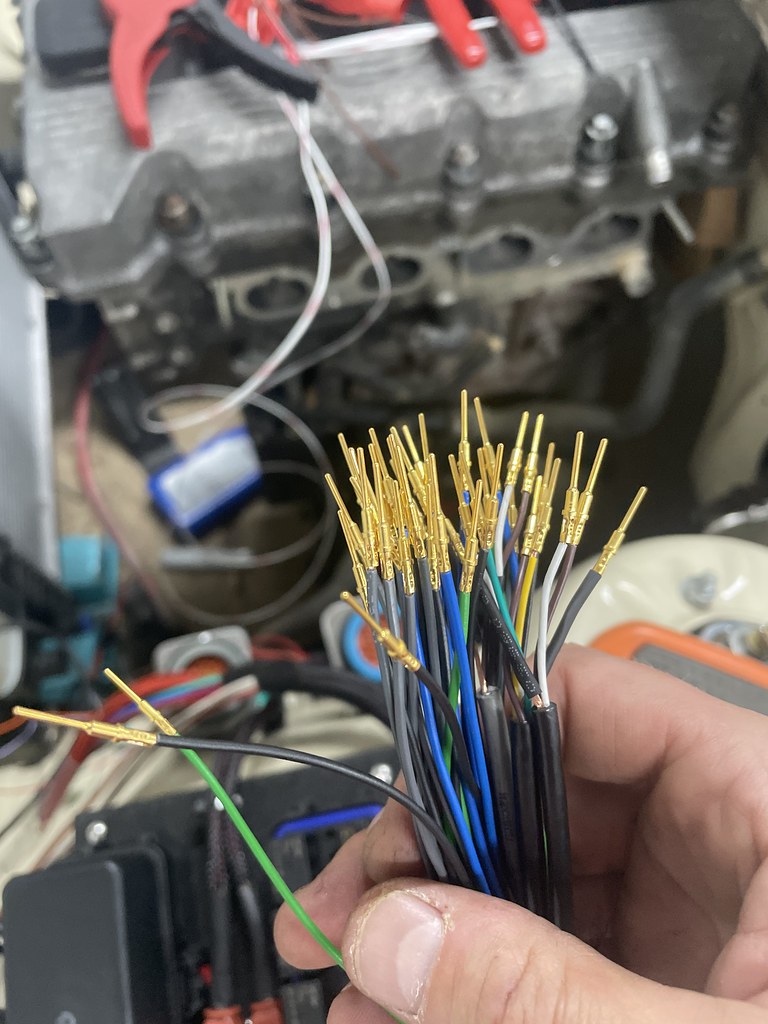
I decided to not run the motor NA and go for boost. I got the intercooler setup and i have a log manifold from my friends Volvo. The cylinder spacing is spot on i just need to redrill the flange for m42 bolt pattern. I got some green top injectors that should support 200-250whp which should be more than enough to test the chassis.
I also pondered the idea of running e90 cluster in my car. I got the arduino setup with can shield and was able to control most of the cluster. Cluster talks at 100kbs and maxxecu supports 500kbs i will need to setup arduino with dual can to translate the messages from maxx to BMW but that should not be a big issue.




-
Update once every 3 years
I am committed( at least for now ) to get that thing on the road.Turbo manifold is done. Just need to finish welding the wastegate take off. I am still waiting for 3" stainless for the downpipe and exhaust and will finish the wastegate and manifold once I get it. Surprisingly my old downpipe from m10 fits but upside down :P.
It's been a while when I left off the engine wiring harness. I restarted the process couple days ago. I took me a while to go thru my documentation to figure out what goes where. I just have to terminate the harness with two circular connectors and should be good to go.I also started working on coolant hoses. I got the heater core connection figured out. Turbo coolant hoses are also planned. I have bunch of stainless tube to hardline the turbo coolant and oil lines.


Now the question:
Dash/gauges?
1. Do I do digital dash
2. Digital Dash with analog tach
3. All analog with small 2-3" screen to display can bus data from ECU. i.e. EGT's, Timing, boost, oil T, oil PDid a little rendering. I looks kinda meh but gives you some idea.

-
Would be awesome to keep analog gauges, but have some sort of P3 digital vent gauge that is subtle/matches the BMW amber color. Wonder if you could hack up an OEM vent to fit one of these https://p3.io/
-
I decided to go with ADU5 digital display in the middle and will use 80mm analog tach and speed.
I started making some molds to build CF cluster bezel. I will receive my ADU in two weeks.


I am trying to make the car drivable and somewhat reliable so I can take it to Vintage. The goal is to have it on the road first week of March and shake it down and fix whatever falls apart.
I finished engine harness and tested all circuits. Bought new wally world AGM battery and amazon special battery tray.

 [/url][
I got a nice deal on ID 1050x injectors. I was a bit disappointed with fitment and the fact that I will loose beautiful stock m42 injector harness box/cover. But I could not find ev6 sized injector that would flow 1000 or more cc's.

 [/img][/url]
I finished all oil lines and coolant lines. I used stainless hardlines for turbo coolant and turbo oil feed.

Radiator hoses are generic amazon silicone 90's joint with stainless tube.

Cheapo bead roller struggled a bit with stainless tube but it got the job done.

I finished welding exhaust manifold

Added some vacuum ports to the intake.

Don't mind the welds I forgot what to do when welding a massive heatsink of aluminum could not get the welder dialed.
160 amps was to low. 200 amps was destroying the tungsten and it would weld like crap. It is sealed and will be covered and not visible

Need to redo the turbo drain. It will most likely crack when the manifold expands due to heat. I will add flex section closer to the oil pan.

To do list.
1. Start the motor and if it doesn't explode immediately bring it to temp and fix leaks if any.
2. Fab up Turbo to IC pipe.
3. Fab up downpipe and rest of the exhaust.
4. Fab up clutch hydraulic lines
5. Mount brake fluid reservoirs
6. Assembly all brakes. Buy braided steel brake lines.
-
Nice progress!

https://www.instagram.com/_jdesigner_/ http://nevertoolow.tumblr.com/
🥳SOLD BMW E24 633CSI - BMW M30B32 🧪SOLD HCH ES9 - 1.3 LDA
👽BMW E30 325IC - Toyota 1JZ-GTE ⏰ HONDA EF9 CIVIC SI - JDM B18C5
☠️BMW E36 318i - Ford 5.0 FE302 🚴♂️ GT-Labomba - 26x2.75 Freeride
🤹♀️SOLD BMW E36/7 Z3 - BMW M54B25 🧓SOLD BMW E10 2002 - BMW M10M05 -
It’s alive.
Priming oil pump was a pain. Had to use sprayer bottle to pump some oil thru the galleries to get the pump going.
Its loud
I need to fab up down pipe and exhaust. Zf 320 was sitting dry for couple years and now have detent issues.
I hope some atf and heat will loosen things up.Redid the oil drain with the flex

I painted some brackets and added intake manifold brace. I also finished steering shaft for the e36 PS rack. But in the meantime i got my Z4 manual rack and will have to shorten that shaft a bit, or make a new one. The splined bits are from Woodward and are fairly cheap so might as well make a new shaft.

I reused the timing guides that came with the motor. I was putting the motor together 3-4 years ago and stupid me instead of changing the guides i said fockit. So one of the guides, the lower horseshoe one is cracked. So i replaced this guide and I am still fighting timing case covers. They just did not want to seal. Stock metal gasket and RTV didn't do much. I used copper spray this time and a set of new gaskets.


I cleaned up some interior wiring and tuned idle a bit, I mean recalibrated TPS. It was idling at modest 3700rpm before adjustment
I also reassembled rear hubs and put the calipers and new rear disks.I tried laminating carbon for the first time. Overall it was not that bad (i guess we will se results tomorrow once it cures. Stretching carbon fabric around corners is a bit tricky and corners came out kinda meh. I will try again tomorrow to see if i can make it better.
I used Epon 828 epoxy resin and epikure 3200 hardener from Westlake. Also used 3m 77 spray adhesive to hold fabric in place. I did 2 layers of "amazon special" carbon fabric (3k twill weave) covered it with peel ply layer and breather and used storage vacuum bag.
Mold was prepped with 5 coats of release wax and 3 coats of PVA.


I mounted brake and clutch reservoirs. It is incredibly tight but it works. Engine an transmission has poly mounts and there is barely any movement so I should be fine

Temporary exhaust


I needed to resurface intake manifold flange. Flange had a high spot by cylinder #2 and was not sealing and vacuum leaked like crazy. A bit of a sand paper, new gasket and my all time favorite copper spray and its fixed.
I got my ADU display. It integrated with MaxxEcu over can bus very well.

I am waiting on some bolts for brake caliper carriers, some m10 brake line fittings and v-band flanges to fab the downpipe and the rest of the exhaust.
-
I had some timing cover leaks that I had to fix.

Brakes are done. I used stainless hard lines which do not seal as well at the fittings as NiCopp lines. I had couple small leaks. A bit more torque at the fittings fixed the issue.
Clutch hydraulic lines are done and it looks like clutch works ok.
I put driveshaft, diff and axles in. Tightened whole front suspension minus tie rods.
I still need to shorten stock e36 tie rods for this setup to work.
I have a z4 manual rack that I will put in I just need to figure out the splines. I hope they are the same as e36 rack so I could reuse my Woodward u-joints.
Valve cover lost its beautiful blue color for the more modest wrinkle black

The stupid intake manifold flange was warped. And my shitty welds were full of pinholes. No wonders that I could not set the idle below 1.2k rpm.


2 hours later and the flange started too look flat again

I spent whole evening chasing pinholes. I think I got them all.
I welded new downpipe and rest of the exhaust. Its a 3" going into borla XR-1 muffler to Vibrant super quiet resonator and side exits on the driver side.
I still need to weld a beauty ring for the side exit. I got a 4" stainless pipe for this.





Hello! It looks like you're interested in this conversation, but you don't have an account yet.
Getting fed up of having to scroll through the same posts each visit? When you register for an account, you'll always come back to exactly where you were before, and choose to be notified of new replies (either via email, or push notification). You'll also be able to save bookmarks and upvote posts to show your appreciation to other community members.
With your input, this post could be even better 💗
Register Login