
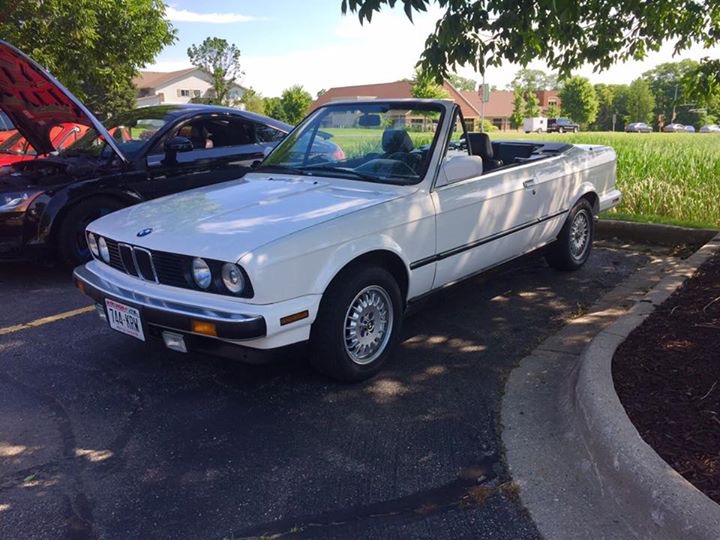
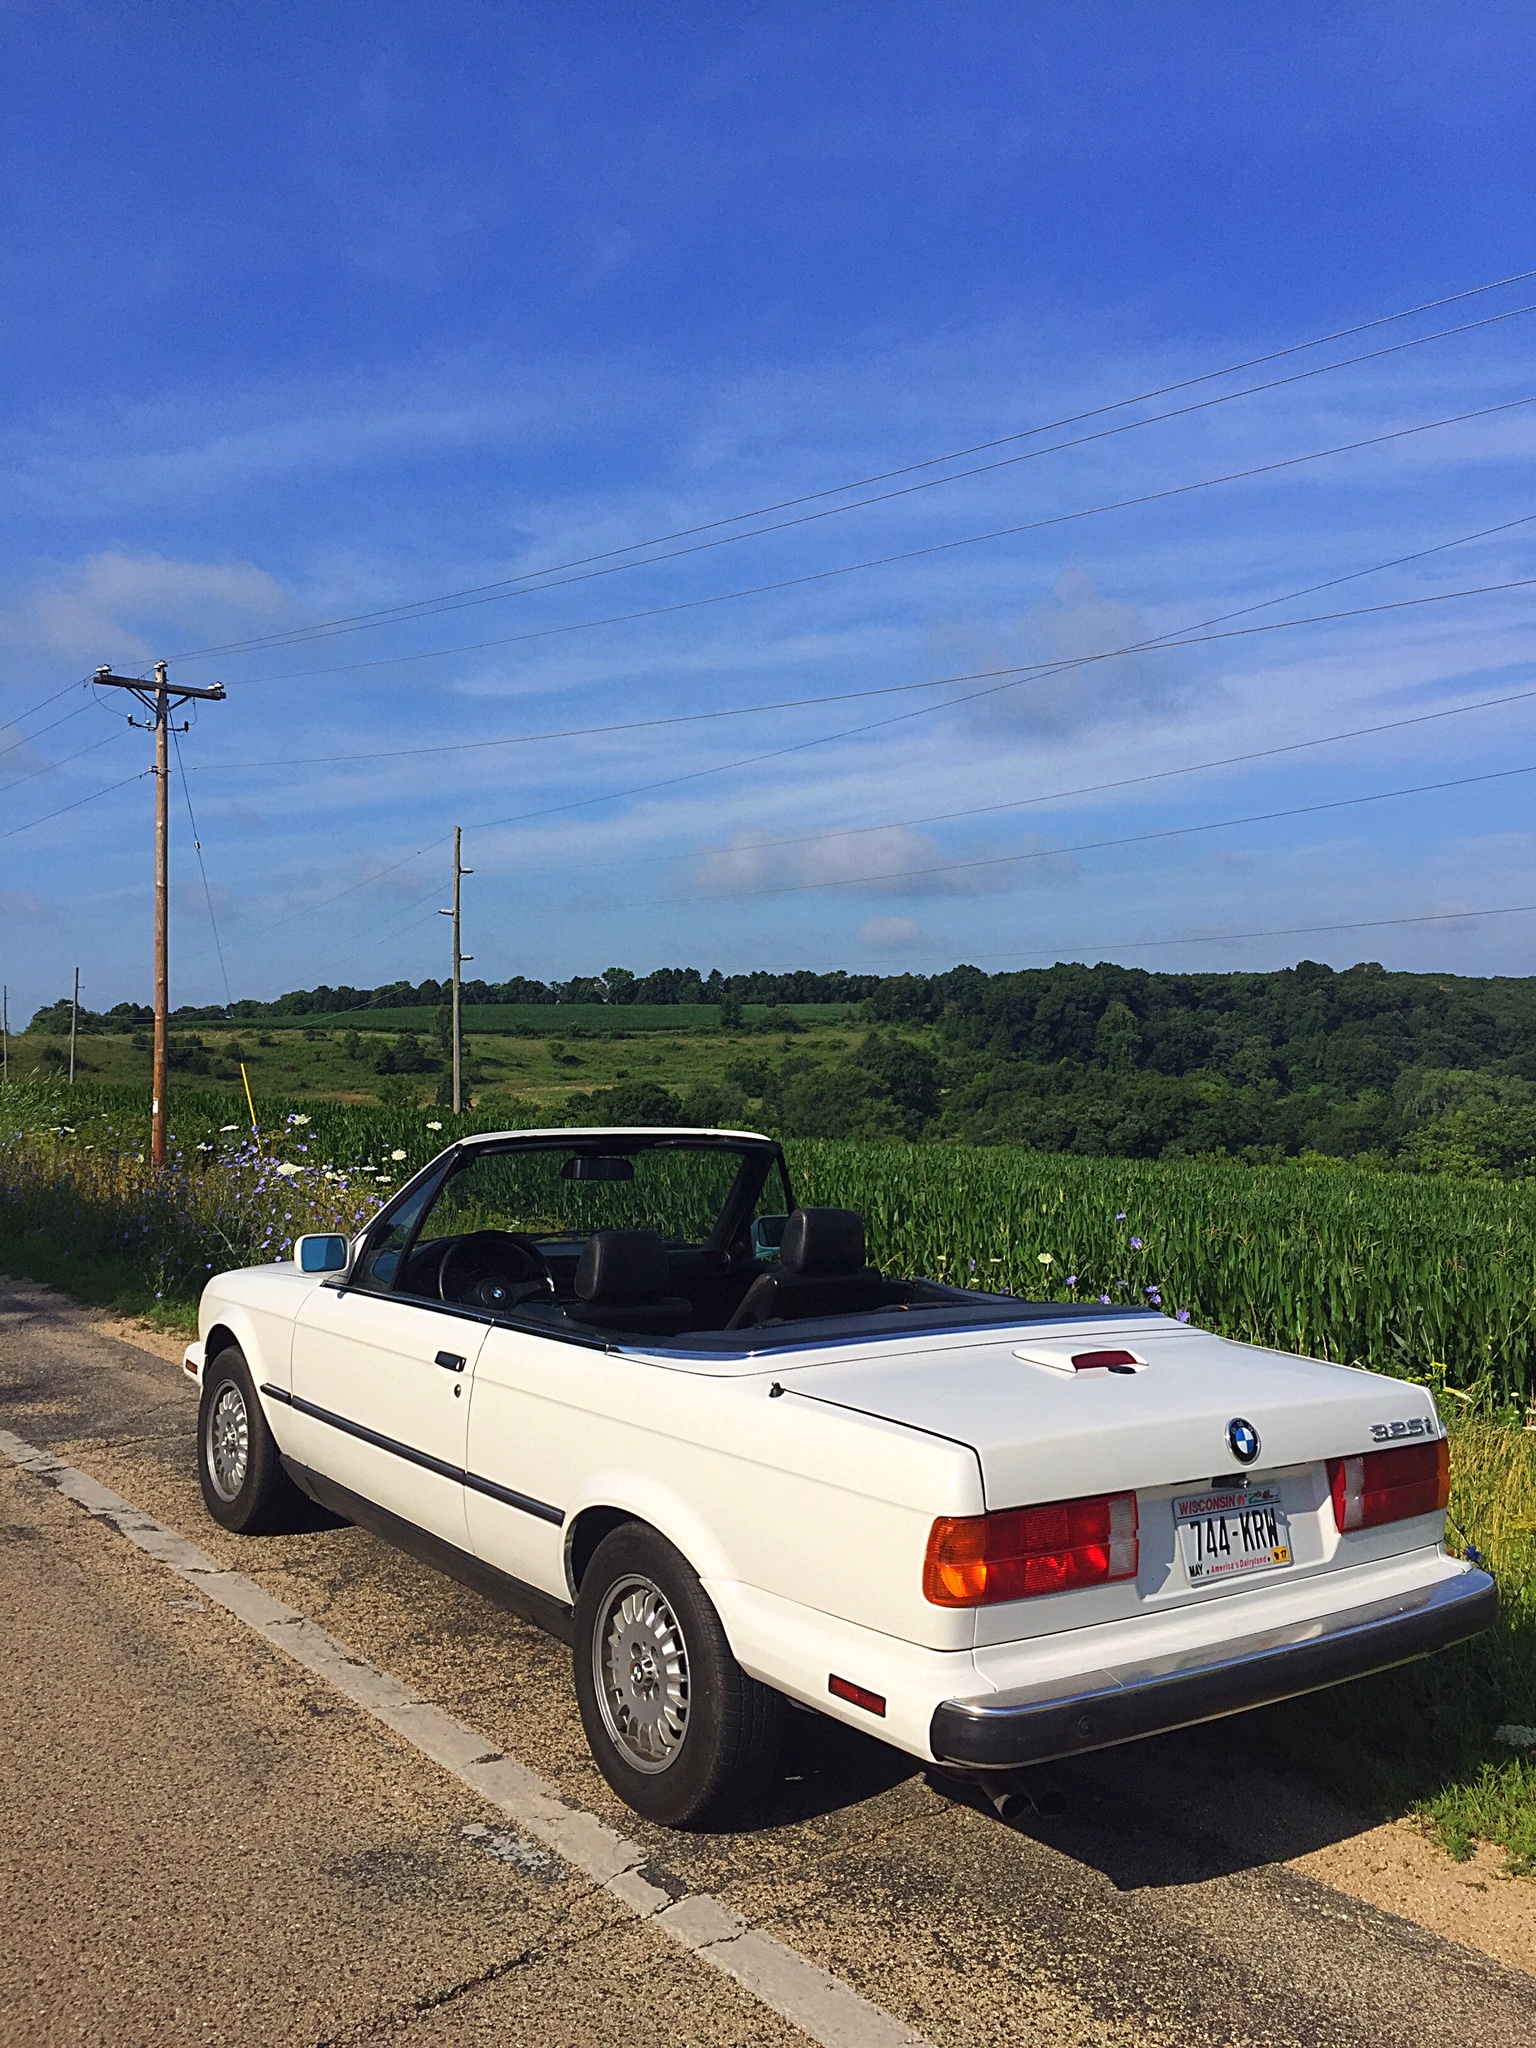
Alpine E30 Convertible Running Log
-
If it has serviceable unjoints and is less than a rebuild, the cost over a used driveshaft seems worth the investment to me if you can swing it now. Rebuilds will be far cheaper.
also forgot to reply sooner but glad the bushing job wasn’t too much of a pain! Really surprised one came out in one piece for you.
-
If it has serviceable unjoints and is less than a rebuild, the cost over a used driveshaft seems worth the investment to me if you can swing it now. Rebuilds will be far cheaper.
also forgot to reply sooner but glad the bushing job wasn’t too much of a pain! Really surprised one came out in one piece for you.
That’s my thought. I think it’d just be worth not having to worry about them for a long time, even finding a used one in any condition right now is tough.
Yeah, it went super smooth! Glad I got the practice run with the e30 bushings outside the car, I think this spring I’ll be doing the e34 ones but potentially leaving the subframe in the car to do it. I’m a bit torn, I’m not sure if I want to pull the whole subframe and do RTAB’s at the same time. I’ll already have the struts off as well… decisions, decisions.
-
The first of the parts are showing up! Still need to place my order with FCP for the bulk of the manual transmission items (clutch, master, slave, etc.) but ordered my DSSR and selector today joint from Ireland engineering, driveshaft, clutch pivot pin and fuel tank from Rockauto, trans mounts from AKG, and shifter stuff from McMaster. Shooting to fab that up this weekend with the help of @m42b32’s excellent write up, I drove his car last year and fell in love with the shifter enough that I had to have my own. Also, the price of OEM shift levers seems to have increased significantly, and I see no reason to spend more for an inferior end result.
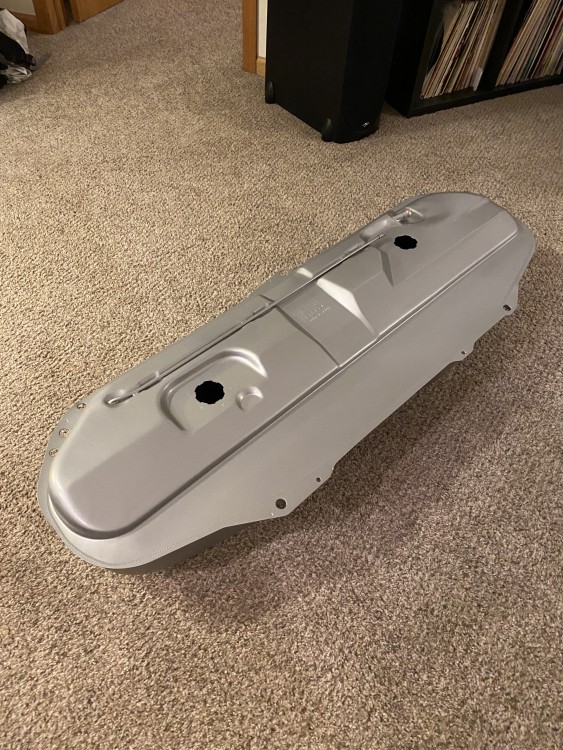
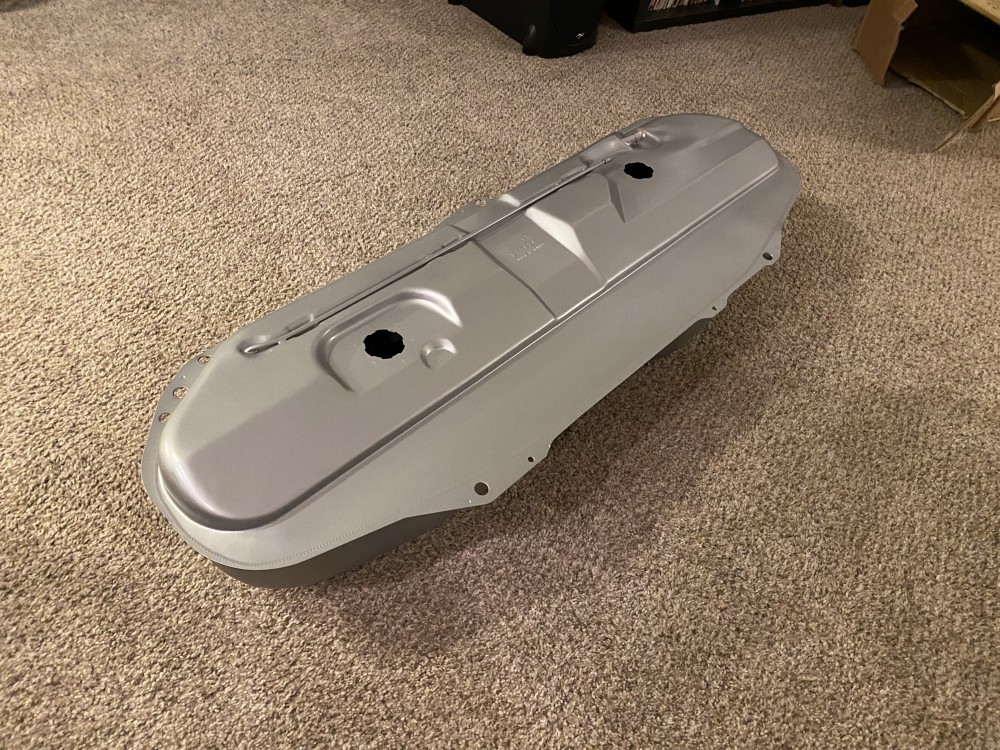
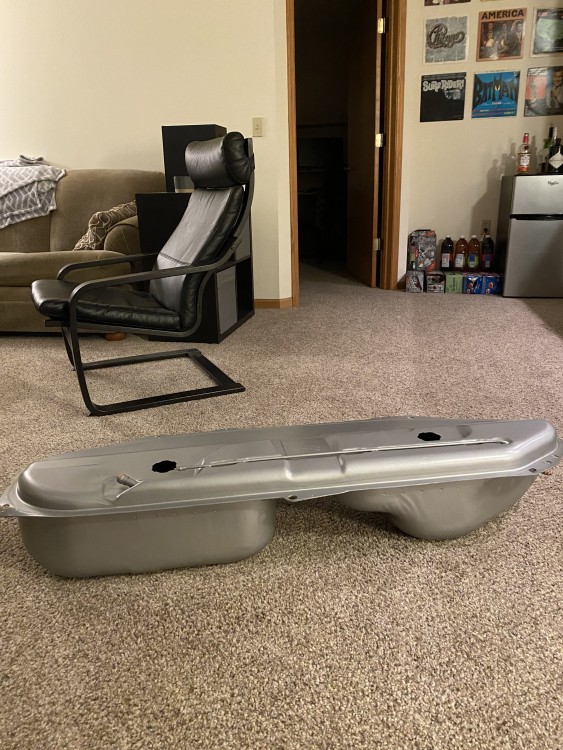
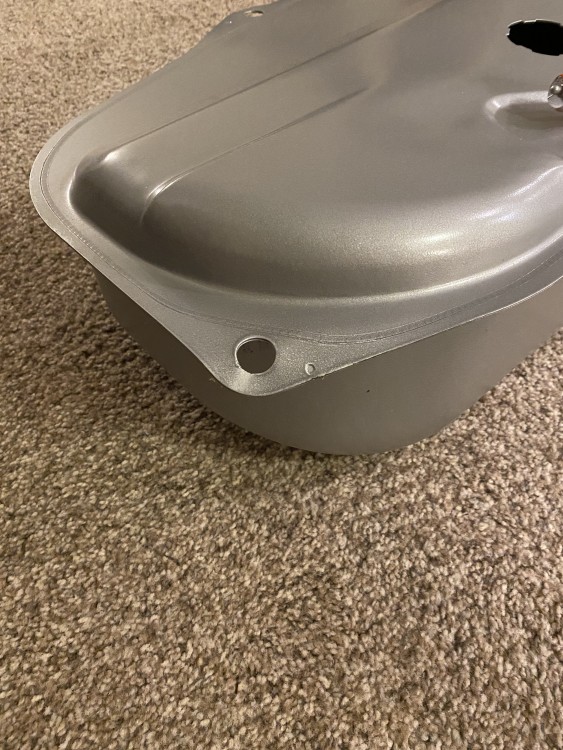
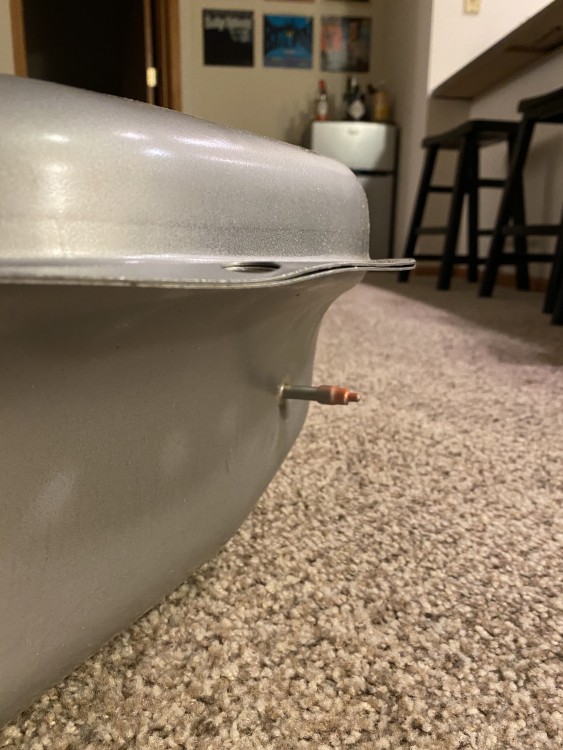
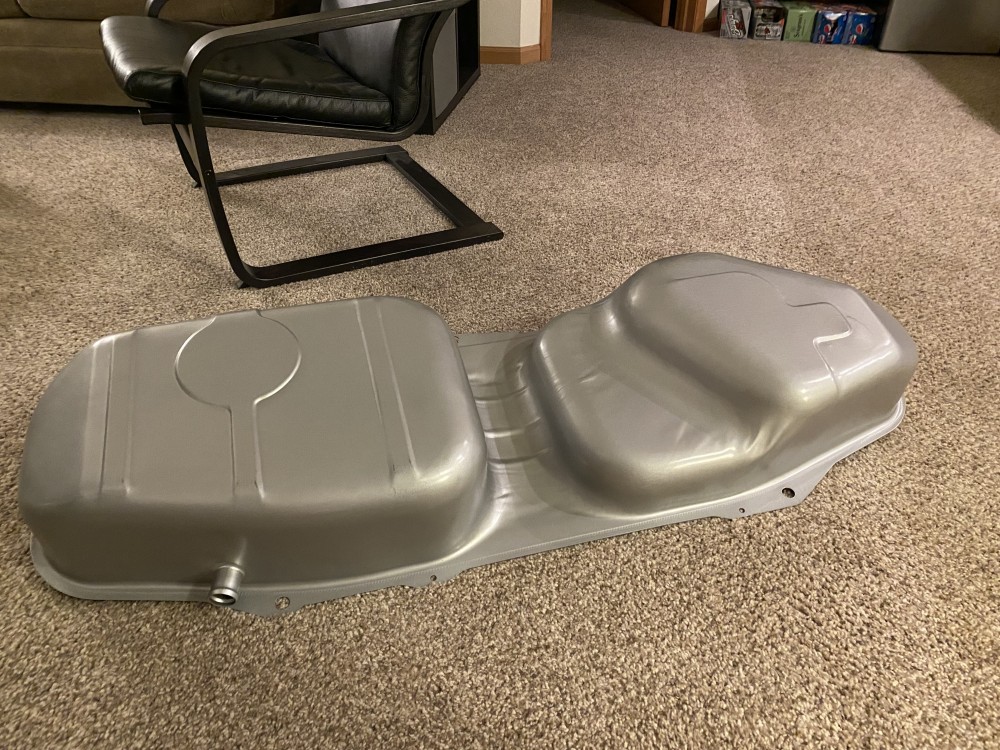
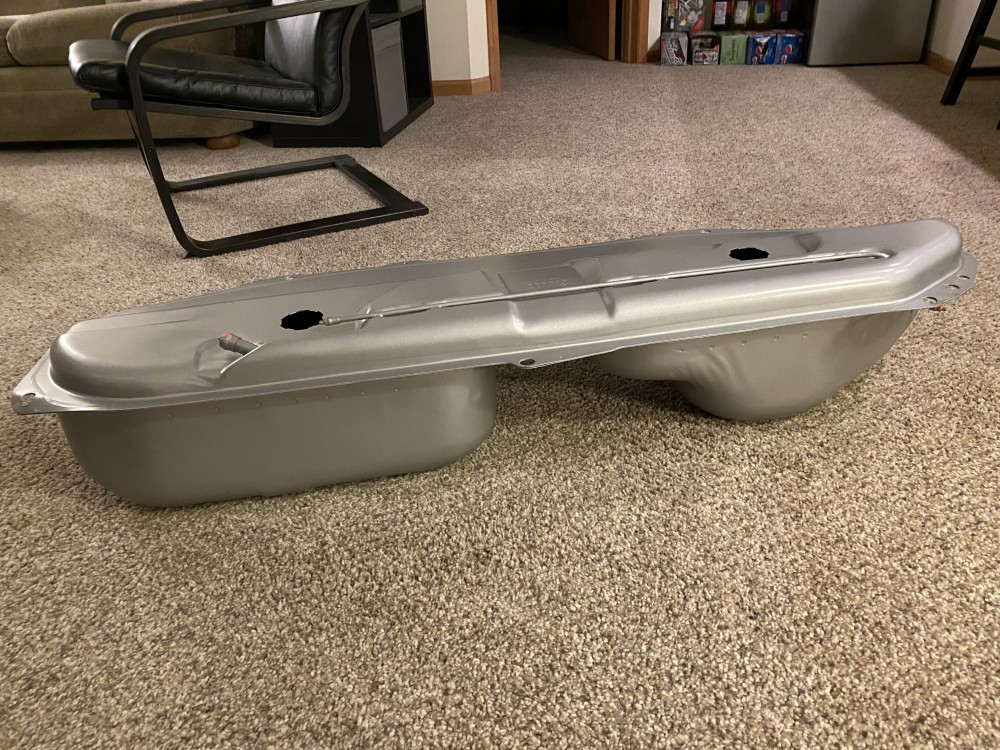
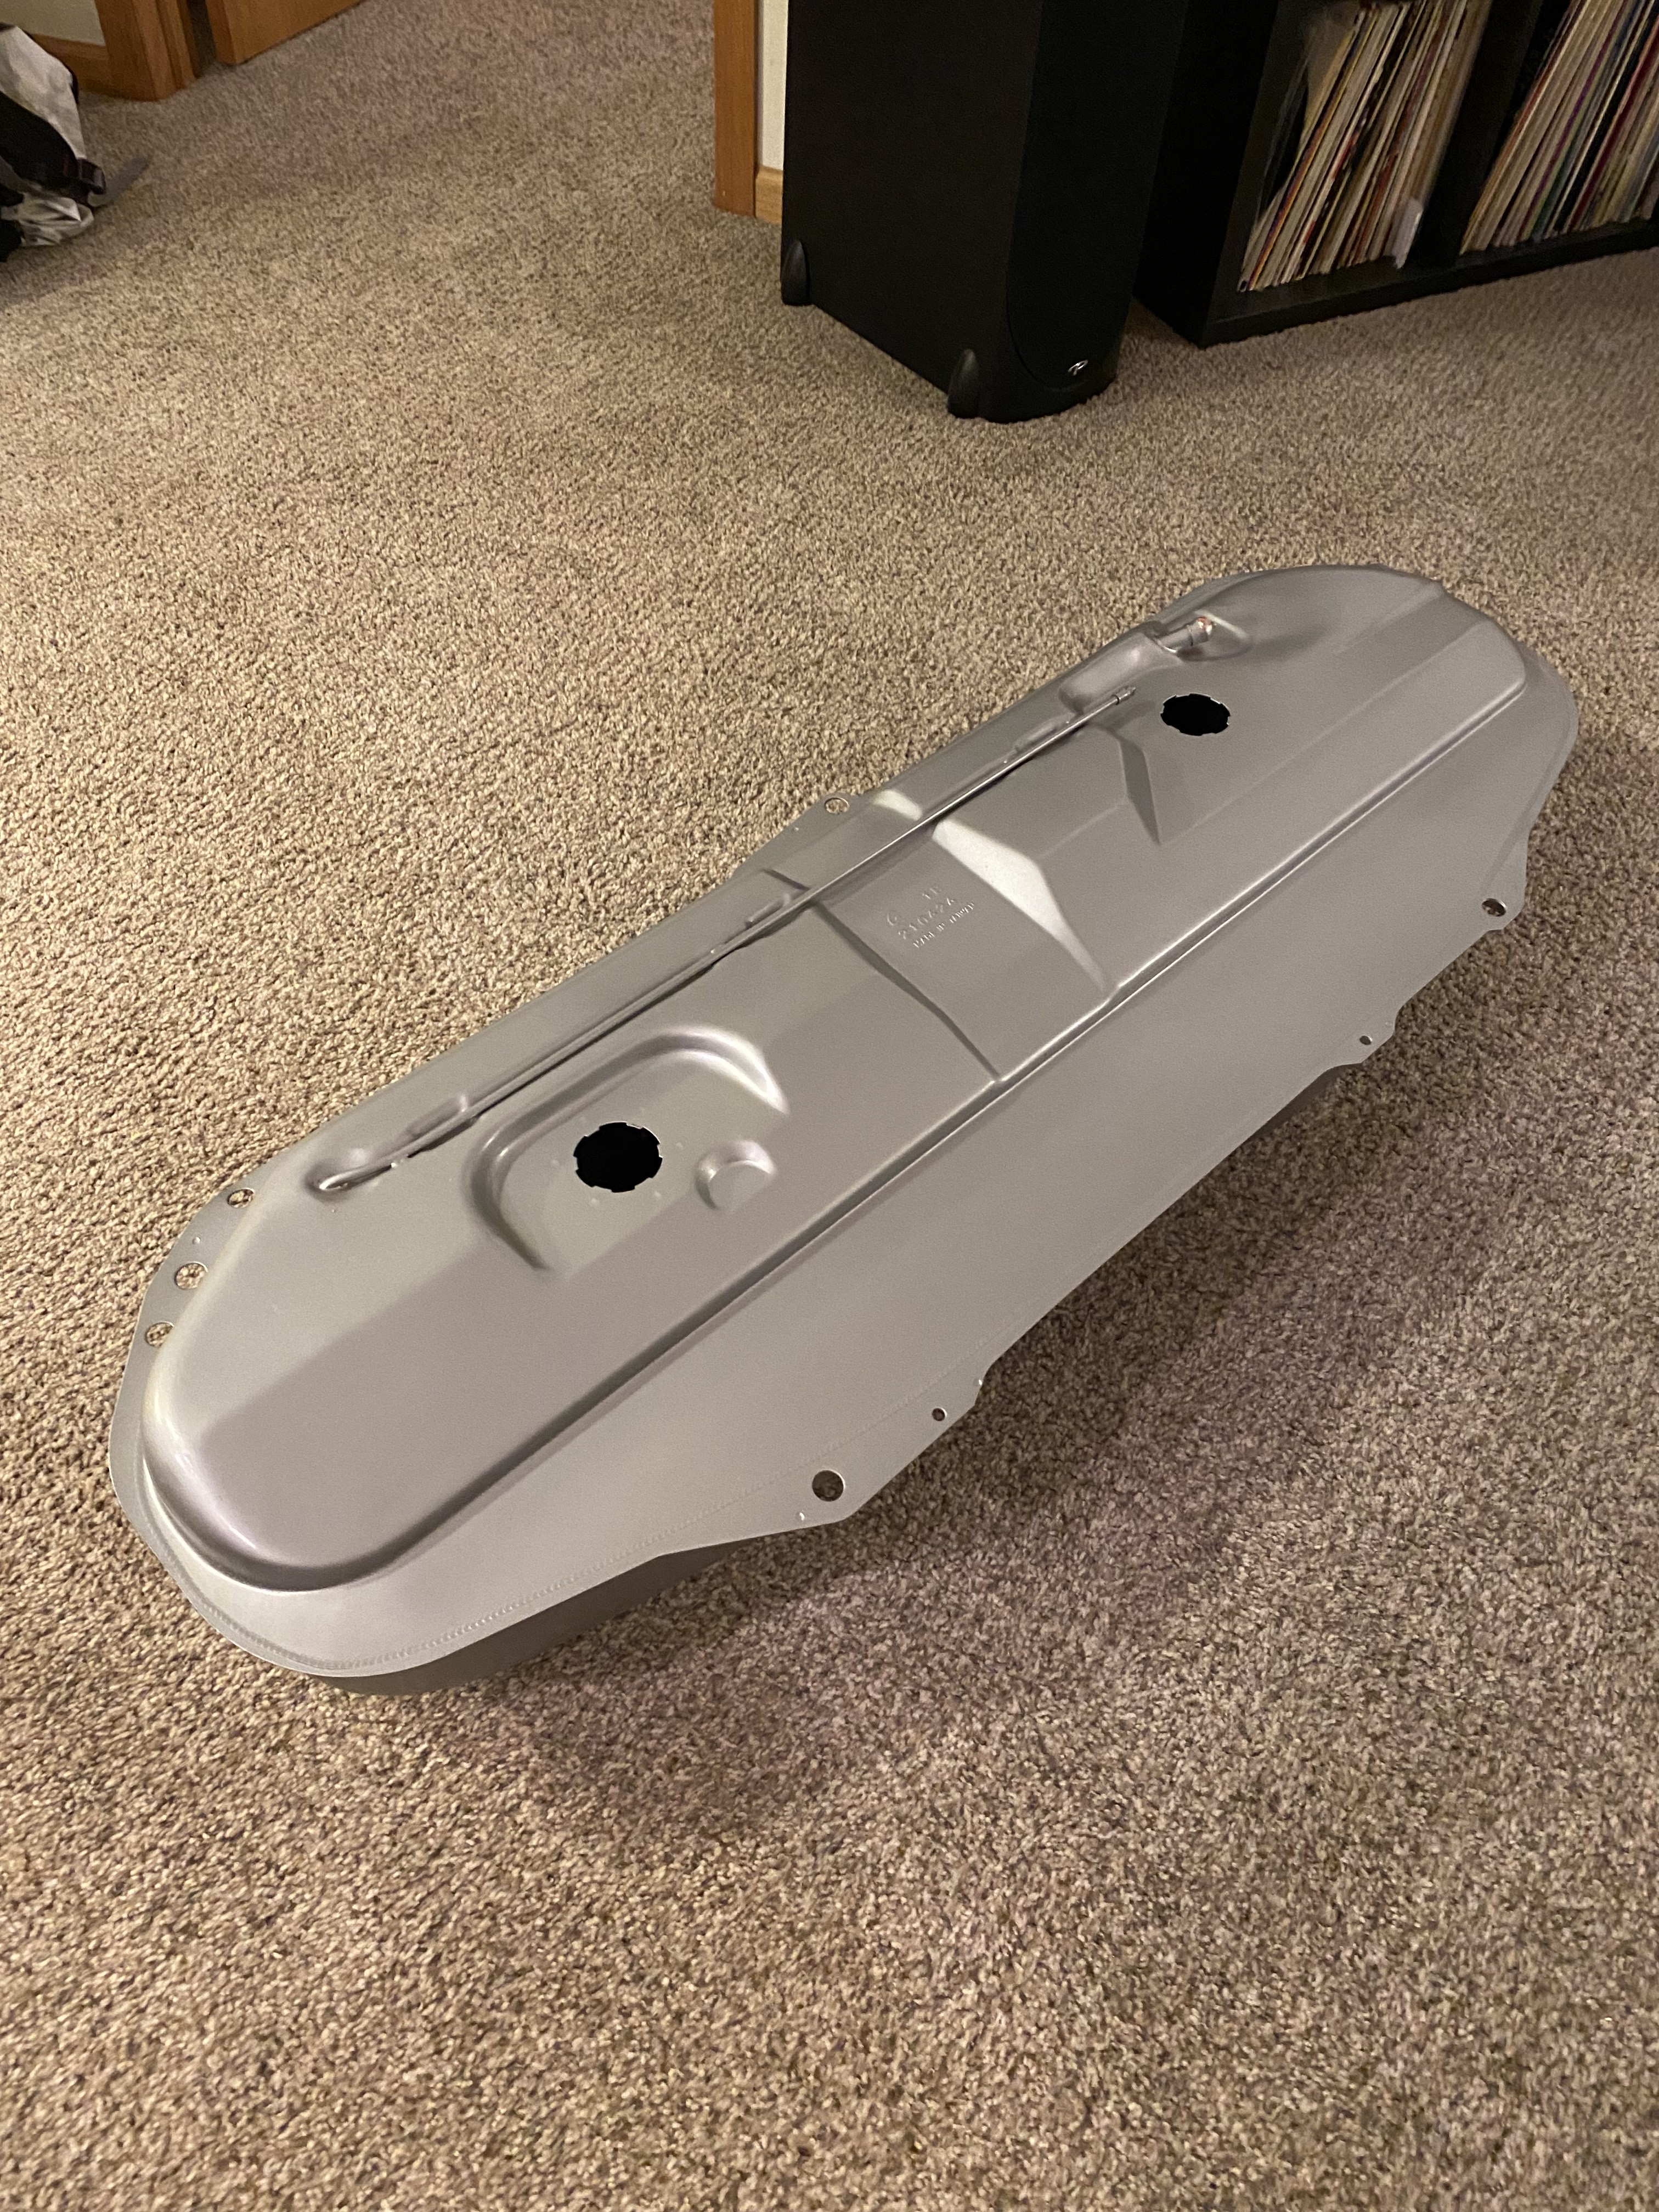
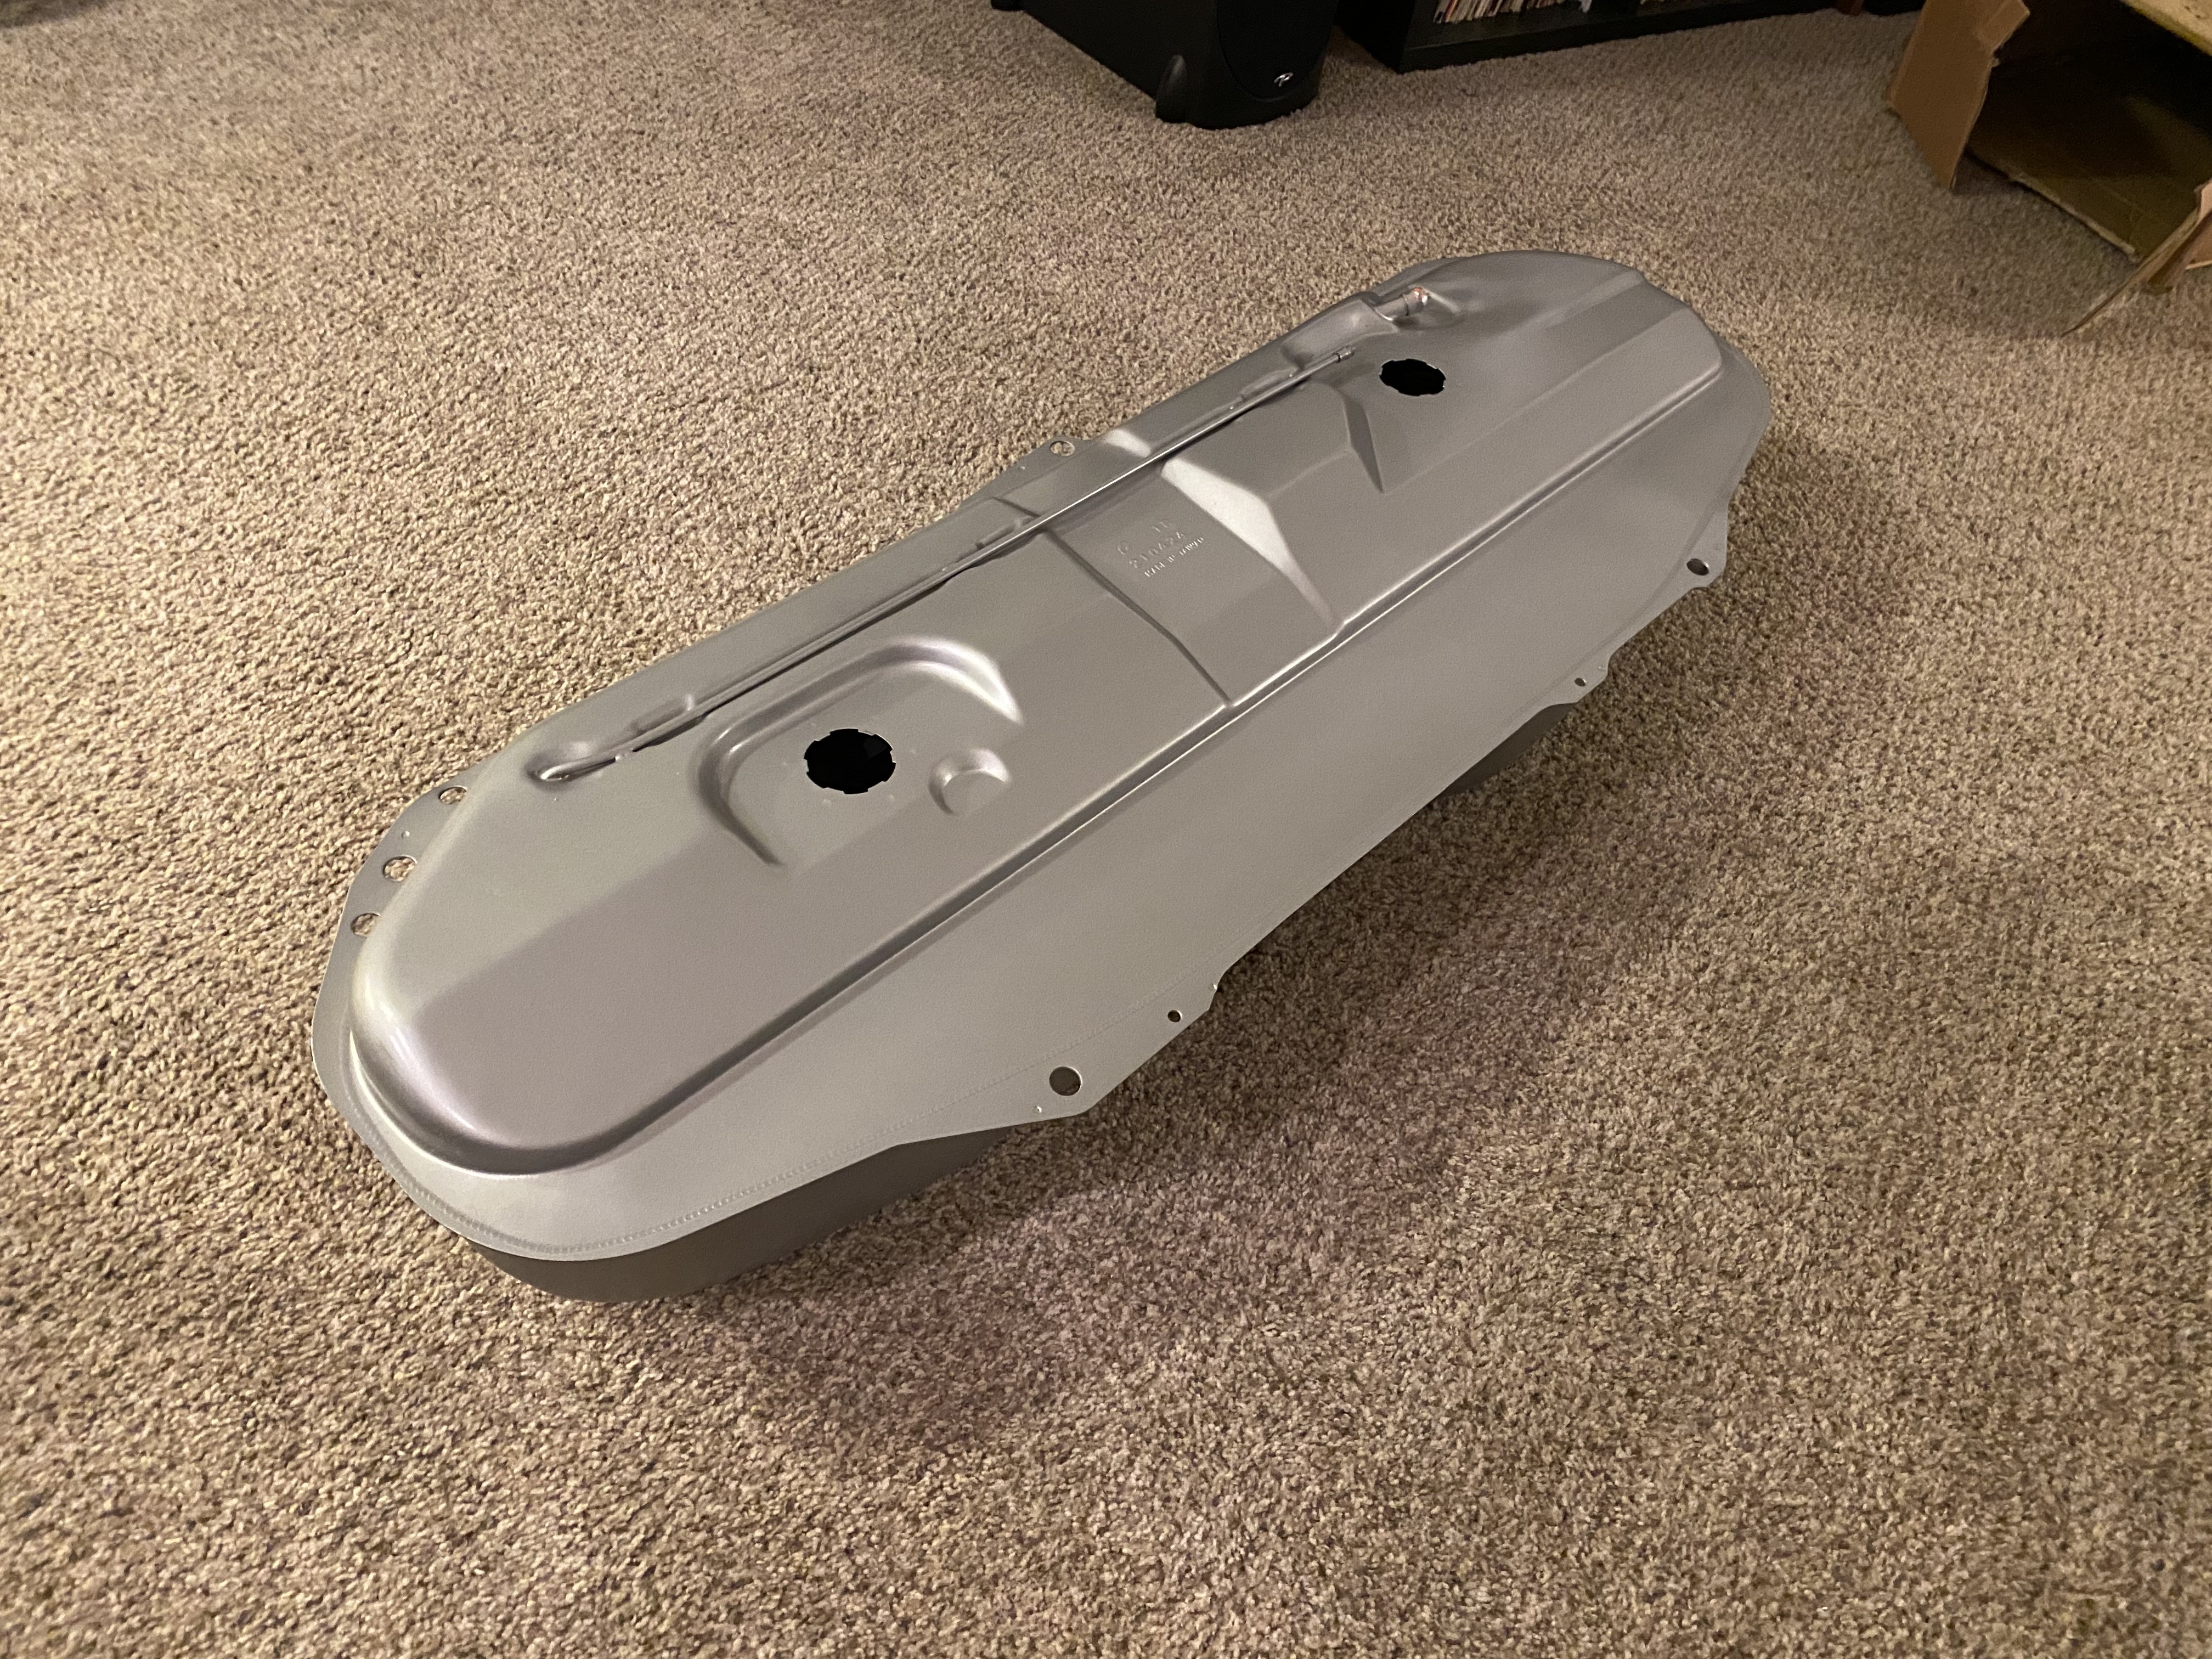
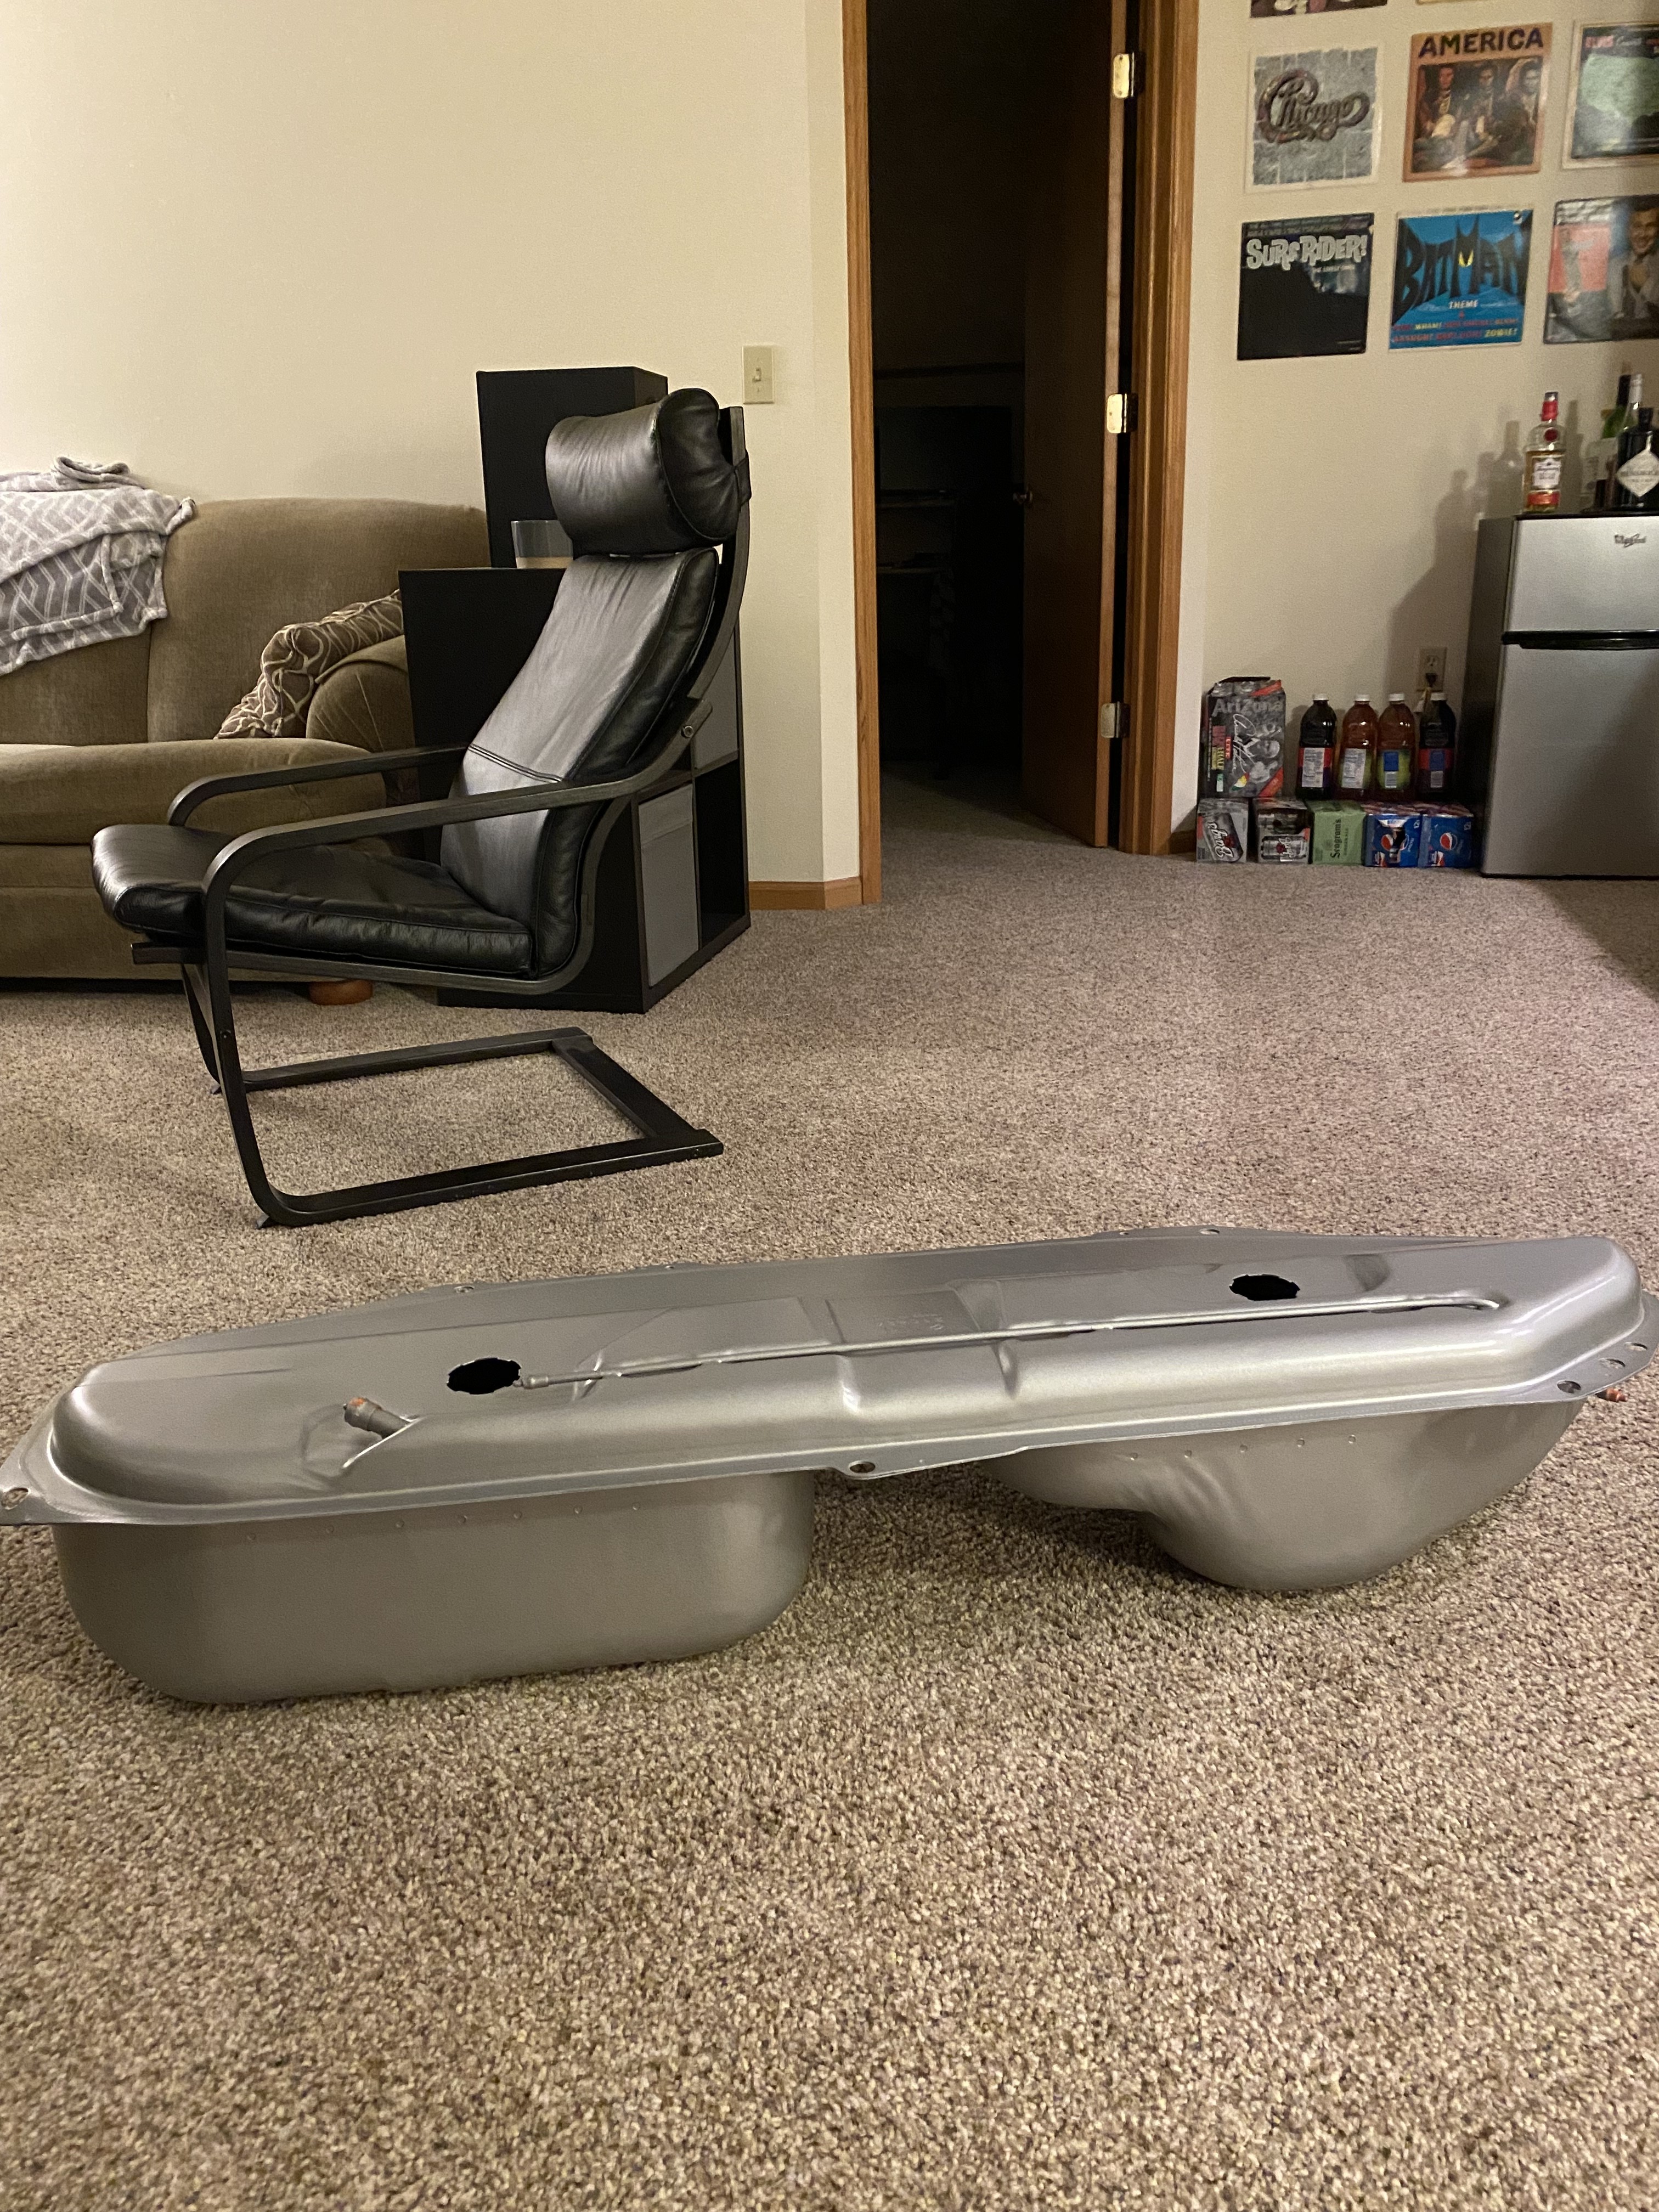
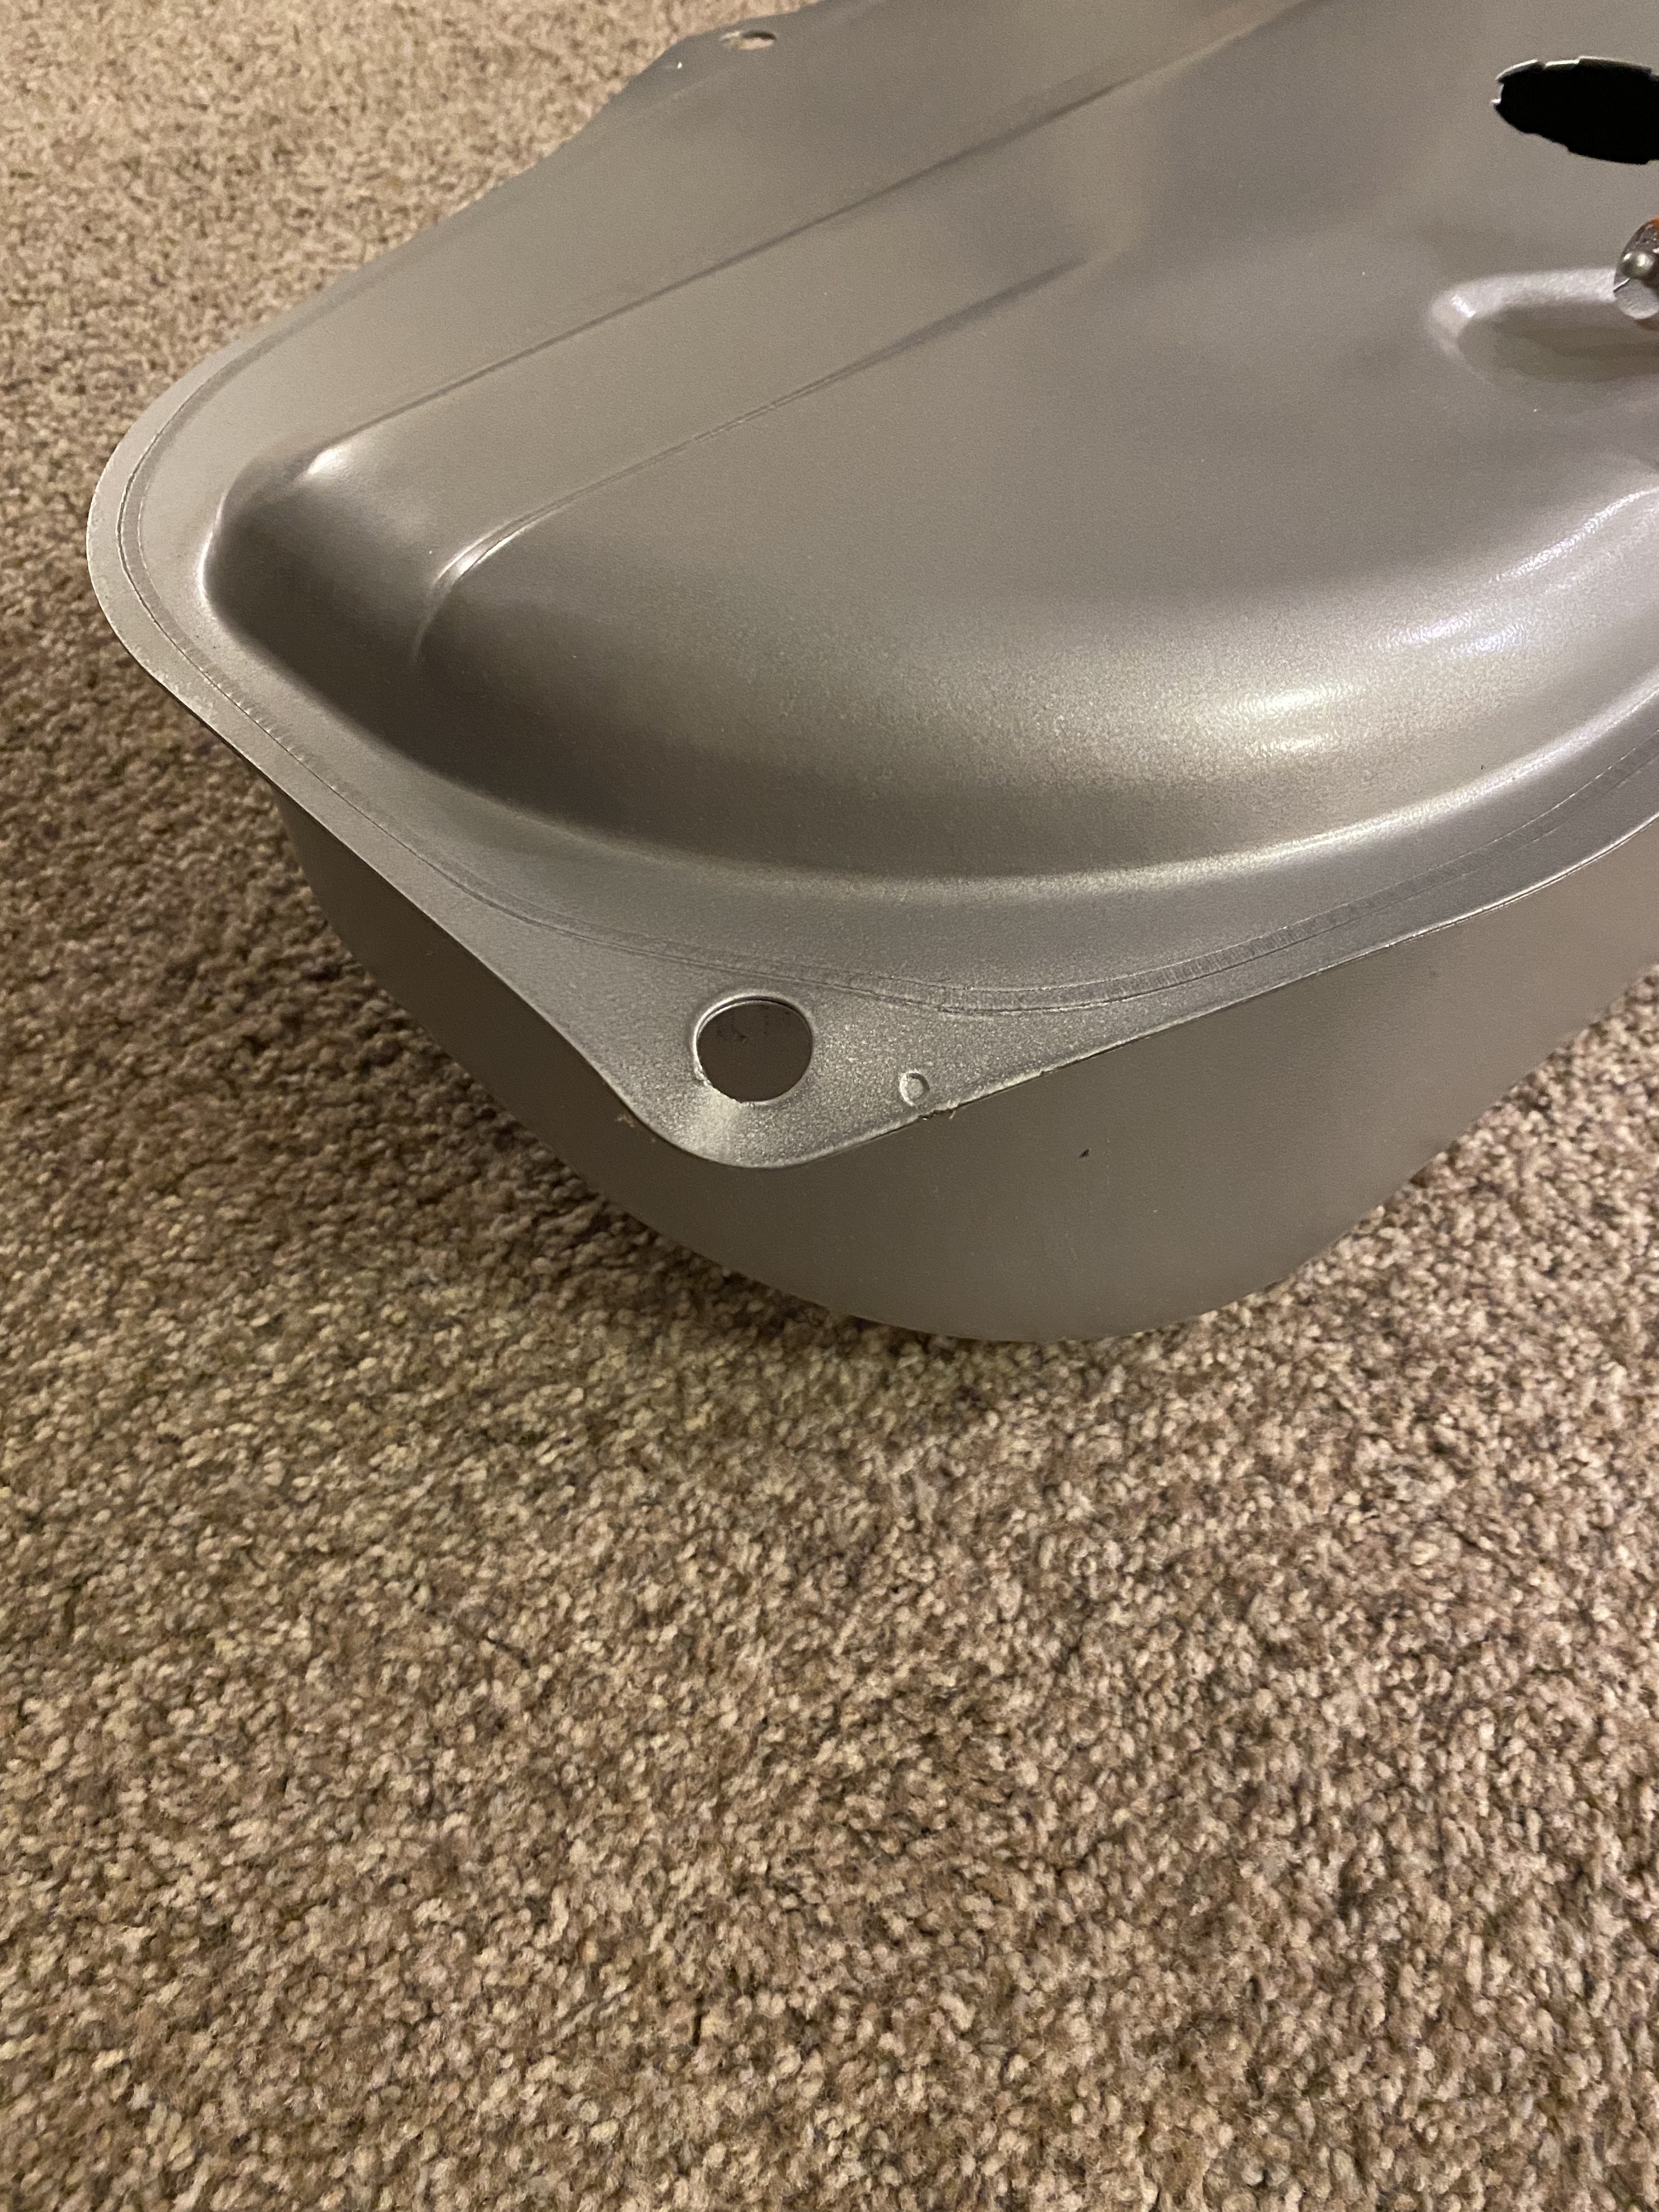
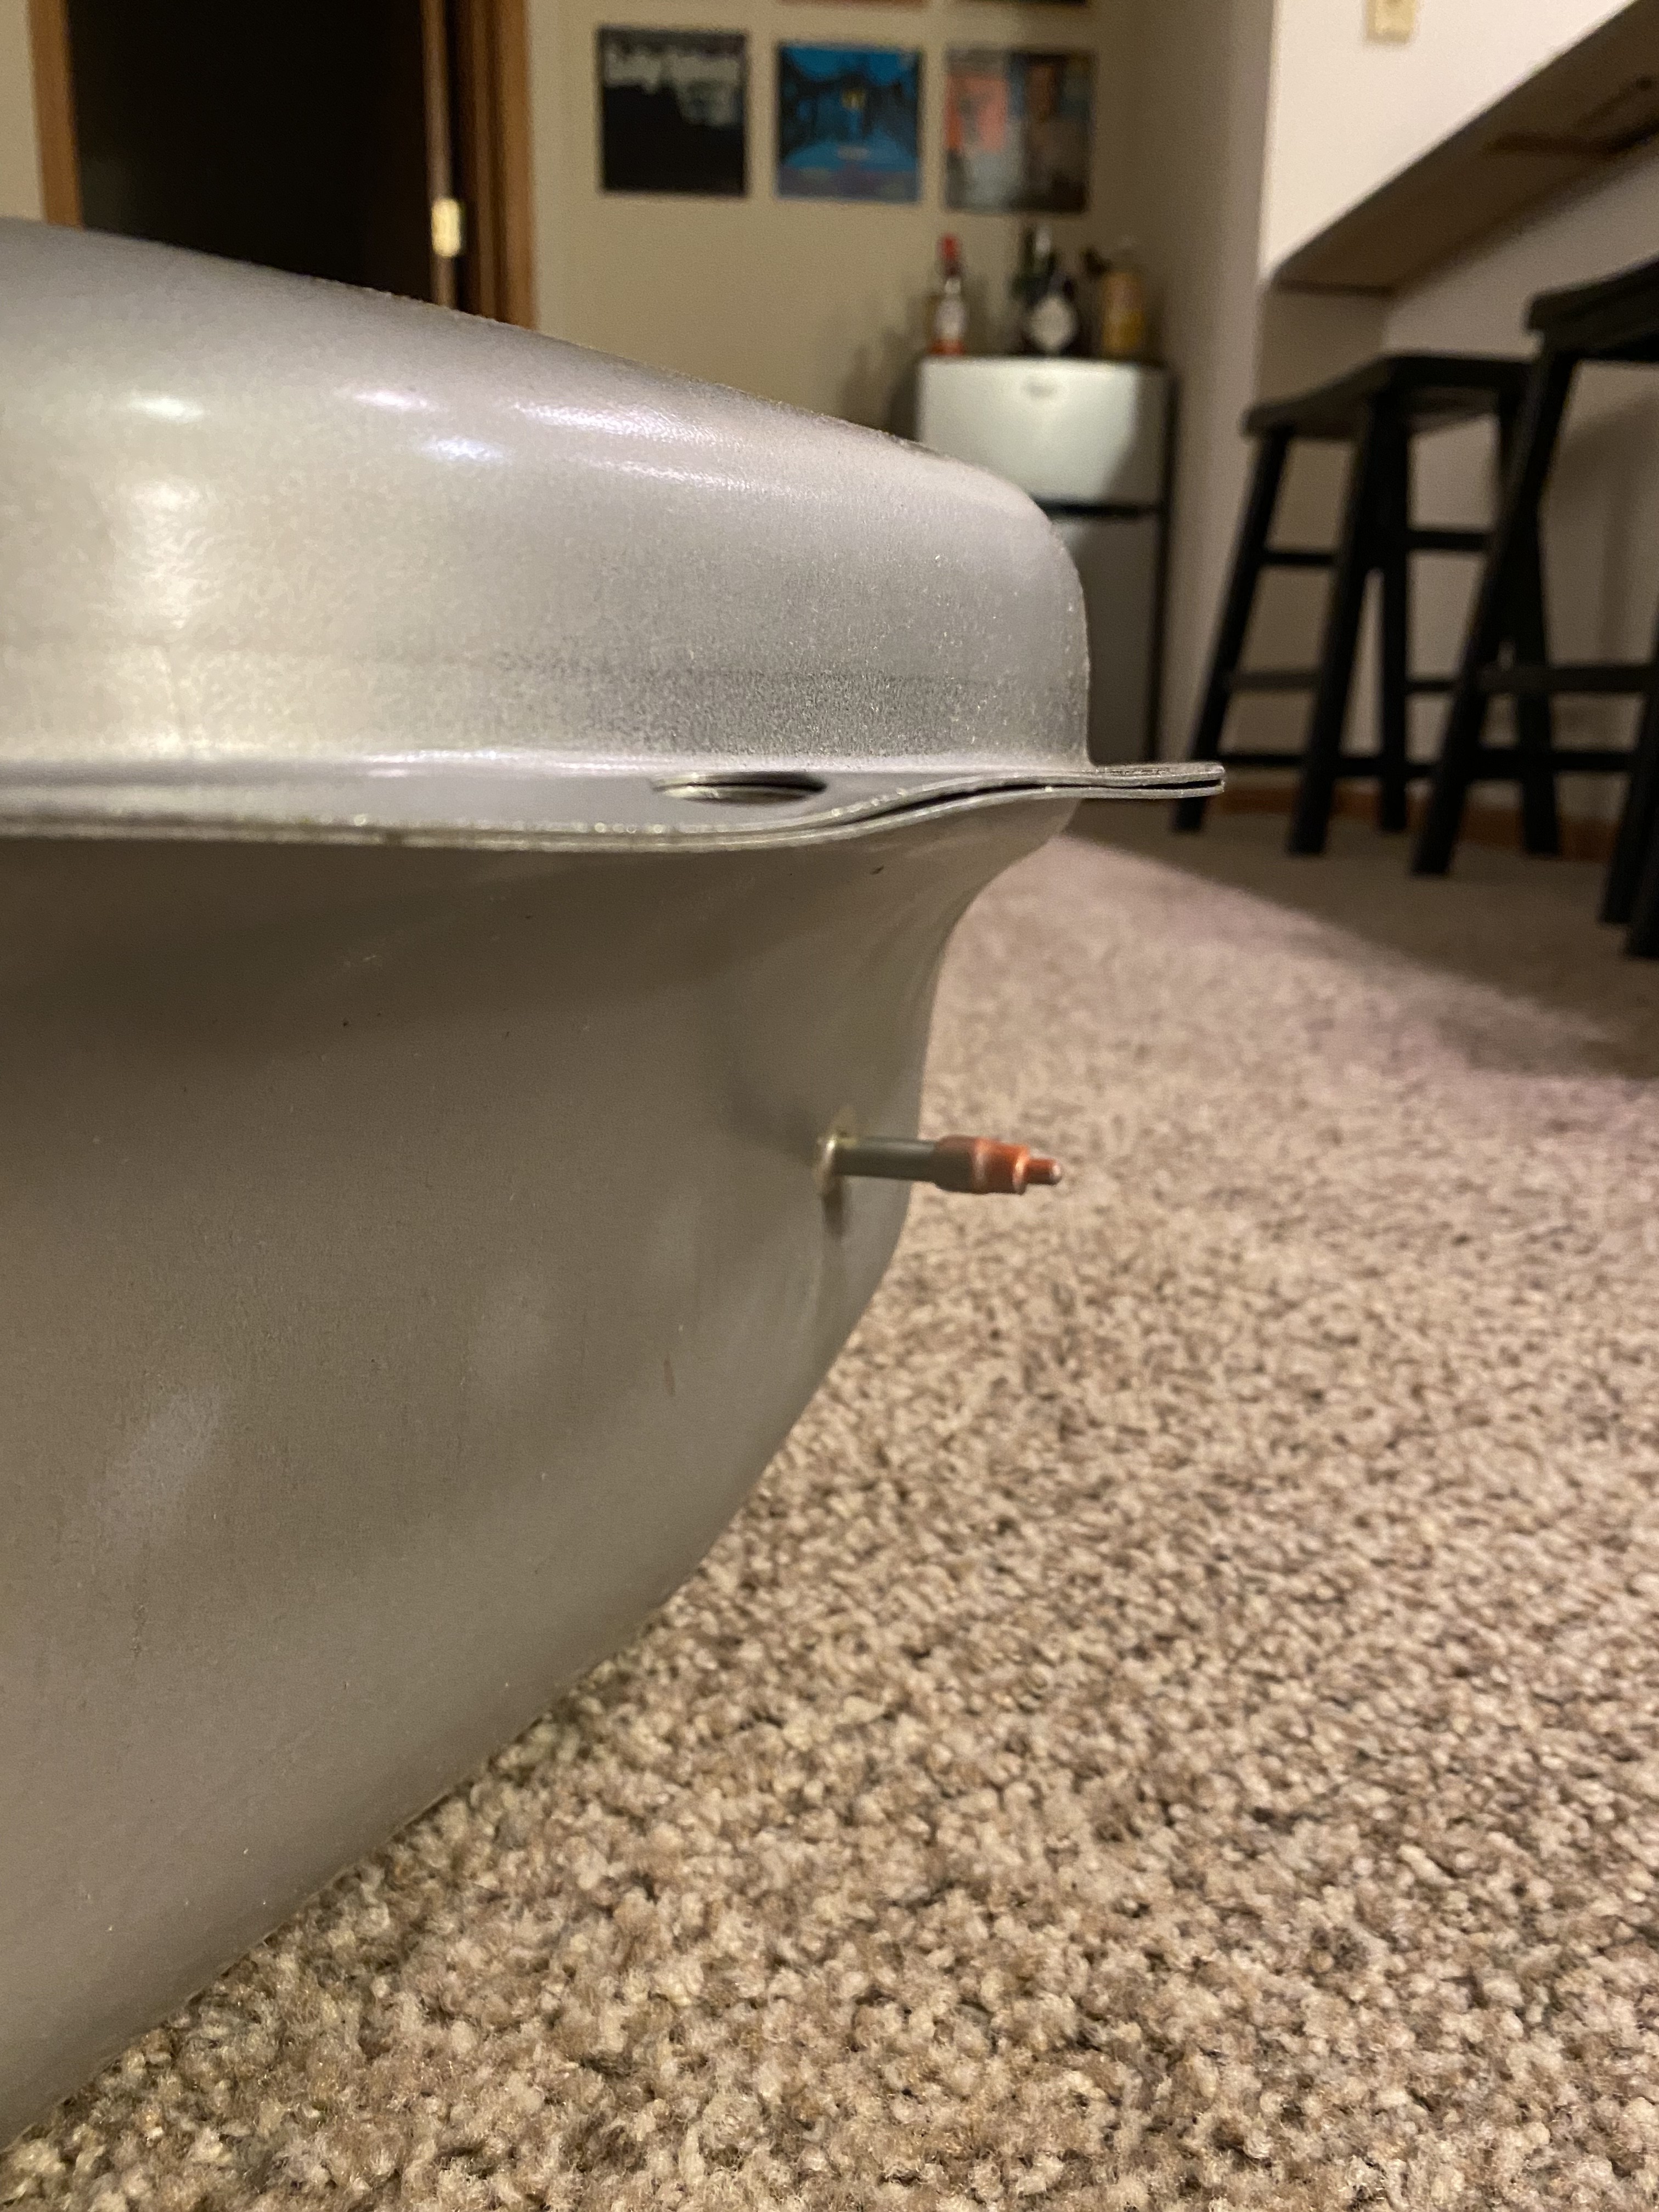
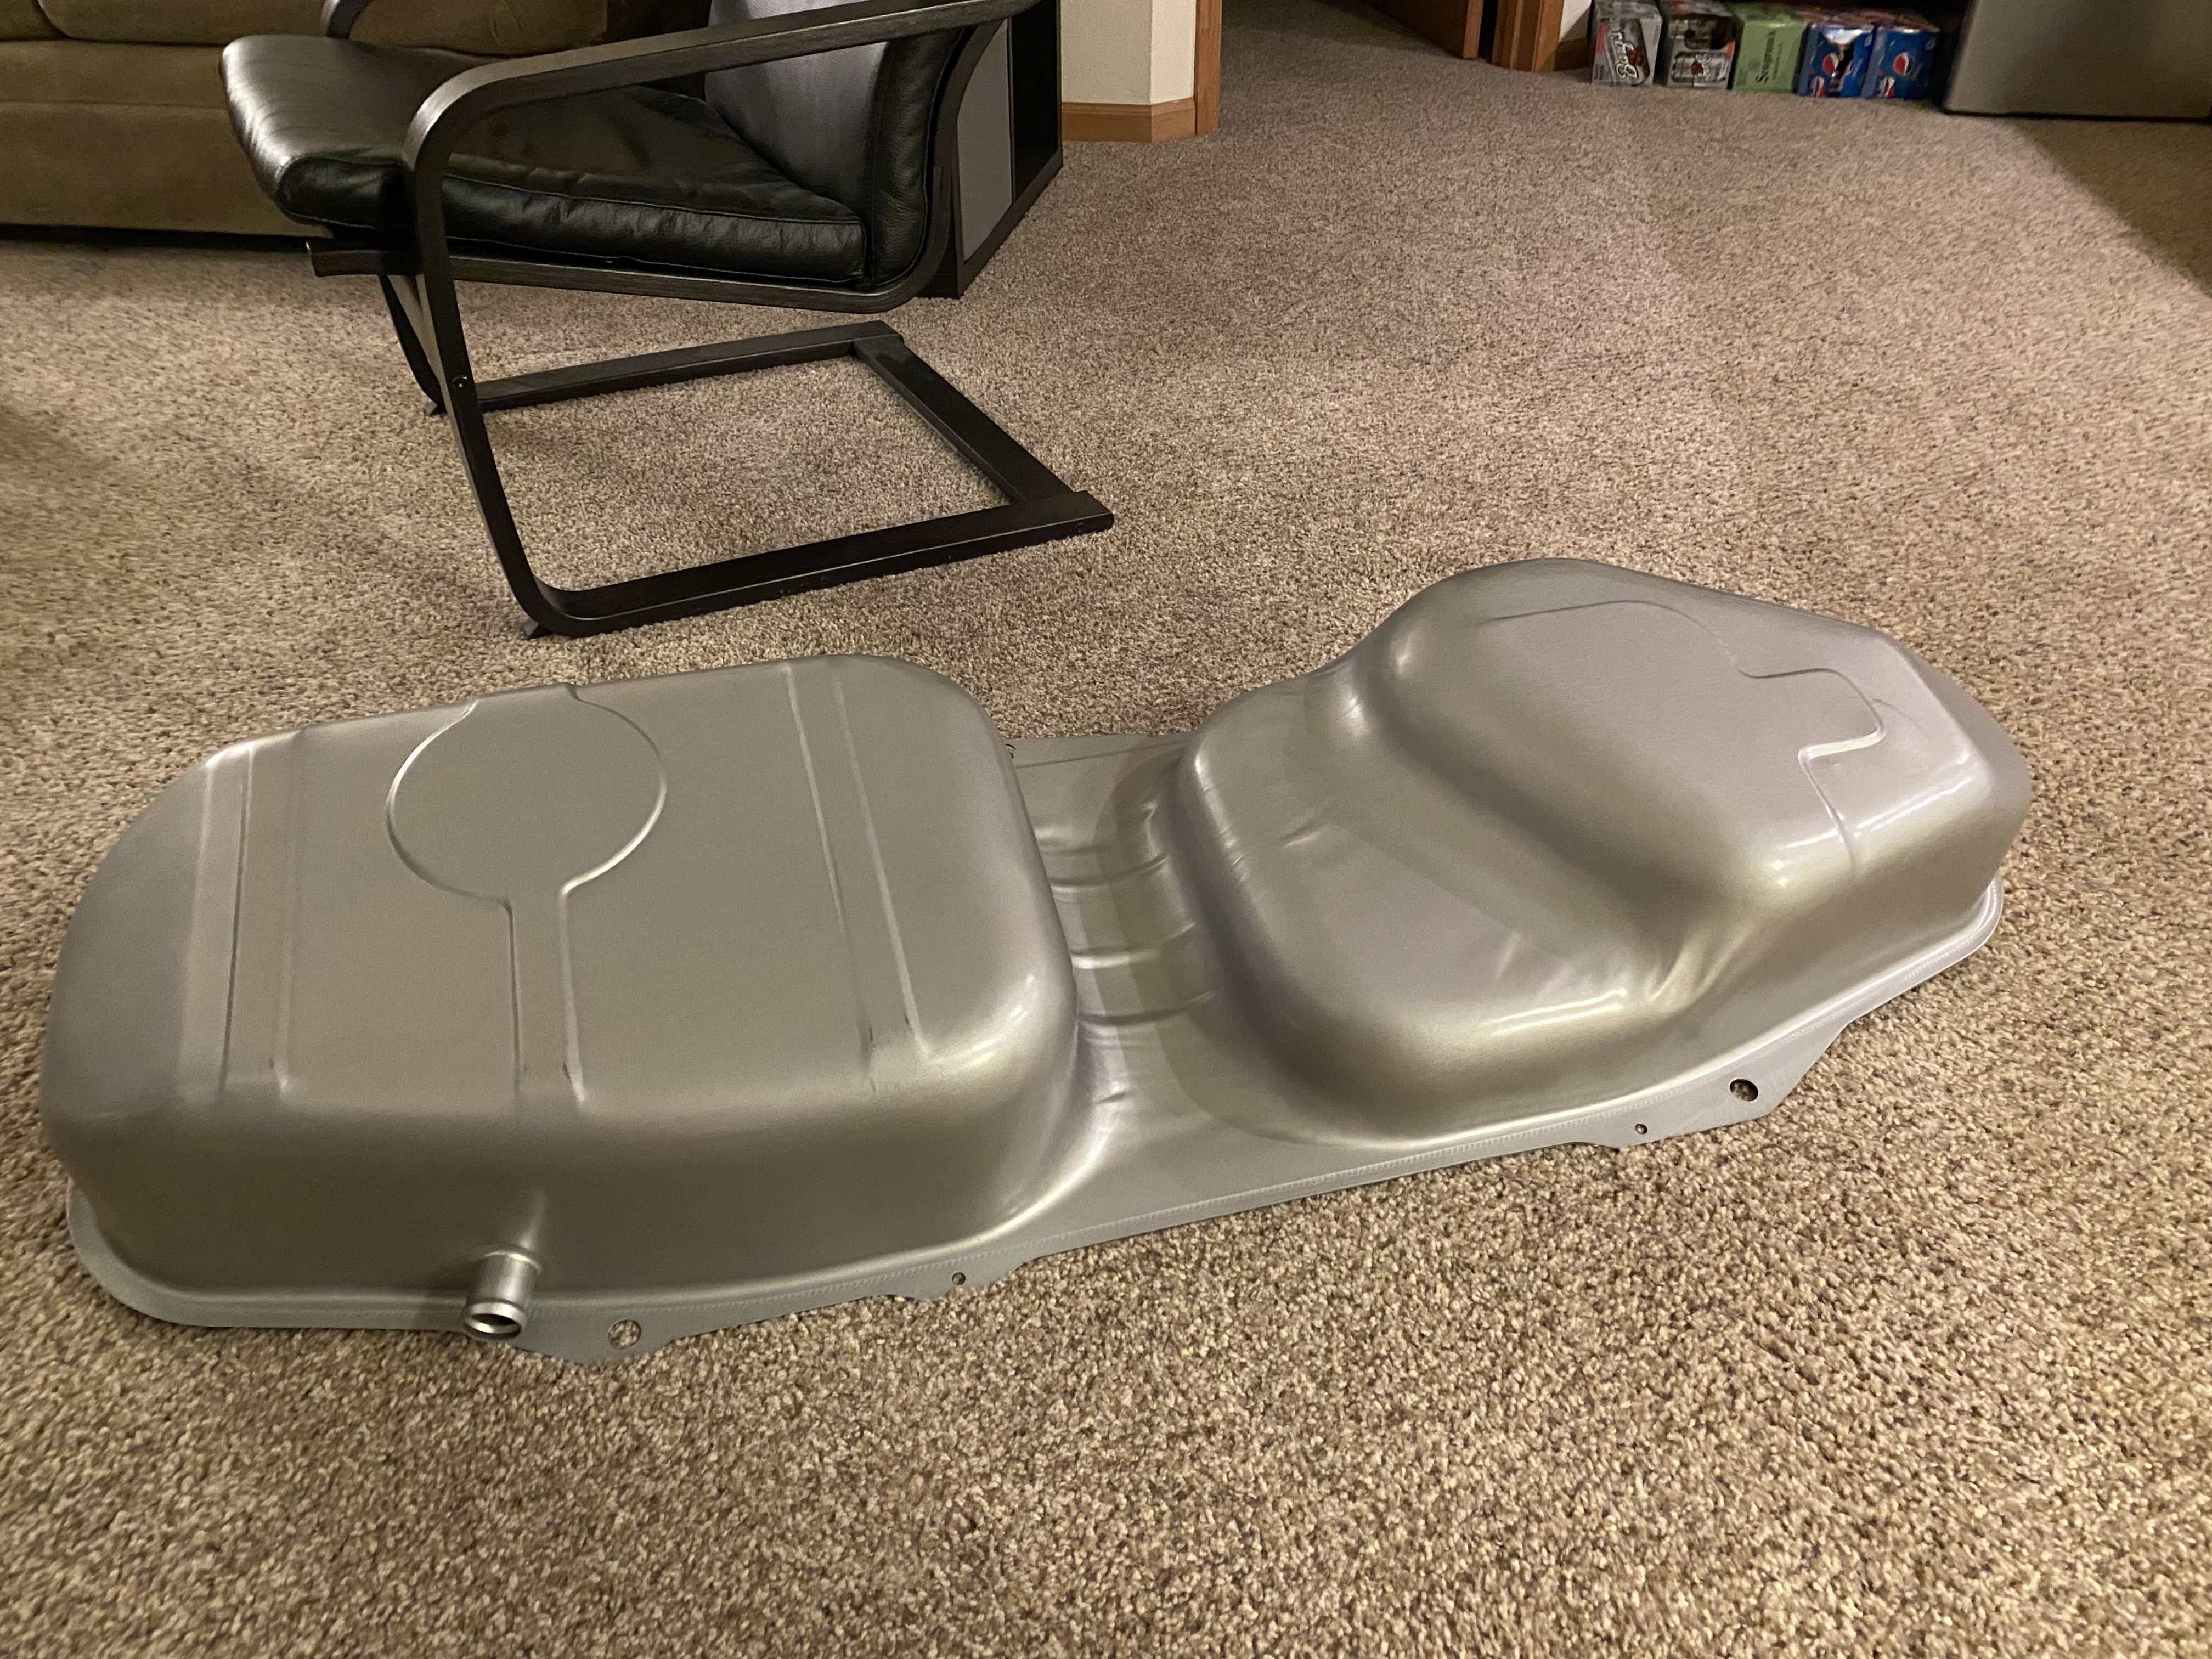
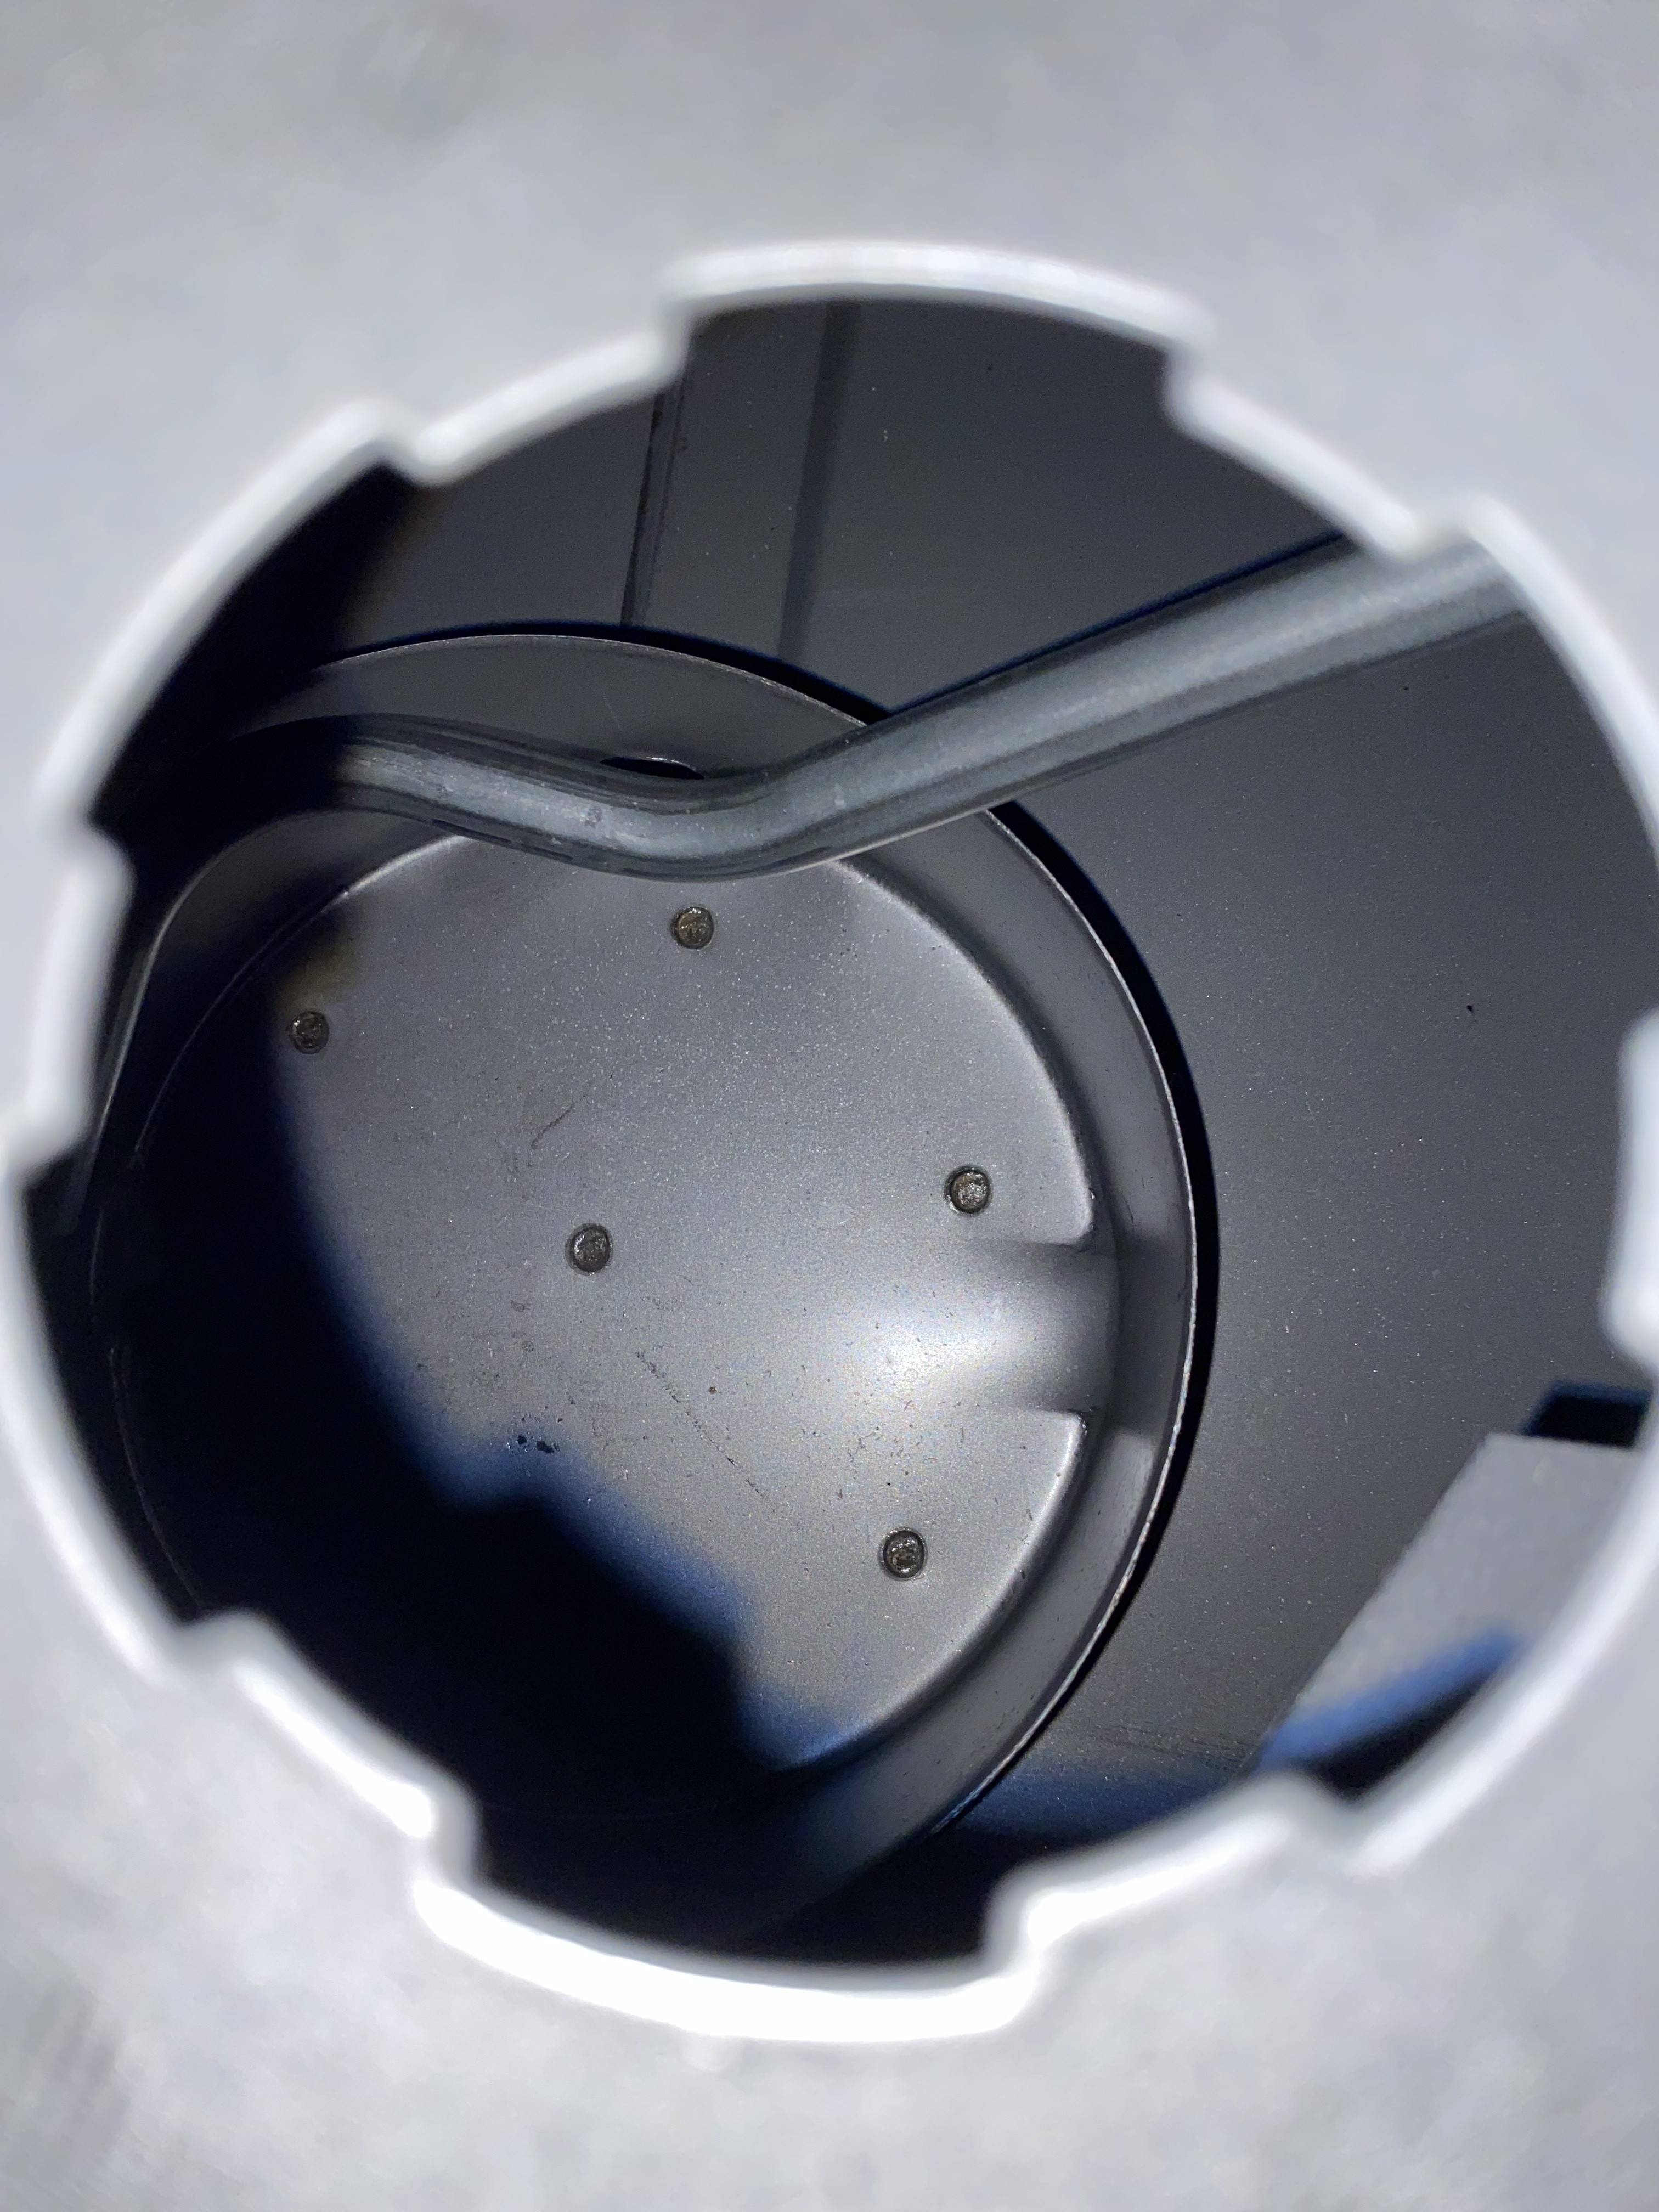
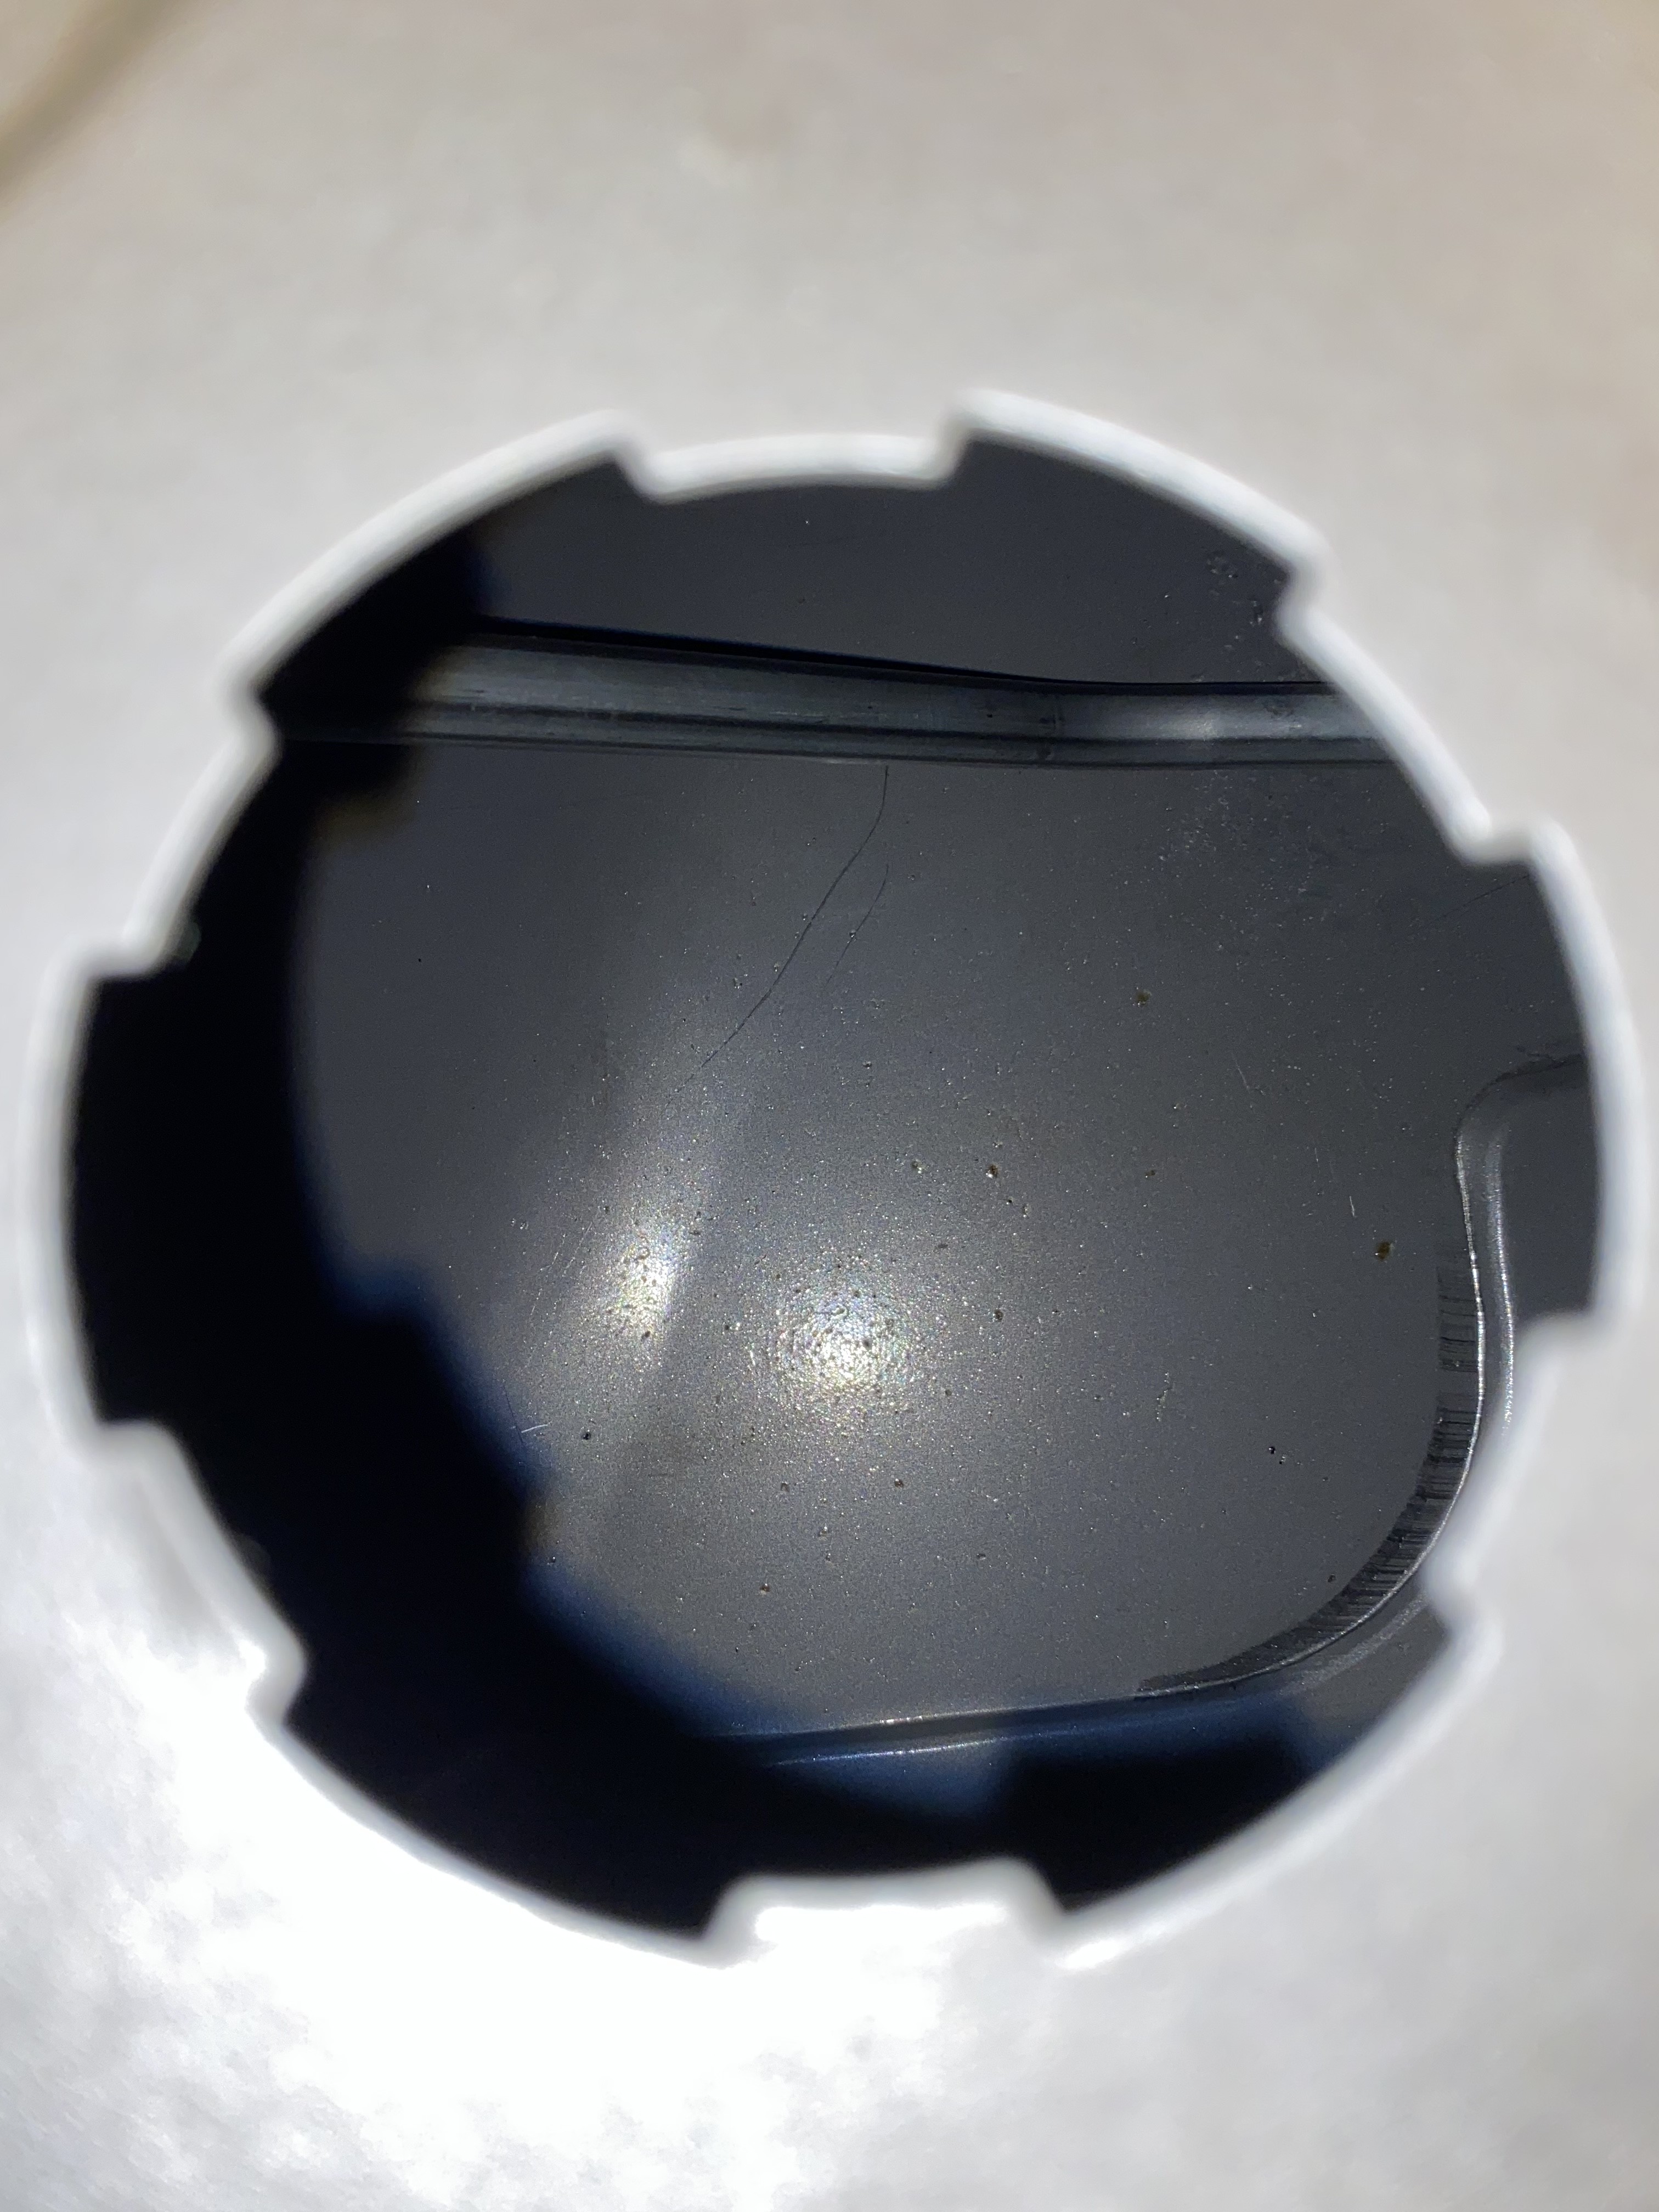
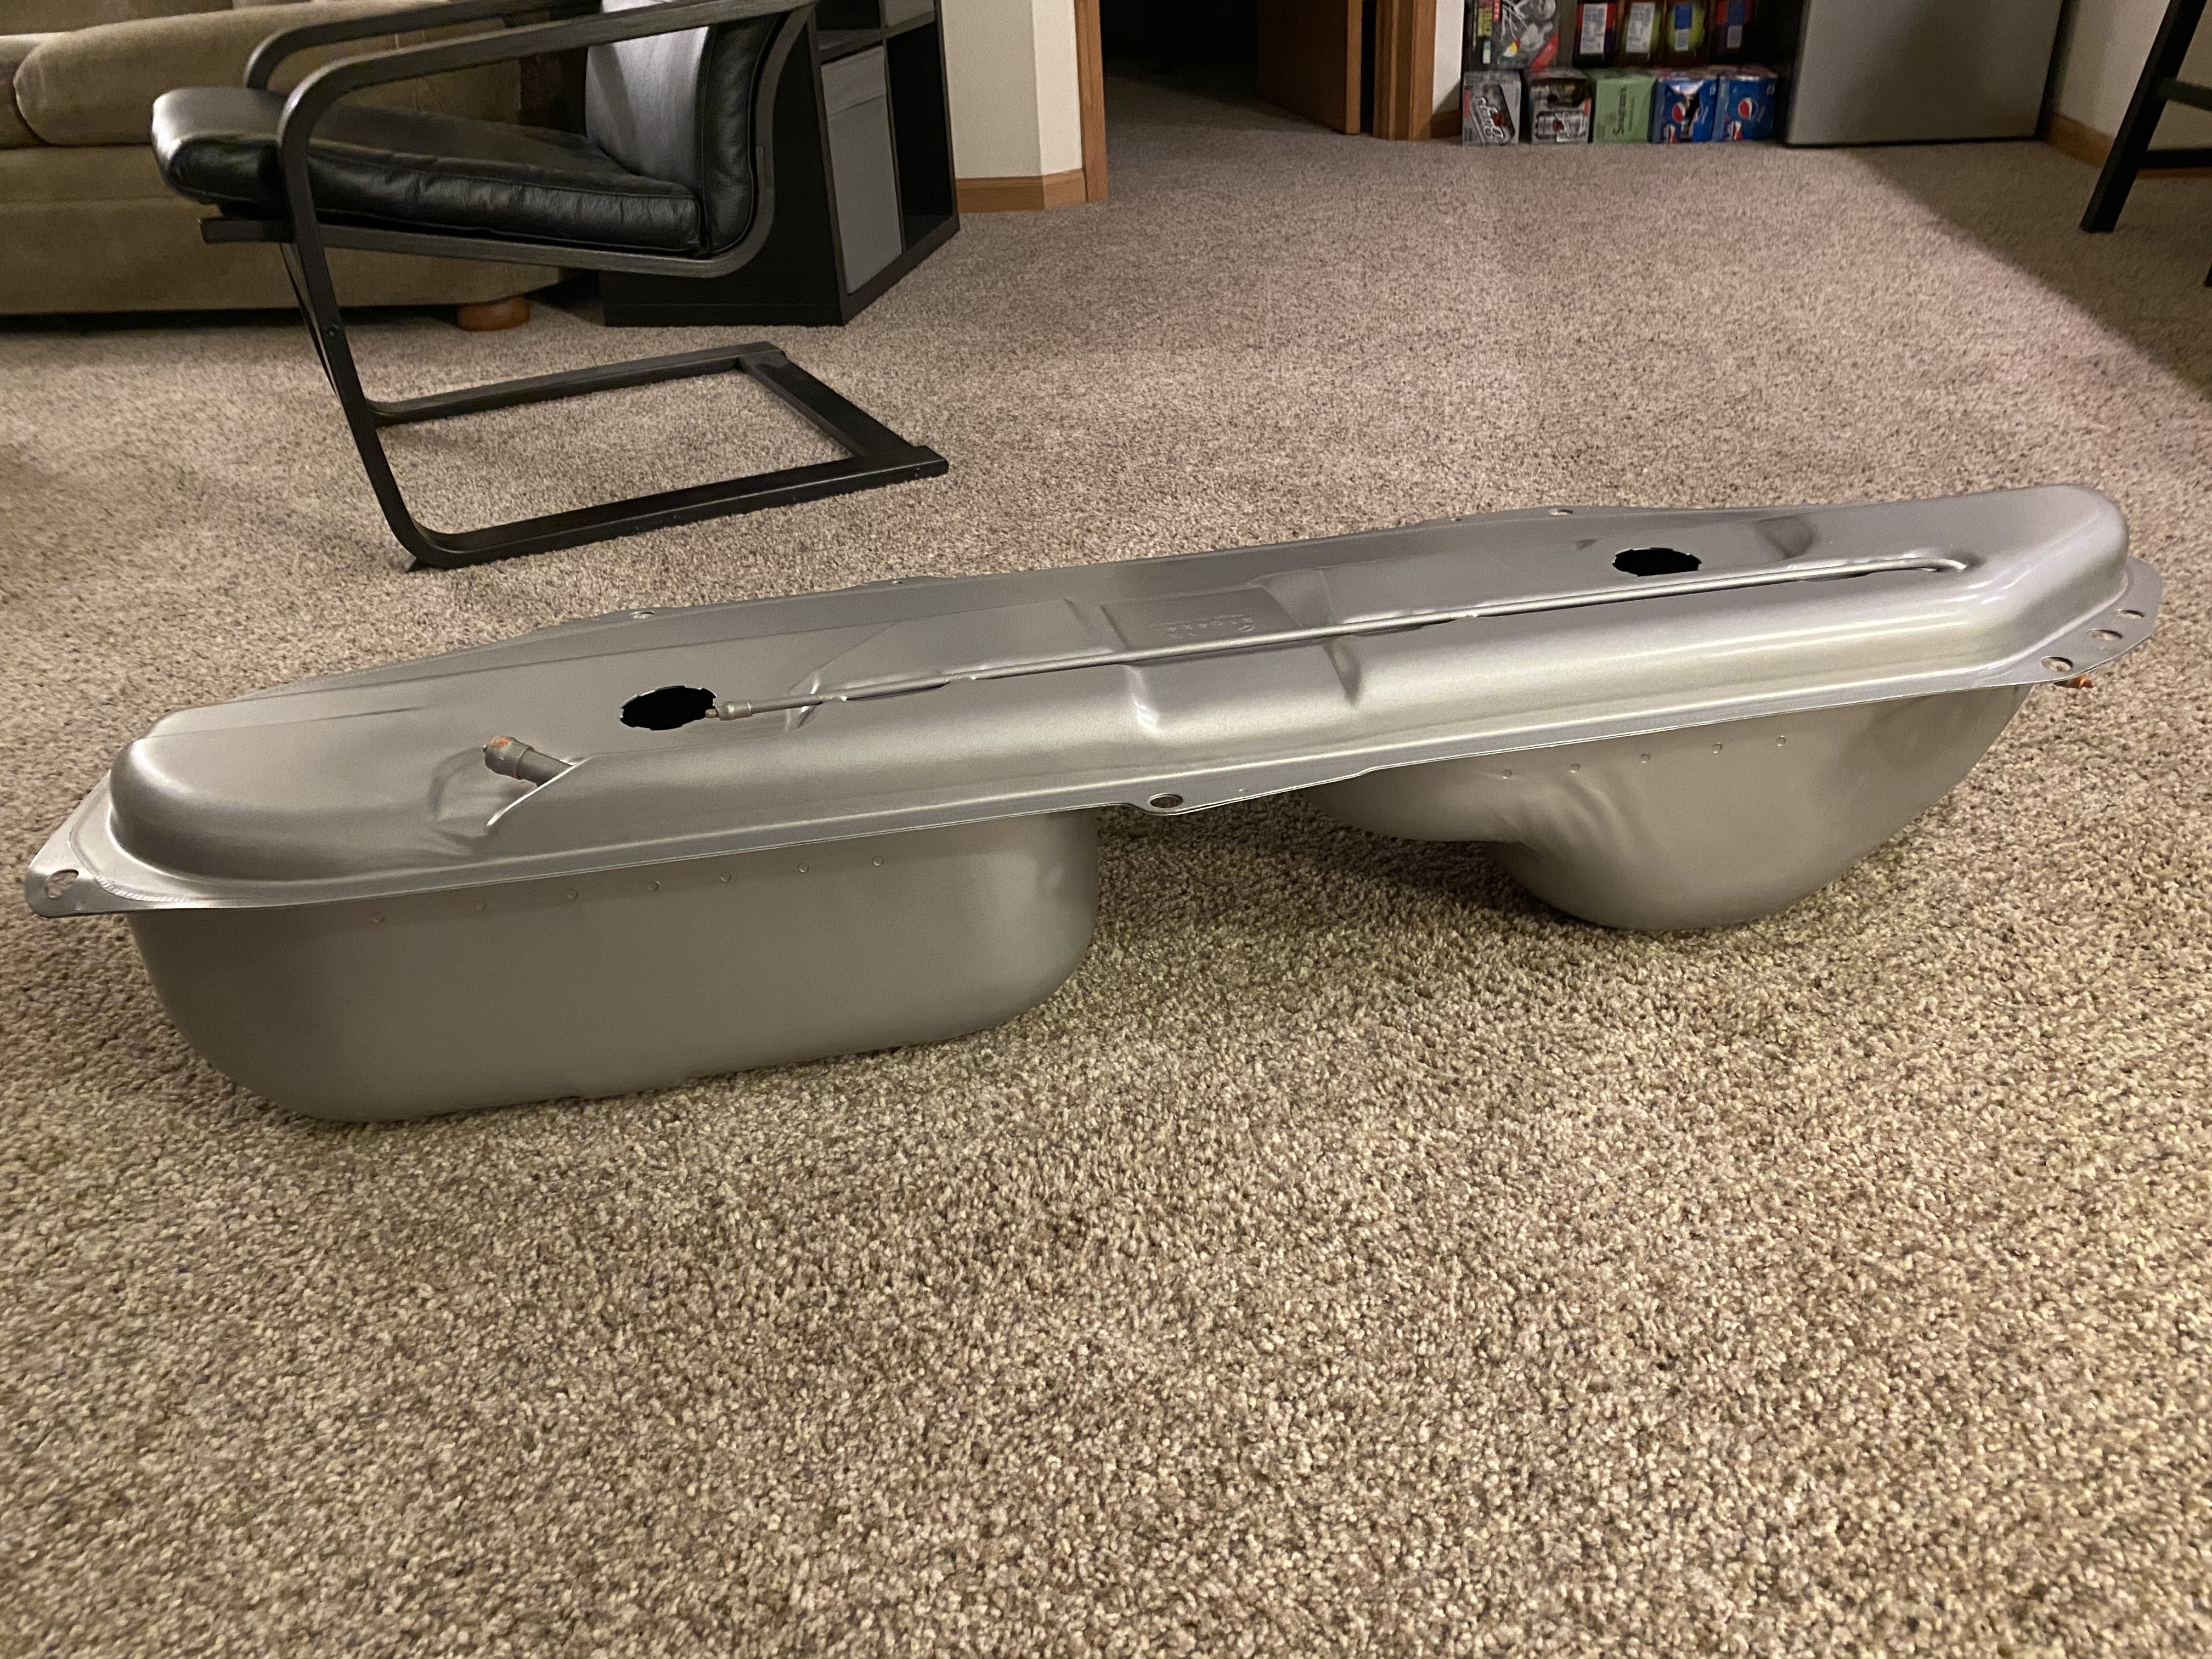
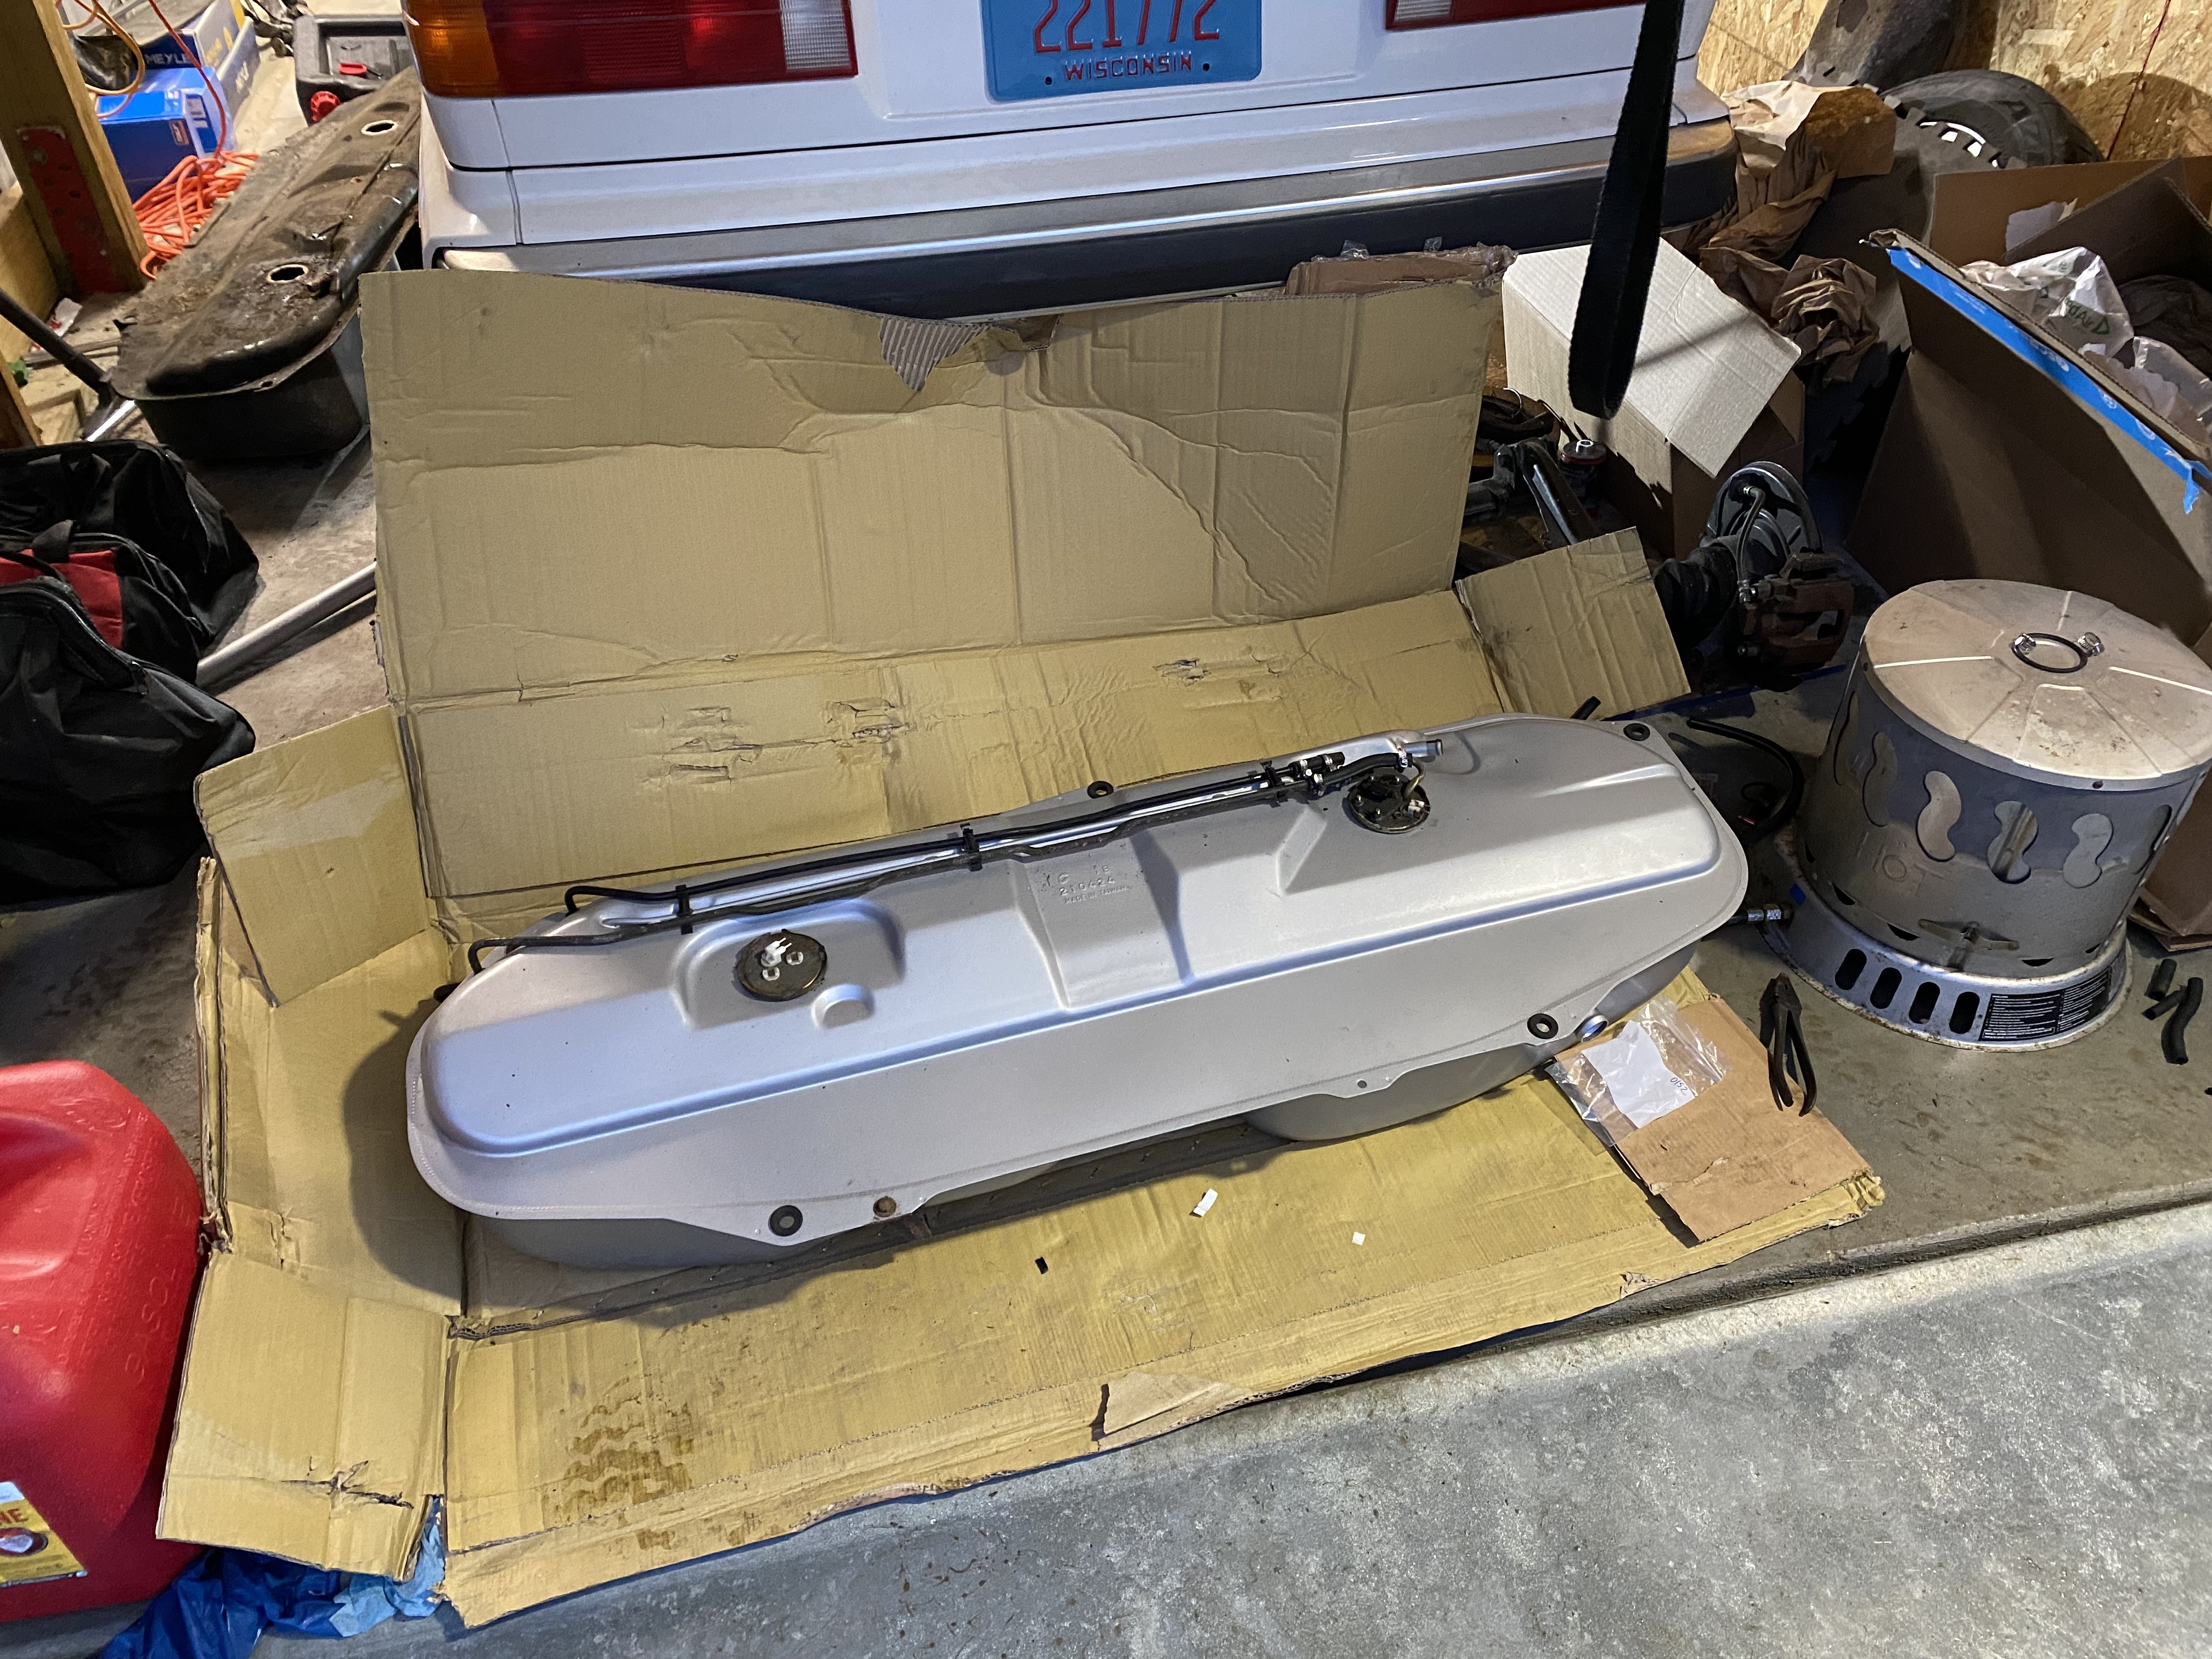
Anywho, the fuel tank showed up today, and I thought I would give my initial impressions since I really haven’t seen much info online about the tank I bought. If anyone has looked recently on Rockauto, the Spectra tank that seems to be the first choice is out of stock, with the only available option being from Liland Global. Didn’t have much choice, so bit the bullet.
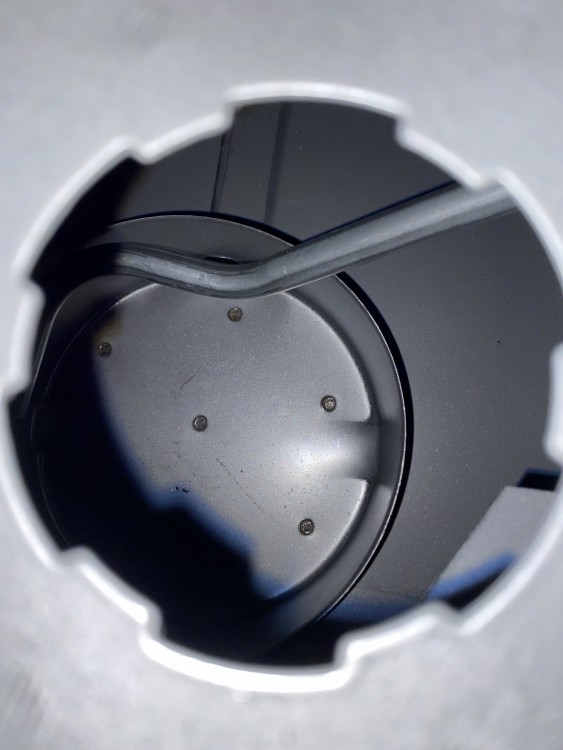
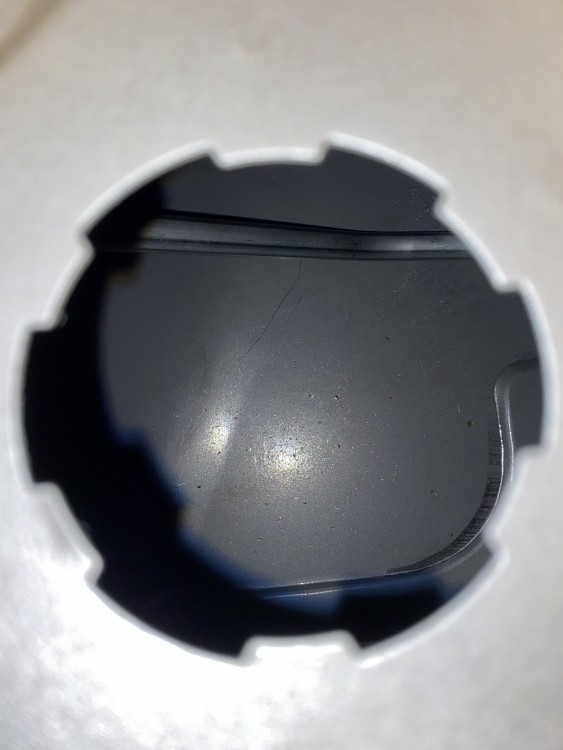
Packaging was kinda shitty, no bubble wrap or protection but other than a few bent tabs, everything seems to be in one piece. All of the small fittings have foam protectors on them to prevent overspray and clogging of lines, which I thought was a nice touch. Some waviness can be seen in a few spots on the tank but overall it seems to be an okay product for the money. The finish is pretty uniform and seems to be relatively thick and tough, and the metal itself is of reasonable thickness. I will probably POR the seam before I install it to try to eke a little more life out of it, but that’s probably not strictly necessary. My only real gripe so far is some small bits of debris in the tank shown in the images, but it’s nothing the fuel filter won’t take out.
I’ll post another update when I go to install it, and another when it comes time to fill it! Fingers crossed!
-
Got some more work done today, but more of a one step forward, 1.5 steps back deal.
I successfully pulled the tank, no thanks to the engineer that specced those horrible ass crimp fittings to all the fuel lines (I have choice words I’d like to use, but won’t). They do their job fine but are such a pain when it comes time to replacing and removing things.
Anywho, got the tank down, all the lines and senders/pump and whatnot transferred to the new tank. Fit was pretty solid, the new mounting grommets fit in snugly, the sender and pump fit tightly, and all bracketry mounts right up. My only gripe is that the tank thickness appears to be different between the replacement and OEM one where the senders mount, so you cannot use new OEM o-rings; thankfully, they include slightly thinner o-rings in the packaging, but something worth noting. Otherwise, barring the lack of drain plug everything seems to be more than up to snuff. The holes all seem to line up well with the mounting points on the body, finish is nice, all the inlets/outlets are in the correct spots. Honestly, if they had painted it black, you could’ve told me it was genuine BMW and I might’ve believed you.
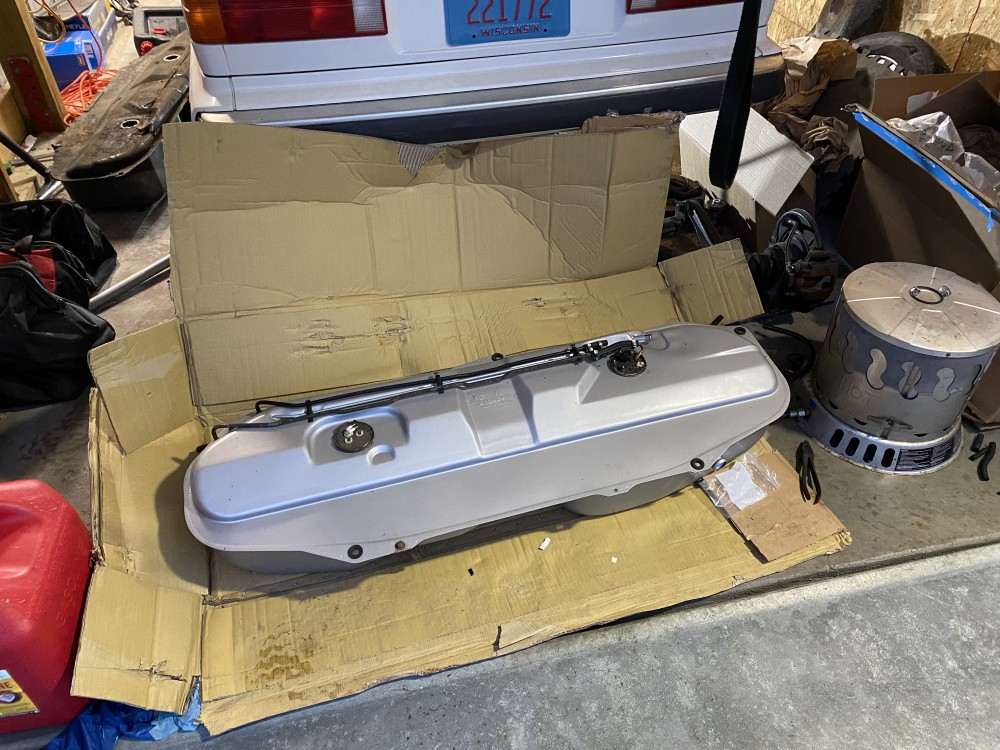
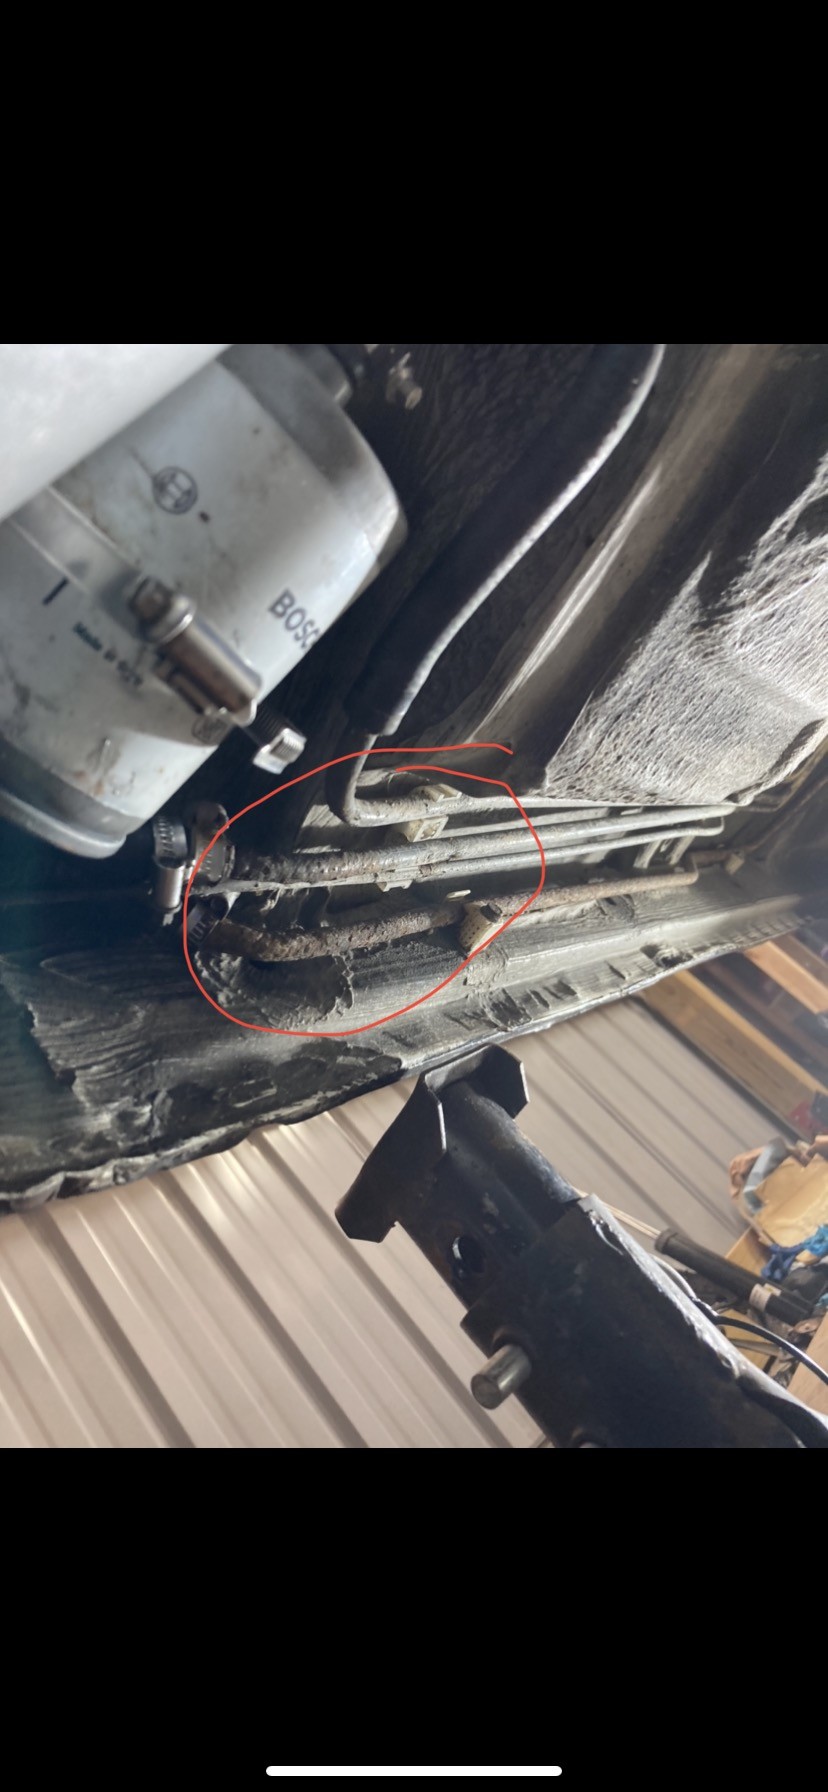
So that was a win, but when disconnecting the fuel lines to remove the tank I noticed that my fuel hard lines were pretty crusty.
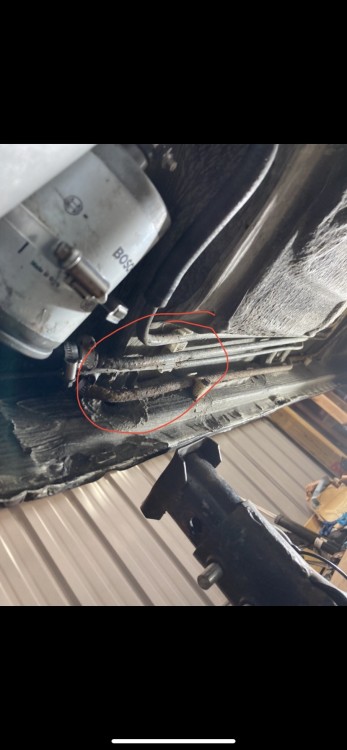
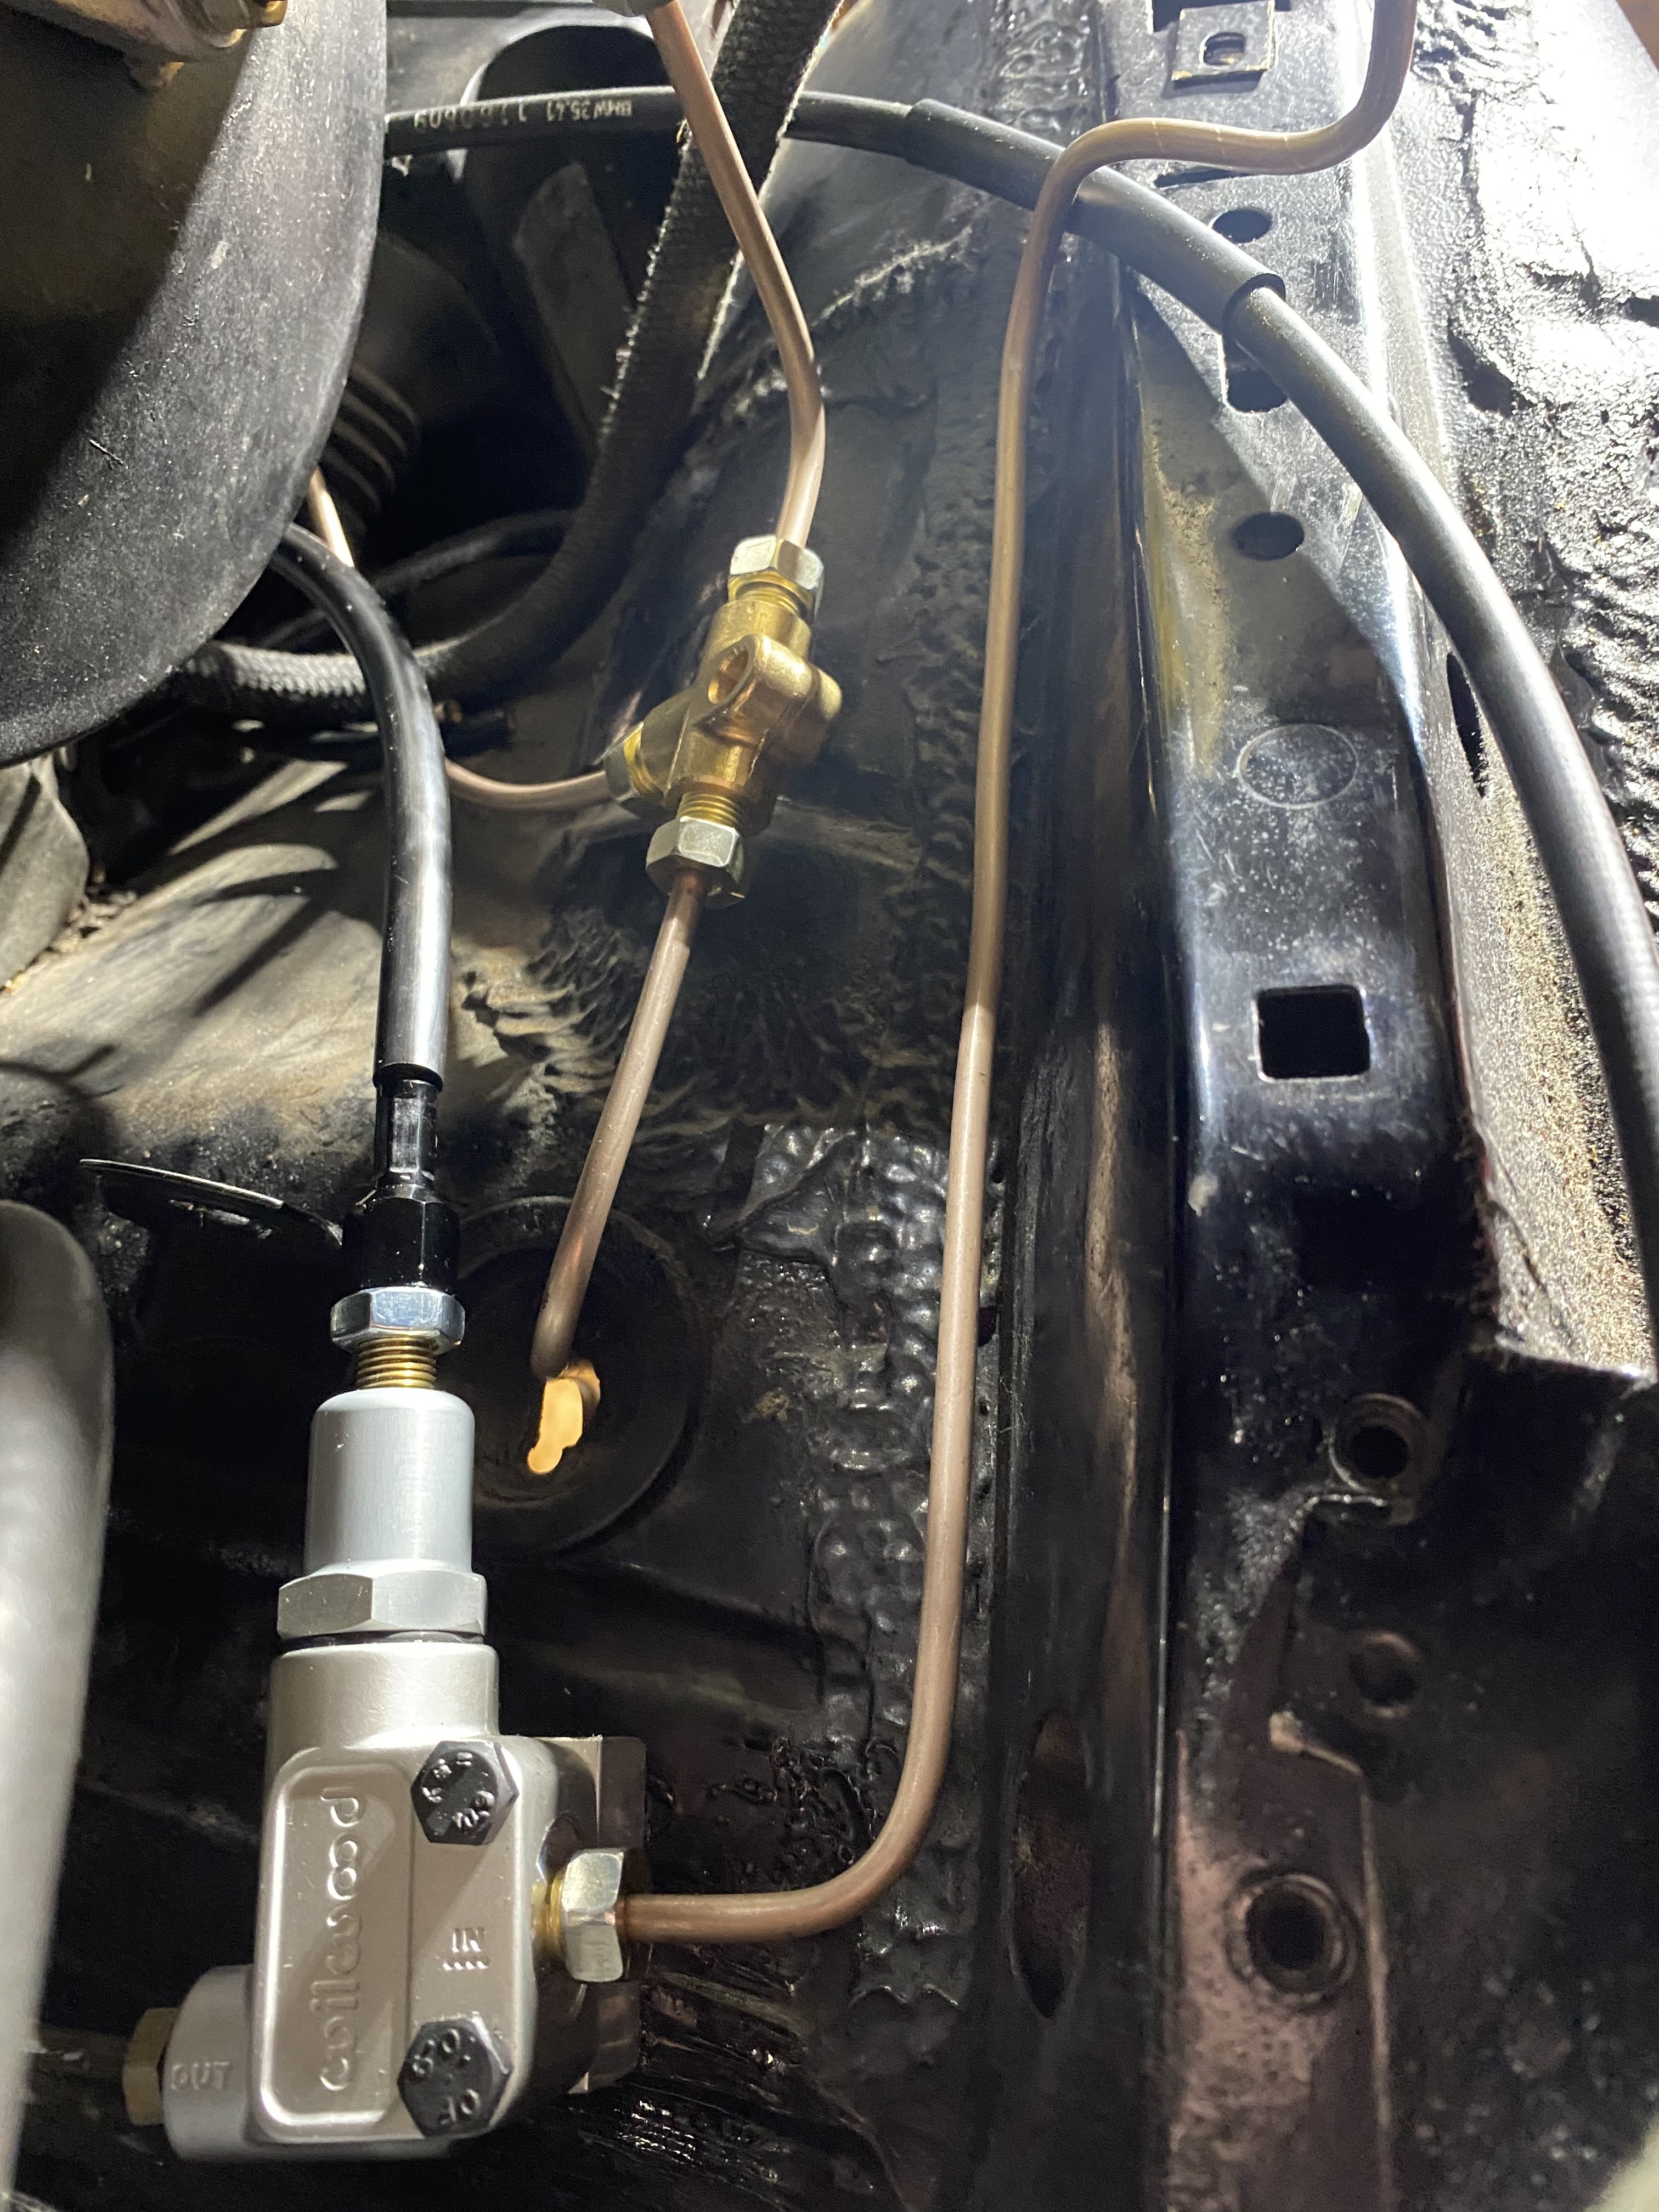
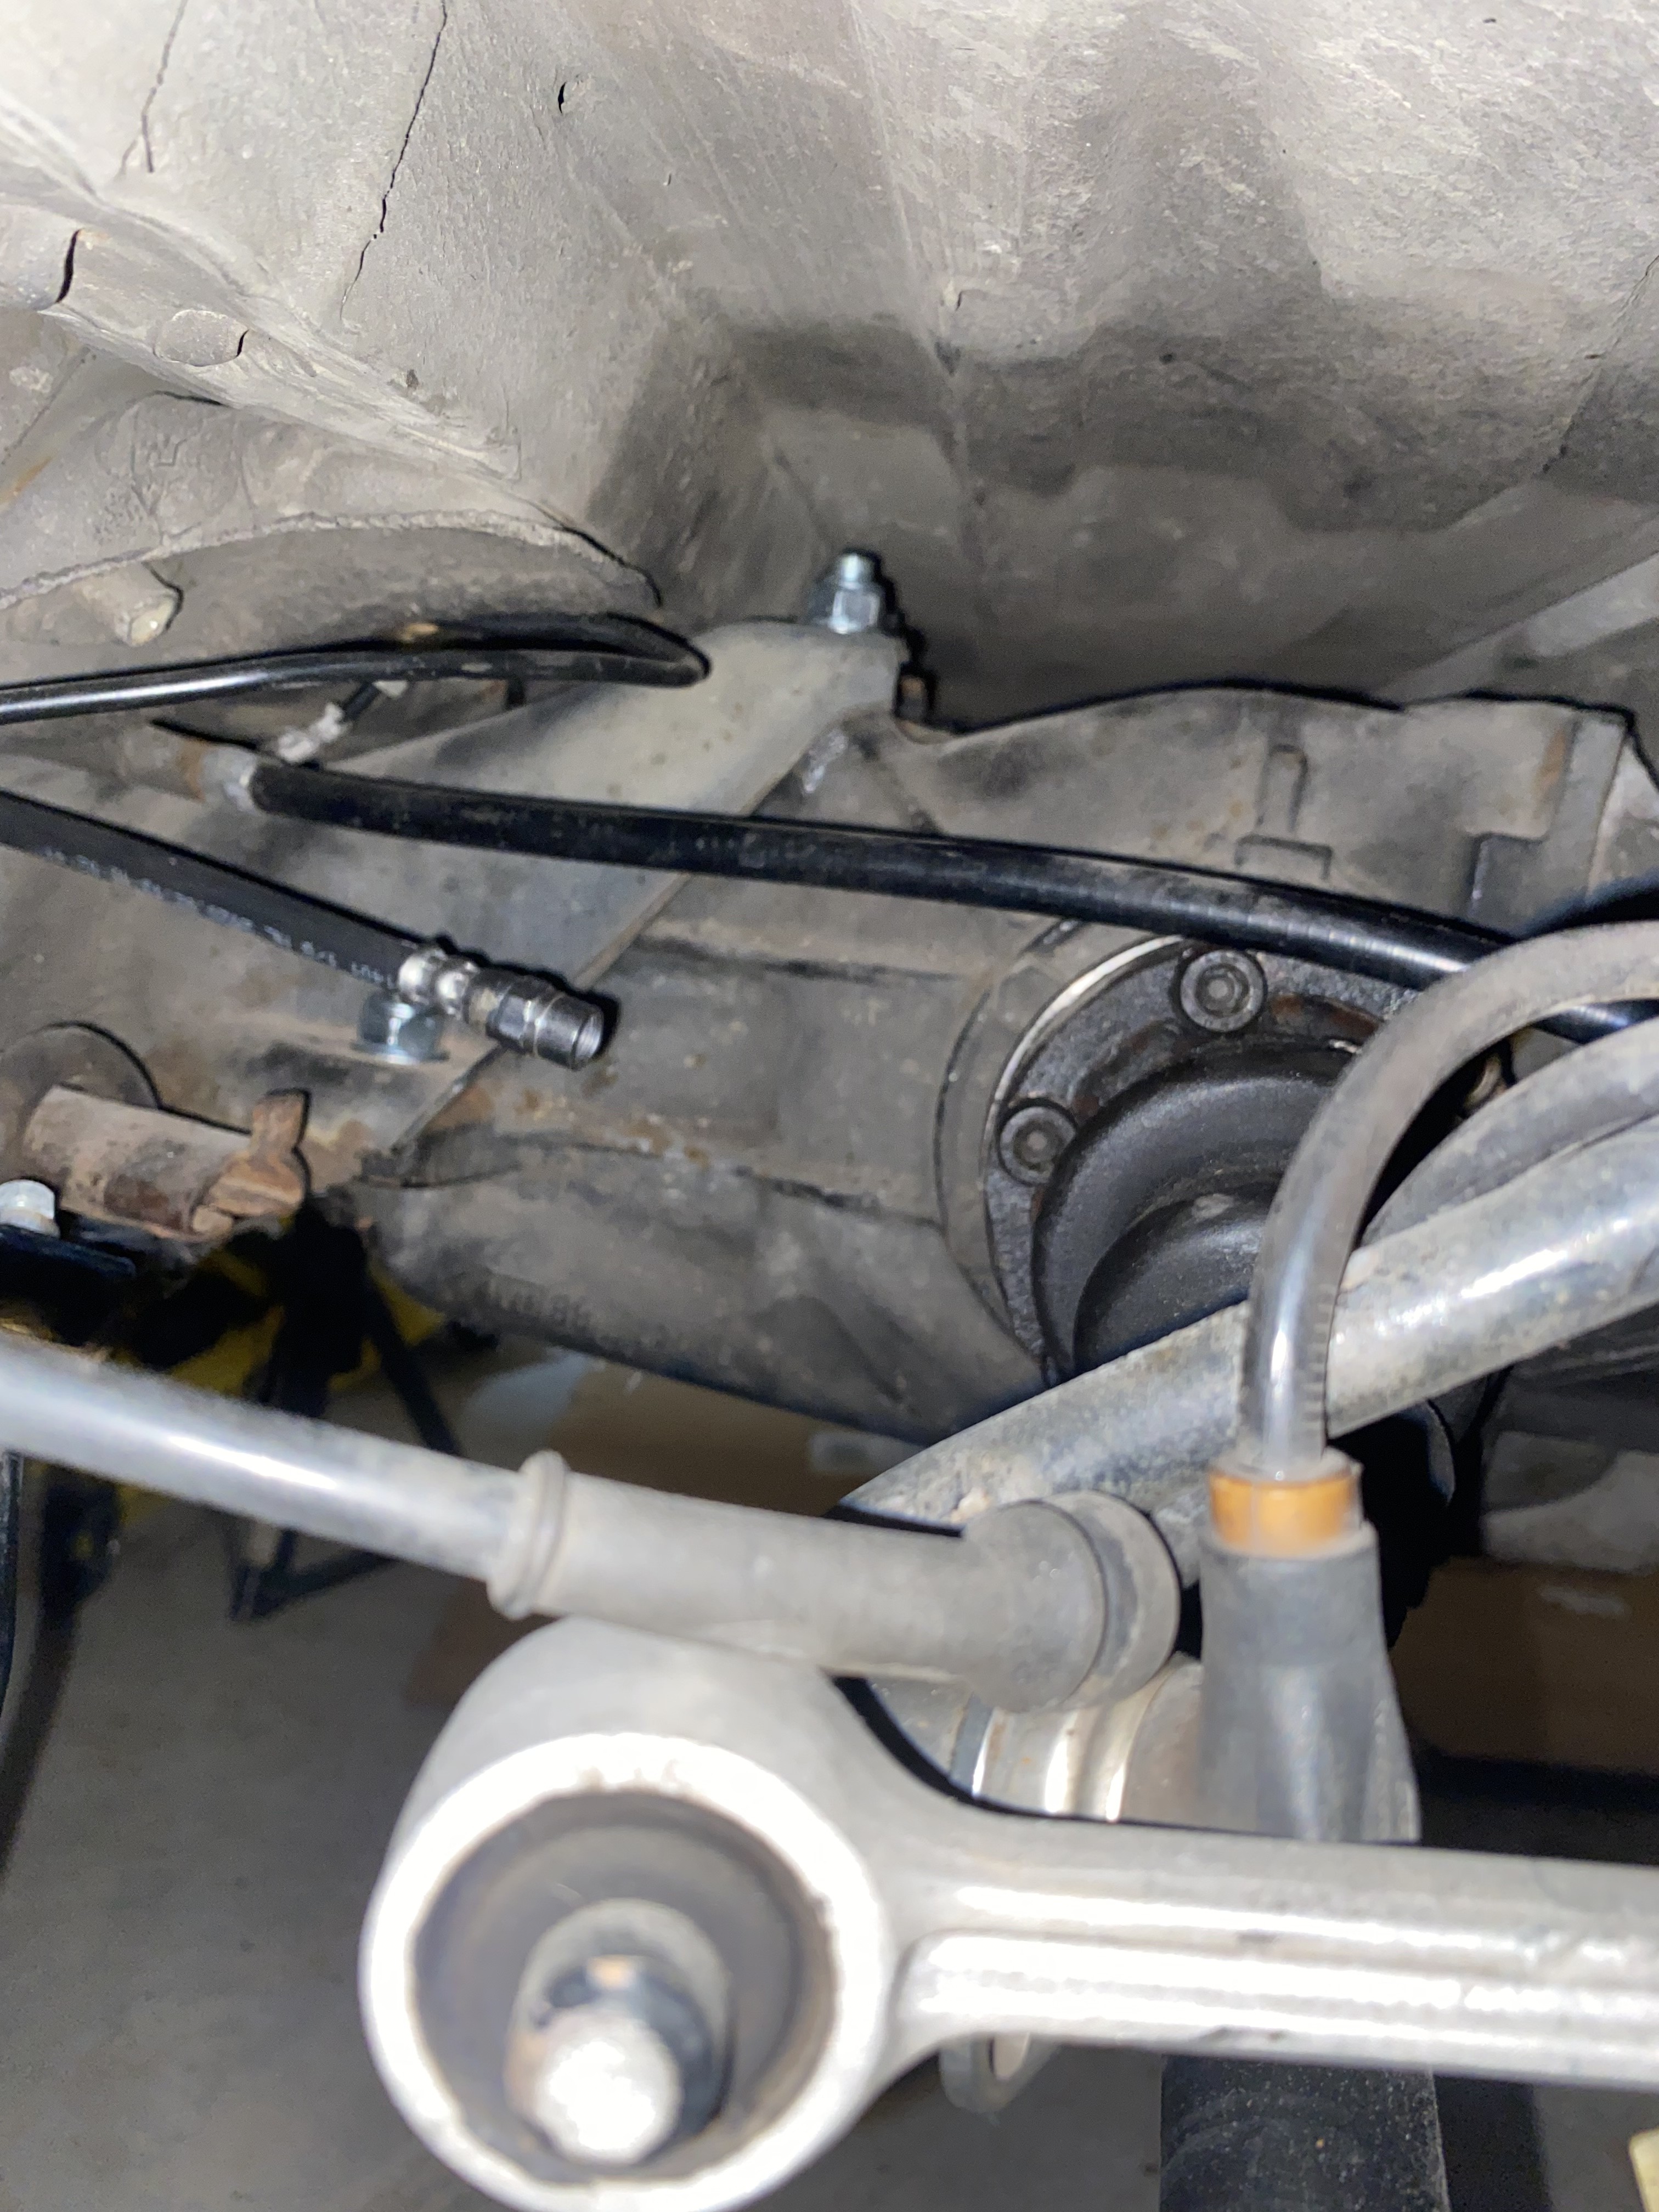
So those need to be done. I have no desire to burn this car down or worse, and it seems foolish to not take the opportunity to fix it all while it’s disconnected. In the same vein, I noticed the rear brake lines were also getting pretty gnarly. I replaced the hard lines on the trailing arms a few years ago but never touched the soft or hard lines upstream of that, and they’re pretty bad (soft lines have hairline cracks, hard line junctions look like they spent time on the titanic, etc.). So the plan is to either buy all new OEM hardlines from FCP and bend them myself, or install the ChaseBays hard line delete that just runs soft lines all the way back and to the trailing arms. It takes it down to three total lines for the whole rear brake system after the ABS pump, and I’m weighing whether the cost is worth the simplicity it adds. Any thoughts? Potential concerns about longevity?
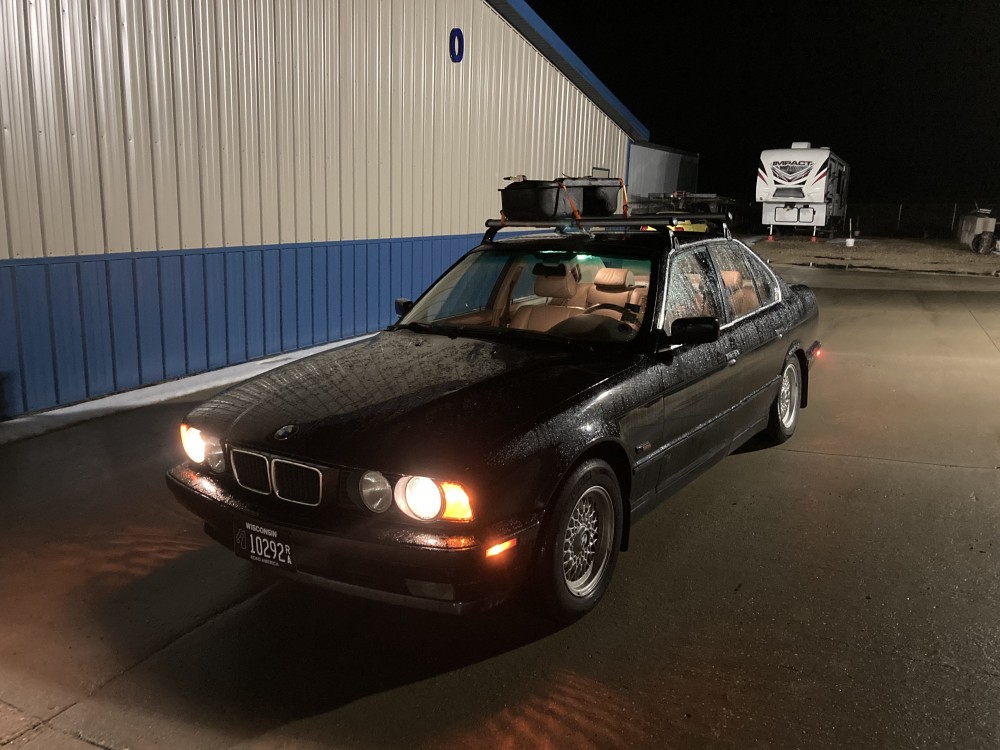
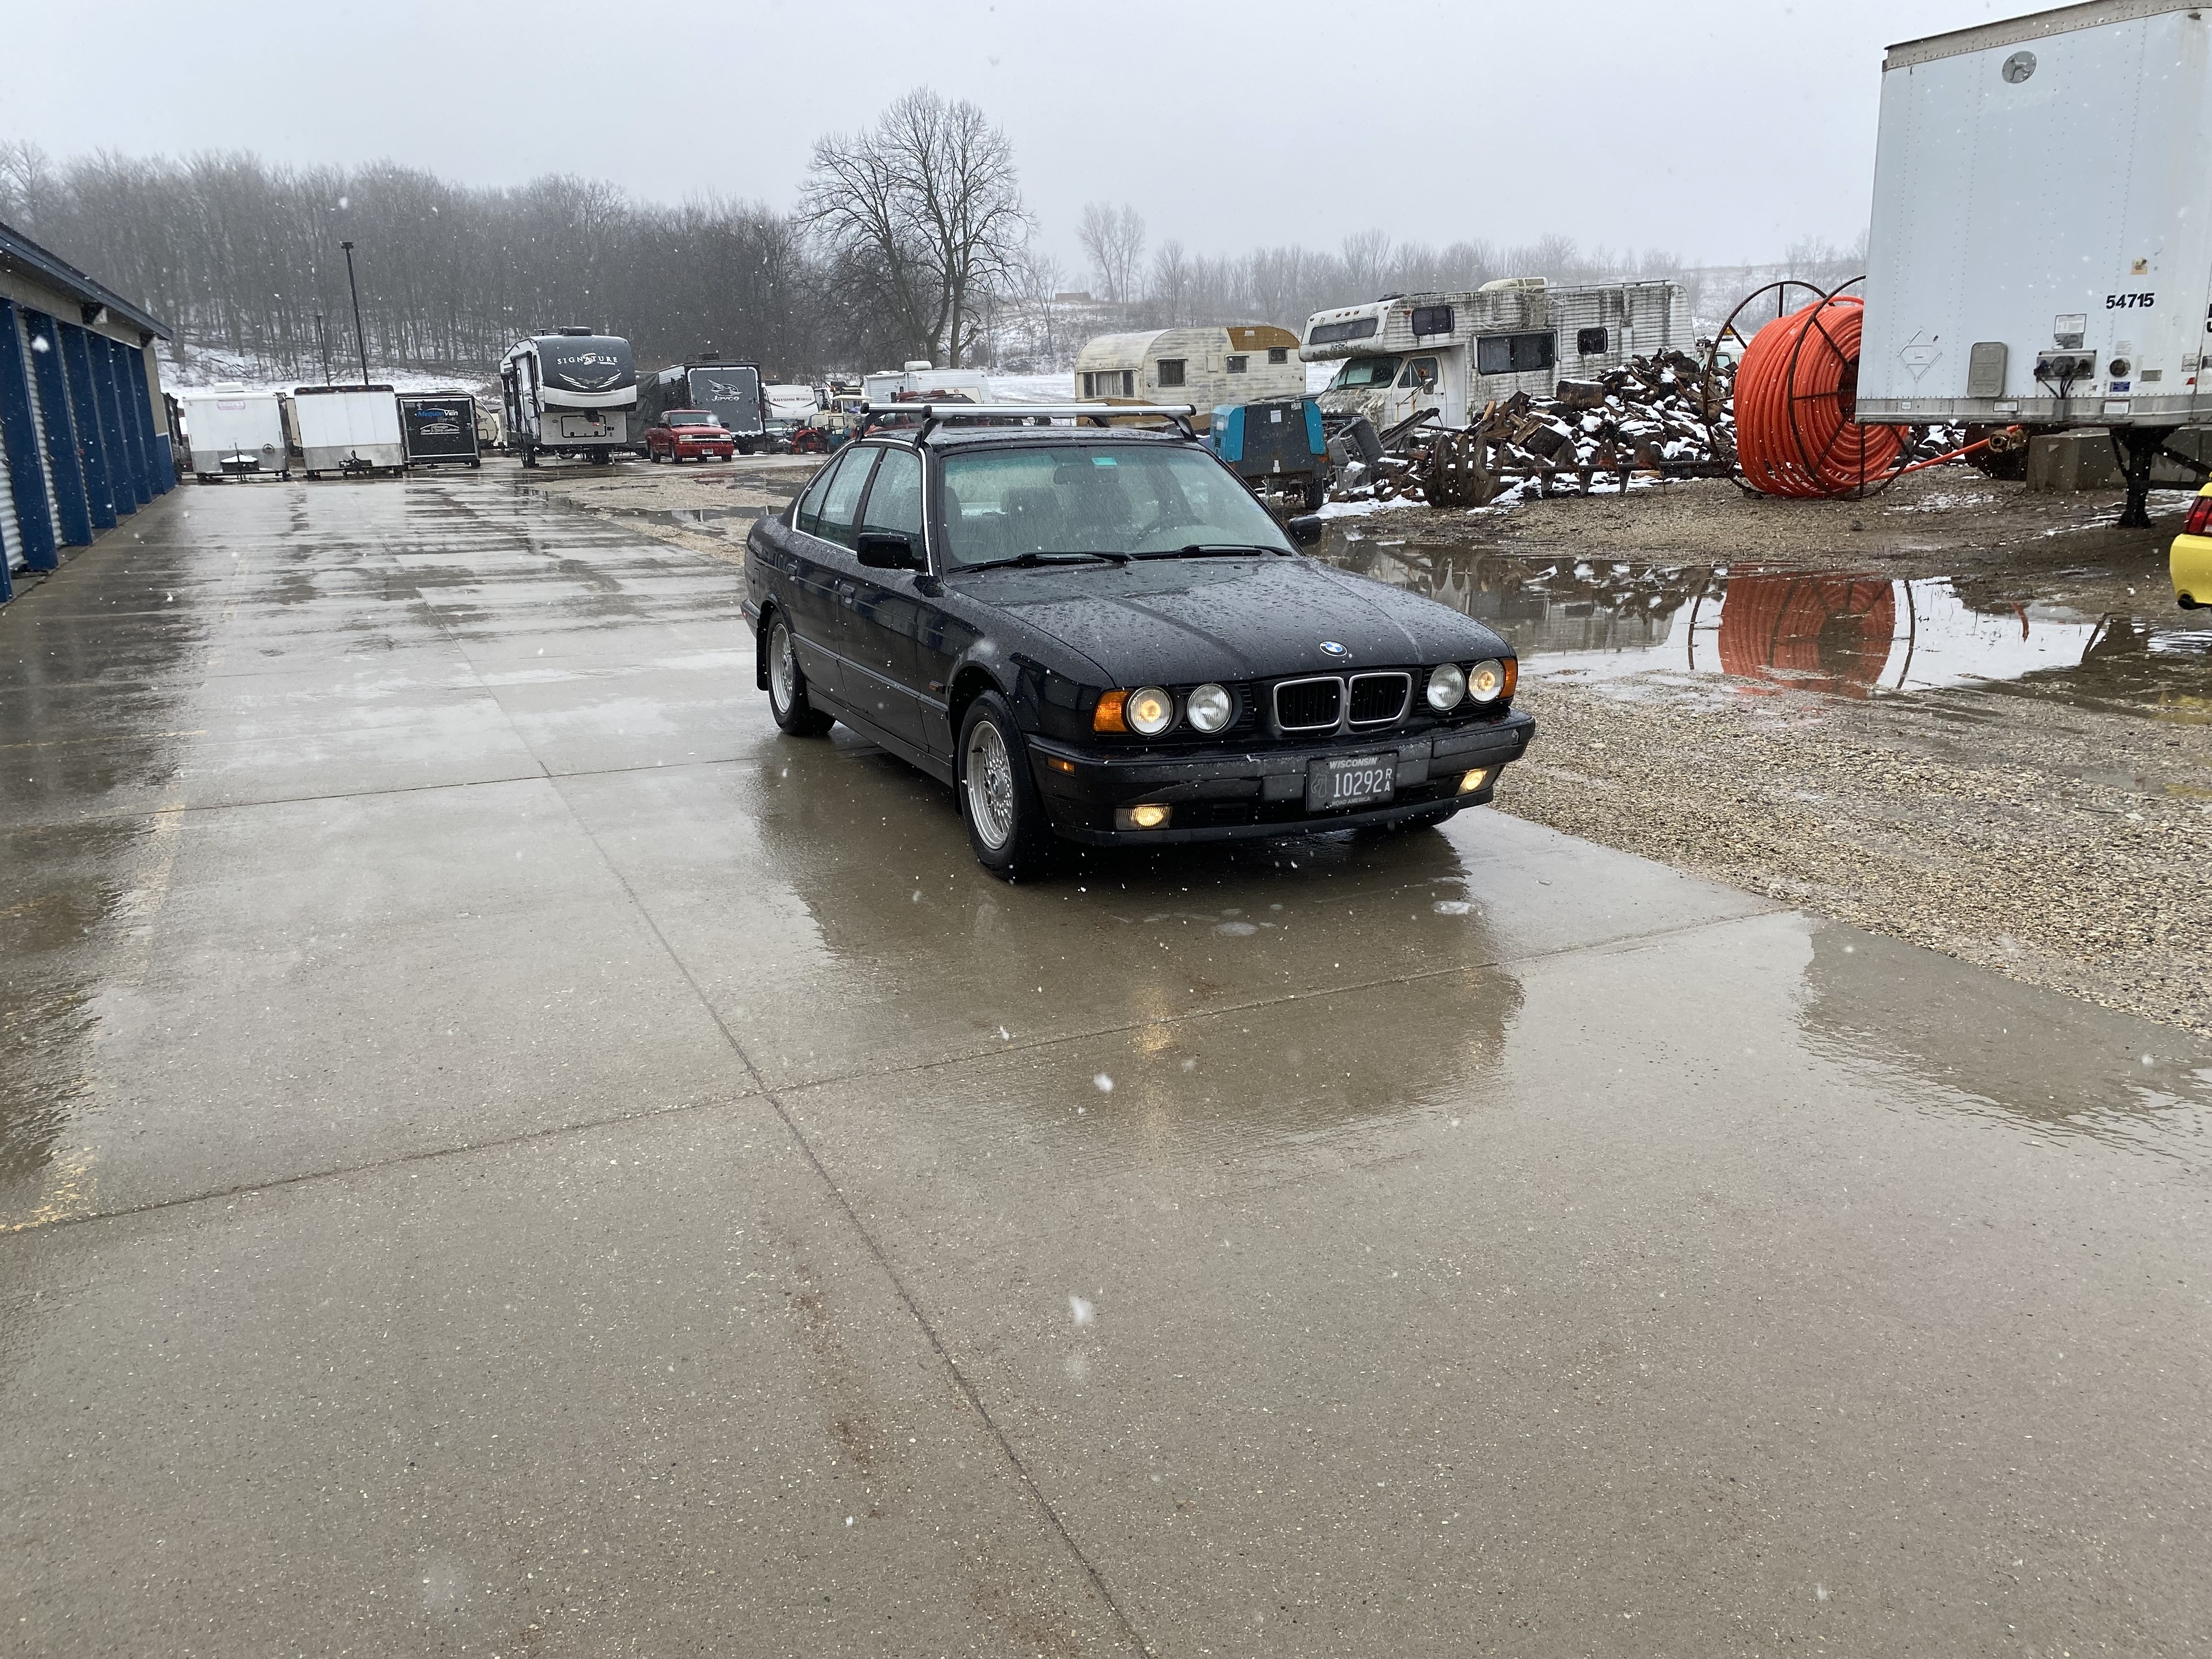
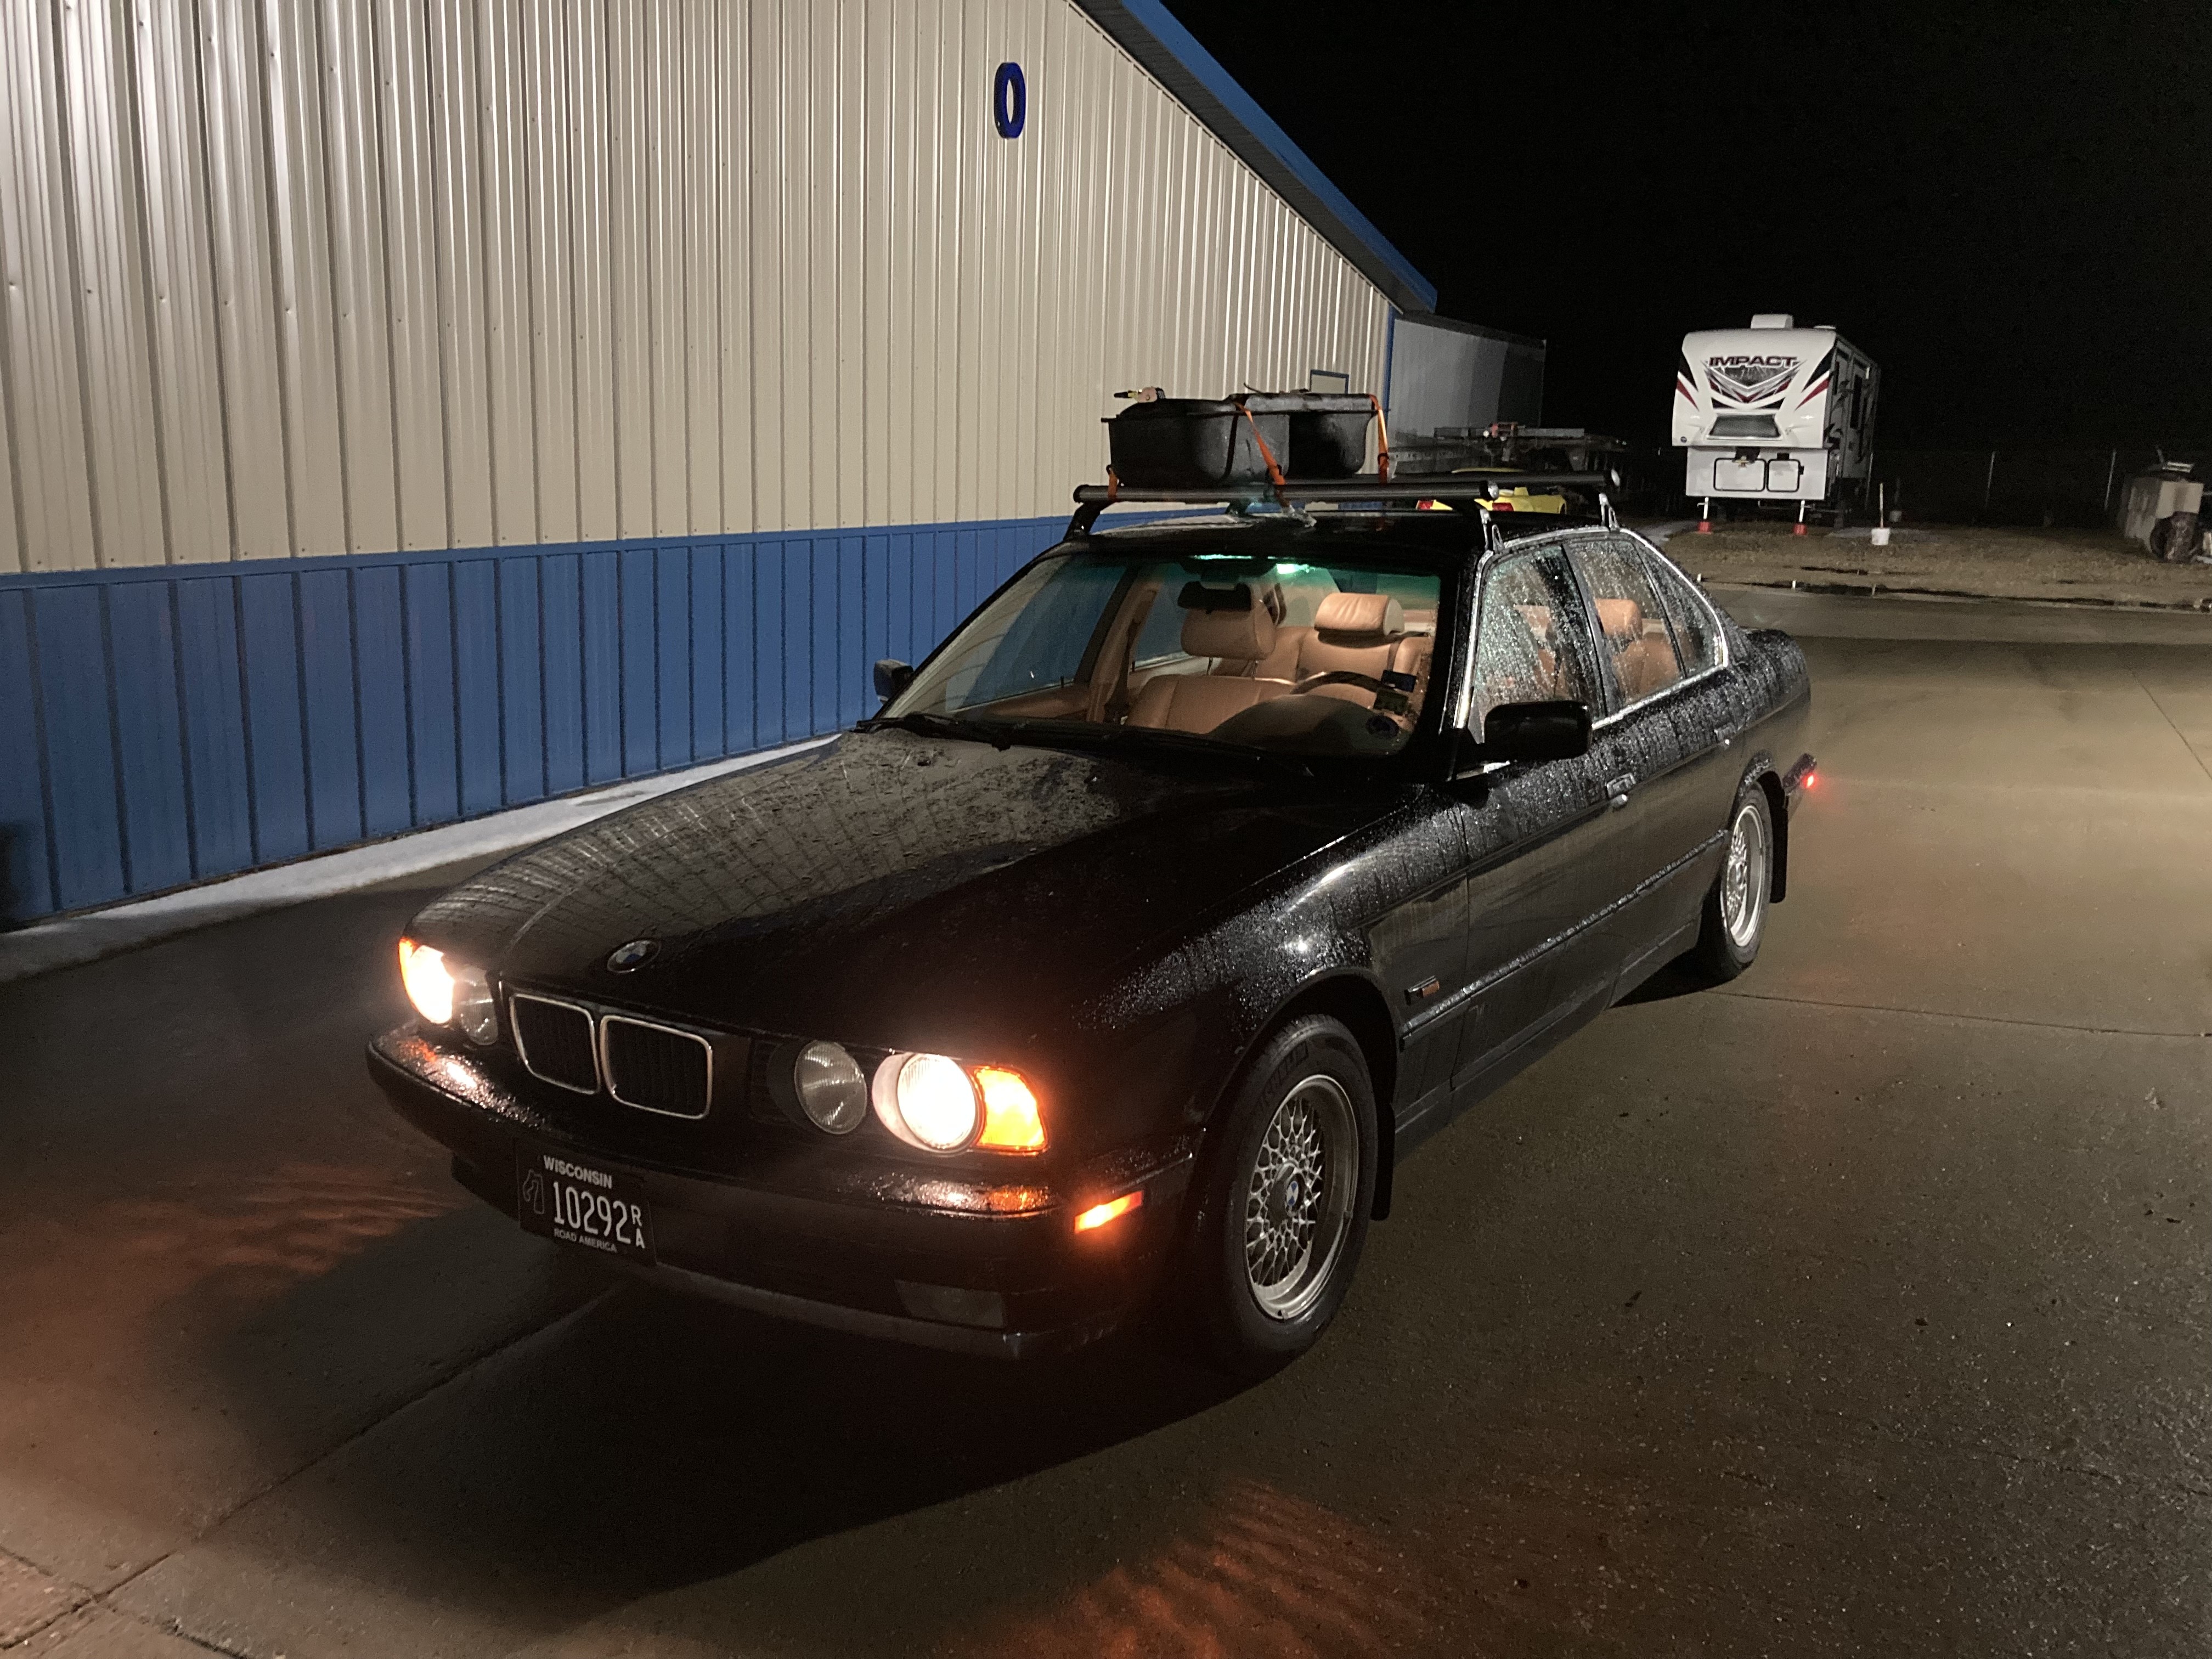
In other news, got the e34 into full winter mode just in time for spring, oh well. Mudflaps got added to keep crap off the rockers, and roof rack installed to carry the old fuel tank
 what, did you think I was going to put it in the backseat?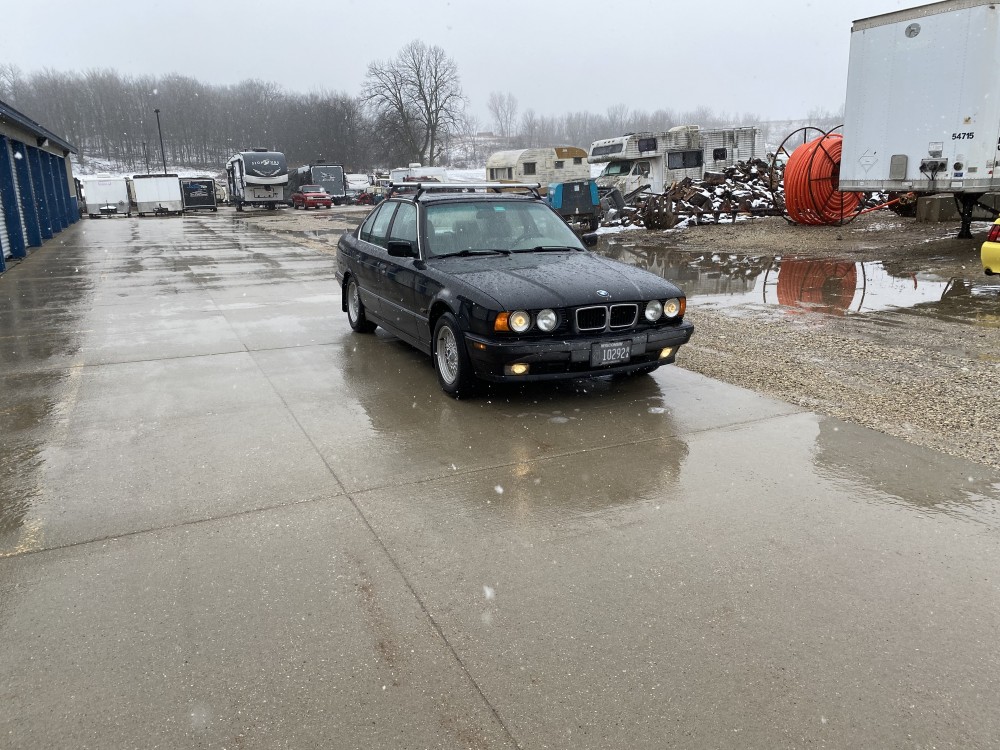
-
Depending on your OCD level, oem steel line is gonna be hard to bend making it that much harder to match up. I’ve always gone with copper-nickel for it’s ease of use and even then it’s hard to match the curves/angles. If you wanna make your own lines, I have the Eastwood flaring tool which makes that job 1000% easier. The only difficult part I remember from that job on the calypso was the 3 way tee in the rear took quite a bit of work to remove and clean up. The flares were seized for us at least so had to cut the line short and put the tee in the vice to use a socket on the flare. Idk if those tees are available new but that would save a lot of work too.
-
Depending on your OCD level, oem steel line is gonna be hard to bend making it that much harder to match up. I’ve always gone with copper-nickel for it’s ease of use and even then it’s hard to match the curves/angles. If you wanna make your own lines, I have the Eastwood flaring tool which makes that job 1000% easier. The only difficult part I remember from that job on the calypso was the 3 way tee in the rear took quite a bit of work to remove and clean up. The flares were seized for us at least so had to cut the line short and put the tee in the vice to use a socket on the flare. Idk if those tees are available new but that would save a lot of work too.
Noted, good to know. I’m perhaps unnecessarily wary of flaring my own lines, but it’s an option for sure. Might’ve been the shitty kits I used in the past though too. Bending the trailing arm line wasn’t too bad from what I remember, but I suppose these lines are a bit more complicated. I’ll let you know! It’s probably going to come down to price, if the OEM lines and fittings come out to be more than $150 or so I might just get the chase bays setup to be done with it.
-
OEM lines don’t show up pre bent, at least for the long run to the rear brakes
on my old red e30 I ran chase bays line for the main rear run, it was quick and easy
my current car I went the copper nickel route and re did all the front line and flared stuff. Also super easy to work with
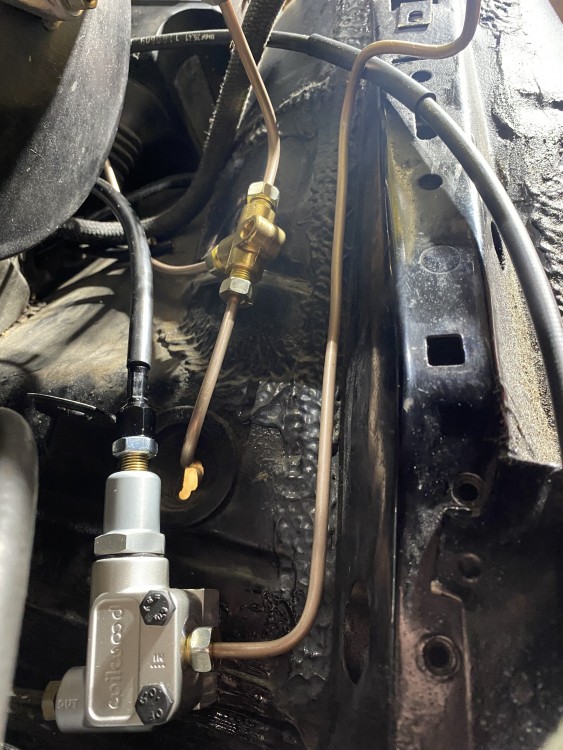
-
^ thats the same tee used in the stock position in the rear. I hear ya on the diy flaring, you’re right though the tools have always been the problem. The split die style flaring tool makes perfect flares about 95% of the time. The only time it doesn’t work is because the line wasn’t square. Remembering to put the flare nut on the line is the hardest part
-
^ thats the same tee used in the stock position in the rear. I hear ya on the diy flaring, you’re right though the tools have always been the problem. The split die style flaring tool makes perfect flares about 95% of the time. The only time it doesn’t work is because the line wasn’t square. Remembering to put the flare nut on the line is the hardest part
That is the exact part for the rear T lol, wanted a m10 bubble flare fitting, figured that would be the easiest to find

-
Man, it’s been a bit since I posted on this. Mostly because I haven’t touched it since last post really
 I swore I’d never let a project sit but here I am.
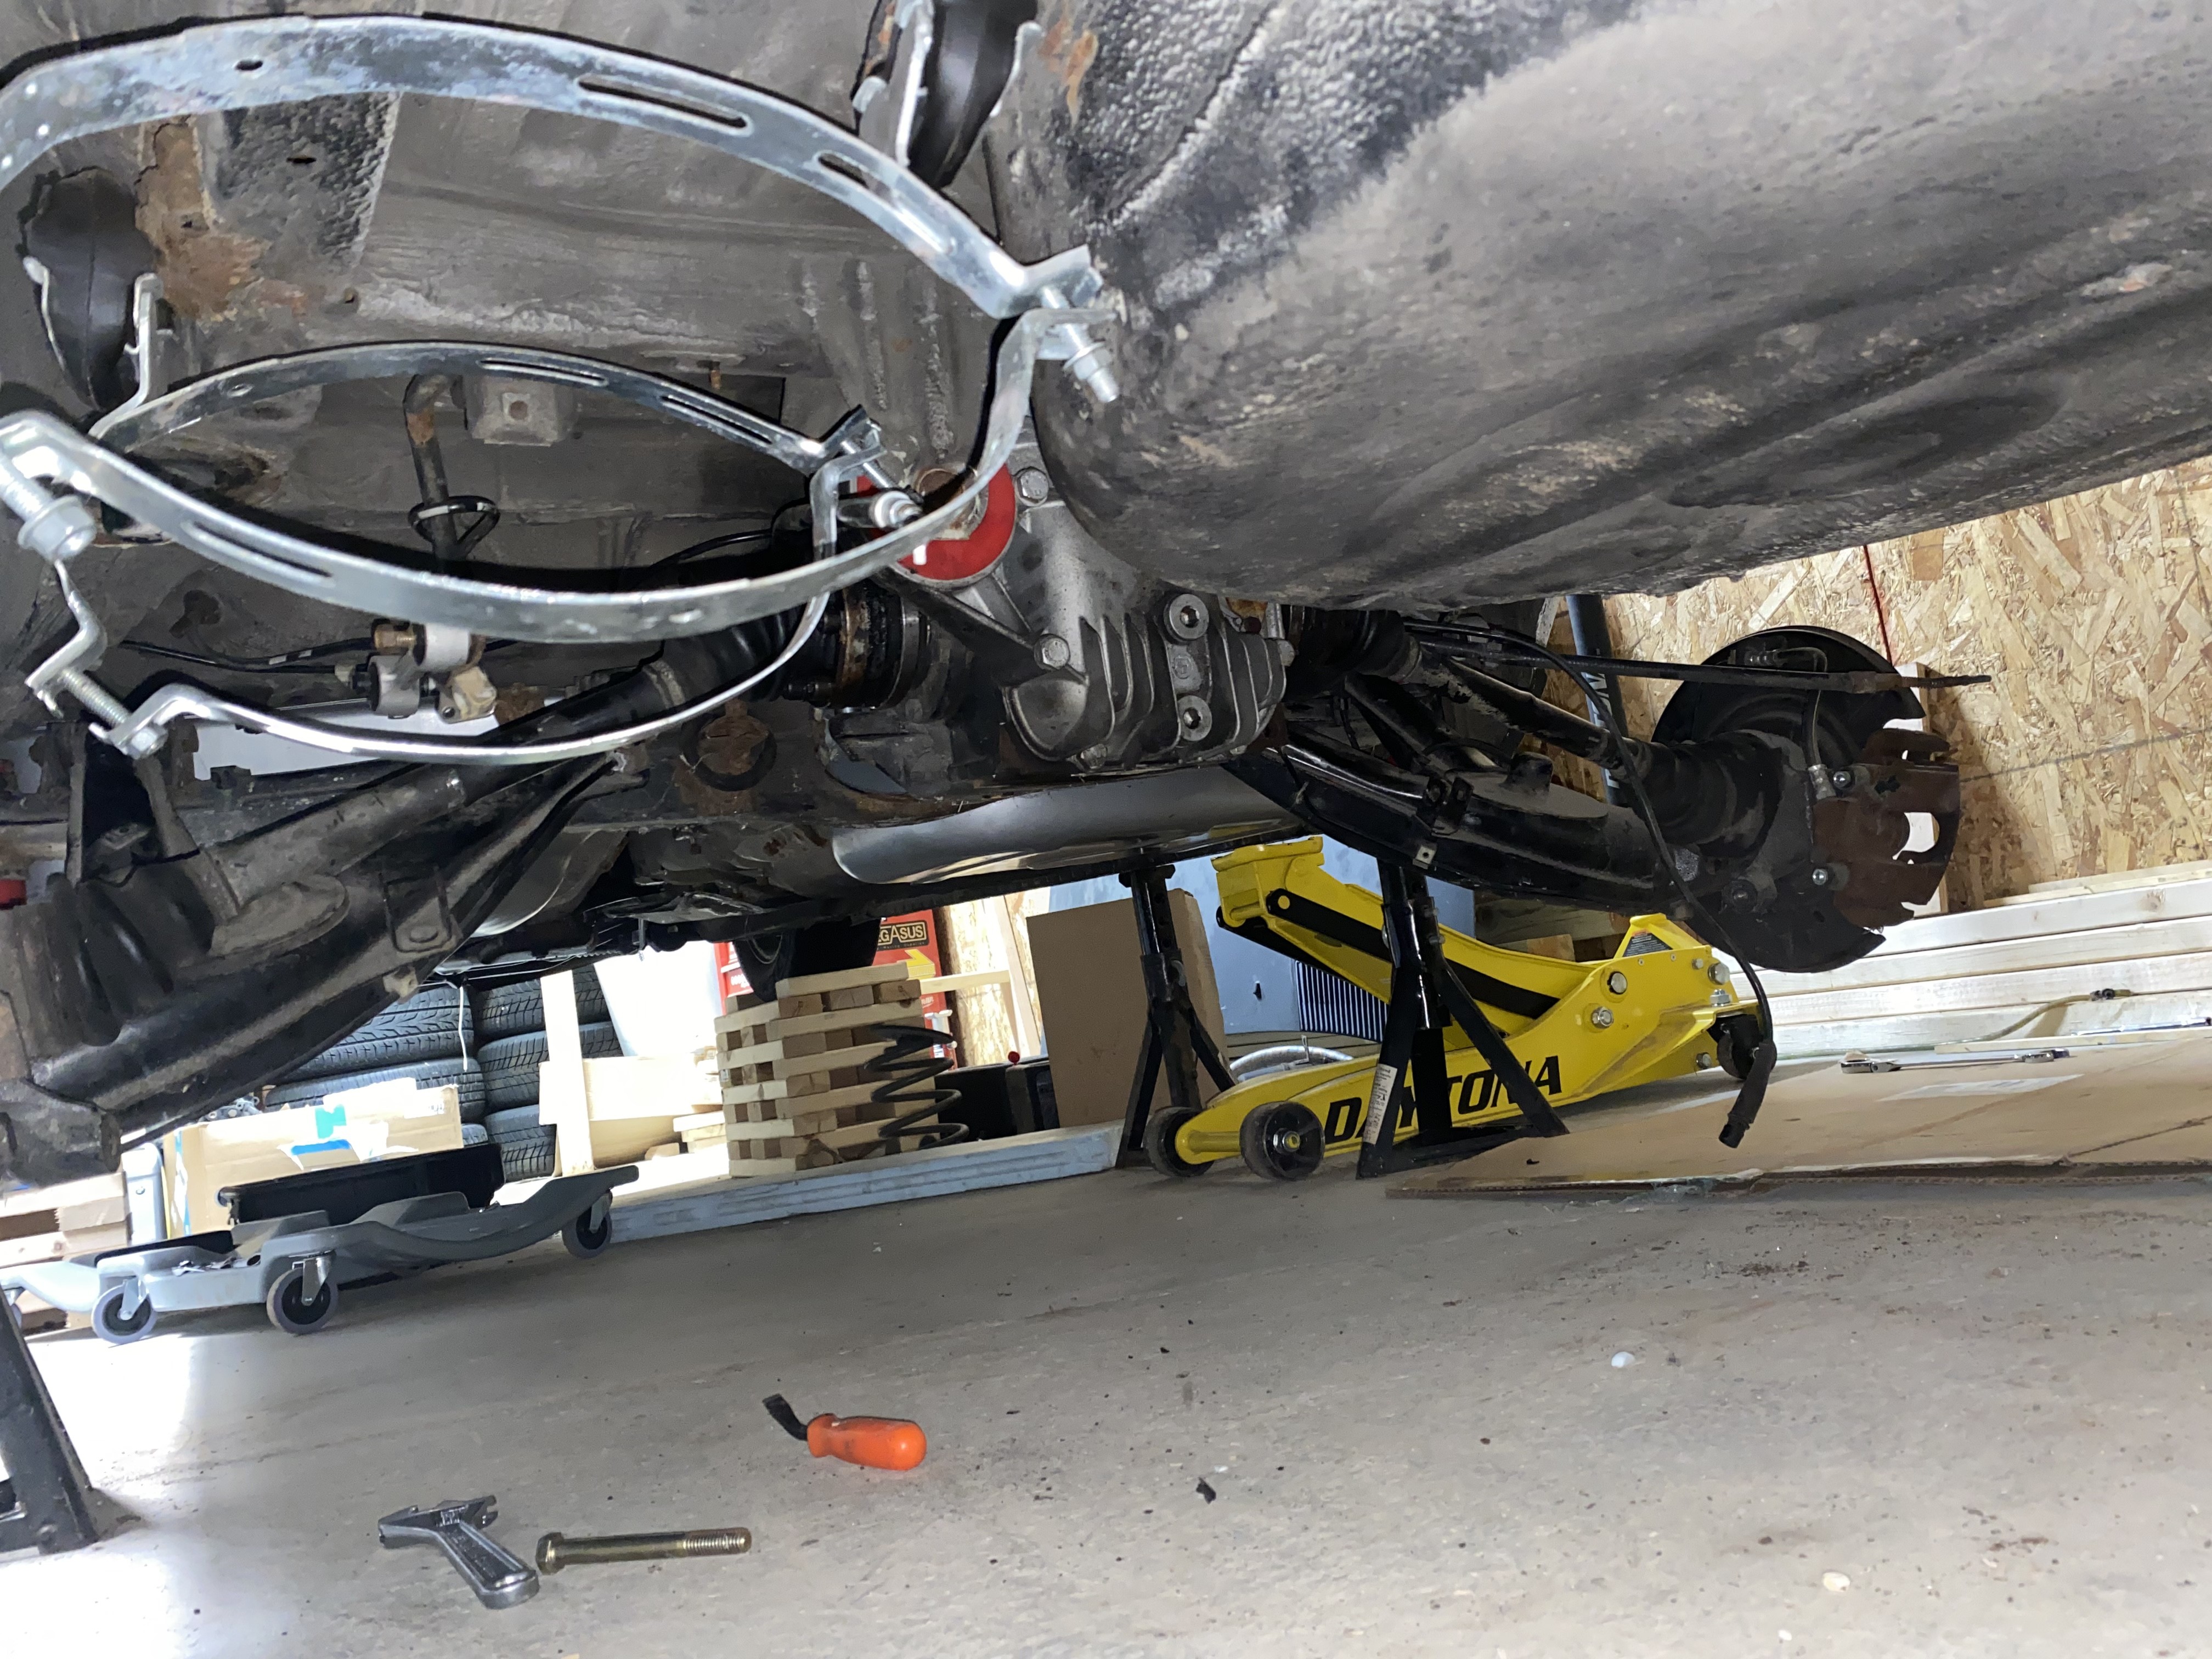
Two weekends ago I finished bending all the rear hardlines after I kinked one of the short ones last spring and got frustrated and stopped working on it (I also got stupid busy, but hey). Fuel system can now go back in, subframe after that, and then the car can come back down and get re-situated for the manual swap! I decided to go engine-out for that one since the oil pan gasket needs replacement, the timing belt is due, and 80% of everything else is already disconnected.
Excited to hopefully make more progress this winter spring when I have time, I’d like to get it done before June so I can enjoy it and shake it down before a planned Blue Ridge parkway road trip this fall. Hoping that once the rear end is back together things will progress more quickly.
-
Sheesh, long overdue for an update here.
I’ve been lagging on getting this done; the spring ended up being completely full (like, every single weekend from January to May) with water ski team maintenance stuff, and the season went until May to now. The team hasn’t had an official member dedicated to fleet main fence in a long time so the backlog was enormous. Like, waterlogged and rusting boat trailer bearings that haven’t been repacked in a decade, rotting trailer floor, and broken bilge pumps and blowers, enormous.
I’m finally getting a chance to get back into cars though thankfully, and have made some good progress! It feels amazing to be finally getting somewhere.
Fuel tank is back in and the tank-adjacent stuff is plumbed in. I’m holding off on installing the fuel hardlines until the engine comes out and goes back in so I don’t accidentally damage them. My brake hardlines seem to fit nicely though, which is exciting!
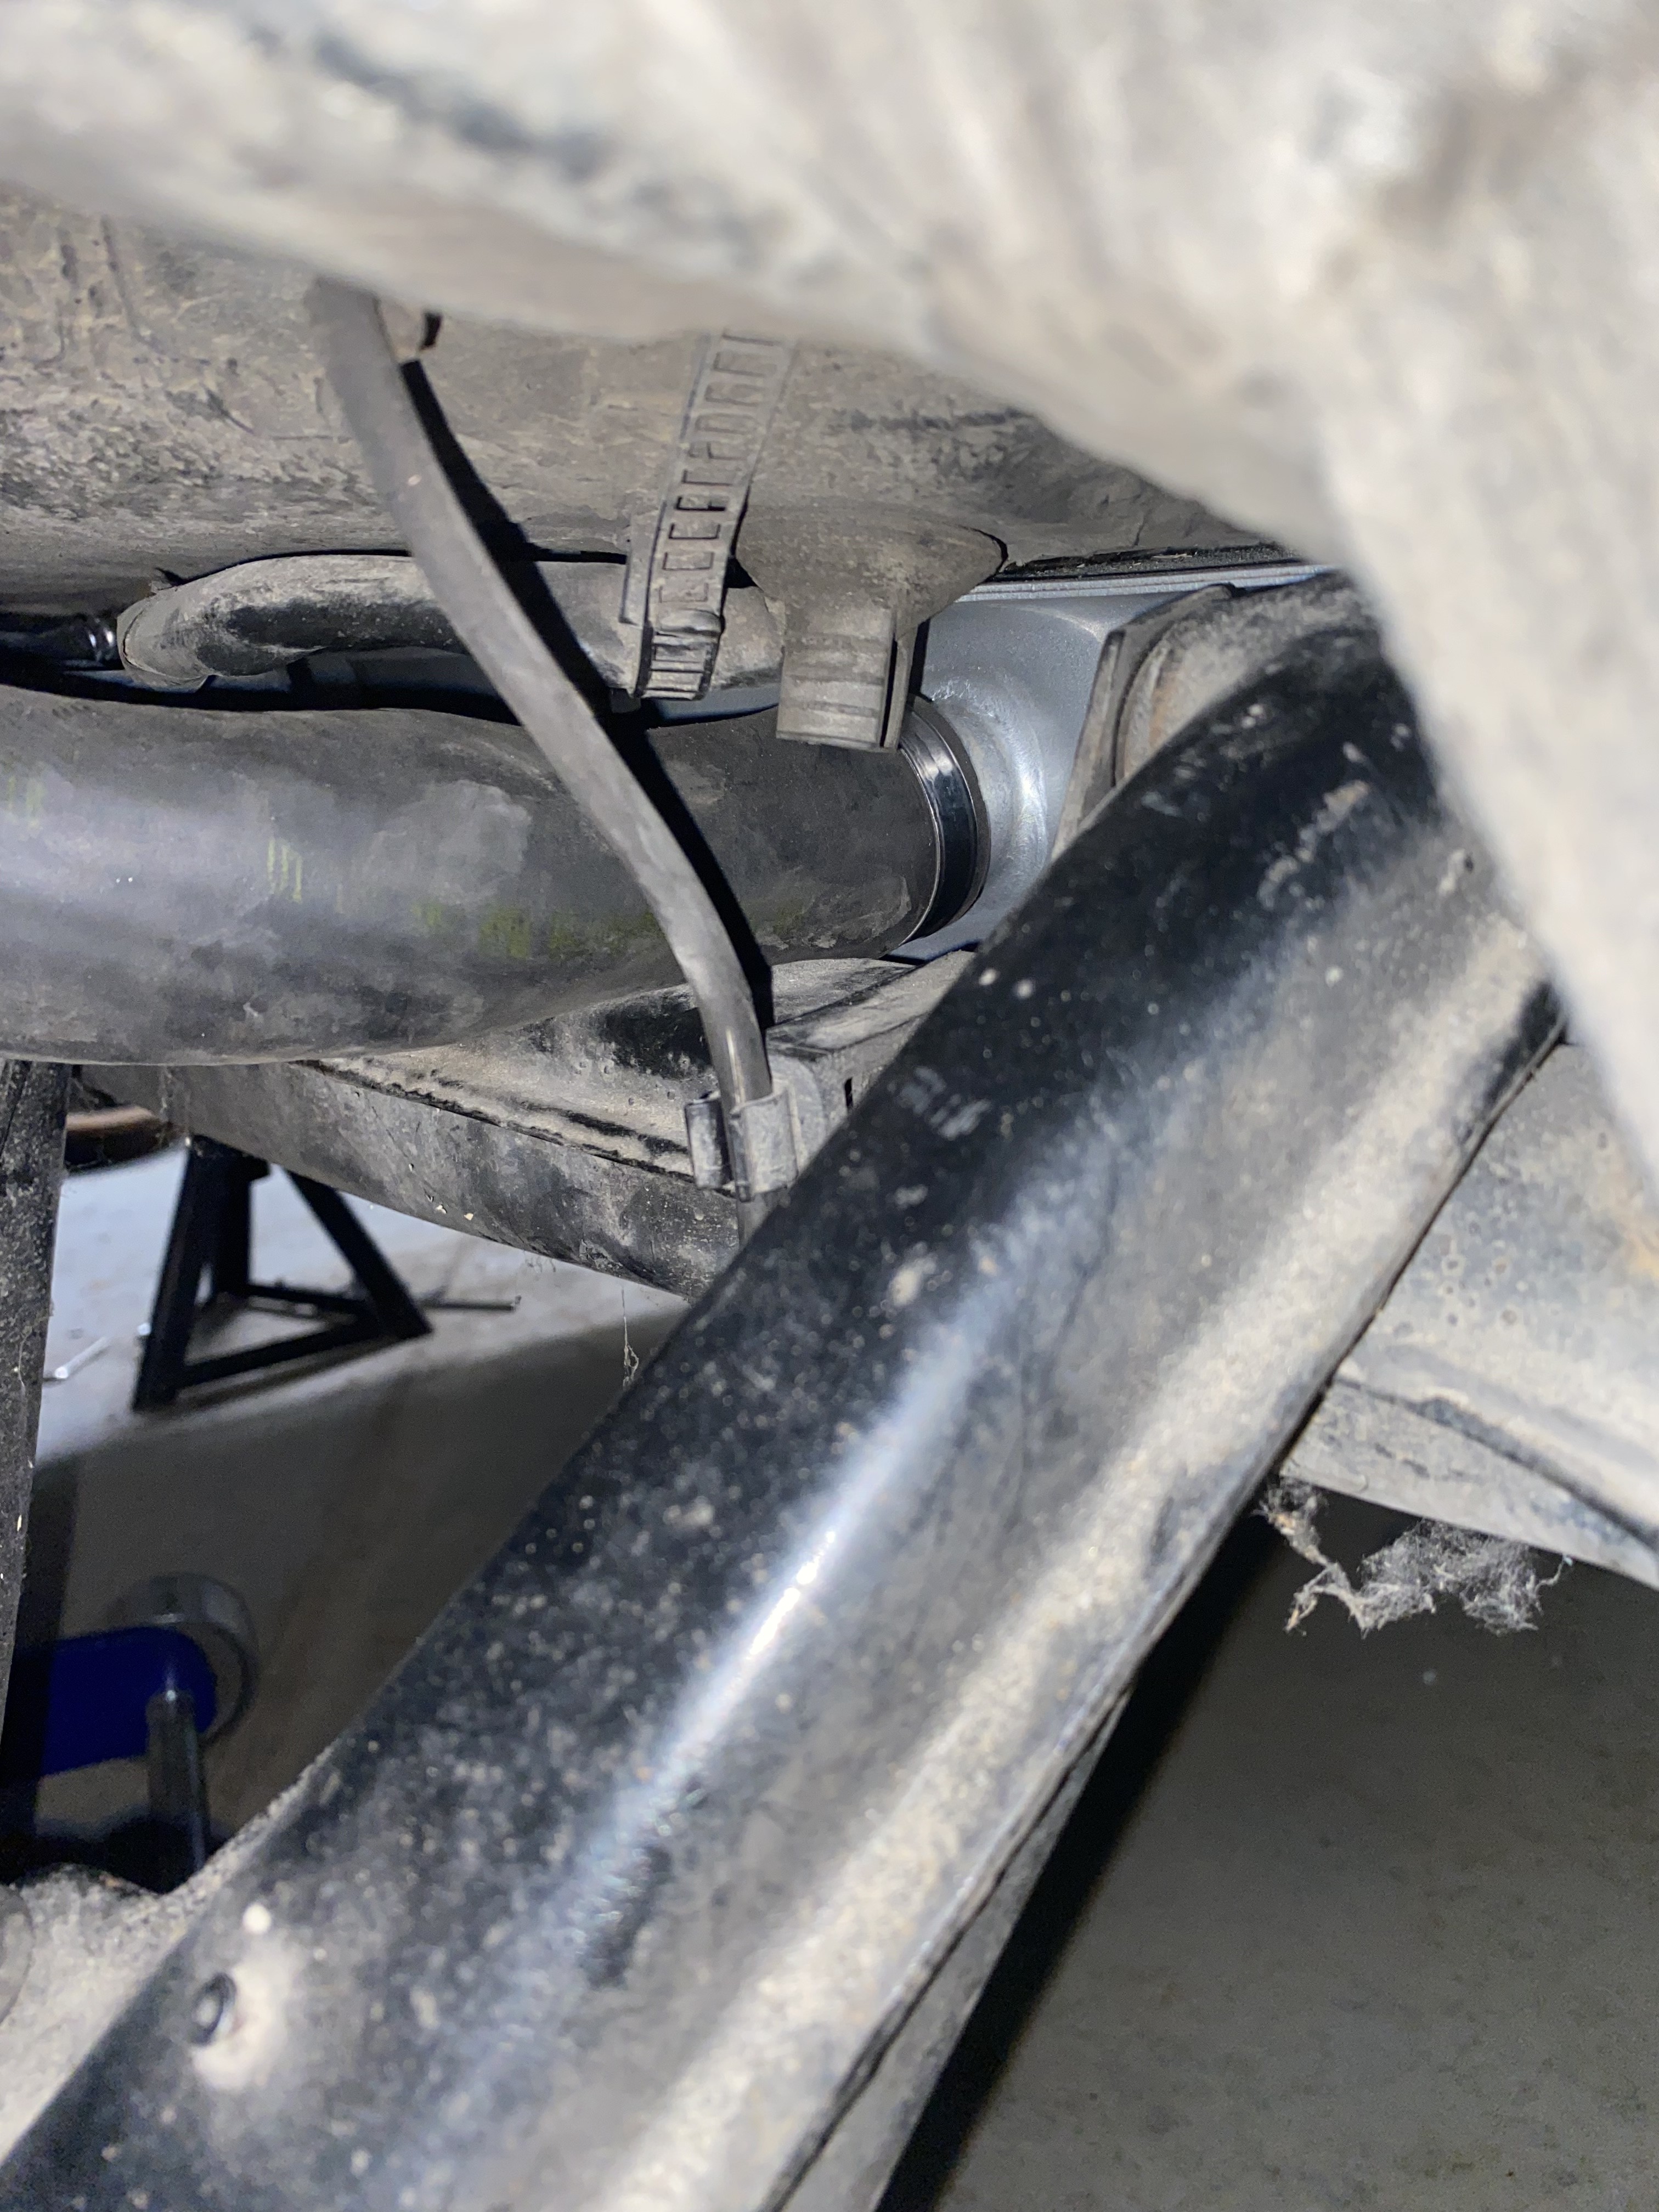
And tonight, for the first time in something like 20 months, the car’s subframe and chassis were reunited. Big stuff! My only concern so far is that the fuel tank neck is contacting the subframe because of the subframe riser bushings; it doesn’t seem to be severe though, so I’m probably going to leave it. Don’t have much of a choice I guess.
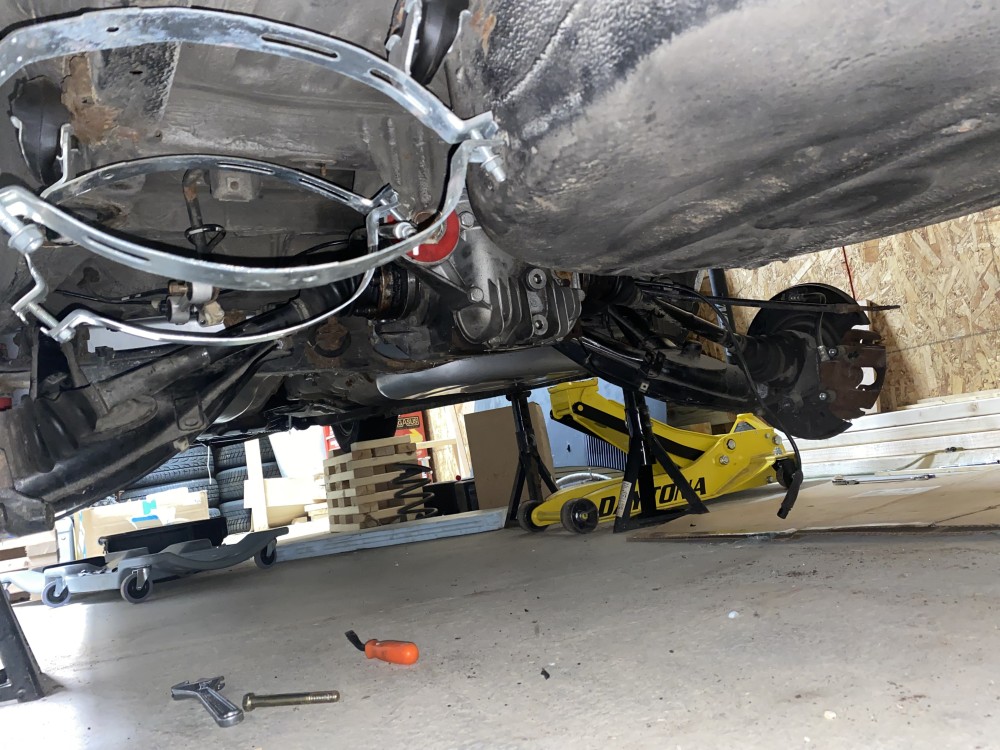
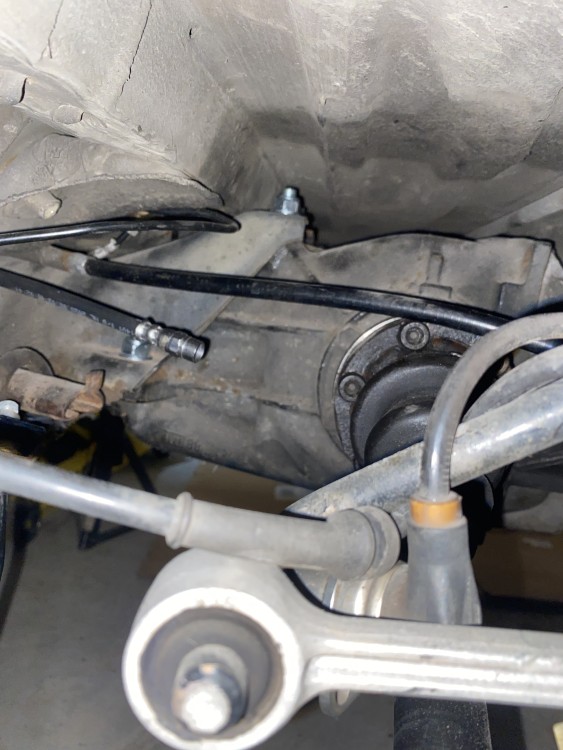
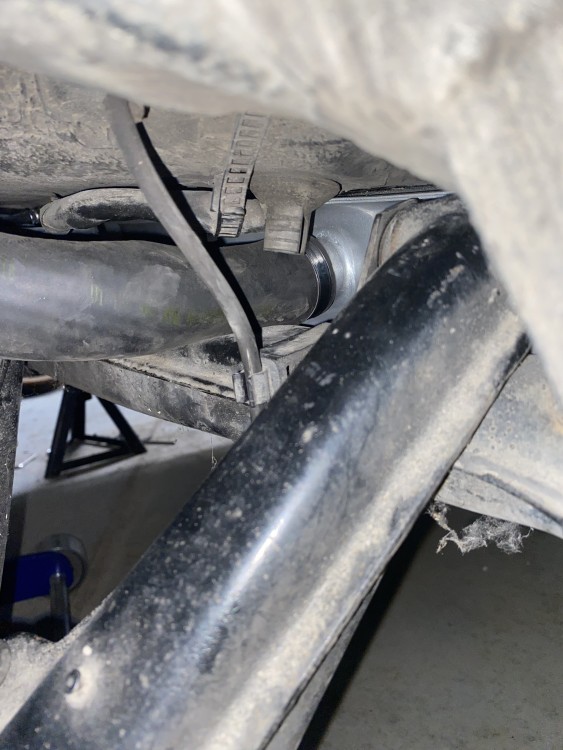
Engine oil has been drained, PS hoses disconnected, a/c lines are unhooked, and all fuel/intake/other things have been disconnected in the bay other than the starter ground strap, oil cooler lines, coolant hoses, and the DME. The plan is to button up the rear end ASAP and get it back on four wheels so that I can reposition it, then yank the engine and get cracking on the swap stuff/timing belt. Also planning to get the HIKfab skidplate welded on by @rampelsauce while the engine is out, should make it a snap to weld and repaint.
Hoping to make a lot of progress this fall. I’d love to get it done, but I’ve made promises like that before (look at how long it’s been sitting). It WILL get done before next summer; the ski team is doing an 80’s themed show and it’d be sacrilege to not have the quintessential 80’s car not running for it.
-
Had an interesting issue today I’d like to pick everyone’s brains on: reconnected everything on the e30, engine back in, cranks but no start. Cool. Engine and entire fuel system have been removed and out back in, so not that surprising.
I started with the fuel system because it was the fastest - I pulled the fuel return line on the FPR, and it was bone dry even with cranking for a cumulative 20+ seconds. Didn’t smell like fuel either (new lines). Tried jumping fuel pump relay, no dice, so it’s something with fuel delivery. Found that the fuse is blown. Replaced, it blew again when I cranked it. So a short of some sort or a bad pump.
This is where it gets interesting. I used a Milwaukee M12 battery to directly power the pump - ran fine. I then put my multimeter in-line and got something like 2-3 amps. Cool, so not the pump?
Not so fast! I then used the multimeter on both pin 87 at the relay socket (feeds power to fuse and then the pump) and tested resistance to ground (with the pump unplugged) expecting to see low resistance indicating a short somewhere. No dice - seems to be normal with no completed circuit.
After a lot of double checking of that result at various locations, I hooked up a jumper wire from the power wire of the fuel pump to the positive connector on the pump itself - but NOT connecting the ground on the pump to body/harness ground. I then jumped the fuel pump relay again, and POP goes the fuse again.
So it appears my pump is faulty and shorting out internally? Anyone ever experience this? I’ll be ordering a new pump from FCP tonight but just seems weird. The car did sit for three years since it last ran, but it was inside and dry. No fuel pump issues before I parked it and the existing pump has about 10 years and 20k miles on it only. No idea of brand. Anyone have any thoughts?
-
Update: It runs! I pulled the fuel pump assembly thinking I might’ve pushed a wire so it was shorting, and noticed my wires going in were opposite the ones on the pump body (brown to red, and brown to green/purple). The connector was busted partially so I just zip tied the two piles together when I put it back together; I must’ve reversed those somehow. Corrected it, was able to jump the fuel pump normally, and the car fired off almost immediately! Now for the clutch slave, driveshaft, and exhaust! Nearly there!
-
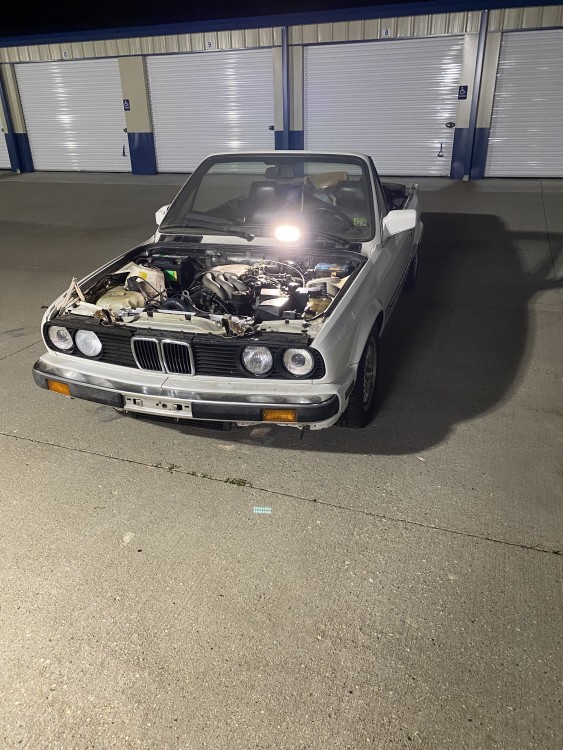
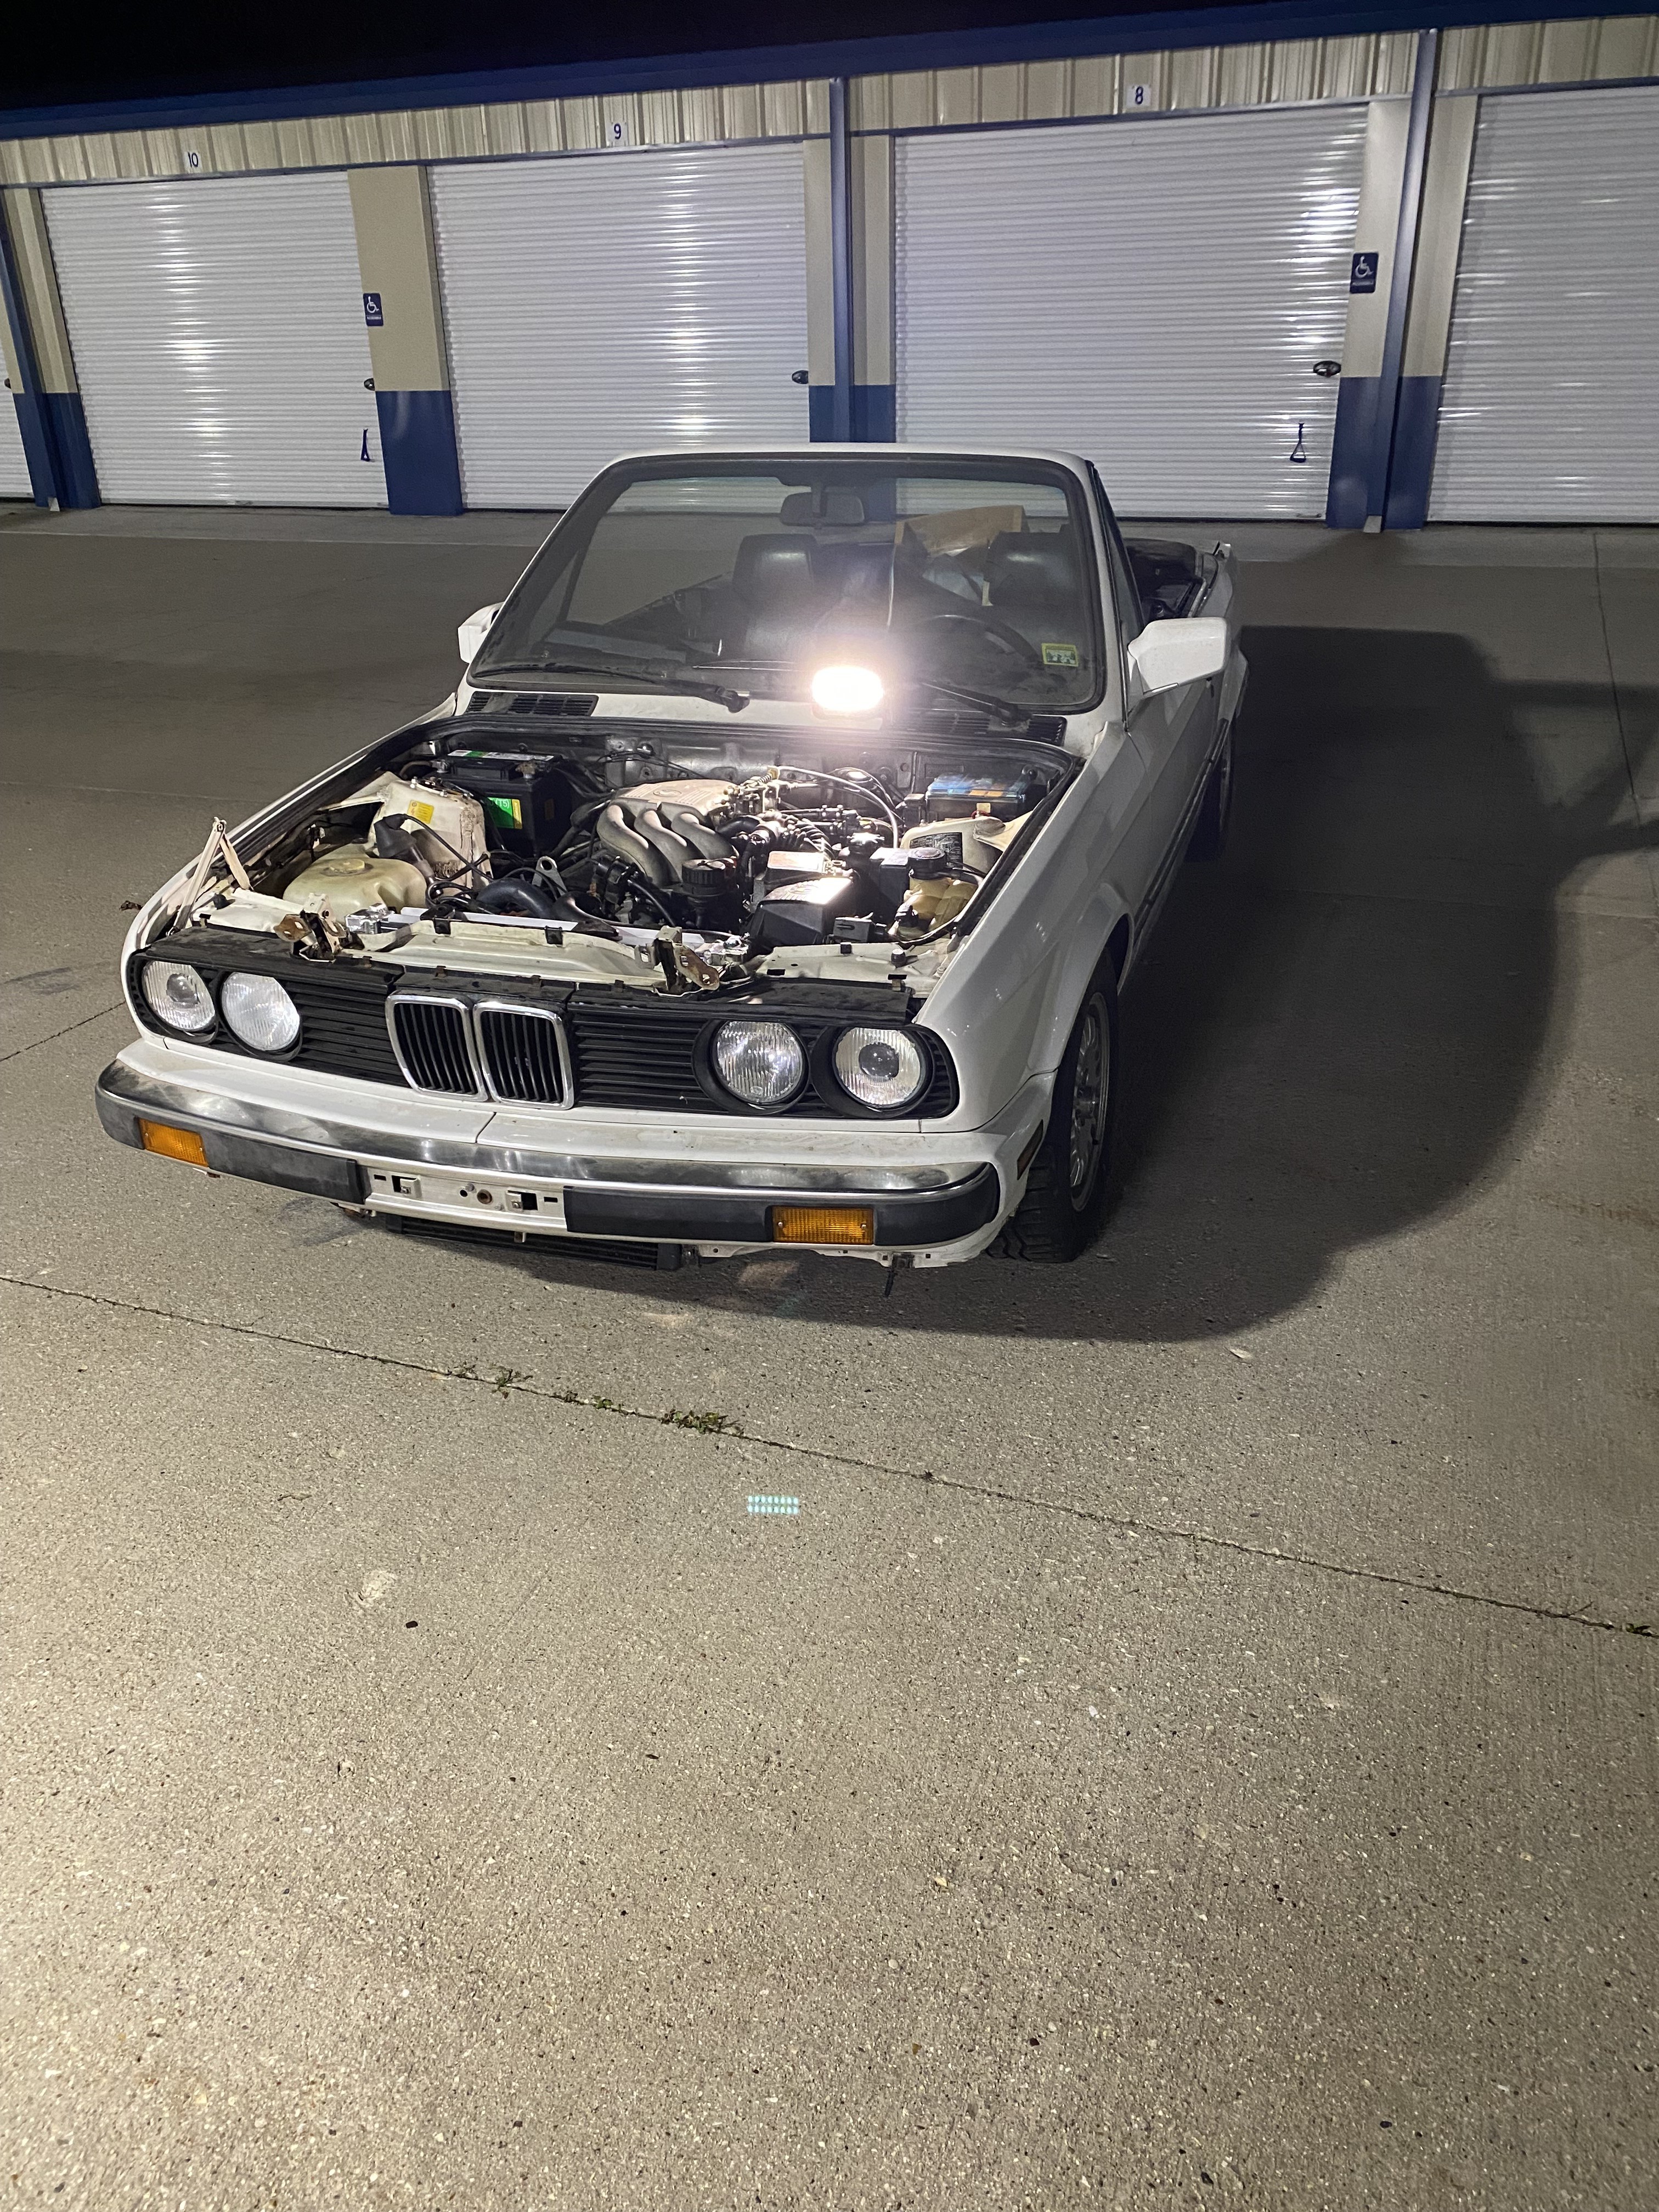
It drives!!!!! First time in nearly three years that this car has moved under its own power and it feels oh-so-good.
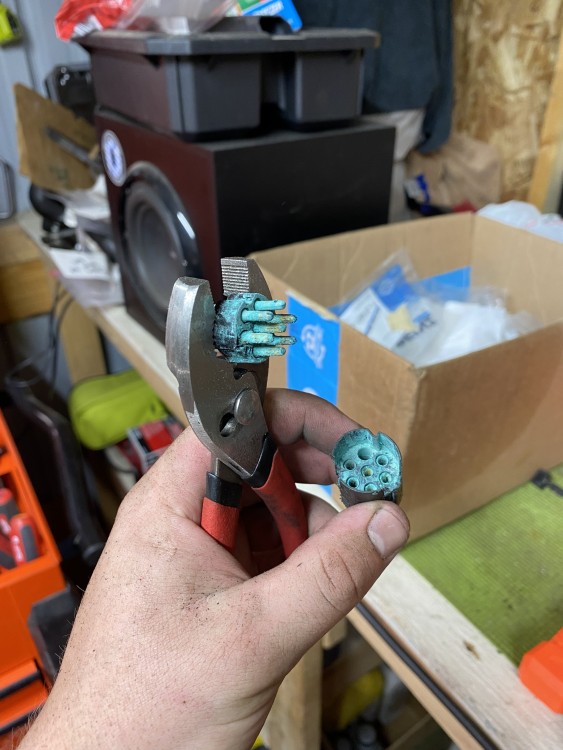
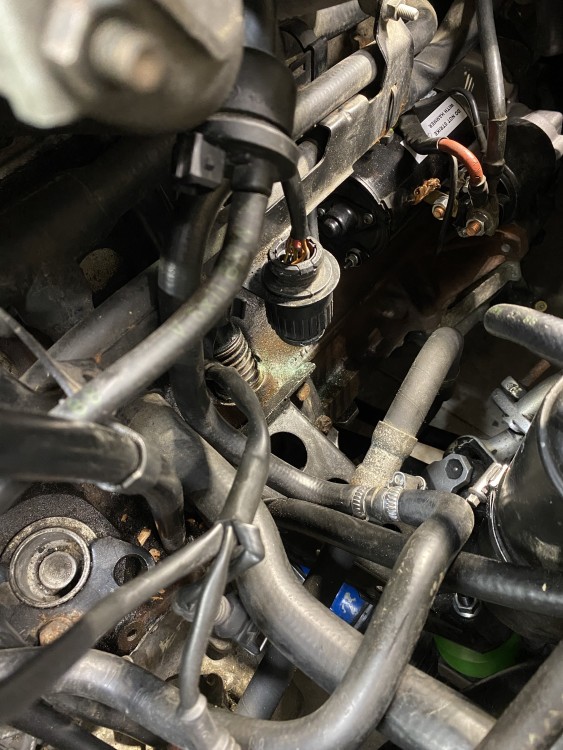
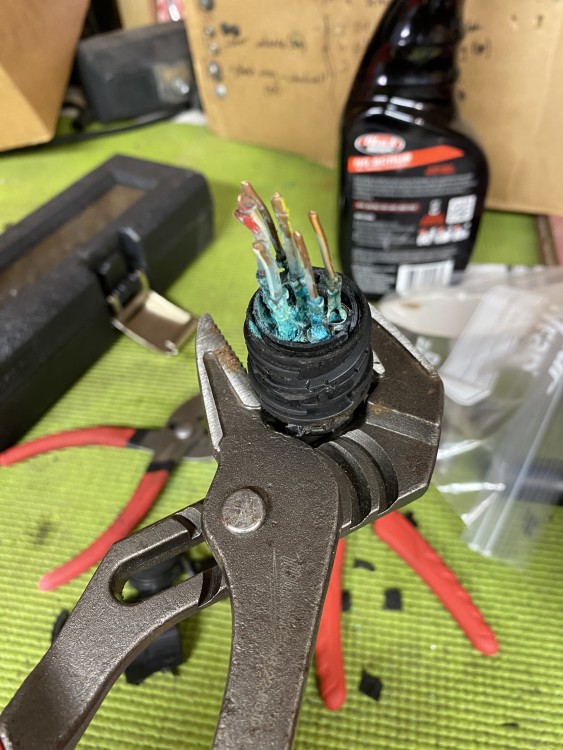
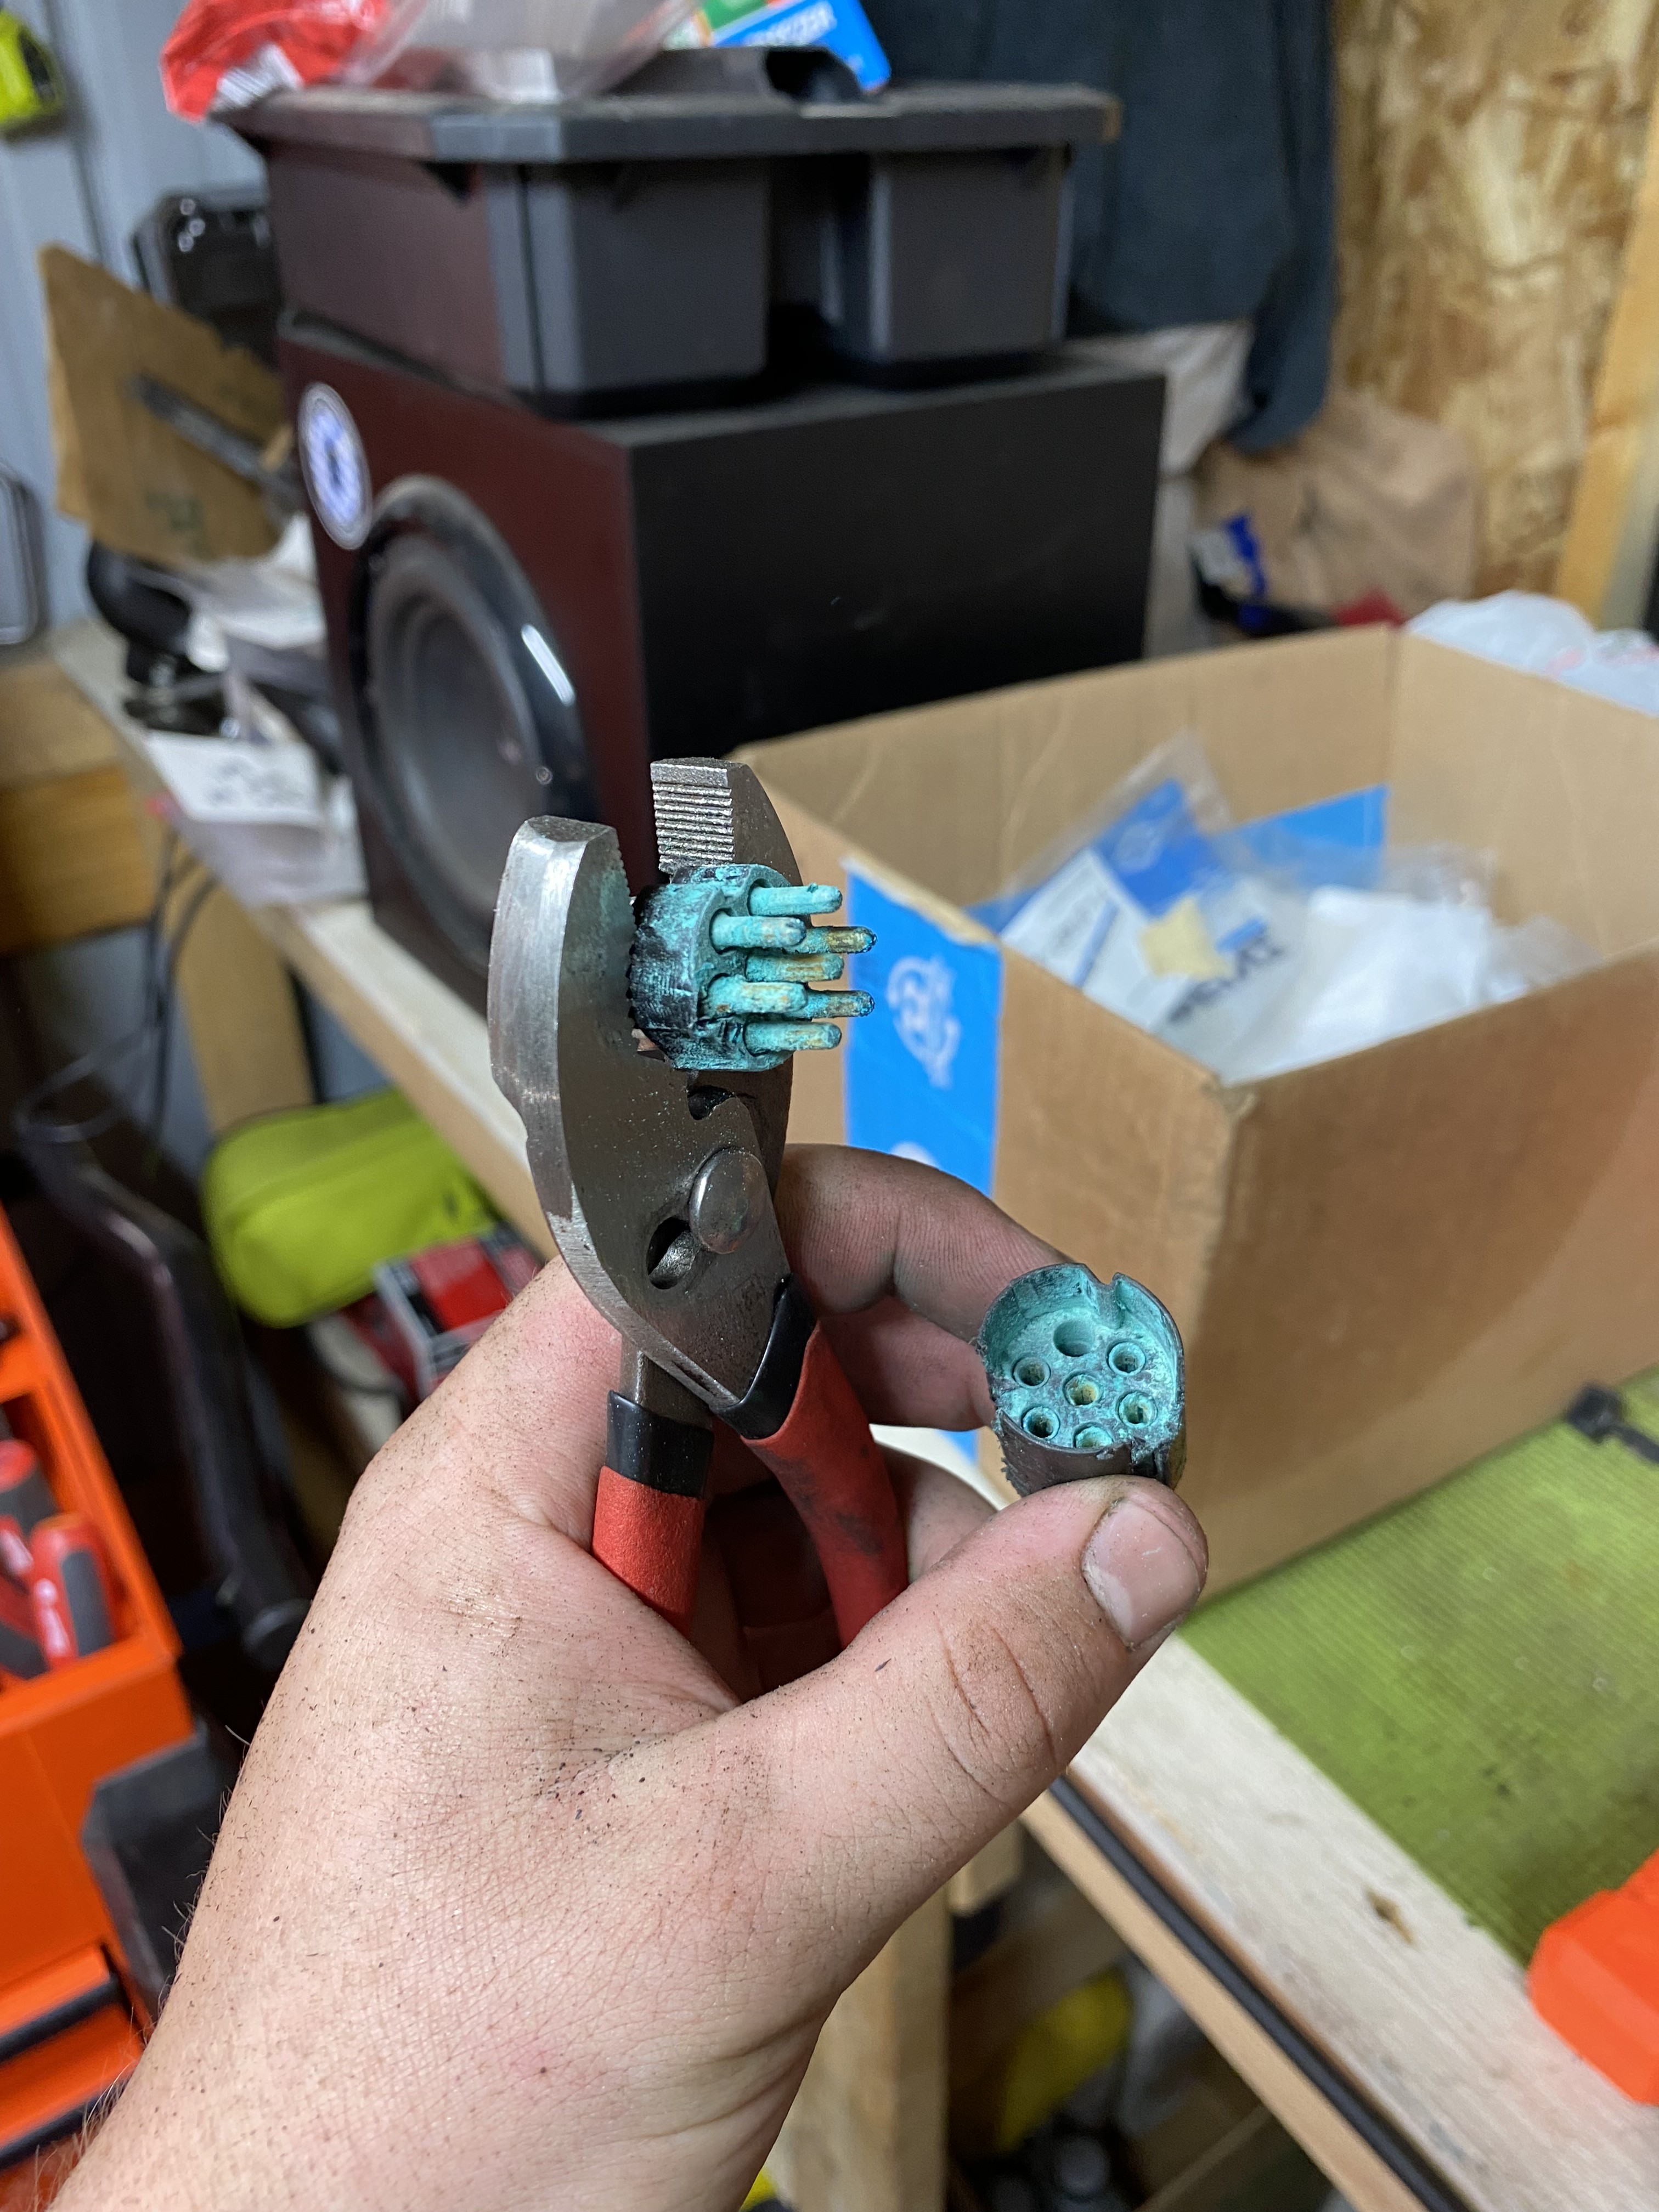
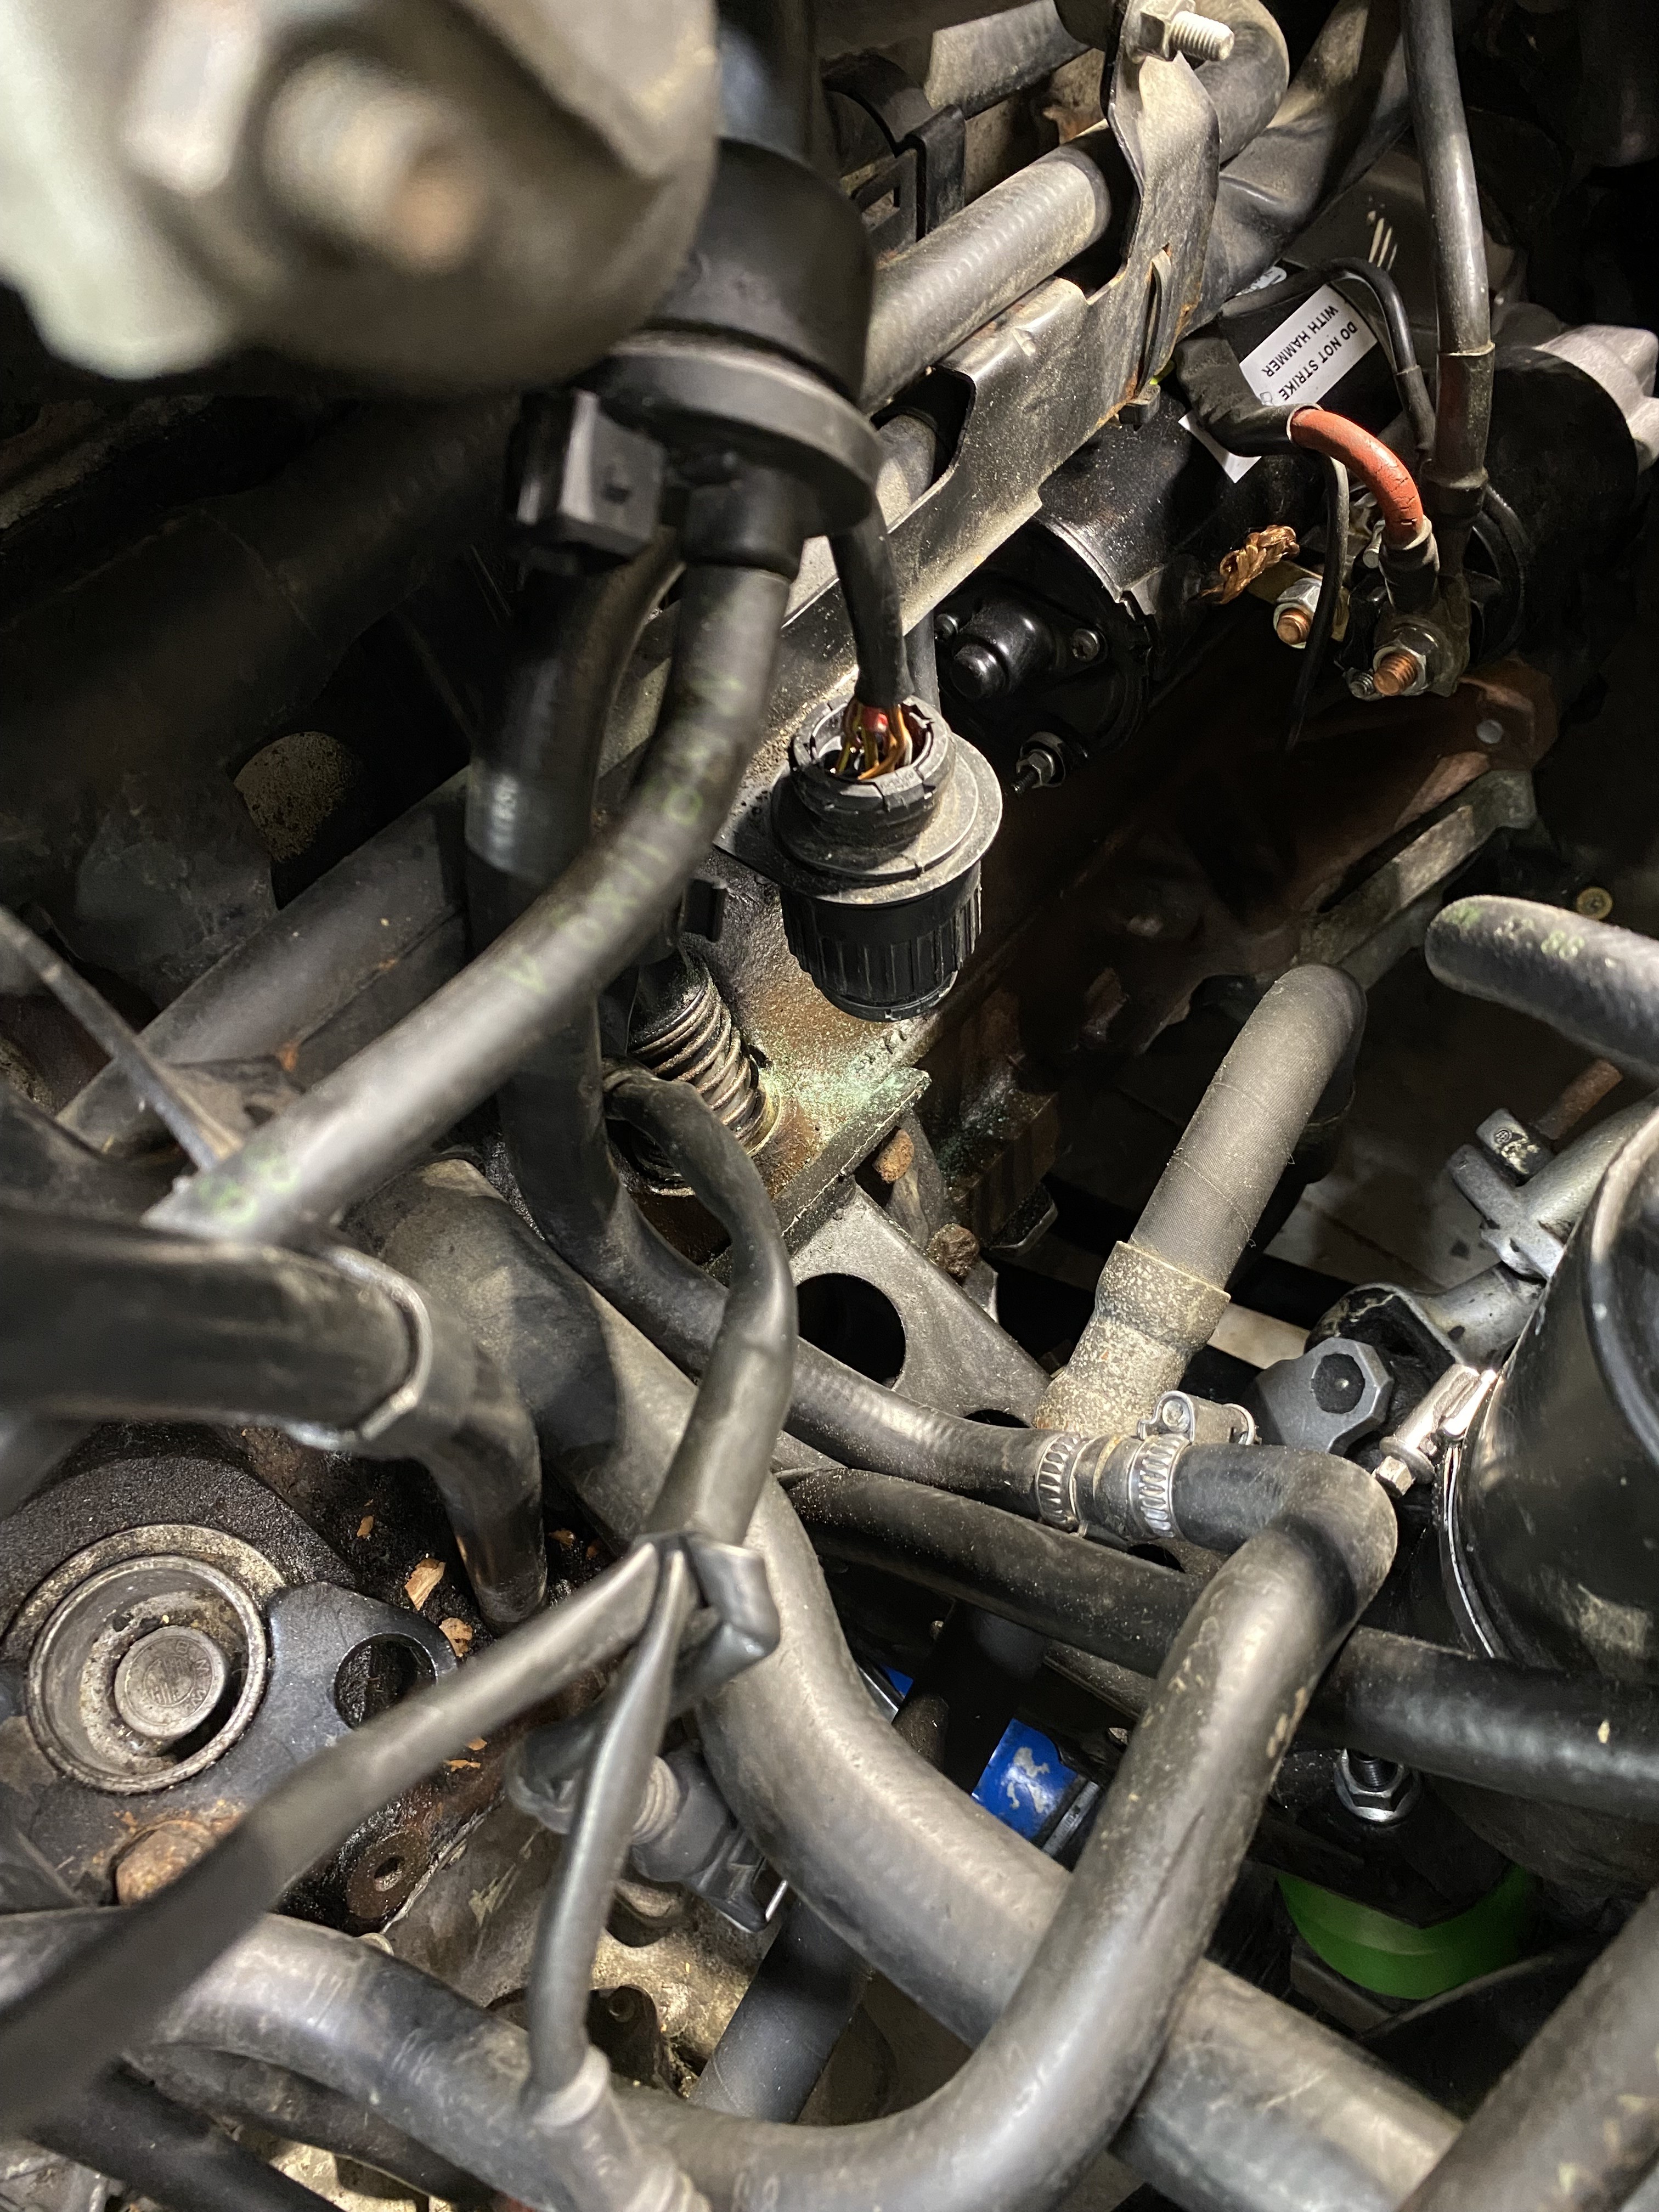
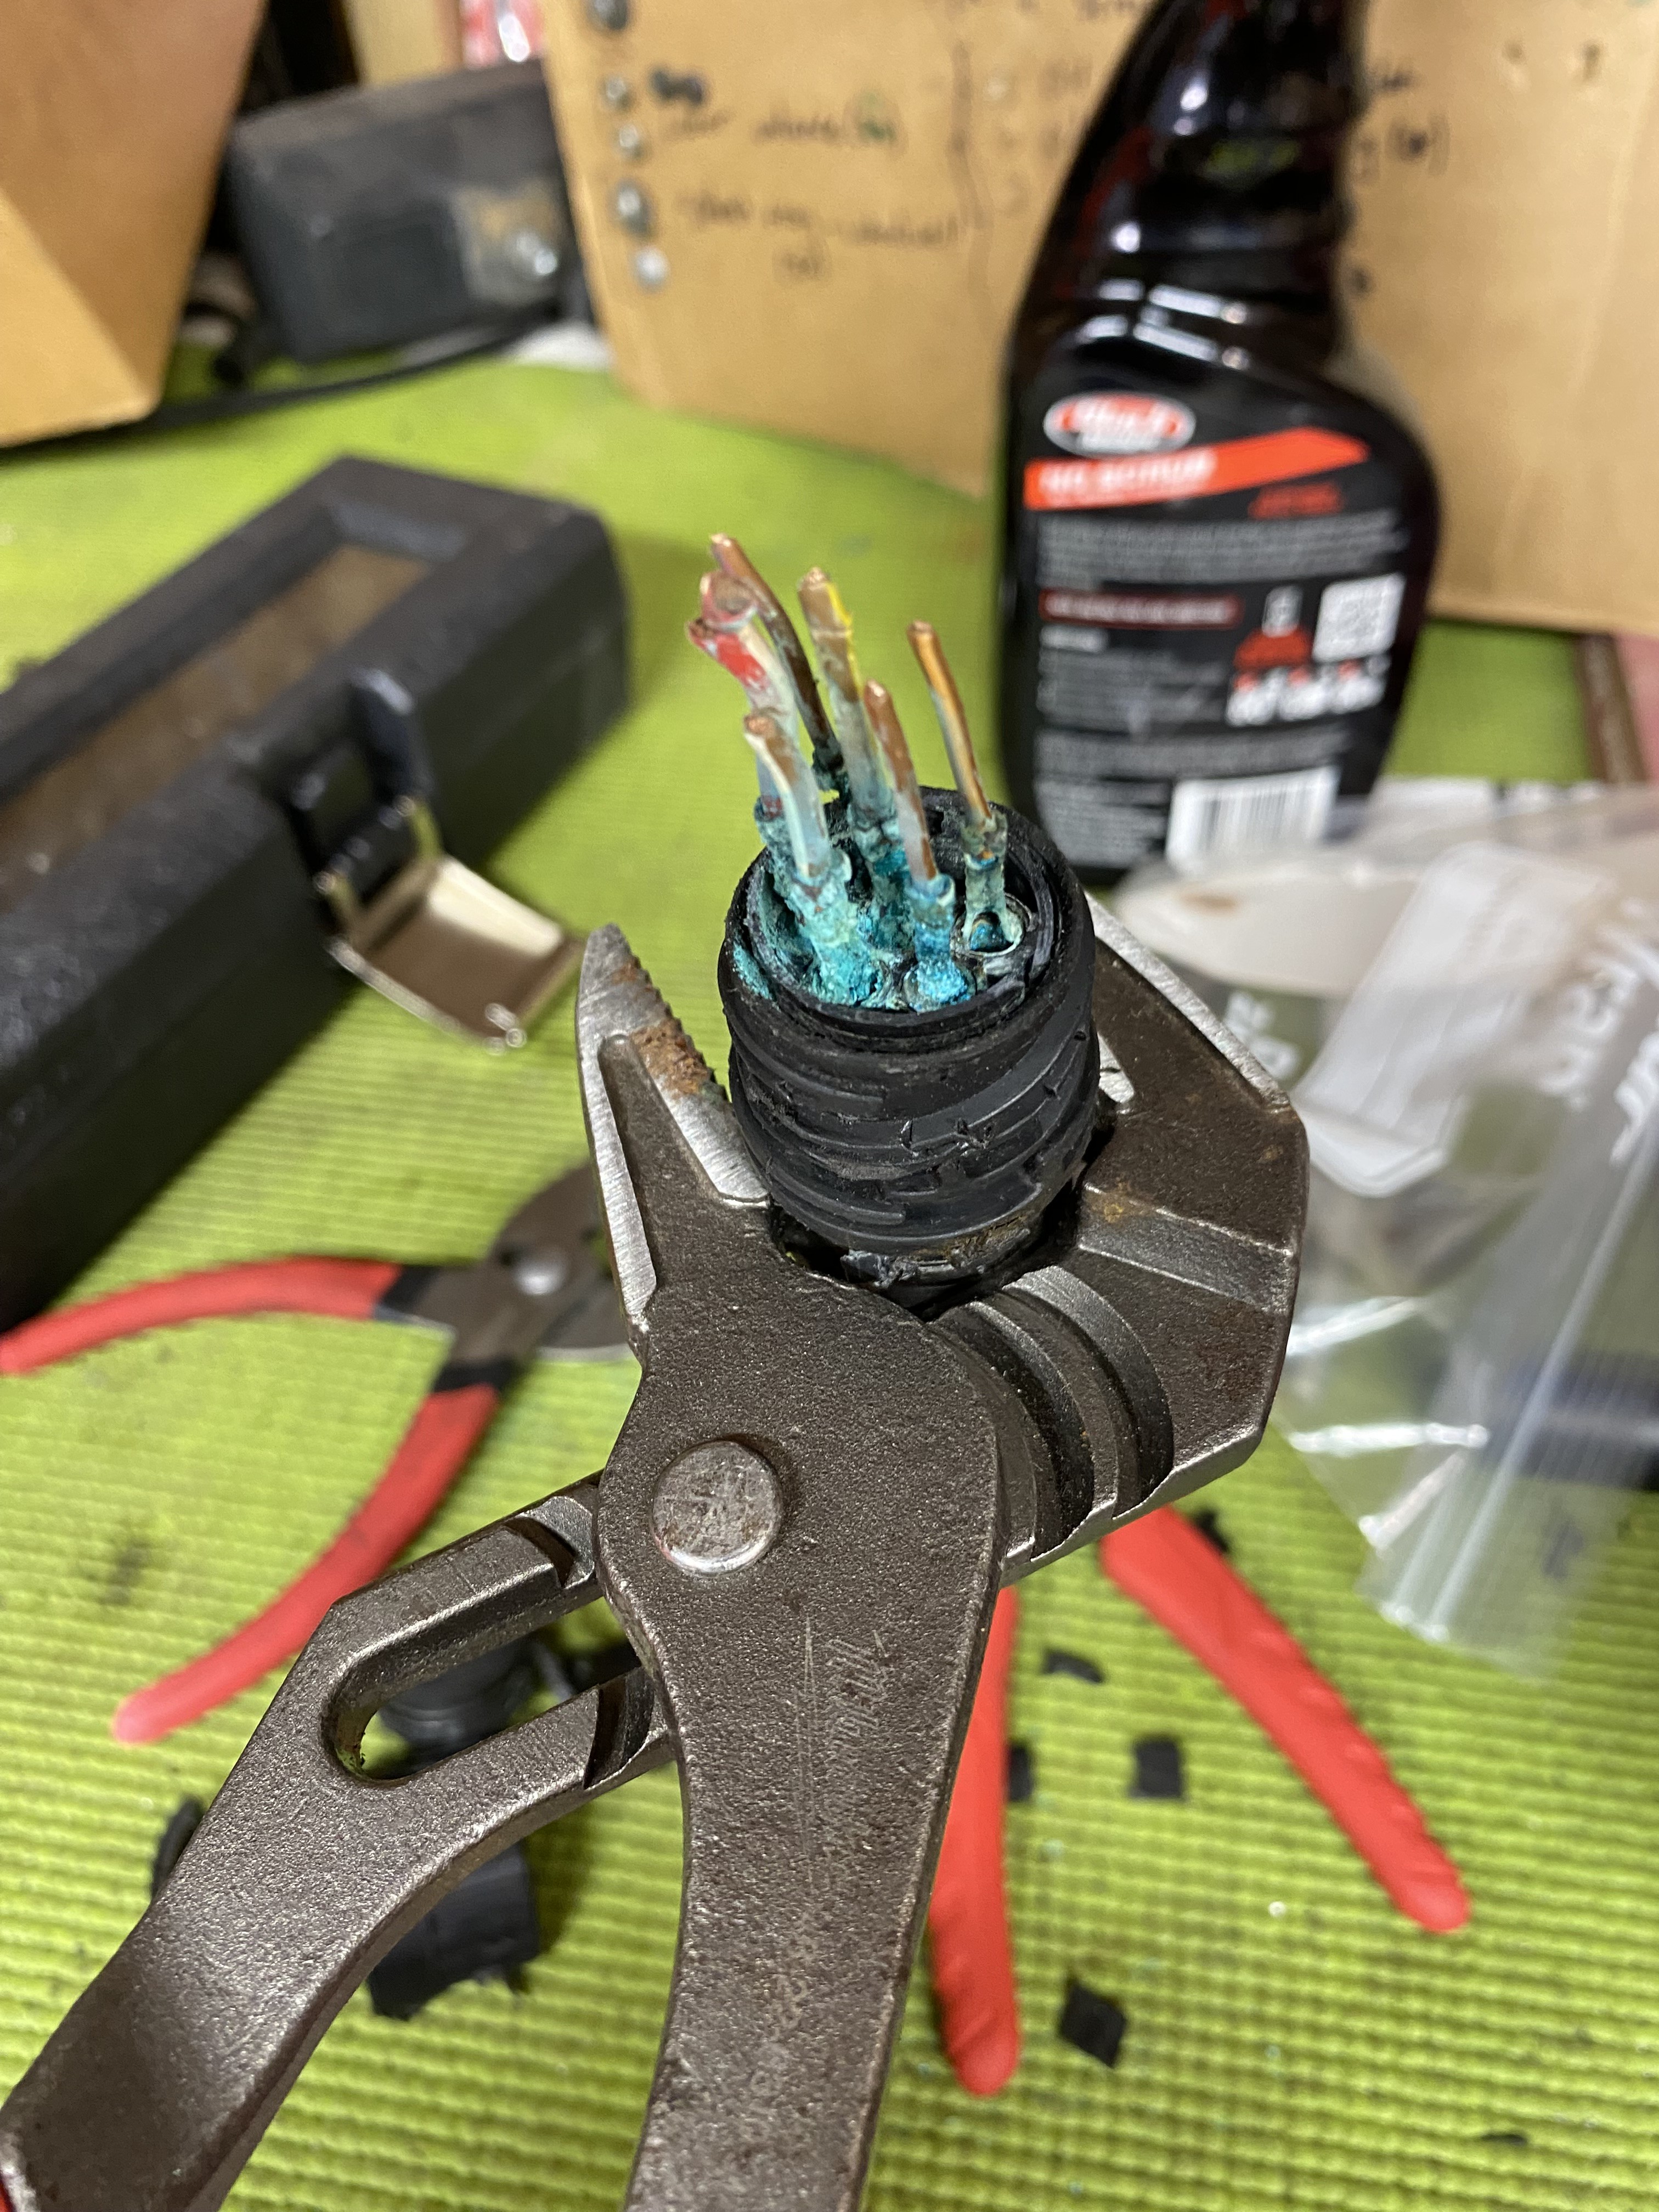
Had a minor snafu with it running though on initial start. When I first lit it off last week it was idling super slow but Infigured it was just from time sitting and would quickly adjust, but no such luck. Got a CEL, read it via stomp test, and it came back as an “Injector Batch 1 Fault”. Some quick research pointed to the C191 connector under the intake manifold as a likely culprit, especially since I wasn’t able to separate it despite a lot of trying when the engine was out.
I pulled the boots off of the connector and immediately saw major corrosion, and made the executive decision to just cut the connector out. It turned out to be the right call - I had to pretty much destroy the connector on the bench to eventually separate the halves. I spliced the wires back together, and lo and behold, running on all 6 again. Idle is a bit slow and it stumbles a little when recs return to idle, but I’ll chase that in time.
Drove around for 20 minutes, bled the cooling system, checked function of all major systems, and it all seems OK. Next steps are interior and body reassembly, then I’ll get my skidplate welded and be good to go!
-
Awesome!! That first drive probably felt great!
It did! Exhaust is hitting the tunnel a little and needs adjusting, and the shifter I bought sucks (garagistic chassis mount… figured they couldn’t mess that up. I have been proven wrong) but generally it drove perfectly and ran okay once the plug was fixed. Idle is a tad low and it isn’t idling perfectly but it gets up and goes once you’re moving.
Slight diff leak as well, either a halfshaft or the output seal but not worrying about that for now. That’s a winter project haha, interior reassembly and shakedown starts next week! Hoping to put on some real miles this fall before it gets parked for winter.
-
Jeez, I’m bad about updates here. I put maybe 500 miles on it this fall, and installed factory rubber engine mounts the day I parked it to tone down NVH. The 95A poly ones were too harsh for my liking.
Also installing a new Z3 shift lever and a completely refreshed OEM shift assembly with DSSR before the warm weather comes back - the garagistic shifter doesn’t have enough throw for my liking. Way too notchy.
Black Friday sales were good this year too, so I bought a Continental/VDO Bluetooth head unit and will be installing that before spring as well. Super pumped to have a more OEM looking radio finally!
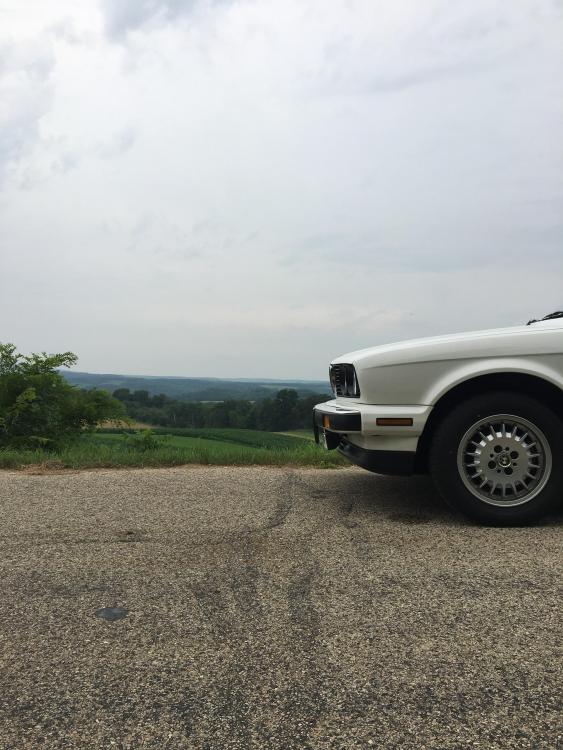
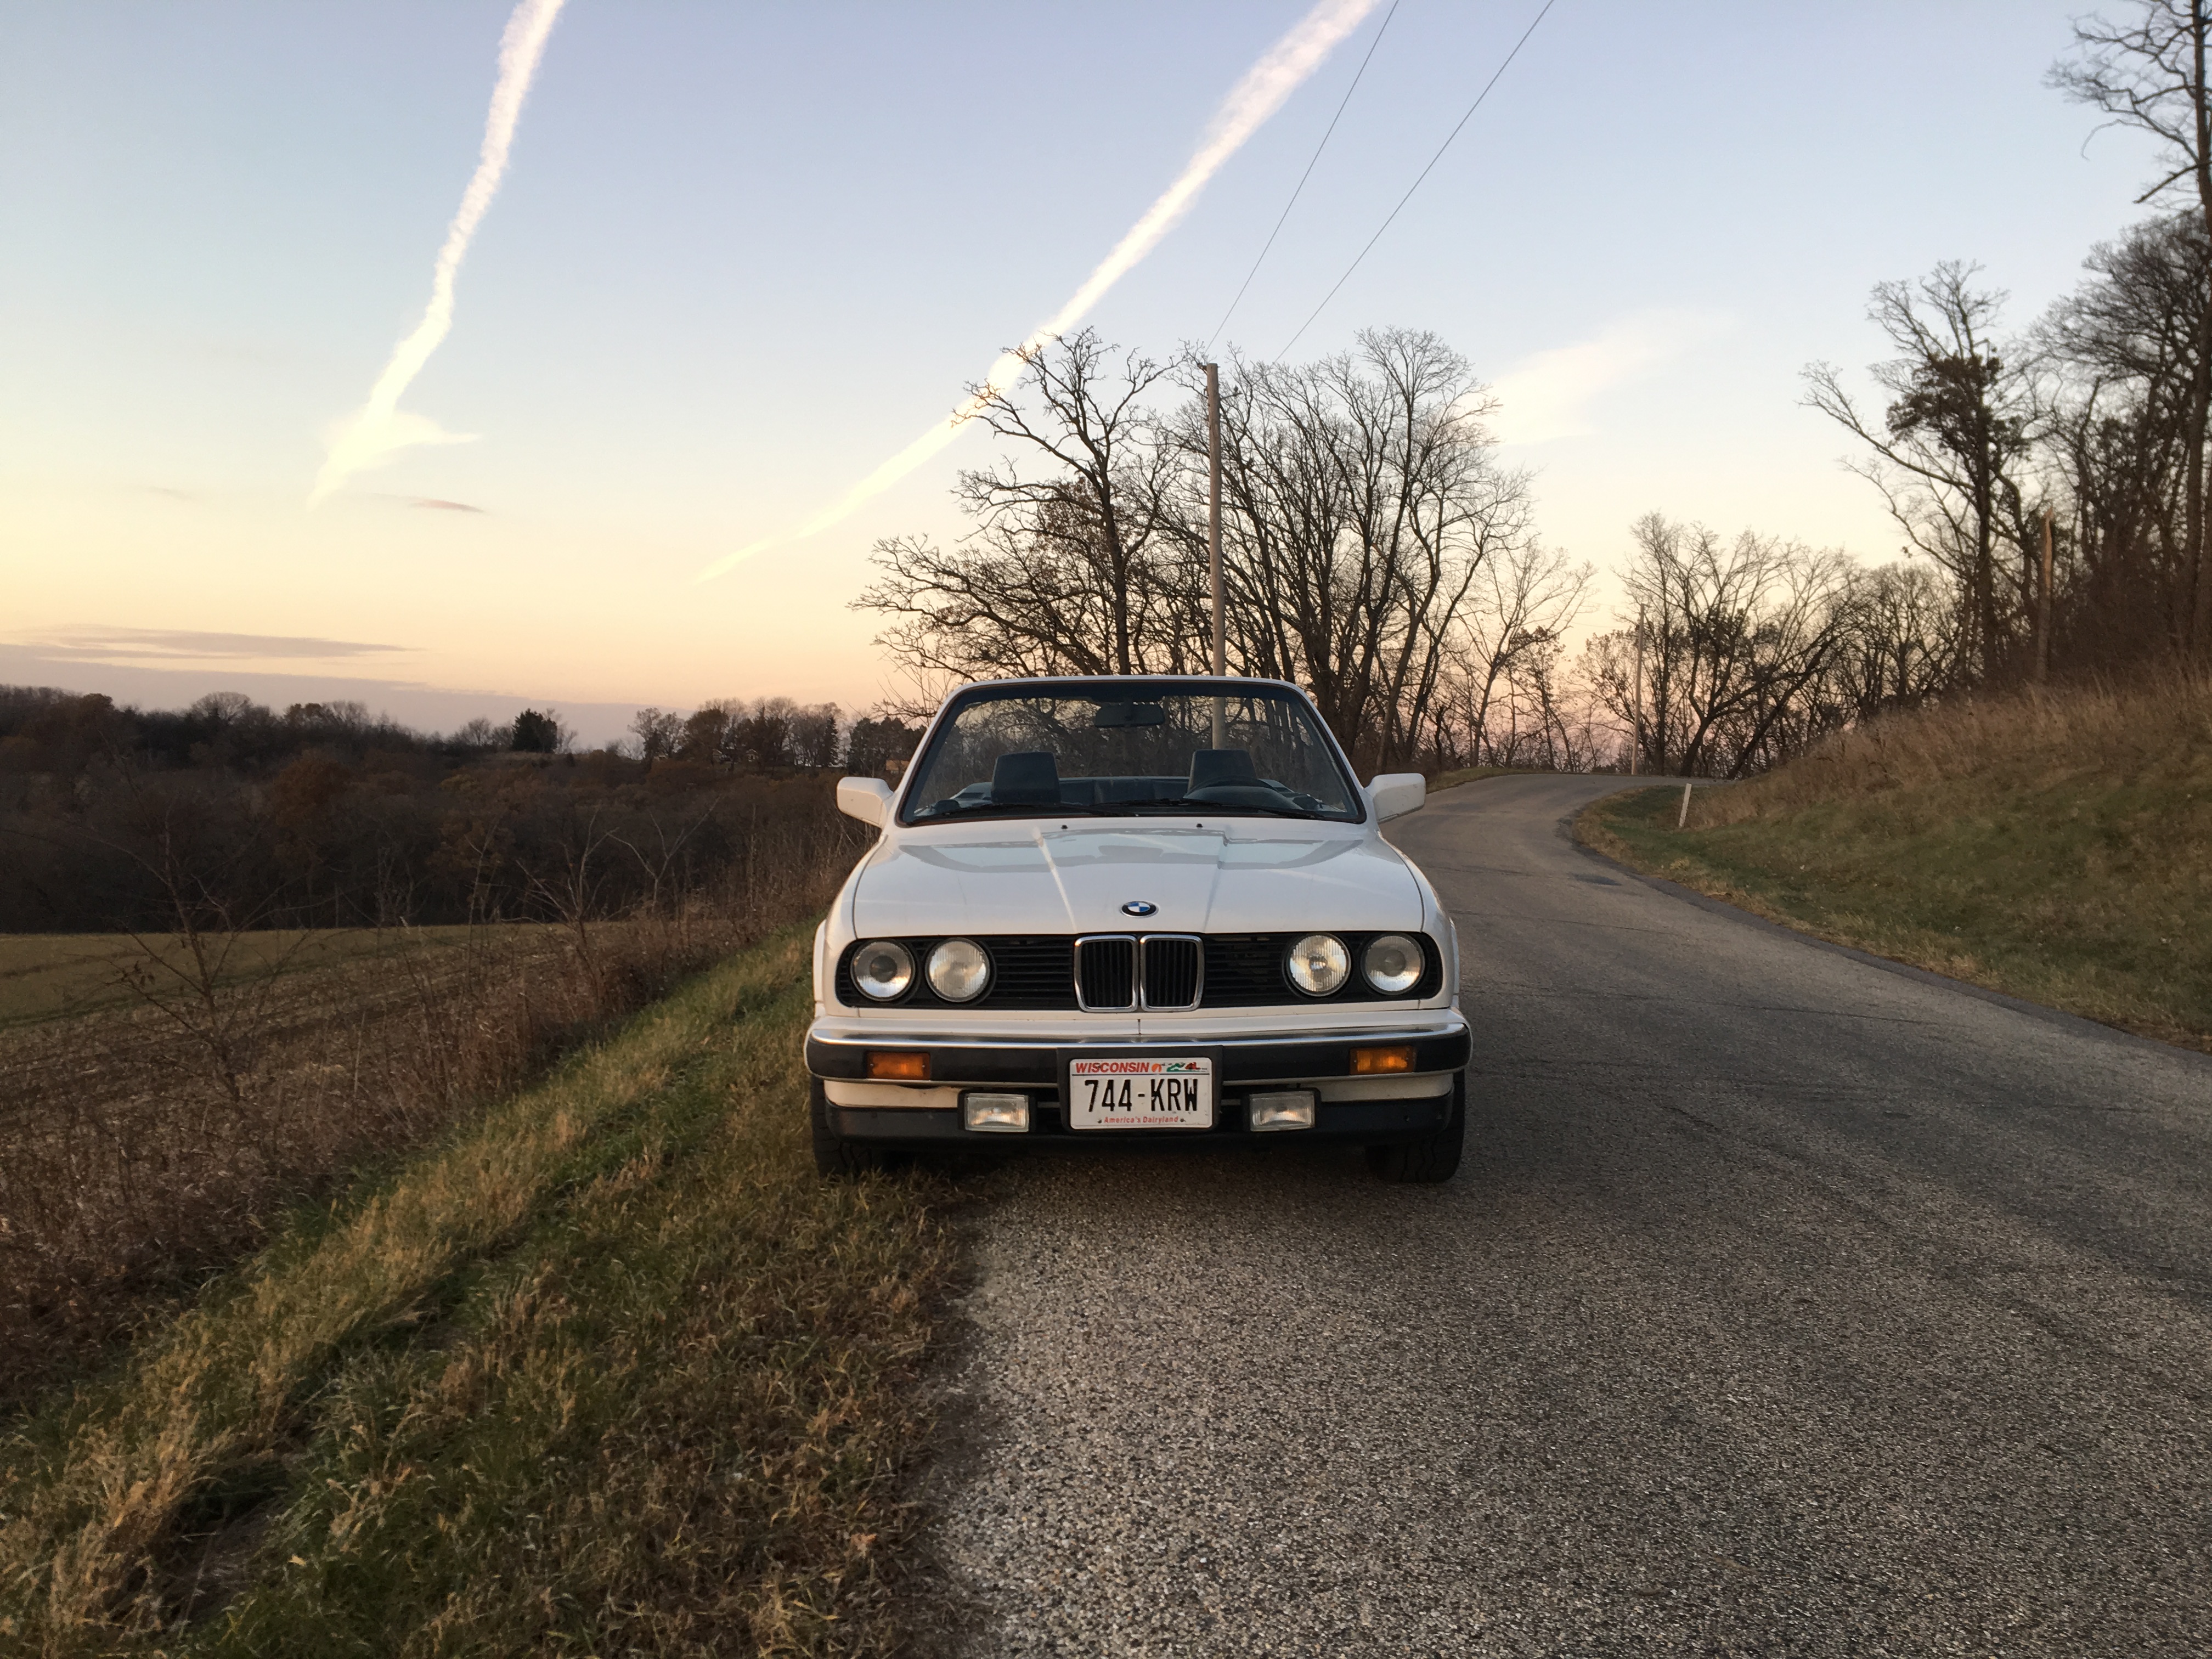
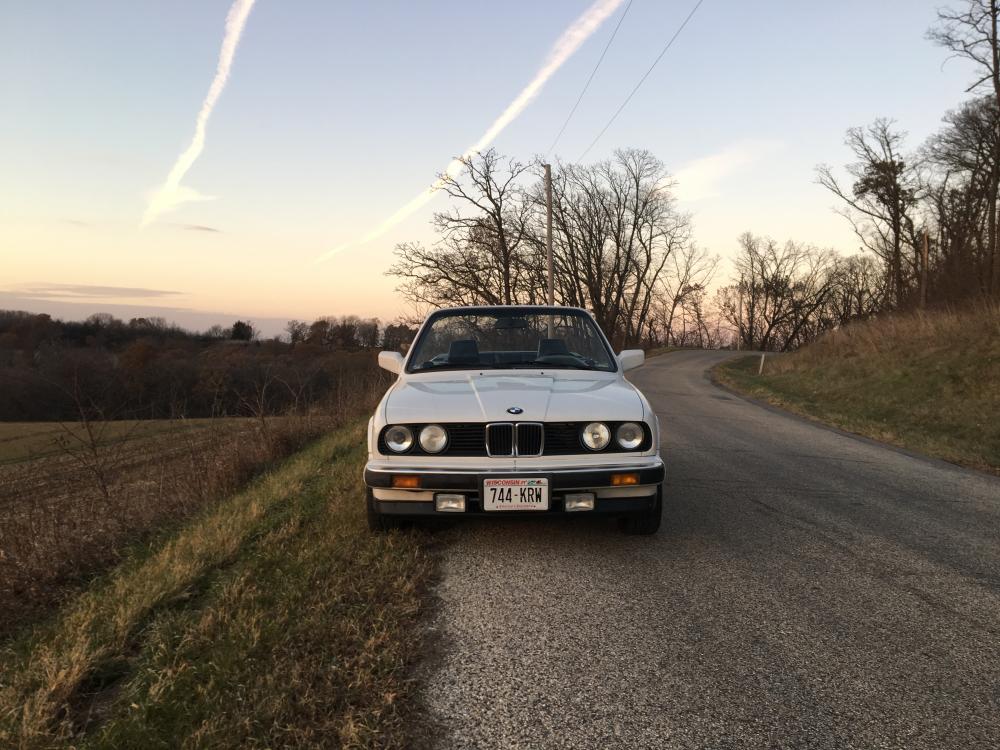
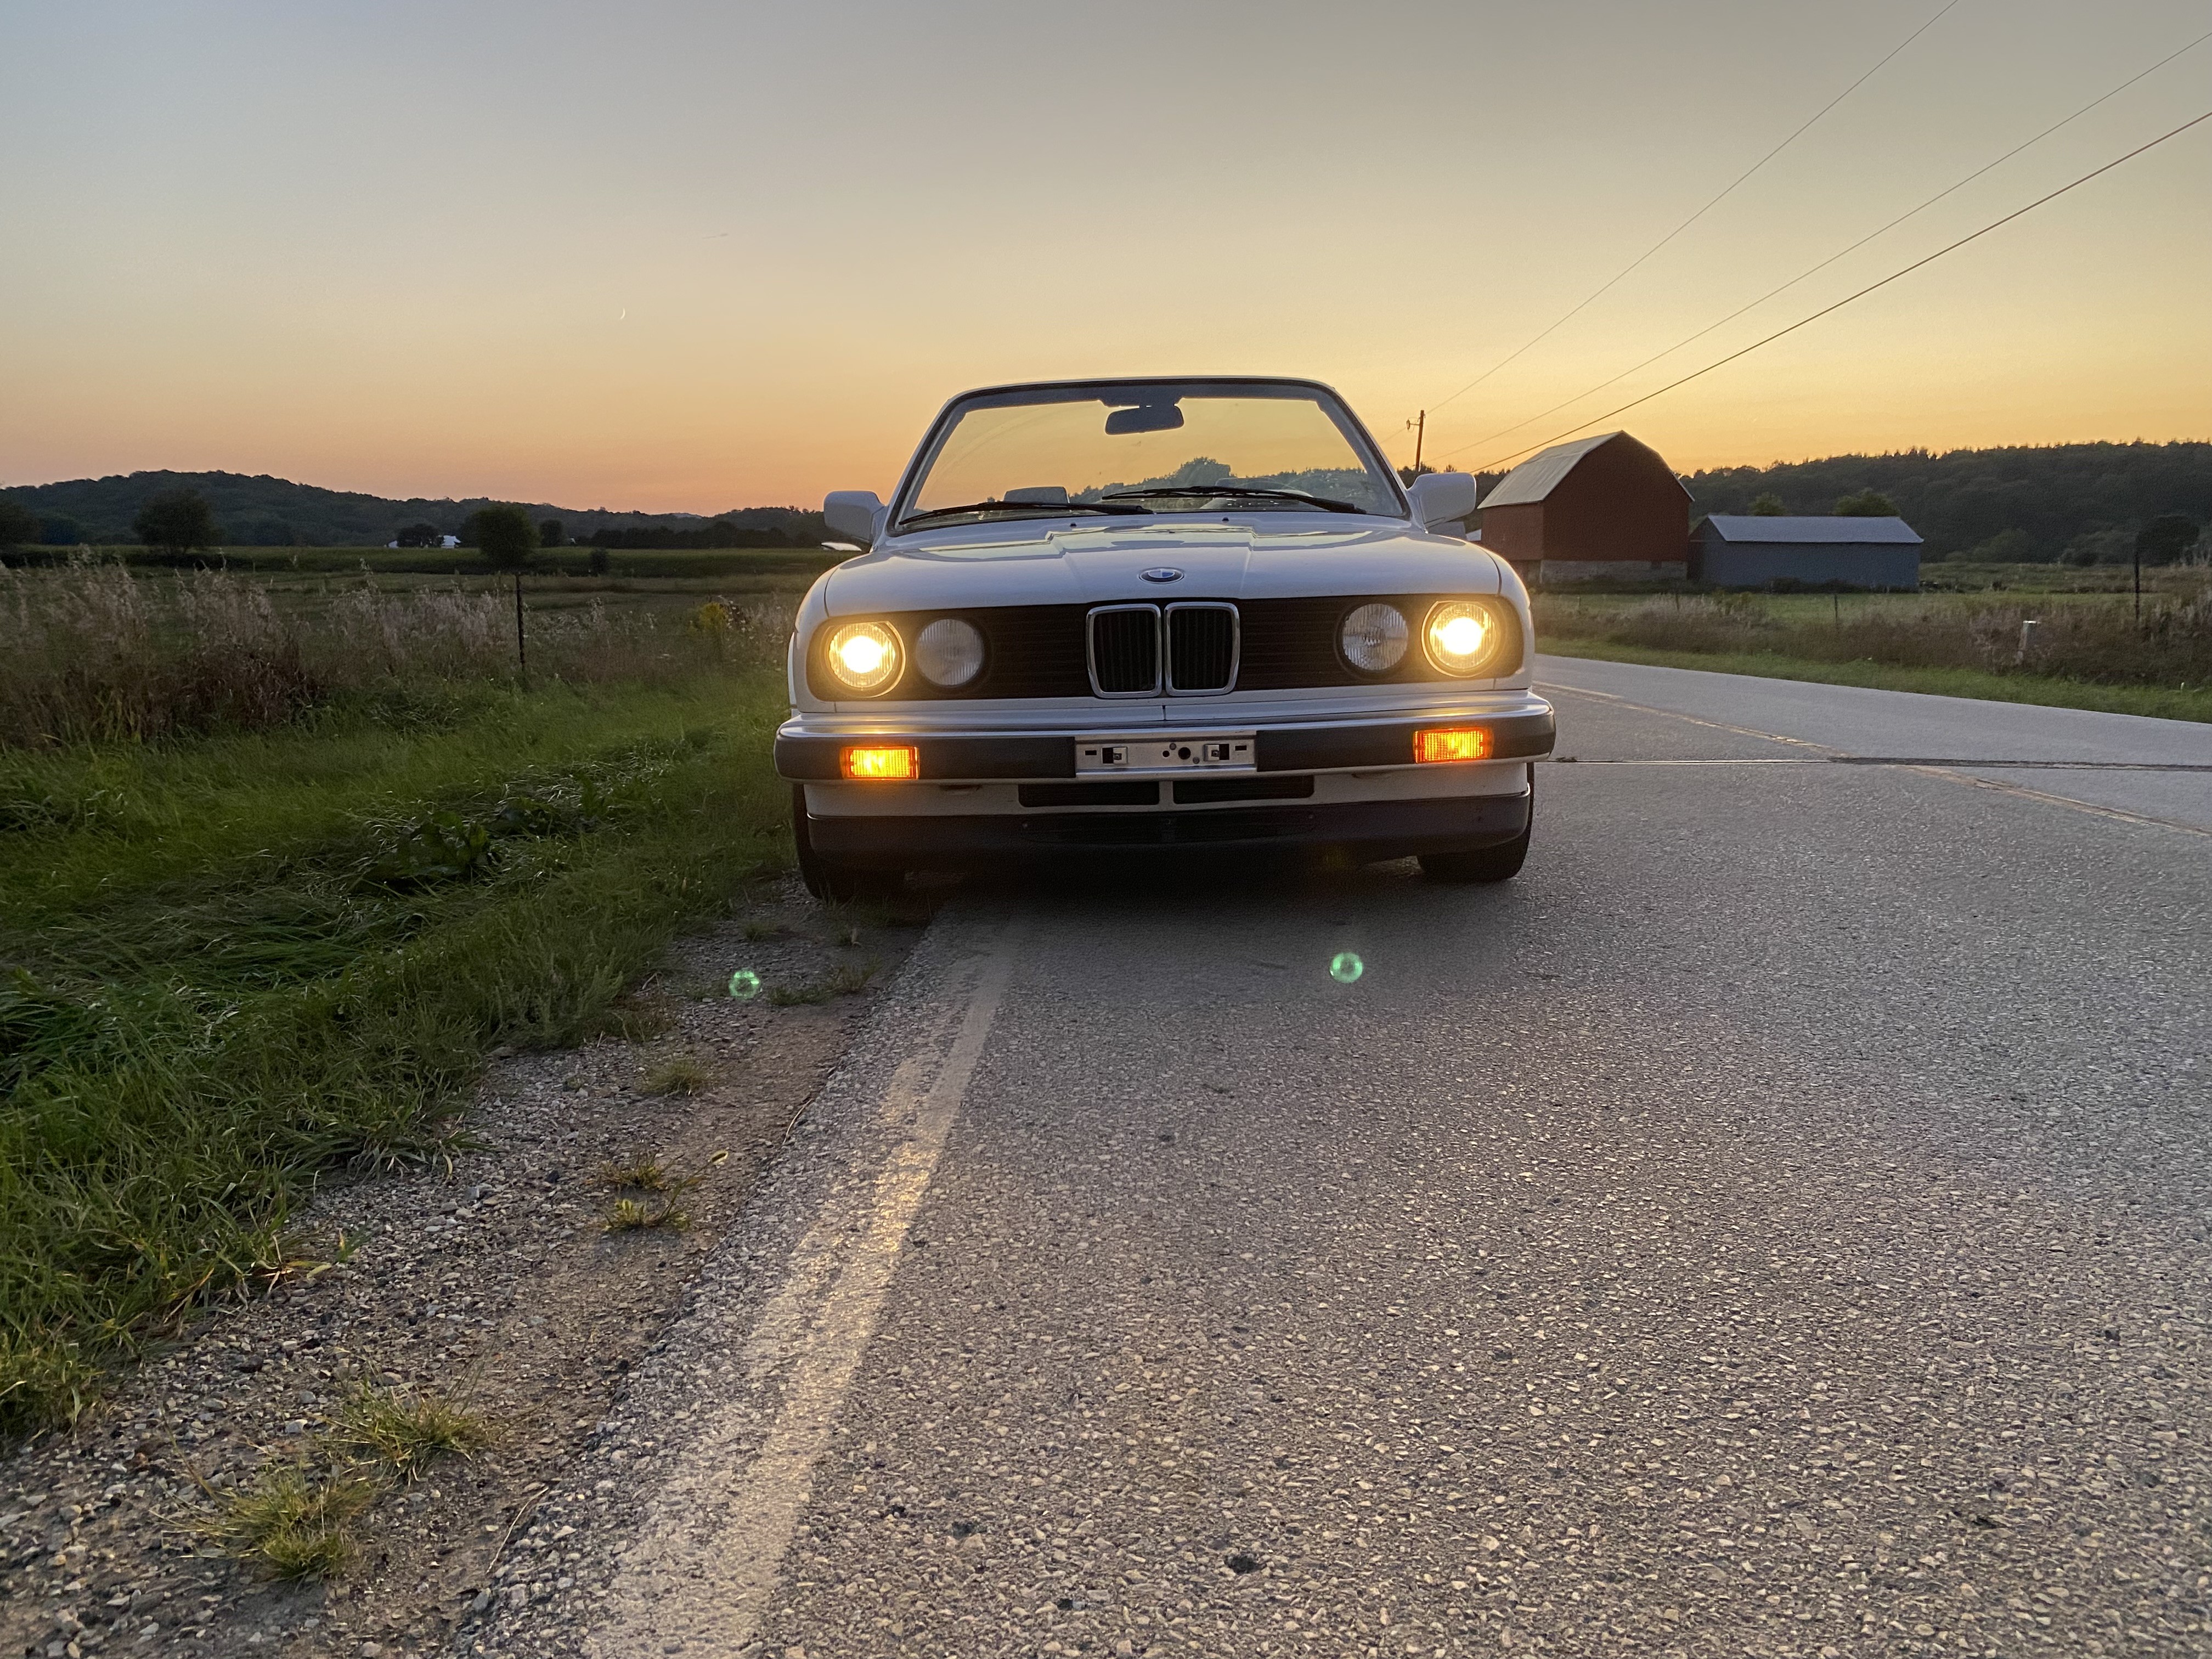
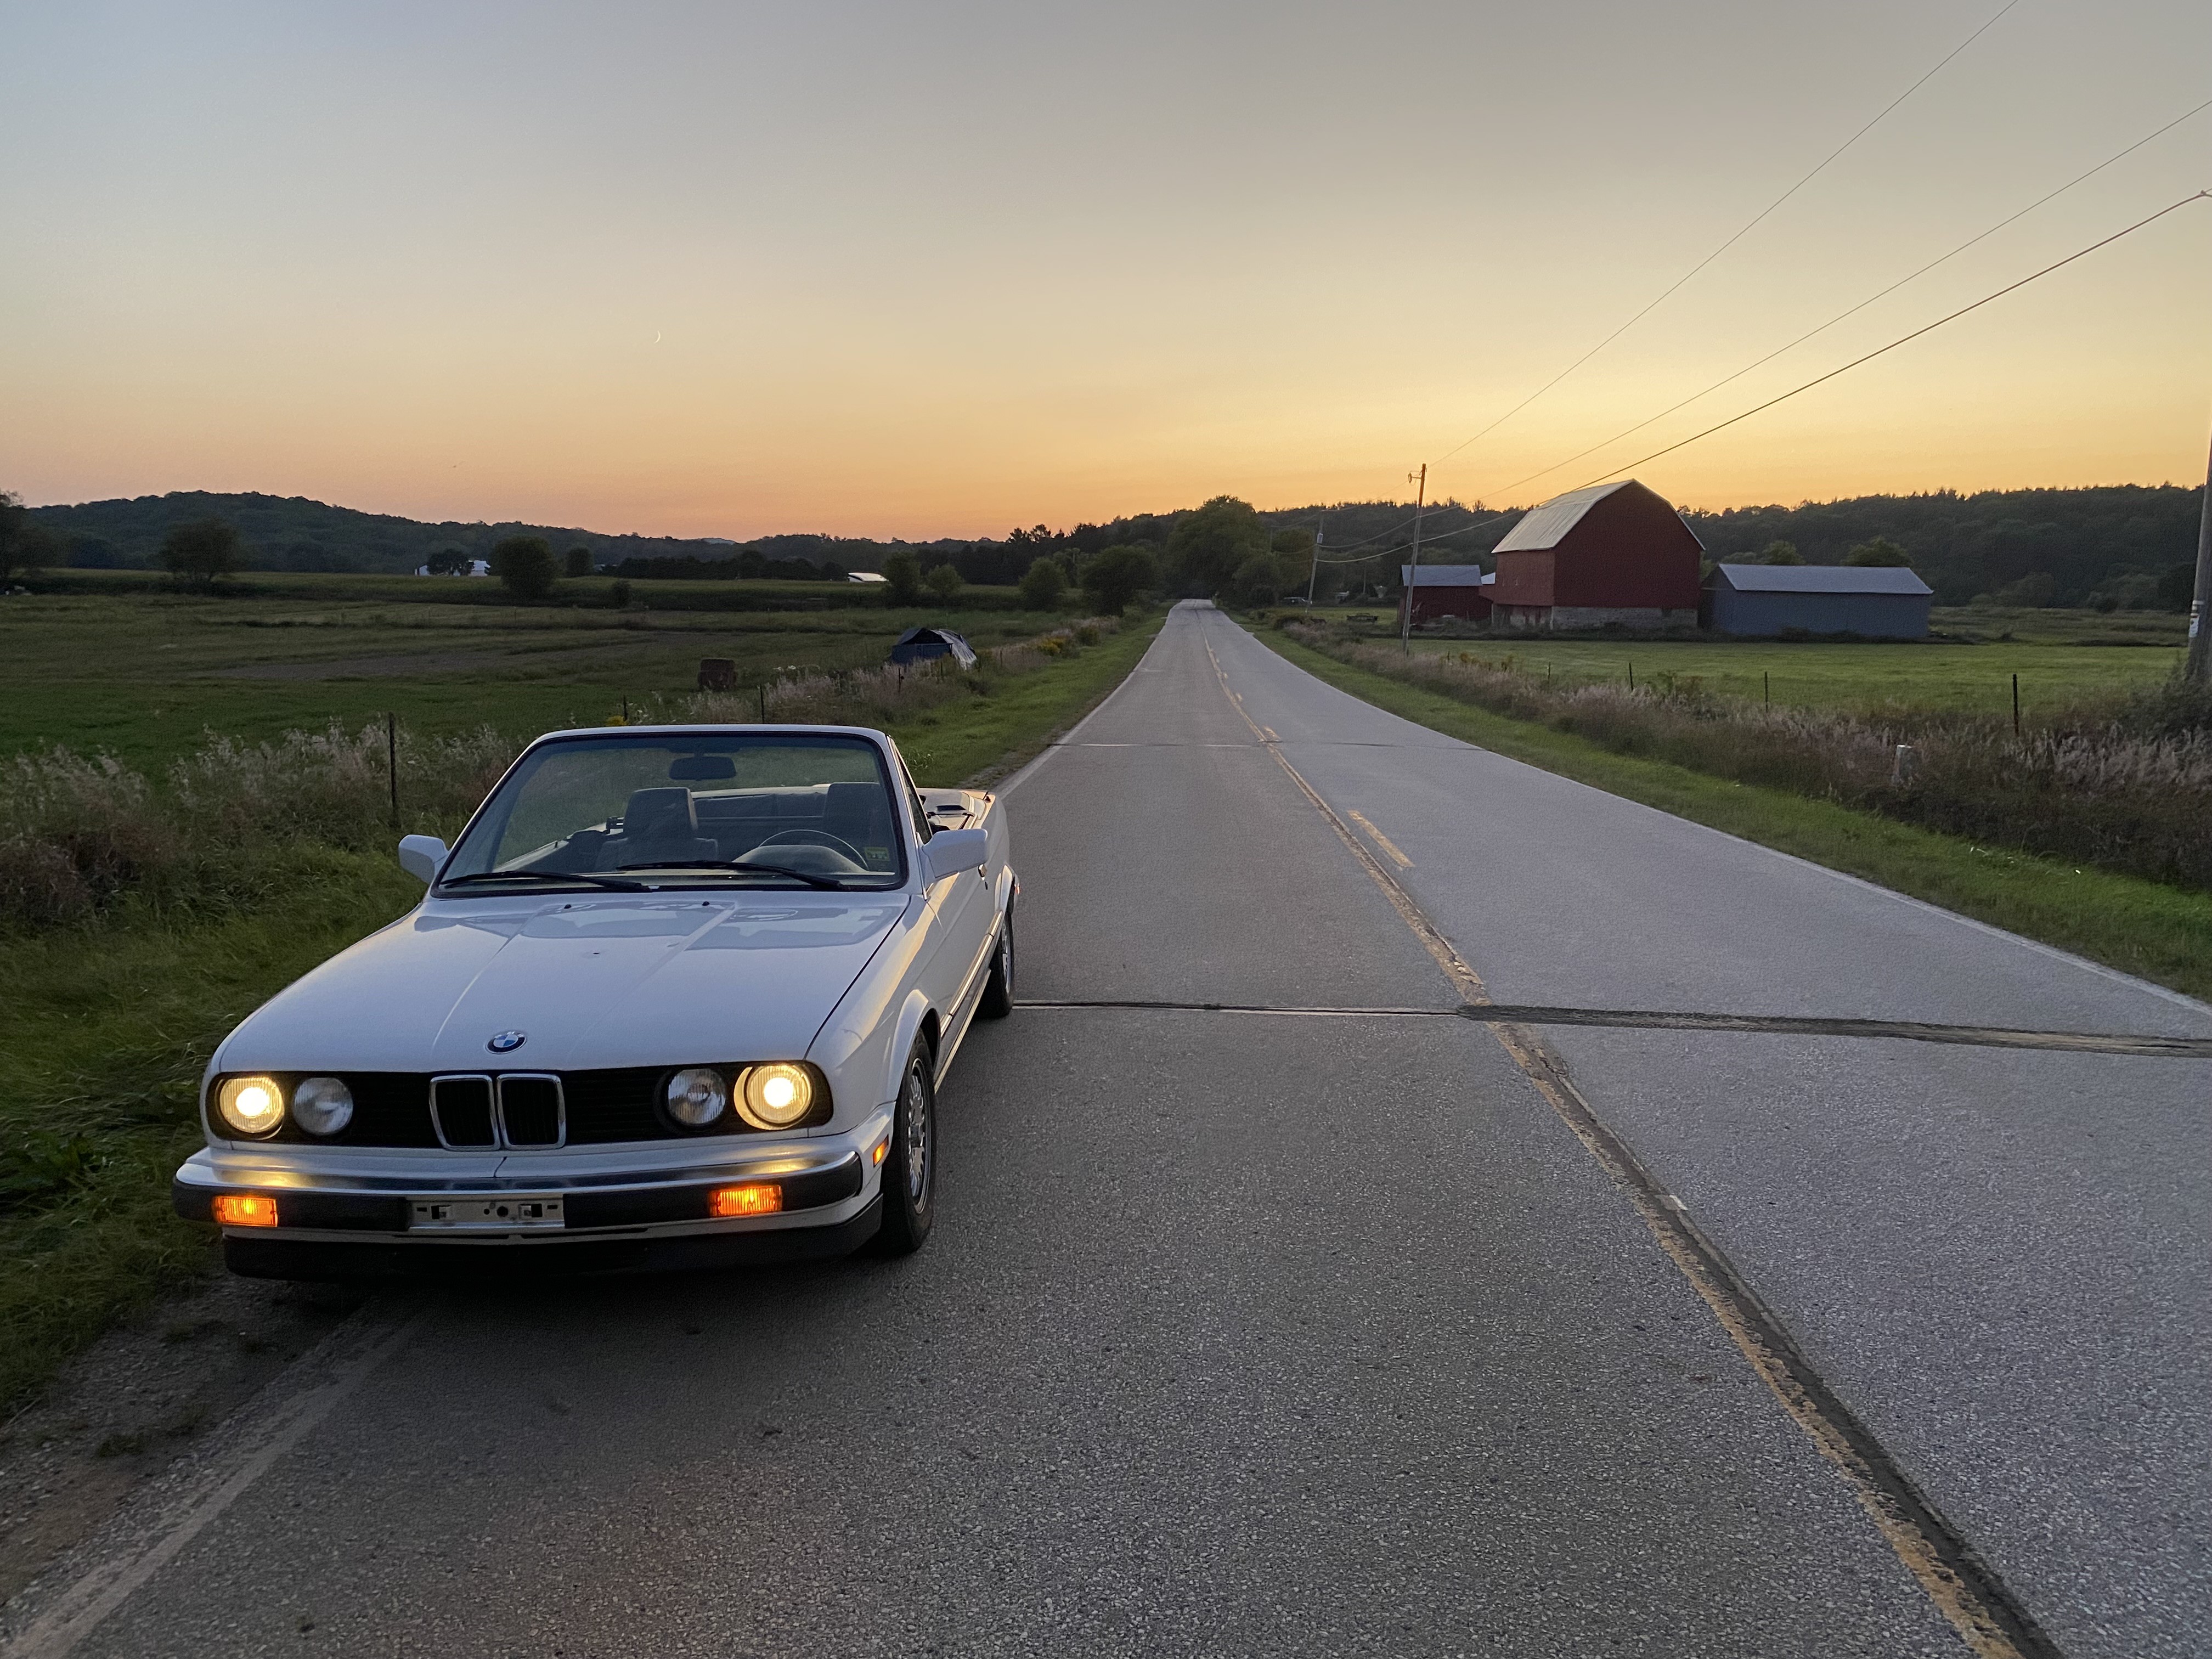
Some pics:
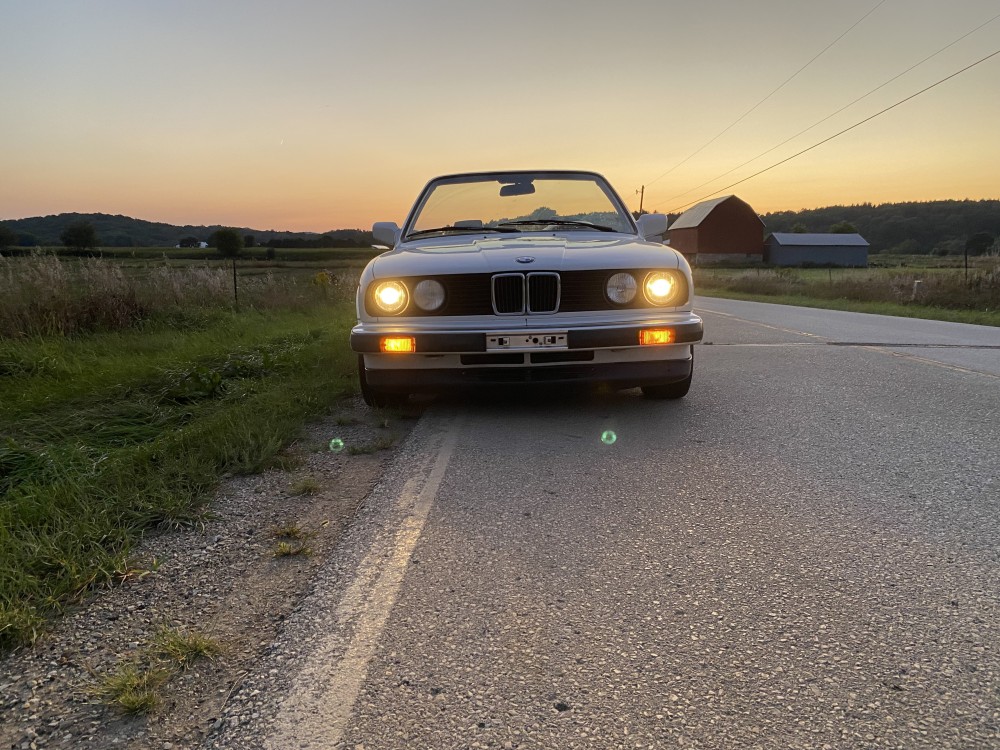
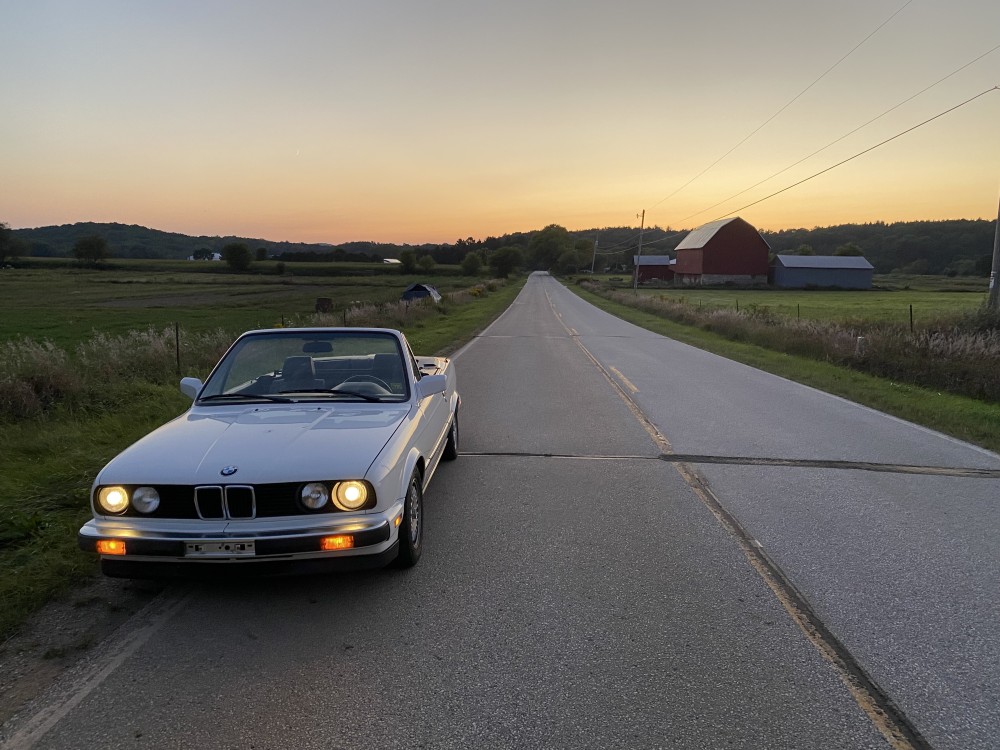
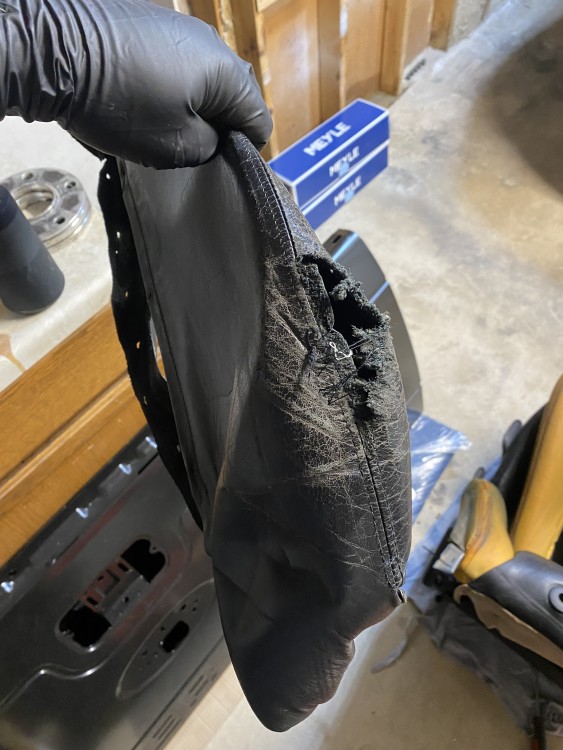
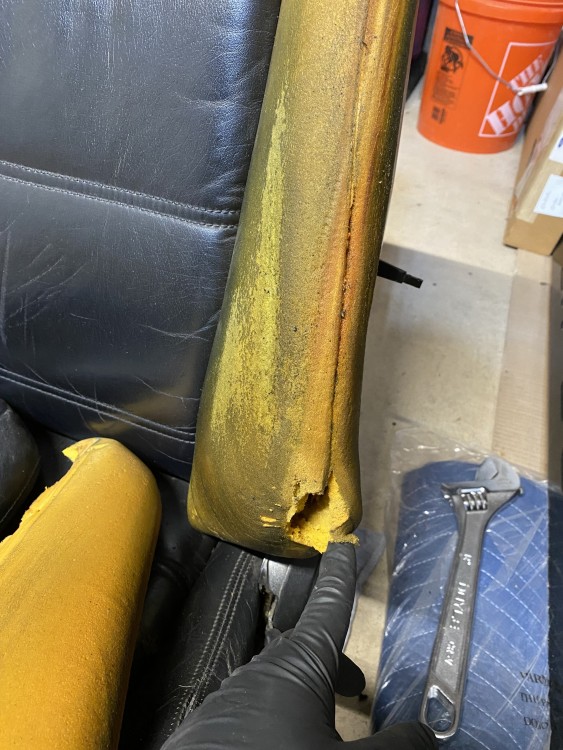
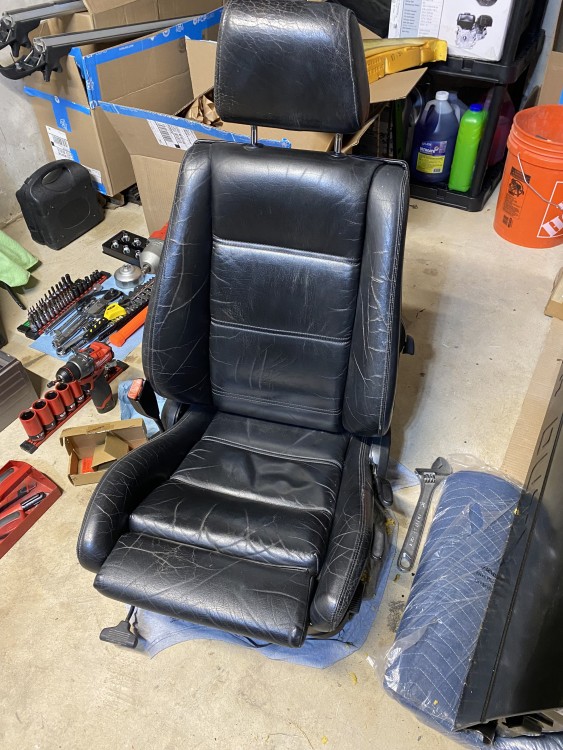
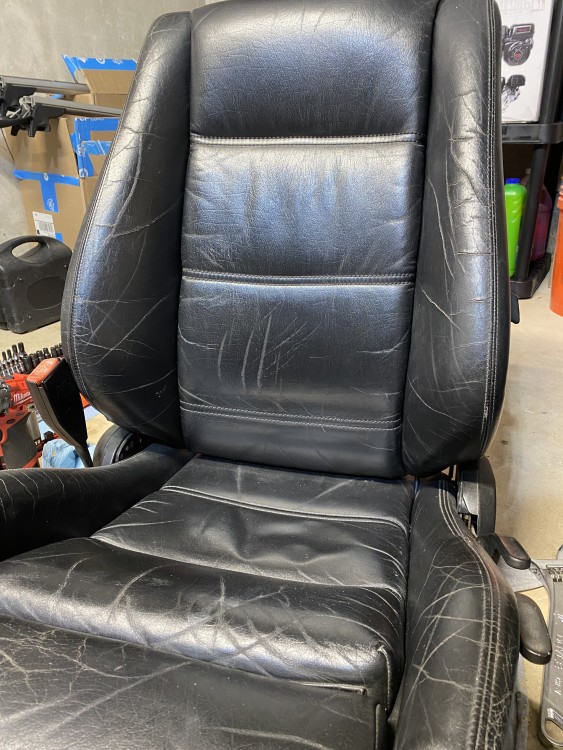
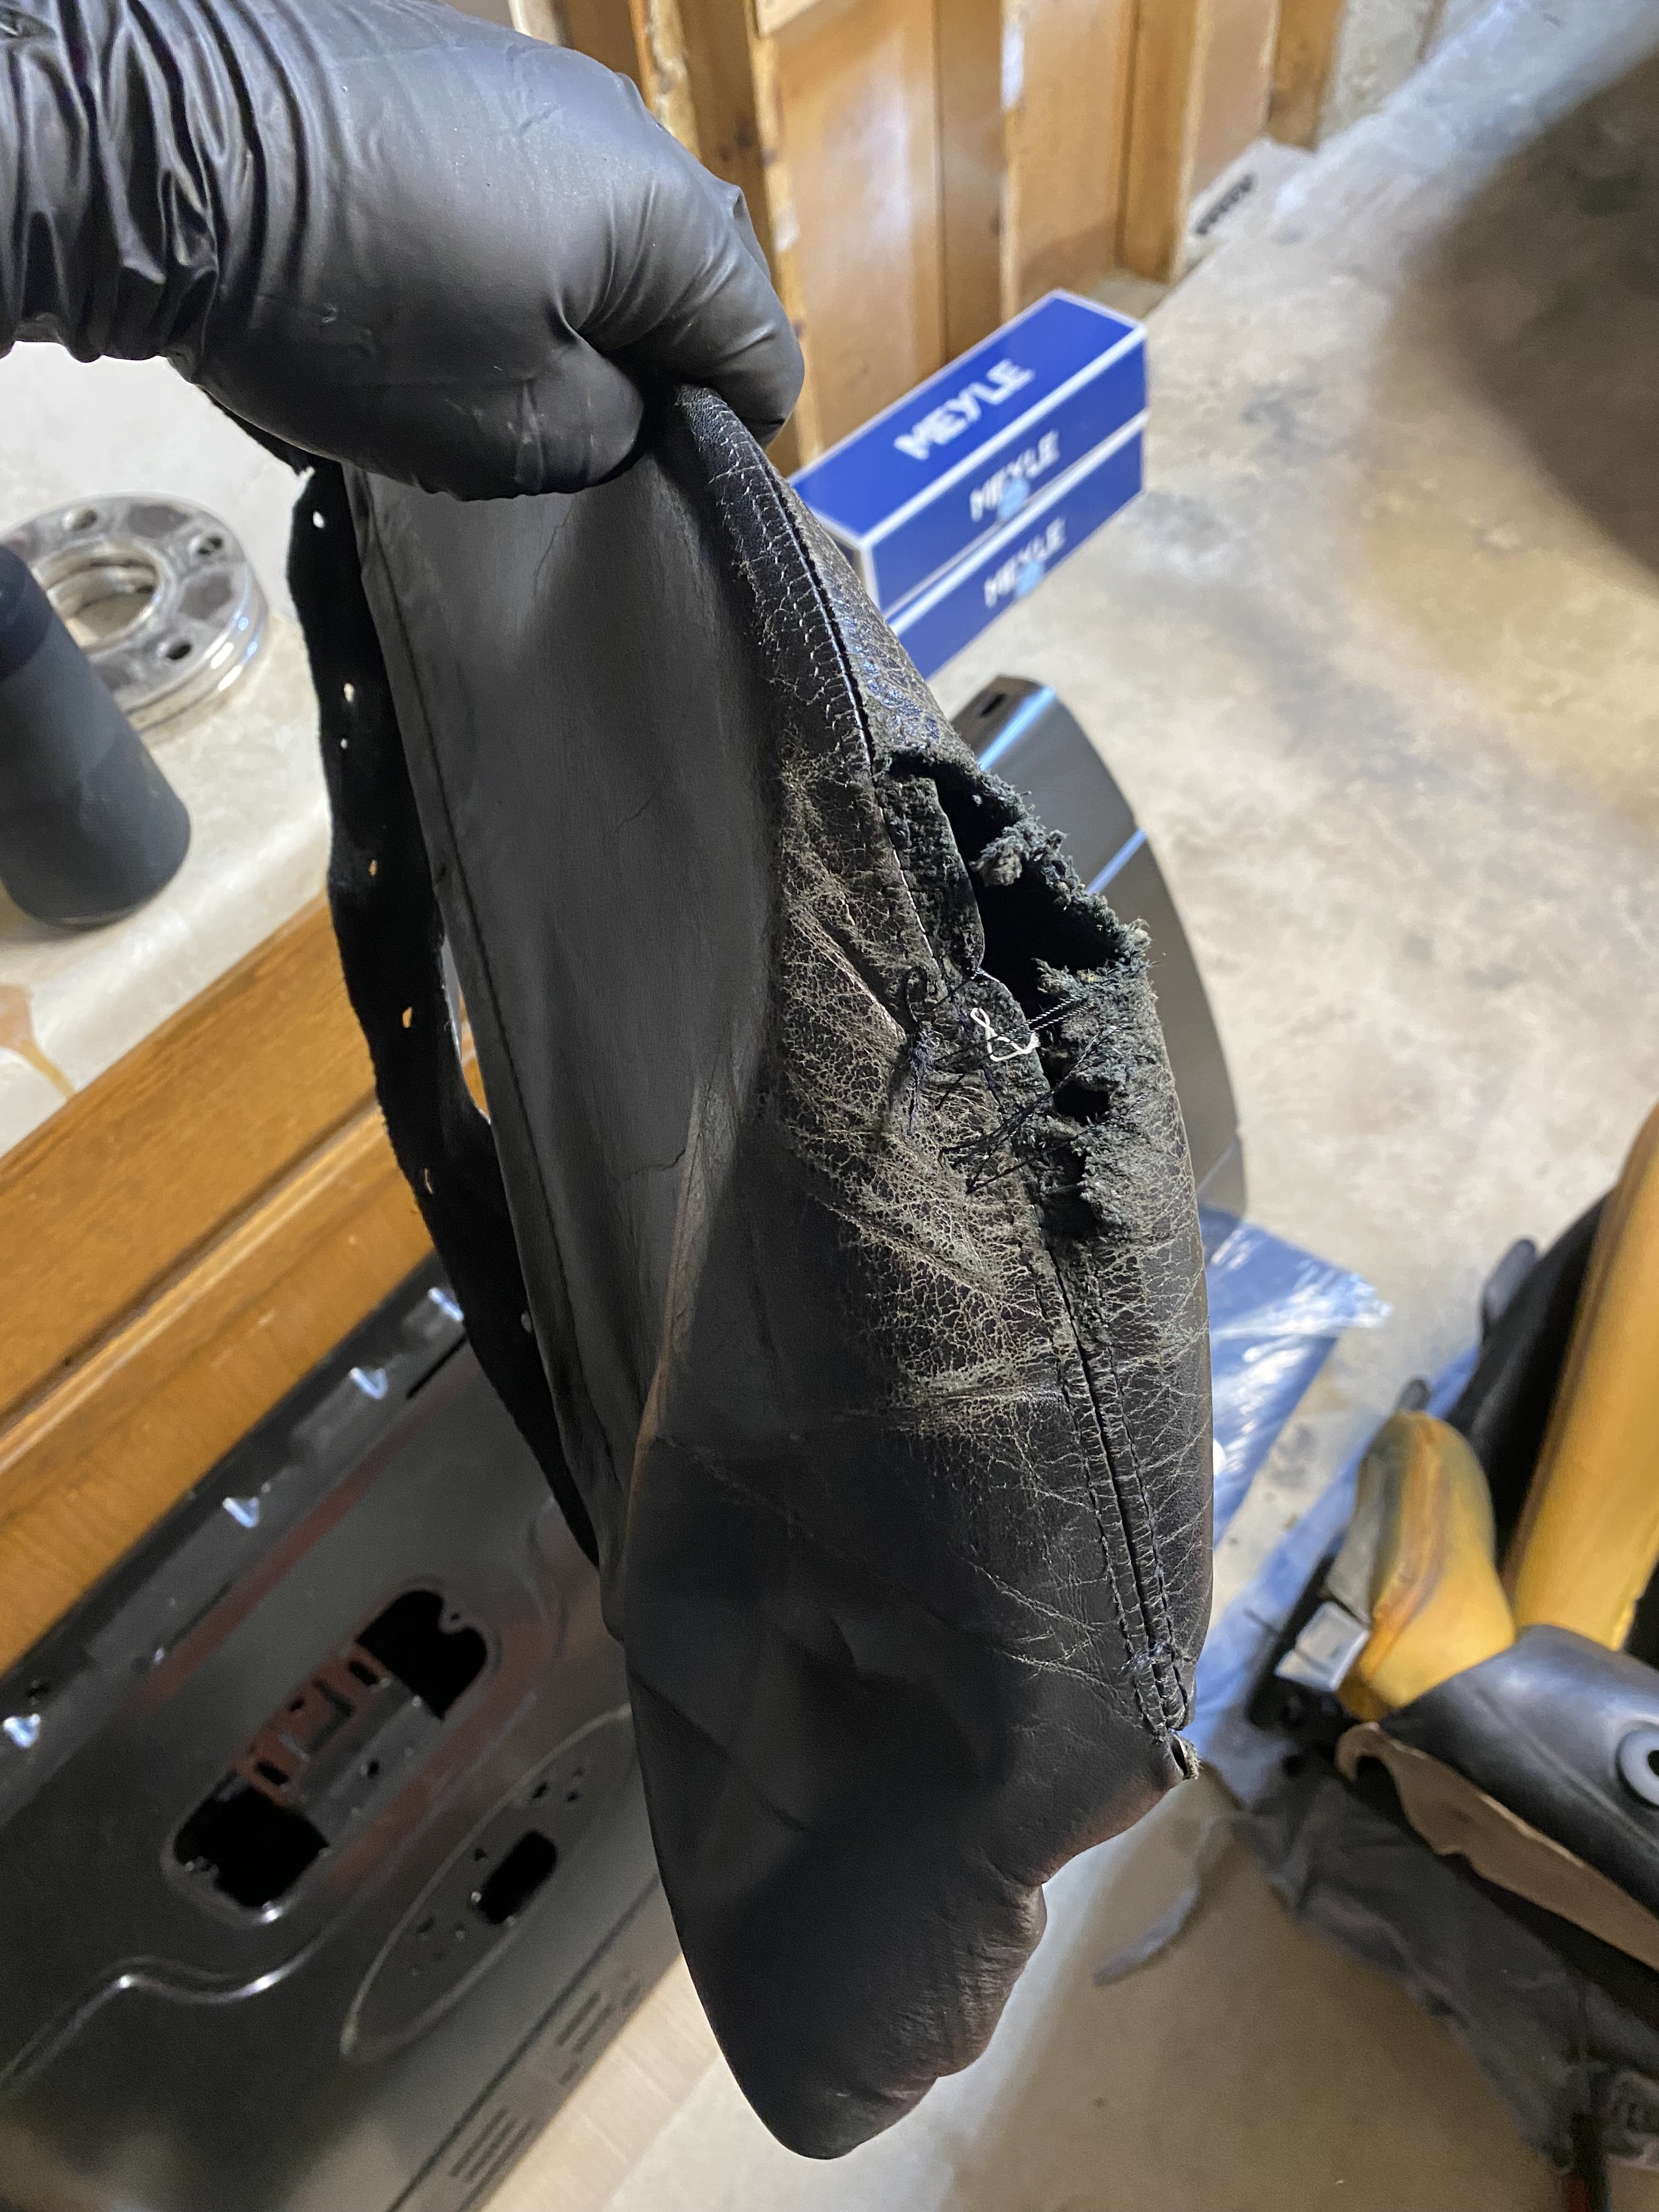
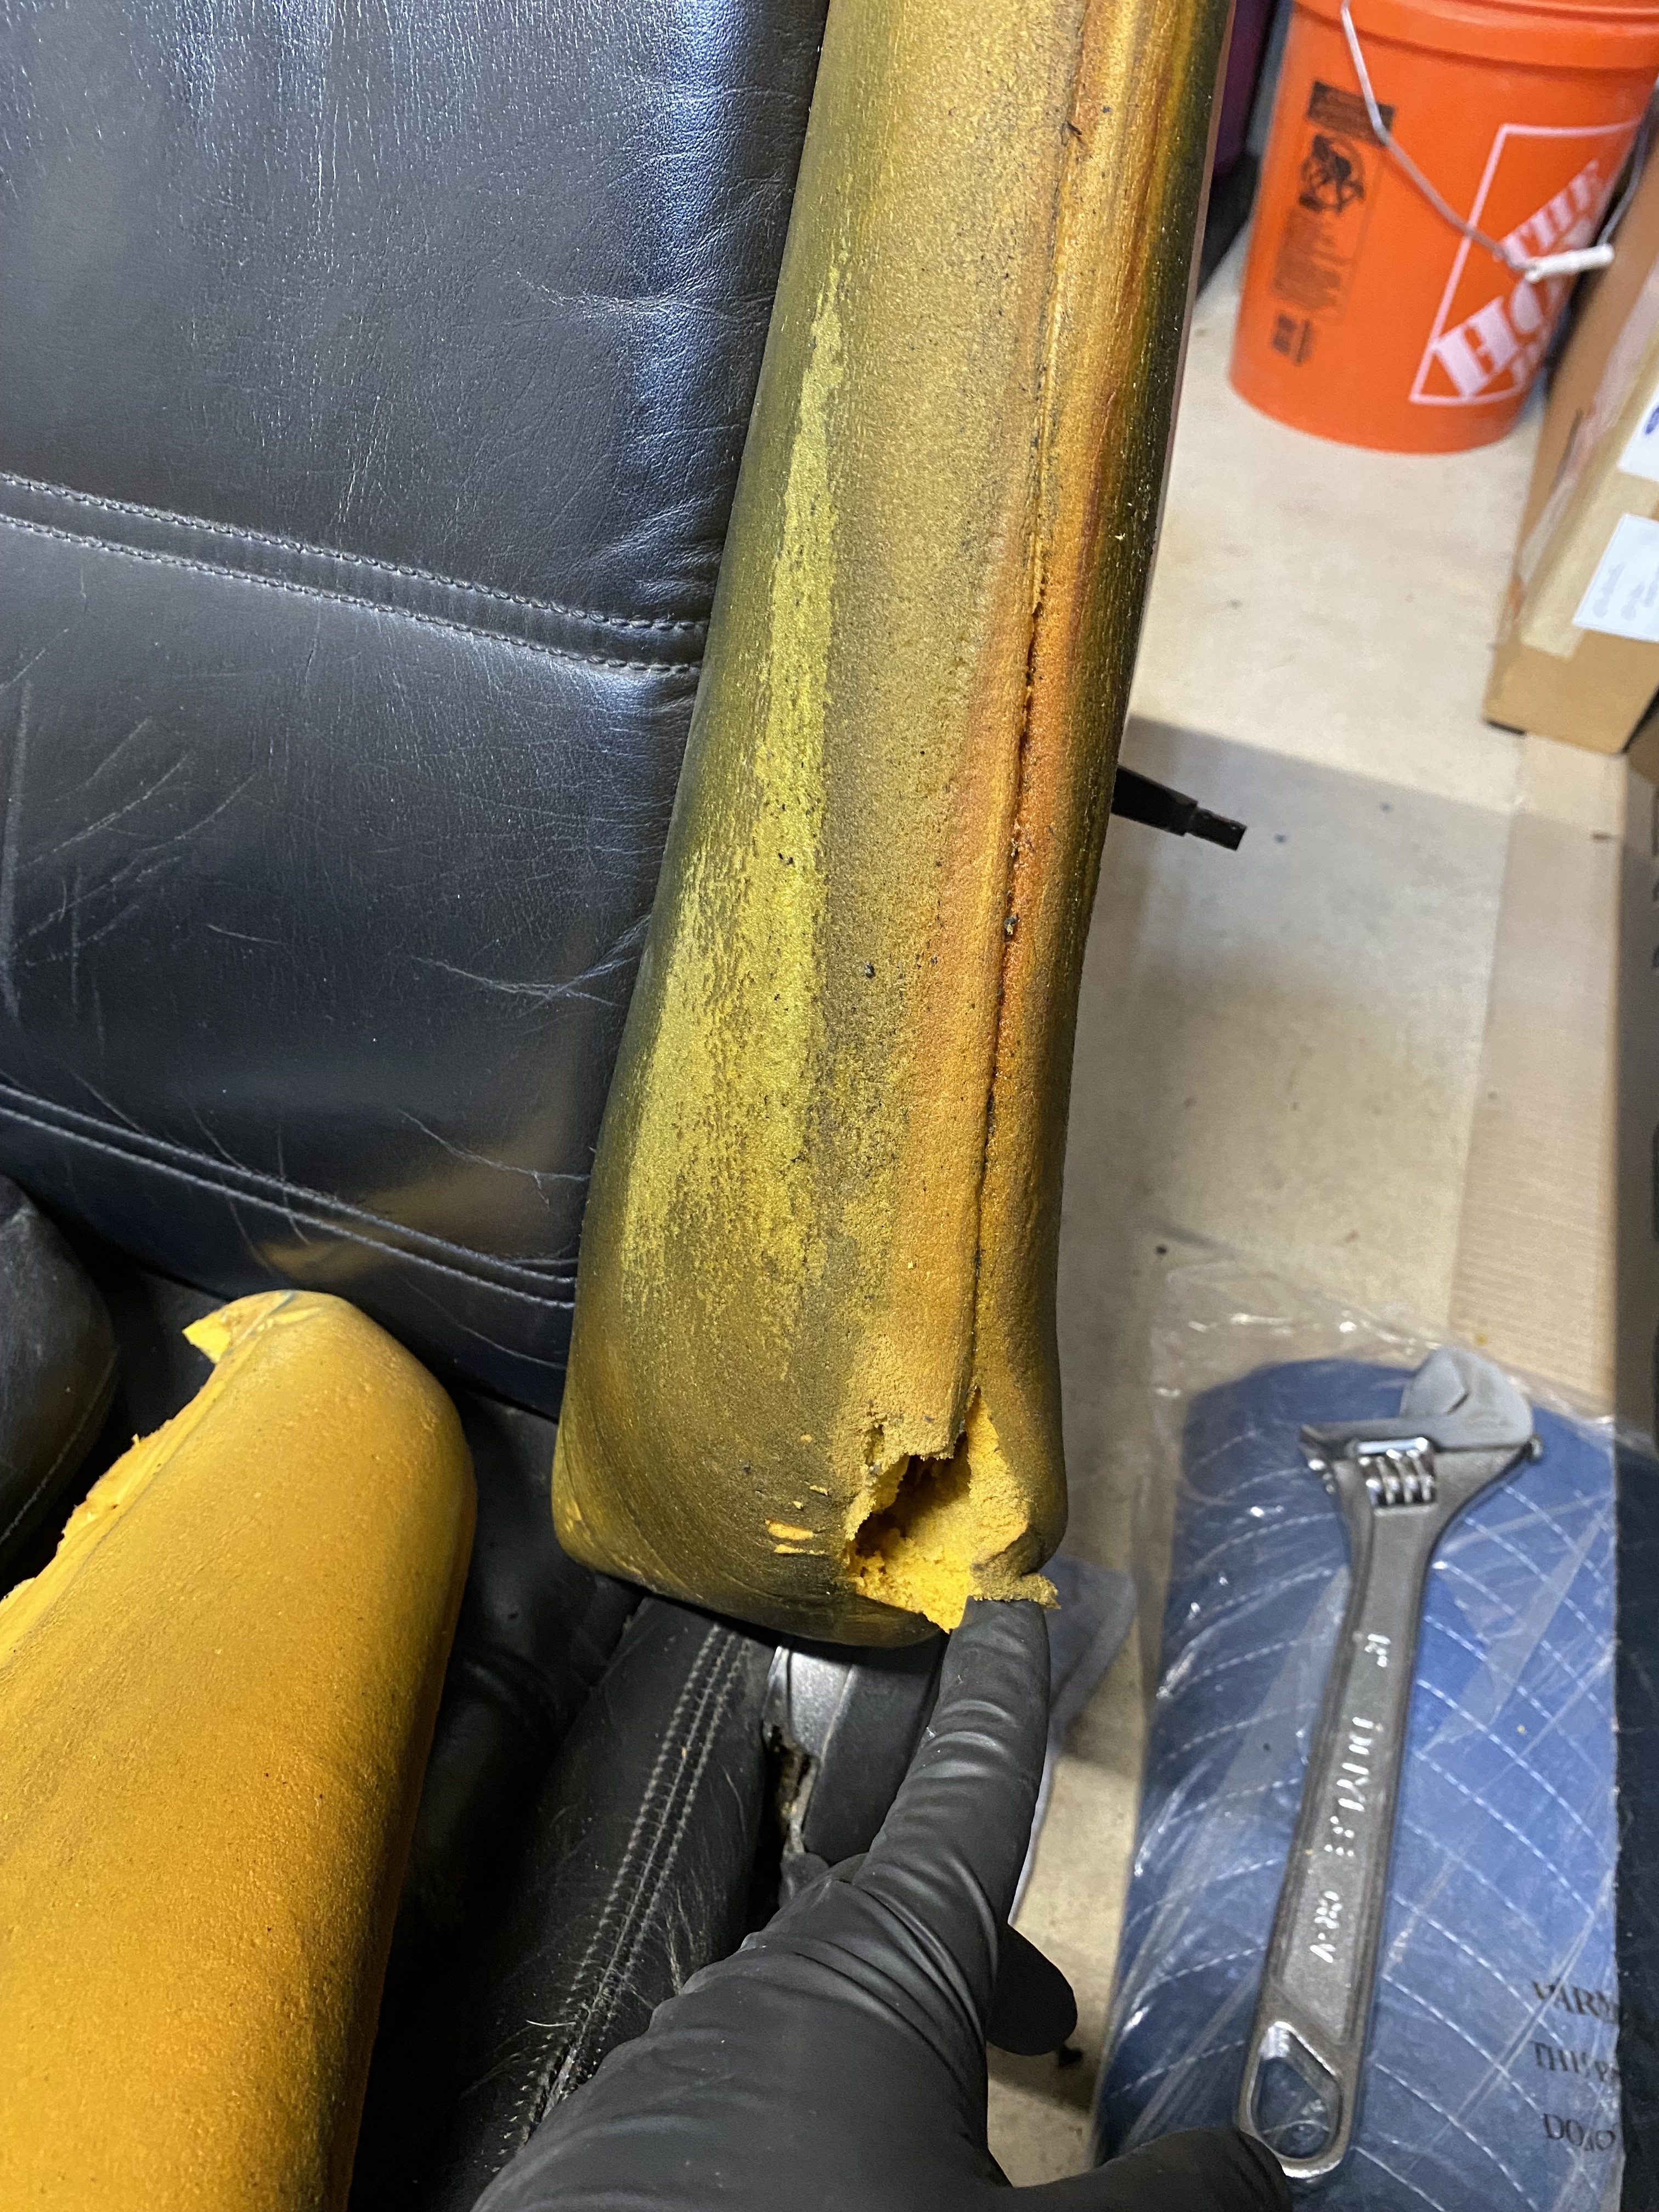
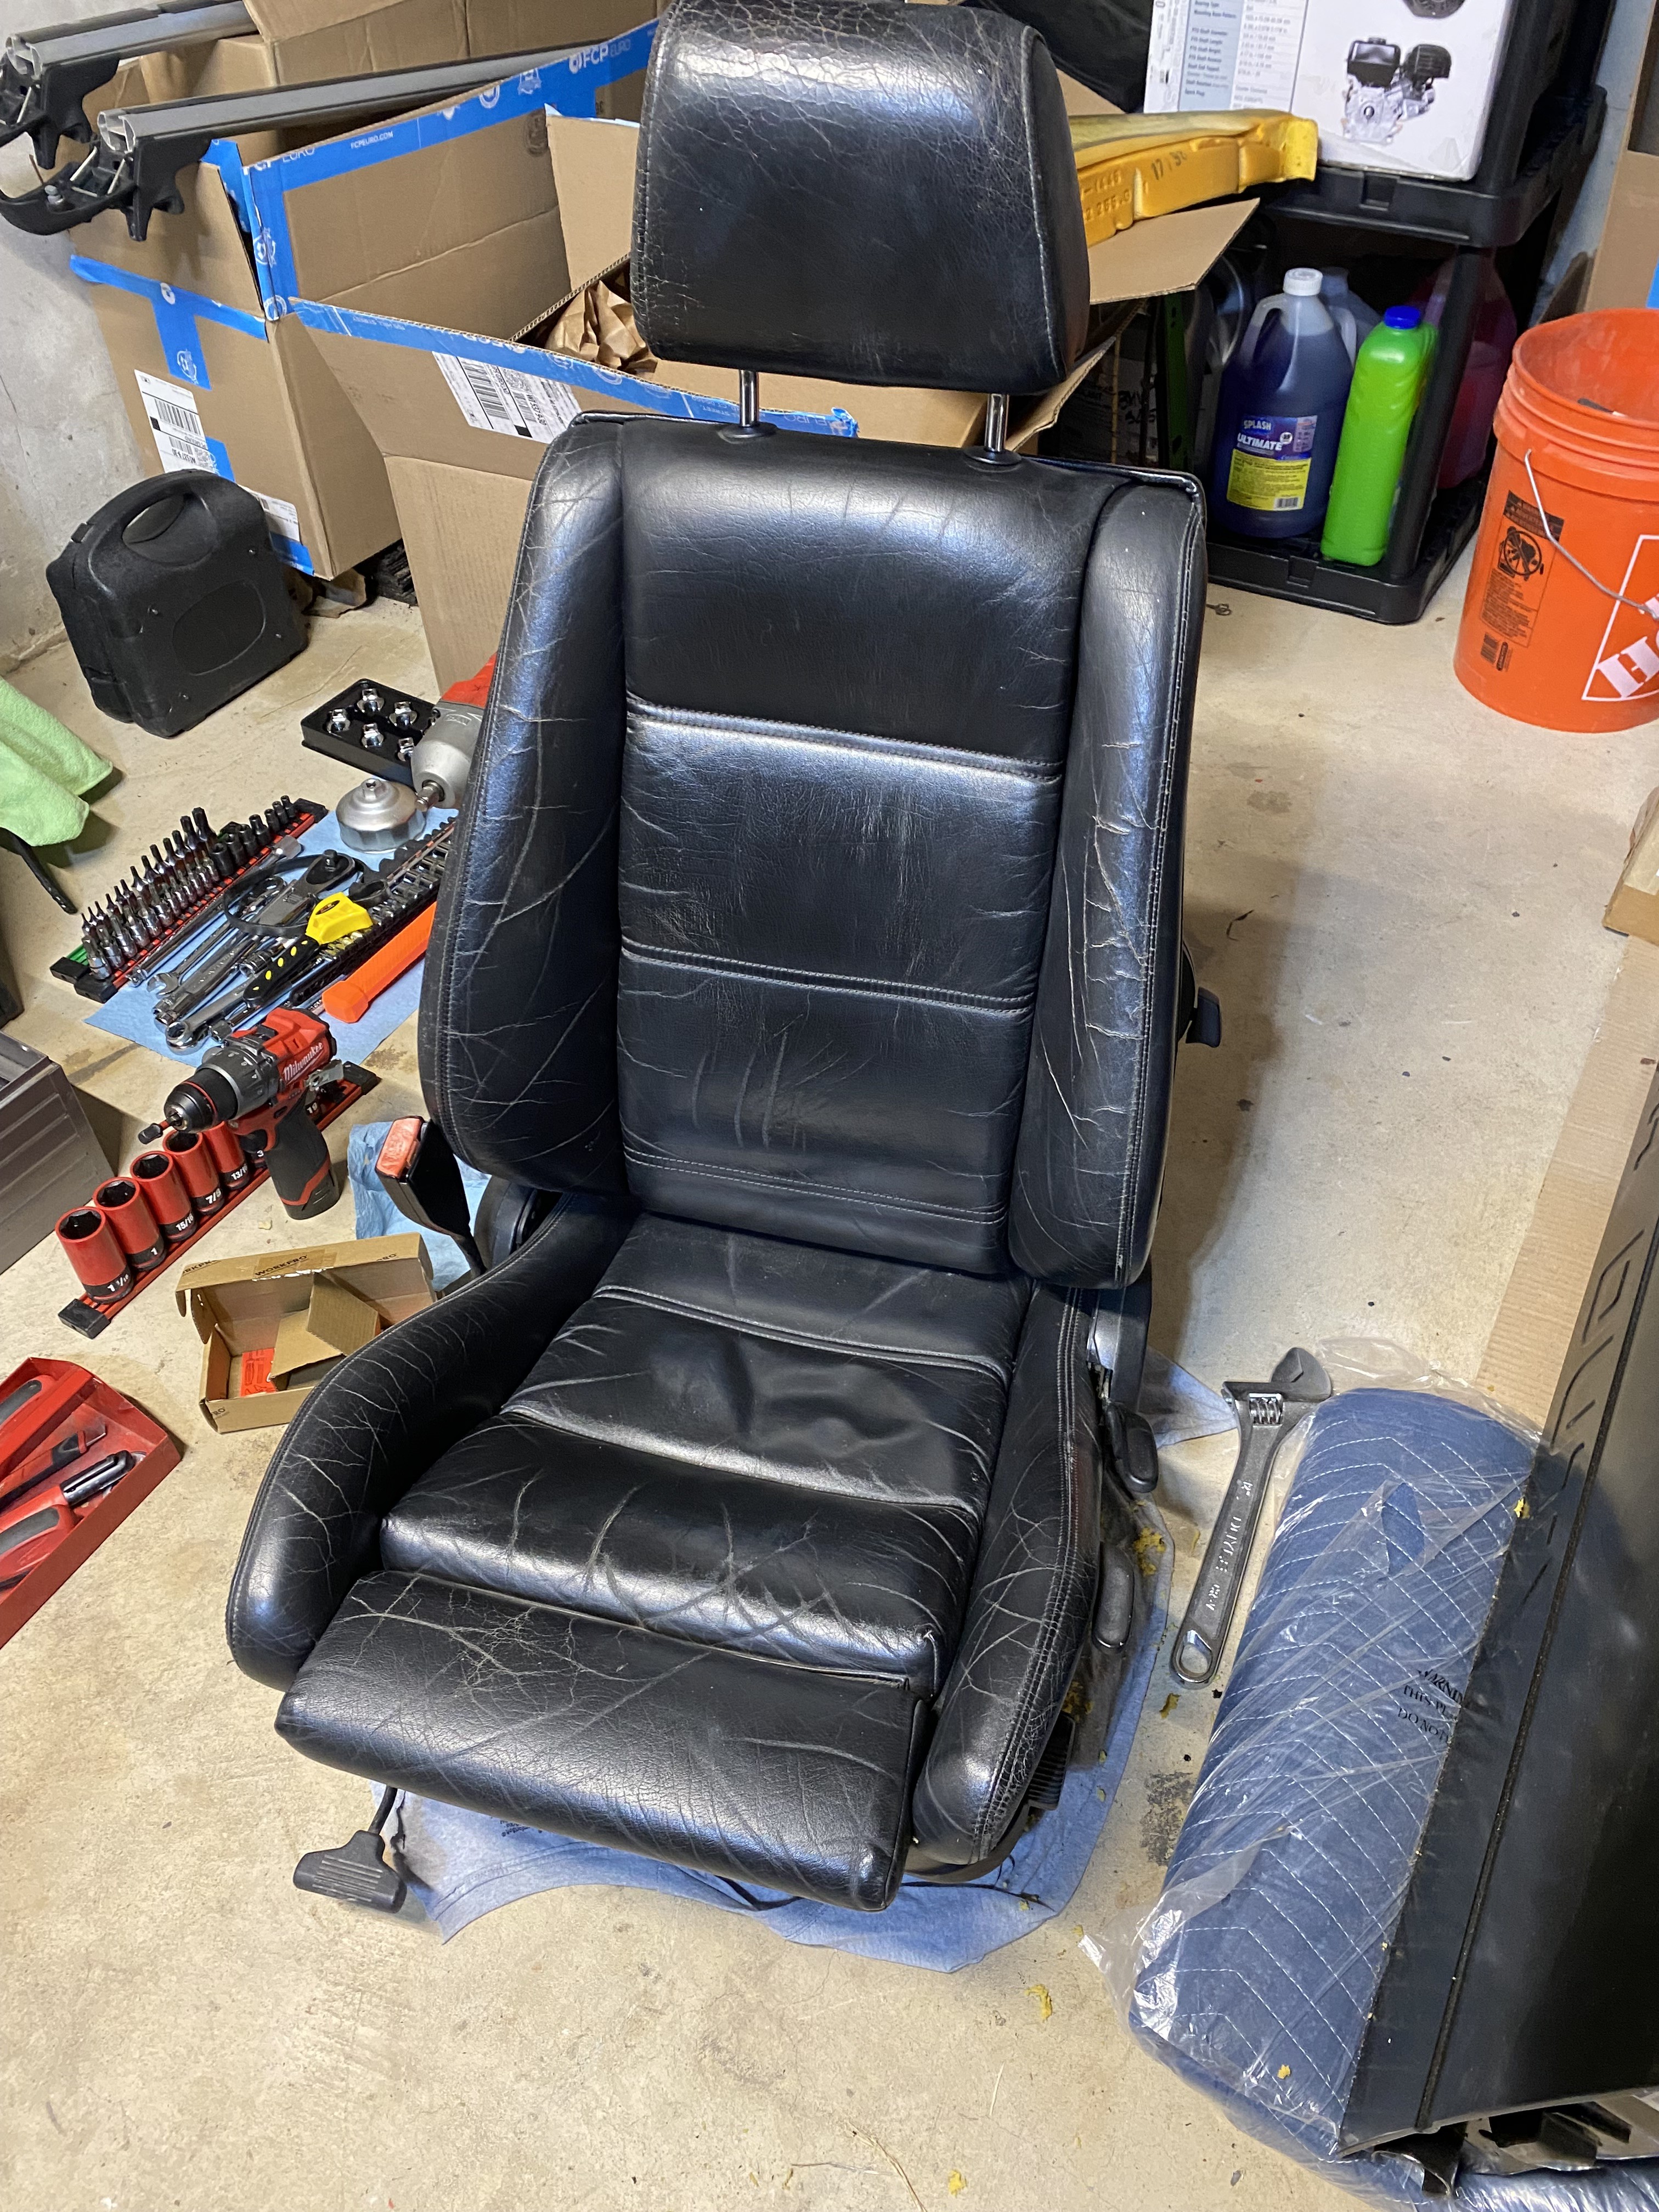
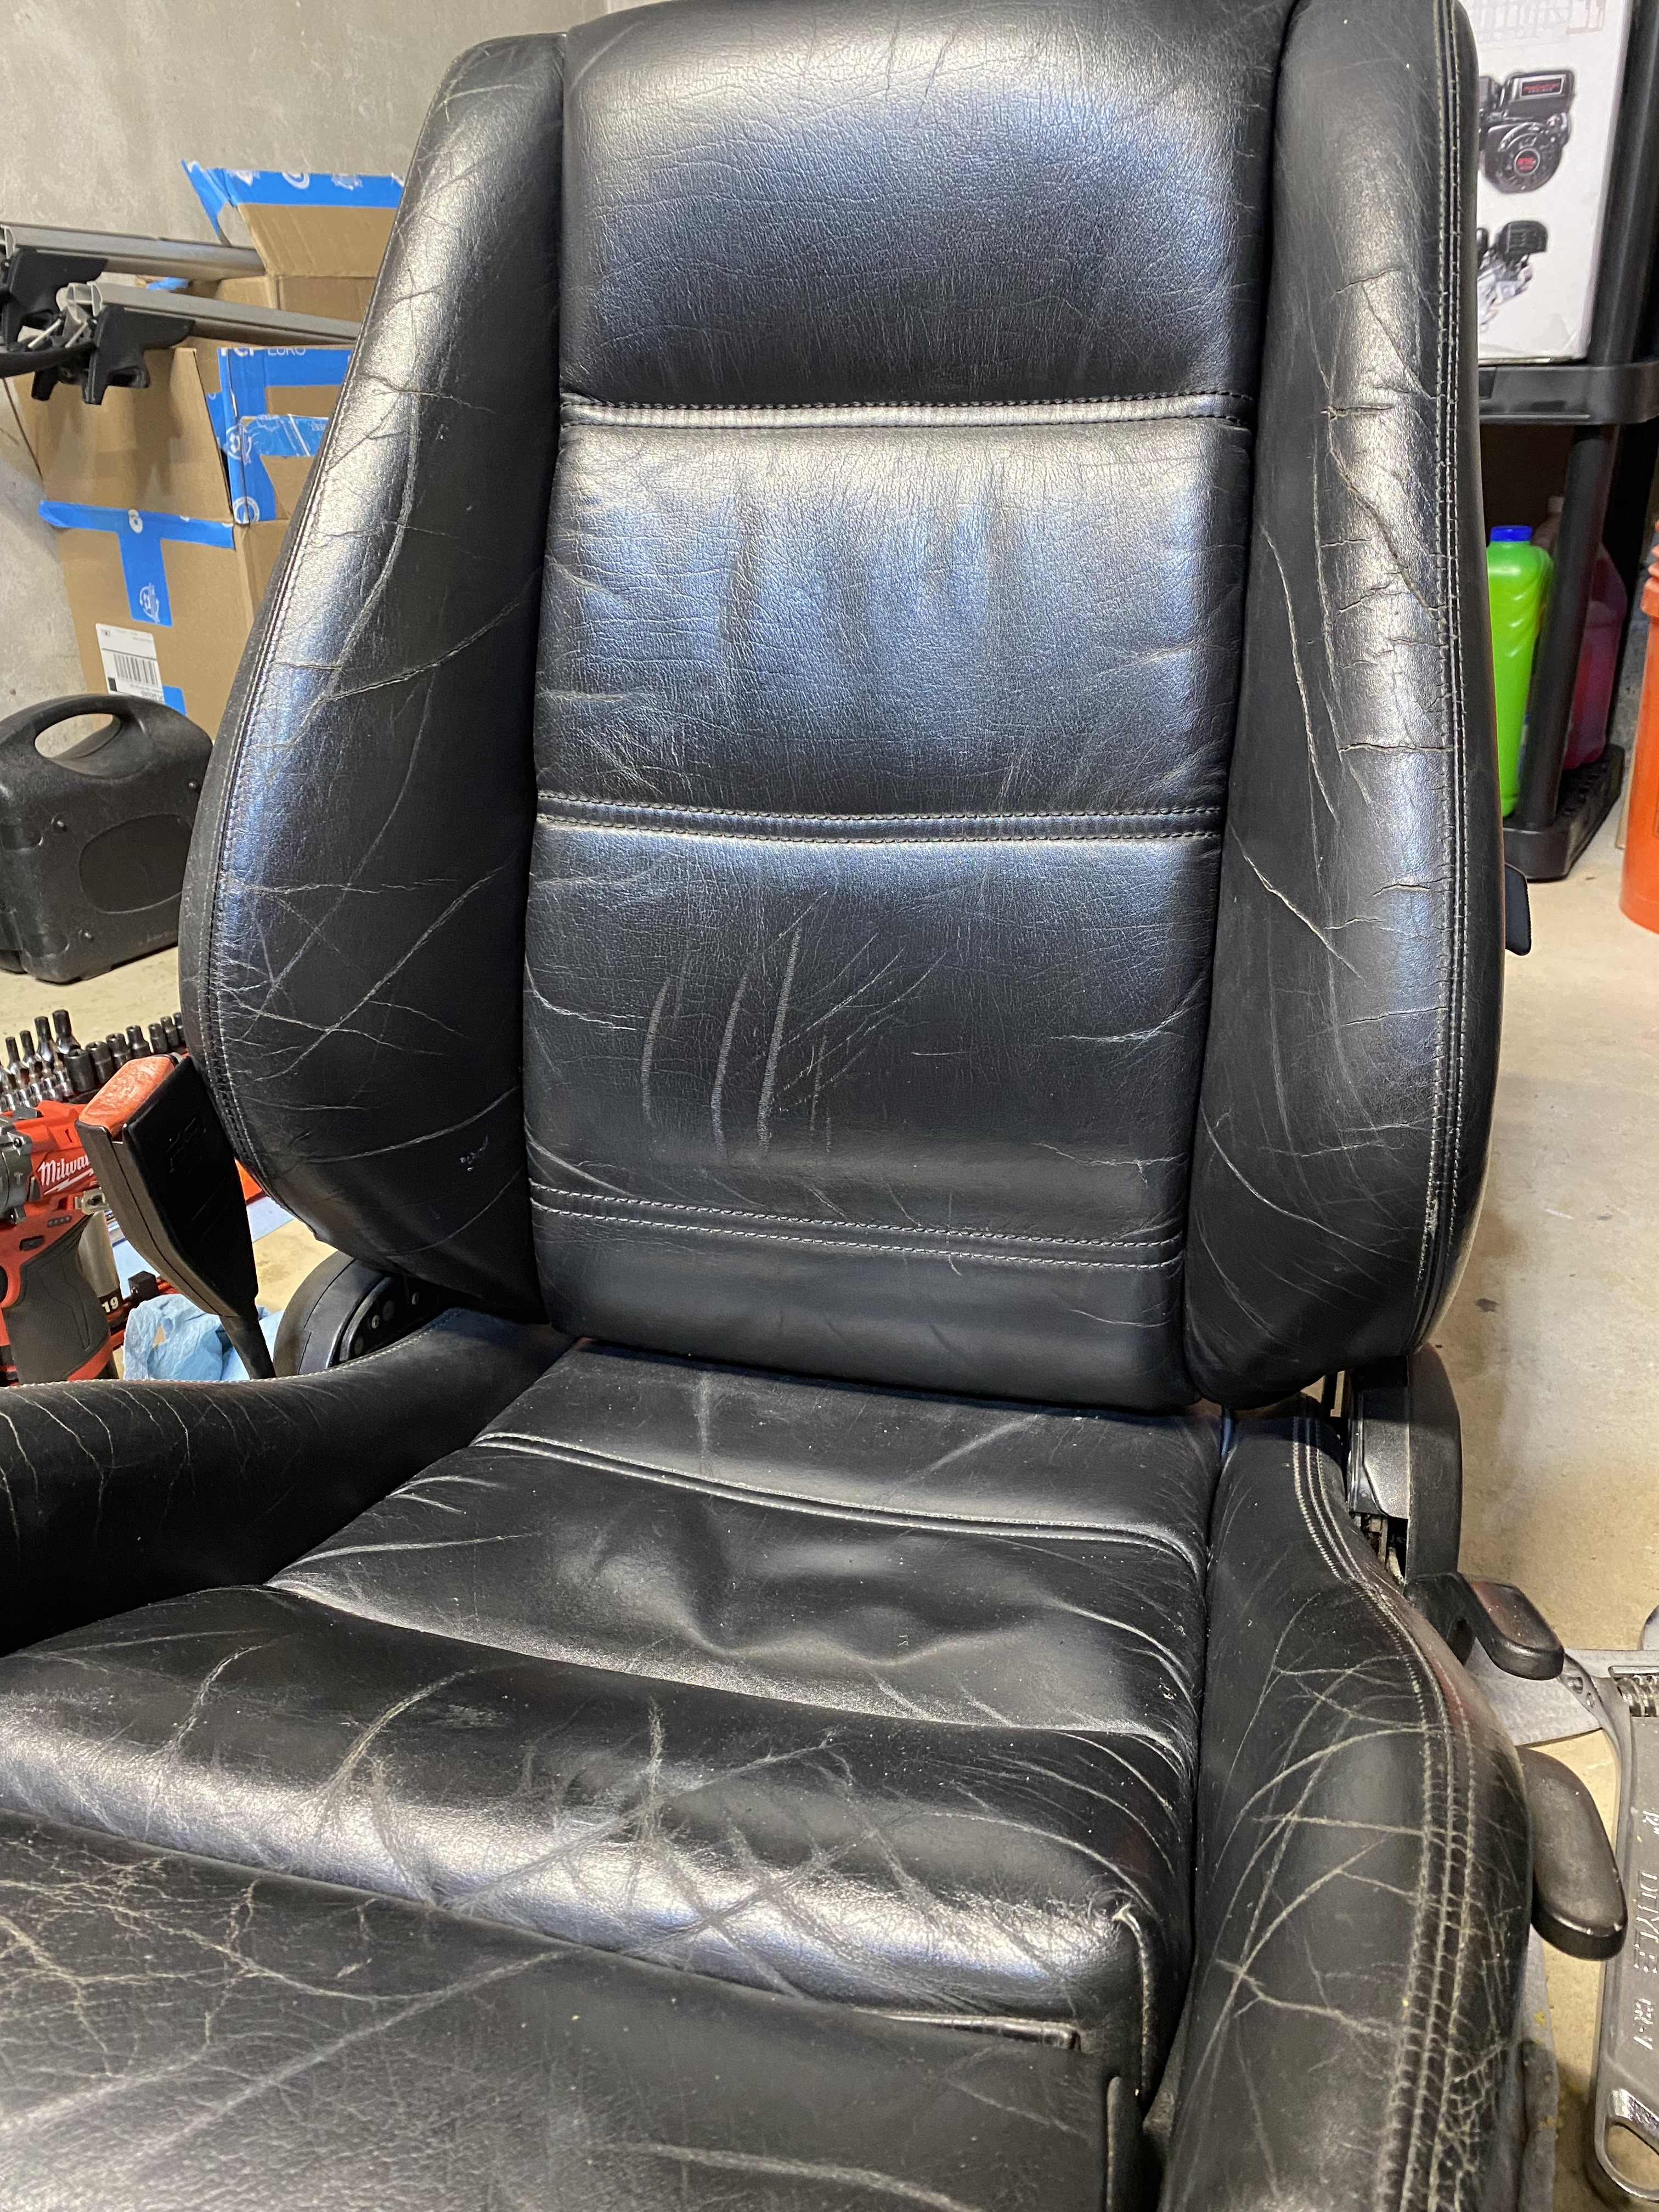
Just this last week, I took the time to pull the driver’s seat out so I could replace the driver’s bolster. I bought like 3-4 junk seats from someone on here a few years ago (turbo S5x in the fox valley area?) for one single bolster, and honestly, well worth it! I still need to correct the rear seatback tear but the driver’s seat is more important to me at this point. I used a cheapo hog ring kit off of Amazon and it worked surprisingly well - start to finish it probably only took me an hour or a little more including pulling the bolster off the old seat.
-
I will post a larger update down the road when i get around to uploading like a million photos, but I took the car down to The Vintage in Hendersonville, NC last week/weekend - needless to say, the trip was one for the books and a must - do for anyone on this forum. No major mechanical issues either - the worst one was a bad brake light switch that I fixed temporarily with a clutch switch and some good ole manual control
 . So much cool BMW brain-melt action, and even better, just an awesome group of people who love 'em and drive 'em hard.
I made my trip a bit extra special by taking the long way there, driving to Pittsburgh day one, then cutting south along Skyline Drive/Blue Ridge Parkway for around 250 miles through VA until I reached NC where the majority of it is still closed due to damage from Hurricane Helene last fall. The event went for three days in NC, then i took two days coming home (including driving the Tail of the Dragon).
All in all, a wonderful trip I'd love to have some fellow WIBimmers accompany me on with their own cars in future years!
The stats:
2700 miles
8 days
12 states
2.5 days of rain
One flash flood warning and one large rock hit to the skidplate
28.5mpg average
One failed brake light switch - found a replacement at the Vintage! (no, I didn't steal it from another unsuspecting vert owner)
20lbs of Stromung exhaust lugged home with me diagonally across the interior
25+ Alpinas viewed at the CCA museum in Greer
At least 10 E9's that i left drool puddles on
And a partridge in a pear tree



Hello! It looks like you're interested in this conversation, but you don't have an account yet.
Getting fed up of having to scroll through the same posts each visit? When you register for an account, you'll always come back to exactly where you were before, and choose to be notified of new replies (either via email, or push notification). You'll also be able to save bookmarks and upvote posts to show your appreciation to other community members.
With your input, this post could be even better 💗
Register Login