Skip to content
  • Categories
  • Recent
  • Tags
  • Popular
  • Users
  • Groups
Skins
  • Light
  • Brite
  • Cerulean
  • Cosmo
  • Flatly
  • Journal
  • Litera
  • Lumen
  • Lux
  • Materia
  • Minty
  • Morph
  • Pulse
  • Sandstone
  • Simplex
  • Sketchy
  • Spacelab
  • United
  • Yeti
  • Zephyr
  • Dark
  • Cyborg
  • Darkly
  • Quartz
  • Slate
  • Solar
  • Superhero
  • Vapor

  • Default (No Skin)
  • No Skin
Collapse
WIBIMMERS logo

WIBIMMERS

  1. Home
  2. General Discussion
  3. Members BMWs
  4. A purists nightmare - E46 drift build

A purists nightmare - E46 drift build
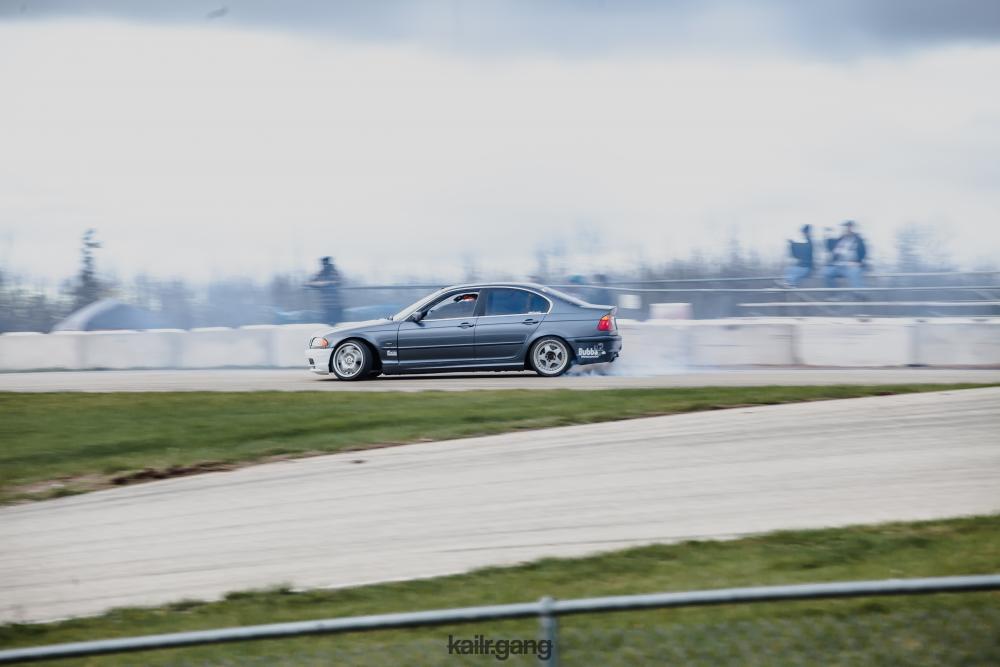
Scheduled Pinned Locked Moved Members BMWs
400 Posts 25 Posters 0 Views 1 Watching
  • Oldest to Newest
  • Newest to Oldest
  • Most Votes
Reply
  • Reply as topic
Log in to reply
This topic has been deleted. Only users with topic management privileges can see it.
  • patsbimmer1P
    patsbimmer1P
    patsbimmer1
    wrote on last edited by
    #360

    I see a livery when I look at this car and I wish I was talented enough to share it. I'm seeing white/dark red/ dark grey.

    2011 e90 M3 - DCT, Borla exhaust, BMW Performance Black Grille, ECS Painted Corners, Ziza Angel Eyes

    07 335i Stella - sport package, BMS DCI, zhp knob, TMS cf parking brake lever, VRSF downpipes, MHD tune, H&R race springs, other stuff *SOLD*

    97 328i Lola - sport package, m50 intake manifold, m50 manifold.com install kit, custom CAI, K&N filter, Borla exhaust, FK silverline coilovers, 25.5mm front sway bar, Powerflex front sway bushings, Turner Radiator, fan delete *sold*
    95 325is *sold*
    93 nissan 240sx KA-T *sold*

    BMWCCA #473306

    Instagram @patsbimmer1

    AKA- HALLWAY PAT

    "burnouts bring babes and babes dont have time for bushings" - Kaiser Rolls

    1 Reply Last reply
    0
    • TkuhnT
      TkuhnT
      Tkuhn
      wrote on last edited by
      #361

      patsbimmer1 said:

      I see a livery when I look at this car and I wish I was talented enough to share it. I'm seeing white/dark red/ dark grey.

      Id love to see it if you made it come to life! Haha but I cant wait to get it in all white.

      1 Reply Last reply
      1
      • TkuhnT
        TkuhnT
        Tkuhn
        wrote on last edited by
        #362

        Been a minute since I updated.

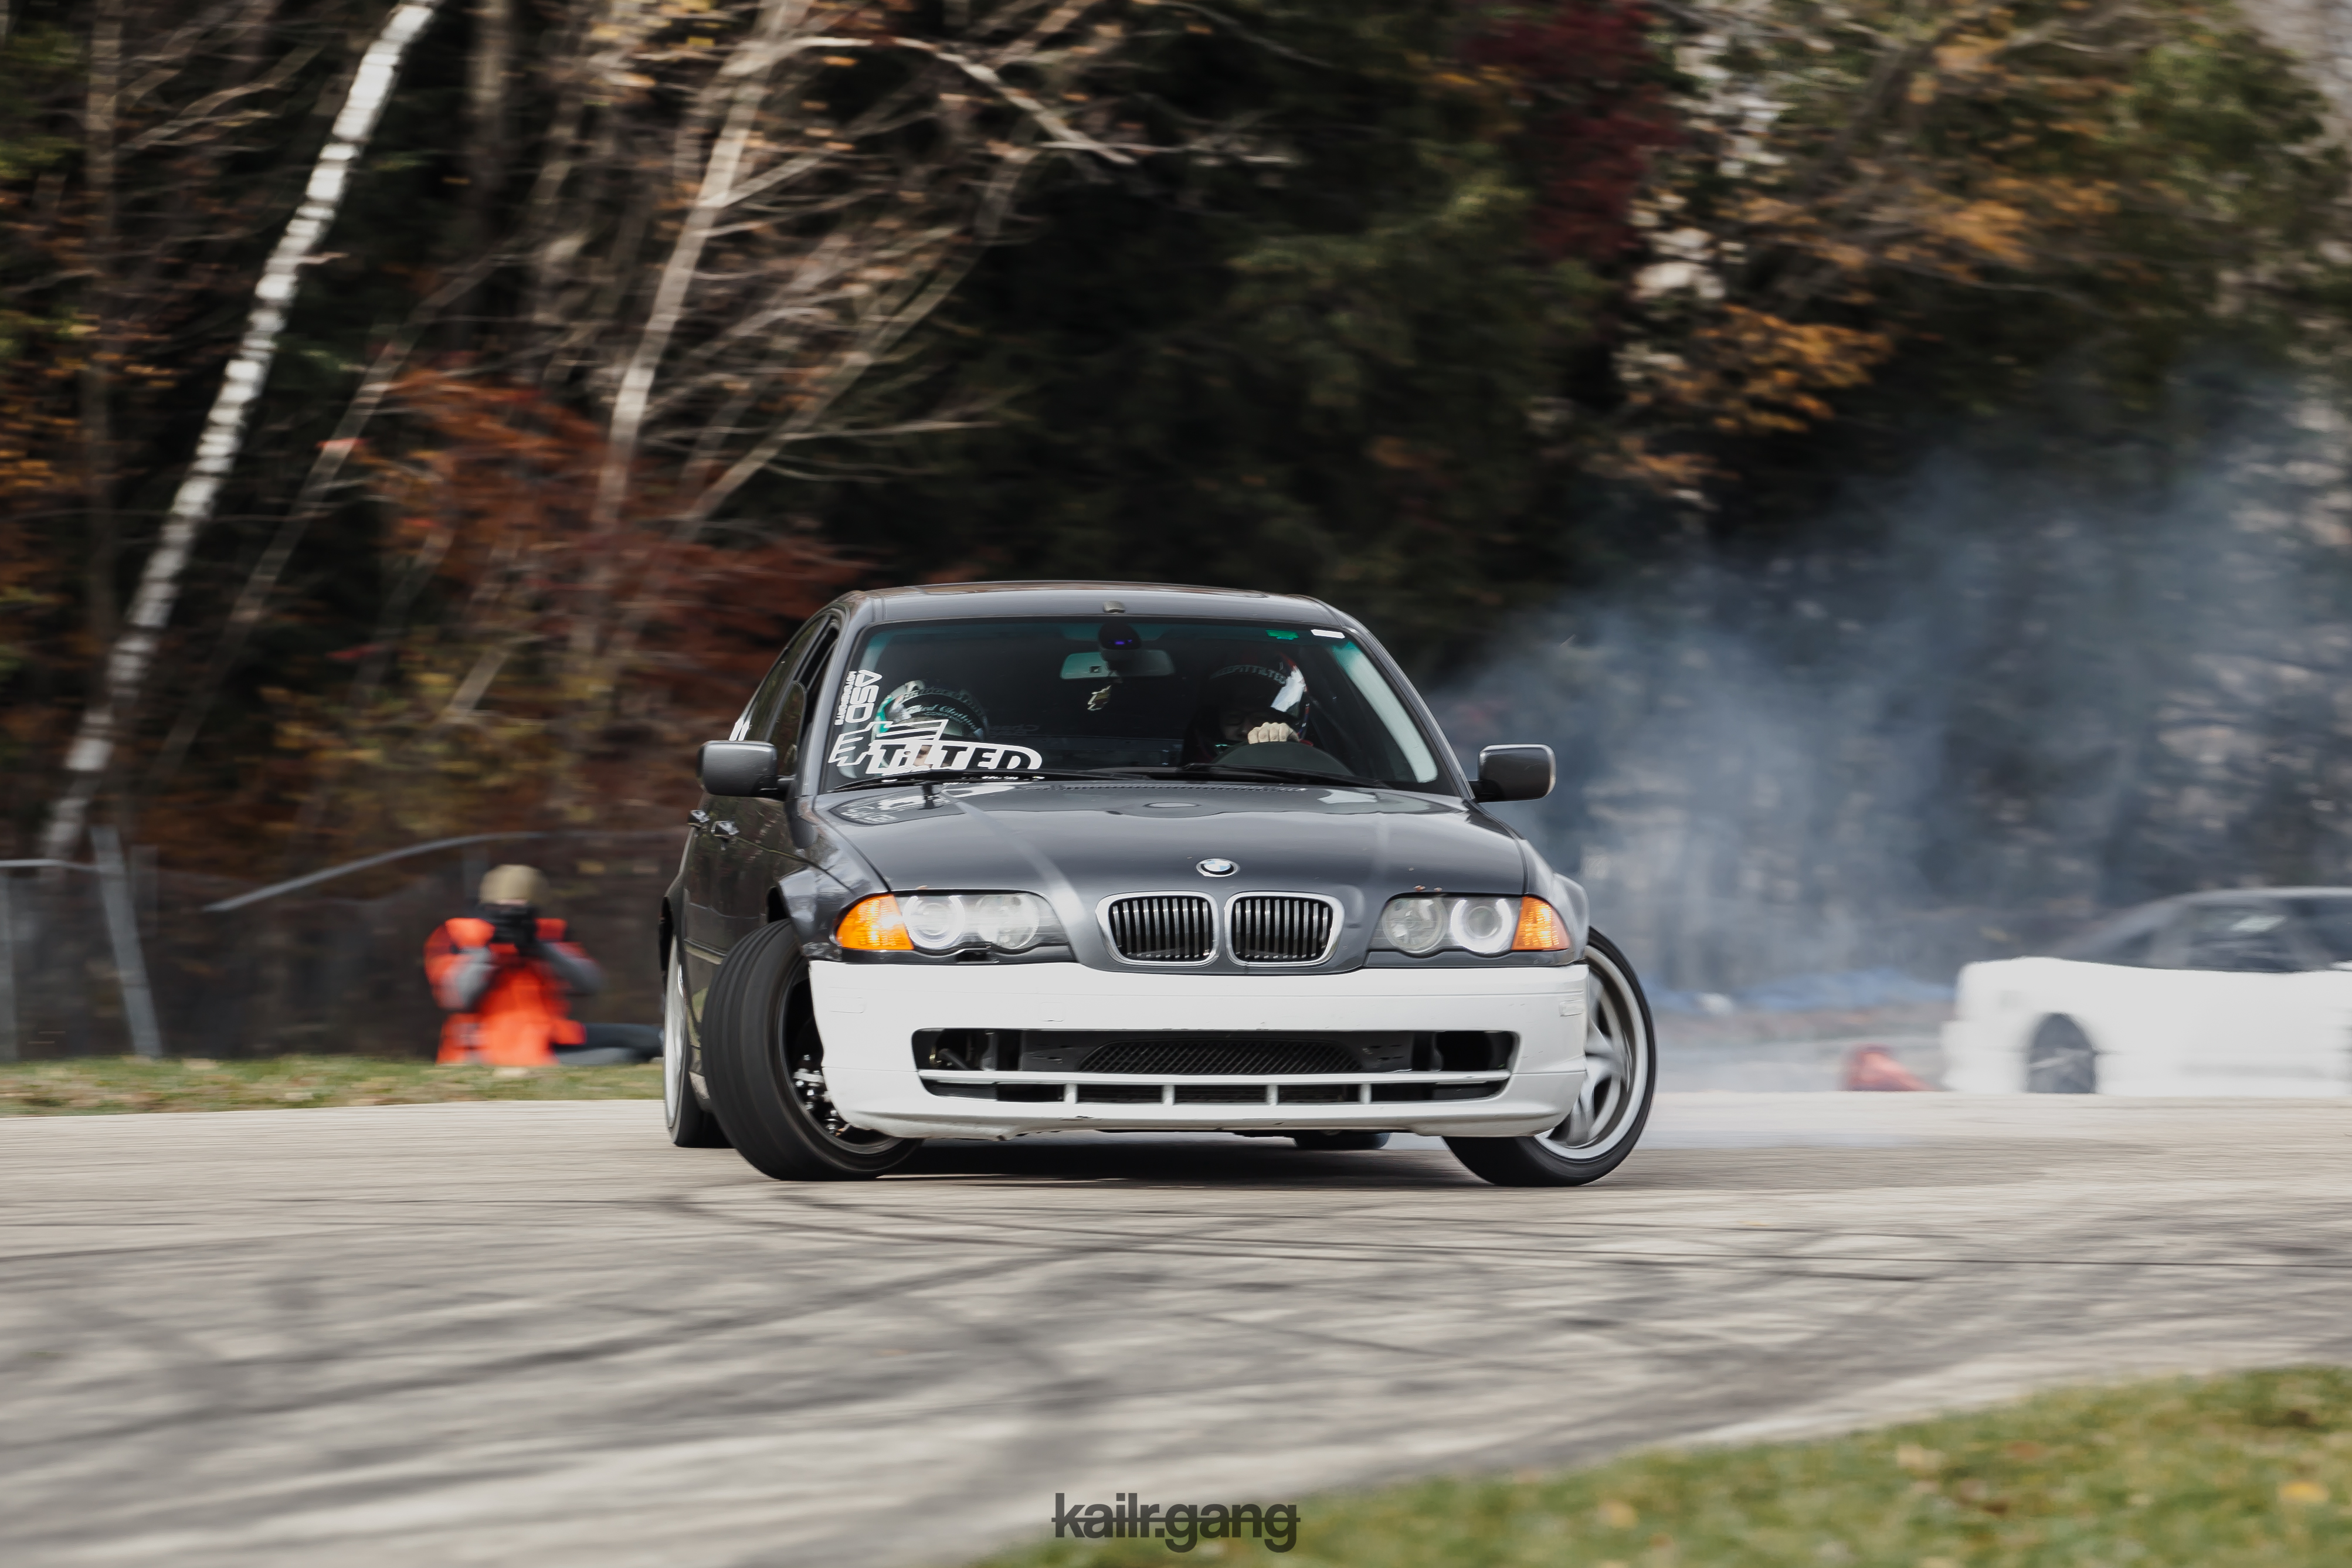
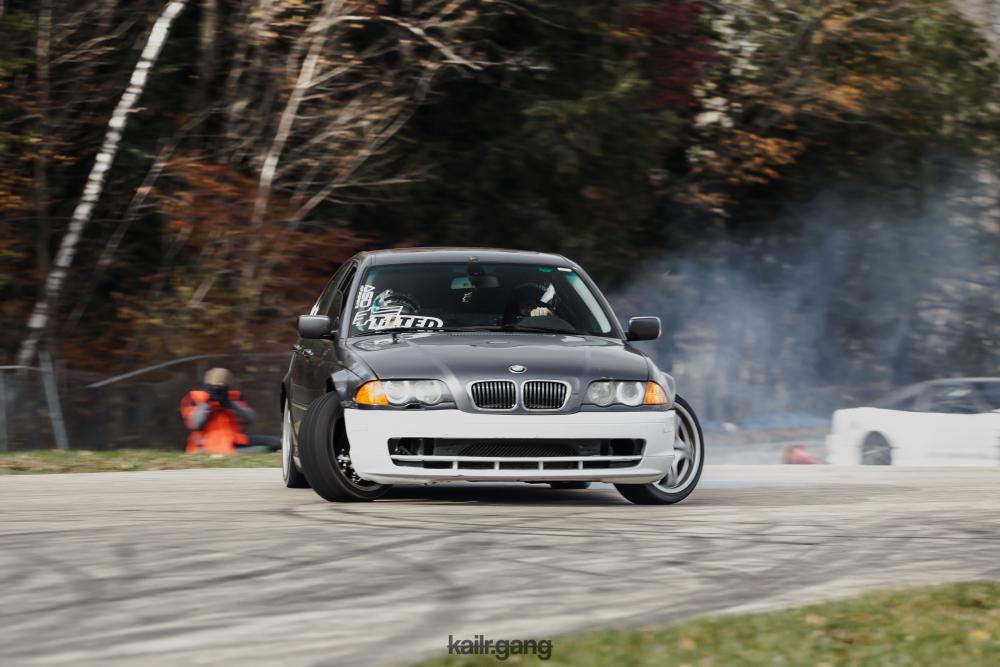
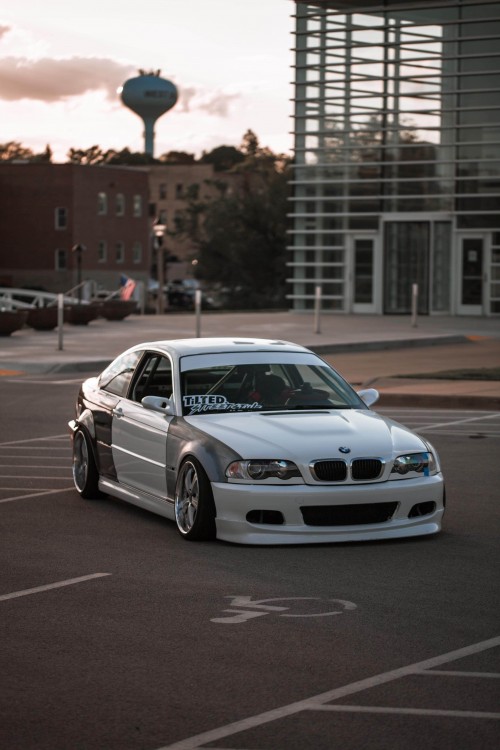
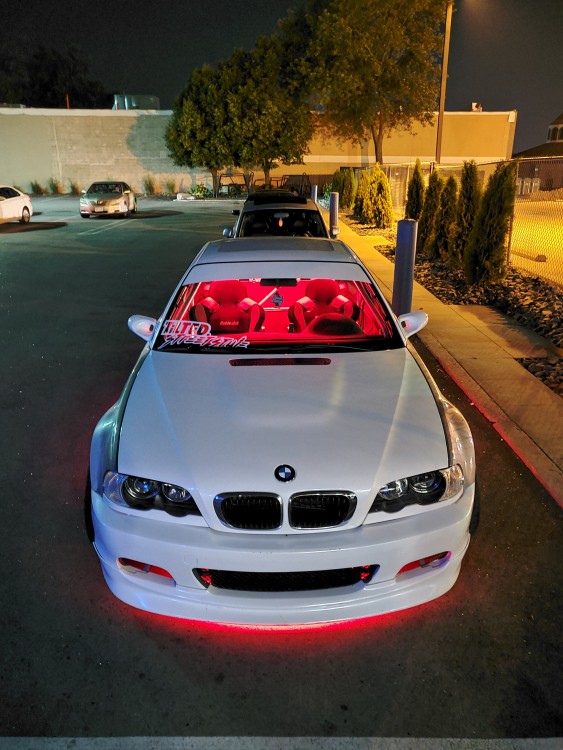
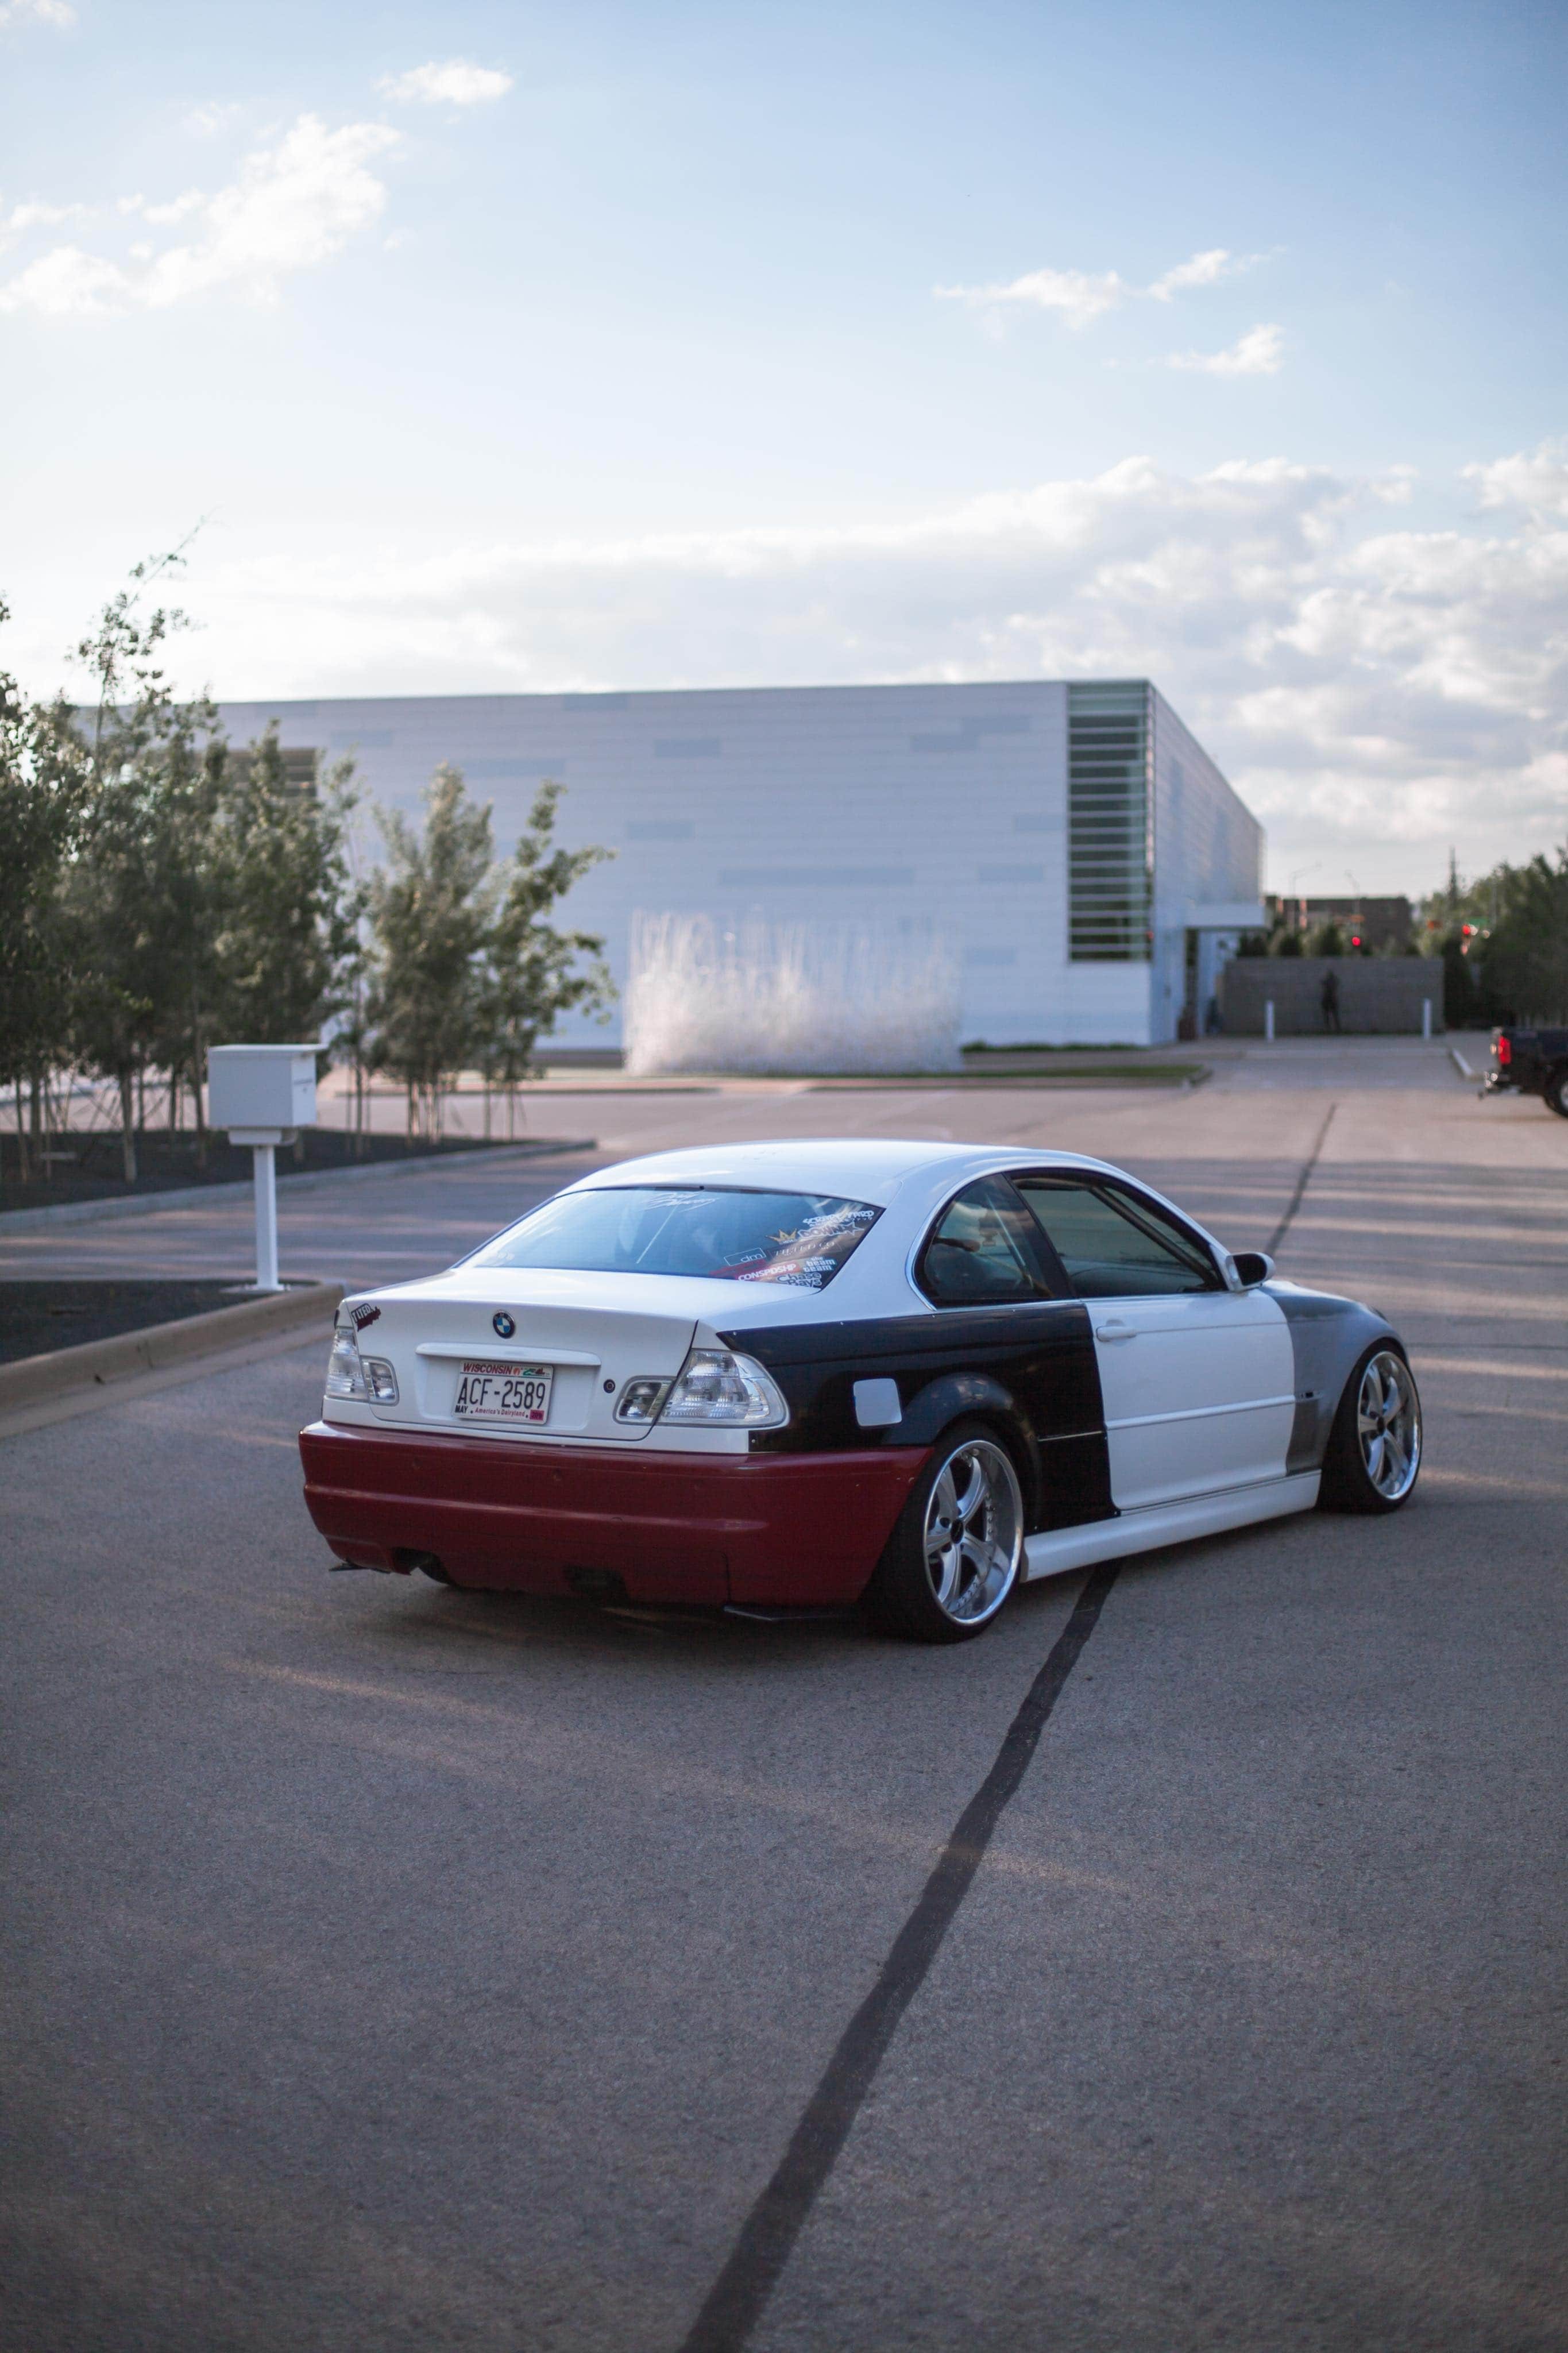
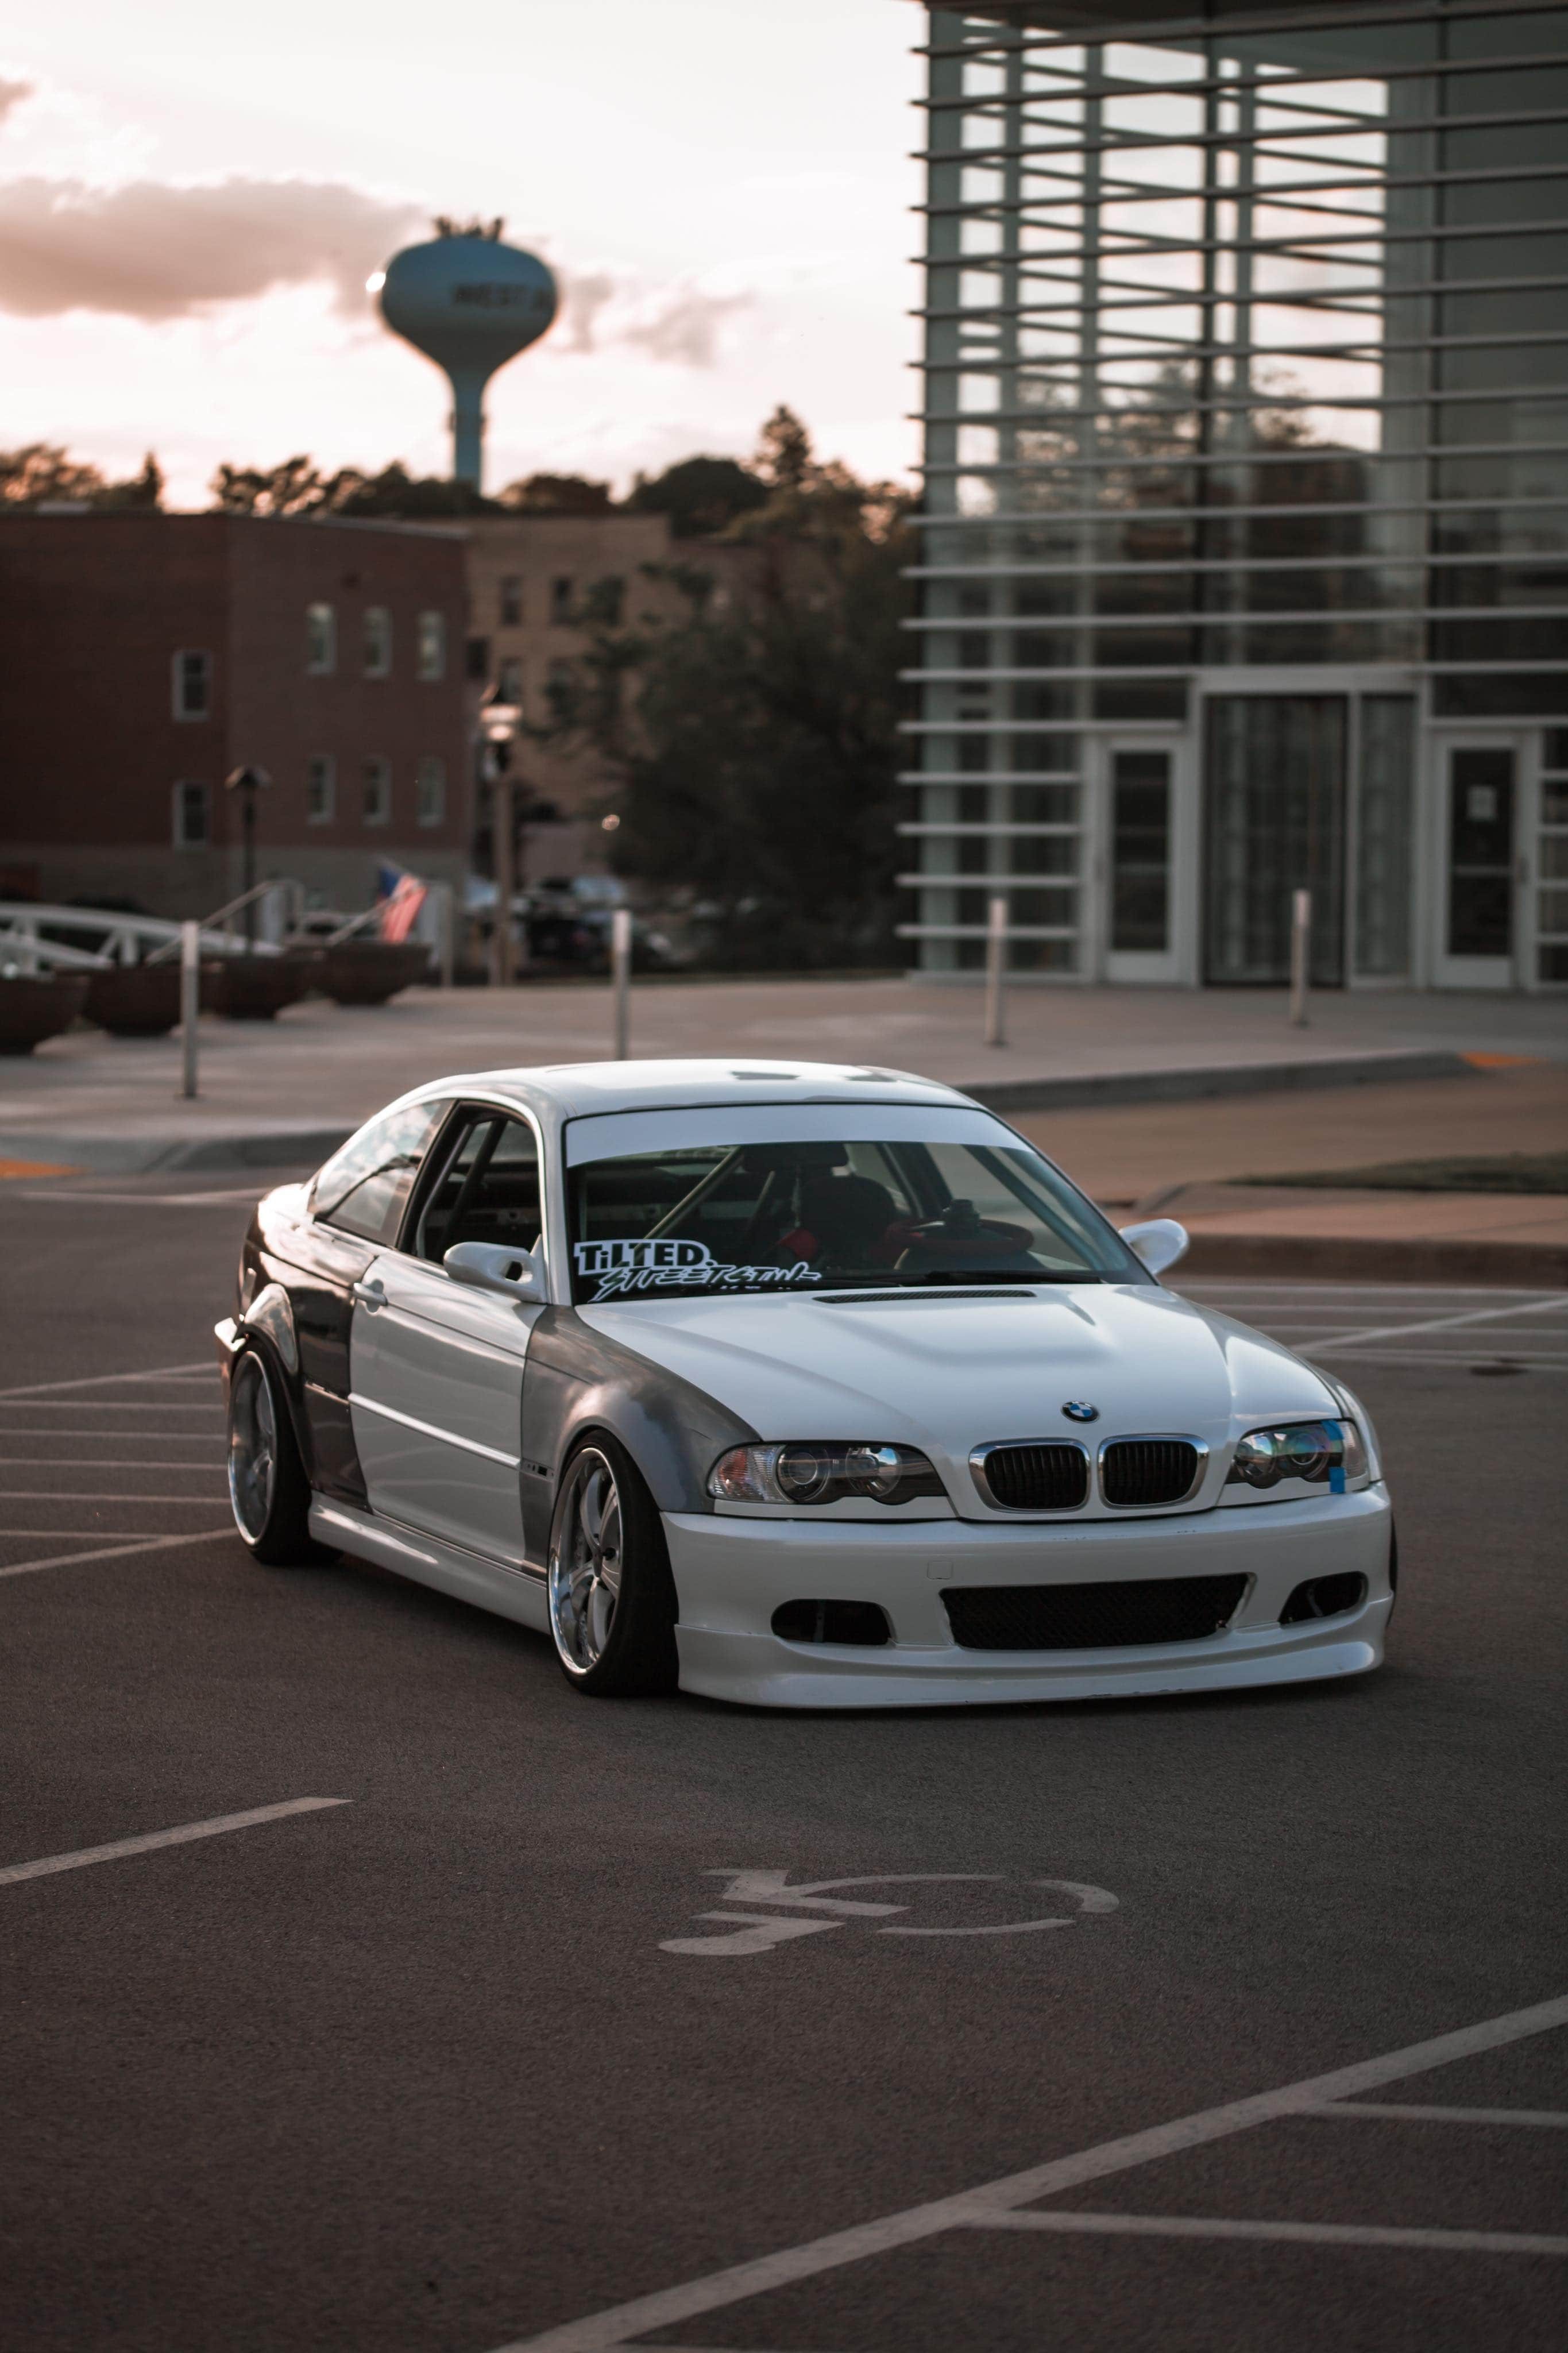
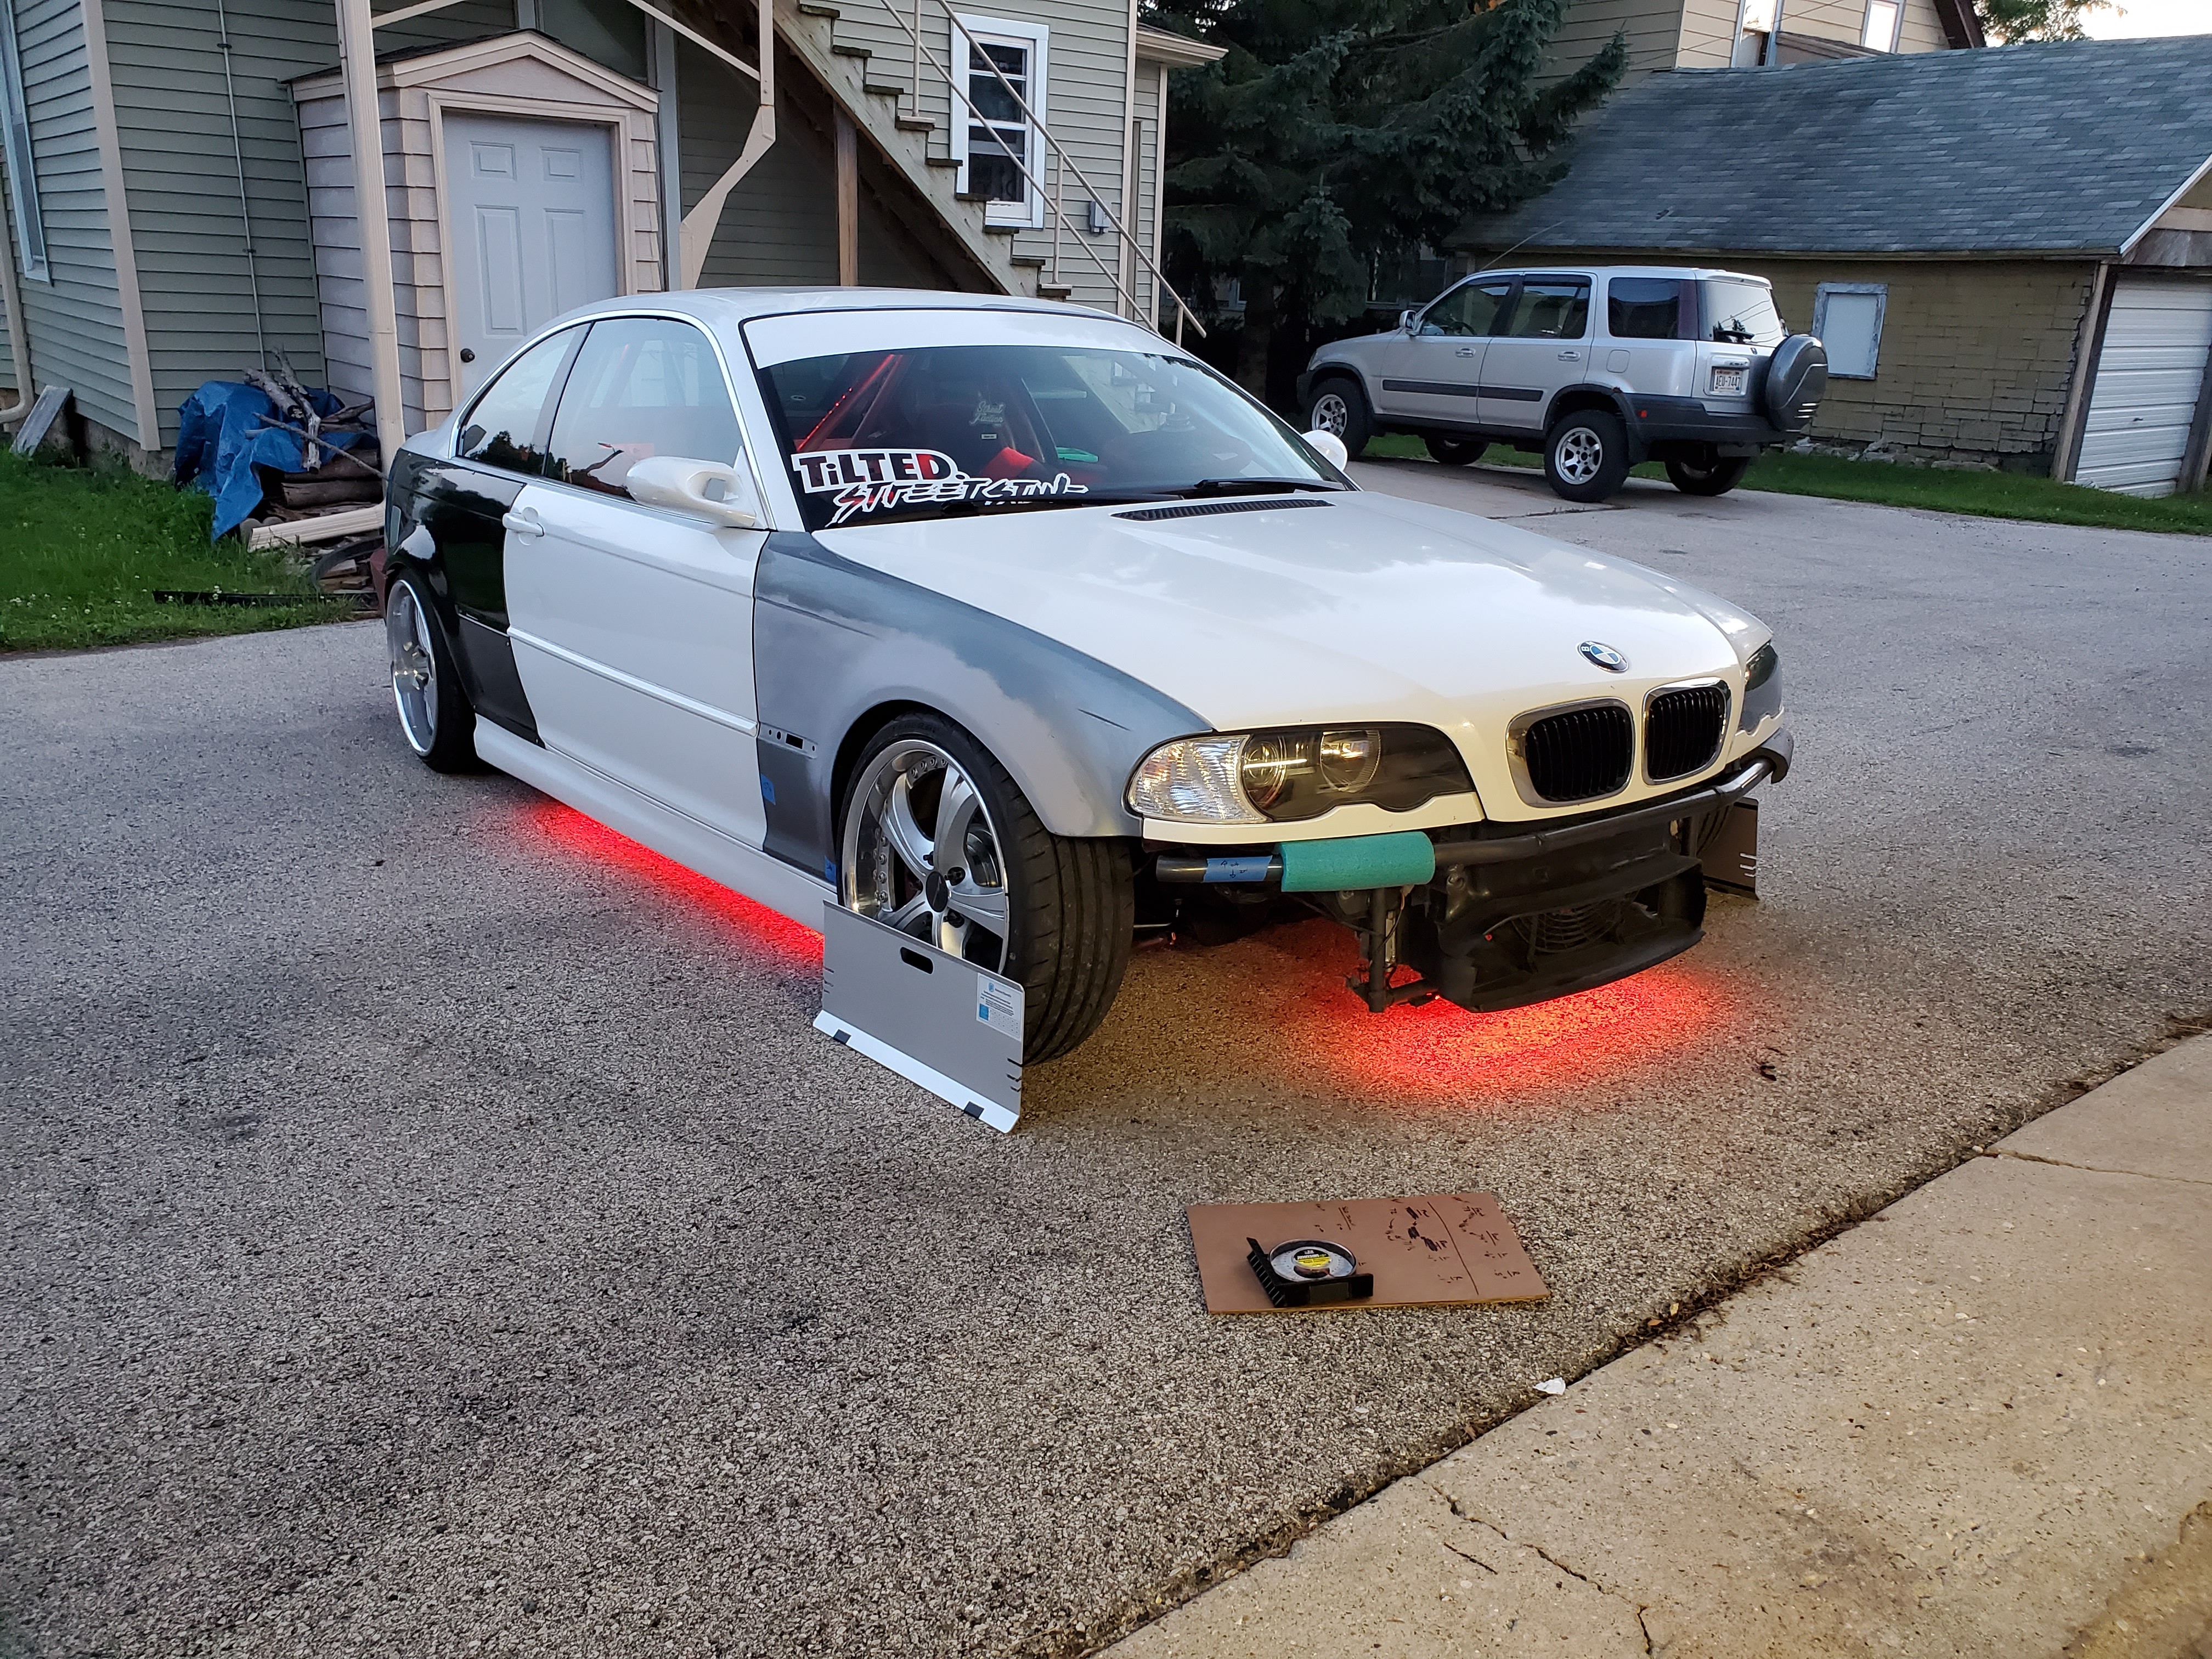
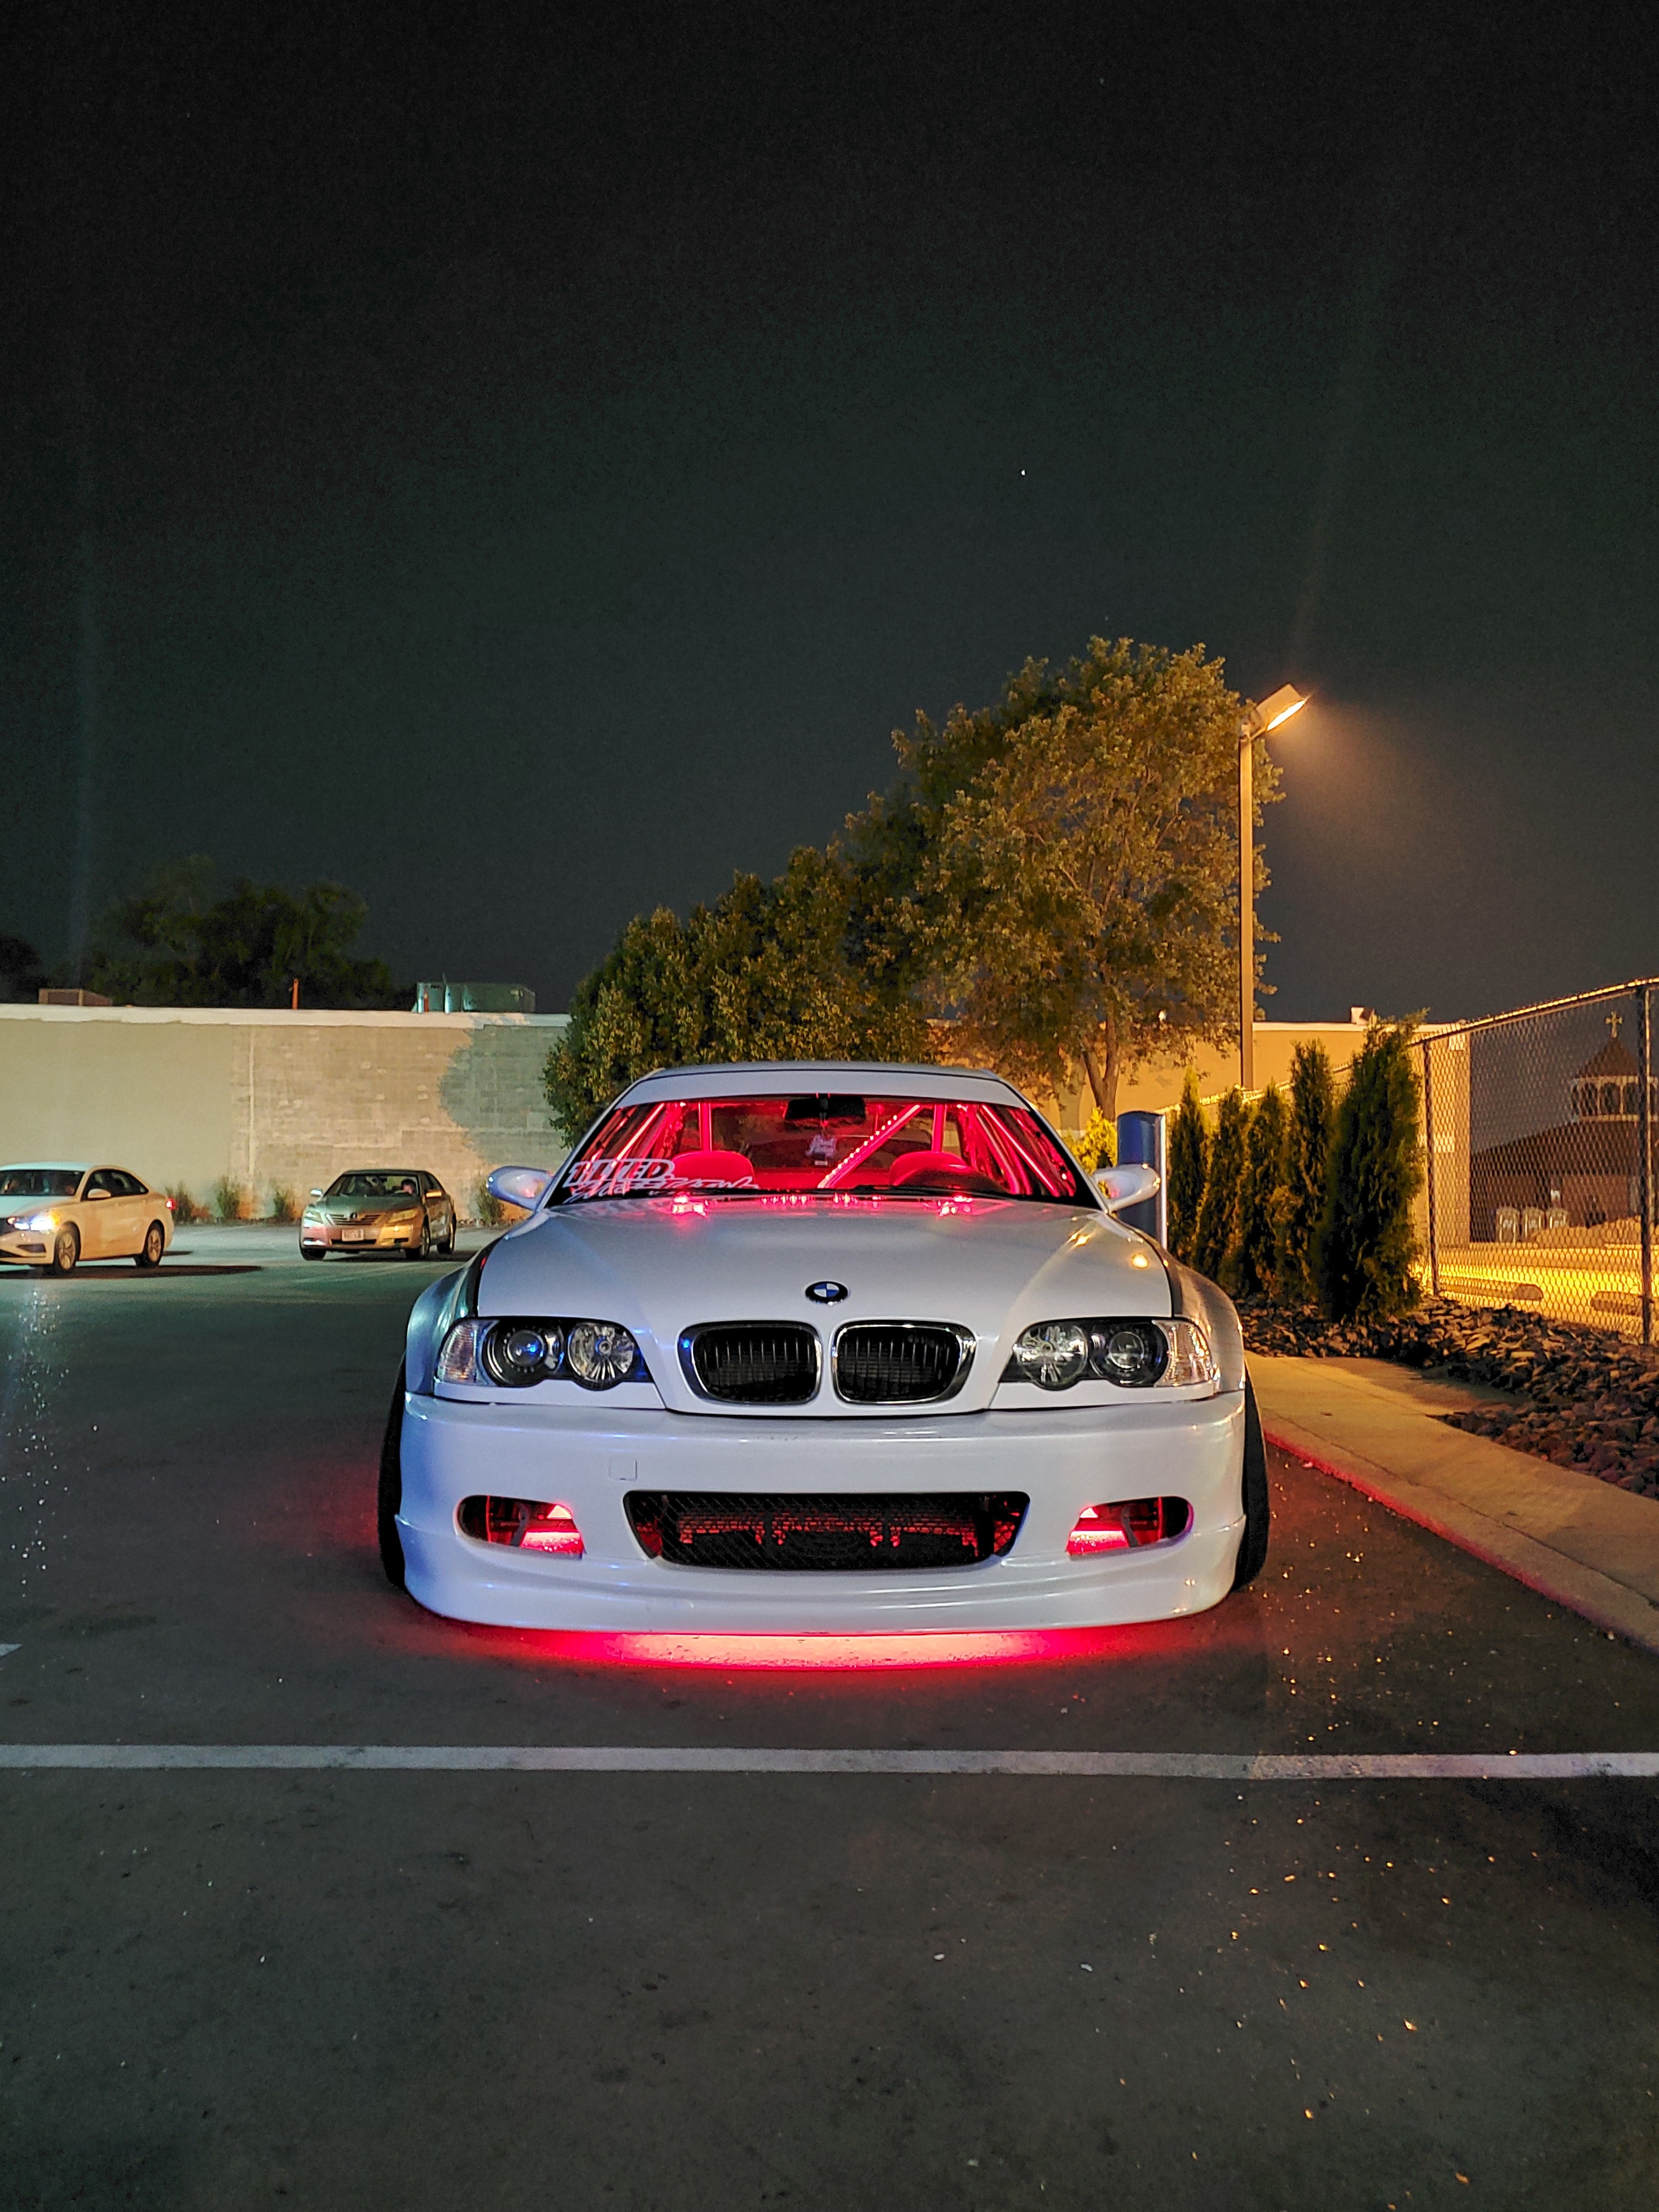
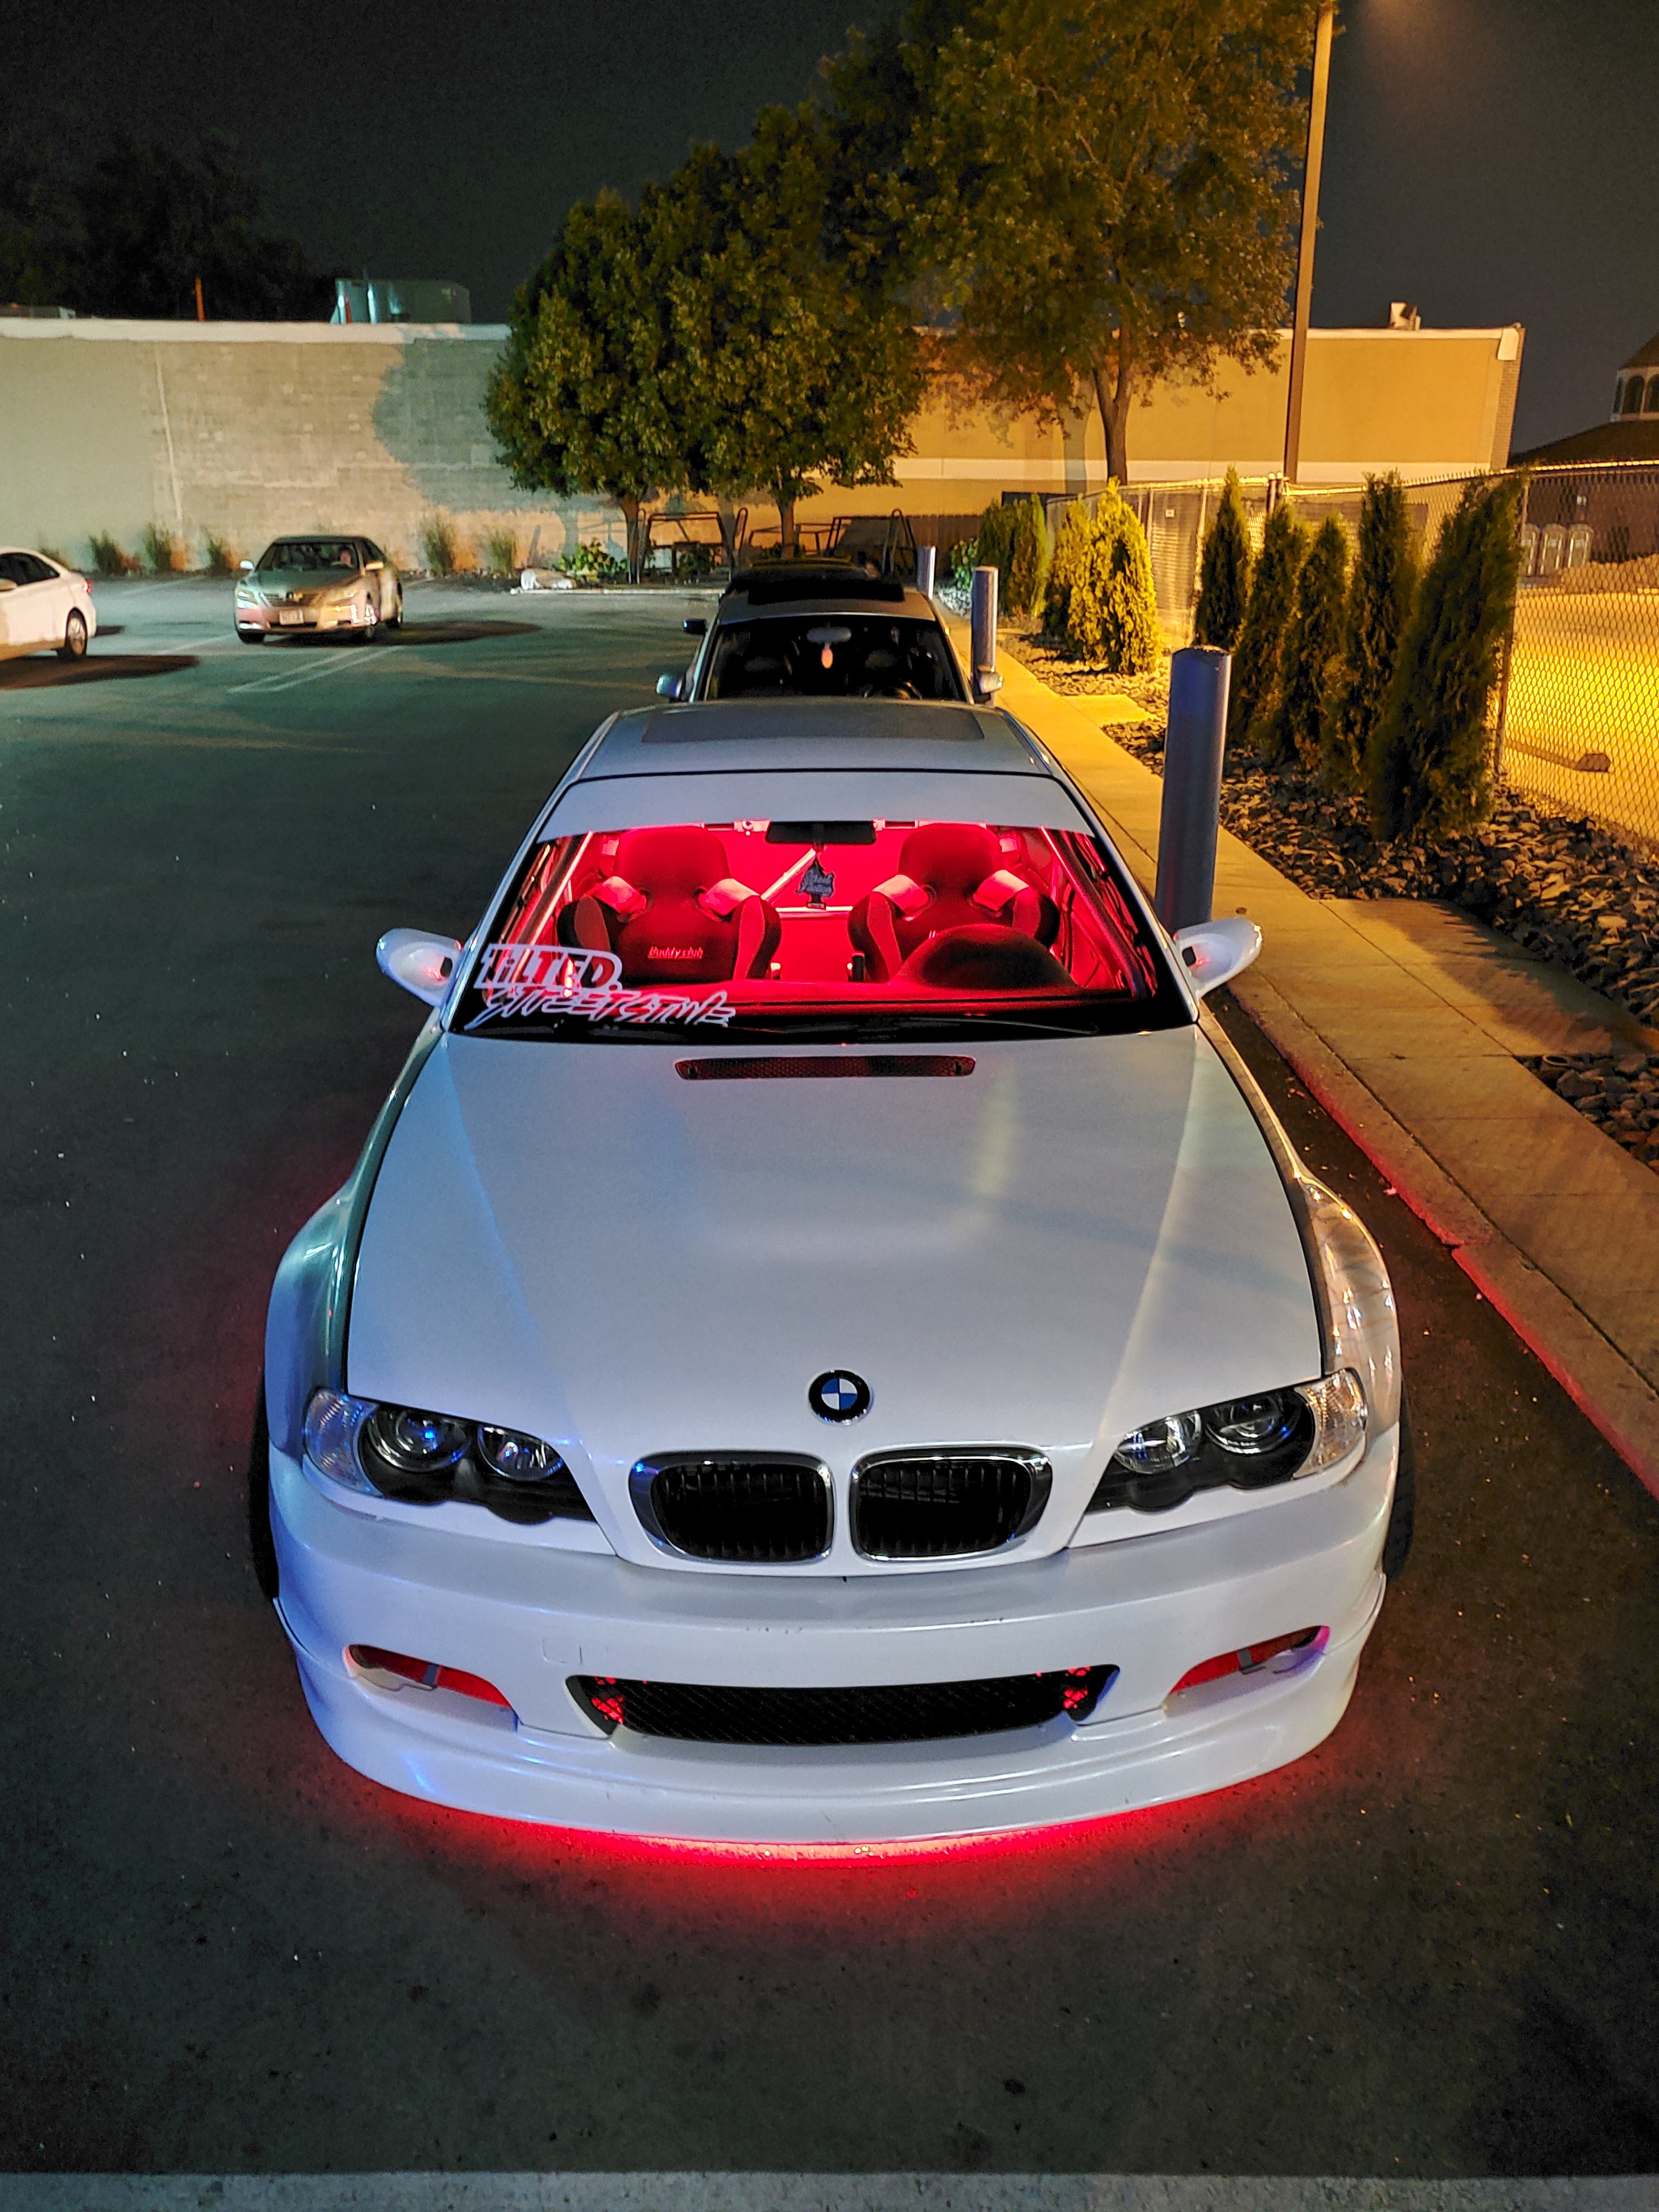
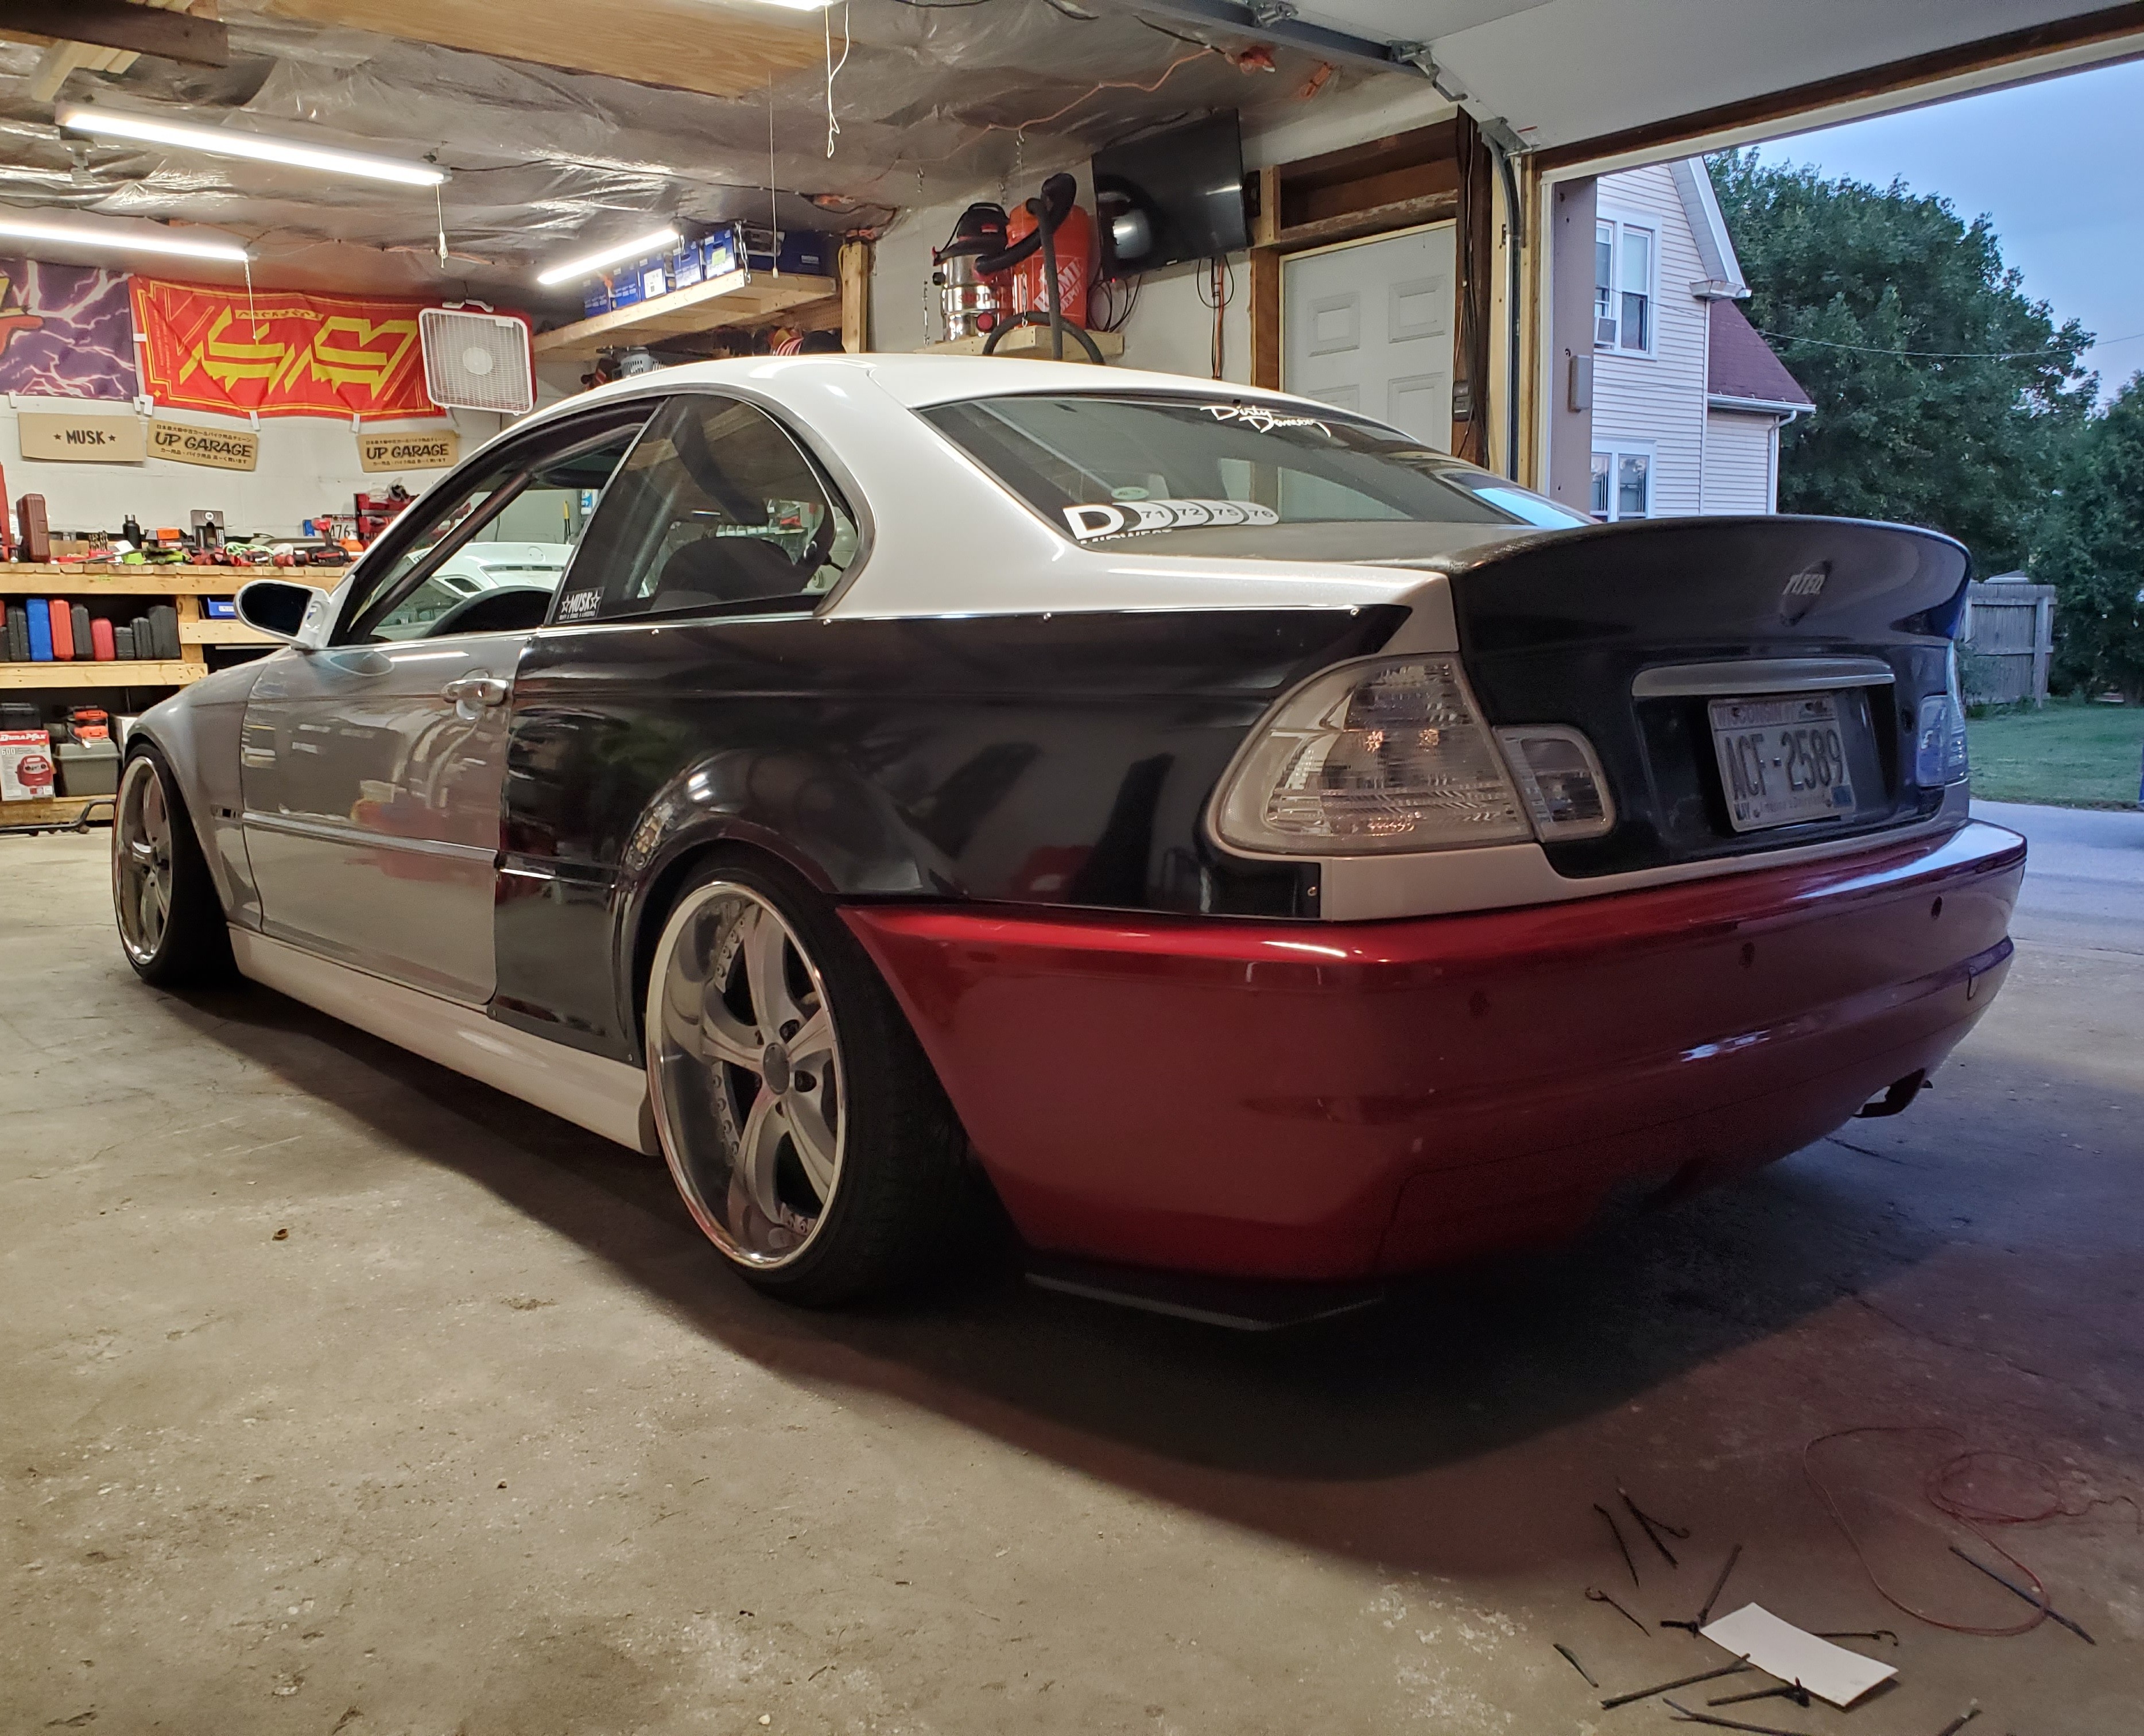
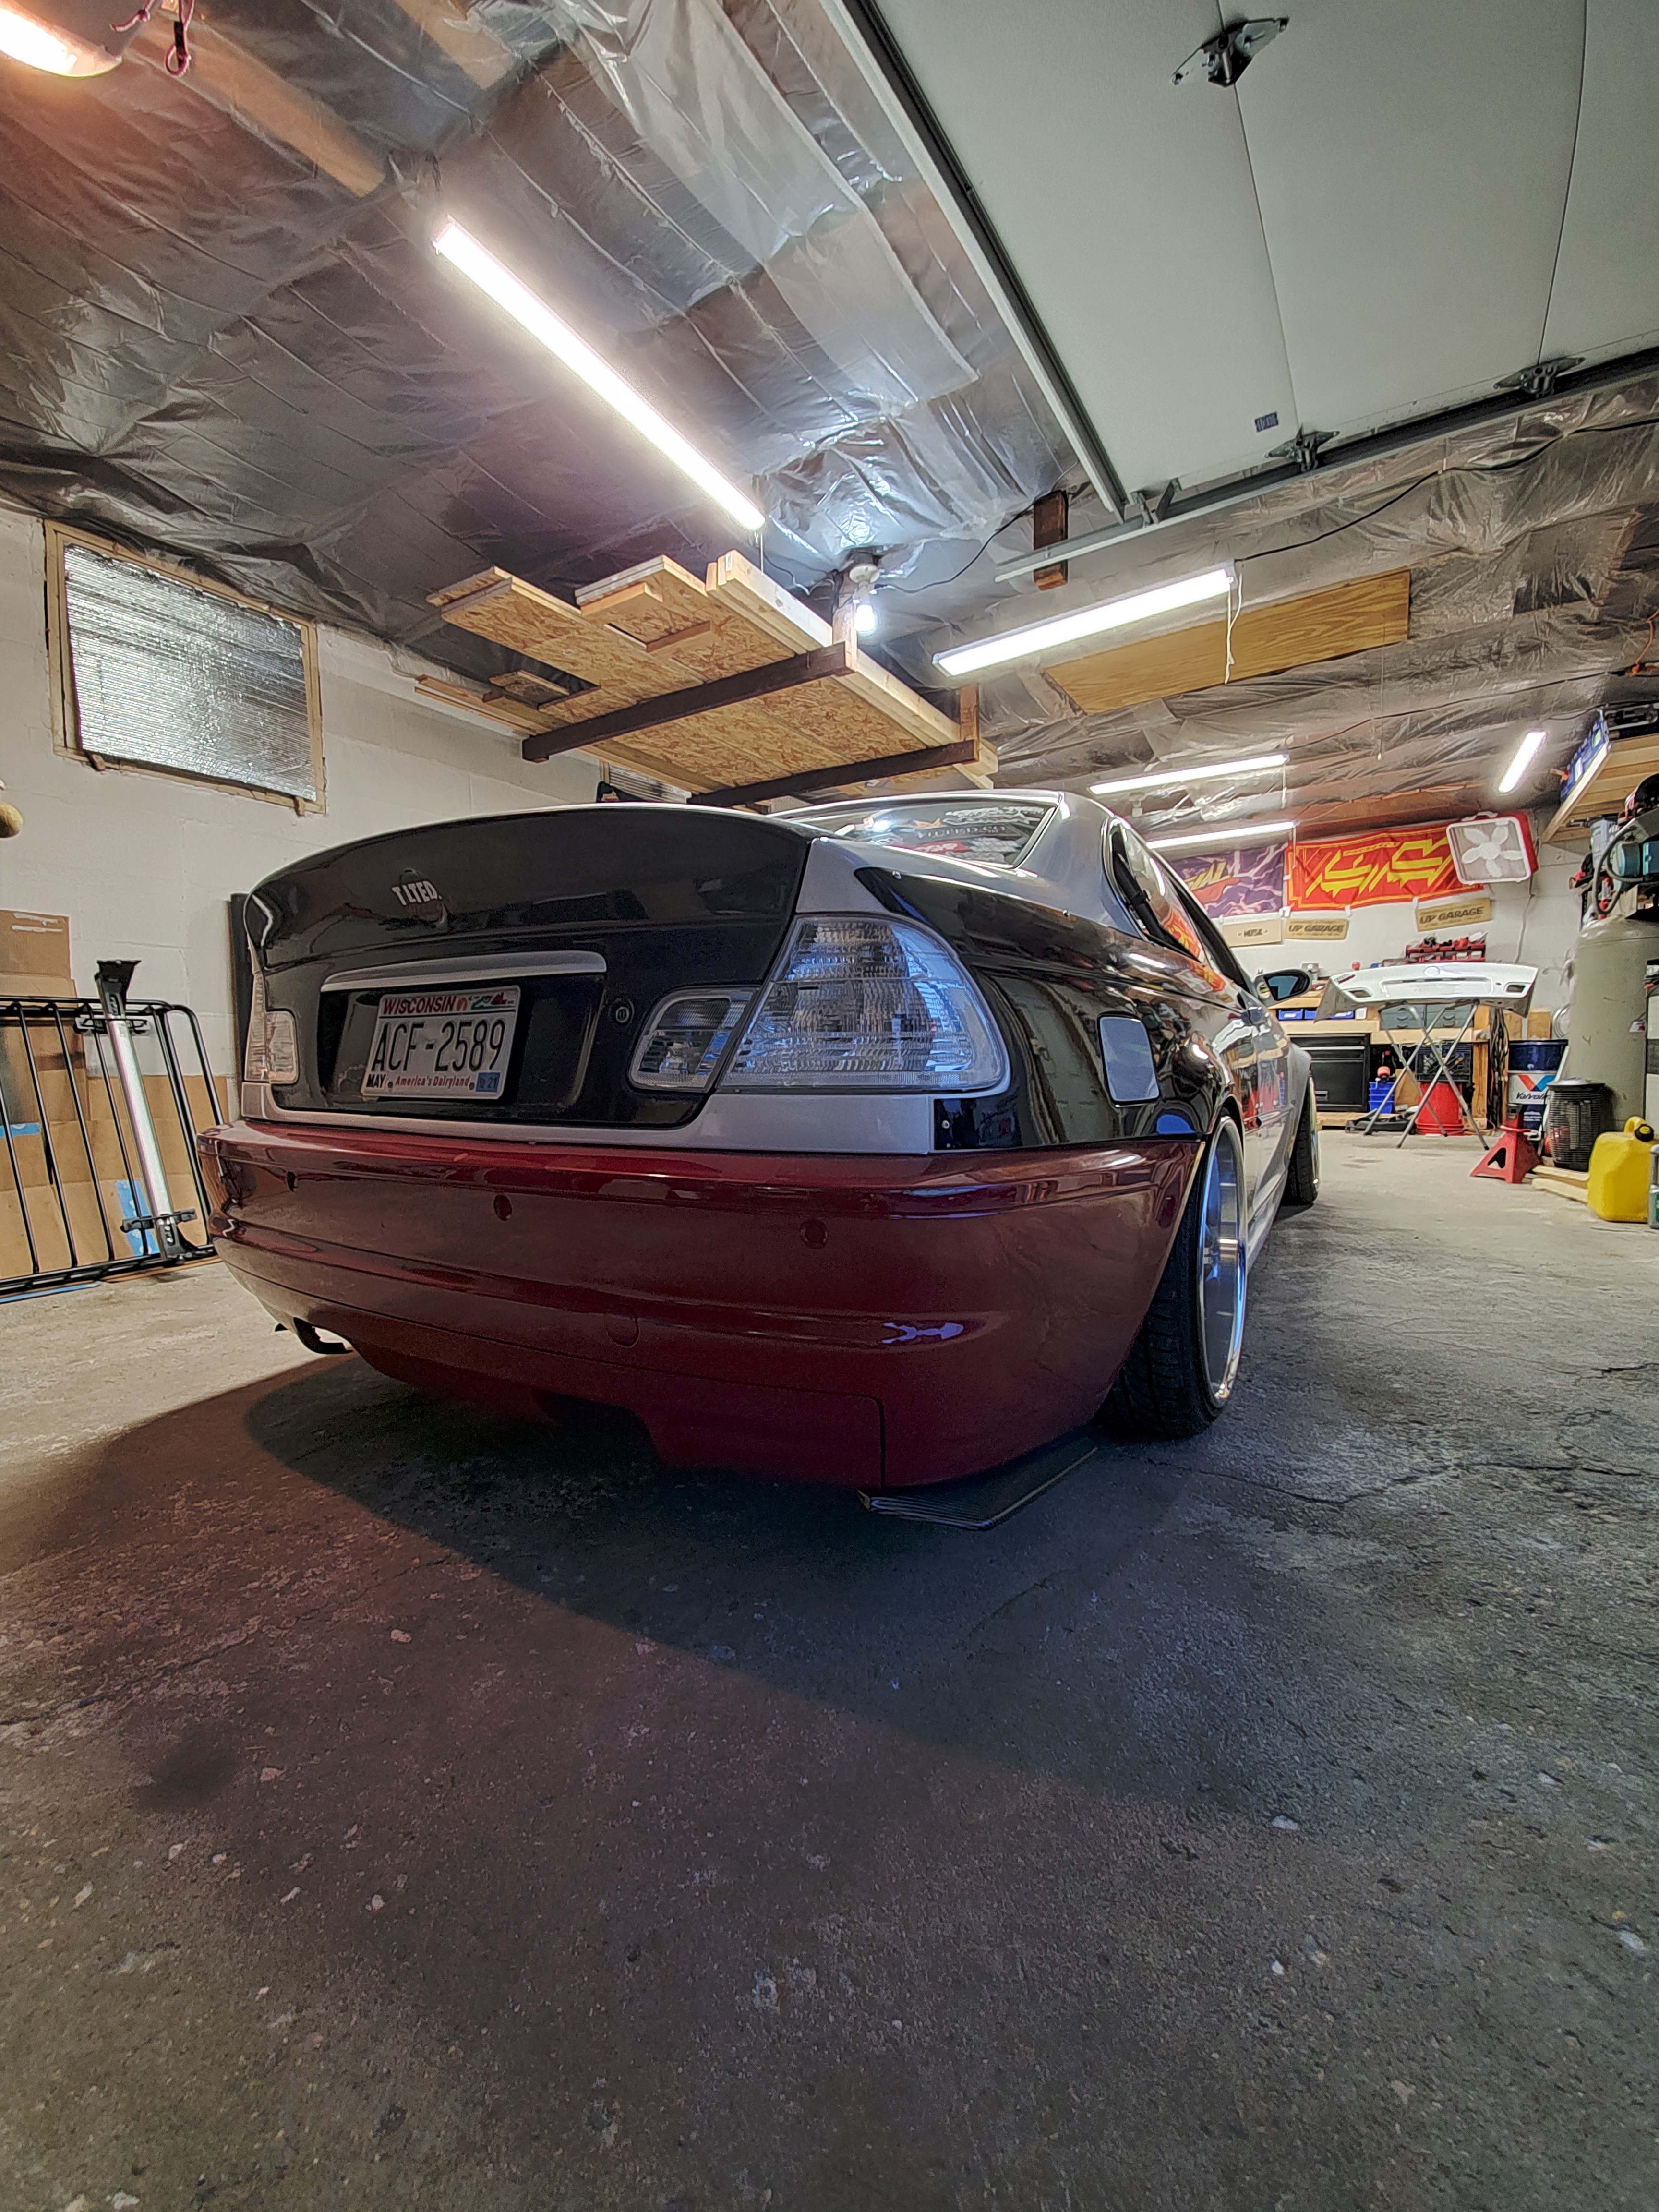
        Got some photos from a shoot with a friend.          Unfortunately this was before I lowered the rear haha.
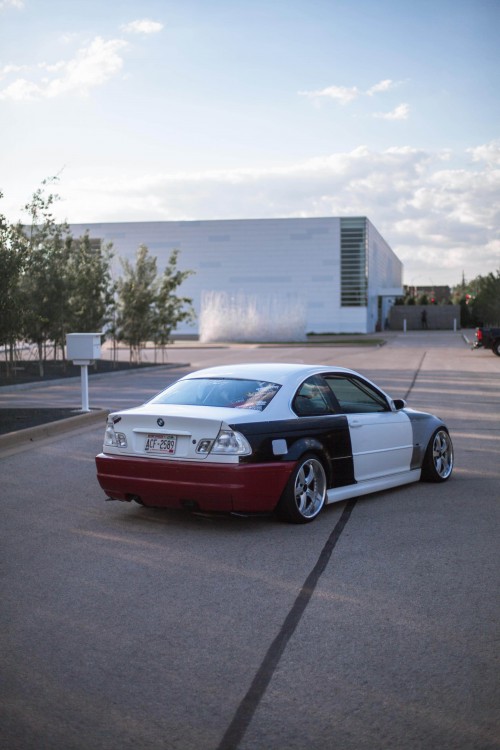
        received1169918836700210.jpeg

        received1190487571316614.jpeg

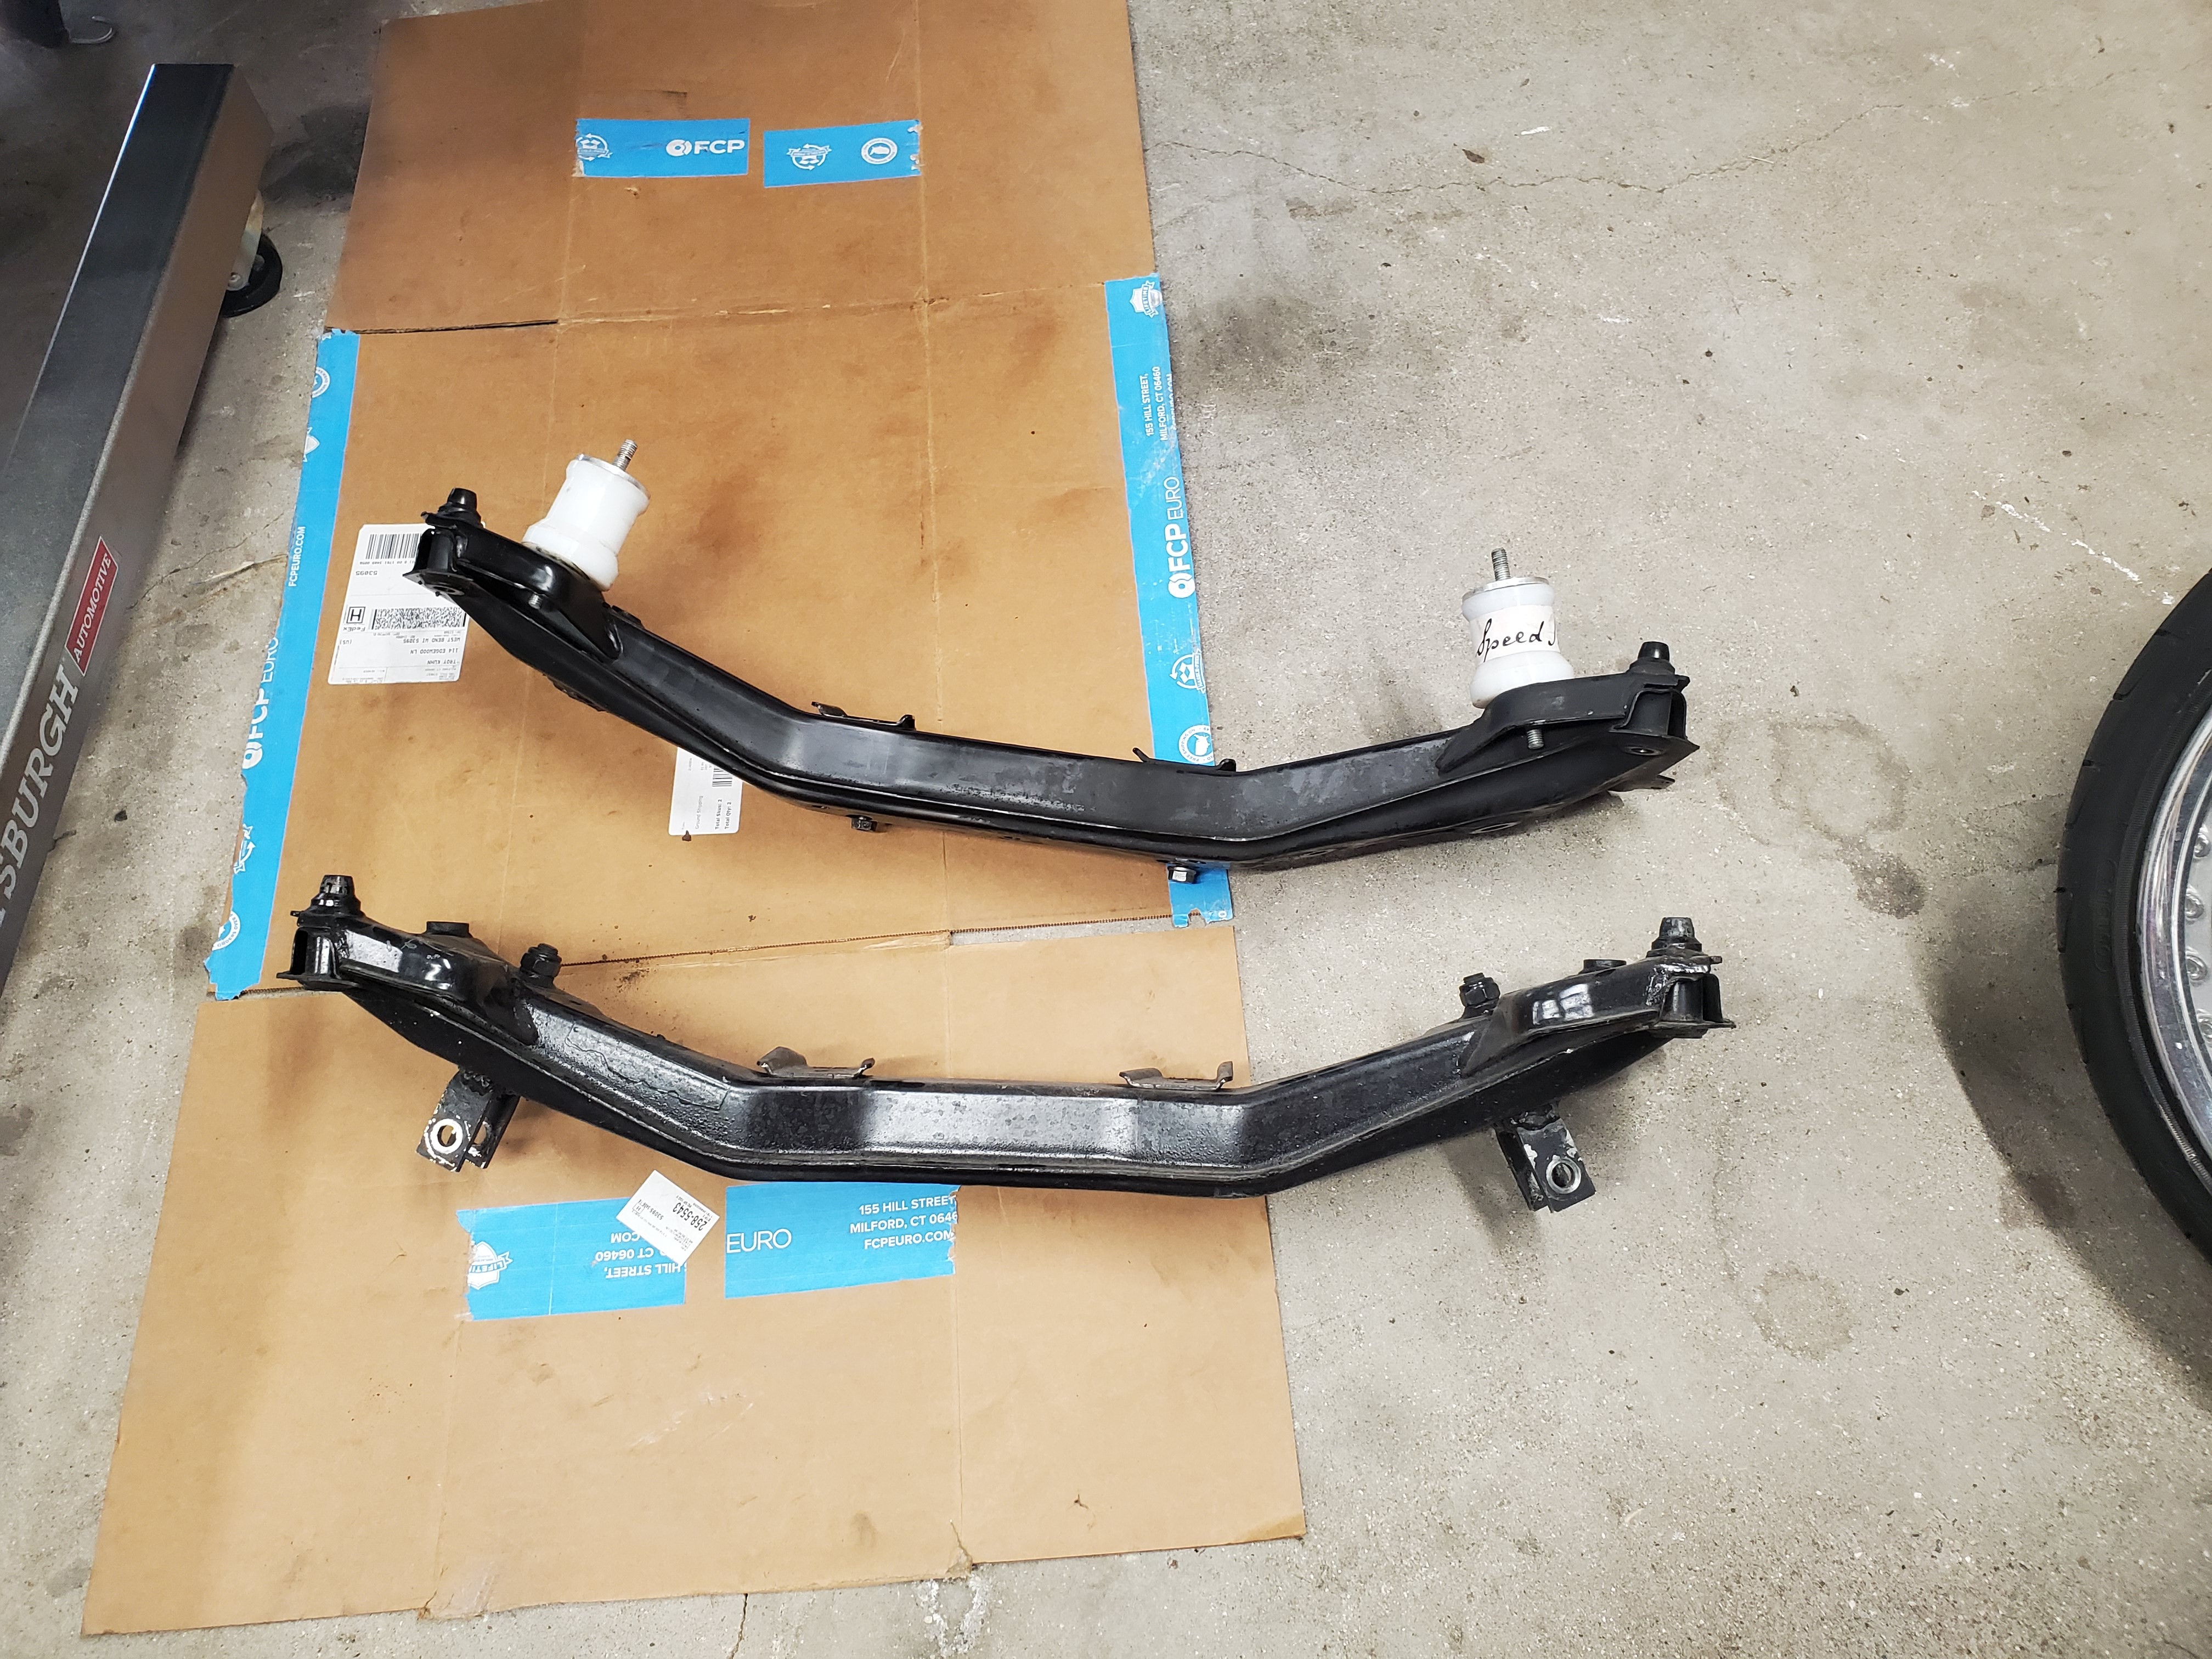
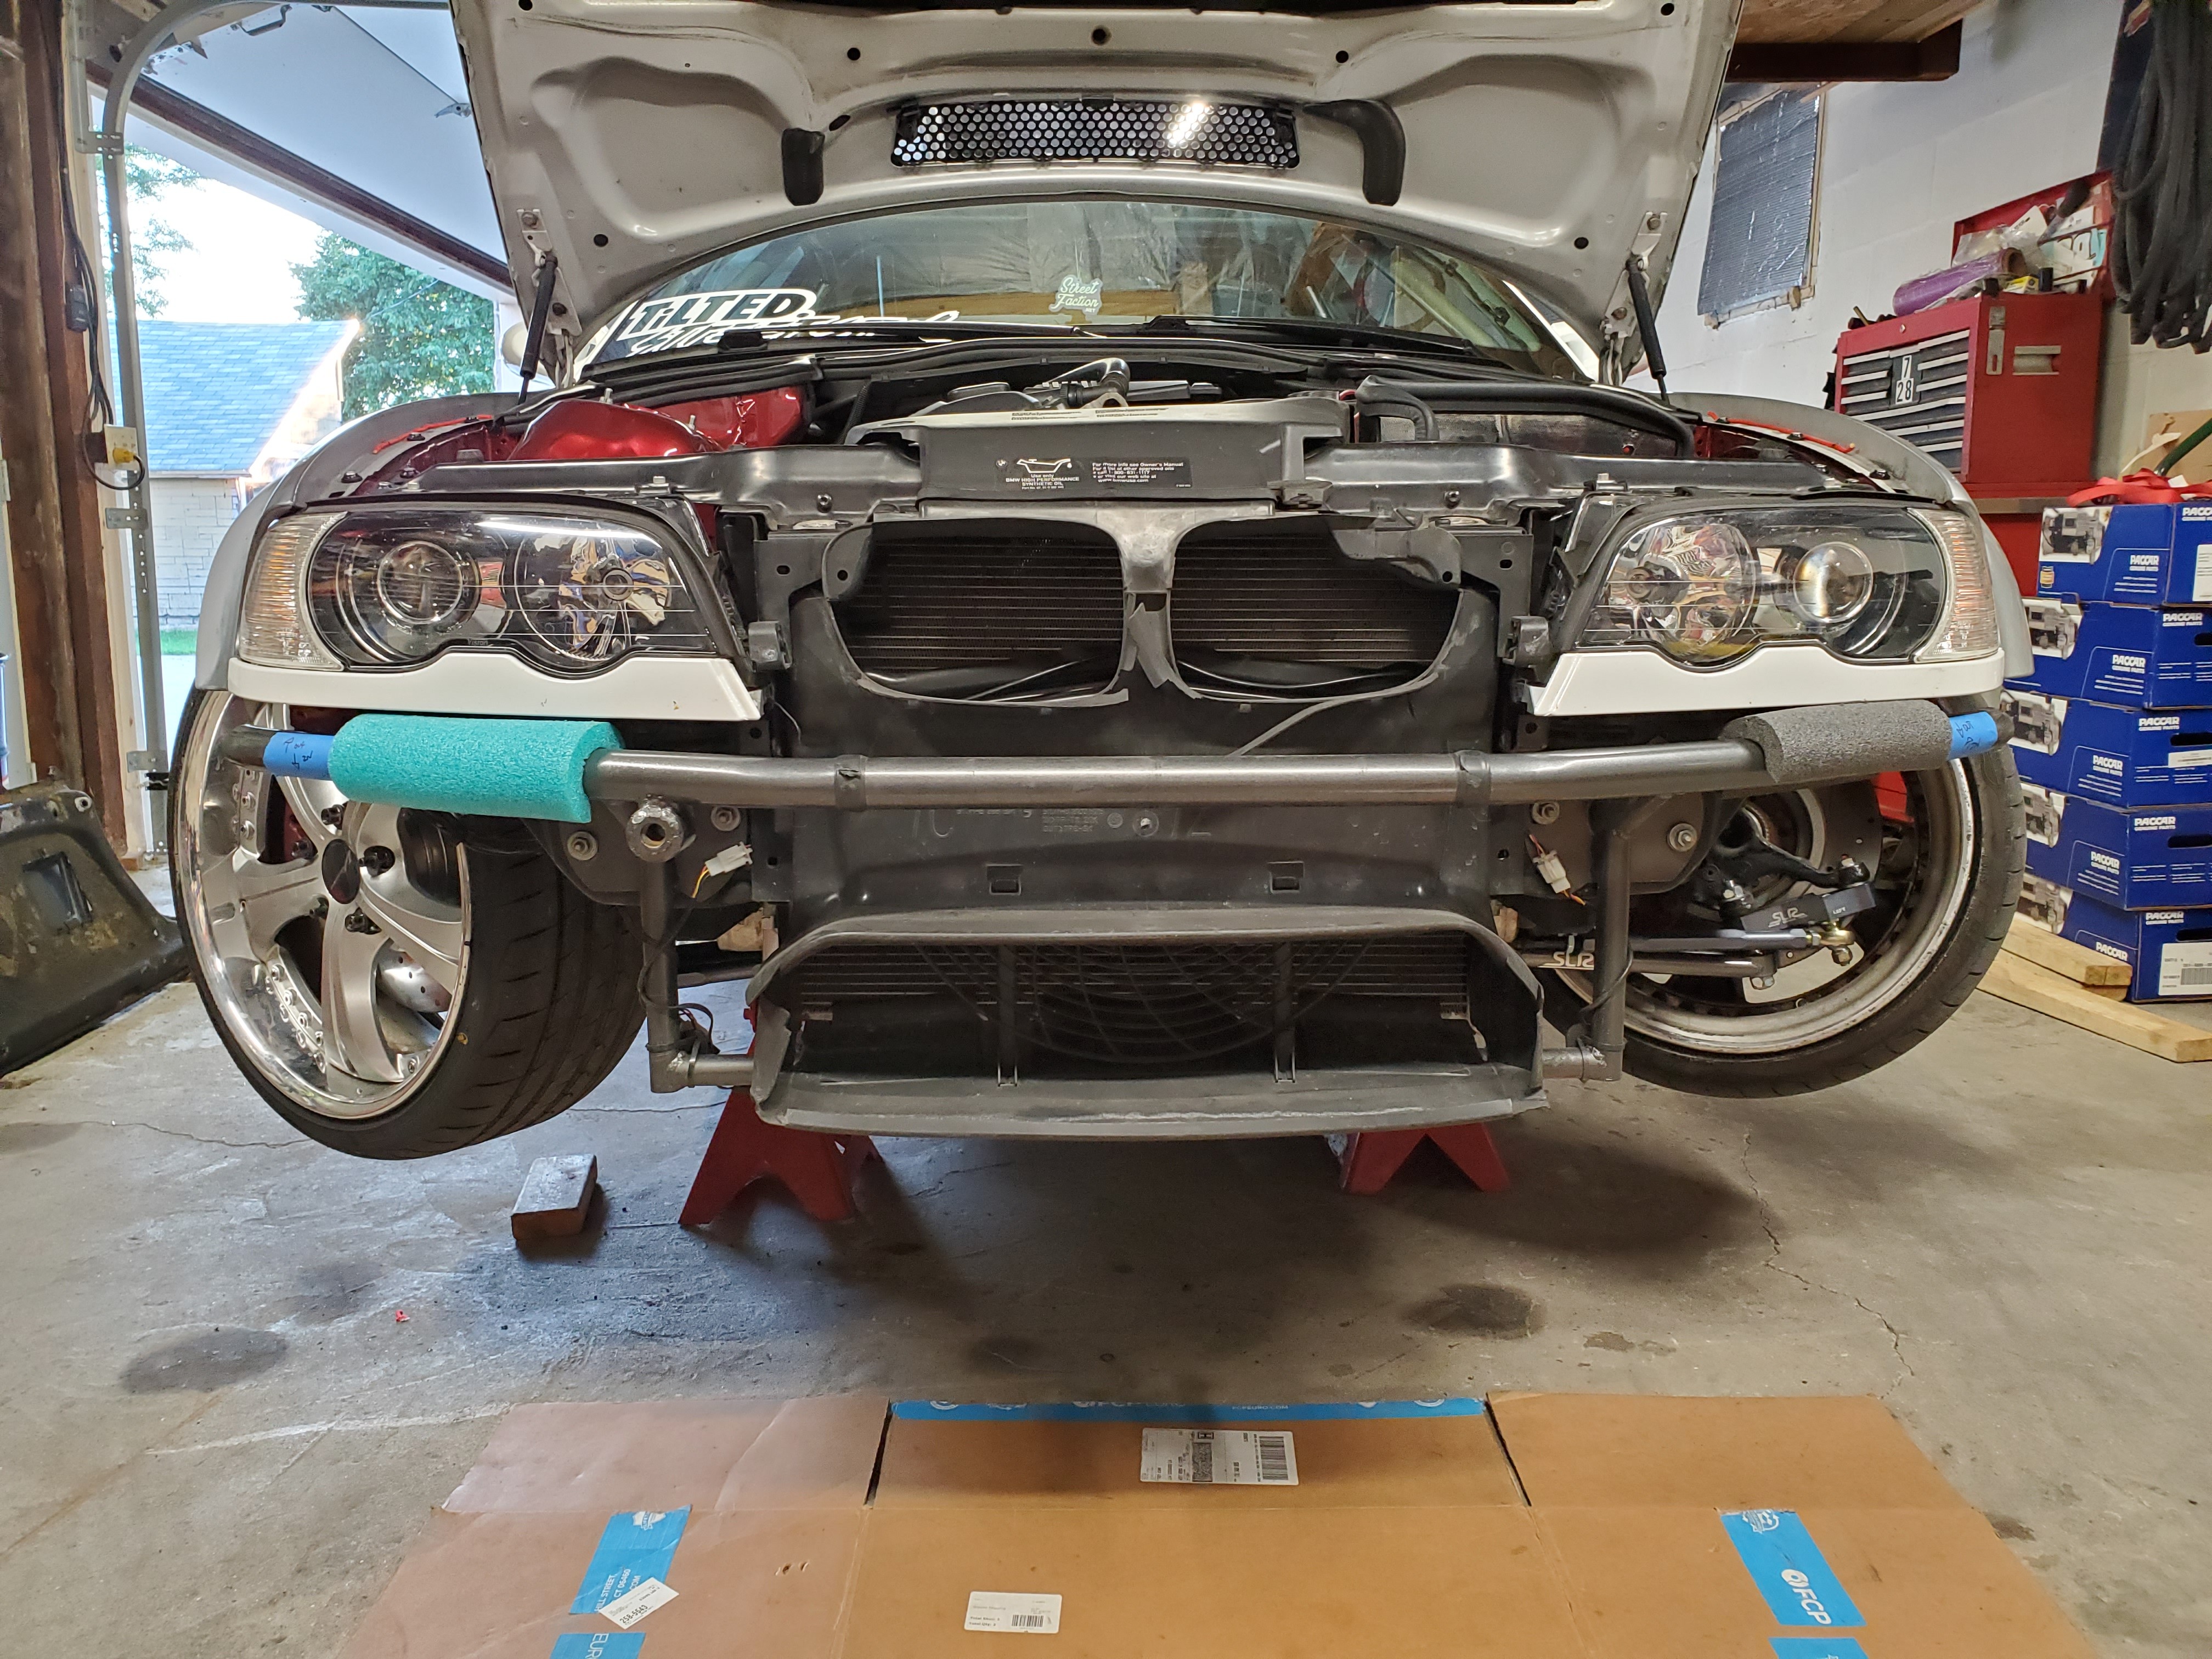
        New SLR ultra angle kit should be here tomorrow! So I pulled the MG kit off the car along with swapped in a factory subframe.
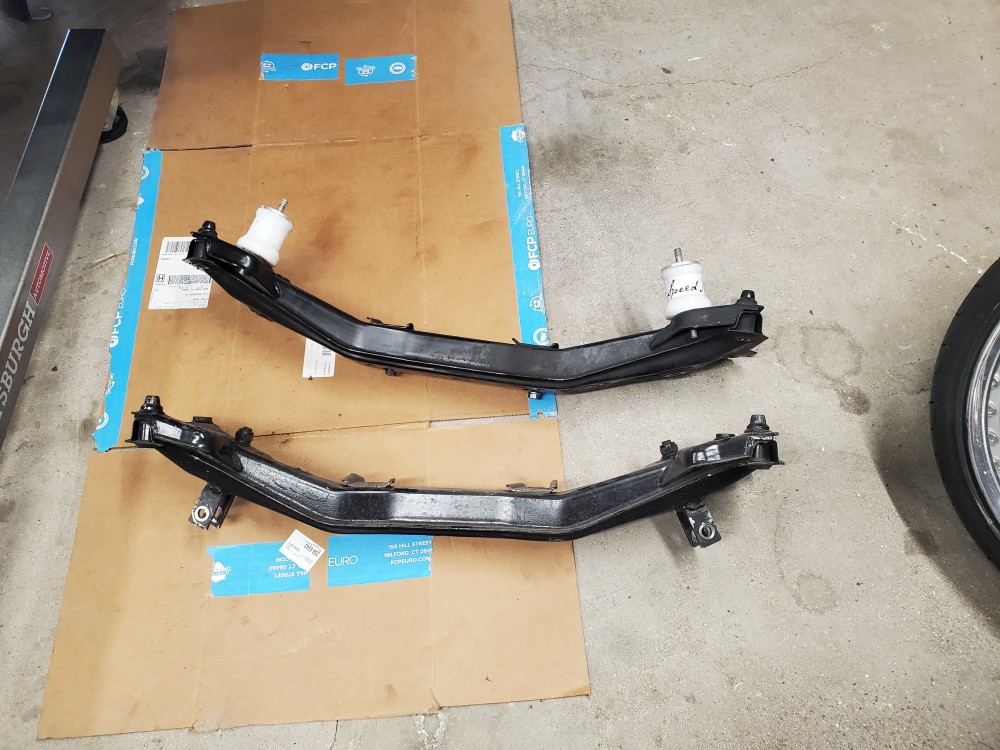
        20200802114835.jpg

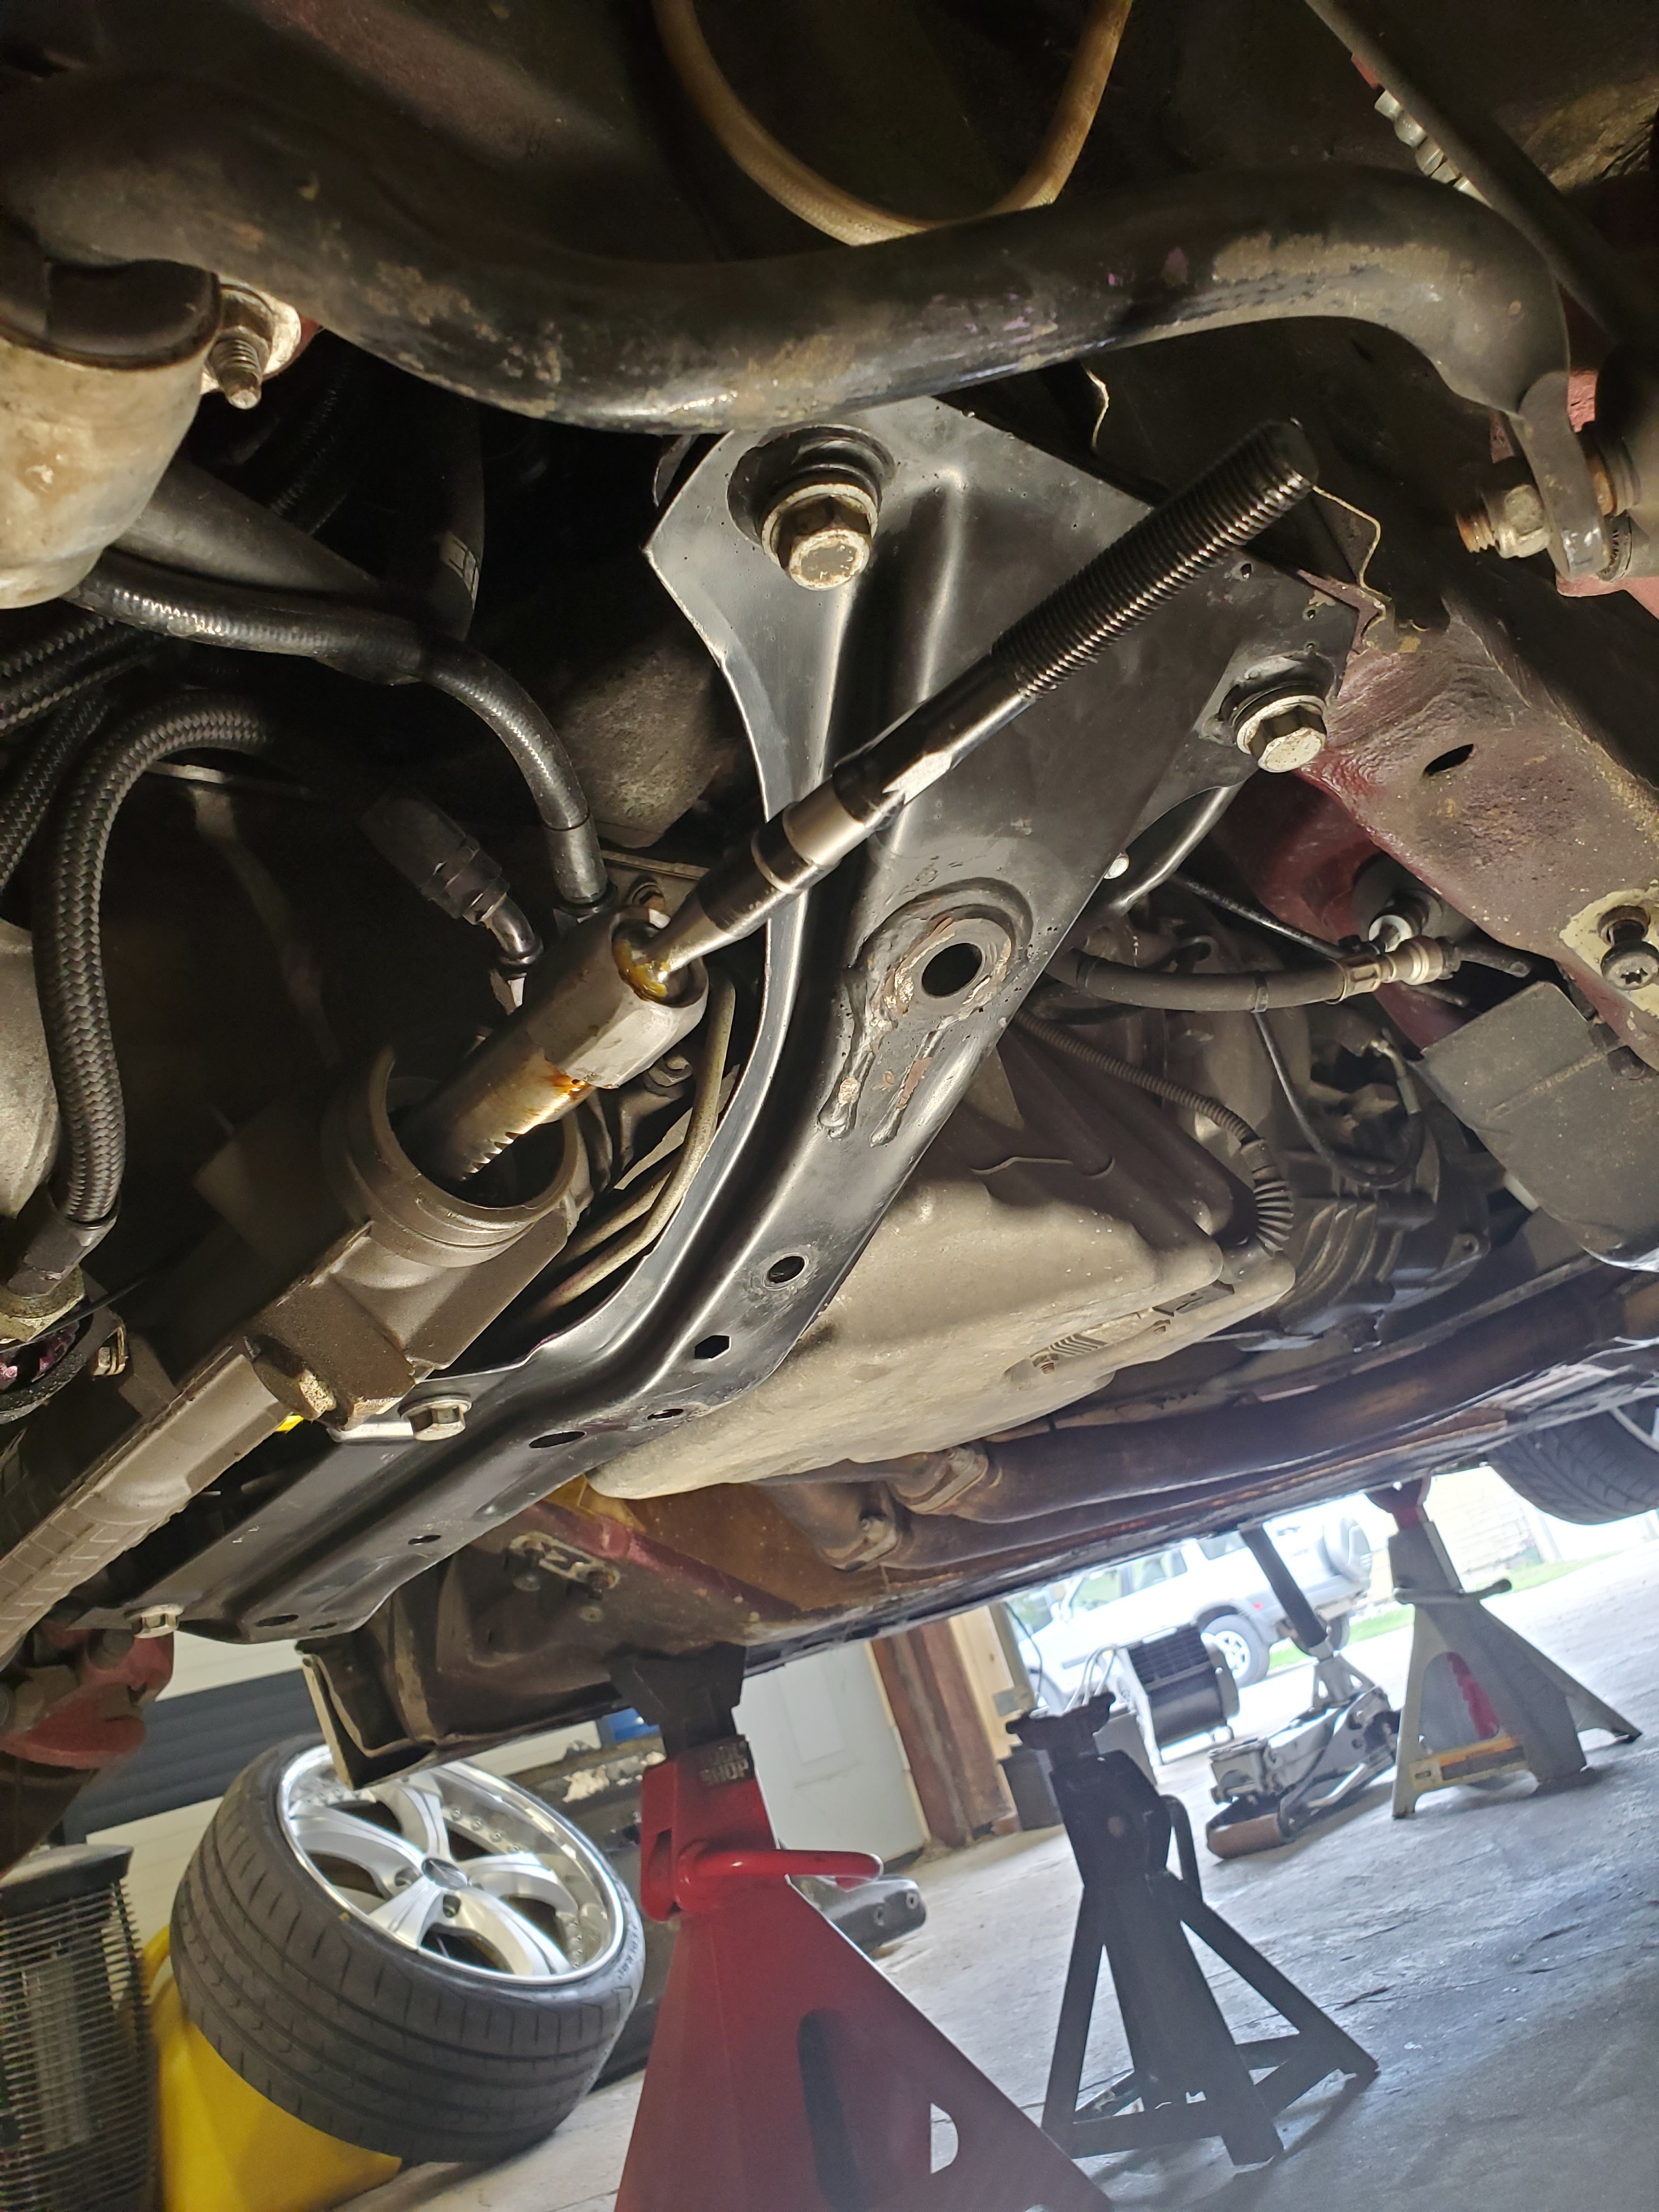
        Installed new inner tie rods while everything was apart.
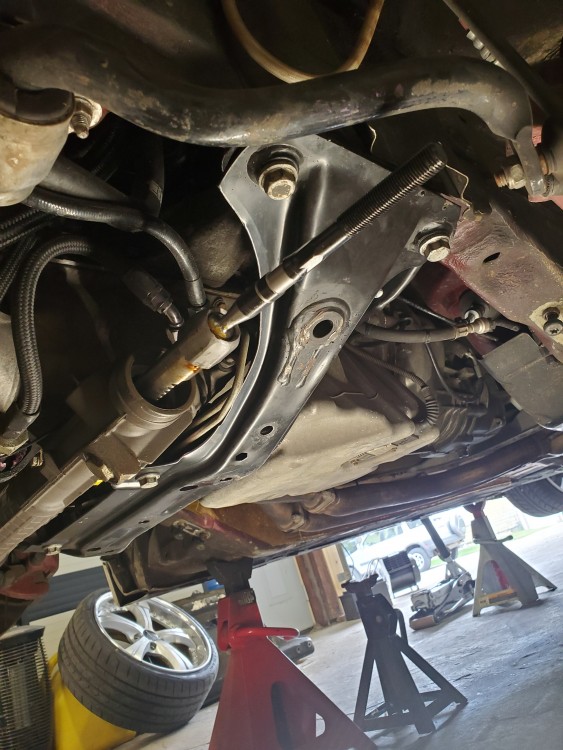
        20200802123821.jpg

        Picked up a used UUC dssr as well and got that installed while the car is down for a few days, excited to hopefully feel the difference 
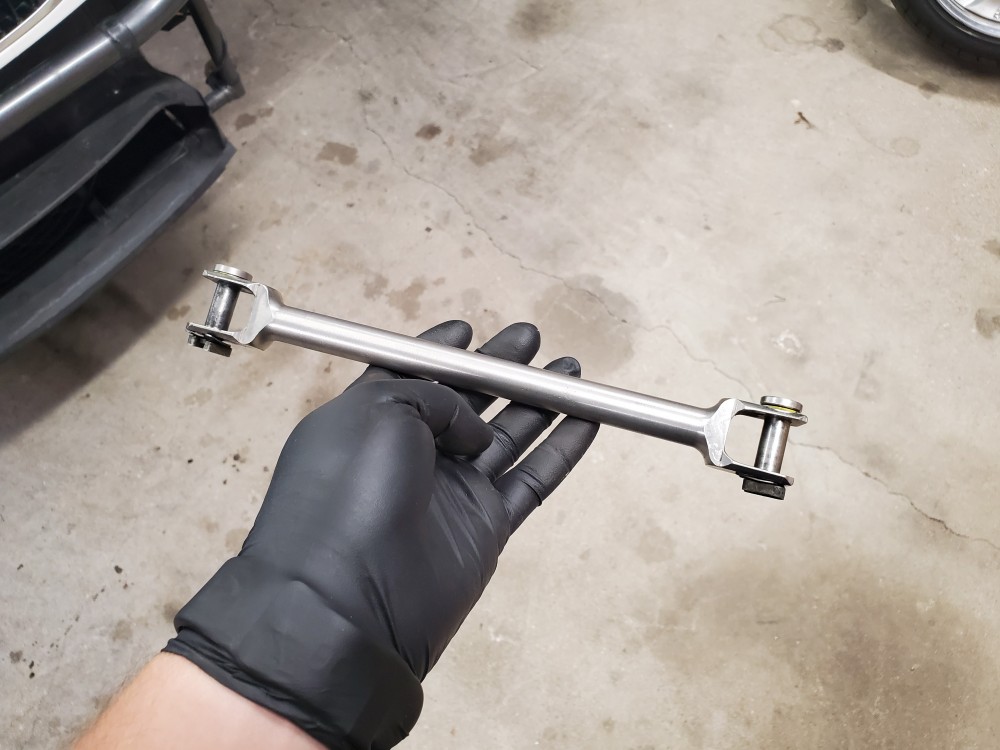
        20200802145232.jpg

        More updates soon hopefully!

        1 Reply Last reply
        2
        • TkuhnT
          TkuhnT
          Tkuhn
          wrote on last edited by
          #363

          Update!

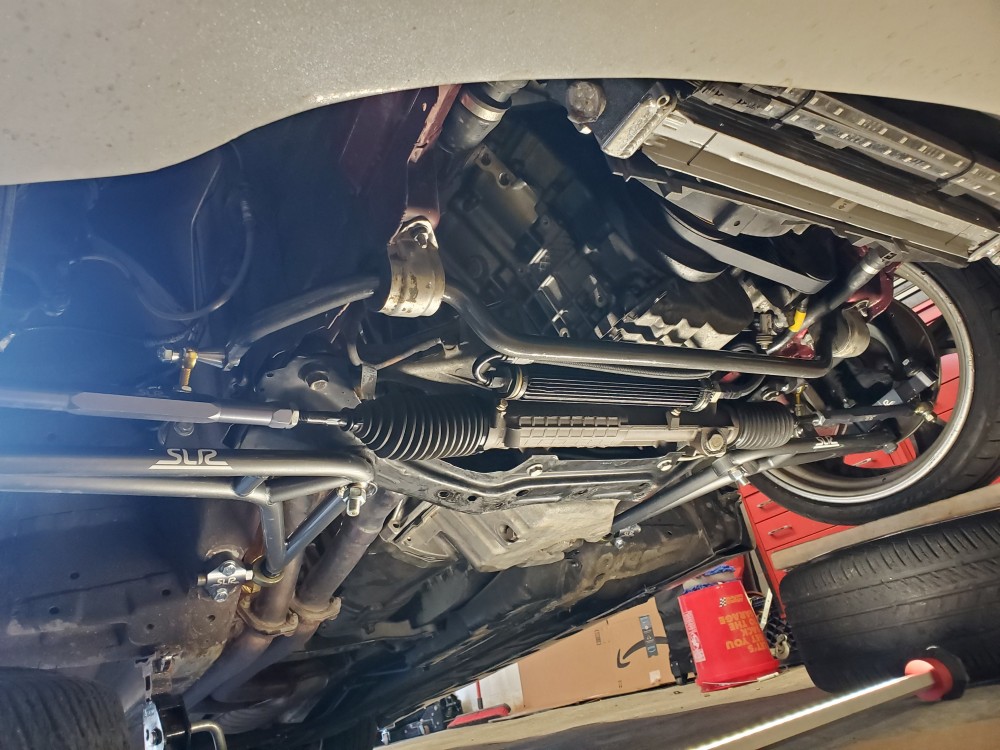
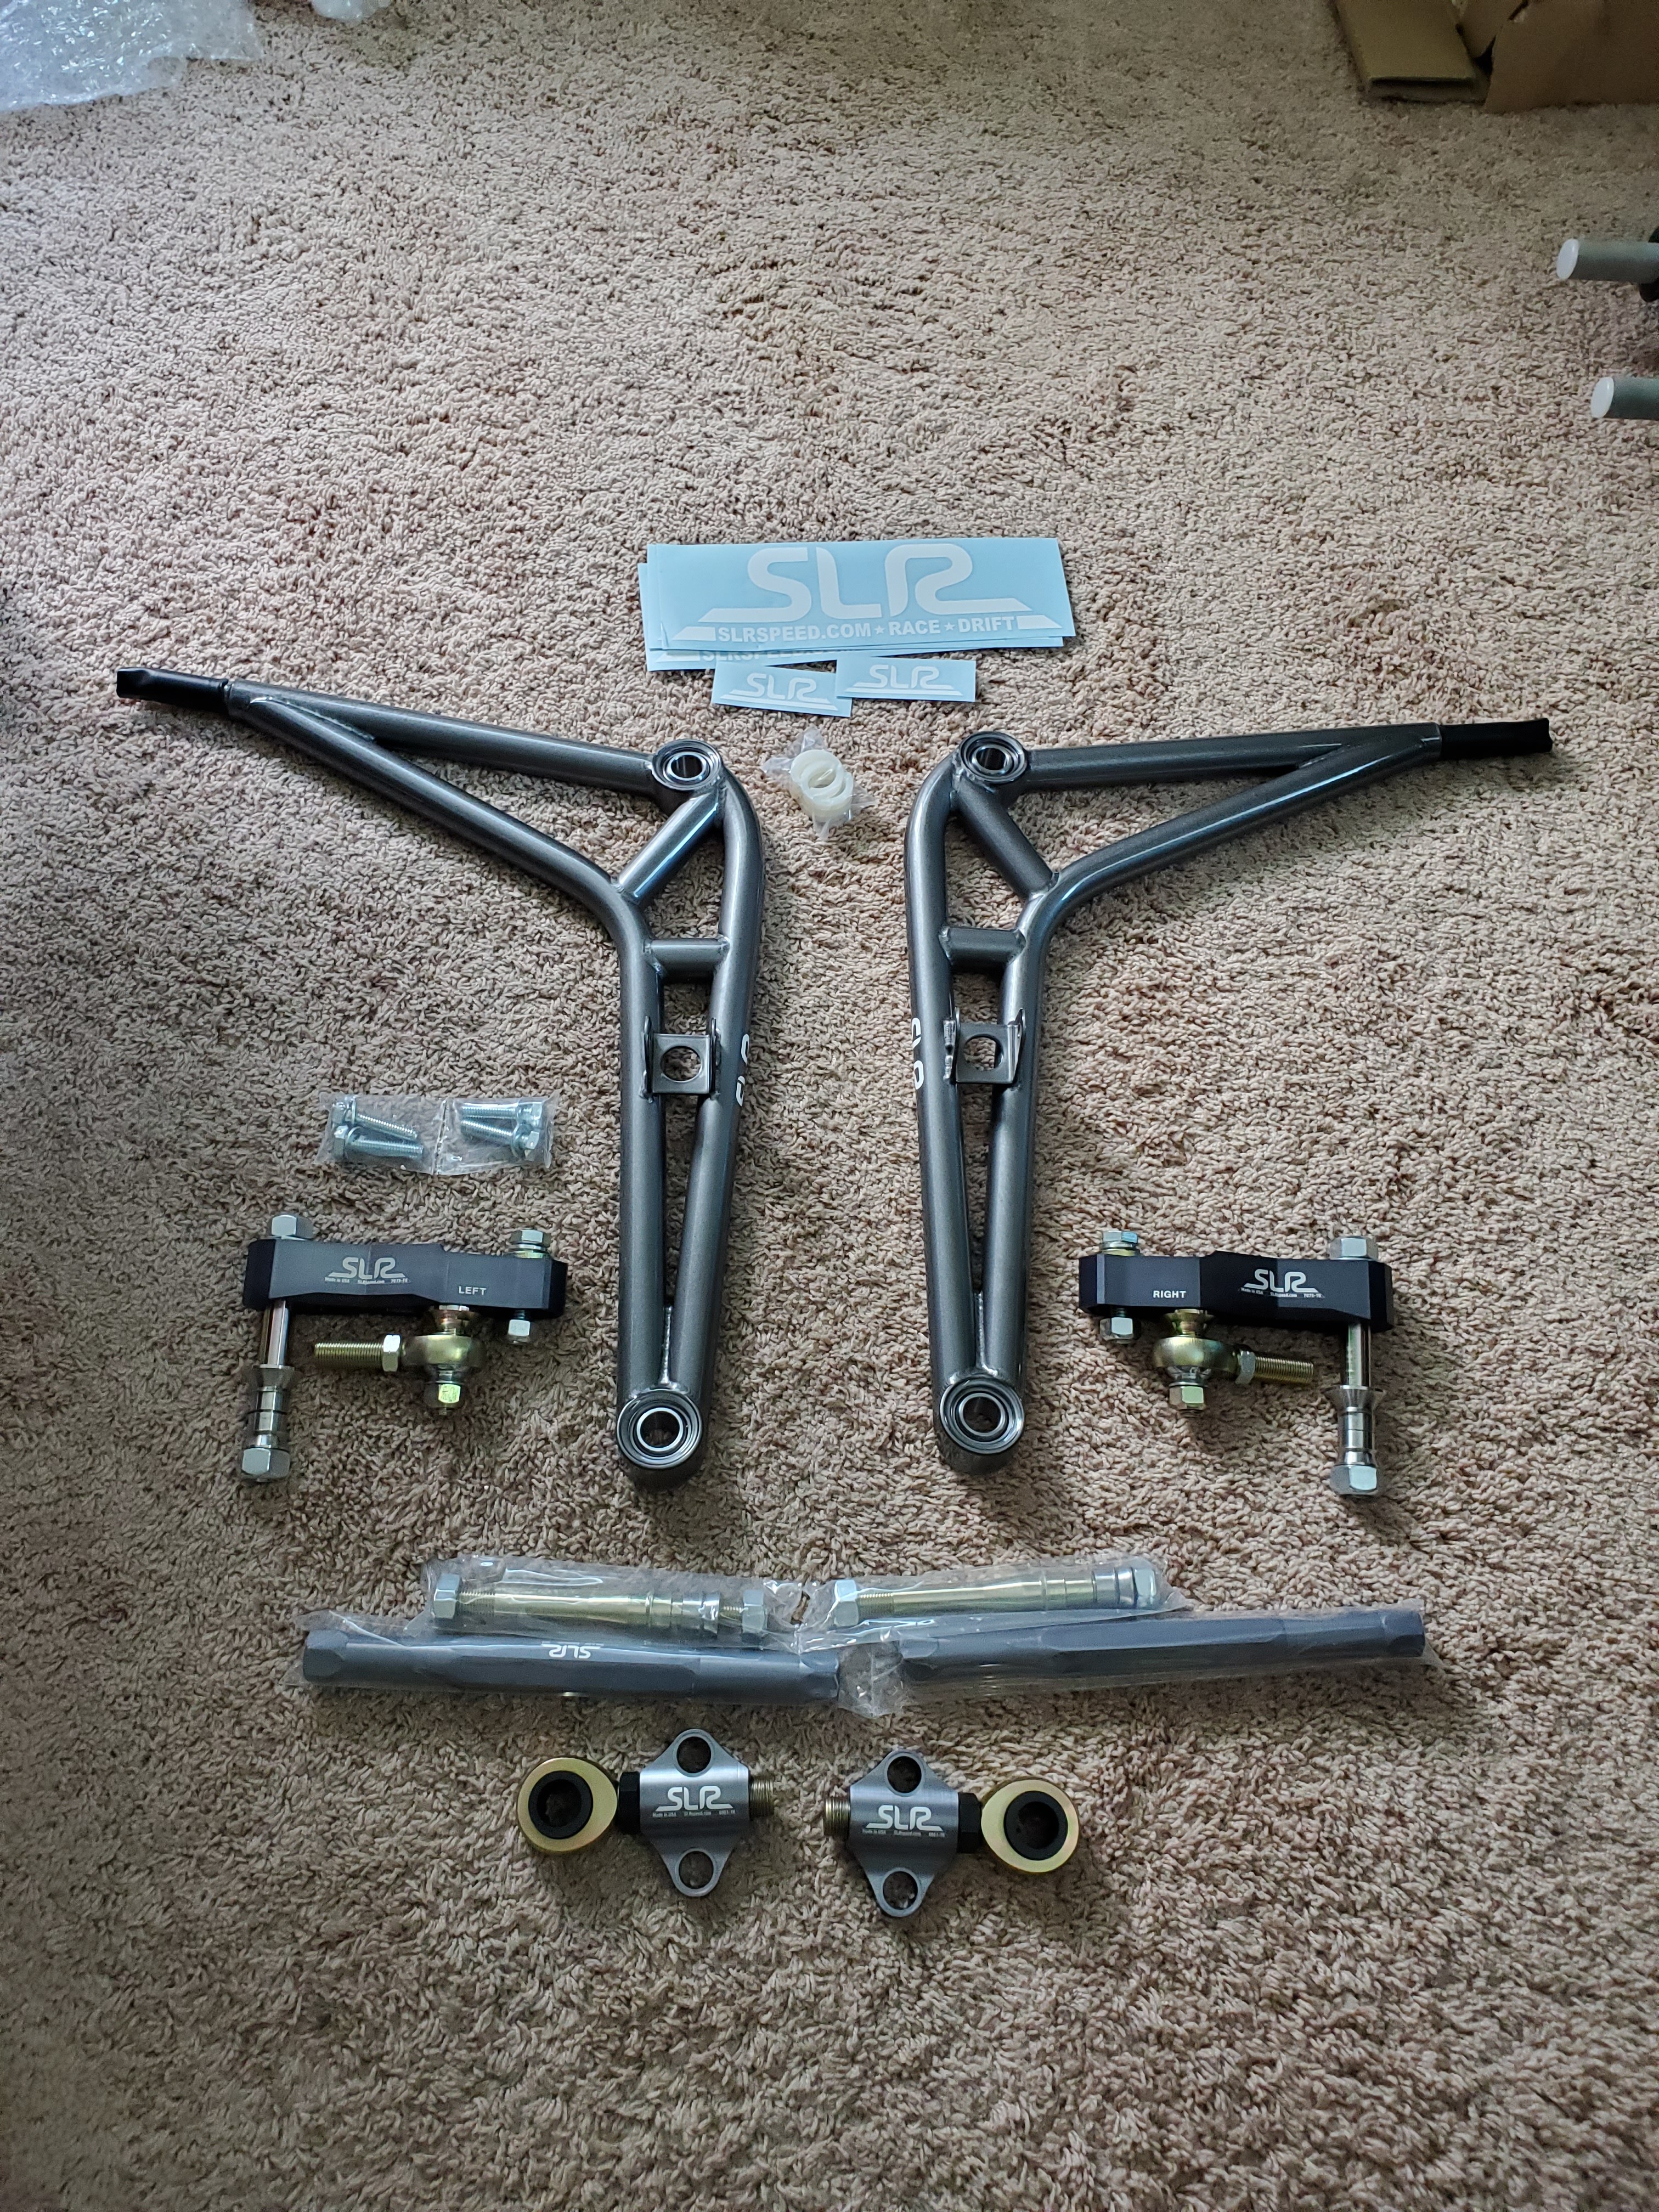
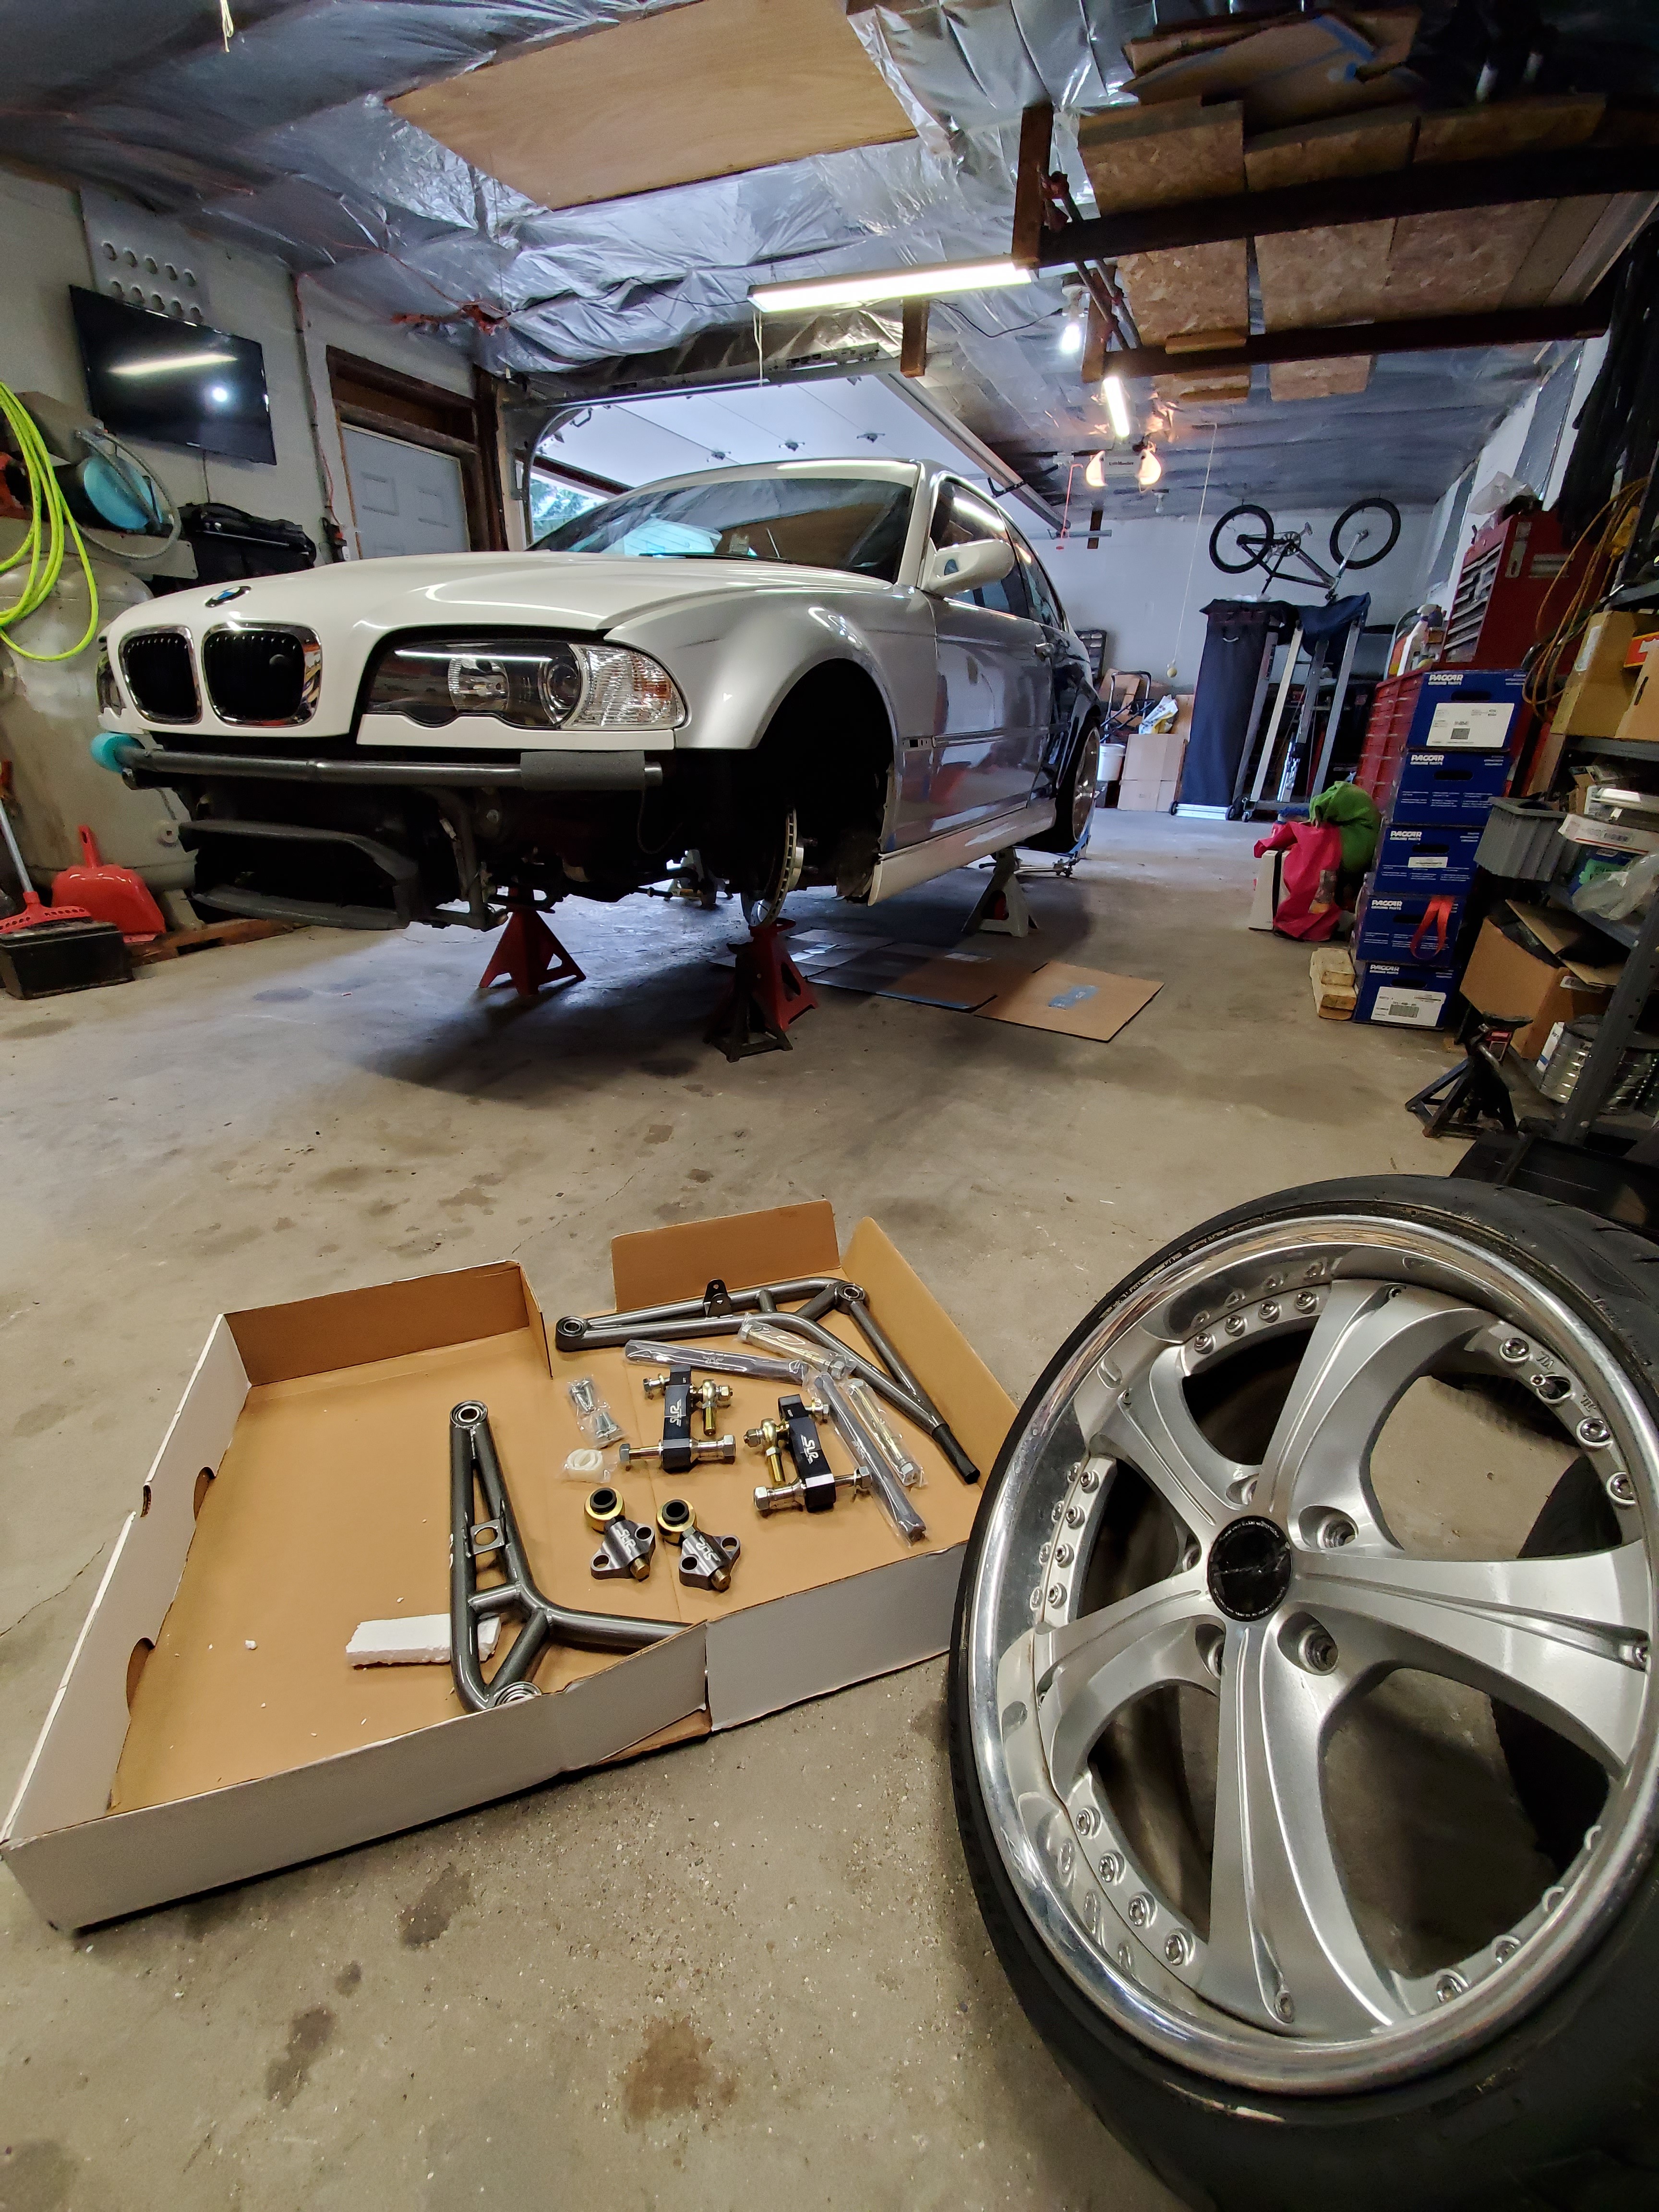
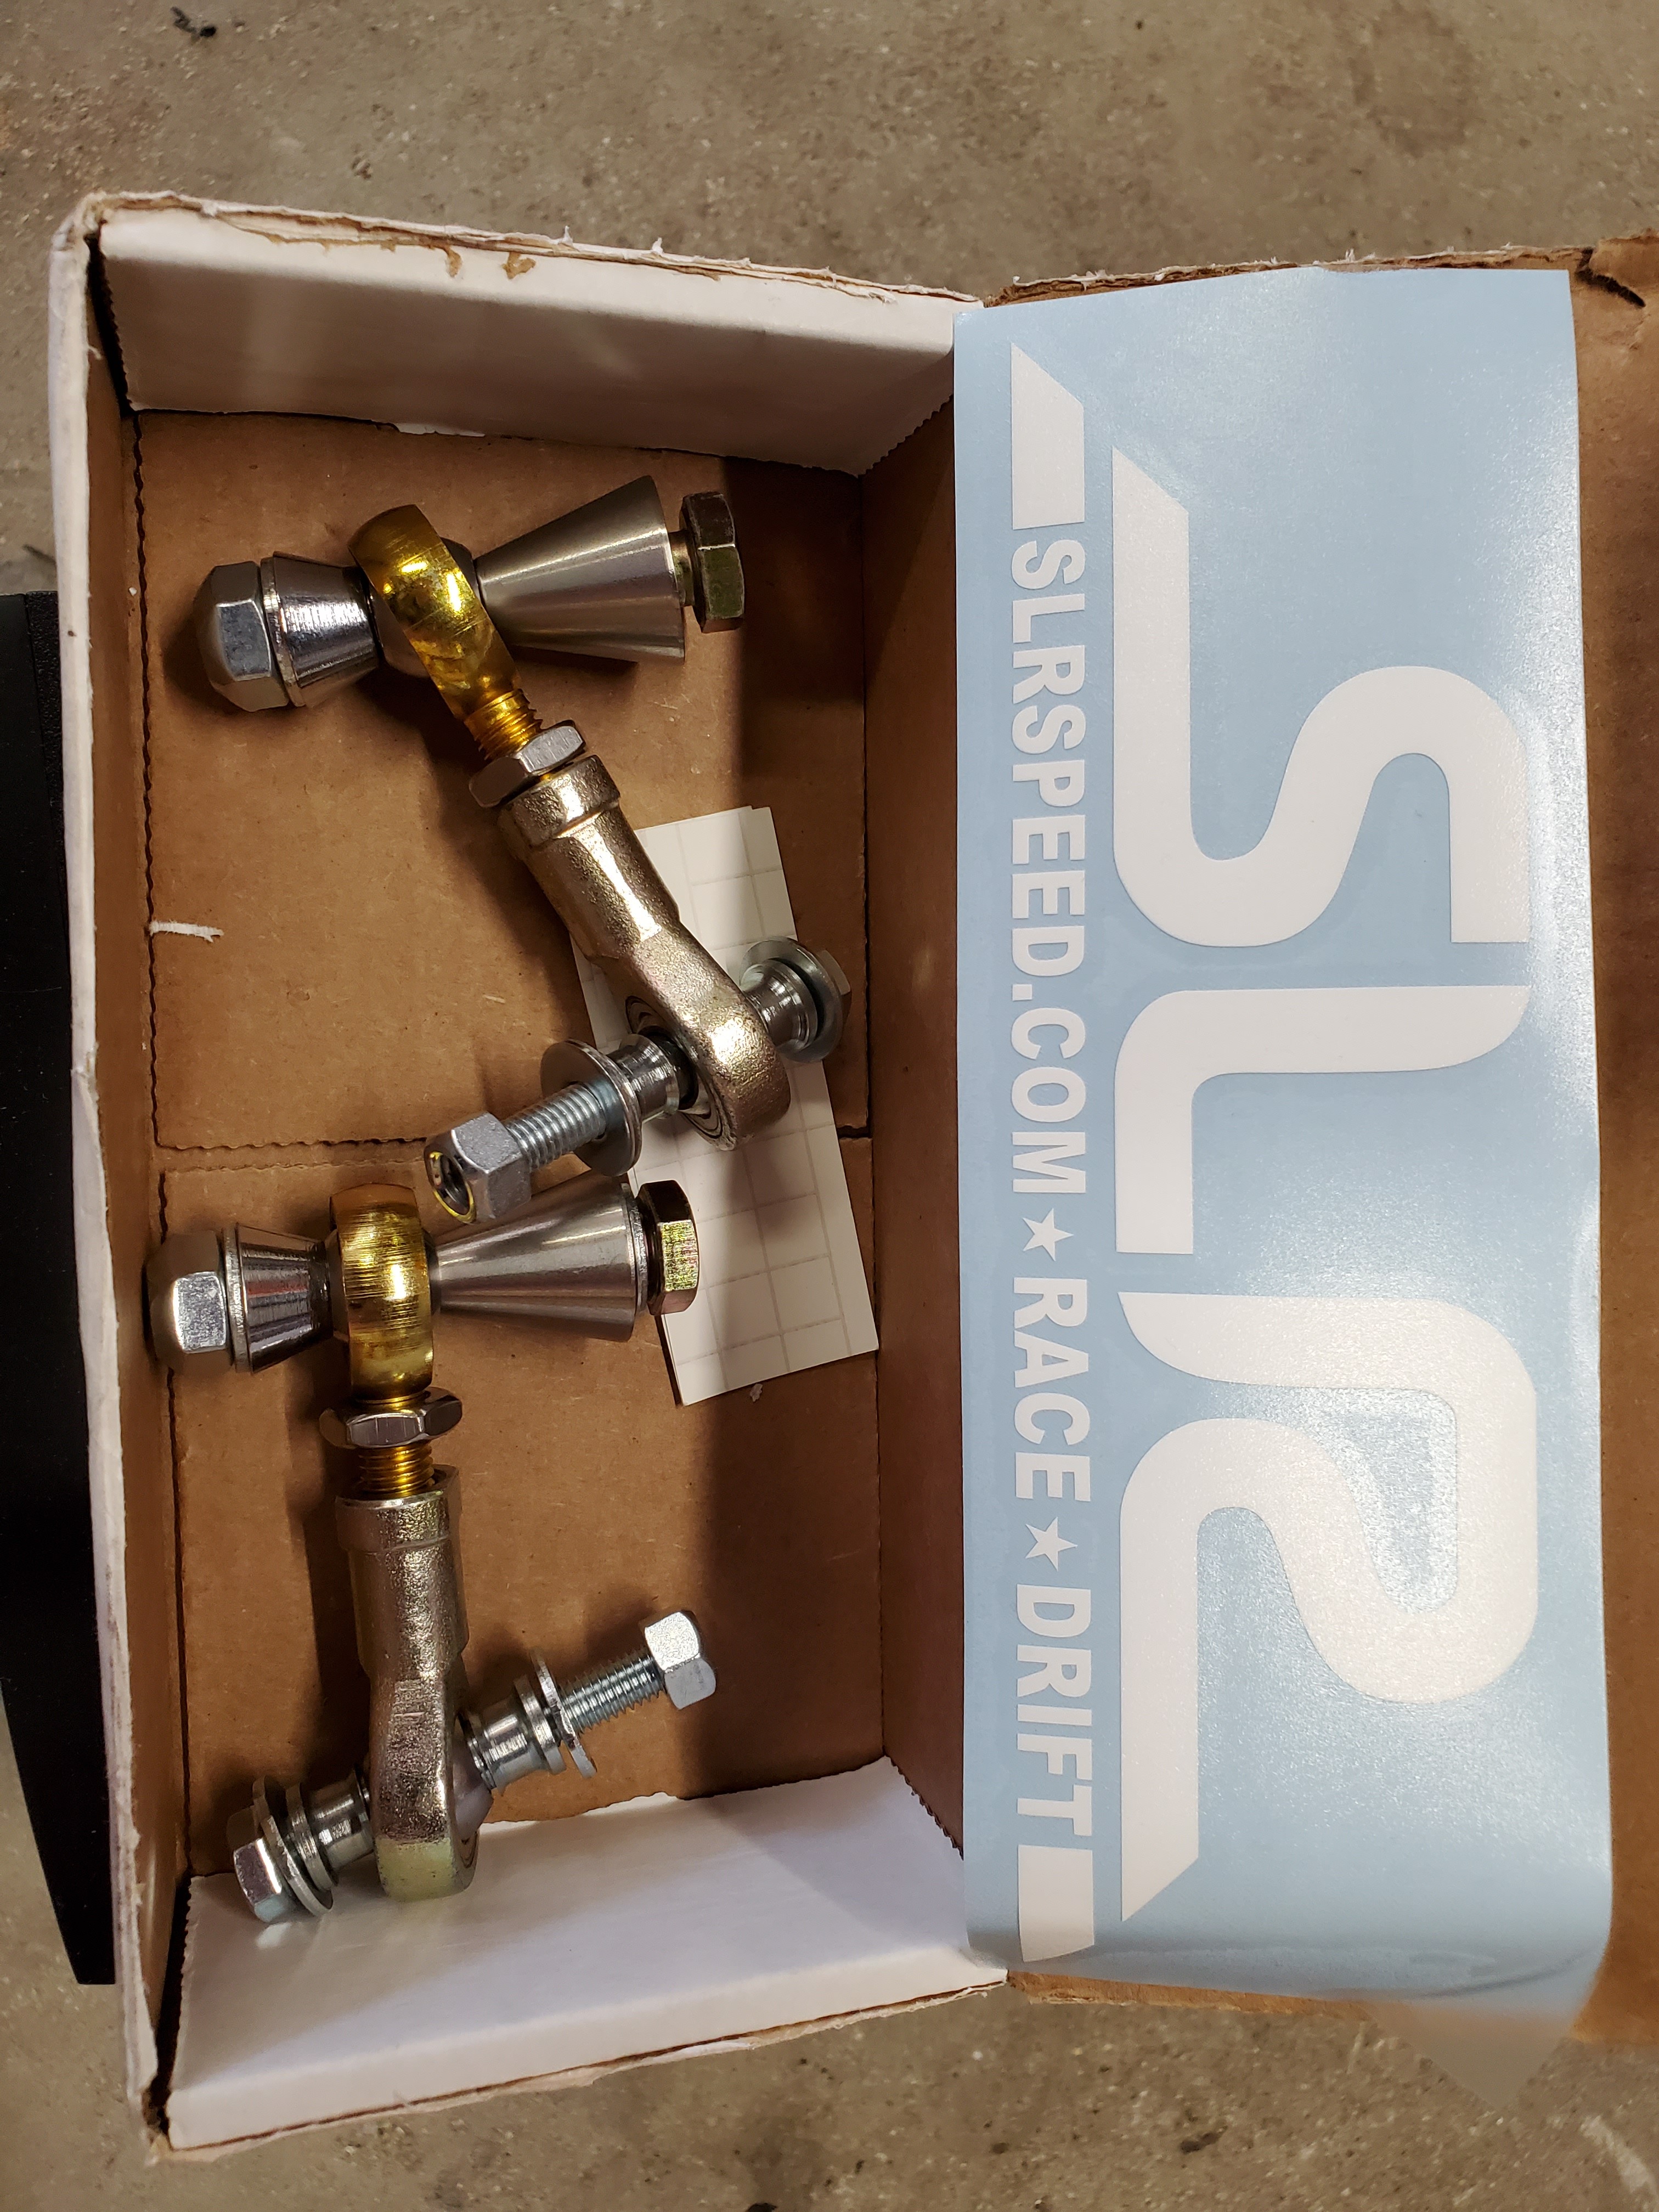
          Received the new SLR kit and got it installed the same day!
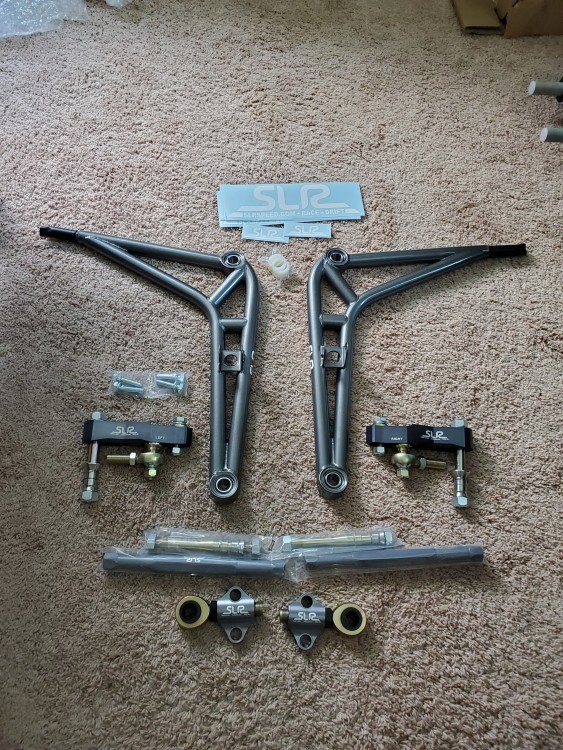
          20200804170651.jpg

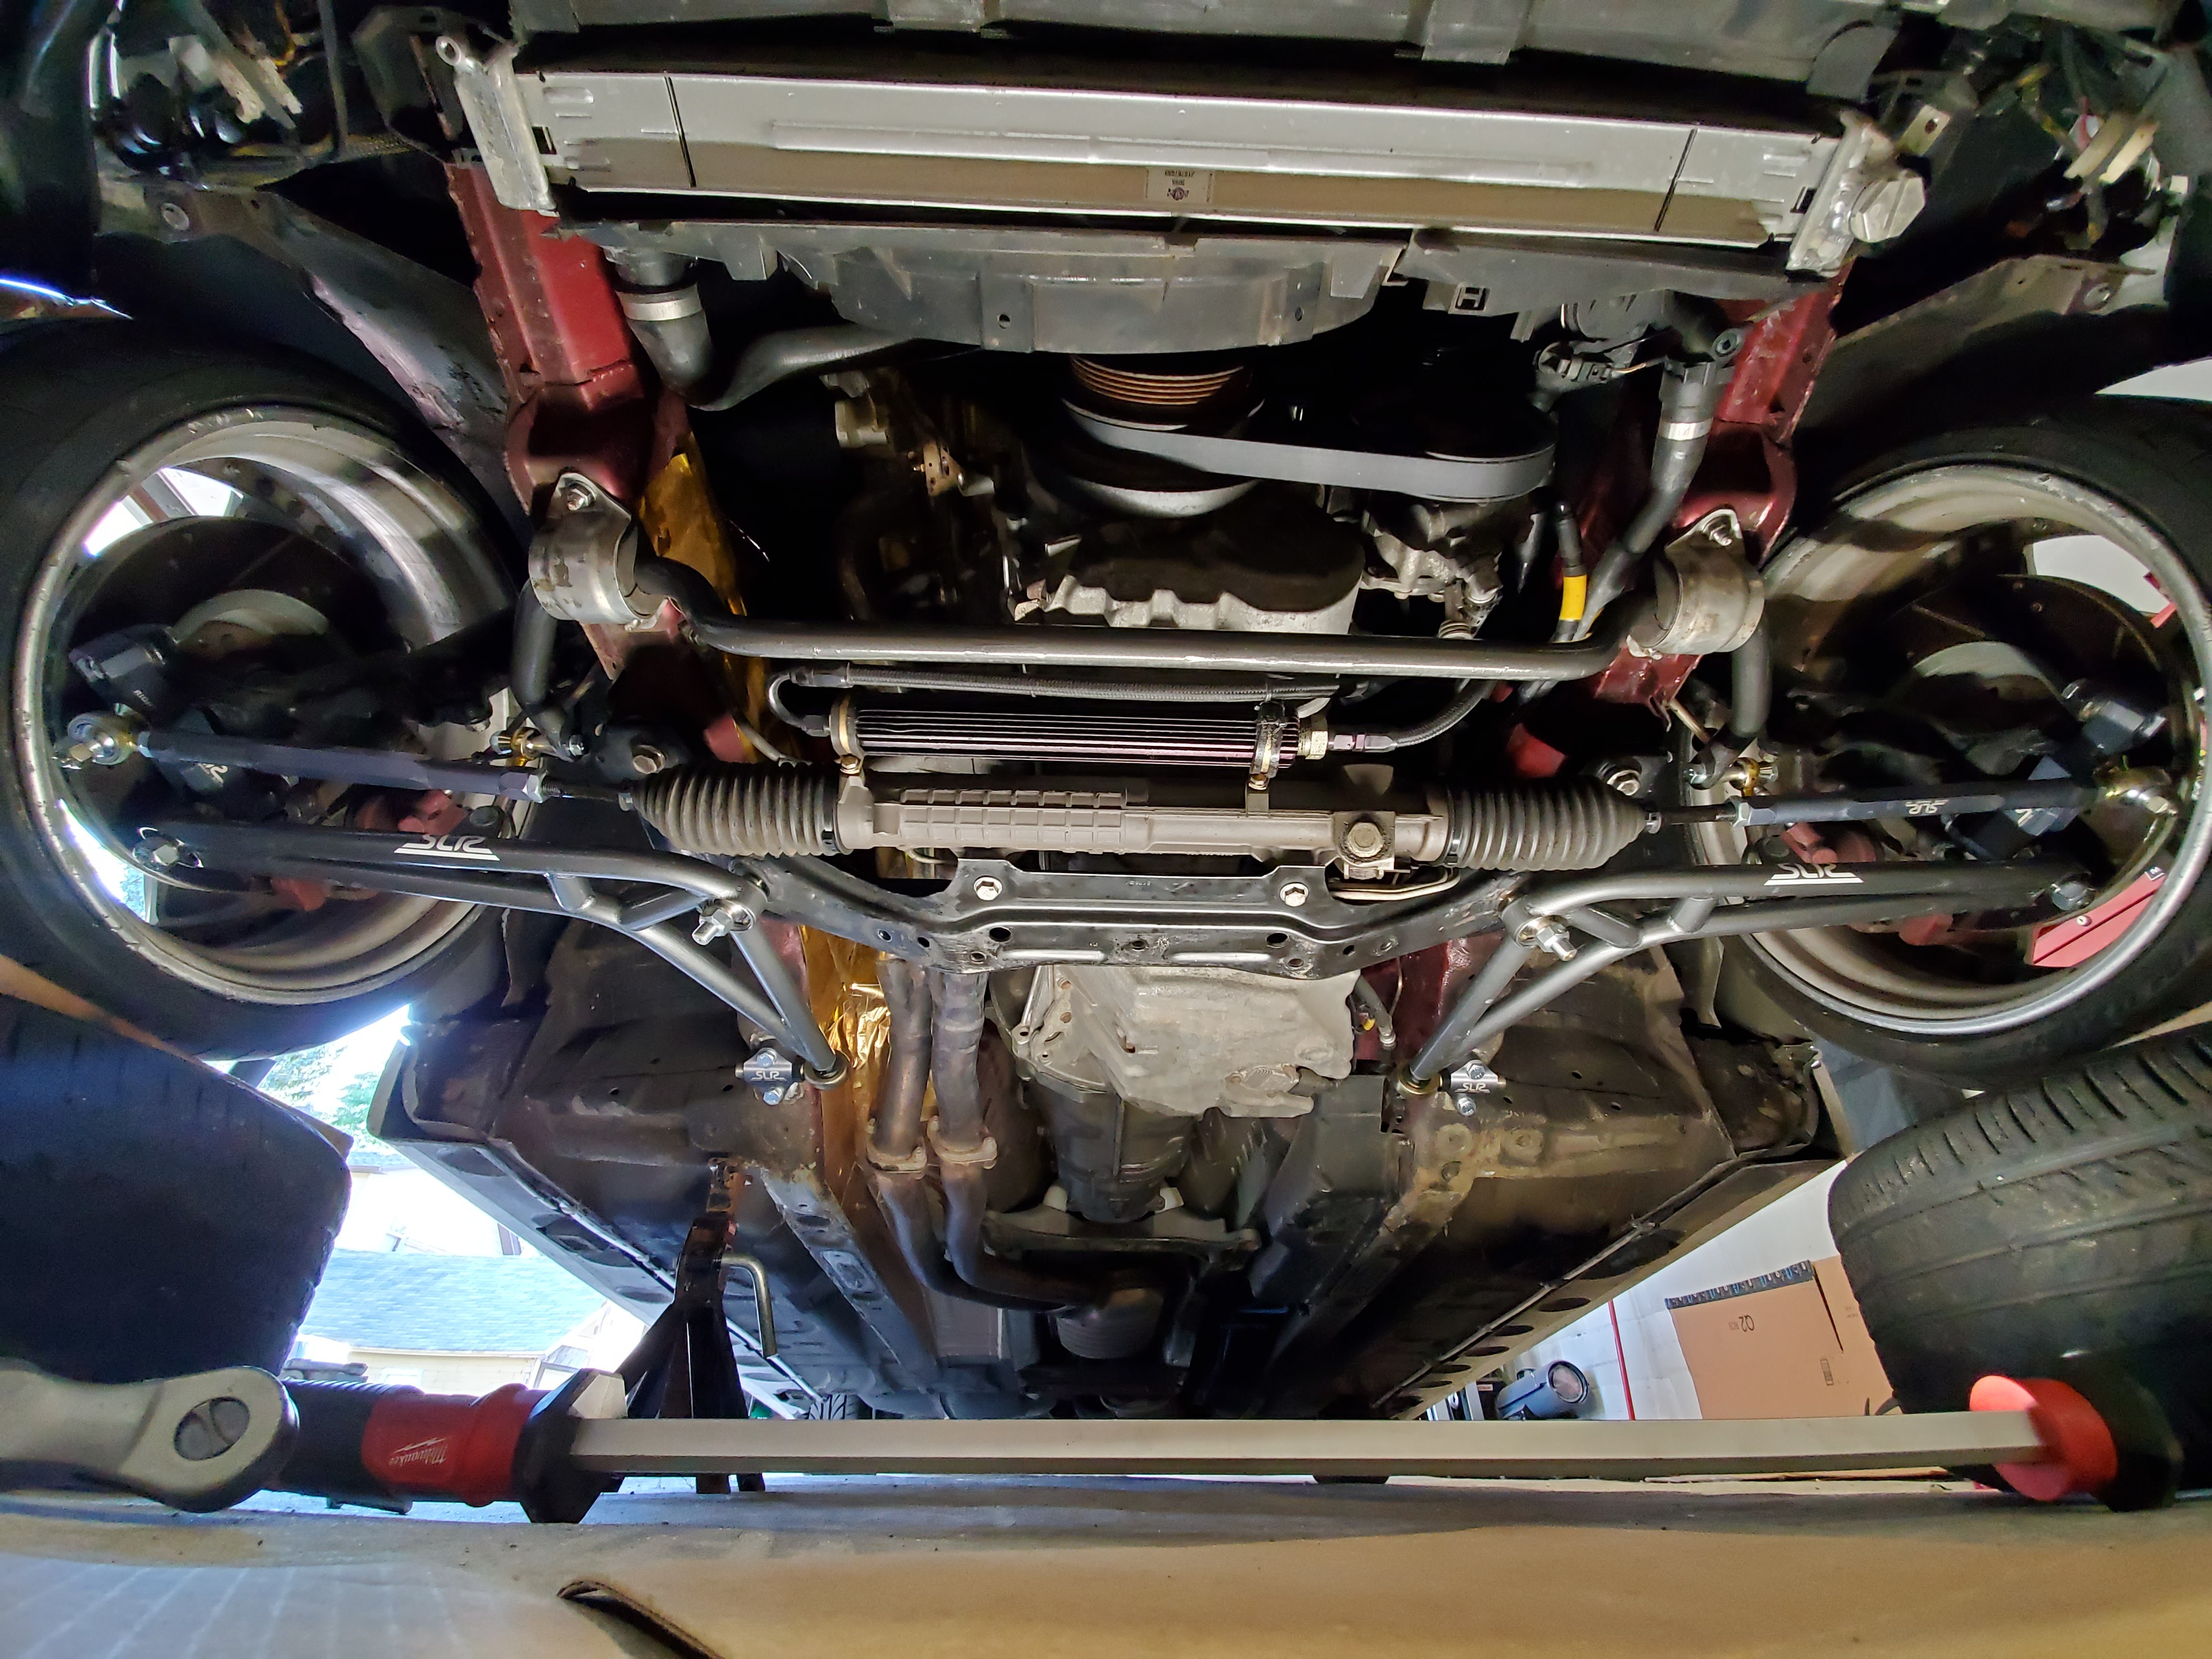
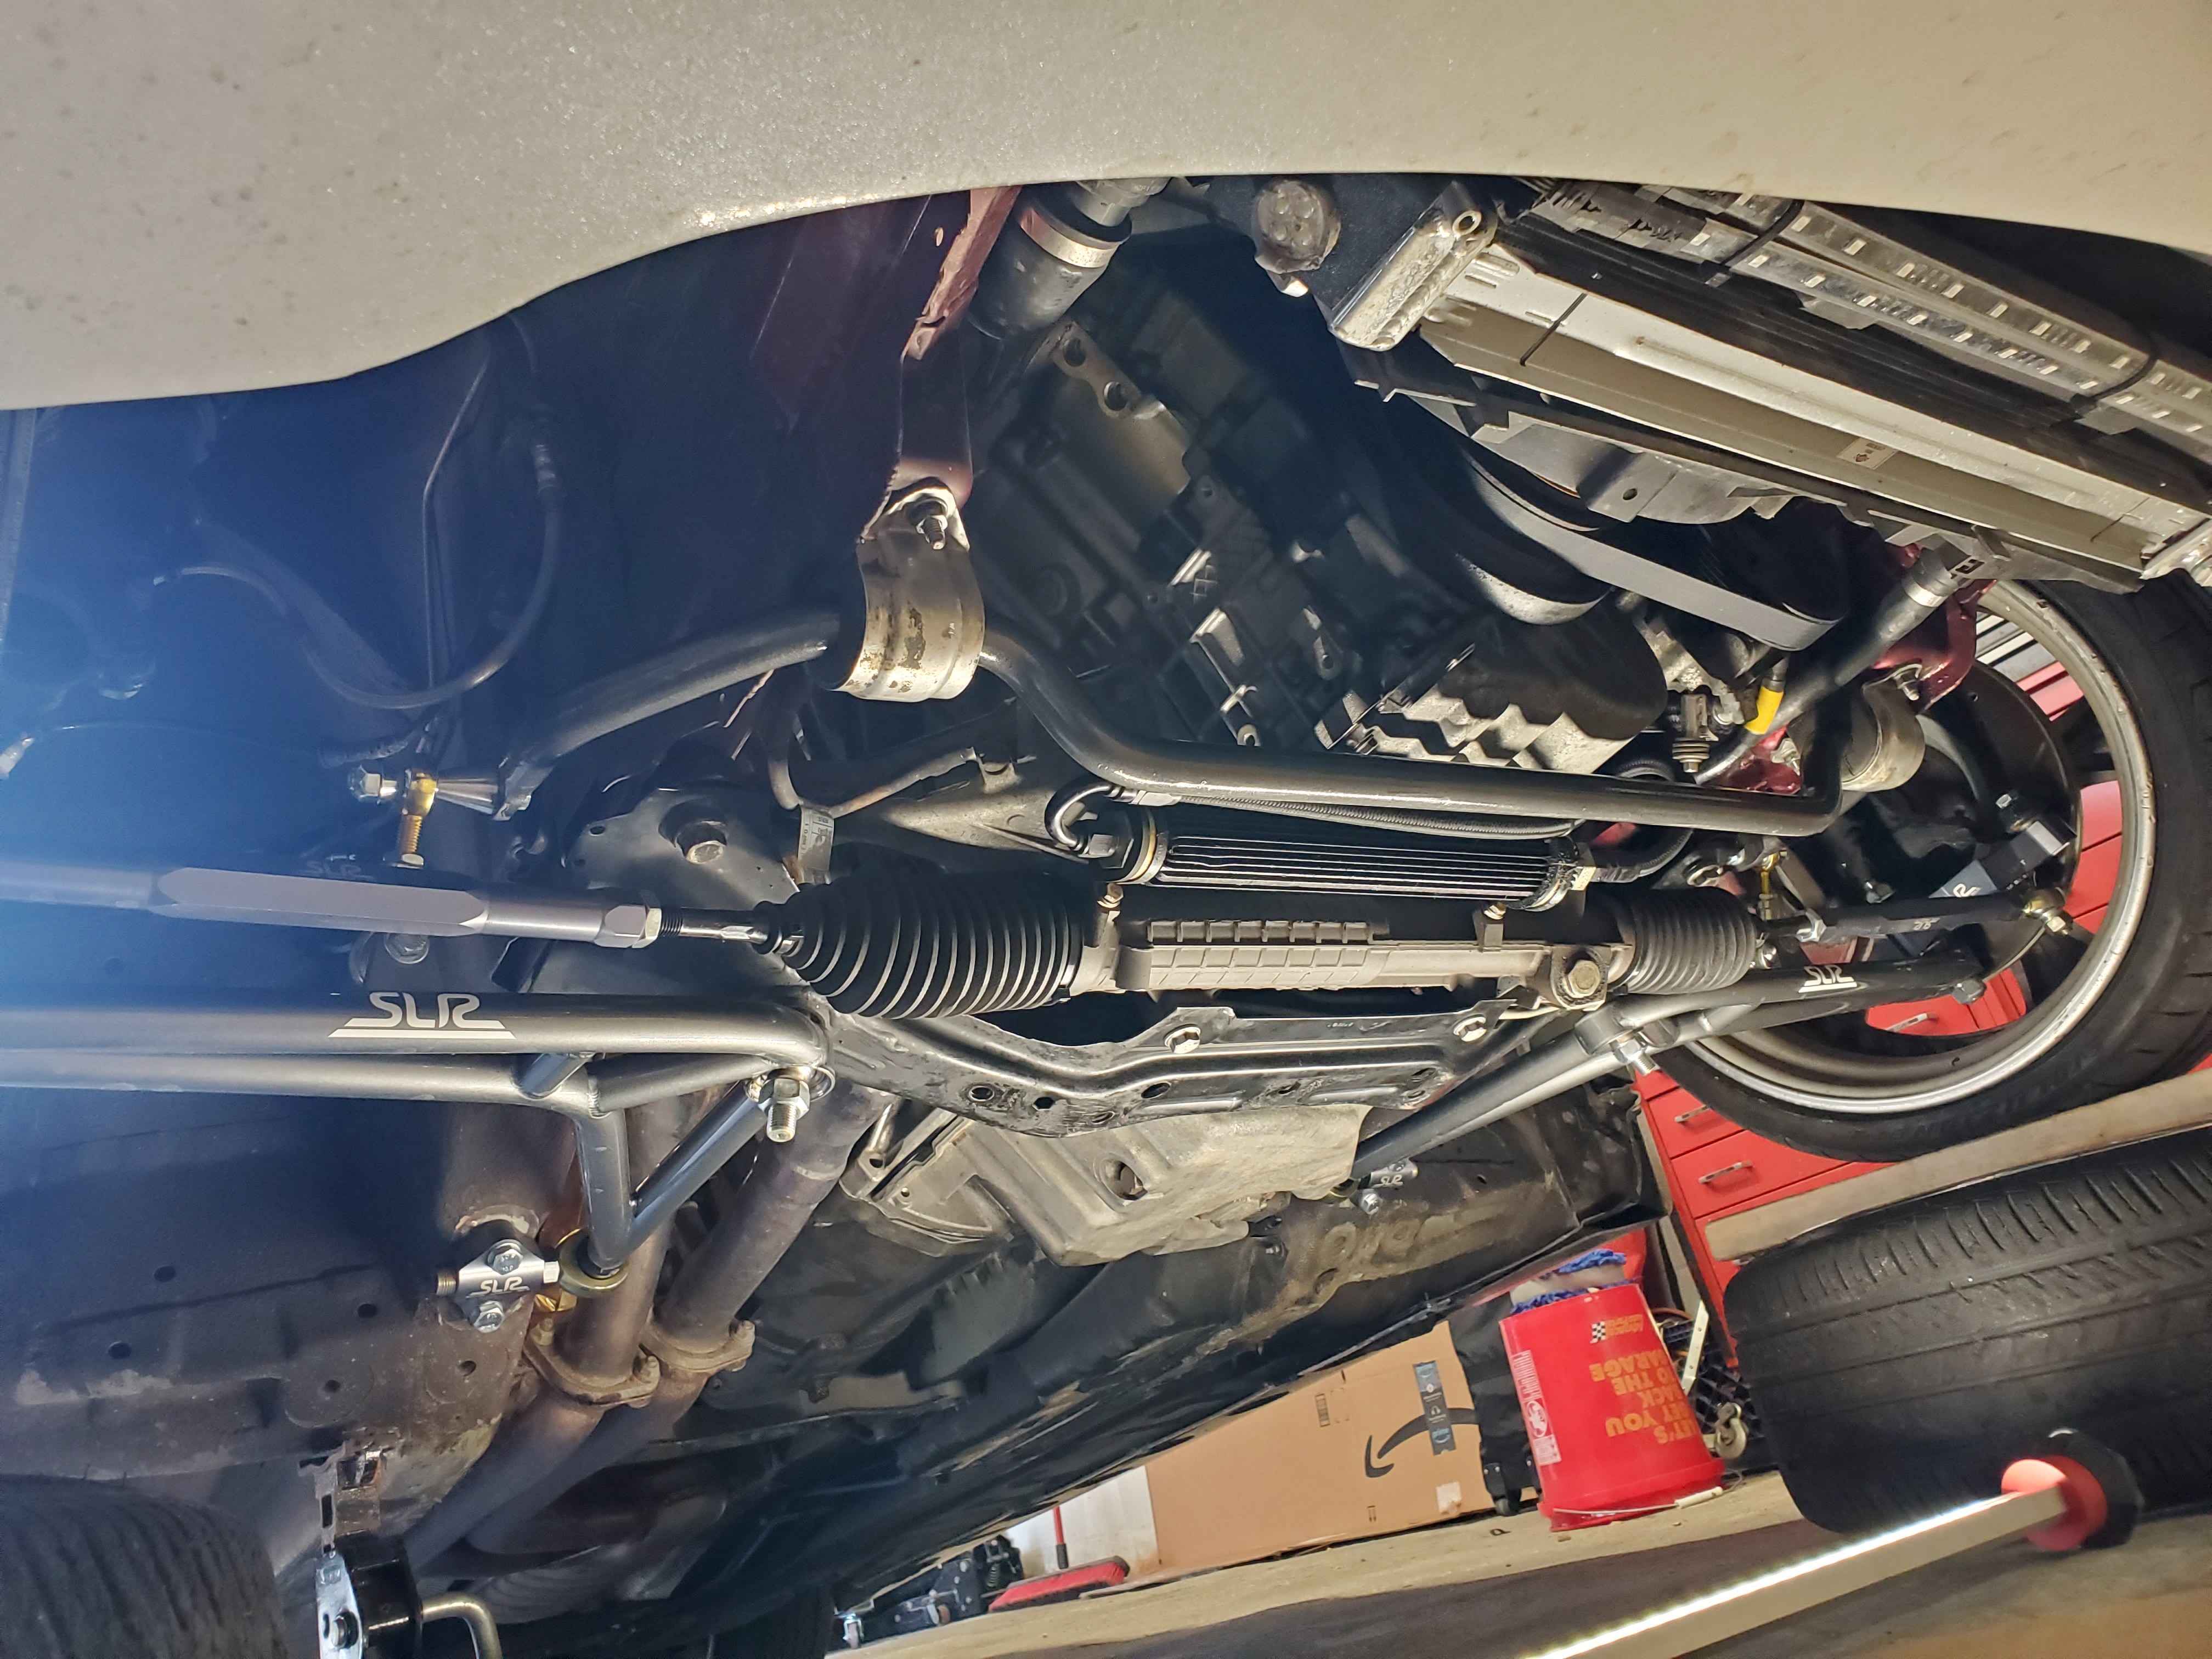
          The quality and build of this kit is out of this world.
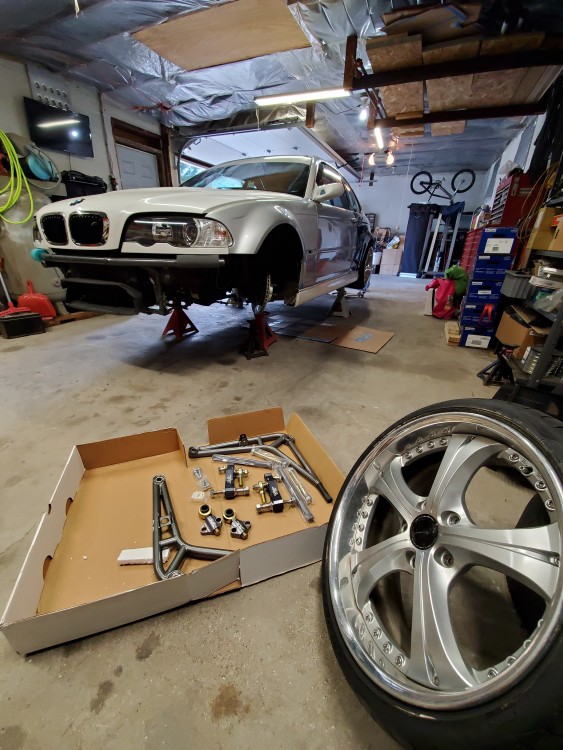
          20200804171731.jpg

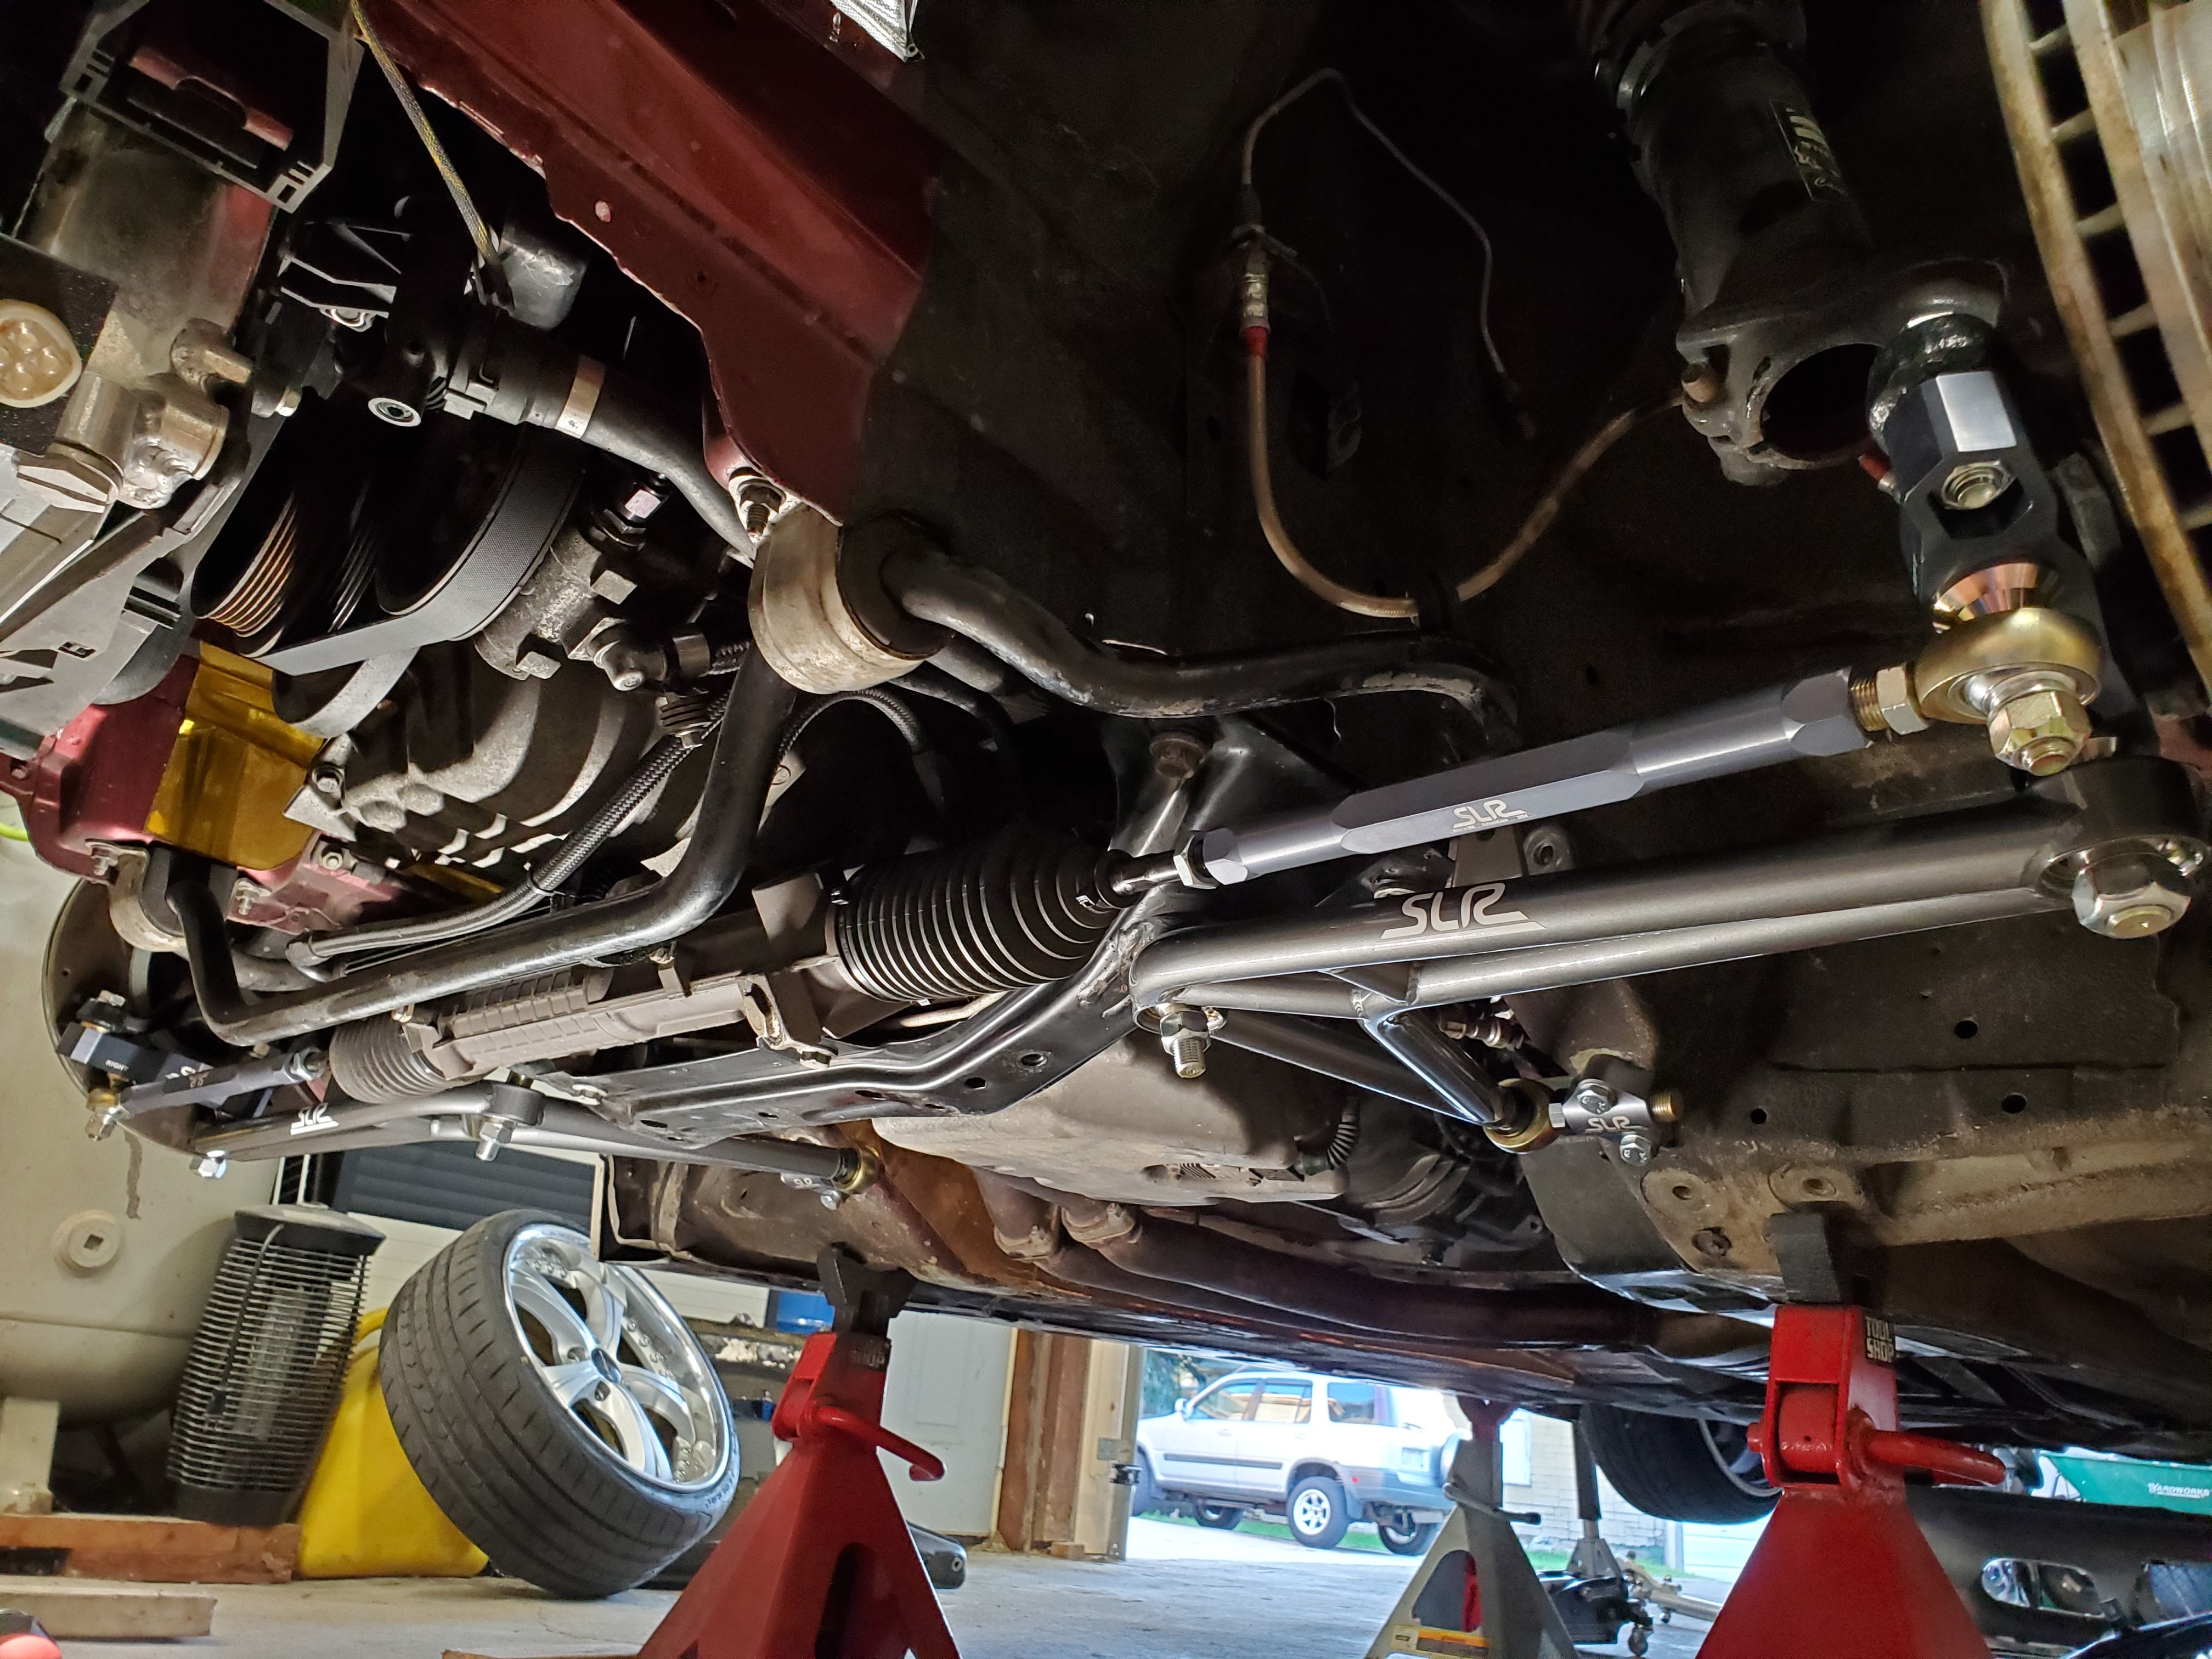
          And fhe fit is right in par with everything else about it. I cannot believe I waited this long to purchase one.

          Here is a photo of one installed.
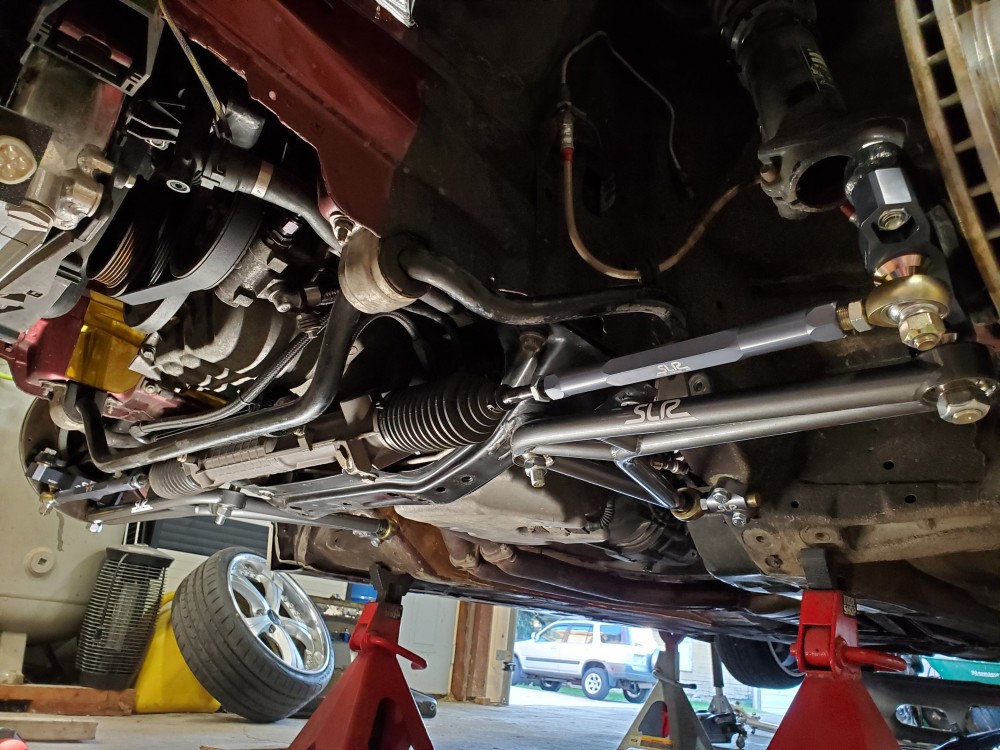
          20200804192512.jpg

          And a photo of the wheels on at full lock, mind you this is without the lock stops that keep the barrel from making contact with the lower arm. Its just insane what this kit is capable of.
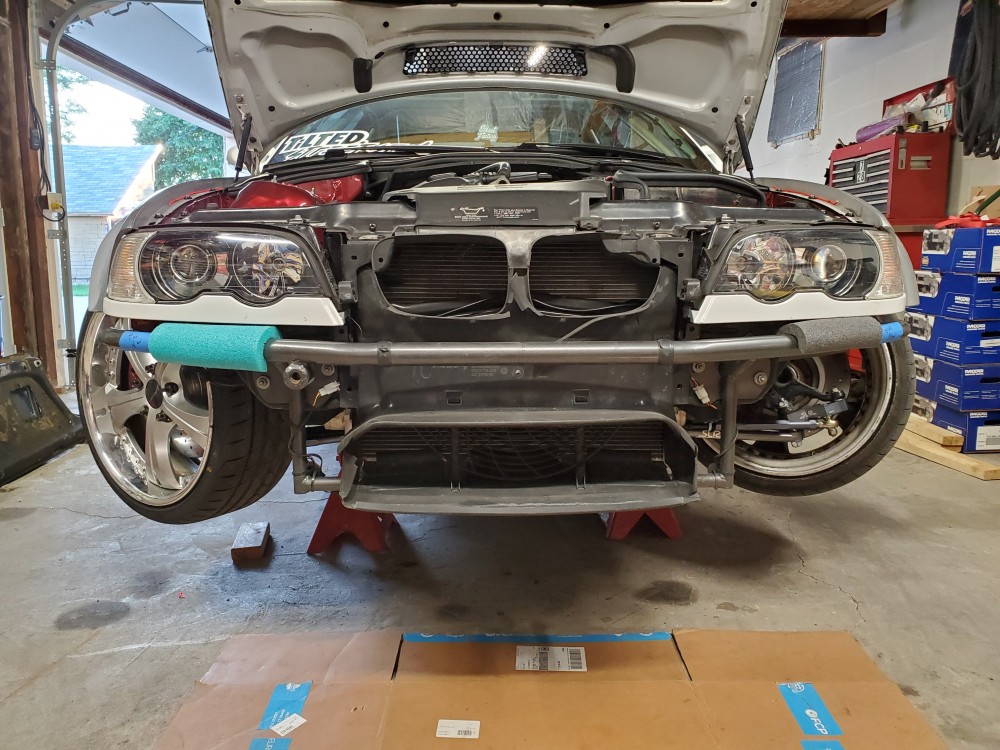
          20200804193340.jpg

          Once I had the lock stops dialed it was time for a good ole driveway alignment.
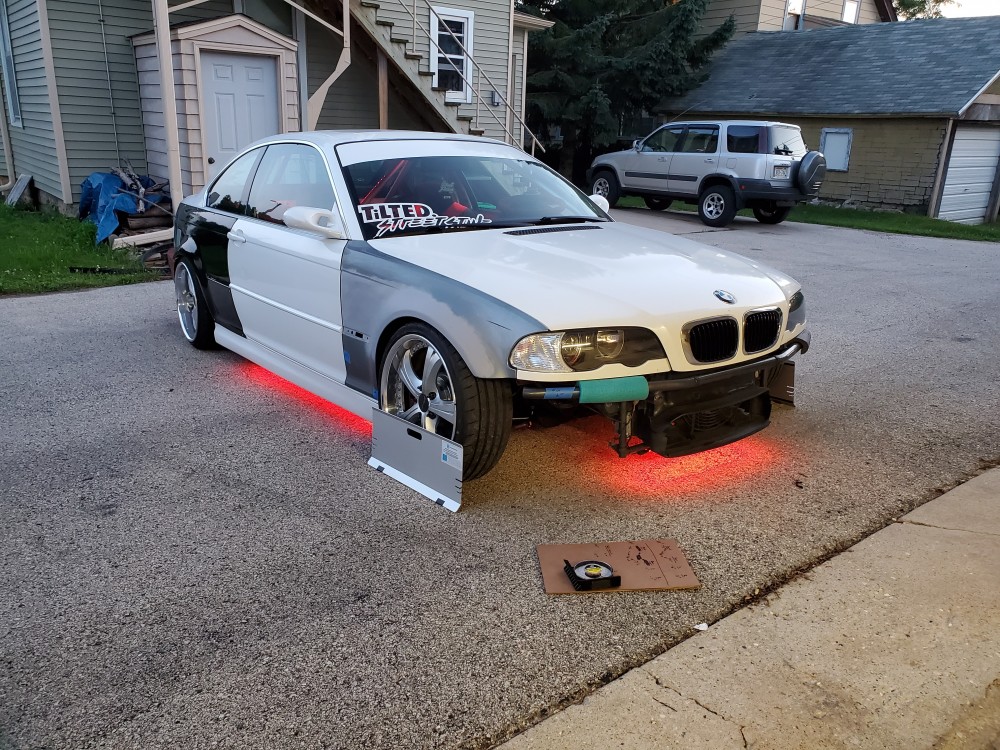
          20200804201921.jpg

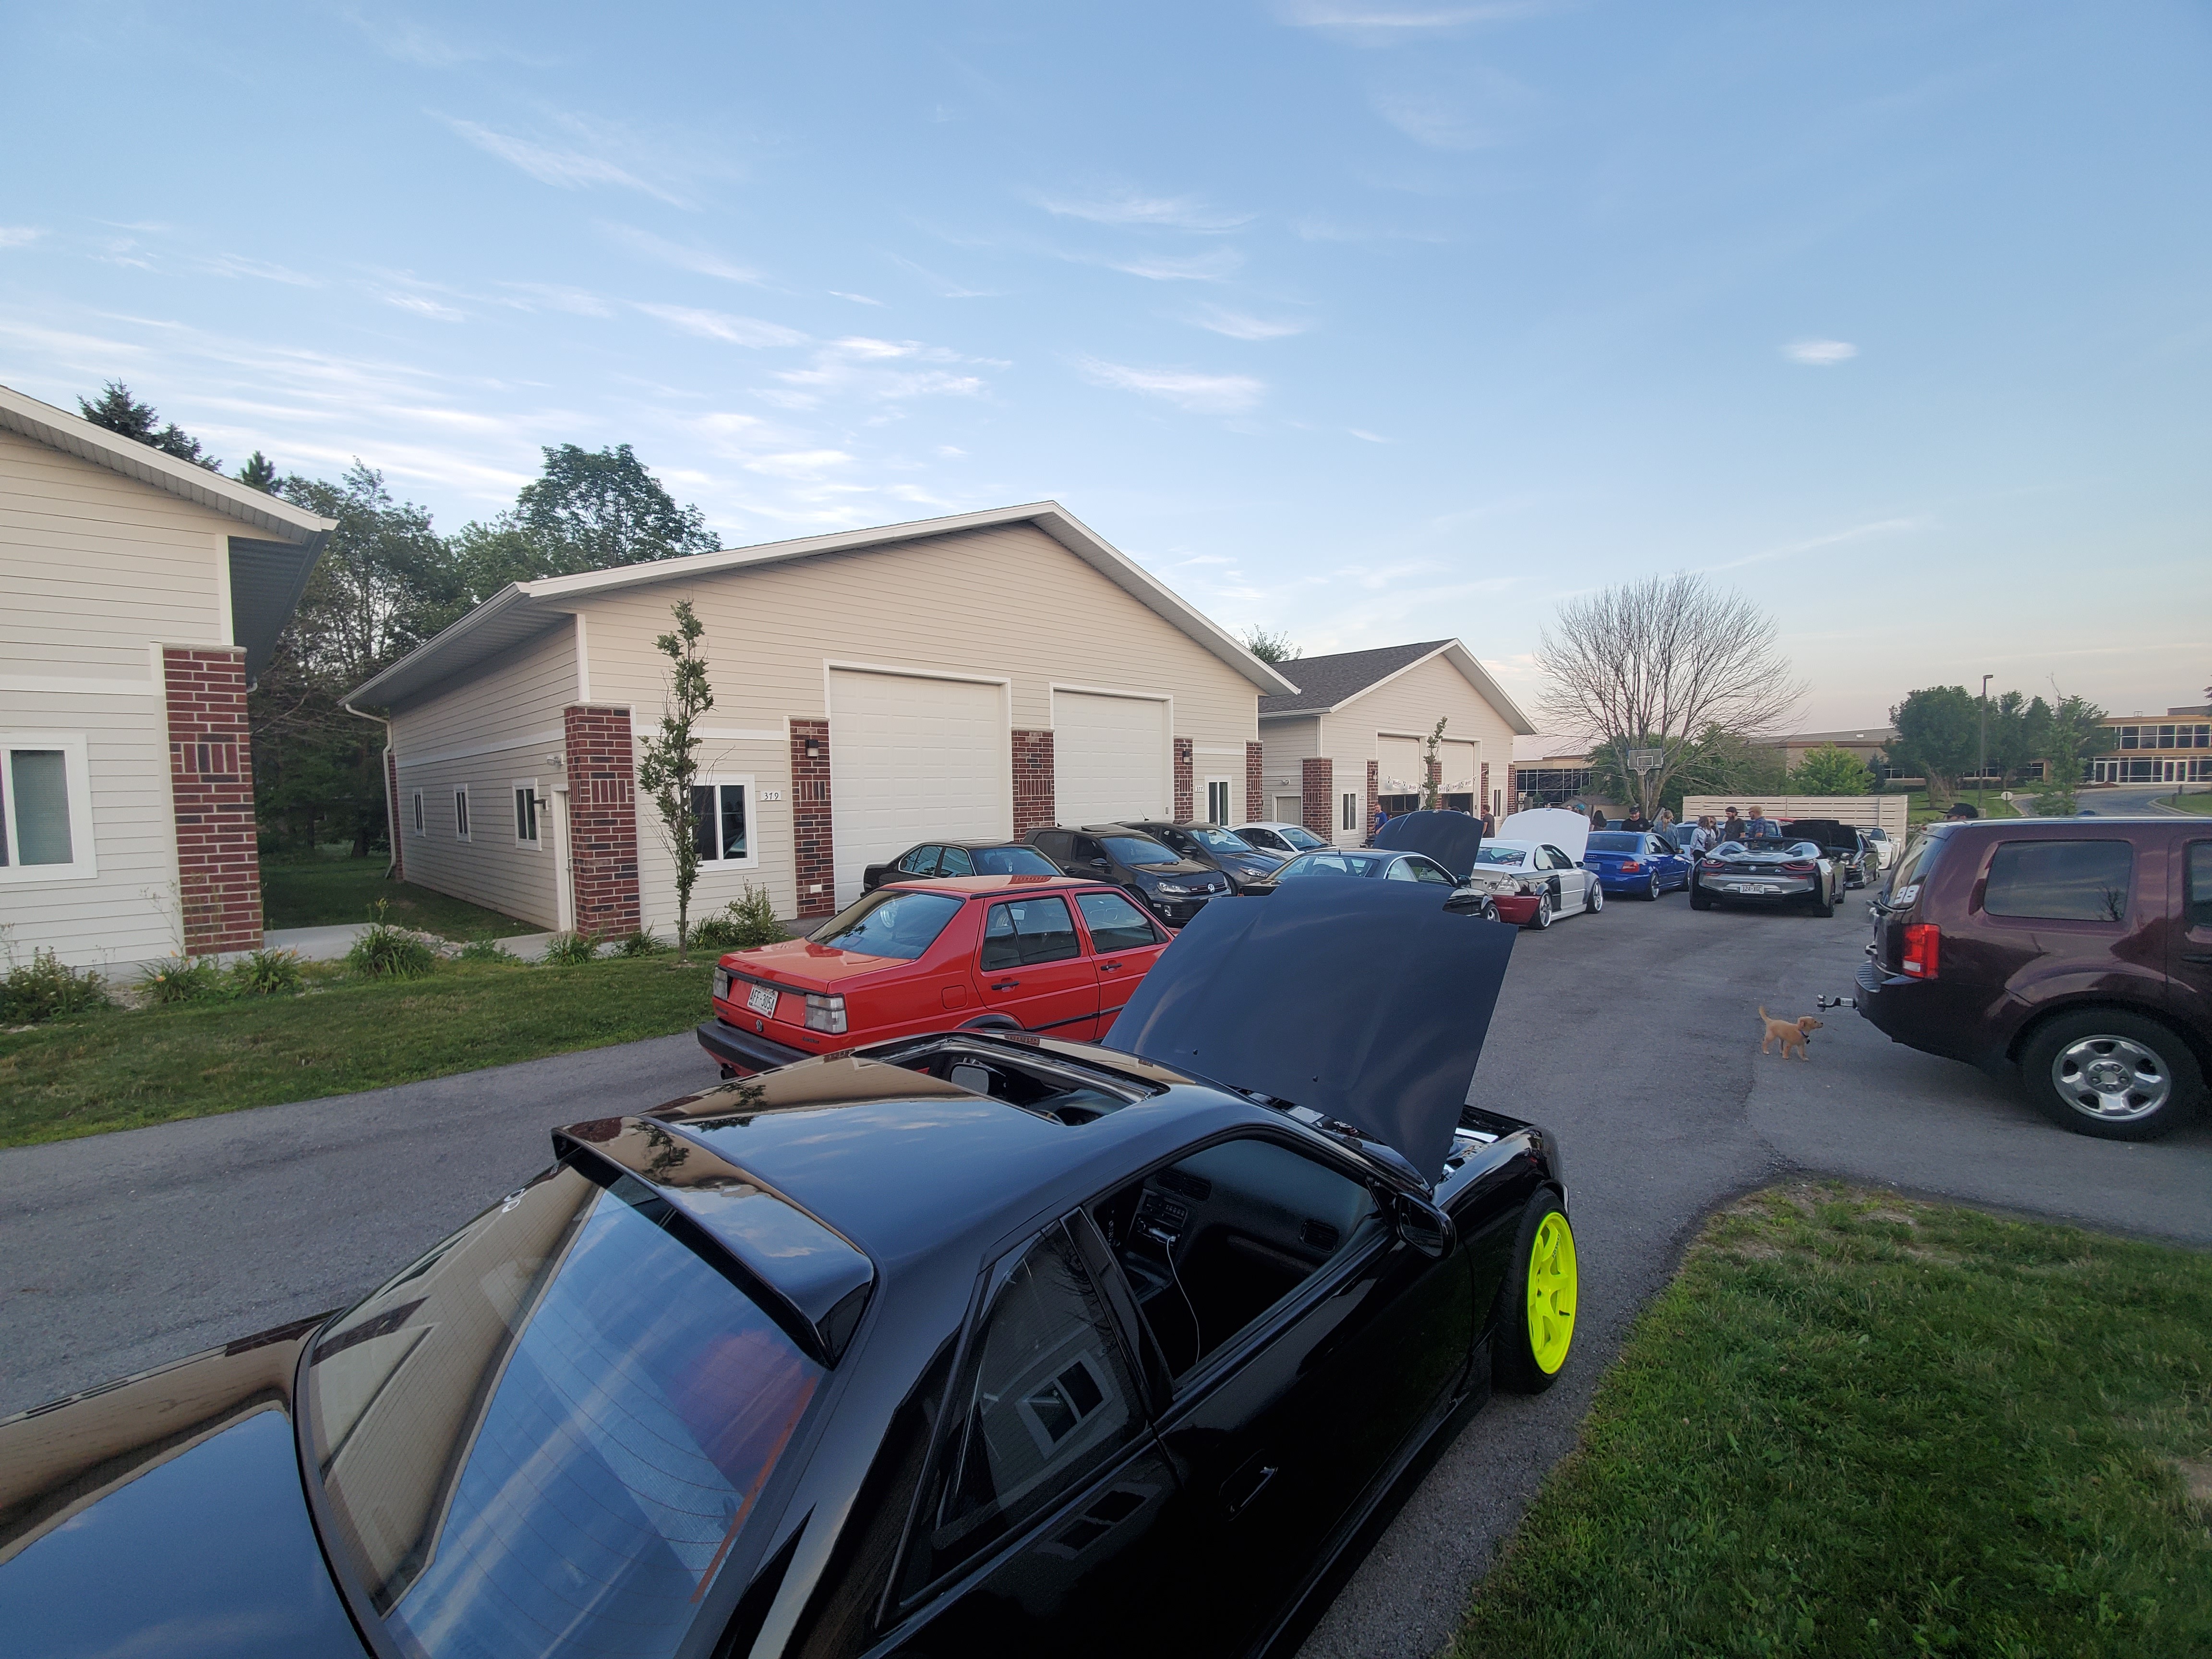
          Went to a shop get together/party with the Pnuespeed guys (who we get our tires from) and they announced the big news of a rebranding! They are adding wheels, clutches, suspension and lots of other automotive parts to their arsenal and it will all be available through Track Day Direct. 

          Here's a photo from the get together 
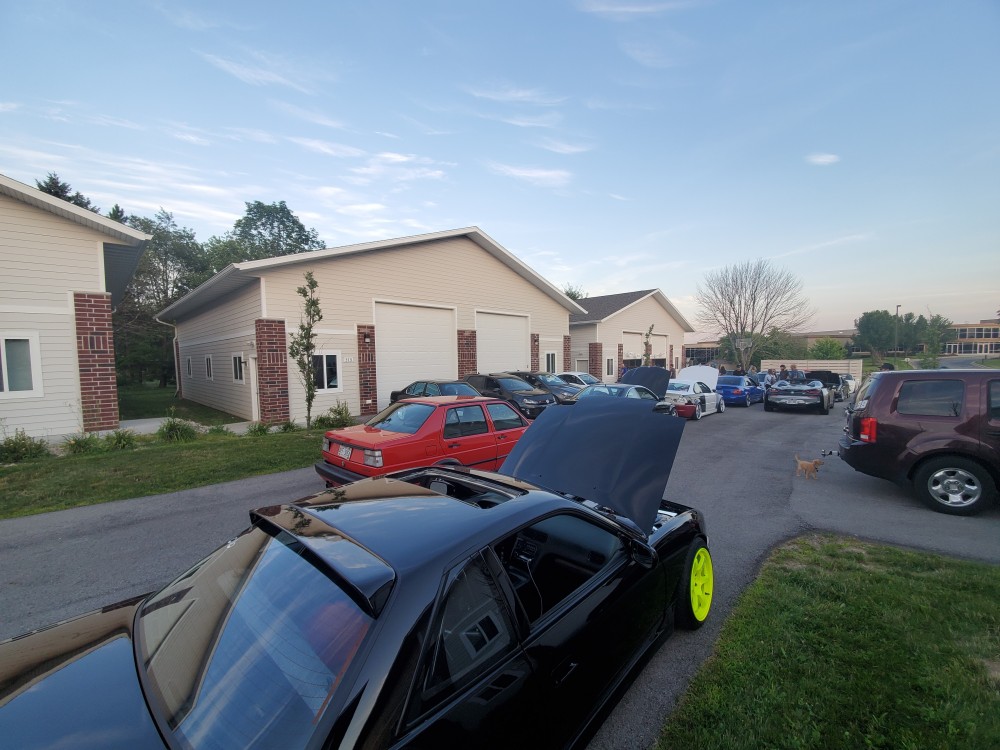
          20200807193115.jpg

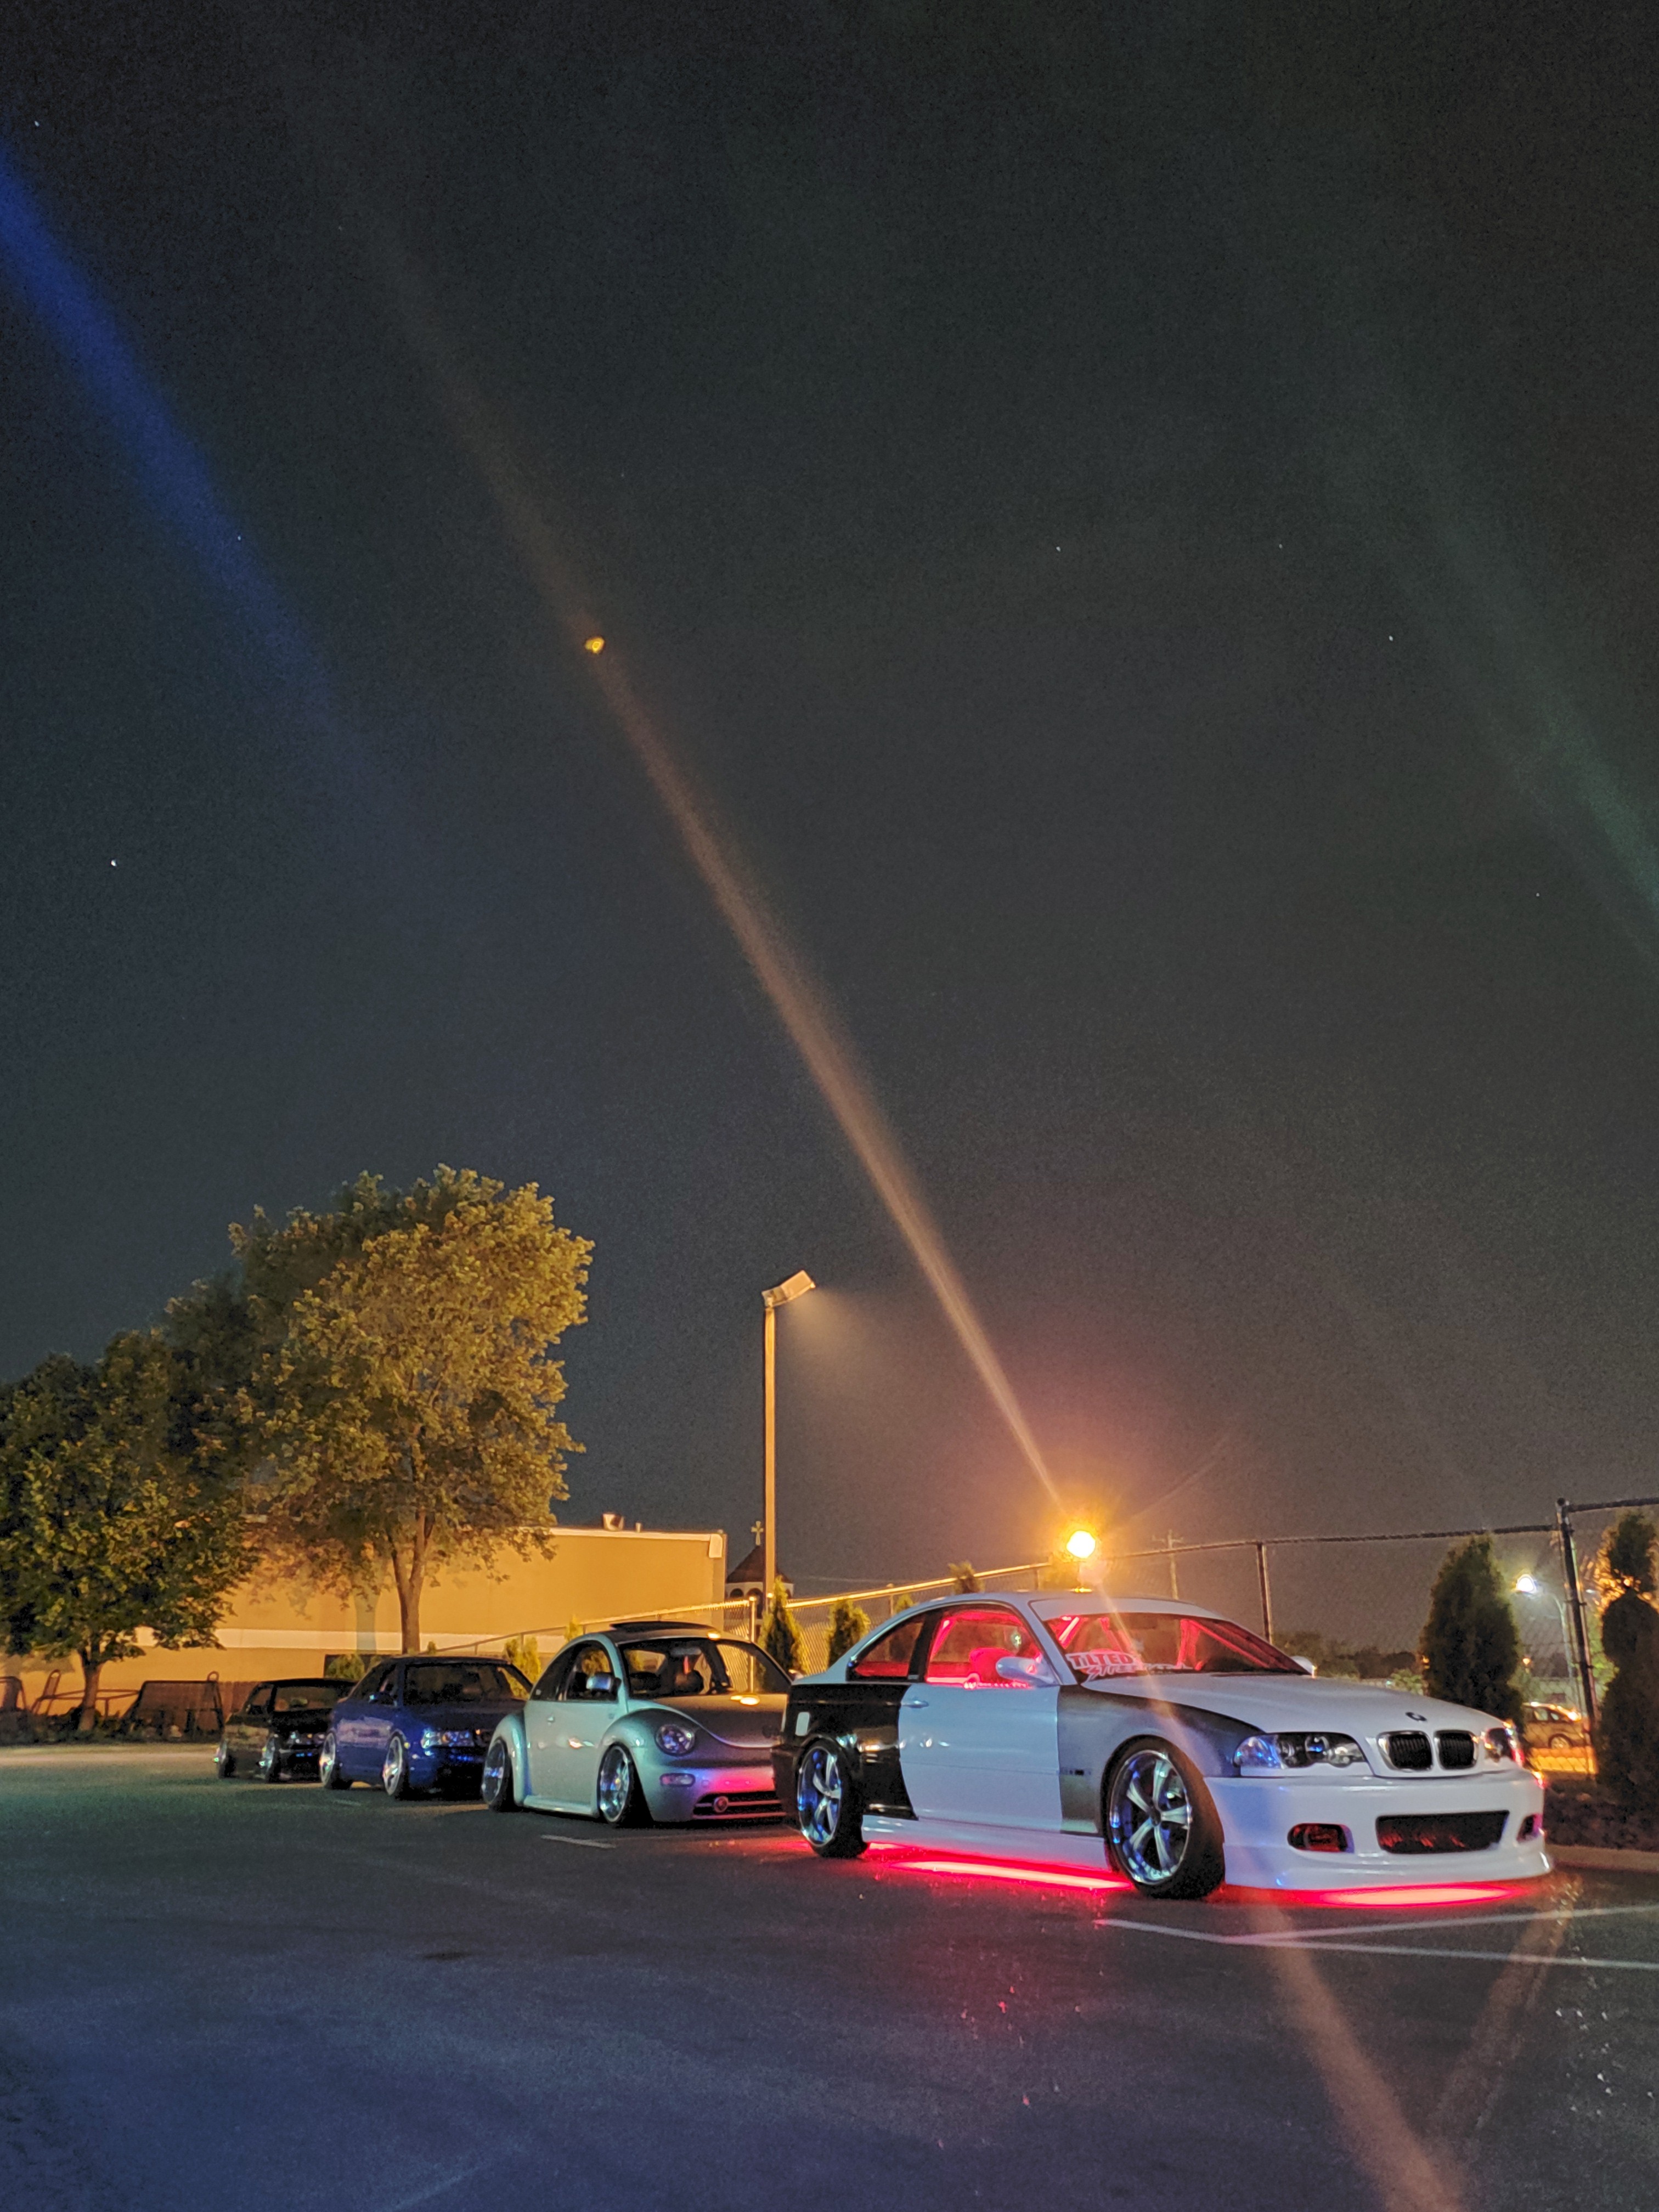
          And after the shop party we went for a cruise to get ice cream in Milwaukee and I snagged a few pics!
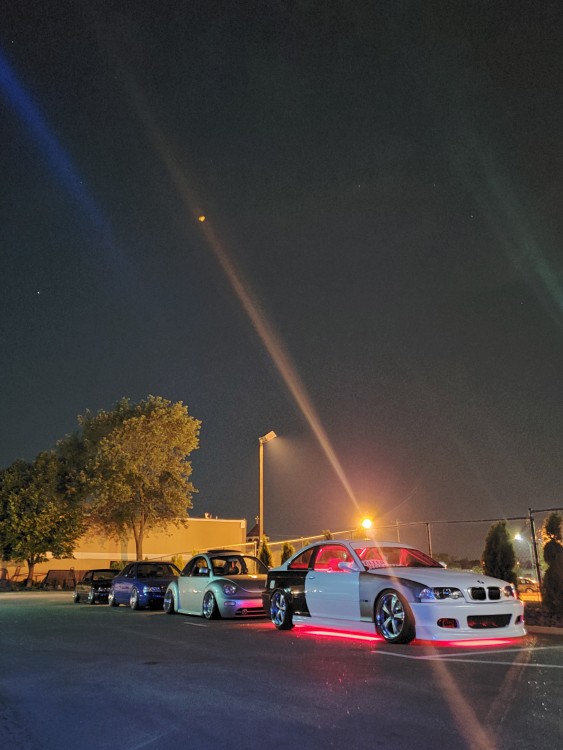
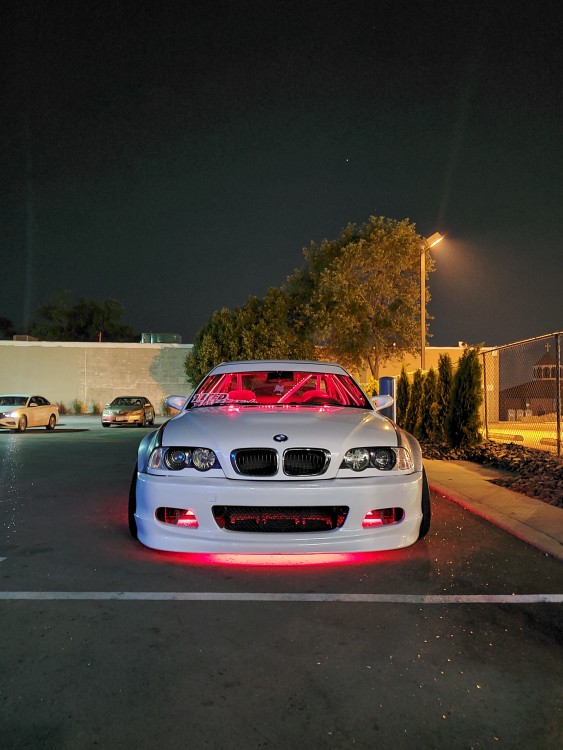
          20200807225330.jpg

          20200807230552.jpg

          20200807230606.jpg

          It was really nice getting to go for more than a 10 minute cruise! Hopefully after getting the sway bar set up sorted out/parts ordered ill be able to make it to an event this year lol.

          1 Reply Last reply
          1
          • TkuhnT
            TkuhnT
            Tkuhn
            wrote on last edited by
            #364

            Small update!

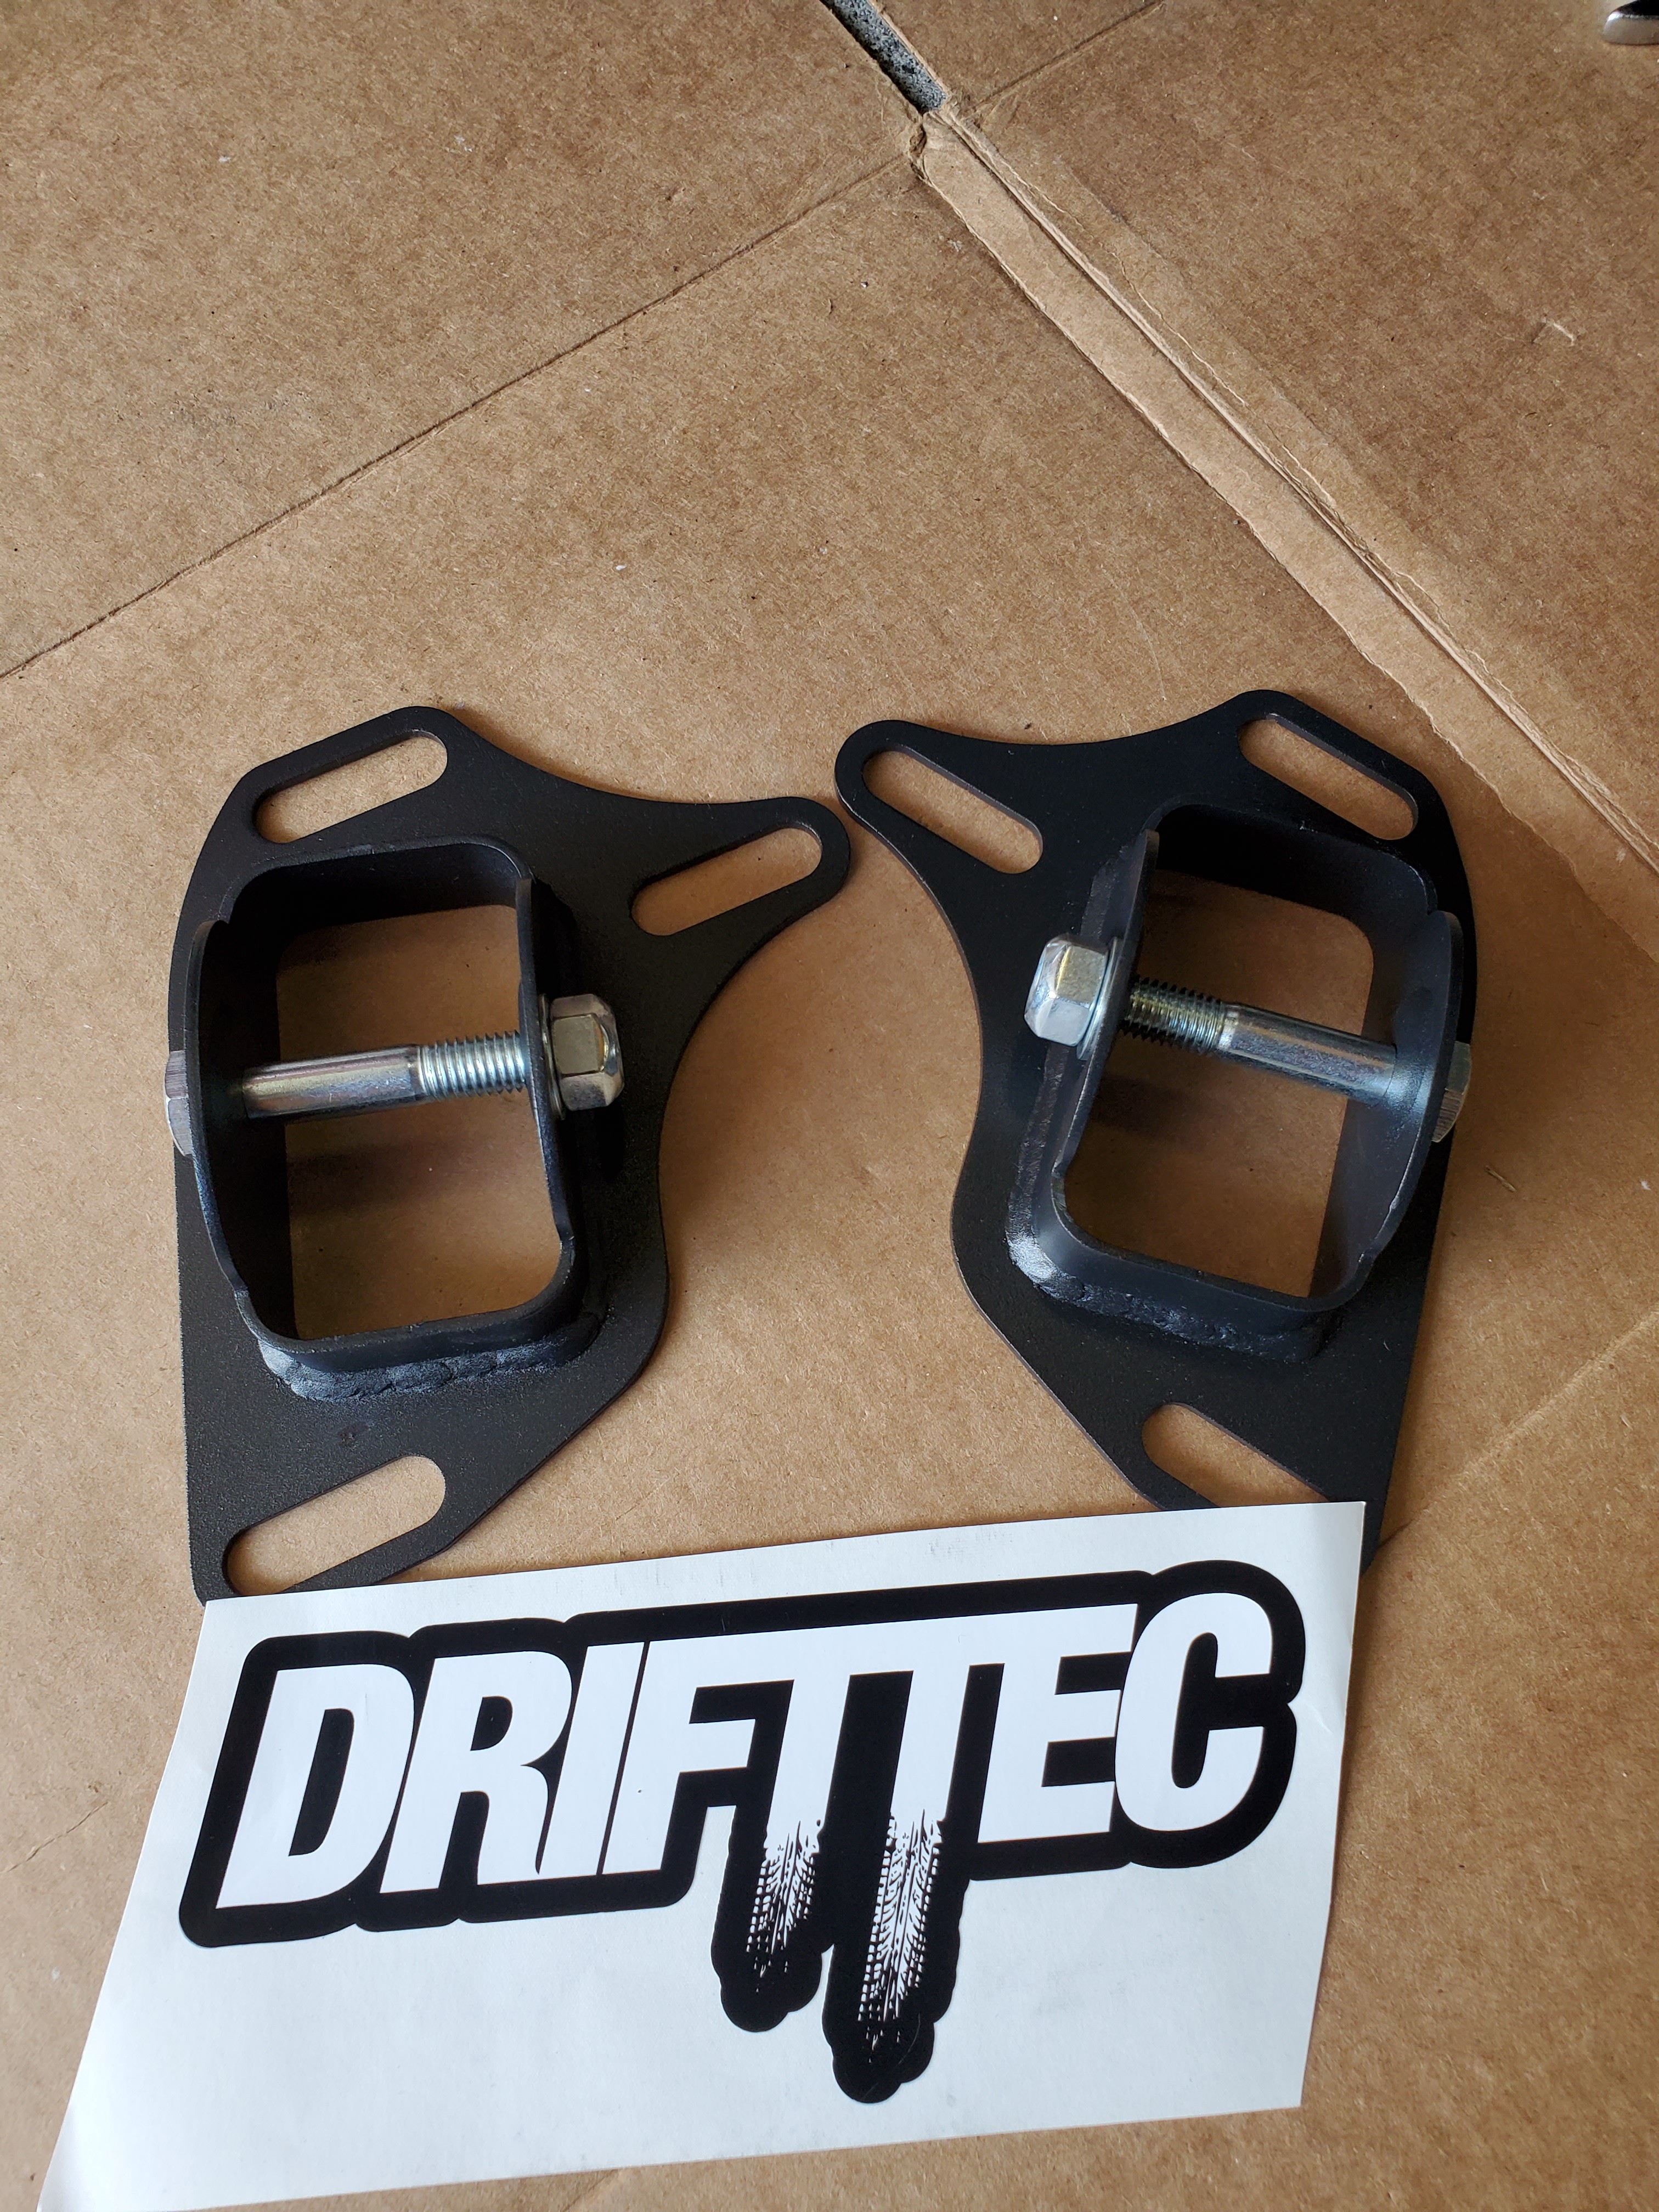
            Ordered some drifttec toe brackets in hopes of really being able to dial in my rear alignment.

            Last time i lowered the car it really messed up the rear alignment, the car had a 1/2" toe out which is obviously not great lol
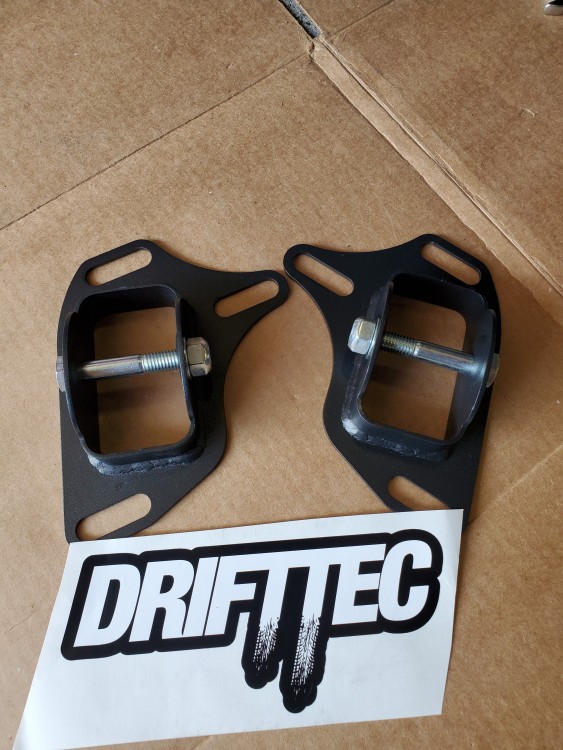
            20200812170316.jpg

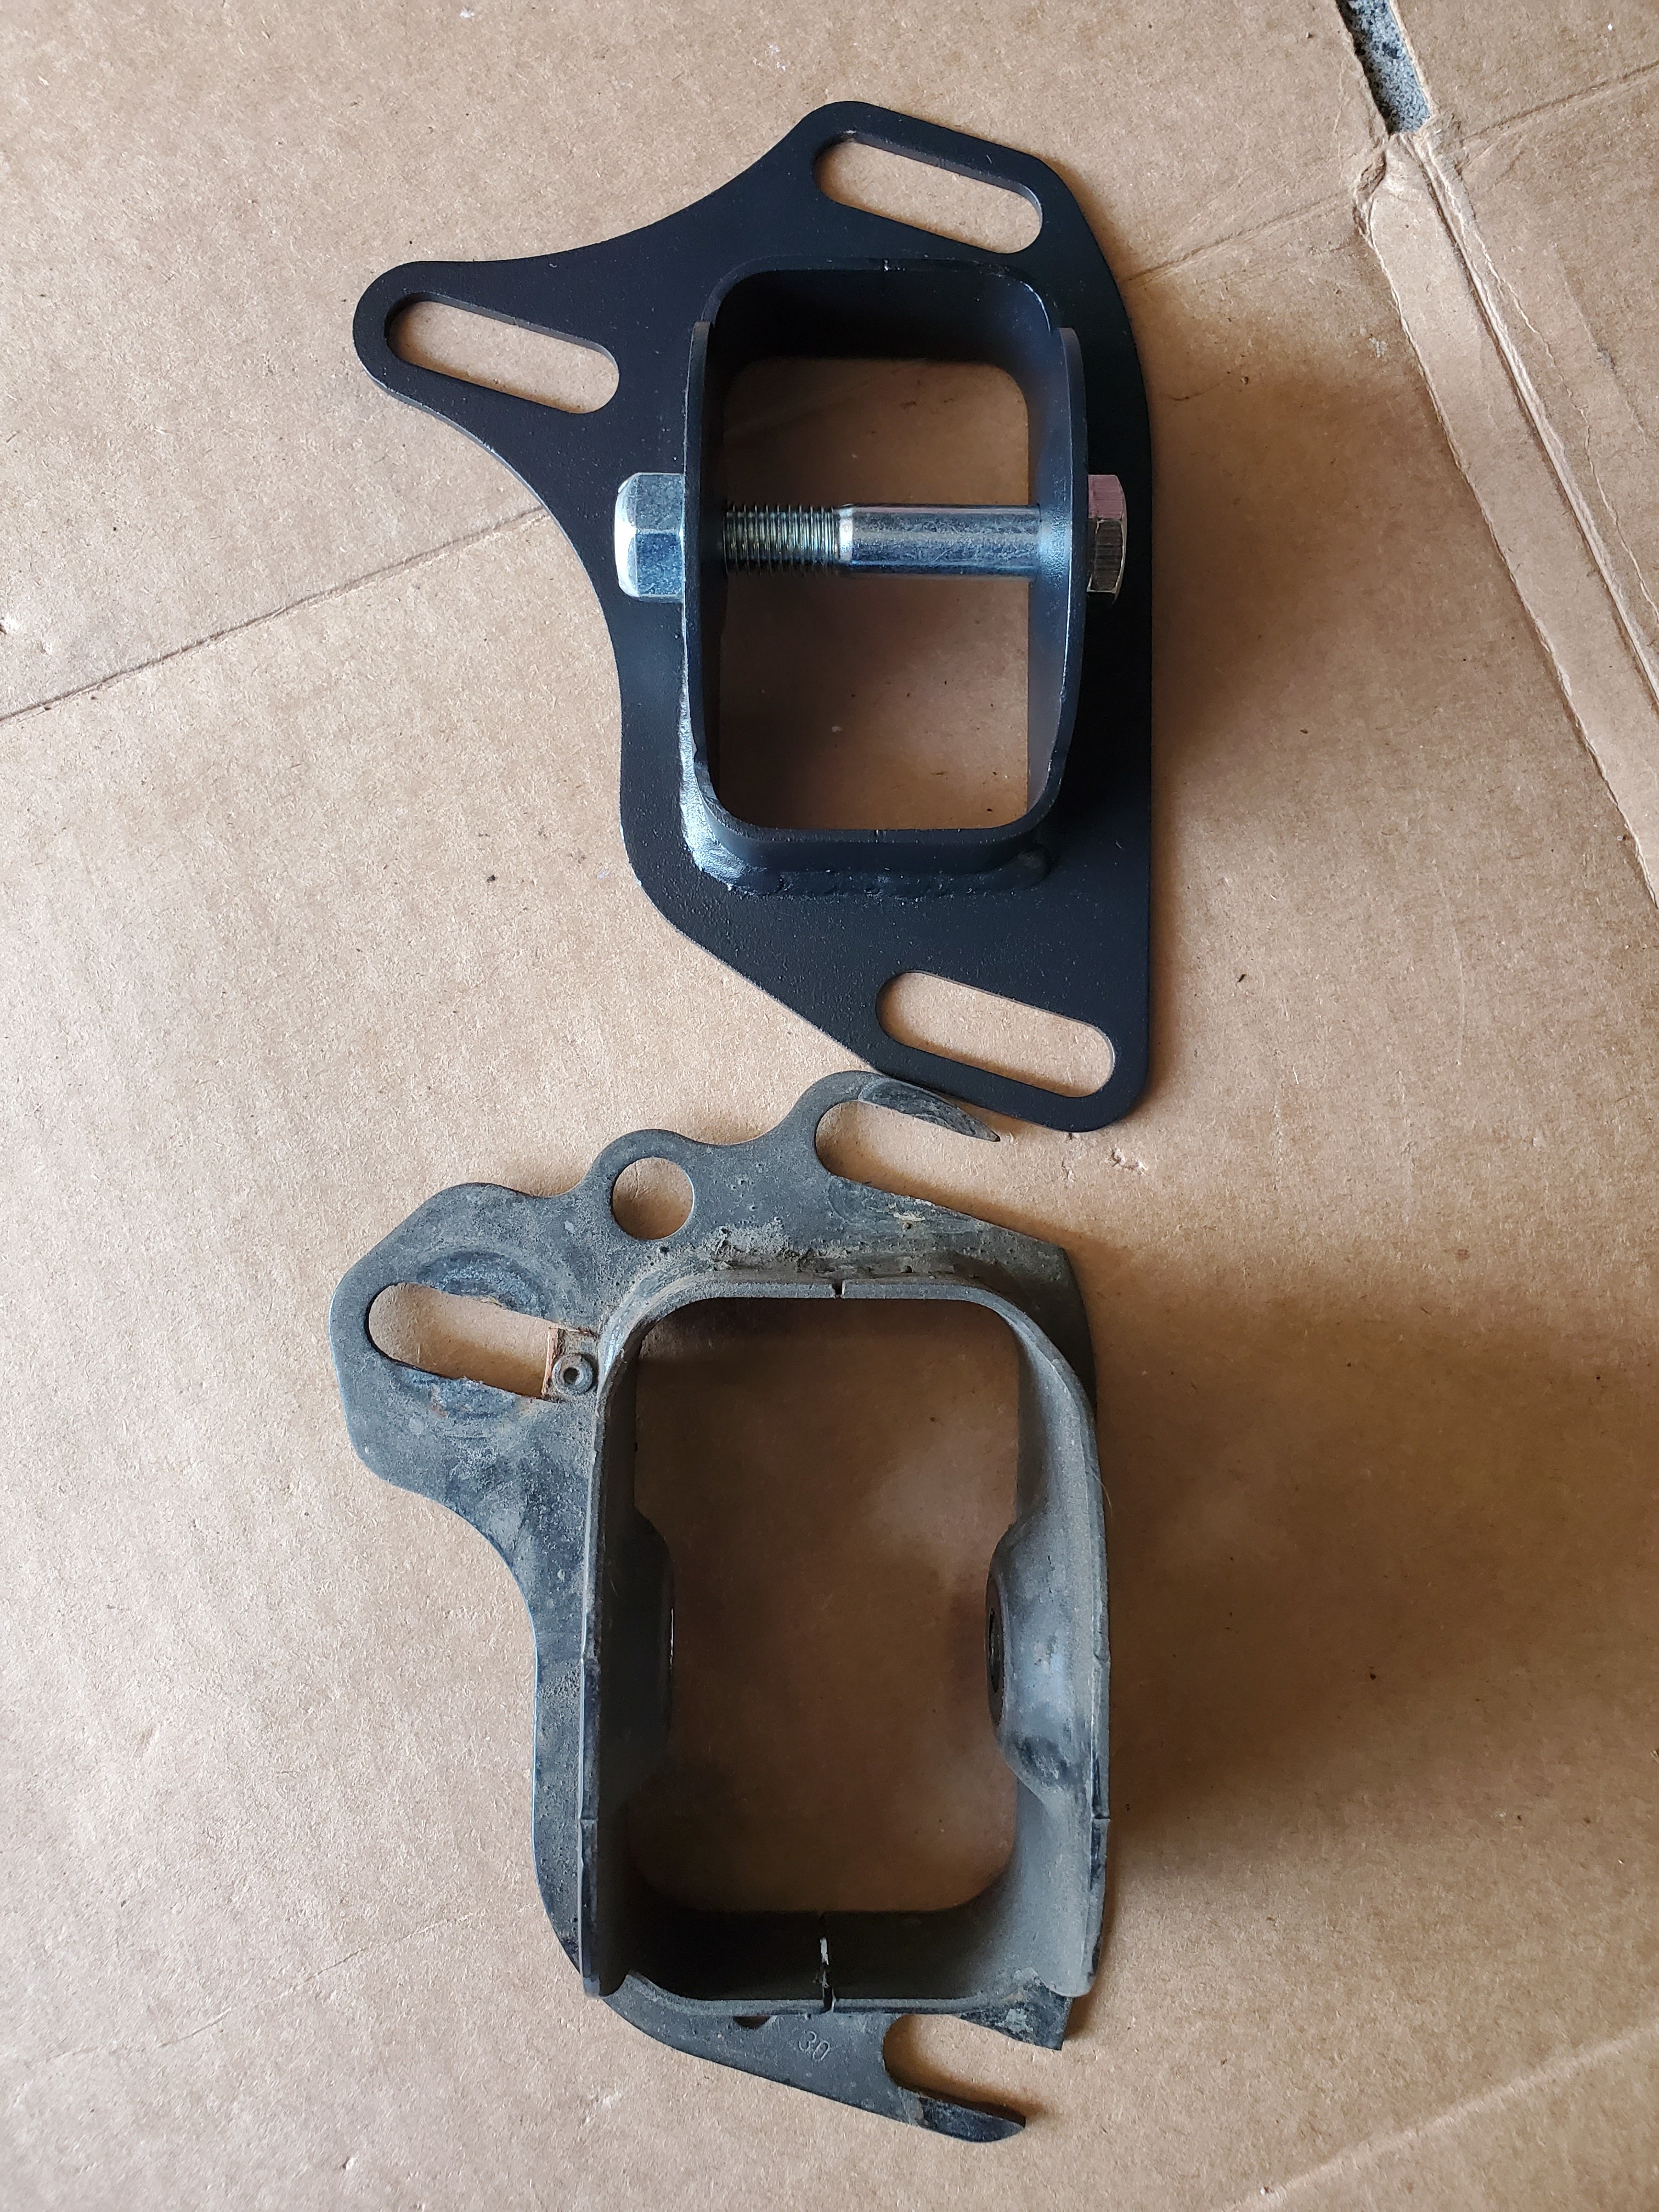
            These braclets are really well made as i was kind of skeptical originally.

            Here is a side by side with the original one I had in the car, sketchy slotting and all lol.
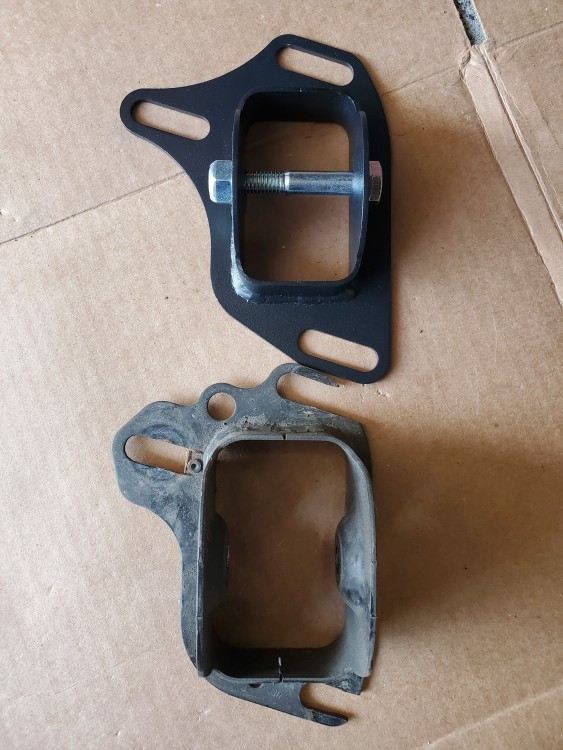
            20200812170340.jpg

            Got these installed and the car aligned in just over an hour which was great. 

            Now the rear is sitting at 3/16" toed in. Which for now will be worth trying and aging with some settings to see how it will affect grip.

            1 Reply Last reply
            1
            • TkuhnT
              TkuhnT
              Tkuhn
              wrote on last edited by
              #365

              UPDATE

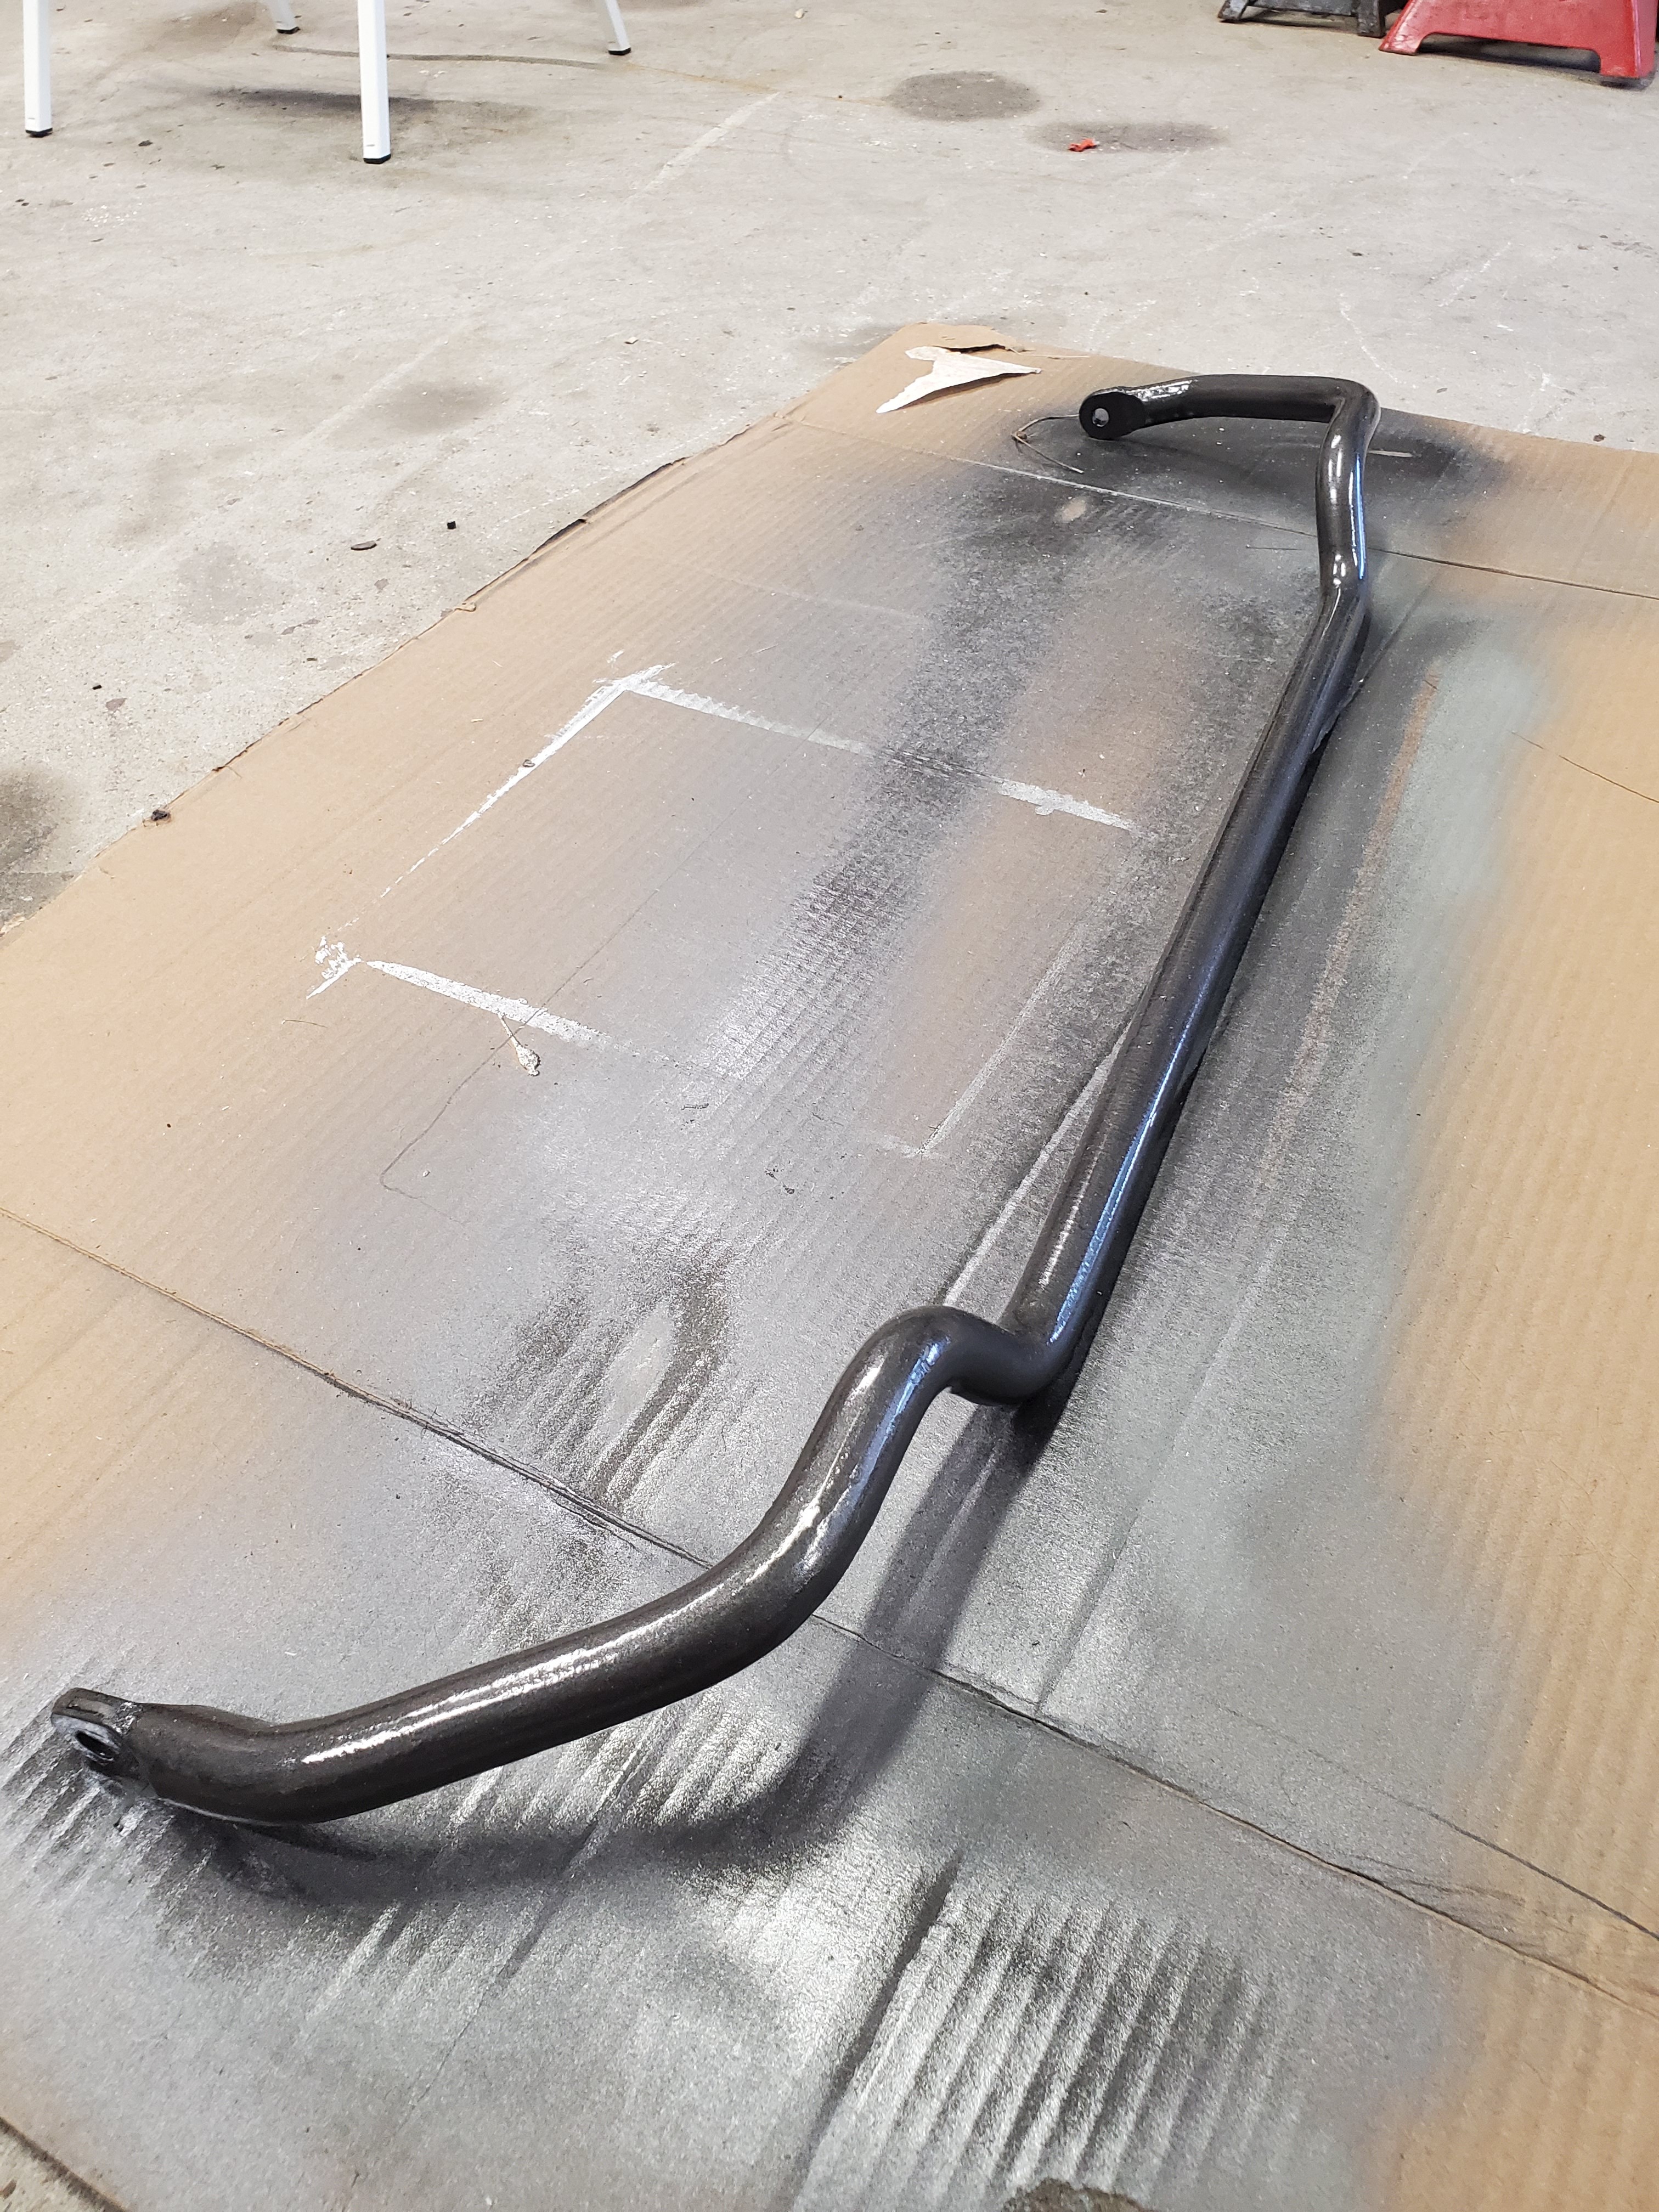
              With the new SLR ultra angle kit the general consensus seemed to be to run a non-m e36 sway bar in the front.

              So I picked this one up from Earl. Also happy to know that this one is from a Ti and is slightly larger than the other non-m e36 ones.

              I cleaned it up and painted it while I was waiting for the new endlinks to arrive.
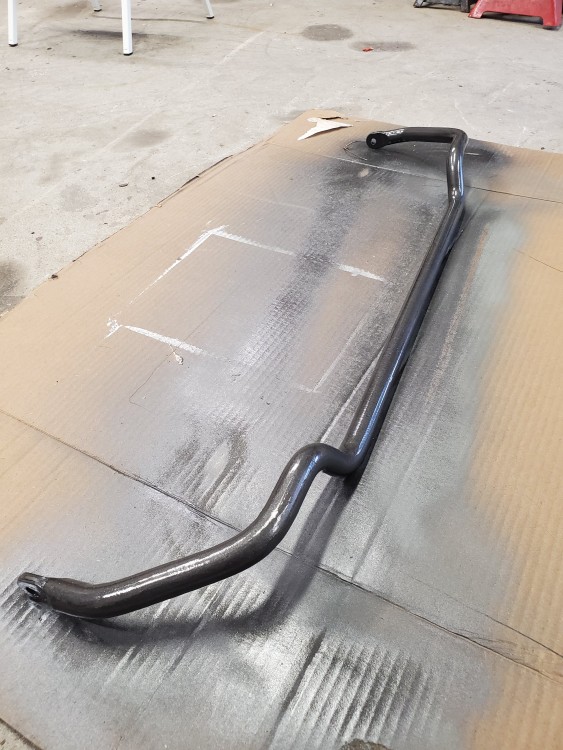
              20200816174733.jpg

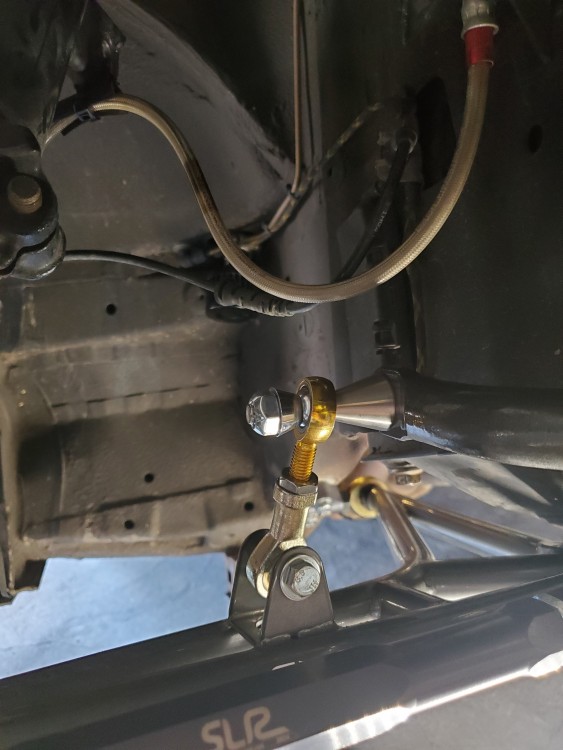
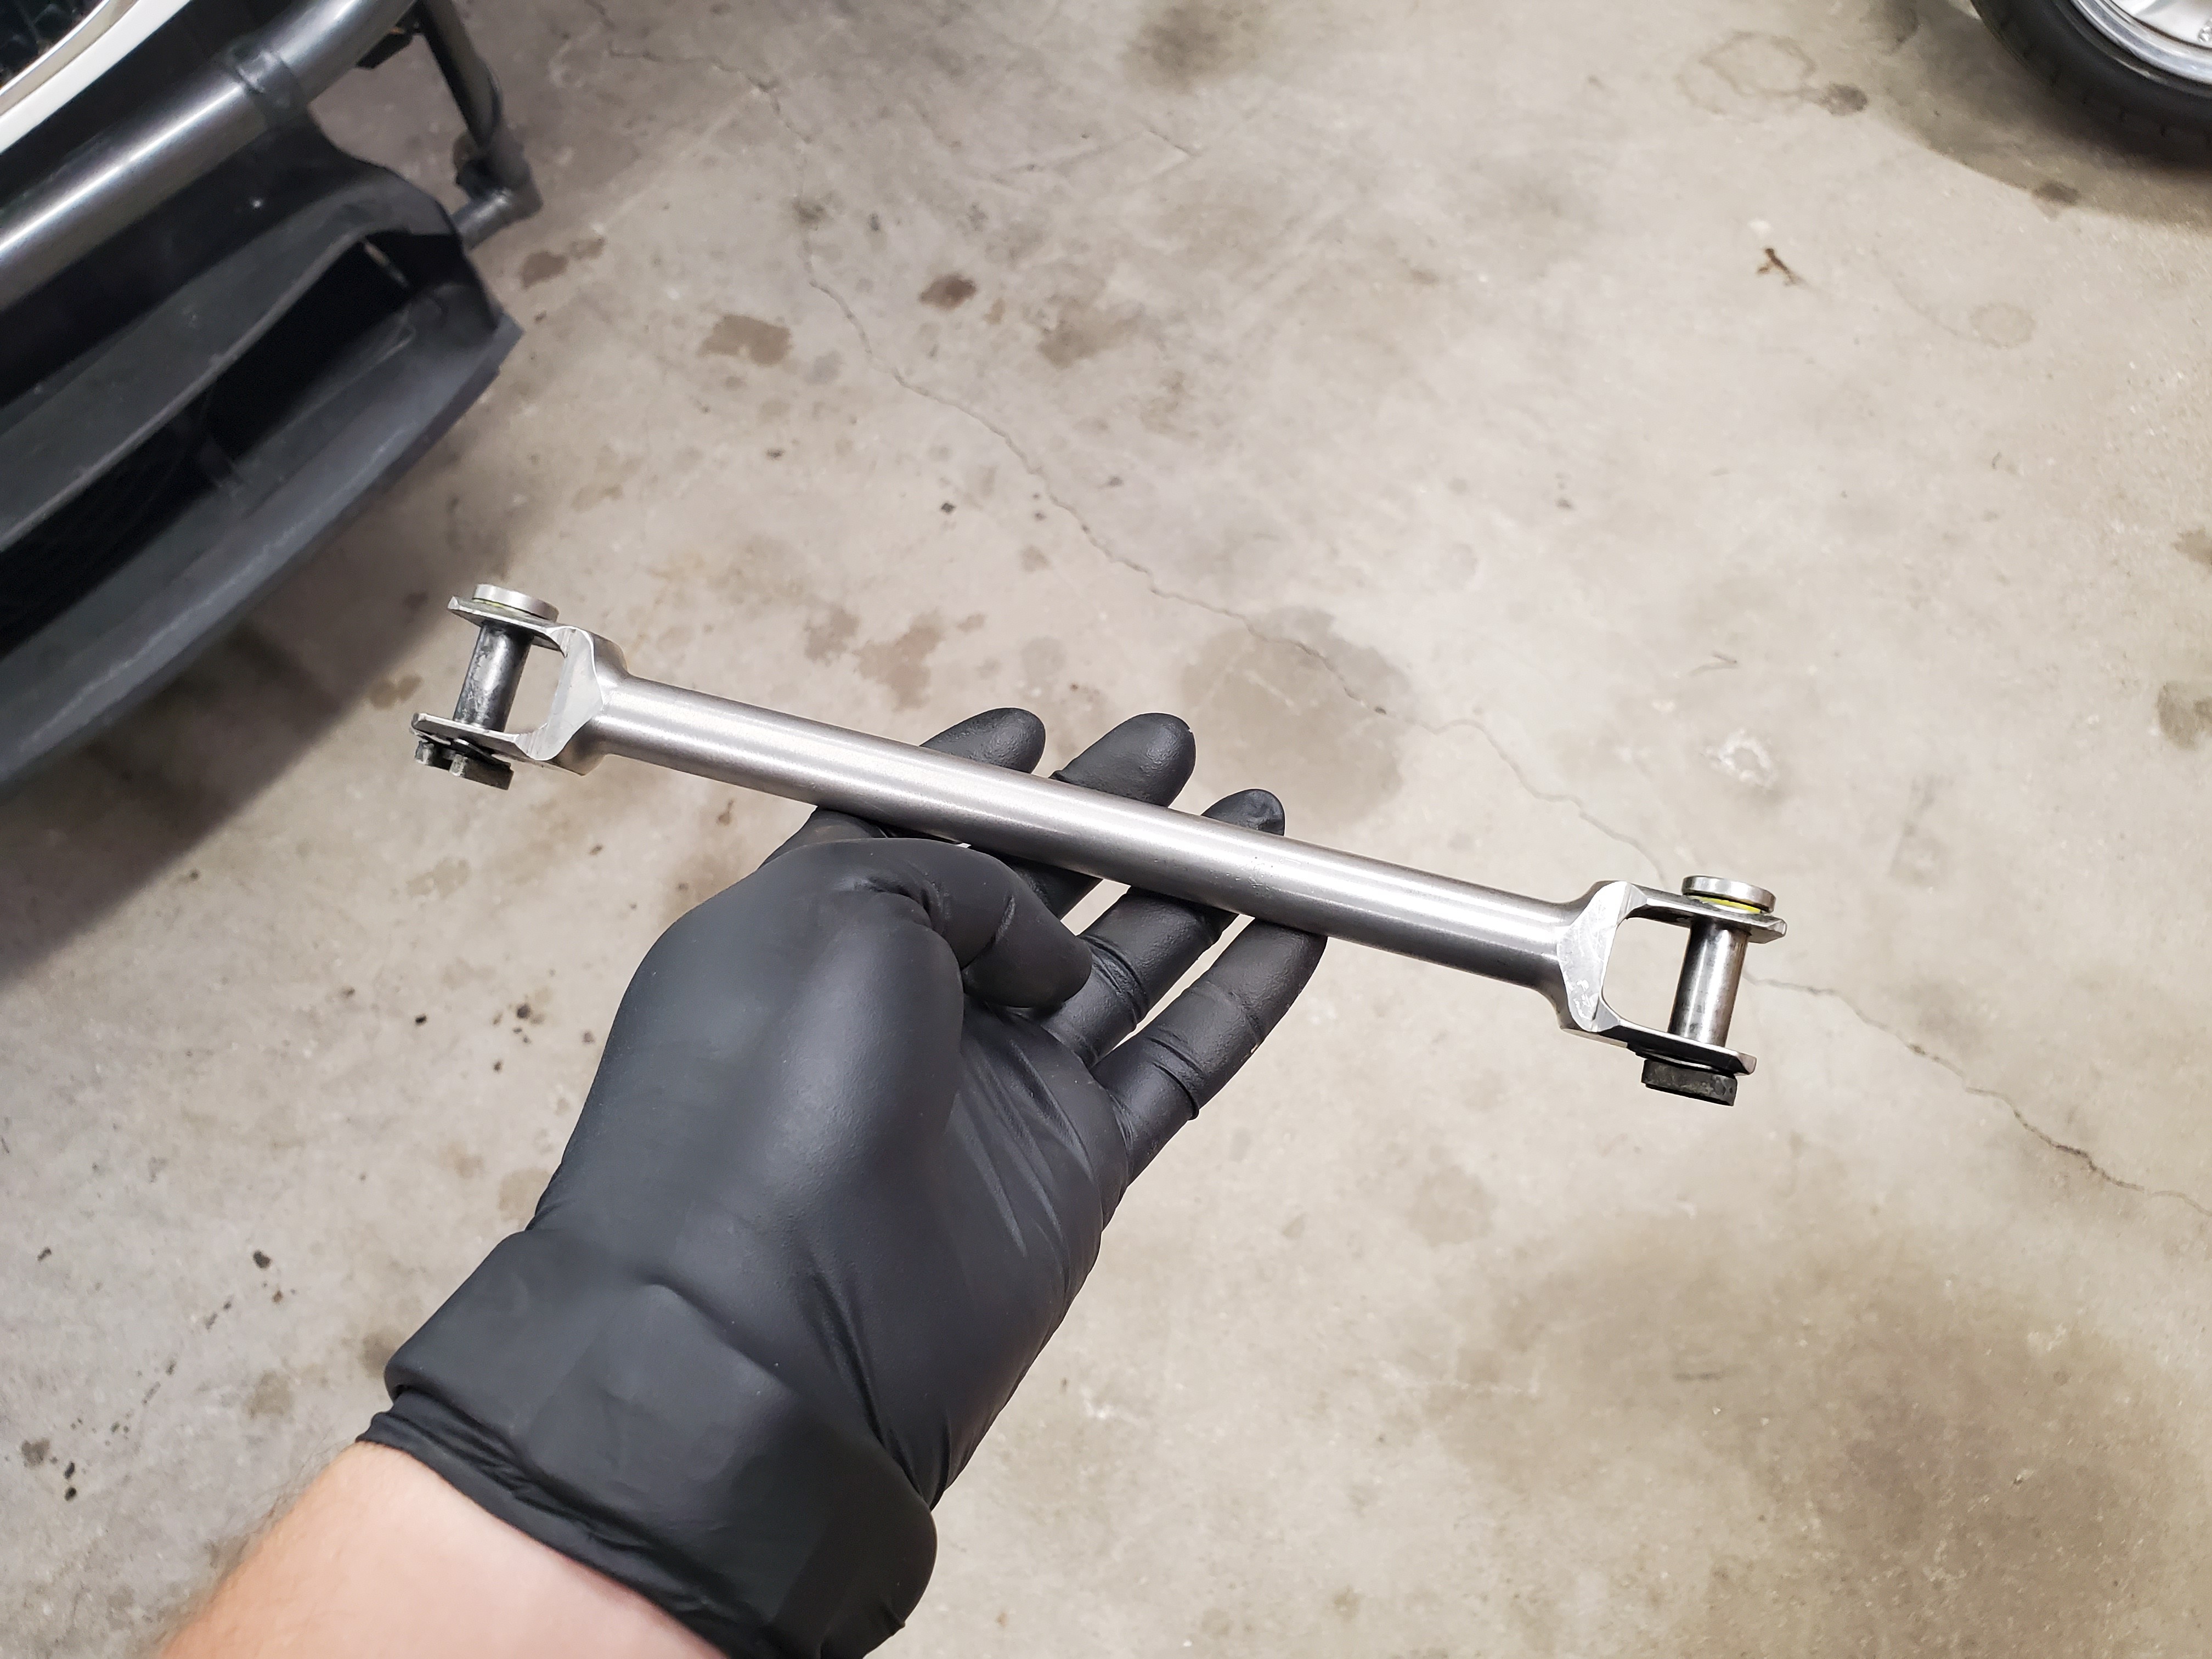
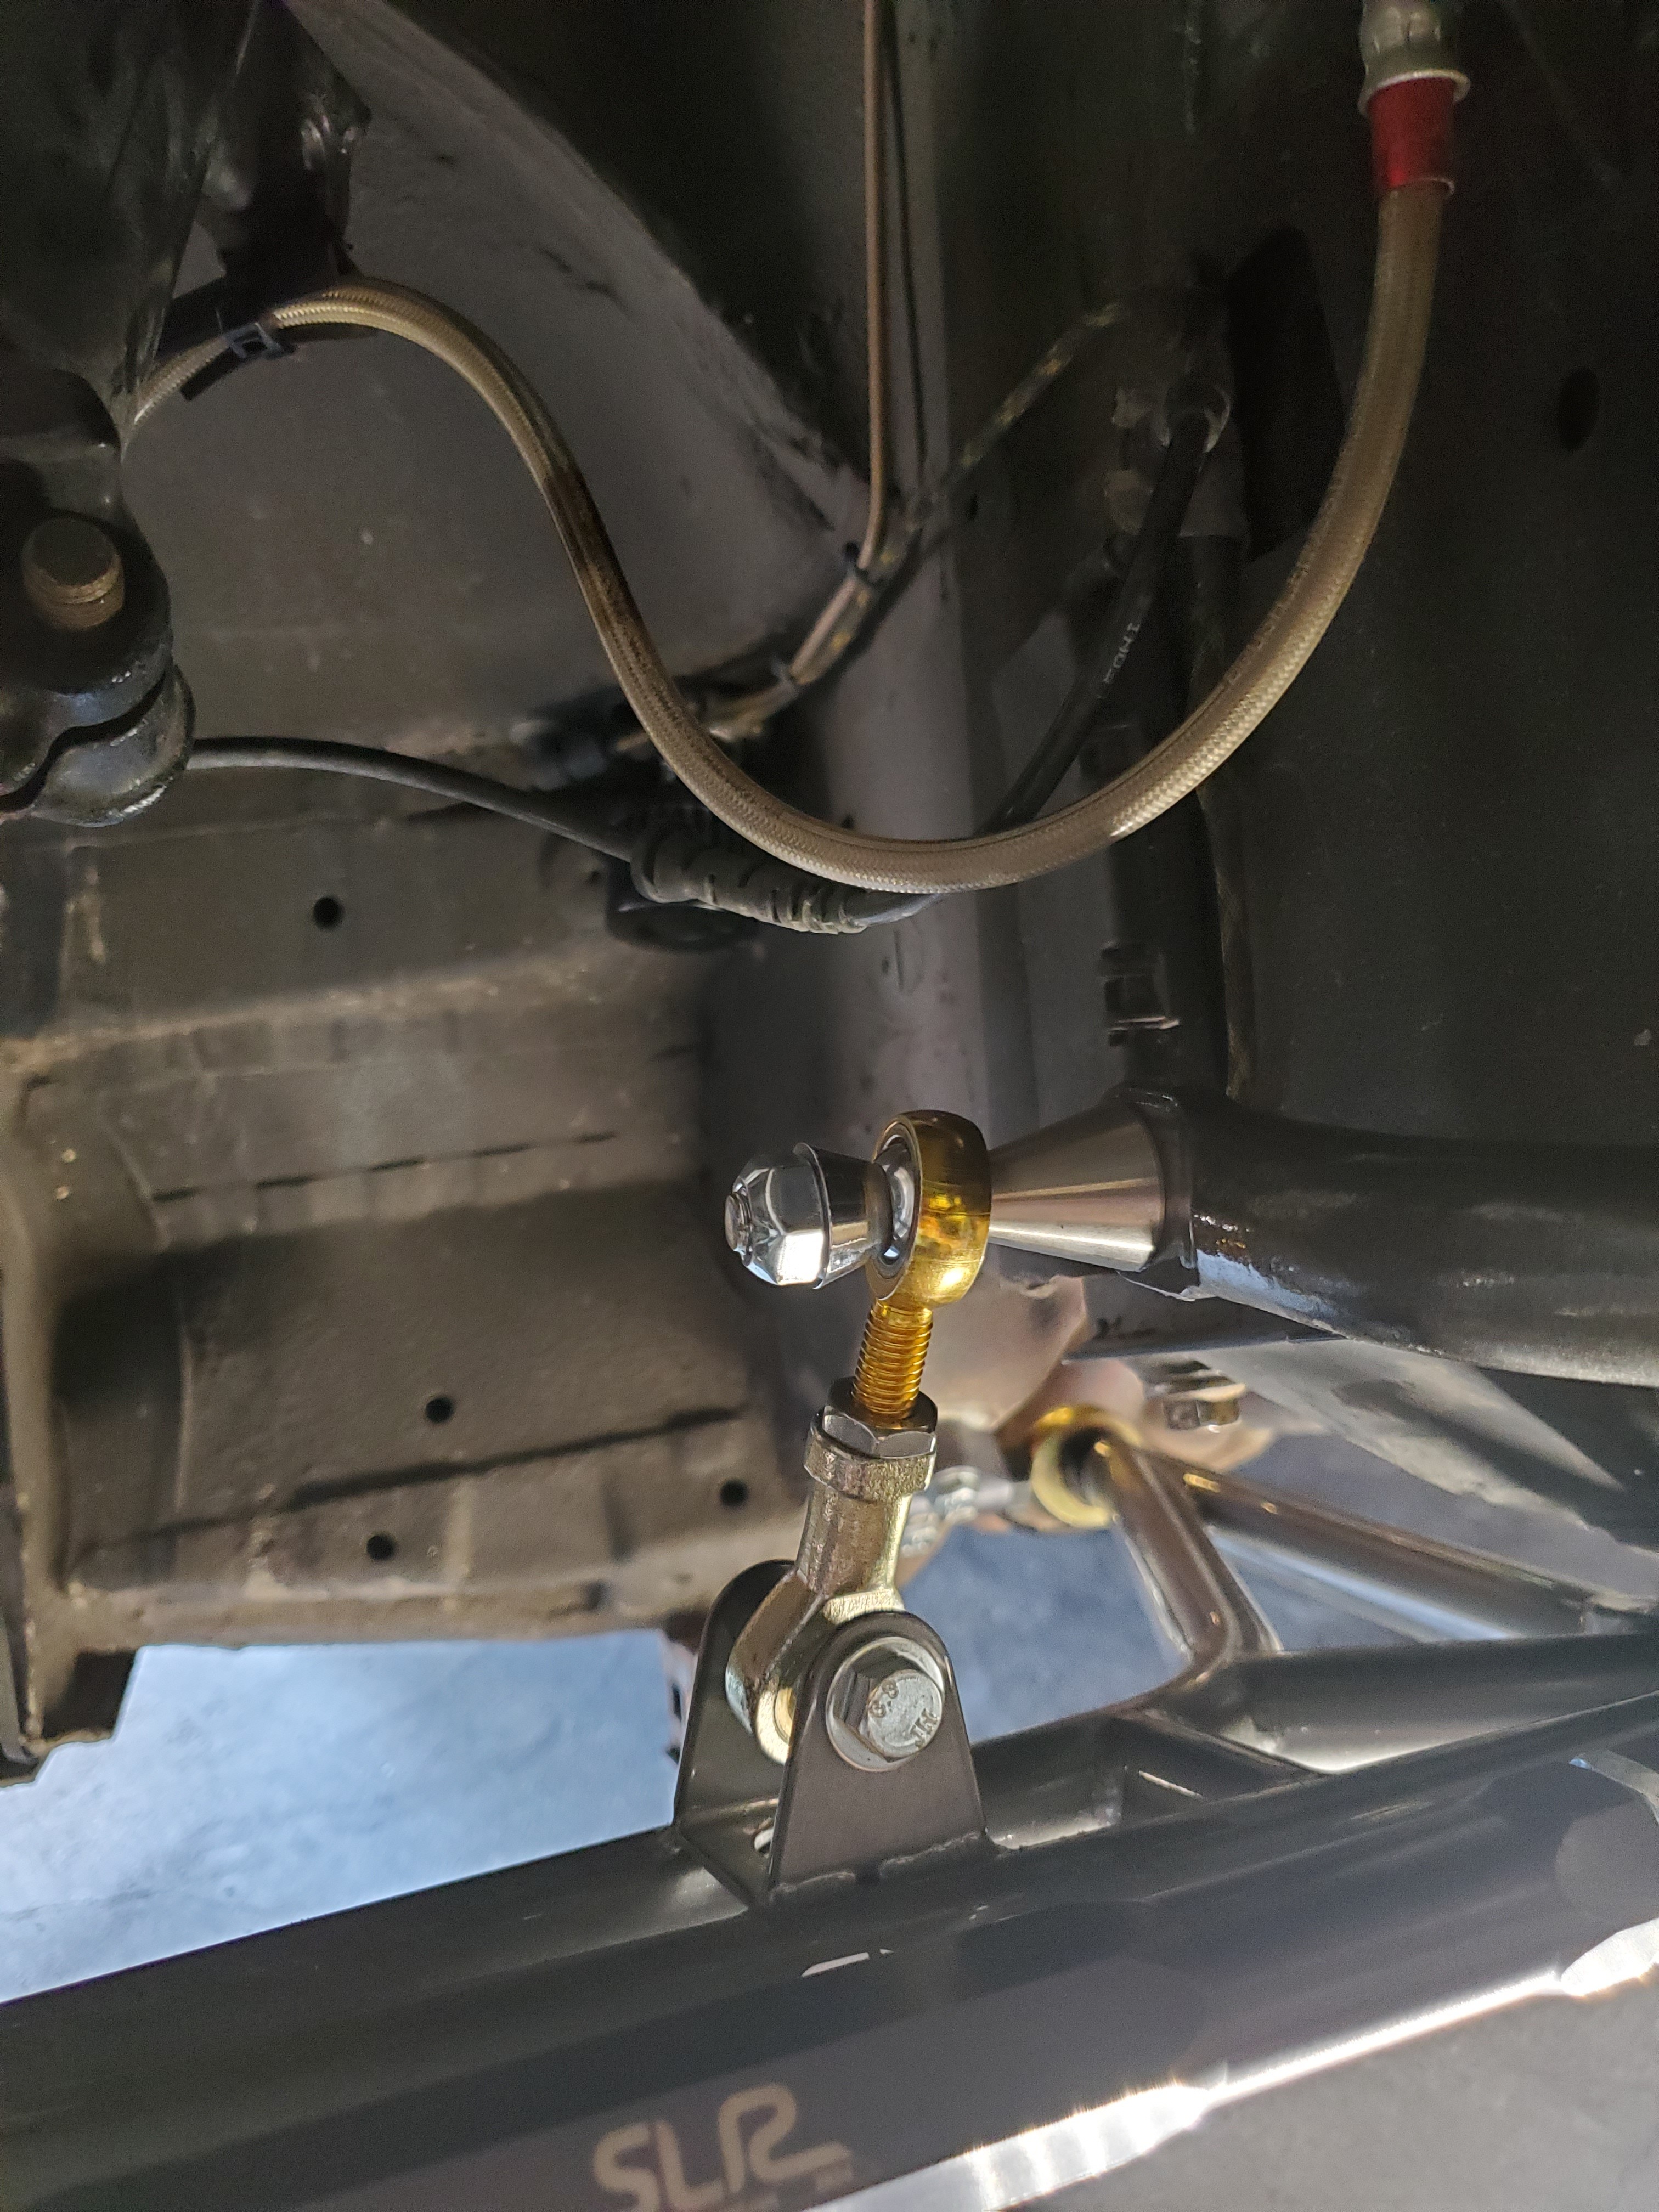
              And here are the SLR end links. They attach the same way as non-m e36 ones do as the SLR  arms have mounting provisions for them.
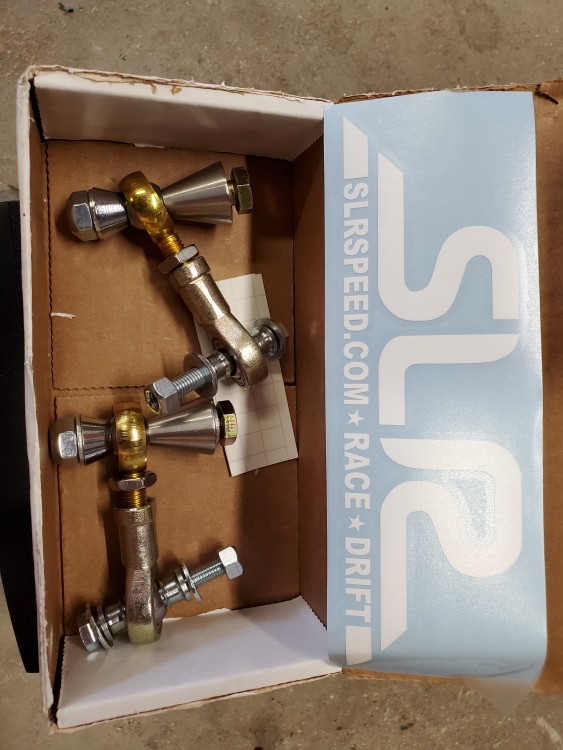
              20200818164606.jpg

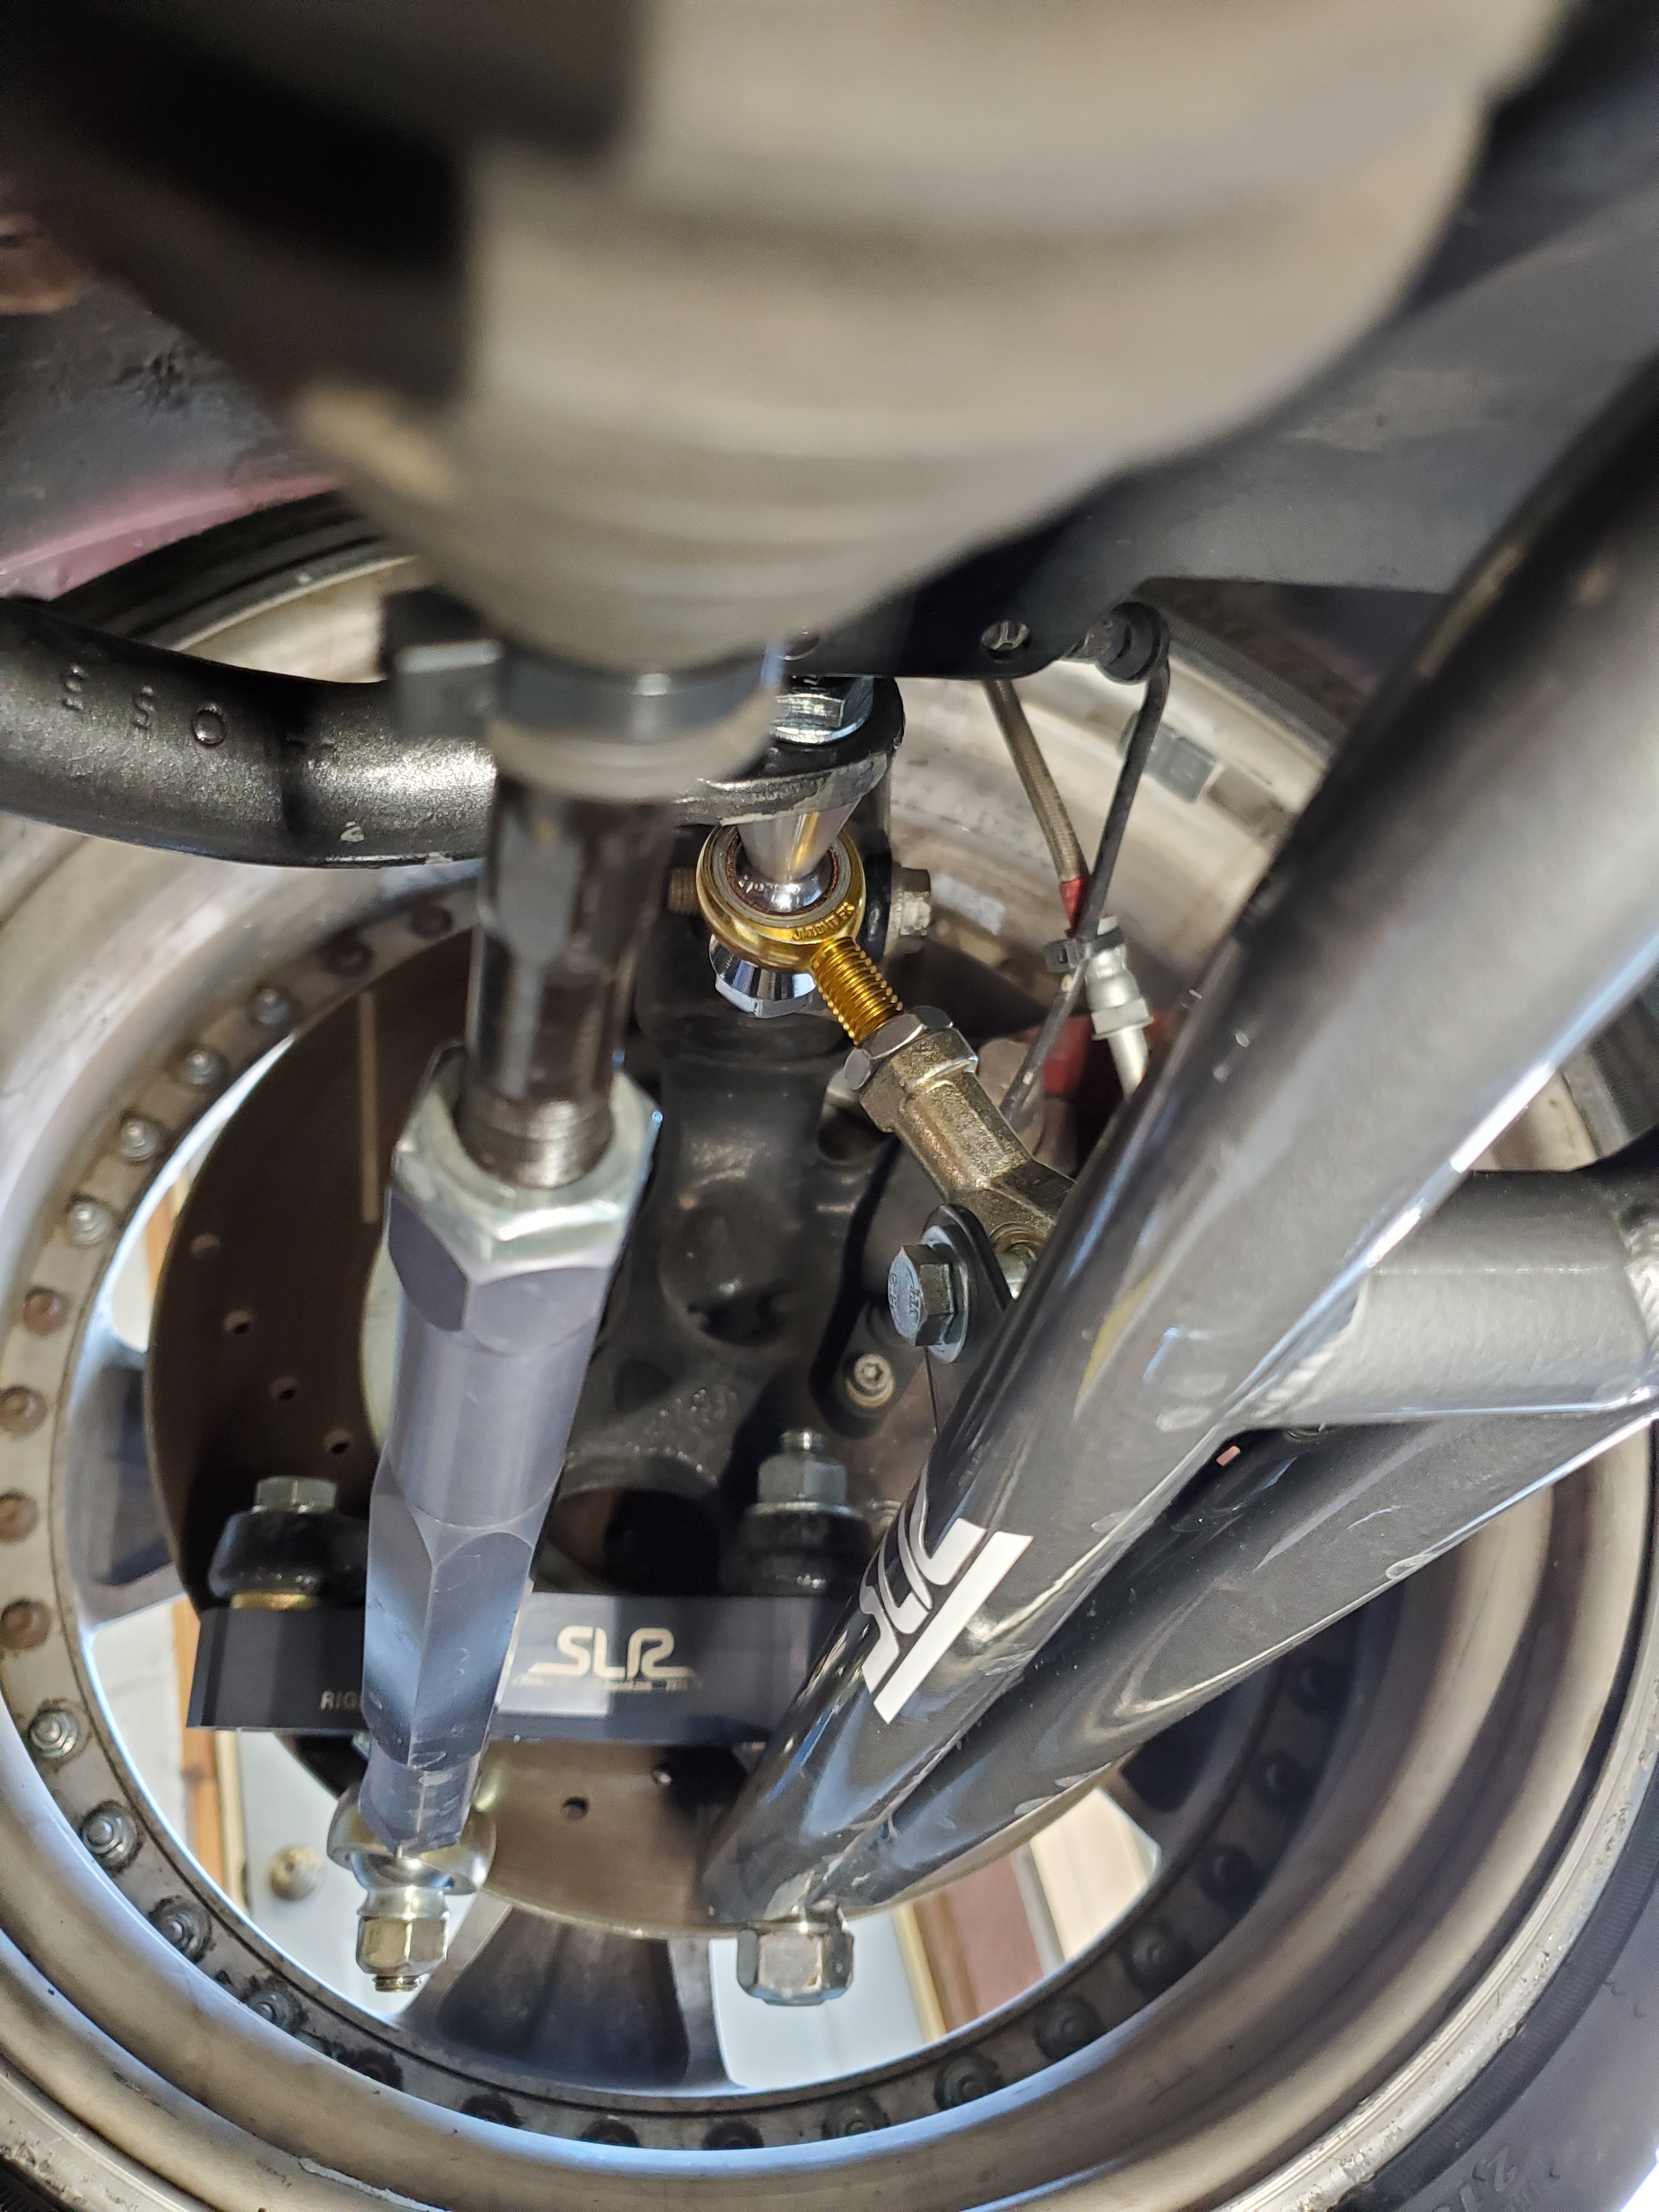
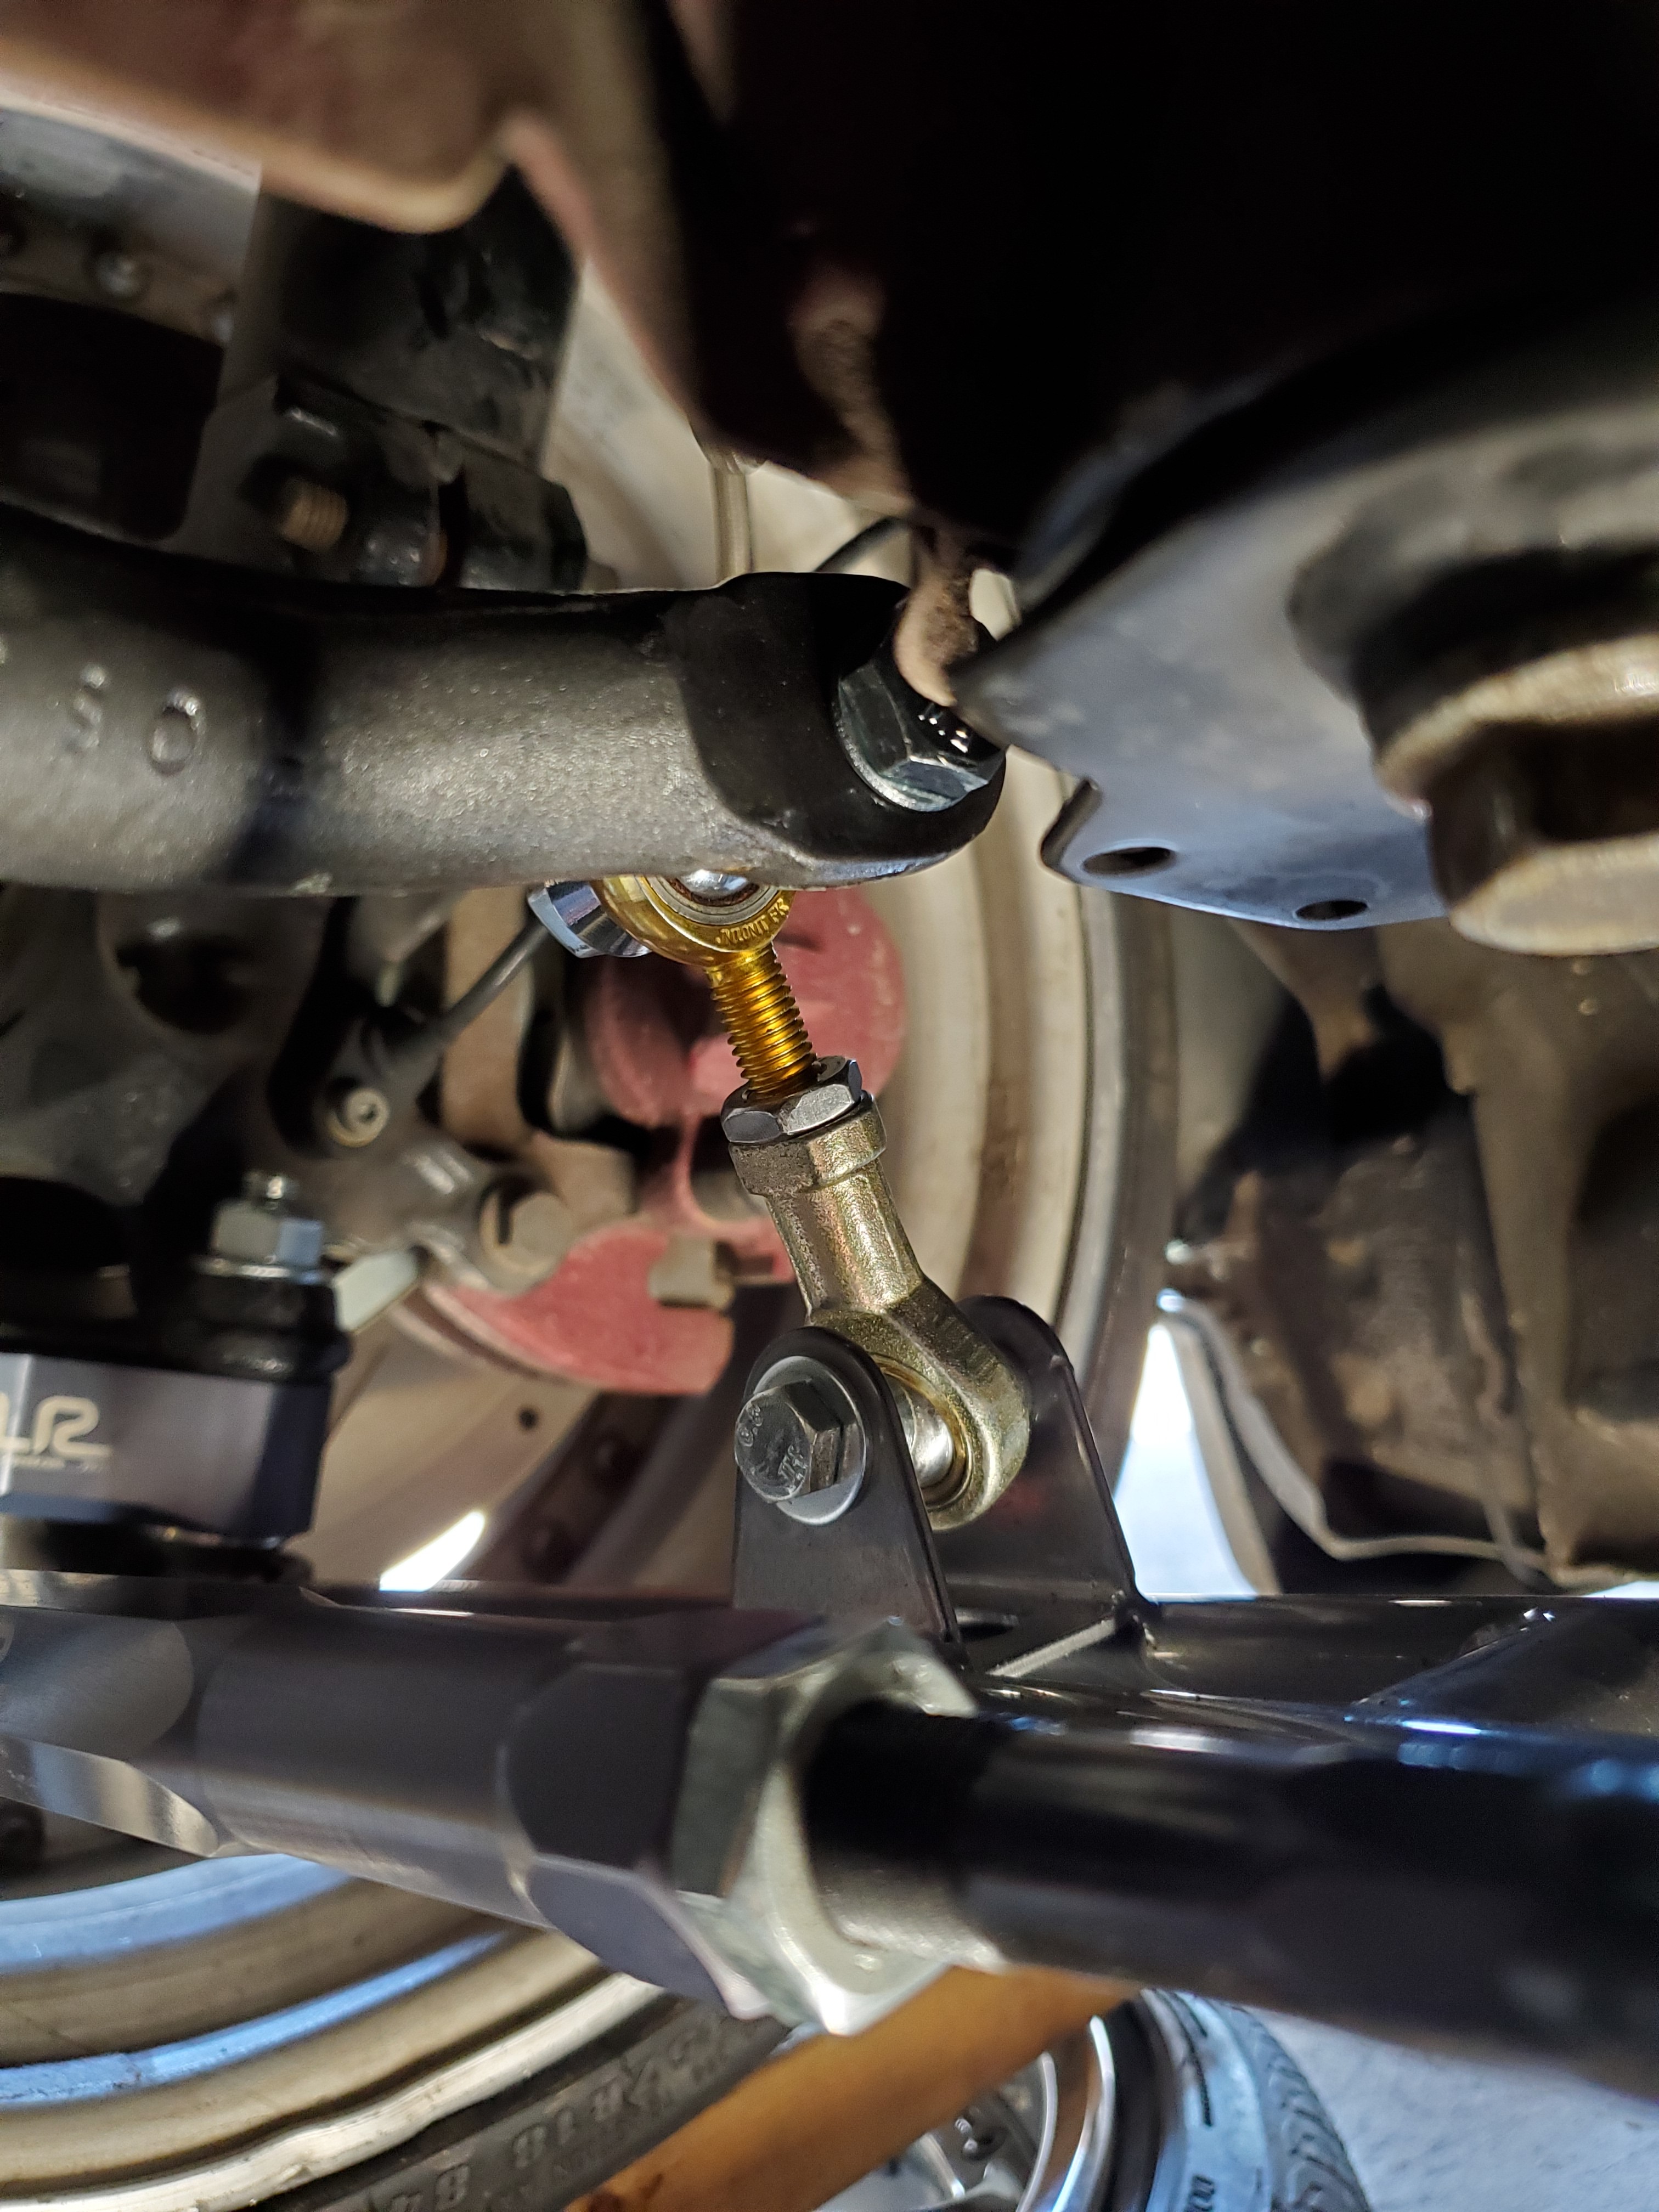
              Now I got the bar installed along with the links. I was not super impressed with the angle of the links. After talking to Sean at SLR it seems that they (now) recommend cutting the stock e46 sway bar and reshaping the end then drilling a new hole. The e36 sway bar has seemed to work for many before though so I am leaving it in for now, there doesn't seem to be bind even with the angle on the links.
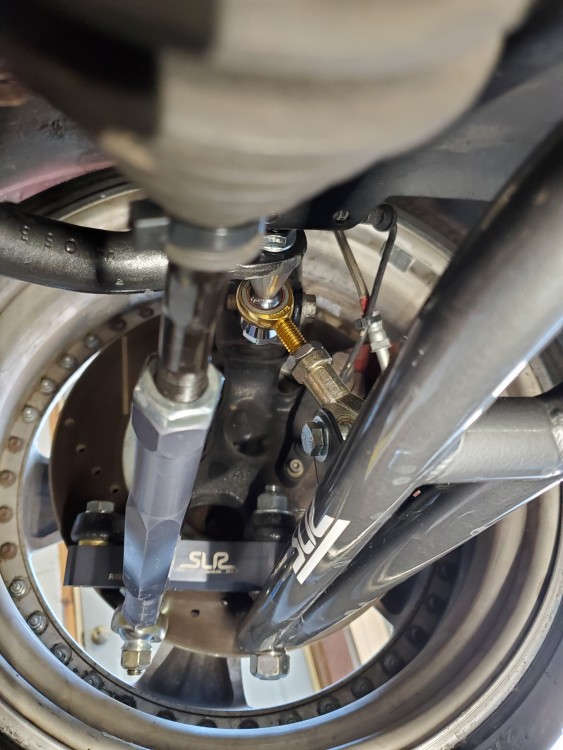
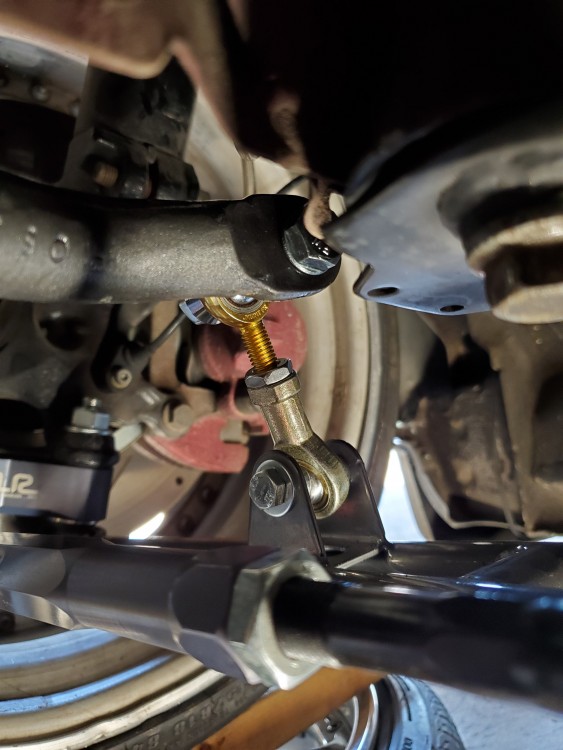
              20200818175433.jpg

              20200818175439.jpg

              20200818175444.jpg

              Once i am able to do some actual testing I will start to play with sway bars.

              Definitely nice having the sway bar mounted to the lower arm now though.
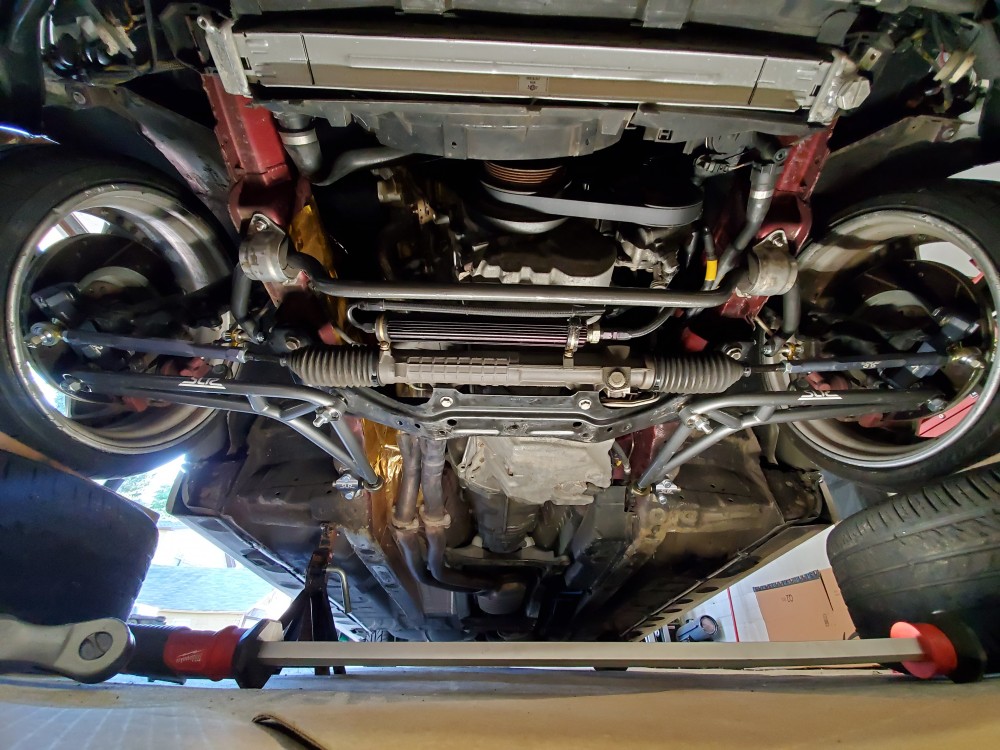
              20200818175642.jpg

              20200818175707.jpg

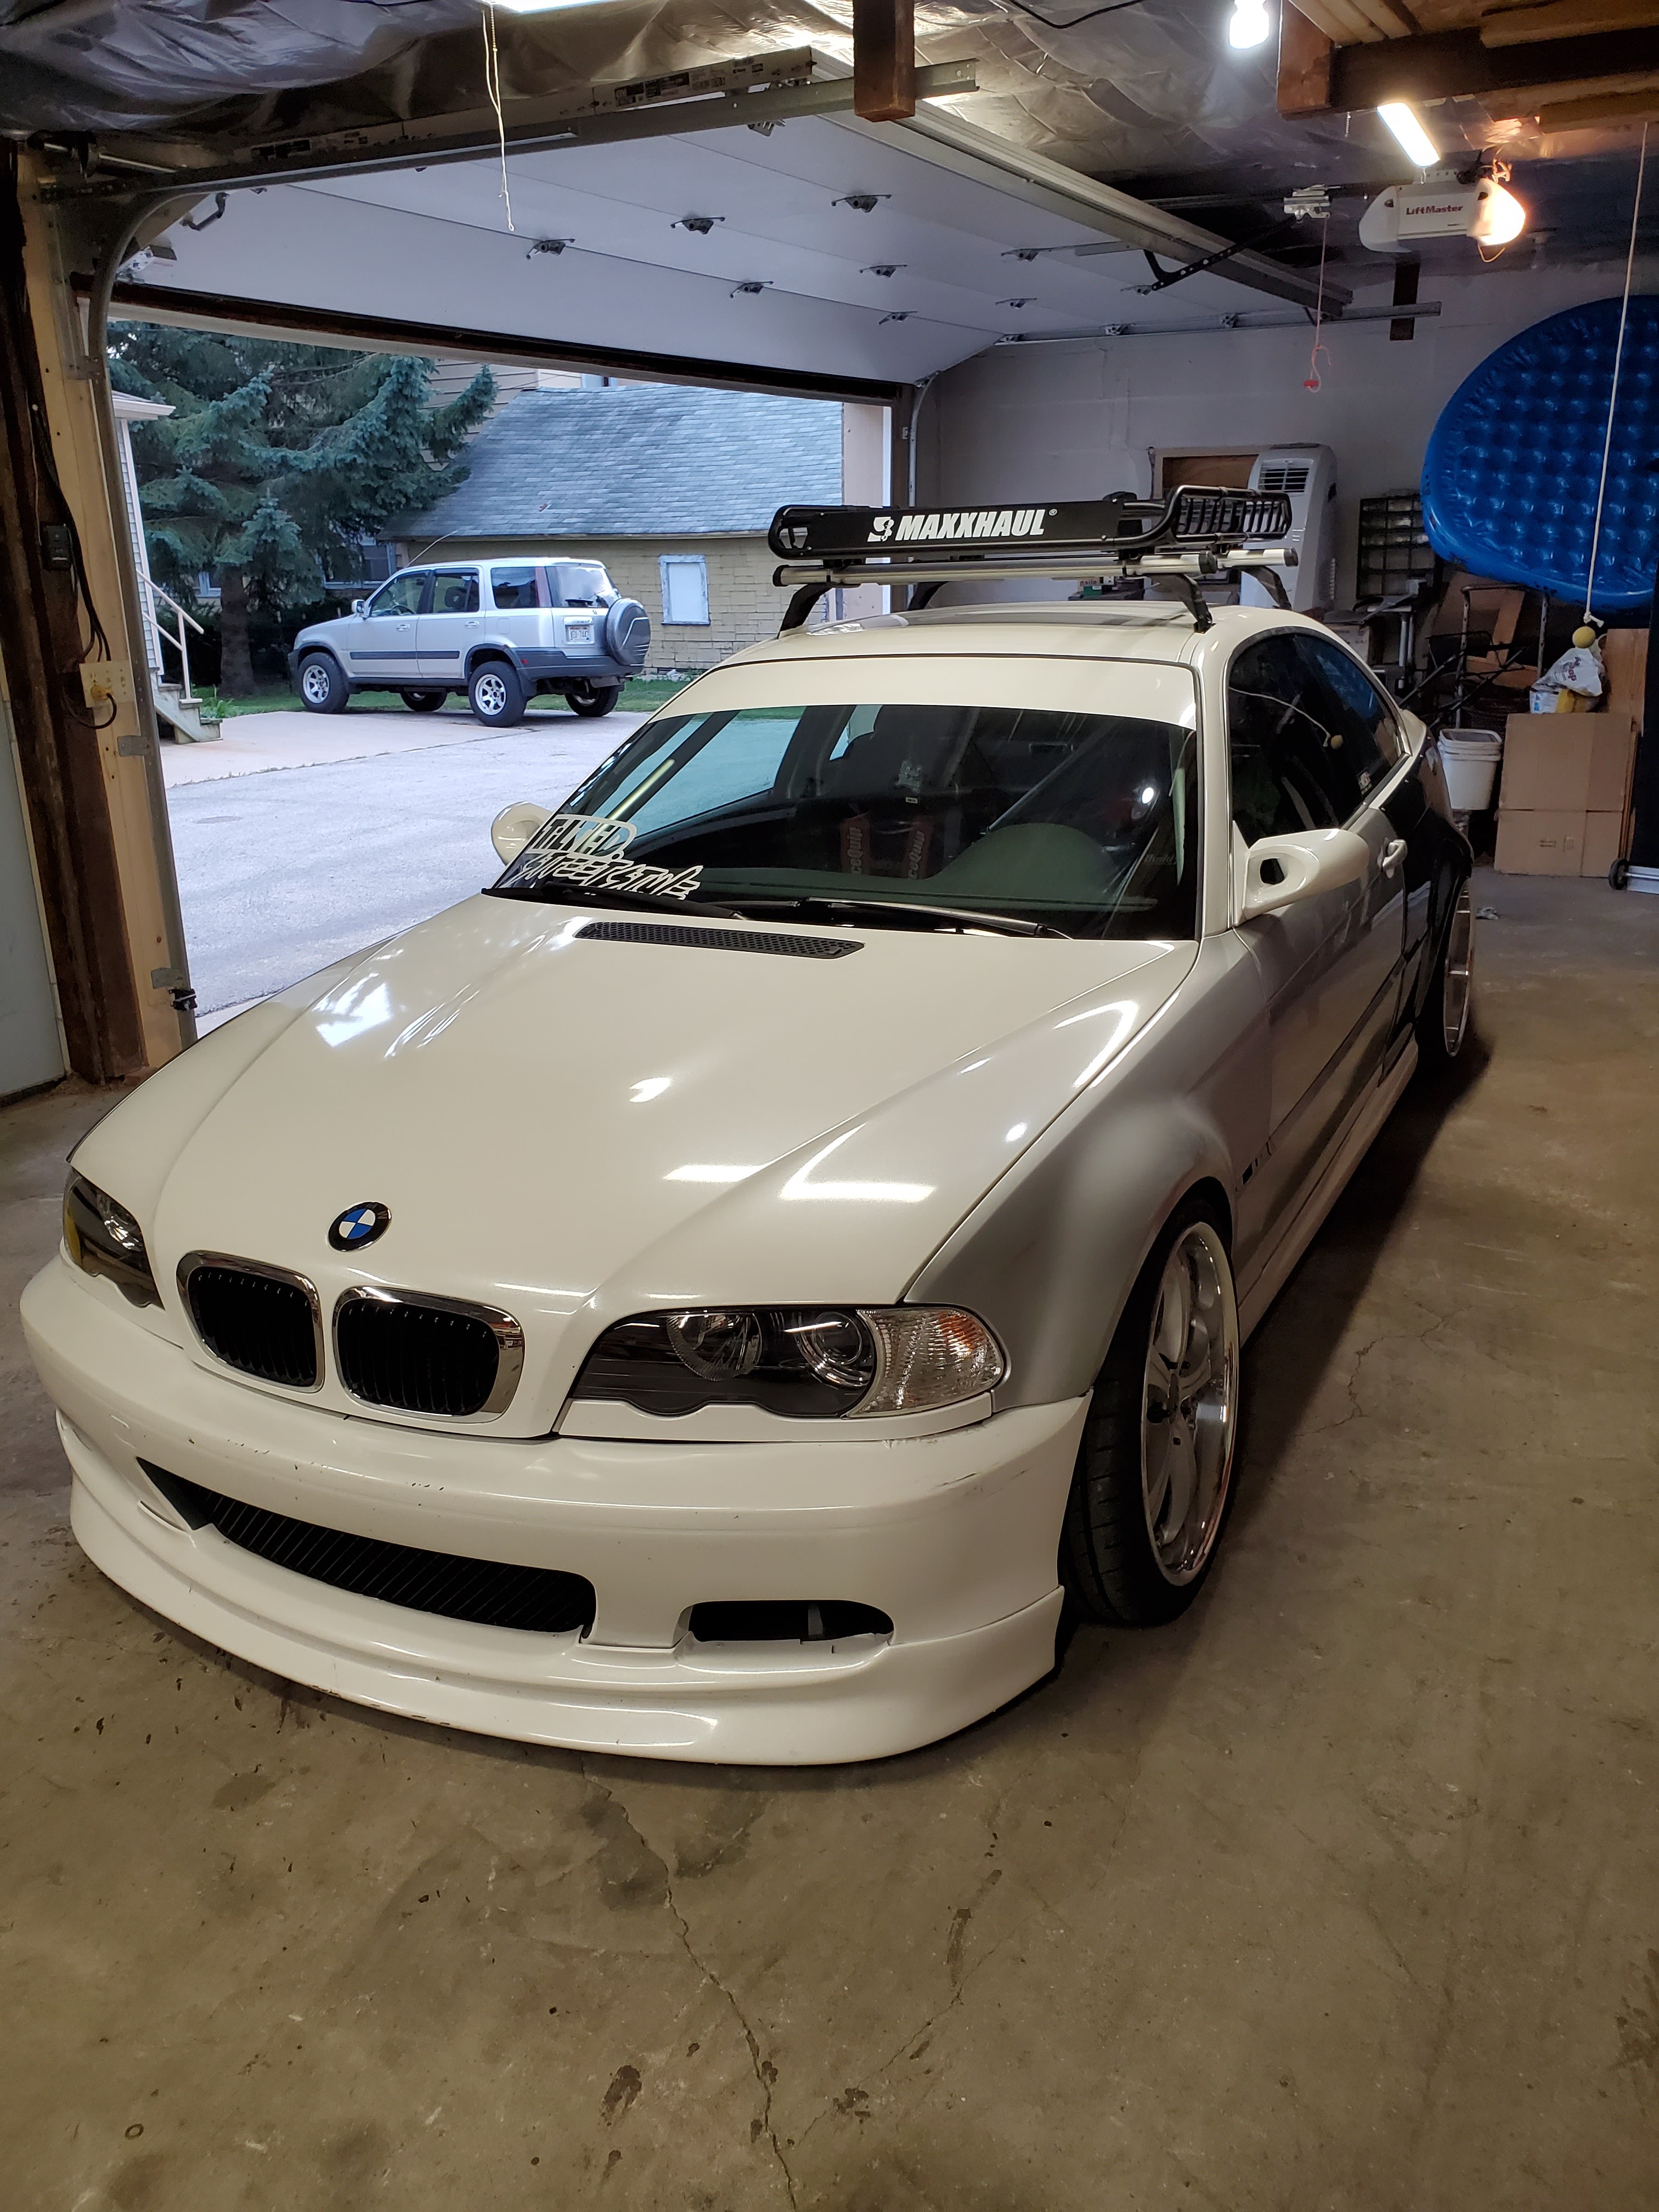
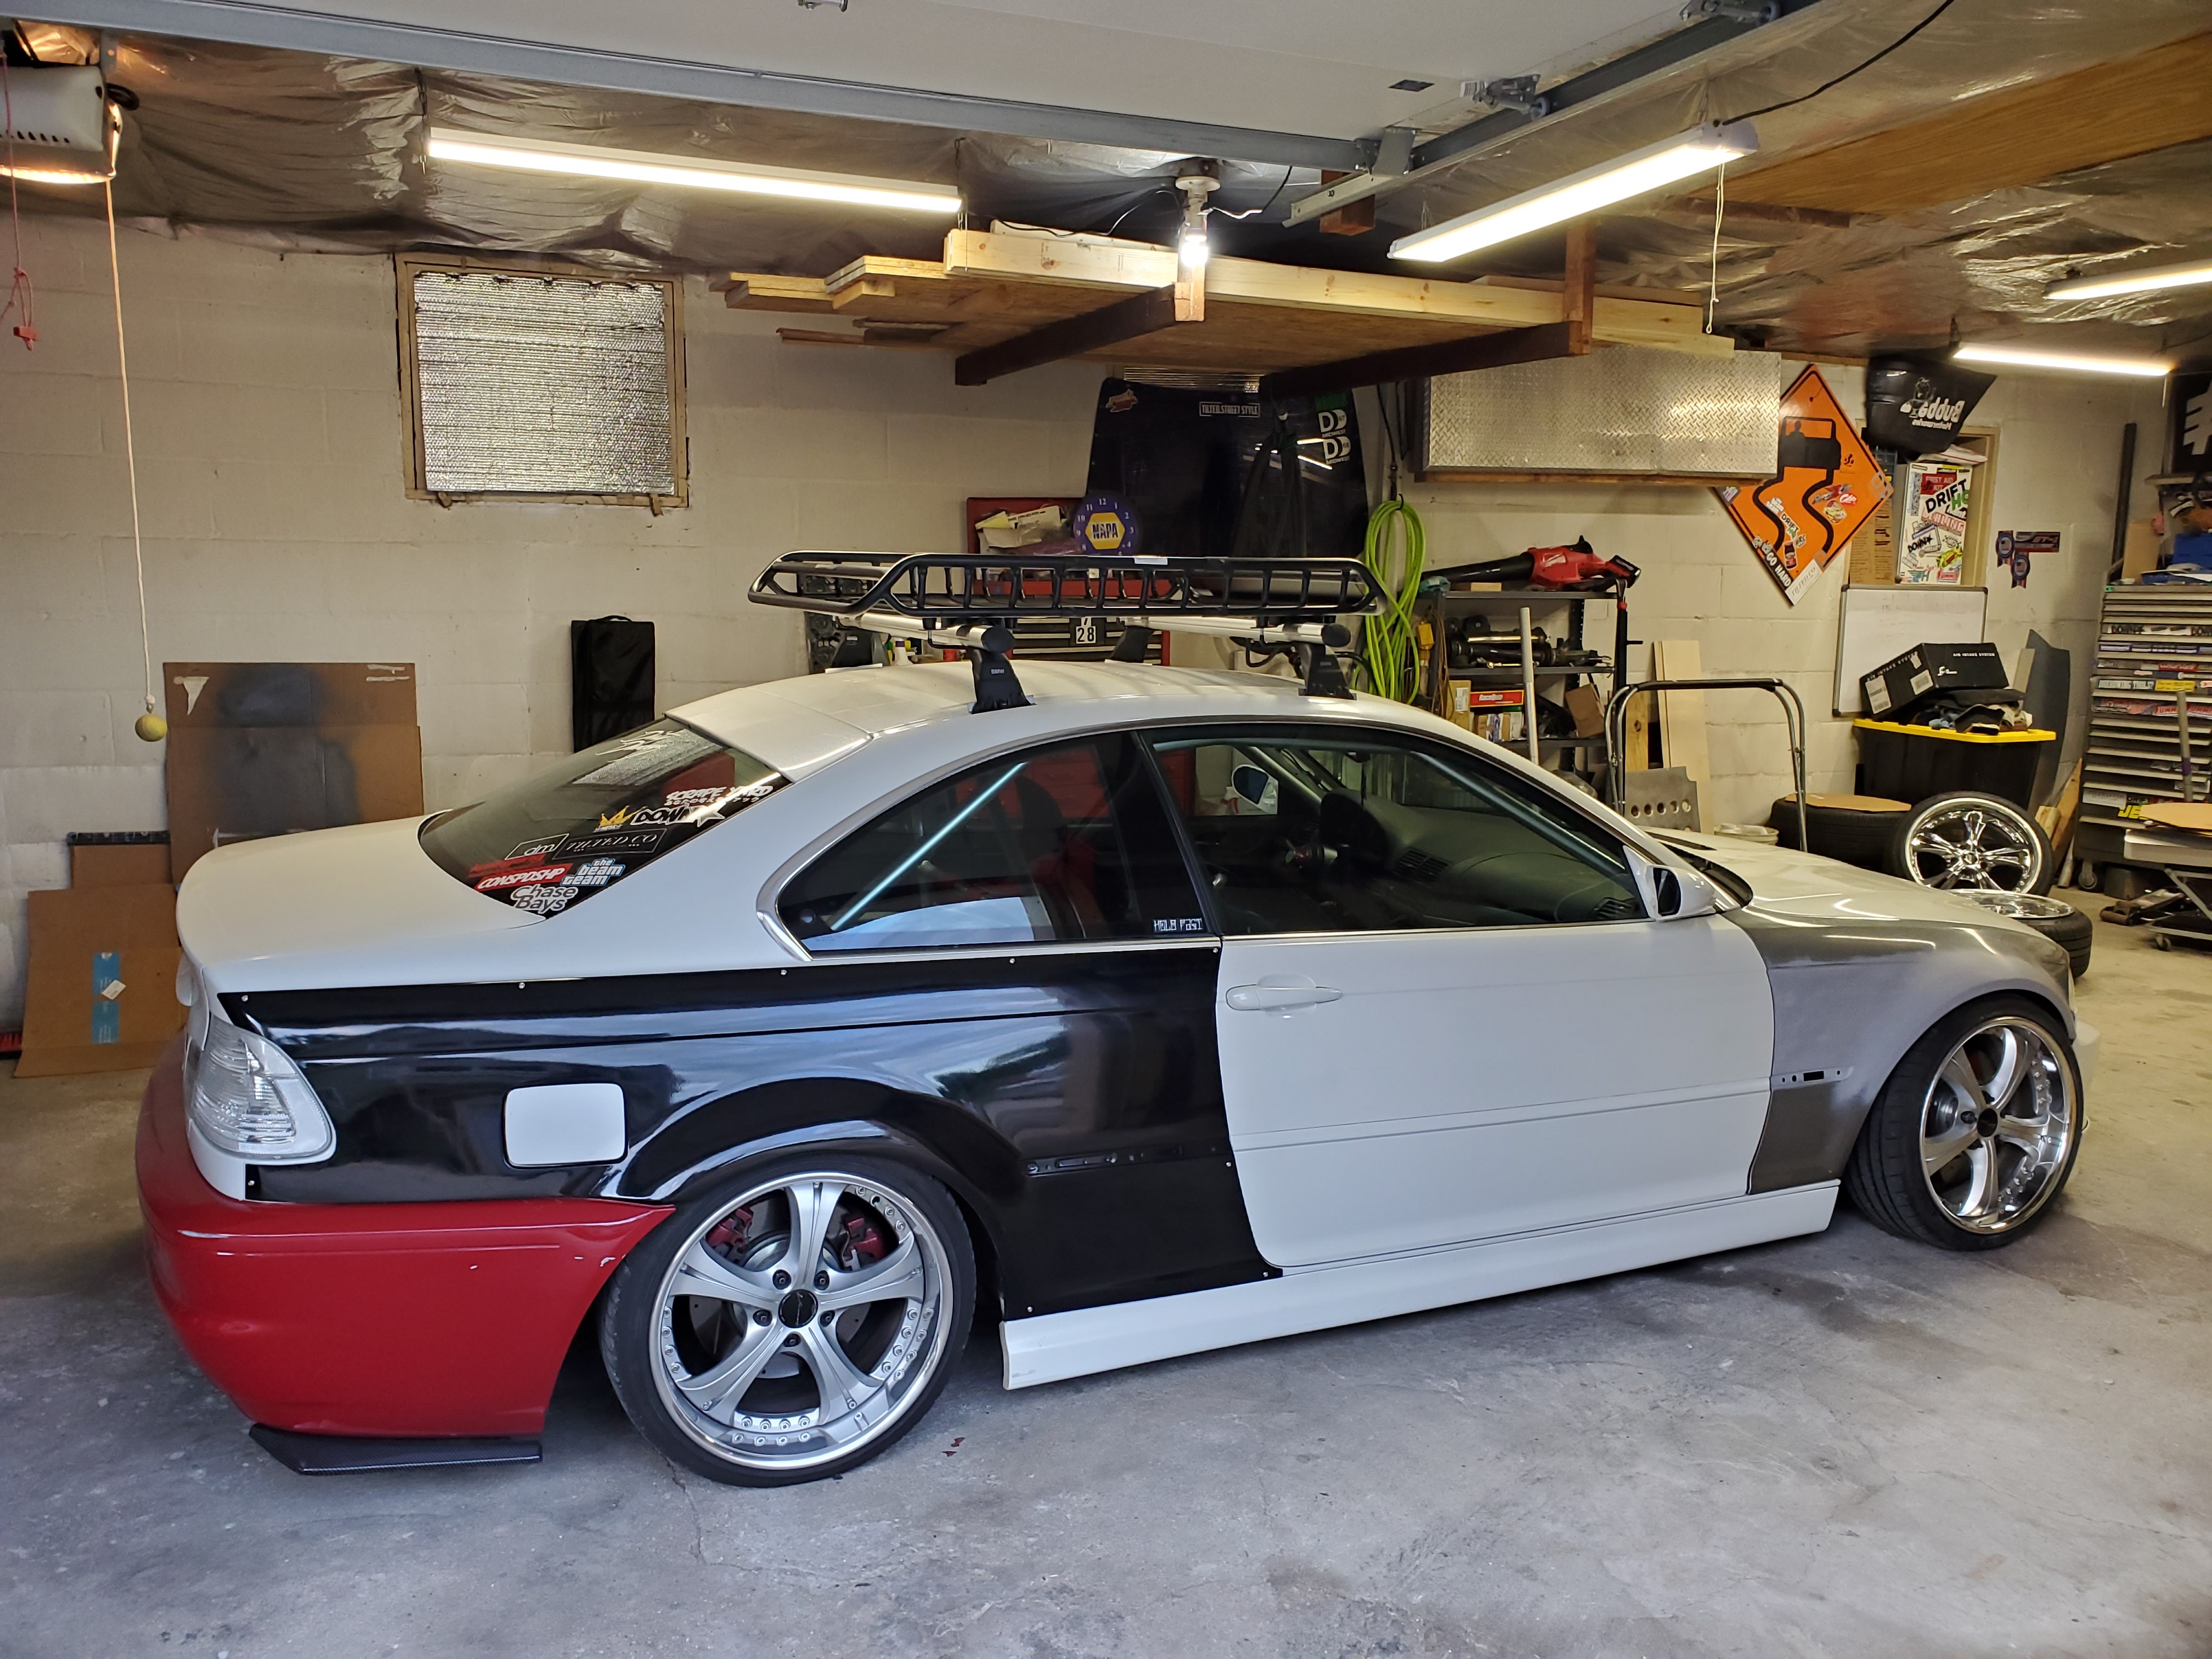
              Now for something a little more fun. I finally ordered and assembled my roof basket to go with the roof rack that I have had for 2 years lol. Its kinda a cheapo basket but it should do the job of carrying a few tires to and from the track when im not able to have some help!
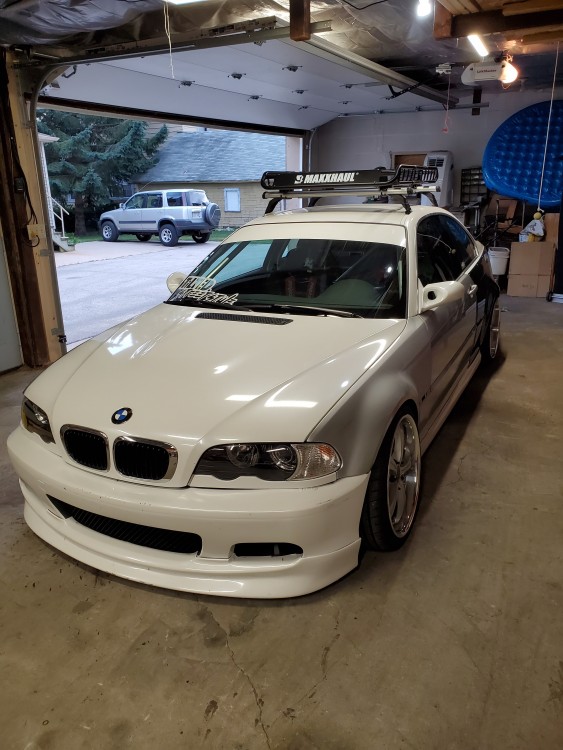
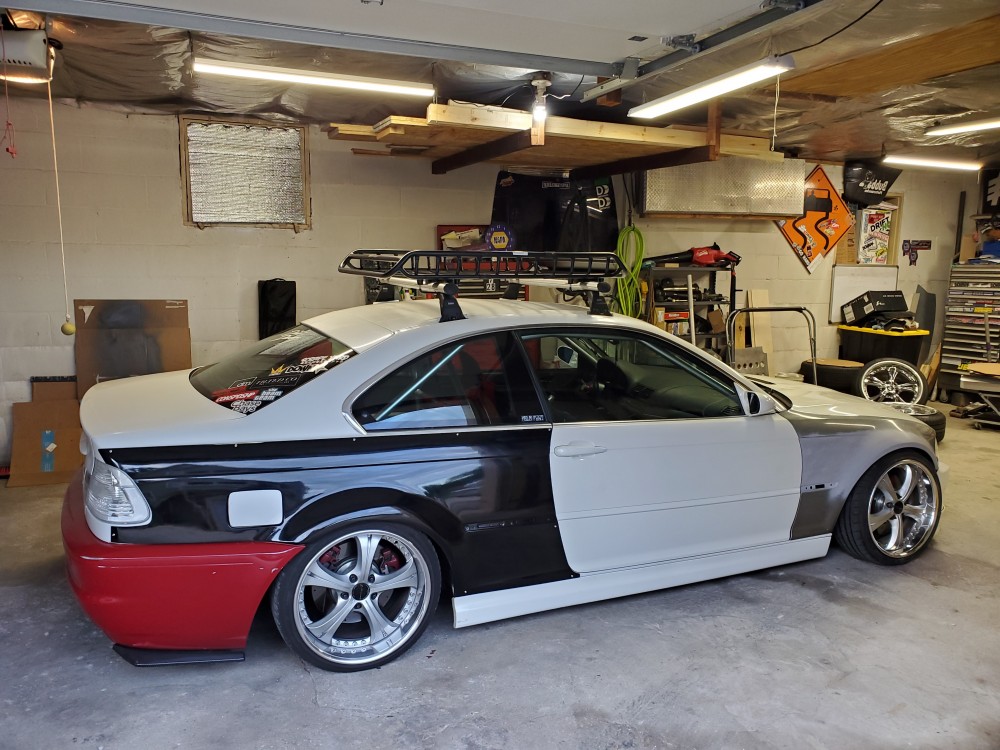
              20200820185742.jpg

              20200820185817.jpg

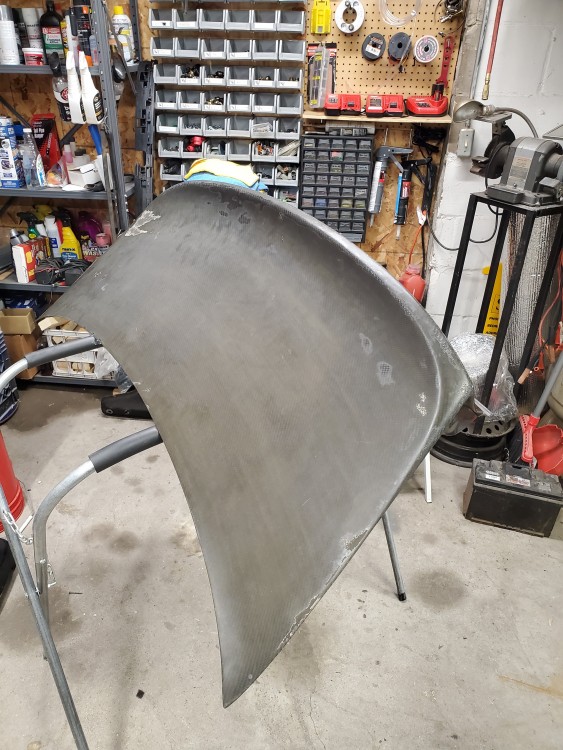
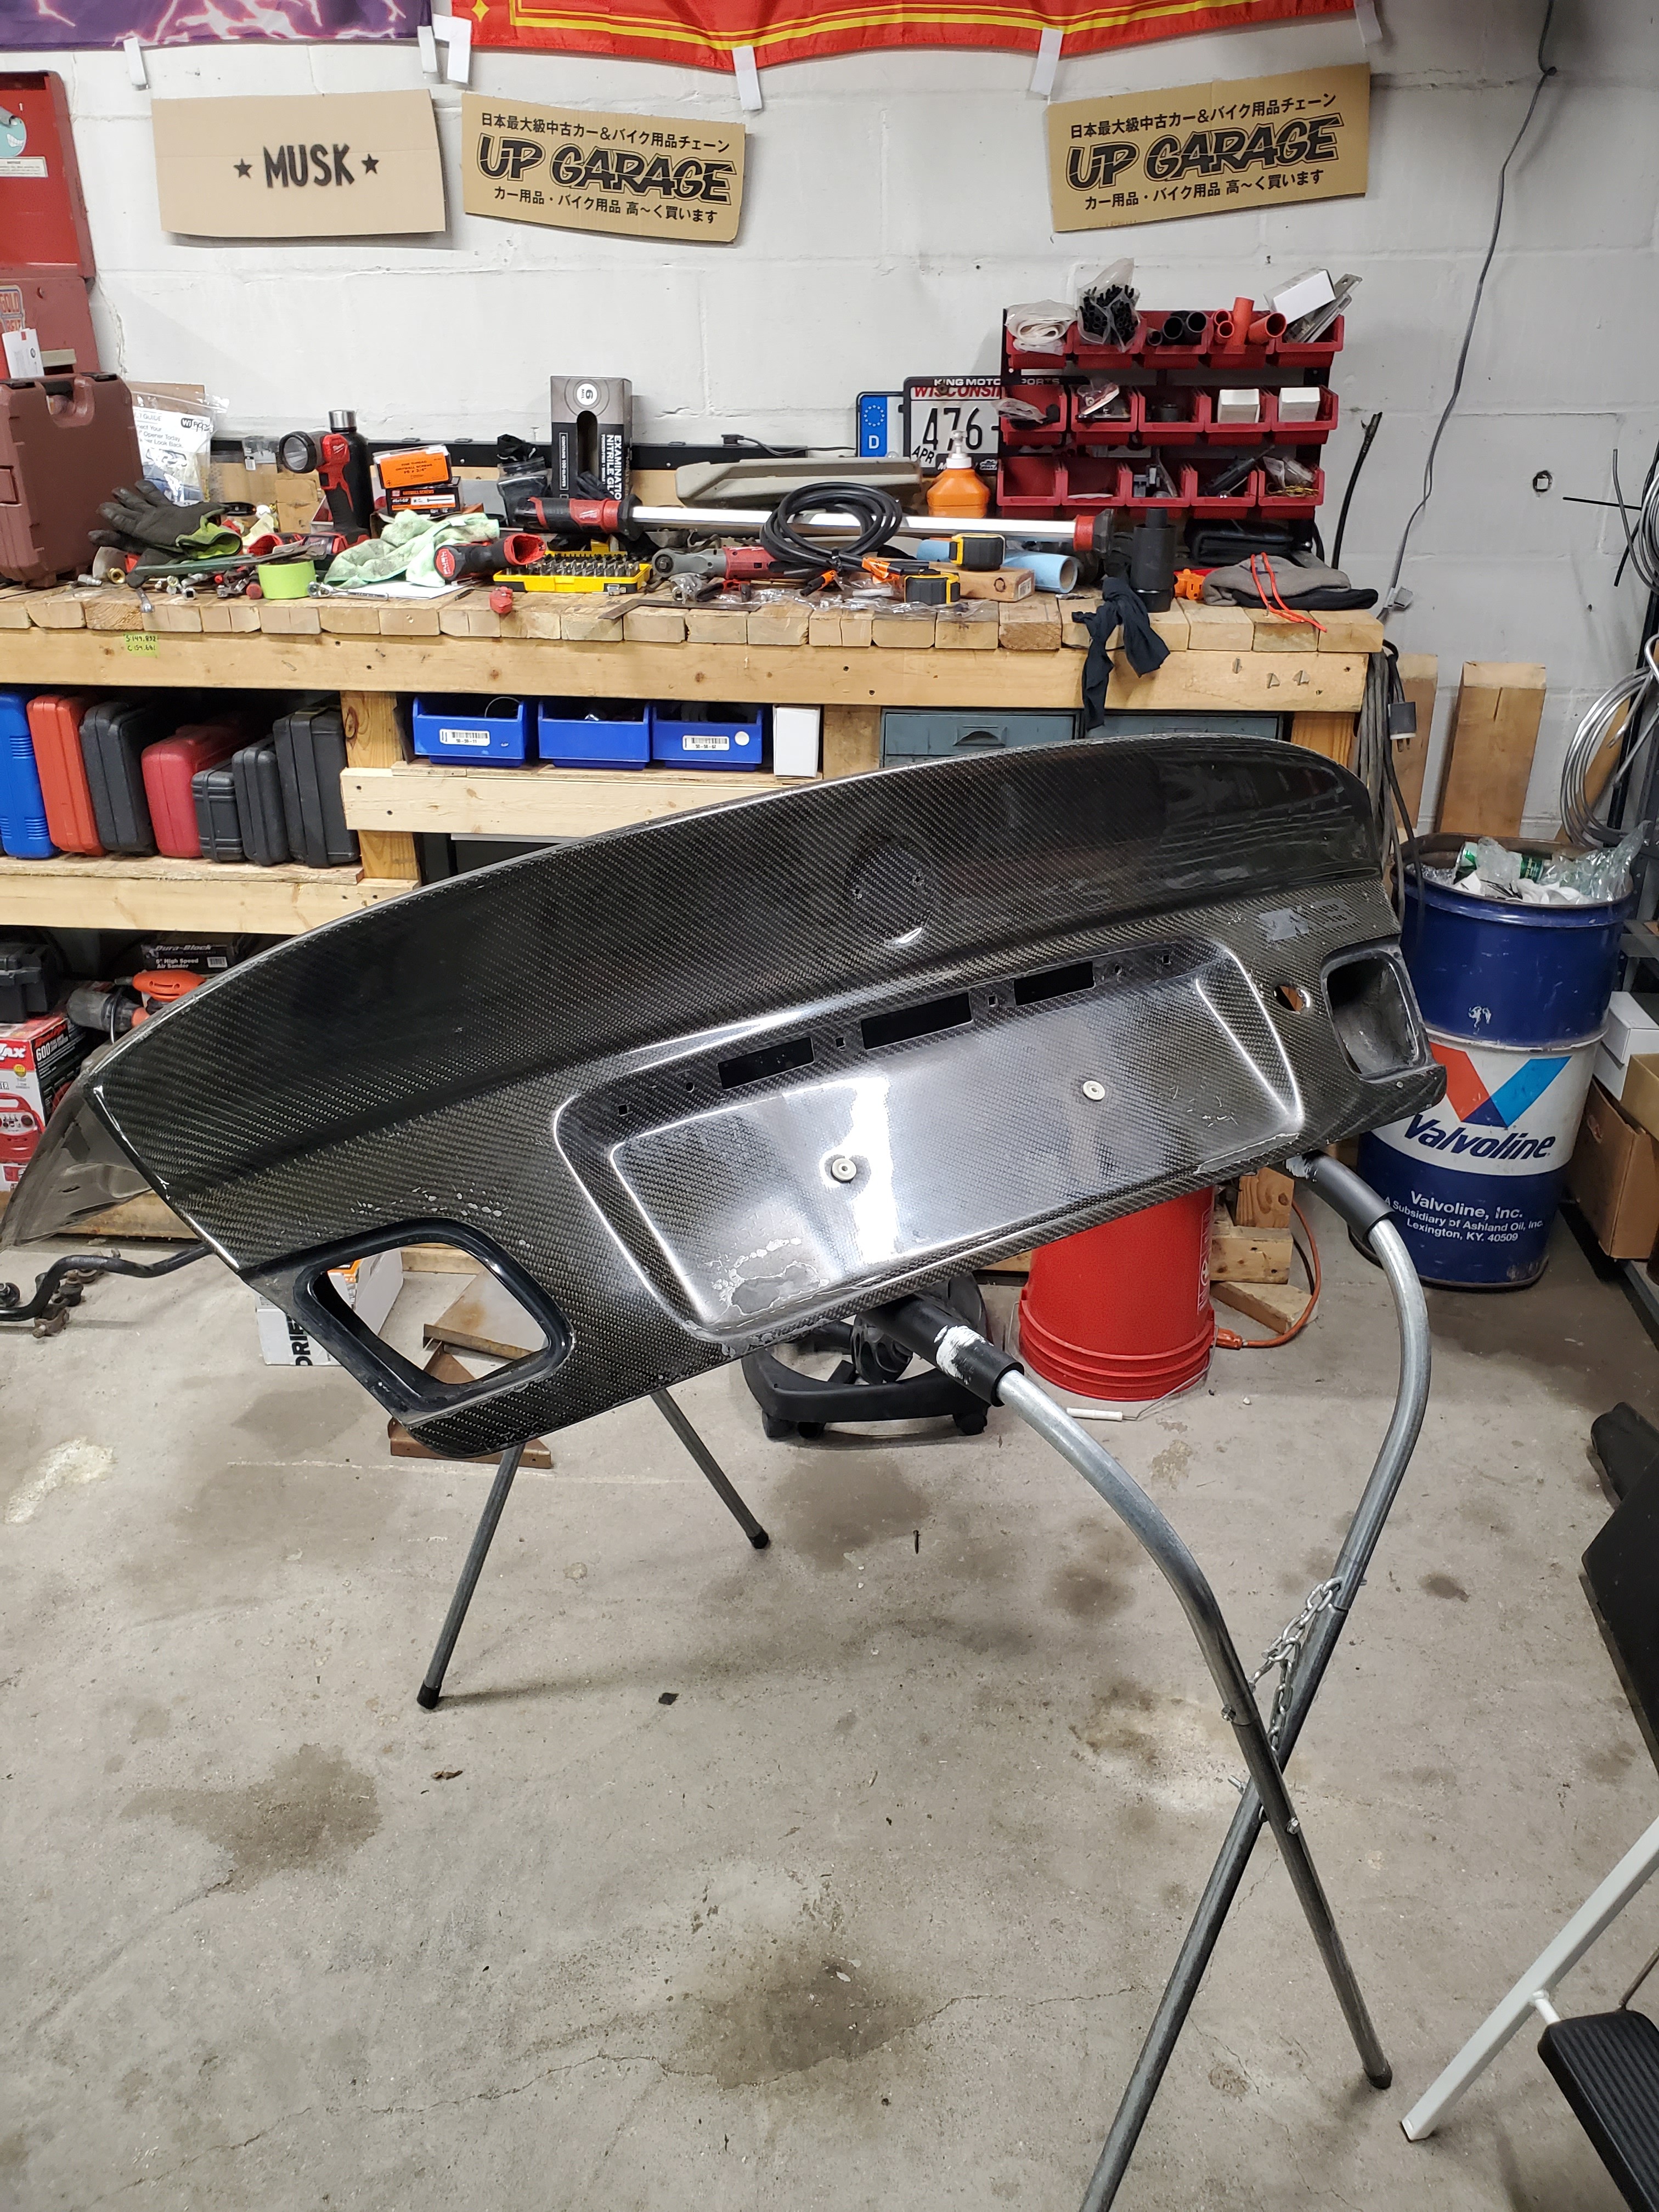
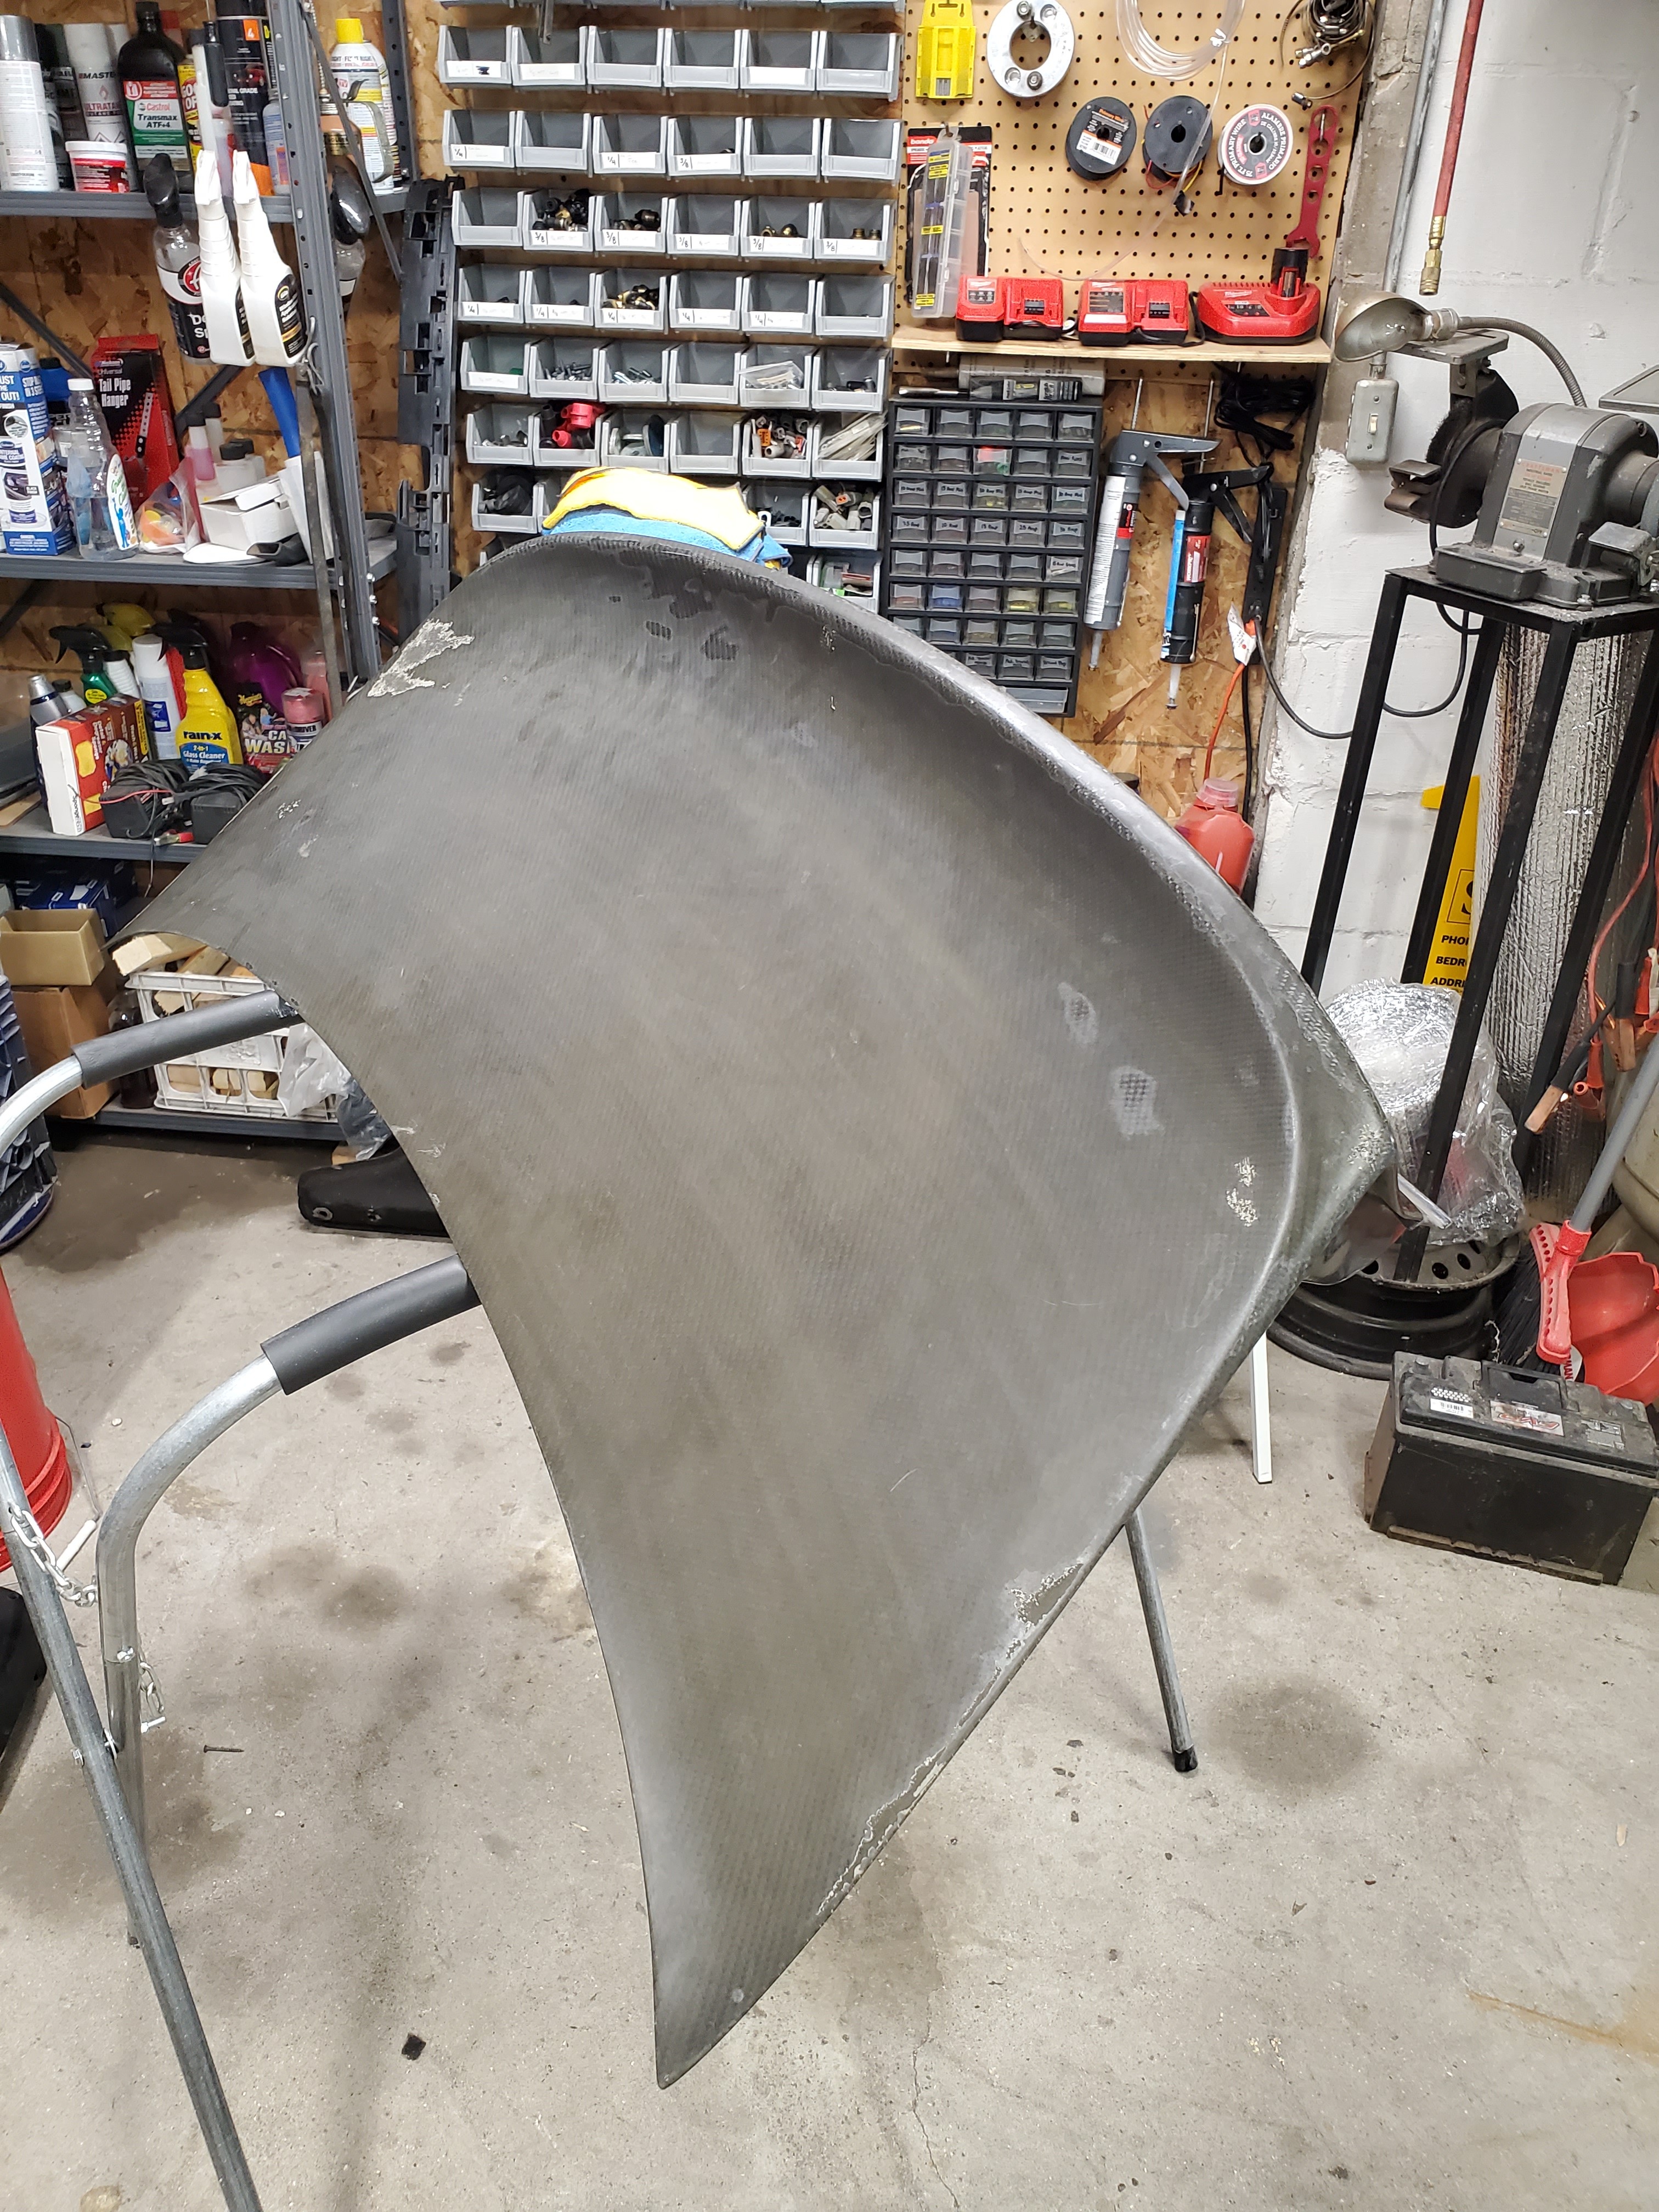
              And finally, I snagged up a CSL style carbon fiber trunk! I've been wanting the don musk one but the price along with shipping is just not reasonable for me currently. While this one is in a bit of rough shape, extremely sun faded, its a great candidate to have cleaned up and then wrapped. 
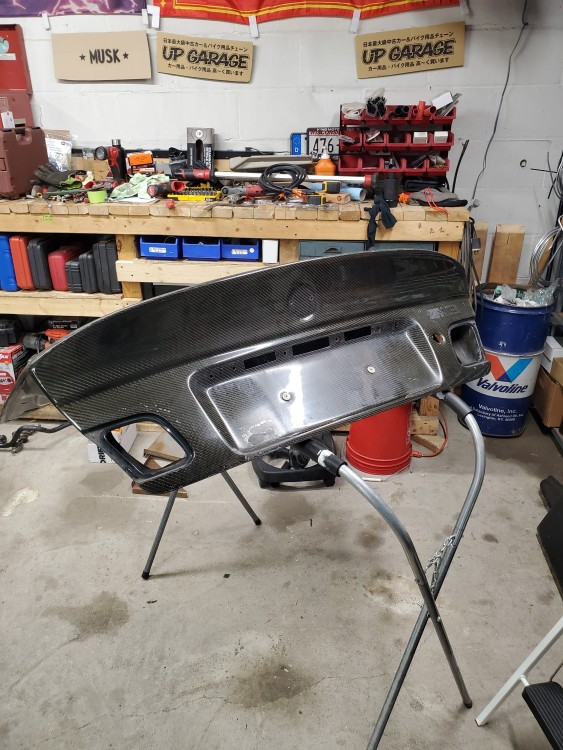
              20200820190527.jpg

              20200820190535.jpg

              I will most likely end up putting this on the car in its current condition anyways to see how it looks, and if I'm going through all that work I'm just going to leave it on since the car is looking like a dumpster fire color wise always lol.

              1 Reply Last reply
              0
              • B
                B
                B C
                wrote on last edited by
                #366

                It looks like those SLR arms provide some bump steer correction. I’ve been looking at ways to eliminate bump steer on my e46 but im not sure this full yeet setup is what I need

                1 Reply Last reply
                0
                • TkuhnT
                  TkuhnT
                  Tkuhn
                  wrote on last edited by
                  #367

                  B C said:

                  It looks like those SLR arms provide some bump steer correction. I’ve been looking at ways to eliminate bump steer on my e46 but im not sure this full yeet setup is what I need

                  Hahaha so SLR offers this set up which is more geared toward drift but it has 4 Ackerman adjustment settings to go from full drift to full race. Id recommended checking out what they offer for a road race application on their website! Also Sean the owner is extremely knowledgeable.

                  1 Reply Last reply
                  1
                  • TkuhnT
                    TkuhnT
                    Tkuhn
                    wrote on last edited by
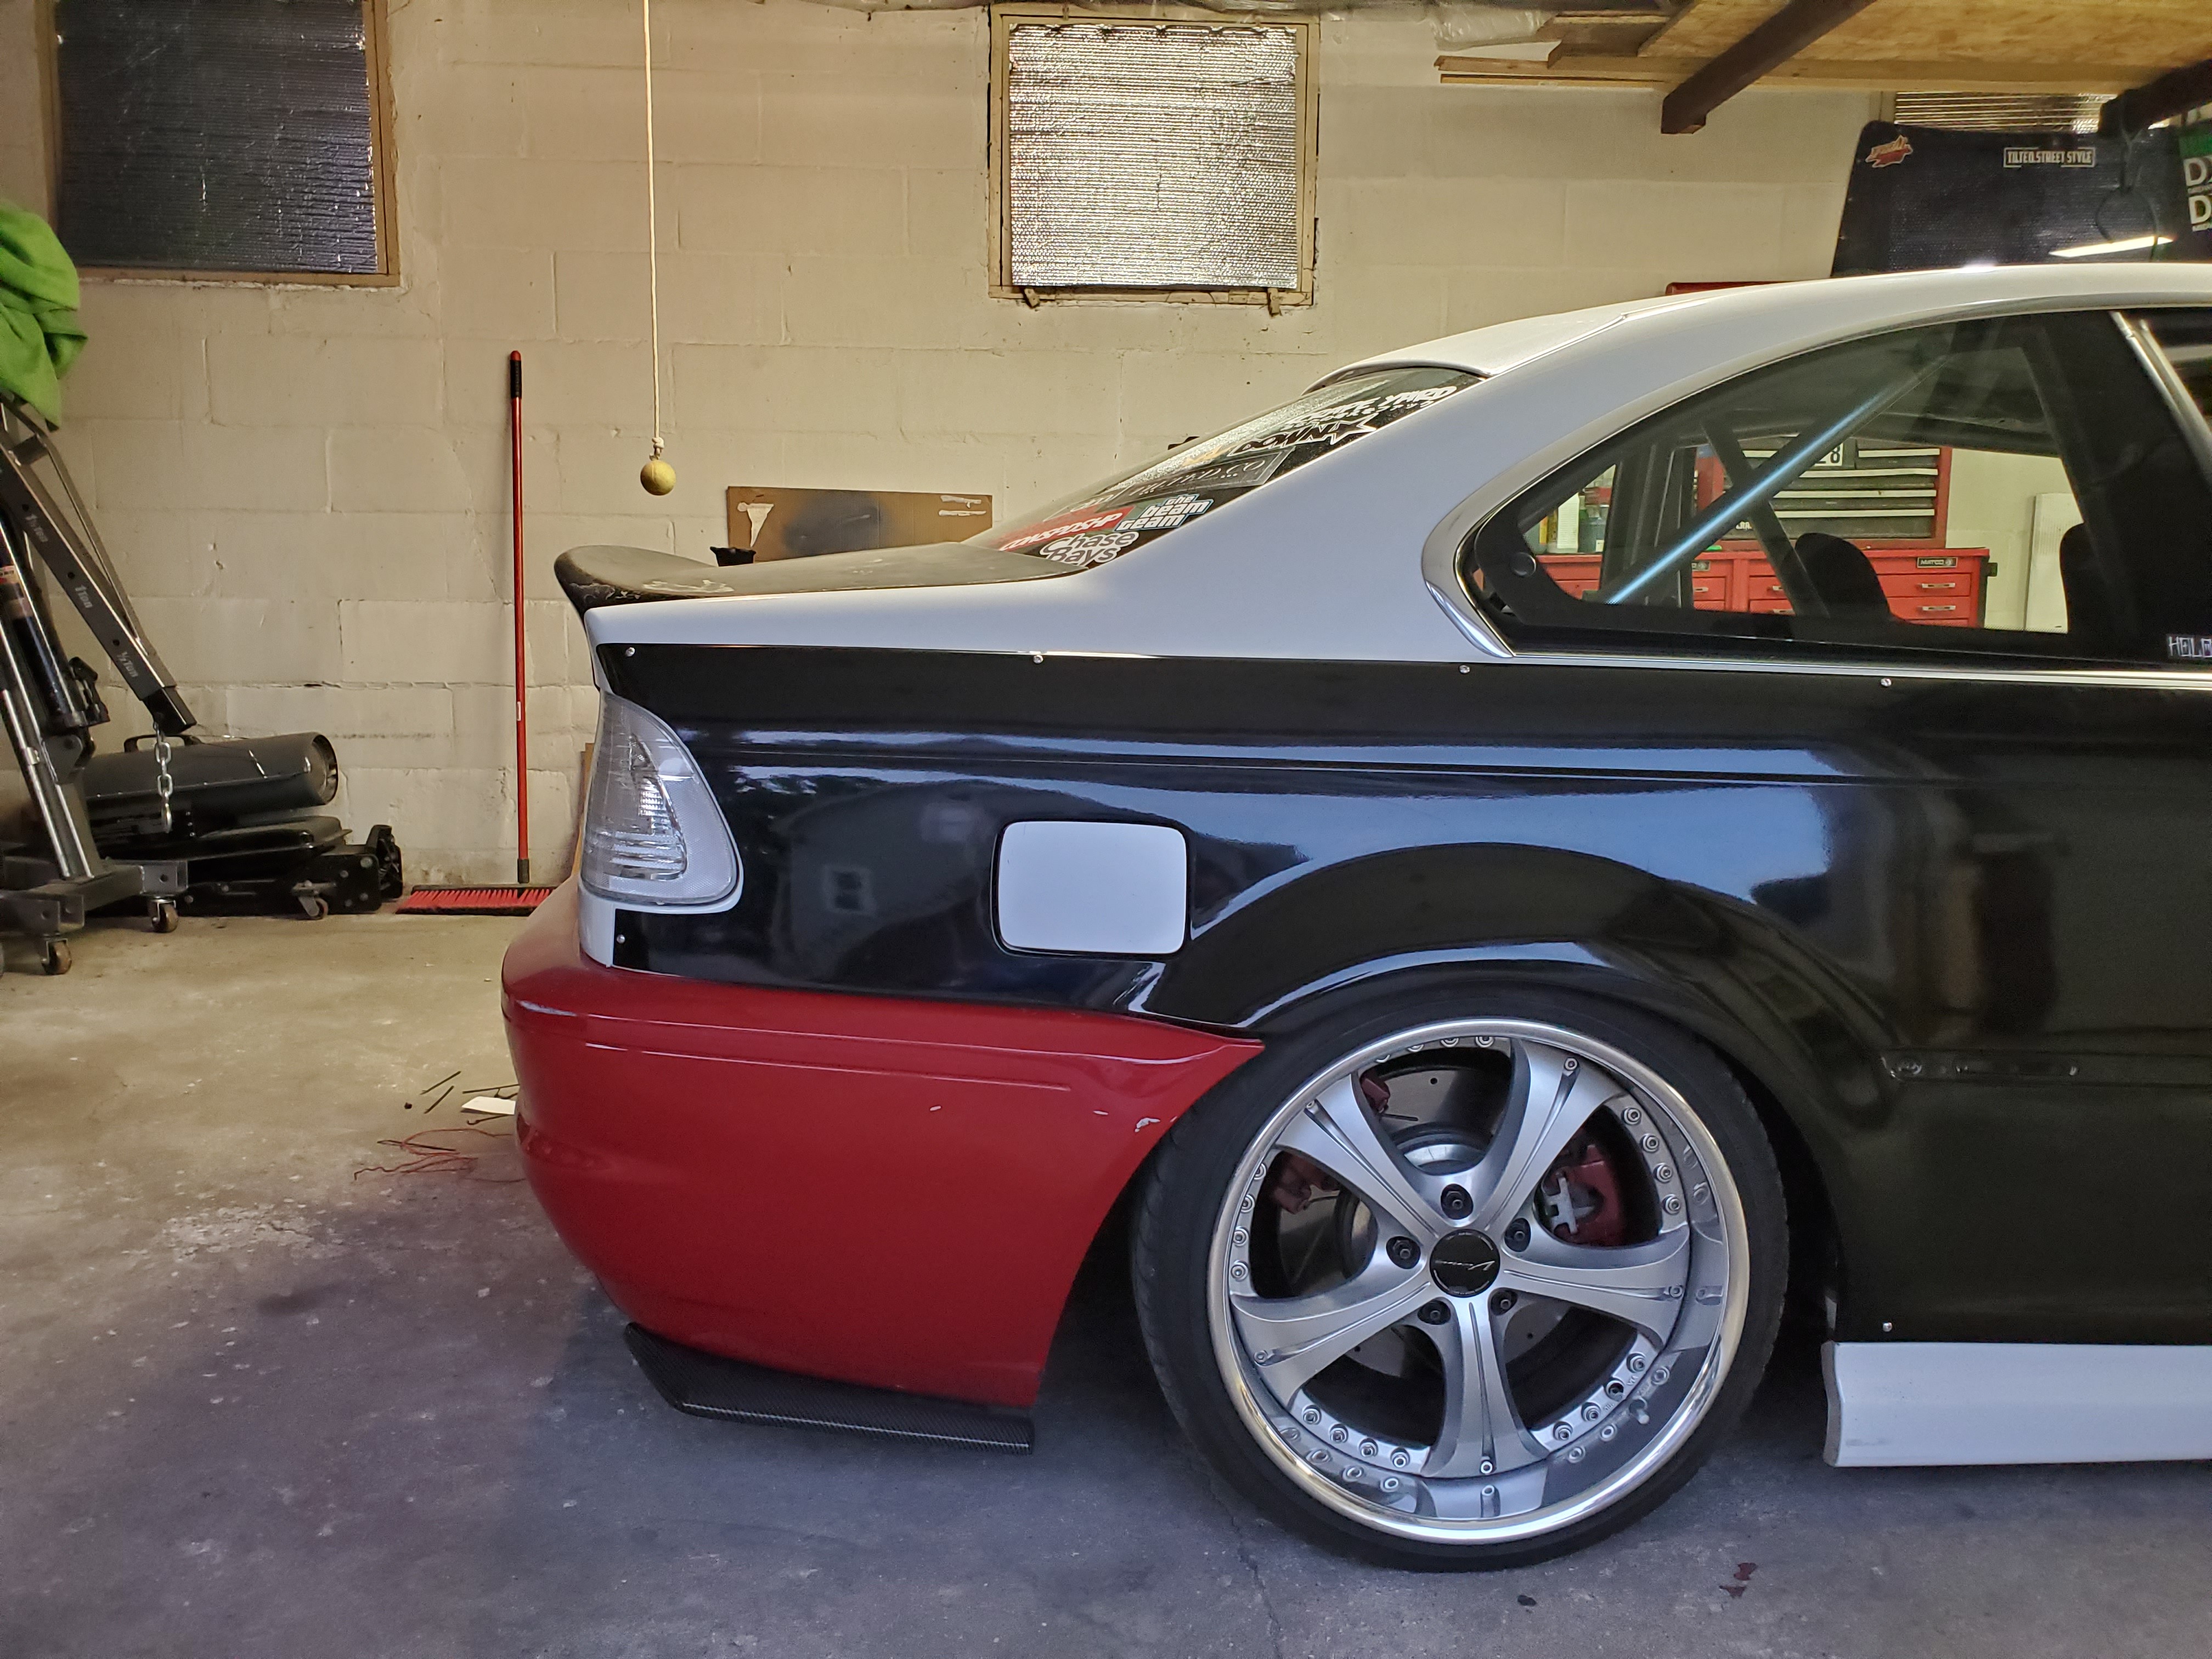
                    #368

                    Photos of the new to me trunk installed. 

                    20200821194912.jpg

                    IMG20200822090424682.jpg

                    20200821195835.jpg

                    1 Reply Last reply
                    2
                    • TkuhnT
                      TkuhnT
                      Tkuhn
                      wrote on last edited by
                      #369

                      Been a minute! Have had quite the off season just getting to this point. I'm going to try and keep the story as short winded as possible. 

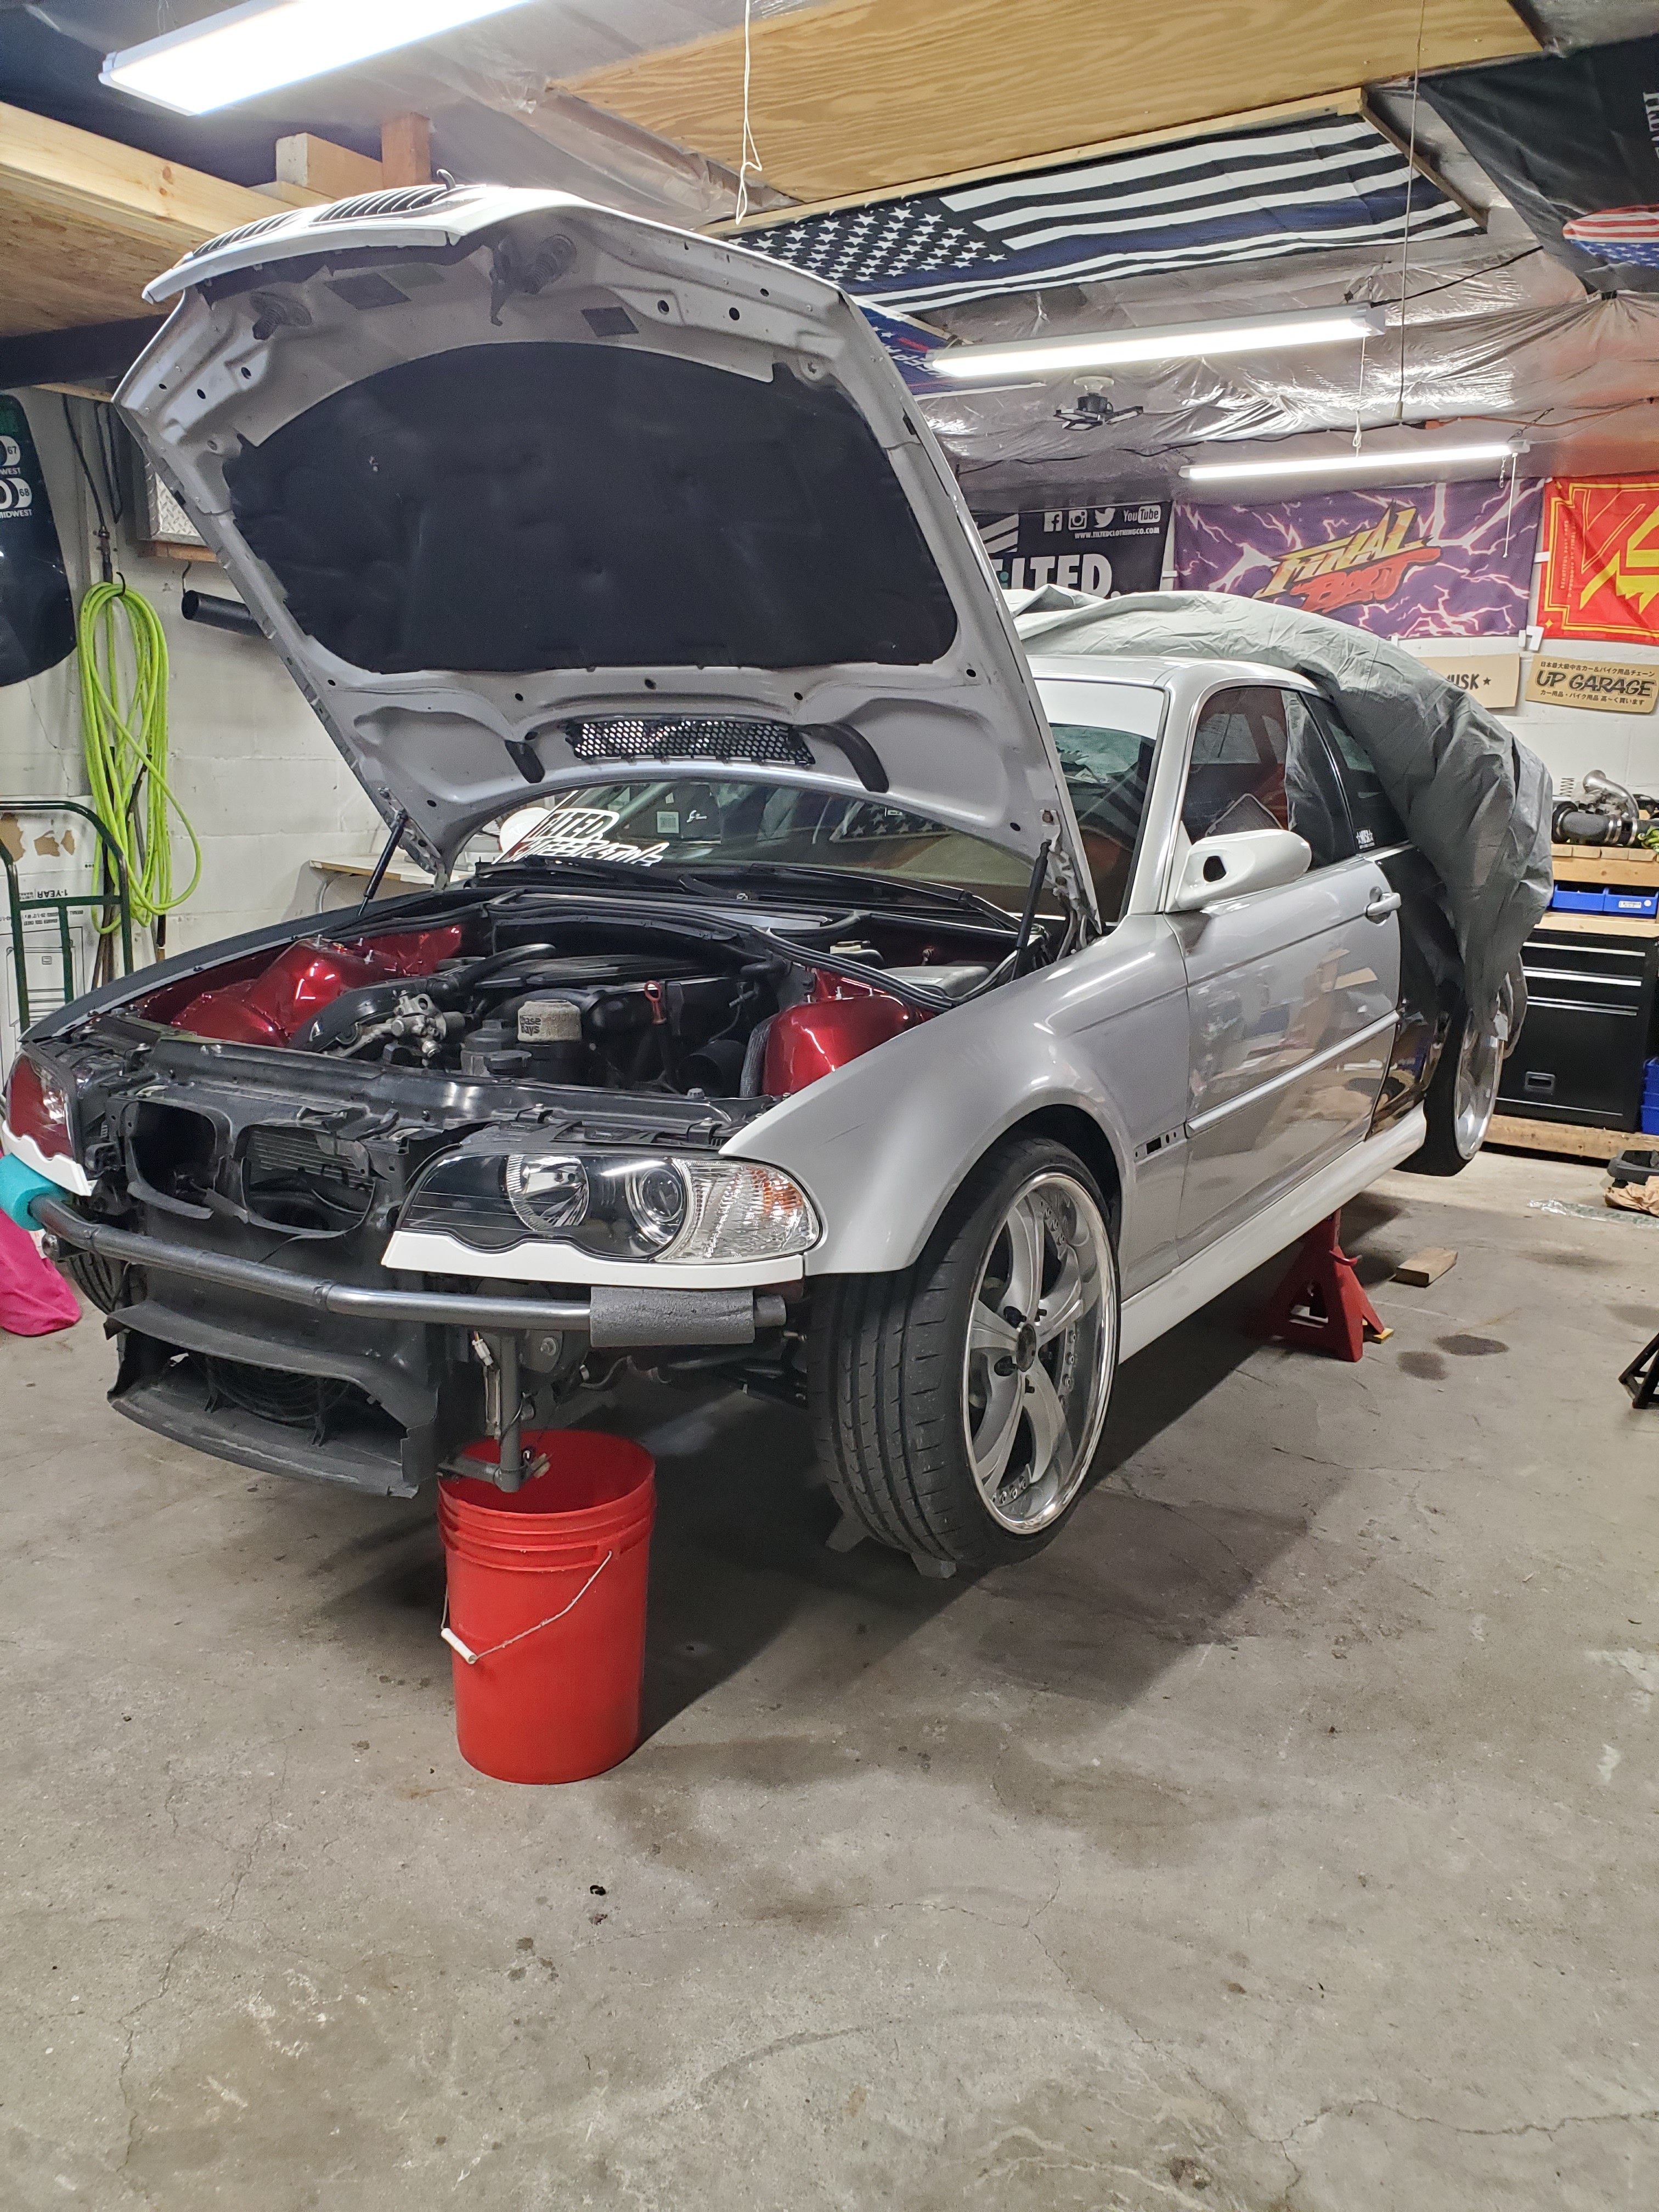
                      First thing was first it was that time of year to get the car on the stands and drained the engine fluids. 
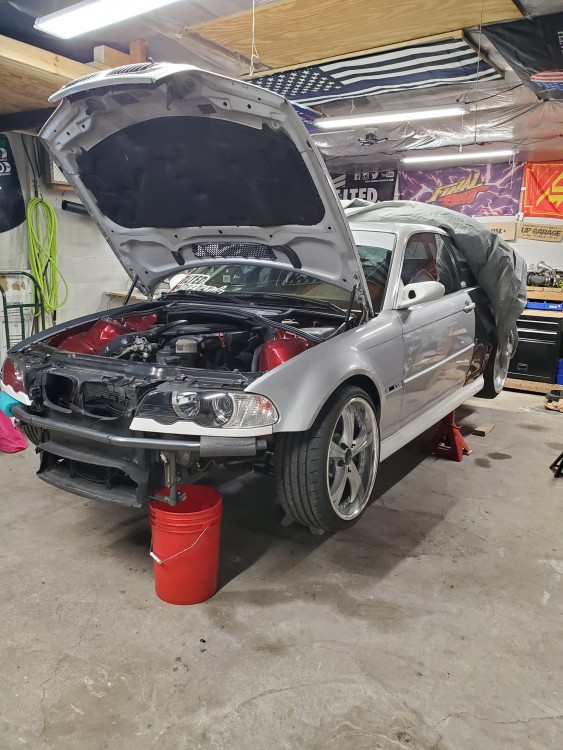
                      20201223190343.jpg

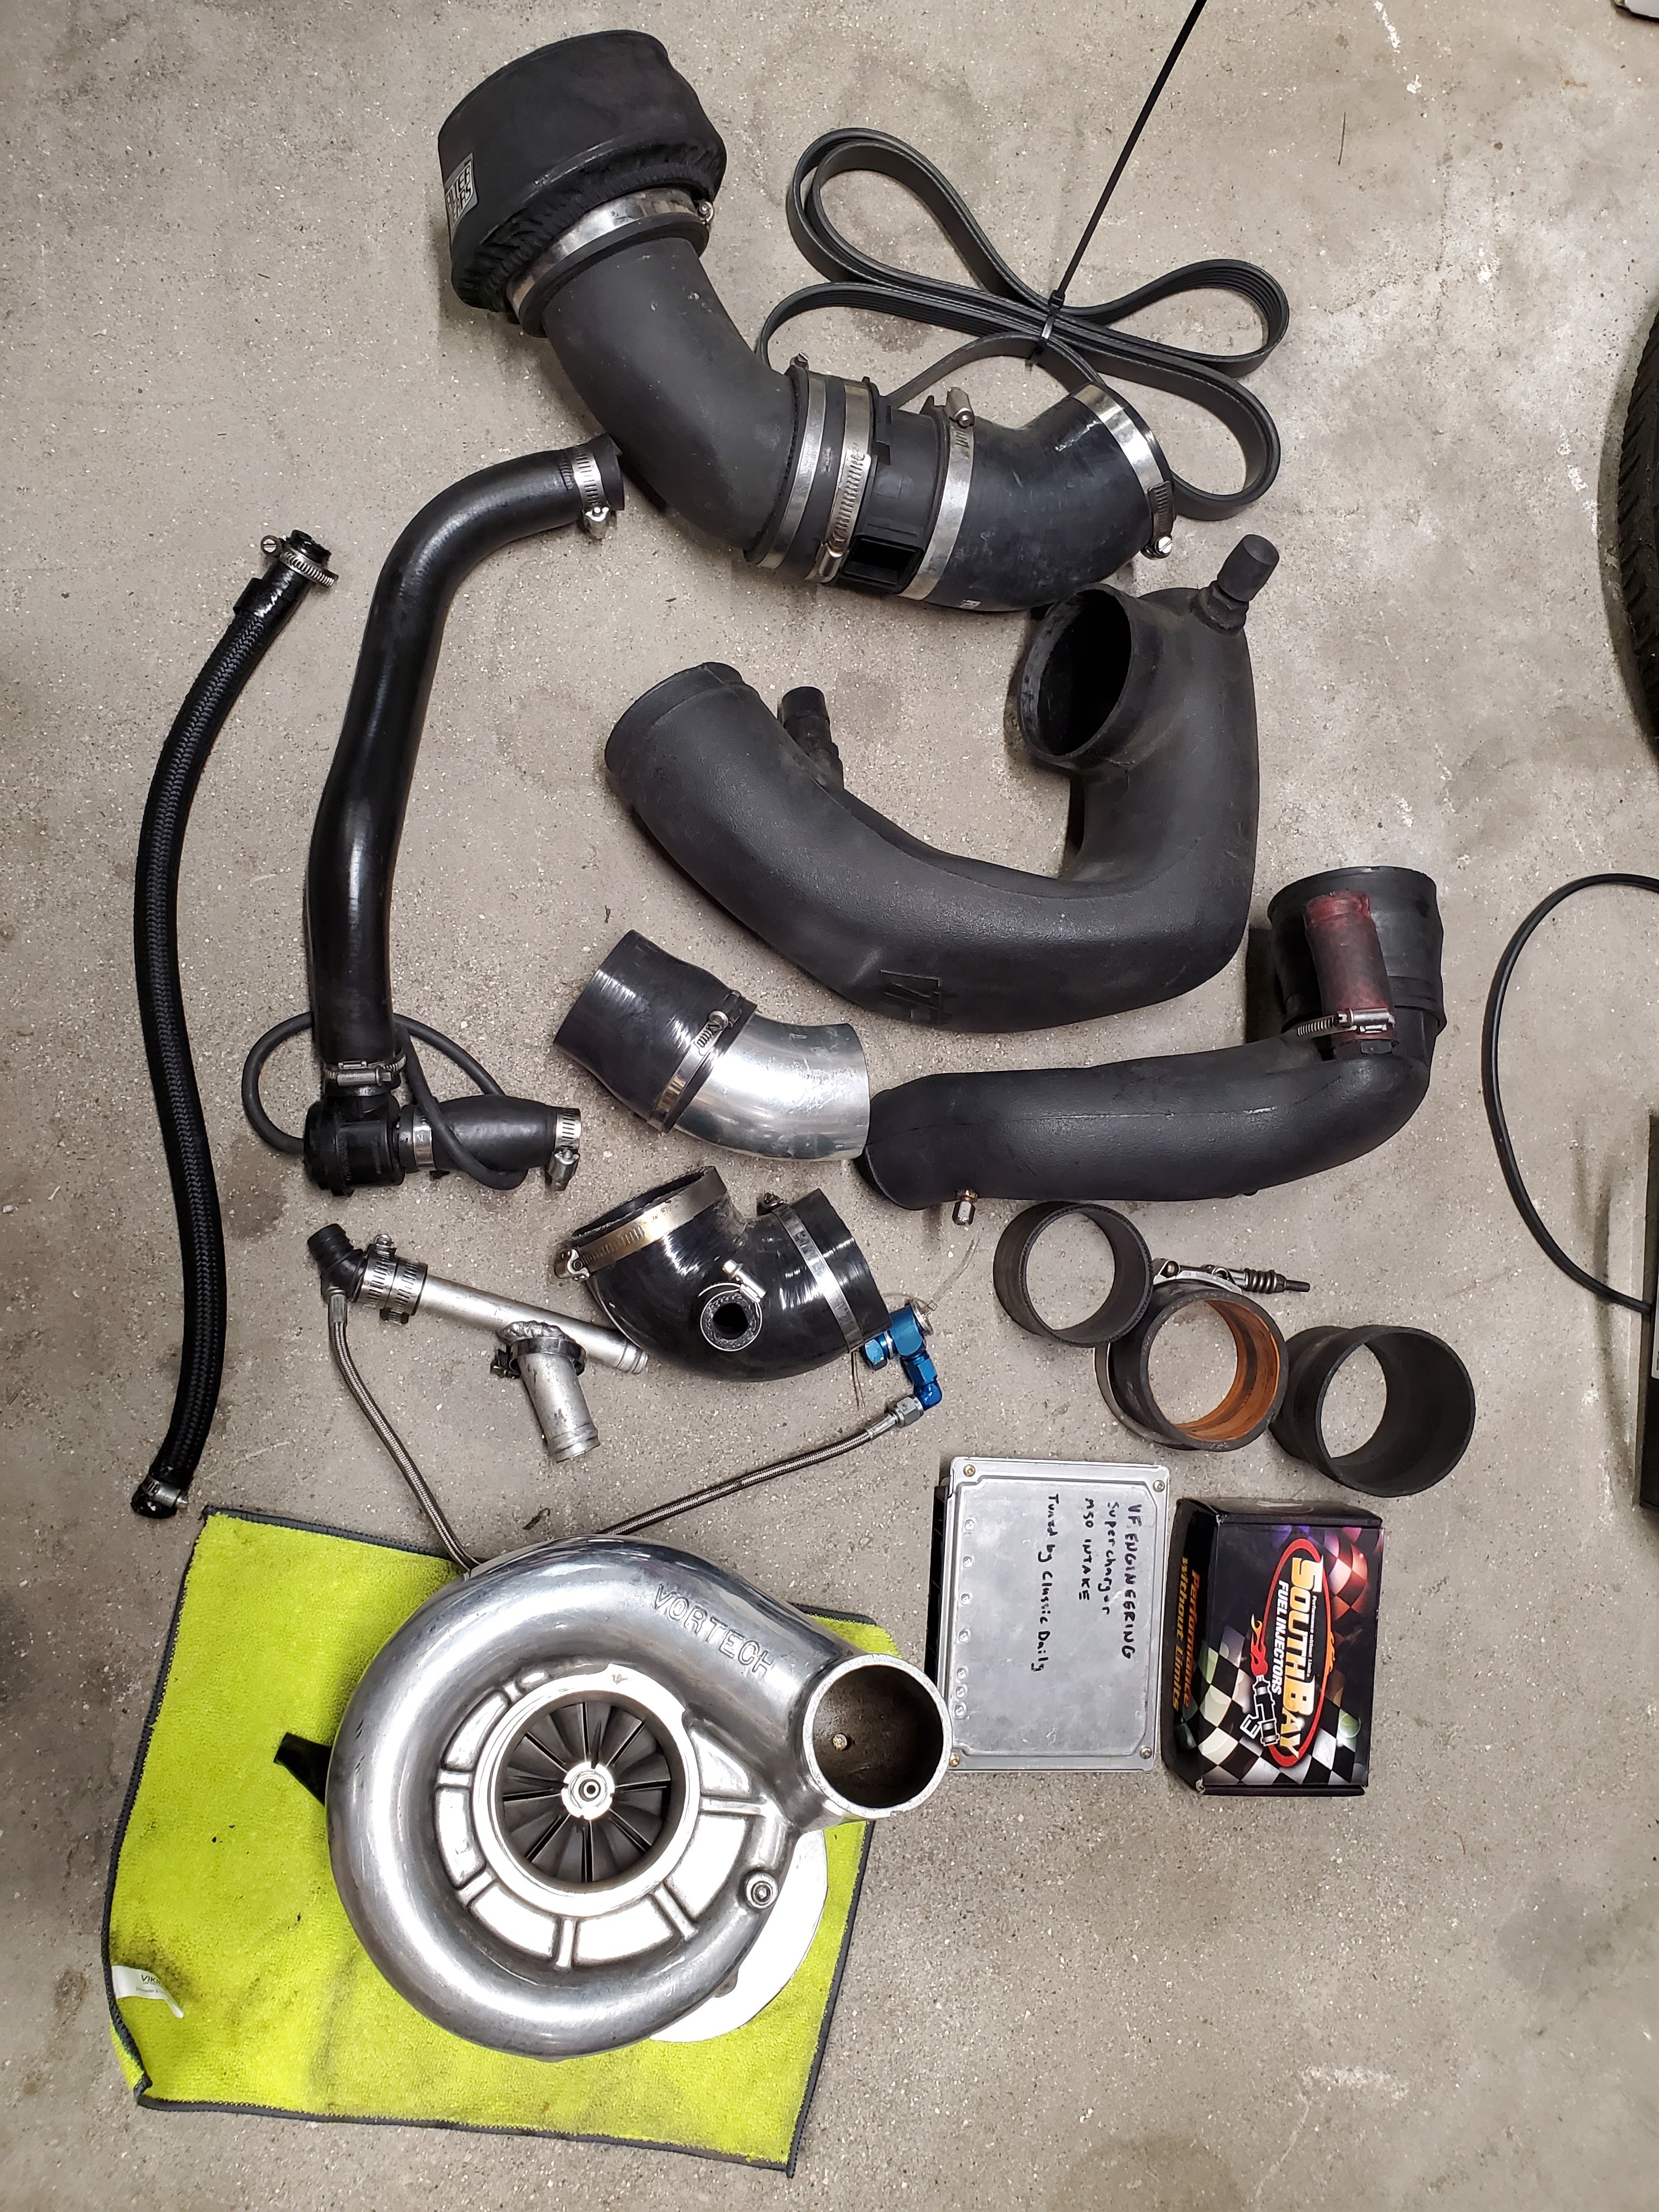
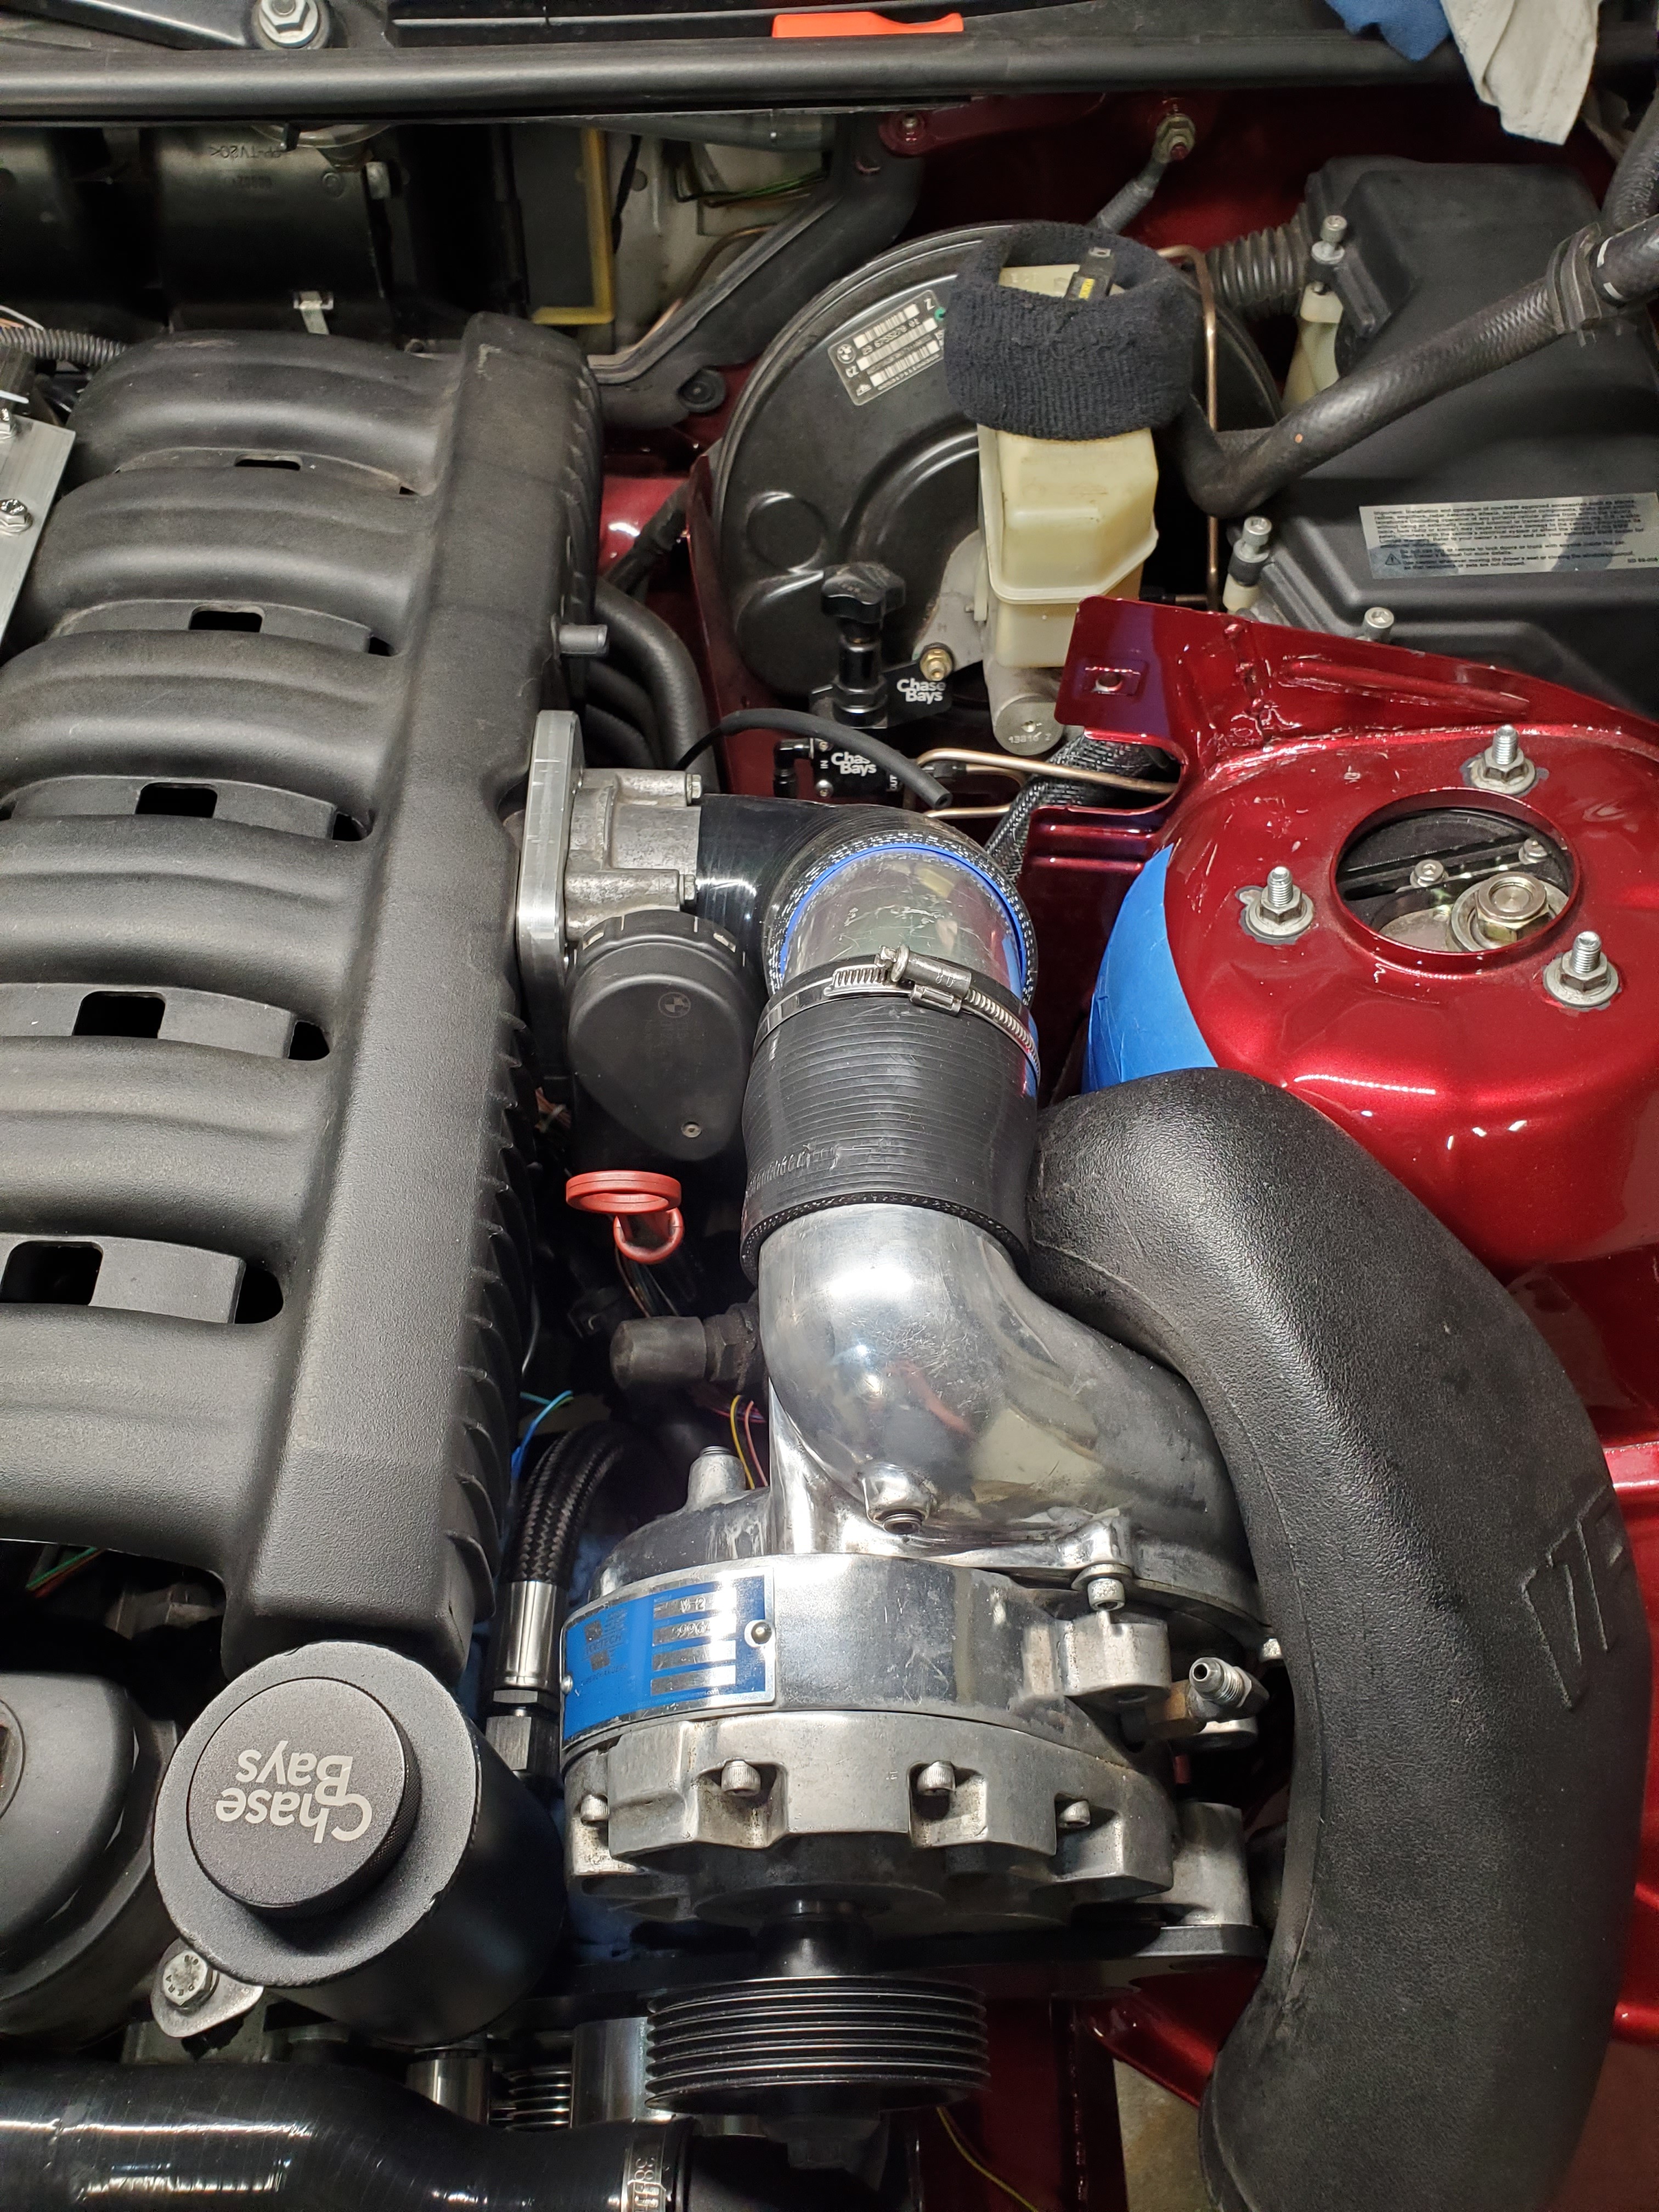
                      Big news first, I was able to purchase a VF engineering supercharger kit from a friend! 

                      He sent me everything to use the kit with the m54b30 manifold and the parts that he made up to have the kit work with a M50 manifold.
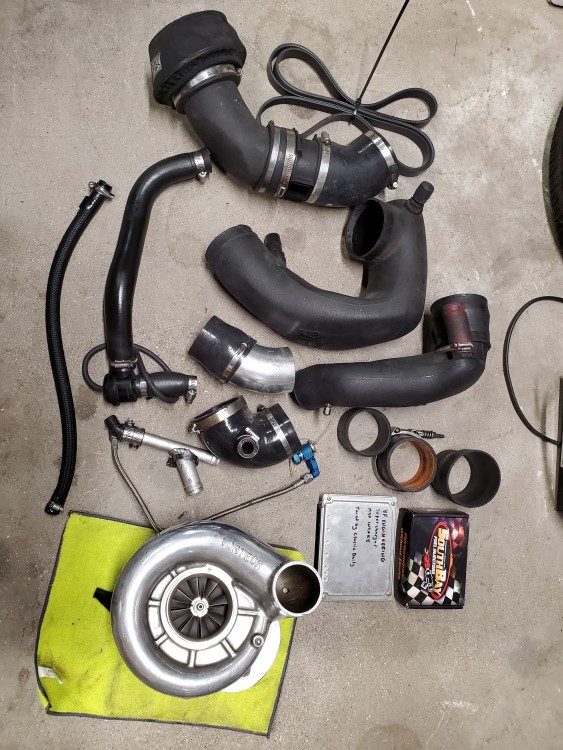
                      20201224103723.jpg

                      For starters you may notice that there is no mounting bracket for the charger to the engine. Well thats because the box broke in shipping and the bracket slipped out, never to be seen again. This is where the story could get long winded, BUT the short of it is UPS is absolutely useless with help or even through the claim process and I was forced to find another option.

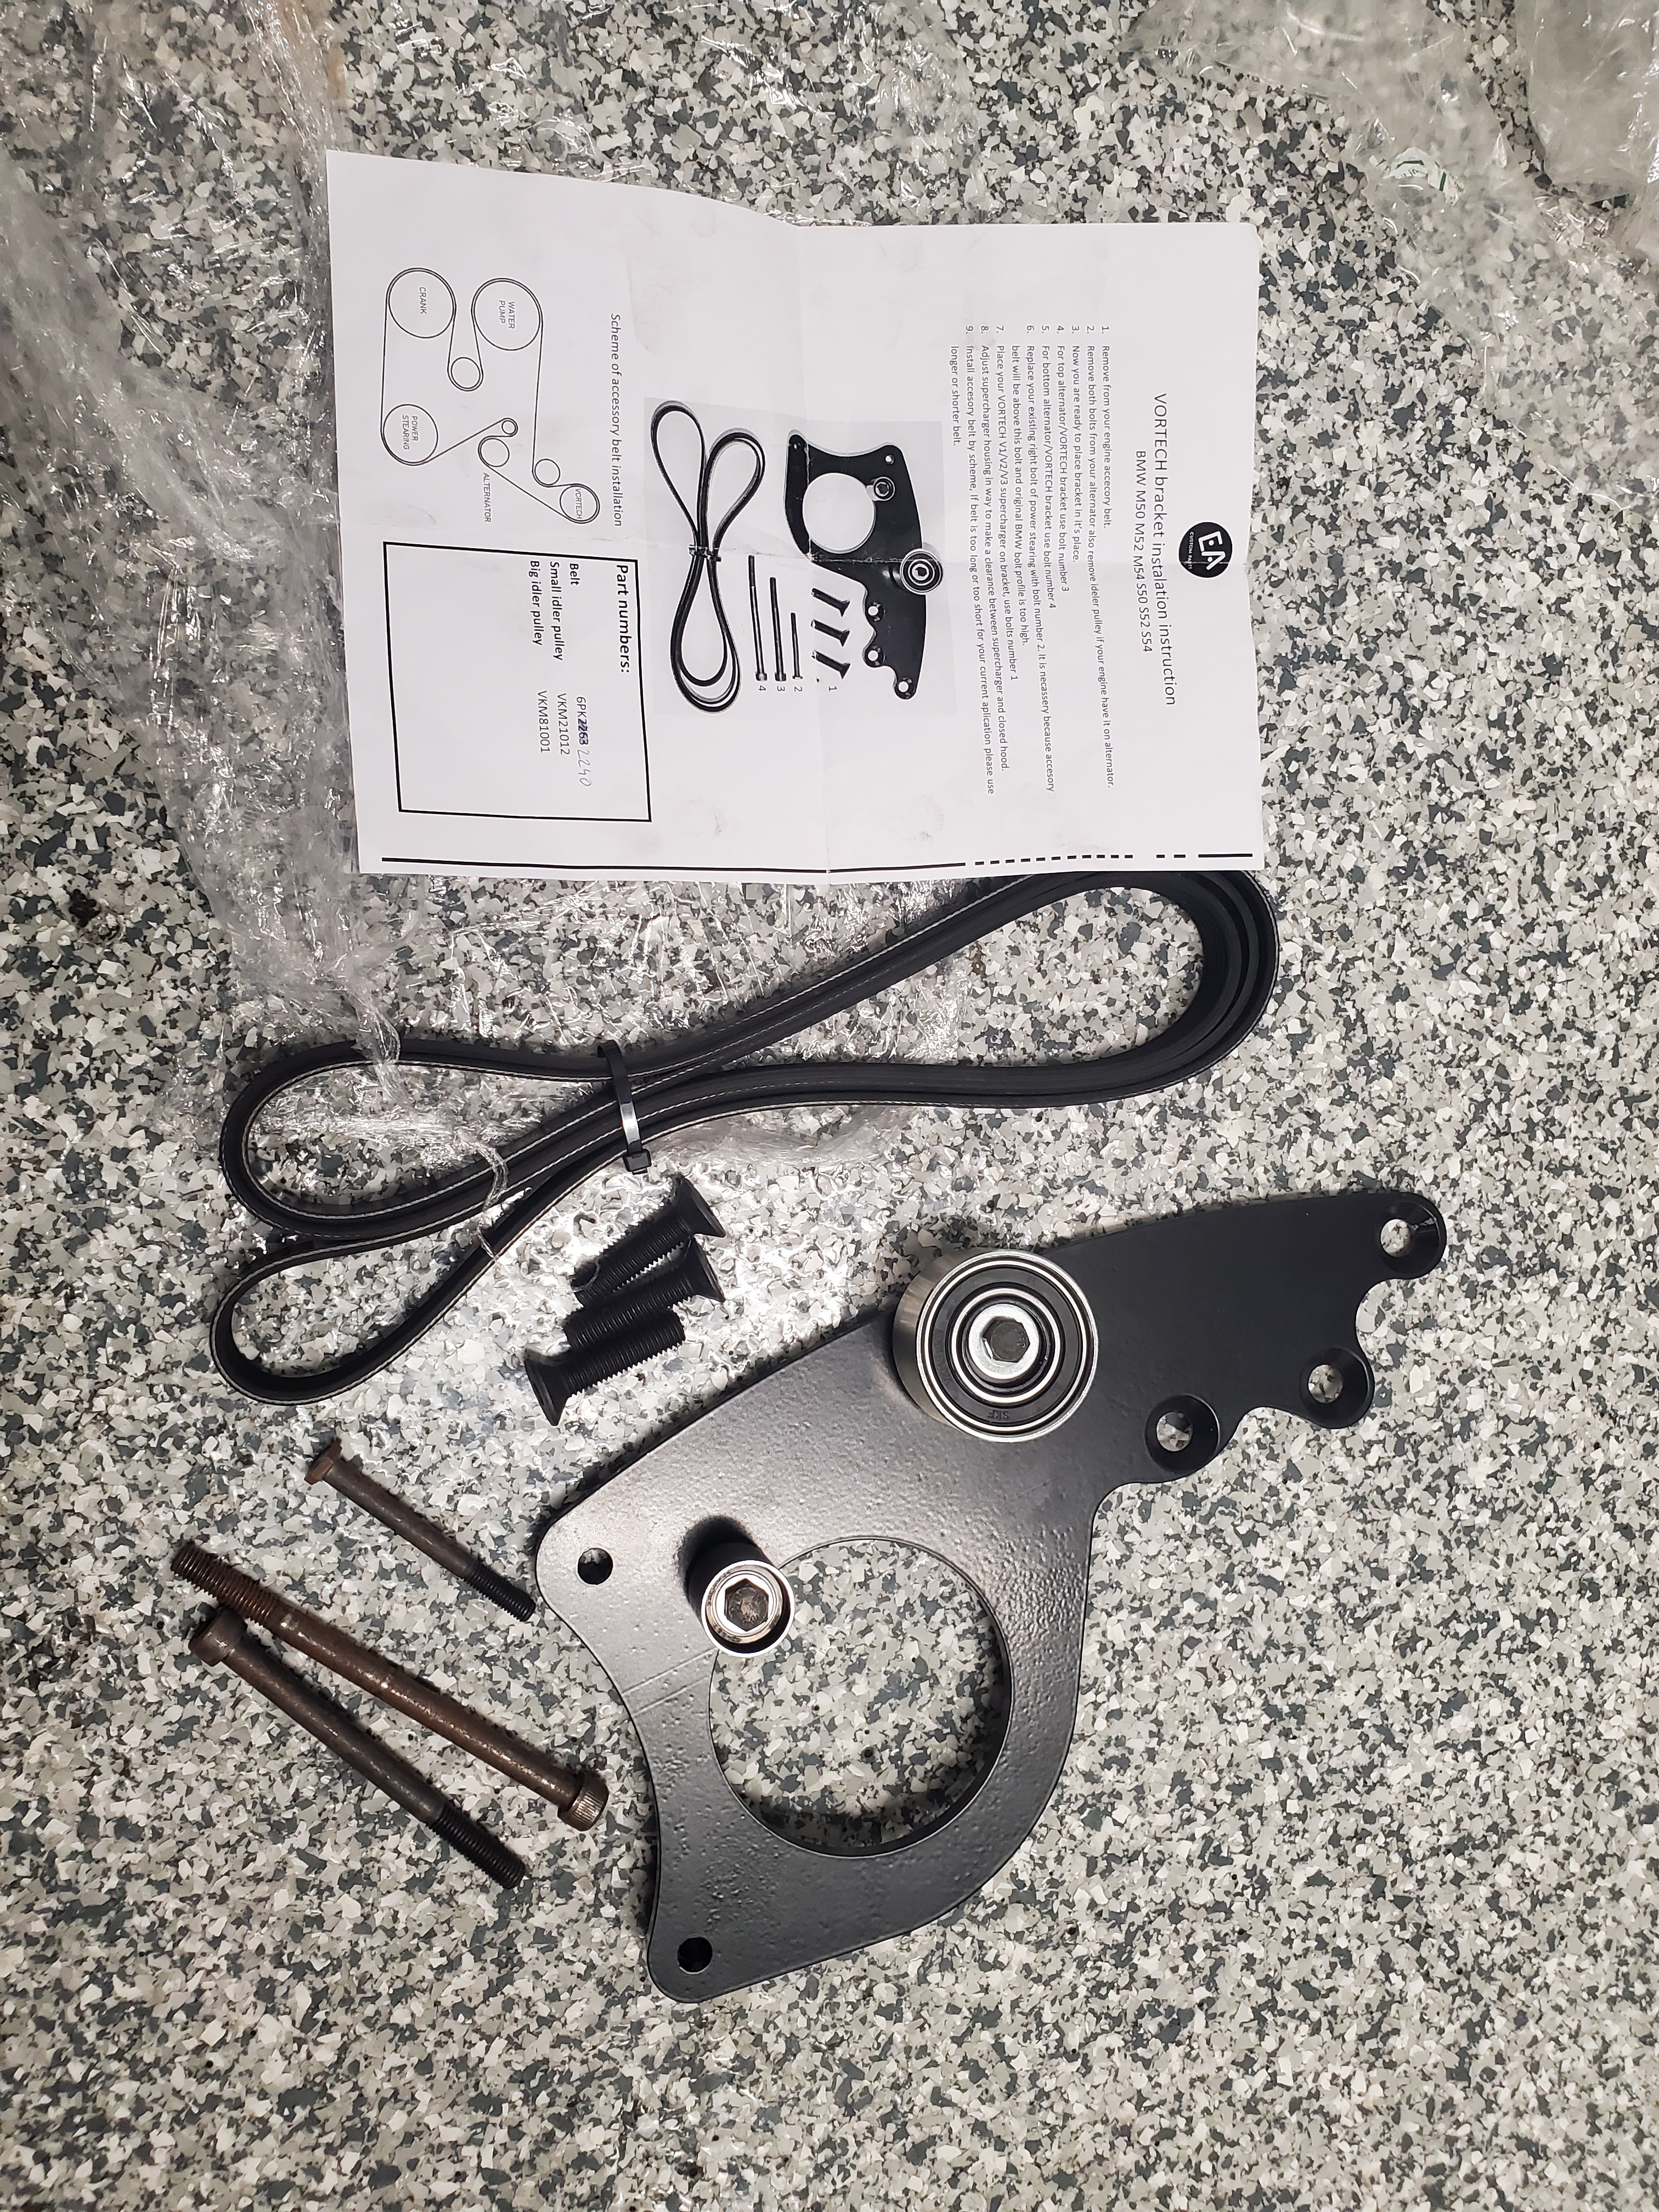
                      Lucky I found a guy in Latavia that makes a bracket for Votech V1,2 and 3 blowers to M5x engines. It's no billet piece like the VF one but VF Engineering is also as useless as UPS. They told me they won't support old kits because it's a liability, so they won't sell a bracket separately. COOL RIGHT.

                      Anyways here's the steel bracket I sourced.
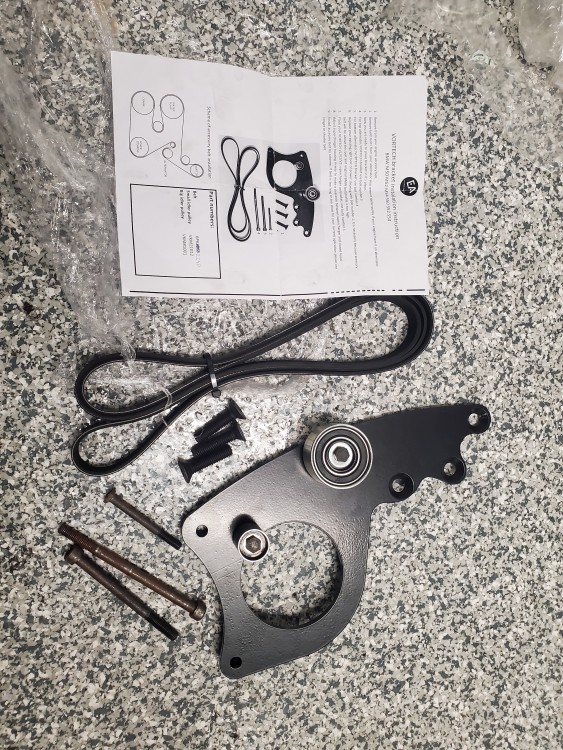
                      20201230122608.jpg

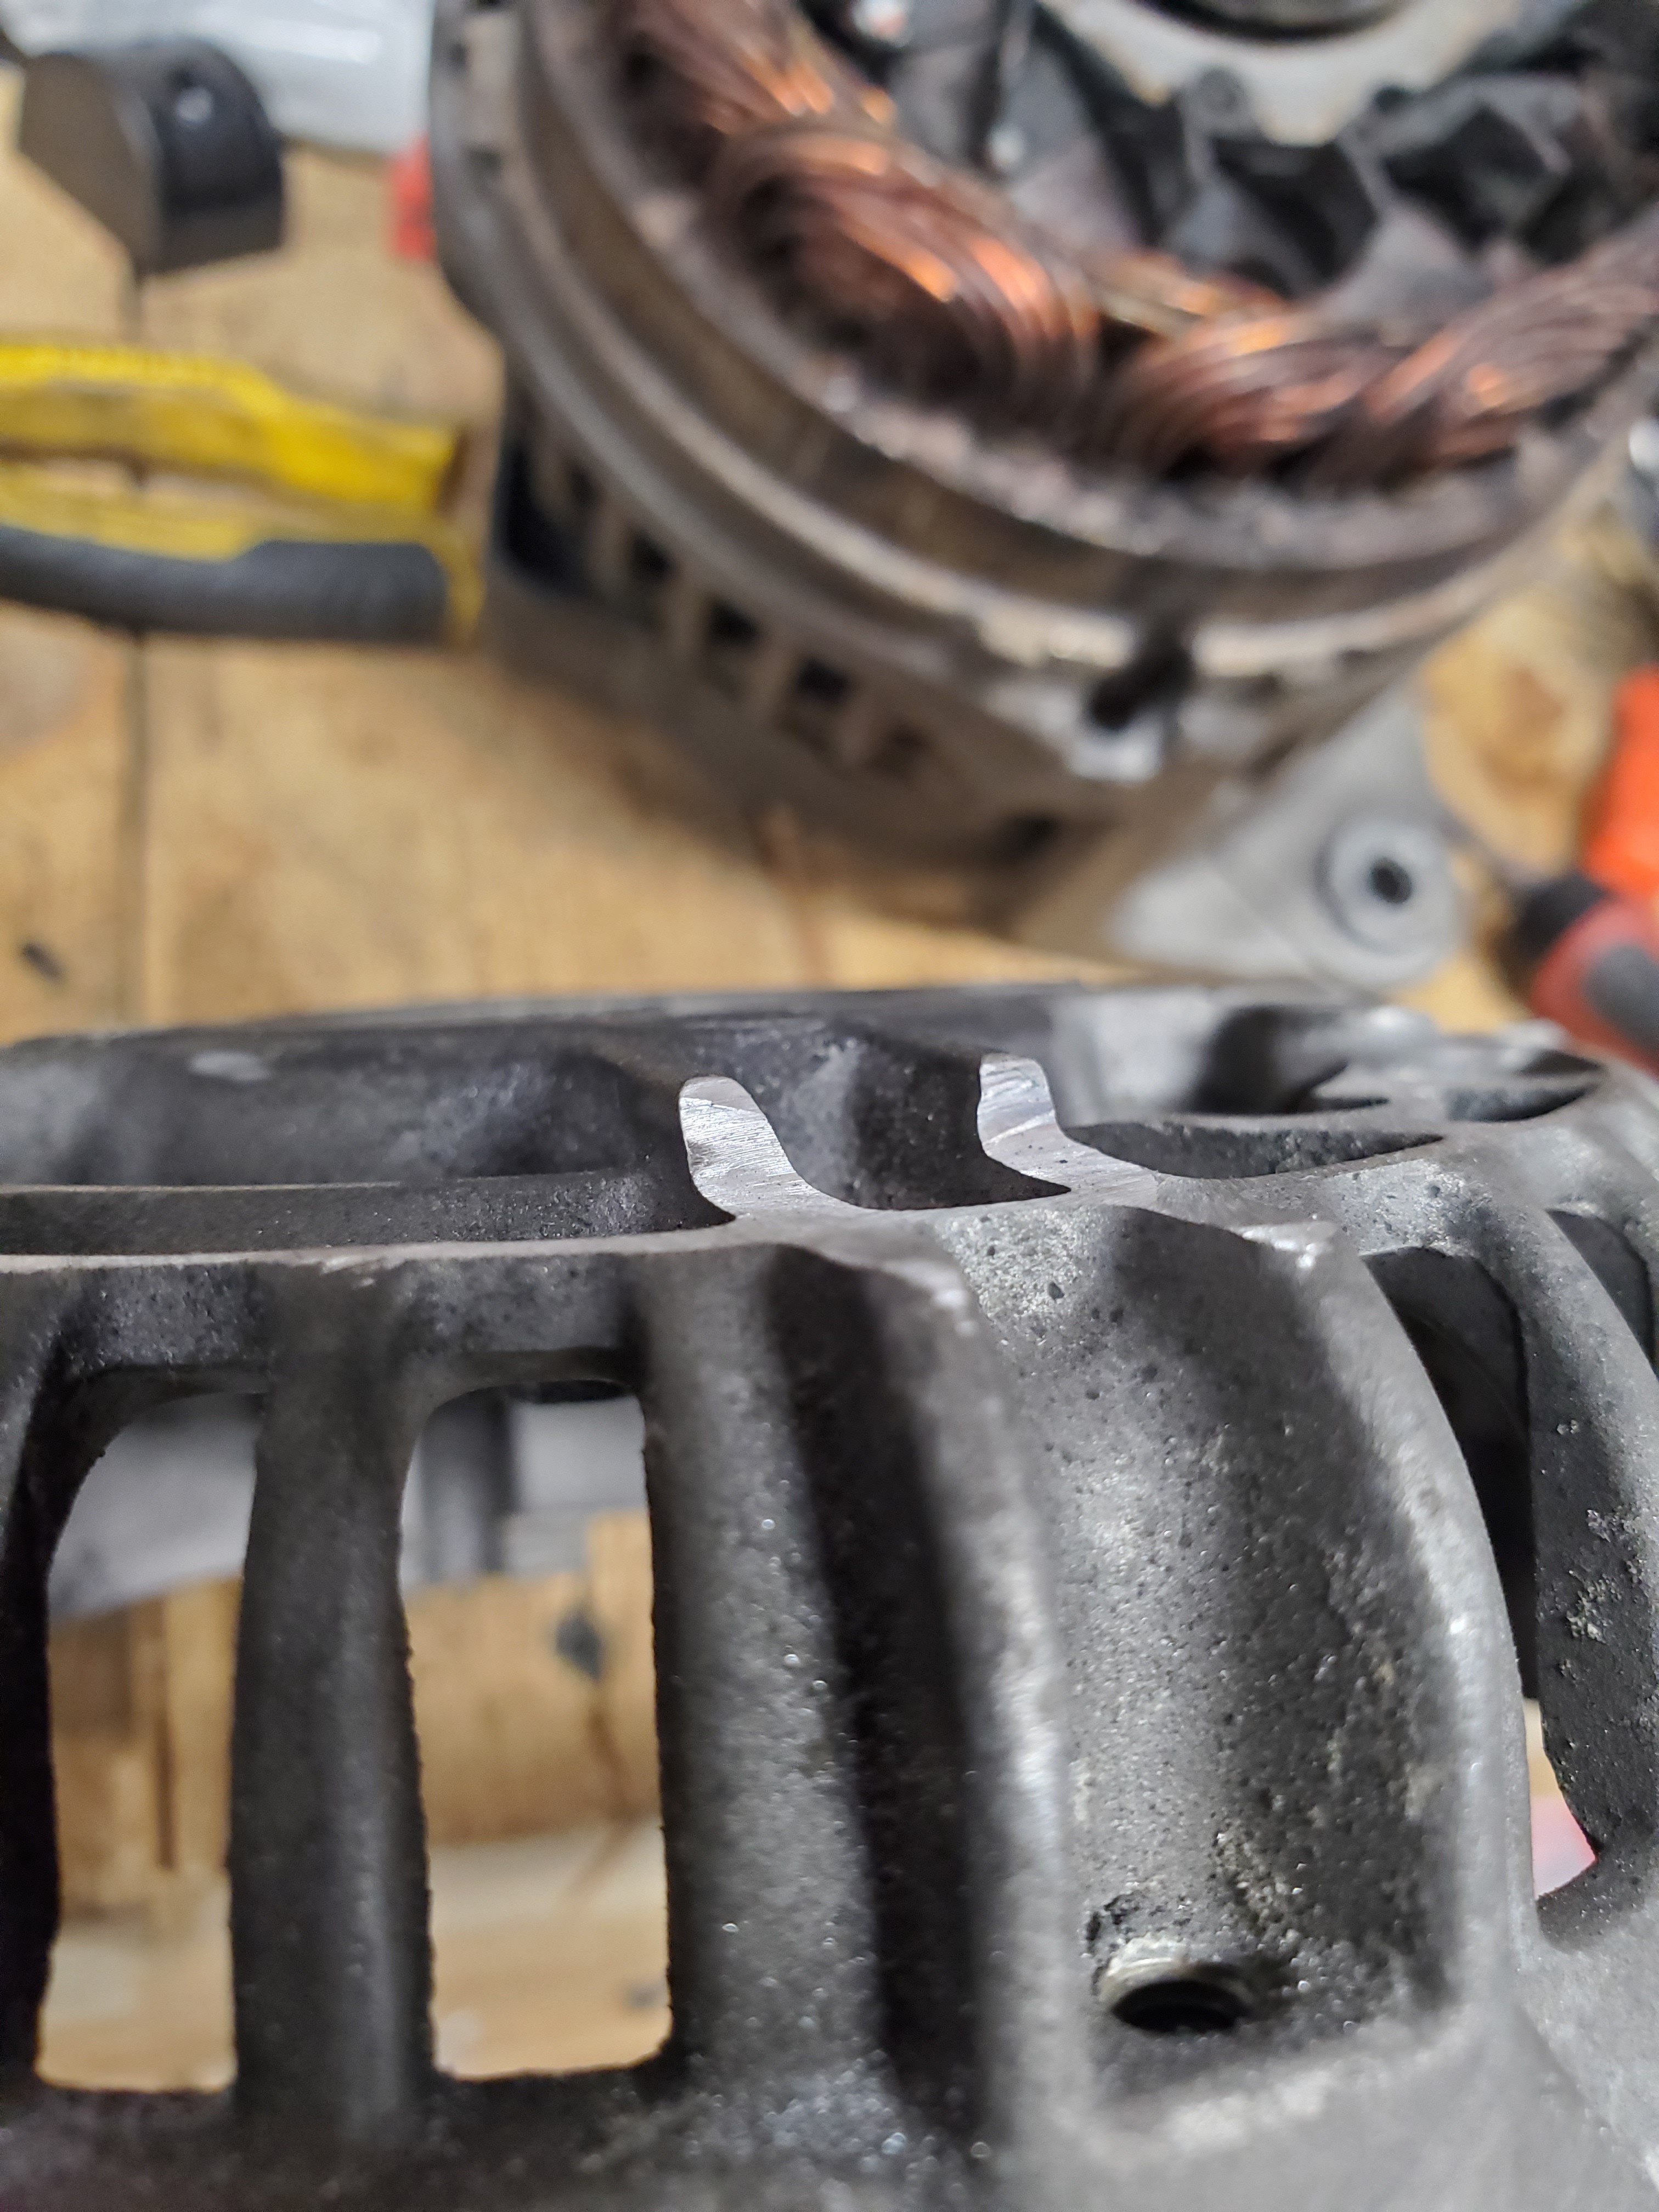
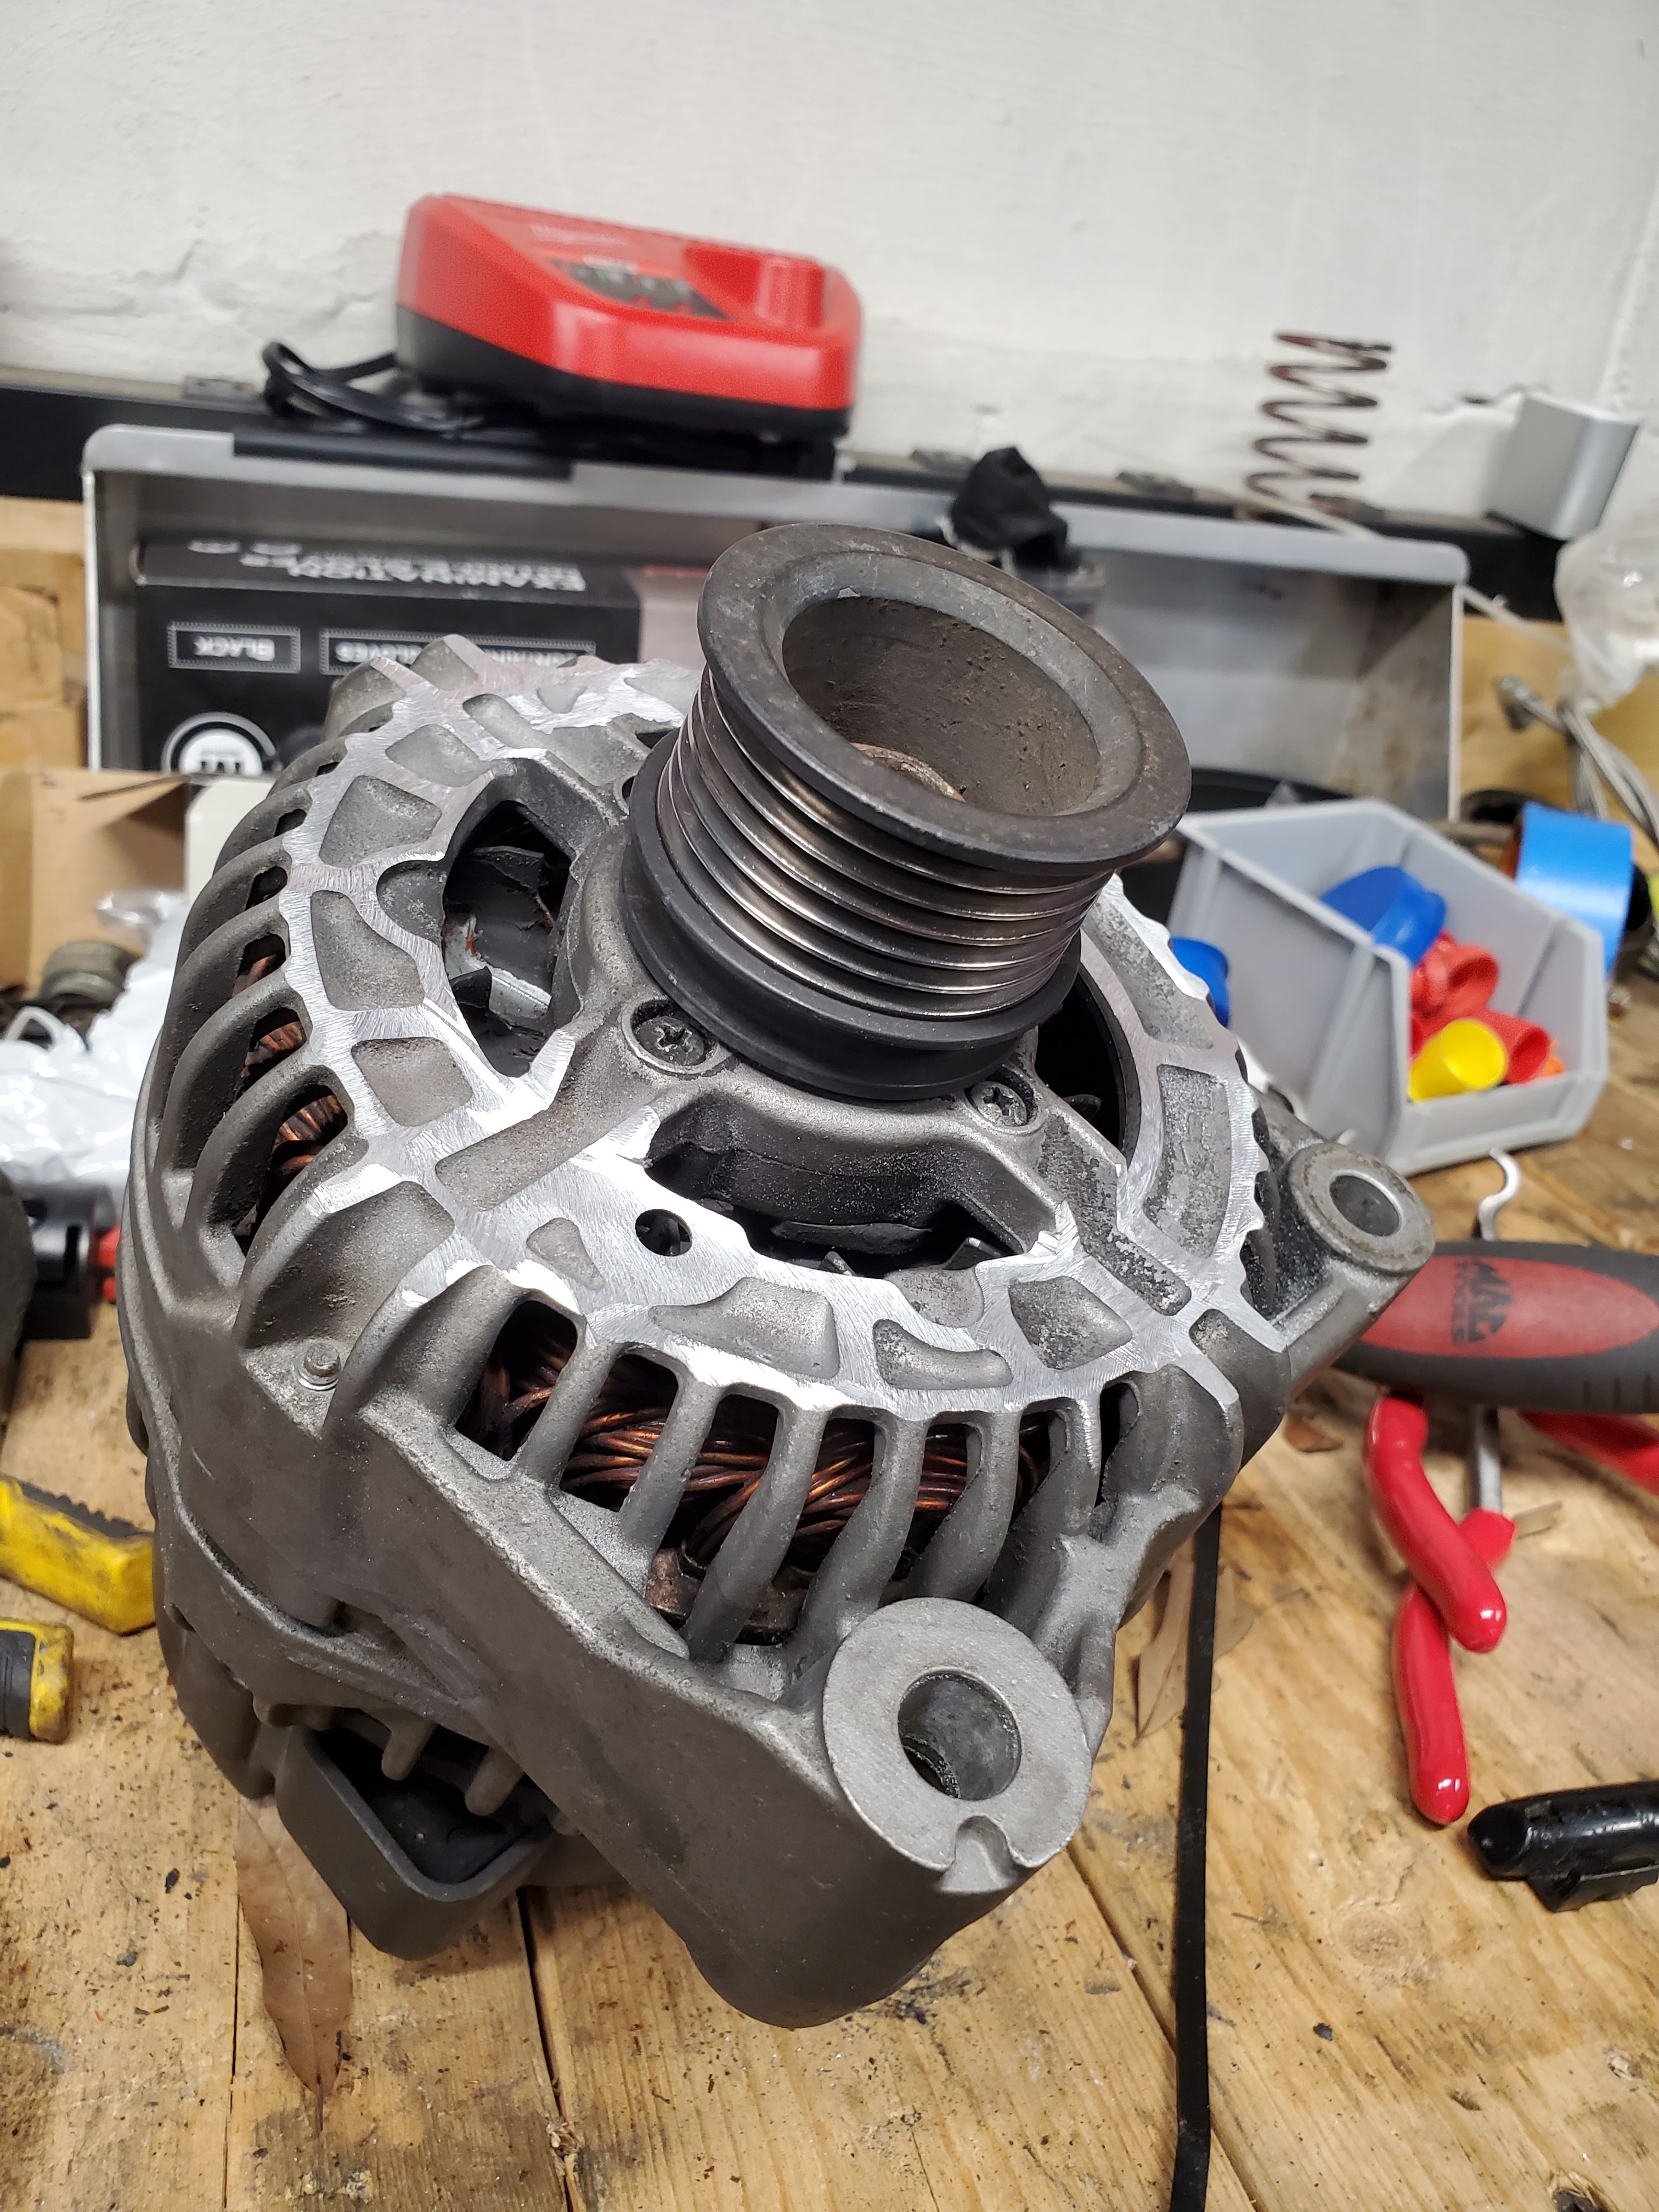
                      Now in typical fashion of course the bracket didn't fit right lol. It was hitting on the alternator housing, after talking to the seller it appears it was designed around a smaller 90 amp alternator, and mine is a 120 amp. Soooooo I took the alternator apart and massaged off some material.
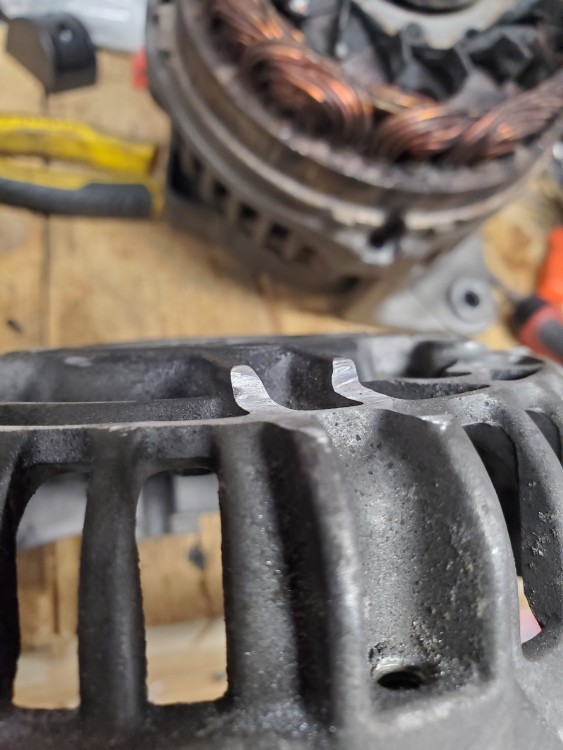
                      20201230181904.jpg

                      And here is the alternator reassembled. 
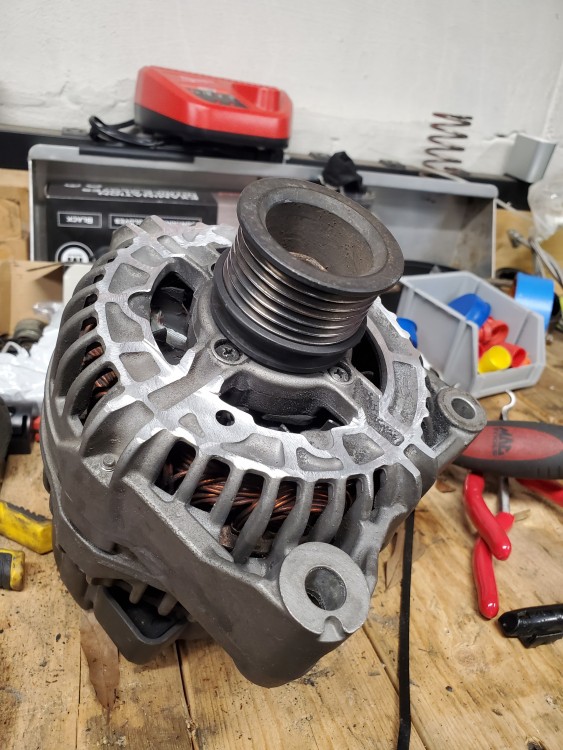
                      20201230184541.jpg

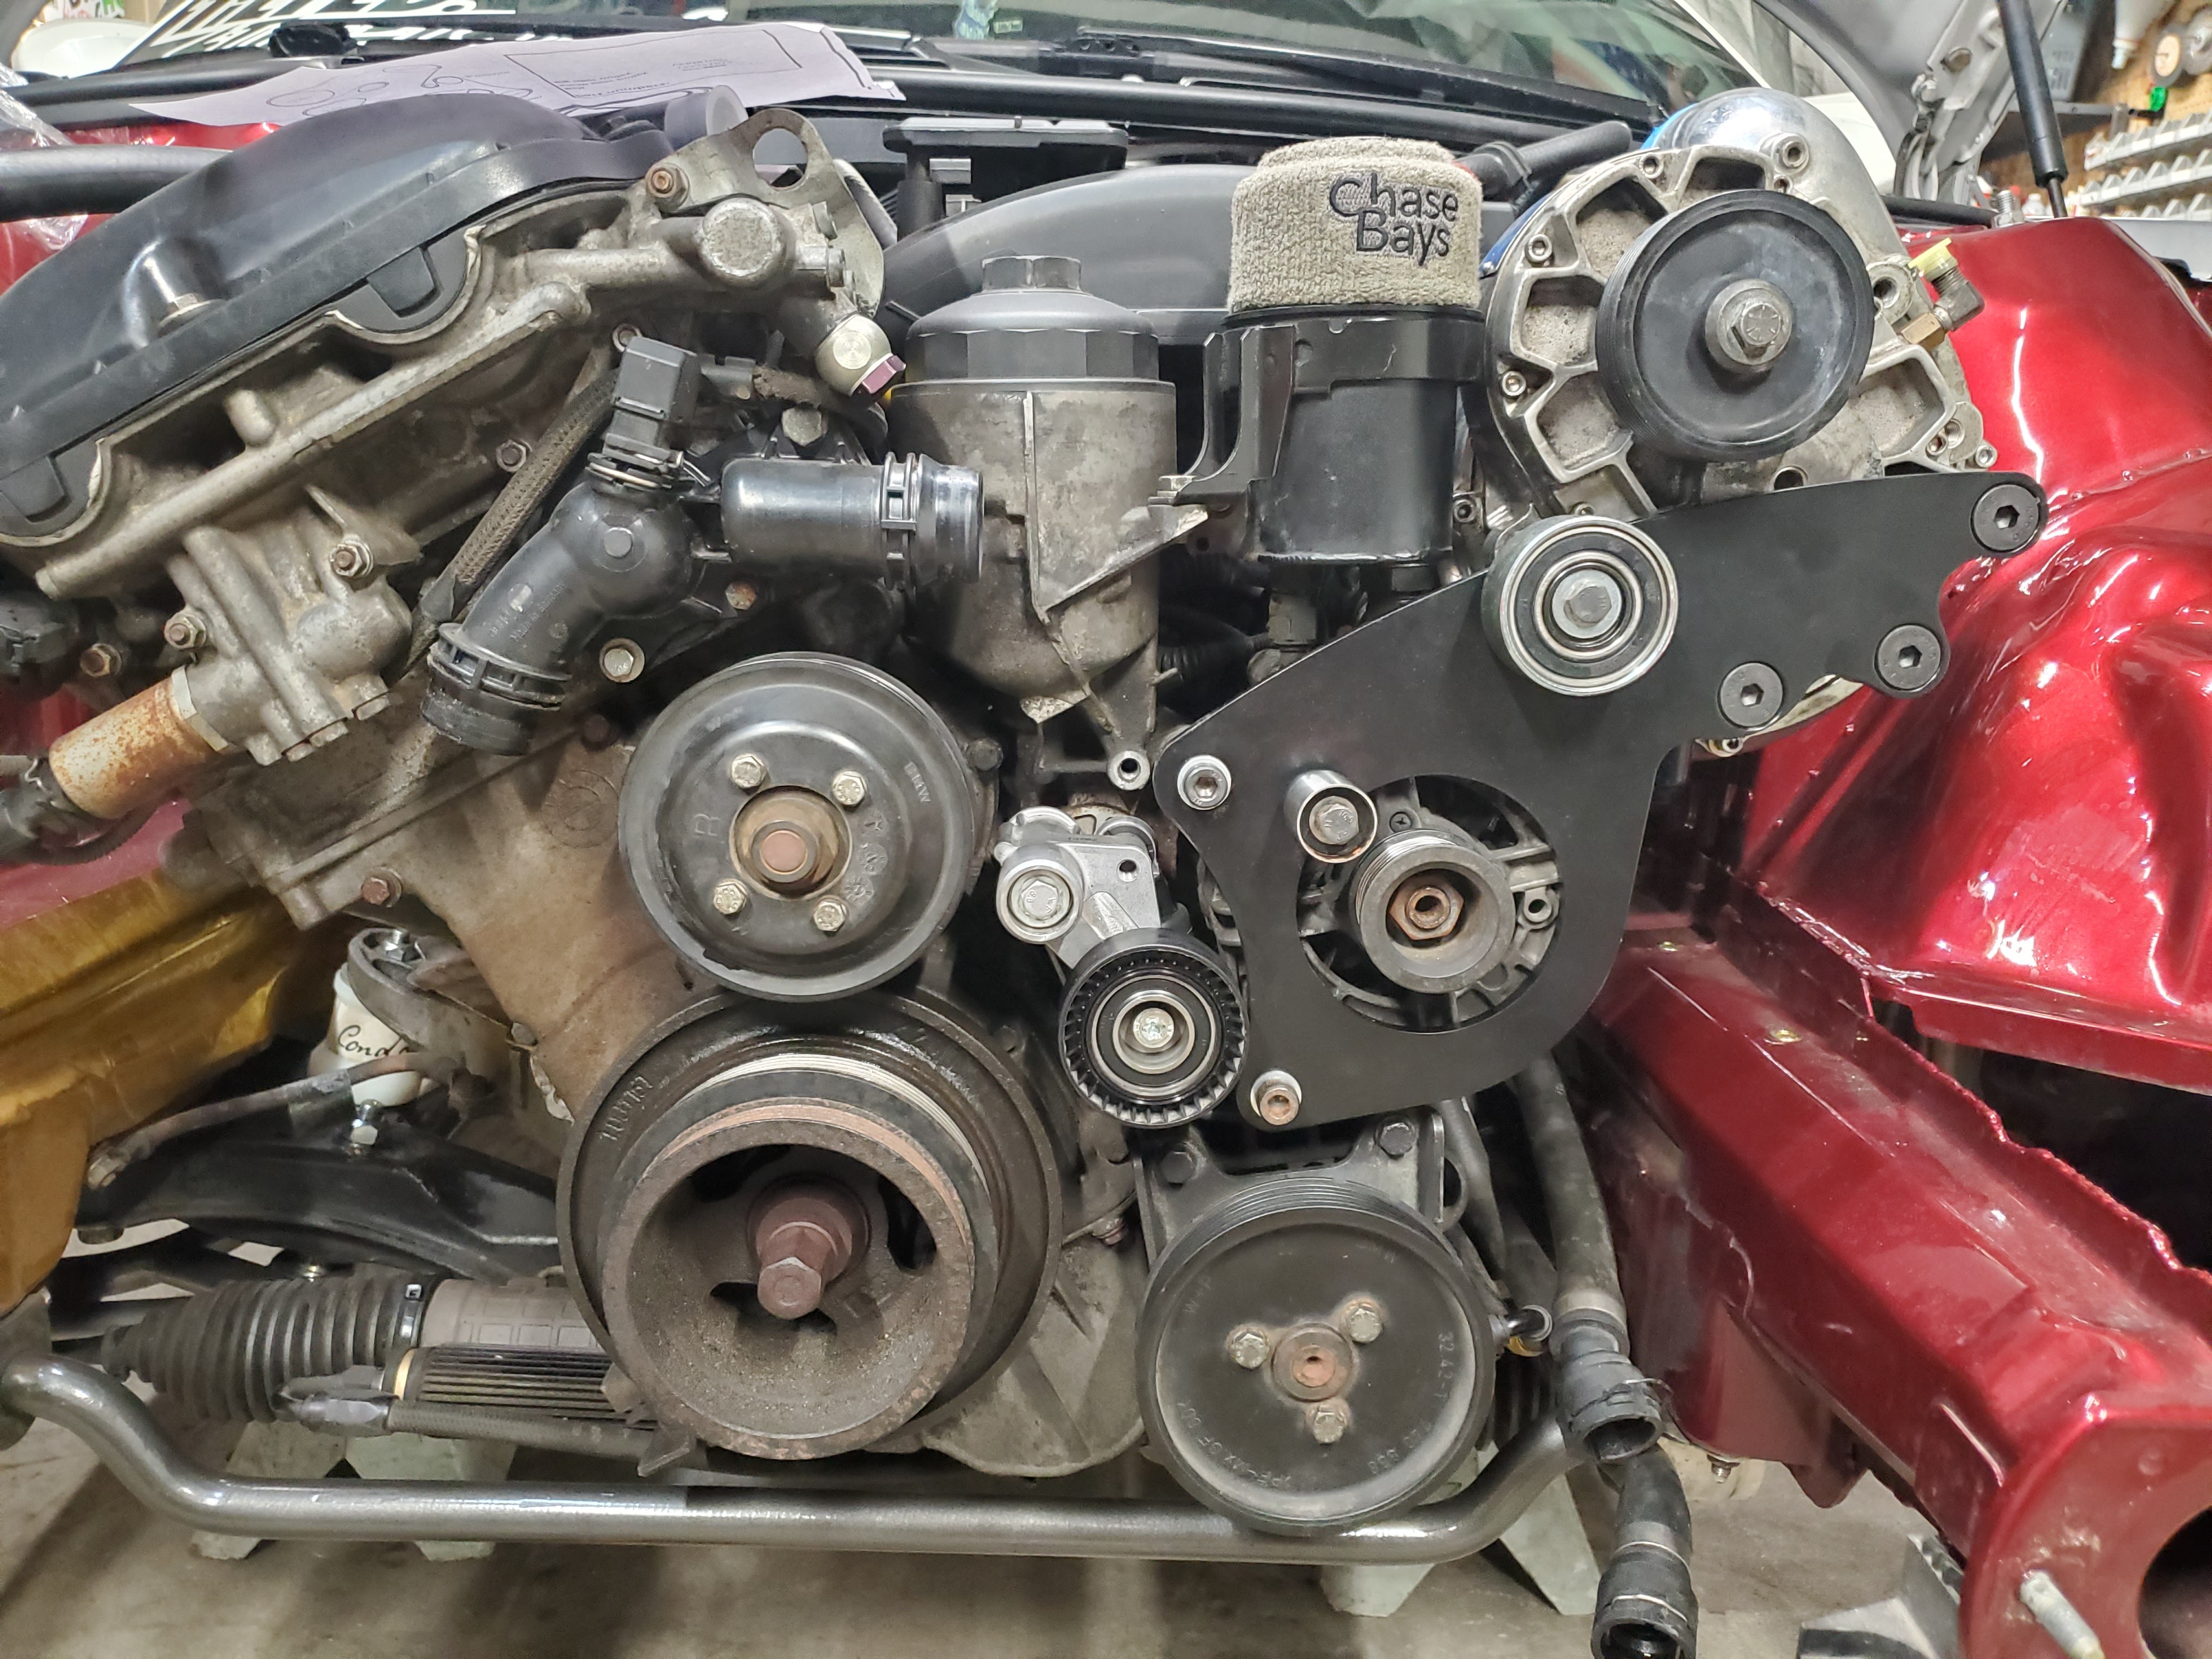
                      And here's the bracket mounted with the blower on as well.
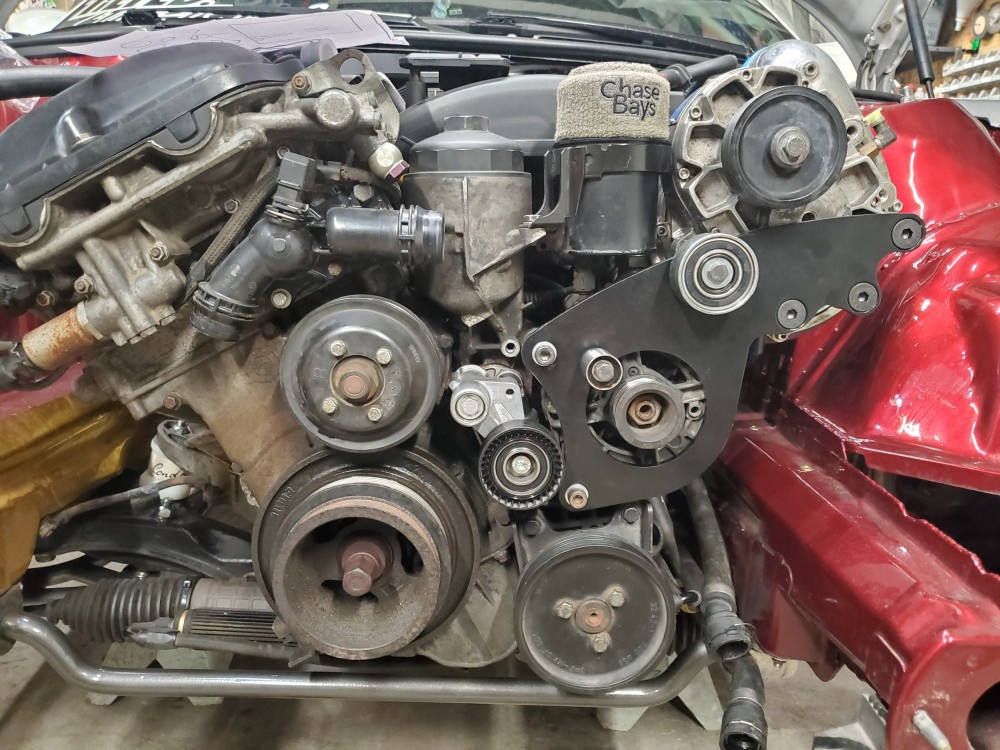
                      20201230174146.jpg

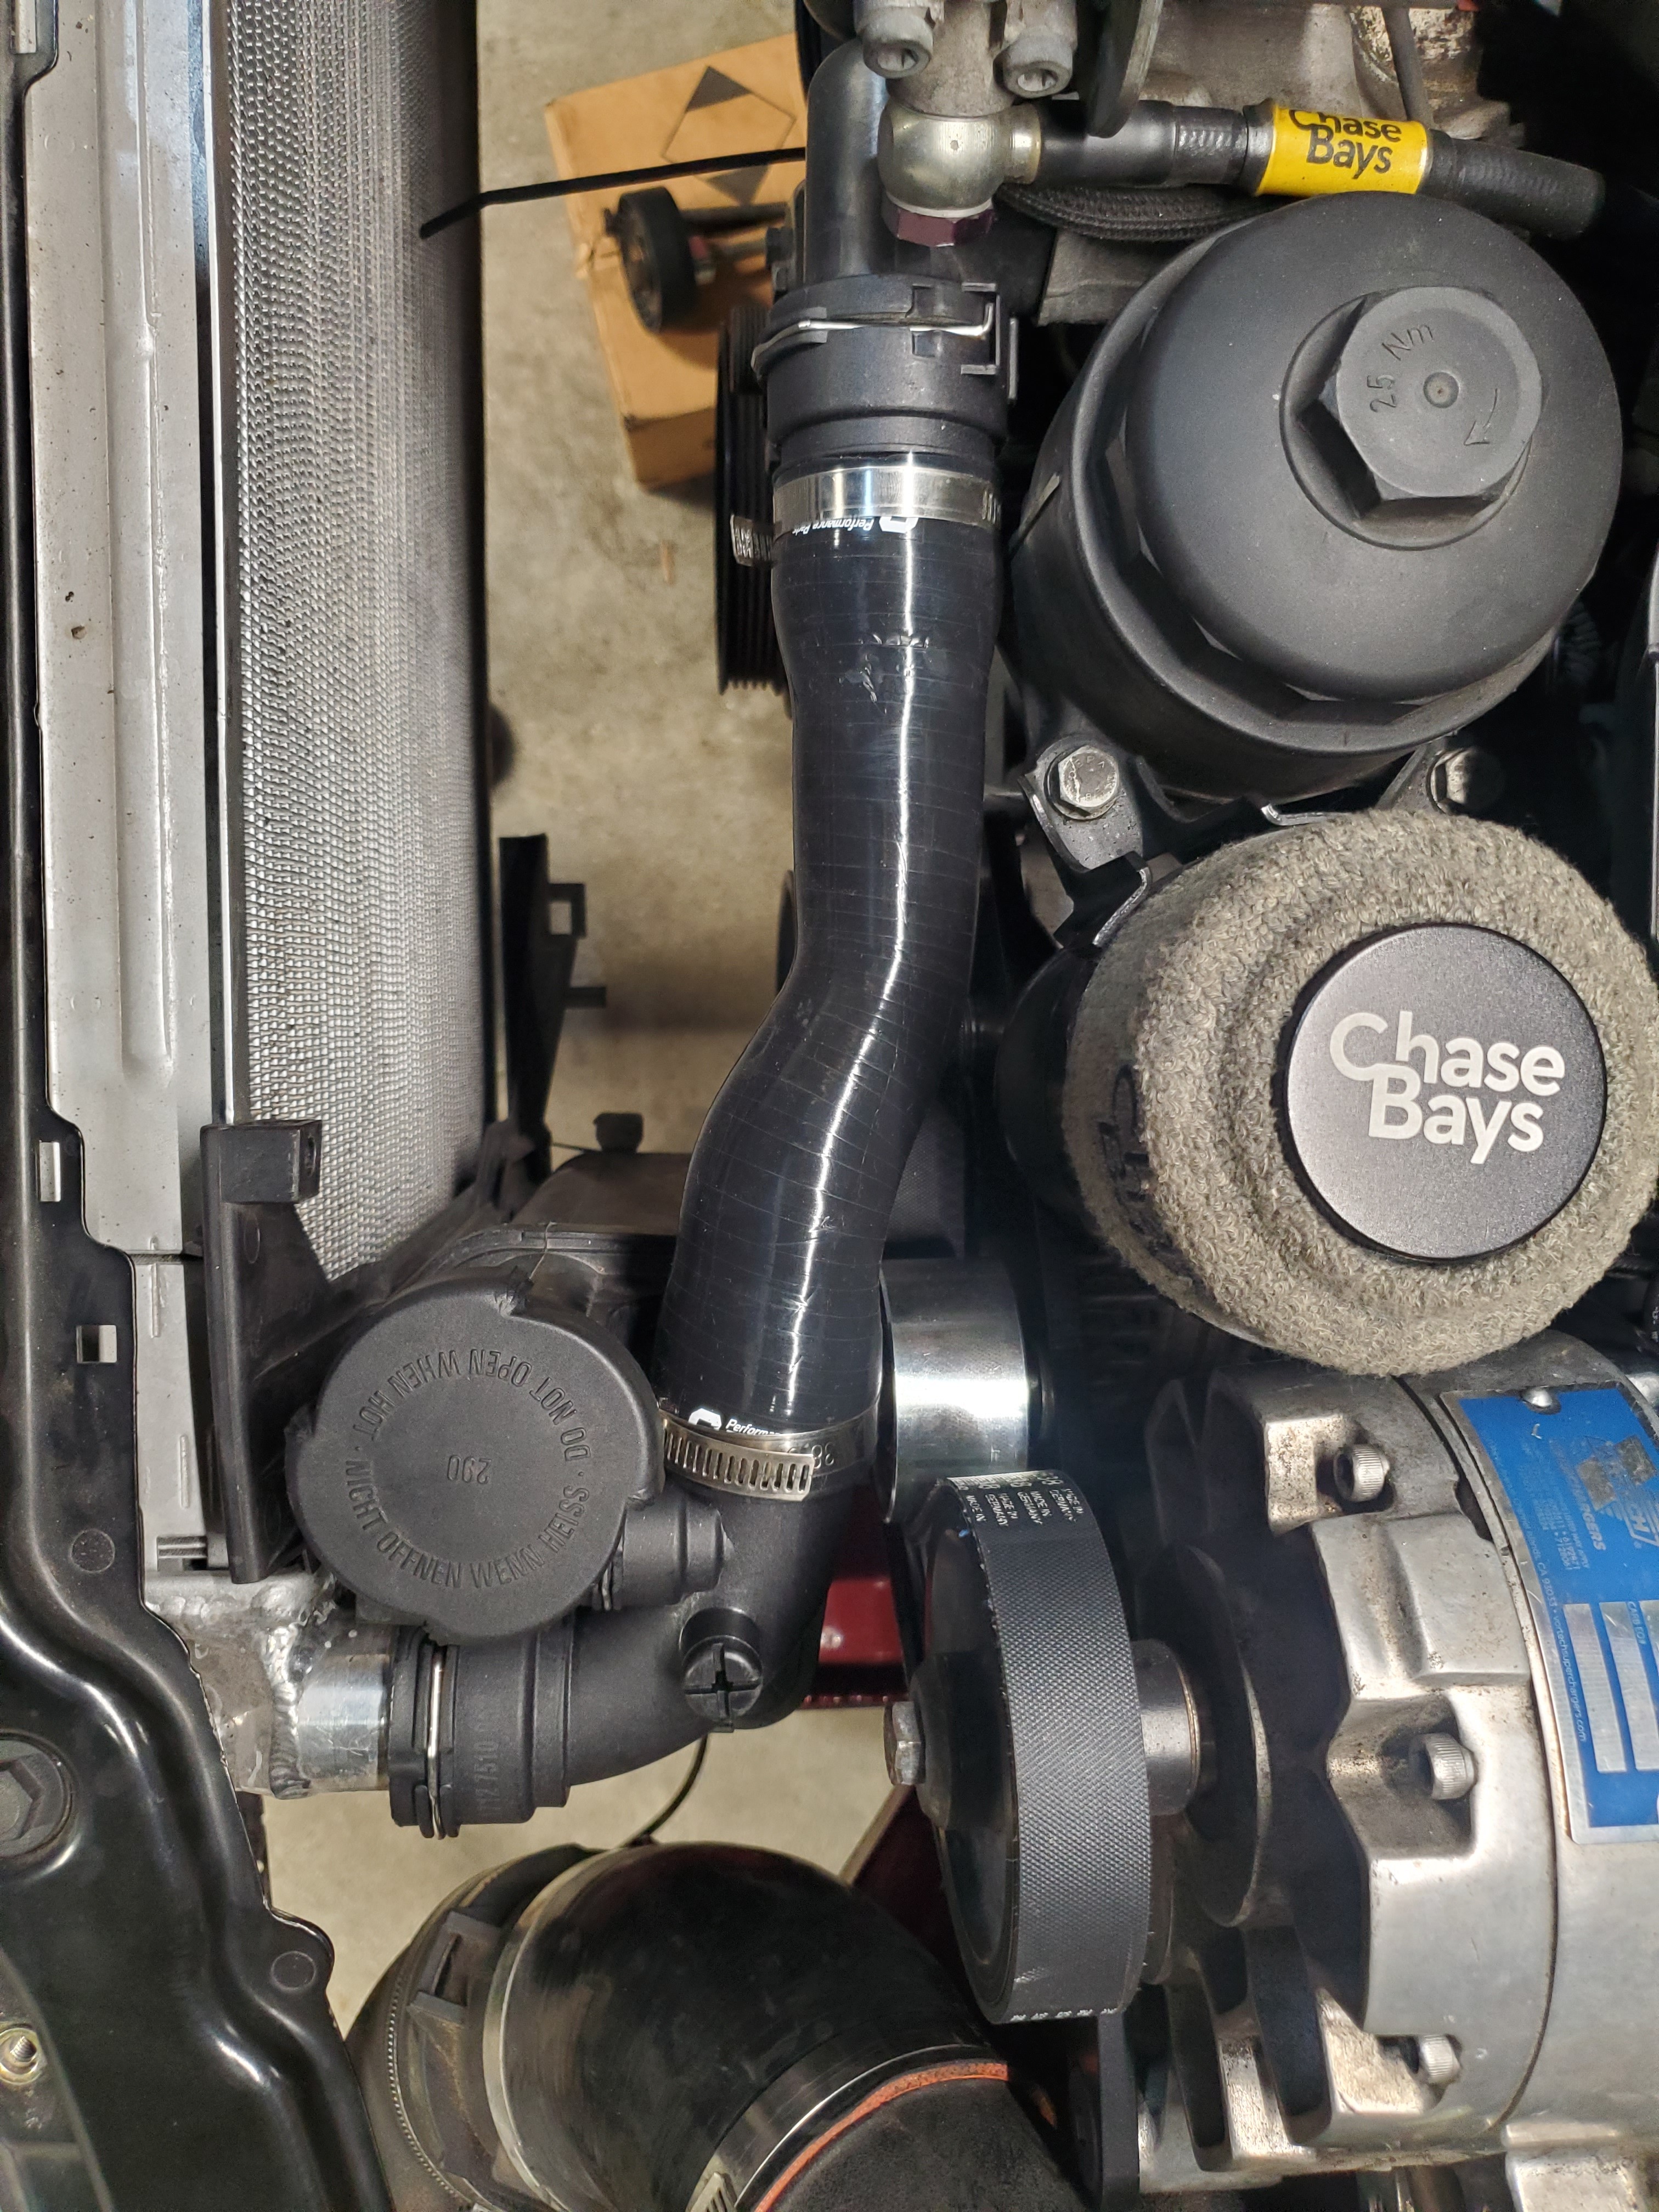
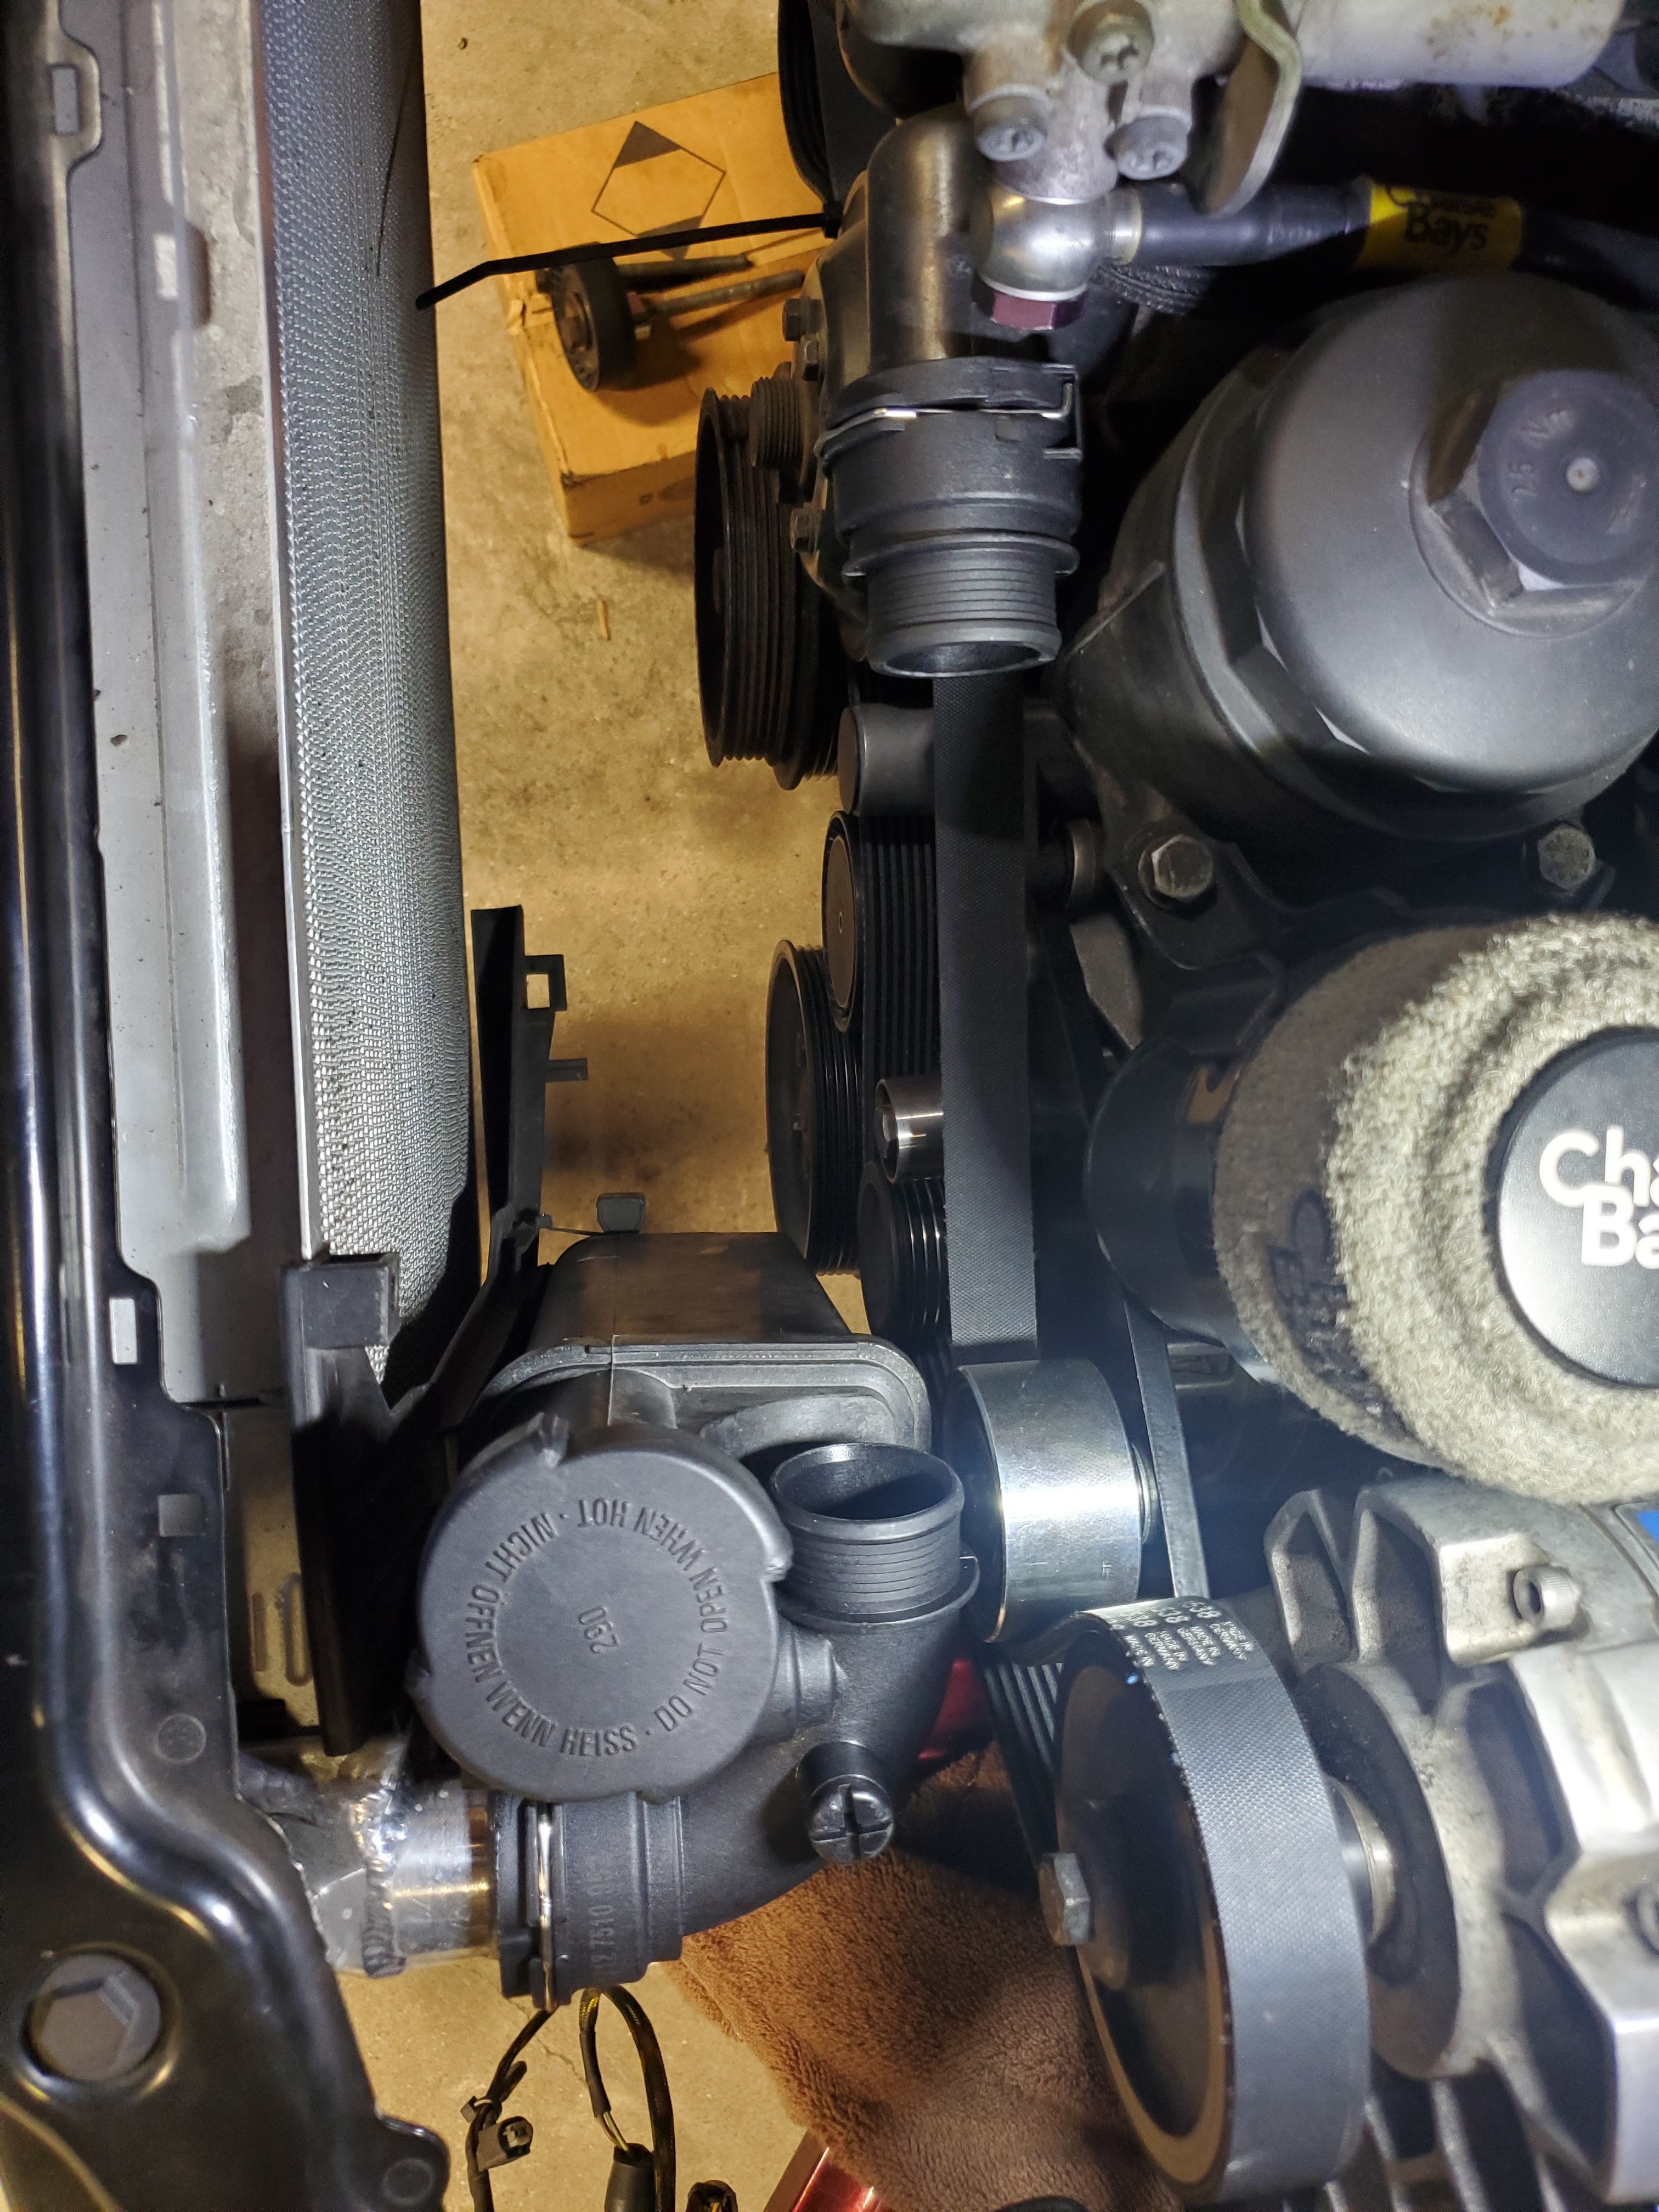
                      The next hurdle I knew about, which was seeing how much clearance there was on the expansion tank being that this kit was designed with the factory radiator. I have the thicker CSF aluminum one, and the friend I bought the kit from tried to swap to a CSF like mine and said it didn't fit.

                      Somehow it fits on my car though, so I'm not mad about that hahahah.

                      Here is a photo of the fitment of the tank/radiator along with the start of fitting the new silicone upper hose, which I started by chopping off the clamps of an original one to get the ends off.
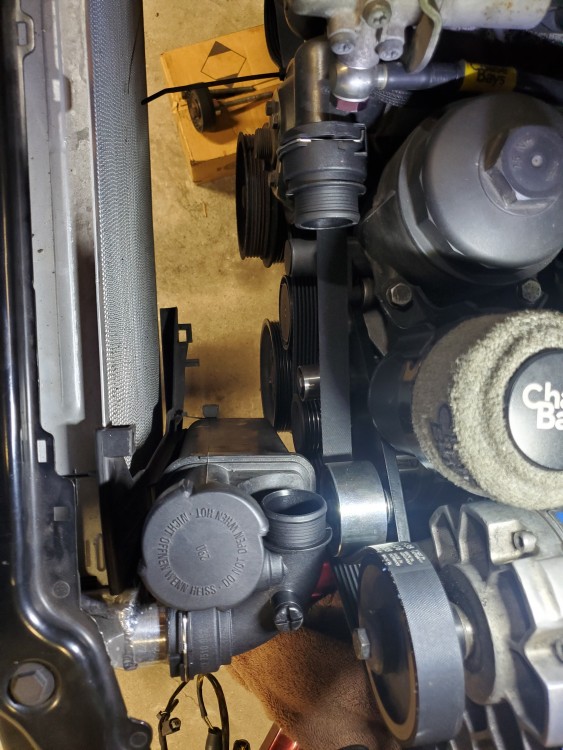
                      20210123121900.jpg

                      Then I trimmed the upper hose and installed the clamps.
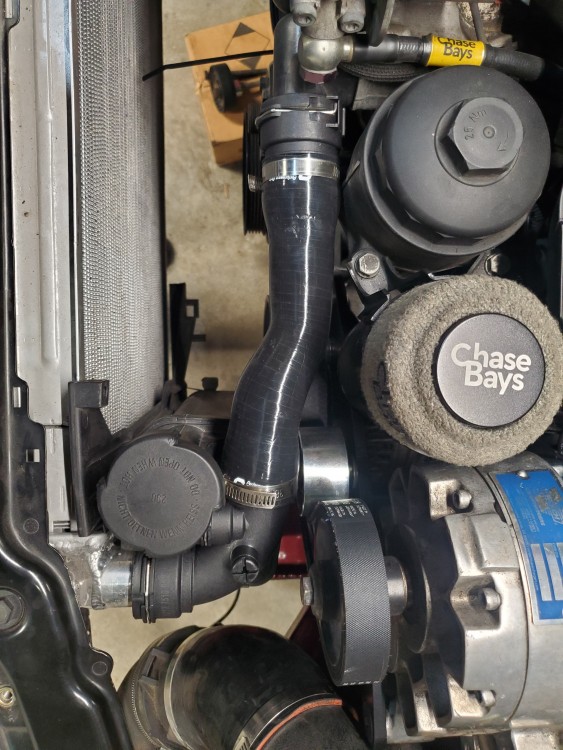
                      20210123125105.jpg

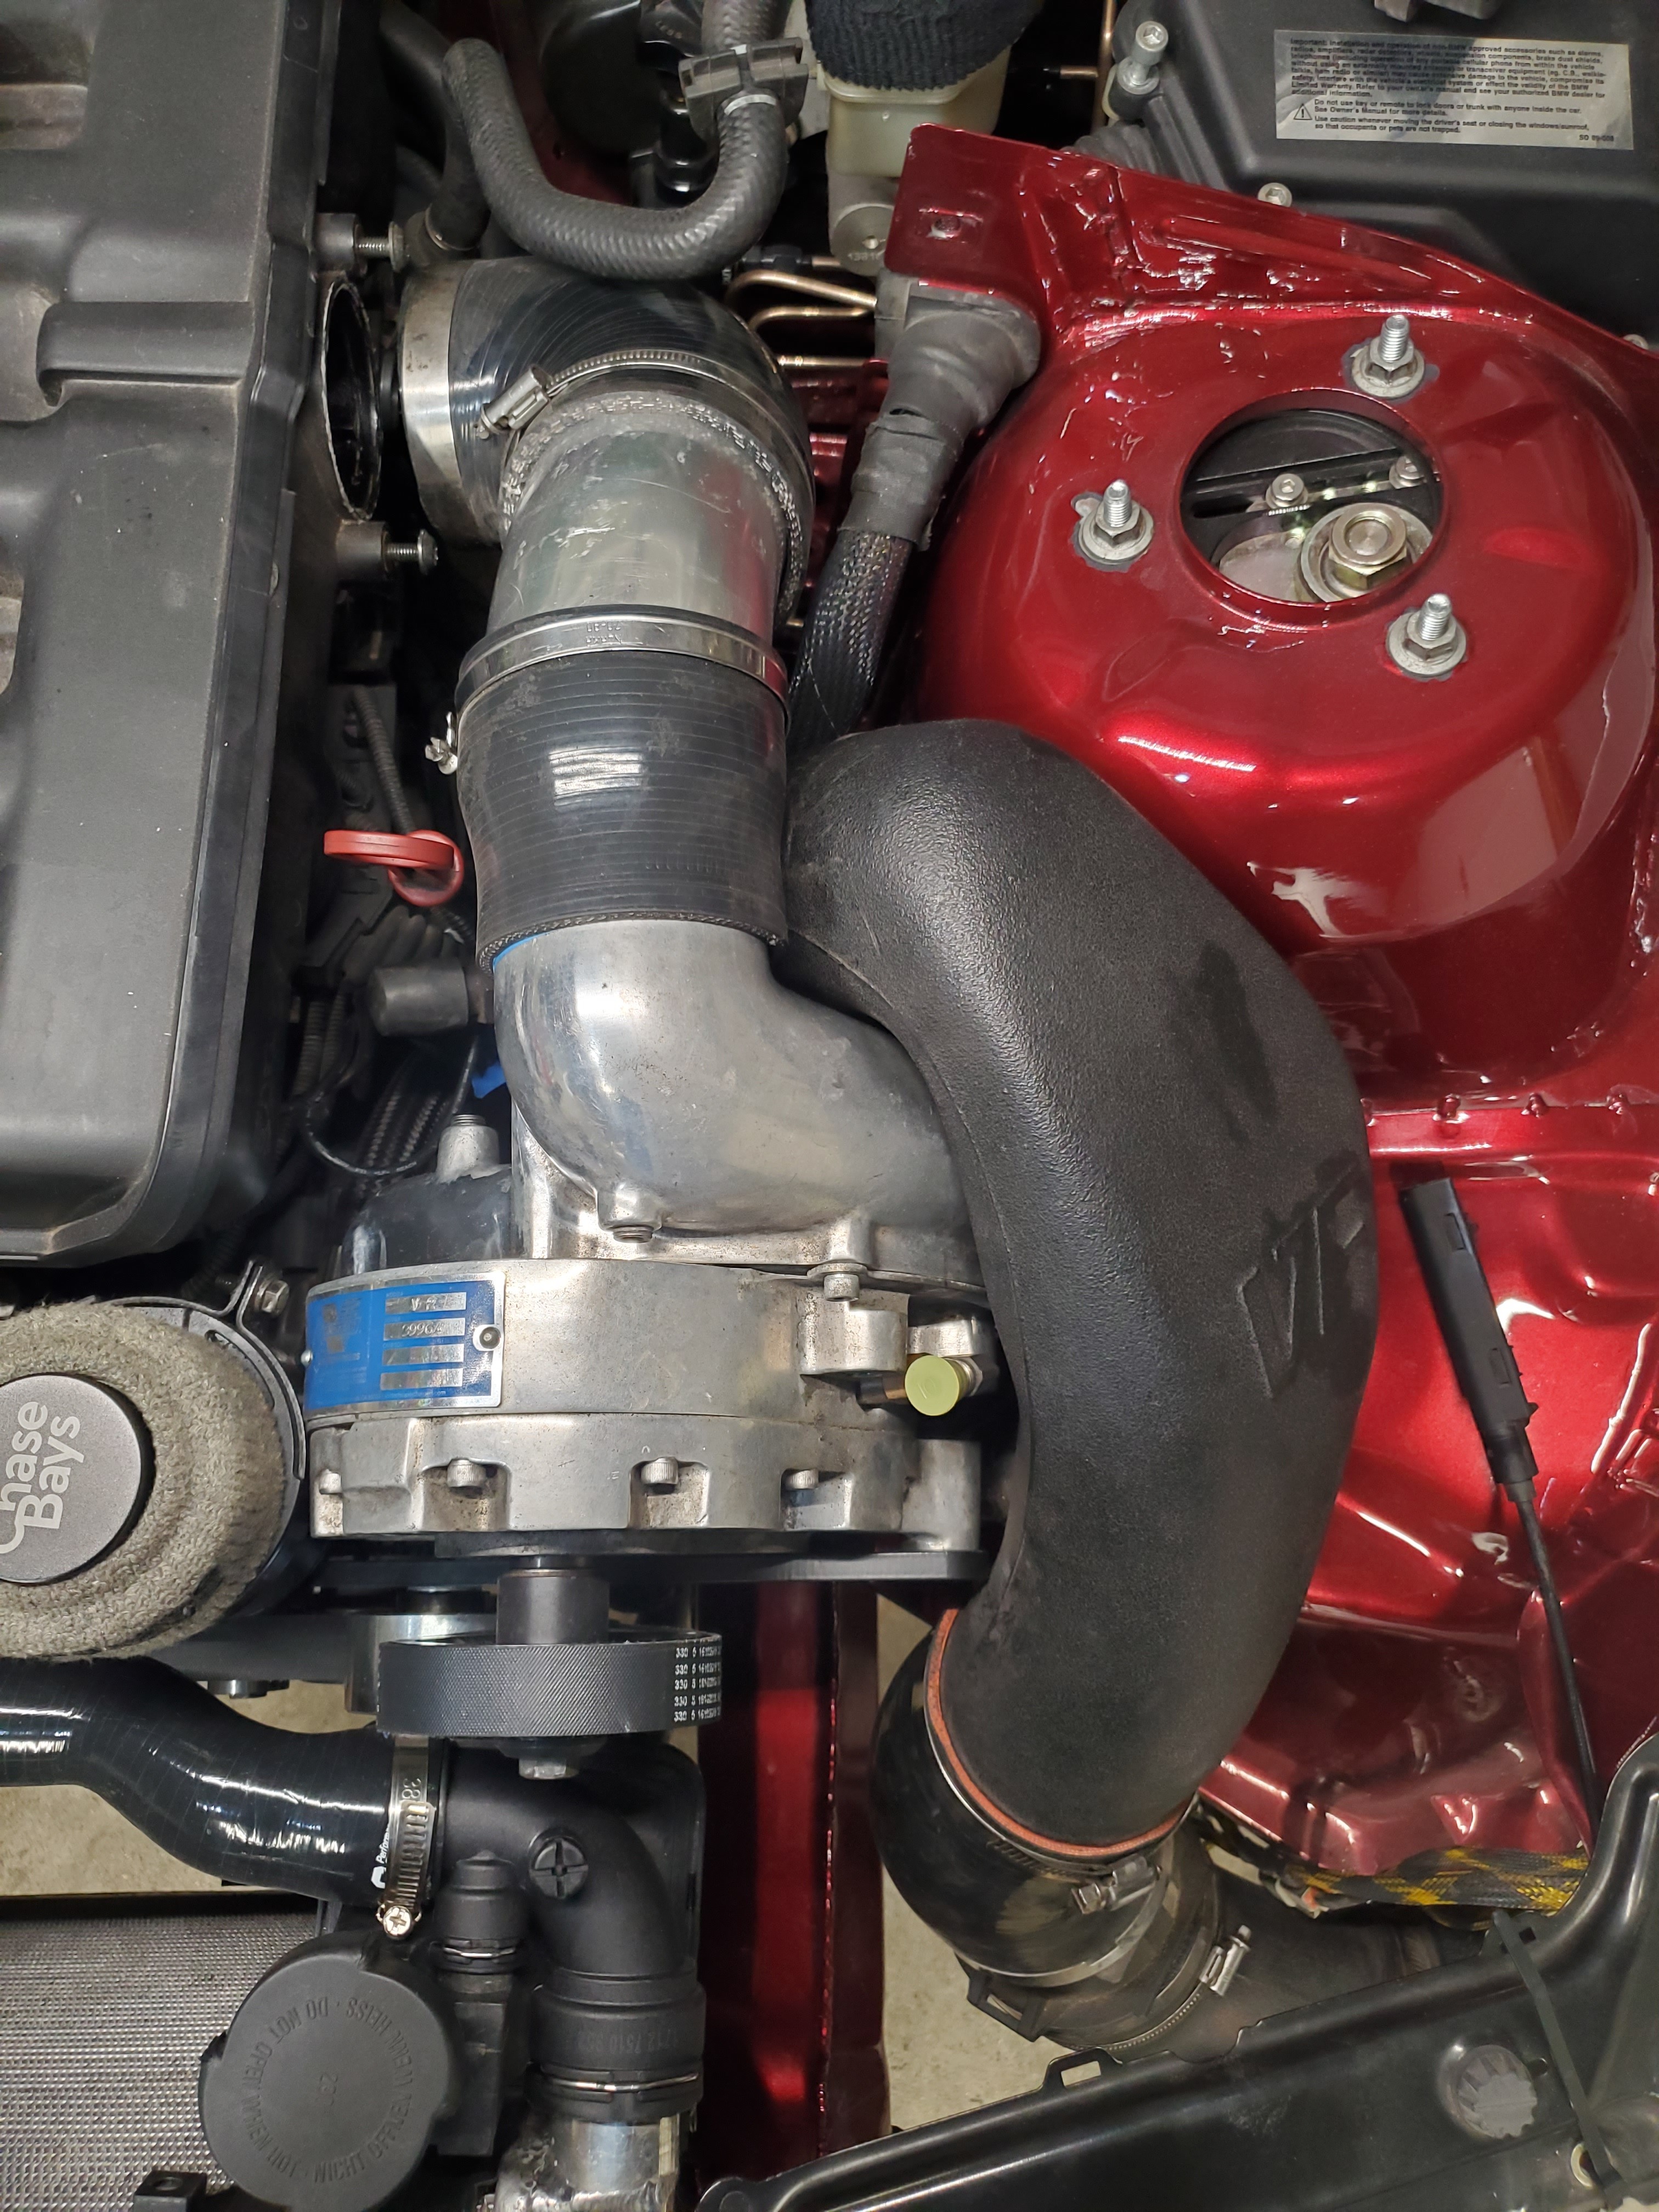
                      Here is the blower mounted with the intake on it along with the M50 charge pipe. (This is the b30 manifold though)
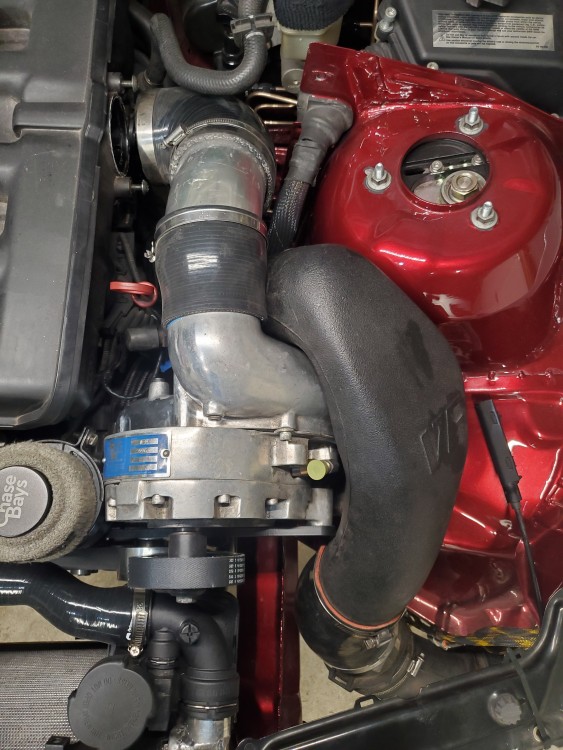
                      20210123125200.jpg

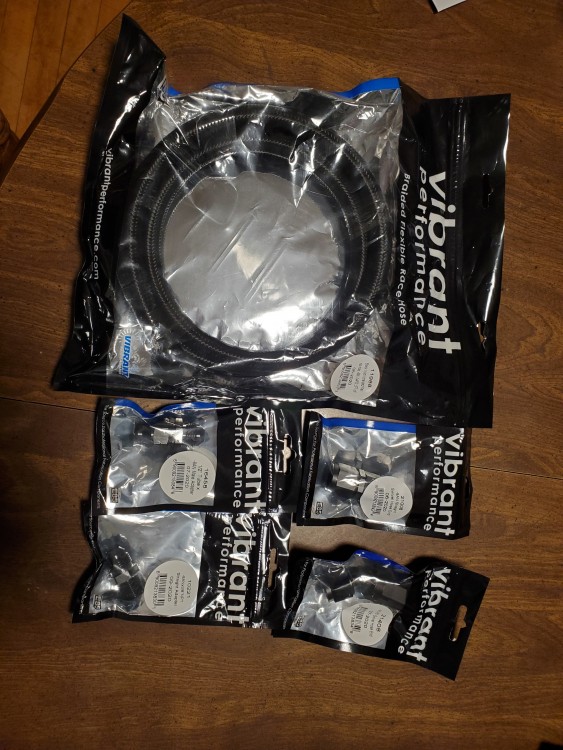
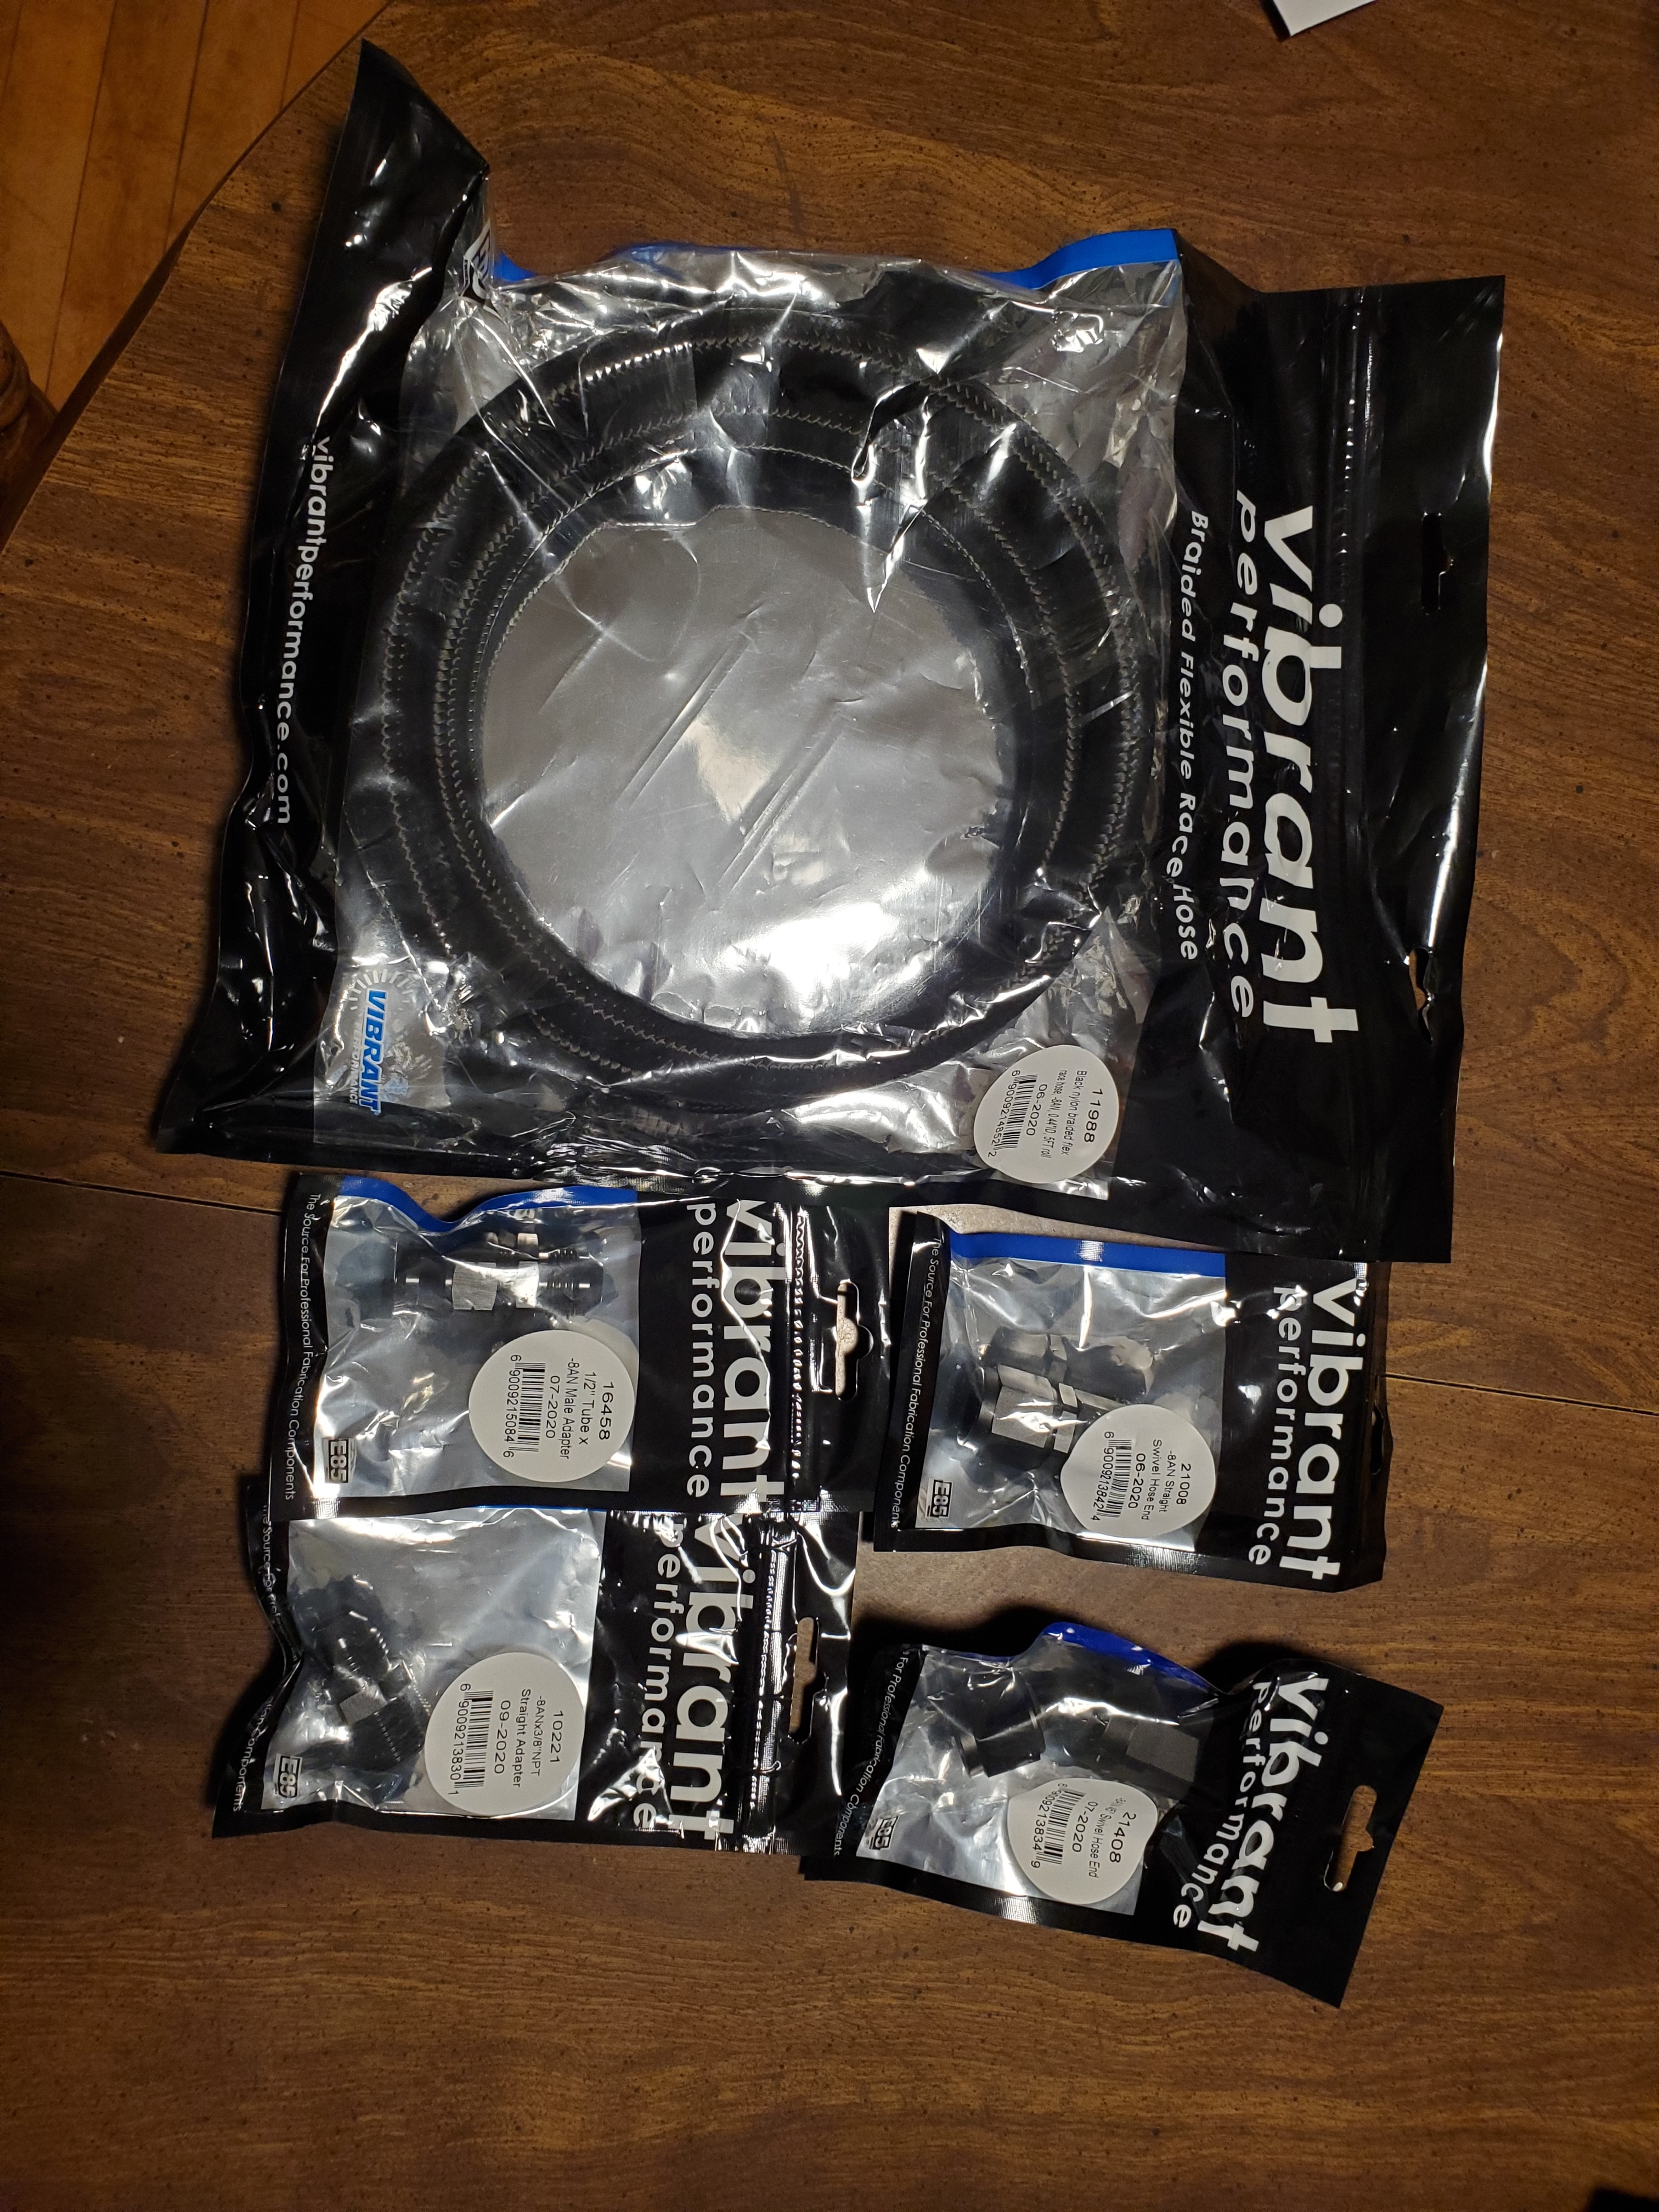
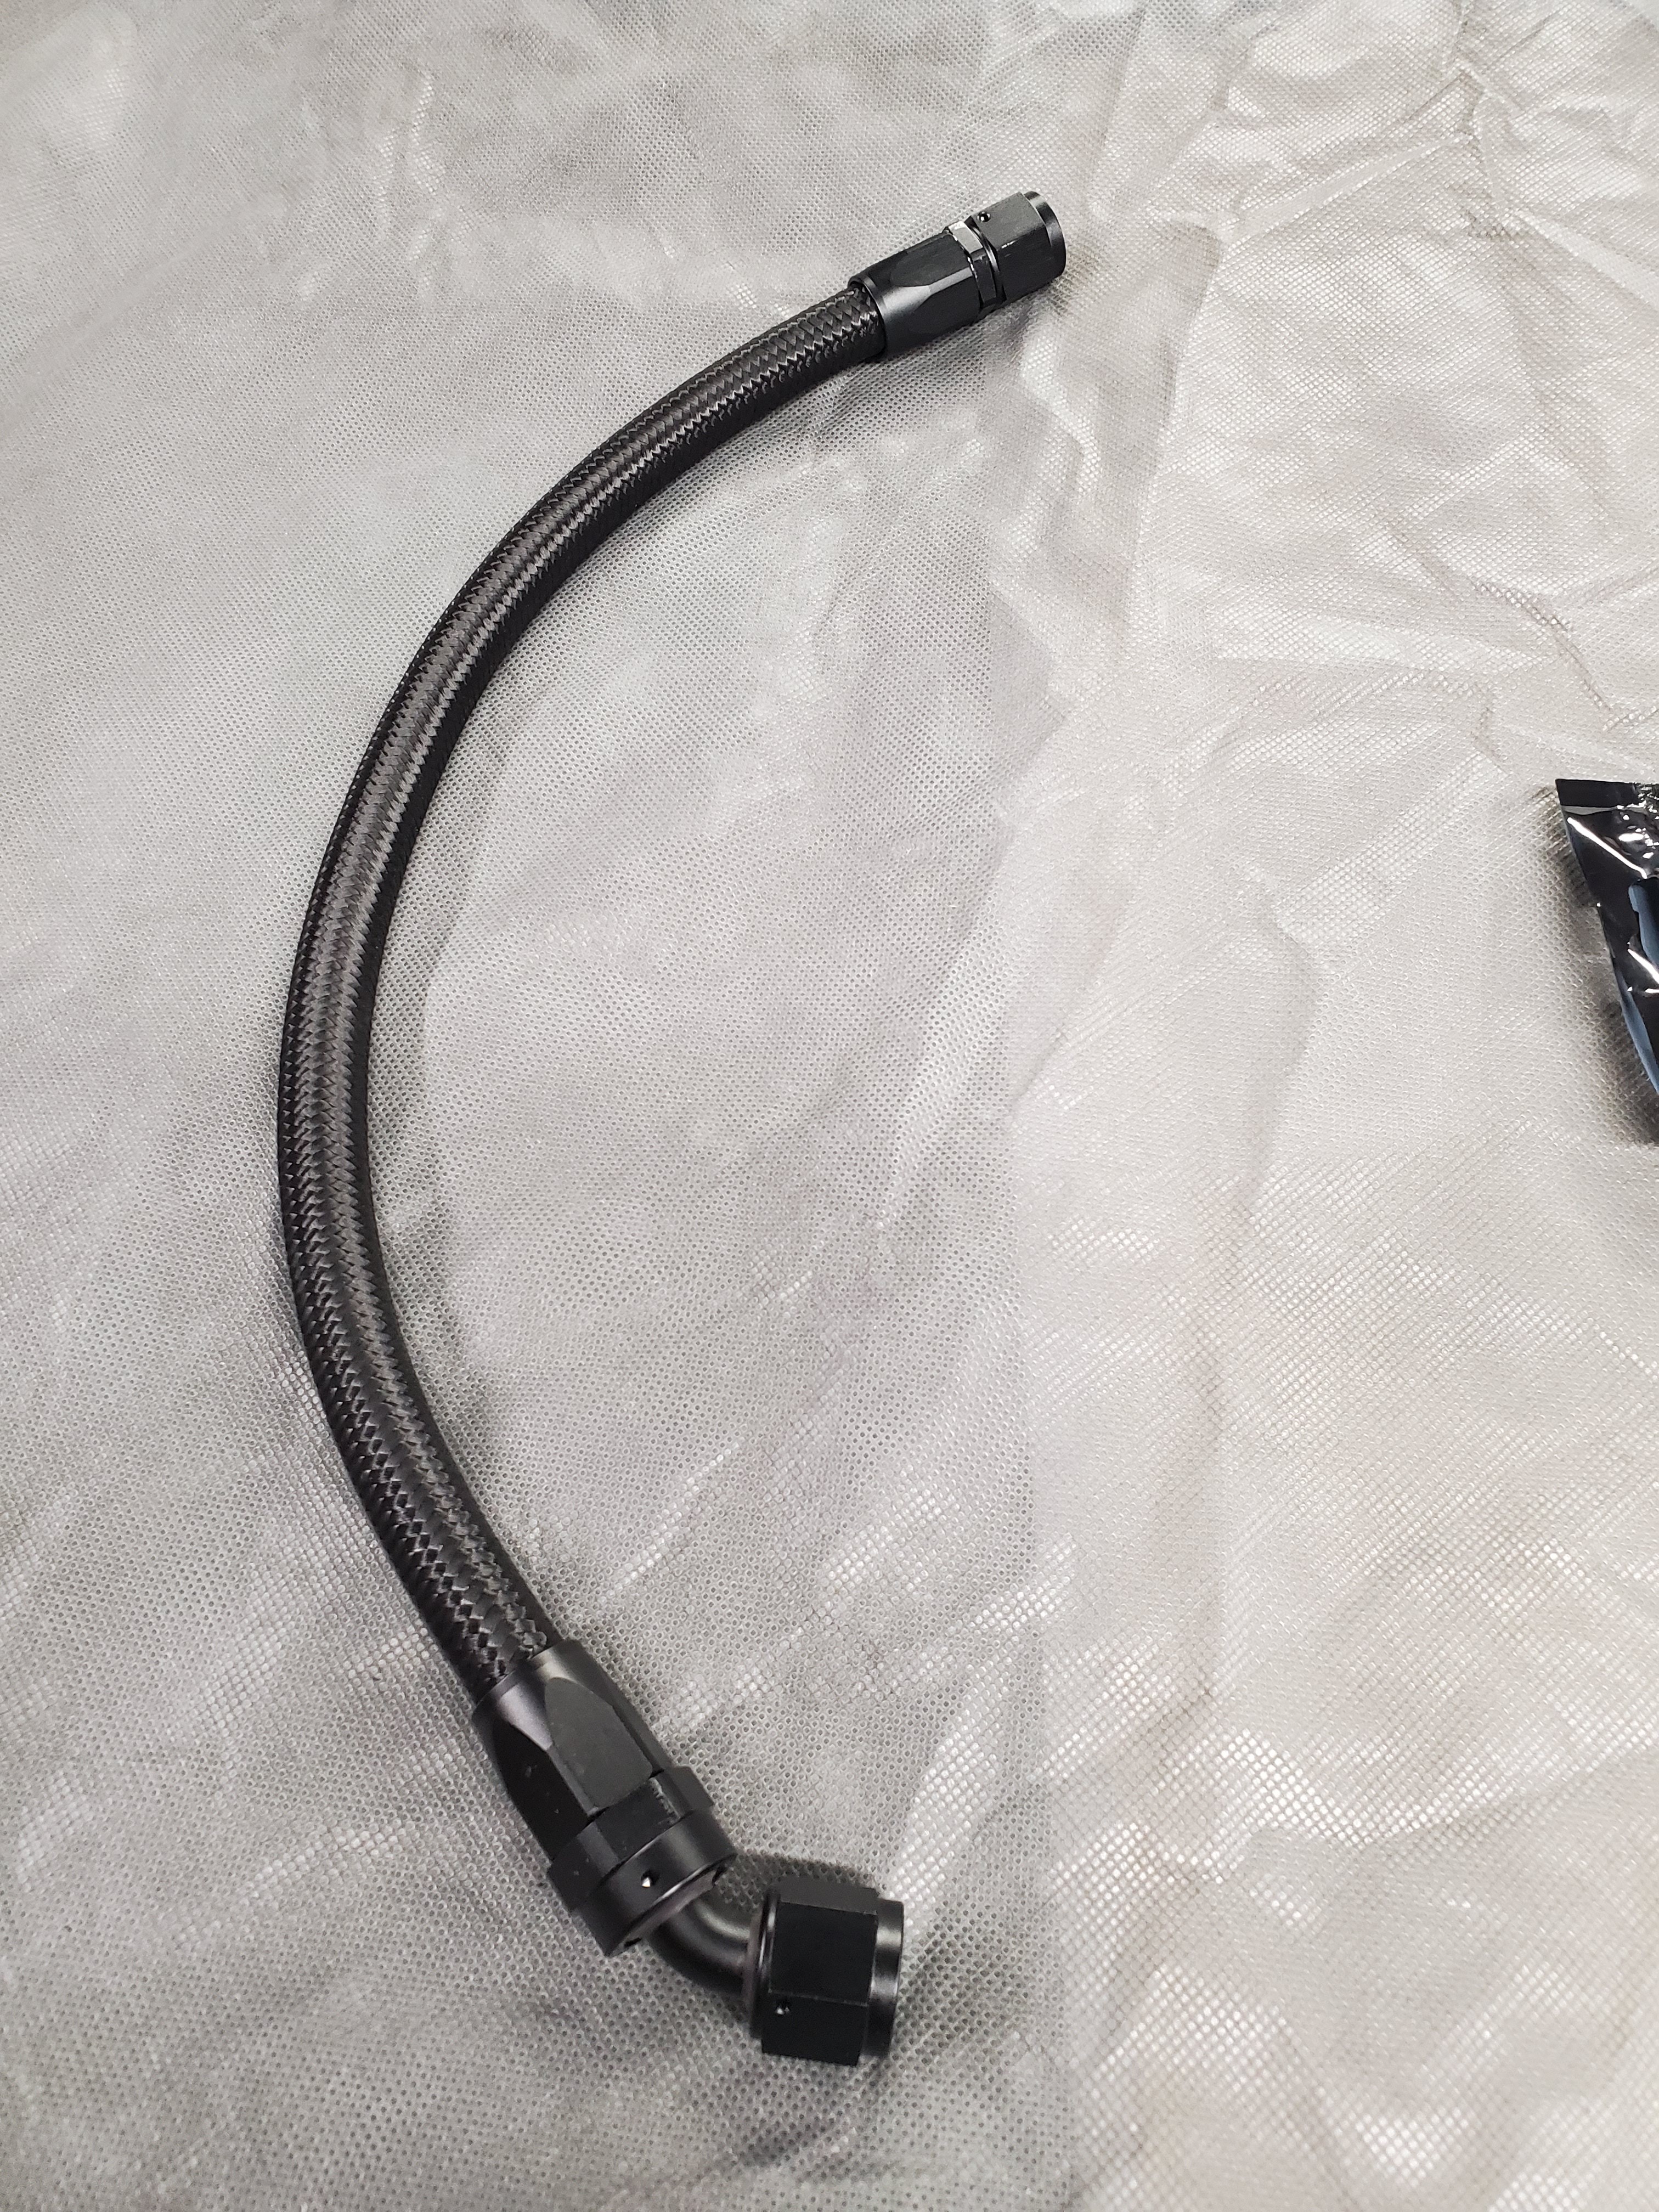
                      I decided that I wanted to ditch the old leaky oil return hose that came with the kit. So I ordered up some Vibrant parts 🤗

                      20210127174439.jpg

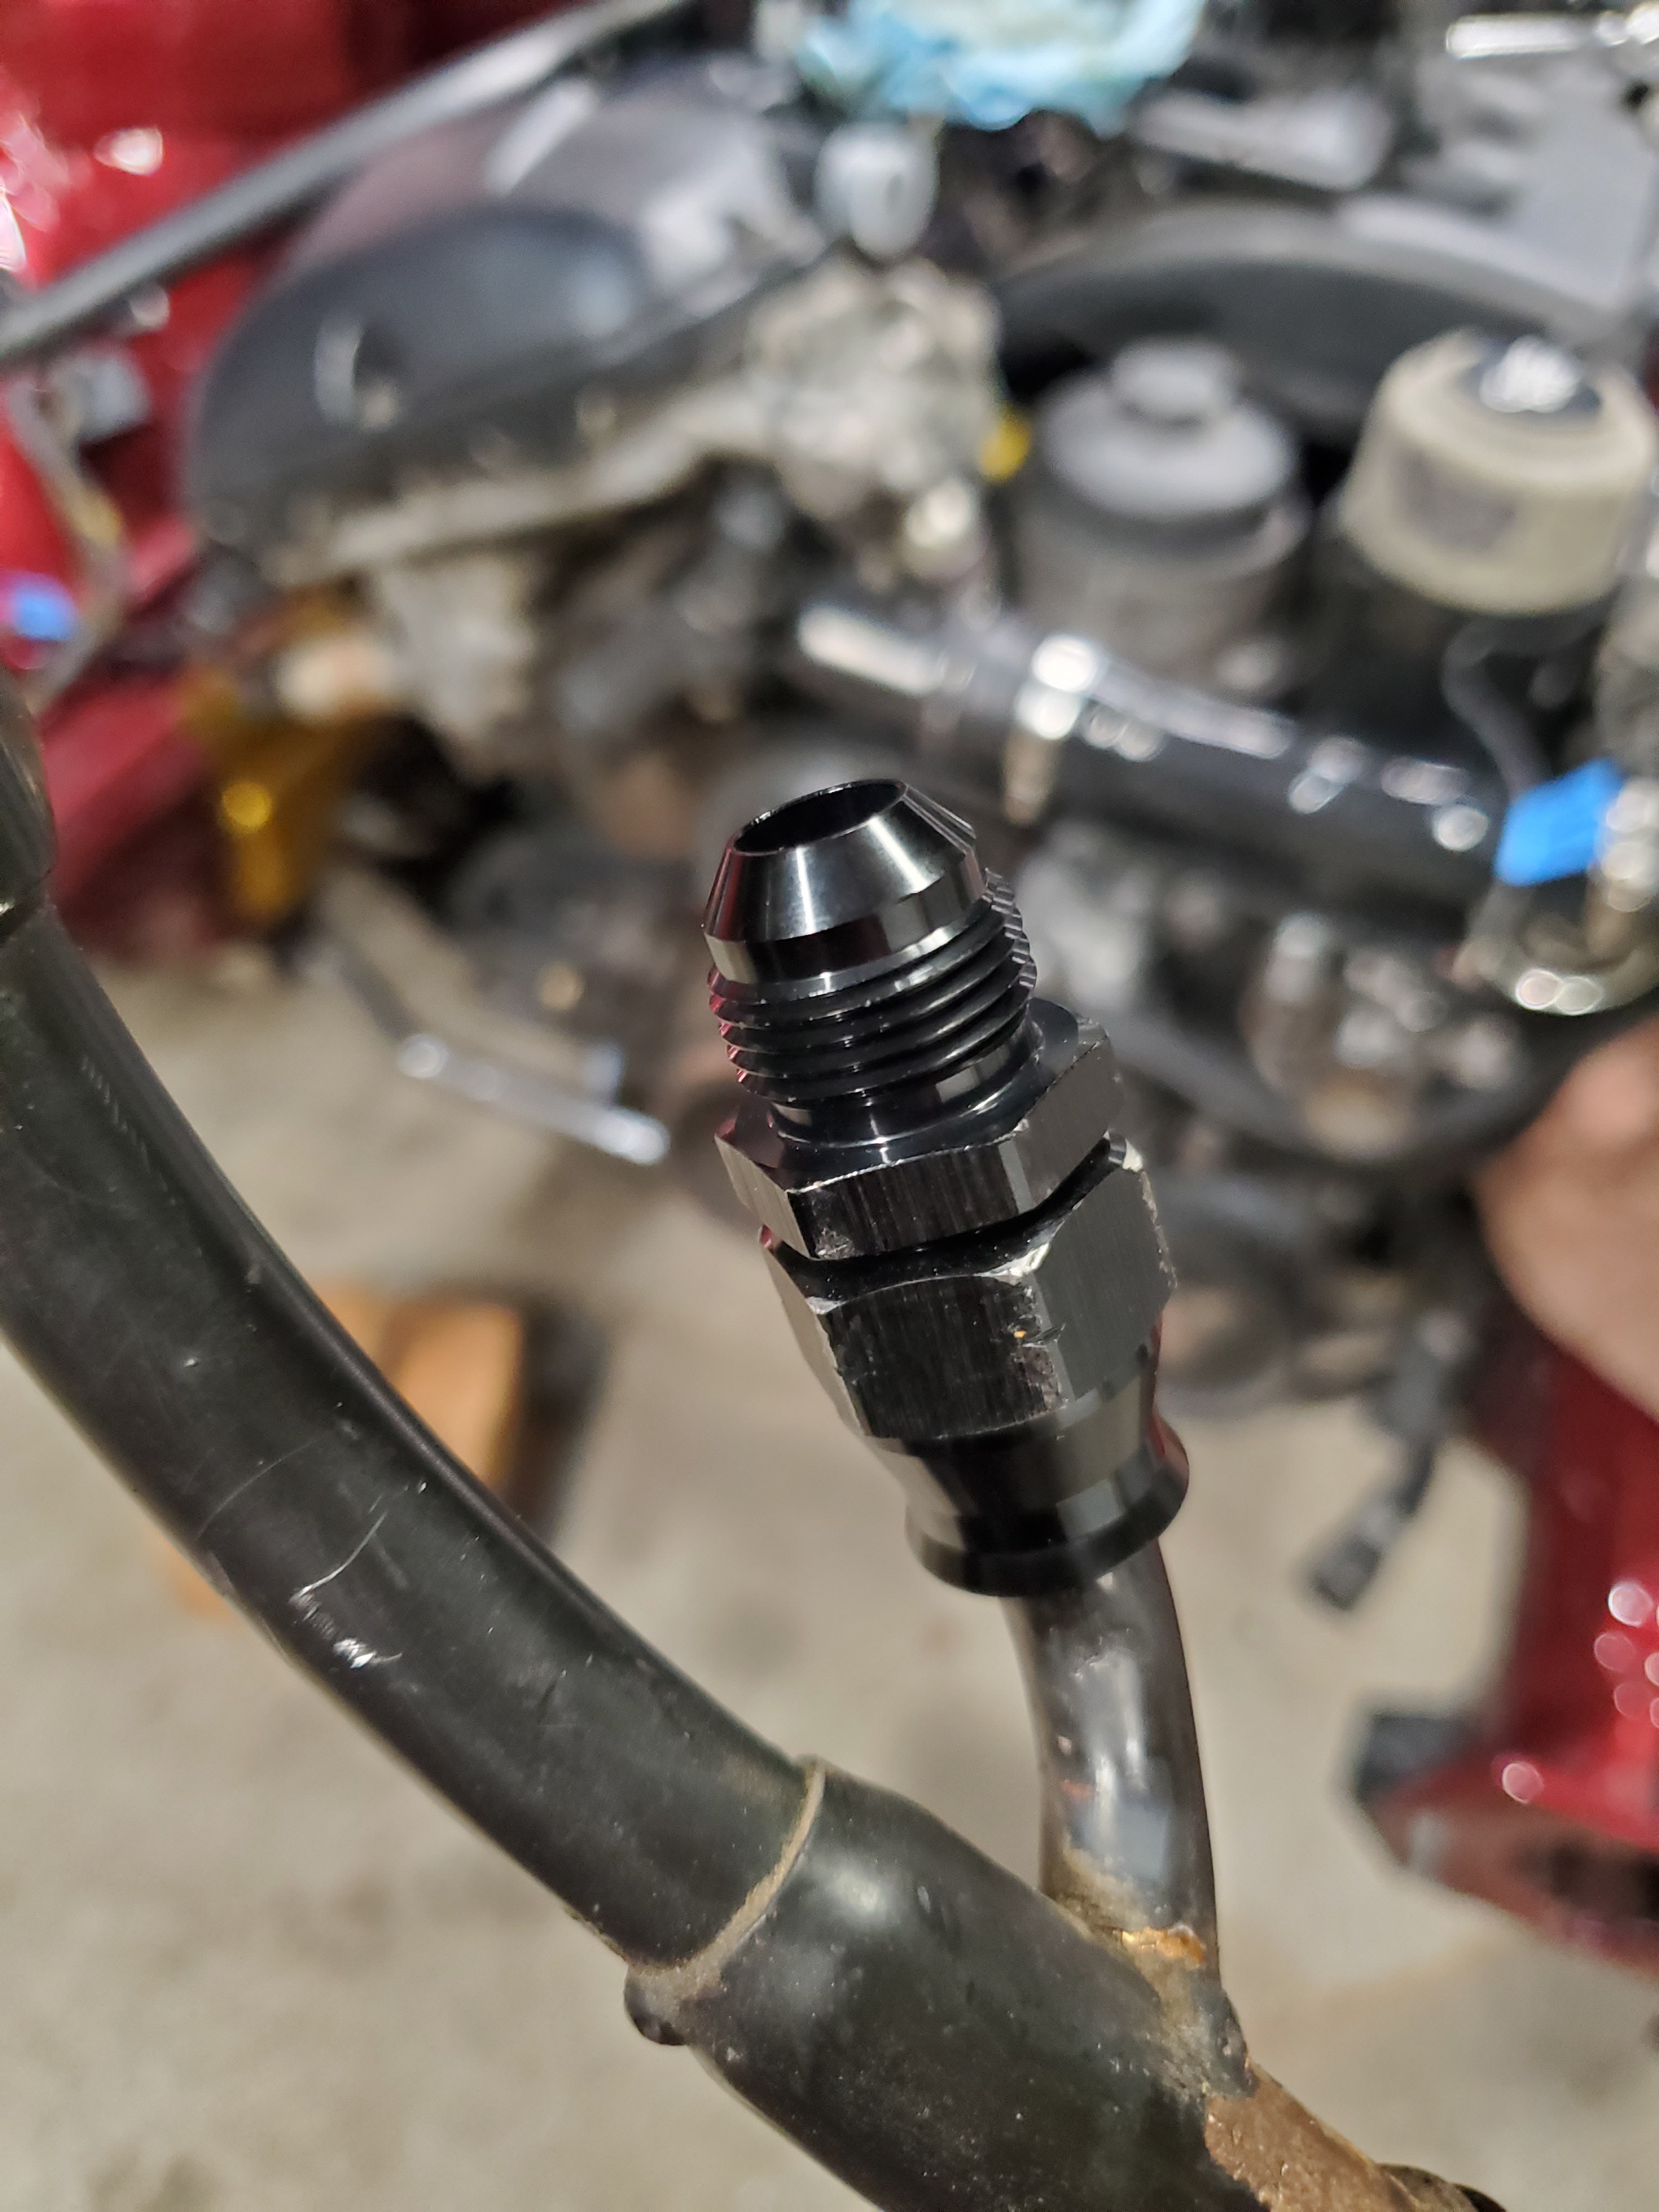
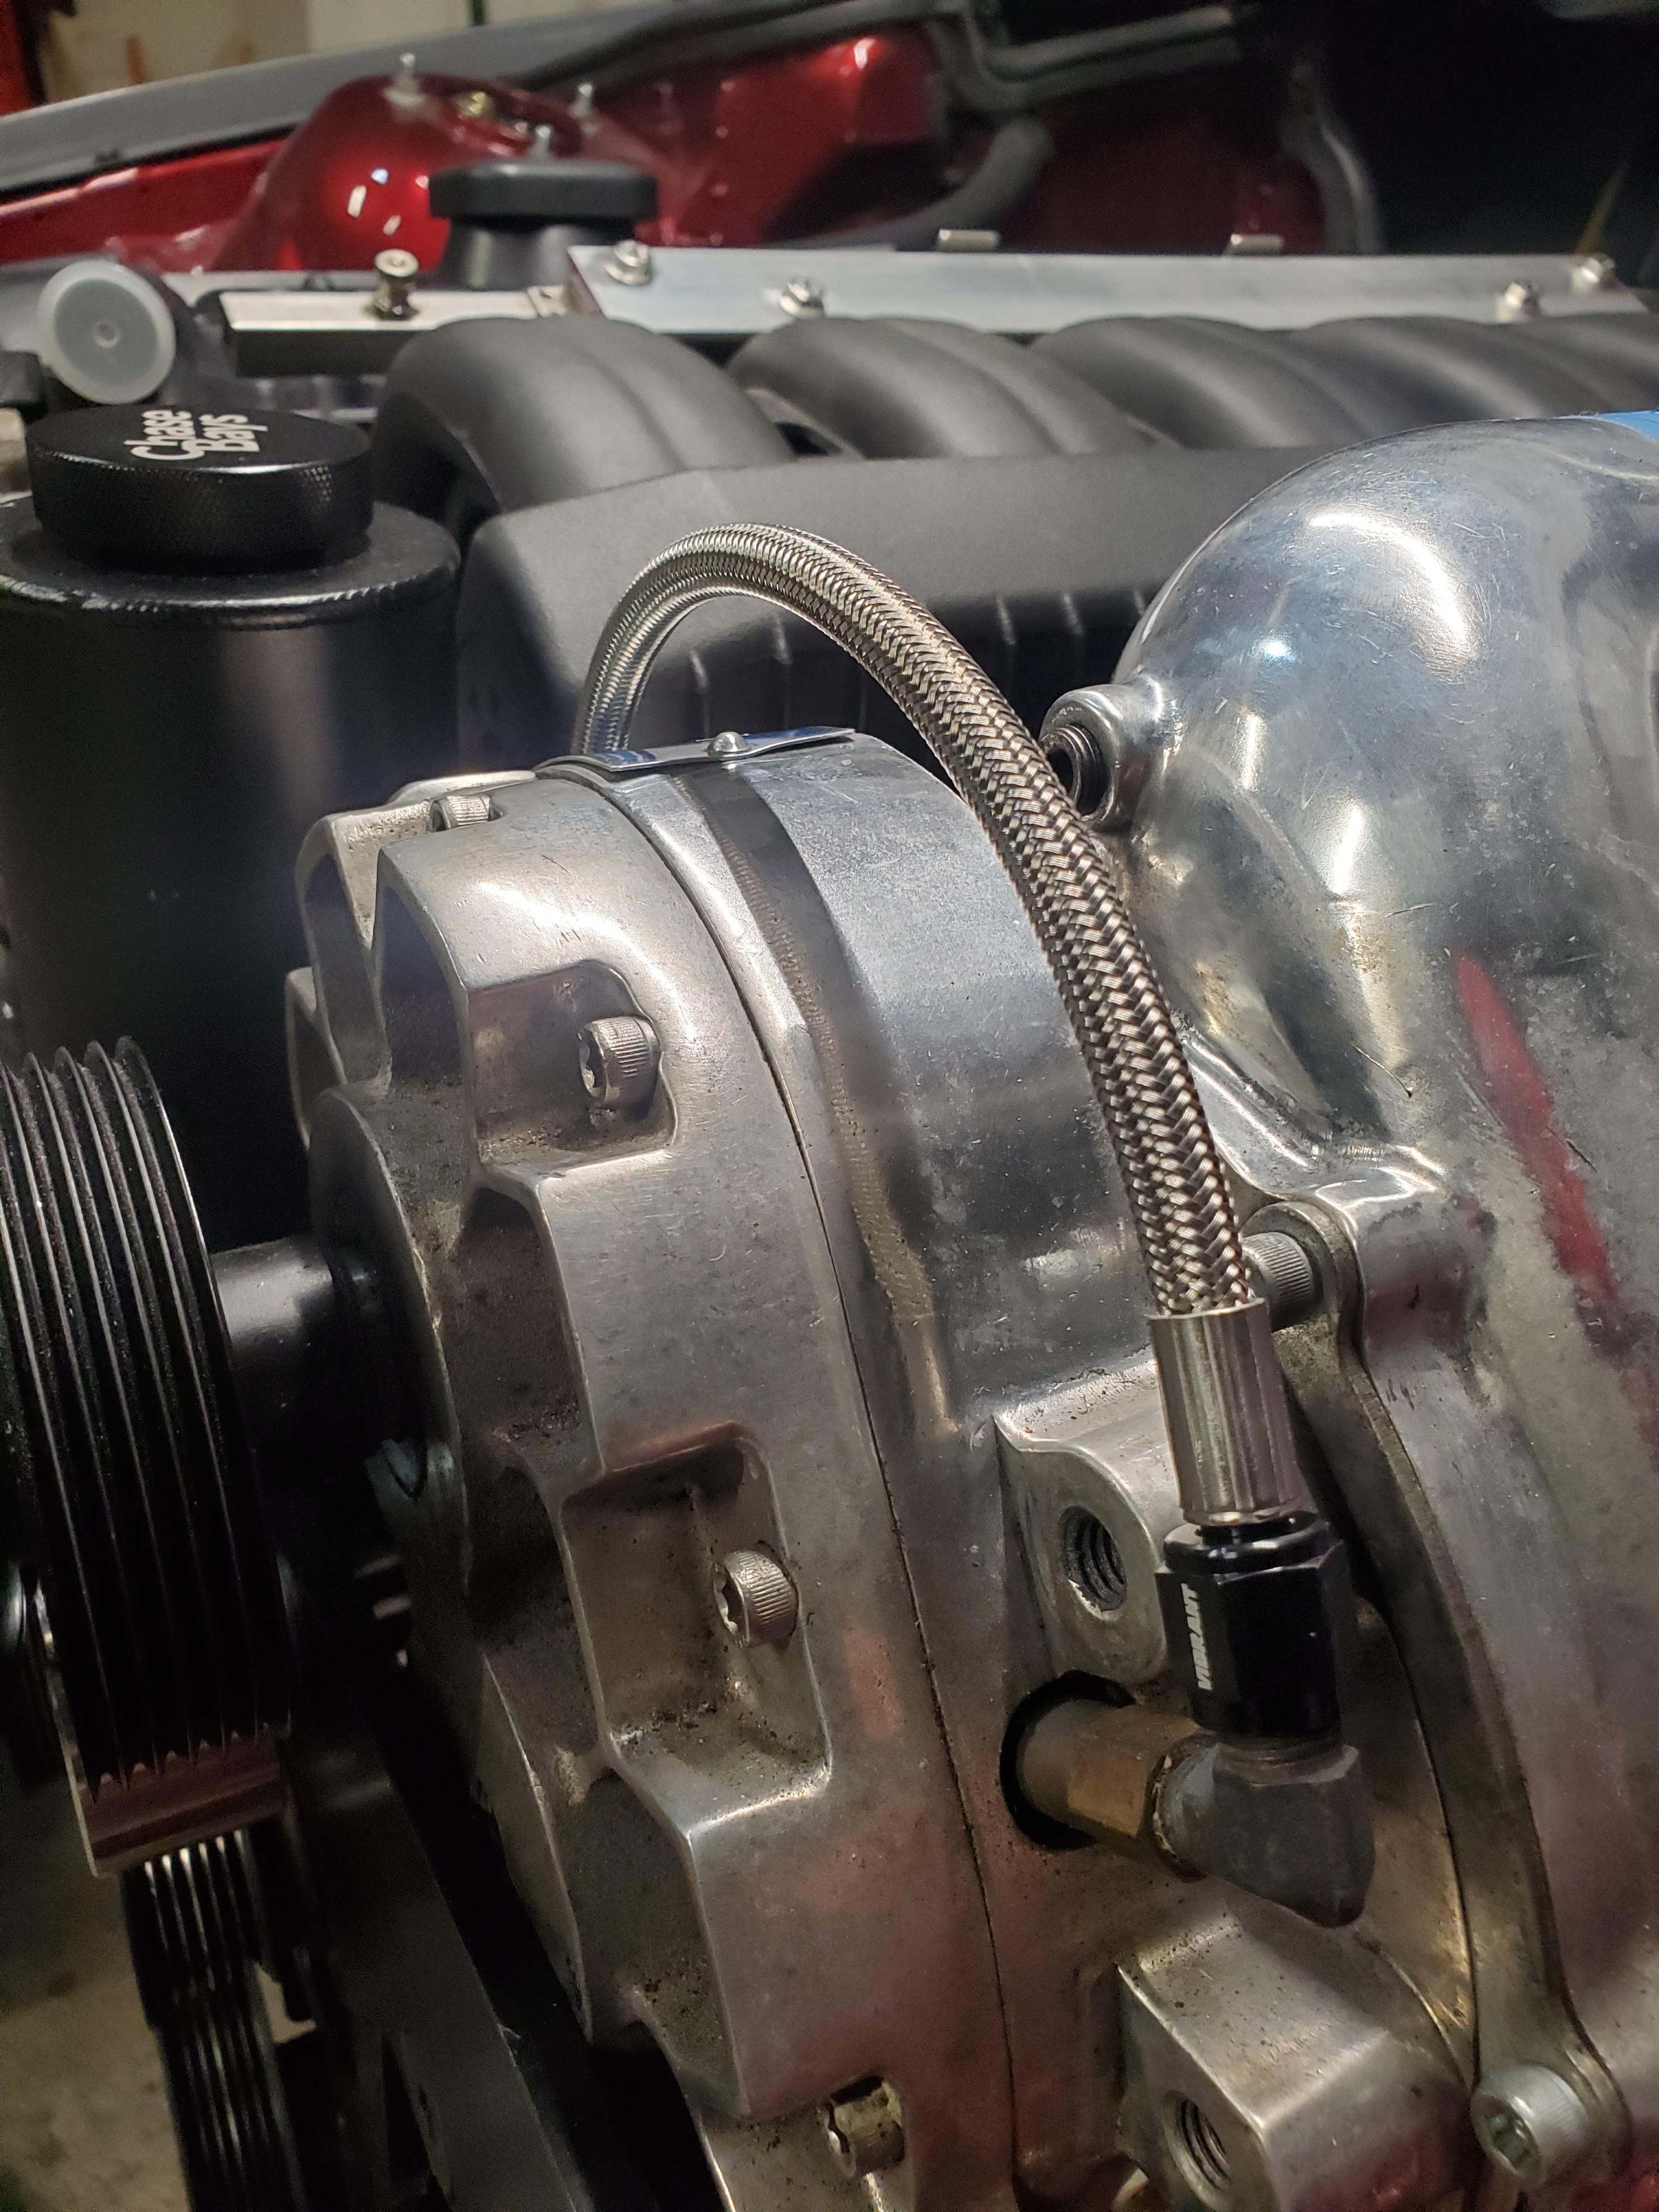
                      The cool thing is the drain which just connects to the CCV drain on the dipstick, so I used a tube to AN adapter.
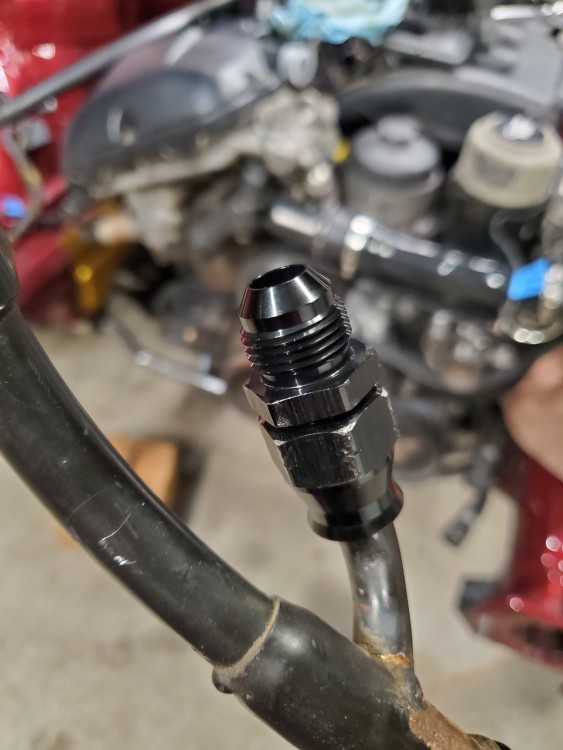
                      20210206172132.jpg

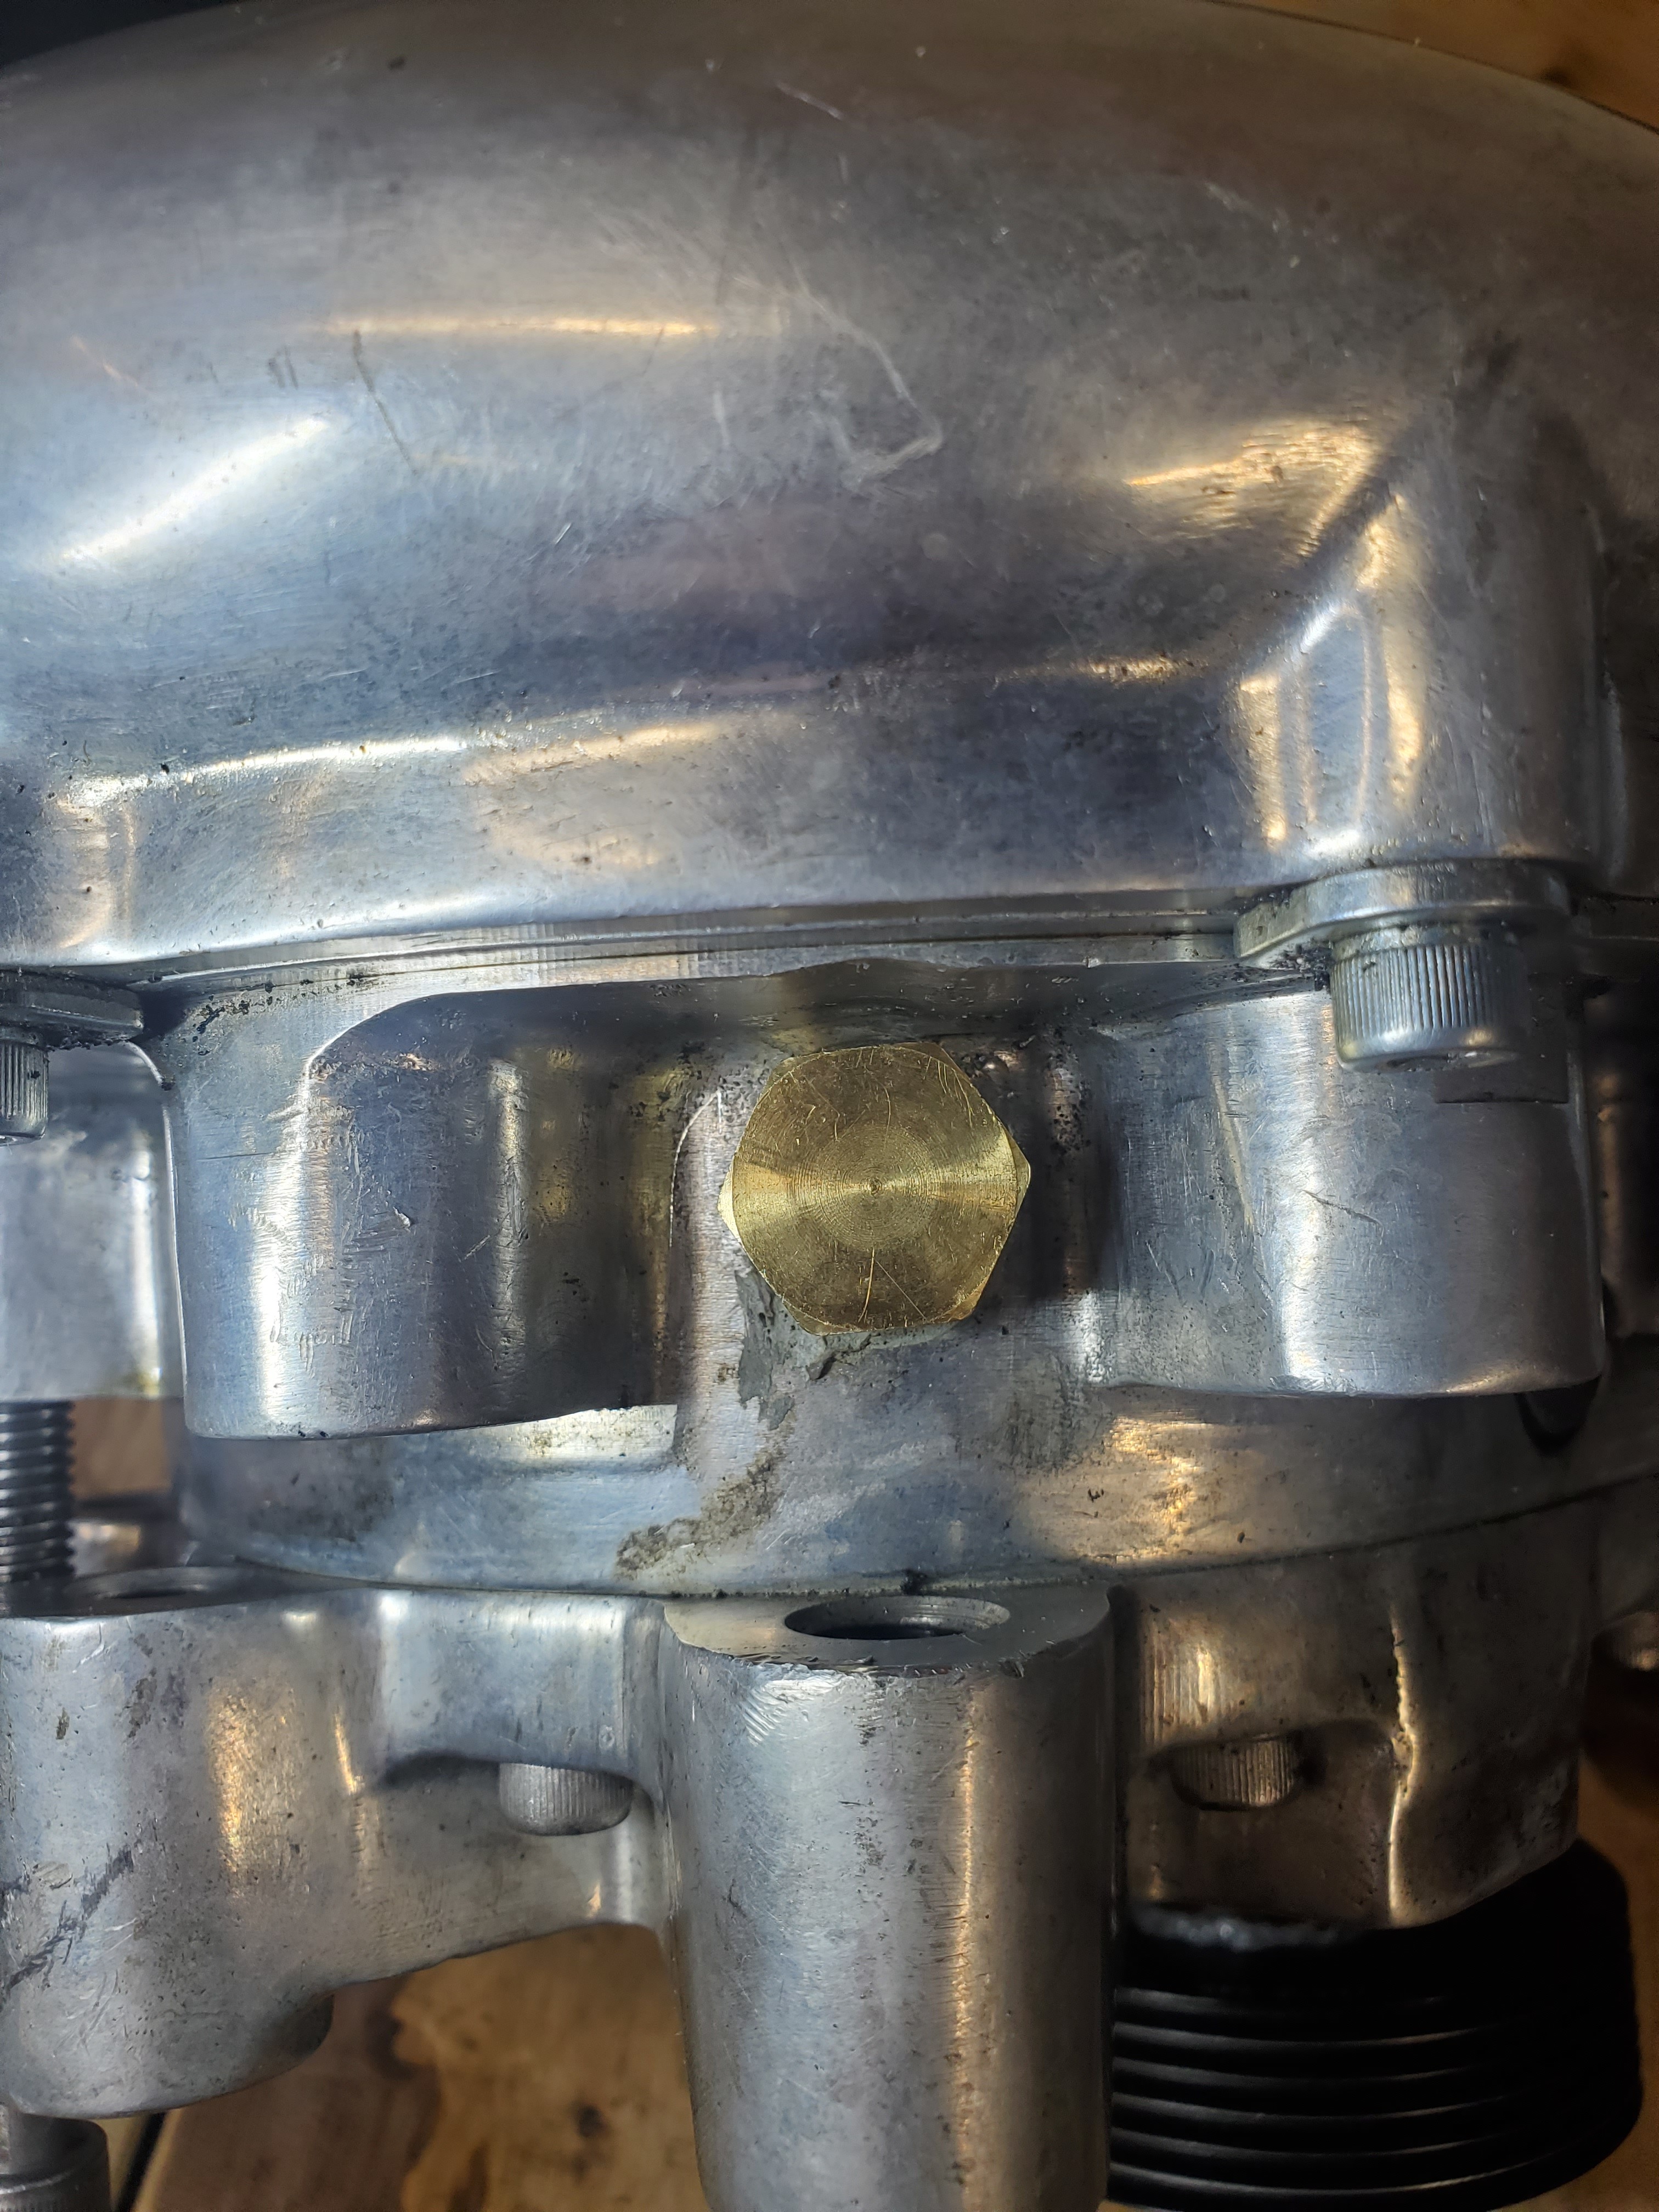
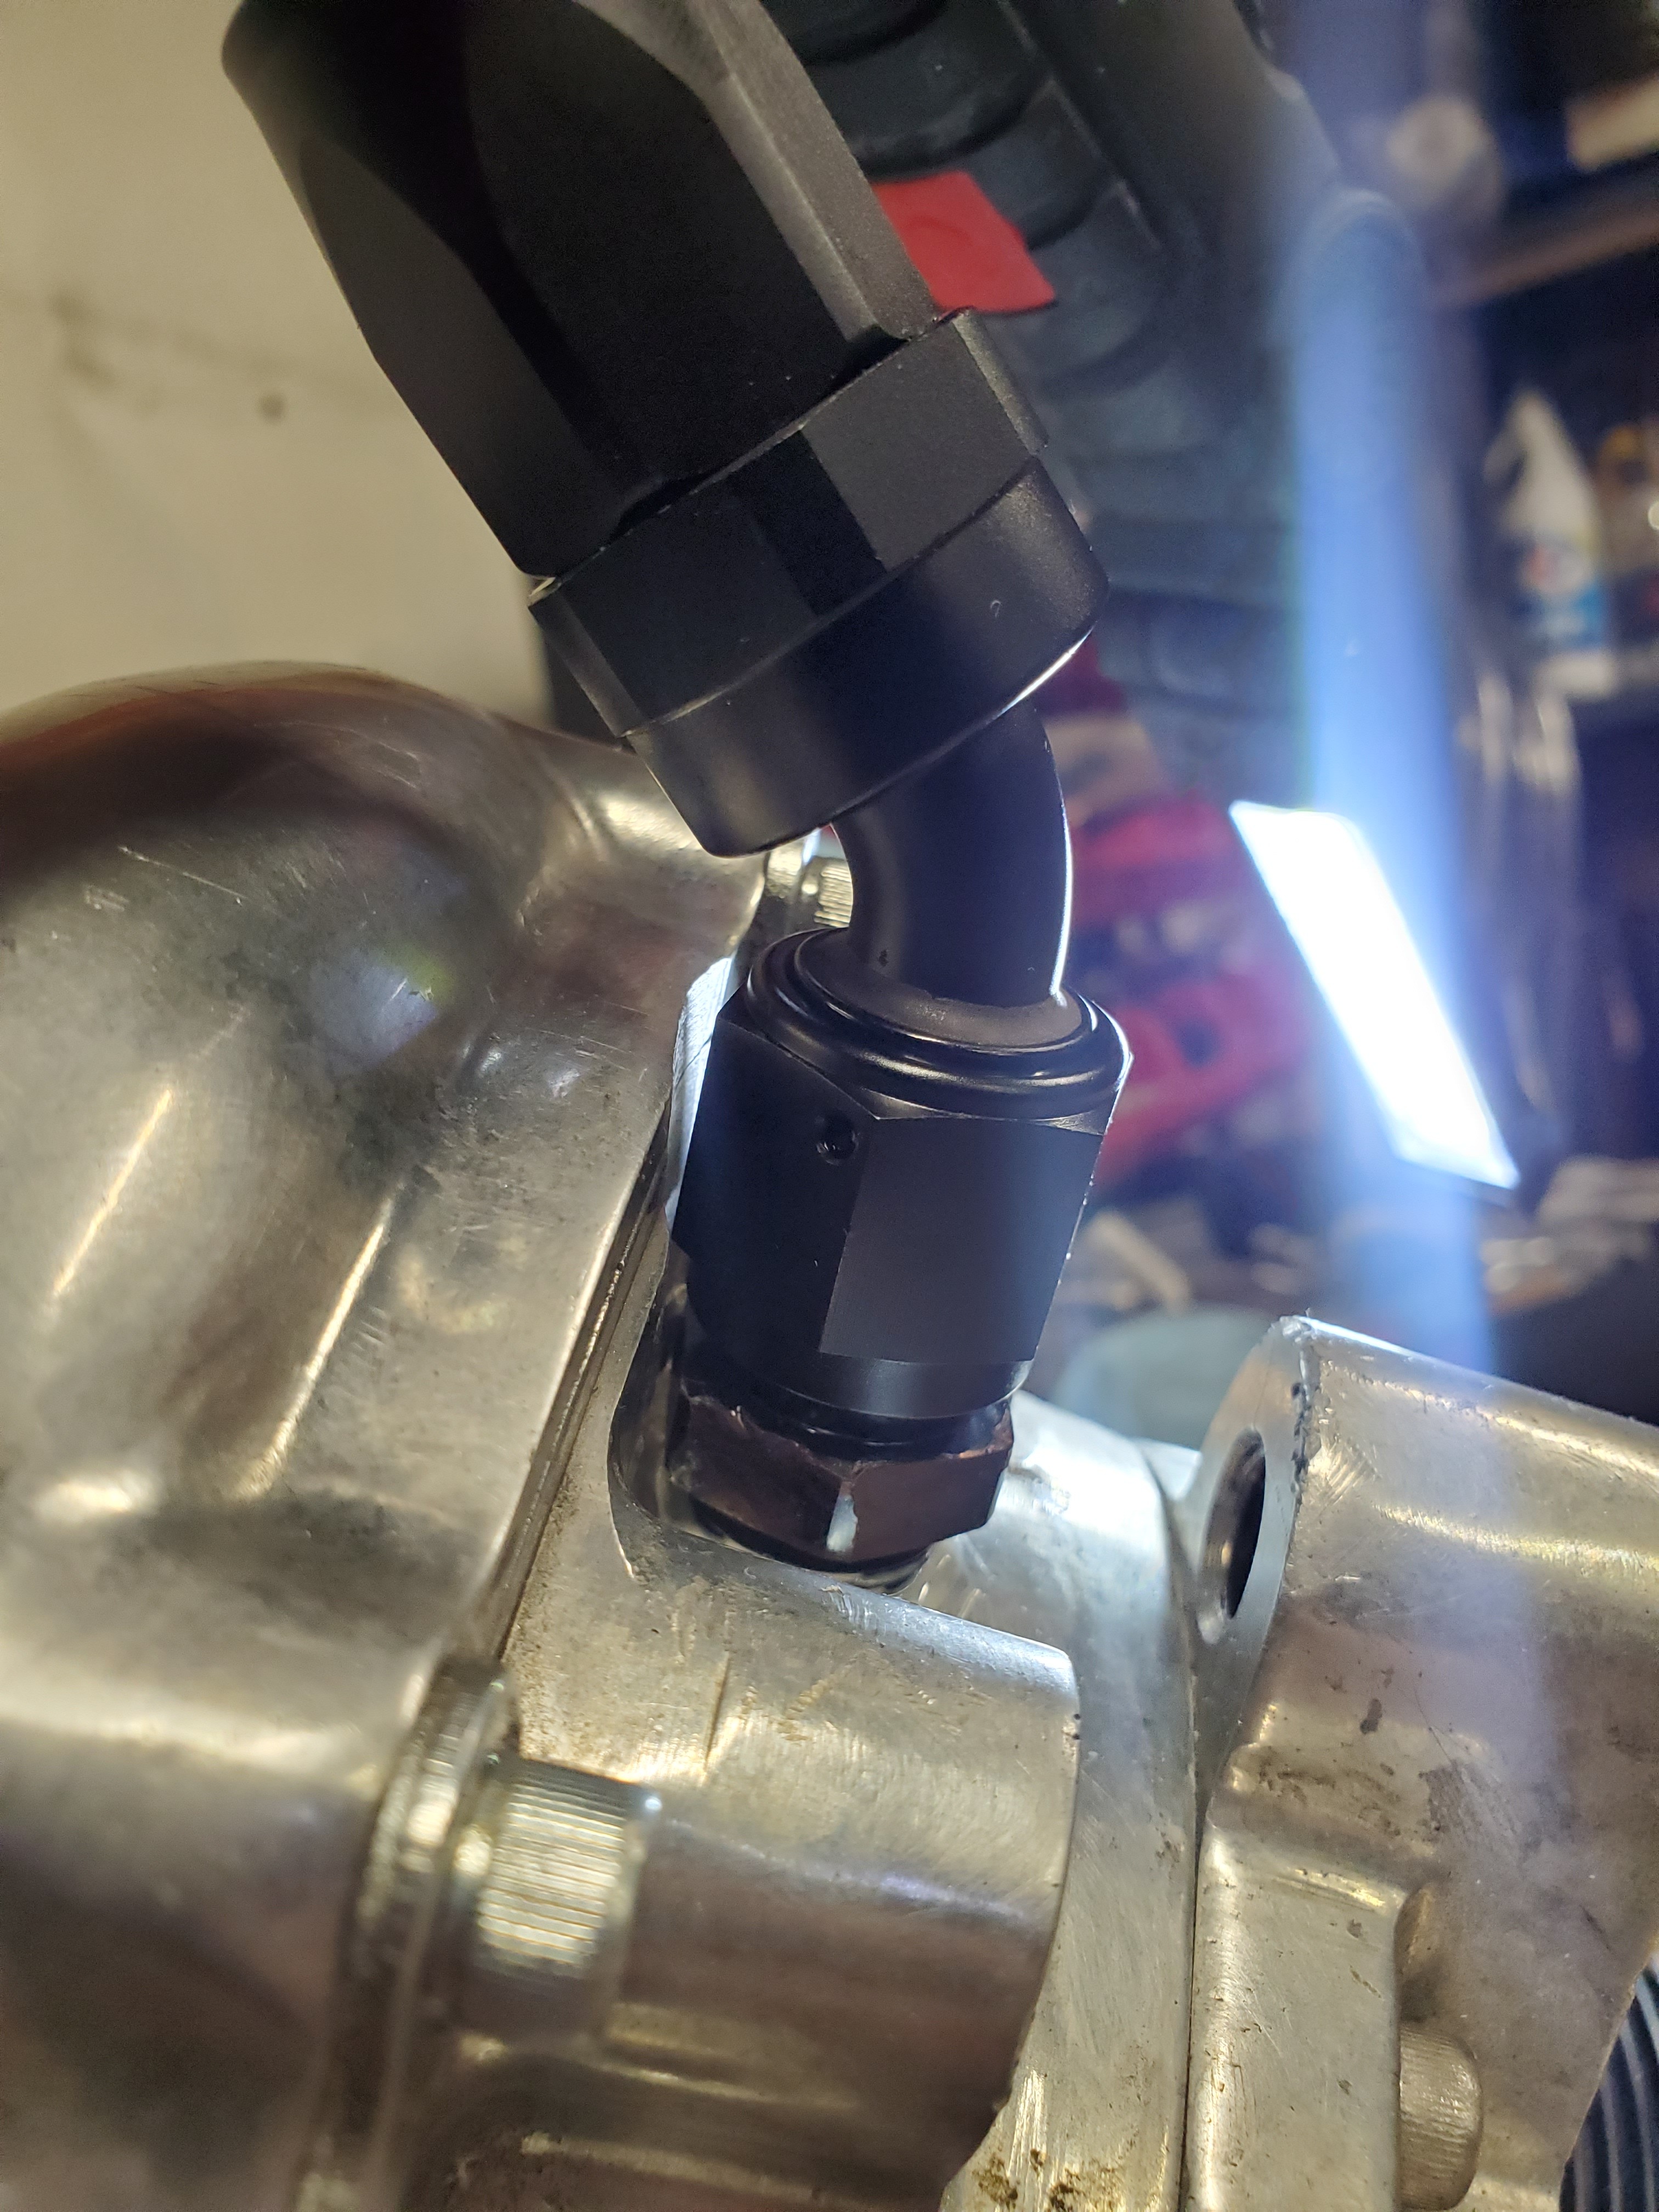
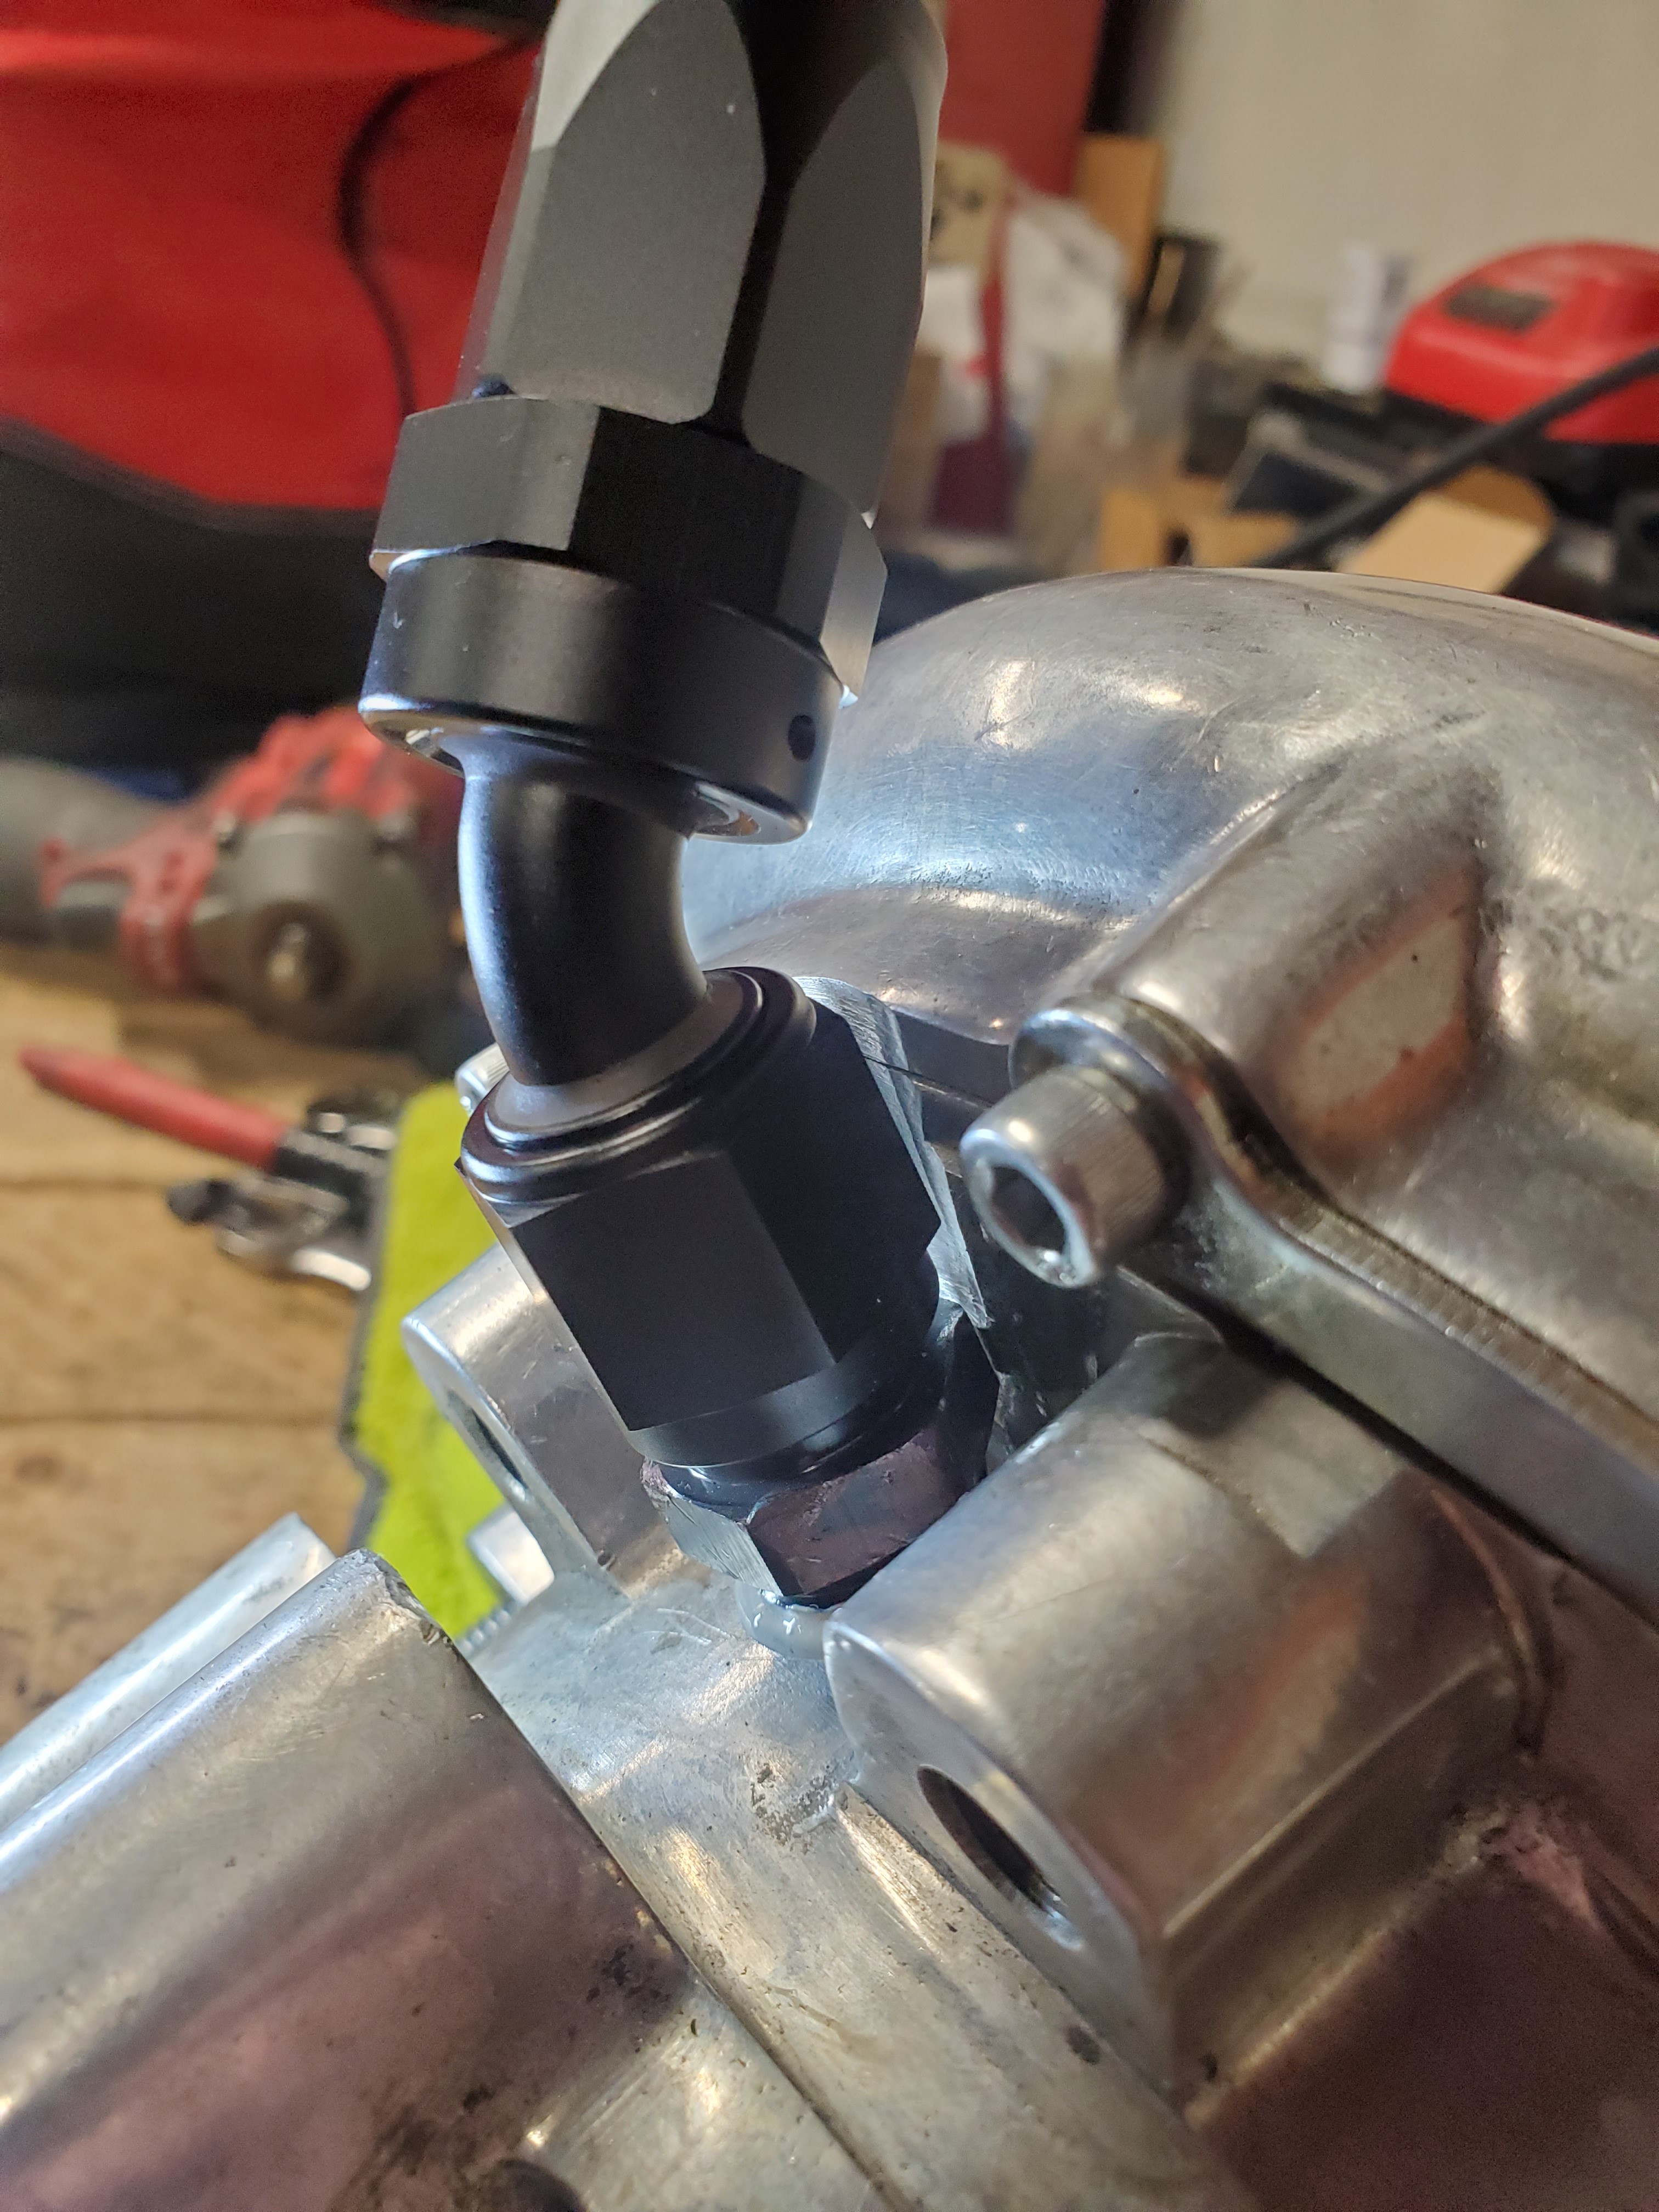
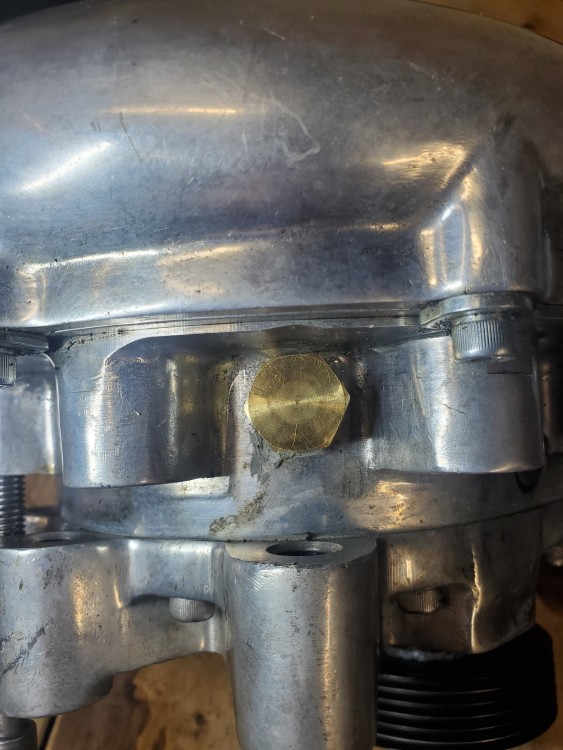
                      I then ran into another road block. The drain fitting on the bottom of the blower hit the housing because it was too big (-8 AN).

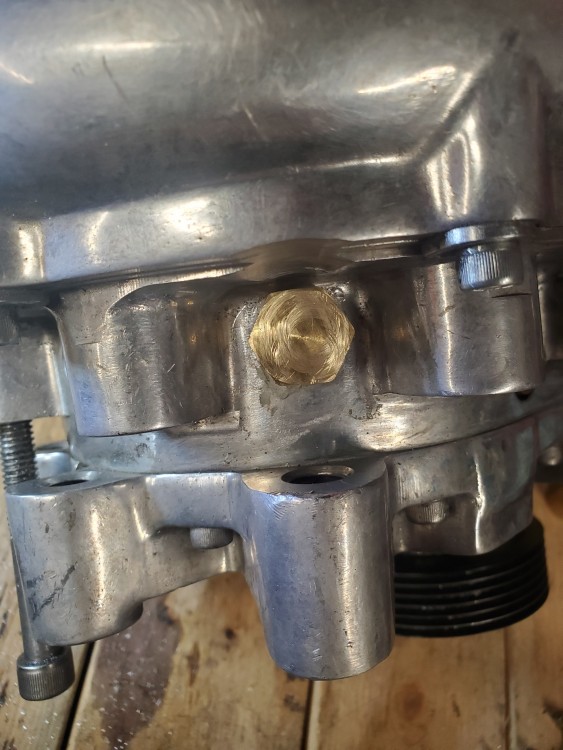
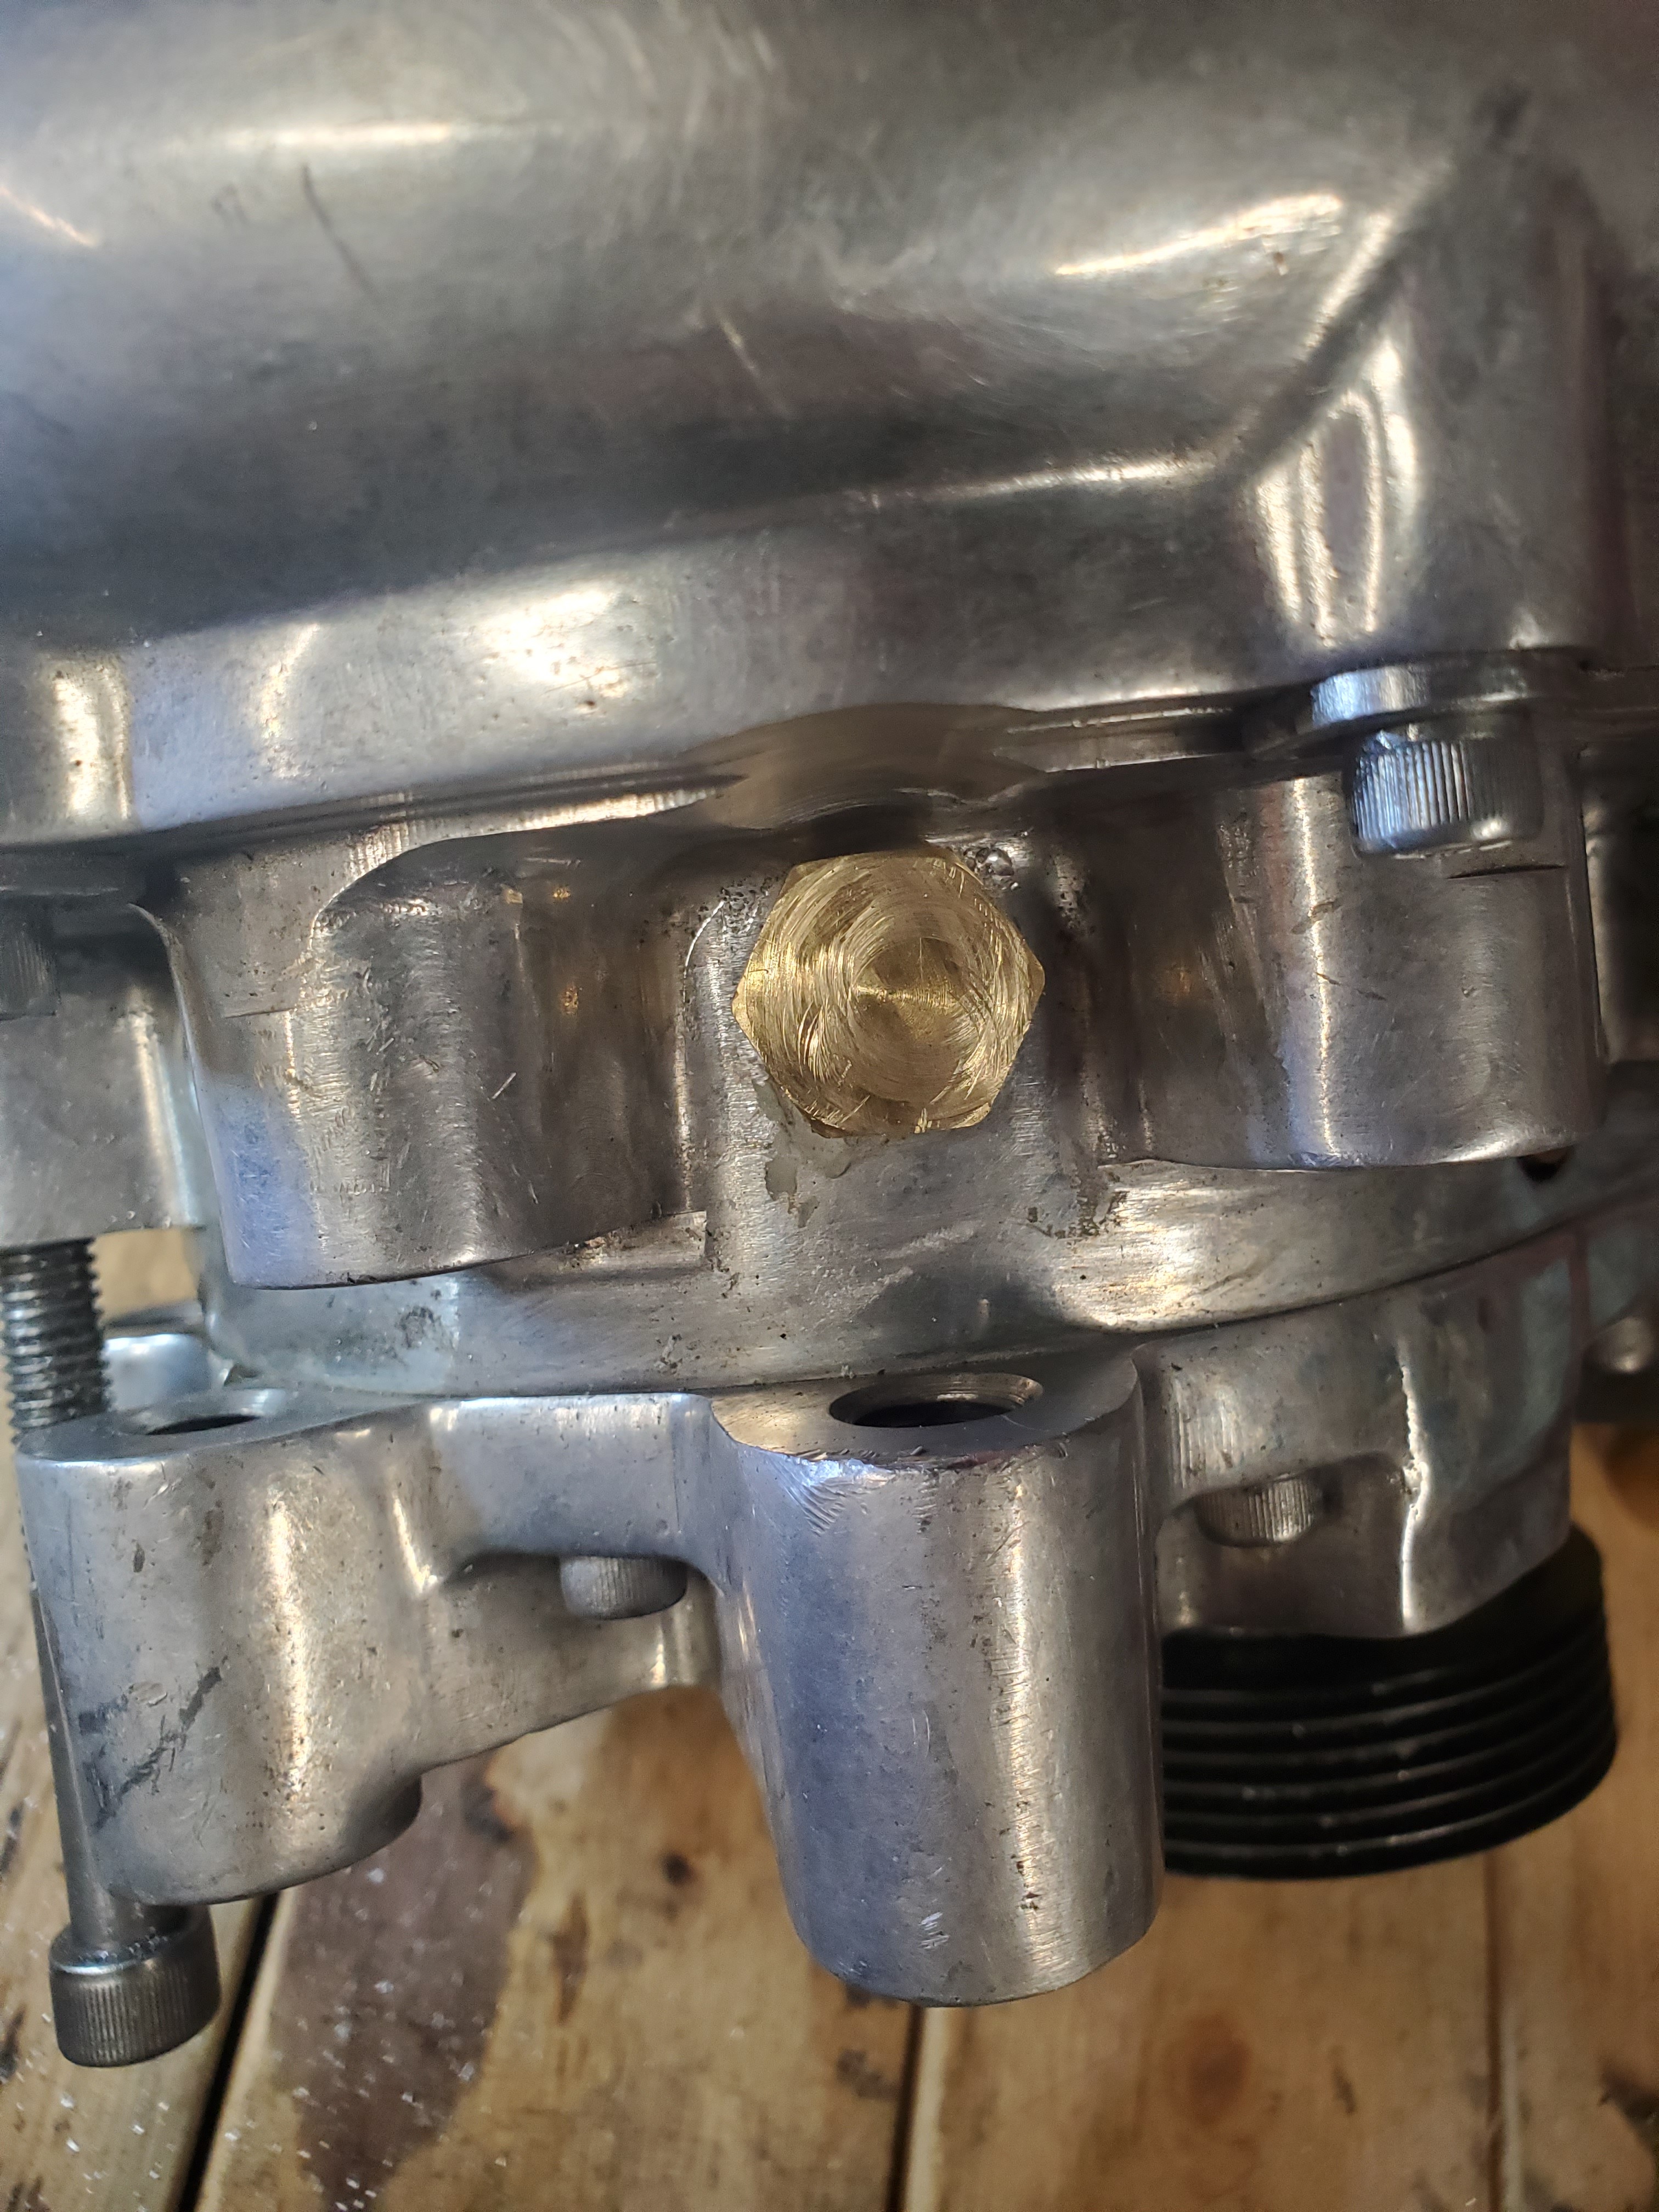
                      I couldn't seem to find an extension that I was happy with, plus the extension would make the line sit lower than I would like. Sooooo I decided to "clearance" the housing to allow for the larger fitting. 

                      Before.
                      20210221111441.jpg

                      After.

                      20210221113437.jpg

                      Worked out great 👍

                      20210221120705.jpg

                      20210221120729.jpg

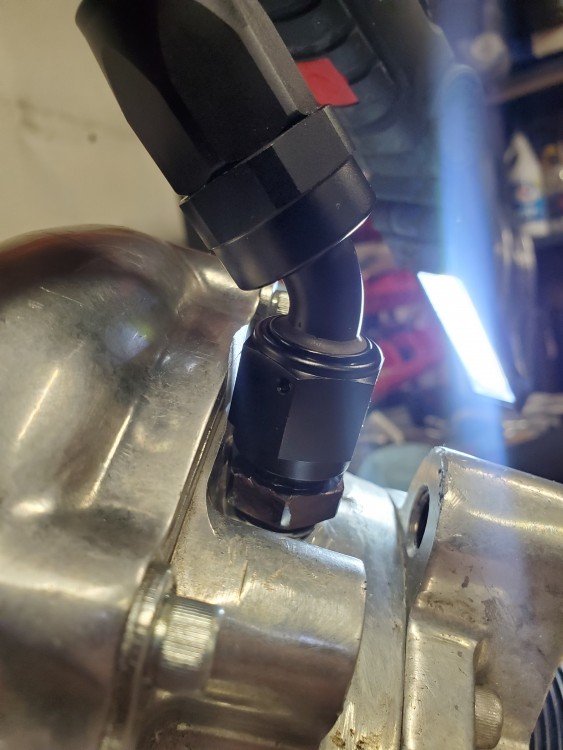
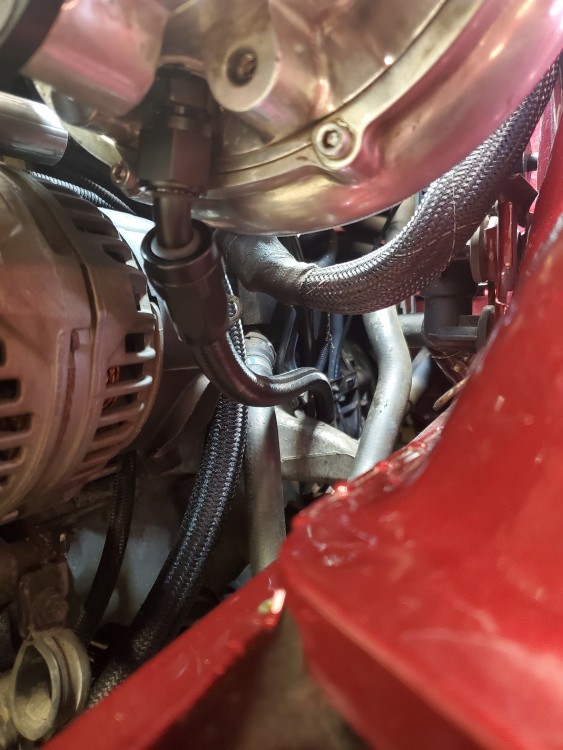
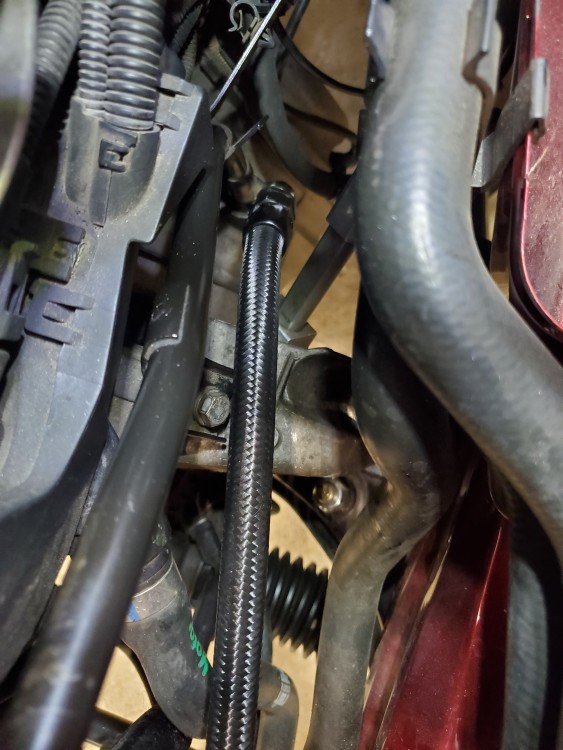
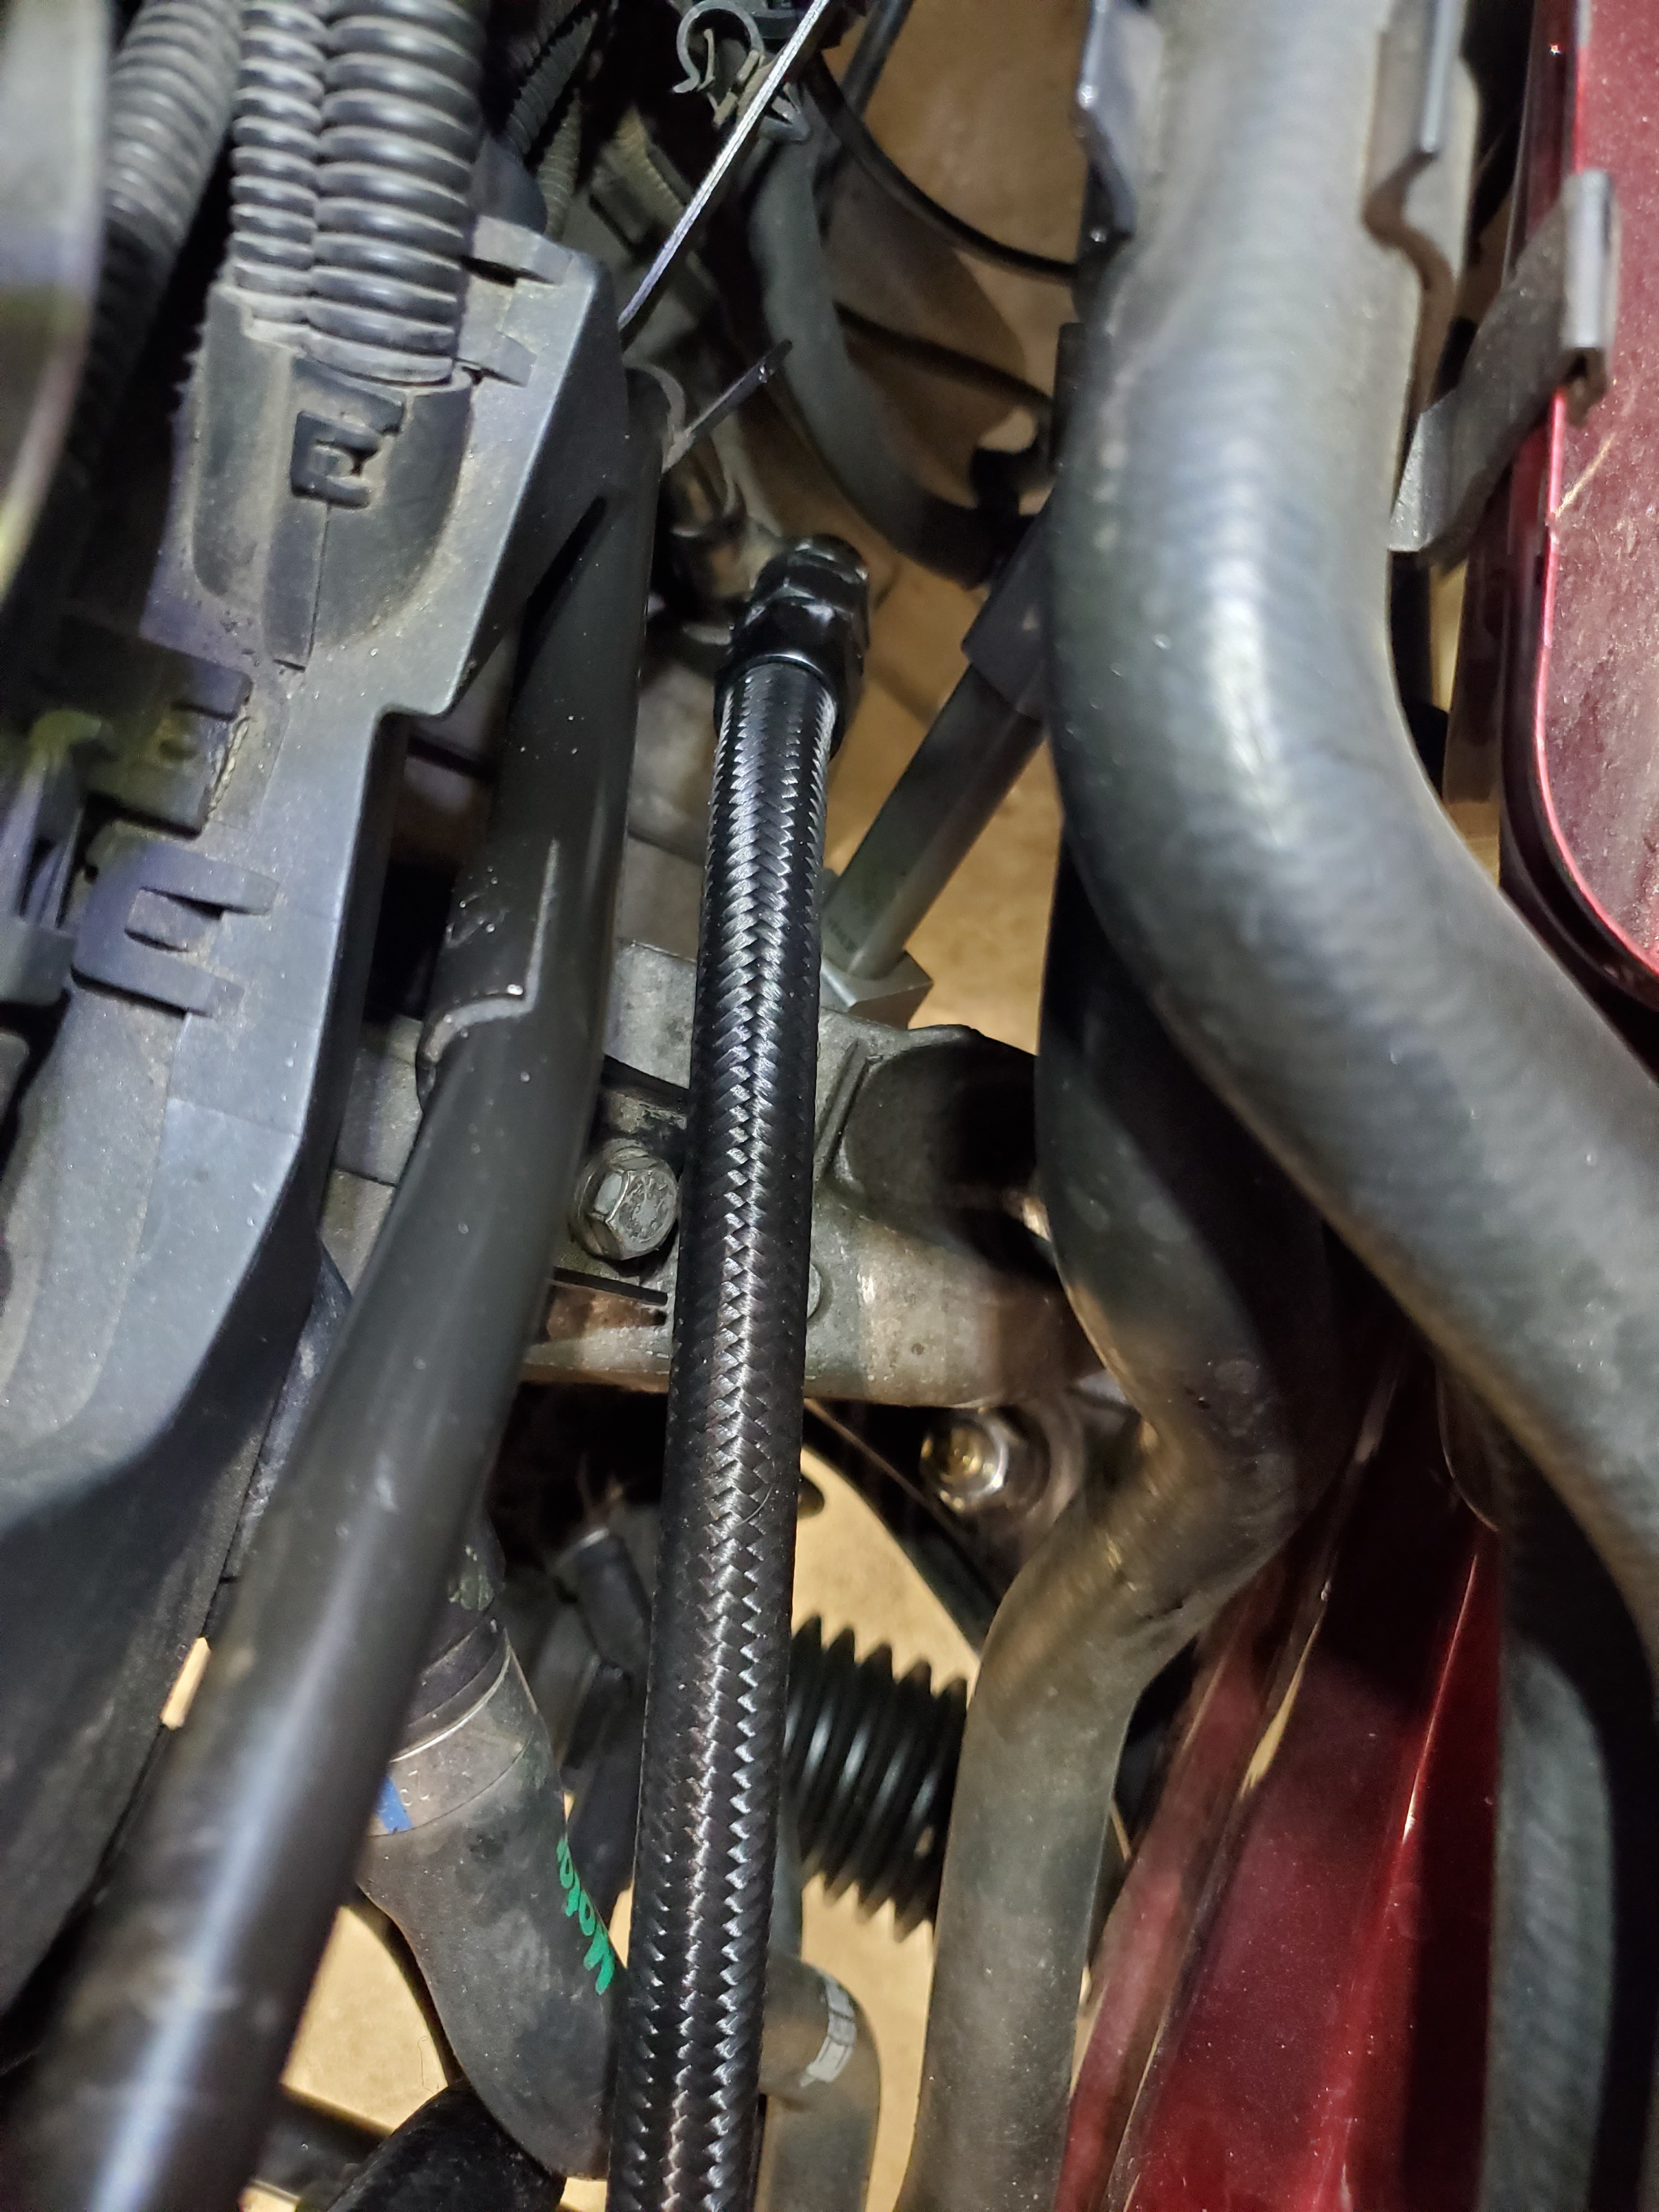
                      Now that I solved that headache I finished making and installing the drain line.
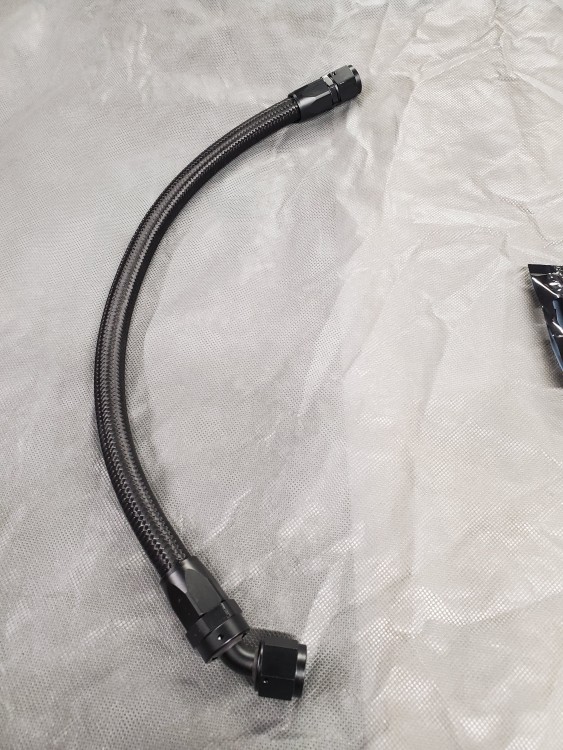
                      20210221124829.jpg

                      20210221130658.jpg

                      20210221130715.jpg

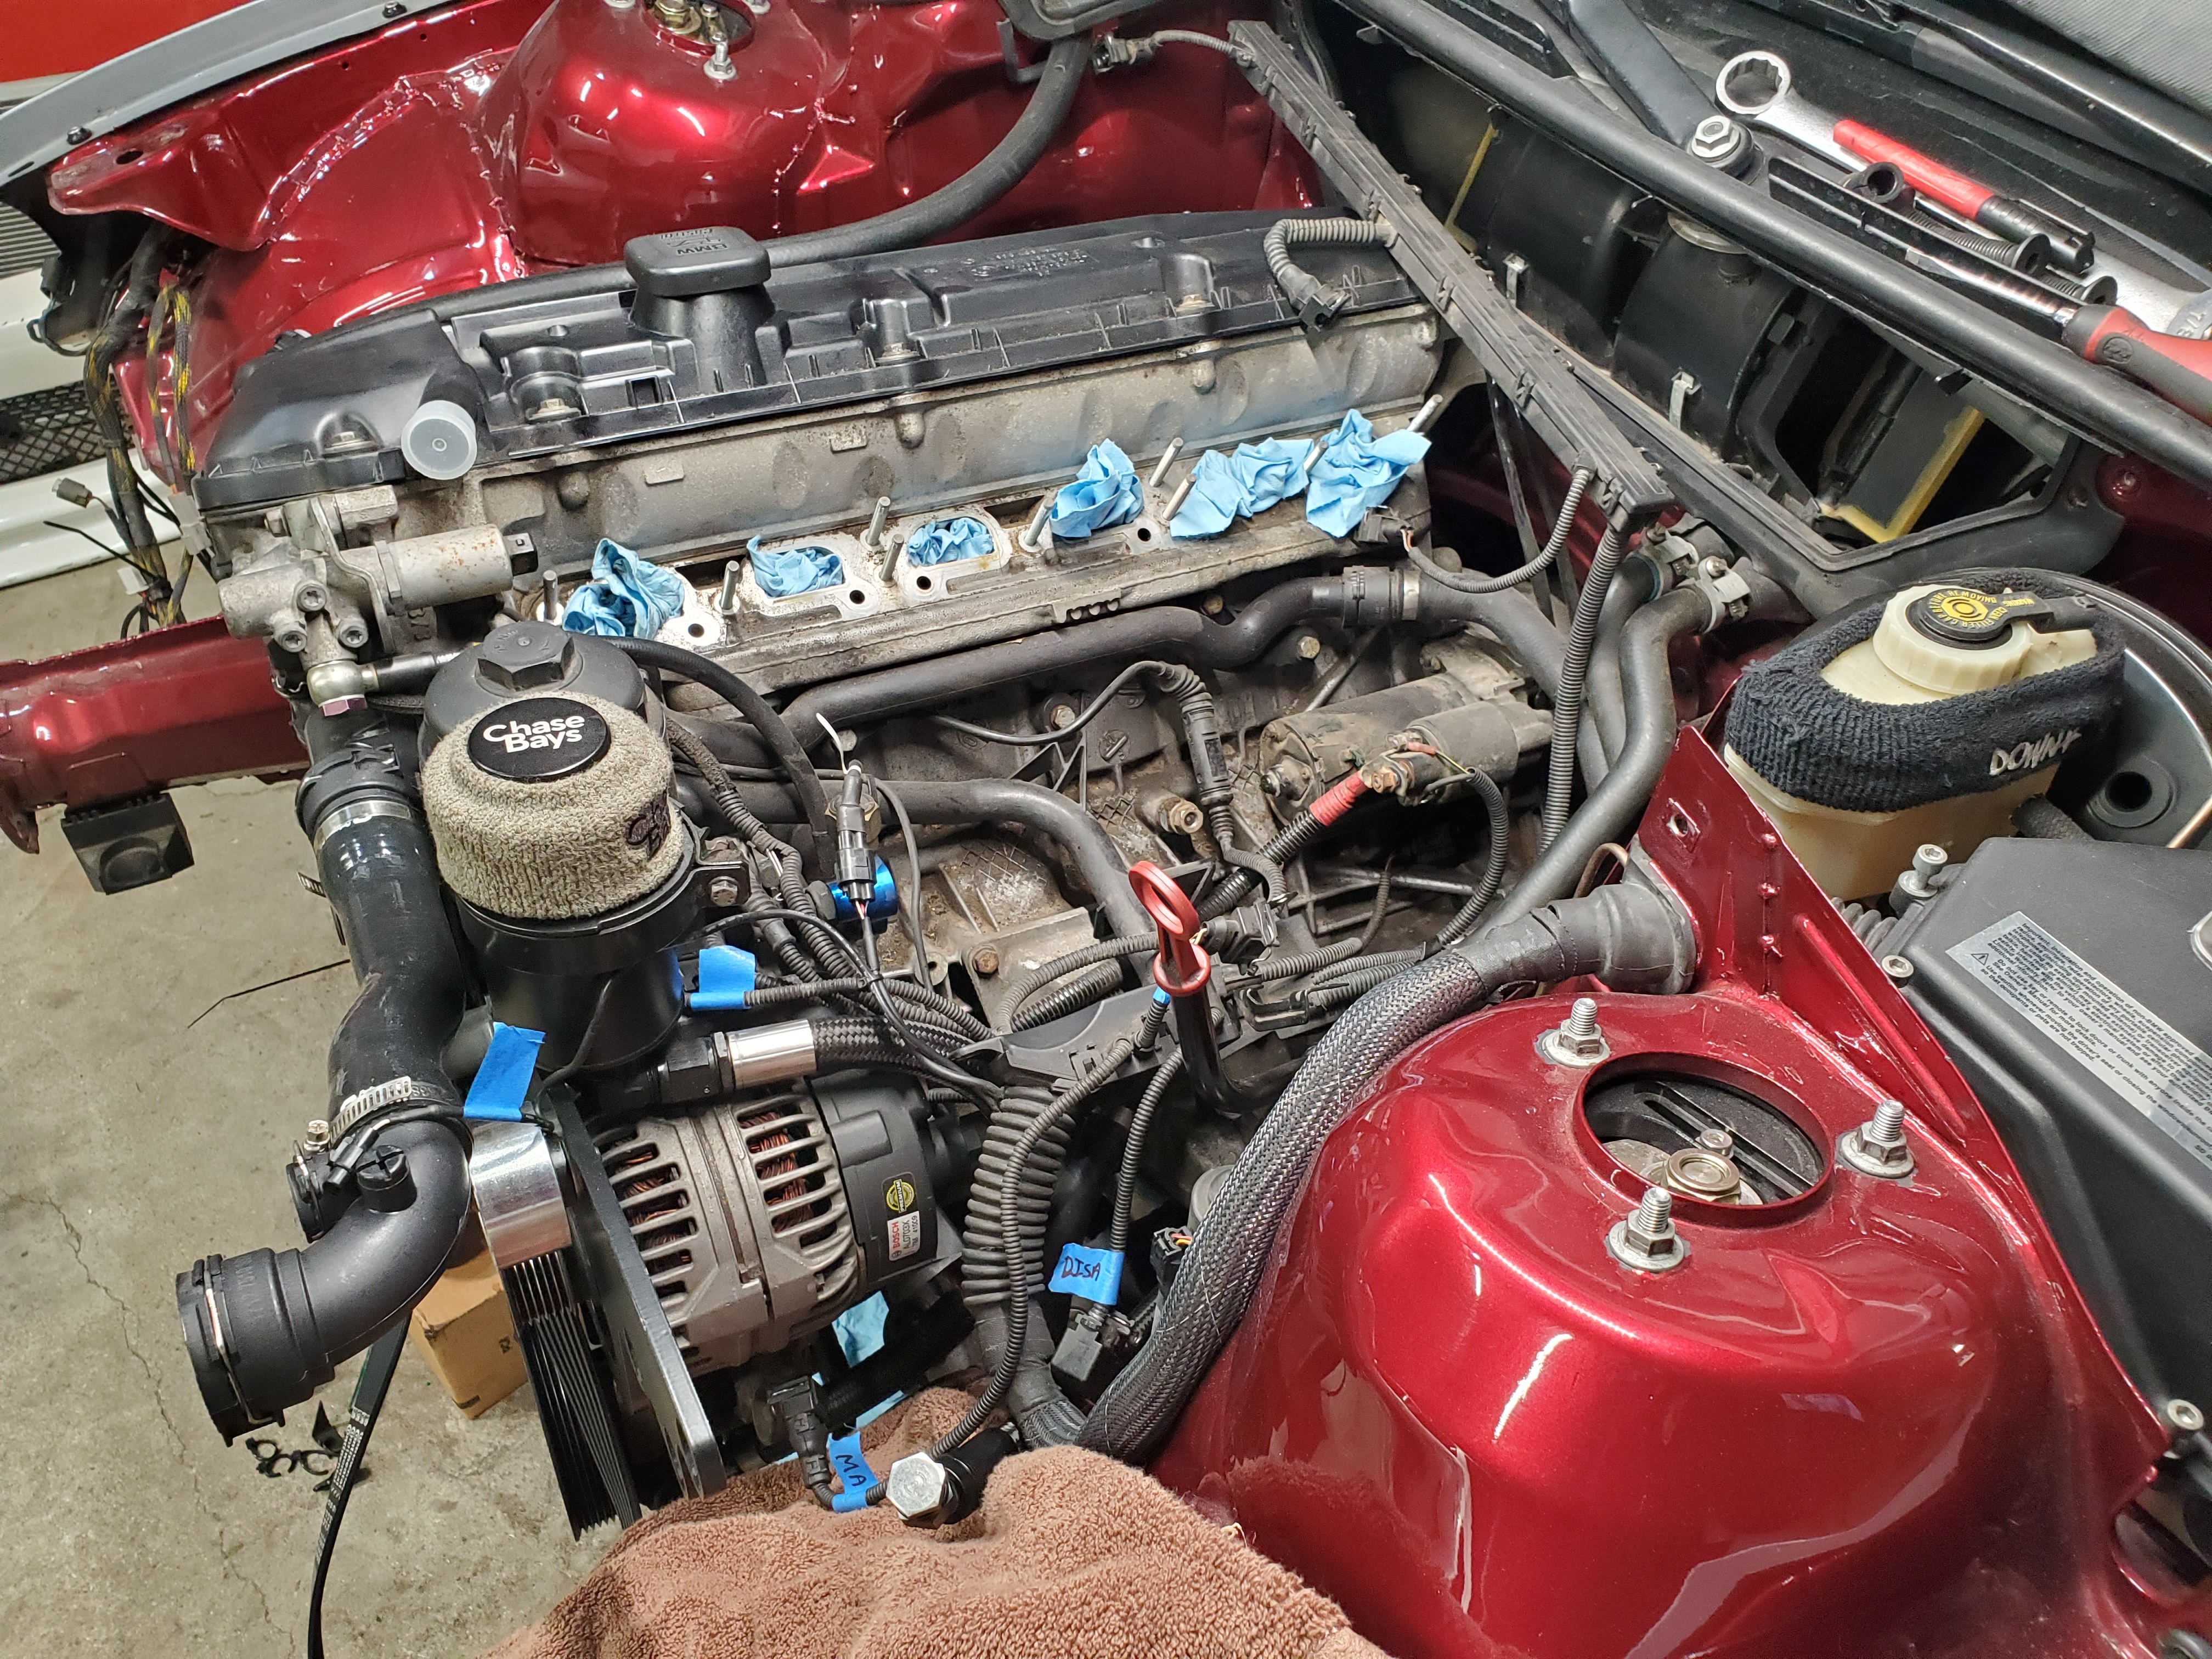
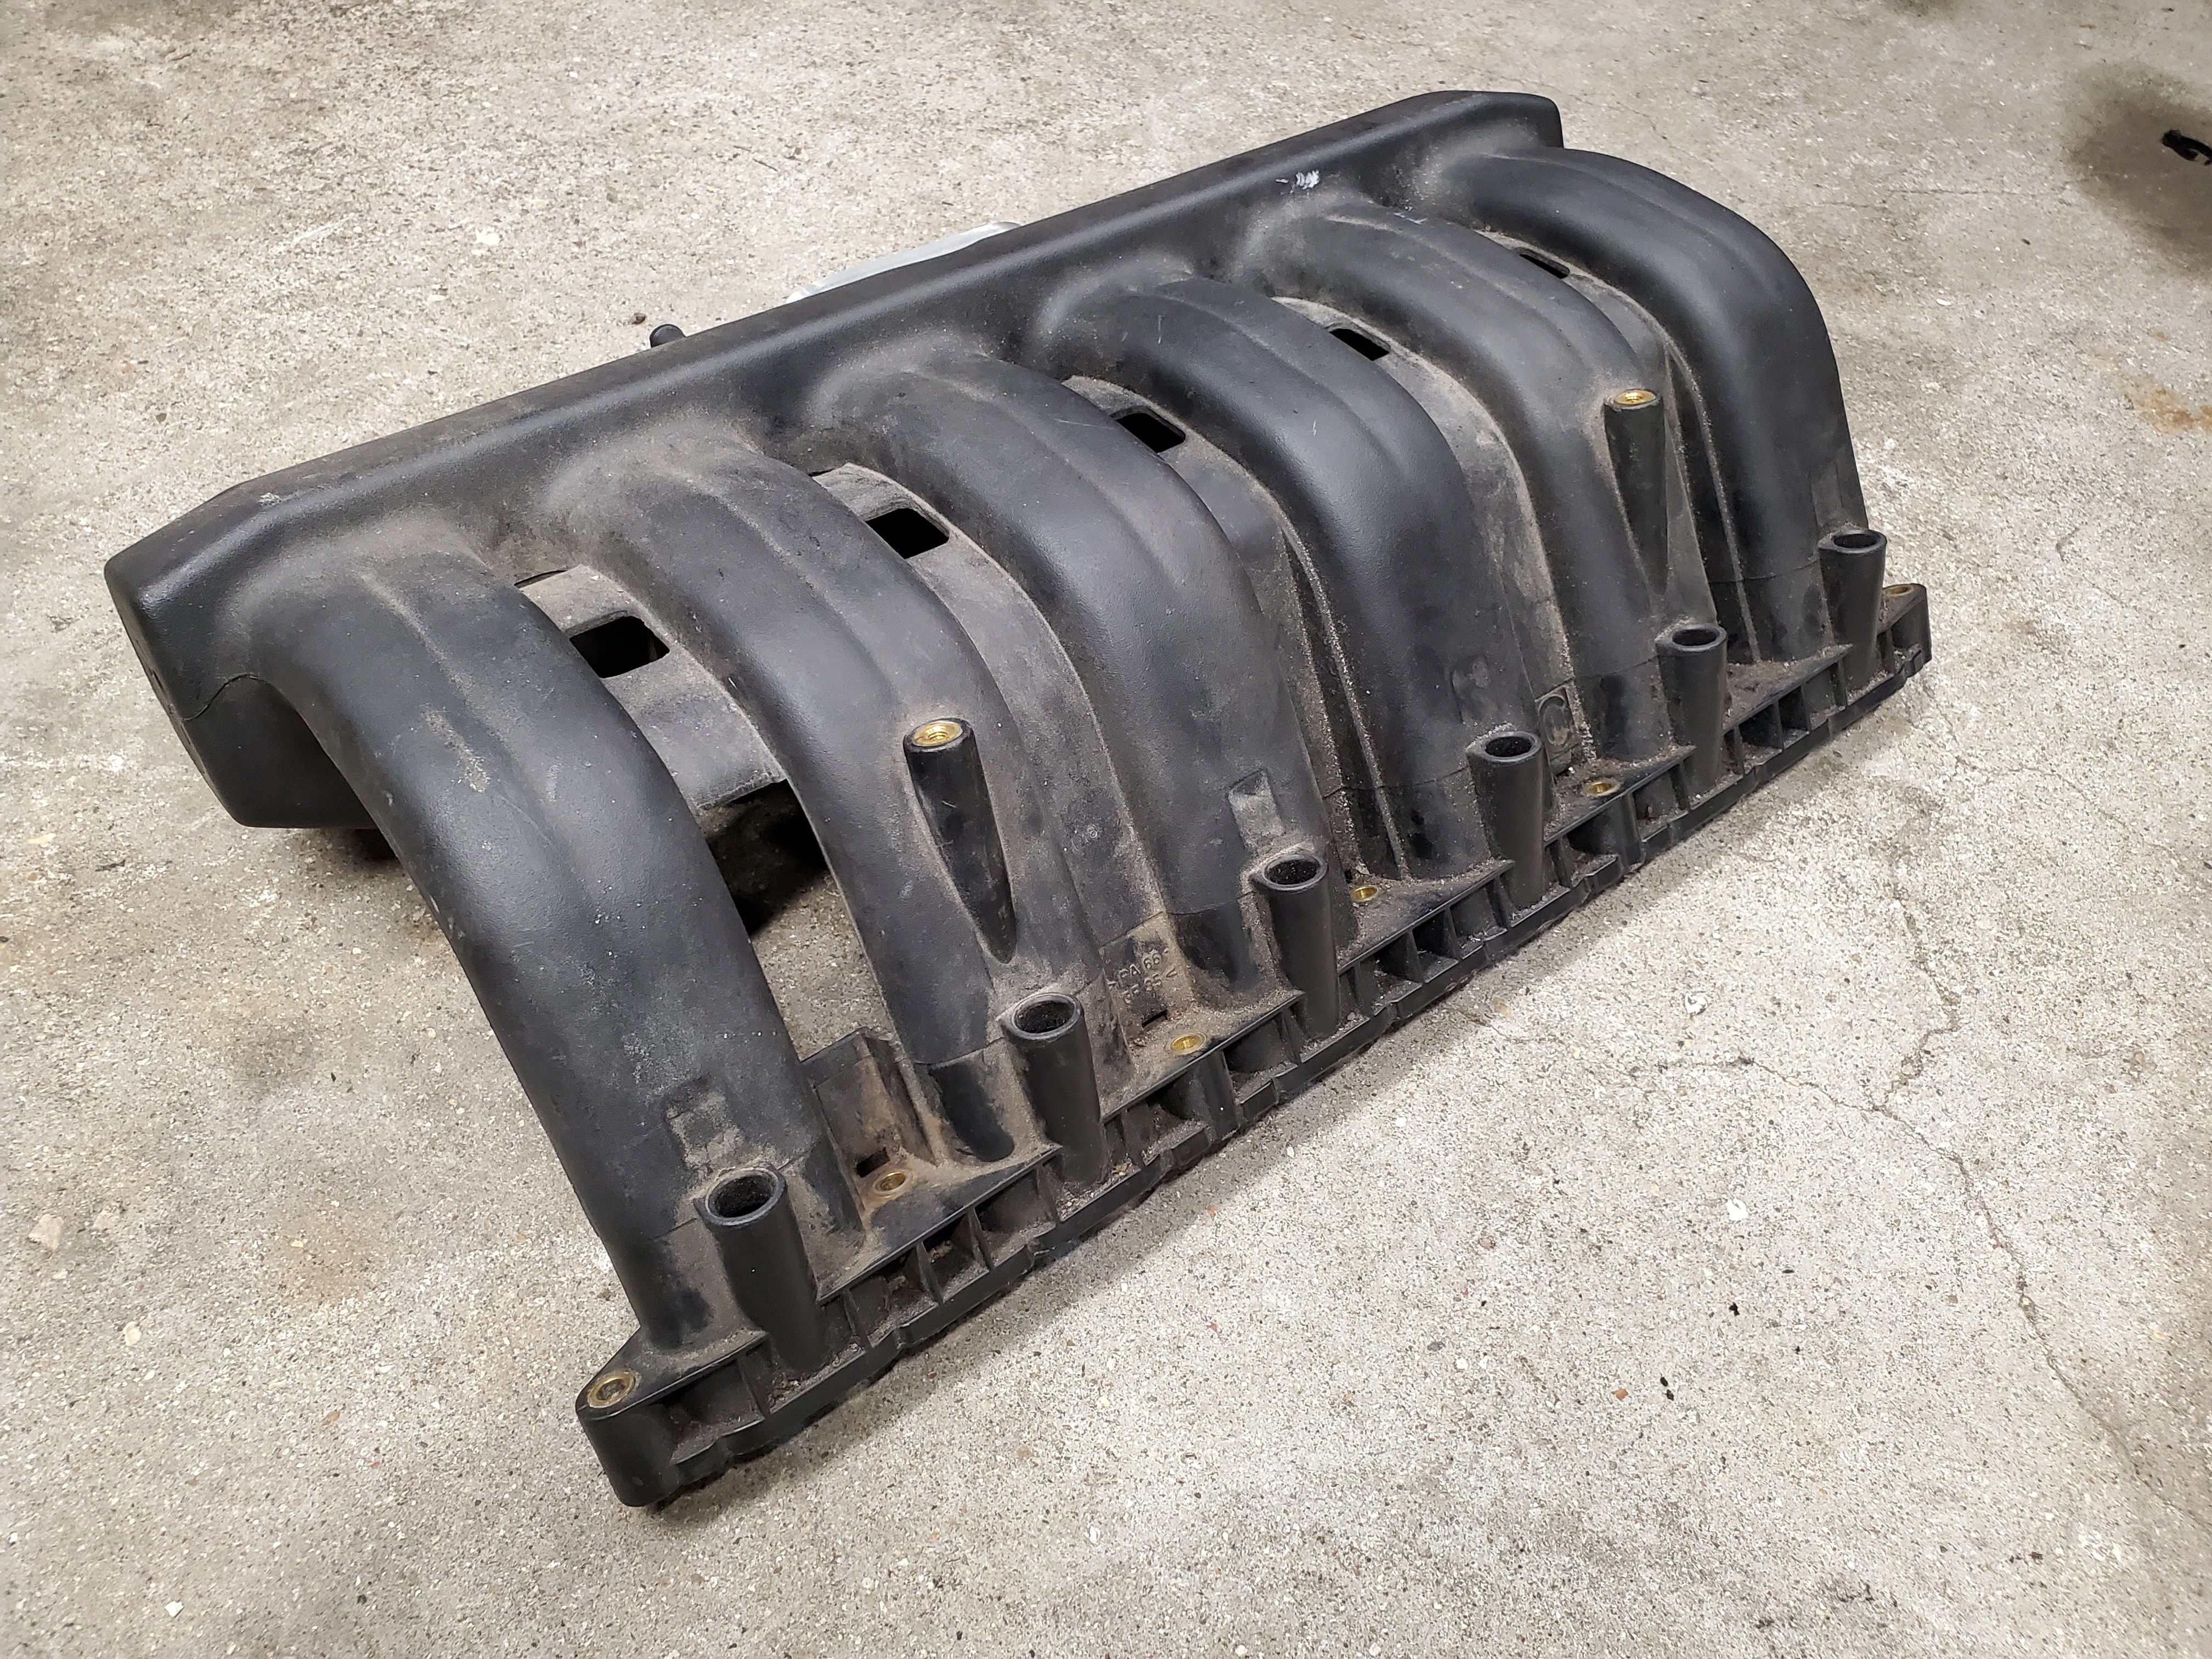
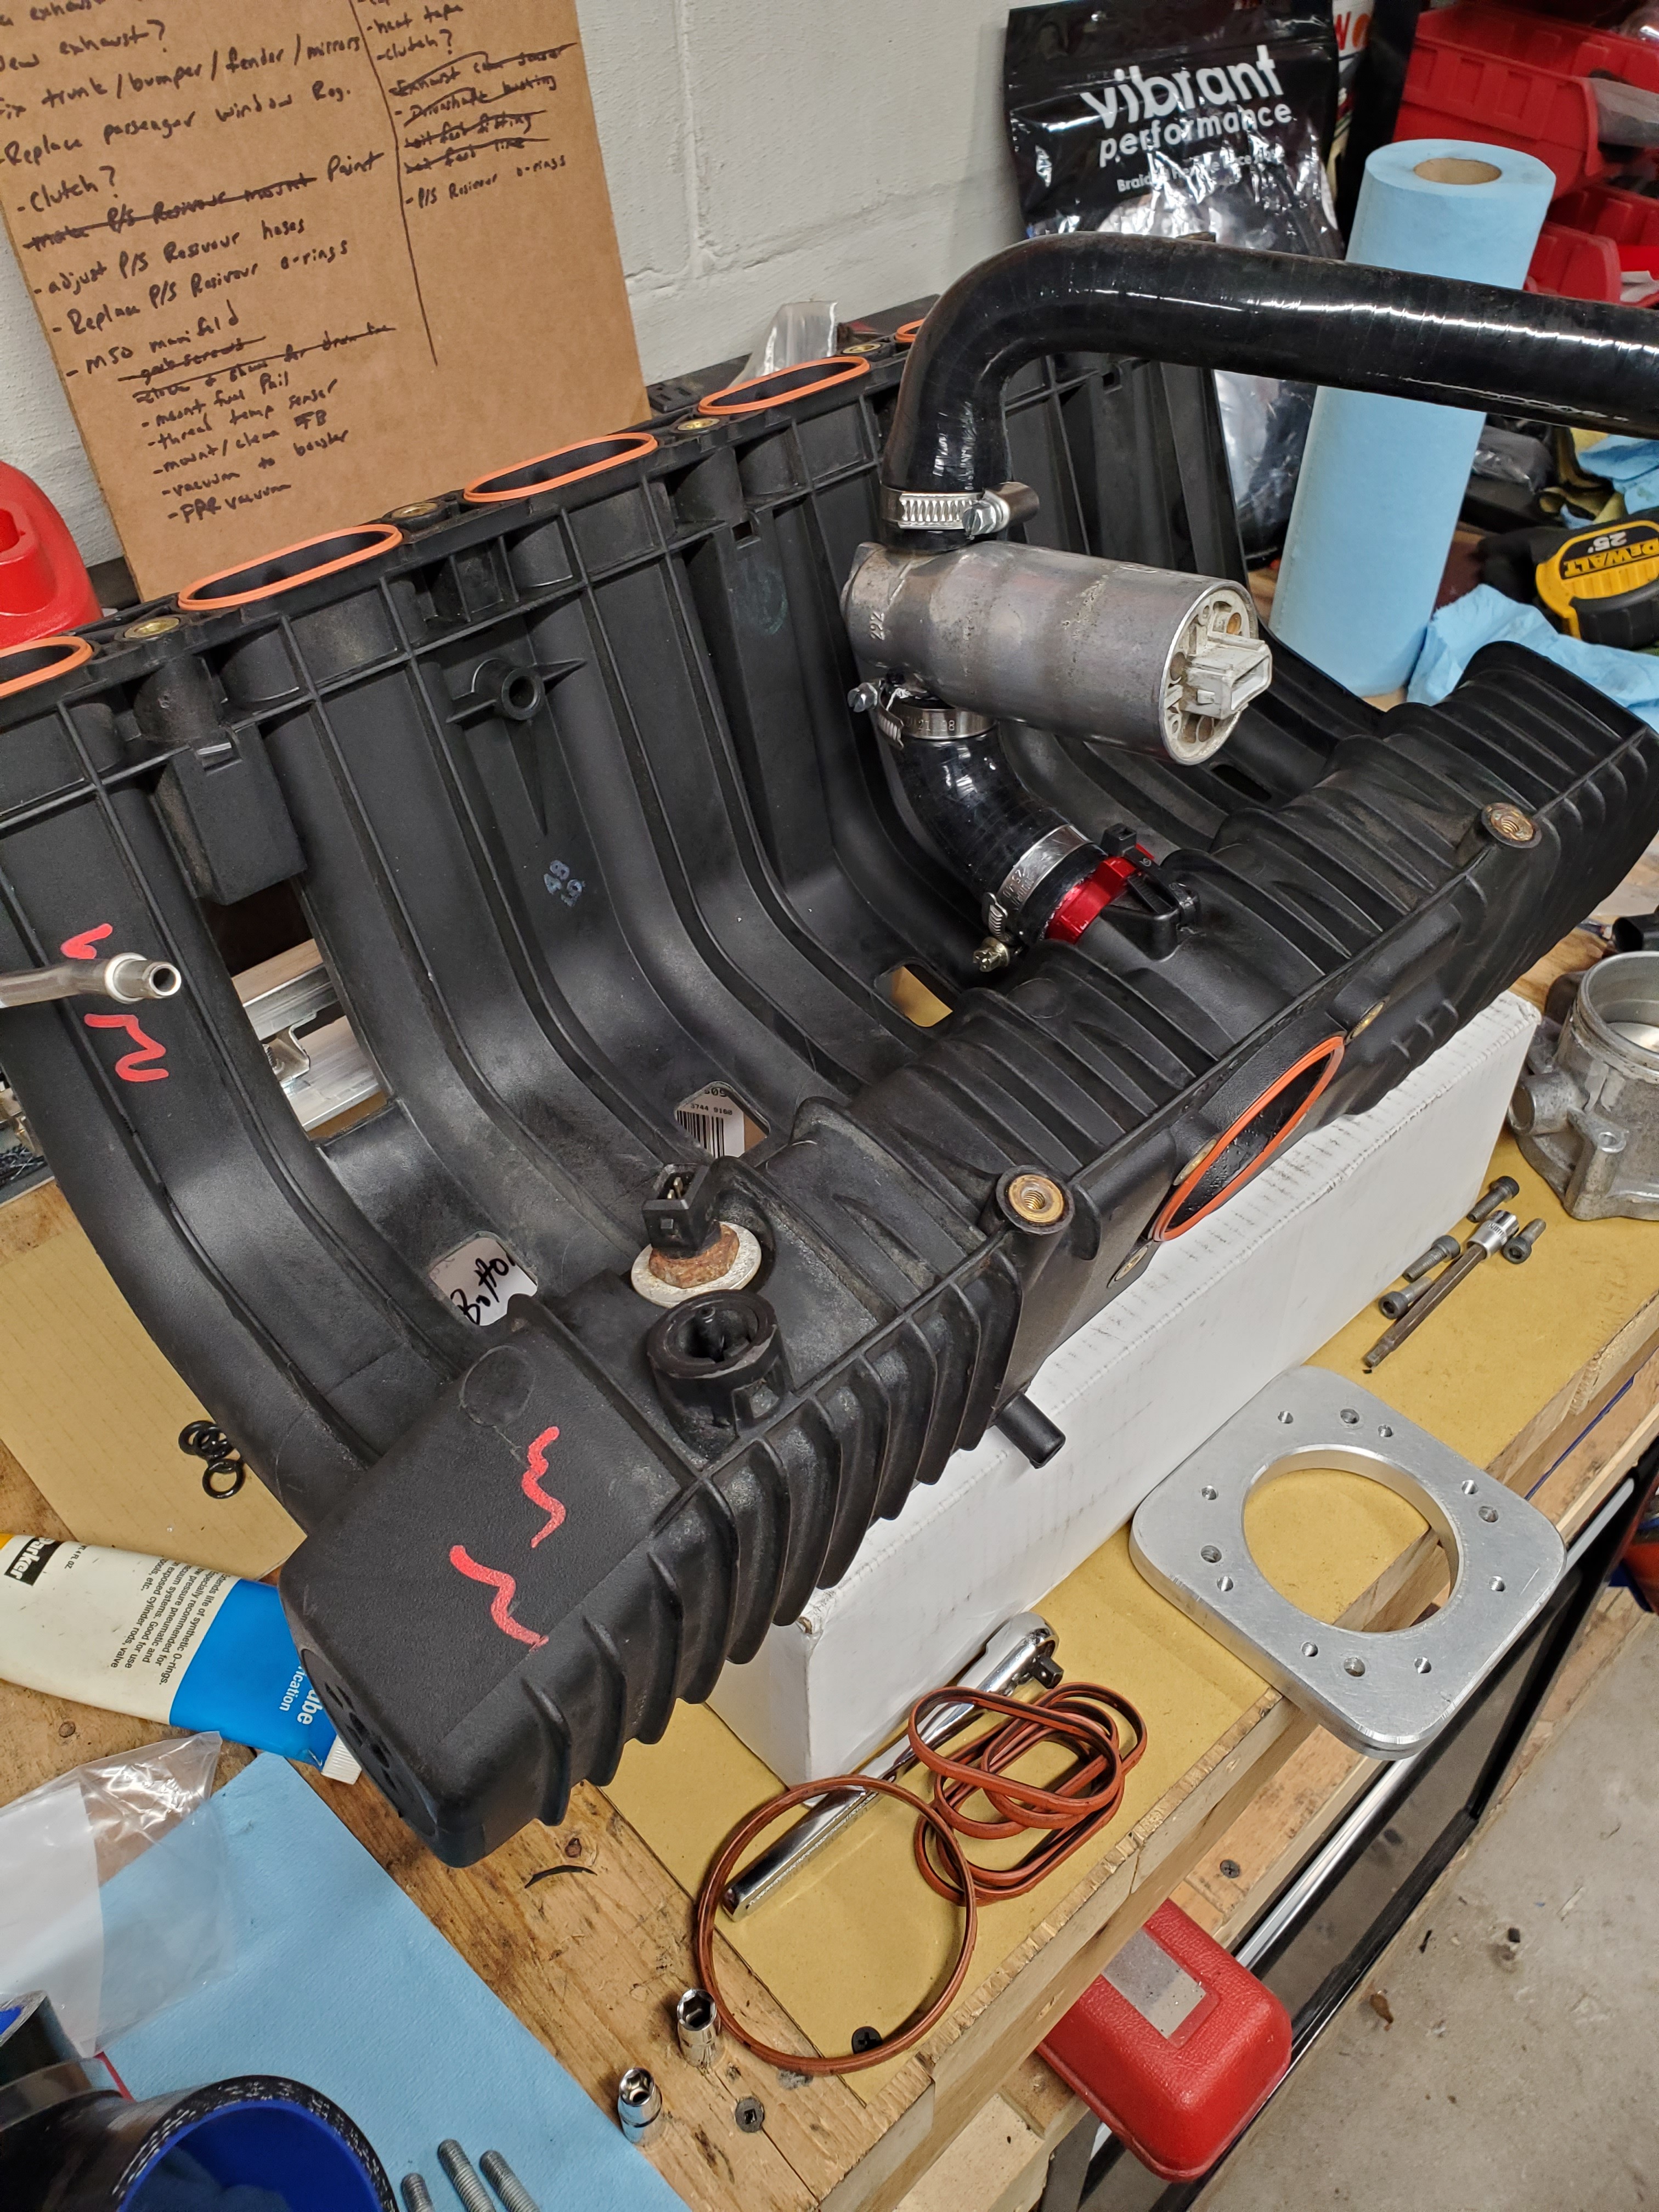
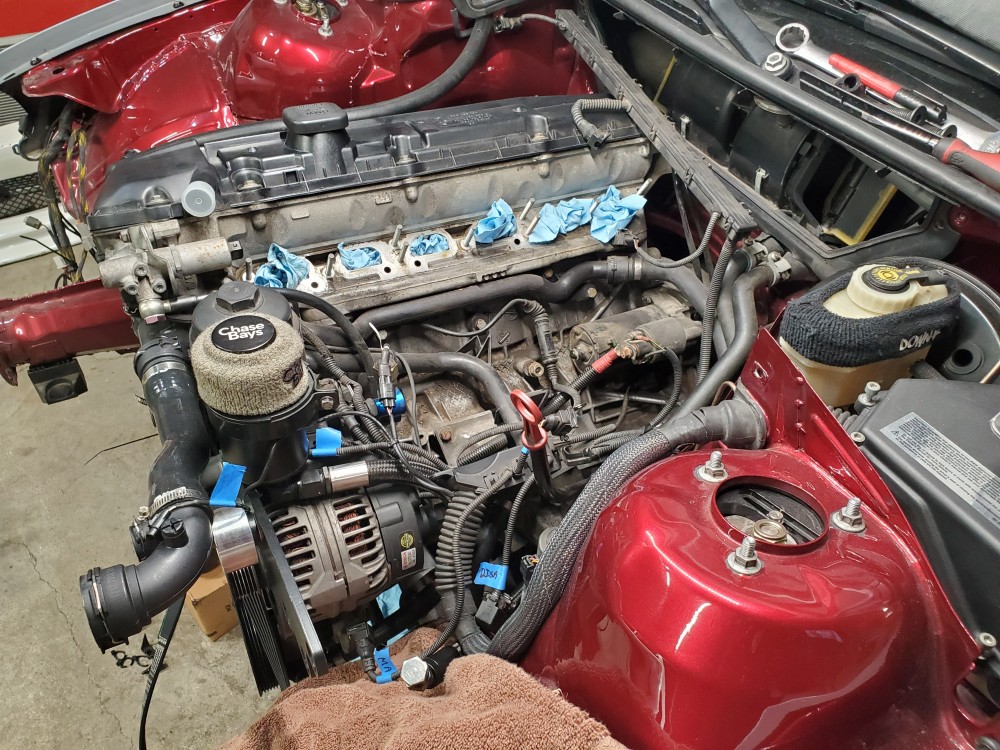
                      And finally to finish catching up to where I'm at currently I pulled the intake manifold in preparation for the M50 manifold I will be picking up in a week or two.

                      Thats it for now! 
                      20210221140148.jpg

                      1 Reply Last reply
                      3
                      • KaiserRollsK
                        KaiserRollsK
                        KaiserRolls
                        wrote on last edited by
                        #370

                        Oh god I’m having flashbacks

                        1 Reply Last reply
                        1
                        • YoungCRY
                          YoungCRY
                          YoungCR
                          wrote on last edited by
                          #371

                          Didn't know M54 guys swap on M50 manifolds too. Great work as always! Excited to see this shred tires faster.

                          Chris Young
                          BMWCCA #458972
                          1986 528e/5  | 1994 530i/5 | 1995 540i/6 | 2013 X5 35d | 1998 C1500 Suburban | 1995 K2500 Suburban

                          1 Reply Last reply
                          1
                          • TkuhnT
                            TkuhnT
                            Tkuhn
                            wrote on last edited by
                            #372

                            KaiserRolls said:

                            Oh god I’m having flashbacks 

                            Is that good or bad lmfao

                            1 Reply Last reply
                            0
                            • TkuhnT
                              TkuhnT
                              Tkuhn
                              wrote on last edited by
                              #373

                              YoungCR said:

                              Didn't know M54 guys swap on M50 manifolds too. Great work as always! Excited to see this shred tires faster. 

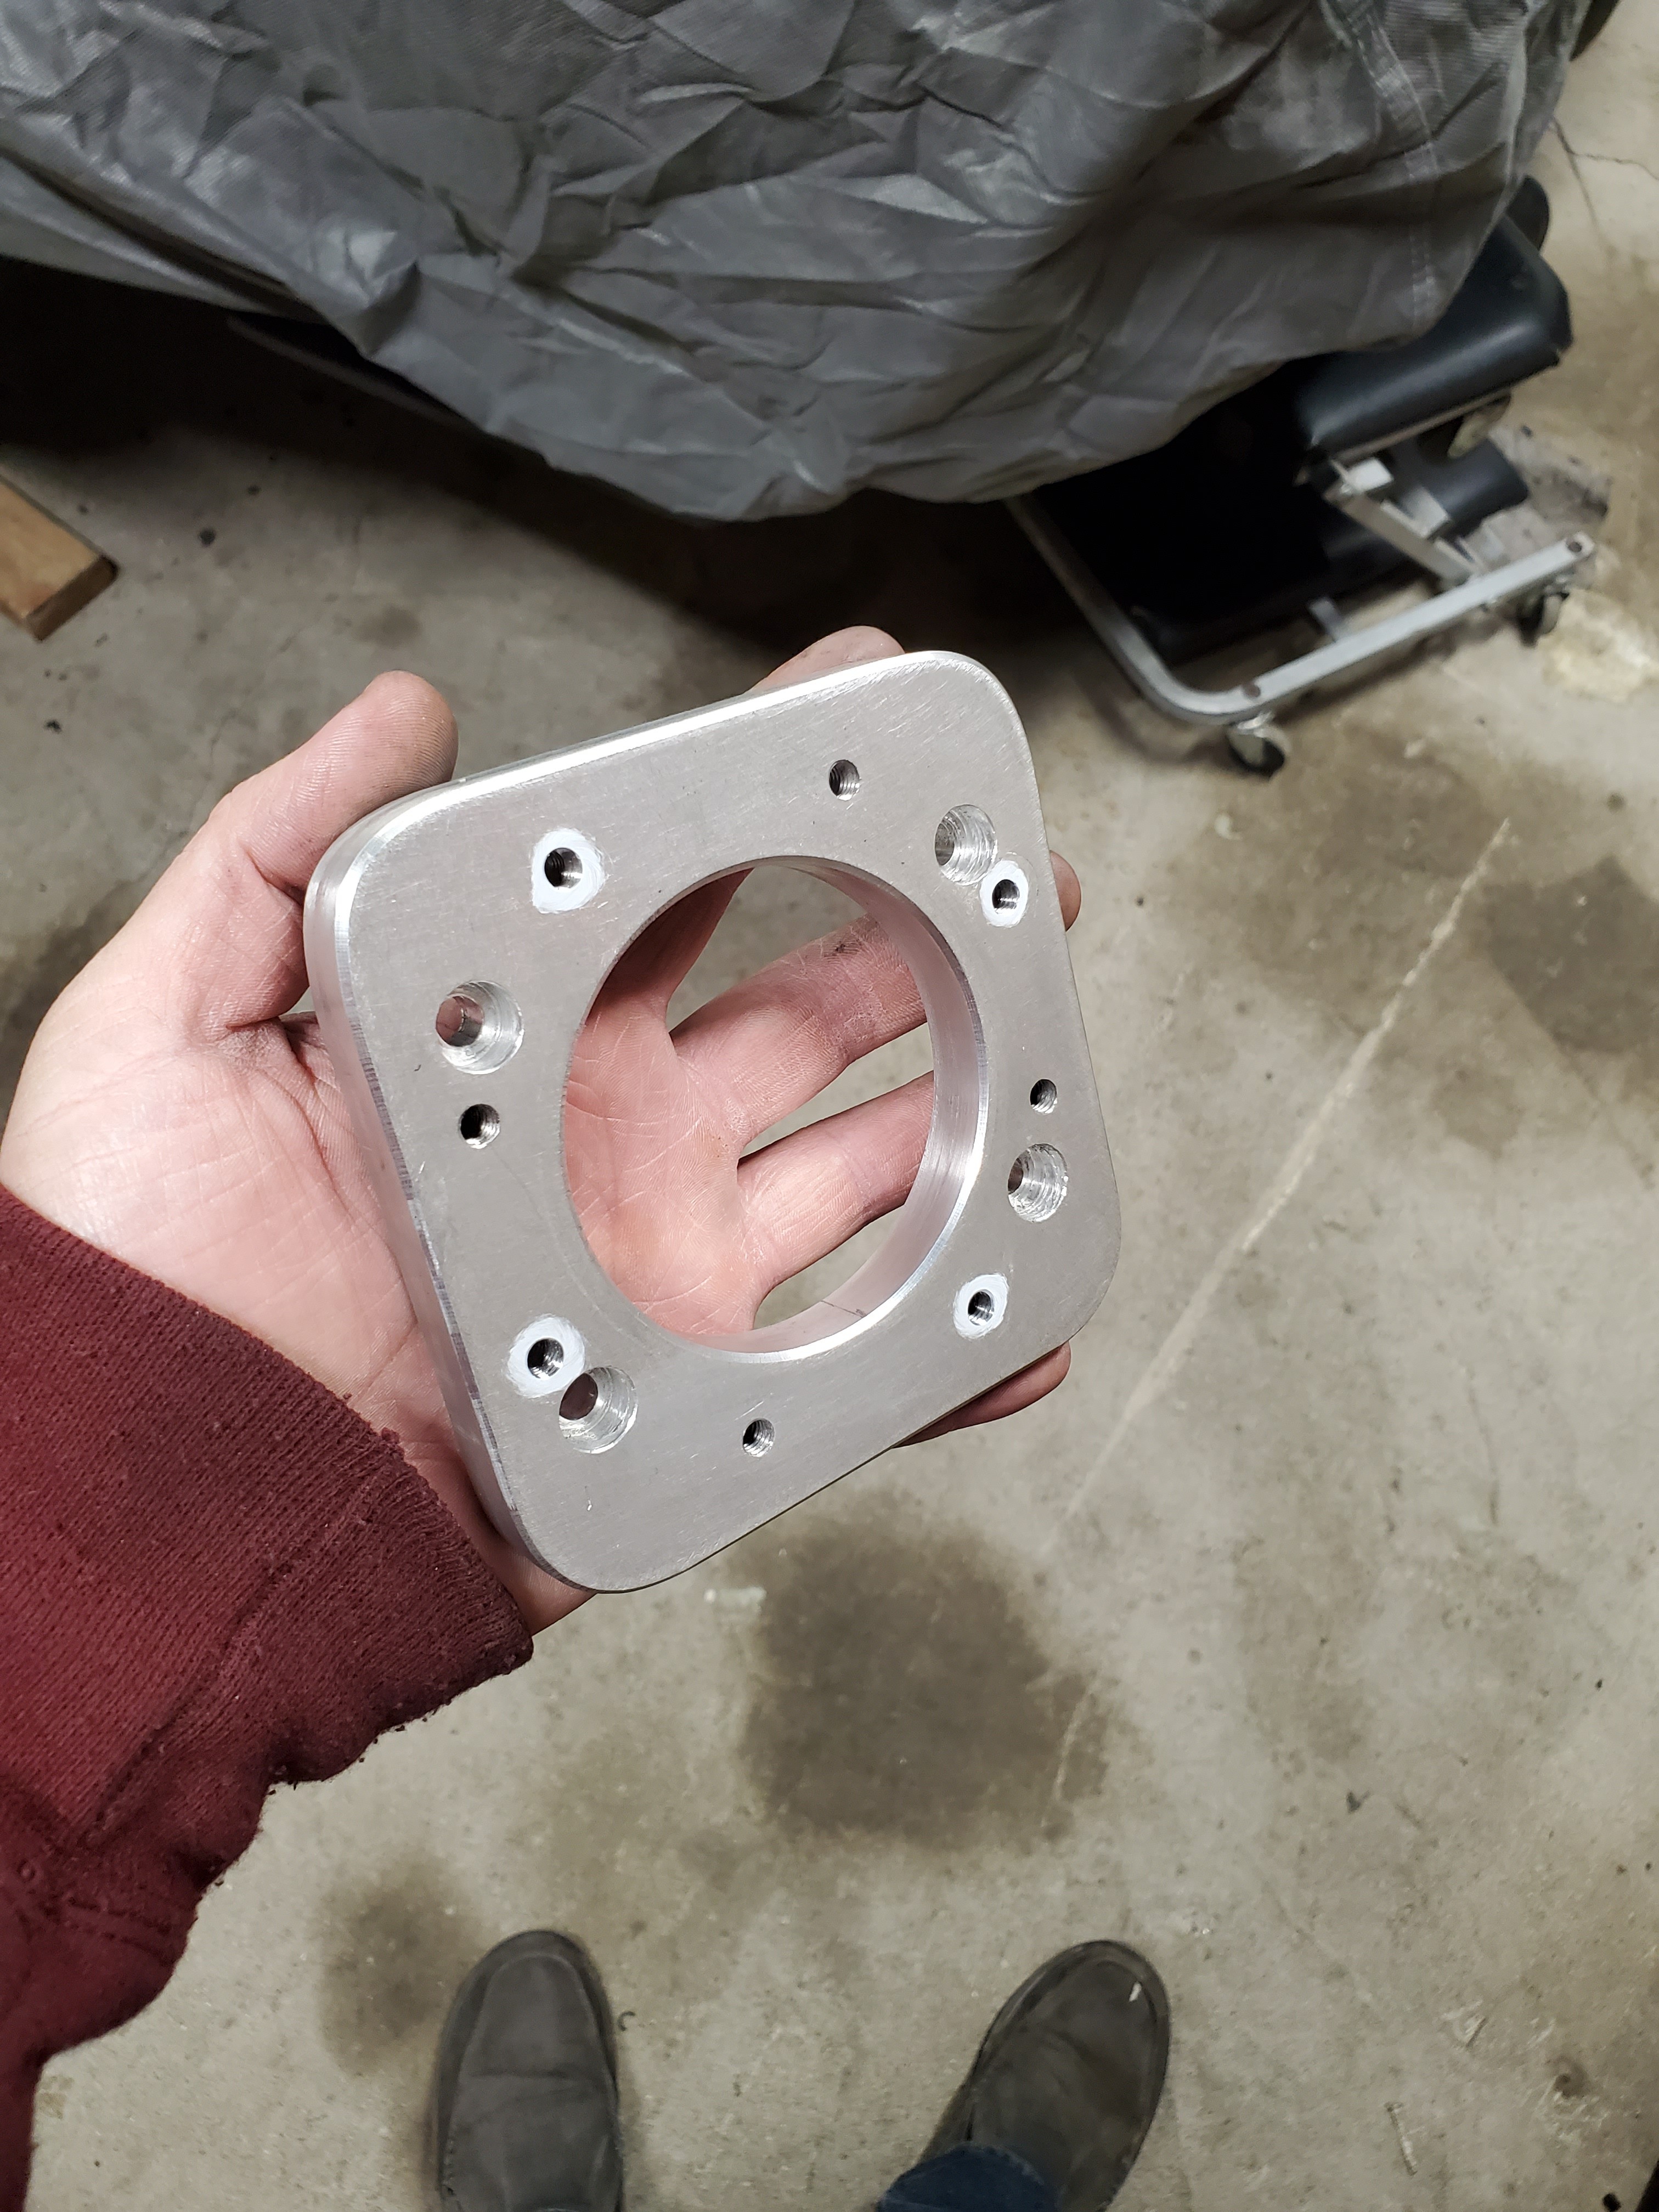
                              Yep! Just have to buy the adapter for the throttle body, plug the vacuum holes on the head and of course have a tune with the DISA deleted.

                              1 Reply Last reply
                              0
                              • KaiserRollsK
                                KaiserRollsK
                                KaiserRolls
                                wrote on last edited by
                                #374

                                Tkuhn said:

                                Is that good or bad lmfao

                                Just remembering all the issues that came with putting 20lbs of poo in a 10lb bag

                                1 Reply Last reply
                                1
                                • TkuhnT
                                  TkuhnT
                                  Tkuhn
                                  wrote on last edited by
                                  #375

                                  KaiserRolls said:

                                  Just remembering all the issues that came with putting 20lbs of poo in a 10lb bag

                                  Thats definitely what this is hahaha

                                  1 Reply Last reply
                                  0
                                  • TkuhnT
                                    TkuhnT
                                    Tkuhn
                                    wrote on last edited by
                                    #376

                                    UPDATE

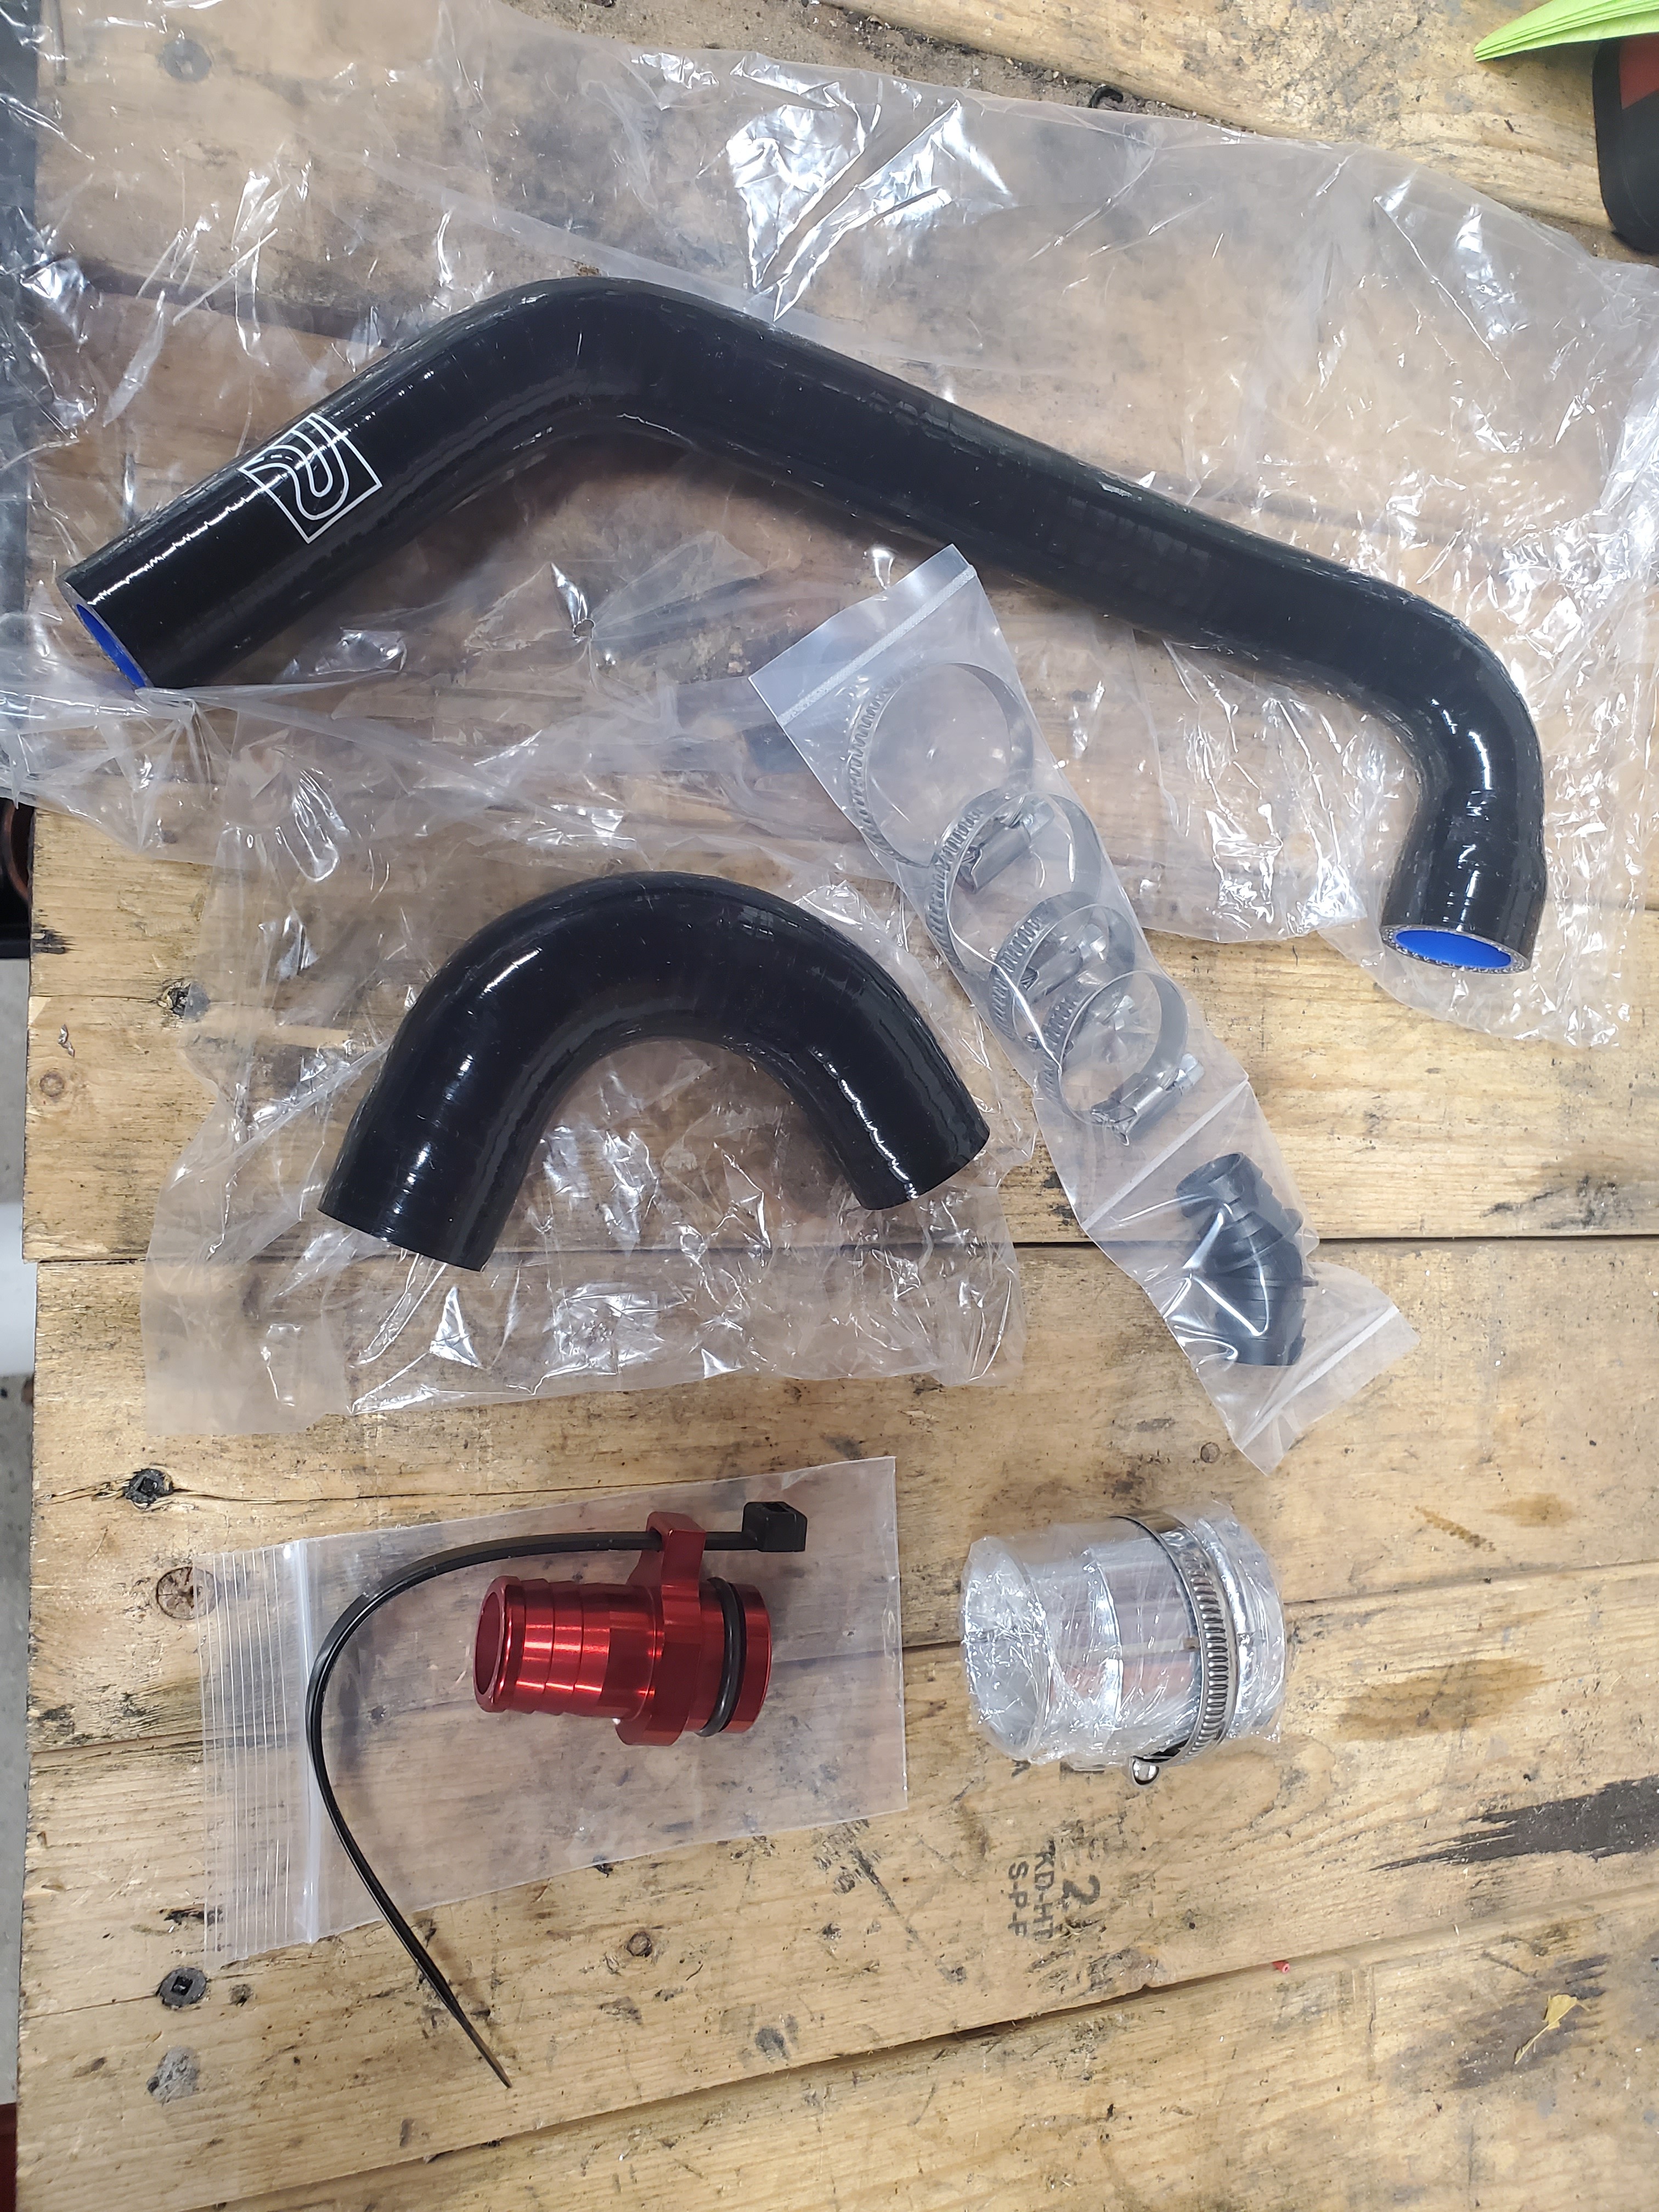
                                    Some parts came in. Silicone IACV hose kit with the aluminum boost proof fitting and a non-m fuel pump sleeve.
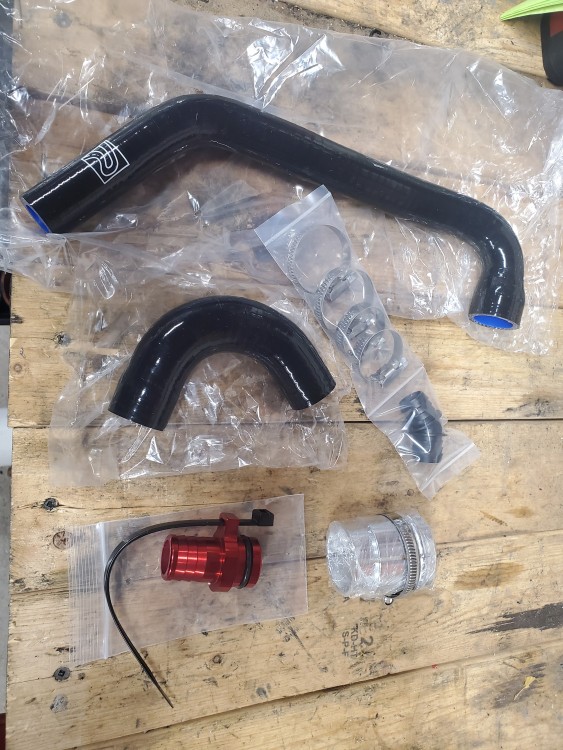
                                    20210227092635.jpg

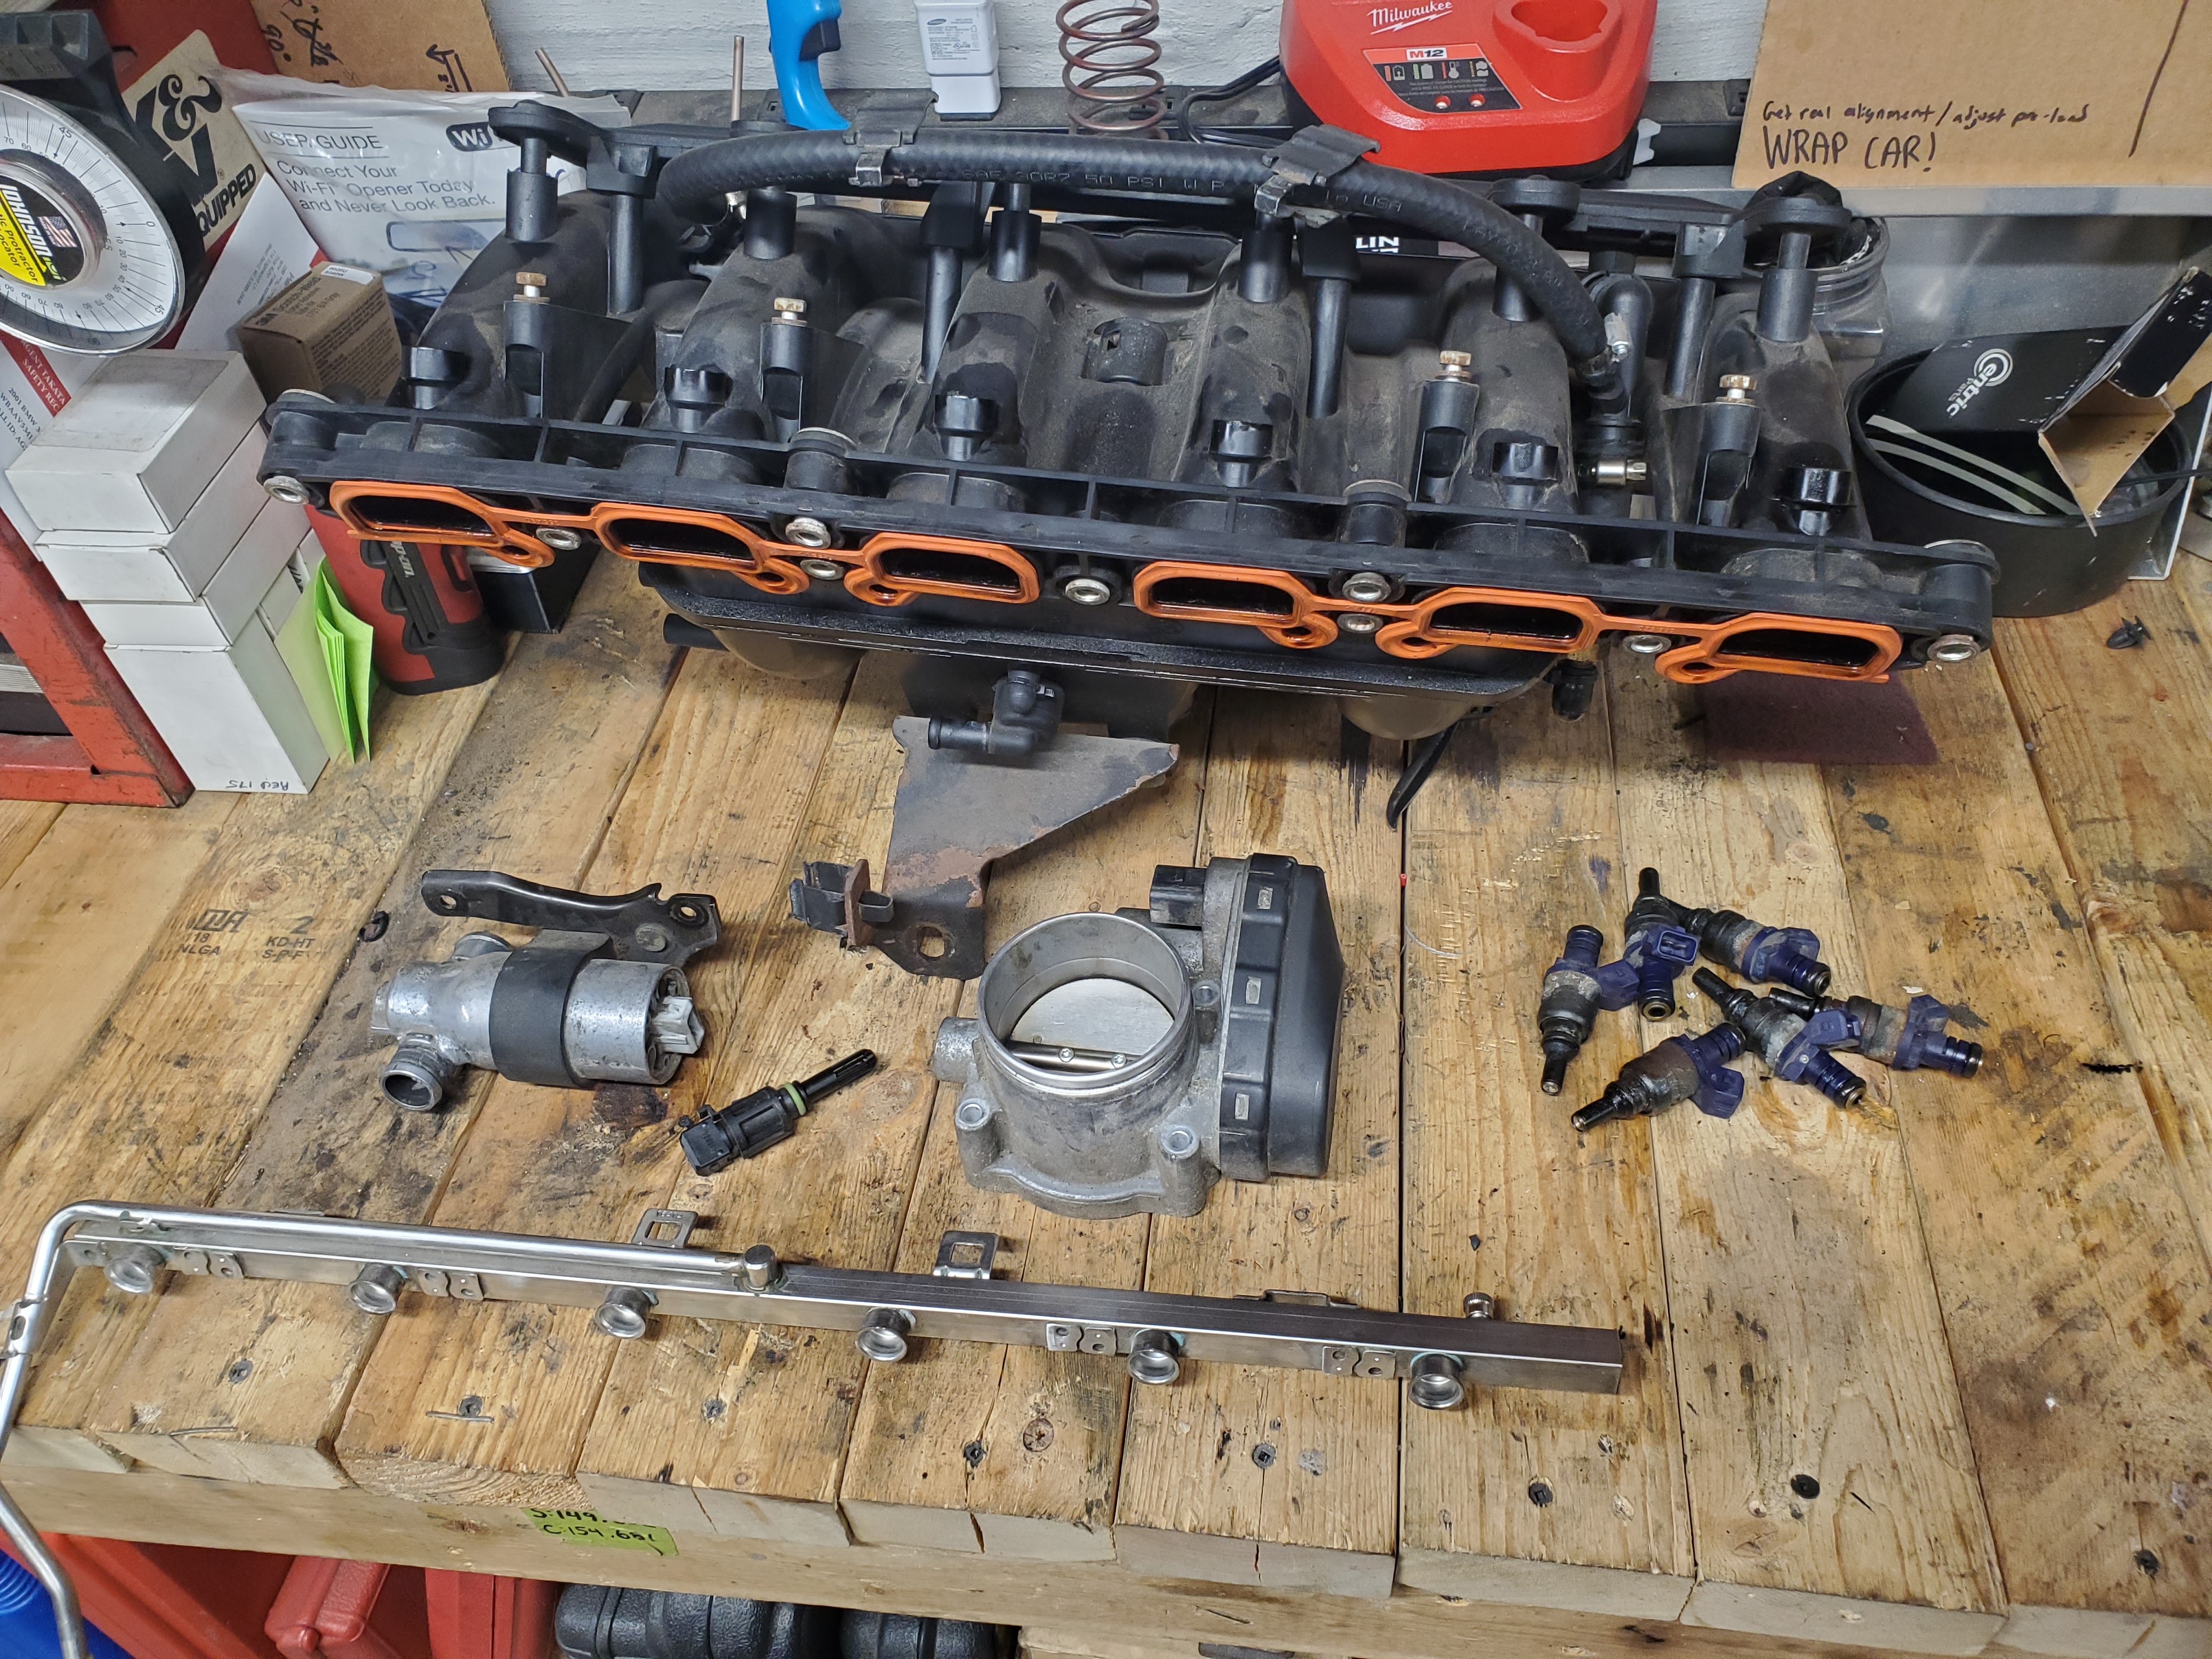
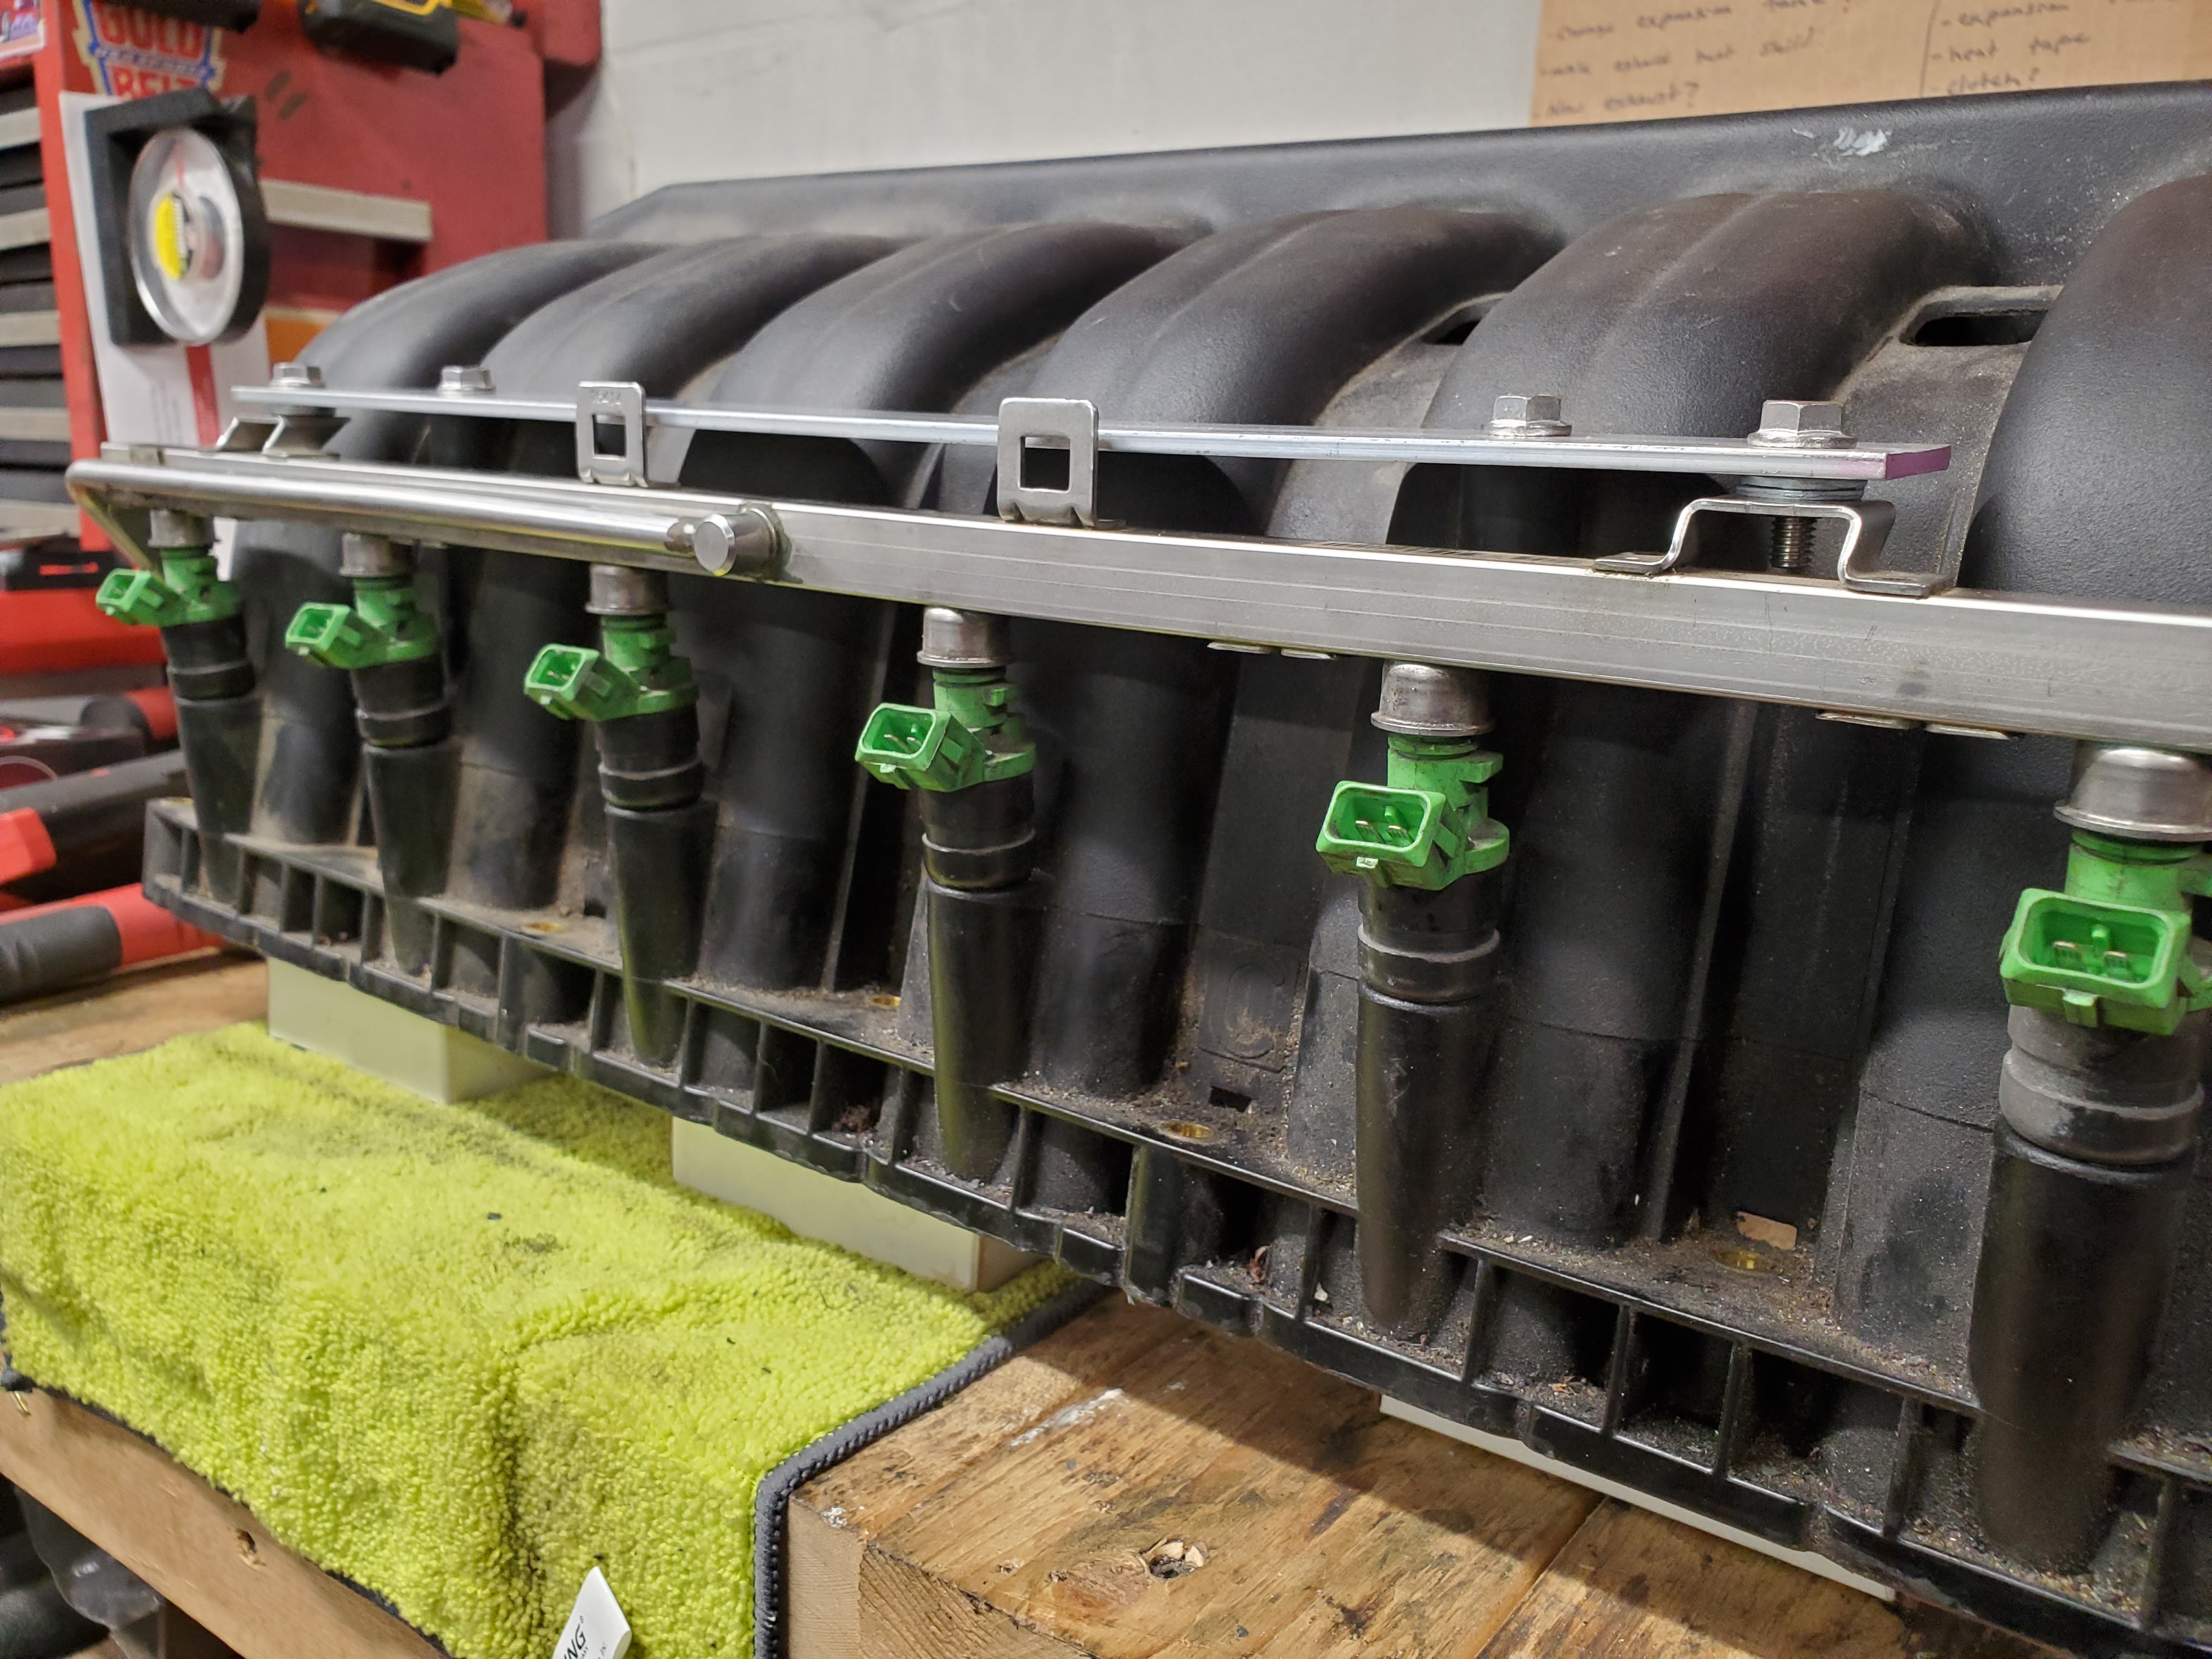
                                    I broke down my M54 manifold as well. Removed the fuel rail, iacv, throttle body and the IAT sensor.
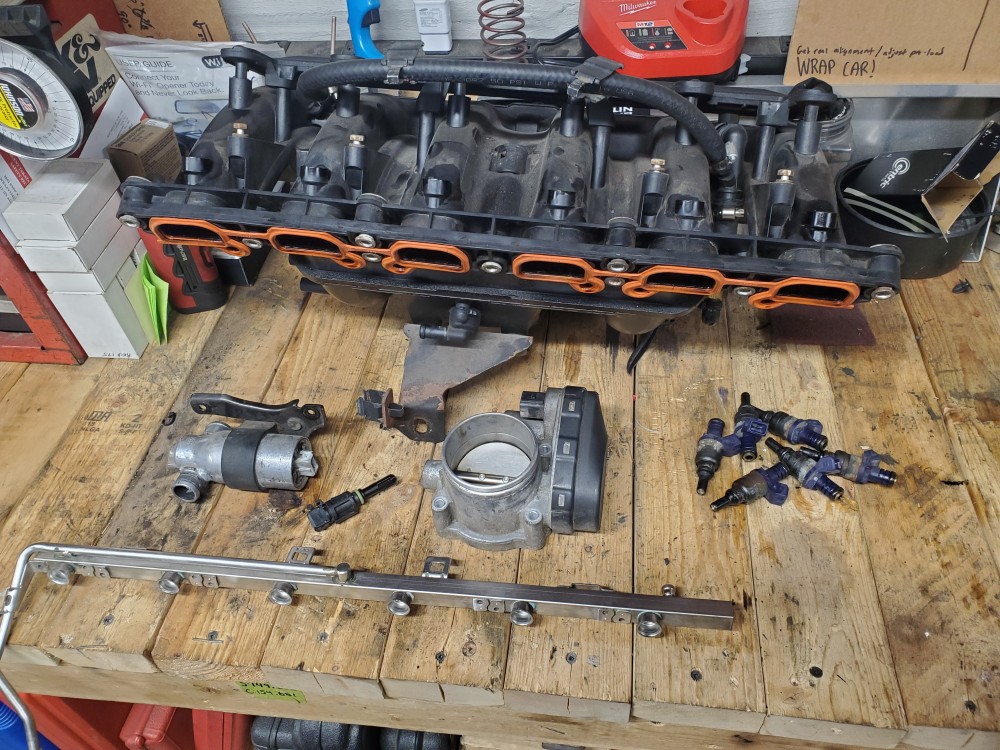
                                    20210228104929.jpg

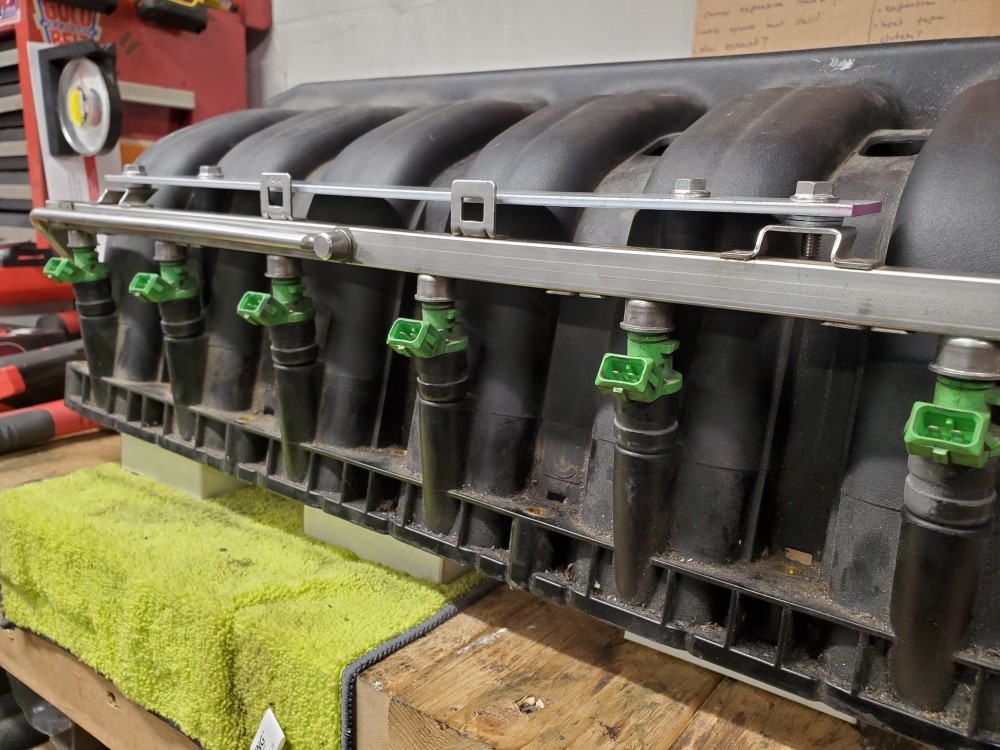
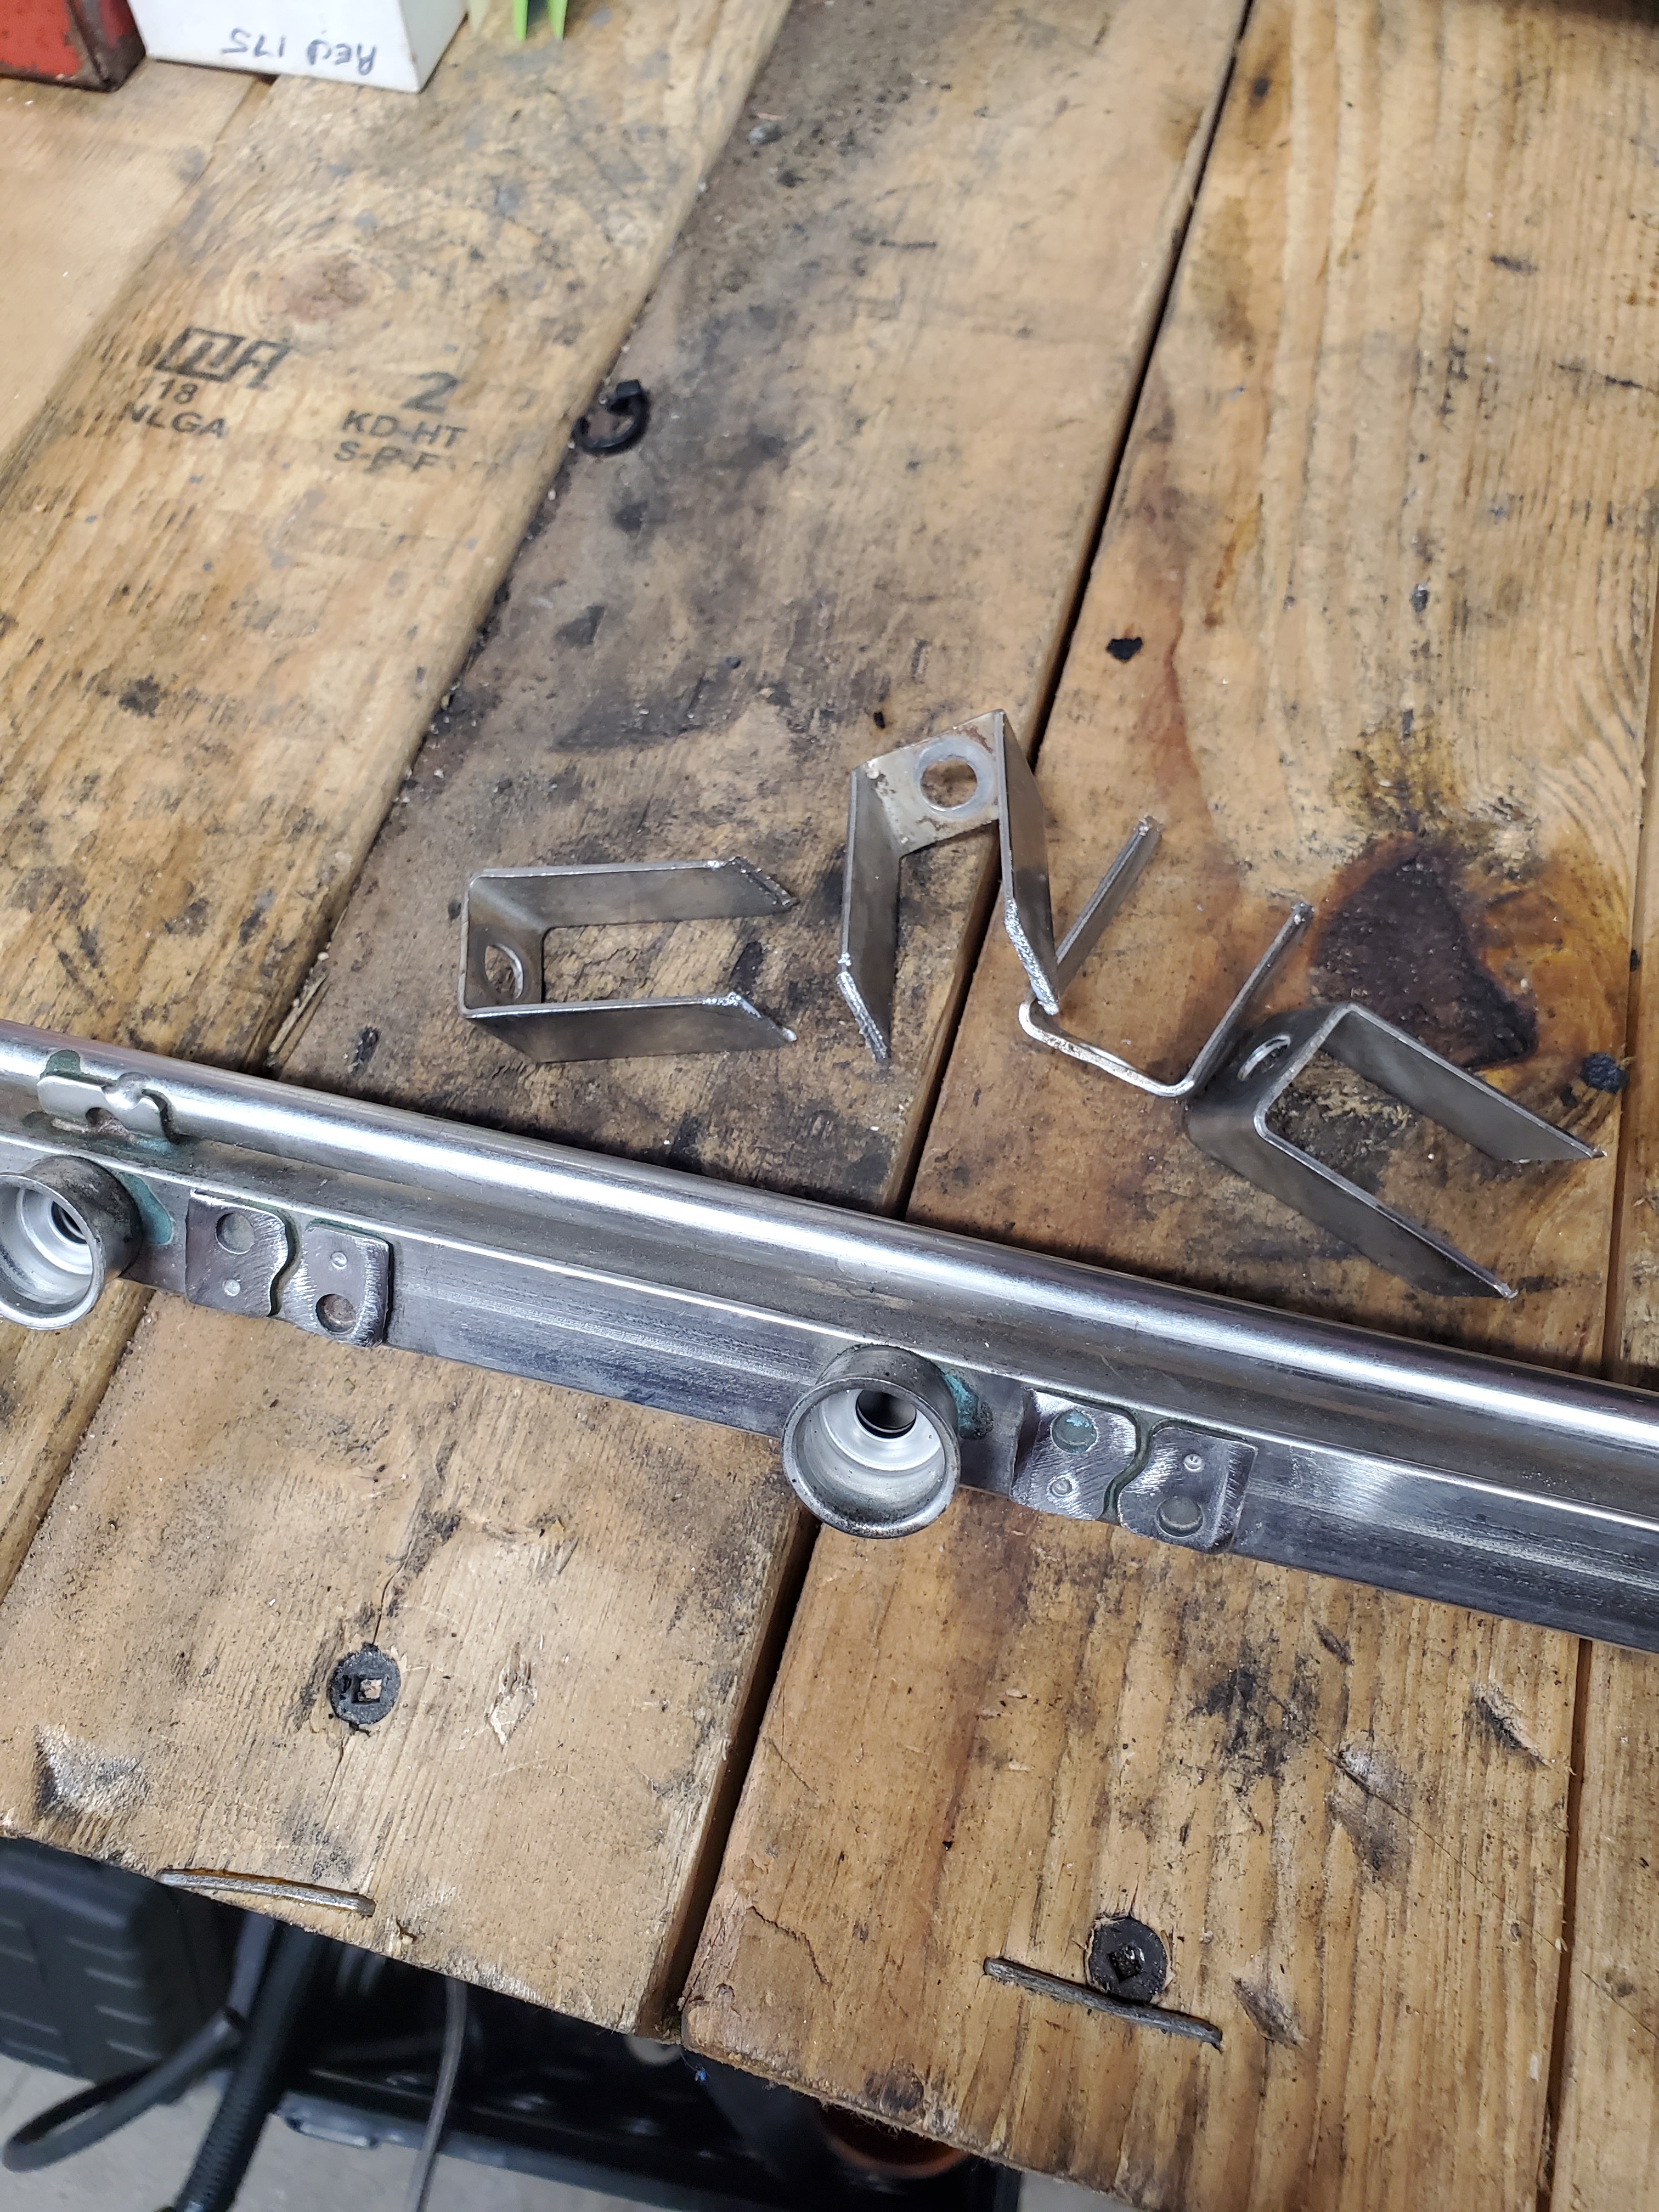
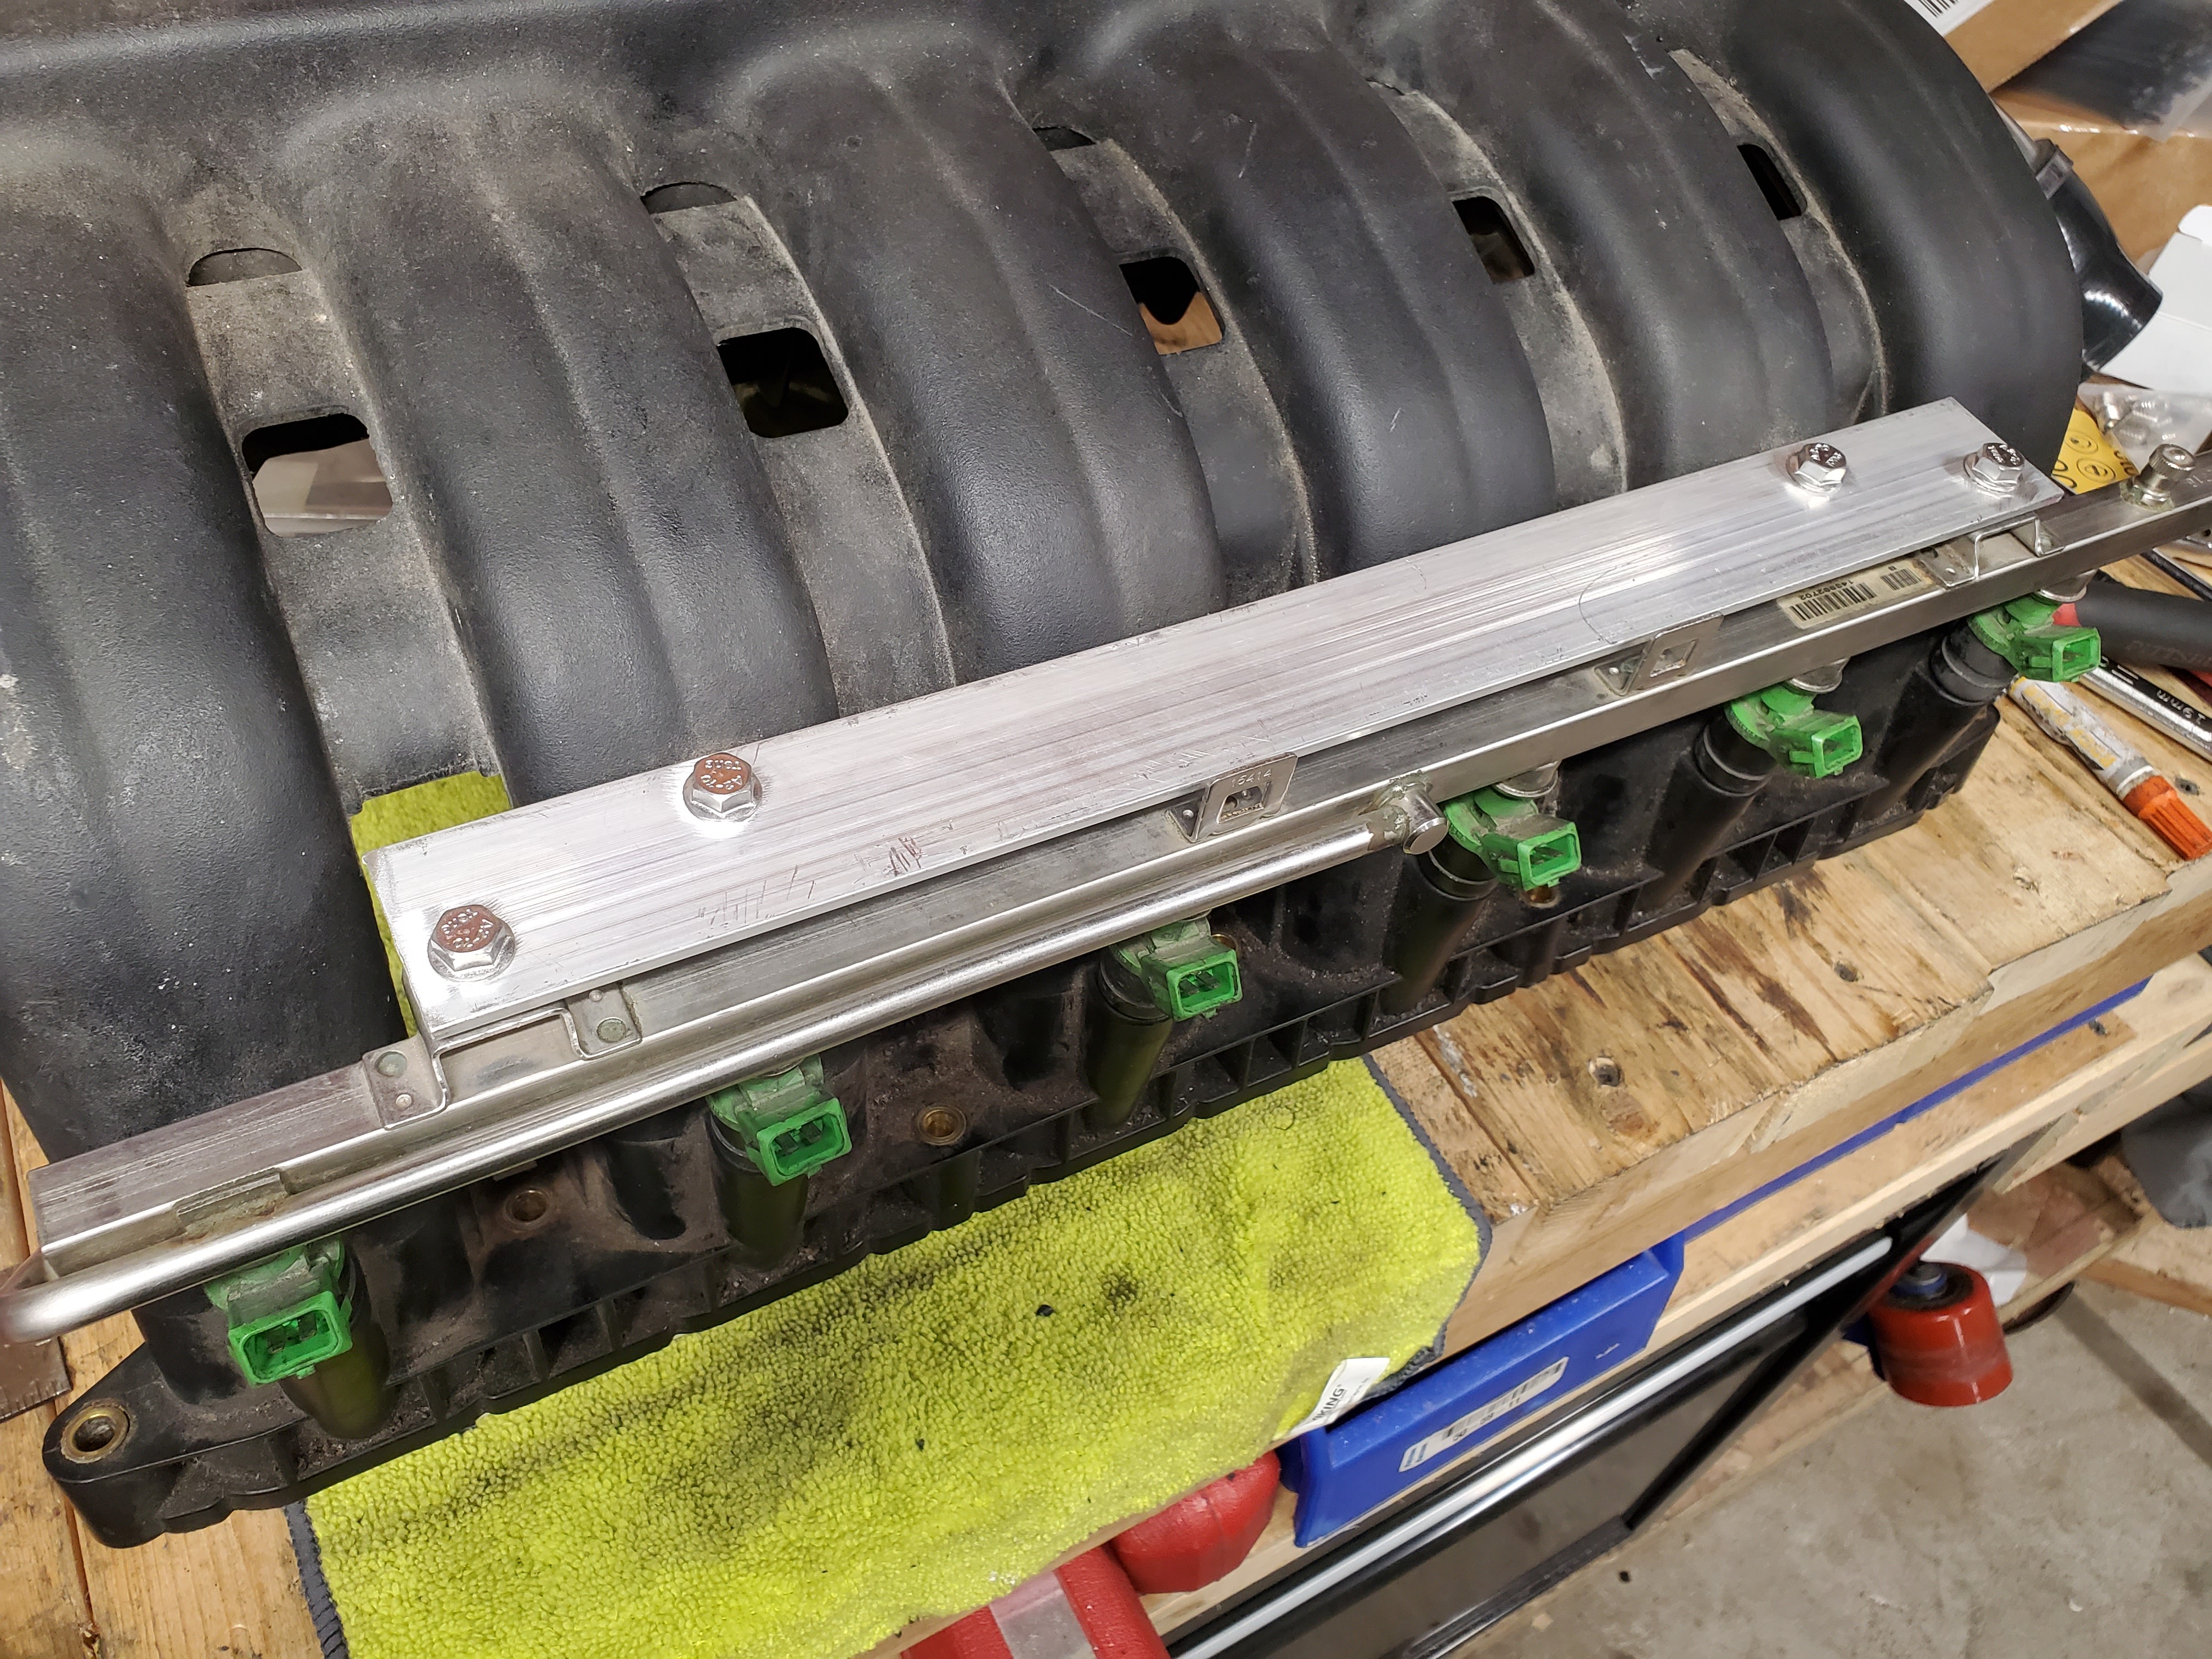
                                    Then I started the modifications to the fuel rail that I know need to be made to use the factory M54b30 fuel rail on the M50 manifold, which is cutting off the mounting tabs.
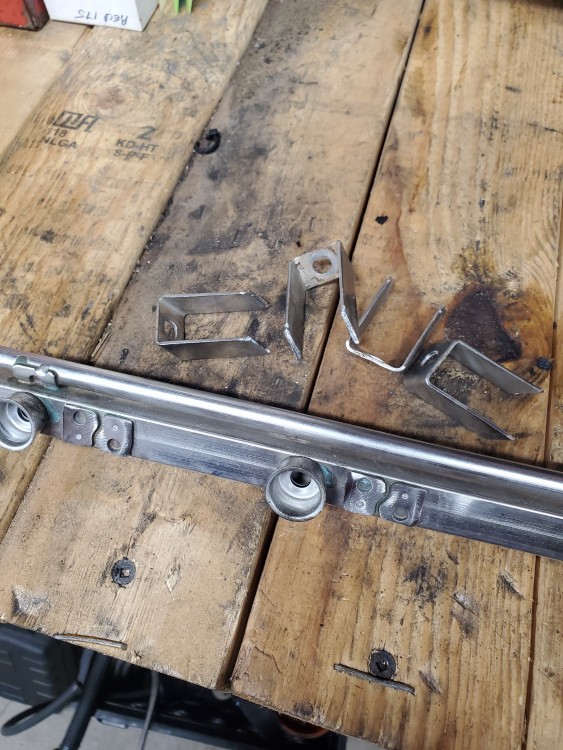
                                    20210228105012.jpg

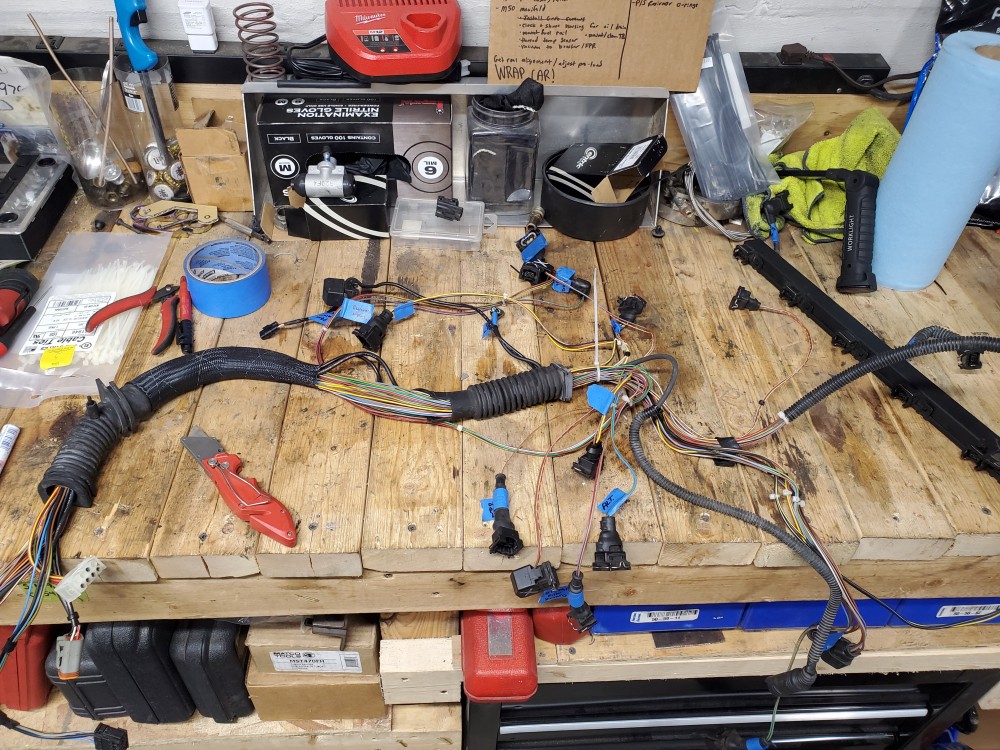
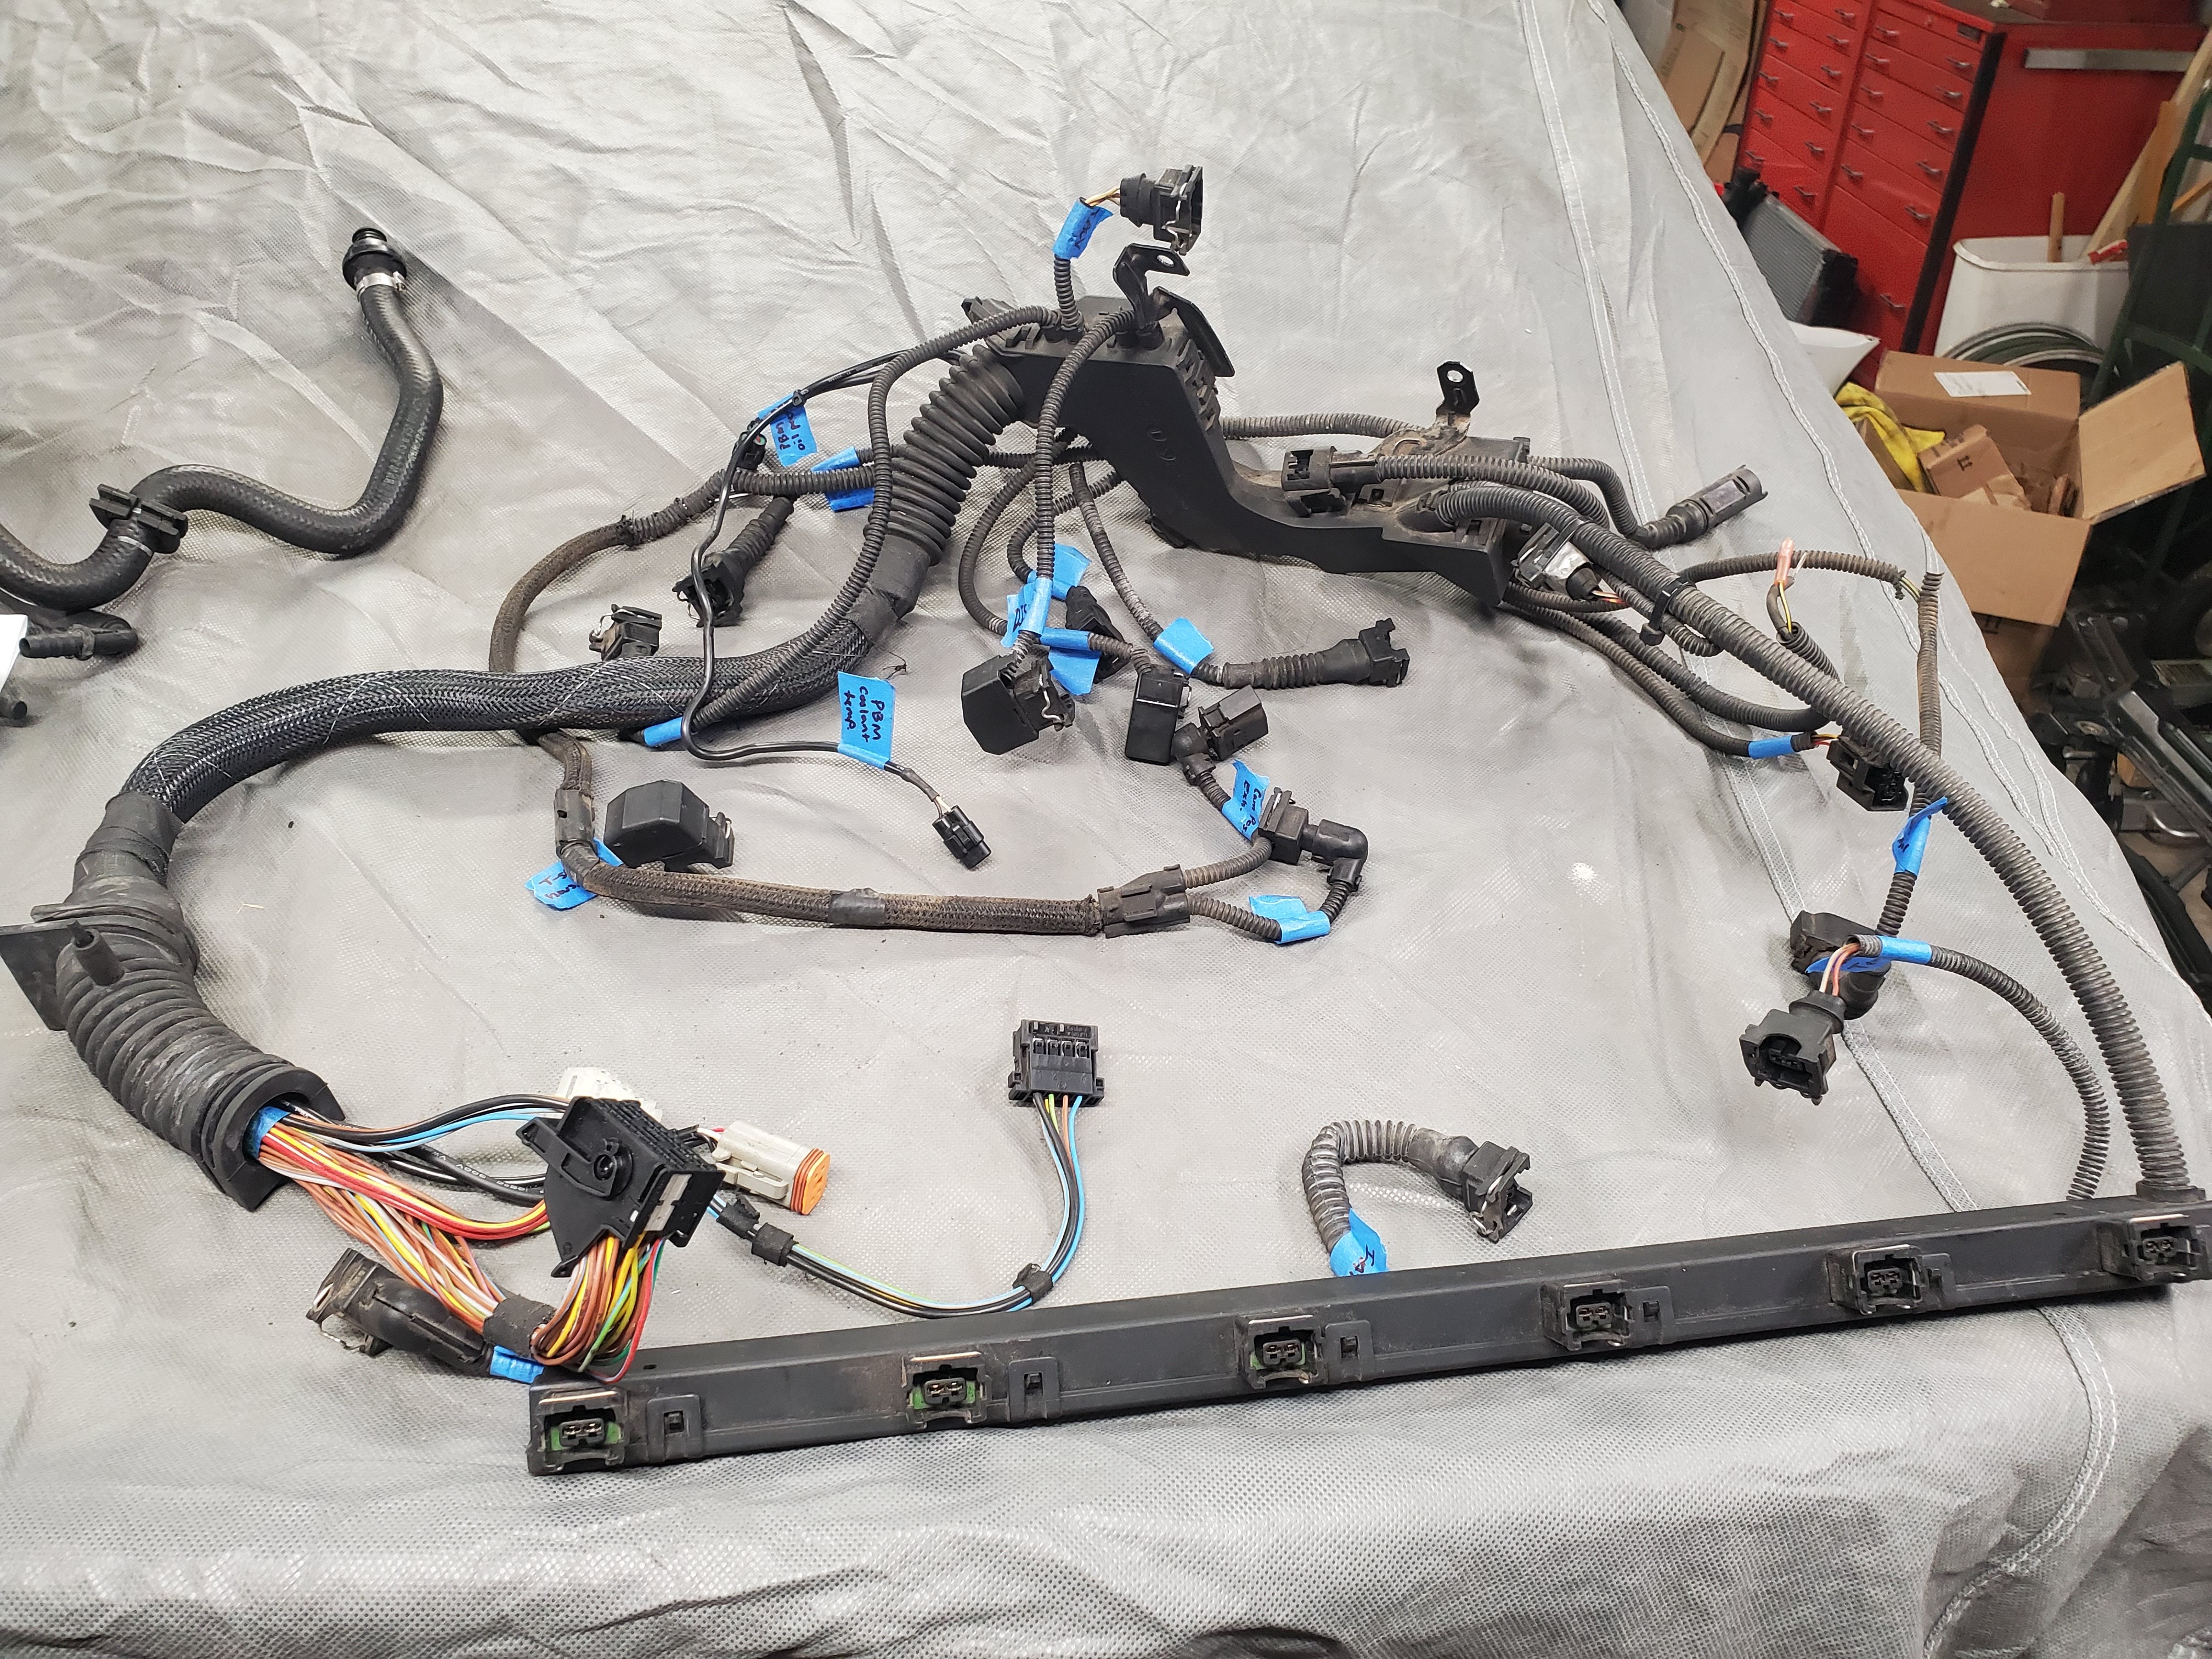
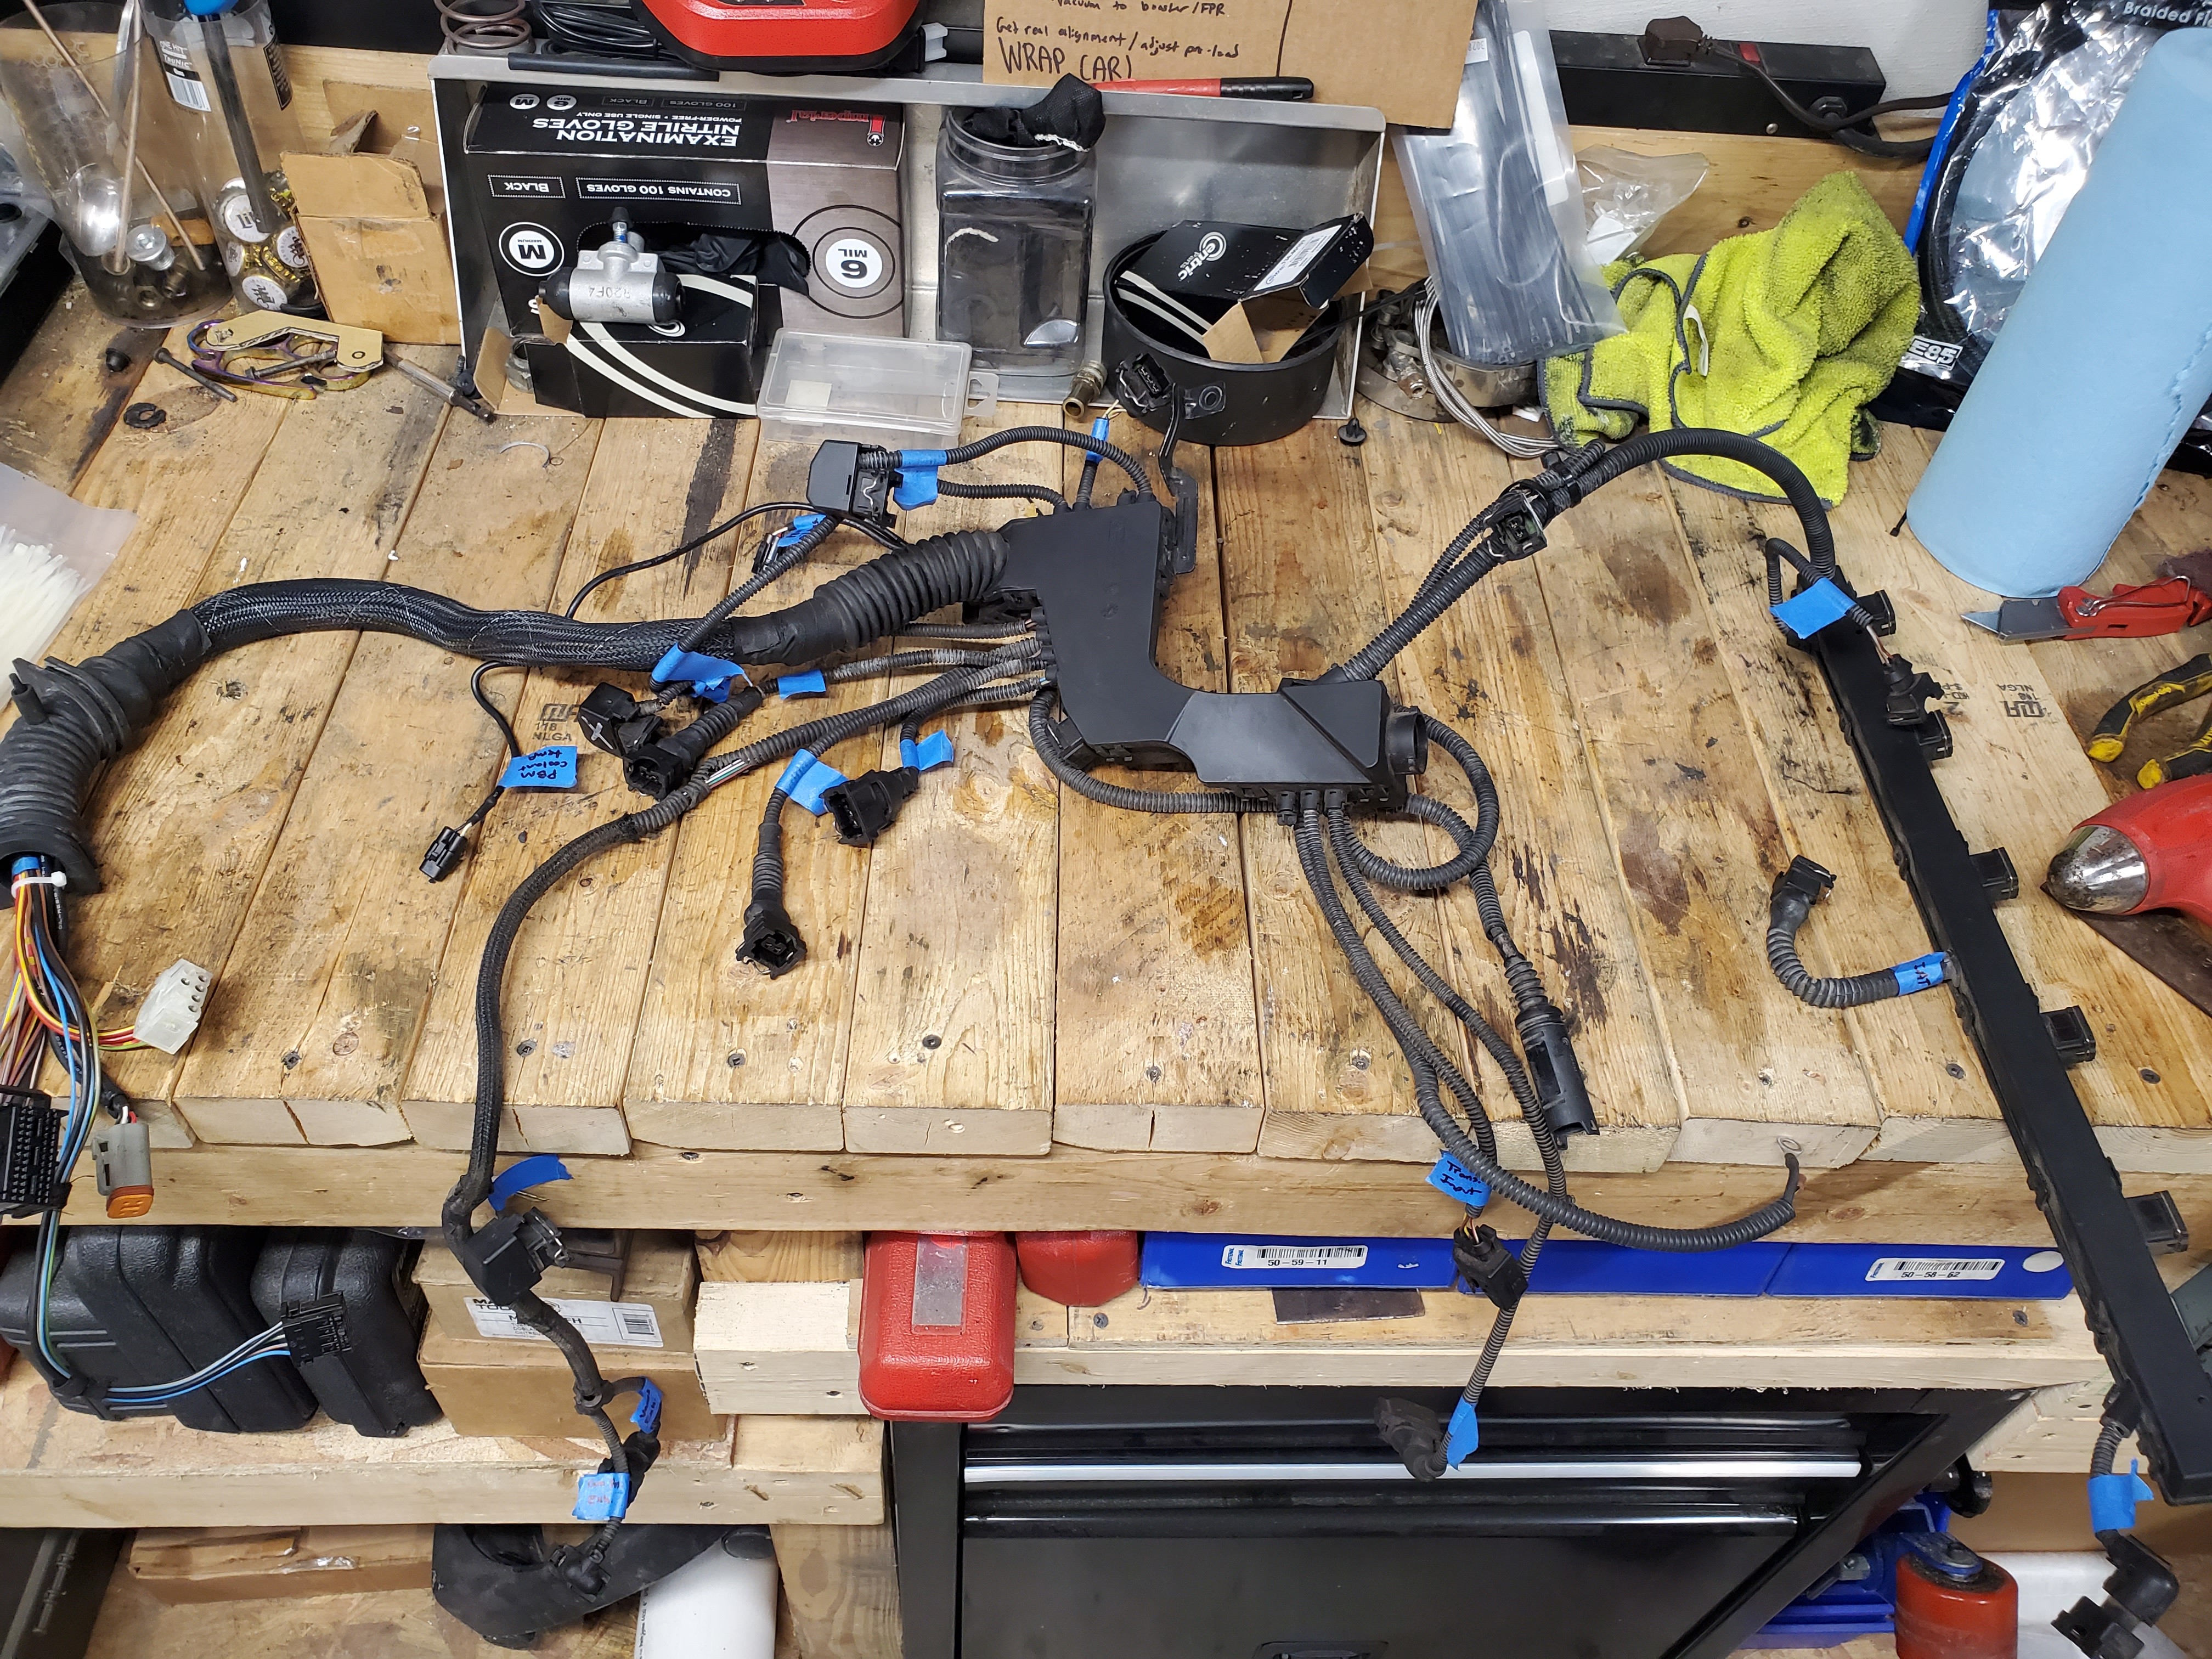
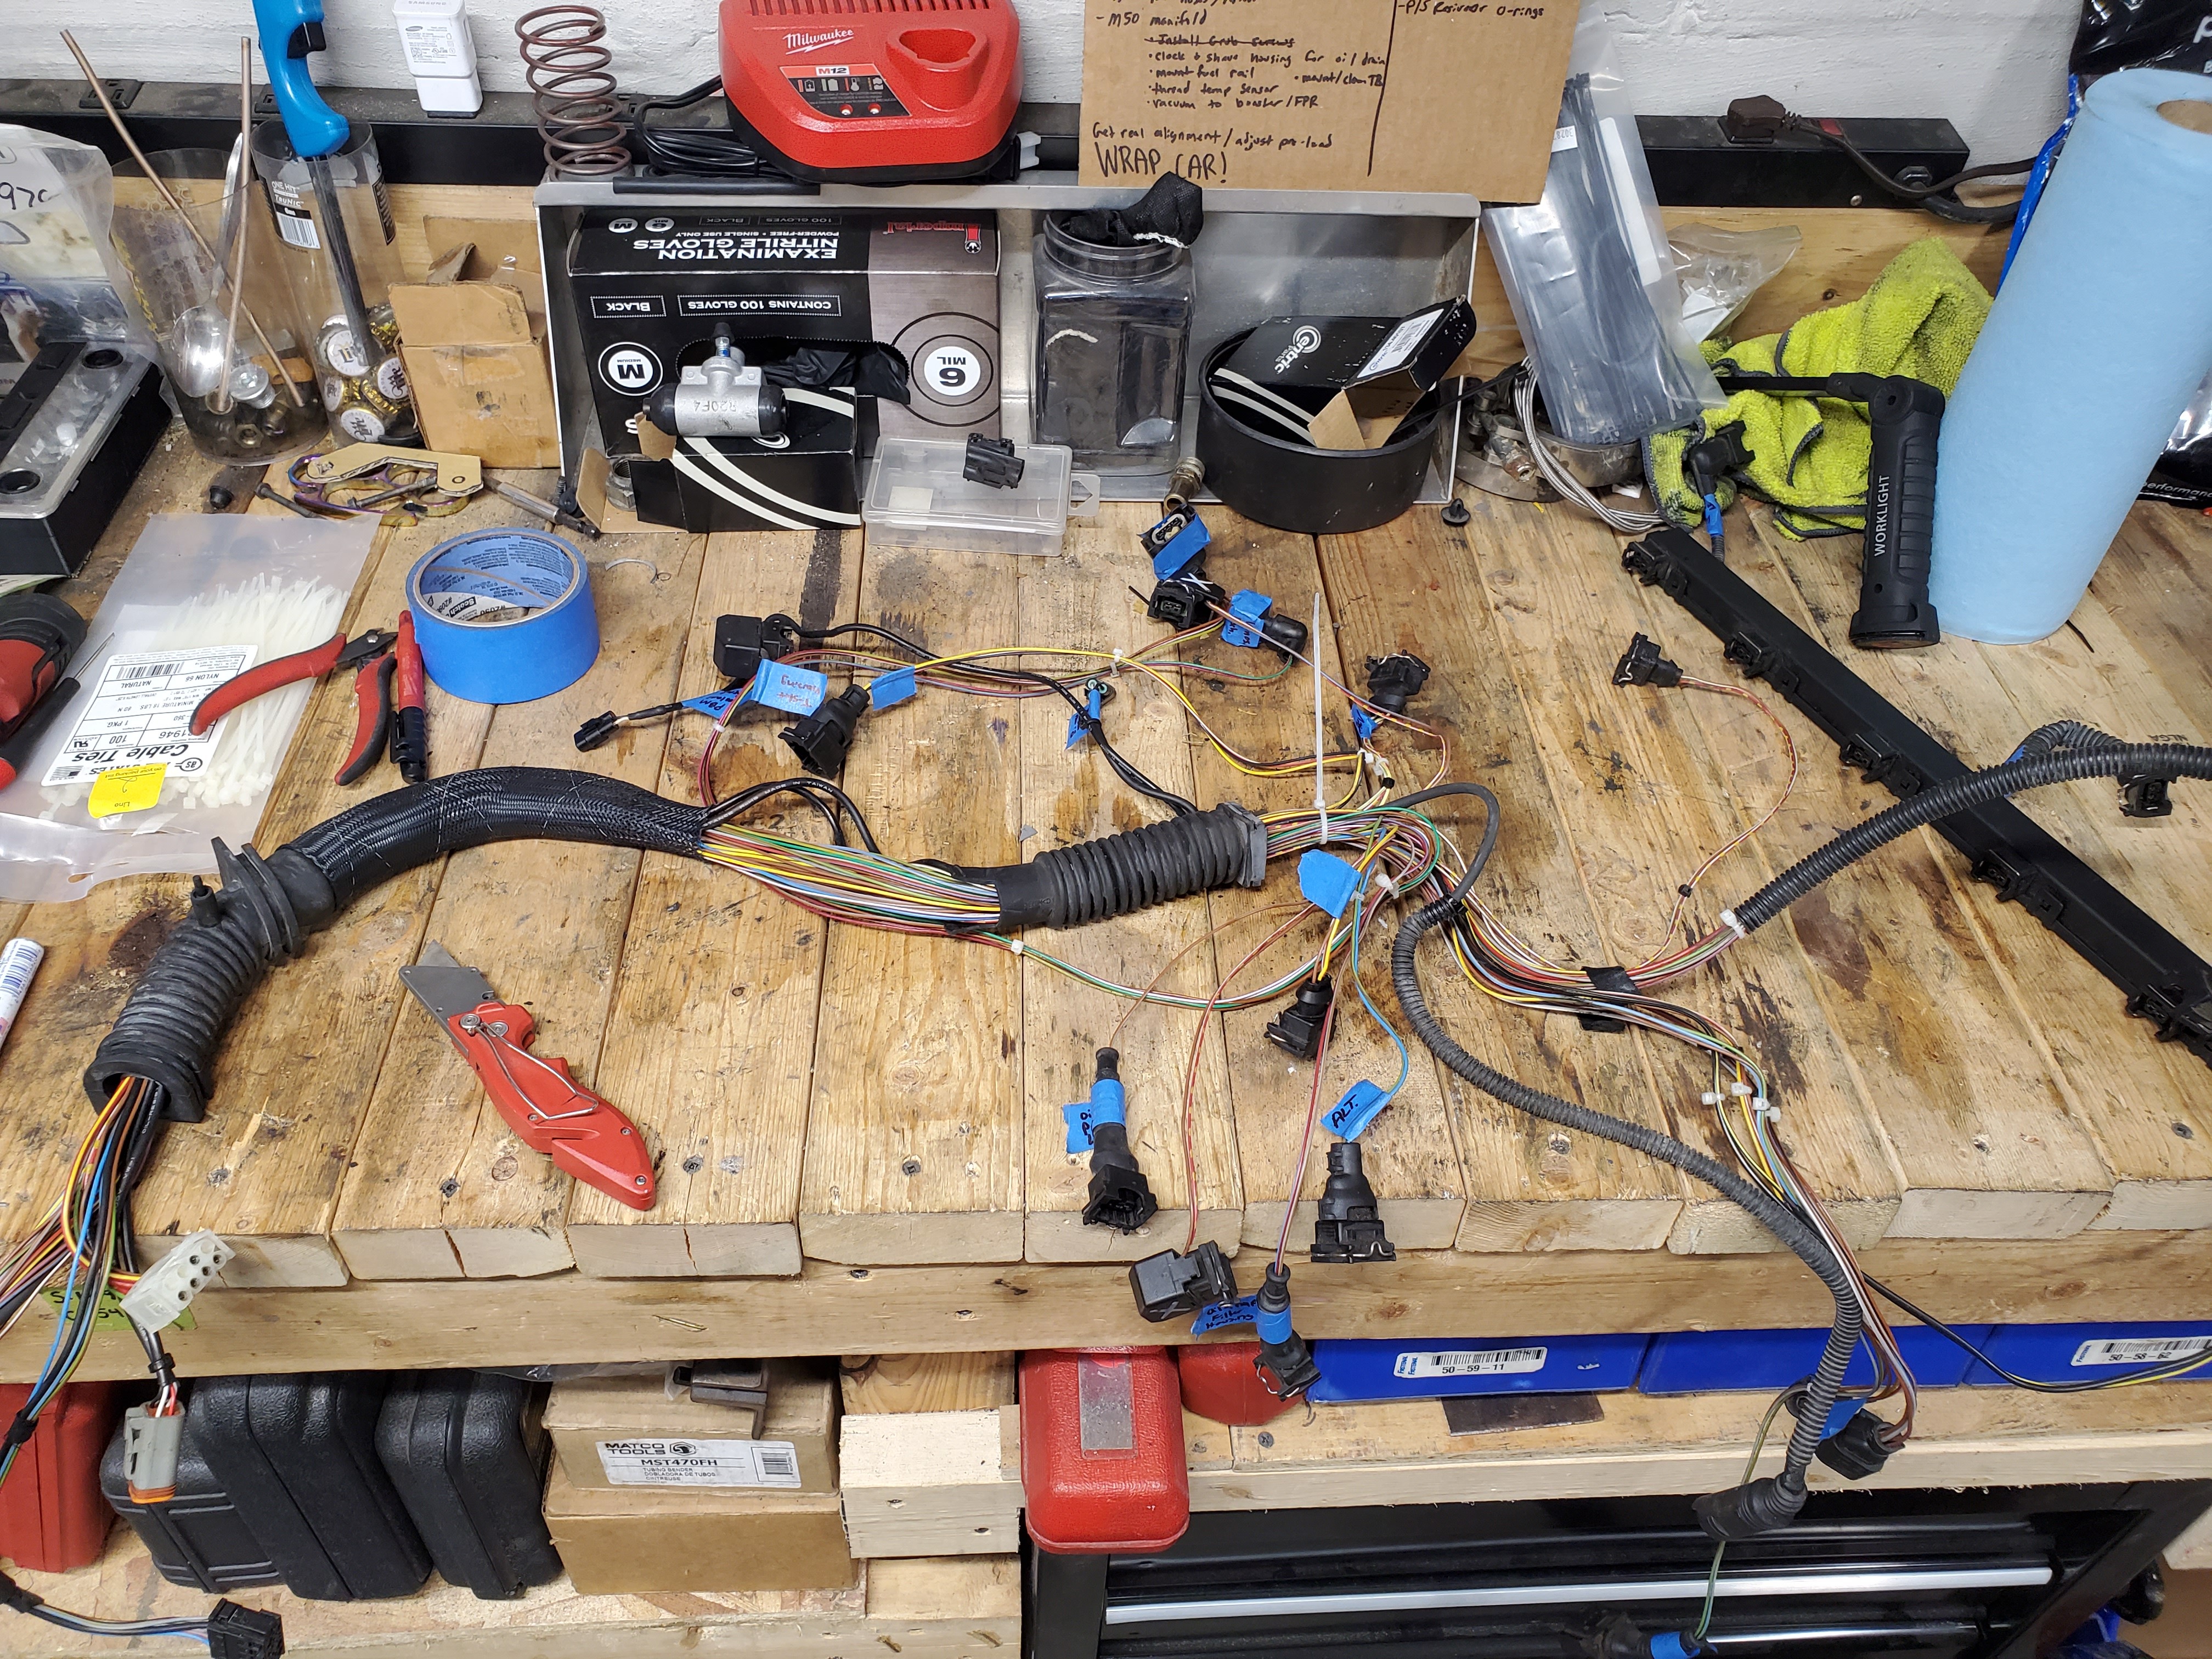
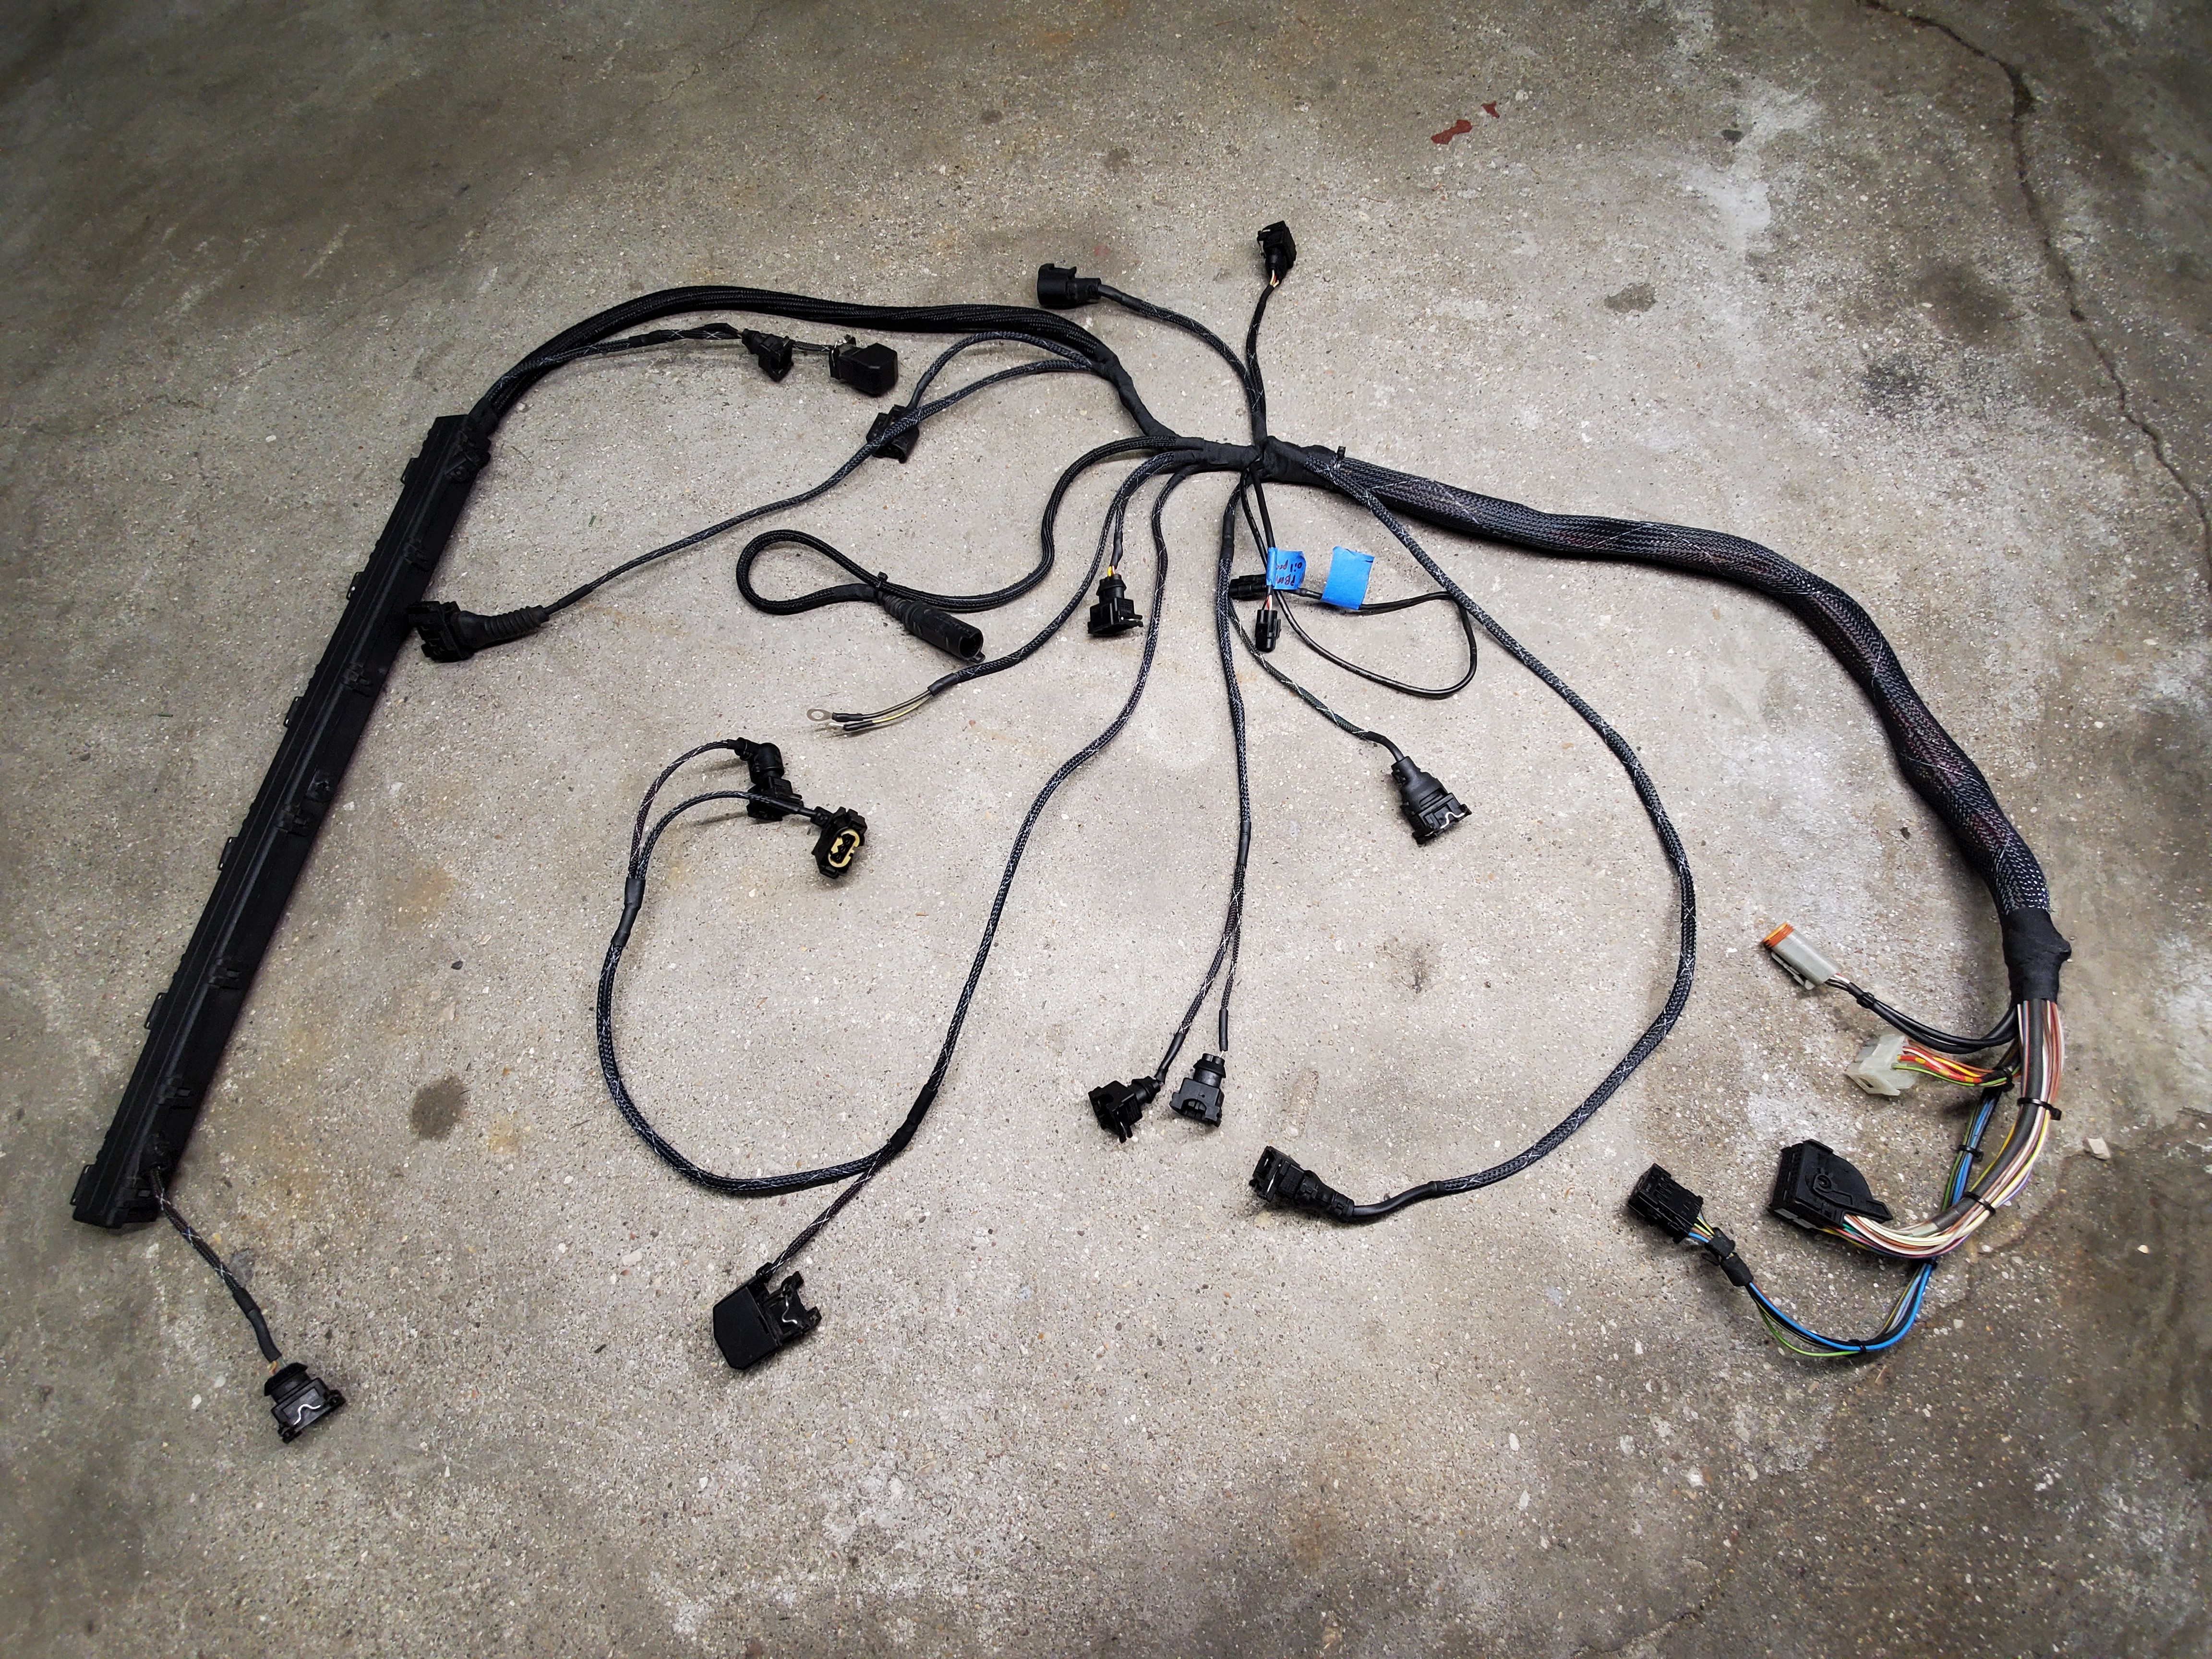
                                    While I was waiting for the manifold I also pulled the harness off and labeled it all as well as wrote down the pin numbers and locations in preparation for re-looming as well as some modifications.
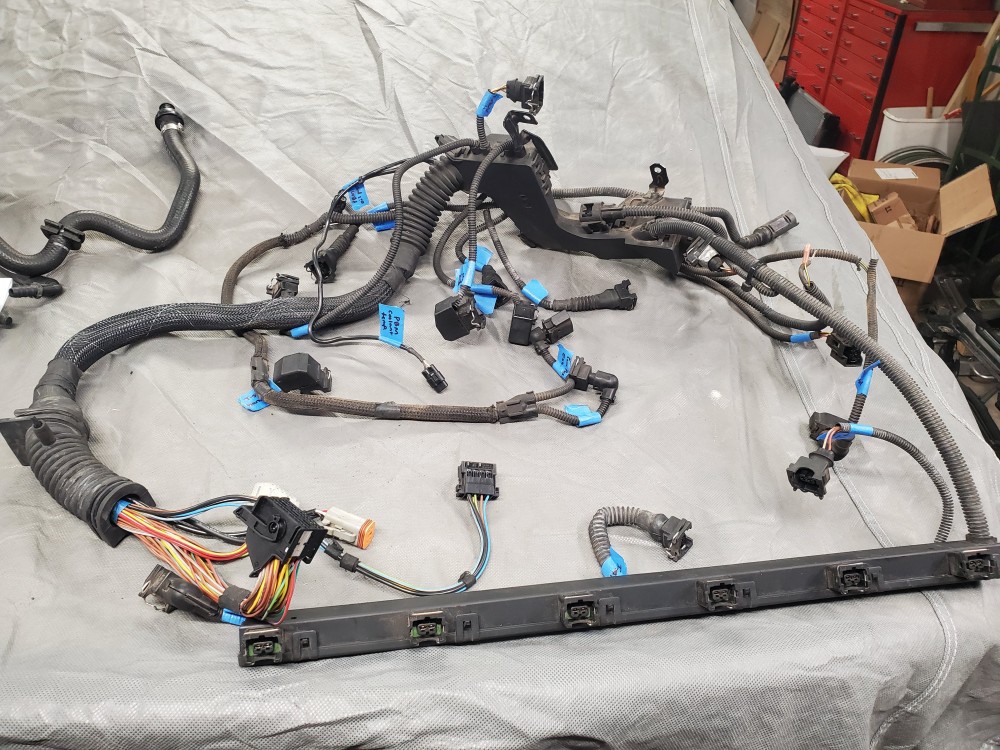
                                    20210228111331.jpg

                                    Here is the manifold before I cleaned it up. I definitely forgot to snap a pic after pressure washing it.
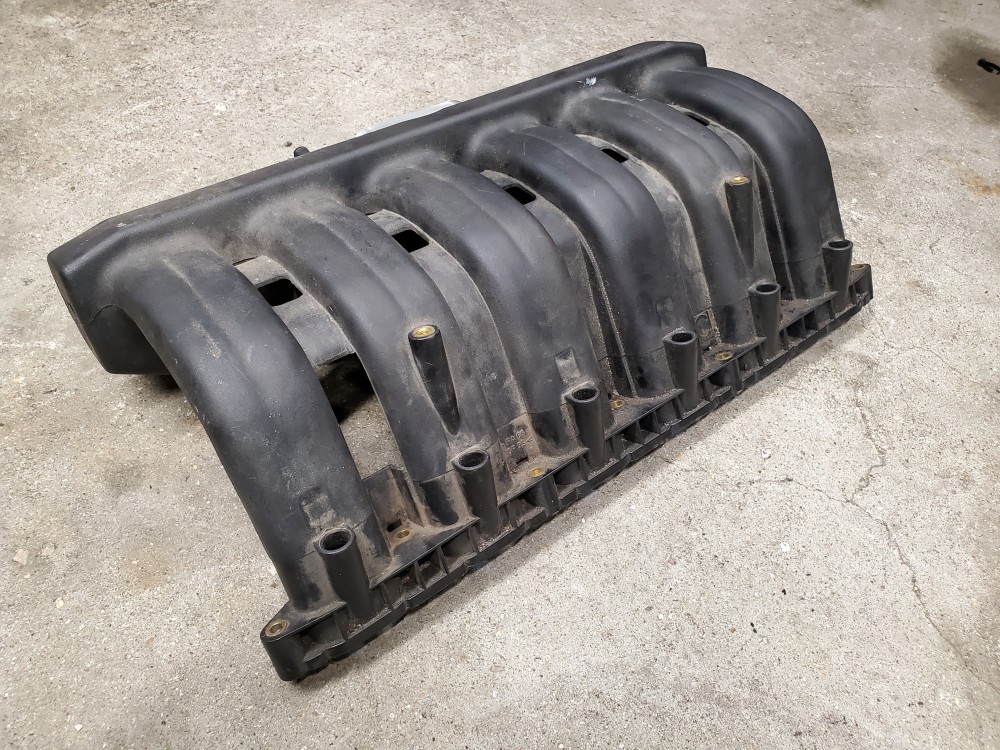
                                    20210304165250.jpg

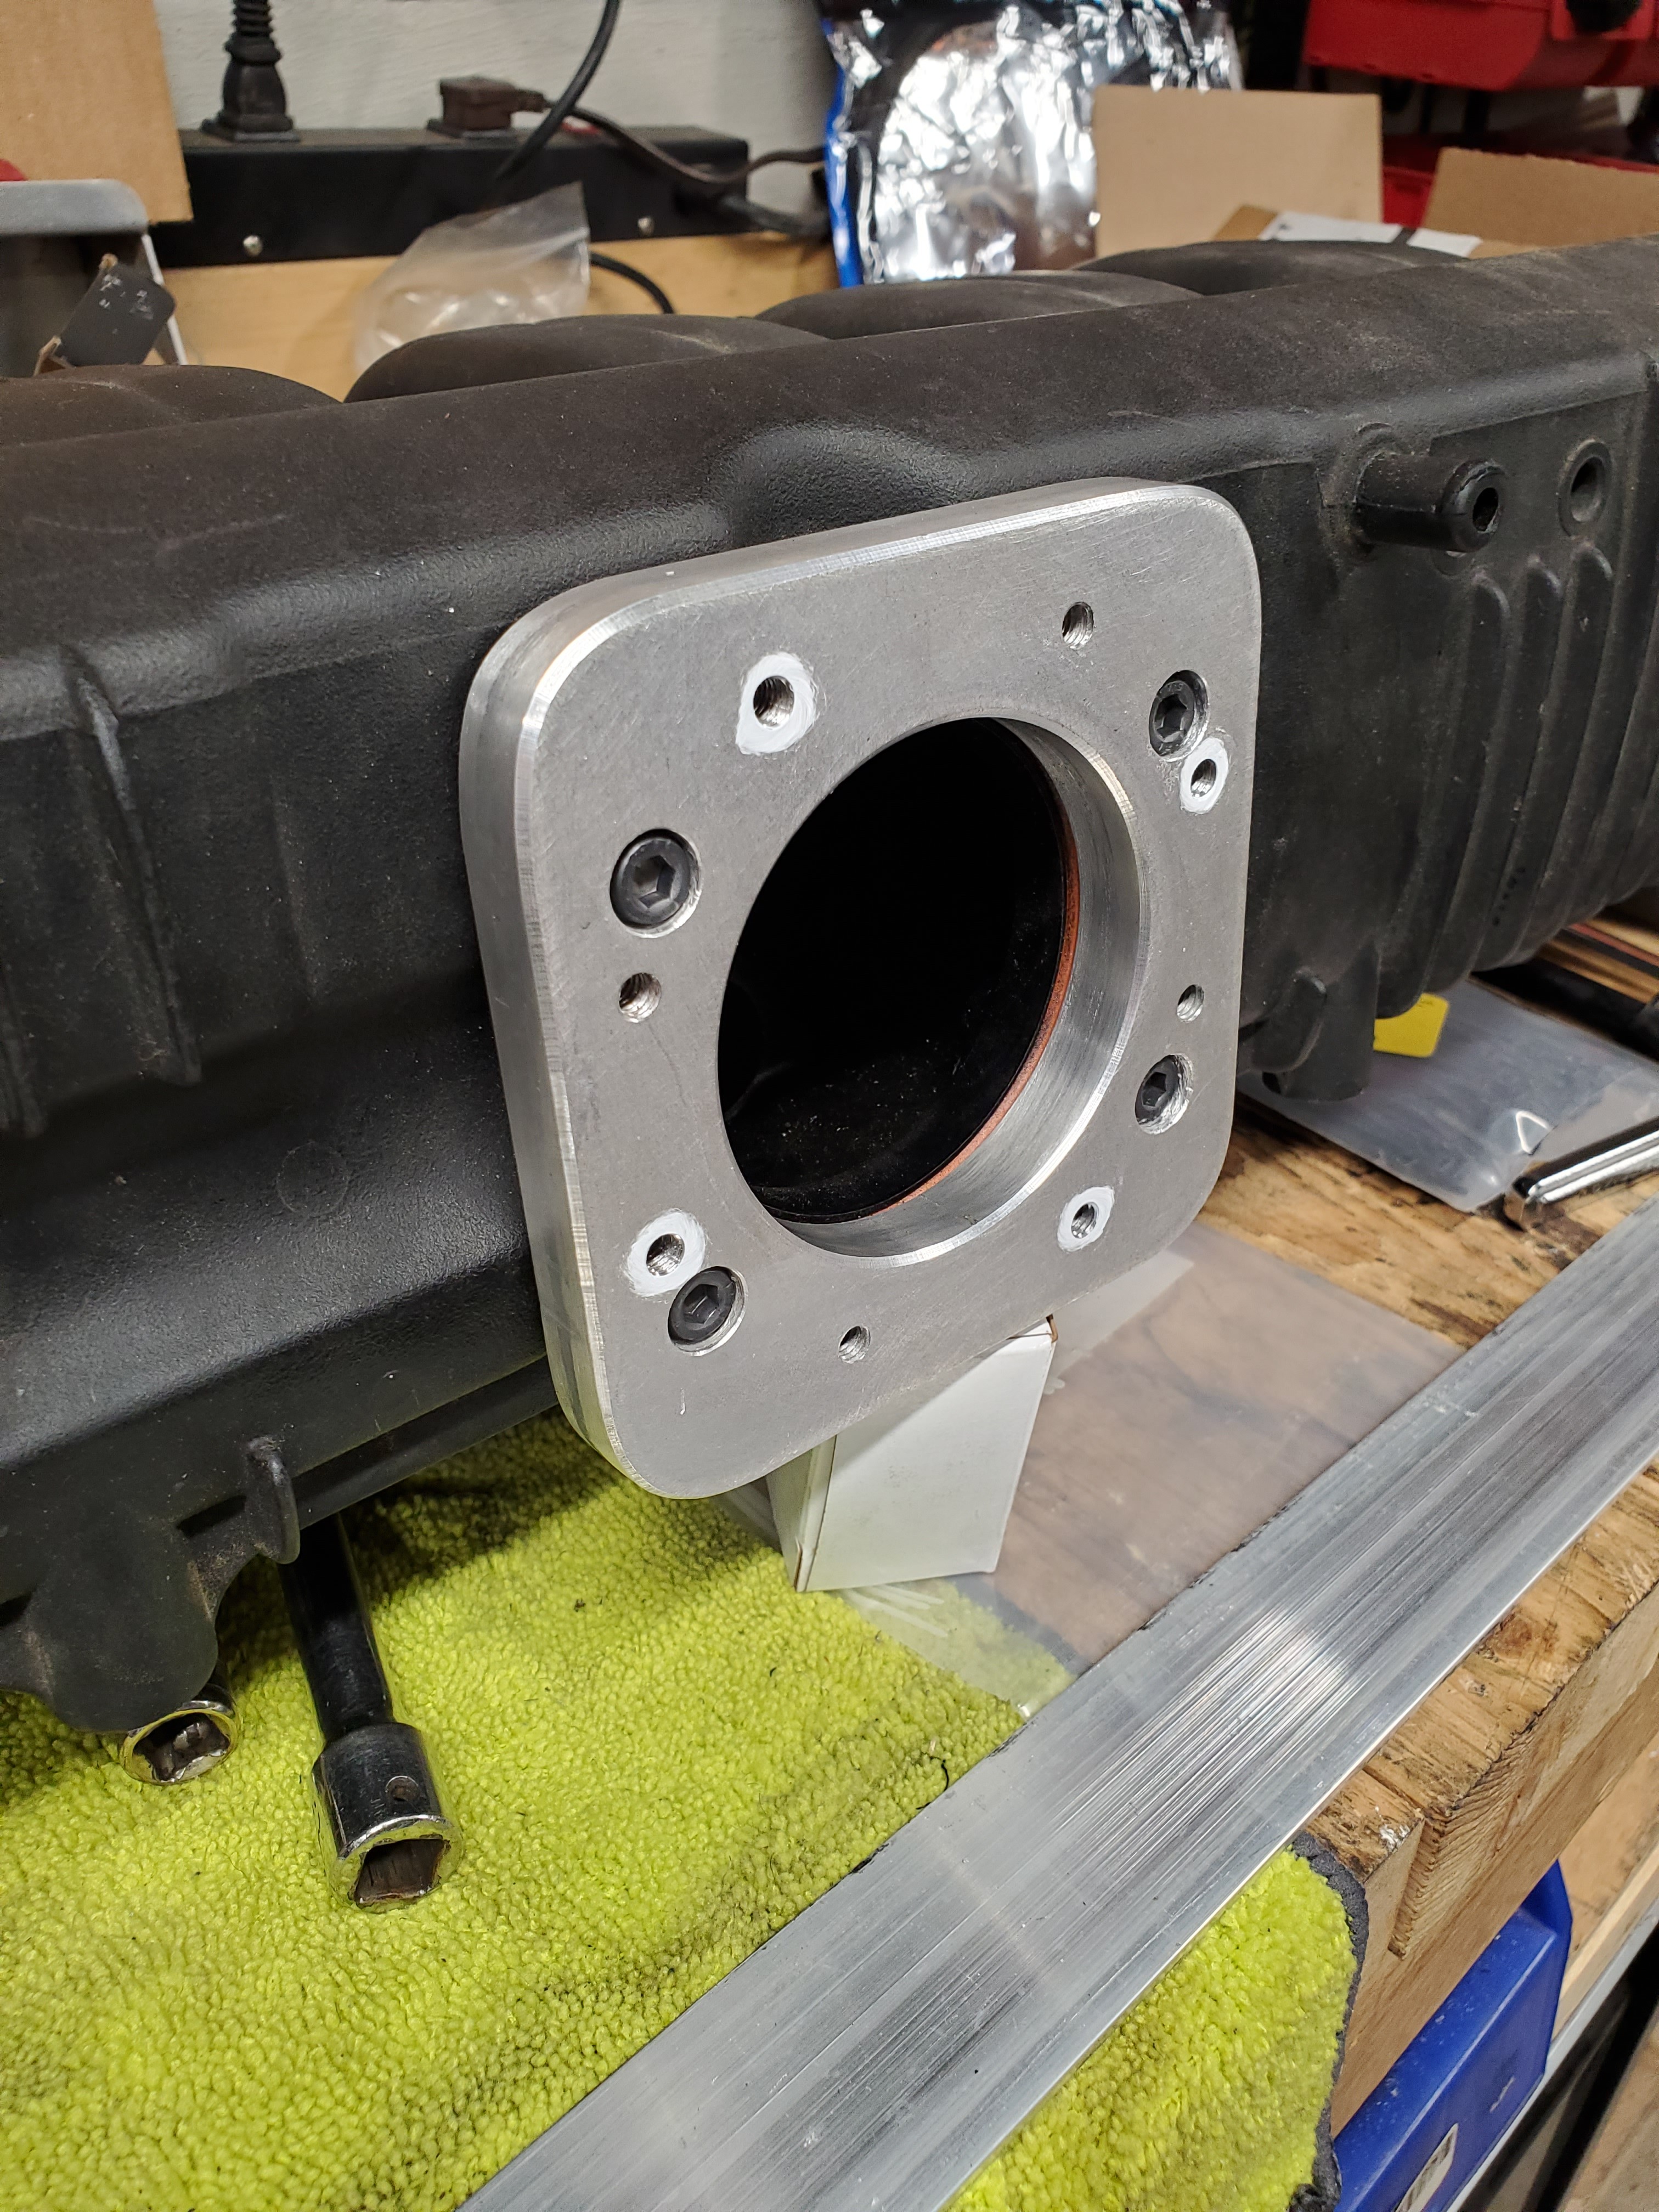
                                    Here is the manifold adapter to put my b30 throttle body onto the M50 manifold.
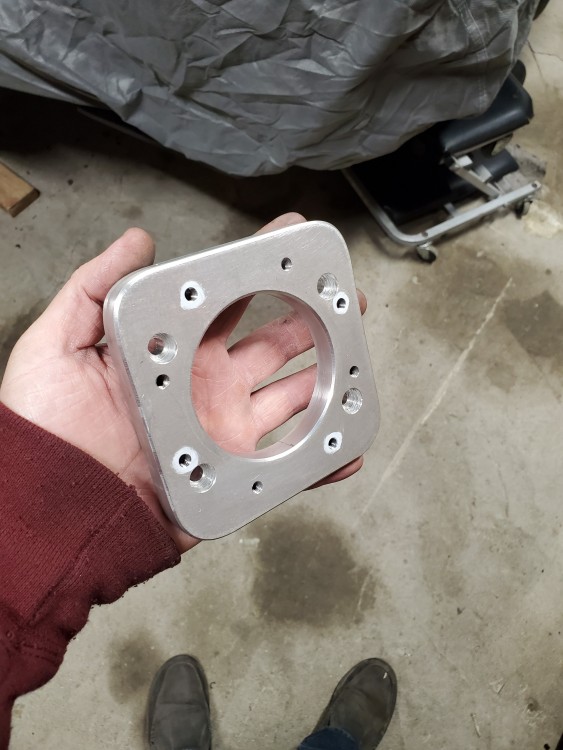
                                    20210304165521.jpg

                                    Mocked it on while I'm waiting for all the gaskets and O-rings to show up.
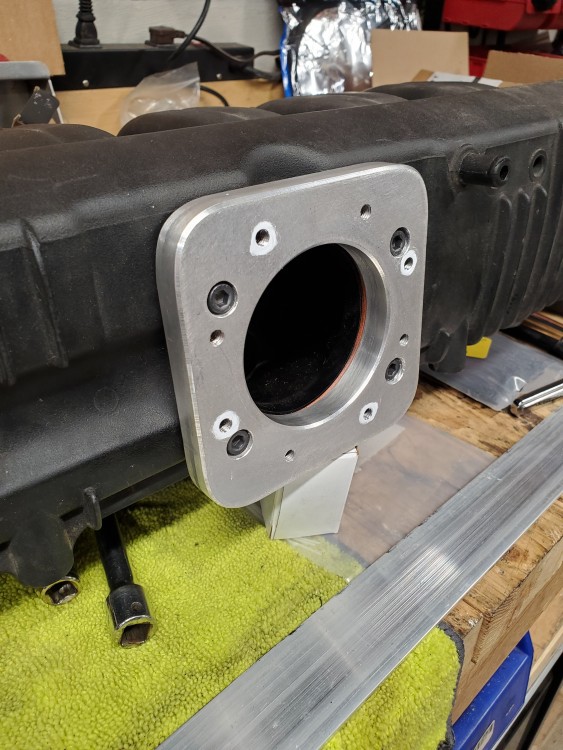
                                    20210304165319.jpg

                                    Then I got on to mounting the fuel rail, gotta thank my buddy @_Wackster for the idea to mount this way rather than what comes in the standard kits.
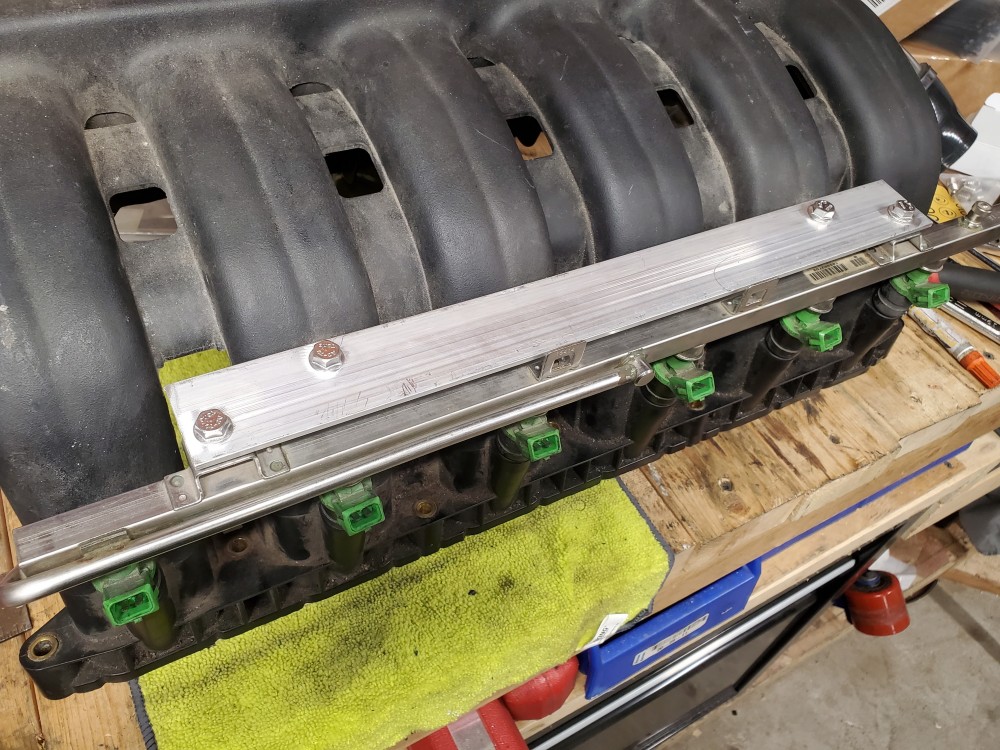
                                    20210304182701.jpg

                                    20210304182713.jpg

                                    I have some ideas on how to spice it up appearance wise if I can't make the factory manifold cover fit.

                                    Next I plugged up the ccv holes in the head.
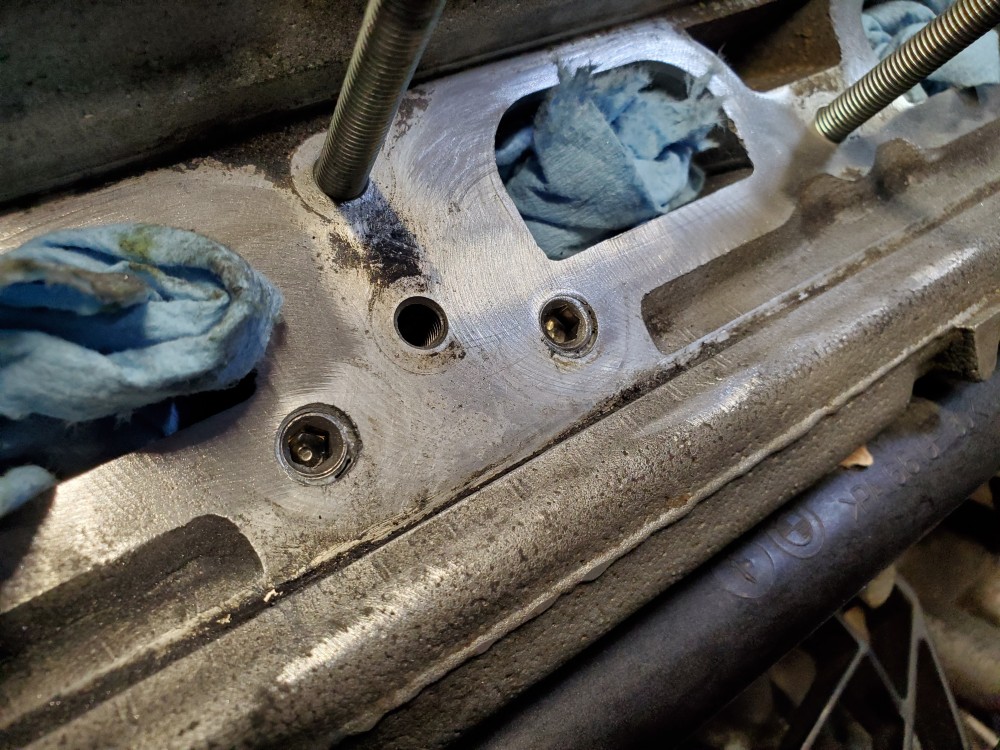
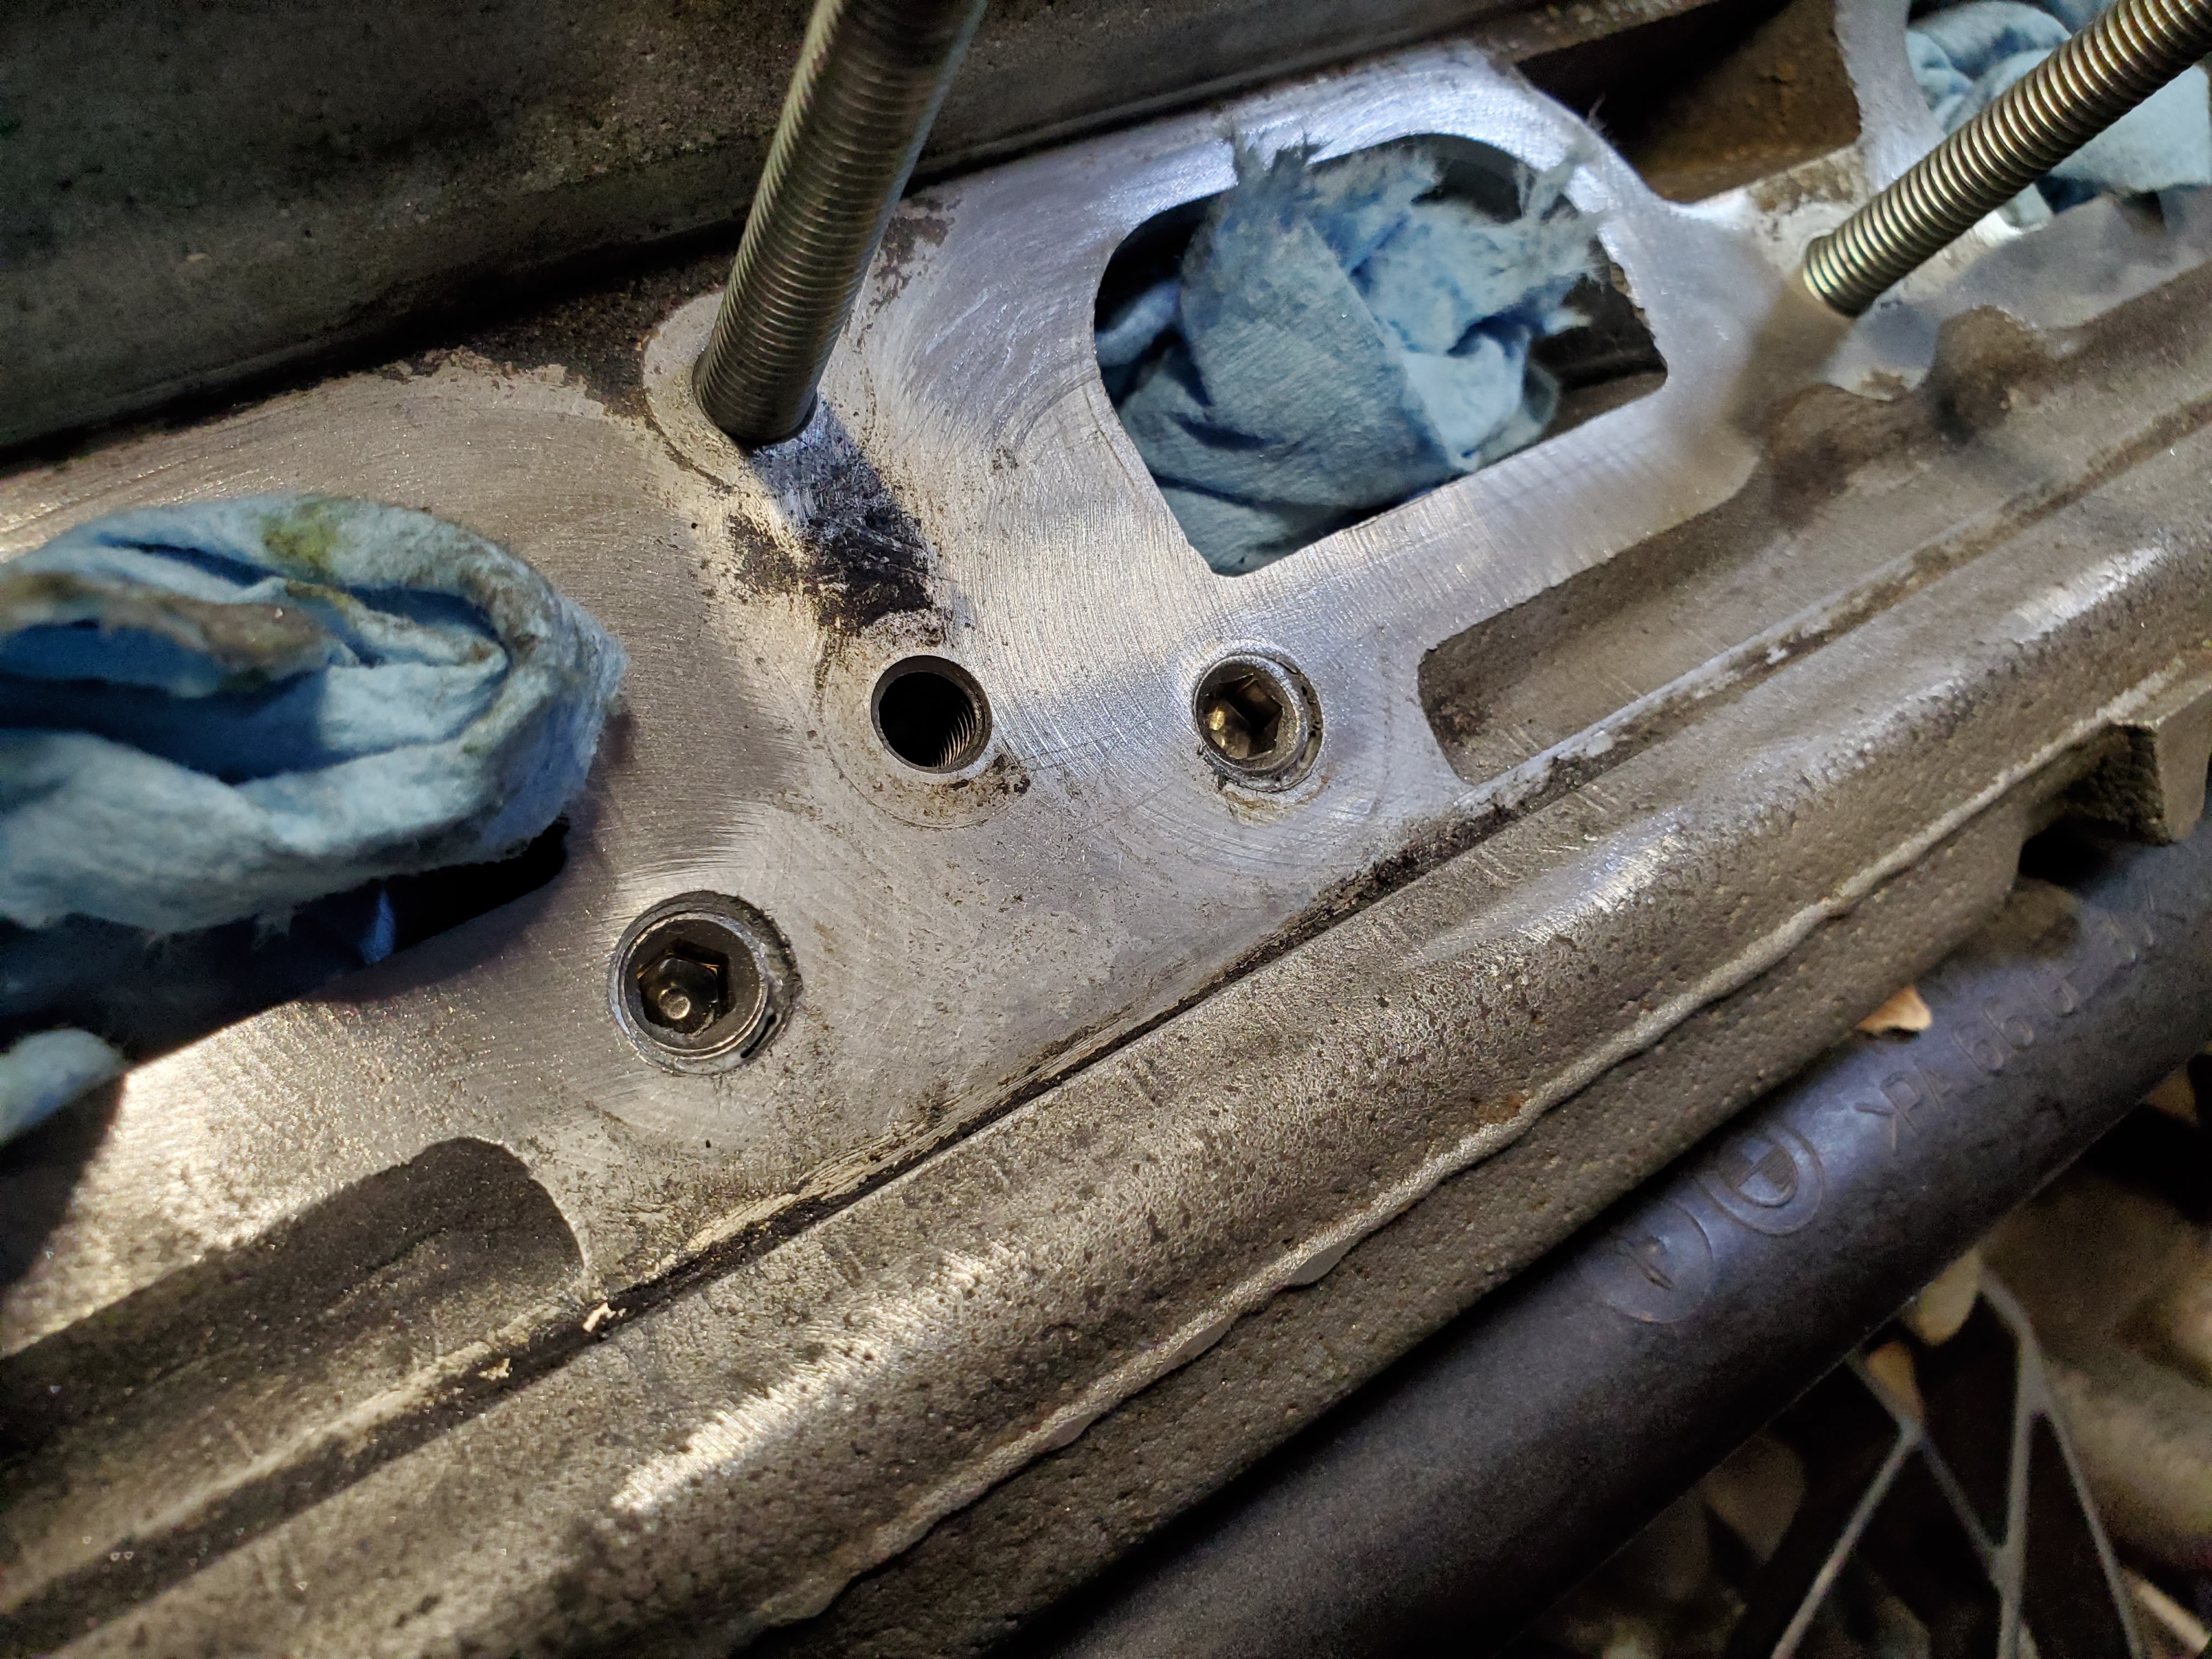
                                    20210304180121.jpg

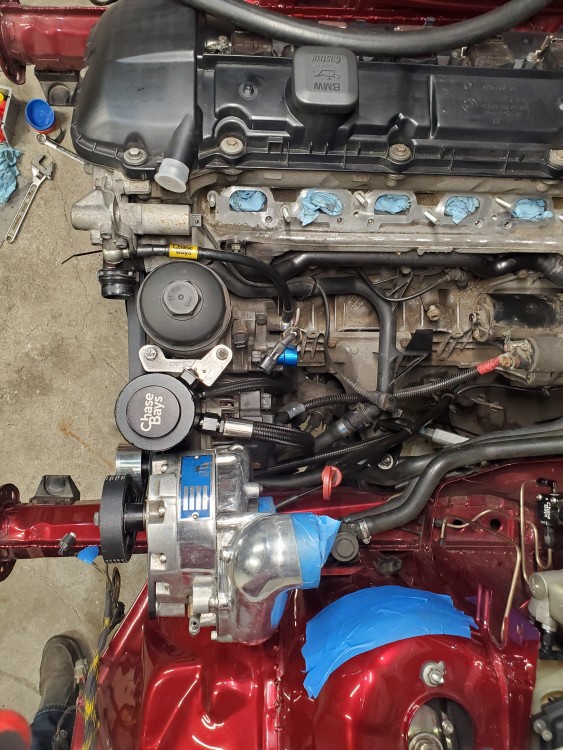
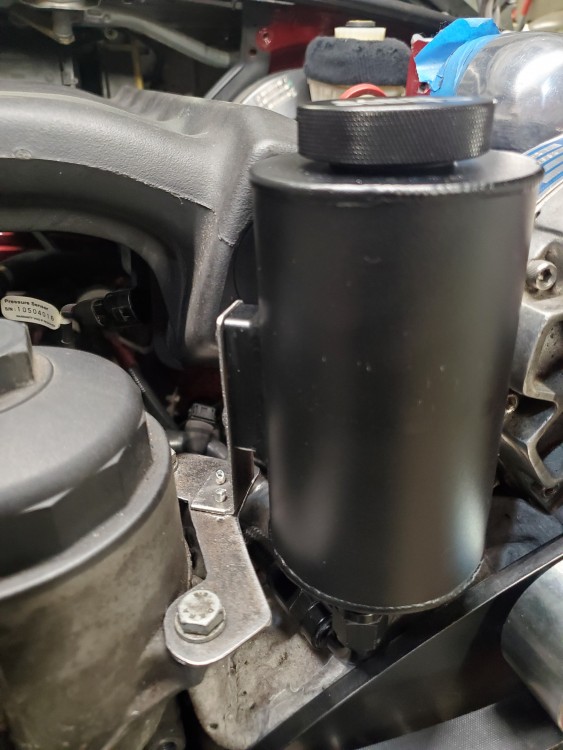
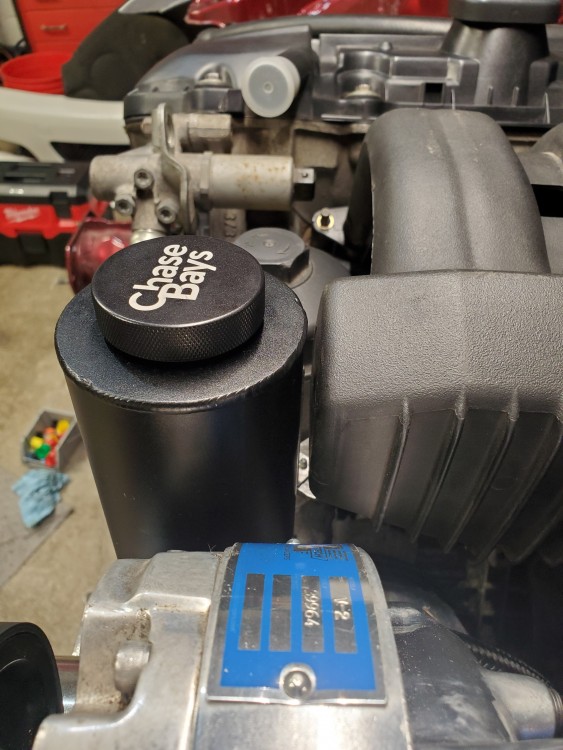
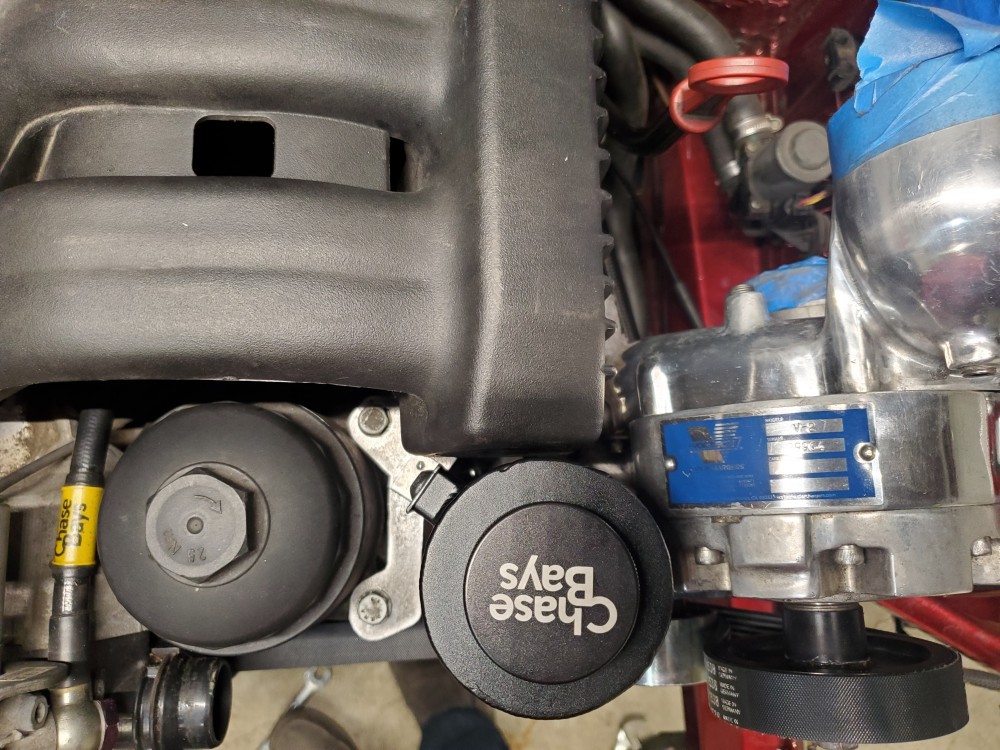
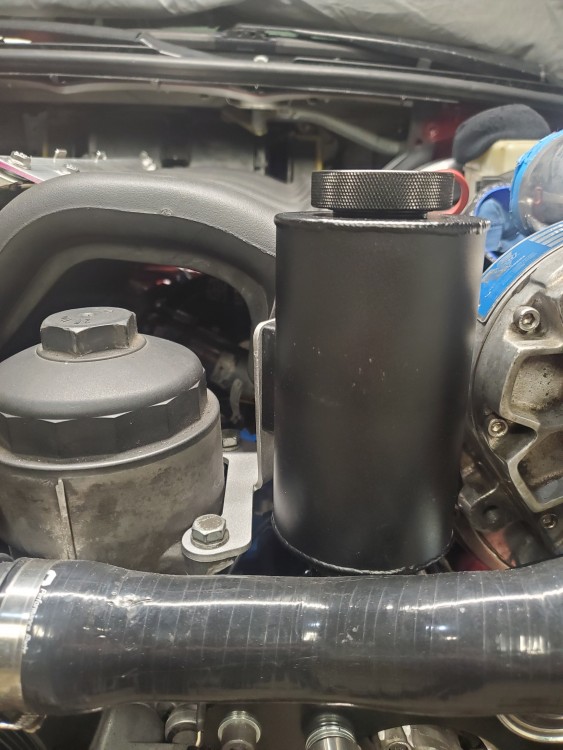
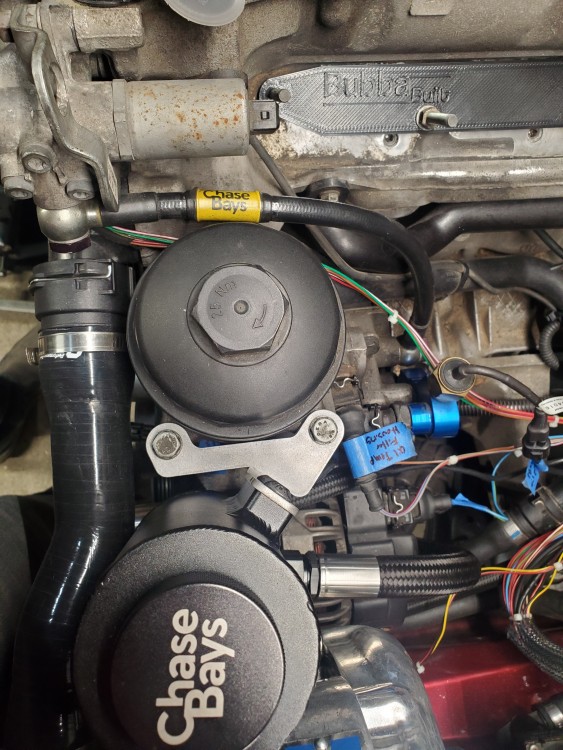
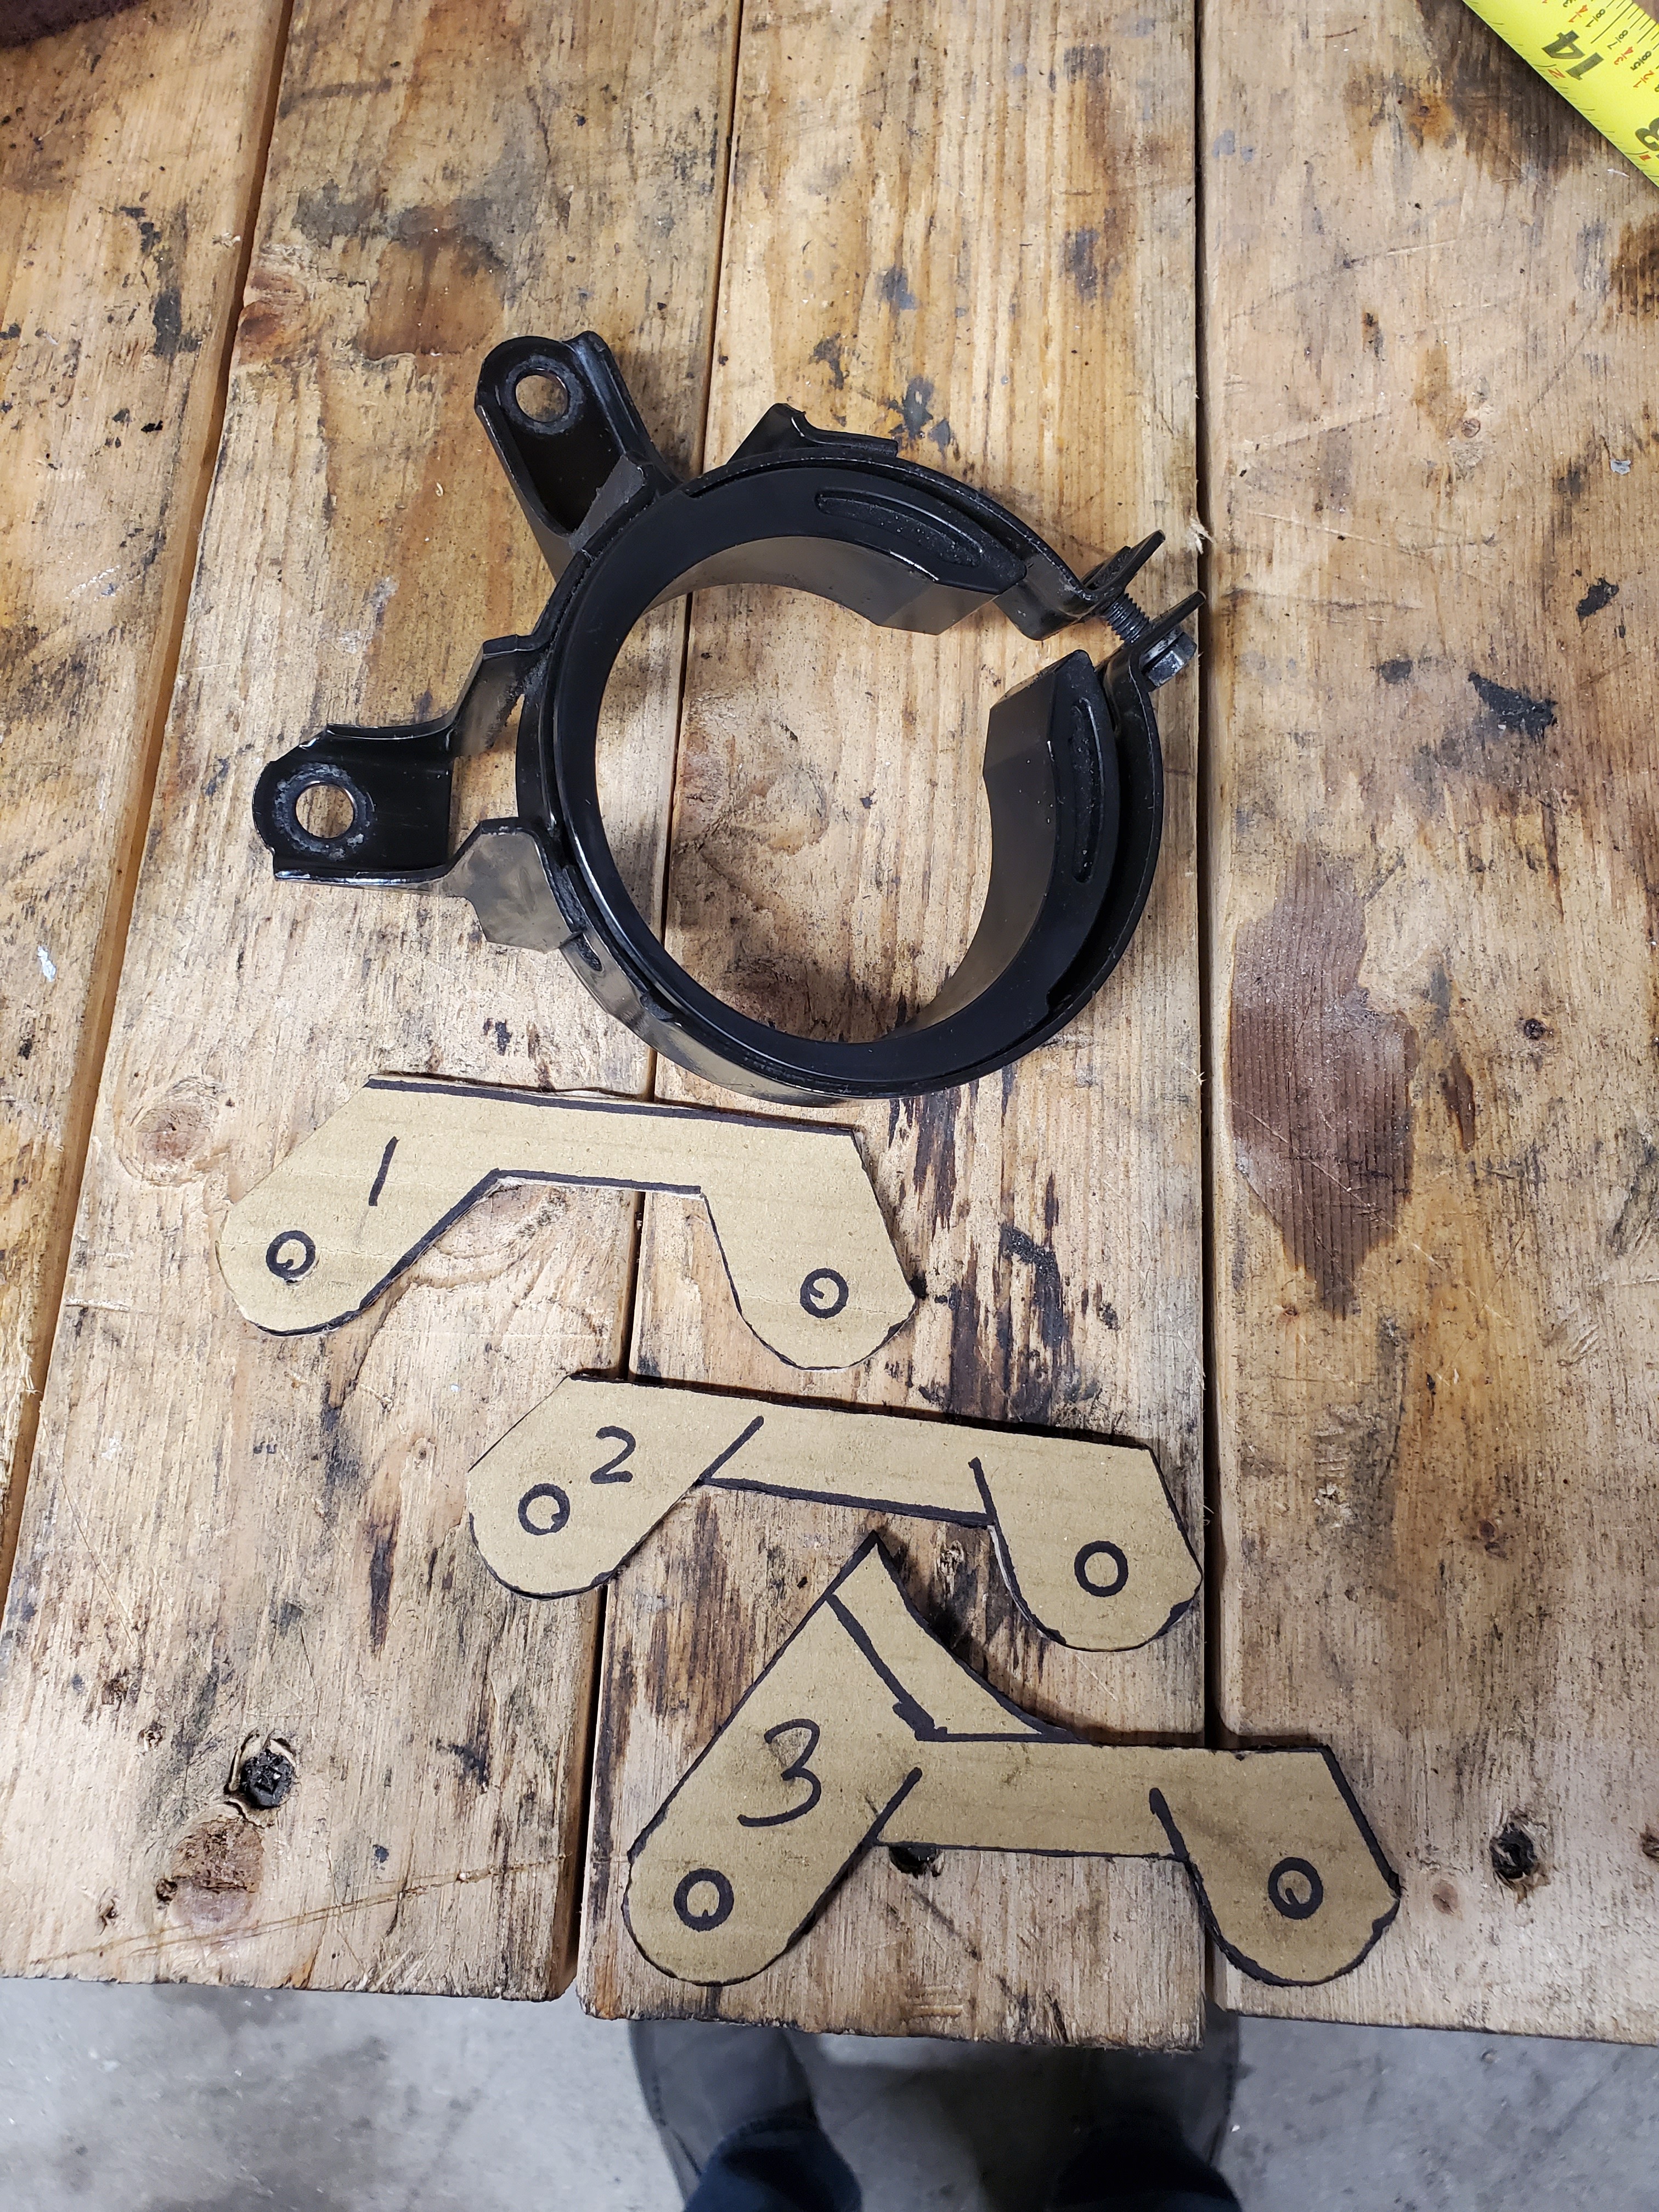
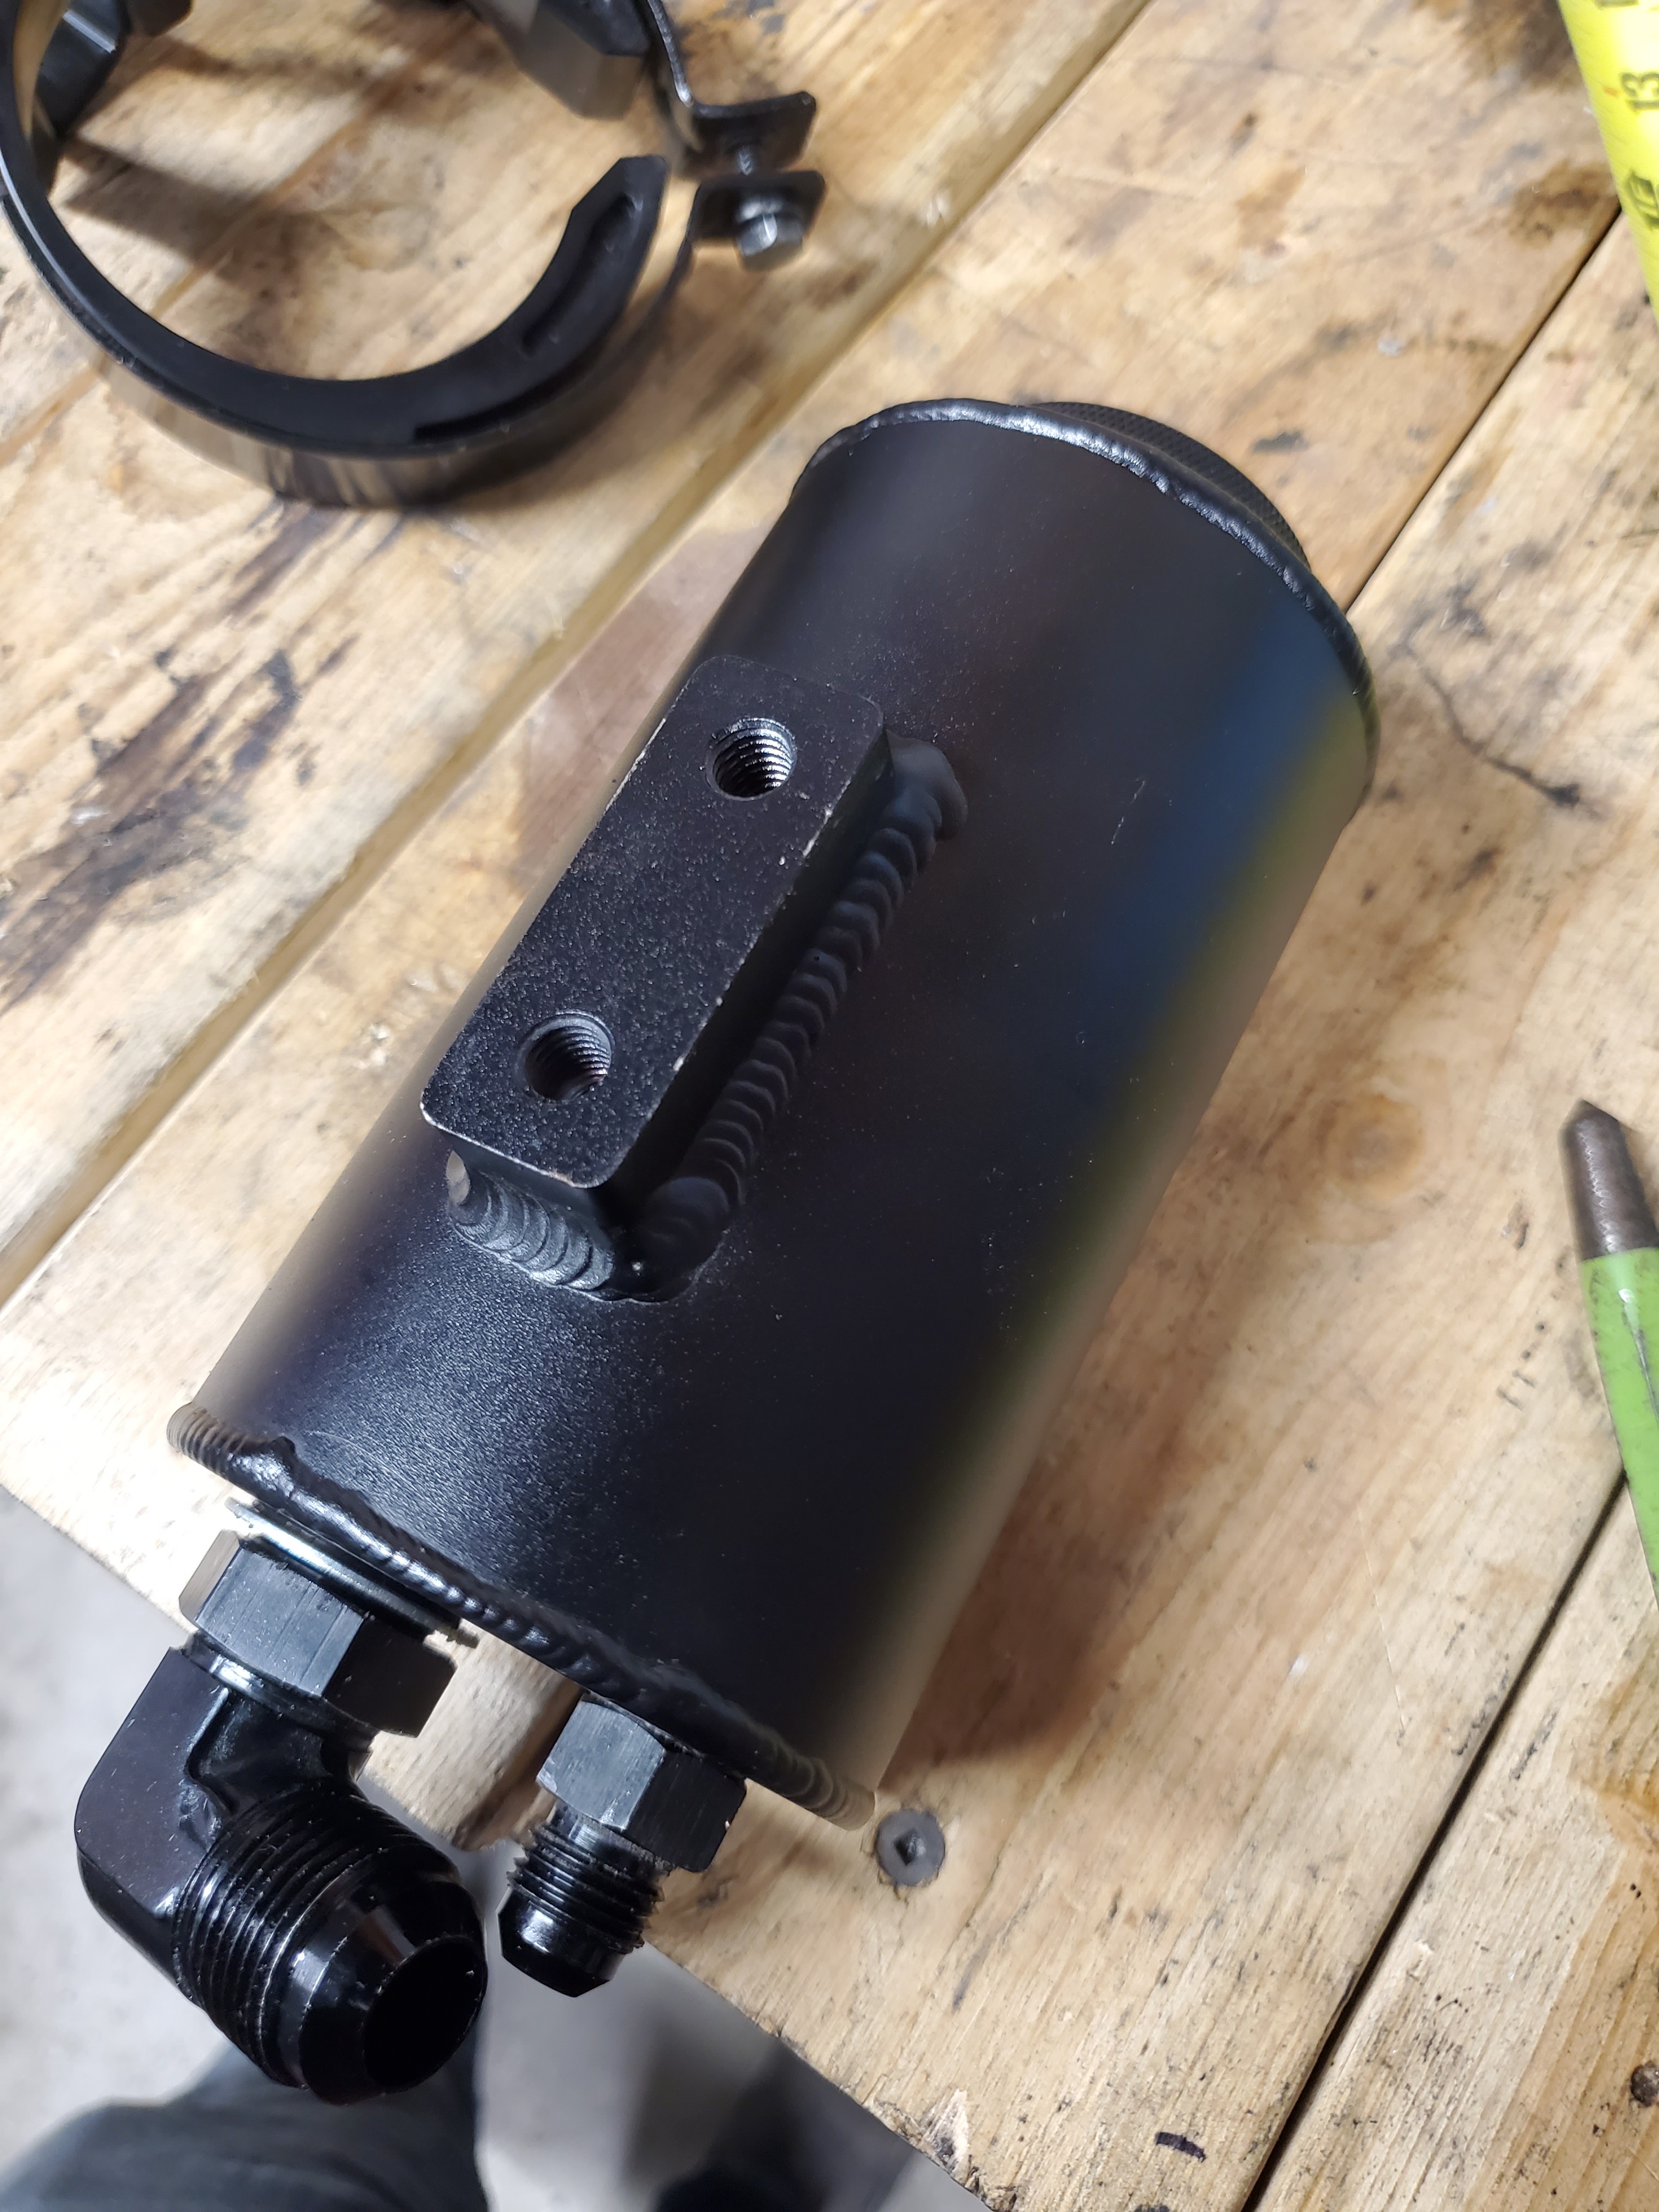
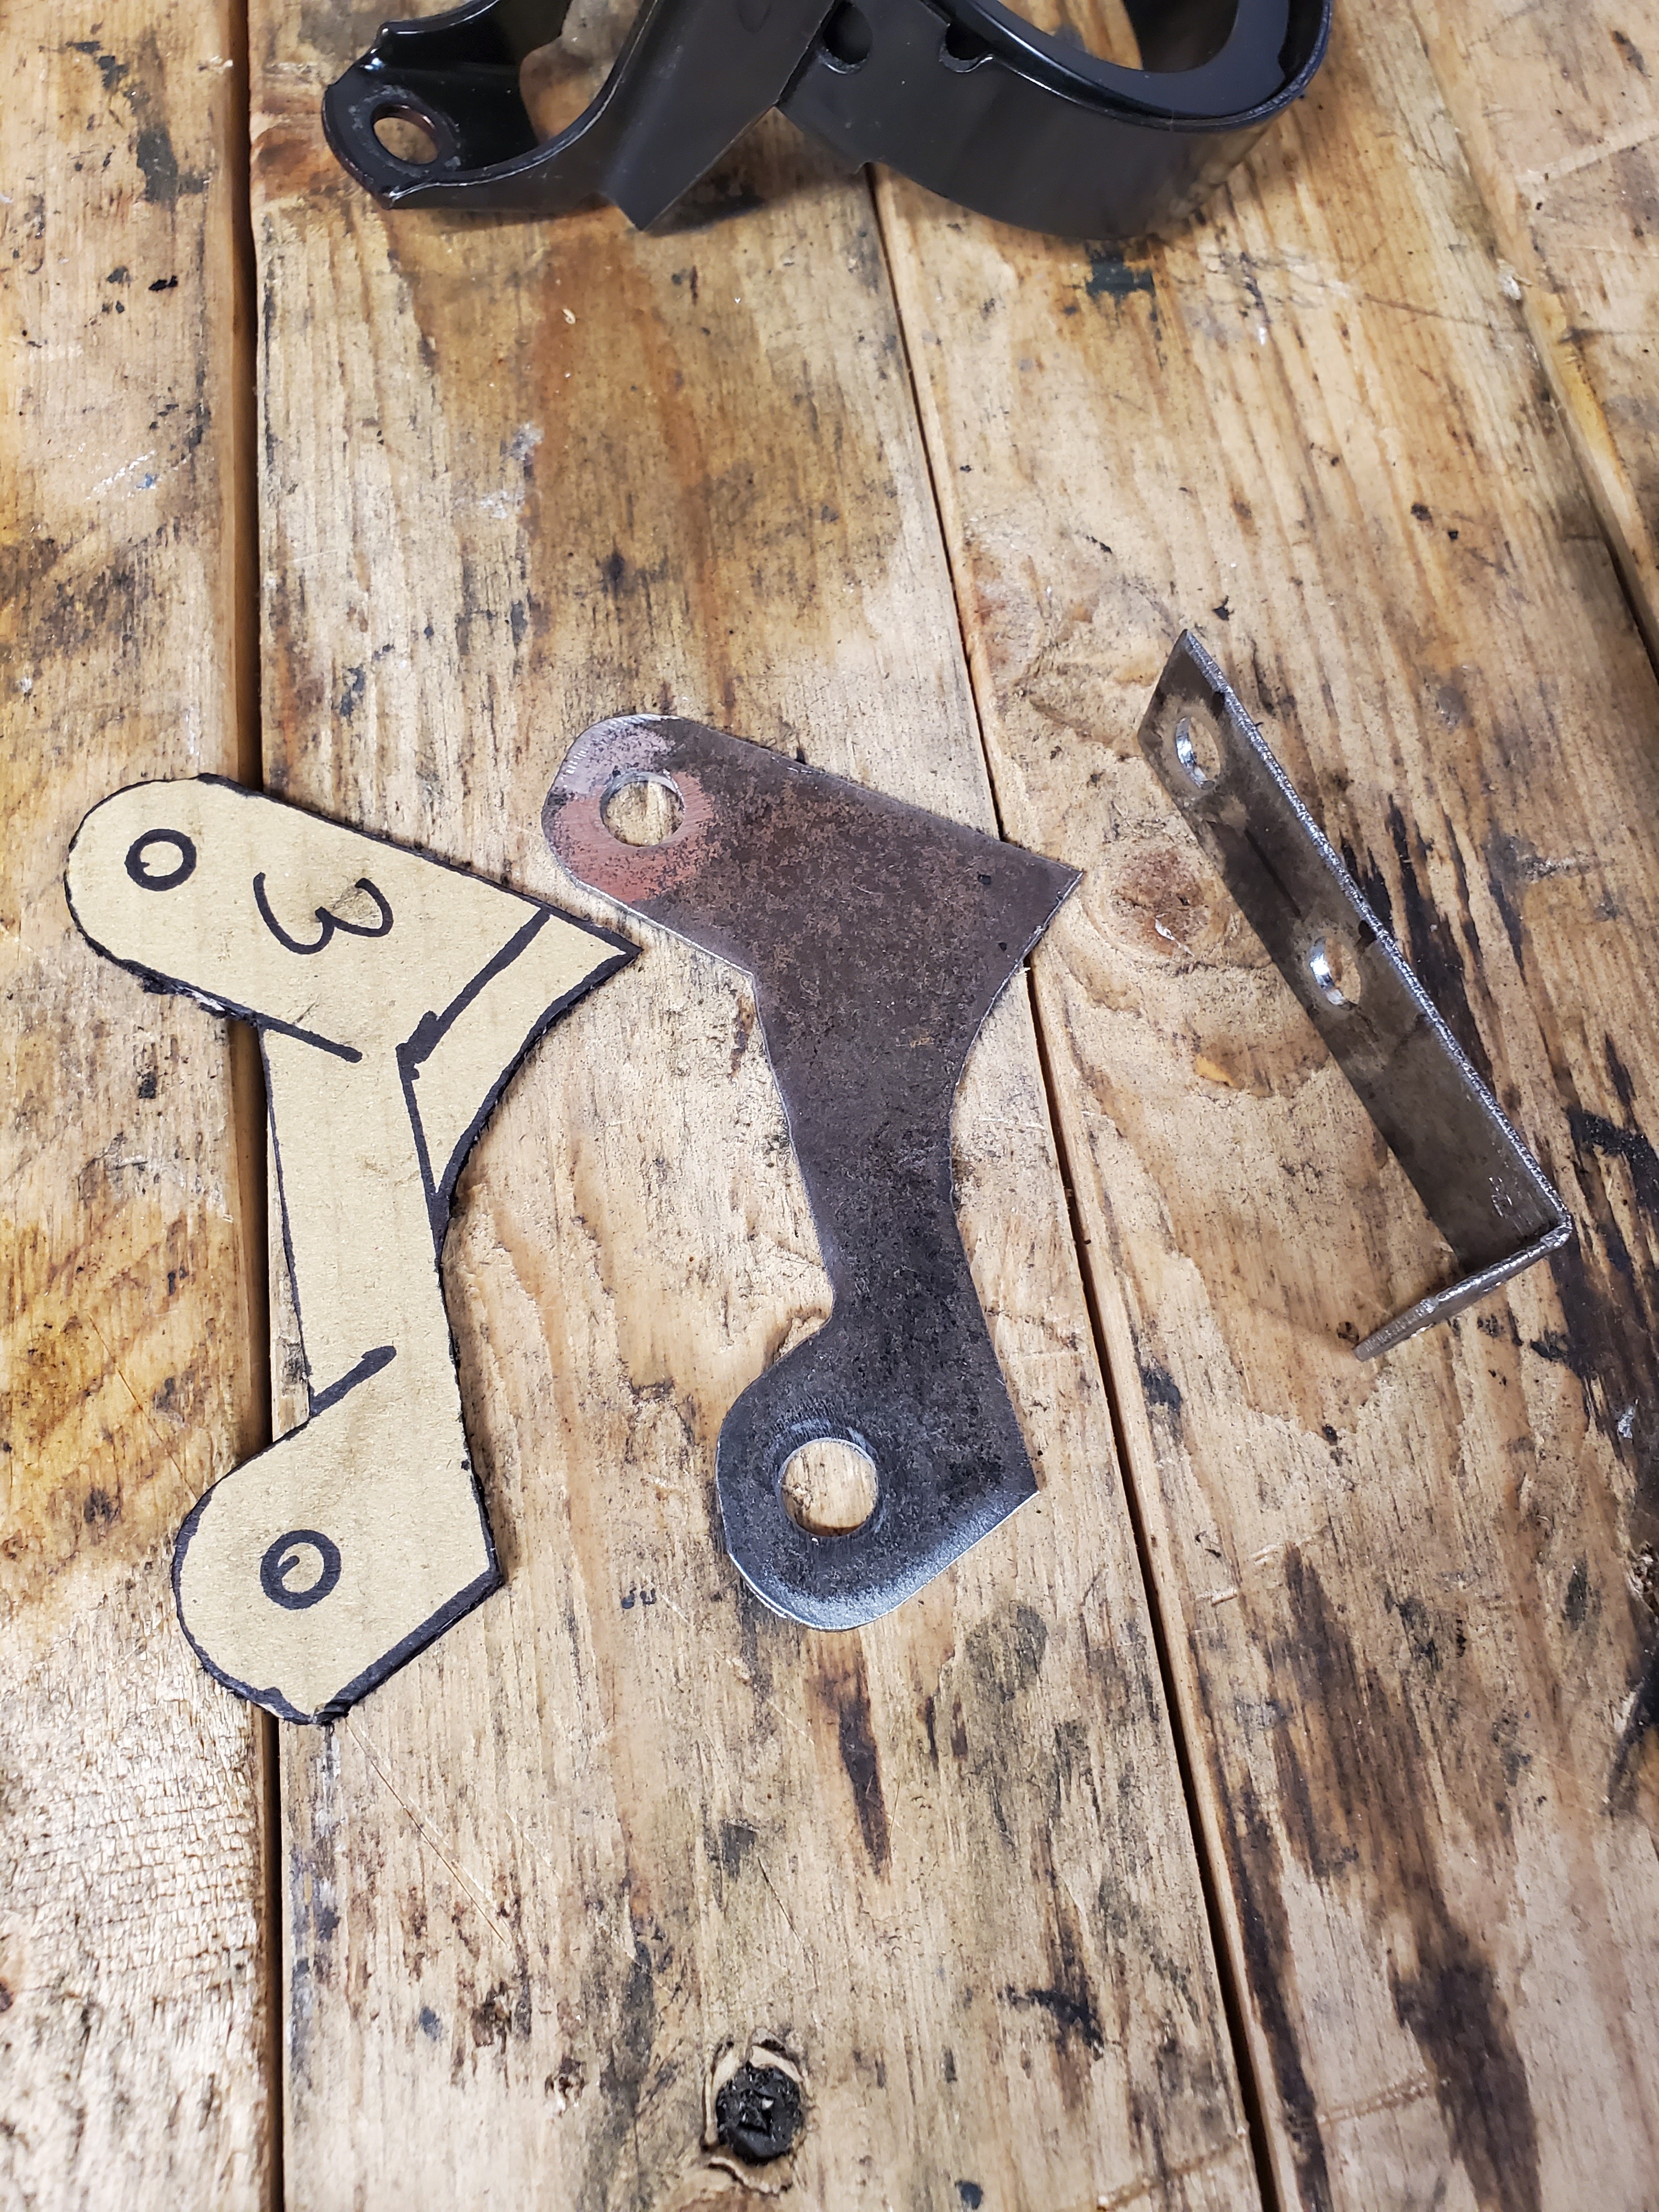
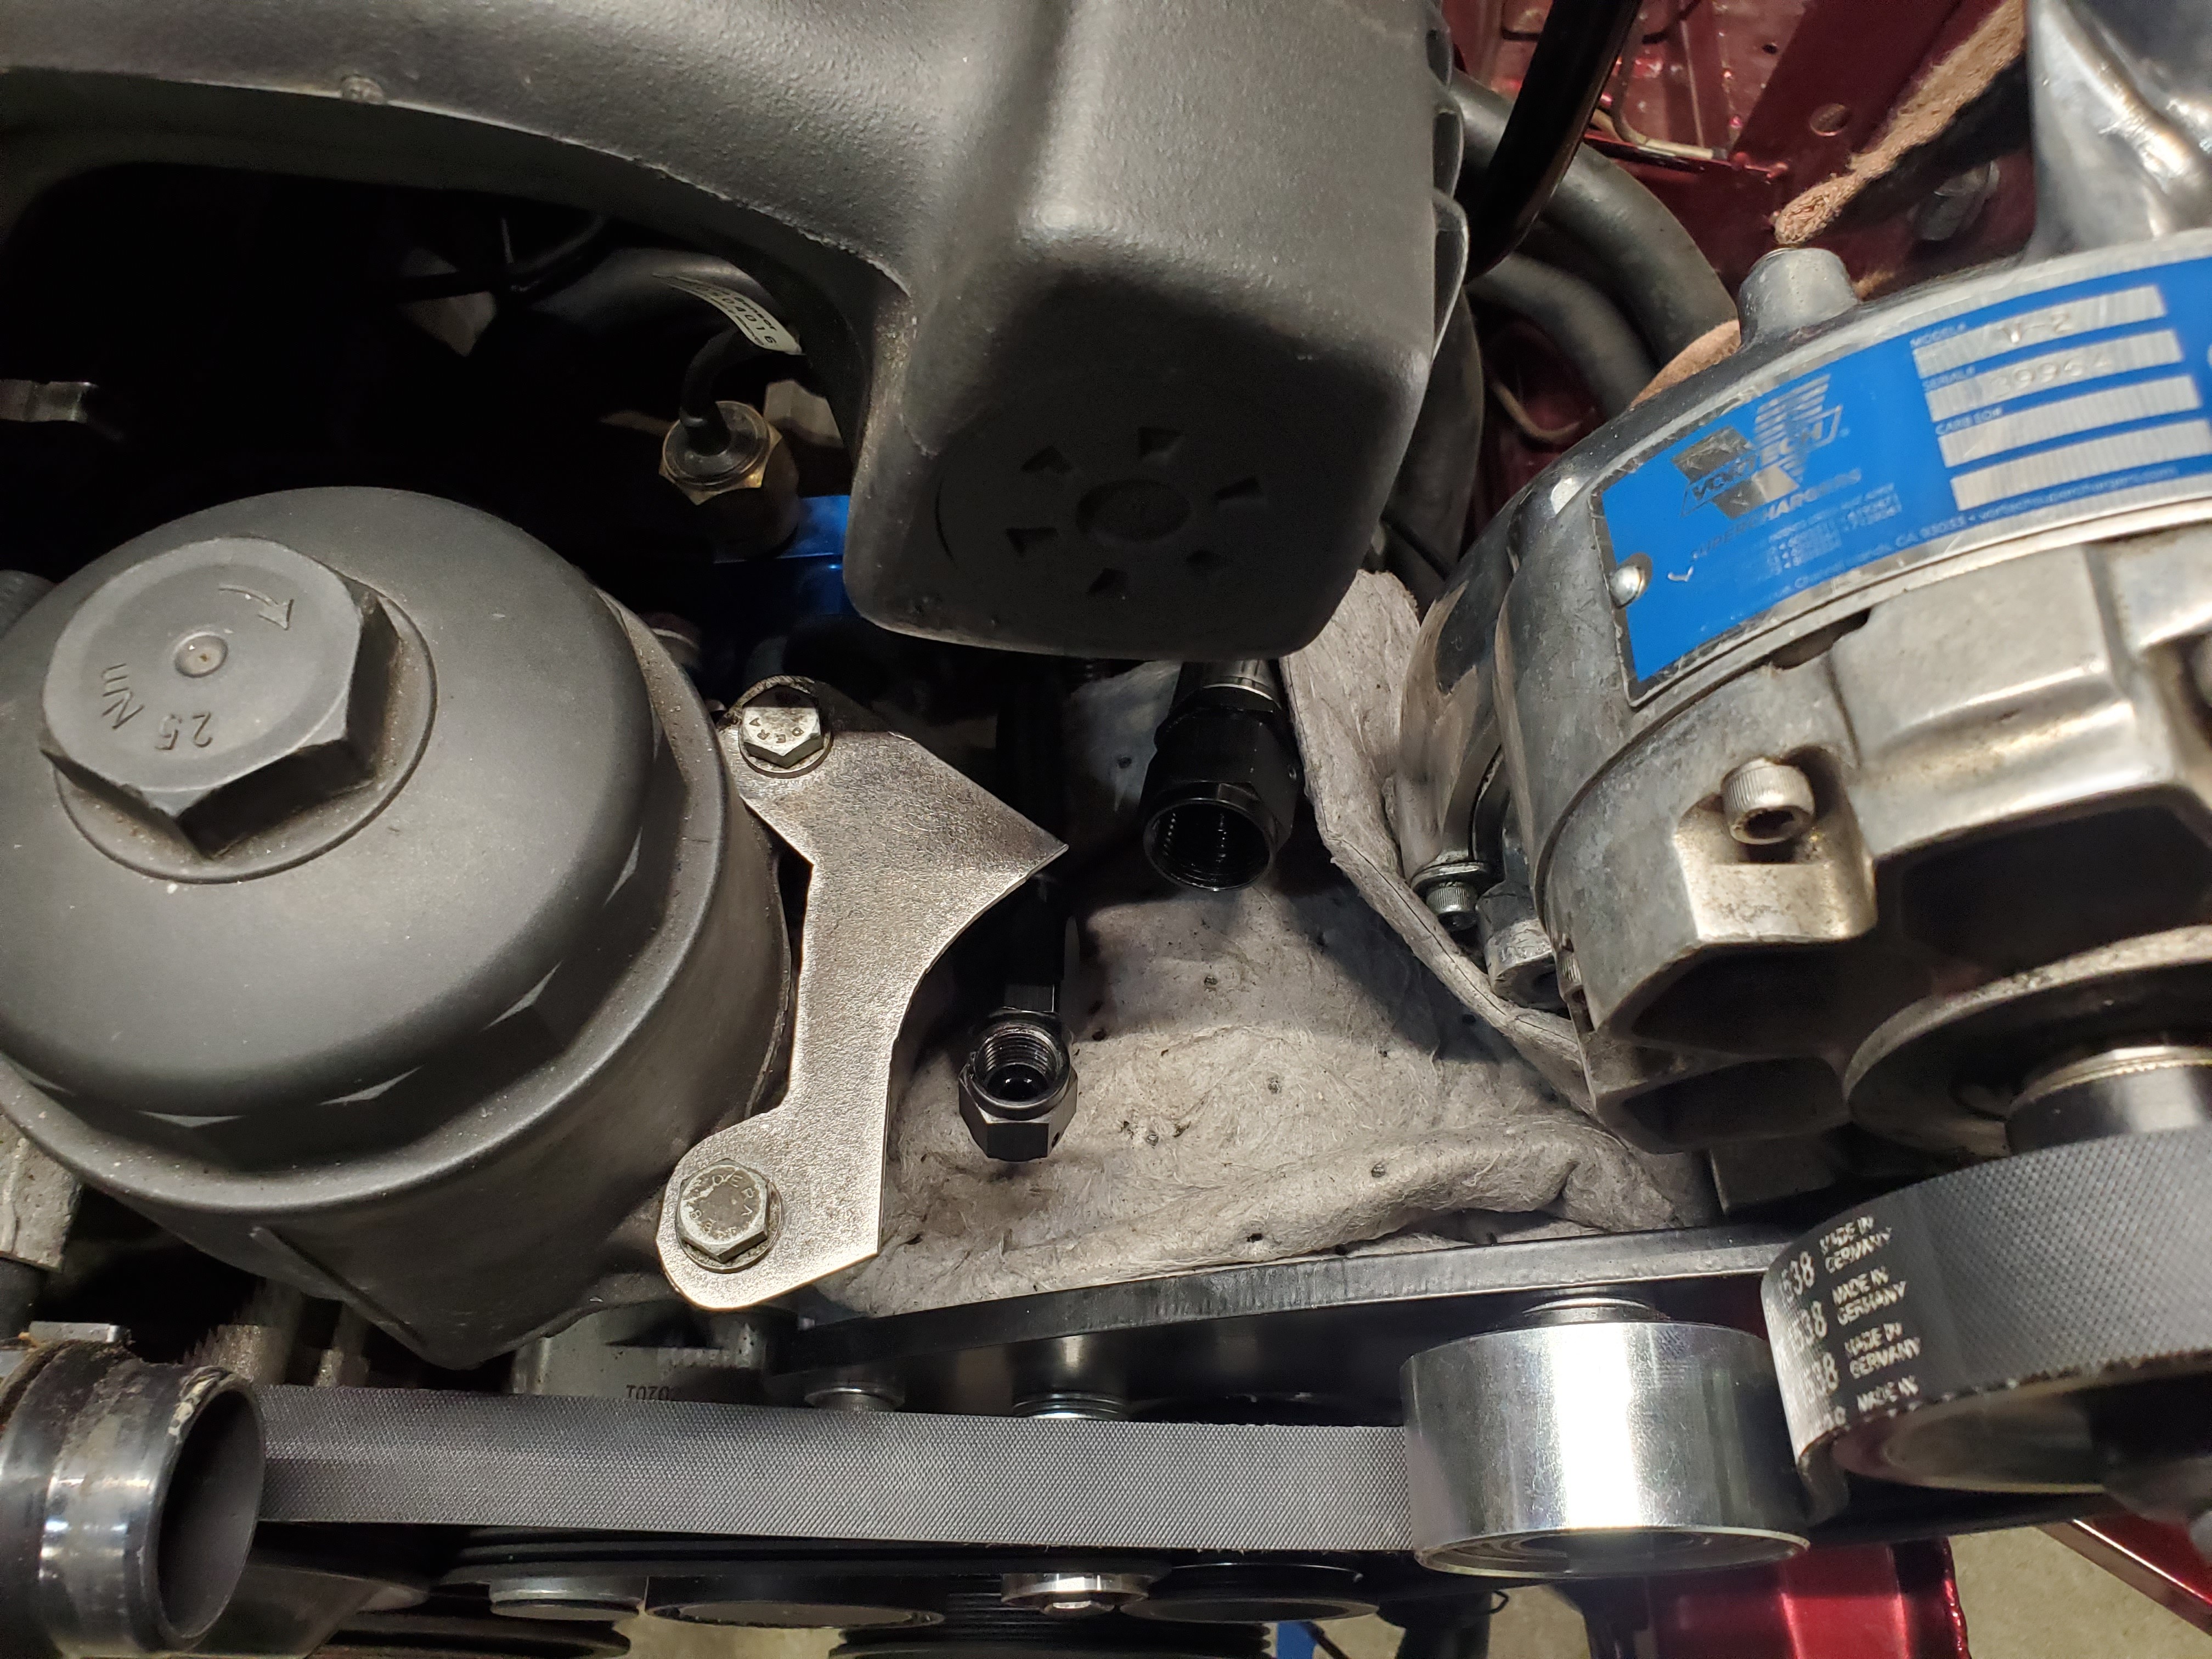
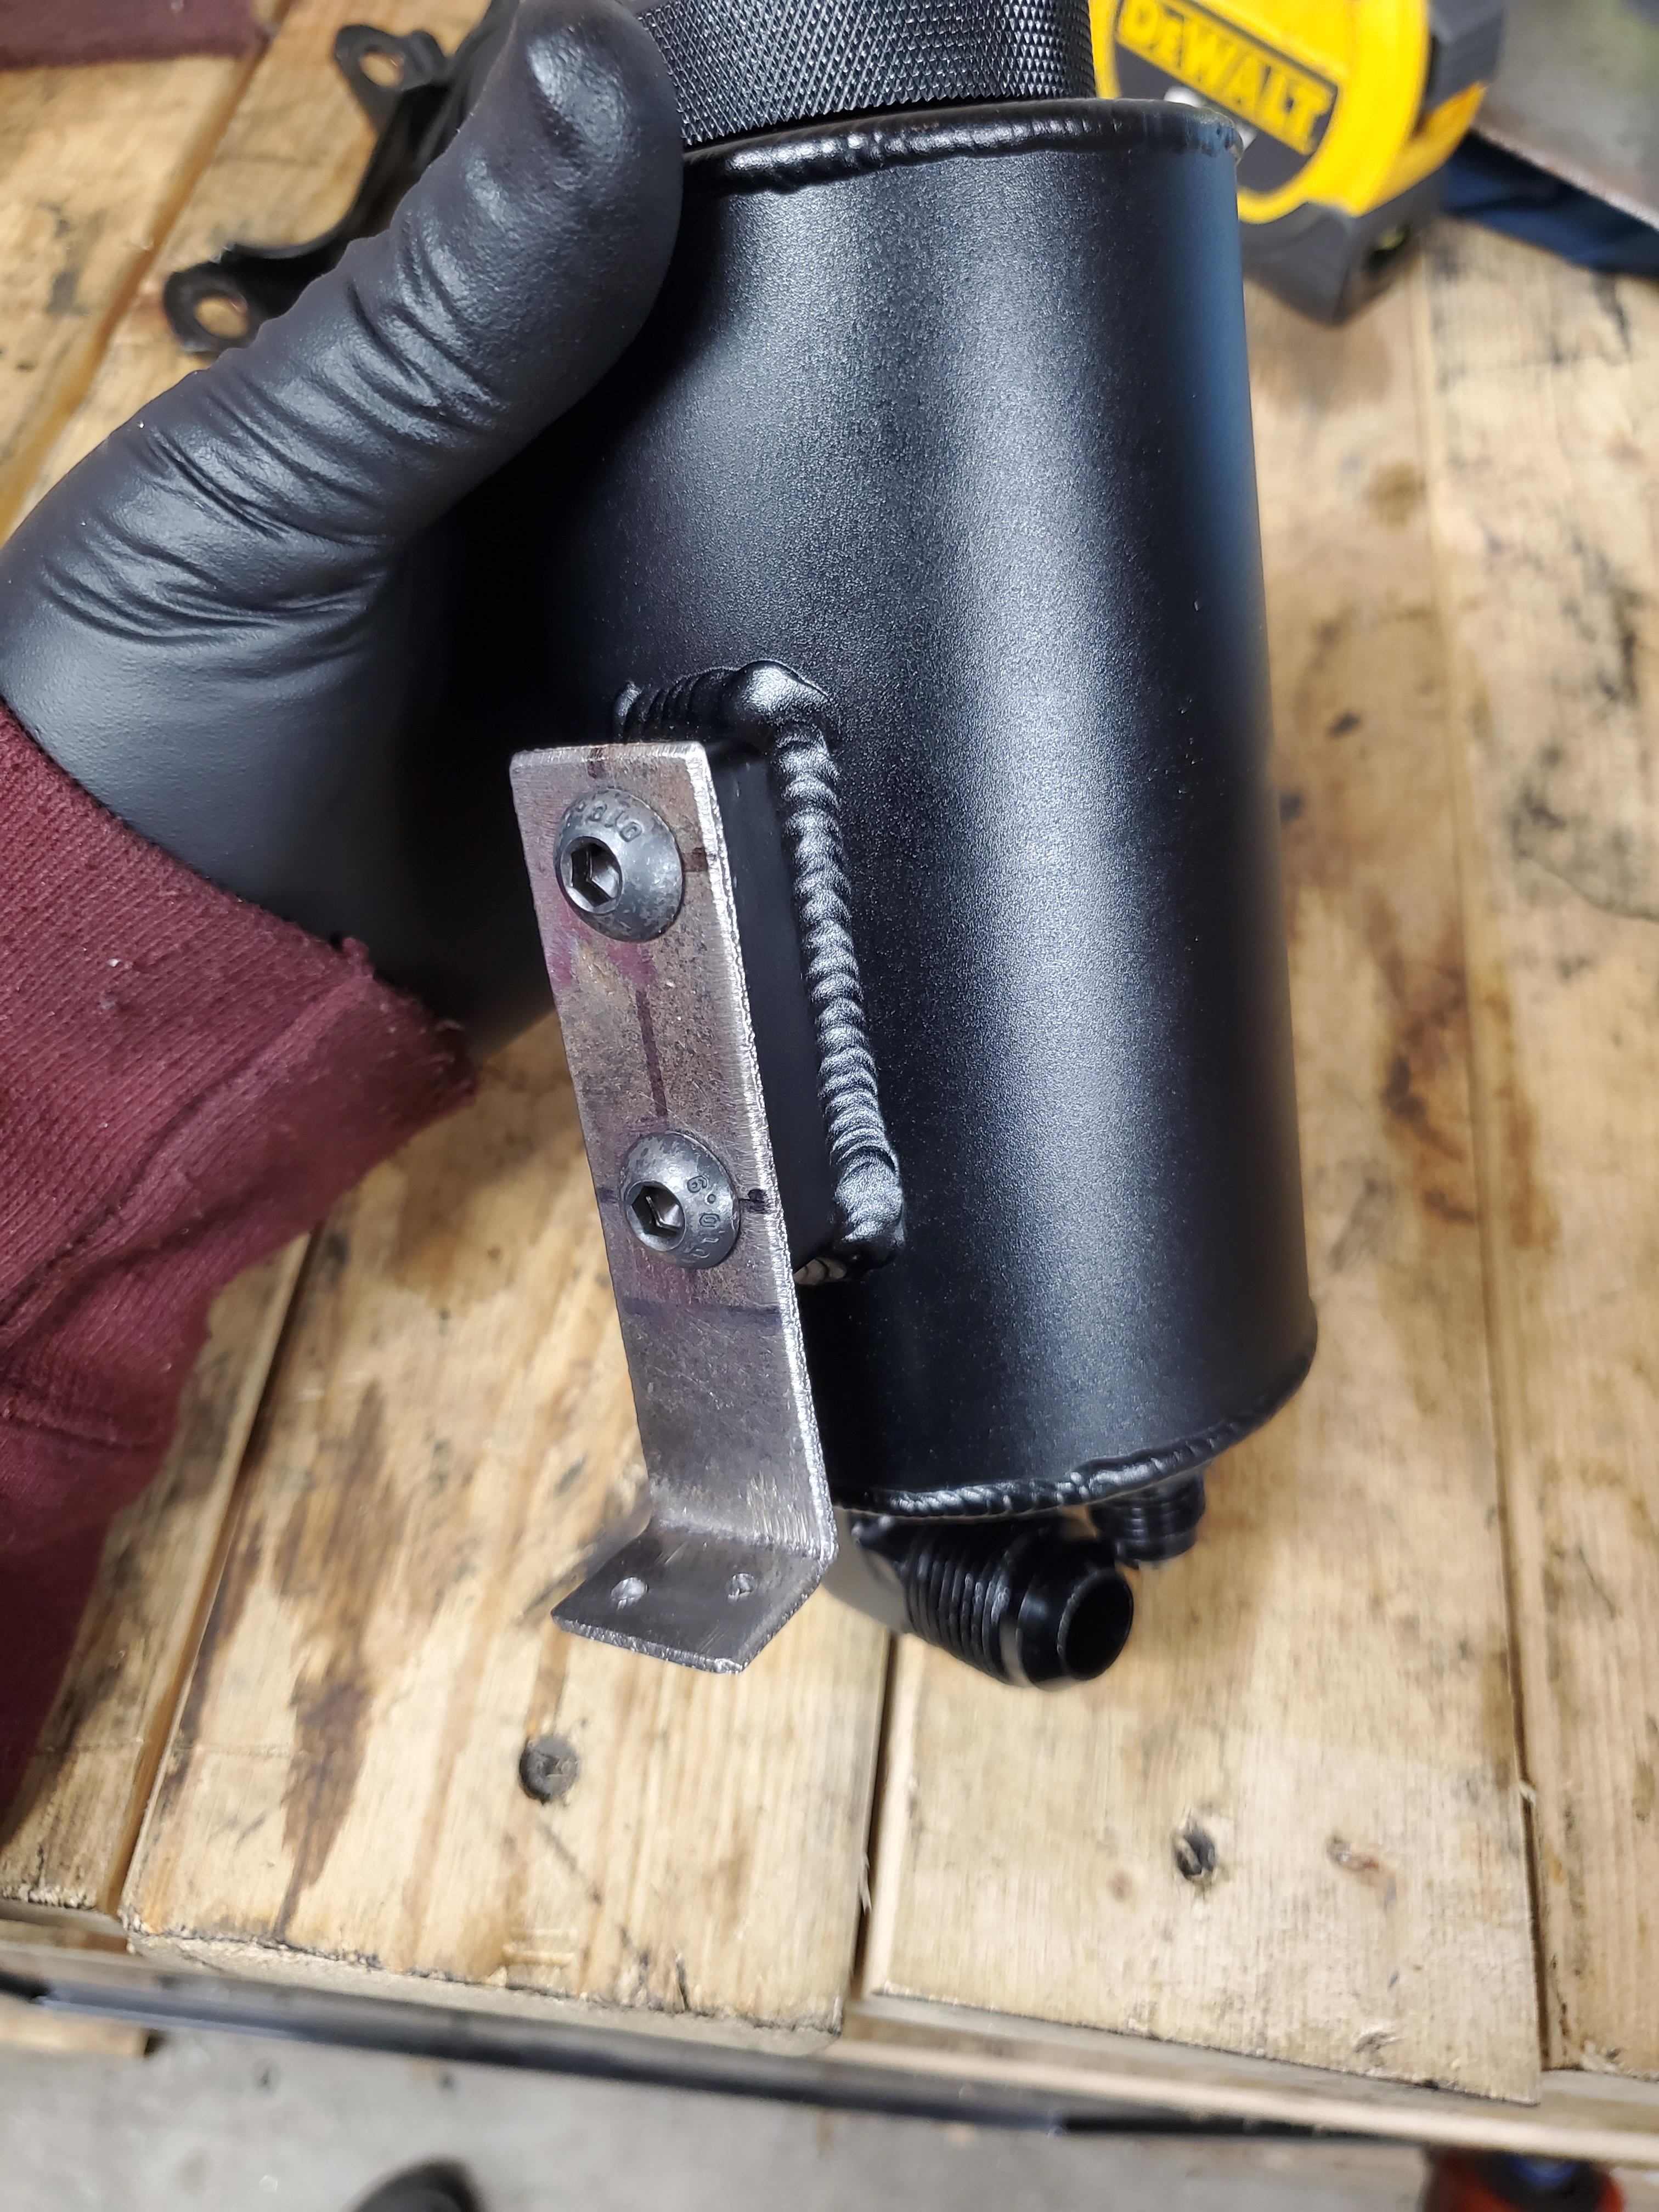
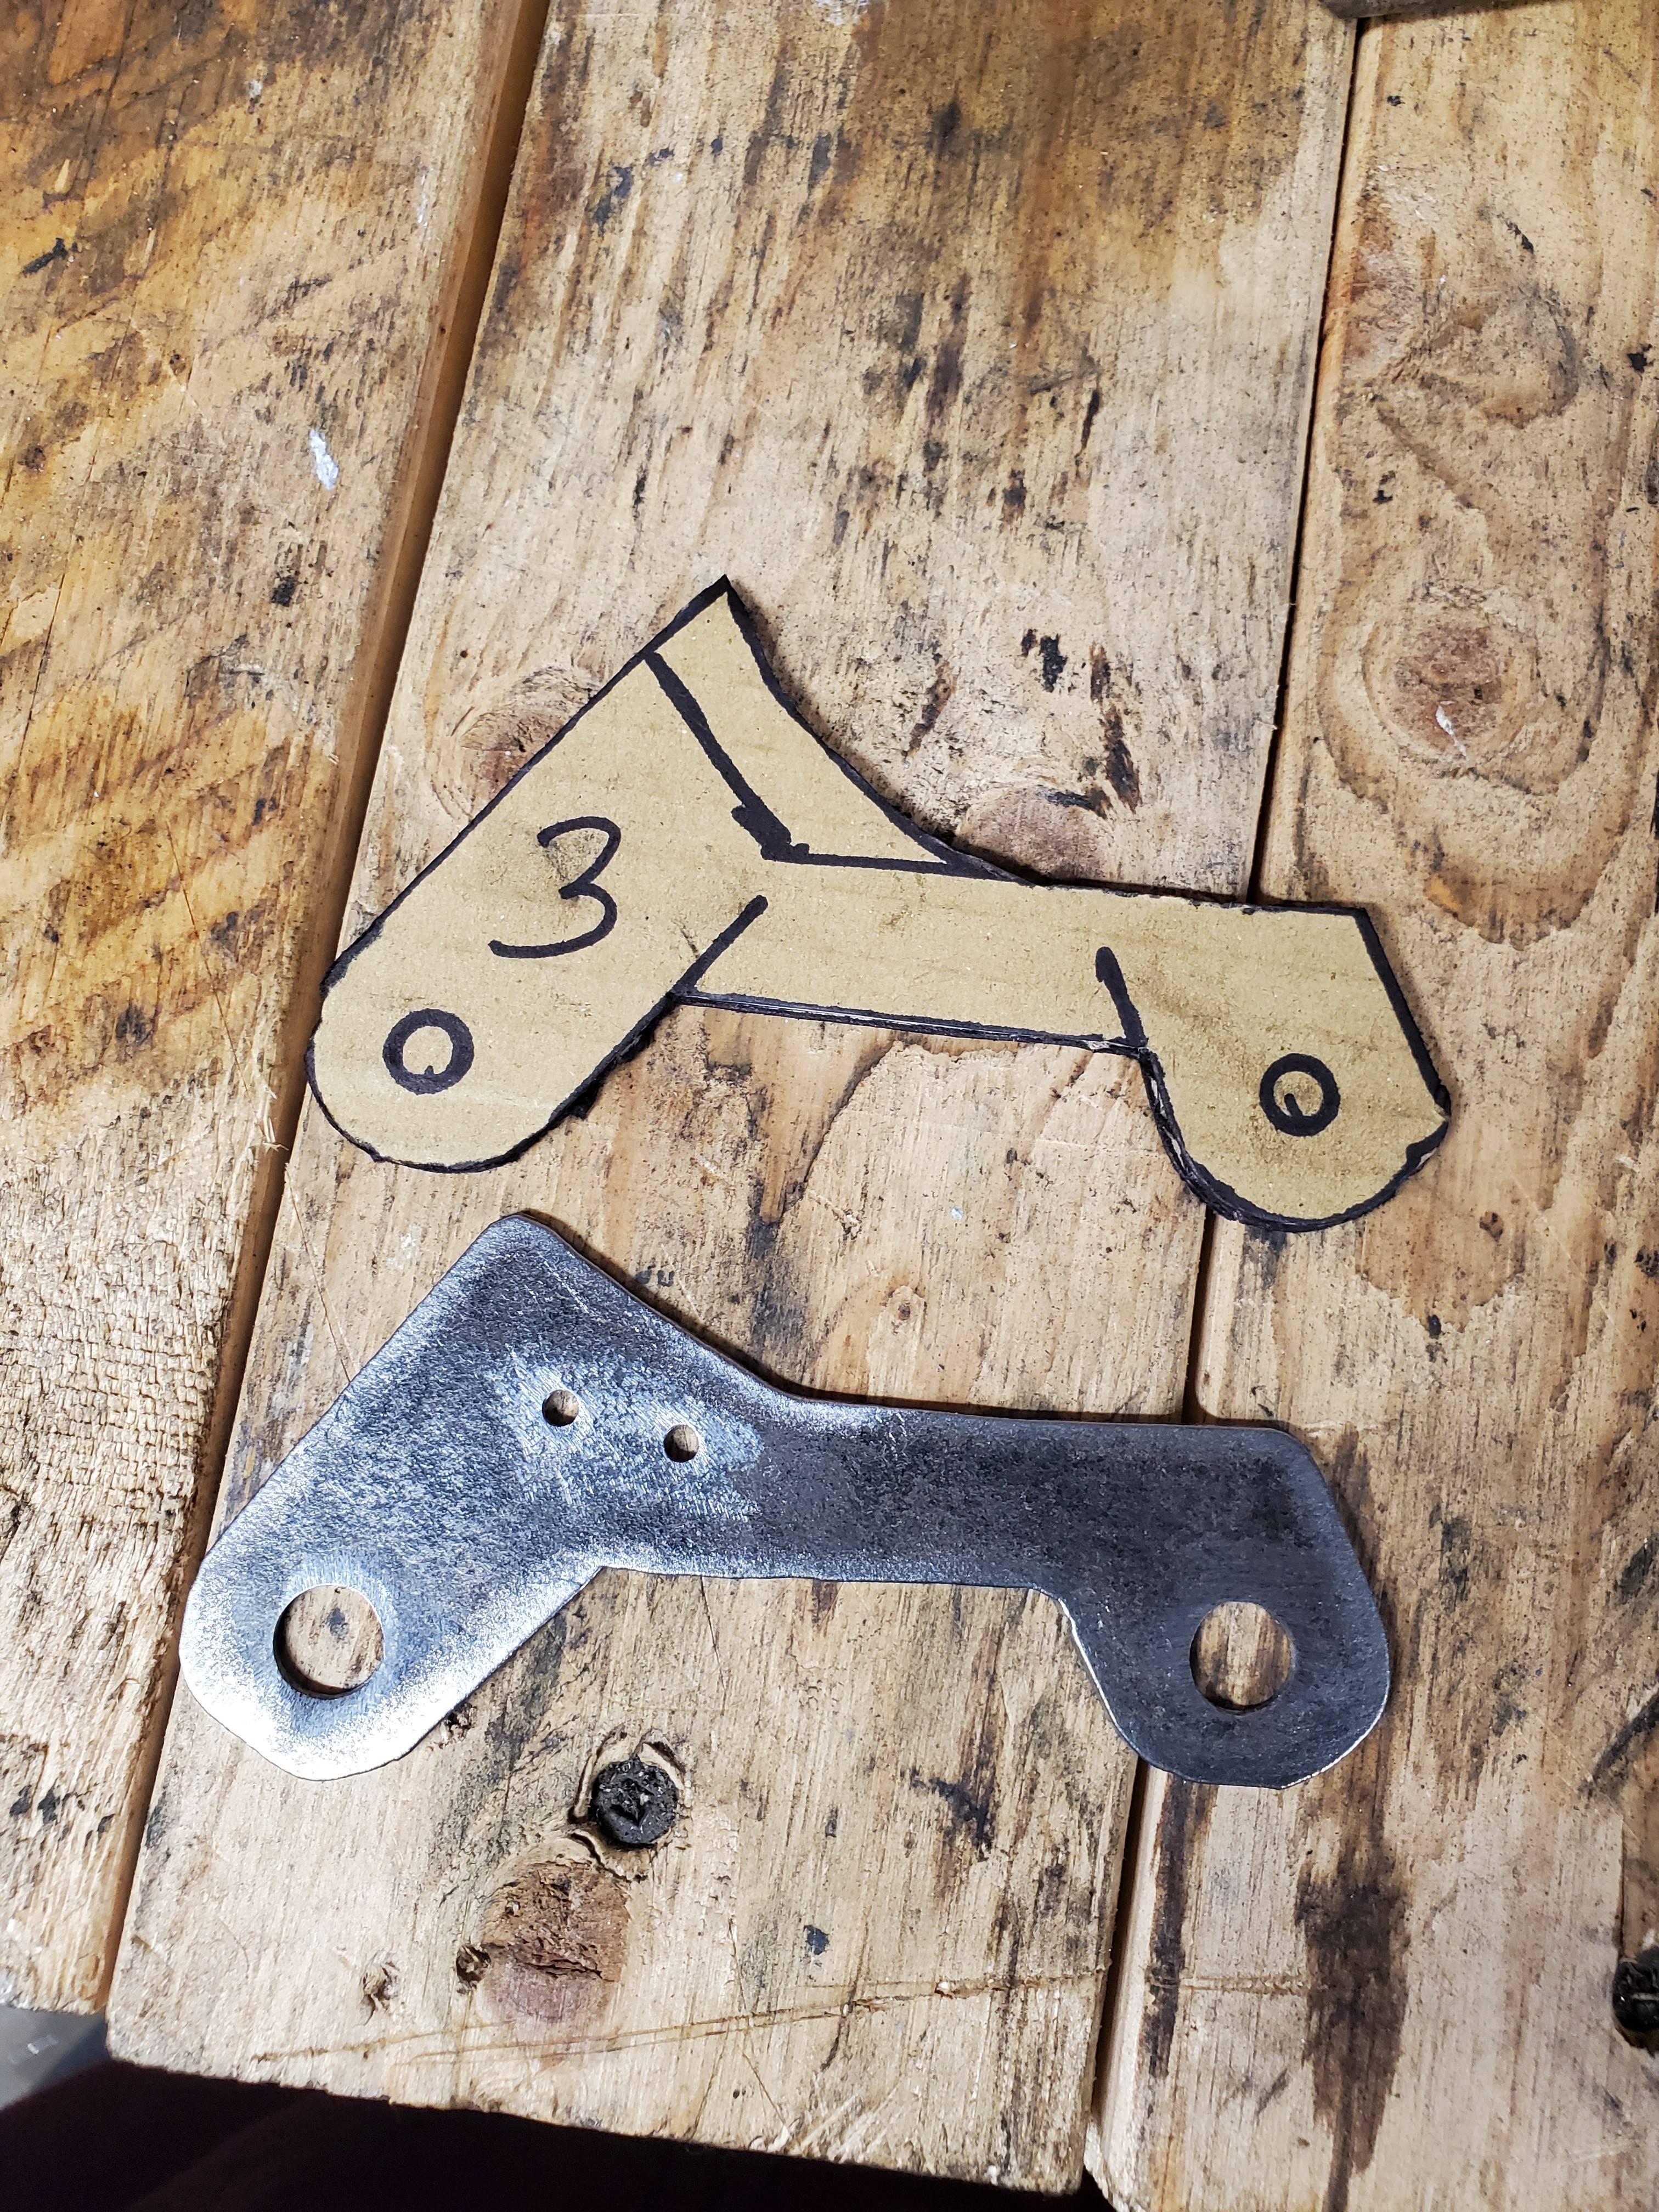
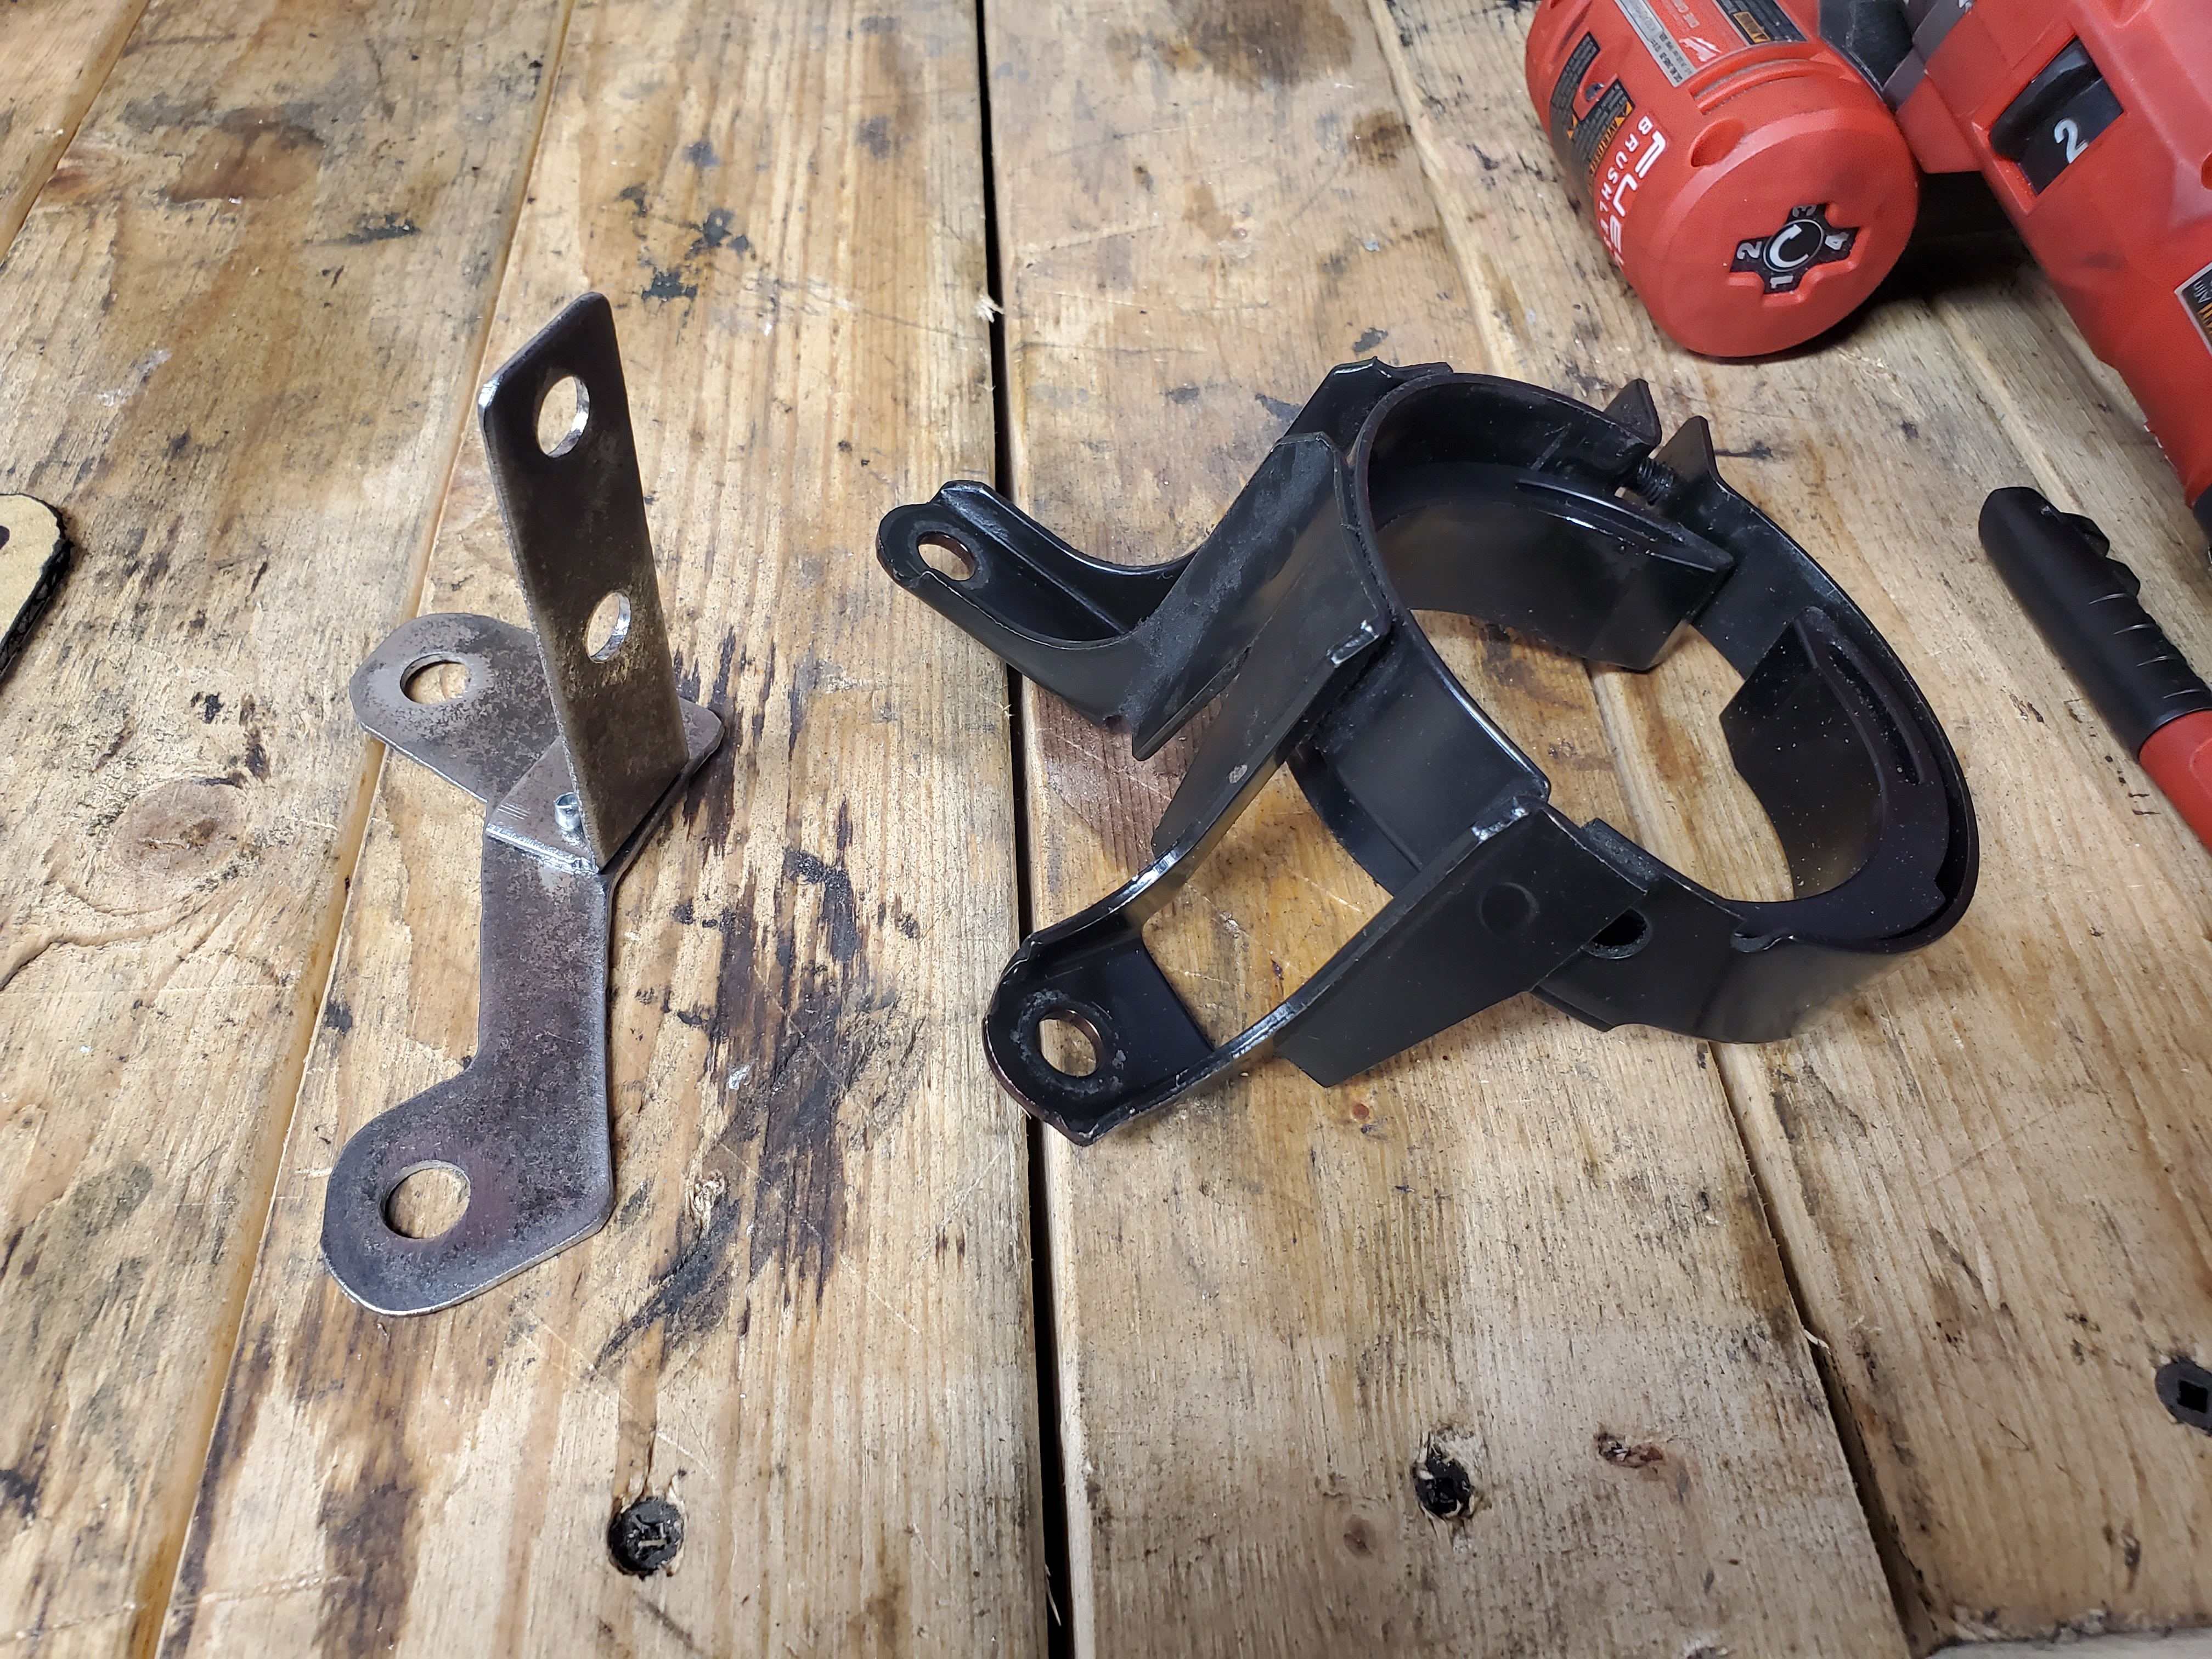
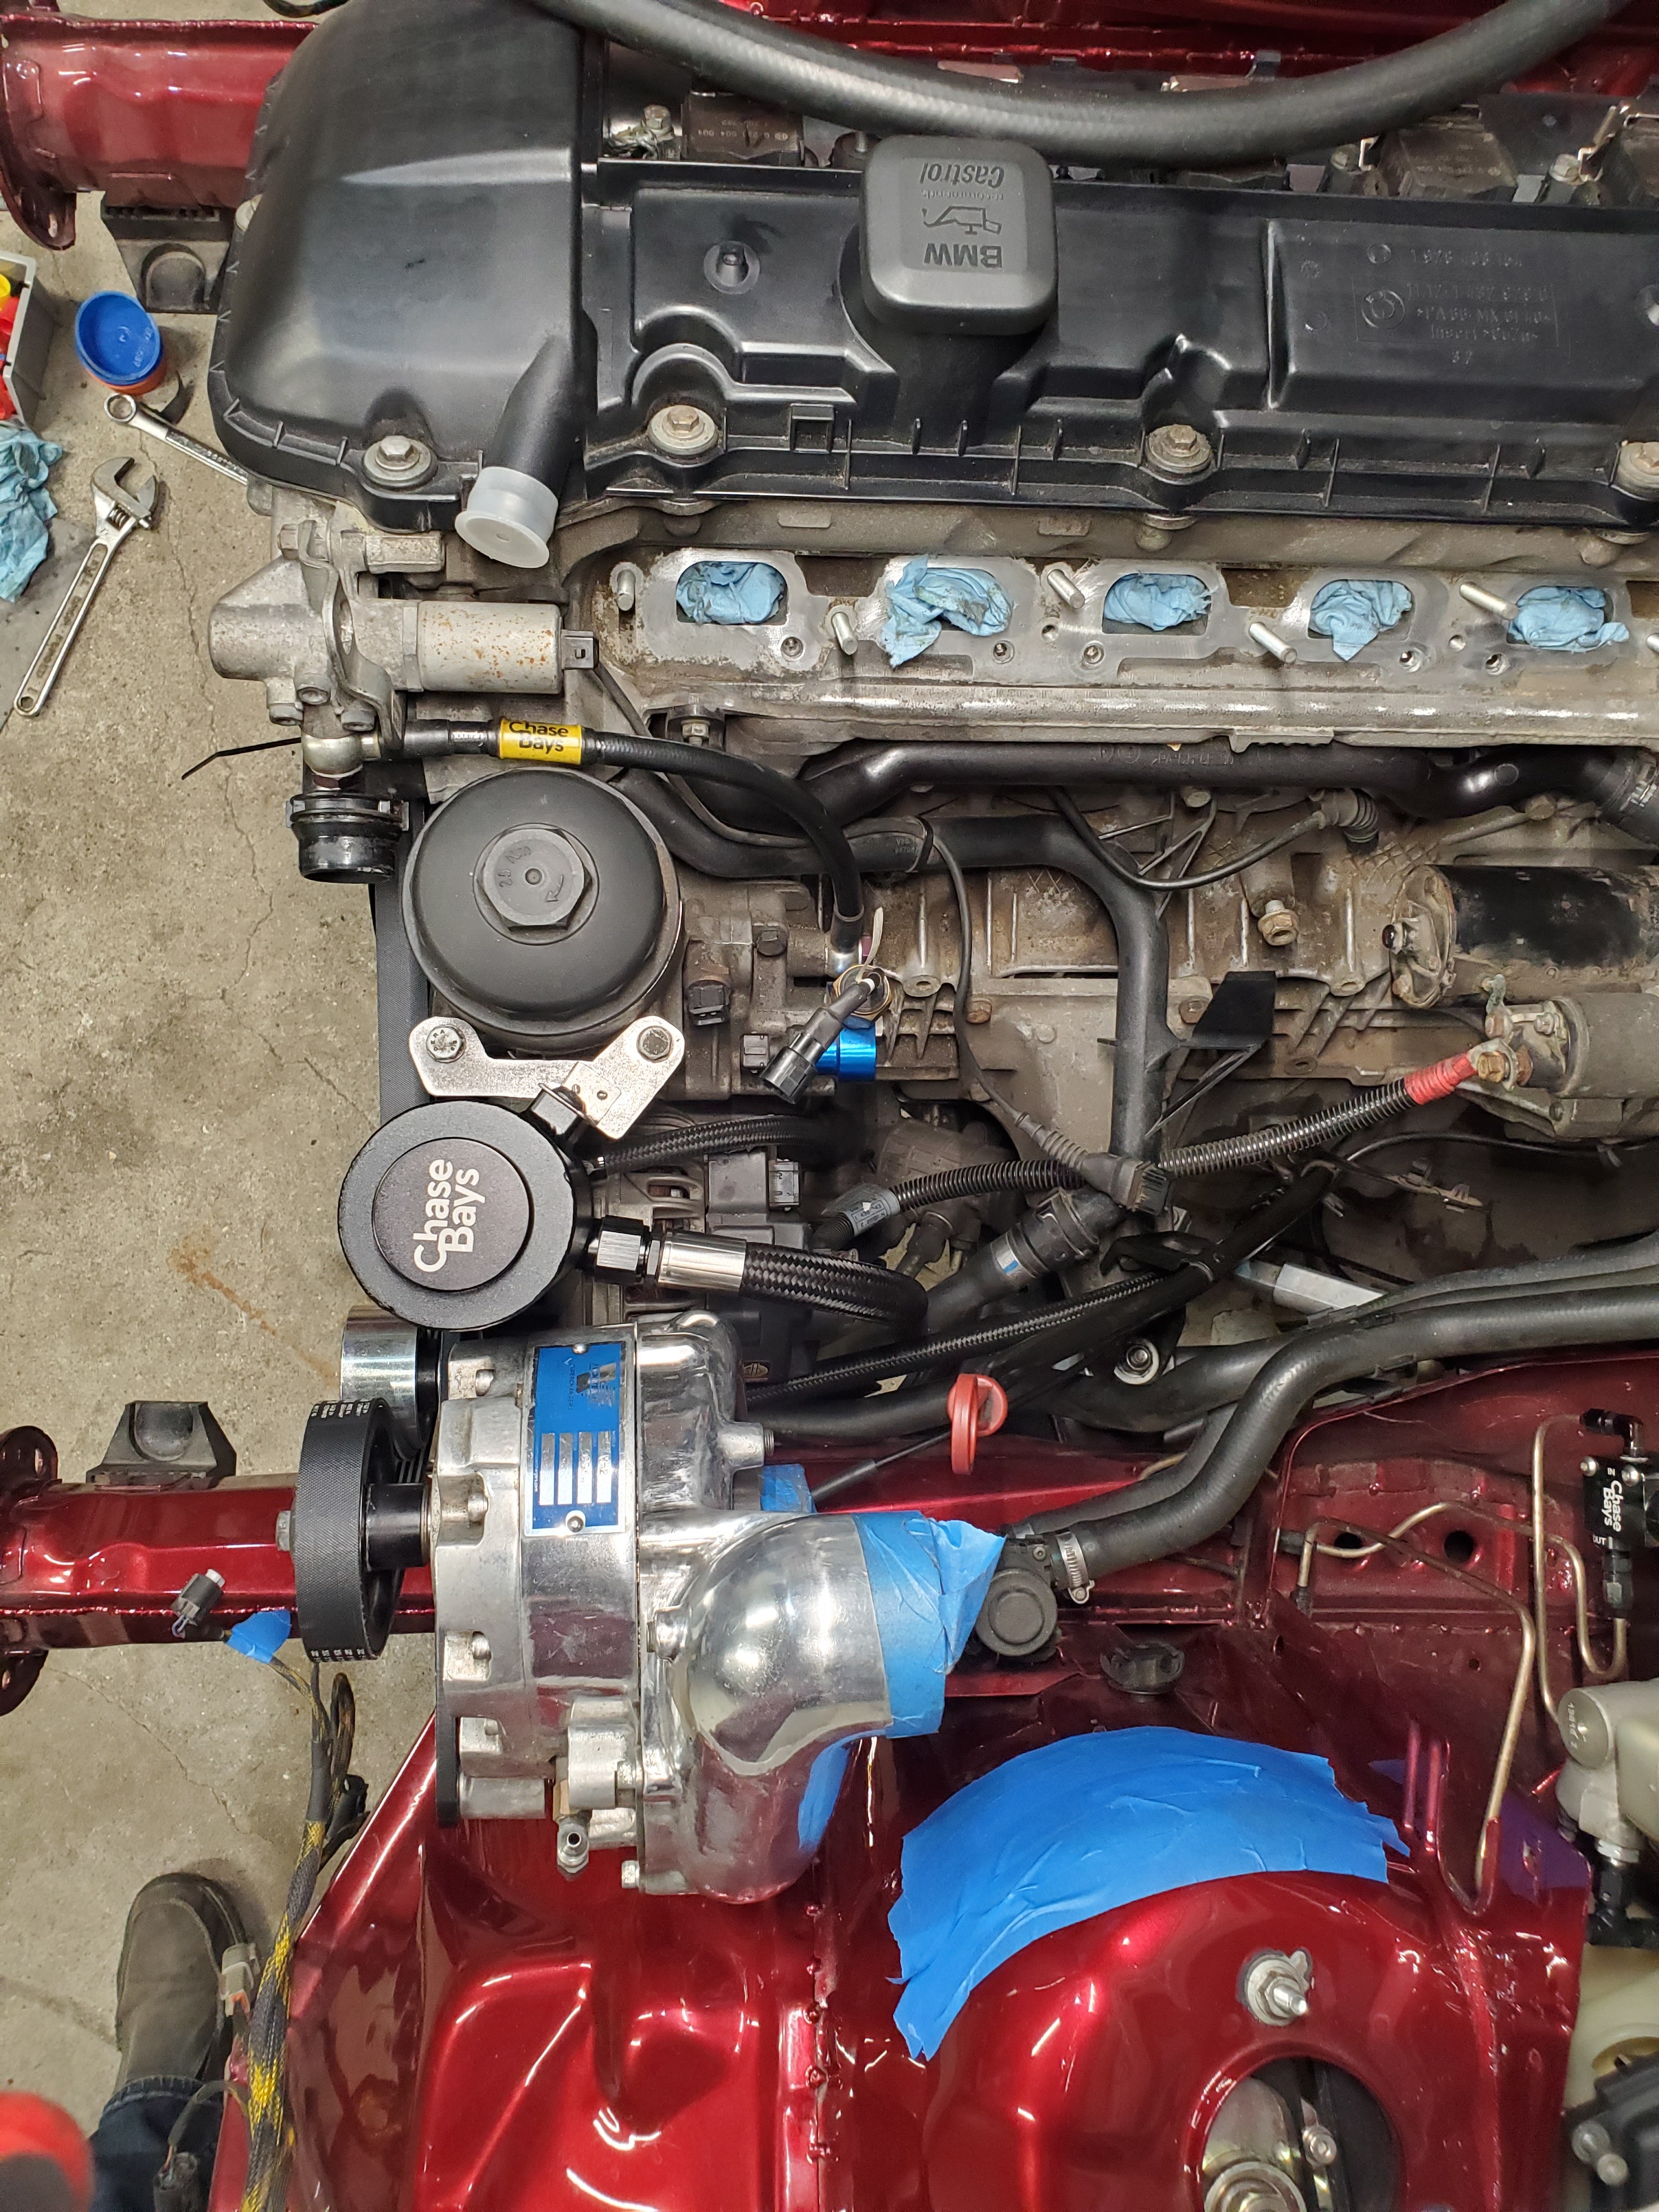
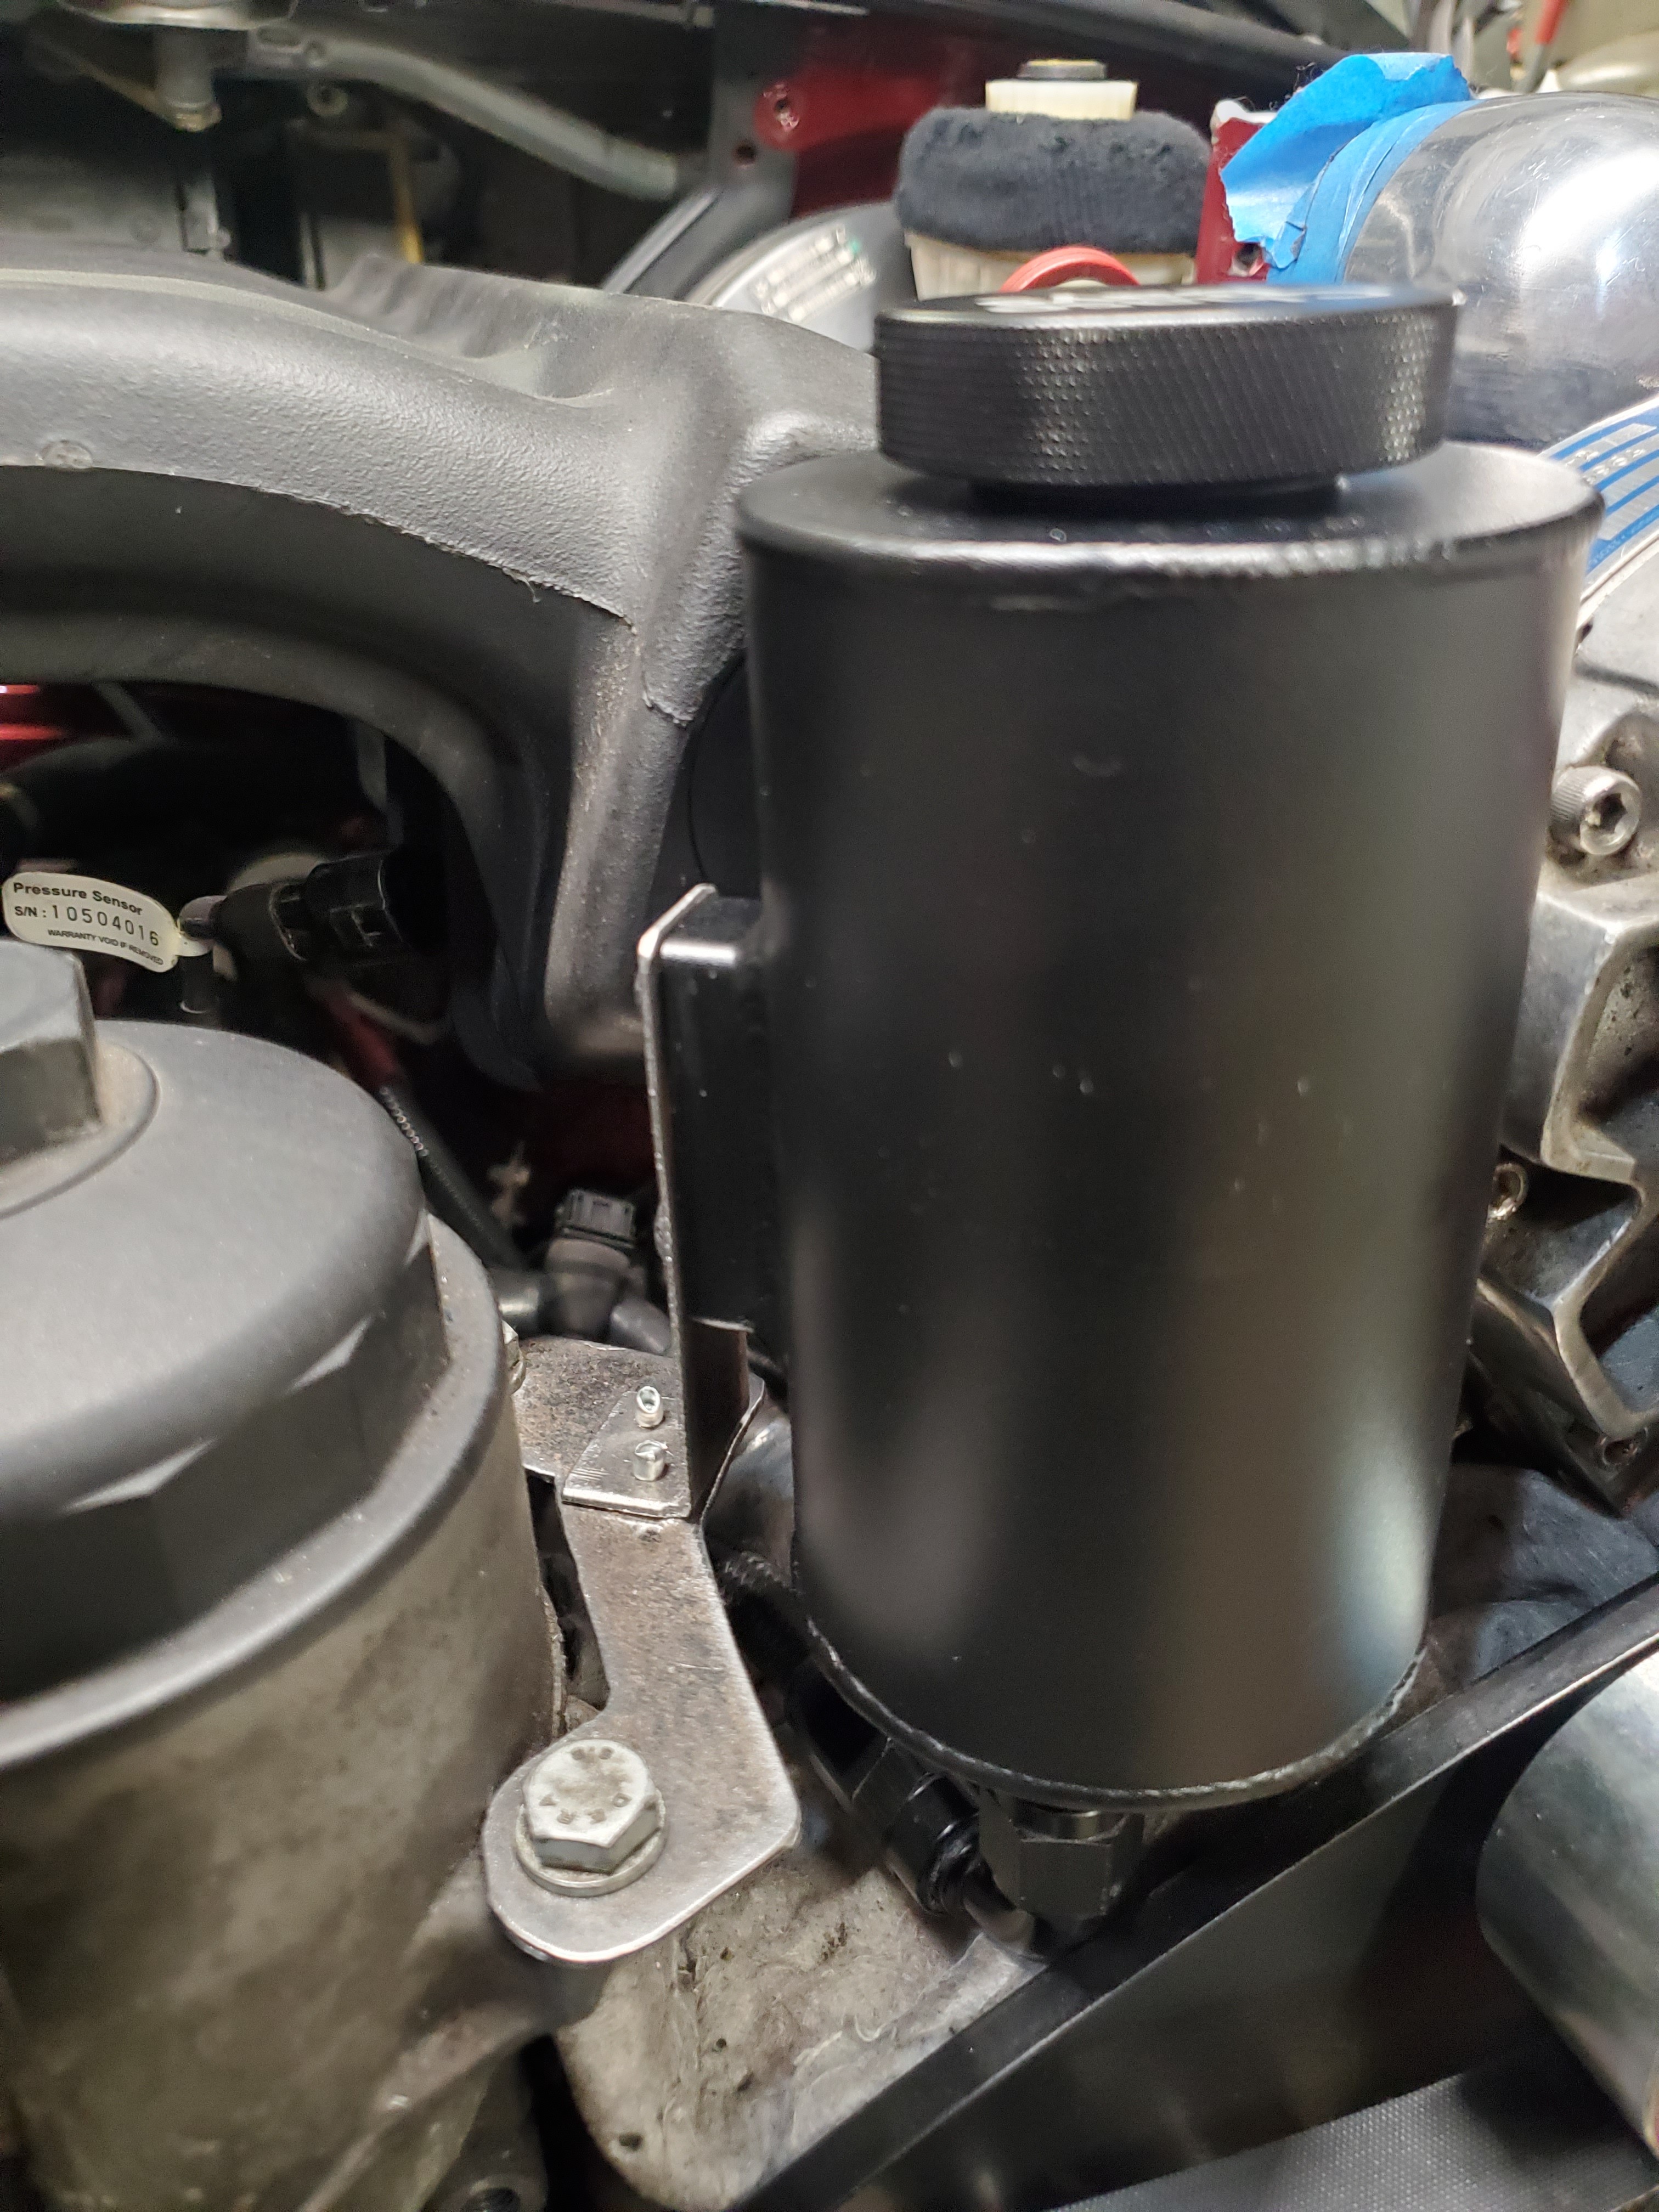
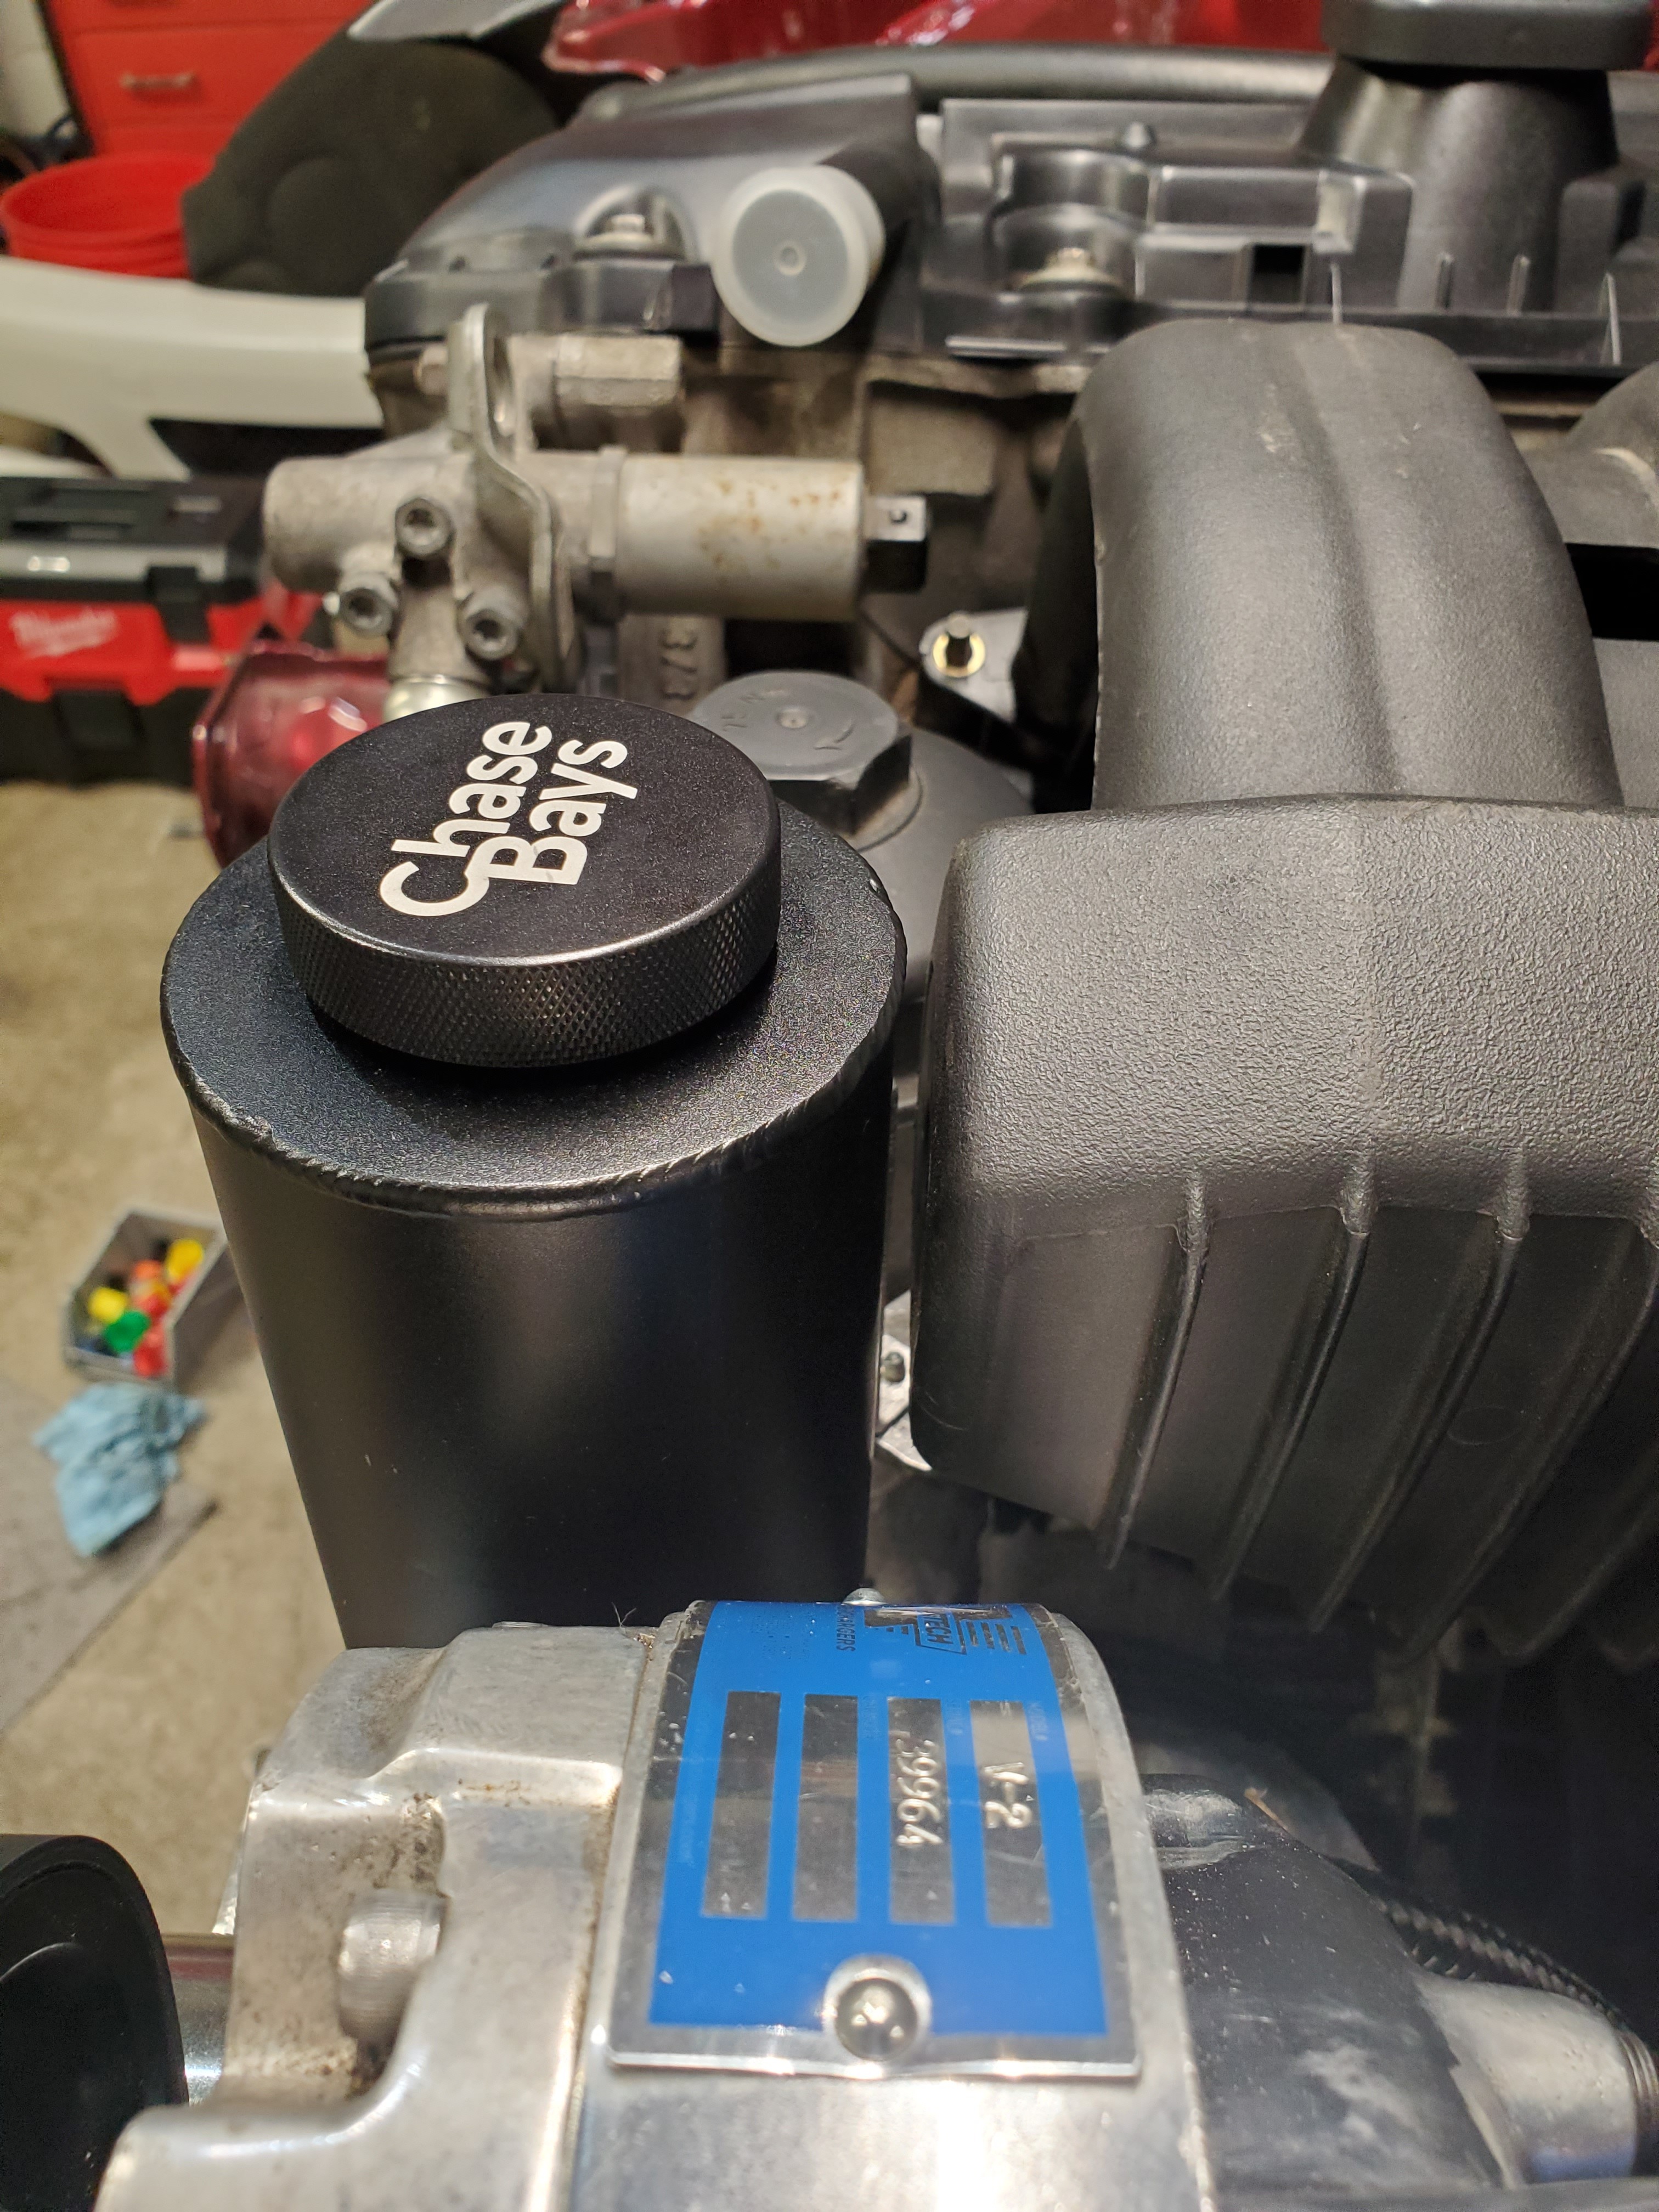
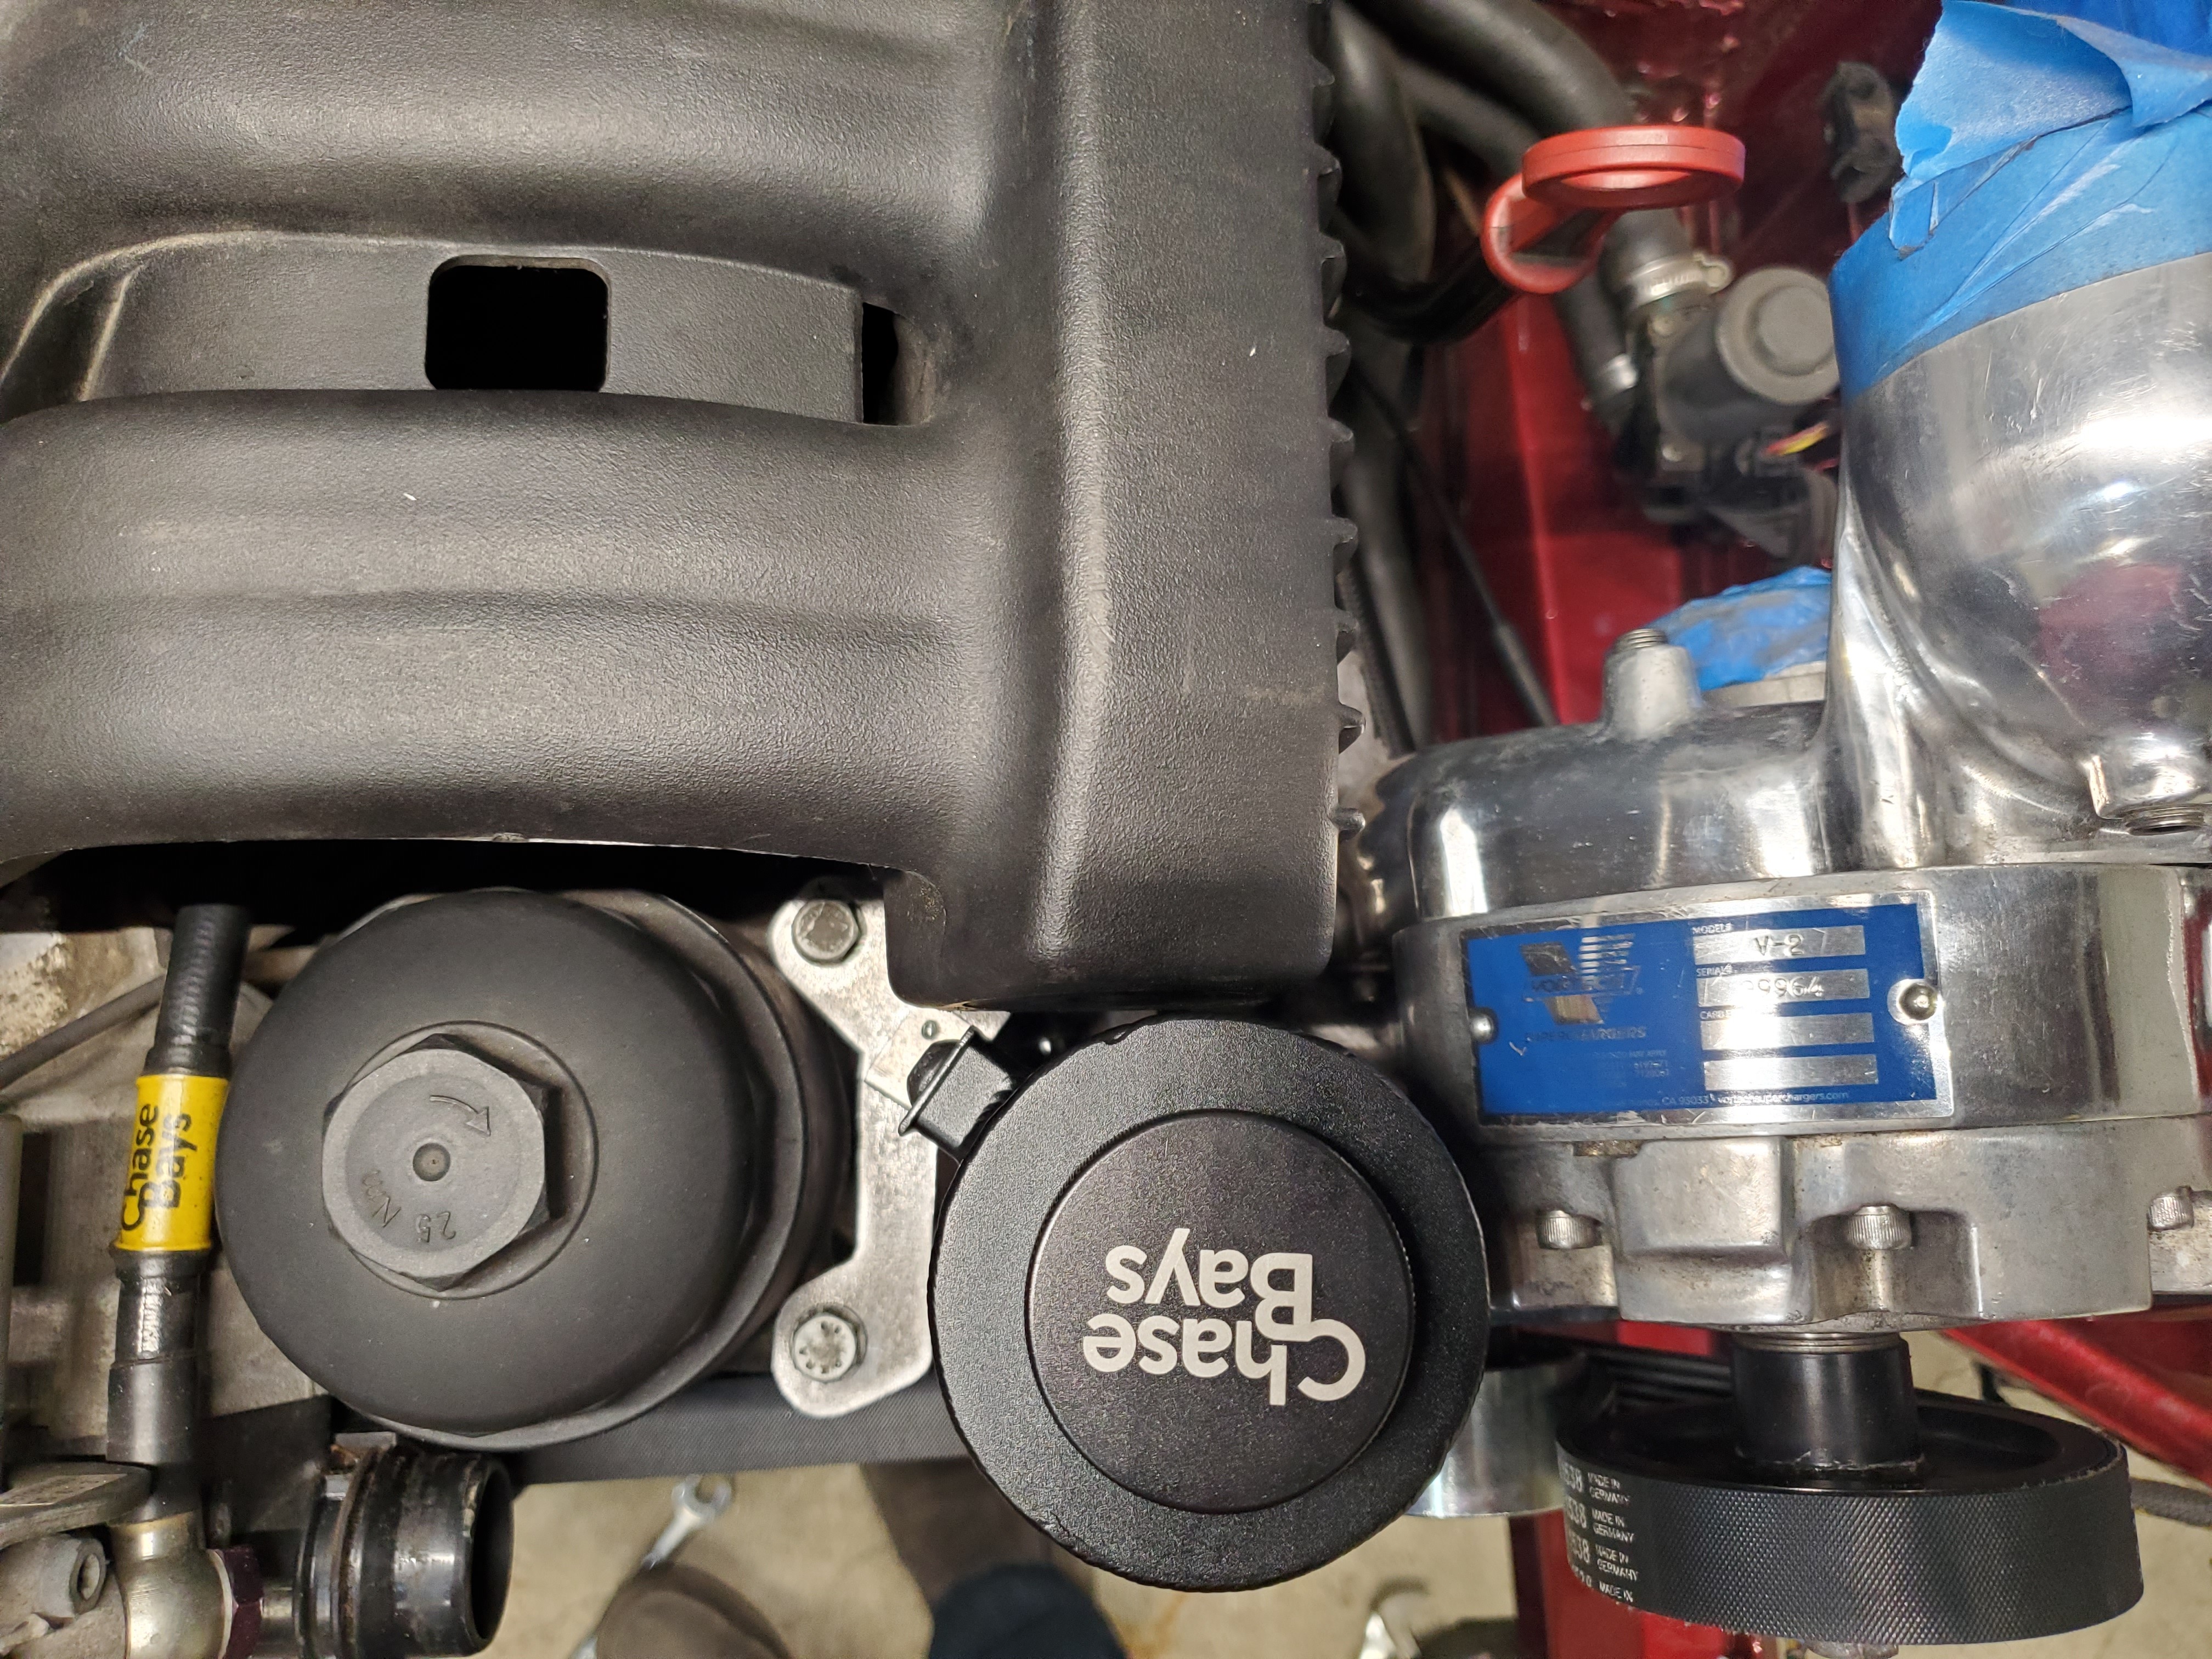
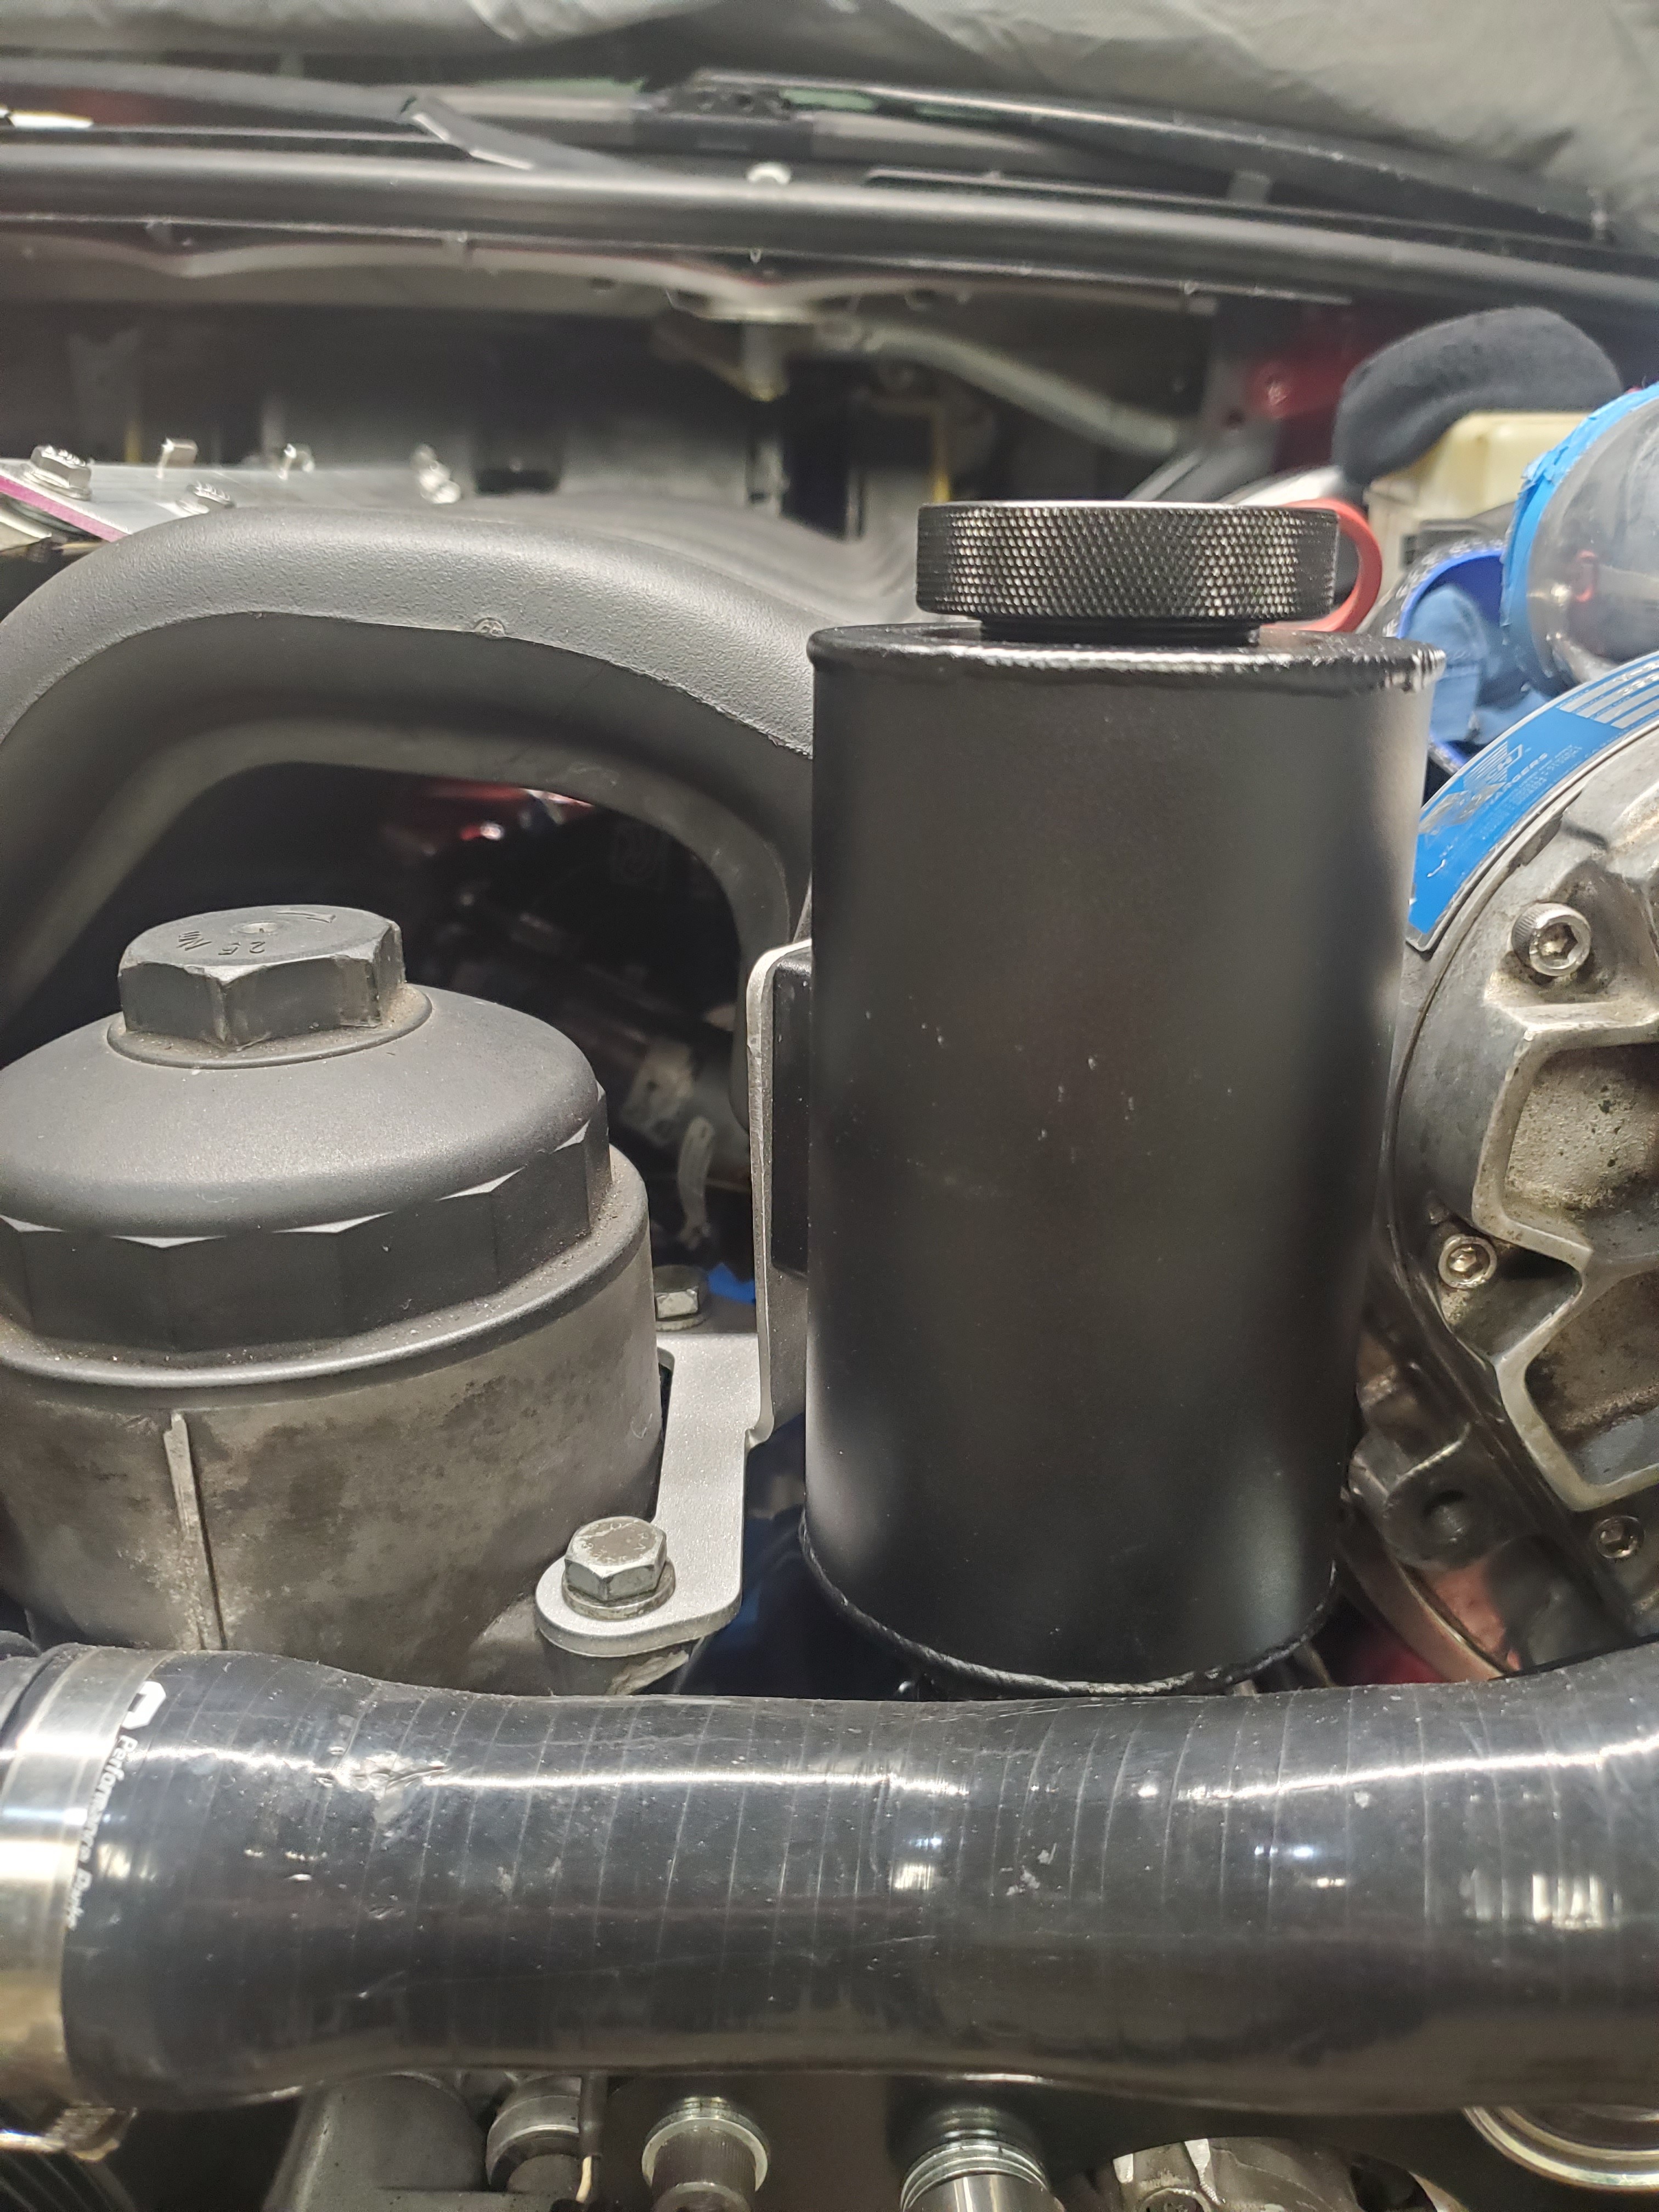
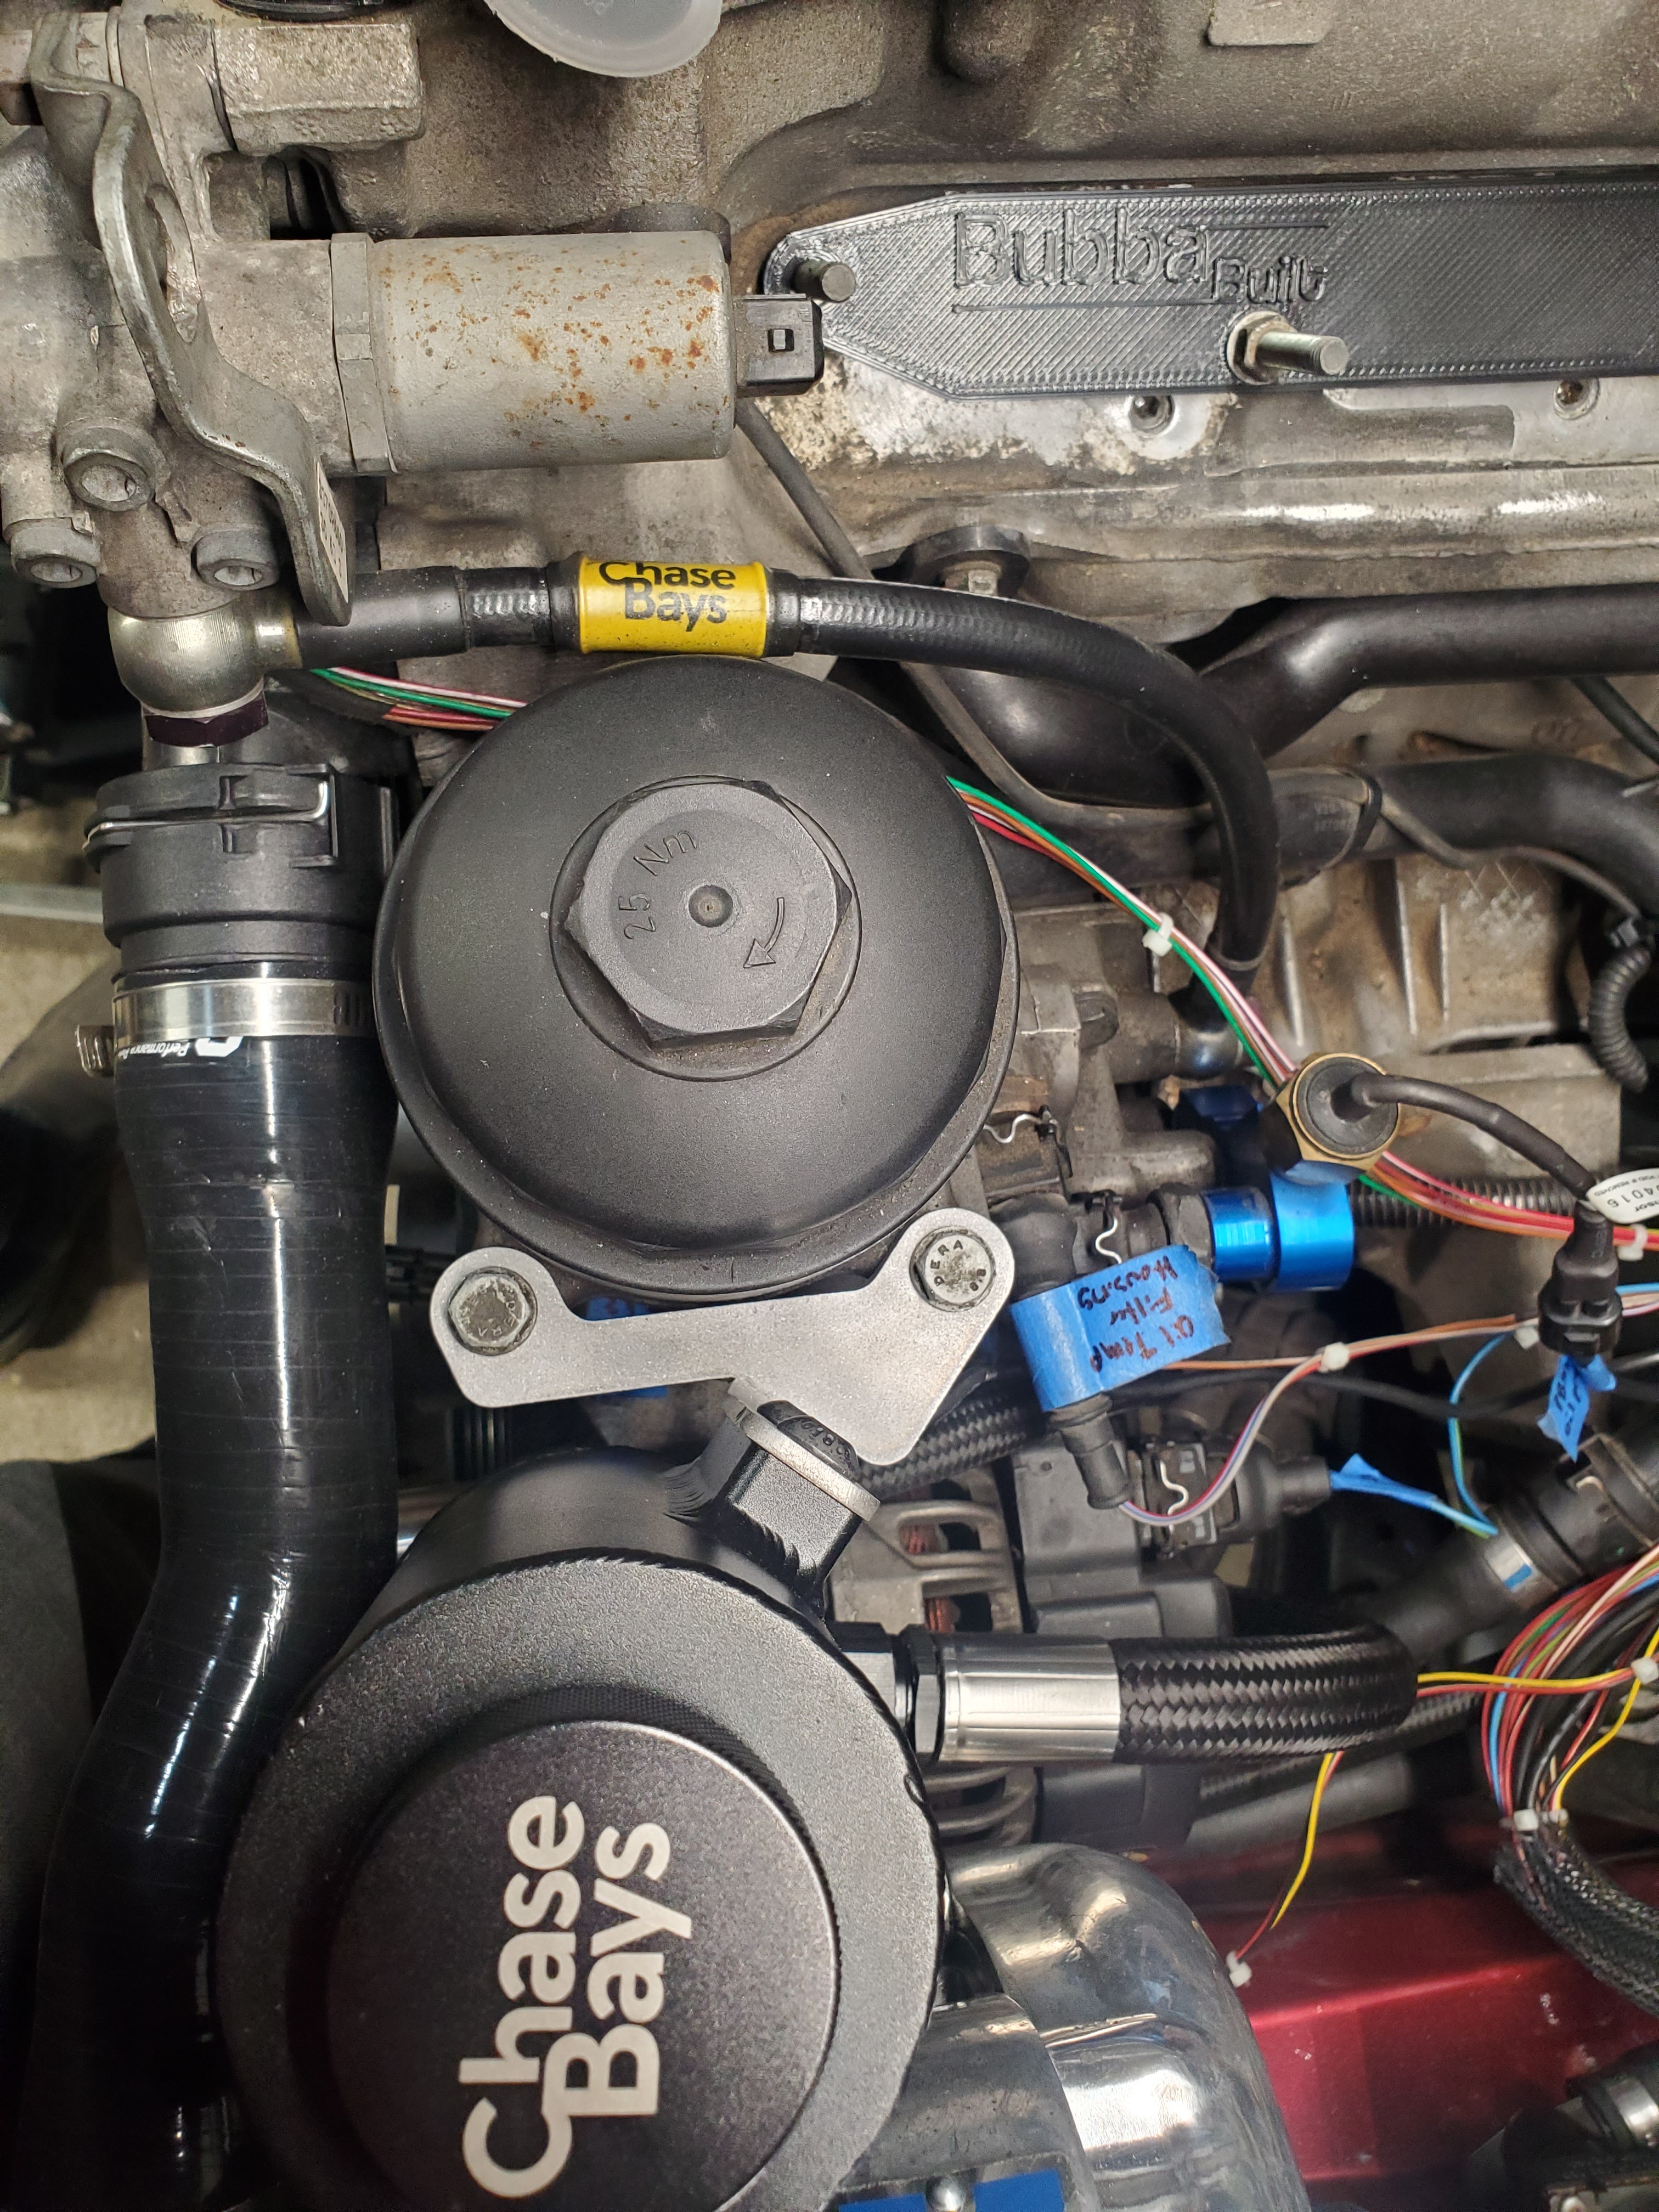
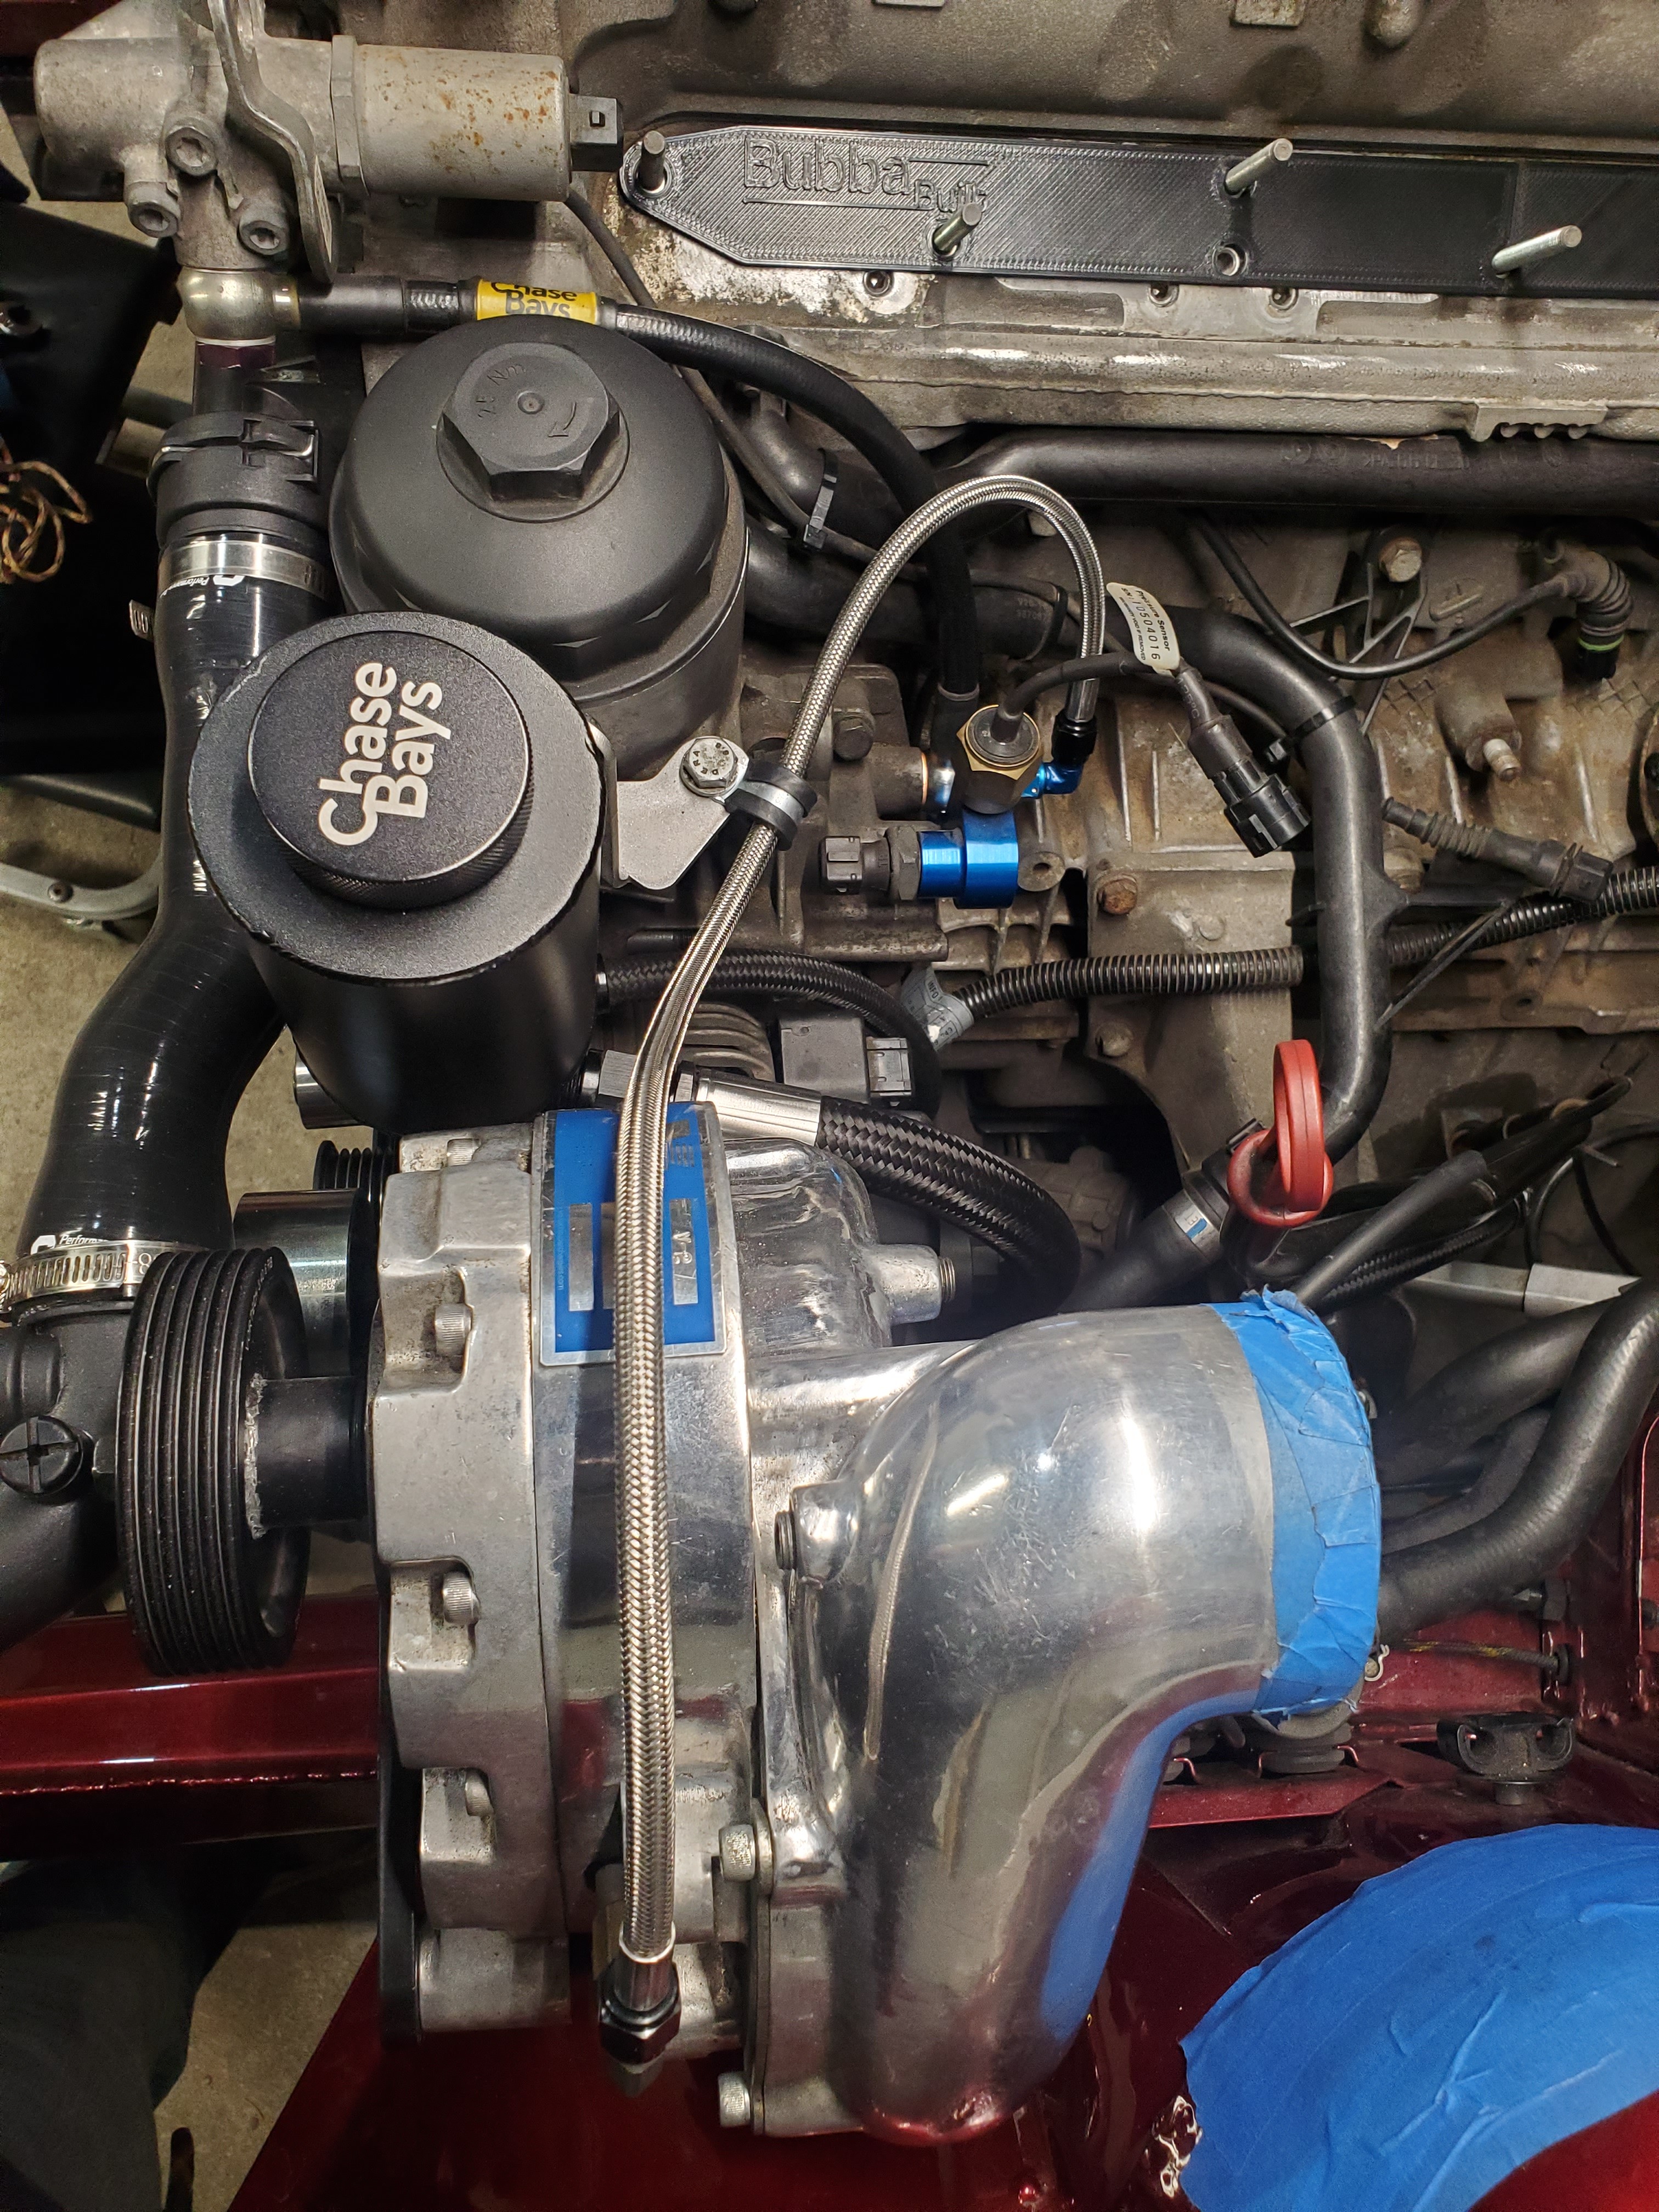
                                    I was able to test fit the manifold and I knew that the chase bays power steering resiviour would be a problem. So I devised an idea and began with the first CAD work of the season lol.

                                    Here is the base part of the mount, originally used the pattern of the factory mount that the chase bays unit used. Then I modified its shape from there, below is the progression.
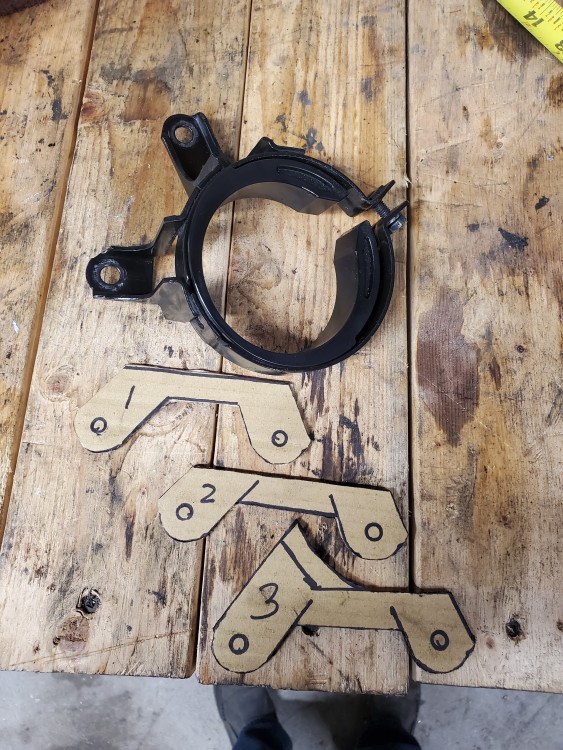
                                    20210306093646.jpg

                                    Then I made the upright mount with hols that lined up with the mounting holes on the chase bays resiviour, and transfered it all to some metal.
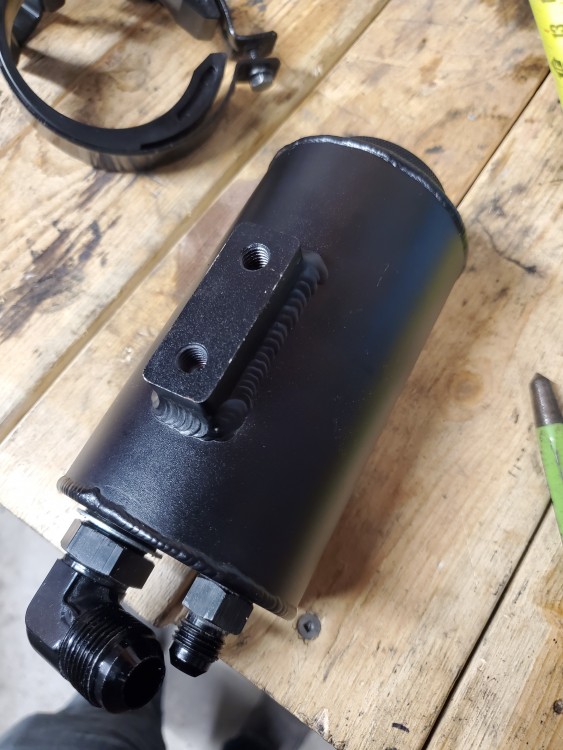
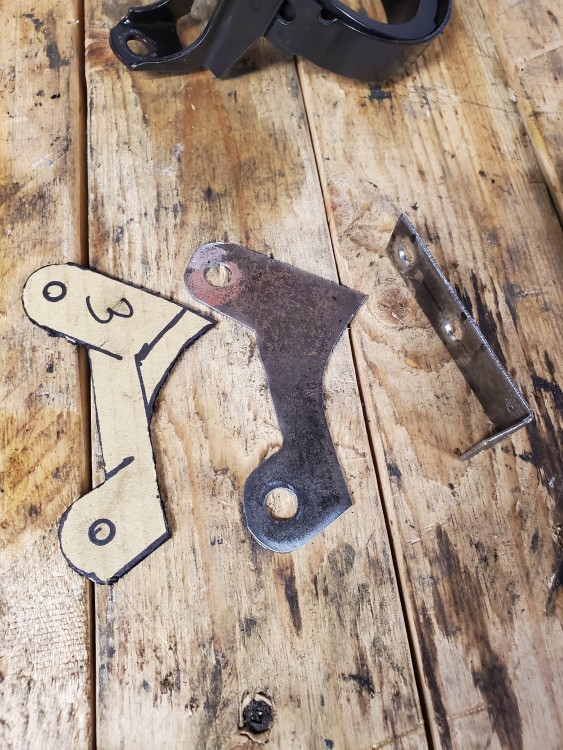
                                    20210306093733.jpg

                                    20210306093833.jpg

                                    Here's the plate mounted to the oil filter housing. 
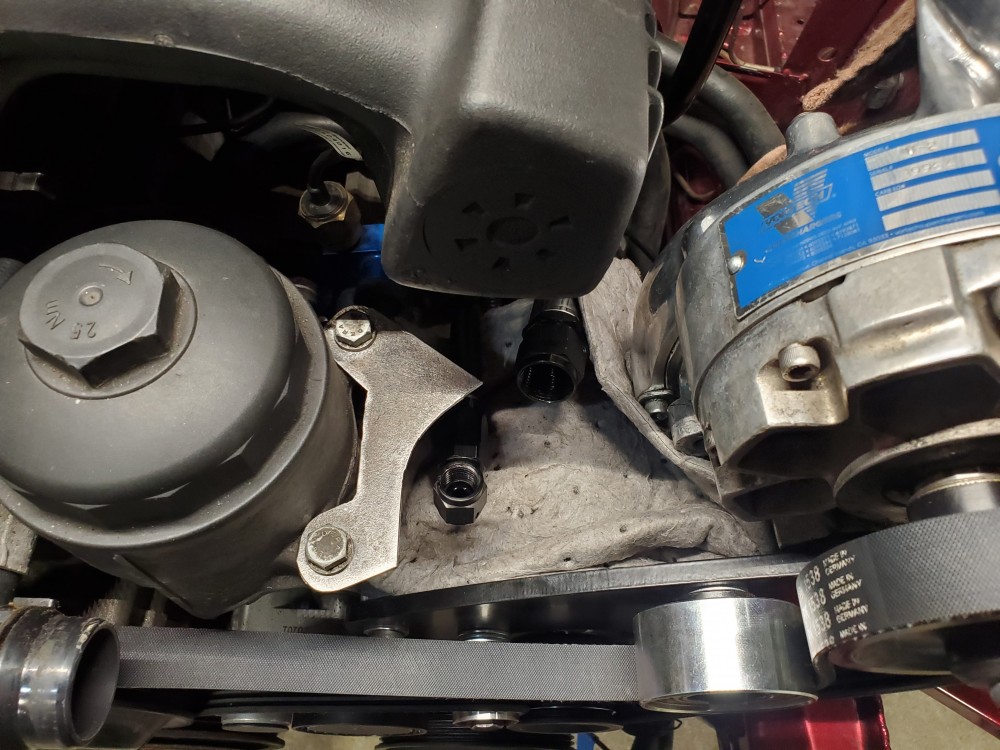
                                    20210306094050.jpg

                                    Then I made a few final adjustments to the base plate and marked and drilled some holes for rivets.
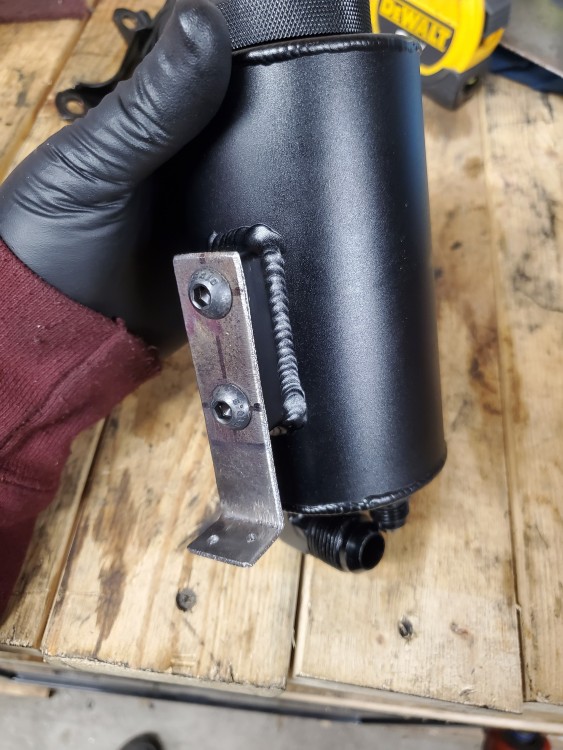
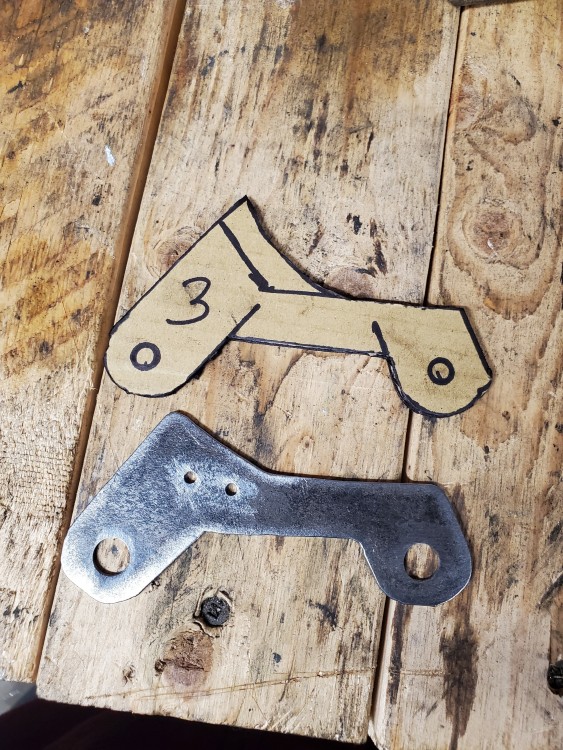
                                    20210306094215.jpg

                                    20210306095359.jpg

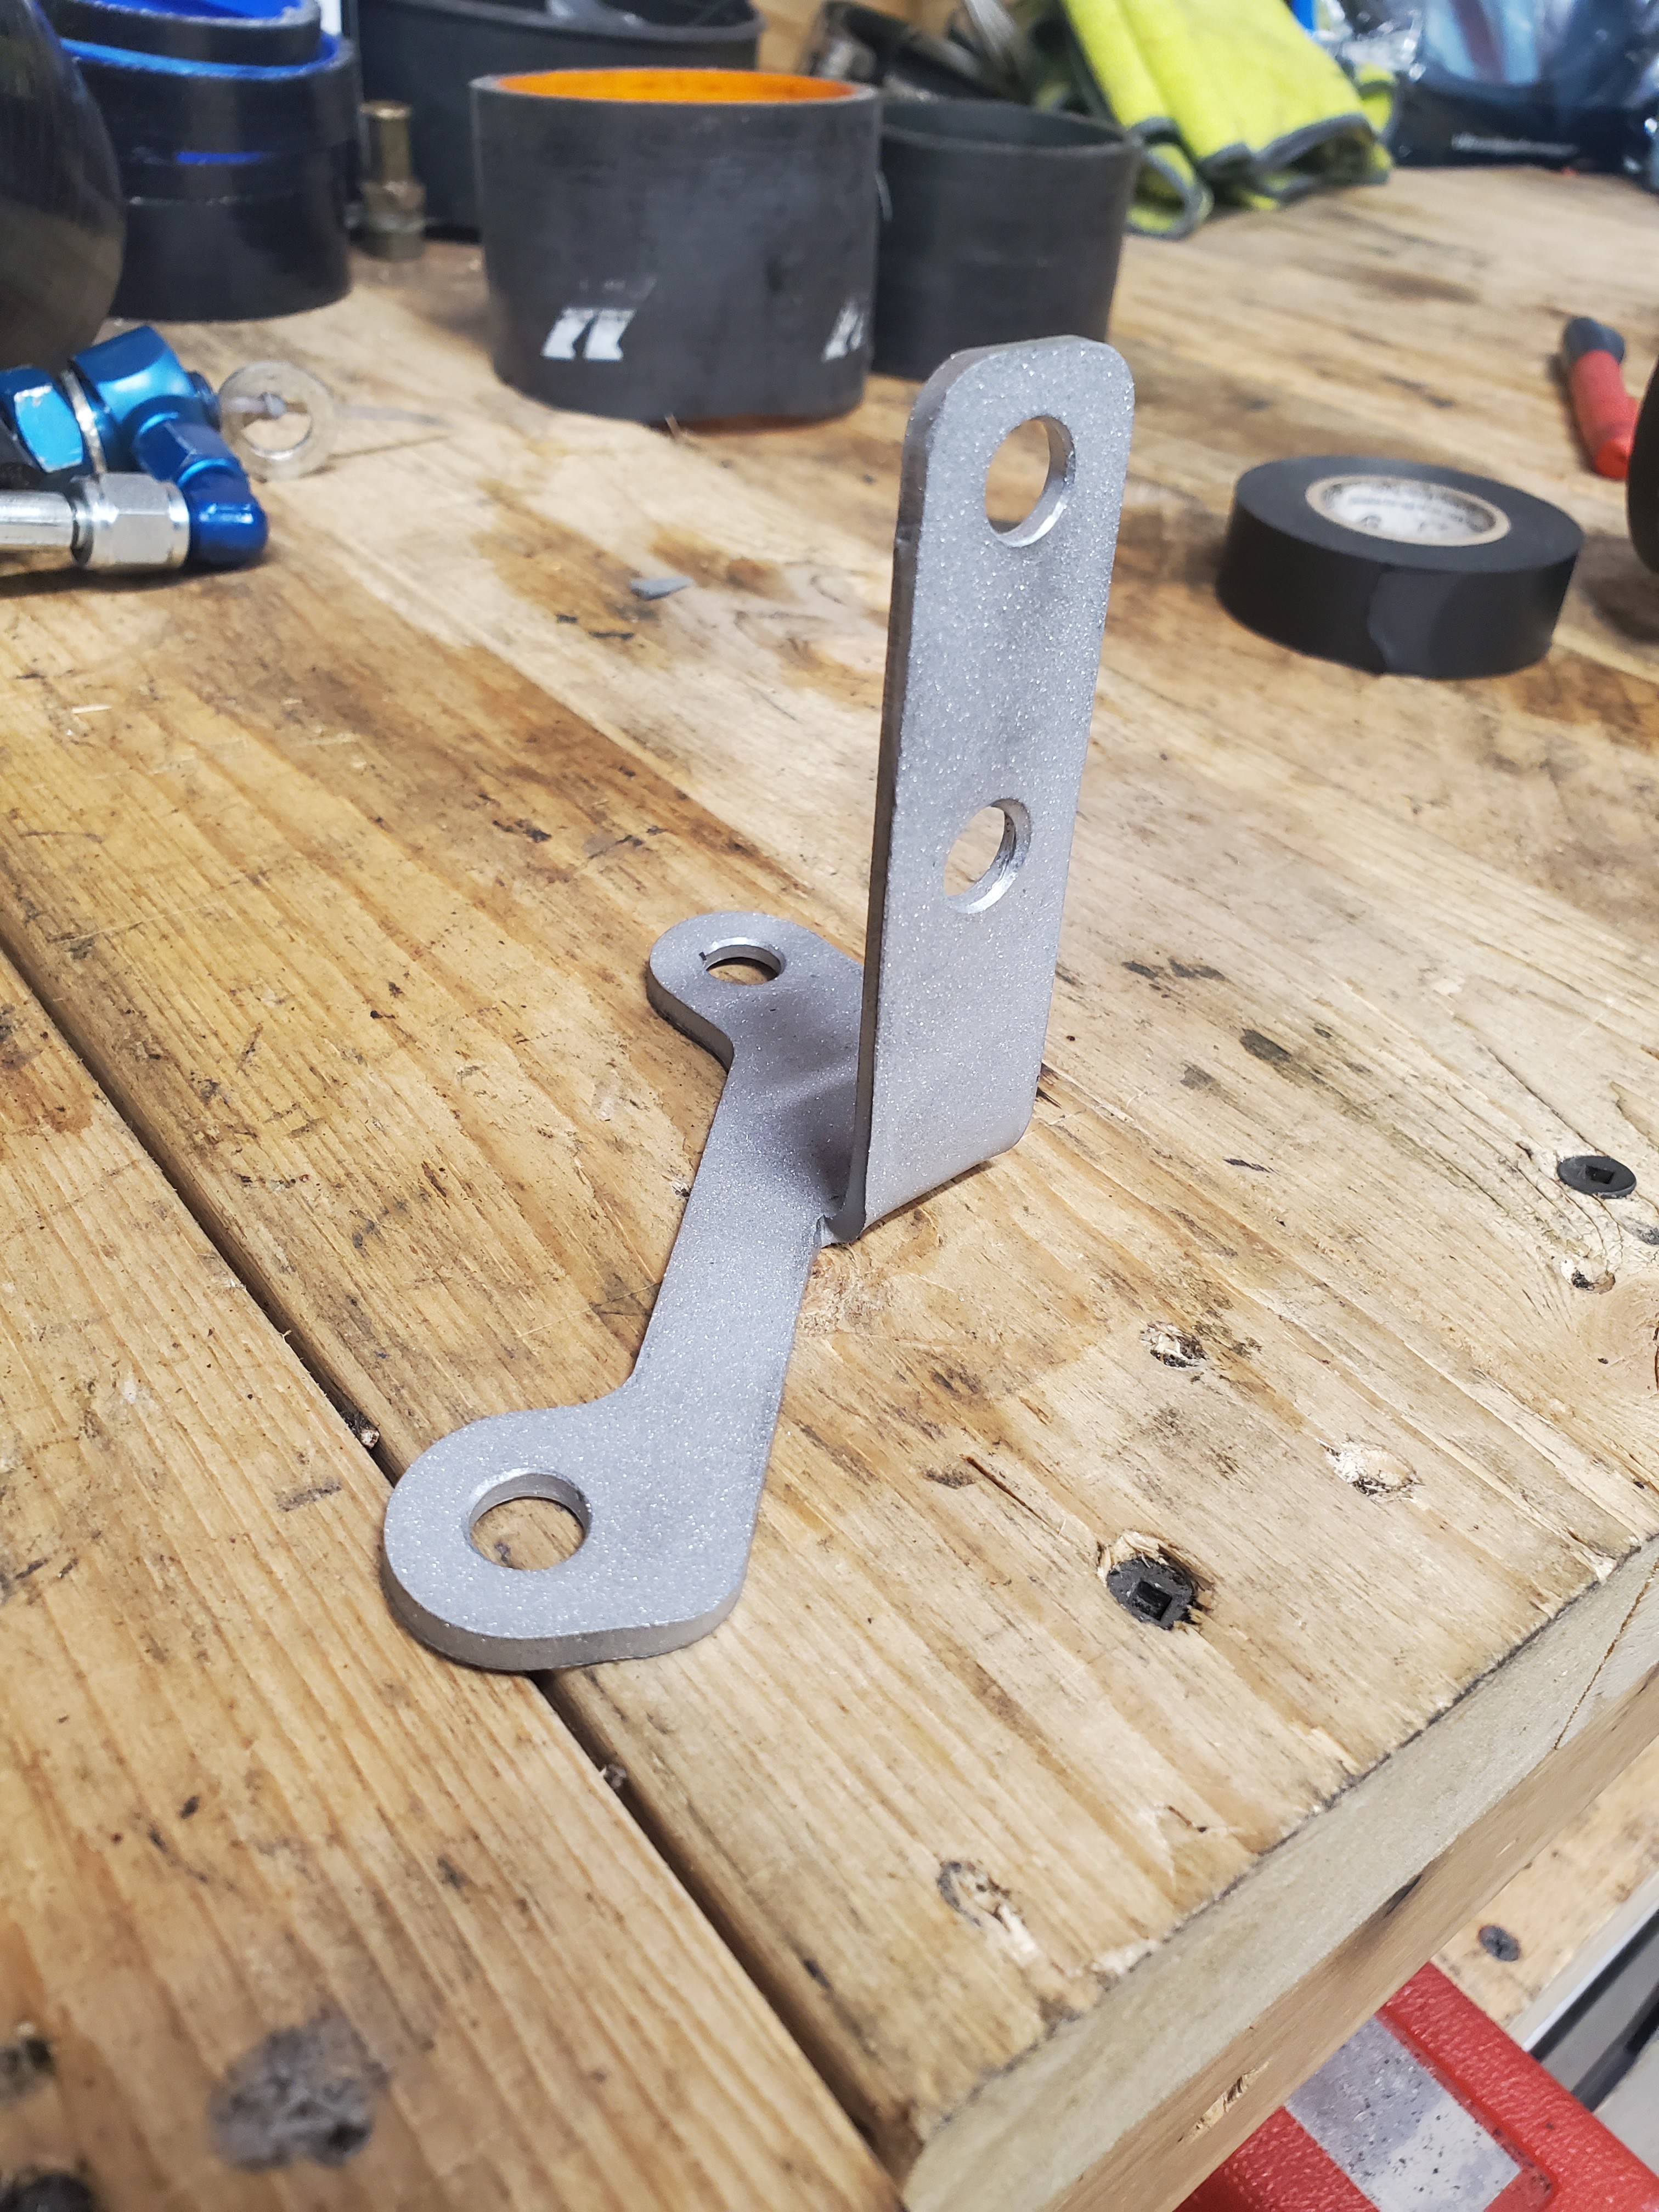
                                    The plan is to have this drawn up, cut, and bent so it is all one piece. 

                                    But here is the final product for now.
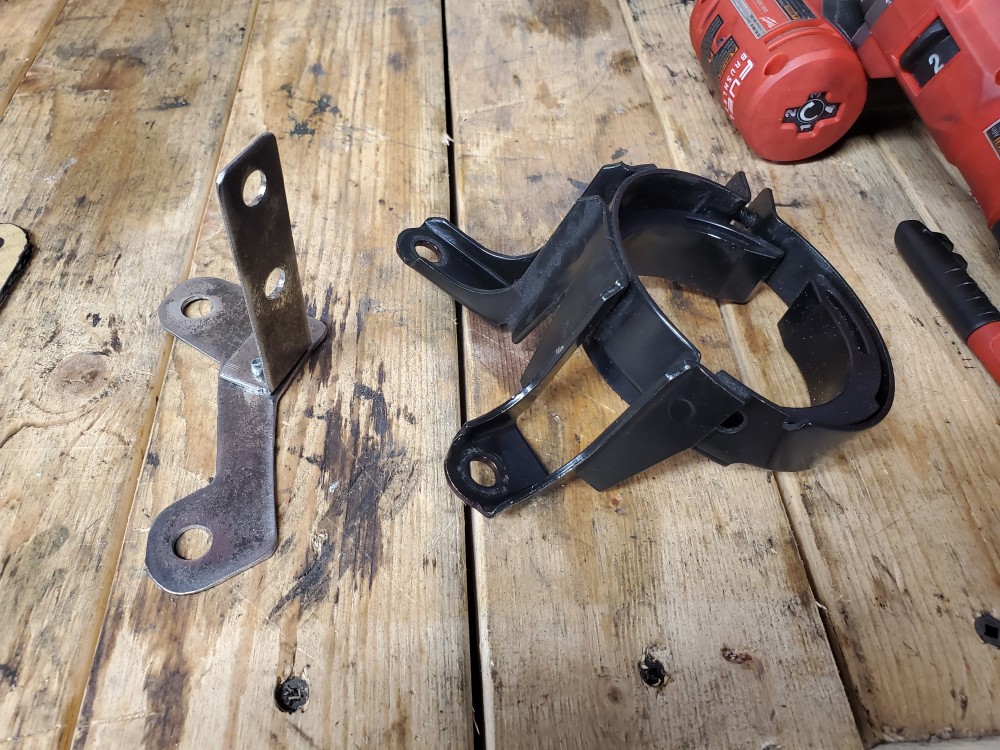
                                    20210306095917.jpg

                                    20210306101222.jpg

                                    20210306100528.jpg

                                    20210306100551.jpg

                                    20210306100519.jpg

                                    With the resiviour mount done for now I moved on to stripping down the engine harness.
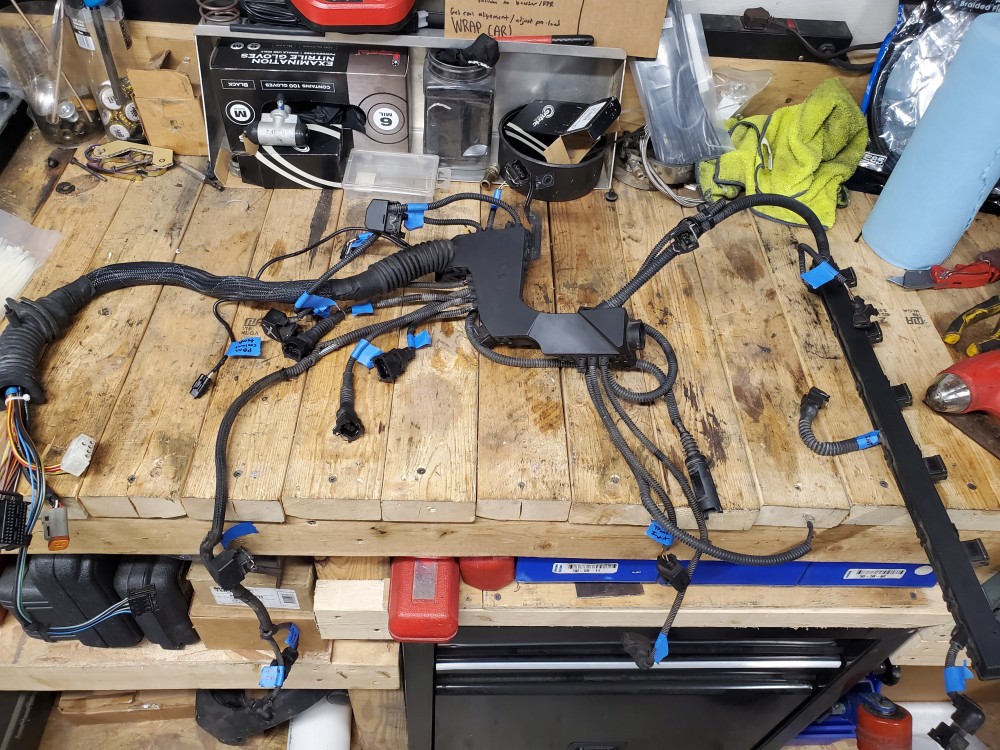
                                    20210306111242.jpg

                                    20210306115907.jpg

                                    I did remove all the wiring for the DISA, SAI, and the evap solenoid from the sensor plugs to the connector on the DME.

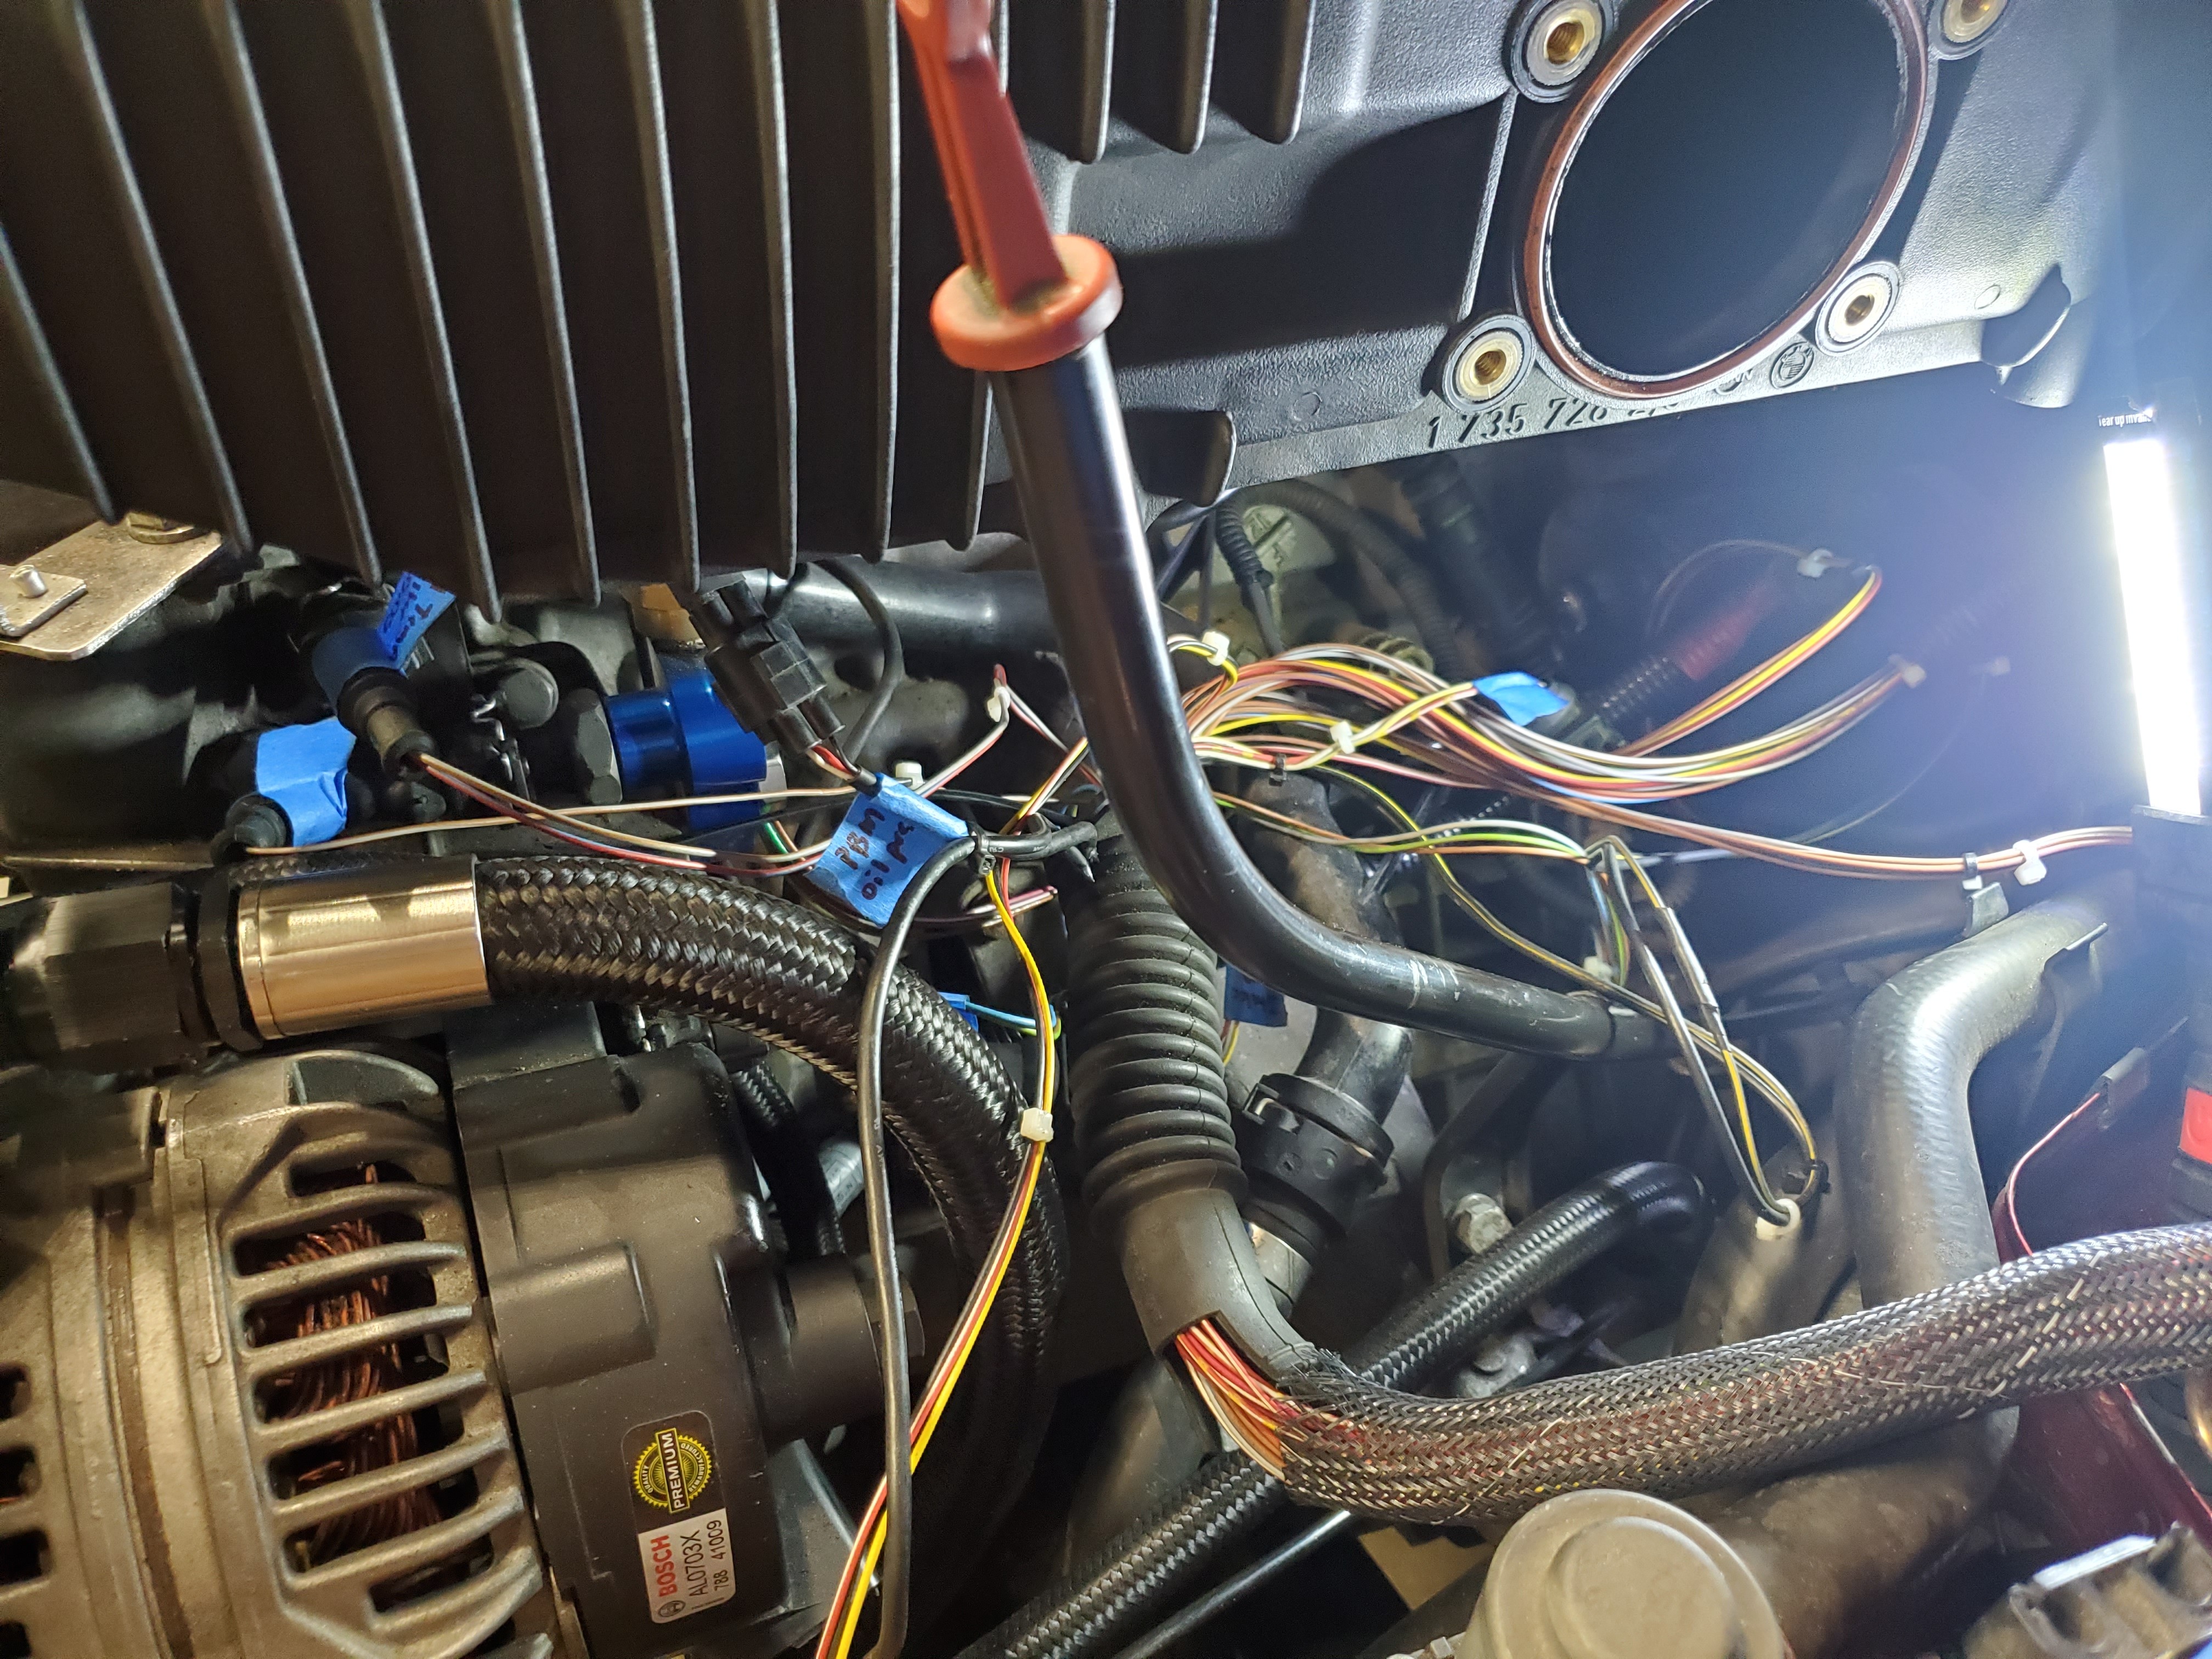
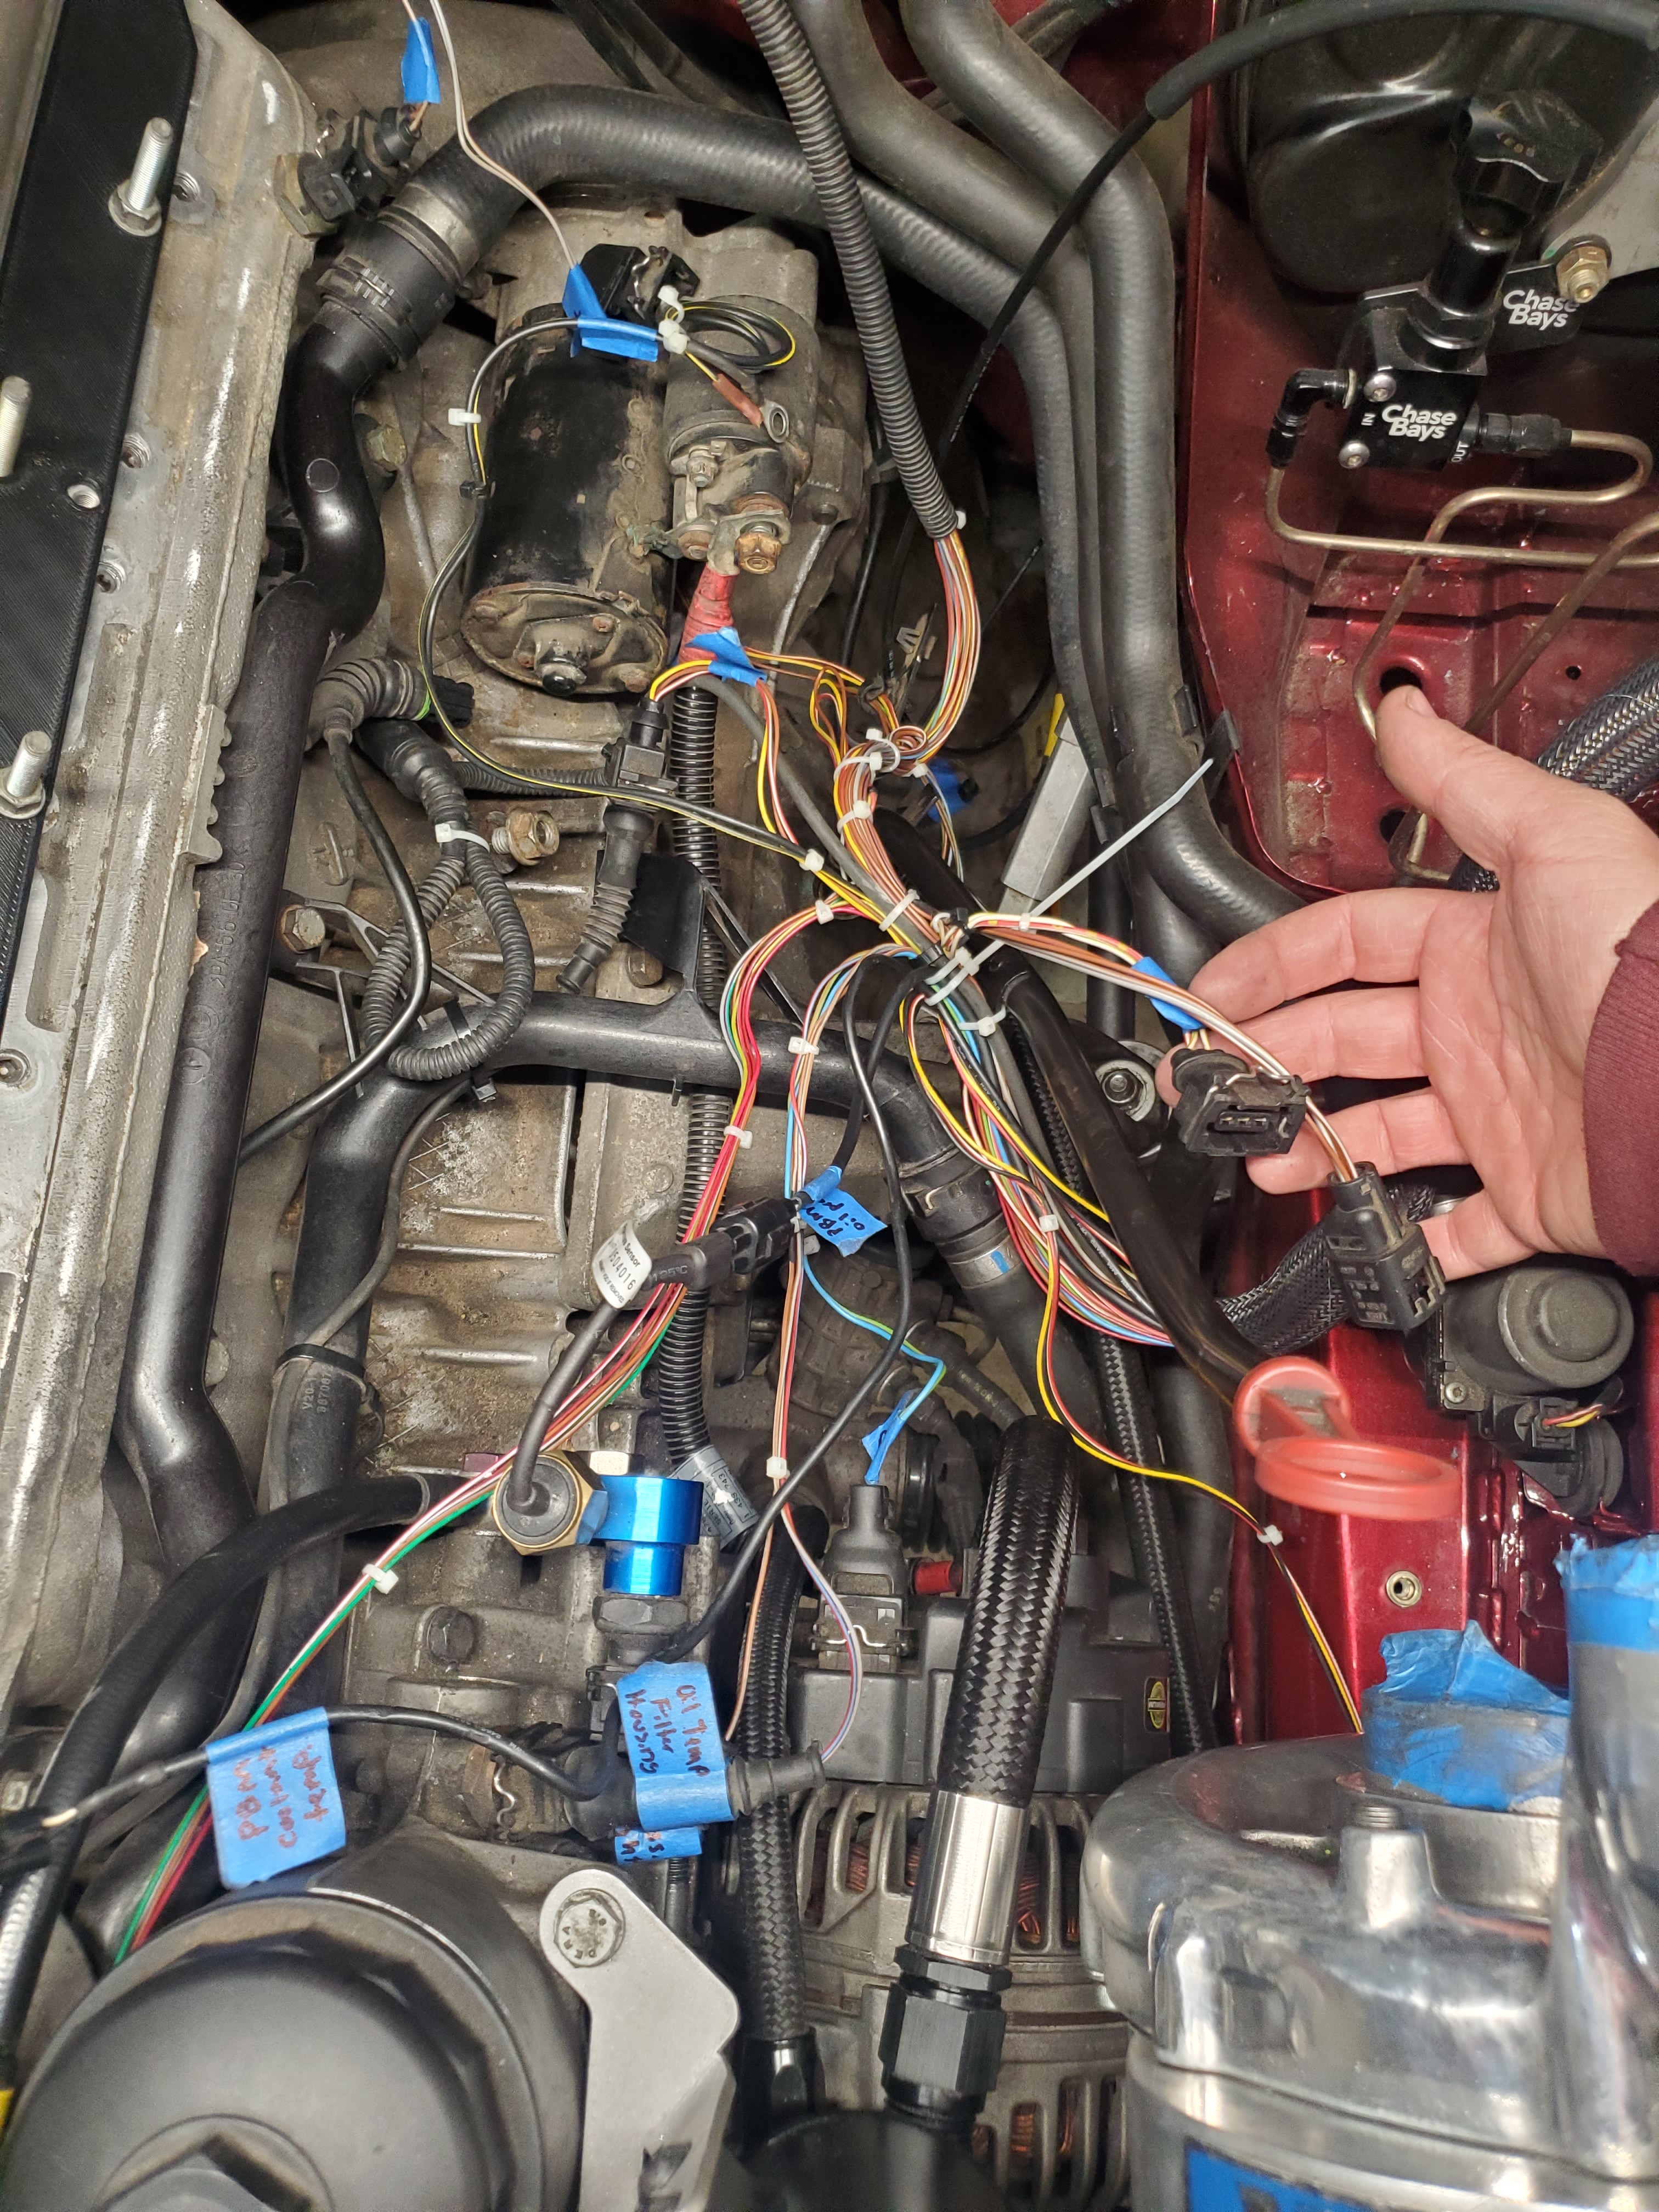
                                    Once I removed what I wanted I put it on the engine and began the slow process of routing things.

                                    The beginning.
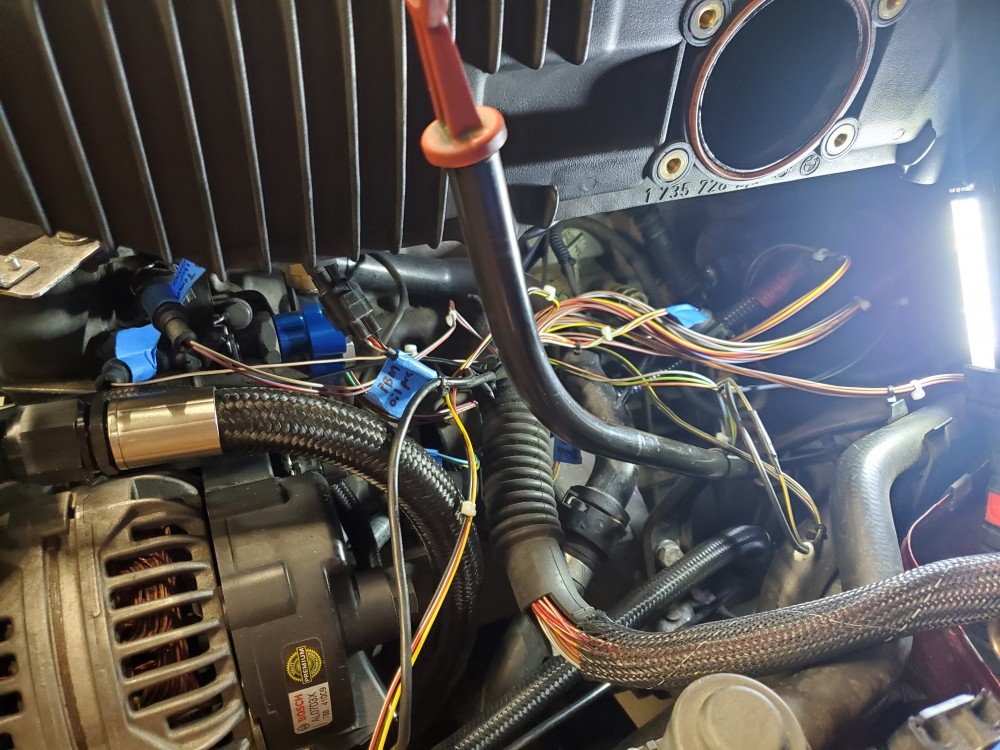
                                    20210306143705.jpg

                                    and the end for now. 

                                    20210306155620.jpg

                                    Waiting on a few things to finish up the harness along with a few other parts to finish up the manifold swap which should be here and done by next weekend. 

                                    So that's it for now!

                                    1 Reply Last reply
                                    3
                                    • TkuhnT
                                      TkuhnT
                                      Tkuhn
                                      wrote on last edited by
                                      #377

                                      UPDATE

                                      Got some parts in!

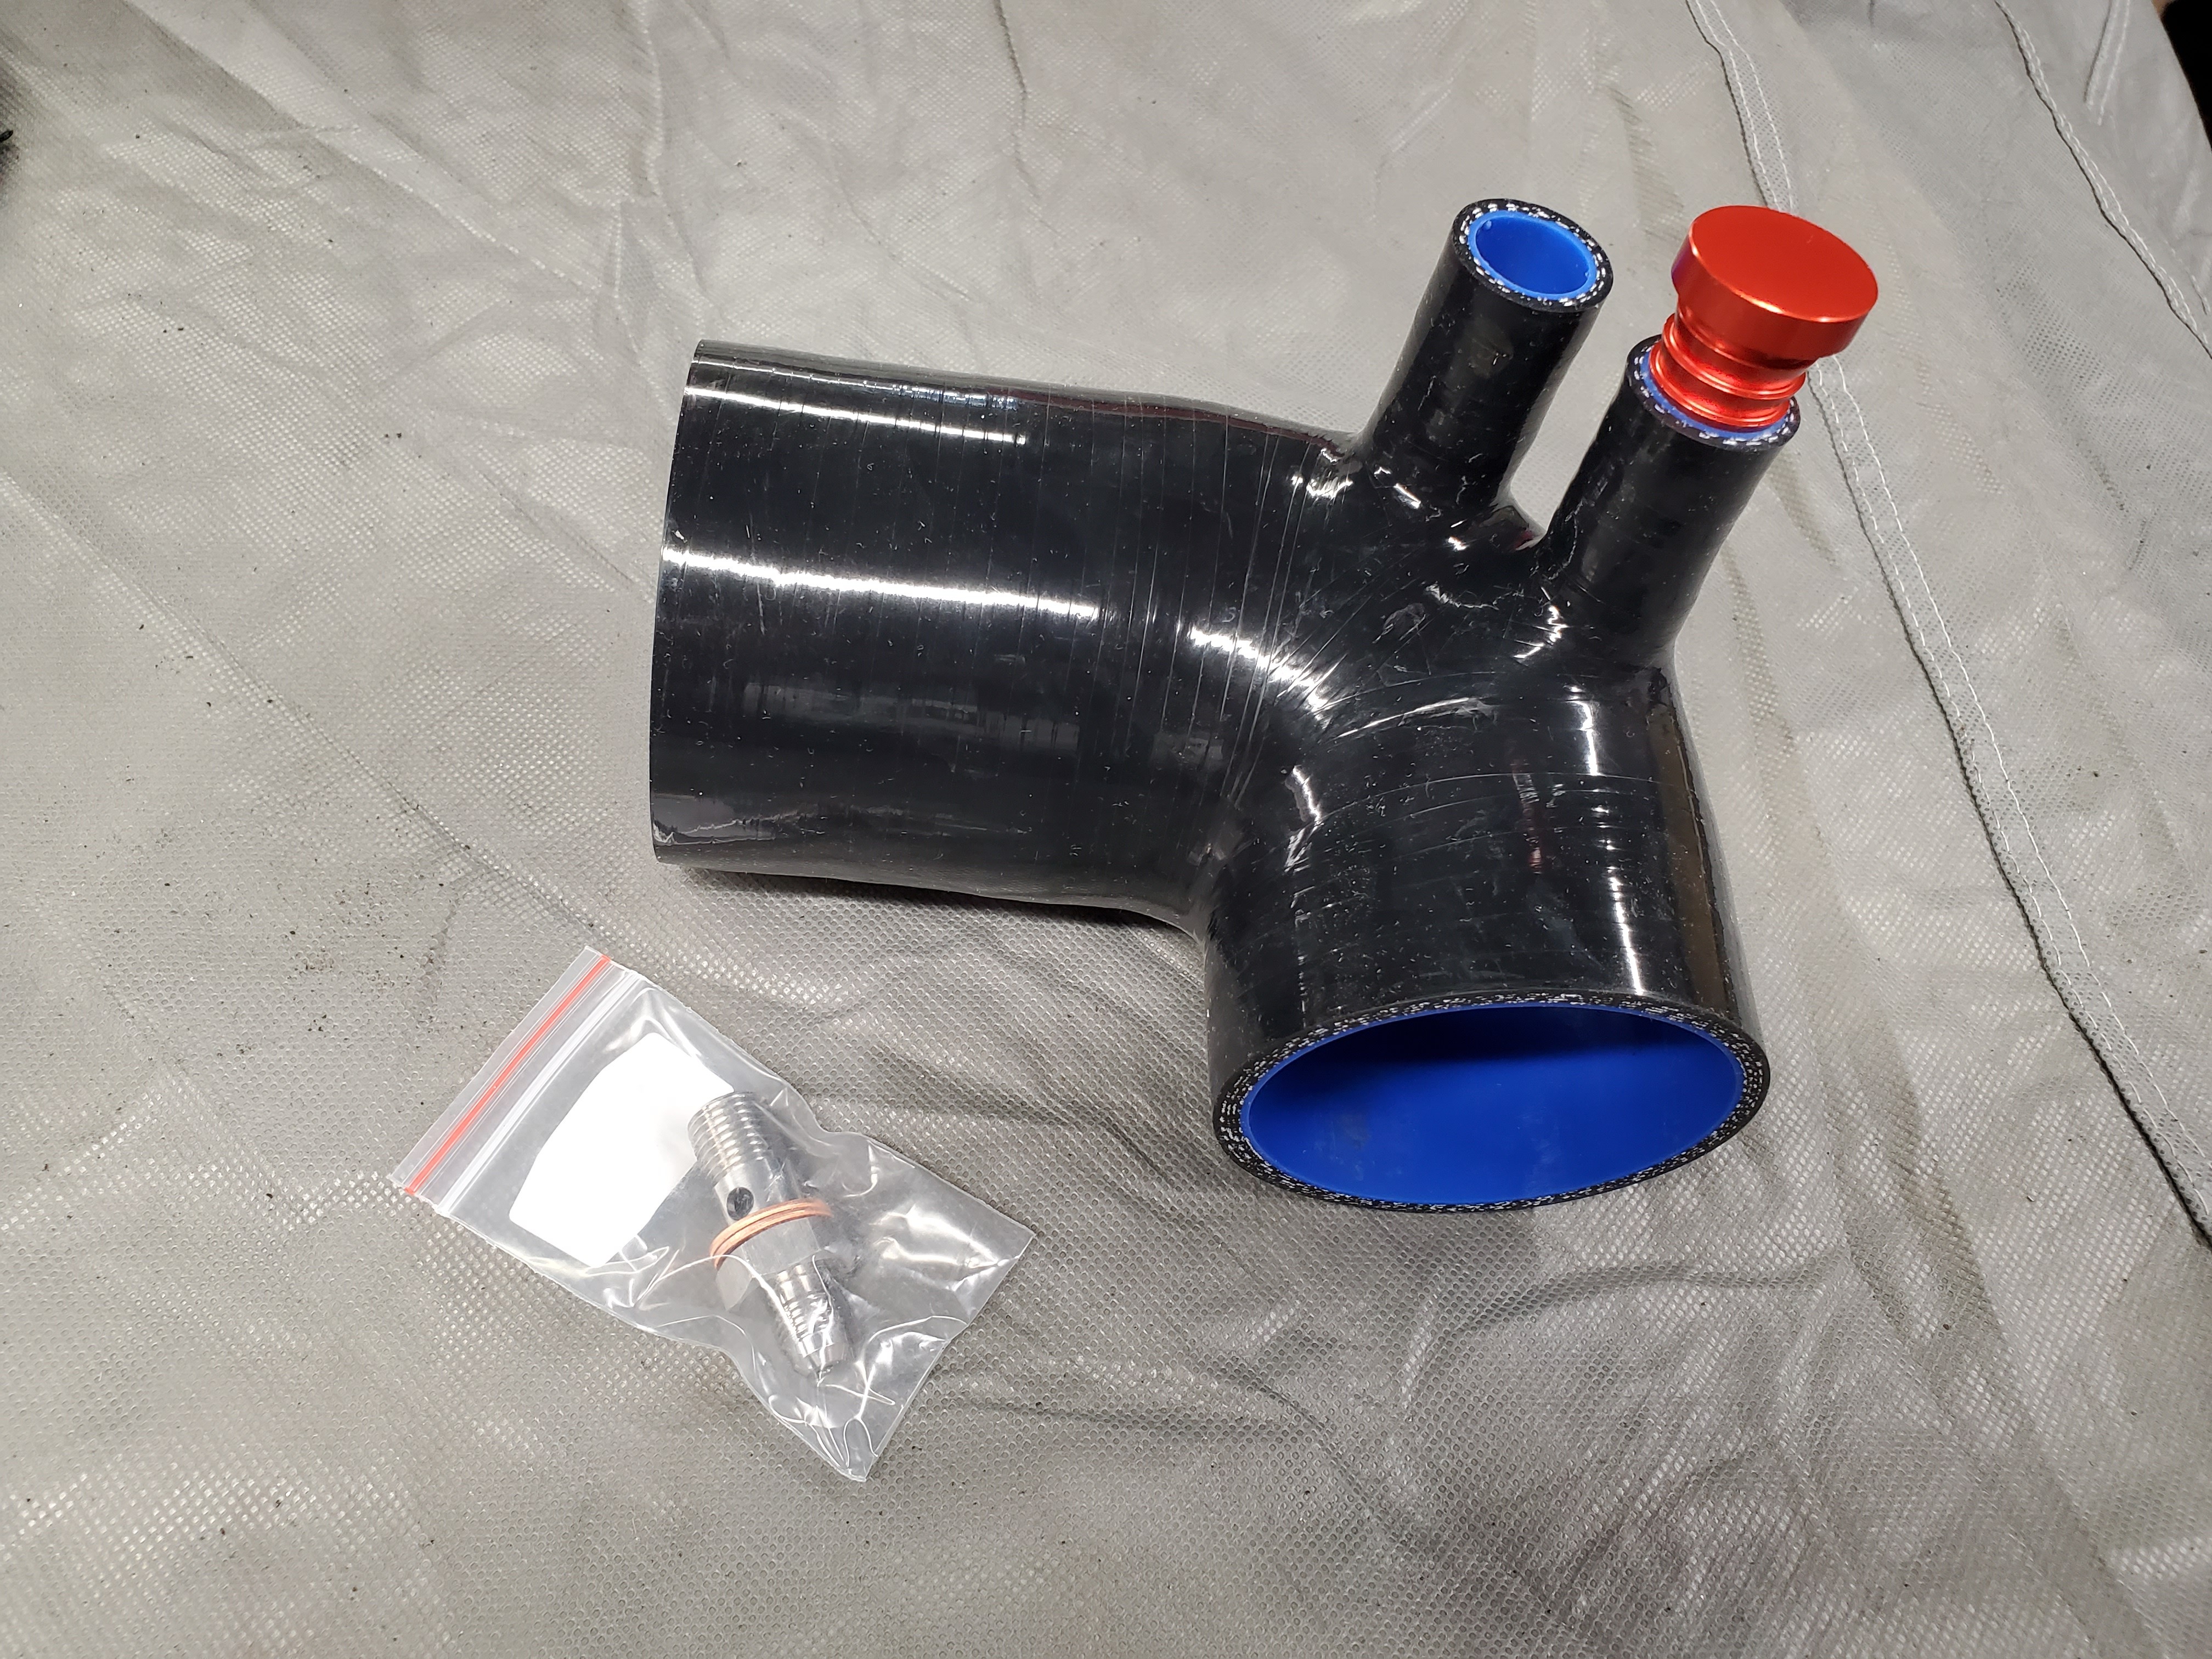
                                      Throttle body coupler with 2 ports and a -4 banjo adapter for the vanos oil line.
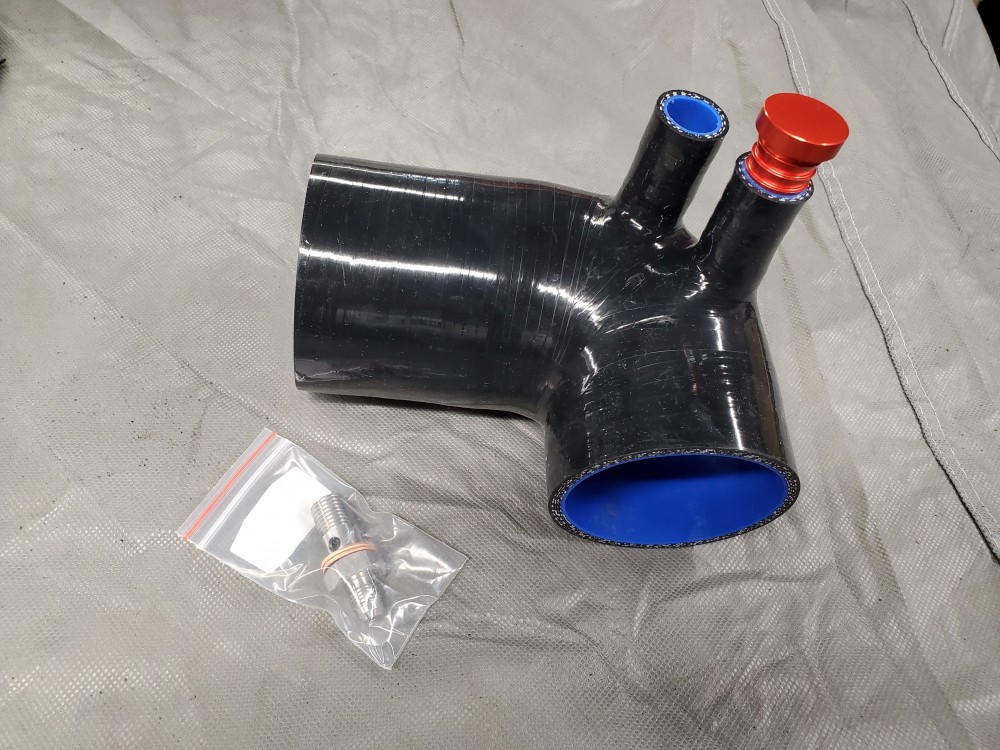
                                      20210310165535.jpg

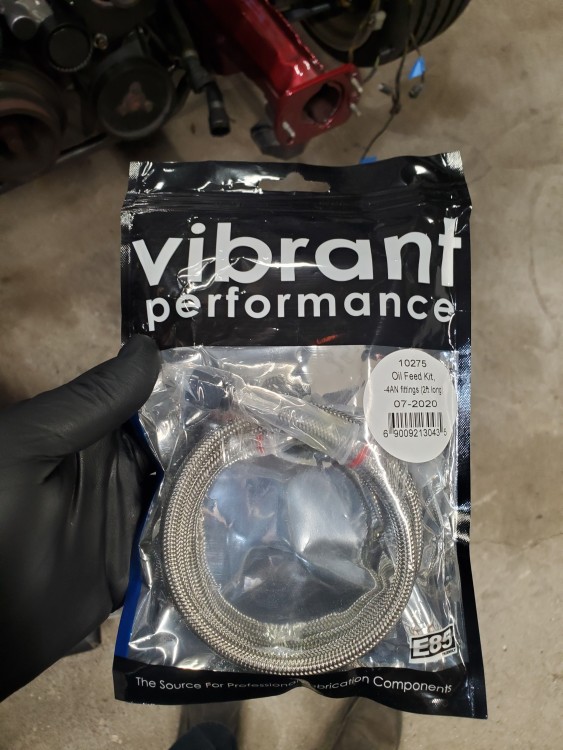
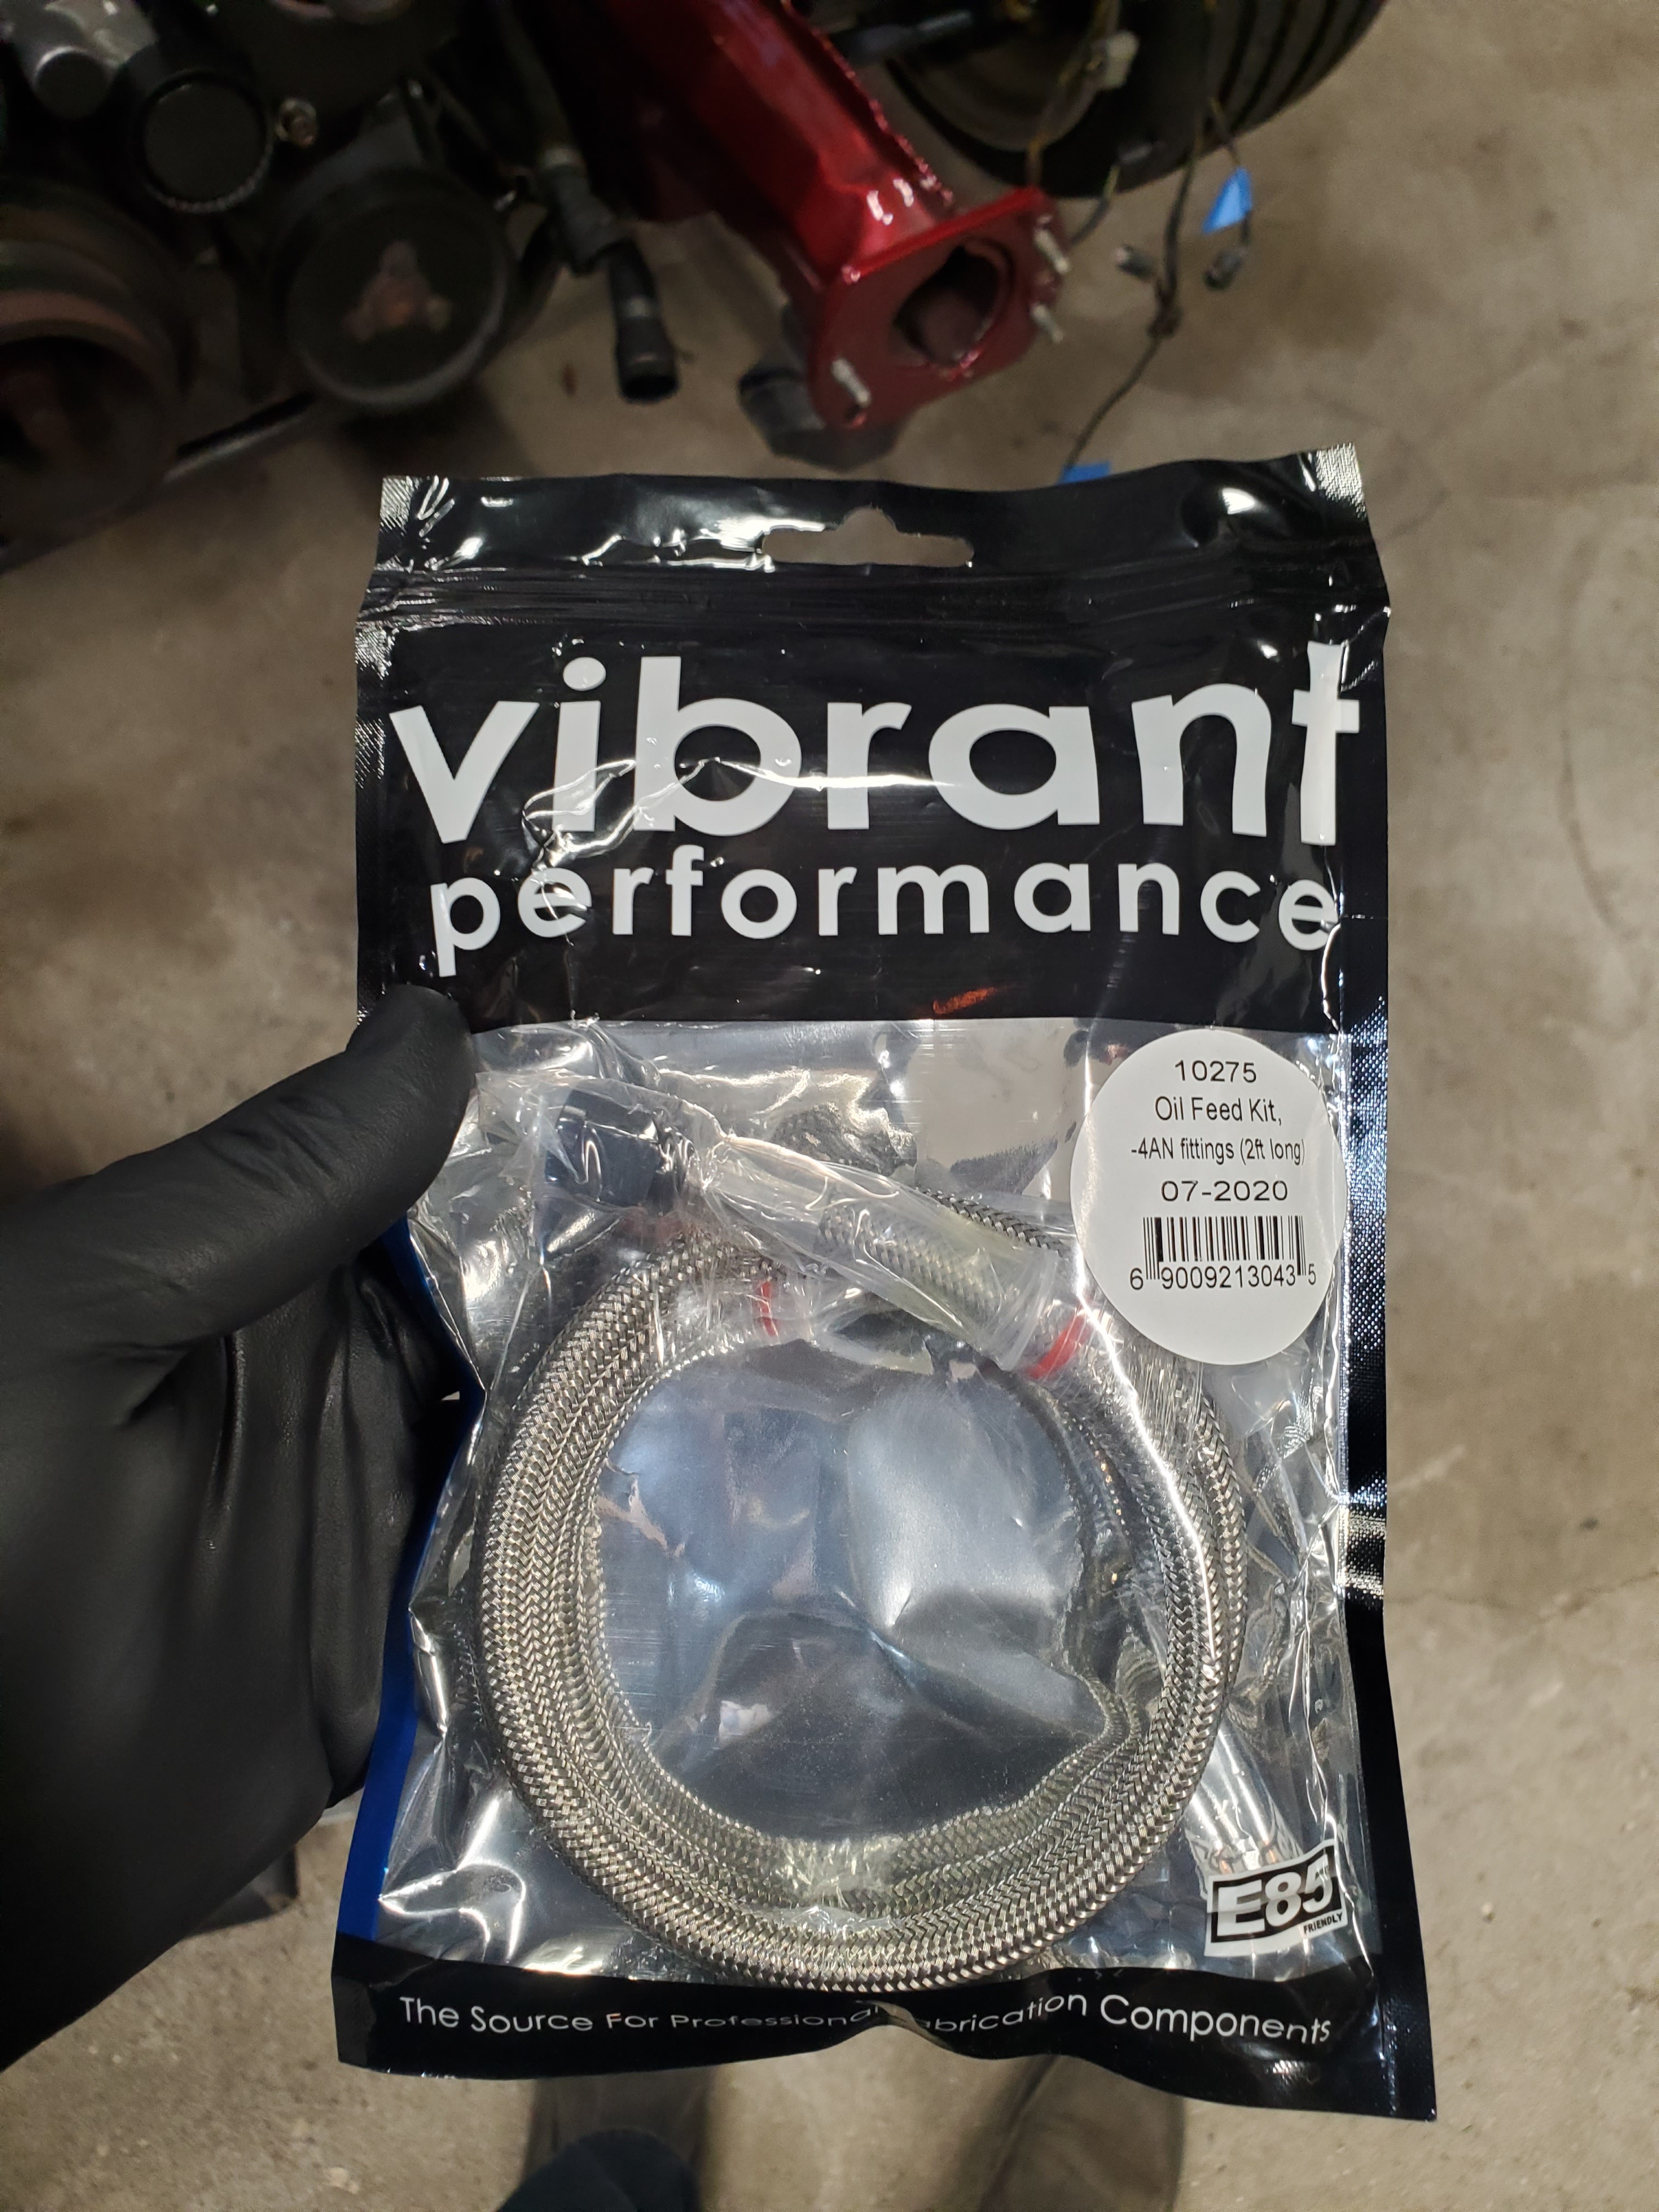
                                      Vibrant -4 oil feed line

                                      20210314110012.jpg

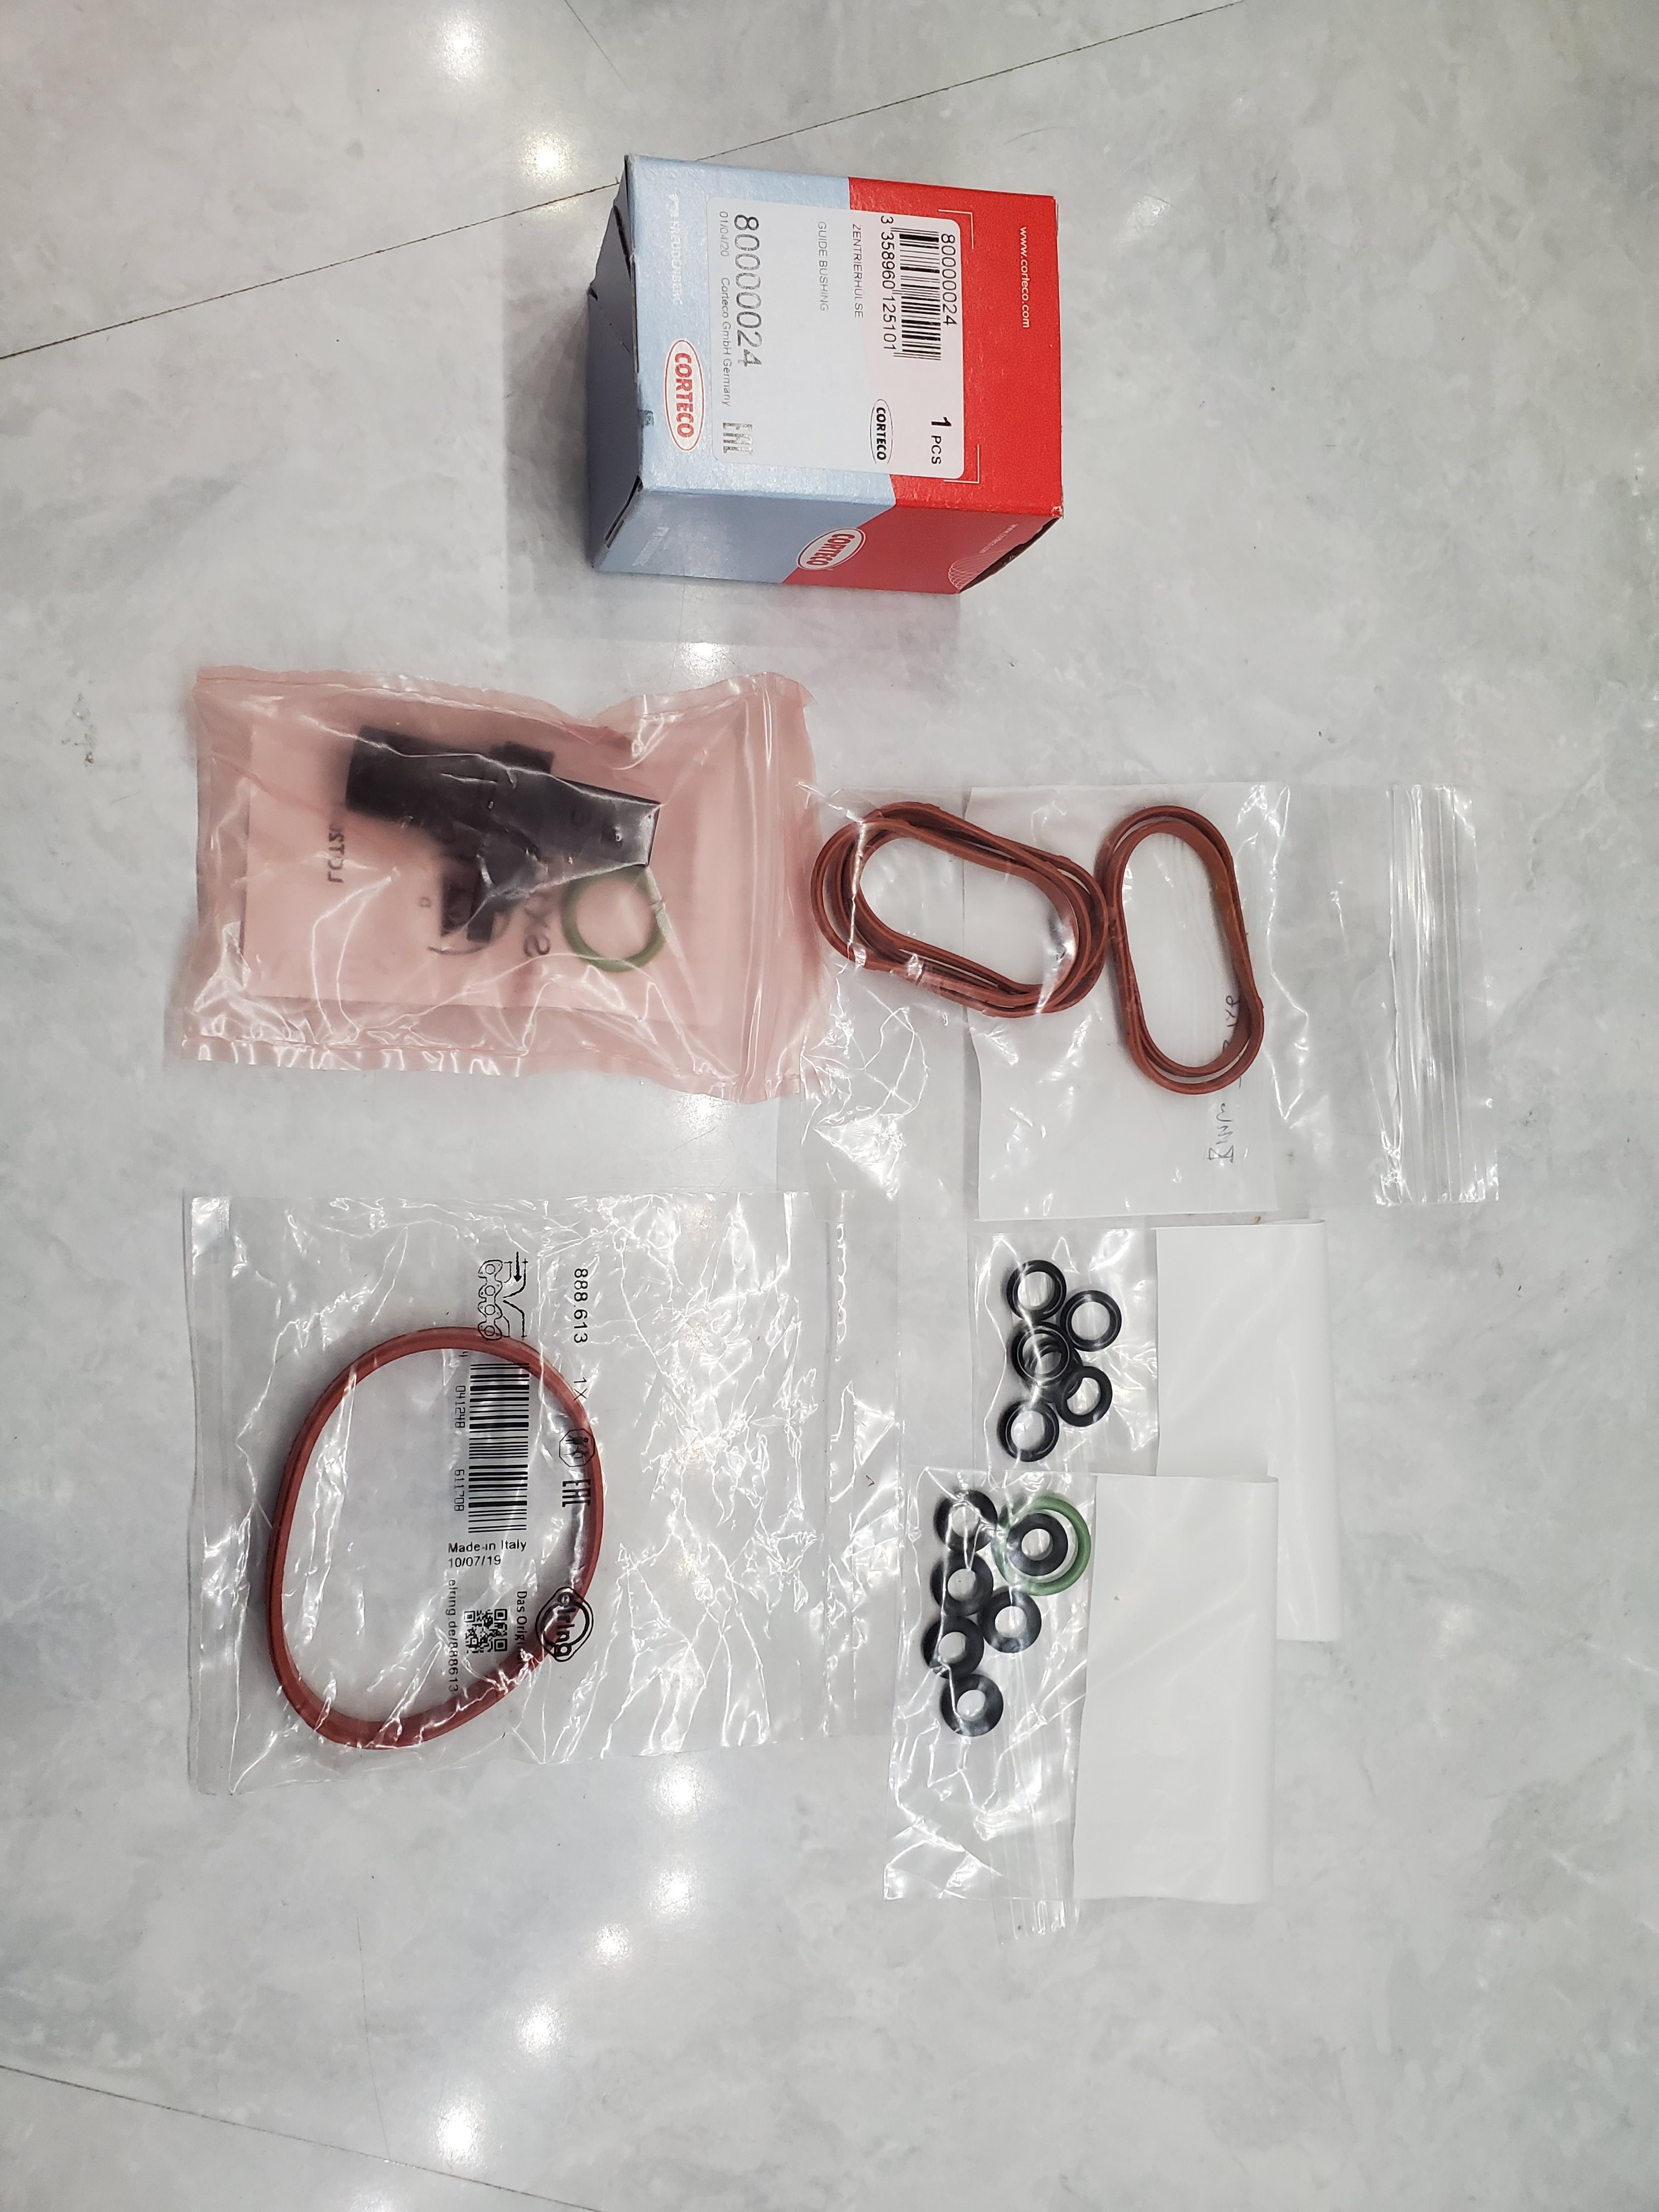
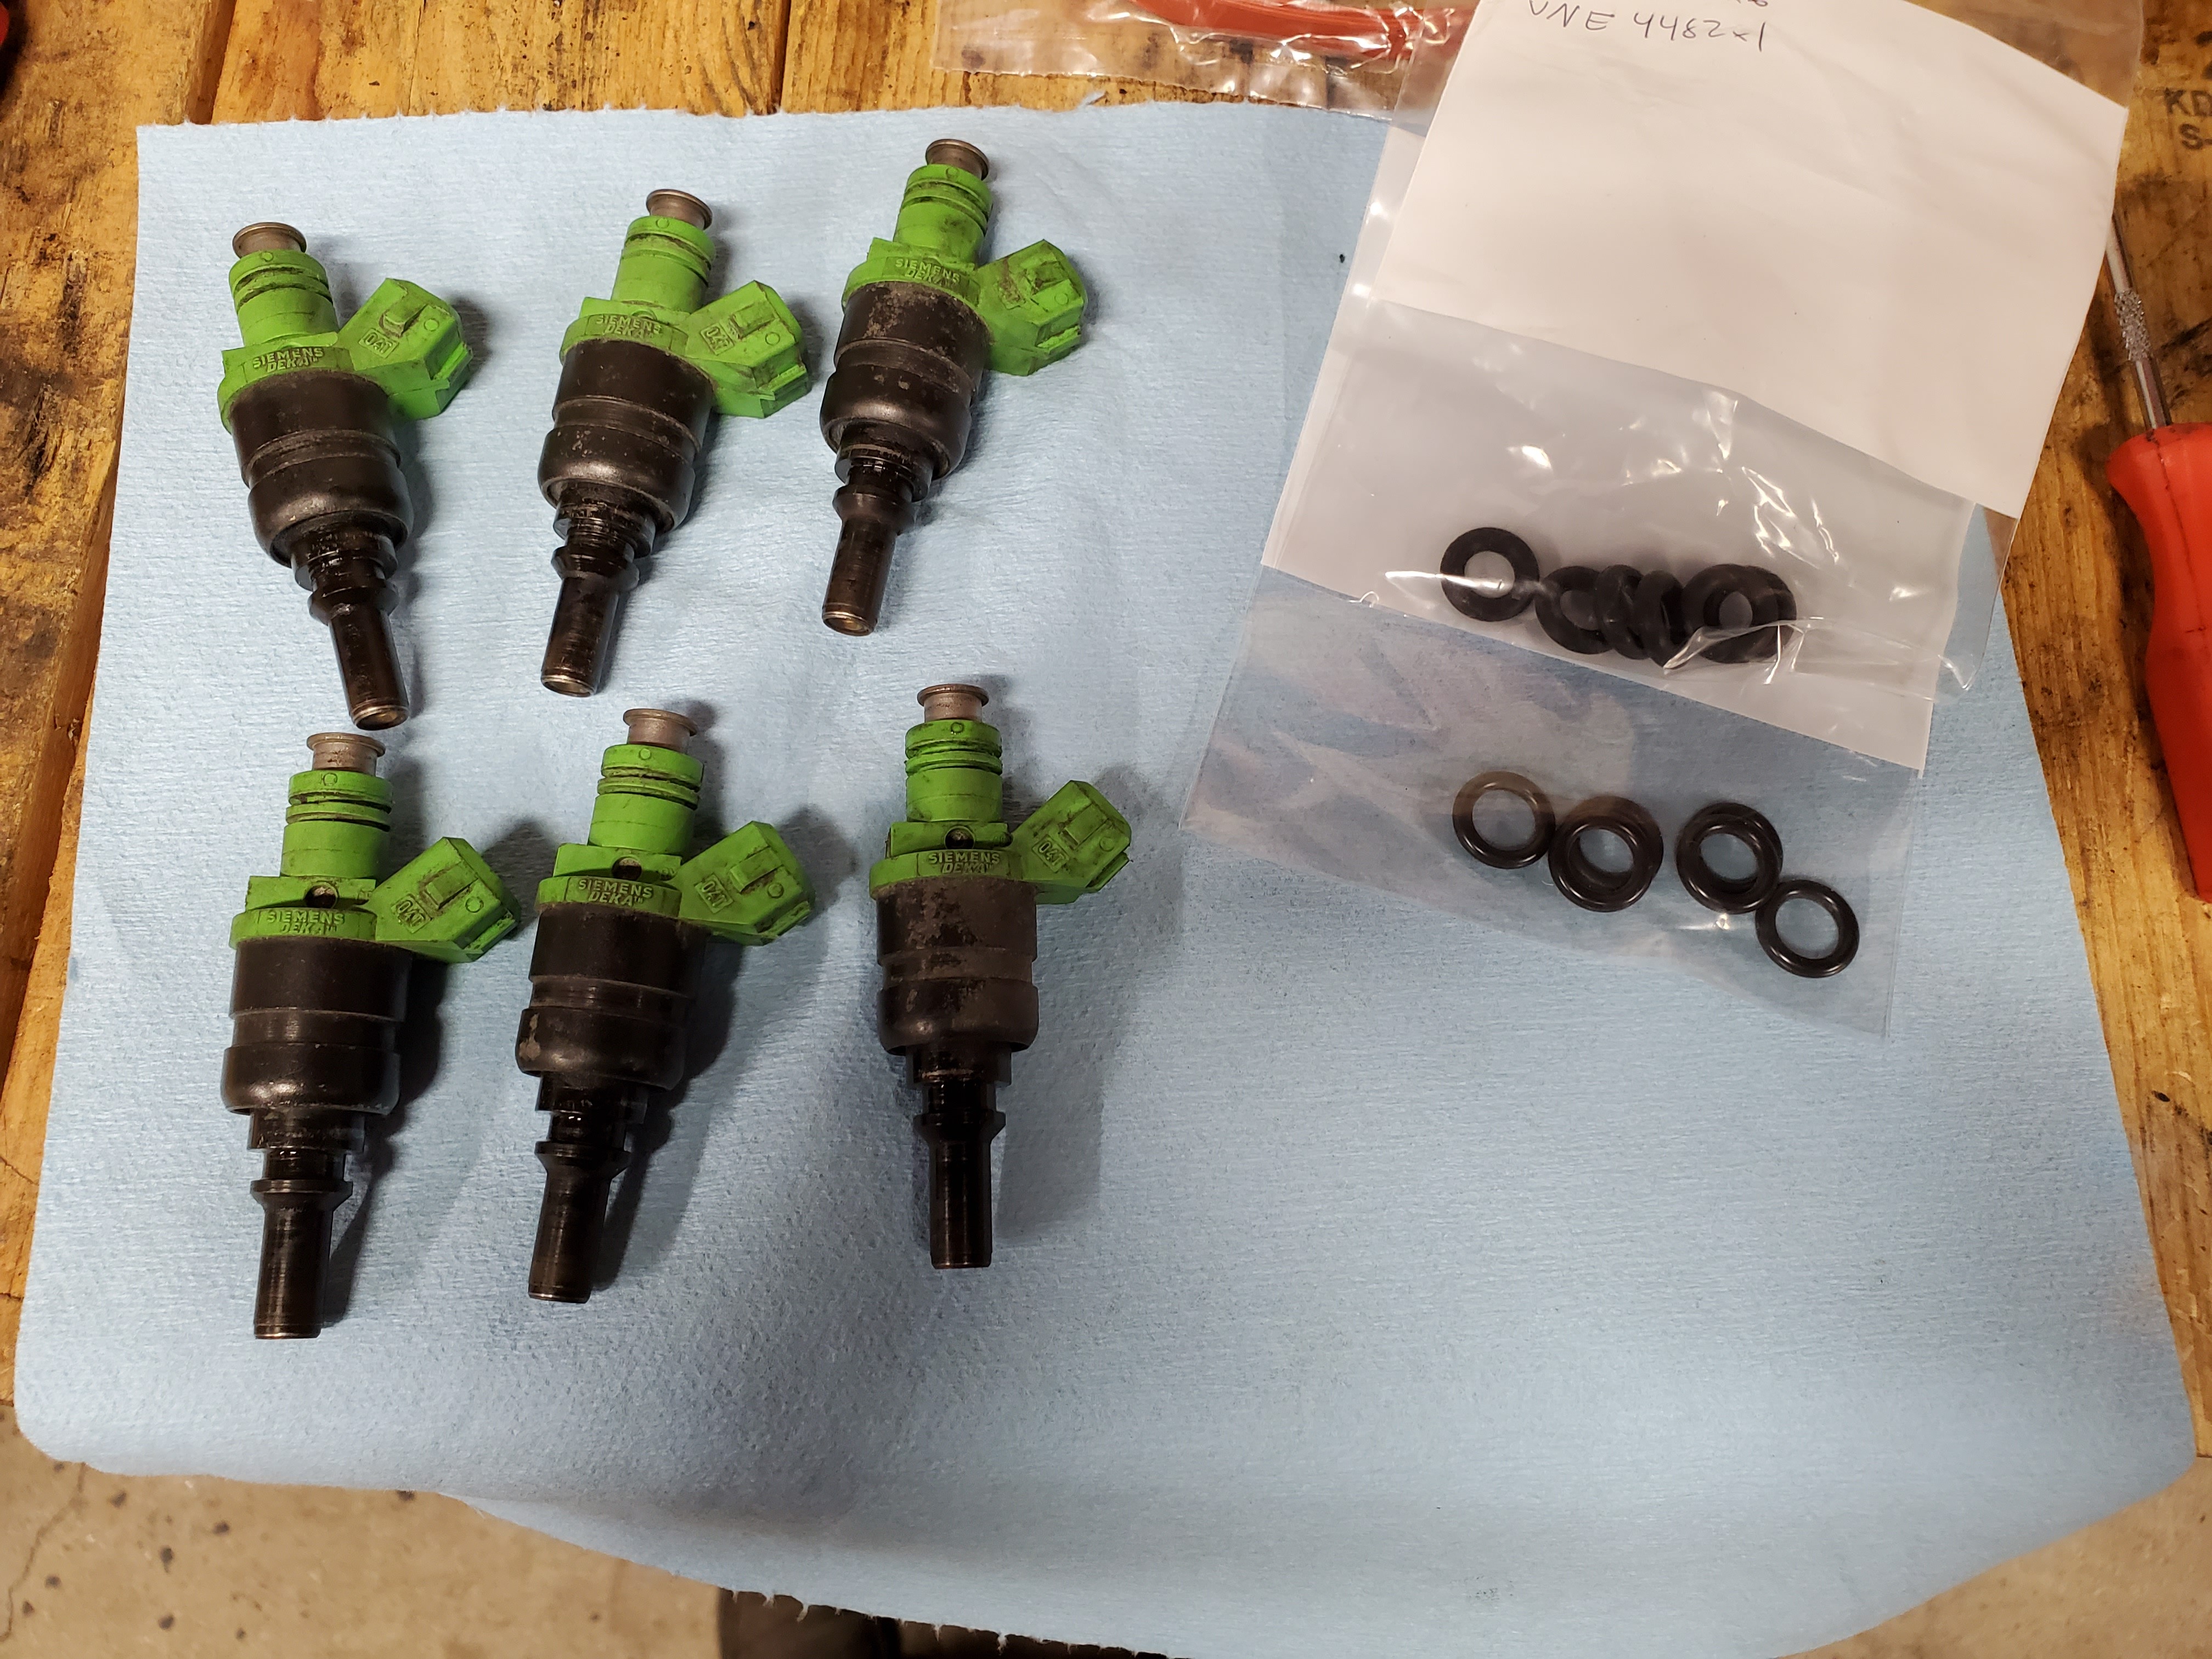
                                      New o rings for the injectors, new intake manifold gaskets, throttle body gasket for the m50 manifold side, exhaust cam sensor (found out mine was cracked), and also a centering bushing for the driveshaft.
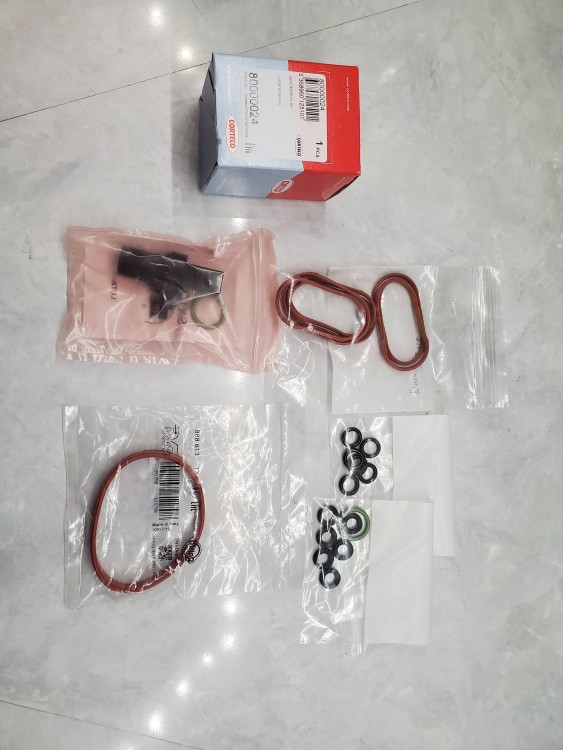
                                      20210307180703.jpg

                                      and finally for parts the sleeving for the engine harness came as well.

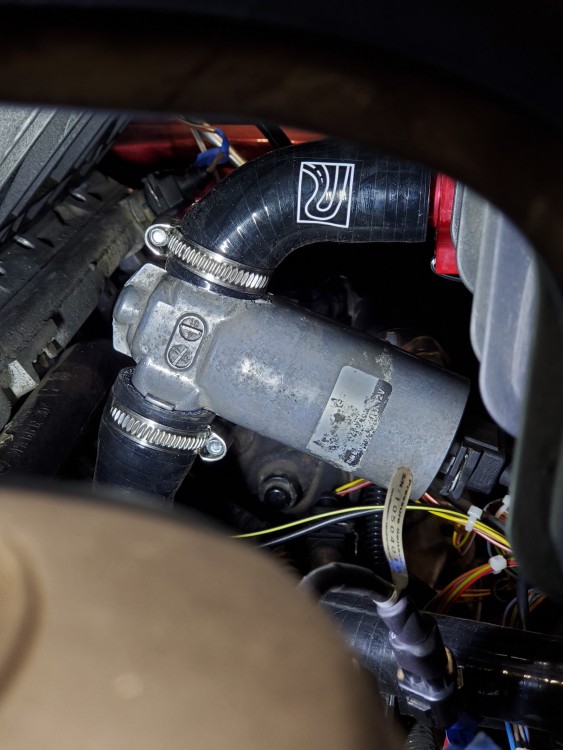
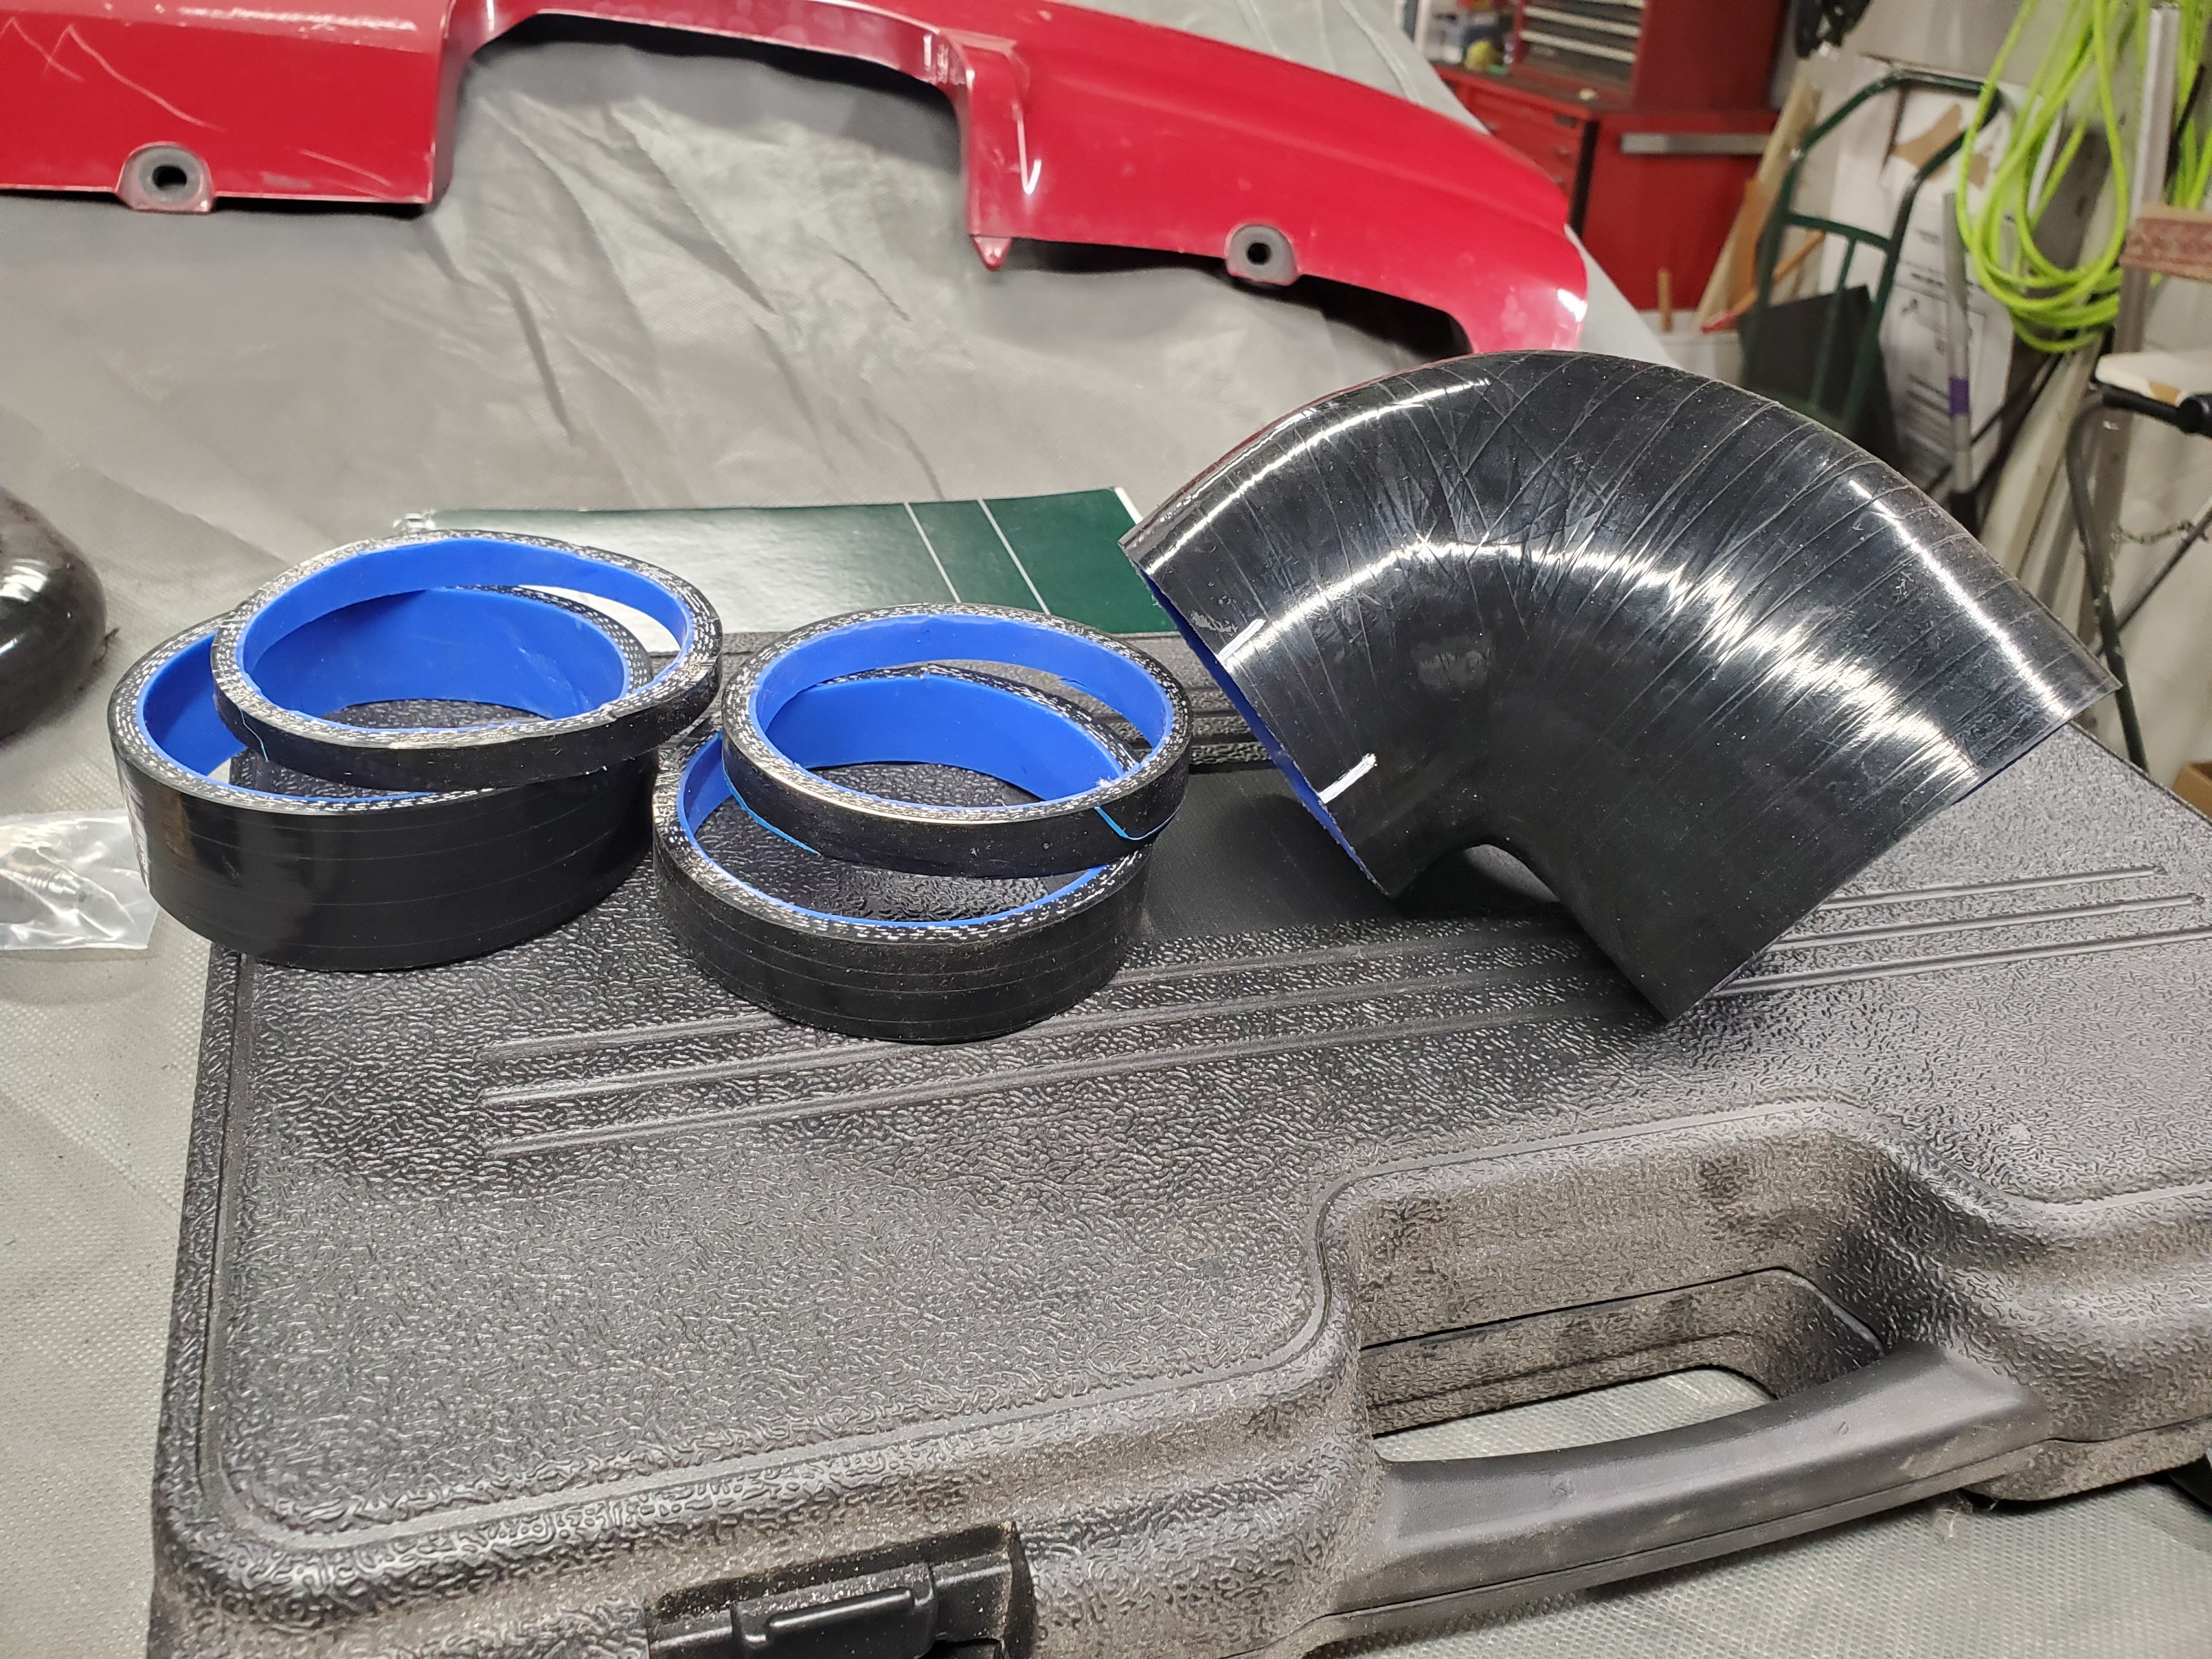
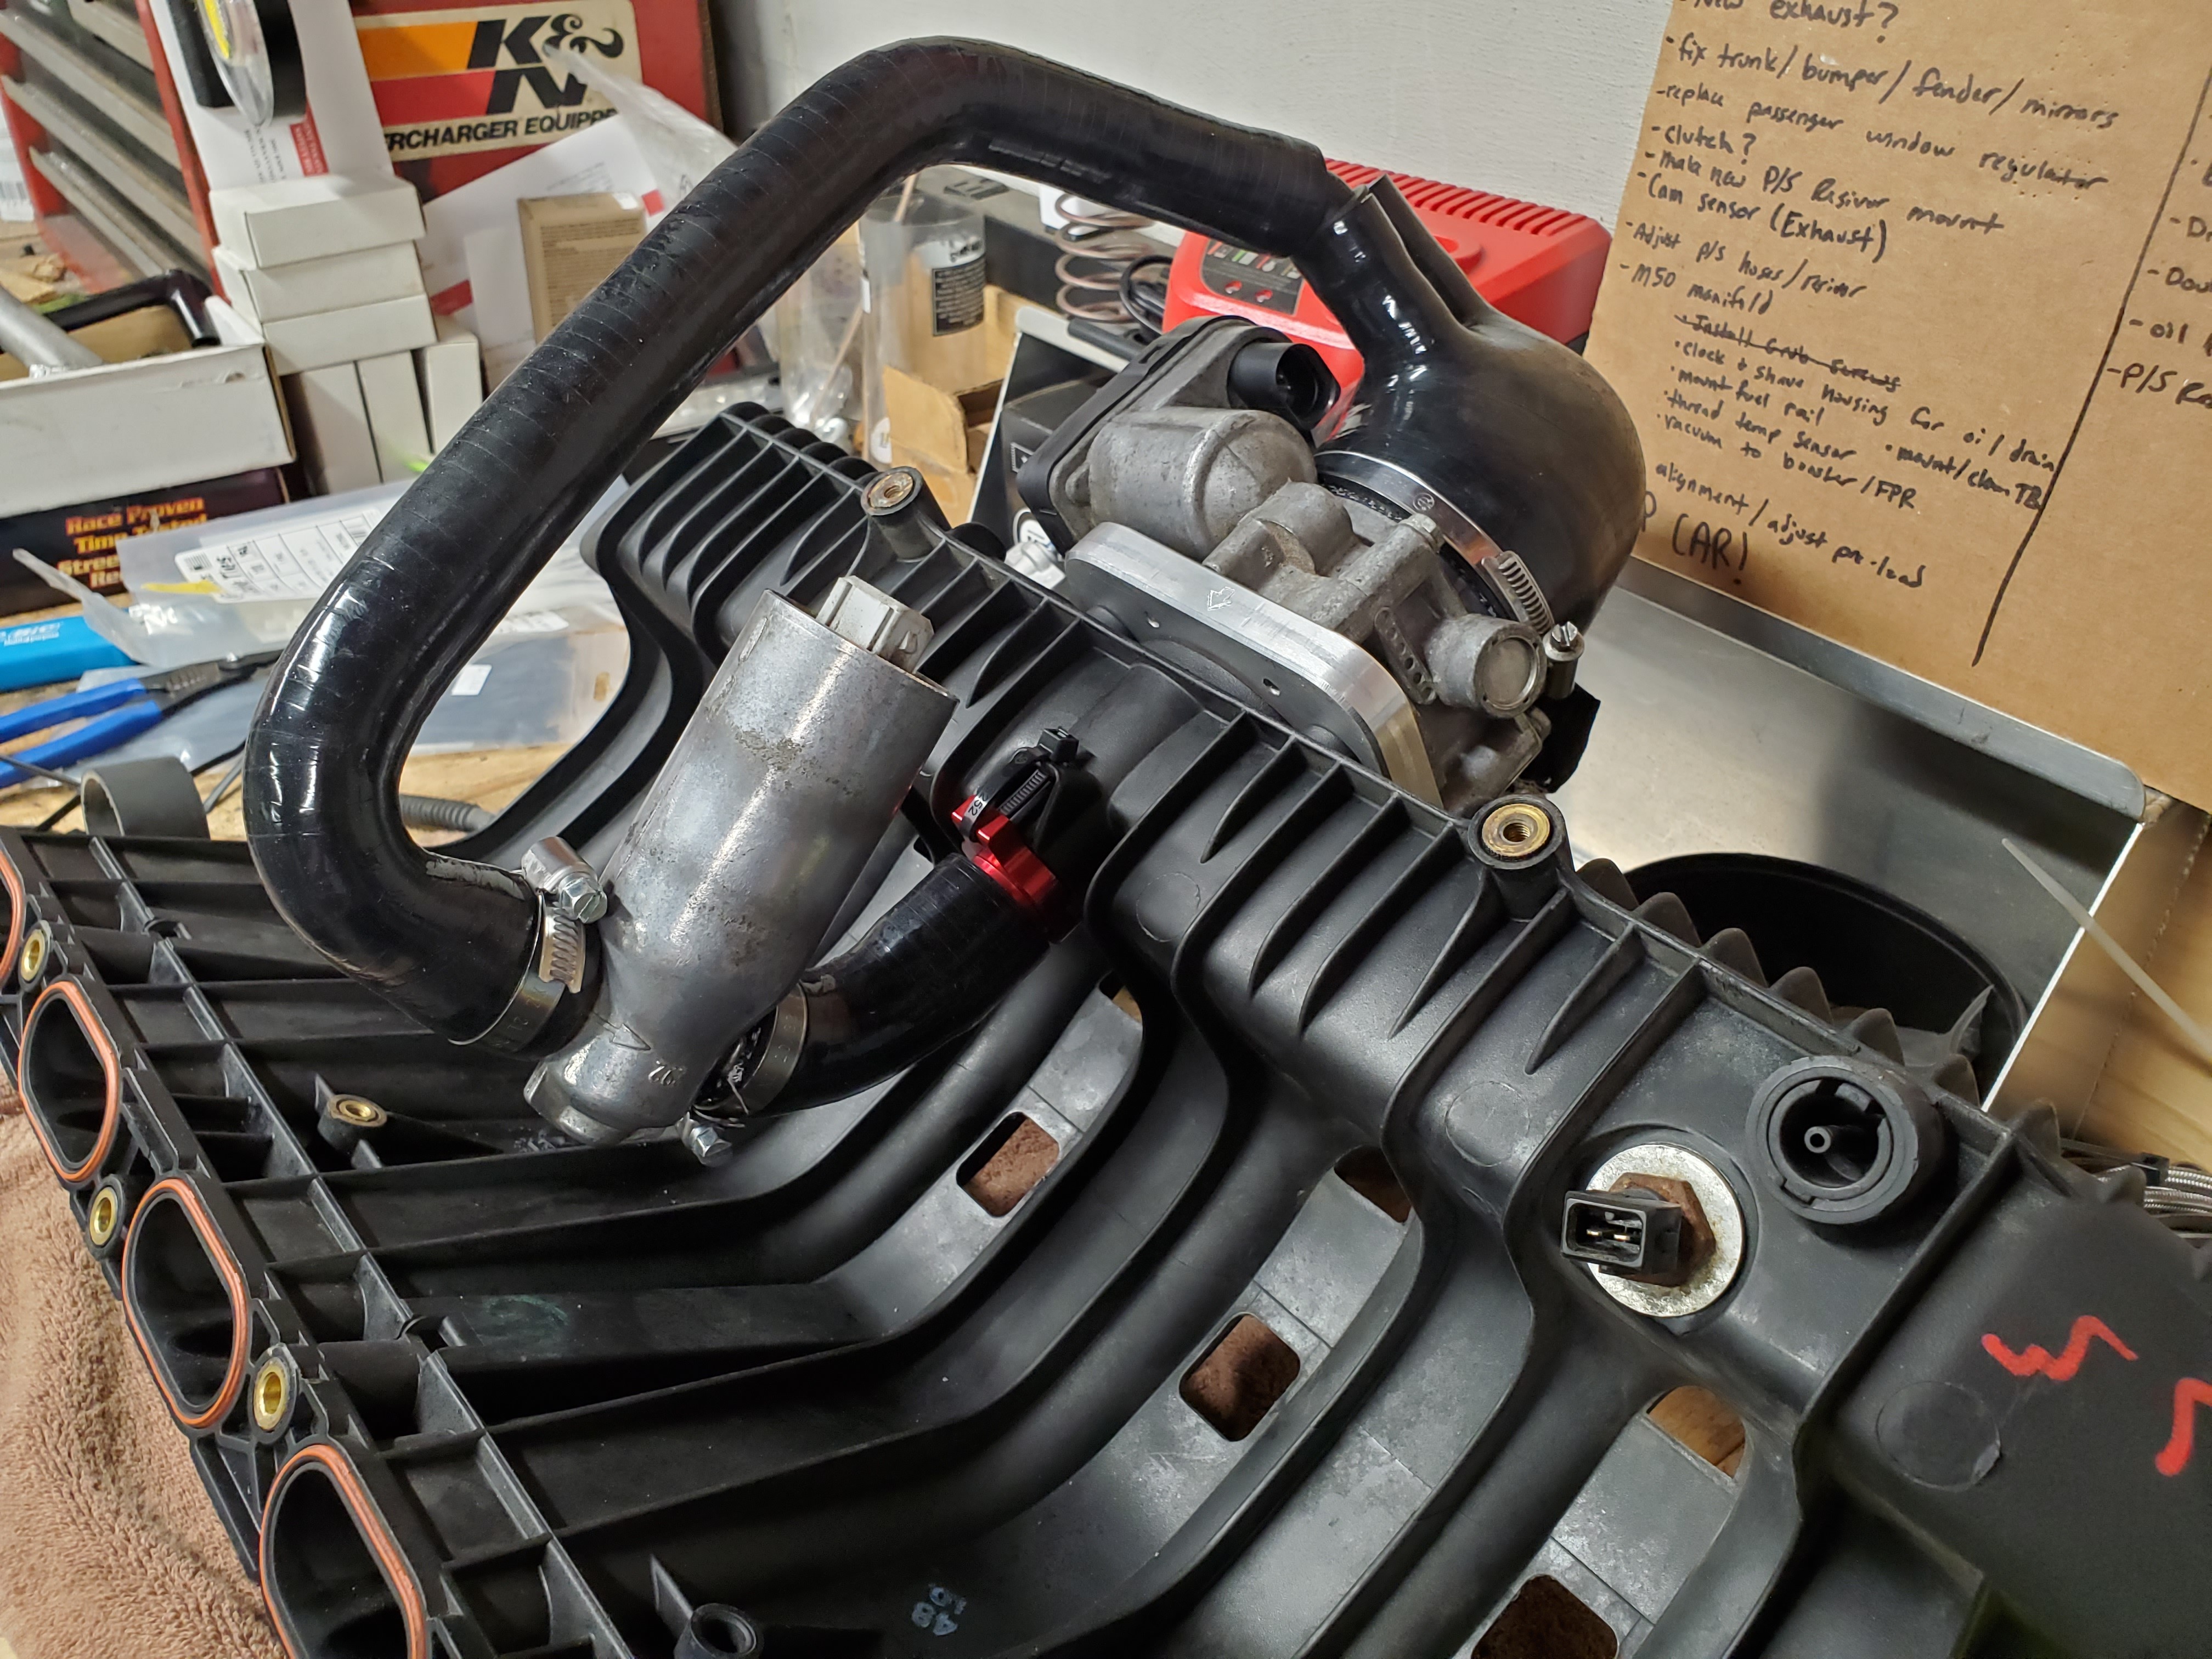
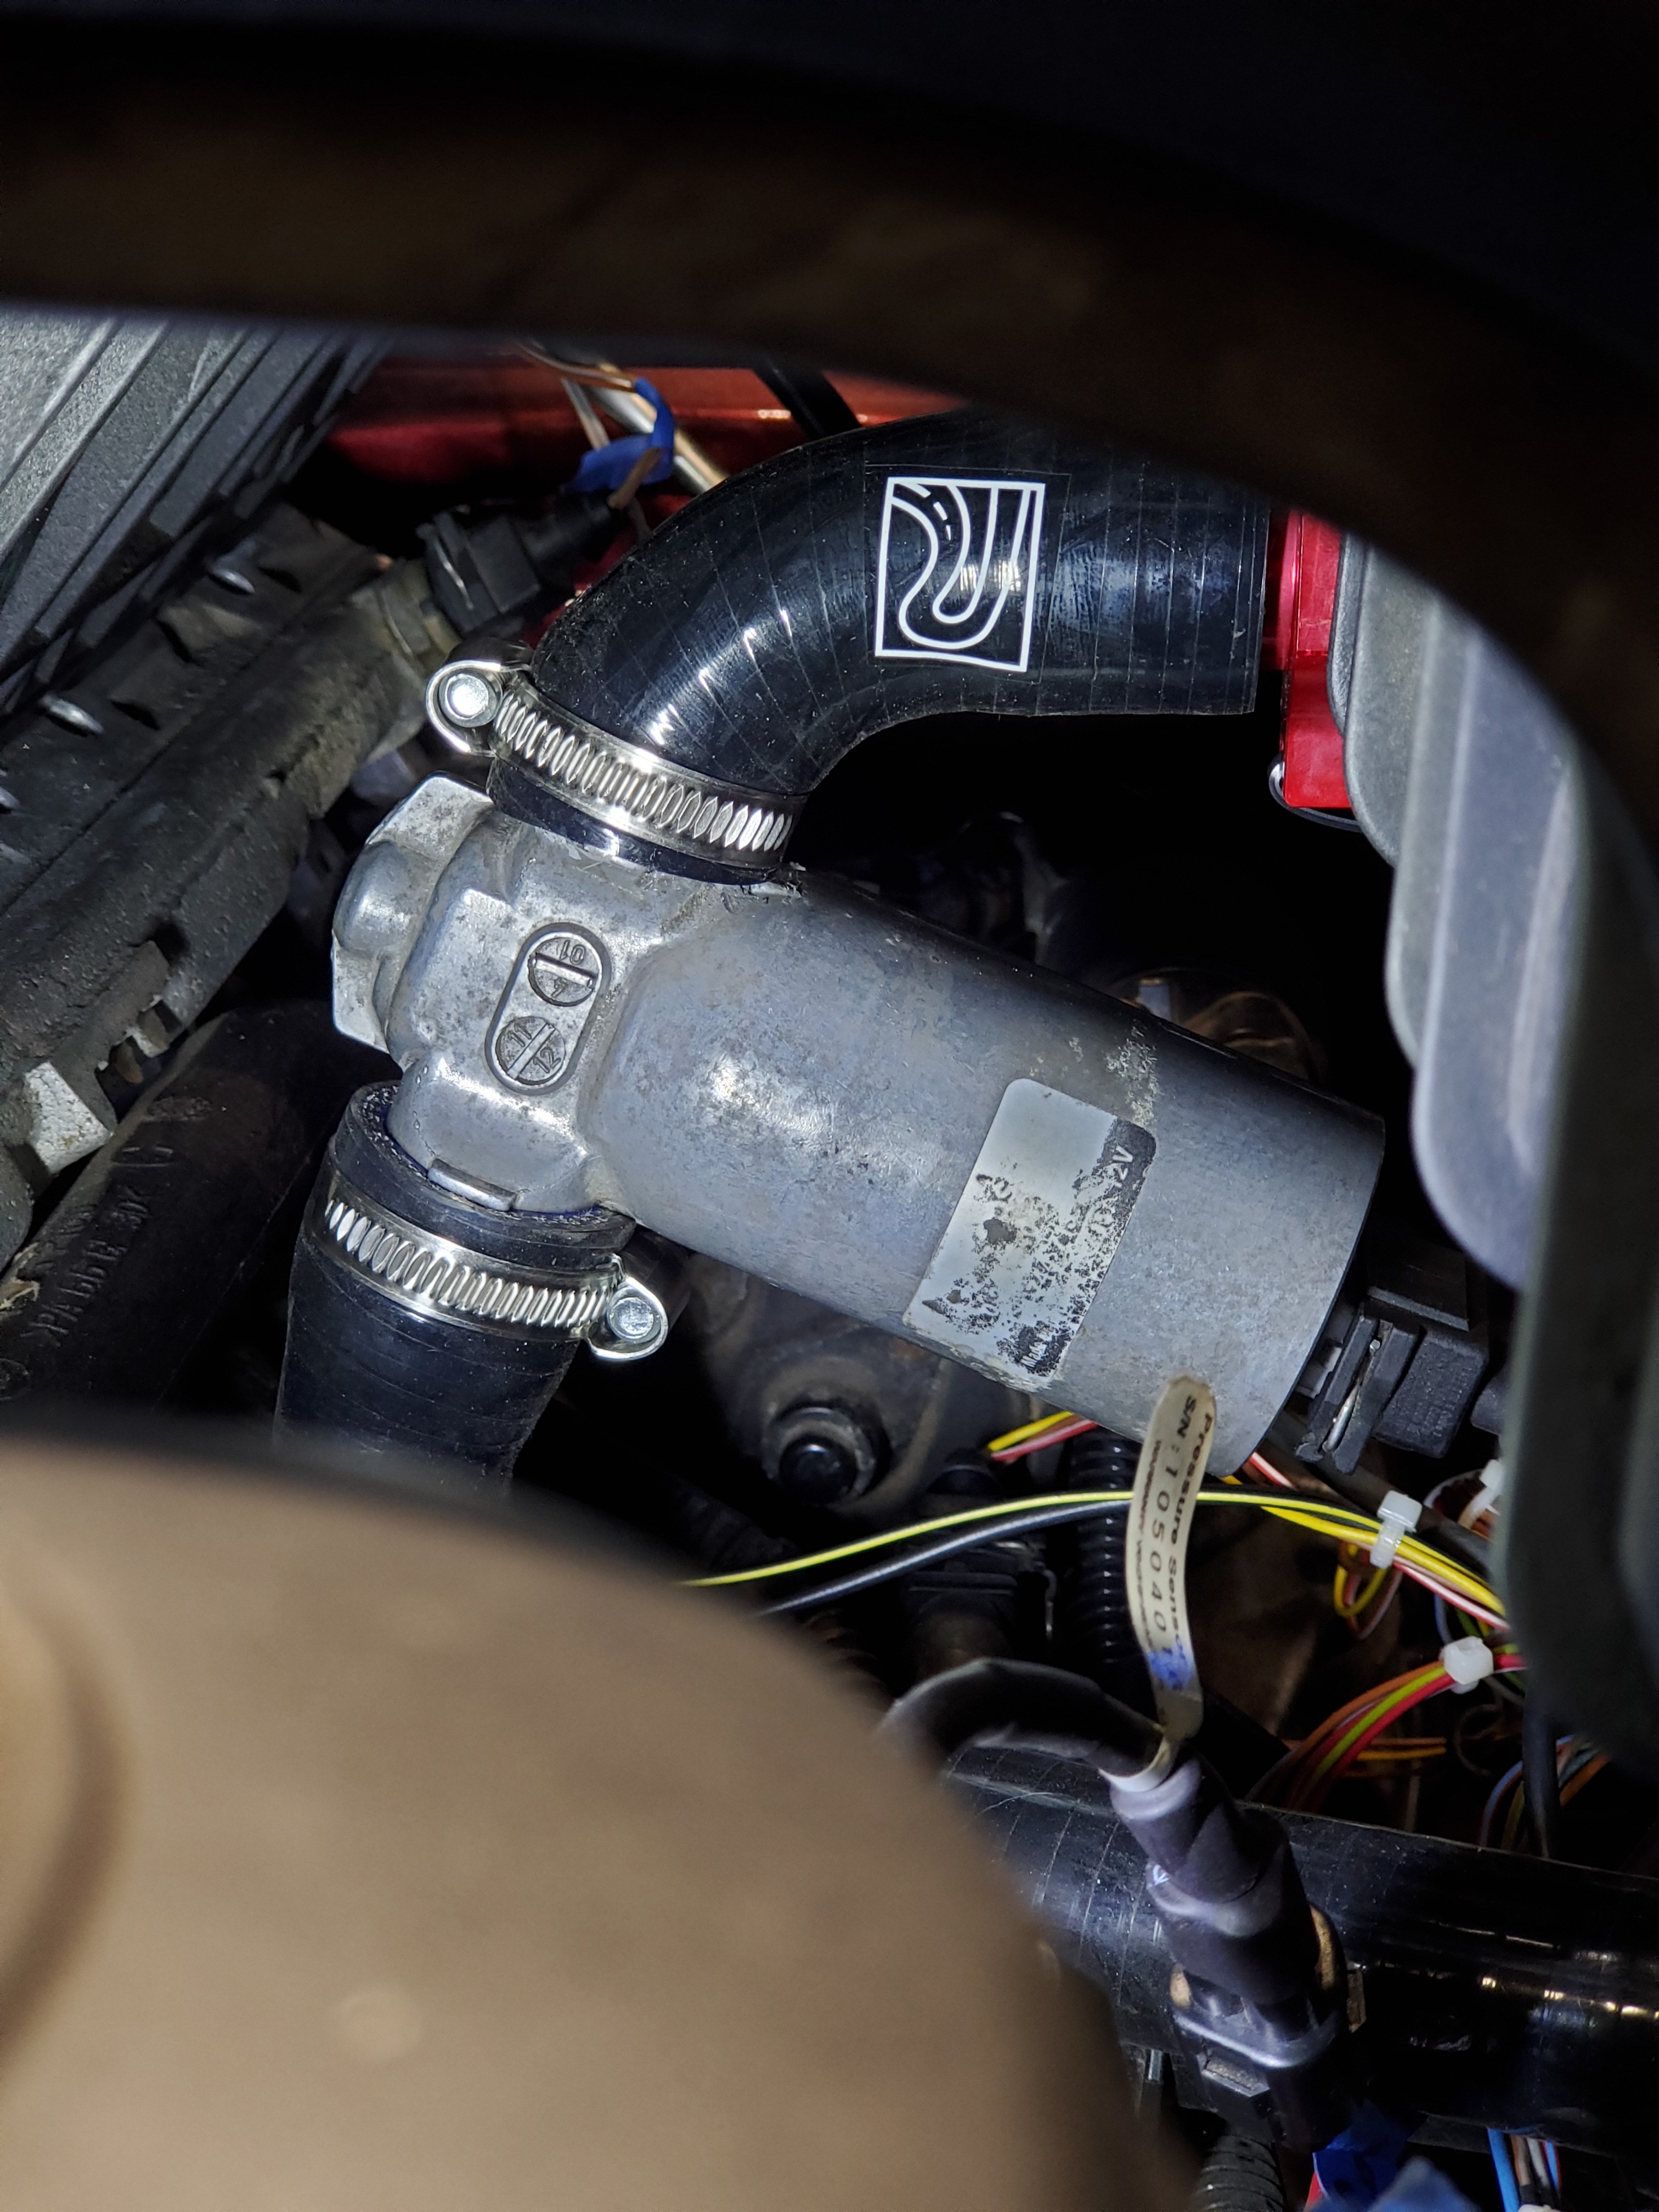
                                      While I still had the manifold on I got to setting up the new double port coupler. The reason I went with the double port one was to be able to connect the iacv separate from the diverter valve. Ended up chopping quite a bit off both sides but it fits pretty well now.
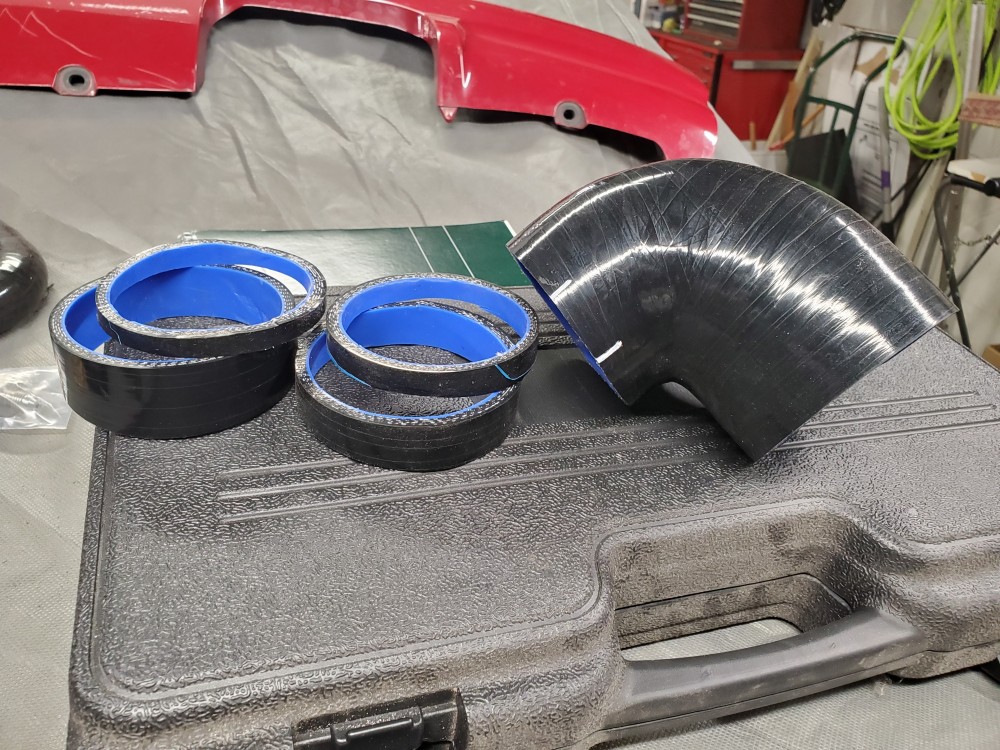
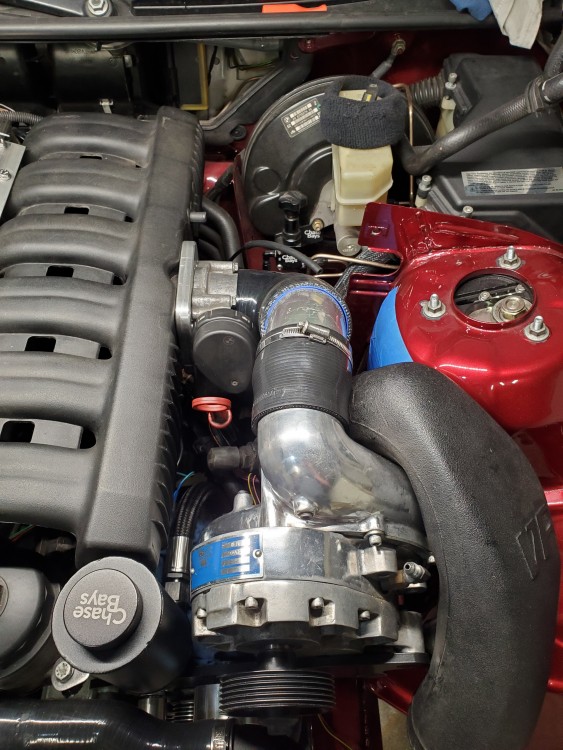
                                      20210310175050.jpg

                                      20210310174050.jpg

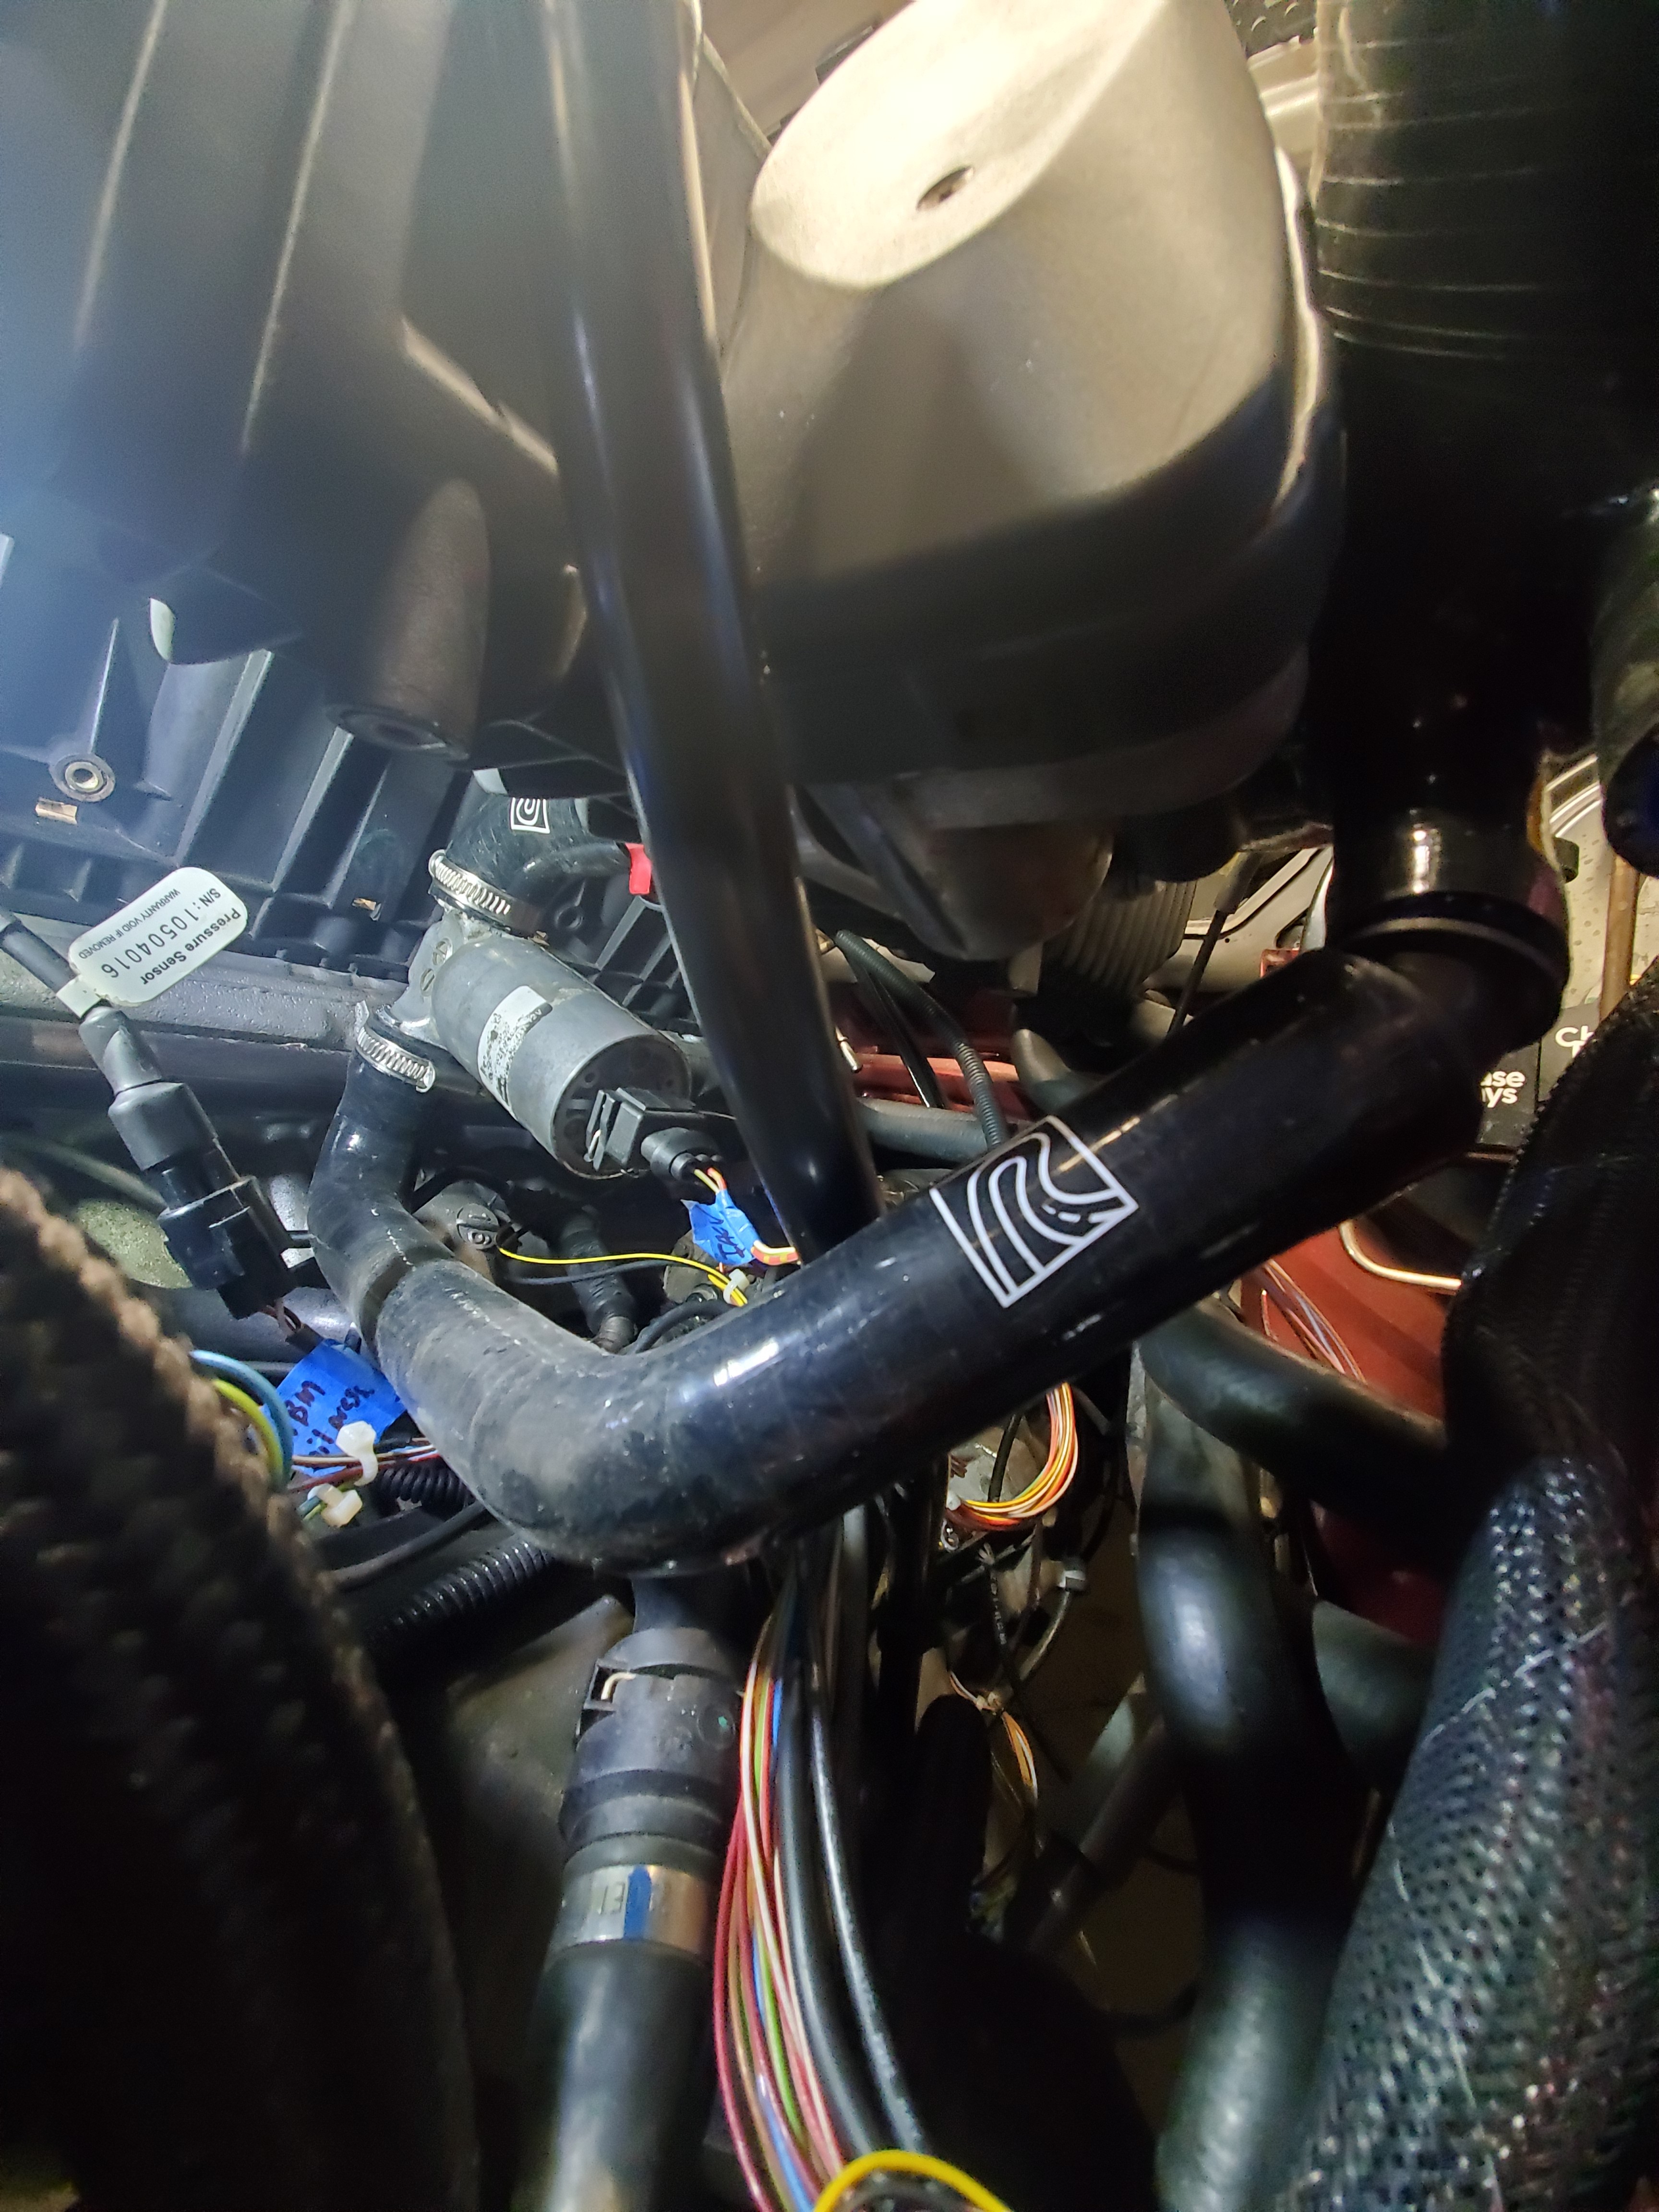
                                      Once the throttle body elbow angle was finalized I was able to set up the IACV hoses. I ended up trimming the U shaped hose that the kit comes with because I was not liking how it was intended to sit.

                                      Here's what I came up with.
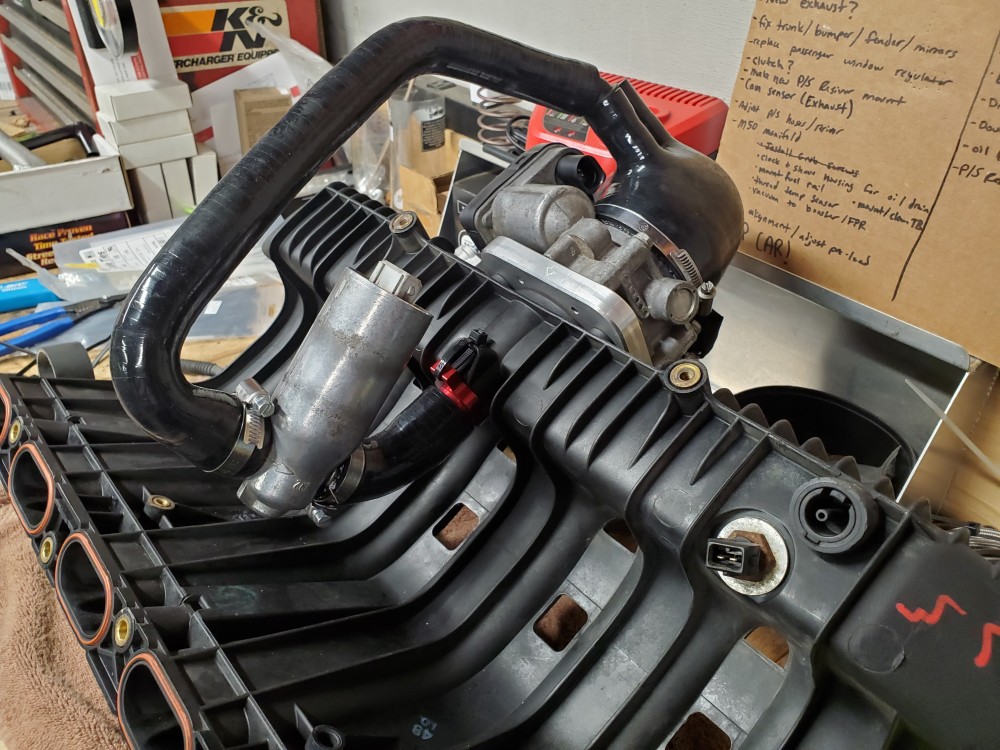
                                      20210310182611.jpg

                                      This way tucks really well under the manifold when it's bolted on the engine.
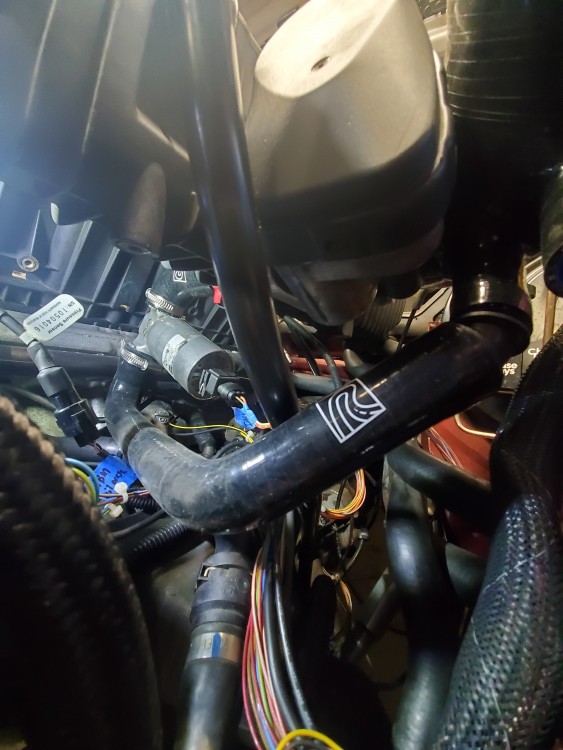
                                      20210310182257.jpg

                                      20210310182355.jpg

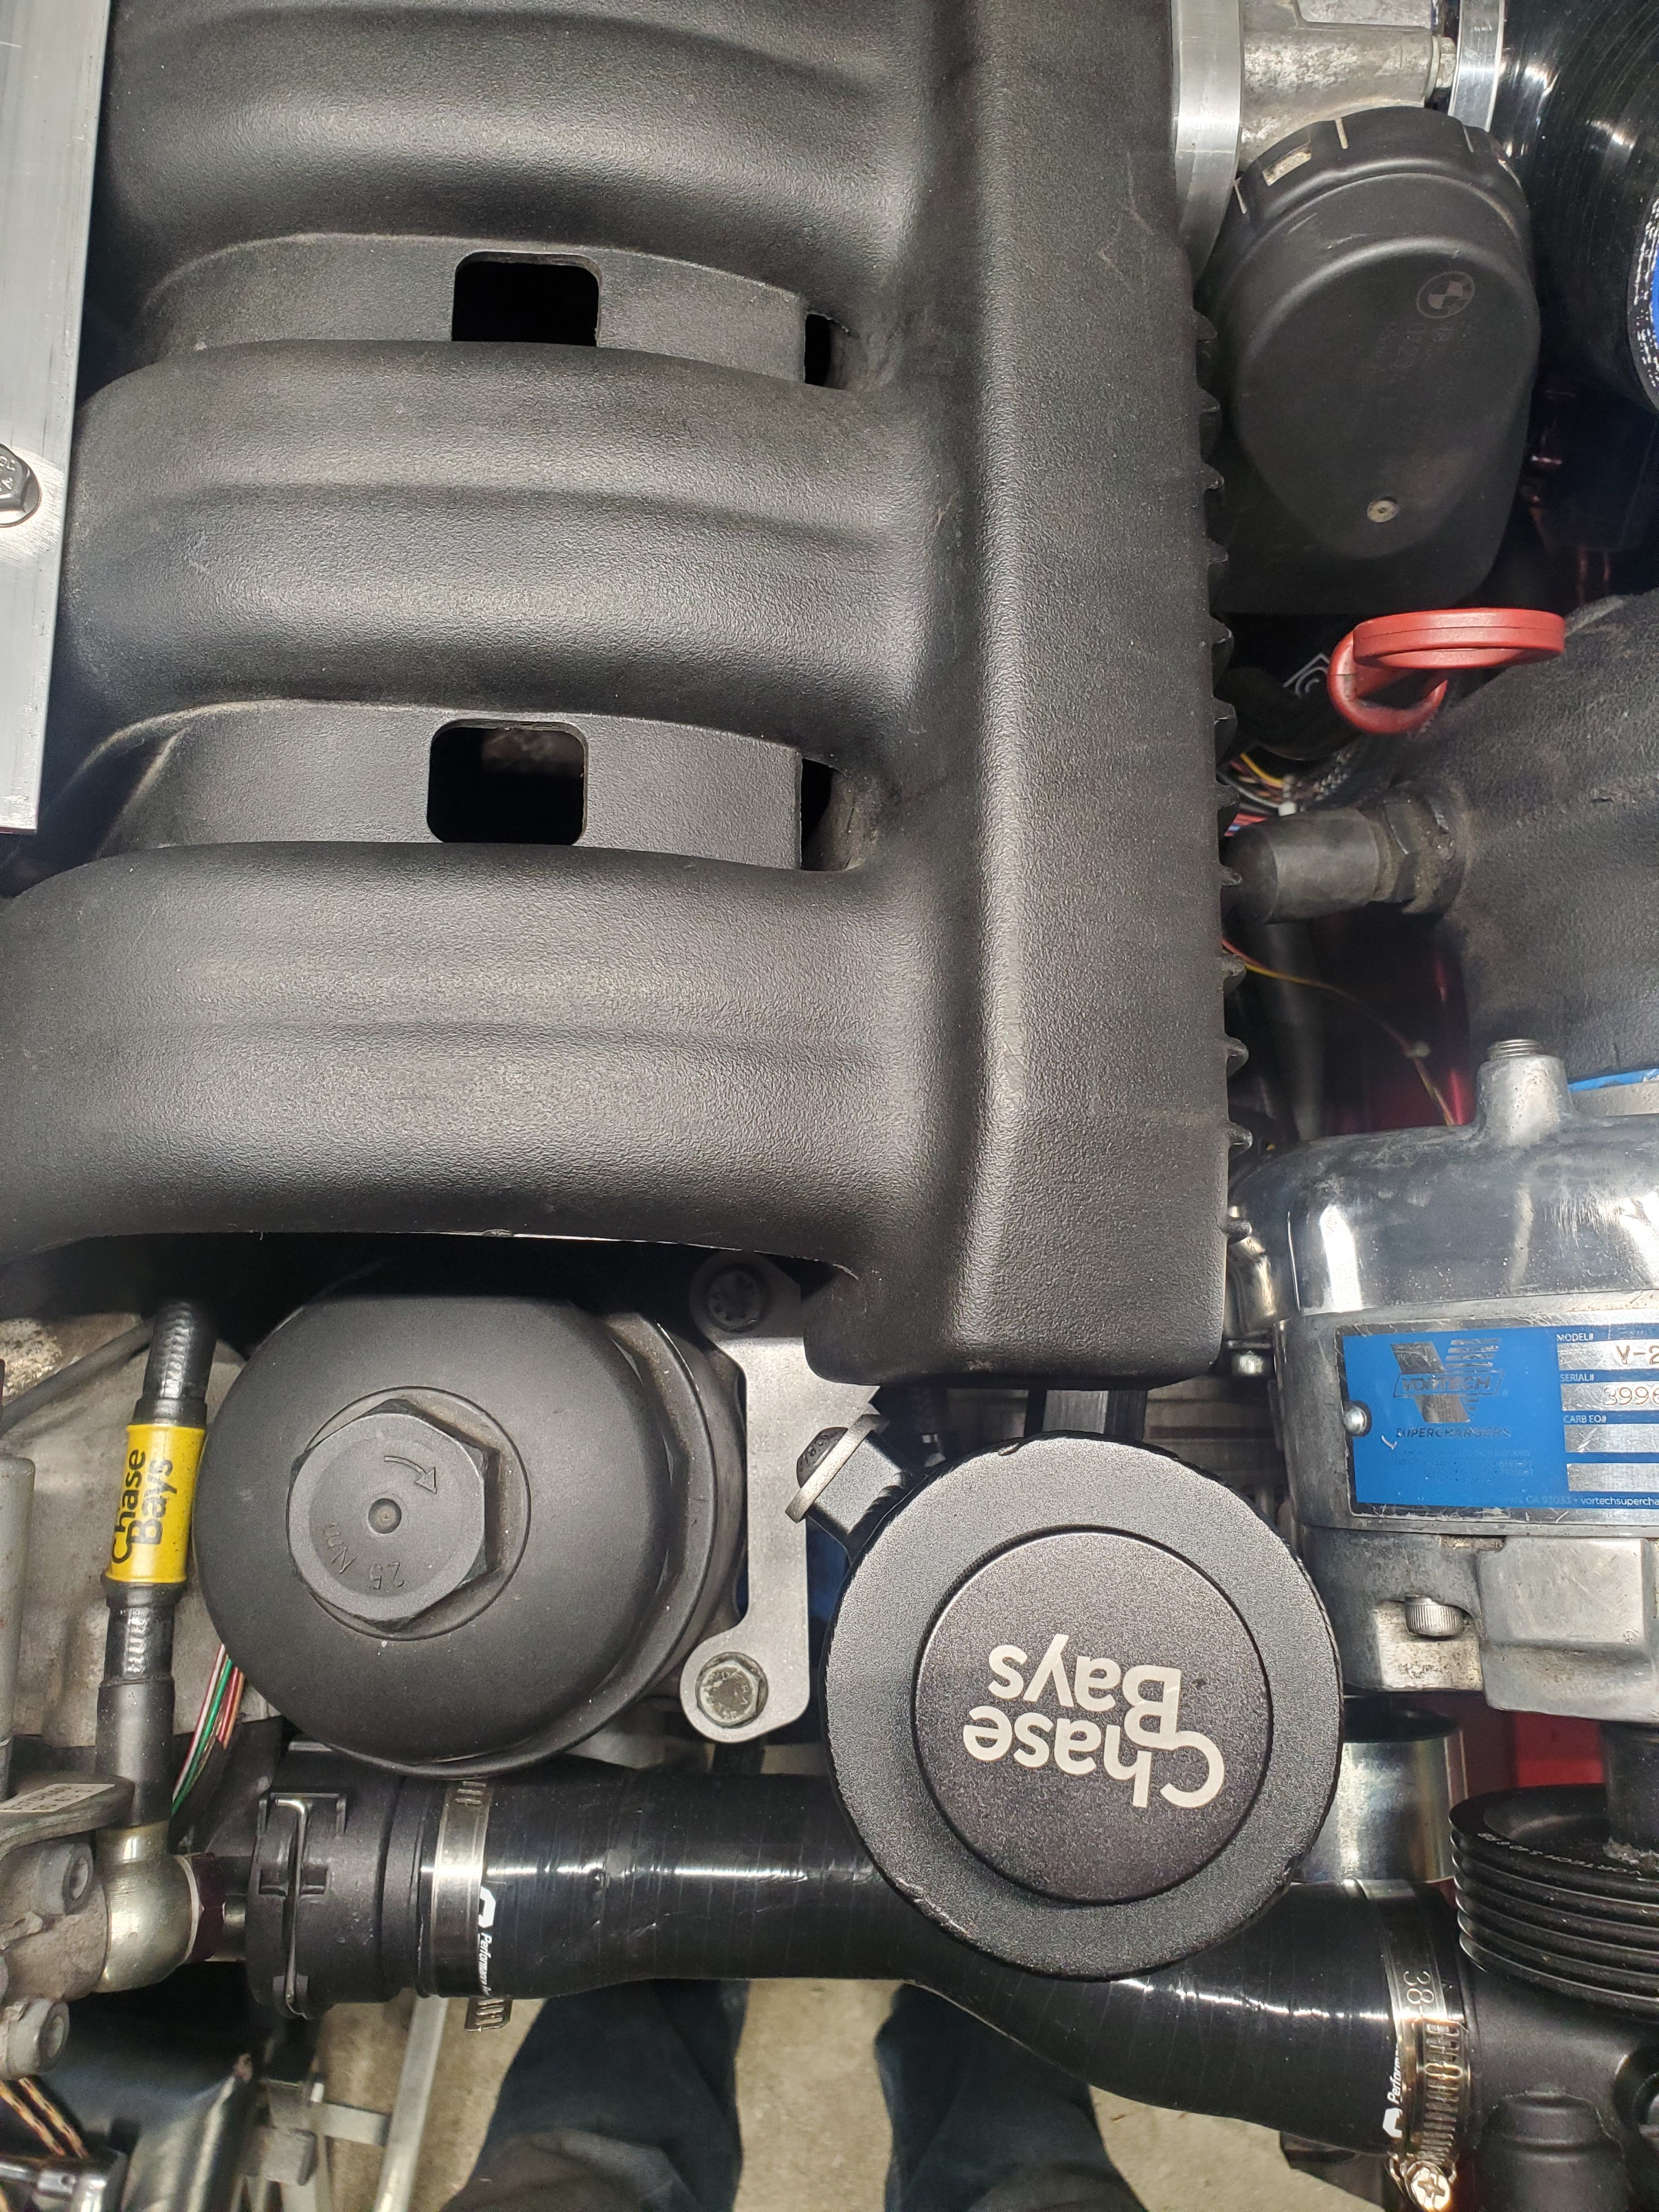
                                      I was also able to take my "prototype" power steering resiviour bracket to @Sam_Holzmann and he drew it into digital form and cut it out on the plasma. 

                                      Here is "V1"
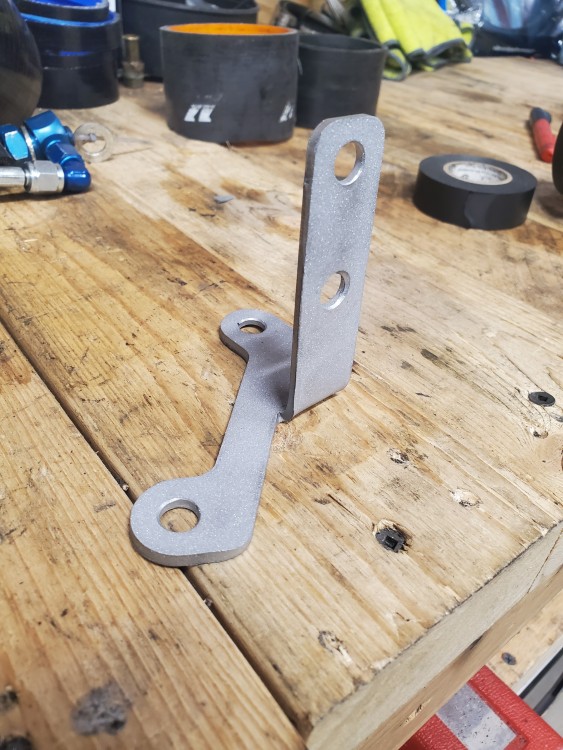
                                      20210312222913.jpg

                                      And it fits great just like the prototype version.
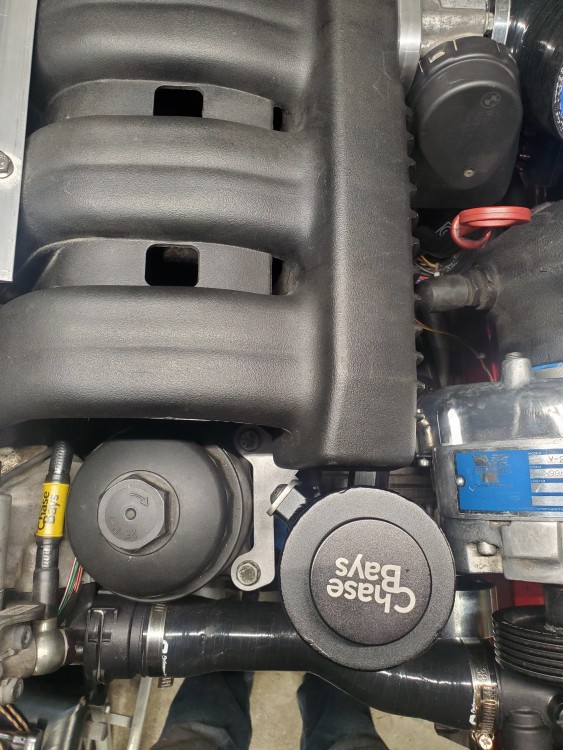
                                      20210312223756.jpg

                                      20210312223741.jpg

                                      20210313103945.jpg

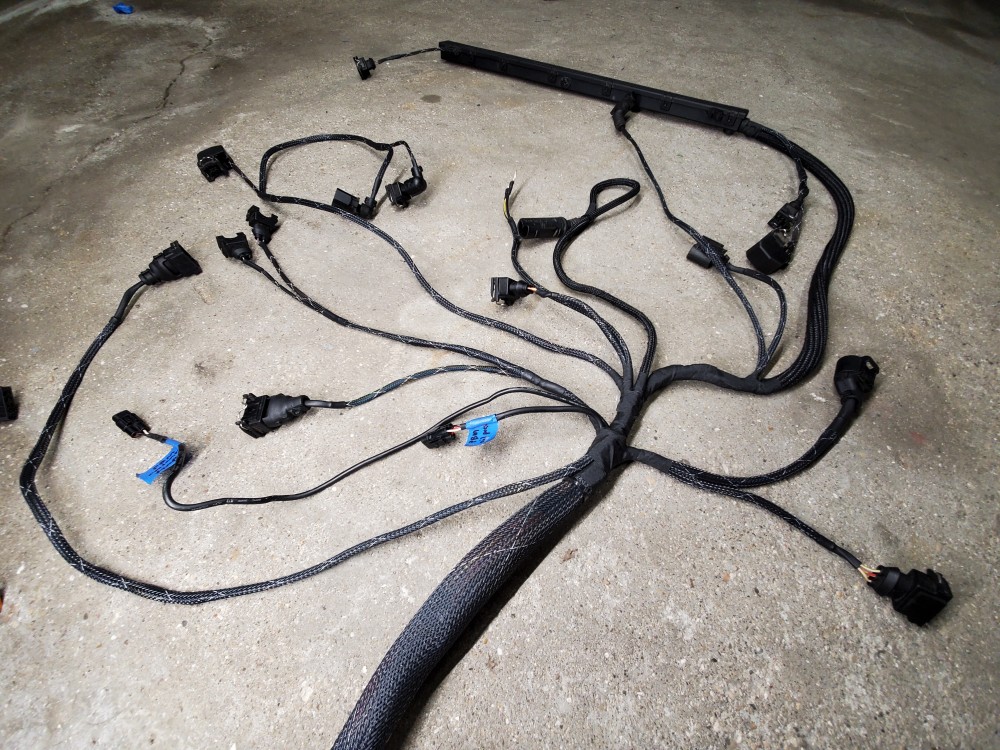
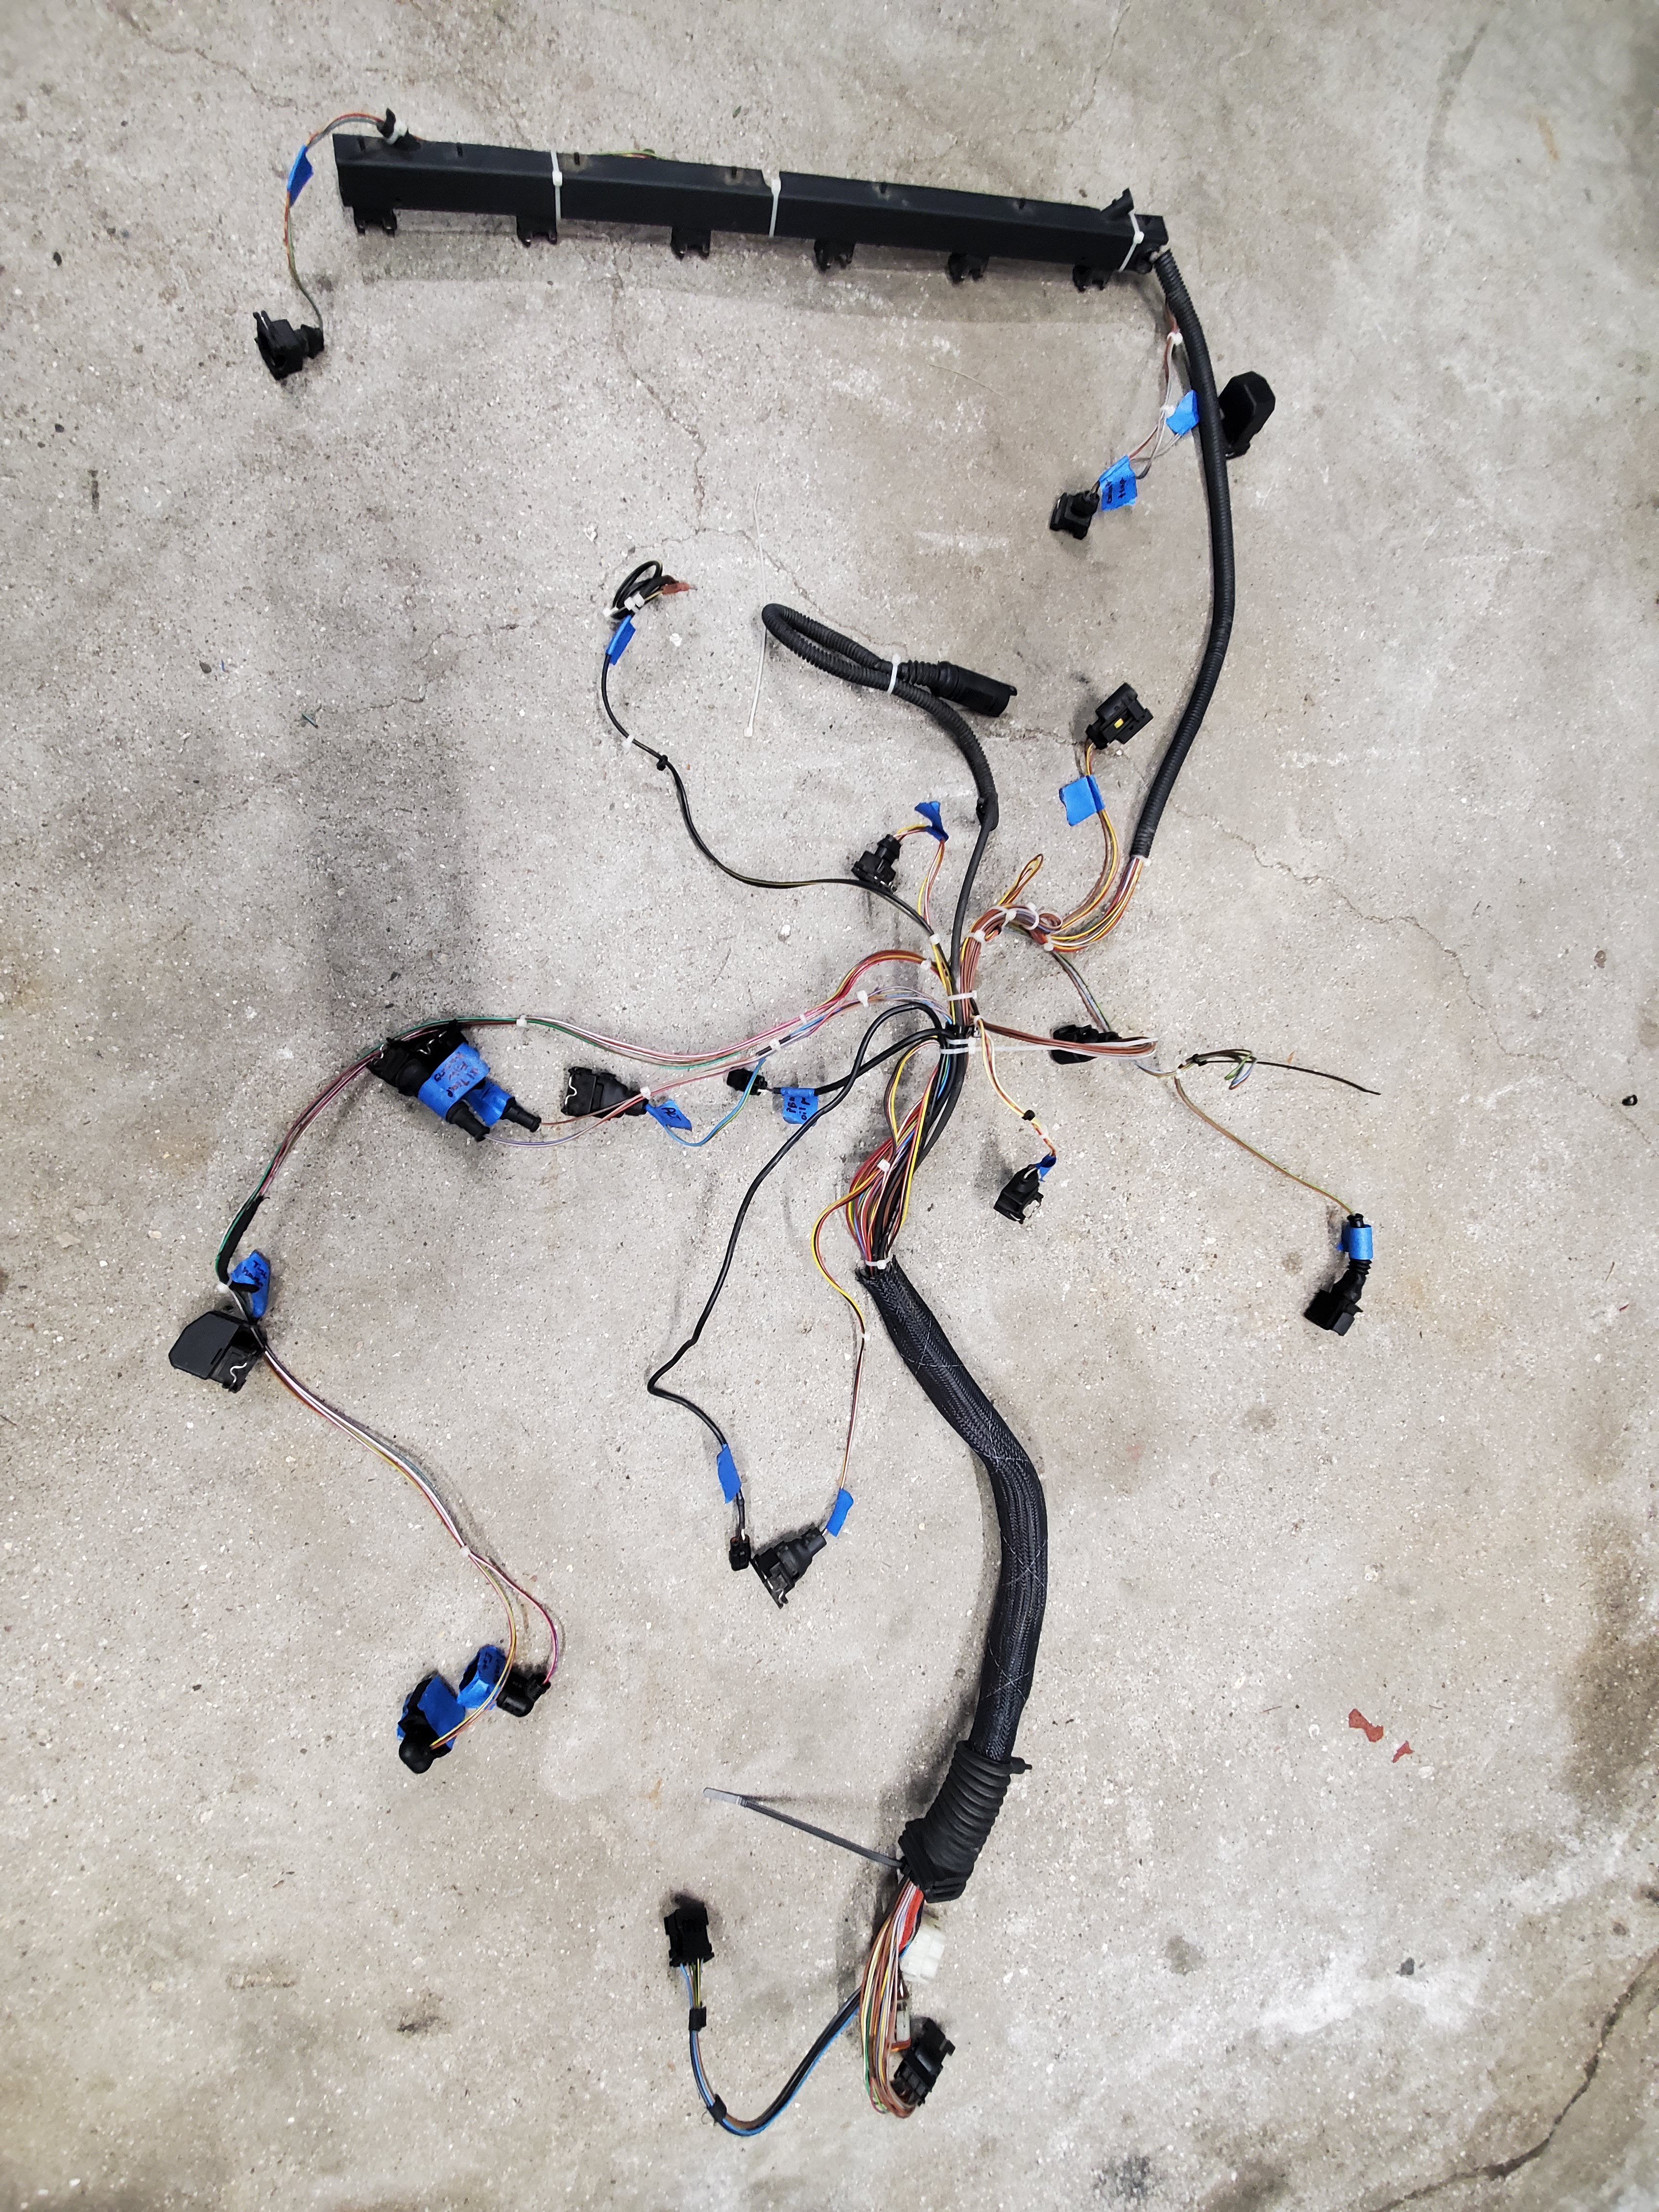
                                      Next I got to work on finishing the engine harness. I finalized some lengths and removed the harness from the engine one last time.
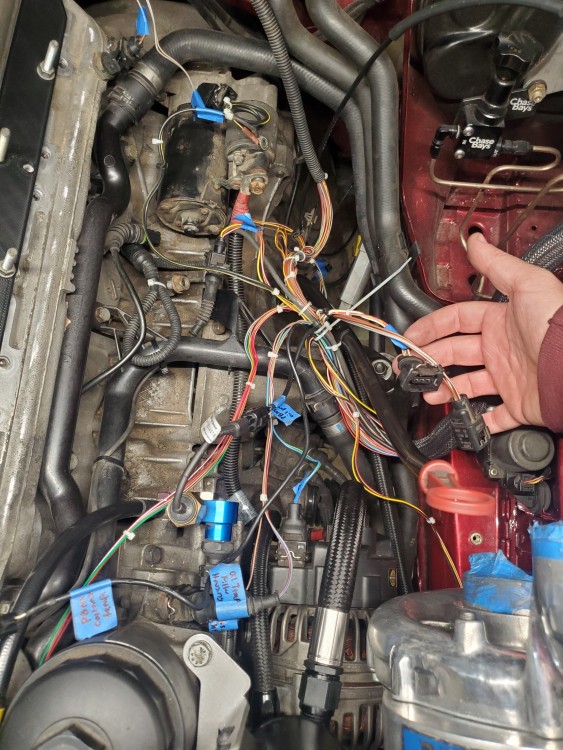
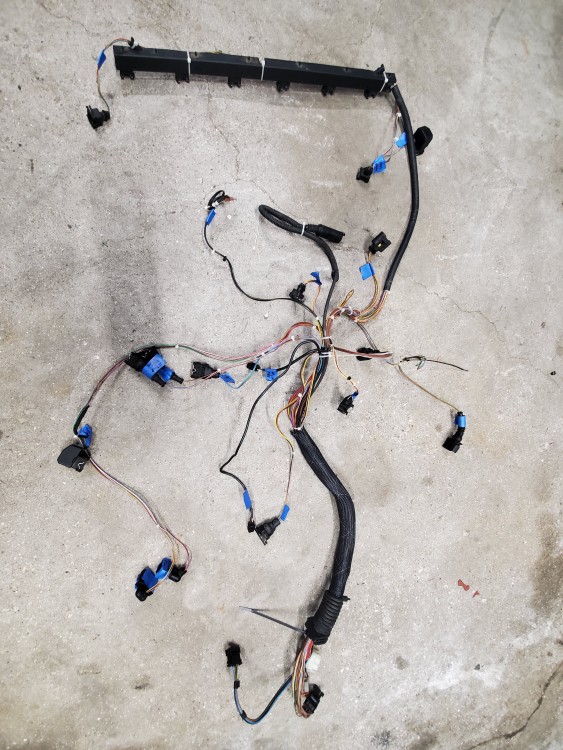
                                      20210313104649.jpg

                                      20210313105312.jpg

                                      After lengthening some leads and shortening a couple others this is the bare harness.
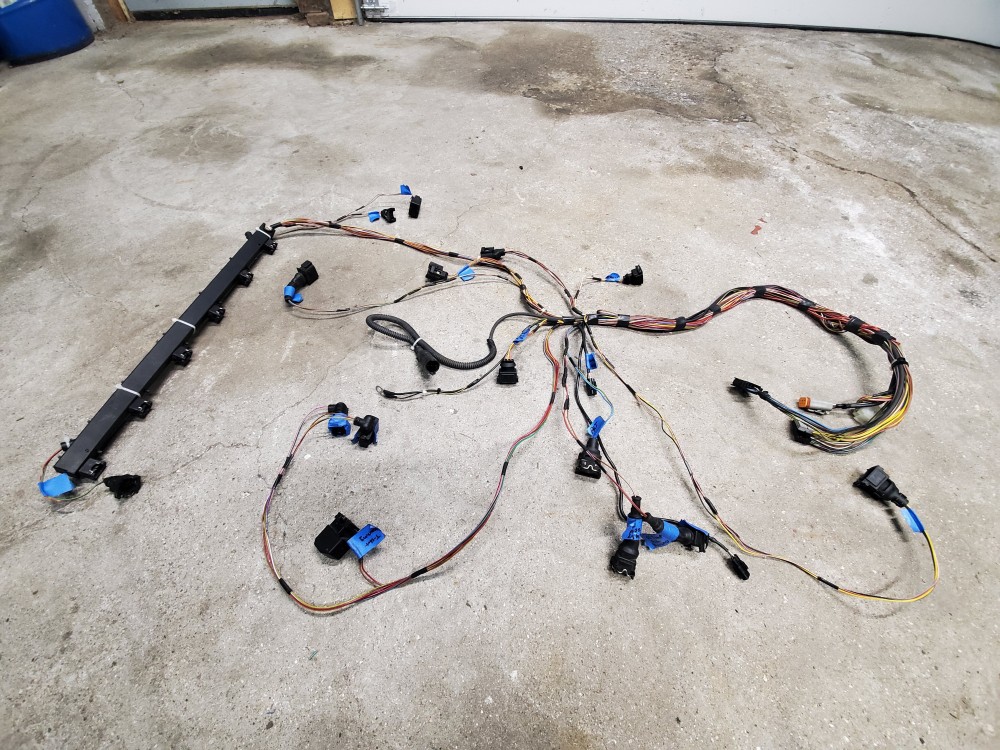
                                      20210313125958.jpg

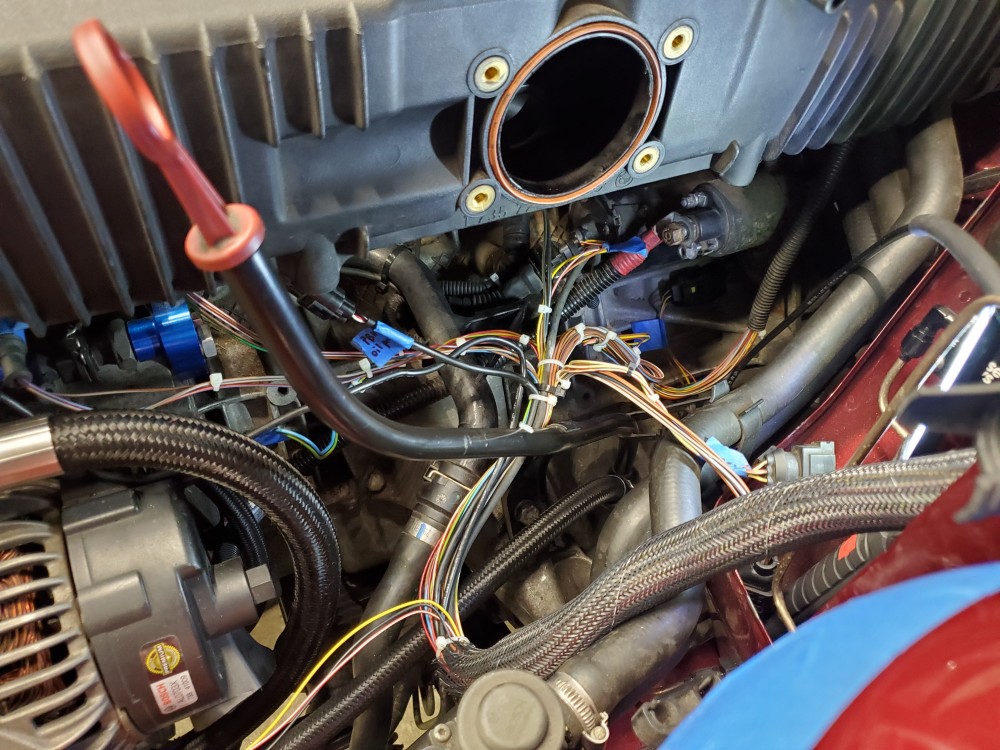
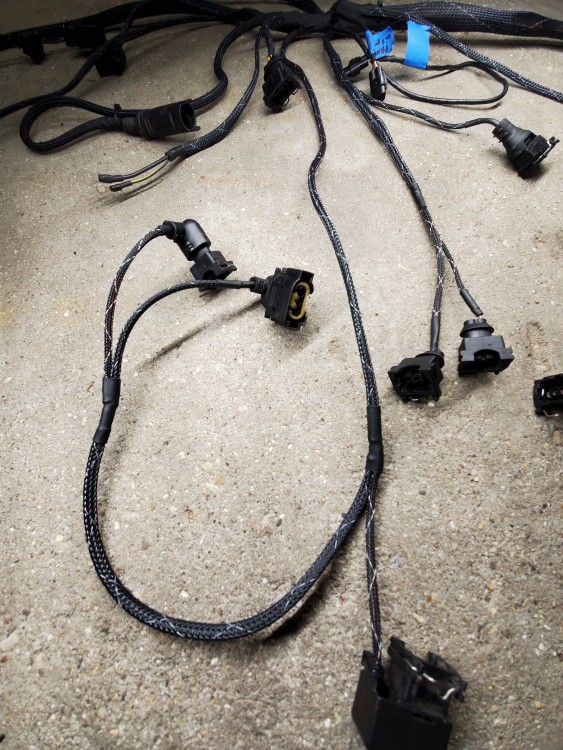
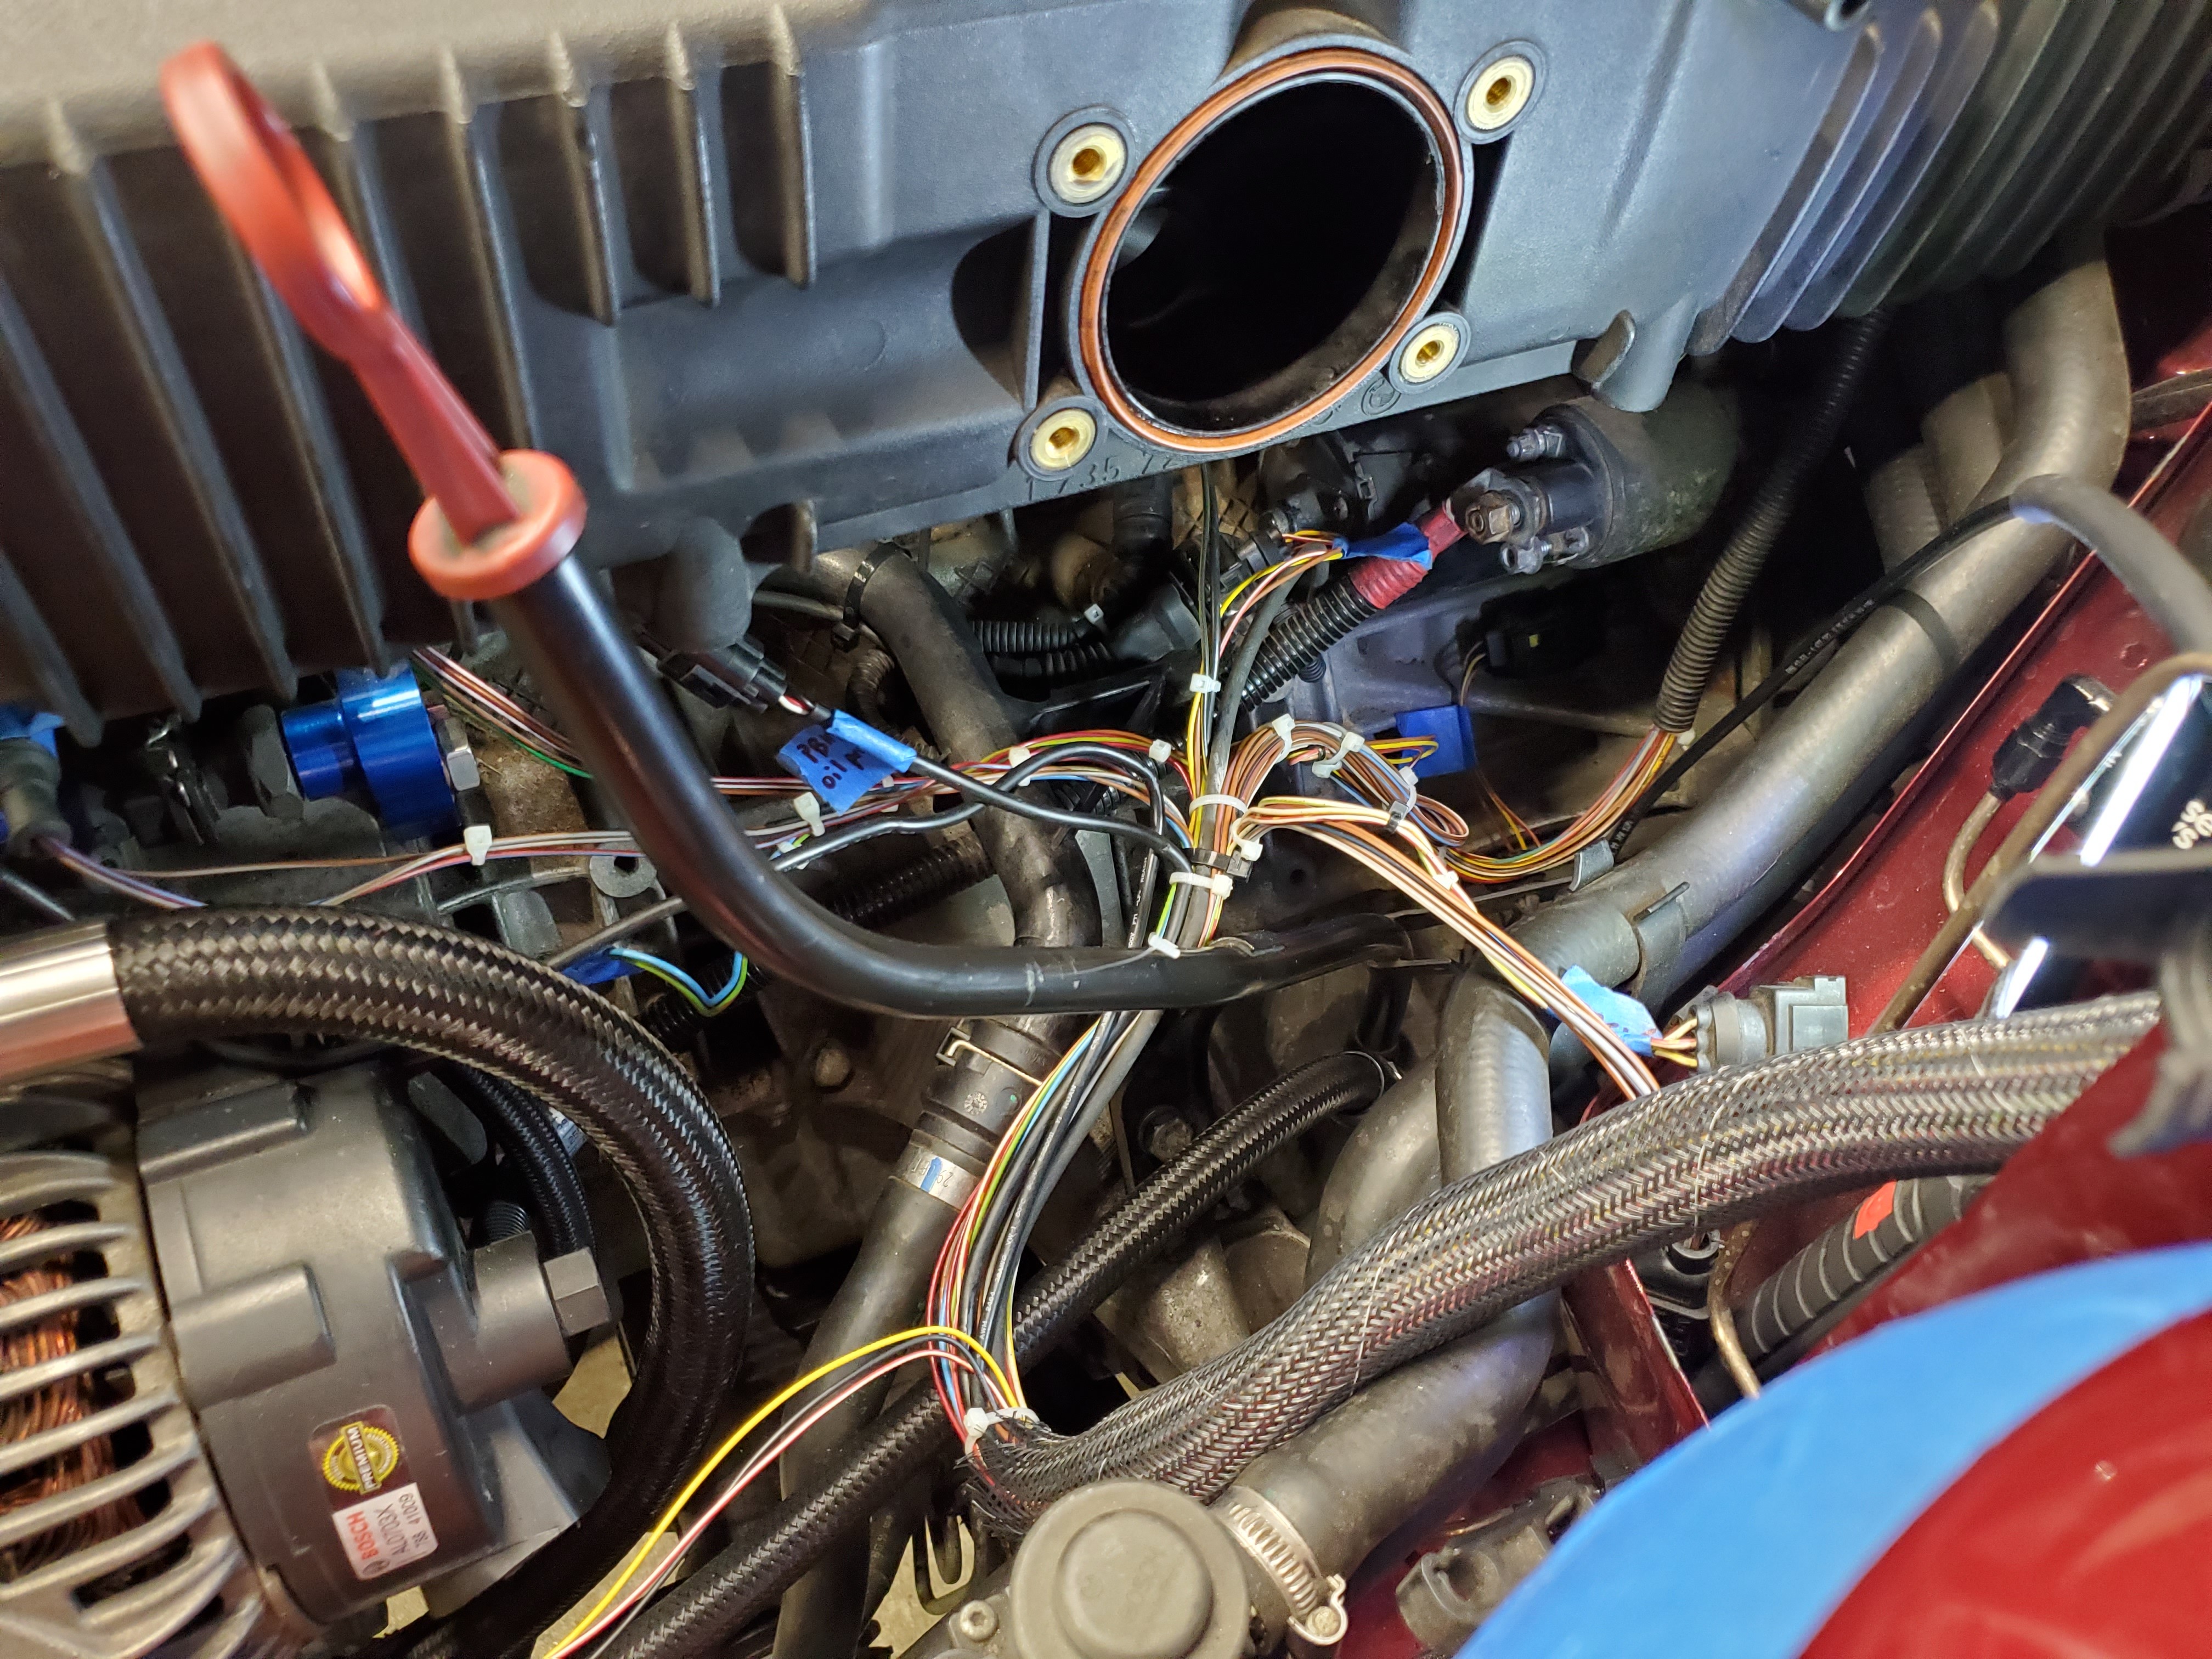
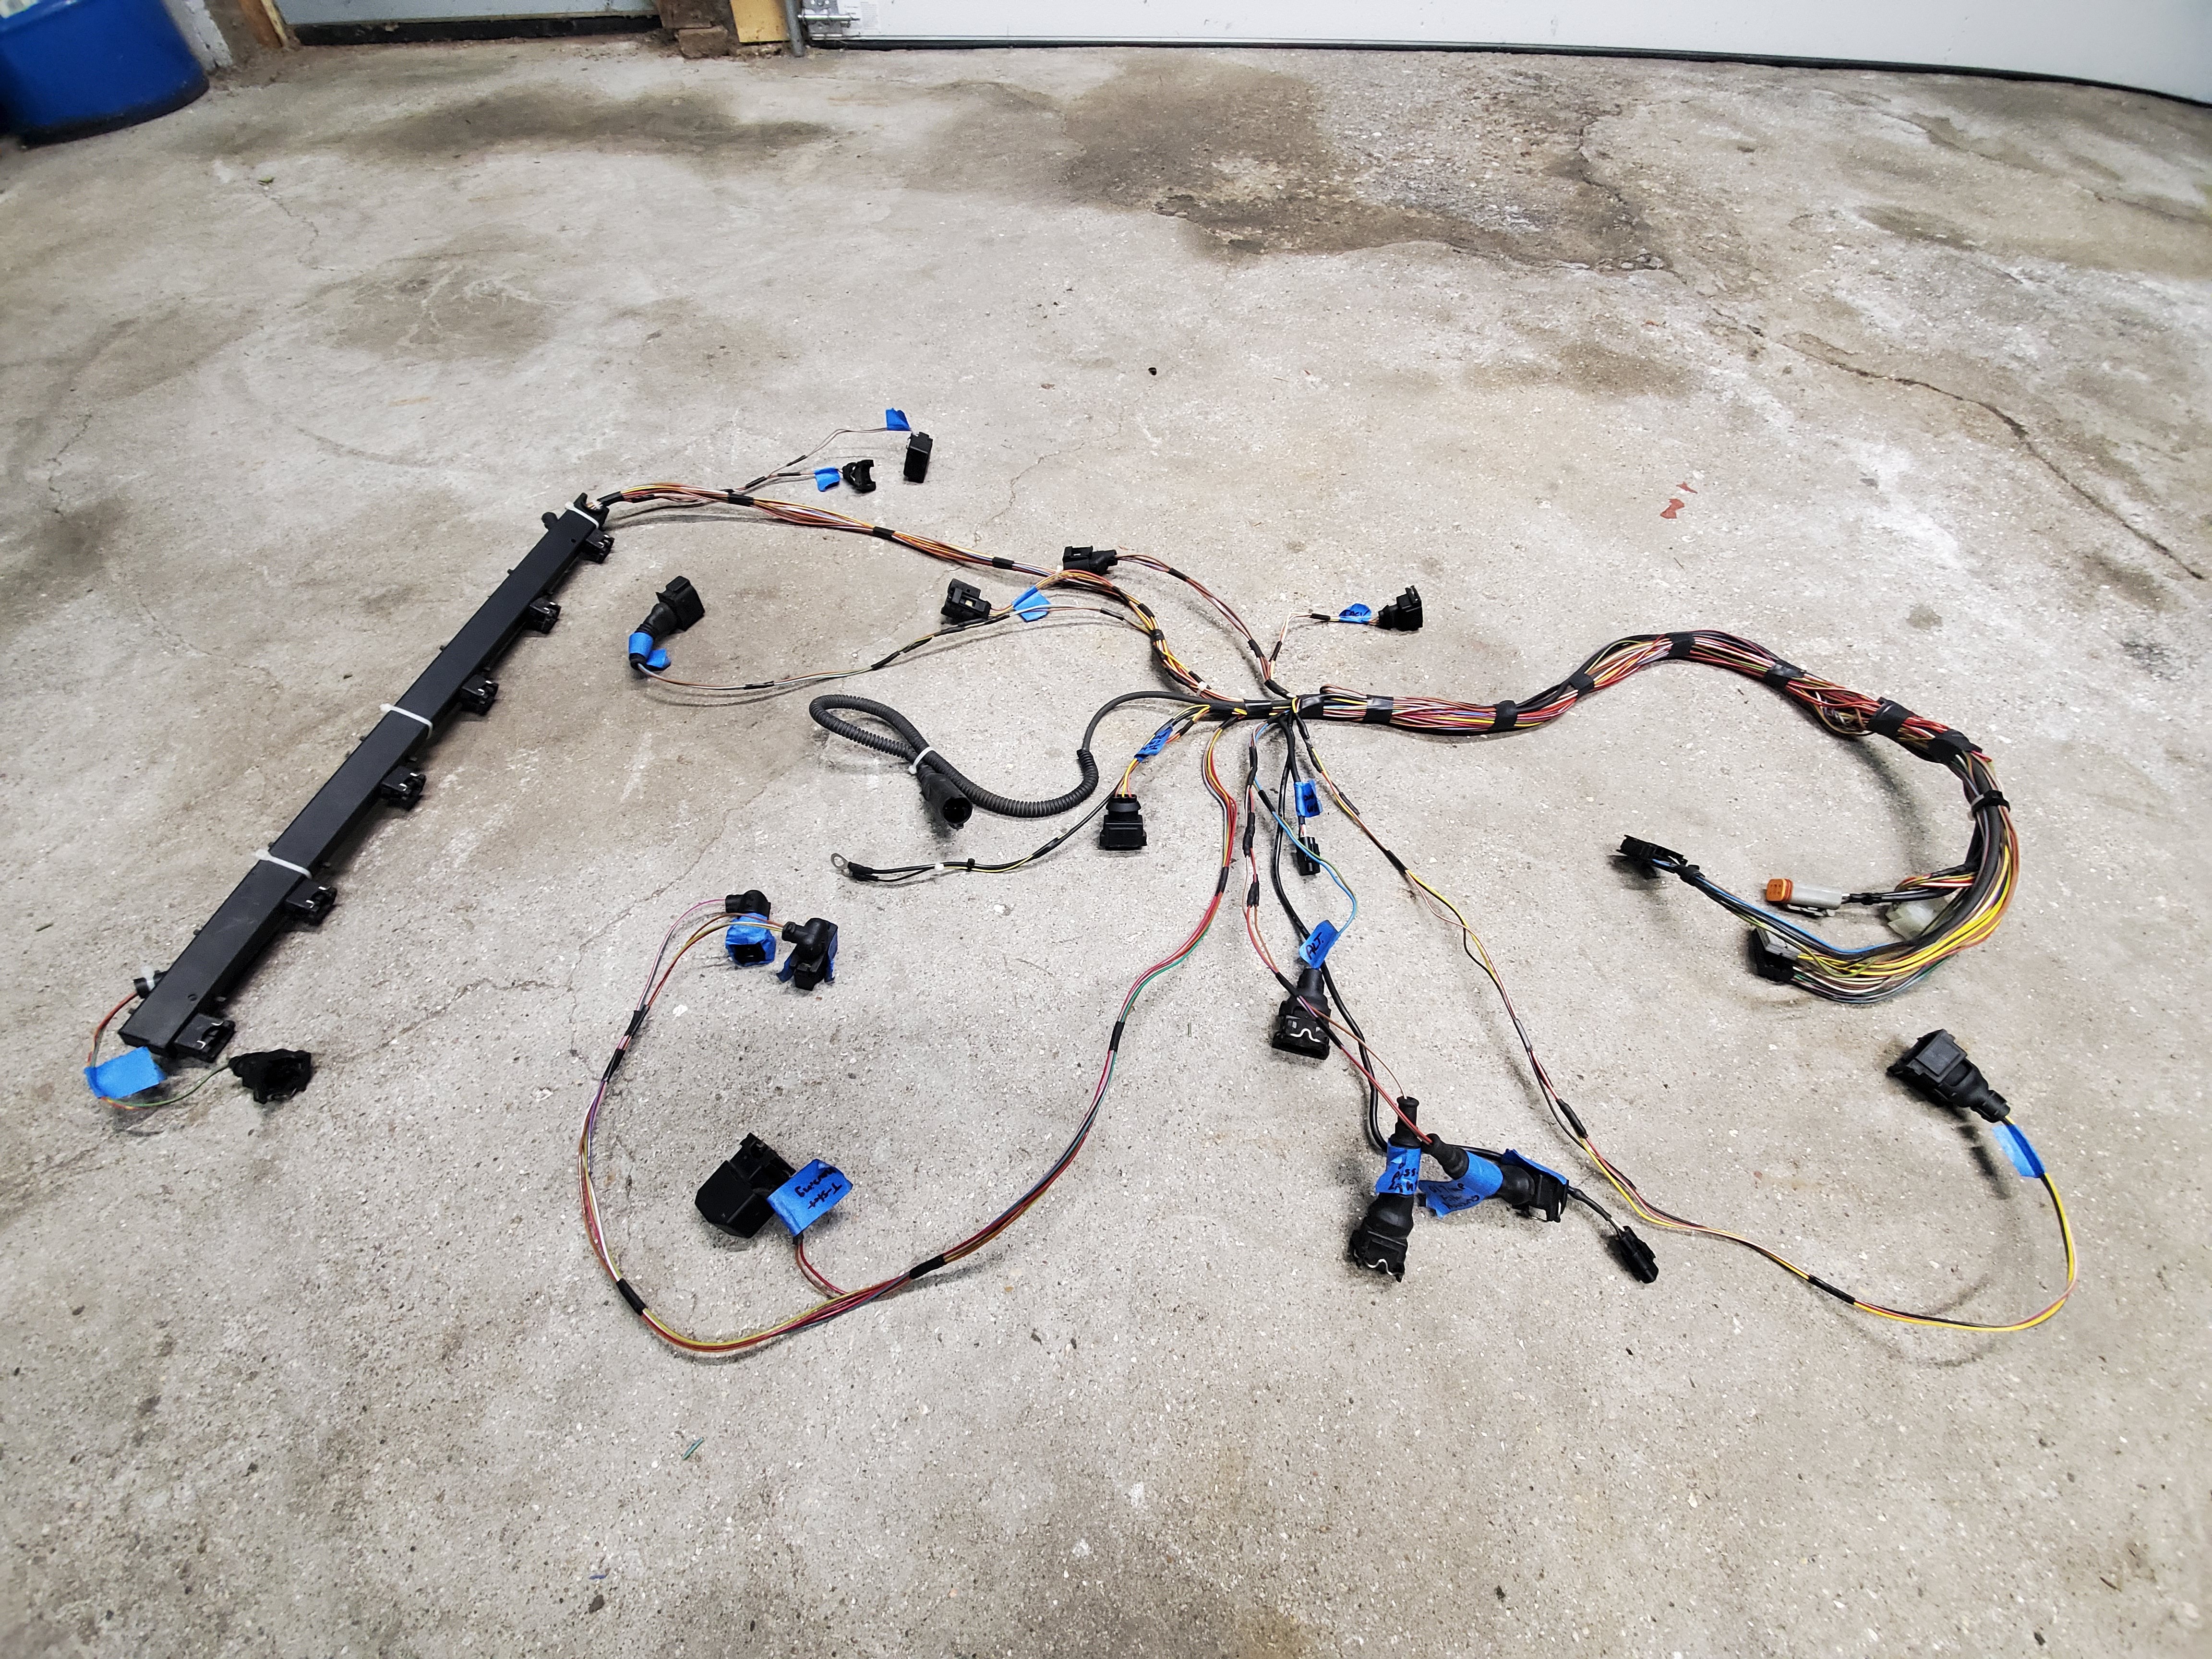
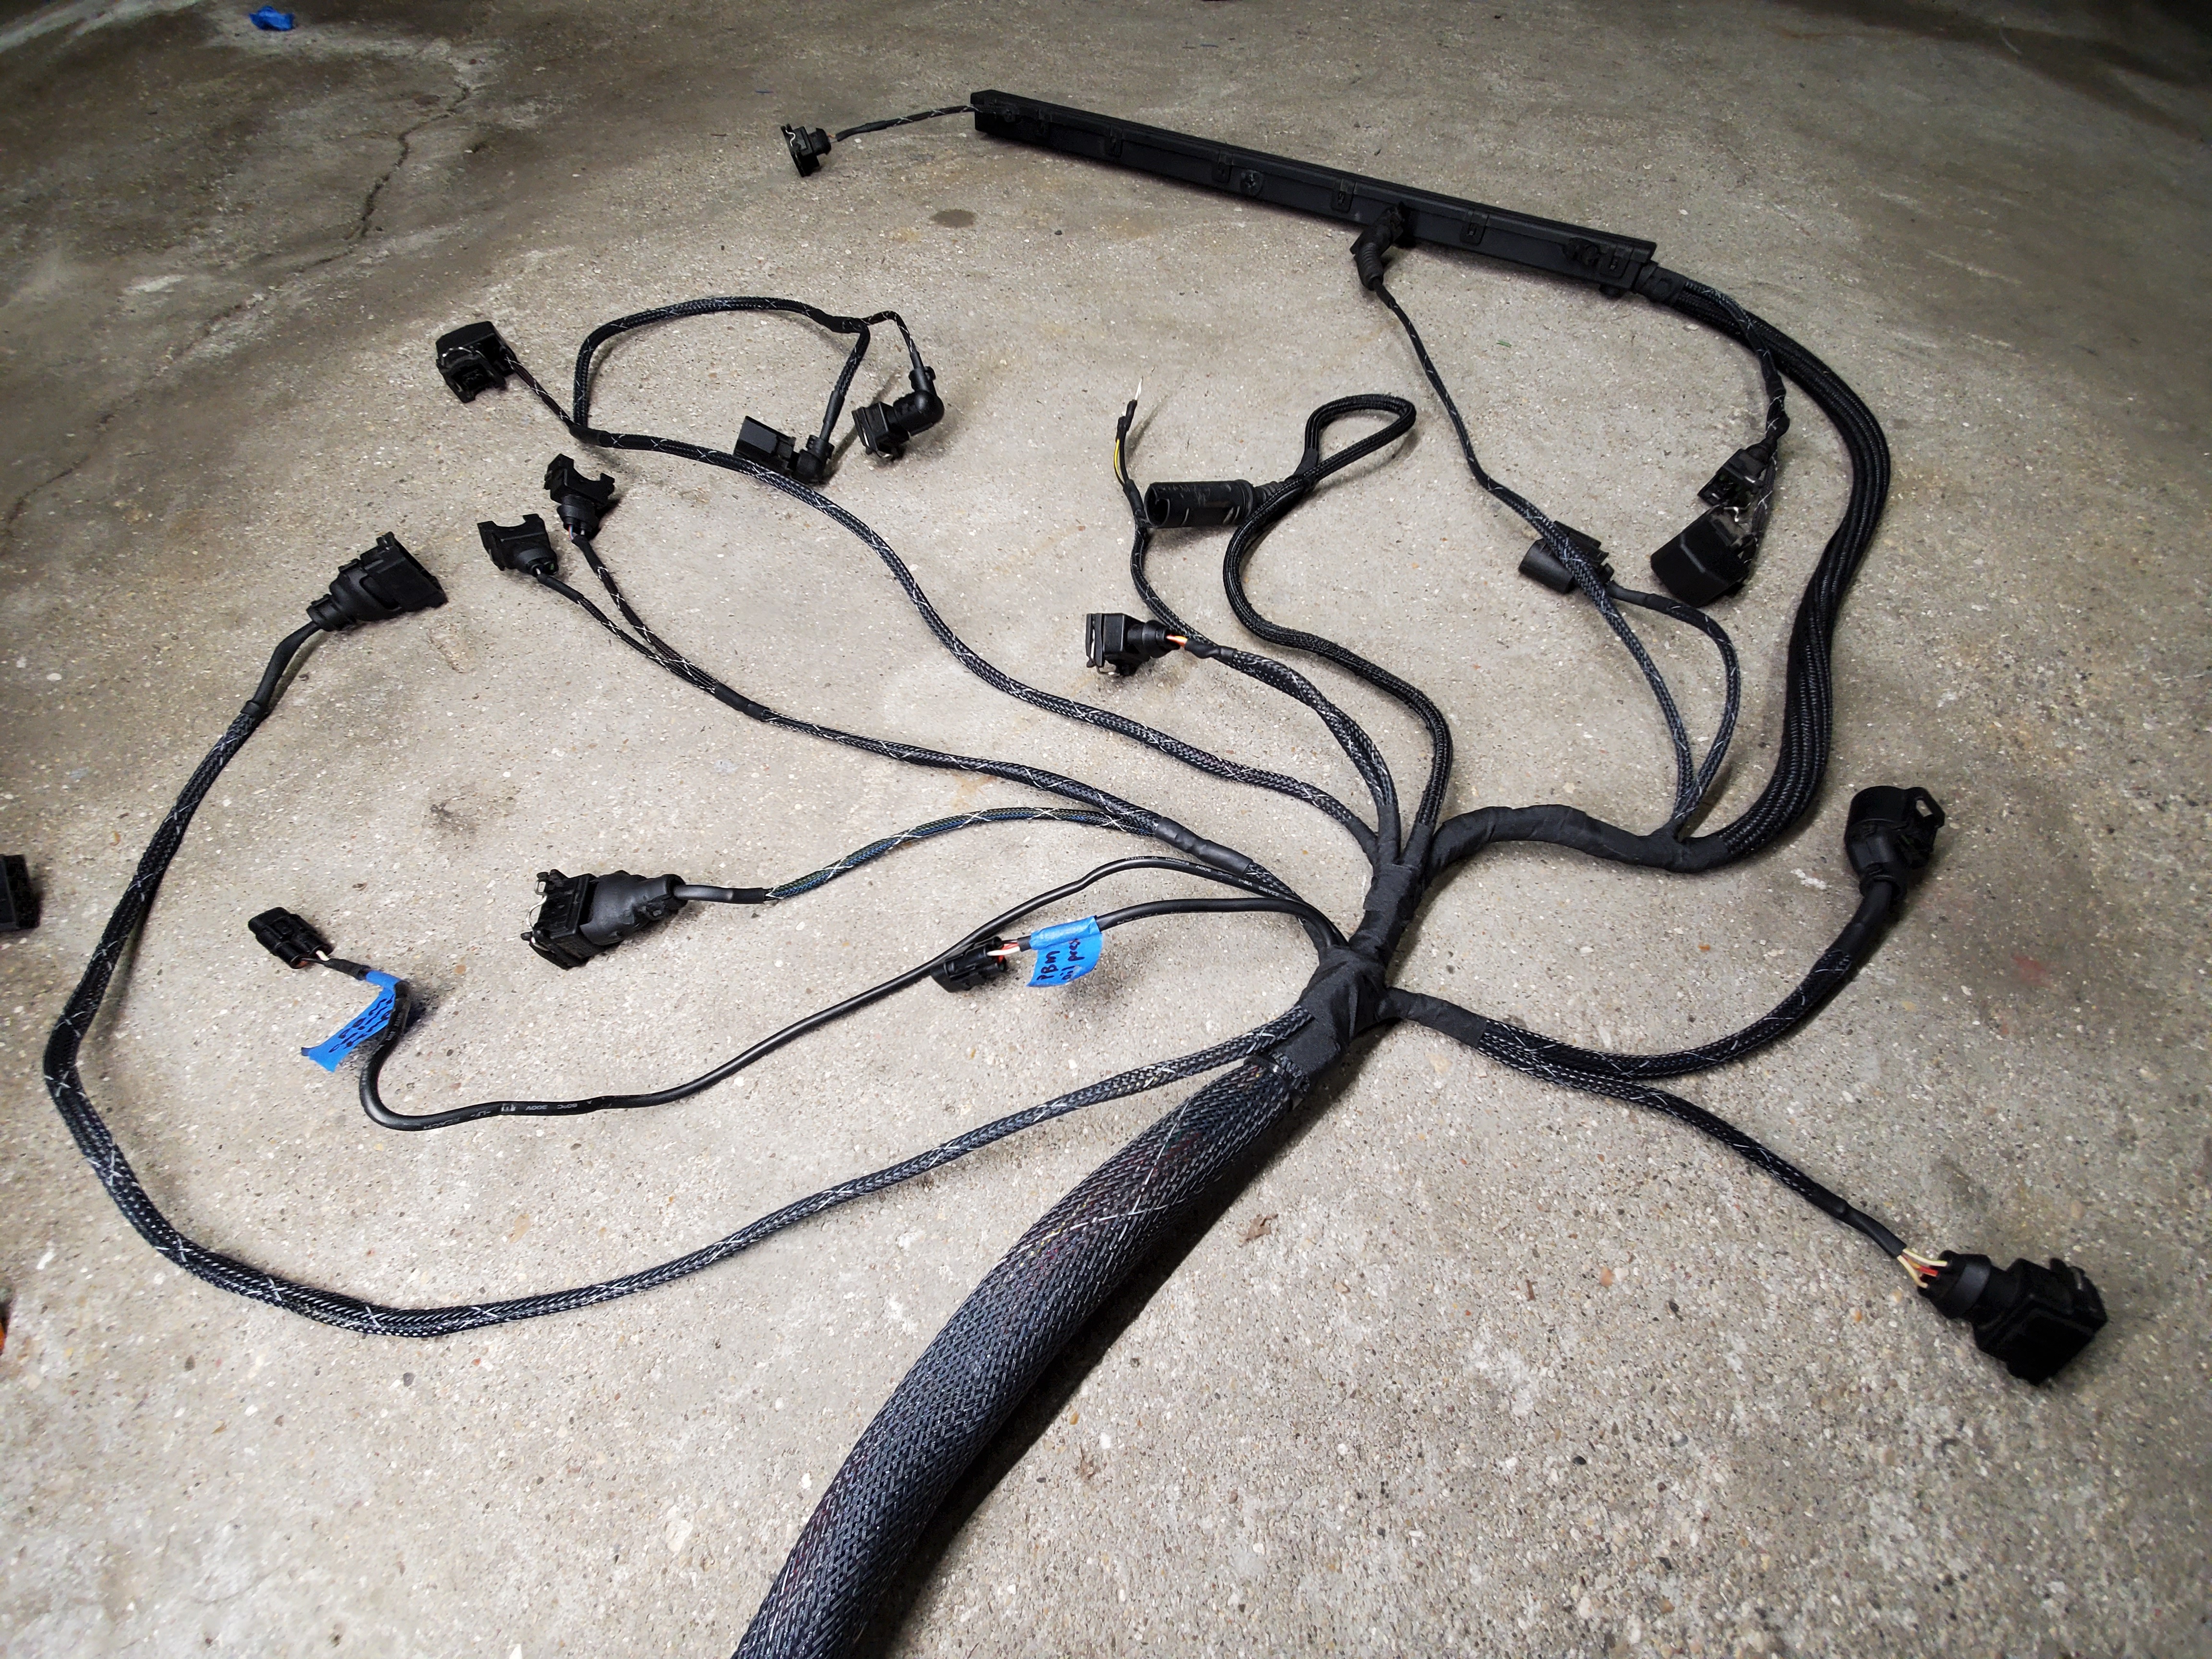
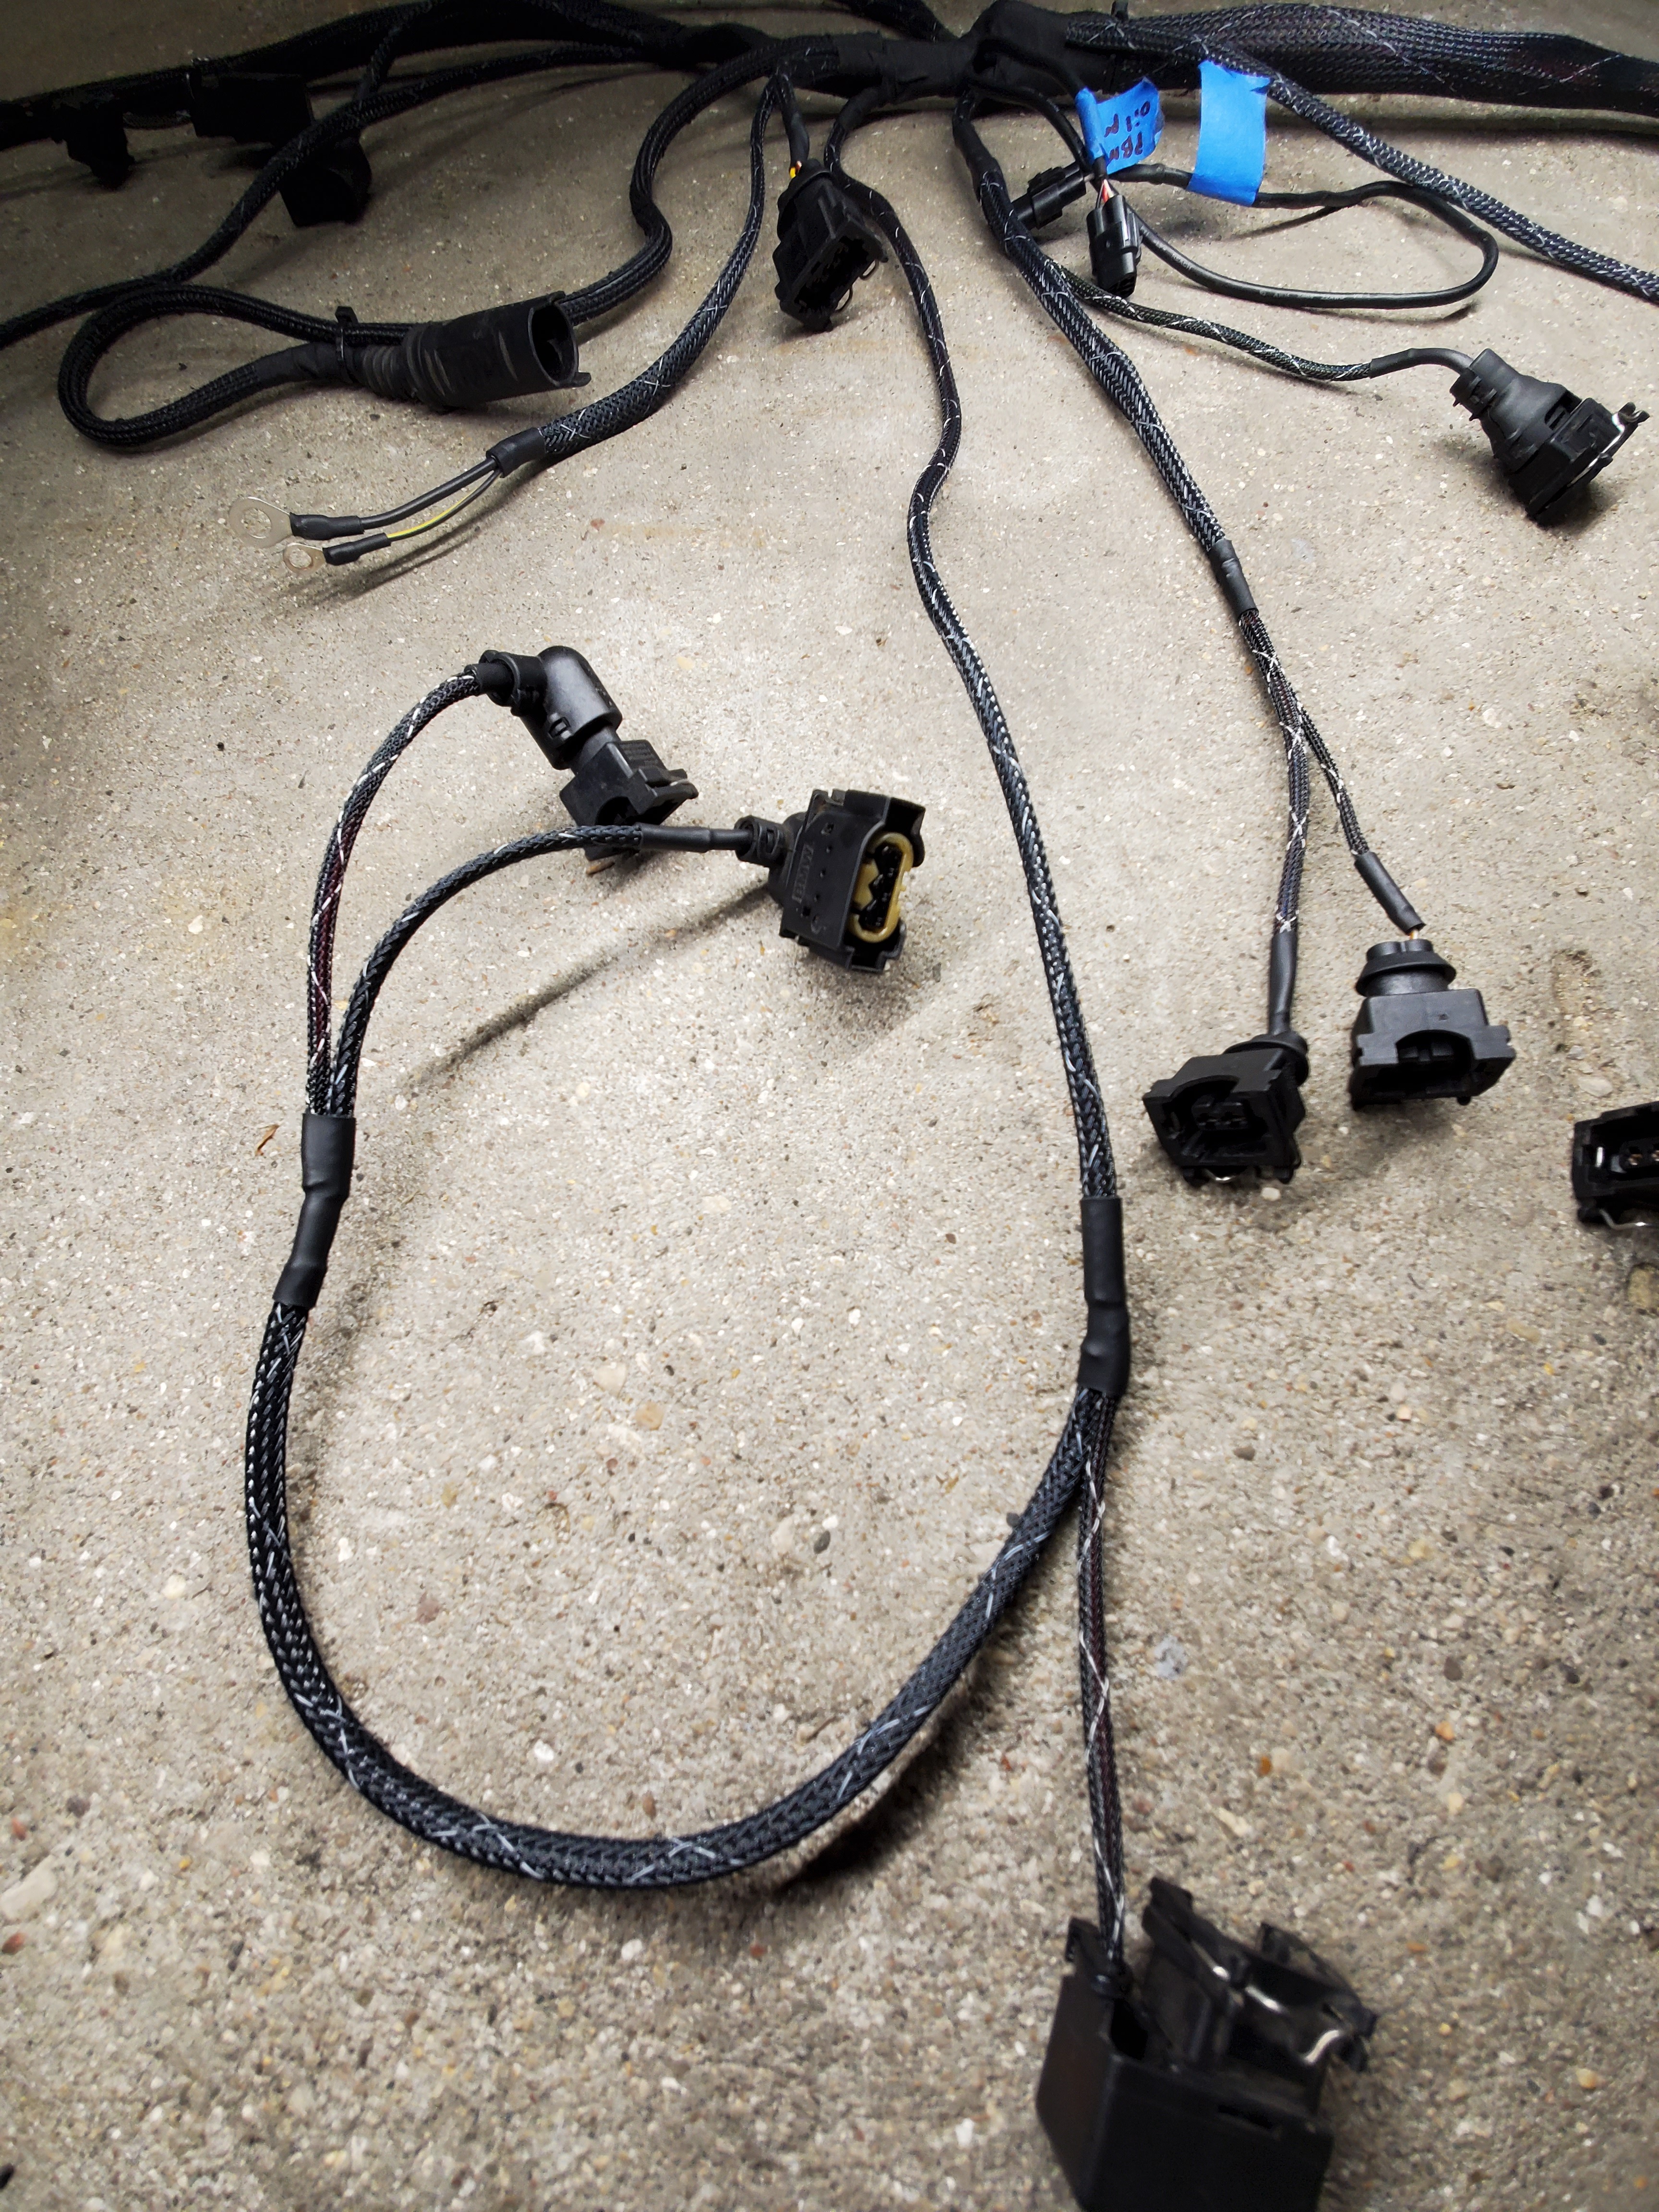
                                      And finally after about 4 hours of looming it is complete 😁

                                      Super happy with how this harness turned out. 
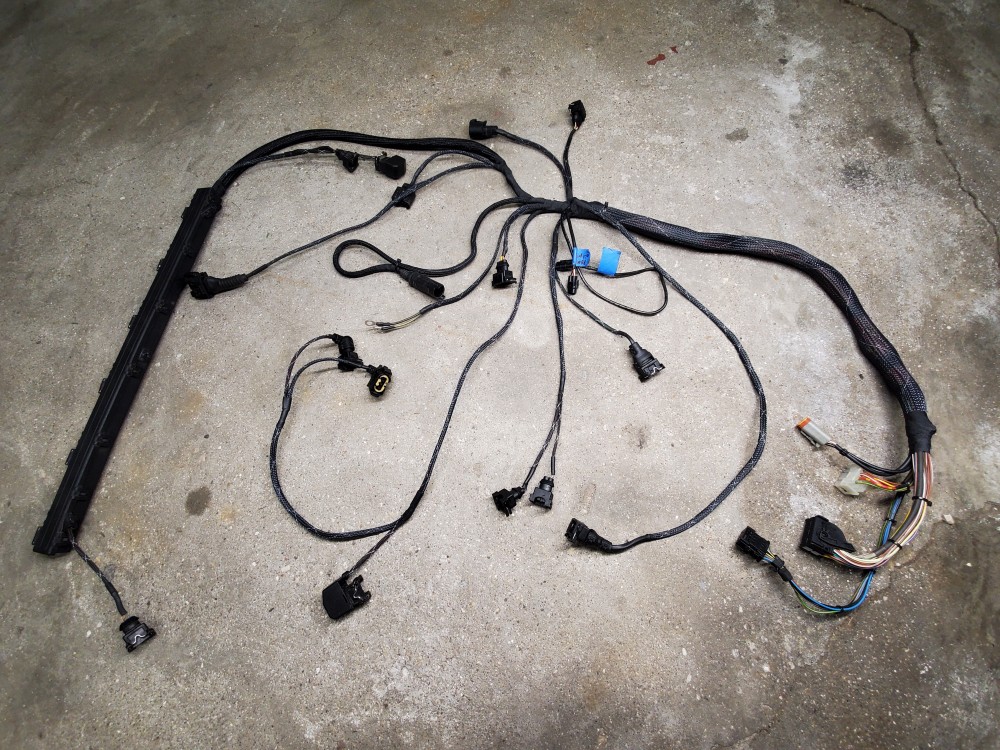
                                      20210314124824.jpg

                                      20210314125028.jpg

                                      20210314124919.jpg

                                      Now that the harness is done I got the new injector o-rings, throttle body gasket on the manifold side, and the 6 manifold to head gaskets.
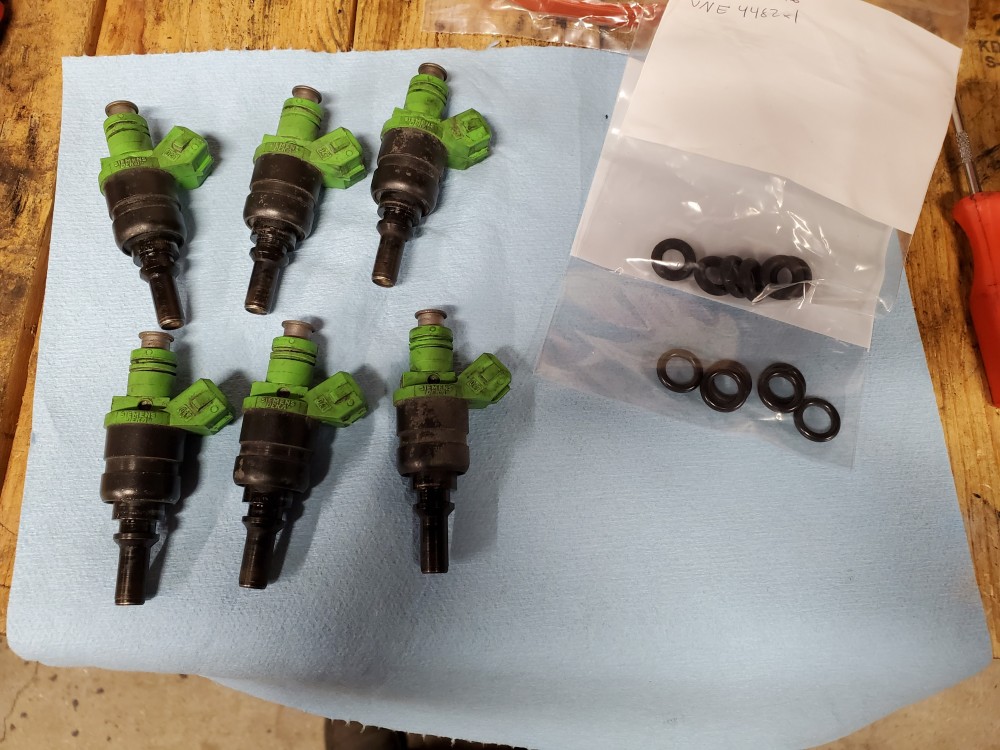
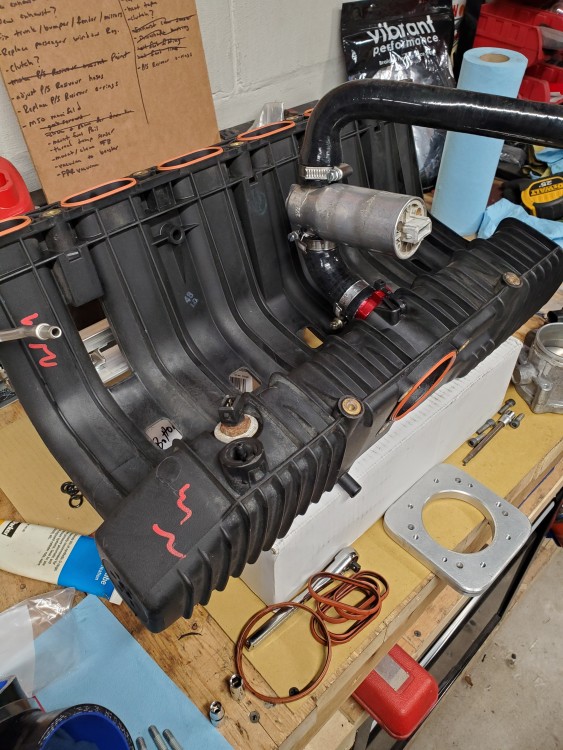
                                      20210314135921.jpg

                                      20210314141707.jpg

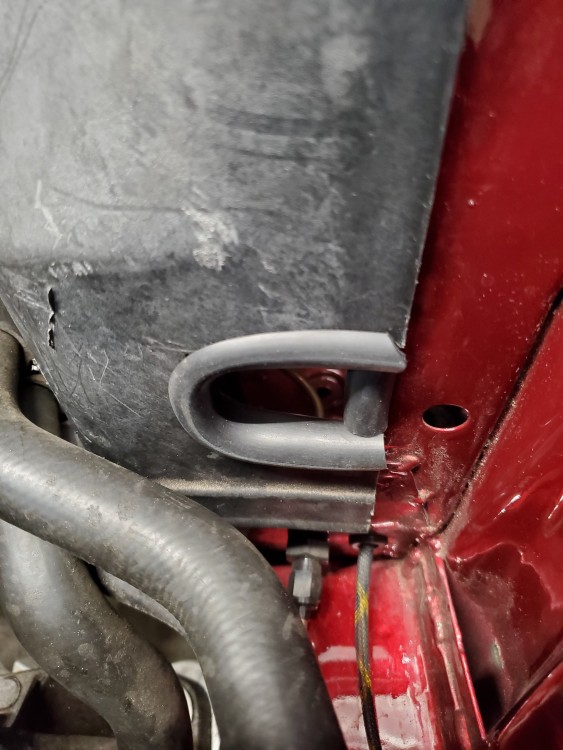
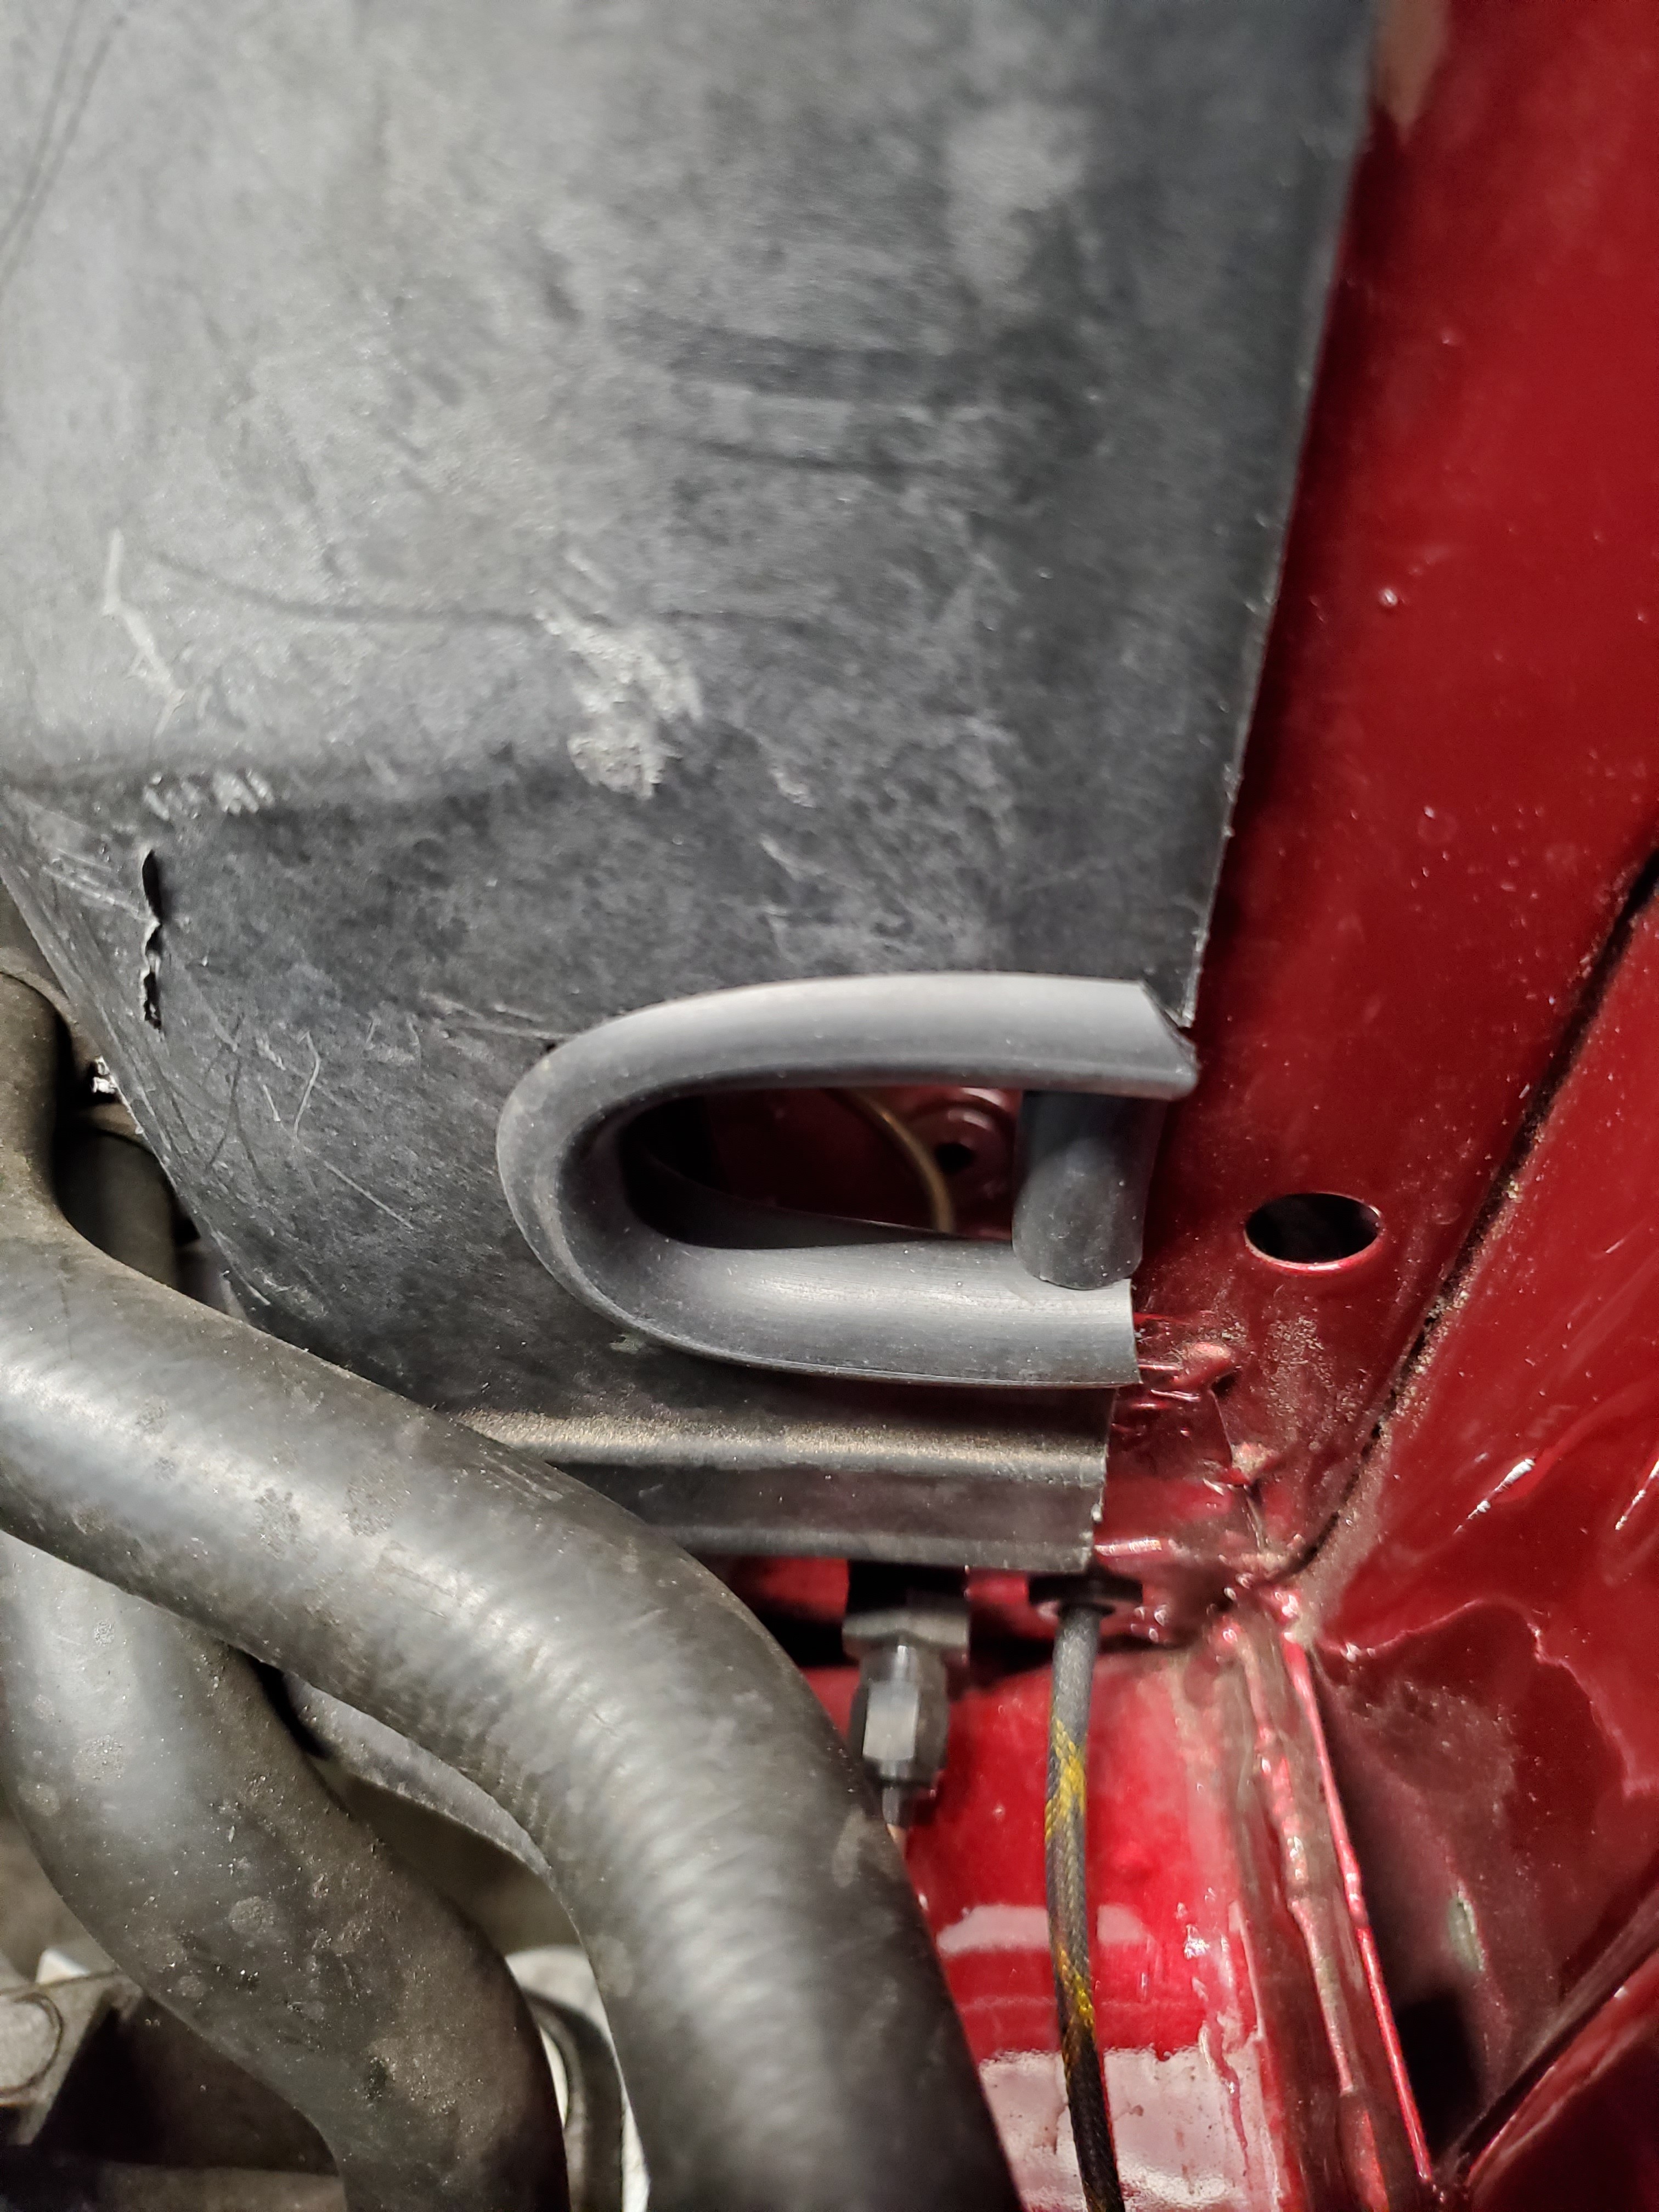
                                      I also went ahead and notched the panel that separates the ebox compartment for the engine bay where the harness is going to come through now.
                                      20210314134550.jpg

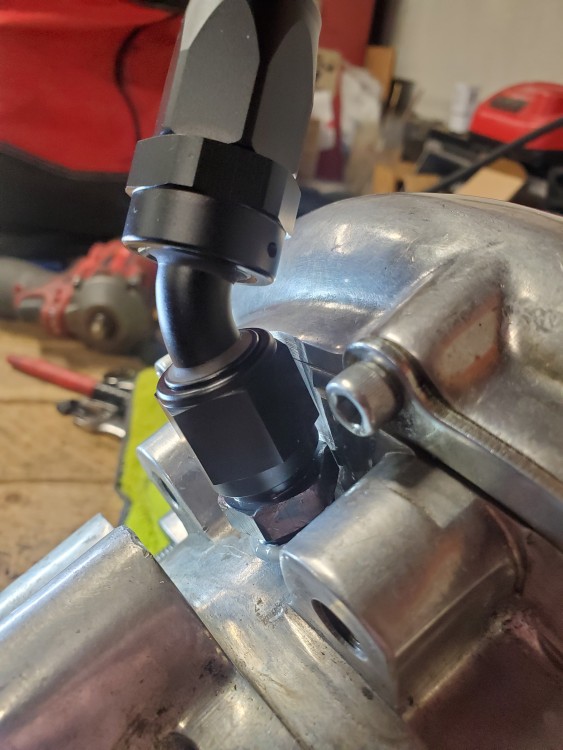
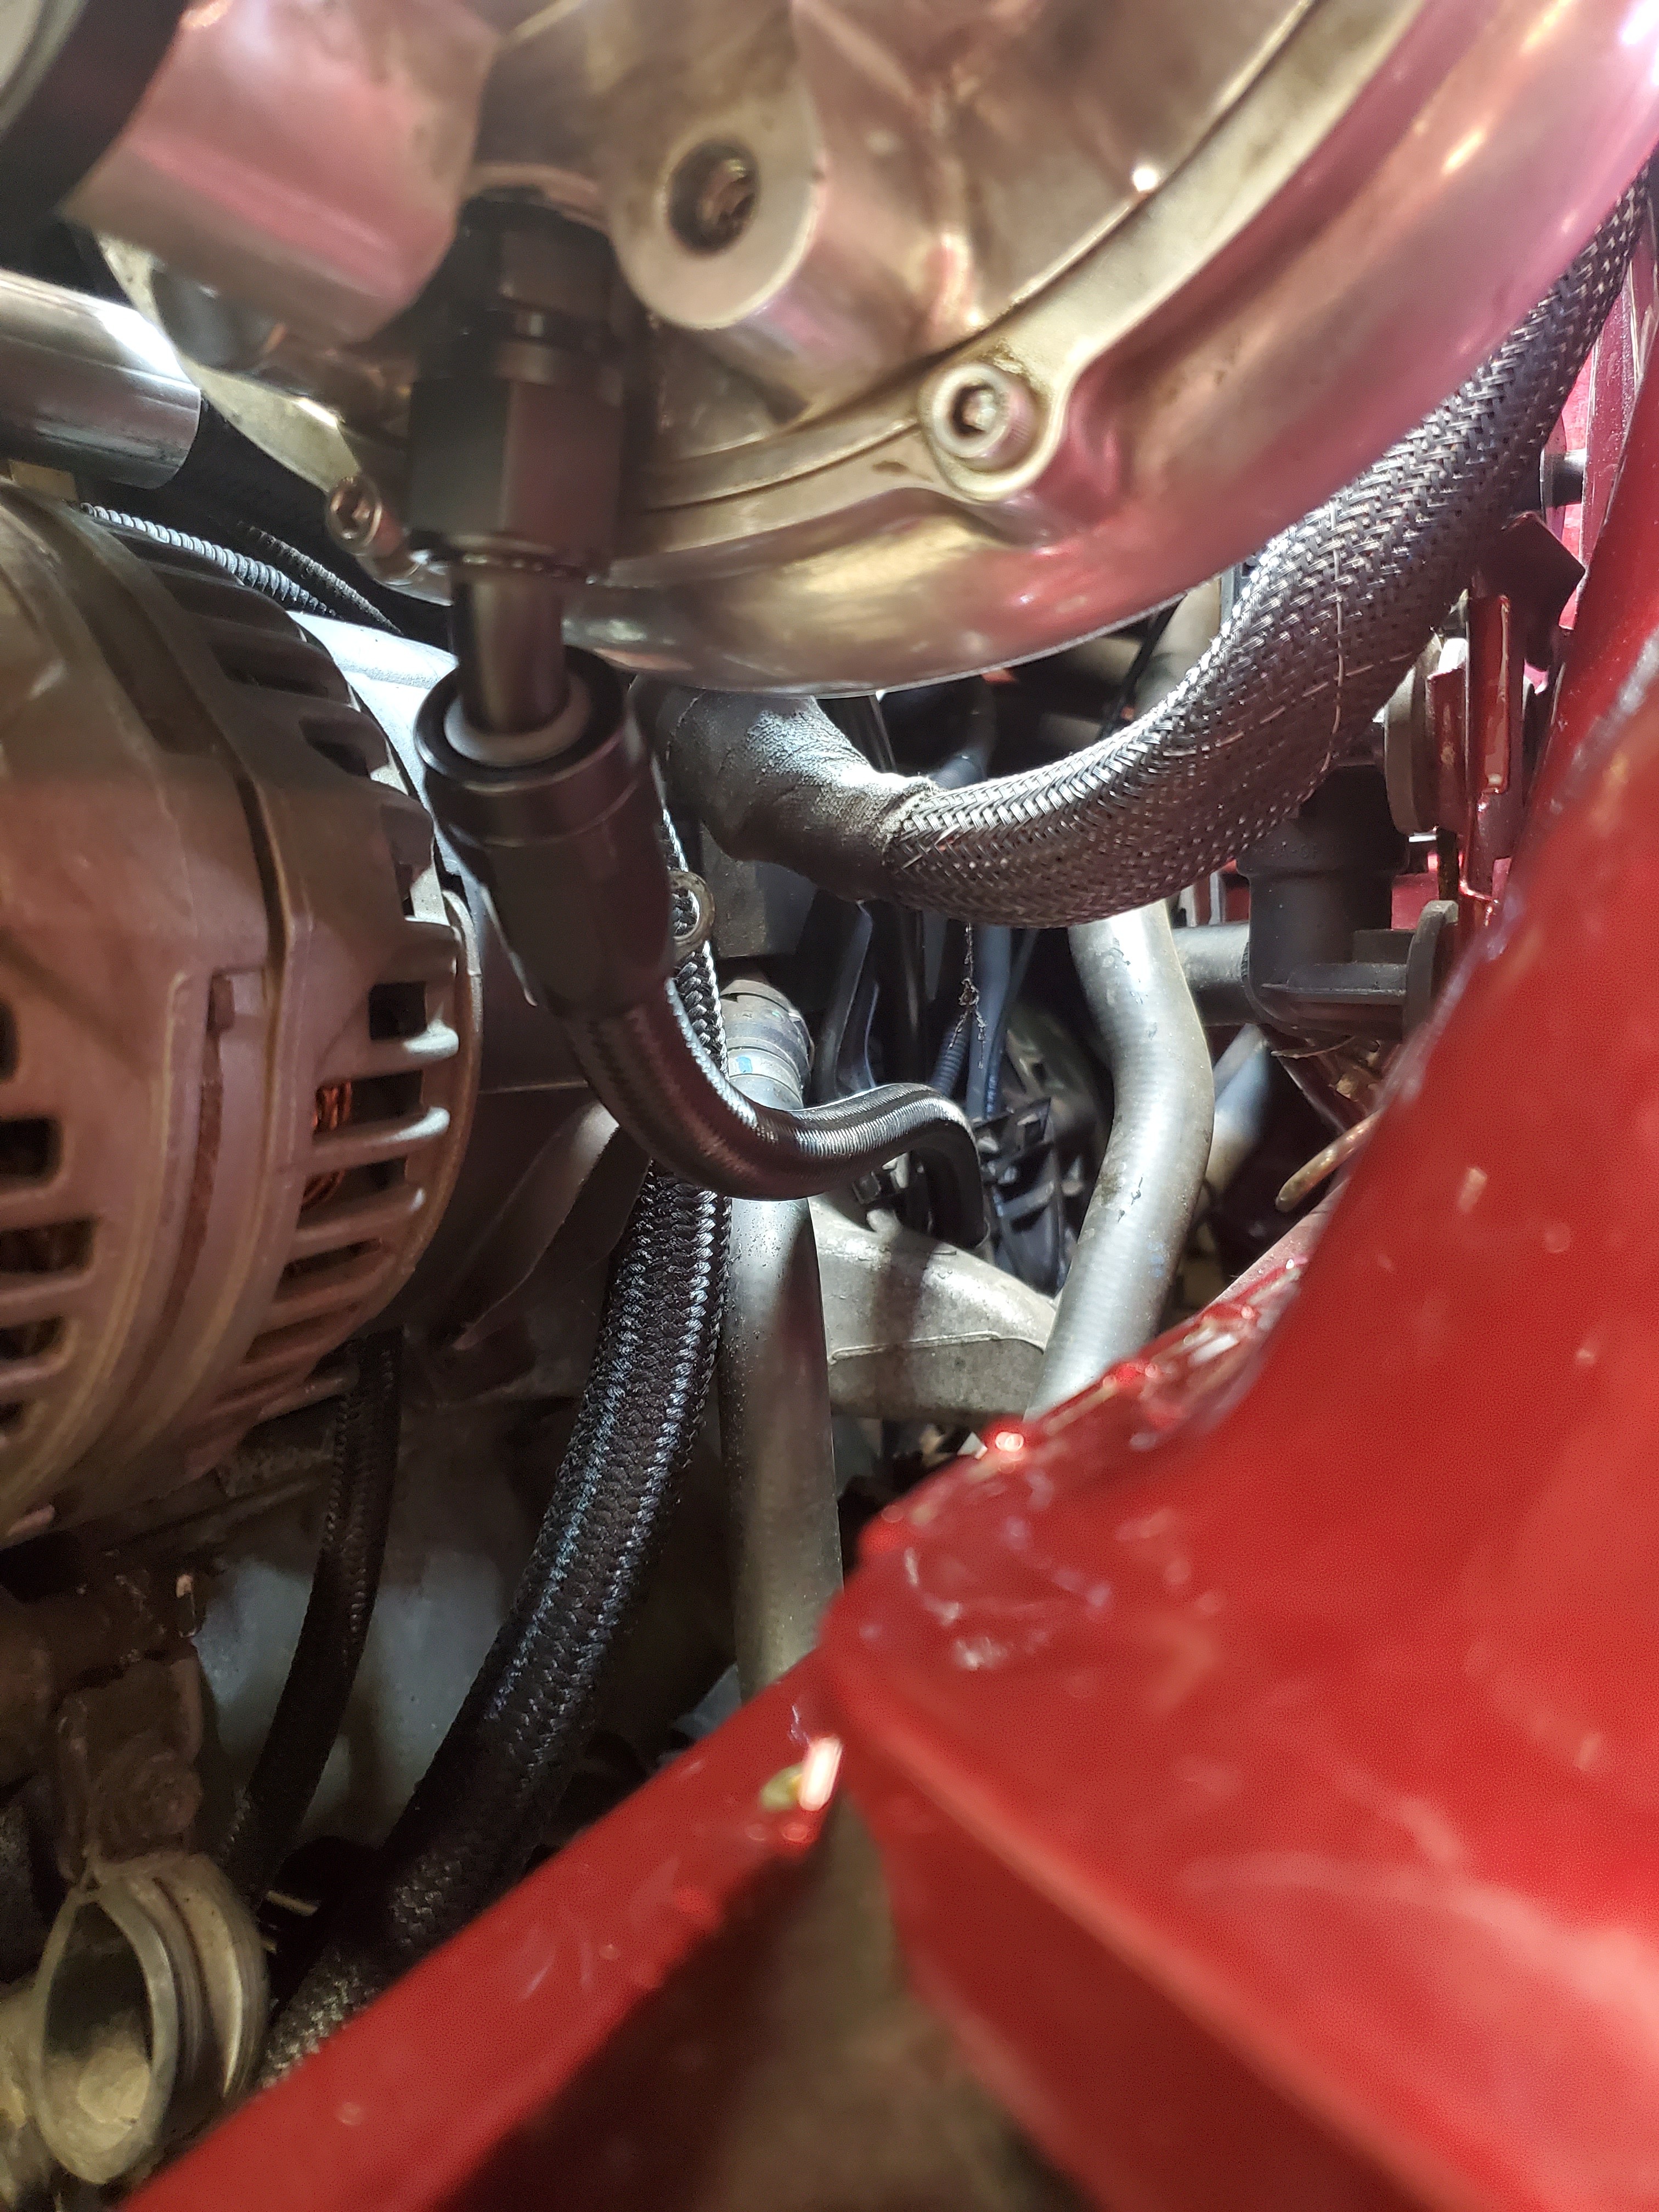
                                      And finally I got that new oil feed line installed along with the vanos banjo bolt fitting. The line that came with the kit was not going to work for my set up but this way worked out exactly how I had hoped and looks super clean.
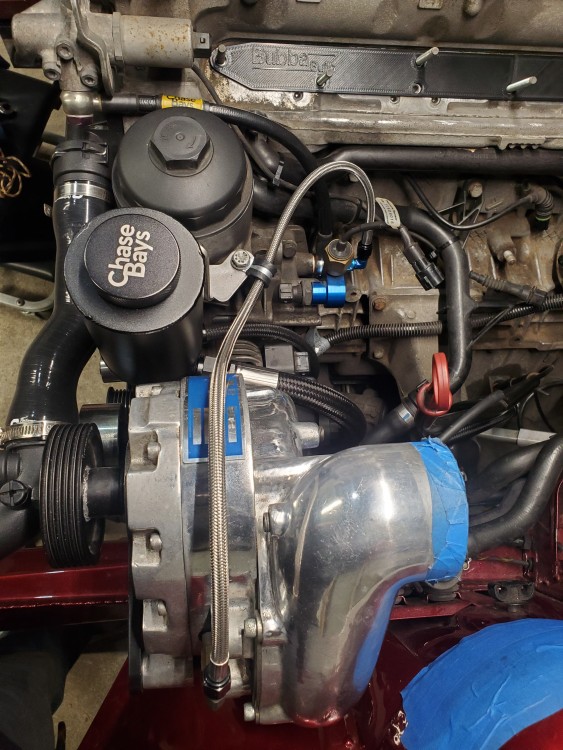
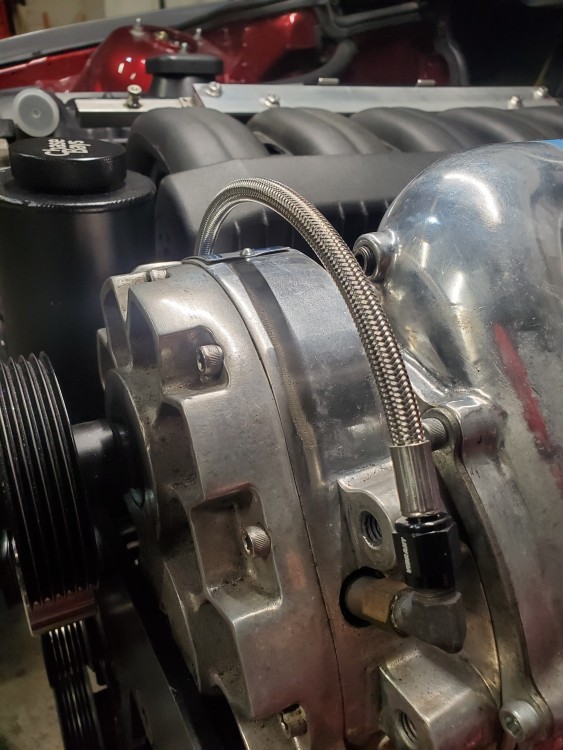
                                      20210314113943.jpg

                                      20210314113501.jpg

                                      Thats it for now! Have a few more parts to order that were further down on the immediate priority list along with figuring out how I want to run the diverter valve hoses. Then on to final assembly I think haha.

                                      1 Reply Last reply
                                      4
                                      • YoungCRY
                                        YoungCRY
                                        YoungCR
                                        wrote on last edited by
                                        #378

                                        What products do you use for the harnesses? I love all the details you and Sam put into these builds.

                                        Chris Young
                                        BMWCCA #458972
                                        1986 528e/5  | 1994 530i/5 | 1995 540i/6 | 2013 X5 35d | 1998 C1500 Suburban | 1995 K2500 Suburban

                                        1 Reply Last reply
                                        1
                                        • TkuhnT
                                          TkuhnT
                                          Tkuhn
                                          wrote on last edited by
                                          #379

                                          YoungCR said:

                                          What products do you use for the harnesses? I love all the details you and Sam put into these builds. 

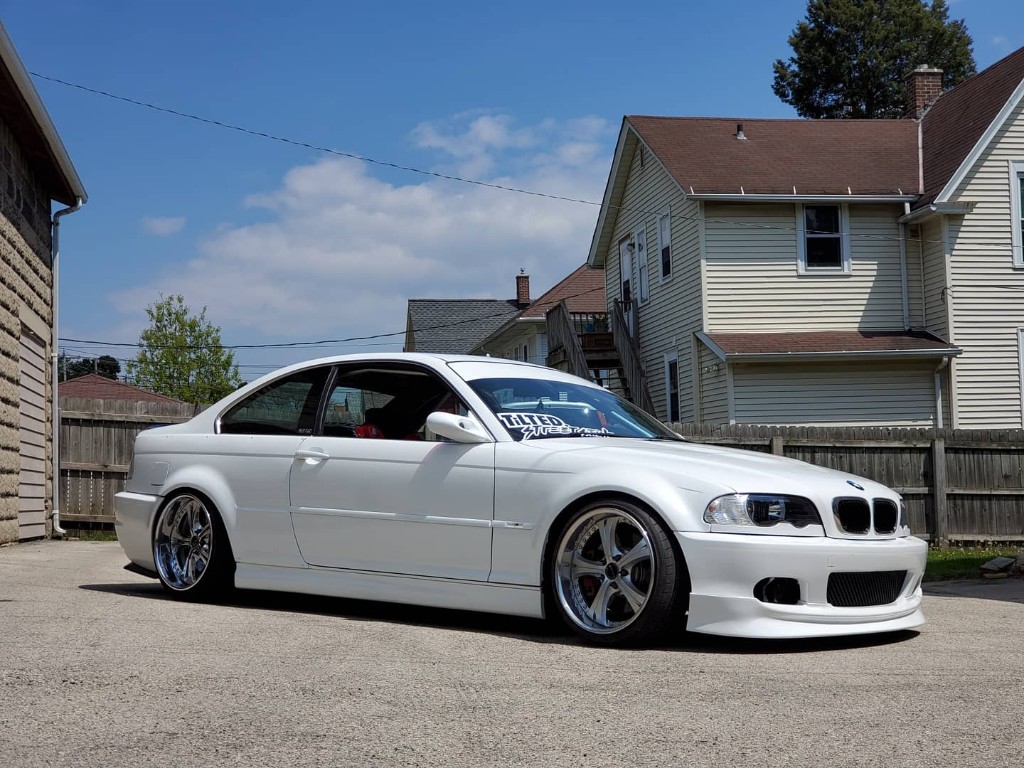
                                          Thanks!! And I use flexo flame retardant sleeving. That's what this harness is done in and same with the chassis harness wiring that I did.

                                          1 Reply Last reply
                                          1

                                          Hello! It looks like you're interested in this conversation, but you don't have an account yet.
                                          Getting fed up of having to scroll through the same posts each visit? When you register for an account, you'll always come back to exactly where you were before, and choose to be notified of new replies (either via email, or push notification). You'll also be able to save bookmarks and upvote posts to show your appreciation to other community members.
                                          With your input, this post could be even better 💗

                                          Register Login
                                          Reply
                                          • Reply as topic
                                          Log in to reply
                                          • Oldest to Newest
                                          • Newest to Oldest
                                          • Most Votes


                                          • Login

                                          • Don't have an account? Register

                                          • Login or register to search.
                                          Powered by NodeBB Contributors
                                          • First post
                                            Last post
                                          0
                                          • Categories
                                          • Recent
                                          • Tags
                                          • Popular
                                          • Users
                                          • Groups