Skip to content
  • Categories
  • Recent
  • Tags
  • Popular
  • Users
  • Groups
Skins
  • Light
  • Brite
  • Cerulean
  • Cosmo
  • Flatly
  • Journal
  • Litera
  • Lumen
  • Lux
  • Materia
  • Minty
  • Morph
  • Pulse
  • Sandstone
  • Simplex
  • Sketchy
  • Spacelab
  • United
  • Yeti
  • Zephyr
  • Dark
  • Cyborg
  • Darkly
  • Quartz
  • Slate
  • Solar
  • Superhero
  • Vapor

  • Default (No Skin)
  • No Skin
Collapse
WIBIMMERS logo

WIBIMMERS

  1. Home
  2. General Discussion
  3. Members BMWs
  4. Non-BMW Stuff on a BMW Forum

Non-BMW Stuff on a BMW Forum
Scheduled Pinned Locked Moved Members BMWs
1.2k Posts 29 Posters 0 Views 1 Watching
  • Oldest to Newest
  • Newest to Oldest
  • Most Votes
Reply
  • Reply as topic
Log in to reply
This topic has been deleted. Only users with topic management privileges can see it.
  • G
    G
    gilber33
    wrote on last edited by
    #696

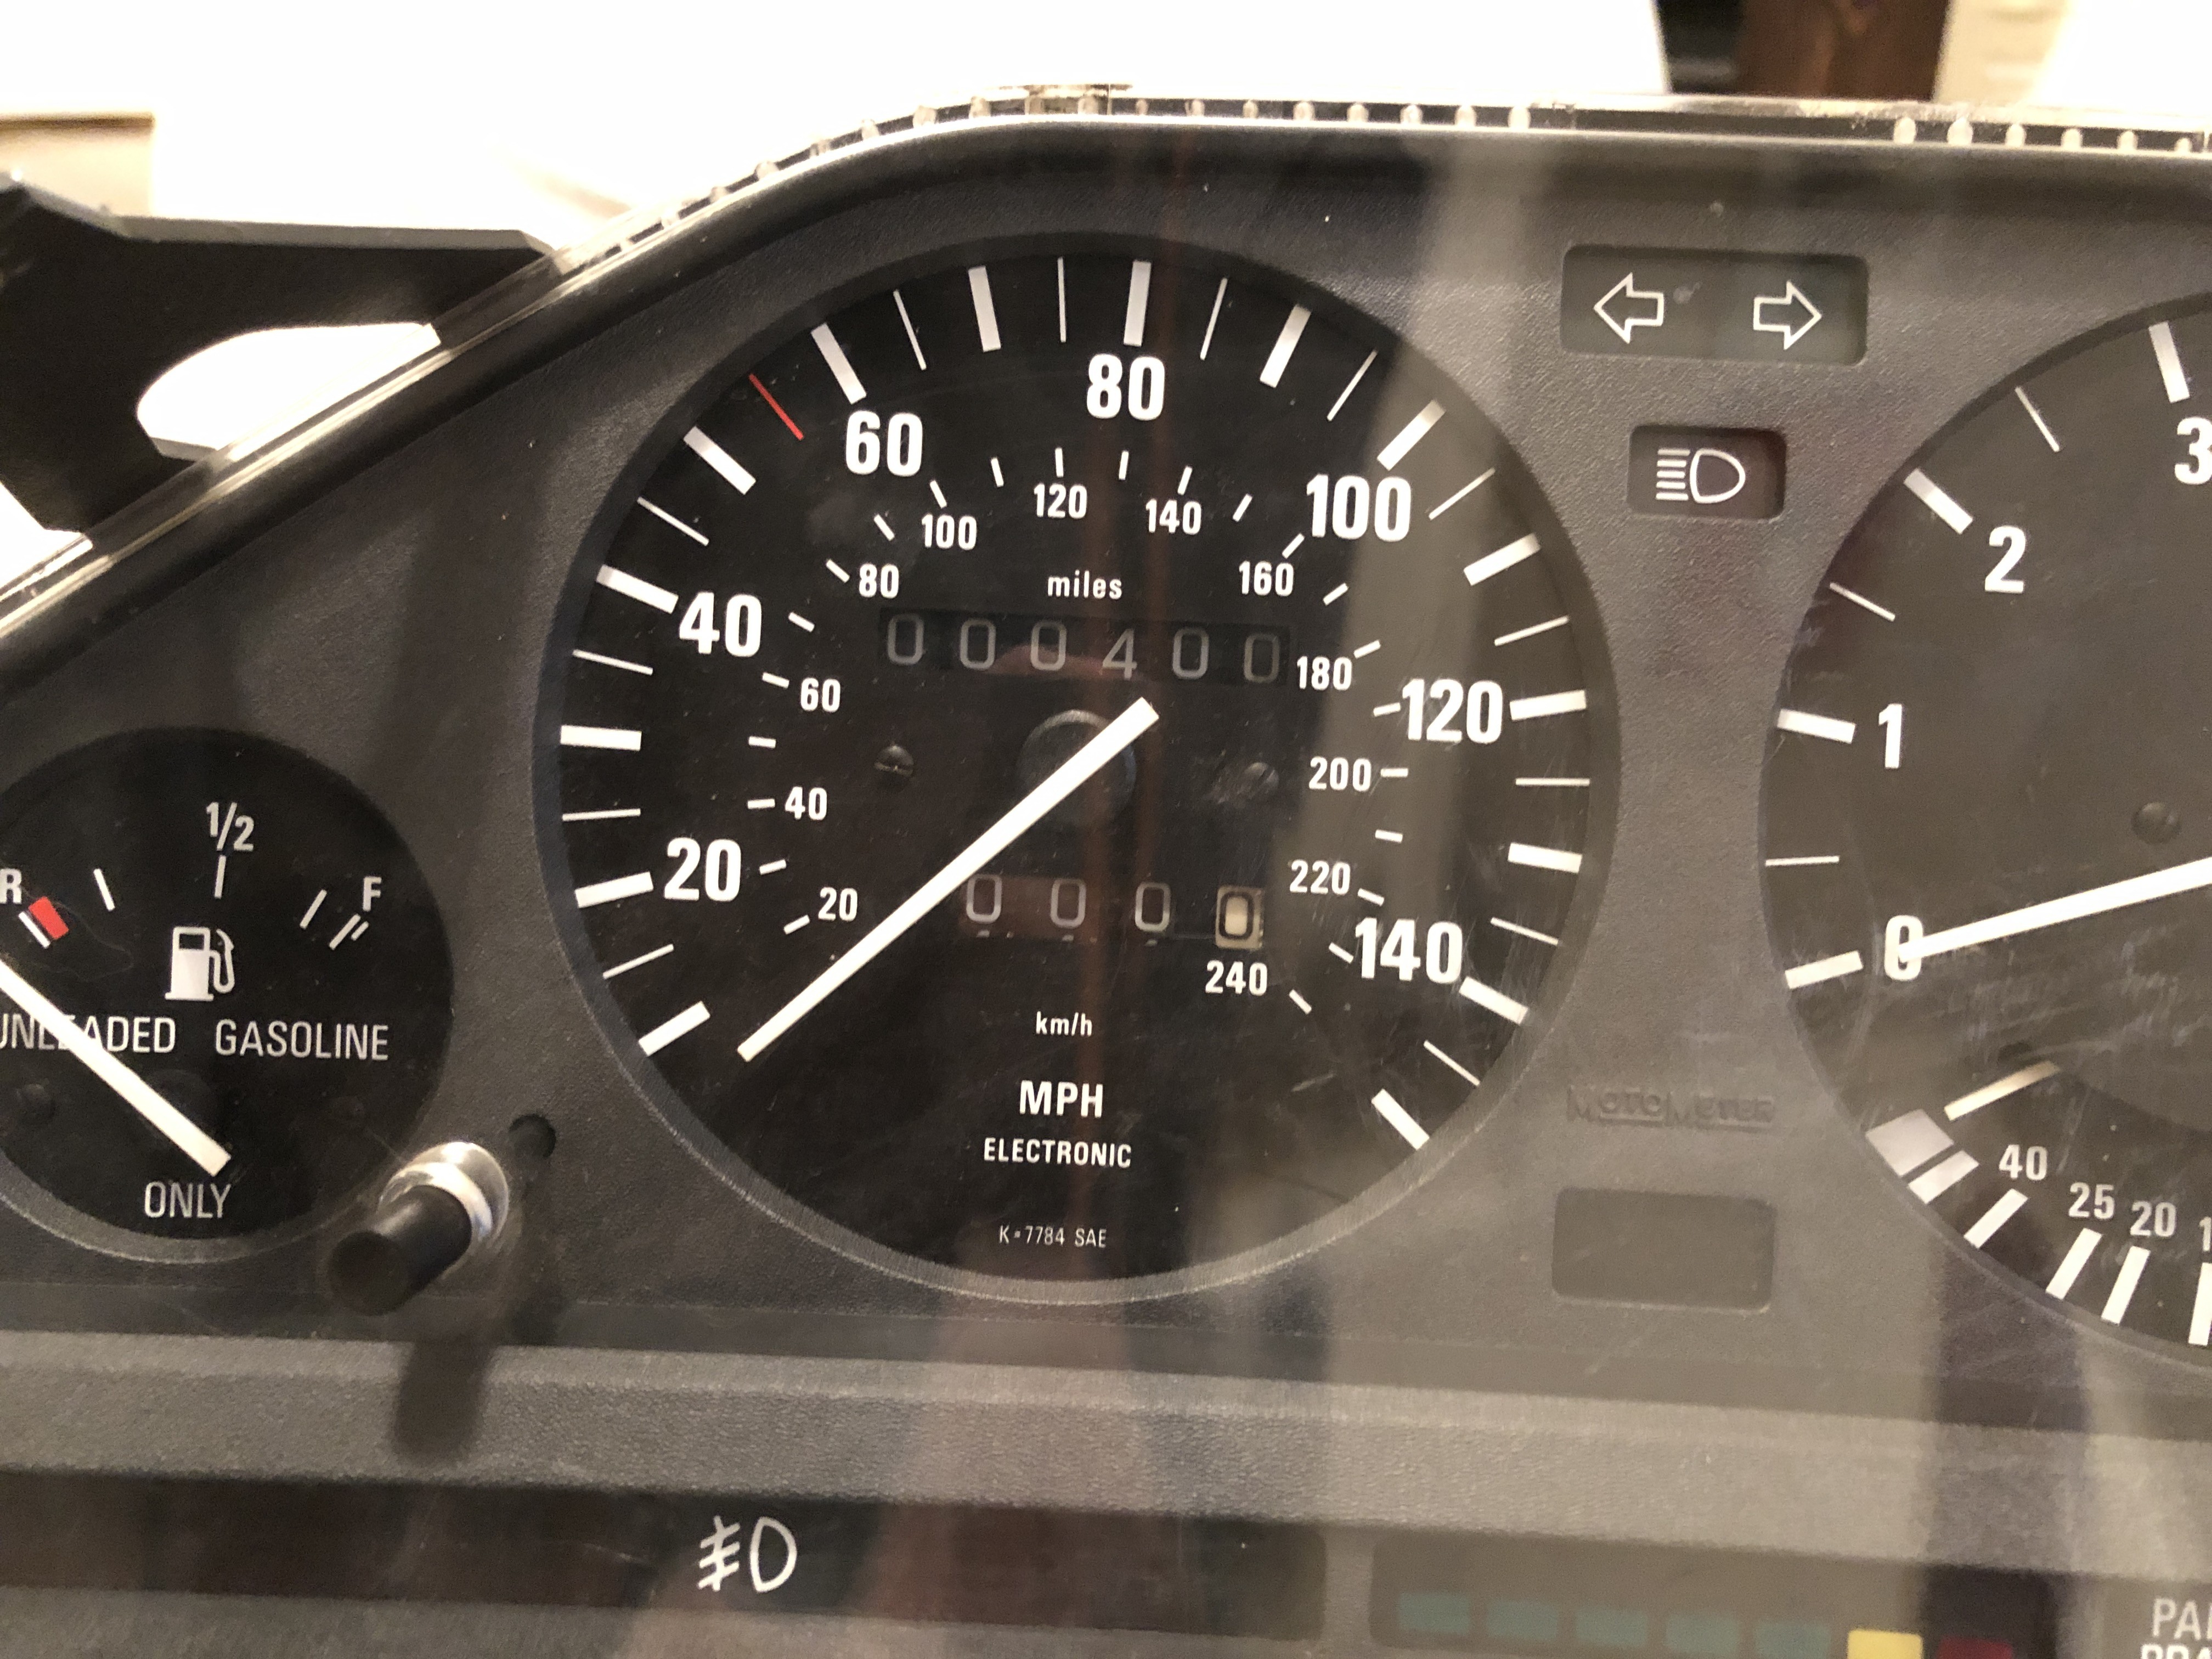
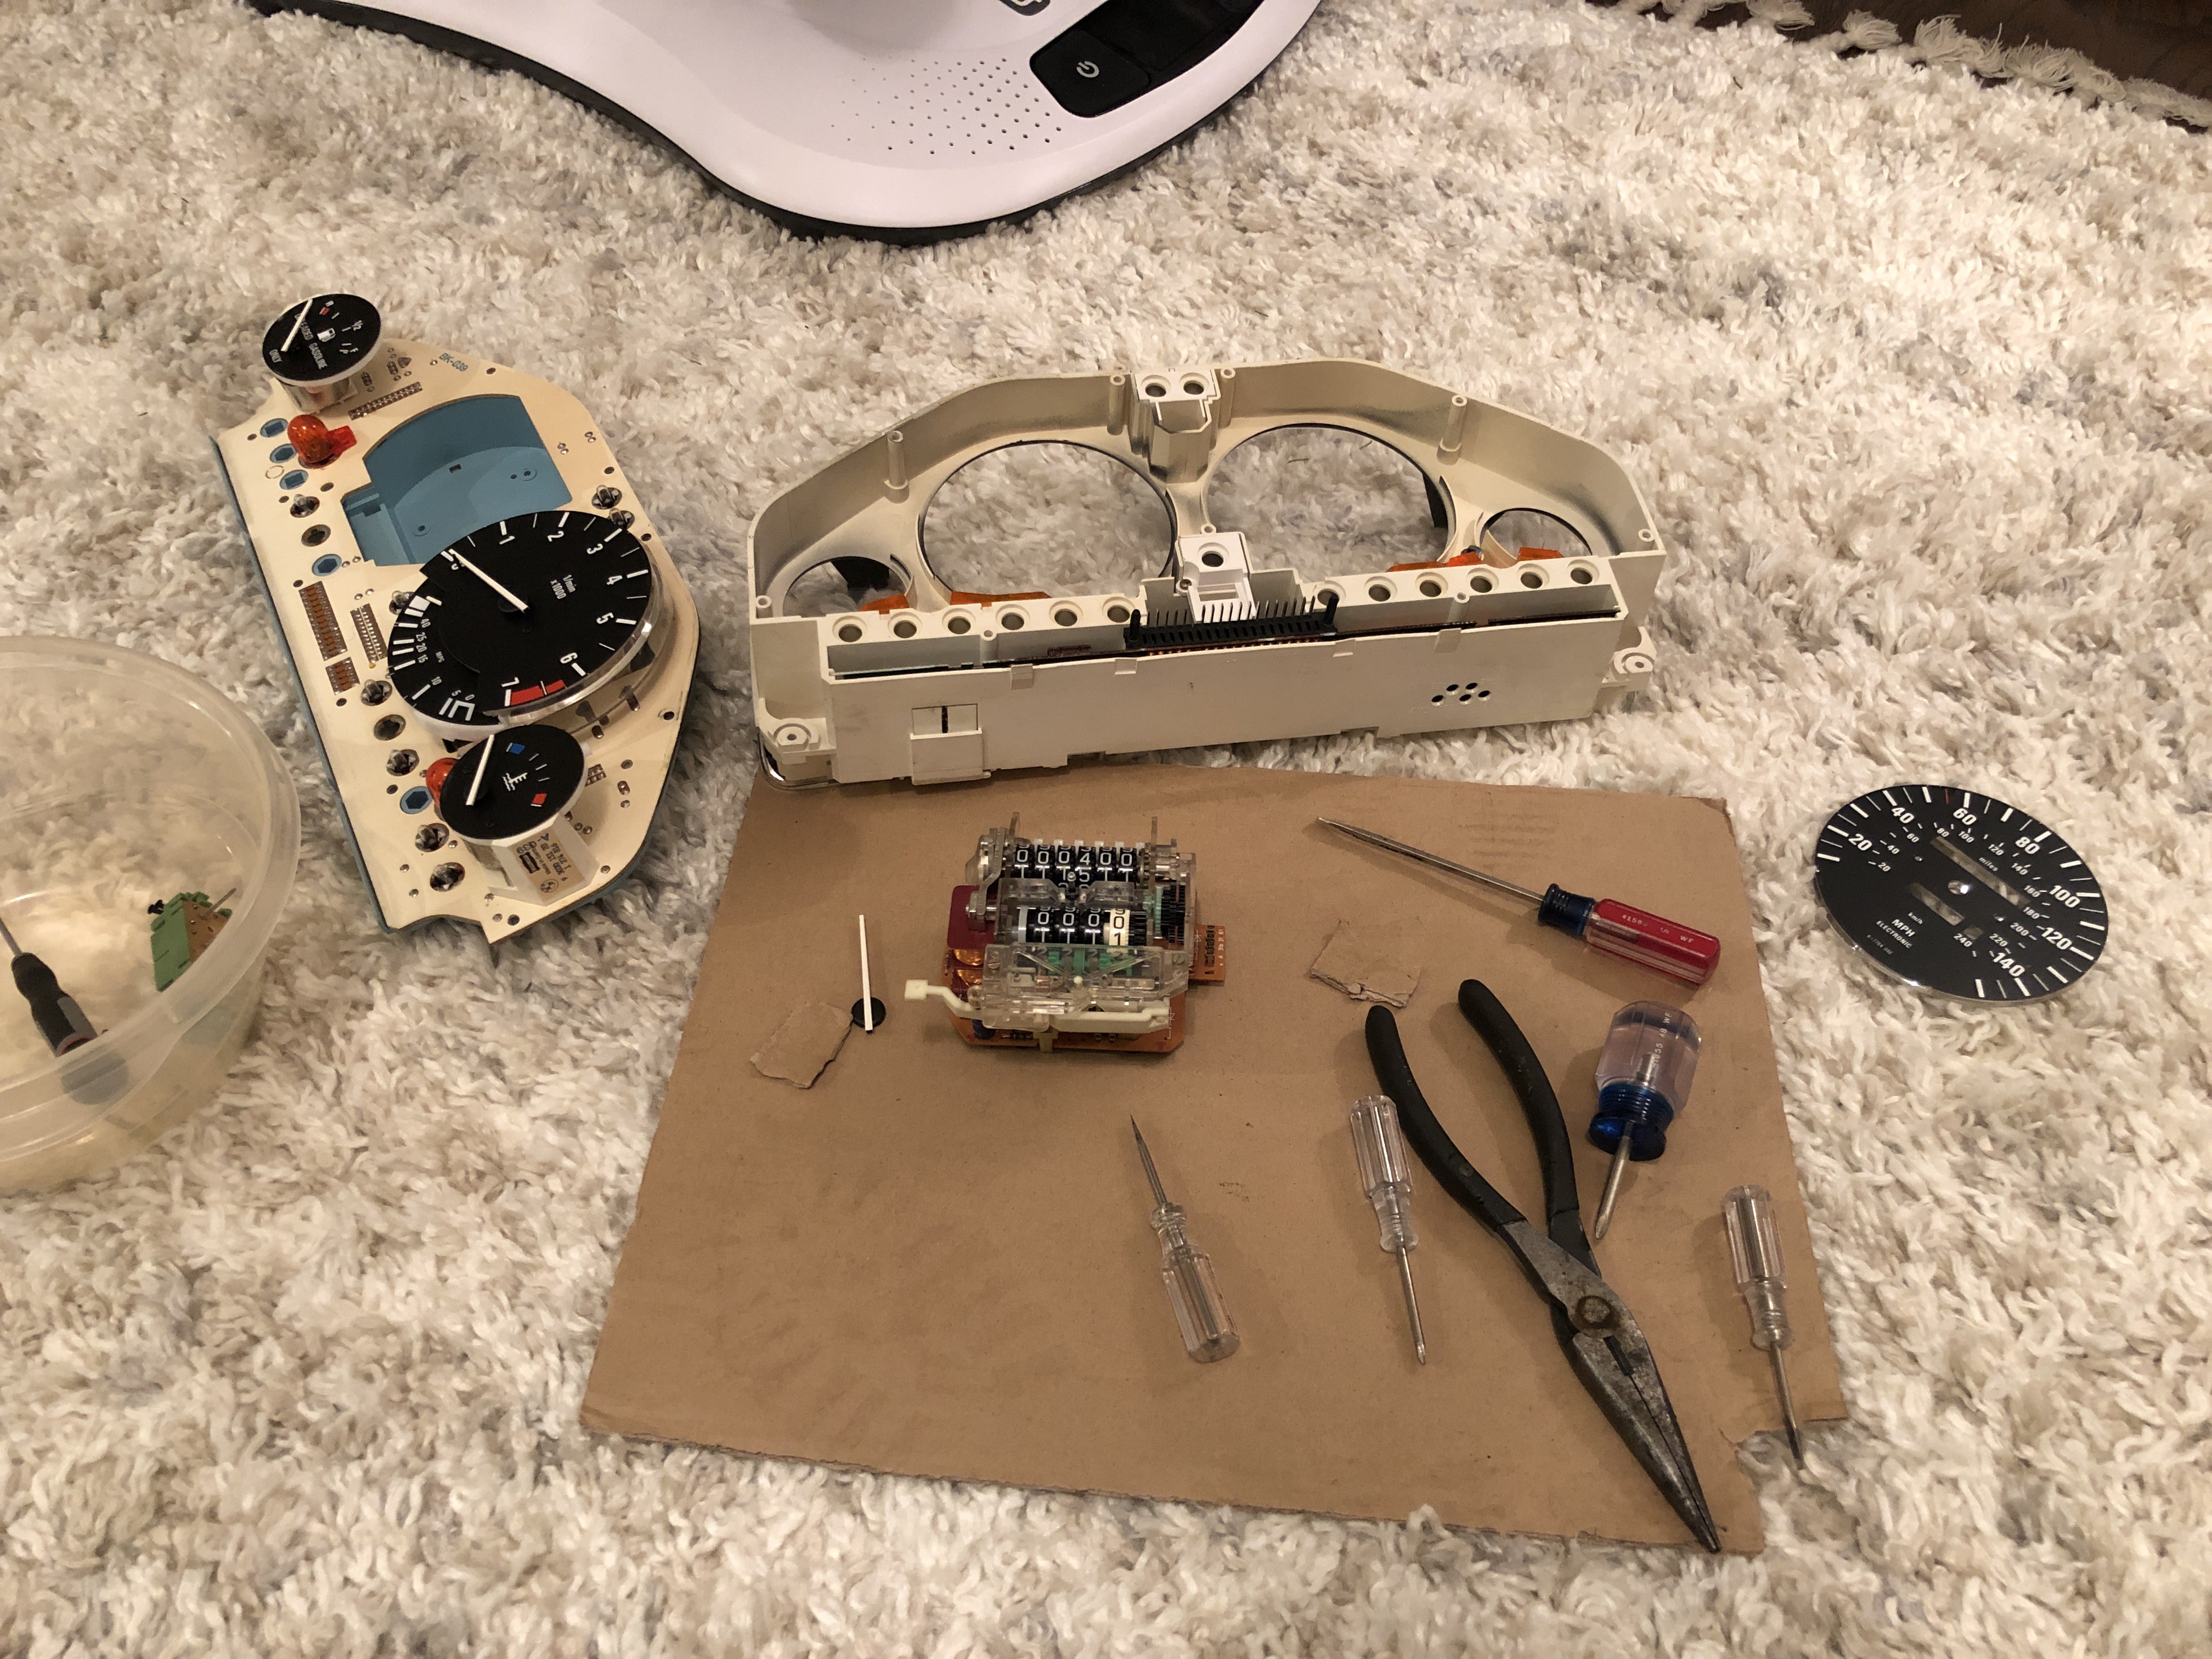
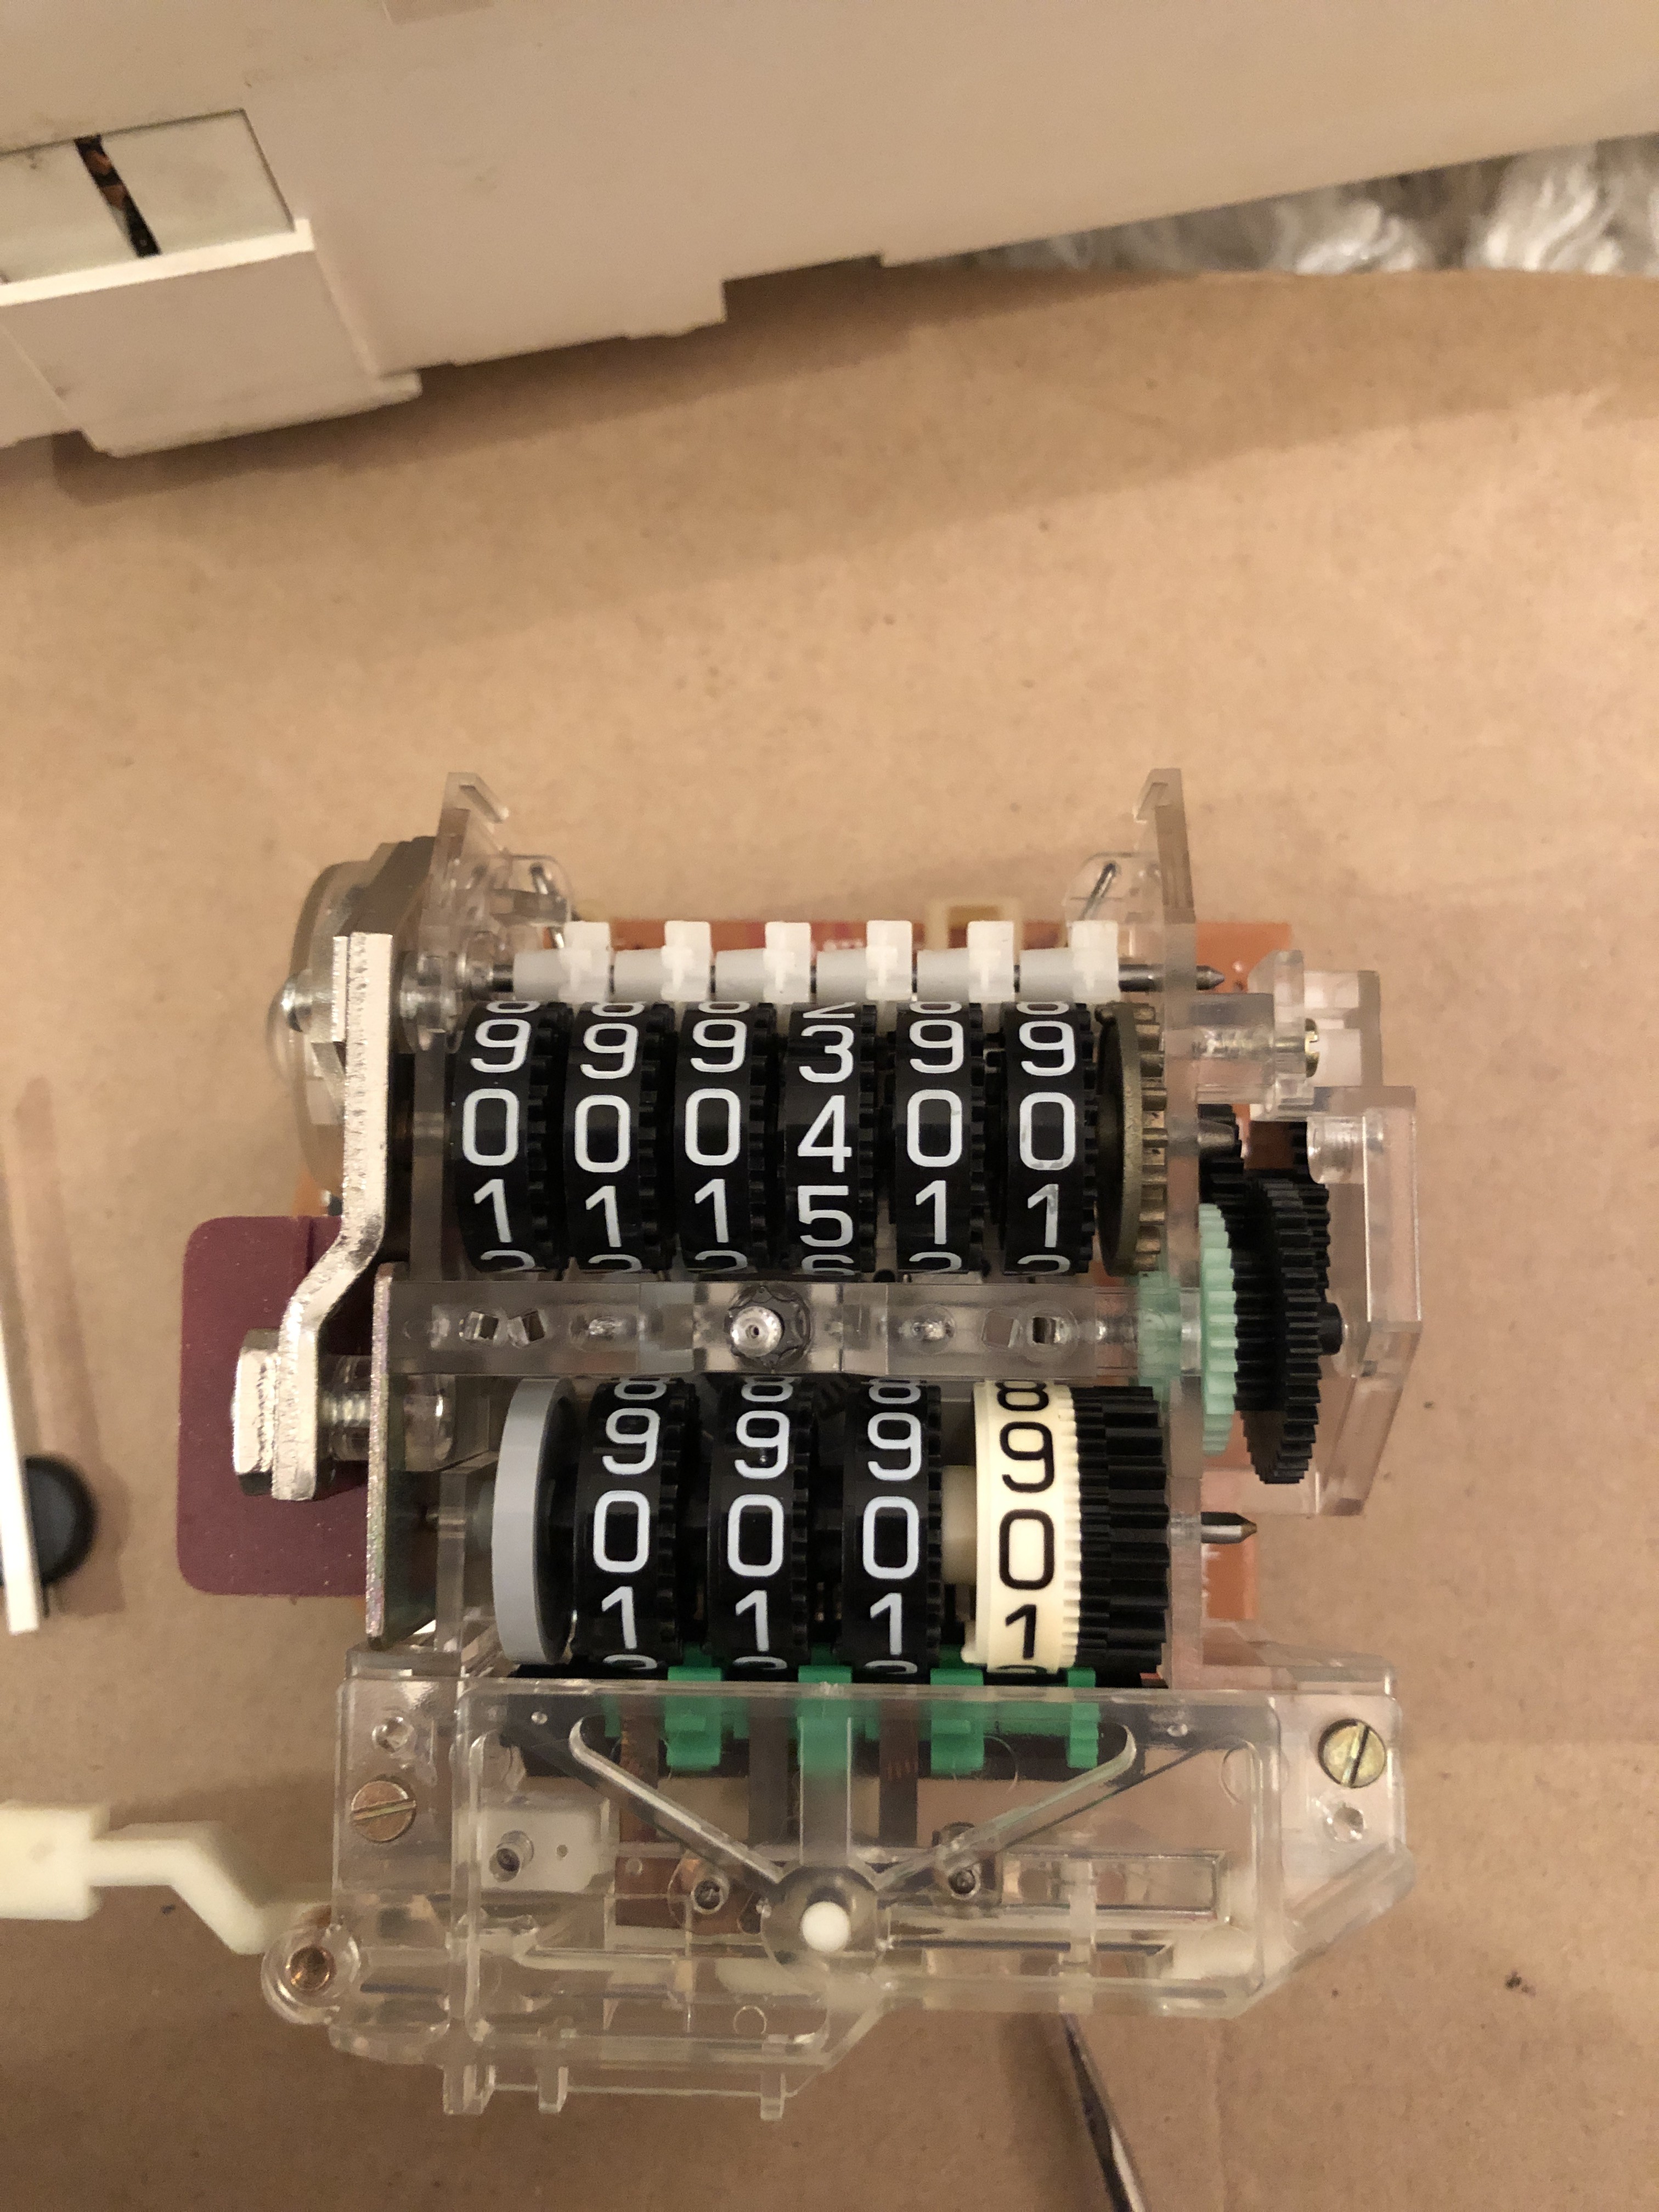
    Finally did something that I’ve really really wanted to do since getting the new engine it. Reset the odometer to roughly the miles on the engine. Now the odometer has some meaning to my ownership. 
     

    8FBABEBB-C2BB-46EA-B440-8232C39C6F6C.jpeg

    CDB6A9C8-C60D-4549-BE29-5D46E8C5A82C.jpeg

    56AA10A7-03BD-4674-8D74-2B933A857945.jpeg

    1 Reply Last reply
    1
    • G
      G
      gilber33
      wrote on last edited by
      #697

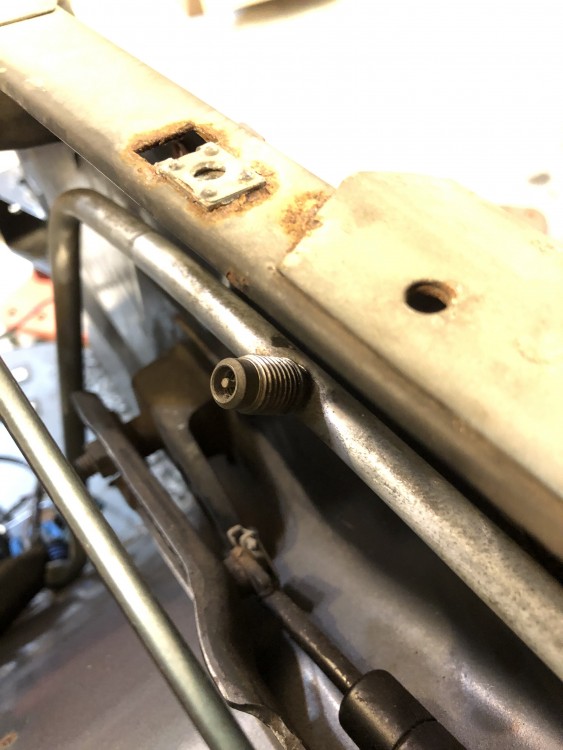
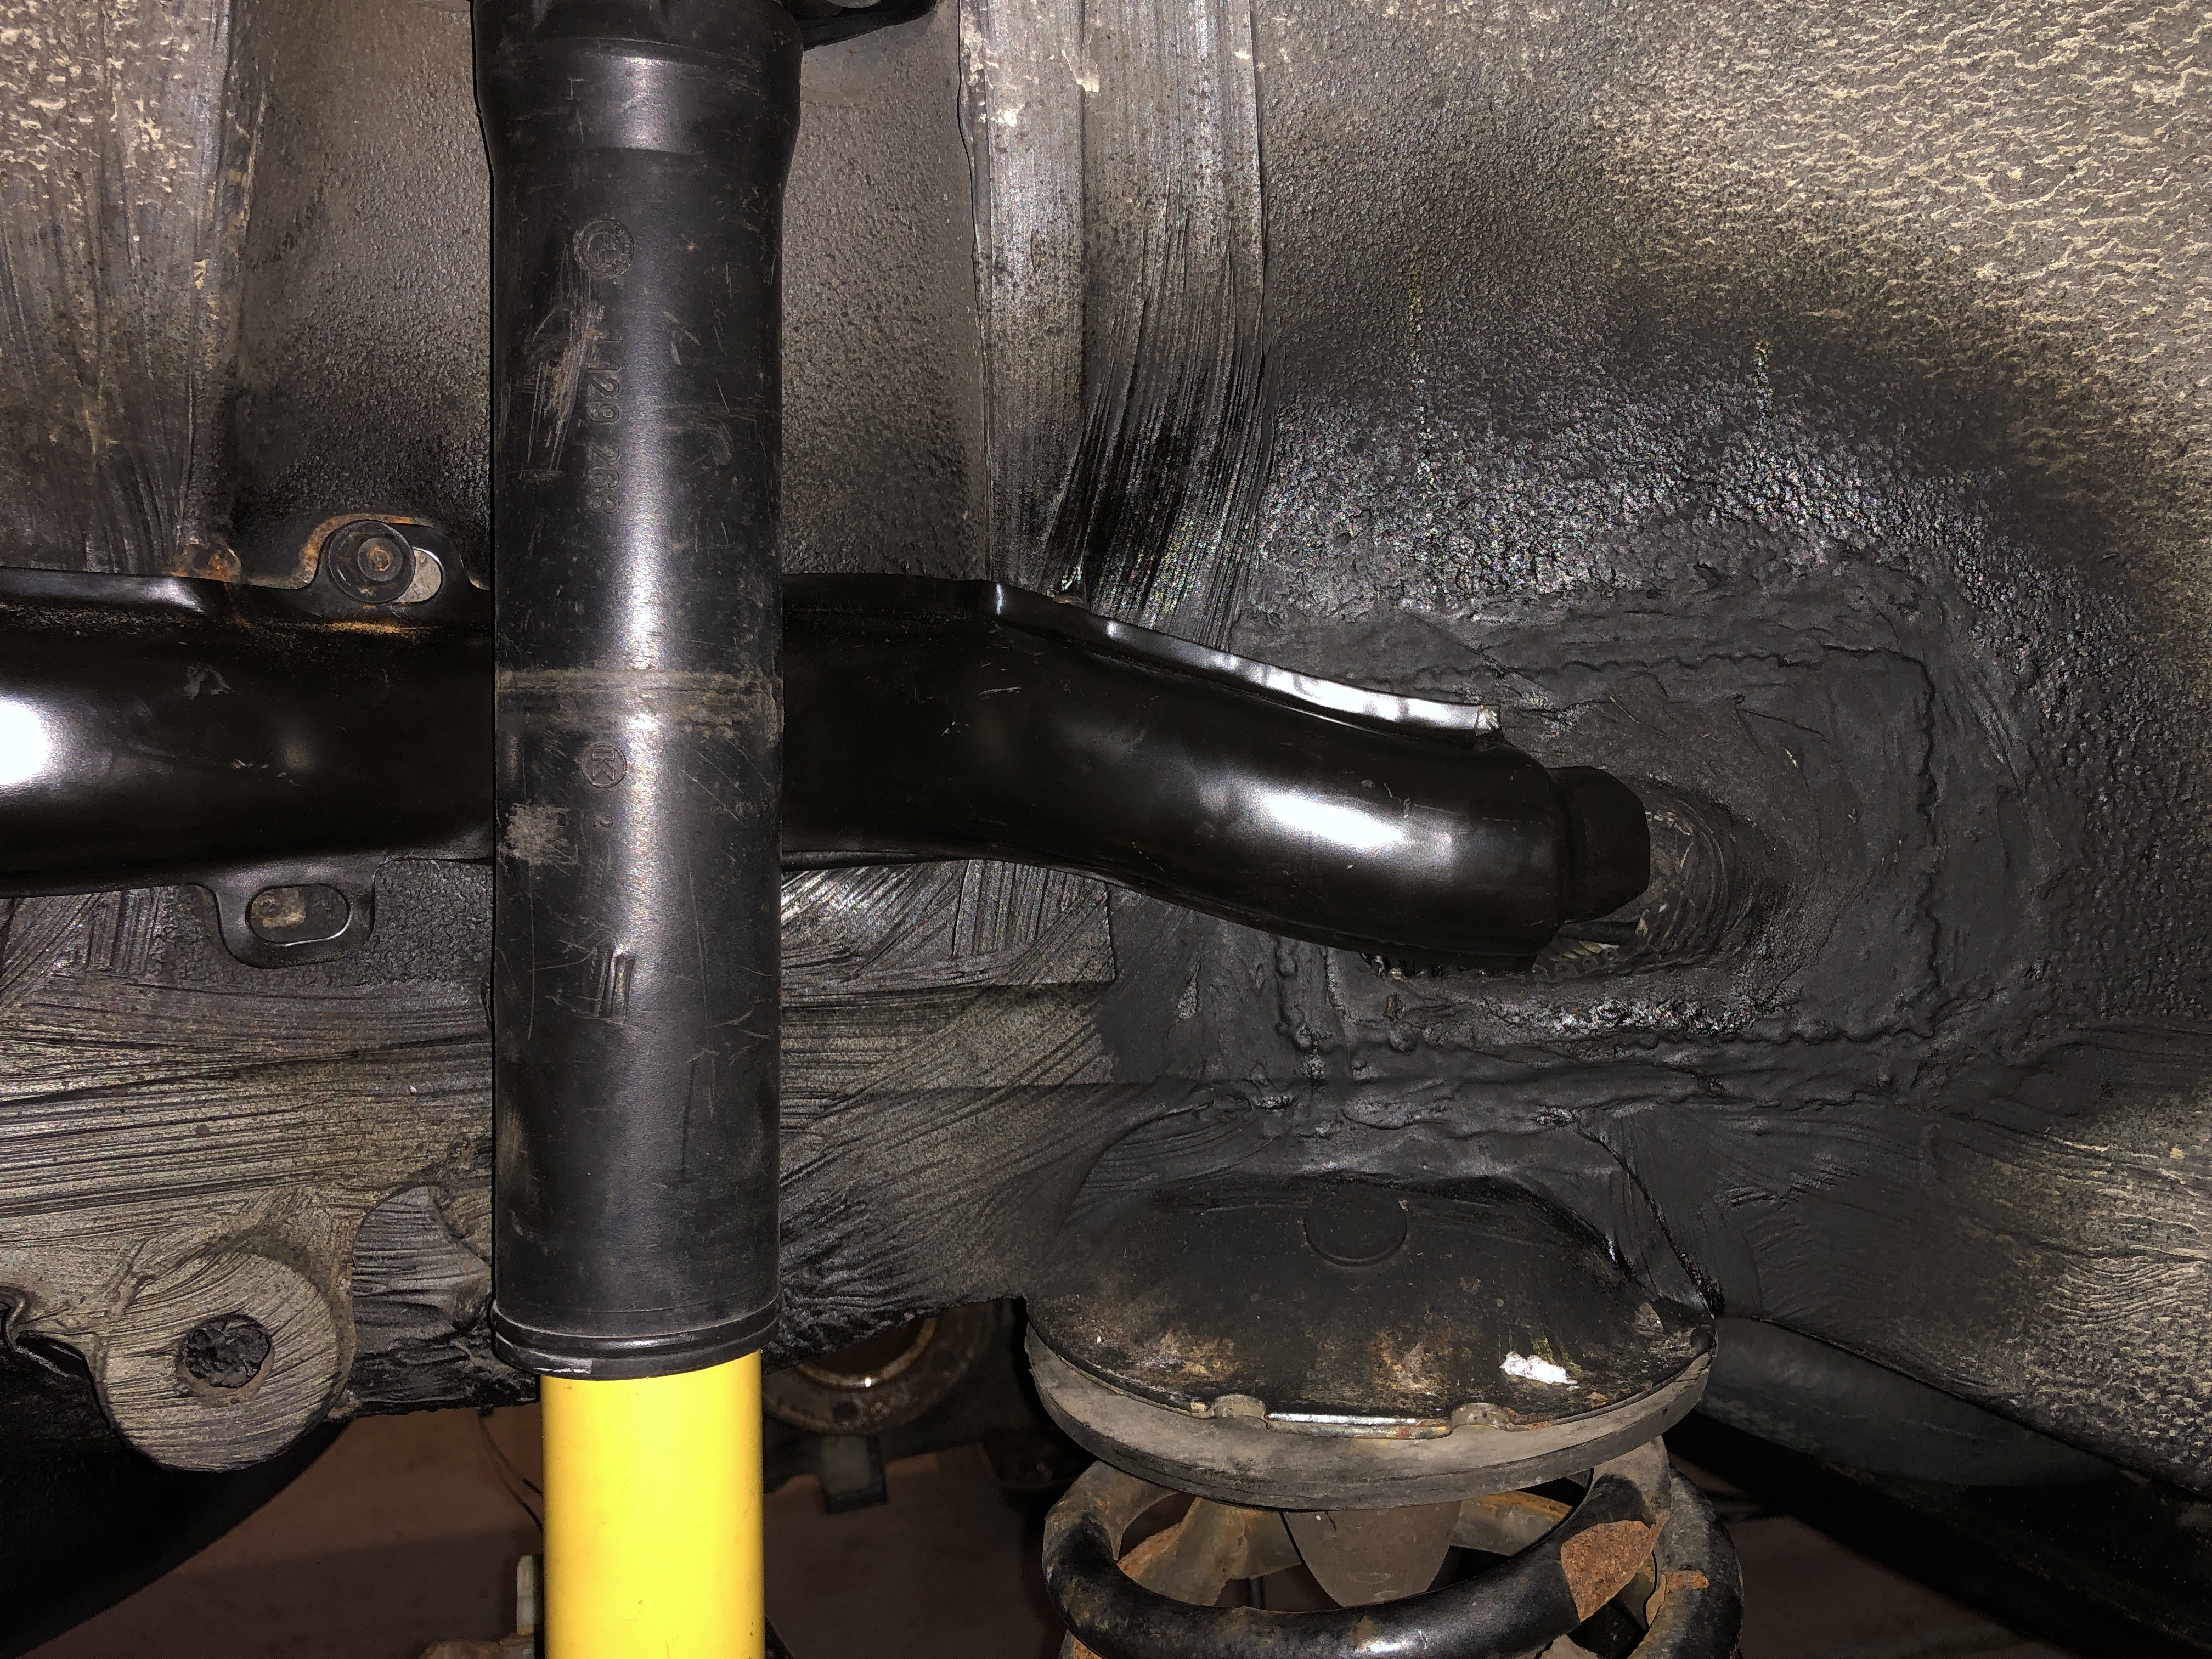
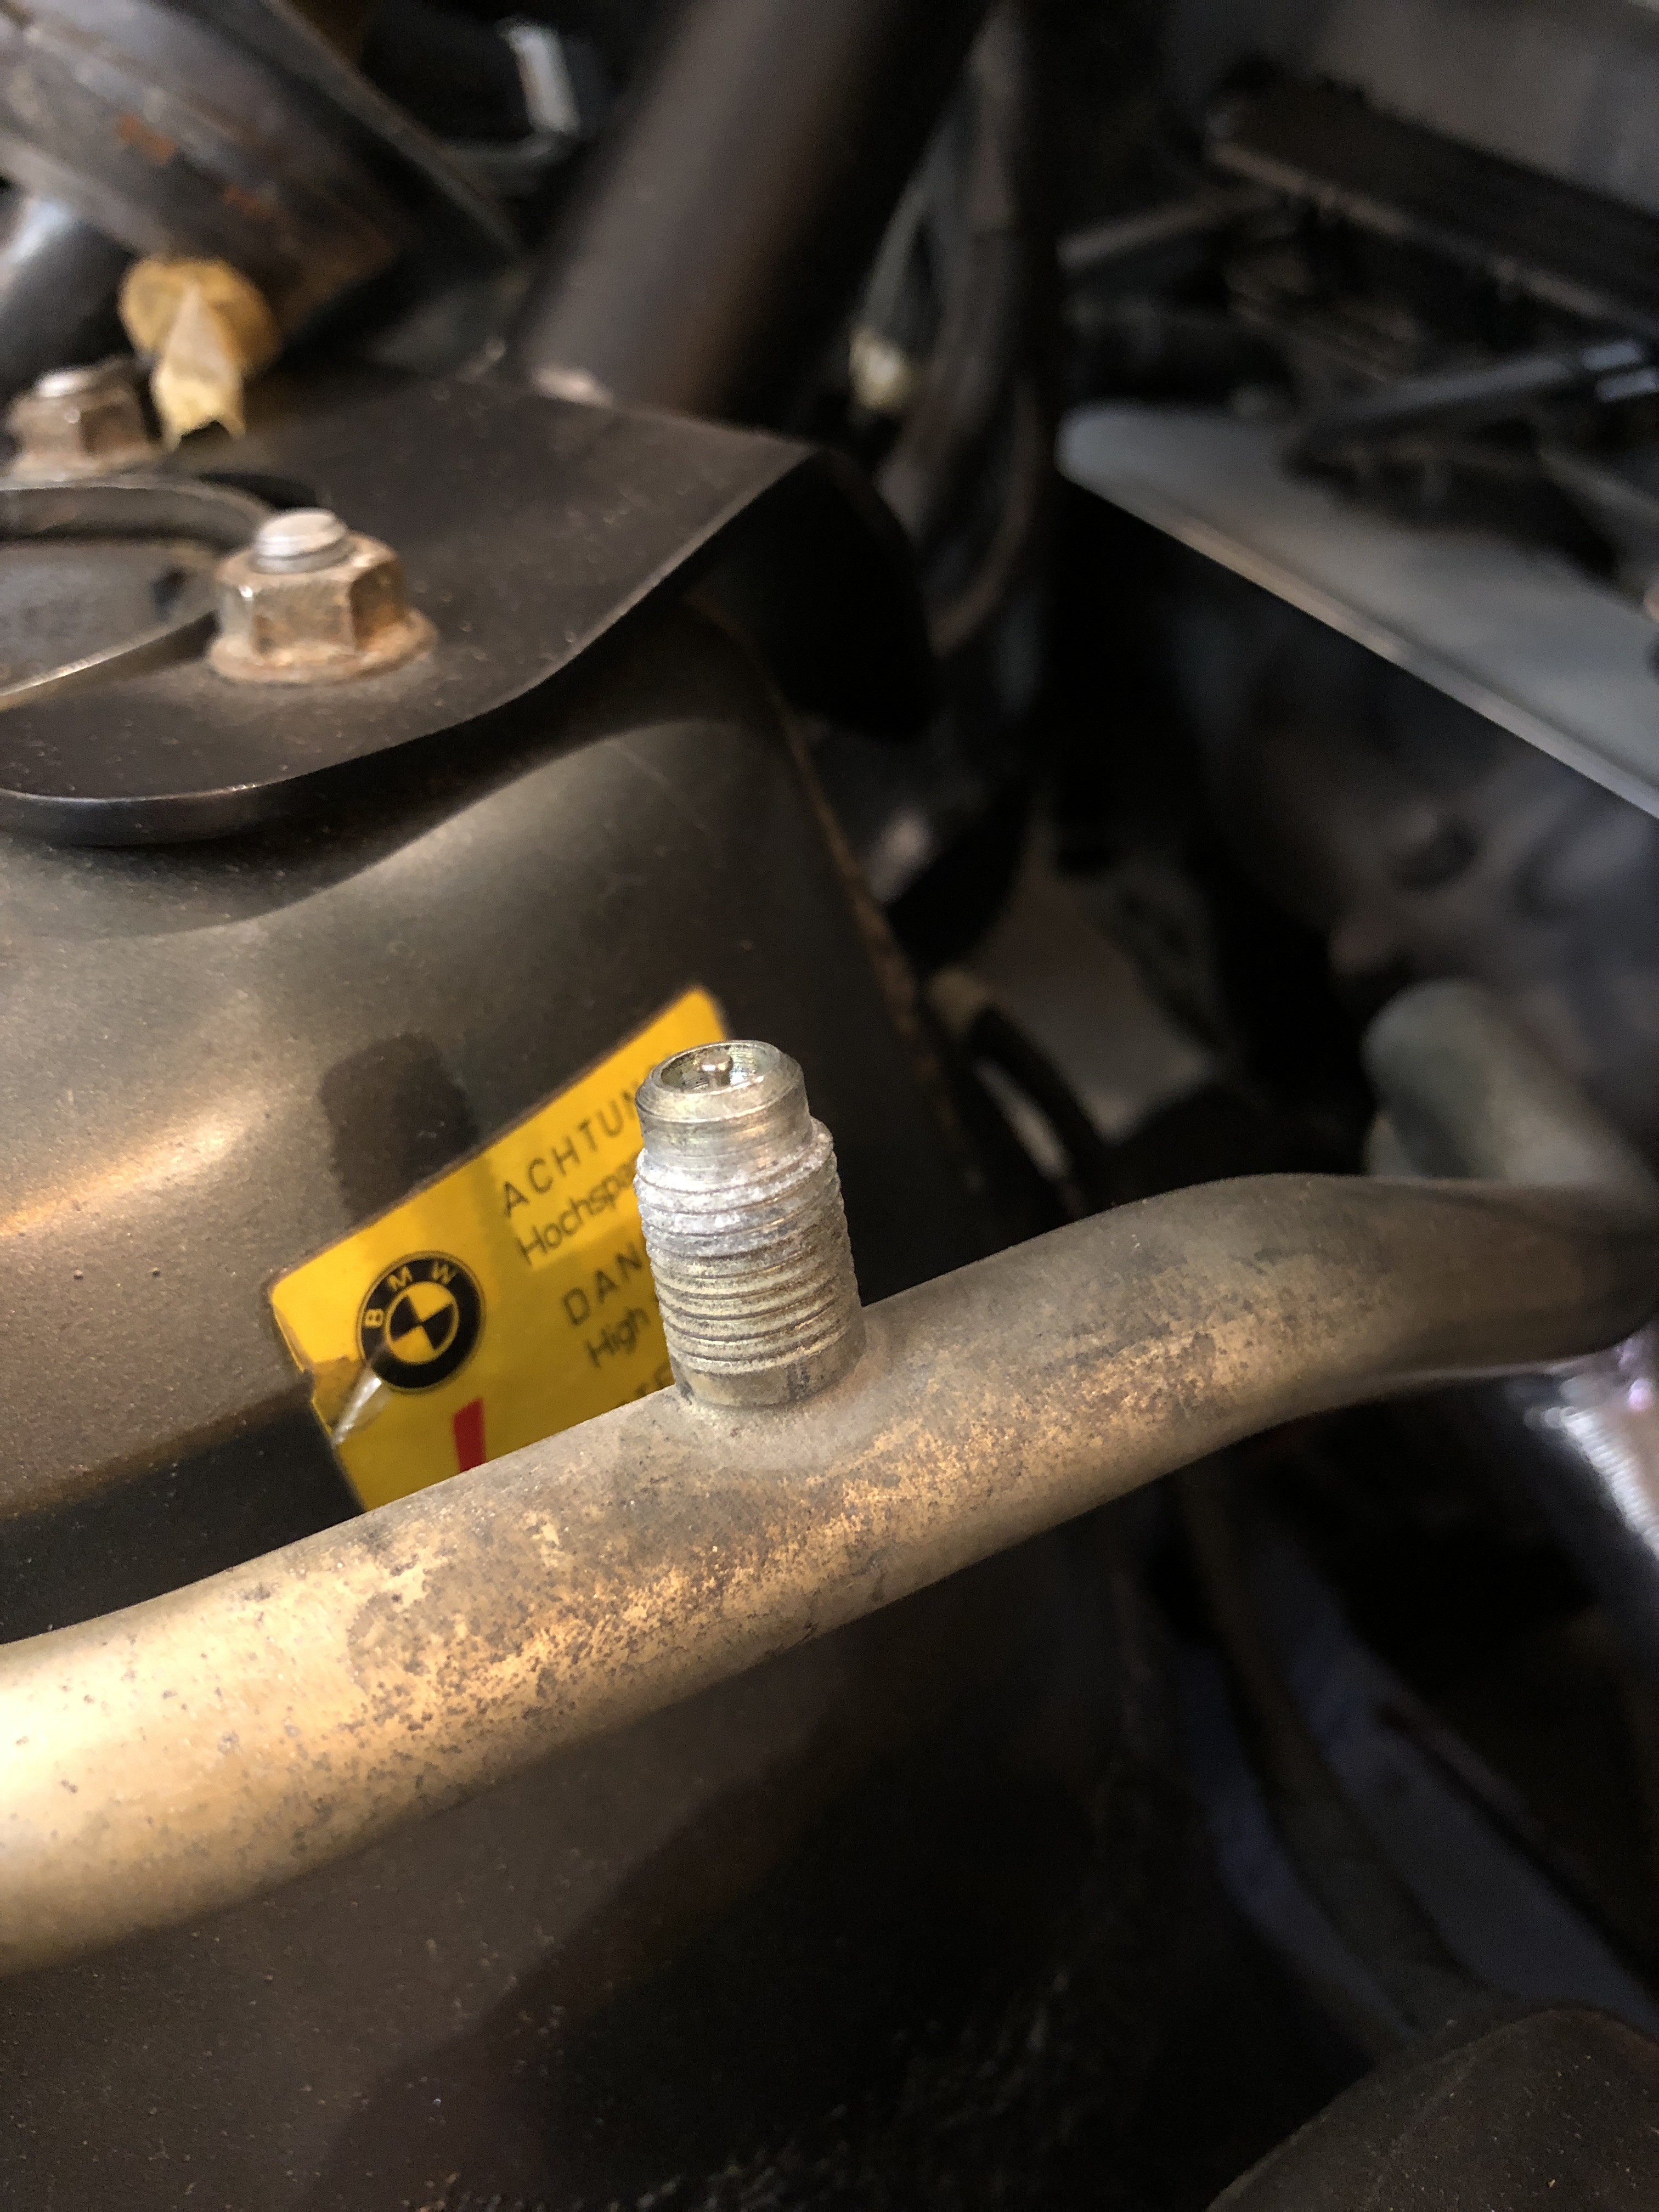
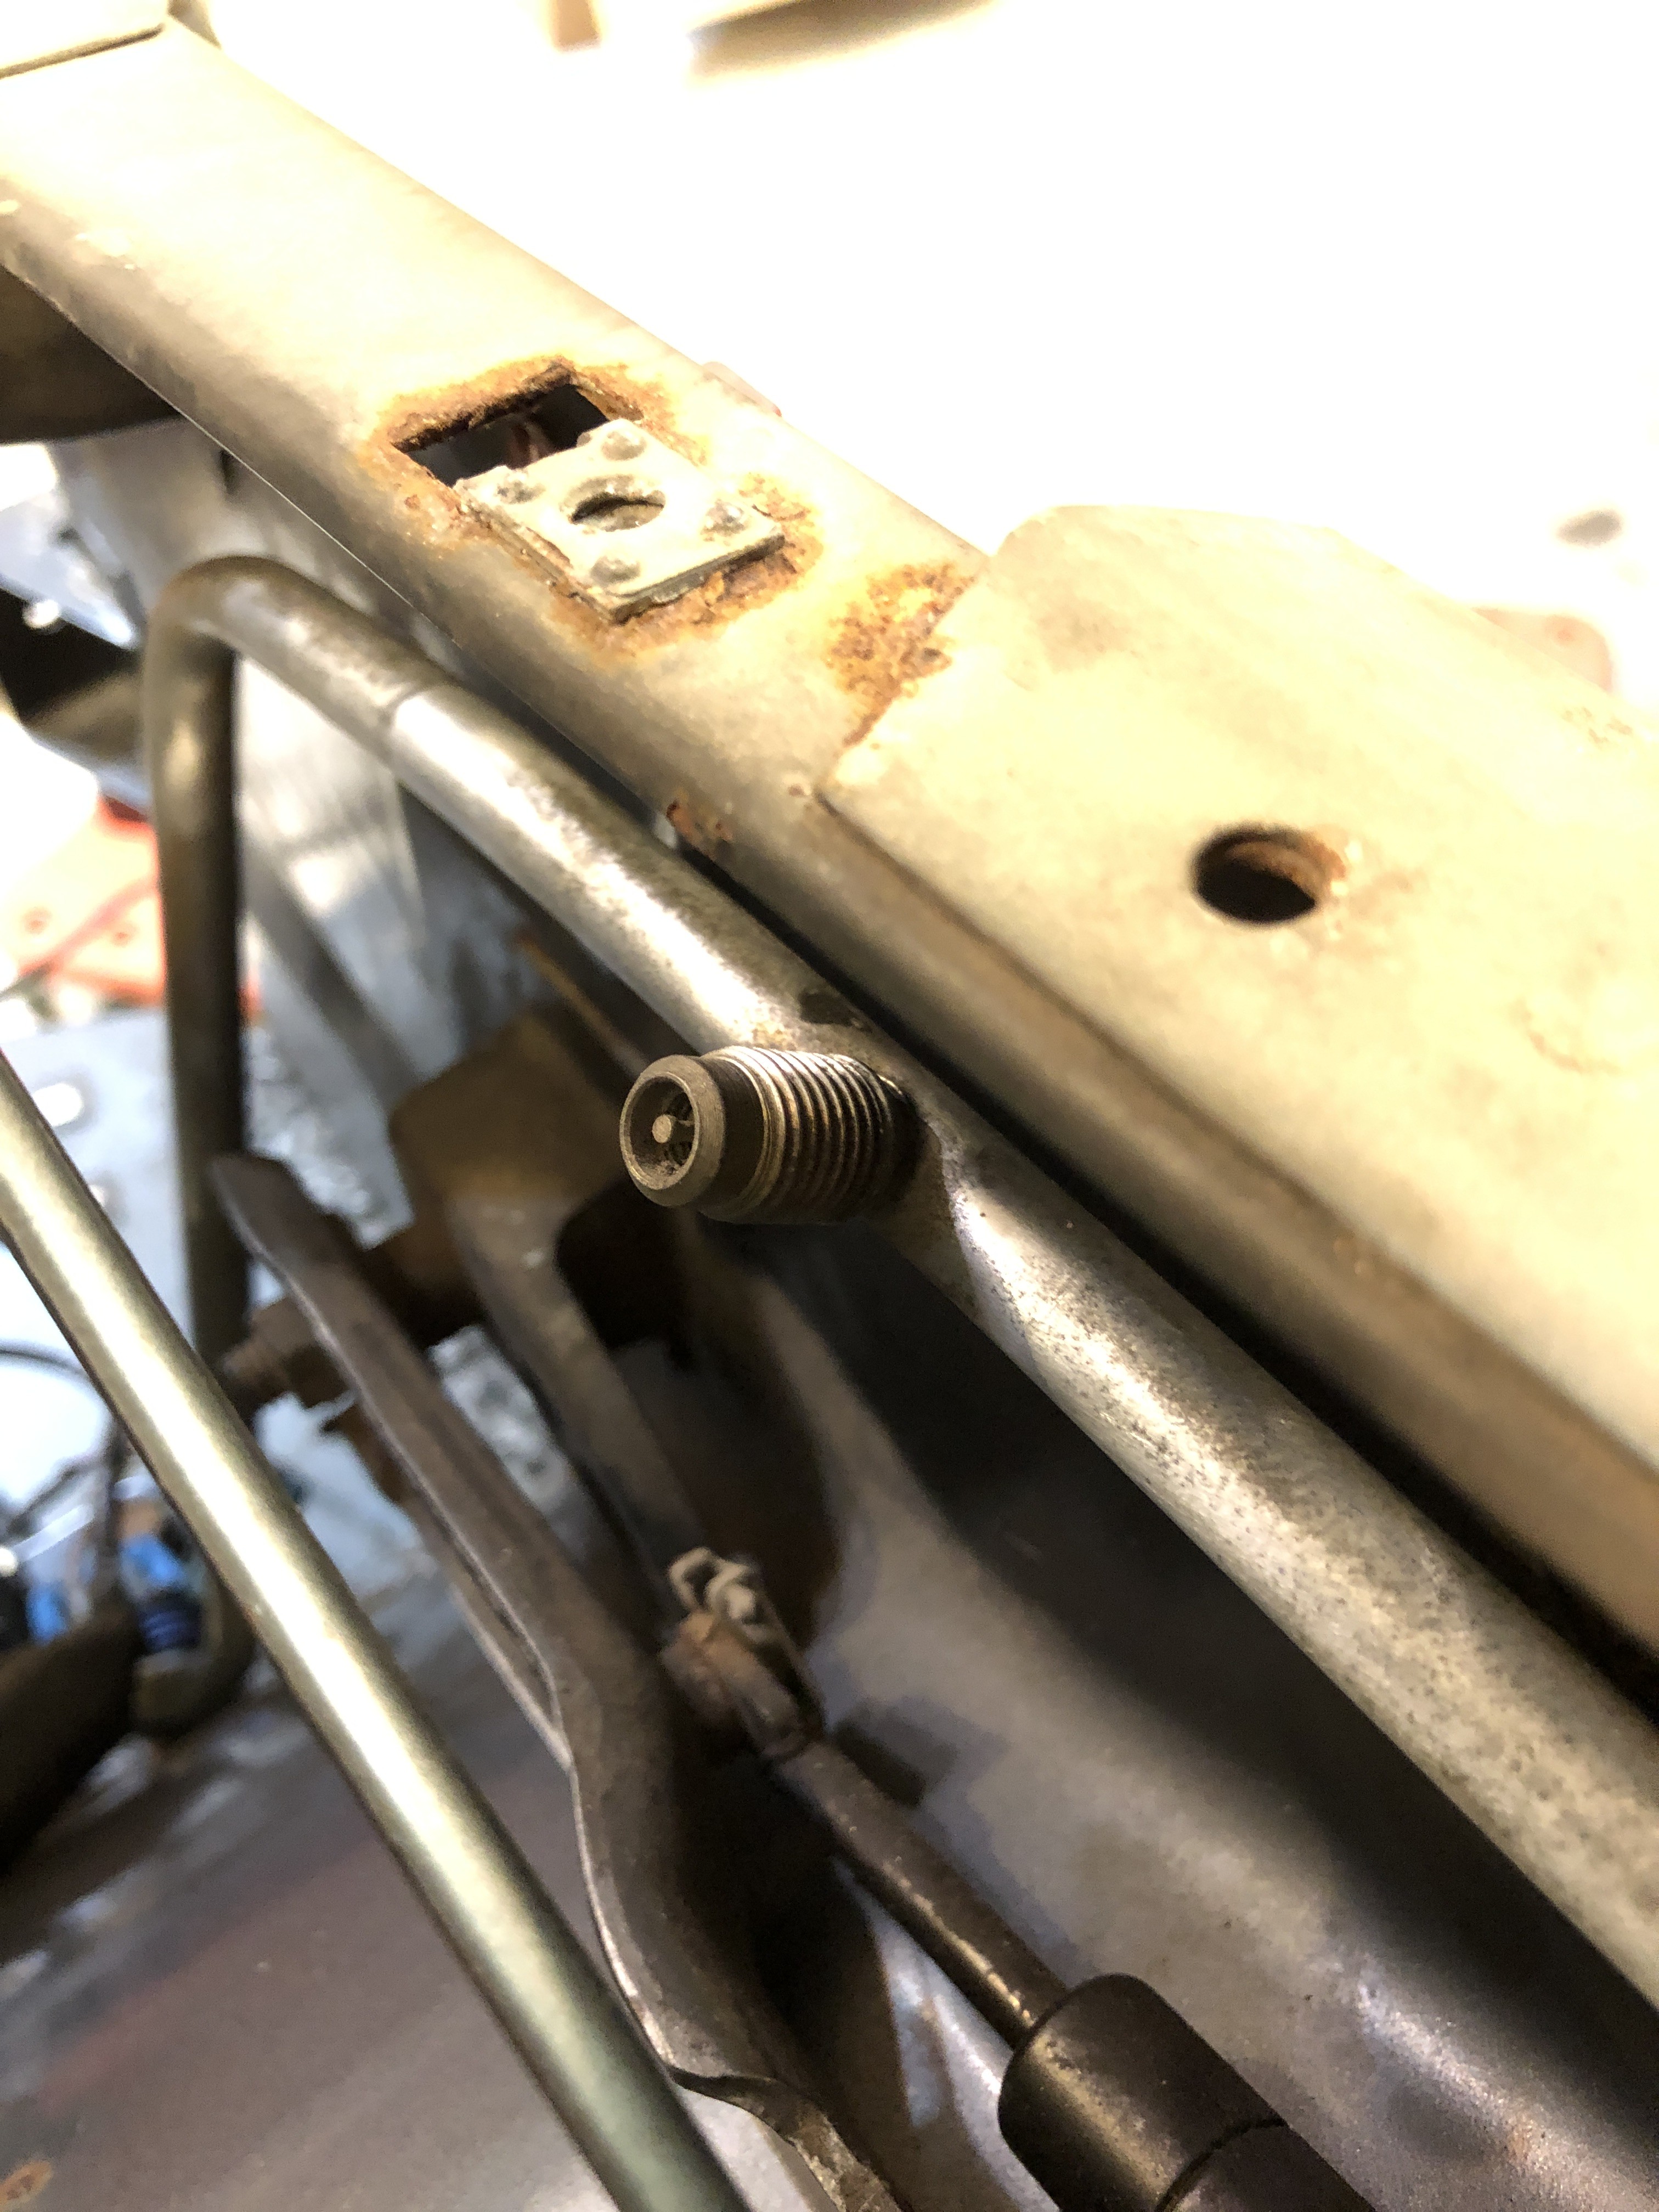
      Alright, I have three questions I’m hoping you guys can give me some advice. 
       

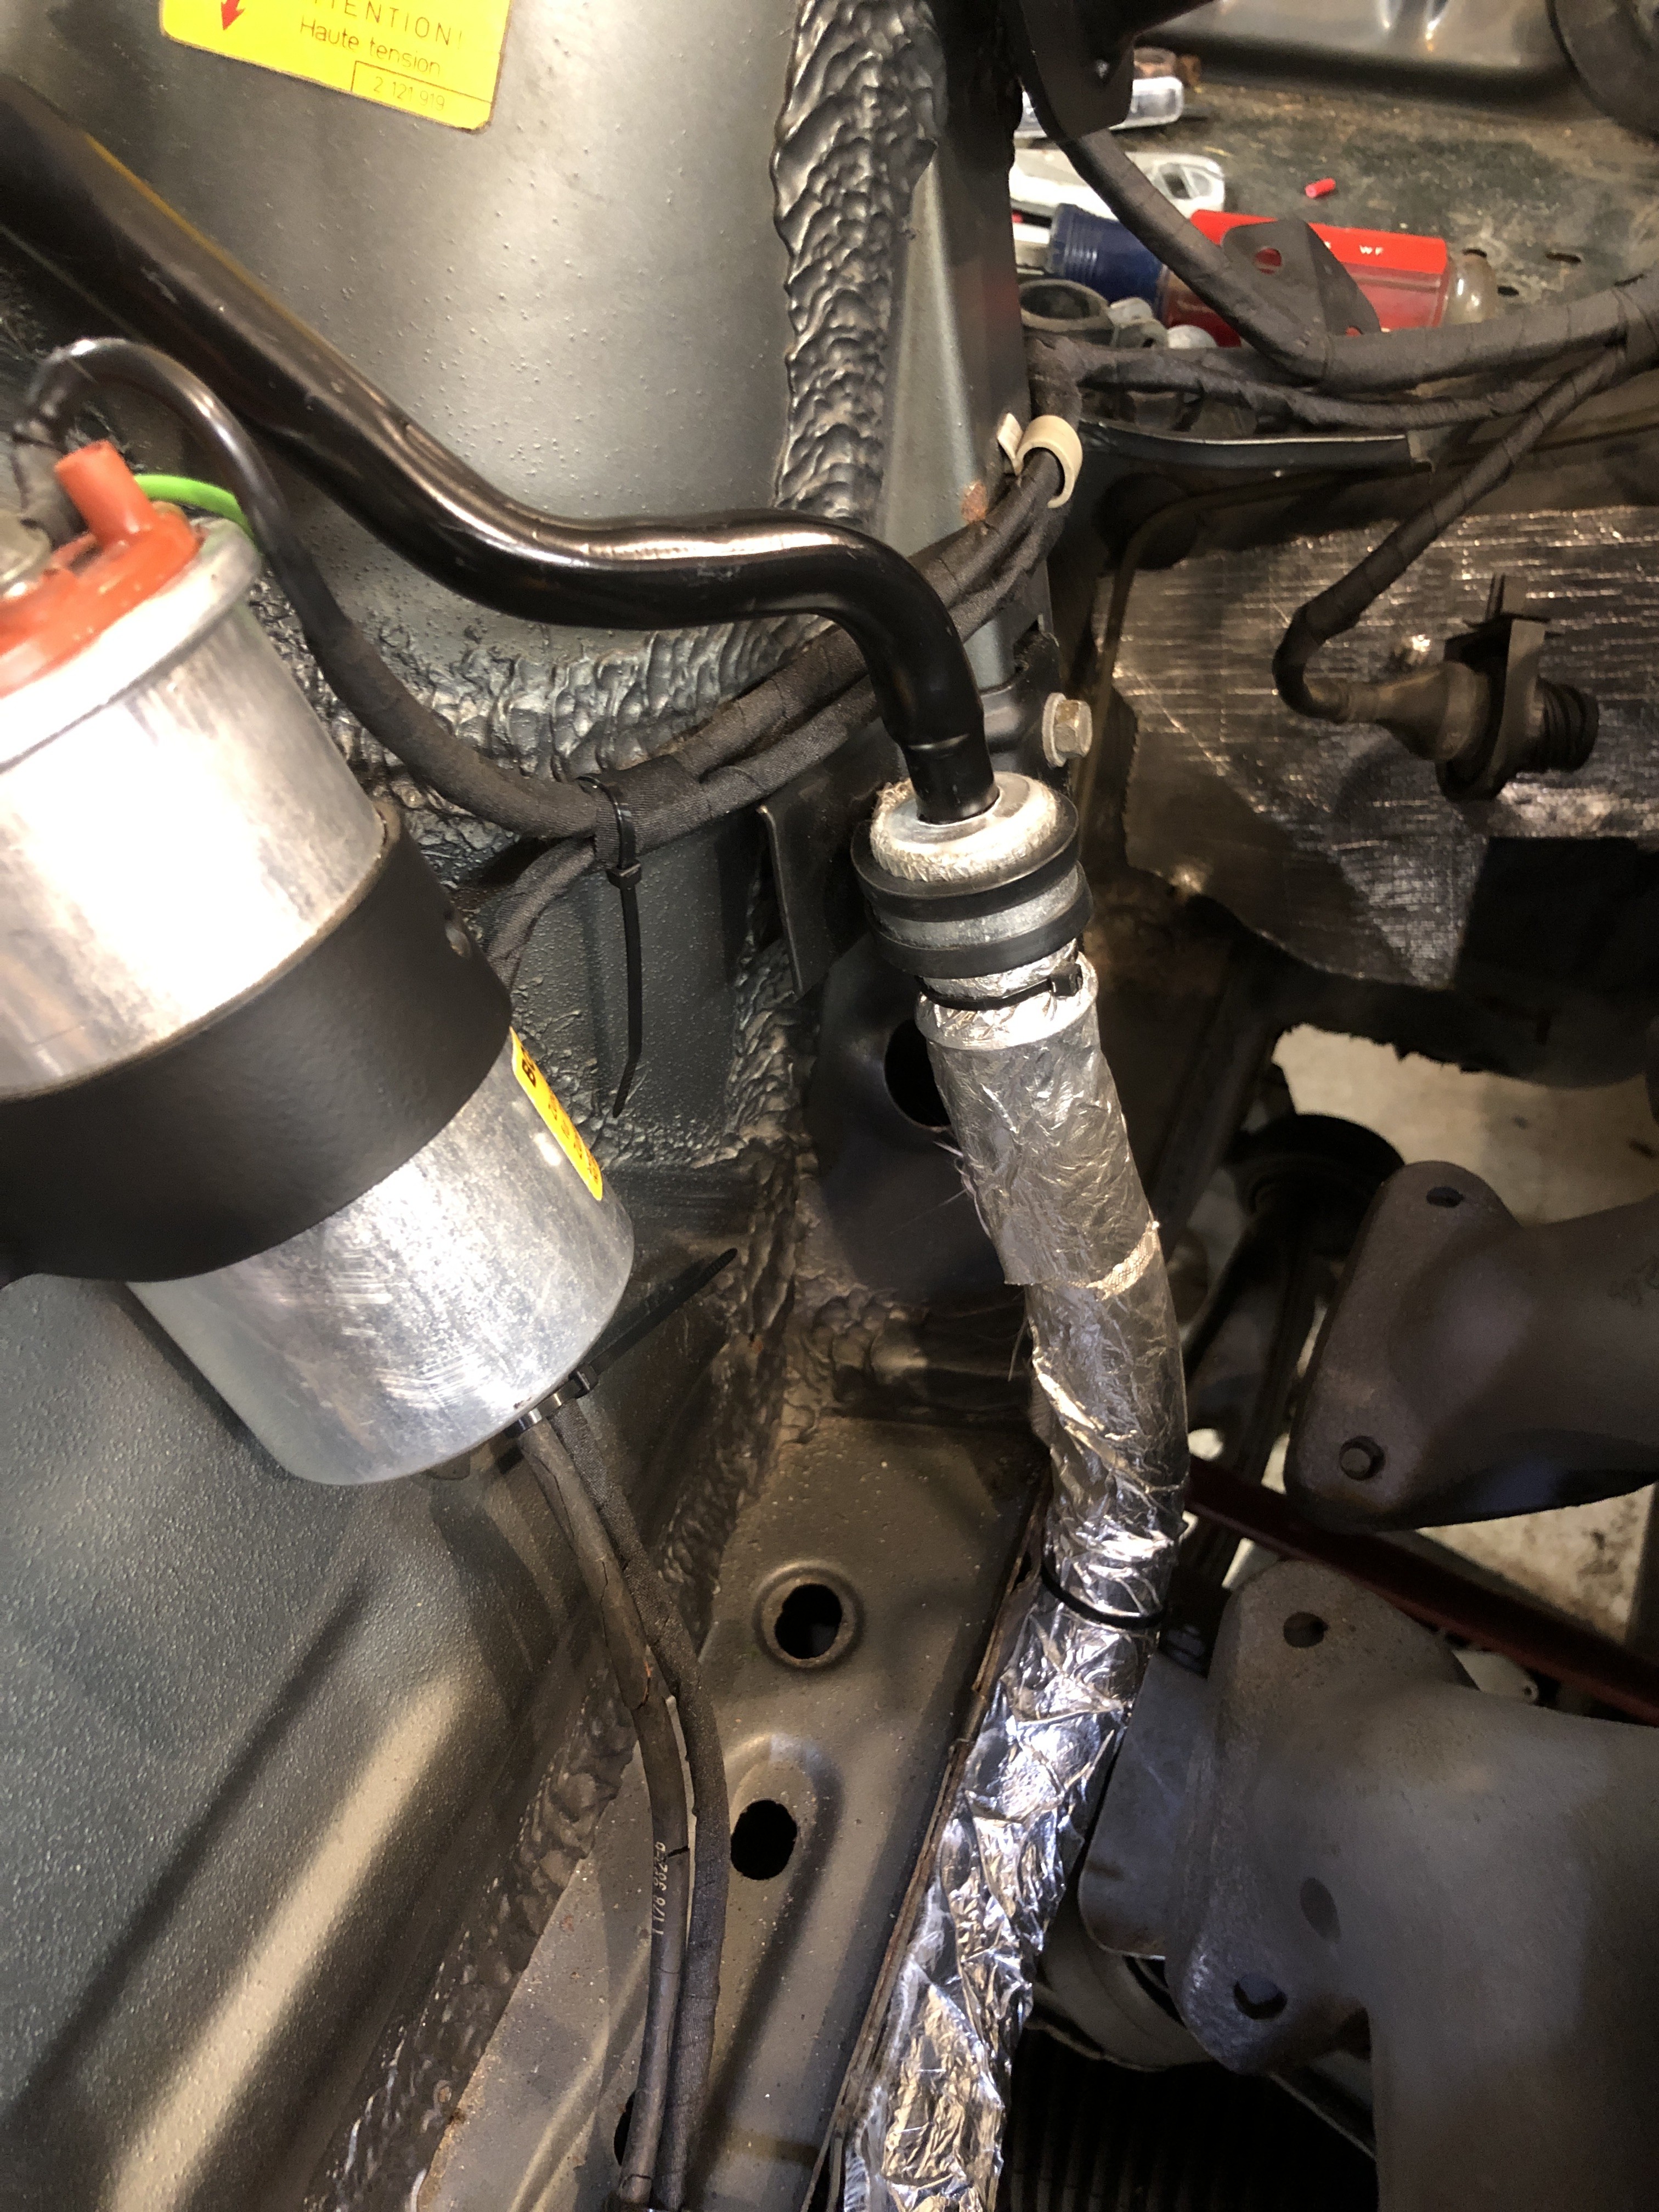
      1. I got the new vent line cover. But the end towards the front of the car would usually sit inside the pipe coming from the car. I don’t have that anymore so there’s nothing securing it. Any ideas how to do this? I’m thinking some type of strap across it? 
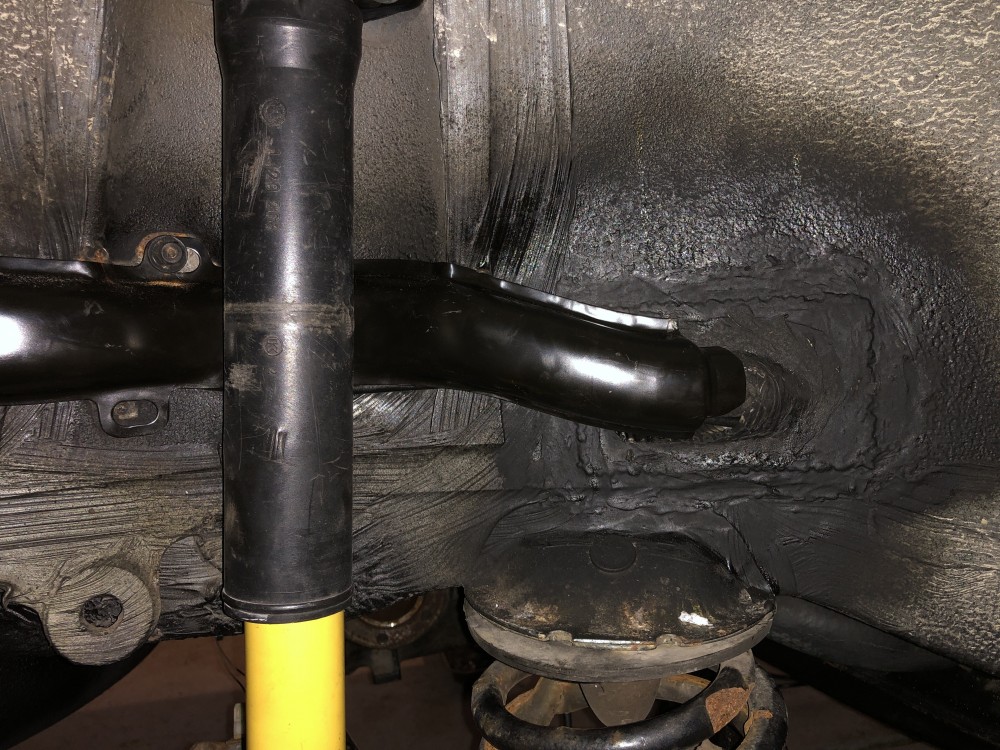
         

      6B8068DF-6570-41DC-8CB2-DF3A3F9A5625.jpeg

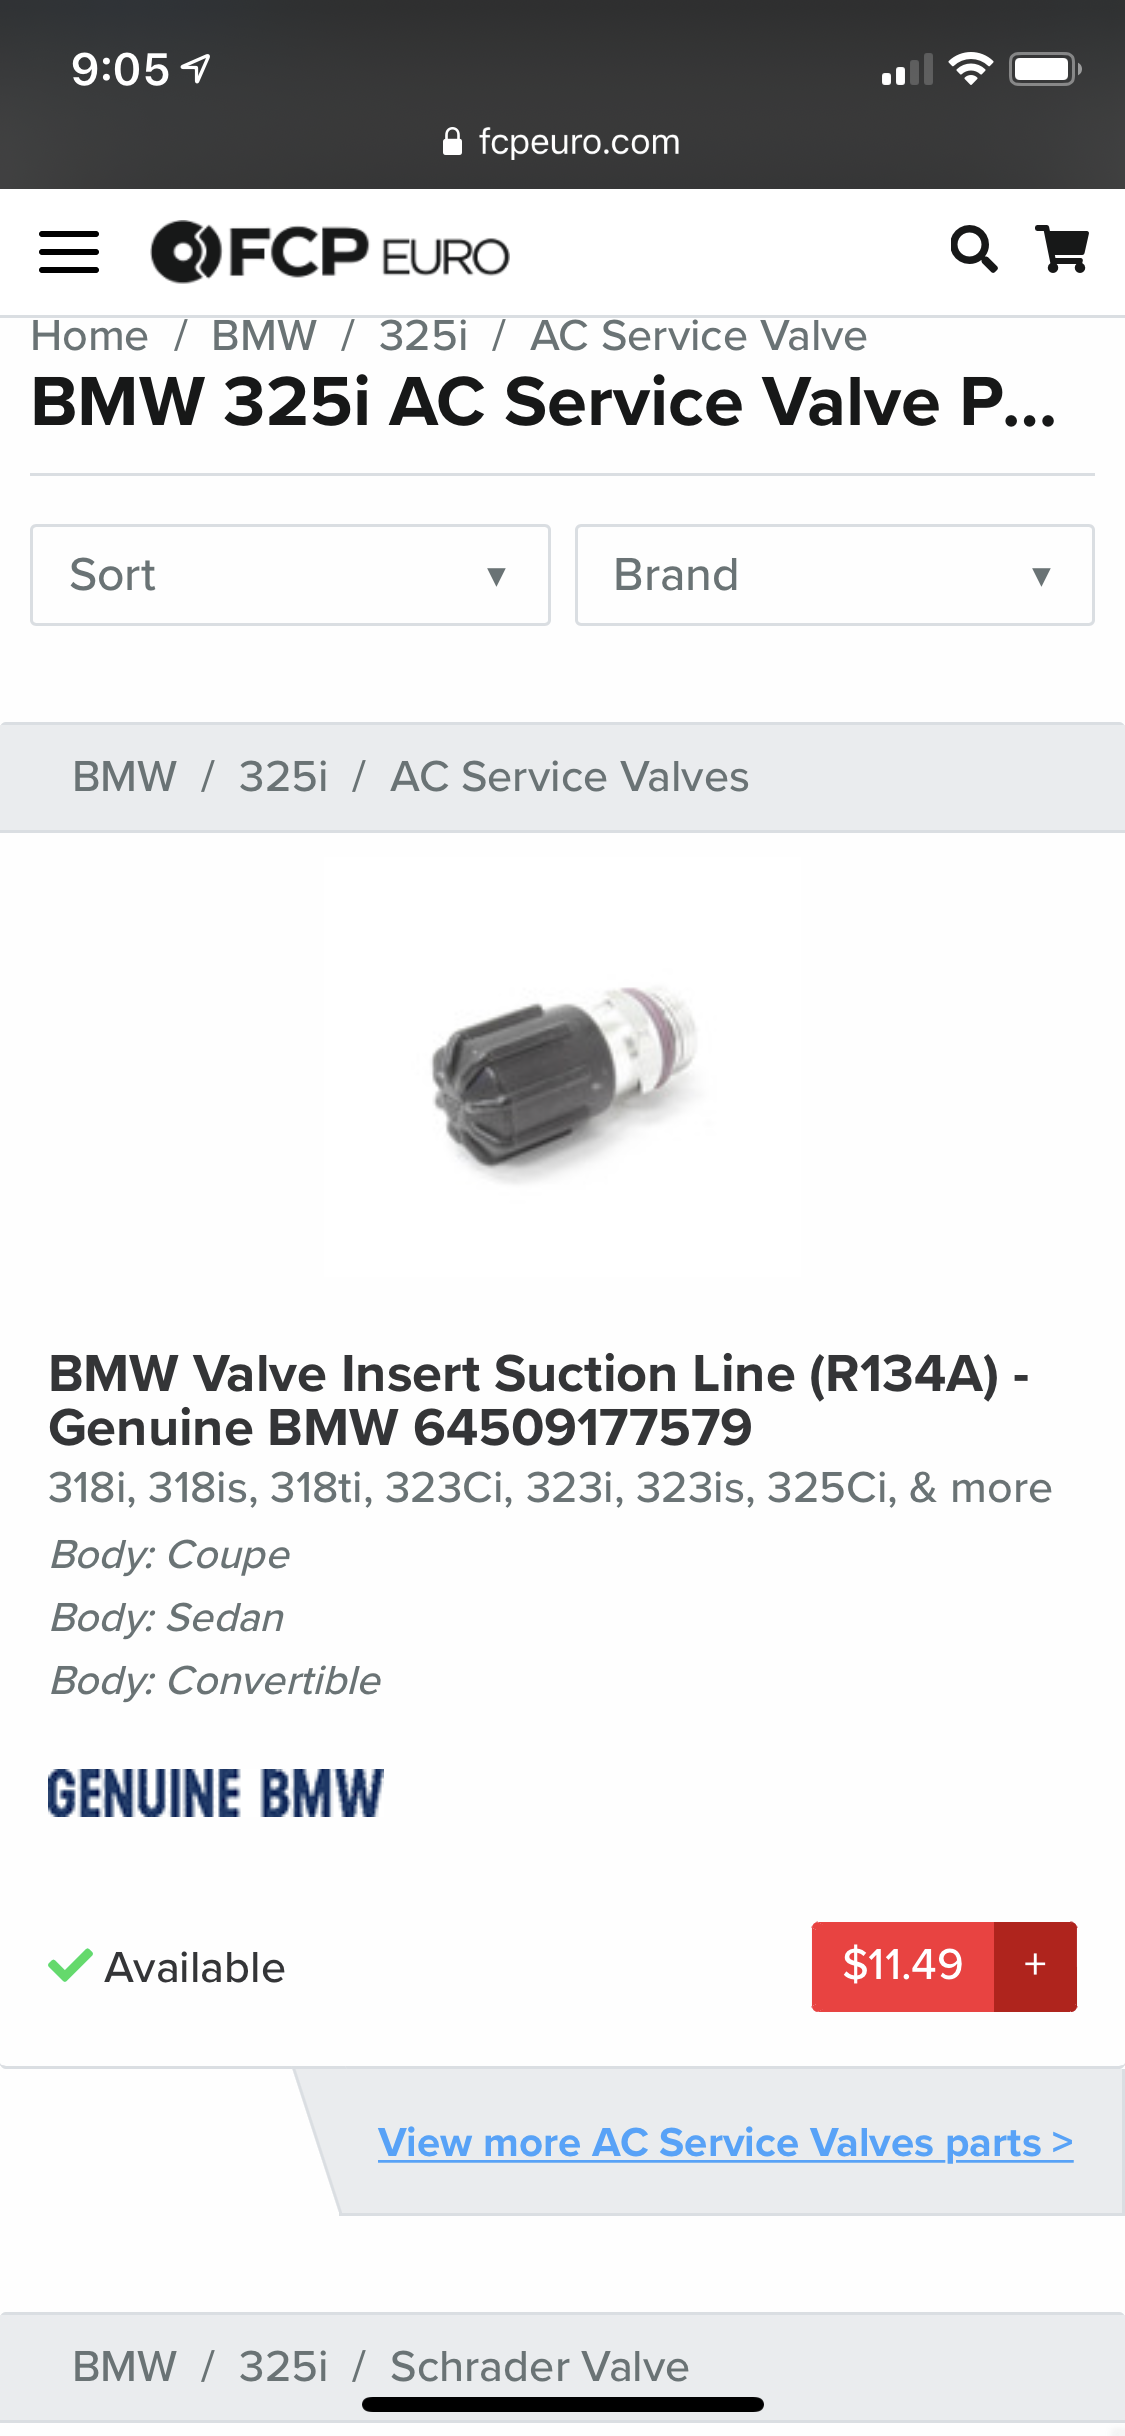
      1. My AC lines have these Schroeder valves for servicing. I’m seeing replacement Schroeder valves on FCP and whatnot but these are not replaceable. Are there just various types of lines and mine do not need new valves? 
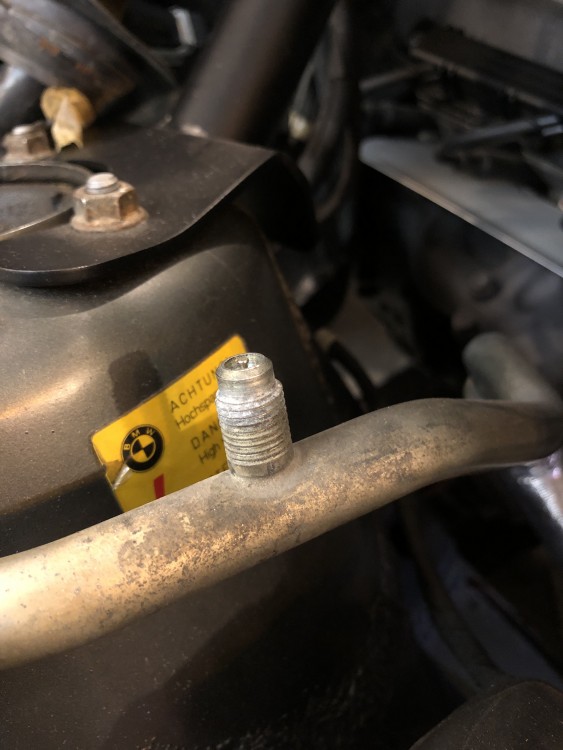
         

      317F5C80-8F13-461B-A15E-E97C33A07699.jpeg

      6D593900-75C5-40F5-8B57-CAB43B8F580B.jpeg
       

      The replacement valve. Unless this is the one that goes on the compressor end of the suction line? 
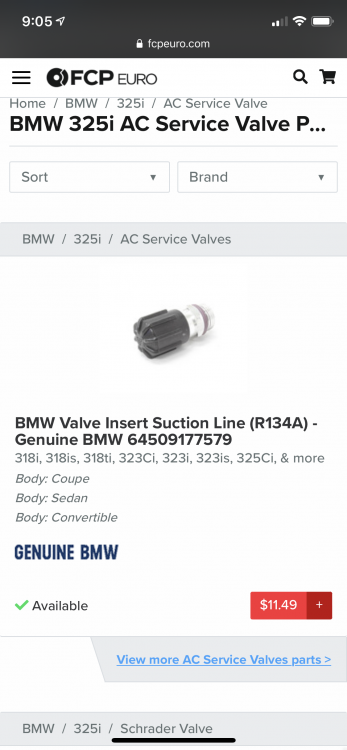
      ACF49DA2-FBAF-4DCA-ABD3-8B570B834FB3.png

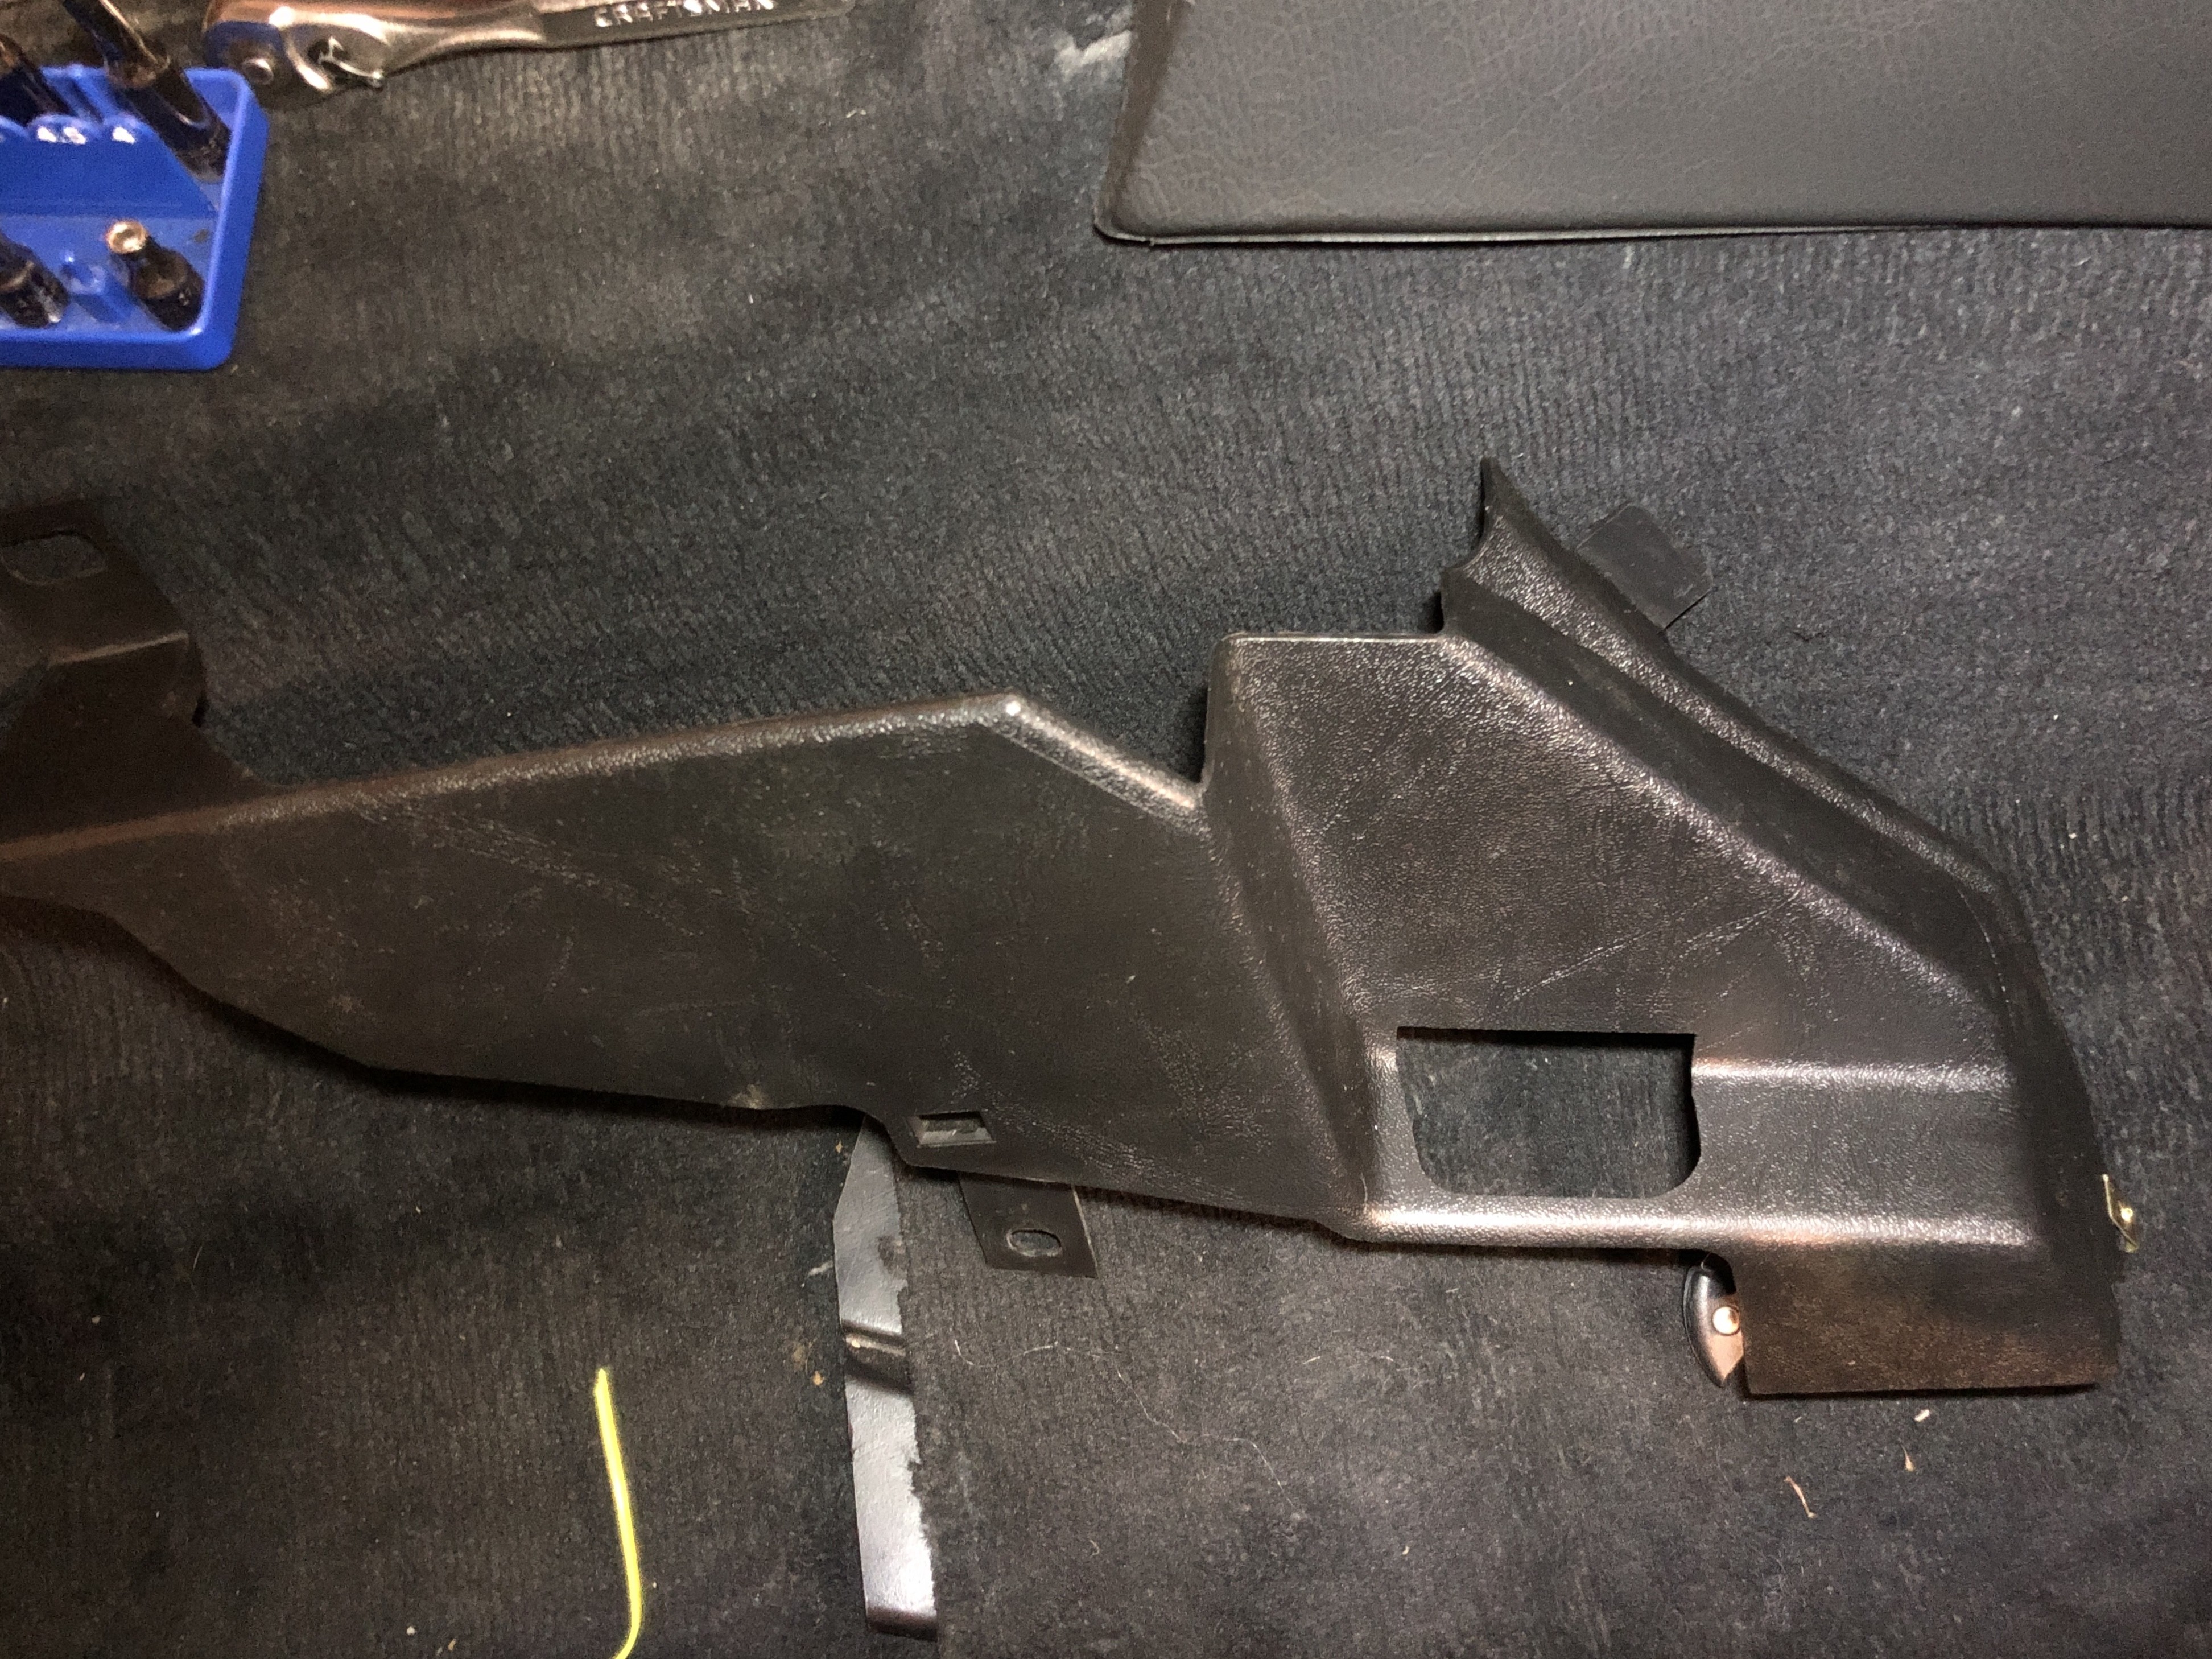
      1. I removed this trim piece and I’m not sure where it goes back. 
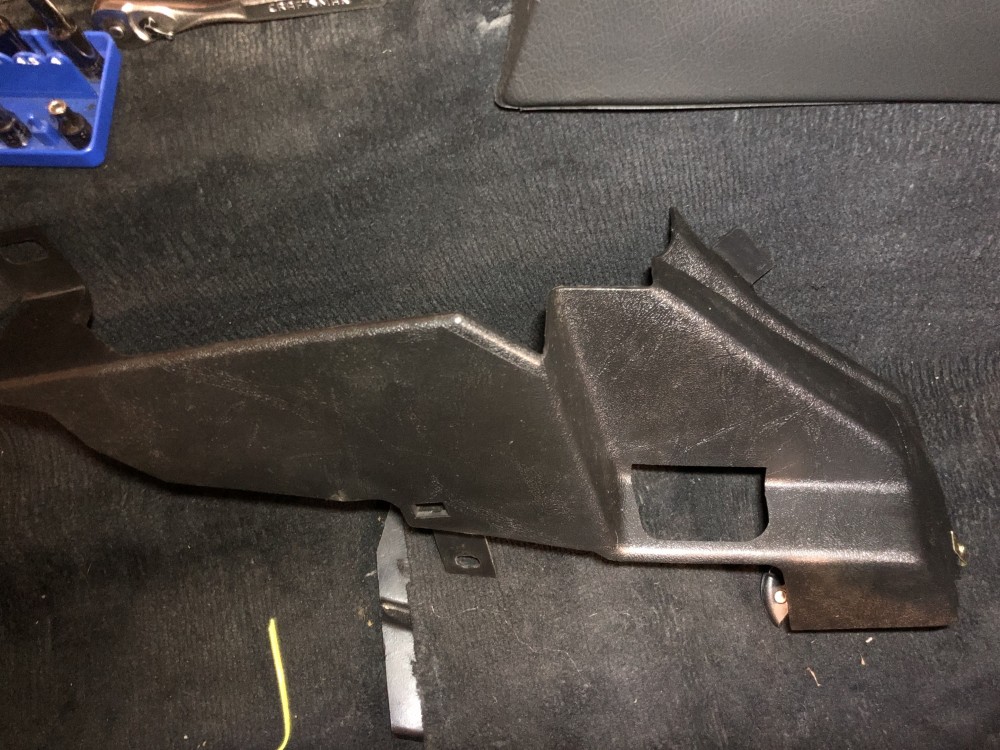
      C0F396B0-DDB5-4128-A14E-D0CE6040E6EF.jpeg

      1 Reply Last reply
      0
      • straight6pwrS
        straight6pwrS
        straight6pwr
        wrote on last edited by
        #698
        1. i think that trim piece goes inside the glovebox, on the left side. the orientation is upside down in the photo.

        Dan

        yajsYRL.jpg.e5f350b4dfe961d76ac8b32efce2e1a6.jpg

        1 Reply Last reply
        0
        • G
          G
          gilber33
          wrote on last edited by
          #699

          straight6pwr said:

          1. i think that trim piece goes inside the glovebox, on the left side. the orientation is upside down in the photo.

          I realized the trim is for the hood release area. 

          I got No. 1 figured out and I need some r-12 to r-134 adapter valves for the lines. 

          But the AC saga has hit a wall. The large suction hose I got did not fit my compressor. All I can deduce is that it is from a different variation of compressor and since there are a million variations of compressors and systems, it's hard to tell which system it is from. On top of that, I discovered there are a hand full of Bosch/Behr compressors built that are not compatible with R134a. Turns out the two compressors I have are both Bosch/Behr and both on that small list. I guess the seals in it allow for the smaller molecules of the R134 to pass through them. Now I also need to determine if I find a different compressor, have this one rebuilt, buy a rebuilt one, etc. 

          The guy I got this suction hose from said he still has the compressor from the car that the hose came off of. Going to hope it's not a Bosch unit and will work with my setup.

          1 Reply Last reply
          0
          • straight6pwrS
            straight6pwrS
            straight6pwr
            wrote on last edited by
            #700

            gilber33 said:

            I realized the trim is for the hood release area.

            ahh yes. it has that opening in it perfectly sized to fit a pair of vise grips.

            Dan
            yajsYRL.jpg.e5f350b4dfe961d76ac8b32efce2e1a6.jpg

            1 Reply Last reply
            0
            • G
              G
              gilber33
              wrote on last edited by
              #701

              straight6pwr said:

              ahh yes. it has that opening in it perfectly sized to fit a pair of vise grips.

              lol

              Well, I think I got the AC hose/compressor issue sorted. After looking at as many pictures of the different compressors on and off cars, I beleive the hose I got is for a Denso compressor - which has a different configuration for the two hoses. I ordered what I hope is the correct hose for the Bosch/Behr compressor.

              1 Reply Last reply
              0
              • KaiserRollsK
                KaiserRollsK
                KaiserRolls
                wrote on last edited by
                #702

                Having AC makes me jealous. I really want to build a coolshirt system for the hot autox/lapping days

                1 Reply Last reply
                0
                • G
                  G
                  gilber33
                  wrote on last edited by
                  #703

                  KaiserRolls said:

                  Having AC makes me jealous. I really want to build a coolshirt system for the hot autox/lapping days 

                  Wait to be jealous when it's completely working. lol. 

                  I have to admit I am really excited to see all of these improvements coming together and the car more closely fitting the vision I had for it.

                  1 Reply Last reply
                  1
                  • B
                    B
                    Boris3
                    wrote on last edited by
                    #704

                    KaiserRolls said:

                    Having AC makes me jealous. I really want to build a coolshirt system for the hot autox/lapping days 

                    DIY: I use a $40 Donjoy Iceman Cold therapy unit (cooler and built in pump) bought used off Craigslist in the race car. Cut off the electrical plug end, connect to toggle switch wired to my old cigarette lighter wiring. The Donjoy hose fittings plug right into the hoses of a regular Coolshirt. Fabbed a bracket and strap setup bolted to the passenger floor for the cooler. Total "system" out the door for less than $200 (biggest price is the shirt). Lasts for about 30-40 minutes on a 80-90 degree day due to the small size of the cooler. Plenty for sprint races, lapping, autox. Esp when you're stuck in grid, baking in a three-layer race suit while they clean up the mess some idiot made in the prior session.

                    1990 325i racecar (ITS, former Spec E30); 2004 330i ZHP

                    1 Reply Last reply
                    1
                    • KaiserRollsK
                      KaiserRollsK
                      KaiserRolls
                      wrote on last edited by
                      #705

                      Boris3 said:

                      DIY: I use a $40 Donjoy Iceman Cold therapy unit (cooler and built in pump) bought used off Craigslist in the race car. Cut off the electrical plug end, connect to toggle switch wired to my old cigarette lighter wiring. The Donjoy hose fittings plug right into the hoses of a regular Coolshirt. Fabbed a bracket and strap setup bolted to the passenger floor for the cooler. Total "system" out the door for less than $200 (biggest price is the shirt). Lasts for about 30-40 minutes on a 80-90 degree day due to the small size of the cooler. Plenty for sprint races, lapping, autox. Esp when you're stuck in grid, baking in a three-layer race suit while they clean up the mess some idiot made in the prior session.   

                      I have all of the links saved, just waiting for it to get hot out so I can justify it to myself haha

                      1 Reply Last reply
                      0
                      • G
                        G
                        gilber33
                        wrote on last edited by
                        #706

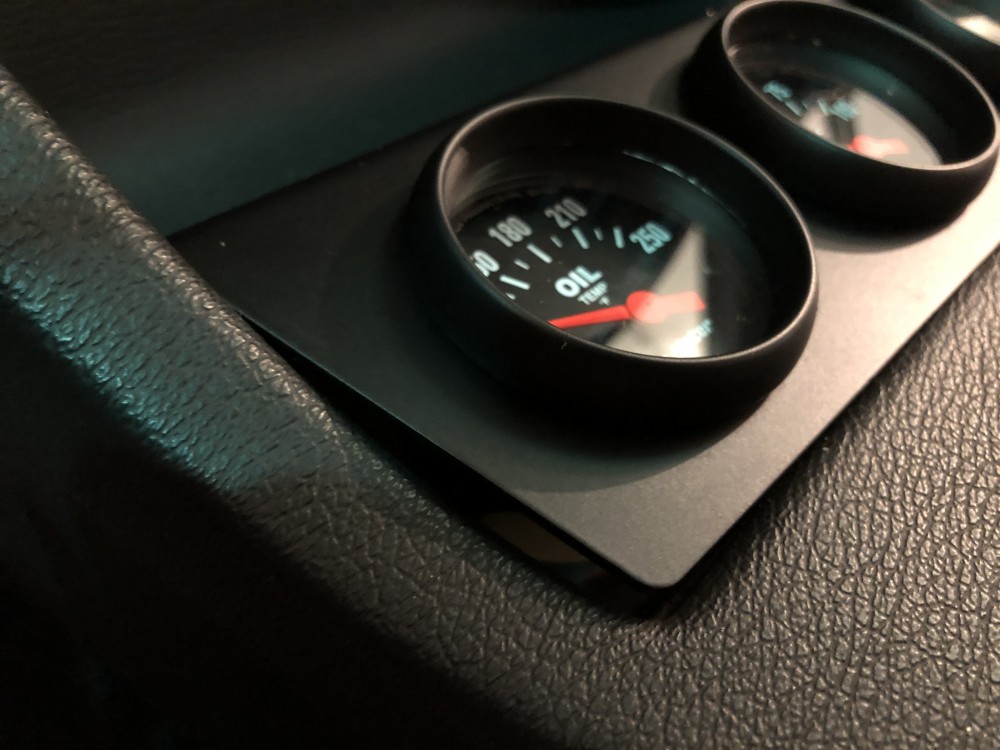
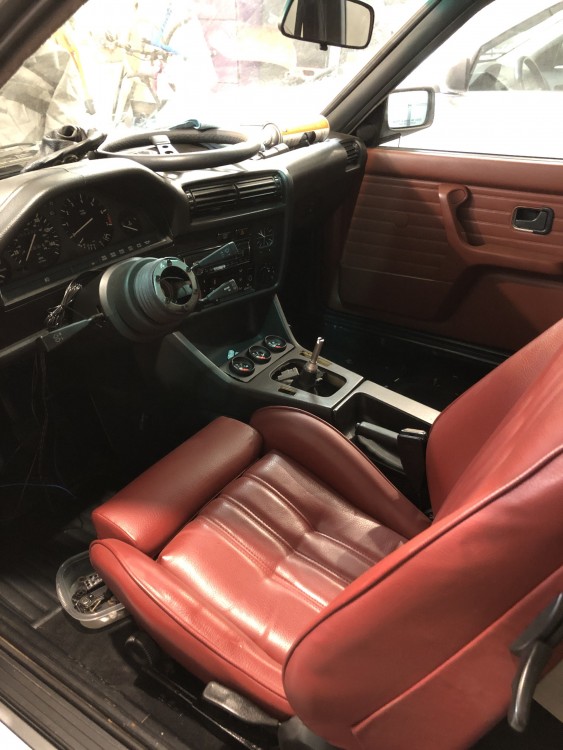
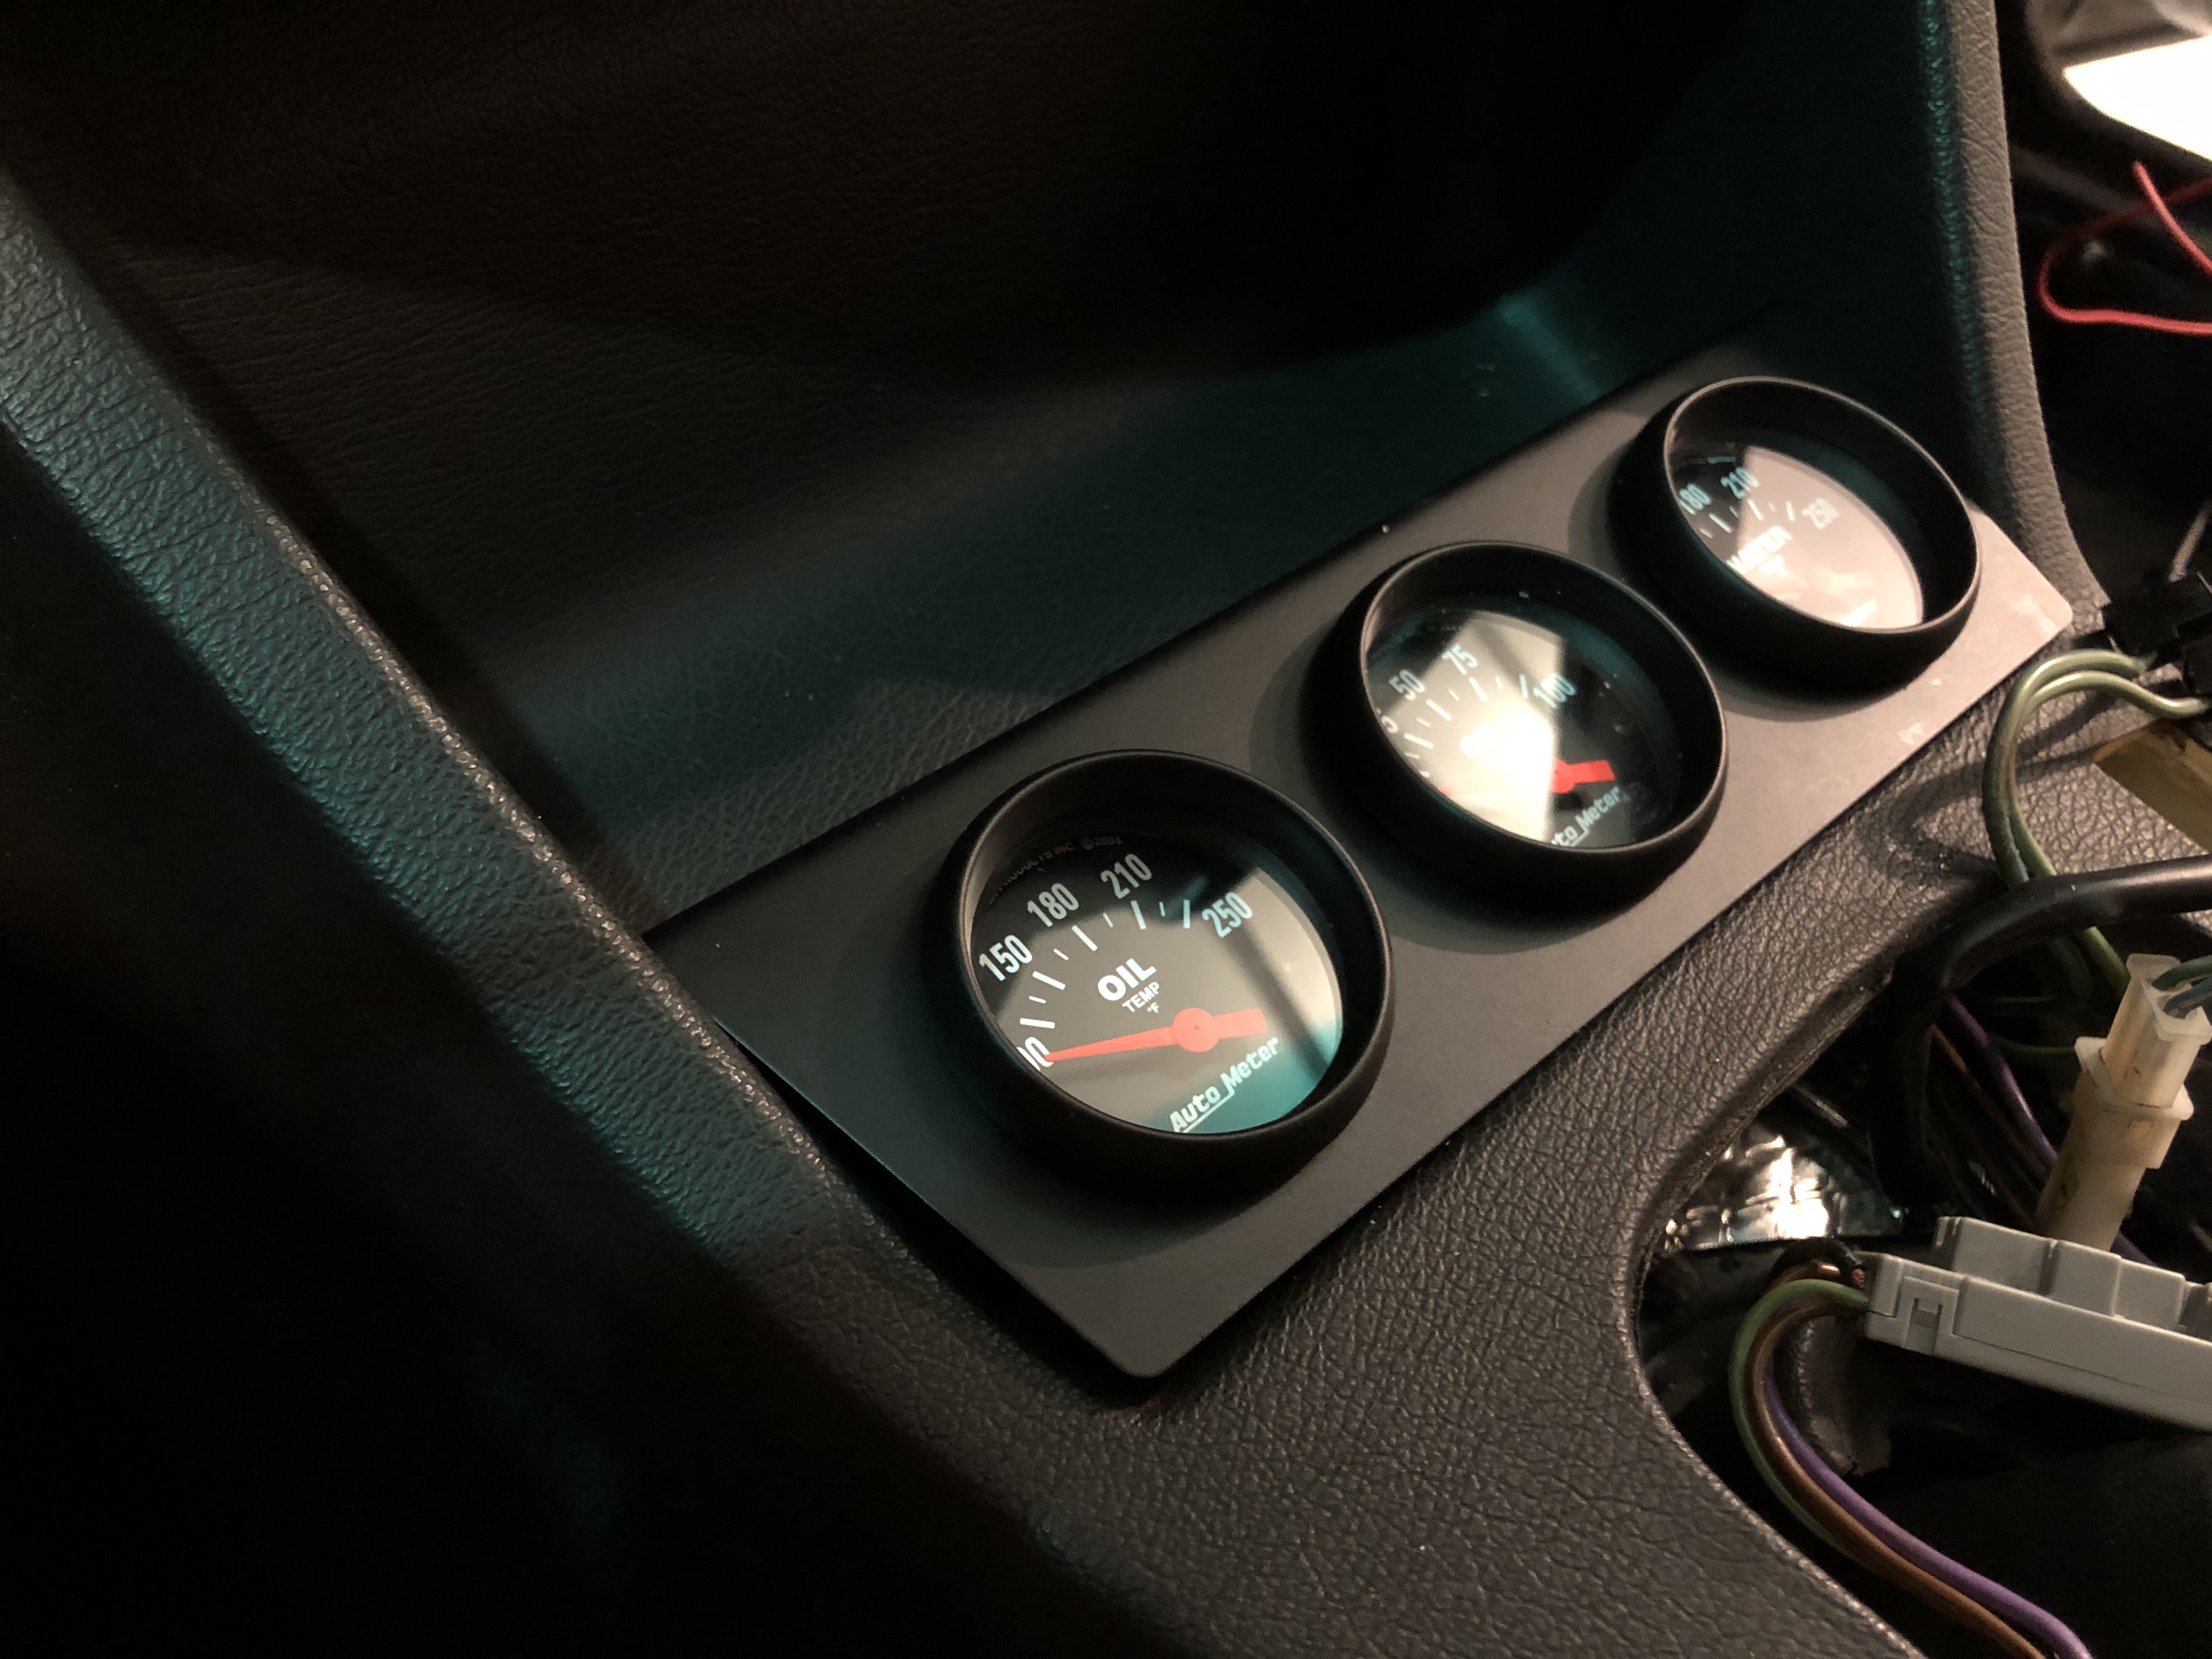
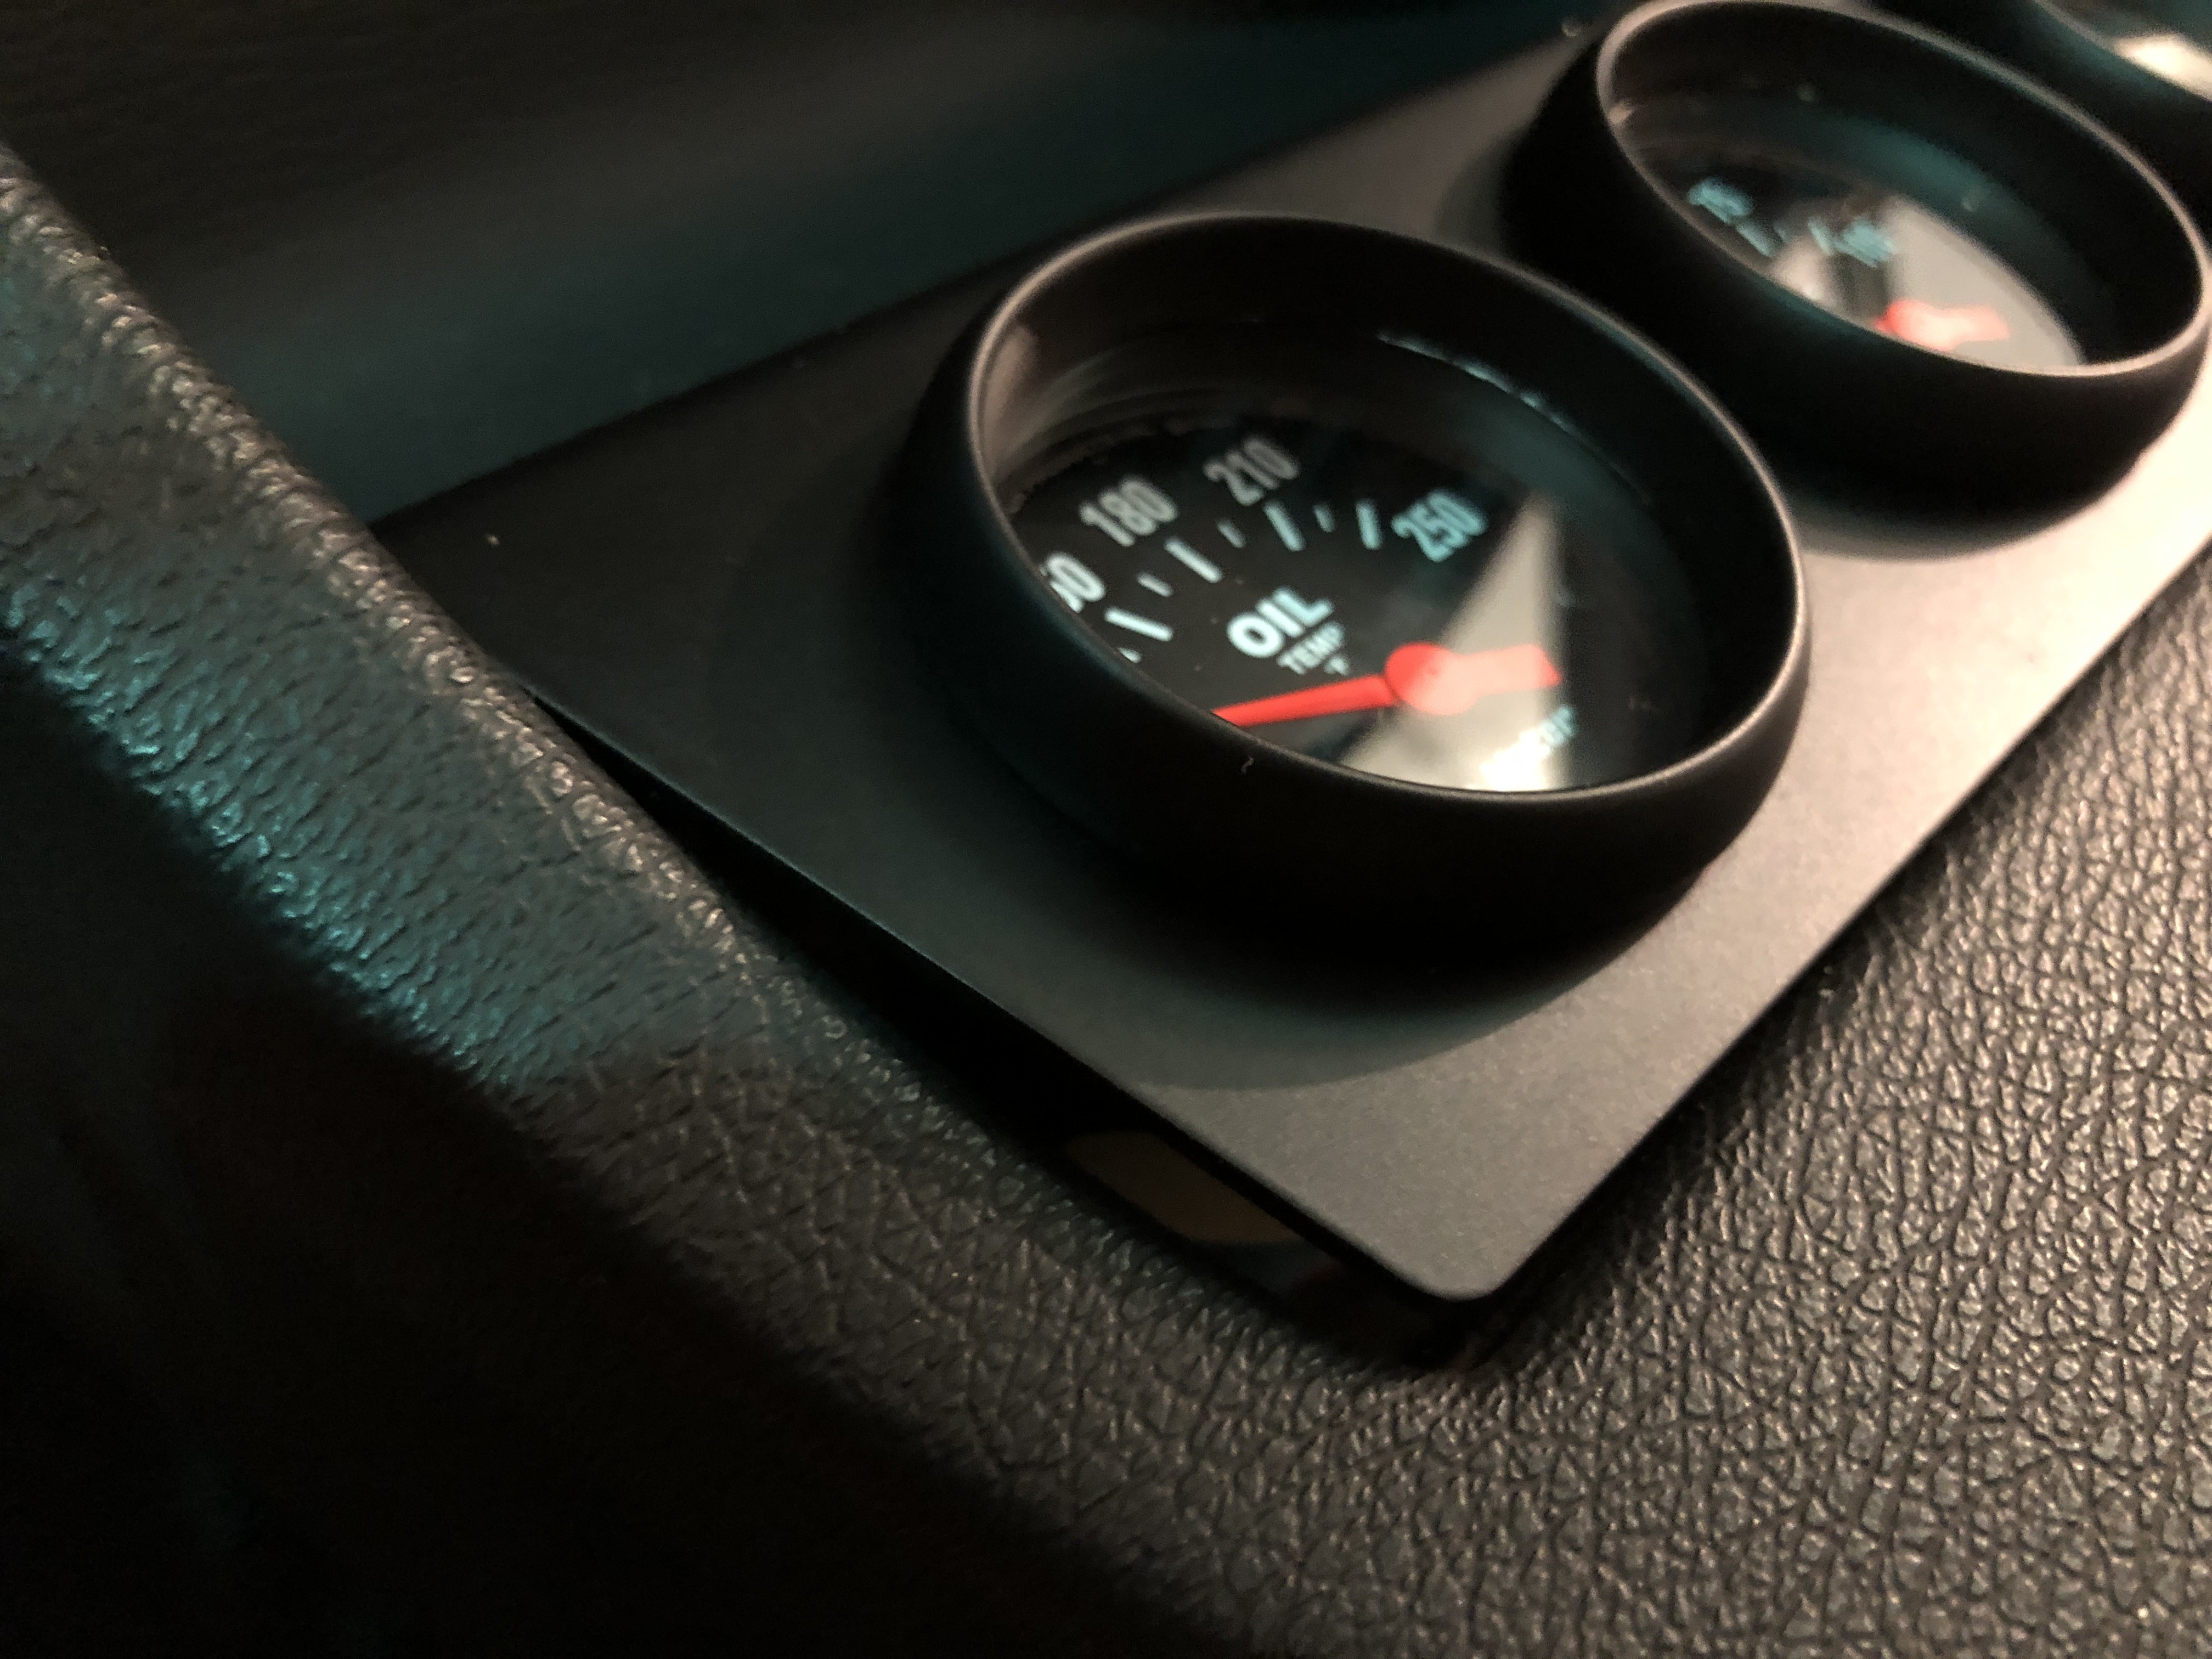
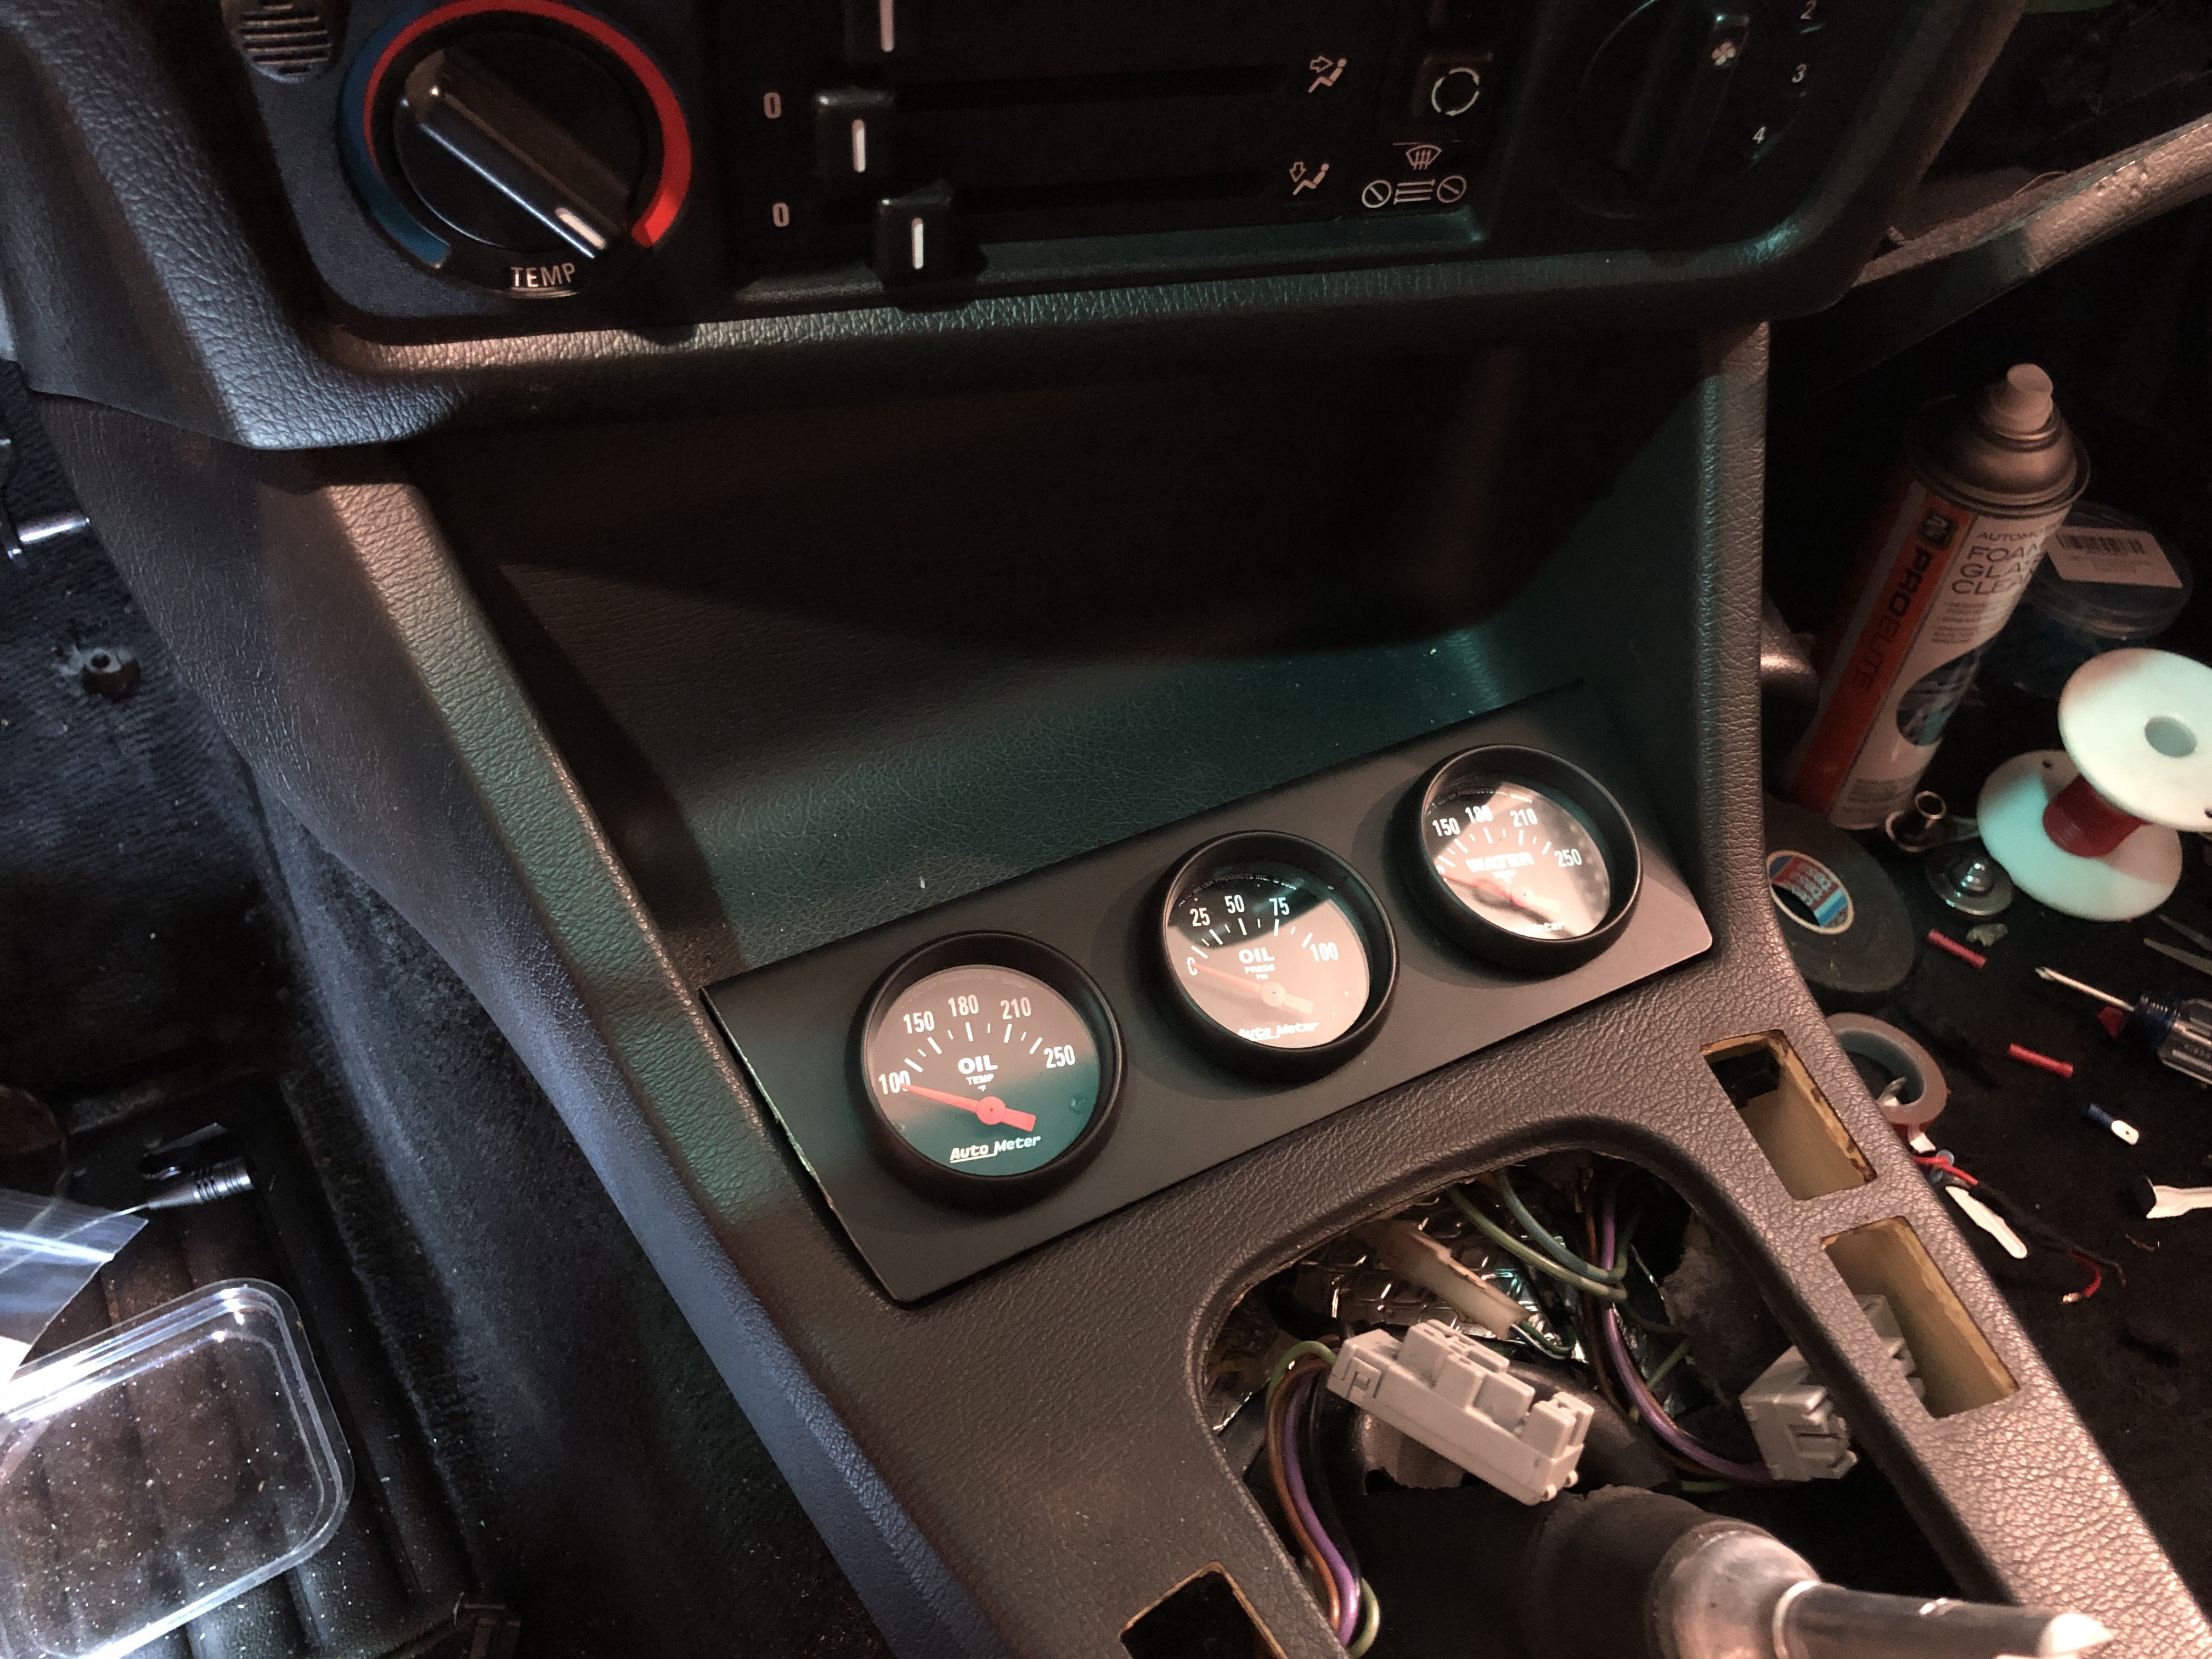
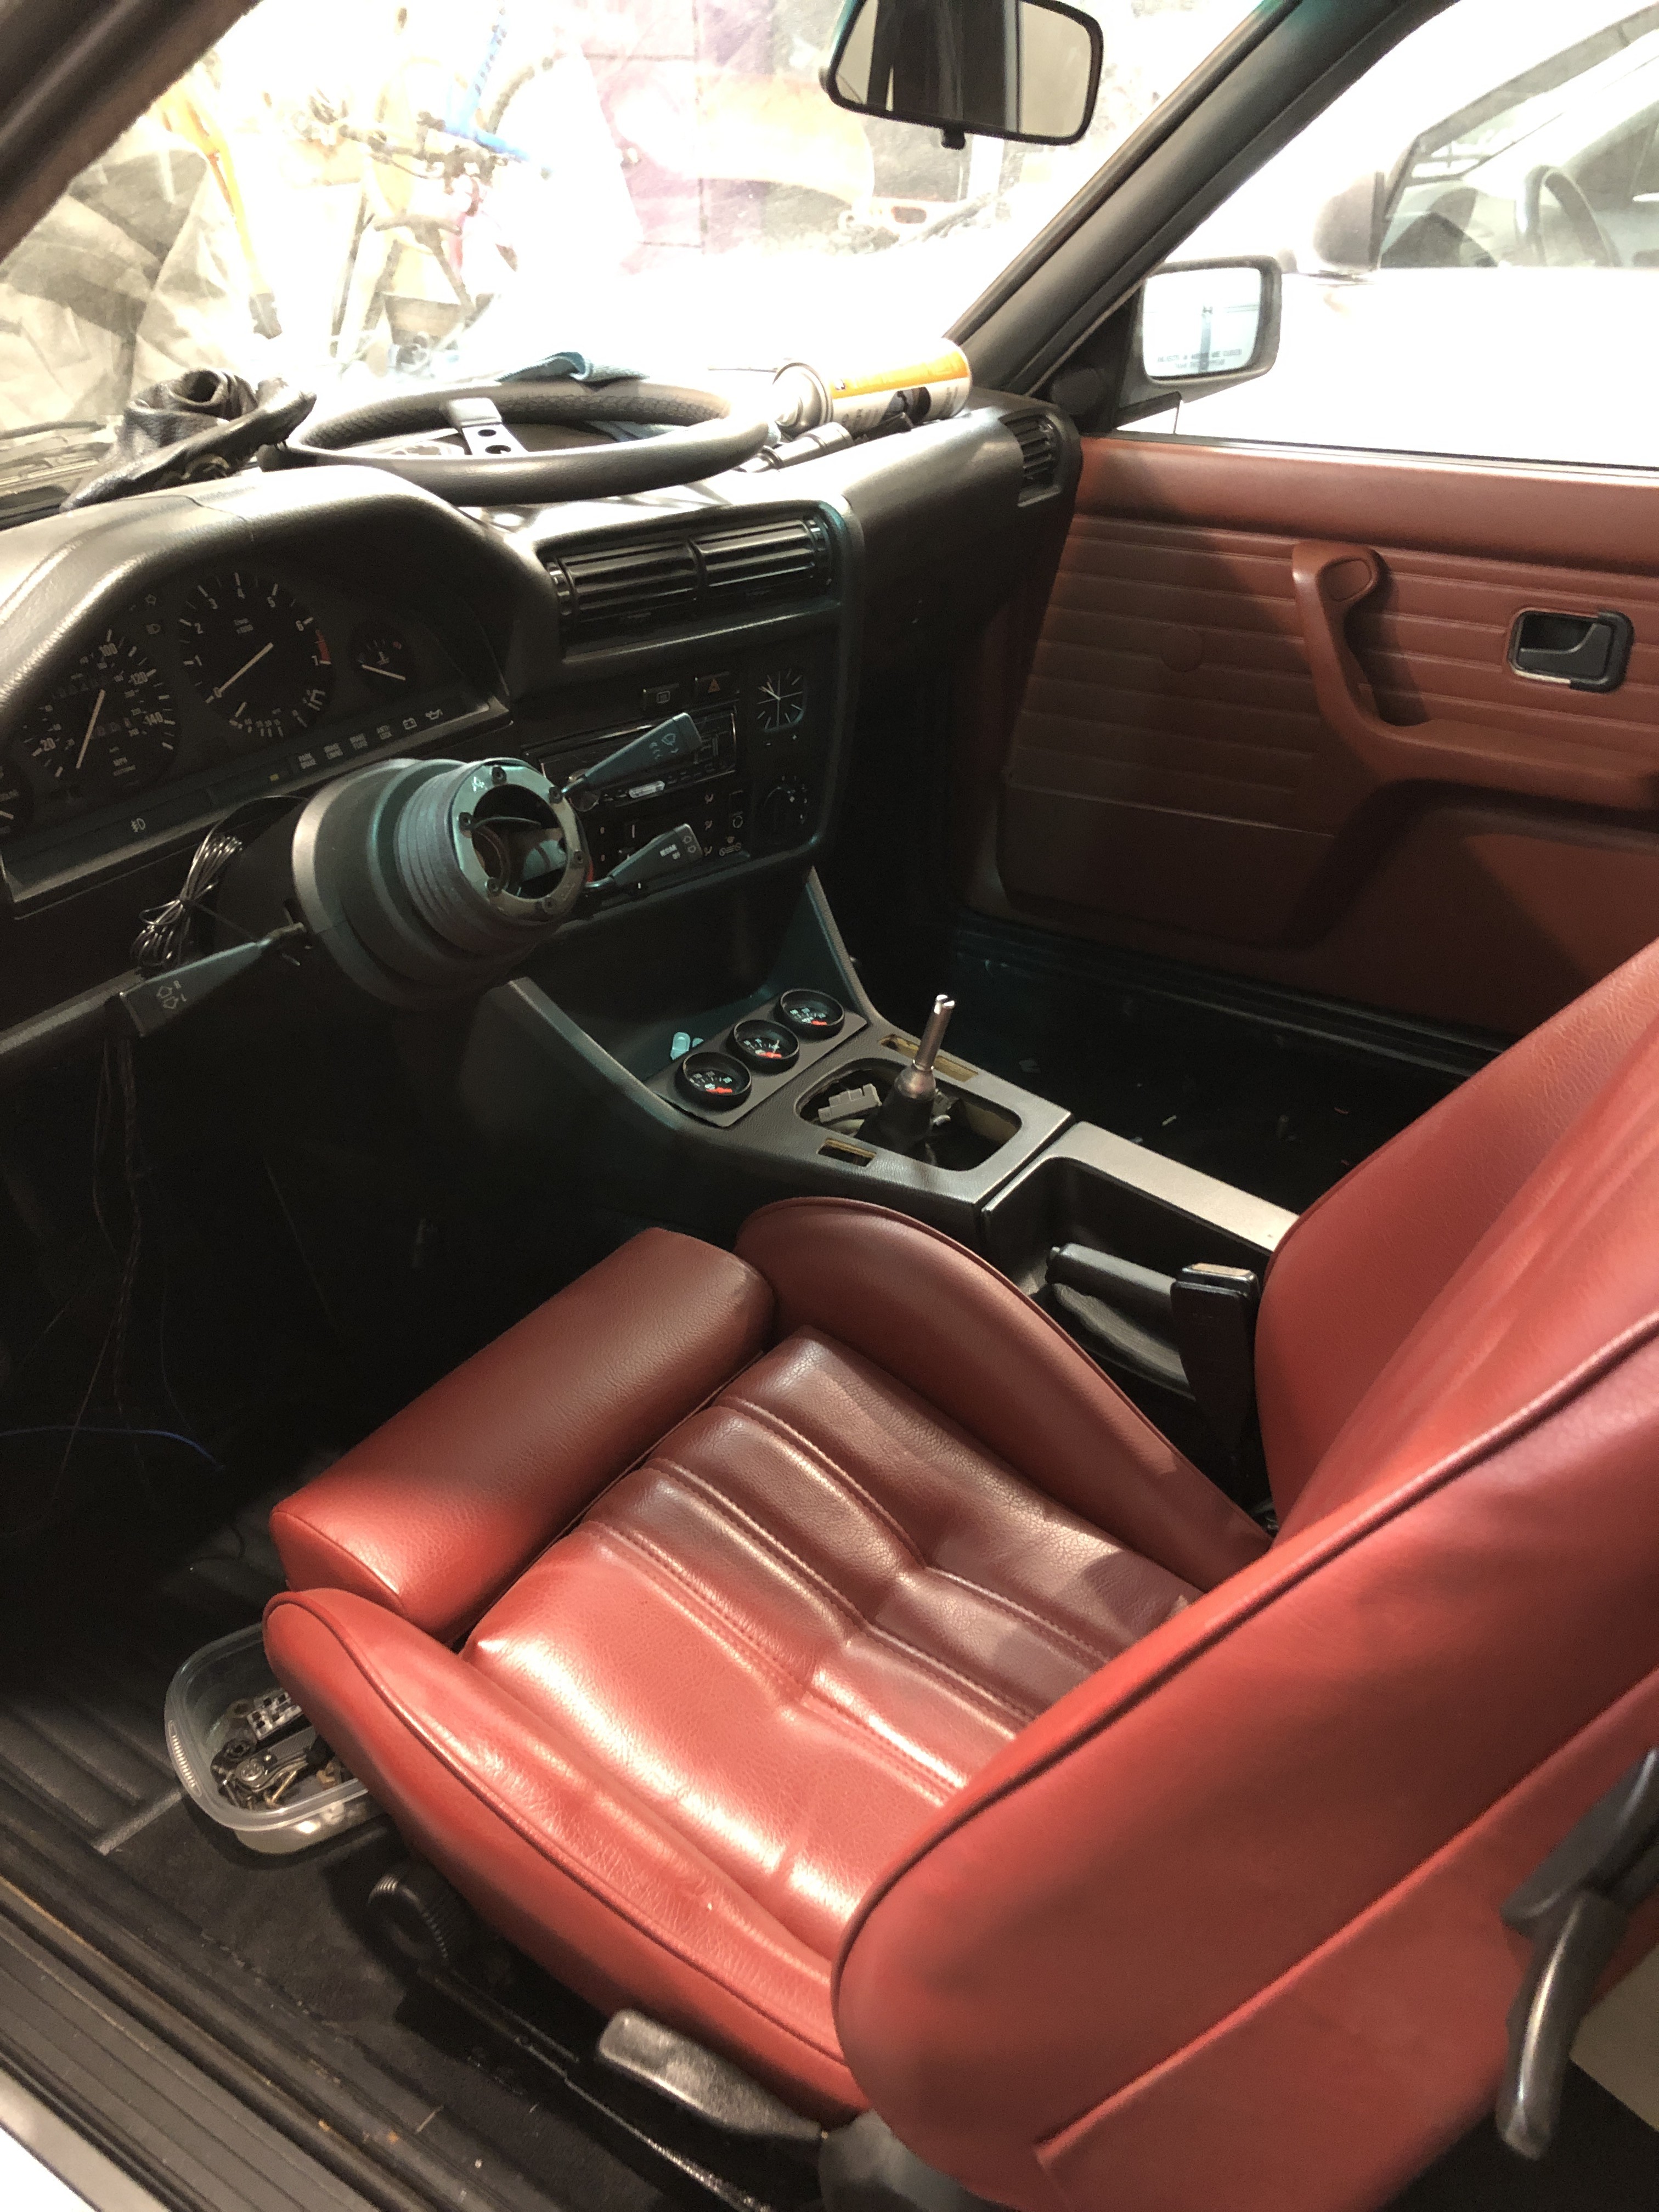
                        Got the gauges mocked up. Started the harnesses for them last night so I can get them in. I need gauges in to be able to put the interior back together. I’m not super thrilled with the fit. But it’s the only gauge bracket that doesn’t either eliminate the storage cubby, middle vents, or something on the dash. I’m going to run some high density foam along the lip under where the gauge bracket sits to conceal that gap. 
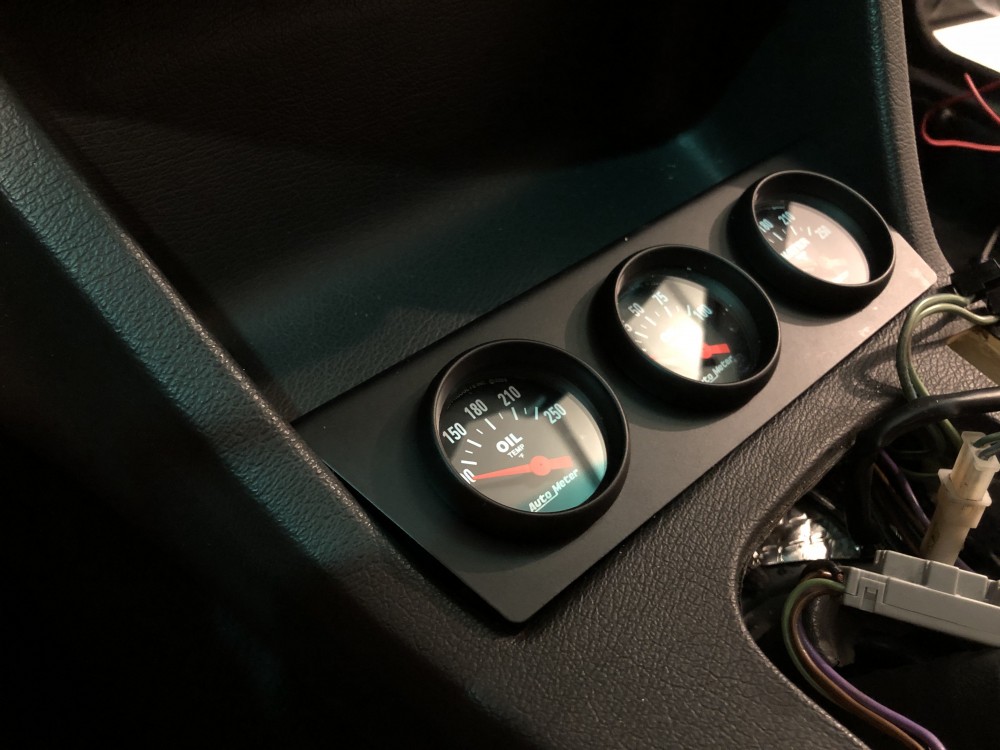
                        11B2A528-8F8C-4ED4-8D97-A477D2EDD71B.jpeg

                        DAC85F96-5EB3-4960-AFB9-E724A53C8343.jpeg

                        I'm using relays that will be mounted behind the dash to control the switched power to the gauges and the switched power to the lights. I'll use the radio swicthed 12v for the trigger on the gauge relay and then a headlight wire for the trigger on the gauge light relay. Pulled power directly from the junction block in the engine bay. 

                        With that said, anyone have a good place to tap a headlight wire of some type for the light relay? 

                        Found this wiring diagram for the lights. Would I be correct in that the yellow/green wire from the switch would be the switched 12v wire going to the lights that I could tap into for the switch on the relay?
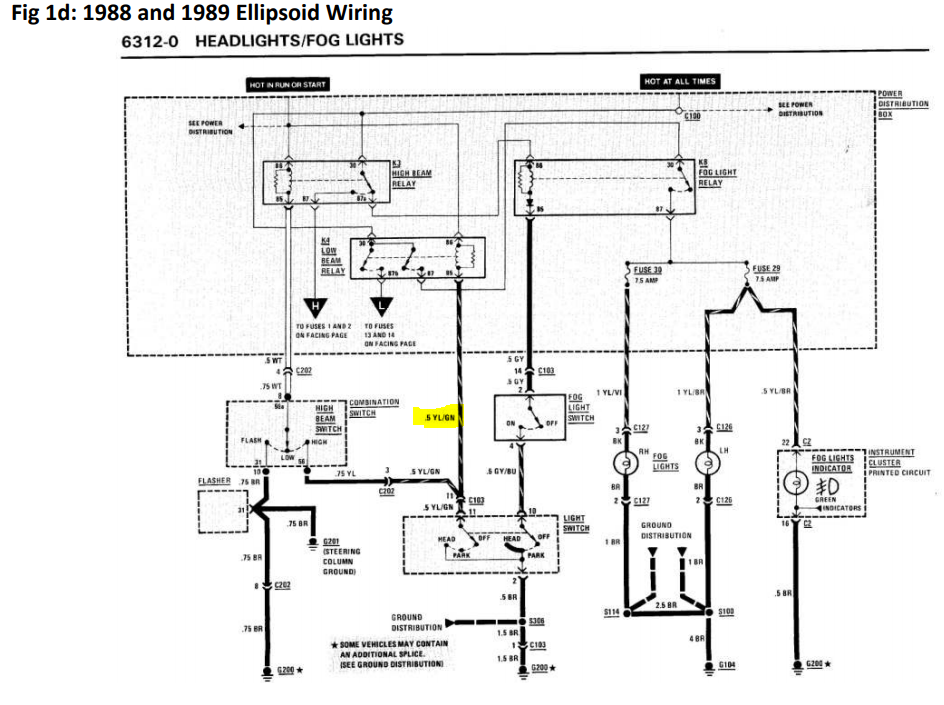
                        image.png

                        1 Reply Last reply
                        0
                        • straight6pwrS
                          straight6pwrS
                          straight6pwr
                          wrote on last edited by
                          #707

                          gilber33 said:

                          With that said, anyone have a good place to tap a headlight wire of some type for the light relay? 

                          if you're already at the back of the radio for the switched power, use the wire there for the switched dashboard lights. it is controlled by the headlight switch.

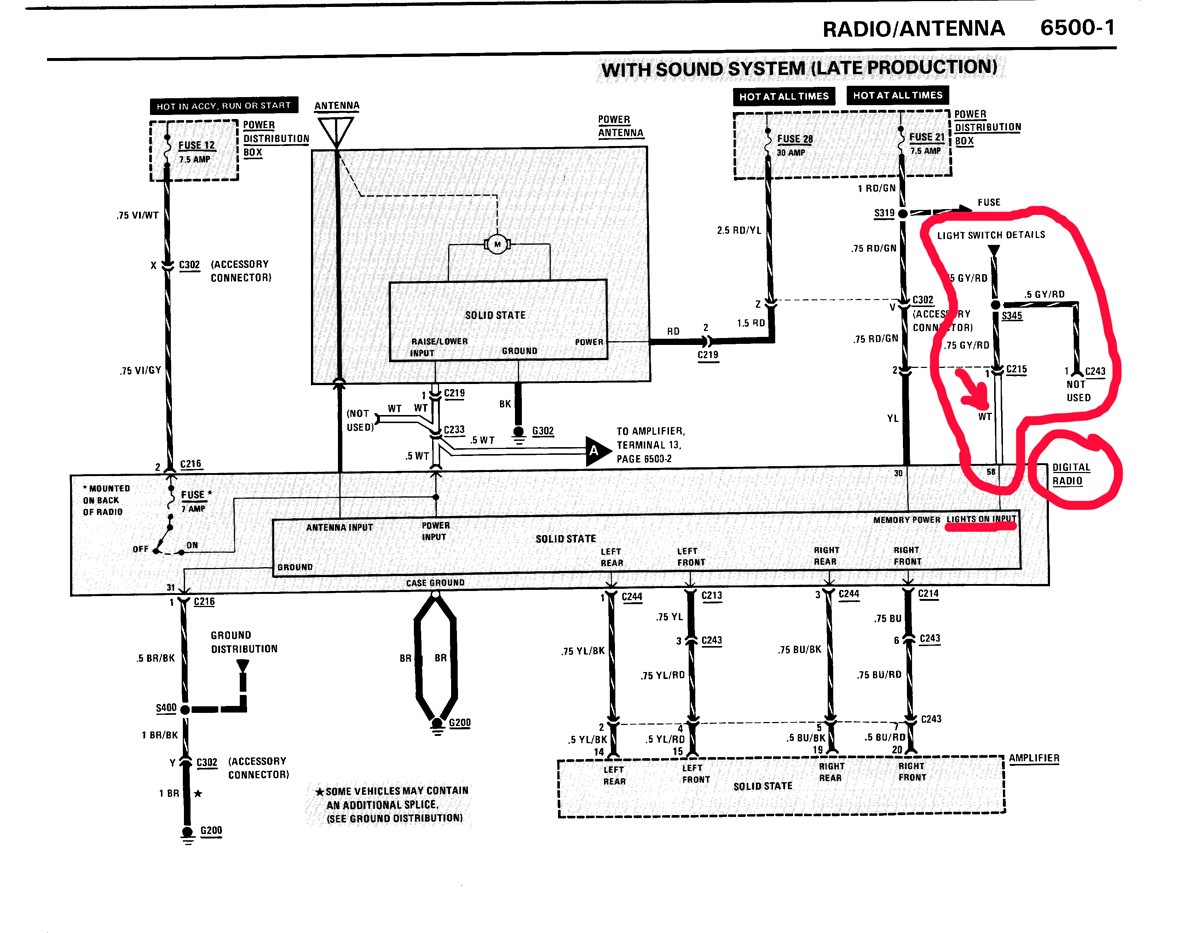
                          i looked up the 89 325i in the ETM, and it suggests a white wire will be the "Lights on input" wire. Some e30s differ based on radio type, etc, but this should be easy to verify.
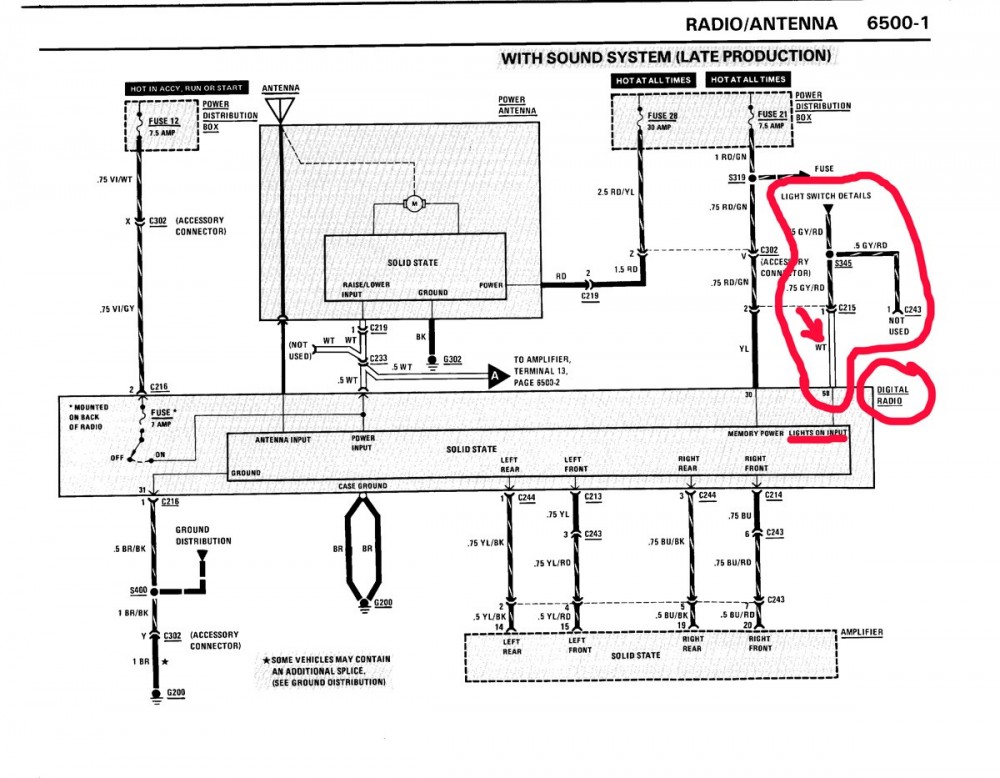
                          e30Radio.jpg

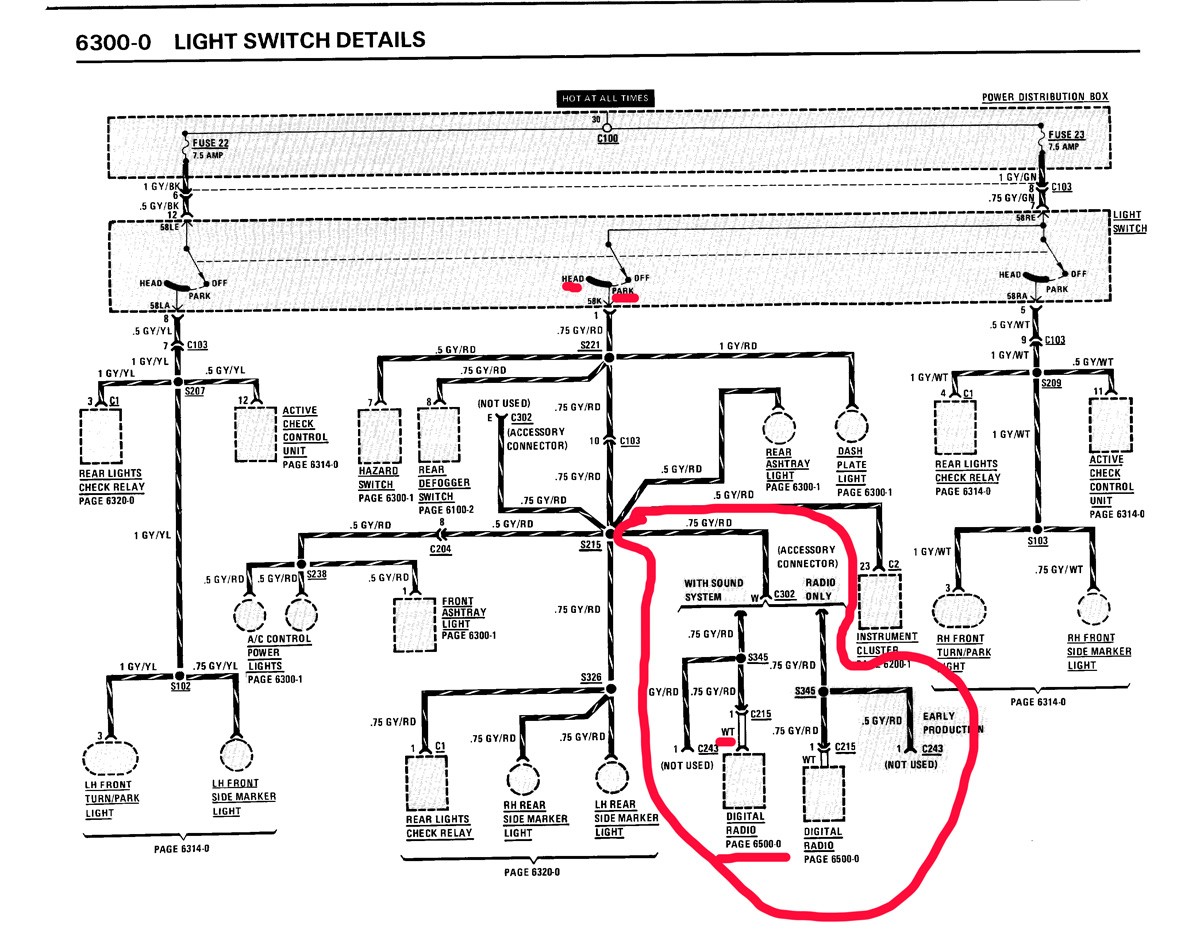
                          tracing that wire to the "Light switch details" it shows that it is controlled by the light switch and gets power in the "Park" lights position and "Head(lights)" lights position.
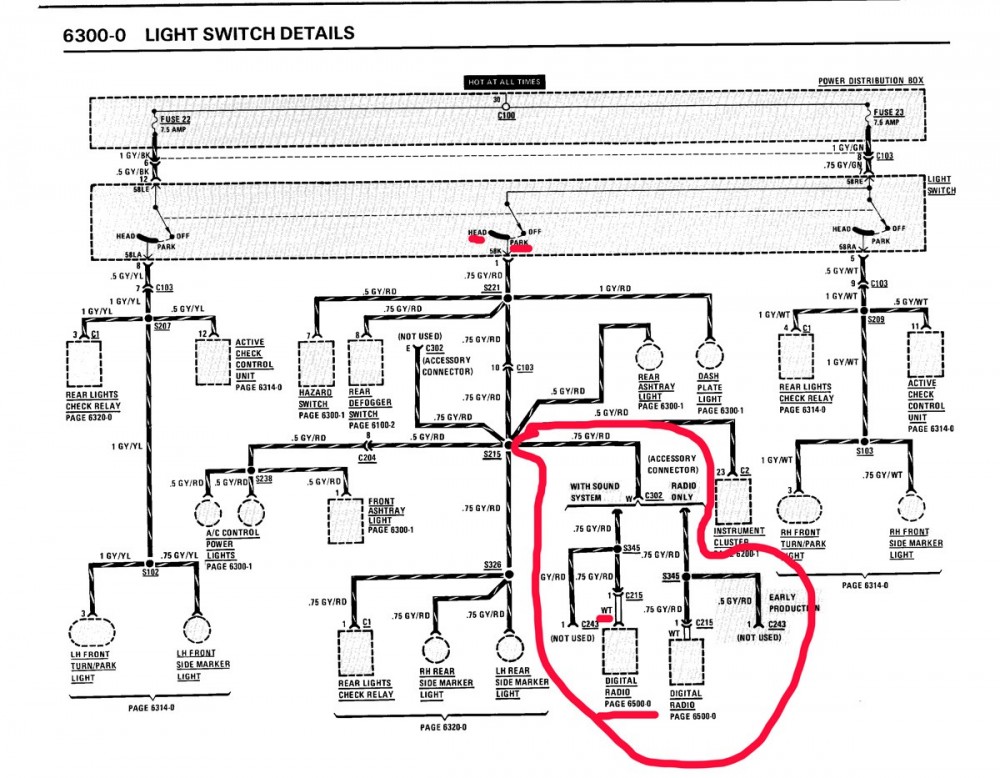
                          e30LightSwitch.jpg

                          Dan
                          yajsYRL.jpg.e5f350b4dfe961d76ac8b32efce2e1a6.jpg

                          1 Reply Last reply
                          0
                          • G
                            G
                            gilber33
                            wrote on last edited by
                            #708

                            straight6pwr said:

                            if you're already at the back of the radio for the switched power, use the wire there for the switched dashboard lights. it is controlled by the headlight switch.

                            Thank you! If I'm reading that correctly, will that white wire be part of the radio wire harness bundle?

                            1 Reply Last reply
                            0
                            • jc43089J
                              jc43089J
                              jc43089
                              wrote on last edited by
                              #709

                              Use the radio wire.  The wire you first identified is actually a switched ground for the relay so it will not work as you intend.

                              2/94 325i Sedan, Arctic Gray: UUC LTW FW, EVO 3 and DSSR, +.020 Maxsil pistons, ASC delete, Eibach shocks/springs, 16" contour reps 238k
                              3/93 325i Coupe, Schwarz 2, Sketchy stance action, ebay turbo, 300k
                              '89 325i Vert, Alpine White: 5spd swapped, sold.

                              '04 Toyota Sienna: 24V to 24V swap in progress

                              '05 Volvo V70R, 6spd.  200k
                              '85 Toyota LandCruiser: Lifted, gas hog. 205k
                              '99 Nissan Maxima: 5spd, Rusty but trusty winter beater. 252k RIP.

                              1 Reply Last reply
                              0
                              • straight6pwrS
                                straight6pwrS
                                straight6pwr
                                wrote on last edited by
                                #710

                                gilber33 said:

                                Thank you! If I'm reading that correctly, will that white wire be part of the radio wire harness bundle? 

                                Yes, on the diagram you can see the black line for the wire just touches the box that represents the radio, instead of having an arrow and connector number (C216, for example). I believe it shares a small two pin connector with that adjacent solid yellow wire. (this is if you still have the factory radio)

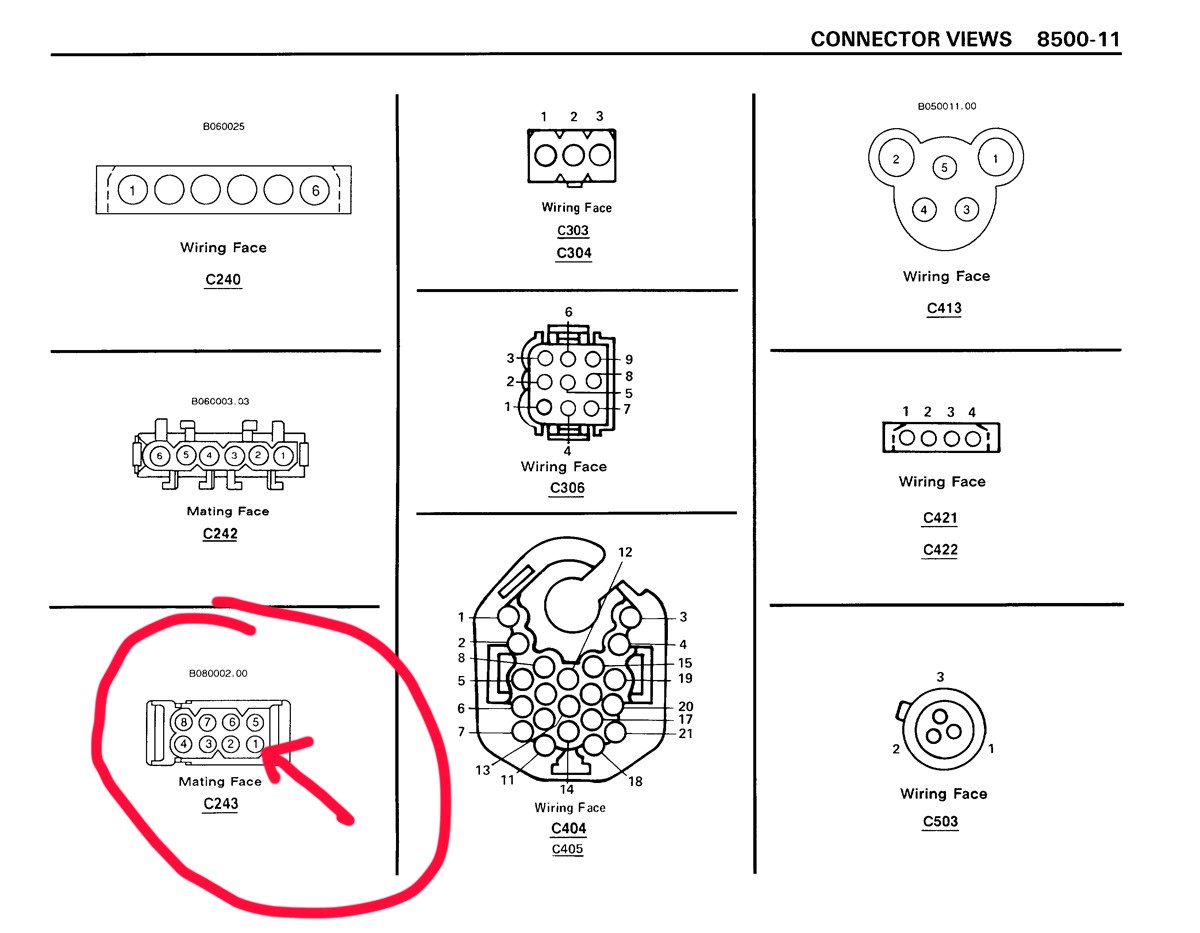
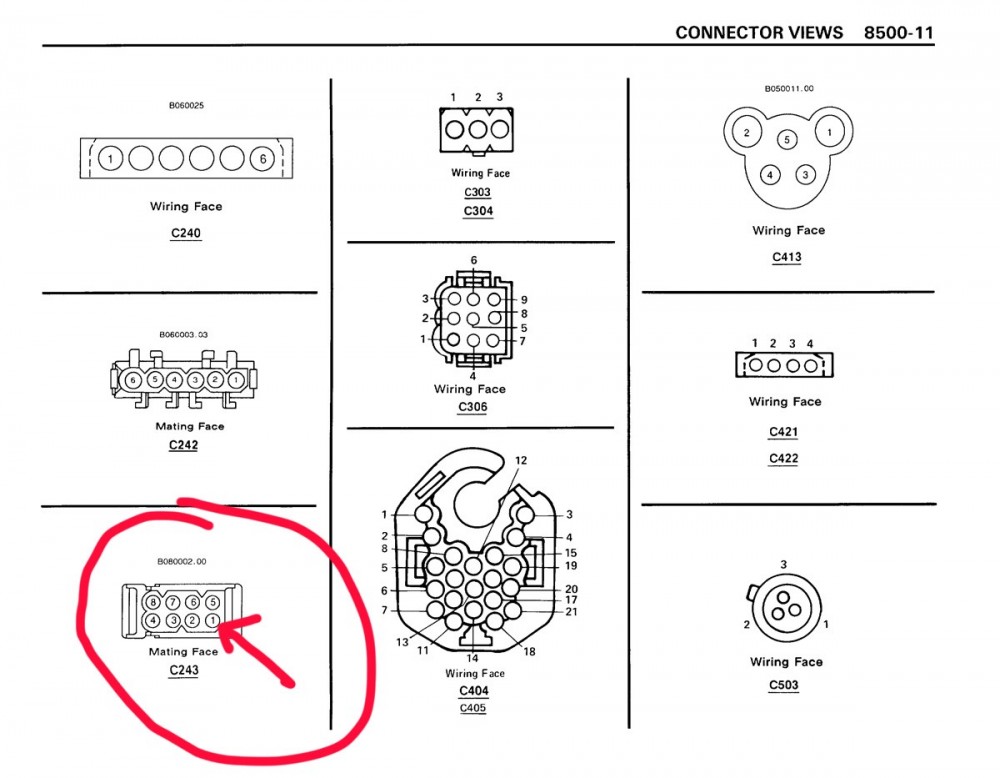
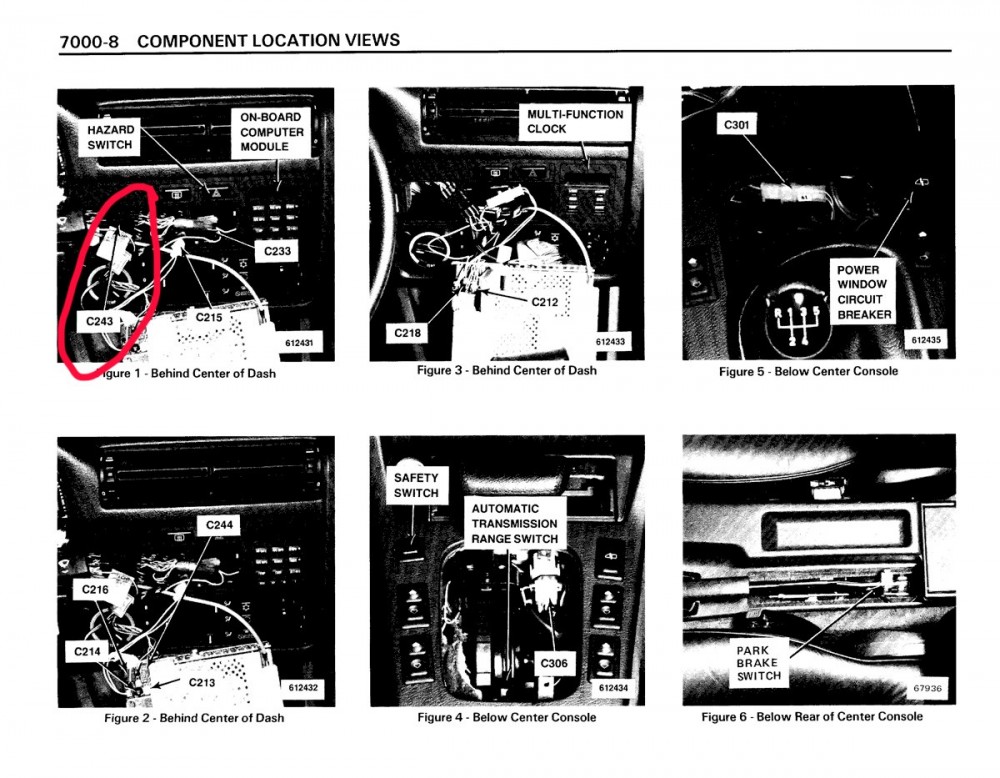
                                alternatively, you may be able to utilize that GY/RD (gray/red) wire that splits off the harness and goes to position 1 of the C243 connector. it is labeled as "not used" which means the pin on the other half of the connector should be missing. you could either pull the pin from the connector and use it, or add a new pin/wire to the side that is missing.

                                this is what the C243 connector looks like:
                                e30C243.jpg

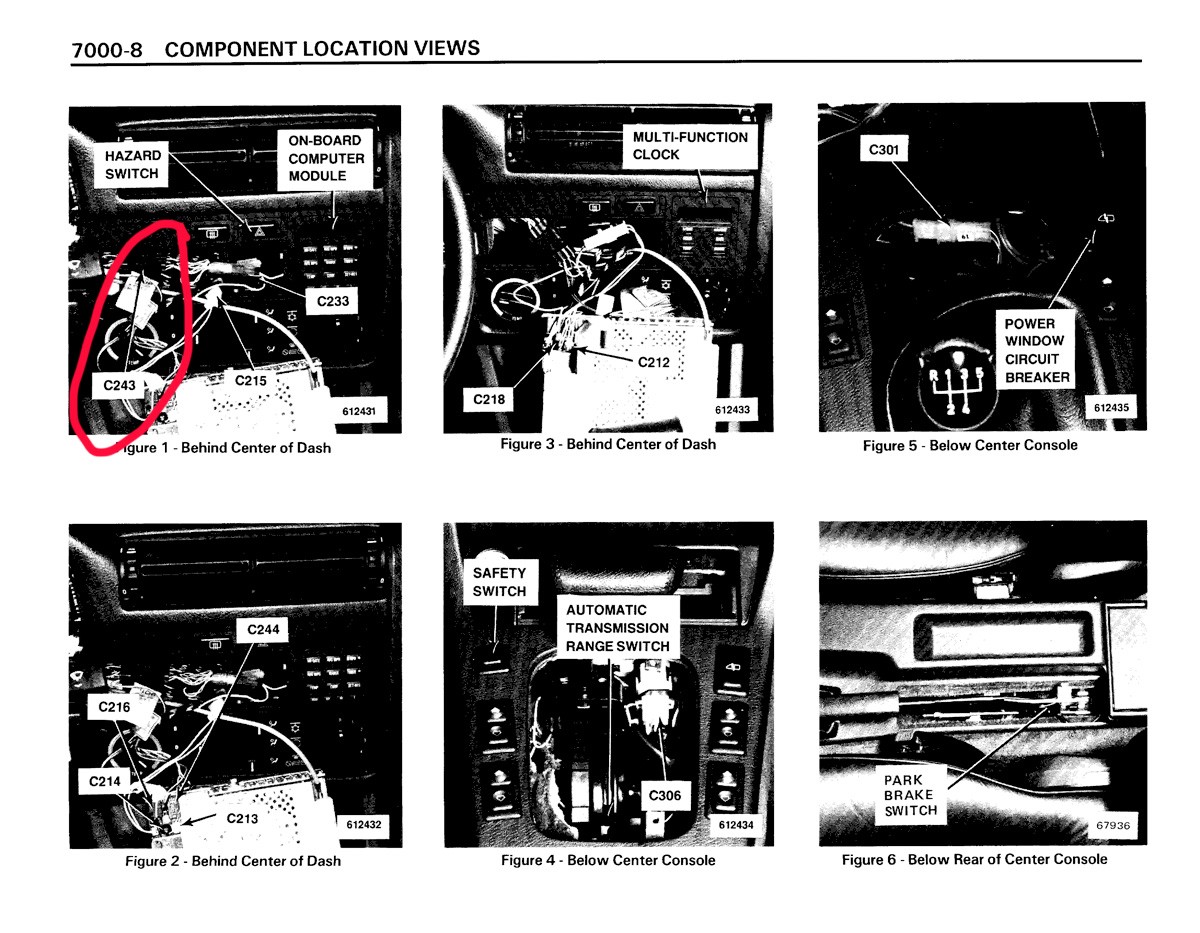
                                it will be upstream in the radio harness in the dashboard. it should be the only 8-pin connector in there, I think.
                                e30C243Location.jpg

                                Dan
                                yajsYRL.jpg.e5f350b4dfe961d76ac8b32efce2e1a6.jpg

                                1 Reply Last reply
                                0
                                • G
                                  G
                                  gilber33
                                  wrote on last edited by
                                  #711

                                  That is extremely helpful! Thank you for all of that information.

                                  1 Reply Last reply
                                  1
                                  • G
                                    G
                                    gilber33
                                    wrote on last edited by
                                    #712

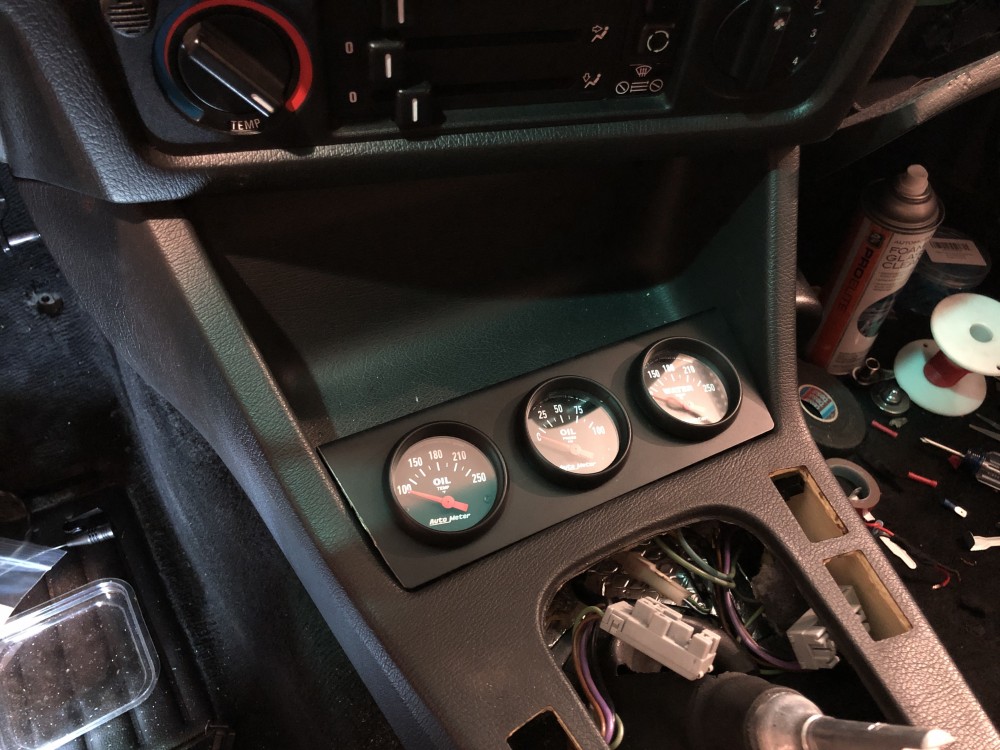
                                    These gauges took way more work and time than I thought they would. Mostly because the bracket fit like garbage once the two screws on the back of it were tightened down.

                                    In the end I had to get out the belt sander and shave one side down so it fit in the cubby. Out of the box it was maybe 1/16” too wide making the fit very poor. It would fit OK when it was loosely sitting in there, but once tightened down it would lift up towards the front. I basically bent the mounting tab down a bit so as it is tightened it pushes the front of the bracket down/forward. 

                                    End result is satisfactory though. I would love to come up with a custom gauge bracket somehow that better matched the interior, but I wouldn’t know where to start. 
                                    150DED70-B323-41C1-B61A-AF4FE6666359.jpeg

                                    28430912-803C-4B17-8559-2EFB877991A8.jpeg

                                    I finally got the replacement rear brake line piece. I have the new/correct AC hose in the car and now all of the AC lines are in with new o-rings. Wtih the rear brake lines done I'll be able to put the gas tank back in the car. Once the rear is done I'll move on to the front struts. 

                                    Debating if I want to rebuild the axles while they are out. From the how-to's I've looked at they appear to be relatively straightforward and all new boots and grease is only $100 to do both axles.

                                    1 Reply Last reply
                                    1
                                    • G
                                      G
                                      gilber33
                                      wrote on last edited by
                                      #713

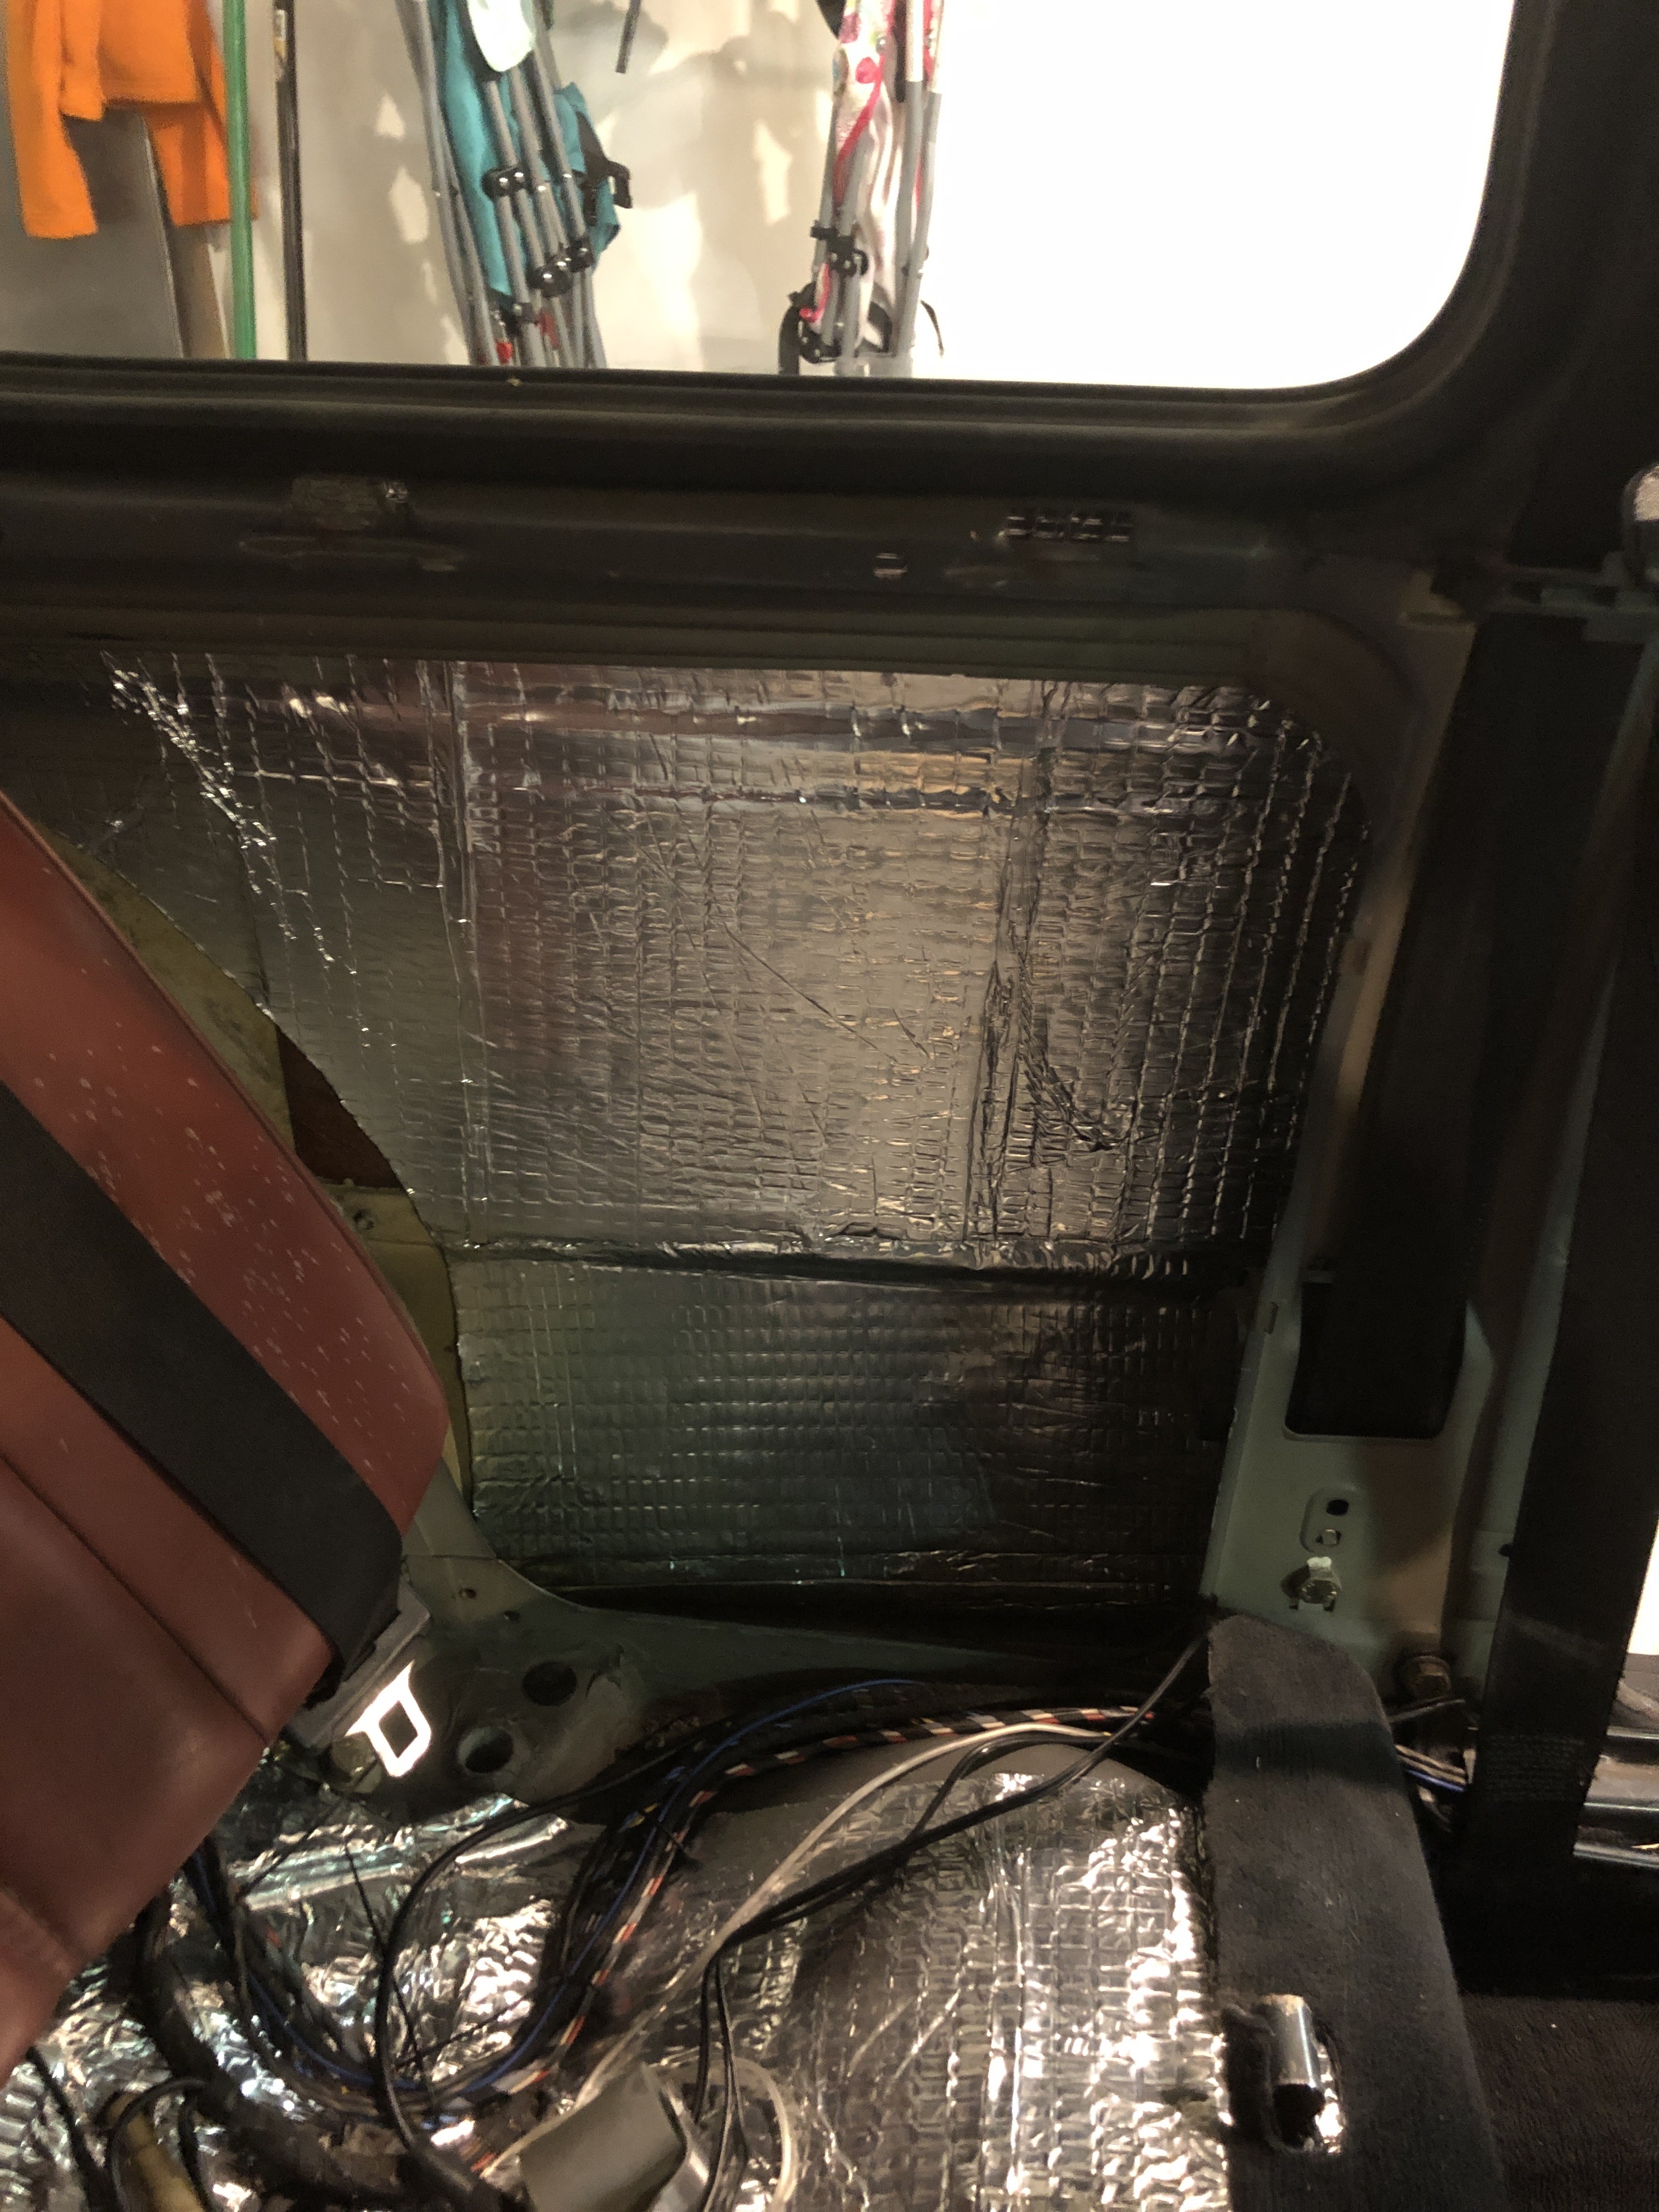
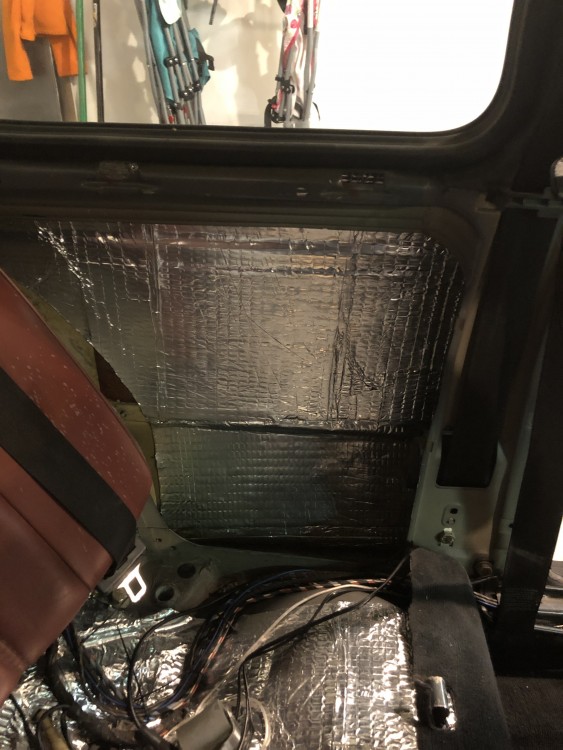
                                      Didn’t realize that the area behind the rear “door” cards are completely bare metal. Took those out and put sound mat in there.
                                      9F8458C1-568D-4B15-AD39-C103C3256645.jpeg

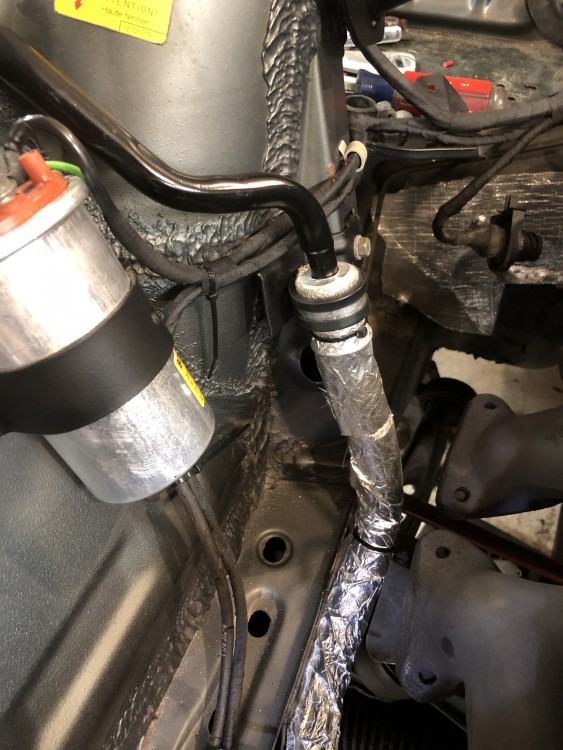
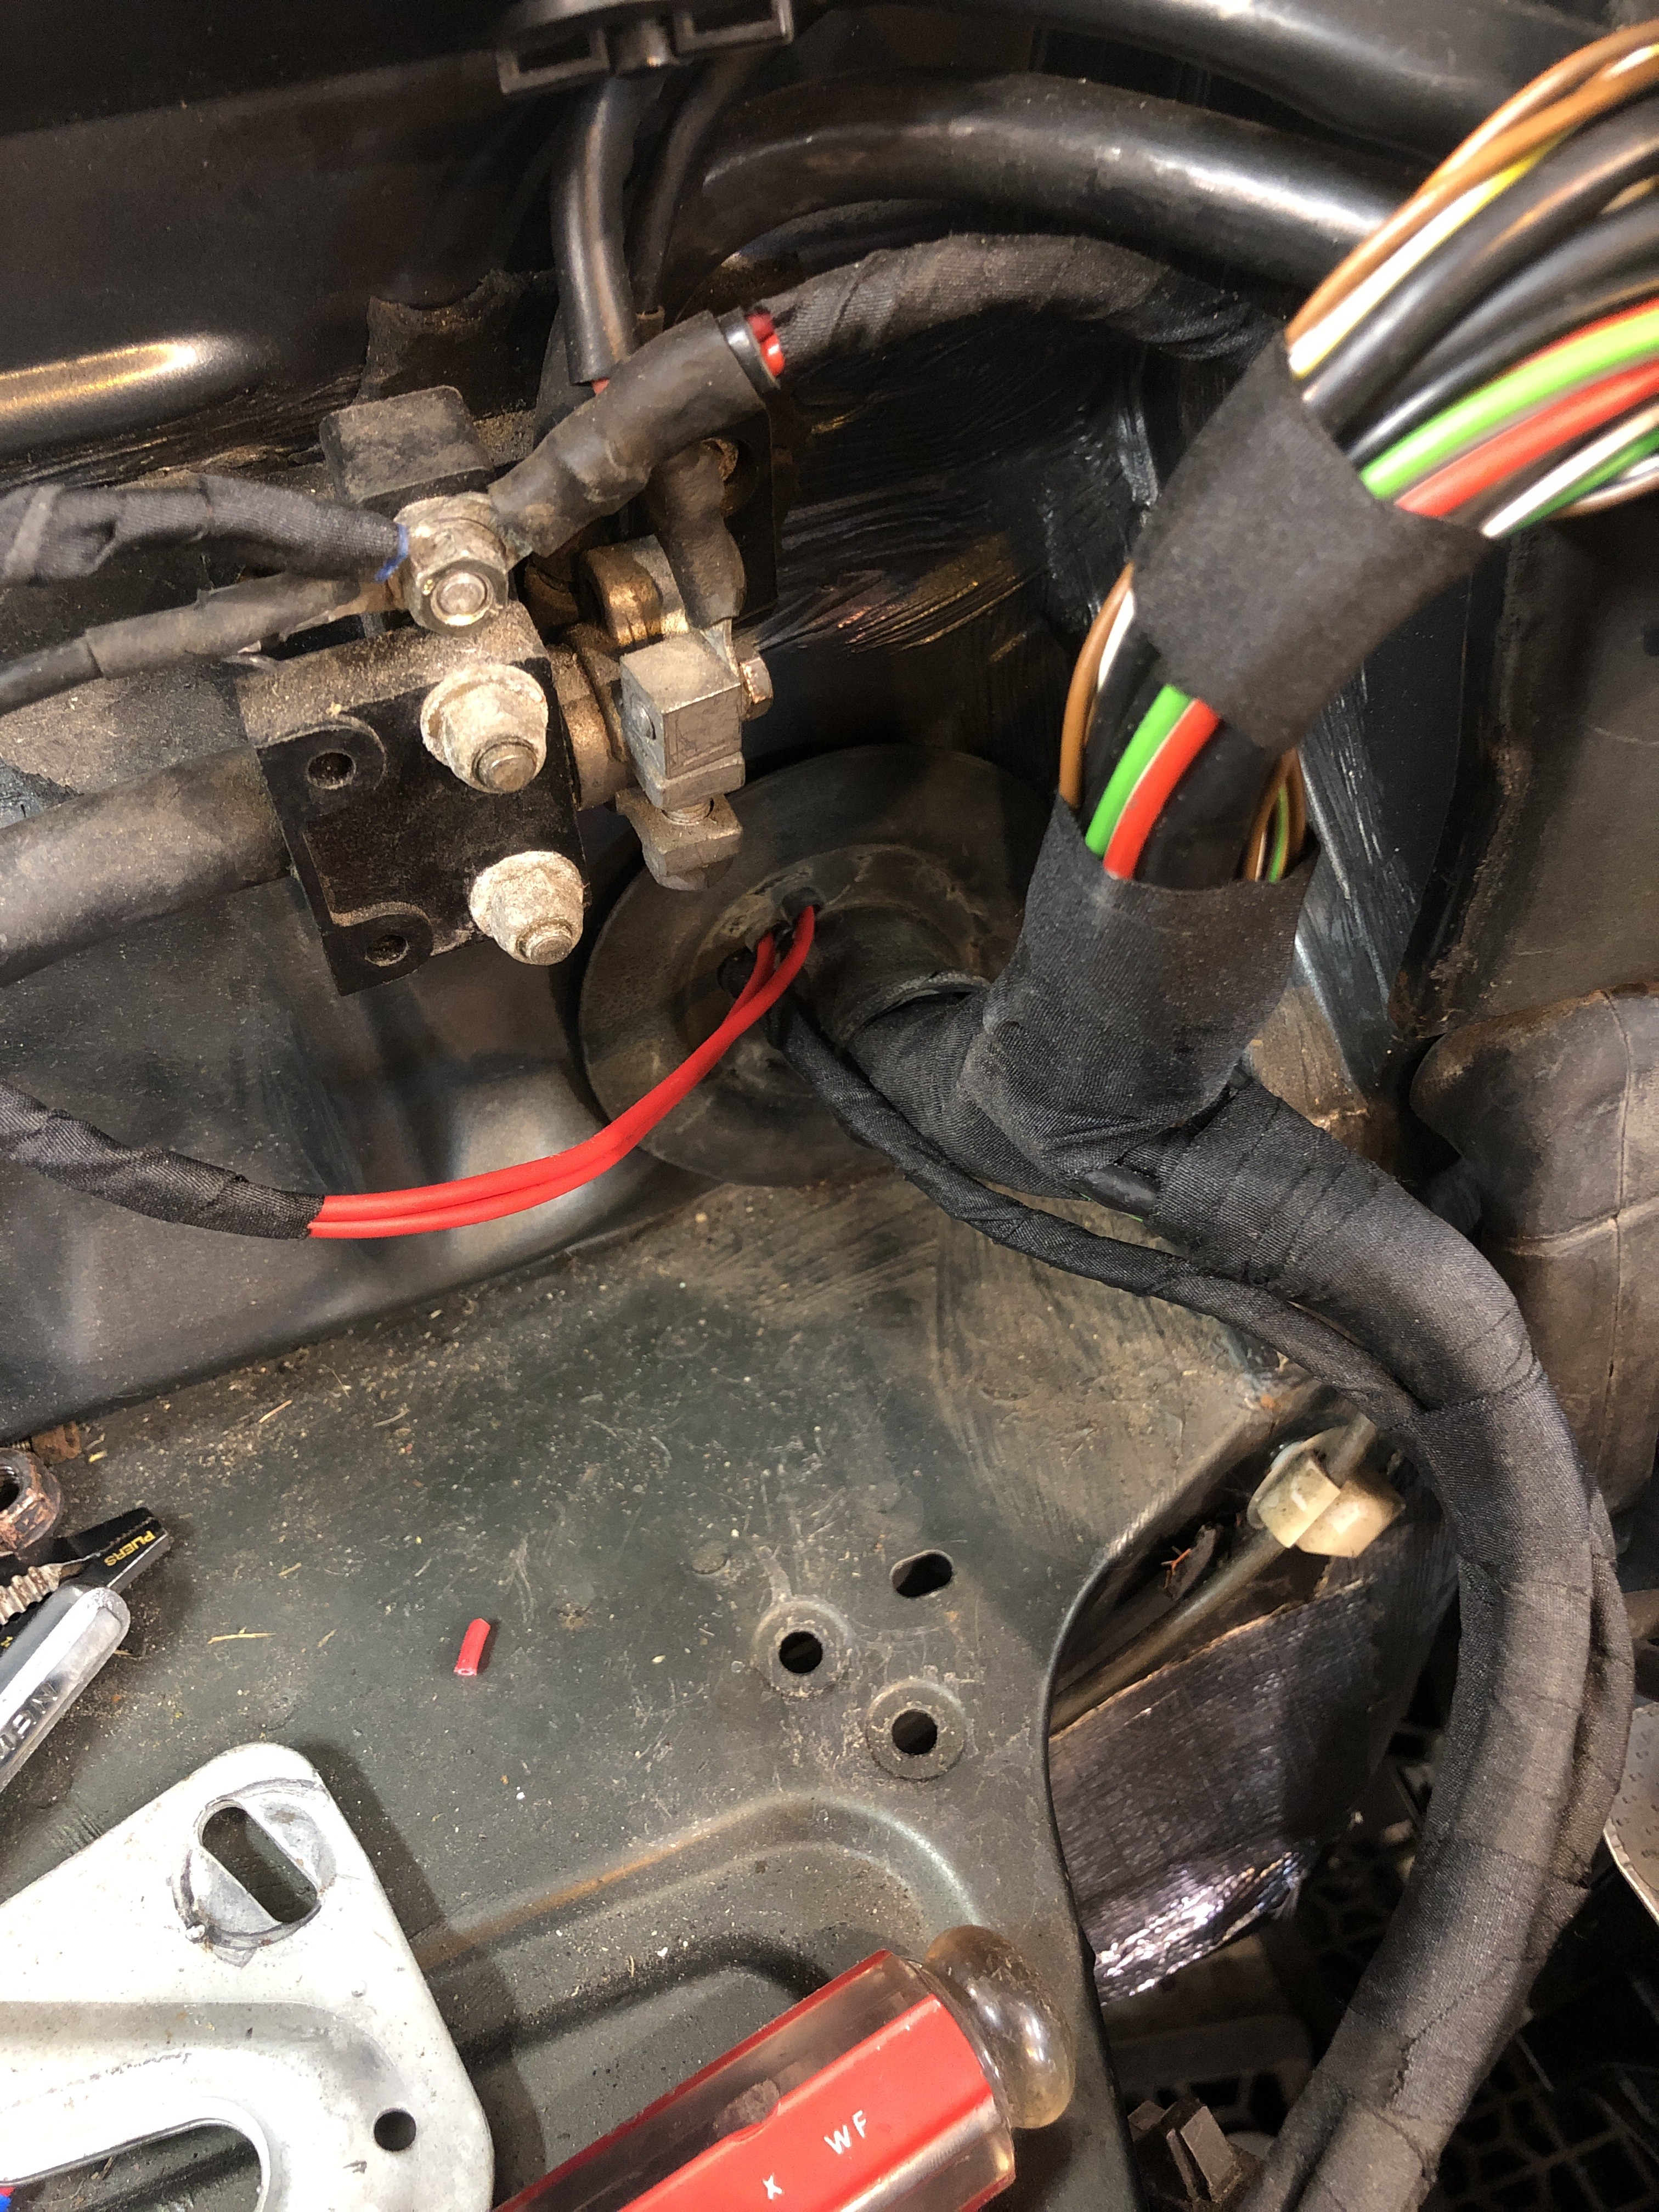
                                      Where the gauge relay power and gauge harness comes through the firewall and the runs down to their respective locations. 
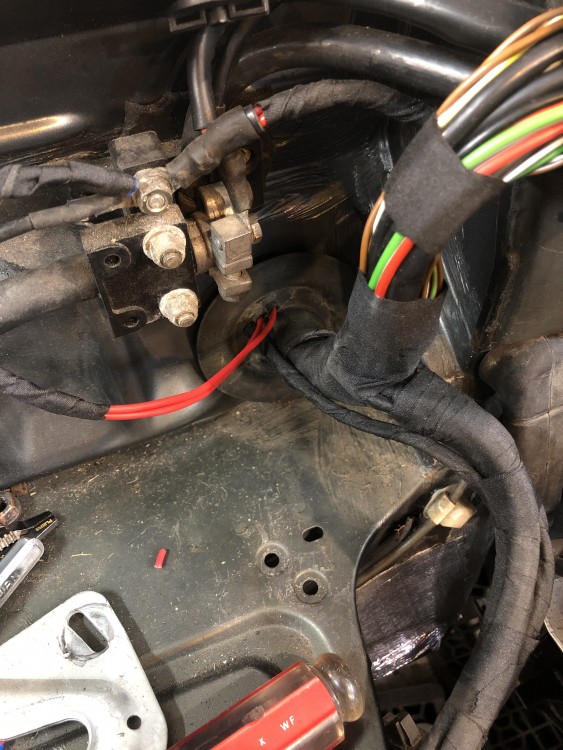
                                       

                                      FFB9C894-B1F8-40B3-B4DC-37219280372E.jpeg

                                      87D39918-102E-4856-9A22-279627881A3F.jpeg

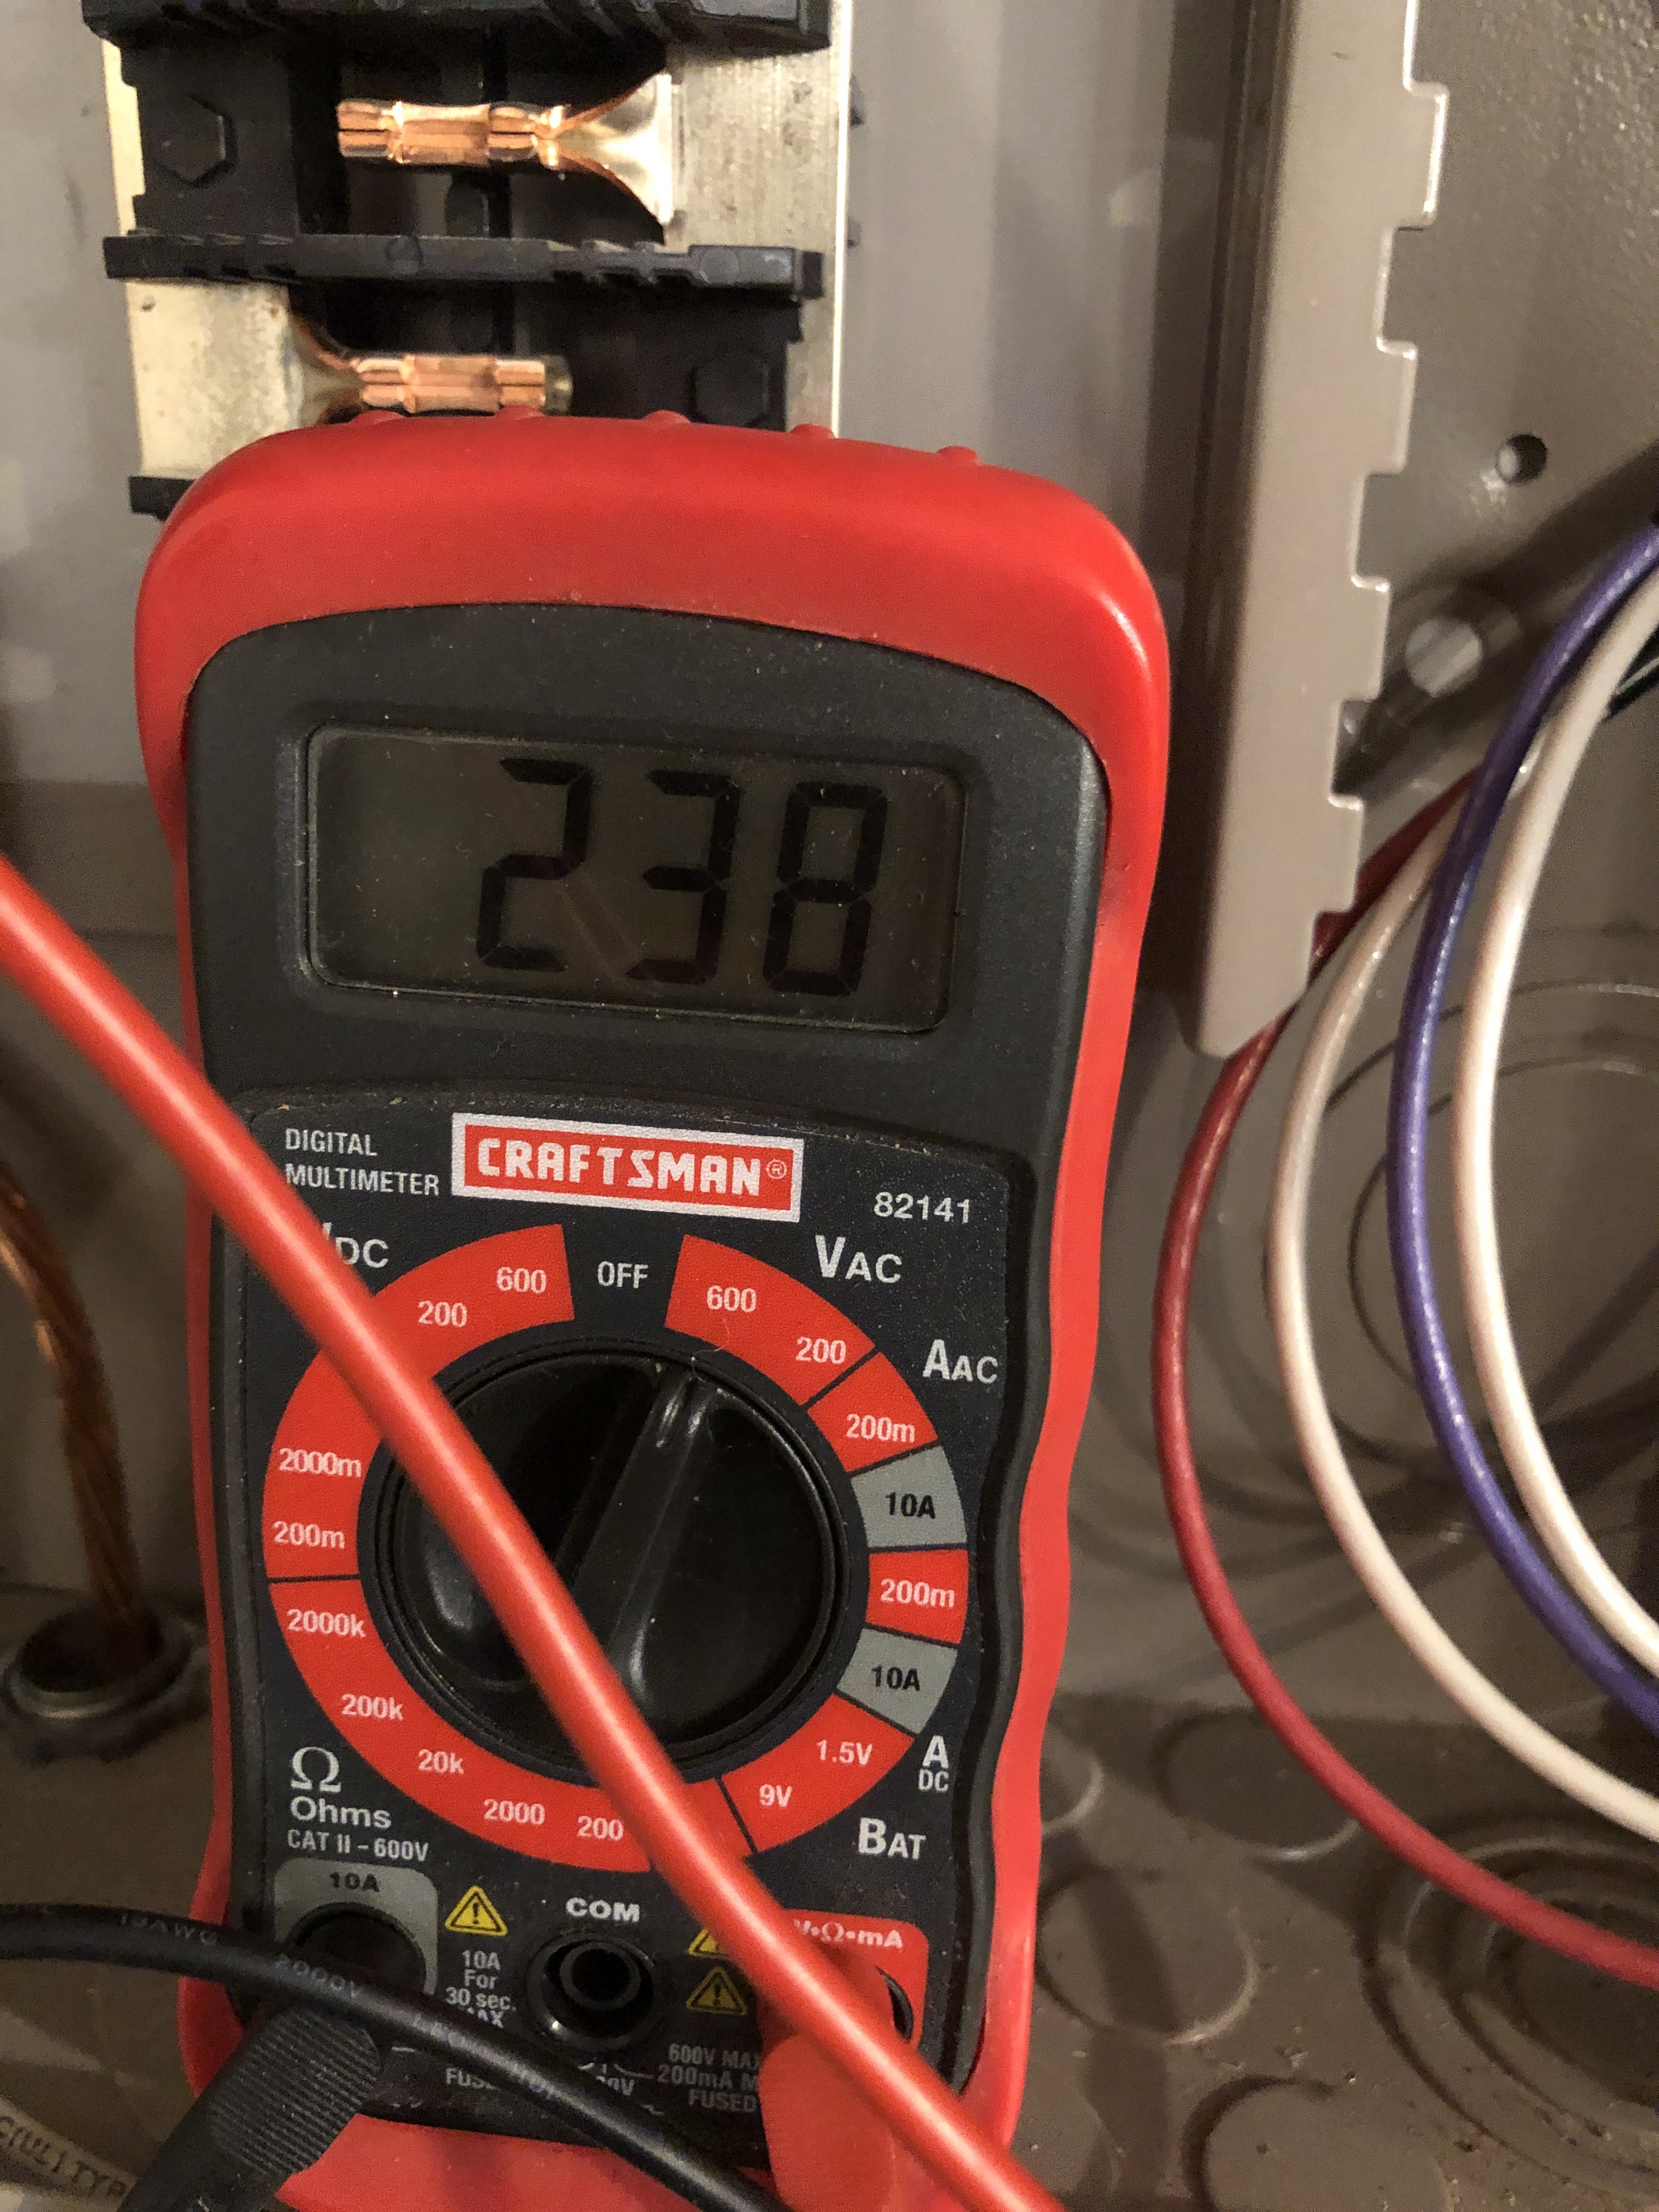
                                      Also discovered that when the power was ran to my garage they ran 220. I asked them to wire the garage for 120v and always assumed they only brought that out to the garage. Cue the installation of 240v outlets. First thing I’m doing is putting in an electric heater. 
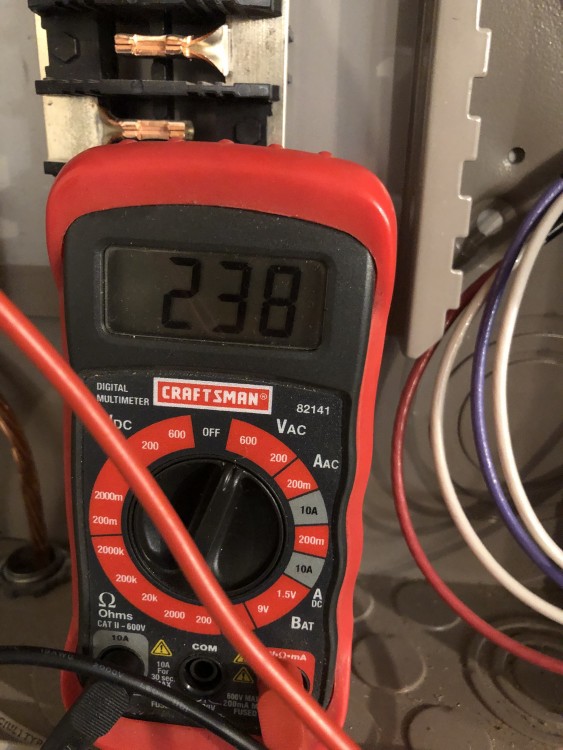
                                       

                                      68C63D09-4F12-4748-A484-F184986DBE61.jpeg

                                      1 Reply Last reply
                                      0
                                      • straight6pwrS
                                        straight6pwrS
                                        straight6pwr
                                        wrote on last edited by
                                        #714

                                        bonus! wish my garage had better electric.

                                        Dan
                                        yajsYRL.jpg.e5f350b4dfe961d76ac8b32efce2e1a6.jpg

                                        1 Reply Last reply
                                        0
                                        • HipMFH
                                          HipMFH
                                          HipMF
                                          wrote on last edited by
                                          #715

                                          gilber33 said:

                                          Also discovered that when the power was ran to my garage they ran 220. I asked them to wire the garage for 120v and always assumed they only brought that out to the garage. Cue the installation of 240v outlets. First thing I’m doing is putting in an electric heater. 
                                           

                                          68C63D09-4F12-4748-A484-F184986DBE61.jpeg

                                          Slightly confused what you mean here. 120v single-phase is actually two 120v legs 180 degrees out of phase, so measuring across the two hots give 240v. Measuring hot to neutral will give you 120v. 120v and 240v are both available from the same panel.
                                          1 Reply Last reply
                                          0

                                          Hello! It looks like you're interested in this conversation, but you don't have an account yet.

                                          Getting fed up of having to scroll through the same posts each visit? When you register for an account, you'll always come back to exactly where you were before, and choose to be notified of new replies (either via email, or push notification). You'll also be able to save bookmarks and upvote posts to show your appreciation to other community members.

                                          With your input, this post could be even better 💗

                                          Register Login
                                          Reply
                                          • Reply as topic
                                          Log in to reply
                                          • Oldest to Newest
                                          • Newest to Oldest
                                          • Most Votes


                                          • Login

                                          • Don't have an account? Register

                                          • Login or register to search.
                                          Powered by NodeBB Contributors
                                          • First post
                                            Last post
                                          0
                                          • Categories
                                          • Recent
                                          • Tags
                                          • Popular
                                          • Users
                                          • Groups