
1JZ E30 Vert Build Thread with Pastry filled wheels

-
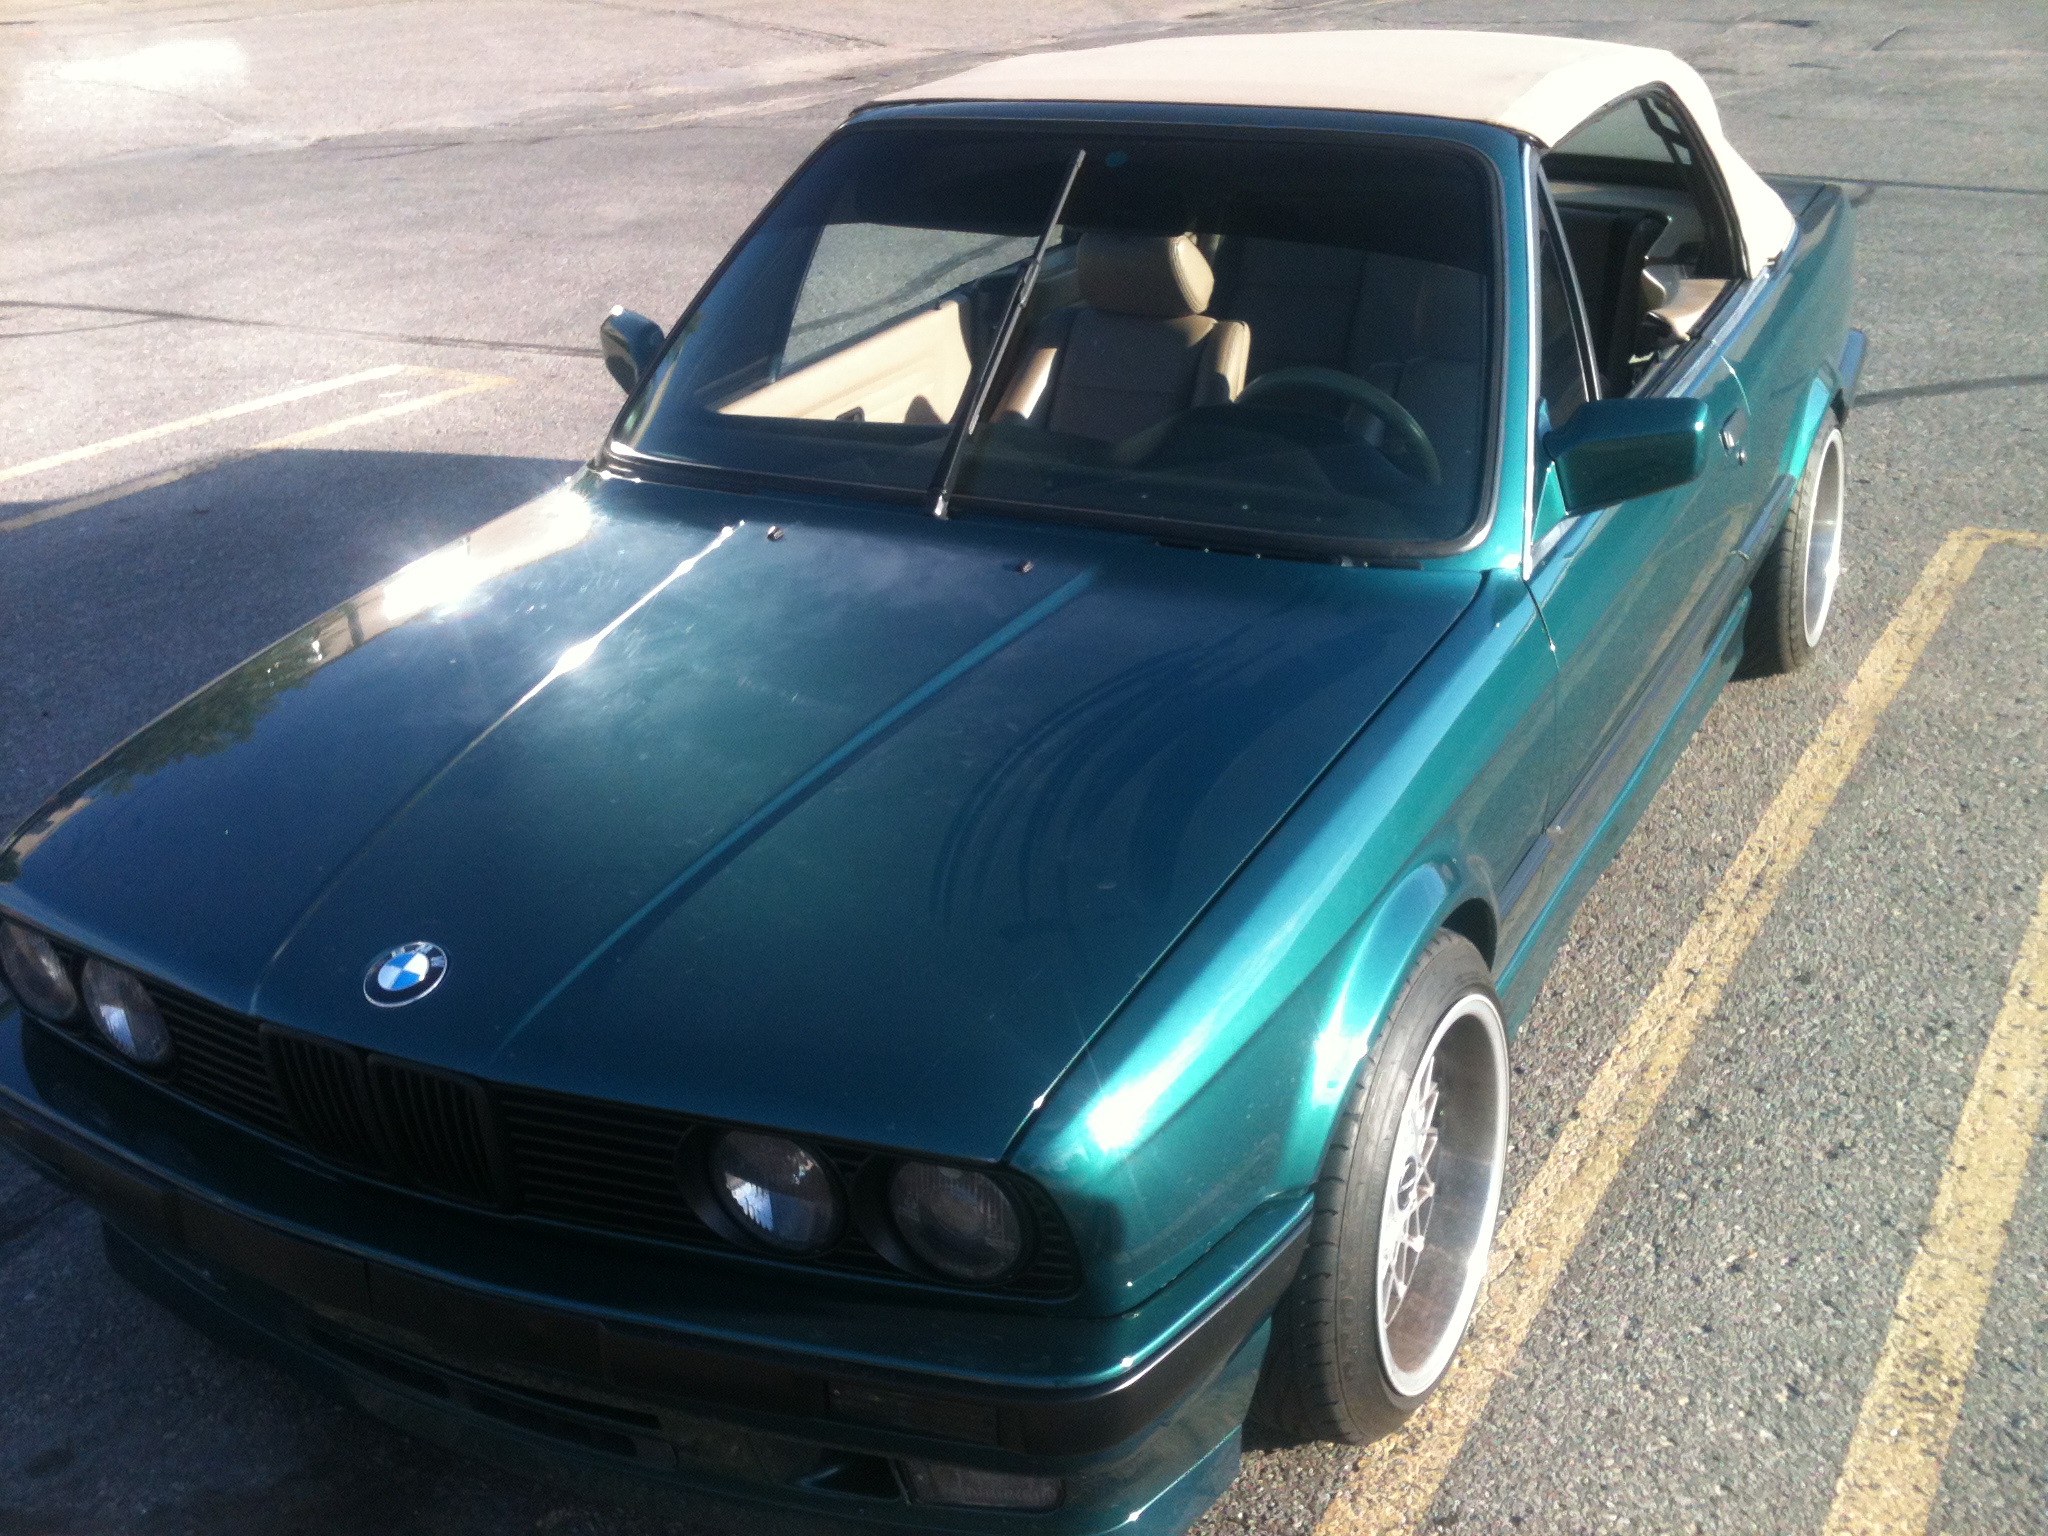
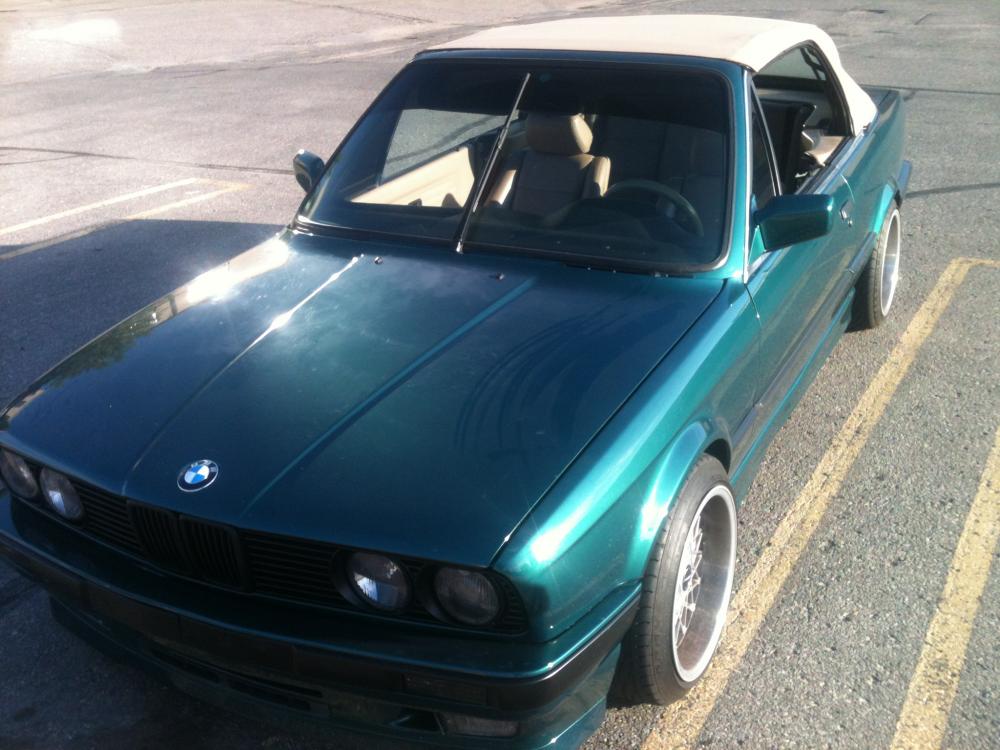
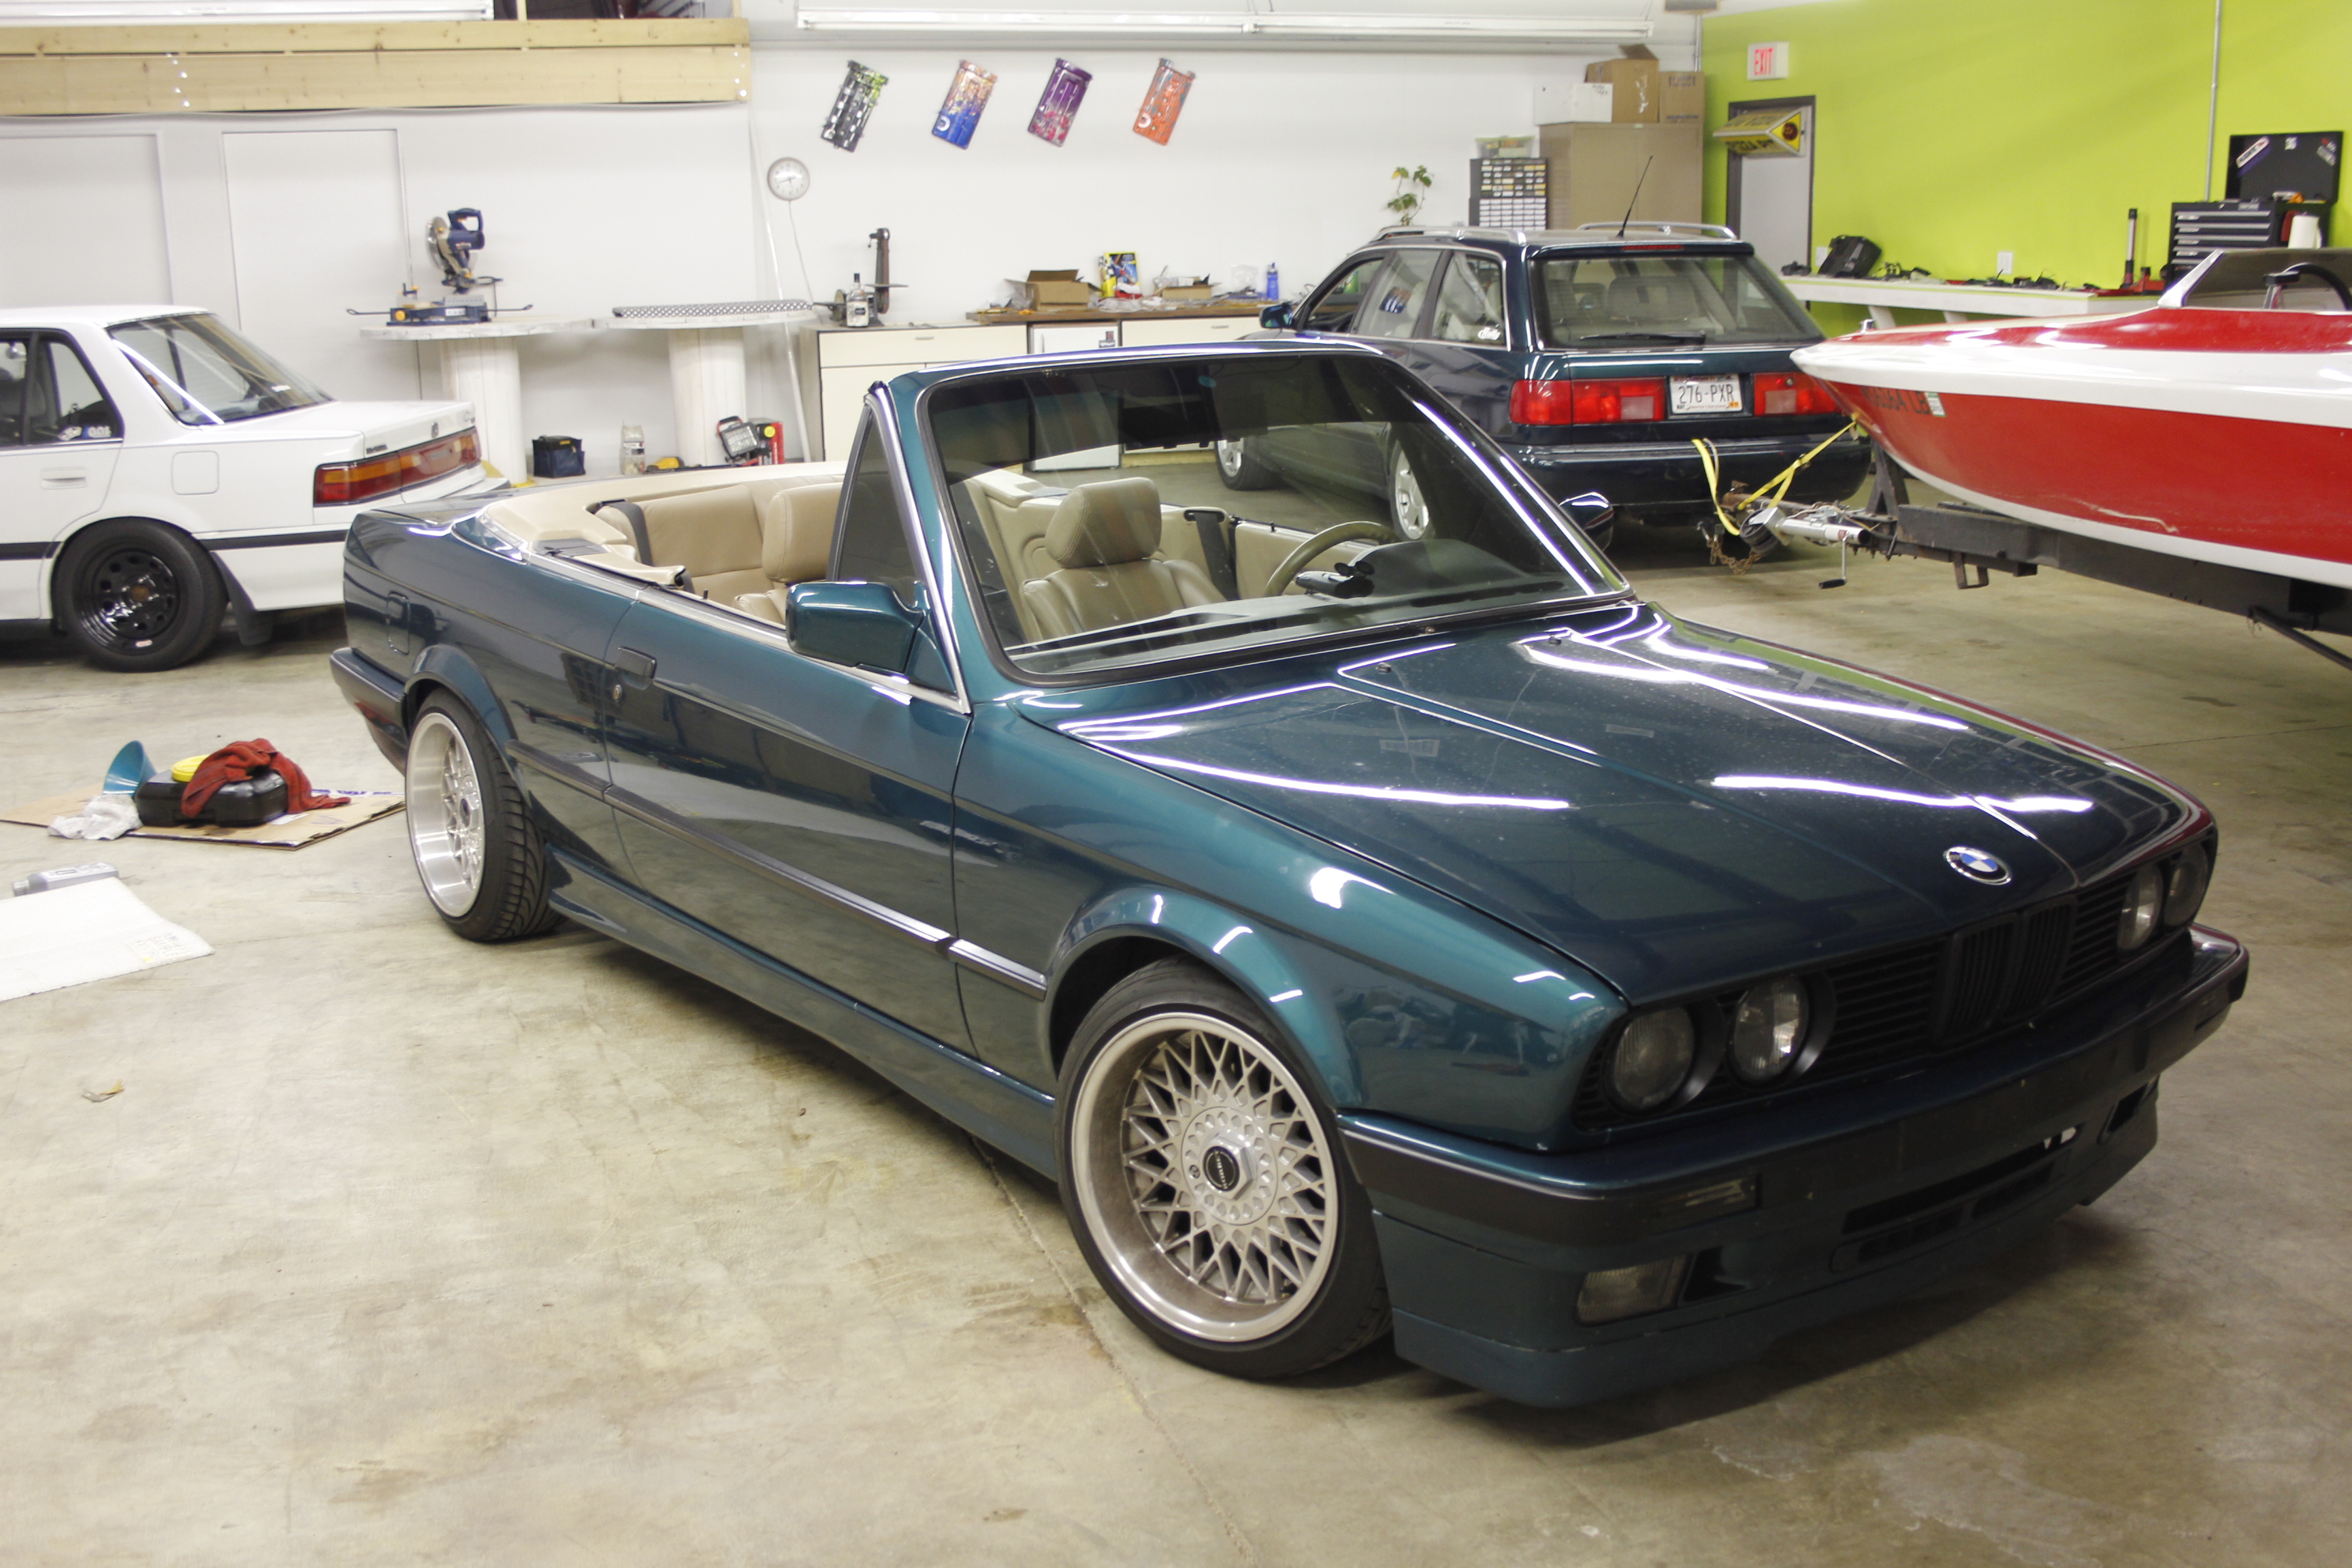
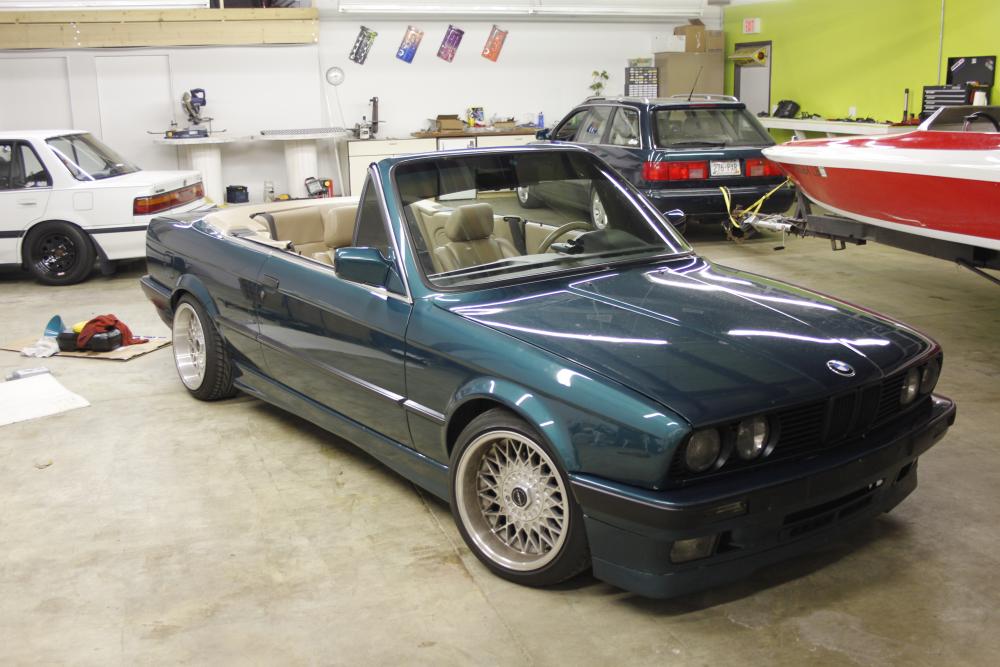
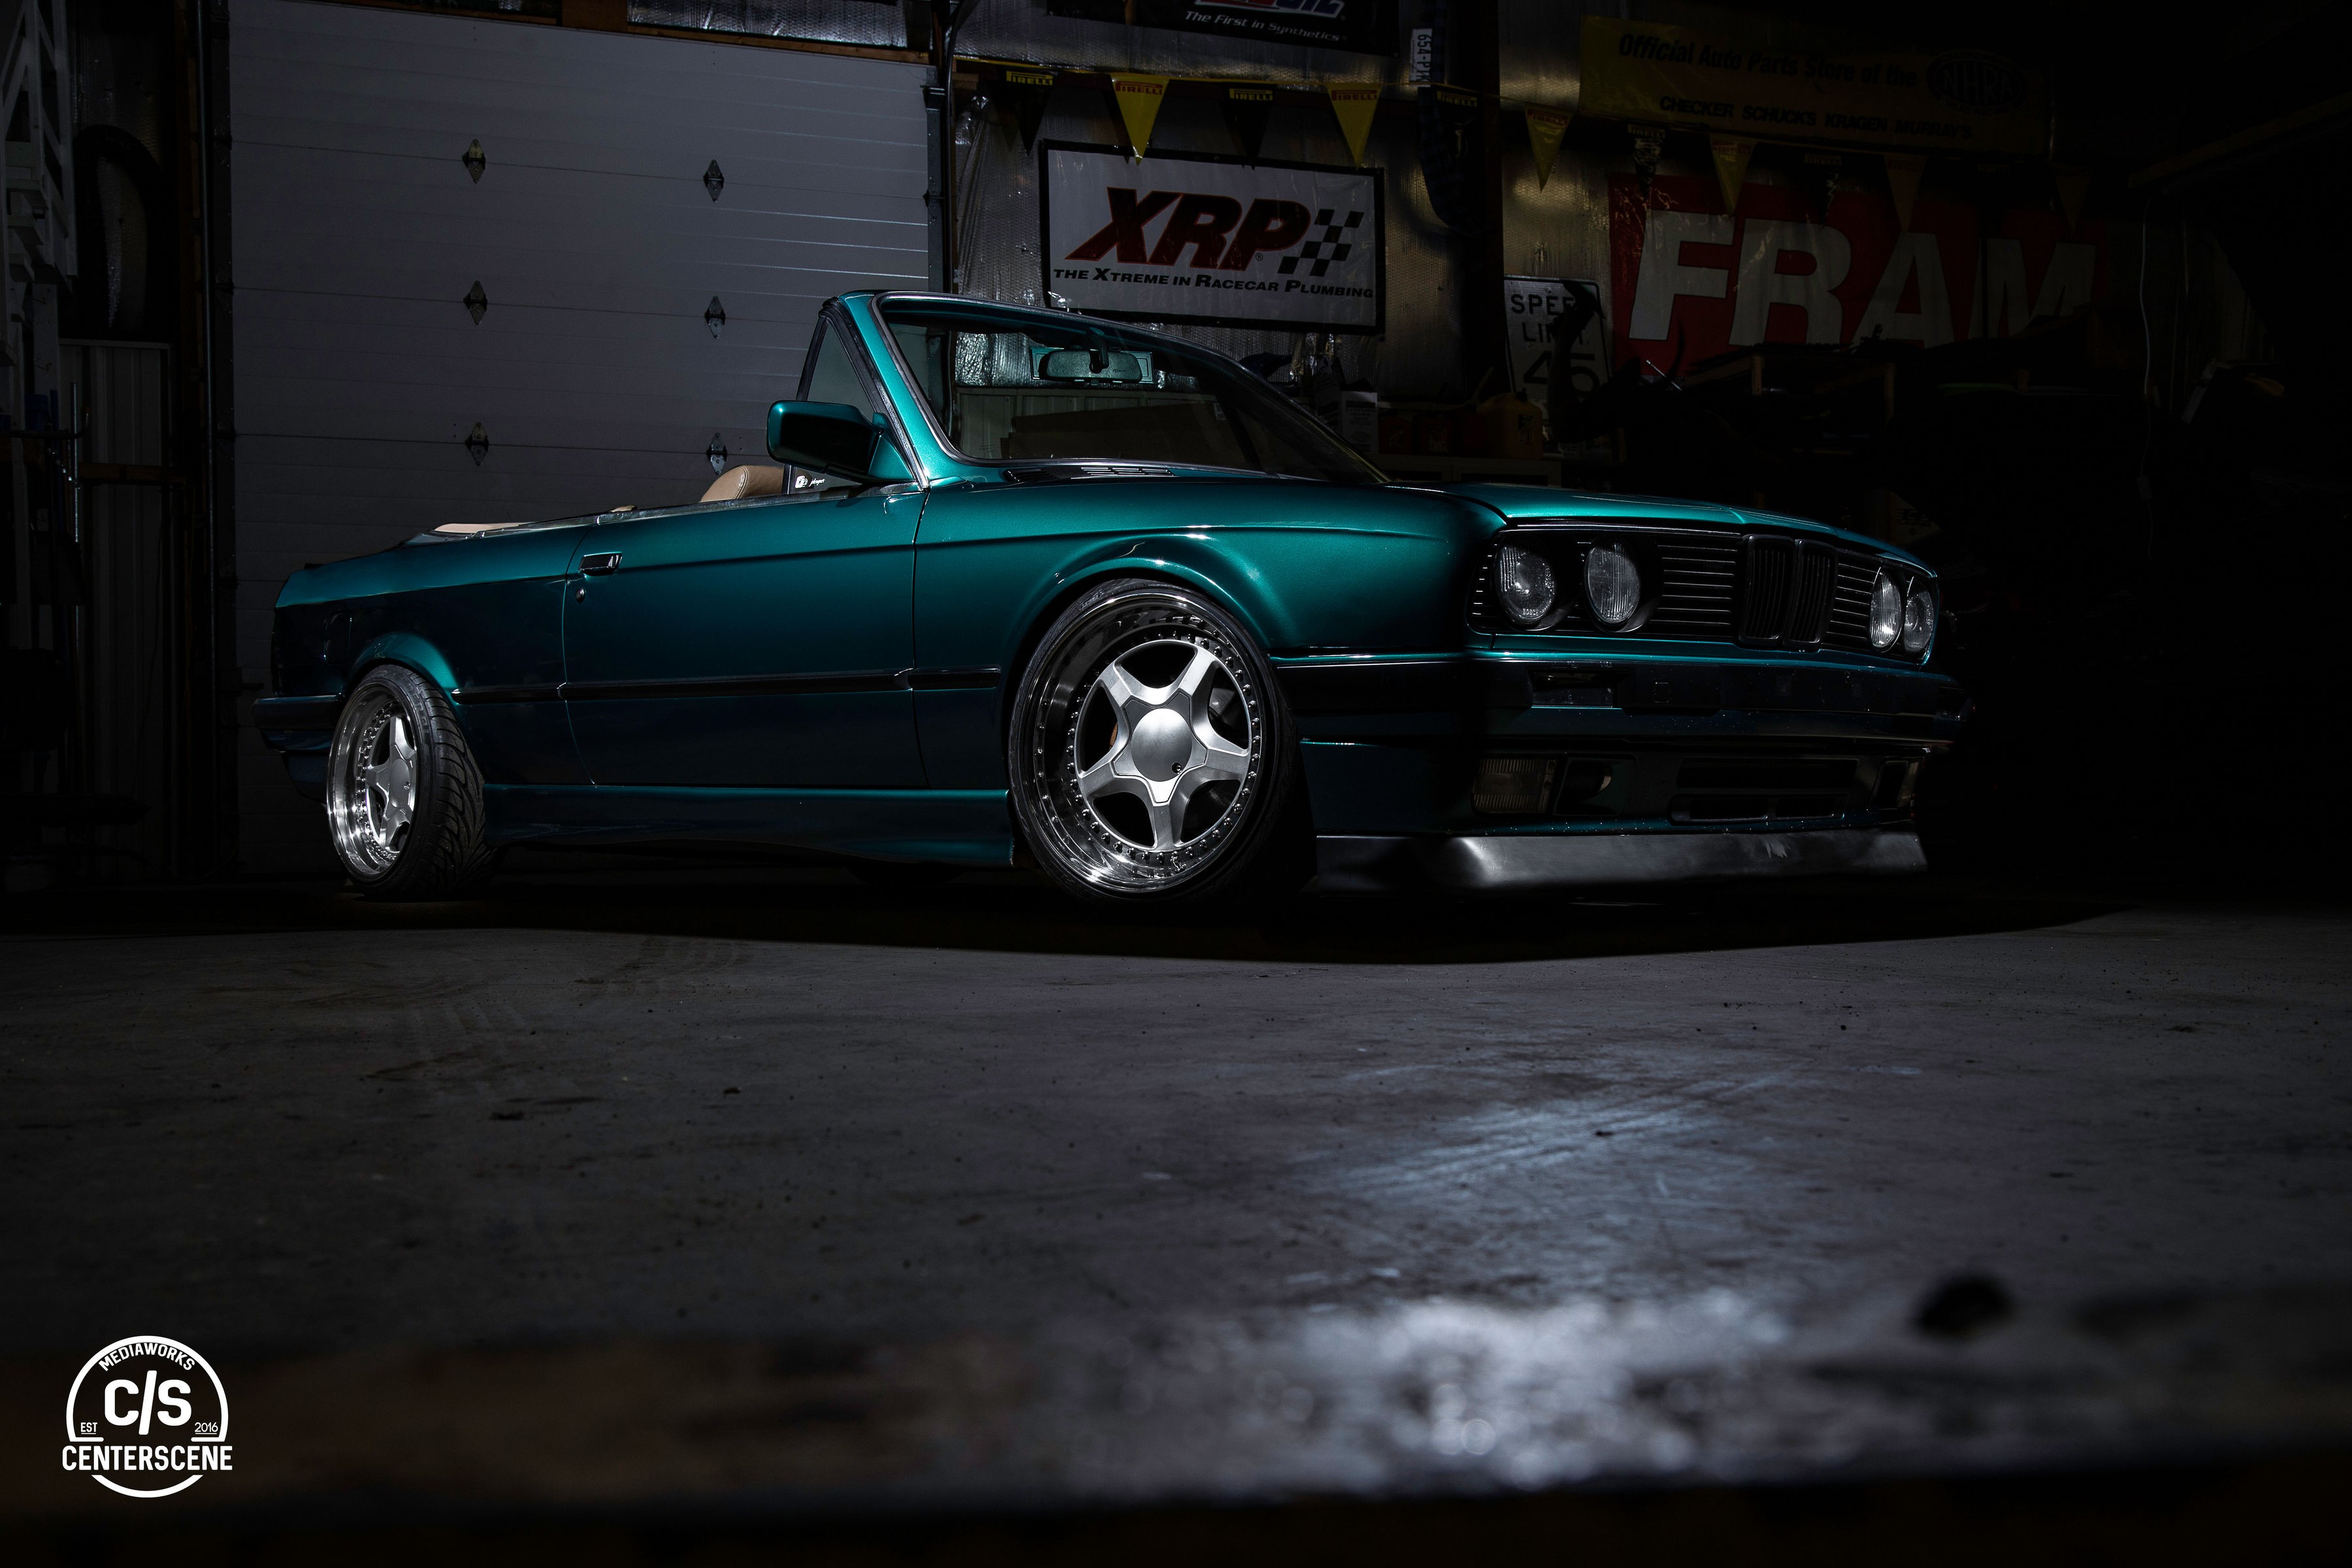
Image #2 from David. Cher took more images and I even got him to take a "practice" shot of the E24

 . Im excited to see his, although I know they will take longer to process.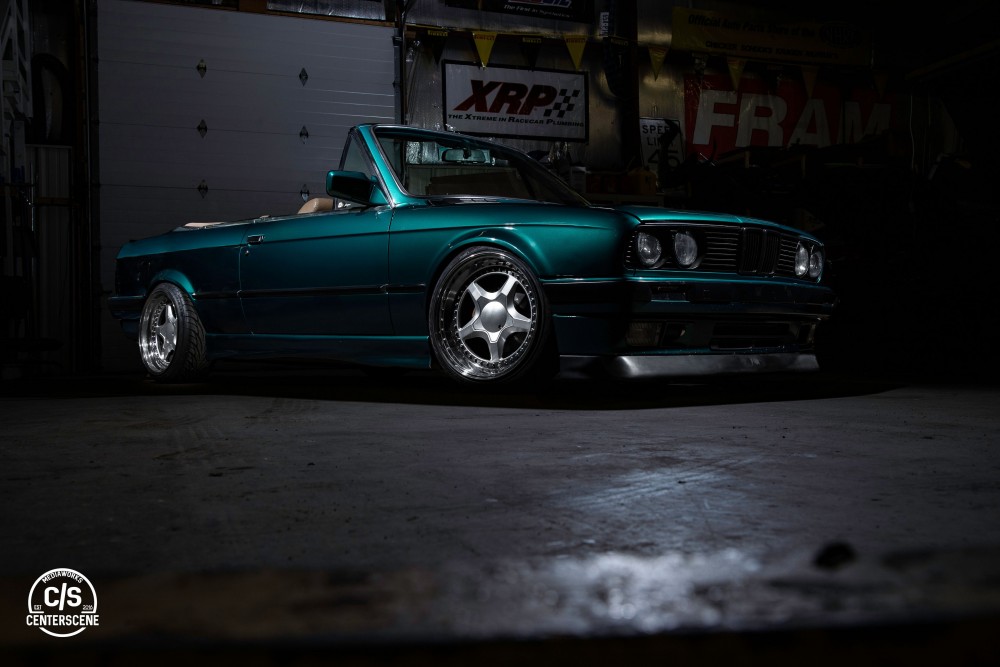

https://www.instagram.com/_jdesigner_/ http://nevertoolow.tumblr.com/
🥳SOLD BMW E24 633CSI - BMW M30B32 🧪SOLD HCH ES9 - 1.3 LDA
👽BMW E30 325IC - Toyota 1JZ-GTE ⏰ HONDA EF9 CIVIC SI - JDM B18C5
☠️BMW E36 318i - Ford 5.0 FE302 🚴♂️ GT-Labomba - 26x2.75 Freeride
🤹♀️SOLD BMW E36/7 Z3 - BMW M54B25 🧓SOLD BMW E10 2002 - BMW M10M05 -
As I wait for Cher to work his magic on the pictures, I have begun work again, and I got quite a bit done in one quick swoop.
Step 1: was attacking the steering. Moving this thing around with the front wheels going wherever they wanted was extremely annoying. Previously I removed all the Z3 steering parts and left it at that. This past weekend I got the Z4 steering rack is installed, figured out inner and outer tie rods, and was able to delete the PS reservoir, pump, and lines. This meant I needed to install a new serp belt and new tensioner pulley as well to allow the belt to go on the opposite side of the tensioner. I even got a green belt for those added style points.
After all of that, there was one last thing I had not been able to solve; the steering coupler issue. If you have an early model E30, the Z4 coupler fits the steering shaft and you just need to shorten the union shaft and call it good. Unfortunately, I have an airbag car and the splines are different. By different I mean that the common size is a 3/4" - 48. 3/4" Dia, 48 Splines. The E30 airbag shaft is 11/16" -36. 11/16" diameter, 36 splines. From what I have read, it seems like keeping some type of vibration damper is ideal as the feeling is very direct and may cause some column vibration. Seeing that I have fairly stiff suspension and rubber bands for tires, I wont overlook this.
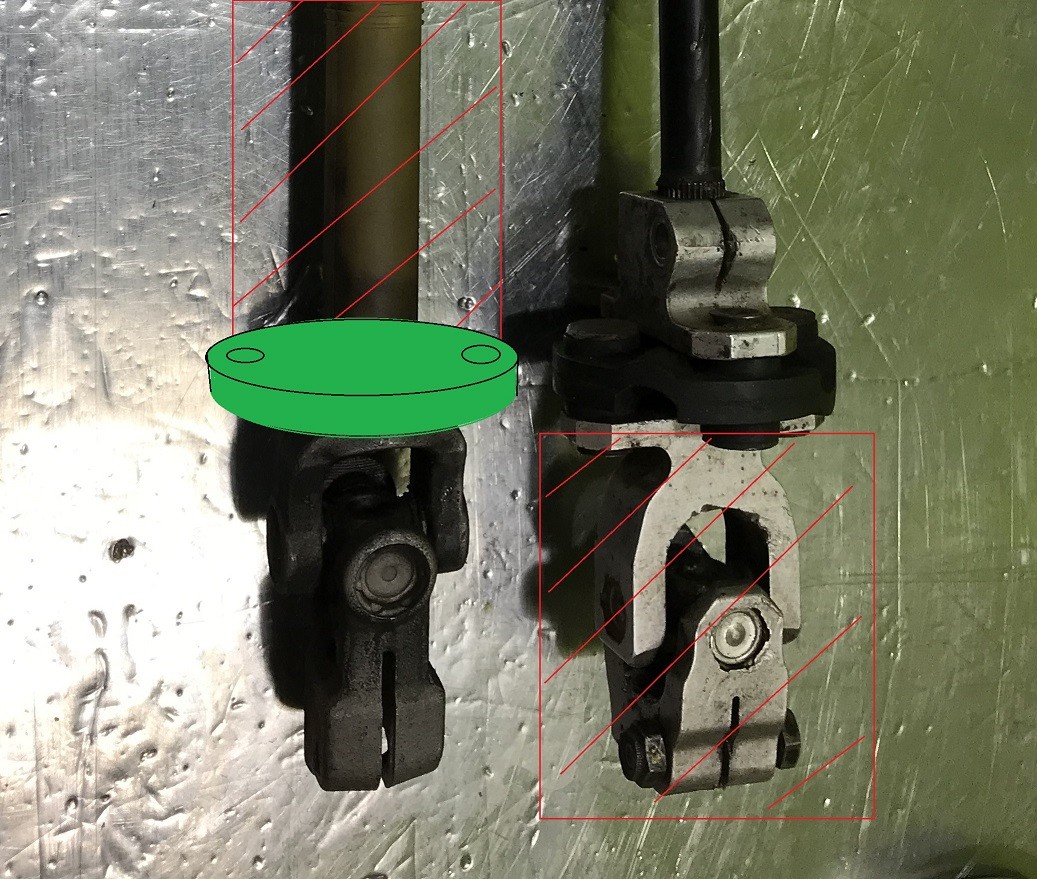
Basically this is what I need to make, and I need to make it visually appealing.
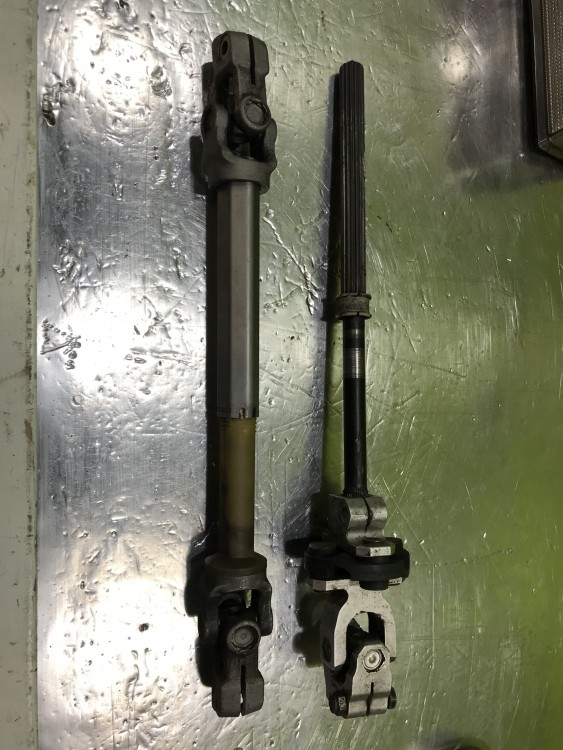
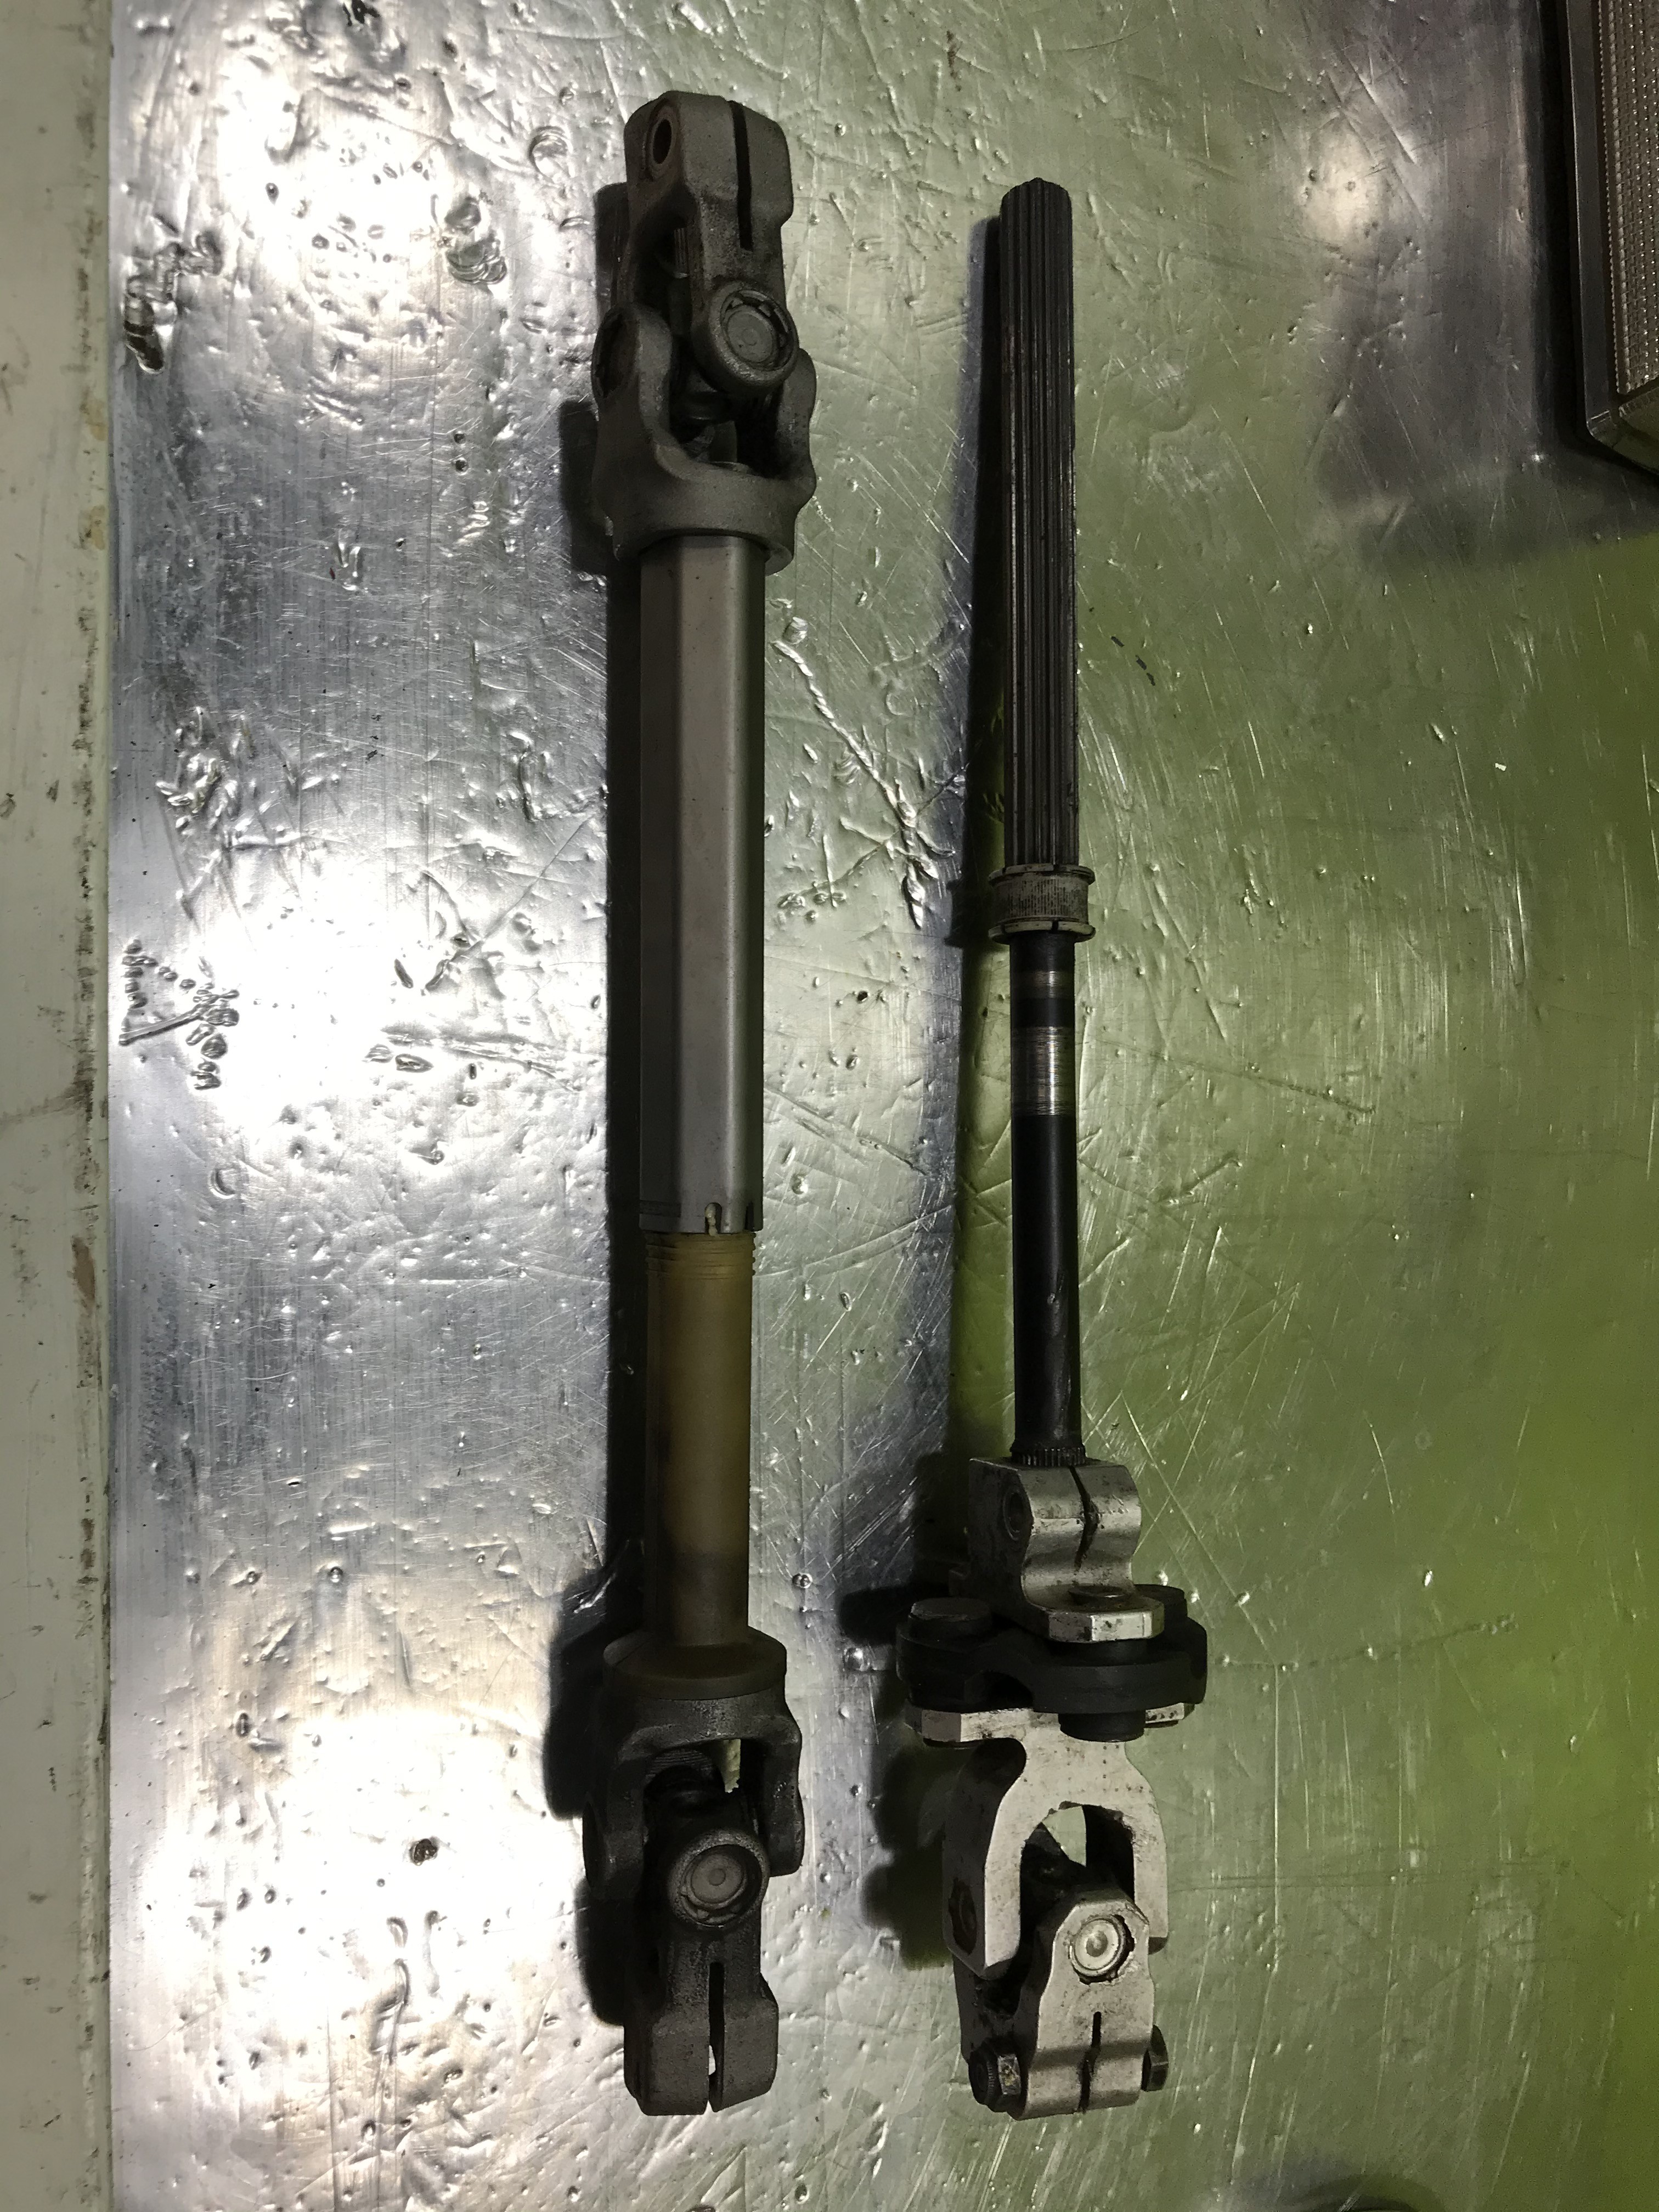
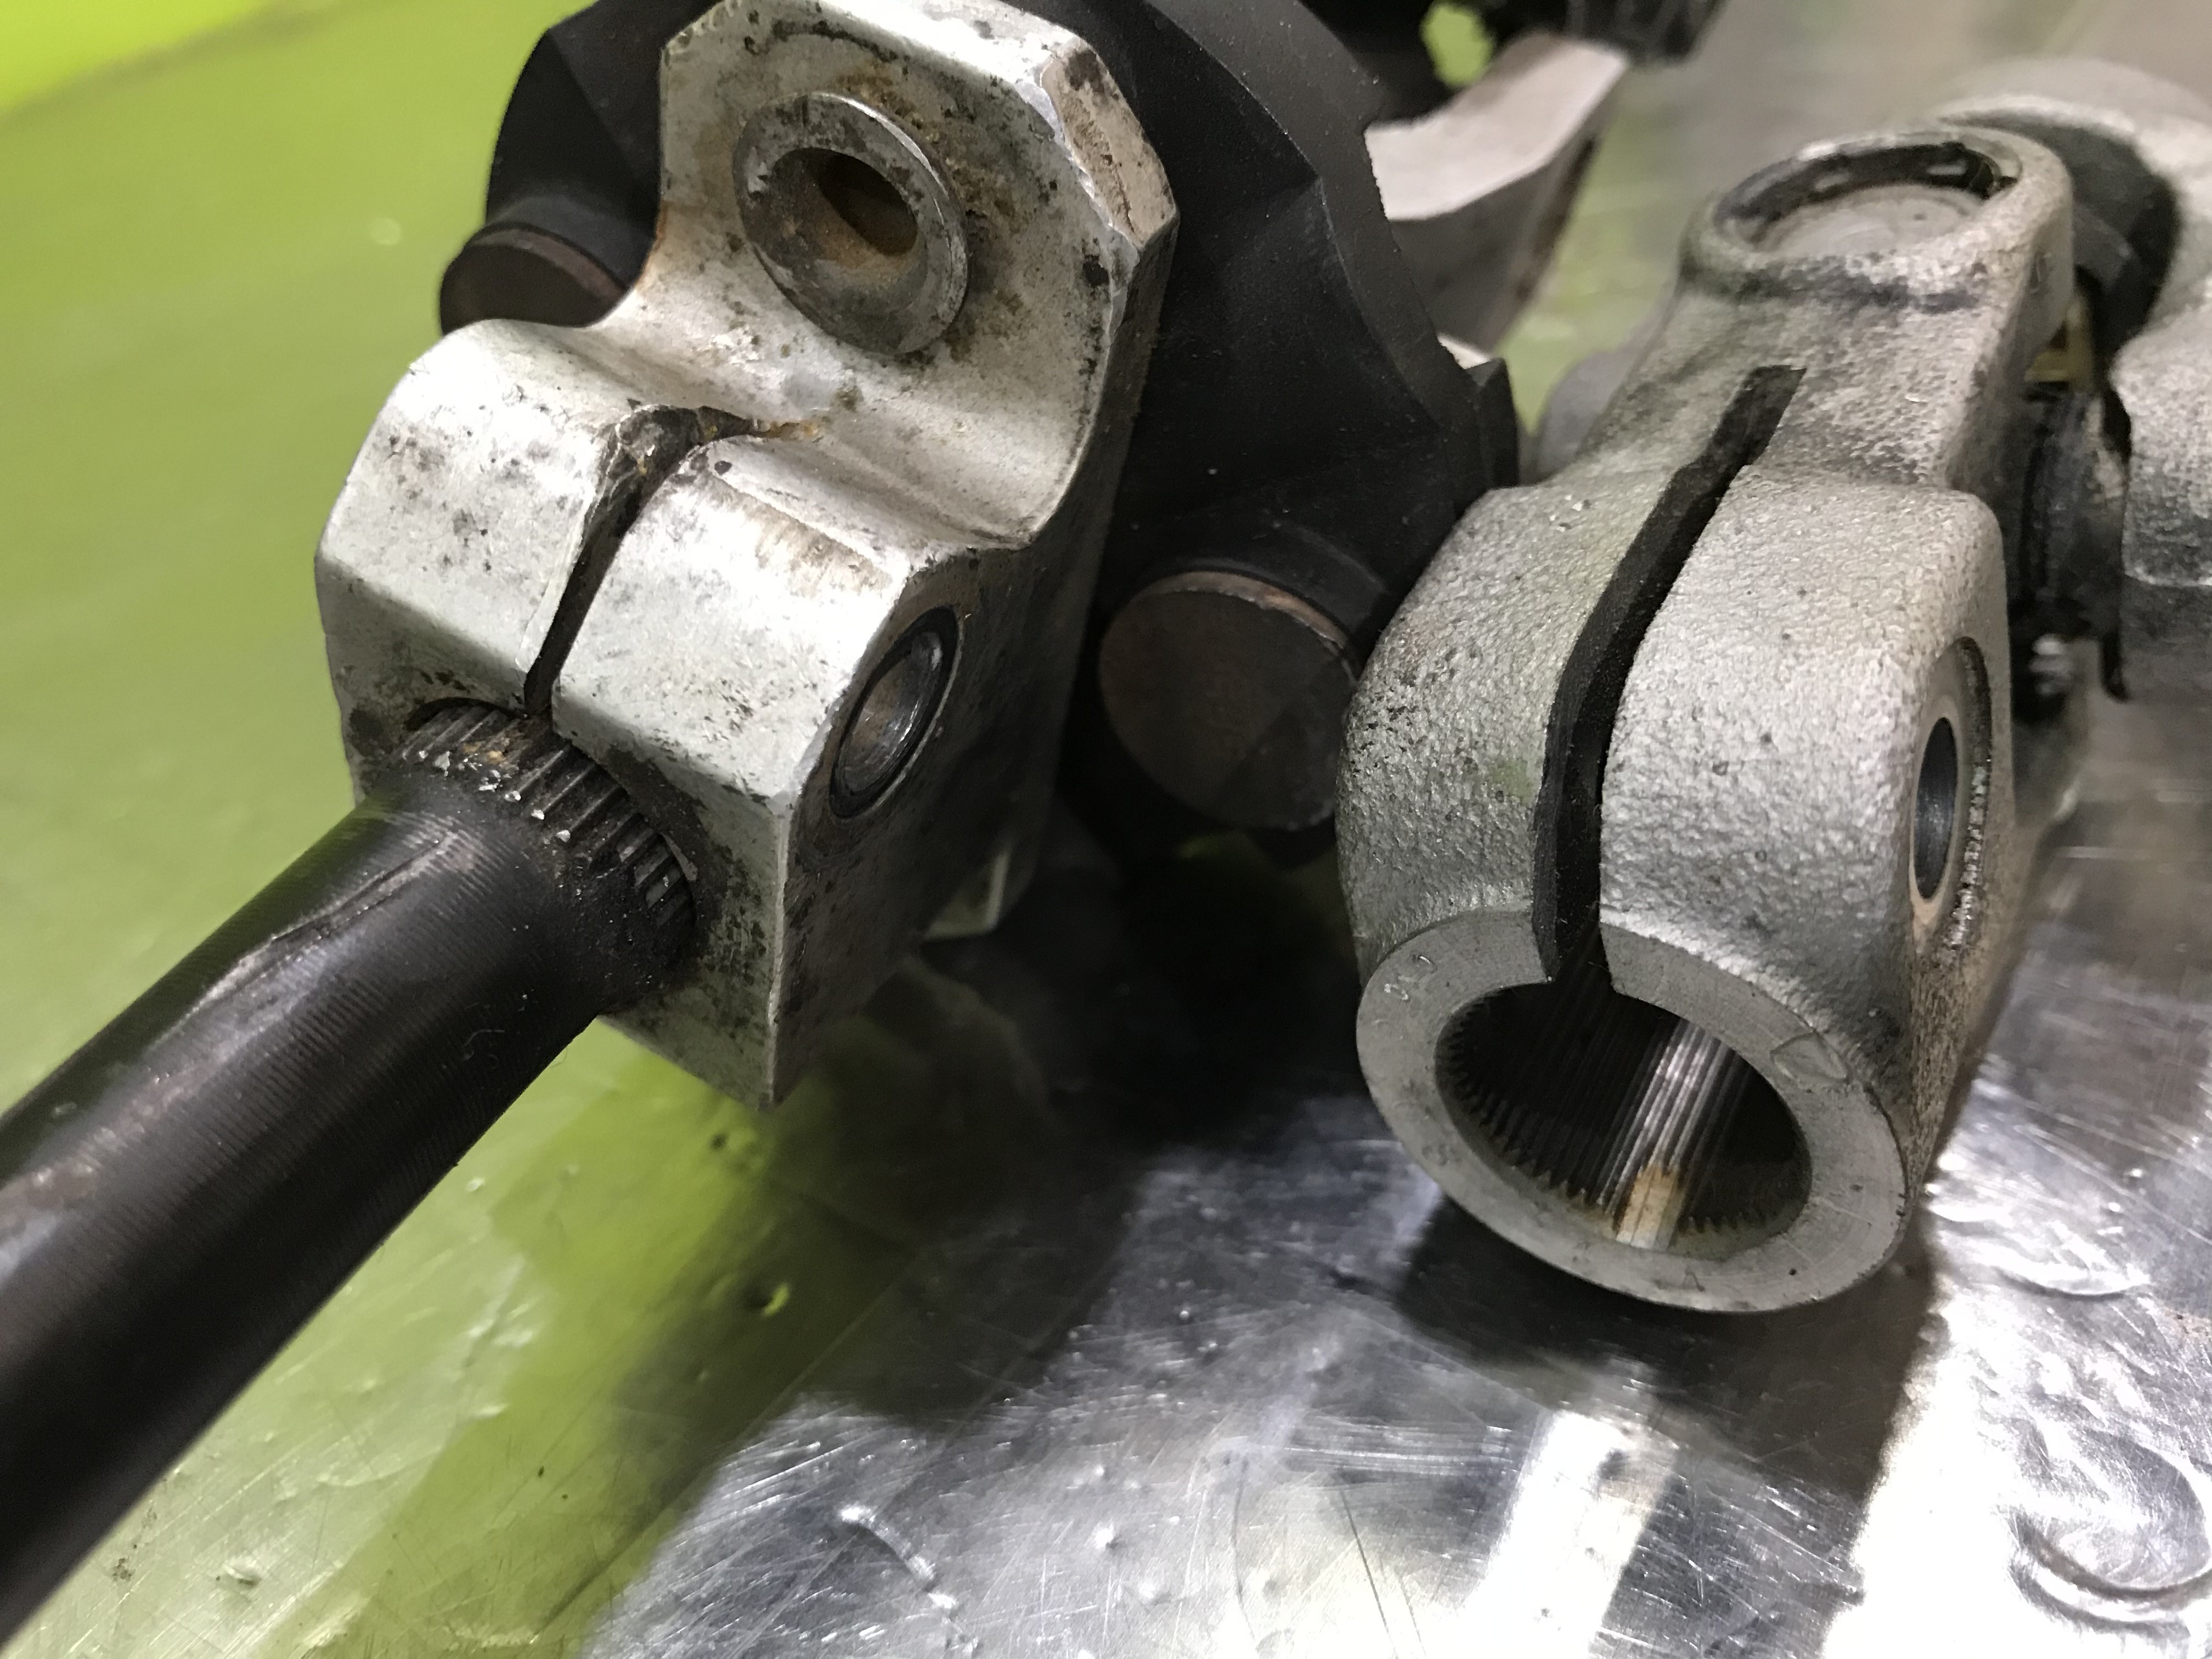
This is what I have;
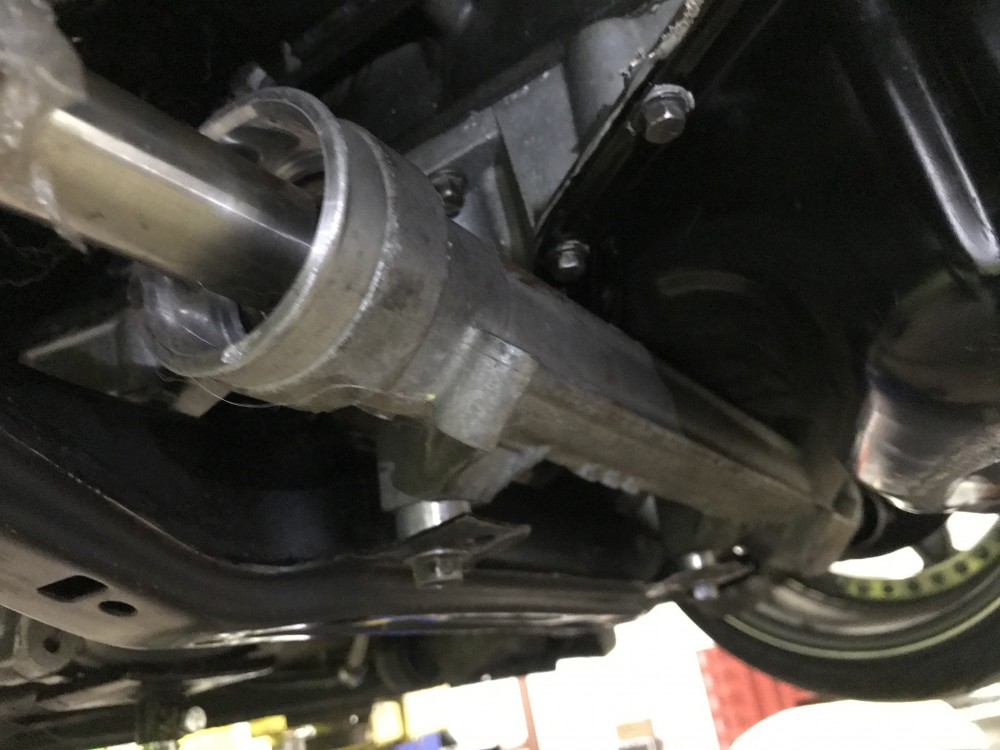
The new Z4 shaft is on the left, the E30 Airbag shaft is on the right
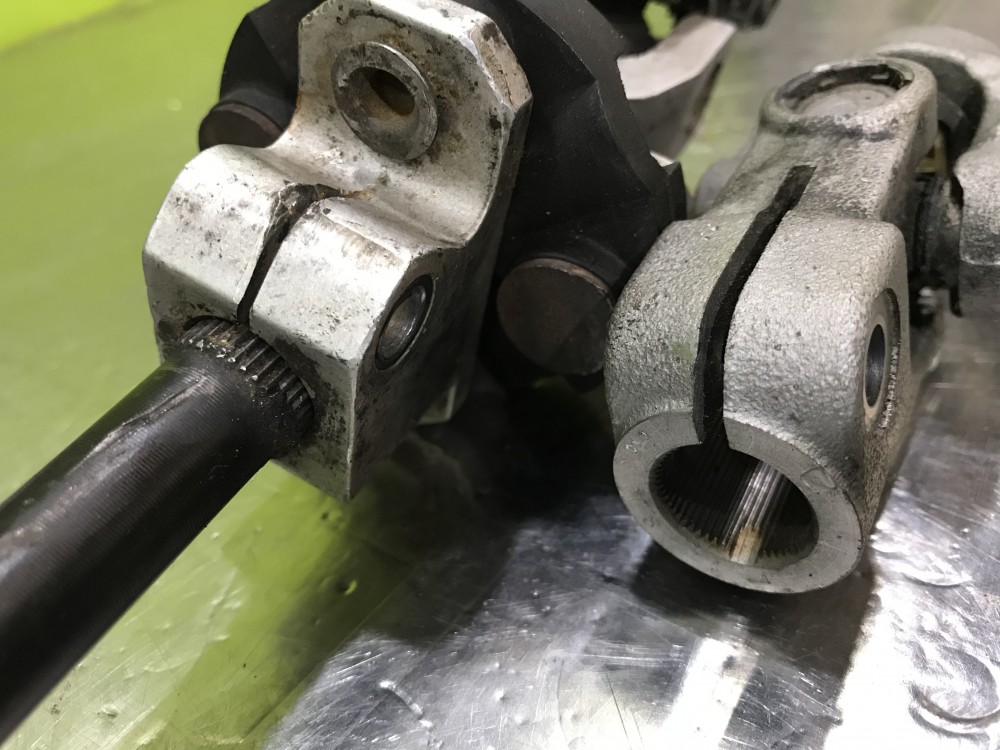
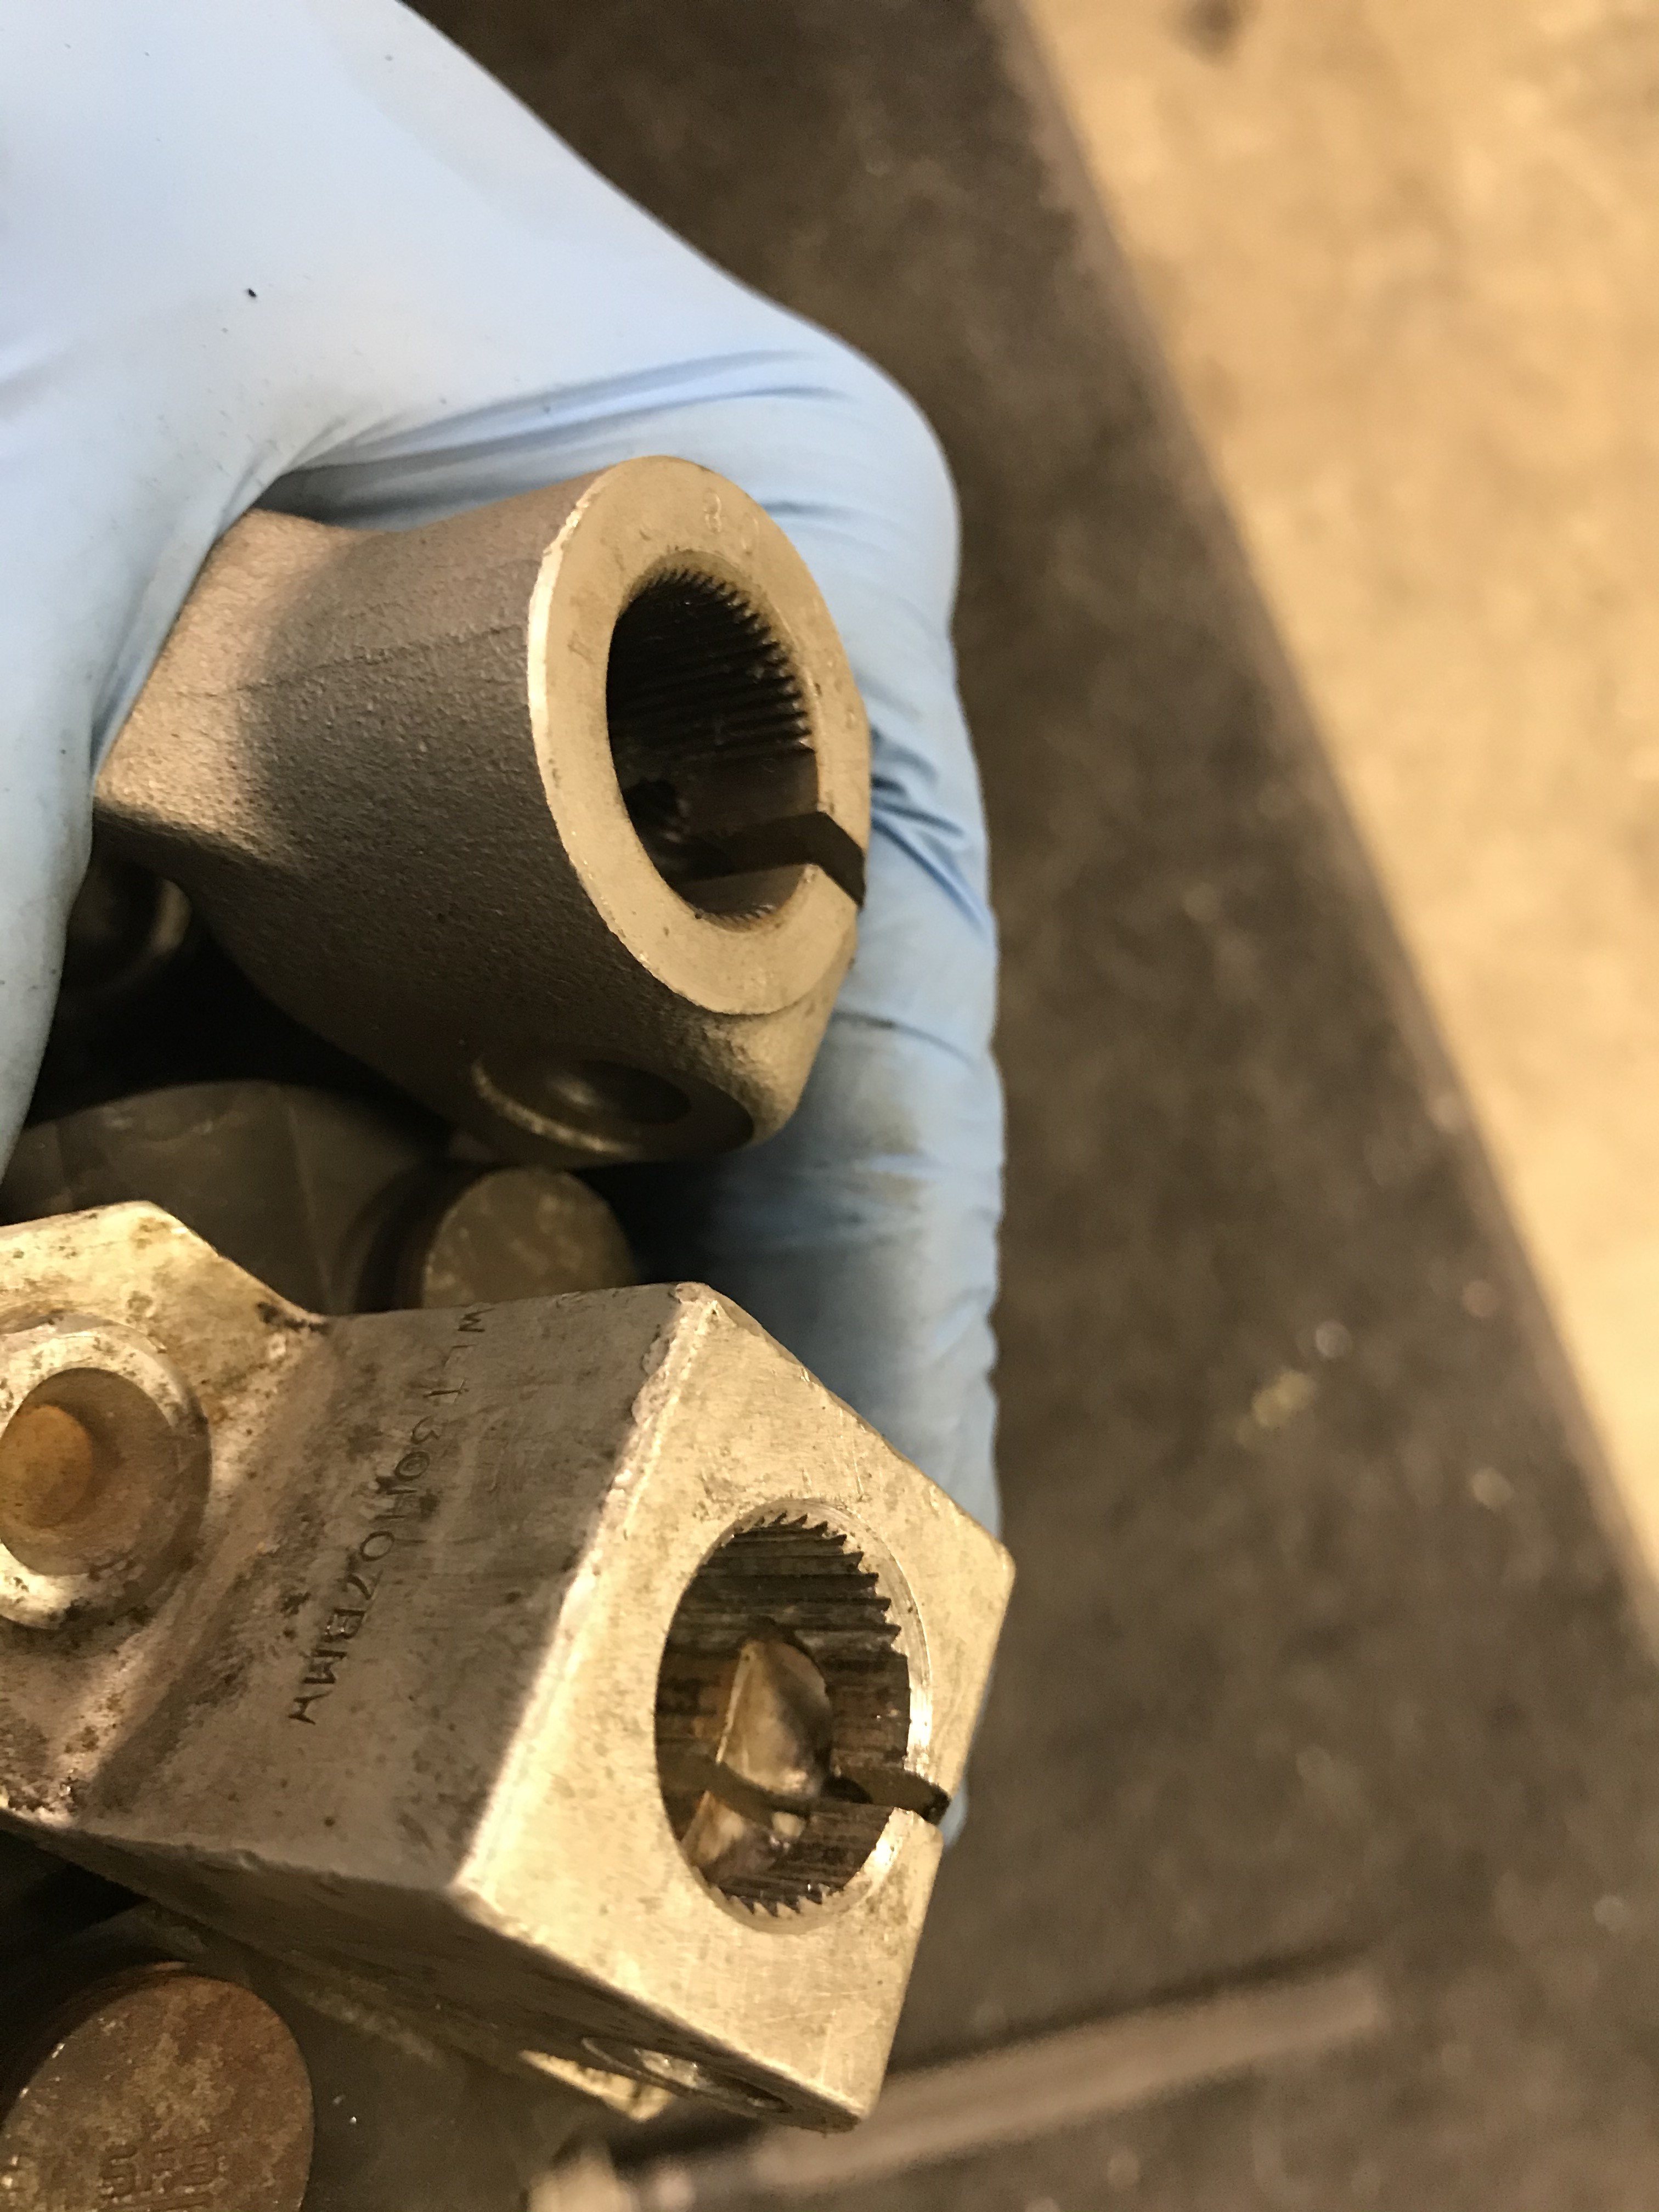
Here is a close up of the two couplers. As you will notice that the one is aluminum and one is steel. Because of this I can not simply just weld the correct ends together.
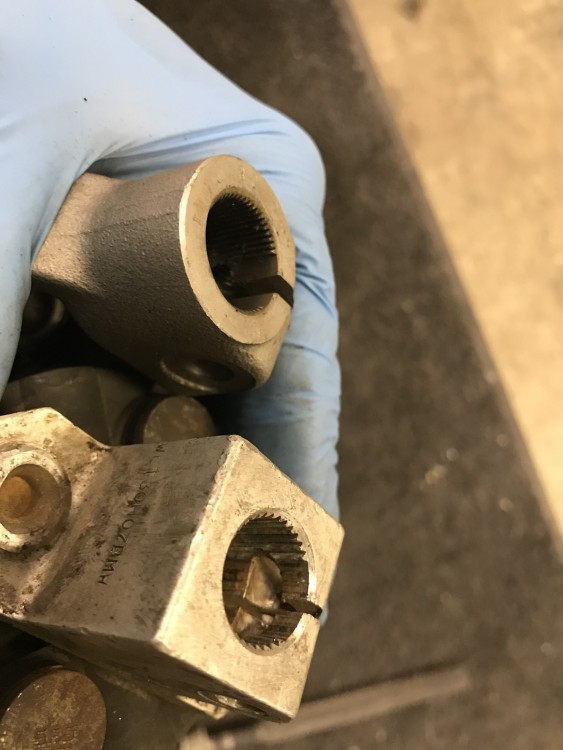
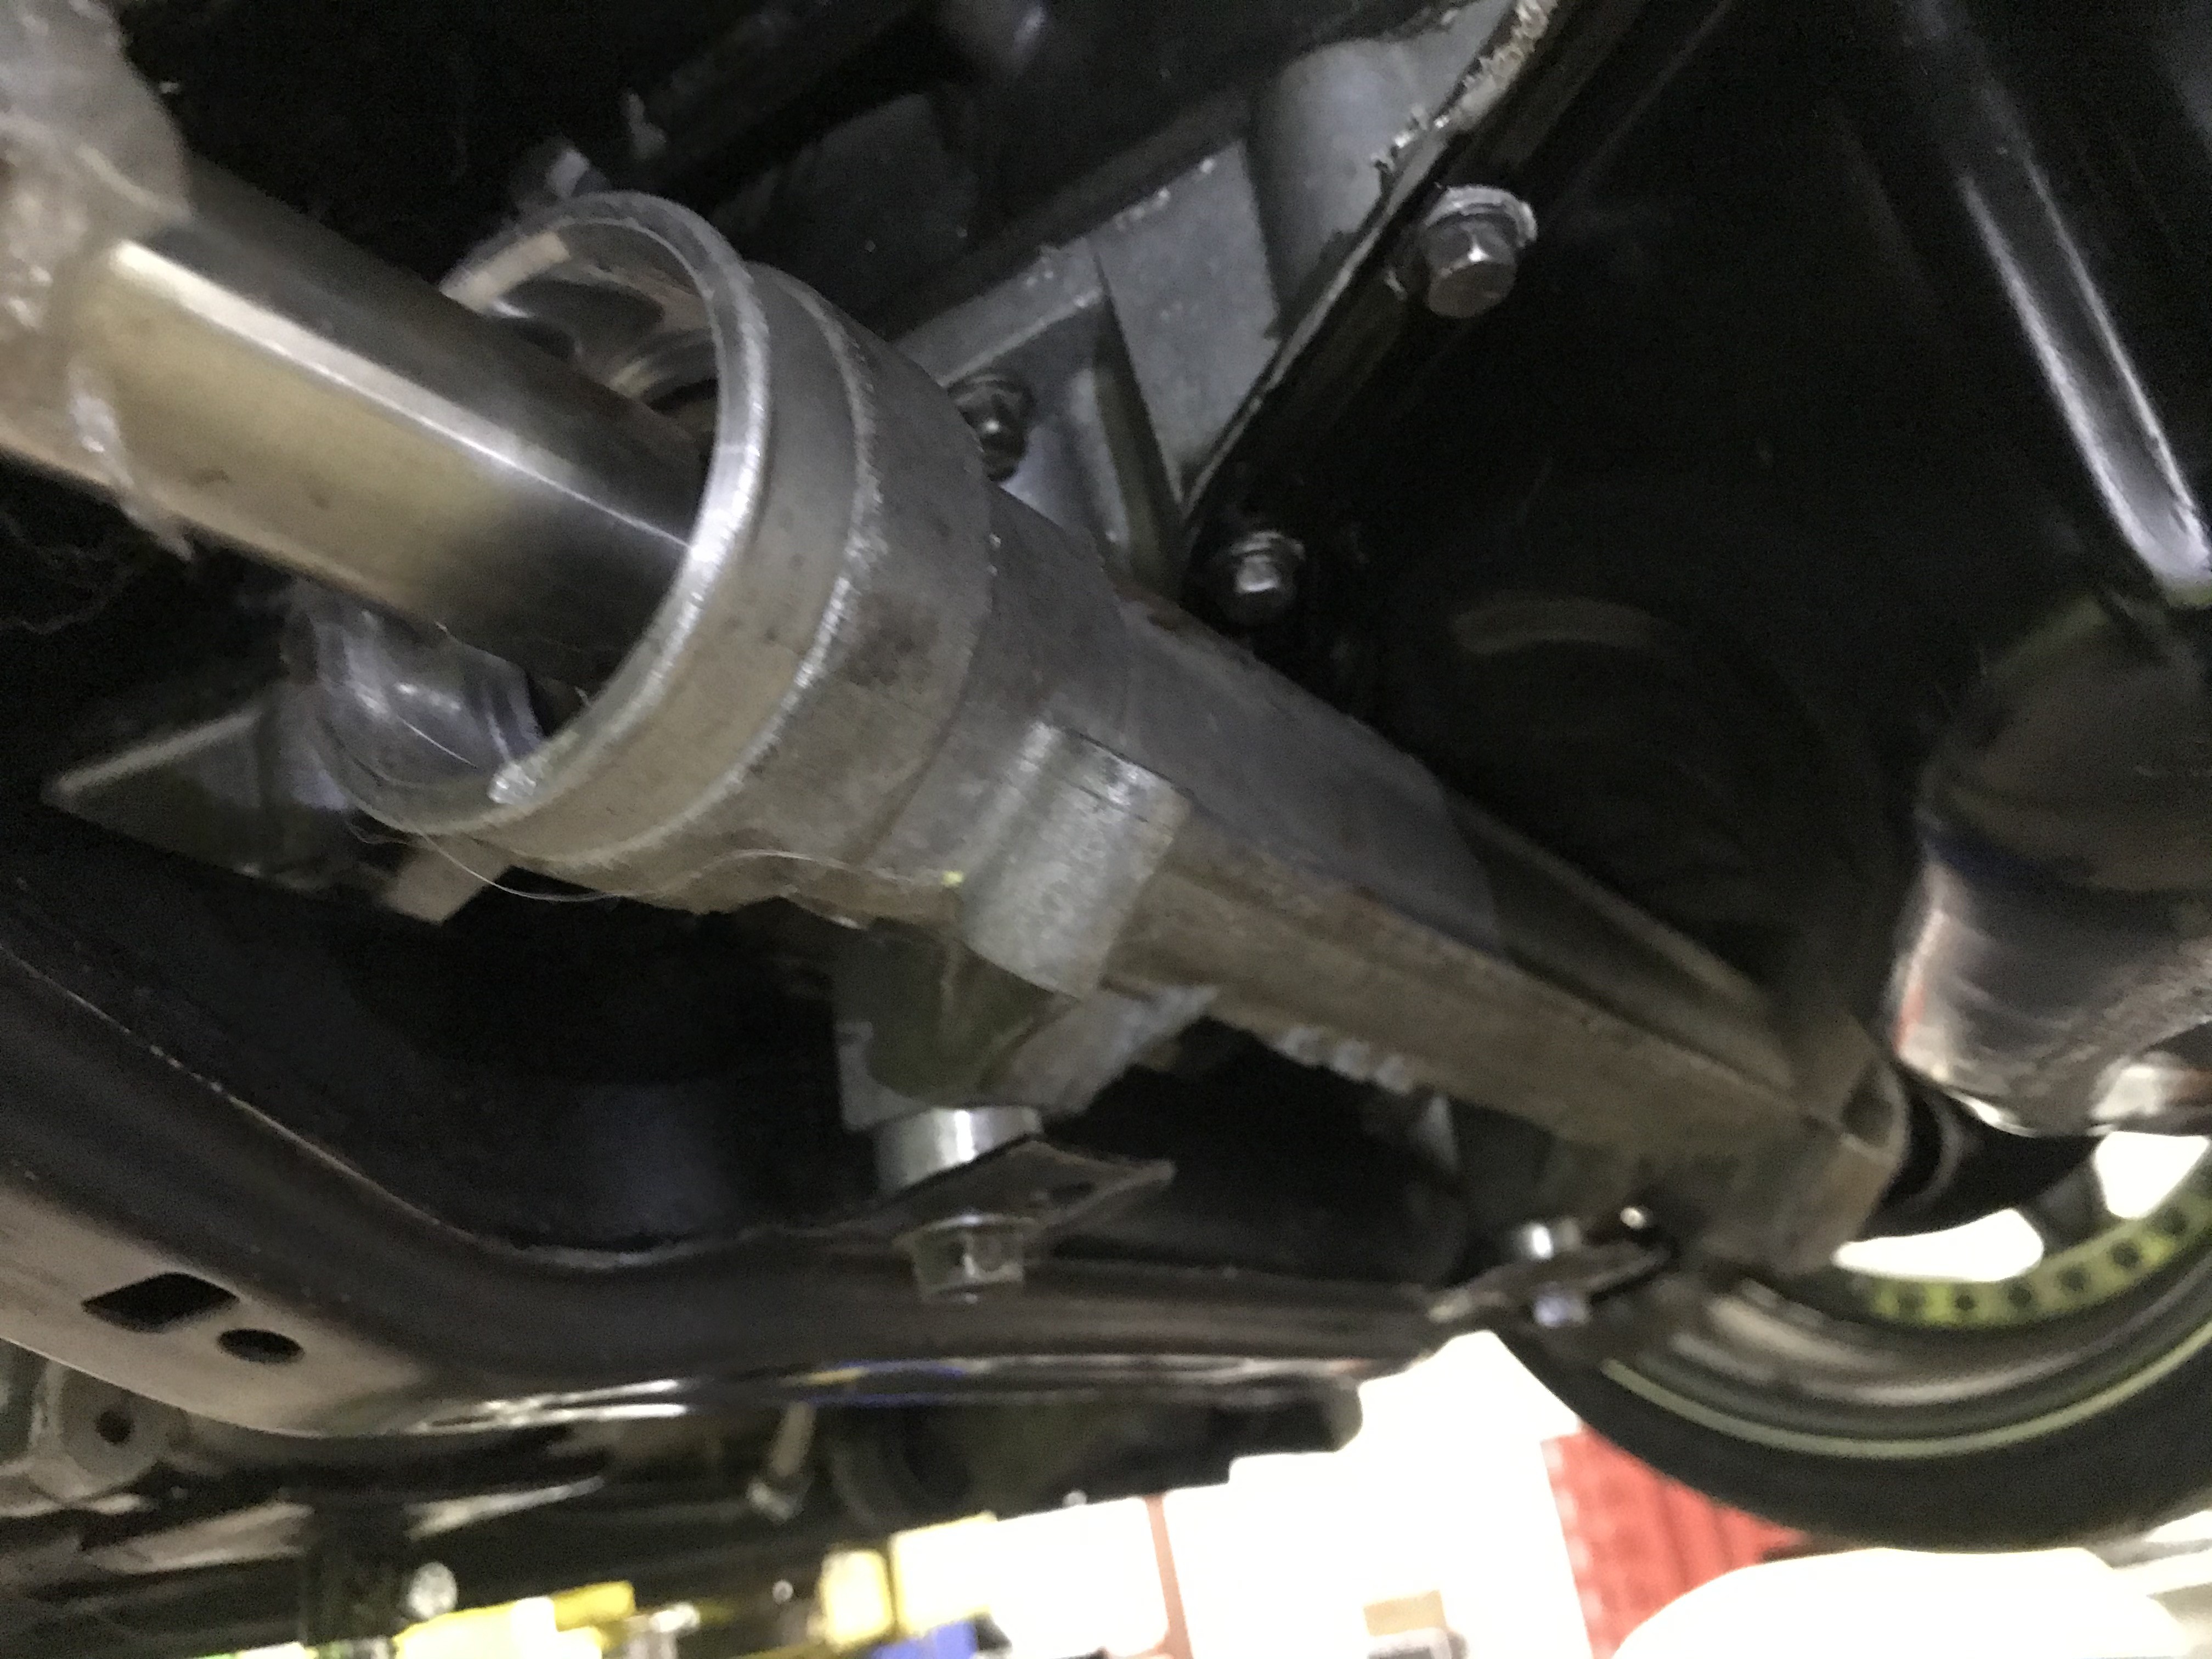
And here is the rack in the car. As you can see you need the same spacers as you would for a Z3 or M3 rack.
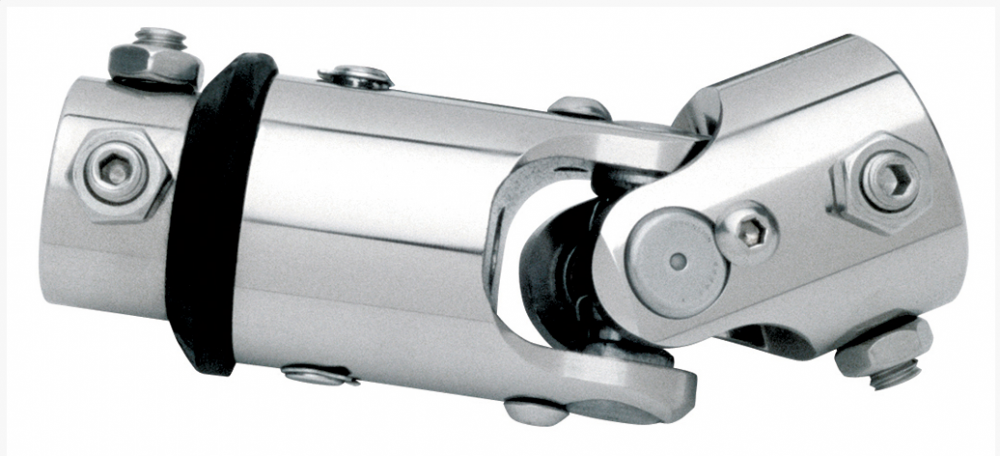
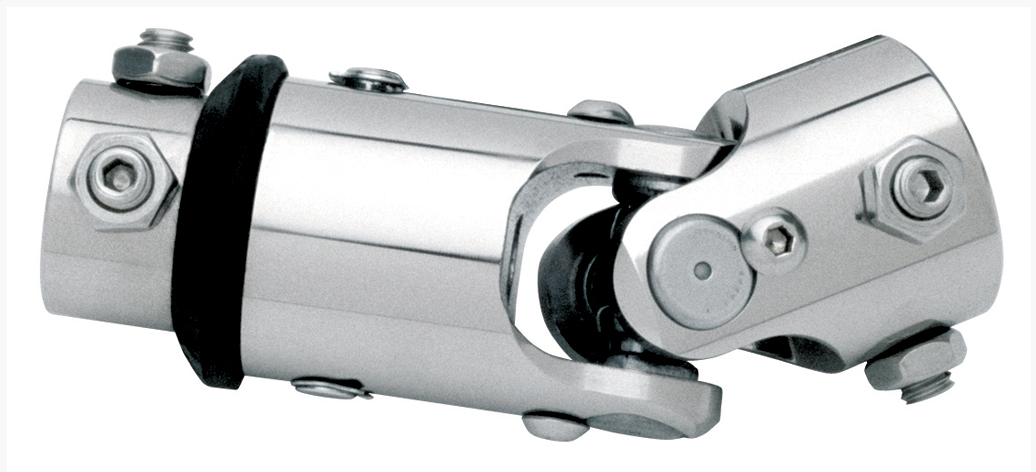
Flaming river makes a dampening universal joint but they are not cheap. I have to make sure they have it available in the correct splines/dia for my application and I won't need to make any custom parts. They look like this:
https://www.instagram.com/_jdesigner_/ http://nevertoolow.tumblr.com/
🥳SOLD BMW E24 633CSI - BMW M30B32 🧪SOLD HCH ES9 - 1.3 LDA
👽BMW E30 325IC - Toyota 1JZ-GTE ⏰ HONDA EF9 CIVIC SI - JDM B18C5
☠️BMW E36 318i - Ford 5.0 FE302 🚴♂️ GT-Labomba - 26x2.75 Freeride
🤹♀️SOLD BMW E36/7 Z3 - BMW M54B25 🧓SOLD BMW E10 2002 - BMW M10M05 -
Forgot to ask you about the firewall, did you already enlarge it for the Z3 rack?
Never needed to. I think that's an issue with early models running newer racks. It was certainly offset more than the factory rack but not enough that I needed to modify anything. I wish they would hurry up and make steer-by-wire more common.

https://www.instagram.com/_jdesigner_/ http://nevertoolow.tumblr.com/
🥳SOLD BMW E24 633CSI - BMW M30B32 🧪SOLD HCH ES9 - 1.3 LDA
👽BMW E30 325IC - Toyota 1JZ-GTE ⏰ HONDA EF9 CIVIC SI - JDM B18C5
☠️BMW E36 318i - Ford 5.0 FE302 🚴♂️ GT-Labomba - 26x2.75 Freeride
🤹♀️SOLD BMW E36/7 Z3 - BMW M54B25 🧓SOLD BMW E10 2002 - BMW M10M05 -
I wish they would hurry up and make steer-by-wire more common.
I know it's probably not the point of this build, but it seems from a lot of reviews that the electric power steering, whether full drive by wire or electric motor assist is really disliked for the disconnected feel.
-
I know it's probably not the point of this build, but it seems from a lot of reviews that the electric power steering, whether full drive by wire or electric motor assist is really disliked for the disconnected feel.
Yeah I would never use steer-by-wire. It was more of a joke. I will say that electric power assist is great though. I have driven a few cars with it and it's not any different than traditional PS. My civic hybrid actually has it and its great.
https://www.instagram.com/_jdesigner_/ http://nevertoolow.tumblr.com/
🥳SOLD BMW E24 633CSI - BMW M30B32 🧪SOLD HCH ES9 - 1.3 LDA
👽BMW E30 325IC - Toyota 1JZ-GTE ⏰ HONDA EF9 CIVIC SI - JDM B18C5
☠️BMW E36 318i - Ford 5.0 FE302 🚴♂️ GT-Labomba - 26x2.75 Freeride
🤹♀️SOLD BMW E36/7 Z3 - BMW M54B25 🧓SOLD BMW E10 2002 - BMW M10M05 -
Yeah I would never use steer-by-wire. It was more of a joke. I will say that electric power assist is great though. I have driven a few cars with it and it's not any different than traditional PS. My civic hybrid actually has it and its great.
That's good to hear. I haven't owned anything new enough to try out electric power assist yet.
Someday before I die it would be great to figure out a rack set up for the M5. Stupid steering box with 37 linkages is stupid.
-
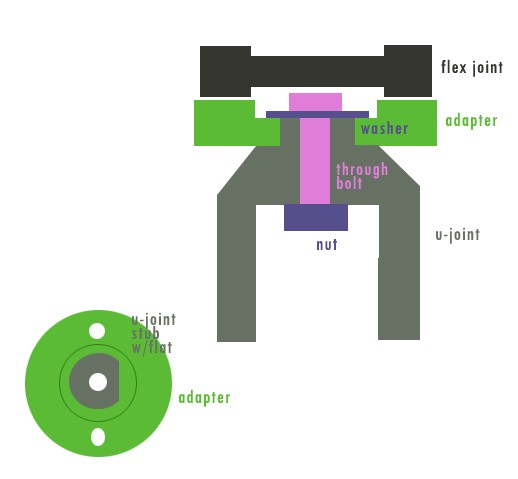
not sure how limited you want to keep the fab work on this but here's what popped in my head:
leave a stub of the z4 shaft connected to the u-joint. cut a flat onto it and put a hole through the middle.
key the flat into the adapter plate and put a bolt through to clamp the two parts together. a recess in the adapter plate could keep the bolt away from the flex joint.
Dan

-
Use the Z4 u-joint bit and fabricate an adapter so that it could be bolted to the rubber damper on the E30 bits. Welding on the cast piece probably isn't a good idea, but the stock shaft is attached to it somehow...?
Almost spot on to my plan. I looked at it all for about 3 hours last night and decided my best bet is make a disc that I can weld to the Z4 steel end. This I will then turn on the lathe to make it centric and mark the placement for the mounting bolts. Then I will run two bolts through the plate into the flex disc connecting it to the aluminum E30 U joint.
not sure how limited you want to keep the fab work on this but here's what popped in my head:
leave a stub of the z4 shaft connected to the u-joint. cut a flat onto it and put a hole through the middle.
key the flat into the adapter plate and put a bolt through to clamp the two parts together. a recess in the adapter plate could keep the bolt away from the flex joint.
That's a damn nice illustration. I am basically doing something similar, although the bolts have to be on the outside of the joint as the end caps of the U-joints are press fit with a special tool and hold the bearings to spec and I don't want to pull them apart. Otherwise I won't be able to get a bolt/ U joint stub through the center.
I hope to have something mocked up this evening.
https://www.instagram.com/_jdesigner_/ http://nevertoolow.tumblr.com/
🥳SOLD BMW E24 633CSI - BMW M30B32 🧪SOLD HCH ES9 - 1.3 LDA
👽BMW E30 325IC - Toyota 1JZ-GTE ⏰ HONDA EF9 CIVIC SI - JDM B18C5
☠️BMW E36 318i - Ford 5.0 FE302 🚴♂️ GT-Labomba - 26x2.75 Freeride
🤹♀️SOLD BMW E36/7 Z3 - BMW M54B25 🧓SOLD BMW E10 2002 - BMW M10M05 -
Almost spot on to my plan. I looked at it all for about 3 hours last night and decided my best bet is make a disc that I can weld to the Z4 steel end. This I will then turn on the lathe to make it centric and mark the placement for the mounting bolts. Then I will run two bolts through the plate into the flex disc connecting it to the aluminum E30 U joint.
That's a damn nice illustration. I am basically doing something similar, although the bolts have to be on the outside of the joint as the end caps of the U-joints are press fit with a special tool and hold the bearings to spec and I don't want to pull them apart. Otherwise I won't be able to get a bolt/ U joint stub through the center.
I hope to have something mocked up this evening.
the shaft is press fit into the u-joint? no weld or splines? although i know the resistance of a press fit can be astounding, that's a little disconcerting.
Dan
-
the shaft is press fit into the u-joint? no weld or splines? although i know the resistance of a press fit can be astounding, that's a little disconcerting.
Correct, and it's in there CRAZY good. You would need to chuck it in a mill to remove it without destroying both parts.
https://www.instagram.com/_jdesigner_/ http://nevertoolow.tumblr.com/
🥳SOLD BMW E24 633CSI - BMW M30B32 🧪SOLD HCH ES9 - 1.3 LDA
👽BMW E30 325IC - Toyota 1JZ-GTE ⏰ HONDA EF9 CIVIC SI - JDM B18C5
☠️BMW E36 318i - Ford 5.0 FE302 🚴♂️ GT-Labomba - 26x2.75 Freeride
🤹♀️SOLD BMW E36/7 Z3 - BMW M54B25 🧓SOLD BMW E10 2002 - BMW M10M05 -
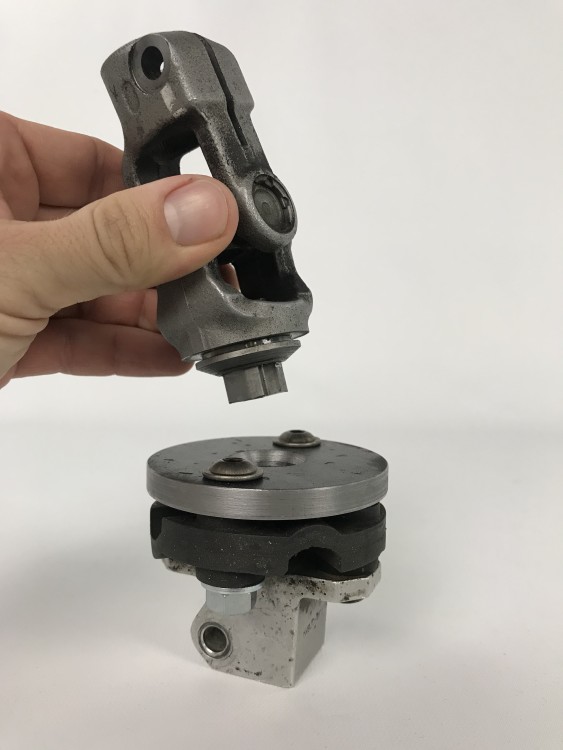
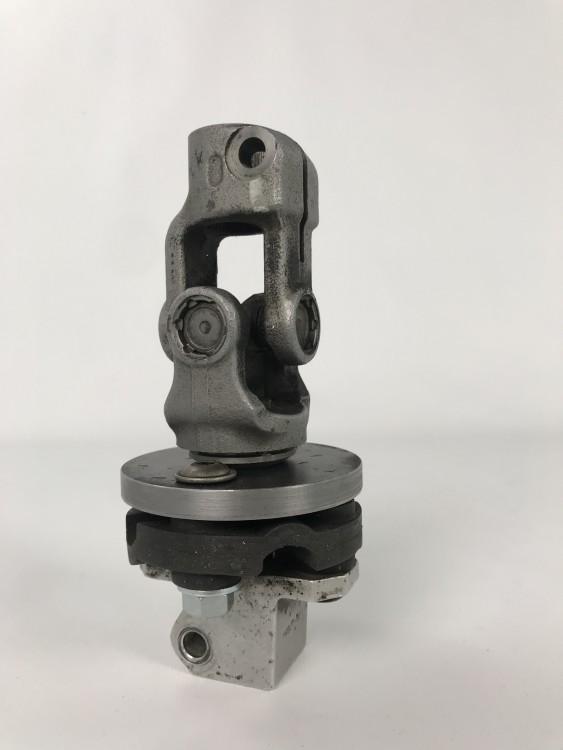
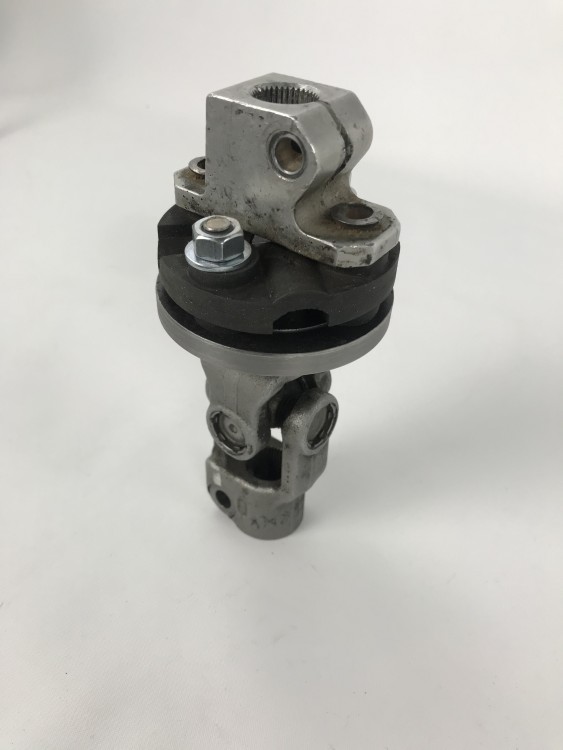
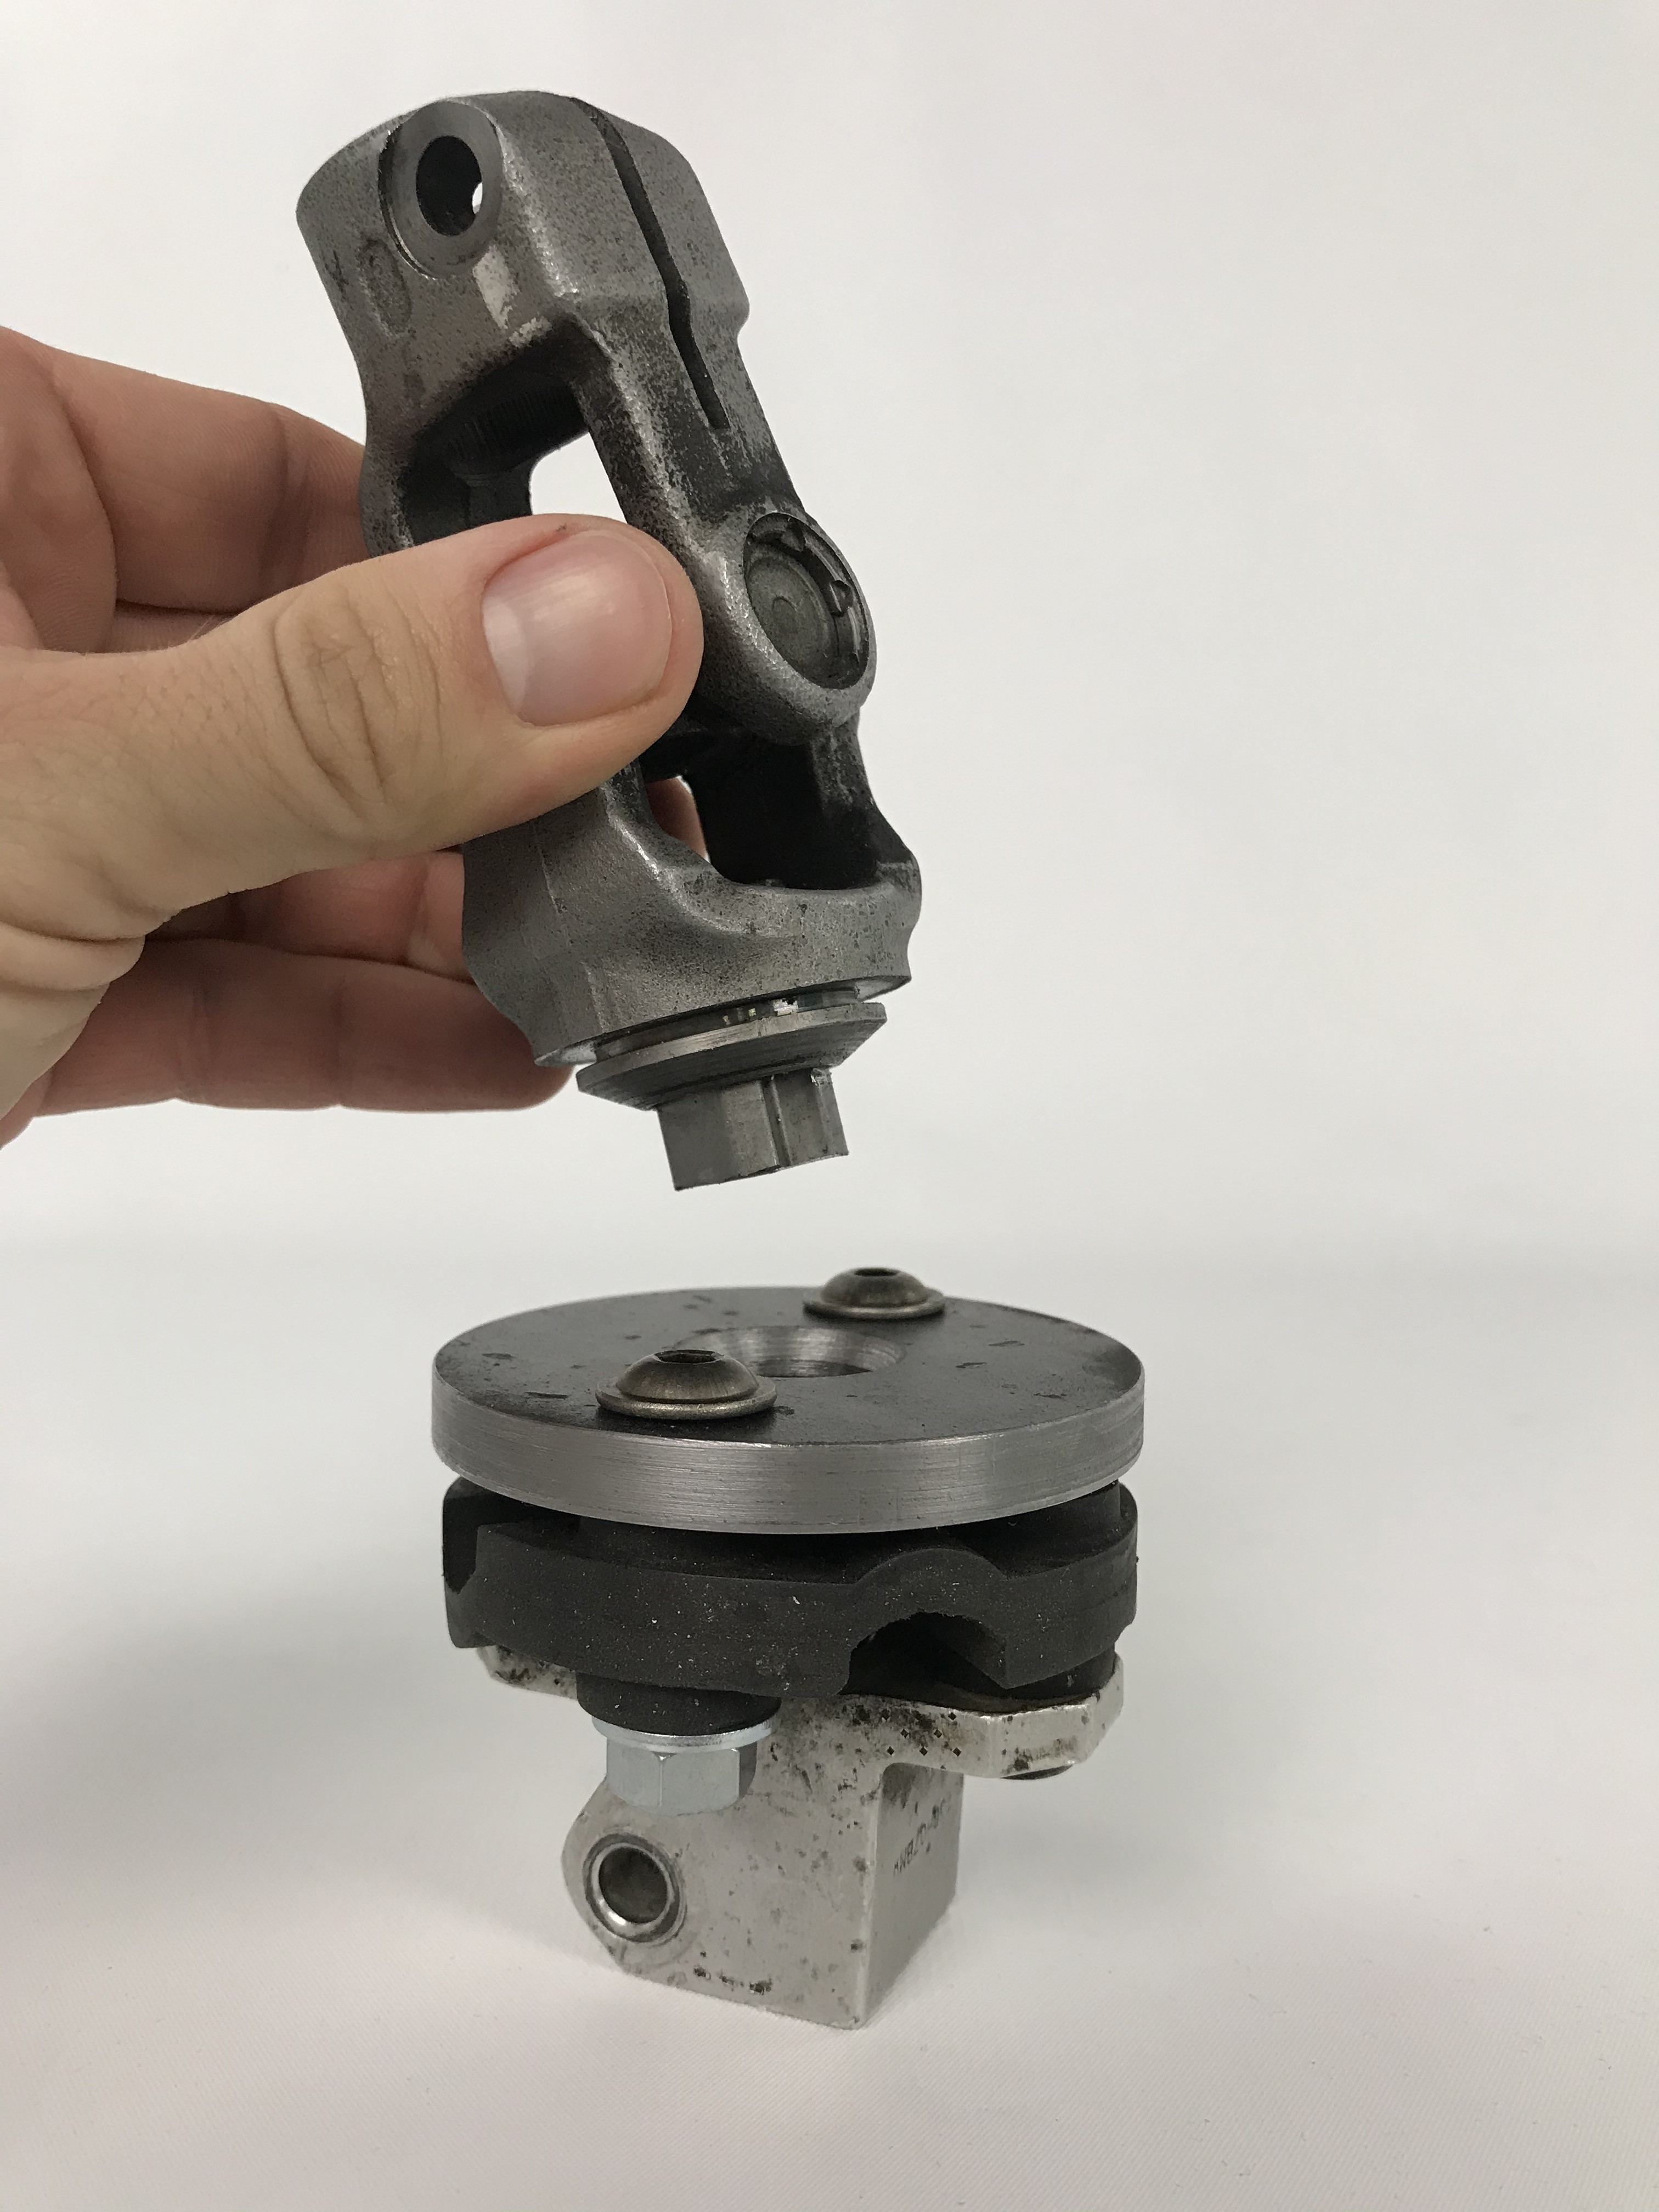
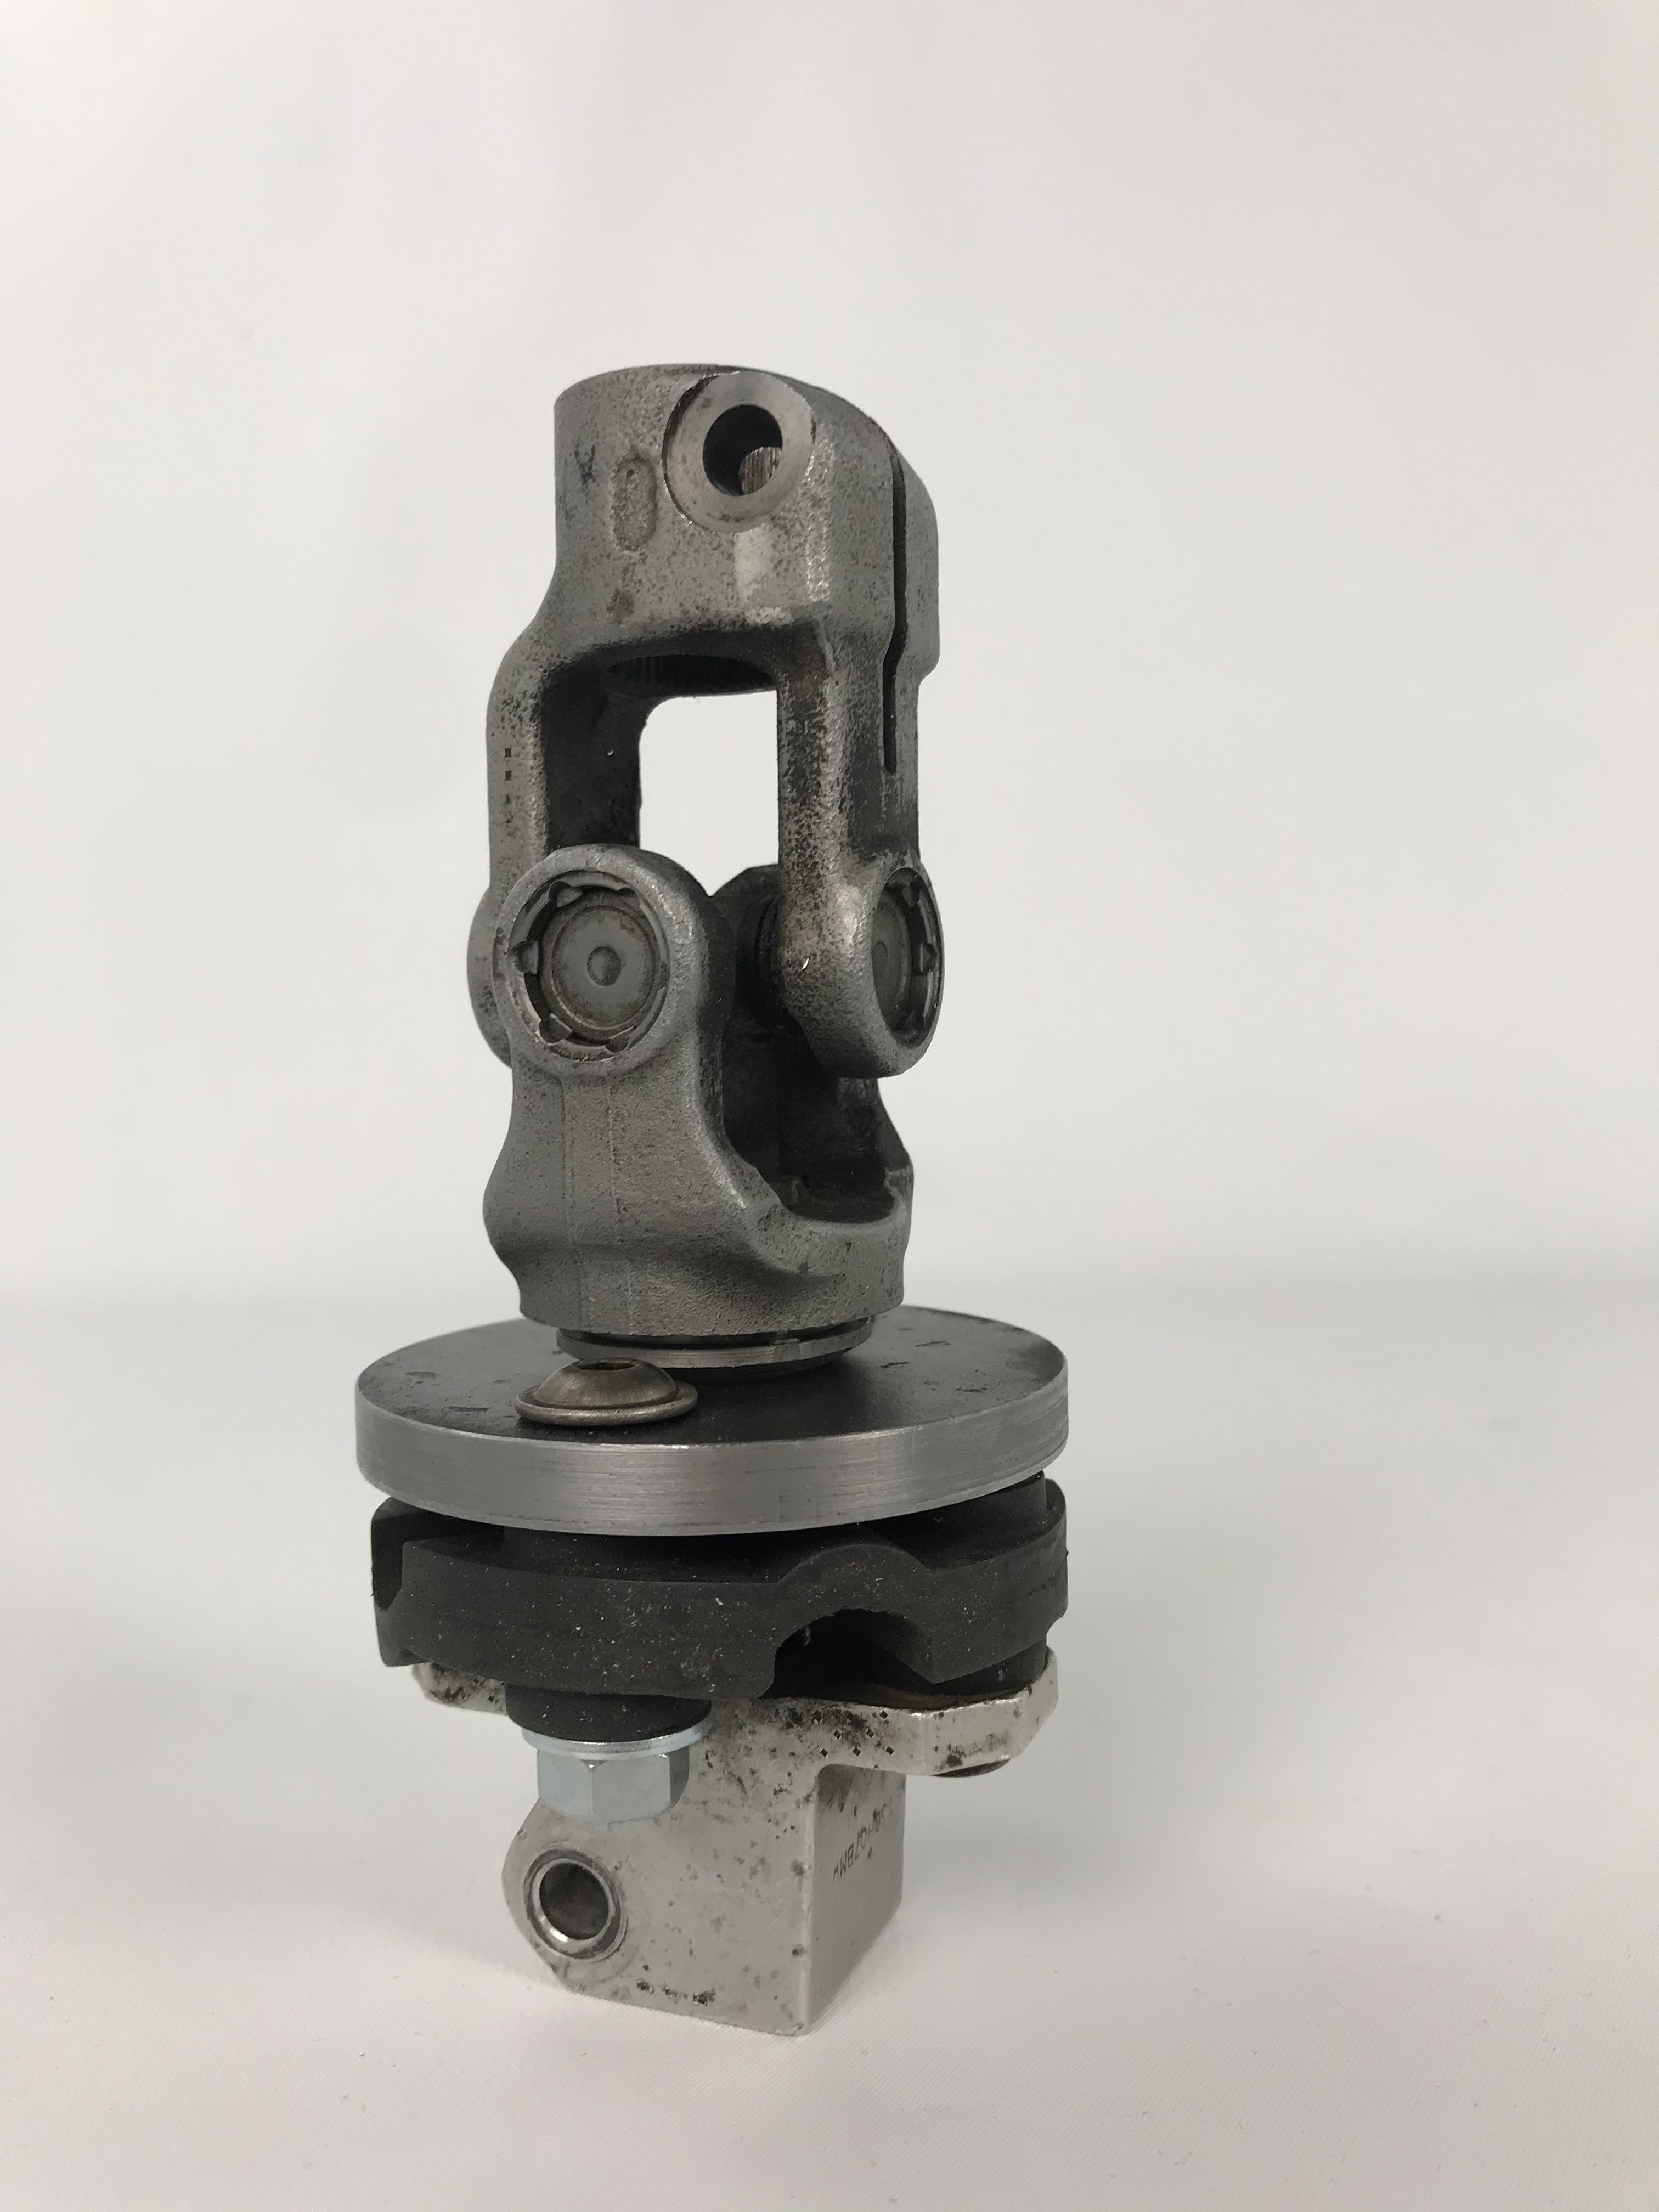
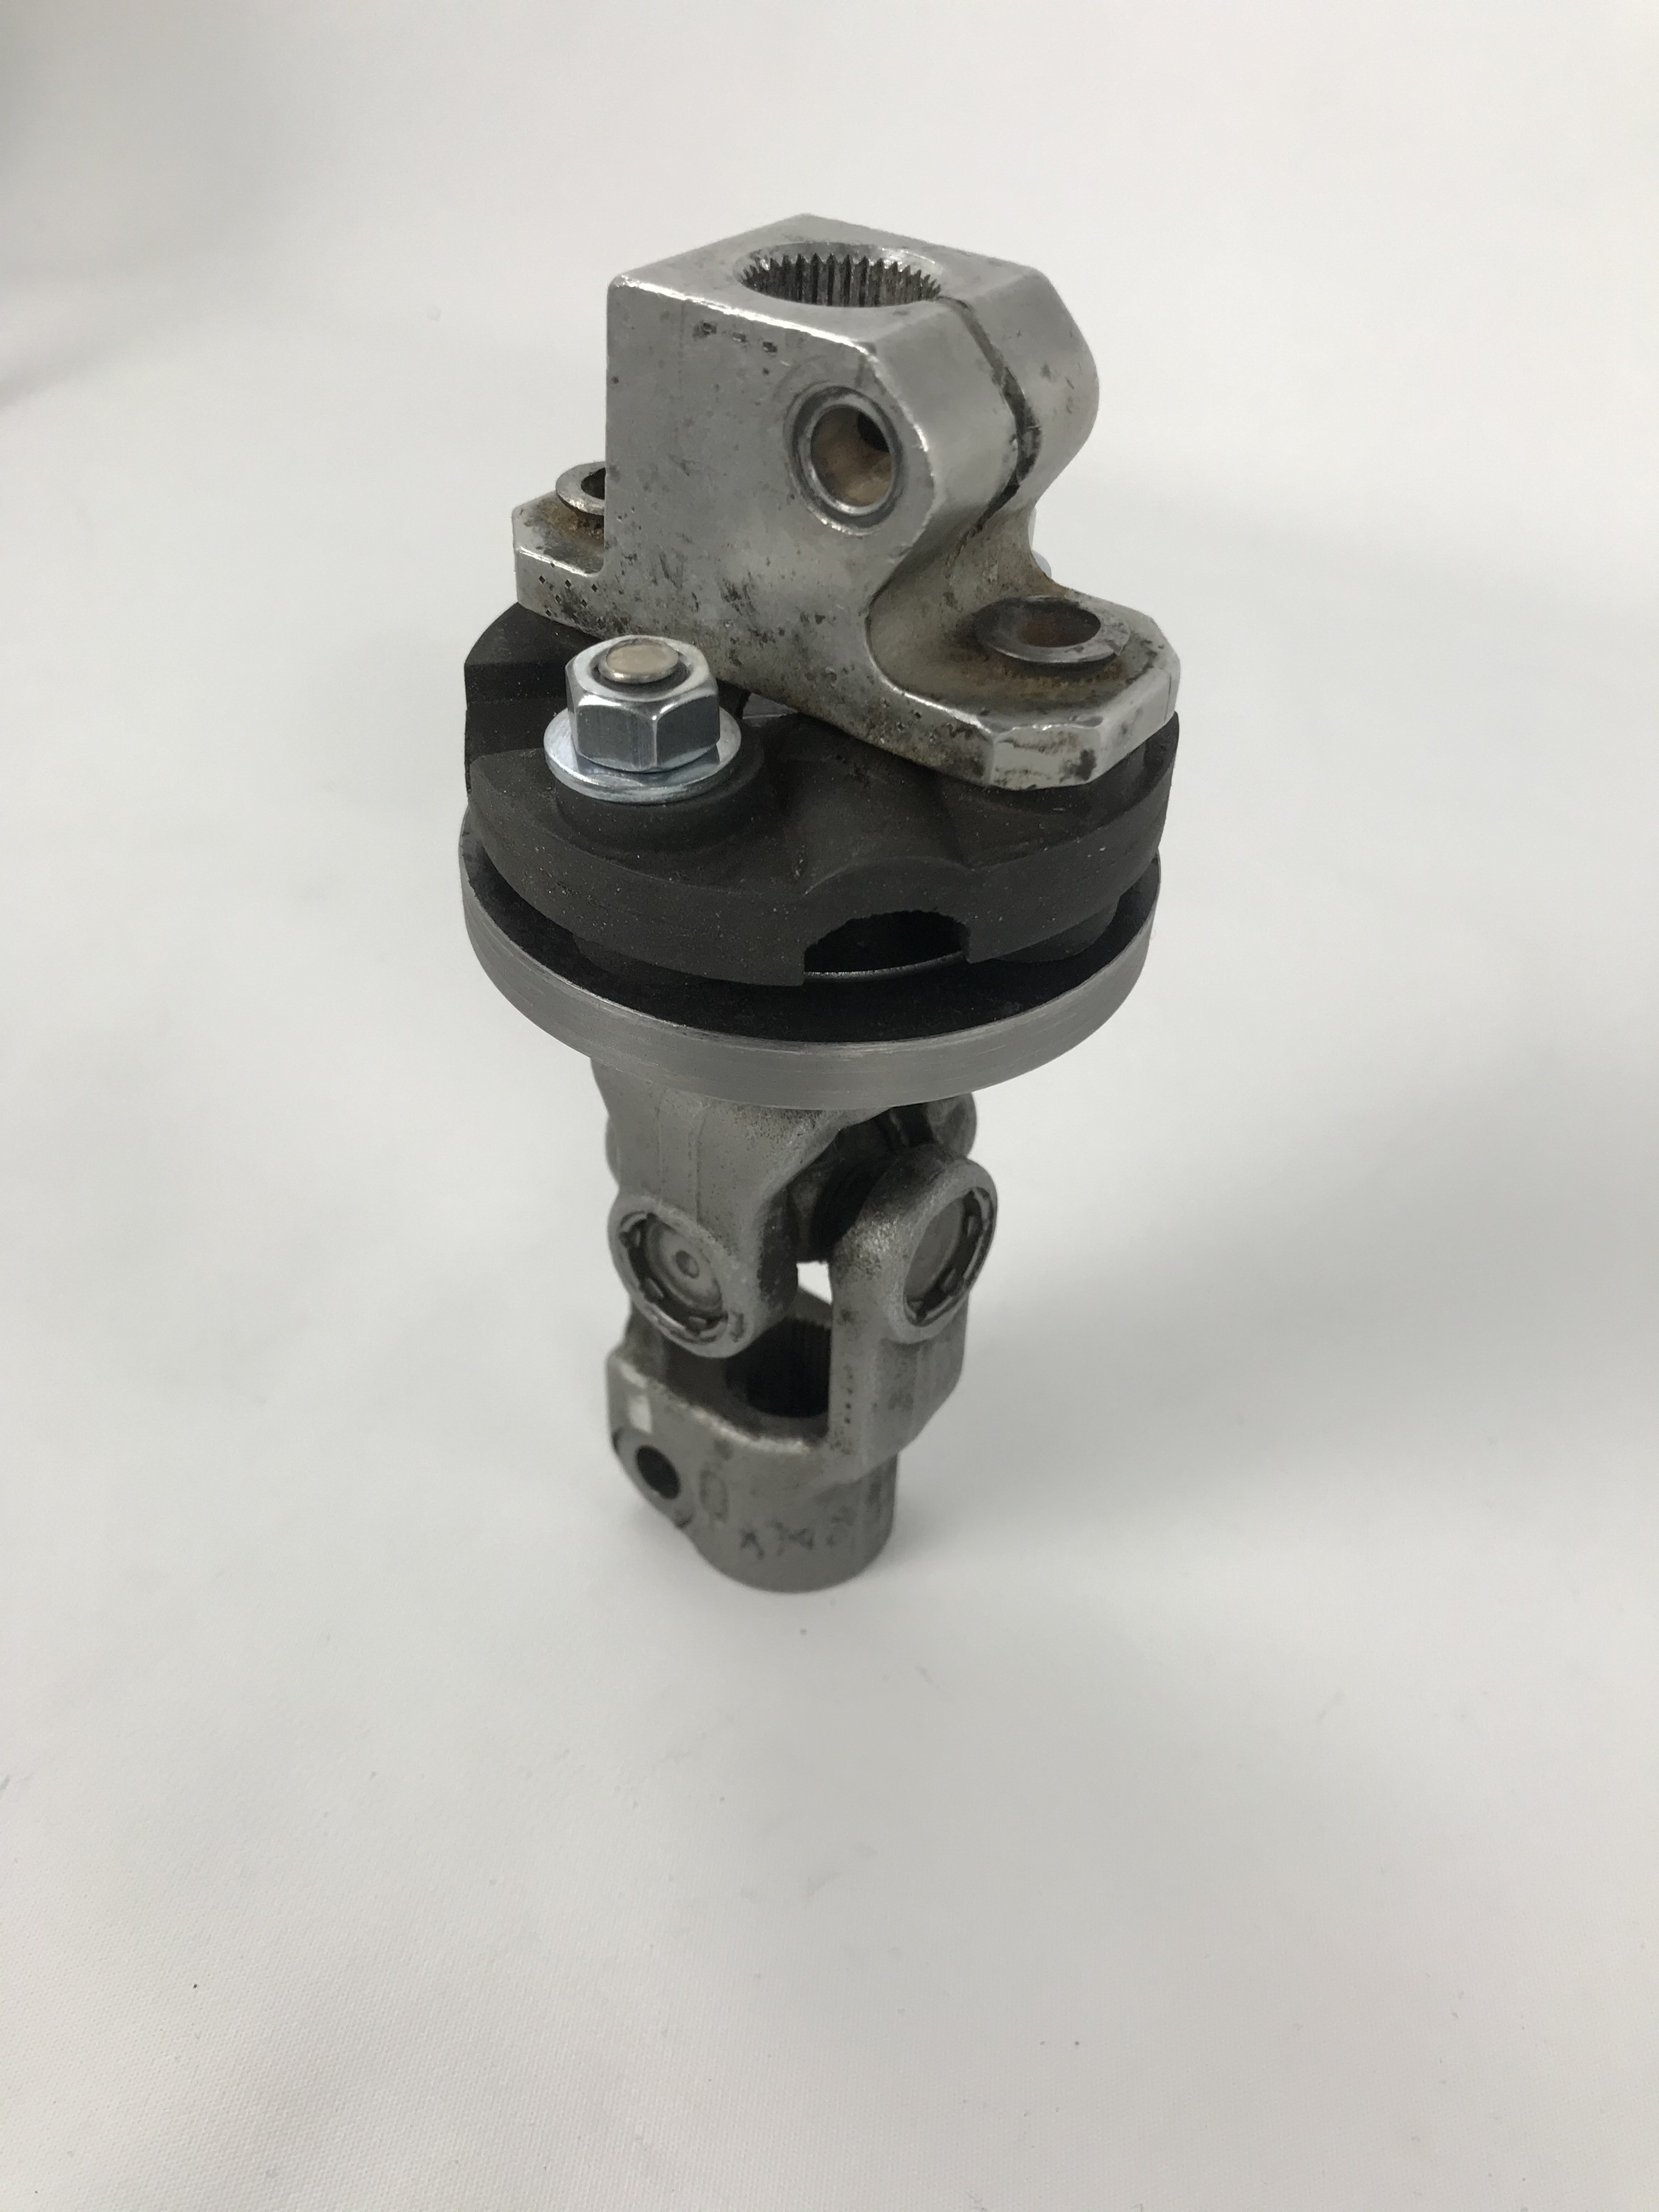
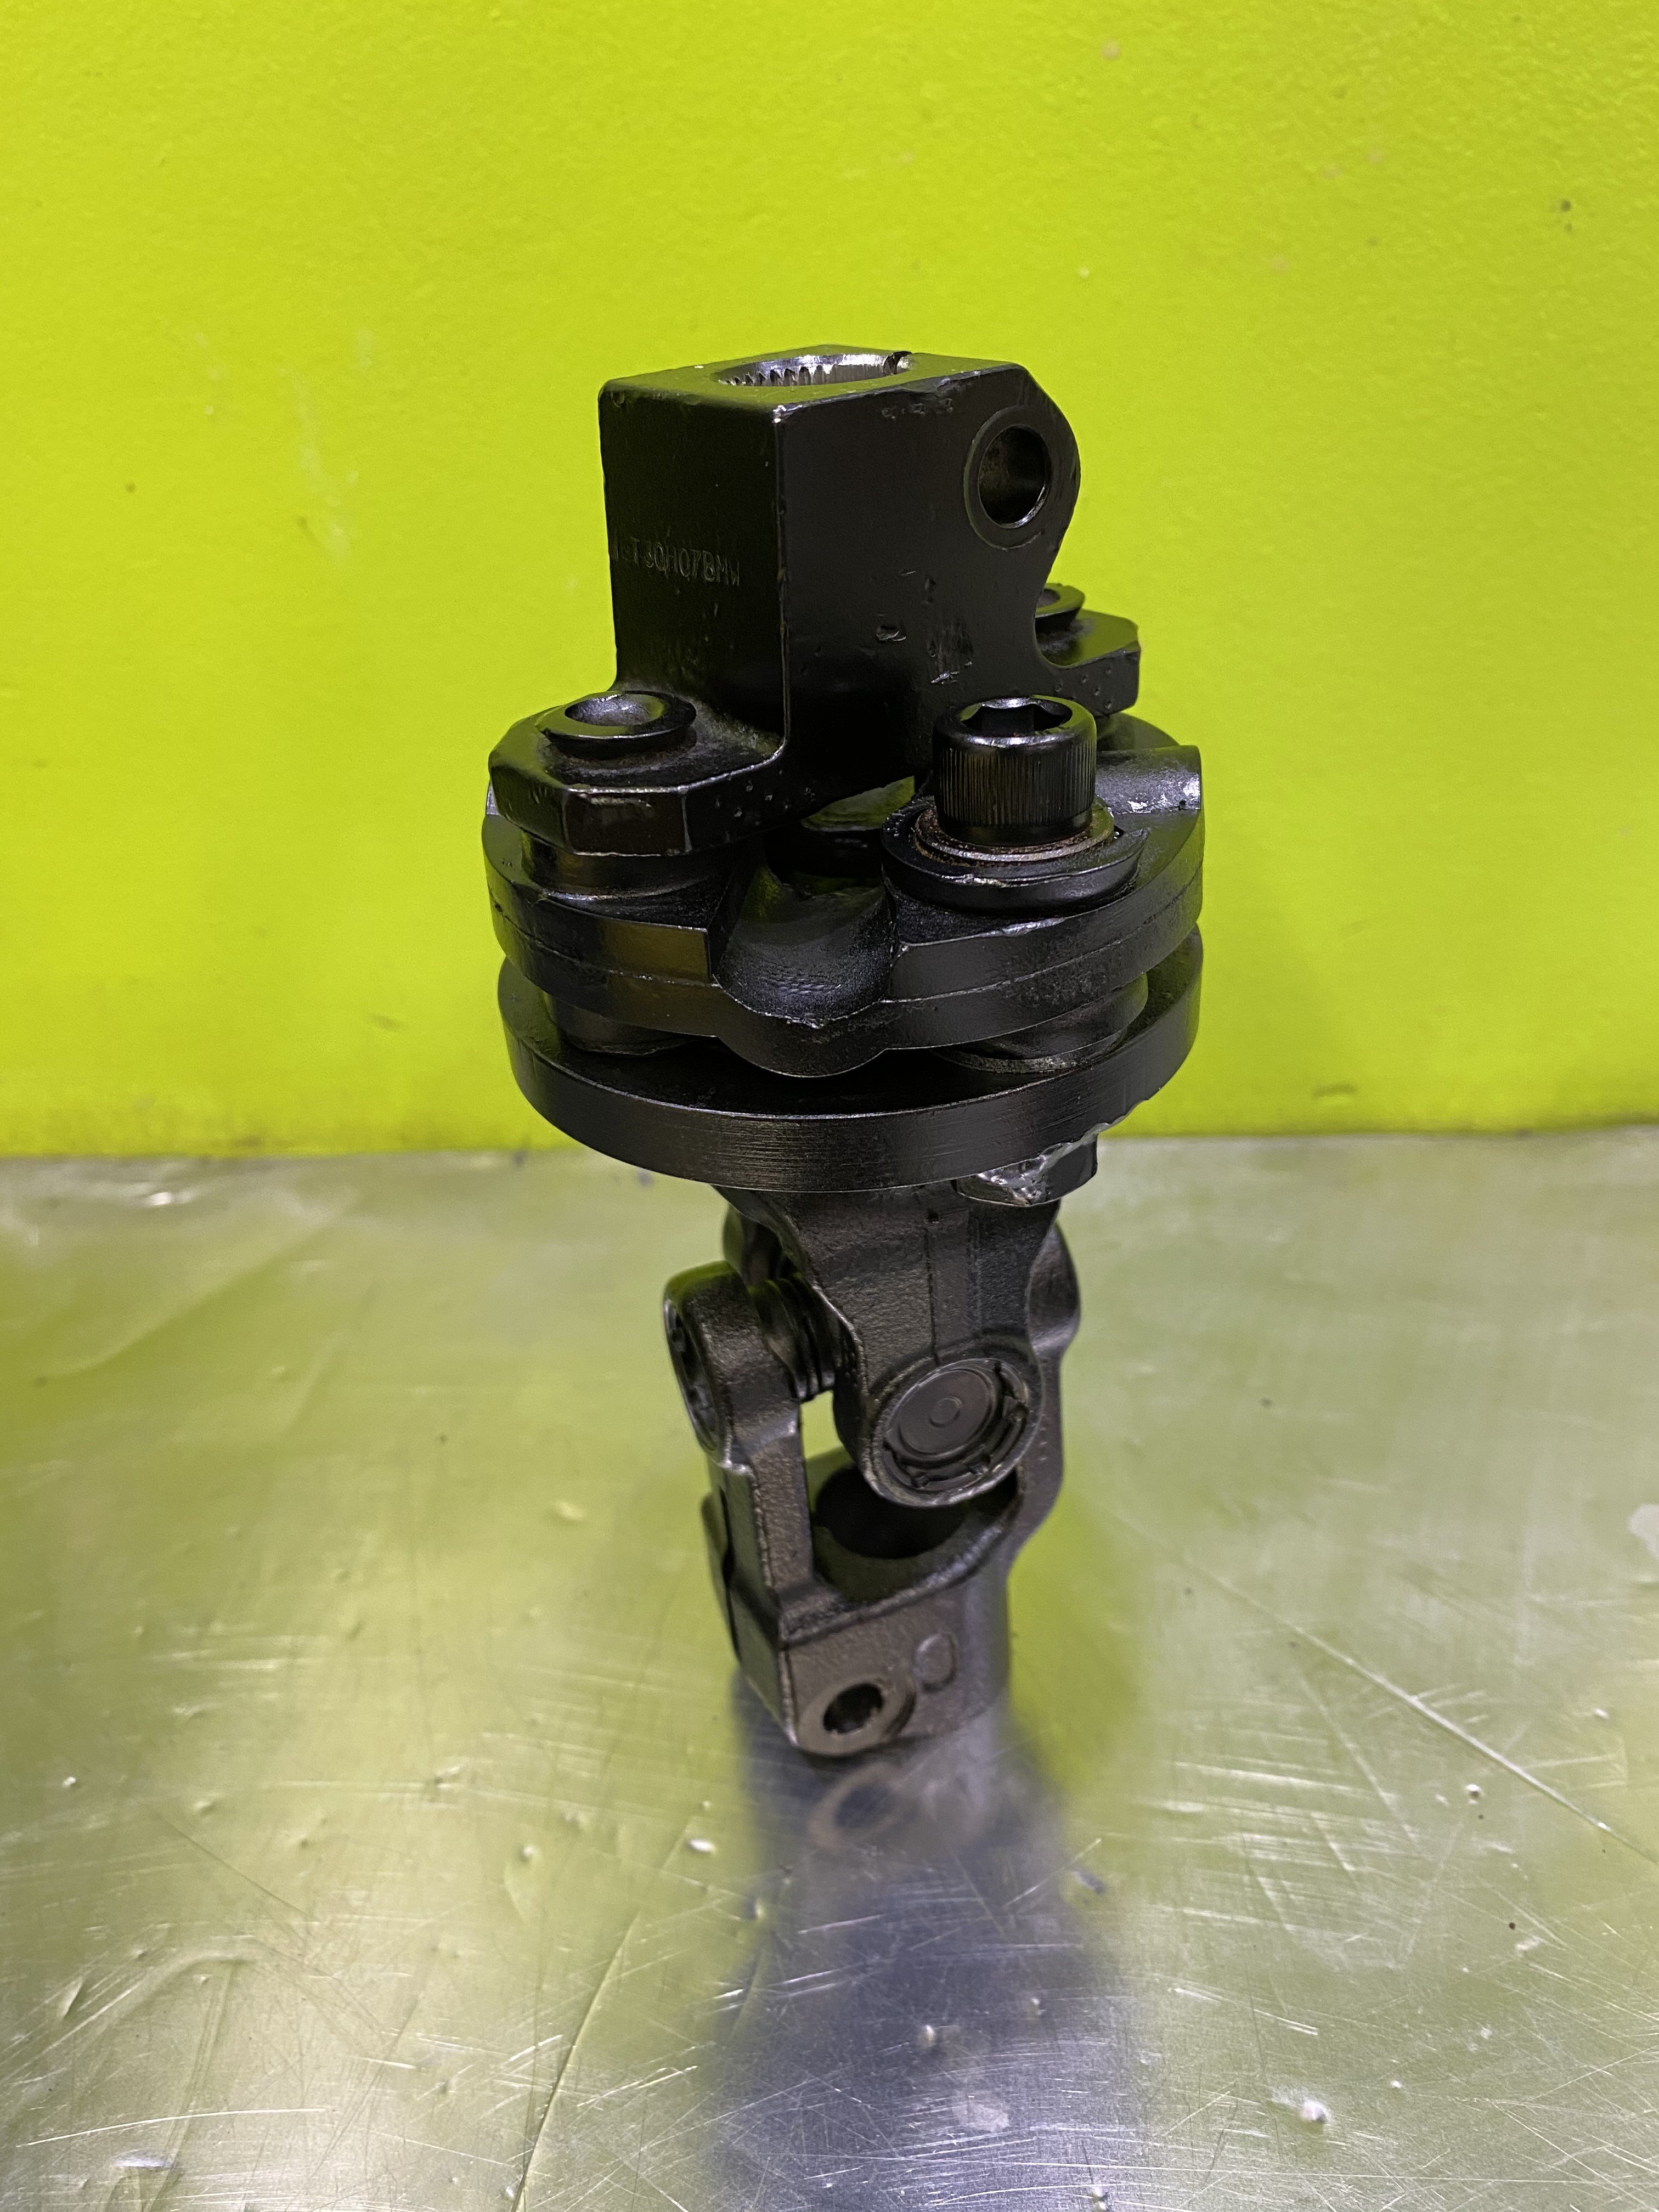
Made an adapter last night and it came out pretty good. I still need to weld it all together but Im thinking this might be temporary though. I need to prove out that there is no binding with a single joint, otherwise I will take the dimensions and still go with the anti-vibe flaming river joint.
(images wont attach. I will try again later)
I have yet to weld this as I realized that I will not be able to remove the hardware once I do so. I rather not tap threads into the plate but that might be my only option.
https://www.instagram.com/_jdesigner_/ http://nevertoolow.tumblr.com/
🥳SOLD BMW E24 633CSI - BMW M30B32 🧪SOLD HCH ES9 - 1.3 LDA
👽BMW E30 325IC - Toyota 1JZ-GTE ⏰ HONDA EF9 CIVIC SI - JDM B18C5
☠️BMW E36 318i - Ford 5.0 FE302 🚴♂️ GT-Labomba - 26x2.75 Freeride
🤹♀️SOLD BMW E36/7 Z3 - BMW M54B25 🧓SOLD BMW E10 2002 - BMW M10M05 -
what will the assembly process be? Are the two adapter bolts the last parts to be installed to bolt the column to the rack, or can everything be preassembled? can you just weld the screws into the adapter plate holes on the z4 joint side so you don't have to put a wrench on that side after final welding? or just weld a nut on that side and flip the fastener to avoid having to tap the adapter plate? i'm not sure what your main goal is here - professional fit/finish, ease of maintenance, or ease of fabrication, etc.
Dan
-
what will the assembly process be? Are the two adapter bolts the last parts to be installed to bolt the column to the rack, or can everything be preassembled? can you just weld the screws into the adapter plate holes on the z4 joint side so you don't have to put a wrench on that side after final welding? or just weld a nut on that side and flip the fastener to avoid having to tap the adapter plate? i'm not sure what your main goal is here - professional fit/finish, ease of maintenance, or ease of fabrication, etc.
It can be preassembled due to the telescoping airbag steering column. I could weld the nuts or bolts to the adapter and call it done. I need to get the right diameter shanked bolts first to see if I’m happy with it. It seems like once it’s all tight, the flex disc deflects and the bolts will just push the material out of the way.
If that’s the case, this might just be a mock up for a flaming river joint. ¯\_(ツ)_/¯
https://www.instagram.com/_jdesigner_/ http://nevertoolow.tumblr.com/
🥳SOLD BMW E24 633CSI - BMW M30B32 🧪SOLD HCH ES9 - 1.3 LDA
👽BMW E30 325IC - Toyota 1JZ-GTE ⏰ HONDA EF9 CIVIC SI - JDM B18C5
☠️BMW E36 318i - Ford 5.0 FE302 🚴♂️ GT-Labomba - 26x2.75 Freeride
🤹♀️SOLD BMW E36/7 Z3 - BMW M54B25 🧓SOLD BMW E10 2002 - BMW M10M05 -
Successful weekend.
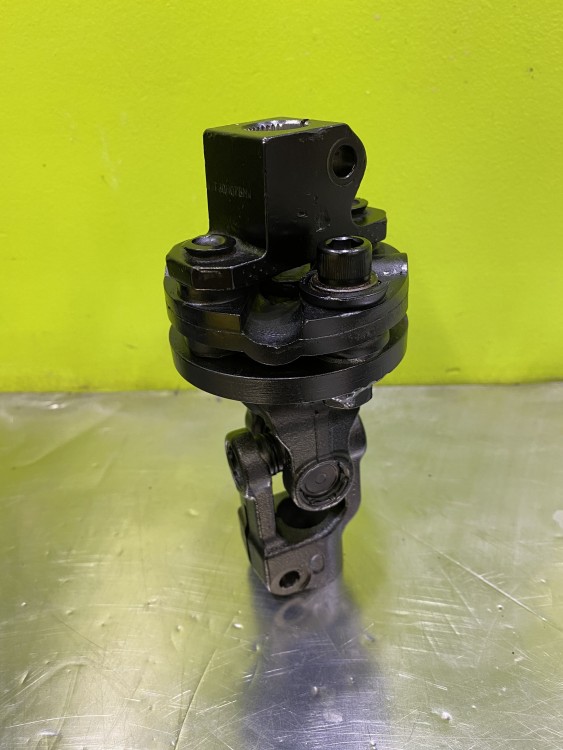
I completed the steering joint and installed it, bolted in new inner and outer tie rods, and I was able to make a pair of E36M3 boots stretch over the bigger bore Z4 rack by putting them in the oven and soften them.
My first expectation of the rack is that lock to lock is super quick. 2.8 rotations or so. Feedback sitting in place is a little bit of a struggle as I kind of expected from what I read online with a non-powered rack. I have had non-powered rack cars before so this isn't new to me. I will potentially look into a electric assist (Similar to this one) later on if it is really bother some. I painted it black in hopes to hide it better in the engine bay.
https://www.instagram.com/_jdesigner_/ http://nevertoolow.tumblr.com/
🥳SOLD BMW E24 633CSI - BMW M30B32 🧪SOLD HCH ES9 - 1.3 LDA
👽BMW E30 325IC - Toyota 1JZ-GTE ⏰ HONDA EF9 CIVIC SI - JDM B18C5
☠️BMW E36 318i - Ford 5.0 FE302 🚴♂️ GT-Labomba - 26x2.75 Freeride
🤹♀️SOLD BMW E36/7 Z3 - BMW M54B25 🧓SOLD BMW E10 2002 - BMW M10M05 -
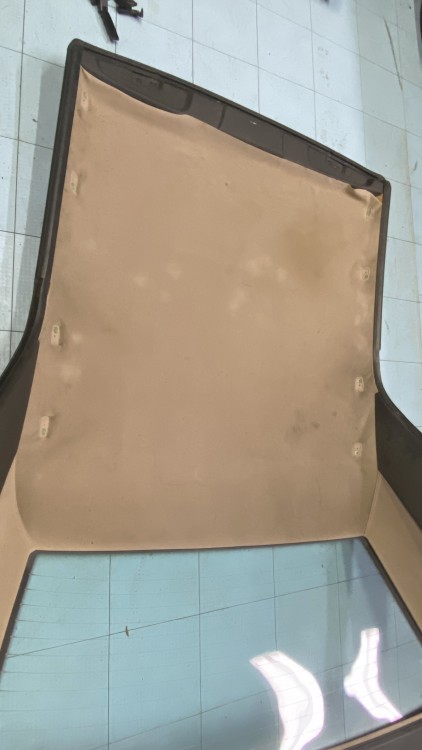
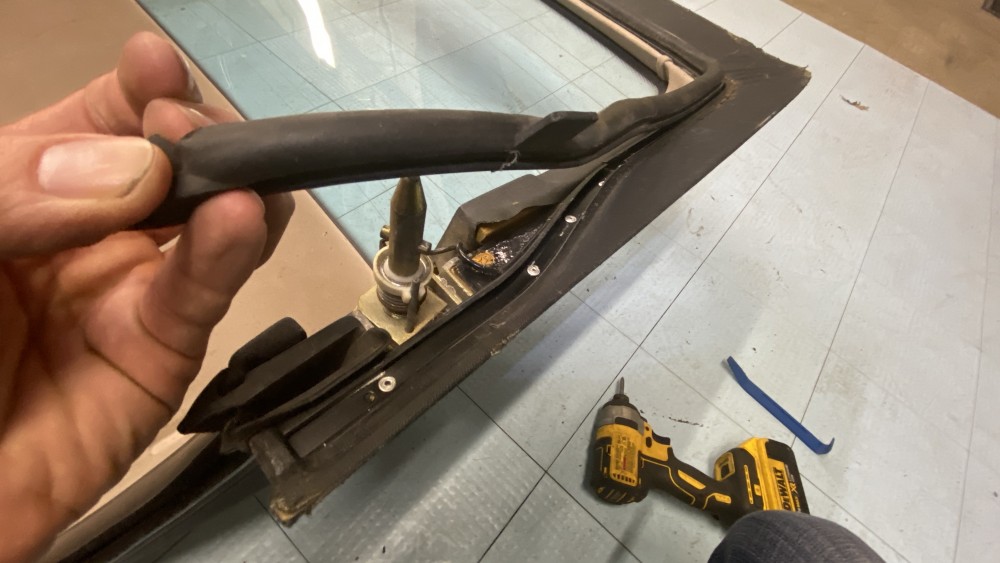
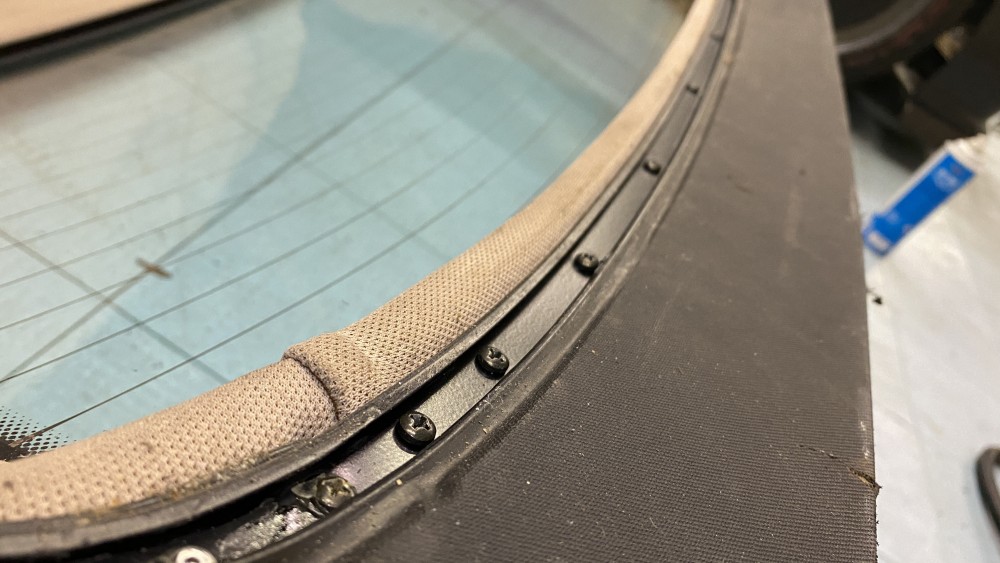
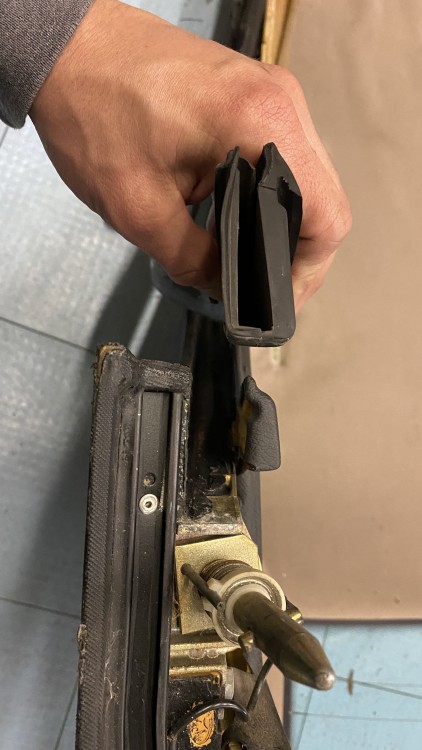
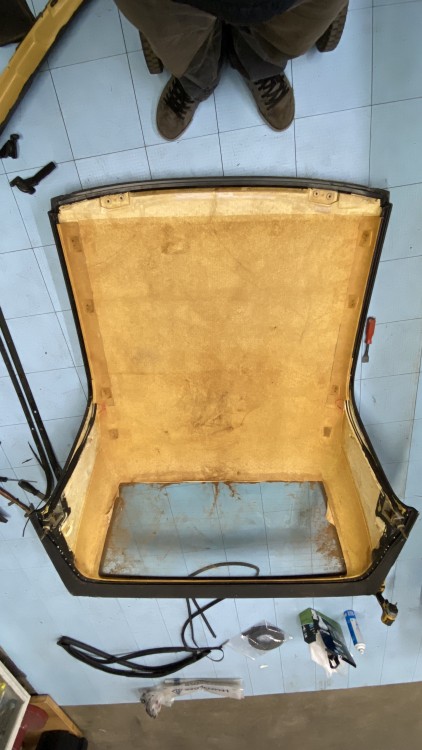
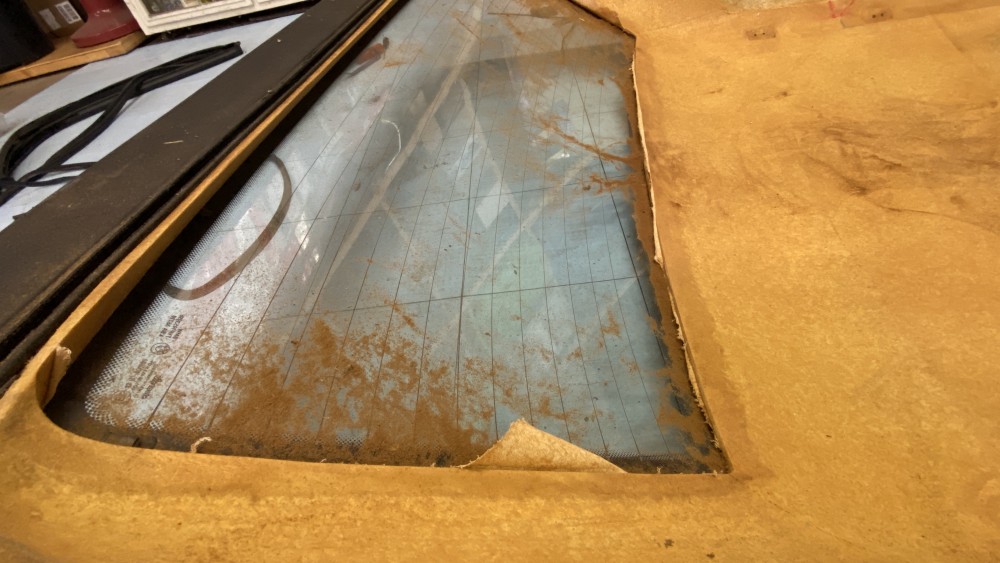
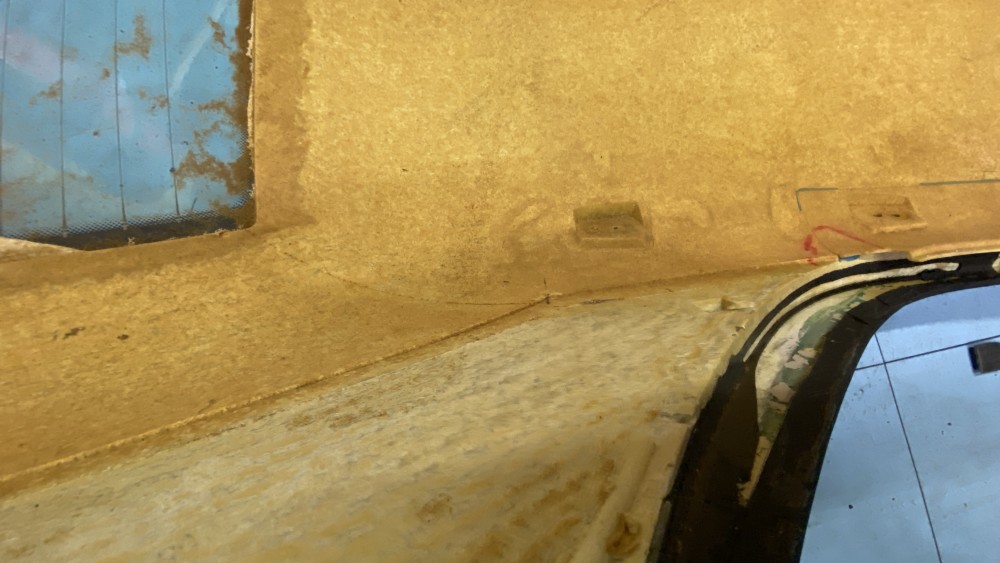
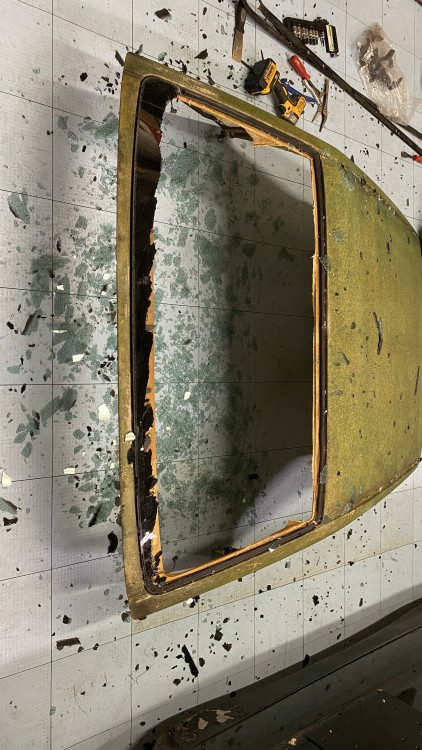
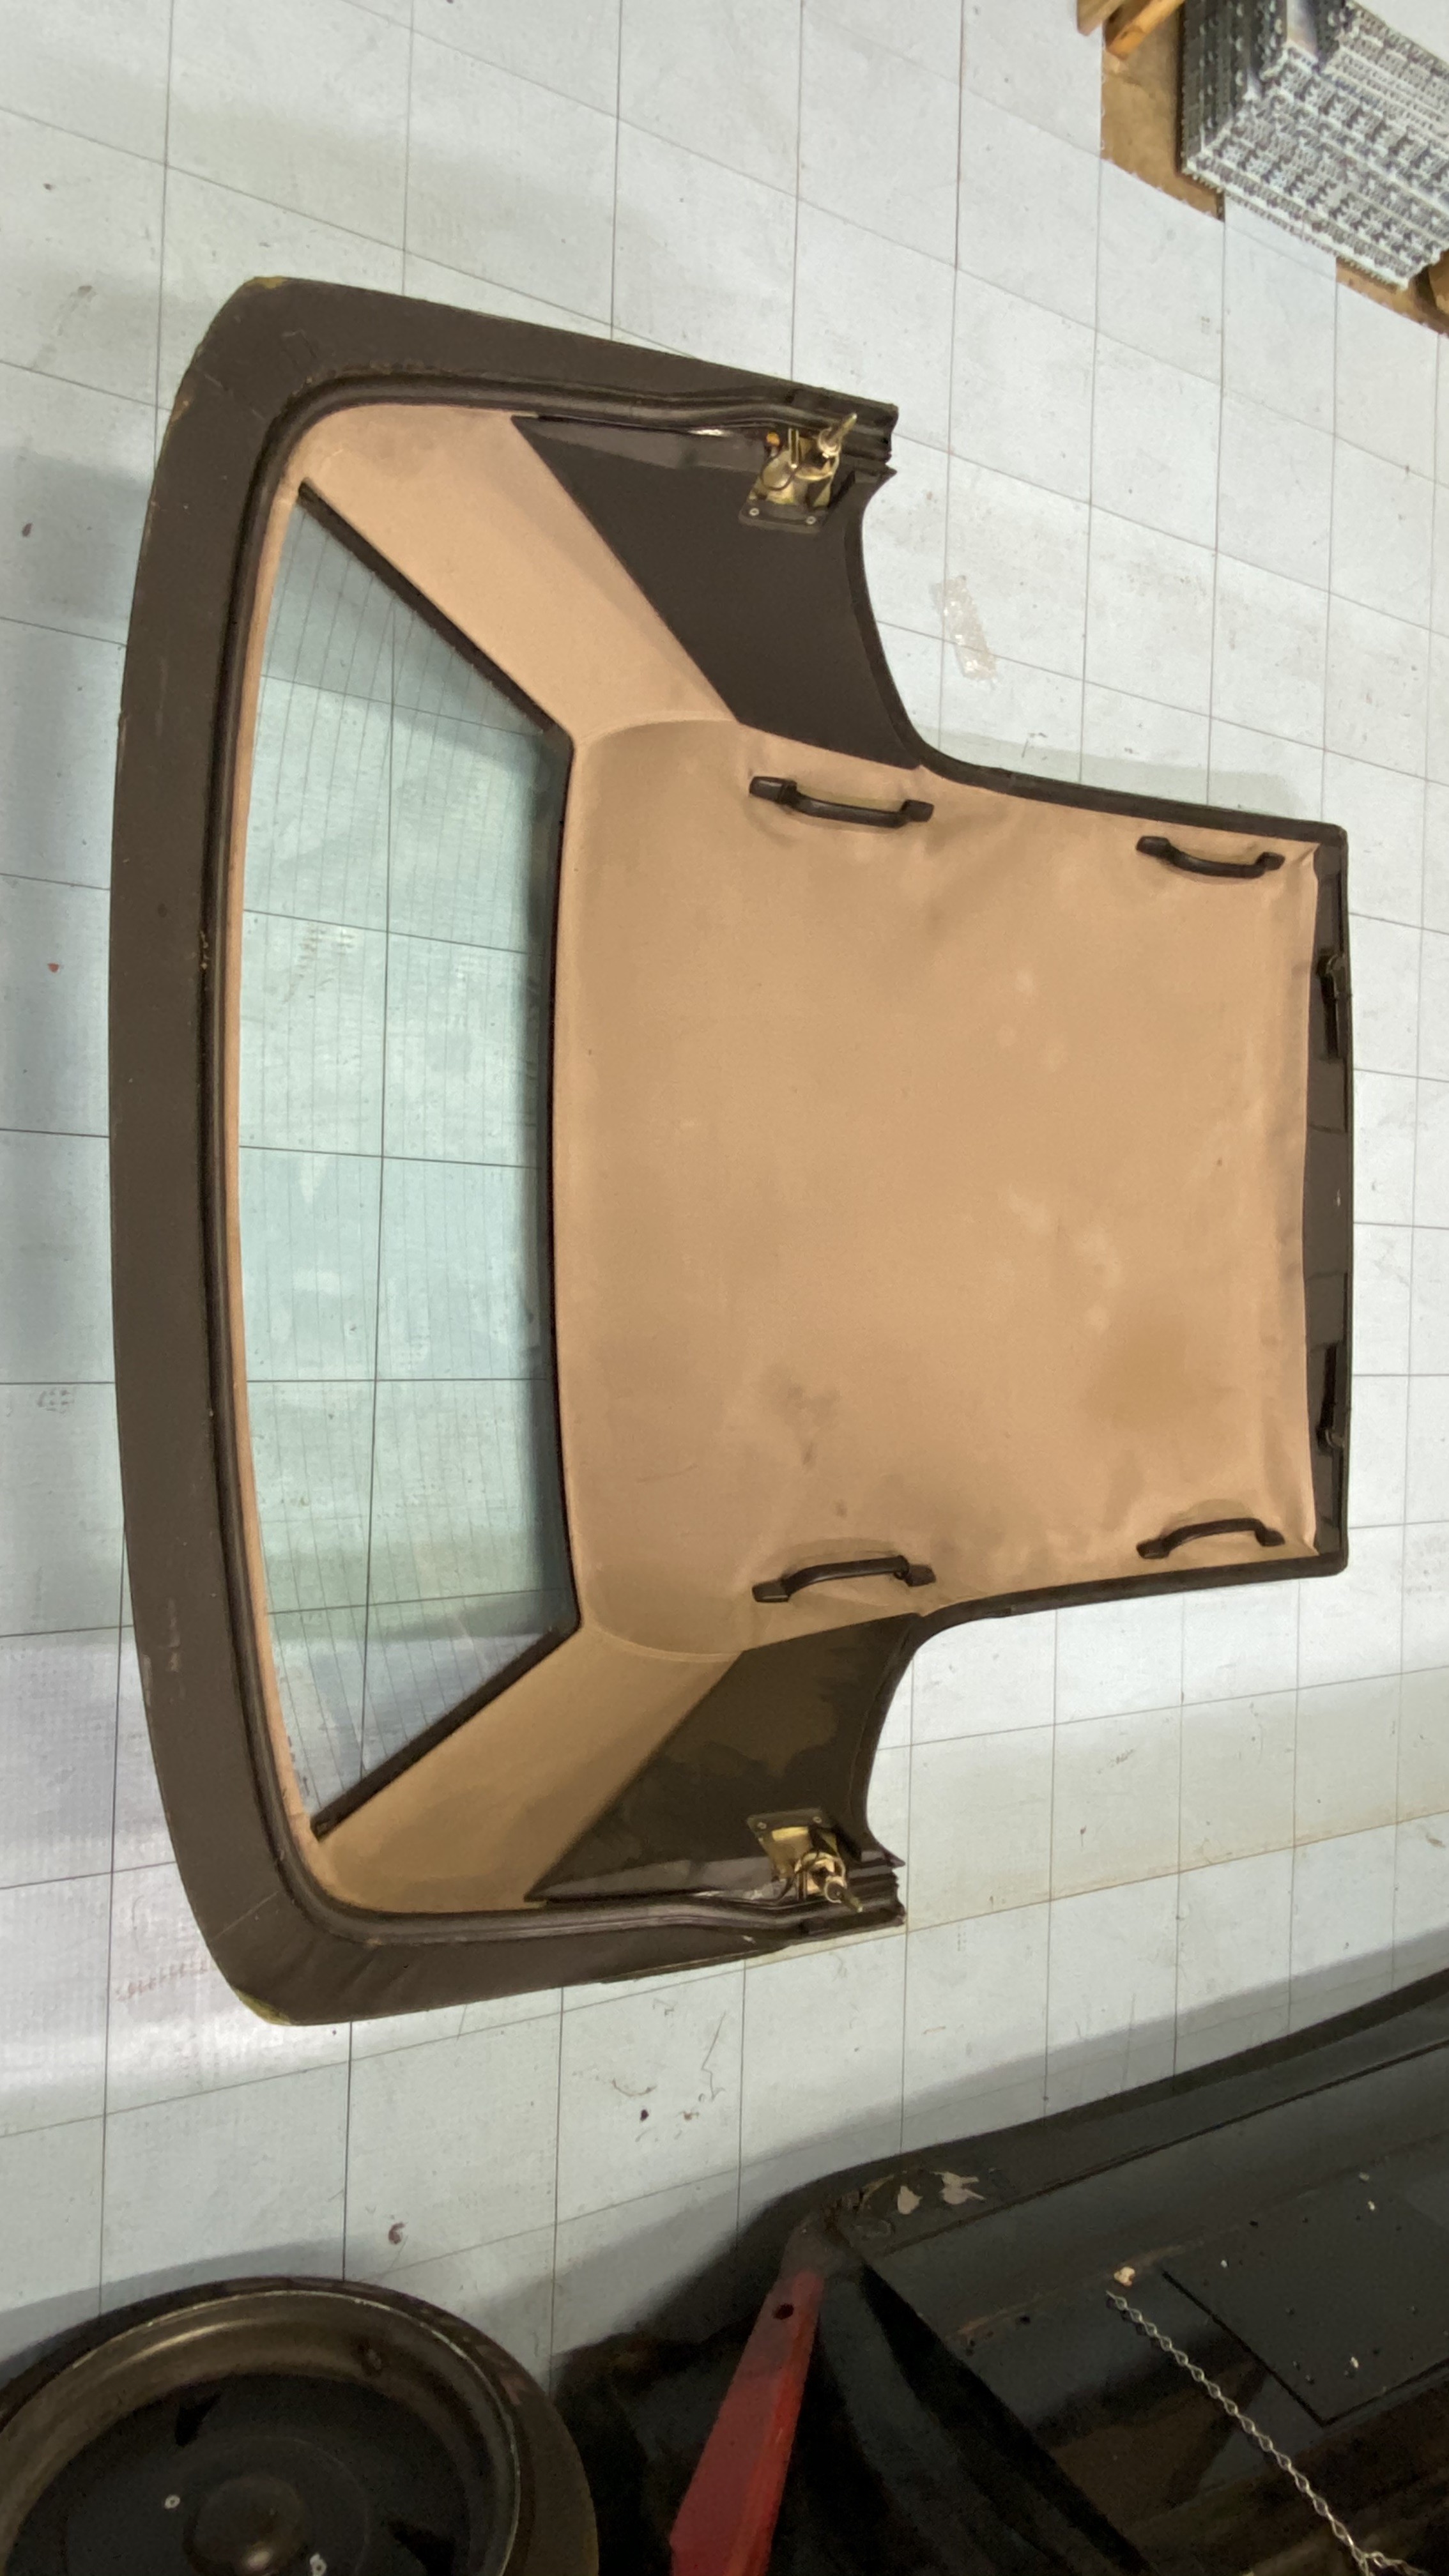
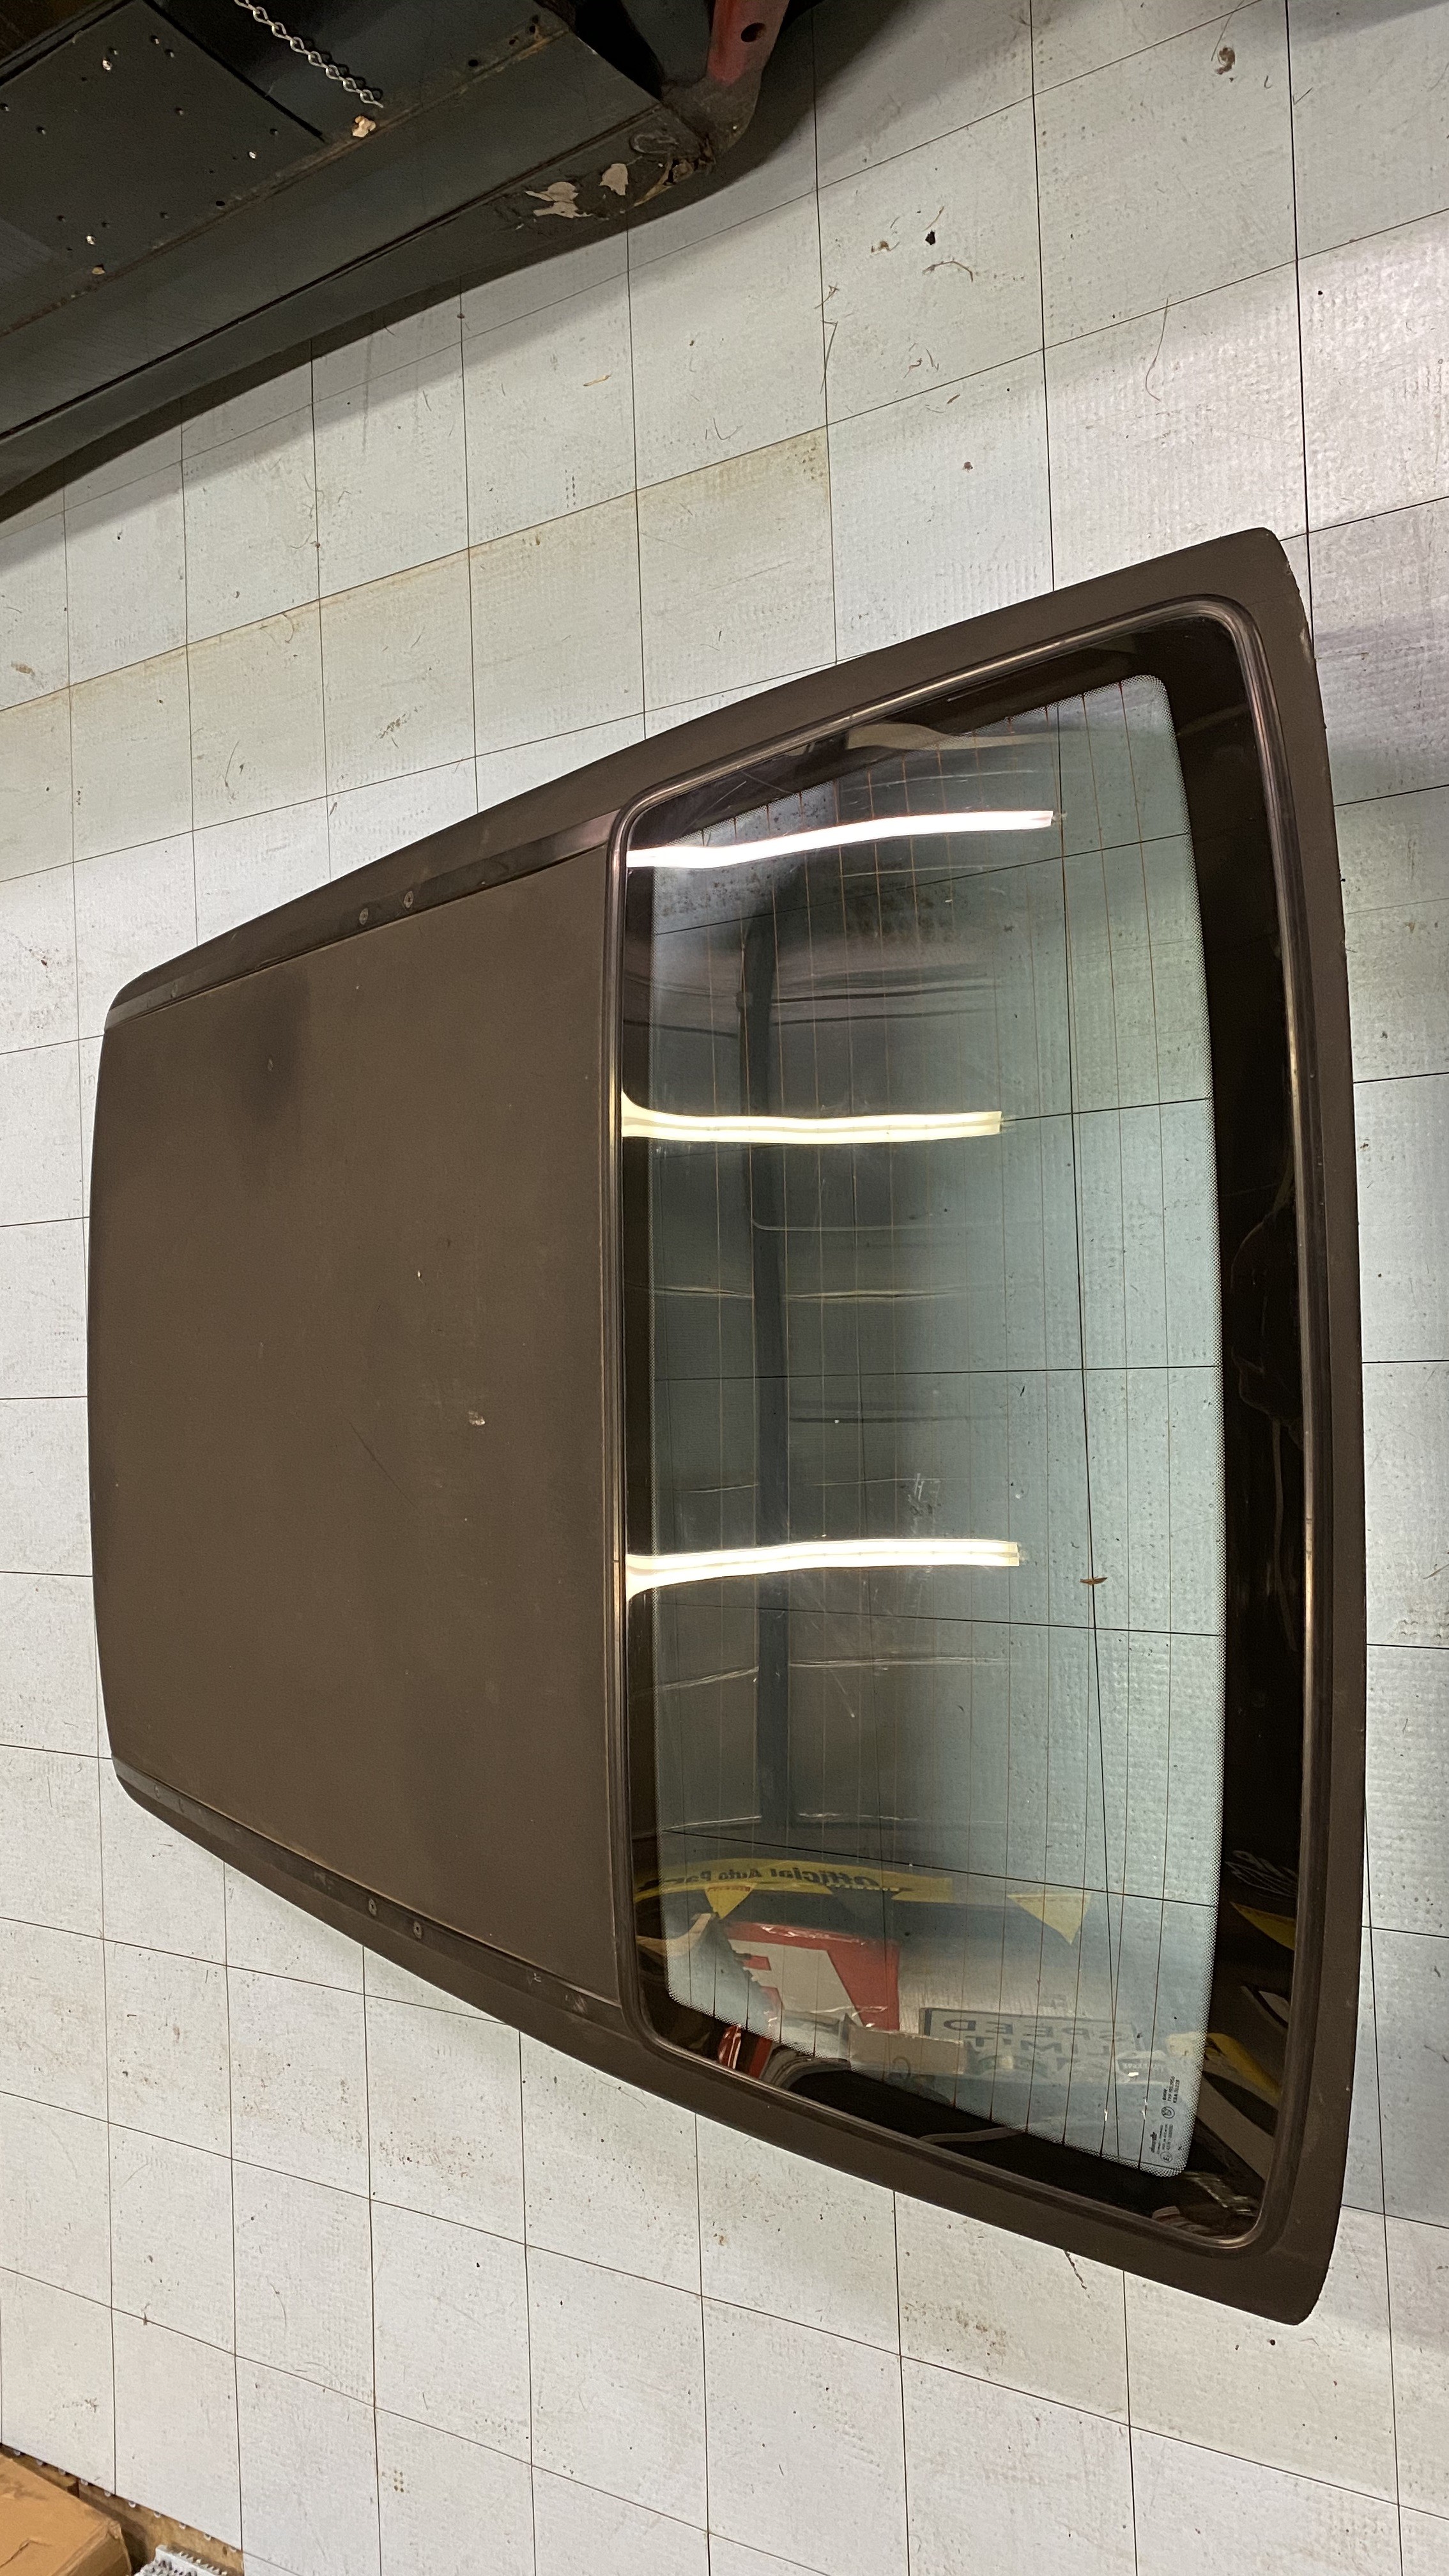
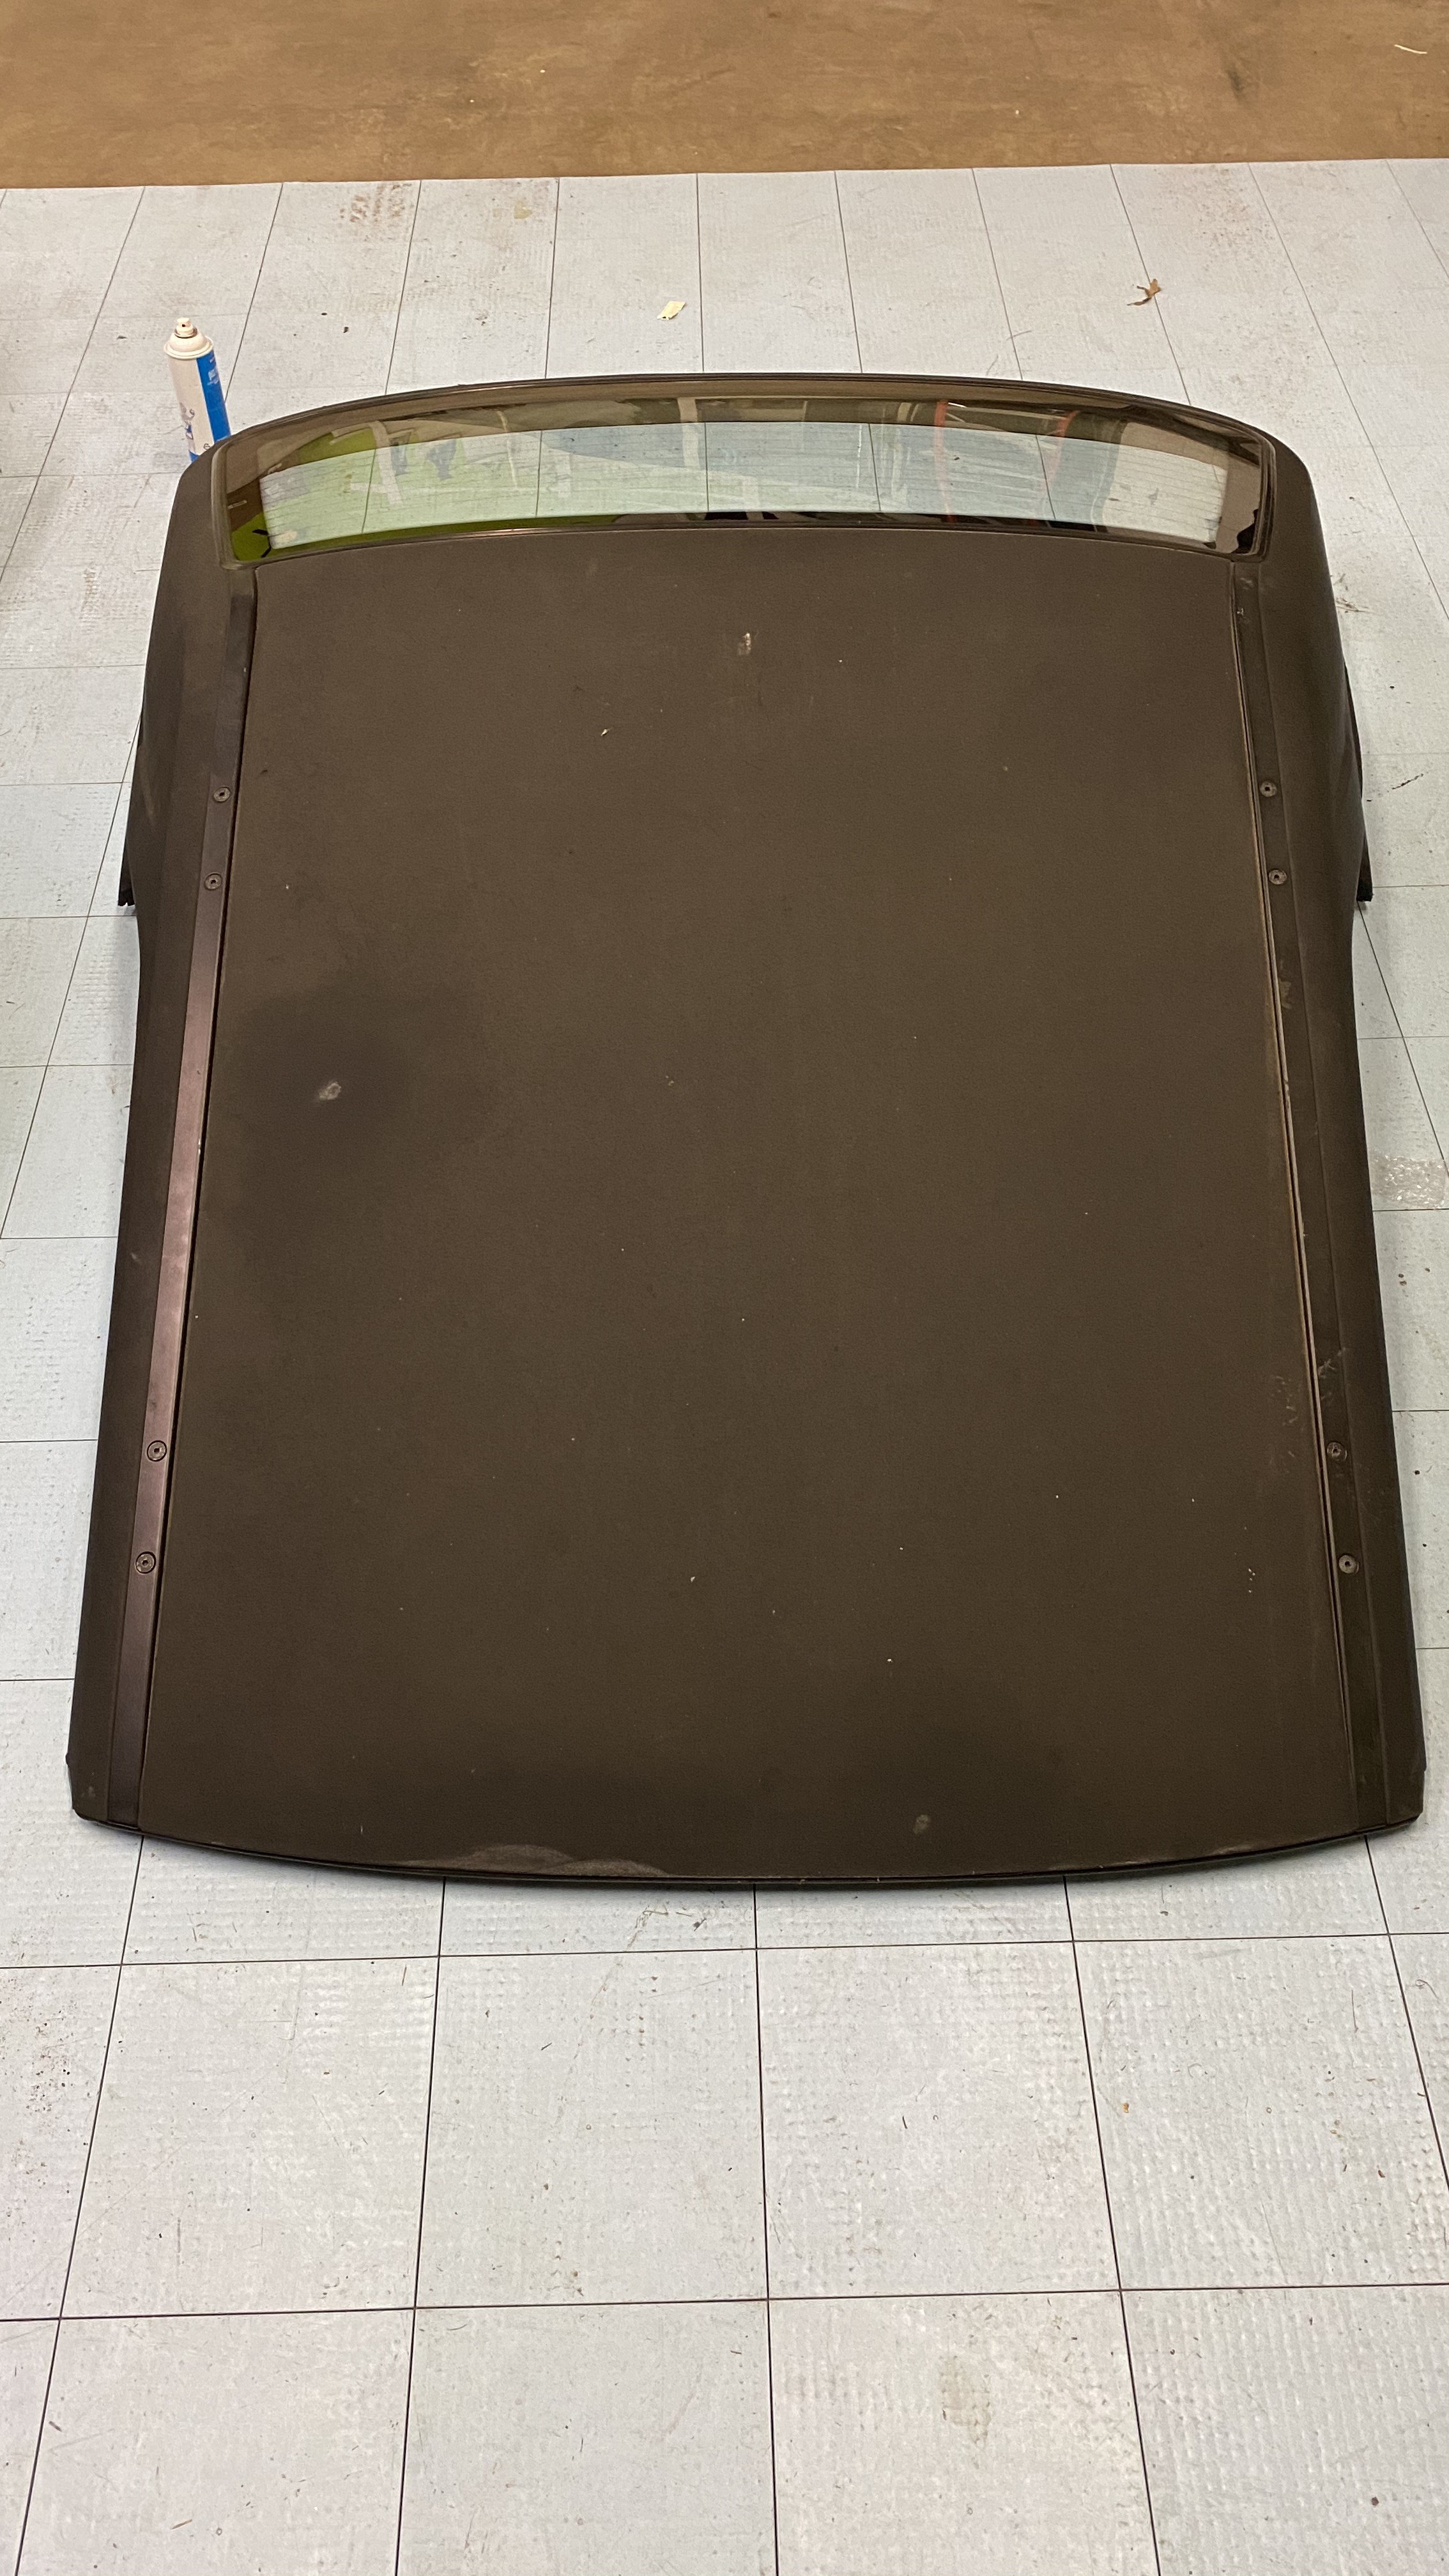
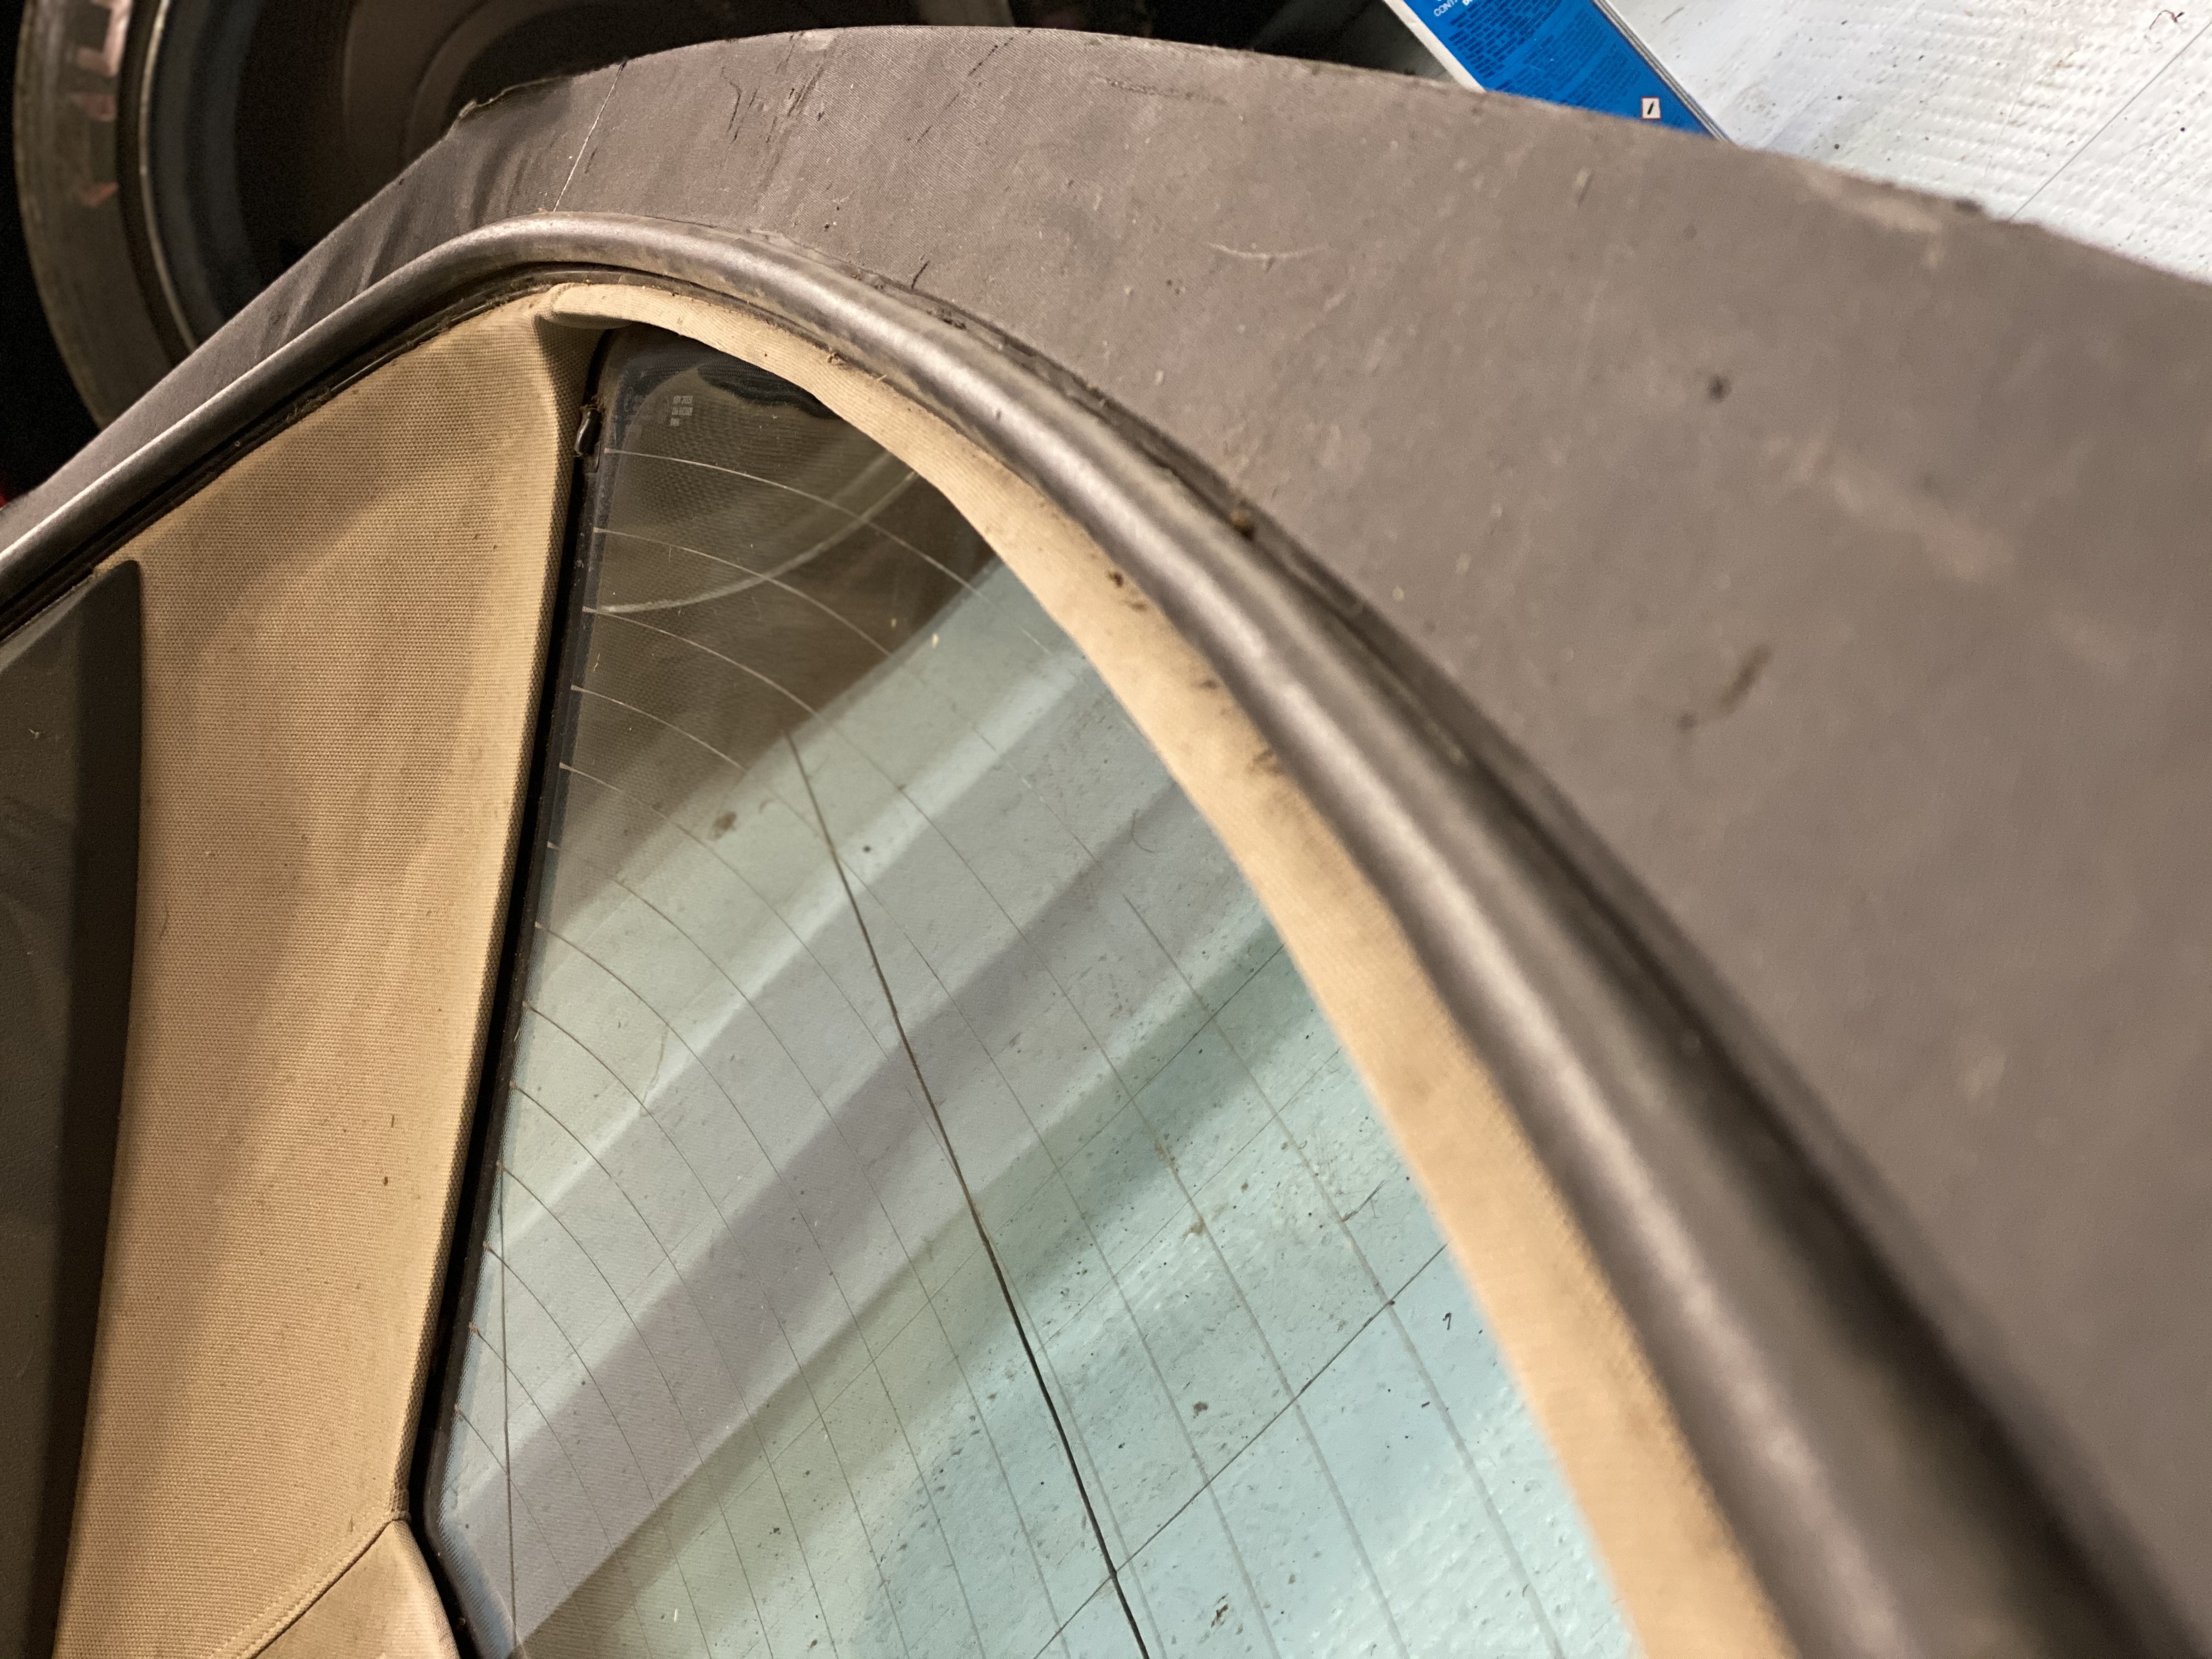
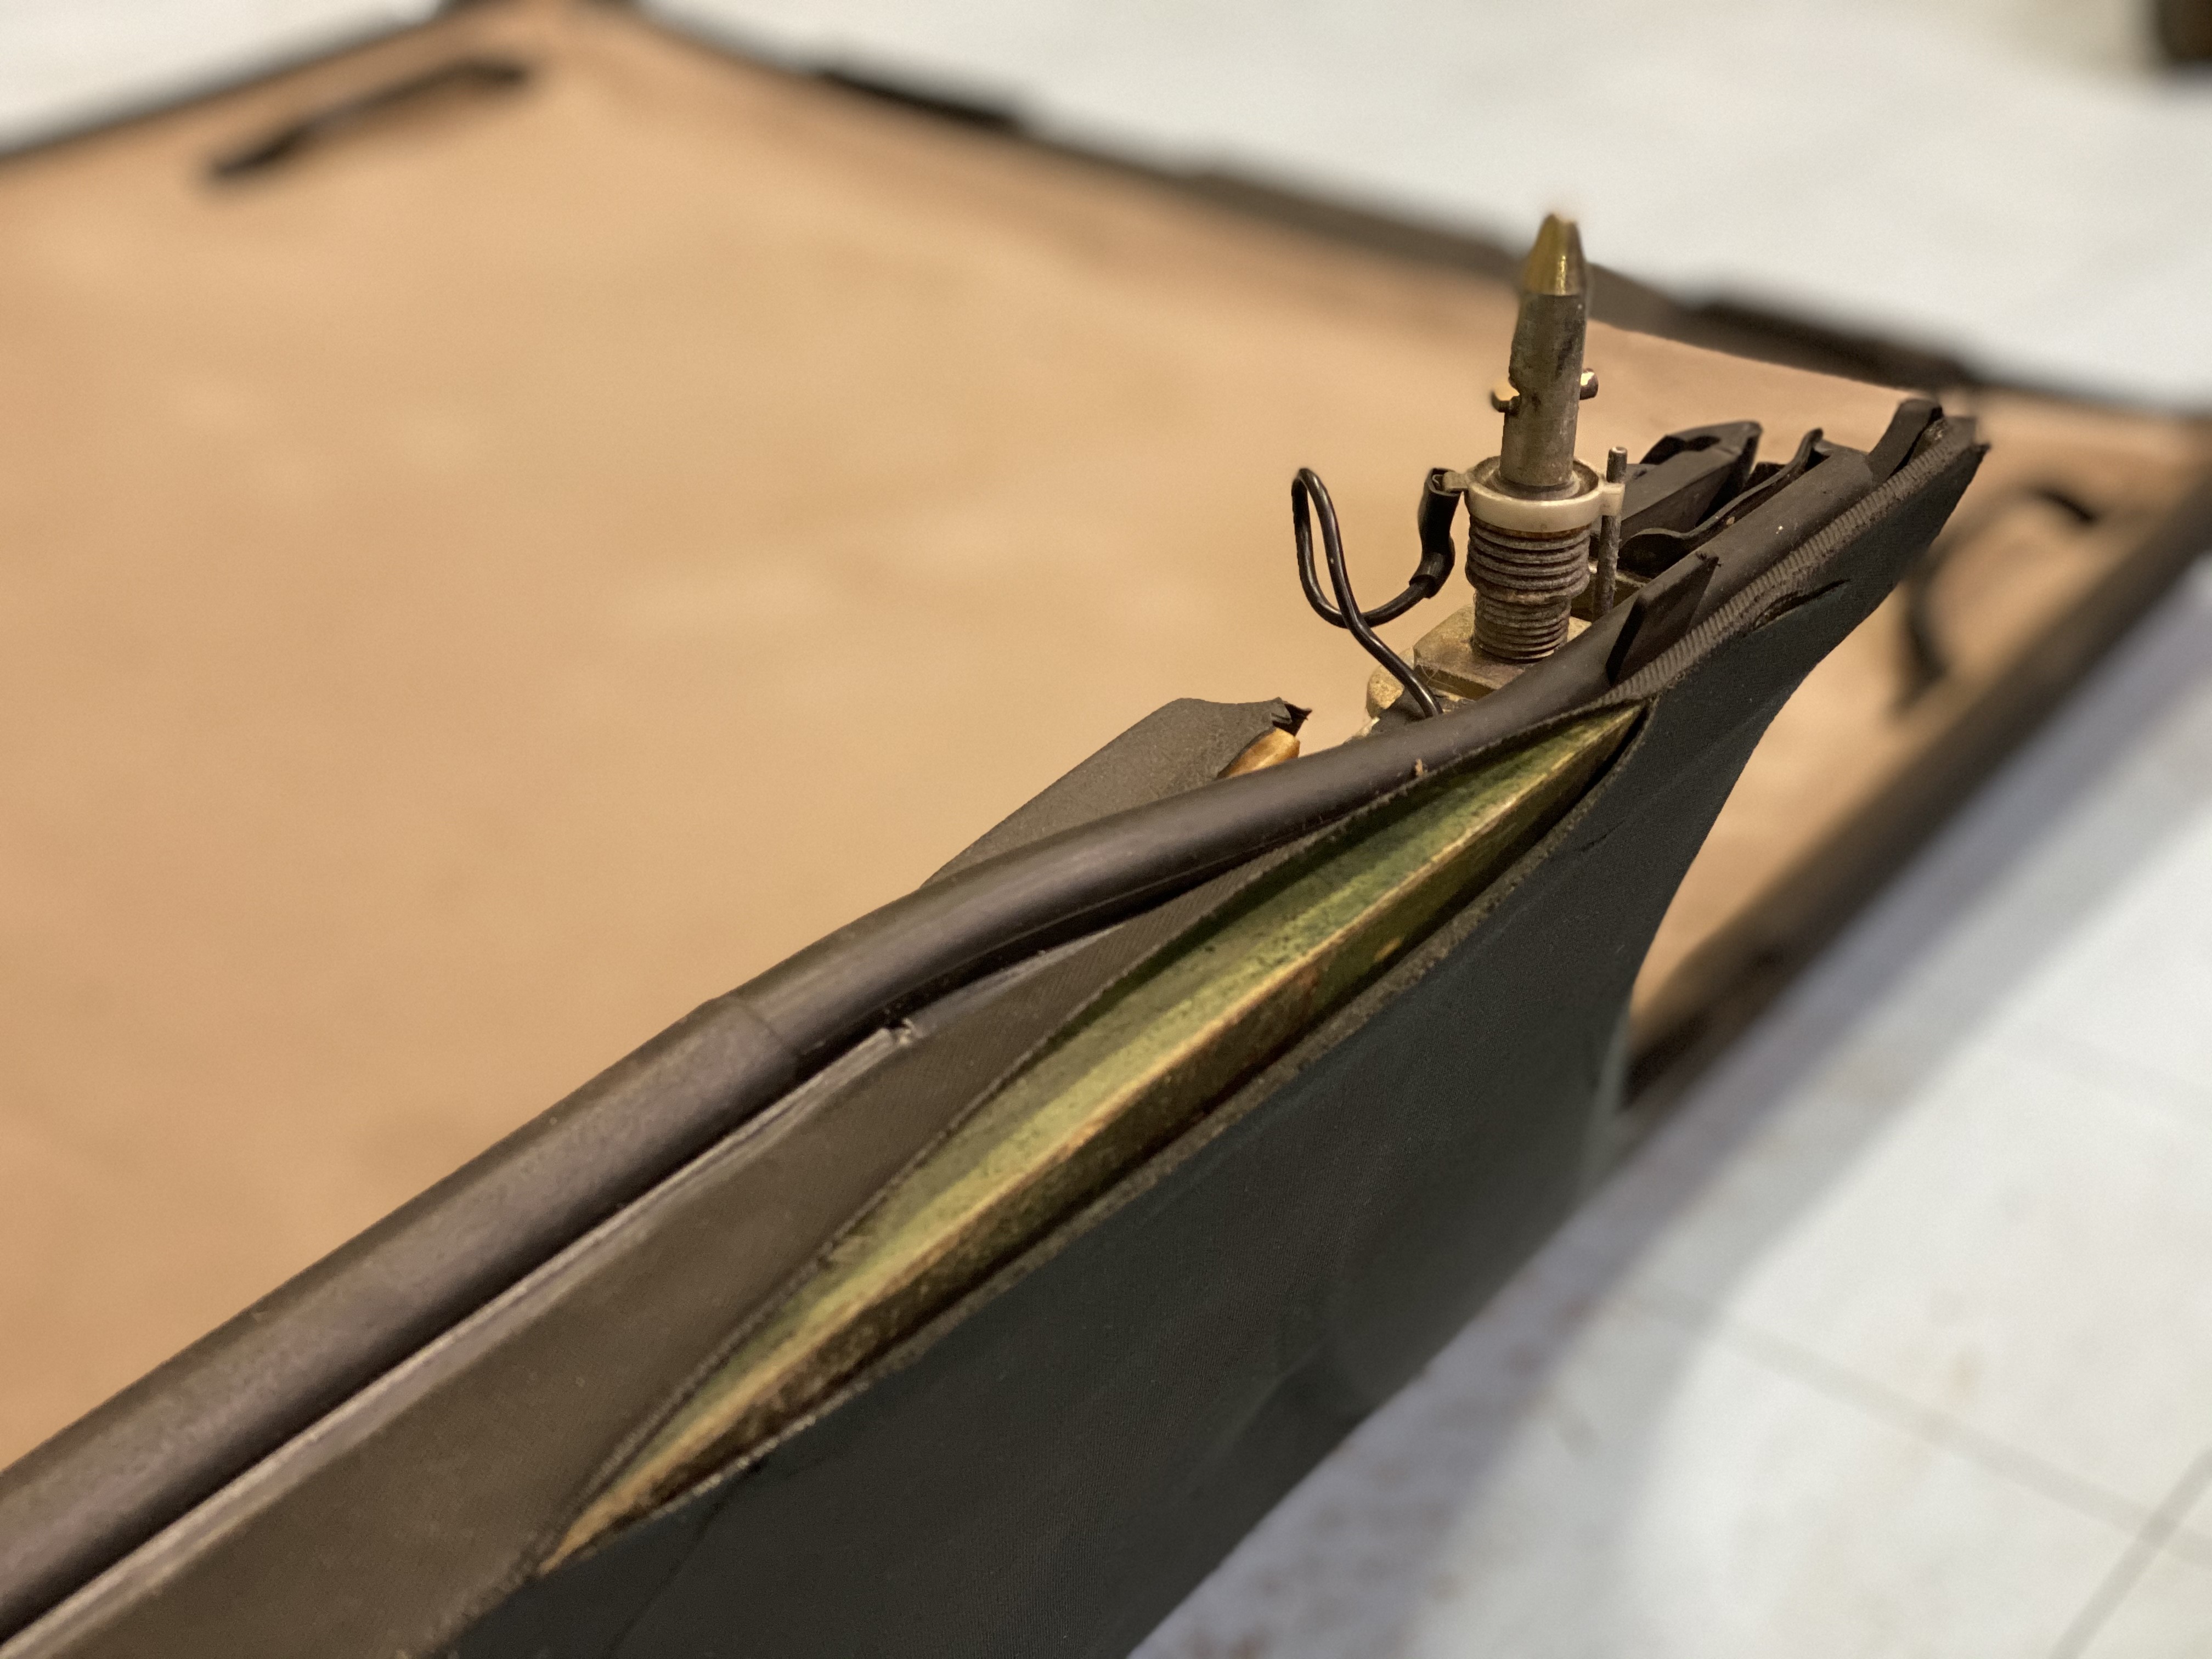
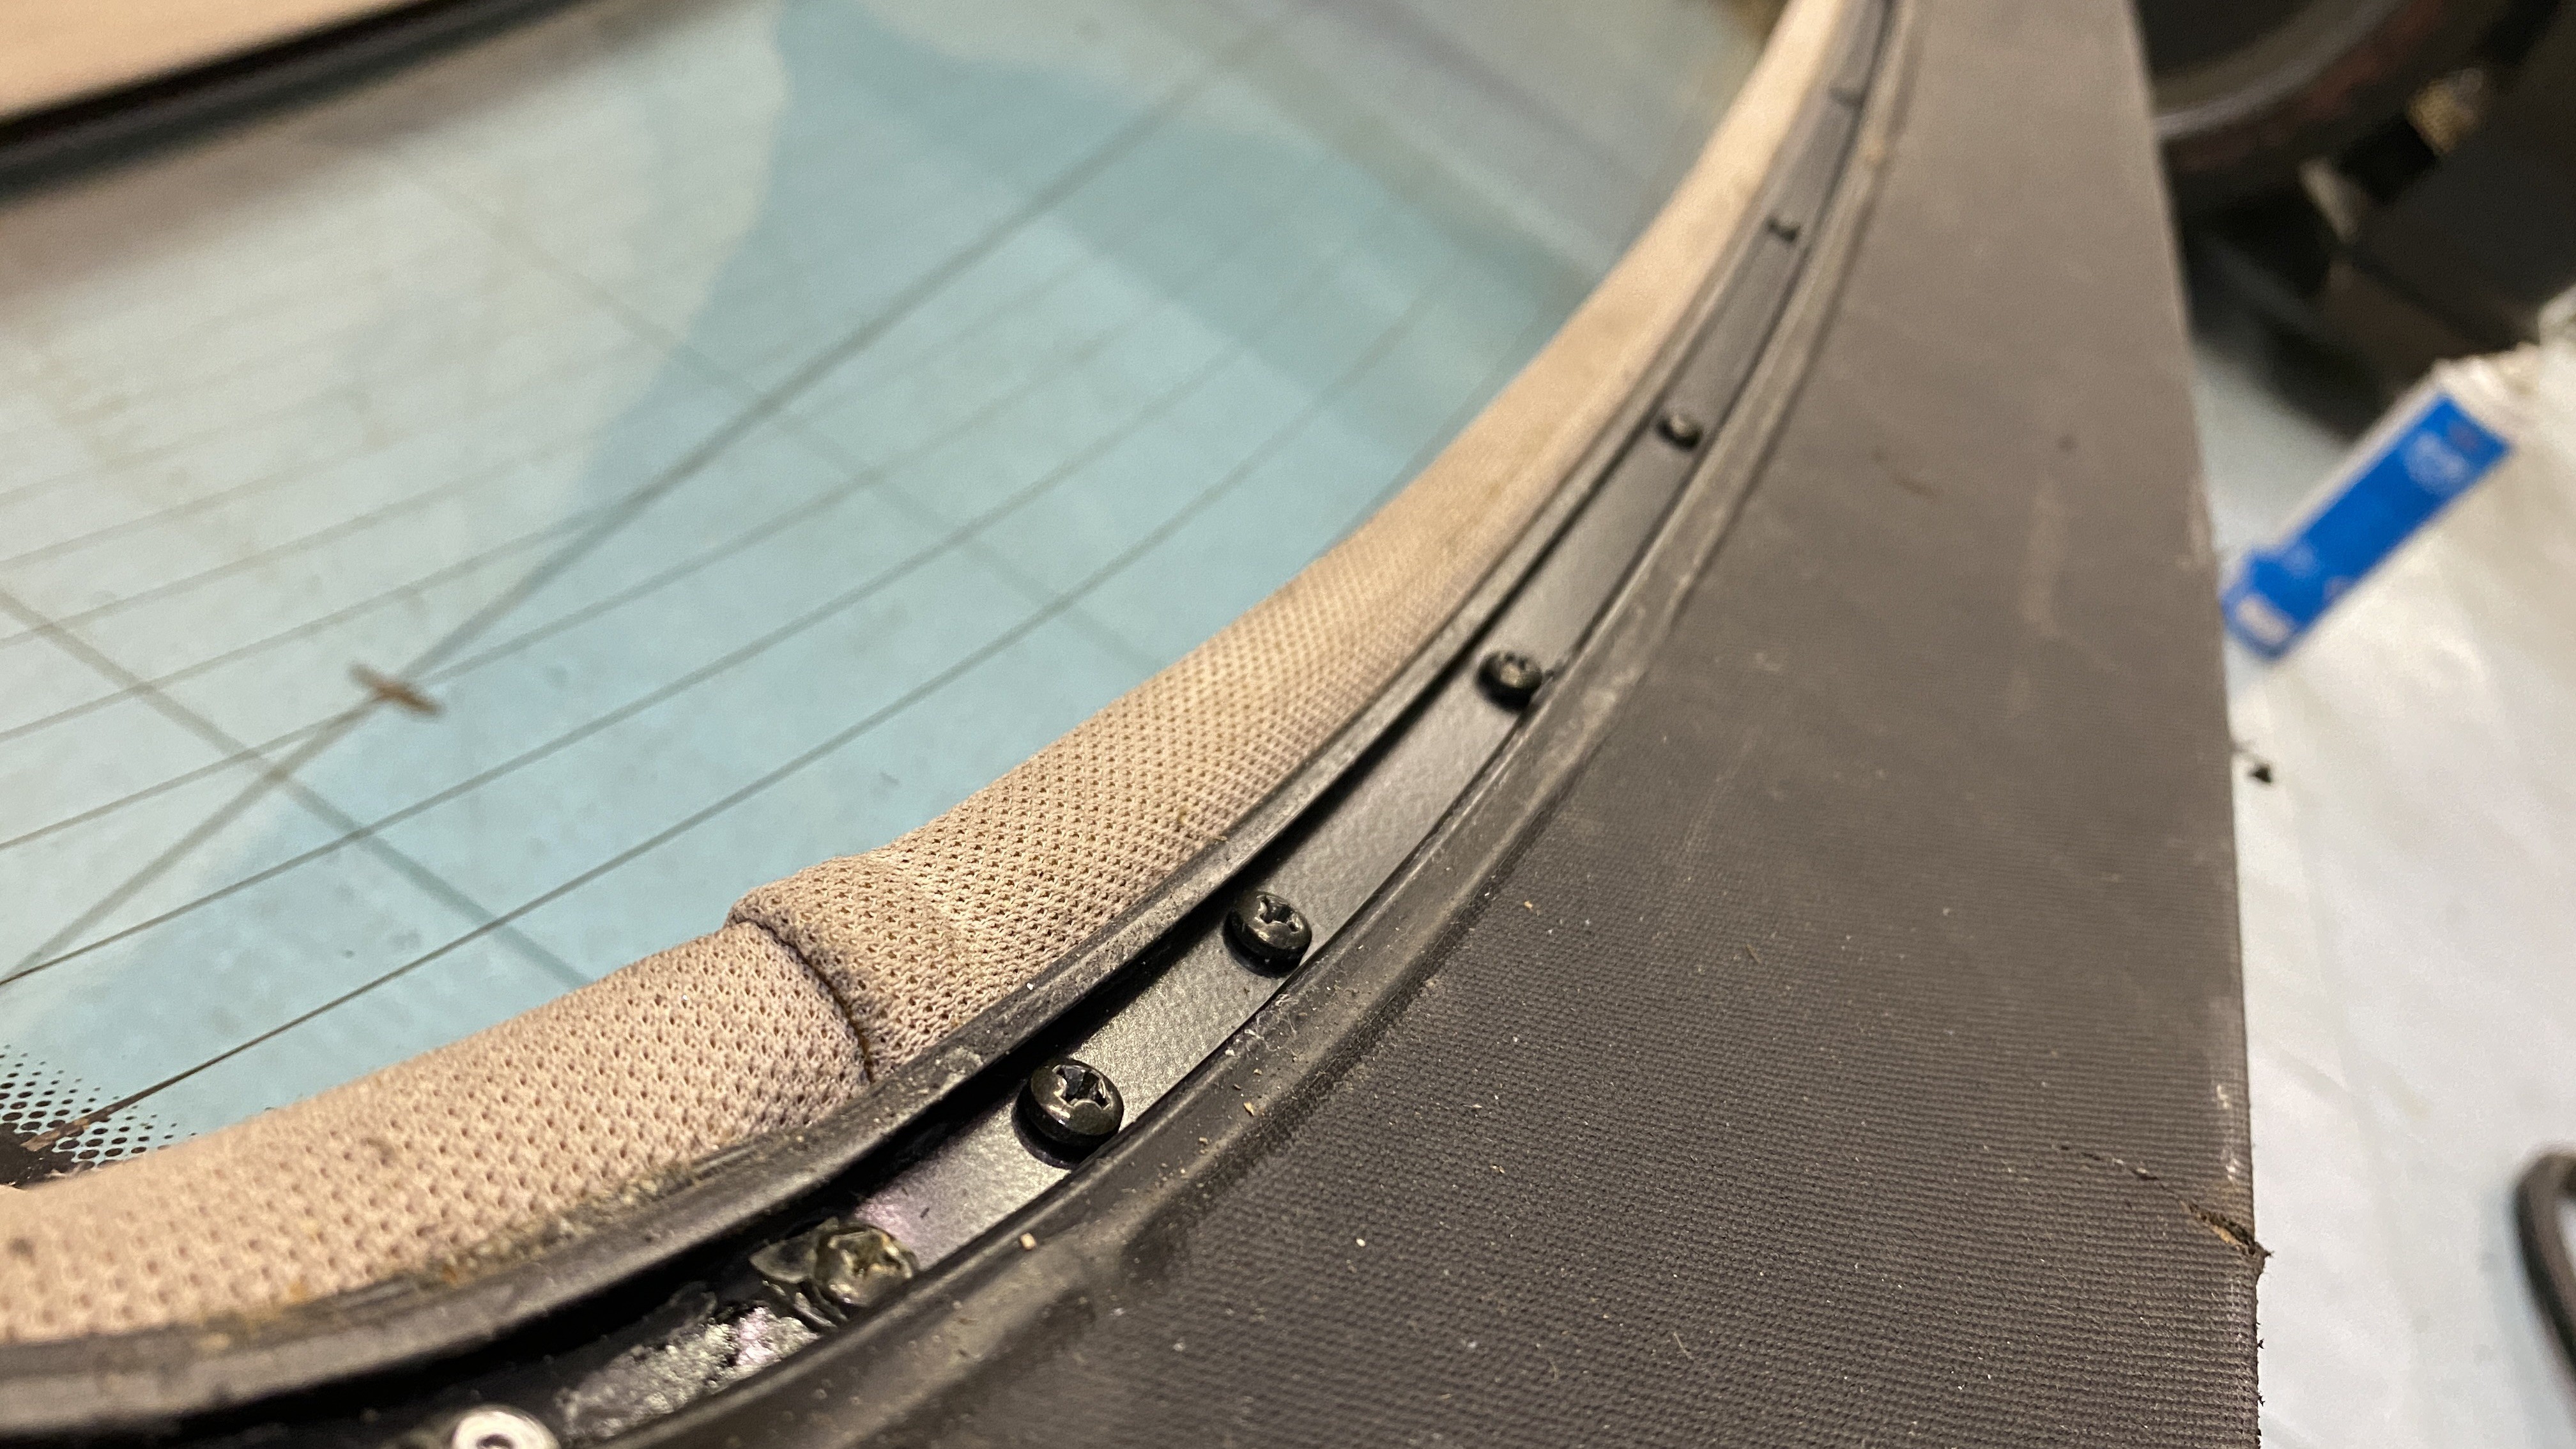
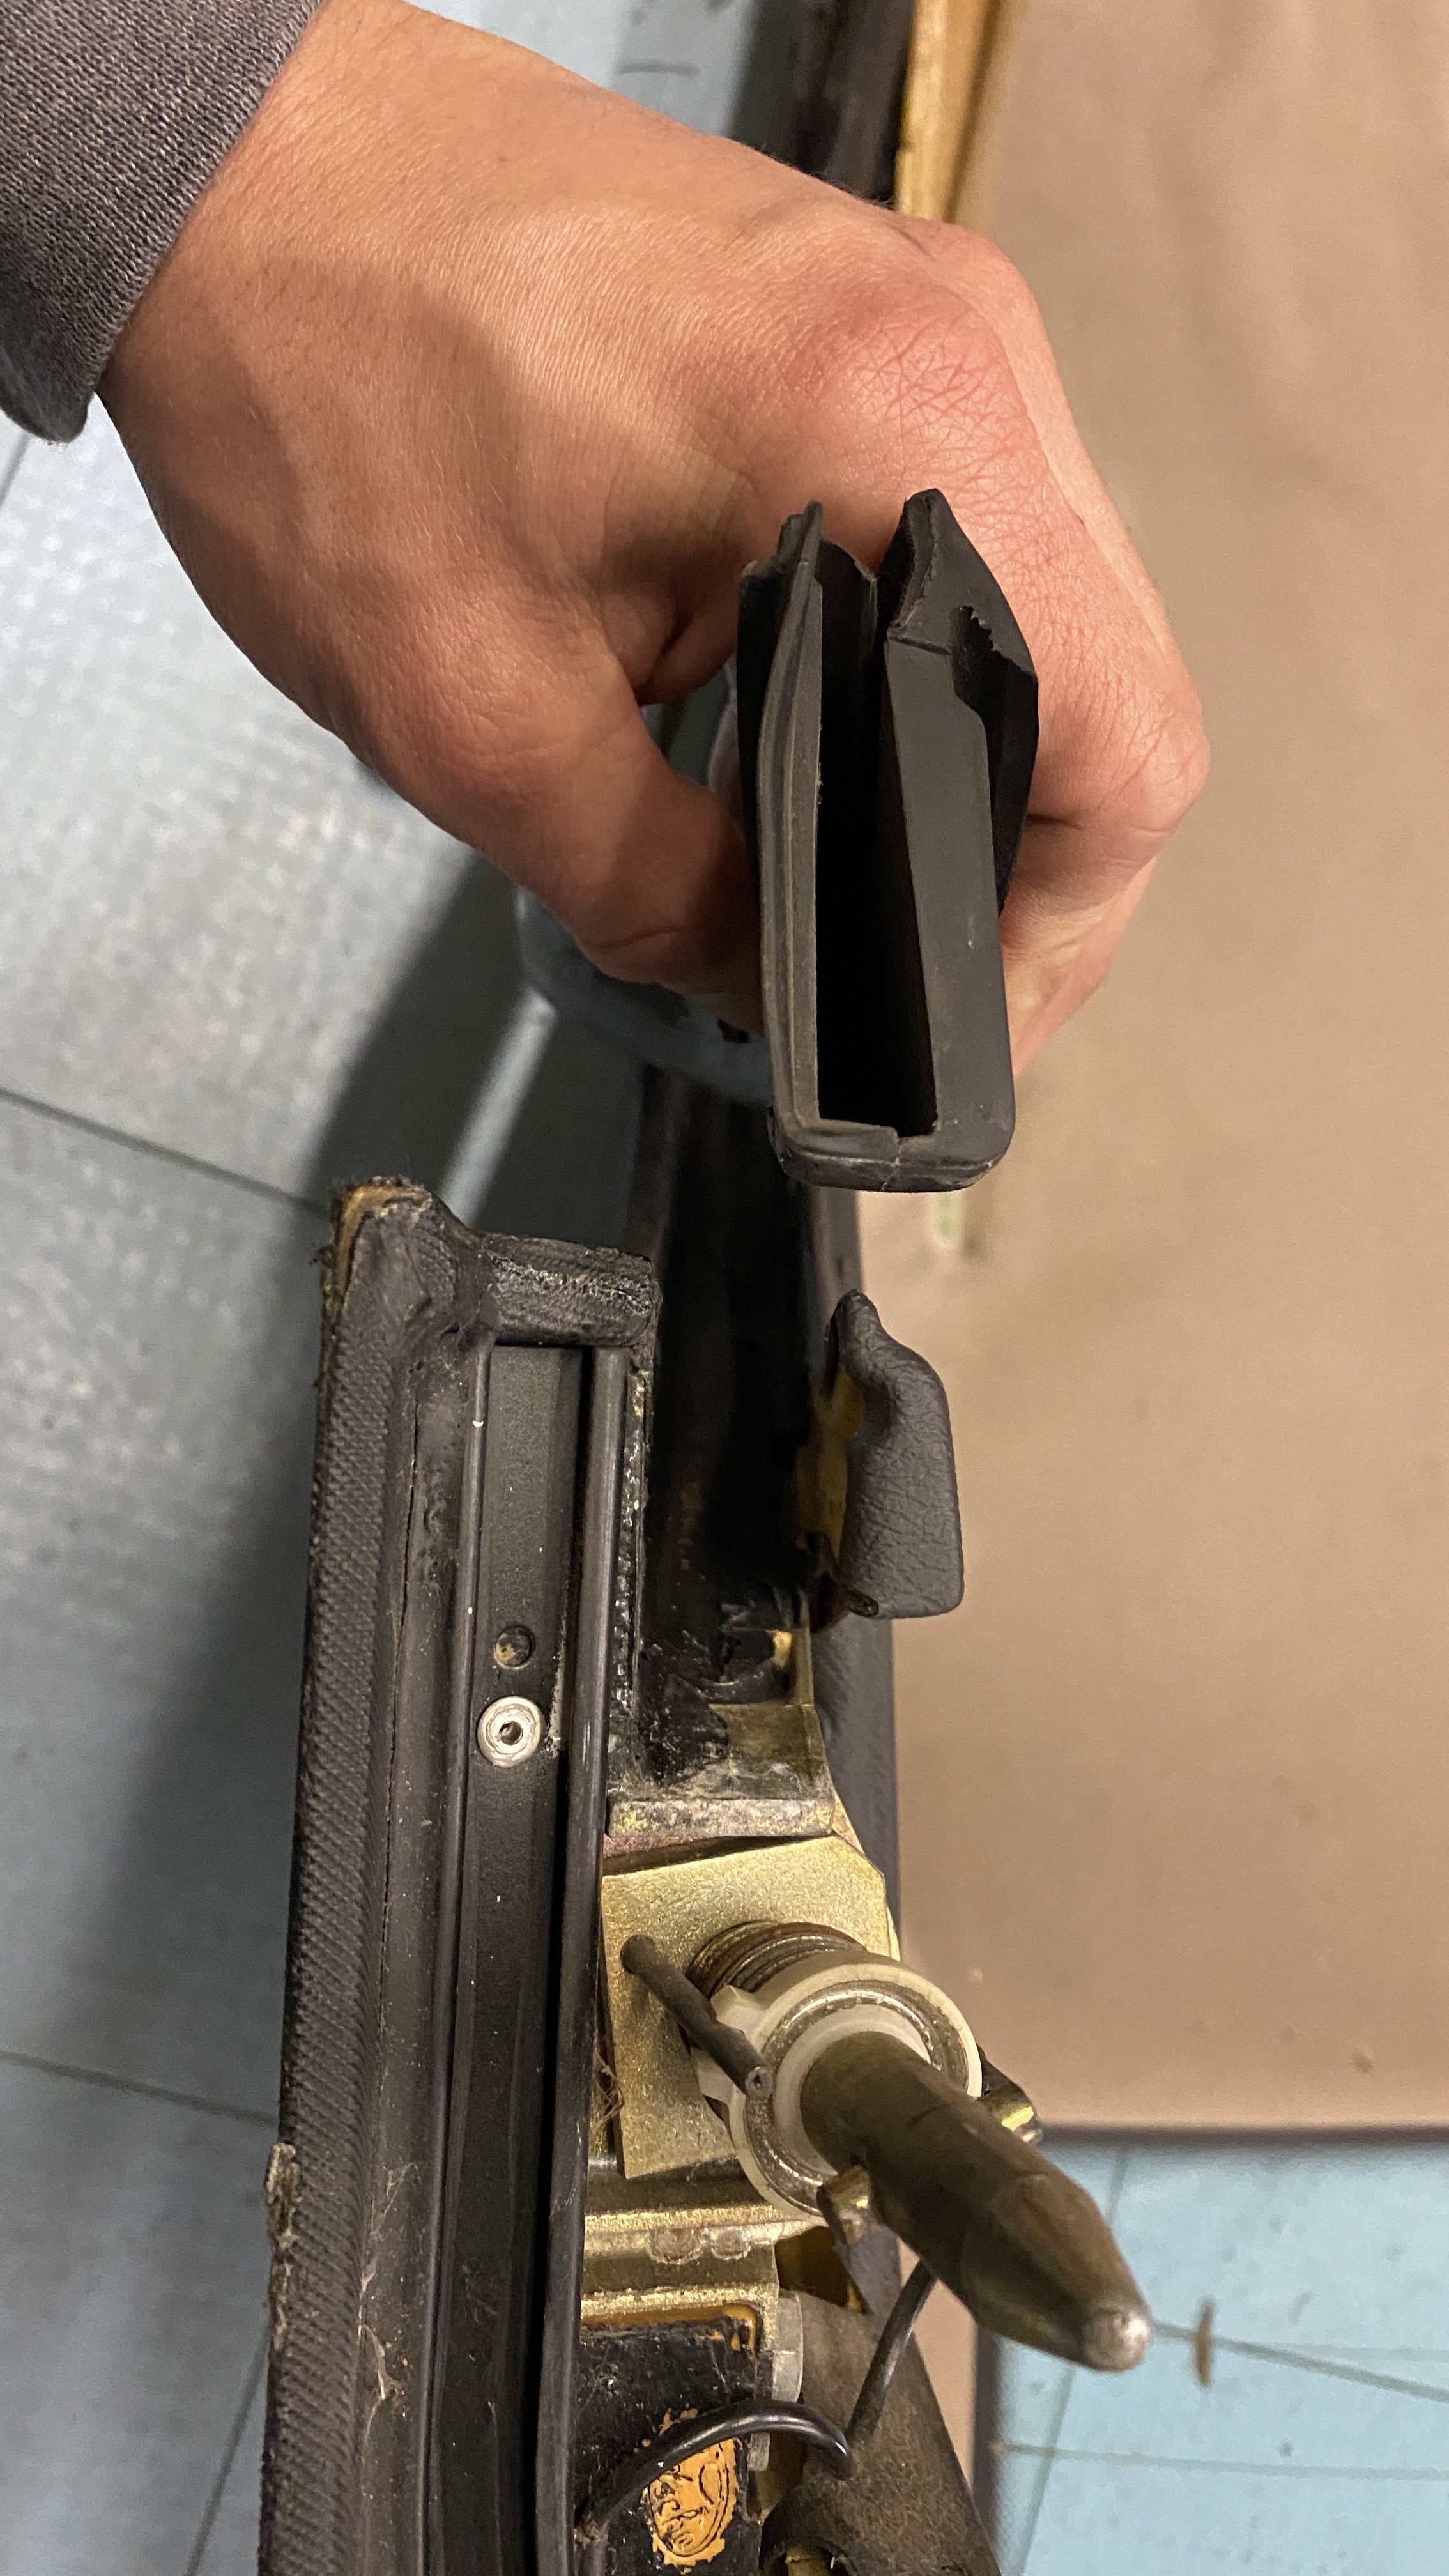
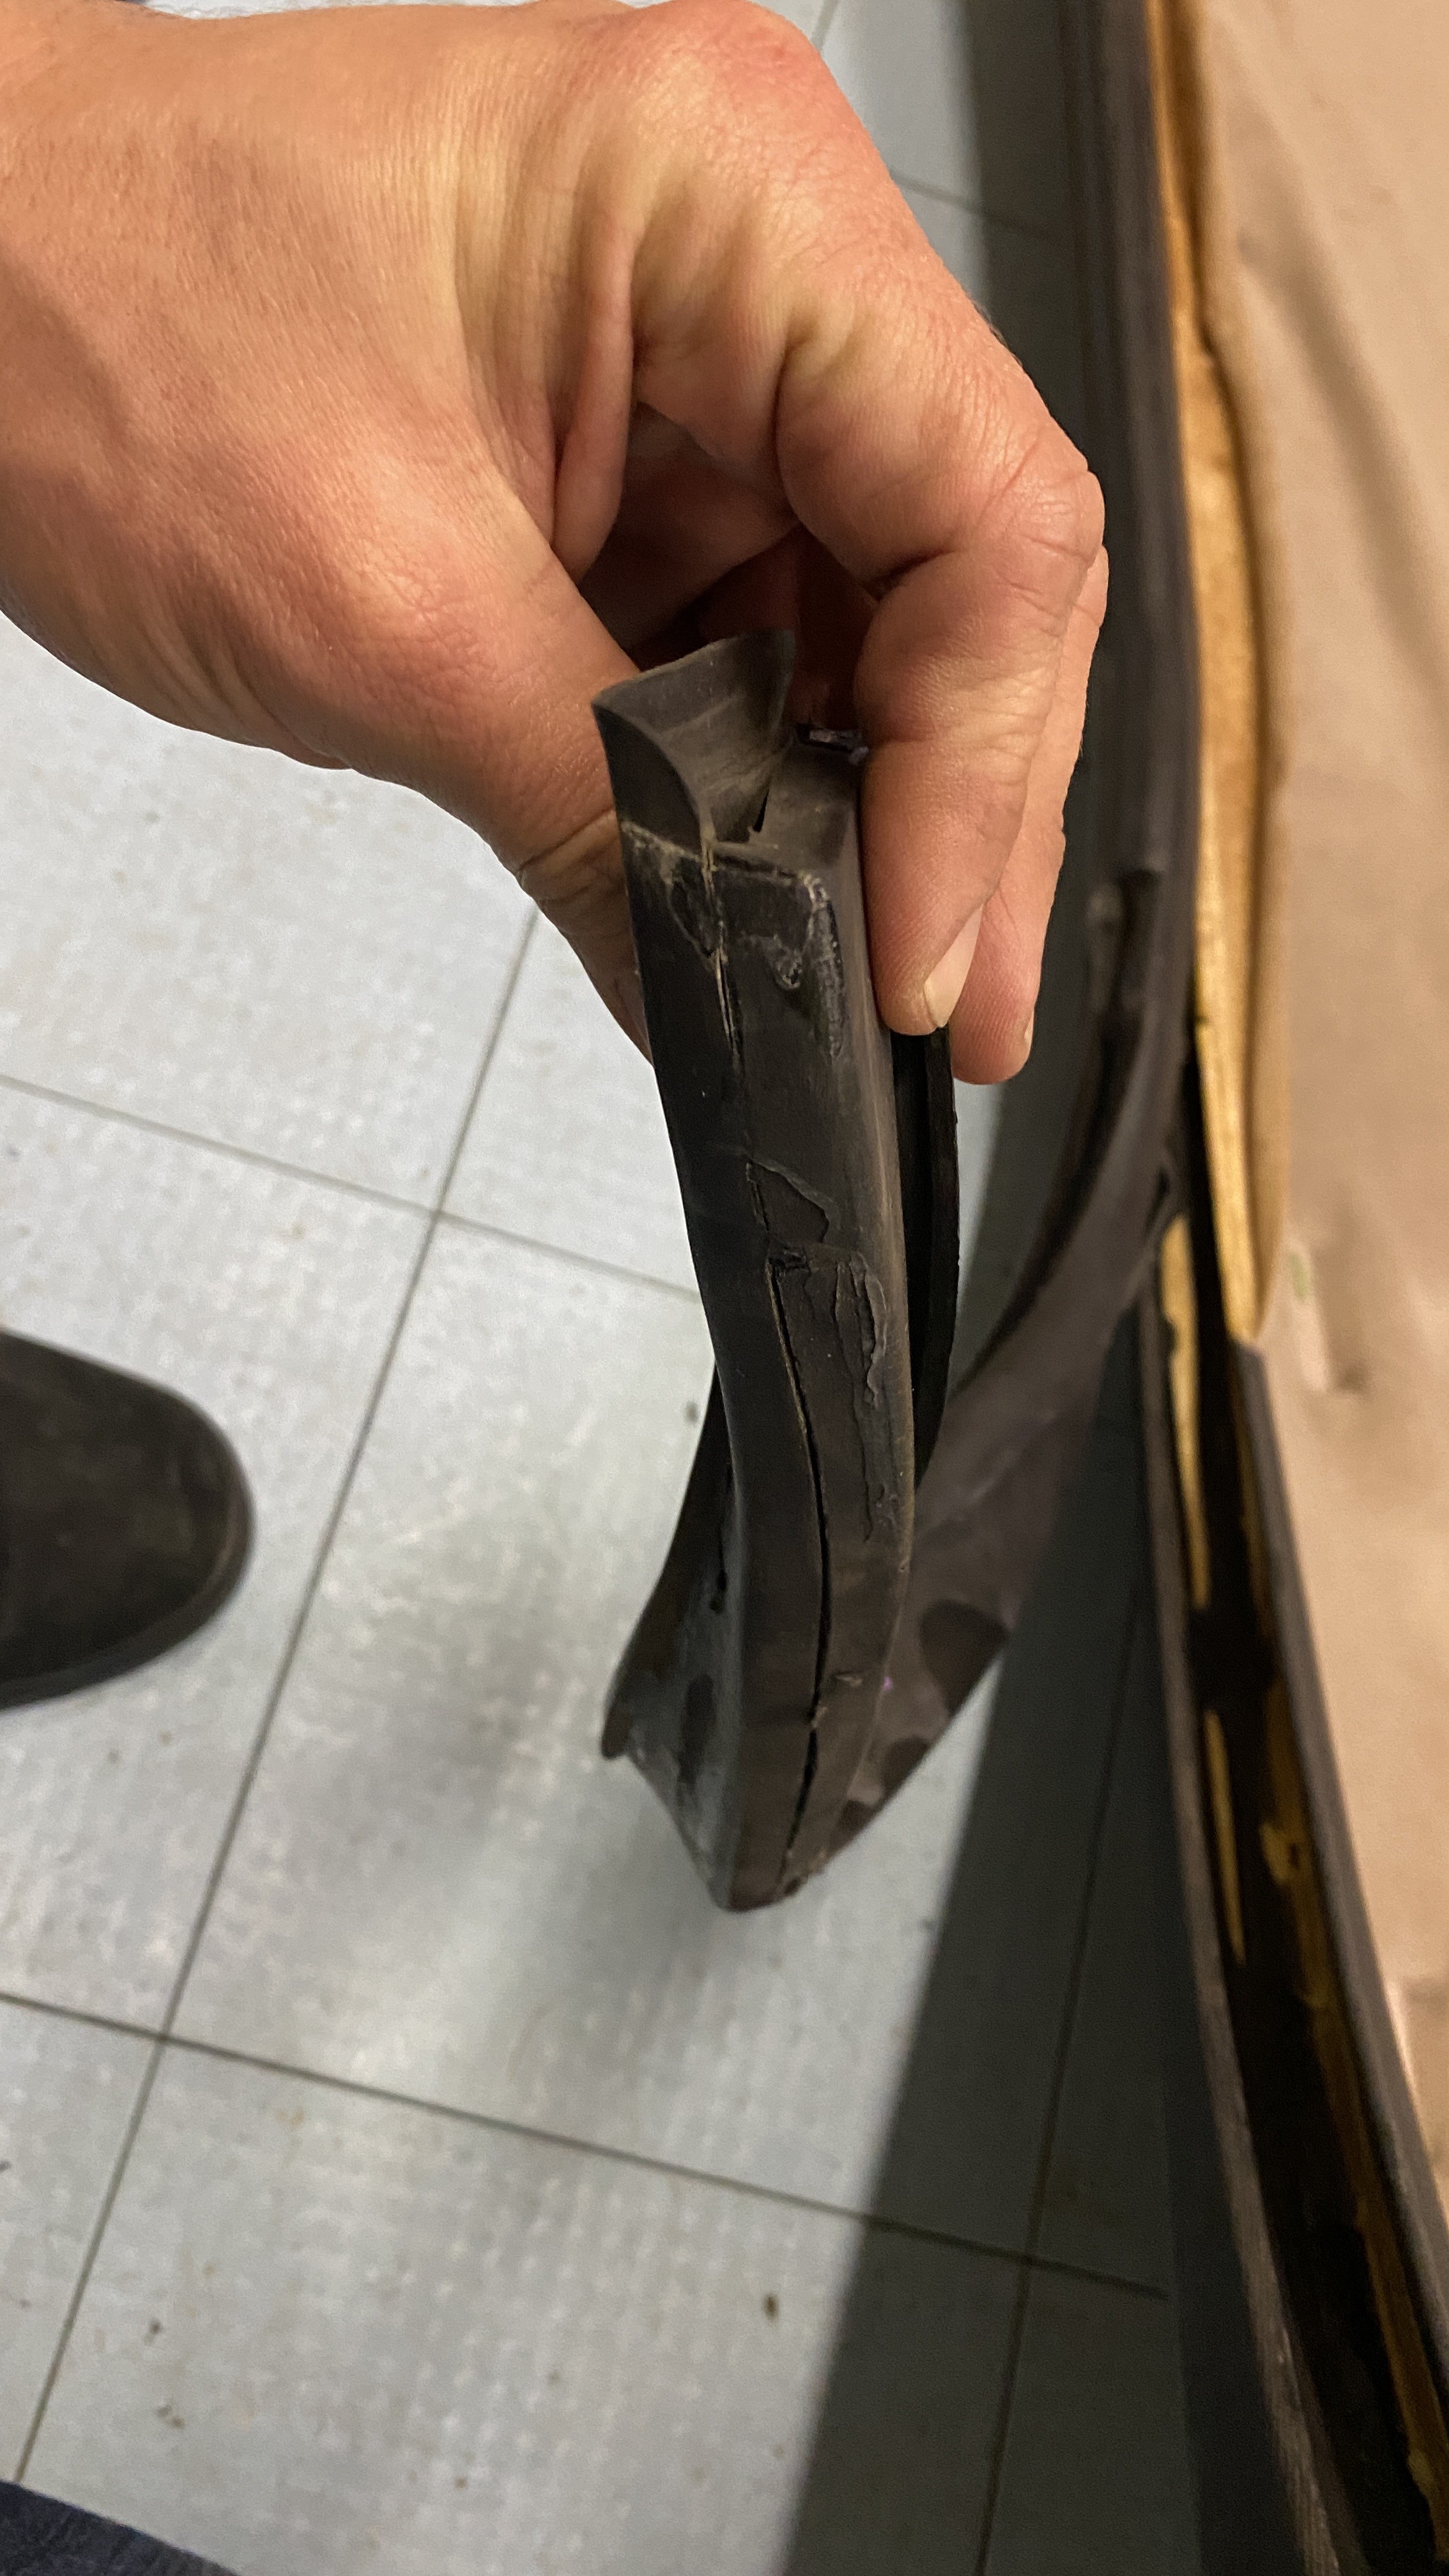
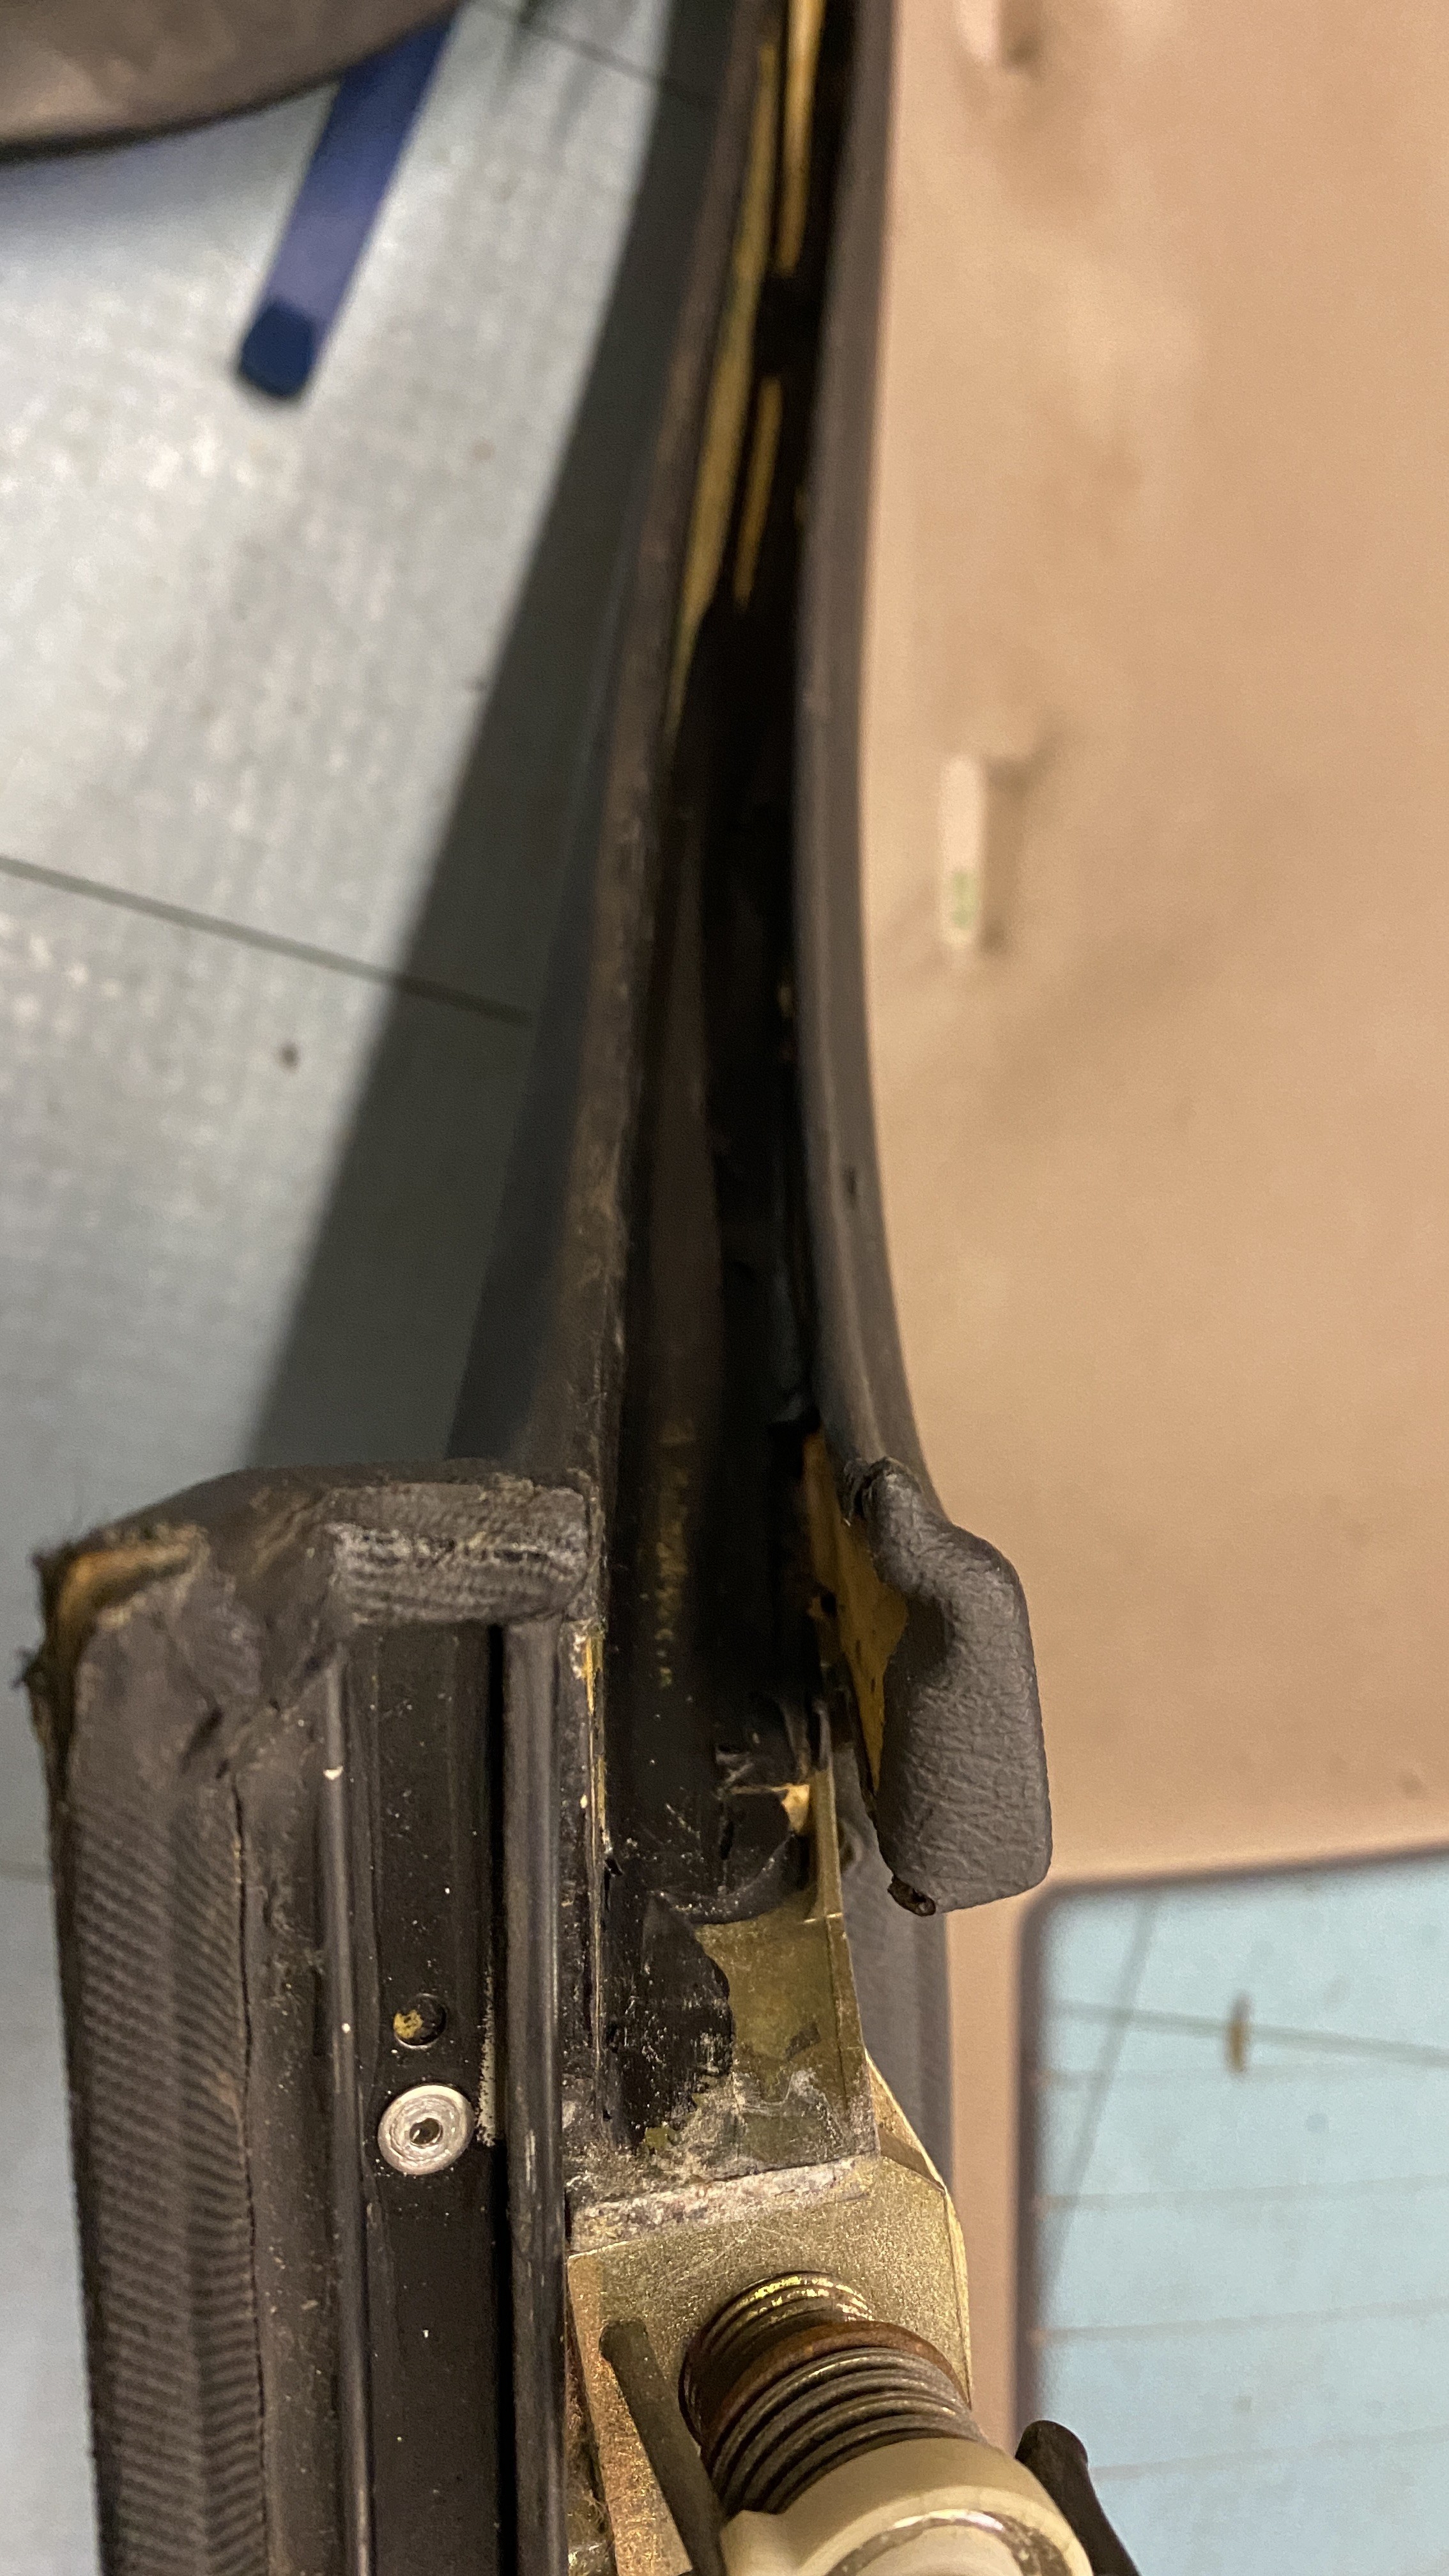
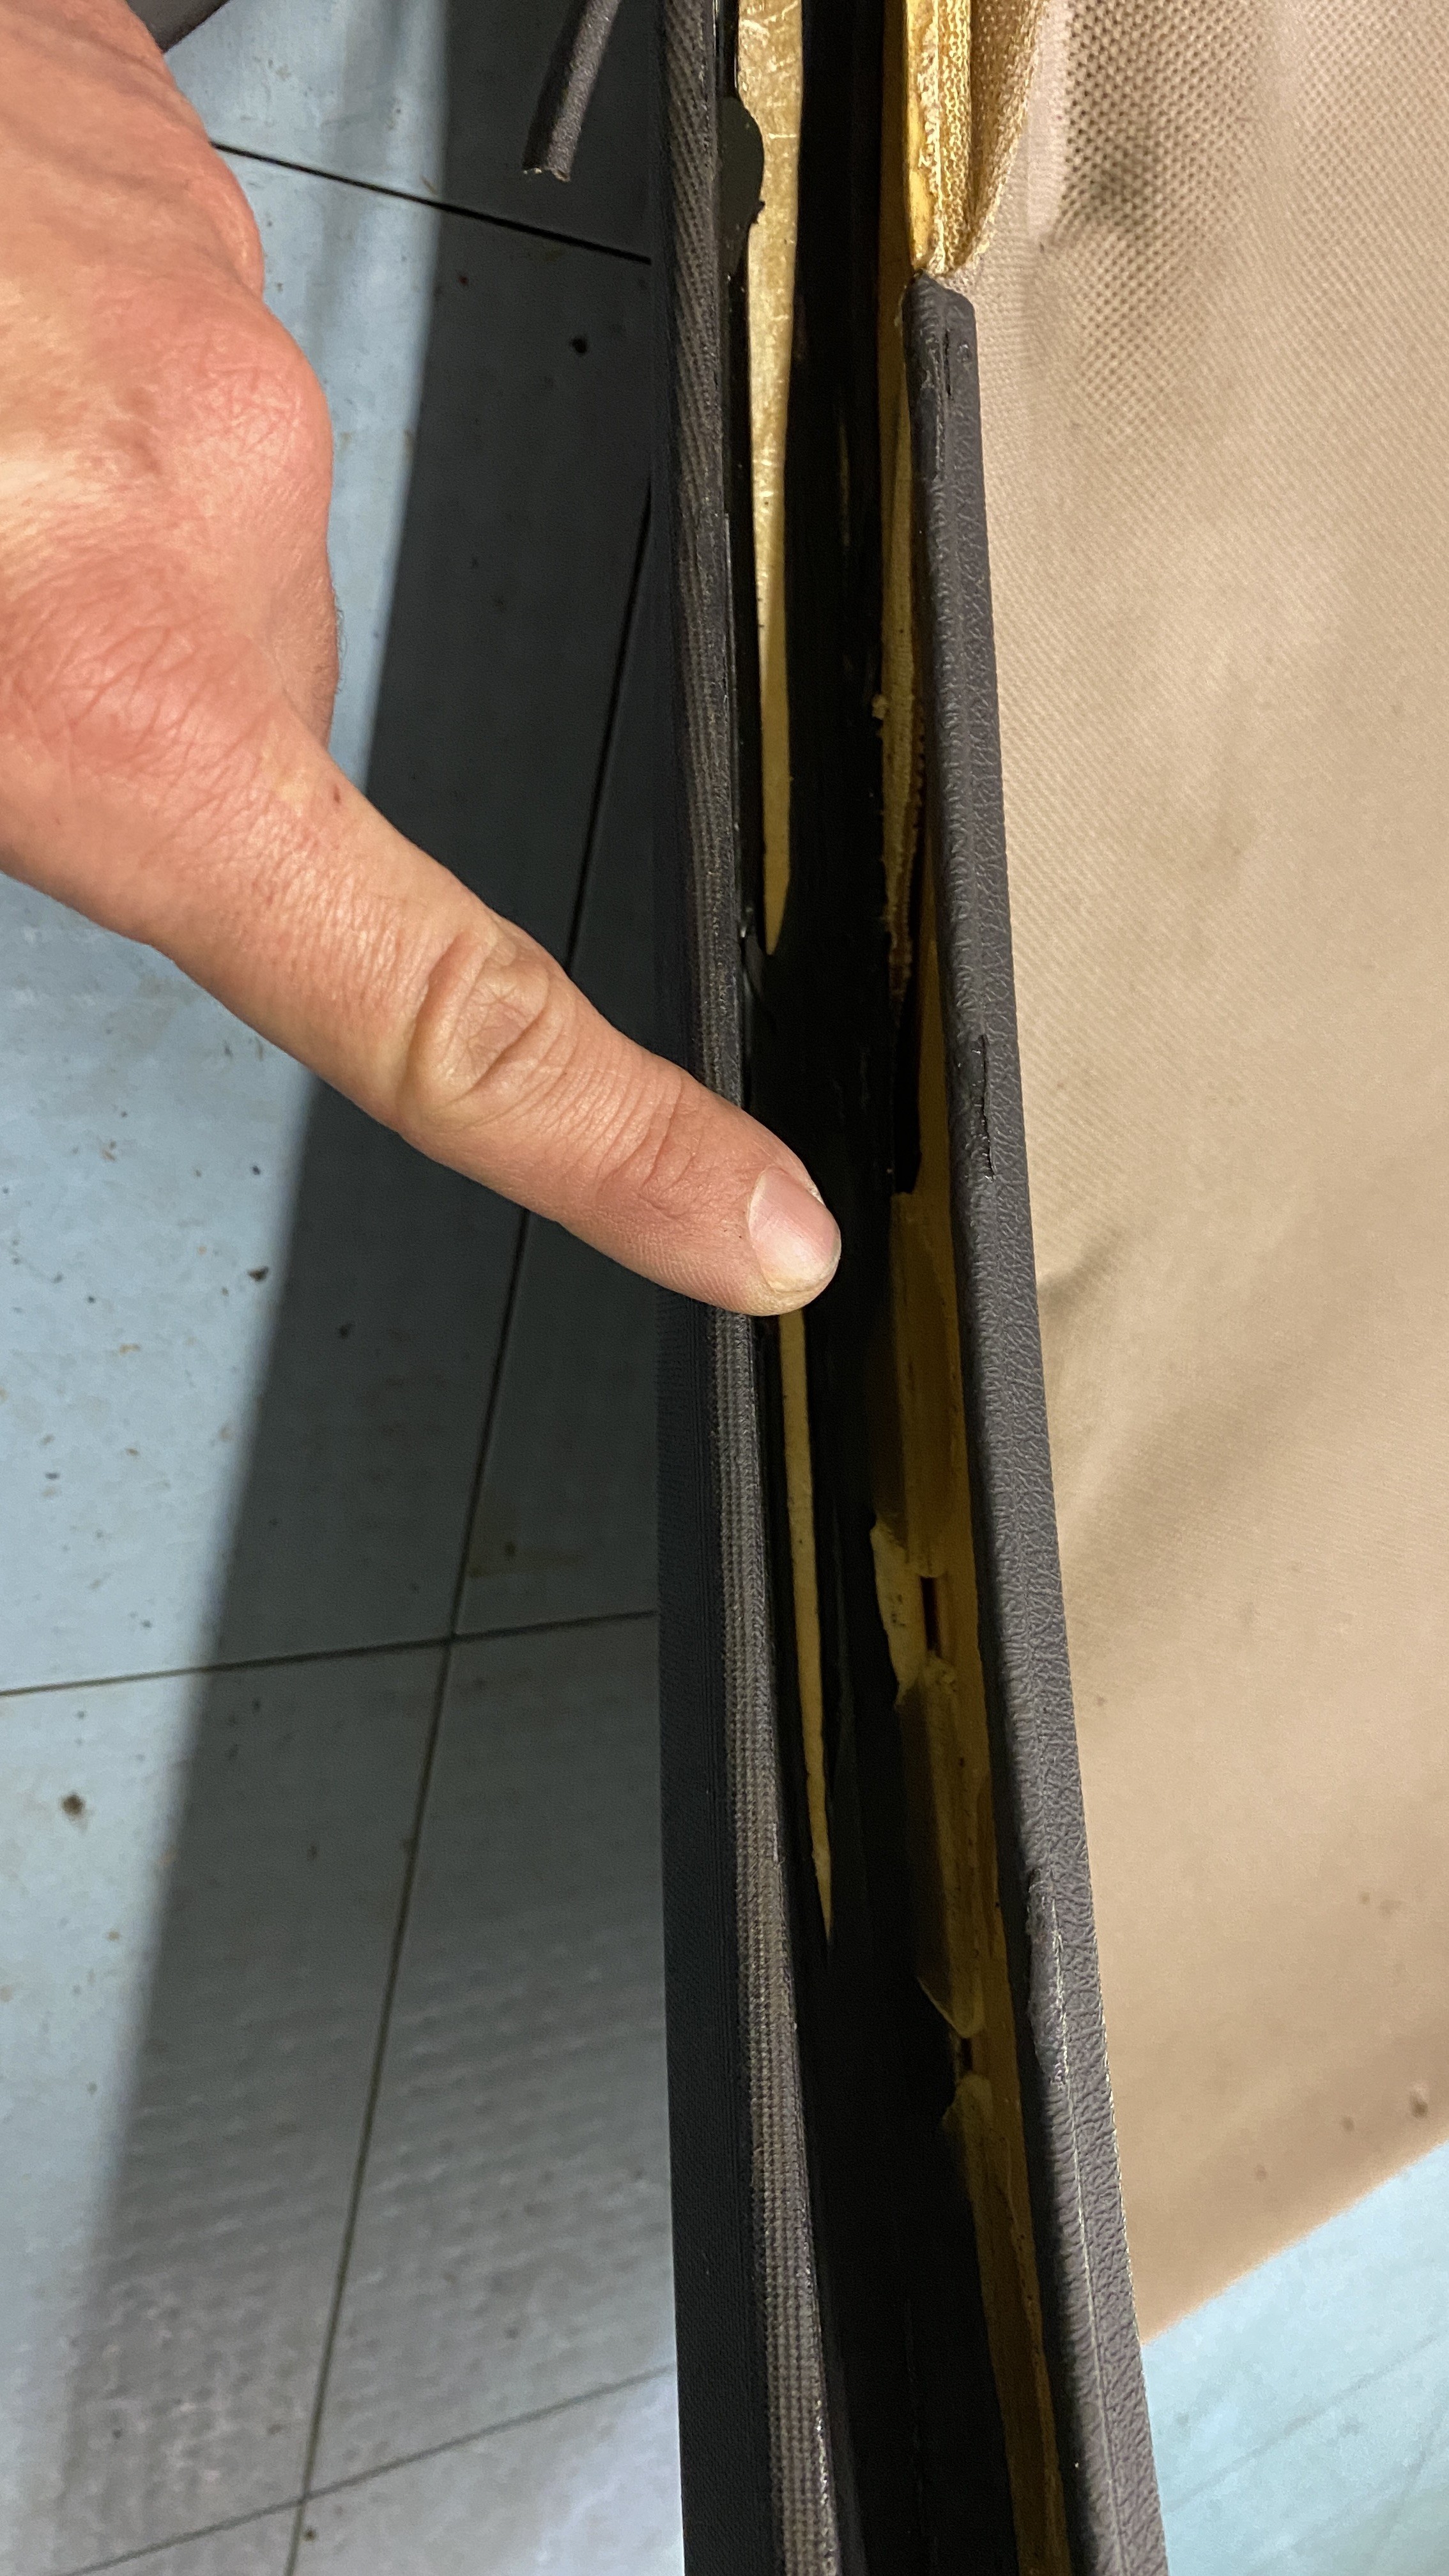
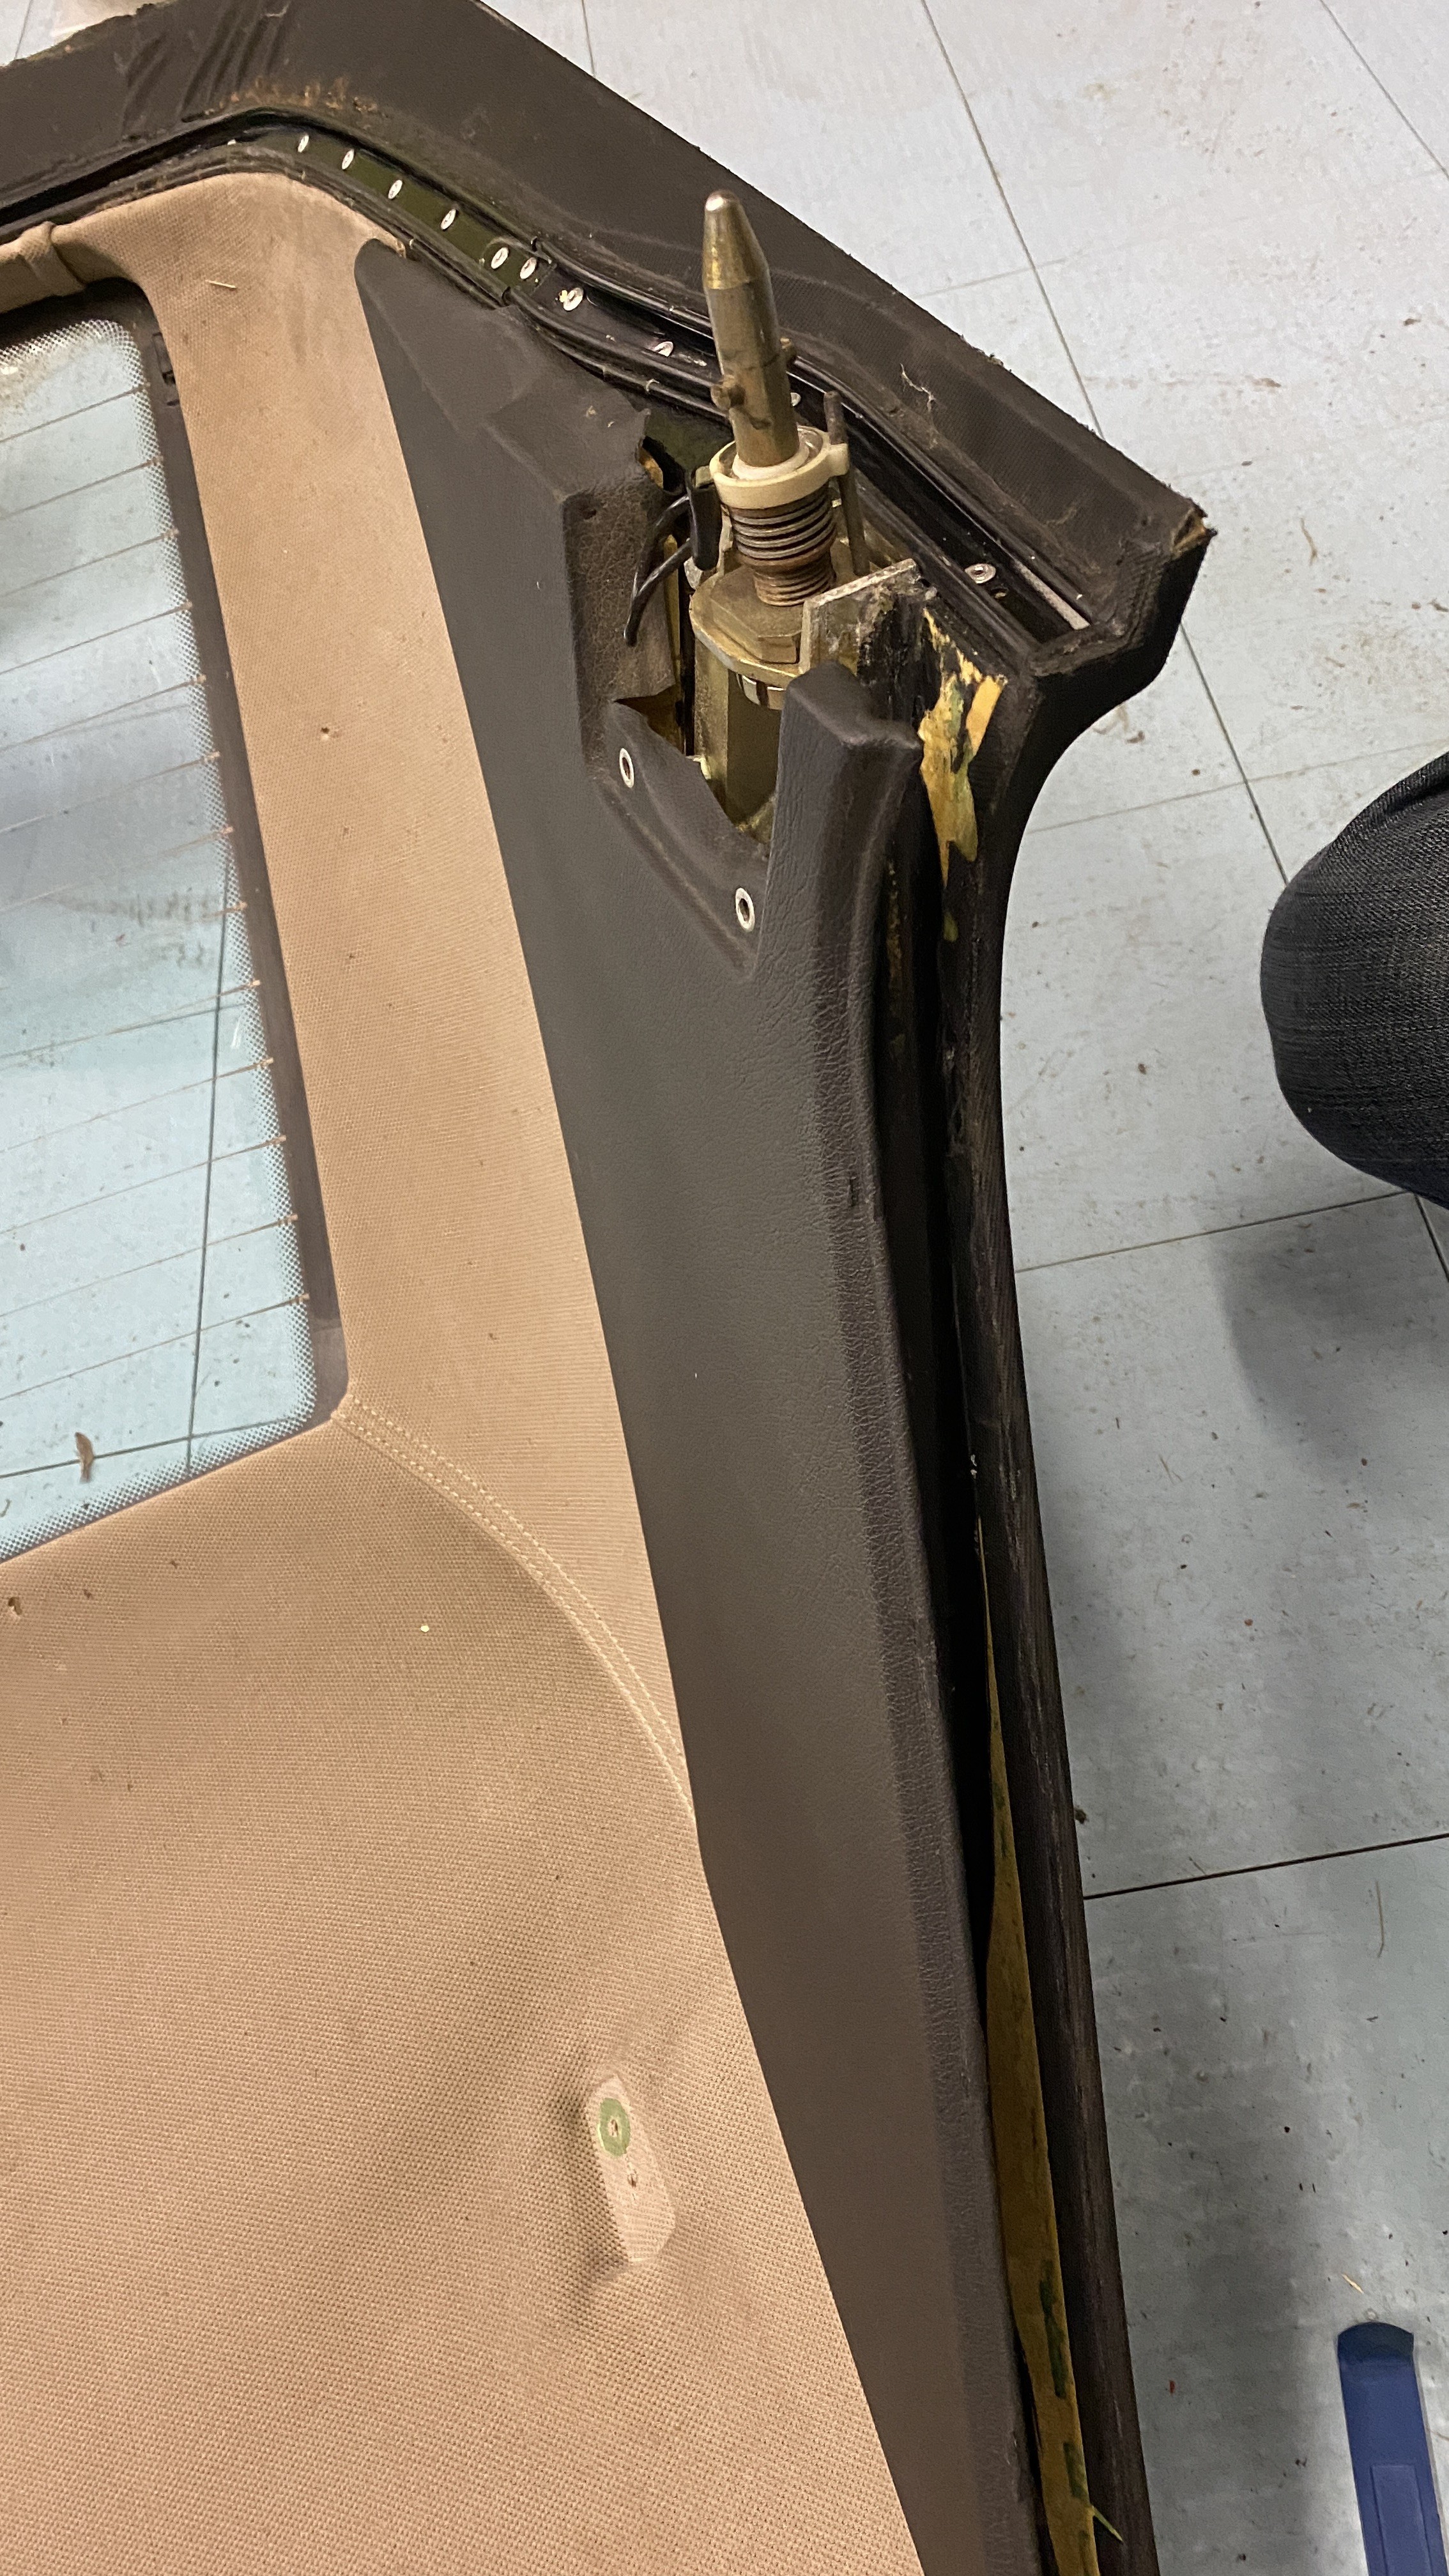
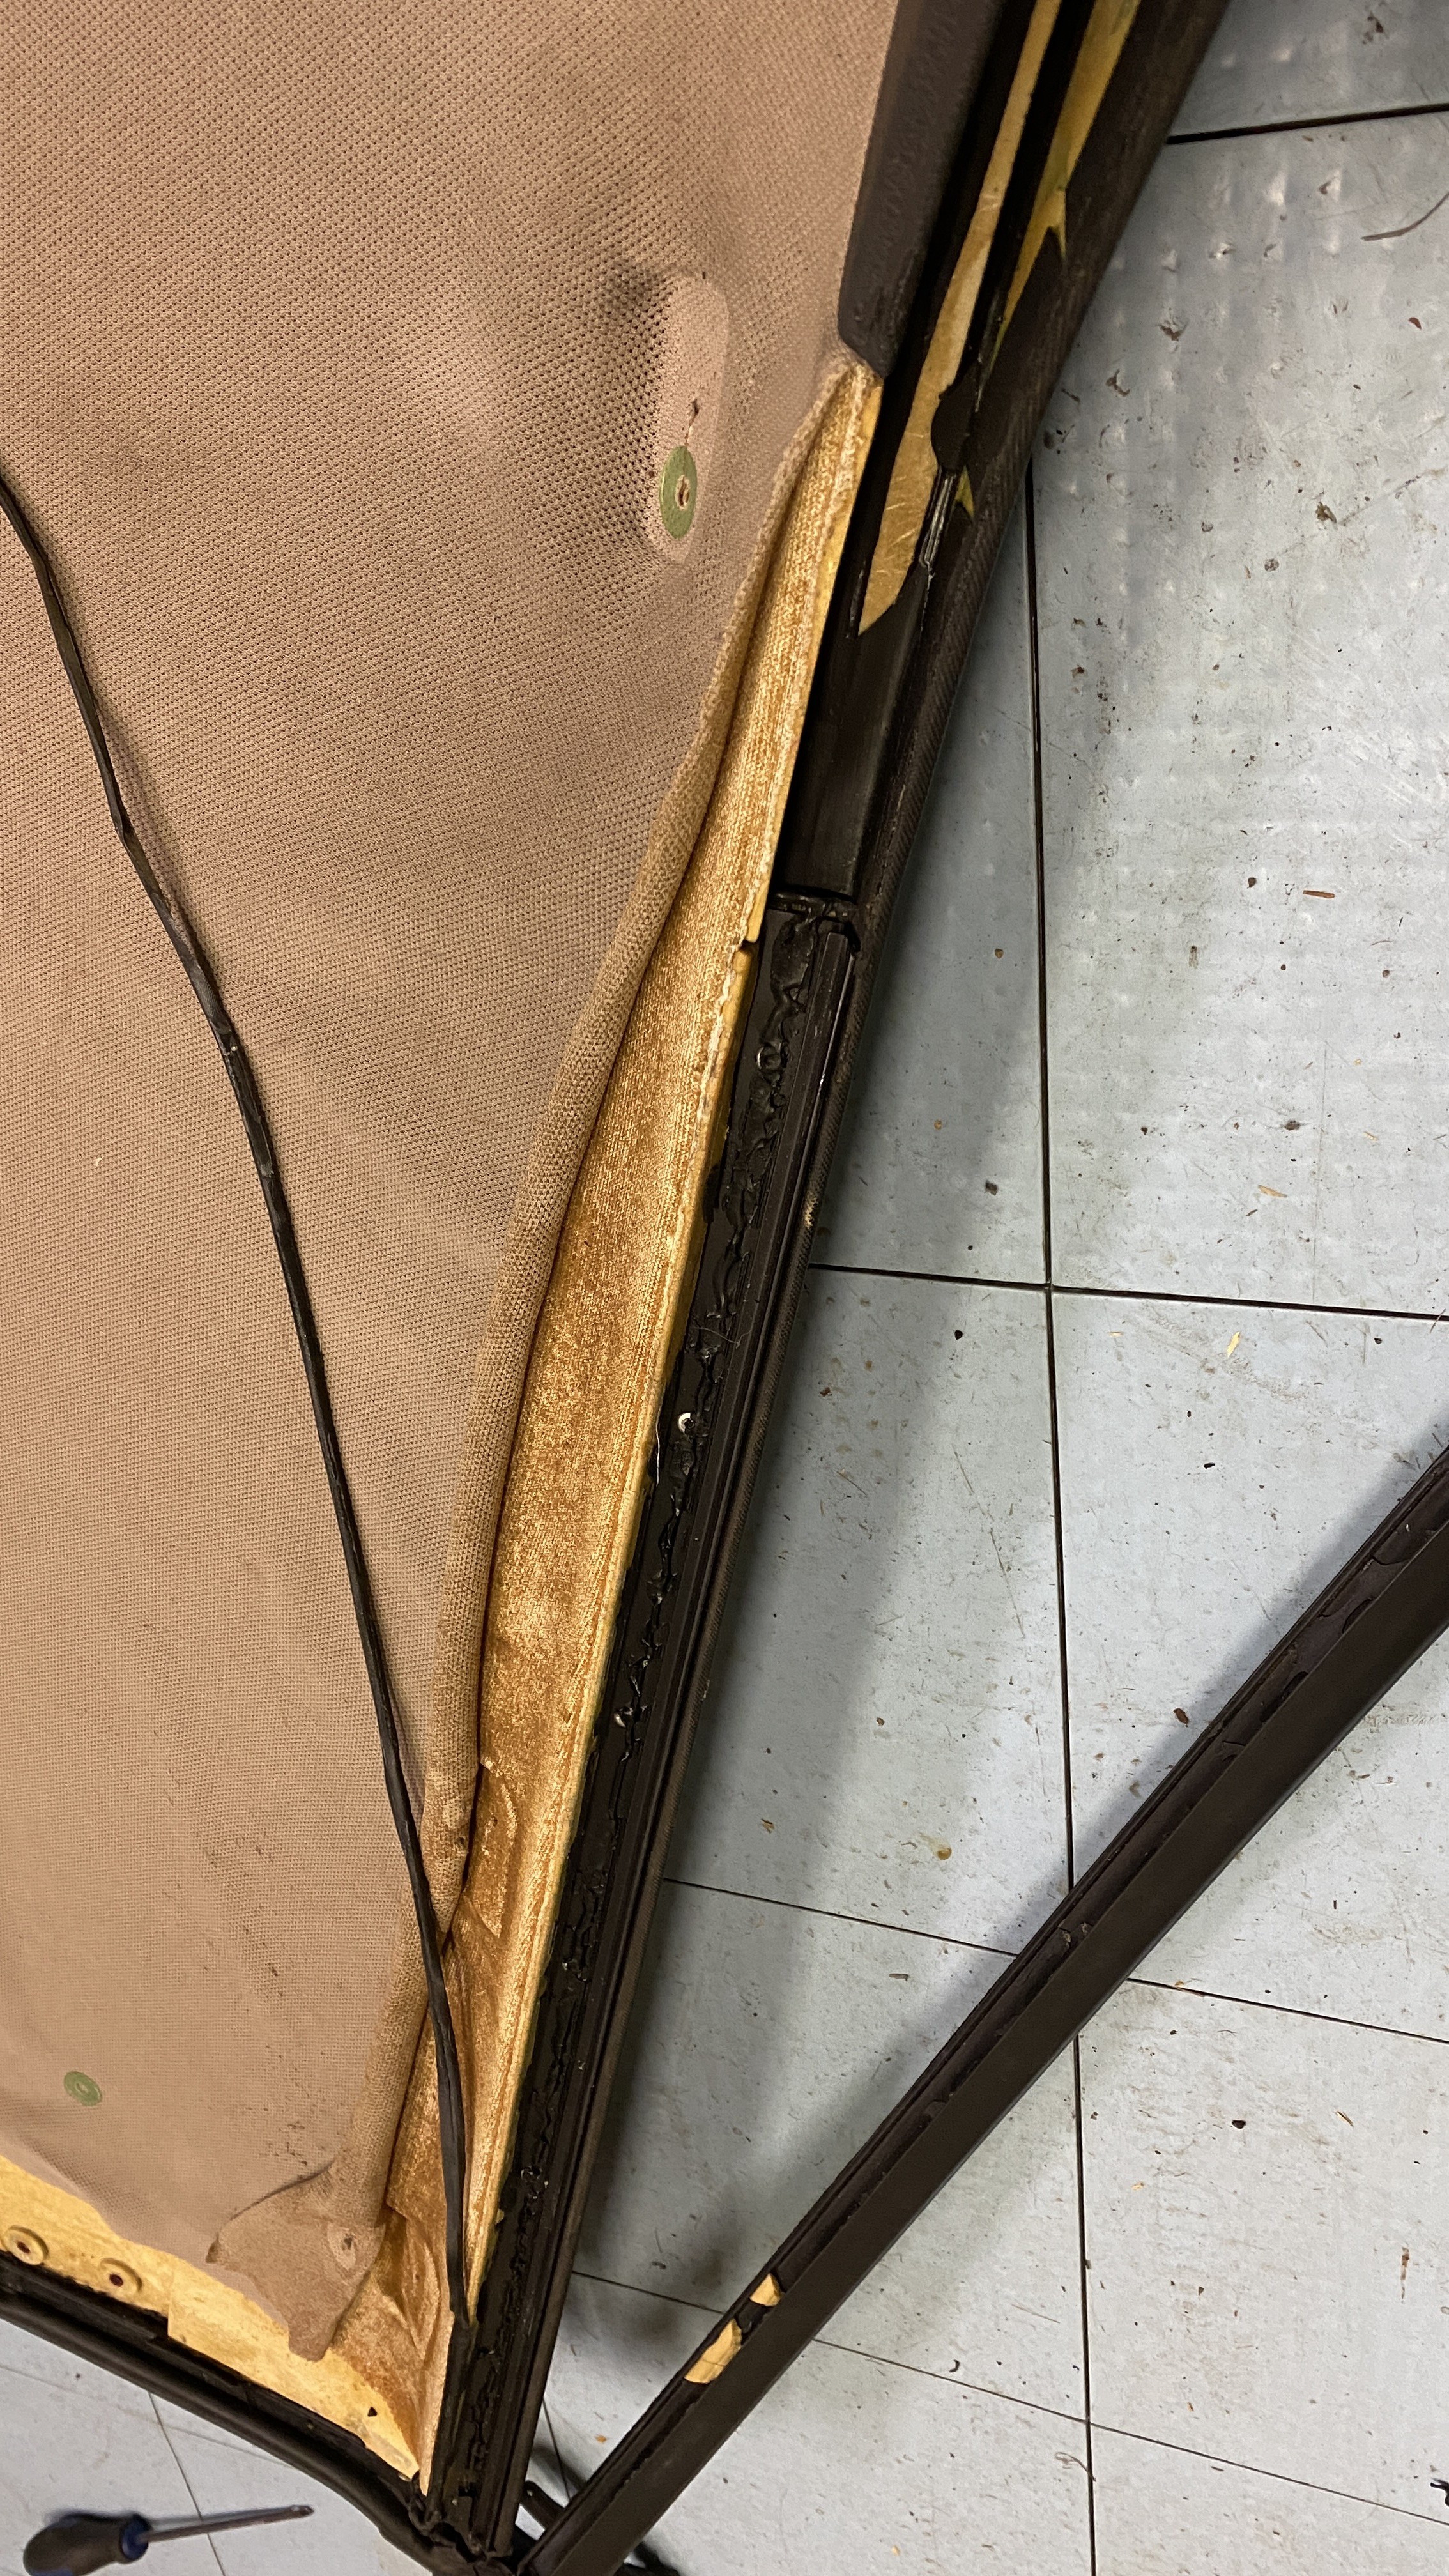
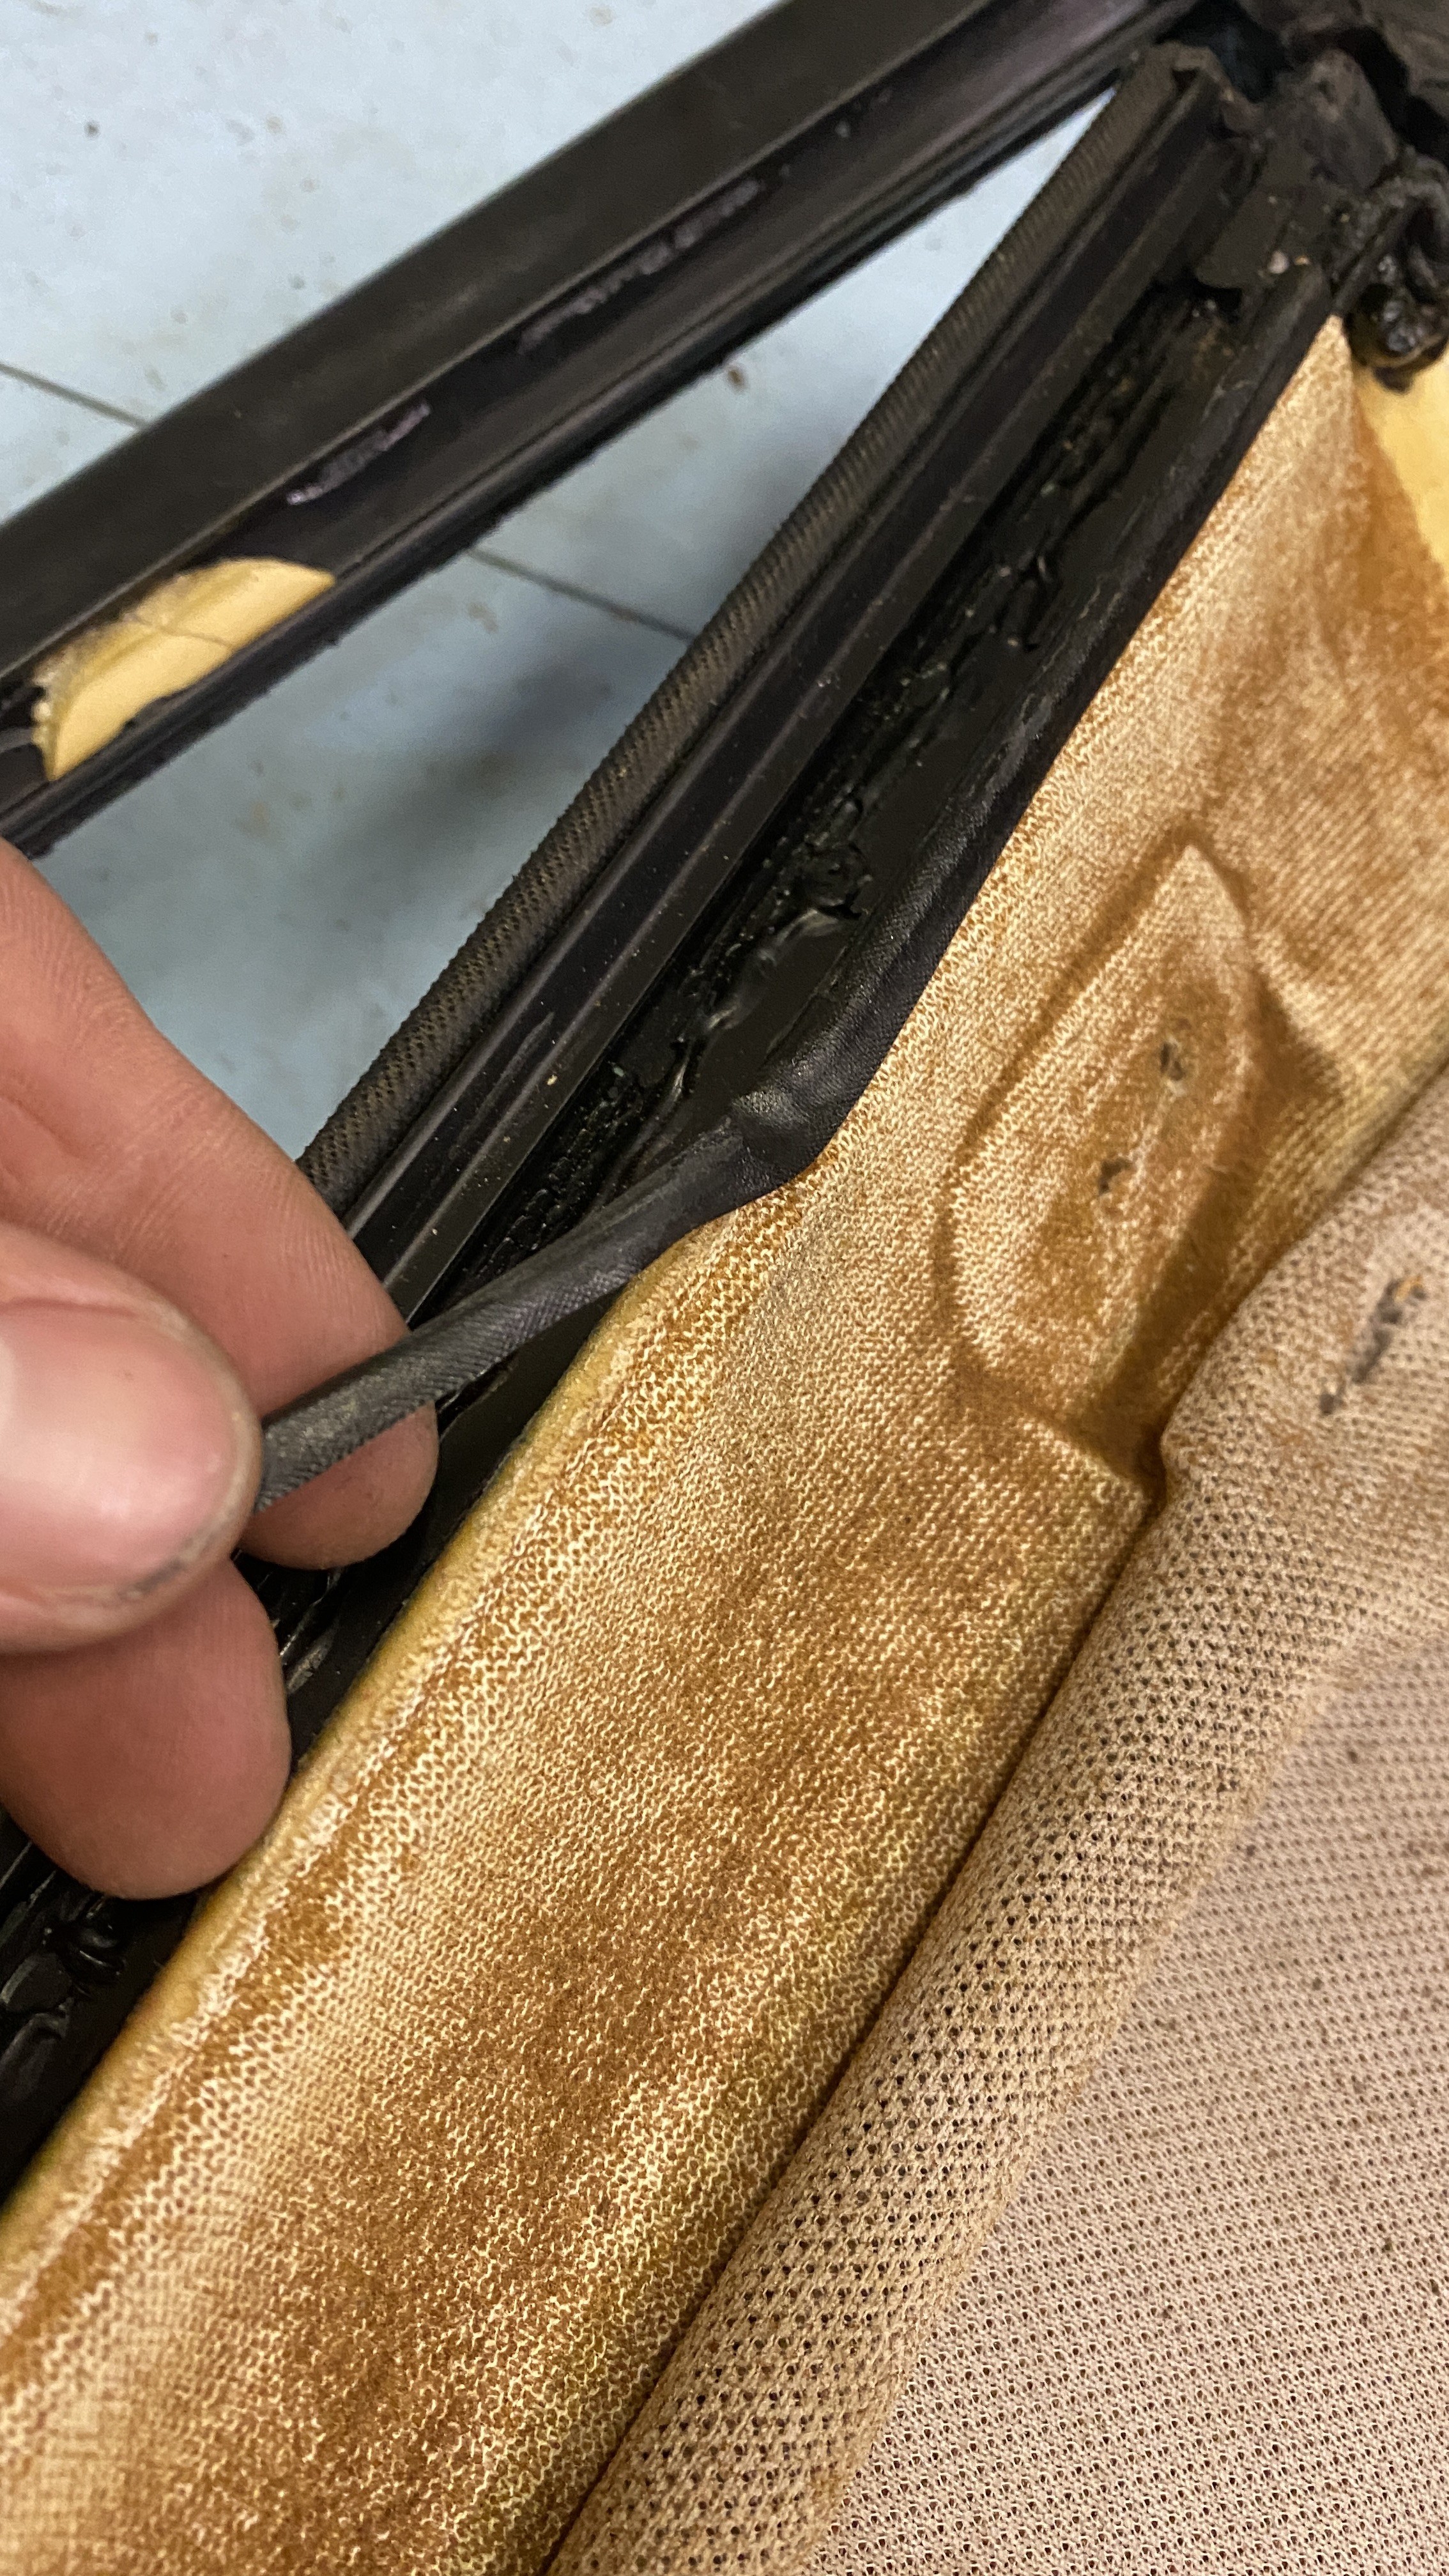
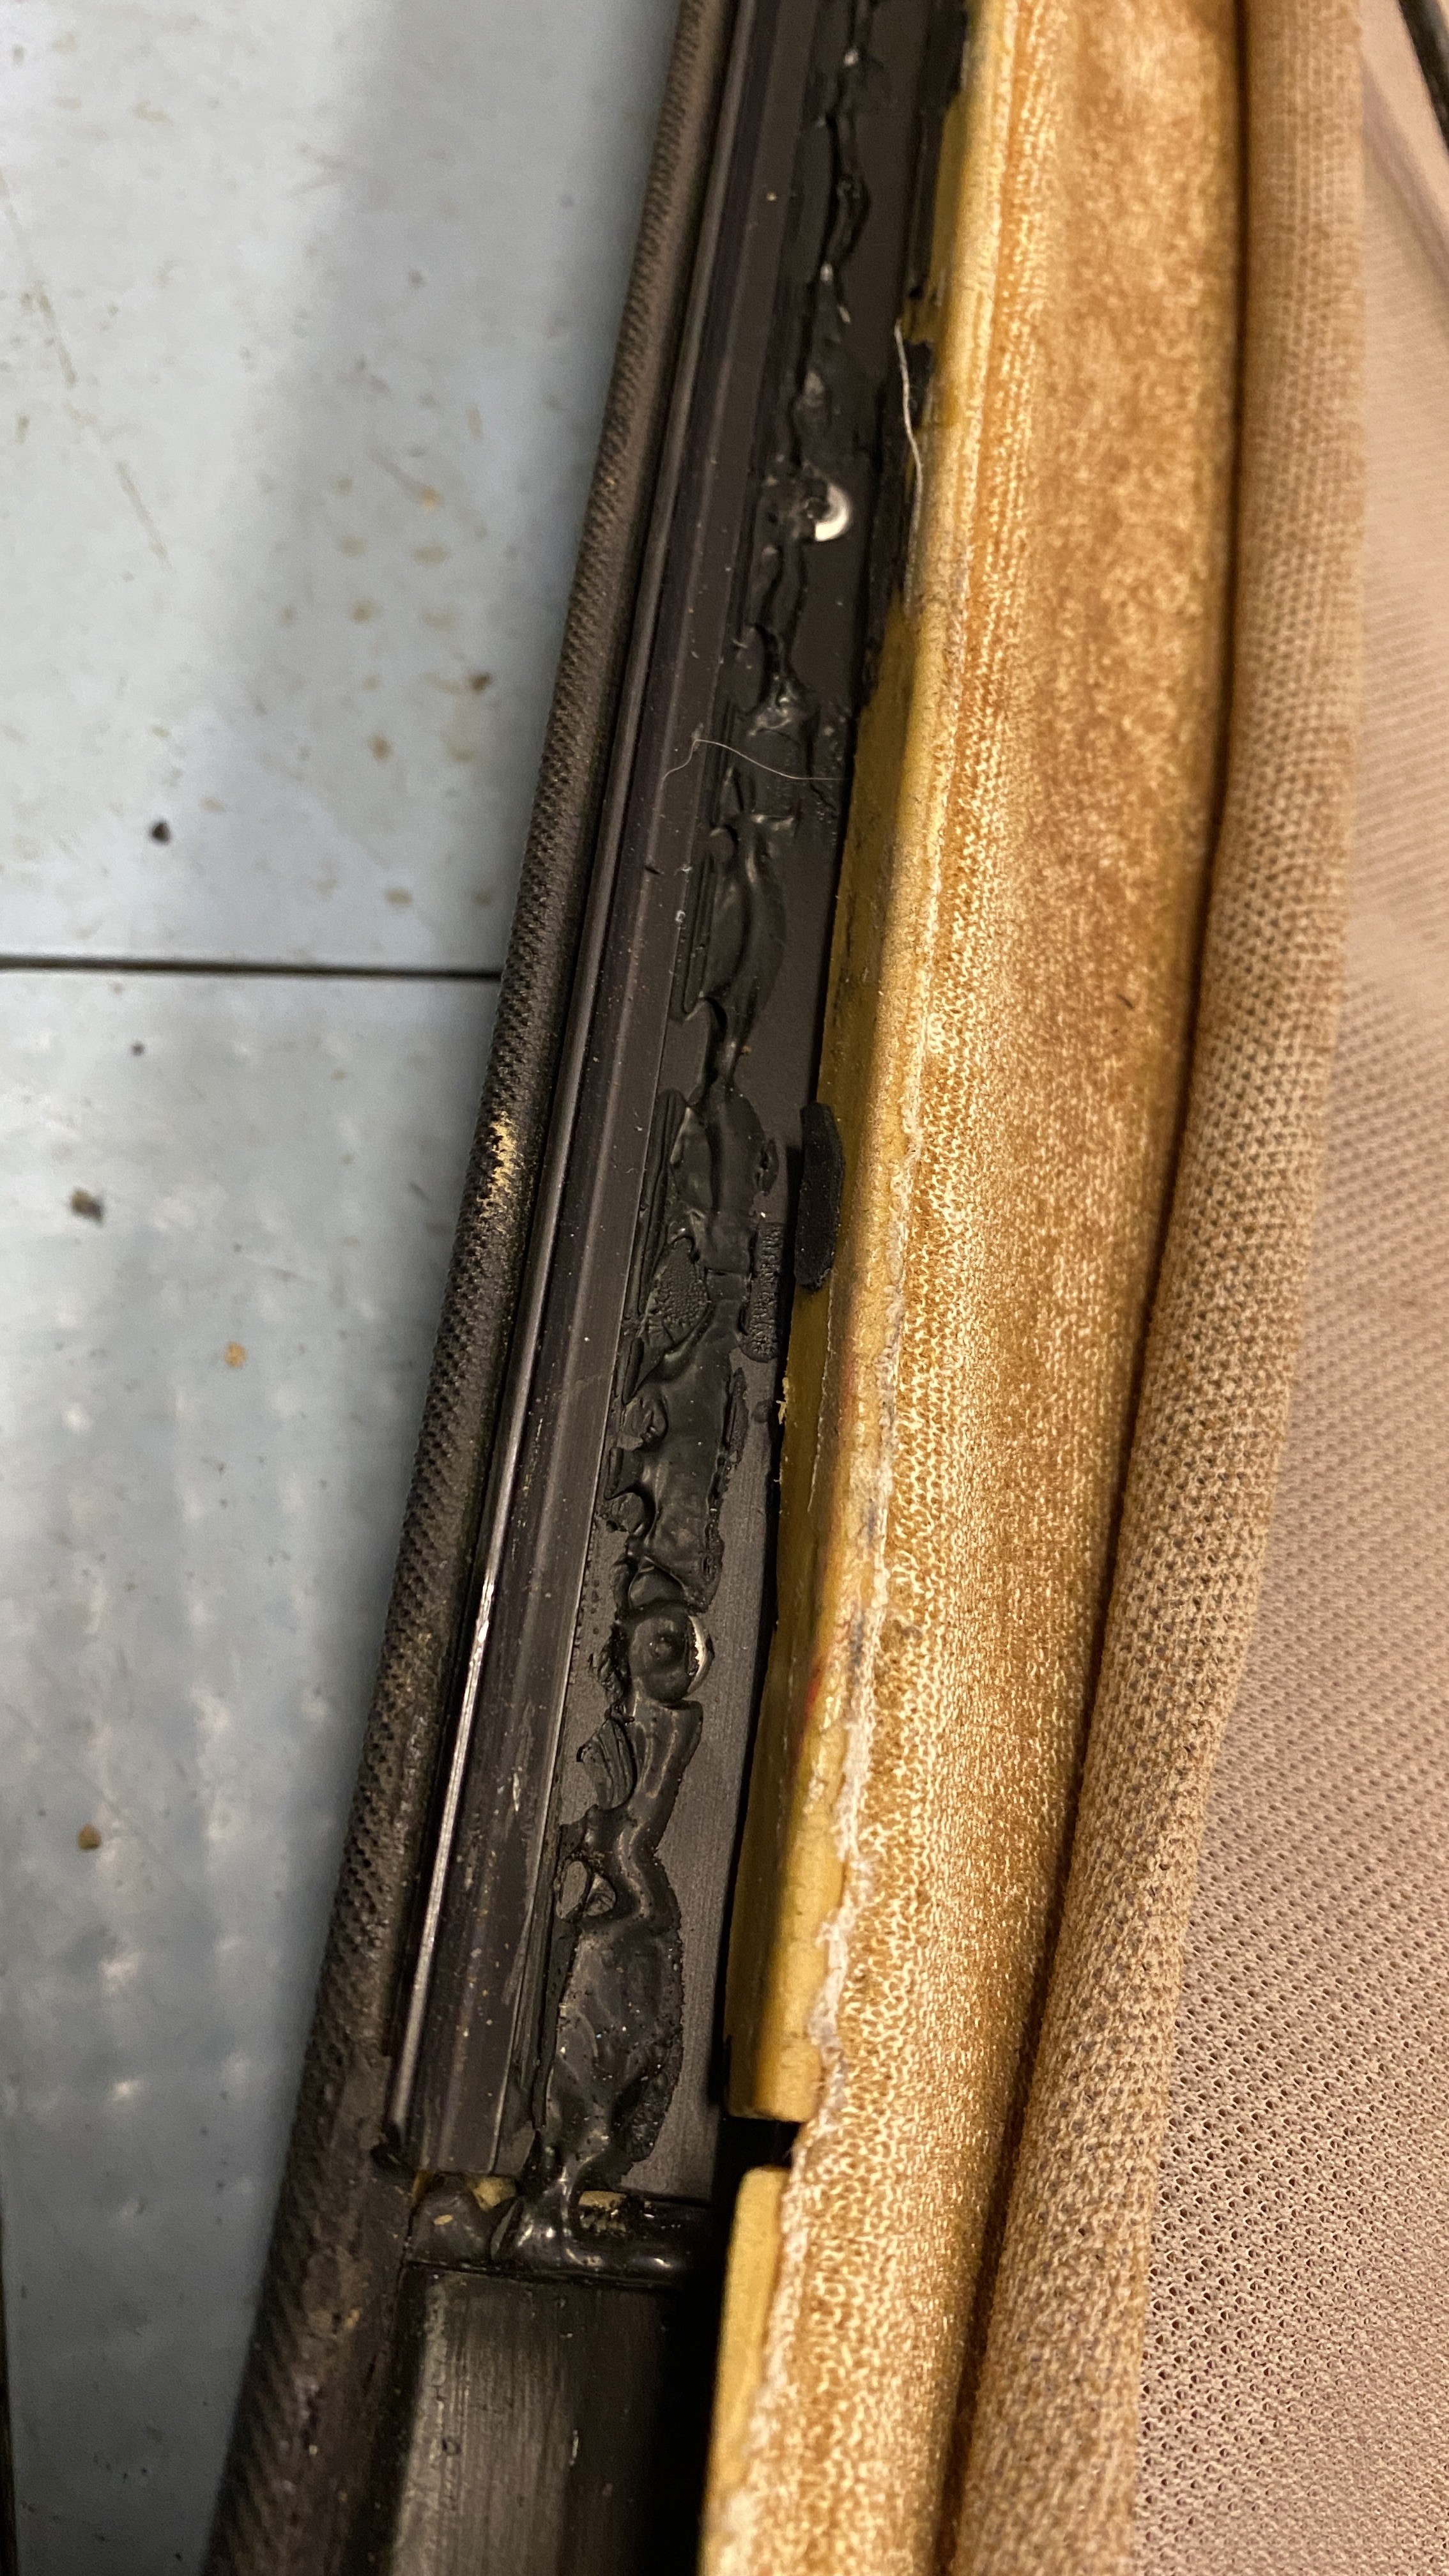
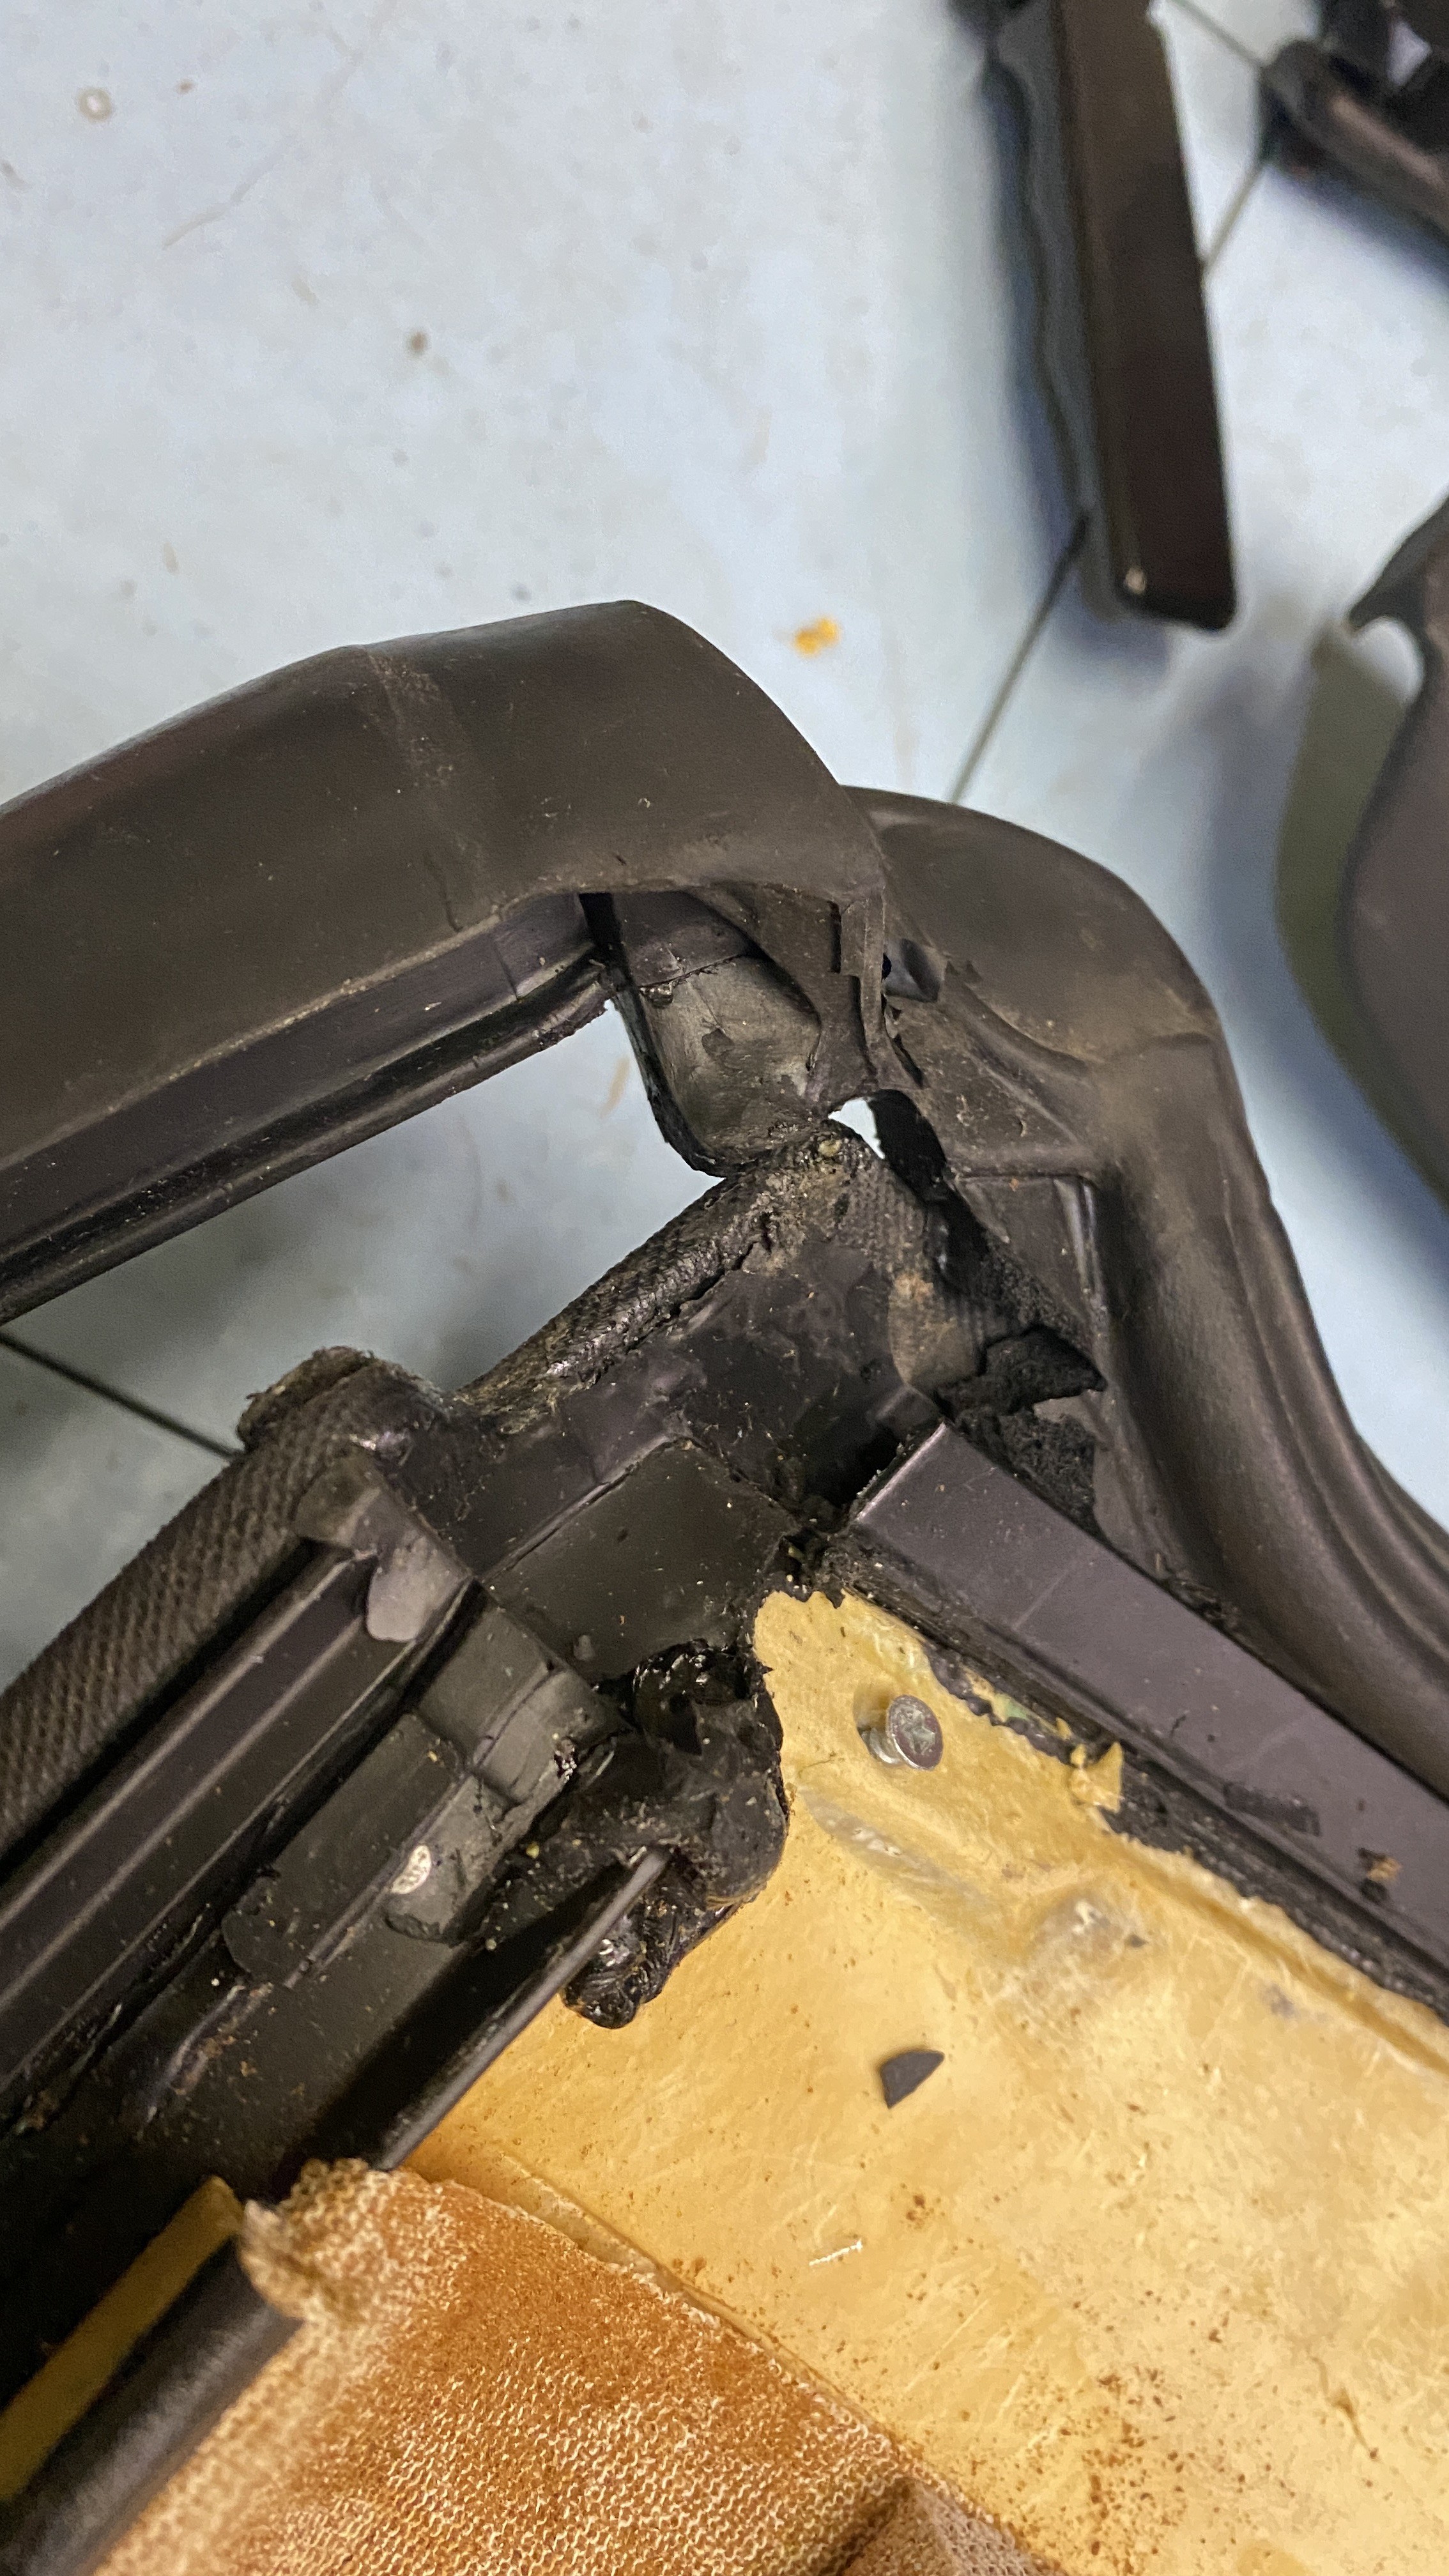
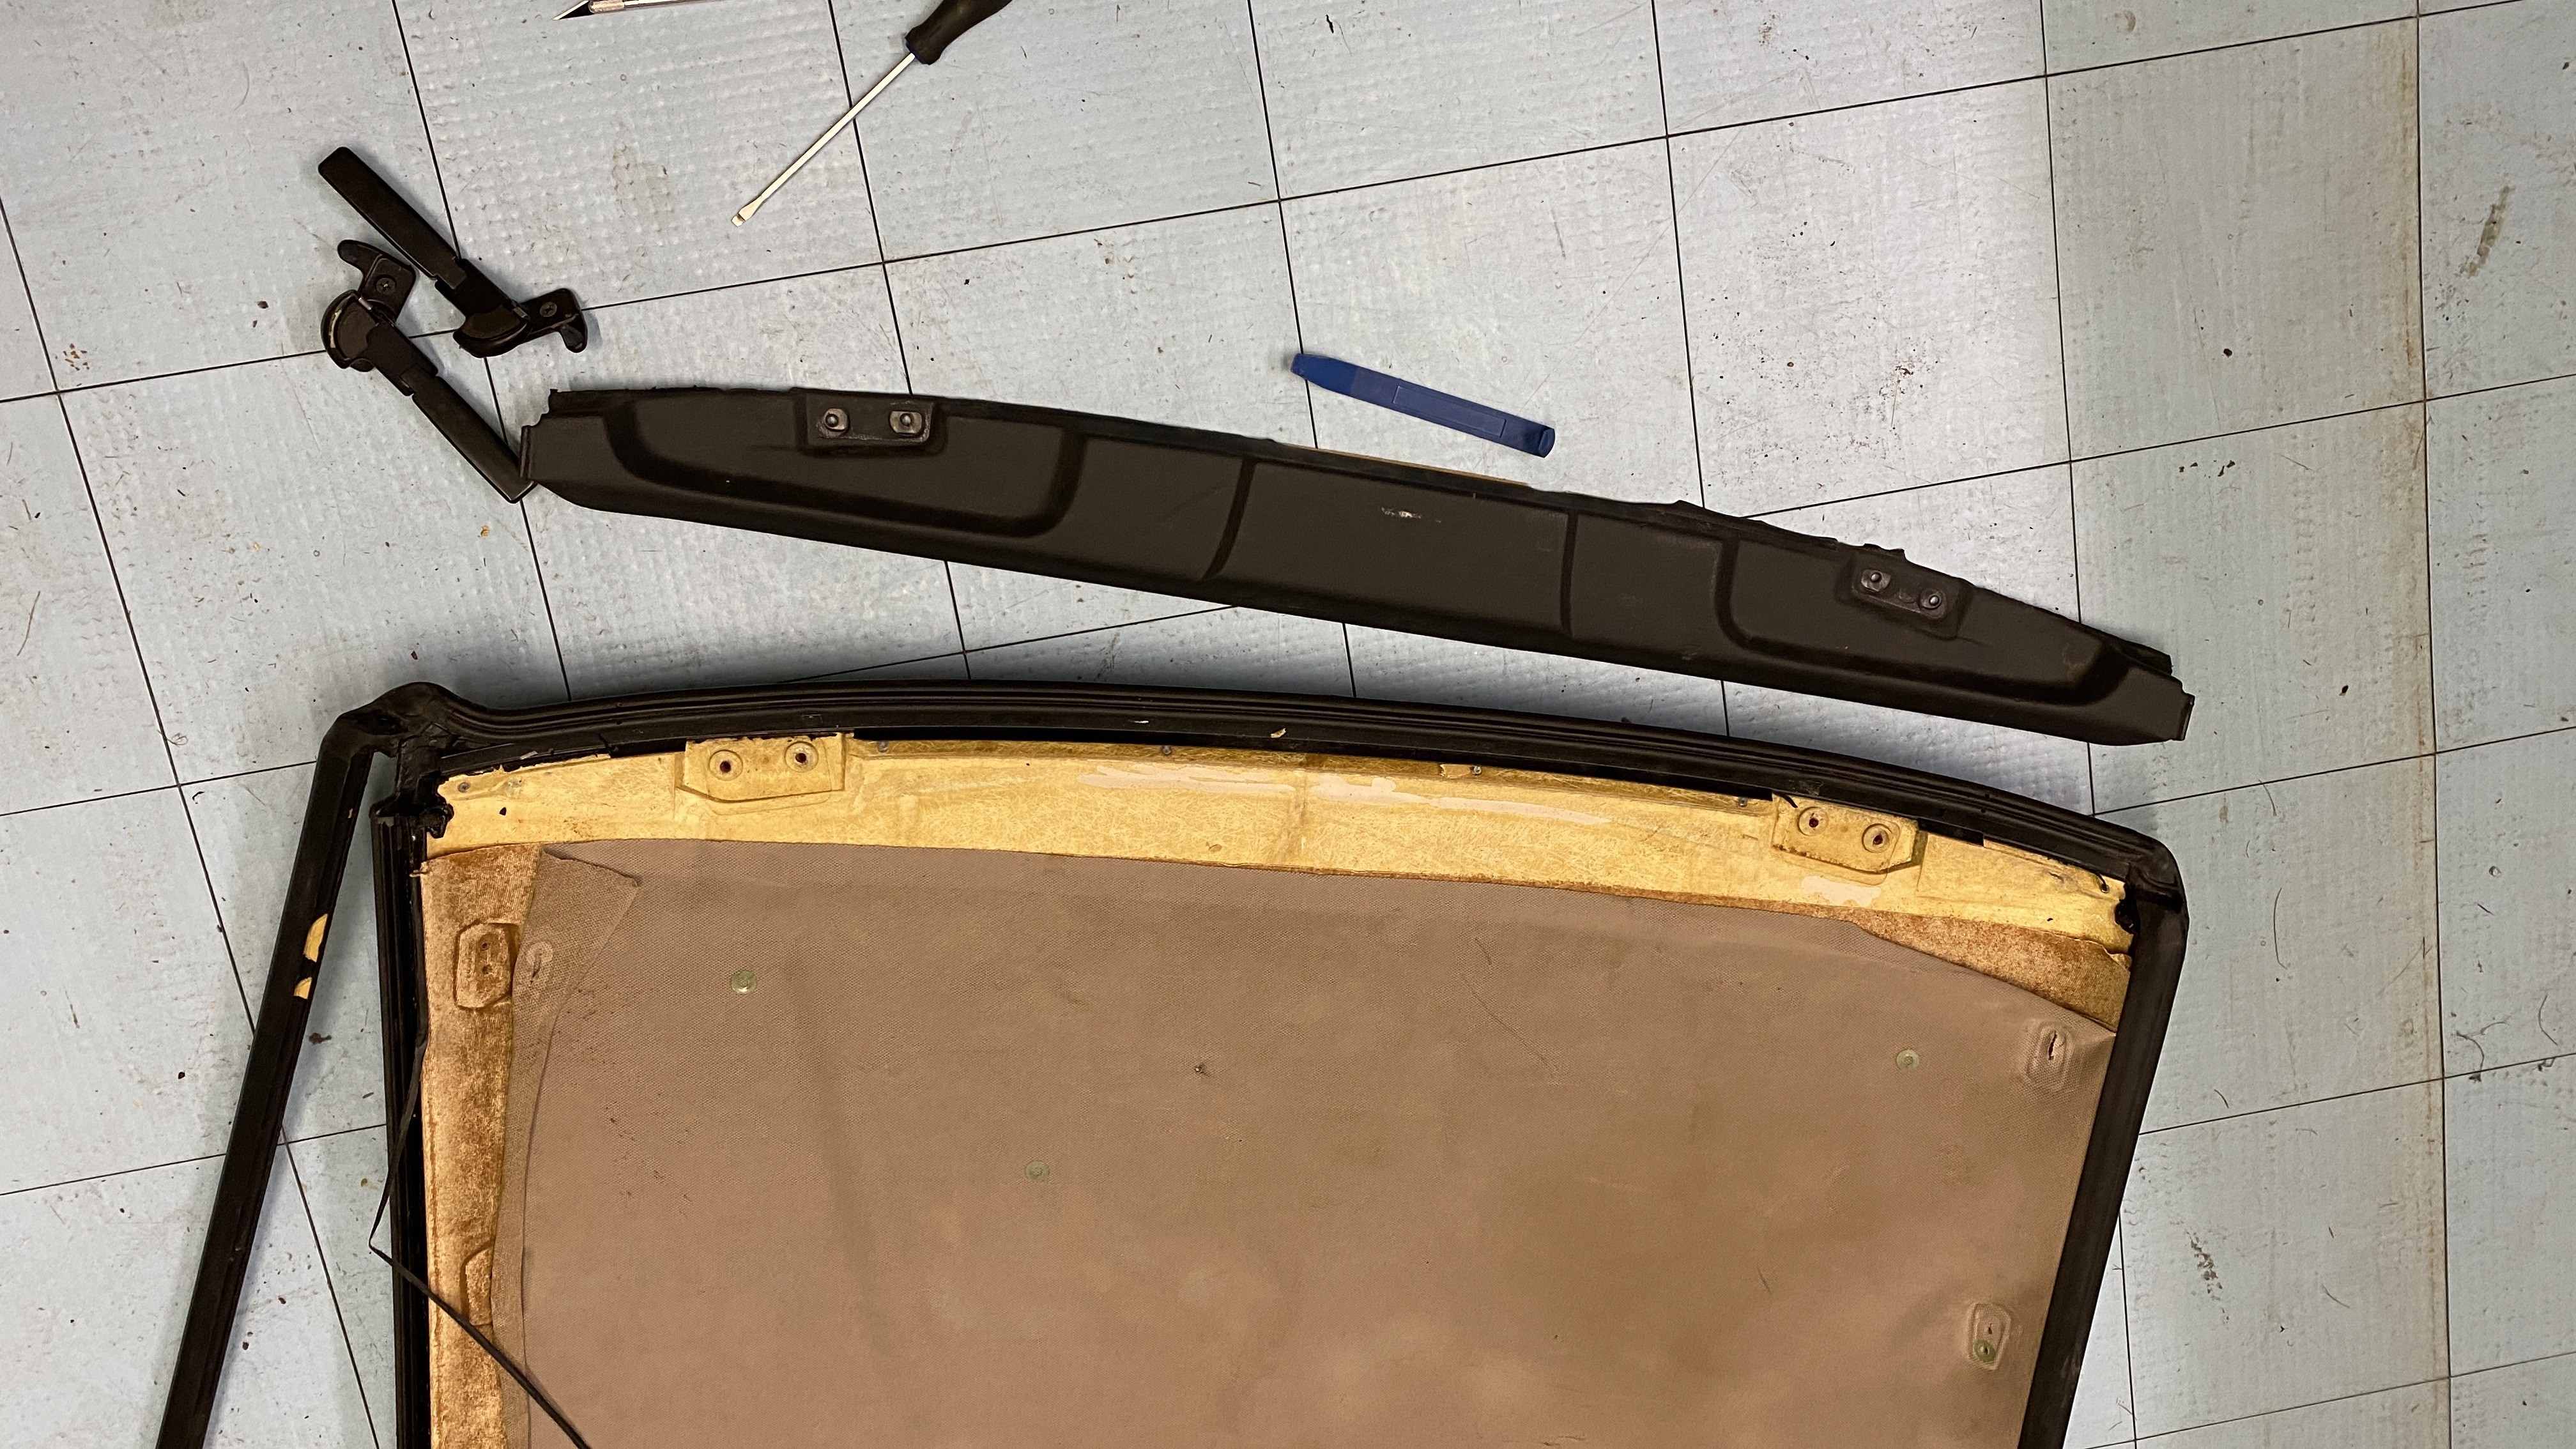
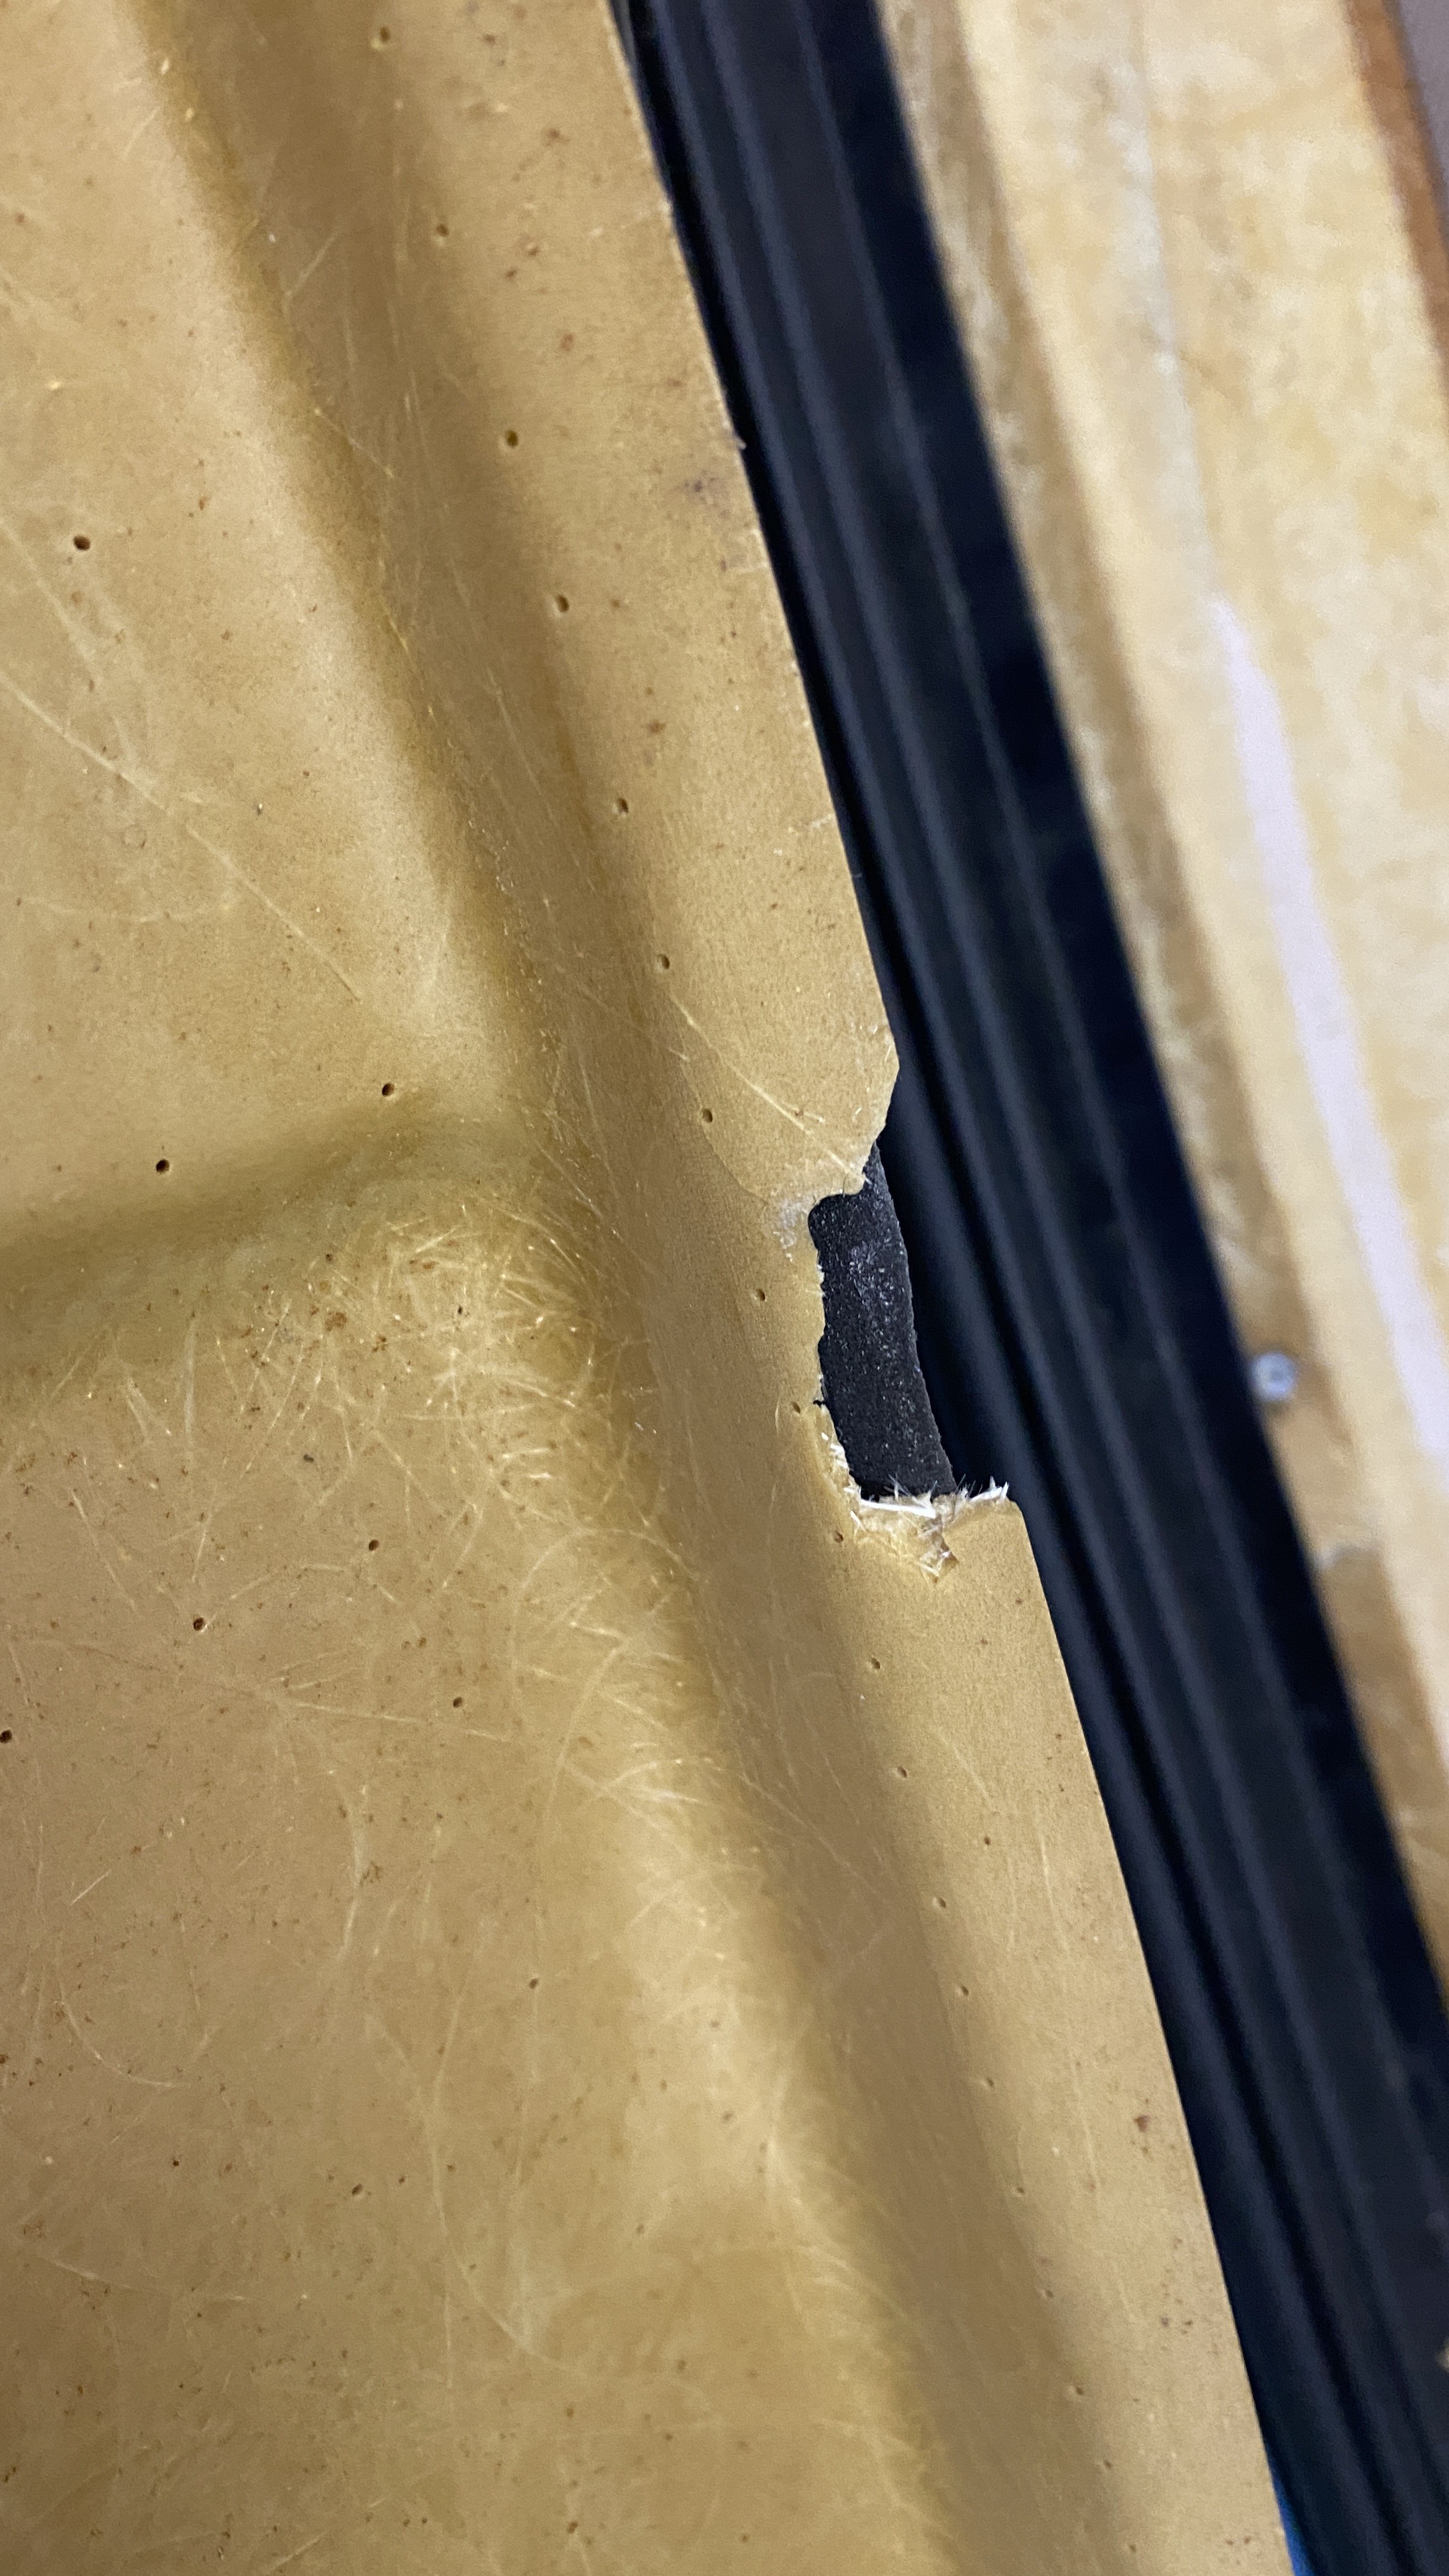
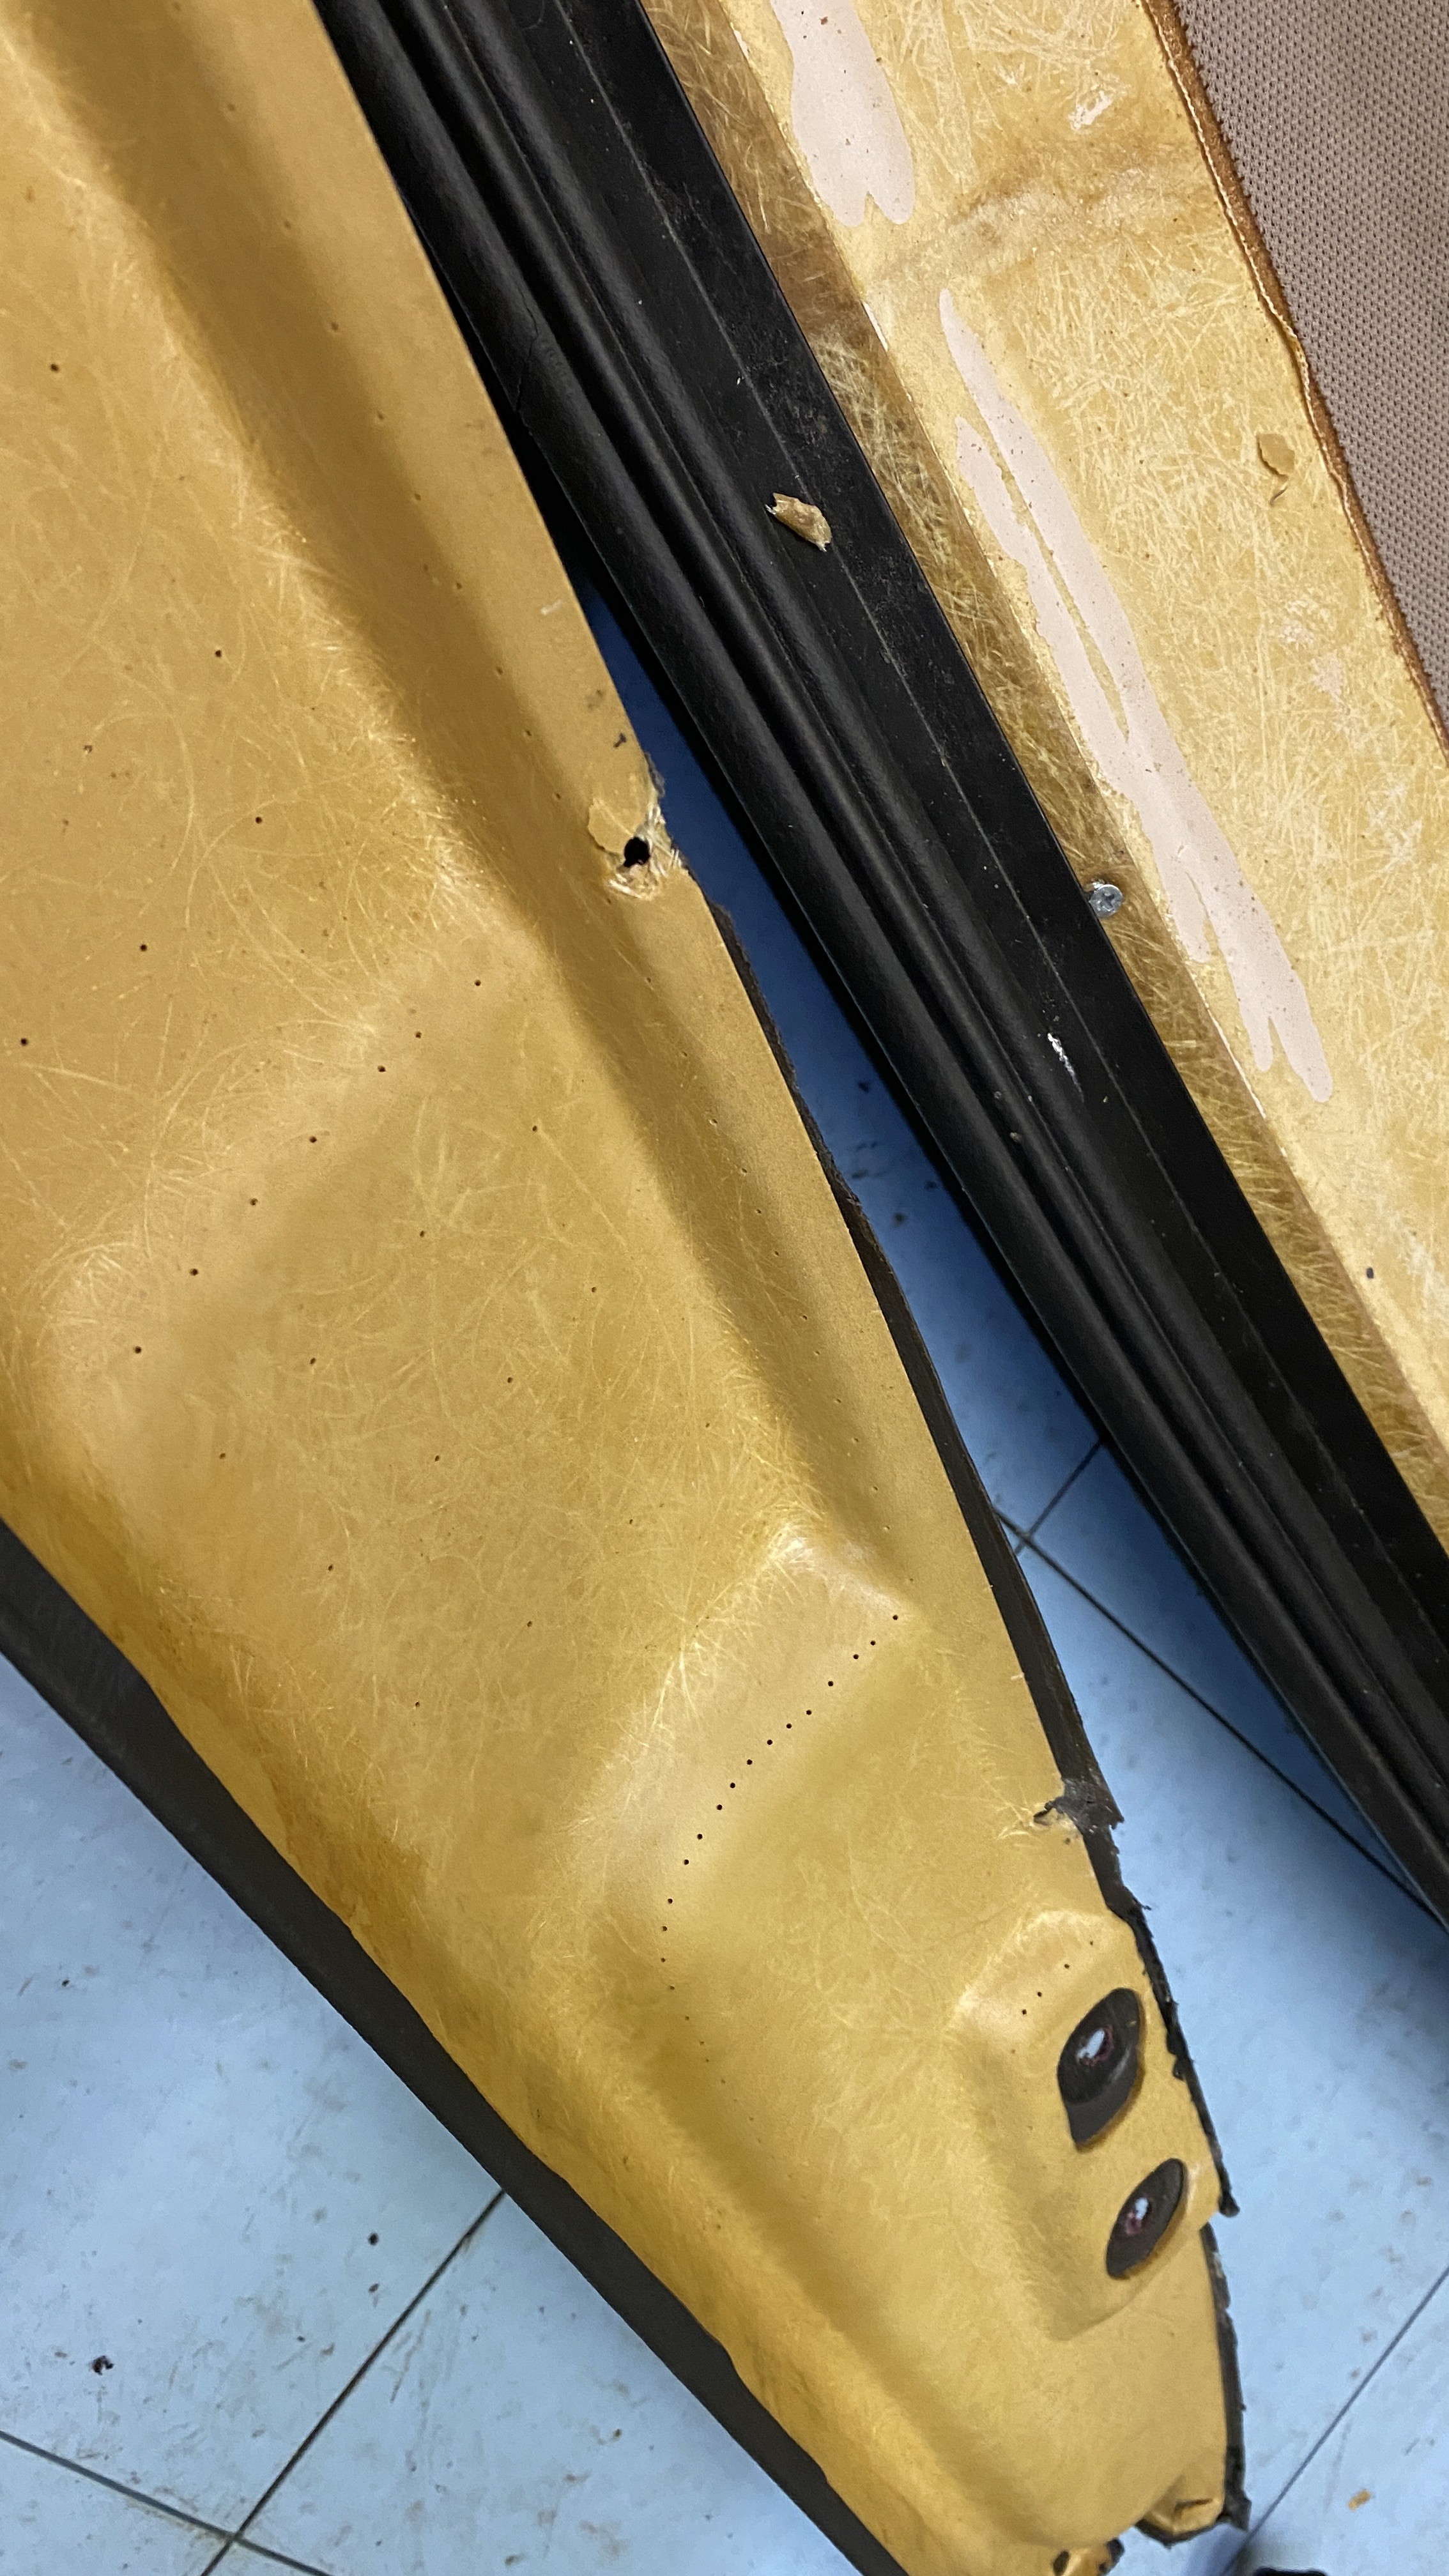
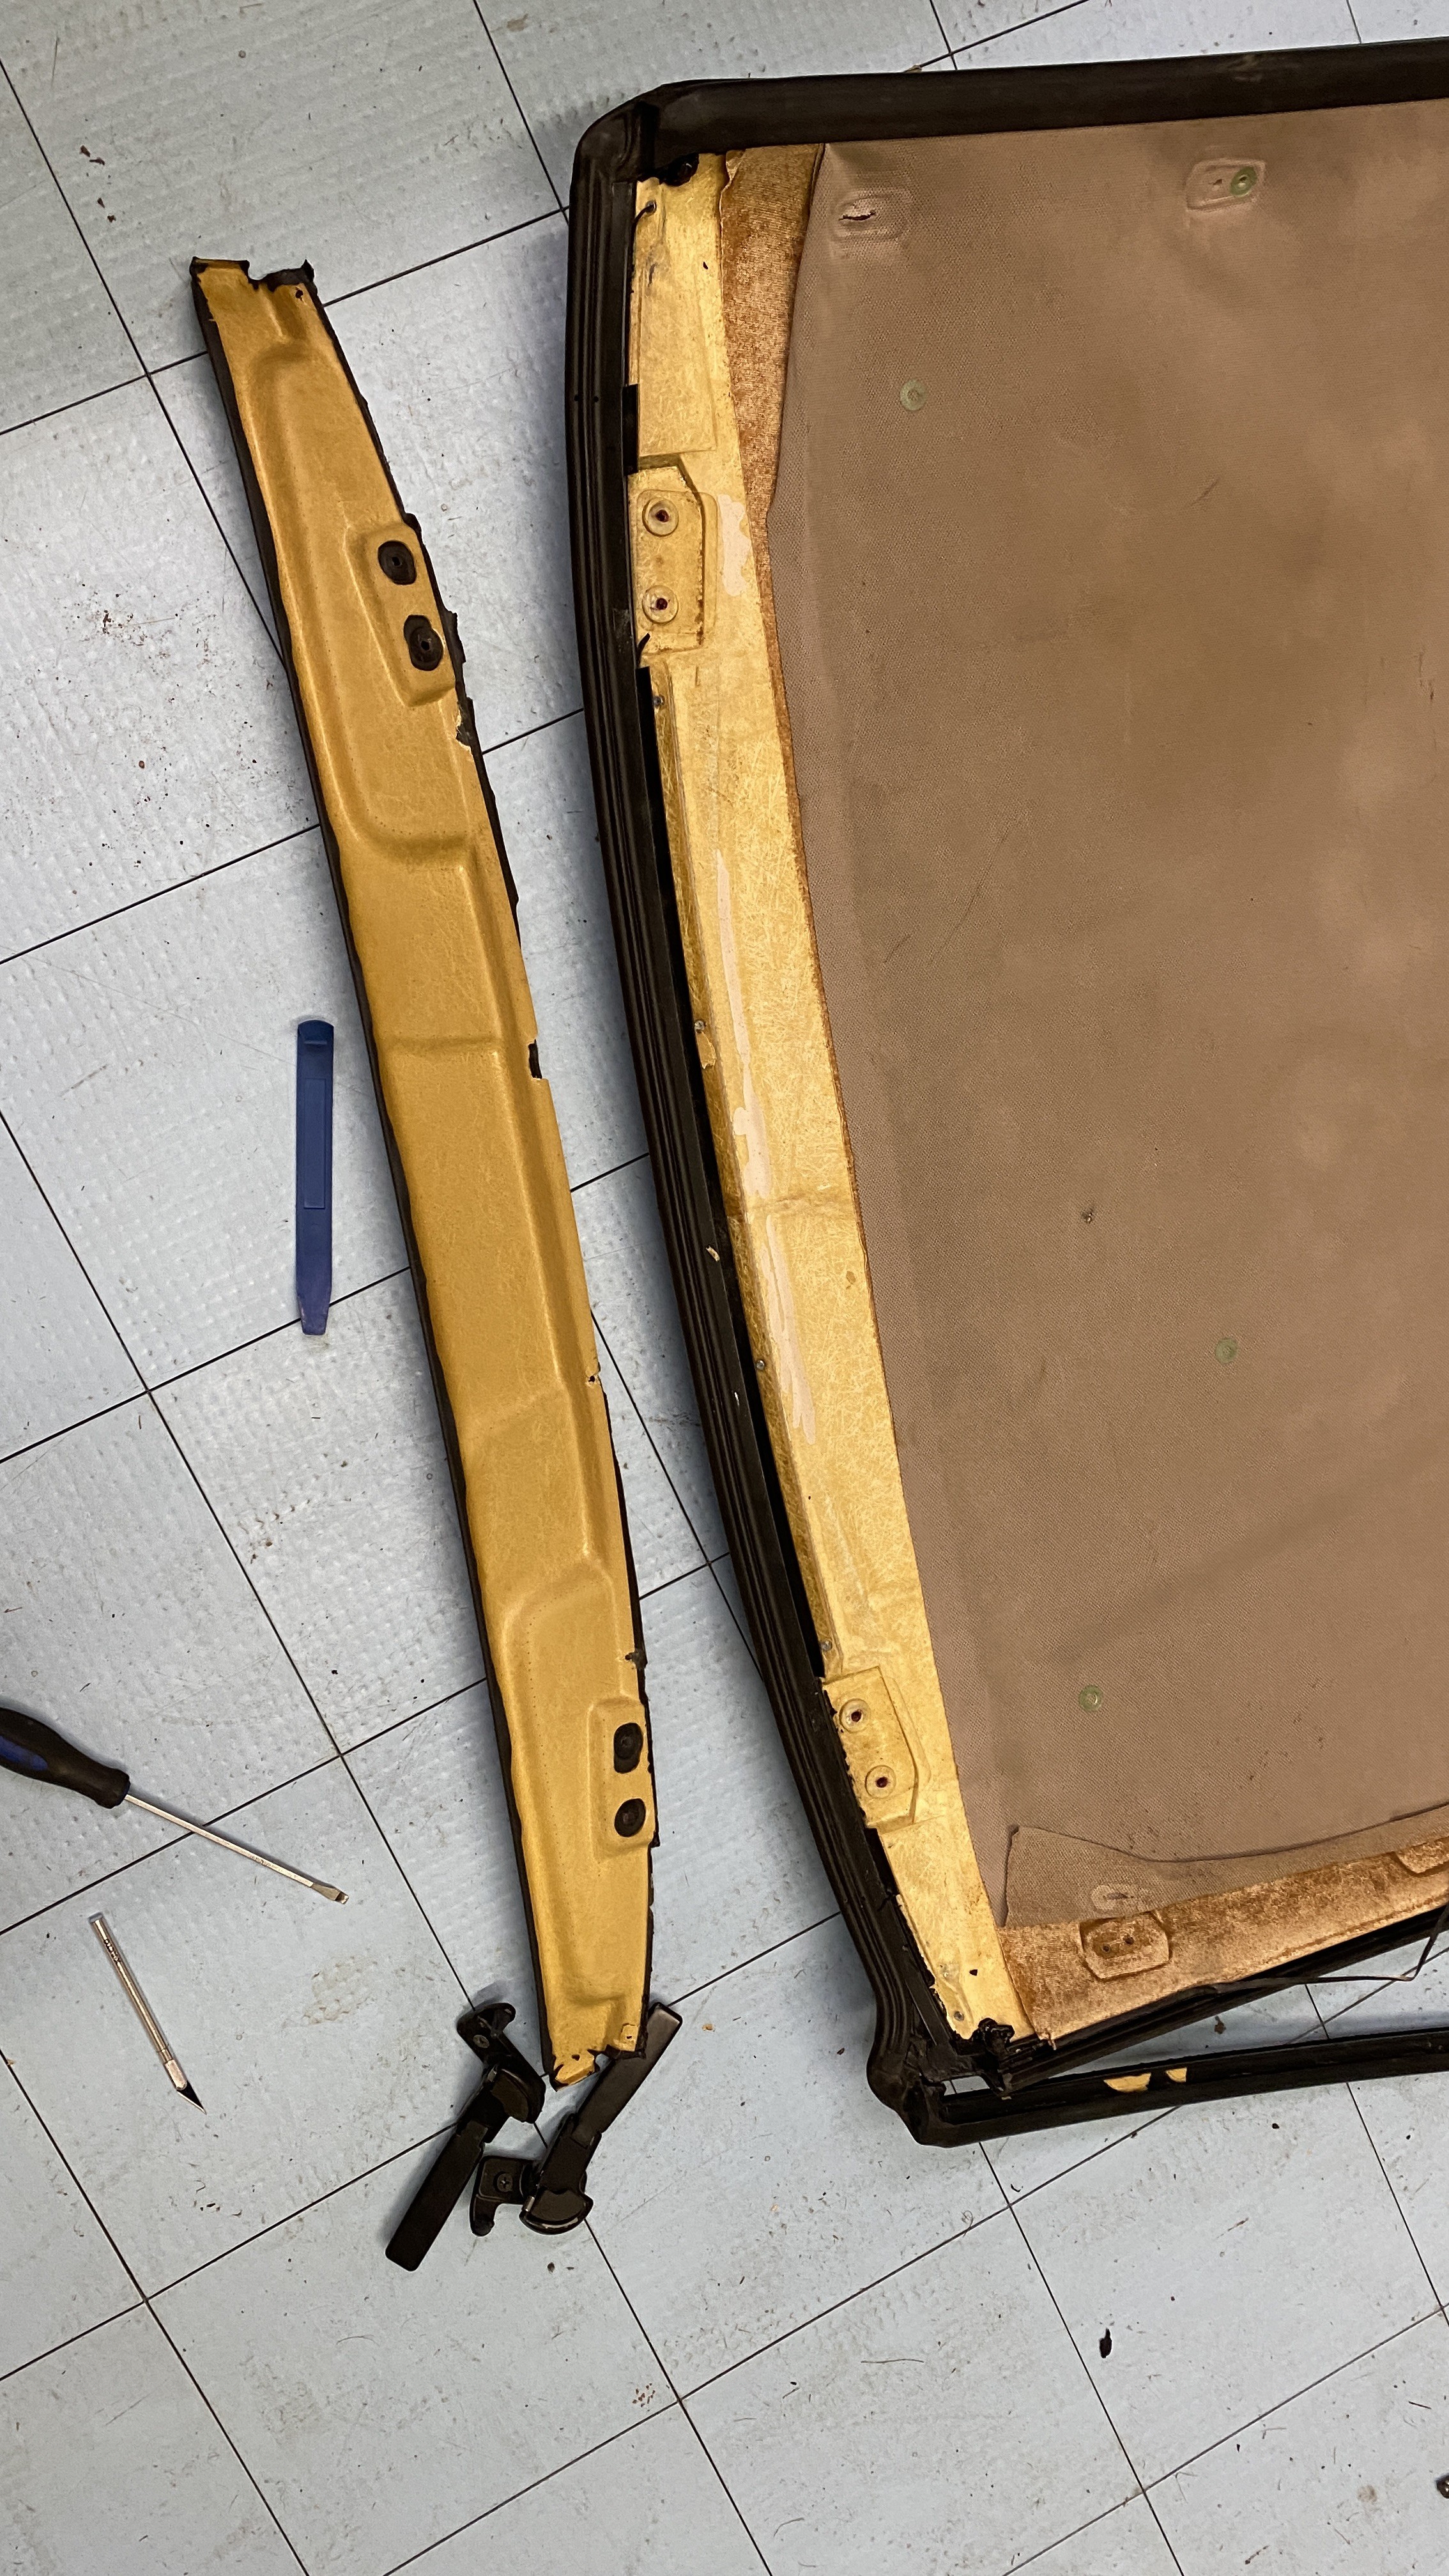
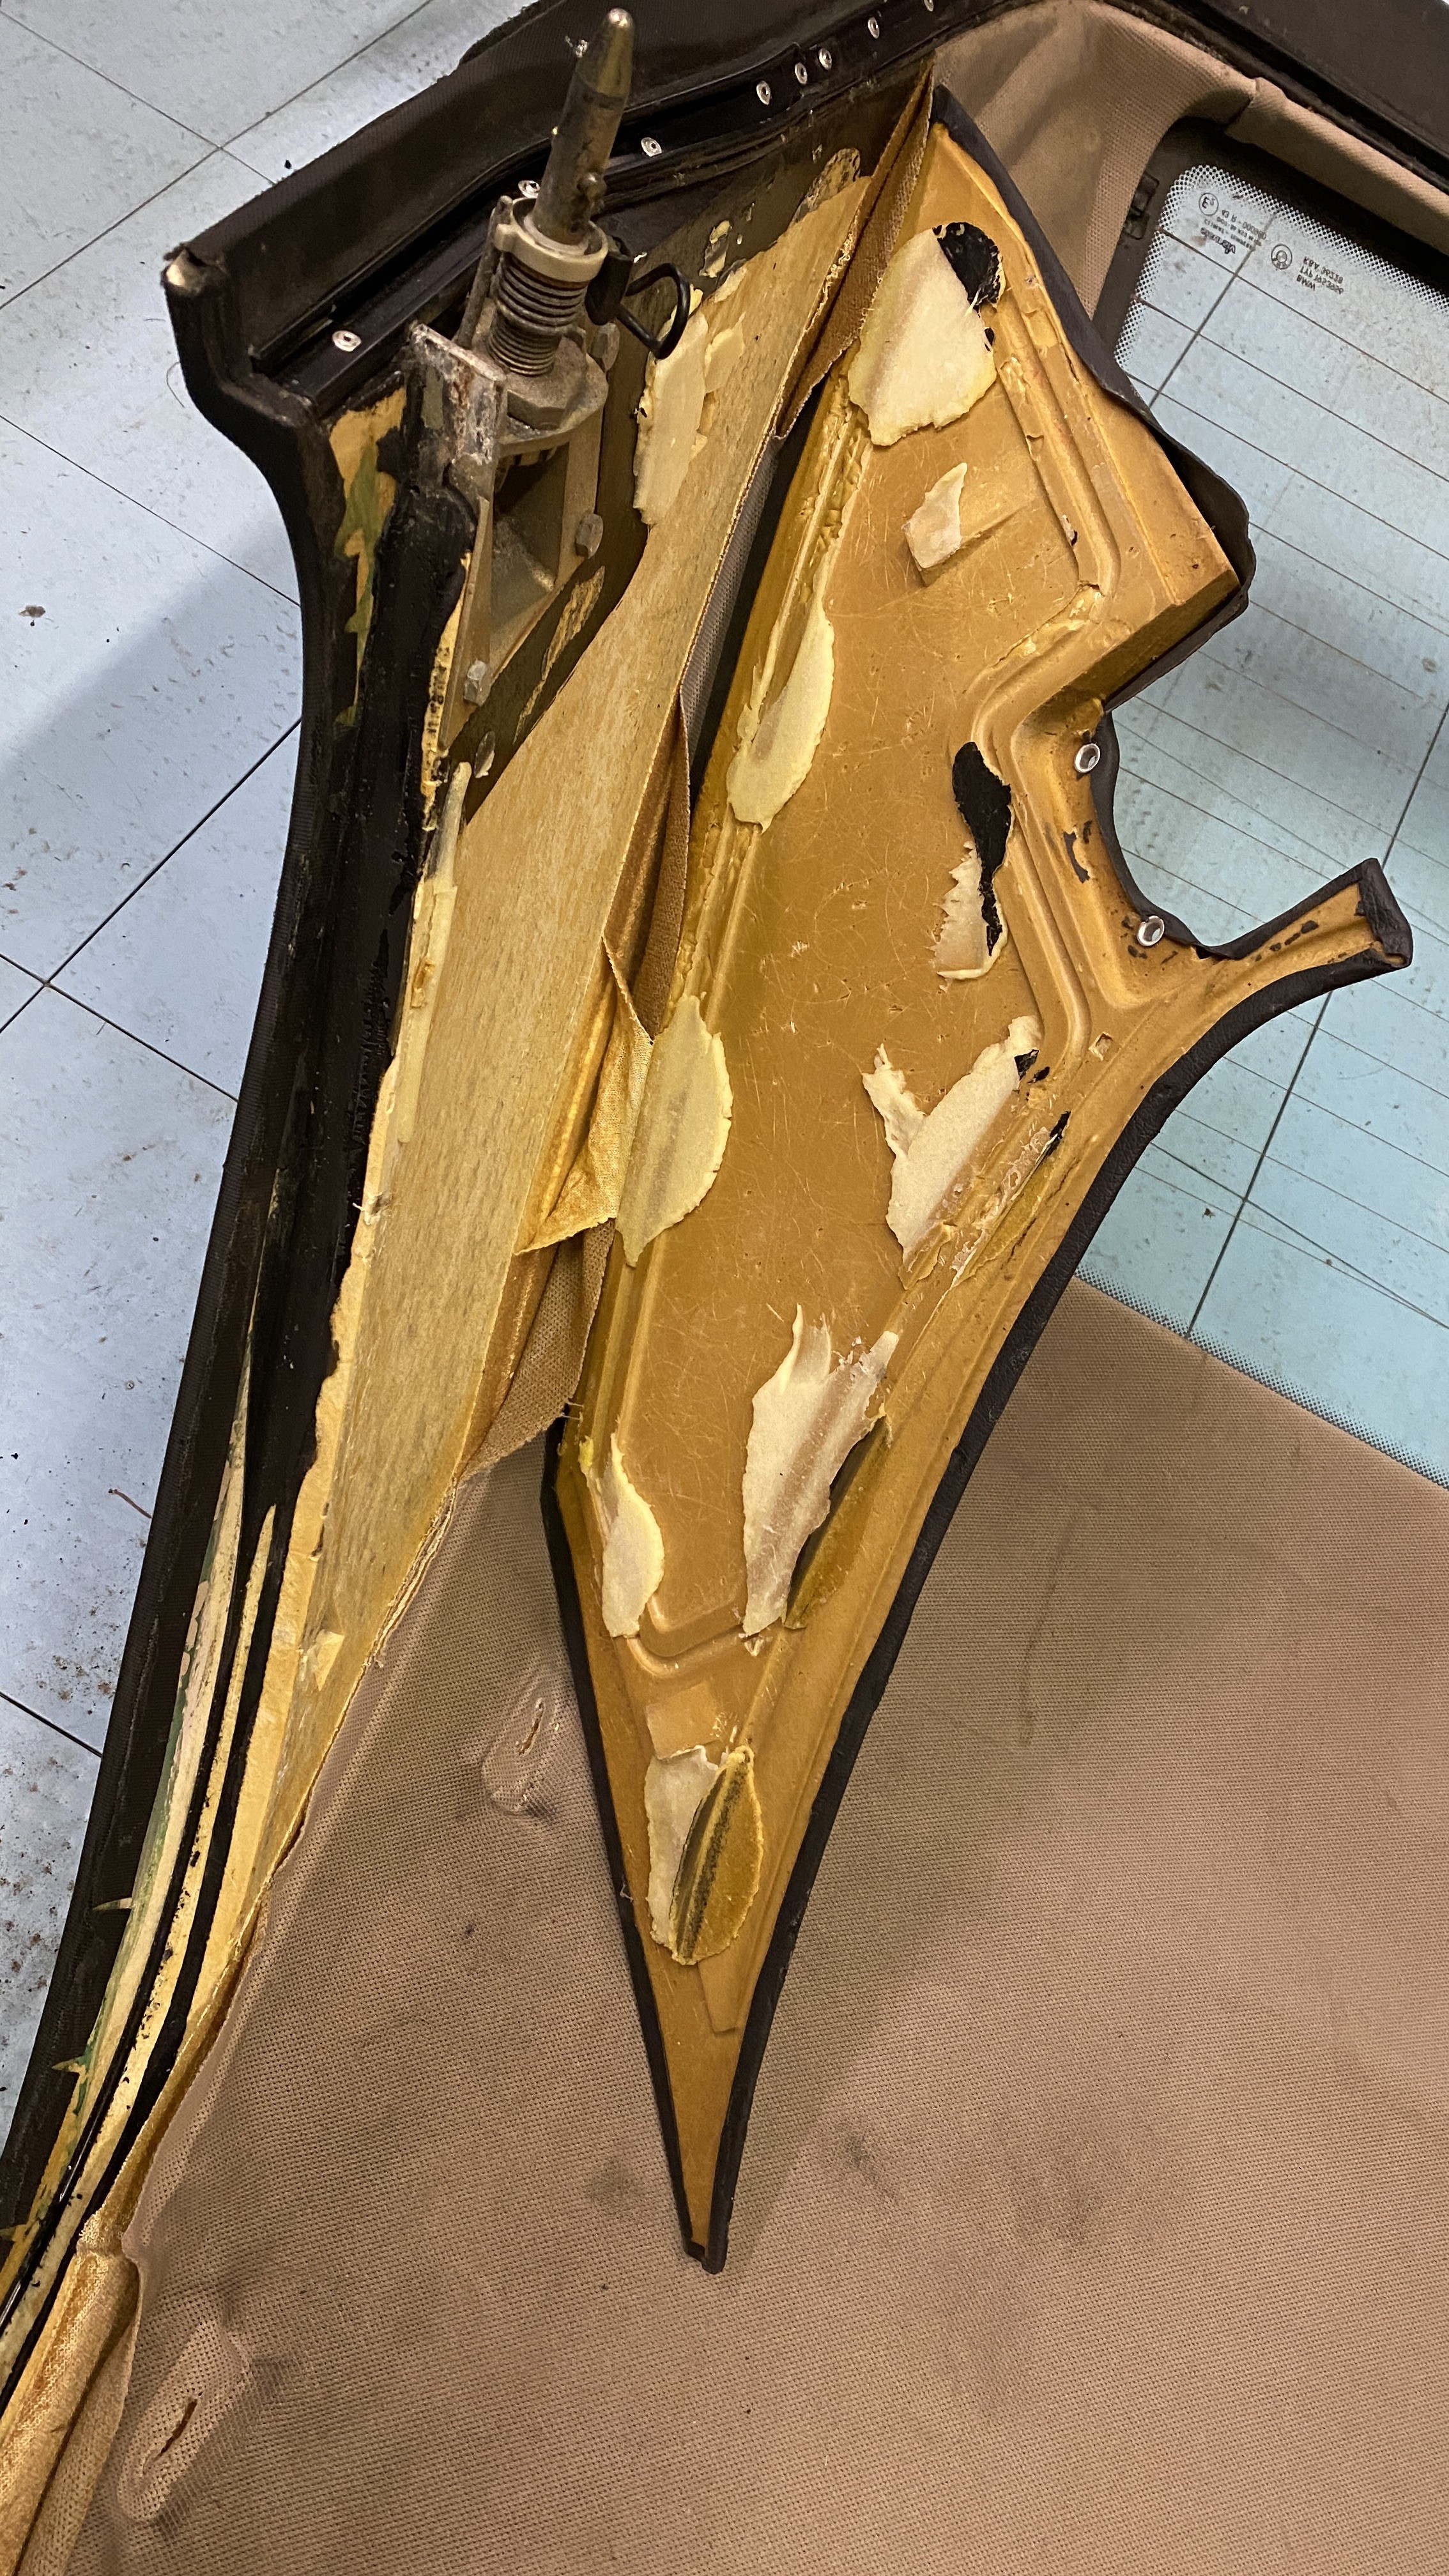
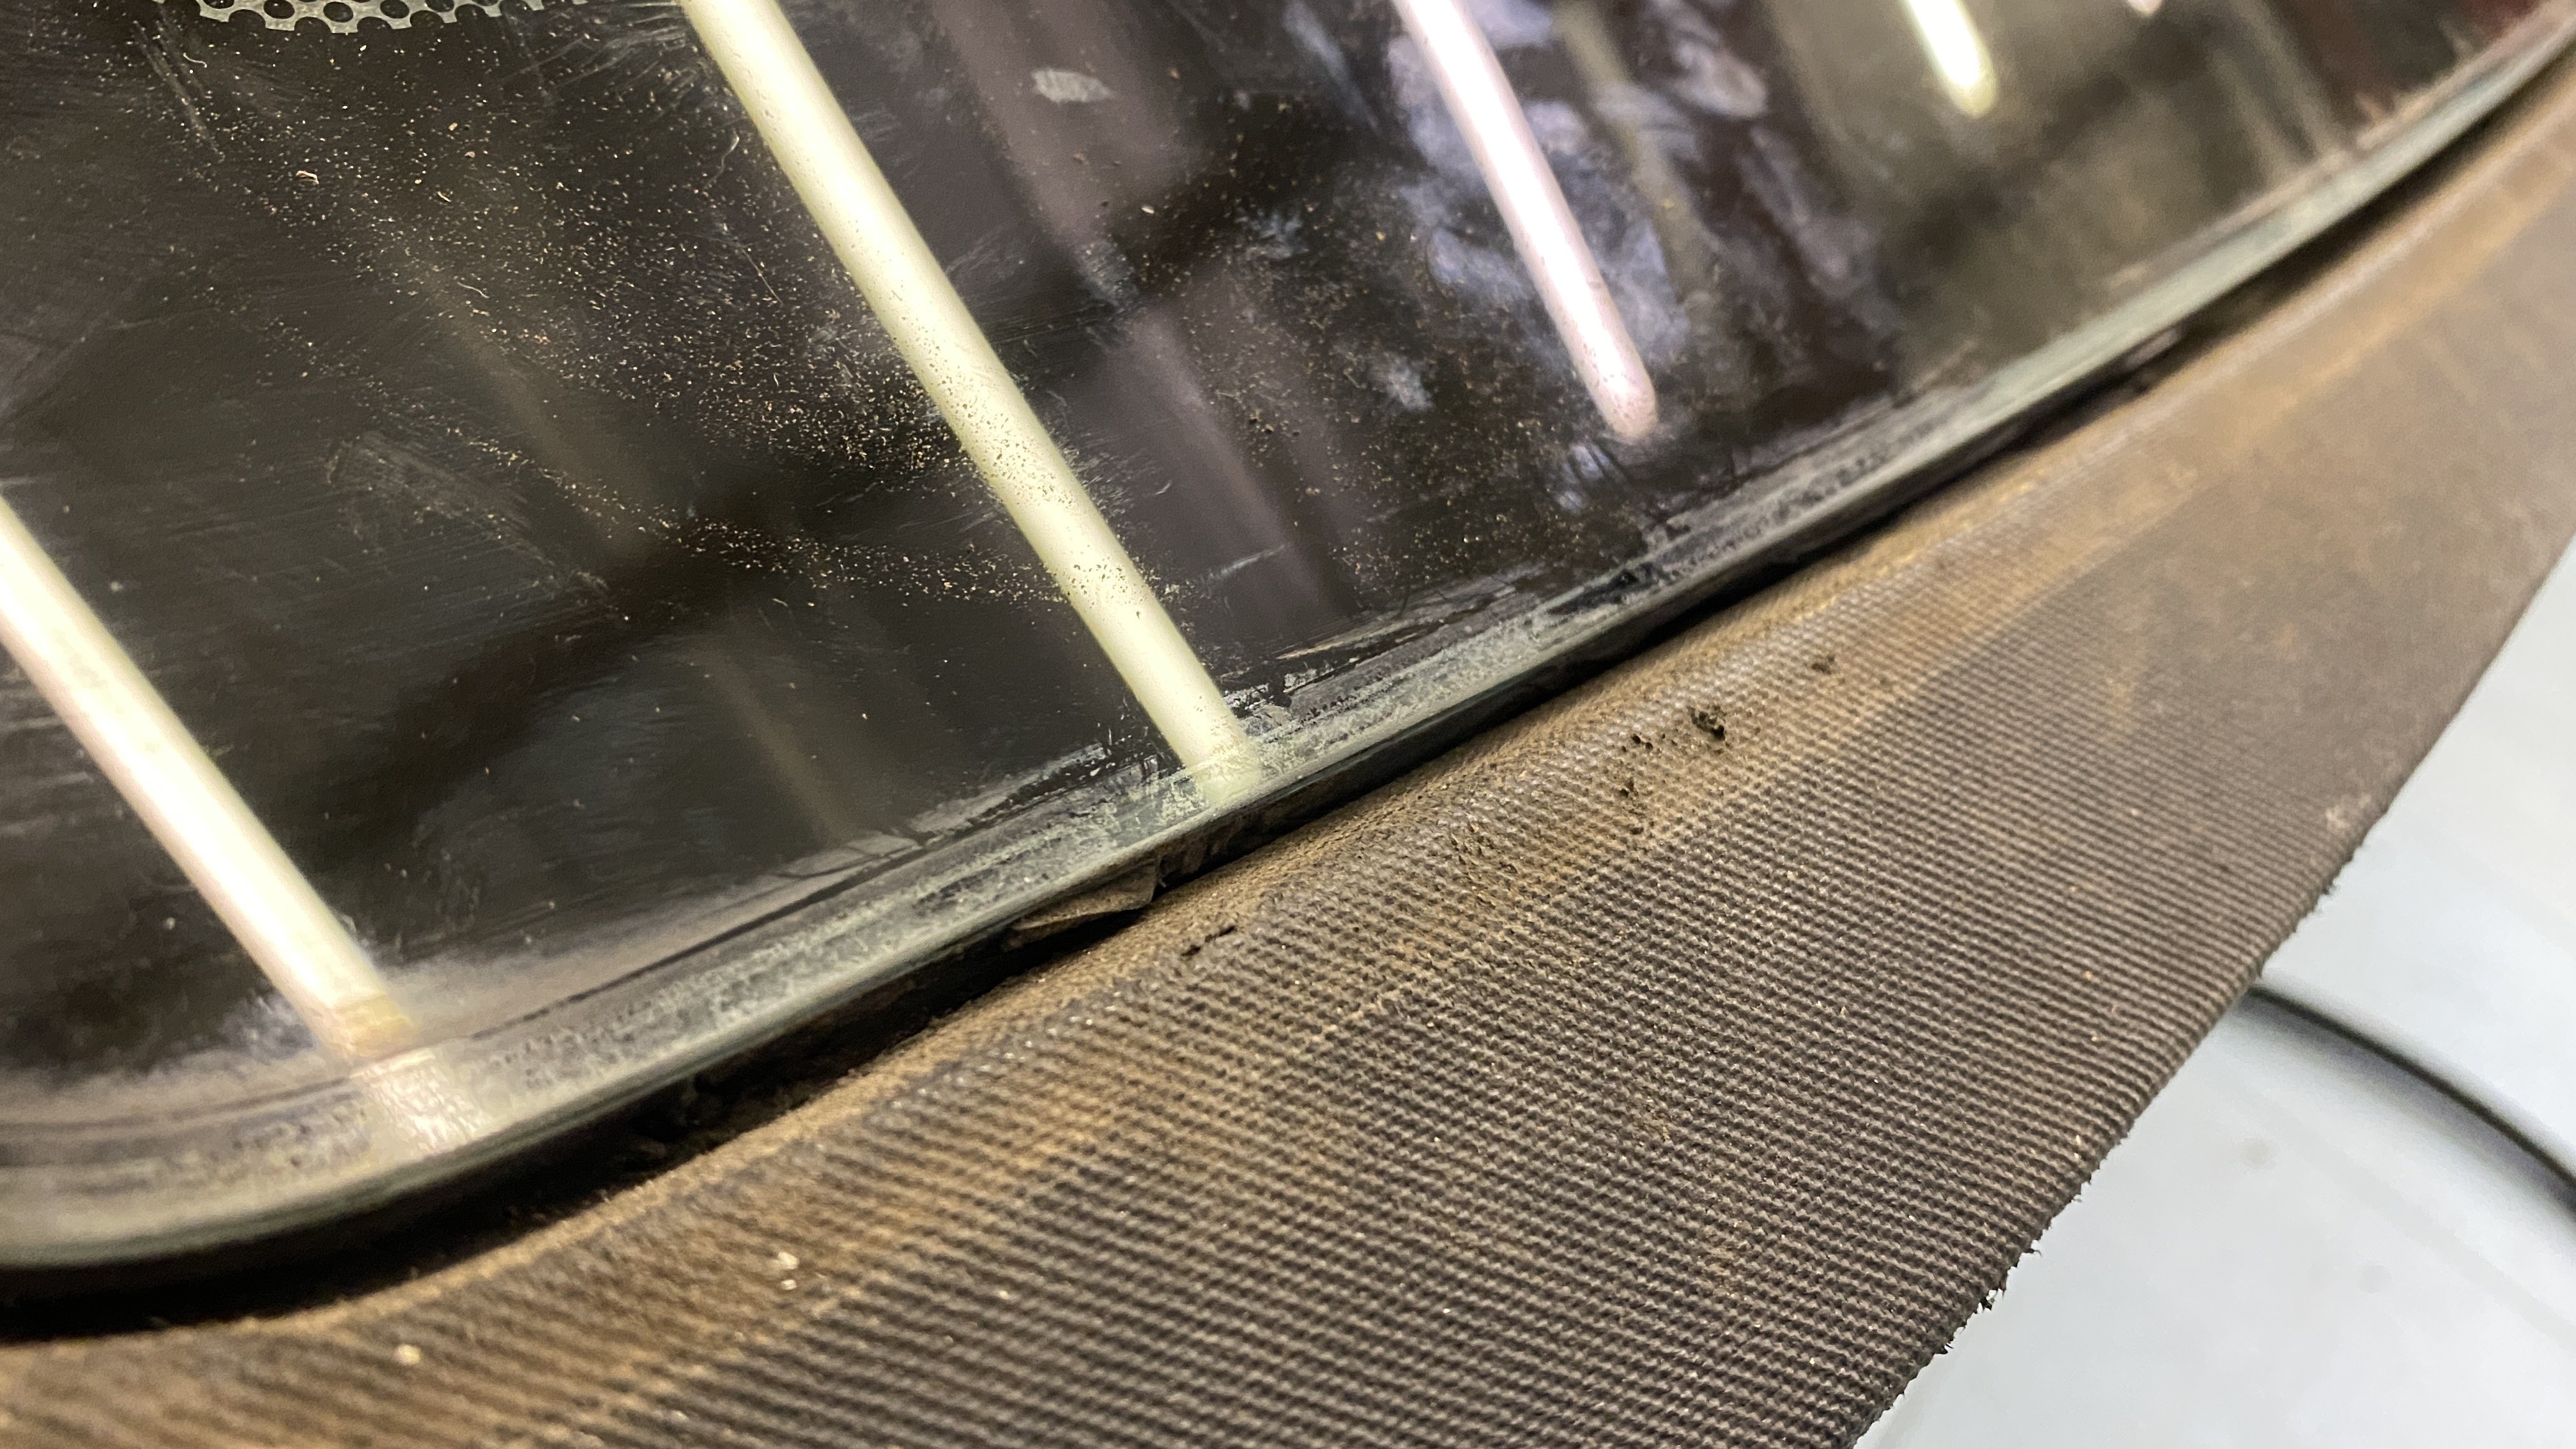
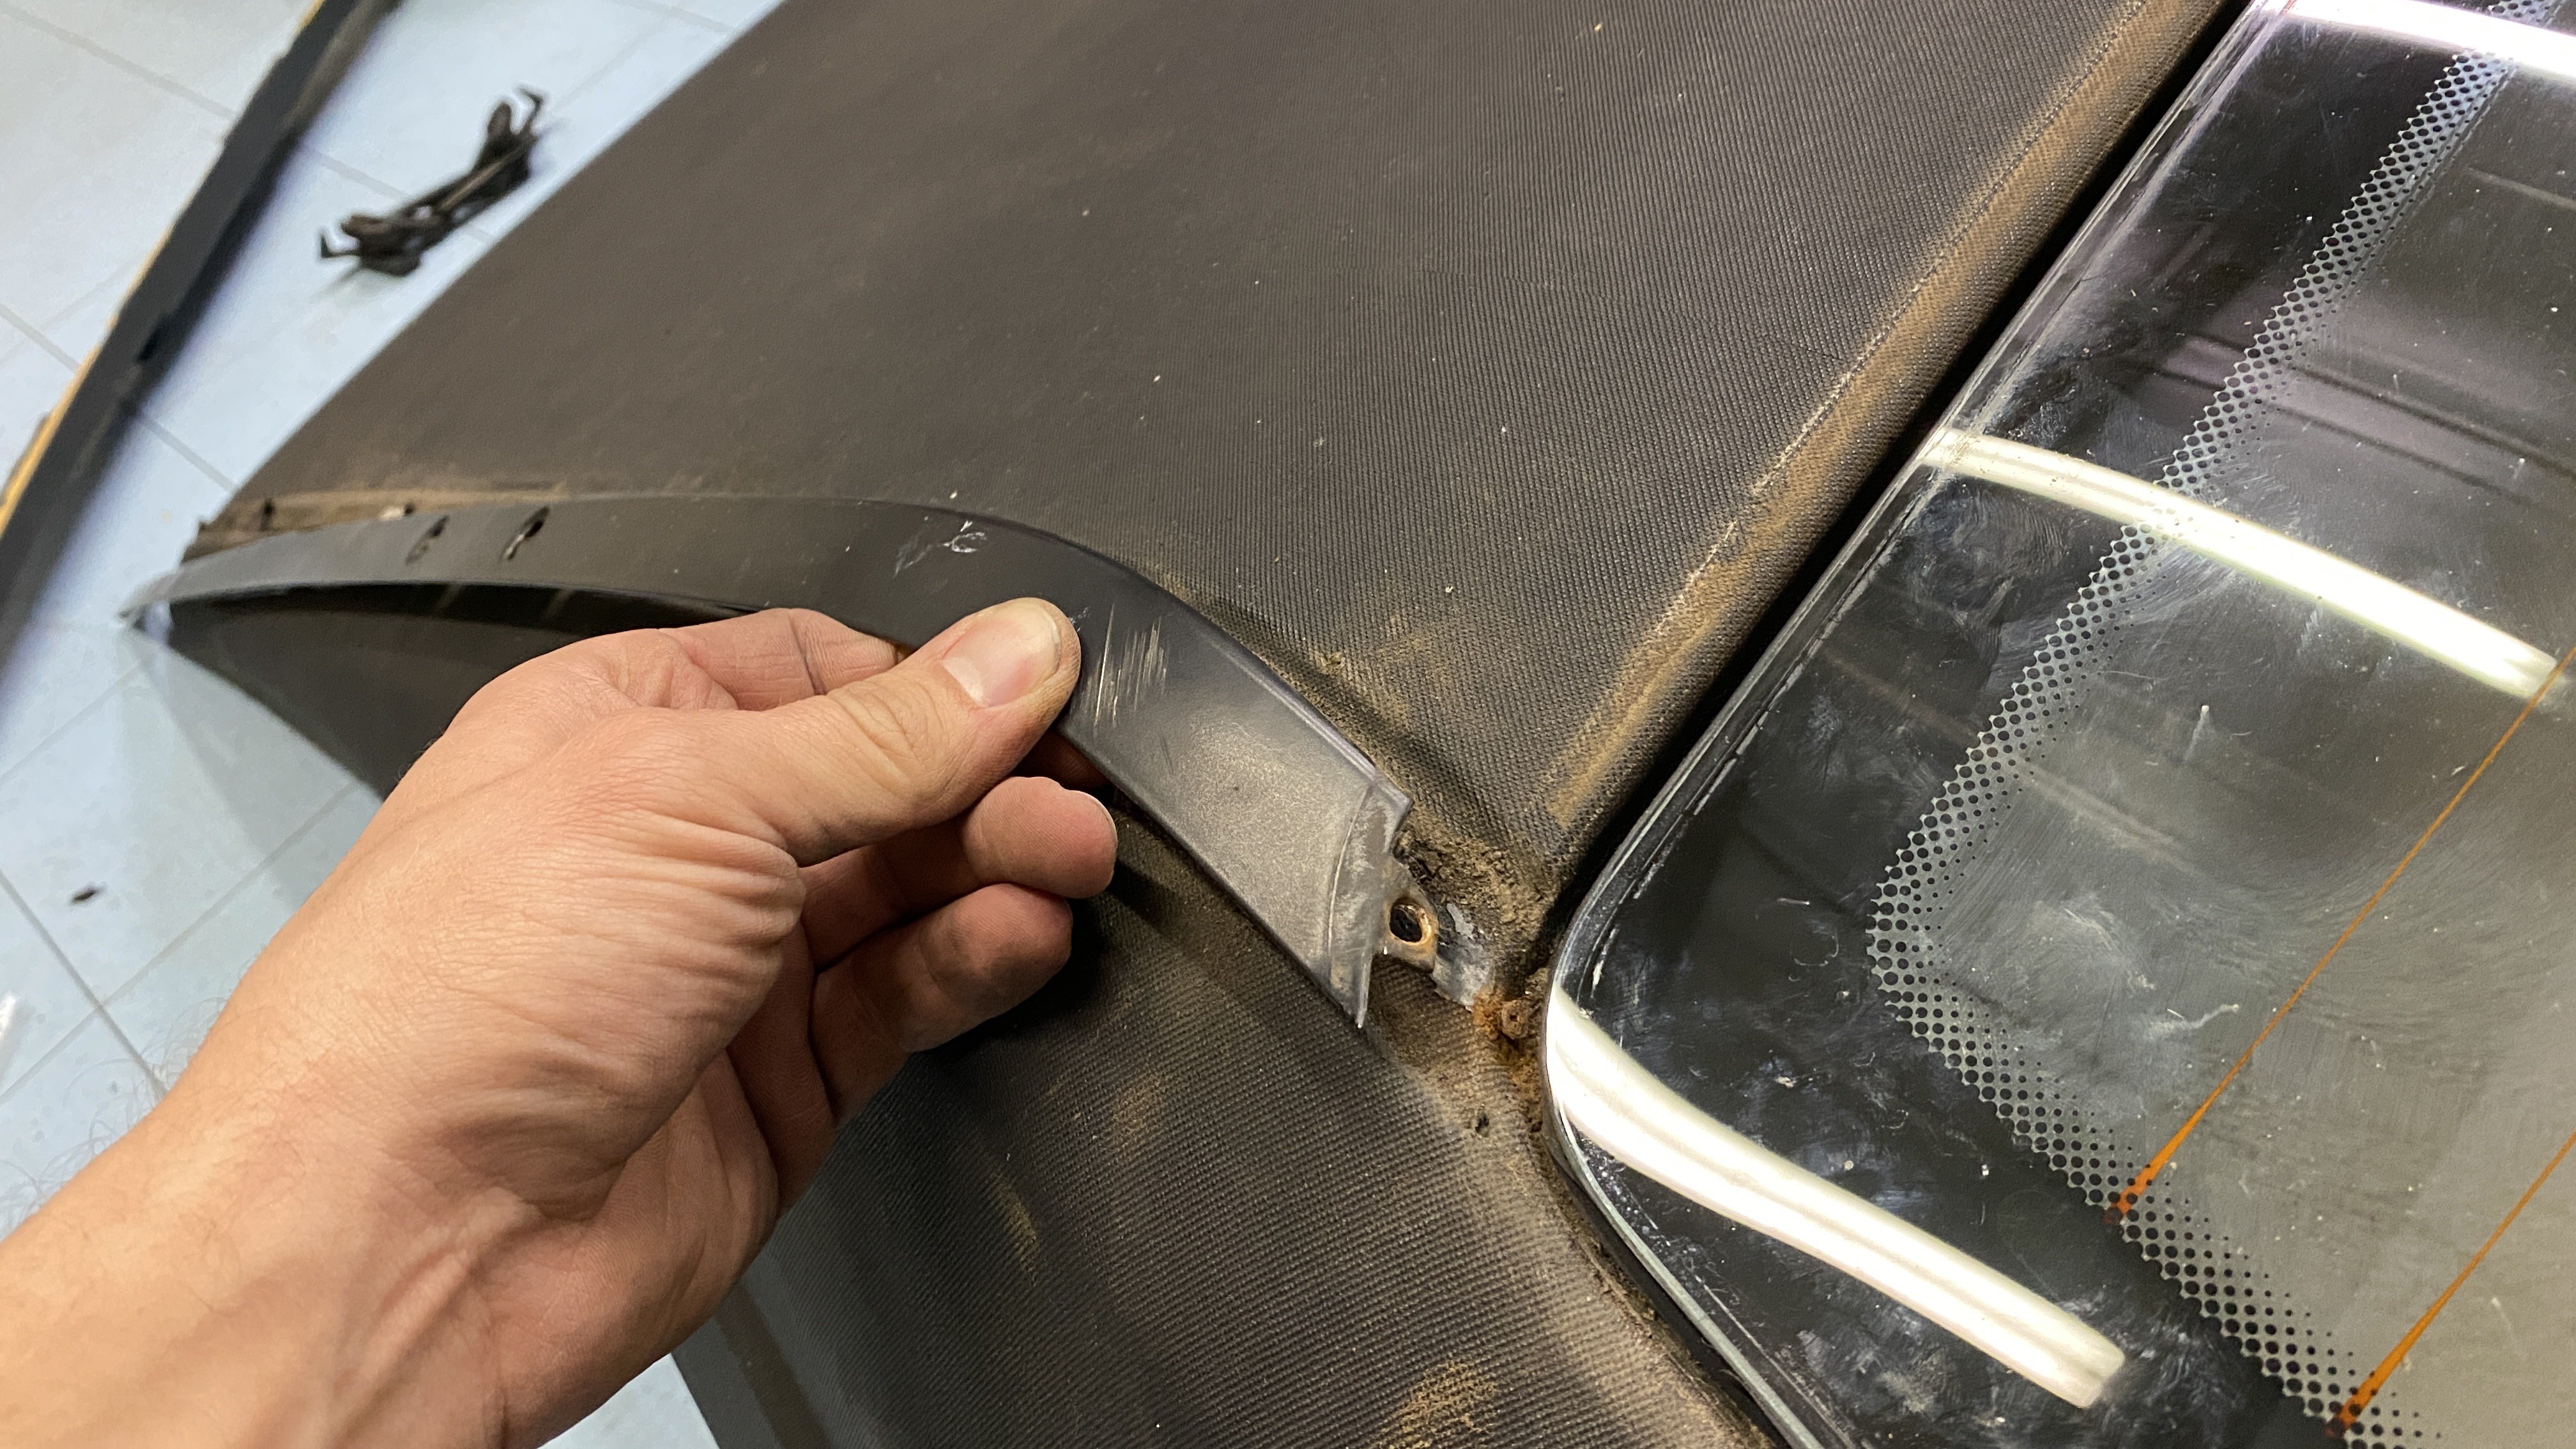
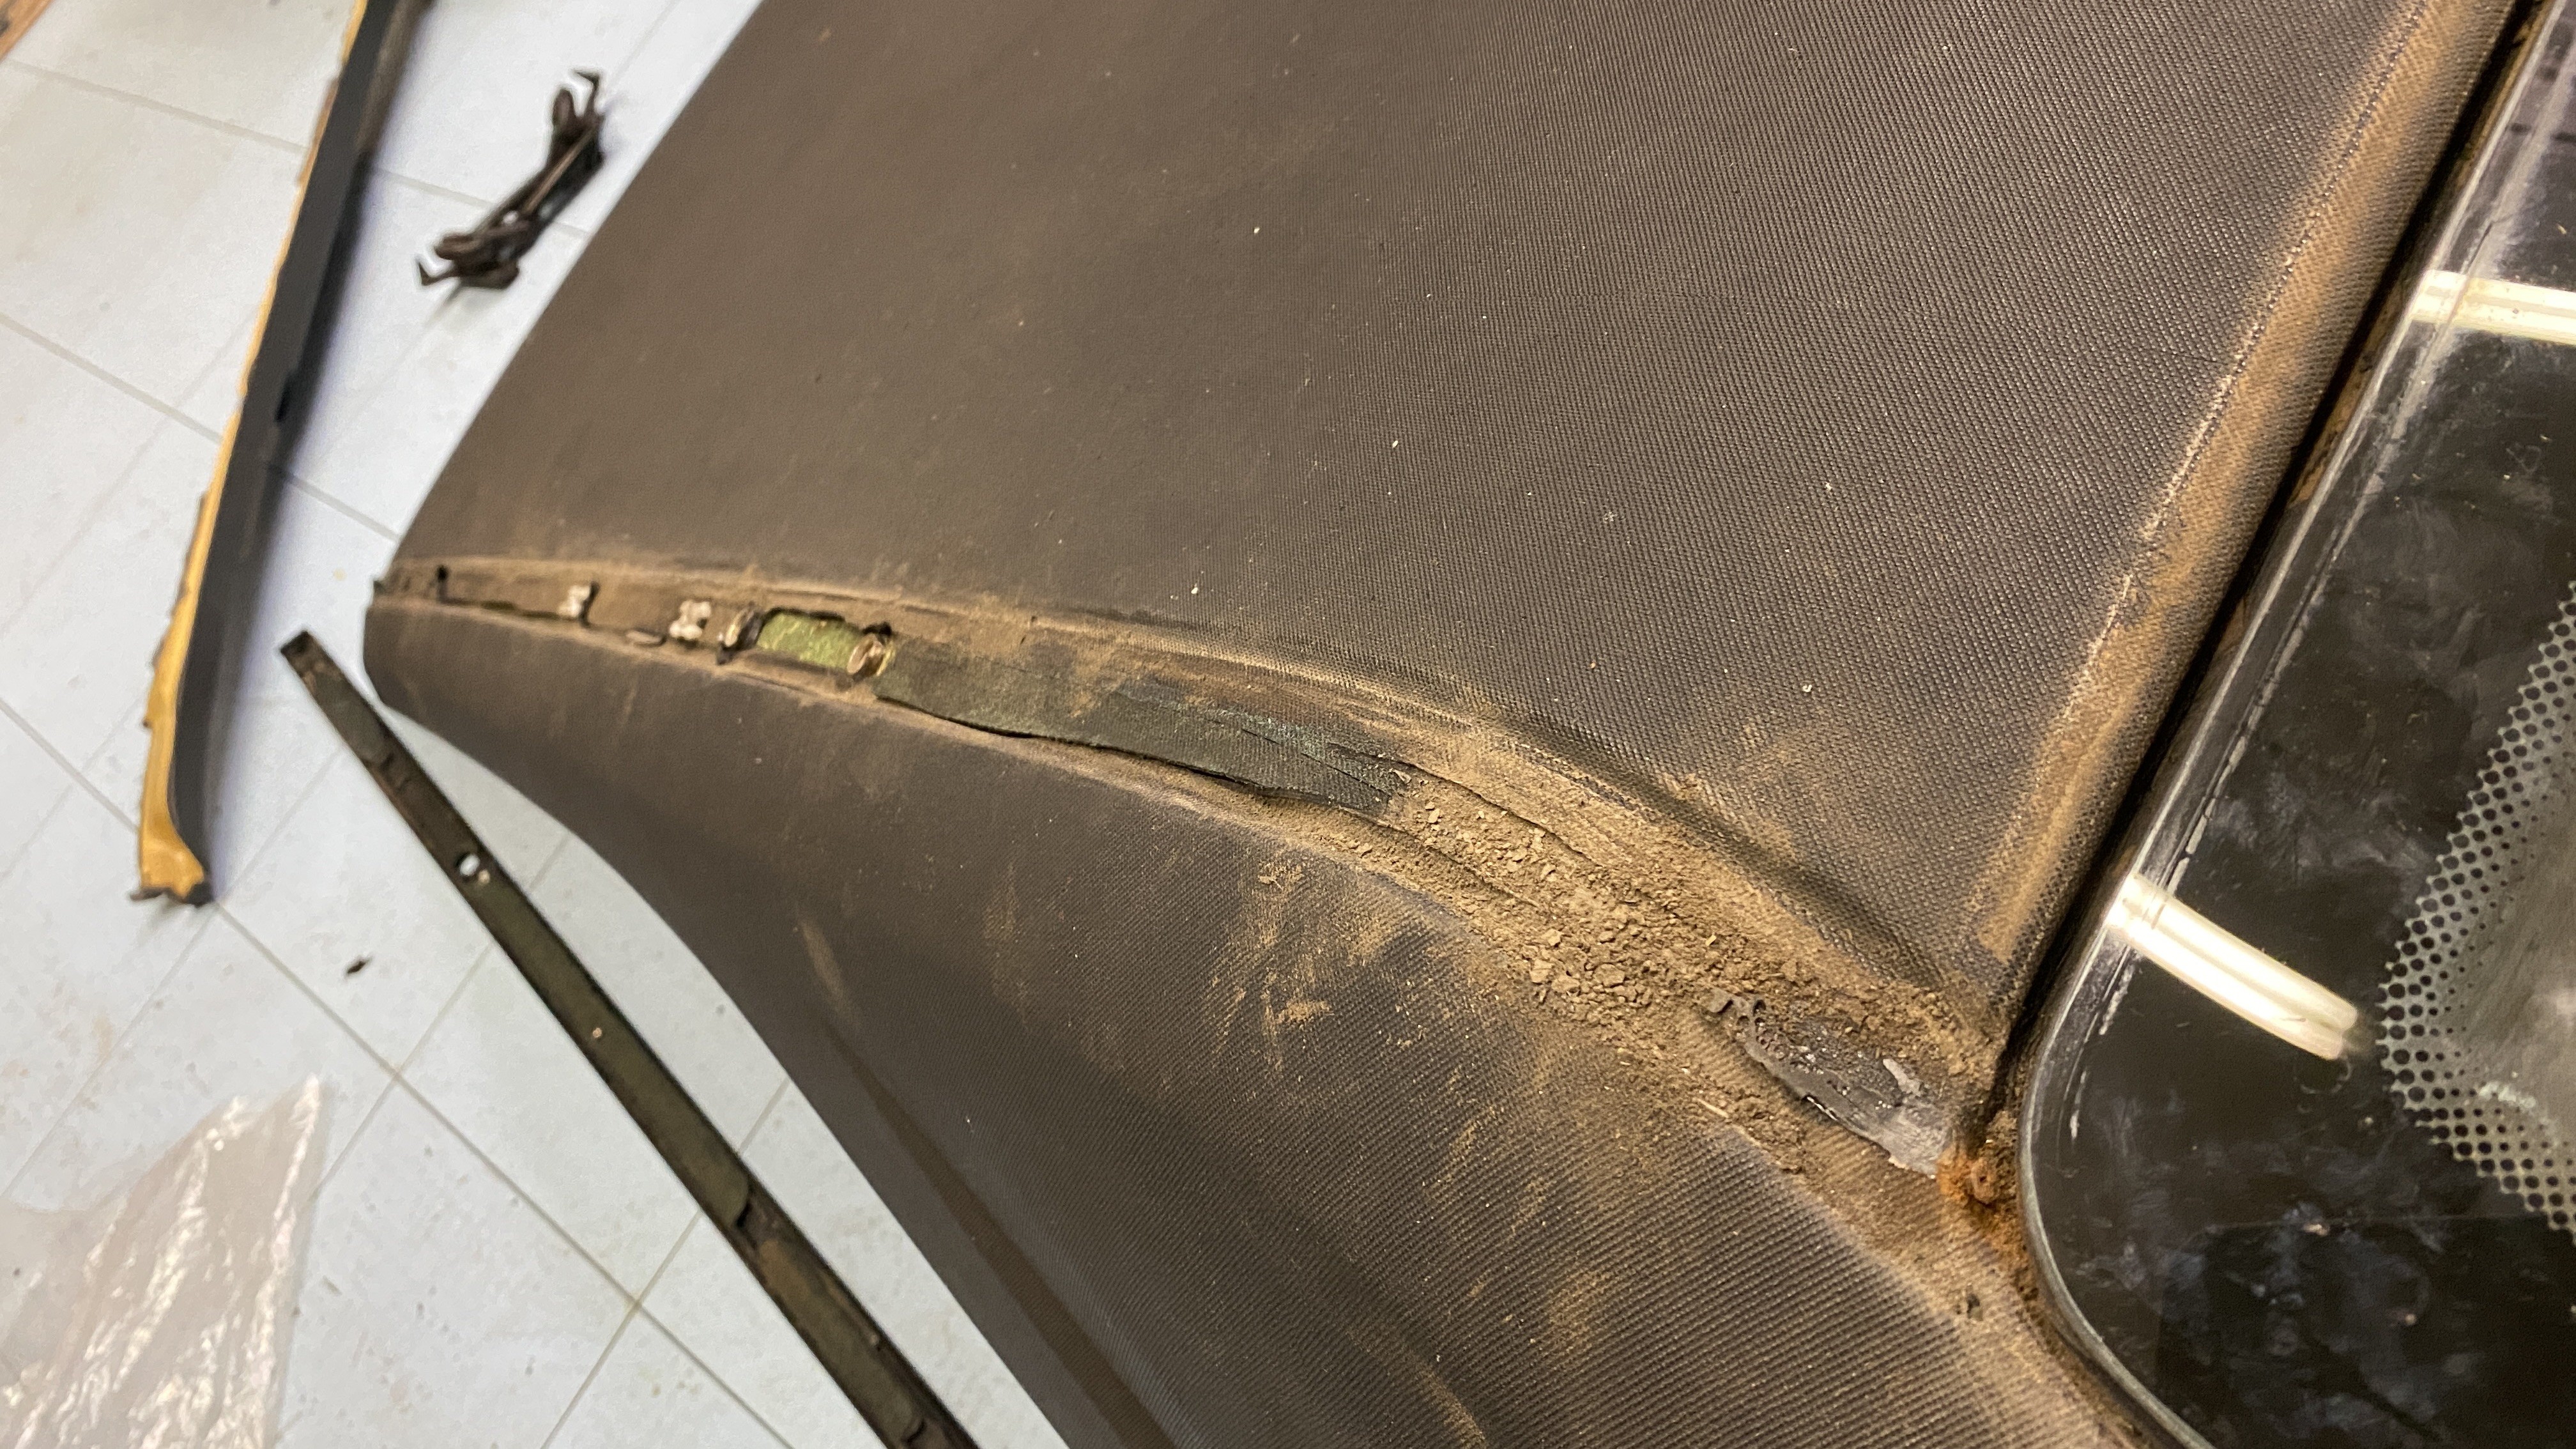
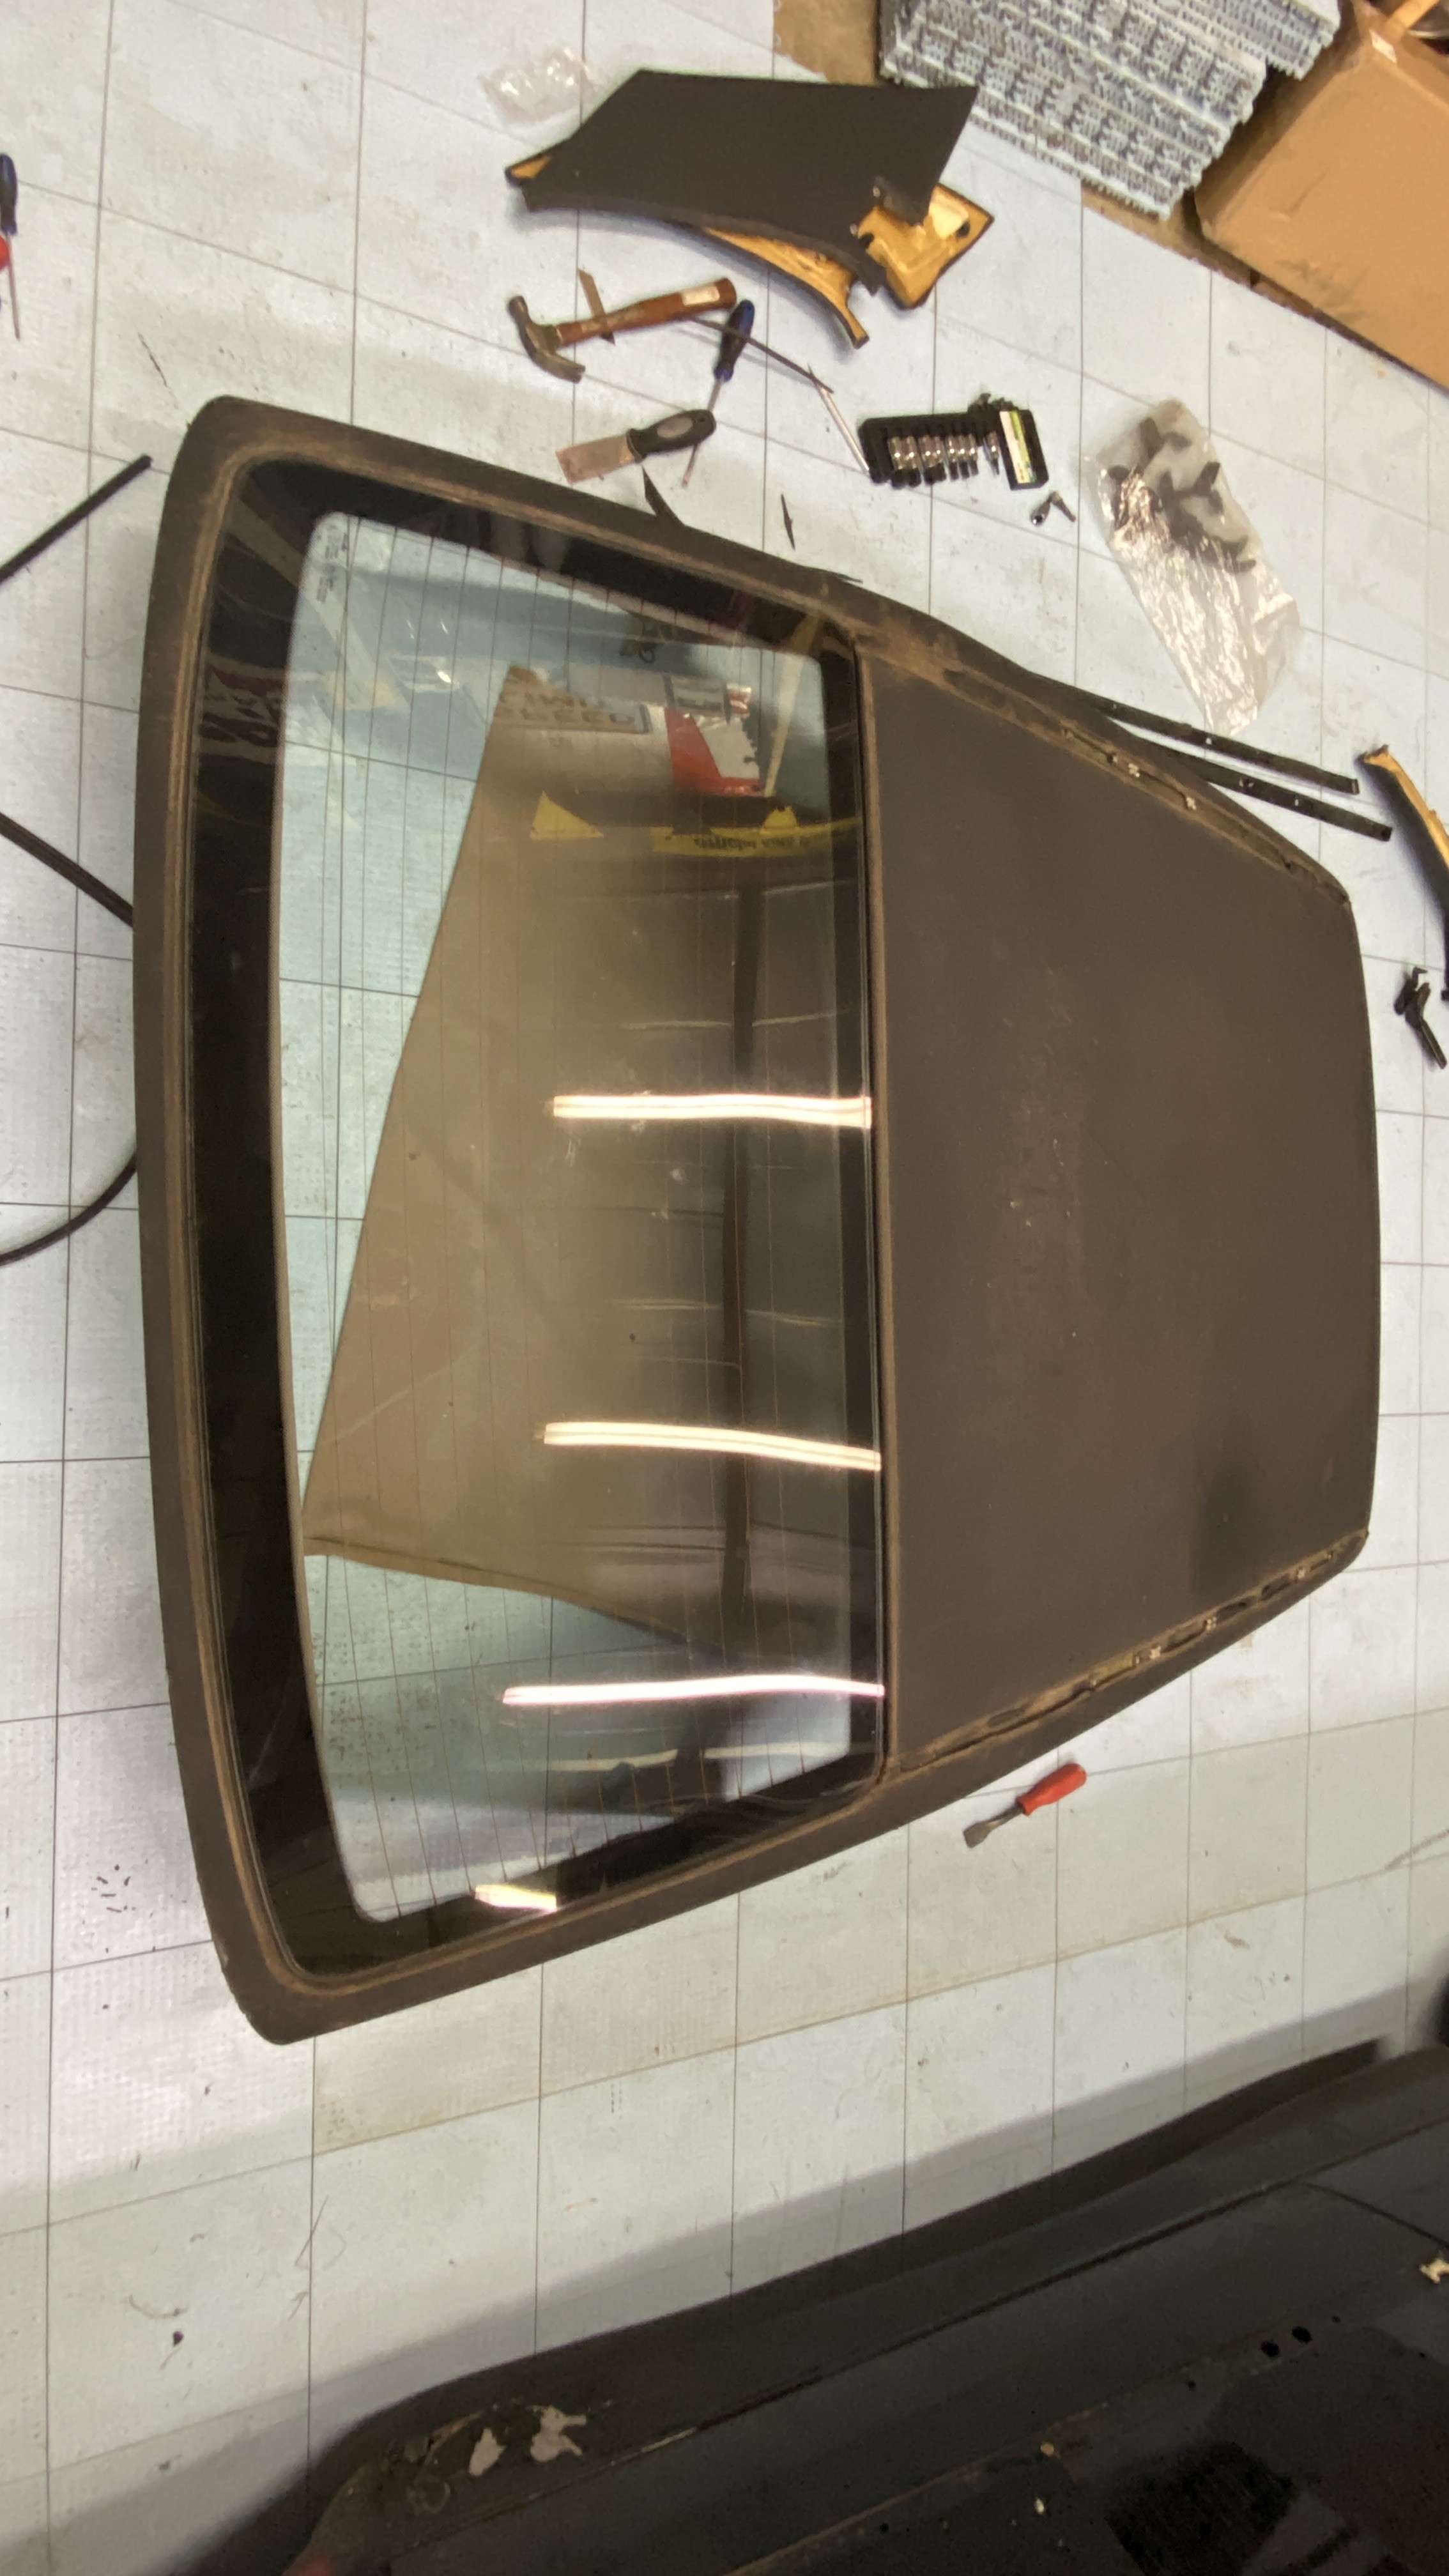
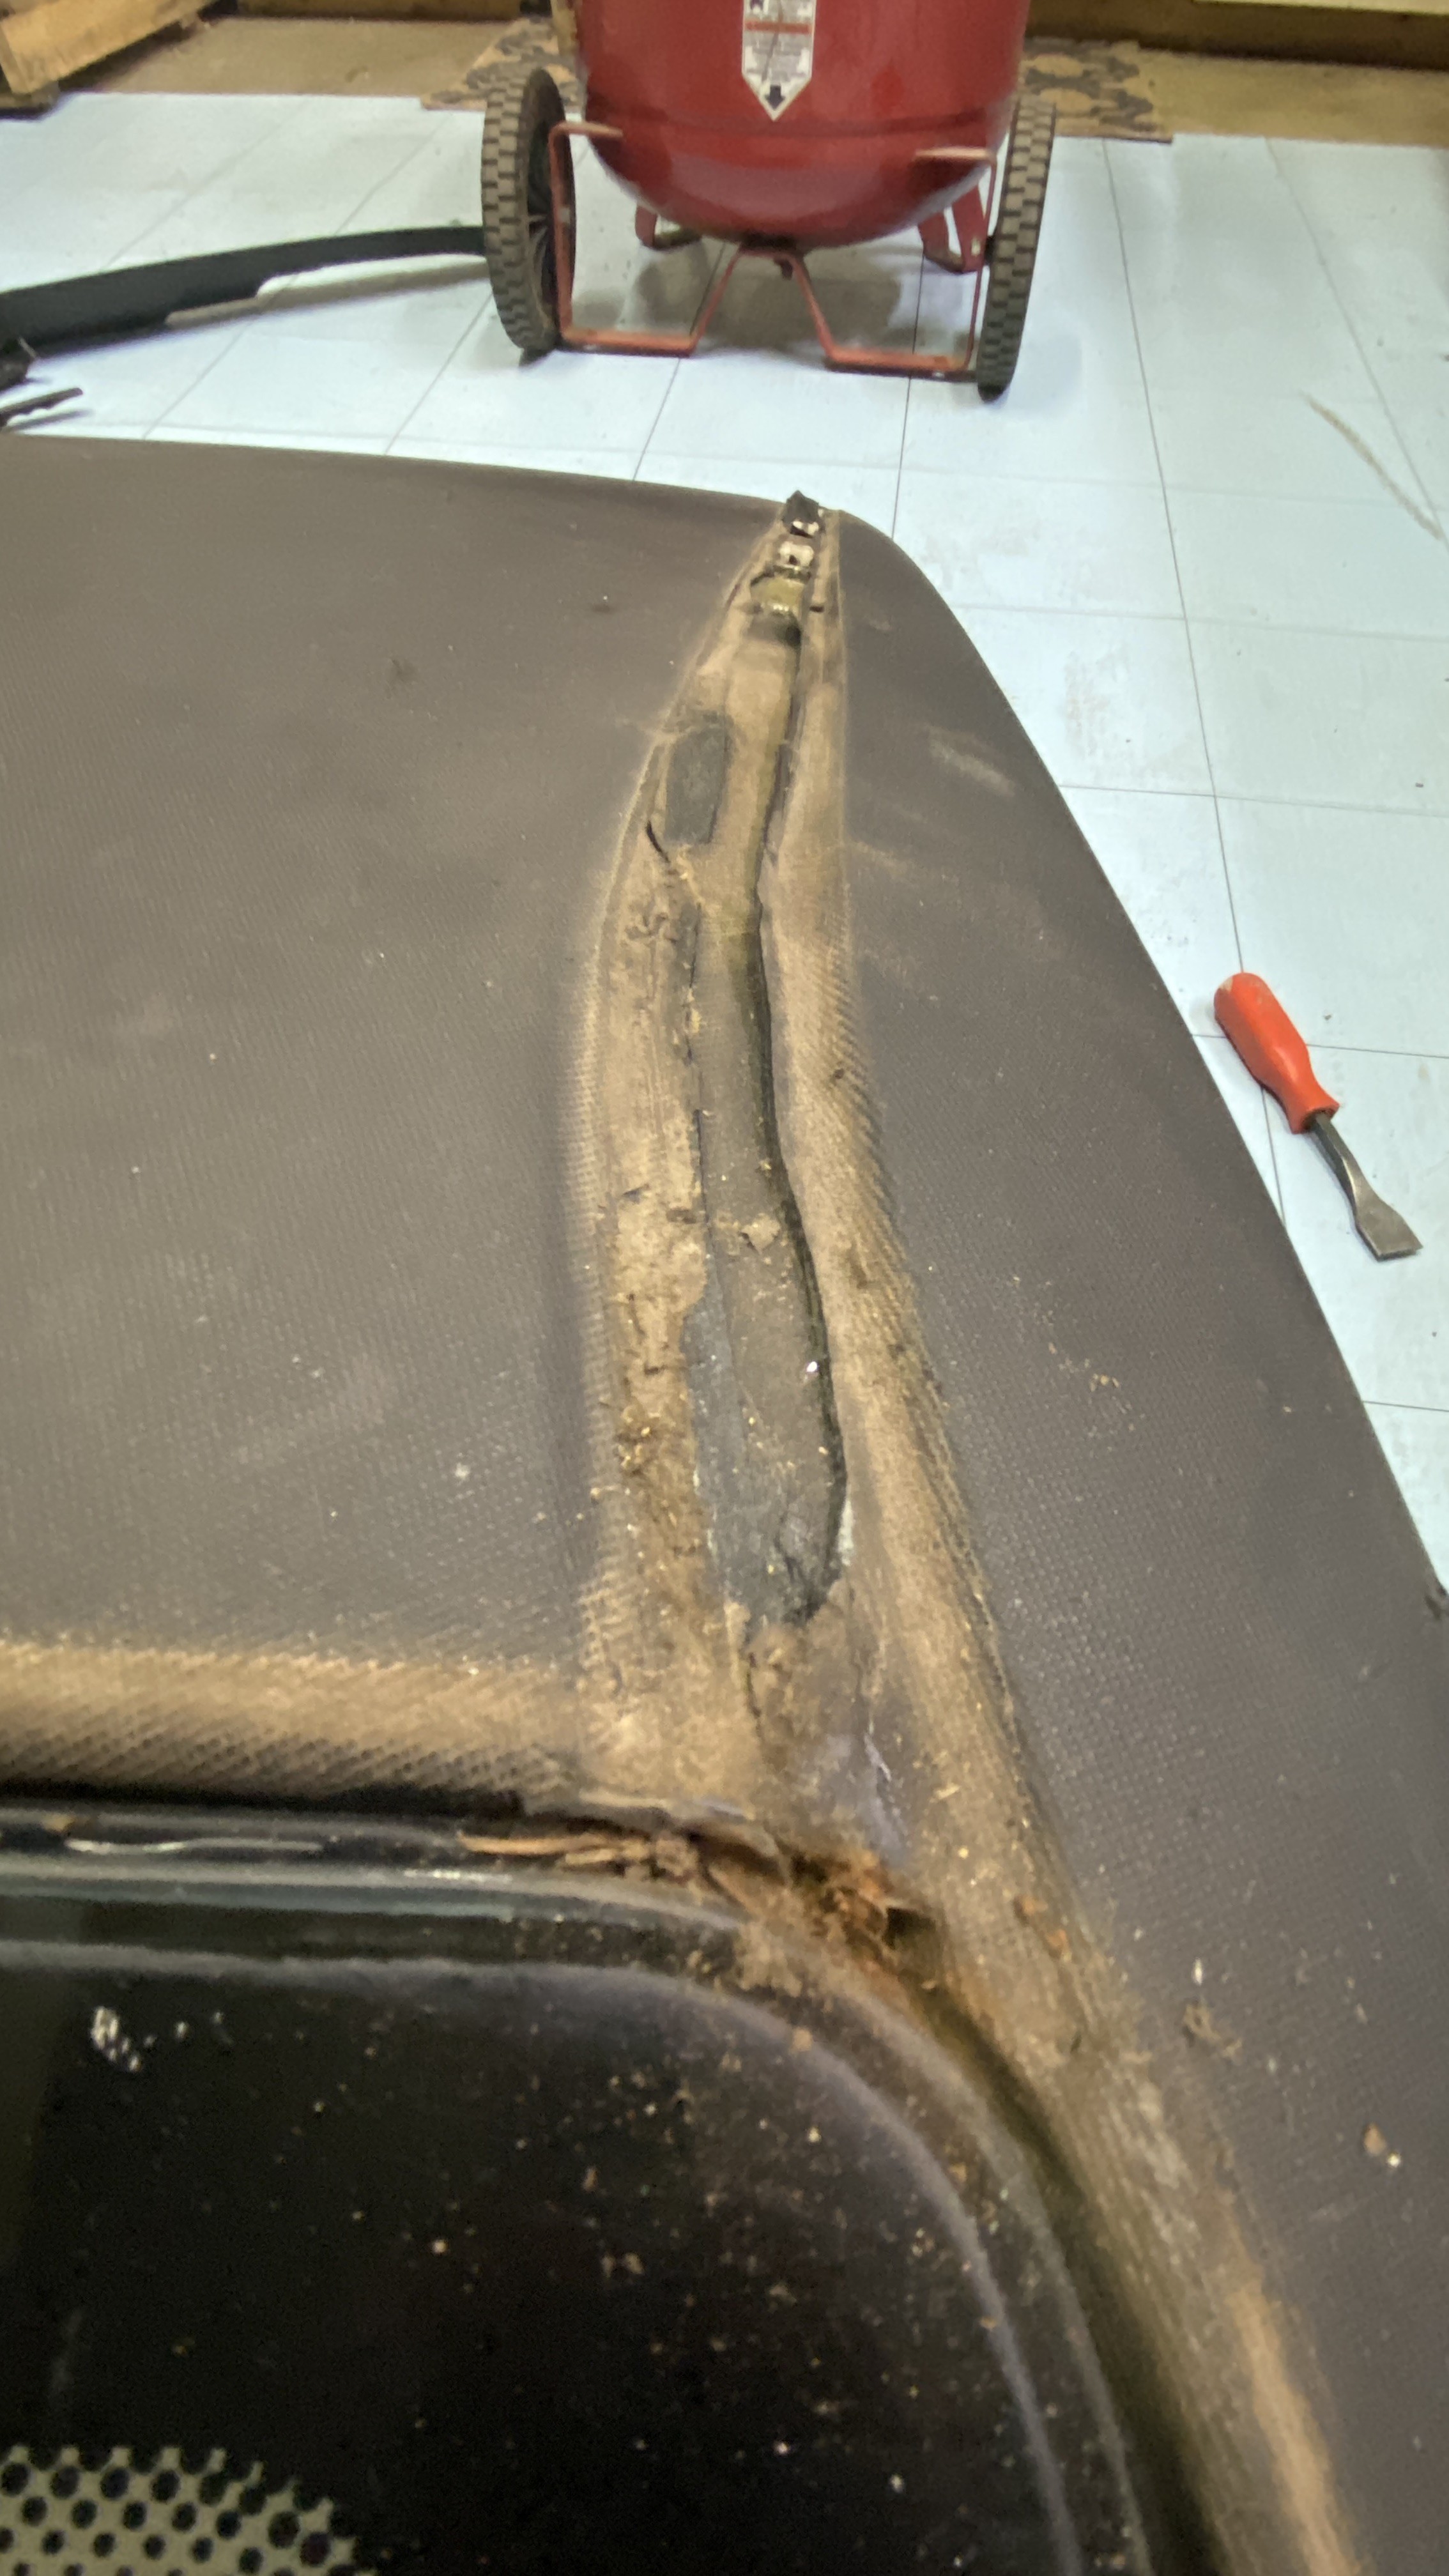
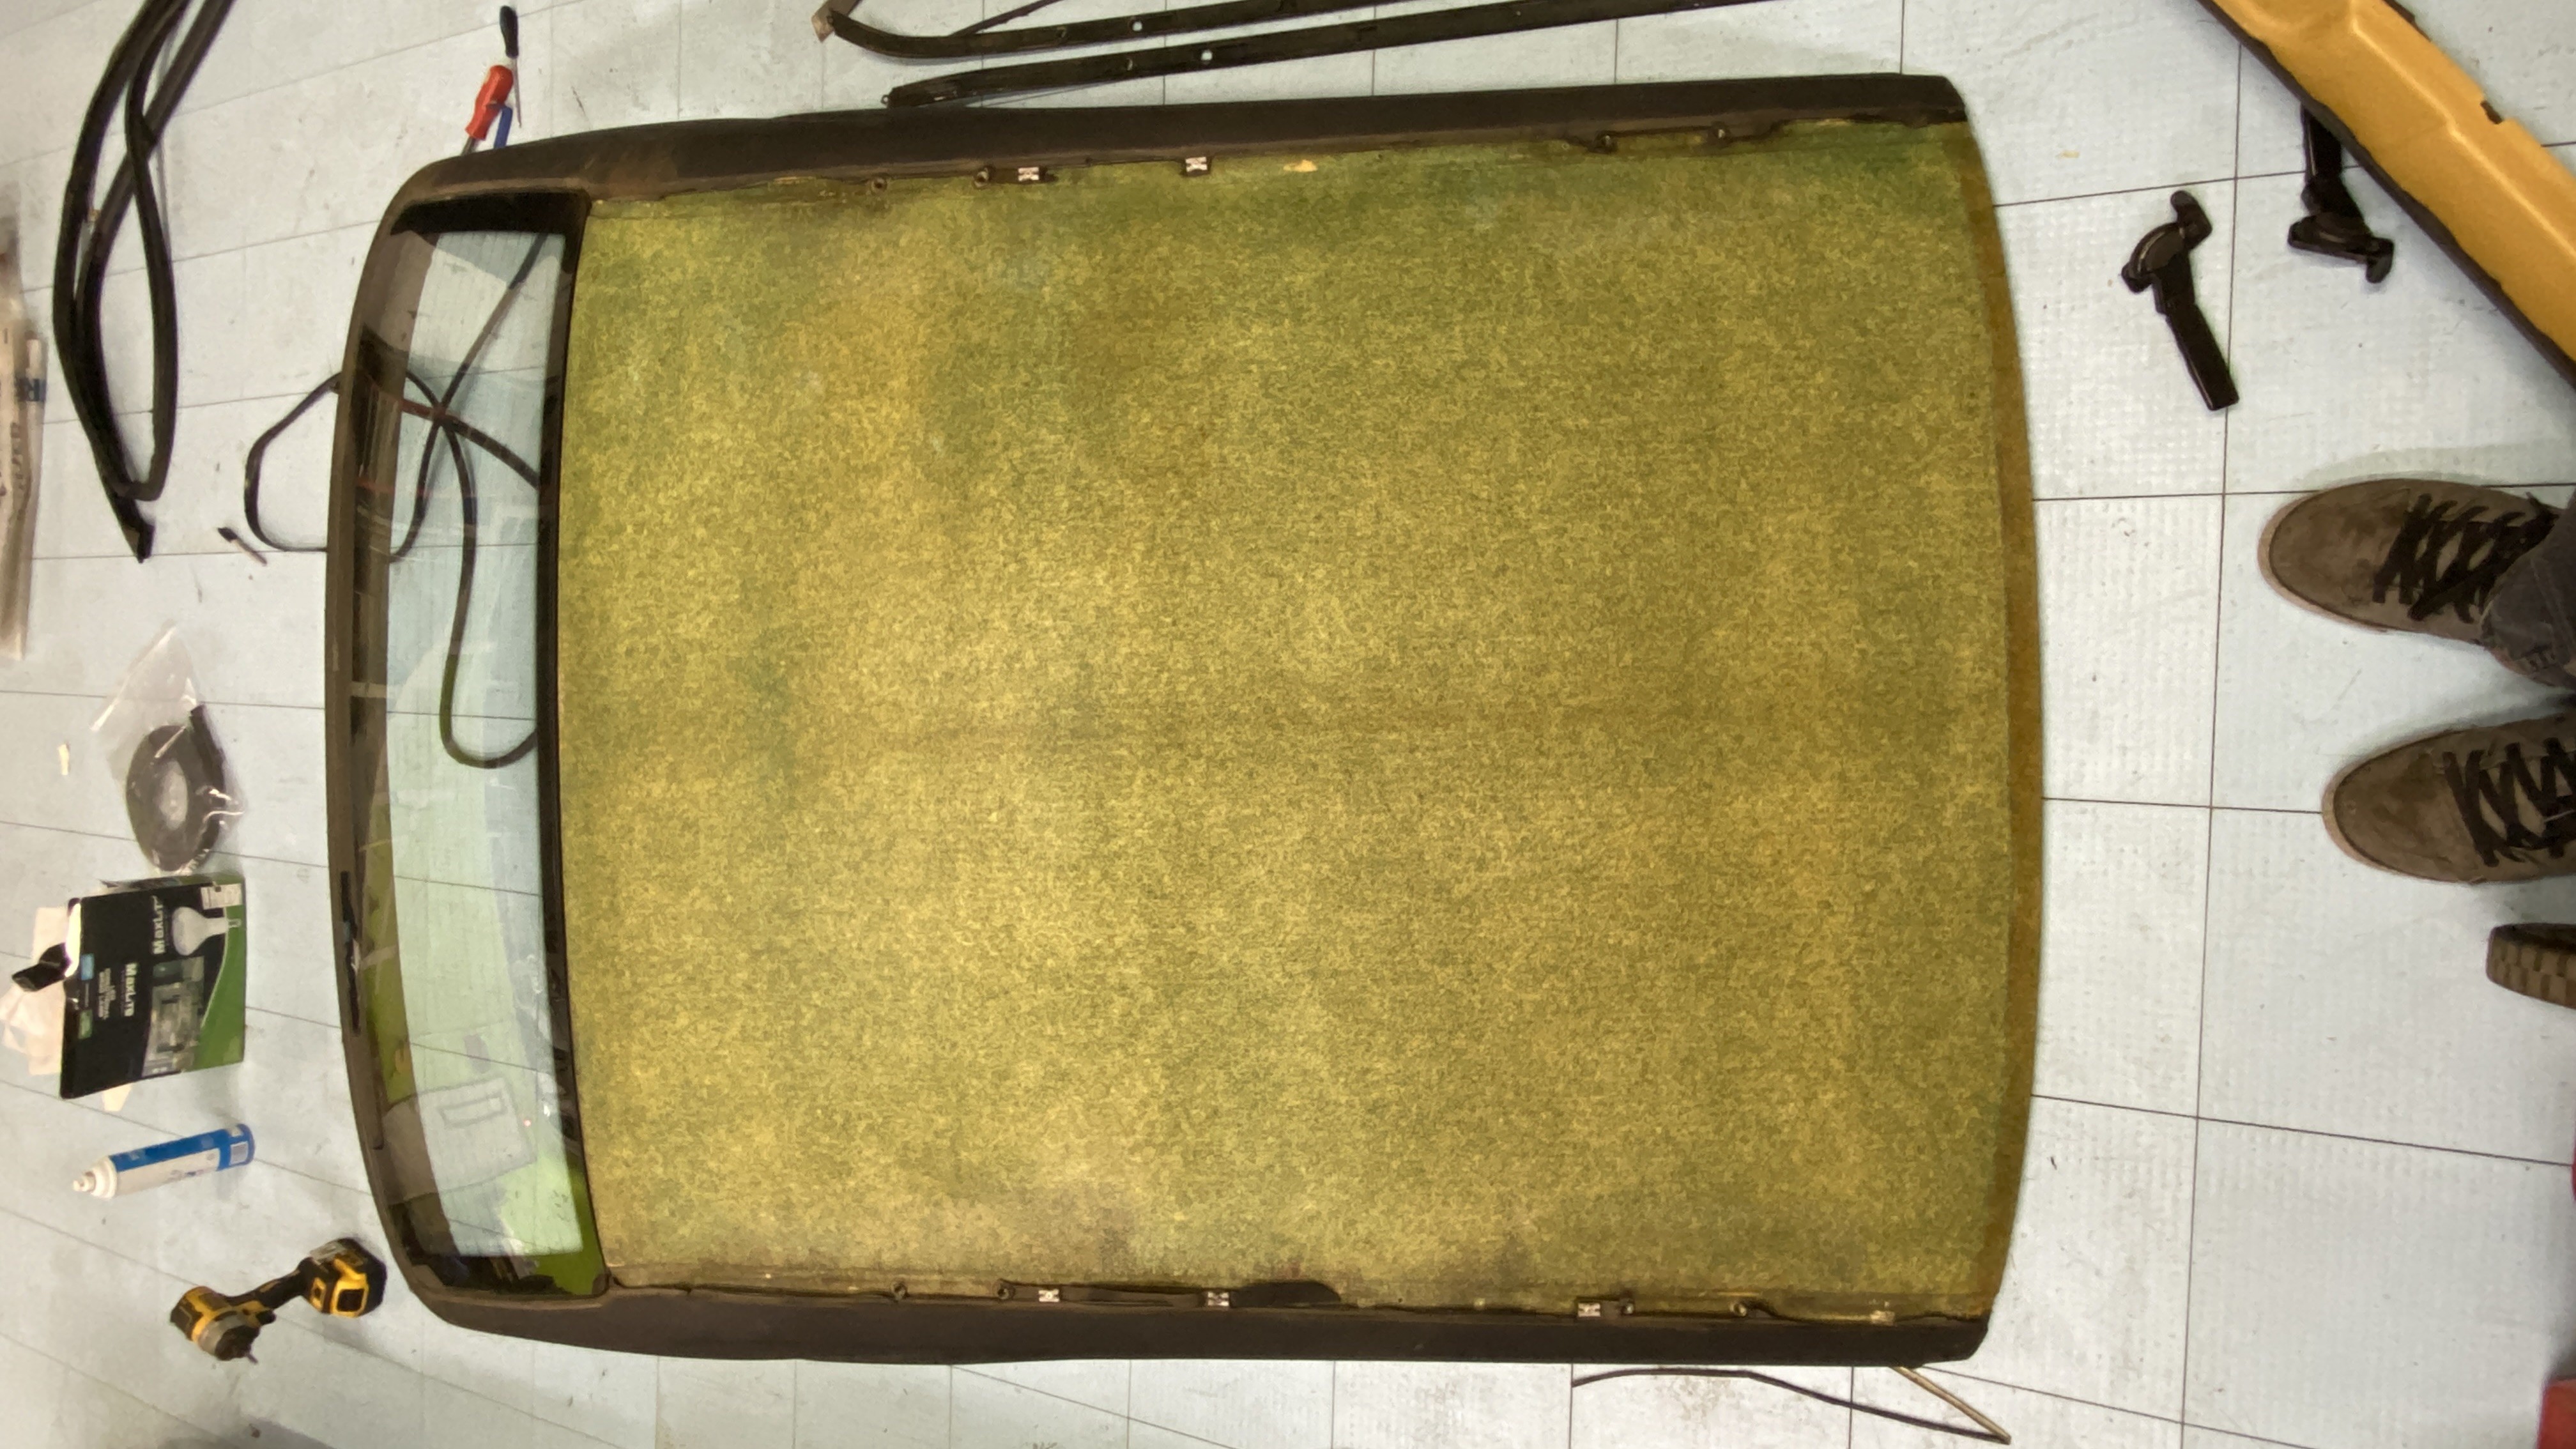
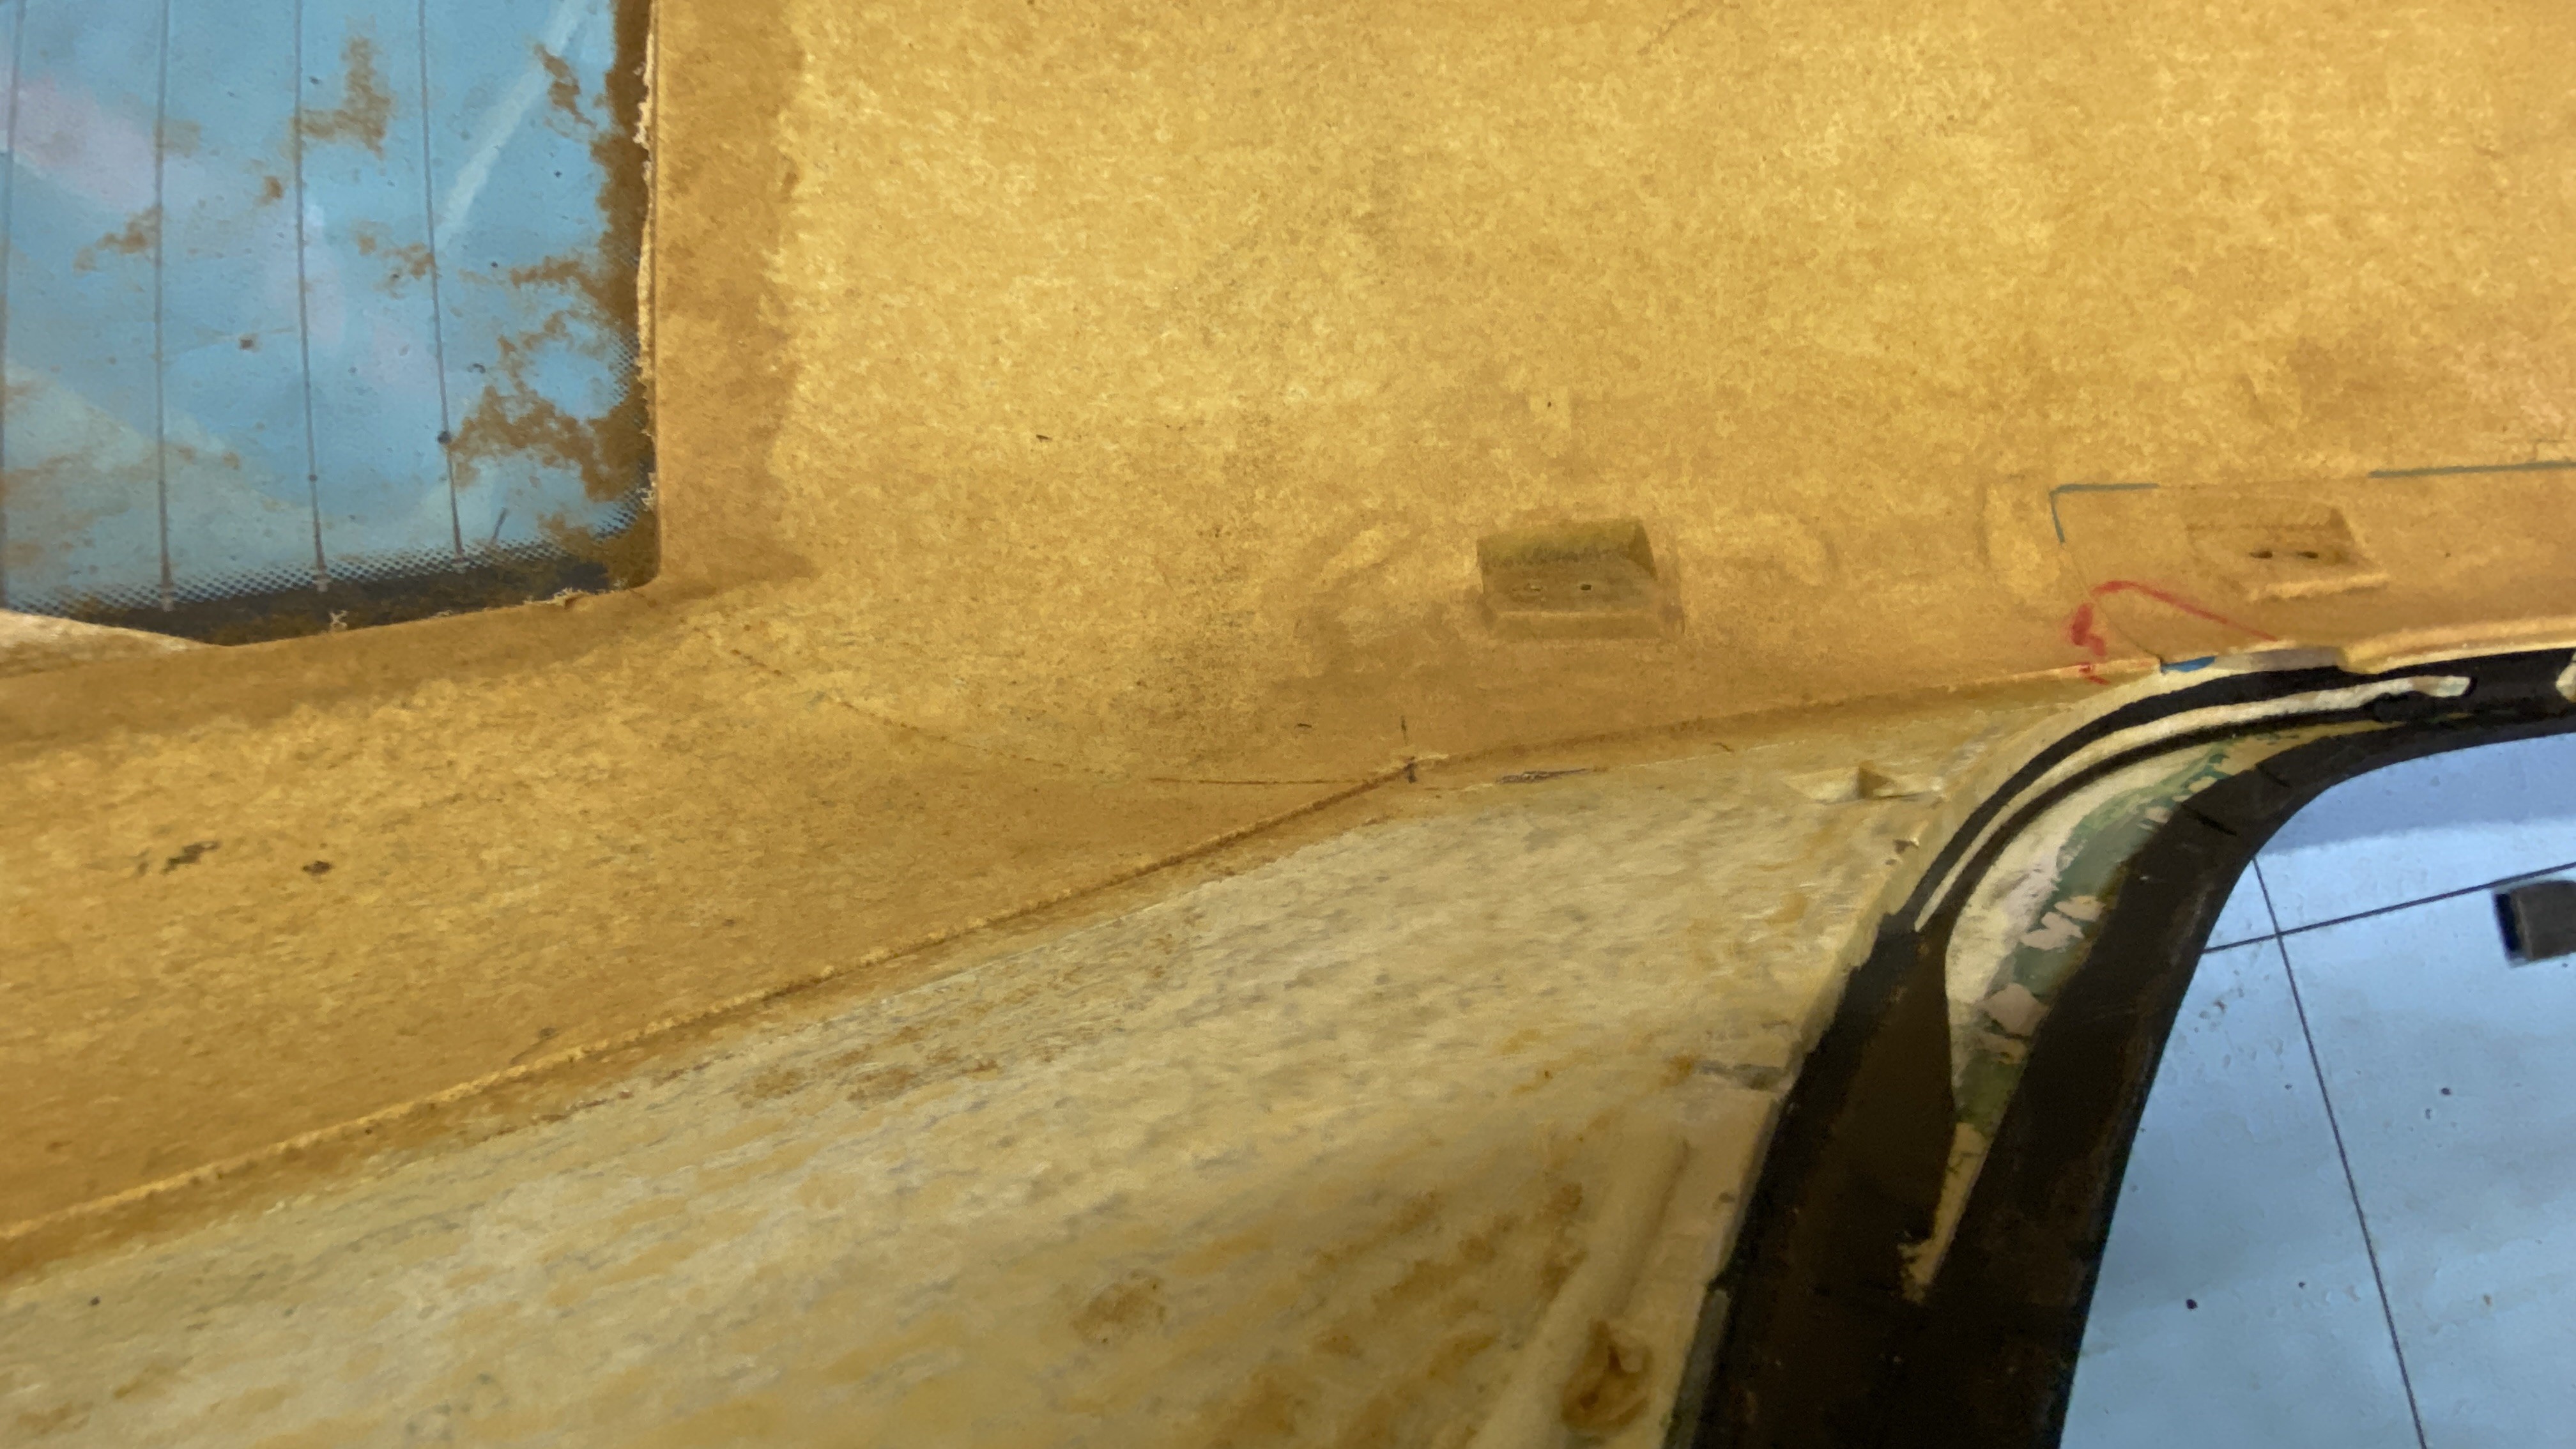
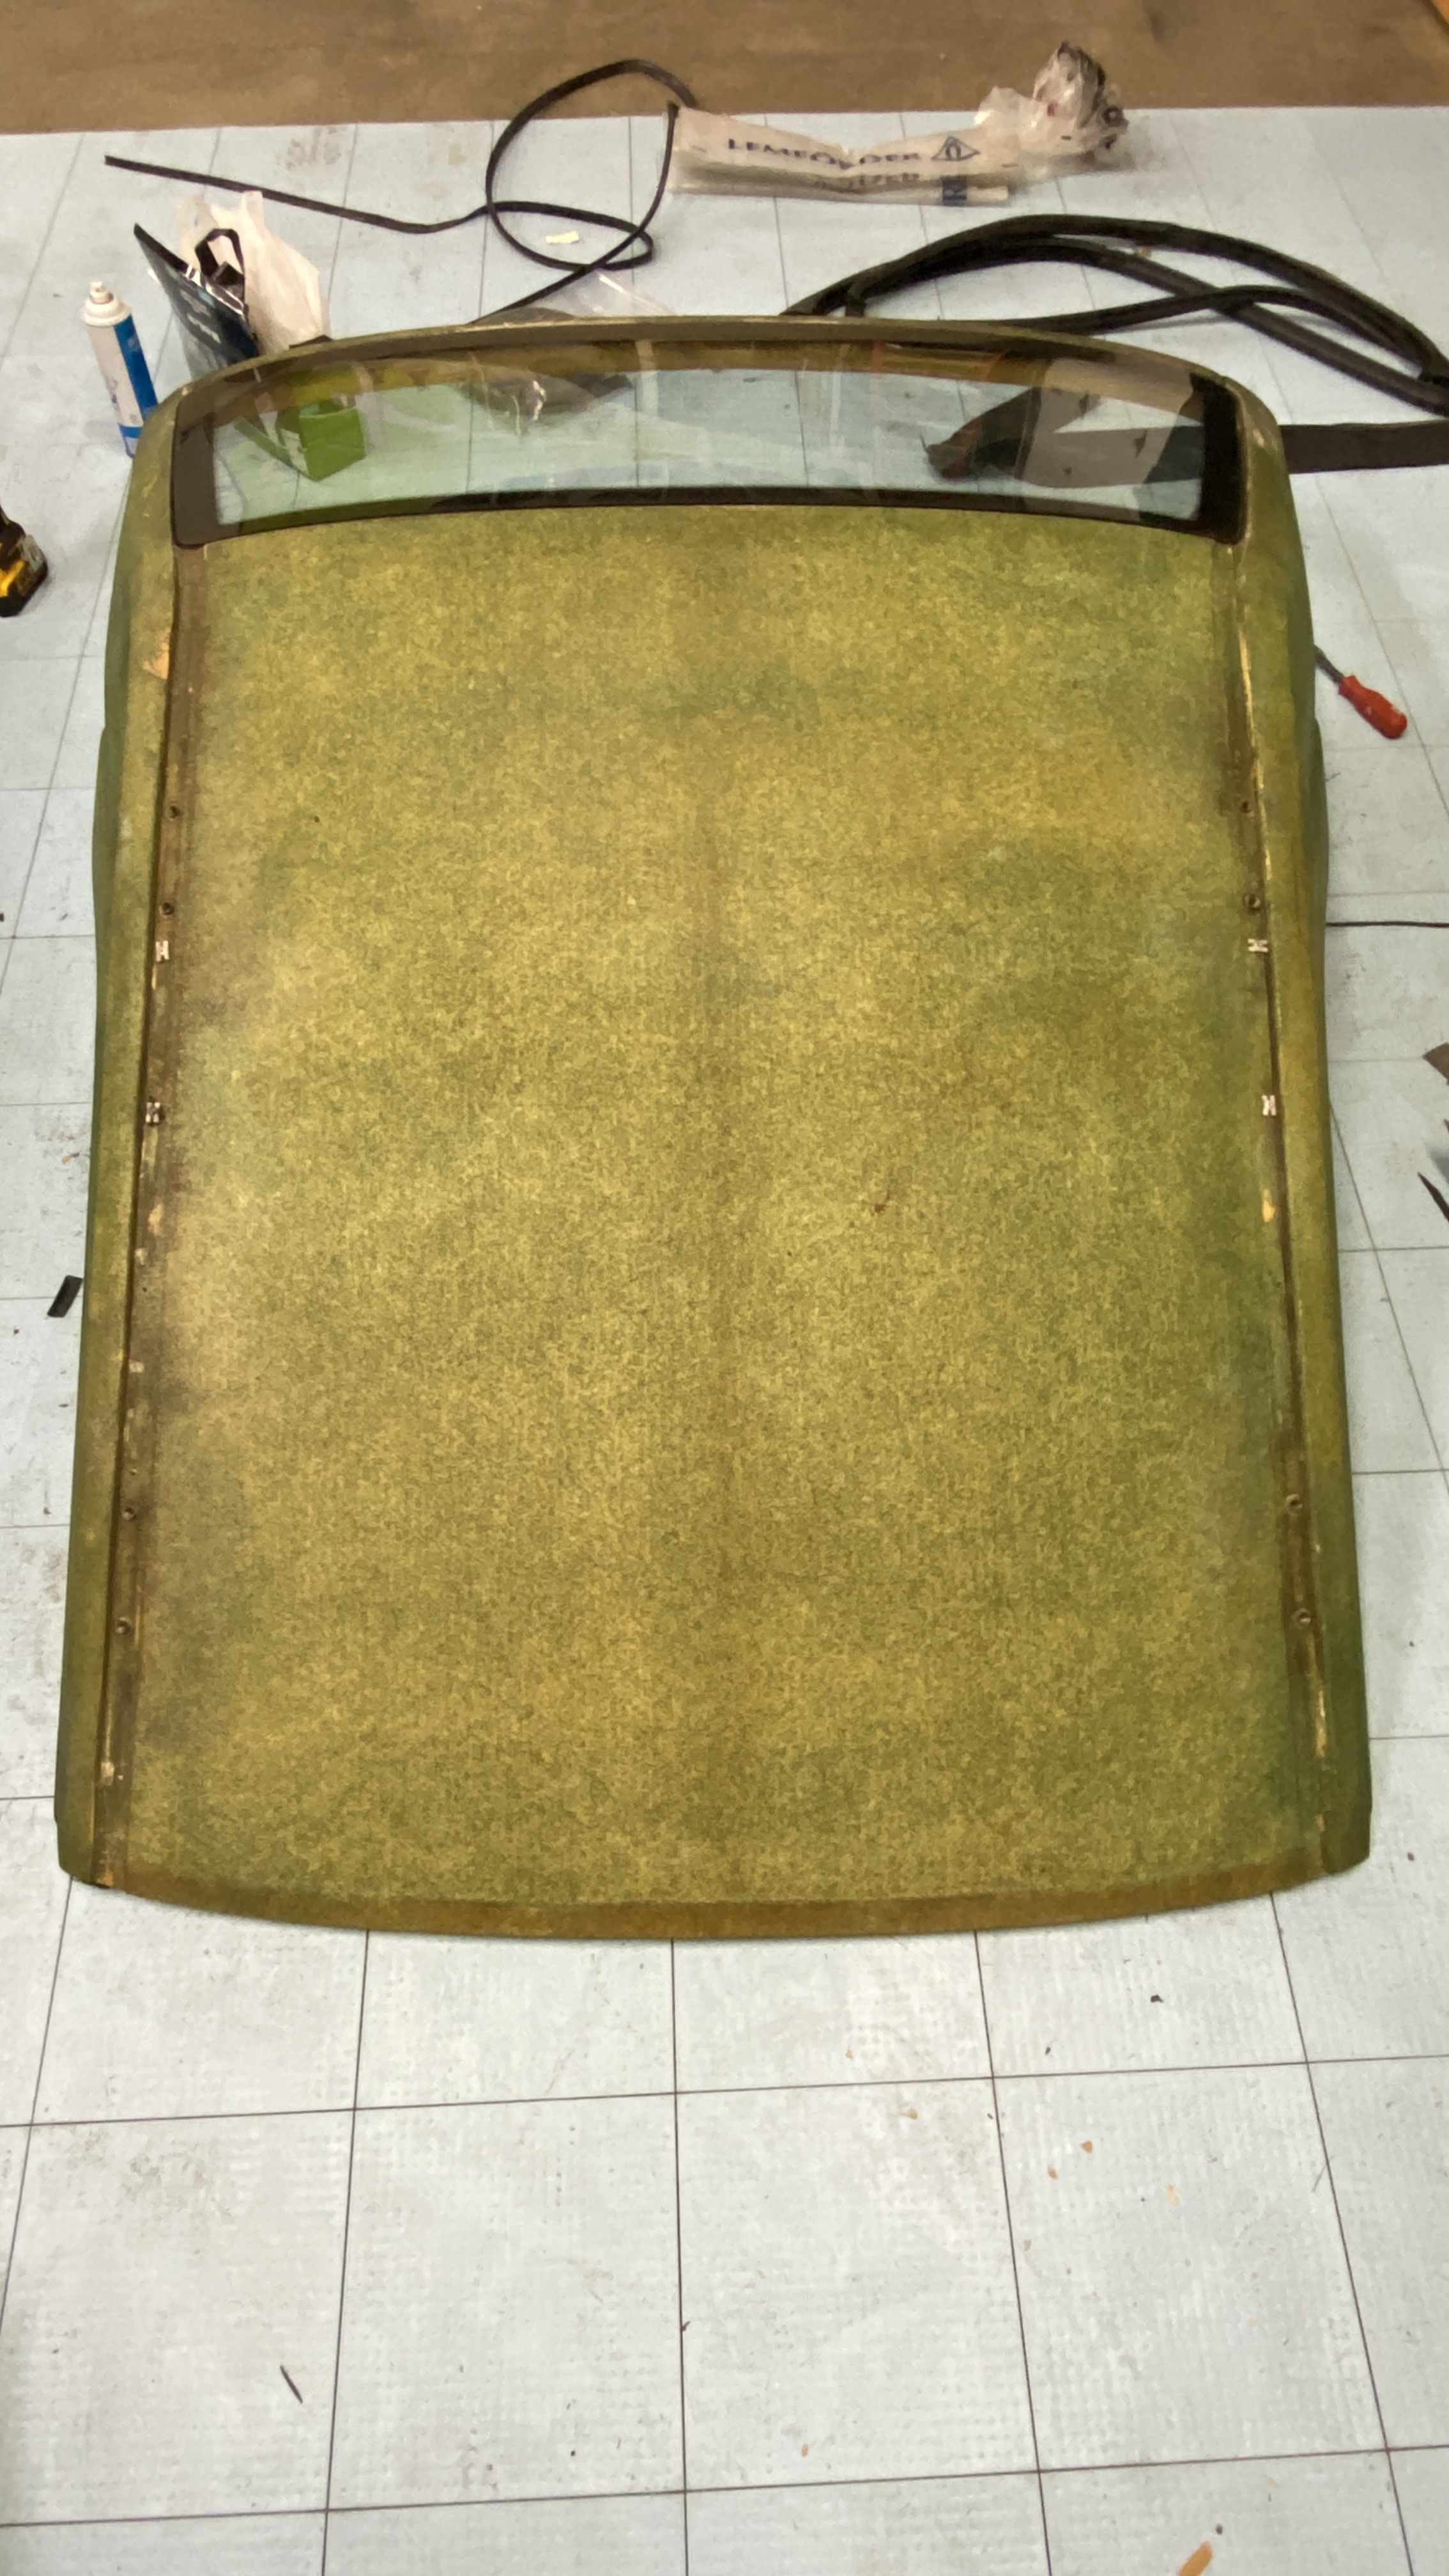
Sick of moving the hardtop around, and I didnt want to leave it on the top of the car, I decided to start taking the hardtop apart over the weekend. It proved to be MUCH more challenging than I expected.
One reason; GLUE.
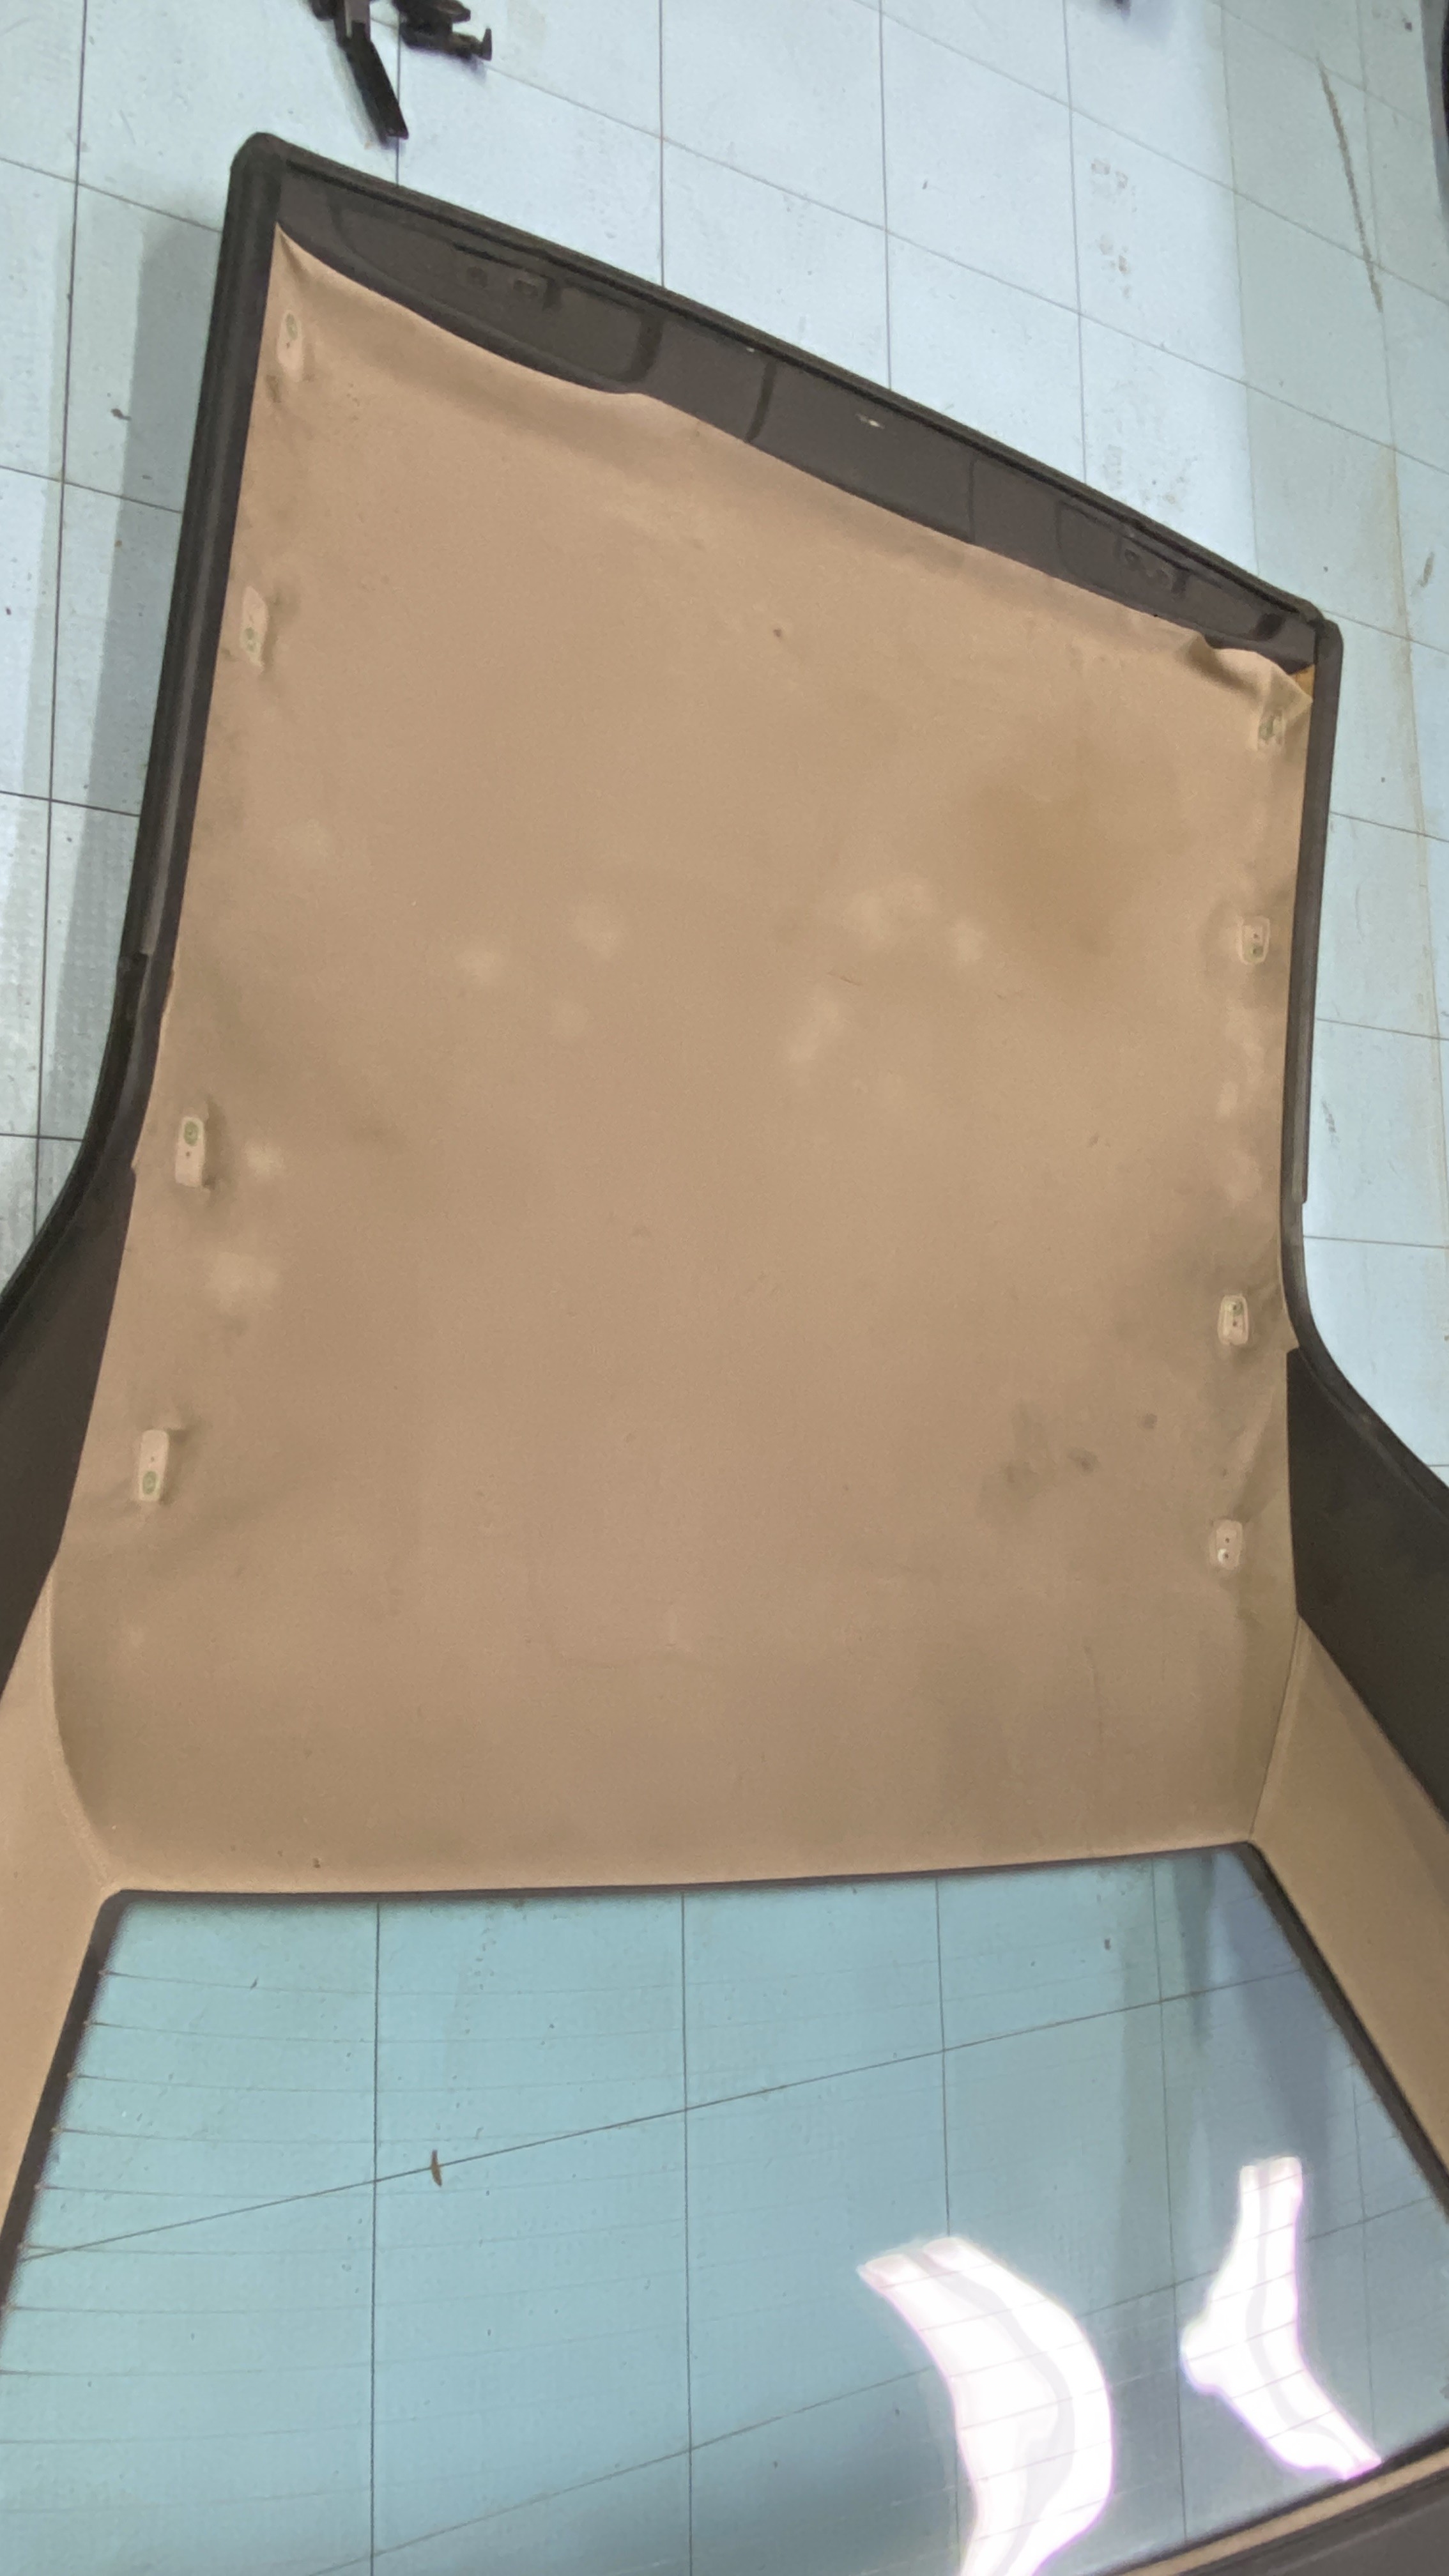
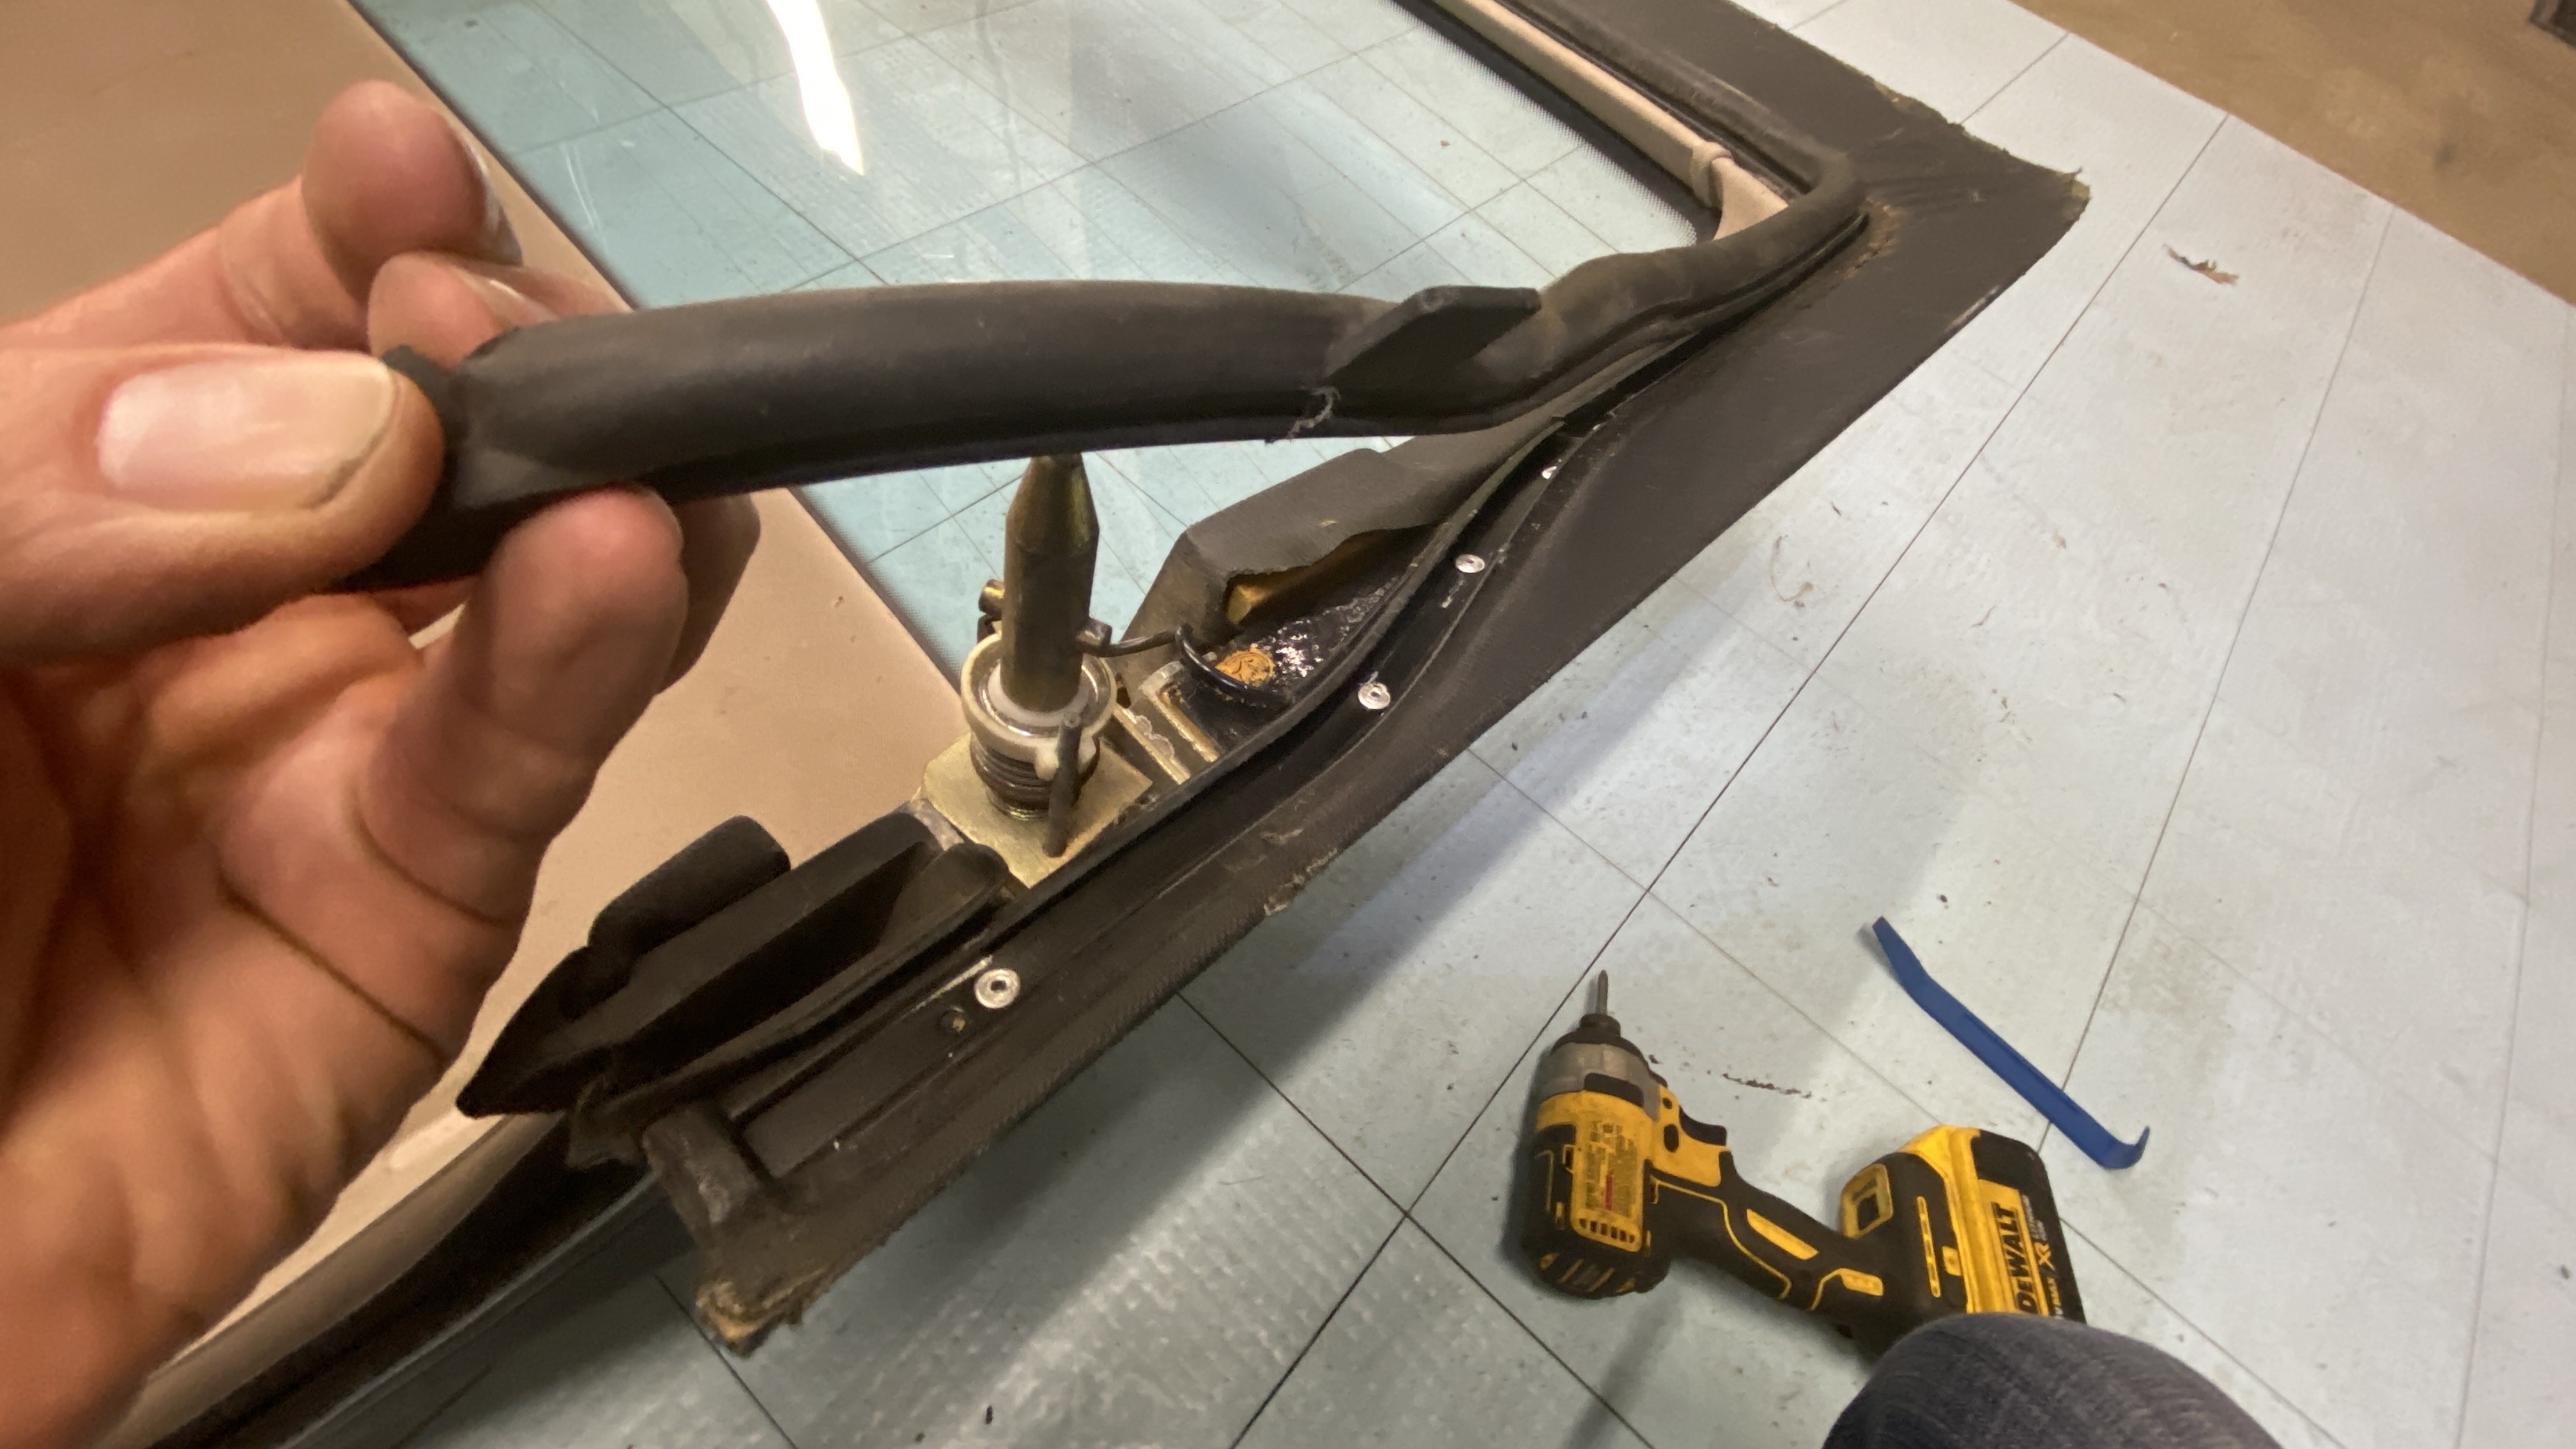
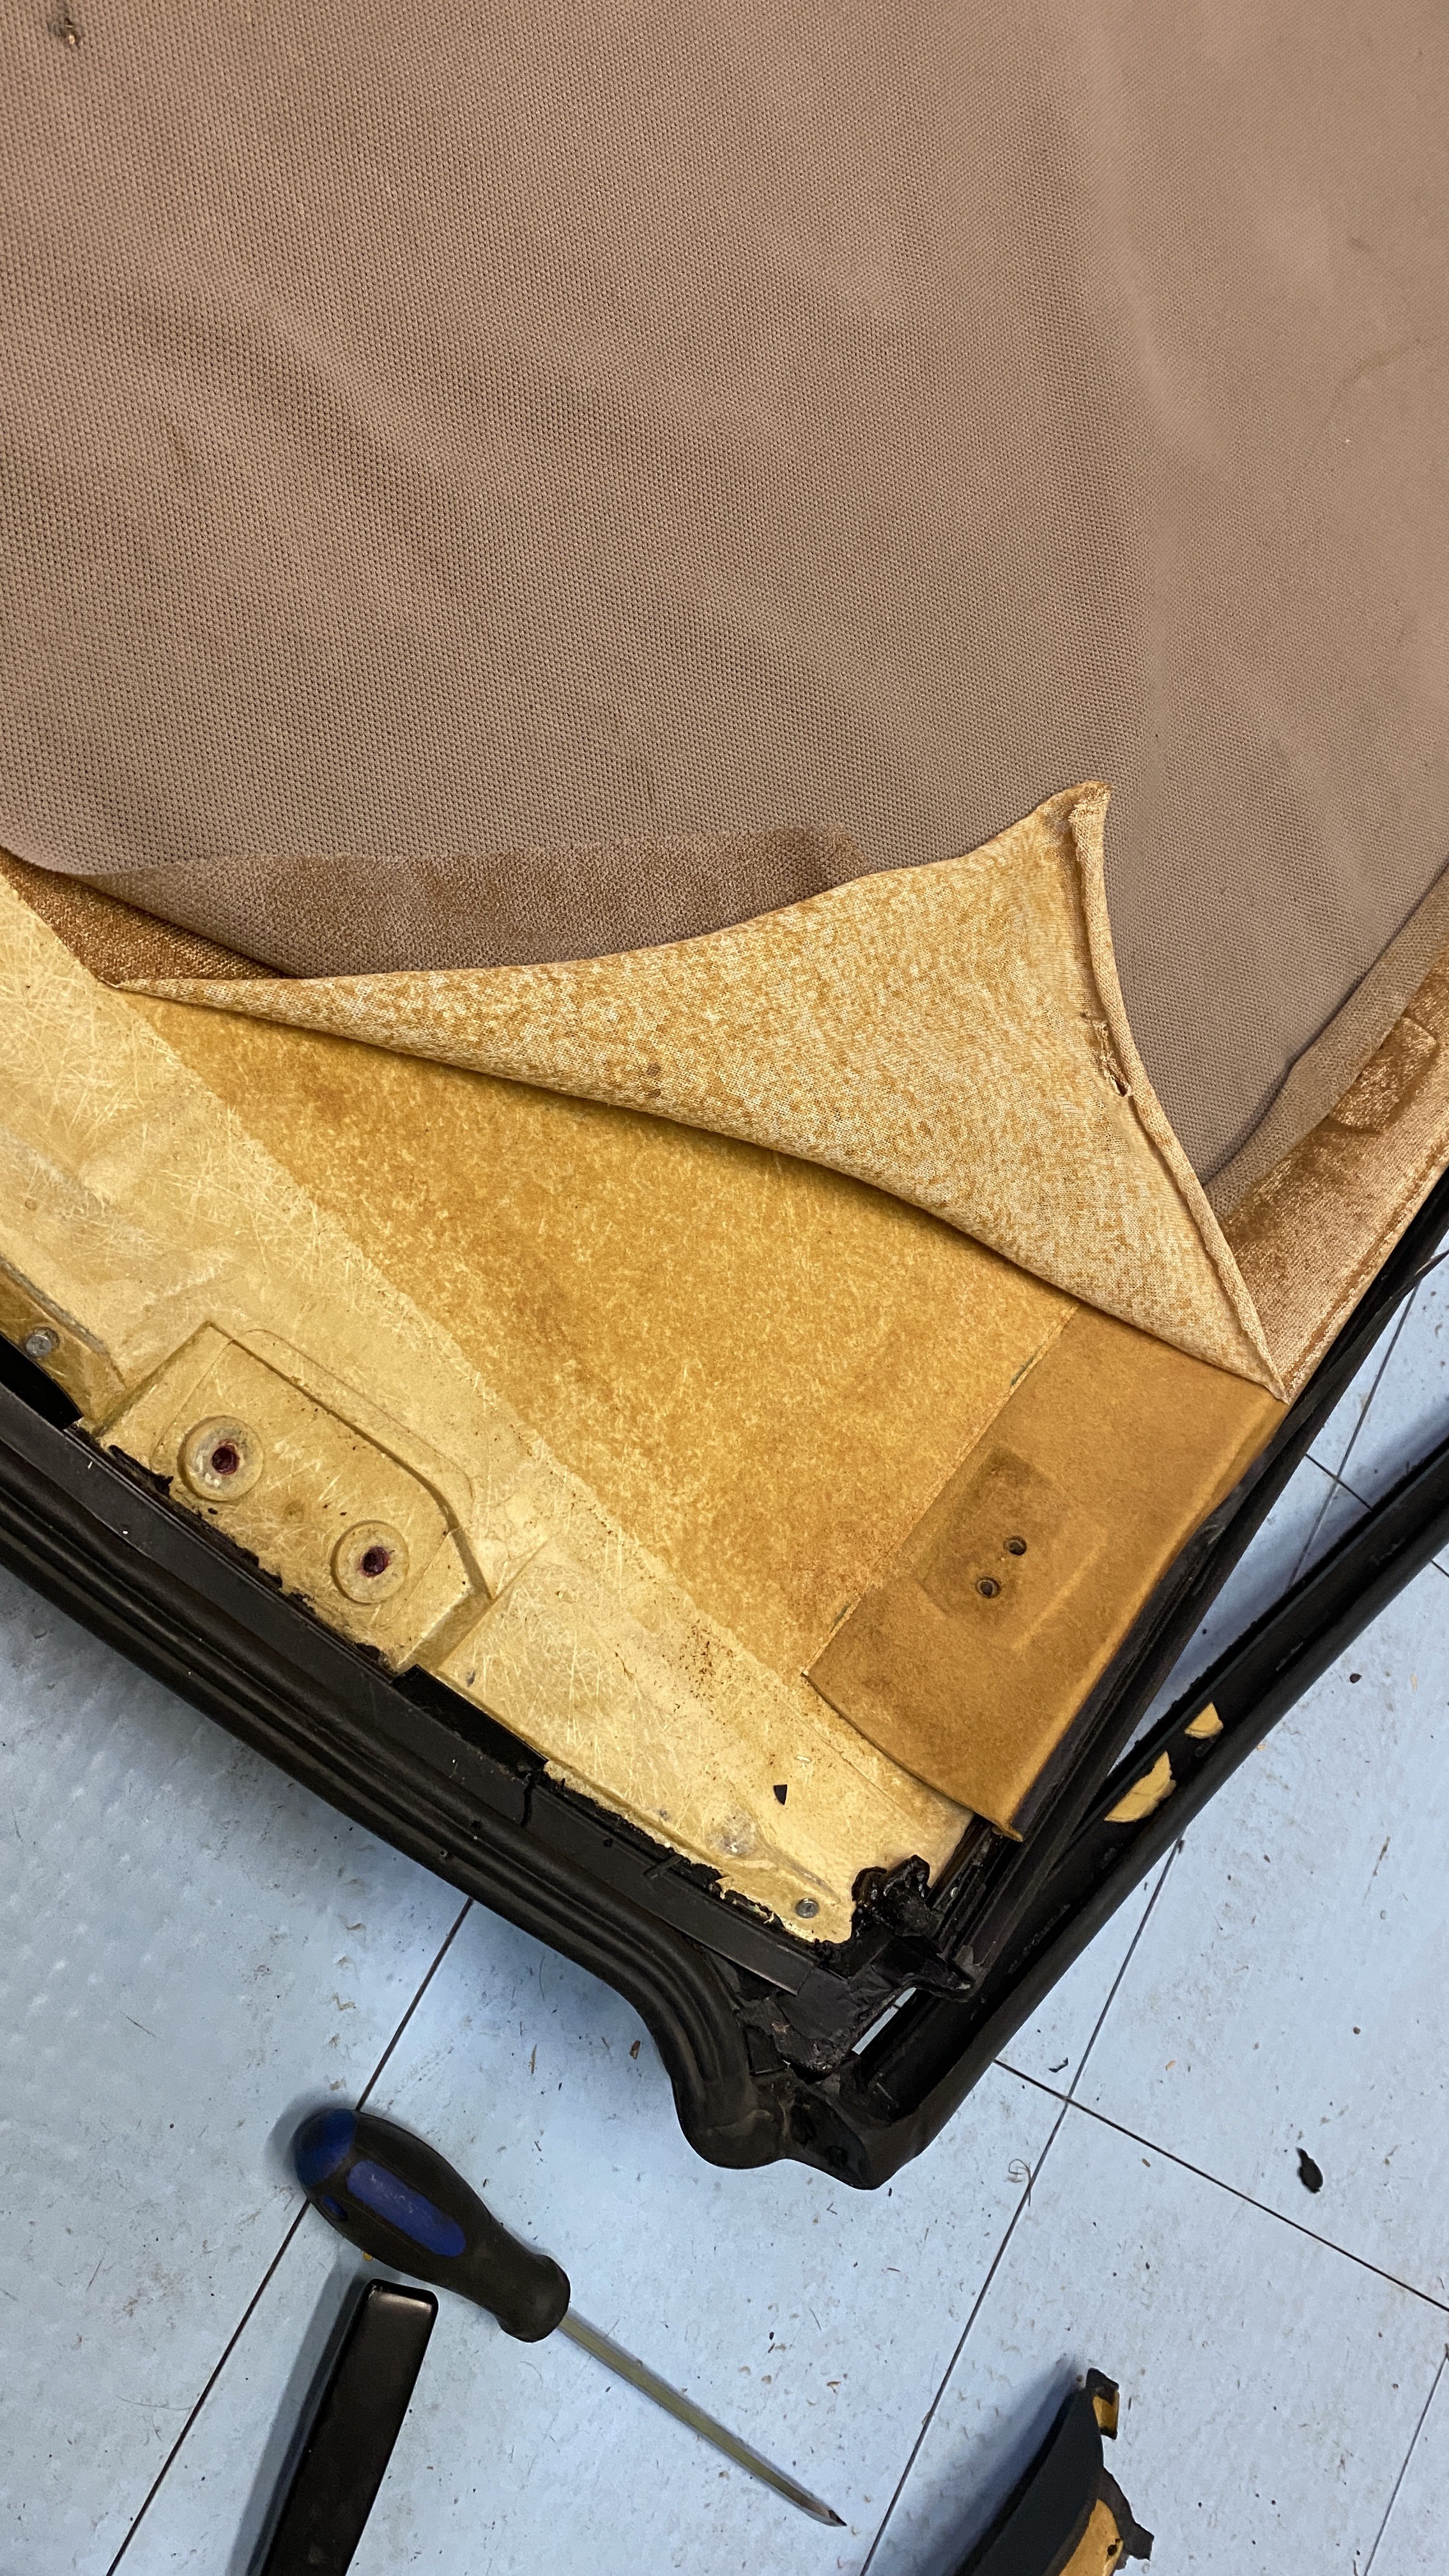
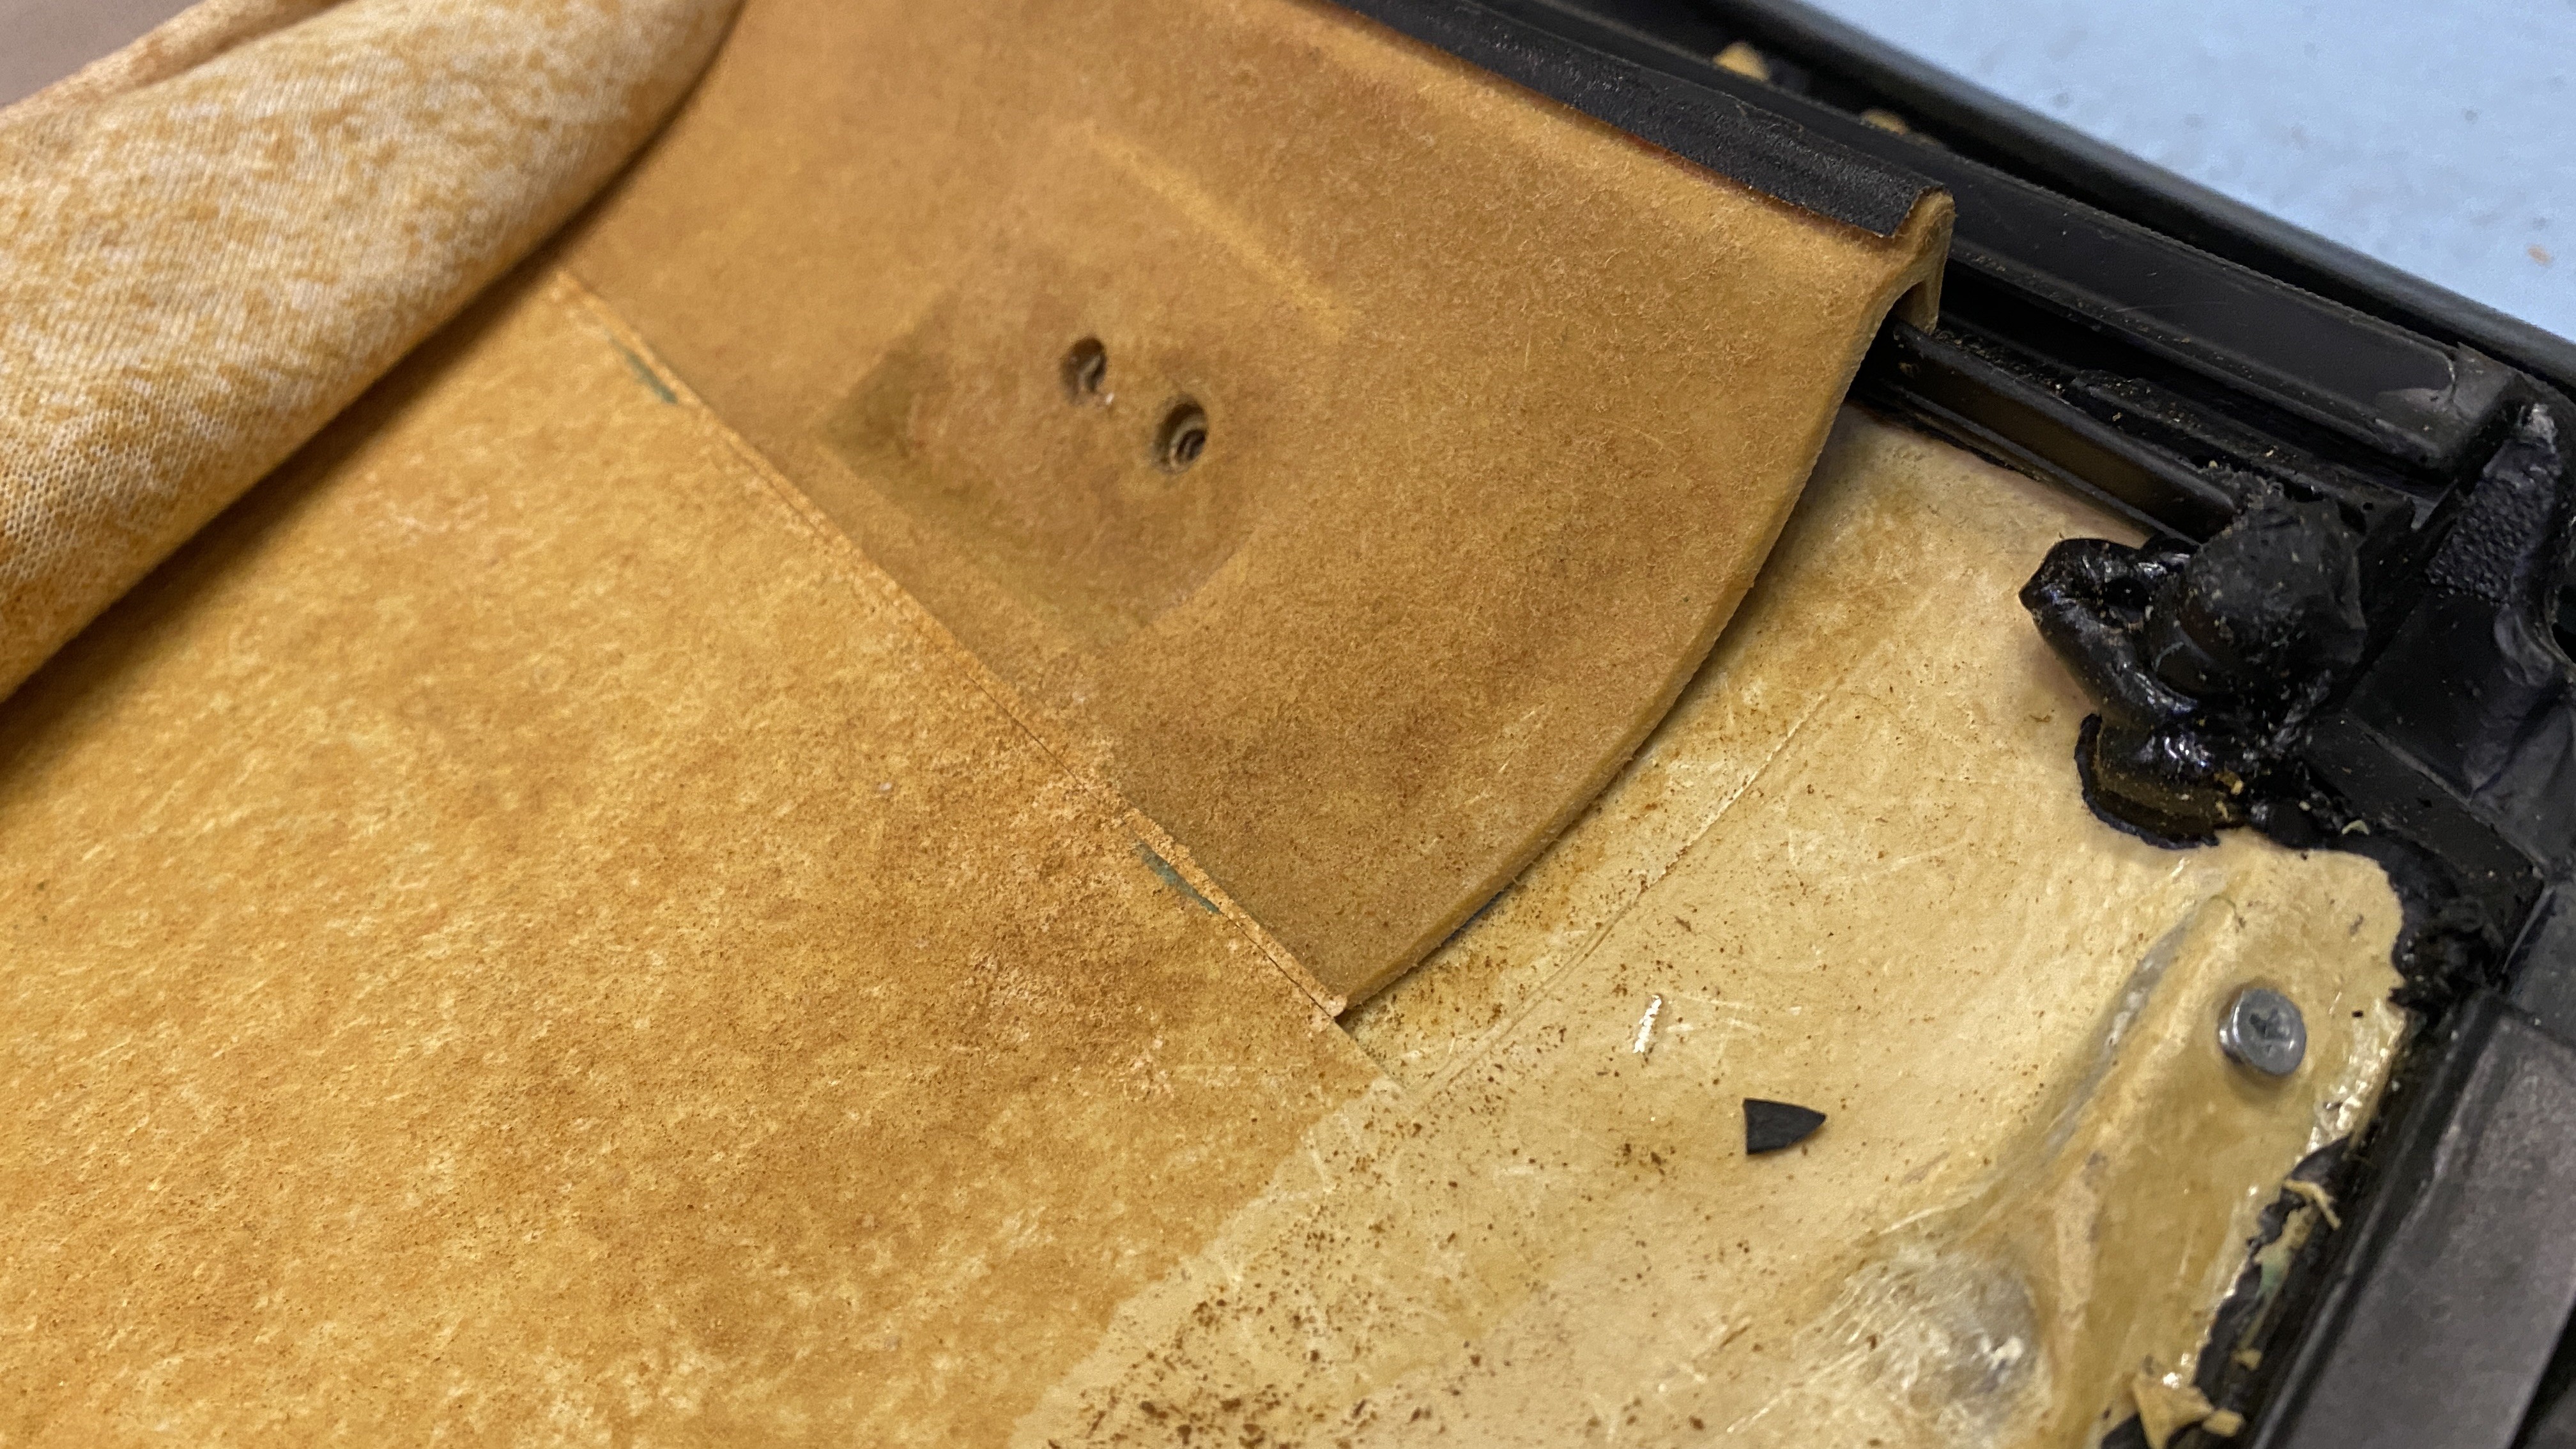
During the assembly, they literally use resin everywhere and glue almost everything in, EVEN if it has fasteners holding it in. Seals, trim, mounts, and fabric are all glued. On the plus side, I inspected all of the seals, latches, and trim and it is all in great shape, just the vinyl and headliner is in visually aging.
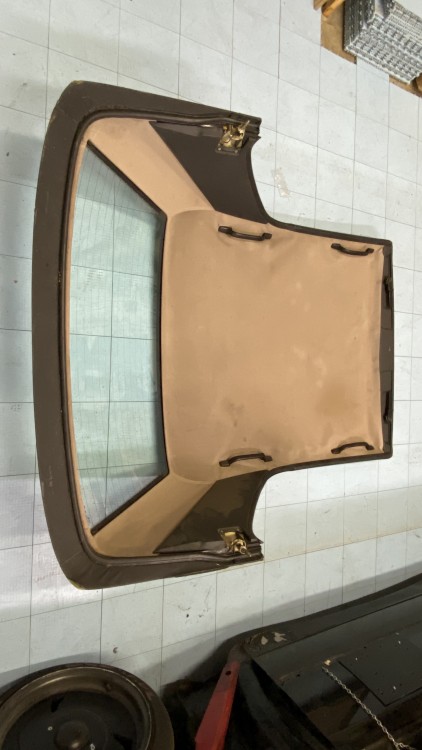
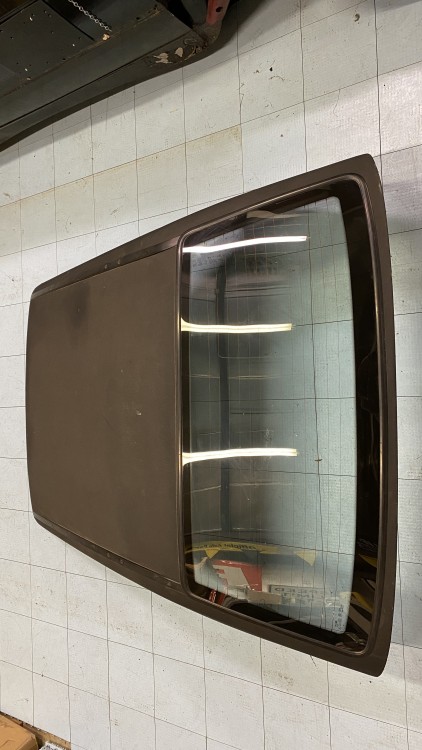
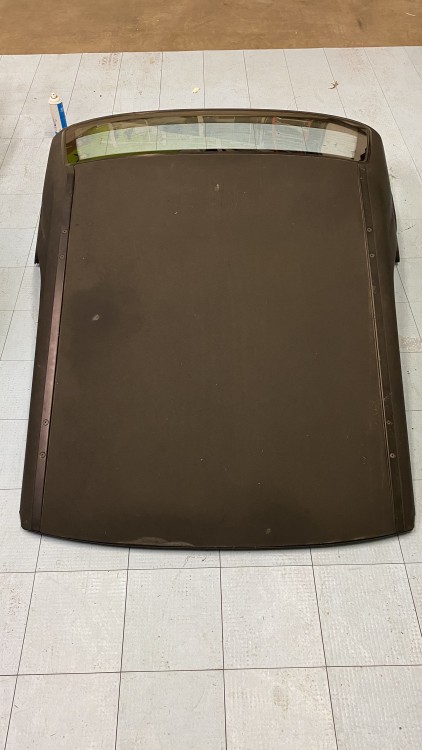
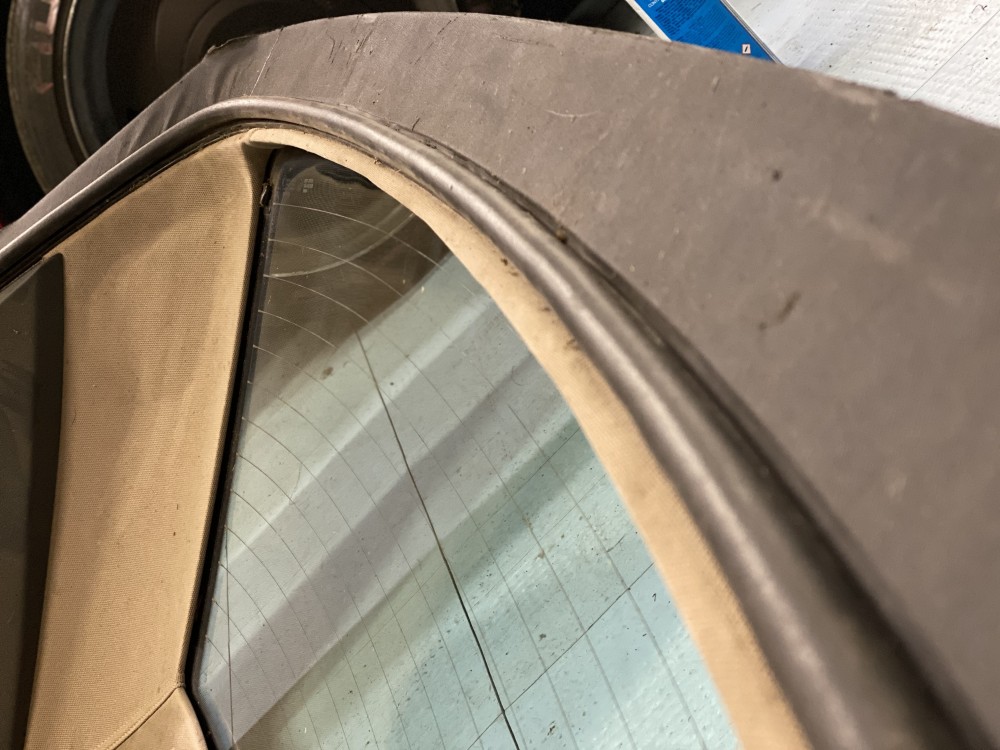
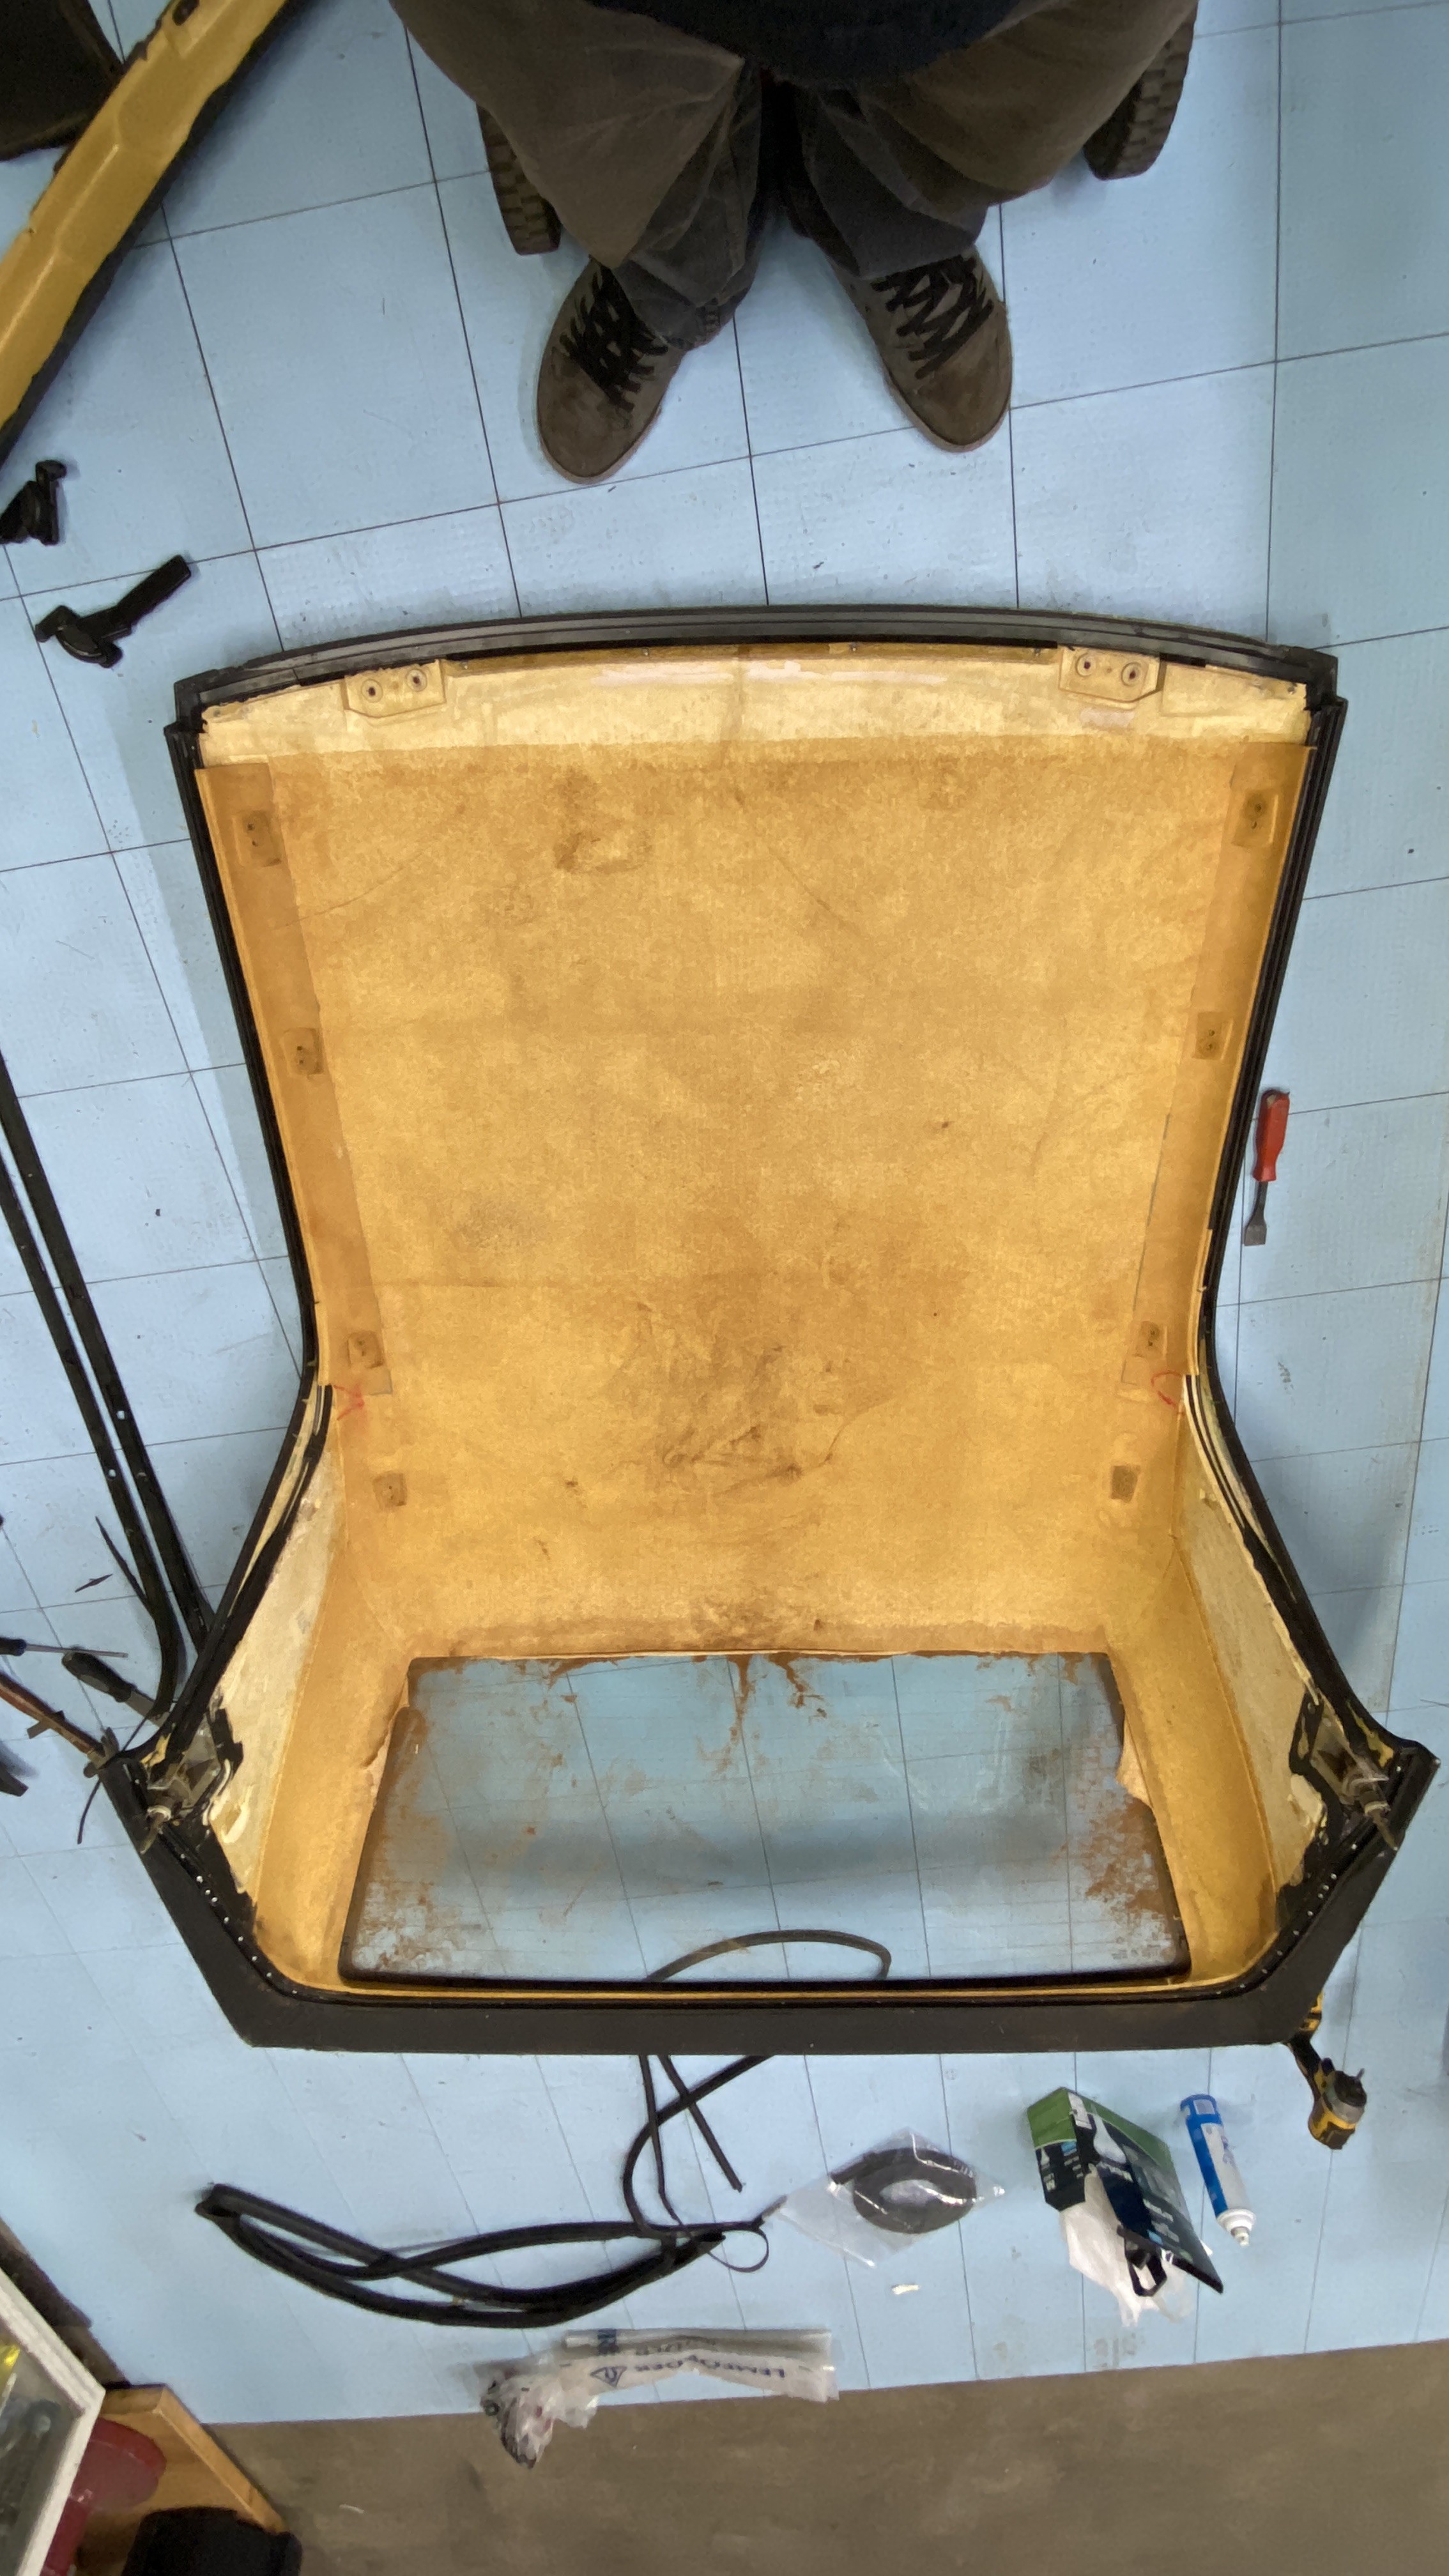
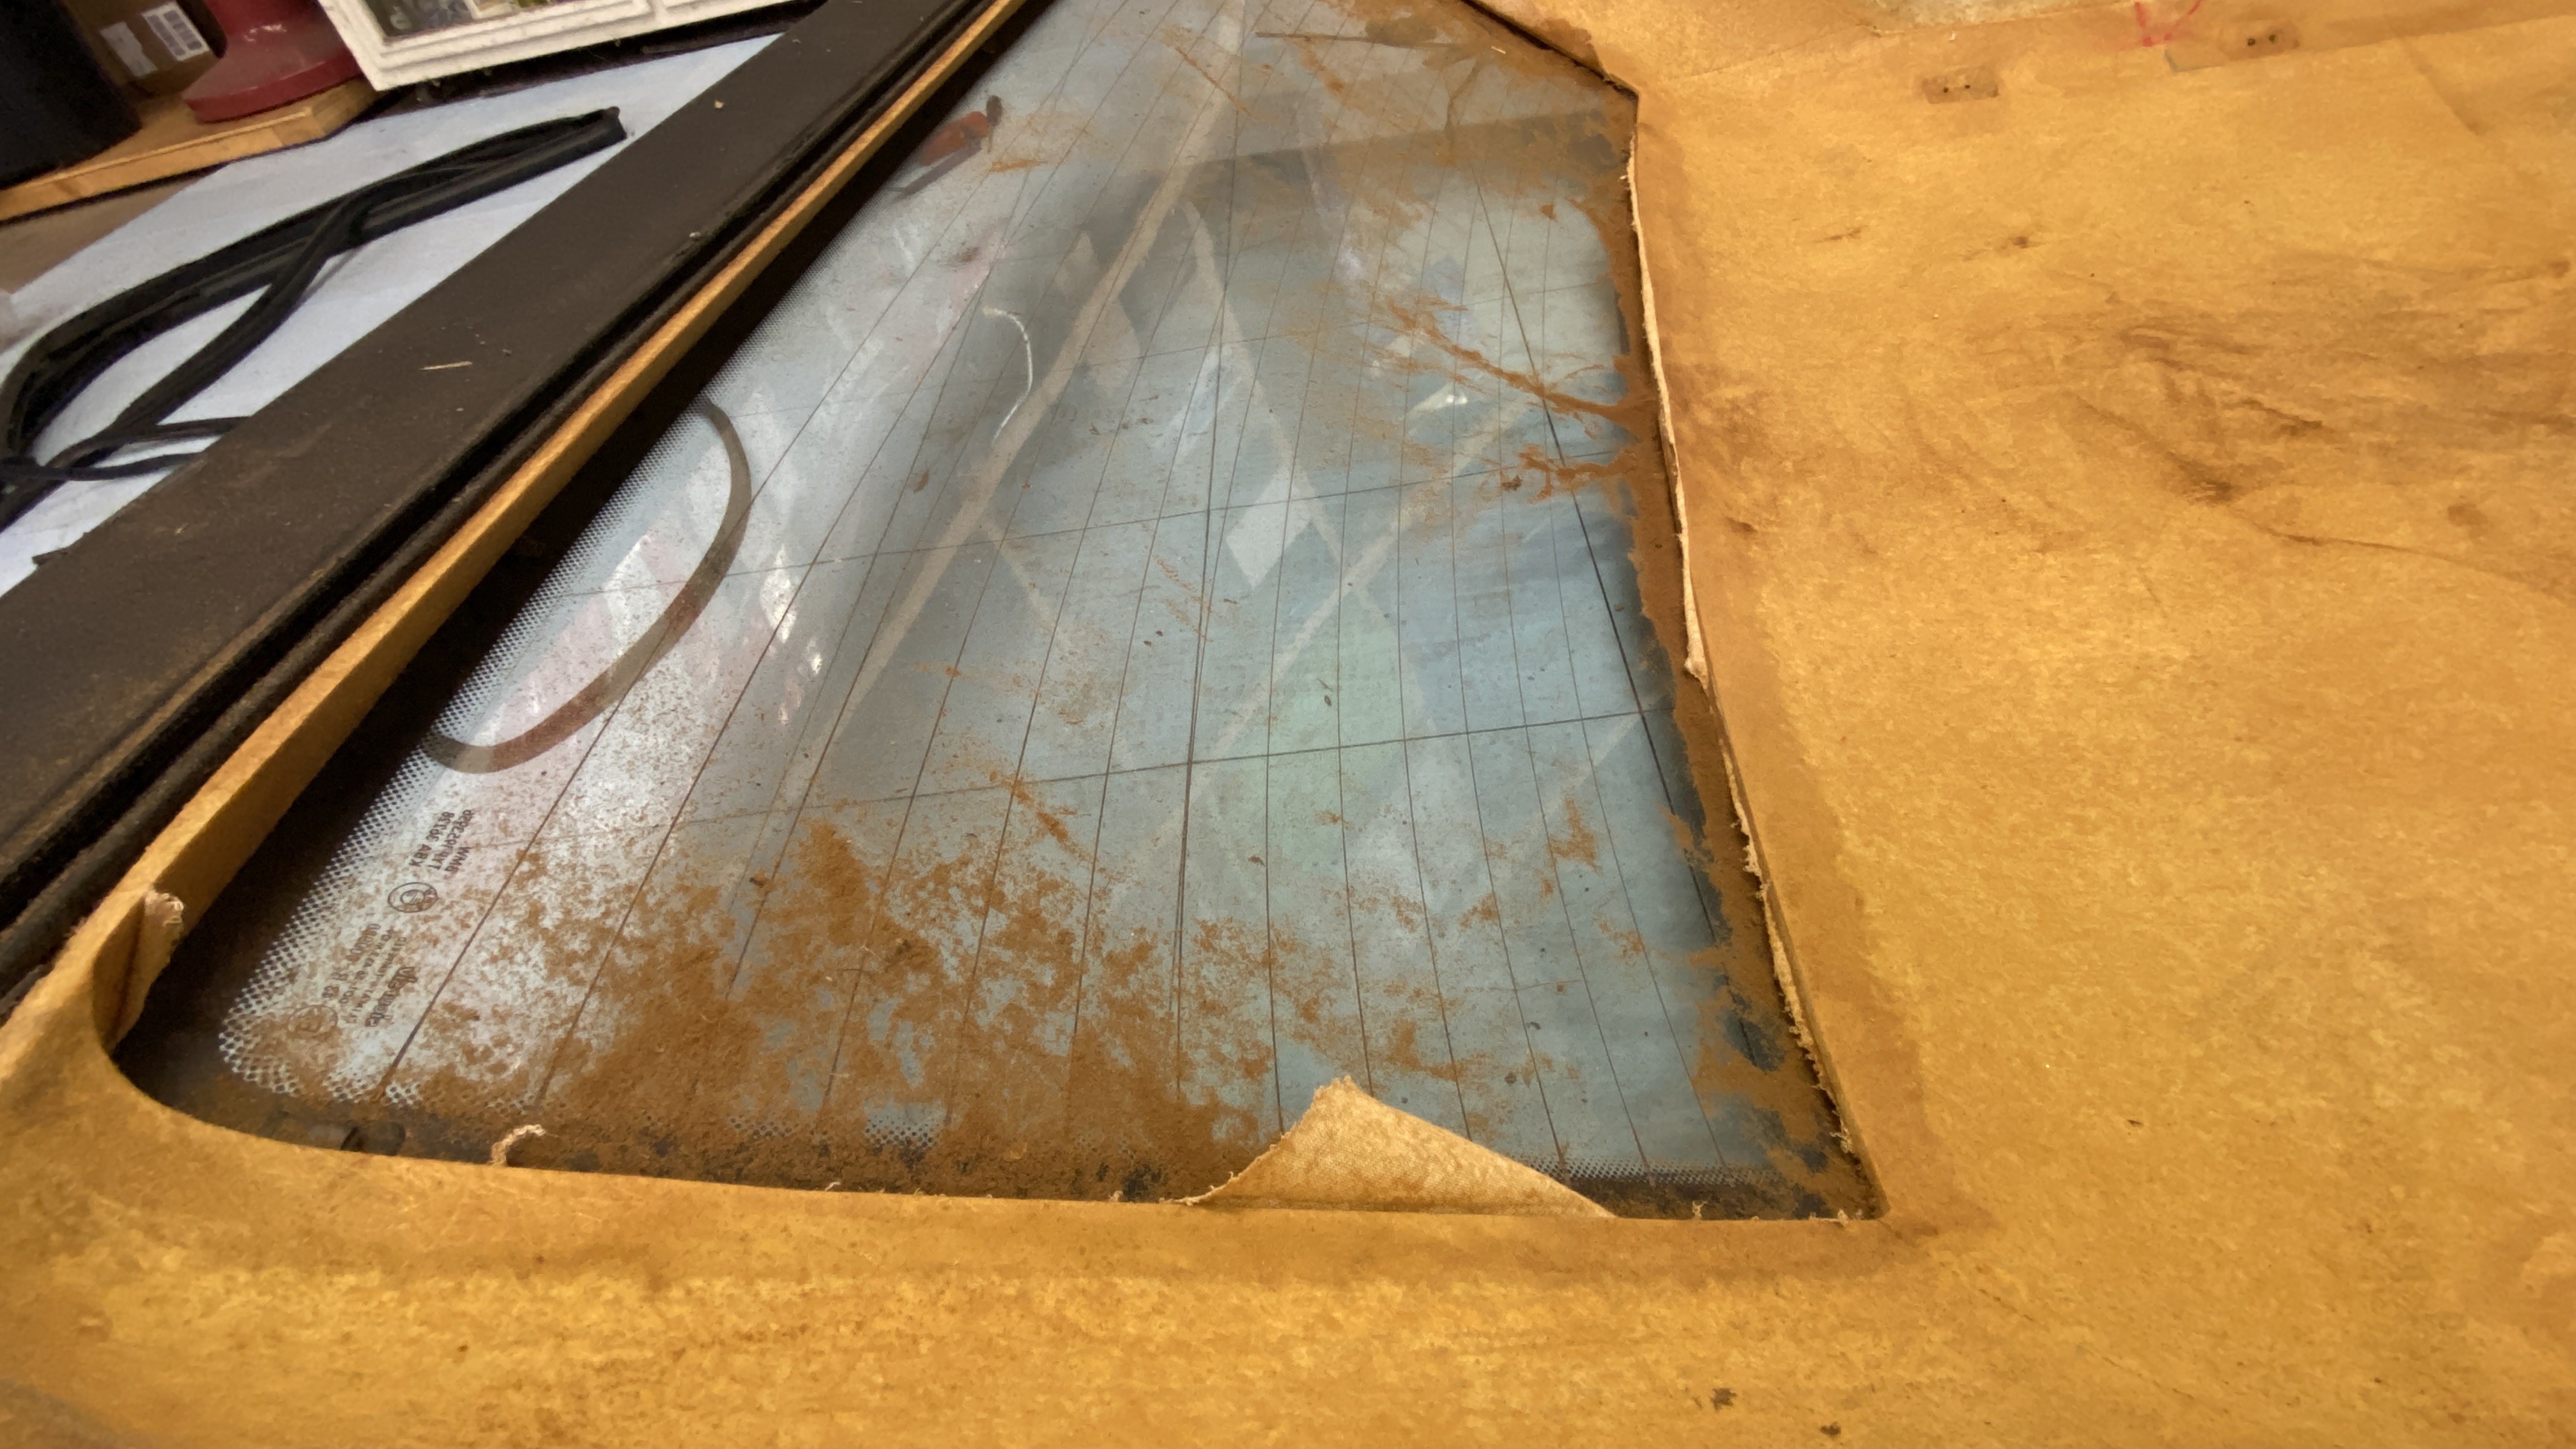
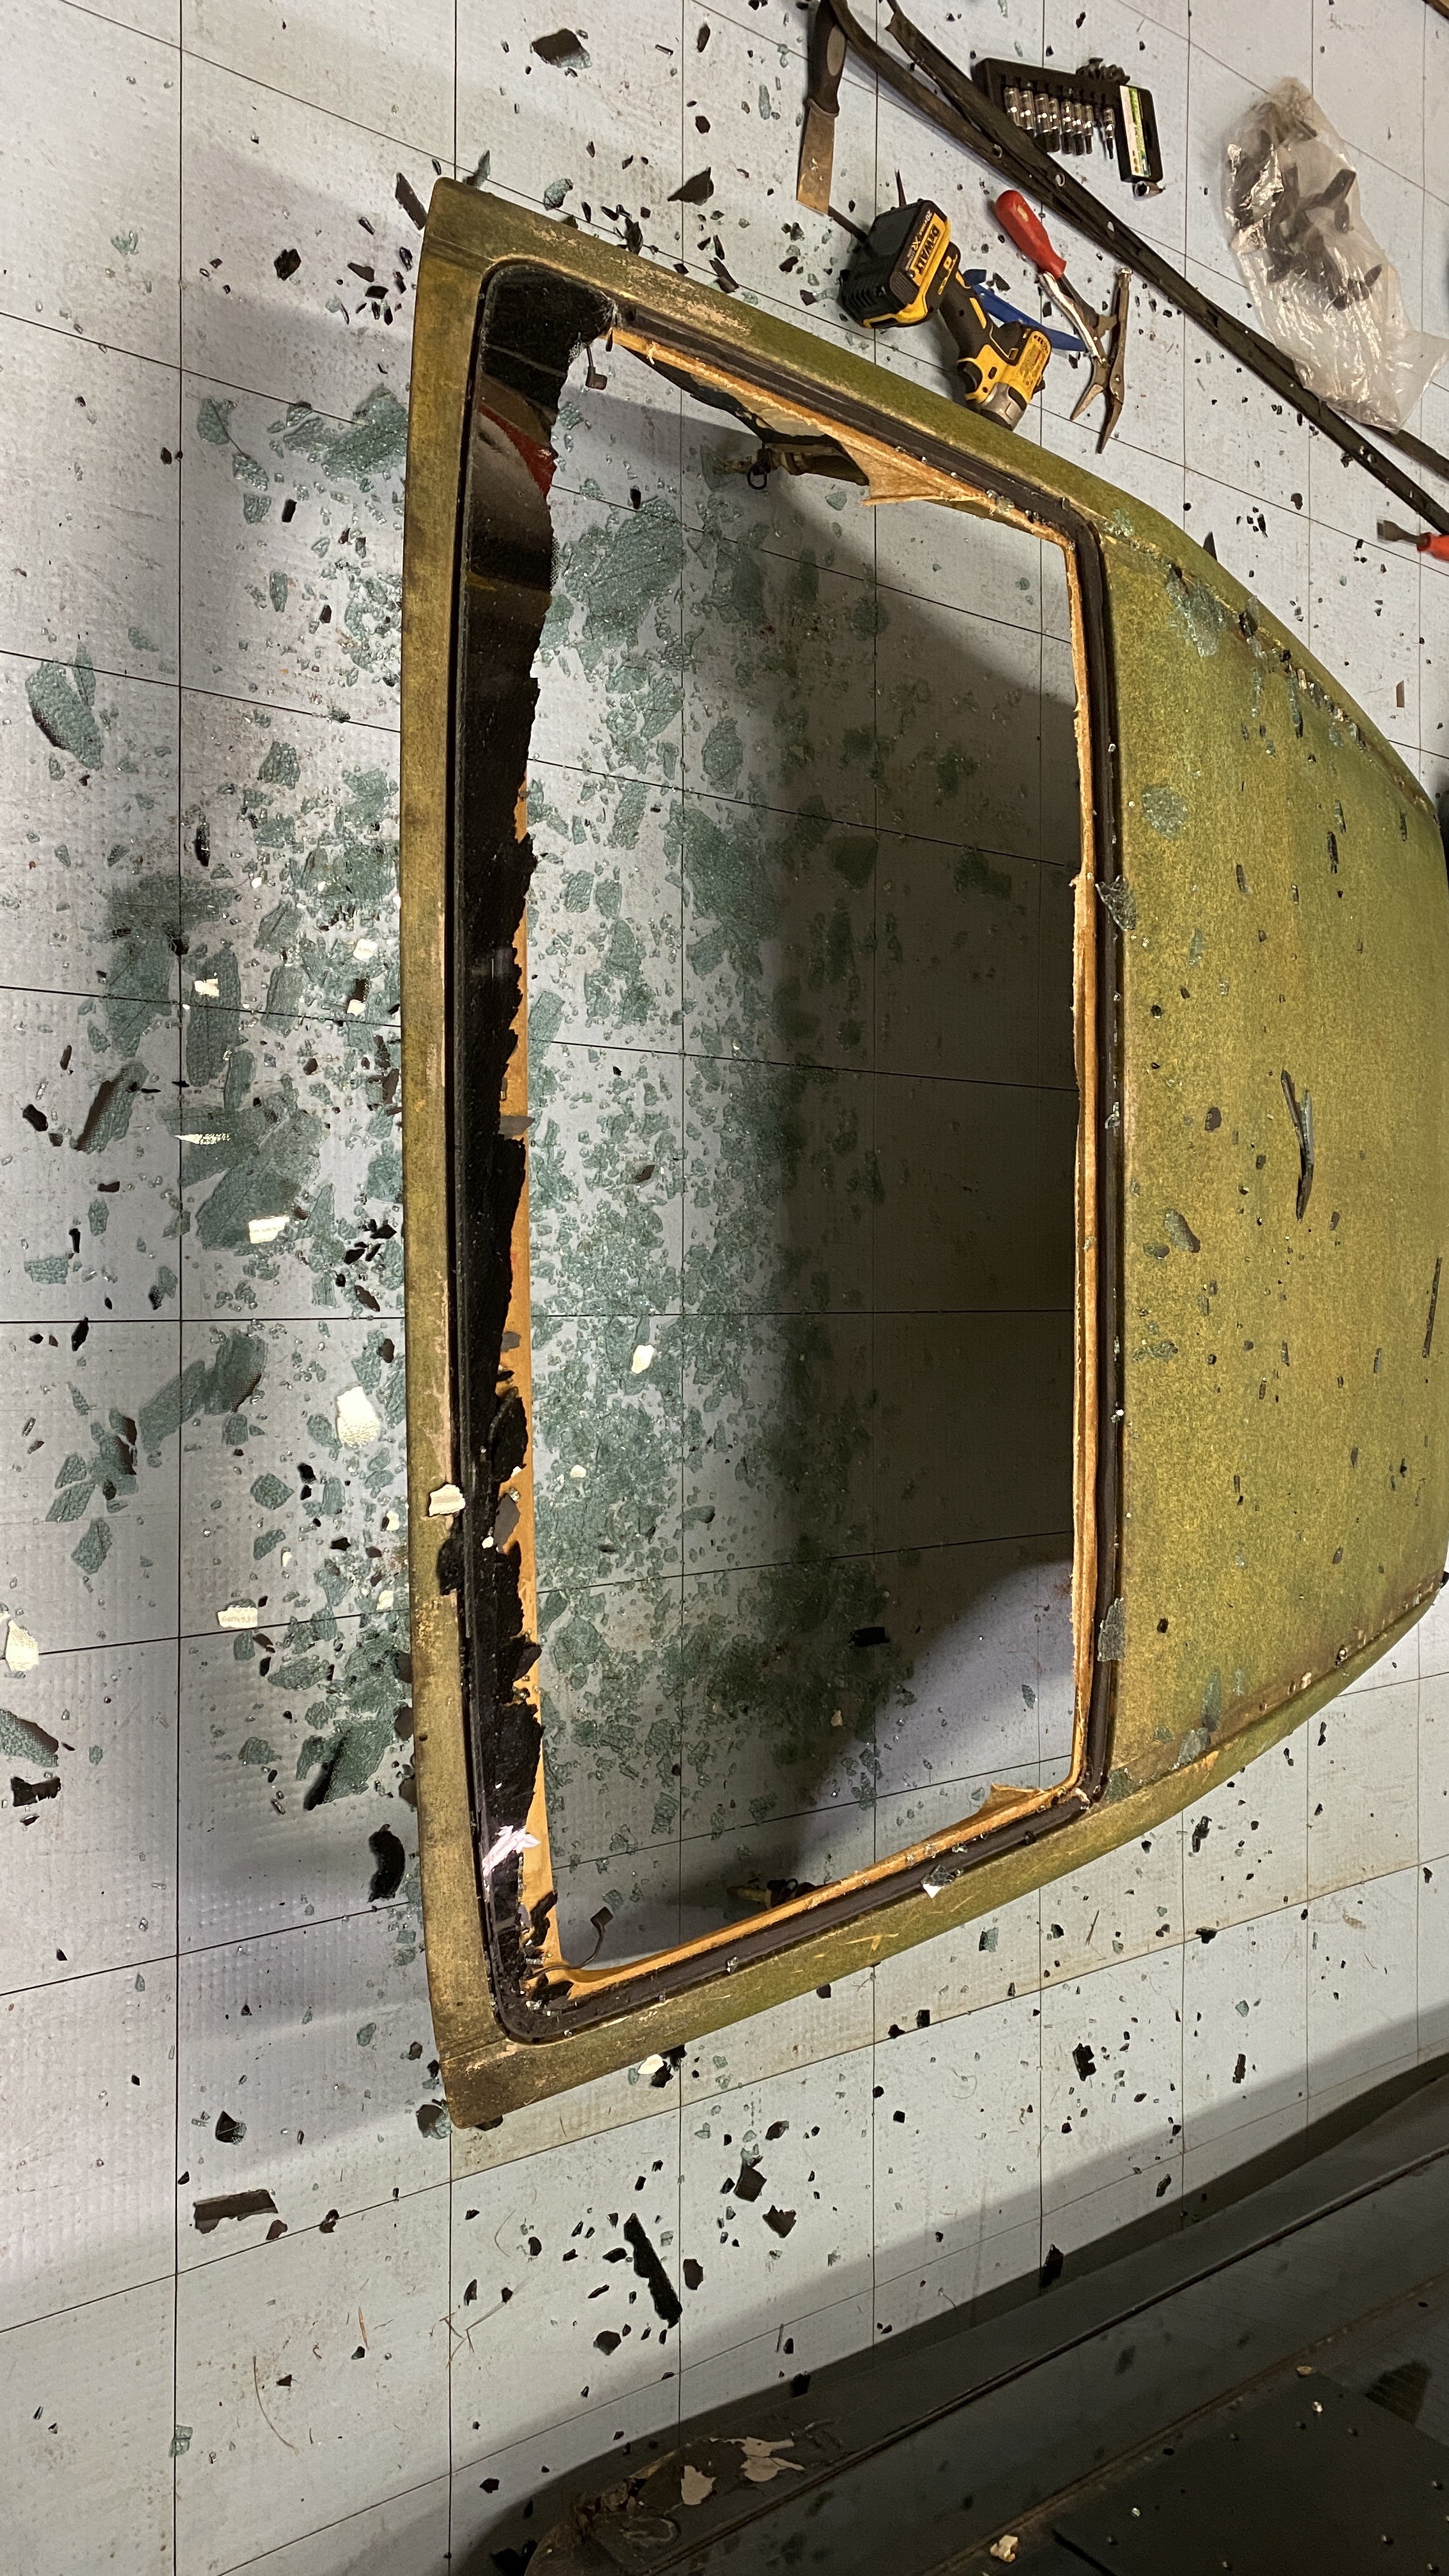
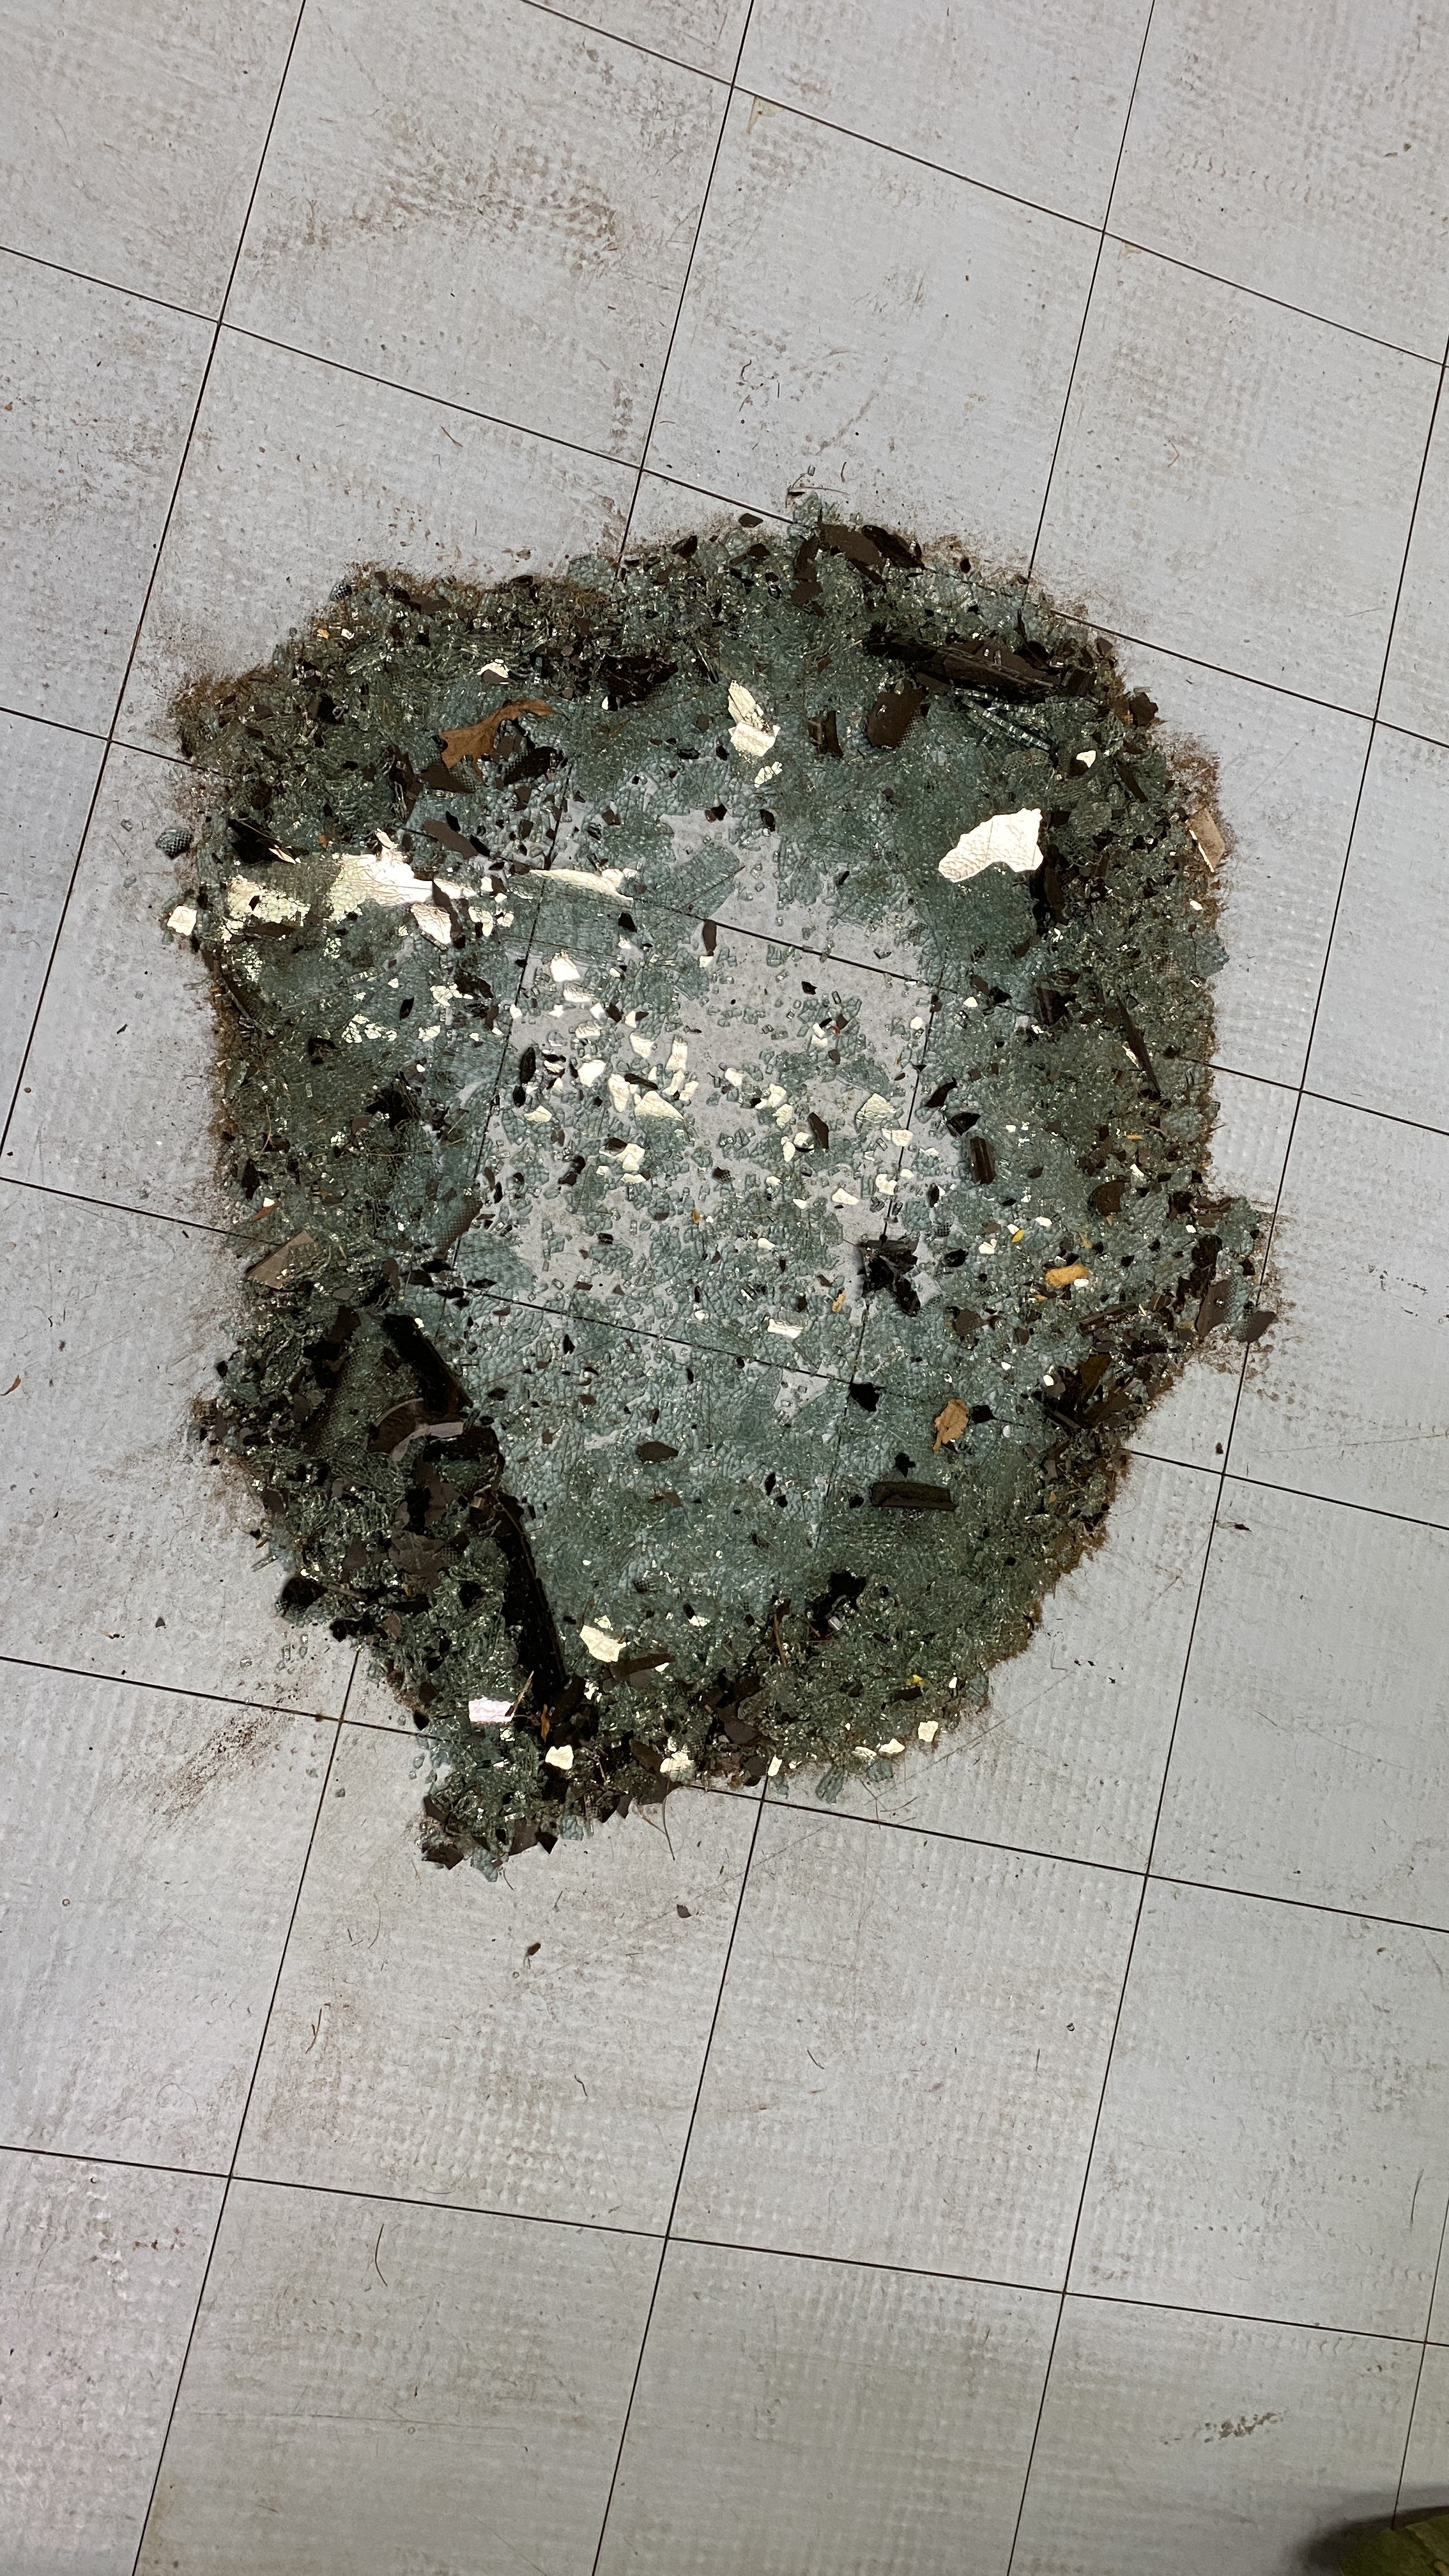
Here are pictures as I dismantled it;
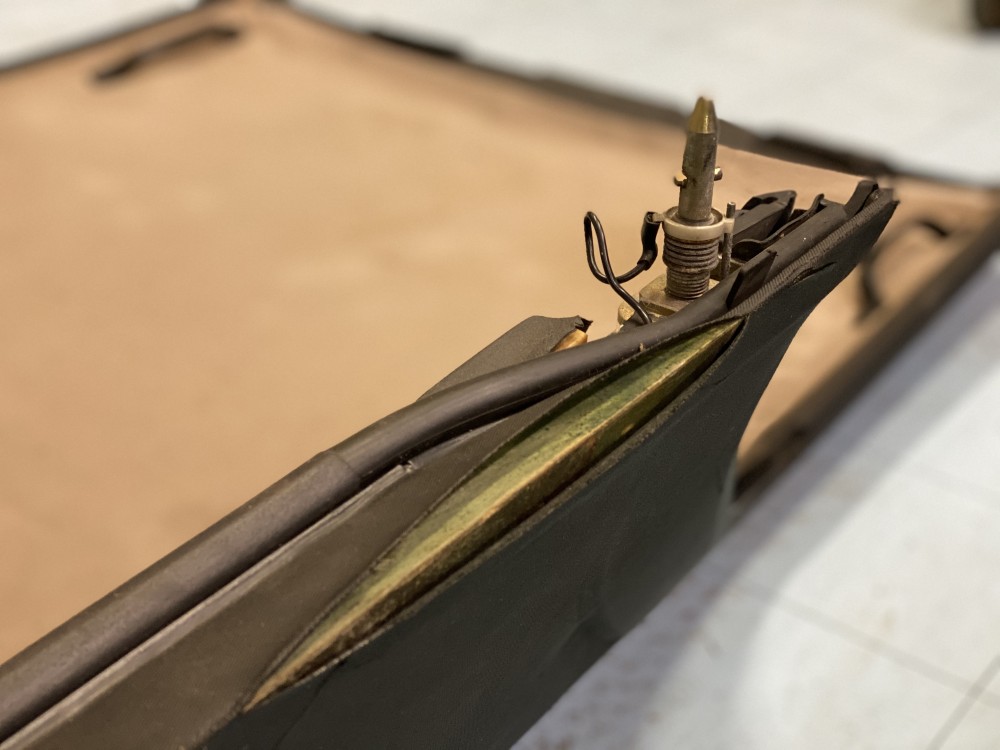
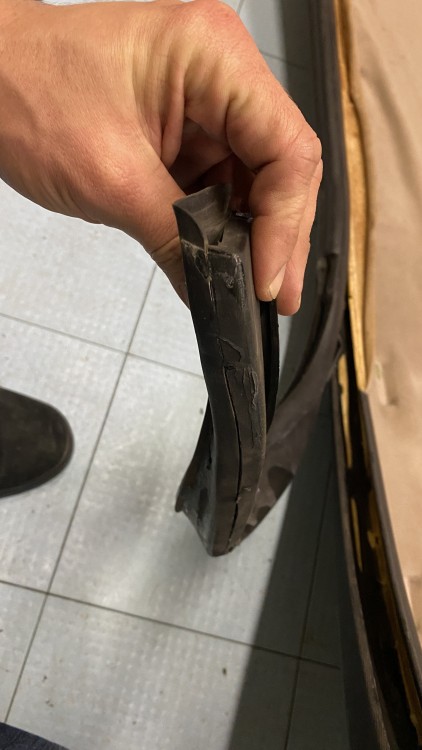
https://www.instagram.com/_jdesigner_/ http://nevertoolow.tumblr.com/
🥳SOLD BMW E24 633CSI - BMW M30B32 🧪SOLD HCH ES9 - 1.3 LDA
👽BMW E30 325IC - Toyota 1JZ-GTE ⏰ HONDA EF9 CIVIC SI - JDM B18C5
☠️BMW E36 318i - Ford 5.0 FE302 🚴♂️ GT-Labomba - 26x2.75 Freeride
🤹♀️SOLD BMW E36/7 Z3 - BMW M54B25 🧓SOLD BMW E10 2002 - BMW M10M05 -
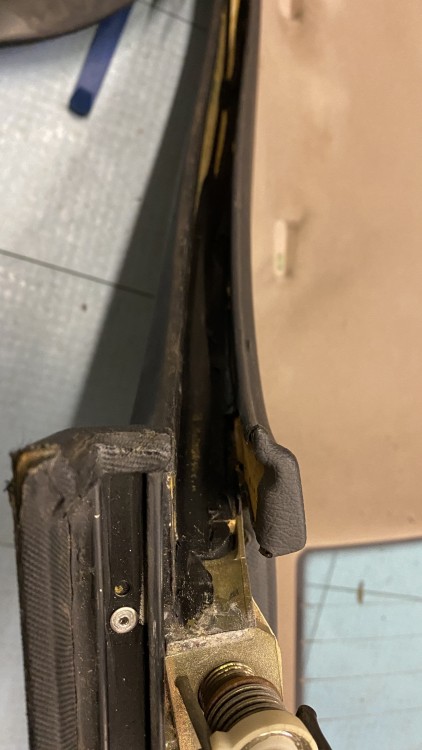
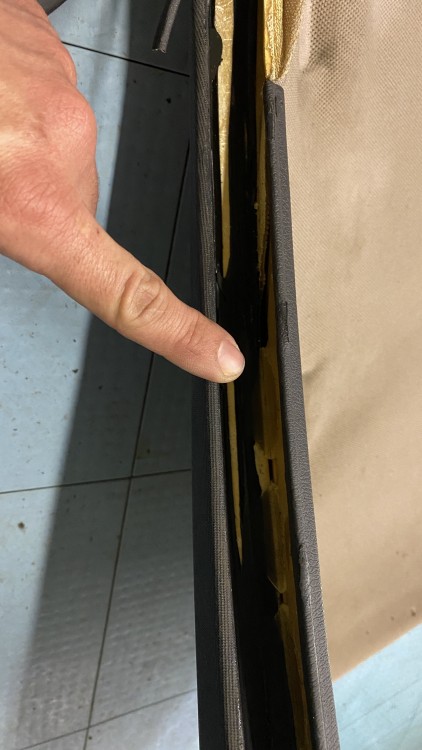
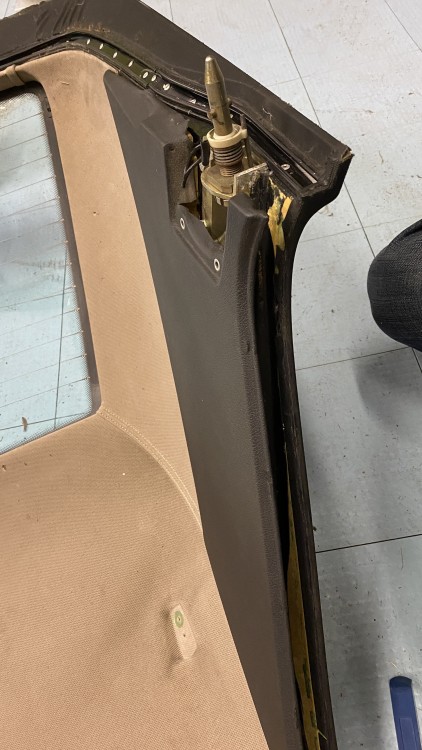
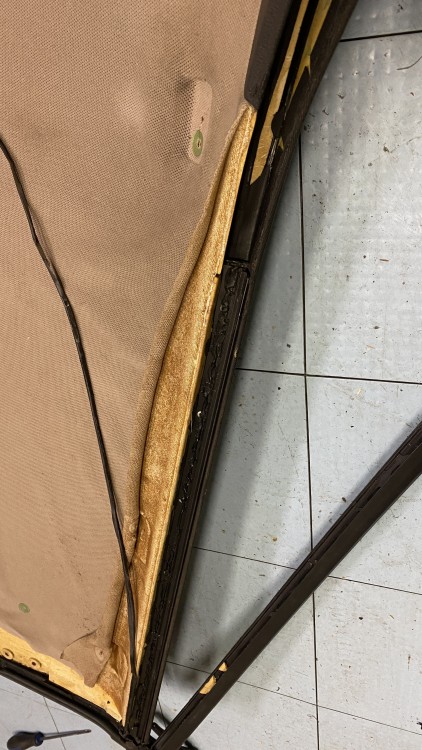
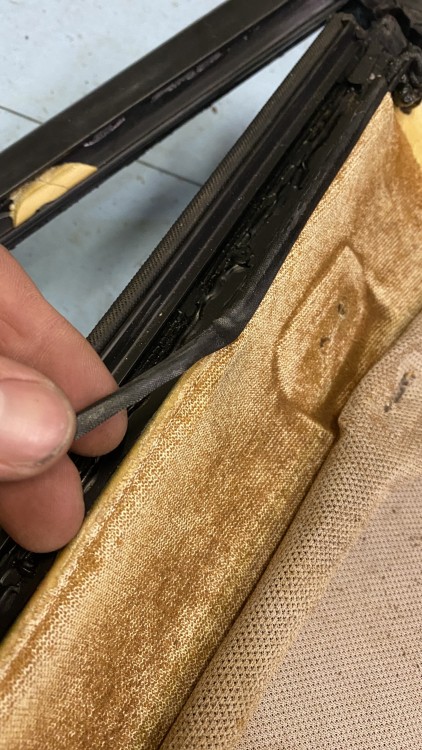
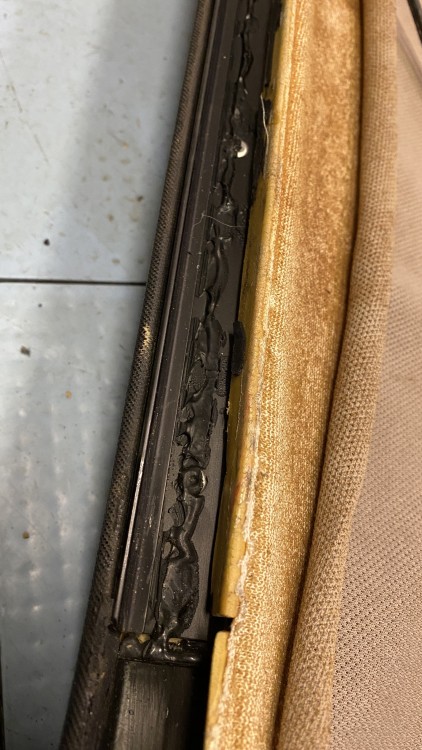
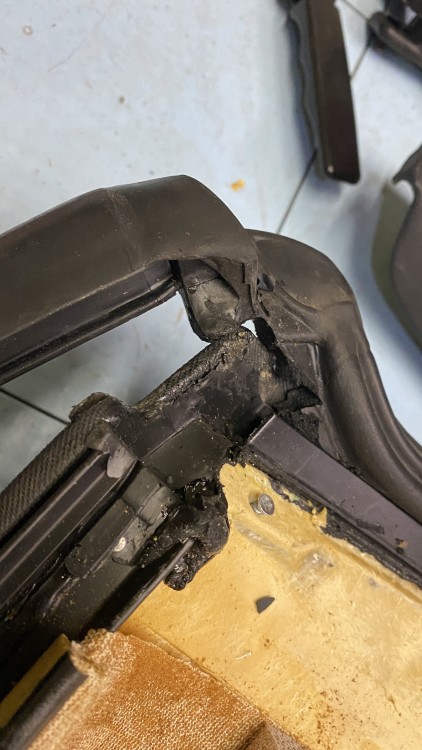
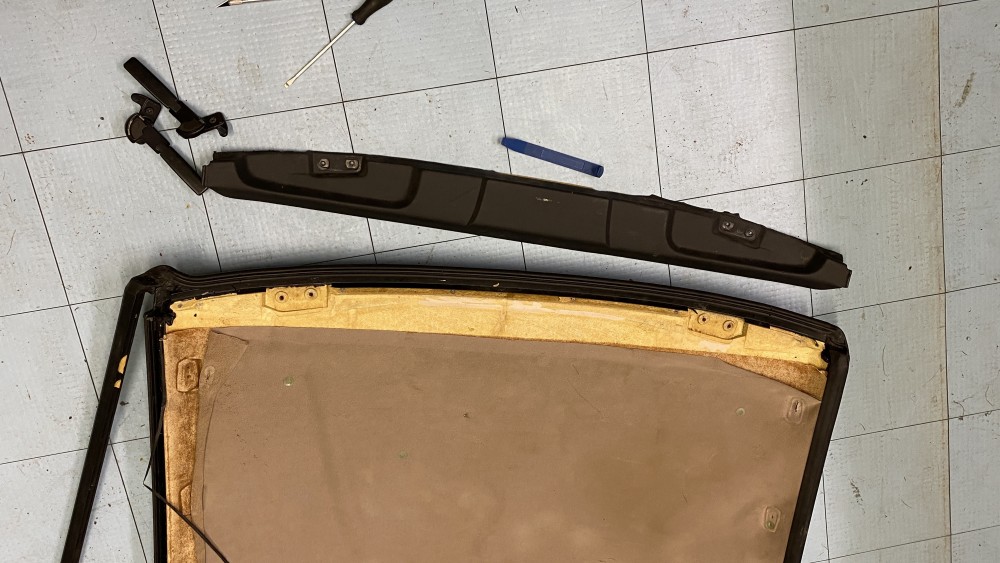
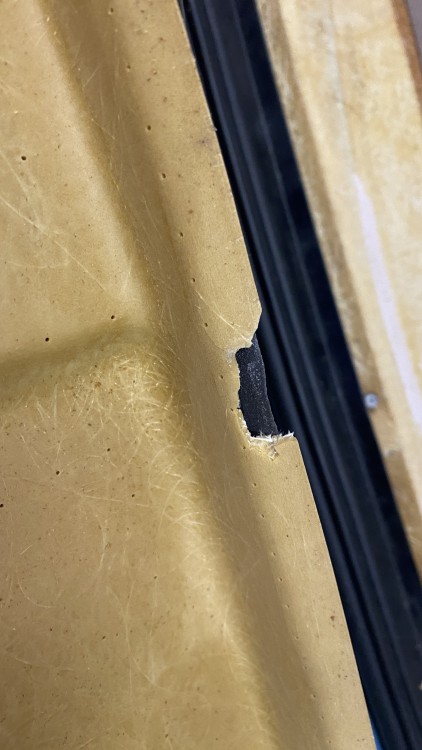
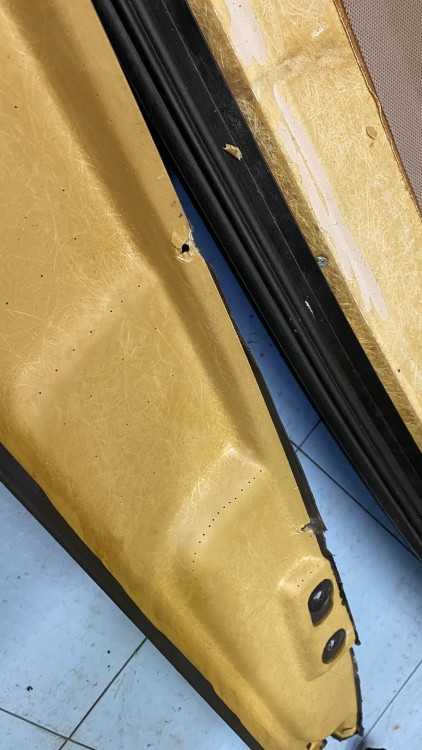
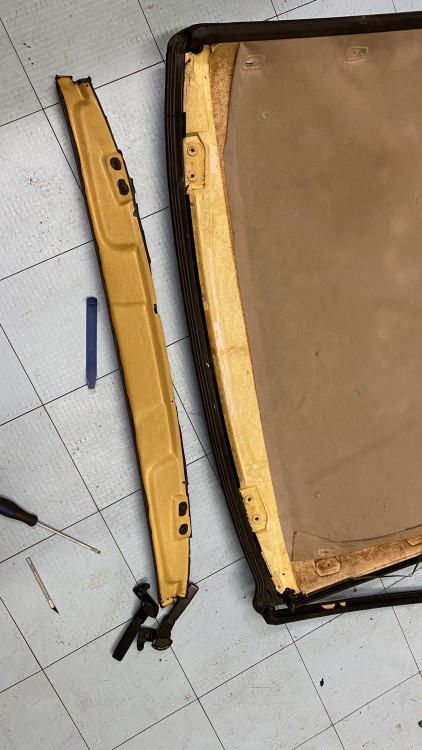
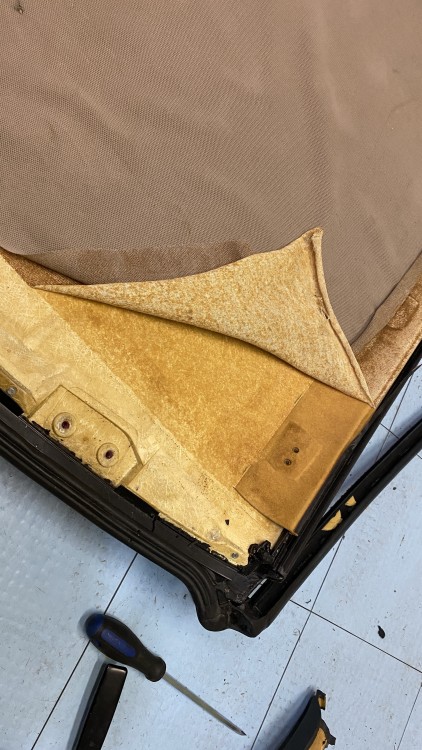
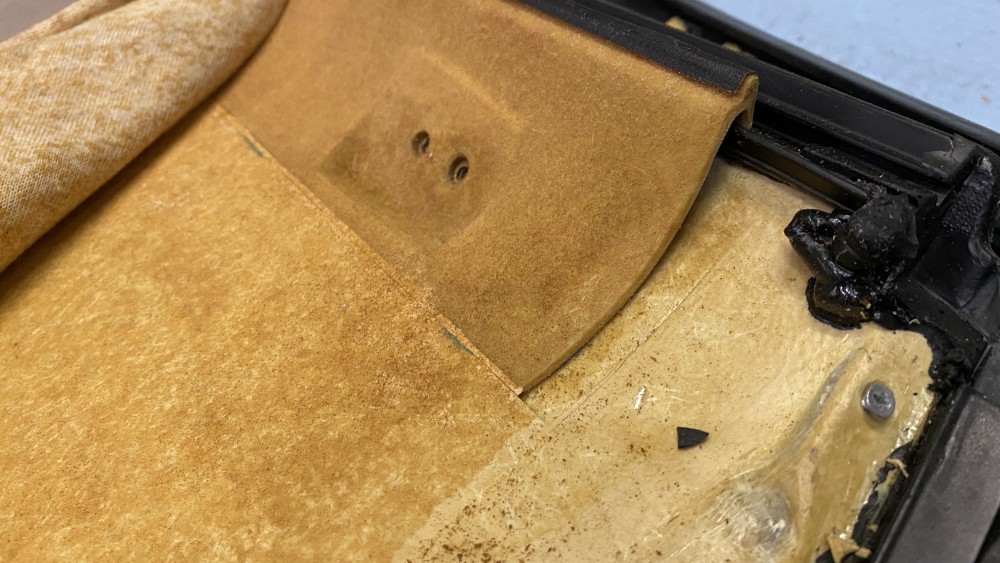
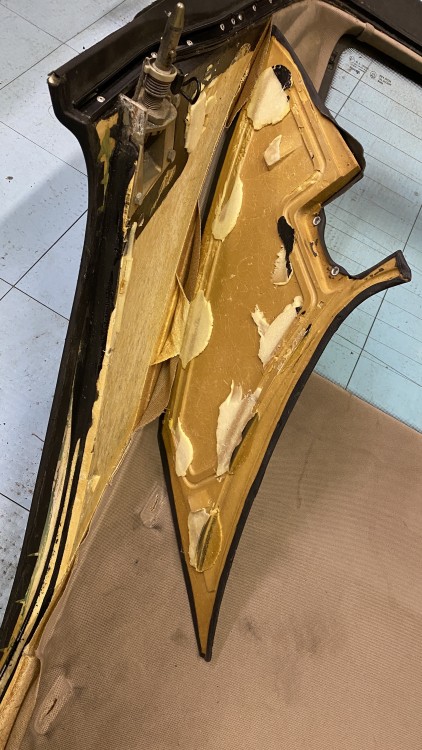
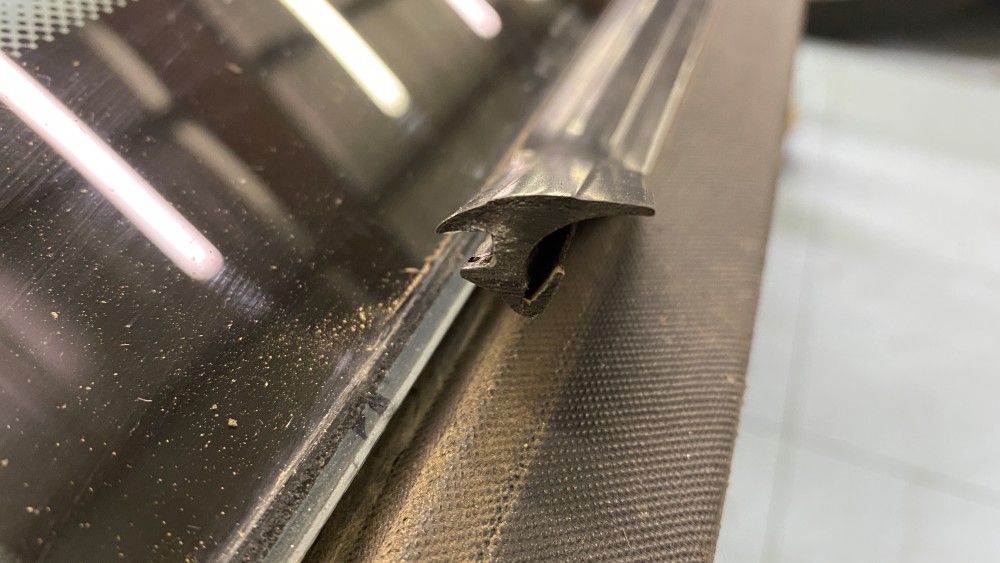
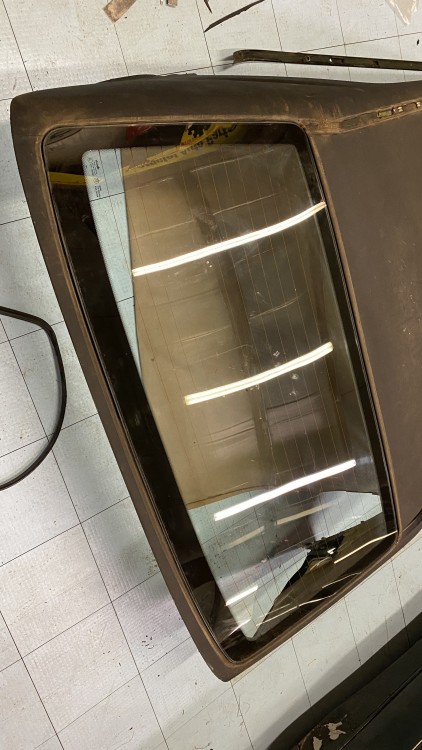
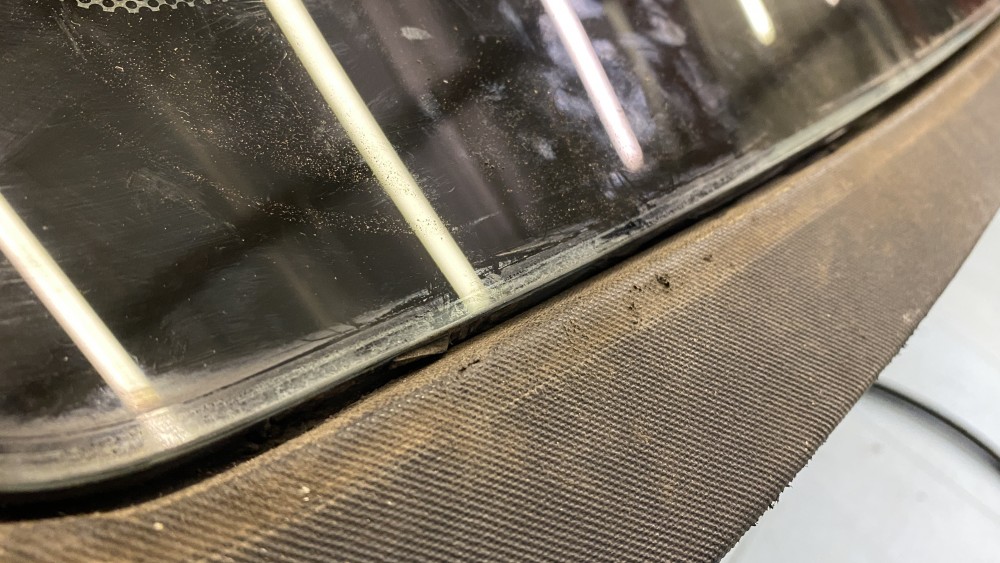
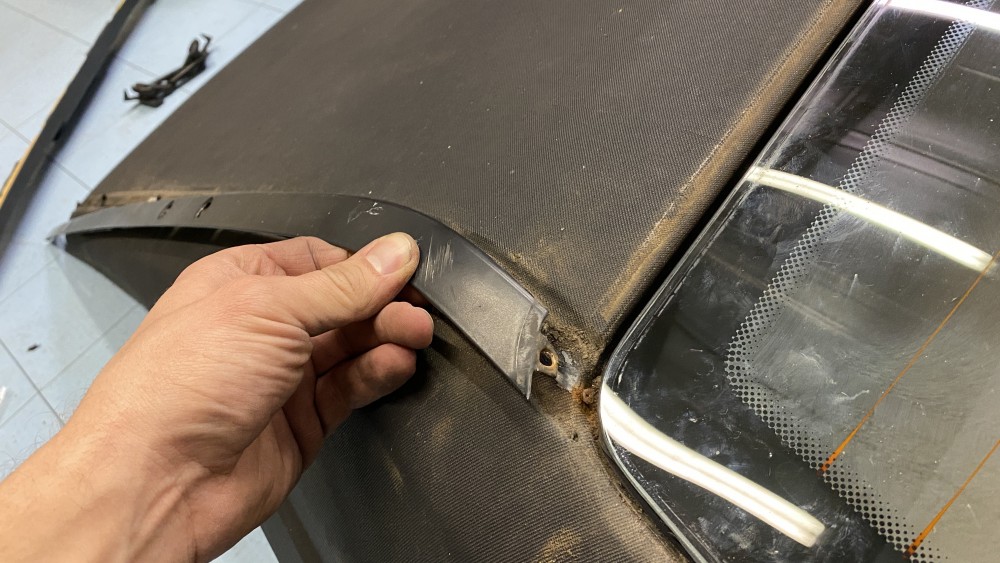
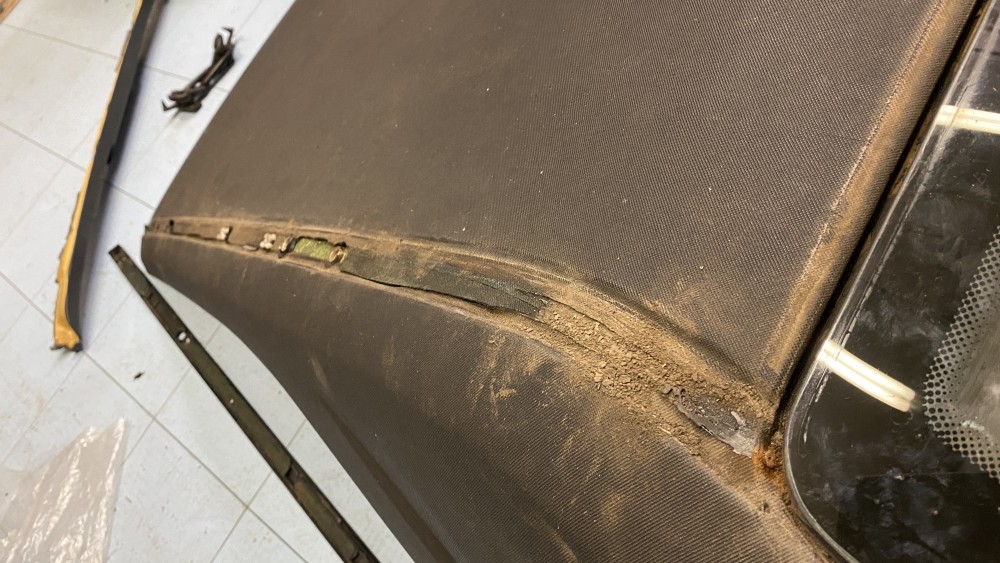
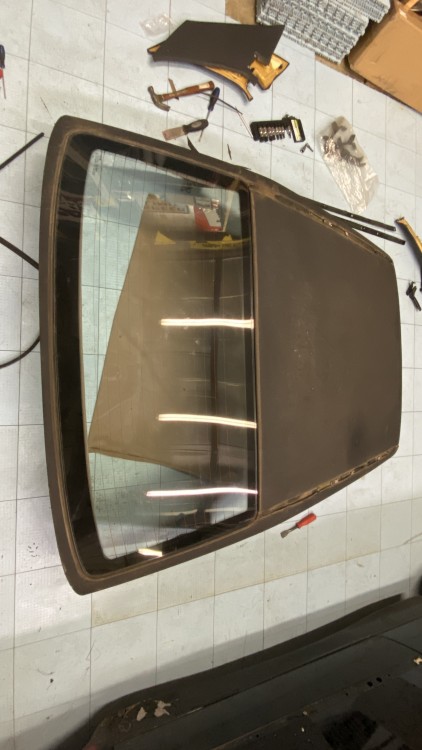
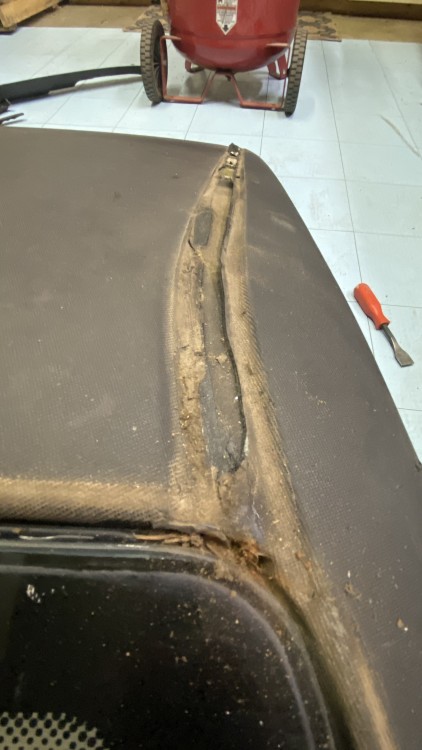
At this point I was able to pull all of the fabrics off. I didnt take any in progress pics but it was really easy and happened quickly.
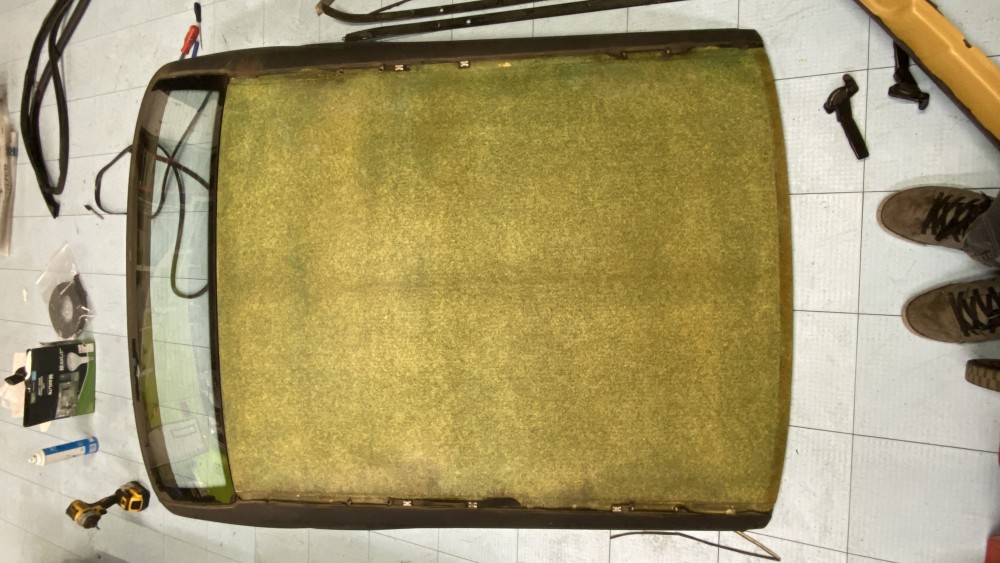
https://www.instagram.com/_jdesigner_/ http://nevertoolow.tumblr.com/
🥳SOLD BMW E24 633CSI - BMW M30B32 🧪SOLD HCH ES9 - 1.3 LDA
👽BMW E30 325IC - Toyota 1JZ-GTE ⏰ HONDA EF9 CIVIC SI - JDM B18C5
☠️BMW E36 318i - Ford 5.0 FE302 🚴♂️ GT-Labomba - 26x2.75 Freeride
🤹♀️SOLD BMW E36/7 Z3 - BMW M54B25 🧓SOLD BMW E10 2002 - BMW M10M05 -
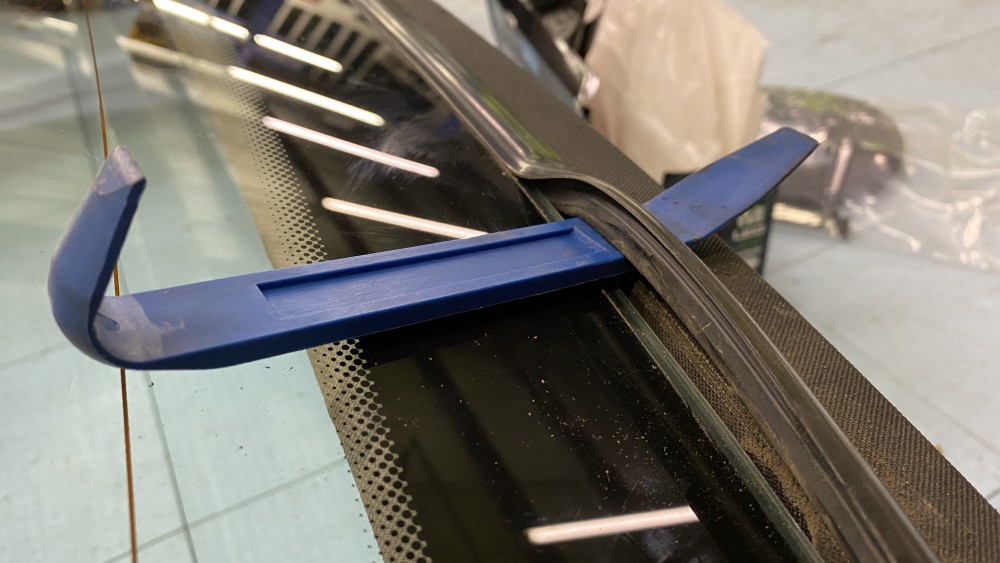
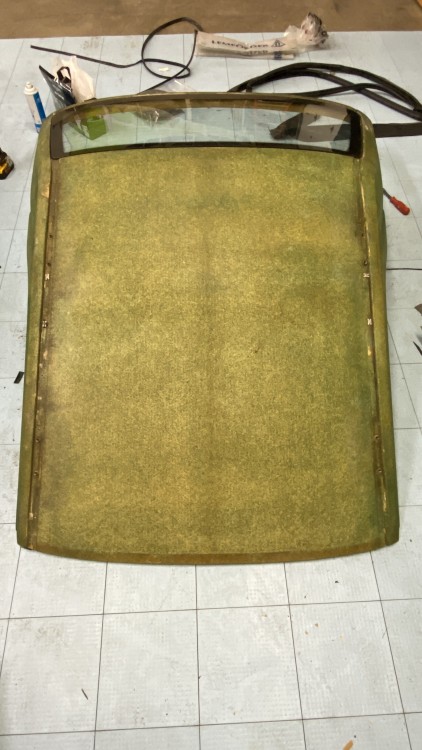
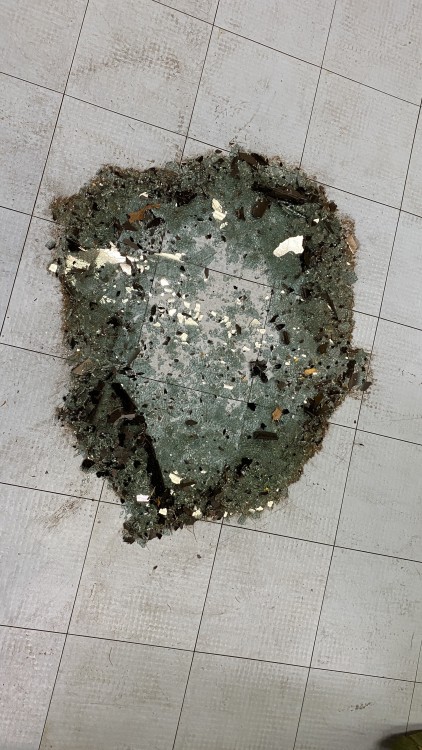
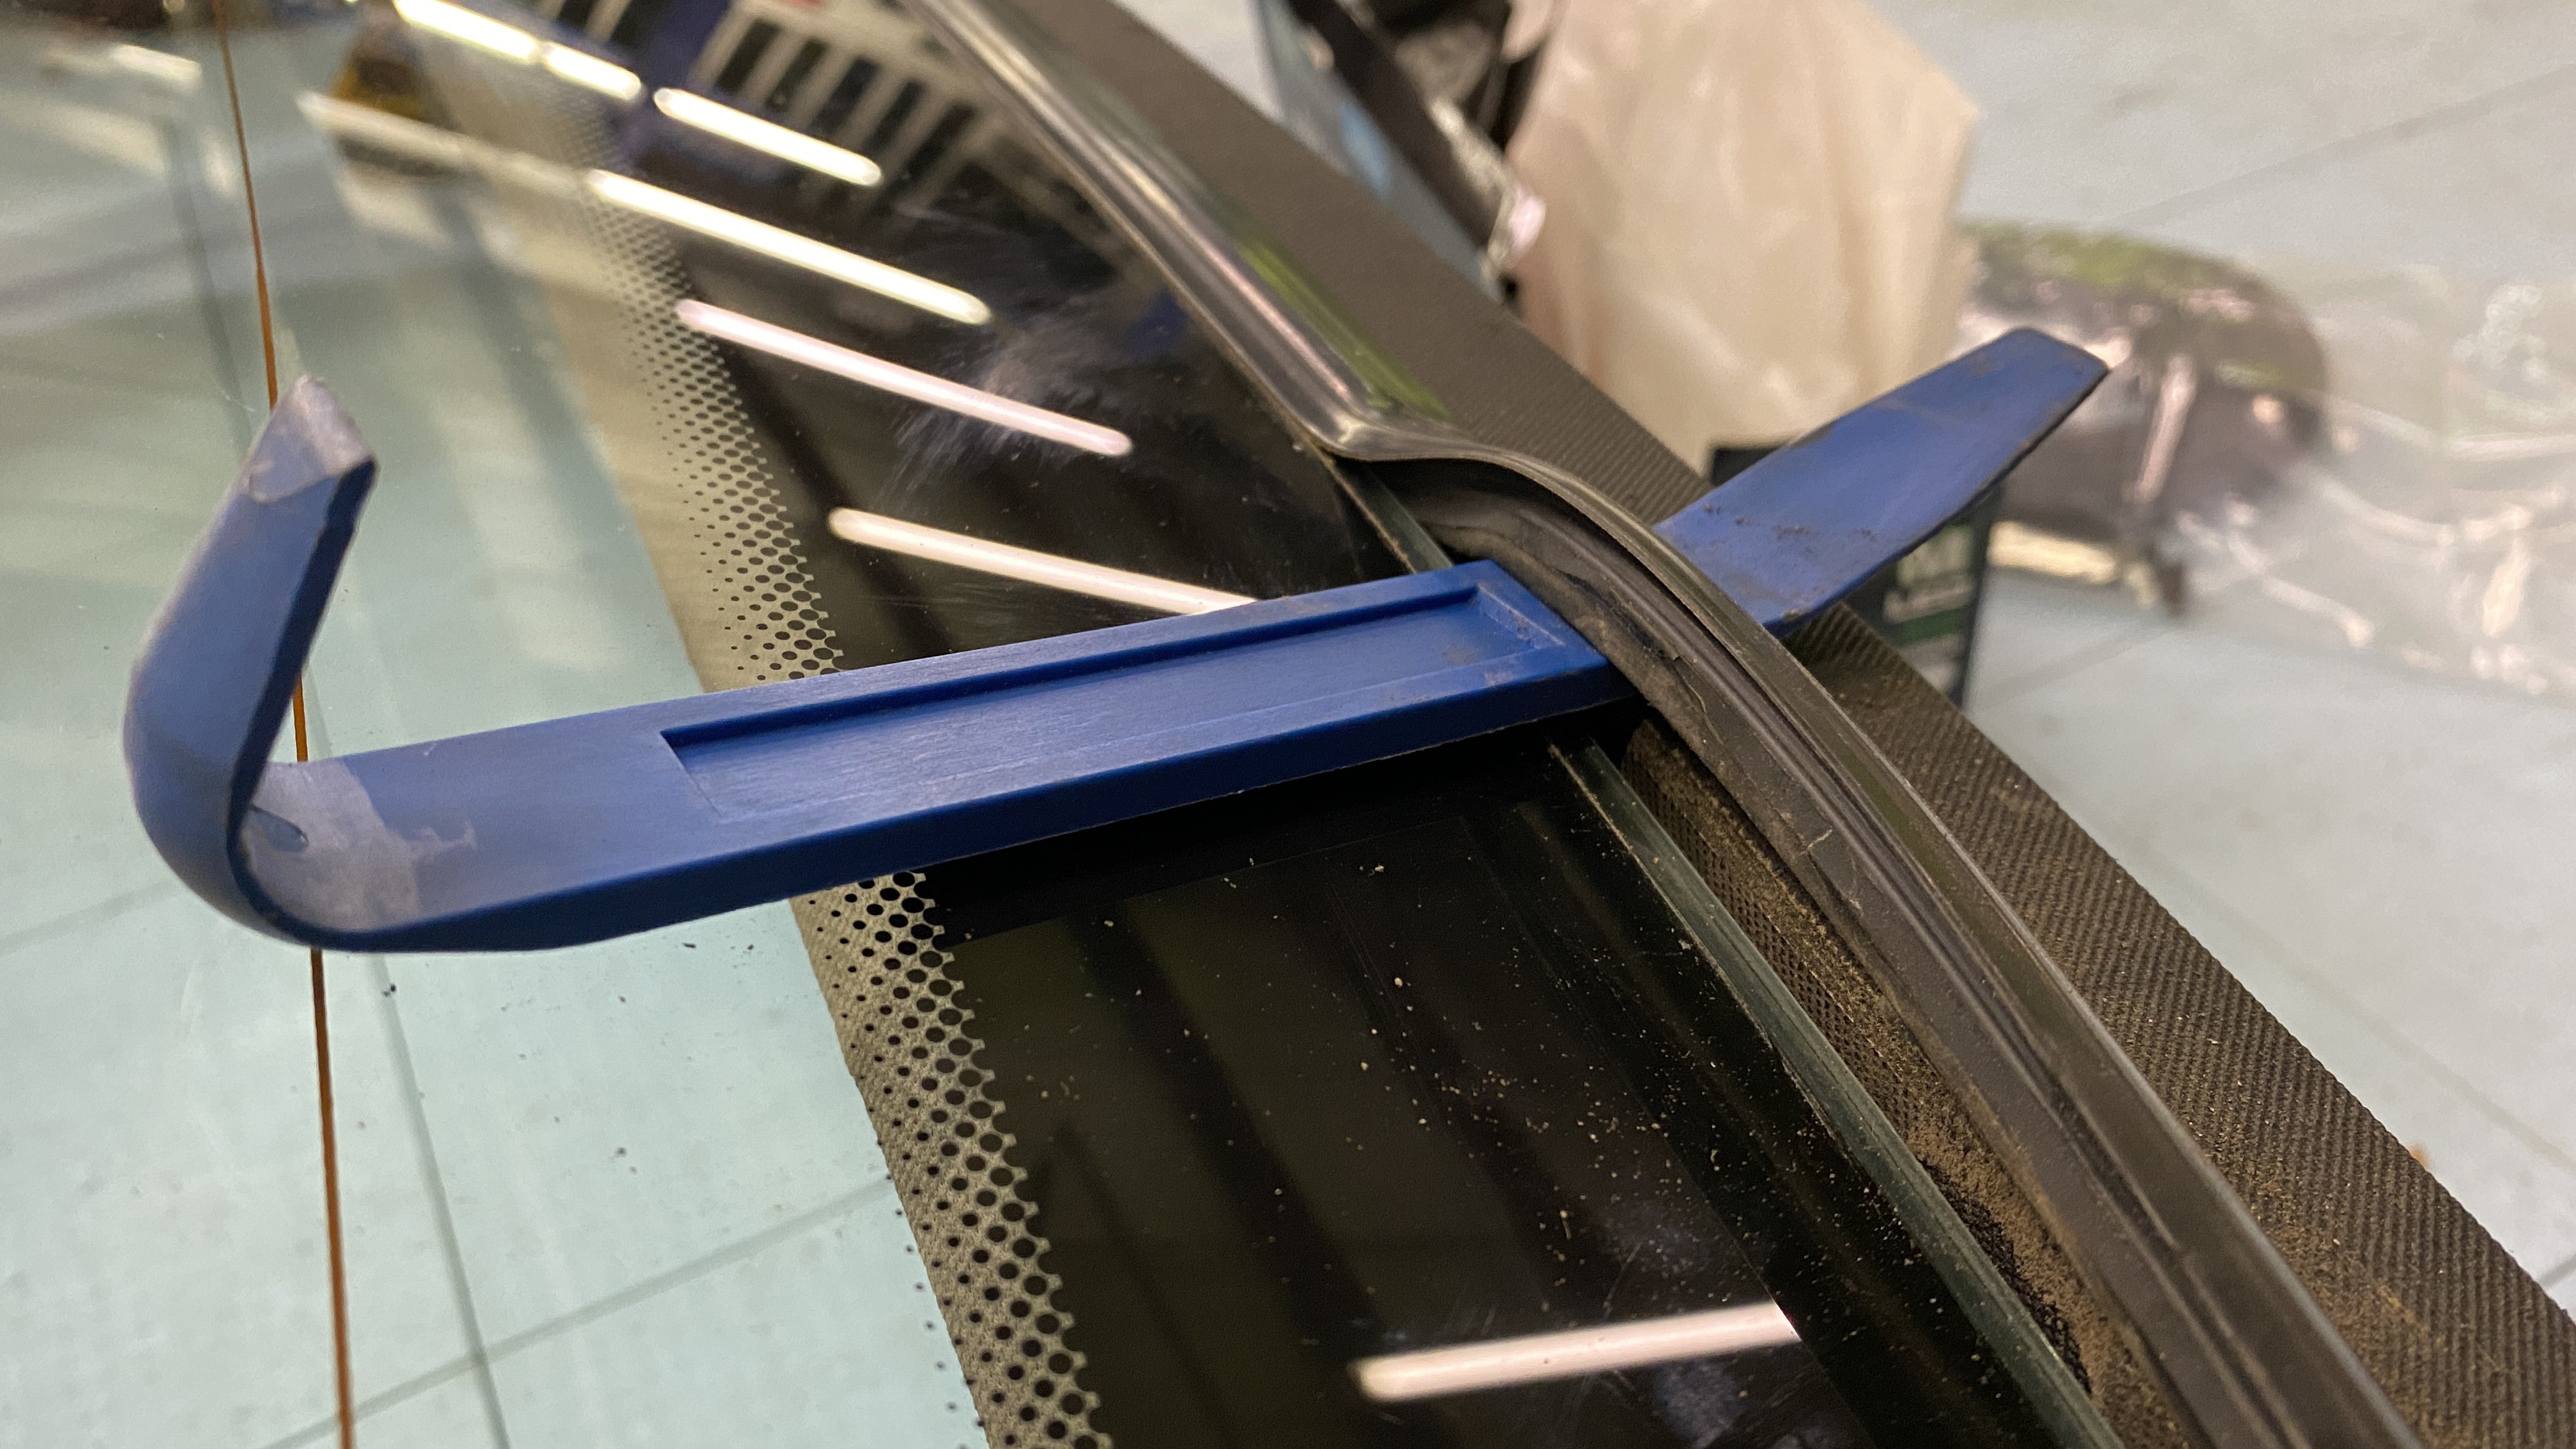
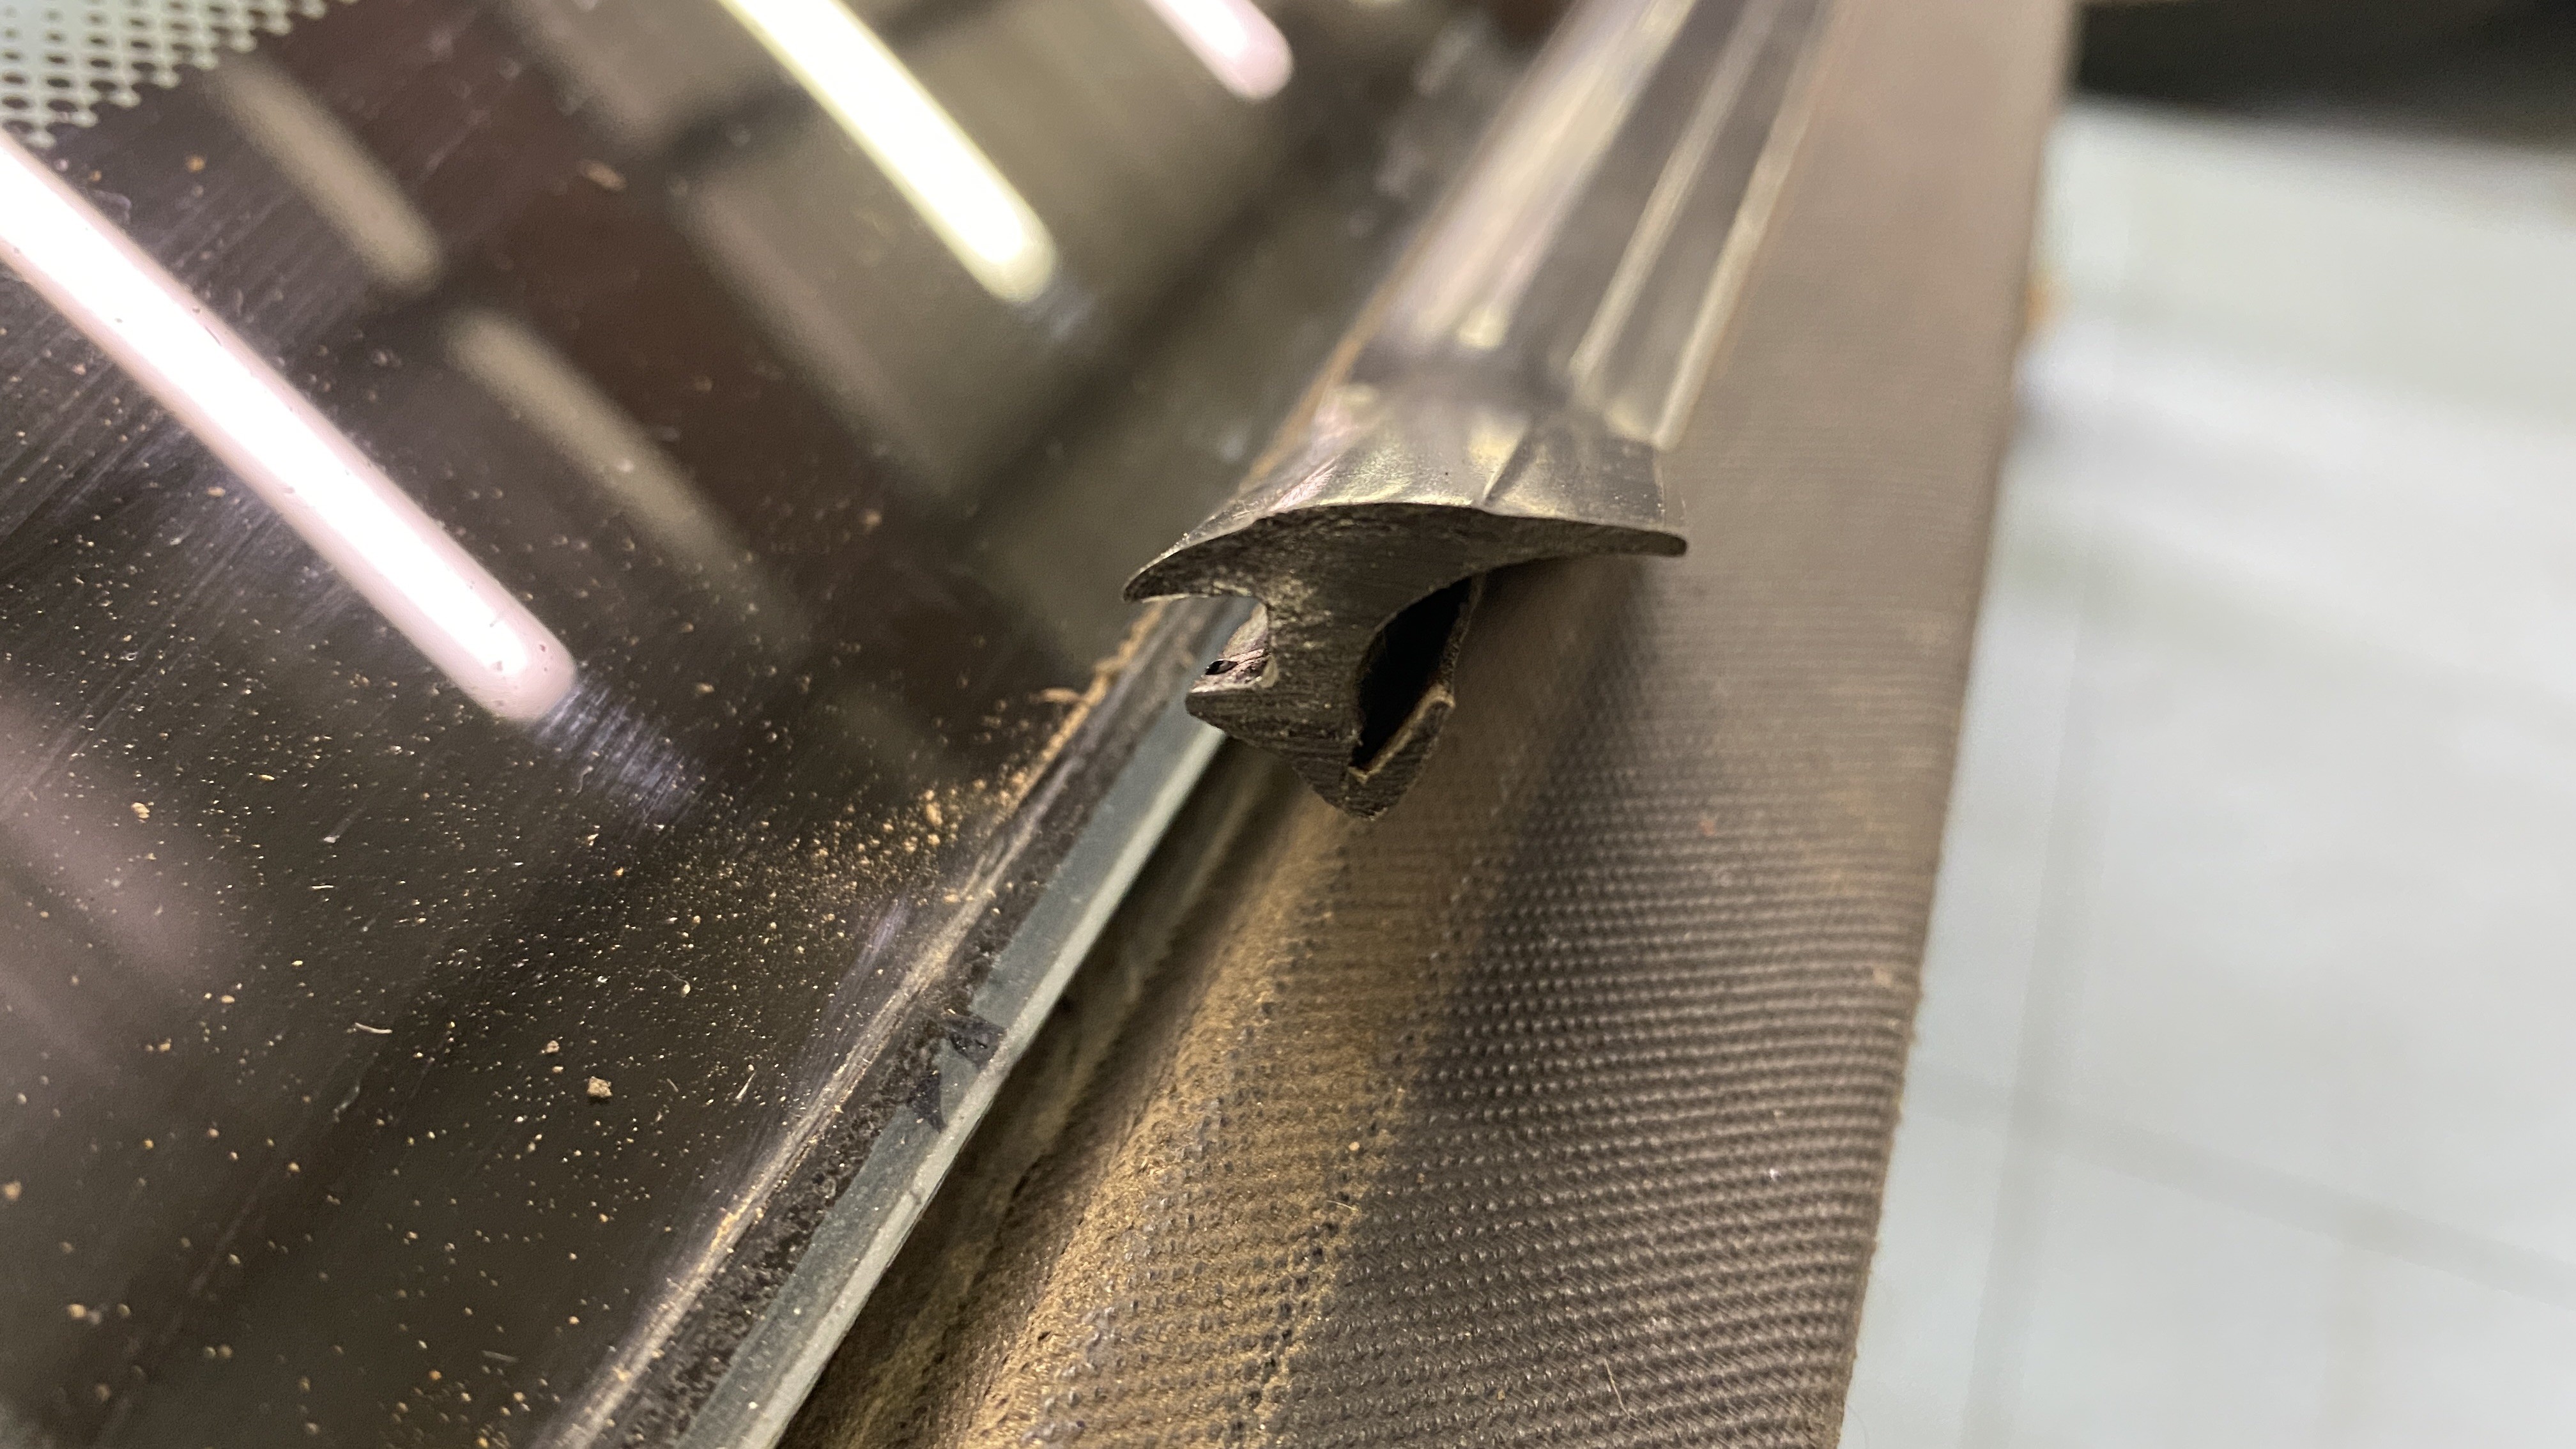
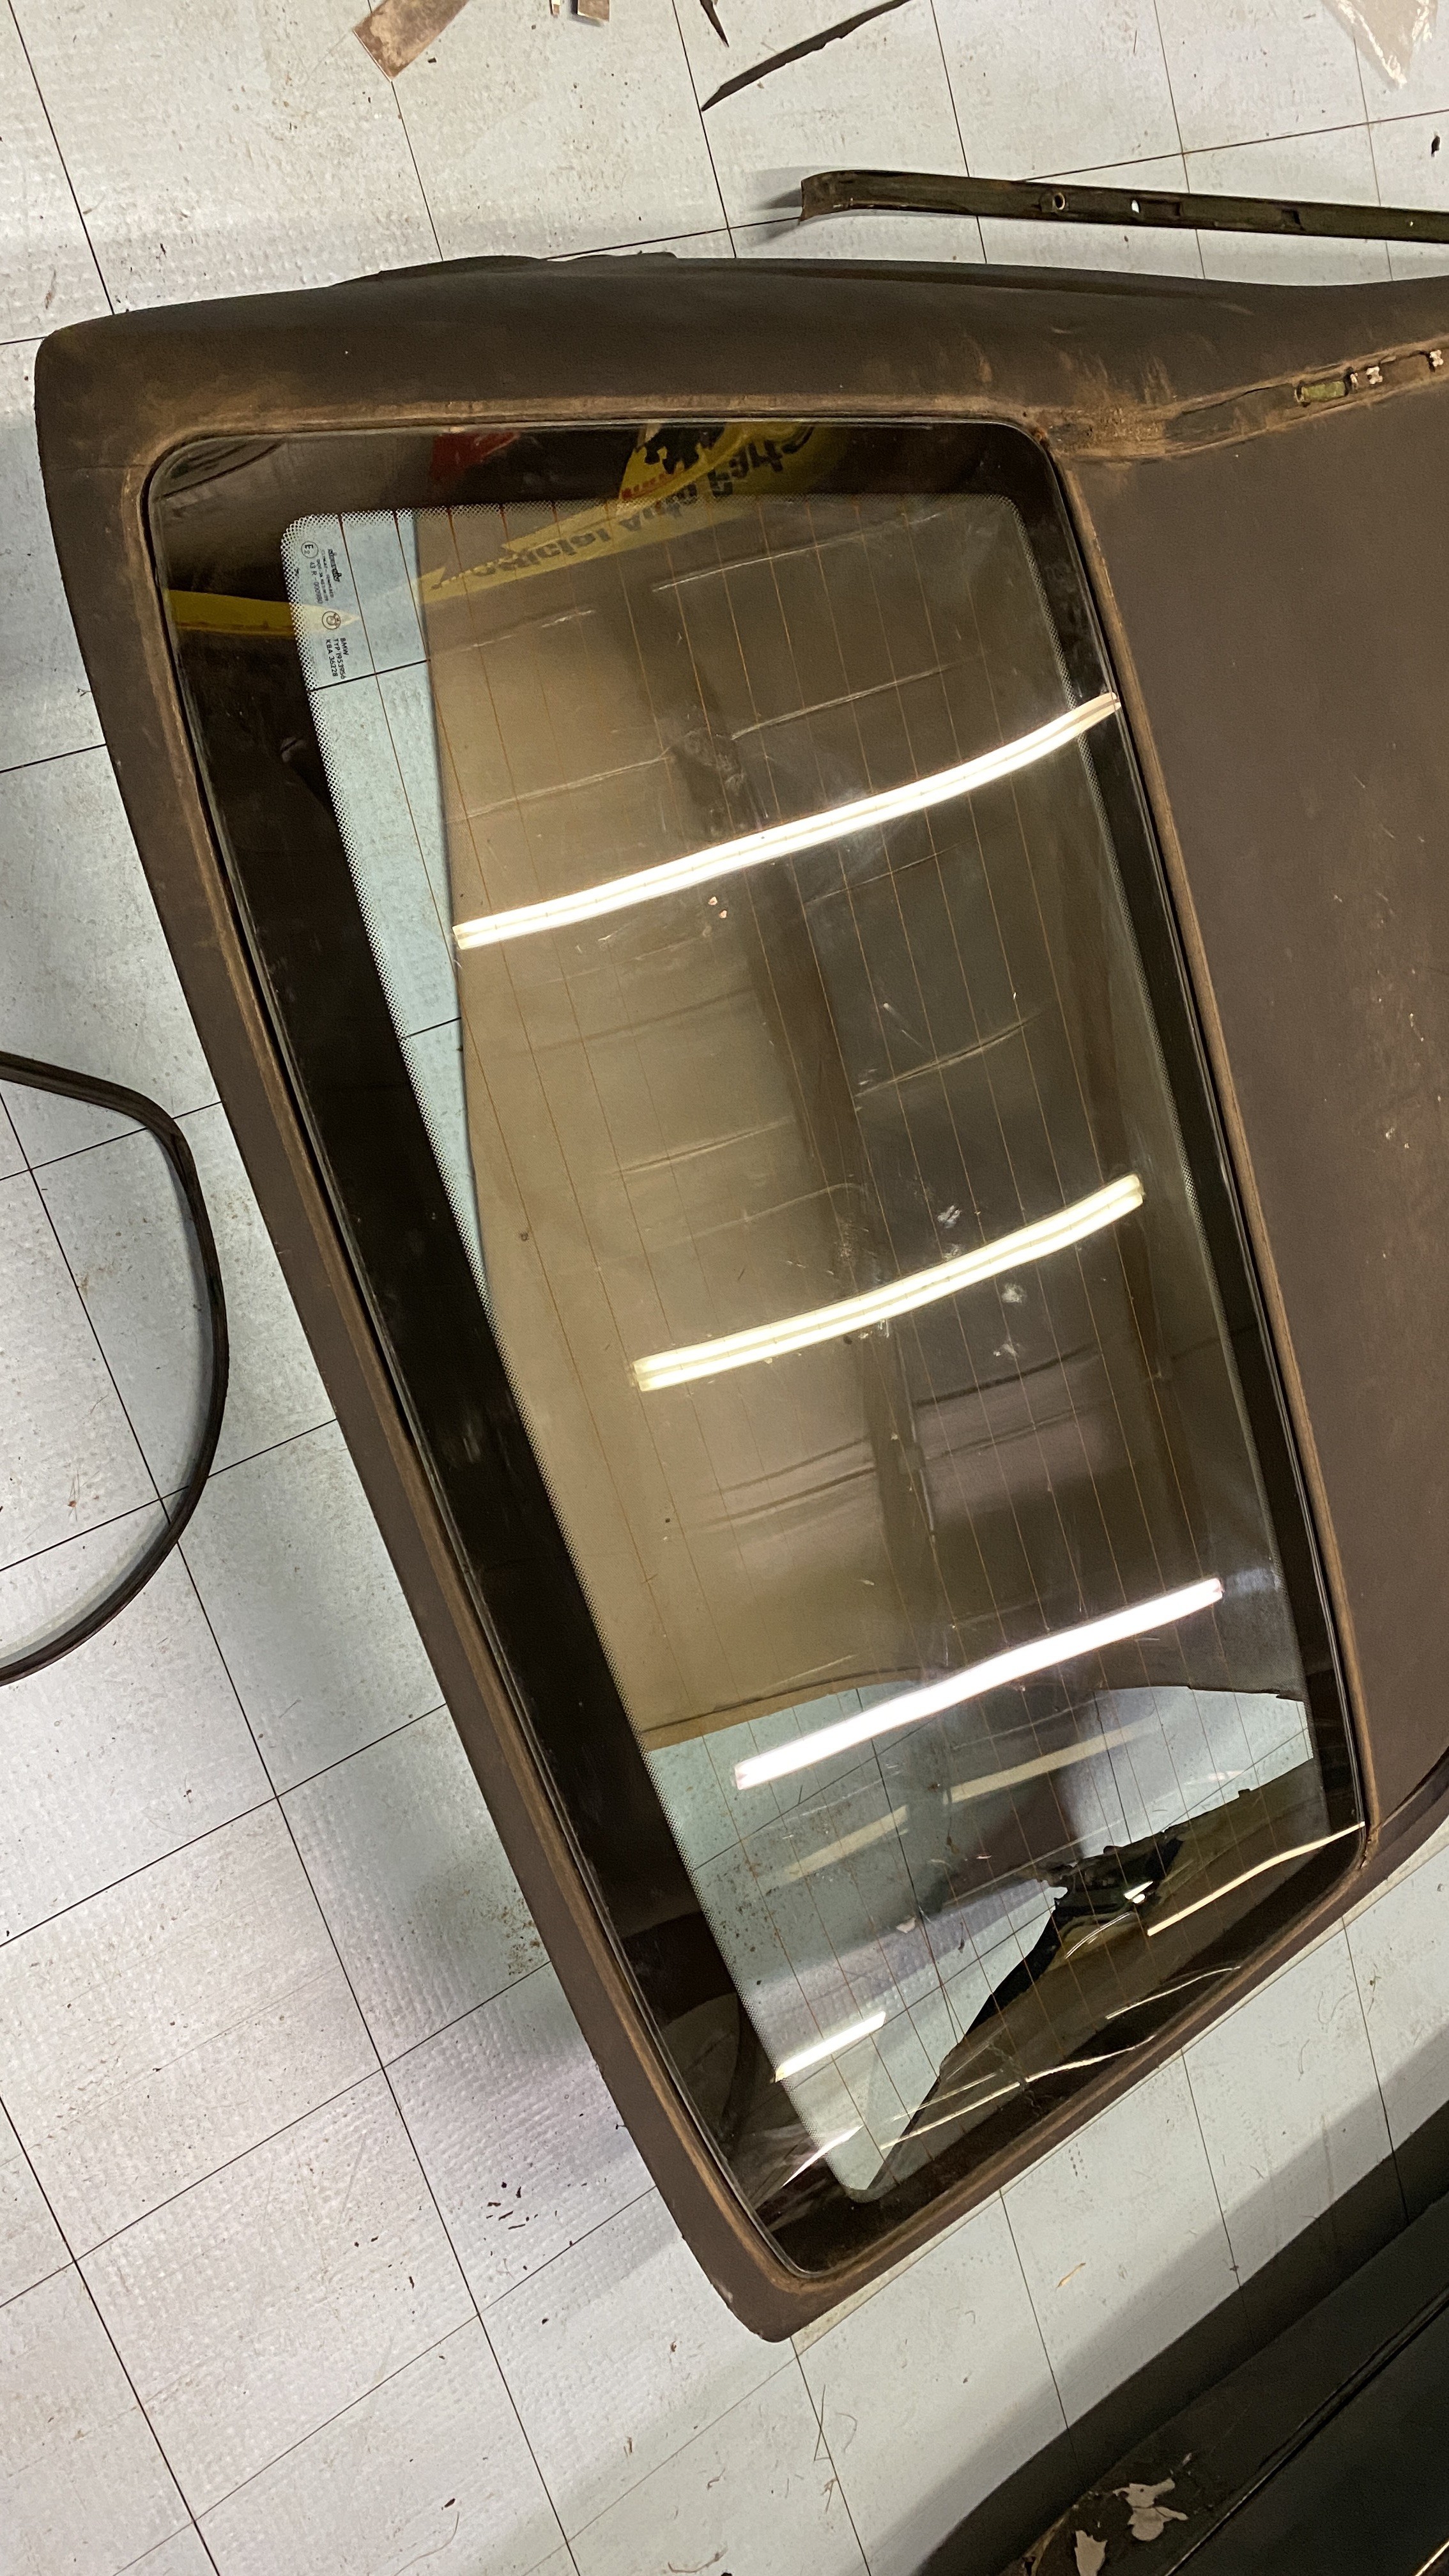
The next step was to remove the glass. I want to keep the glass as it will make a nice guide for creating a buck for forming the Polycarbonate, but it sat a touch higher than the top, and in order to paint and re wrap the top properly it needed to come out so I bought one of these.


https://www.instagram.com/_jdesigner_/ http://nevertoolow.tumblr.com/
🥳SOLD BMW E24 633CSI - BMW M30B32 🧪SOLD HCH ES9 - 1.3 LDA
👽BMW E30 325IC - Toyota 1JZ-GTE ⏰ HONDA EF9 CIVIC SI - JDM B18C5
☠️BMW E36 318i - Ford 5.0 FE302 🚴♂️ GT-Labomba - 26x2.75 Freeride
🤹♀️SOLD BMW E36/7 Z3 - BMW M54B25 🧓SOLD BMW E10 2002 - BMW M10M05




Hello! It looks like you're interested in this conversation, but you don't have an account yet.
Getting fed up of having to scroll through the same posts each visit? When you register for an account, you'll always come back to exactly where you were before, and choose to be notified of new replies (either via email, or push notification). You'll also be able to save bookmarks and upvote posts to show your appreciation to other community members.
With your input, this post could be even better 💗
Register Login