Skip to content
  • Categories
  • Recent
  • Tags
  • Popular
  • Users
  • Groups
Skins
  • Light
  • Brite
  • Cerulean
  • Cosmo
  • Flatly
  • Journal
  • Litera
  • Lumen
  • Lux
  • Materia
  • Minty
  • Morph
  • Pulse
  • Sandstone
  • Simplex
  • Sketchy
  • Spacelab
  • United
  • Yeti
  • Zephyr
  • Dark
  • Cyborg
  • Darkly
  • Quartz
  • Slate
  • Solar
  • Superhero
  • Vapor

  • Default (No Skin)
  • No Skin
Collapse
WIBIMMERS logo

WIBIMMERS

  1. Home
  2. General Discussion
  3. Members BMWs
  4. E46 Touring Life

E46 Touring Life

Scheduled Pinned Locked Moved Members BMWs
87 Posts 11 Posters 0 Views 1 Watching
  • Oldest to Newest
  • Newest to Oldest
  • Most Votes
Reply
  • Reply as topic
Log in to reply
This topic has been deleted. Only users with topic management privileges can see it.
  • Bassboy3313B
    Bassboy3313B
    Bassboy3313
    wrote on last edited by
    #47

    B C said:

    I have been over here ready with toothbrush and Simple Green waiting for an invite to the cleaning party.

    1000 shop towels later, It looks so good

    Lol. Chris was working on his motorcycle this past weekend. Out of nowhere he stopped, walked over to the engine bay and started cleaning it. I wasn't going to stop working on the intake and cv axle to stop him. 🤷‍♂️

    CHECK OUT >>> RAGE DRIFT DESIGNS <<< FOR DECALS AND MORE!

    1 Reply Last reply
    3
    • G
      G
      gilber33
      wrote on last edited by
      #48

      Bassboy3313 said:

      Lol. Chris was working on his motorcycle this past weekend. Out of nowhere he stopped, walked over to the engine bay and started cleaning it. I wasn't going to stop working on the intake and cv axle to stop him. 🤷‍♂️

      lol. @The Full Banana is the same way. Put a cleaning product and towel in his line of sight and he can't resist the urge to start cleaning engine bays.

      1 Reply Last reply
      1
      • Bassboy3313B
        Bassboy3313B
        Bassboy3313
        wrote on last edited by
        #49

        Ran into a snag with the broken control arm bolt stuck in the car frame from one's the previous owners. Have tried drilling it out and using extractor with no luck. Next step is heating with propane torch and quenching with wd40 to see if that breaks it free with extractor. If not, guess it's drilling out to bigger size, retapping, enlarging hole on control arm mount and bolting it in with bigger bolt.

        CHECK OUT >>> RAGE DRIFT DESIGNS <<< FOR DECALS AND MORE!

        1 Reply Last reply
        0
        • m42b32M
          m42b32M
          m42b32
          wrote on last edited by
          #50

          Bassboy3313 said:

          Ran into a snag with the broken control arm bolt stuck in the car frame from one's the previous owners. Have tried drilling it out and using extractor with no luck. Next step is heating with propane torch and quenching with wd40 to see if that breaks it free with extractor. If not, guess it's drilling out to bigger size, retapping, enlarging hole on control arm mount and bolting it in with bigger bolt. 

          No dice on welding a nut to it? Or is it too far recessed into the frame?

          1991 318is, 1991 318i, 2022 Bronco

          1 Reply Last reply
          0
          • Bassboy3313B
            Bassboy3313B
            Bassboy3313
            wrote on last edited by
            #51

            m42b32 said:

            No dice on welding a nut to it? Or is it too far recessed into the frame? 

            Would be a messy weld as it isn't flush with frame surface. Welding on your back in a tight space isn't the easiest either, lol.

            CHECK OUT >>> RAGE DRIFT DESIGNS <<< FOR DECALS AND MORE!

            1 Reply Last reply
            0
            • m42b32M
              m42b32M
              m42b32
              wrote on last edited by
              #52

              Bassboy3313 said:

              Would be a messy weld as it isn't flush with frame surface. Welding on your back in a tight space isn't the easiest either, lol. 

              Ah bummer, the nut trick only seems to work well if there is some of the bolt sticking out. Would be very counter productive to accidentally weld it to the car haha.

              1991 318is, 1991 318i, 2022 Bronco

              1 Reply Last reply
              0
              • Bassboy3313B
                Bassboy3313B
                Bassboy3313
                wrote on last edited by
                #53

                m42b32 said:

                Ah bummer, the nut trick only seems to work well if there is some of the bolt sticking out. Would be very counter productive to accidentally weld it to the car haha. 

                Lol yes! Yes it would.

                CHECK OUT >>> RAGE DRIFT DESIGNS <<< FOR DECALS AND MORE!

                1 Reply Last reply
                1
                • Bassboy3313B
                  Bassboy3313B
                  Bassboy3313
                  wrote on last edited by
                  #54

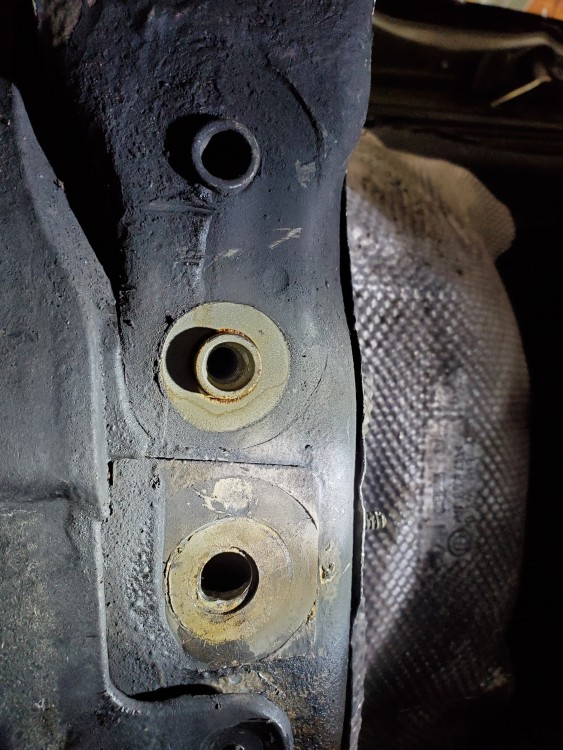
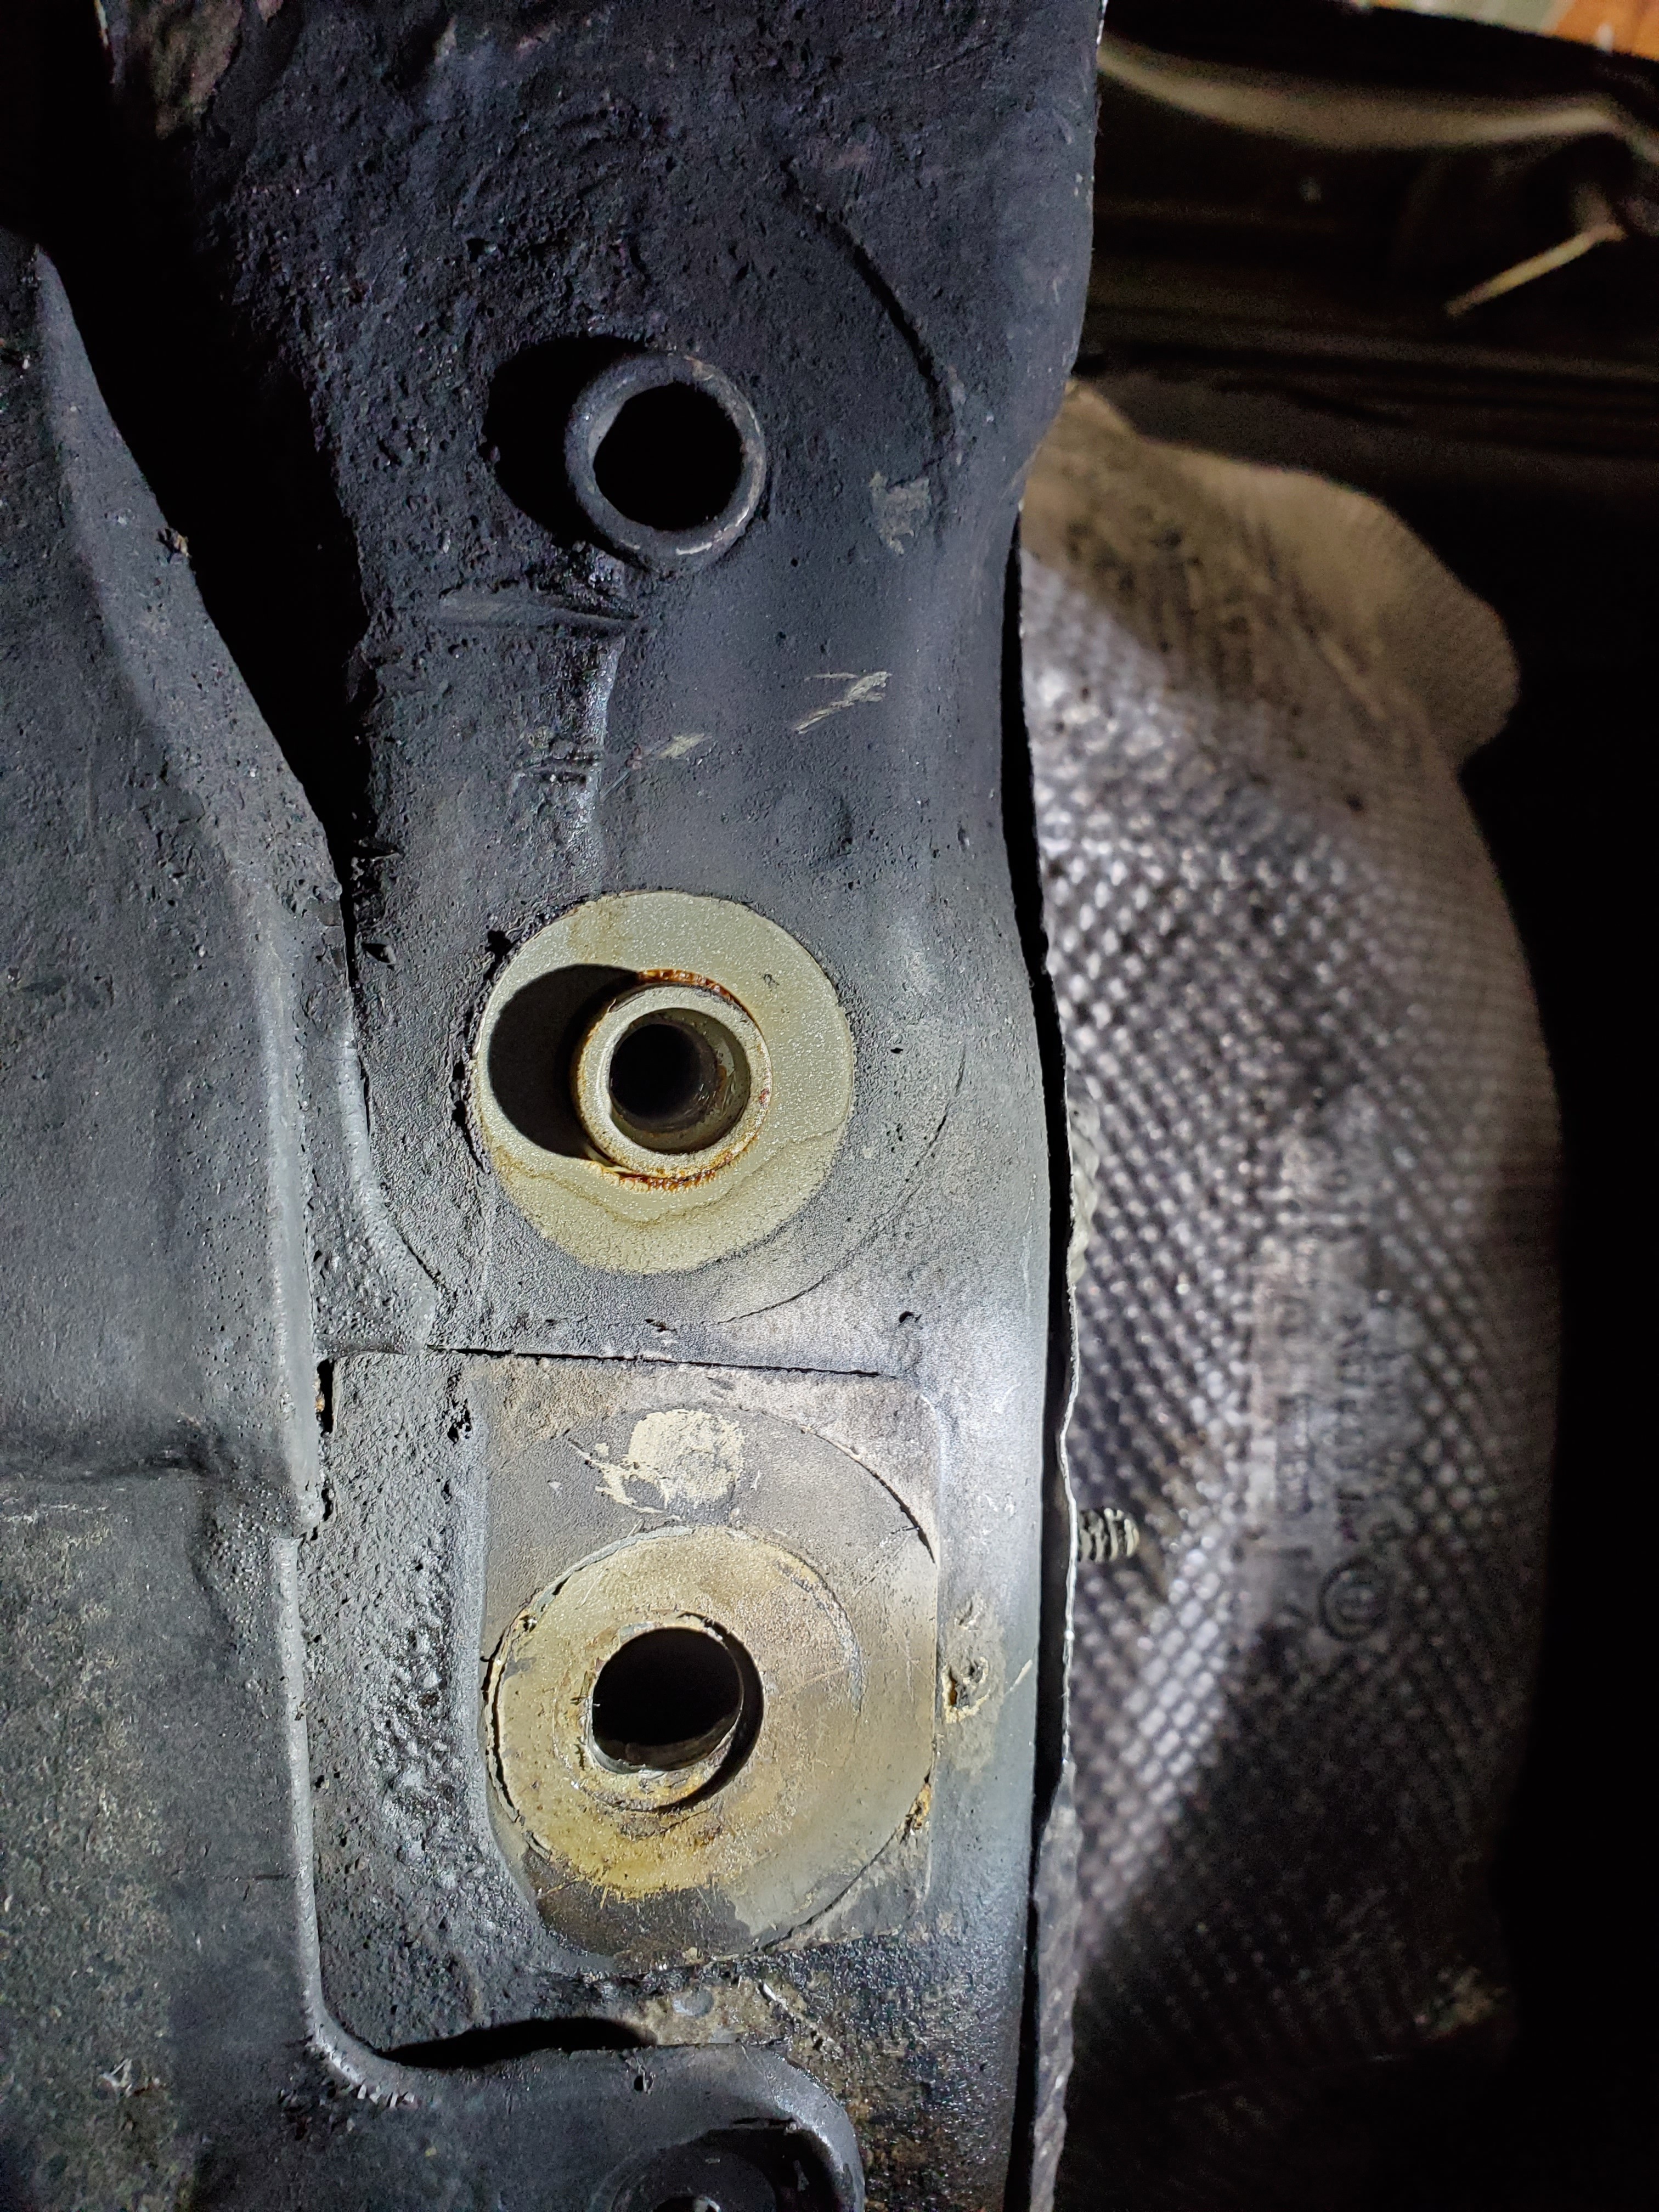
                  Took another crack at it with the extractor but heating it first with a torch. As I was turning the extractor with the tap handle, the entire threaded insert broke loose and fell inside the frame rail. 😳😡

                  20210325191031.jpg

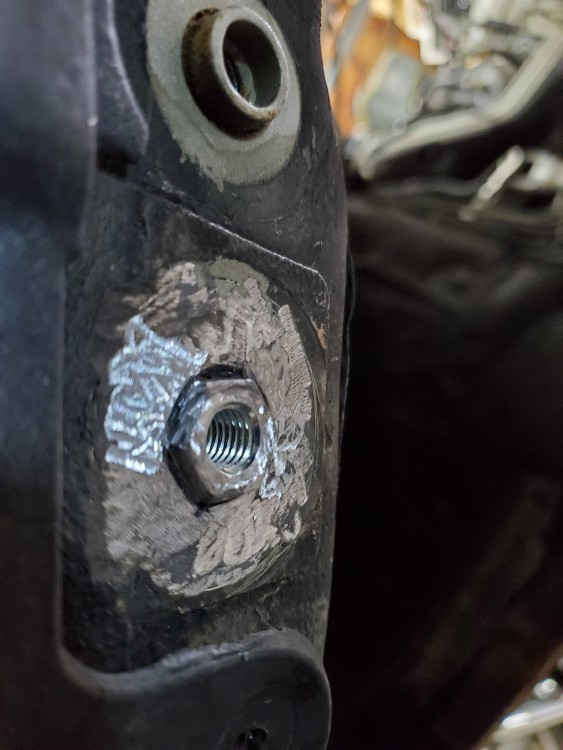
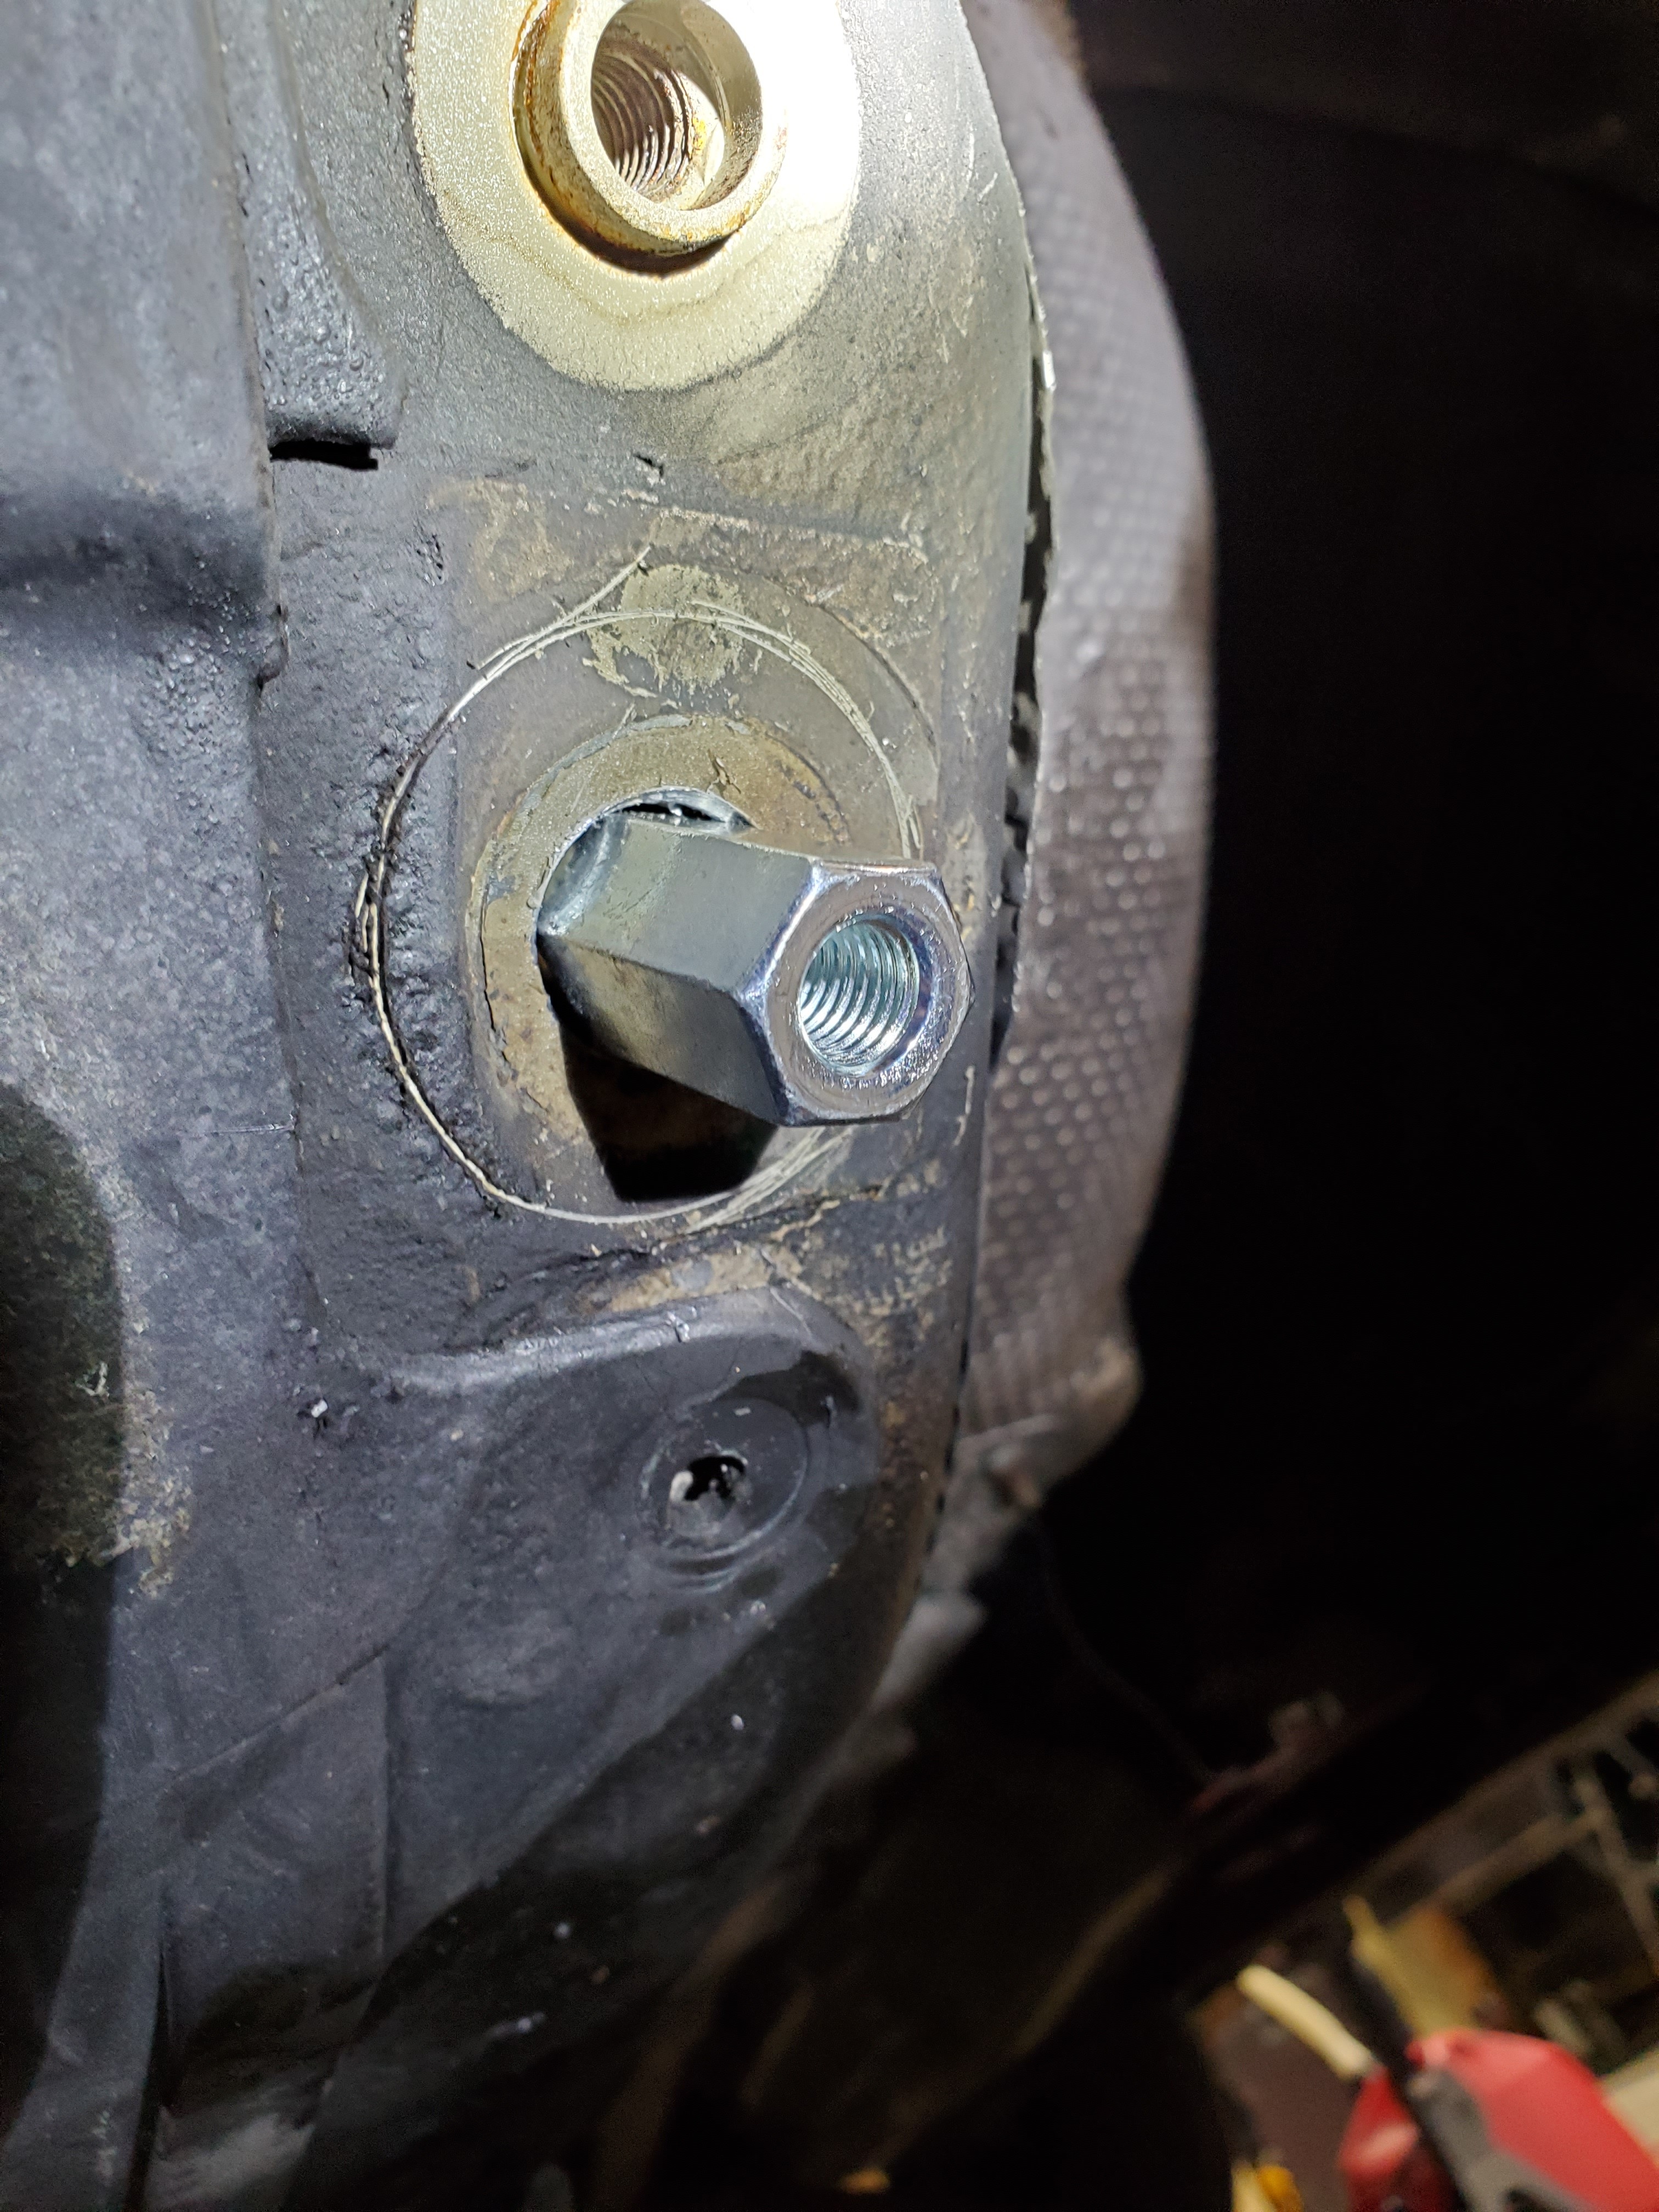
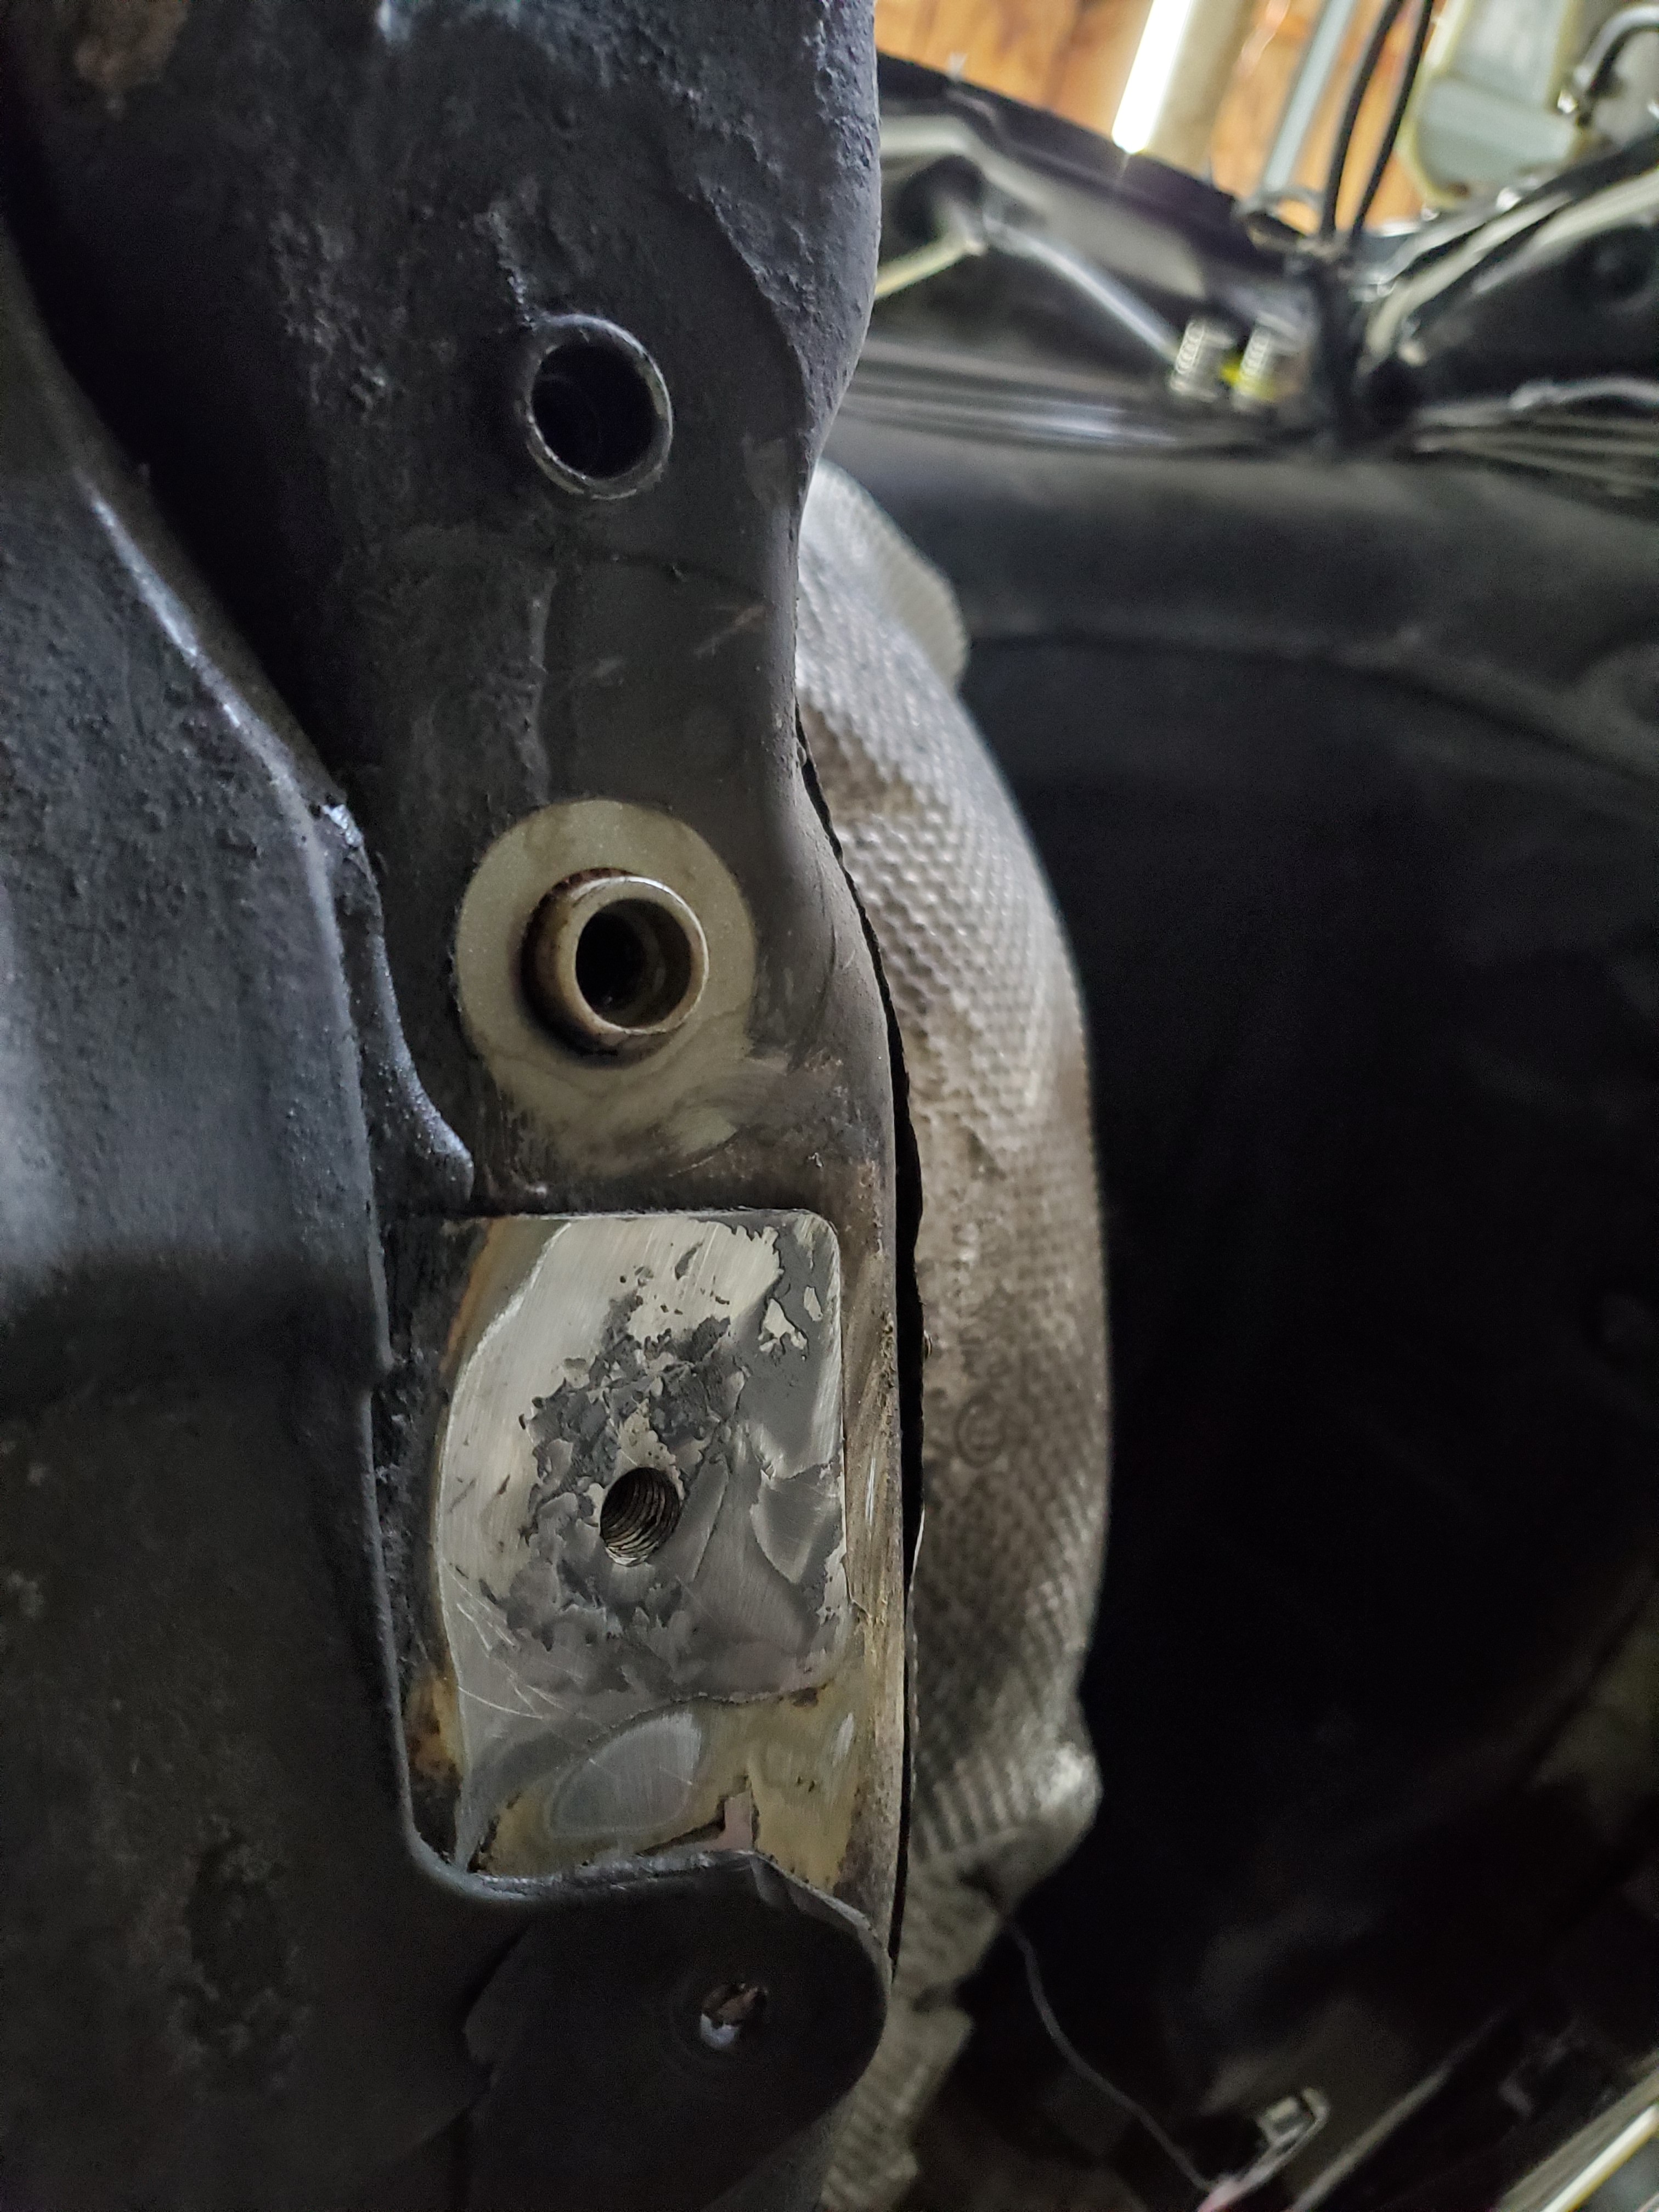
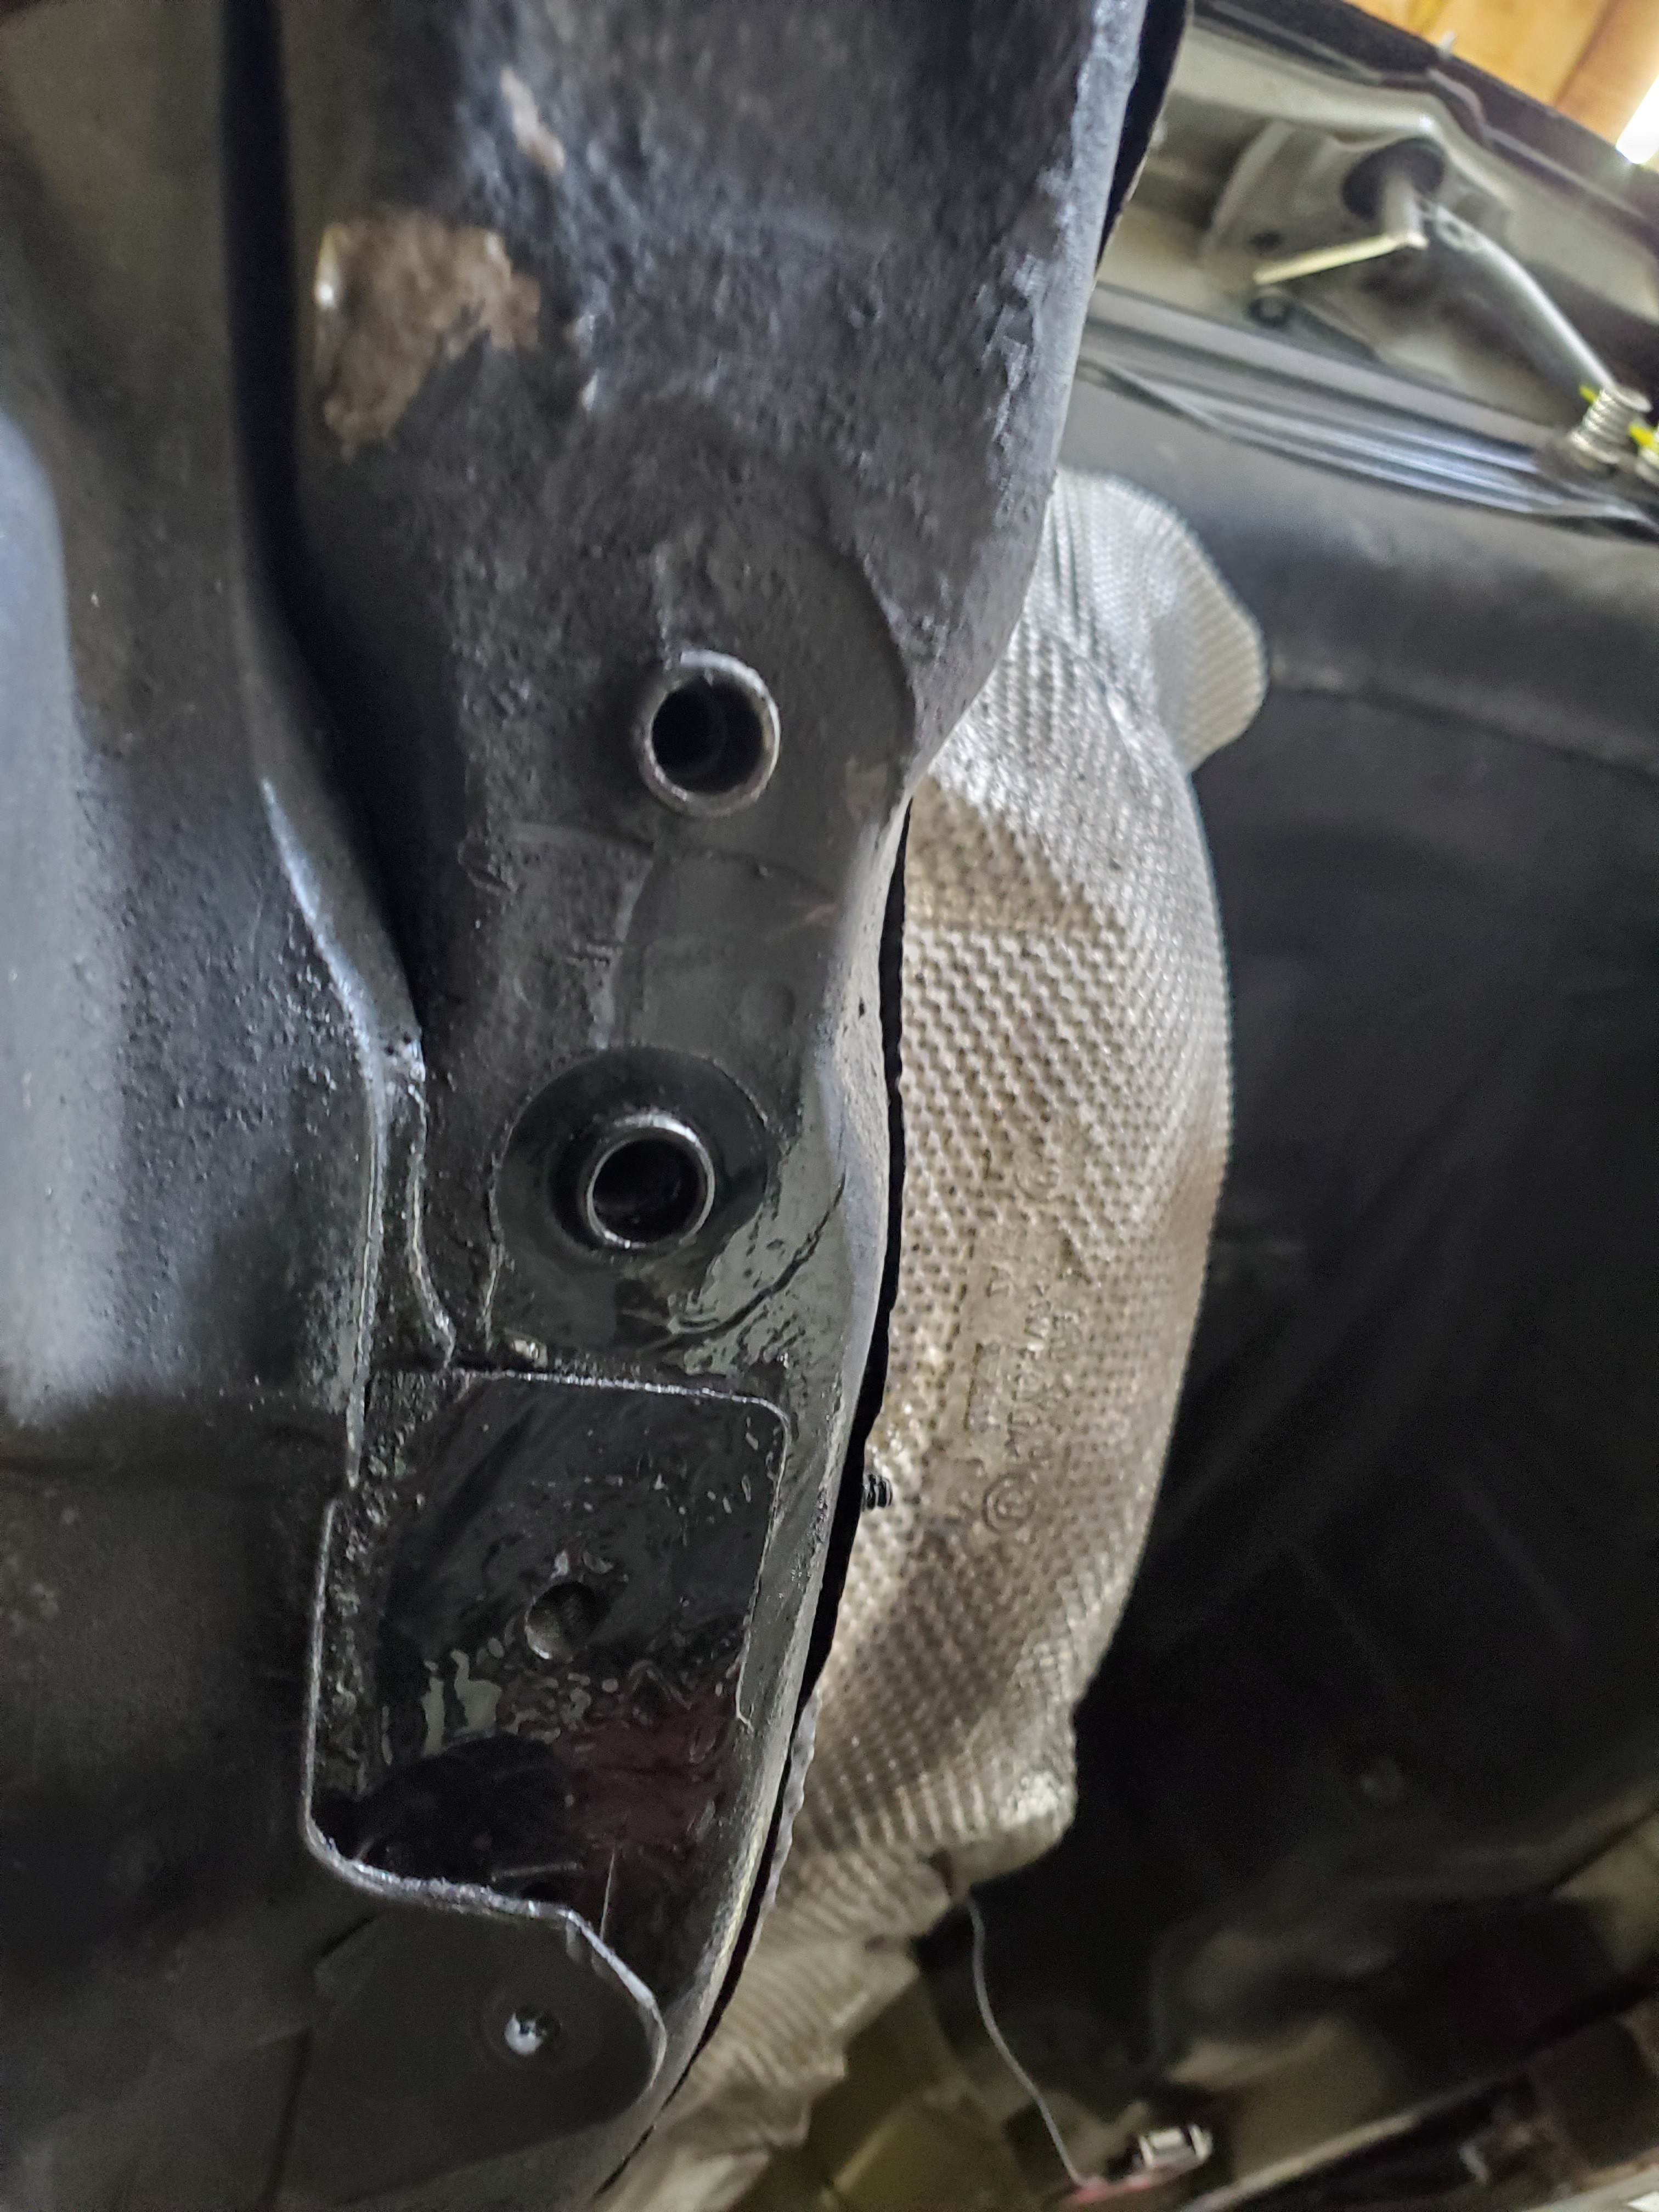
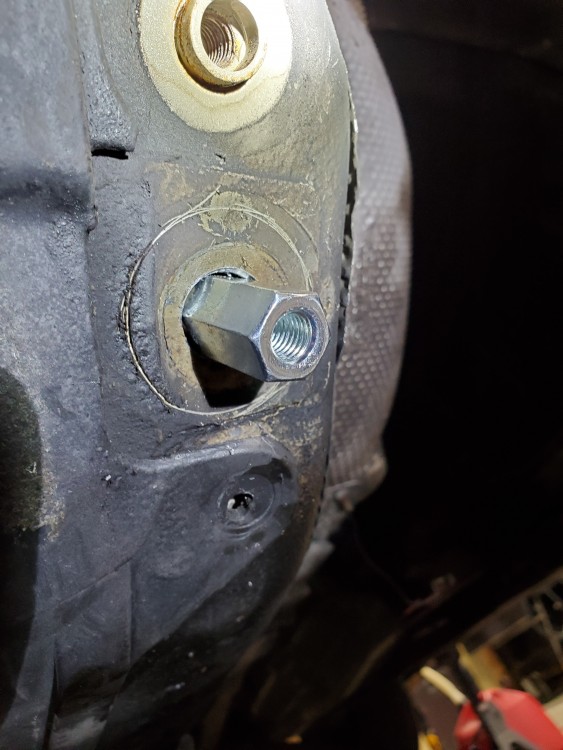
                  Leaving me with an empty hole, a few different ideas came to mind. To keep damage to the frame rail to a minimal, I opted with opening up the hole just enough to snugly tap in a threaded coupling. Ground off the finish and applied a layer of jb weld to possibly help things hold from inside. Left it about 1/16" out from frame in order for the welds to have more surface area to mend with. 
                  20210327120741.jpg

                  20210327124938.jpg

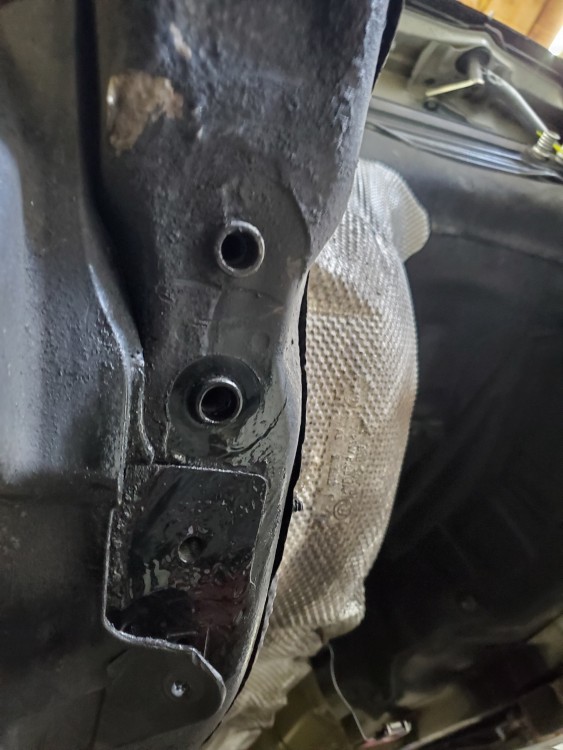
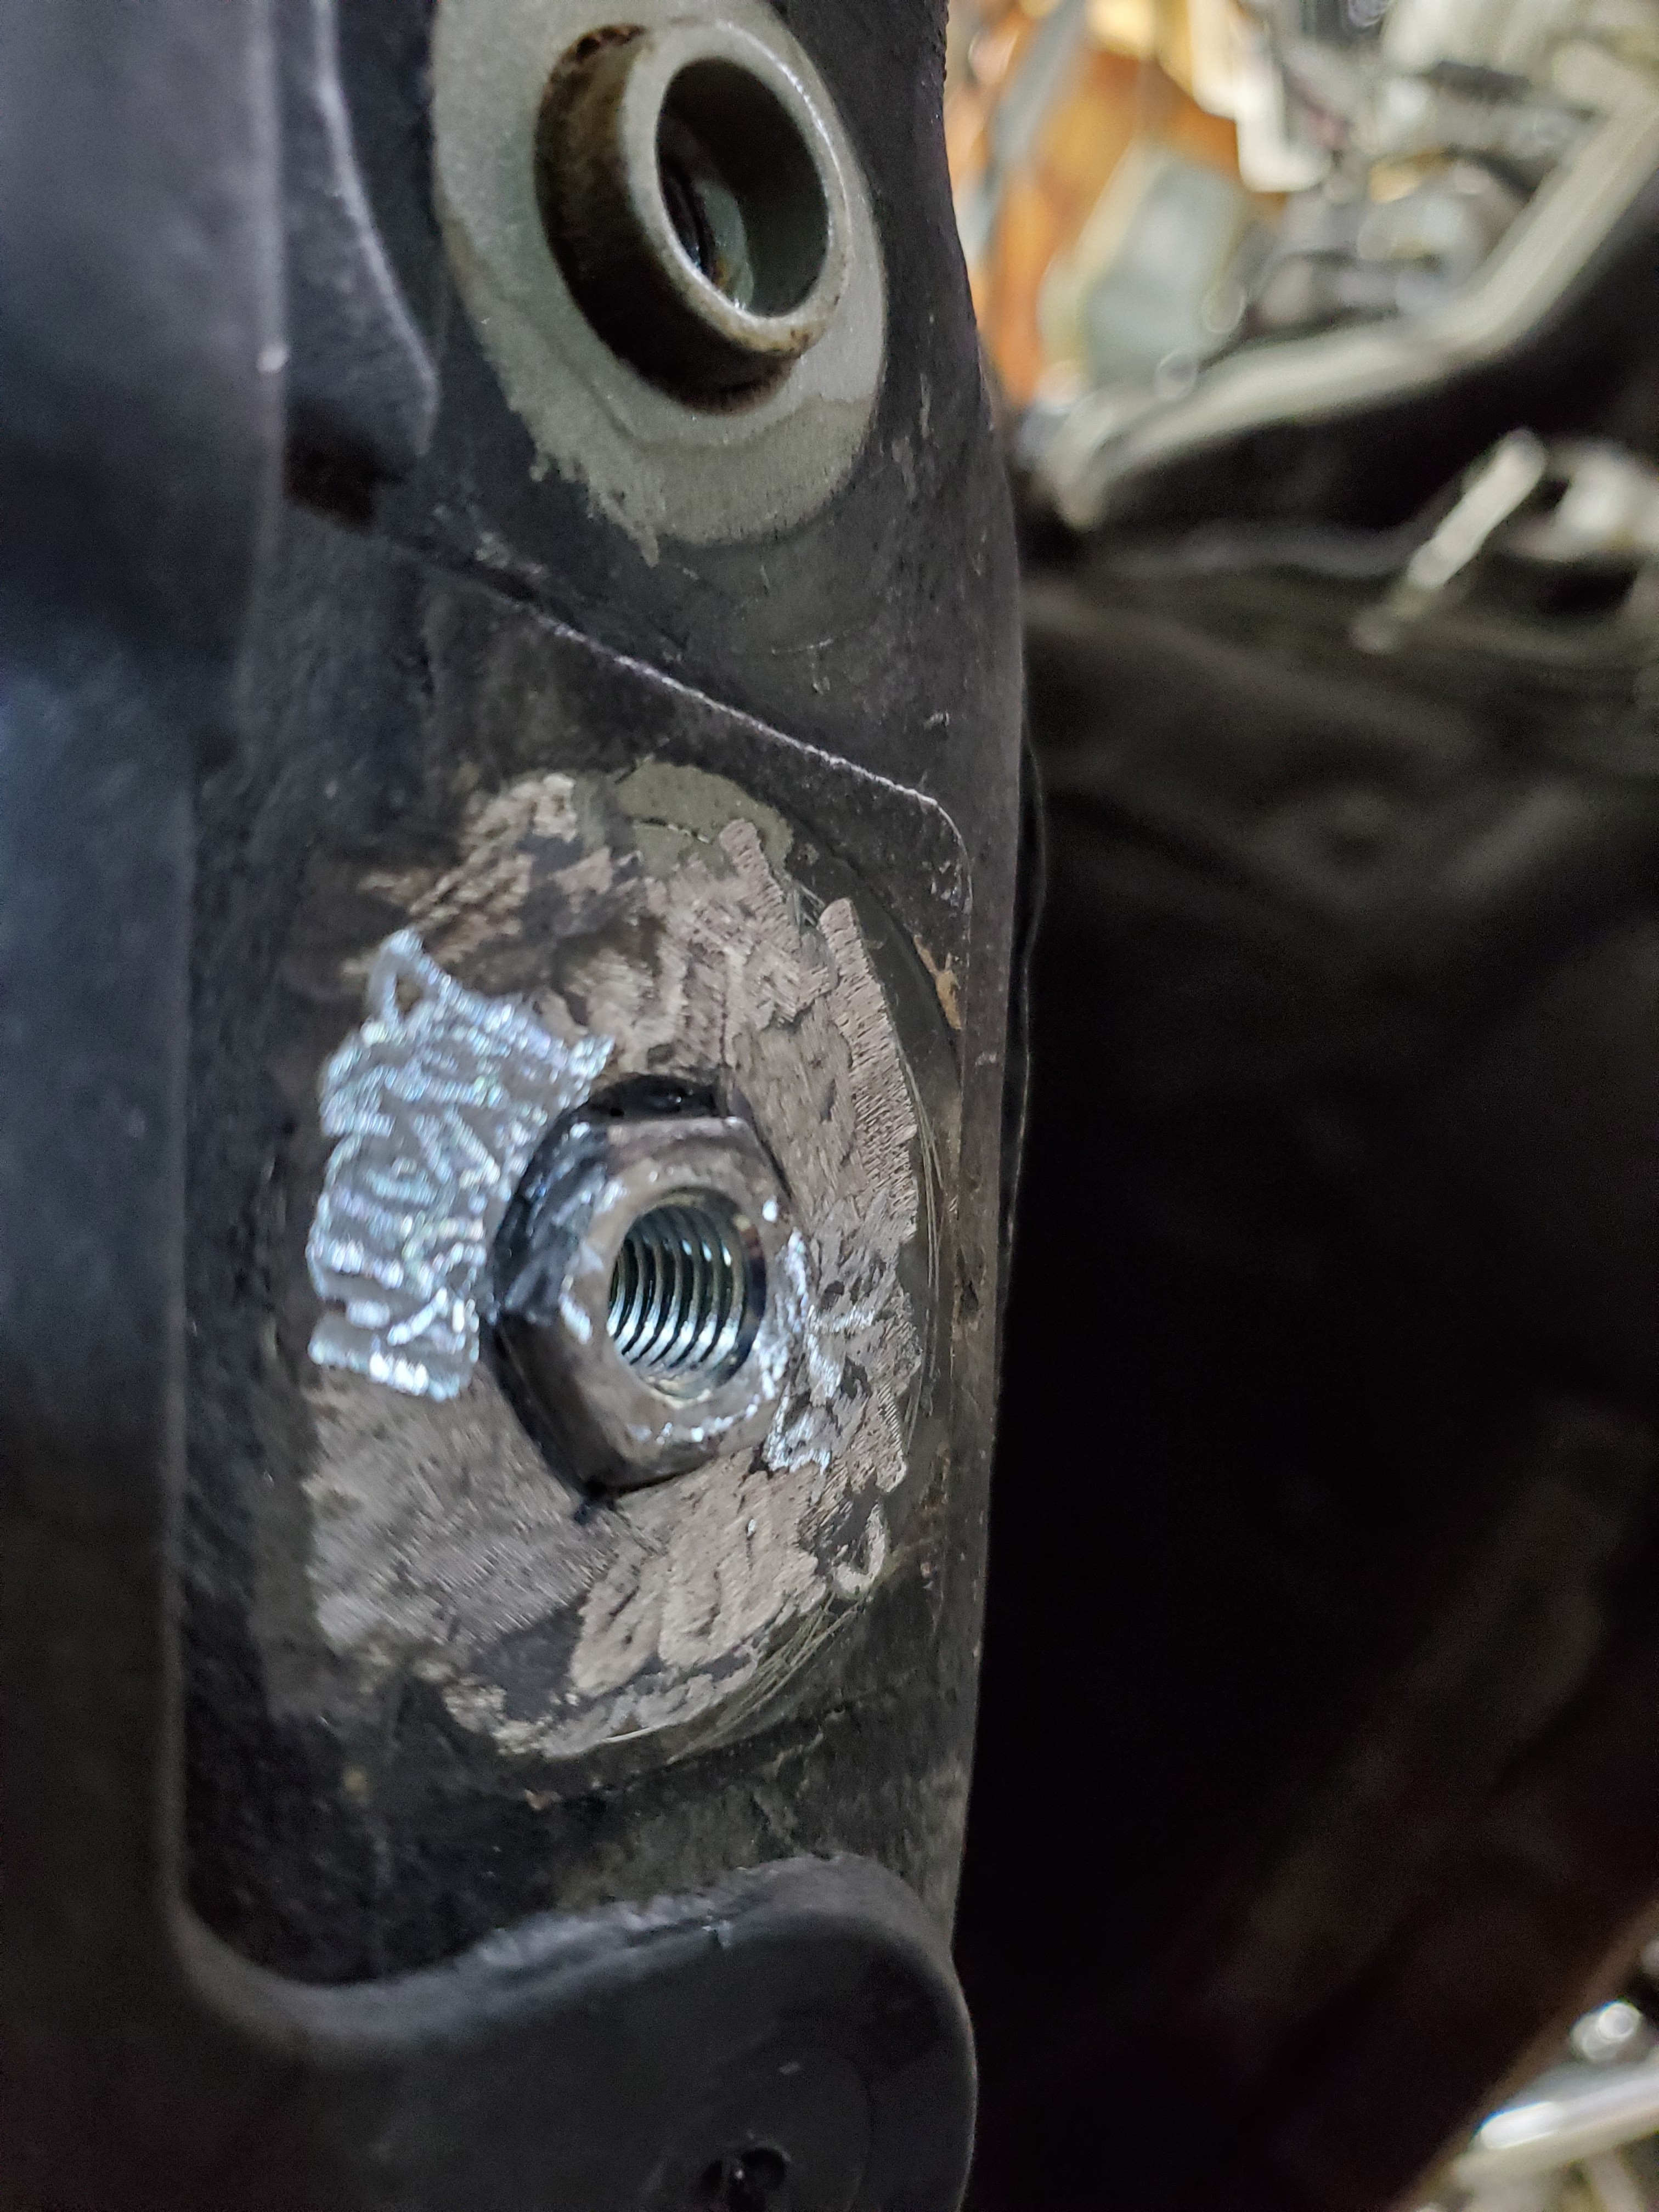
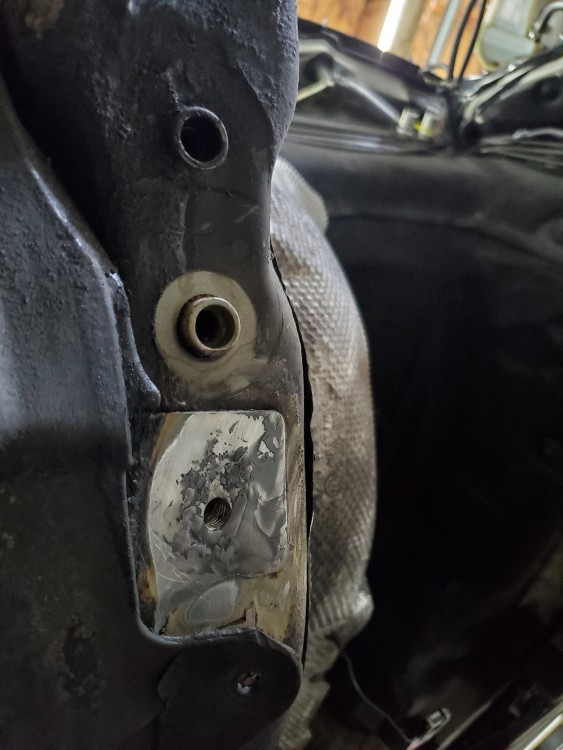
                  I then welded it all around, ground it flush to frame, put a skim coat of jb weld to fill any pinholes left over and sprayed it black. Paint is still wet in pic, but you get the idea. 
                  20210328140857.jpg

                  20210328145231.jpg

                  Crisis averted!

                  CHECK OUT >>> RAGE DRIFT DESIGNS <<< FOR DECALS AND MORE!

                  1 Reply Last reply
                  4
                  • YoungCRY
                    YoungCRY
                    YoungCR
                    wrote on last edited by
                    #55

                    Nice save

                    Chris Young
                    BMWCCA #458972
                    1986 528e/5  | 1994 530i/5 | 1995 540i/6 | 2013 X5 35d | 1998 C1500 Suburban | 1995 K2500 Suburban

                    1 Reply Last reply
                    0
                    • Bassboy3313B
                      Bassboy3313B
                      Bassboy3313
                      wrote on last edited by
                      #56

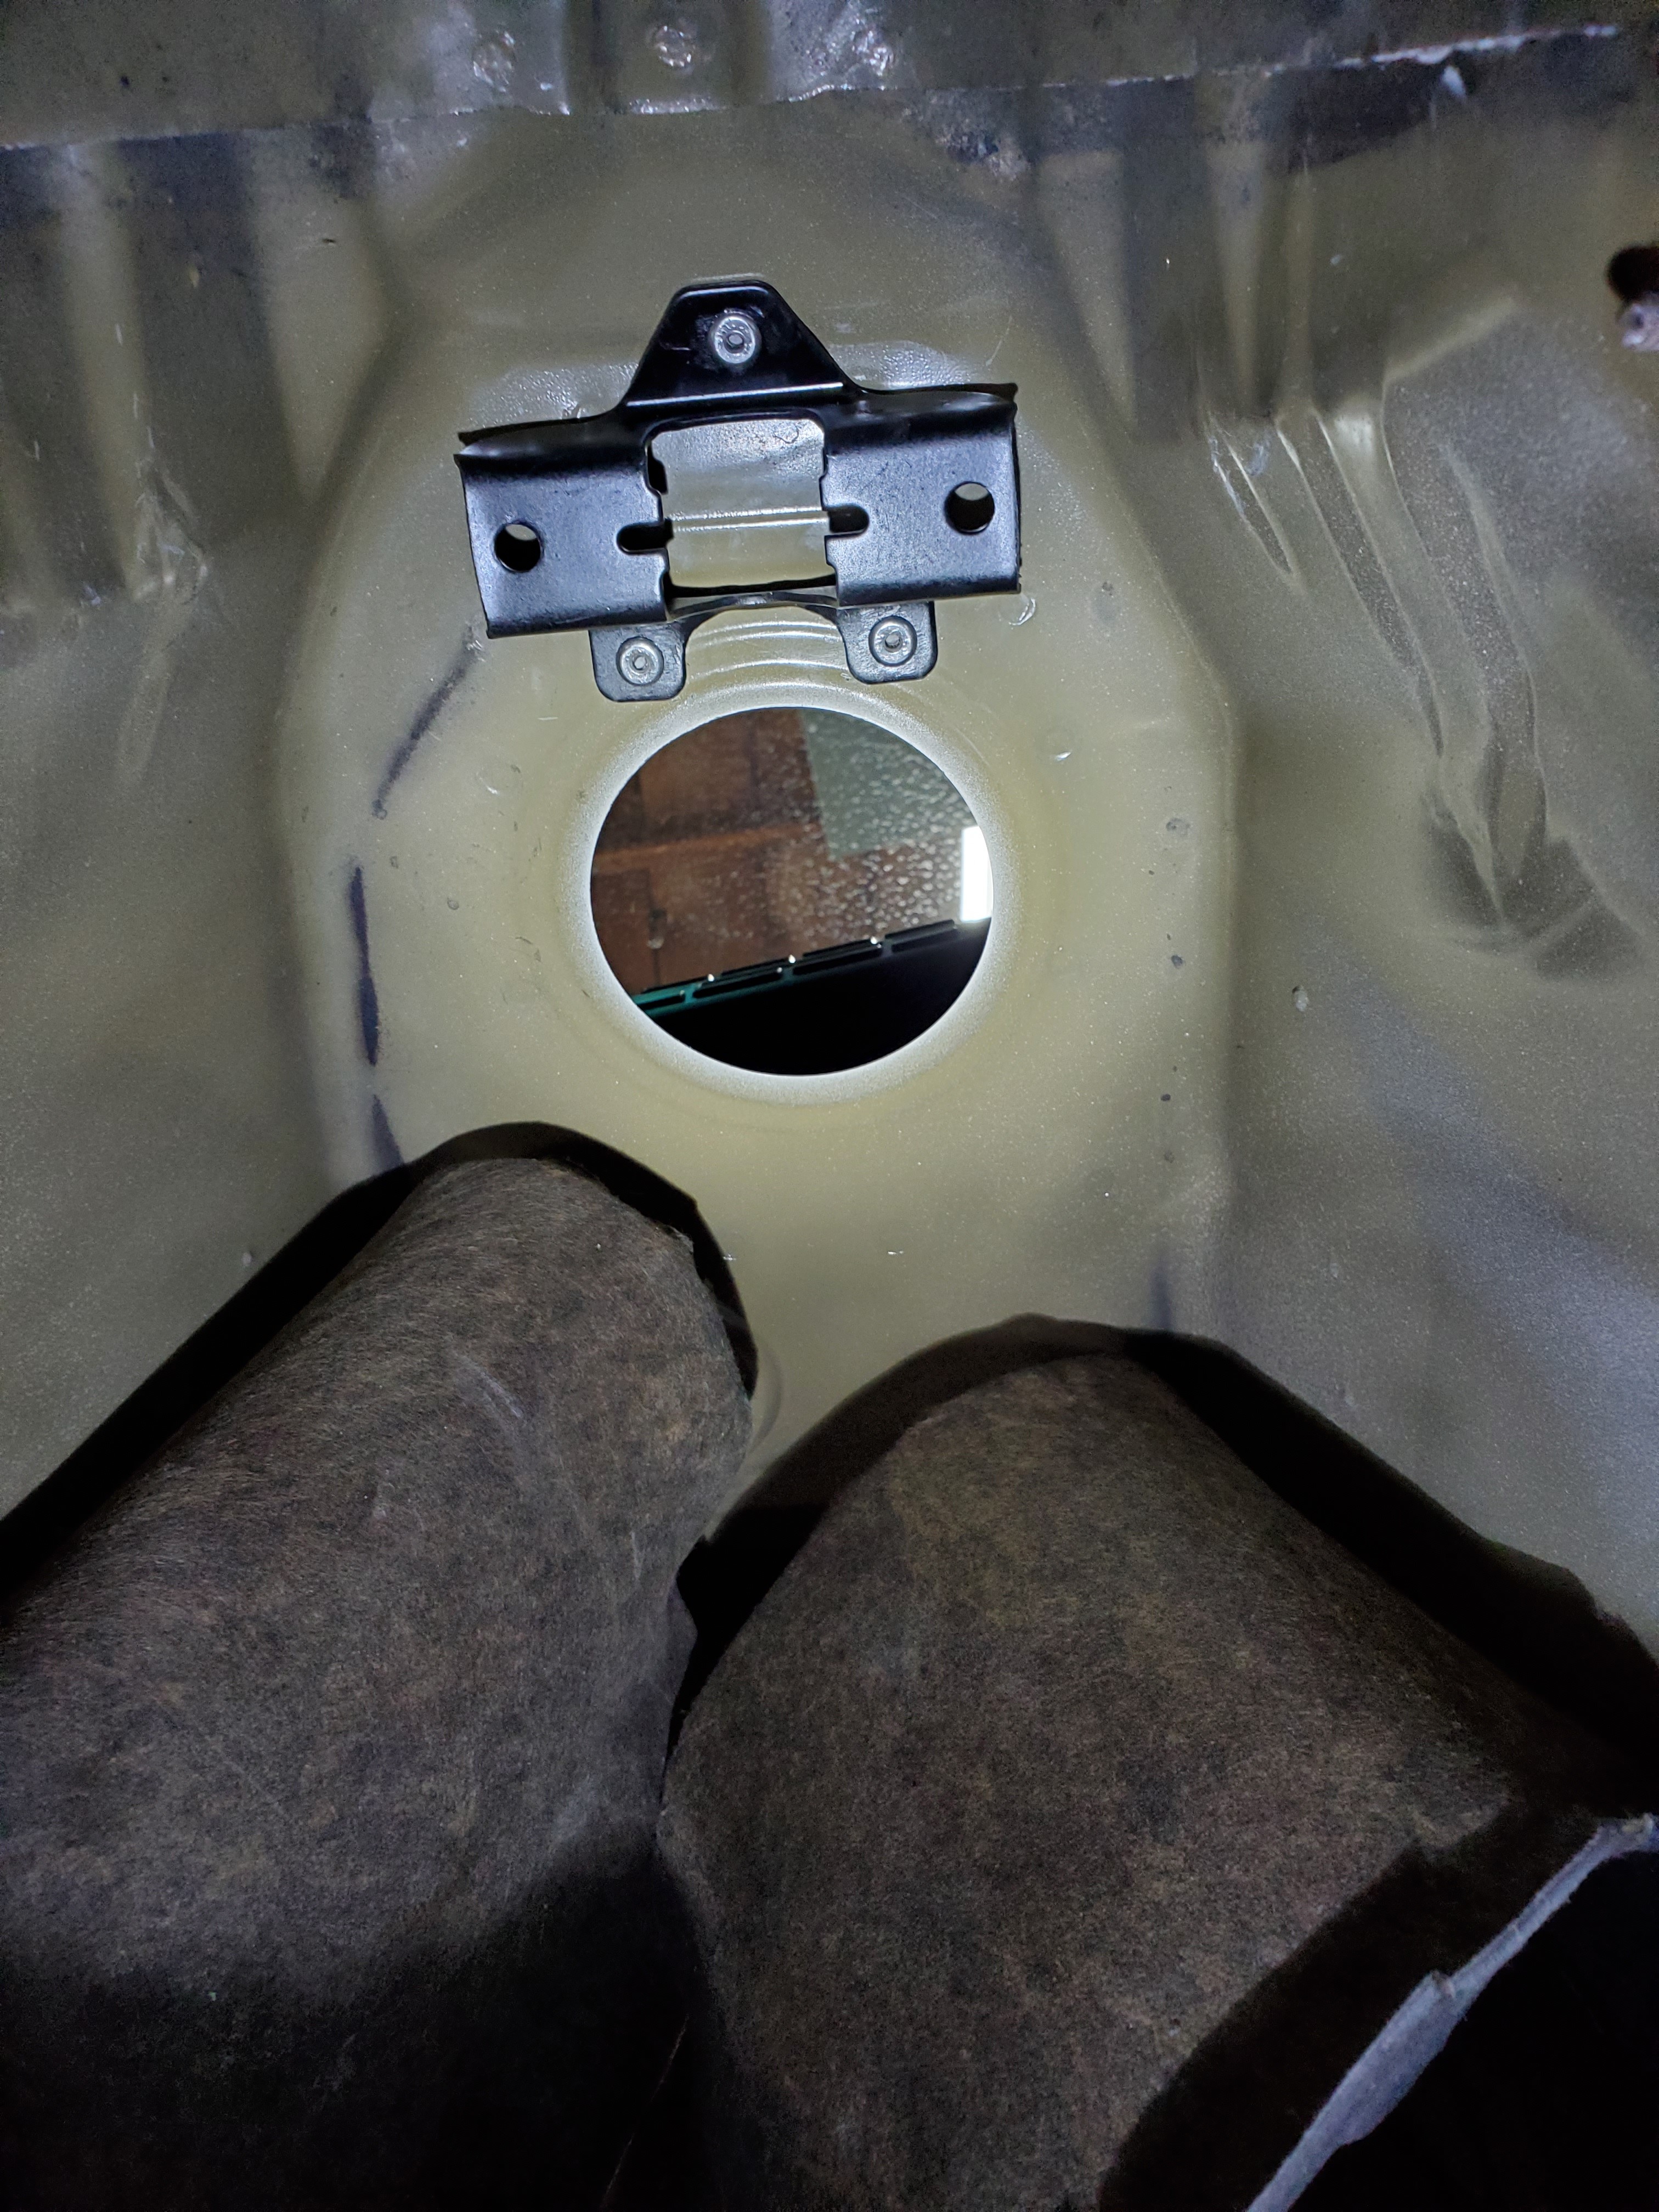
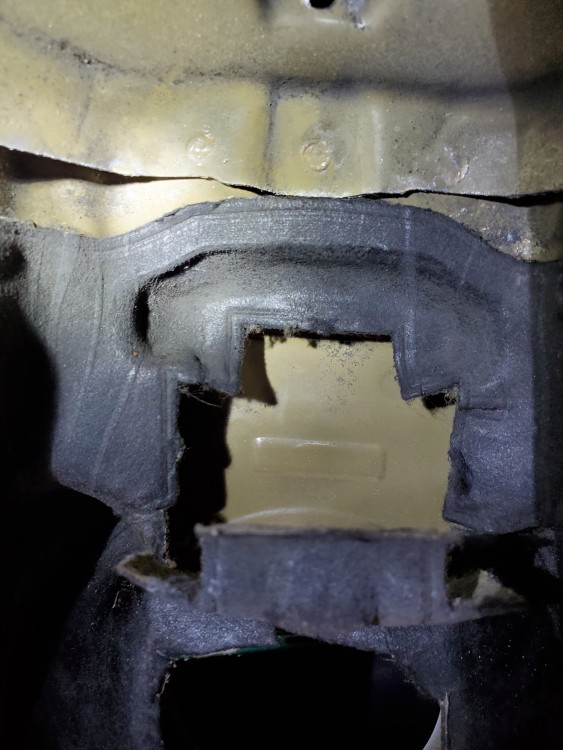
                      Normally all e46s have the rear manual shifter bushing bracket already on the chassis, but of course the touring did not. Went ahead and purchased the bracket from FCP Euro. Had to modify it by cutting the ears off as they were preventing the bracket from sitting flush against surface. Once good, I drilled some holes in the three tabs as well as the trans tunnel and pop riveted the brqcket on with some steel rivets. Sprayed some black paint over everything to prevent rusting as well.
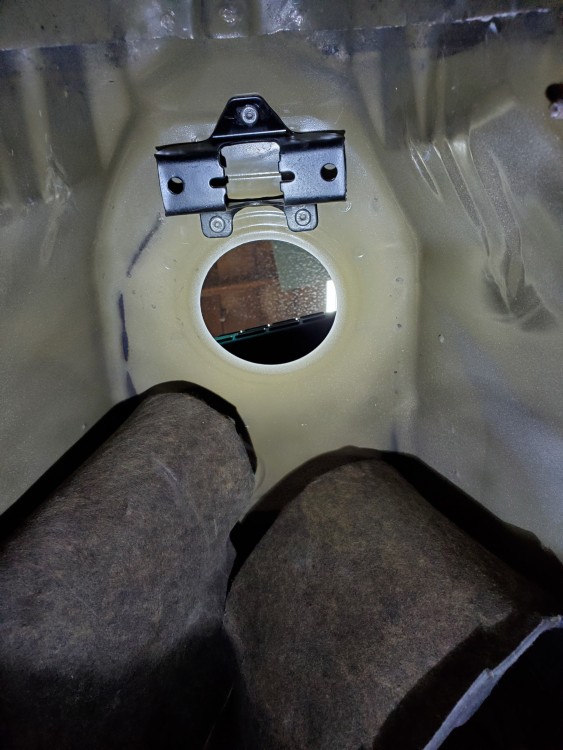
                      20210413183755.jpg

                      20210418093429.jpg

                      I also installed the front prop shaft and installed clutch fluid line on brake fluid reservoir and finished the wiring for the clutch switch. This required adding wires to a DME plug and an EWS plug. For this. I went to the pick-n-pull and cut out some plugs with pigtails. I then de-pinned two wires to allow me to attach the new wires right into the plugs like factory.  Then just extended the wires to the clutch switch and done! Sorry no pics of that since it was tight under the dash while working. 

                      Hopefully will have the engine/trans installed in the chassis this week.

                      CHECK OUT >>> RAGE DRIFT DESIGNS <<< FOR DECALS AND MORE!

                      1 Reply Last reply
                      2
                      • Bassboy3313B
                        Bassboy3313B
                        Bassboy3313
                        wrote on last edited by
                        #57

                        The ship has landed!

                        20210423203934.jpg

                        CHECK OUT >>> RAGE DRIFT DESIGNS <<< FOR DECALS AND MORE!

                        1 Reply Last reply
                        8
                        • Bassboy3313B
                          Bassboy3313B
                          Bassboy3313
                          wrote on last edited by
                          #58

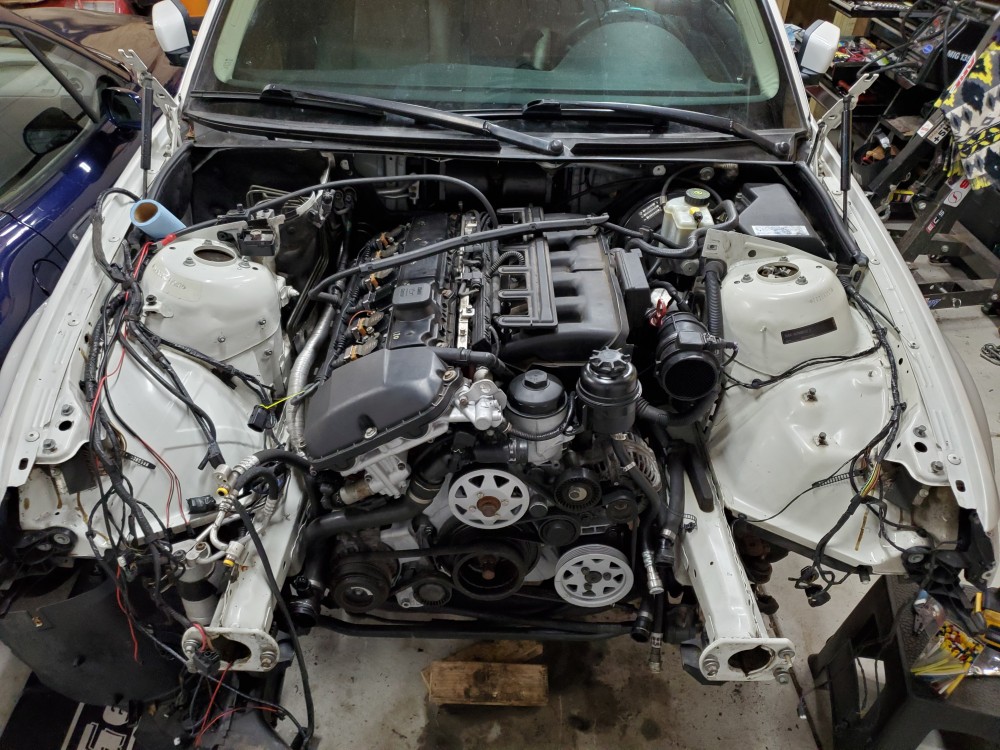
                          Subframe secured, electrical all connected, new slave cylinder and lines installed, front axles installed, new tierod in, suspension all buttoned up, driveshaft/heatshield/exhaust installed, radiator and all hose connections done, and steering shaft connected.

                          Waiting on all fluids to show up in mail this weekend. Then it's on to changing oil in front diff, rear diff, transmission, transaxle and engine.  Along with new coolant and brake fluid.

                          CHECK OUT >>> RAGE DRIFT DESIGNS <<< FOR DECALS AND MORE!

                          1 Reply Last reply
                          4
                          • B
                            B
                            B C
                            wrote on last edited by
                            #59

                            Finish line is in sight

                            1 Reply Last reply
                            2
                            • Bassboy3313B
                              Bassboy3313B
                              Bassboy3313
                              wrote on last edited by
                              #60

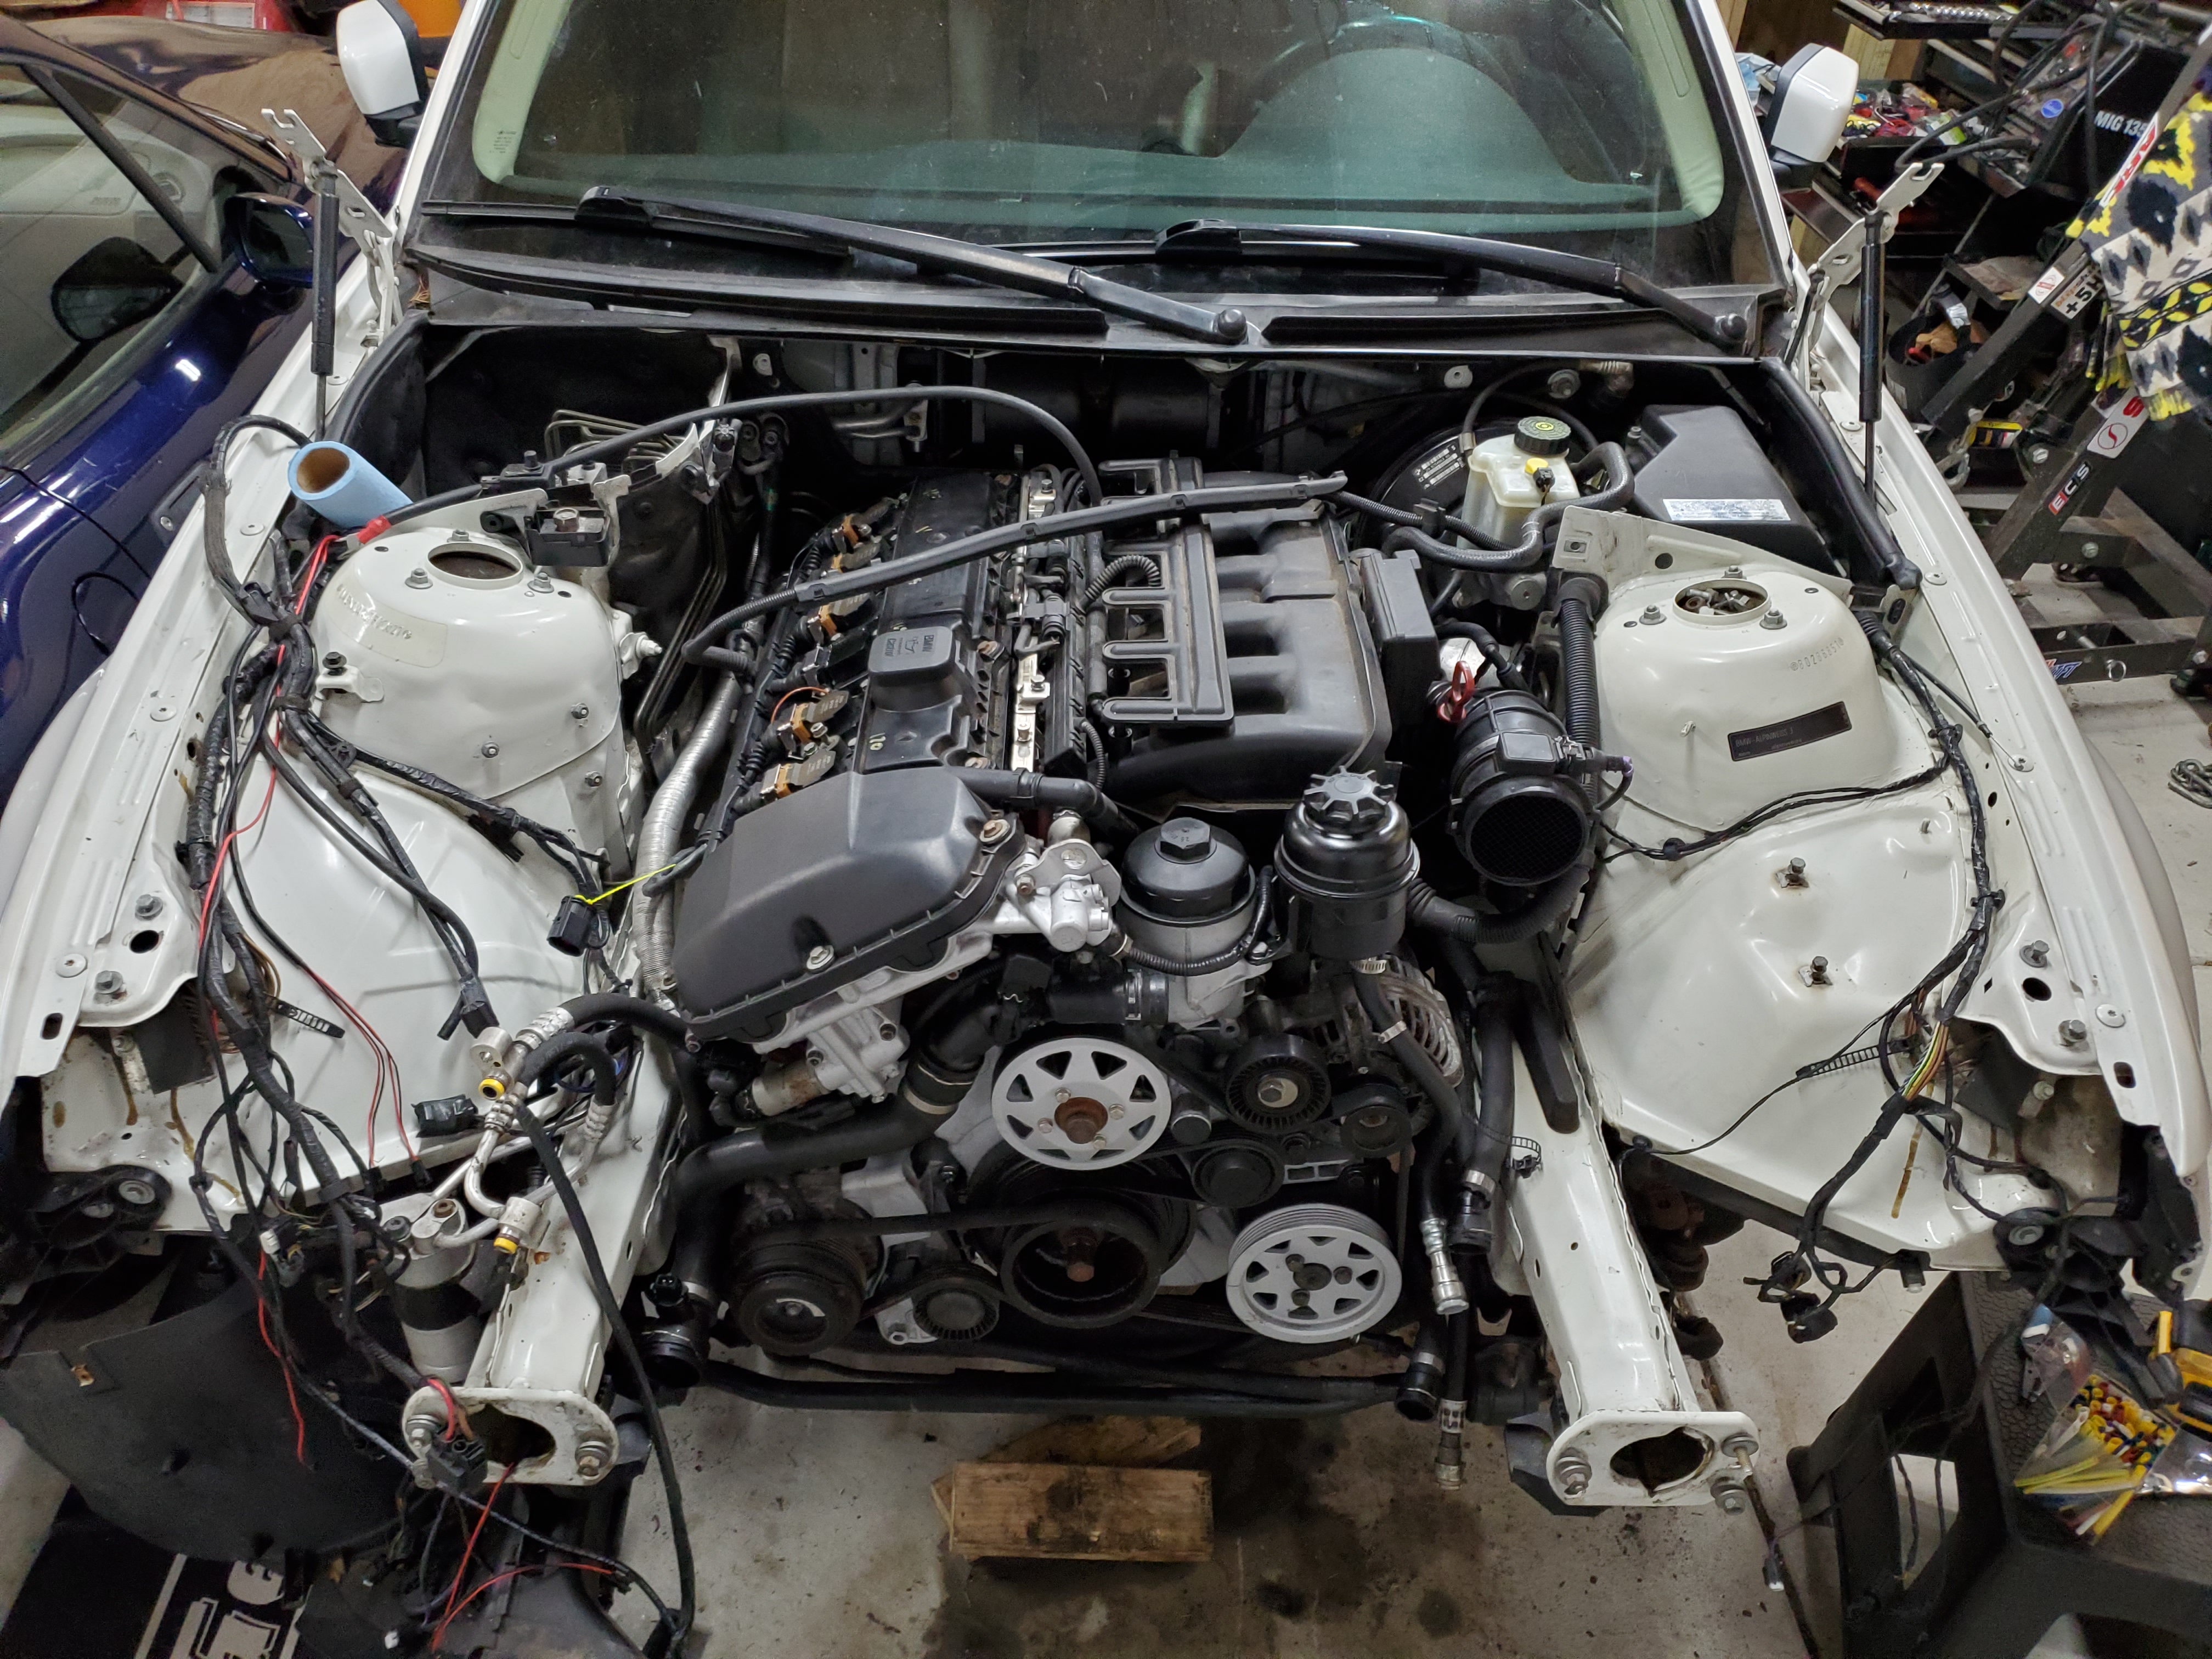
                              Bad news bears! Filled it up with fluids today and found a slow coolant leak coming from backside of the timing cover area. Which probably means the new orings on one of the new plastic coolant pipes I installed must not be seated properly. 

                              Time to tear the intake back off to fix it. 😡

                              CHECK OUT >>> RAGE DRIFT DESIGNS <<< FOR DECALS AND MORE!

                              1 Reply Last reply
                              1
                              • B
                                B
                                B C
                                wrote on last edited by
                                #61

                                Here is the plus-side though: More practice pulling the manifold while the engine is in the car will increase your confidence in doing any future maintenance items that require it (Hopefully there are none). 
                                In my E30 ownership experience I had been into almost everything on that car to the point where swapping a diff or pulling the driveshaft was child’s play. Hope pulling the manifold becomes almost second nature like that for you.

                                There is a very real mental-aspect about wrenching. When you don’t have the pressure to cobble together a repair to be able to drive to work on Monday, the challenge can become enjoyable.

                                1 Reply Last reply
                                0
                                • Bassboy3313B
                                  Bassboy3313B
                                  Bassboy3313
                                  wrote on last edited by
                                  #62

                                  Another plus side is more seat time in the Z Coupe. 👍

                                  CHECK OUT >>> RAGE DRIFT DESIGNS <<< FOR DECALS AND MORE!

                                  1 Reply Last reply
                                  0
                                  • Bassboy3313B
                                    Bassboy3313B
                                    Bassboy3313
                                    wrote on last edited by
                                    #63

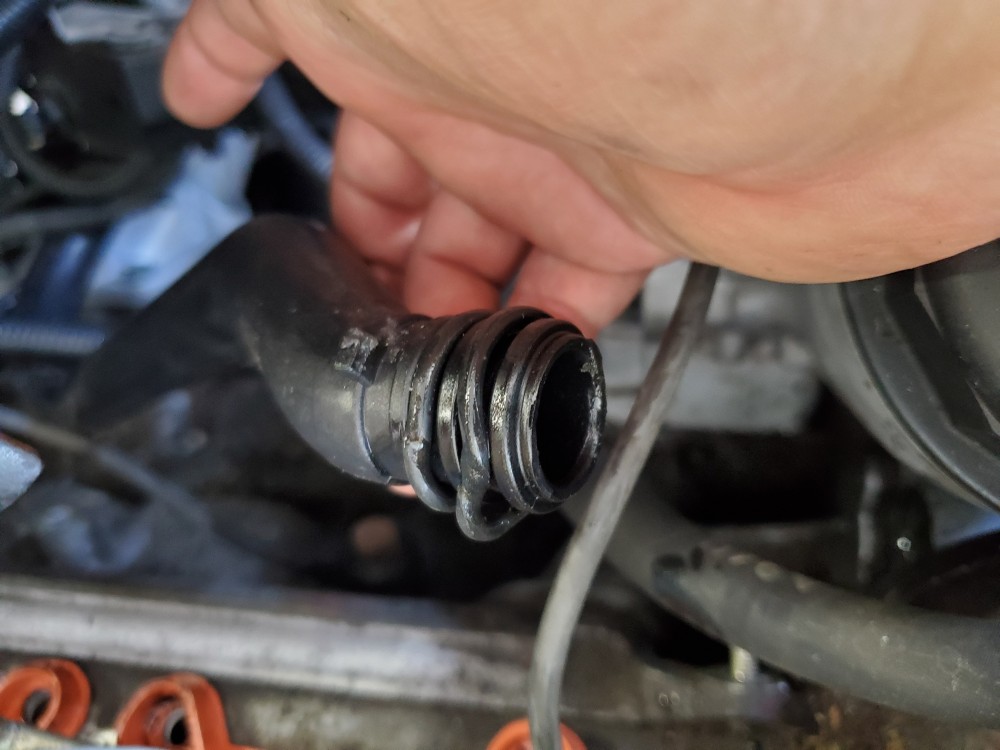
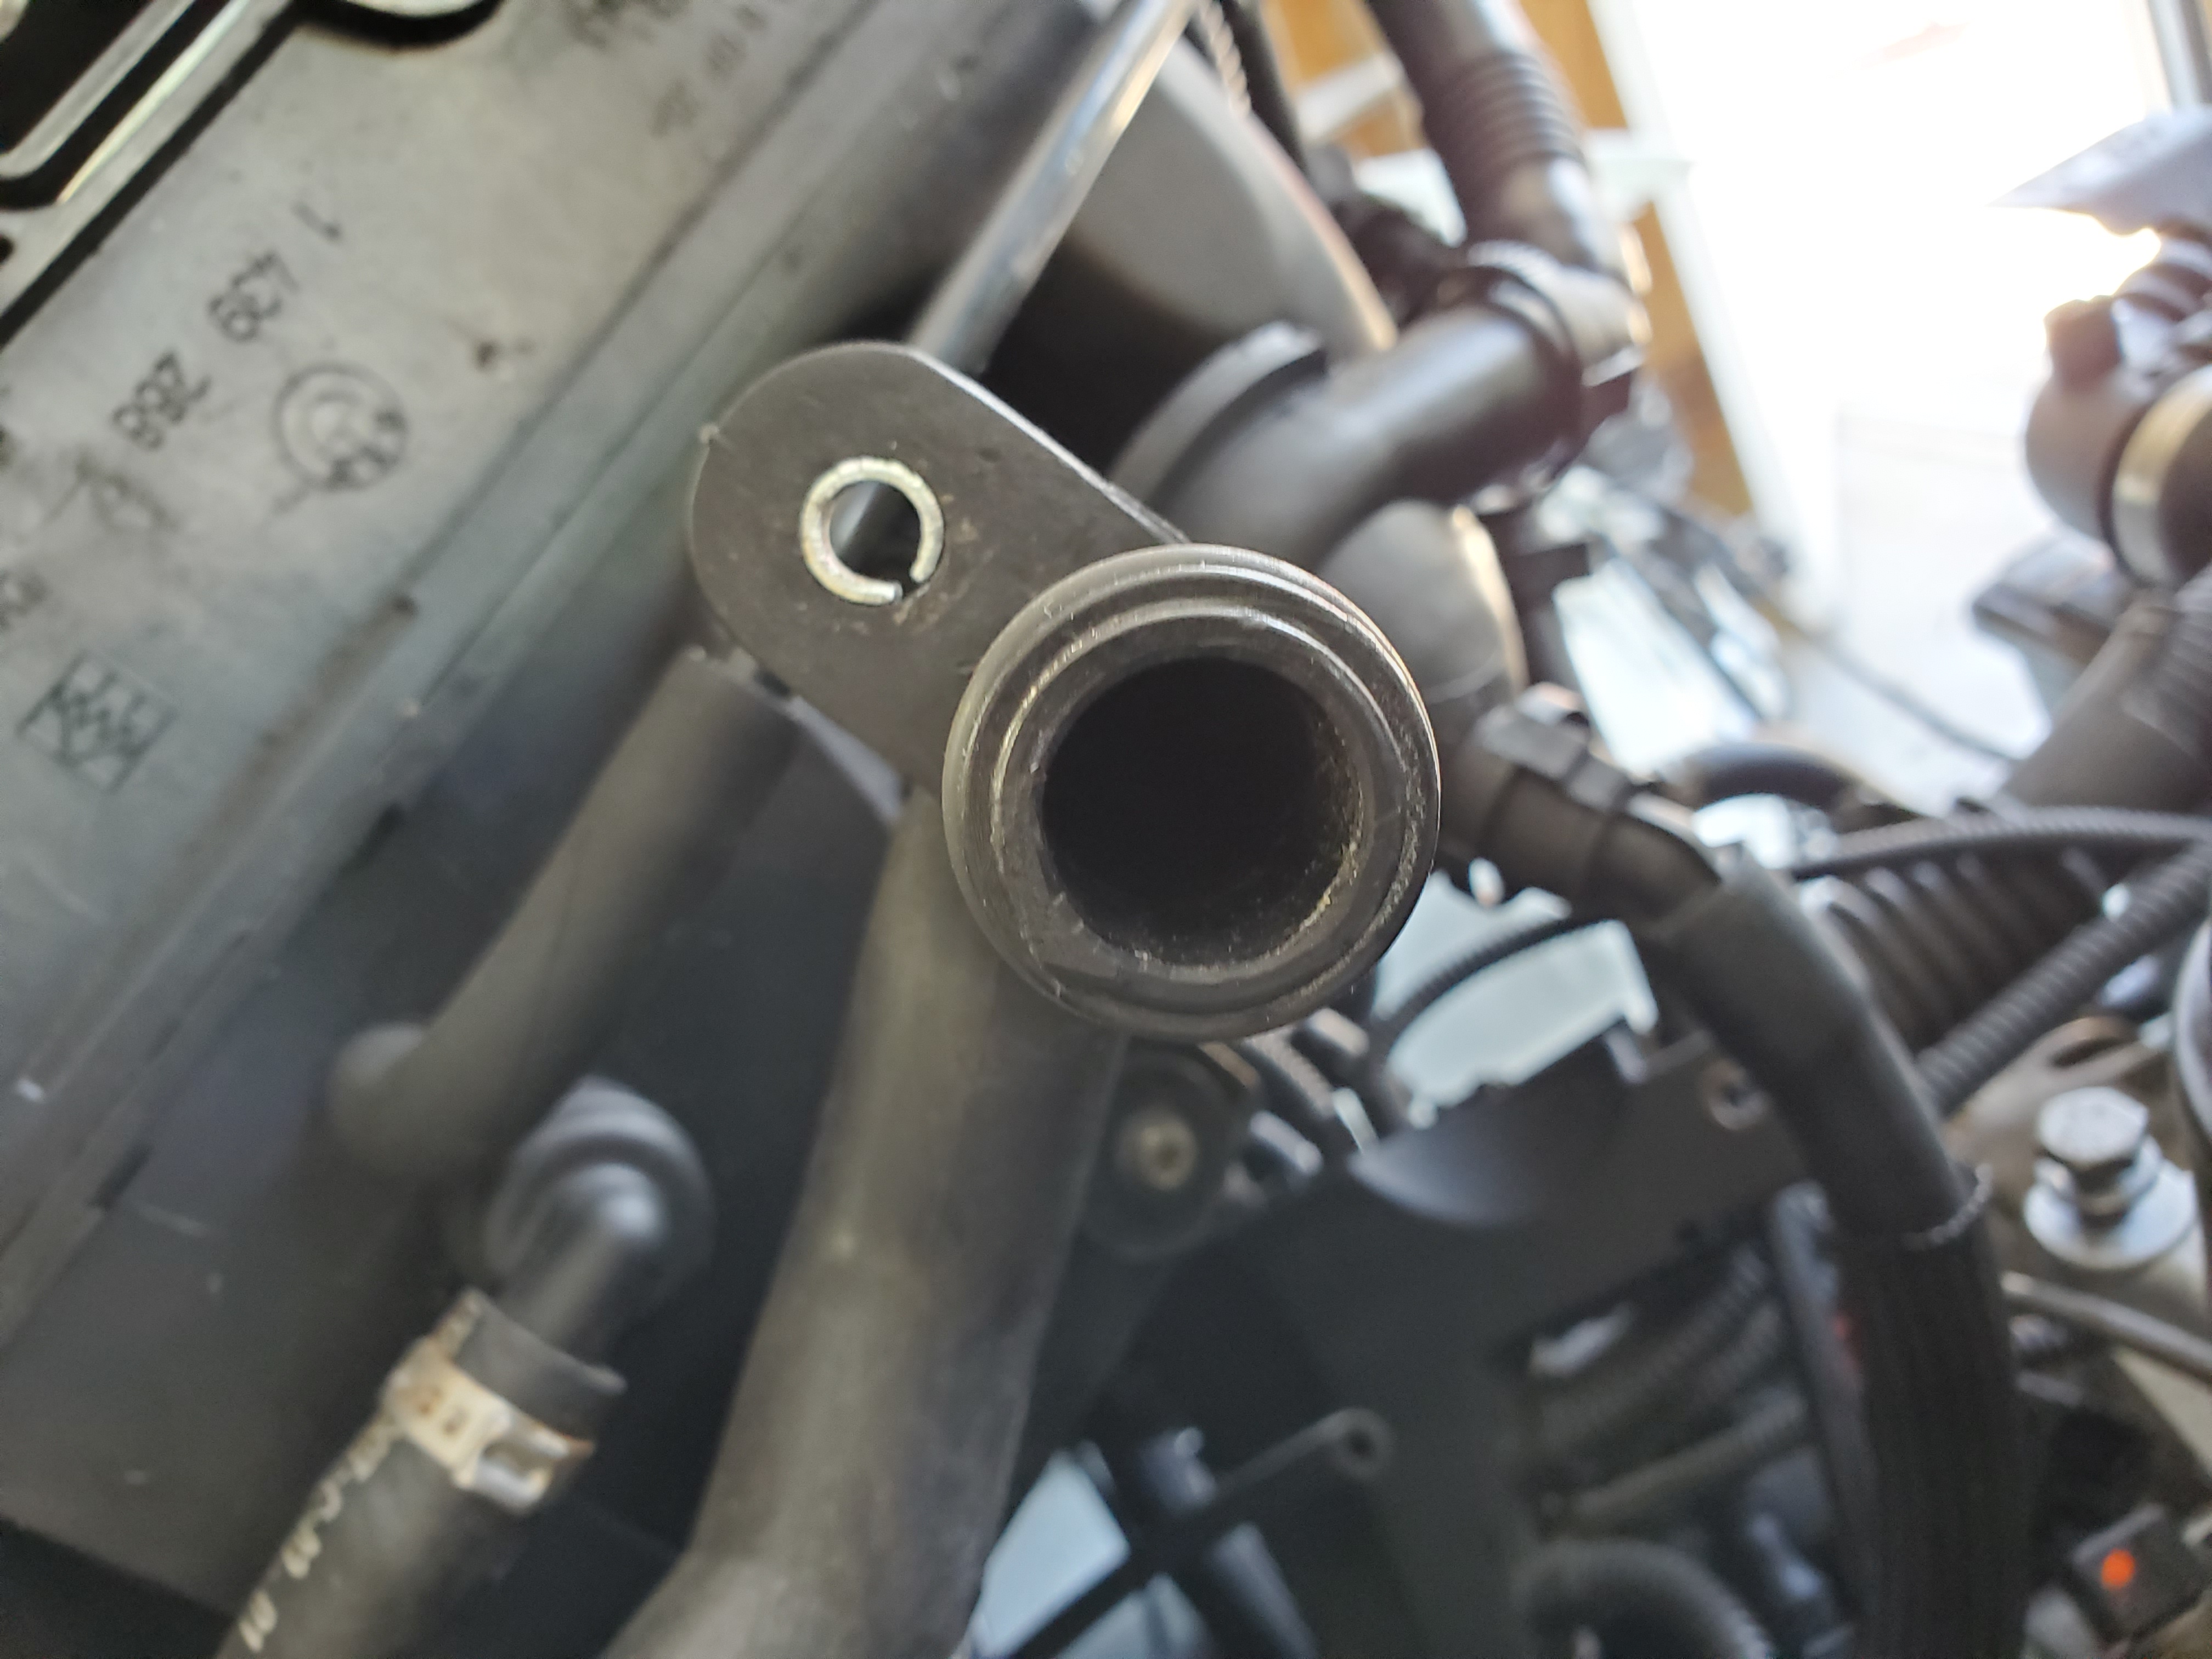
                                    Got the manifold off again and checked the two coolant pipes by pulling them off. First one was the pipe going to cylinder head. All looked good.
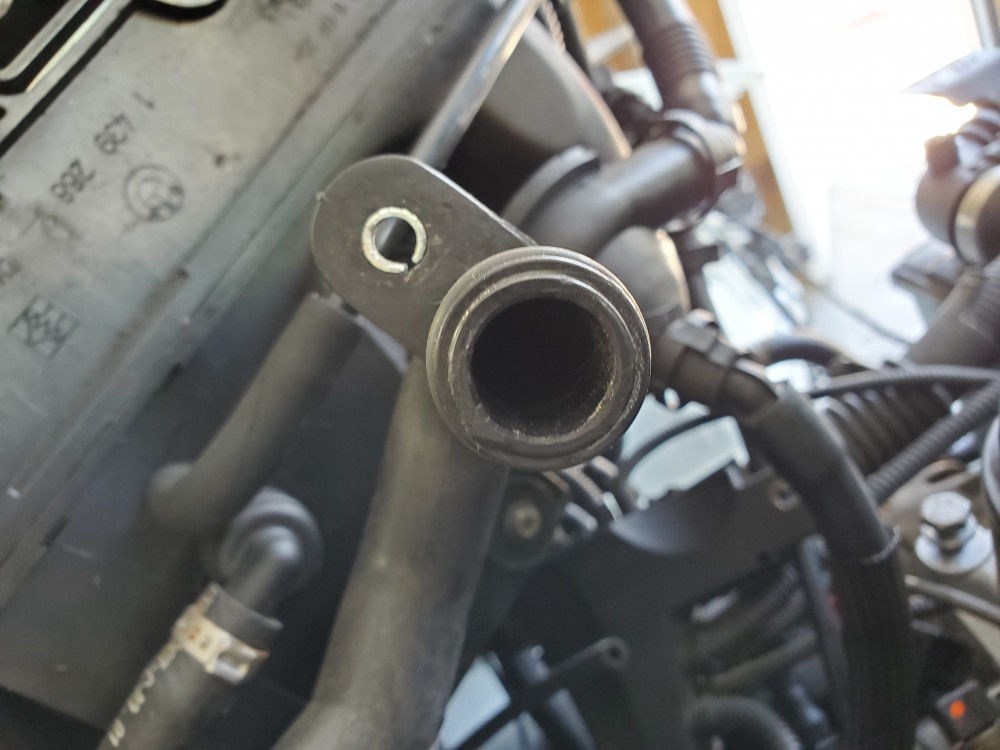
                                    20210530115138.jpg

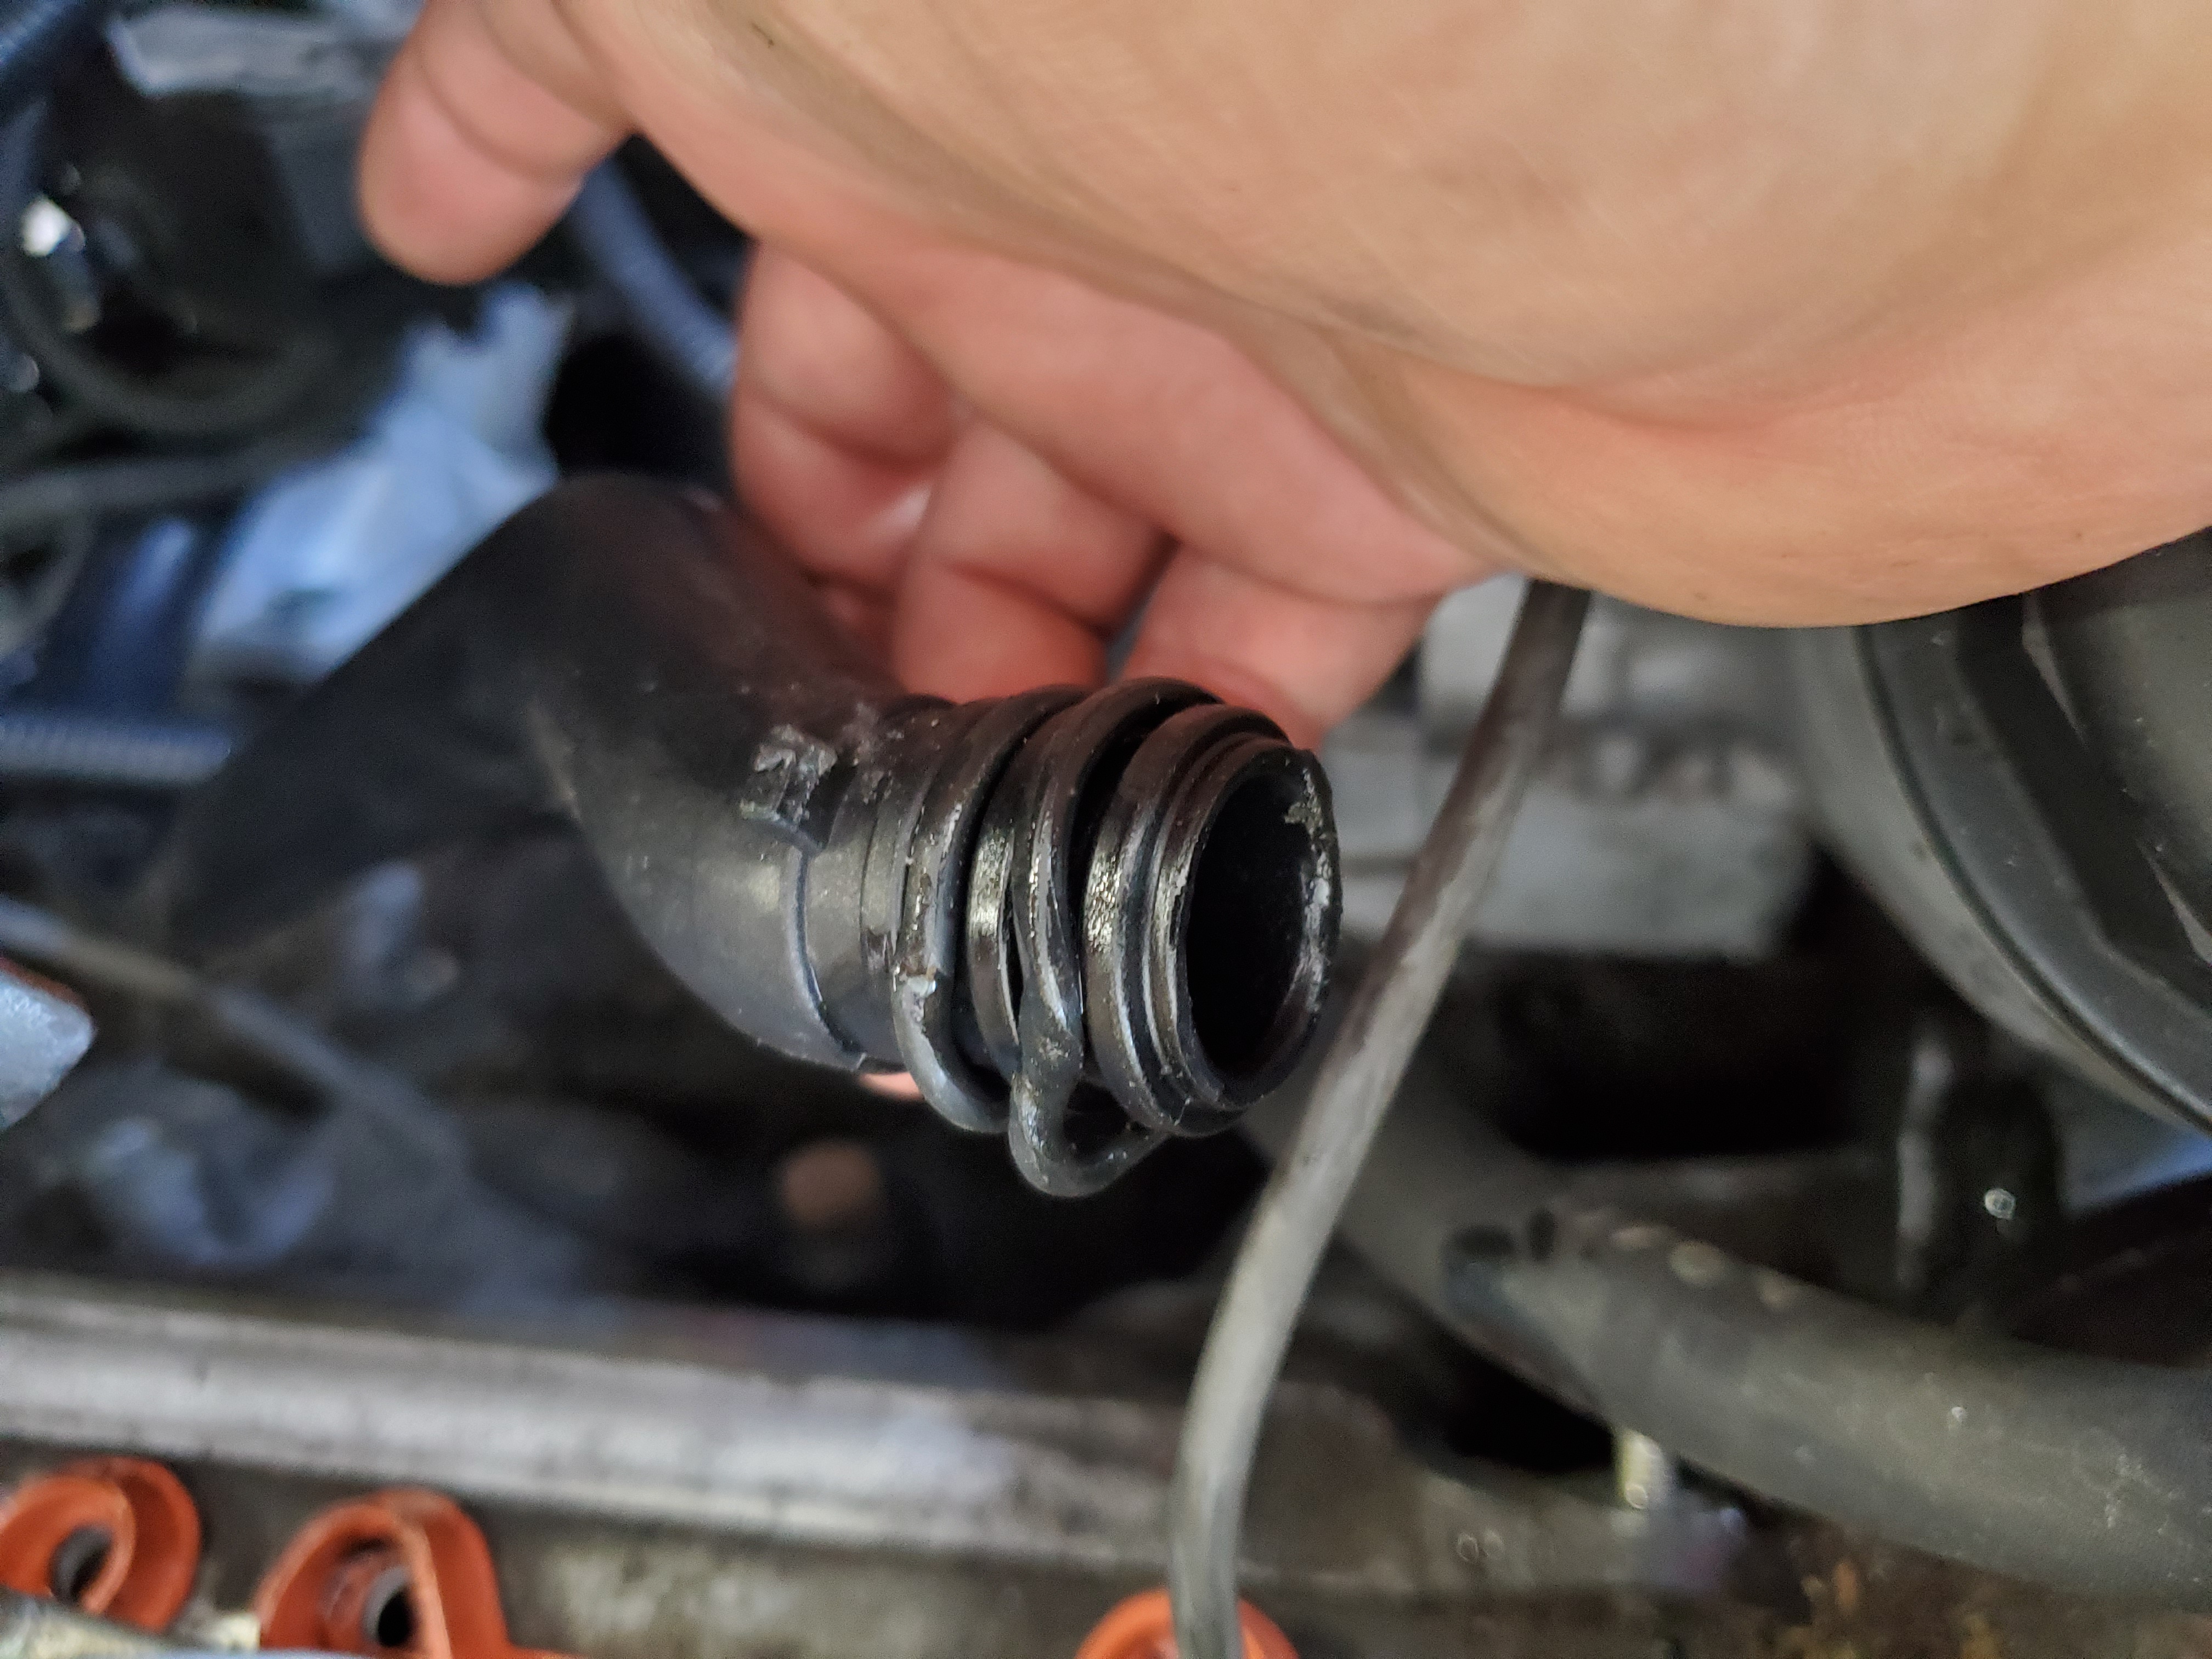
                                    Took the pipe off going to the back of timing cover and found both oring deformed and pinched 🤔

                                    20210530115057.jpg

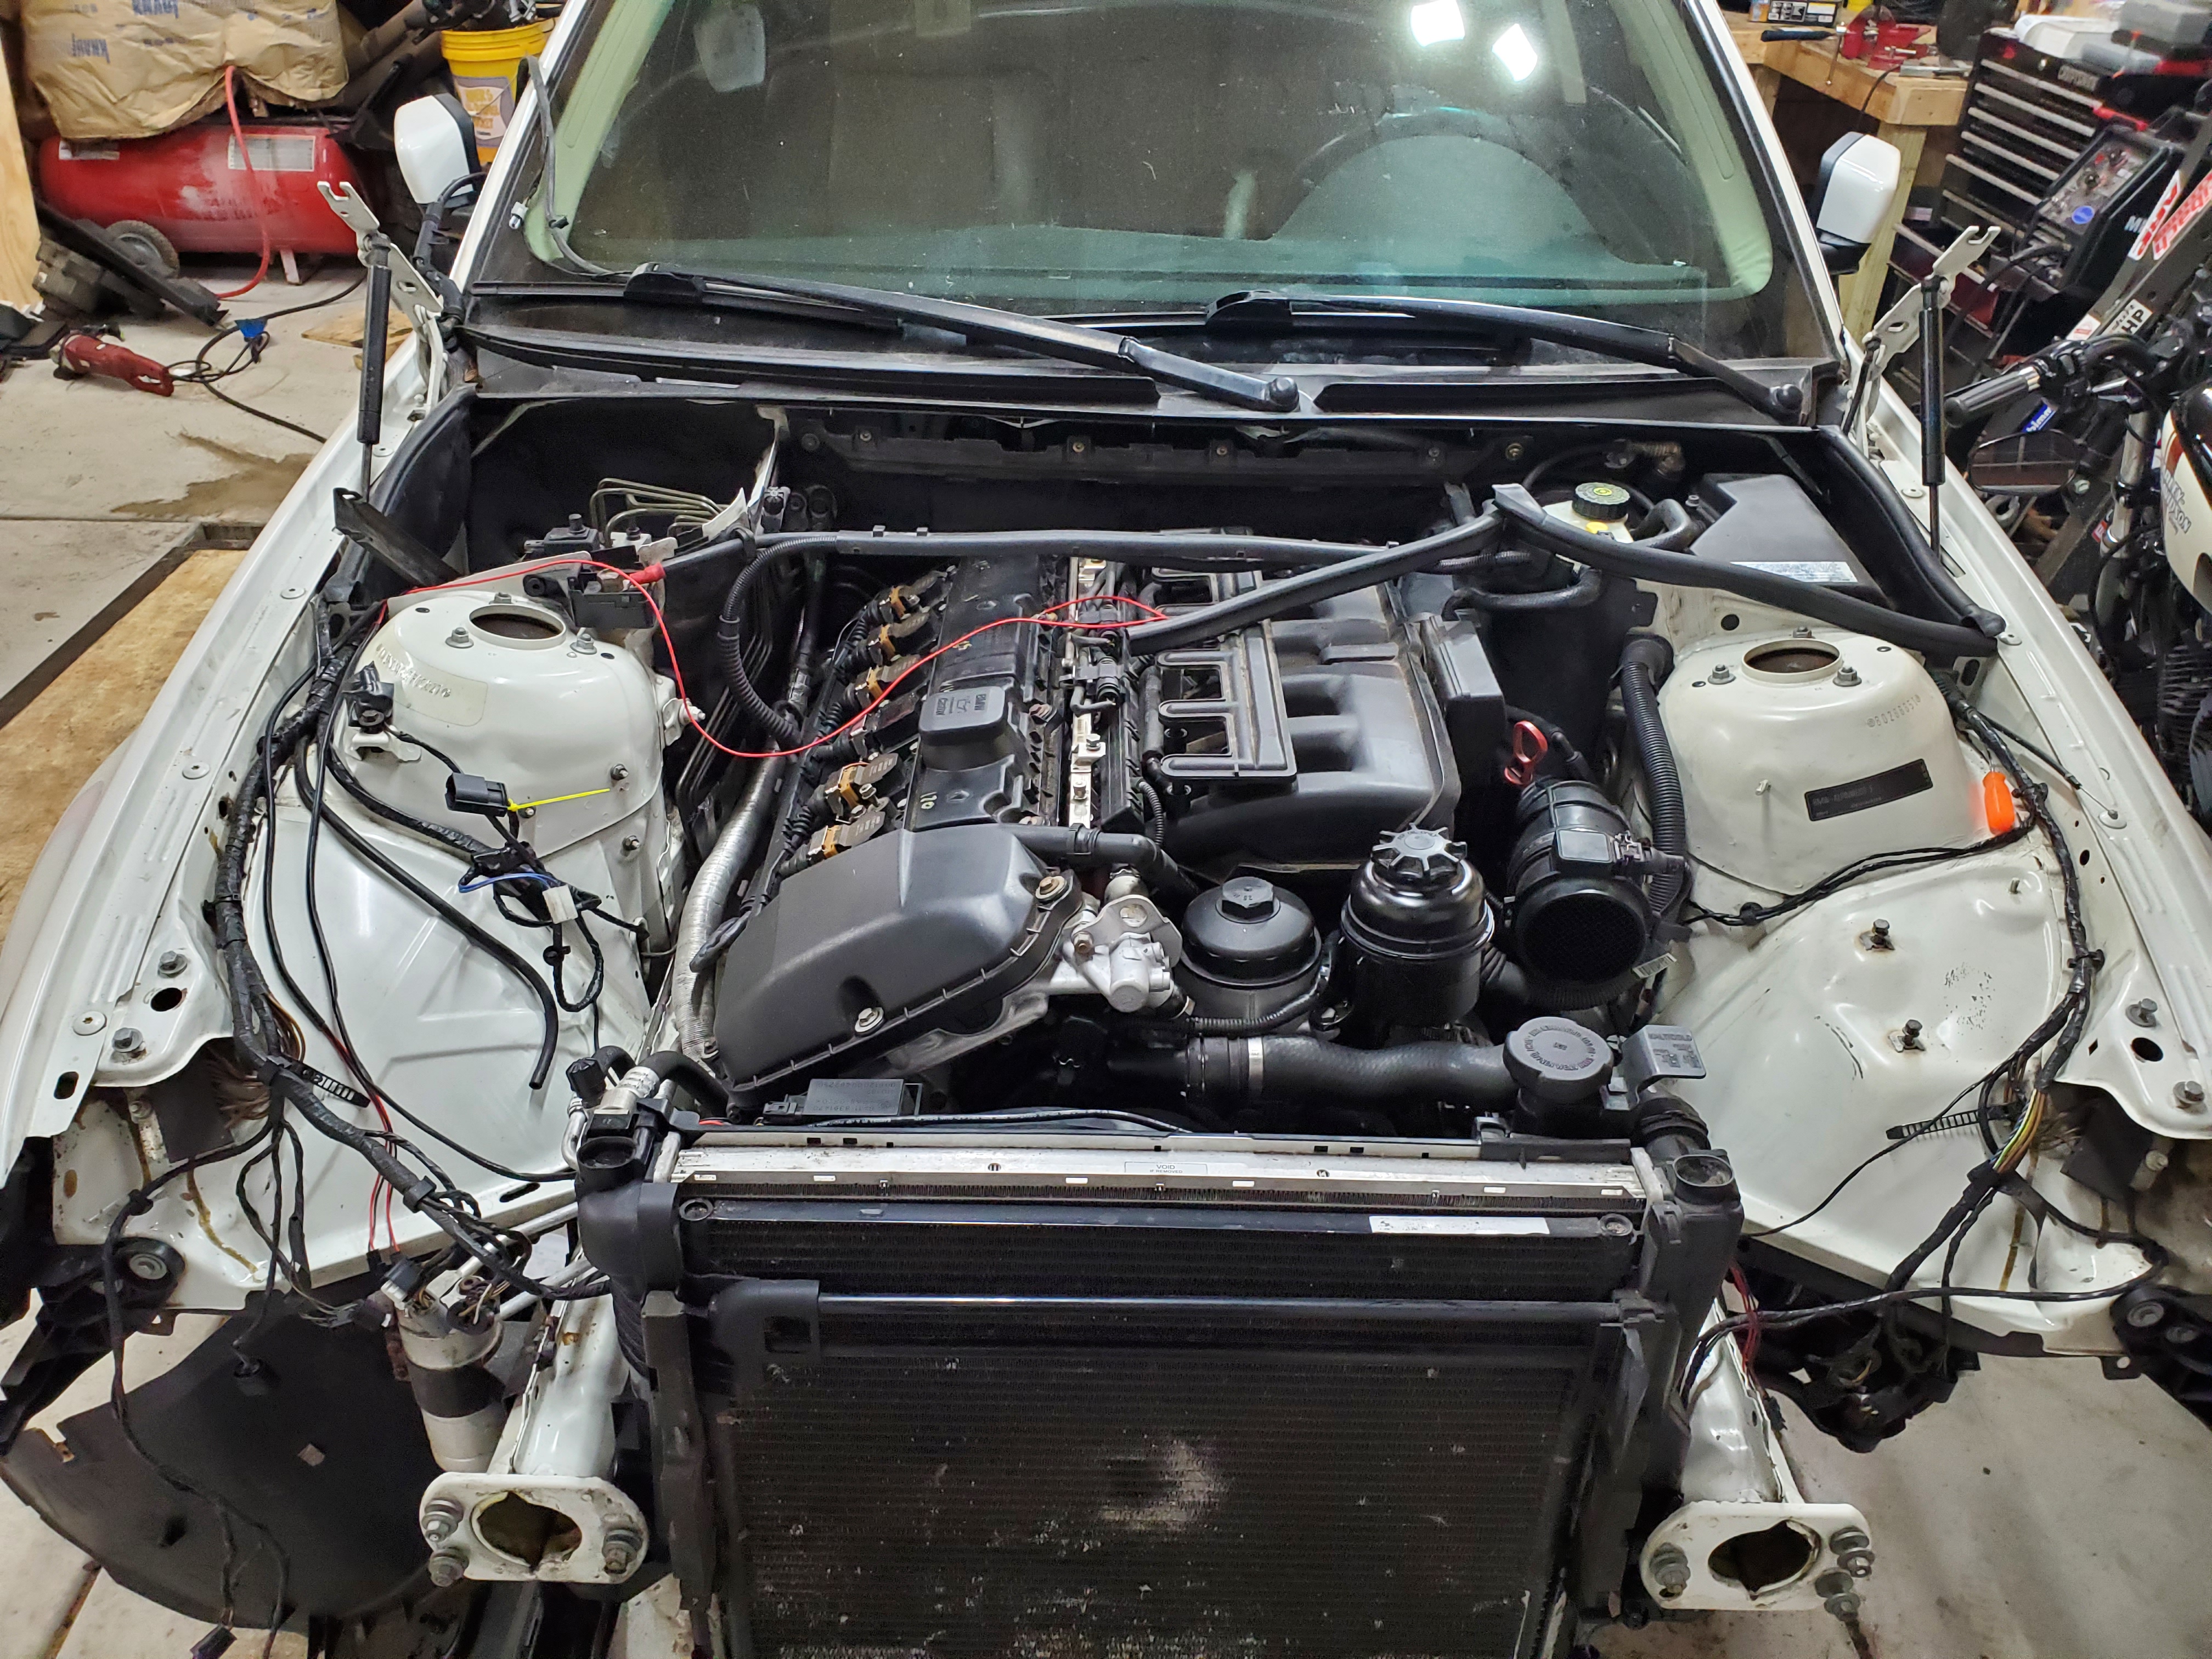
                                    No idea how this happened. I made sure the ports were extremely cleaned and lubed up the orings when I installed it. Oh well, at least it was an obvious issue. I popped two new orings on from my spare stash, luned them up with coolant and reinstalled them. I made sure to refill coolant to see if leak was fixed before reinstalling the manifold and all is good. 
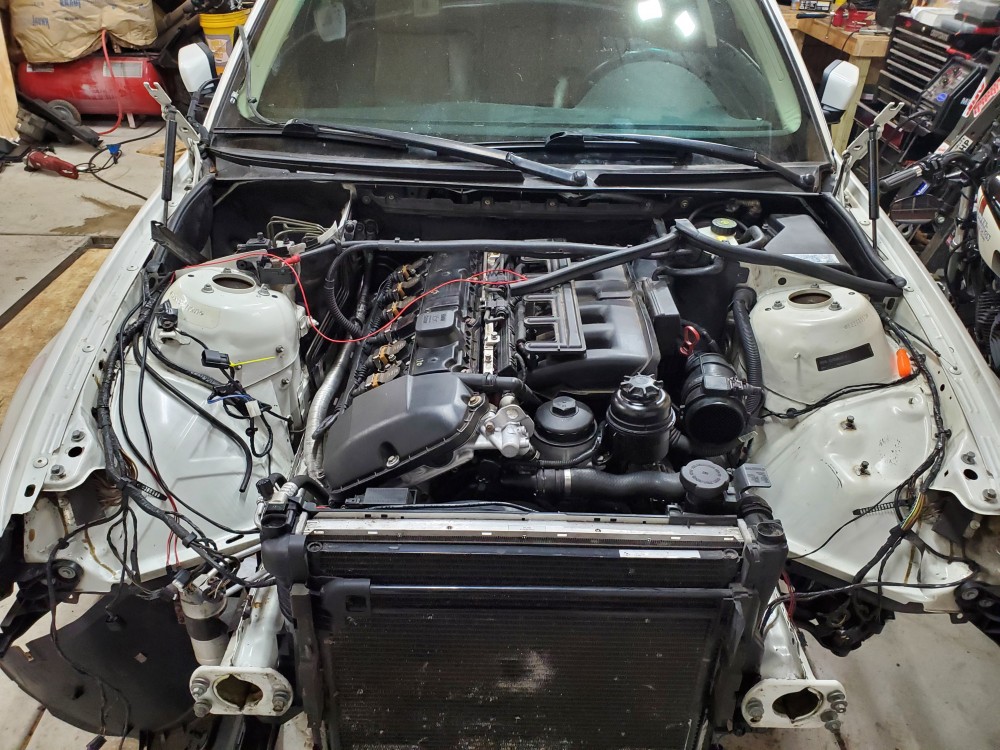
                                    20210530204800.jpg

                                    CHECK OUT >>> RAGE DRIFT DESIGNS <<< FOR DECALS AND MORE!

                                    1 Reply Last reply
                                    0
                                    • Bassboy3313B
                                      Bassboy3313B
                                      Bassboy3313
                                      wrote on last edited by
                                      #64

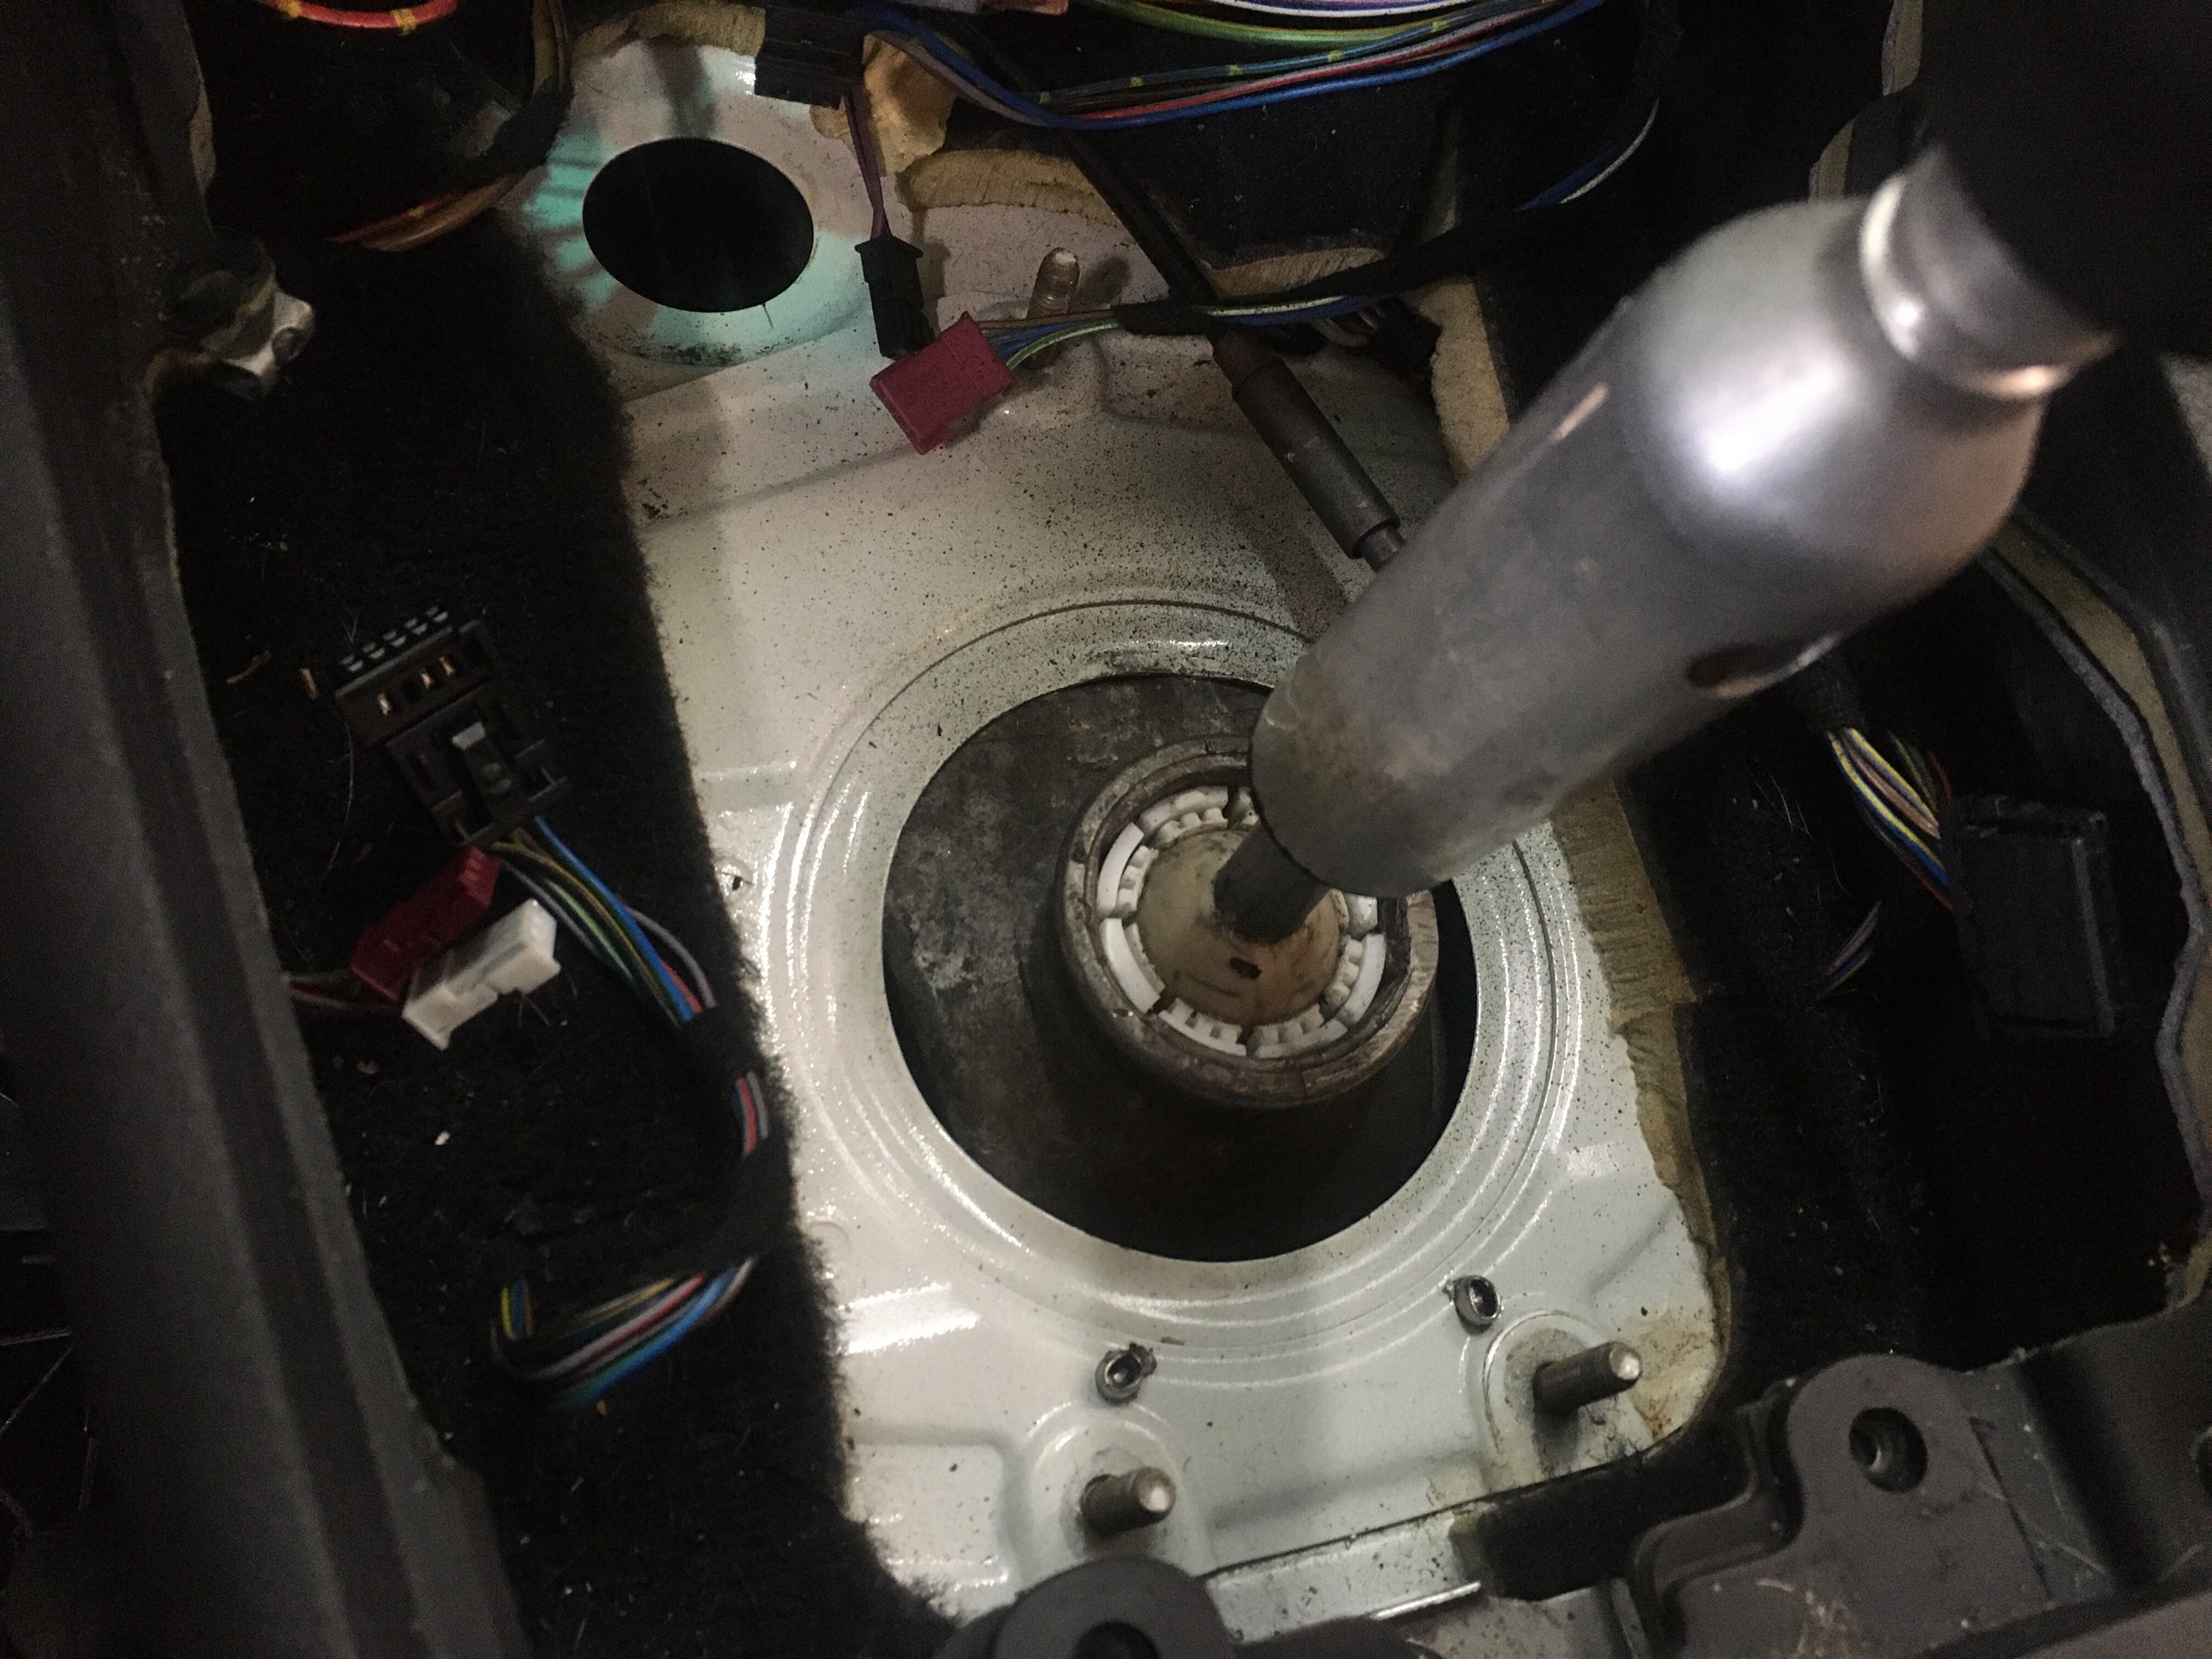
                                      @B C came over this morning to attempt some coding as it's all foreign to me. We noticed that the shifter seemed to be rubbing on something when going into 5th and reverse is a no-go completely. The shifter carrier seems to be jammed up against the tunnel floor as well, which doesn't seem right. 
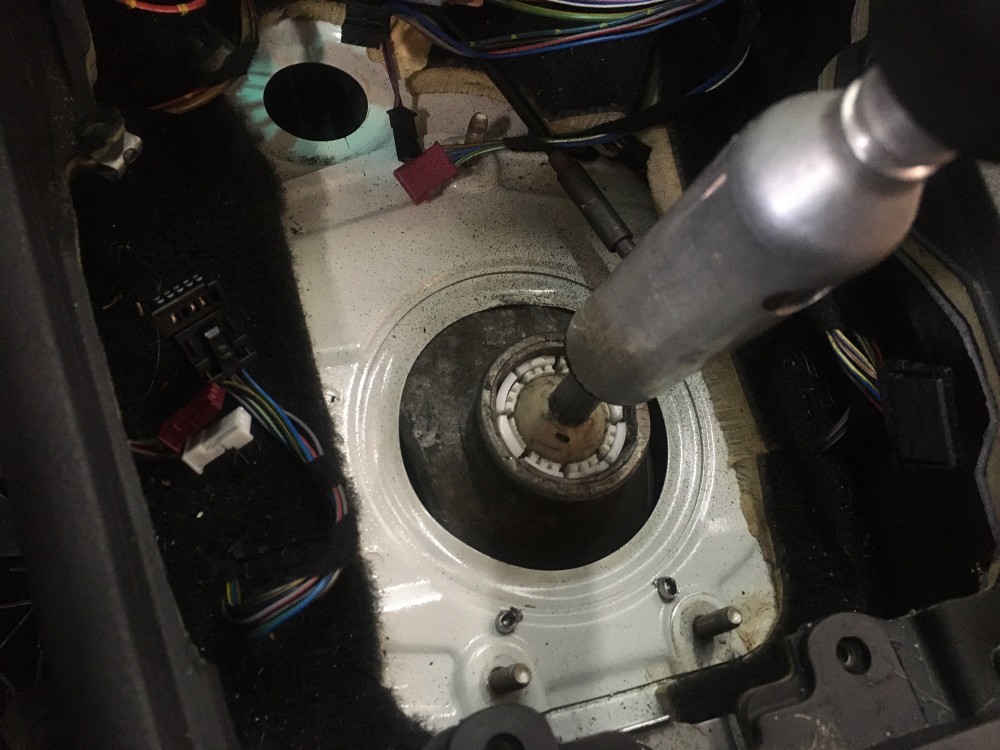
                                      IMG4143.jpg

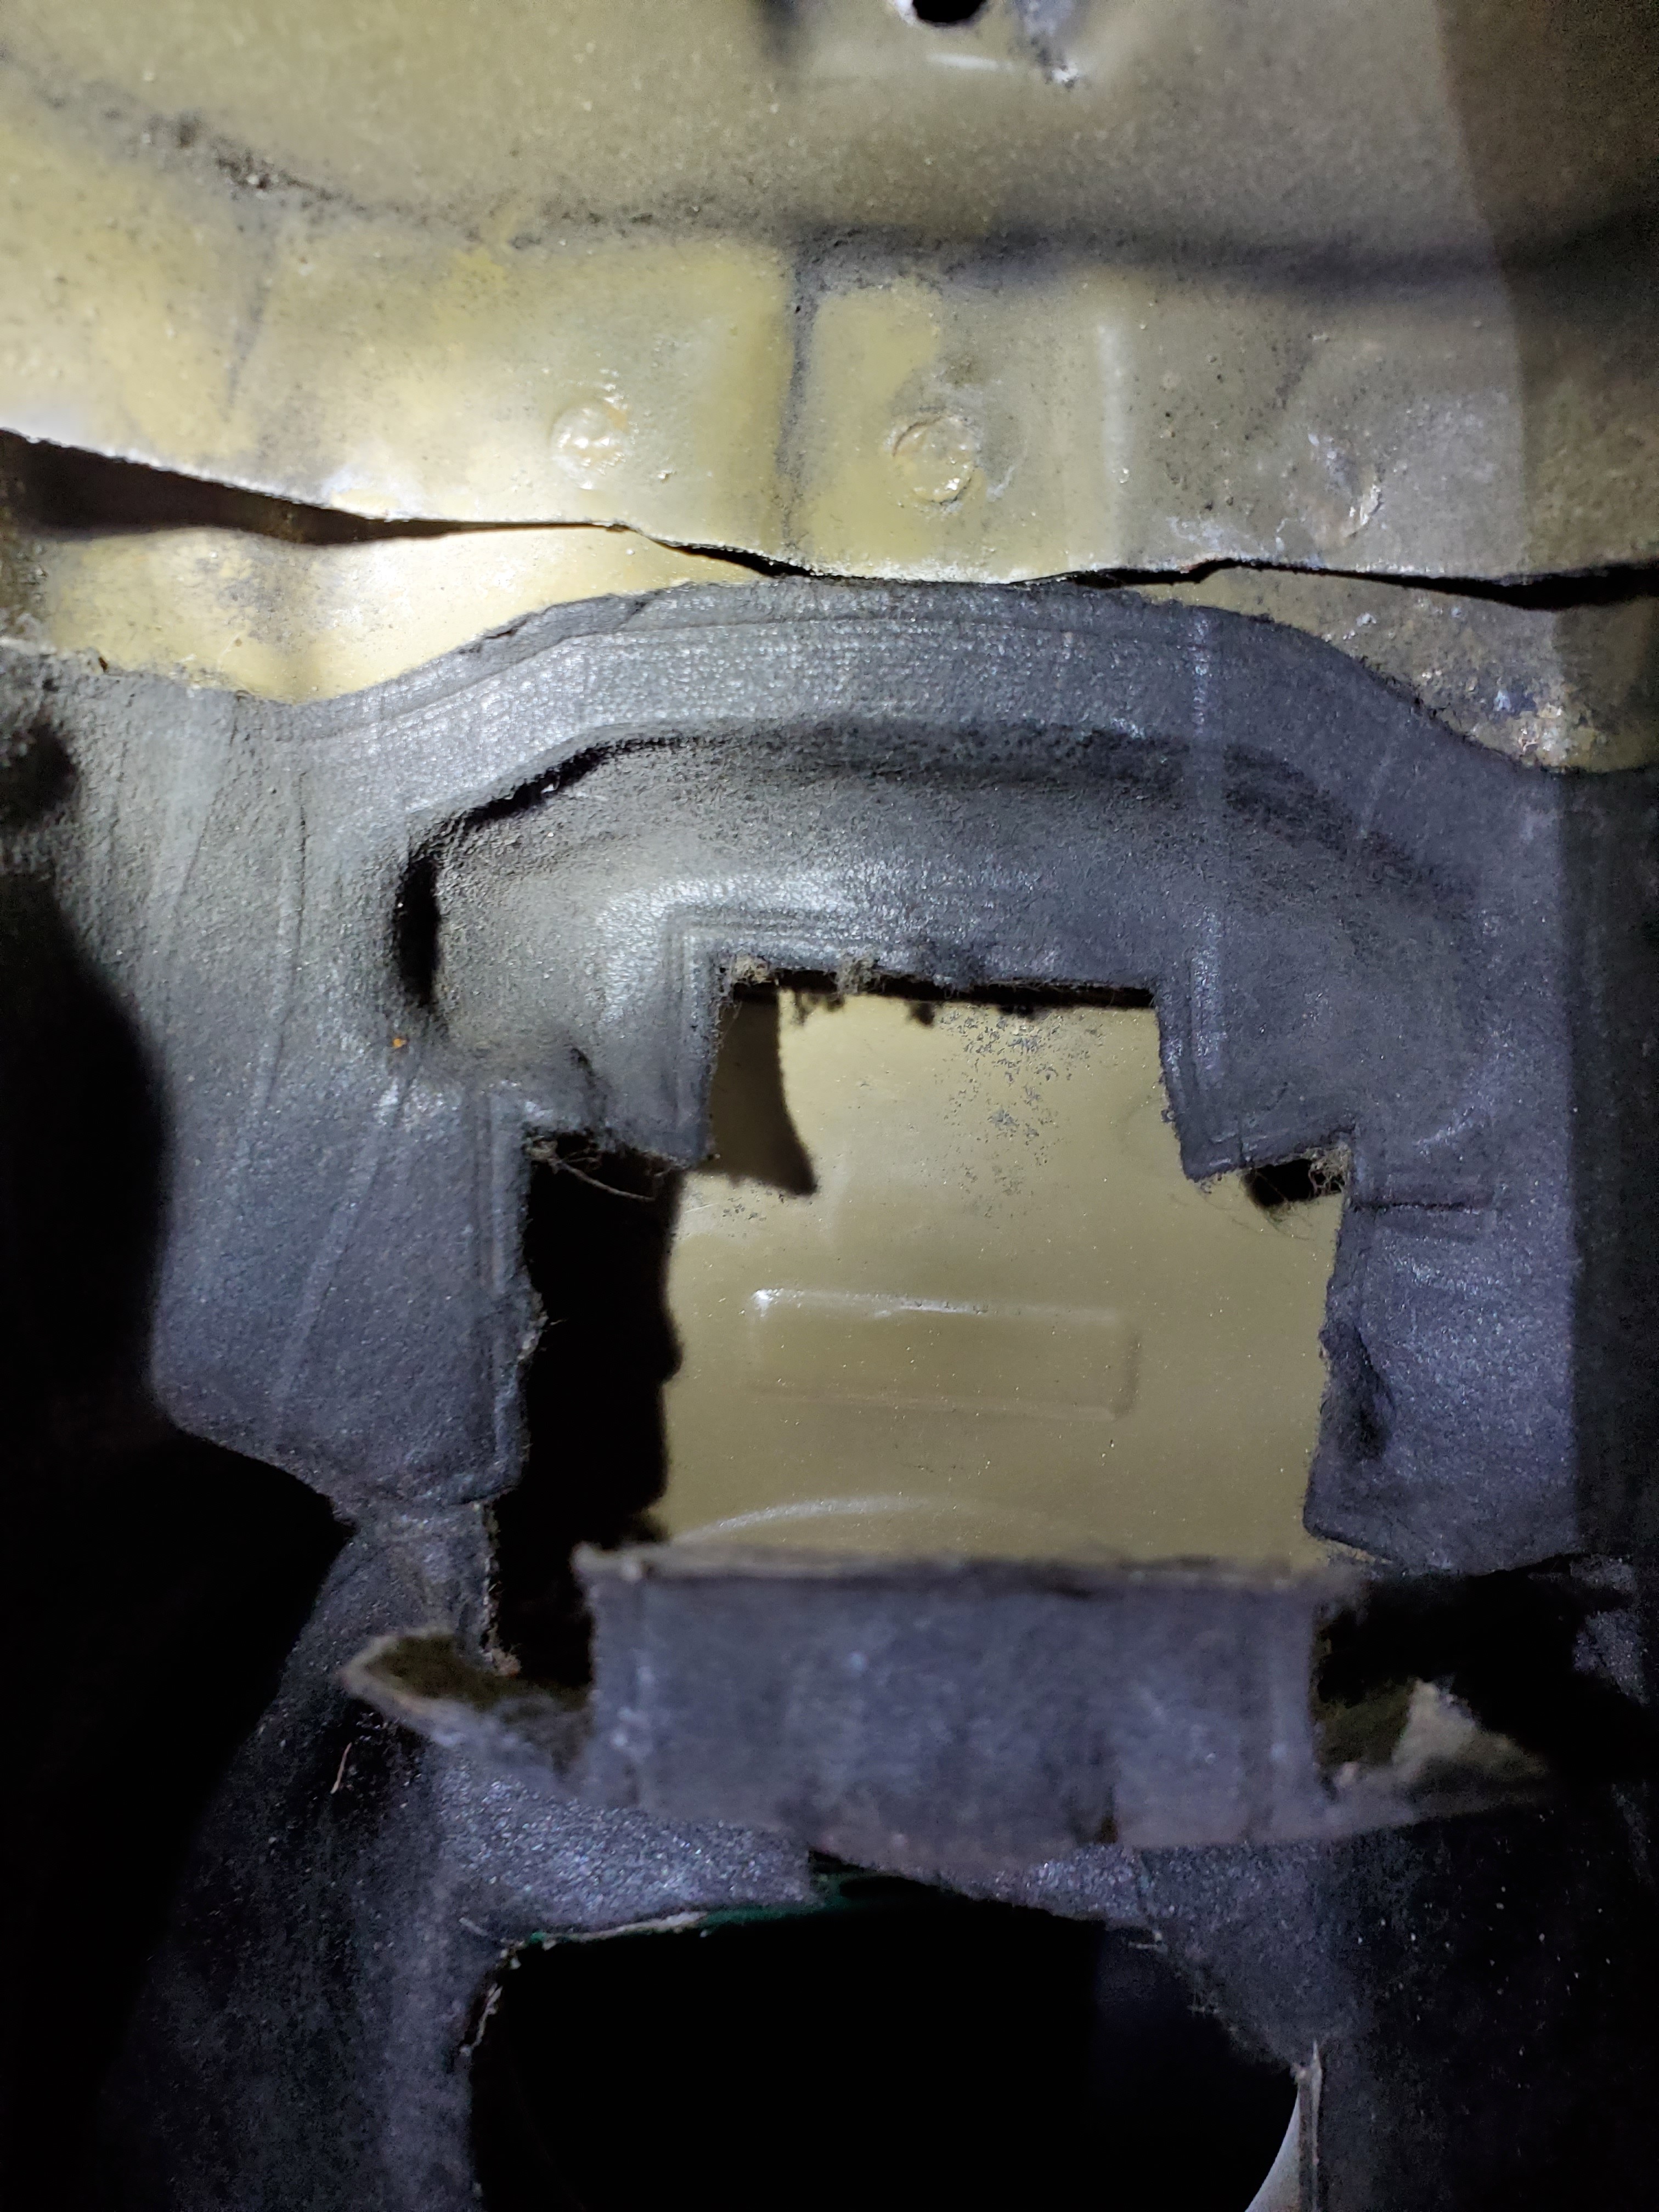
                                      I know the shift rod is on the correct side as it would hit the top of transmission when flipped the other way. I had to install the rear bushing carrier bracket due to my car missing this. I am curious if the way I installed it (check previous posts) pit the bushing too high which is lifting the whole carrier? 

                                      All I can find online is stuff for RWD e46s, nothing for the XI AWD shifter carrier as its different. 

                                      Any ideas? I will have to remove the exhaust and heatshield, possibly driveshaft again to get a good view on what's going on. Just figured I'd see what ya'll think in the meantime.

                                      CHECK OUT >>> RAGE DRIFT DESIGNS <<< FOR DECALS AND MORE!

                                      1 Reply Last reply
                                      0
                                      • YoungCRY
                                        YoungCRY
                                        YoungCR
                                        wrote on last edited by
                                        #65

                                        @i_love_cars any ideas? Reference to thread for his xi shifter install.

                                        Chris Young
                                        BMWCCA #458972
                                        1986 528e/5  | 1994 530i/5 | 1995 540i/6 | 2013 X5 35d | 1998 C1500 Suburban | 1995 K2500 Suburban

                                        1 Reply Last reply
                                        1
                                        • B
                                          B
                                          B C
                                          wrote on last edited by
                                          #66

                                          Auto to Manual coding in NCSExpert:  All credit to 50sKid on youtube for the information. He had some trial and error in his video but I consolidated the correct required steps for future reference:

                                          https://www.youtube.com/watch?v=FiBr1h9j0bU

                                          NCS Expert

                                          1)      File>Load Profile>Expert mode (or Factory Coding,  depends on which version of NCSExpert you have)

                                          2)      Go to “F1 VIN/ZCS FA”>”F3 ZCS/FA f.ECU” (reads vehicle order from module)

                                          3)      Select E46 Chassis

                                          4)      Select AKMB

                                          5)      Select “F2 Enter FA”, ignore incorrect VIN, click OK

                                          6)      Remove $205 (automatic transmission control module) from vehicle order by selecting it from the list and hitting the delete key.

                                          7)      Hit “OK” to exit

                                          😎      Click “F6 Back”

                                          9)      Click “F4 Process ECU”

                                          10)   Select AKMB, click “OK”

                                          11)   Click  “F2 Change Job”

                                          12)   Select “FA_Write” , click “OK”

                                          13)   Click “F3 Execute Job” watch for it to show “job ended”  under AKMB

                                          Now write the updated vehicle order to the ALSZ module:

                                          14)   Click “F1 Change ECU”

                                          15)   Select ALSZ

                                          16)   Verify that JOBNAME = FA_Write, if not,  select “F2 Change Job” to “FA_WRITE”

                                          17)   Click “F3 Execute Job”

                                          Exit NCS Expert

                                          18)   Open NCS Expert to check that $205 is gone from the vehicle order (steps 1-5)

                                          19)   Click “F6 Back”  

                                          20)   Click “F3 Process Car”

                                          21)   Click “F1 Code Car” (these steps reset everything to default, this will not undo the $205 being removed from vehicle order)

                                          22)   If trans icon is flashing, unplug transmission control module.

                                          23)   Unplug blue connectors near DME (GM Module)

                                          Run INPA

                                          Clear error memory

                                          Clear adaptations

                                          You will know you are successful when the gear indicator on the instrument cluster is no longer illuminated (will not show a gear icon, will not show "P, R, N, D, or S", nothing) and the car can start with the clutch switch/clutch pressed


                                          1 Reply Last reply
                                          2

                                          Hello! It looks like you're interested in this conversation, but you don't have an account yet.

                                          Getting fed up of having to scroll through the same posts each visit? When you register for an account, you'll always come back to exactly where you were before, and choose to be notified of new replies (either via email, or push notification). You'll also be able to save bookmarks and upvote posts to show your appreciation to other community members.

                                          With your input, this post could be even better 💗

                                          Register Login
                                          Reply
                                          • Reply as topic
                                          Log in to reply
                                          • Oldest to Newest
                                          • Newest to Oldest
                                          • Most Votes


                                          • Login

                                          • Don't have an account? Register

                                          • Login or register to search.
                                          Powered by NodeBB Contributors
                                          • First post
                                            Last post
                                          0
                                          • Categories
                                          • Recent
                                          • Tags
                                          • Popular
                                          • Users
                                          • Groups