Skip to content
  • Categories
  • Recent
  • Tags
  • Popular
  • Users
  • Groups
Skins
  • Light
  • Brite
  • Cerulean
  • Cosmo
  • Flatly
  • Journal
  • Litera
  • Lumen
  • Lux
  • Materia
  • Minty
  • Morph
  • Pulse
  • Sandstone
  • Simplex
  • Sketchy
  • Spacelab
  • United
  • Yeti
  • Zephyr
  • Dark
  • Cyborg
  • Darkly
  • Quartz
  • Slate
  • Solar
  • Superhero
  • Vapor

  • Default (No Skin)
  • No Skin
Collapse
WIBIMMERS logo

WIBIMMERS

  1. Home
  2. General Discussion
  3. Members BMWs
  4. the one and only e30 s52 engine swap

the one and only e30 s52 engine swap
Scheduled Pinned Locked Moved Members BMWs
521 Posts 25 Posters 1 Views 1 Watching
  • Oldest to Newest
  • Newest to Oldest
  • Most Votes
Reply
  • Reply as topic
Log in to reply
This topic has been deleted. Only users with topic management privileges can see it.
  • GunMetalGreyG
    GunMetalGreyG
    GunMetalGrey
    wrote on last edited by
    #362

    I'm excited to see my old stuff going to good use!

    ...

    1 Reply Last reply
    3
    • SteelBlueS
      SteelBlueS
      SteelBlue
      wrote on last edited by
      #363

      Oh lord

      1 Reply Last reply
      4
      • straight6pwrS
        straight6pwrS
        straight6pwr
        wrote on last edited by
        #364

        Diagram from The Book of E30 Ownership

        someone said:

        before e30 turbo announcement:

        perpetually non-running e30s ---------------------you-----running e30s

        after e30 turbo announcement:

        perpetually non-running e30s -------------you-------------running e30s

        after e30 turbo installation:

        perpetually non-running e30s -you-----------------------running e30s

        Dan
        yajsYRL.jpg.e5f350b4dfe961d76ac8b32efce2e1a6.jpg

        1 Reply Last reply
        4
        • AsparagusMikeA
          AsparagusMikeA
          AsparagusMike
          wrote on last edited by
          #365

          More updates!

          For the last week I have been enjoying the nice warm weather of Arizona. I got back Saturday and on Sunday I headed on over to the shop and got a couple more things accomplished.

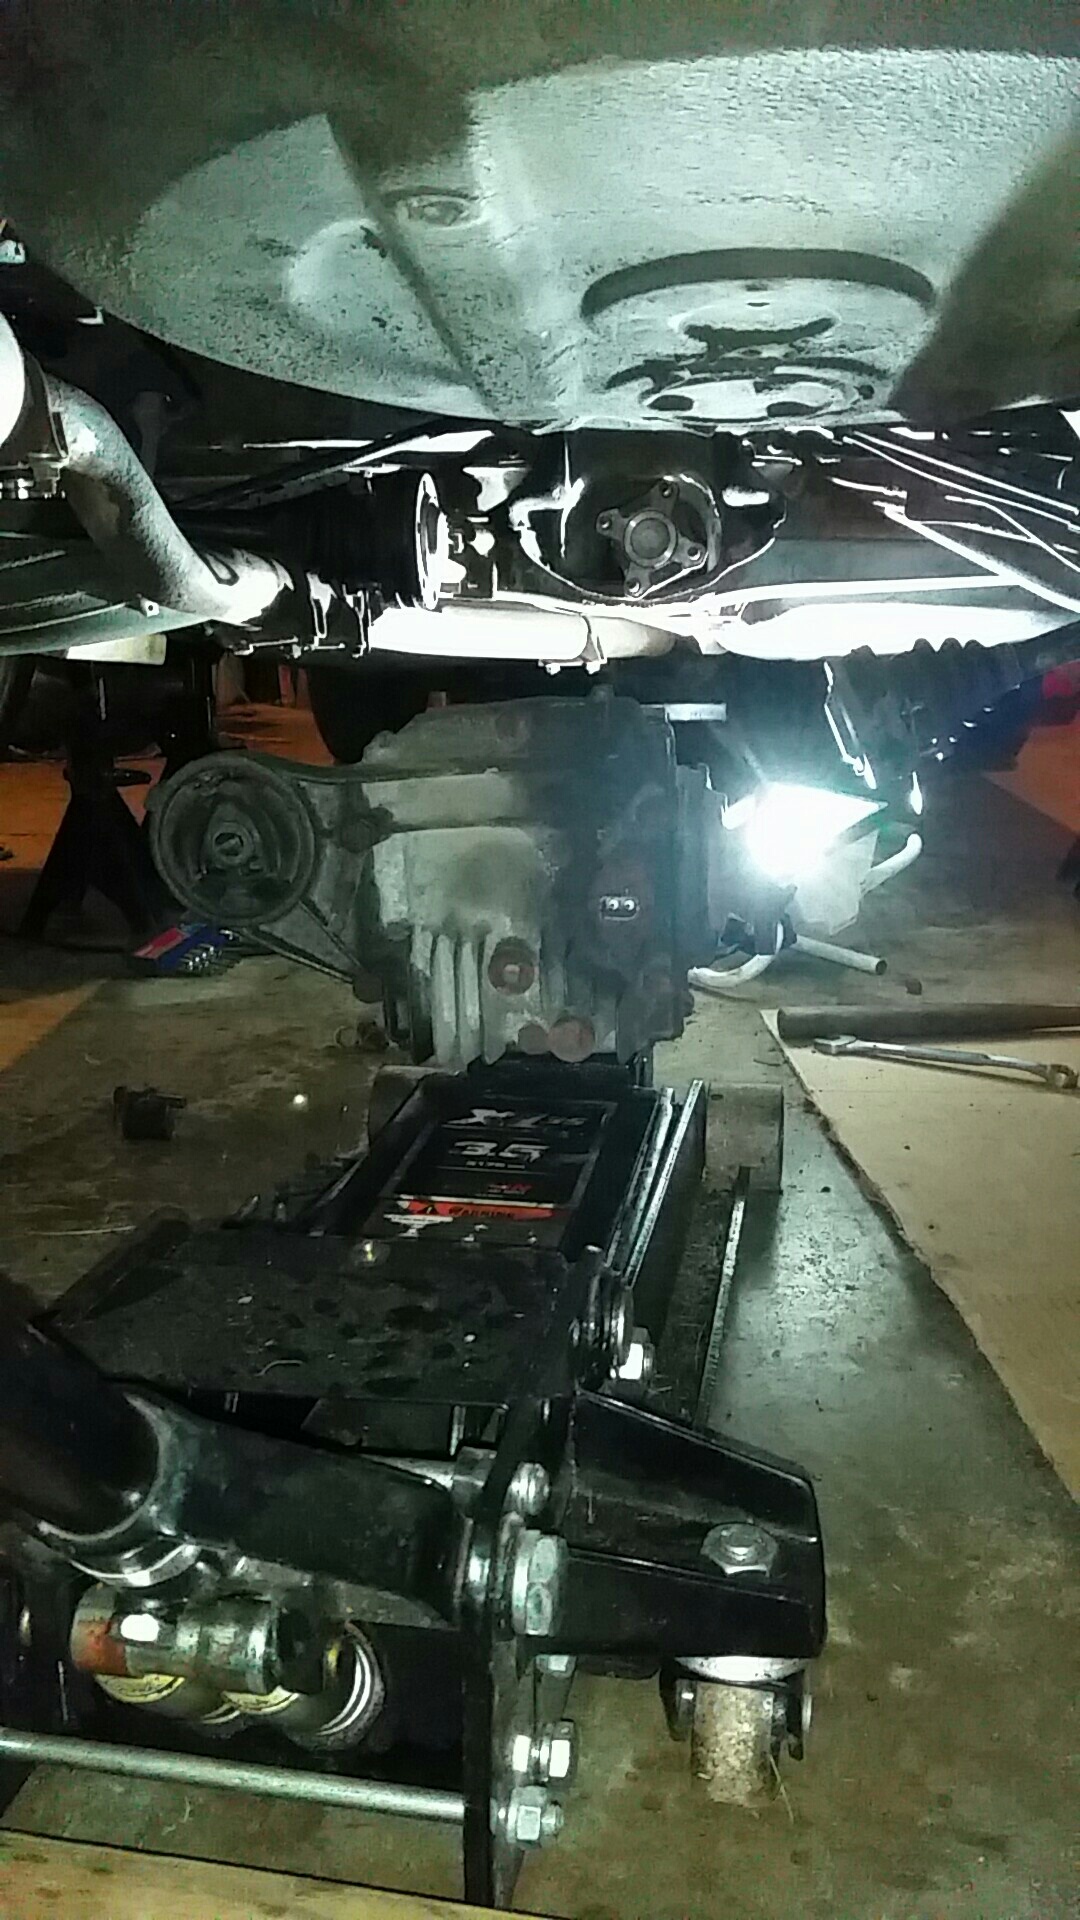
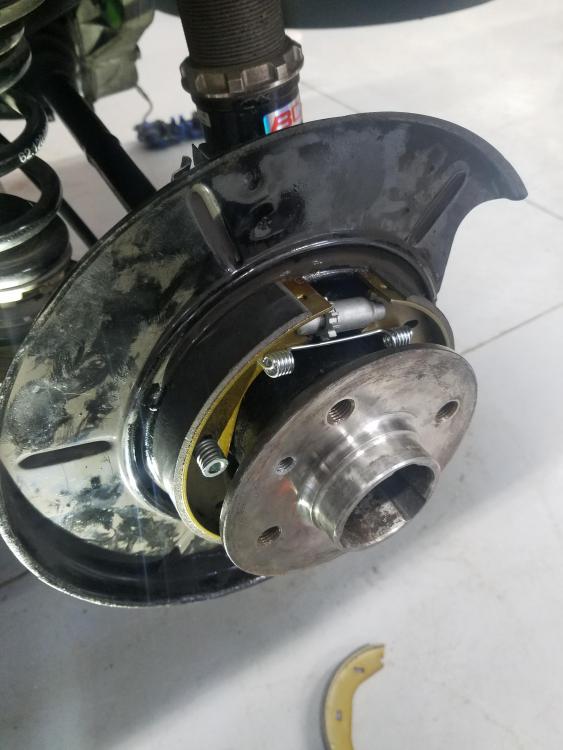
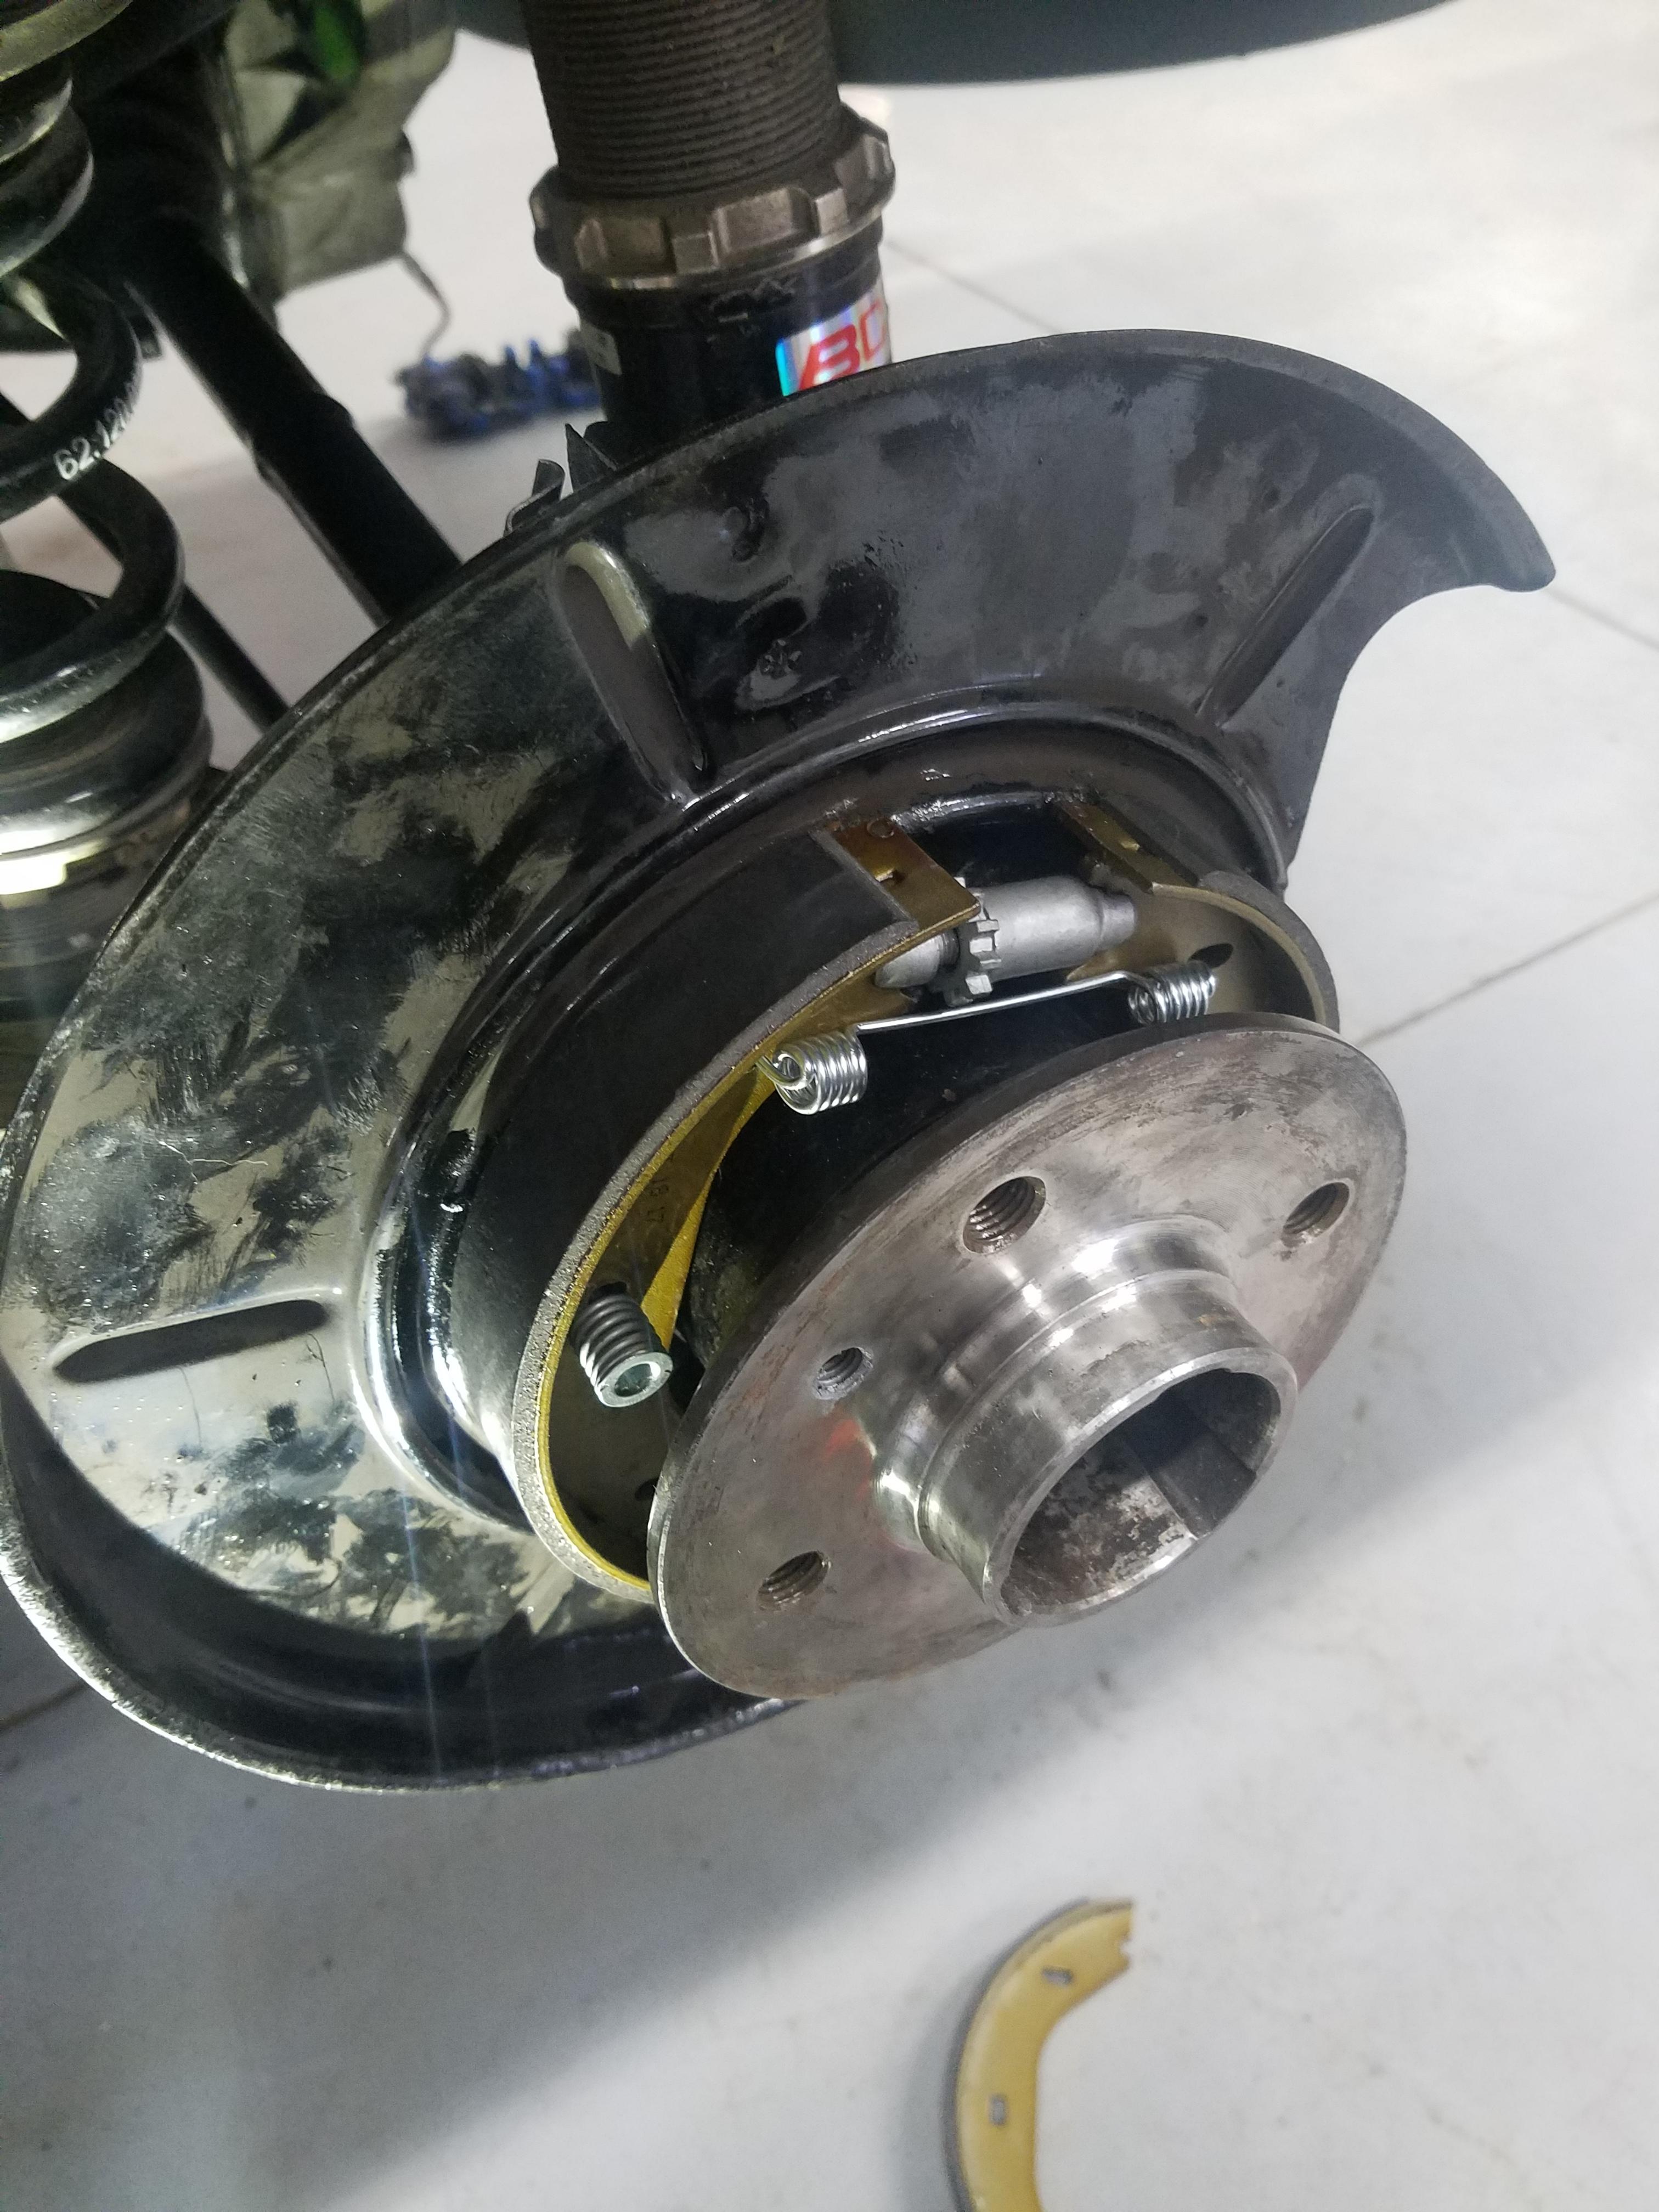
          As for the rear end, I still had to re-install the brakes and got my e brake installed and dialed in, feels great!

          20190120134606.jpg

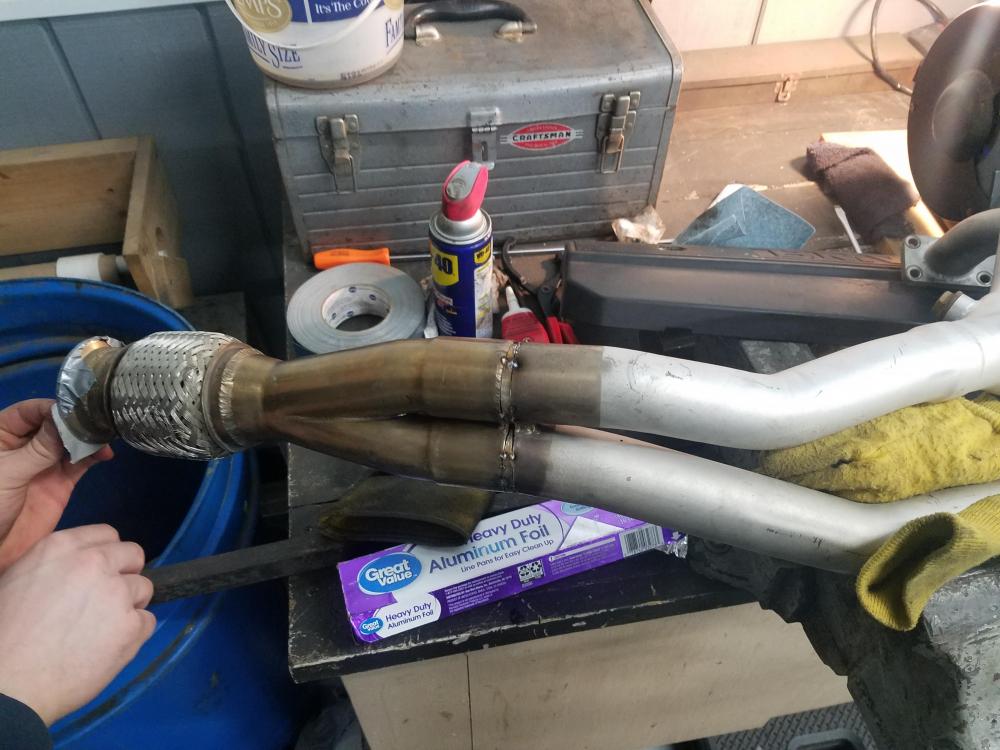
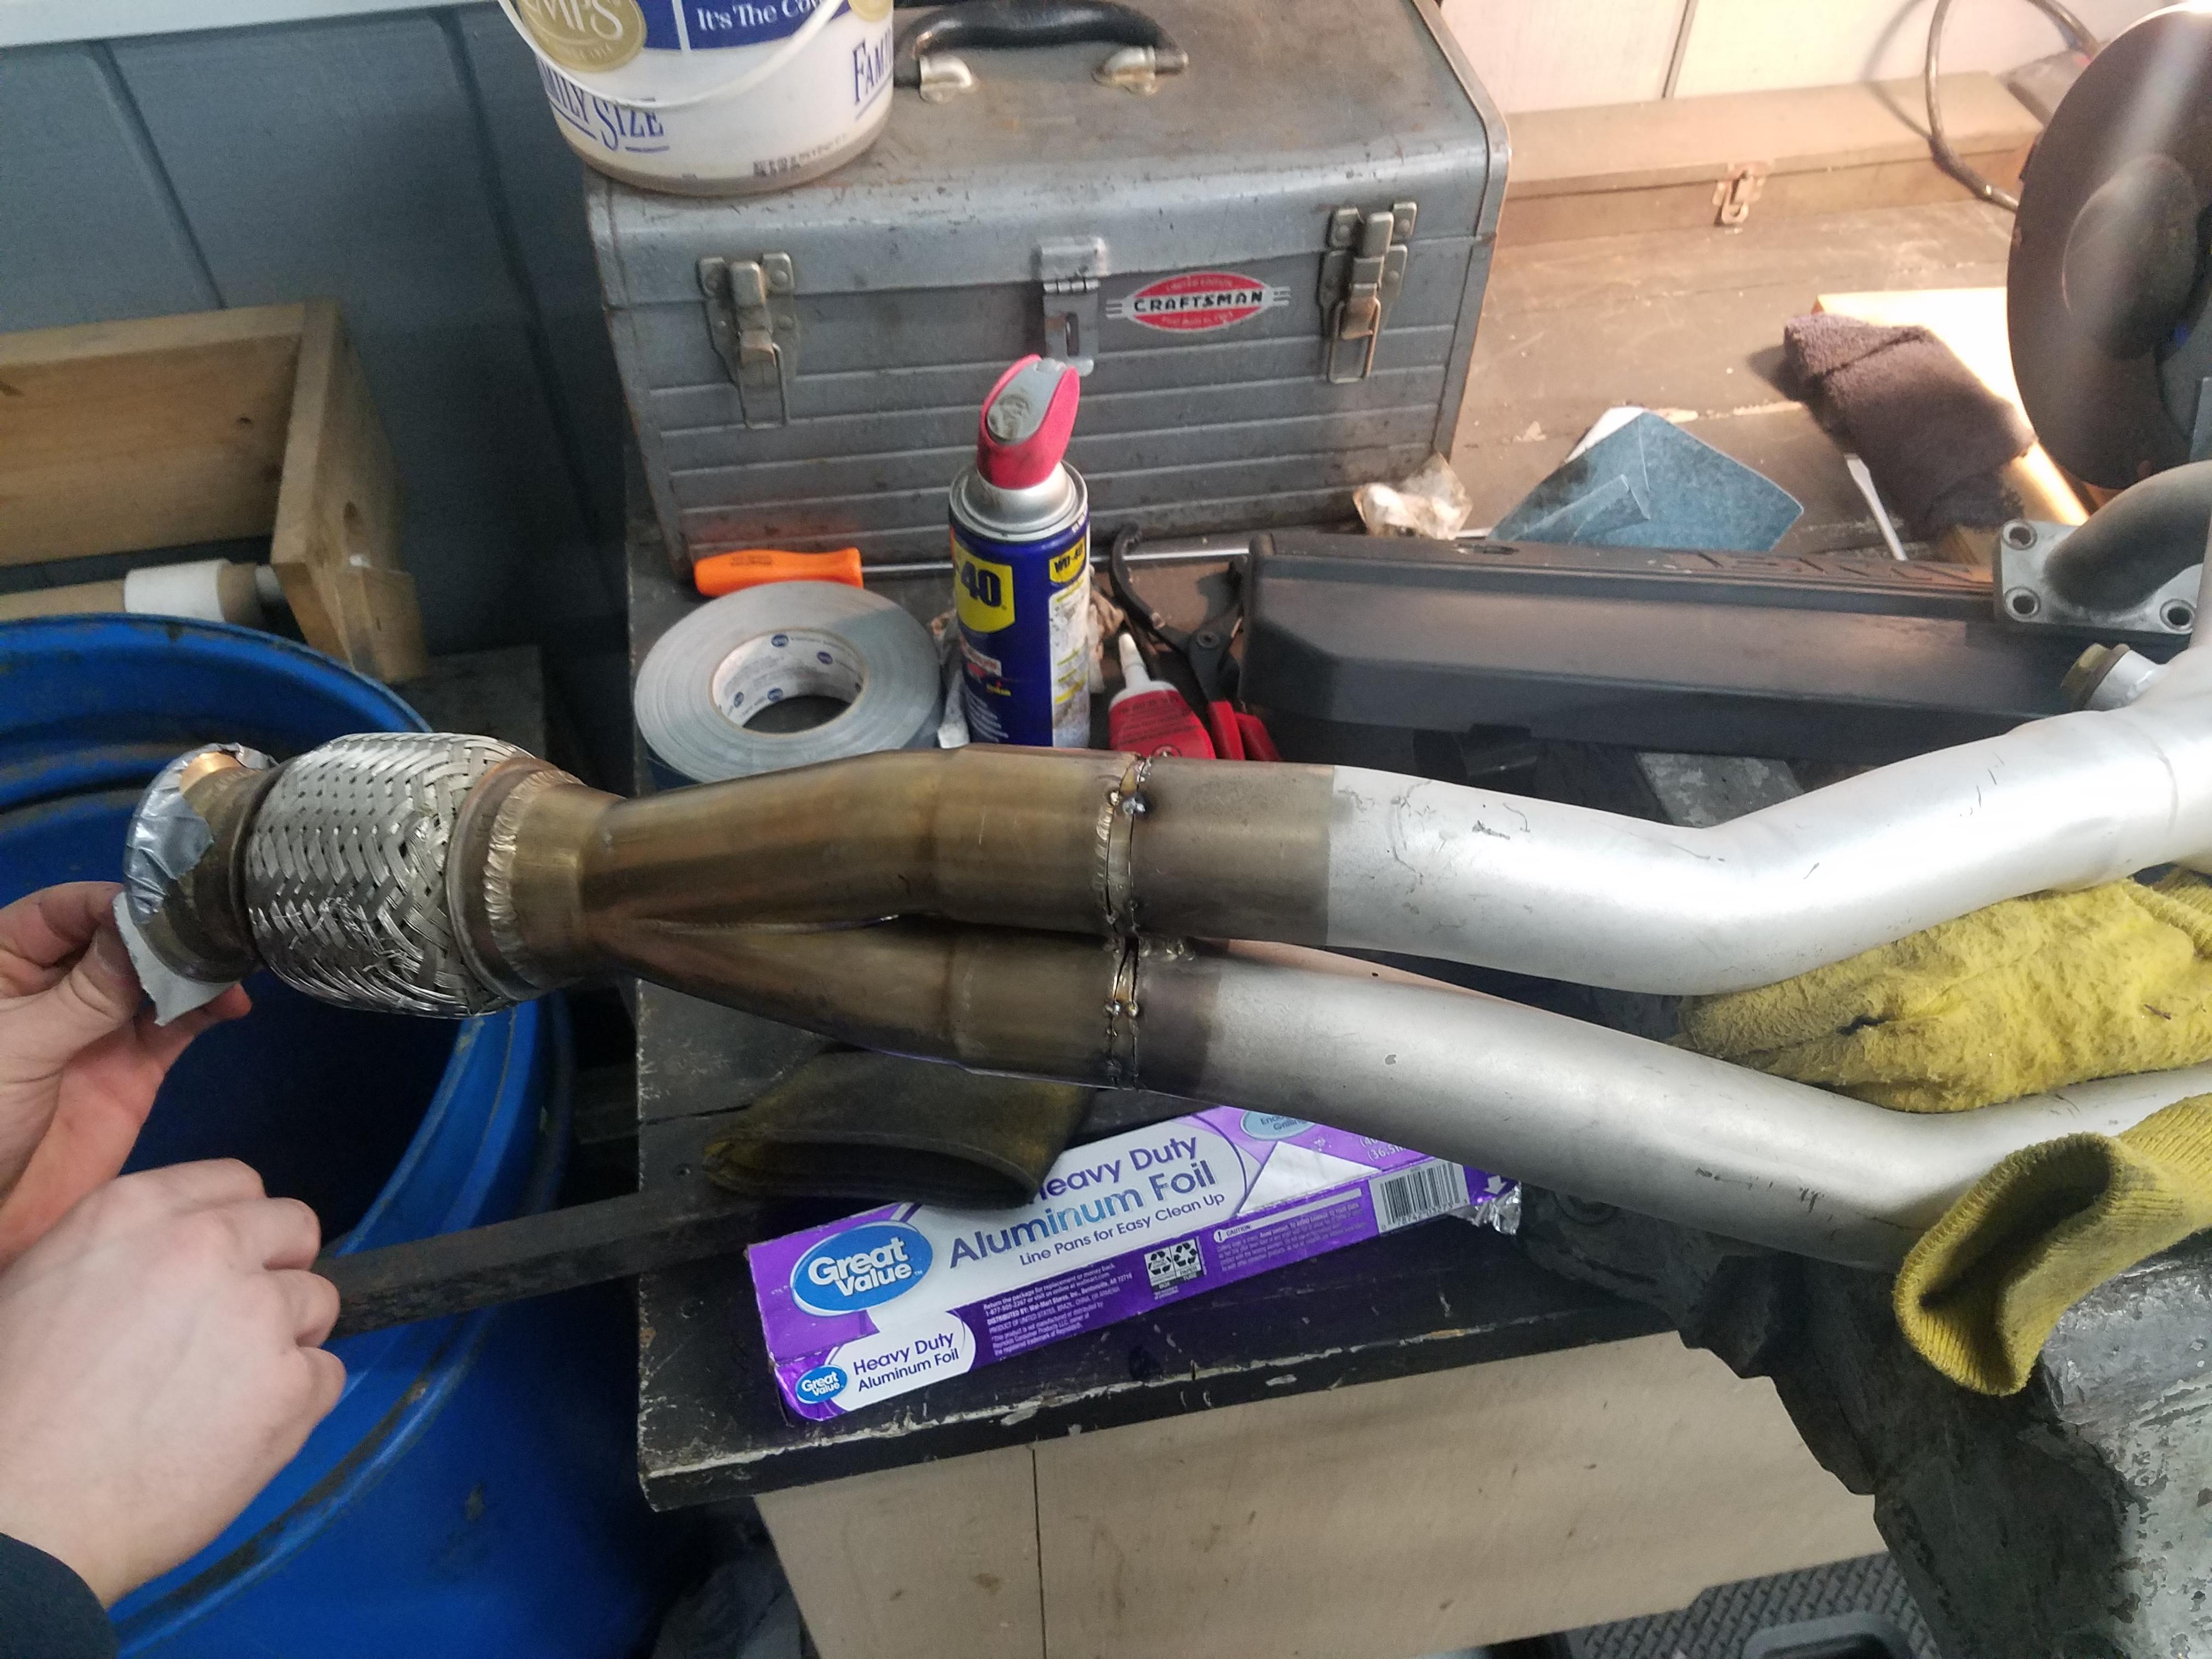
          After going through and torquing everything in the rear end I moved on to the next big thing I needed to get out of the way, fixing the exhaust. After some cutting of the y-pipe my buddy stopped by and fab'd up some small pie cuts to raise it and then tacked them in place.

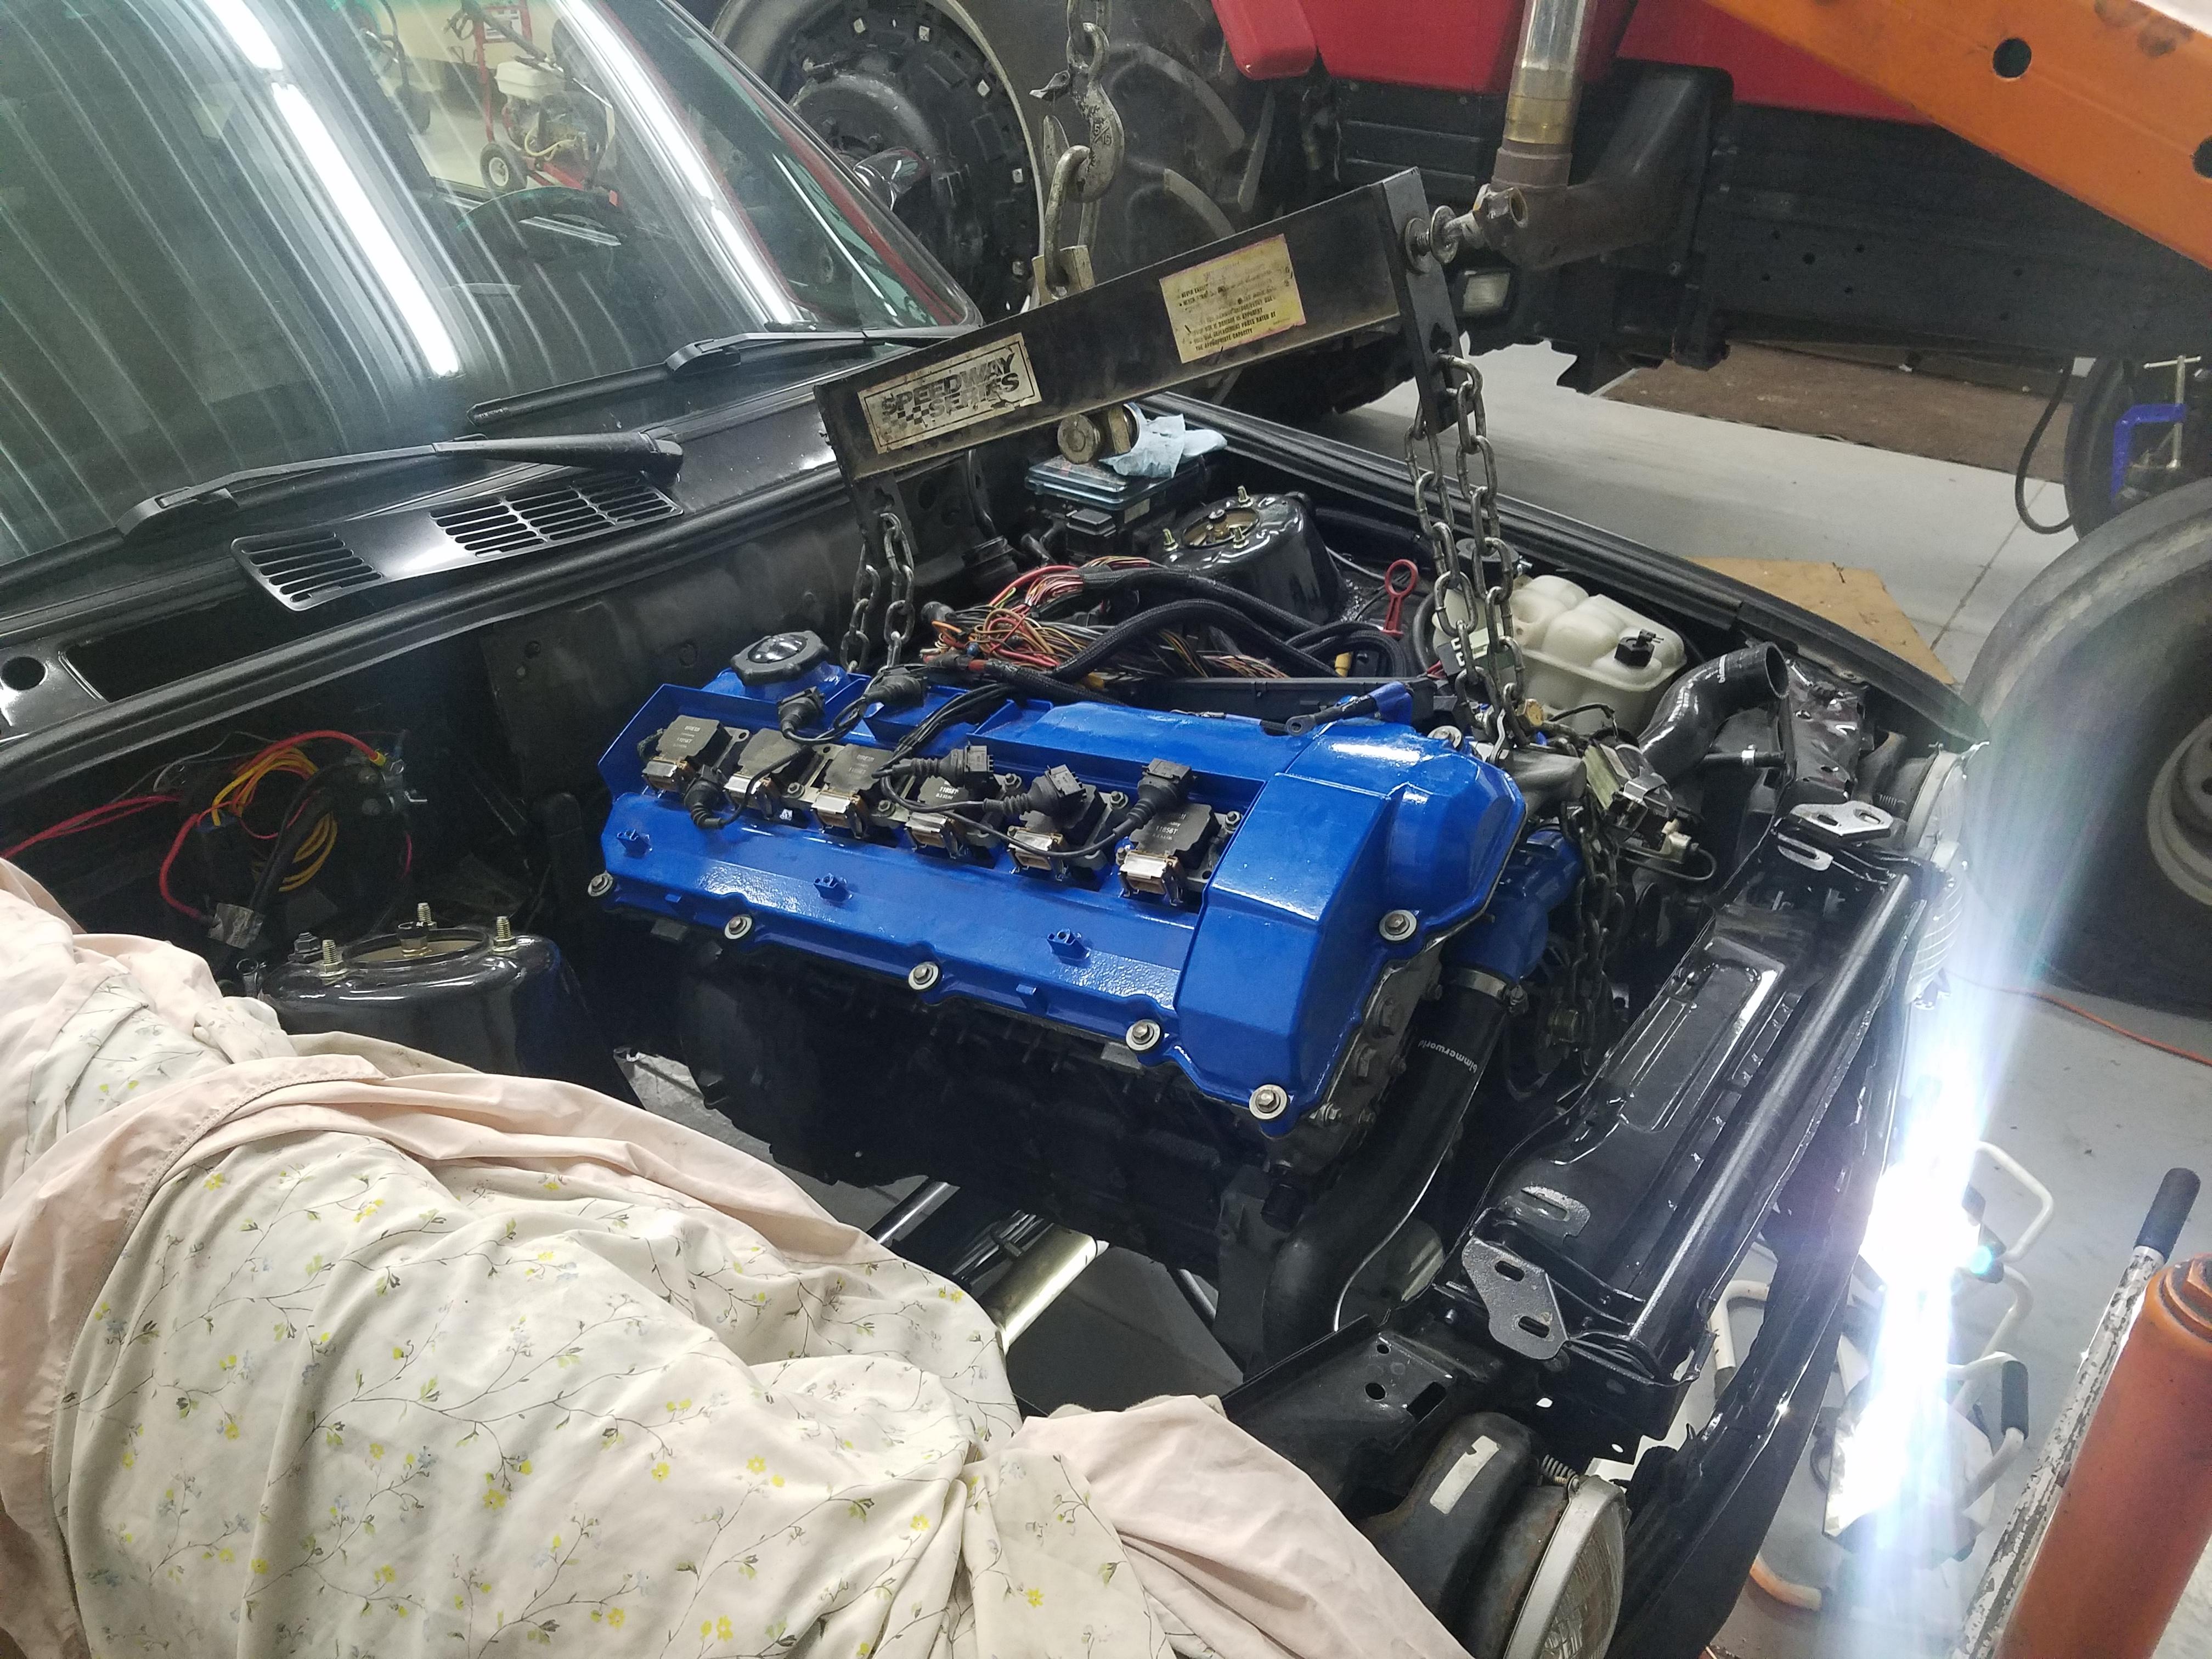
          Once that was secured I got the fluids drained and everything disconnected on the motor to be pulled.

          20190121214449.jpg

          raised the motor enough to get the headers pulled with ease. Threw em on the bench and welded em back up.

          20190121214433.jpg

          With the exhaust finished up and soon off to its new owner I can now turn my attention to getting the motor pulled and prepped.

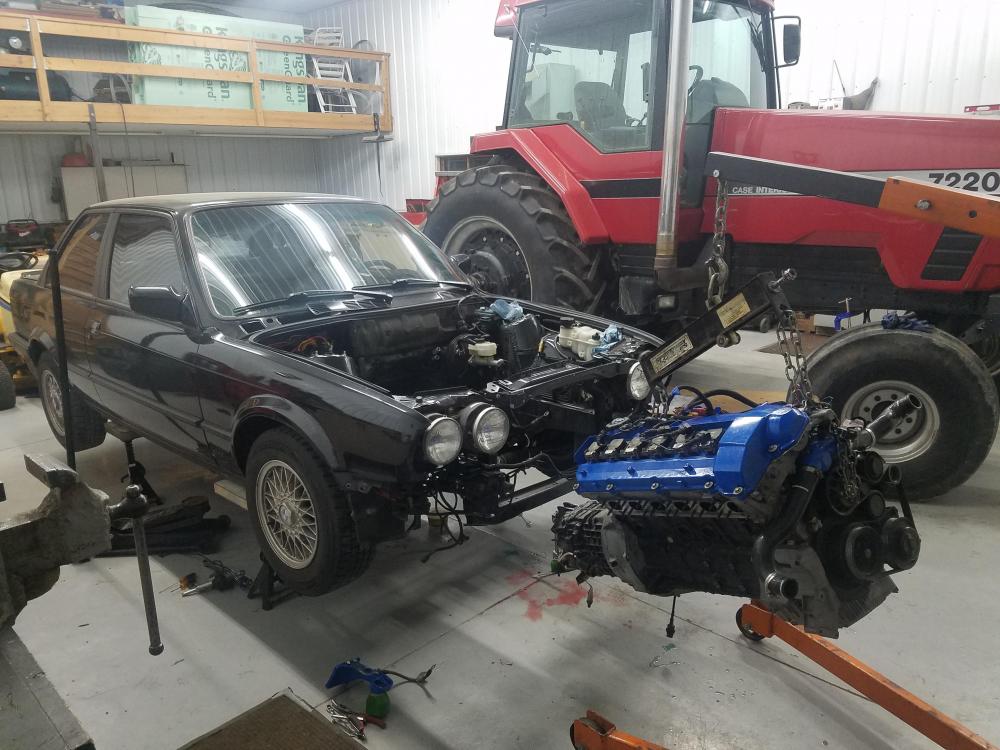
          After I got out of class today, I spent a couple hours over at the shop getting the motor pulled completely out of the car. Ya, that's all I got done.

          20190122180027.jpg

          A few things on the to do list before she goes back in...

          - Pull the valve cover and re-torque all the head studs

          - Pull the oil pan off to weld in the fitting for the oil drain line as well as a baffle for the pick up

          - Replace the s52 oil filter with s54 housing

          - Pull the trans to replace the input shaft seal as well as inspect the clutch

          - Mount the turbo manifold and turbo

          Also will need to do a bit of trimming to the battery tray in the engine bay to make room for the down pipe.

          Progress is on hold tell this weekend where my goal is to hopefully get a few of these things done.

          Stay tuned!

          1 Reply Last reply
          1
          • GunMetalGreyG
            GunMetalGreyG
            GunMetalGrey
            wrote on last edited by
            #366

            AsparagusMike said:

            Stay tuned!

            This is something that should be in your research! 

            Getting after it I see! Good work!

            ...

            1 Reply Last reply
            0
            • SteelBlueS
              SteelBlueS
              SteelBlue
              wrote on last edited by
              #367

              I yearn for a large garage that I could work on things year round.

              1 Reply Last reply
              0
              • AsparagusMikeA
                AsparagusMikeA
                AsparagusMike
                wrote on last edited by
                #368

                SteelBlue said:

                I yearn for a large garage that I could work on things year round.

                Ya, I am pretty spoiled. I continue to remind my grandfather every chance I get how grateful I am to be able to use some of his shop space for my projects, I literally wouldn't be able to do this without it.

                1 Reply Last reply
                1
                • straight6pwrS
                  straight6pwrS
                  straight6pwr
                  wrote on last edited by
                  #369

                  side note: cool to see some Red Power!

                  Dan
                  yajsYRL.jpg.e5f350b4dfe961d76ac8b32efce2e1a6.jpg

                  1 Reply Last reply
                  0
                  • GunMetalGreyG
                    GunMetalGreyG
                    GunMetalGrey
                    wrote on last edited by
                    #370

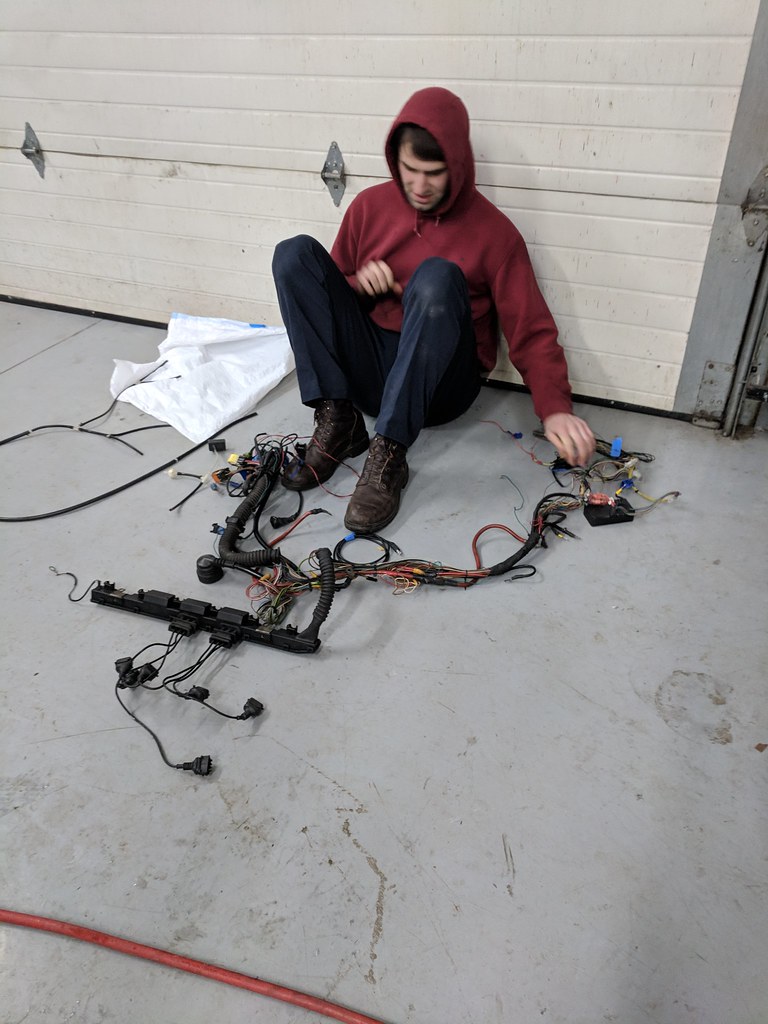
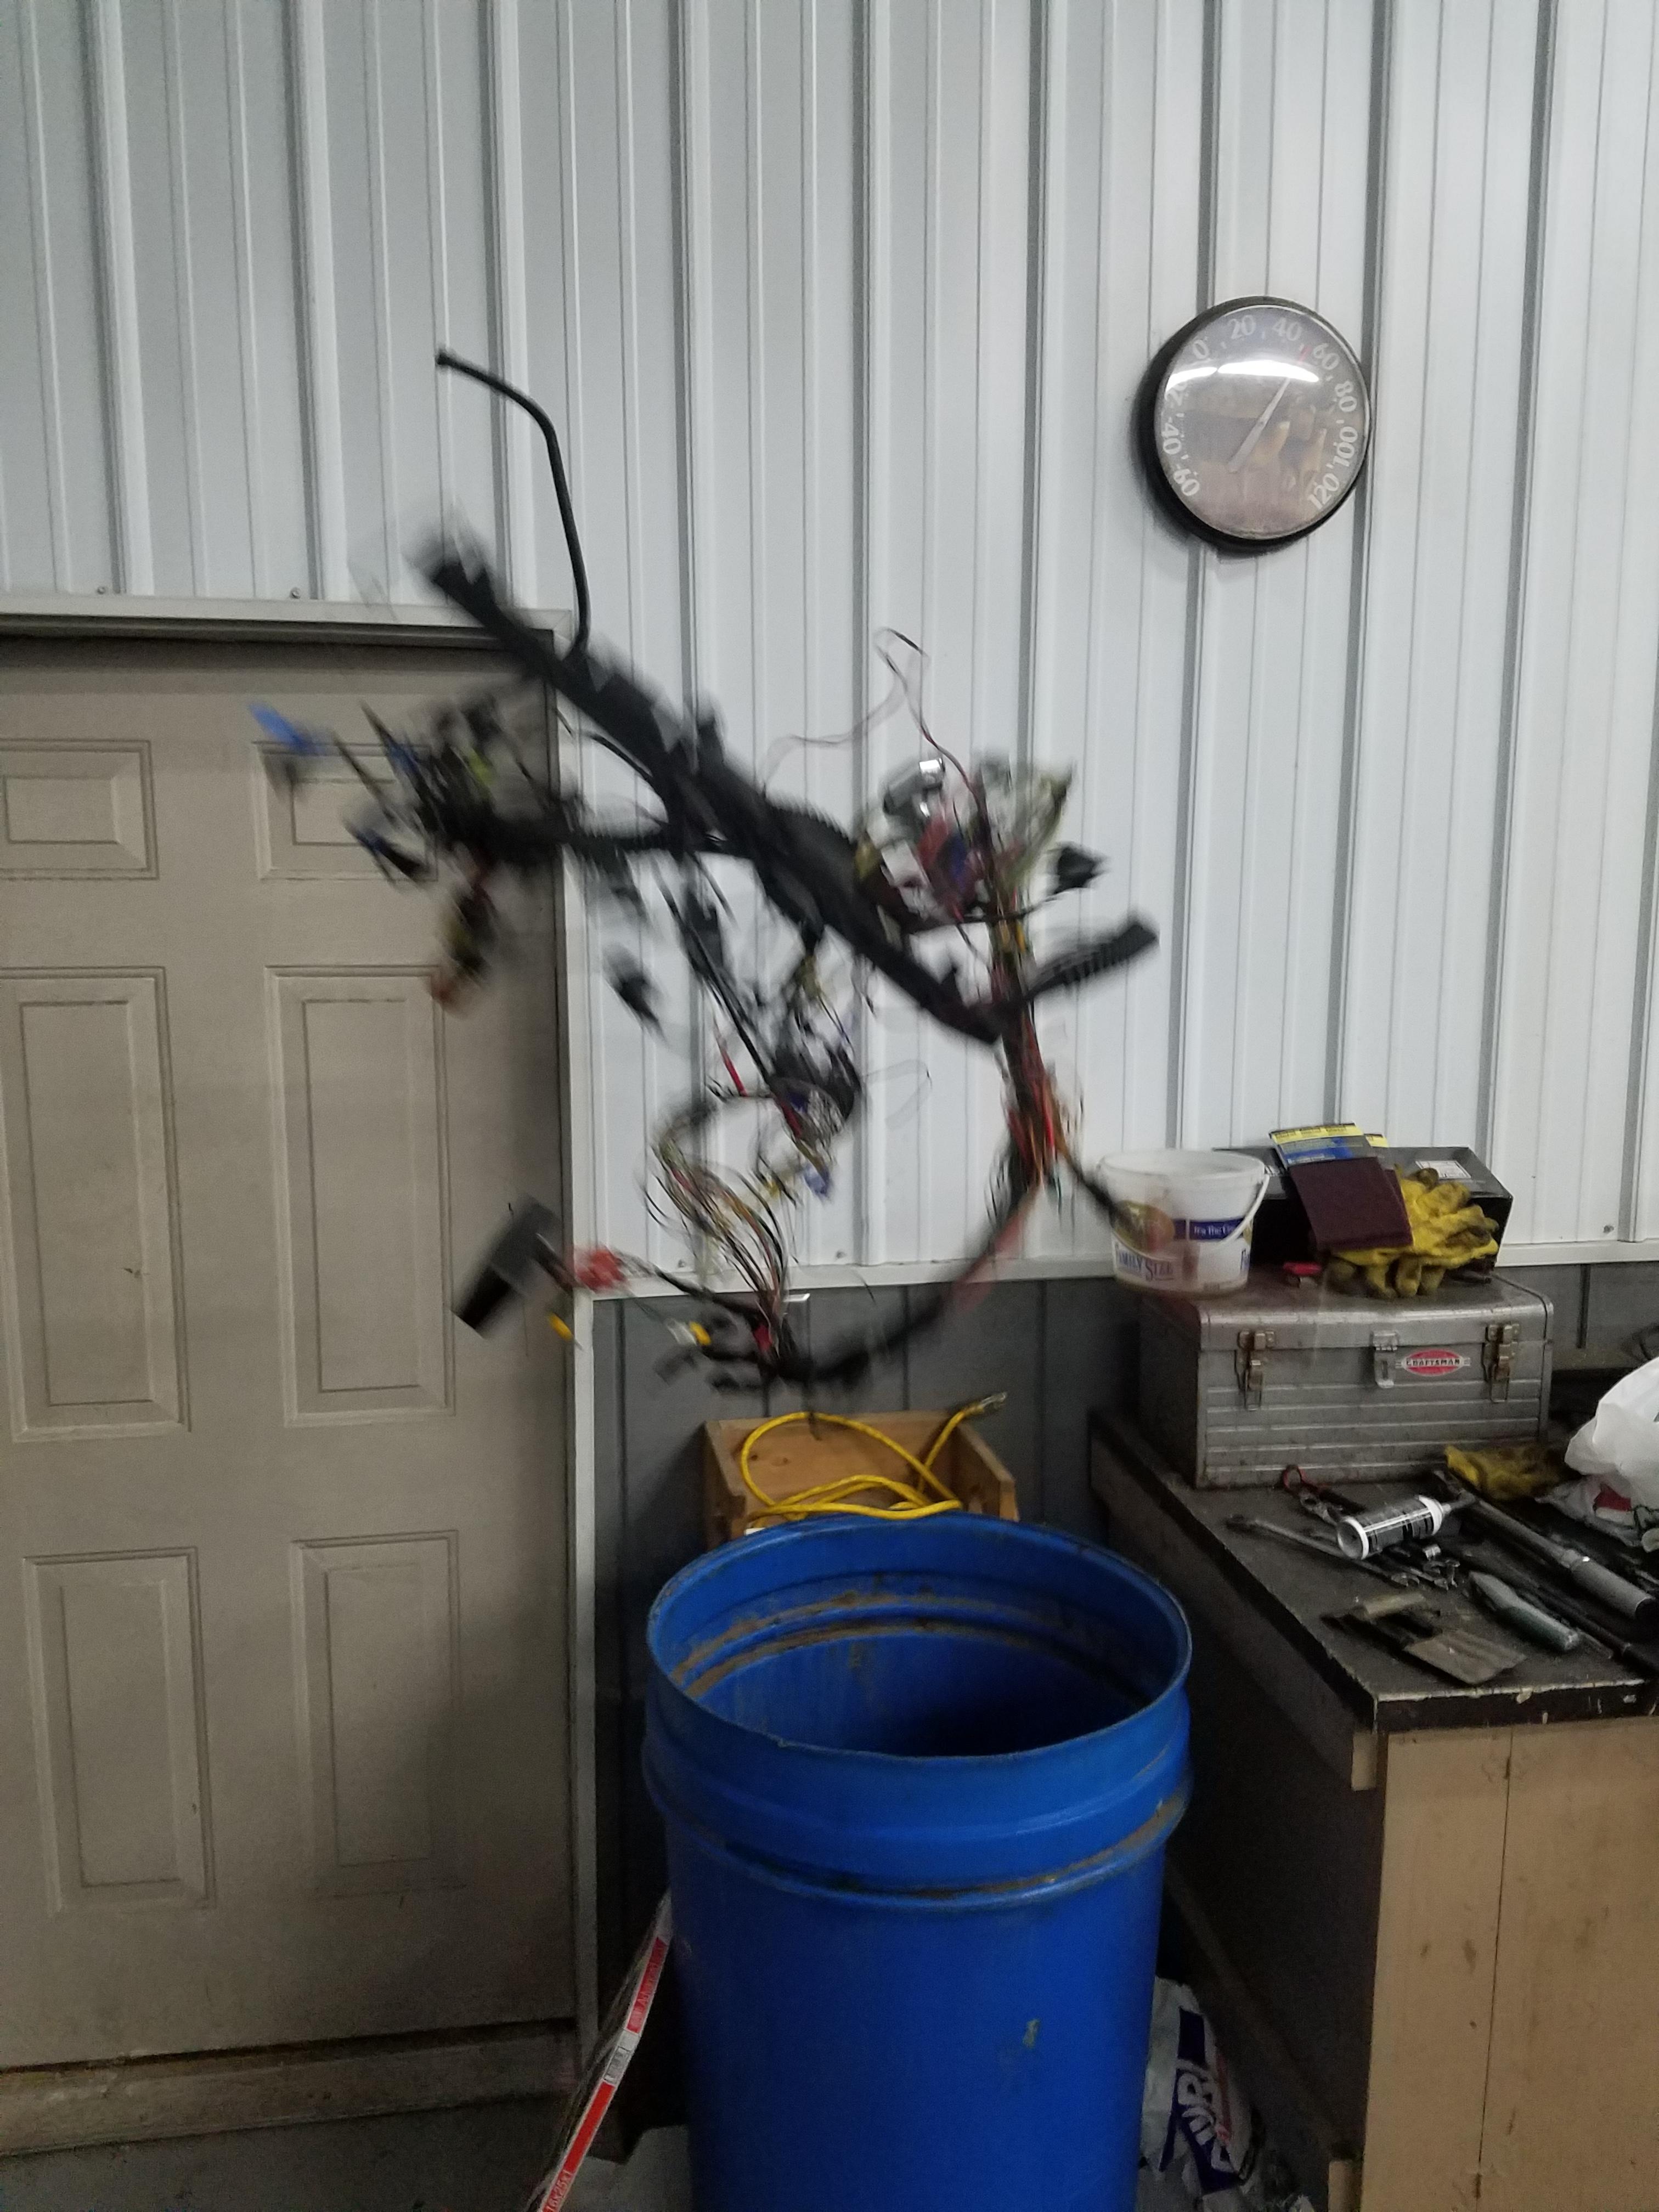
                    Mike when he starts to realize what he got himself into for tuning and wiring.

                    IMG20190126212306

                    ...

                    1 Reply Last reply
                    2
                    • B
                      B
                      B C
                      wrote on last edited by
                      #371

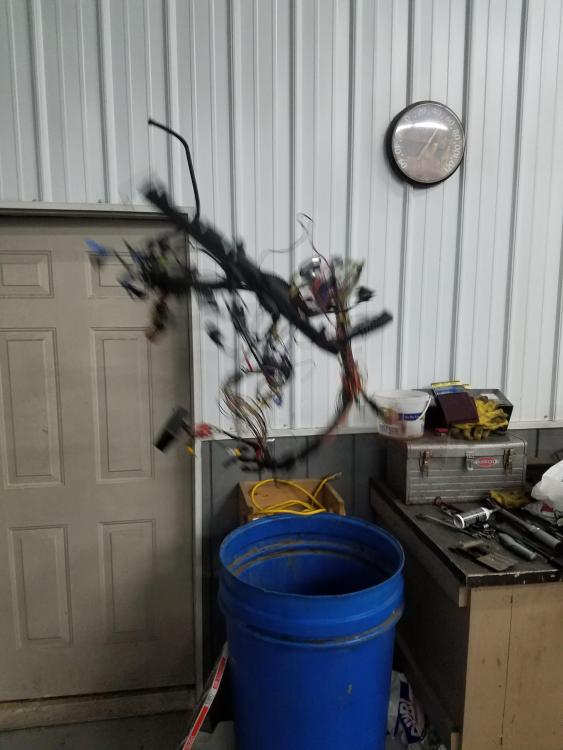
                      Thats not actually Mike. It's a homeless man that Ben gave a harness to instead of some spare change. That will keep him warm and well fed through the week. Great job Ben.

                      1 Reply Last reply
                      1
                      • AsparagusMikeA
                        AsparagusMikeA
                        AsparagusMike
                        wrote on last edited by
                        #372

                        20190129185946.jpg

                        1 Reply Last reply
                        8
                        • GunMetalGreyG
                          GunMetalGreyG
                          GunMetalGrey
                          wrote on last edited by
                          #373

                          ^beautiful shot!

                          ...

                          1 Reply Last reply
                          0
                          • AsparagusMikeA
                            AsparagusMikeA
                            AsparagusMike
                            wrote on last edited by
                            #374

                            More updates!

                            Thankfully with this weather being so shit forcing class to be cancelled it's given me more time to get things done at the shop.

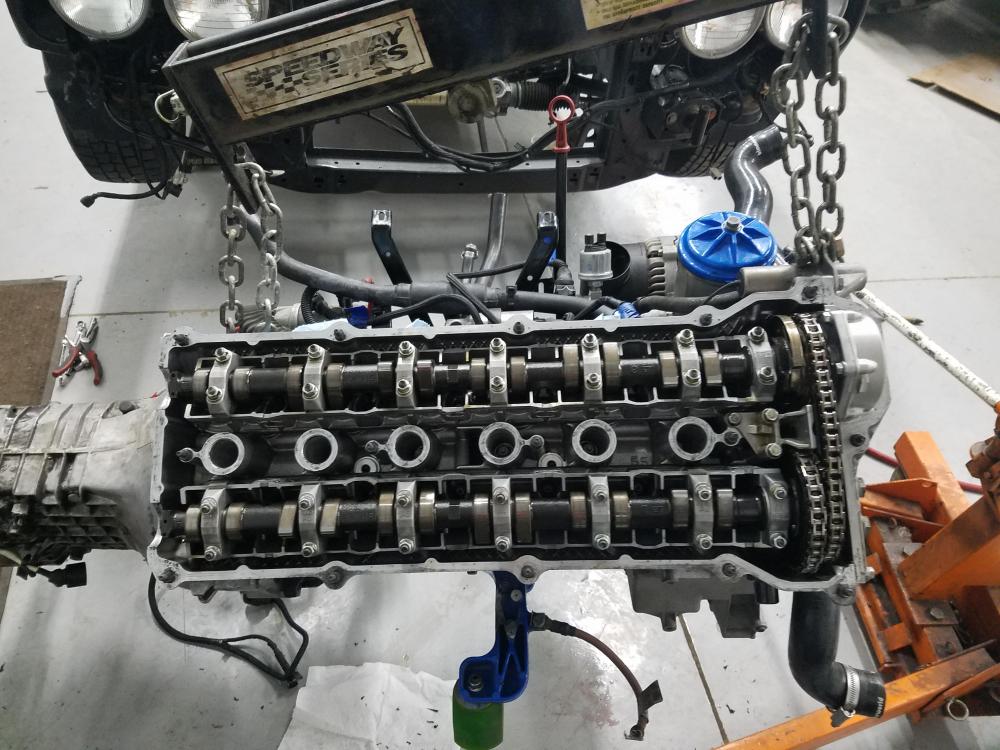
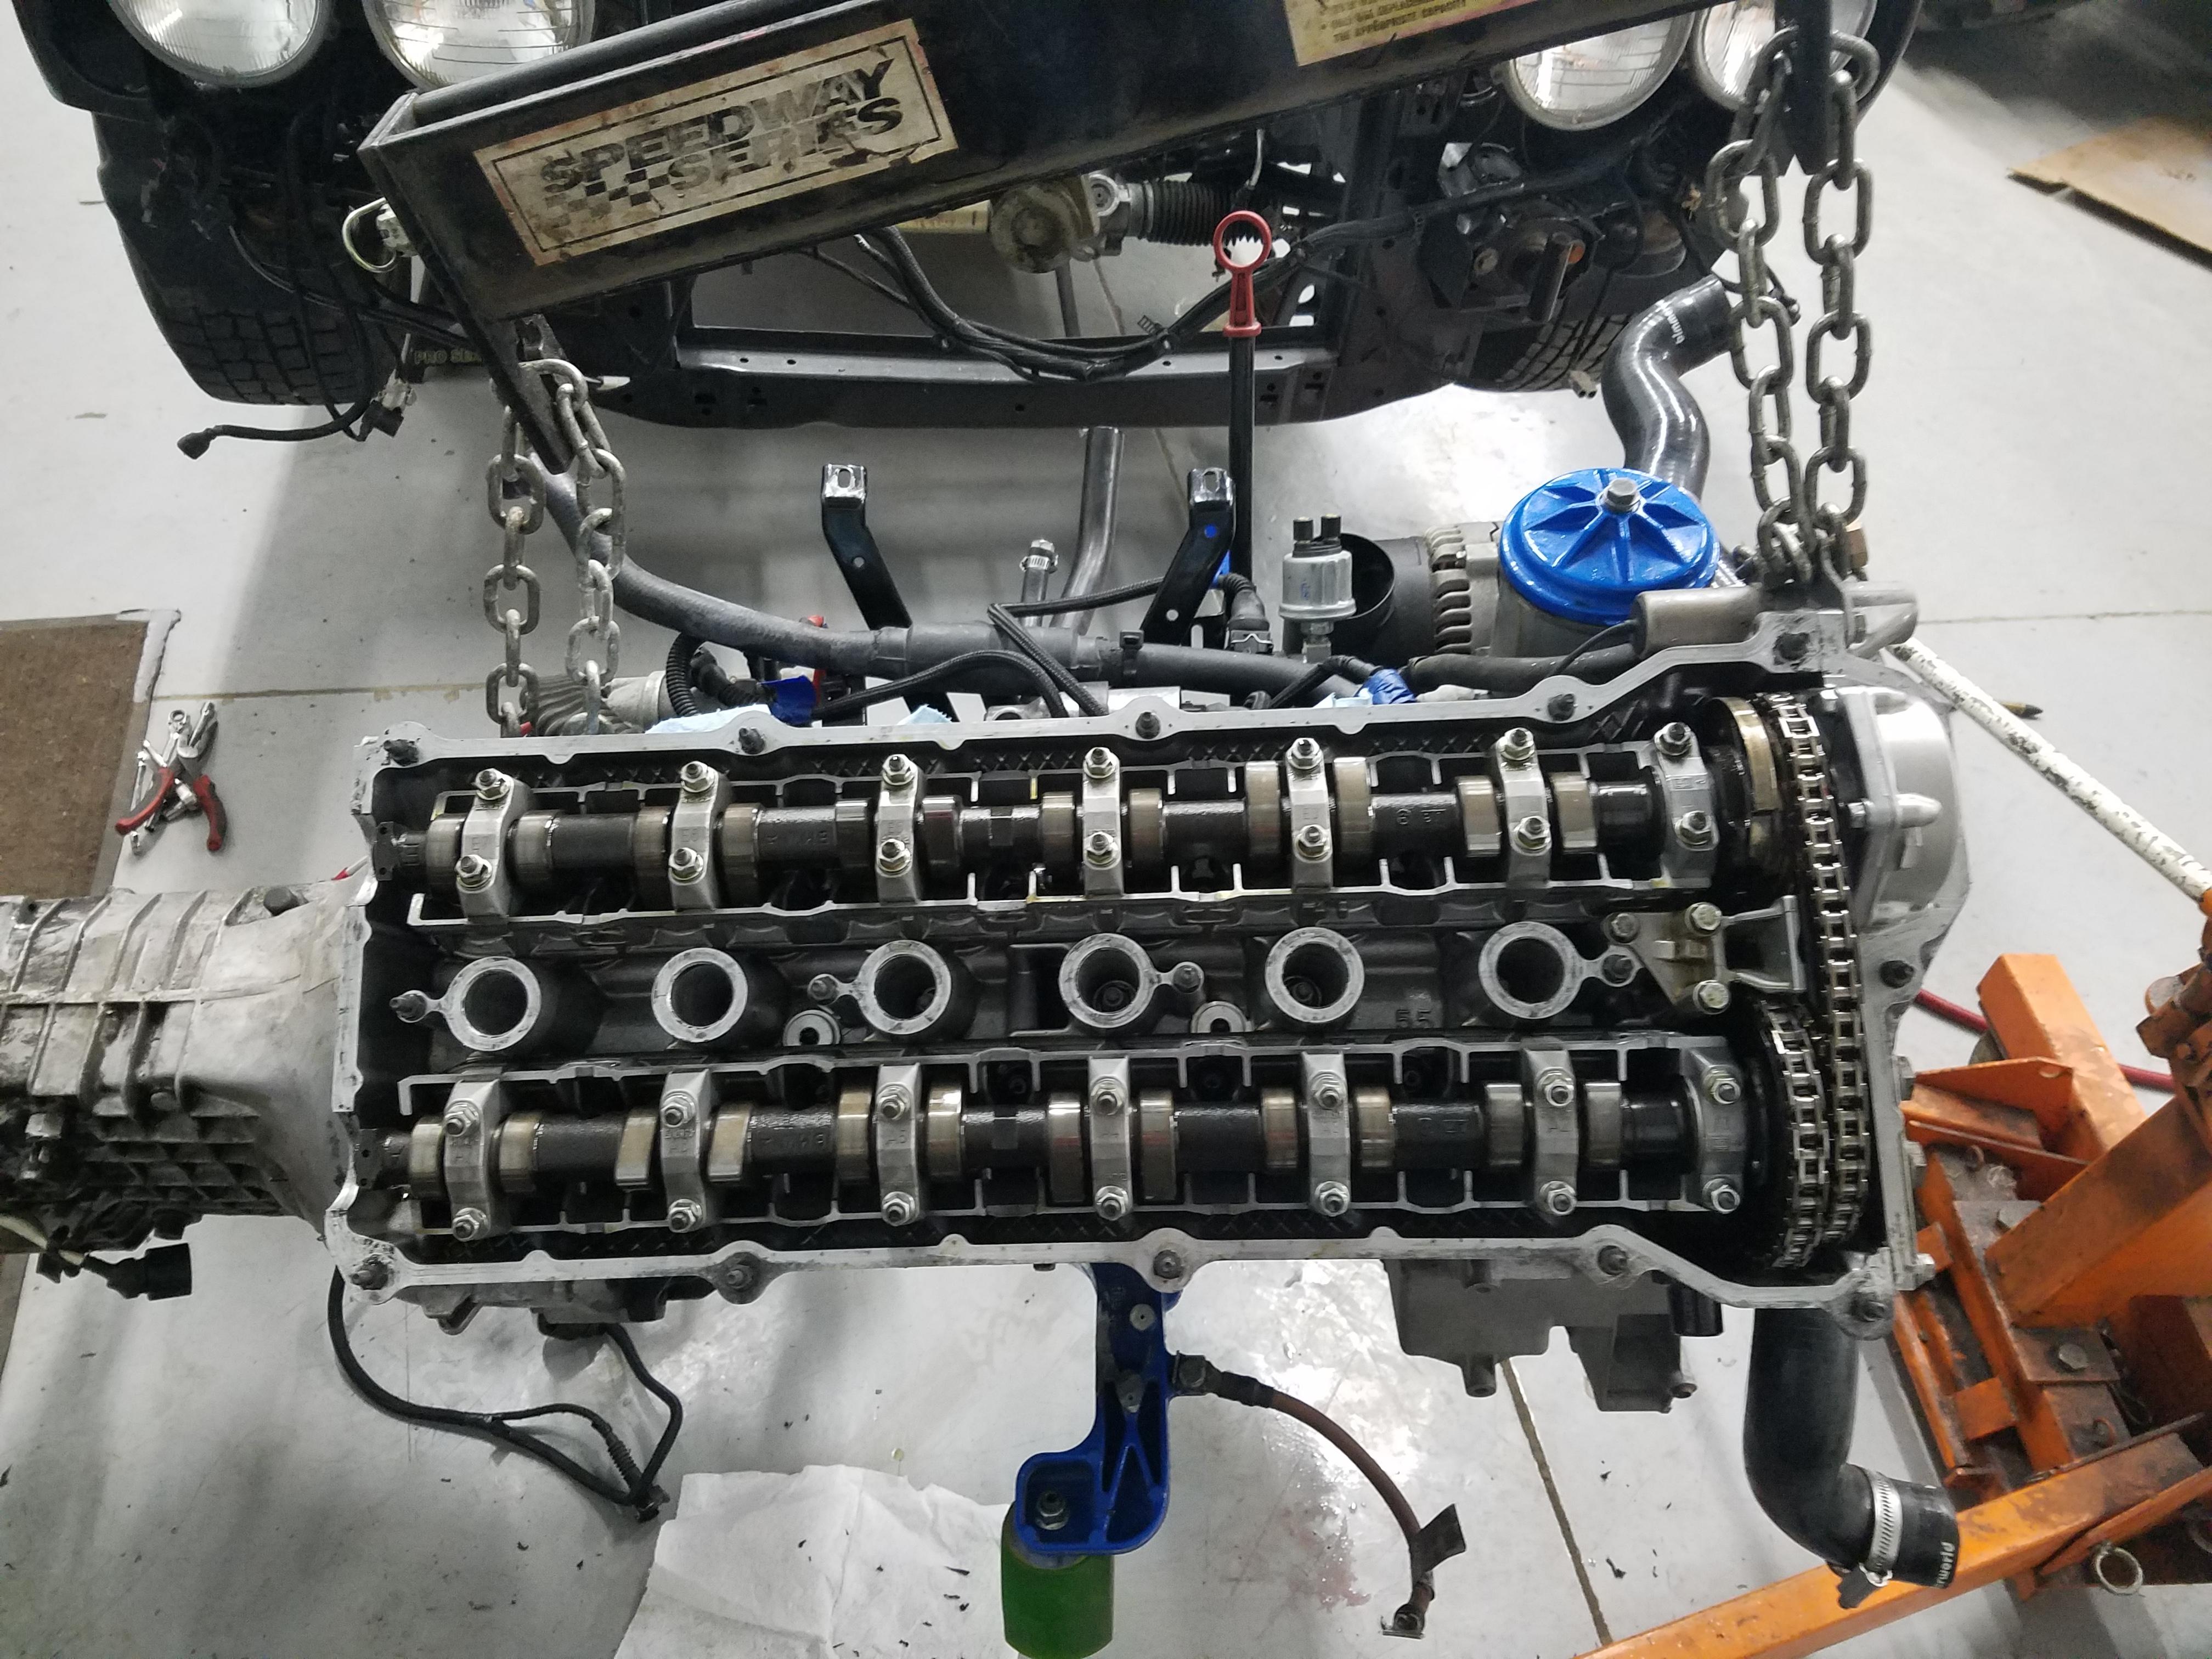
                            With the motor out of the car I went ahead and popped off the valve cover and re-torqued all the head studs. Luckily I did this as I got a 1/4 turn out of a few of them.

                            Cams look good as well as everything else visually.

                            20190124180141.jpg

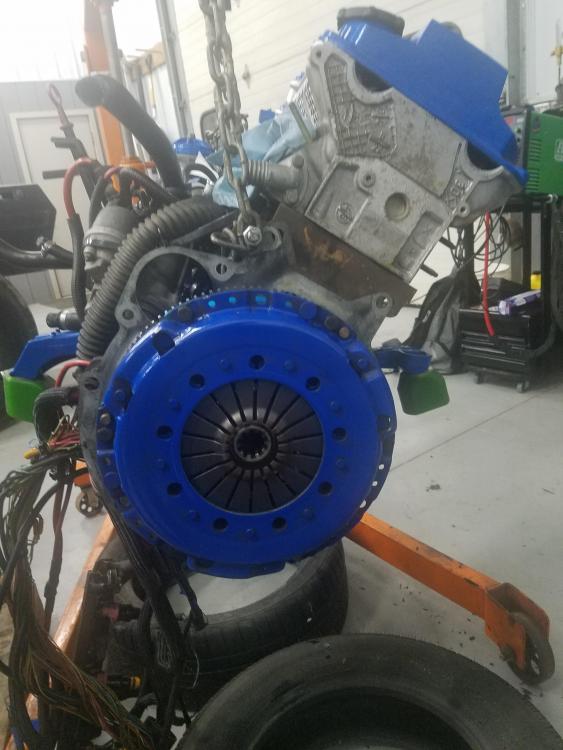
                            After this I went ahead and popped on a new valve cover gasket and torqued her down. Time to pull the trans.

                            20190125223002.jpg

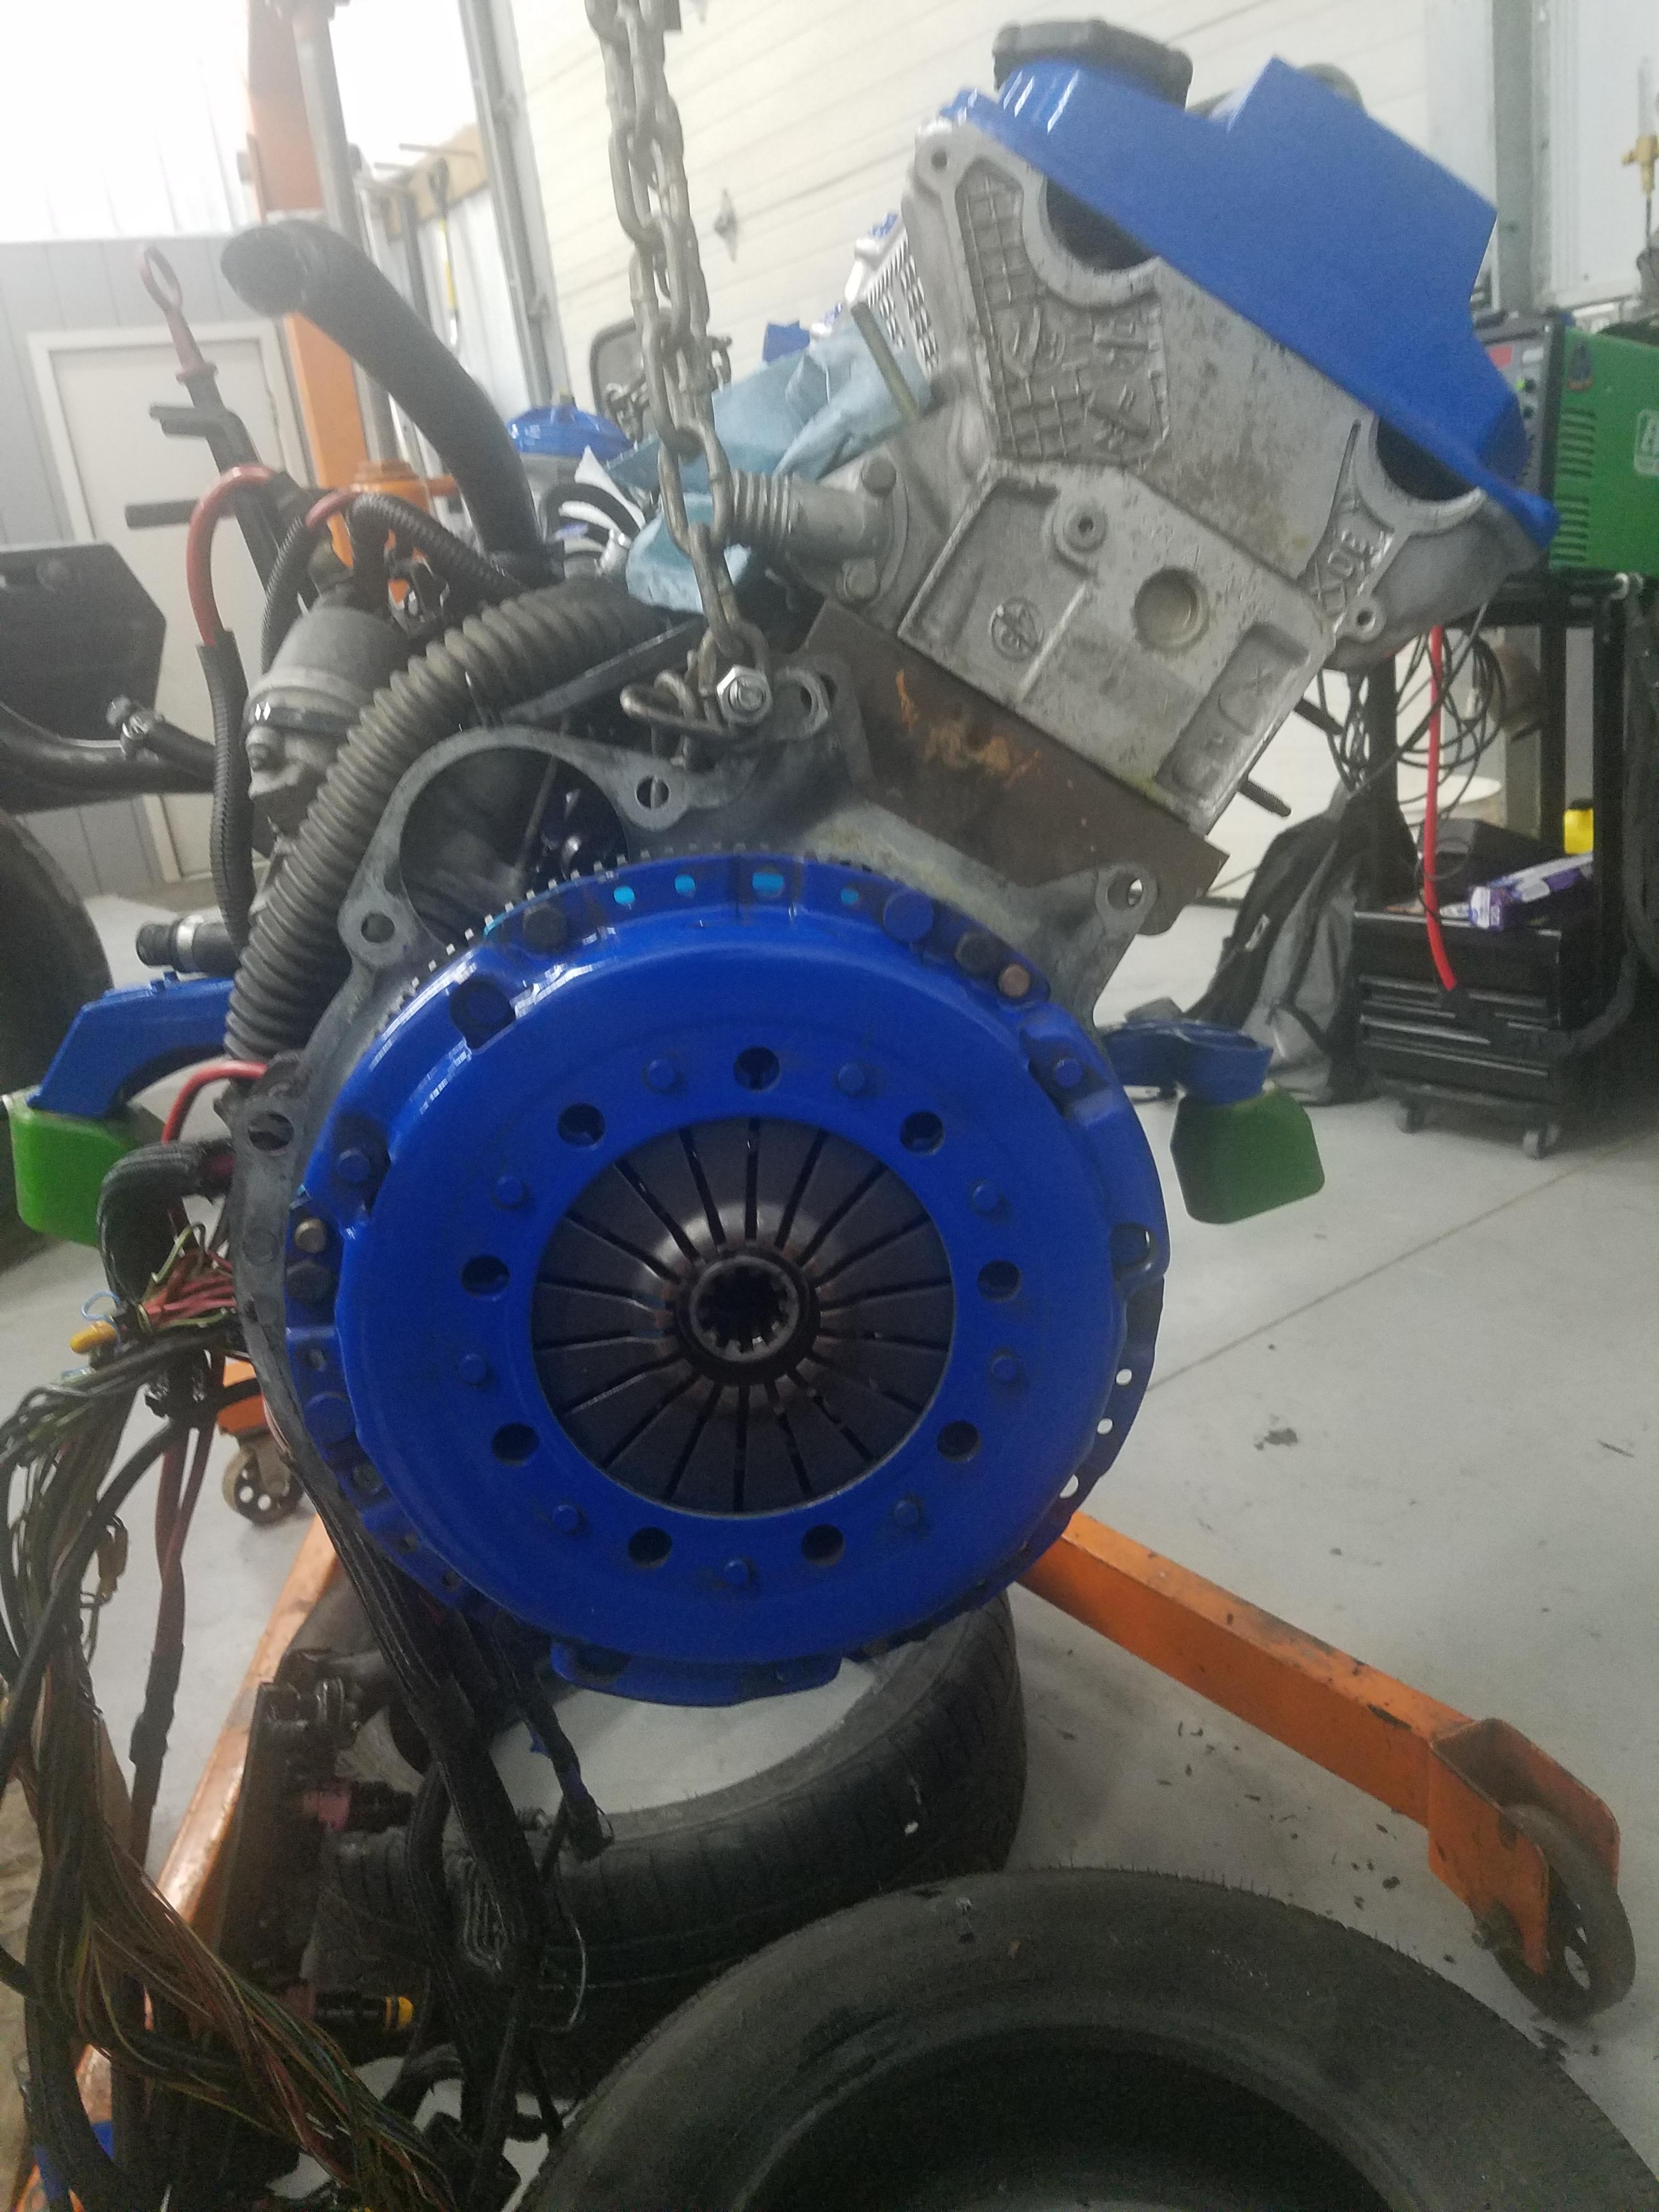
                            Overall clutch looks fine. Also took a look at the input shaft seal and surprisingly saw no dampness or leaks. Unscrewed the fill ports while the trans was sitting on the bench and the level was right up to the top. Started taking a look at the oil pan gasket and I believe the leak was coming from that area which is great cause pan is coming off anyways.

                            20190125235932.jpg

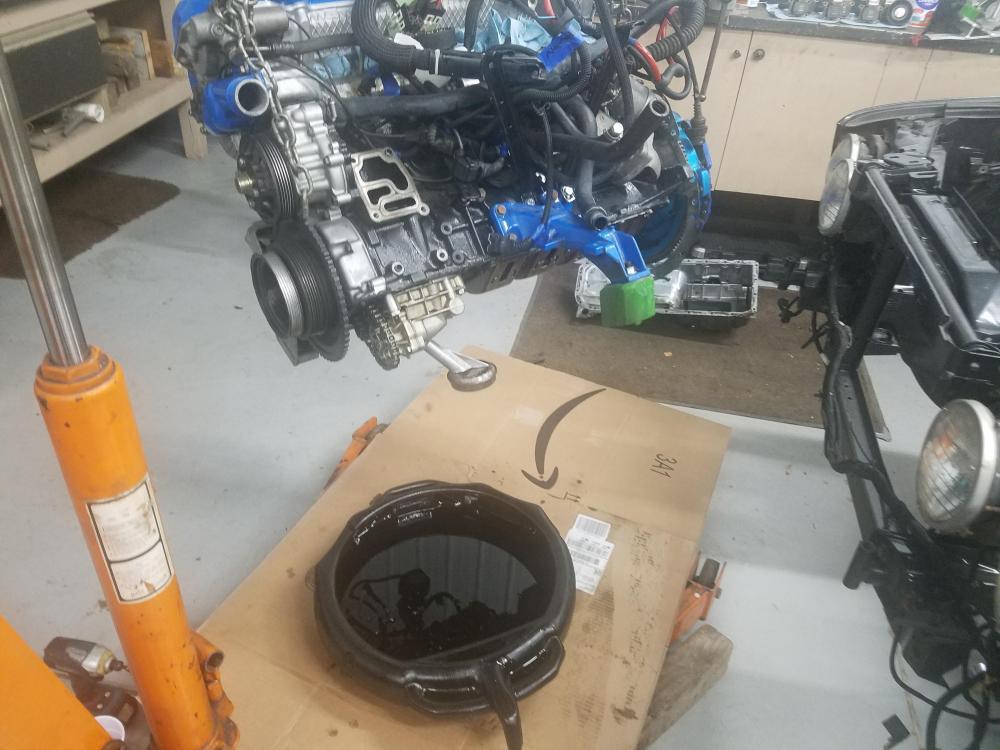
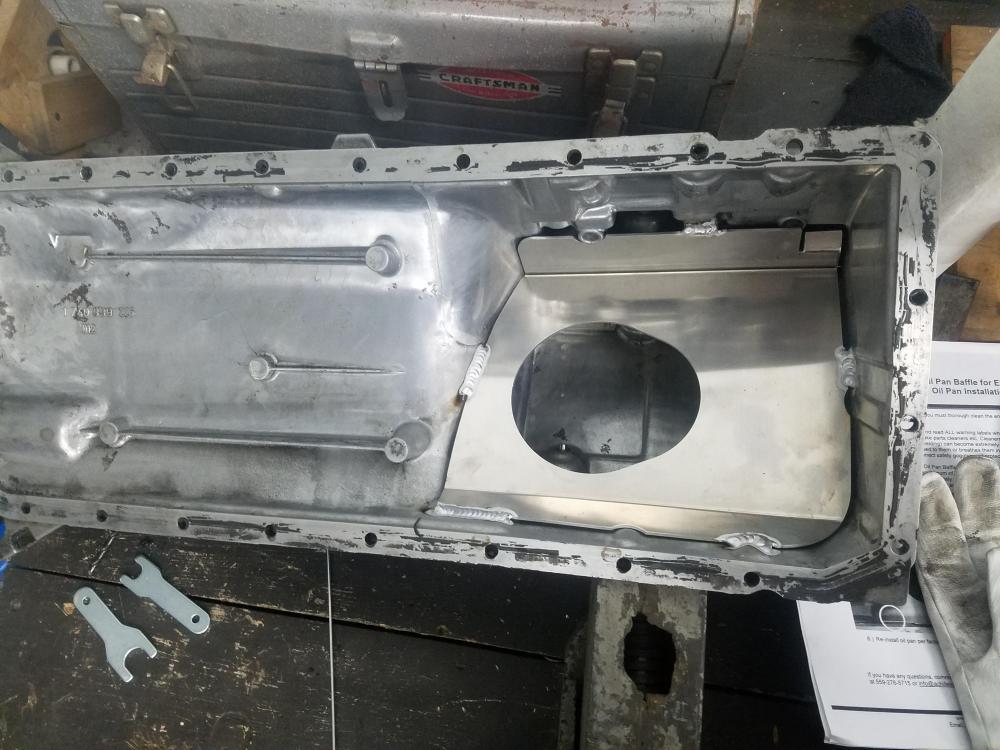
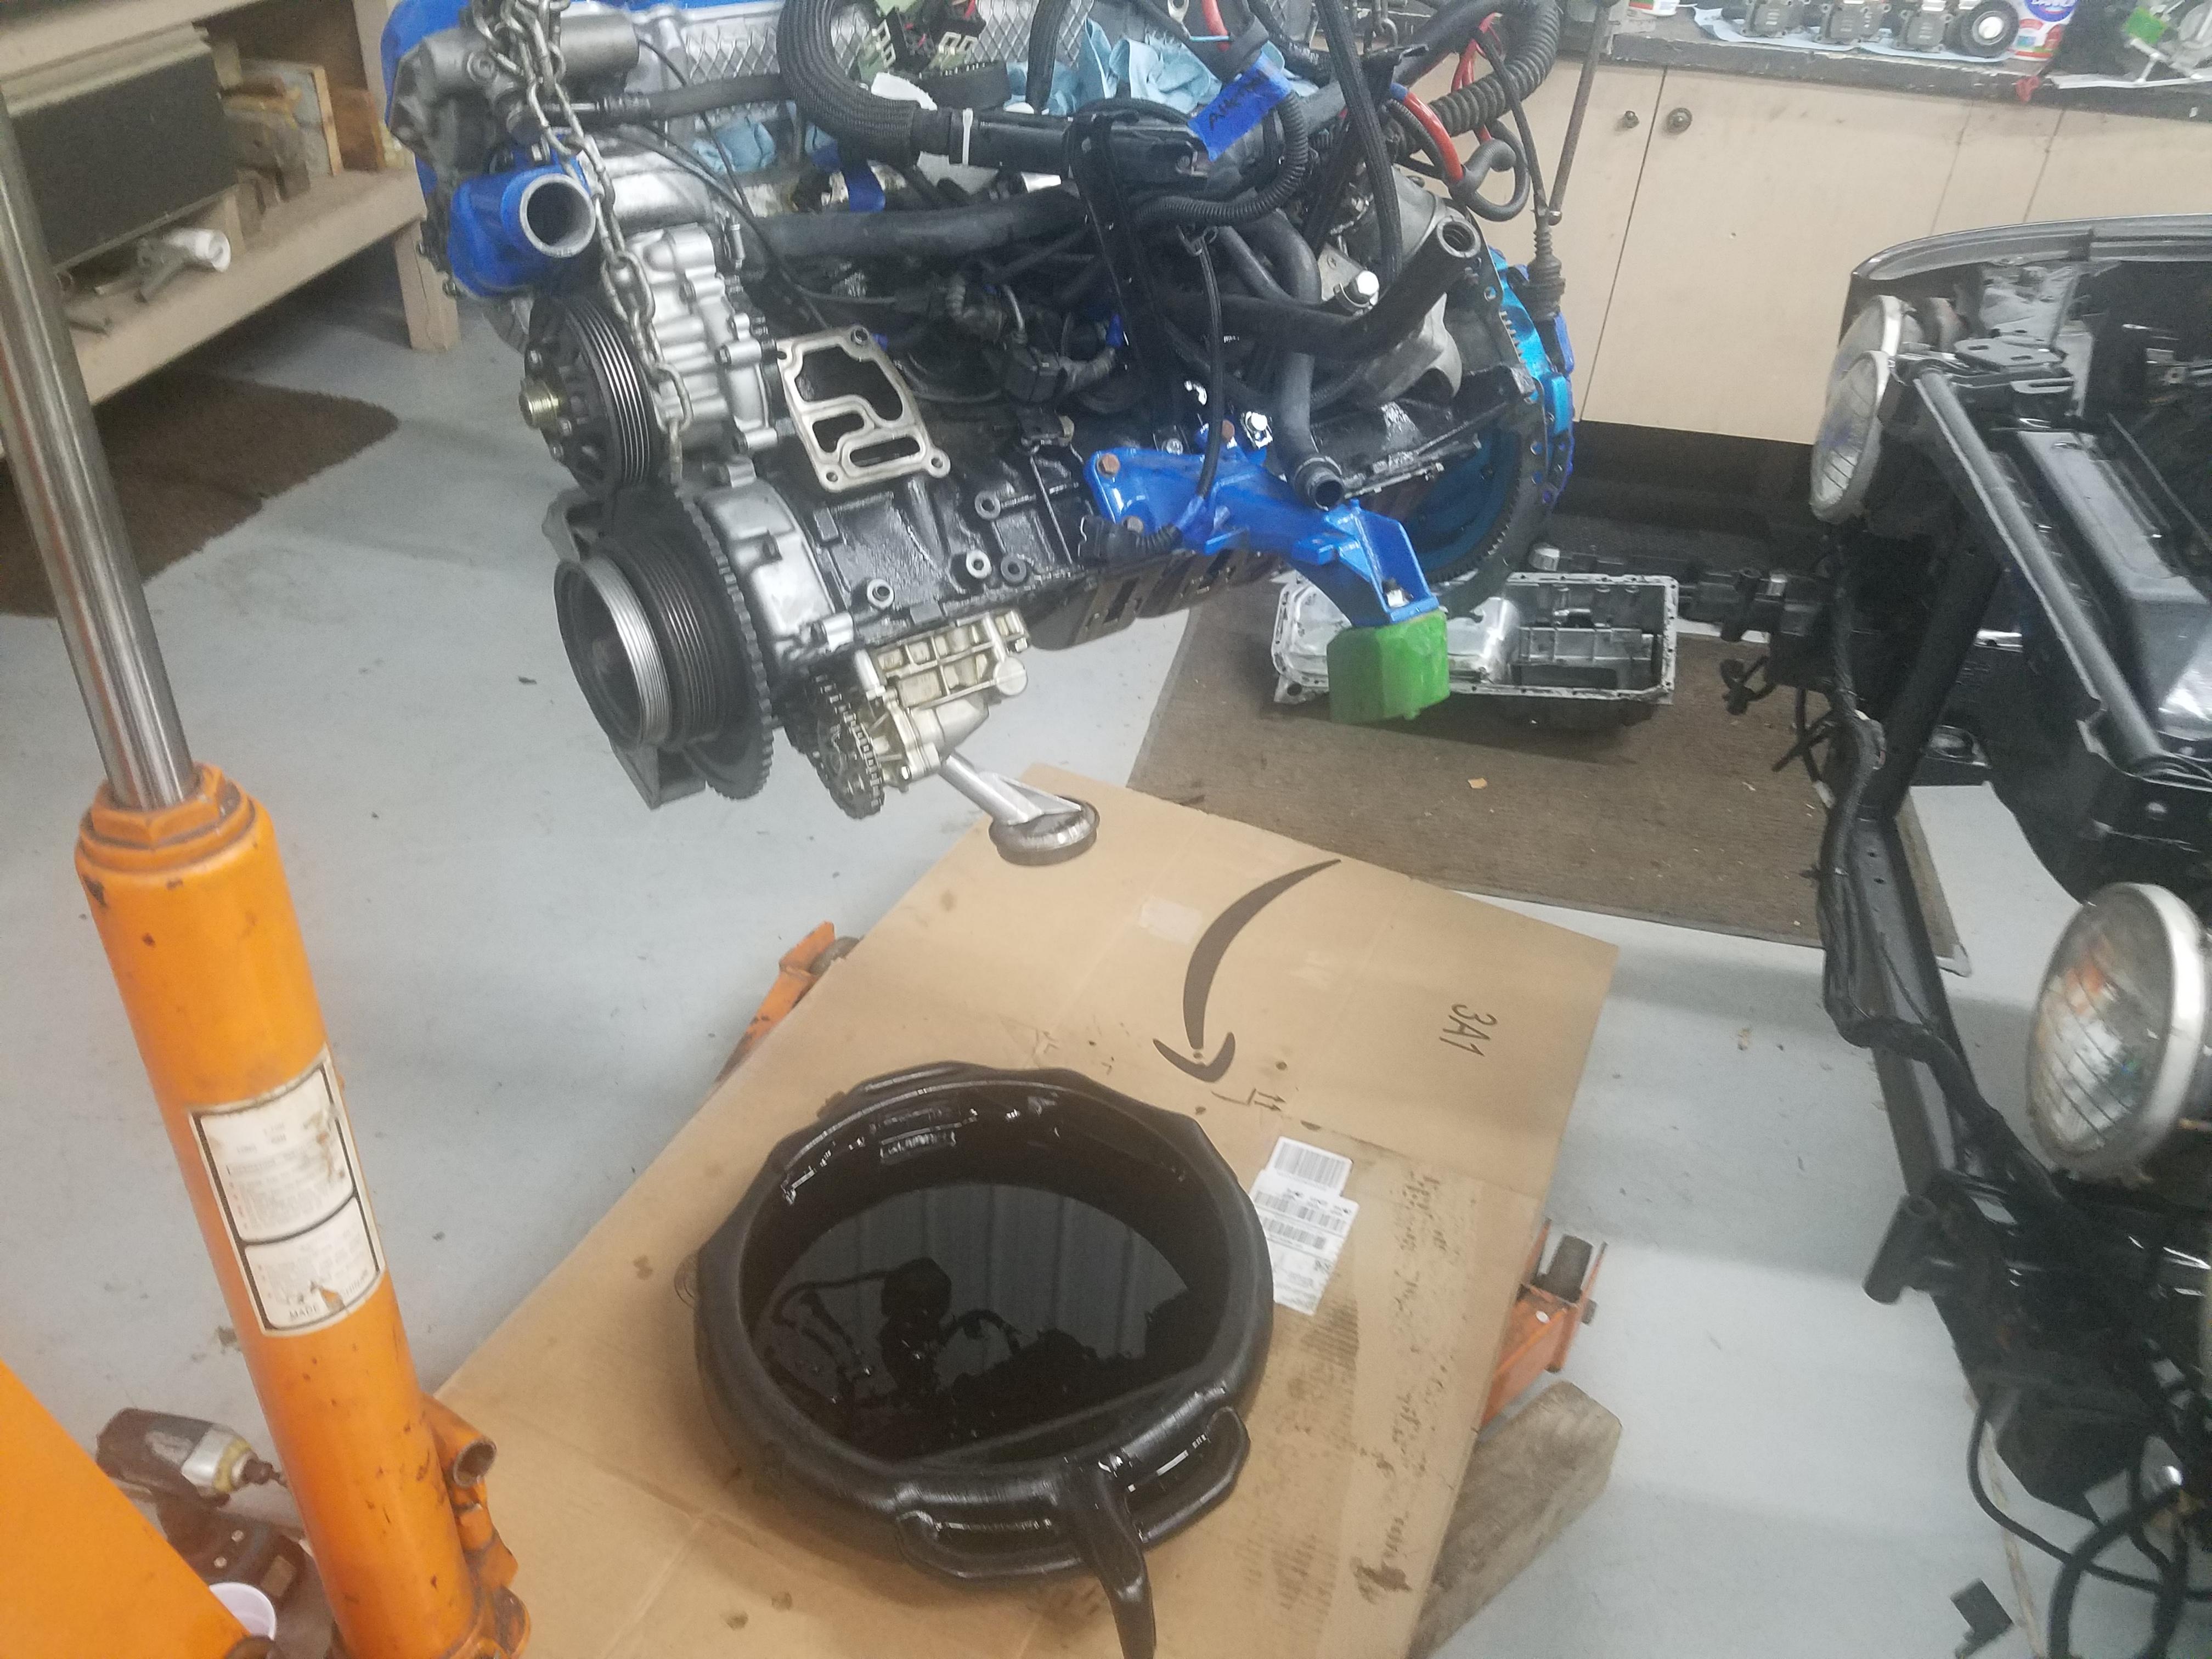
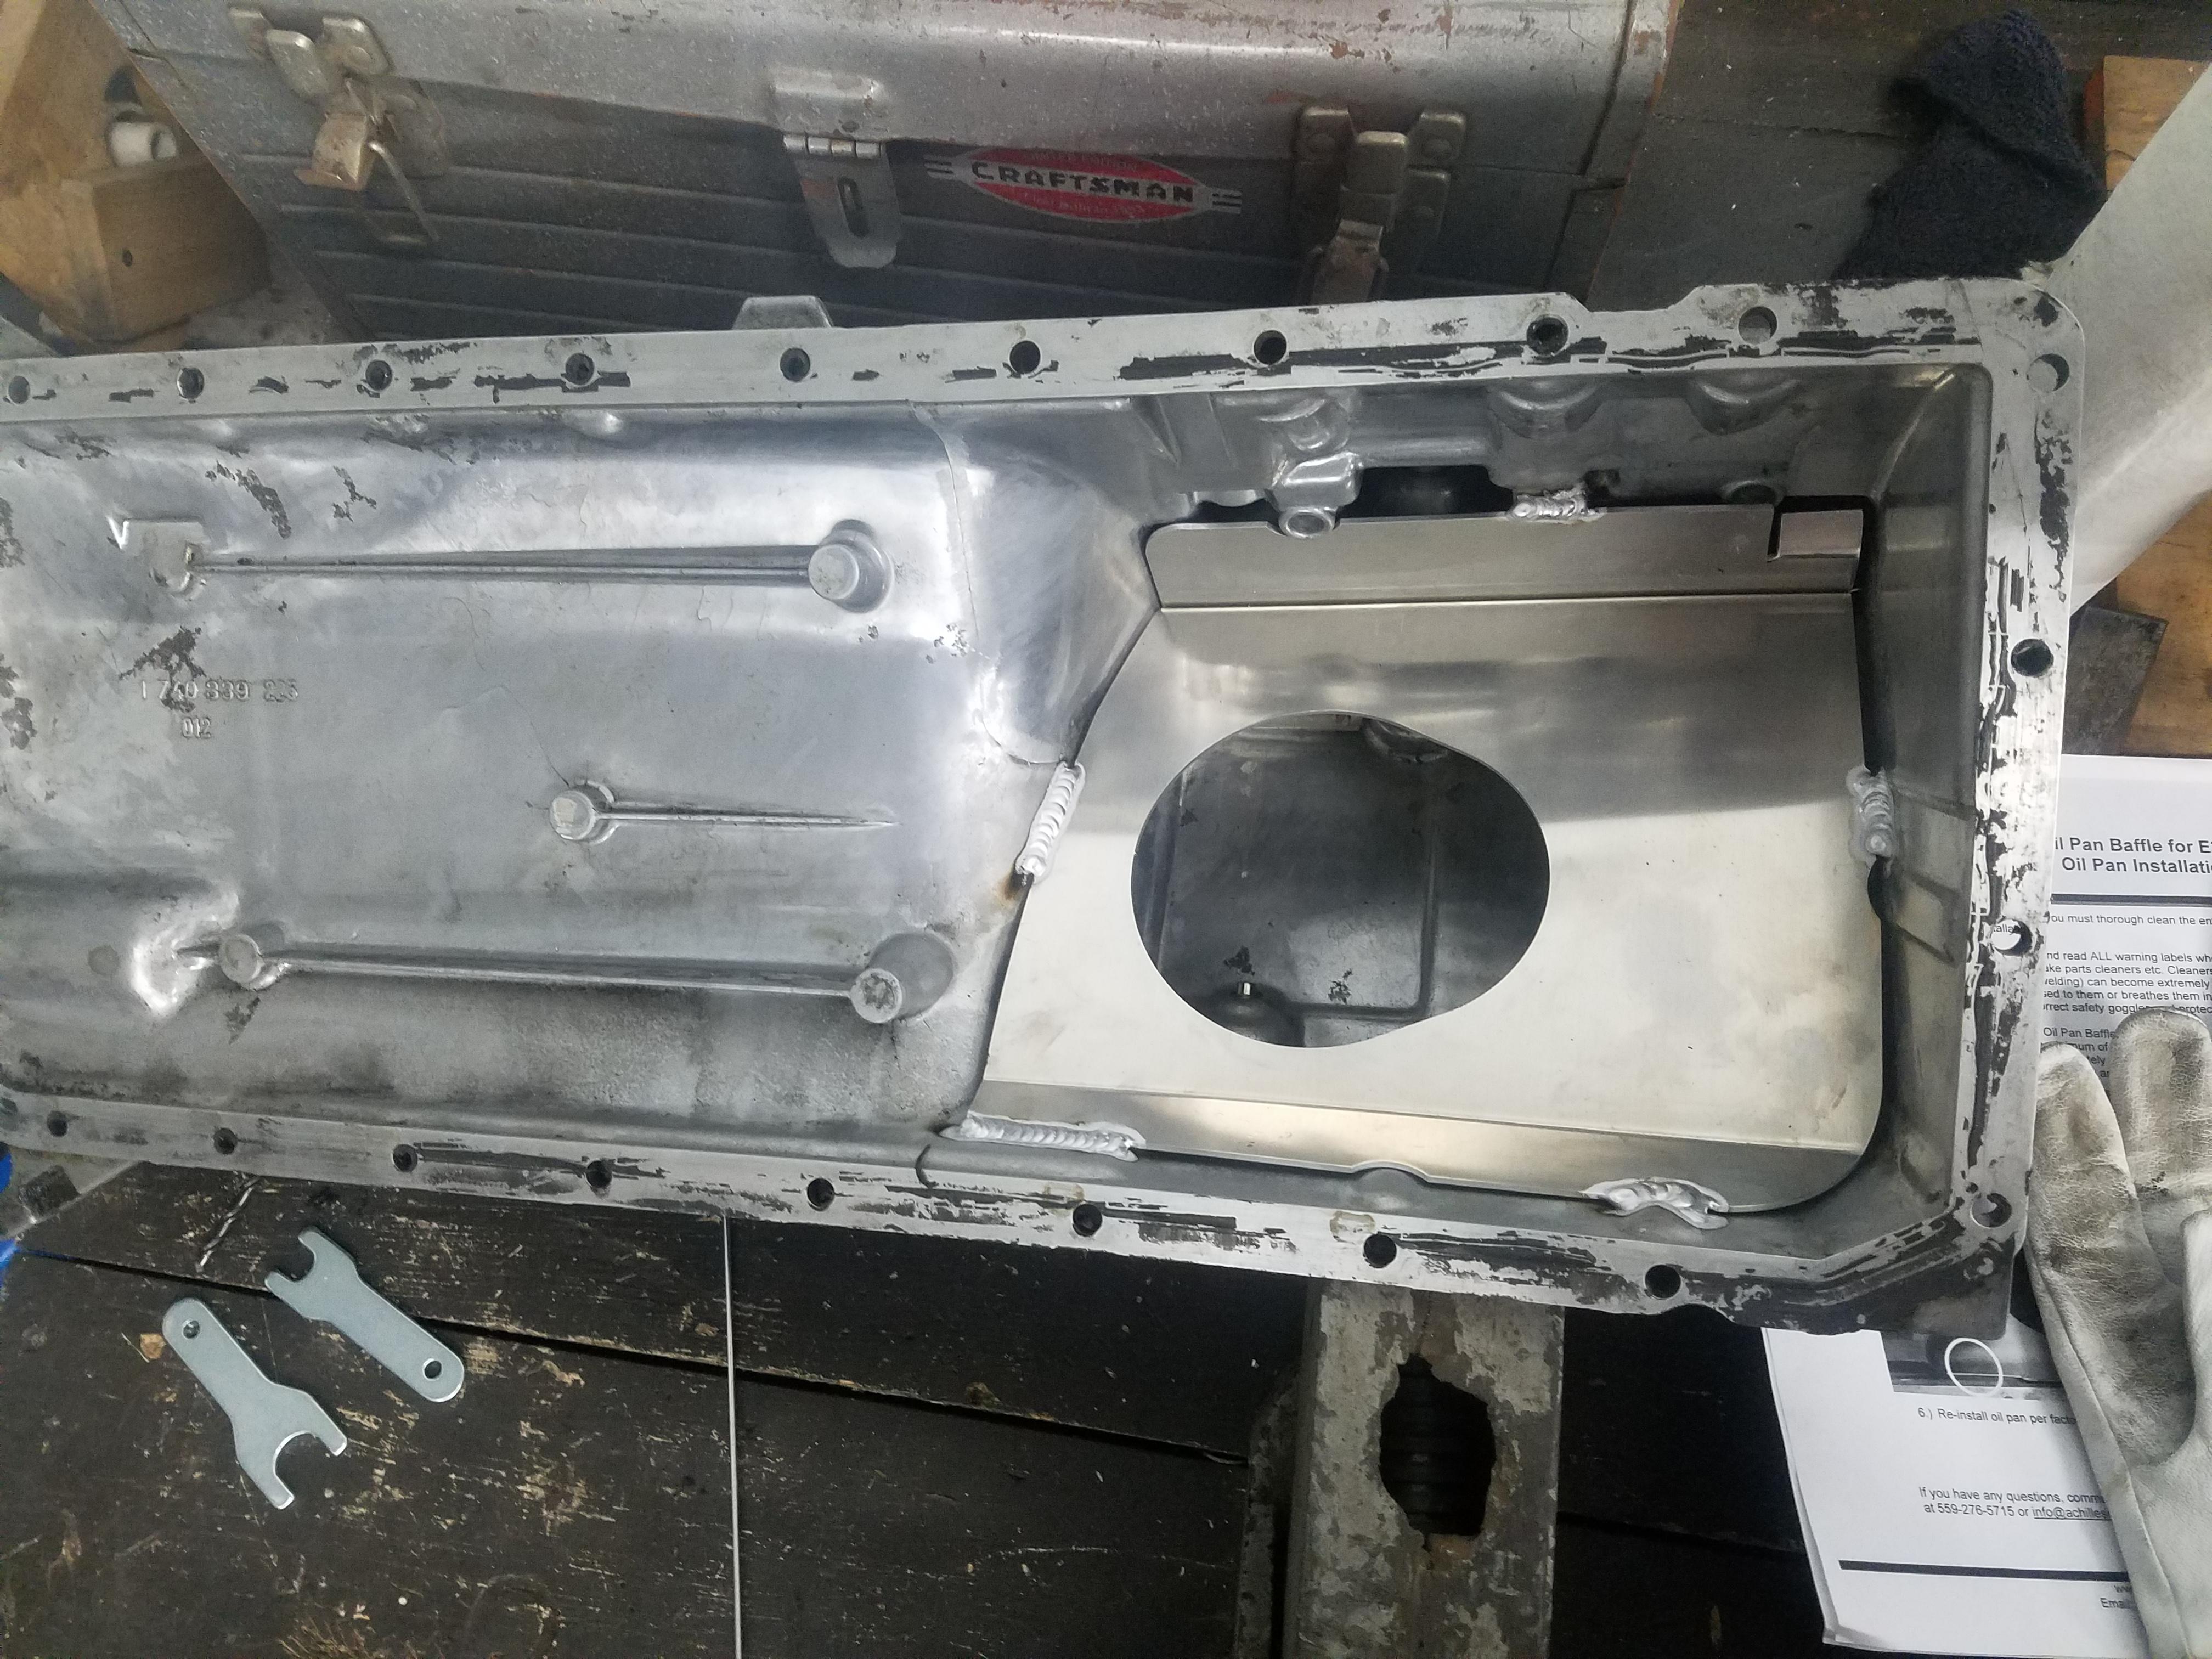
                            With the oil drained I got the stock oil filter housing removed. Took a thorough inspection of the bottom end and was quite pleased with the way everything is looking. Threw the oil pan on the bench and scrubbed er clean as well as drilling out the rivet holding in the stock e34 baffle.

                            Following day my buddy stopped by and welded in the new Achilles baffle.

                            20190128124902.jpg

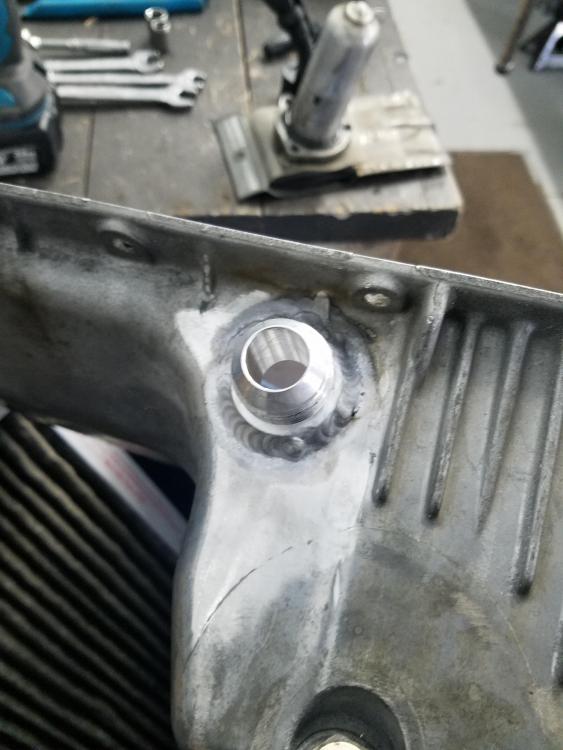
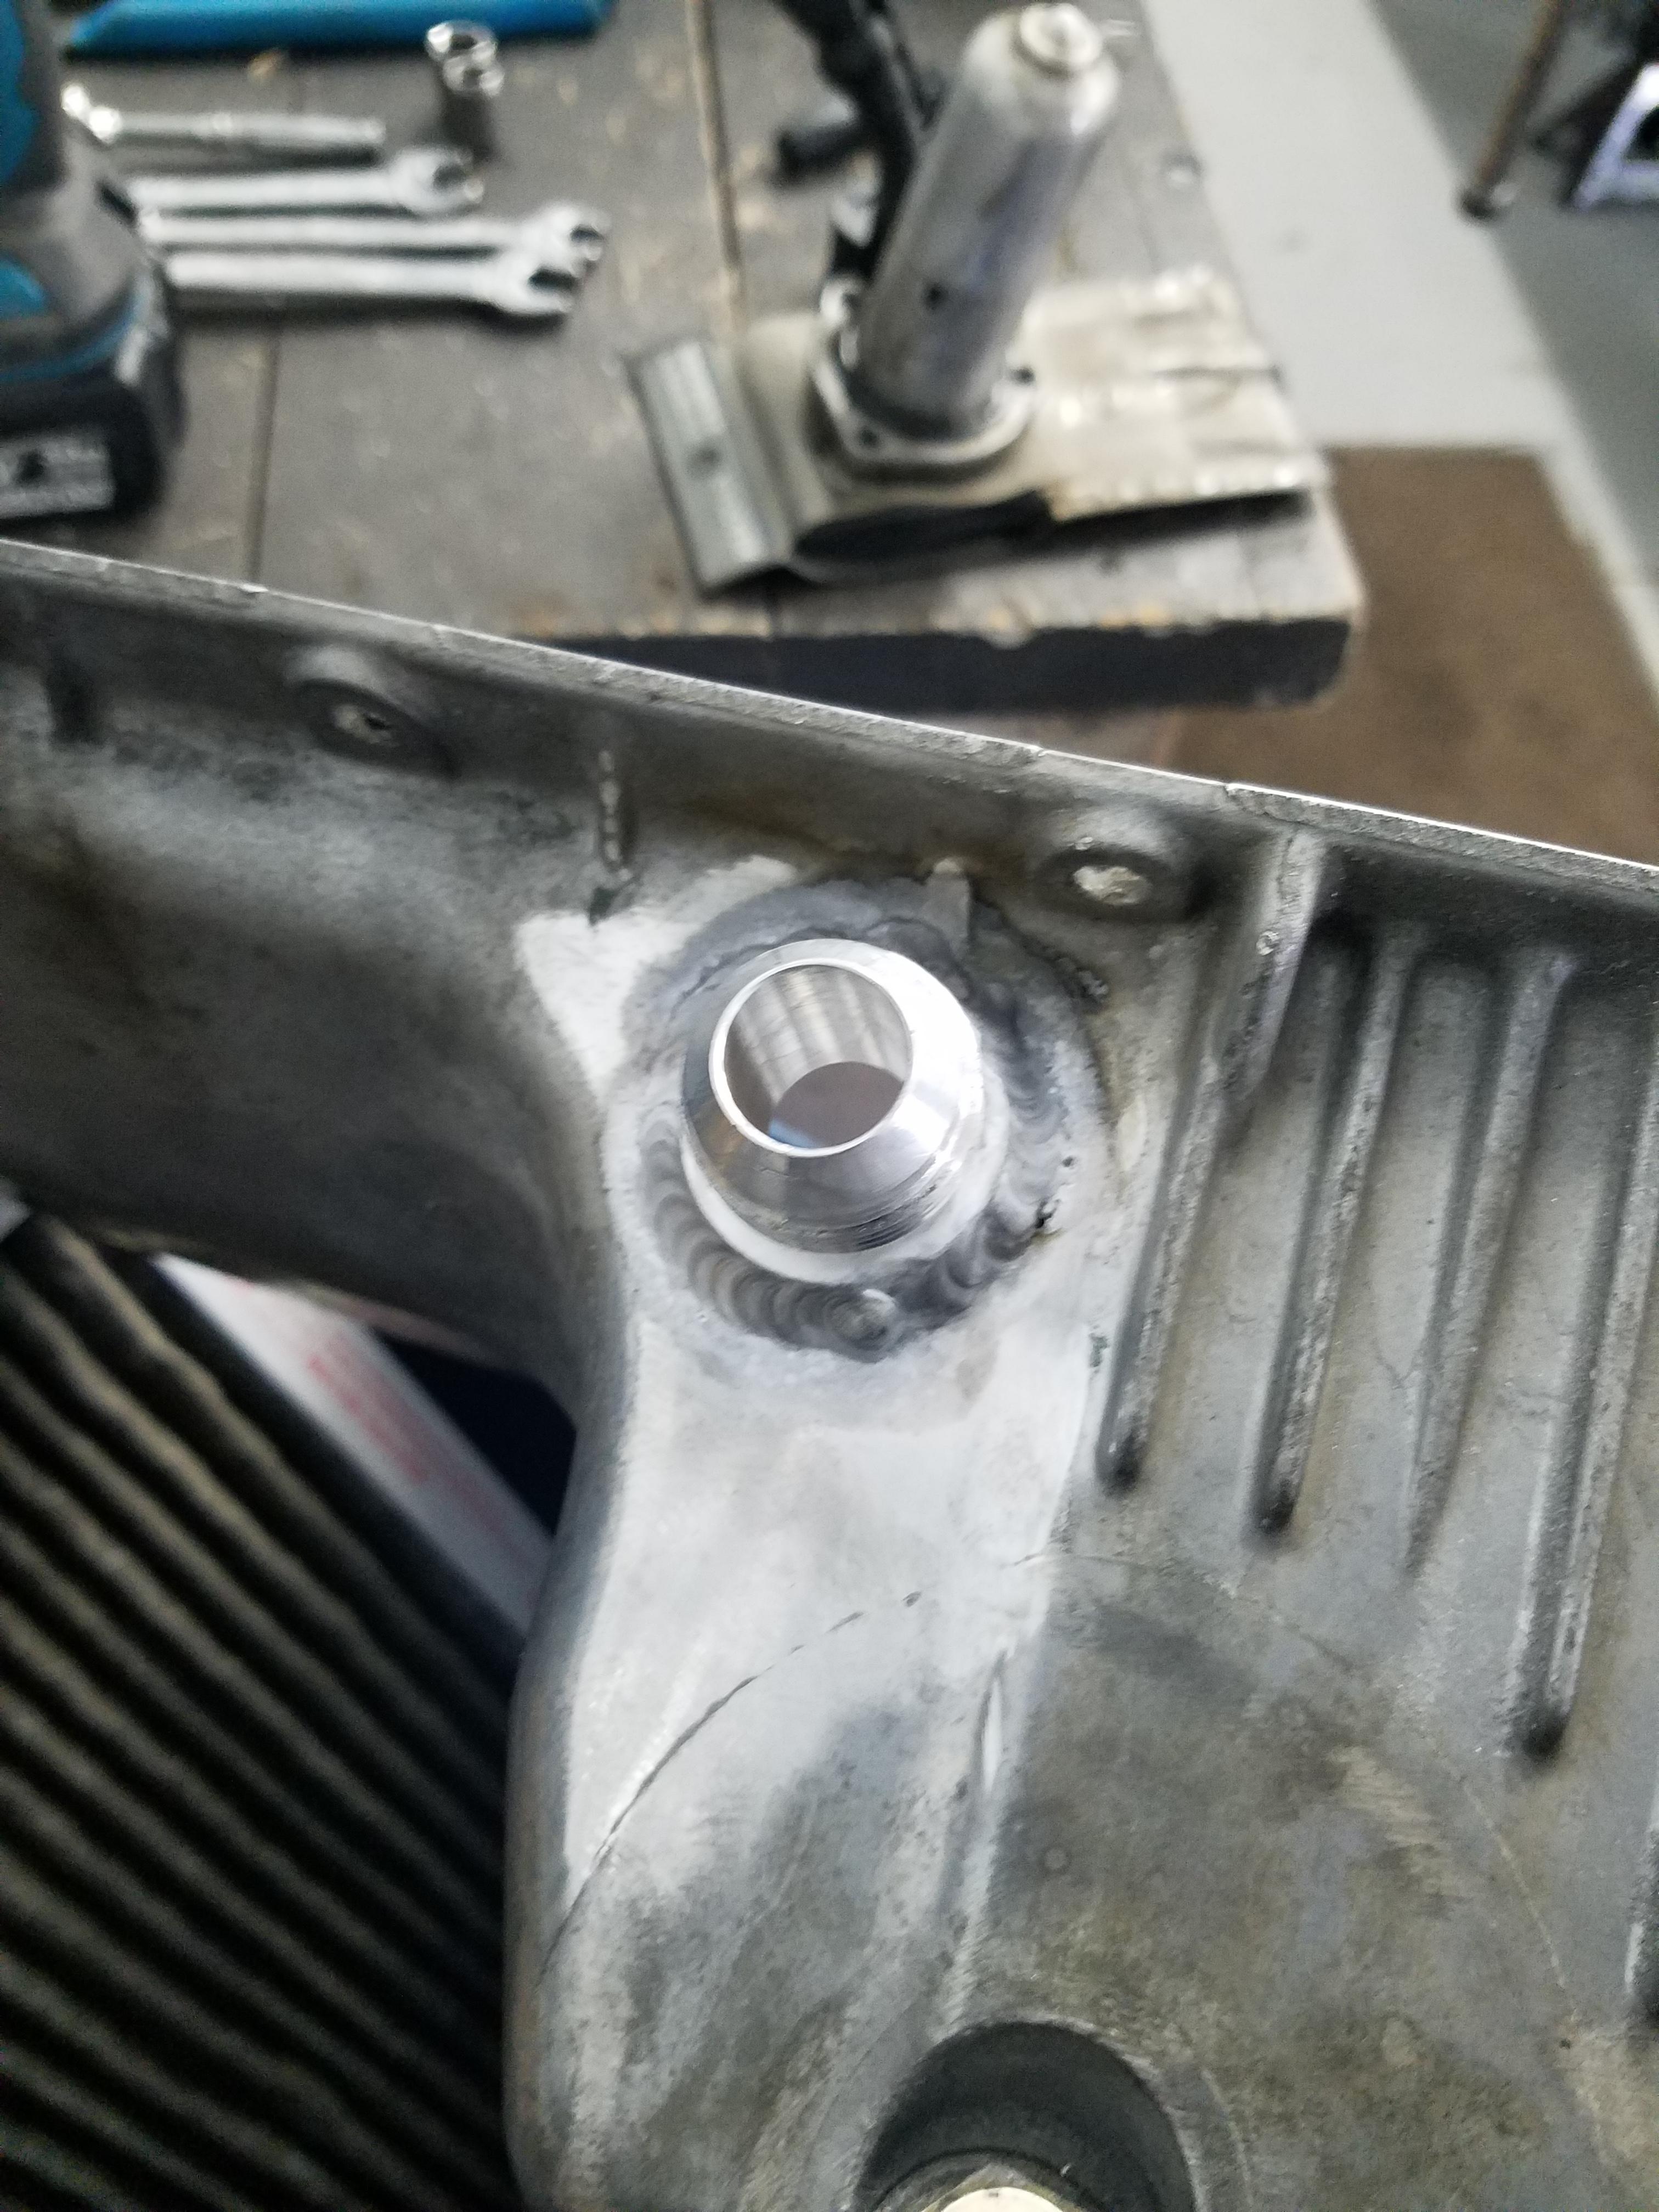
                            Once done with that we mounted the pan back on the engine with a couple bolts. Mounted the manifold and turbo and got a location for the oil drain line -12 an fitting. Pulled the pan, drilled a hole and welded er in.

                            20190129170430.jpg

                            With that done I got to work on removing all the old rtv, always a good time 🙄

                            Now, initially I ran a oil pan gasket with rtv on both sides. But, this time I decided to just run rtv with no gasket and I think it's gonna seal just as good if not better then with the gasket, we shall see.

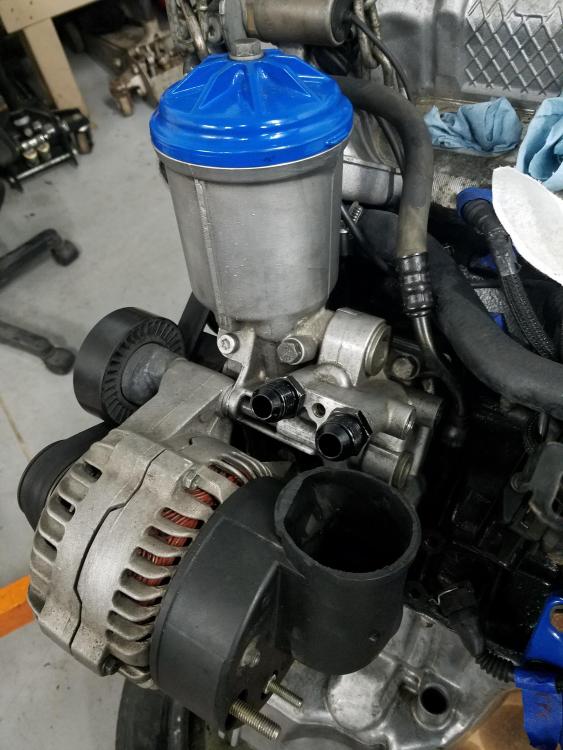
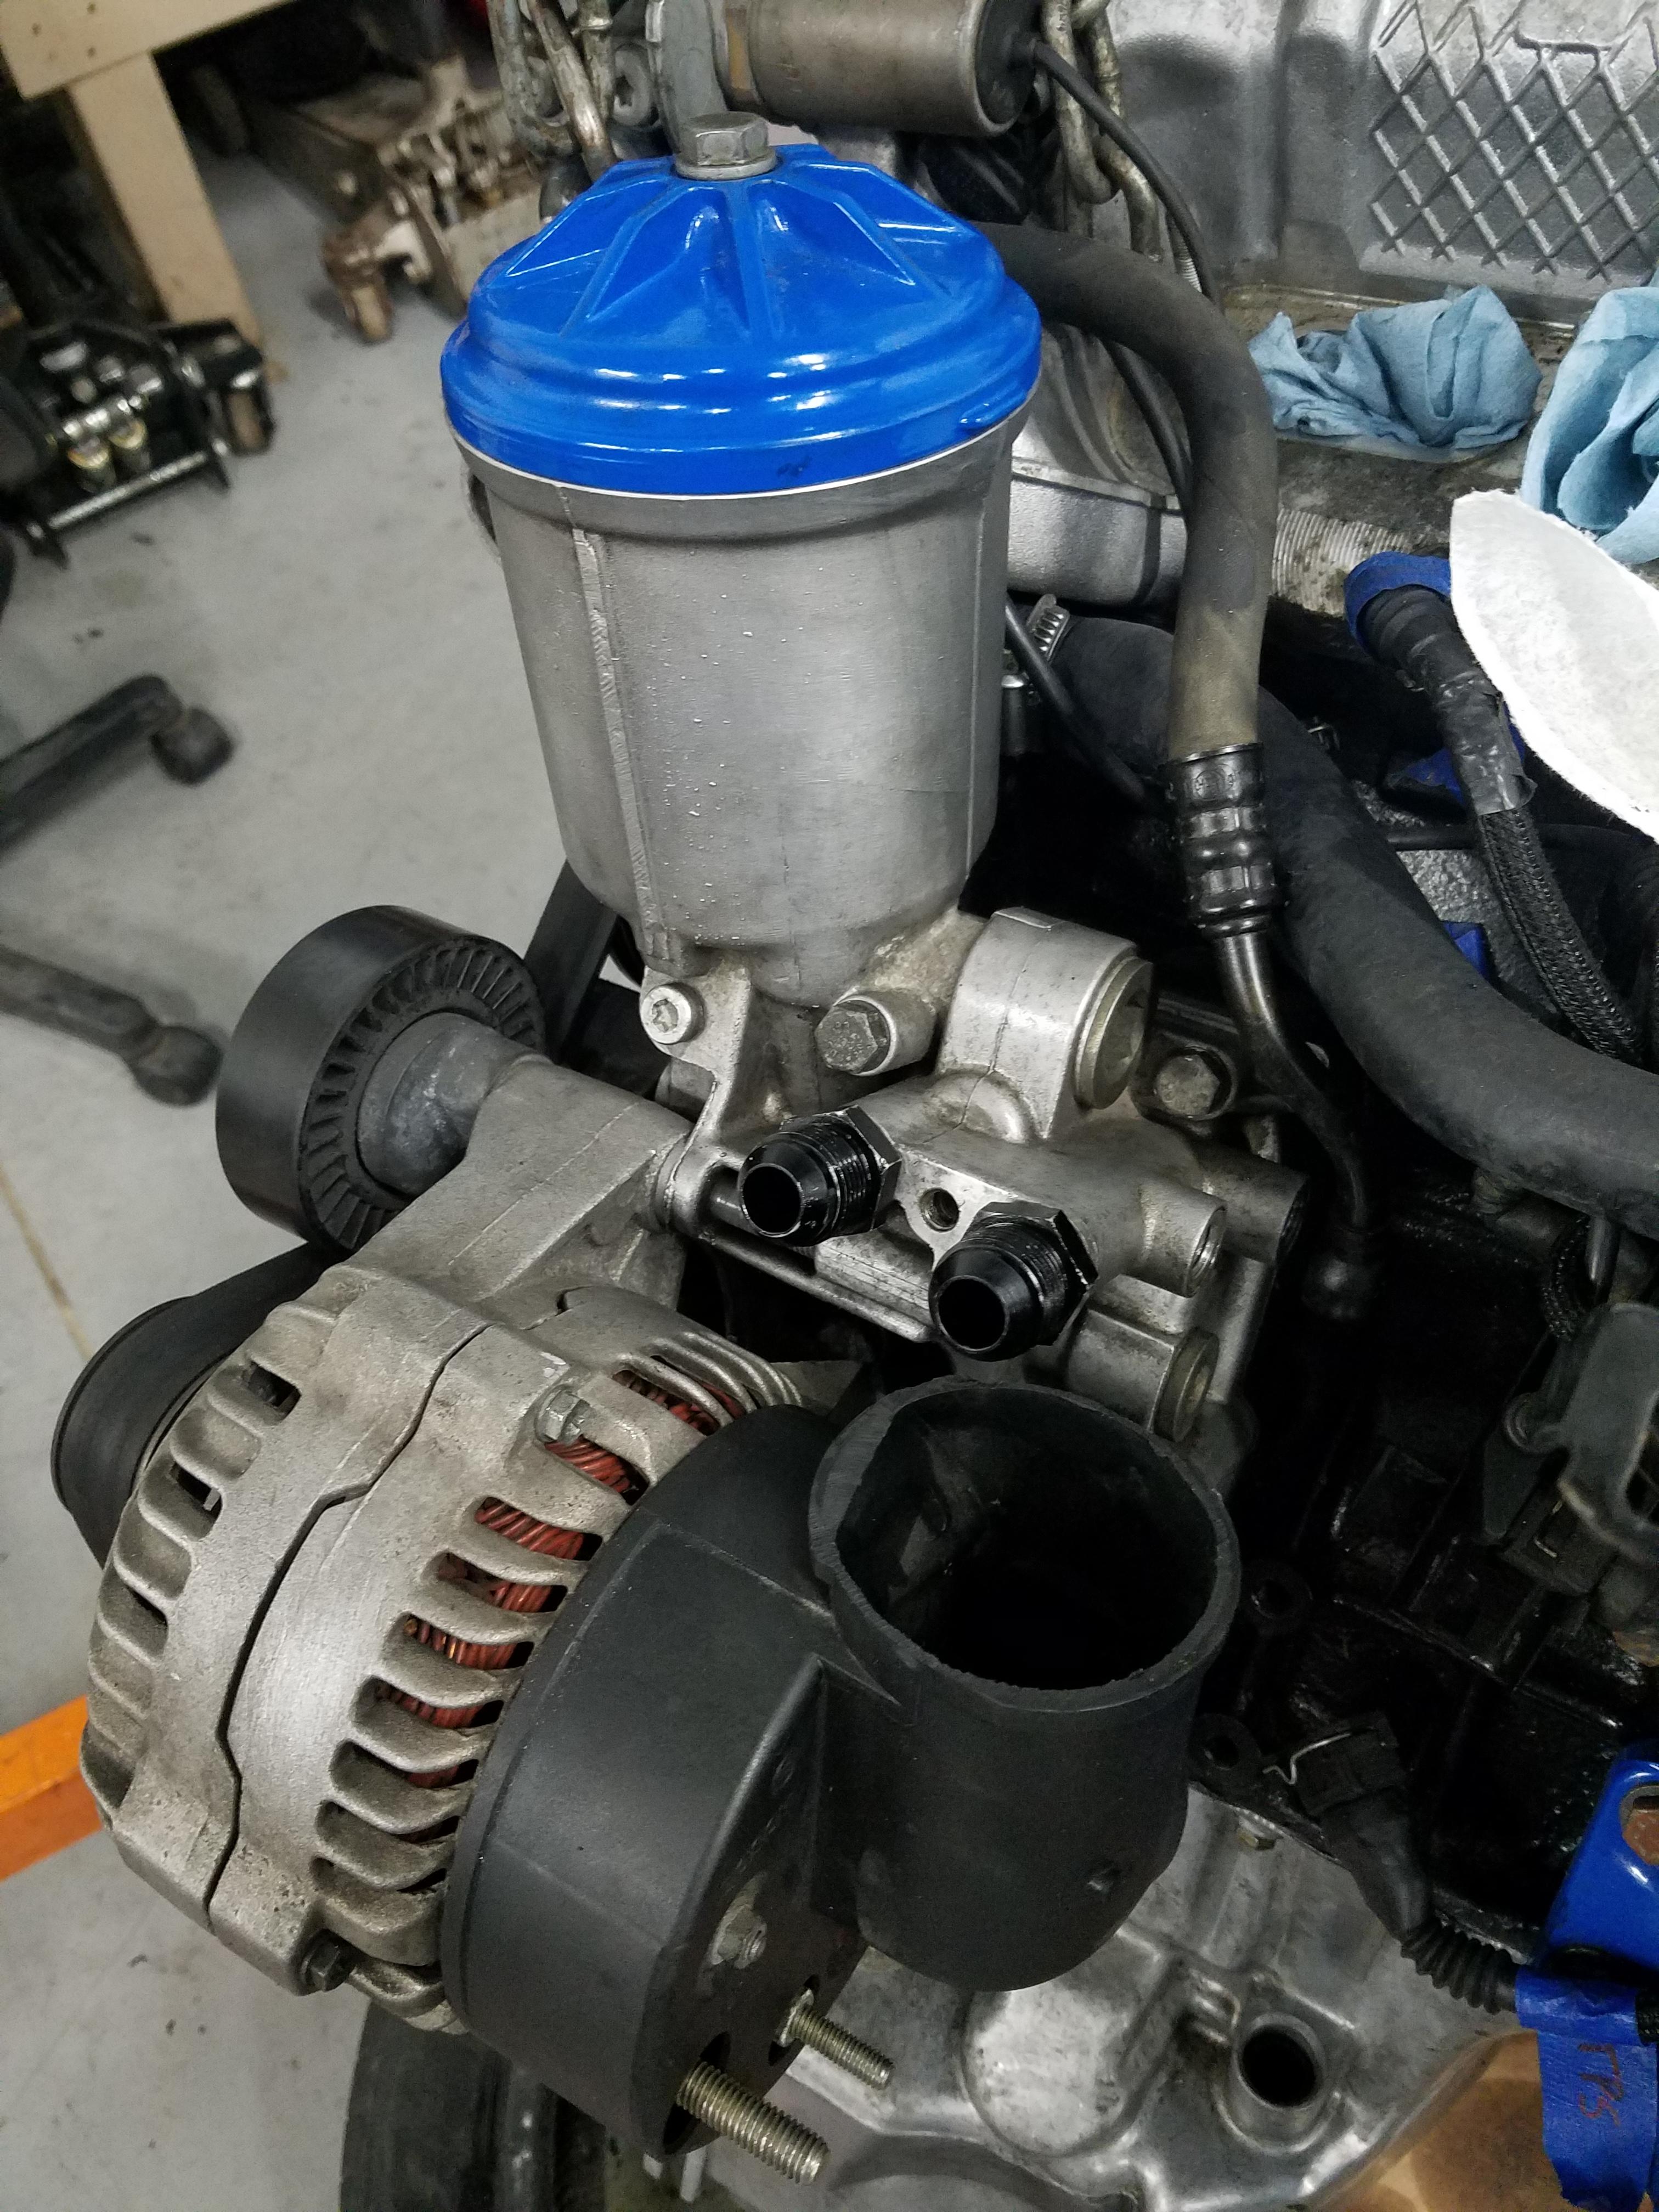
                            Also got the s54 housing cleaned up and mounted with a fresh gasket.

                            20190129185957.jpg

                            20190129190019.jpg

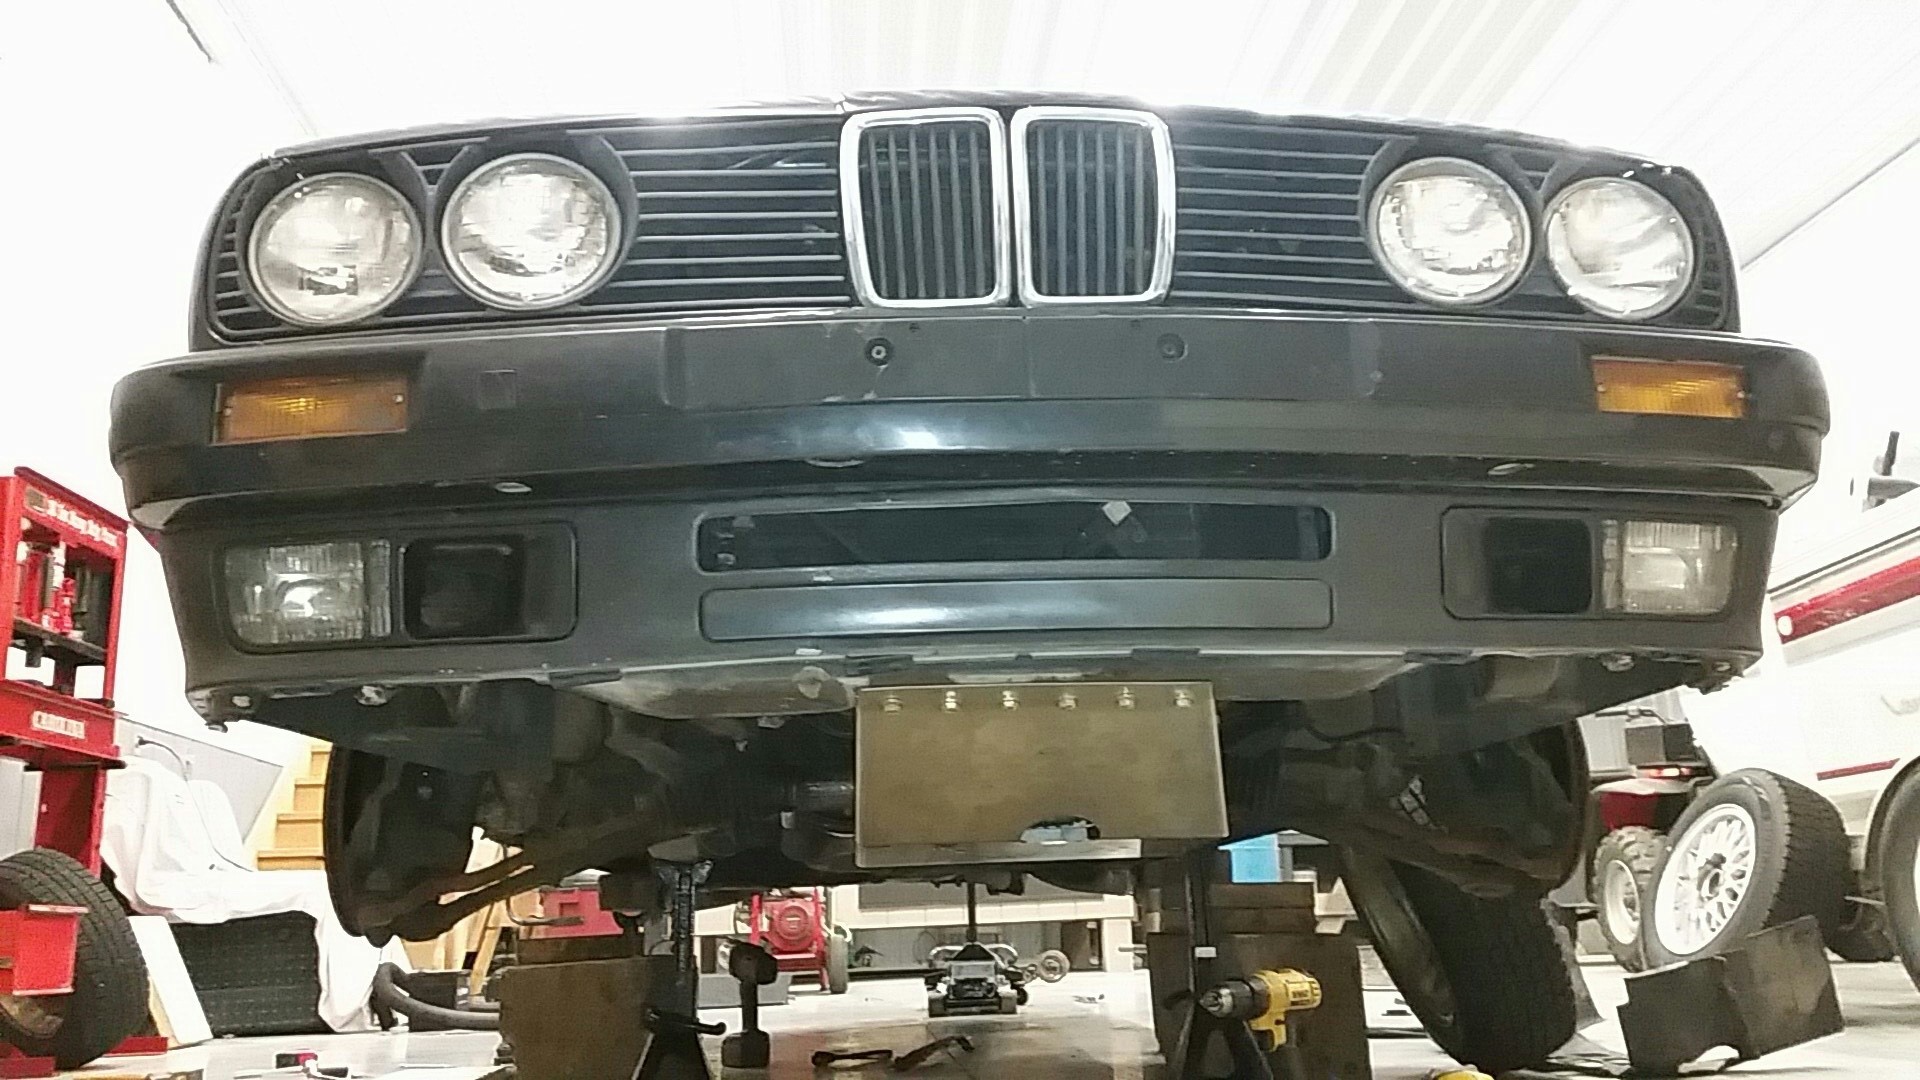
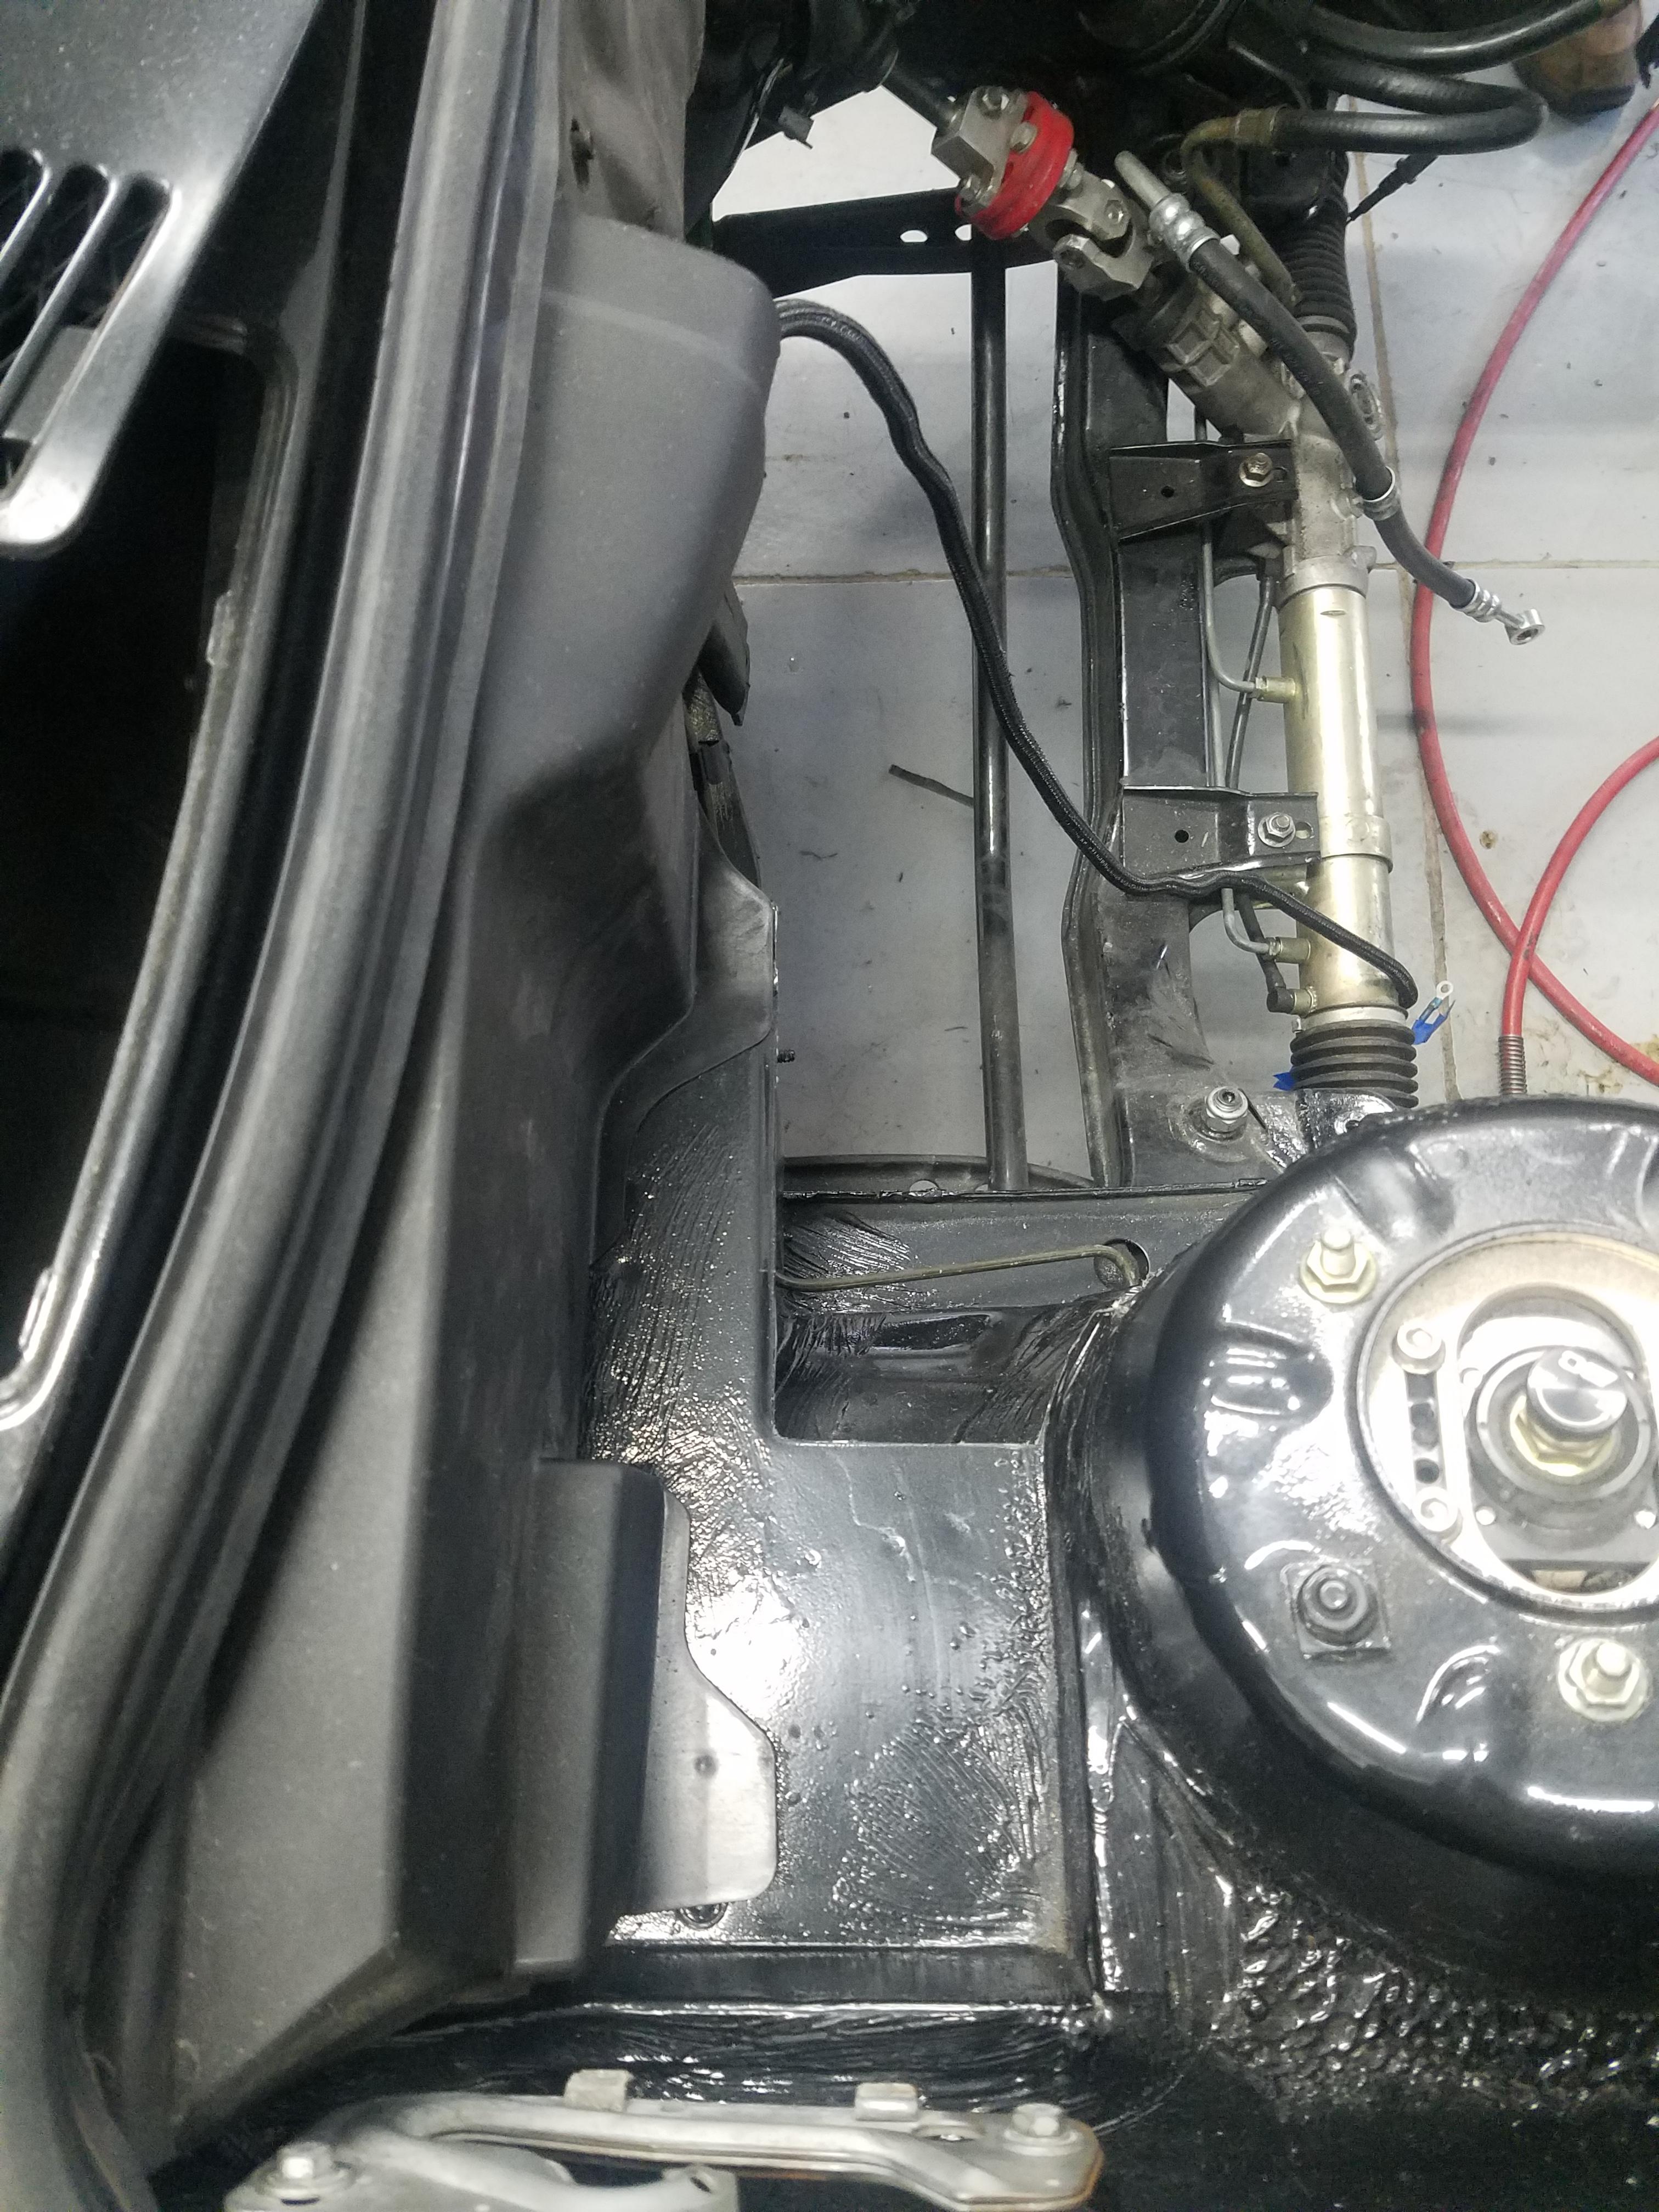
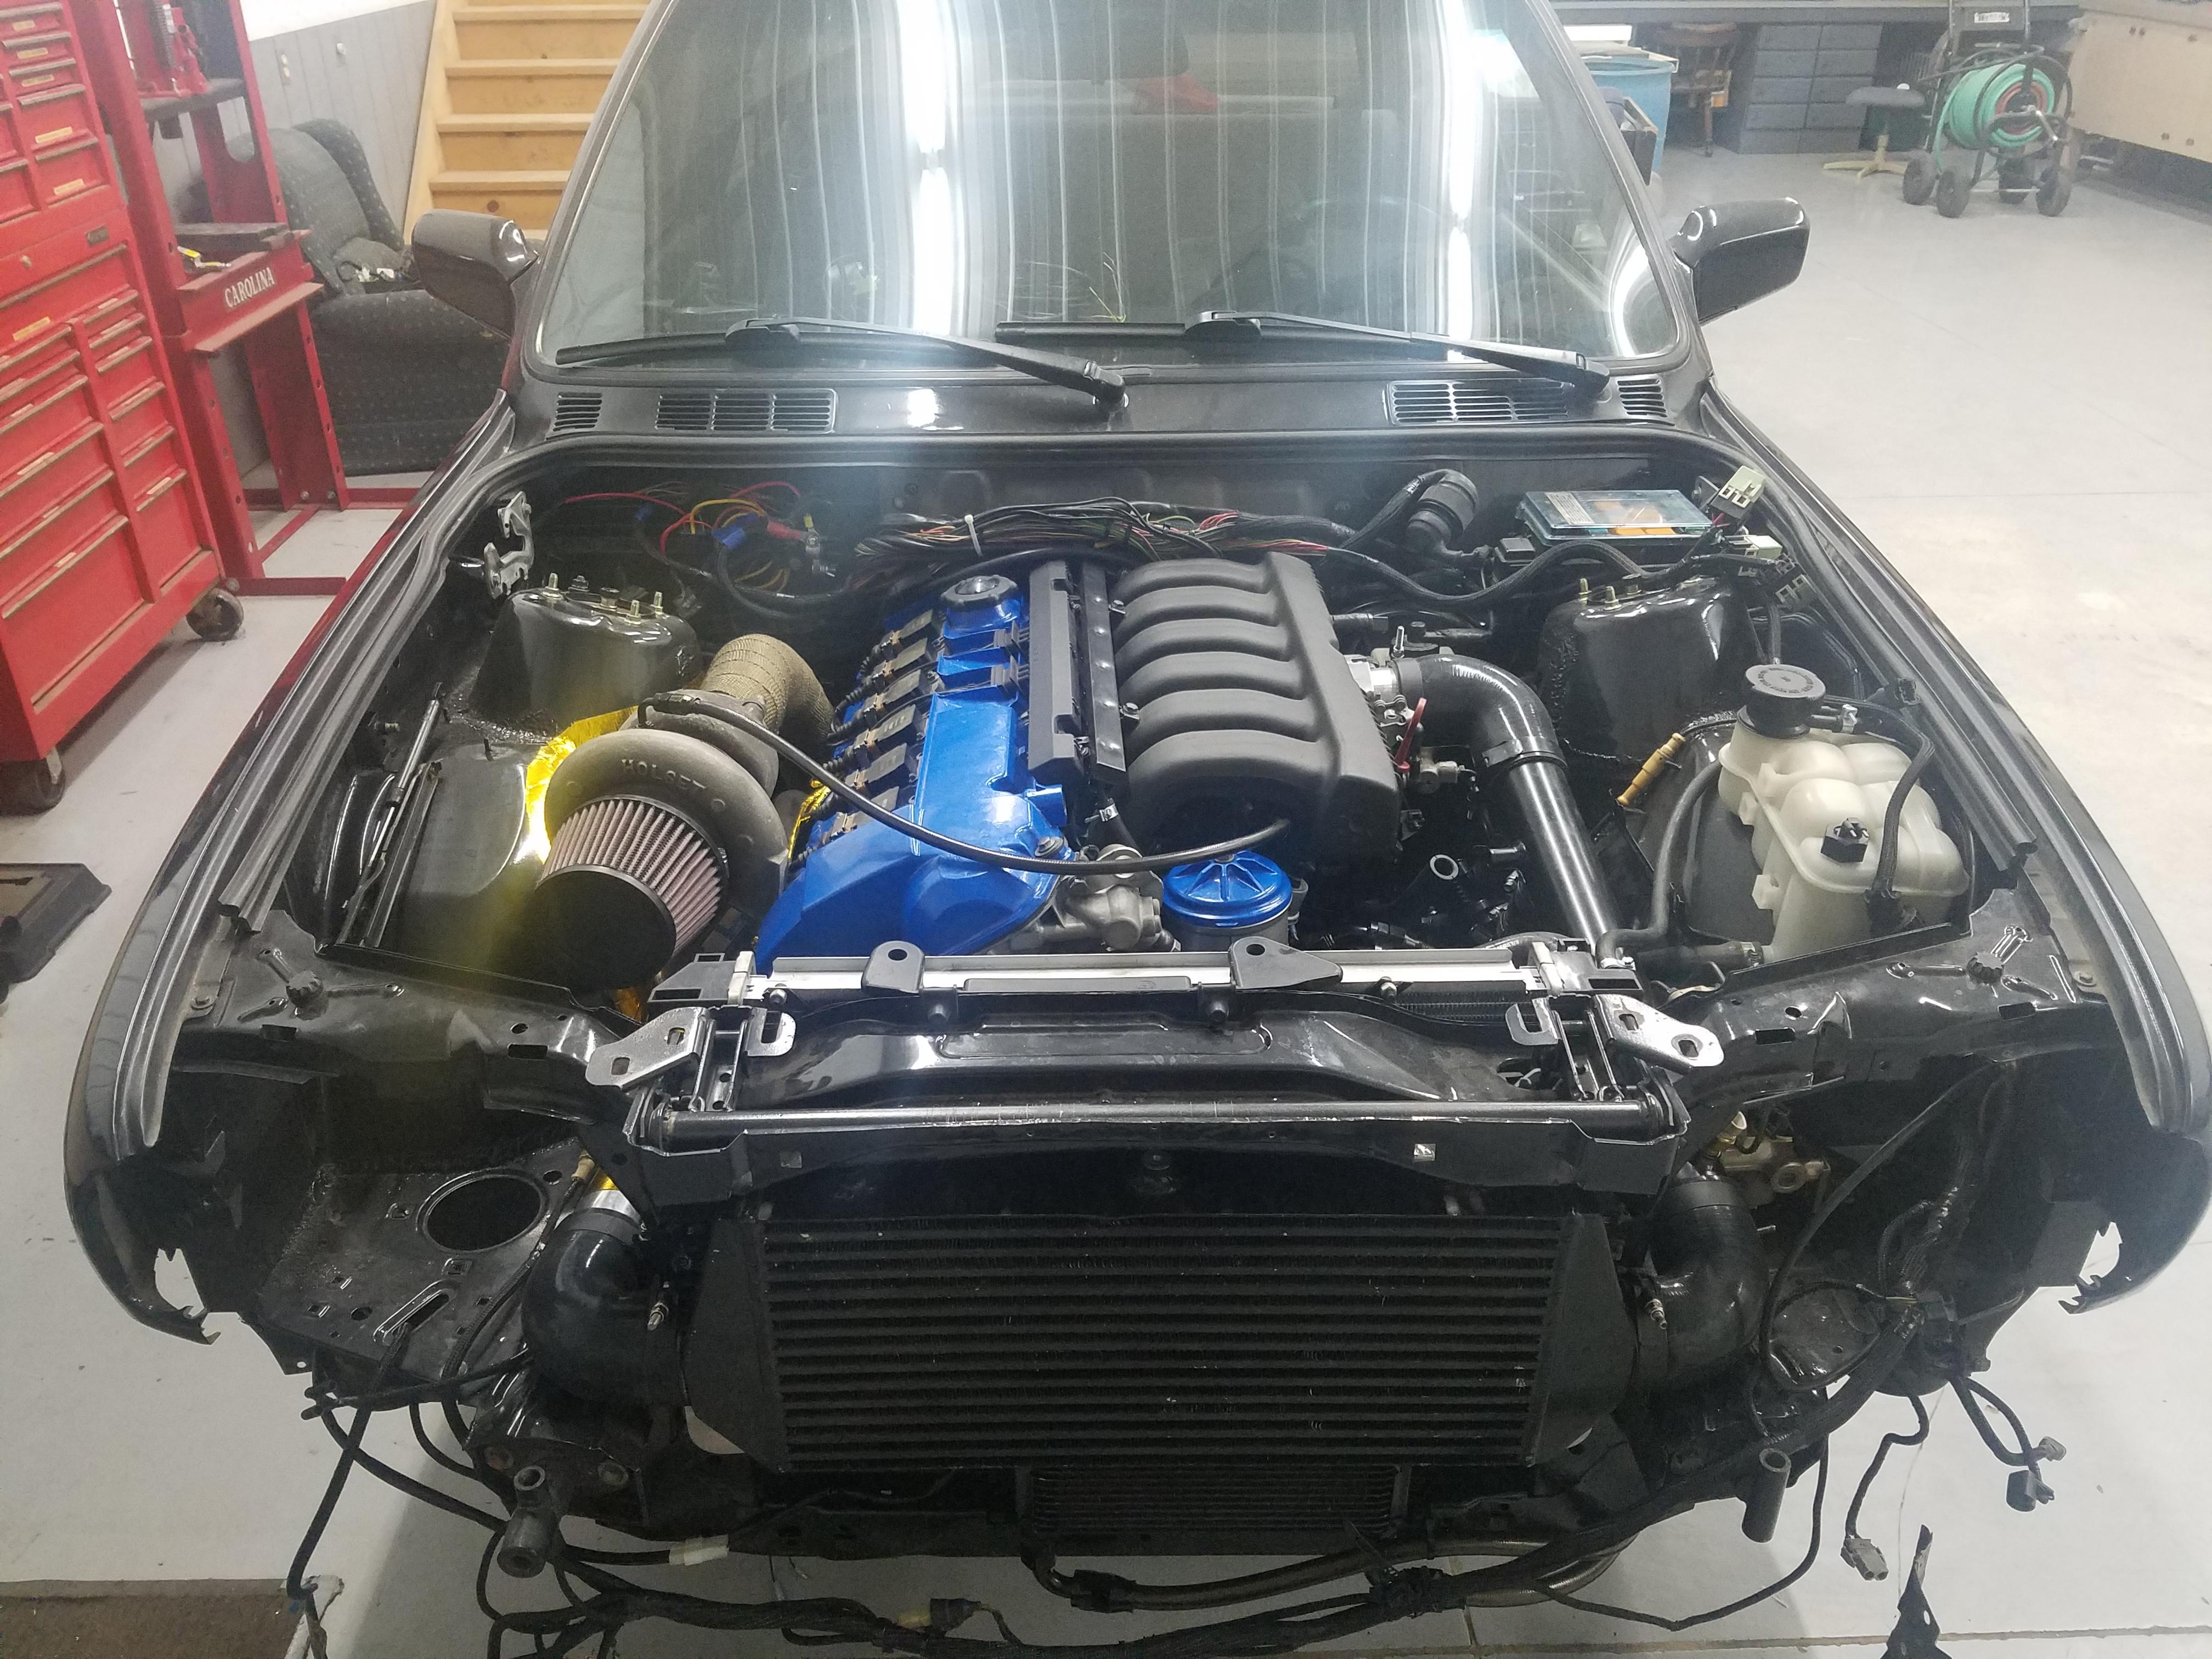
                            After re-mounting the trans and getting the manifold and turbo all torqued down on the motor it was about ready to be put back in the car. Unfortunately a good chunk of the battery tray has to be cut out for clearance of the down pipe so with the engine out of the car I went at it with a dremel and cutting wheel.

                            20190130151648.jpg

                            I didn't cut it all the way back as I wanted to keep the holes where the plastic cover sits so that should do.

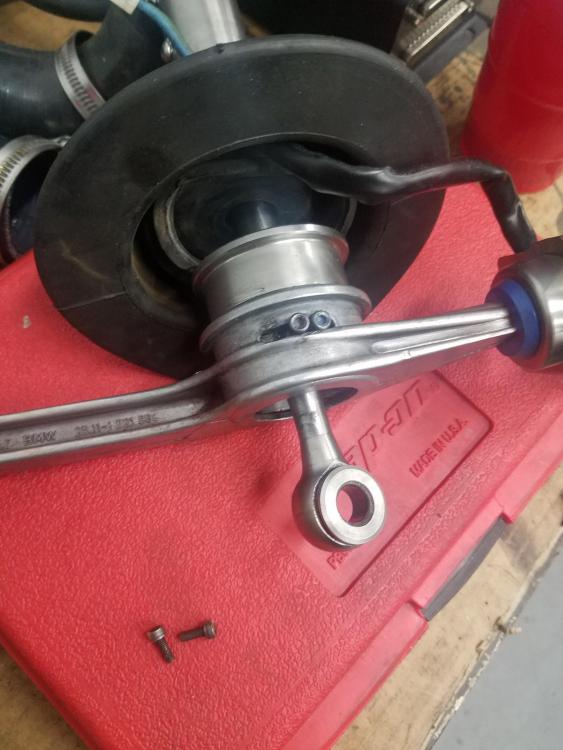
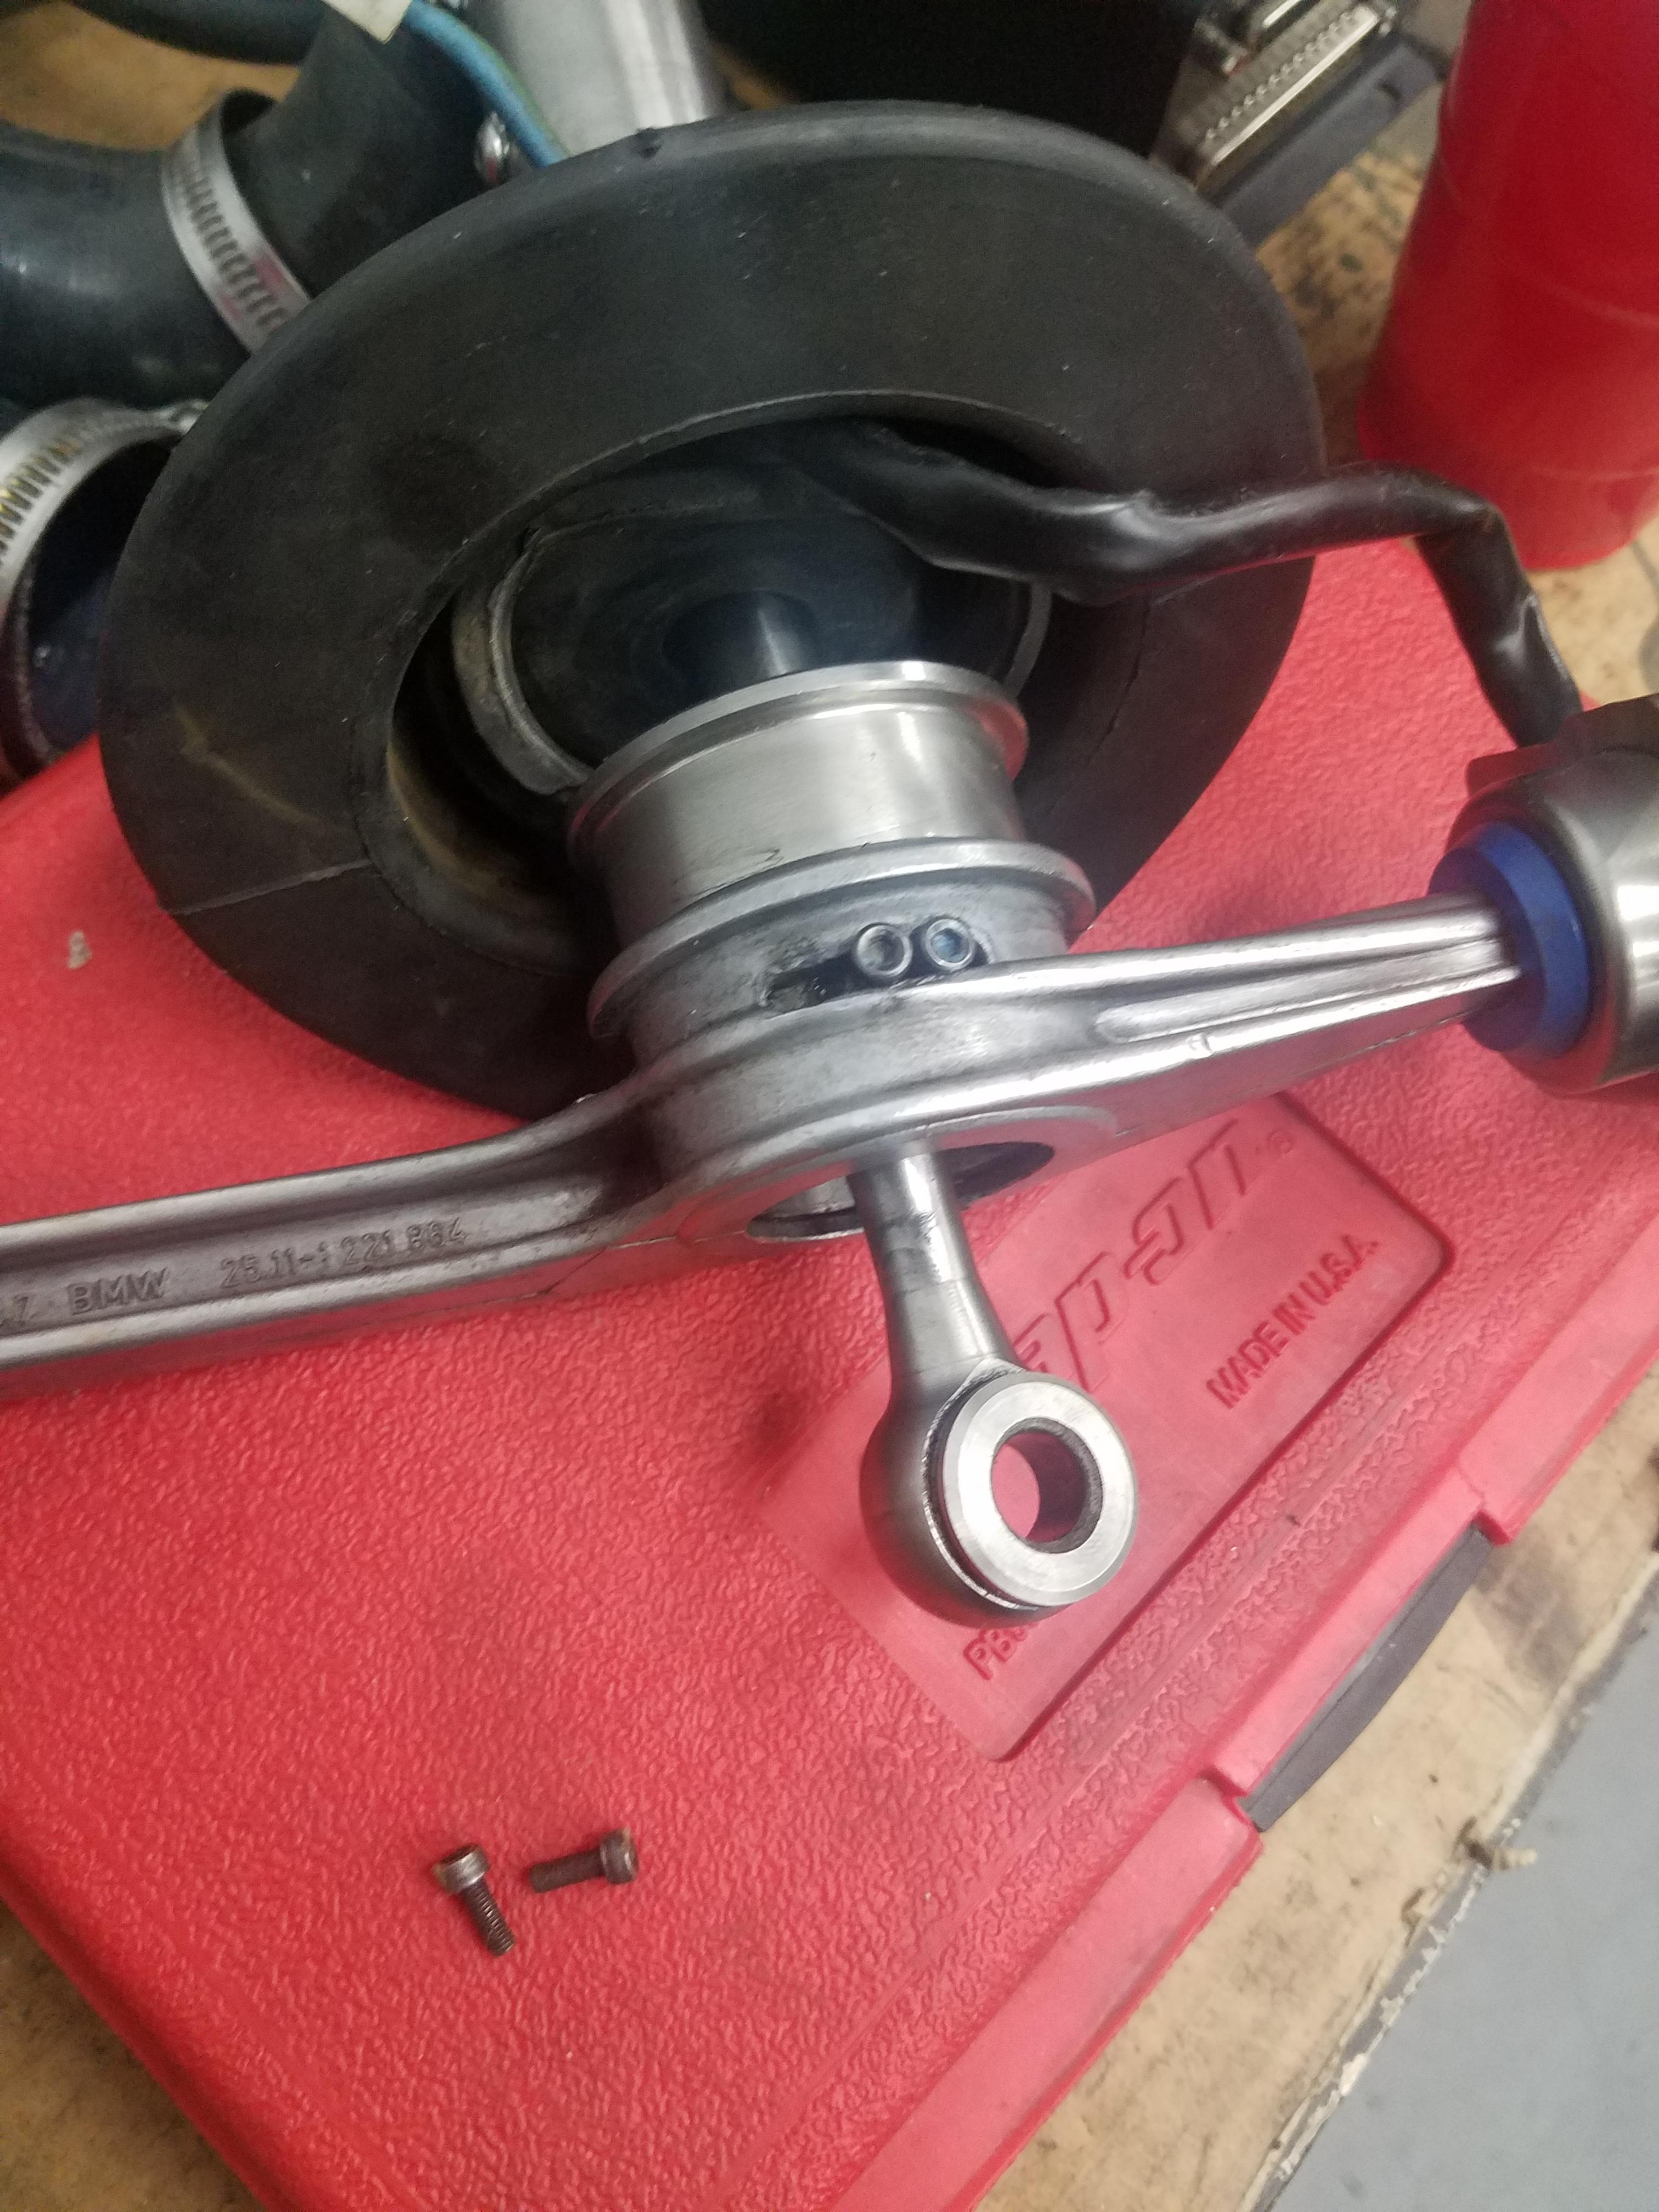
                            Ah and one more thing! when I initially was pulling the drive shaft out two little screws fell on the ground. After closer inspection I found that they were part of the shifter assembly.

                            20190130172236.jpg

                            Seeing this, I went ahead and pulled each screw and threw a dab of red loctite on each one and tightened em down good. Hopefully won't be having this issue no more, I am still trying to figure how the hell I didn't lose them in the first place.

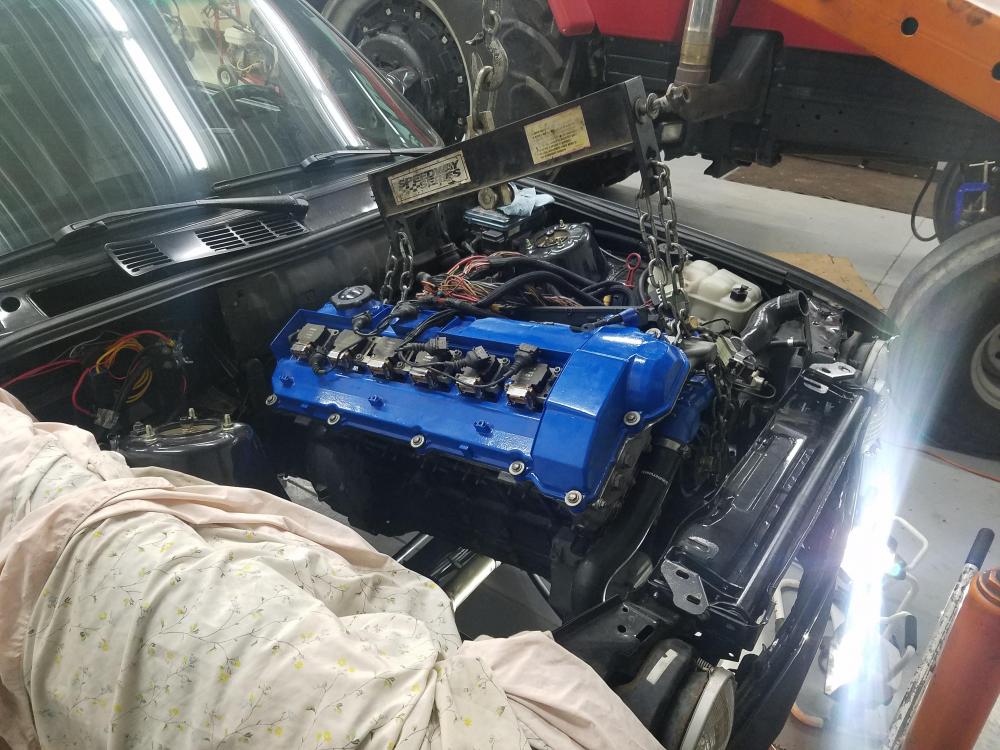
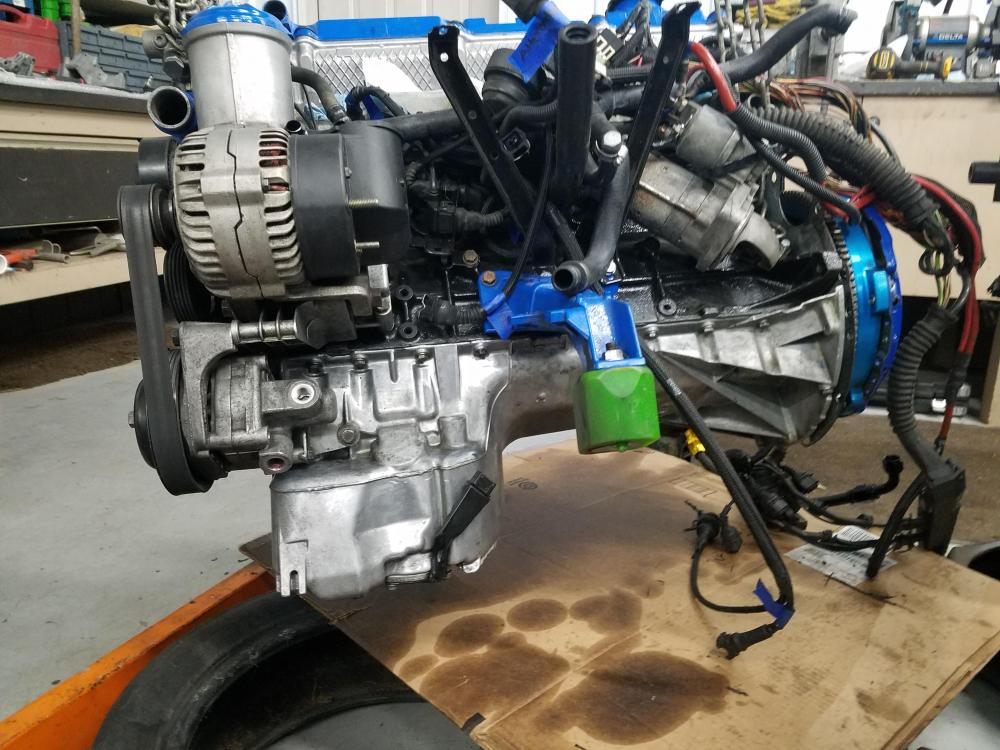
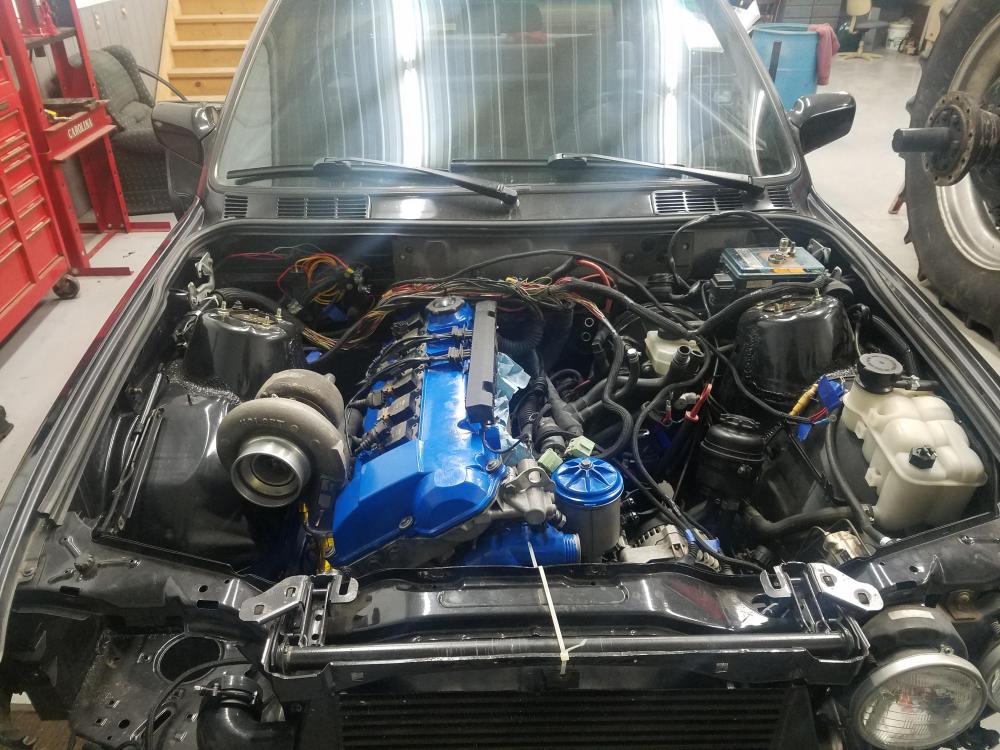
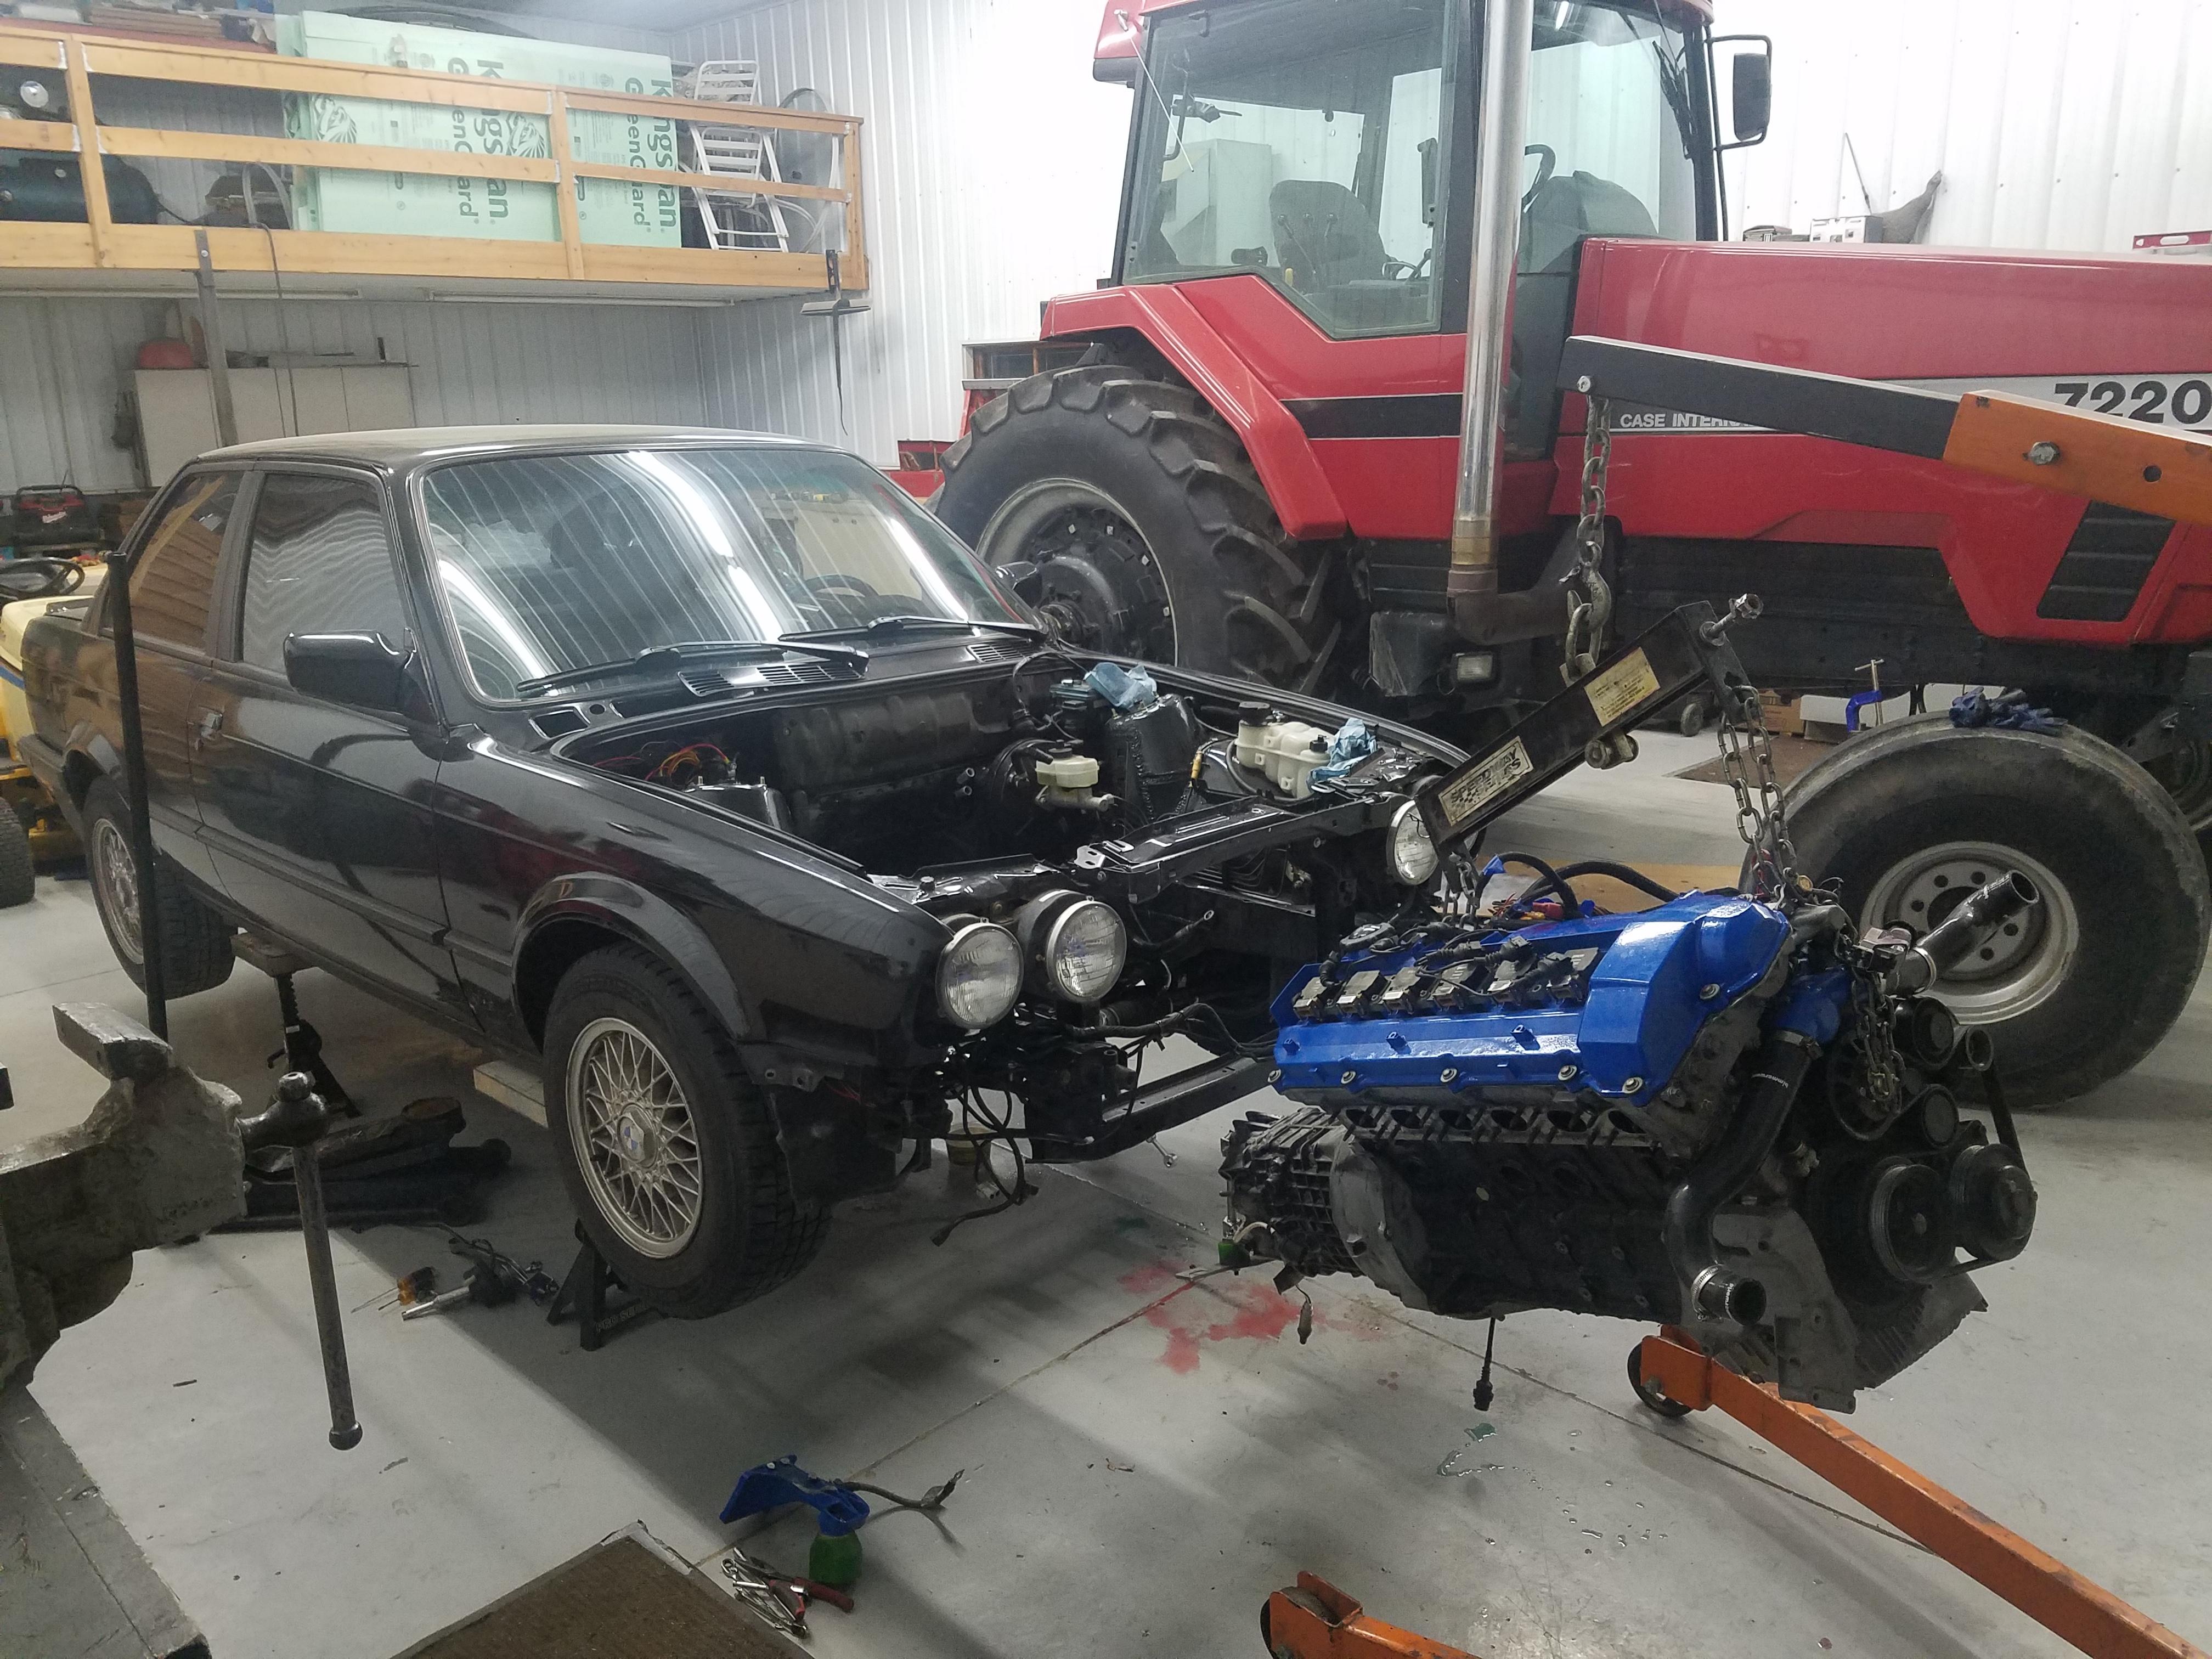
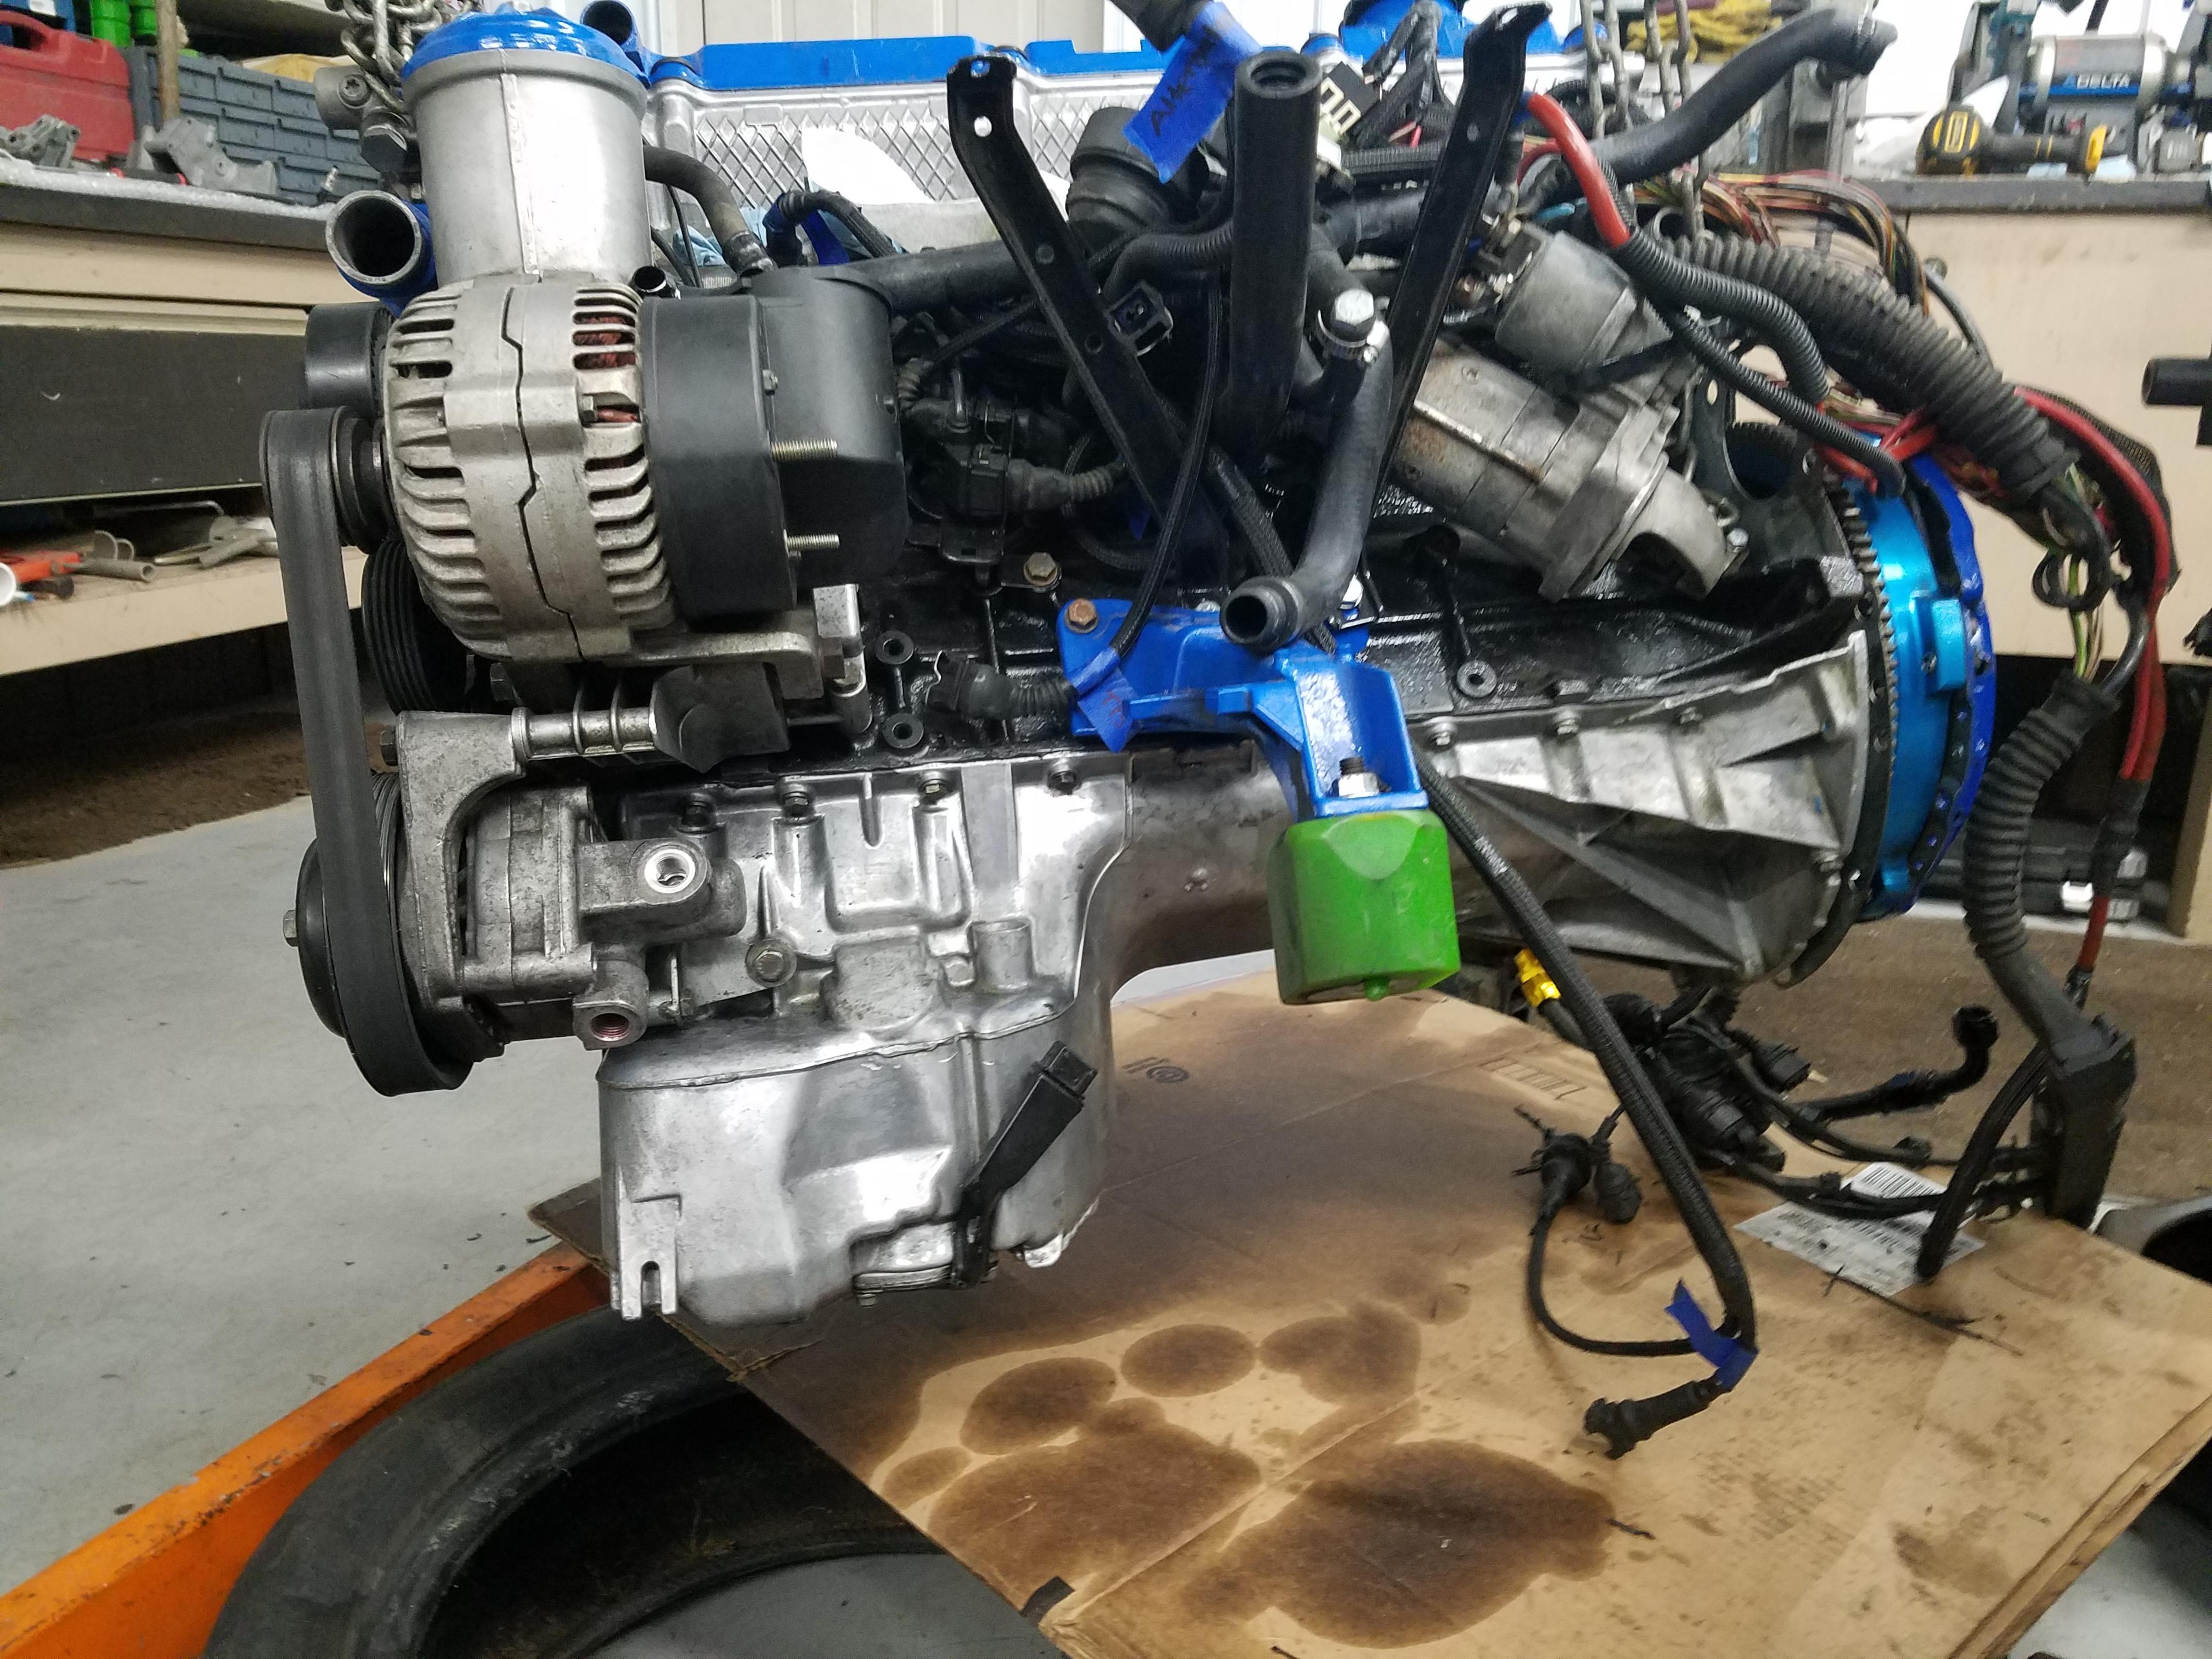
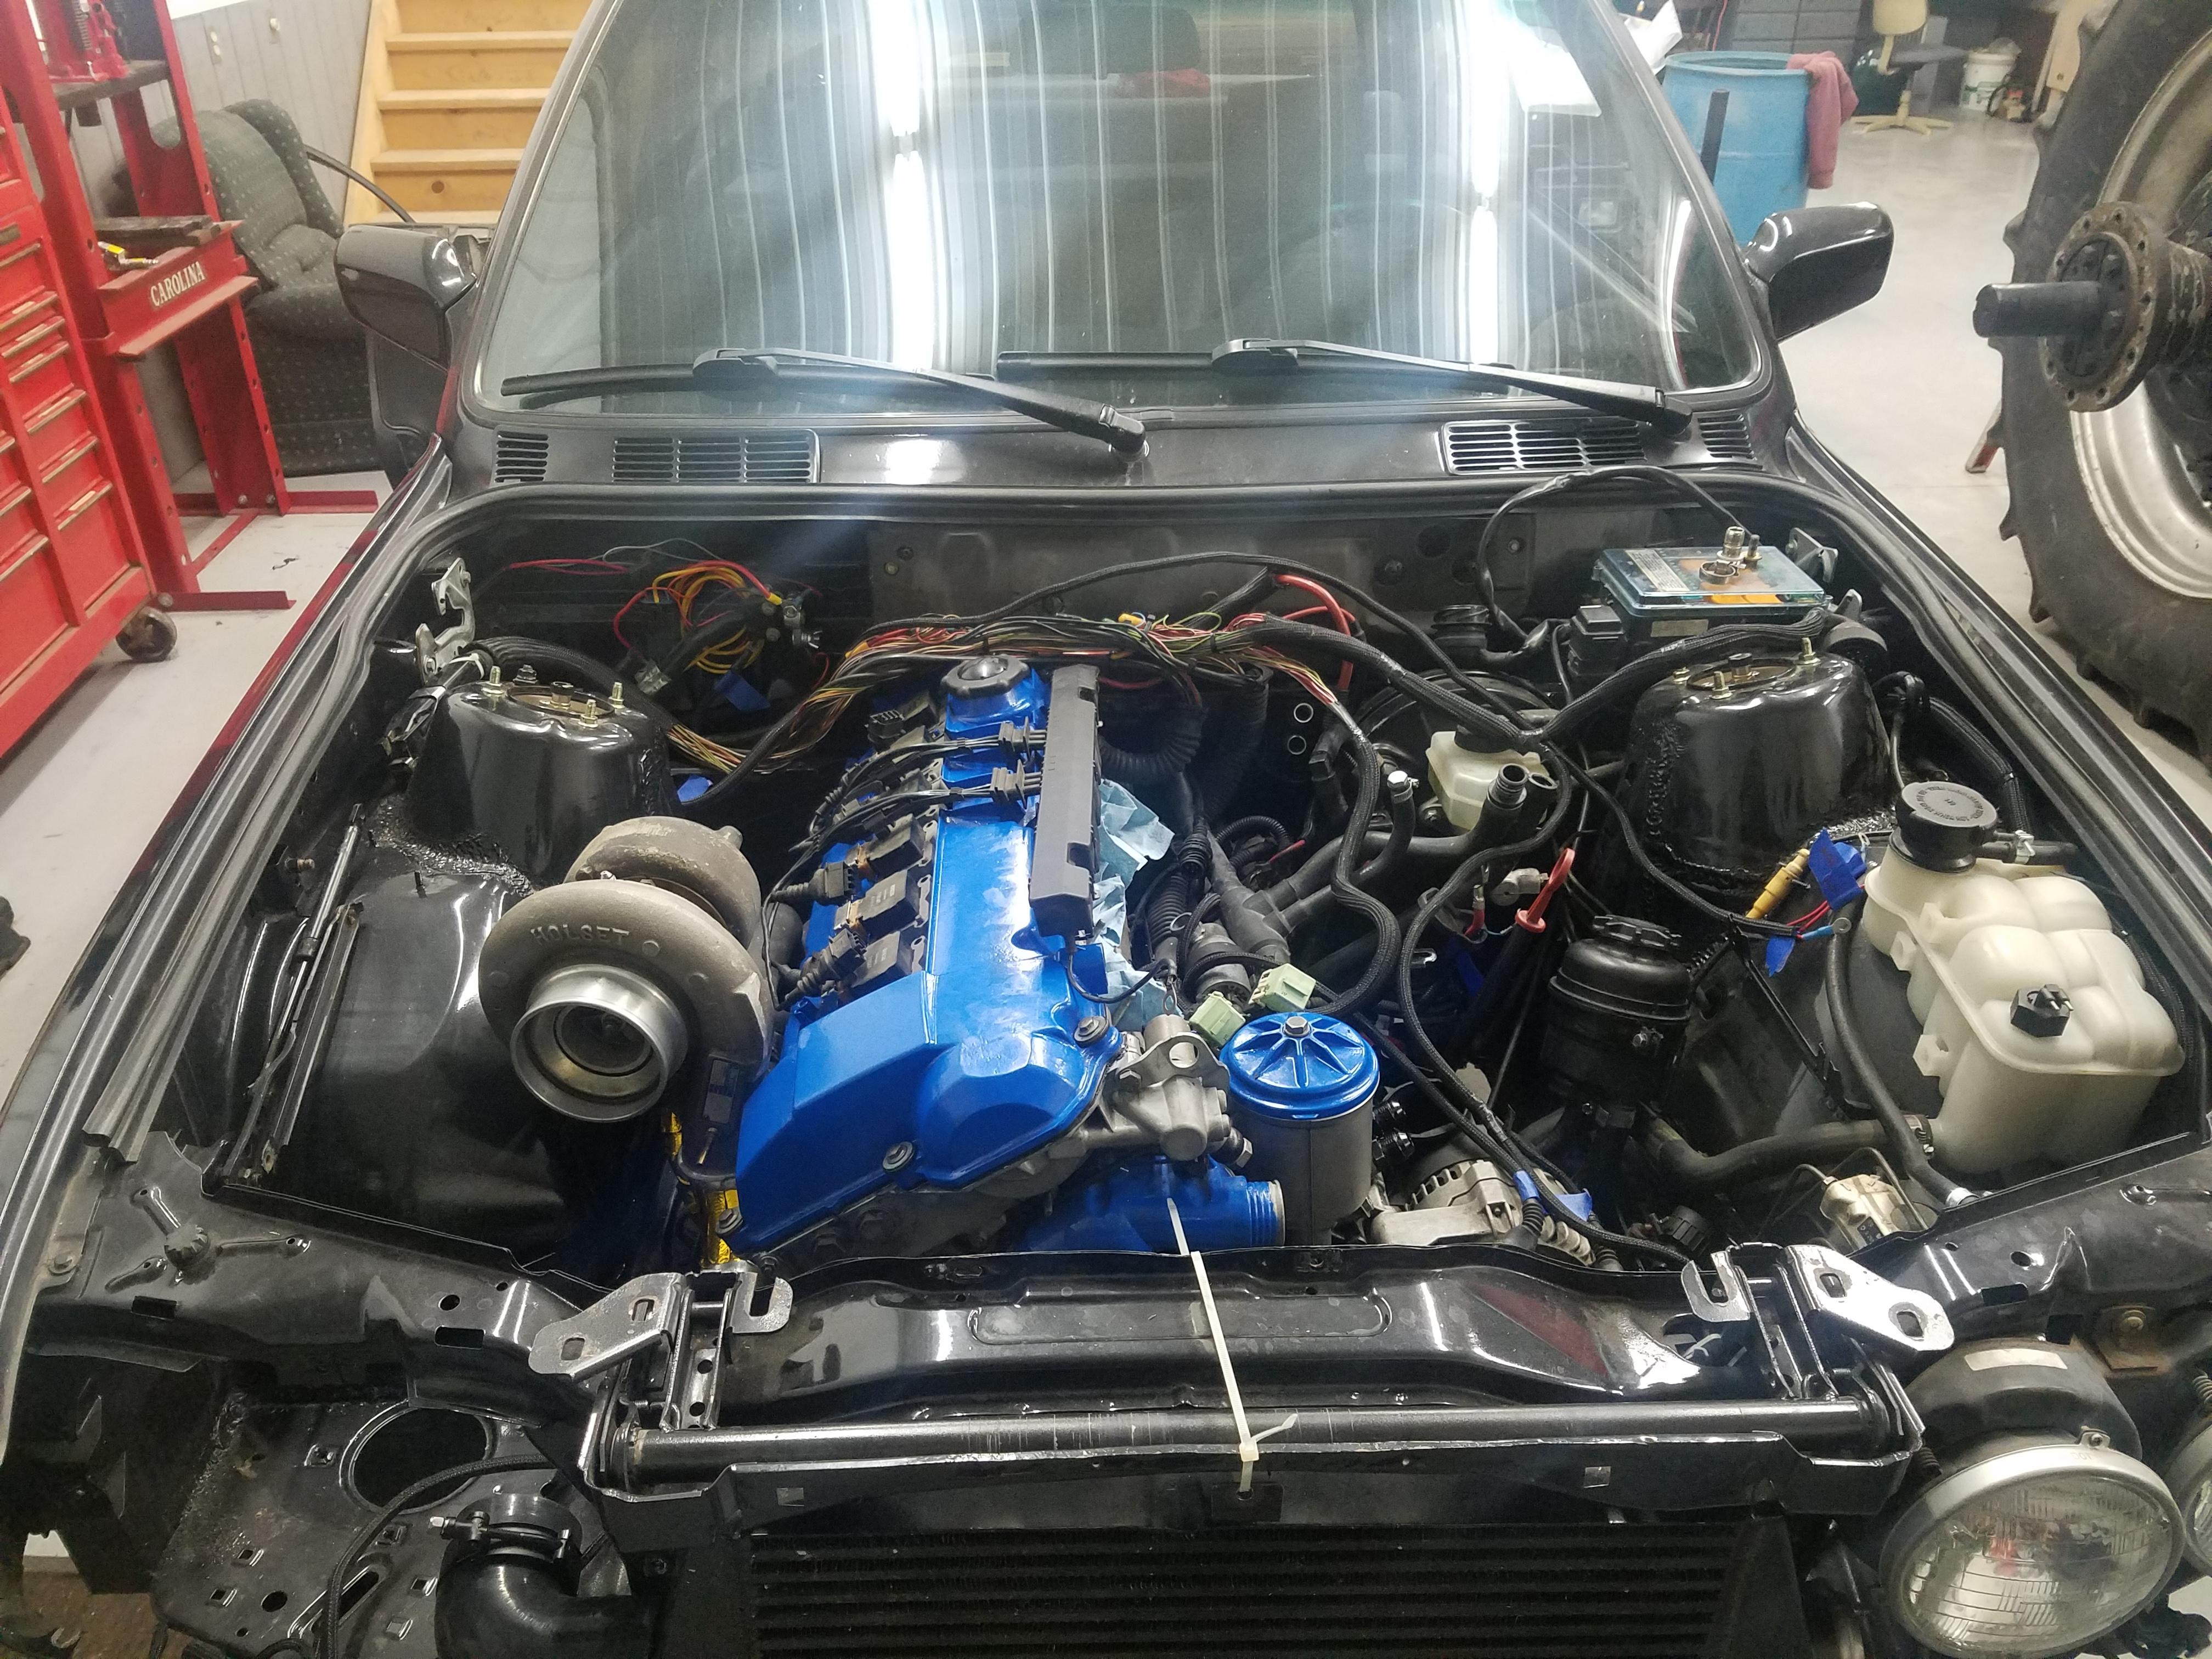
                            With that all said and done it was time to drop er back in the car.

                            20190130213032.jpg

                            Let me just say If I'm gonna be pulling this out a lot in the future for reasons we will not talk about I will be looking into doing a removable core support as this was about the biggest bitch to get in with the turbo and manifold already on. With it all bolted back up in the car everything does fit pretty well though.

                            Next couple things on the list to get done include:

                            1. Building a intercooler bracket
                            2. Running some water through the heater core to figure out whats going on there
                            3. Hopefully have some heat tape showing up in the mail here soon and then I can go ahead and get the exhaust installed to see if their are any fitment issues there.
                            4. re-install radiator. With the intercooler I will no longer have room for a pusher fan so I have decided to order up a puller fan and were gonna see if we can make that fit otherwise I'm fucked.
                            5. What I'm gonna be doing for wiring and tuning is still be determined...
                            1 Reply Last reply
                            0
                            • SteelBlueS
                              SteelBlueS
                              SteelBlue
                              wrote on last edited by
                              #375

                              Ben did a removable core support on his car.

                              This thing is gonna fuck though.

                              1 Reply Last reply
                              0
                              • straight6pwrS
                                straight6pwrS
                                straight6pwr
                                wrote on last edited by
                                #376

                                SteelBlue said:

                                Ben did a removable core support on his car.

                                This thing is gonna fuck though.

                                maxresdefault.jpg

                                Dan
                                yajsYRL.jpg.e5f350b4dfe961d76ac8b32efce2e1a6.jpg

                                1 Reply Last reply
                                0
                                • GunMetalGreyG
                                  GunMetalGreyG
                                  GunMetalGrey
                                  wrote on last edited by
                                  #377

                                  Man this brings back memories.

                                  Putting motor in or removing, turbo on or not. 

                                  Option Number A: Leave turbo off, attach turbo in car, make custom wrenches and use crows foot wrenches to tighten it down as best as you can before your knuckles are at the bone.
                                  Option Number B: Leave turbo on, torque bolts well while out of car, hate yourself for leaving it on while lowering it into the engine bay.
                                  Option Letter 3: Take sawzall to that damn core support that is always getting in the way... 

                                  I'm glad to see the clock marks were still visible on the cold side of the turbo, did you throw that snap ring in there? 
                                  I see you already trimmed your alternator cooling duct, good work. Those lines will wrap quite snugly over the alternator, but it looks dope as hell once it's in there. 
                                         - Put the front hose on first, then the one towards the rear of the engine. Fully tighten the first one before going to the second. 

                                  I look forward to hearing this thing absolutely roasting the stock wheels wrapped in old snow tires 😄

                                  ...

                                  1 Reply Last reply
                                  2
                                  • AsparagusMikeA
                                    AsparagusMikeA
                                    AsparagusMike
                                    wrote on last edited by
                                    #378

                                    GunMetalGrey said:

                                    I'm glad to see the clock marks were still visible on the cold side of the turbo, did you throw that snap ring in there? 

                                    I have not, I need to get the beauty cover trimmed and in place first. I have although tested out the installation process of this snap ring and it now haunts me in my sleep.

                                    GunMetalGrey said:

                                    I see you already trimmed your alternator cooling duct, good work. Those lines will wrap quite snugly over the alternator, but it looks dope as hell once it's in there. 
                                           - Put the front hose on first, then the one towards the rear of the engine. Fully tighten the first one before going to the second. 

                                    Thank you for this. Oil cooler lines will be hooked up as soon as I have it mounted with the intercooler on the front. I do like how you made it so it mounts right on the bottom of the intercooler, makes it quite easy.

                                    1 Reply Last reply
                                    2
                                    • AsparagusMikeA
                                      AsparagusMikeA
                                      AsparagusMike
                                      wrote on last edited by
                                      #379

                                      Time for some progress updates my dudes.

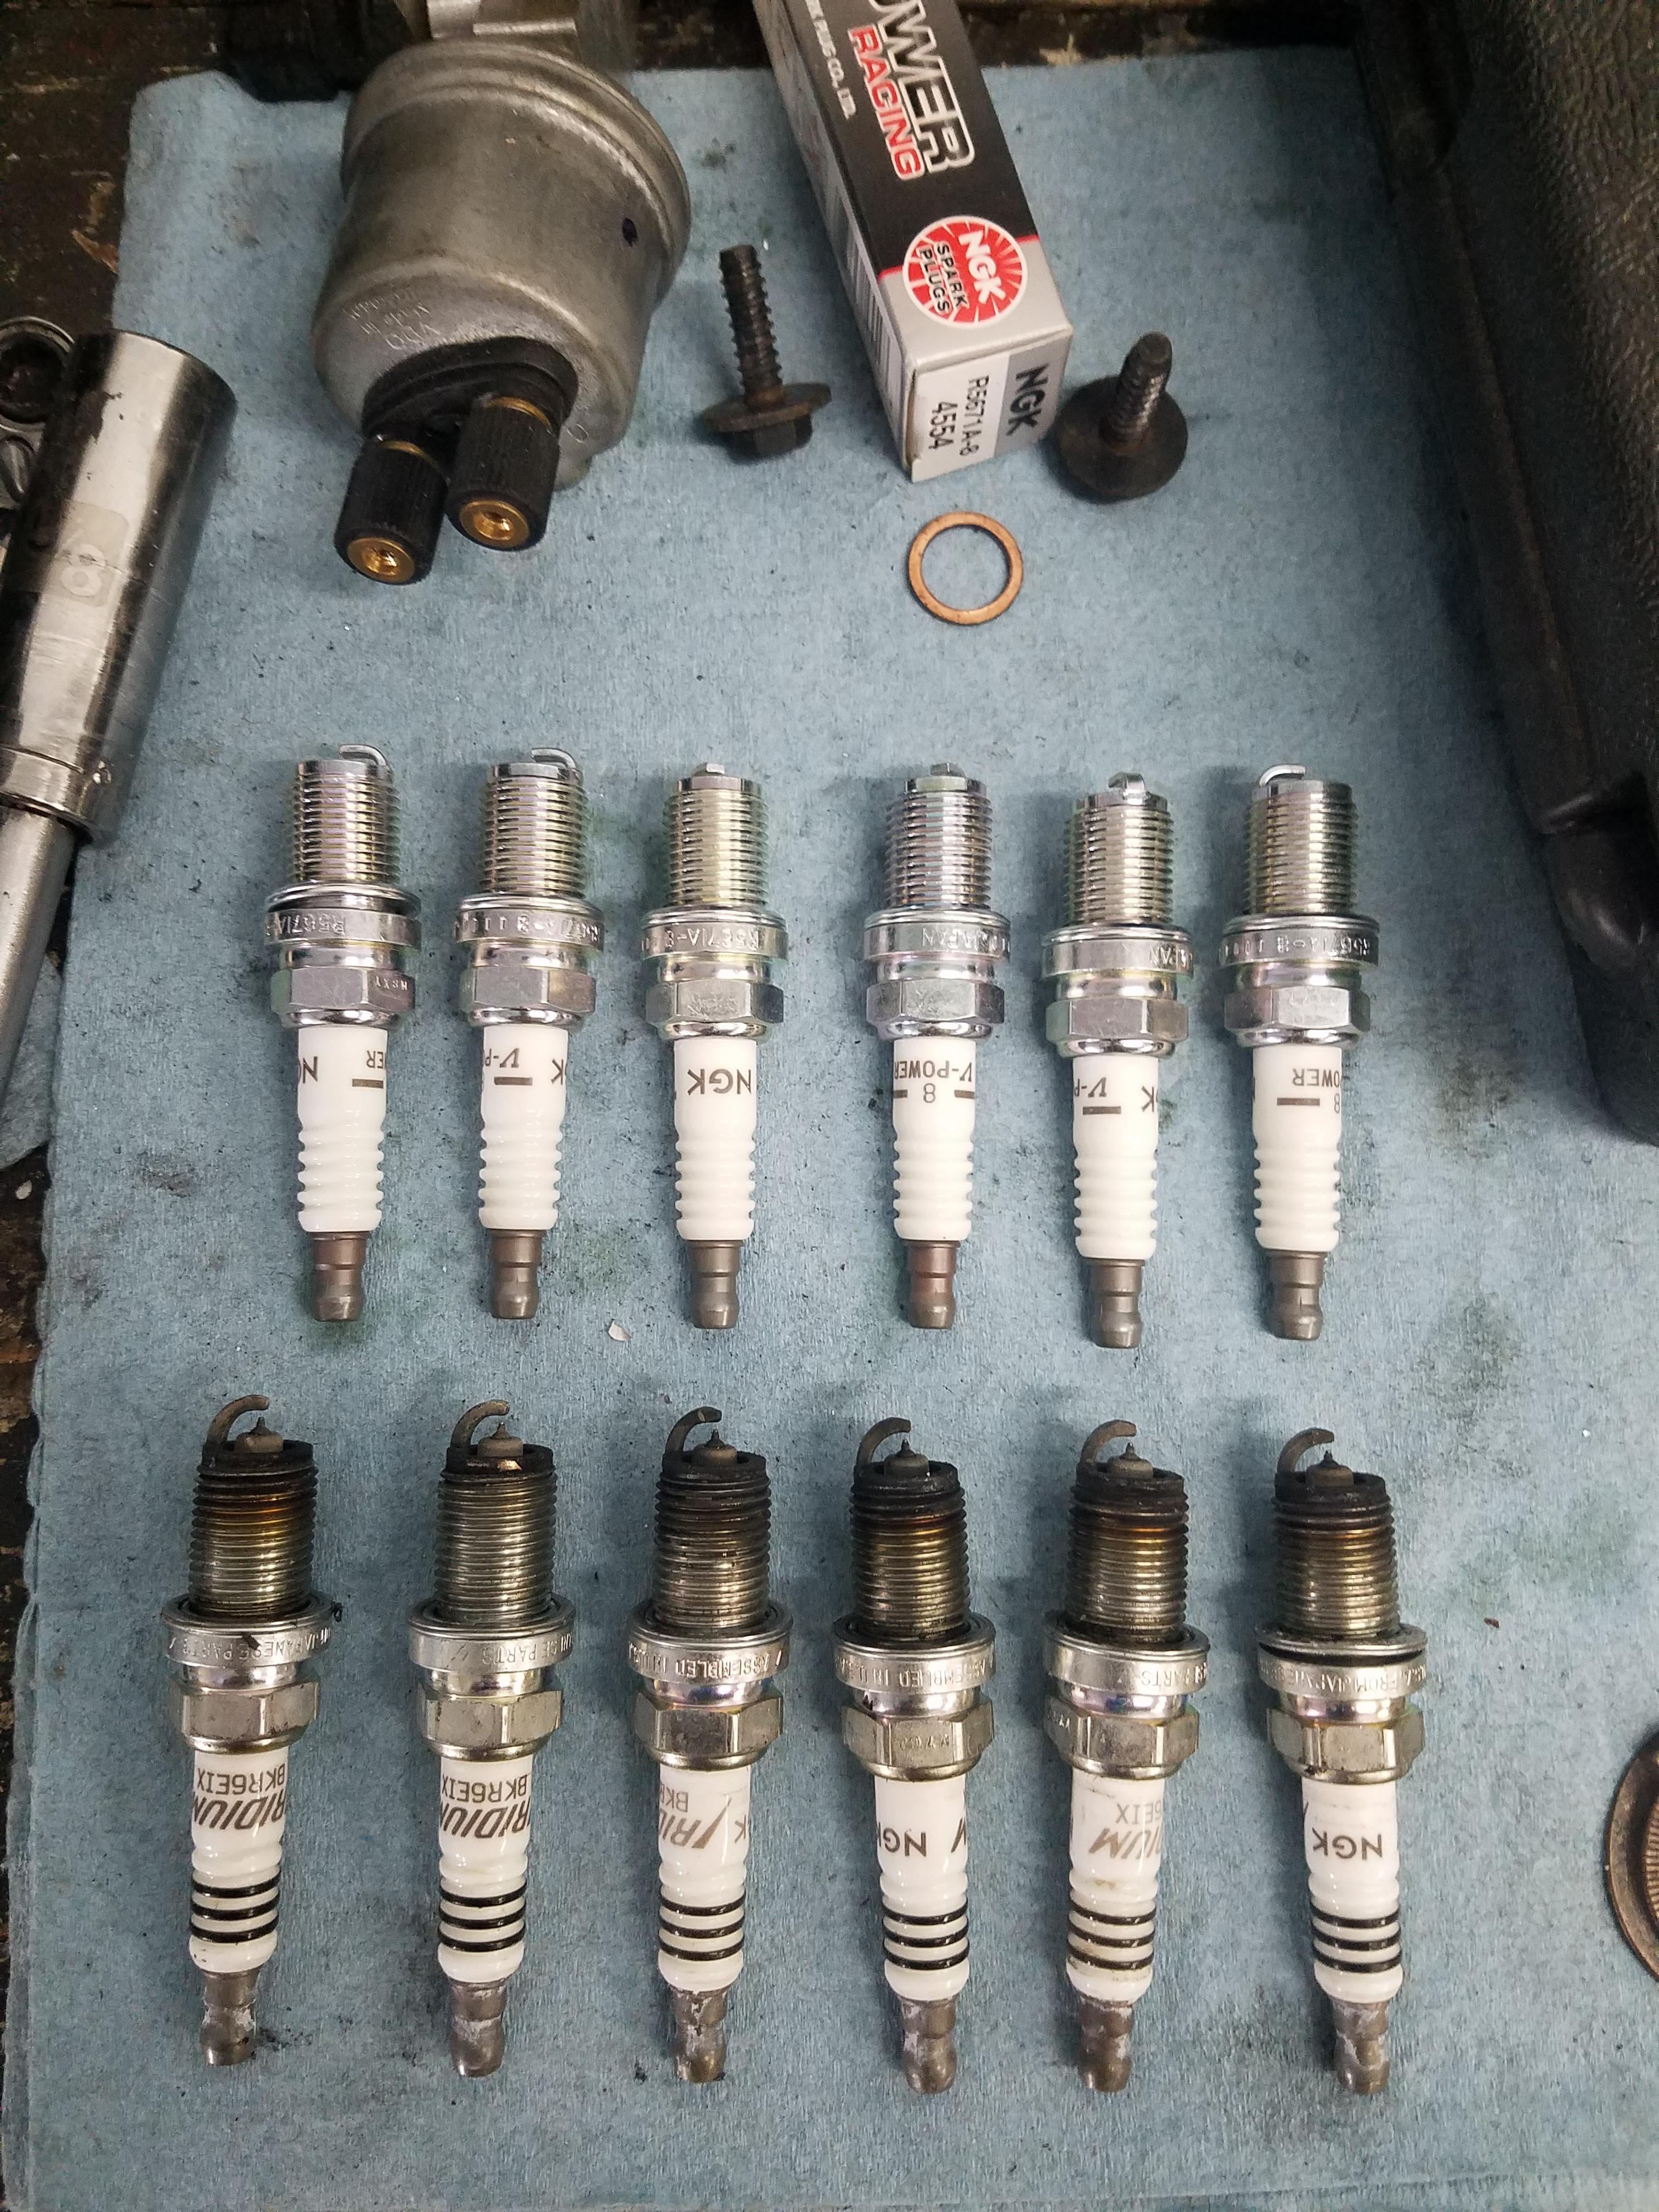
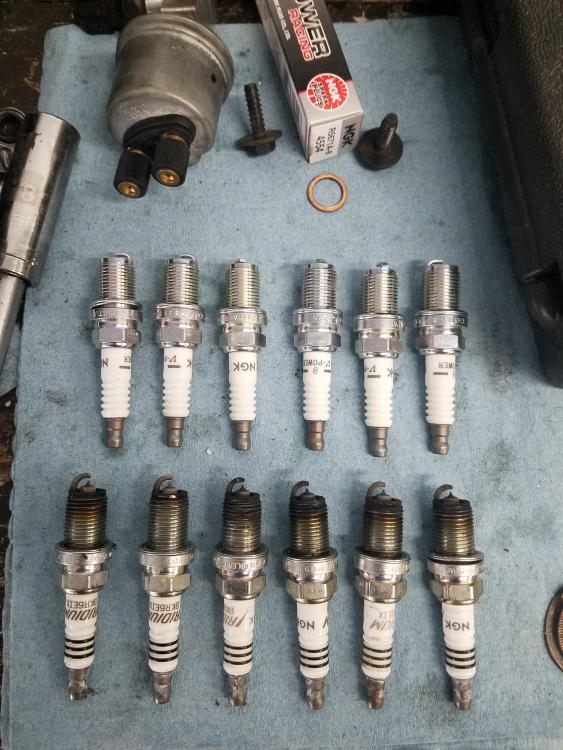
                                      New spark plugs!
                                      20190201123106.jpg

                                      NGK (4554) 2 step colder plugs. Gaped them to .021, hopefully should do the trick.

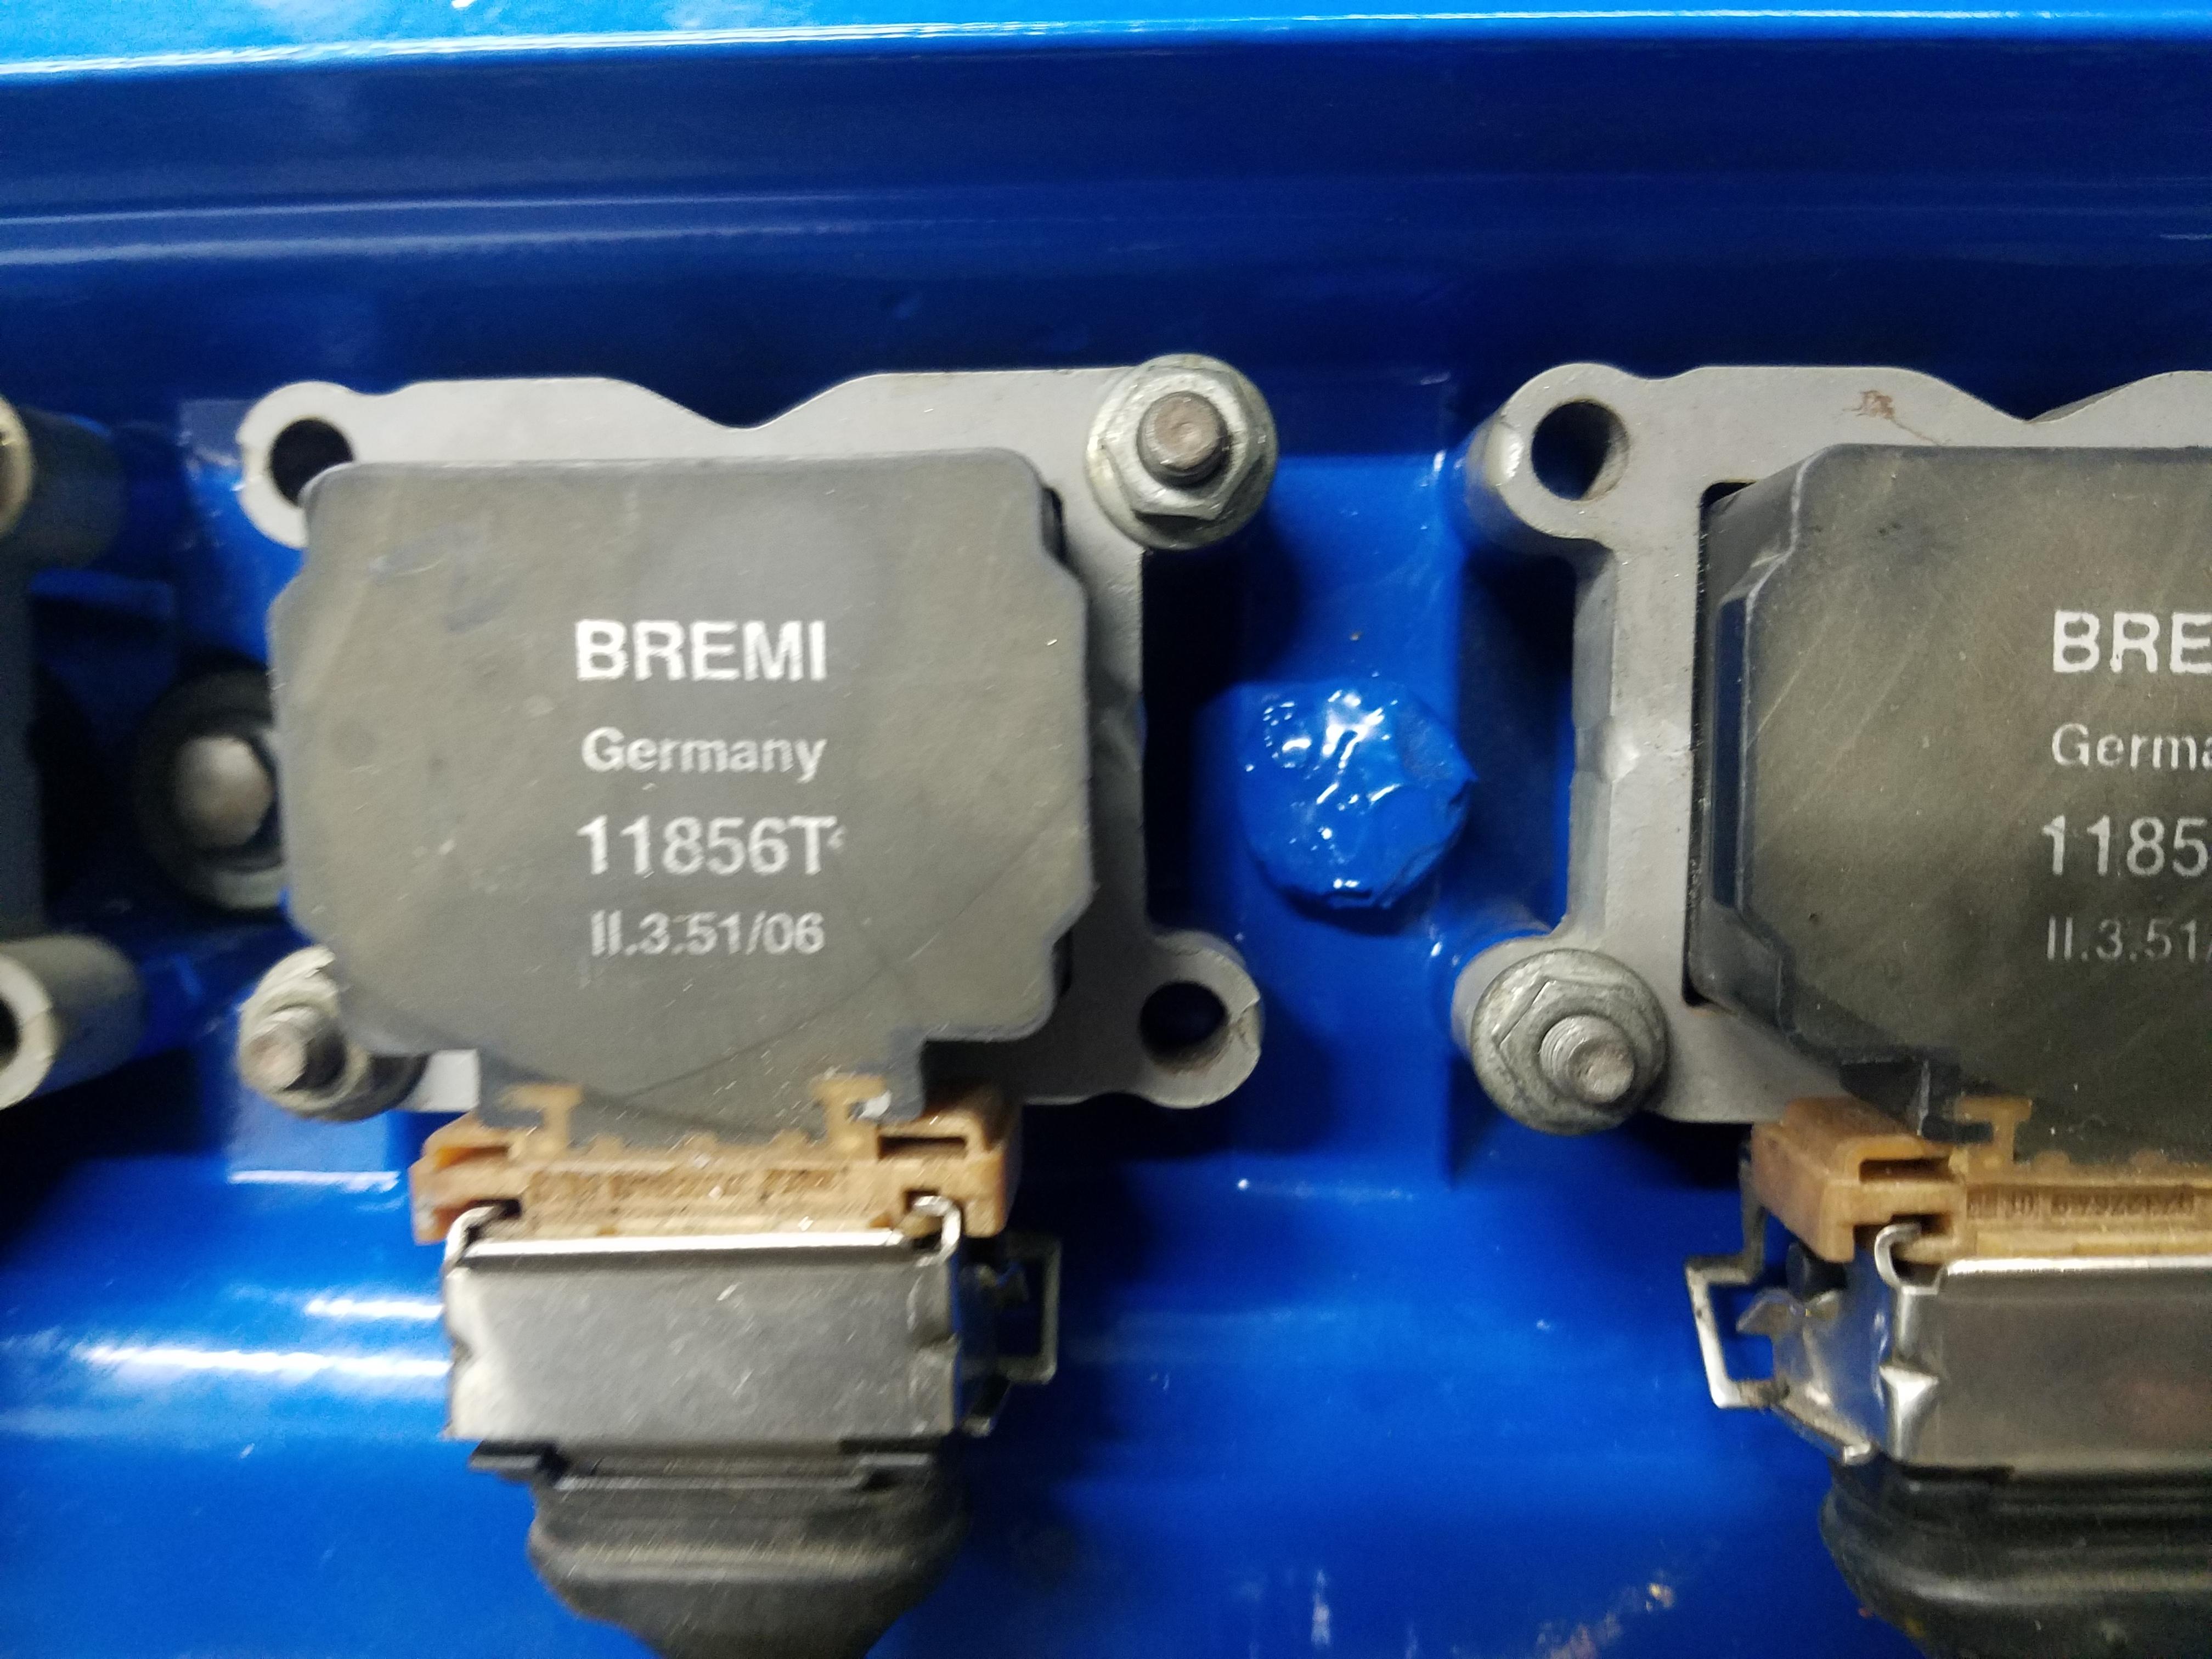
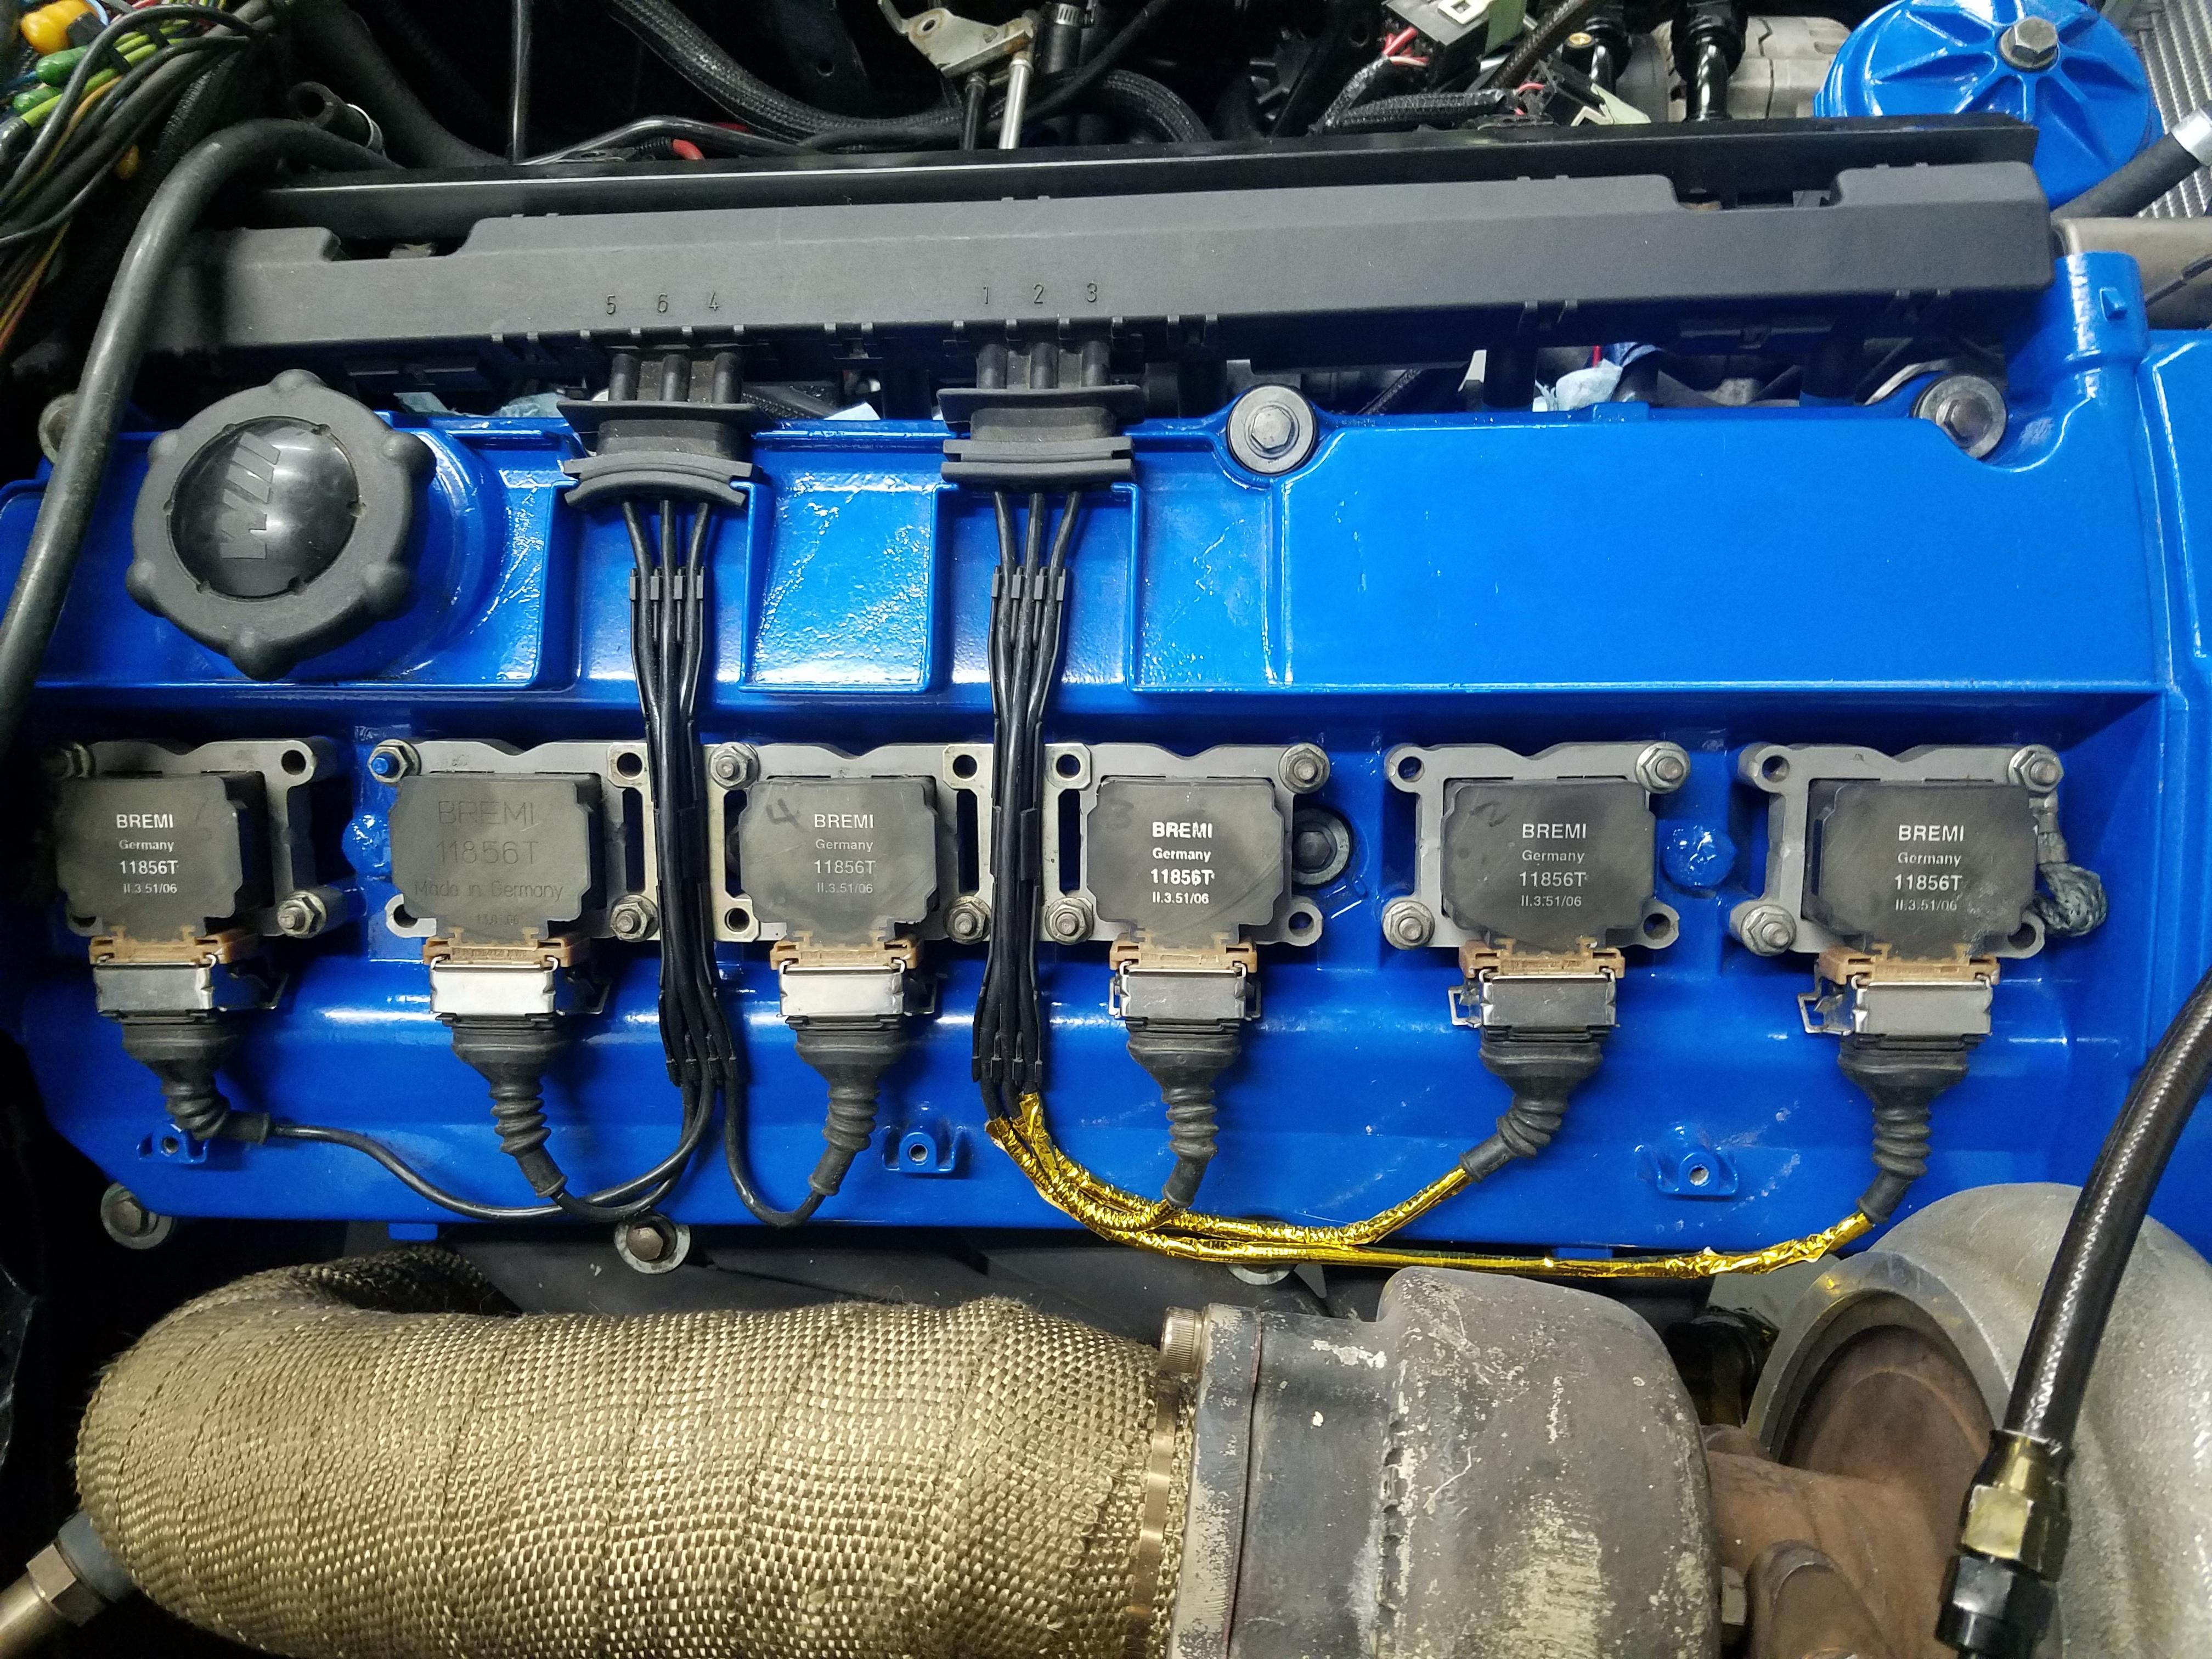
                                      Went ahead and started working on trimming up the beauty cover to clear the turbski's when I noticed something interesting about the mounting points for it on the valve cover.
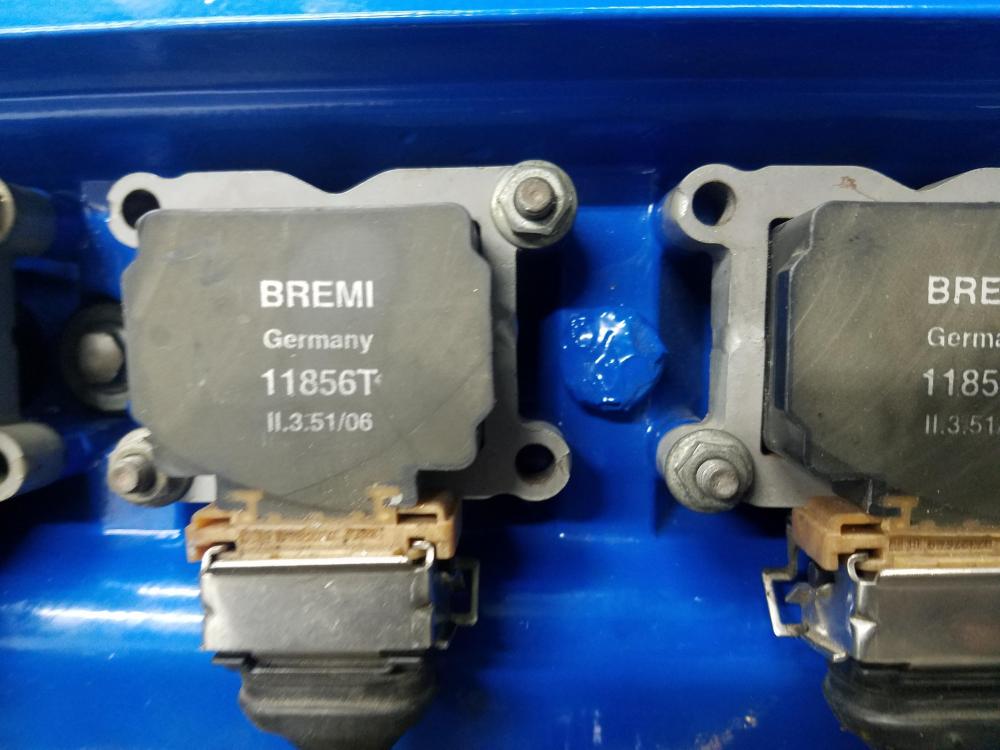
                                      20190204221225.jpg

                                      Not sure how the hell that happened and to be honest I never really noticed it tell now. Looks like the beauty cover will be sitting this one out.

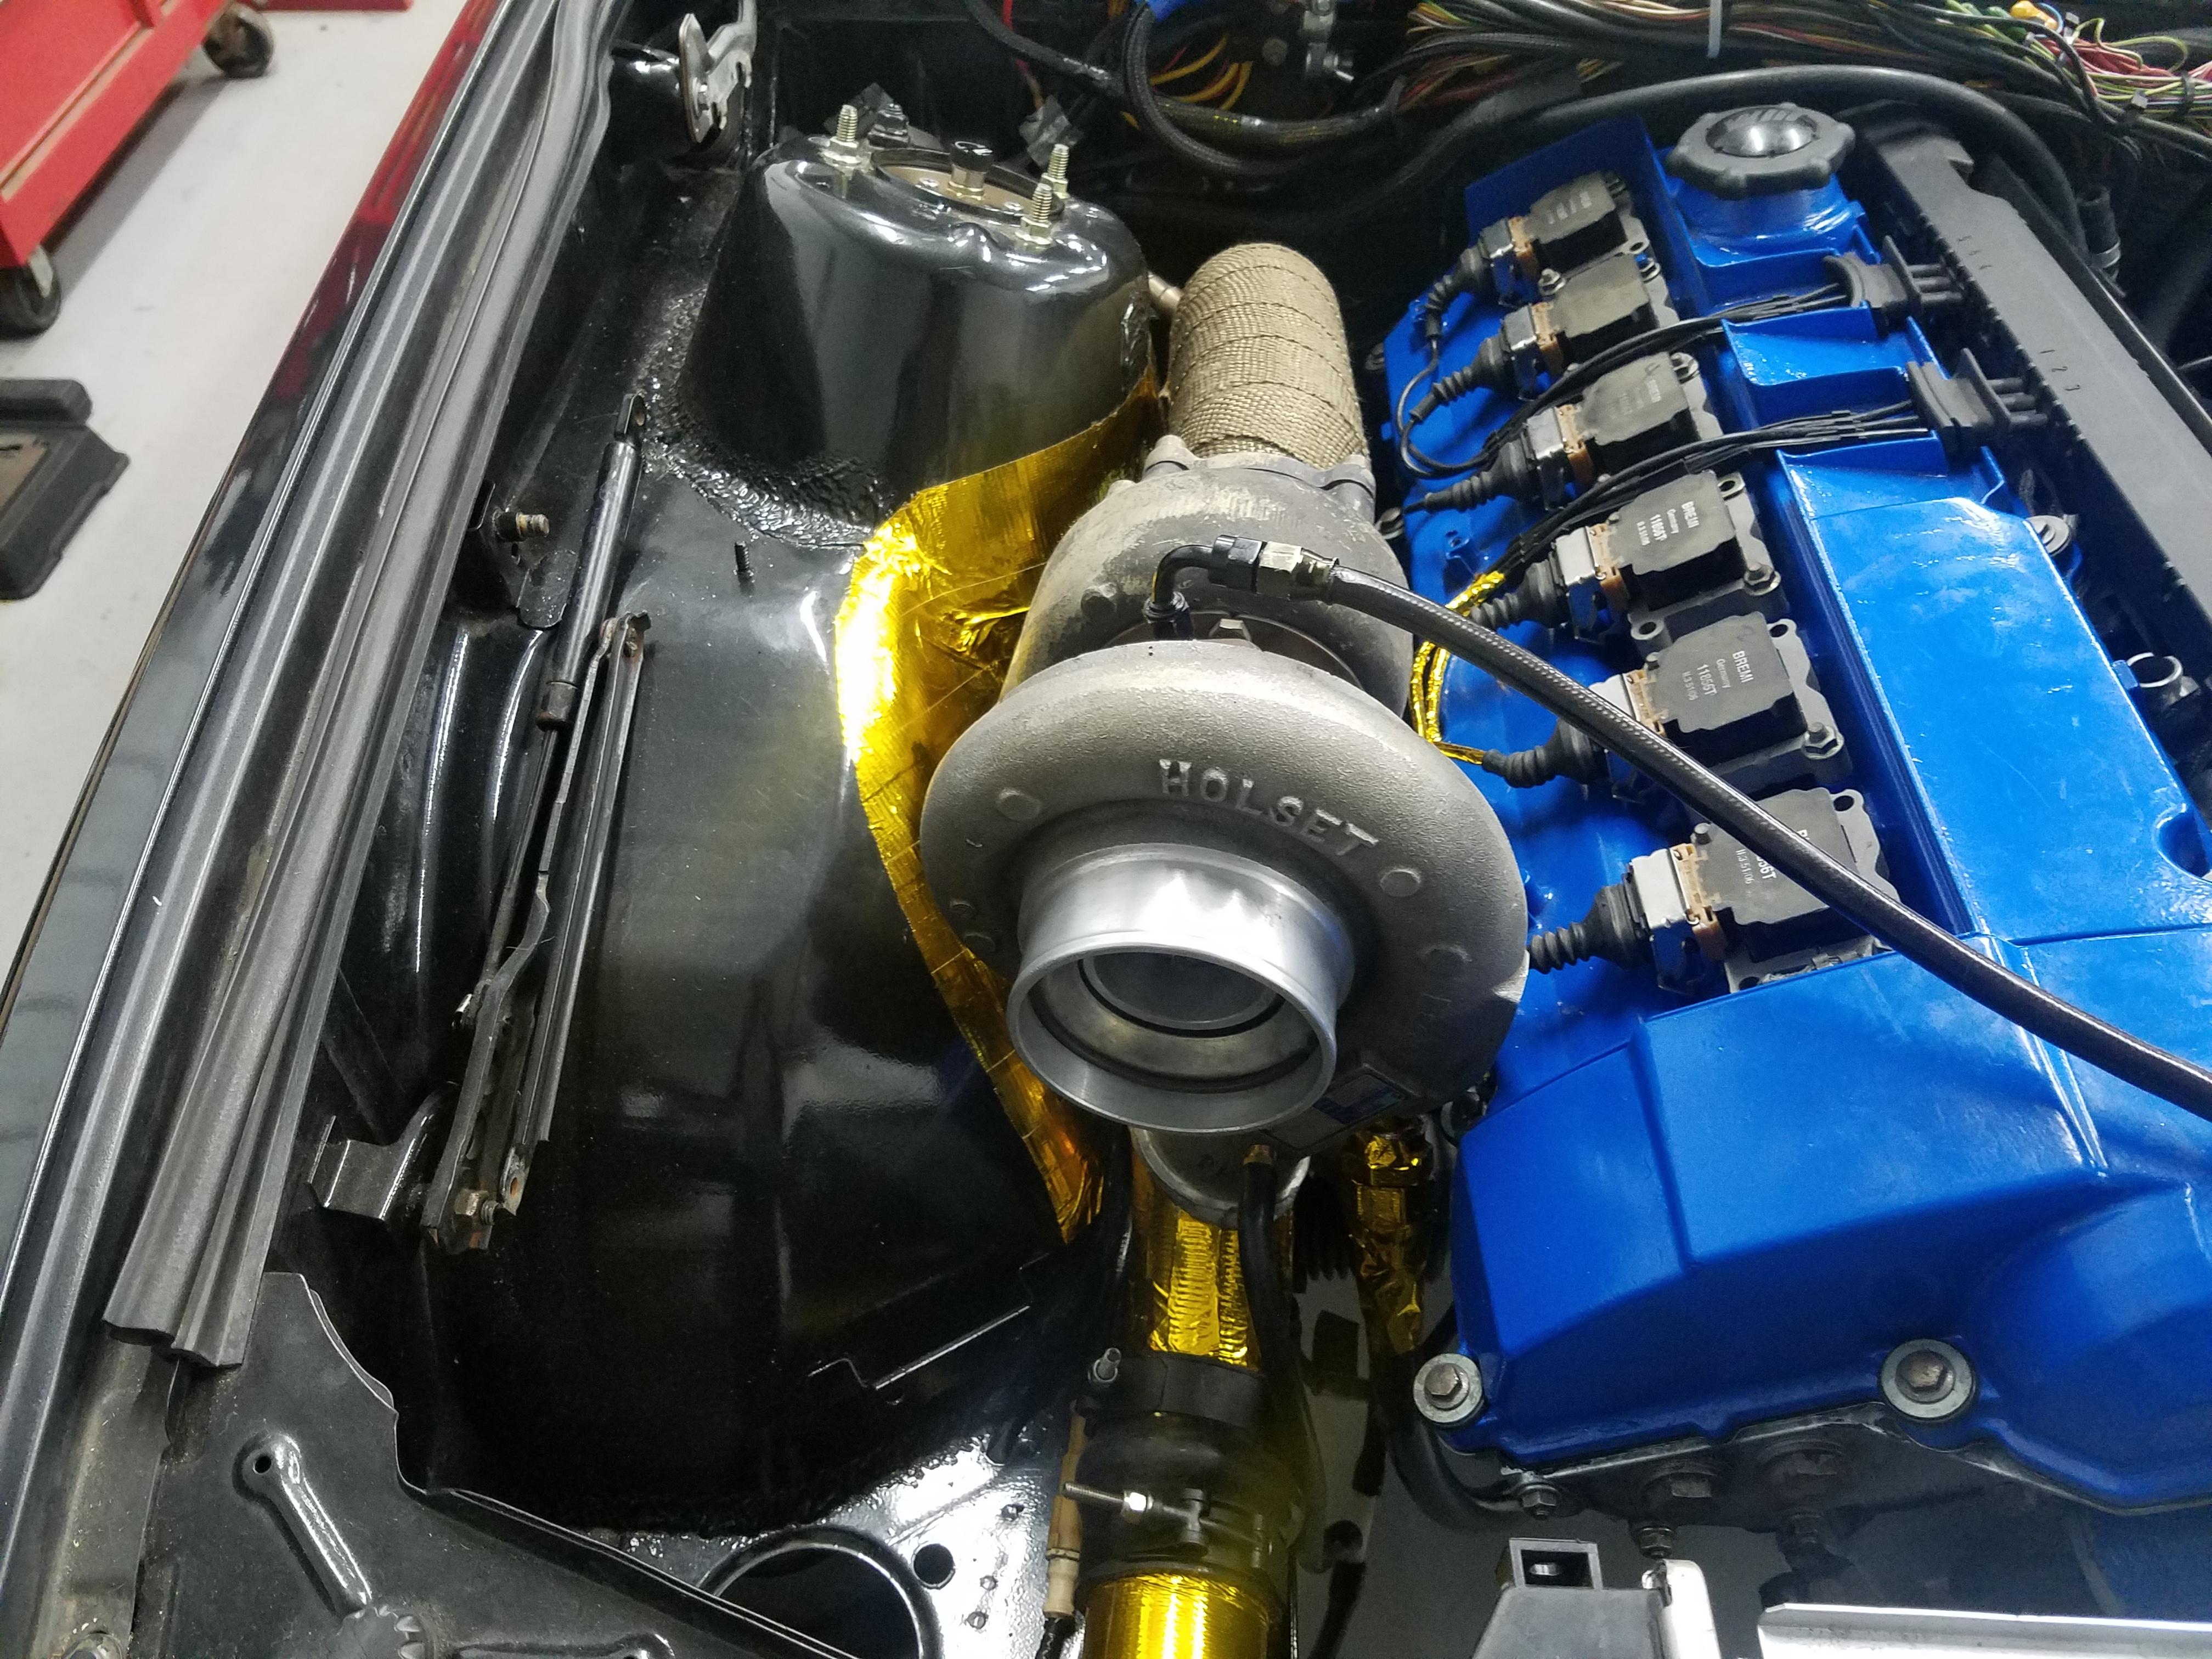
                                      To compensate a little (not to sure how much it will help) I went ahead and heat taped all the wires closest to the hot side of the turbo.
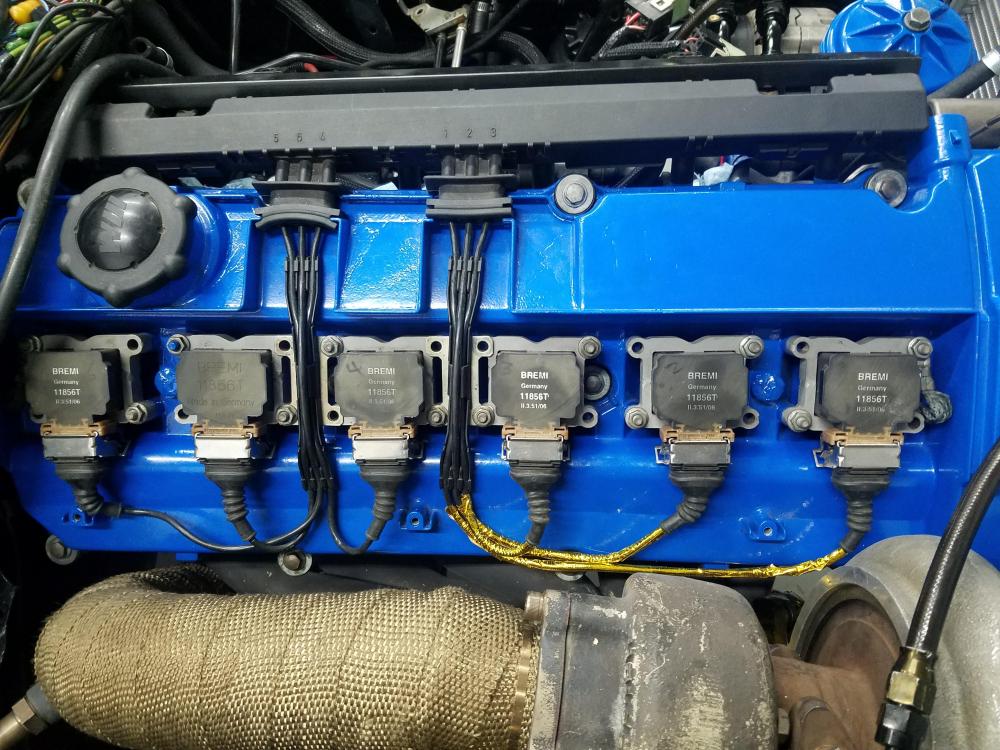
                                      20190204221228.jpg

                                      I guess we'll see what happens with that.

                                      Also got the section of the strut tower heat taped where need be.
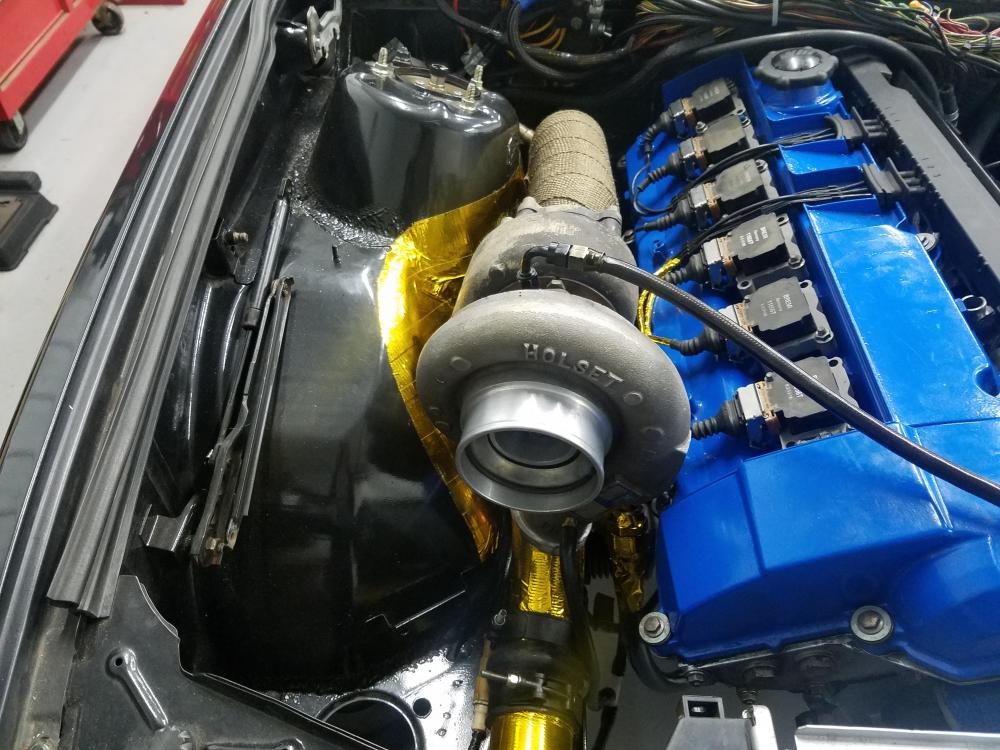
                                      20190204221237.jpg

                                      With that finished up I went on to the next thing, heater core issues. As per @straight6pwr advice I went ahead and poured water through both sides of the heater core pipes and sure enough water came out both sides.
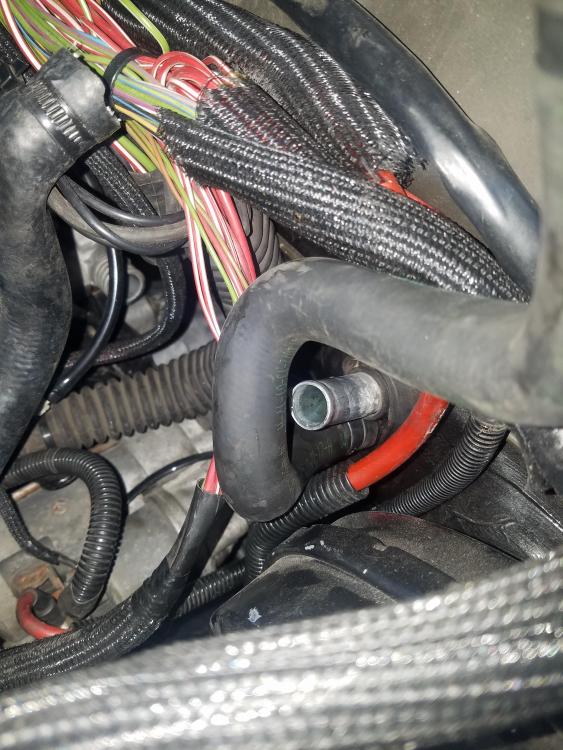
                                      20190205194022.jpg

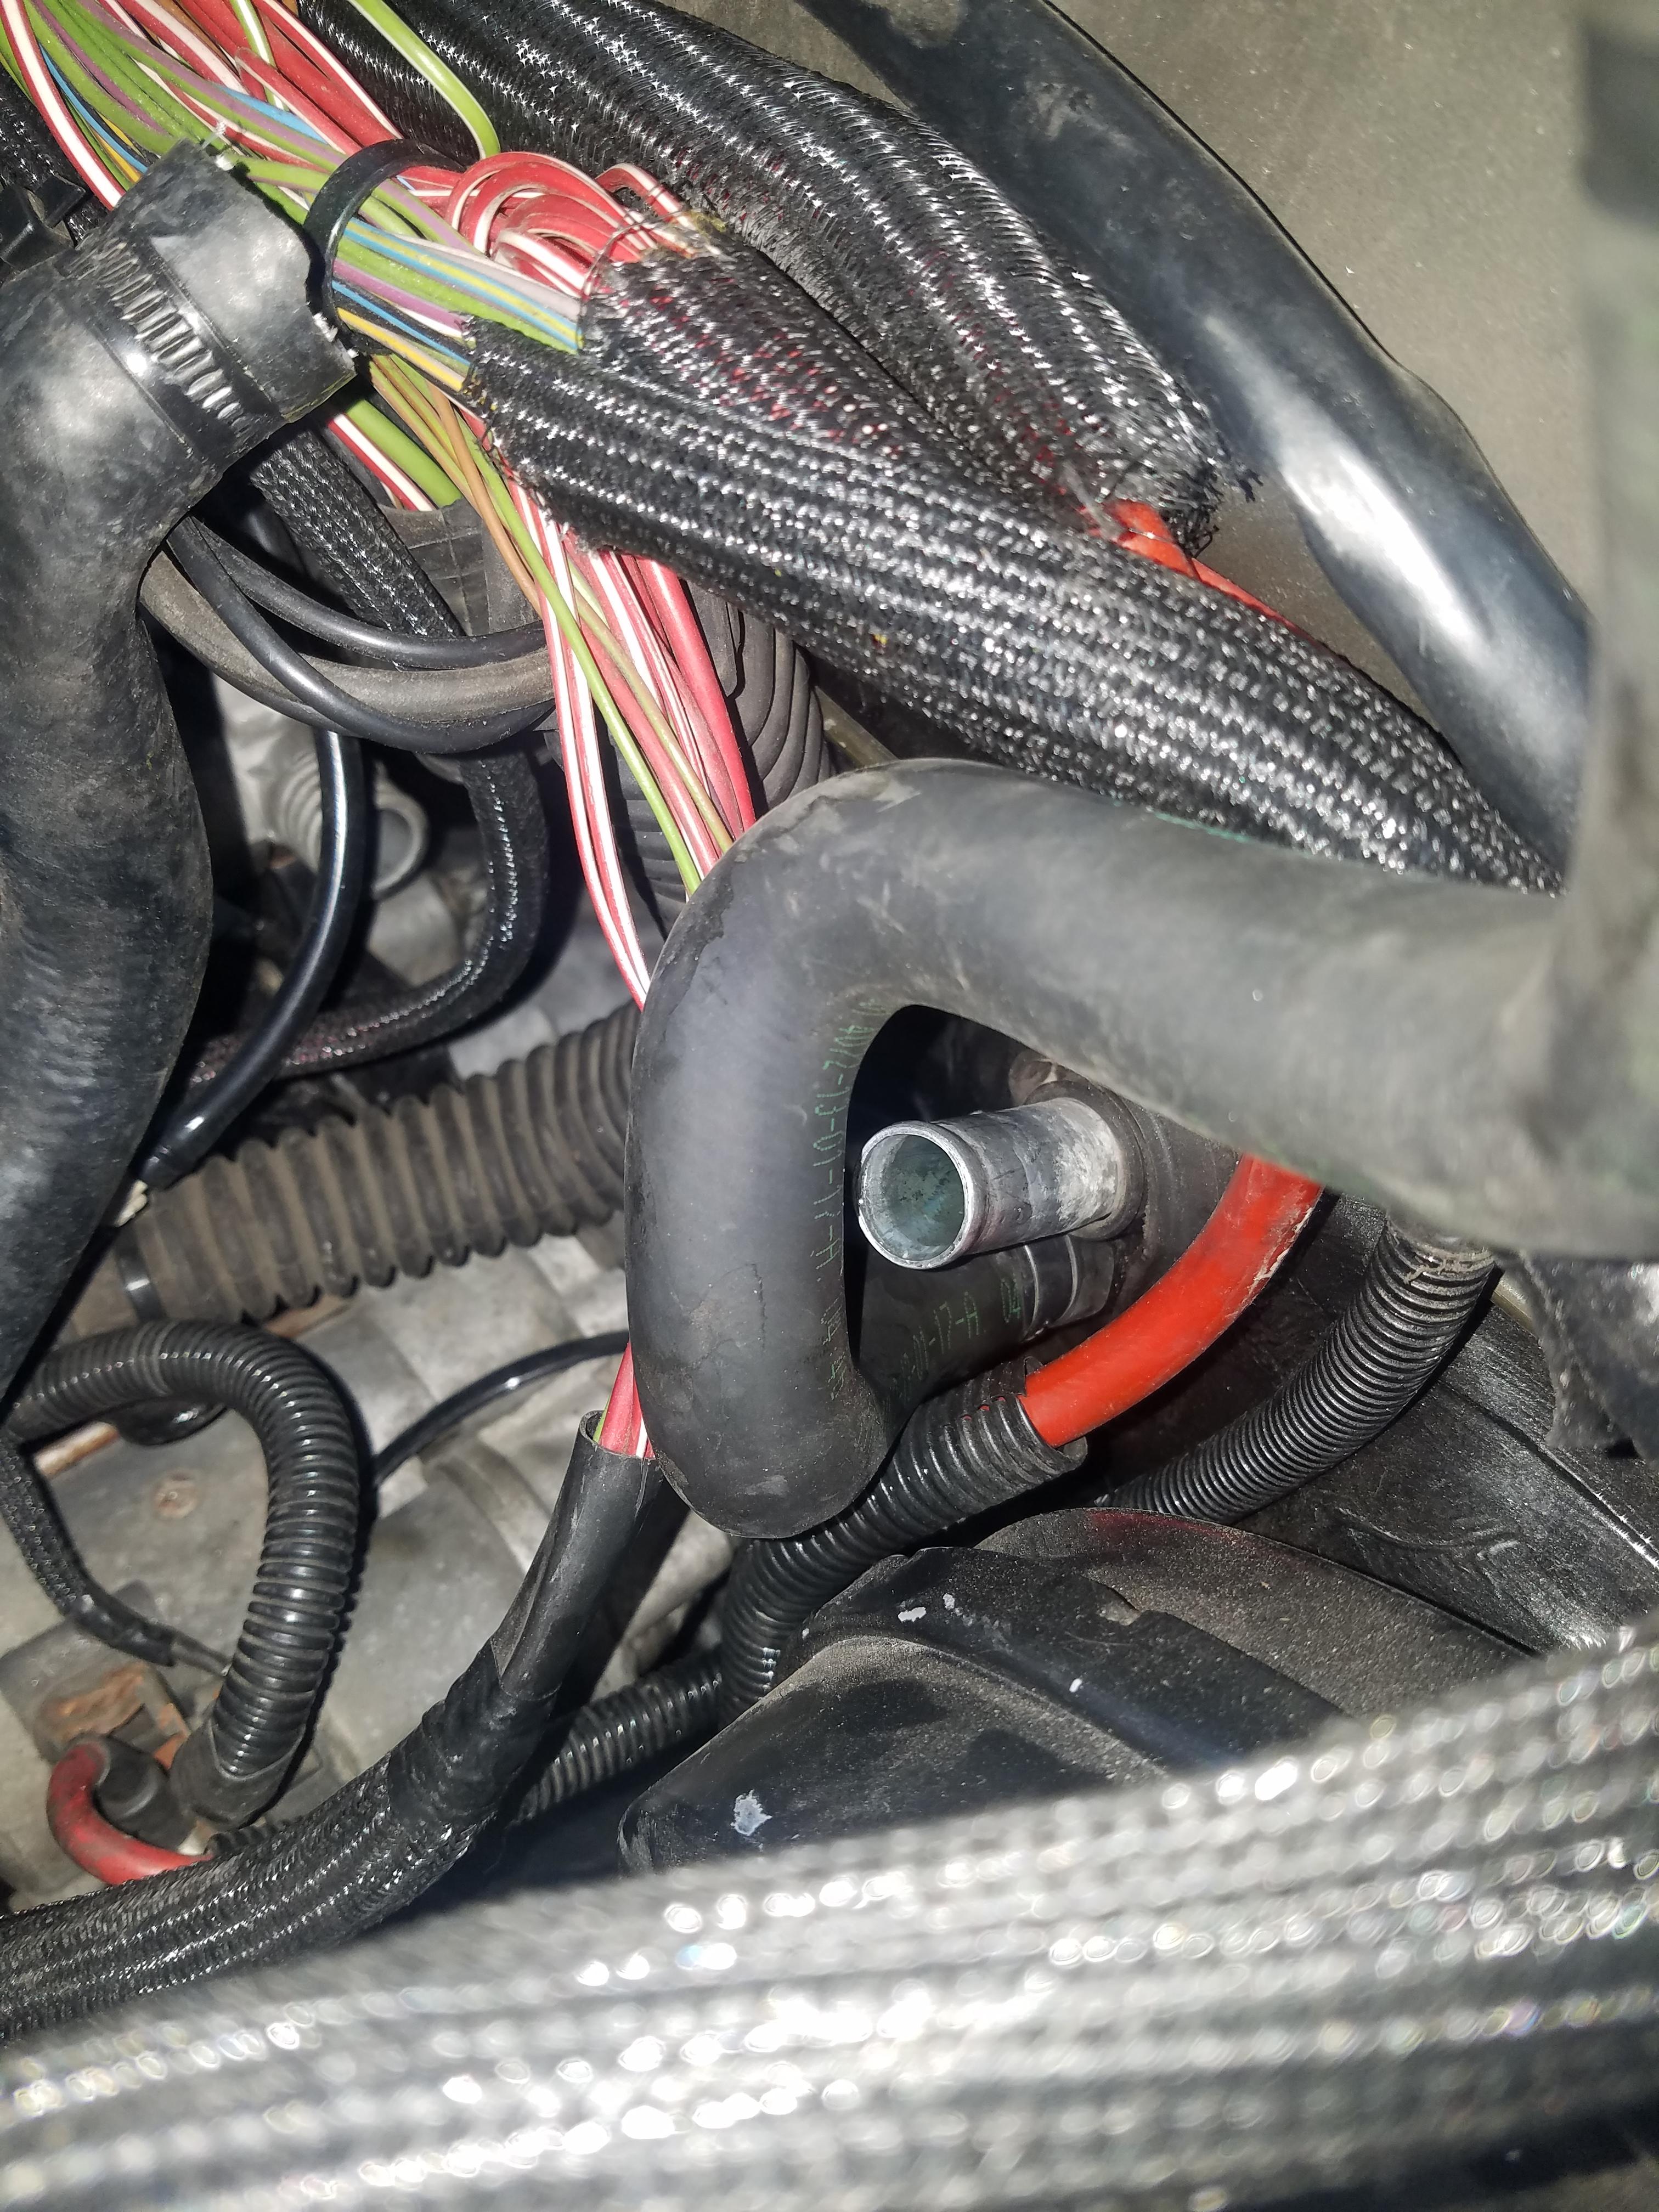
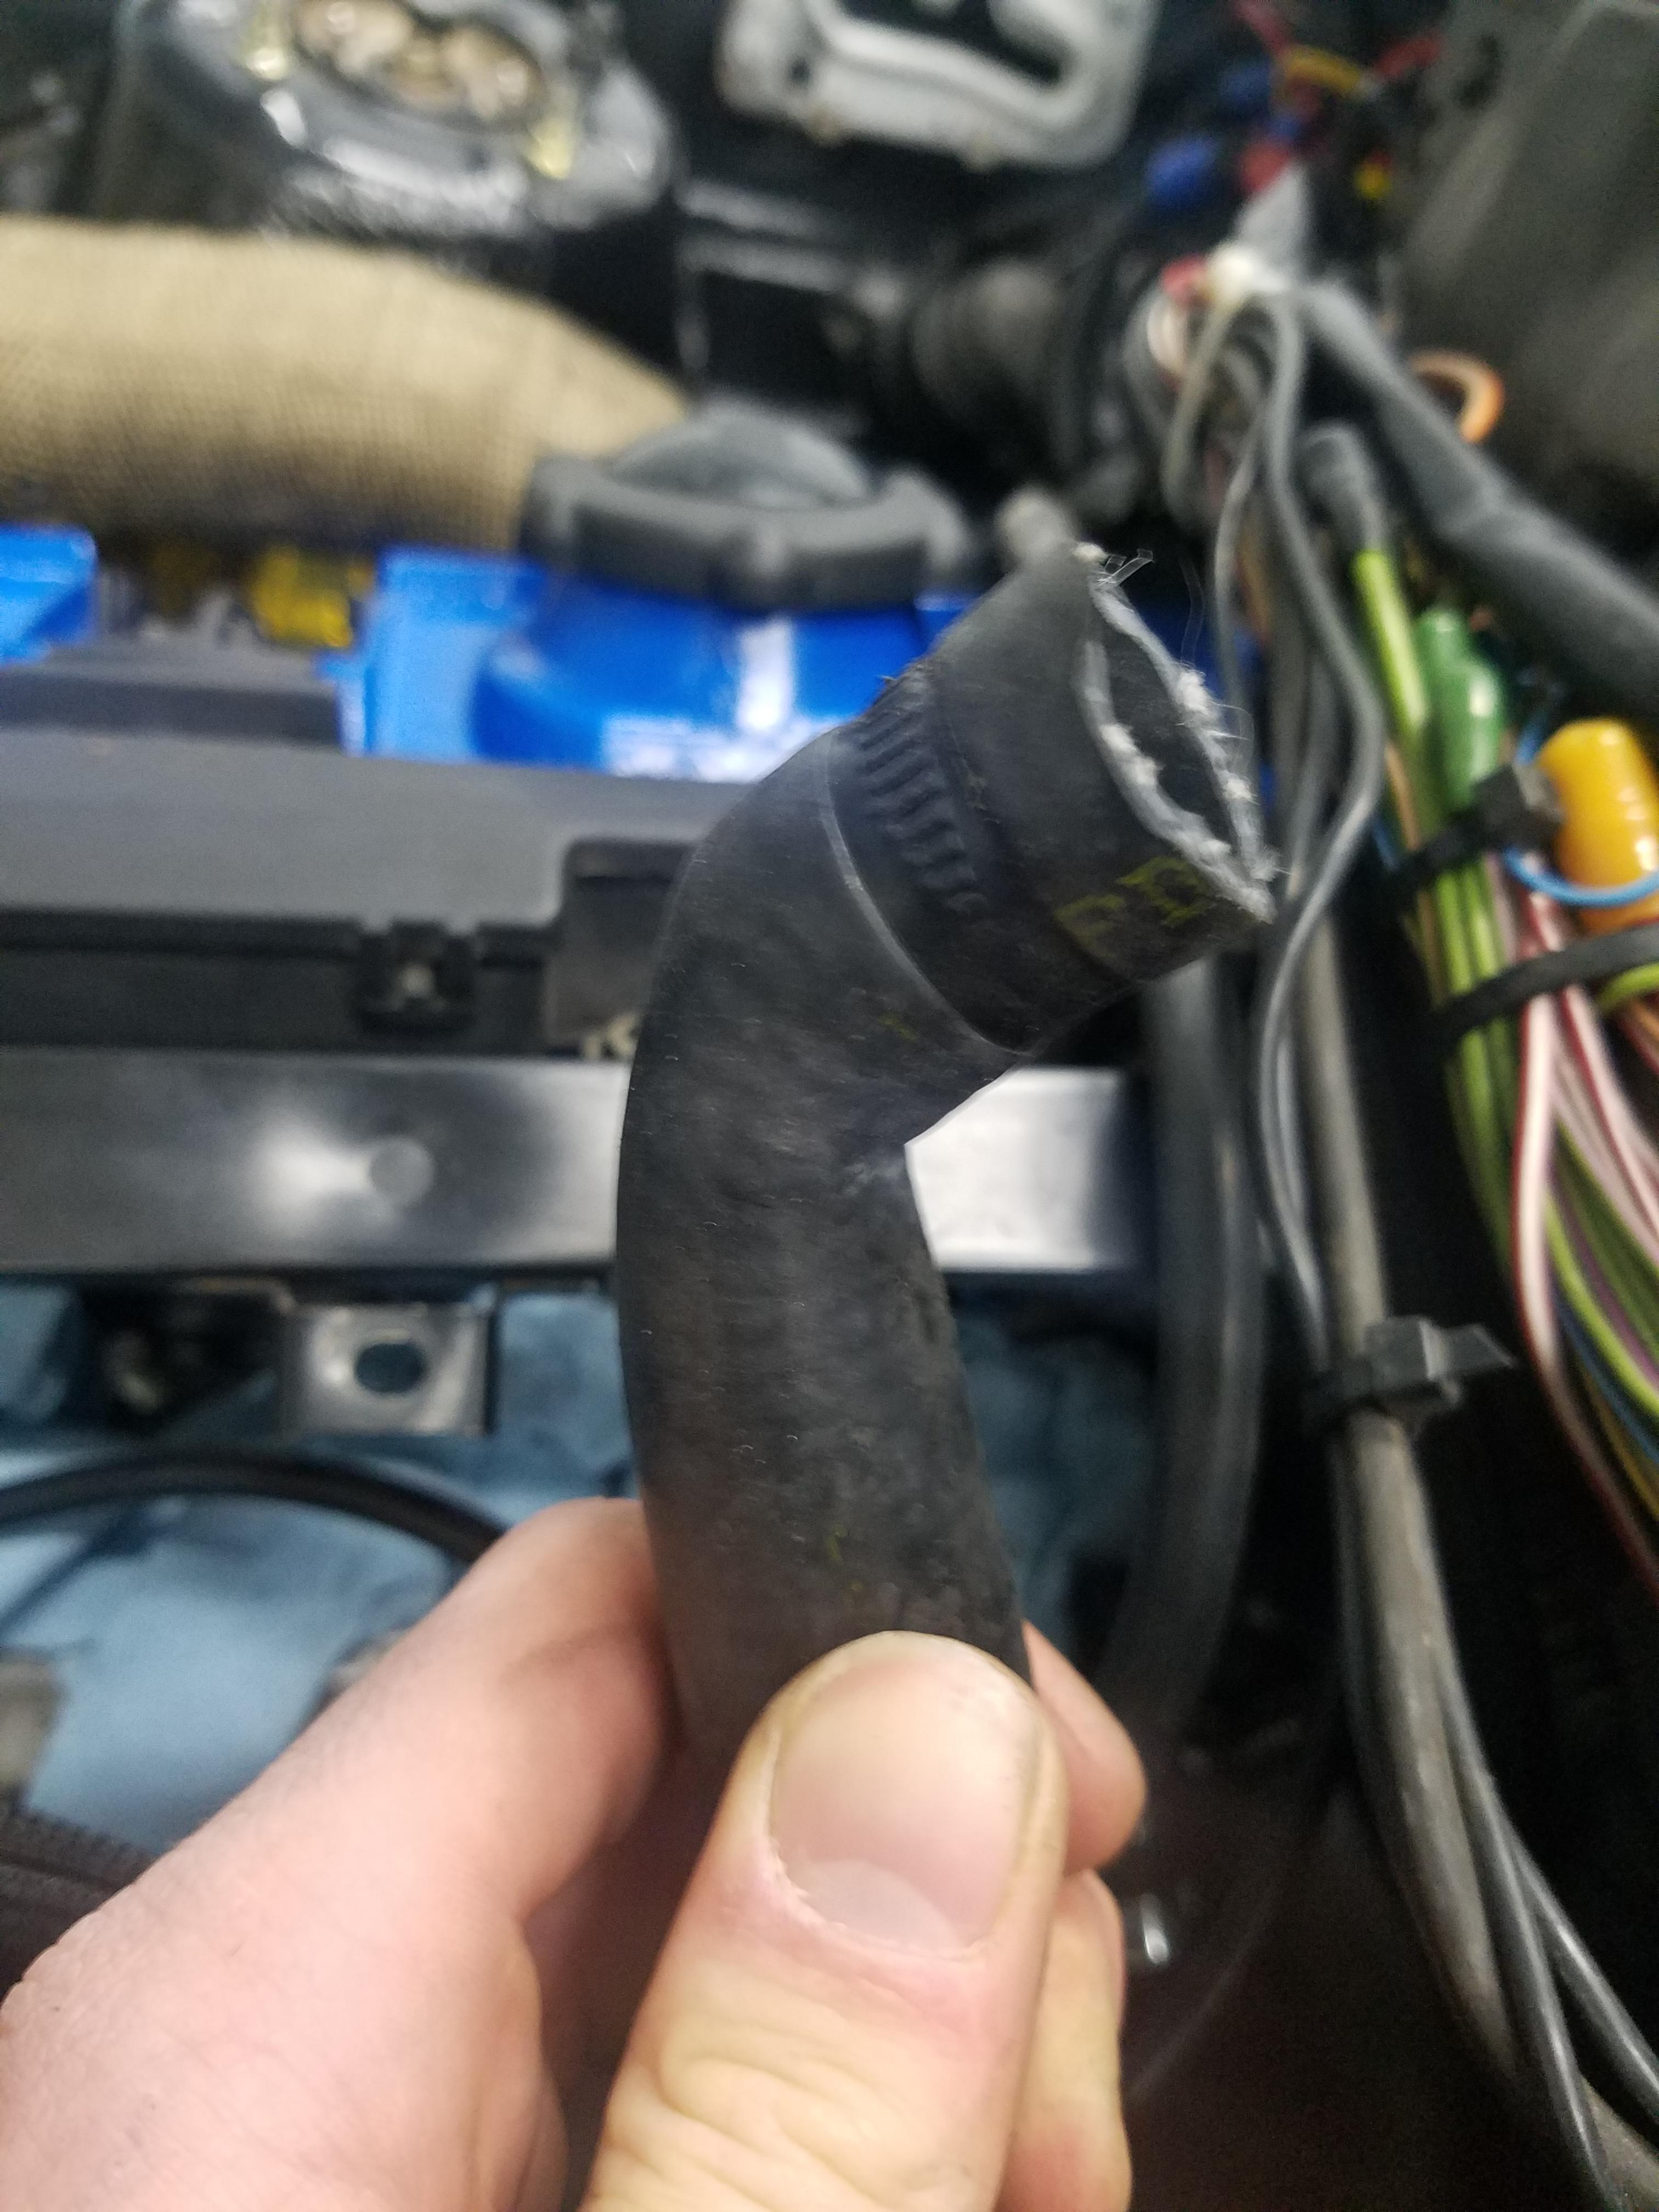
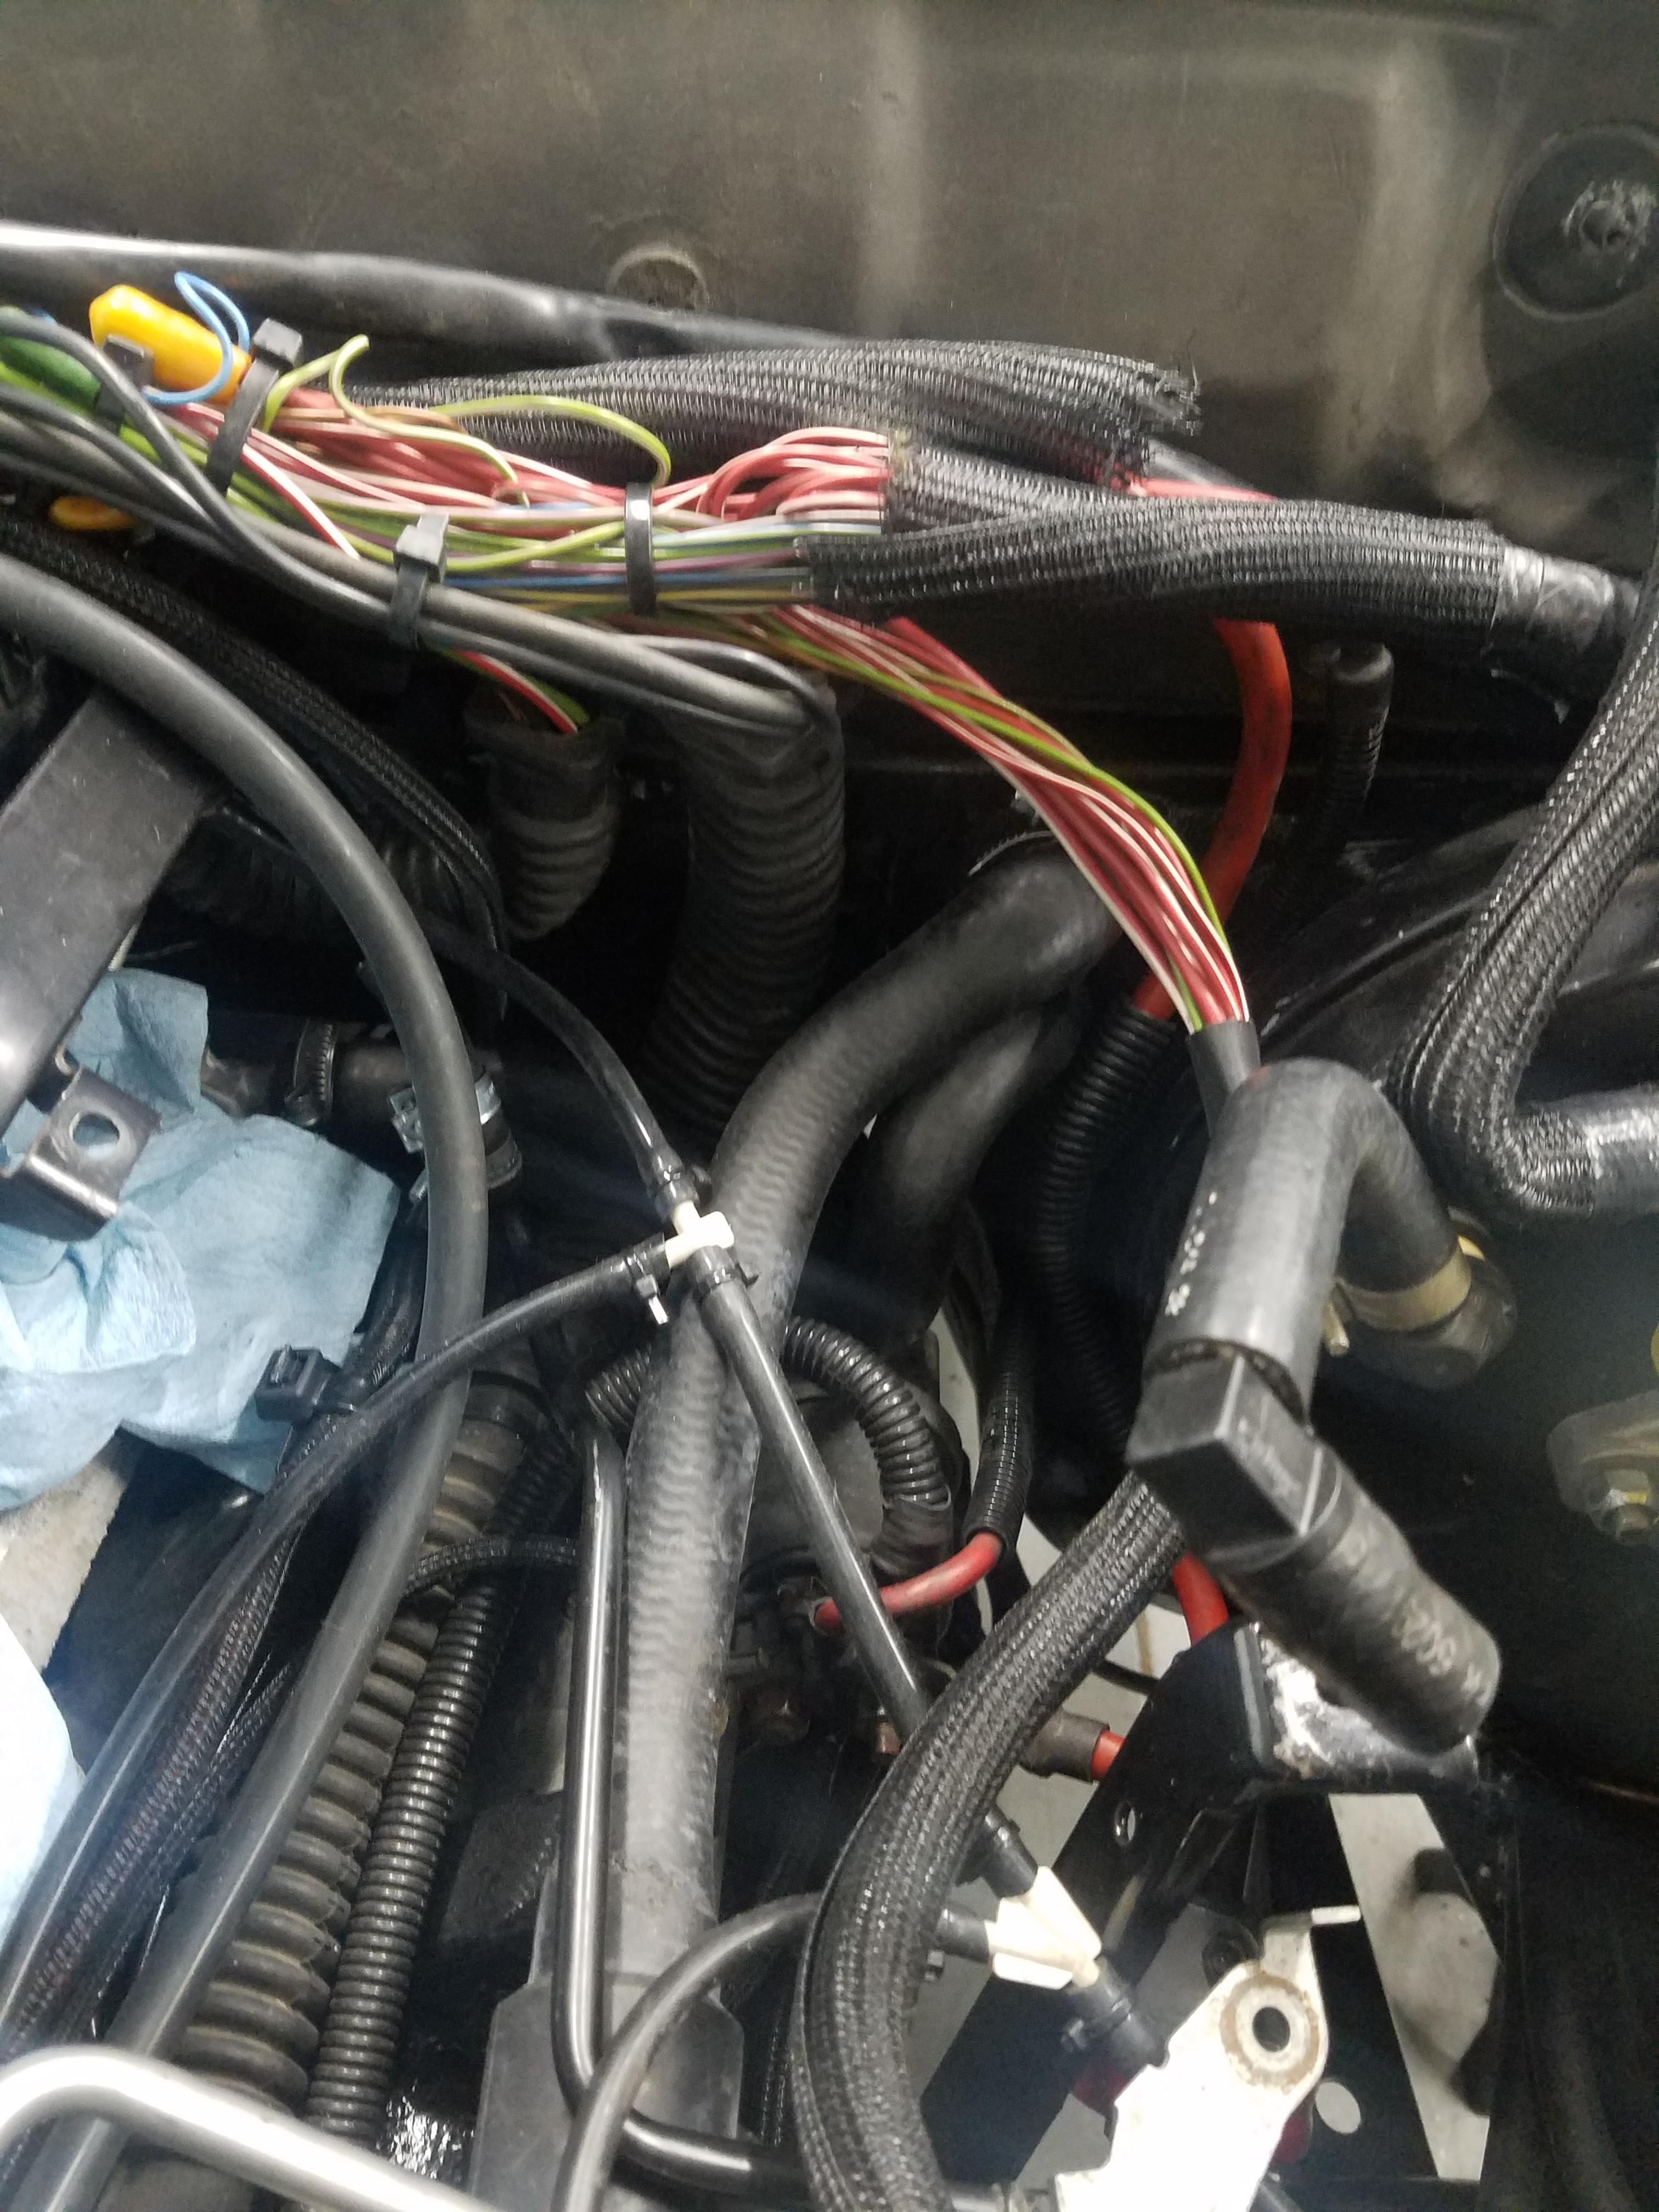
                                      After figuring that the core is most likely not the problem I have now assumed that it had a little something to do with this...
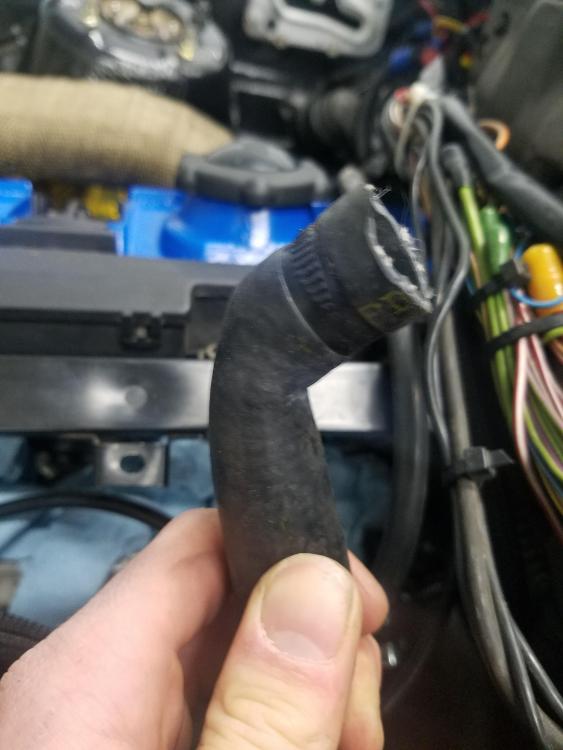
                                      20190205195217.jpg

                                      The kink was even worse when it was hooked up originally so I tried twisting it a bit when hooking it back up and I'm hoping that will do the trick.
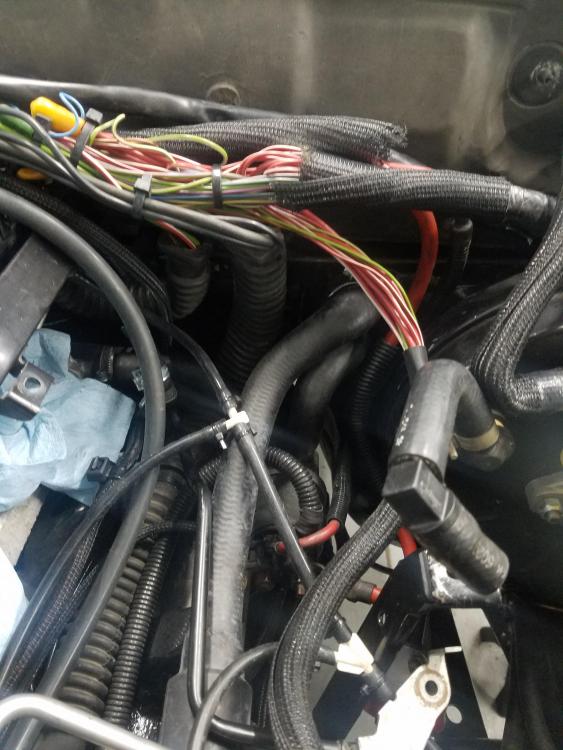
                                      20190205203021.jpg

                                      I will also be pulling the HVAC panel to check to make sure the temp dial is functioning properly. I sure am happy to know that it wasn't the heater core though.

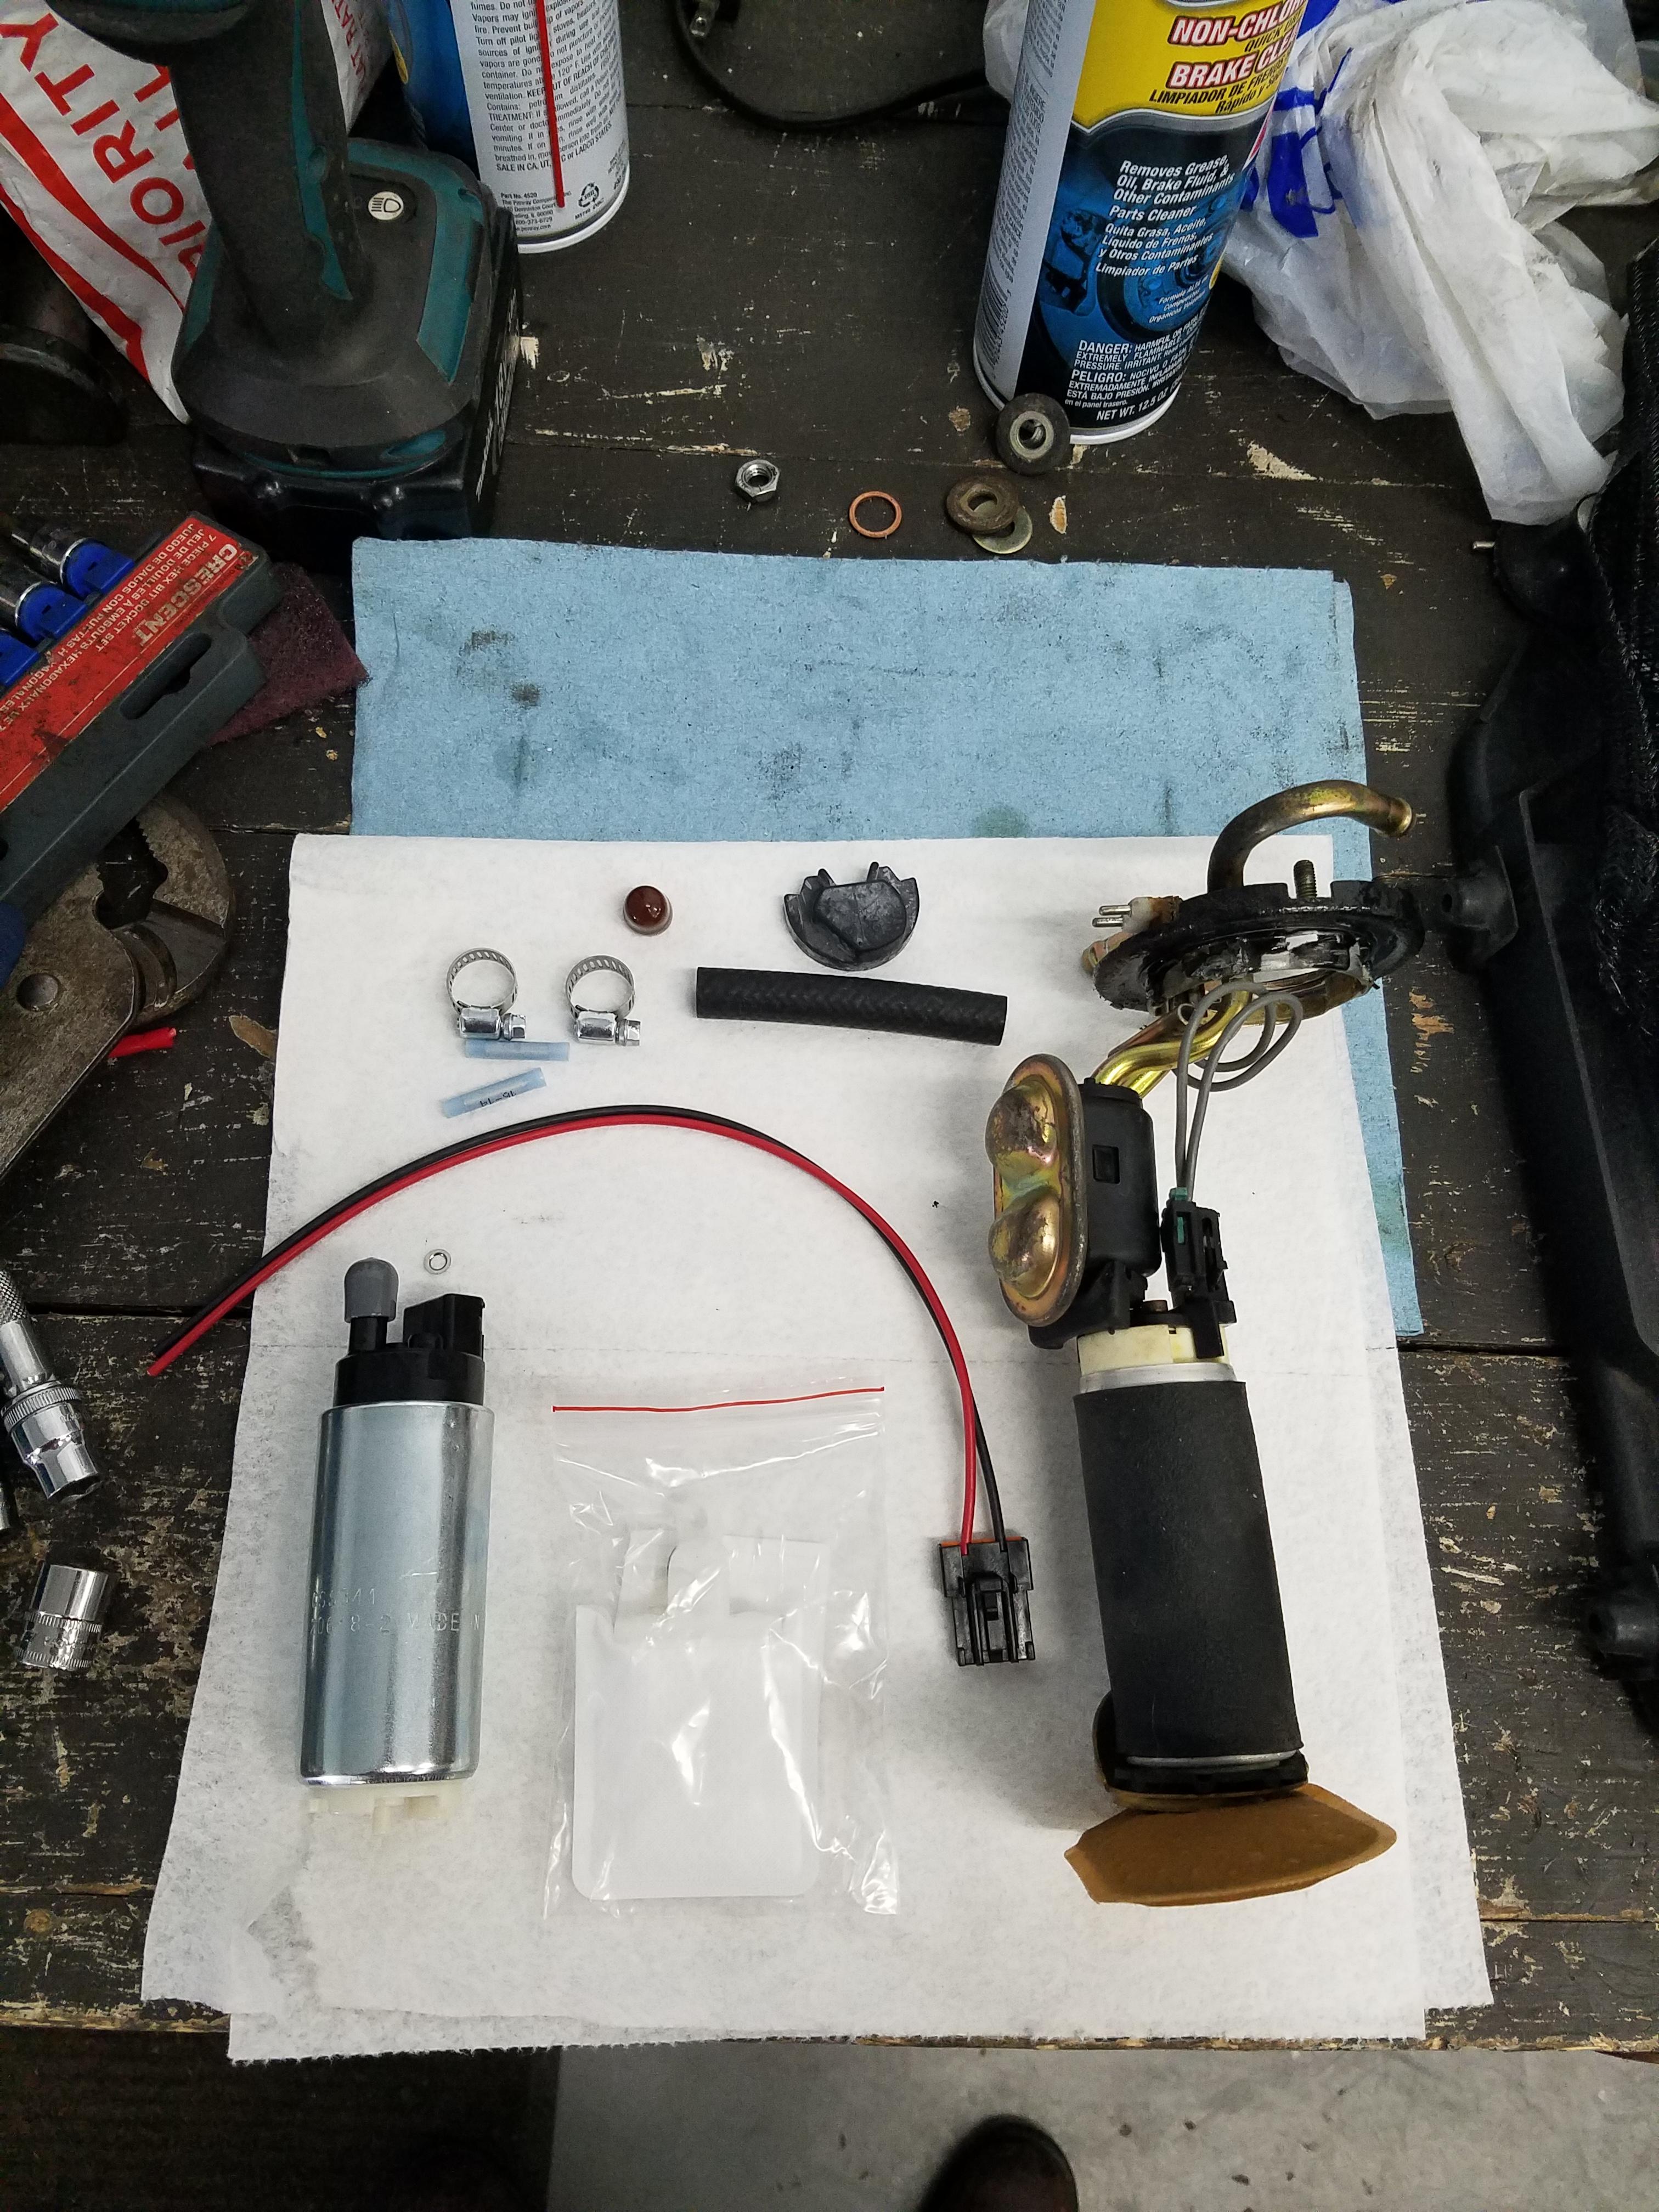
                                      Next up, fuel pump.
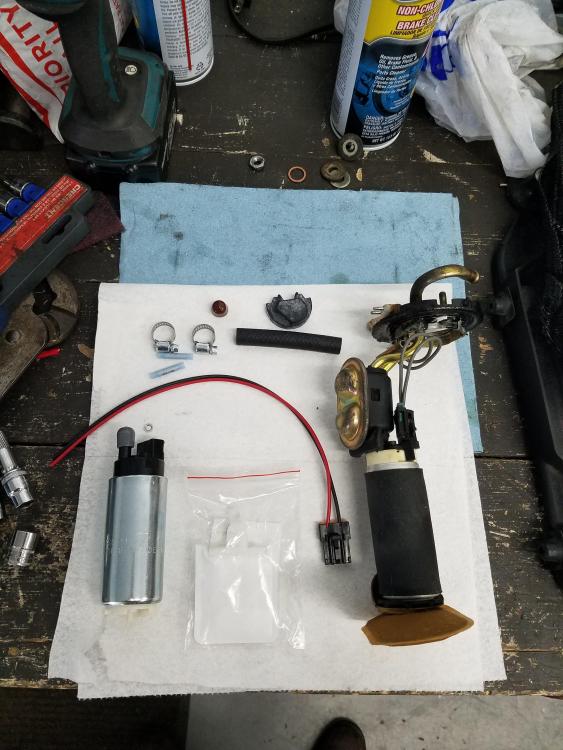
                                      20190211105632.jpg

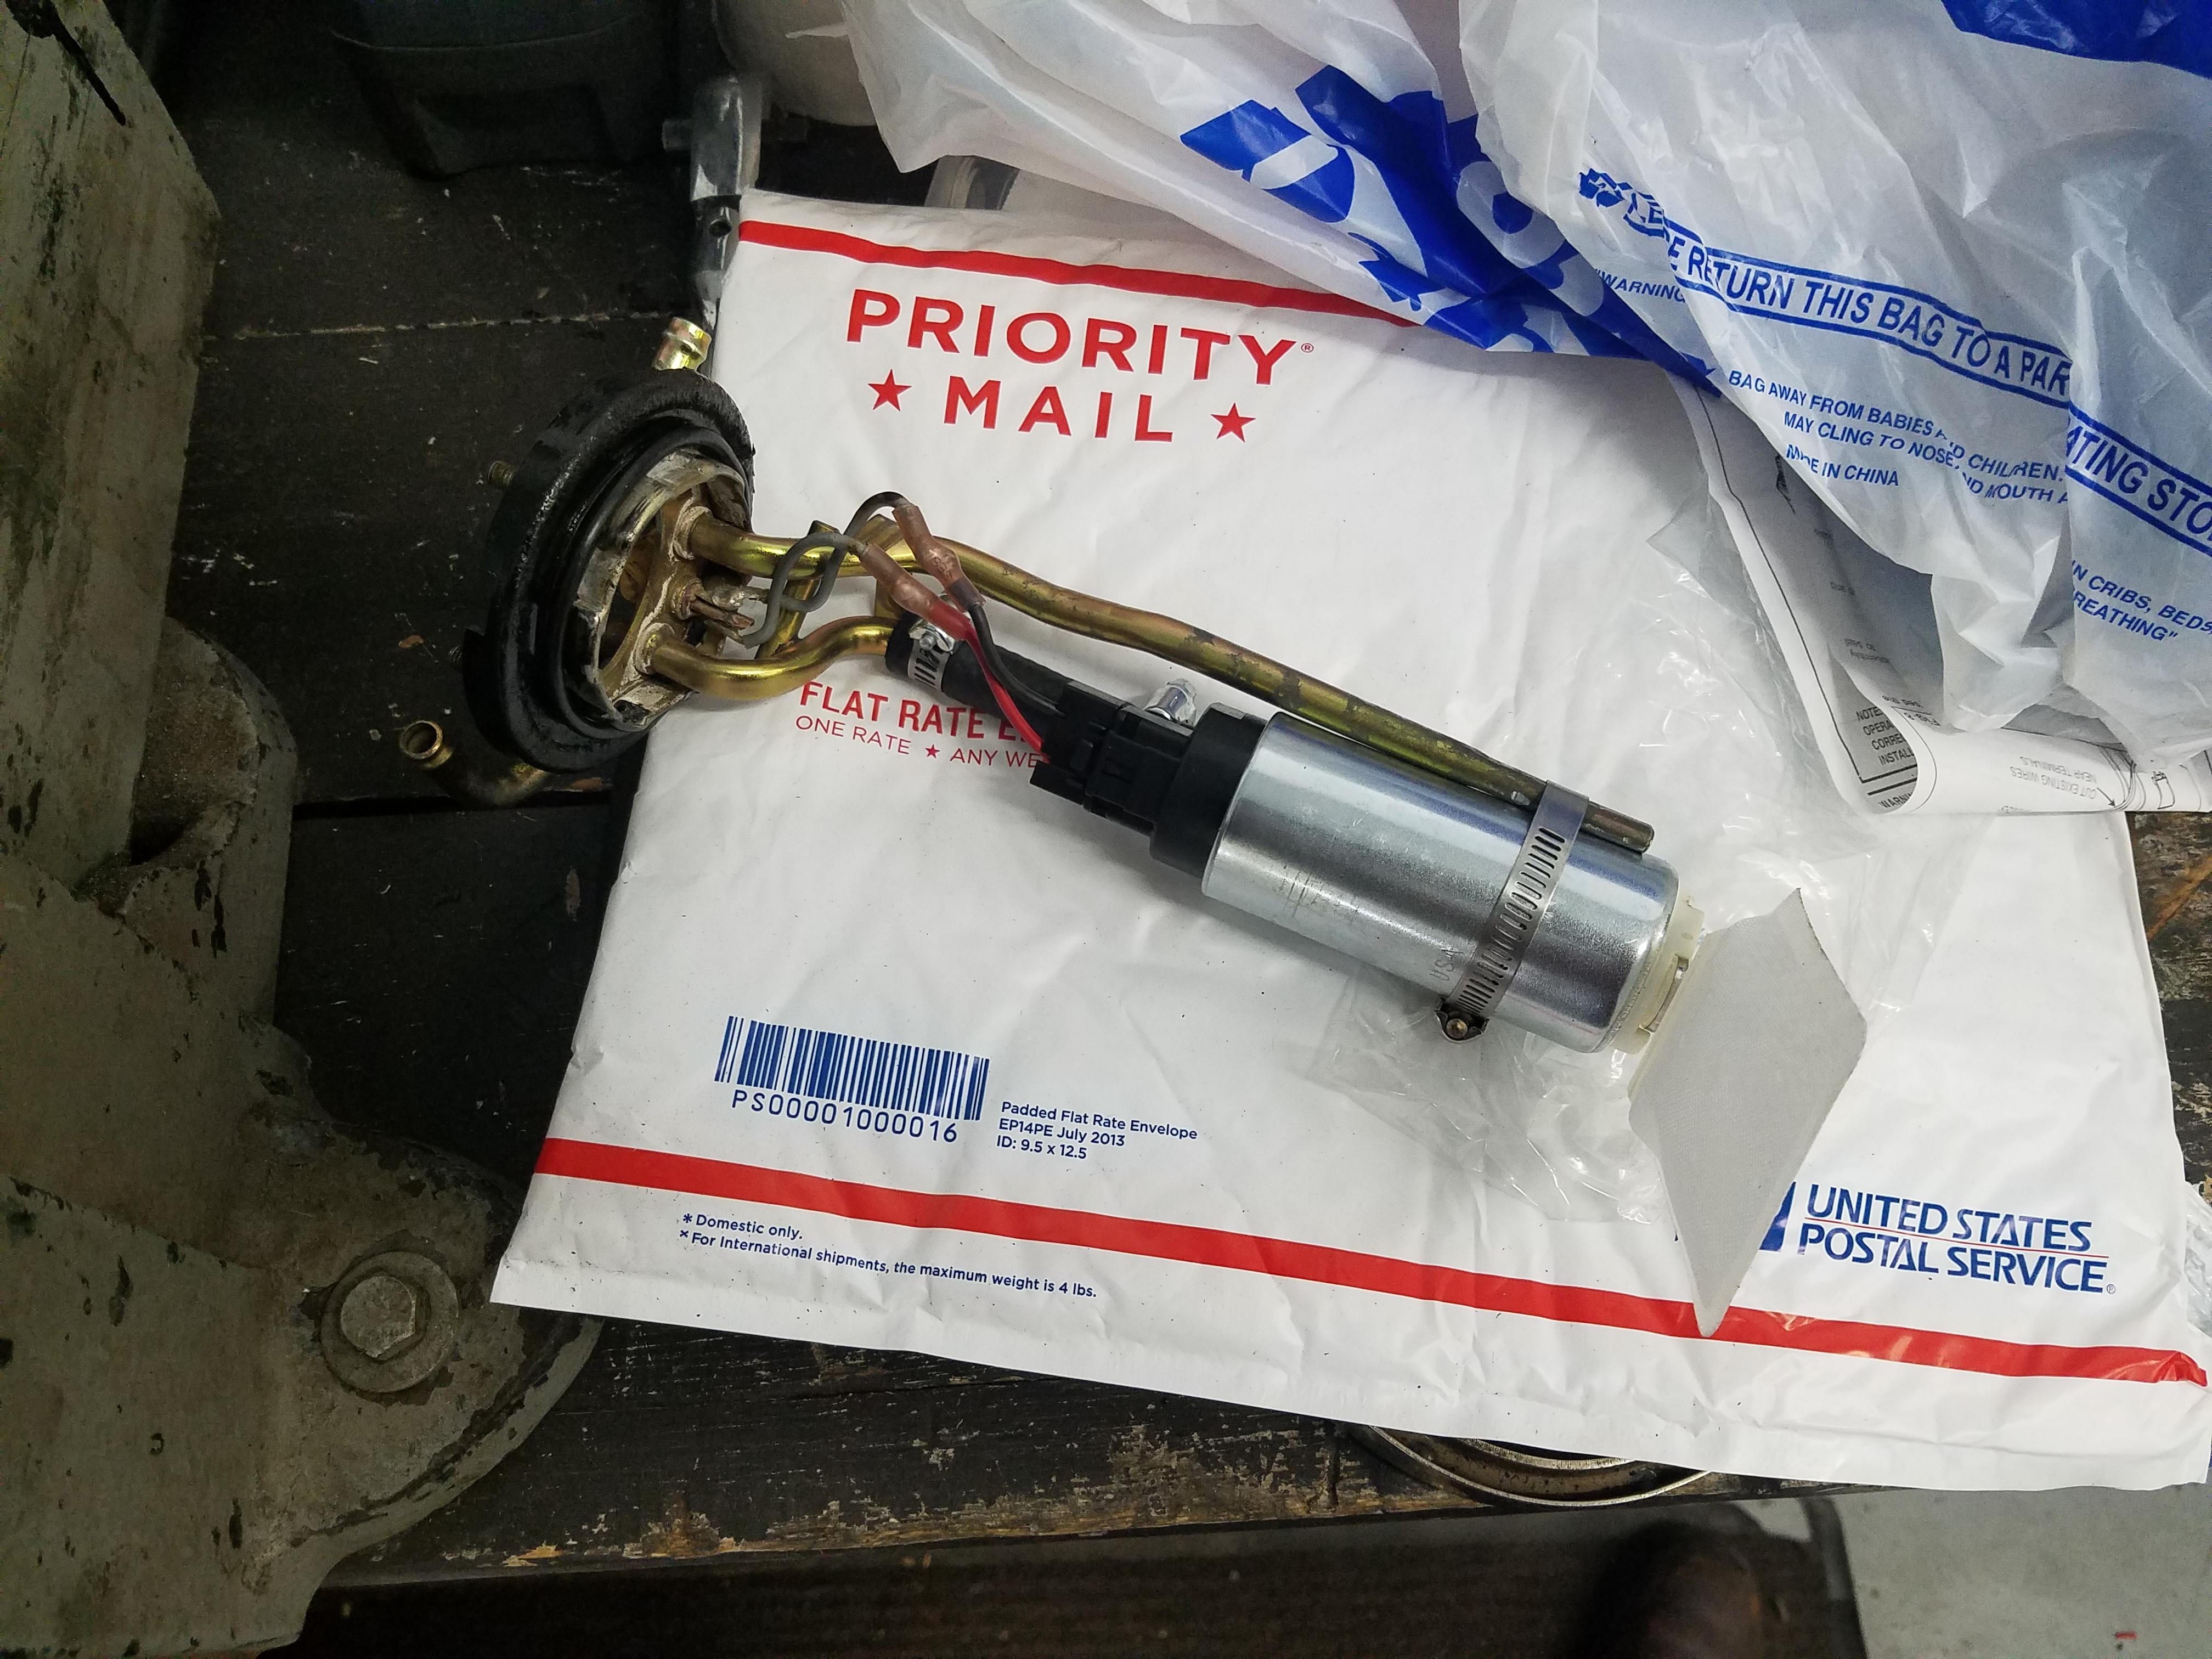
                                      Ordered me up a Walbro 255 fuel pump and the installation kit on amazon. Stock pump ran like a champ with no issues on the NA setup but, with the extra amount of demand for fuel I felt it would be necessary for the upgrade. Everything showed up on Saturday and I got right to it.

                                      Fairly easy install, curious as to how loud this will be in comparison to the stock pump.
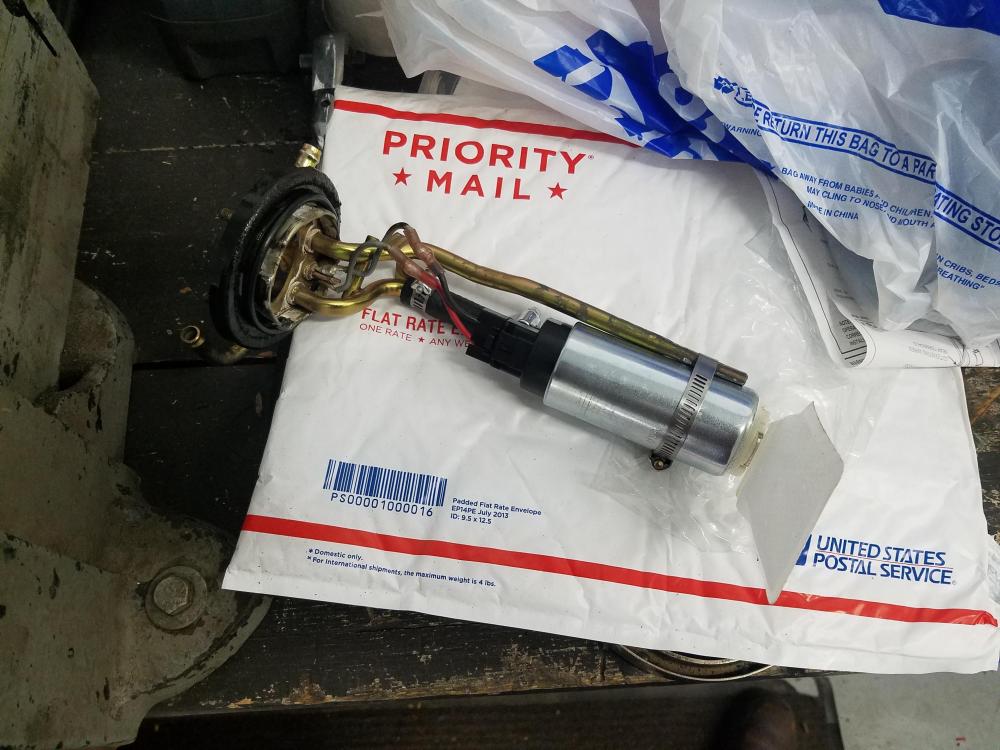
                                      20190211134609.jpg

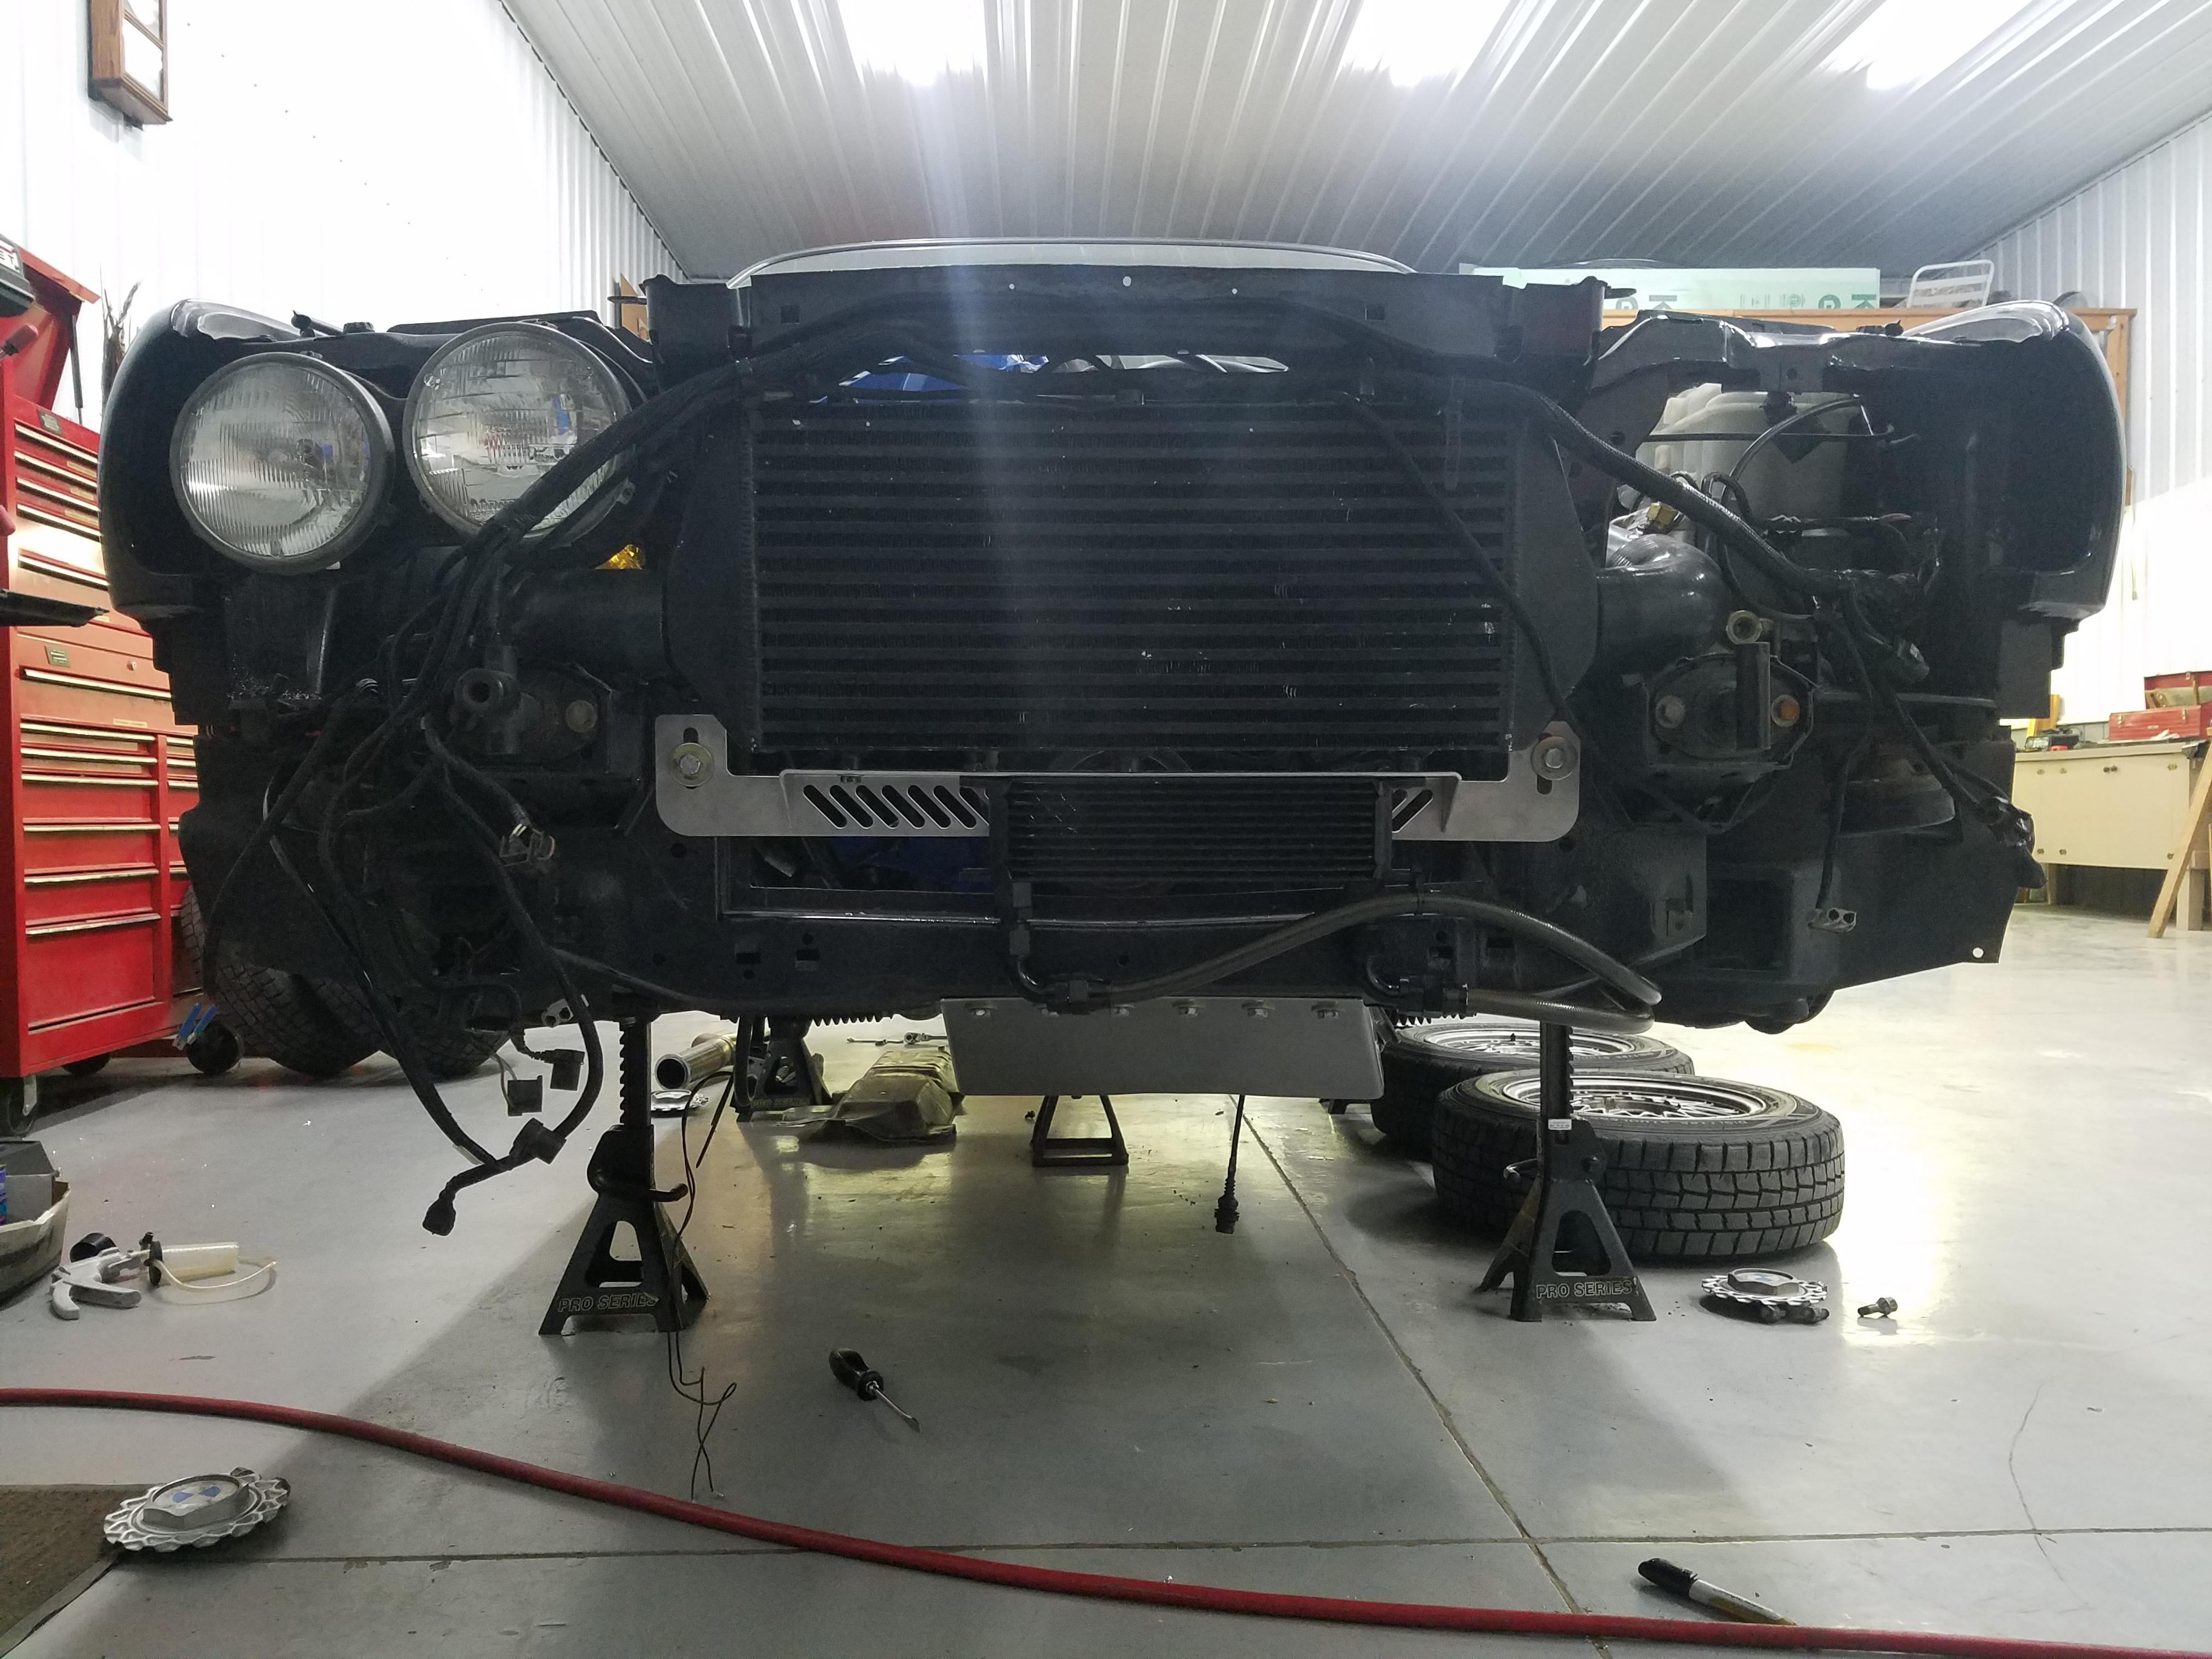
                                      Ah, what's next... Intercooler bracket.

                                      Spent a little time with my buddy on solid works and came up with a cool little design for a bracket. Following day we took the design over to a friends shop and had it cut out on a scrap piece of 3/16 aluminum with his plasma table and bent it up in the press brake.
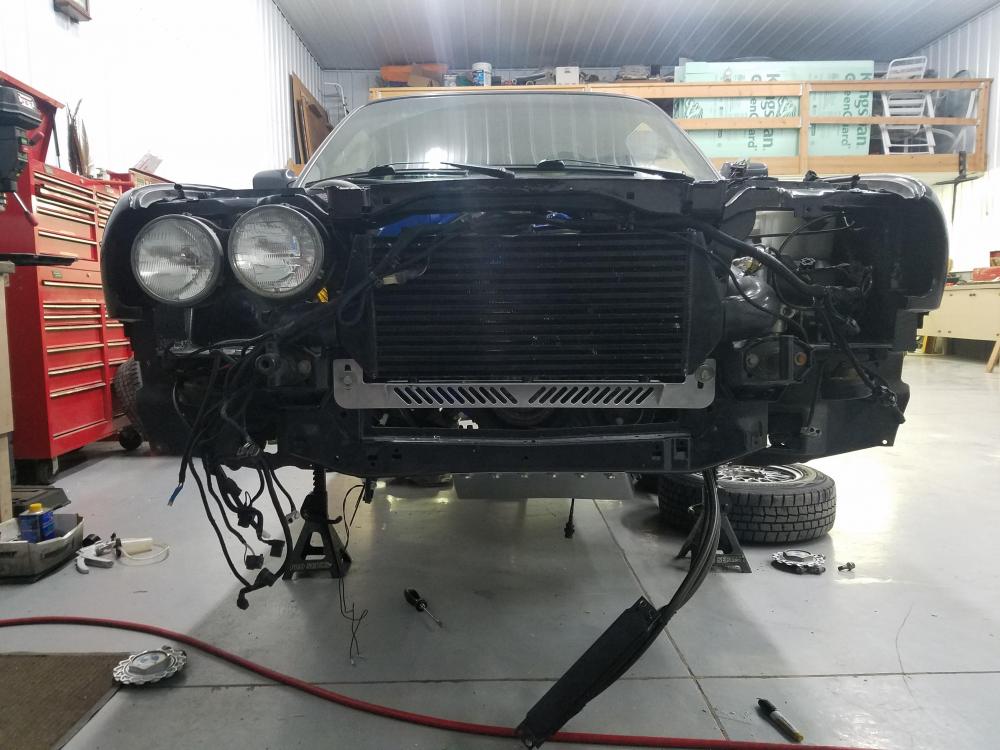
                                      20190211171206.jpg

                                      Also had holes cut out for the oil cooler fitment.
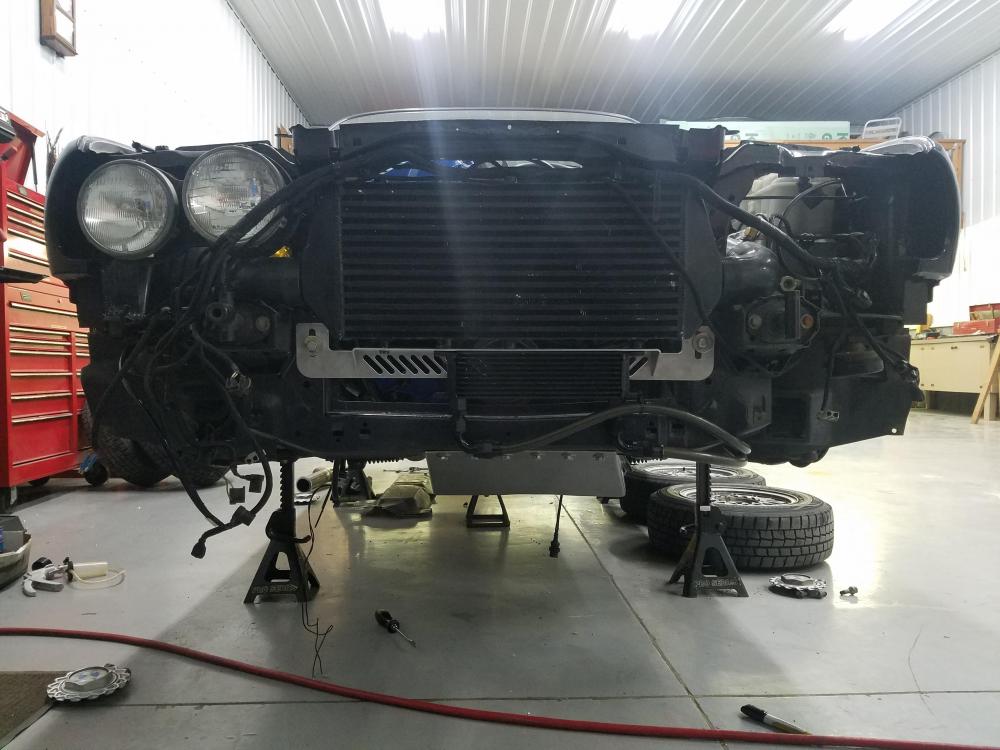
                                      20190211172059.jpg

                                      It really keeps the intercooler and oil cooler solid and held in place nicely and I'm super pleased with how it turned out.

                                      Spent the rest of the night getting the intake manifold back on and everything hooked up including the larger 80 lb Siemens fuel injectors, oil cooler lines and the vacuum lines for the 2 diverter valves which is then all routed into the cabin to hook up to the MS.
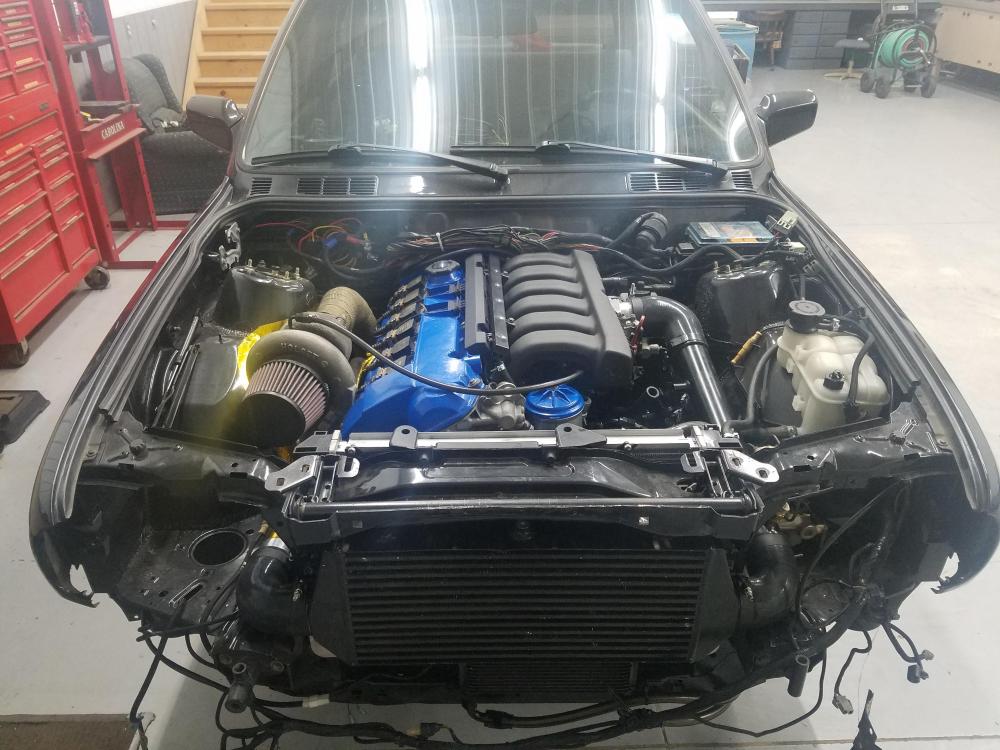
                                      20190211210104.jpg

                                      Speaking of MS. As some of you may of suspected from one of my previous post I had no intentions of running the MS3x with what was supposedly considered a wiring harness.

                                      I will be going with the much more cleaner and user friendly MS3 pro pnp.
                                      20190204221547.jpg

                                      1 Reply Last reply
                                      0
                                      • AsparagusMikeA
                                        AsparagusMikeA
                                        AsparagusMike
                                        wrote on last edited by
                                        #380

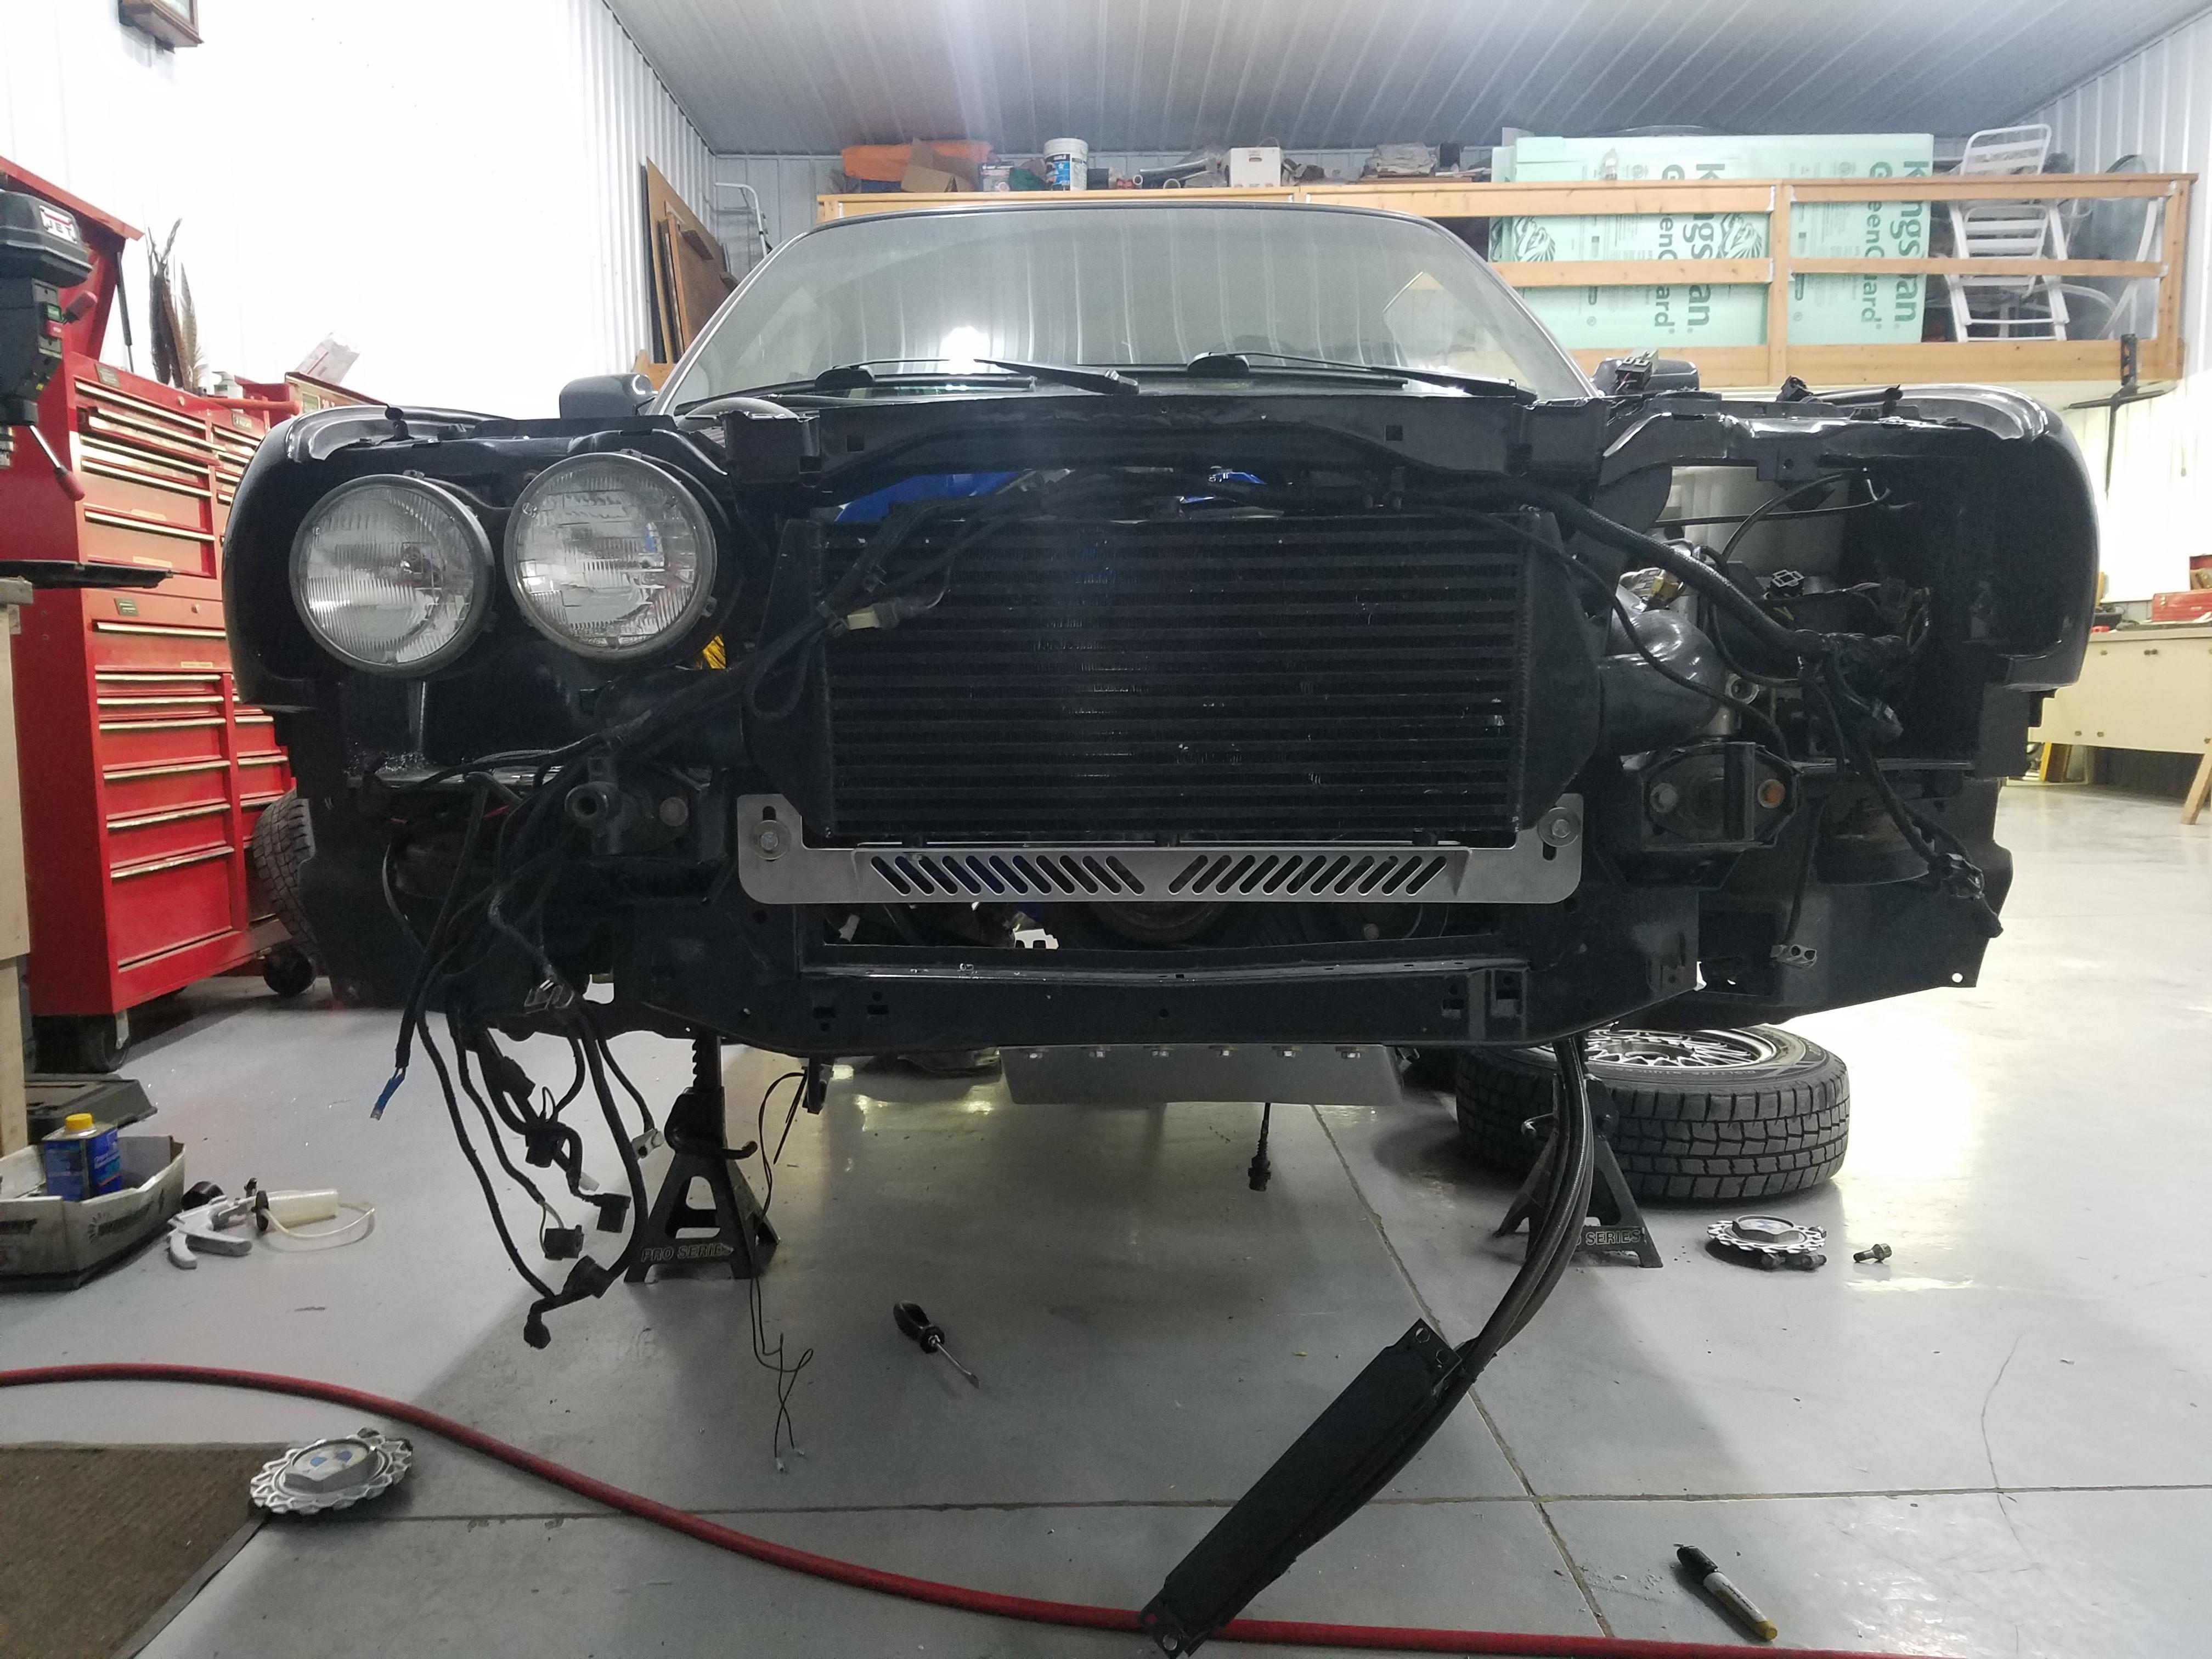
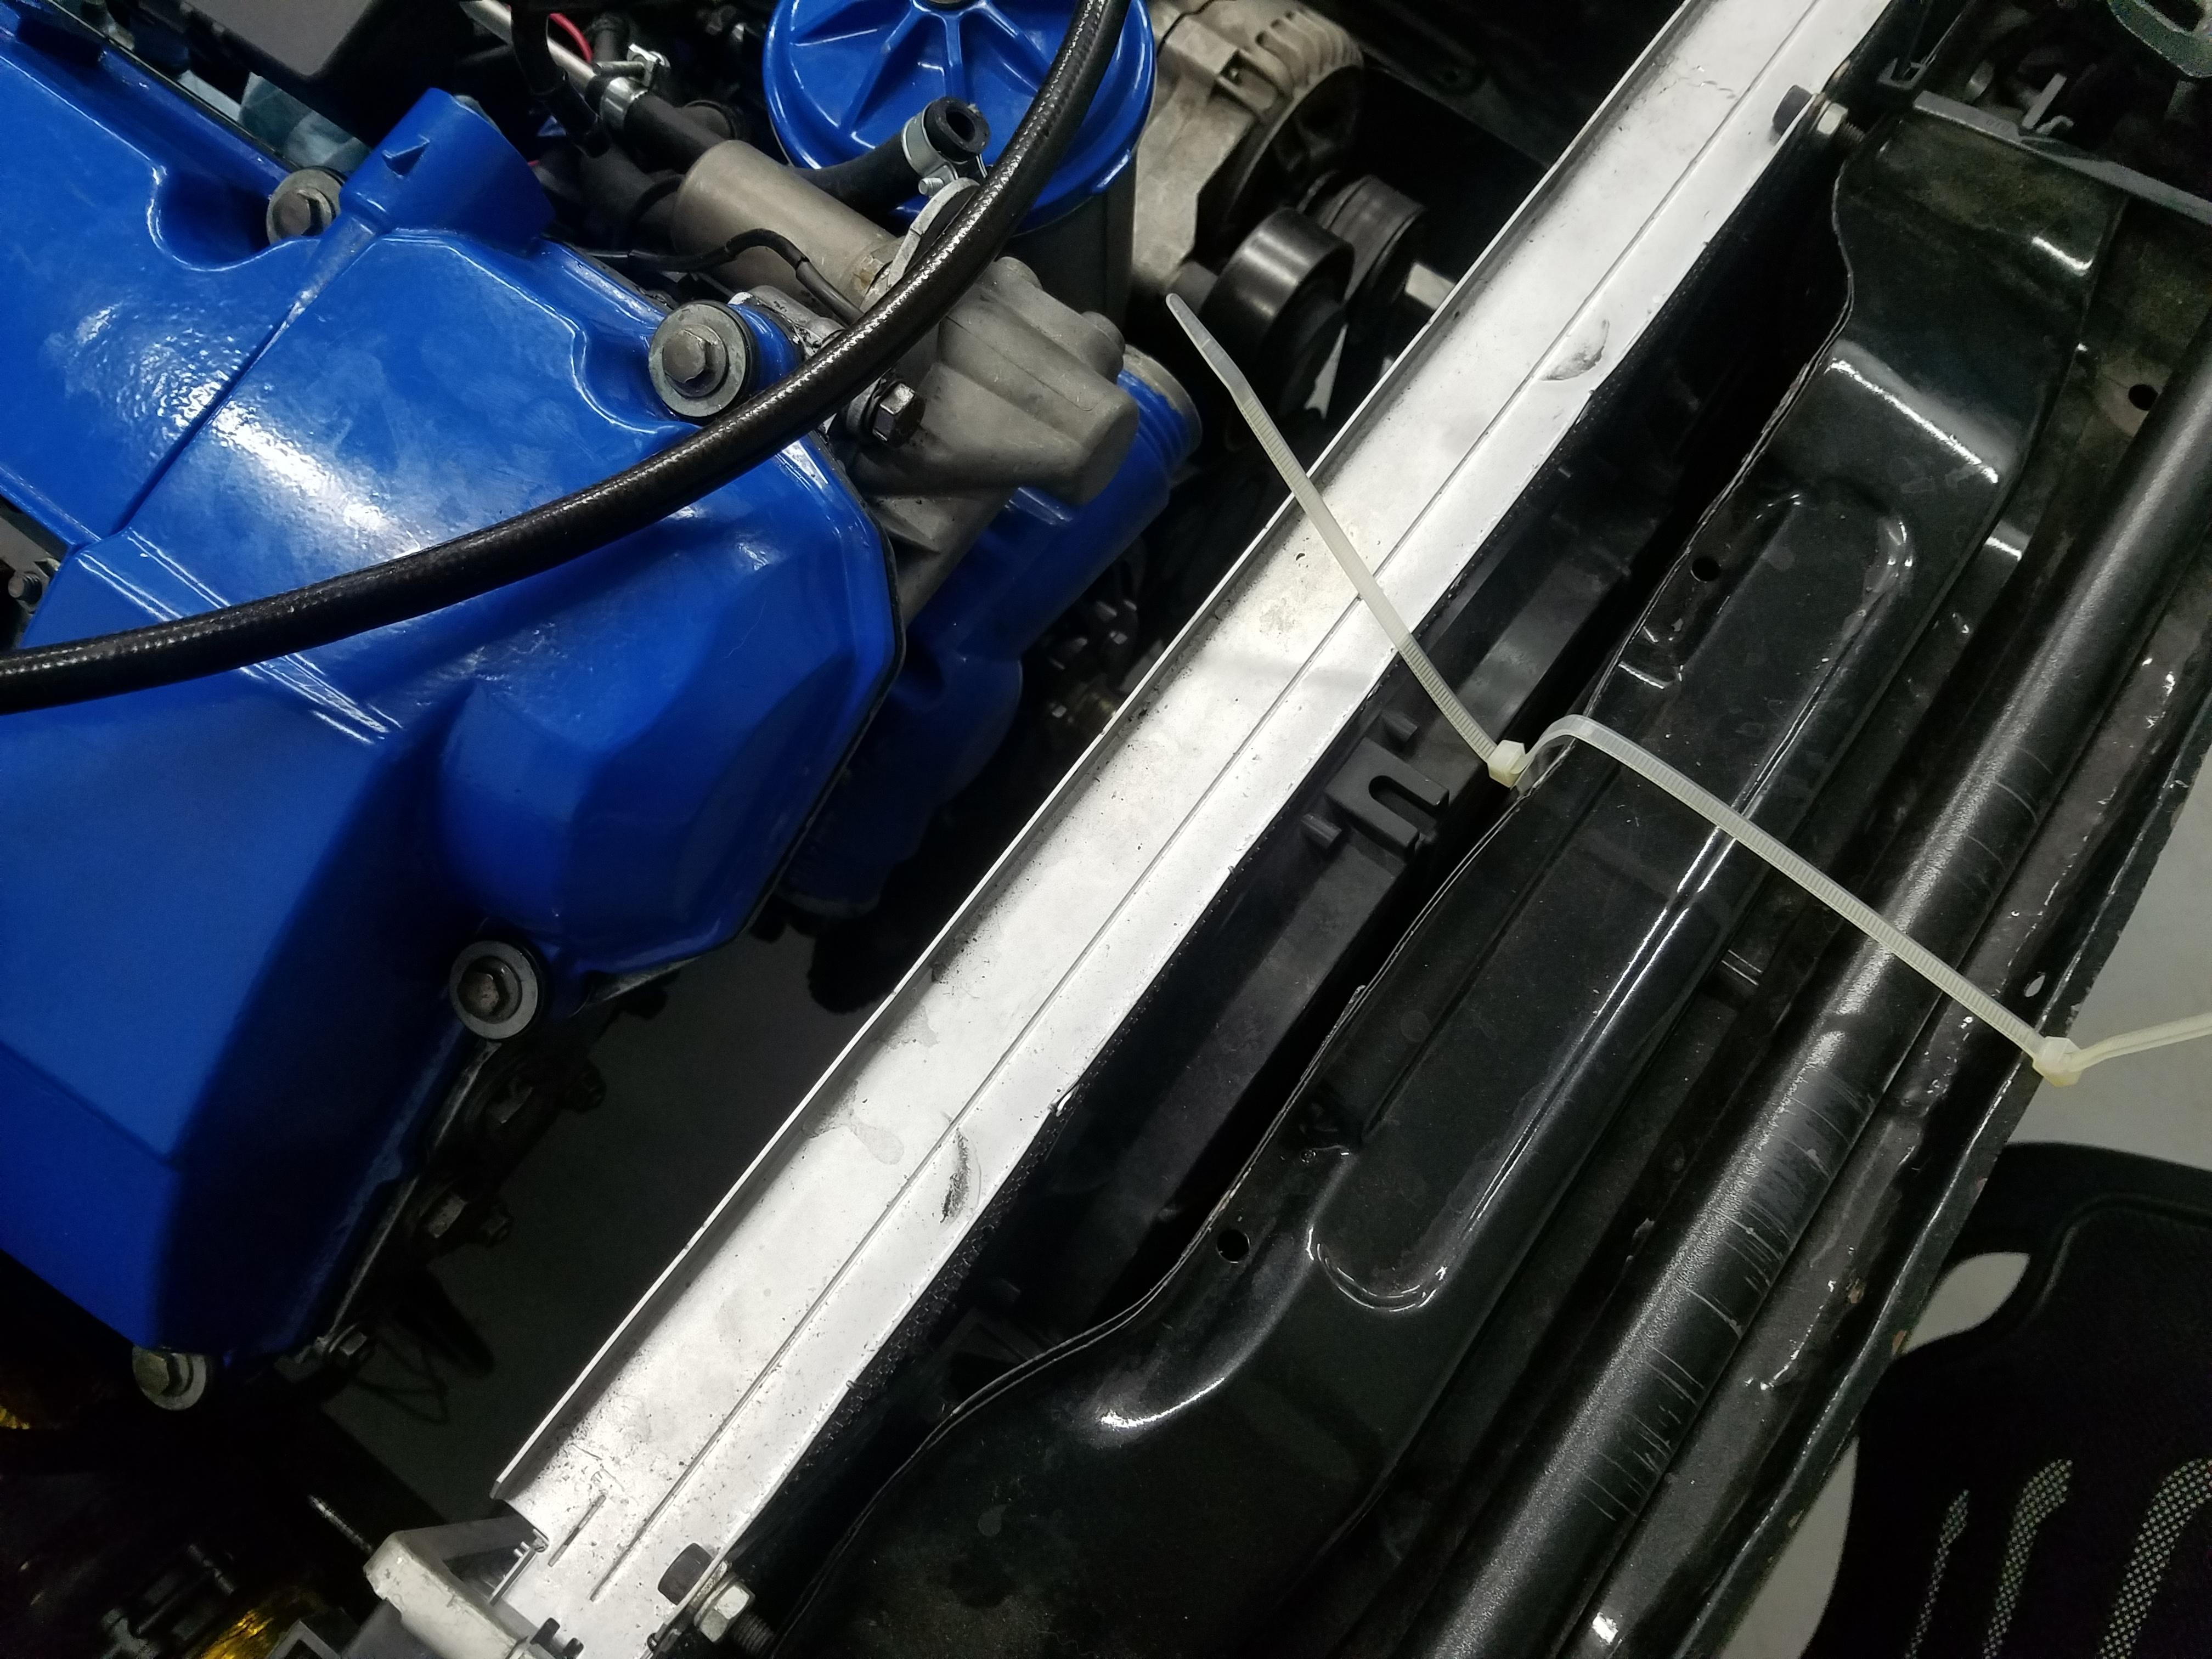
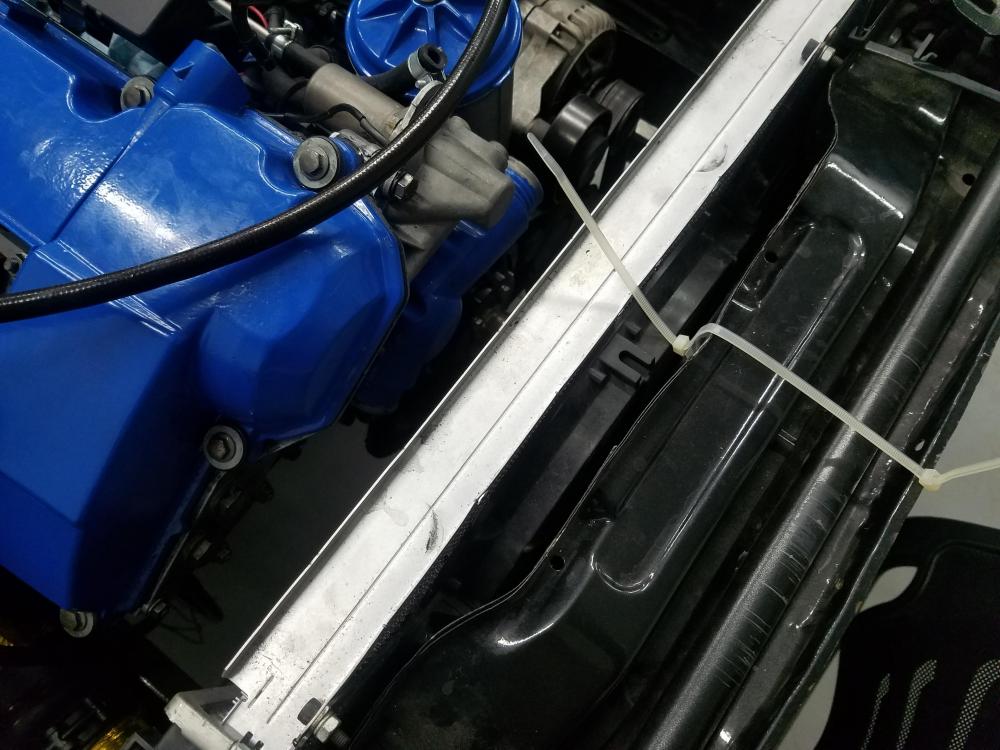
                                        Completely forgot to mention that there was enough gap between the radiator and intercooler for the puller fan to easily fit in between so there will be no need to change up anything there which I am super stoked about. ( if your wondering, that was the reason for the last pic on the previous post lol)

                                        1 Reply Last reply
                                        0
                                        • GunMetalGreyG
                                          GunMetalGreyG
                                          GunMetalGrey
                                          wrote on last edited by
                                          #381

                                          That intercooler bracket looks sweet, nice work on that! 

                                          I'm super curious to see how your valance fits considering you can stick a fan between the rad and the intercooler! 

                                          Looks like you're really busting ass on this thing!

                                          ...

                                          1 Reply Last reply
                                          0

                                          Hello! It looks like you're interested in this conversation, but you don't have an account yet.

                                          Getting fed up of having to scroll through the same posts each visit? When you register for an account, you'll always come back to exactly where you were before, and choose to be notified of new replies (either via email, or push notification). You'll also be able to save bookmarks and upvote posts to show your appreciation to other community members.

                                          With your input, this post could be even better 💗

                                          Register Login
                                          Reply
                                          • Reply as topic
                                          Log in to reply
                                          • Oldest to Newest
                                          • Newest to Oldest
                                          • Most Votes


                                          • Login

                                          • Don't have an account? Register

                                          • Login or register to search.
                                          Powered by NodeBB Contributors
                                          • First post
                                            Last post
                                          0
                                          • Categories
                                          • Recent
                                          • Tags
                                          • Popular
                                          • Users
                                          • Groups