
Lifted E30 V2
-
Interesting note, the E28 downpipe fits the e30 chassis quite well, so I've got the start of the new exhaust as well!
Stacks, please.
Dan

-
Stacks, please.
Ain't gonna happen.
After much delay, it has finally become useful.
It bled air pretty damn quick this time!
This motor is clearly in much better shape, it turns over by hand smoother and doesn't run on 5 cyl until it warms up like the other motor. I think long term I will put the new pump and injectors on this motor, but I will wait till I get the other motor running with those parts.
I forgot that I need to fix the heater core valve so I wasn't going to fill it with coolant knowing that it was going to leak into the cabin.
Hooked up some of the other stuff, alternator, power steering, those kinds of things. I need to get under the car and connect the driveshaft and such, but that always takes motivation because who likes crawling under cars anymore.
I'm stoked to have this running and I can't wait to go roll some coal!
-

-
So Efffing STOKED.

https://www.instagram.com/_jdesigner_/ http://nevertoolow.tumblr.com/
🥳SOLD BMW E24 633CSI - BMW M30B32 🧪SOLD HCH ES9 - 1.3 LDA
👽BMW E30 325IC - Toyota 1JZ-GTE ⏰ HONDA EF9 CIVIC SI - JDM B18C5
☠️BMW E36 318i - Ford 5.0 FE302 🚴♂️ GT-Labomba - 26x2.75 Freeride
🤹♀️SOLD BMW E36/7 Z3 - BMW M54B25 🧓SOLD BMW E10 2002 - BMW M10M05 -
Pulled this little guy out last night, hoping to fix my coolant leak in the cabin.
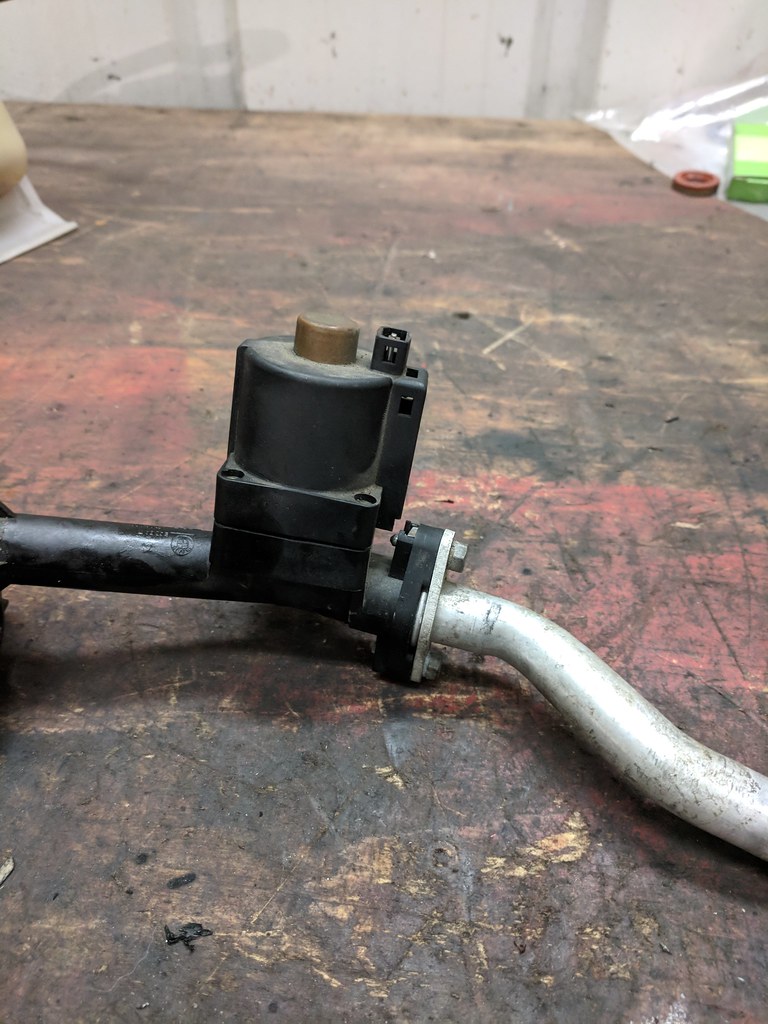
Drilled the heads of the rivets off an opened it up, weird little thing.
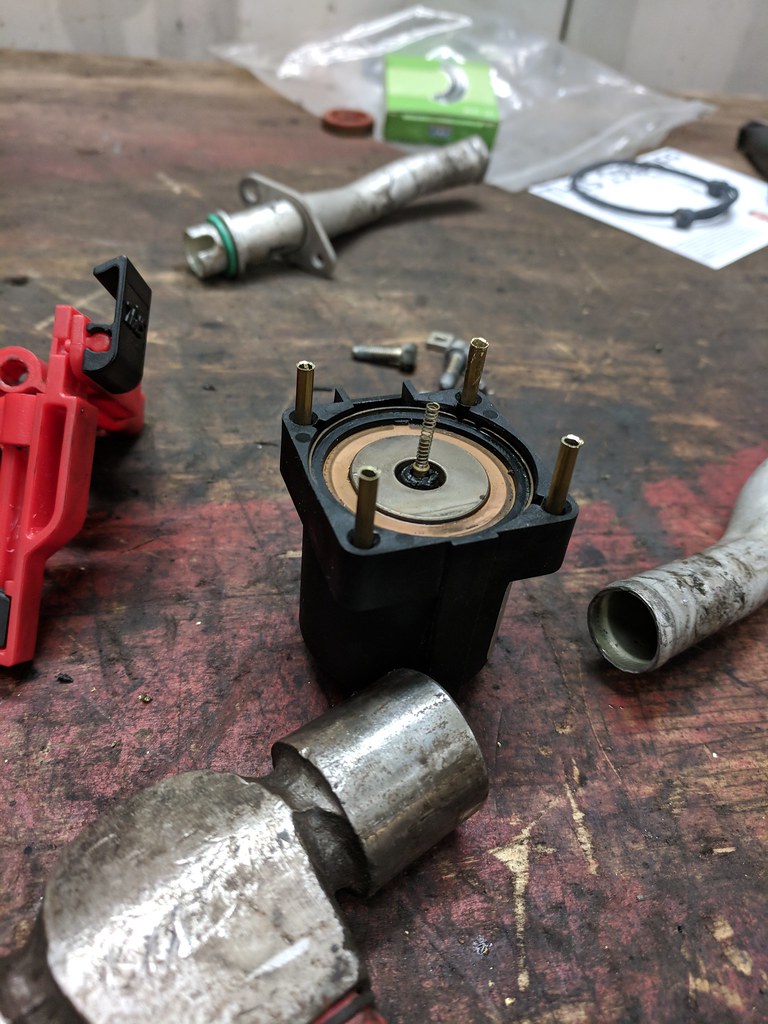
This part is what normally cracks and leaks, but there were no cracks to be found.
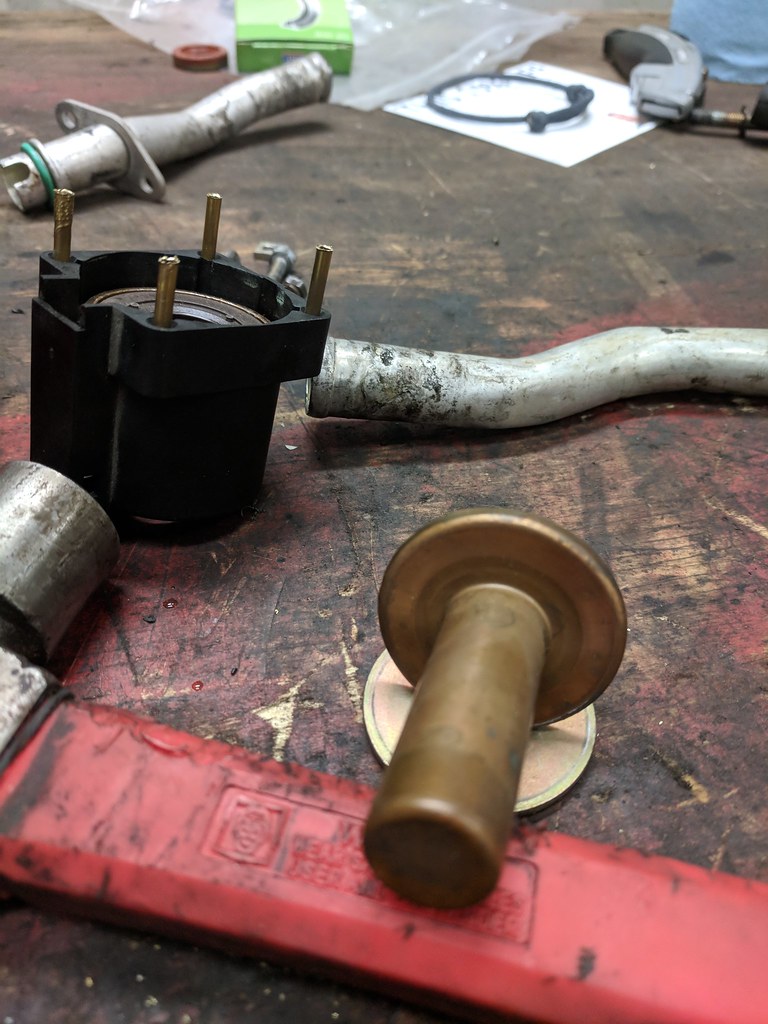
It's out of focus which is annoying
I put the two halves back together with some machine screws, after cleaning up any sealing areas.
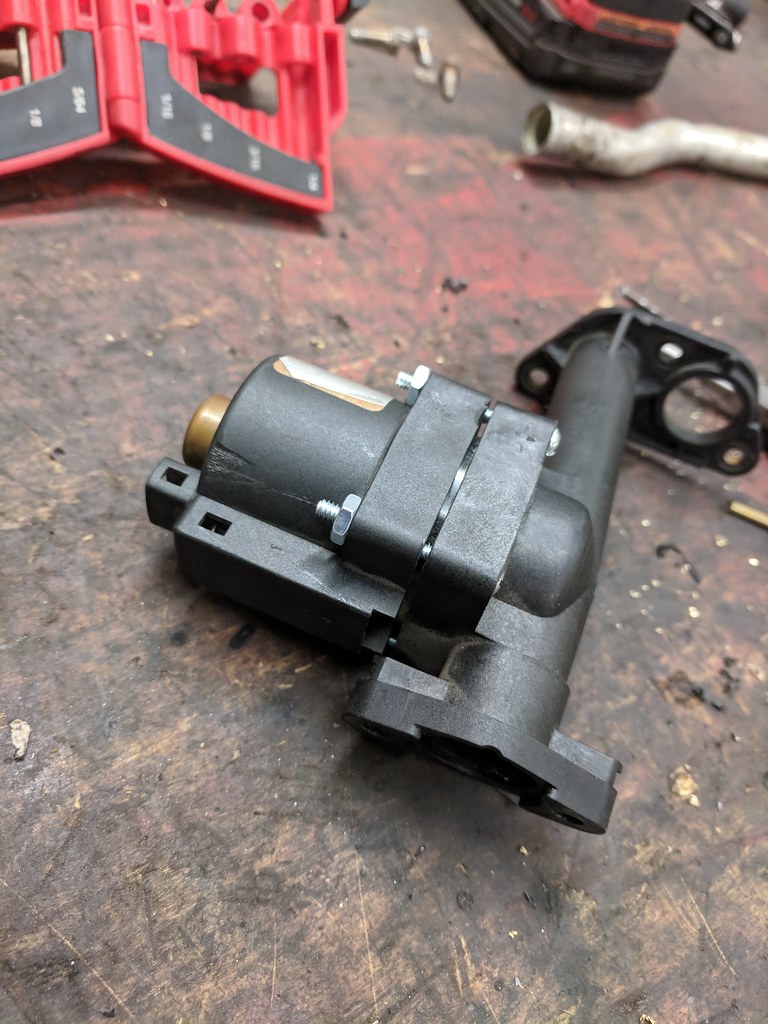
I put it back in the car, and am crossing my fingers that it doesn't leak. I need to remember to plug it back in as well.
Motor looking like a hot mess as always!
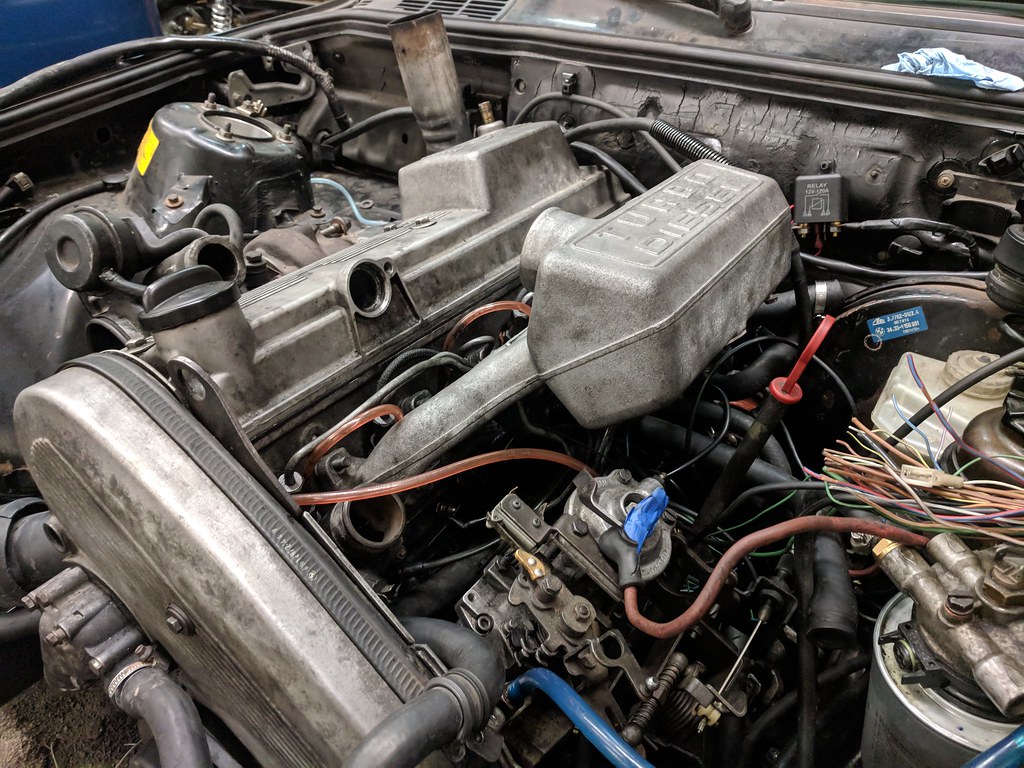
I'm looking into running a water/air intercooler due to space and piping constraints, but the only downside is that they aren't cheap! I wish there was more room to pipe an intercooler inlet and outlet to the same side on these chassis!
Until next time!
-
I came here ready to talk about not doing a top mount.
You did not disappoint.
-
in the two heater valves i've opened up, it was the seal between top and bottom that had disintegrated. considering this seal is not a part you can buy separate, and it's a really strange size, i wasn't able to fix them. i figured maybe i'd buy a sheet of rubber and cut my own, but i gave in and bought a 3rd used unit instead.
Dan
-
in the two heater valves i've opened up, it was the seal between top and bottom that had disintegrated. considering this seal is not a part you can buy separate, and it's a really strange size, i wasn't able to fix them. i figured maybe i'd buy a sheet of rubber and cut my own, but i gave in and bought a 3rd used unit instead.
This is good to know, as I was wondering what to do if it continues leaking.
There was a bit of buildup on the seal so I cleaned that all off, maybe that was the problem all along. -
Did you inspect the green o-ring on this pipe? I had a dribble coming from mine and fixed it with a new o-ring. I think they shrink over time.
https://www.instagram.com/_jdesigner_/ http://nevertoolow.tumblr.com/
🥳SOLD BMW E24 633CSI - BMW M30B32 🧪SOLD HCH ES9 - 1.3 LDA
👽BMW E30 325IC - Toyota 1JZ-GTE ⏰ HONDA EF9 CIVIC SI - JDM B18C5
☠️BMW E36 318i - Ford 5.0 FE302 🚴♂️ GT-Labomba - 26x2.75 Freeride
🤹♀️SOLD BMW E36/7 Z3 - BMW M54B25 🧓SOLD BMW E10 2002 - BMW M10M05 -
Did you inspect the green o-ring on this pipe? I had a dribble coming from mine and fixed it with a new o-ring. I think they shrink over time.
I had replaced all the o rings when I did the heater core, but I will be watching the o rings closely this time.
-
I had replaced all the o rings when I did the heater core, but I will be watching the o rings closely this time.
This might sound dumb, and I would assume you already know, but be careful on what o-rings you use where. There are different materials and they all degrade at different rates as they are made for different applications.
- Buna-N O-Rings
- Nitrile O-Rings
- Viton O-Rings
- Neoprene O-Rings
- Polyurethane O-Rings
- Silicone O-Rings
https://www.thomasnet.com/articles/hardware/o-rings-material-makeup
If its not an OEM ring, it might not be rated to hold the seal as well or as long as one might think. Ask me how I know.

https://www.instagram.com/_jdesigner_/ http://nevertoolow.tumblr.com/
🥳SOLD BMW E24 633CSI - BMW M30B32 🧪SOLD HCH ES9 - 1.3 LDA
👽BMW E30 325IC - Toyota 1JZ-GTE ⏰ HONDA EF9 CIVIC SI - JDM B18C5
☠️BMW E36 318i - Ford 5.0 FE302 🚴♂️ GT-Labomba - 26x2.75 Freeride
🤹♀️SOLD BMW E36/7 Z3 - BMW M54B25 🧓SOLD BMW E10 2002 - BMW M10M05 -
^ Thank you for the awesome link!
Just yesterday I was at HF looking at various assortments of things and I realized I didn't know what materials are good for what application of O-rings.In the case of my heater core I ordered OEM o rings, so I would hope they use the correct material.
-
I threw a power steering belt on last night, along with getting the rest of the cooling system in and hooked up.
I need to crawl under the car and connect the driveshaft, and I keep not wanting to get under the car. That is tonight's project, so realistically I should be able to take it for a quick spin up and down the street to make sure things are in check!
-
I threw a power steering belt on last night, along with getting the rest of the cooling system in and hooked up.
I need to crawl under the car and connect the driveshaft, and I keep not wanting to get under the car. That is tonight's project, so realistically I should be able to take it for a quick spin up and down the street to make sure things are in check!

https://www.instagram.com/_jdesigner_/ http://nevertoolow.tumblr.com/
🥳SOLD BMW E24 633CSI - BMW M30B32 🧪SOLD HCH ES9 - 1.3 LDA
👽BMW E30 325IC - Toyota 1JZ-GTE ⏰ HONDA EF9 CIVIC SI - JDM B18C5
☠️BMW E36 318i - Ford 5.0 FE302 🚴♂️ GT-Labomba - 26x2.75 Freeride
🤹♀️SOLD BMW E36/7 Z3 - BMW M54B25 🧓SOLD BMW E10 2002 - BMW M10M05 -
Donor, meet your transplant patient.
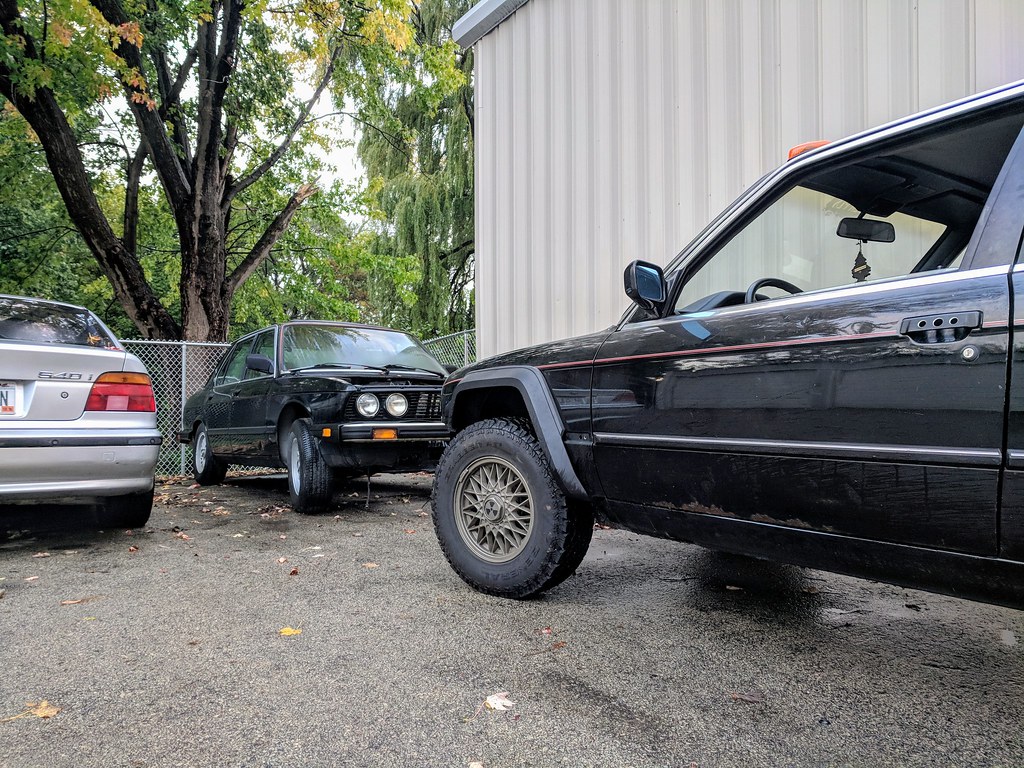
So it's looking like everything was successful at this point, I took it up and down the road the shop is on a couple of times, and it was quite enjoyable.
The new motor feels much healthier, and the turbo sounds just as good
It could use a valve adjustment, but that isn't anything major.It looks so tiny next to the truck, but the side steps on the truck are 12.25" off the ground, and the rocker pinch weld is at 12.13" off the ground, and I am very pleased by this!
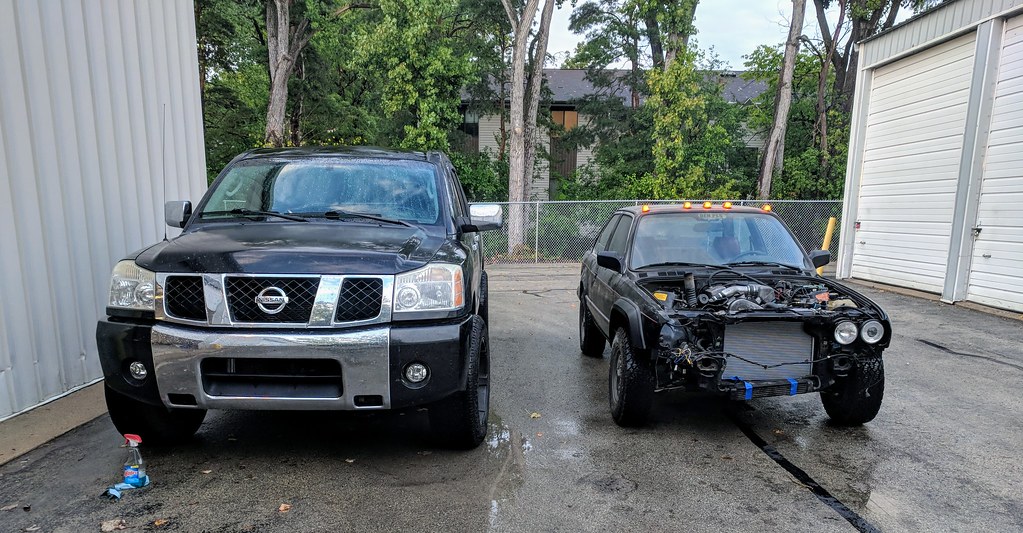
I'm surprised at how much the tires are still rubbing the chassis after doing the "body lift", so it looks like the 3lb sledge will need to fix that.
Next is to finish buttoning things back up and get it road worthy!
Until next time!
-
LOVE IT.
https://www.instagram.com/_jdesigner_/ http://nevertoolow.tumblr.com/
🥳SOLD BMW E24 633CSI - BMW M30B32 🧪SOLD HCH ES9 - 1.3 LDA
👽BMW E30 325IC - Toyota 1JZ-GTE ⏰ HONDA EF9 CIVIC SI - JDM B18C5
☠️BMW E36 318i - Ford 5.0 FE302 🚴♂️ GT-Labomba - 26x2.75 Freeride
🤹♀️SOLD BMW E36/7 Z3 - BMW M54B25 🧓SOLD BMW E10 2002 - BMW M10M05





Hello! It looks like you're interested in this conversation, but you don't have an account yet.
Getting fed up of having to scroll through the same posts each visit? When you register for an account, you'll always come back to exactly where you were before, and choose to be notified of new replies (either via email, or push notification). You'll also be able to save bookmarks and upvote posts to show your appreciation to other community members.
With your input, this post could be even better 💗
Register Login