
Lifted E30 V2
-
Hmm. What is missing from this photo?
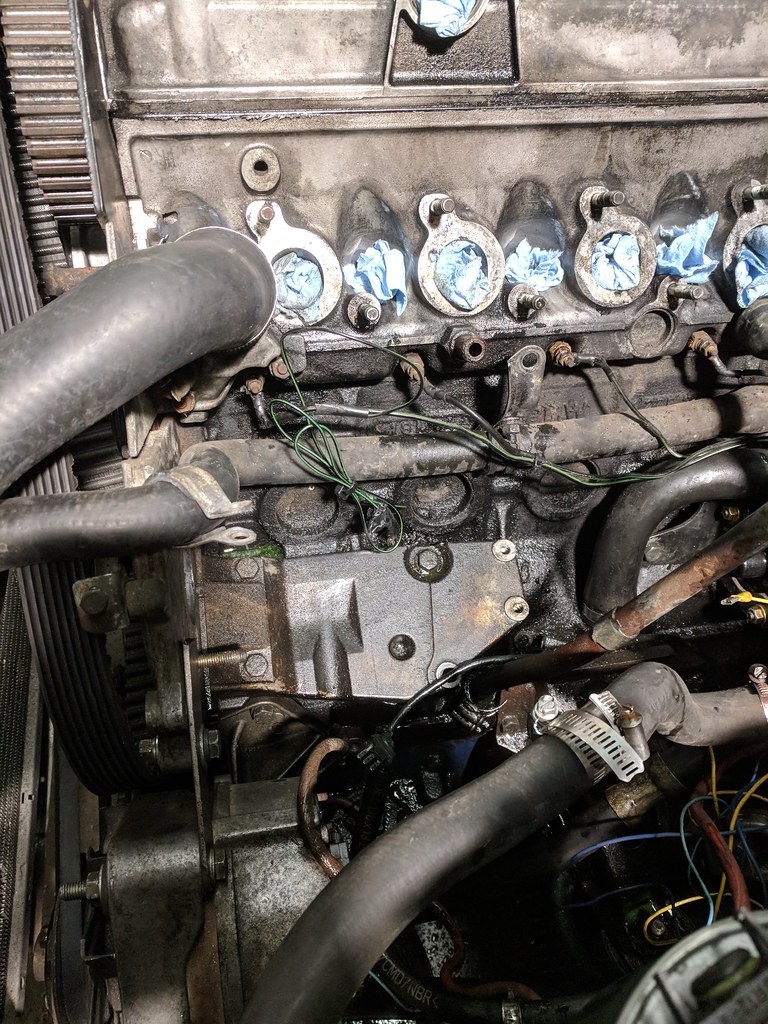
Oh! Found it!
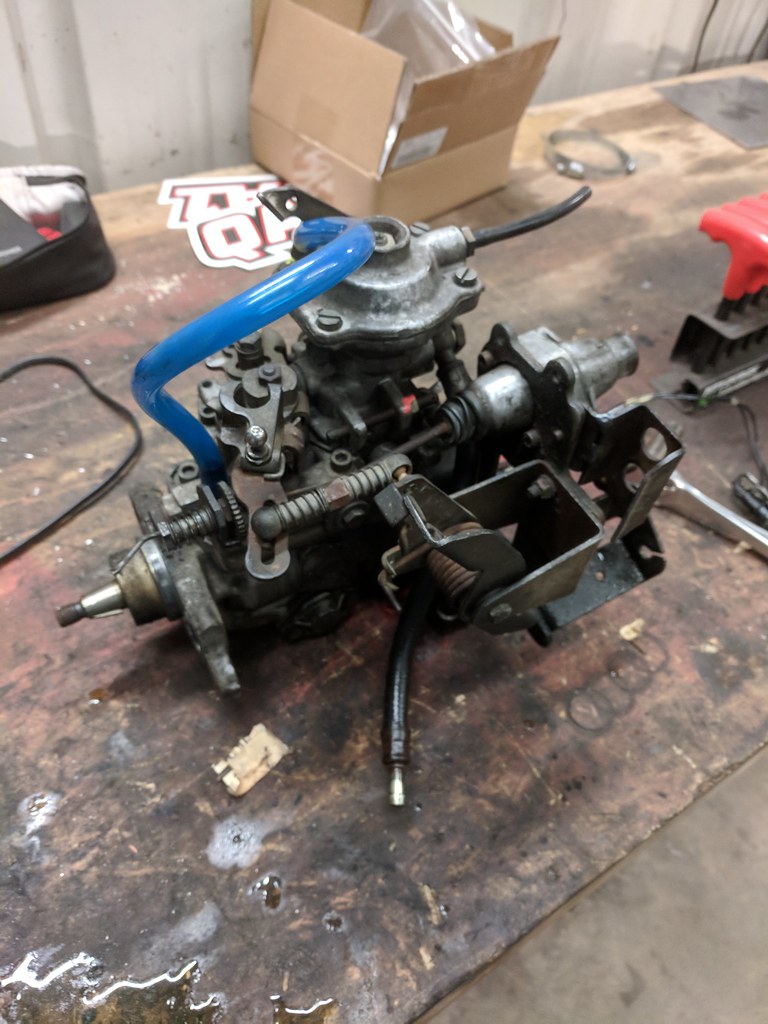
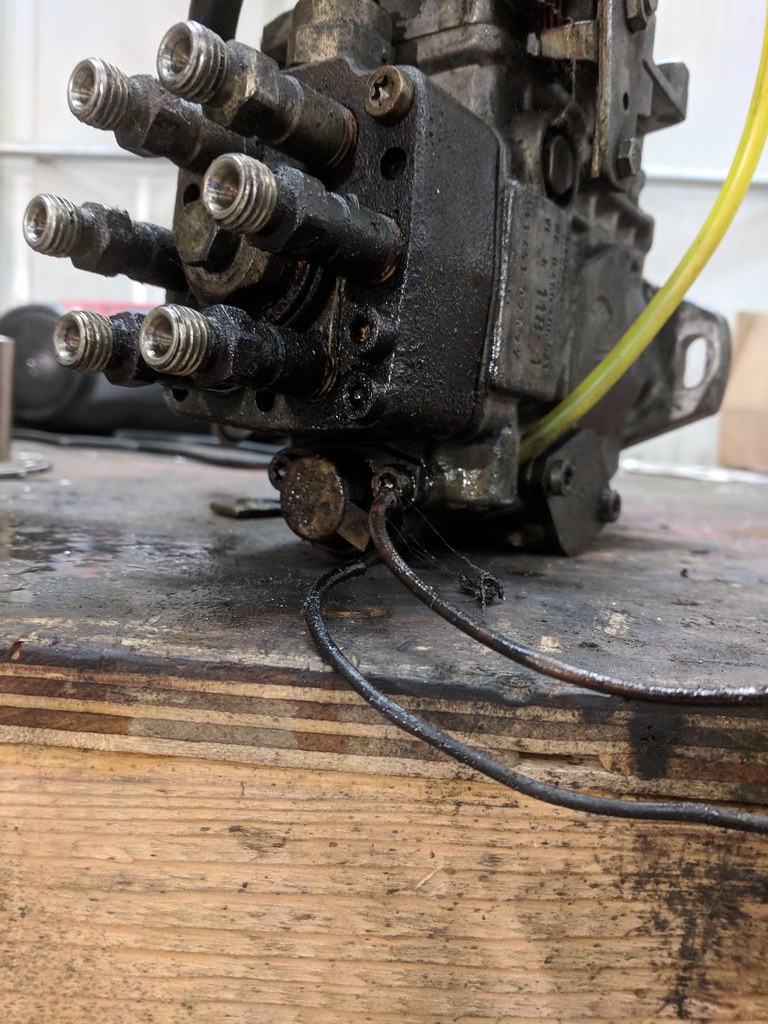
I removed all the accessory stuff and was left with this.
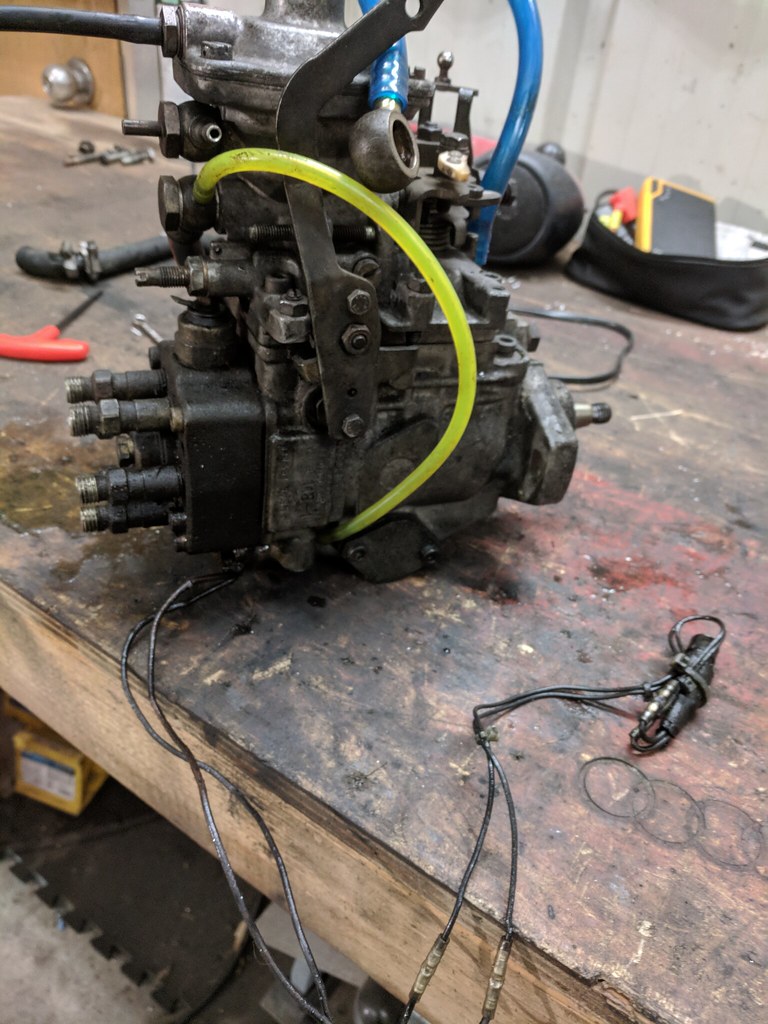
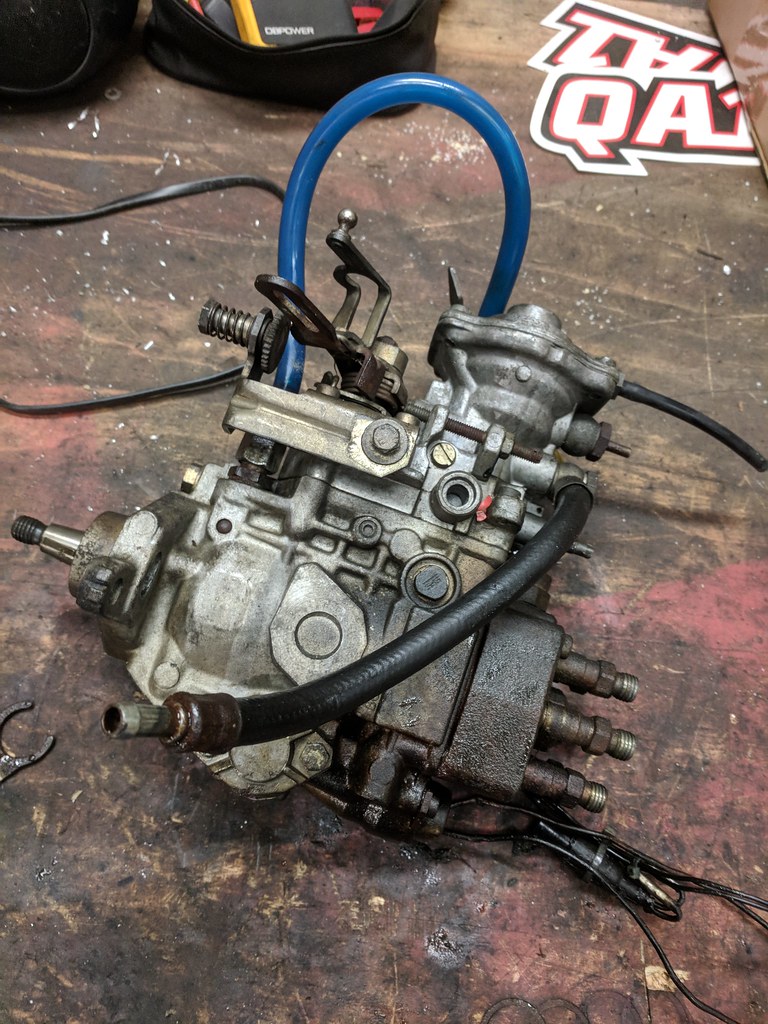
It looks interesting, and I think I can see where fuel was leaking which is relieving. This lower sensor (timing advance) seemed to be quite soaked, so either the o ring seal there went or something above it did, but that area is easy enough to take apart.
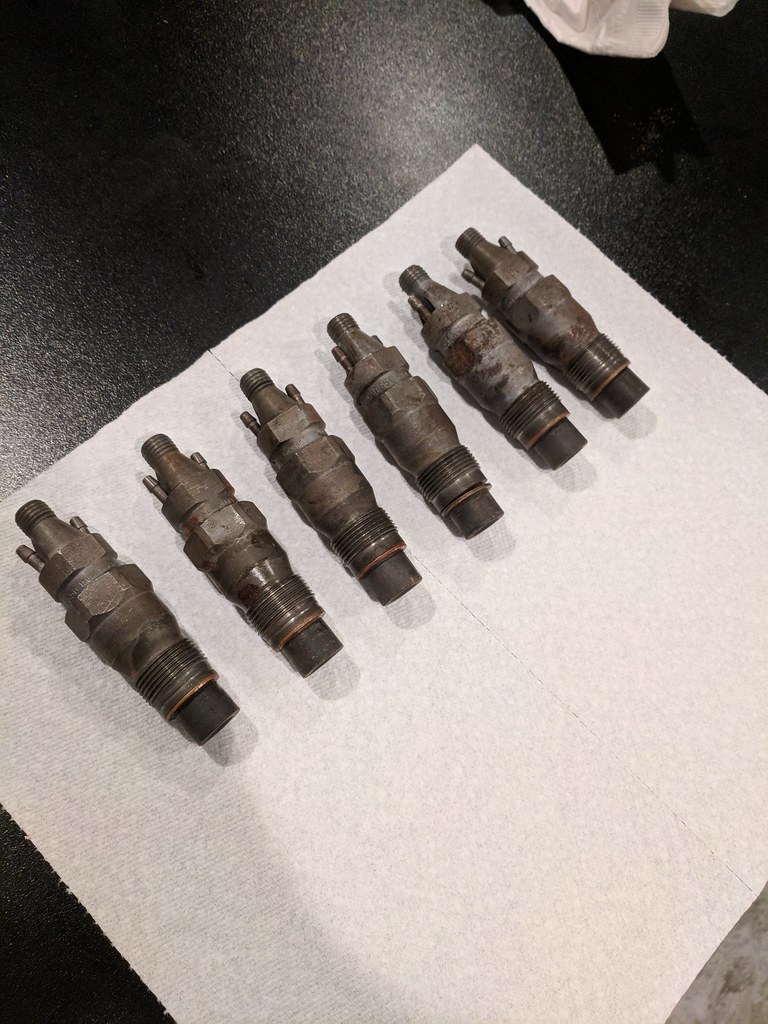
My "new" injectors also came in! These look 1000x better than what I took out of the car. I will be taking them in to have them checked and cleaned if needed.
Now just waiting on the pump seal kit so I can get that taken care of!
-
The injectors were the first thing I saw and my first thought was "those cleaned up well"
Haha, the old ones are destined for the garbage. The bodies aren't even metal anymore it seems....
They are really quite bad. -
That's a neat looking carburetor you have there. Glad to hear it sounds like an easy fix. Those injectors look wayyy better too.

https://www.instagram.com/_jdesigner_/ http://nevertoolow.tumblr.com/
🥳SOLD BMW E24 633CSI - BMW M30B32 🧪SOLD HCH ES9 - 1.3 LDA
👽BMW E30 325IC - Toyota 1JZ-GTE ⏰ HONDA EF9 CIVIC SI - JDM B18C5
☠️BMW E36 318i - Ford 5.0 FE302 🚴♂️ GT-Labomba - 26x2.75 Freeride
🤹♀️SOLD BMW E36/7 Z3 - BMW M54B25 🧓SOLD BMW E10 2002 - BMW M10M05 -
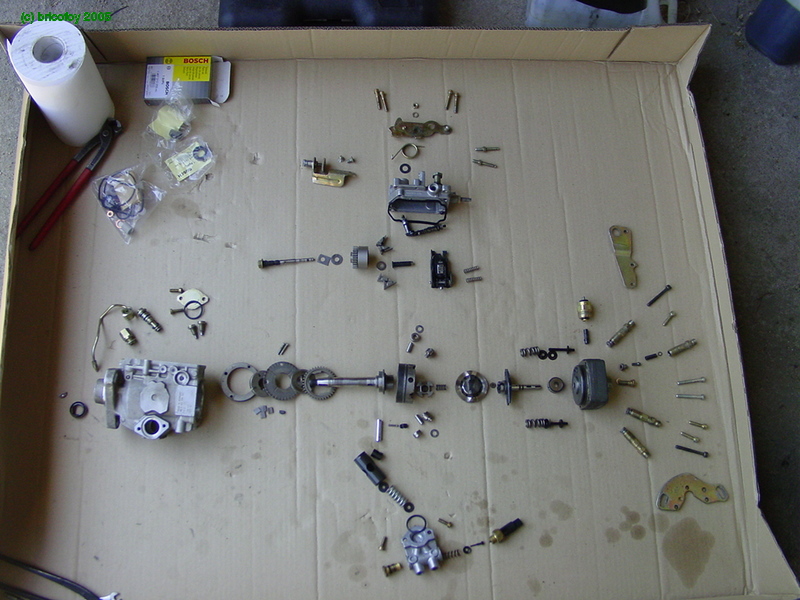
When taken apart it looks a bit like this. (Not my pic, 4cyl VW stuff)
Also, I would like to take this moment to laugh at the fact that my leaking heater core is likely the reason I struggled with temp issues for so long. It was allowing air into the system and was always getting stuck in the thermostat housing. That's the next thing to get taken out!
New radiator ordered (was using a friends)
Thanks to @dealindave I have $50 of sealing washers on the way!
-
This thing is going to be the creme of the crop. I cant wait to see it and get a ride in it!!
https://www.instagram.com/_jdesigner_/ http://nevertoolow.tumblr.com/
🥳SOLD BMW E24 633CSI - BMW M30B32 🧪SOLD HCH ES9 - 1.3 LDA
👽BMW E30 325IC - Toyota 1JZ-GTE ⏰ HONDA EF9 CIVIC SI - JDM B18C5
☠️BMW E36 318i - Ford 5.0 FE302 🚴♂️ GT-Labomba - 26x2.75 Freeride
🤹♀️SOLD BMW E36/7 Z3 - BMW M54B25 🧓SOLD BMW E10 2002 - BMW M10M05 -
Where do you plug the laptop in?
Glad this isn't your pump. Mechanical things are a whole different ball game. It's like tuning with megasquirt, except you have to disassemble and reassemble things every time you want to make a change...
-
Where do you plug the laptop in?
Glad this isn't your pump. Mechanical things are a whole different ball game. It's like tuning with megasquirt, except you have to disassemble and reassemble things every time you want to make a change...
Right? It's been amusing going from MS3X to..... a fuel pump.
Luckily with this pump most adjustments can be done externally, short of swapping rotor heads (moar powwaaaa) so I shouldn't really ever need to get this far into it. -
New injectors were dropped off at a local diesel shop to be tested/cleaned.
Pump seal kit came in.I know what I am doing this weekend.
-
Well the shop called on friday and asked to call them about the injectors, not a great start.
Guy threw them on the bench and tried testing them, he said they didn't hold any pressure, just "hosed" (stuck open). This is impressive as hell considering it takes them 2200psi to open with fuel. Not sure how that happens, but it sucks. He sent me some pics of the injectors after telling me about how rusty they were internally.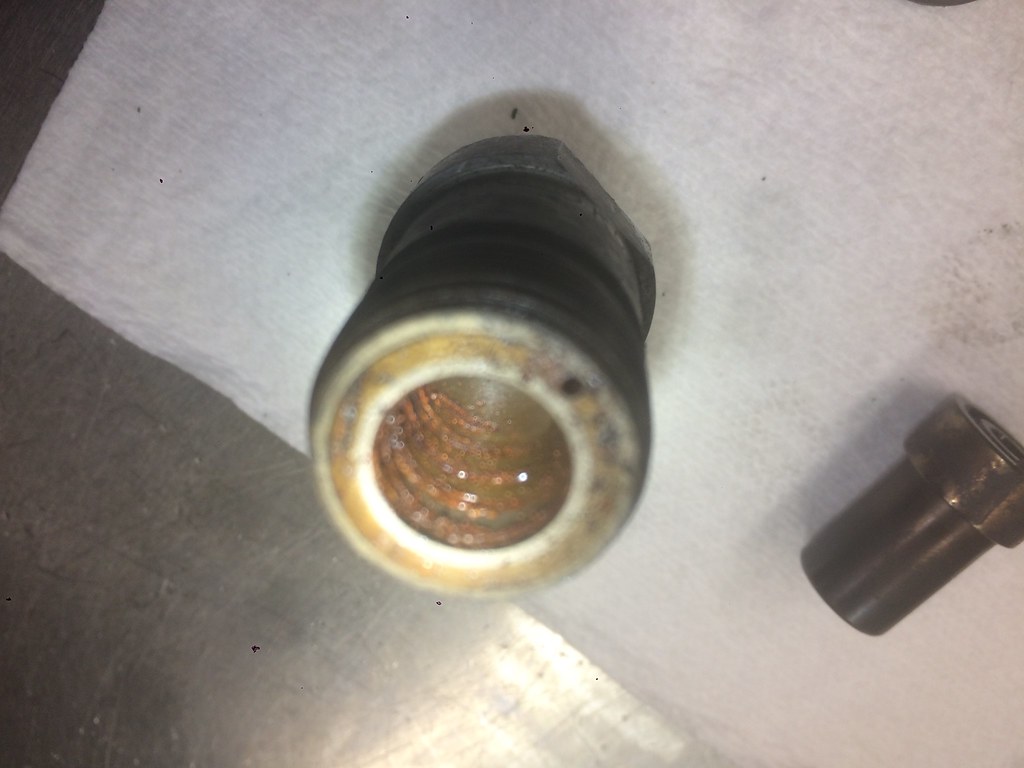
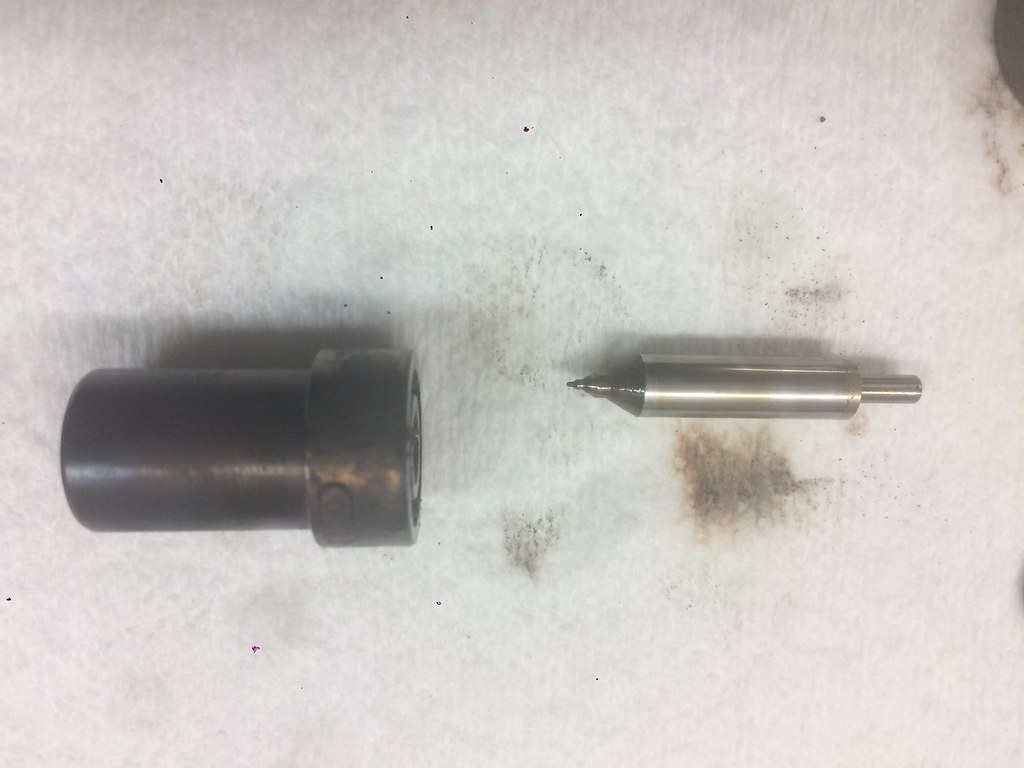
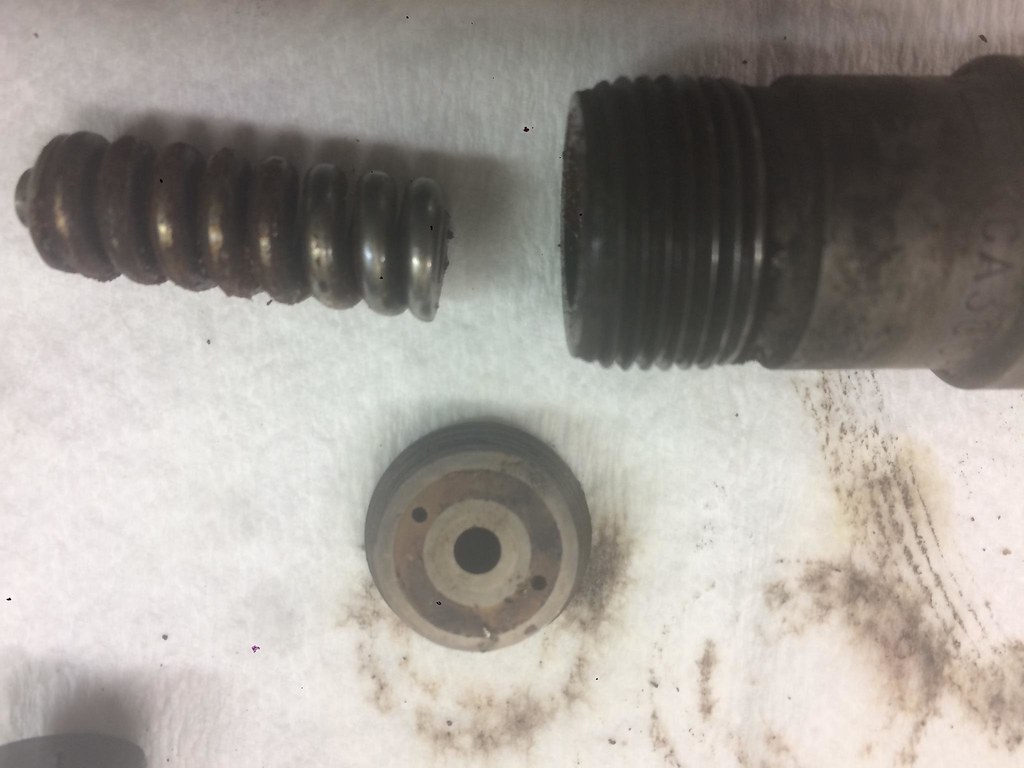
So the bad news is that they are shot, but the good news is that the bodies are still in good shape and they can be fixed.
The downside to rebuilding them is that they require new nozzles, shimming, cleaning, new internals, and to be tested again.
The cost for that is just shy of $500 (nozzles included), and I had paid just shy of $200 for the new injectors. That puts me $750 into injectors (with the seals).
I bit the bullet and bought new nozzles today (Monark Units, highly rated) and I am in communication with the guy I bought the injectors from, I'm hoping to get half of the cost back on the injectors.I put the fuel pump on the bench last night and started taking it apart. I got the "easiest" piece out and realized I was out of my comfort zone already. There was buildup in odd places, I didn't have the right seals for that area, there was a clogged filter element that I didn't have a new one of, and I put it back together. I think I'm going to not mess around and take it to the shop where the injectors are and have things done properly, and when they rebuild it they test the unit to make sure everything works before I get it back. The thought of resealing it myself, putting it back in, and not having it work is rough because it is not a simple task to reinstall/remove.
In better news I got the heater core swapped out!
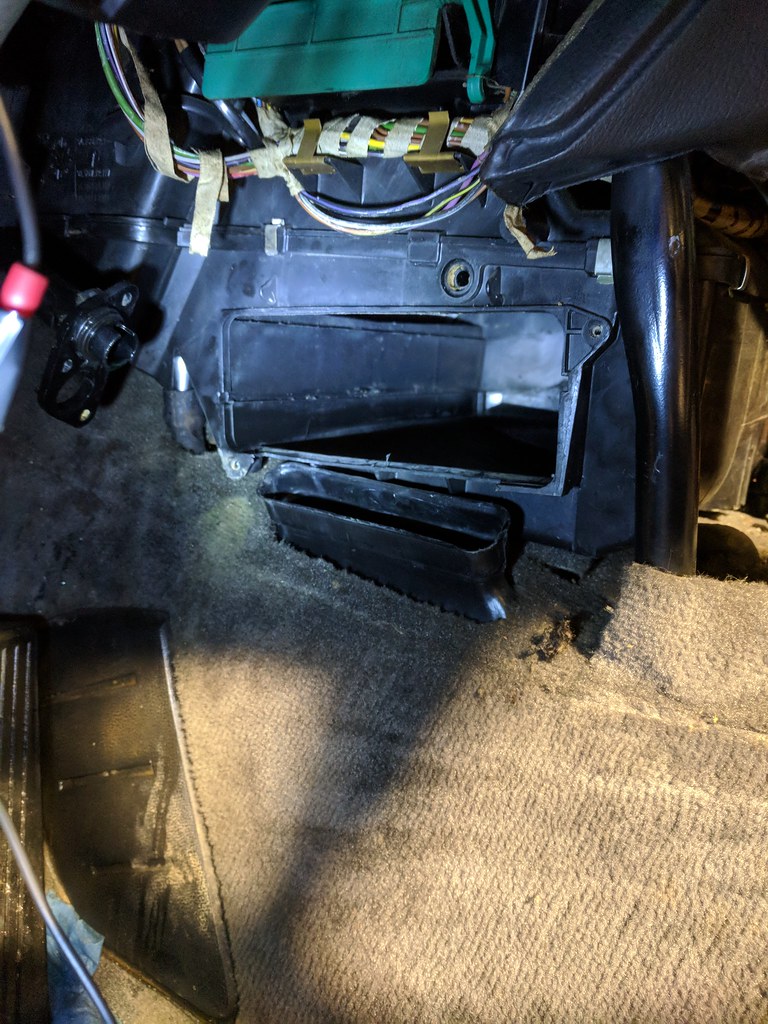
I could tell I wasn't the first one in this location as one of the screws that you need to take out to get the vent out of the way was already out.
I didn't take a picture of the new one in place, as it just looks like a heater core...I also put a new window switch plug in (thanks Sam!) so now my windows work!
I'm trying to fix up all the little crap that I keep not doing while I've got the down time of the motor being inoperable.New nozzles are about 2 weeks out, and I'll drop the pump off this week. Hoping to have it running again in a month.
-
I've had to rebuild 3 pumps in my life and it is very tedious. It isn't a common thing, usually get a new pump or reman but if there is none available and it's a "they need the truck thing" then the rebuild kit it is.
First time I went in thinking I'll be able to pull this sucker apart and have it back together in a hour. Miserable fail, it took hours.
-
I've had to rebuild 3 pumps in my life and it is very tedious. It isn't a common thing, usually get a new pump or reman but if there is none available and it's a "they need the truck thing" then the rebuild kit it is.
First time I went in thinking I'll be able to pull this sucker apart and have it back together in a hour. Miserable fail, it took hours.
Thank you for making me feel better about myself!
They seem pretty serious, so I'll let the guys that know what they're doing take care of it. -
Bummer on the injectors. I hope you get a refund. At least you can rule them out in the future and an issue if they are brand new!
https://www.instagram.com/_jdesigner_/ http://nevertoolow.tumblr.com/
🥳SOLD BMW E24 633CSI - BMW M30B32 🧪SOLD HCH ES9 - 1.3 LDA
👽BMW E30 325IC - Toyota 1JZ-GTE ⏰ HONDA EF9 CIVIC SI - JDM B18C5
☠️BMW E36 318i - Ford 5.0 FE302 🚴♂️ GT-Labomba - 26x2.75 Freeride
🤹♀️SOLD BMW E36/7 Z3 - BMW M54B25 🧓SOLD BMW E10 2002 - BMW M10M05 -
Coolant leak confirmed

I can't believe you've done this...we had those carpets steam cleaned
-
I can't believe you've done this...we had those carpets steam cleaned
The car was trying to continually steam clean them! But it was just watering them down.
-
Got a call from the diesel shop on Friday, once again he asked me to call back about the fuel pump; anyone see a common trend here?
Turns out the pump is all internally pitted and rusted, and the guy was impressed the car even ran. He said rebuilding it is pointless and he cant find an obsolete pump. Nifty.
Turned to the E28 forum as I recalled a guy saying he had fuel pumps in stock, sent him a message and turns out it is @dealindave's euro contact! He recognized me somehow, and said he didn't have a pump anymore but can get one and have it remand. then ship it. So I'm assuming that will take a handful of weeks, which seems to be how this project goes!
Nozzles shipped on Friday from Germany, will be interesting to see how long those take.
The waiting game is in full swing!
-
It think its hilarious that it took a few days to get this thing swapped and running, but now sourcing simple parts is the complete opposite.
https://www.instagram.com/_jdesigner_/ http://nevertoolow.tumblr.com/
🥳SOLD BMW E24 633CSI - BMW M30B32 🧪SOLD HCH ES9 - 1.3 LDA
👽BMW E30 325IC - Toyota 1JZ-GTE ⏰ HONDA EF9 CIVIC SI - JDM B18C5
☠️BMW E36 318i - Ford 5.0 FE302 🚴♂️ GT-Labomba - 26x2.75 Freeride
🤹♀️SOLD BMW E36/7 Z3 - BMW M54B25 🧓SOLD BMW E10 2002 - BMW M10M05 -
I think its hilarious that it took a few days to get this thing swapped and running, but now sourcing simple parts is the complete opposite.
I had not realized the humor of this, thank you for pointing it out!
-
Moar updates!
My excessively expensive crush washers came in! They came in a nice small plastic bag inside of a paper envelope! All the way from The Netherlands!
Take a look at the quality!
They are super soft and hammered flat pretty quick, but they are oblong, but it looks like they are normally a "press fit" application so hopefully the diesel shop can get them on.
They have an interesting chamfer on the inside as well, ruining the thought that they are just a normal washer in a crazy specific size.I hadn't heard back from Ivo in a week or so about the fuel pump, so I started getting concerned that this thing would never work again. I emailed a few people on the E28 page that said they had TD fuel pumps but all of them were pretty much trying to tell me the pumps are the same between the US and the Euro motor, but they have never actually worked with them. Buncha smart guys eh? So I politely told them that they were completely different and had no chance of working with a euro motor that hadn't been adapted to run US spec things.
I reached out to @dealindave because Ivo is a contact of his as well, hoping he could extract some info, and he got a response today that they are searching for a pump. So now I'll be able to sleep at night knowing something is still happening.
While I play the eternal wait game I figured I might as well continue on chassis modifications!
Drew up some subframe spacers and had strut top spacers from before.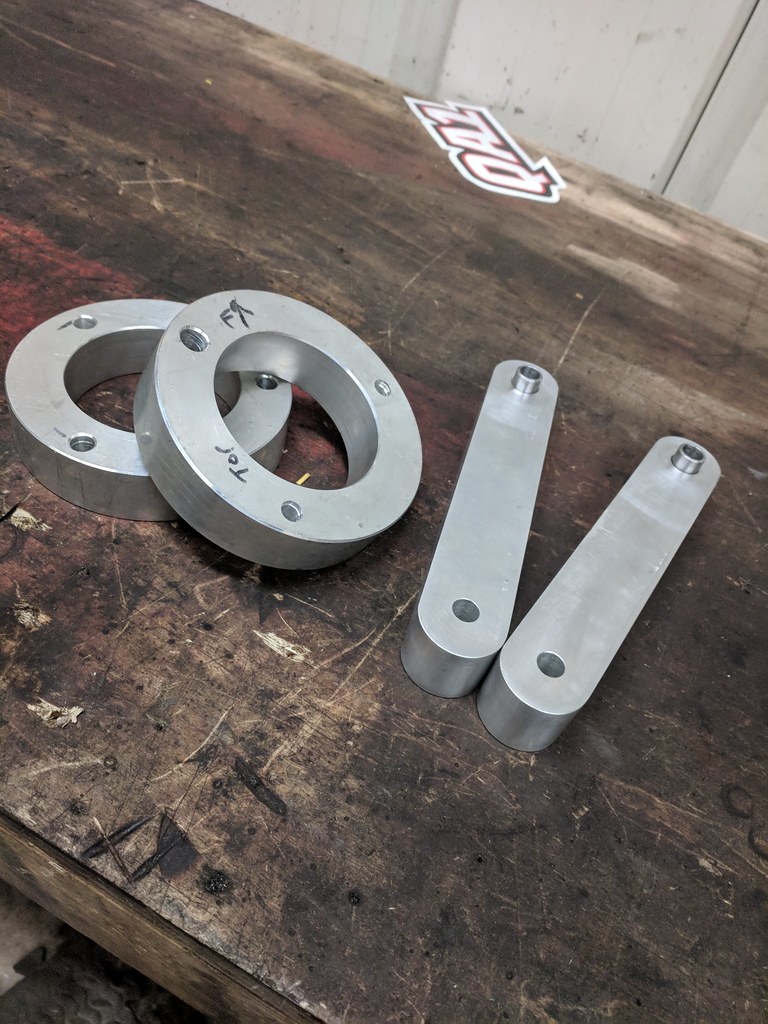
Alignment dowels and everything in the new subframe spacers, fancy shit eh'?
Hooked the motor up to a support bar and loosened up the motor mounts, and lowered the subframe down gently with the longest pry bar I had.
Passenger side was a breeze and the alignment dowels pressed in smoothly.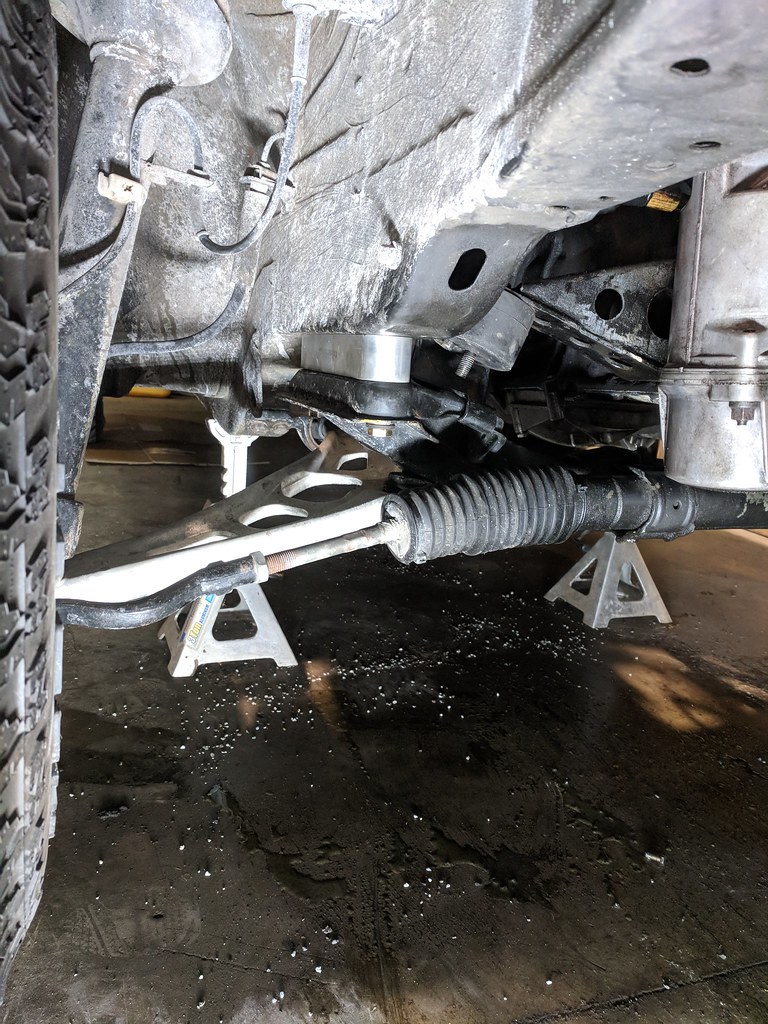
Drivers side was a bit trickier, as the steering coupler didn't want to move all that far. I moved the knuckle up the spline a bit and got the subframe down just far enough to sneak the spacer in.
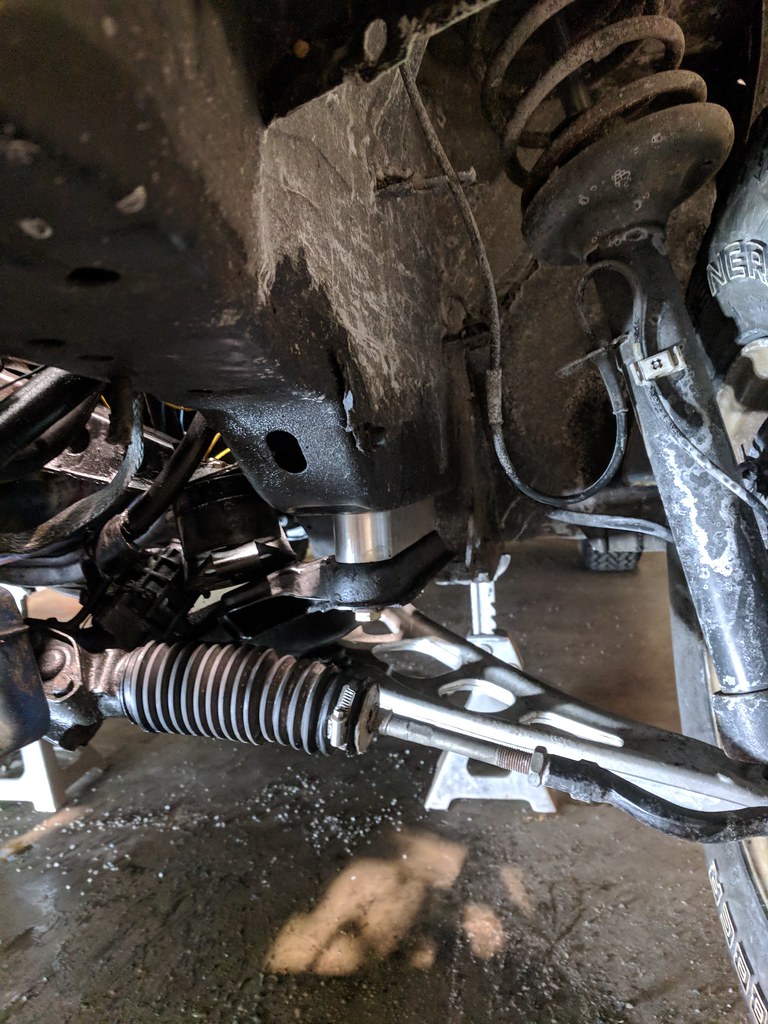
Threw the longer bolts I bought in there and was pleased at how quickly that part went.
Next step of the steering coupler is to see if I can sneak it back down far enough on the steering rack shaft to put the bolt back through it. If not I will be getting a poly steering coupler and adding a few washers to it for spacing.As you can see in the first picture, the motor mount is now fairly far away, and I'm not quite sure how I want to tackle that yet. Gotta play with angles and alignment to see what kind of arrangement I can make. But the motor will be staying at its original height in relation to the body.
I am literally body lifting a uni-body car right now...So the subframe spacers cleared up some of my more extreme control arm angles, but what fun is having non extreme angles? Time to make more of a mess of the geometry!
My subframe is now lower than my oil pan as well, which is sweet.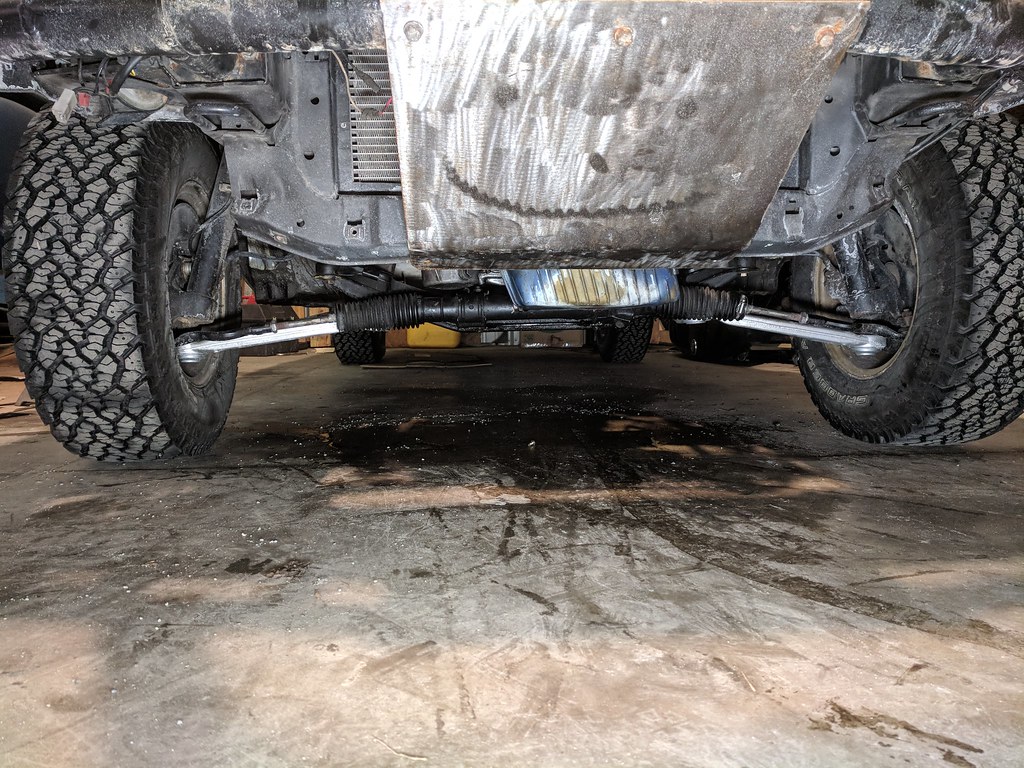
Now onto the strut top spacers!
I needed longer studs through the strut tops, so I found some random hardware in my bucket o' hardware and tacked them in while the strut top was in the chassis (strindle/struckle had been removed at this point)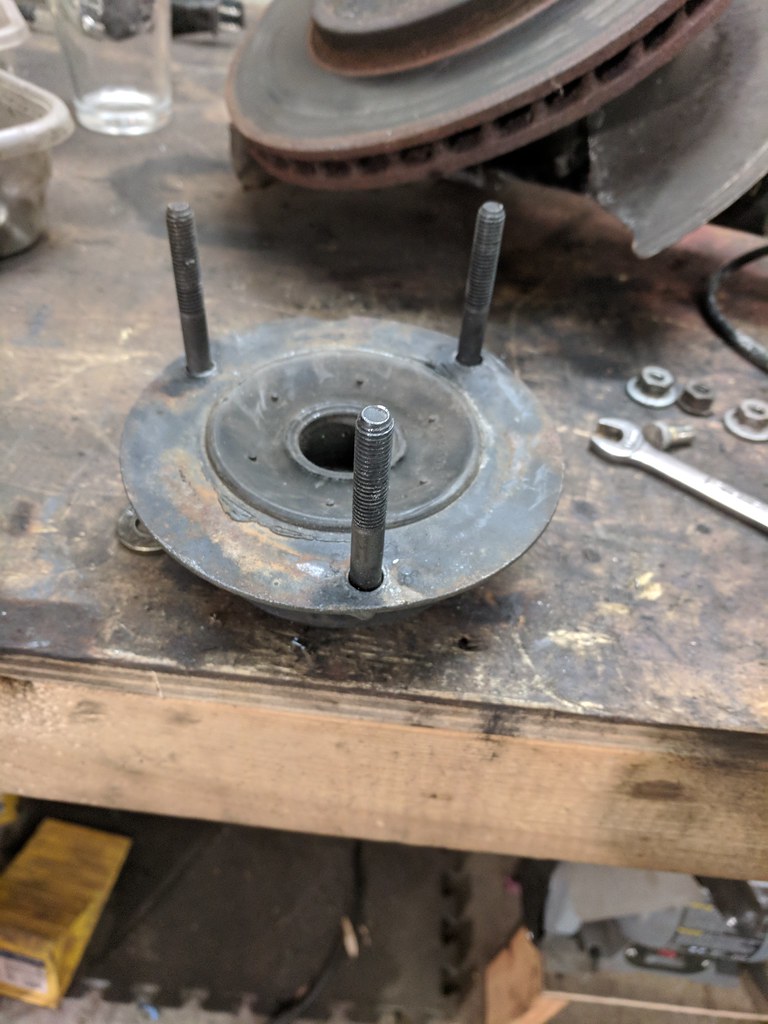
Looks funny right??
Install spacer
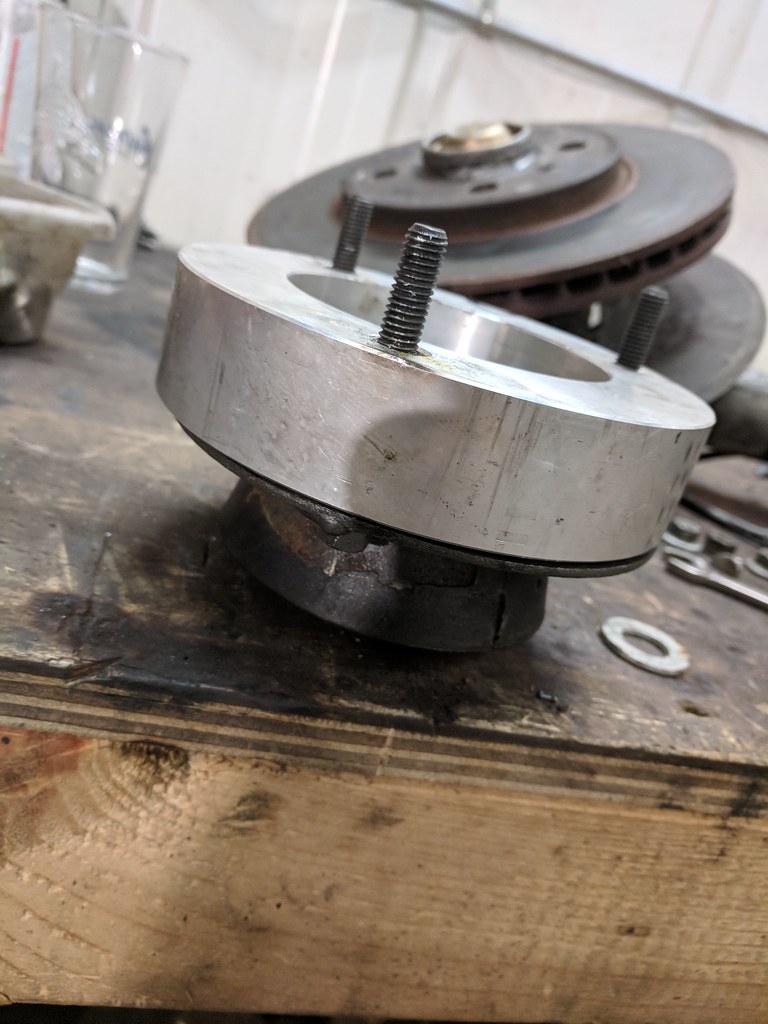
Reinstall strut top to strut and marvel at your creation!
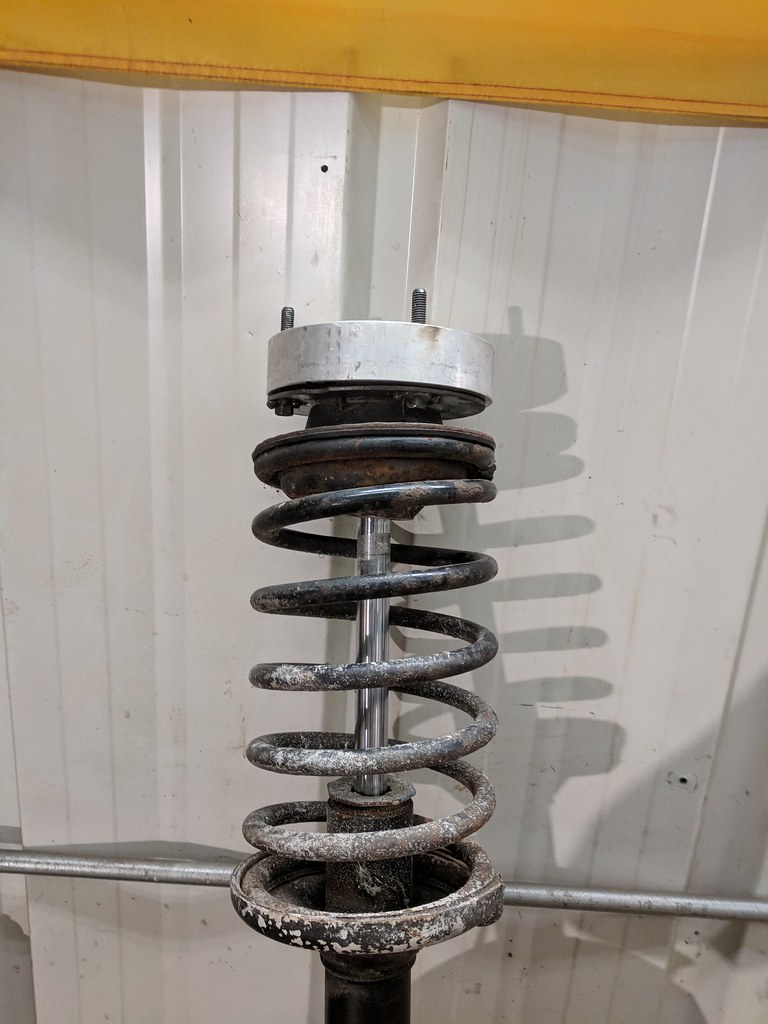
Took the assembly and put it back in the chassis, which looks kind of funny from the top.
The extra stud length is for shimming later to even out the ride height both sides, or push for a bit more overall.
So there ya have it! More lift!
Until the next update!Just kidding.
Side with subframe spacer, no strut spacer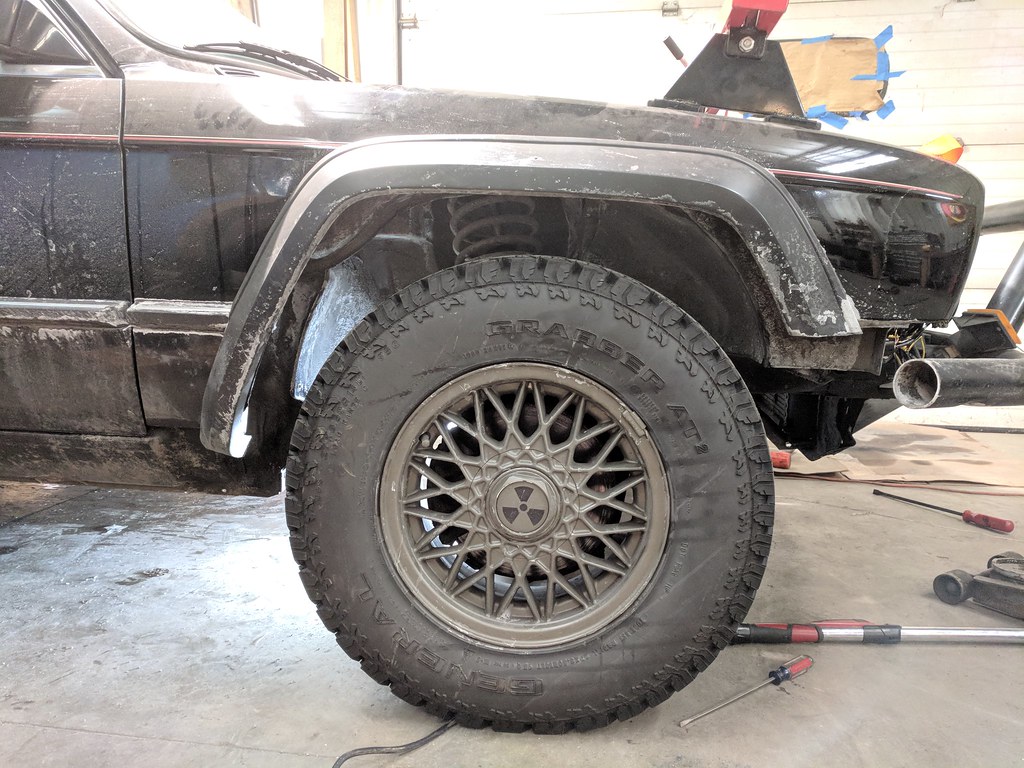
Side with strut and subframe spacer ( I kinda botched the angle due to the garage door)

This gives a bit better perspective

Left (passenger side) has no strut spacer, drivers side does and is at full droop (obviously)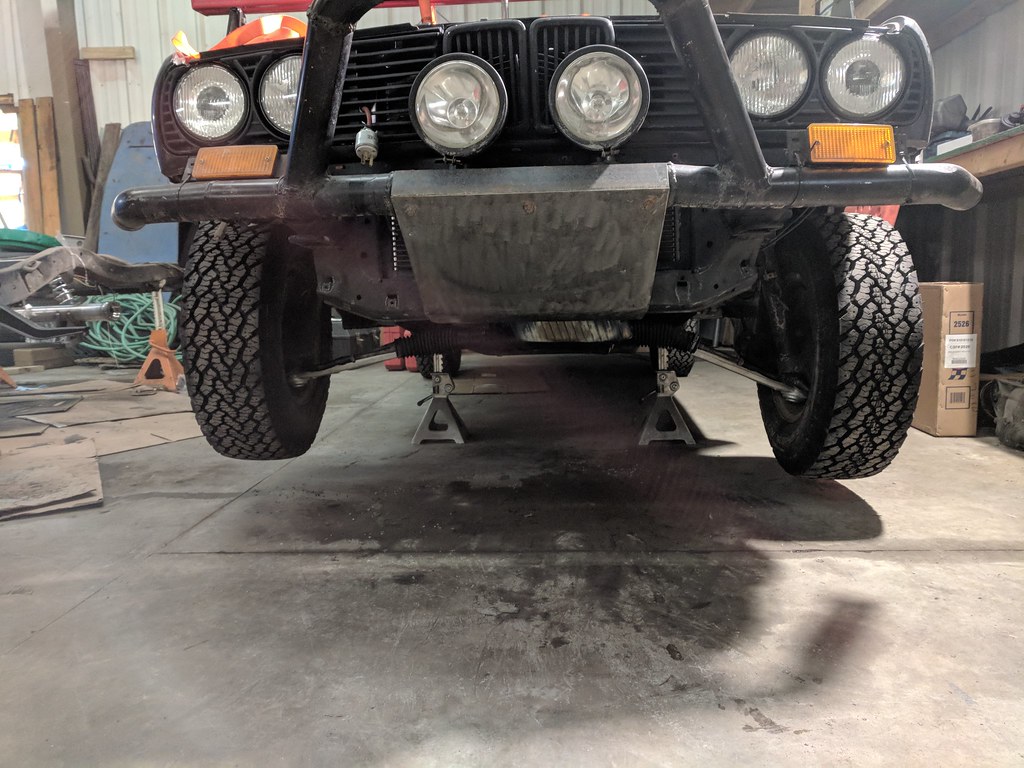
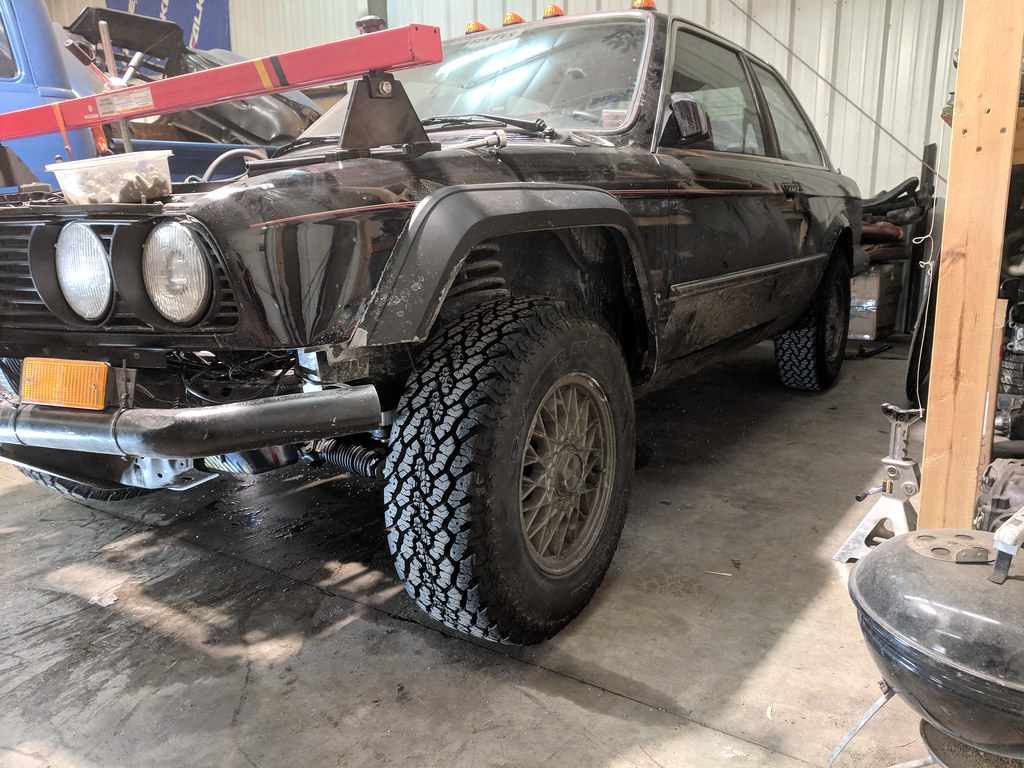
I'm digging the more level ride height, as the rockers sit just about level at 11.75" on the front corner.
So after doing all of this I was pleased, but not all that much. Sure I got more ground clearance but I didn't change the suspension travel or make it any "better".
I'm trying to find weld on (non eyed) coilovers that I could use (with custom spring rates) to increase the front suspension travel from the stock (6" or less if I recall correctly) and bring that up to about 12-15 inches while using a dual spring (dual rates) setup to keep it from harsh bottom outs.All in all I'm happy to see the chassis more level, but am still seeking for more!




Hello! It looks like you're interested in this conversation, but you don't have an account yet.
Getting fed up of having to scroll through the same posts each visit? When you register for an account, you'll always come back to exactly where you were before, and choose to be notified of new replies (either via email, or push notification). You'll also be able to save bookmarks and upvote posts to show your appreciation to other community members.
With your input, this post could be even better 💗
Register Login