
Joined the Club Today
-
Aww damn I would have traded you for my oem black carpet
Dan

-
Aww damn I would have traded you for my oem black carpet
Well shit.
Carpet was pretty stained and beat up in some spots. I think after further inspection you might have changed your mind. I'll still trade if you want

Finally got the clevis modified and welded. Got the booster bolted up at the fire wall and to the pedal. Got the MC on and the hard lines attached. Just need to fill and bleed the system.

I know this way of modifying the clevis was supposed to work, but I was still surprised when it worked. Fits just like stock.

Got the interior put back together. Really like how it came out, especially for how little I spent to get it done.


Lots of work done on the motor. Go.t the front sump oil pan swapped on. Got the new pick up tube on with the new gasket. Removed the mounting bracket for the old pick up tube(bent off). Did the oil pump nut while I was in there. Pulled off the original one and replaced it with a TMS nut with the safety wire through it and added some thread locker as well. Oil pan installed and torqued with some Permatex Black RTV gasket maker.
New valve cover gasket and Bosch spark plugs installed, VCG torqued down.
-
That interior looks REALLY good for dye. Only time will tell how it will hold up!
Only thing I can see wearing is the handles. Otherwise I don’t think the cards themselves will get that much wear and tear. Maybe from the sun? We will see.
-
Current problems:
I knicked the passenger front hard brake line with the angle grinder awhile back like a moron and just realized it today when I was trying to bleed the brakes. Fortunately, I believe this is the replacement. Comes pre flared with fittings, just needs to be bent.
Second, the remaining bolt in the bell housing of the trans. I should have just drilled right through it, but thought using an easy out for would help. It didn't. Now I cant really drill through the bolt because theres like a forged piece of metal in the center of it. Not sure if theres a strong bit head for getting through that, but I've started to kind of contact the housing portion of the hole and really don't want to cut into the trans housing anymore.
-
Current problems:
I knicked the passenger front hard brake line with the angle grinder awhile back like a moron and just realized it today when I was trying to bleed the brakes. Fortunately, I believe this is the replacement. Comes pre flared with fittings, just needs to be bent.
Second, the remaining bolt in the bell housing of the trans. I should have just drilled right through it, but thought using an easy out for would help. It didn't. Now I cant really drill through the bolt because theres like a forged piece of metal in the center of it. Not sure if theres a strong bit head for getting through that, but I've started to kind of contact the housing portion of the hole and really don't want to cut into the trans housing anymore.
Post a picture of this.
Also did you spray the carpet black too?

https://www.instagram.com/_jdesigner_/ http://nevertoolow.tumblr.com/
🥳SOLD BMW E24 633CSI - BMW M30B32 🧪SOLD HCH ES9 - 1.3 LDA
👽BMW E30 325IC - Toyota 1JZ-GTE ⏰ HONDA EF9 CIVIC SI - JDM B18C5
☠️BMW E36 318i - Ford 5.0 FE302 🚴♂️ GT-Labomba - 26x2.75 Freeride
🤹♀️SOLD BMW E36/7 Z3 - BMW M54B25 🧓SOLD BMW E10 2002 - BMW M10M05 -
Post a picture of this.
Also did you spray the carpet black too?
I will post one when I get home from work and yes I did spray the carpet black. I am planning on getting floor mats to try to reduce the amount of interaction with shoes.
-
Post a picture of this.
Also did you spray the carpet black too?
I'm assuming you were talking about the transmission bolt issue. I have ordered the replacement hardline as the brakes are not something I am trying to cut corners with.
The bolt in the trans. While fighting with this stuck bolt and getting the bit lost in the shavings on the surface on the housing, I made some 1/4" impressions on the surface. Nothing serious but it is upsetting, I think I'm going to run a washer with this bolt just for the even surface area. The back side you can see has had a good amount drilled out but now I'm hitting the broken off easy out. I would like to do this myself, but I don't want to damage the surface anymore.
I guess really the next step would be to bring it to a machine shop or something where they might have a more able drill press? I'm open to suggestions.
Top side:

Side mated to block:

-
You could just leave it and run it as is too. Most people in the drifting world don't even run the top half of the transmission bolts on their car in the event that they need to do a trans swap at the track. If you think about the size and quantity of the fasteners, it's overkill for how much clamping force there is holding it to the engine with all of the bolts in place.
-
You could just leave it and run it as is too. Most people in the drifting world don't even run the top half of the transmission bolts on their car in the event that they need to do a trans swap at the track. If you think about the size and quantity of the fasteners, it's overkill for how much clamping force there is holding it to the engine with all of the bolts in place.
I’ve thought about this as there are 9 other bolts that hold it on. This is one of the large bolts at 9 and 3 o’clock on the trans. Would it be bad to not run one of these in particular? It would make like a lot easier if I didn’t need to worry about it. This car will be mainly street driven and a little bit of auto x at most so nothing that would put a significant amount of stress on it.
-
Earls right, you dont need to really worry about it.
If I really wanted it out, I would use some really small drill bits (#50 to #10 or so) and drill a hole or two between the easy-out and the trans wall. You started doing this but 1/4" is way too big. Then drill a hole from the back side(mated to block side) as you have already done but further until you hit the easy-out. then get a small punch and hit the easy-out from that same direction opposite from which you inserted it. Now you should have a hole, continue to step up your drill sizes until you are almost touching the threads on the housing. Use a torch and heat the area, use an easy-out and try again.
I've been there more times than I can count. Good luck!
https://www.instagram.com/_jdesigner_/ http://nevertoolow.tumblr.com/
🥳SOLD BMW E24 633CSI - BMW M30B32 🧪SOLD HCH ES9 - 1.3 LDA
👽BMW E30 325IC - Toyota 1JZ-GTE ⏰ HONDA EF9 CIVIC SI - JDM B18C5
☠️BMW E36 318i - Ford 5.0 FE302 🚴♂️ GT-Labomba - 26x2.75 Freeride
🤹♀️SOLD BMW E36/7 Z3 - BMW M54B25 🧓SOLD BMW E10 2002 - BMW M10M05 -
Earls right, you dont need to really worry about it.
If I really wanted it out, I would use some really small drill bits (#50 to #10 or so) and drill a hole or two between the easy-out and the trans wall. You started doing this but 1/4" is way too big. Then drill a hole from the back side(mated to block side) as you have already done but further until you hit the easy-out. then get a small punch and hit the easy-out from that same direction opposite from which you inserted it. Now you should have a hole, continue to step up your drill sizes until you are almost touching the threads on the housing. Use a torch and heat the area, use an easy-out and try again.
I've been there more times than I can count. Good luck!
Well this is good to know. I think I might avoid it for the time being so I can focus my efforts on other parts of the car.
Thank you for the heads up.
-
your pilot hole in the back of the bolt is a pretty good size. what about just putting a big lag bolt in there (or tapping threads and putting a normal bolt in) and using a impact wrench on it? because it's from the back side, and will bottom out, a tightening rotation will loosen it. you risk snapping that bolt too, but its a bigger size than the easy-out so should take more torque.
Dan
-
Also a good idea. I feel like its so close to coming out you should just get it out of there.
https://www.instagram.com/_jdesigner_/ http://nevertoolow.tumblr.com/
🥳SOLD BMW E24 633CSI - BMW M30B32 🧪SOLD HCH ES9 - 1.3 LDA
👽BMW E30 325IC - Toyota 1JZ-GTE ⏰ HONDA EF9 CIVIC SI - JDM B18C5
☠️BMW E36 318i - Ford 5.0 FE302 🚴♂️ GT-Labomba - 26x2.75 Freeride
🤹♀️SOLD BMW E36/7 Z3 - BMW M54B25 🧓SOLD BMW E10 2002 - BMW M10M05 -
your pilot hole in the back of the bolt is a pretty good size. what about just putting a big lag bolt in there (or tapping threads and putting a normal bolt in) and using a impact wrench on it? because it's from the back side, and will bottom out, a tightening rotation will loosen it. you risk snapping that bolt too, but its a bigger size than the easy-out so should take more torque.
This could be worth the try as I am mainly waiting at parts for the moment.
Wanted to test fit the headers so I could see if there would need to be any drilling done. Looks like just a couple of the corner holes might need to be widened. But much better than I had anticipated after what I had heard and read about these headers. I love how the white came out, really think it's gonna stand out nice in the calypso bay.

-
Top side:
Side mated to block:
Really confused about what's happening here. There's no threads there, so there's no point in trying to spin it. Find a suitable punch, heat the crap out of the area, hose it down with penetrant while it's hot, and smack it out with a 3 pounder. Just don't hit it hard enough to break the casting.

Spraying it with penetrant while it's hot should help suck the oil into the gap as the parts cool. That's the theory at least...
The only thing holding it in is corrosion. The easy-out could also be part of the problem if it's trying to expand the bolt out into the hole, so drilling small holes around that may help...
-
Really confused about what's happening here. There's no threads there, so there's no point in trying to spin it. Find a suitable punch, heat the crap out of the area, hose it down with penetrant while it's hot, and smack it out with a 3 pounder. Just don't hit it hard enough to break the casting.
Spraying it with penetrant while it's hot should help suck the oil into the gap as the parts cool. That's the theory at least...
The only thing holding it in is corrosion. The easy-out could also be part of the problem if it's trying to expand the bolt out into the hole, so drilling small holes around that may help...
the point of spinning it is to utilize the impact gun, since it can hit alot harder/more times than the BFH.
can anyone with an engineering background surmise if either the rotational force or a directional force would be more effective?
Dan
-
the point of spinning it is to utilize the impact gun, since it can hit alot harder/more times than the BFH.
can anyone with an engineering background surmise if either the rotational force or a directional force would be more effective?
Eh, given the scenario it takes way more work to attempt to spin it when compared to how easy it is punch it out.
Beyond that I would think you start getting into grain structure. @snap may have some more thoughts on that though.
That's a steel bolt into aluminum, and aluminum expands at a much lower temp so it should be fairly easy to get out with some heat, a punch, and a good hammer.
Edit: aluminum vs steel expansion (linear) is actually a 2:1 ratio. Neat
Send it flying across the garage! -
Really confused about what's happening here. There's no threads there, so there's no point in trying to spin it. Find a suitable punch, heat the crap out of the area, hose it down with penetrant while it's hot, and smack it out with a 3 pounder. Just don't hit it hard enough to break the casting.
Spraying it with penetrant while it's hot should help suck the oil into the gap as the parts cool. That's the theory at least...
The only thing holding it in is corrosion. The easy-out could also be part of the problem if it's trying to expand the bolt out into the hole, so drilling small holes around that may help...
the point of spinning it is to utilize the impact gun, since it can hit alot harder/more times than the BFH.
can anyone with an engineering background surmise if either the rotational force or a directional force would be more effective?
Eh, given the scenario it takes way more work to attempt to spin it when compared to how easy it is punch it out.
Beyond that I would think you start getting into grain structure. @snap may have some more thoughts on that though.
That's a steel bolt into aluminum, and aluminum expands at a much lower temp so it should be fairly easy to get out with some heat, a punch, and a good hammer.
Edit: aluminum vs steel expansion (linear) is actually a 2:1 ratio. Neat
Send it flying across the garage!Believe me, heating it with a torch and hitting it with a hammer was my first train of thought. Did not get the results I was looking for. One of the start bolts that go through the trans housing had to be cut as well, came out very easily when I went to hit it with a punch and hammer.
-
Black interior has really come together nicely. For how little I have spent on it, I am really happy with how it has turned out. Contrast between the carpets and the seats isn't nearly as dramatic in person. Will run the tan sport seats for now, but will be looking to pick up an after market option during the winter.

How the car currently sits.

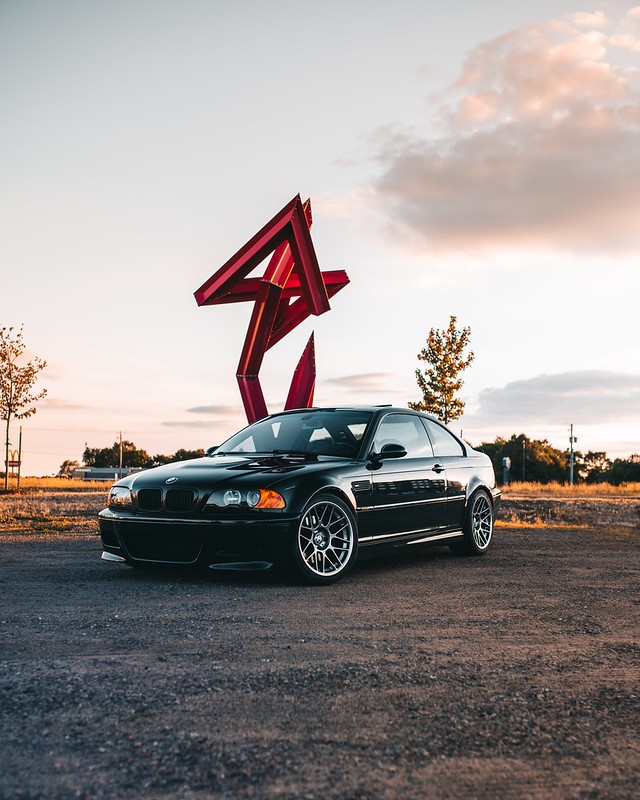
It's amazing how much time and work I've put into it, but from this angle it looks just like it did the day I picked it up minus it being lower. Starting to get really close for the motor to go in. I am waiting on parts right now before that can happen. Replacement brake line for the one I cut and some gaskets for the engine and transmission covering plate.
Kind of running out of stuff to do in the mean time, but I am hoping to get the parts I have for the transmission installed this weekend. Was gonna wait, but maybe start taking off and painting some of the trim pieces?
The trunk is what I should really figure out. I really don't know what to do for fixing that.







Hello! It looks like you're interested in this conversation, but you don't have an account yet.
Getting fed up of having to scroll through the same posts each visit? When you register for an account, you'll always come back to exactly where you were before, and choose to be notified of new replies (either via email, or push notification). You'll also be able to save bookmarks and upvote posts to show your appreciation to other community members.
With your input, this post could be even better 💗
Register Login