
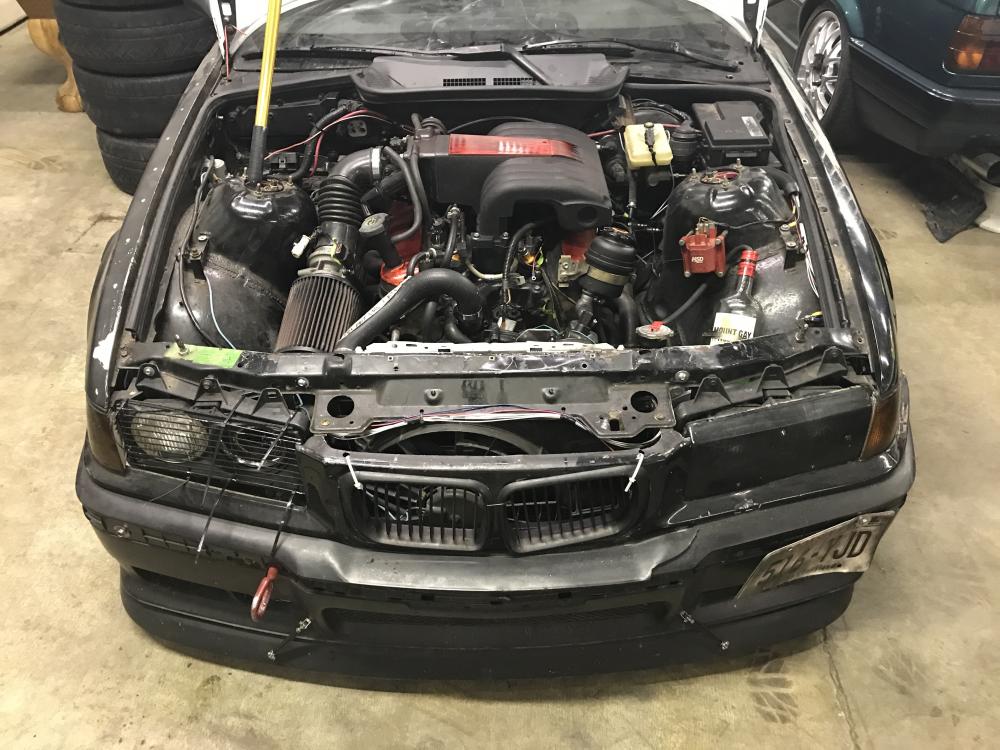
FuturisticConcept Art BMW E36 with a V8 on a bottom dollar budget
-
Pintle caps, orings, and filters came for the injectors. Didnt get around to cleaning, and testing the injectors though.
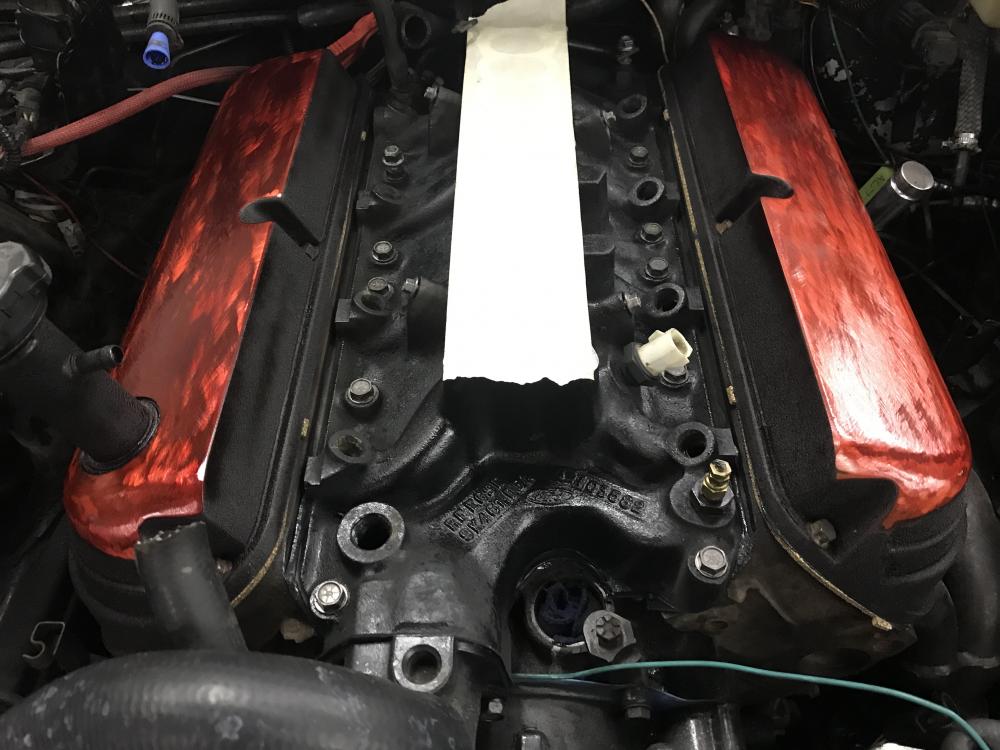
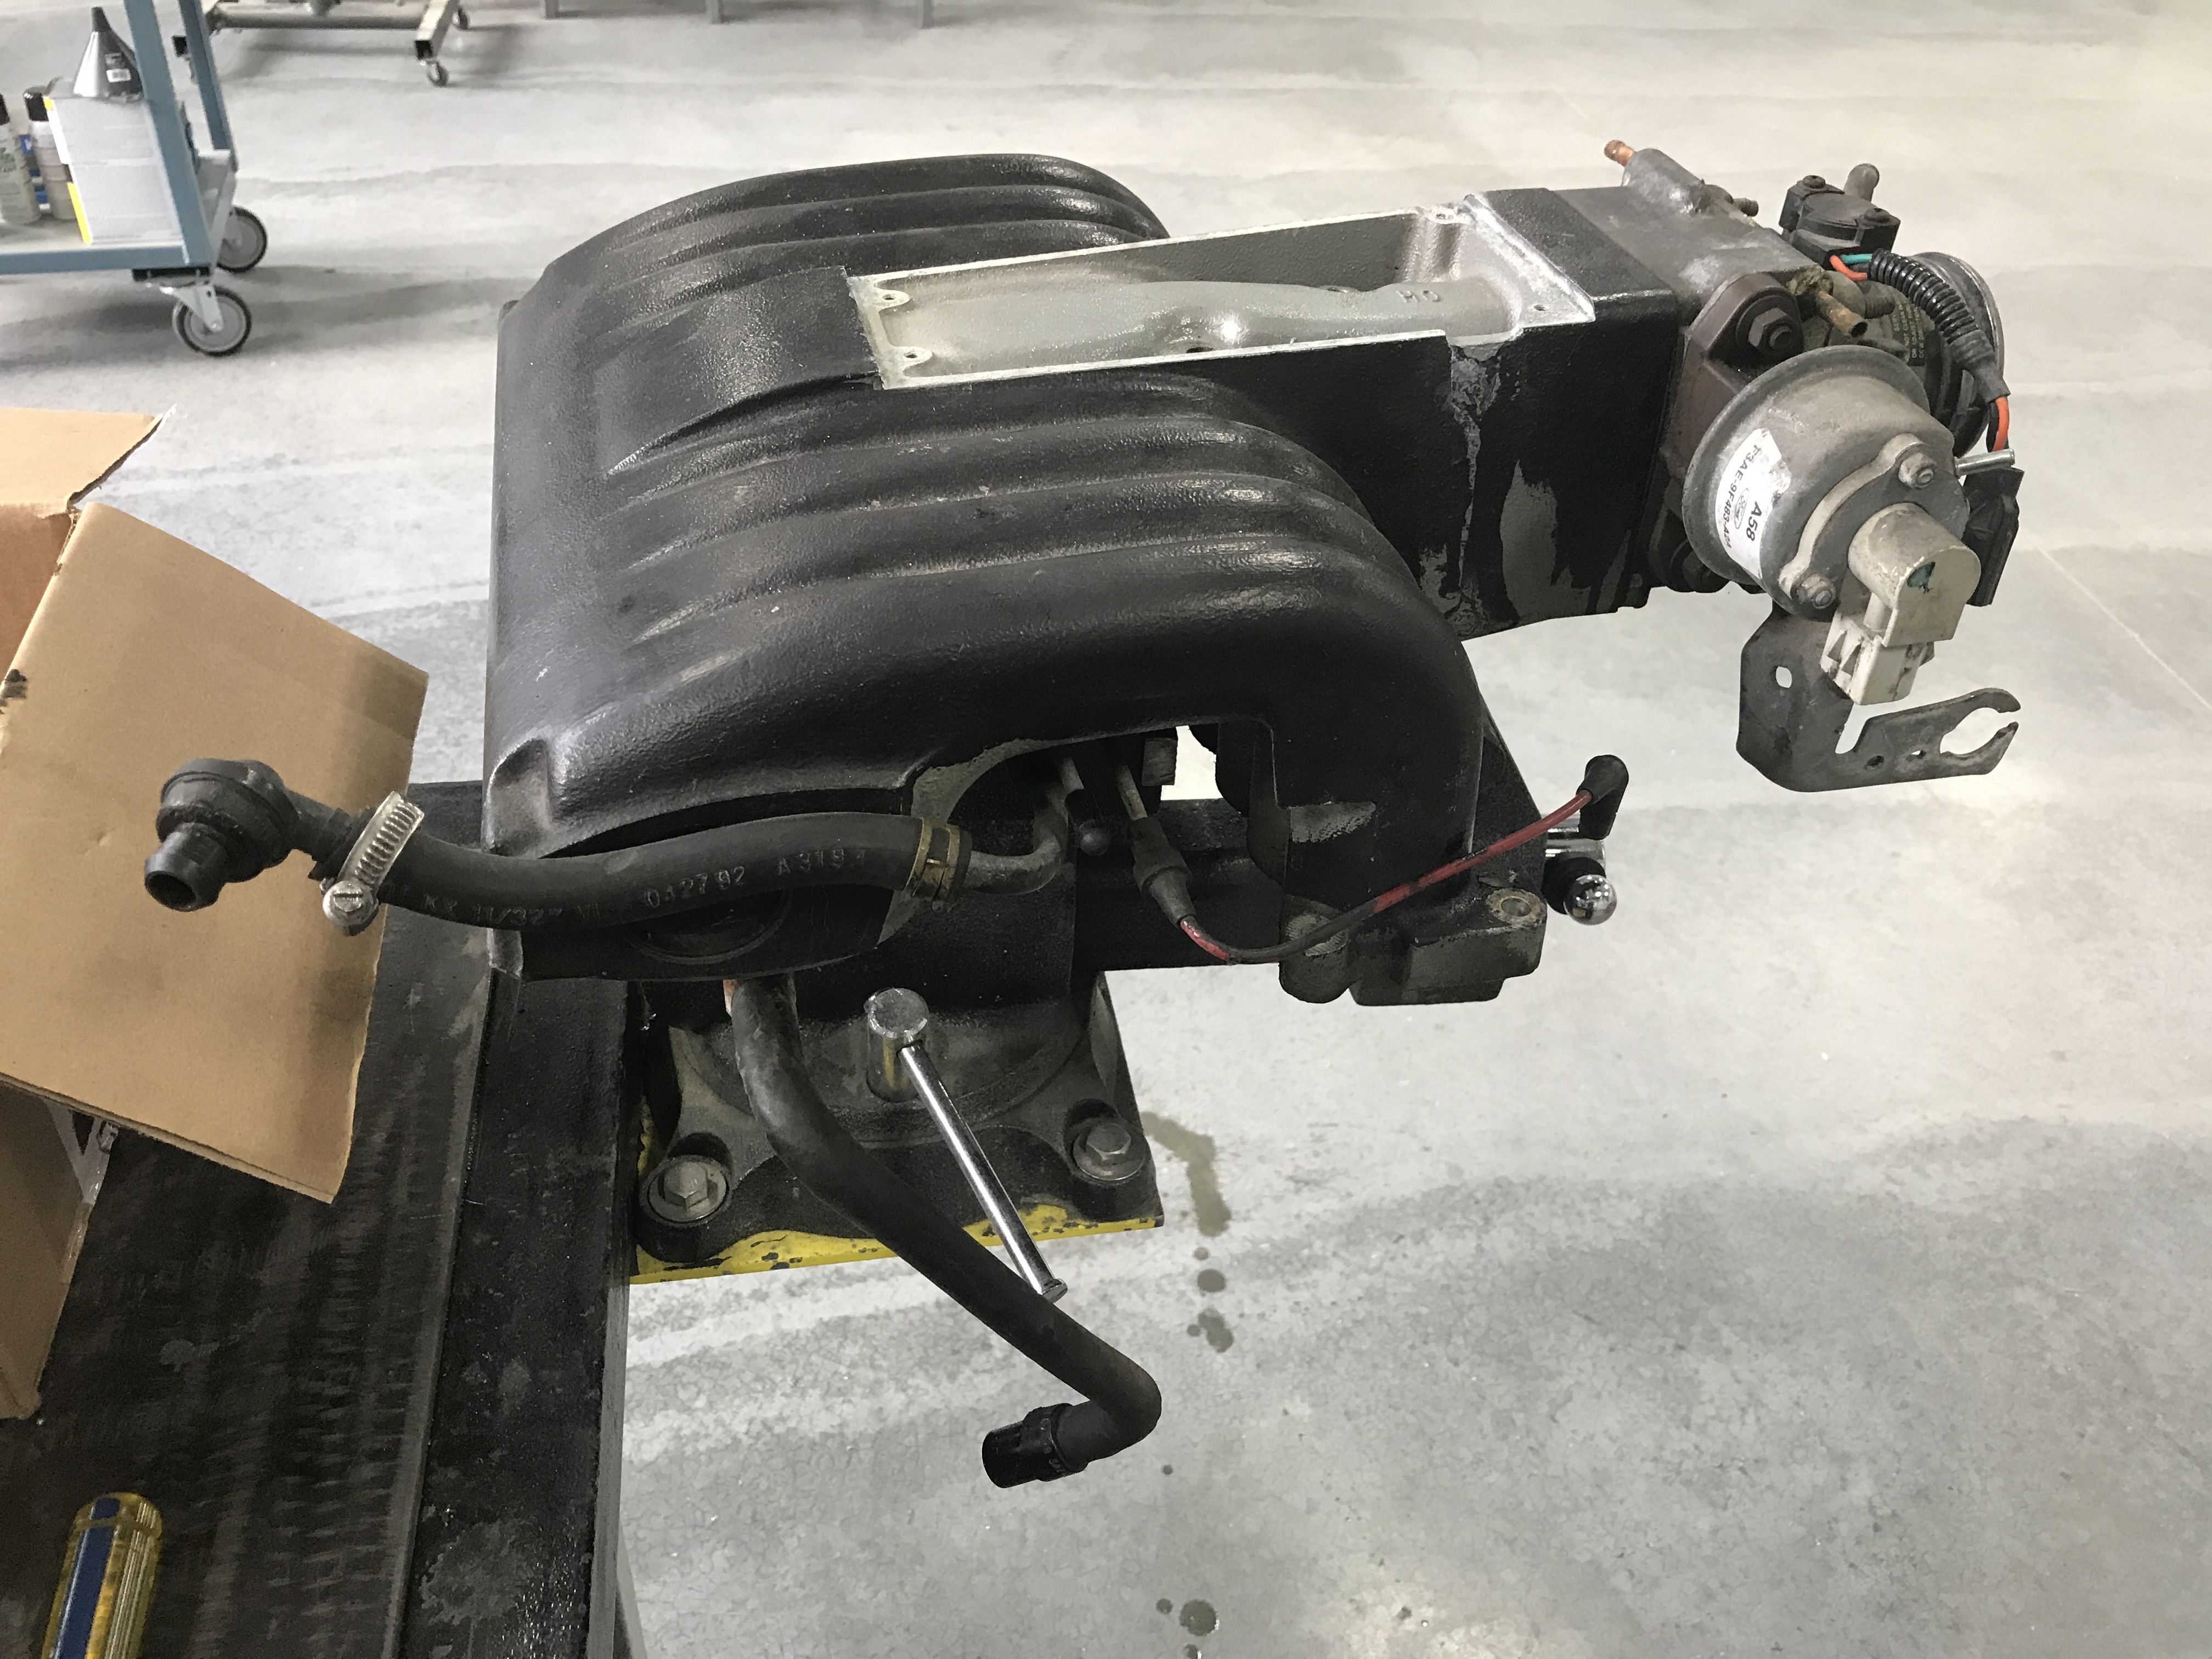
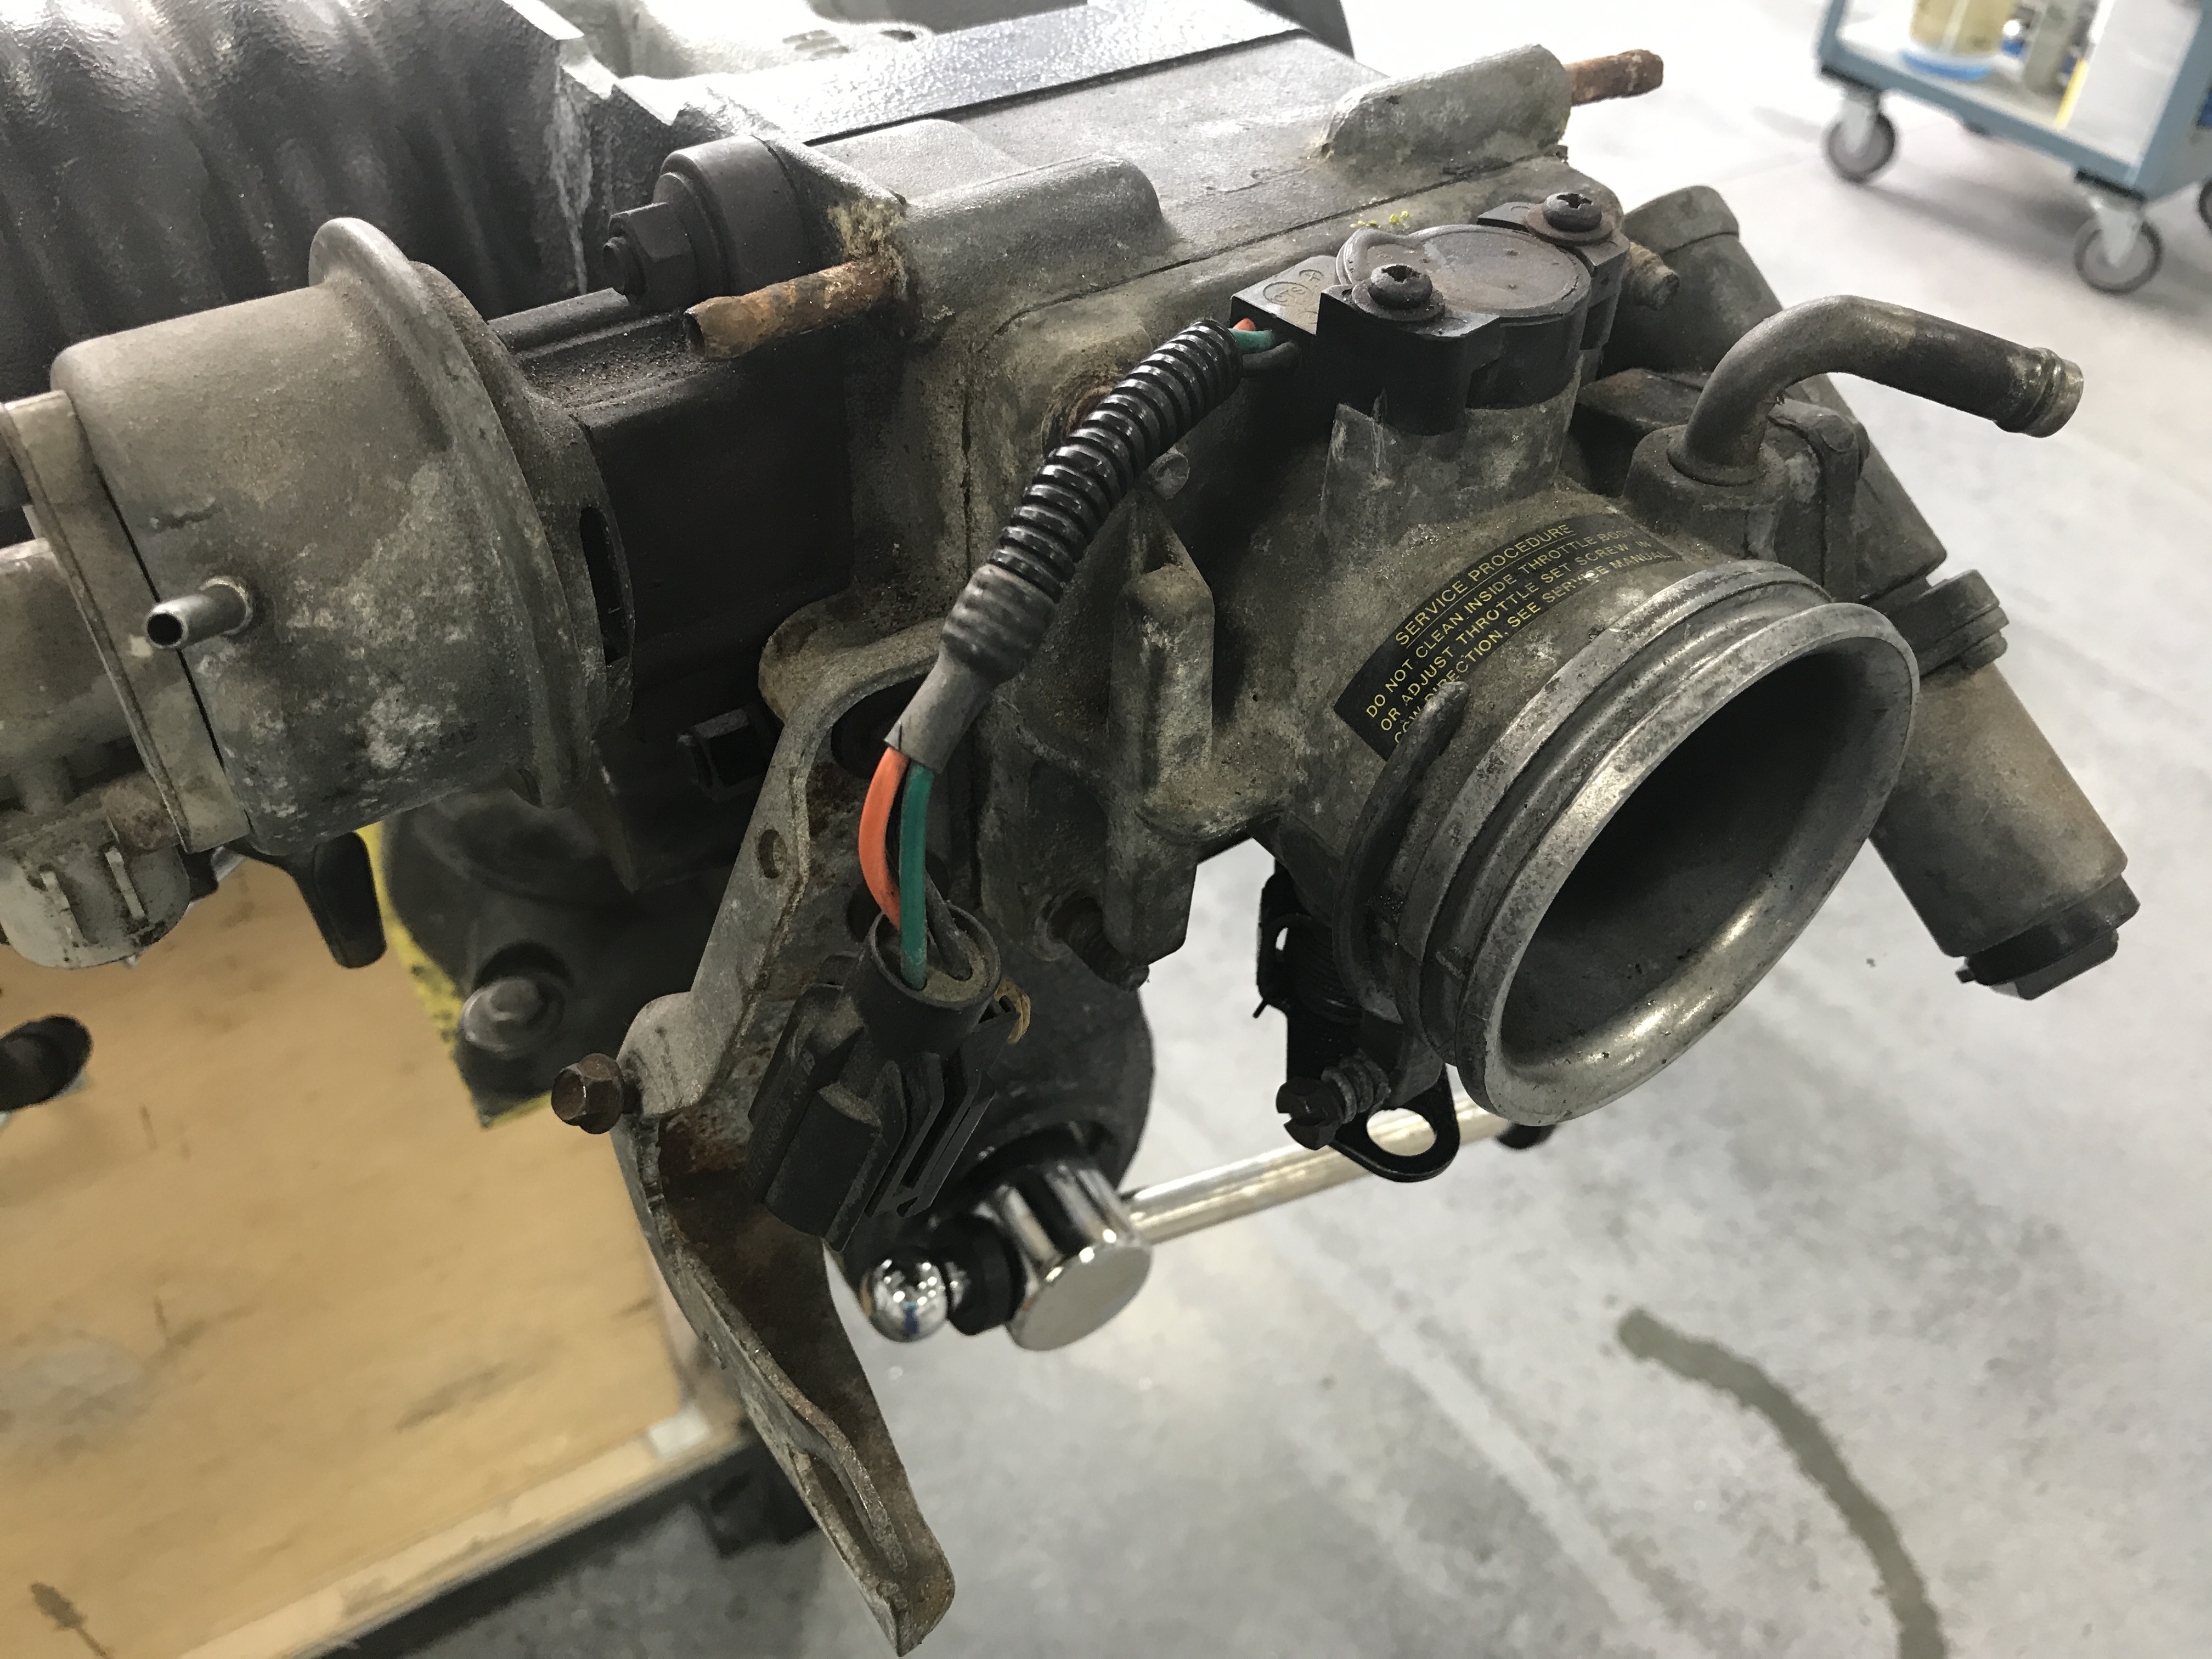
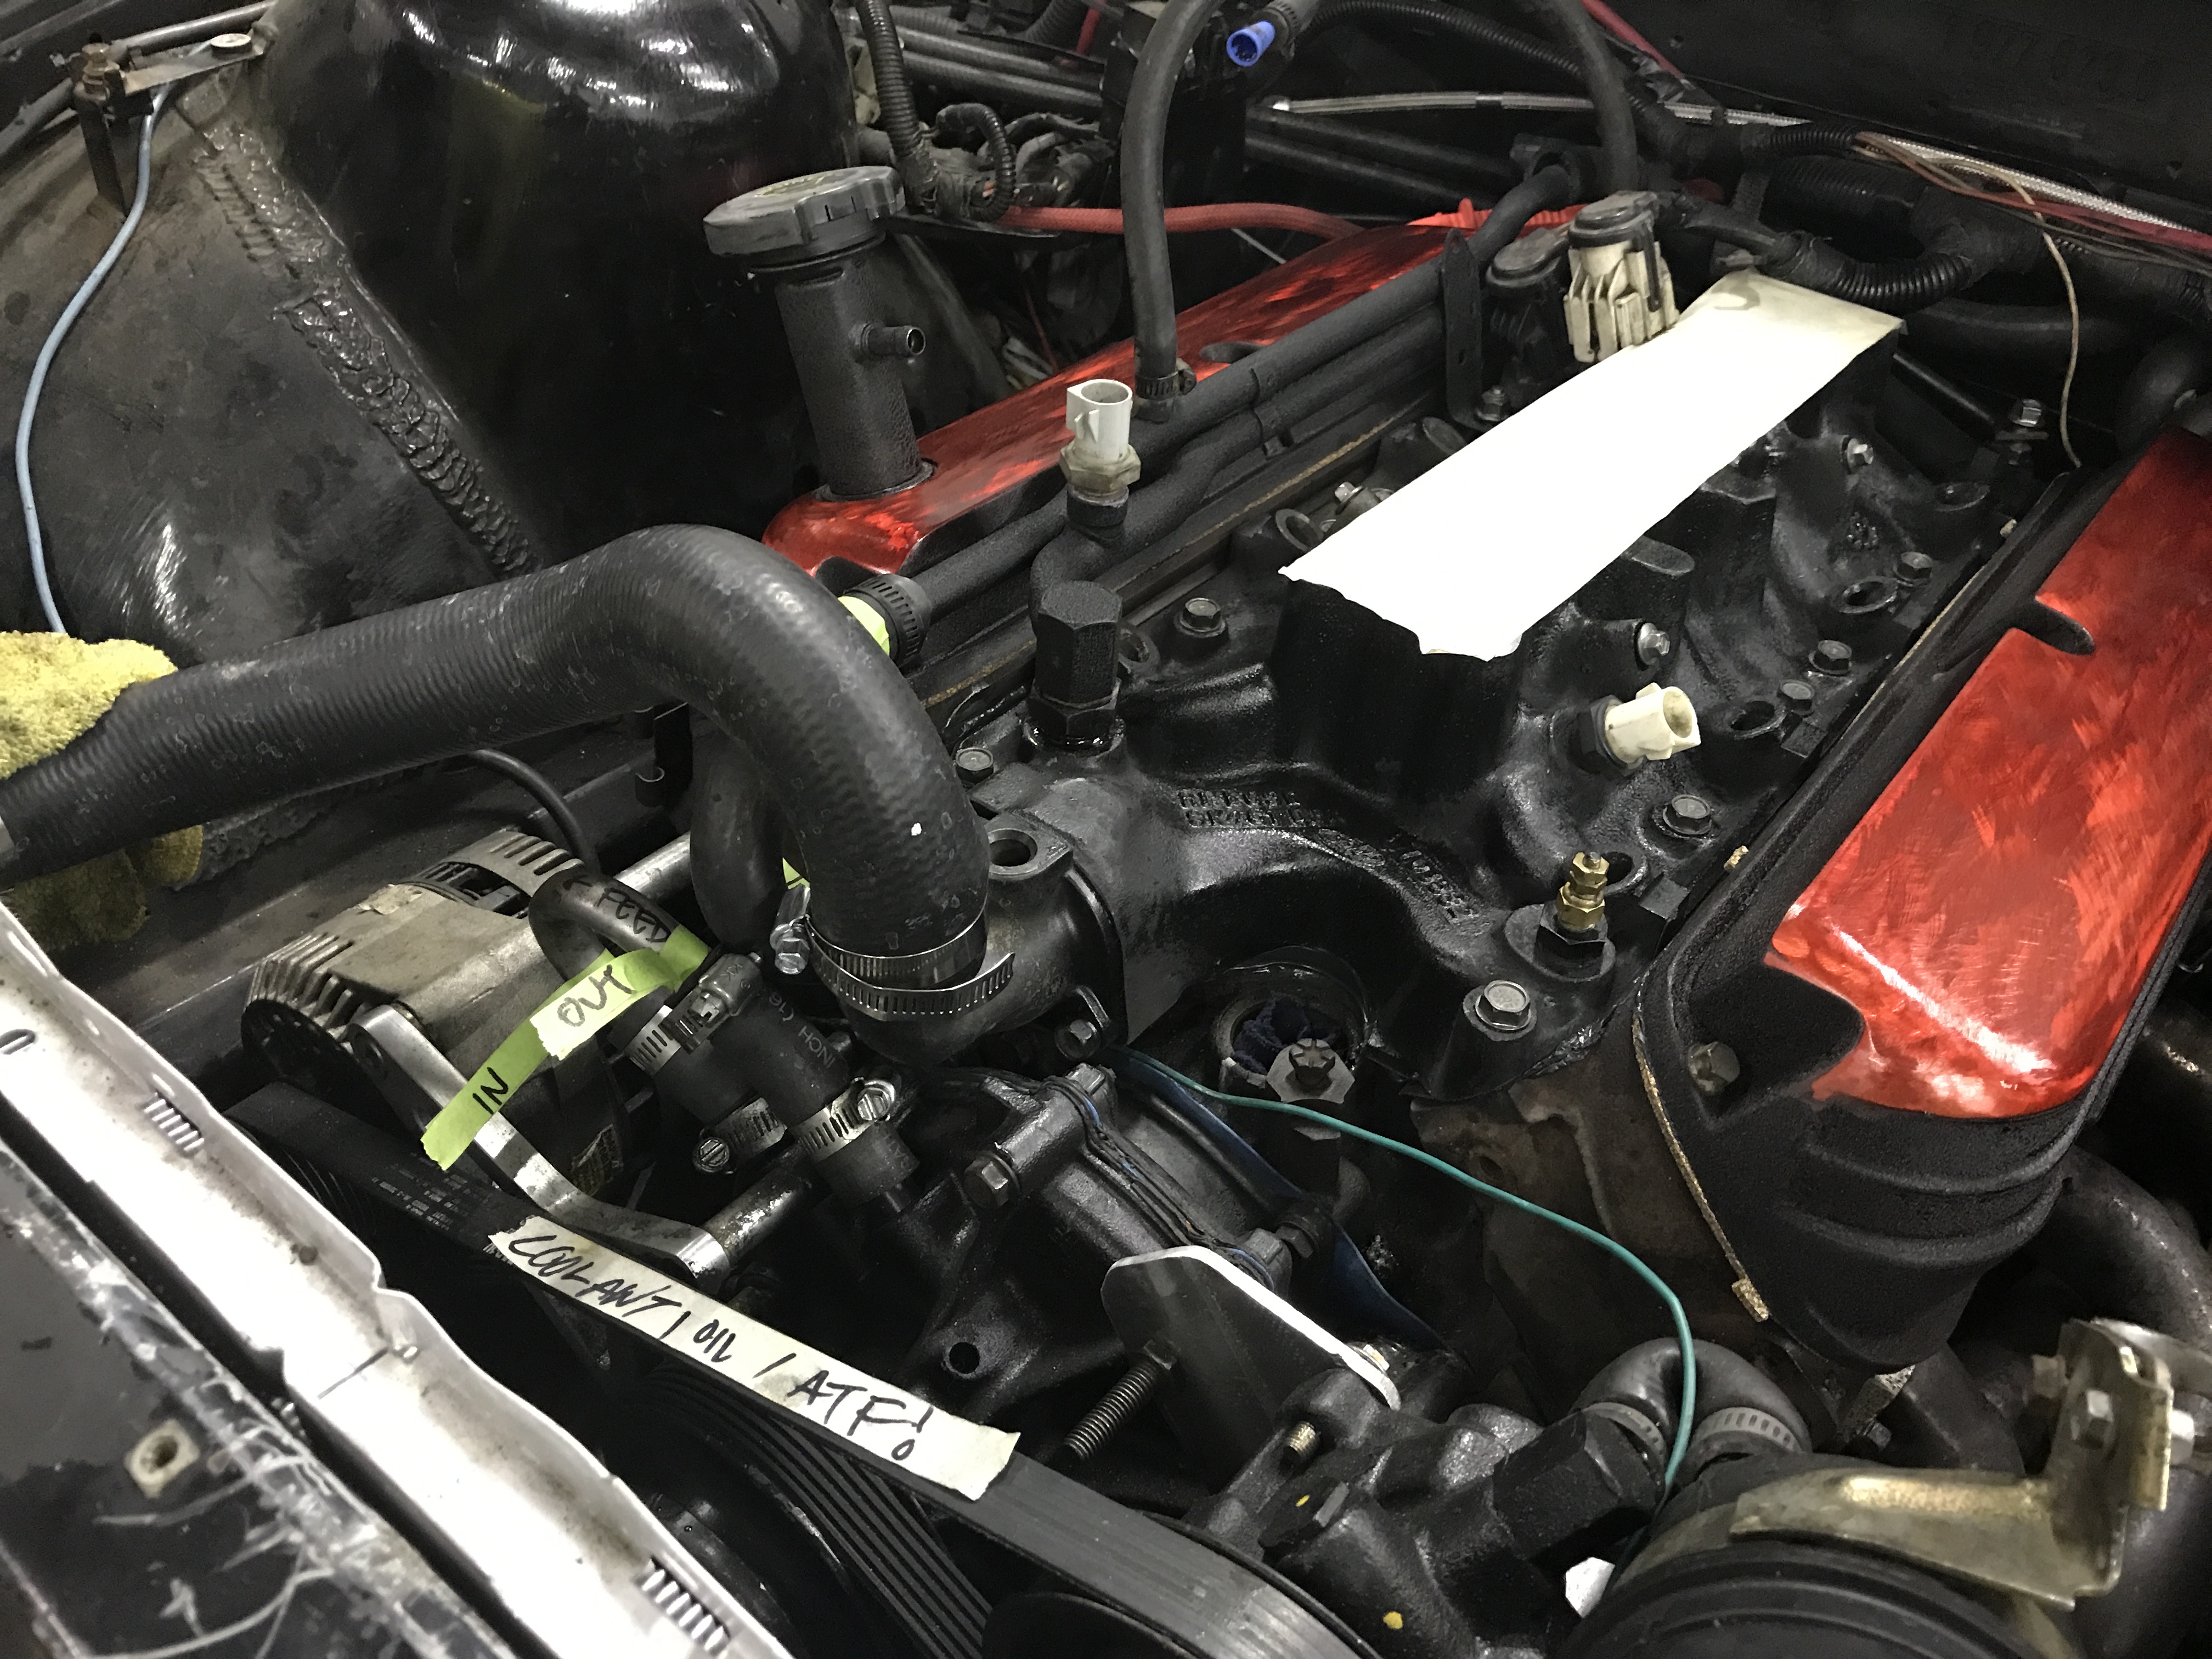
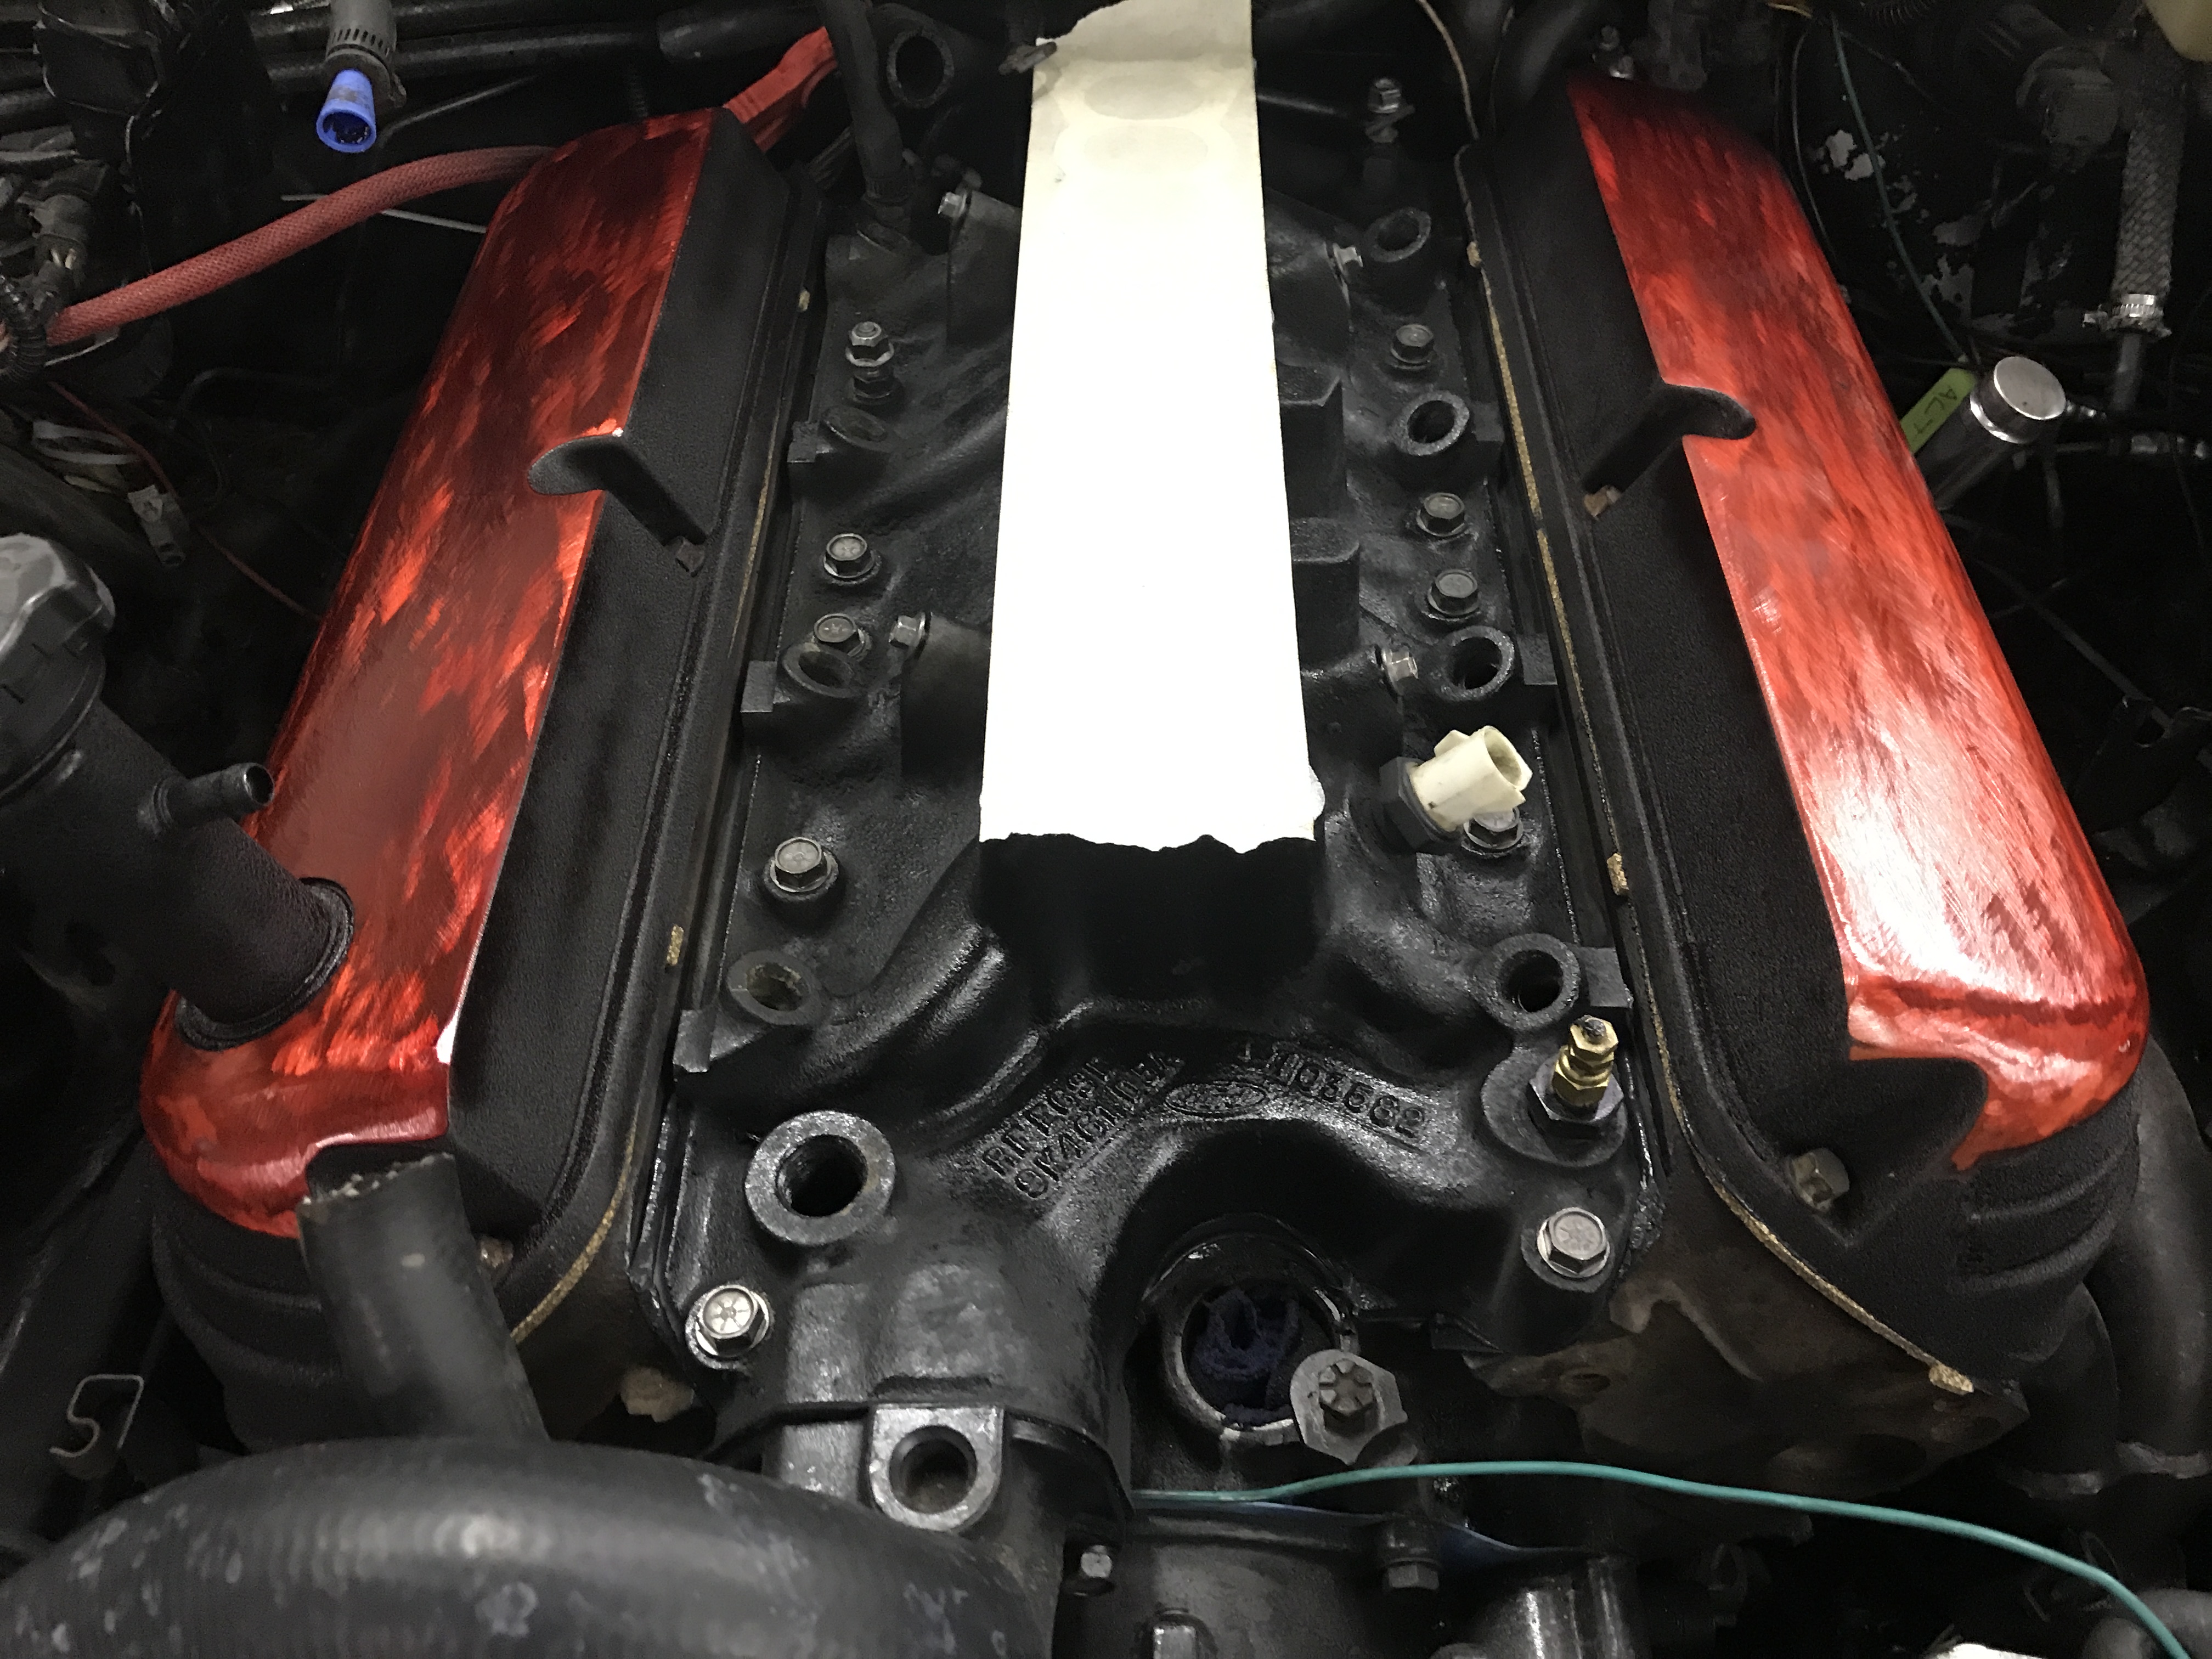
What I did do, is remove the throttlebody and spacer and strip the manifold for paint. I only took two pictures as I spend the rest of the time beating the shit out of the TB with a dead blow to get it off. I have never has such a hard time removing a TB in my life.
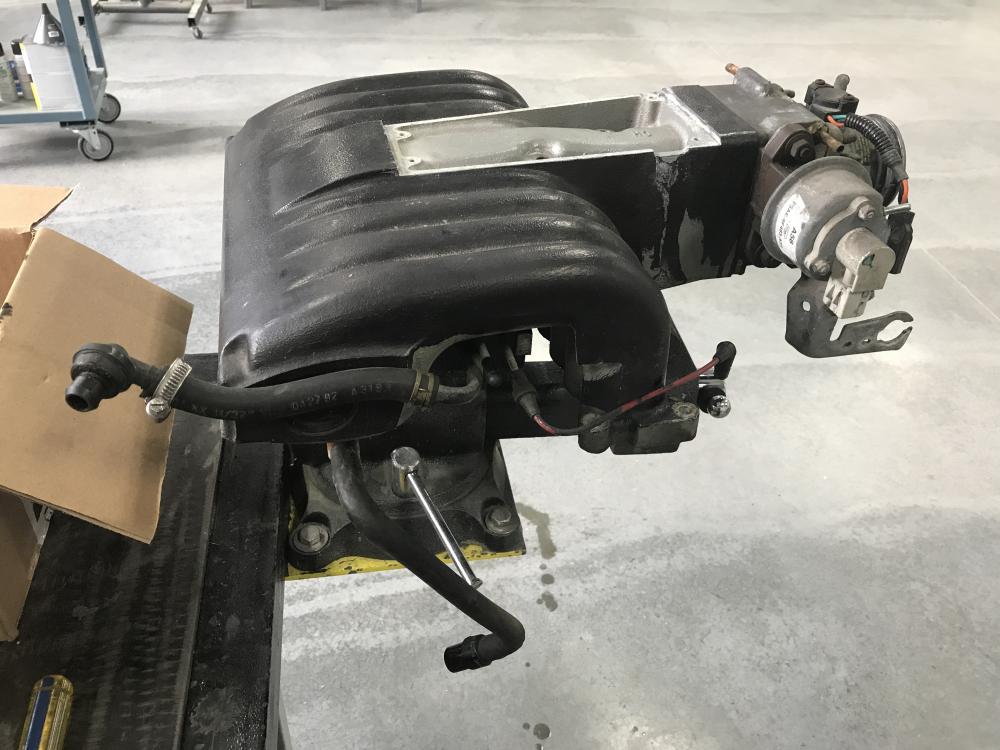
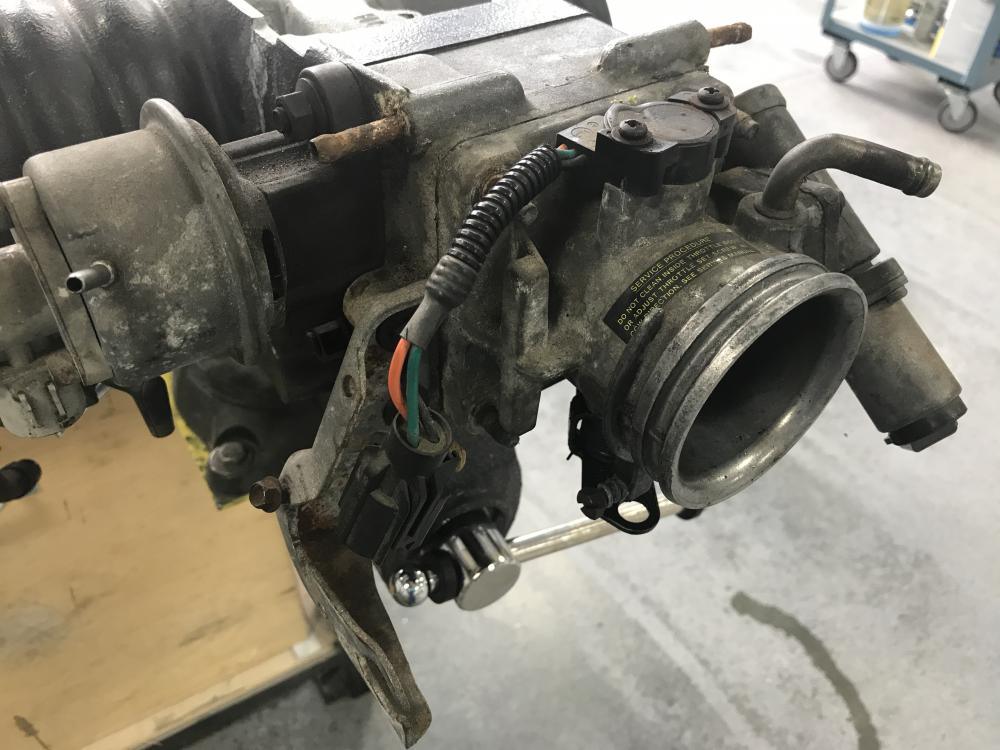
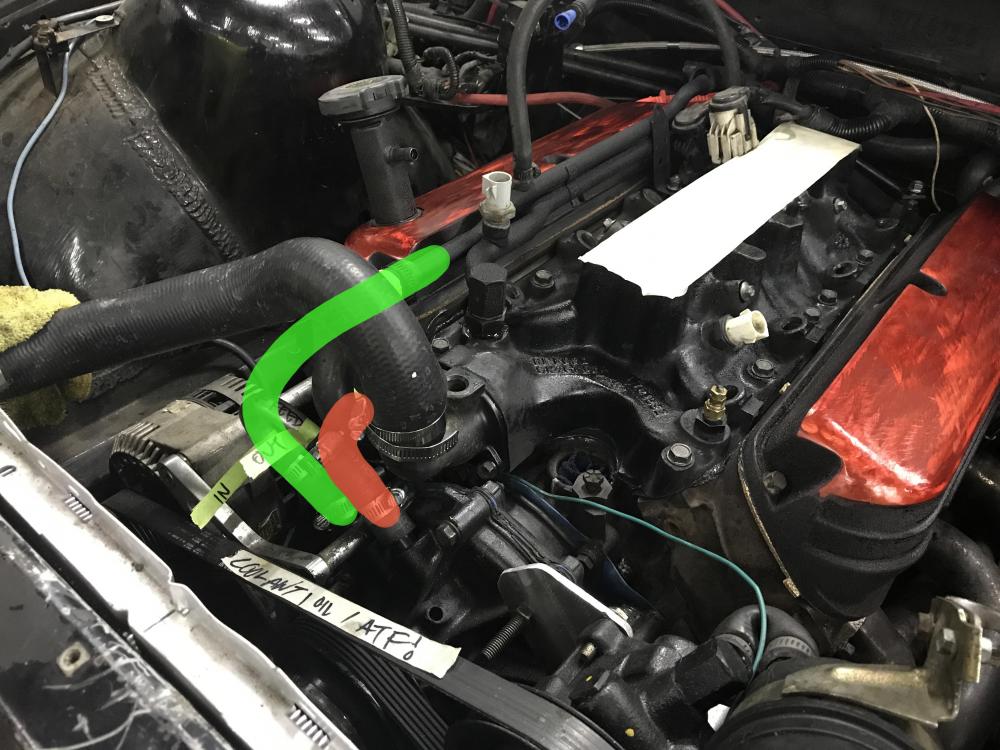
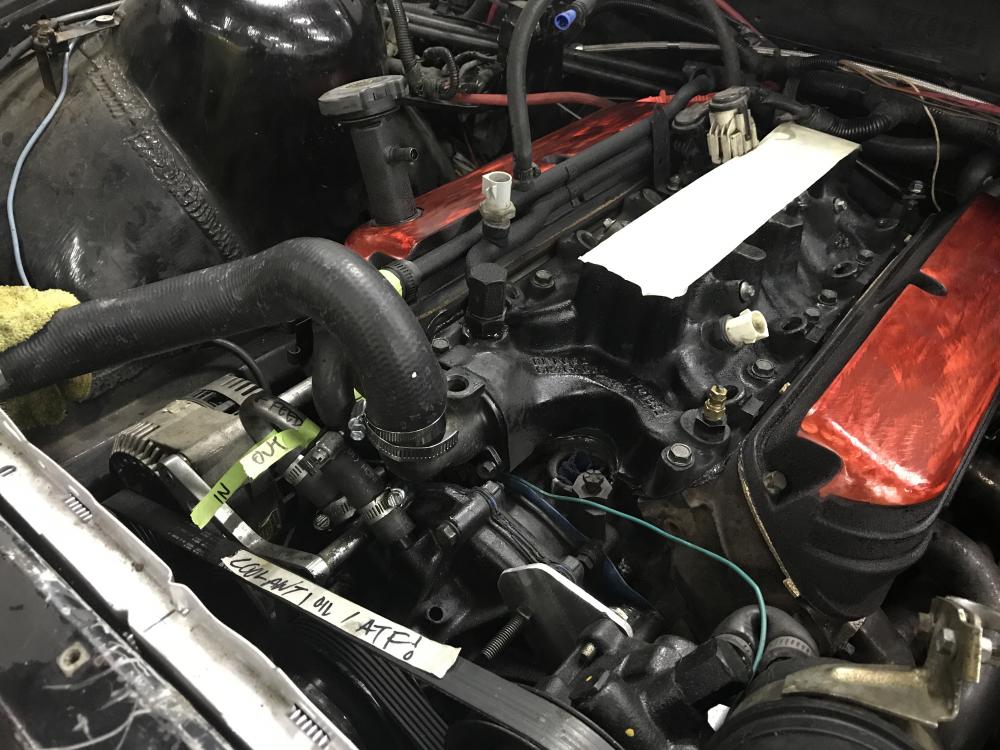
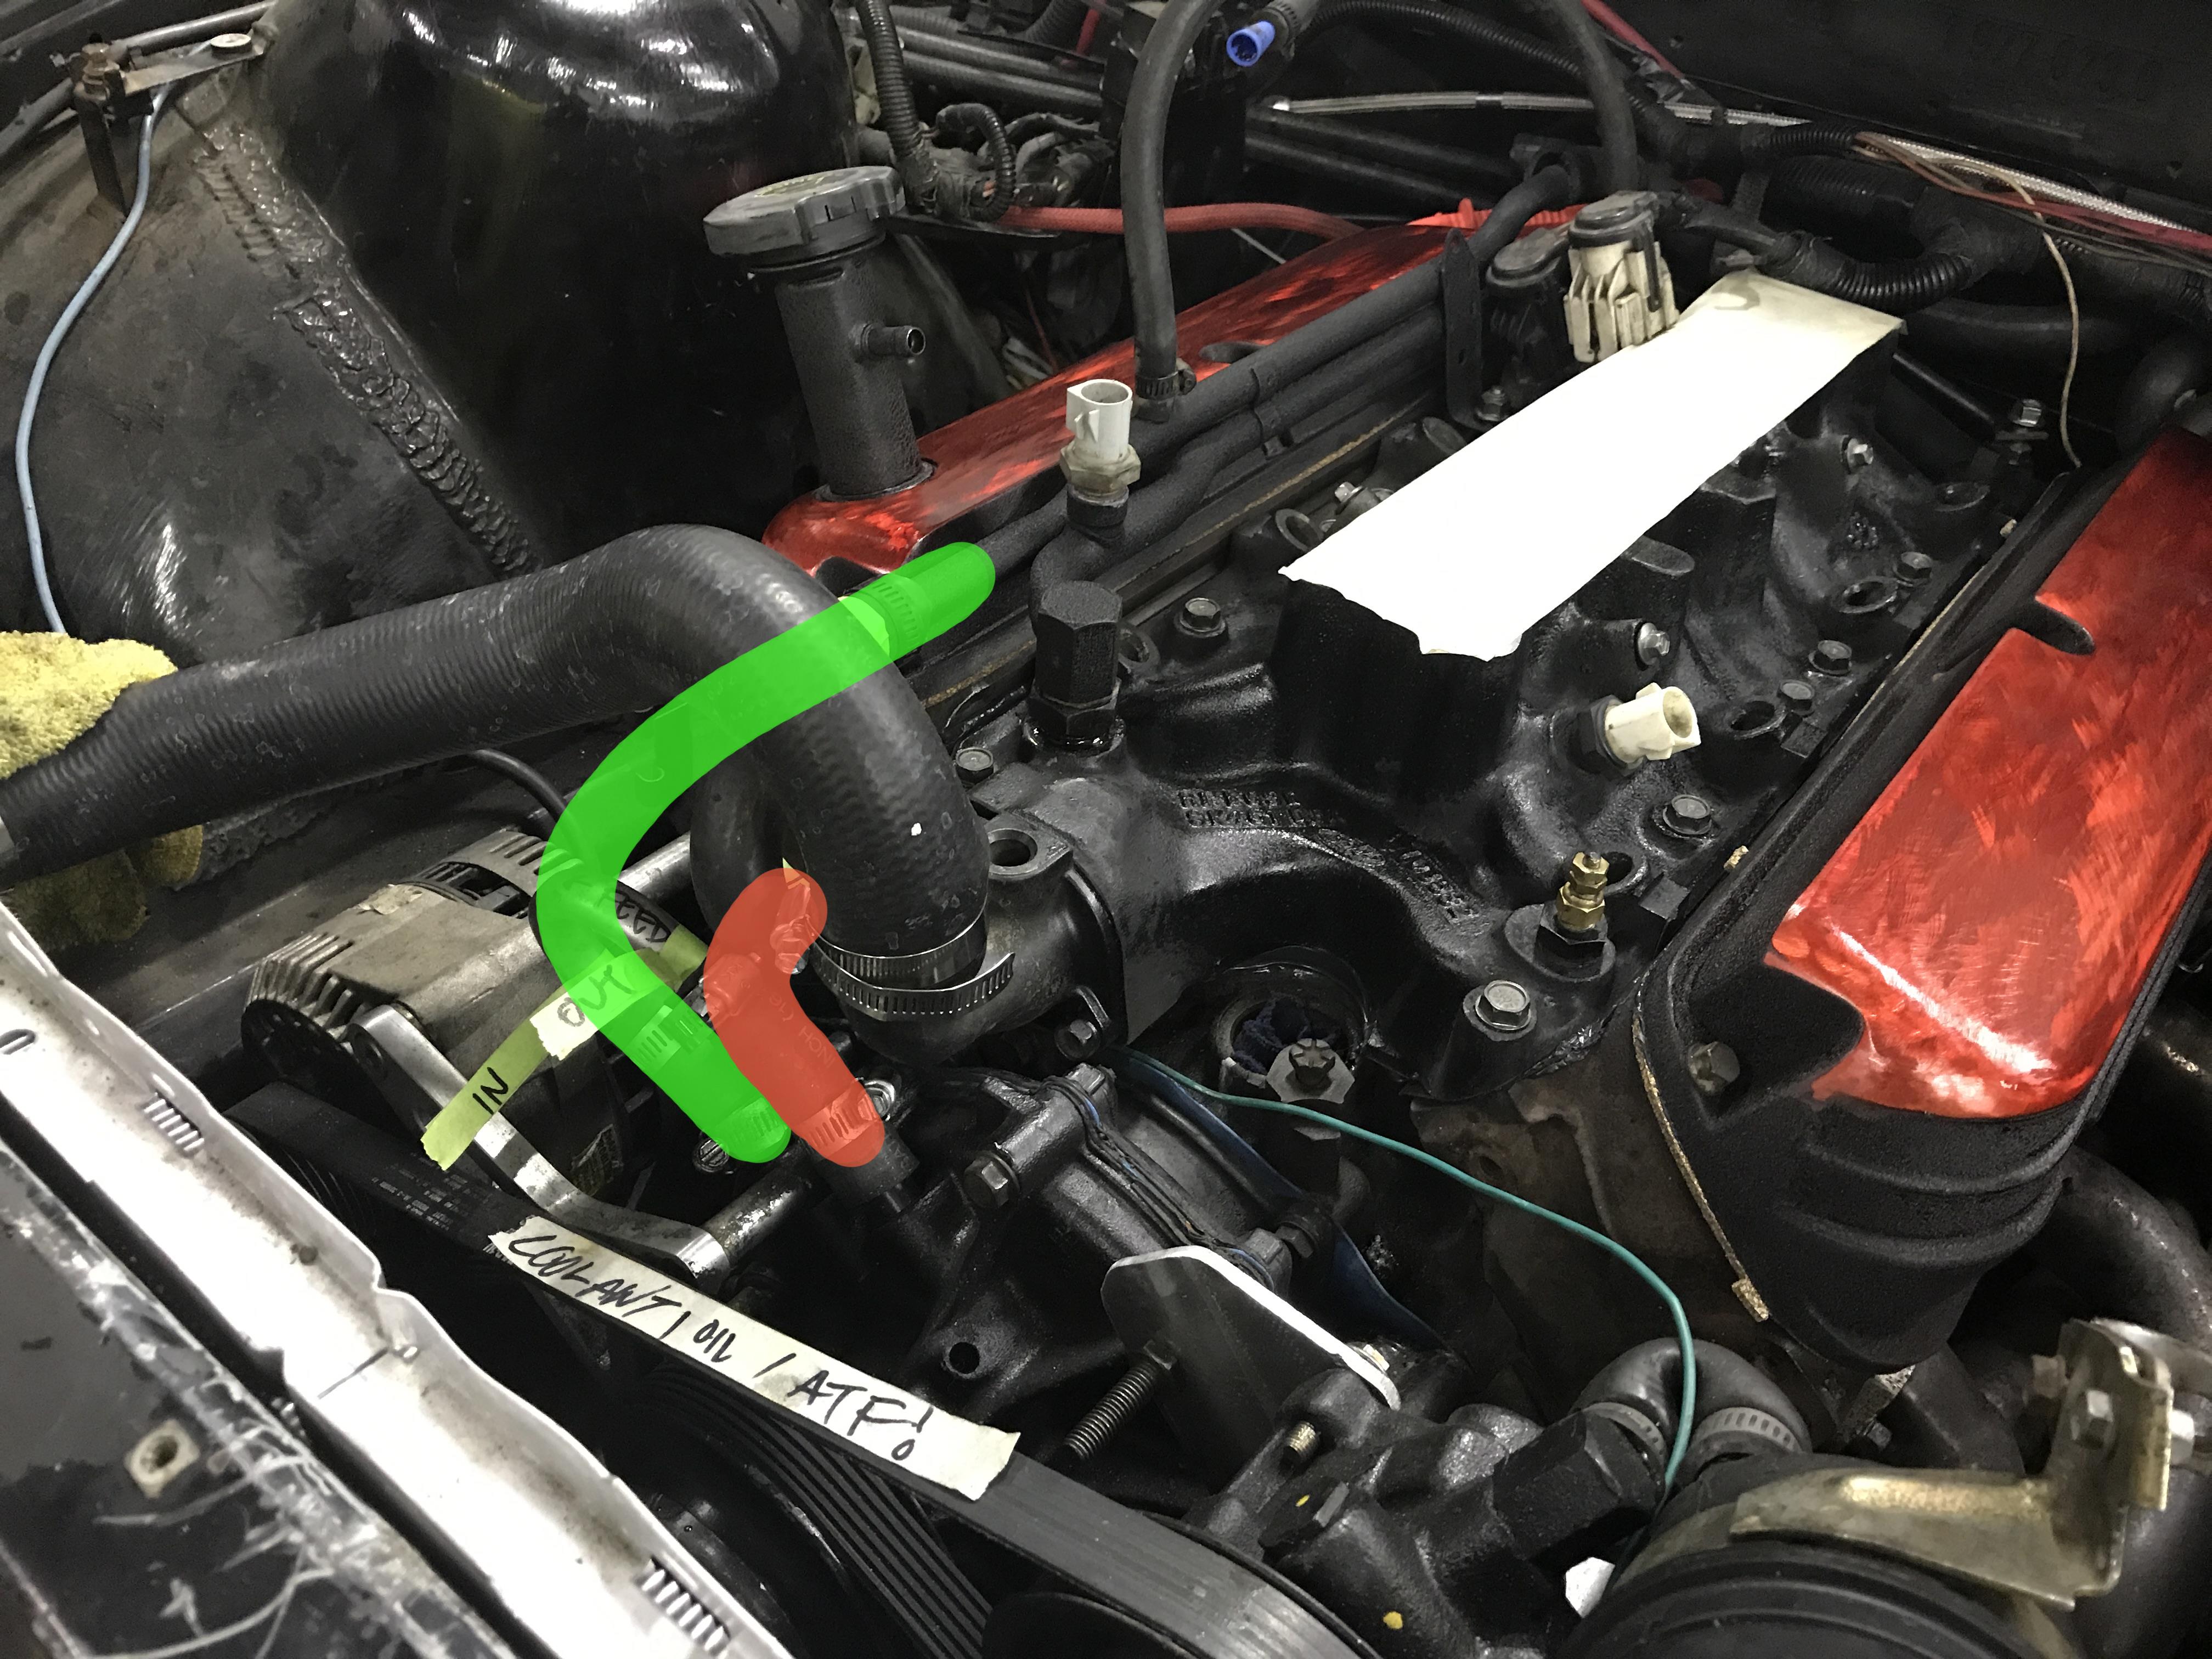
I also installed the valve covers and gaskets along with the coolant pipe for the heater core. This resulted in me doing some research about coolant flow and early E36 heater cores because I currently am not getting heat in the cabin. I found my problem as the water pump lines were looped and I just reinstalled them that way when I did the h2o pump when I got the car. I highlighted what they should be:

https://www.instagram.com/_jdesigner_/ http://nevertoolow.tumblr.com/
🥳SOLD BMW E24 633CSI - BMW M30B32 🧪SOLD HCH ES9 - 1.3 LDA
👽BMW E30 325IC - Toyota 1JZ-GTE ⏰ HONDA EF9 CIVIC SI - JDM B18C5
☠️BMW E36 318i - Ford 5.0 FE302 🚴♂️ GT-Labomba - 26x2.75 Freeride
🤹♀️SOLD BMW E36/7 Z3 - BMW M54B25 🧓SOLD BMW E10 2002 - BMW M10M05 -
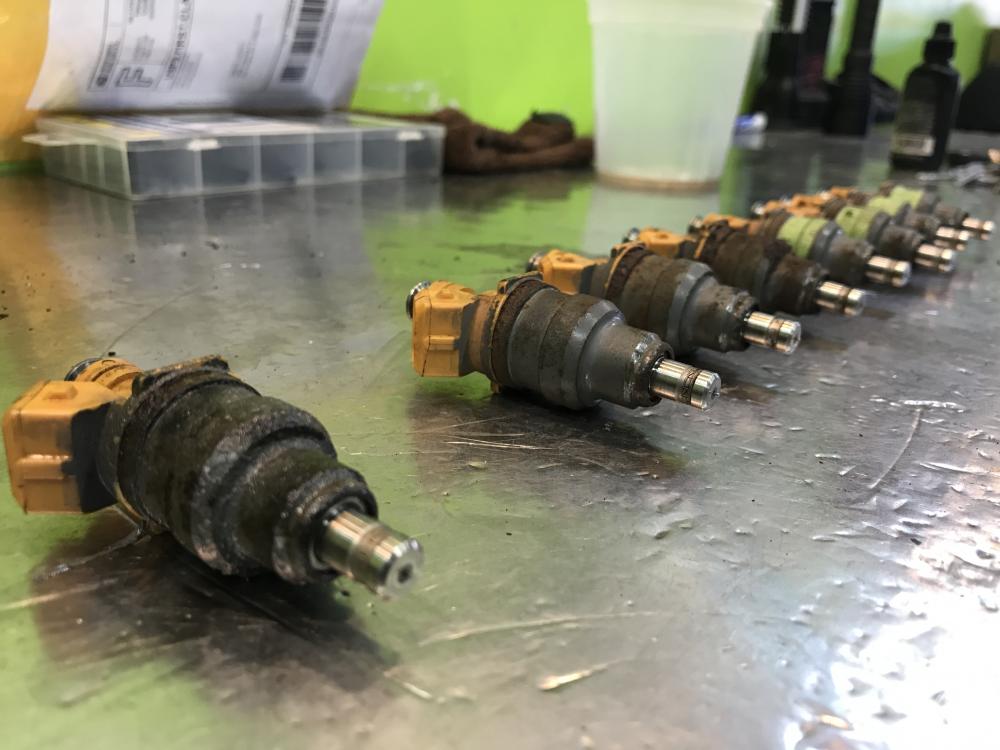
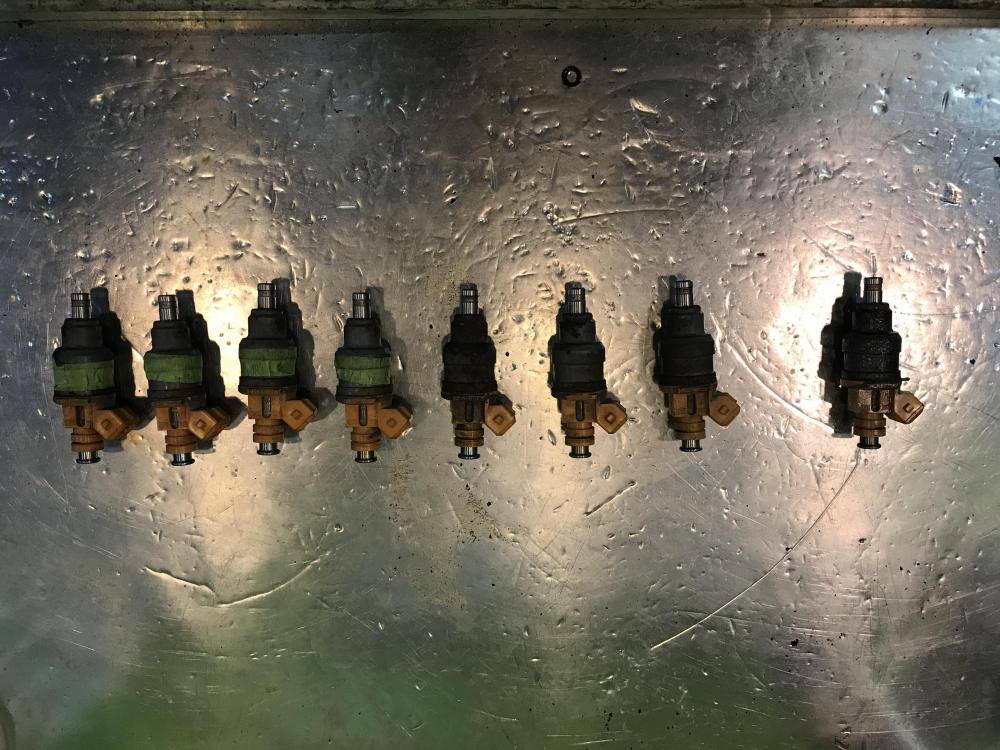
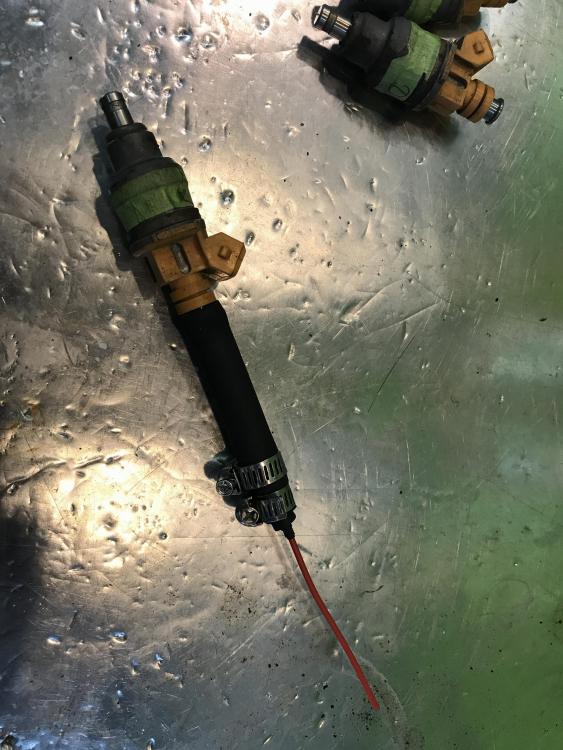
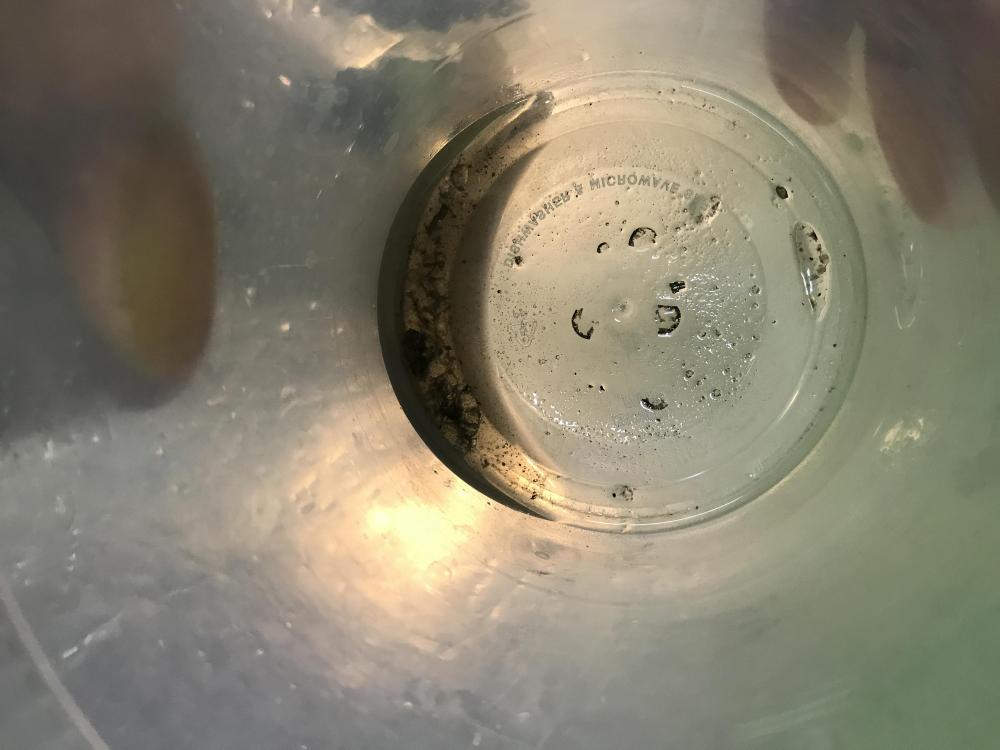
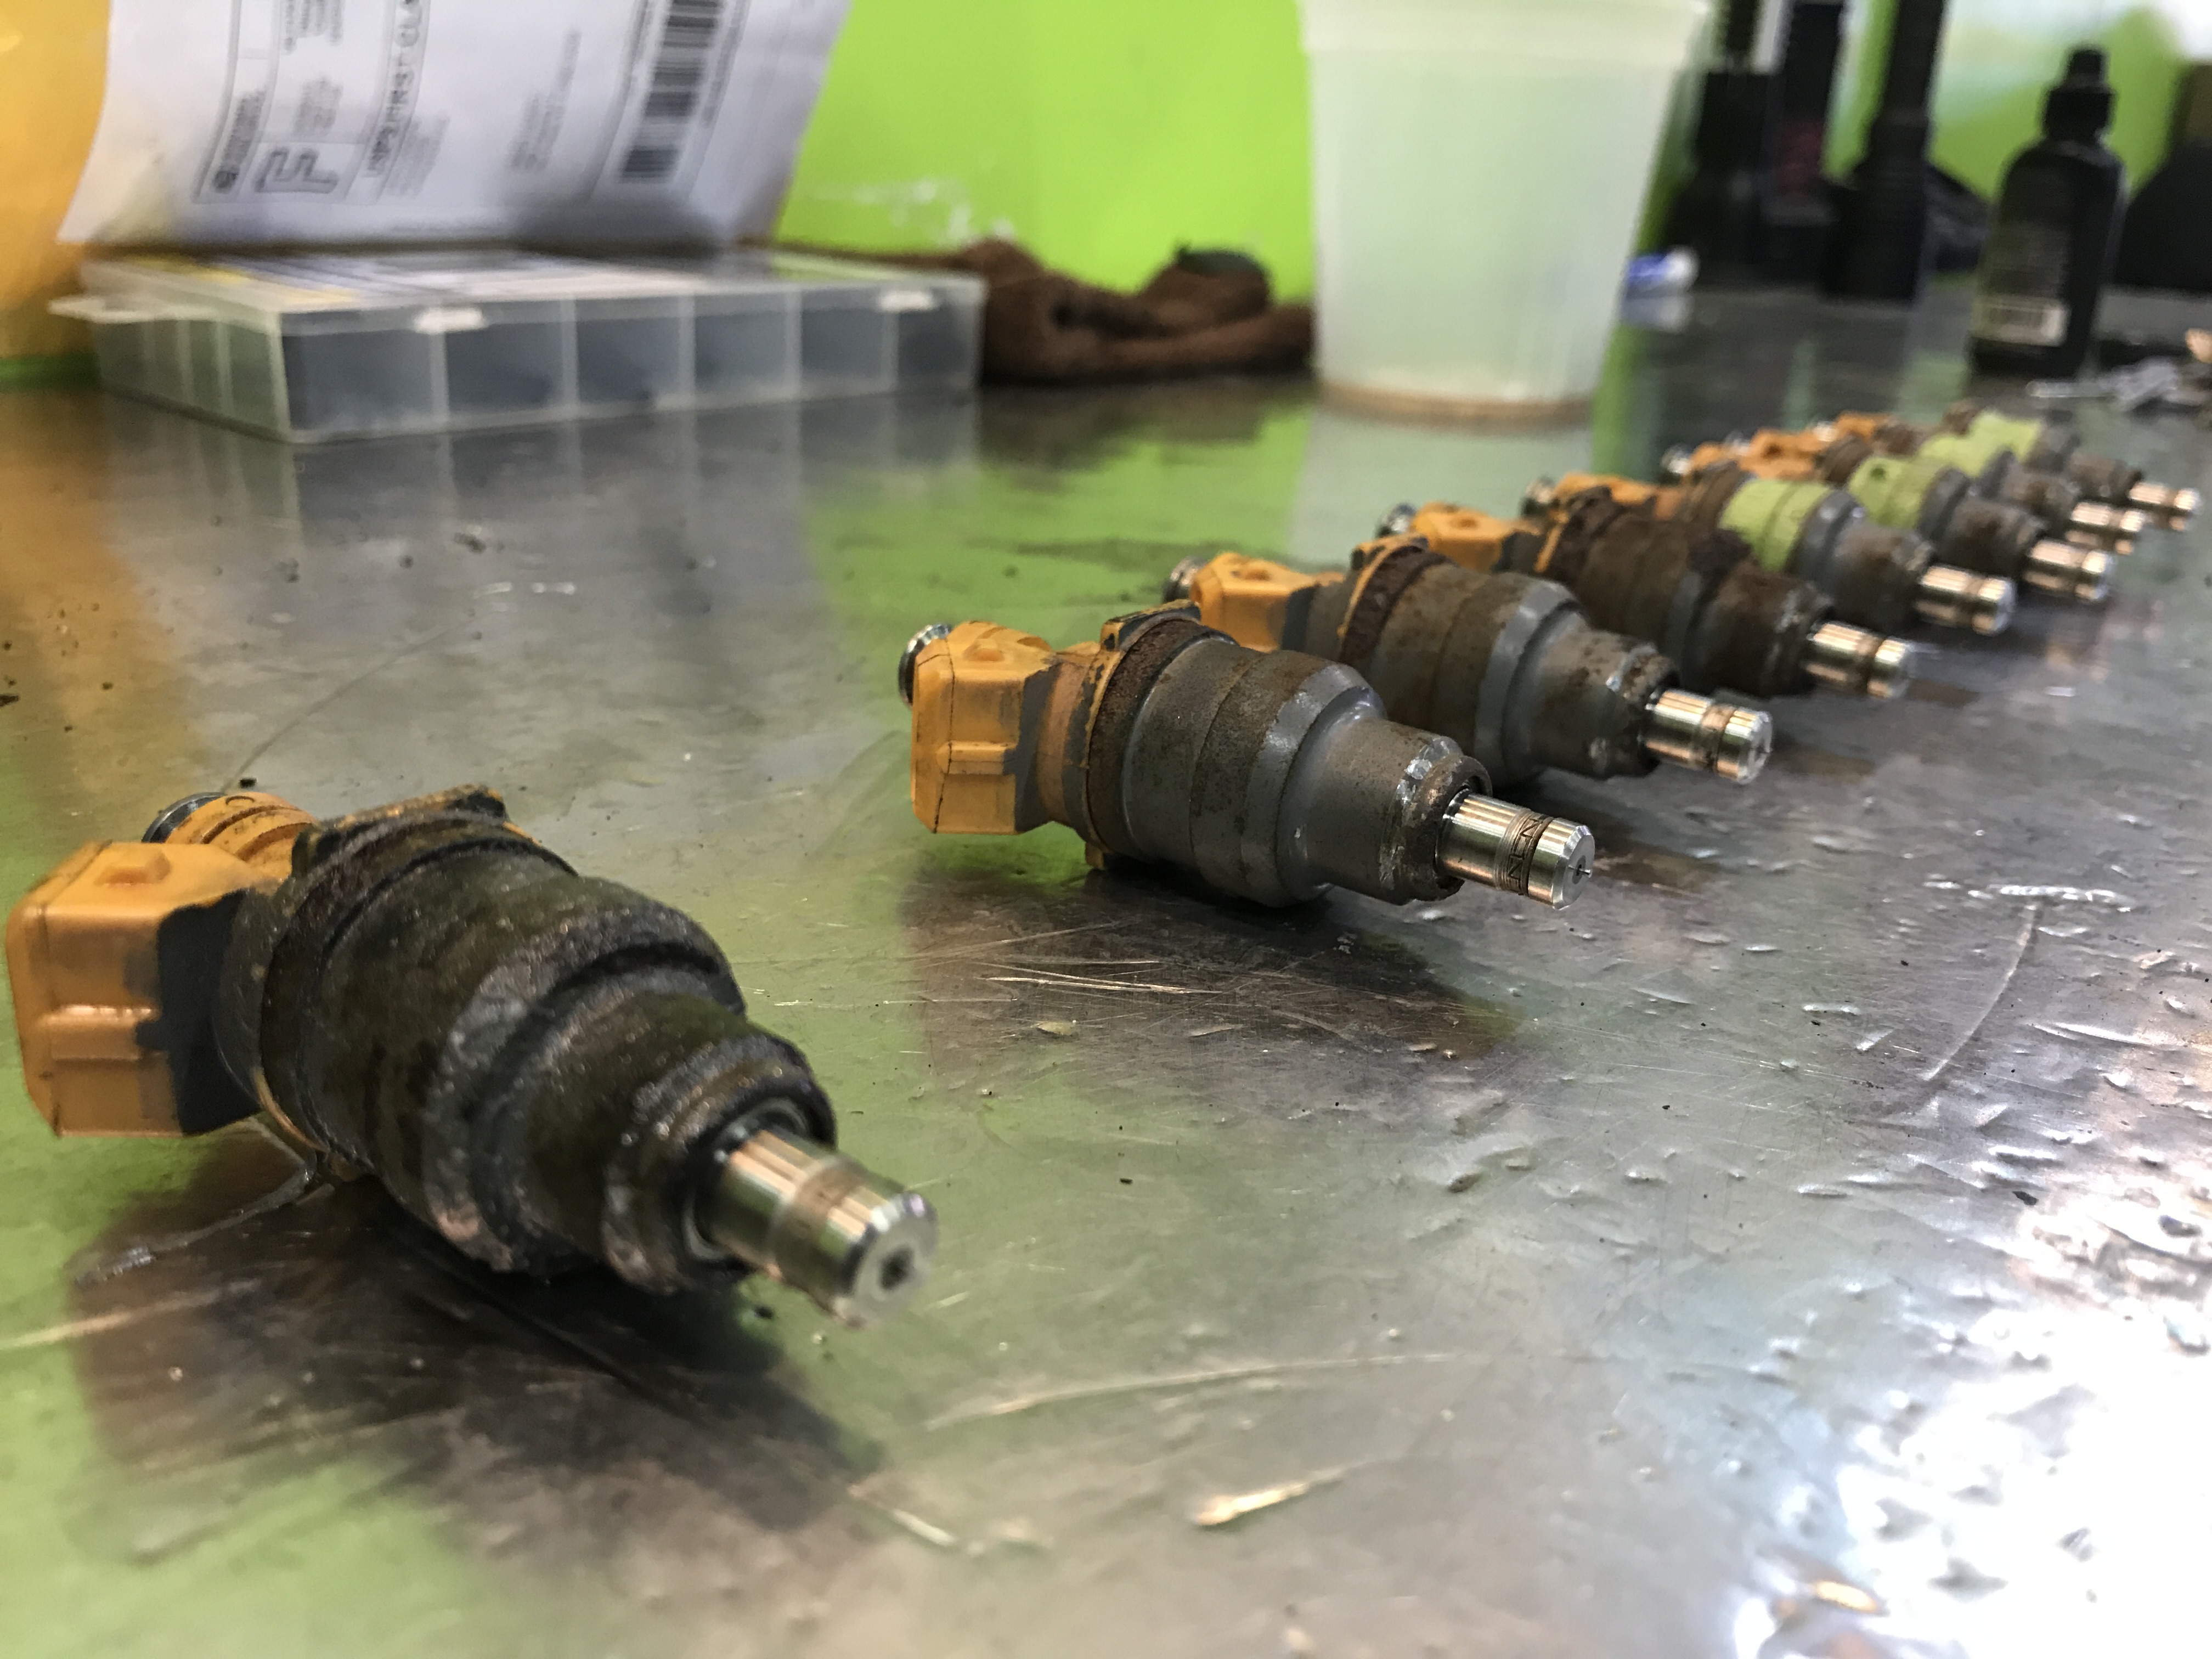
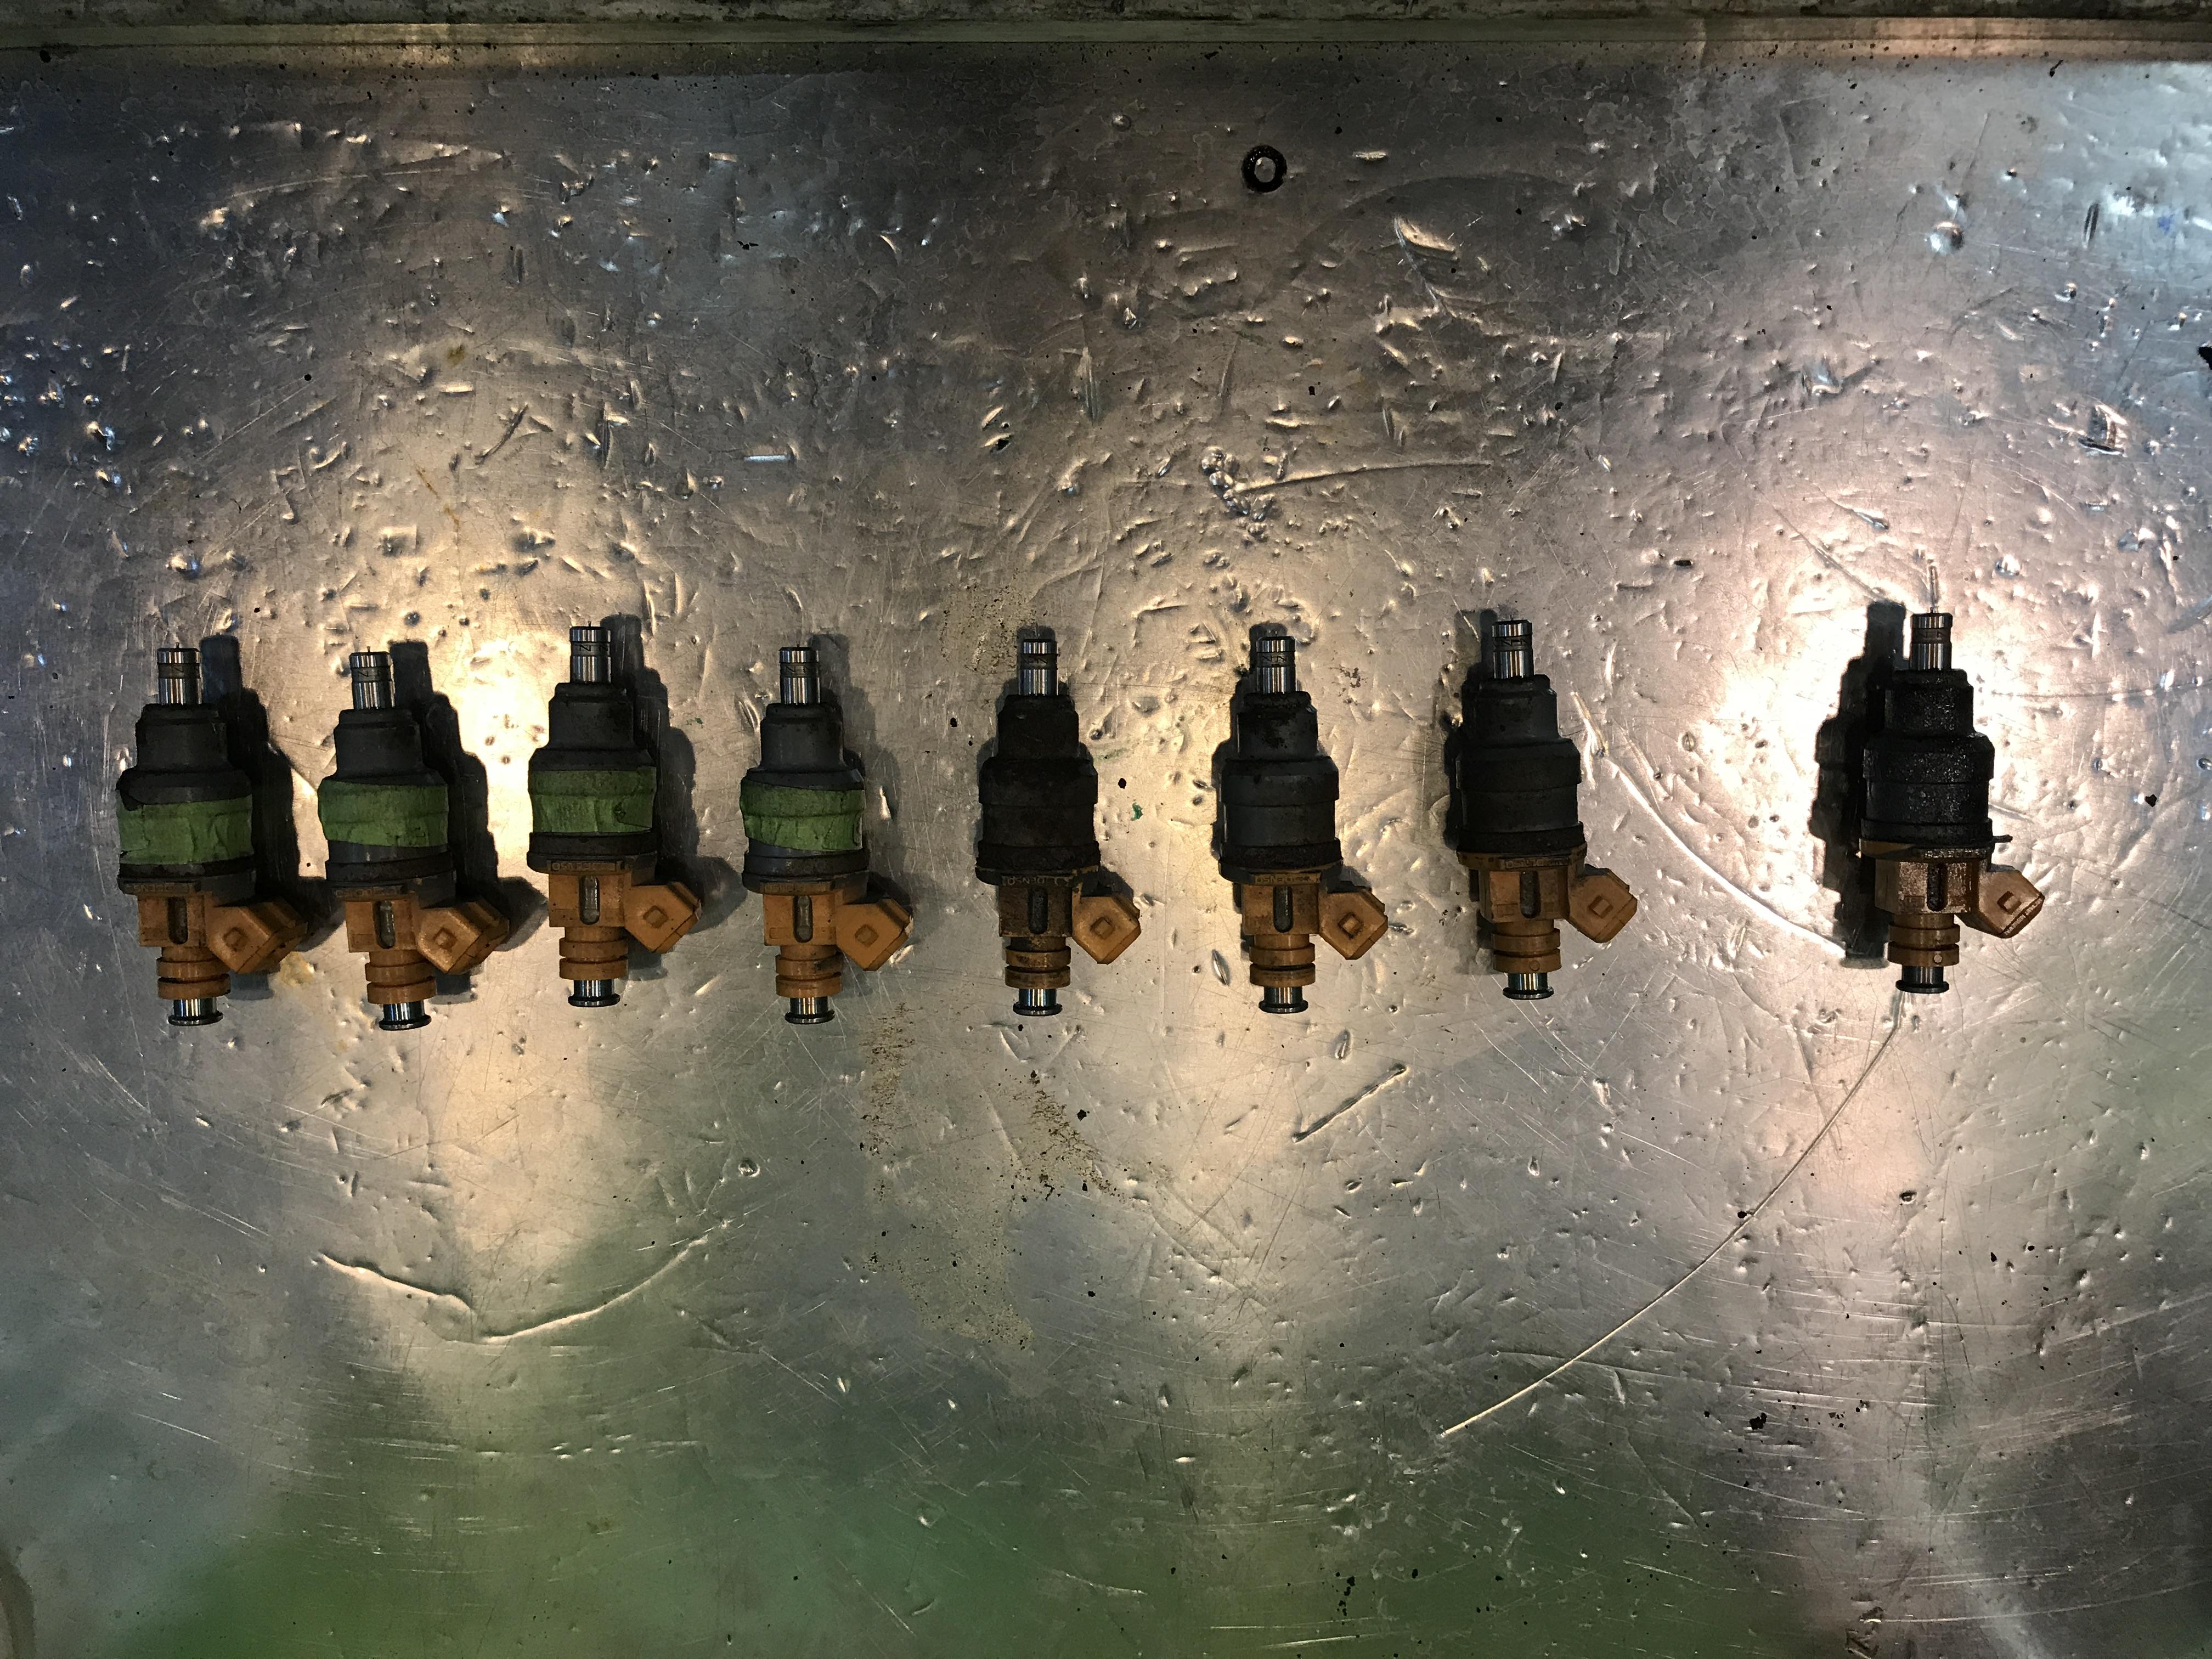
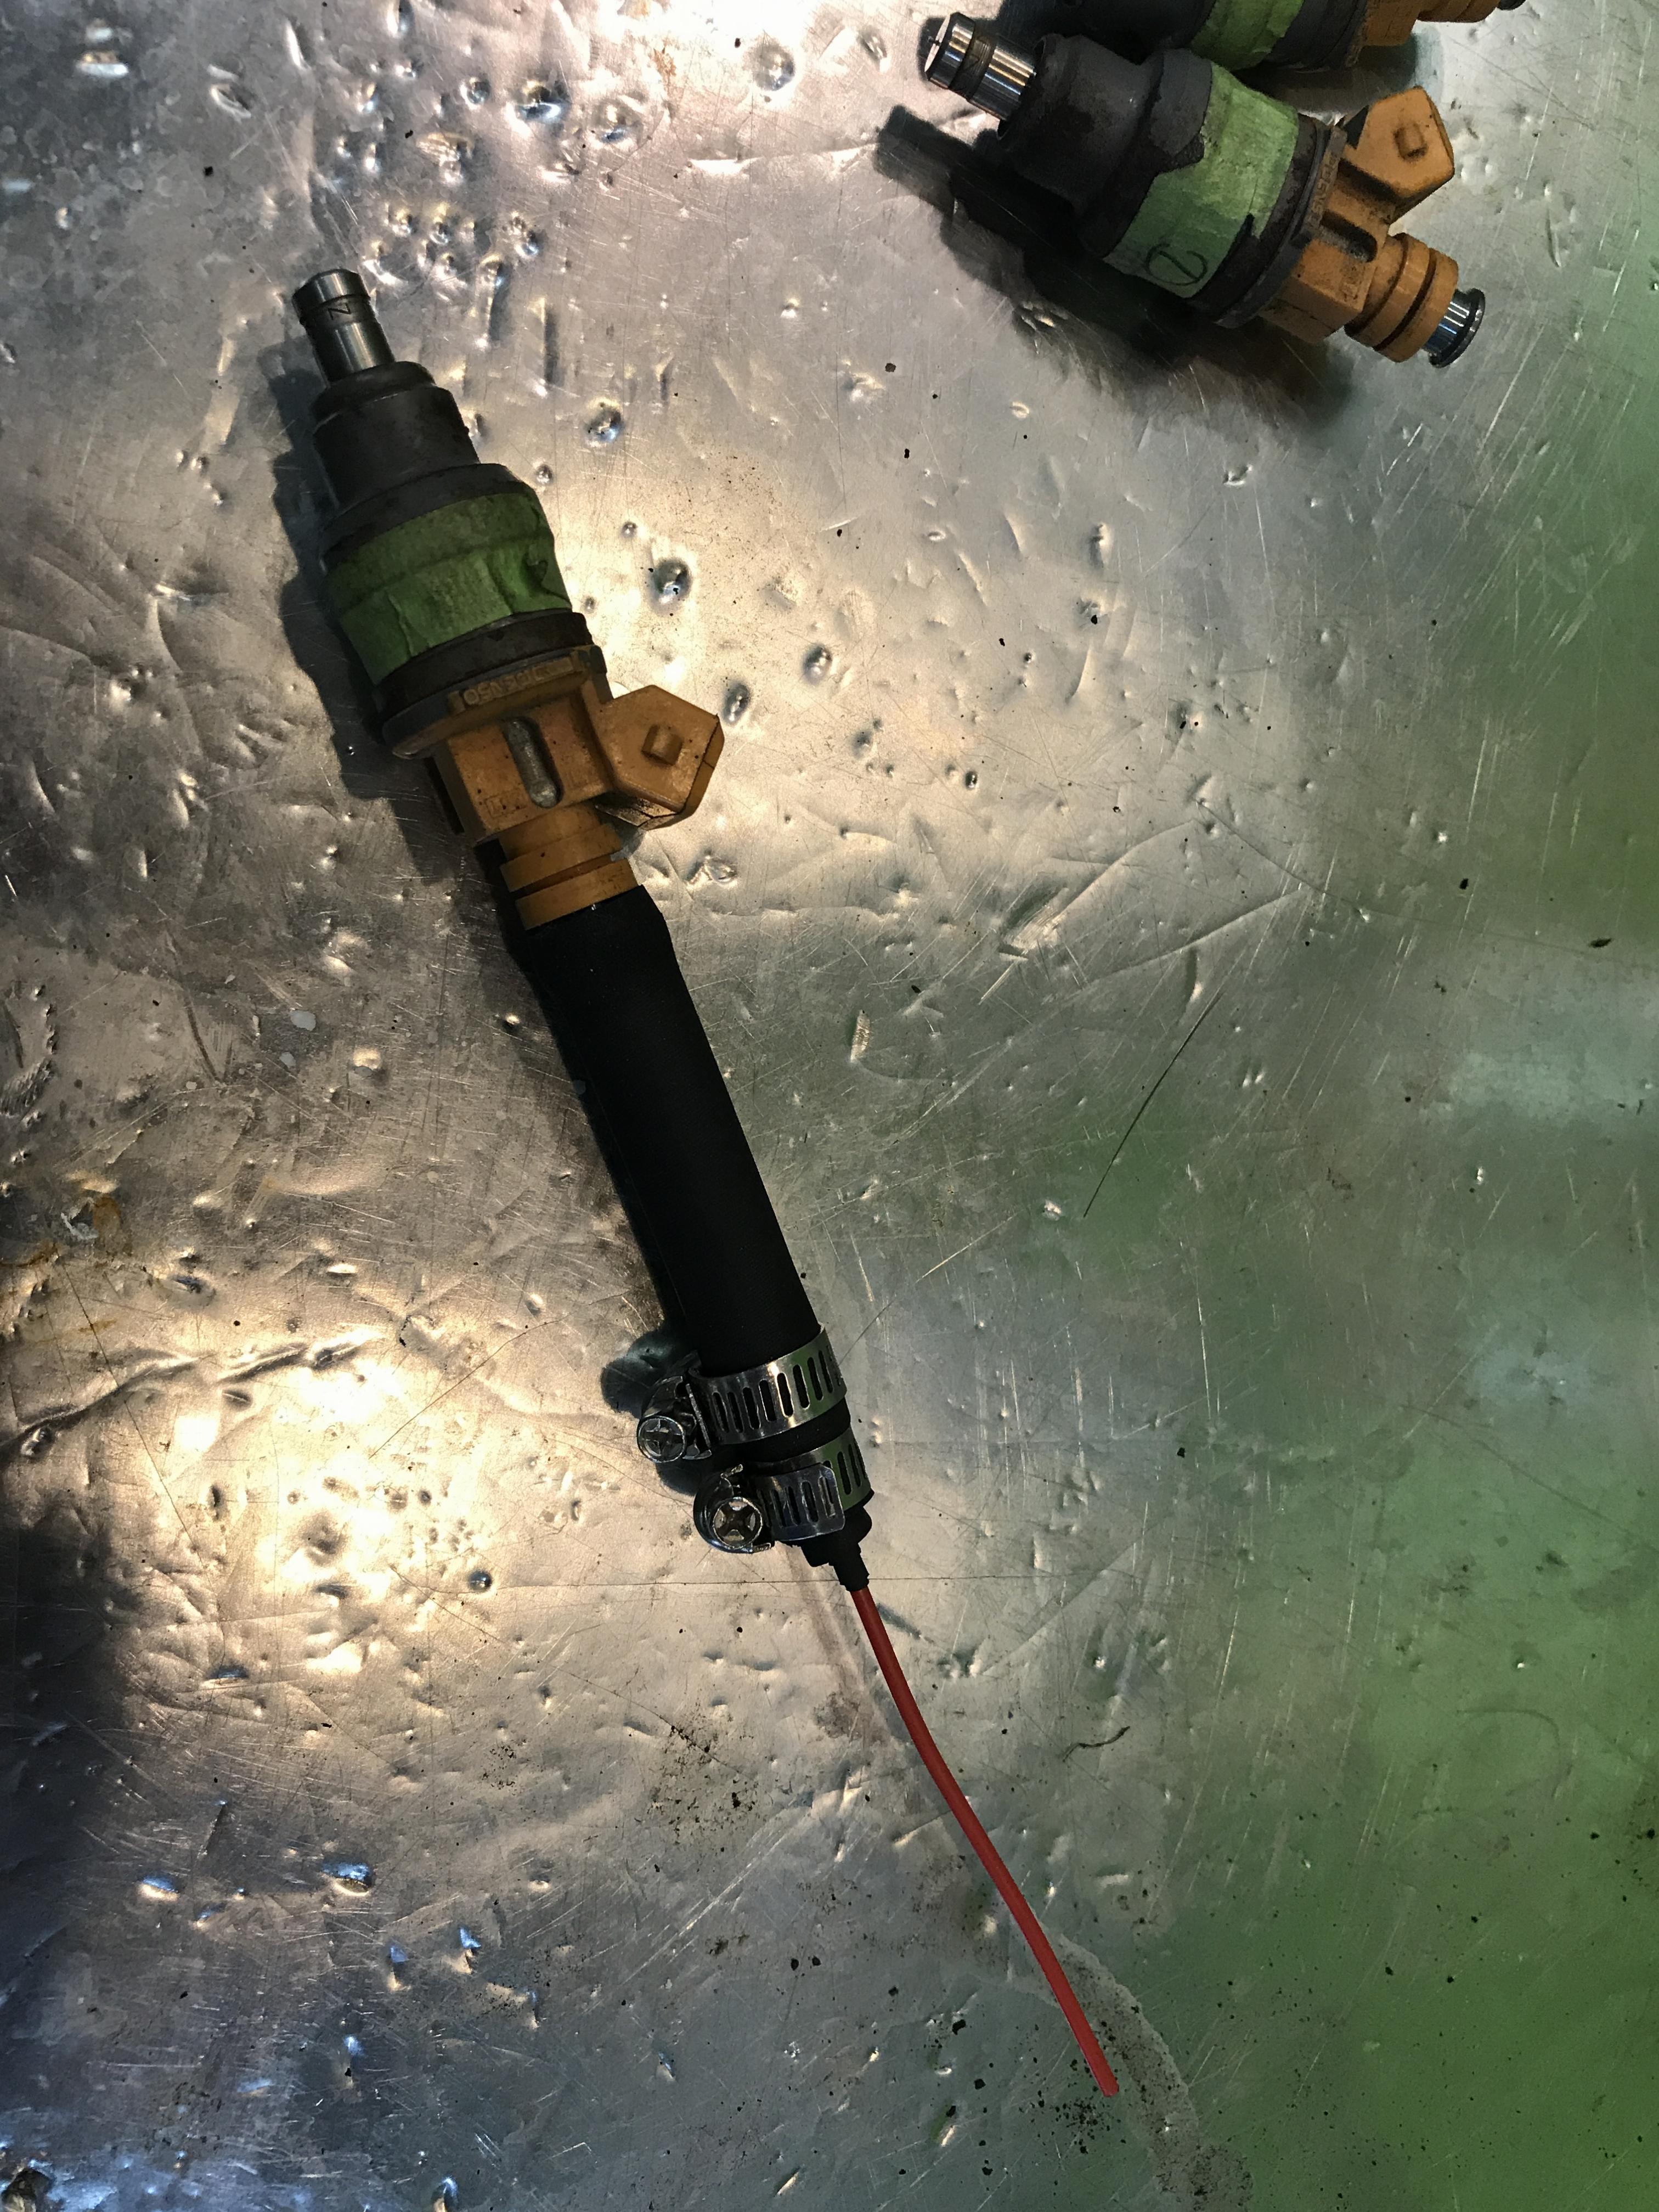
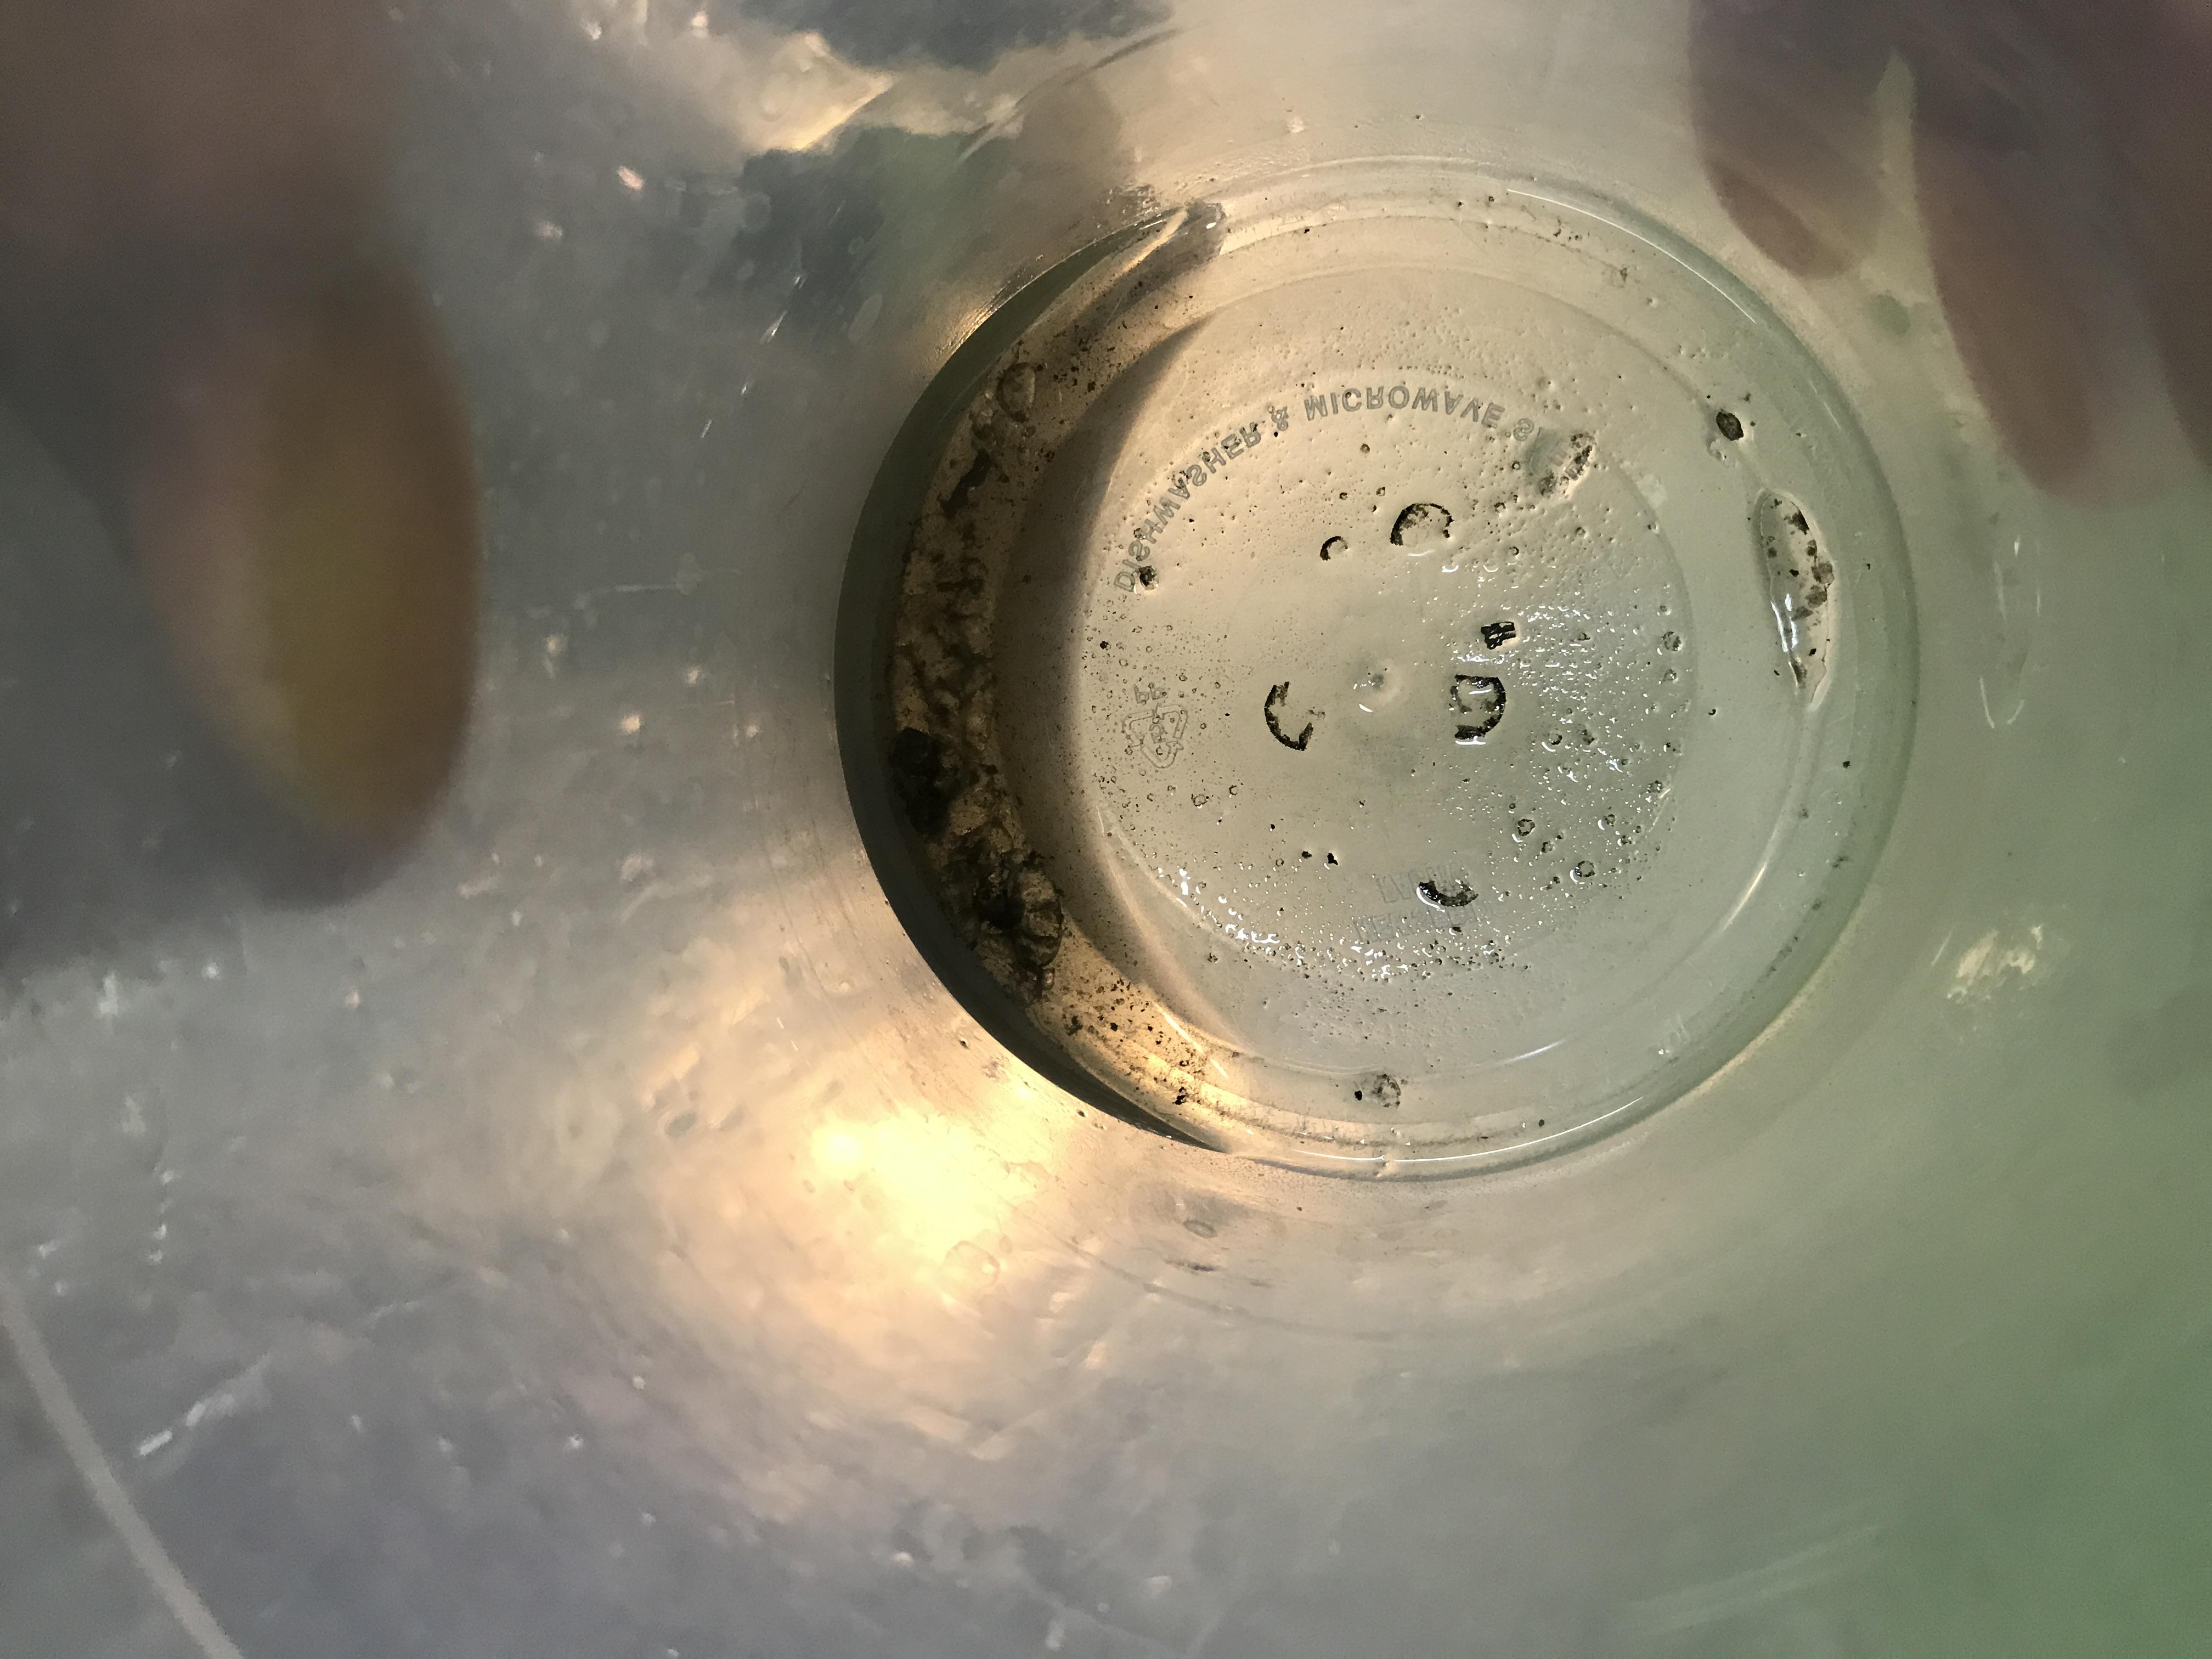
I will add pictures later, but I did test and rebuild my injectors last night. I used a 9v battery, a can of carb cleaner, hose, hose clamps, and heat shrink to make my own pattern tester to pressurize the injectors. Quite a bunch of black deposits came out of at least 4 of the injectors and now have a perfect spray pattern for all 7 of them. Yeah 7. All of them EXCEPT for one injector, which was obviously leaking. With pressure behind it, it was spraying a stream of fuel without the solenoid being energized. This worries me a little that I might have a slightly washed cylinder
 . I plan on buying a new injector and continuing along though.
https://www.instagram.com/_jdesigner_/ http://nevertoolow.tumblr.com/
🥳SOLD BMW E24 633CSI - BMW M30B32 🧪SOLD HCH ES9 - 1.3 LDA
👽BMW E30 325IC - Toyota 1JZ-GTE ⏰ HONDA EF9 CIVIC SI - JDM B18C5
☠️BMW E36 318i - Ford 5.0 FE302 🚴♂️ GT-Labomba - 26x2.75 Freeride
🤹♀️SOLD BMW E36/7 Z3 - BMW M54B25 🧓SOLD BMW E10 2002 - BMW M10M05 -
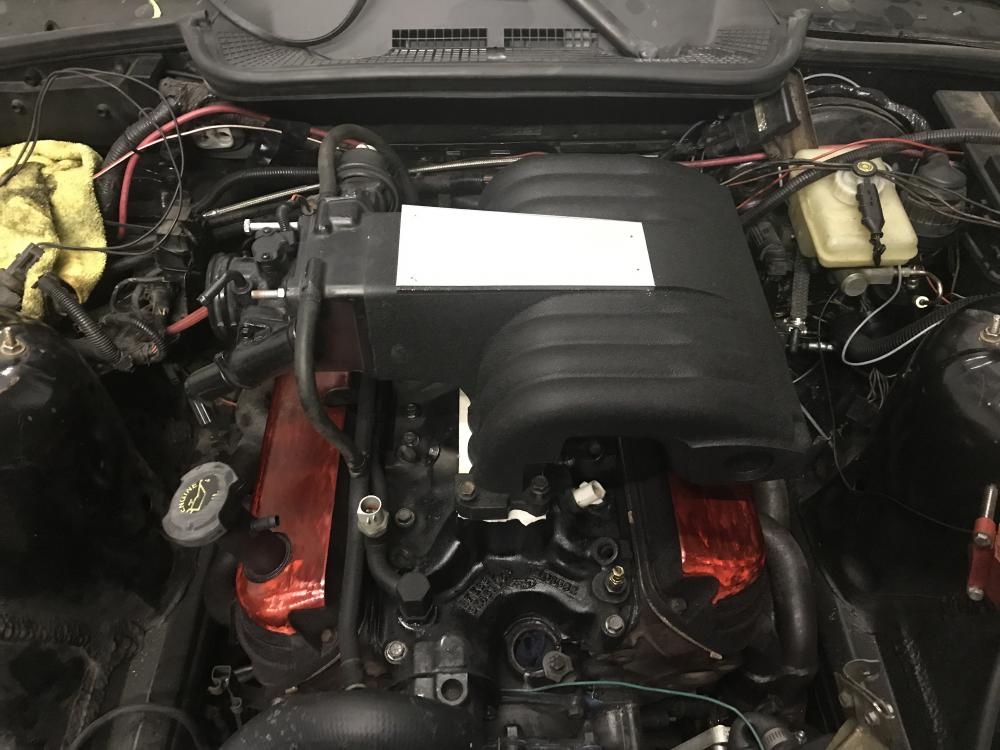
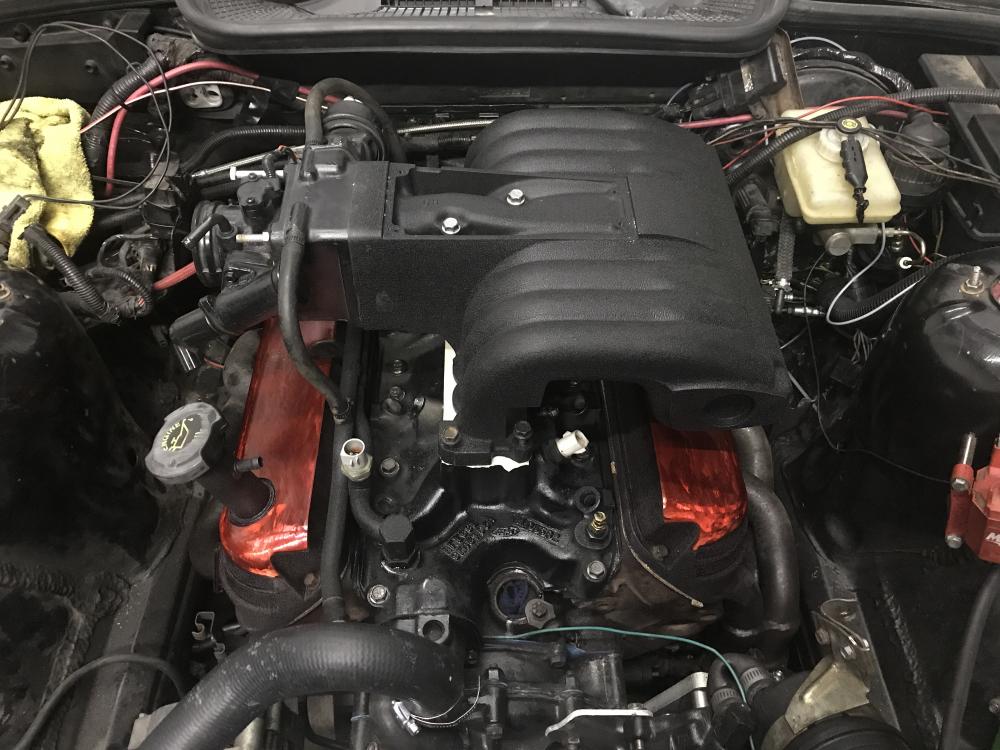
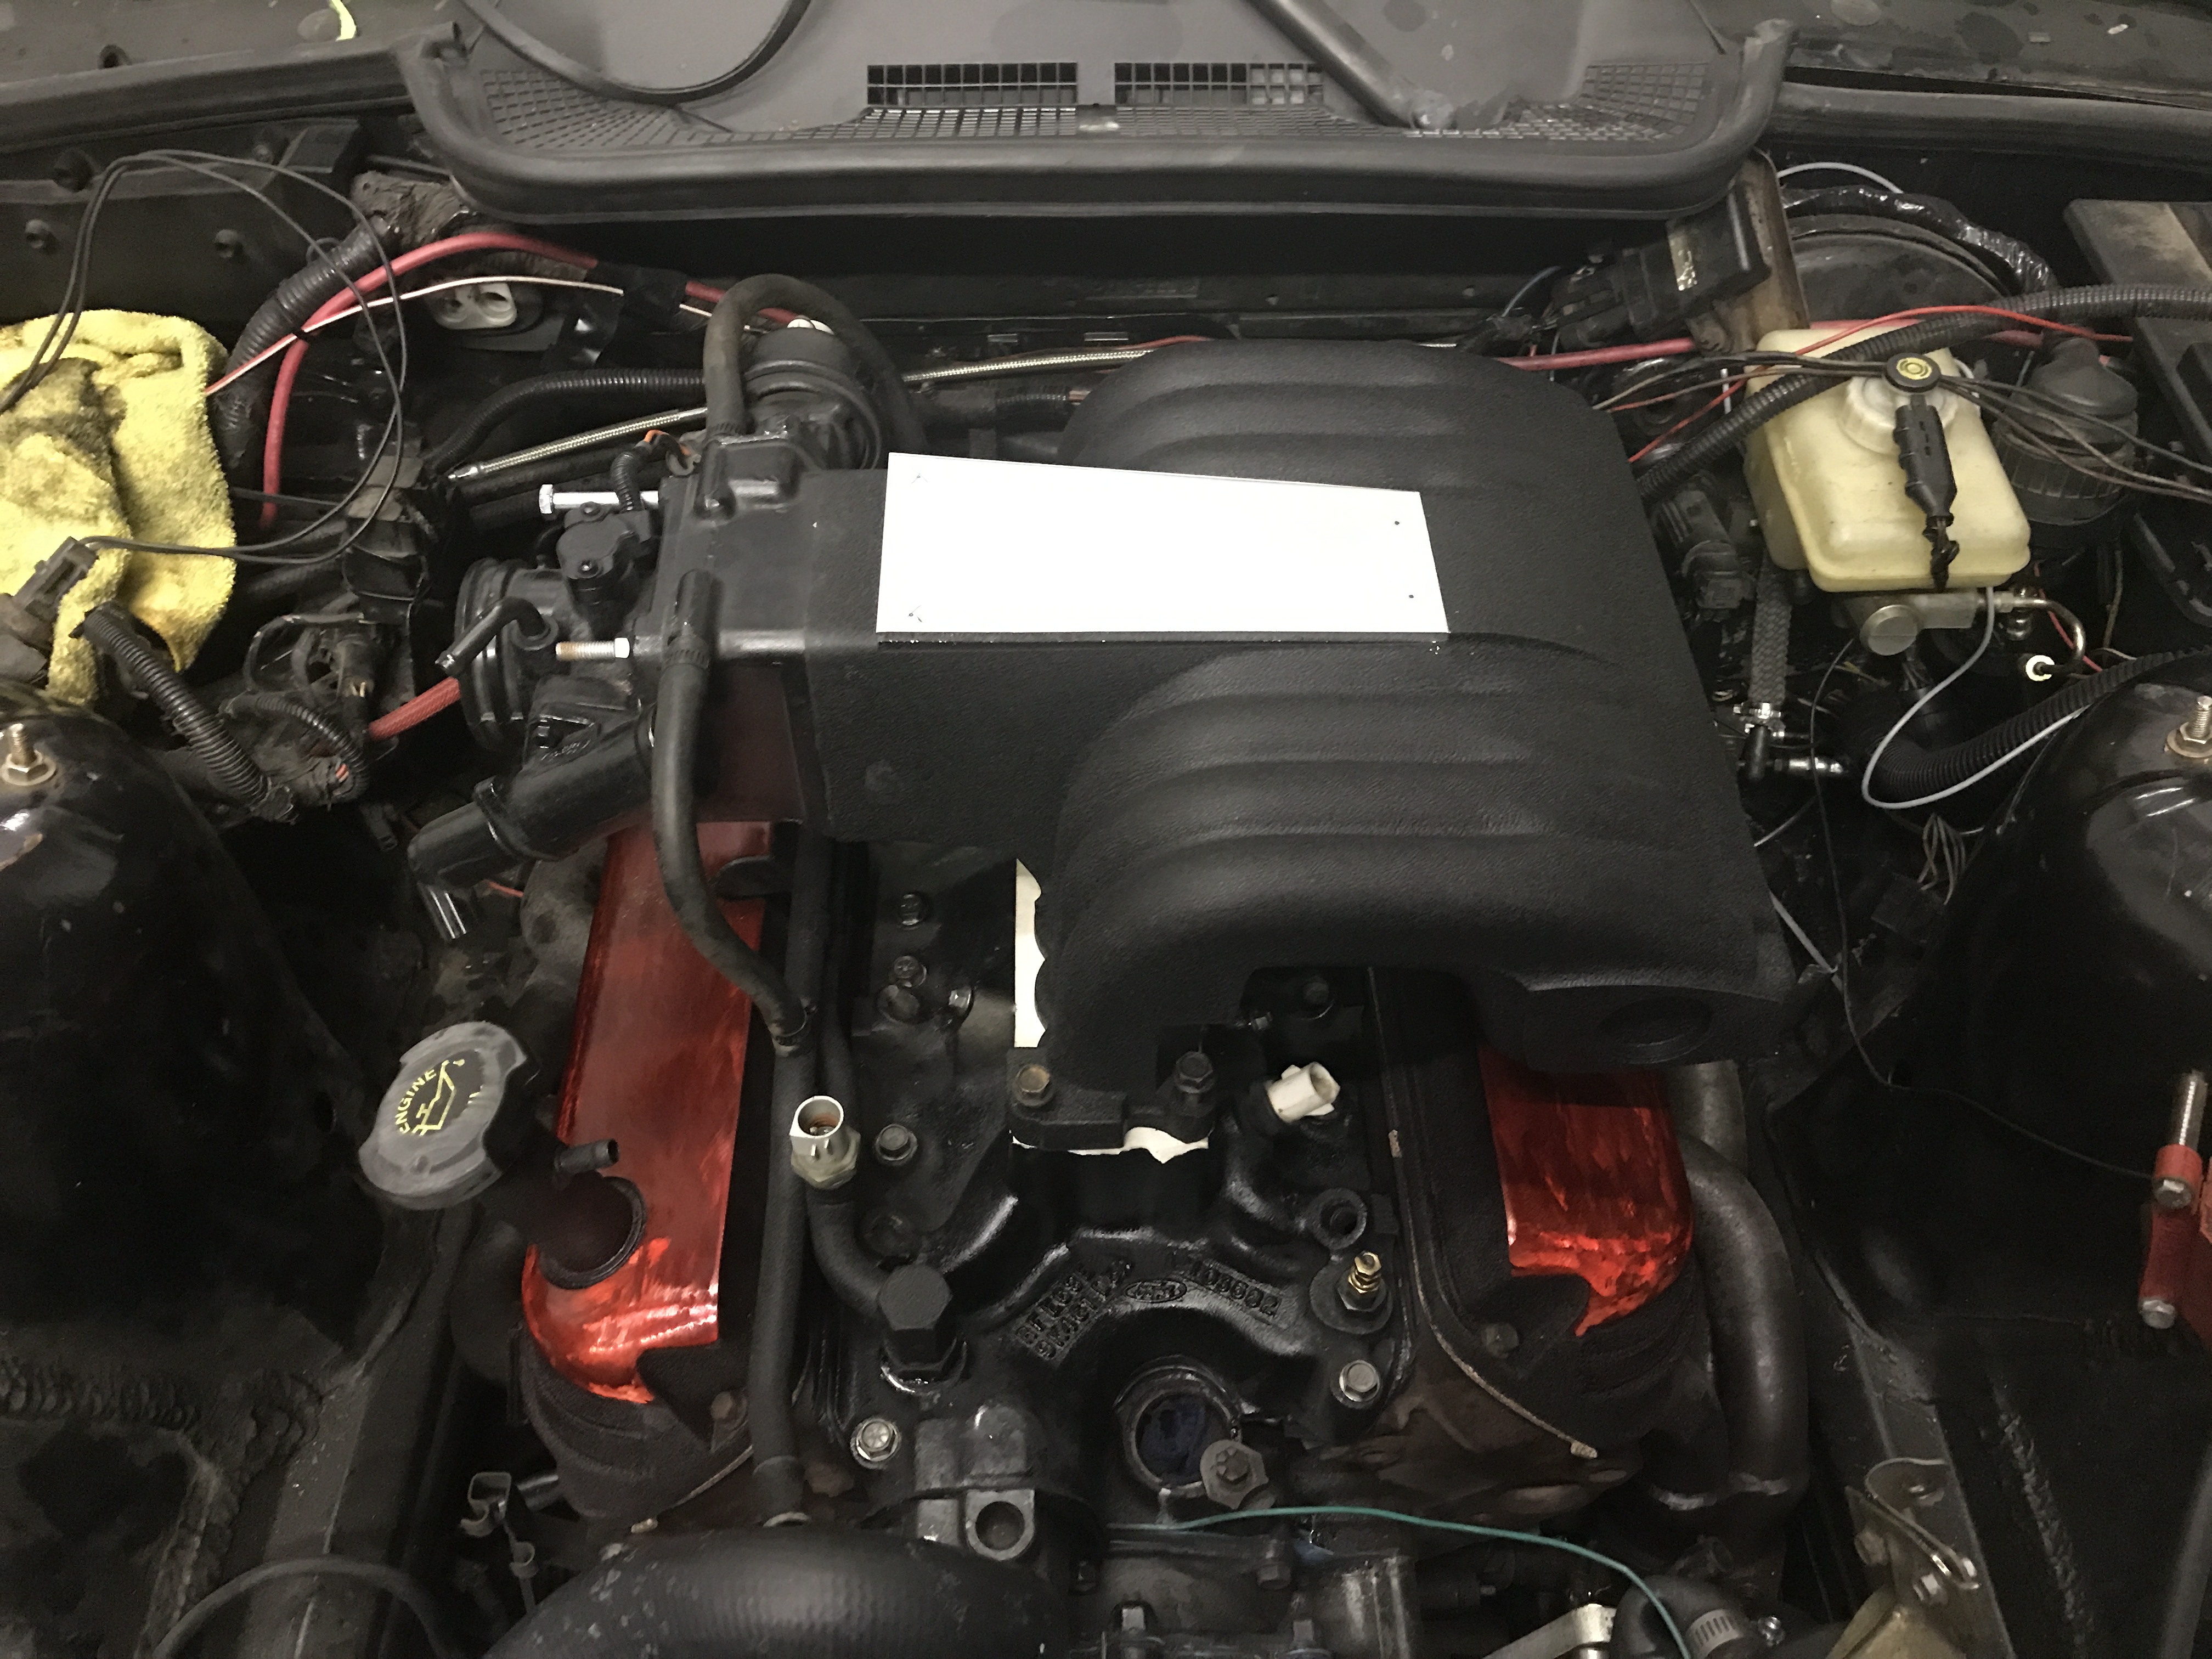
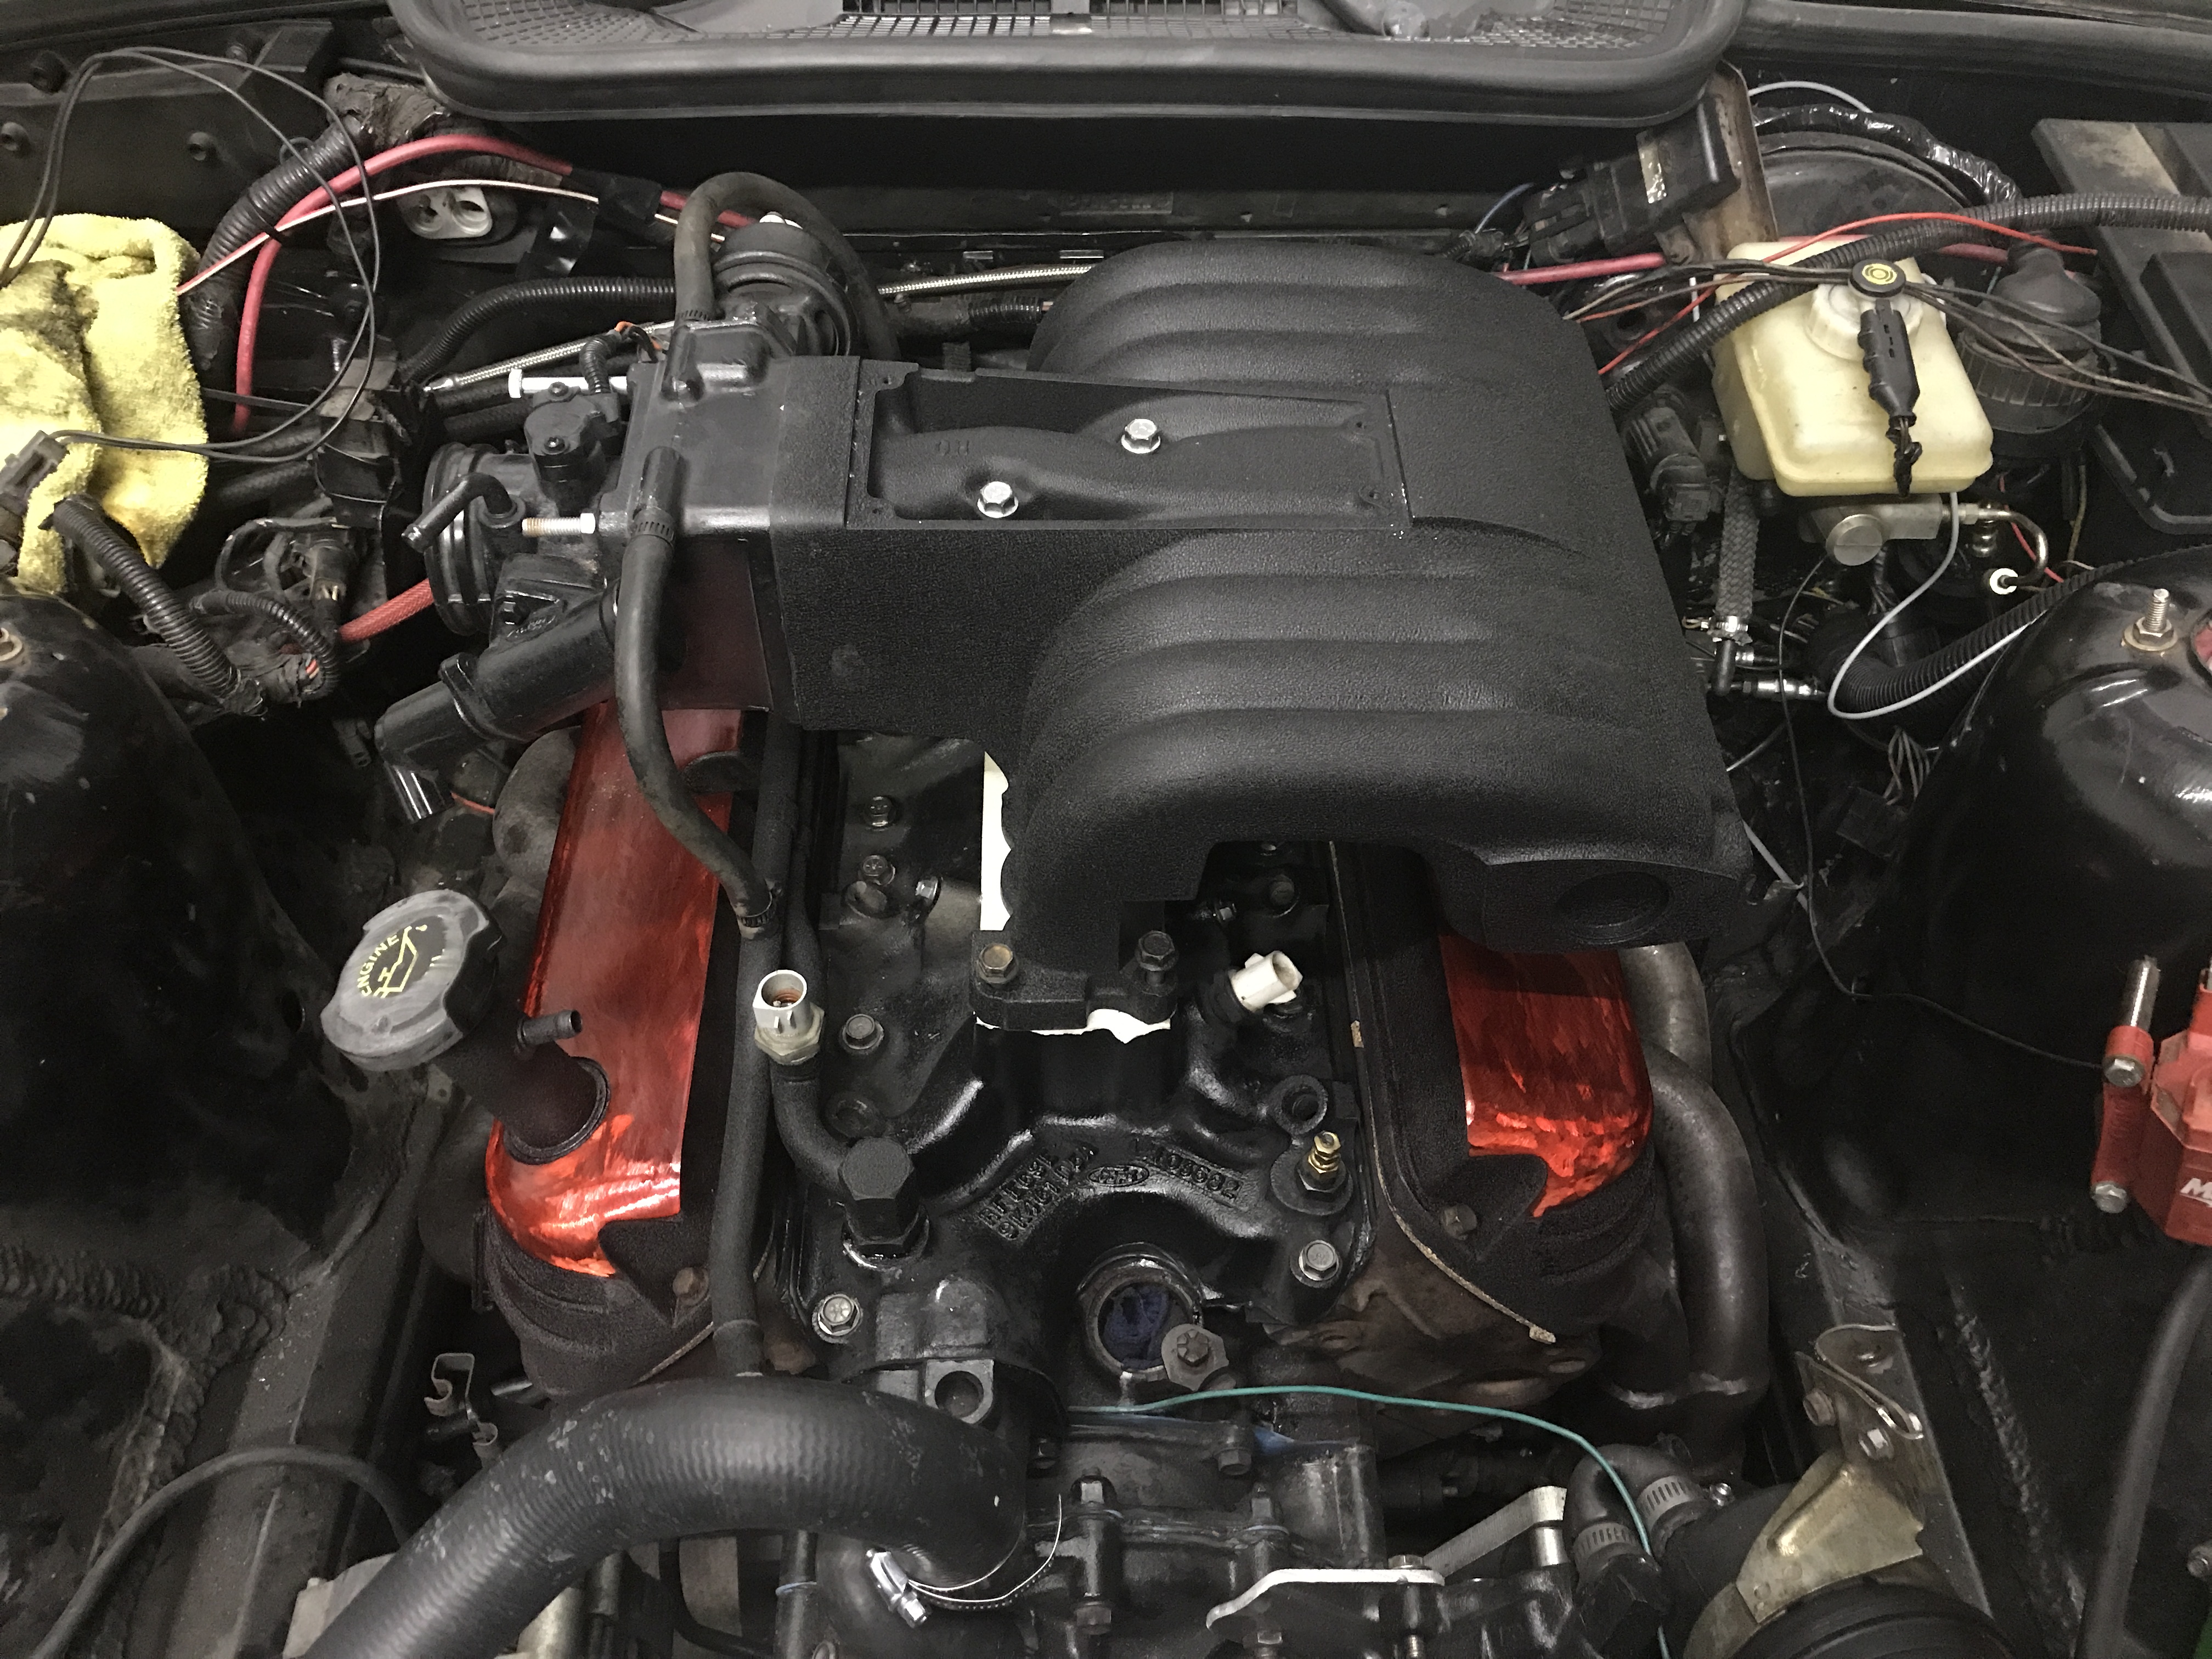
Painted the Throttlebody, EGR plate, and Intake manifold and prepped for the new gaskets I picked up, and cut out a new plate out of aluminum for the top of the manifold. Mocked up how they look now, but wont install until I get a new coolant hose and injector. The injector is the bigger problem as there is no way to install them once the upper manifold is bolted down.

Pics are with and without the plate. I plan on matching the "red metal" look on the valve covers across the top of the intake manifold.
https://www.instagram.com/_jdesigner_/ http://nevertoolow.tumblr.com/
🥳SOLD BMW E24 633CSI - BMW M30B32 🧪SOLD HCH ES9 - 1.3 LDA
👽BMW E30 325IC - Toyota 1JZ-GTE ⏰ HONDA EF9 CIVIC SI - JDM B18C5
☠️BMW E36 318i - Ford 5.0 FE302 🚴♂️ GT-Labomba - 26x2.75 Freeride
🤹♀️SOLD BMW E36/7 Z3 - BMW M54B25 🧓SOLD BMW E10 2002 - BMW M10M05 -
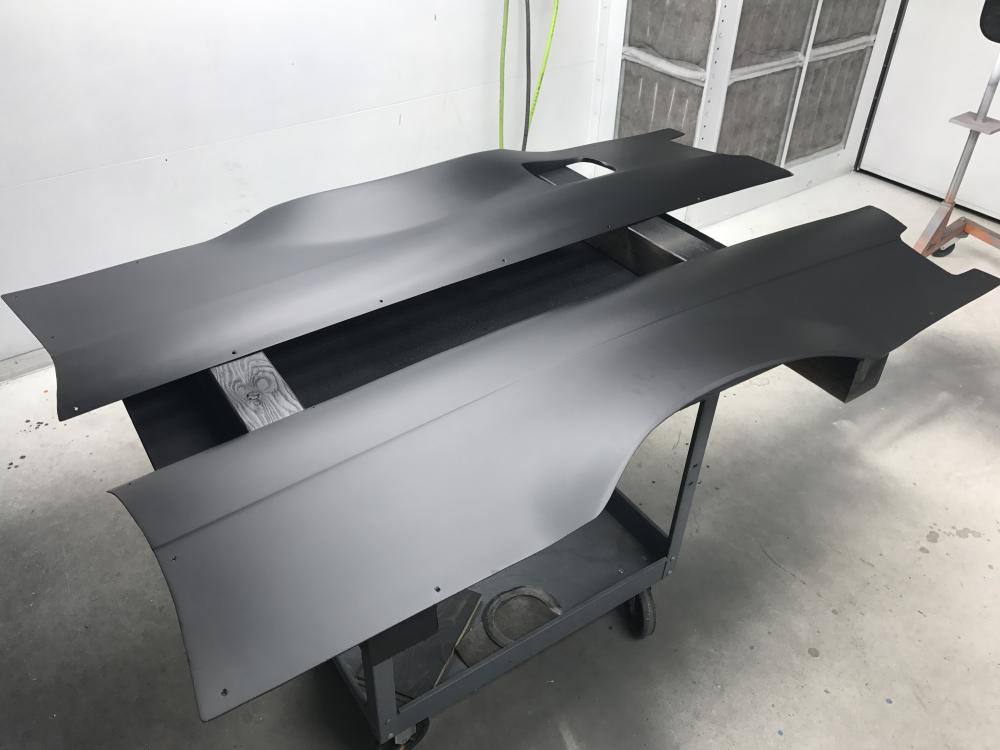
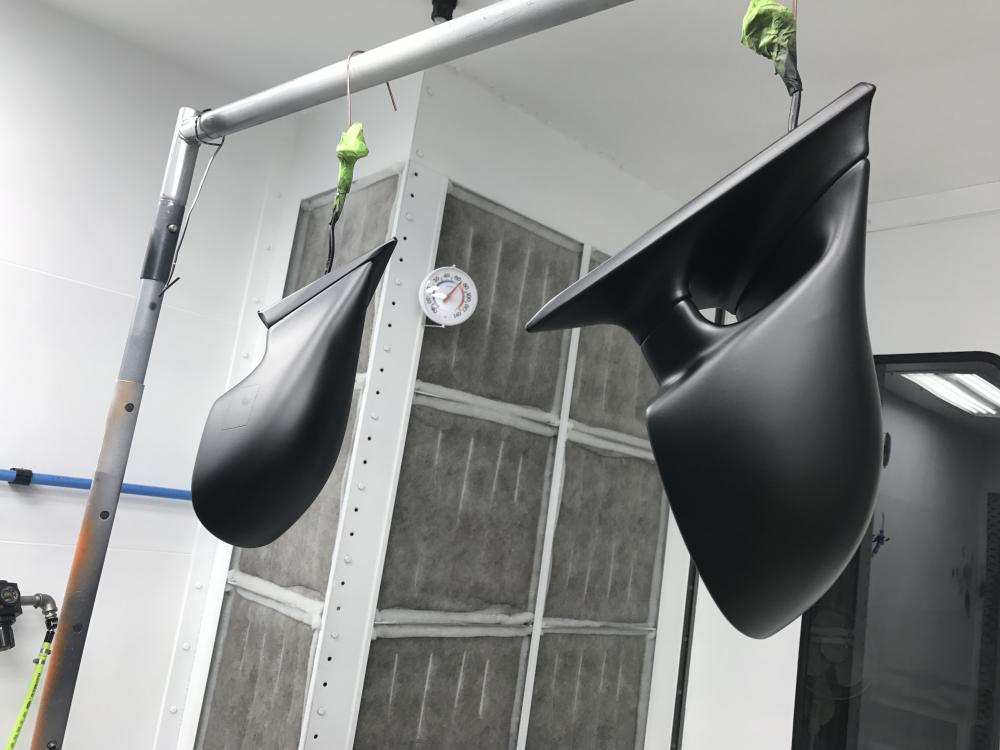
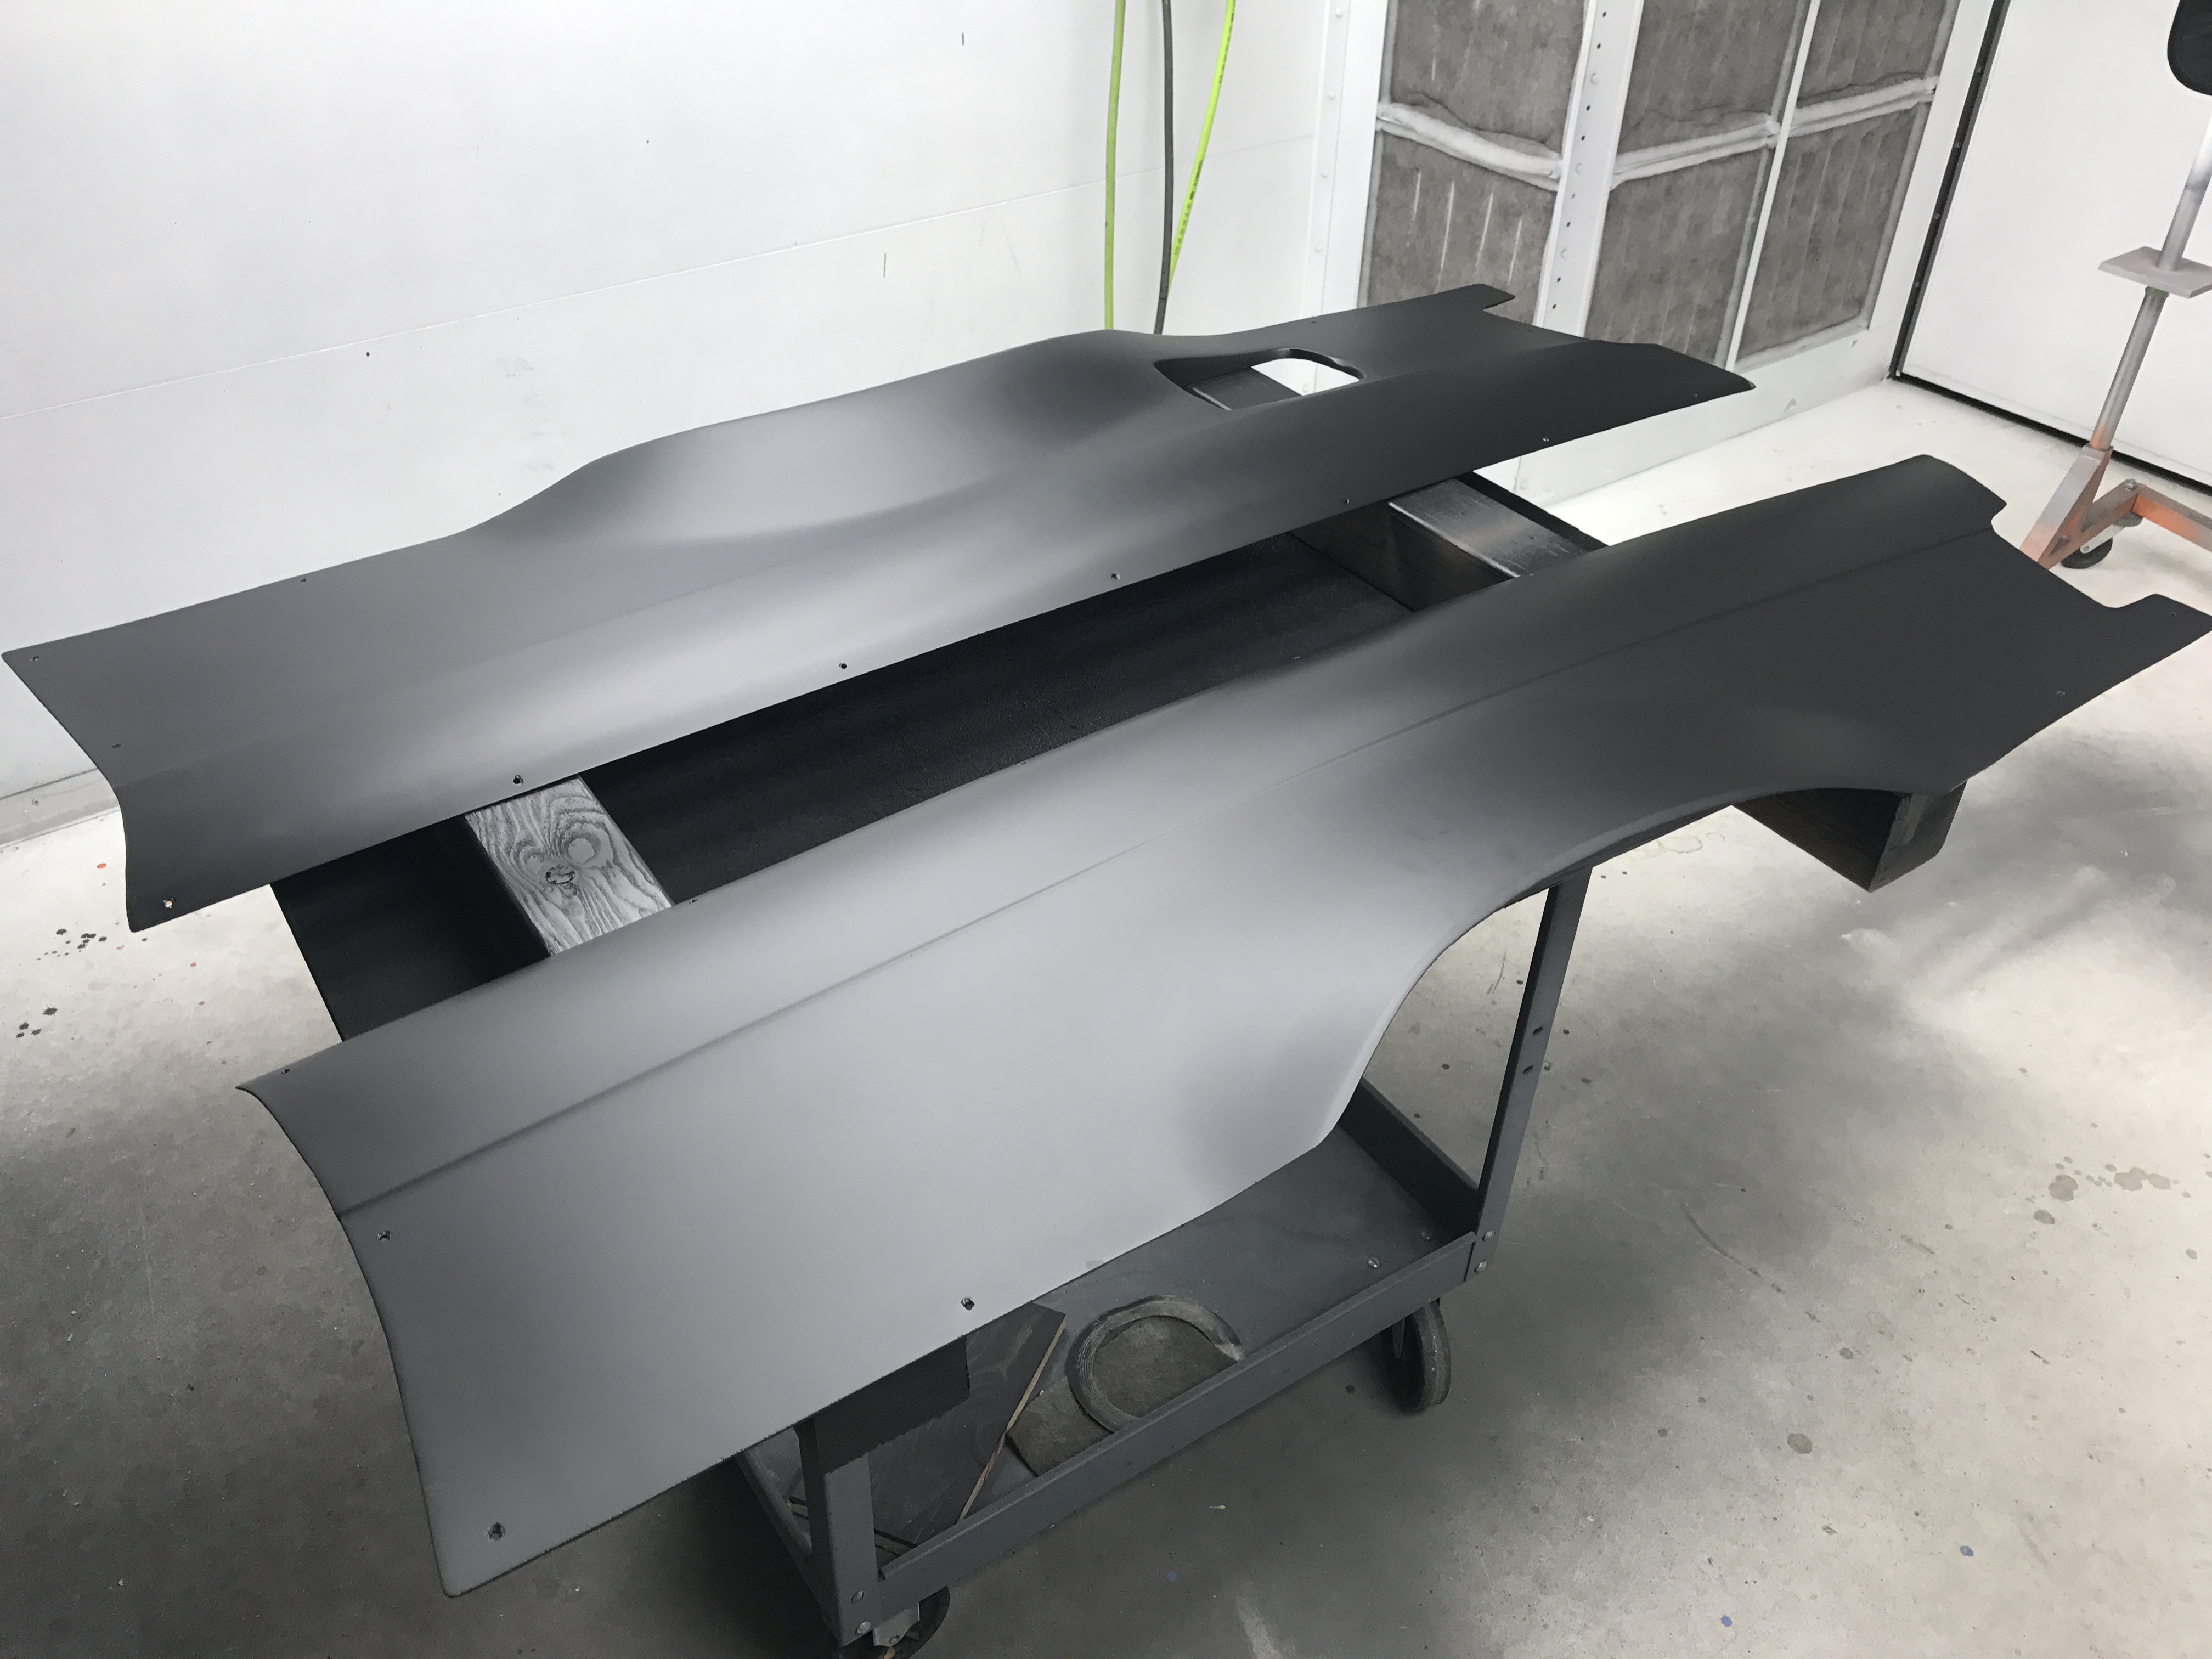
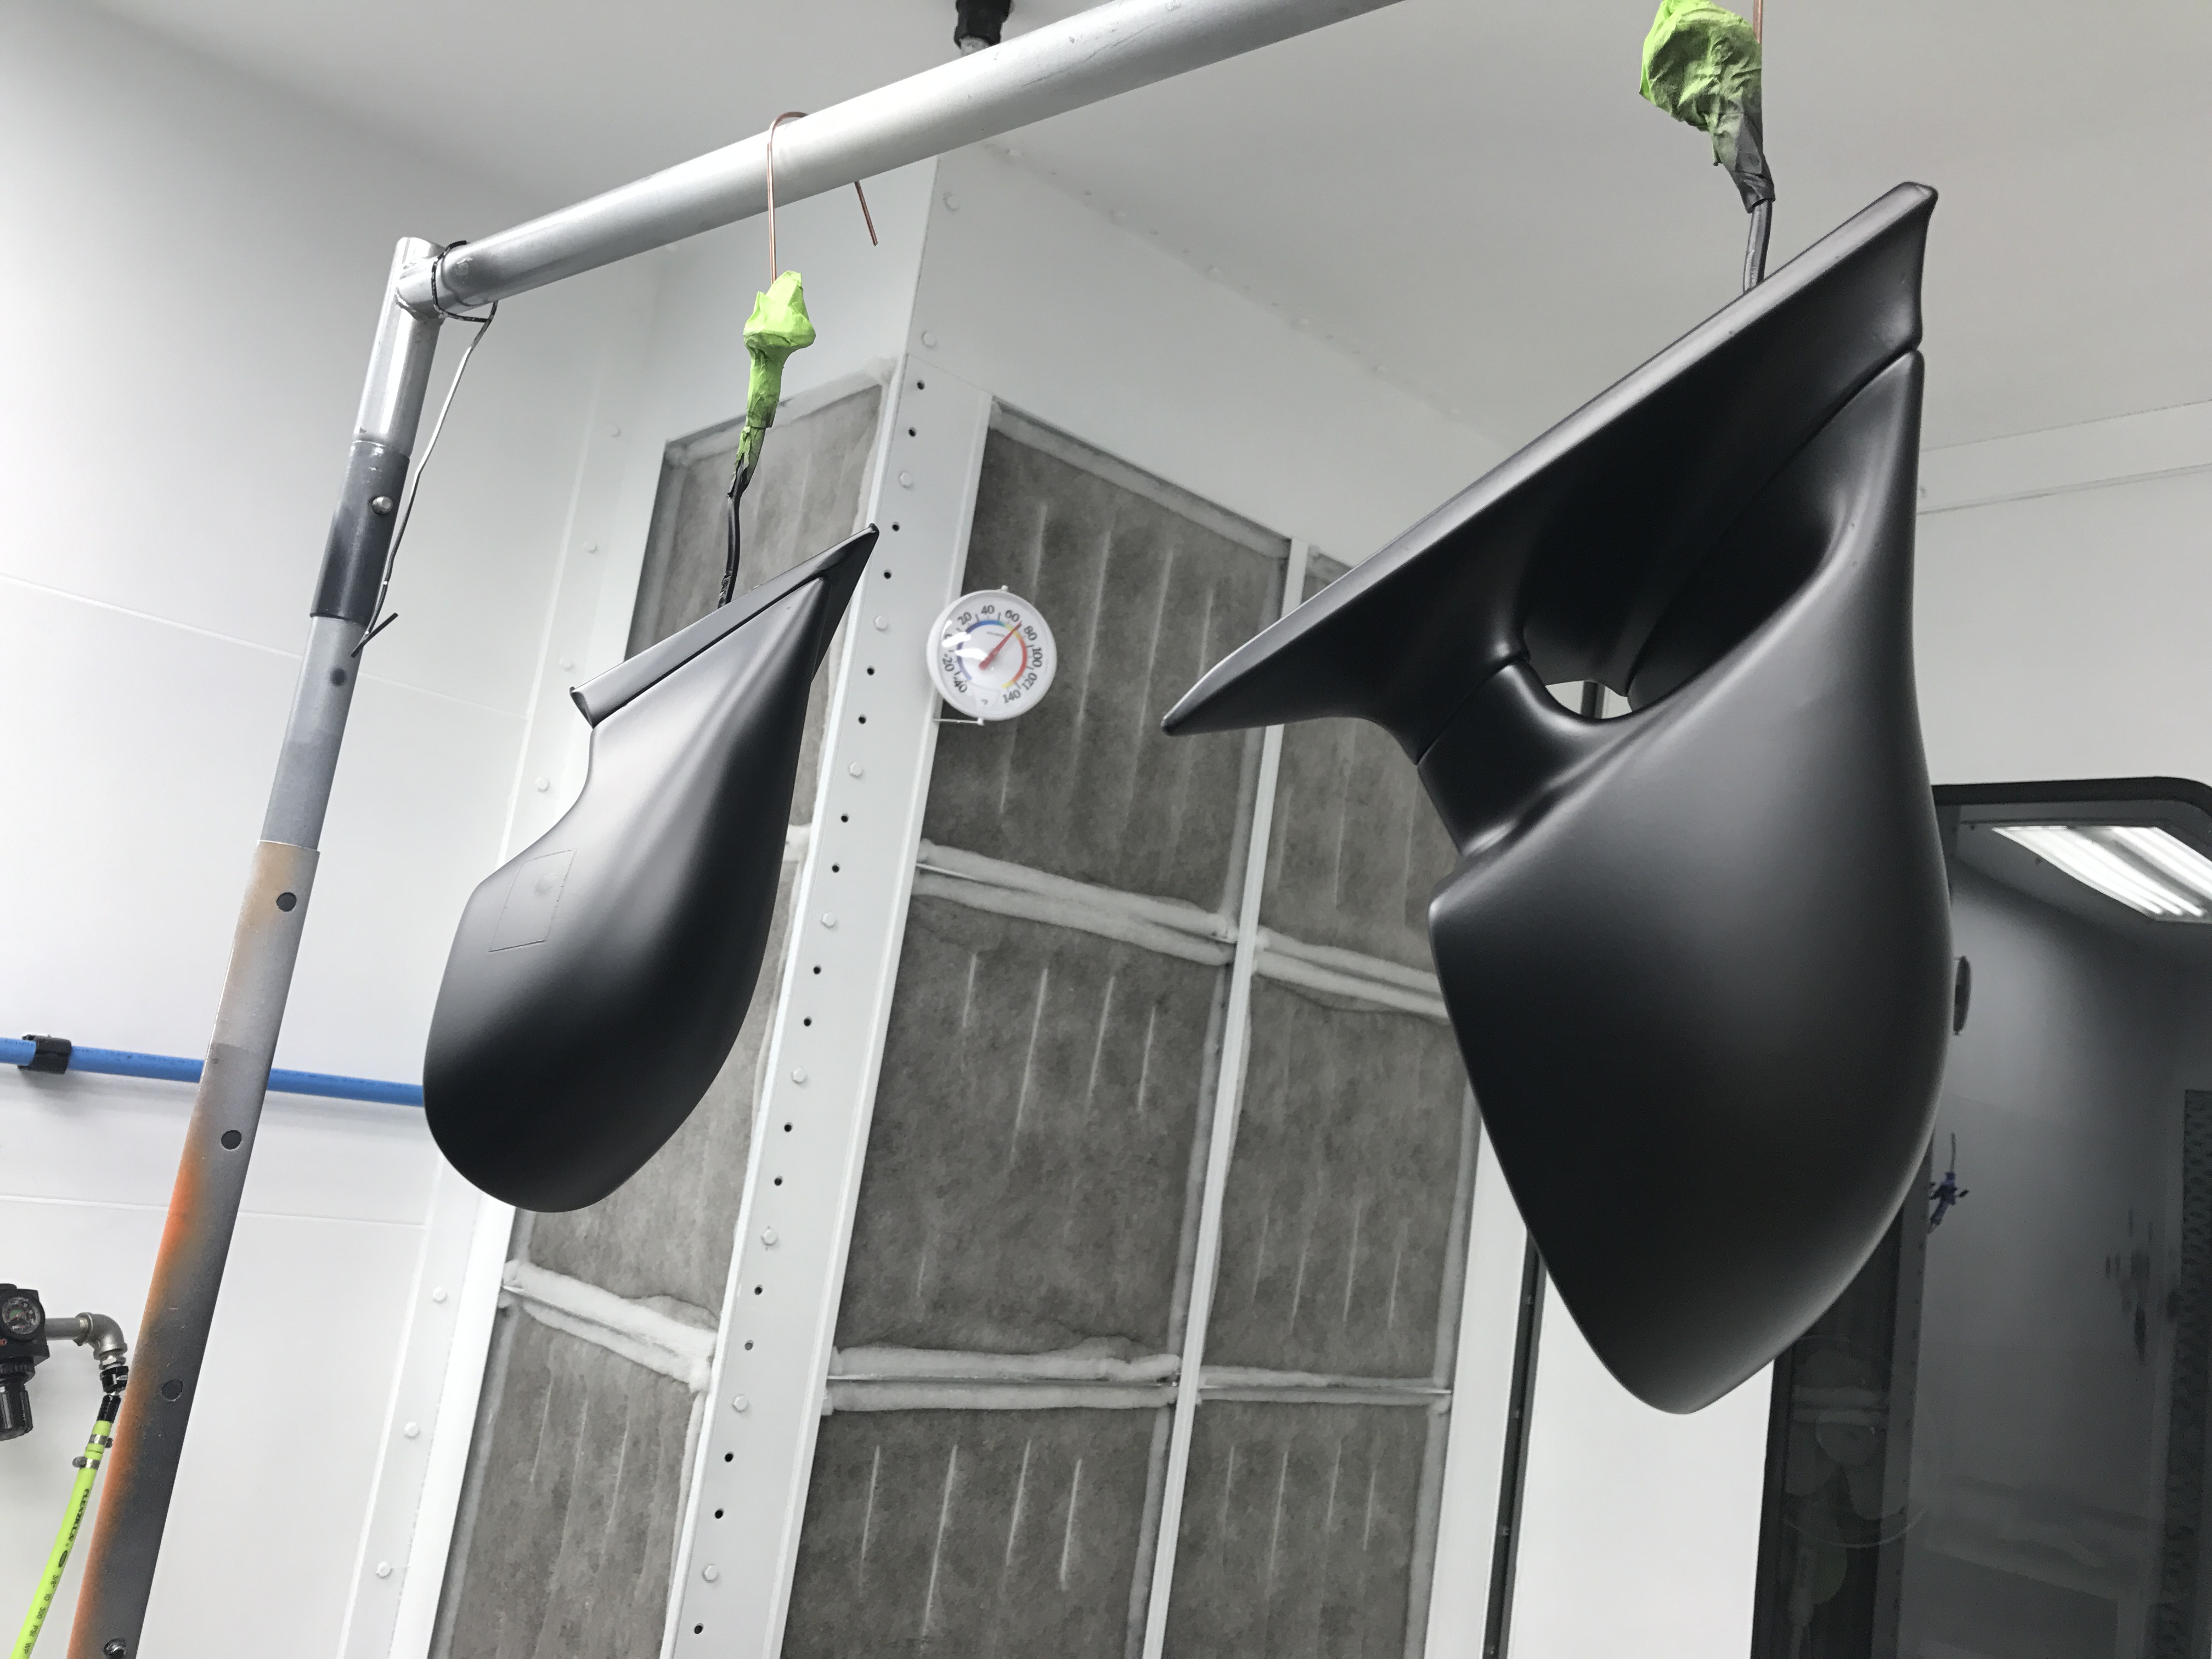
The model maker at my work owed me a favor, so I had him paint my overs and my M3 mirrors since I have been too busy to do it myself. I cant wait to bolt them on when I get back to the shop.
https://www.instagram.com/_jdesigner_/ http://nevertoolow.tumblr.com/
🥳SOLD BMW E24 633CSI - BMW M30B32 🧪SOLD HCH ES9 - 1.3 LDA
👽BMW E30 325IC - Toyota 1JZ-GTE ⏰ HONDA EF9 CIVIC SI - JDM B18C5
☠️BMW E36 318i - Ford 5.0 FE302 🚴♂️ GT-Labomba - 26x2.75 Freeride
🤹♀️SOLD BMW E36/7 Z3 - BMW M54B25 🧓SOLD BMW E10 2002 - BMW M10M05 -
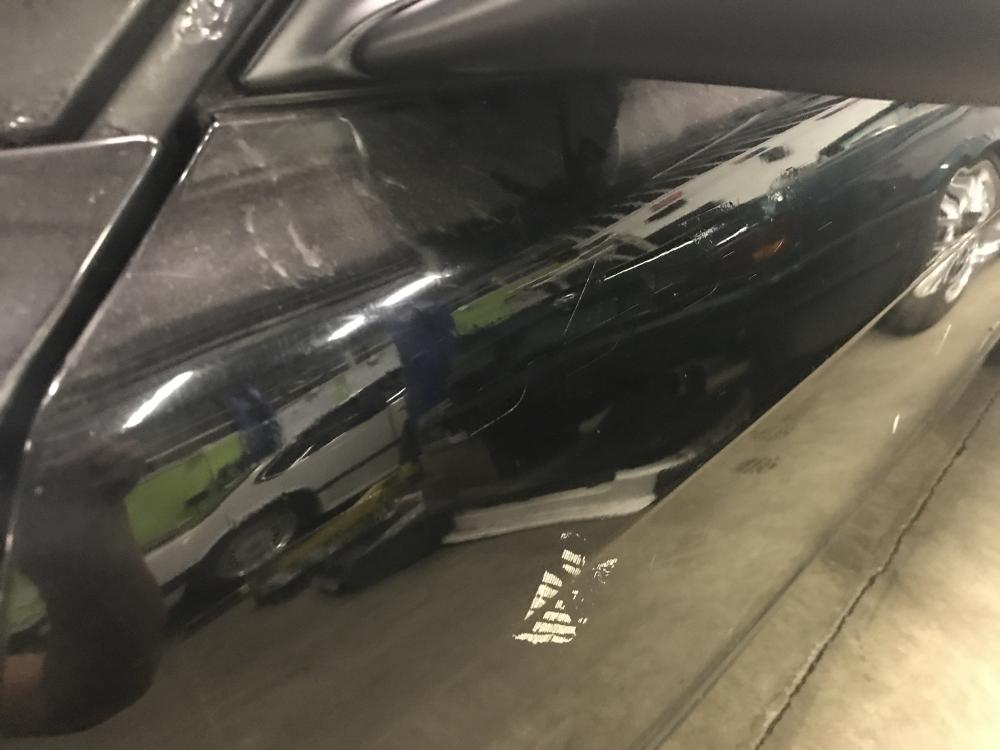
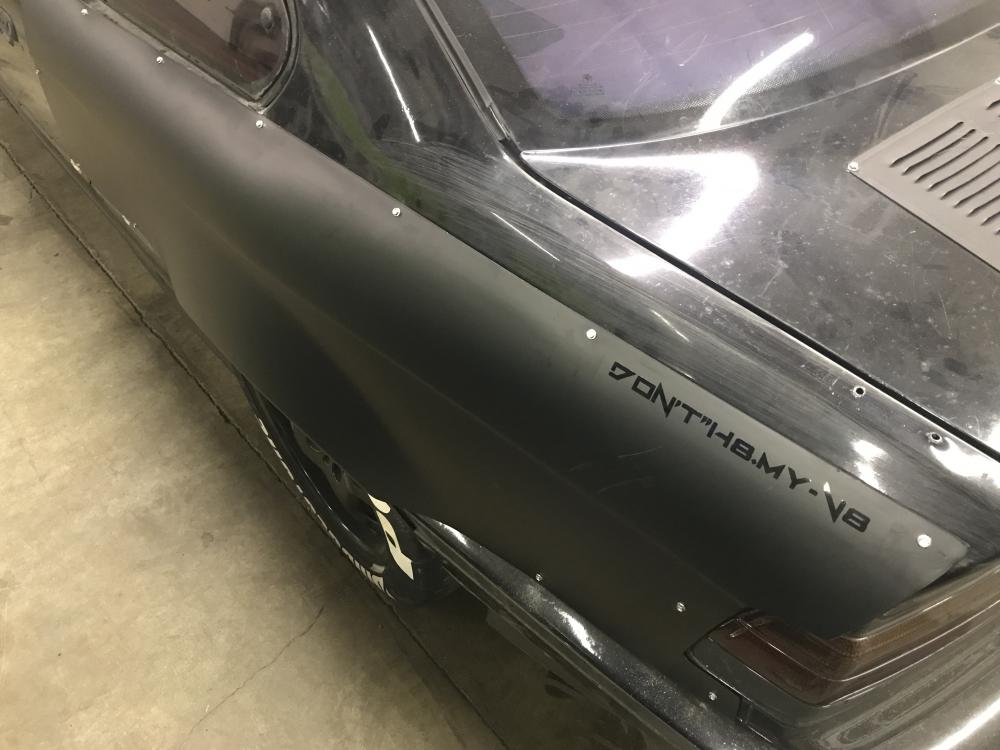
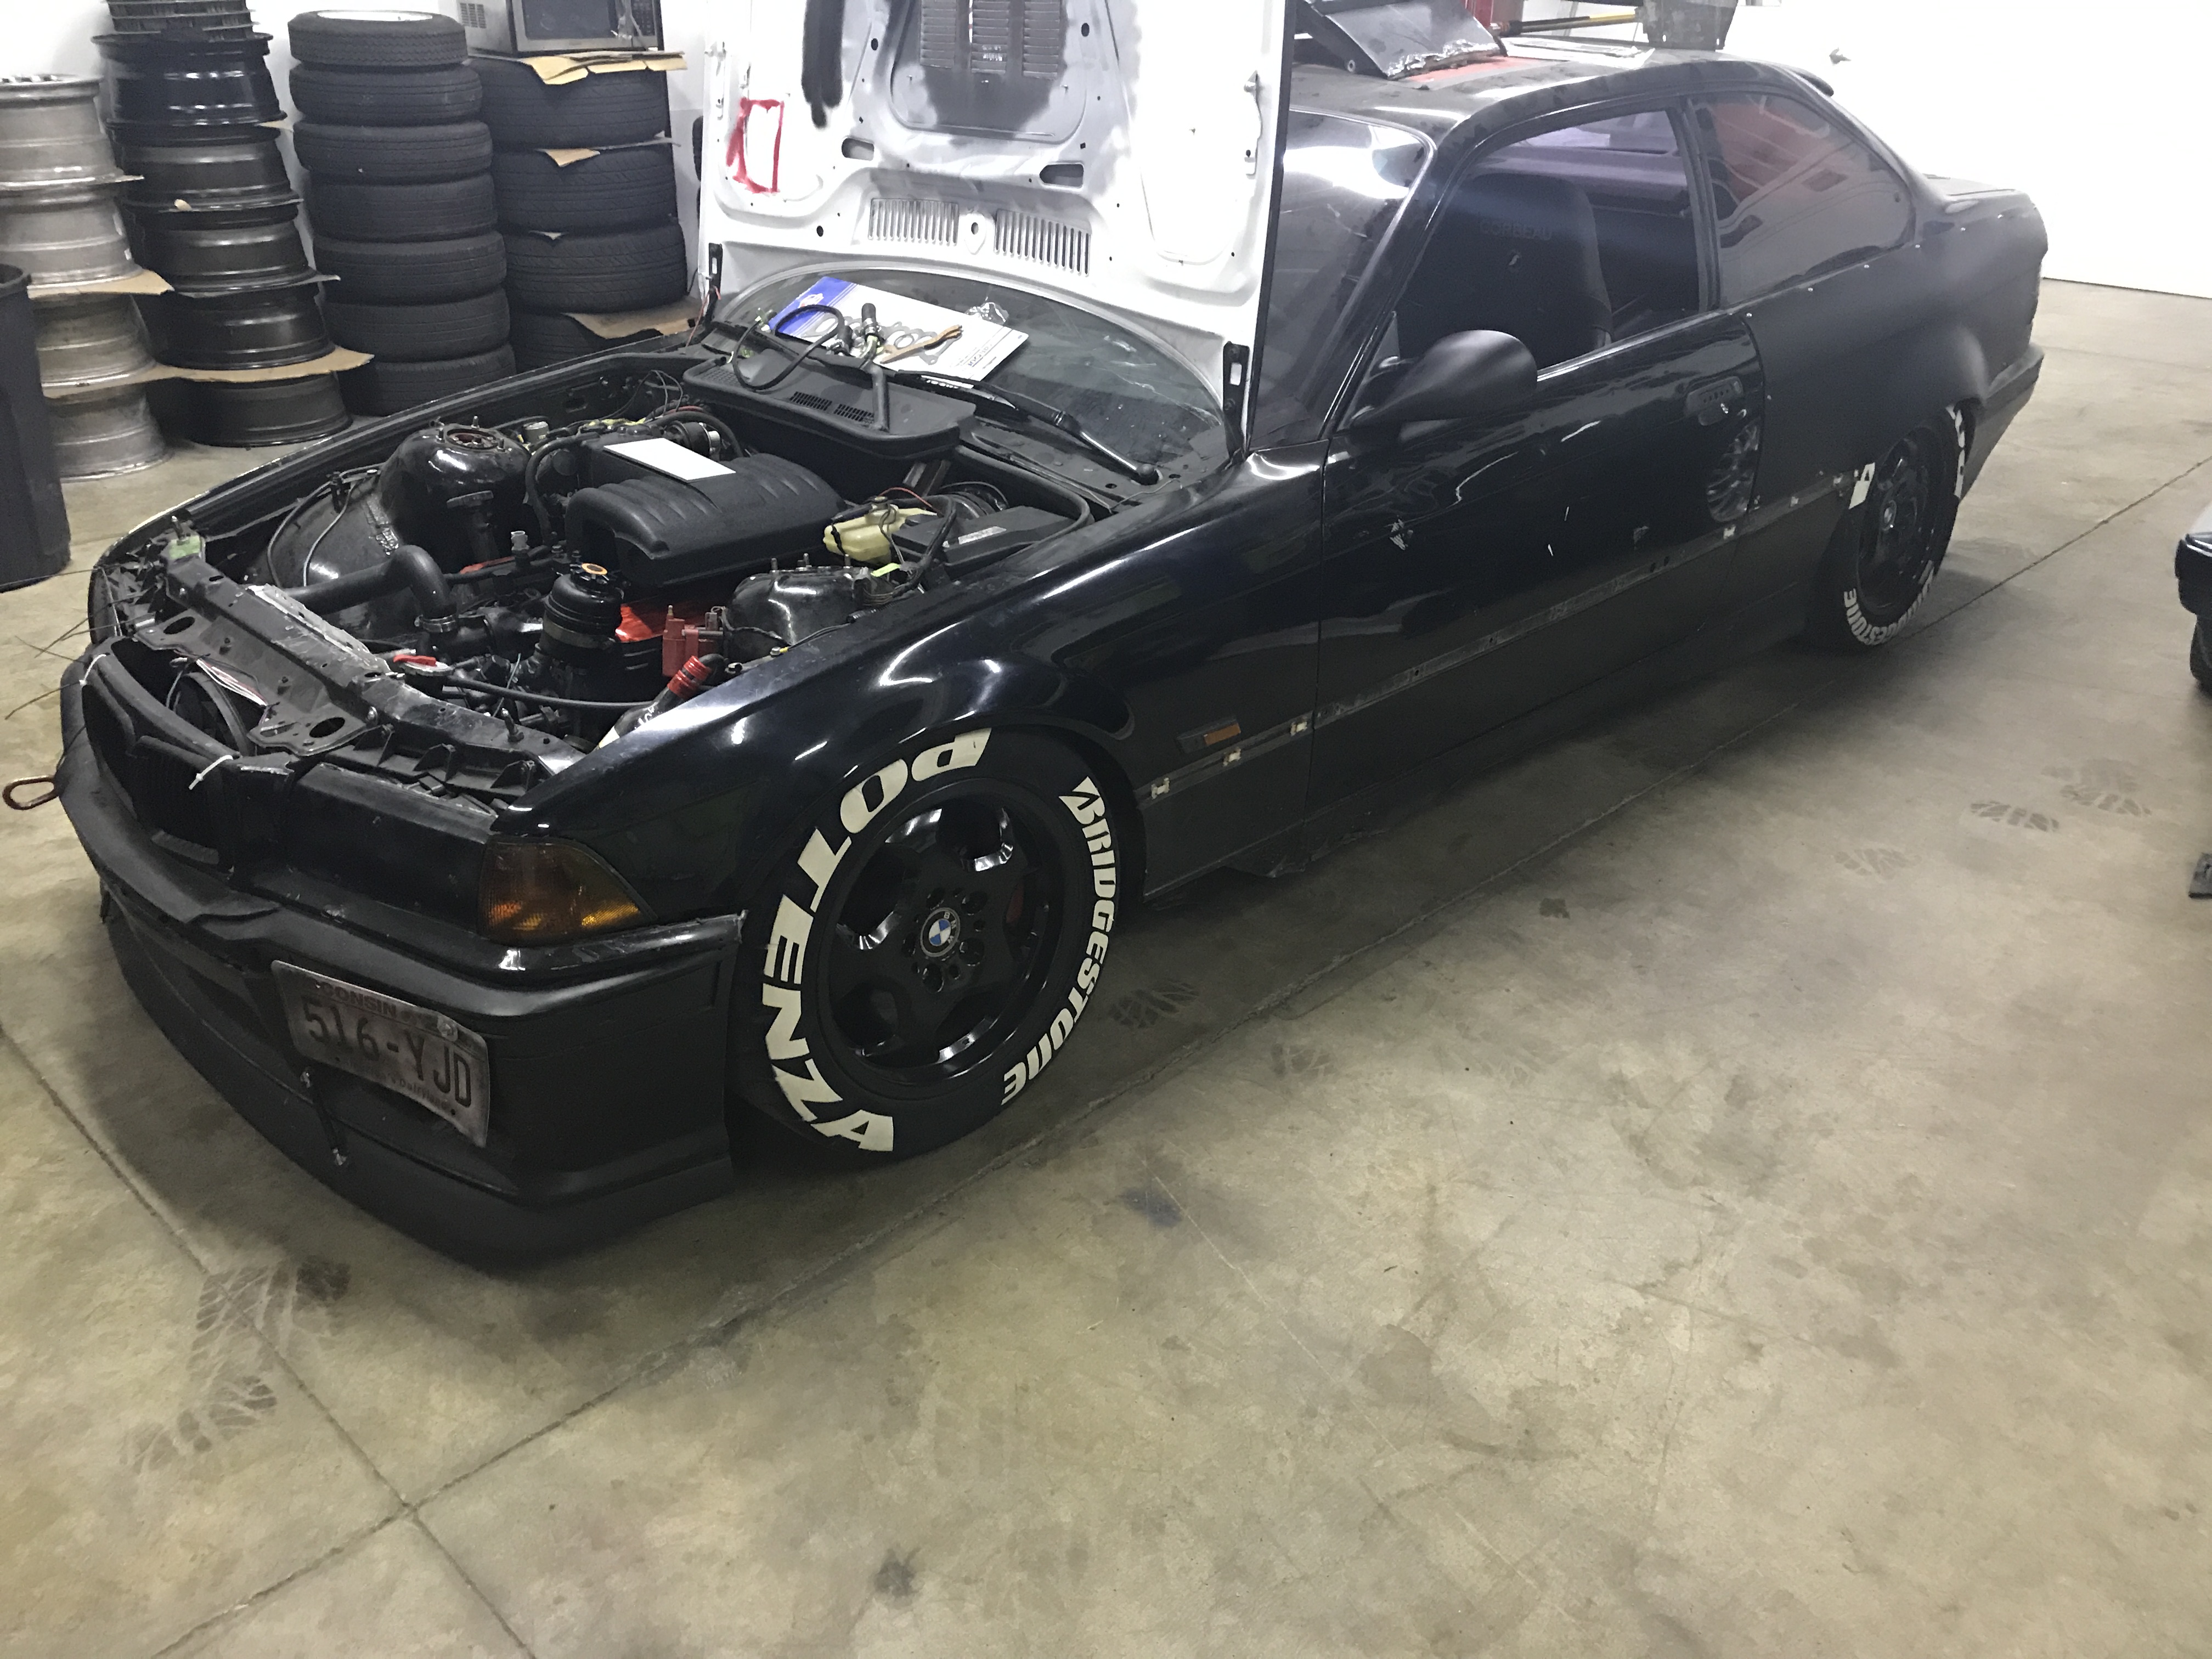
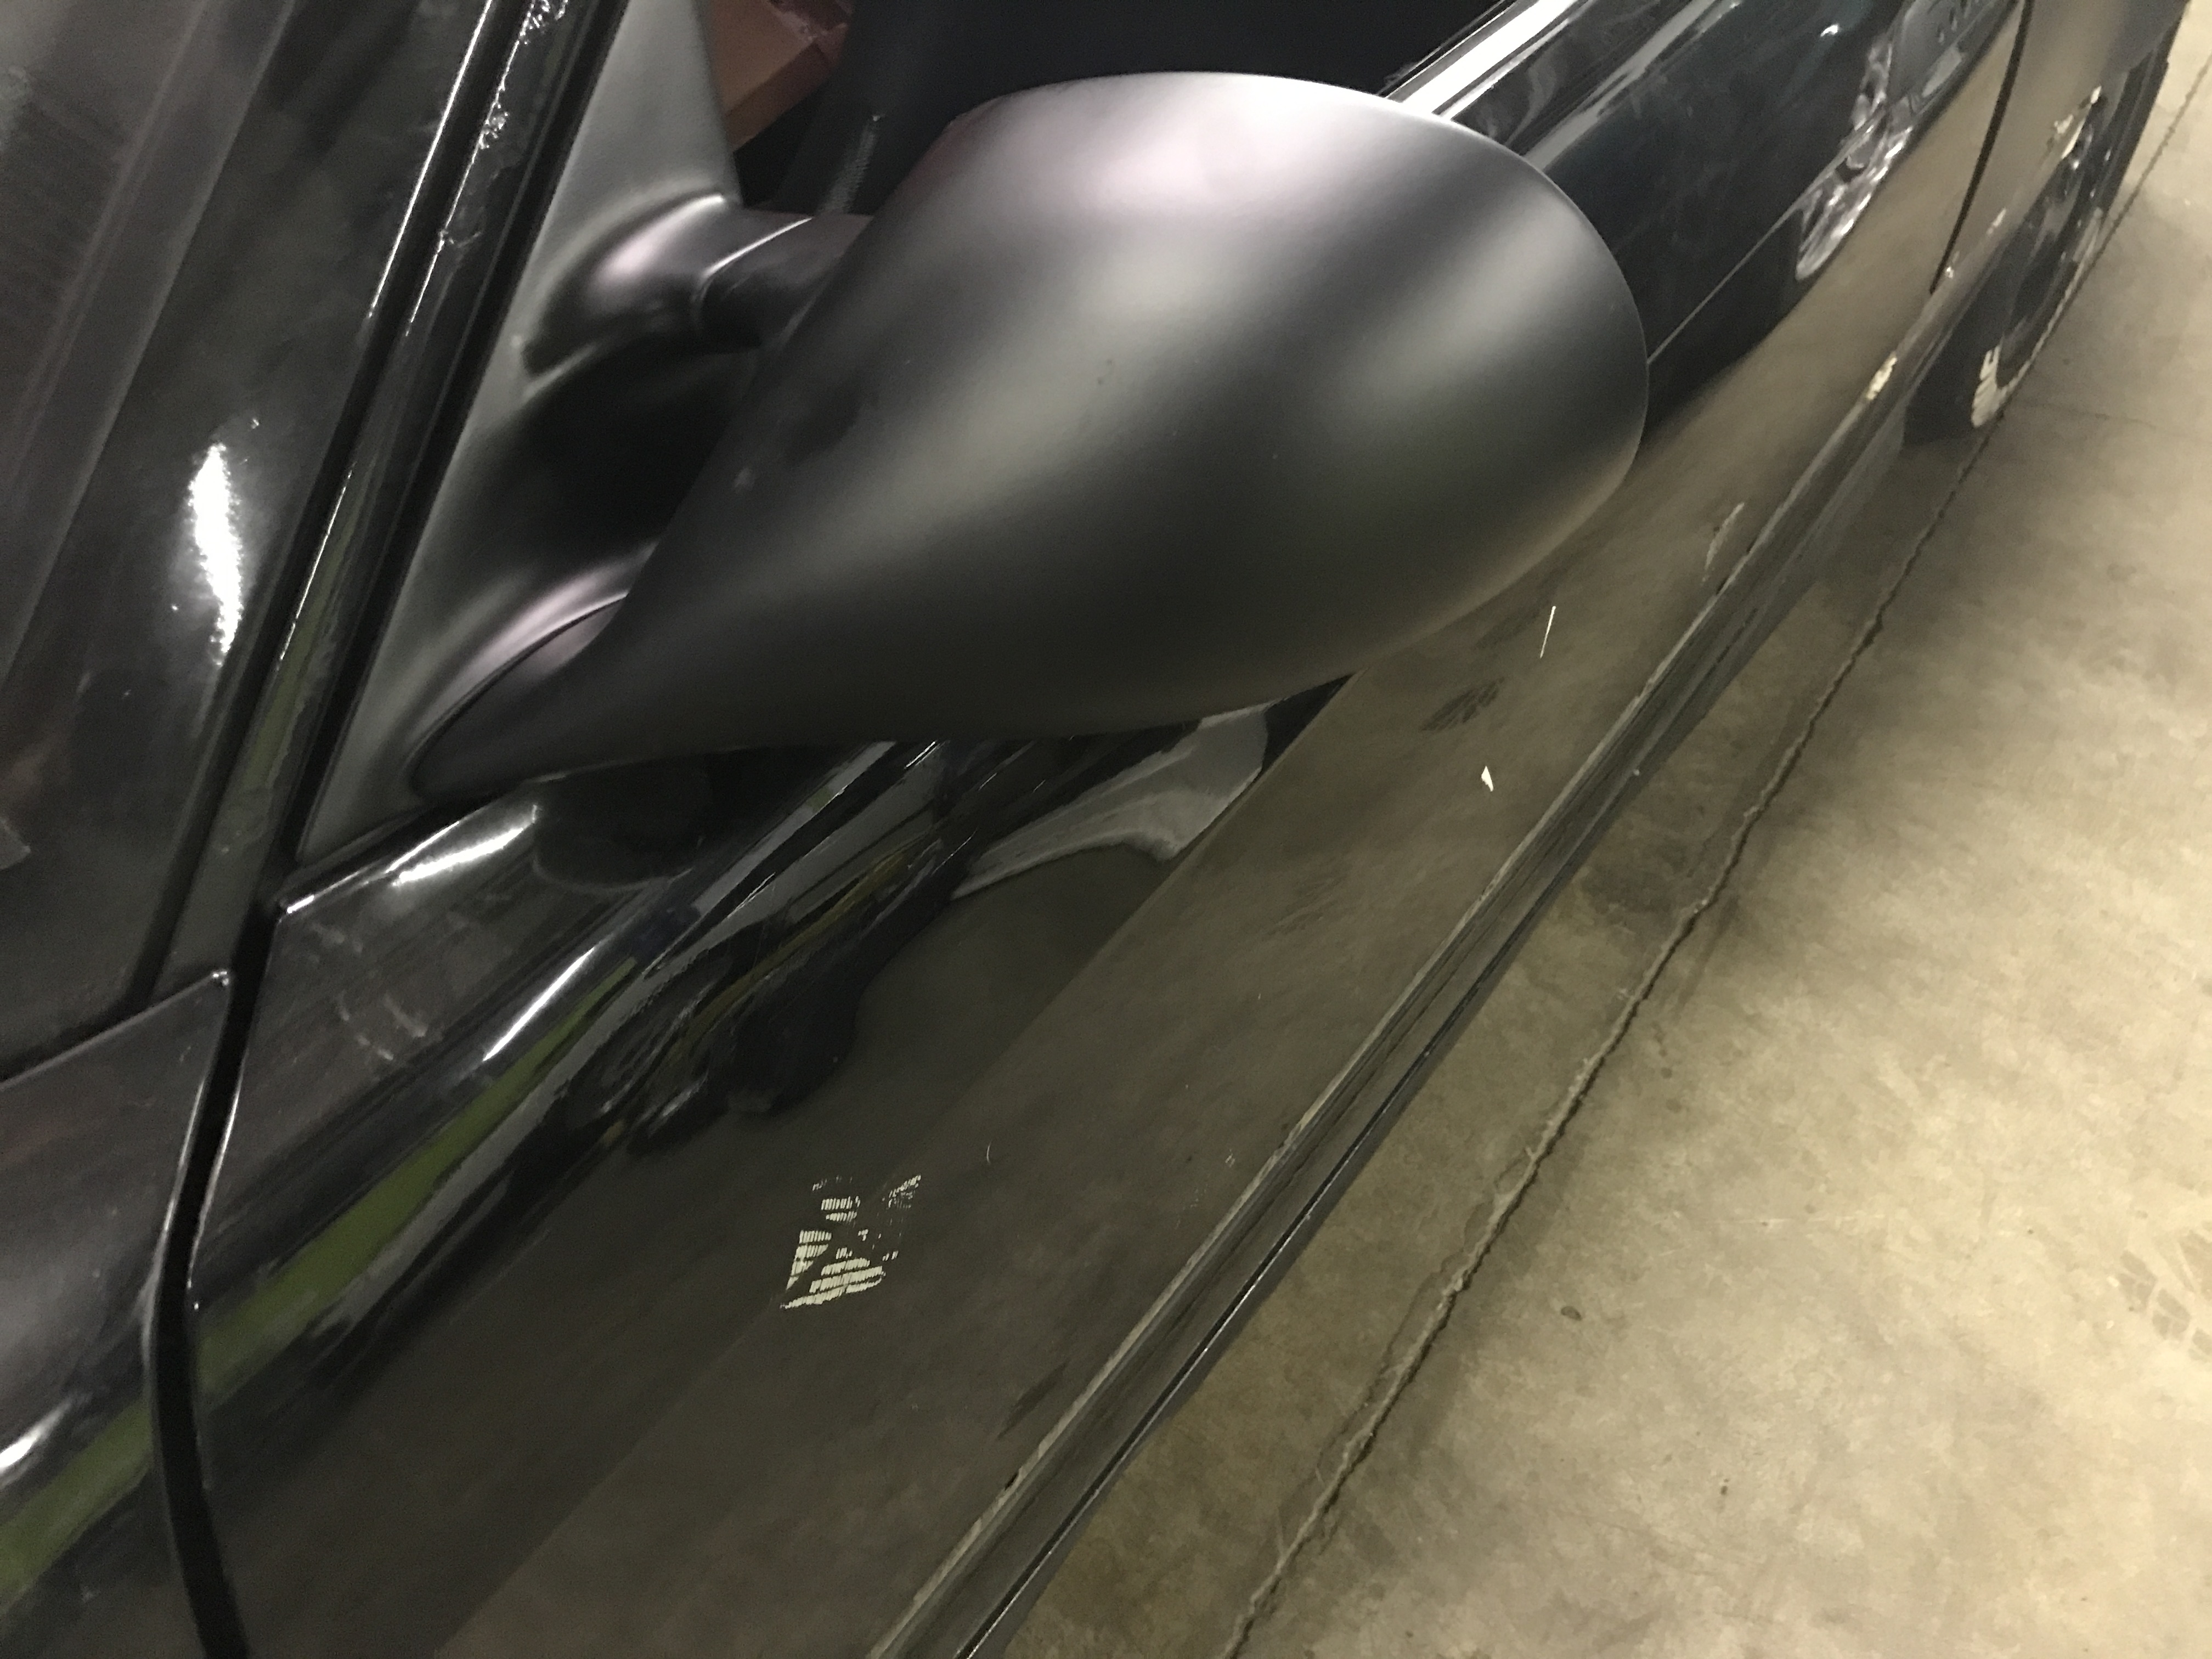
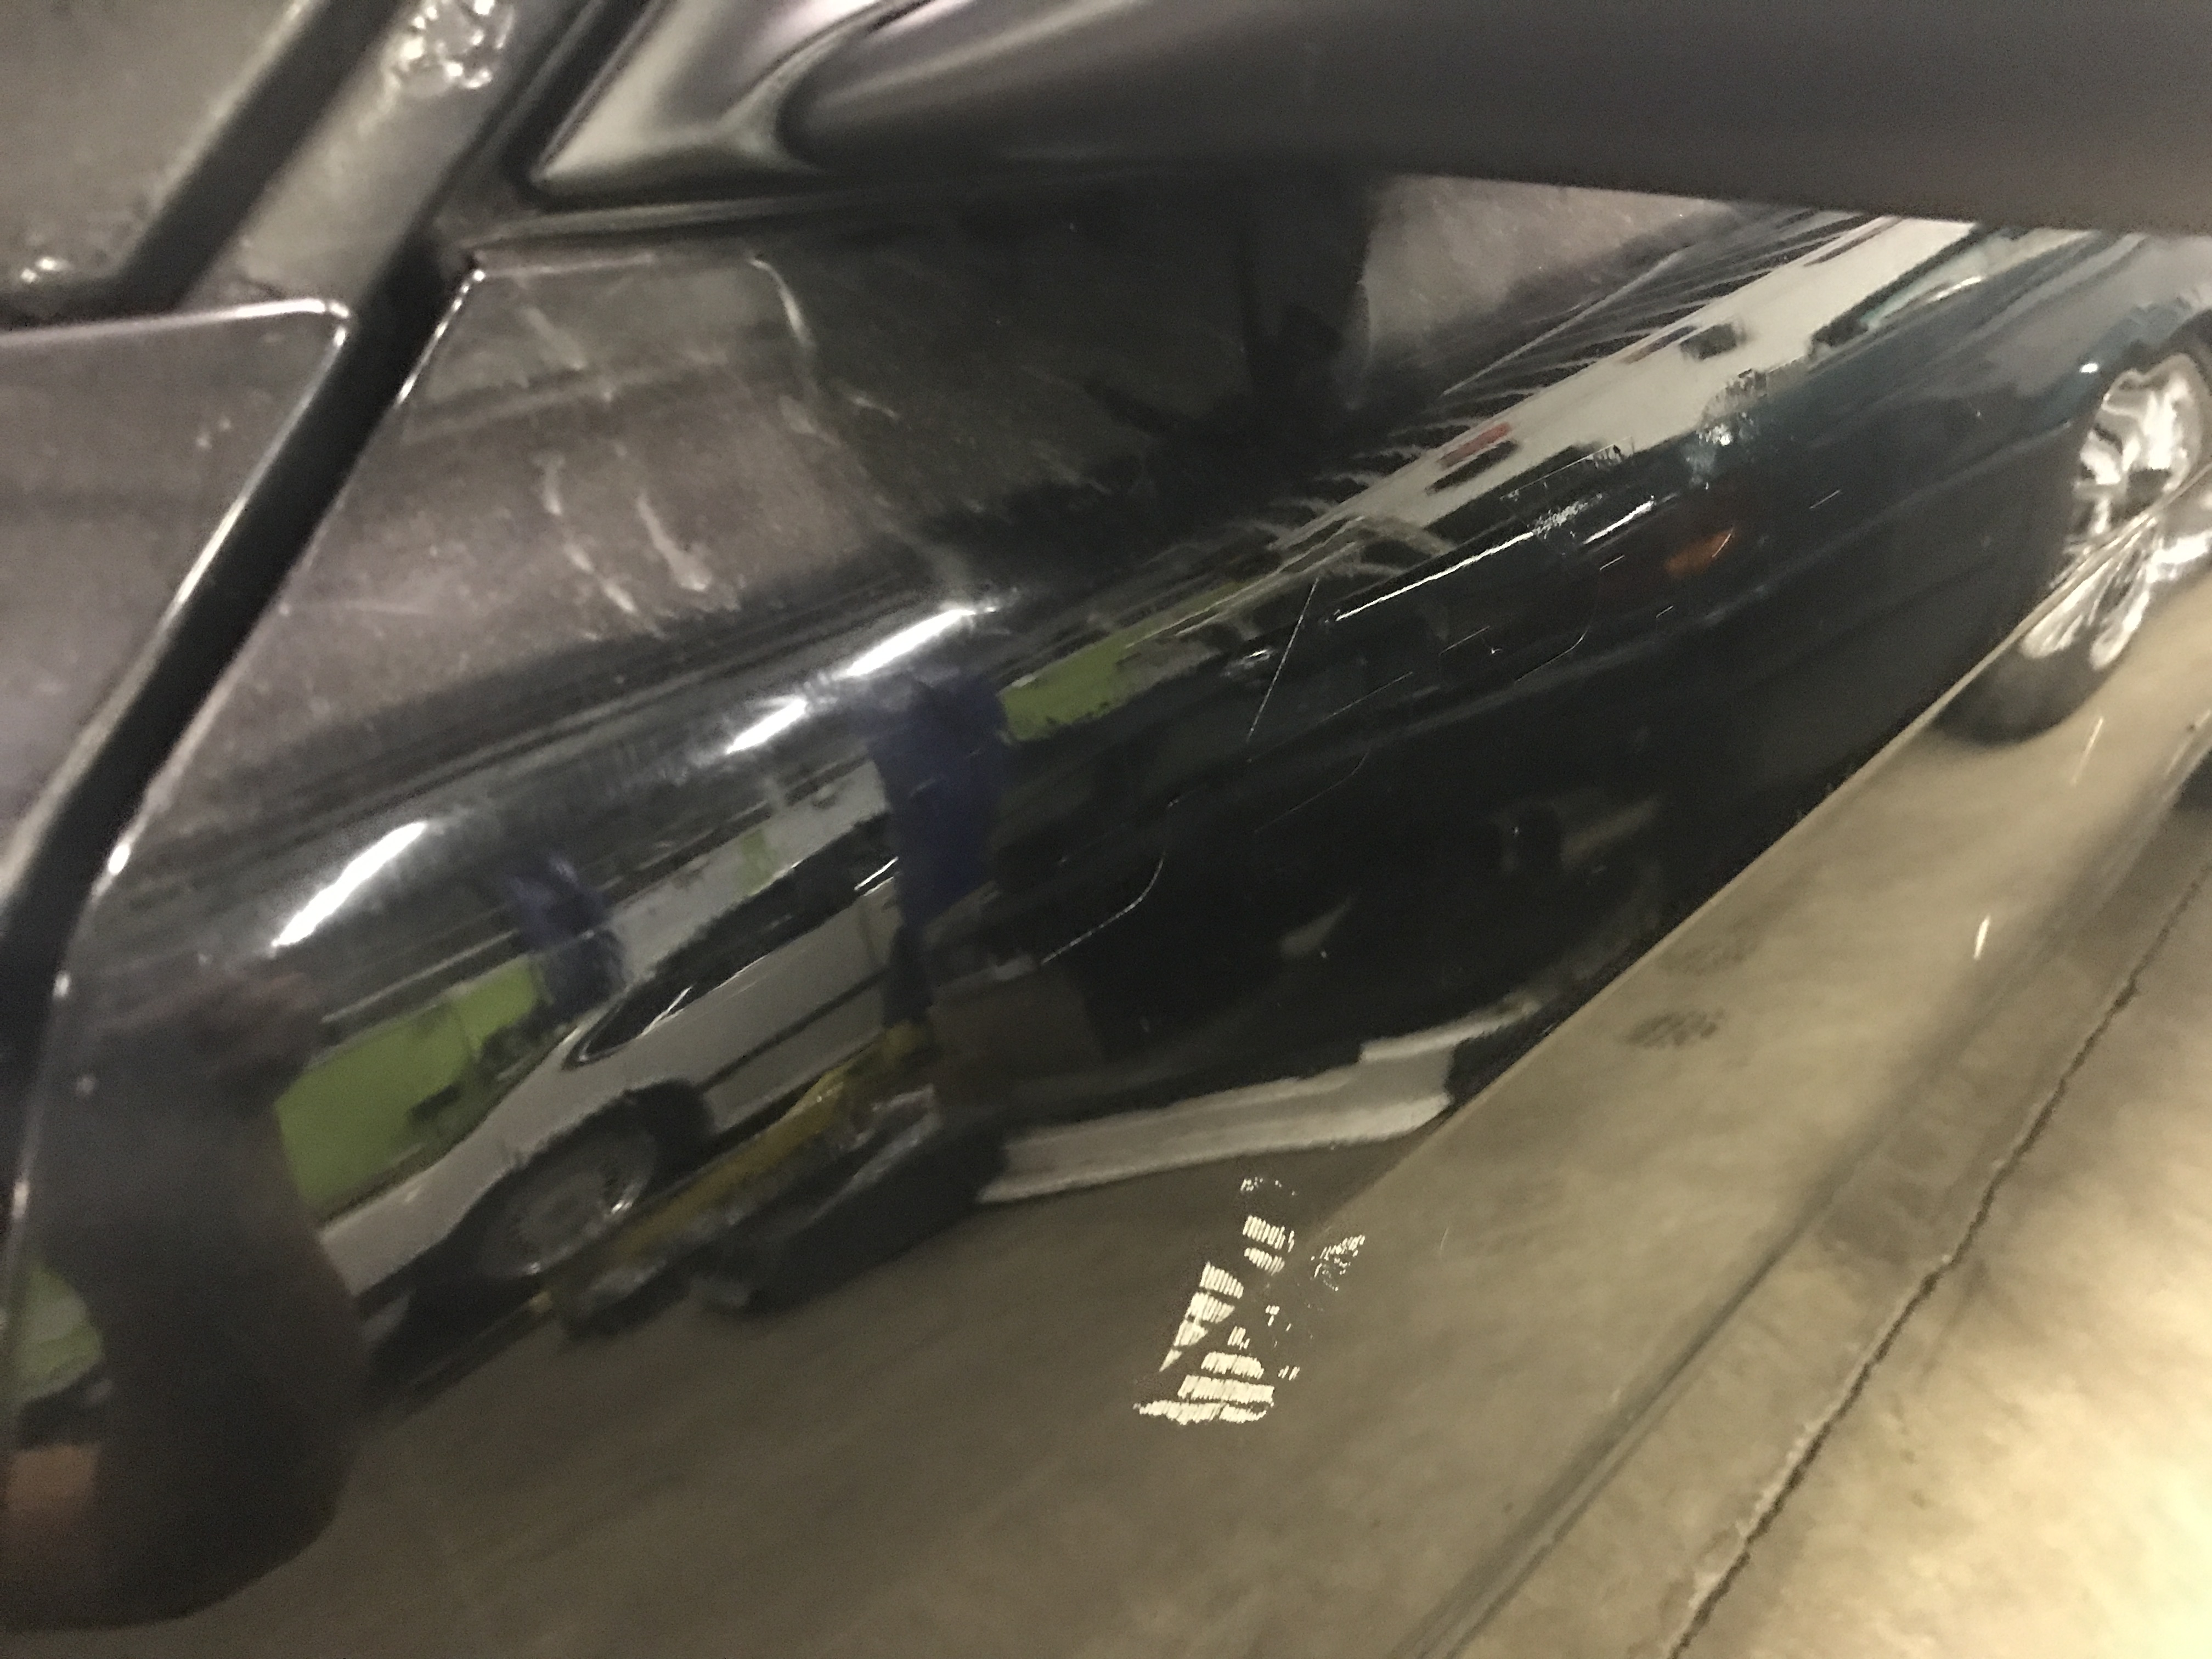
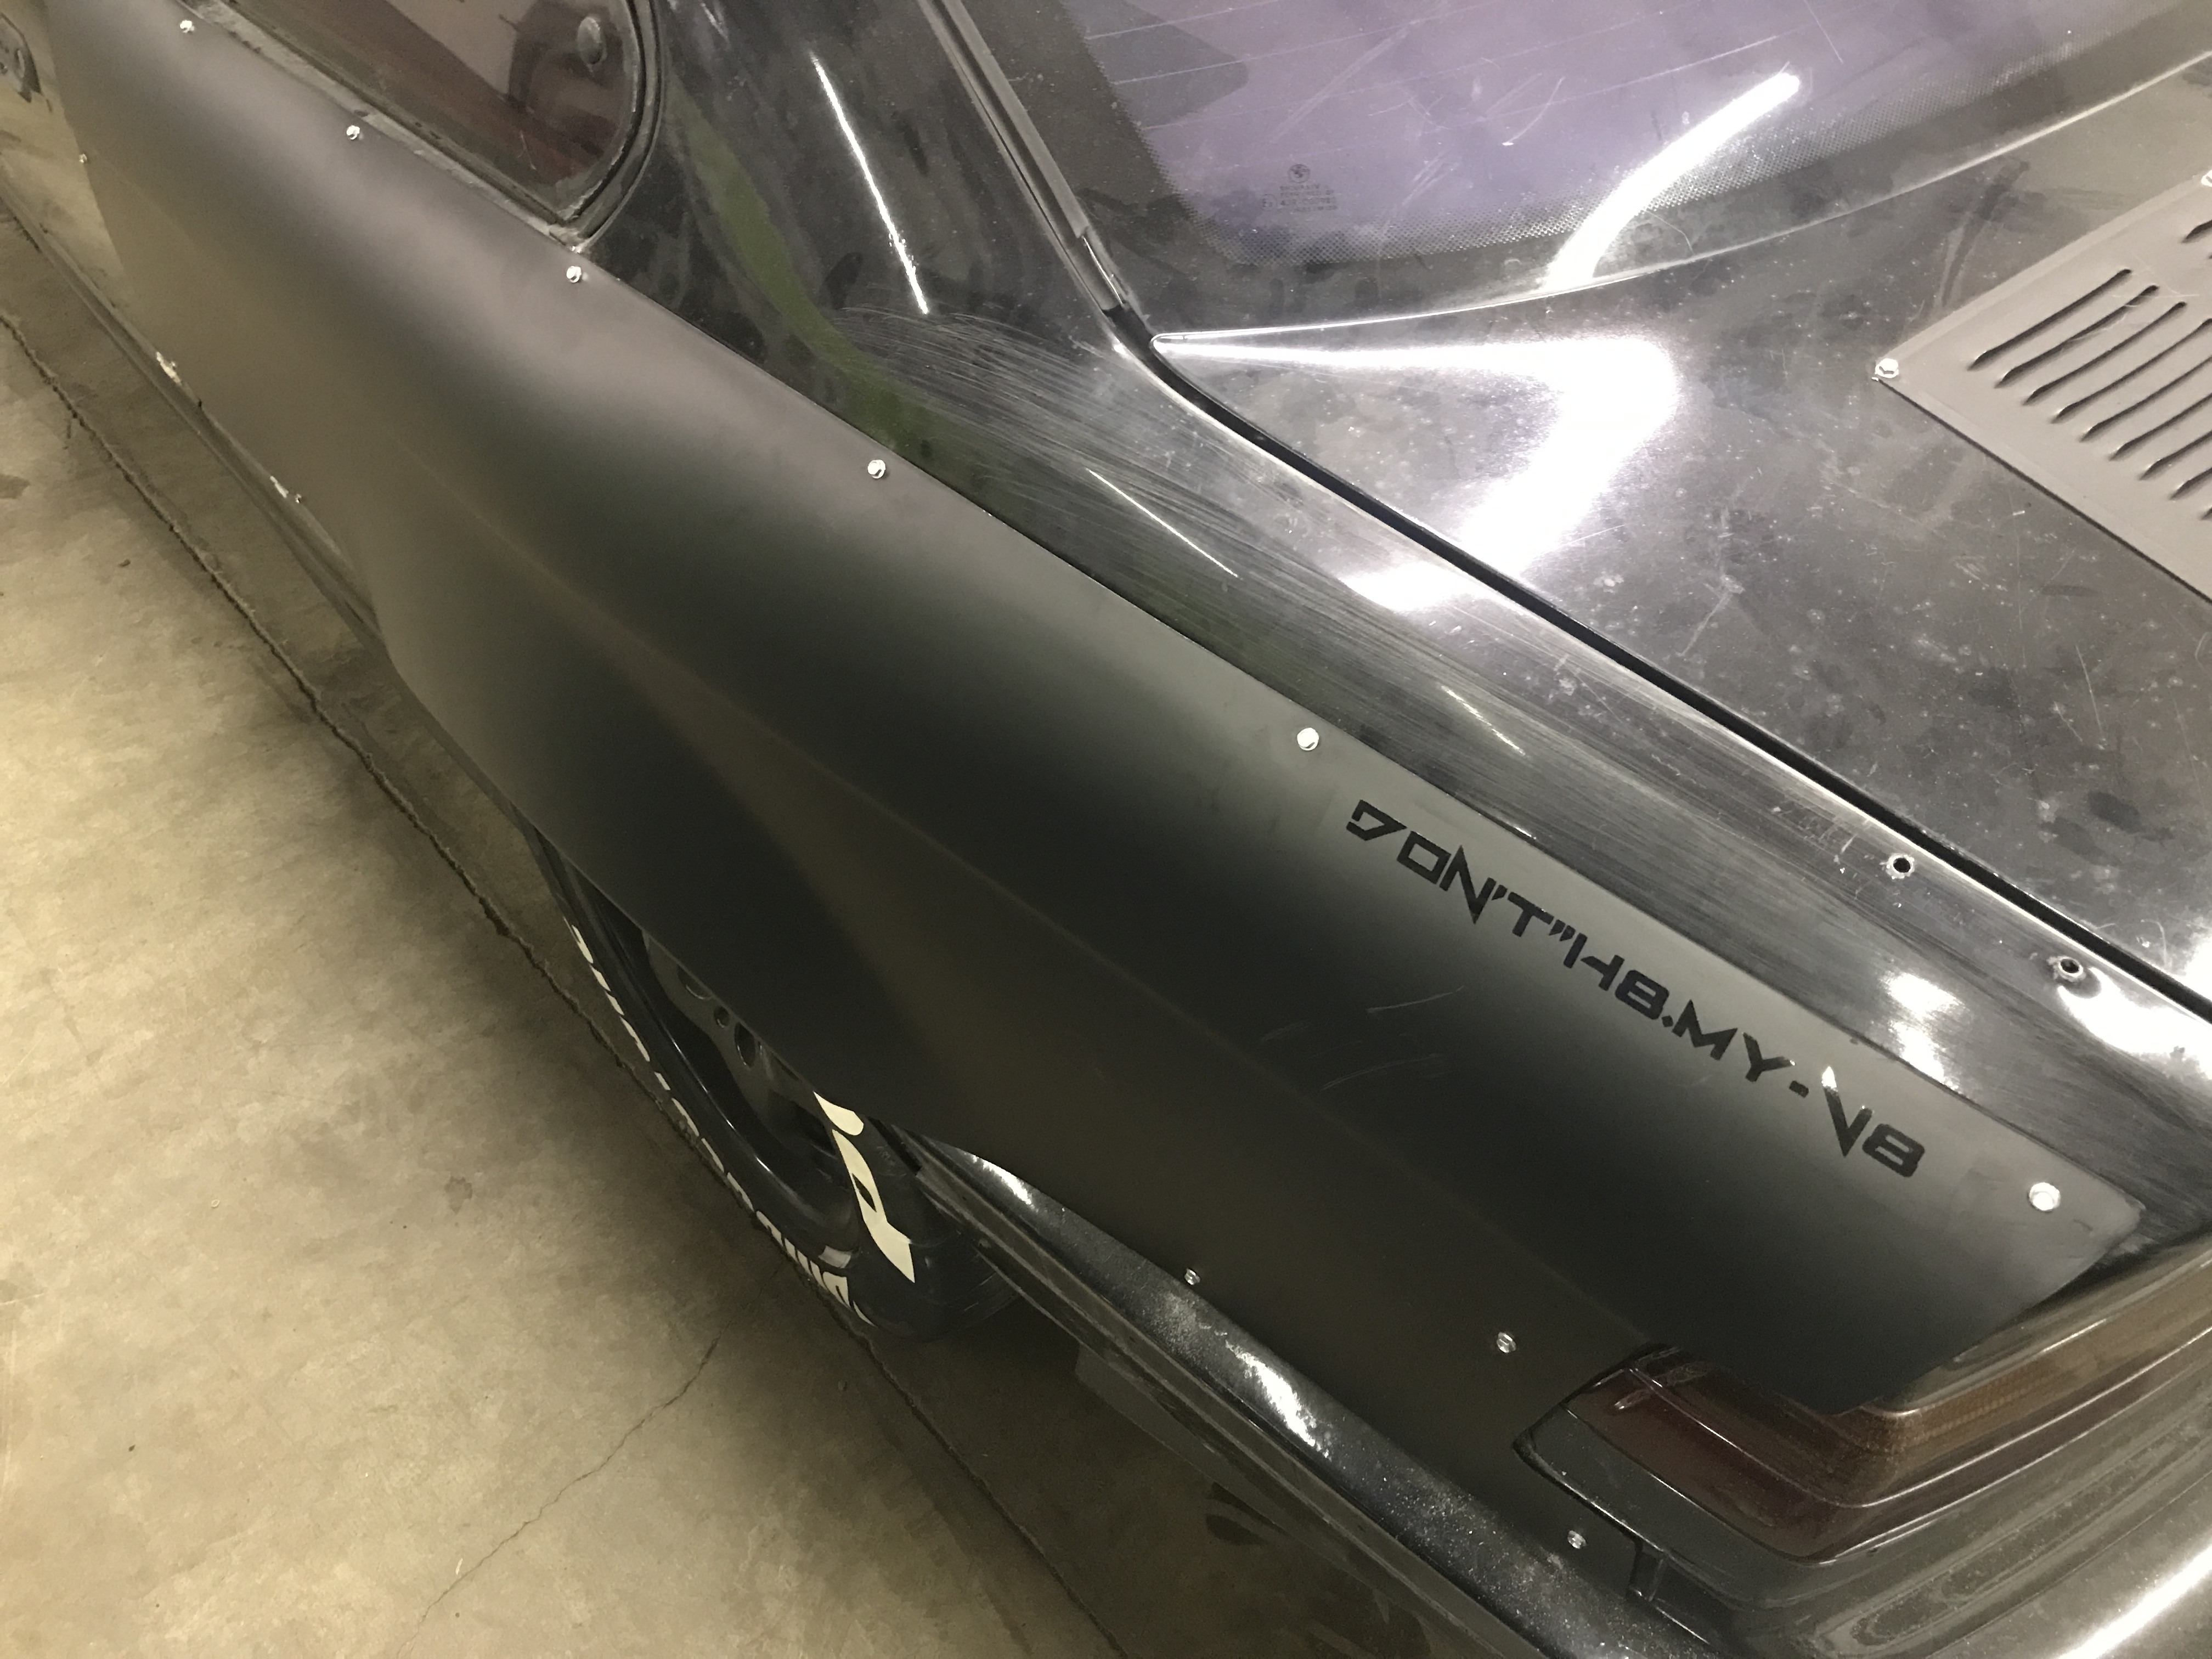
Here are some pictures of the mirrors and over-fenders installed and painted.
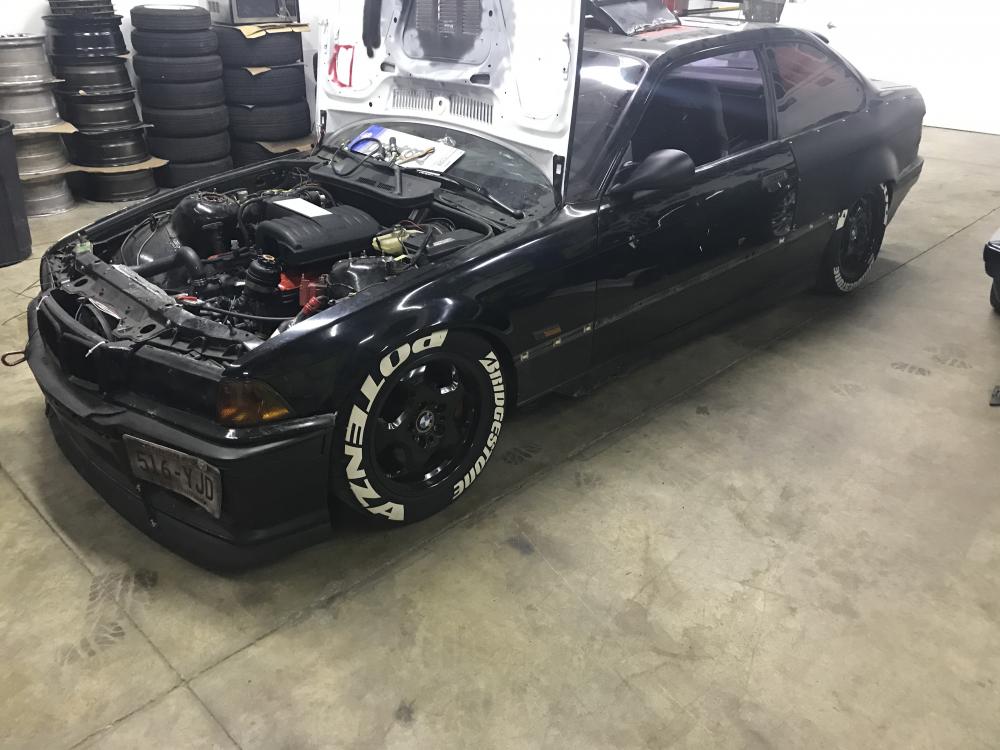
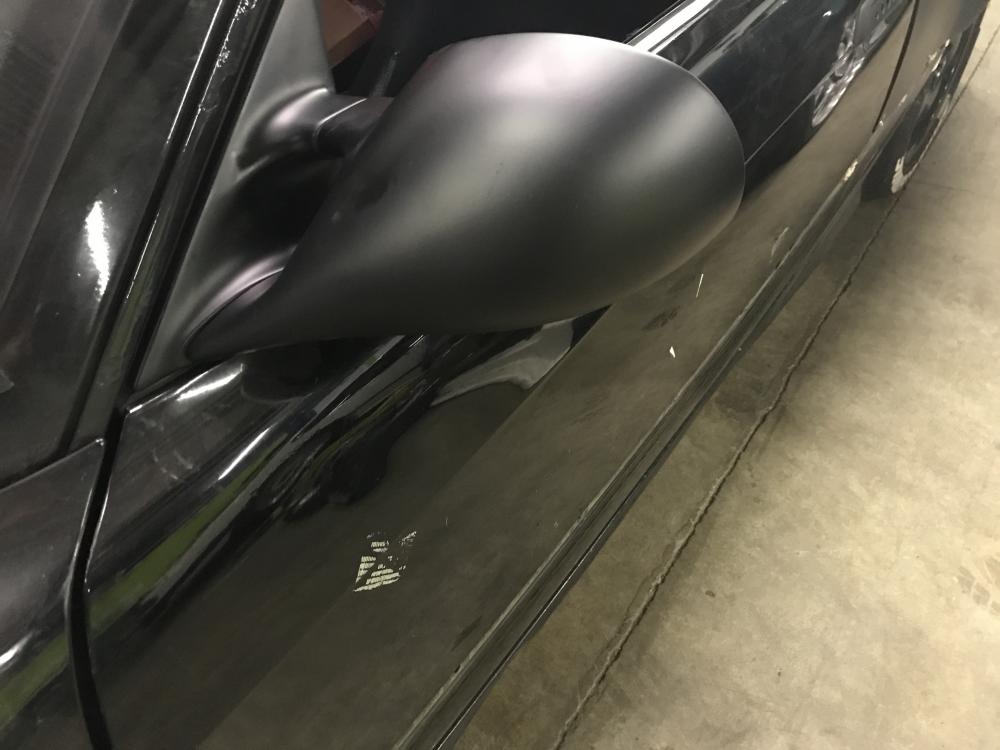
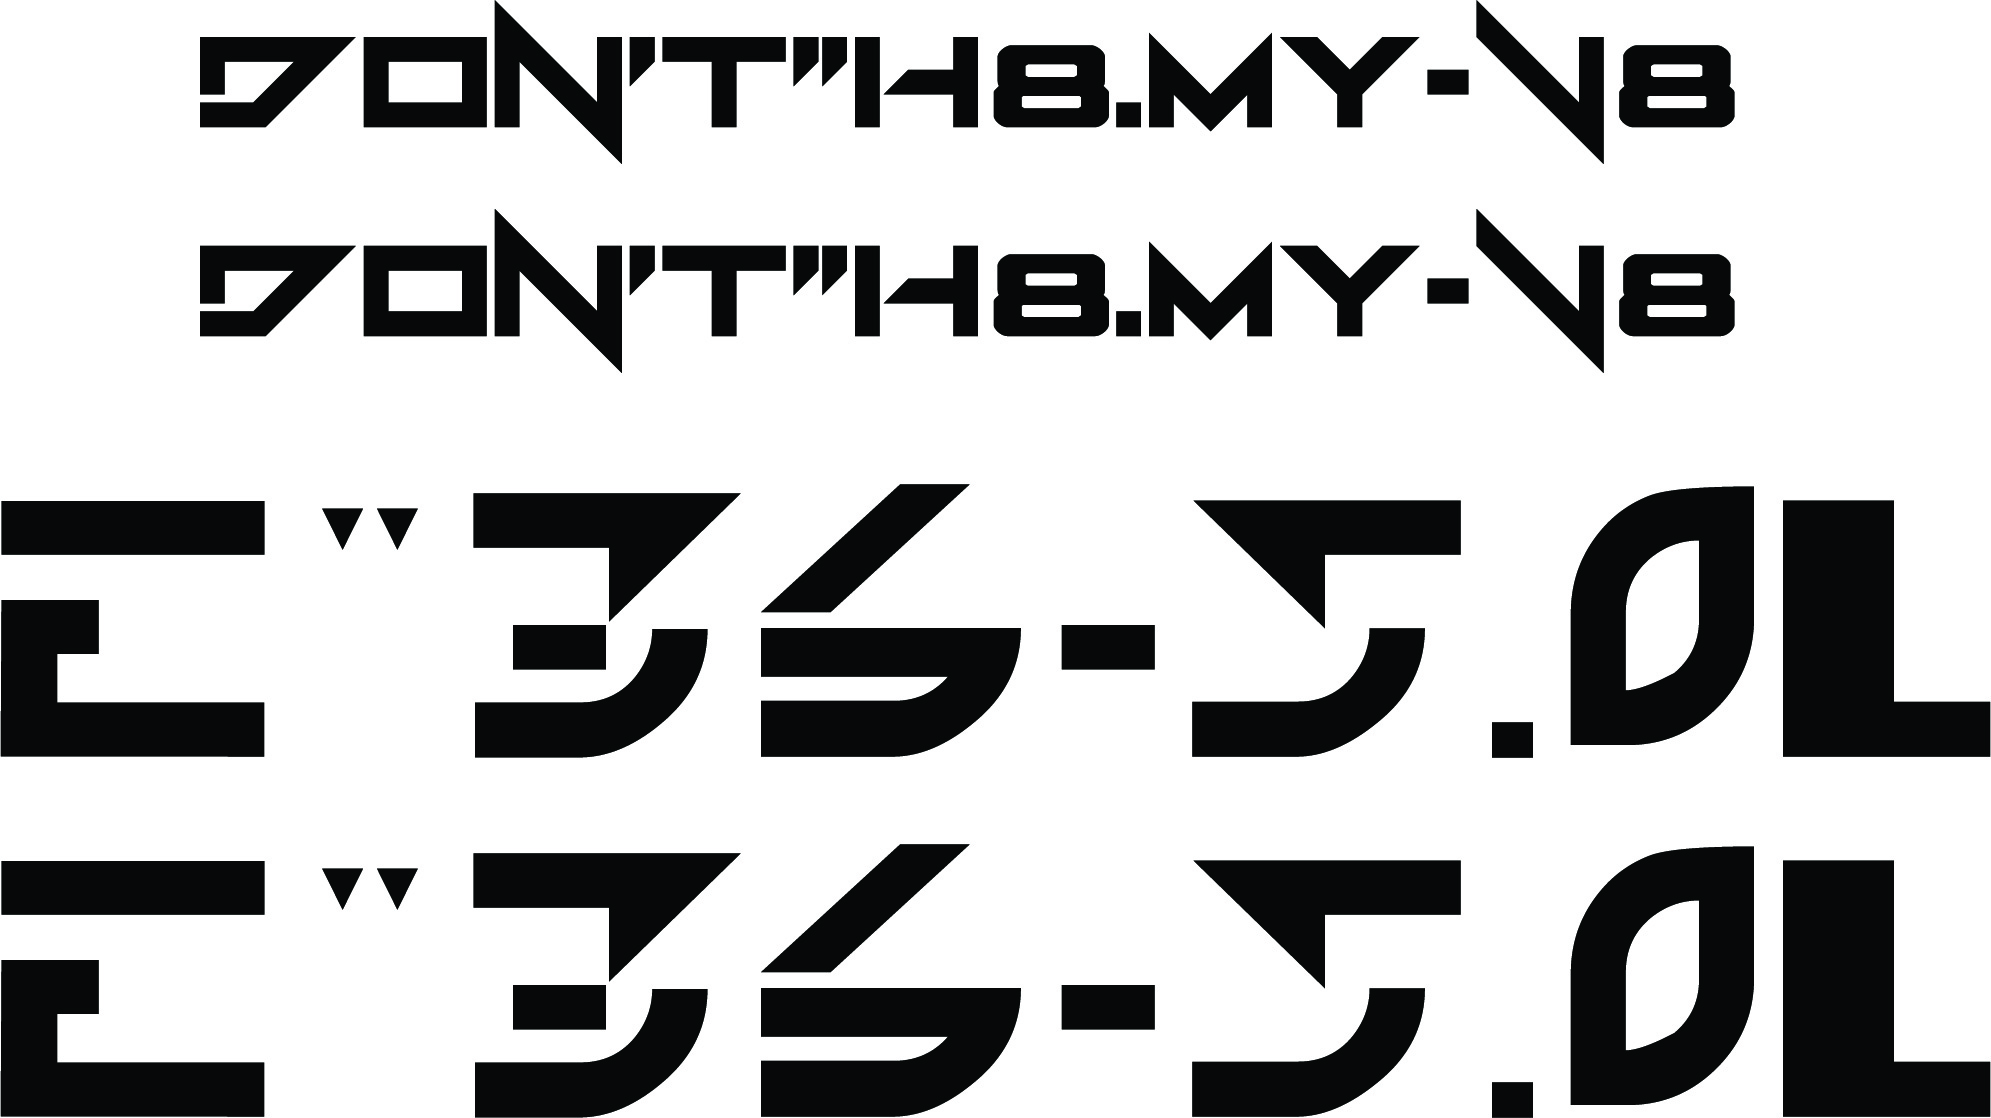
I also created some graphics for the doors that I will have to change as they are impossible to see. Gloss black decal over gloss black paint doesn't read well. I also added graphics to the quarters which did show up; gloss over matte.
If you guys have any suggestions on what I could make for "futuristic" quotes or graphics, I am all ears/eyes.
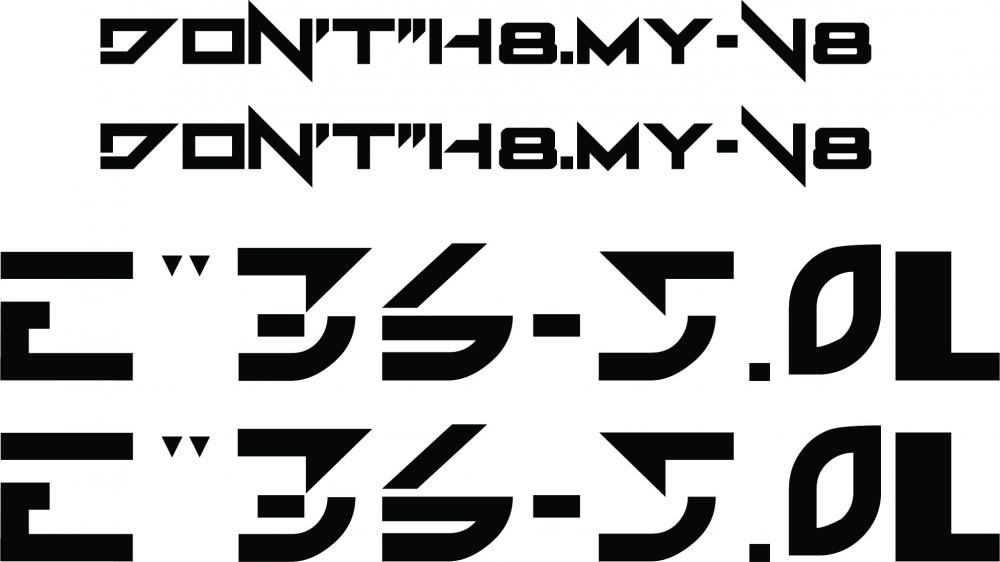
can you see the decal in the image below??!
Also here are some pics of the injectors and the tester I made. Also note the container I was using to spray into and all of the shit and sediment that came out.
https://www.instagram.com/_jdesigner_/ http://nevertoolow.tumblr.com/
🥳SOLD BMW E24 633CSI - BMW M30B32 🧪SOLD HCH ES9 - 1.3 LDA
👽BMW E30 325IC - Toyota 1JZ-GTE ⏰ HONDA EF9 CIVIC SI - JDM B18C5
☠️BMW E36 318i - Ford 5.0 FE302 🚴♂️ GT-Labomba - 26x2.75 Freeride
🤹♀️SOLD BMW E36/7 Z3 - BMW M54B25 🧓SOLD BMW E10 2002 - BMW M10M05 -
Crazy how all that crap came out. I wonder if it would be even worse if you backflowed them
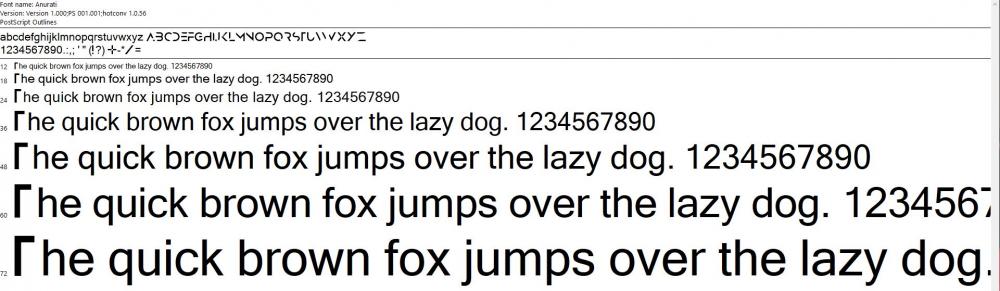
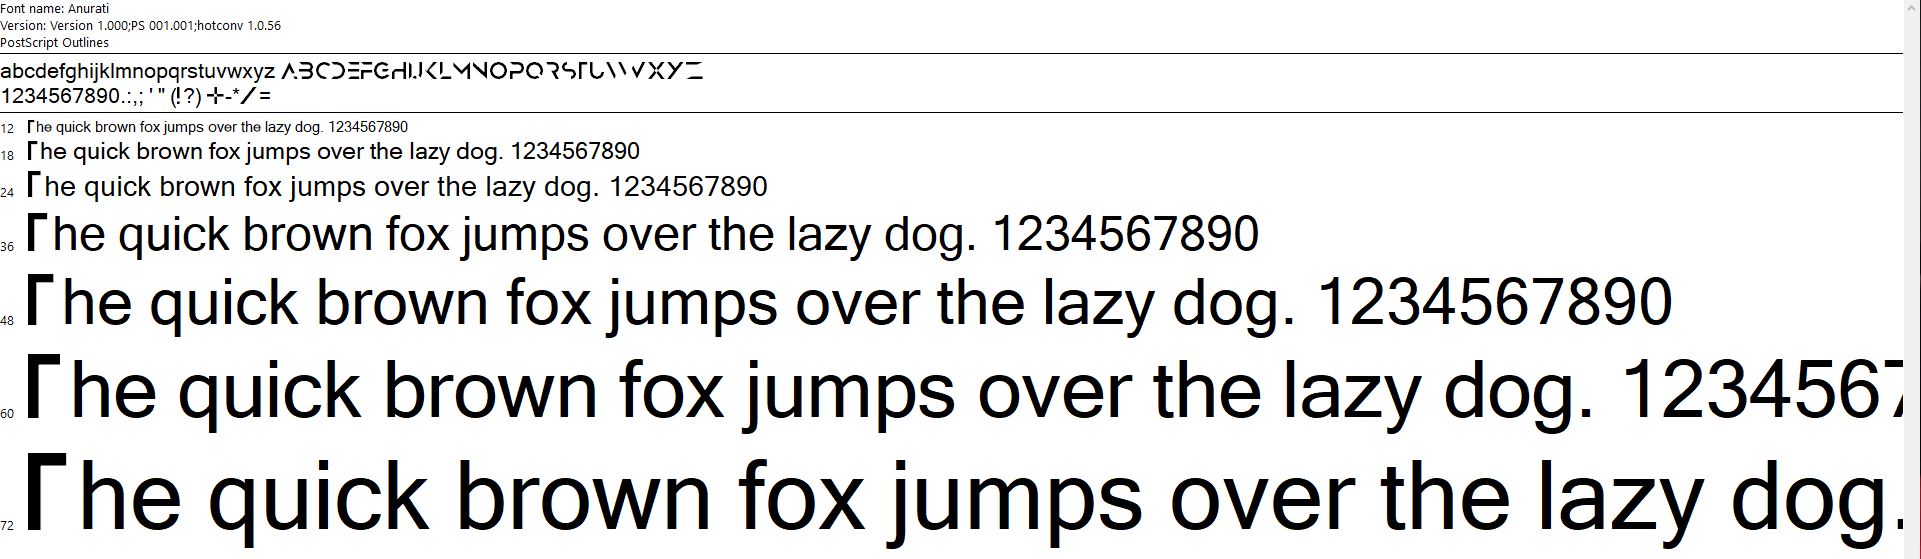
I like the font,
Heres something I found that I like too

Its futuristic to me since the characters are almost a shorthand/advanced and efficient version of standard characters
-
Crazy how all that crap came out. I wonder if it would be even worse if you backflowed them
I like the font,
Heres something I found that I like too
Its futuristic to me since the characters are almost a shorthand/advanced and efficient version of standard characters
Yeah it was a lot more than I expected. I don't think back flowing would make a difference(but that's an assumption). There were filters on the back side (that I replaced) and the spray pattern was perfect afterwards. all the deposits were on the engine side of them.
Do you know the name of that font by chance?
https://www.instagram.com/_jdesigner_/ http://nevertoolow.tumblr.com/
🥳SOLD BMW E24 633CSI - BMW M30B32 🧪SOLD HCH ES9 - 1.3 LDA
👽BMW E30 325IC - Toyota 1JZ-GTE ⏰ HONDA EF9 CIVIC SI - JDM B18C5
☠️BMW E36 318i - Ford 5.0 FE302 🚴♂️ GT-Labomba - 26x2.75 Freeride
🤹♀️SOLD BMW E36/7 Z3 - BMW M54B25 🧓SOLD BMW E10 2002 - BMW M10M05 -
https://www.instagram.com/_jdesigner_/ http://nevertoolow.tumblr.com/
🥳SOLD BMW E24 633CSI - BMW M30B32 🧪SOLD HCH ES9 - 1.3 LDA
👽BMW E30 325IC - Toyota 1JZ-GTE ⏰ HONDA EF9 CIVIC SI - JDM B18C5
☠️BMW E36 318i - Ford 5.0 FE302 🚴♂️ GT-Labomba - 26x2.75 Freeride
🤹♀️SOLD BMW E36/7 Z3 - BMW M54B25 🧓SOLD BMW E10 2002 - BMW M10M05 -
THATS FINE. I BET EVERYONE YELLS IN THE FUTURE ANYWAYS.
https://www.instagram.com/_jdesigner_/ http://nevertoolow.tumblr.com/
🥳SOLD BMW E24 633CSI - BMW M30B32 🧪SOLD HCH ES9 - 1.3 LDA
👽BMW E30 325IC - Toyota 1JZ-GTE ⏰ HONDA EF9 CIVIC SI - JDM B18C5
☠️BMW E36 318i - Ford 5.0 FE302 🚴♂️ GT-Labomba - 26x2.75 Freeride
🤹♀️SOLD BMW E36/7 Z3 - BMW M54B25 🧓SOLD BMW E10 2002 - BMW M10M05 -
Plus, I think you should have a revolver mounted to the dash like this guy:
But maybe my vision of the future is different than yours....
In the future there is only one gear... forward.
-
@HipMF I have been slowly gathering random shit to put in the interior. Any thing is possible, once its found or donated. Currently on the look out for a speak and spell.

https://www.instagram.com/_jdesigner_/ http://nevertoolow.tumblr.com/
🥳SOLD BMW E24 633CSI - BMW M30B32 🧪SOLD HCH ES9 - 1.3 LDA
👽BMW E30 325IC - Toyota 1JZ-GTE ⏰ HONDA EF9 CIVIC SI - JDM B18C5
☠️BMW E36 318i - Ford 5.0 FE302 🚴♂️ GT-Labomba - 26x2.75 Freeride
🤹♀️SOLD BMW E36/7 Z3 - BMW M54B25 🧓SOLD BMW E10 2002 - BMW M10M05 -
Speak and Spell OR a Chrysler voice alert system
-
I once read an article that explained how a speak and spell actually works. Amazing what they were able to given the technology available at the time.
Anyway, found this today. I'll just leave it here:

Khyzyl Saleem is a talented guy.
Speak and Spell OR a Chrysler voice alert system
Damn you. now I am looking up information on doing this.
------------------
Anyways, I got a lot done last night. Pretty much have to install the distributor and time the engine and we should be good for round 2. I really want to get out to at least one event this year with this contraption.
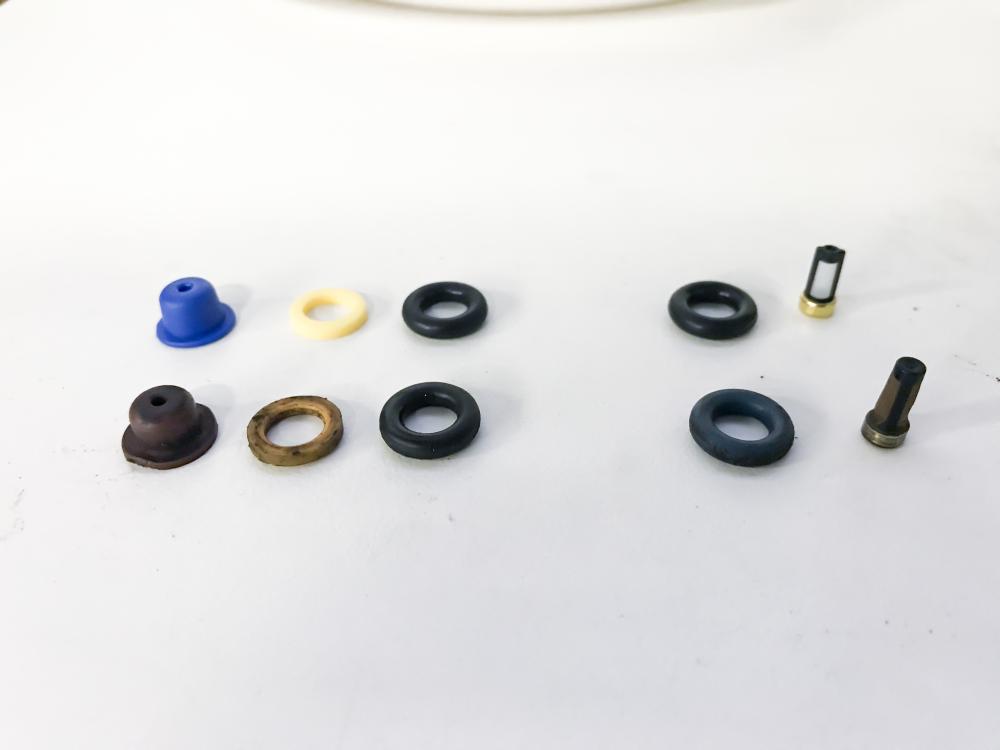
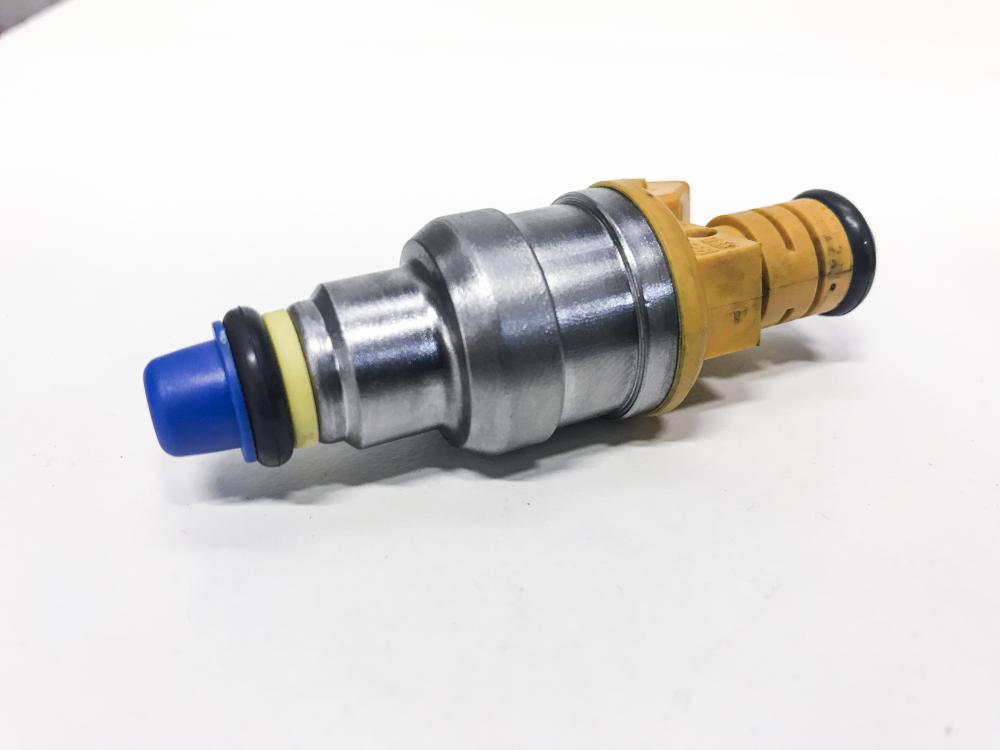
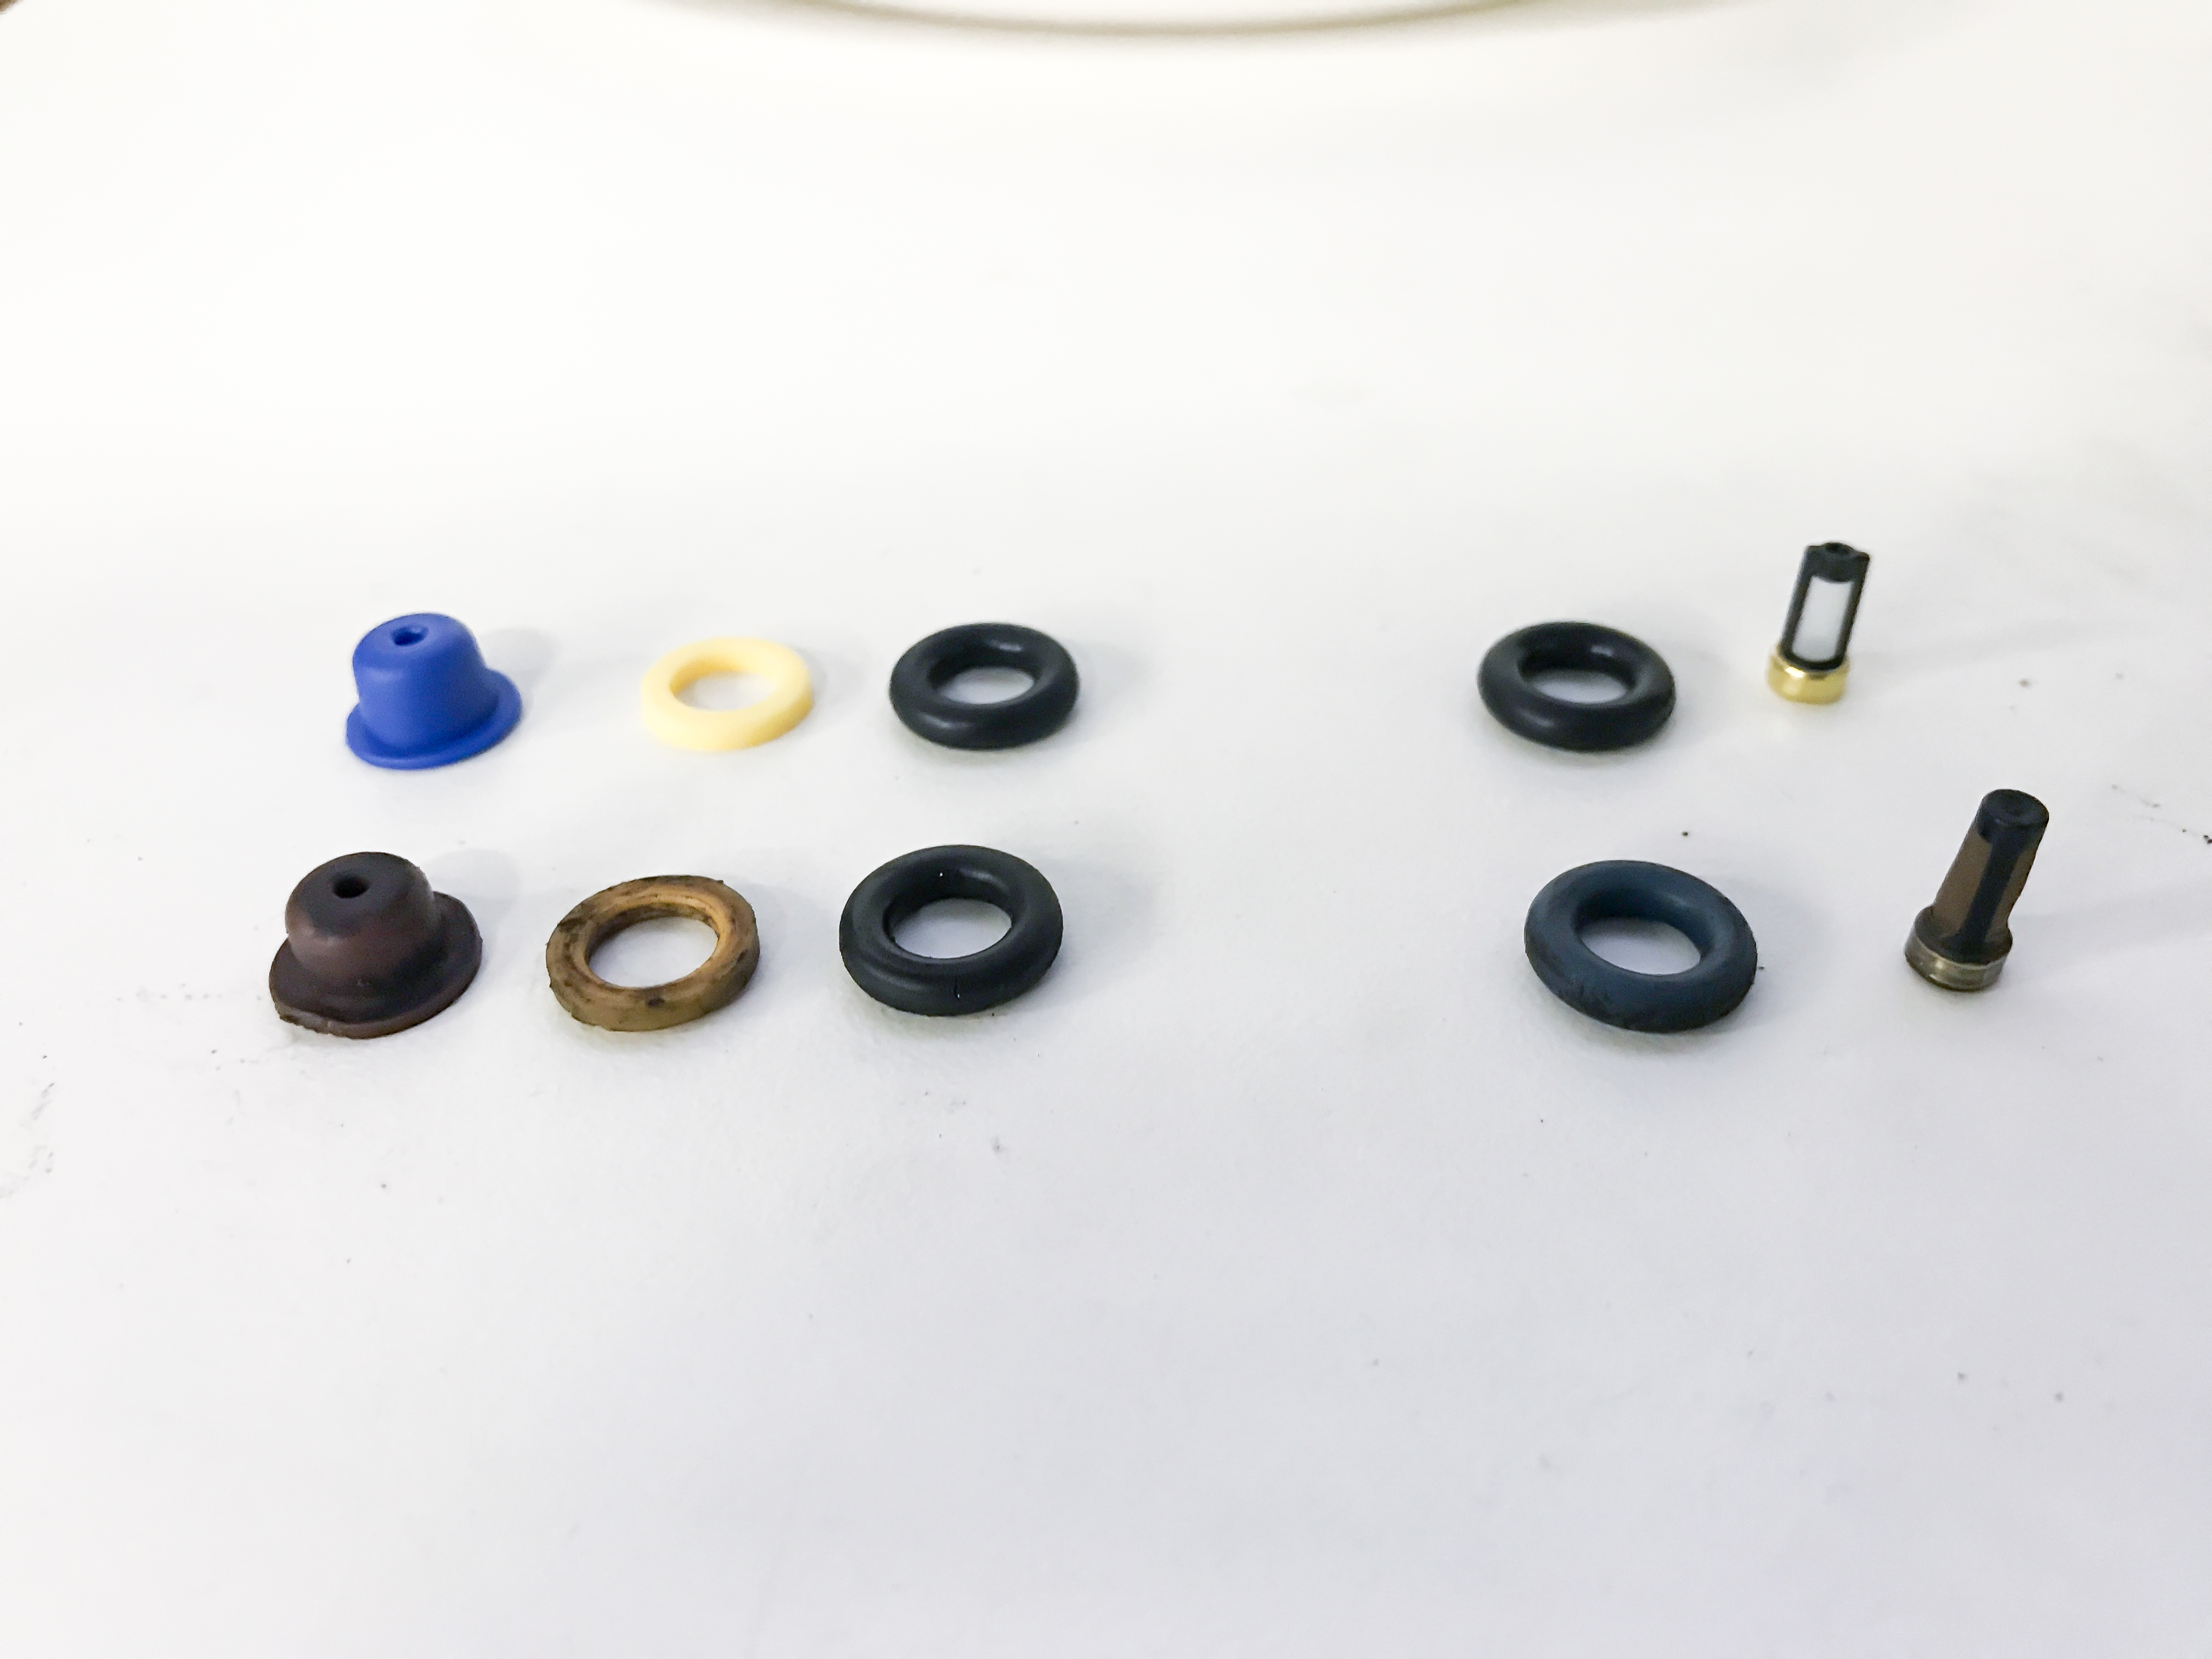
Here is a quick comparison of the old vs. new for the injector seals/pintle caps/filters
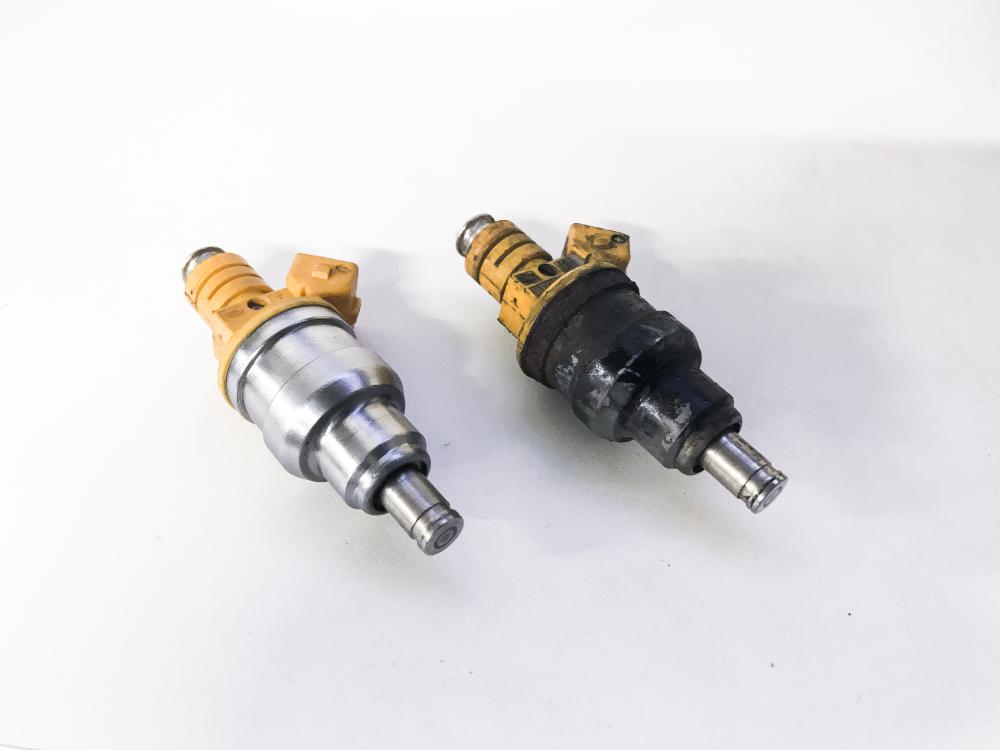
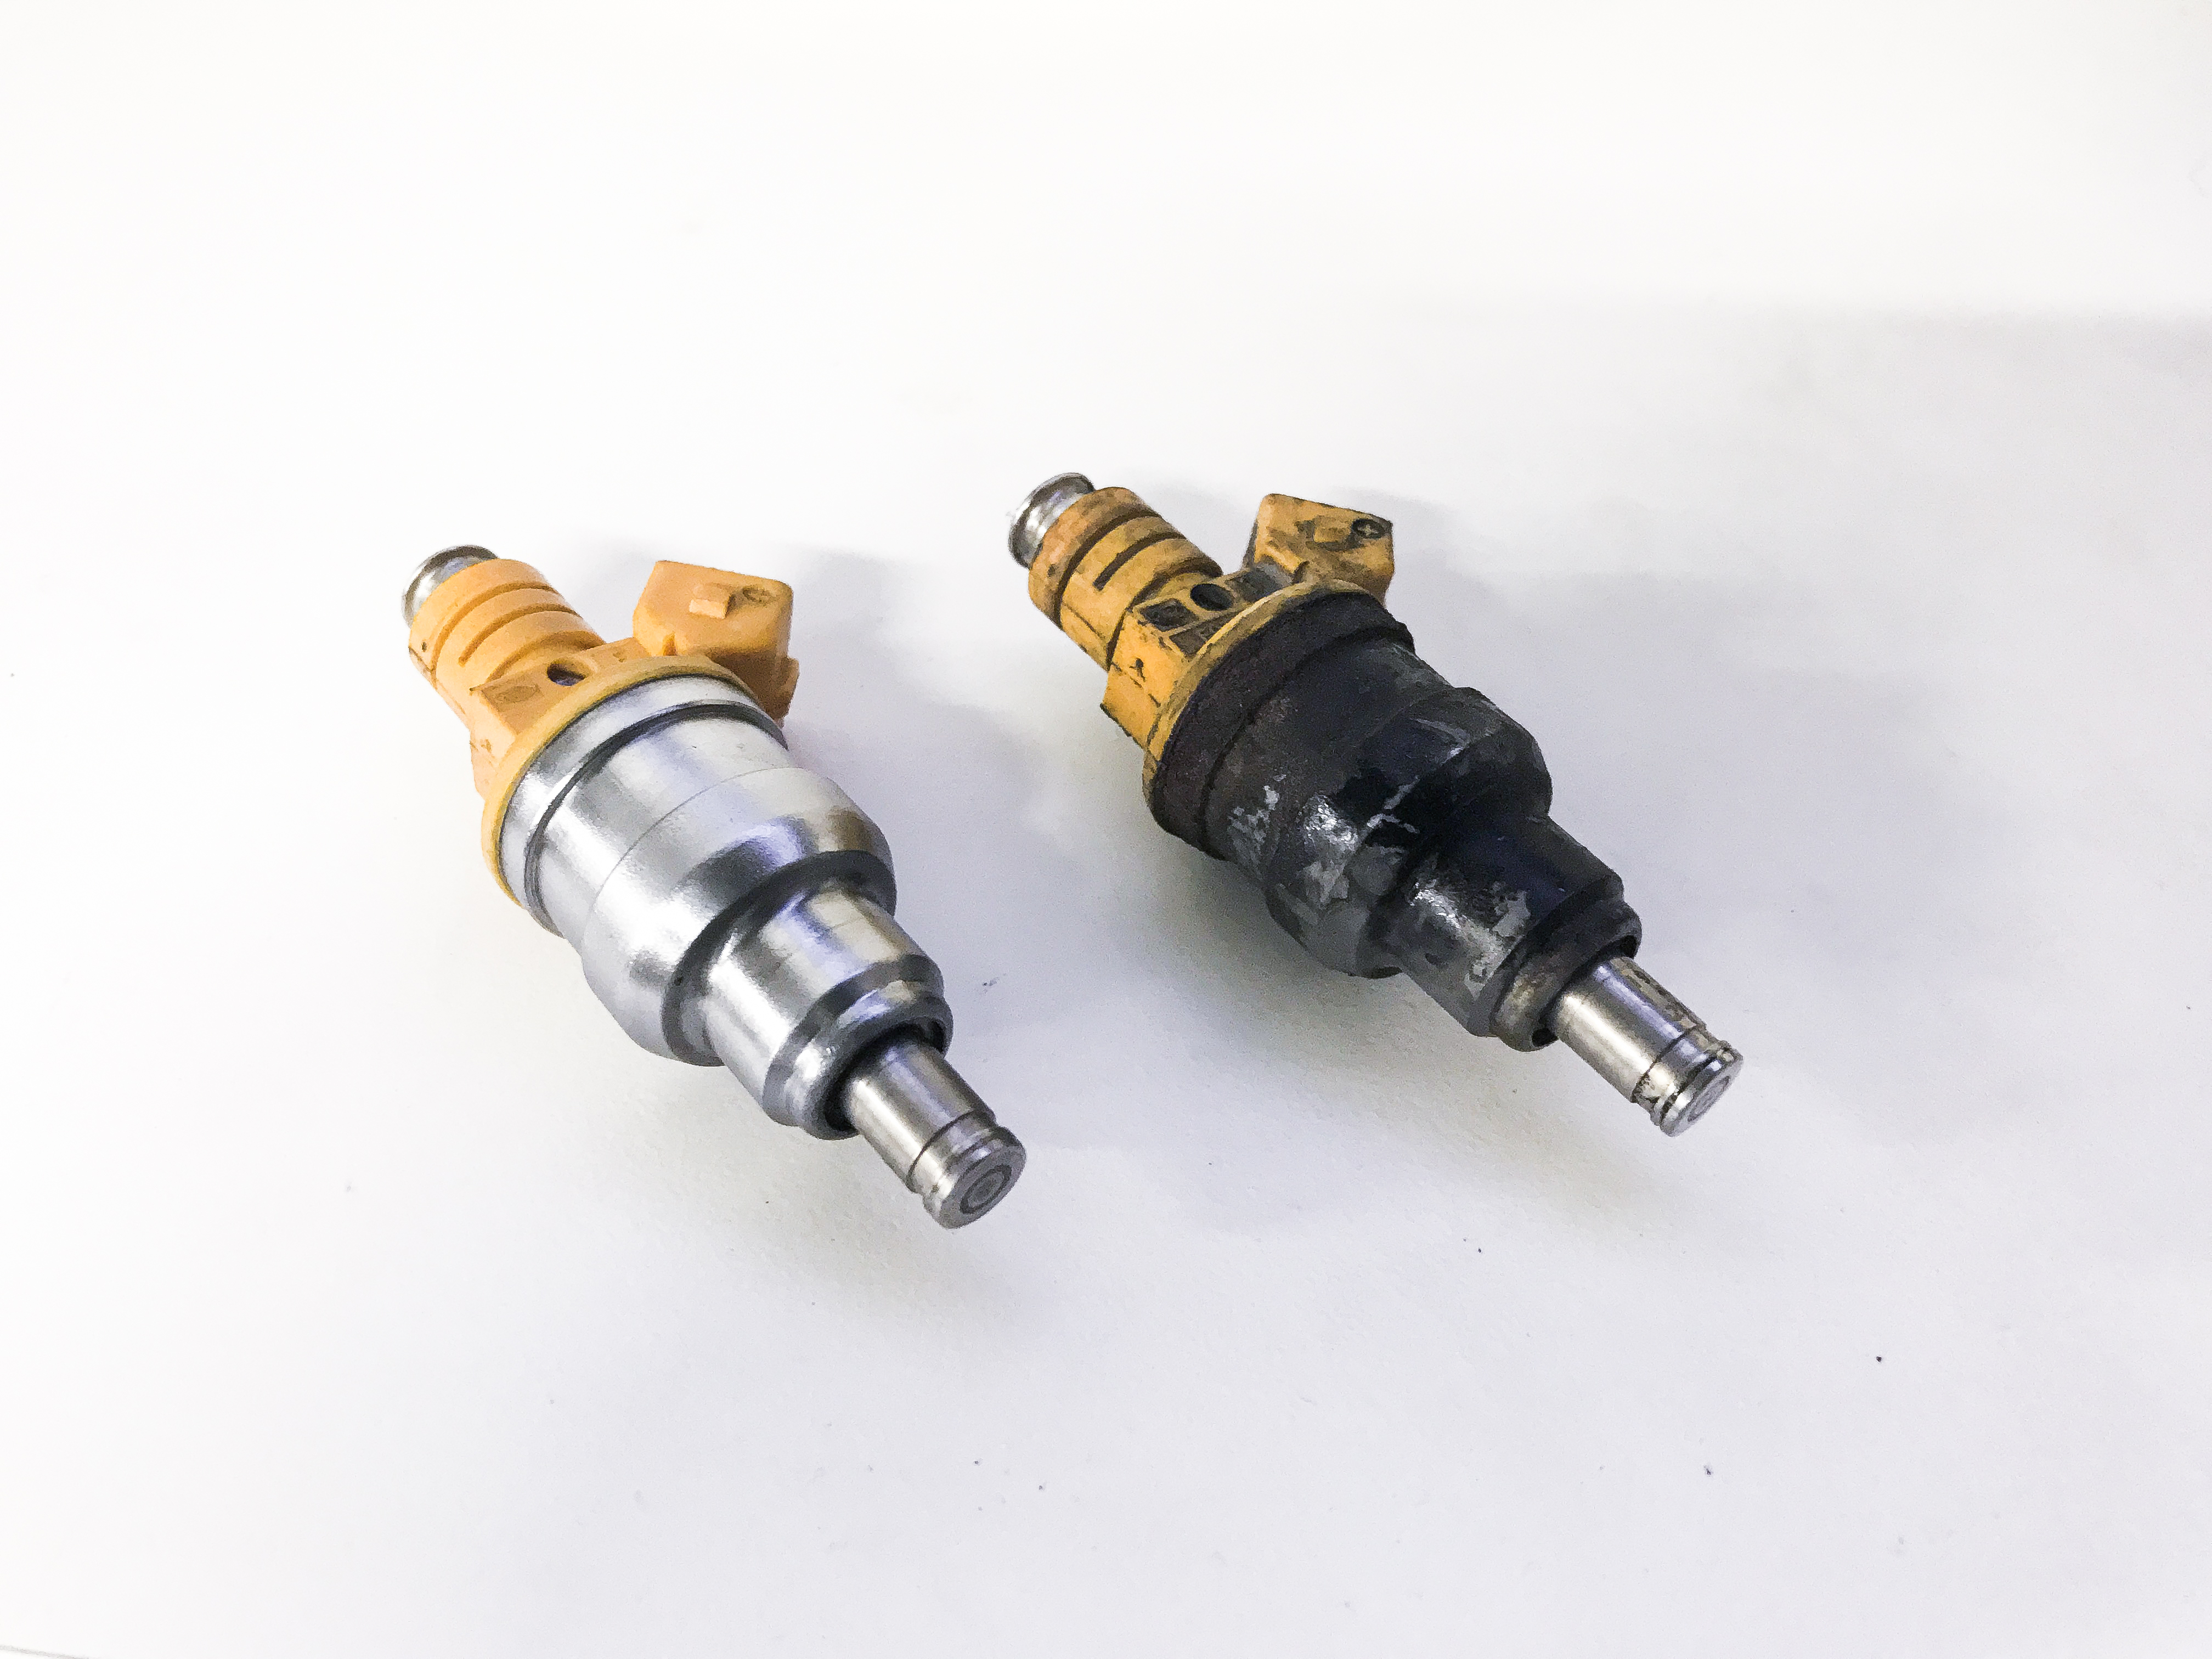
And here is a comparison of the injectors all cleaned up inside and out.
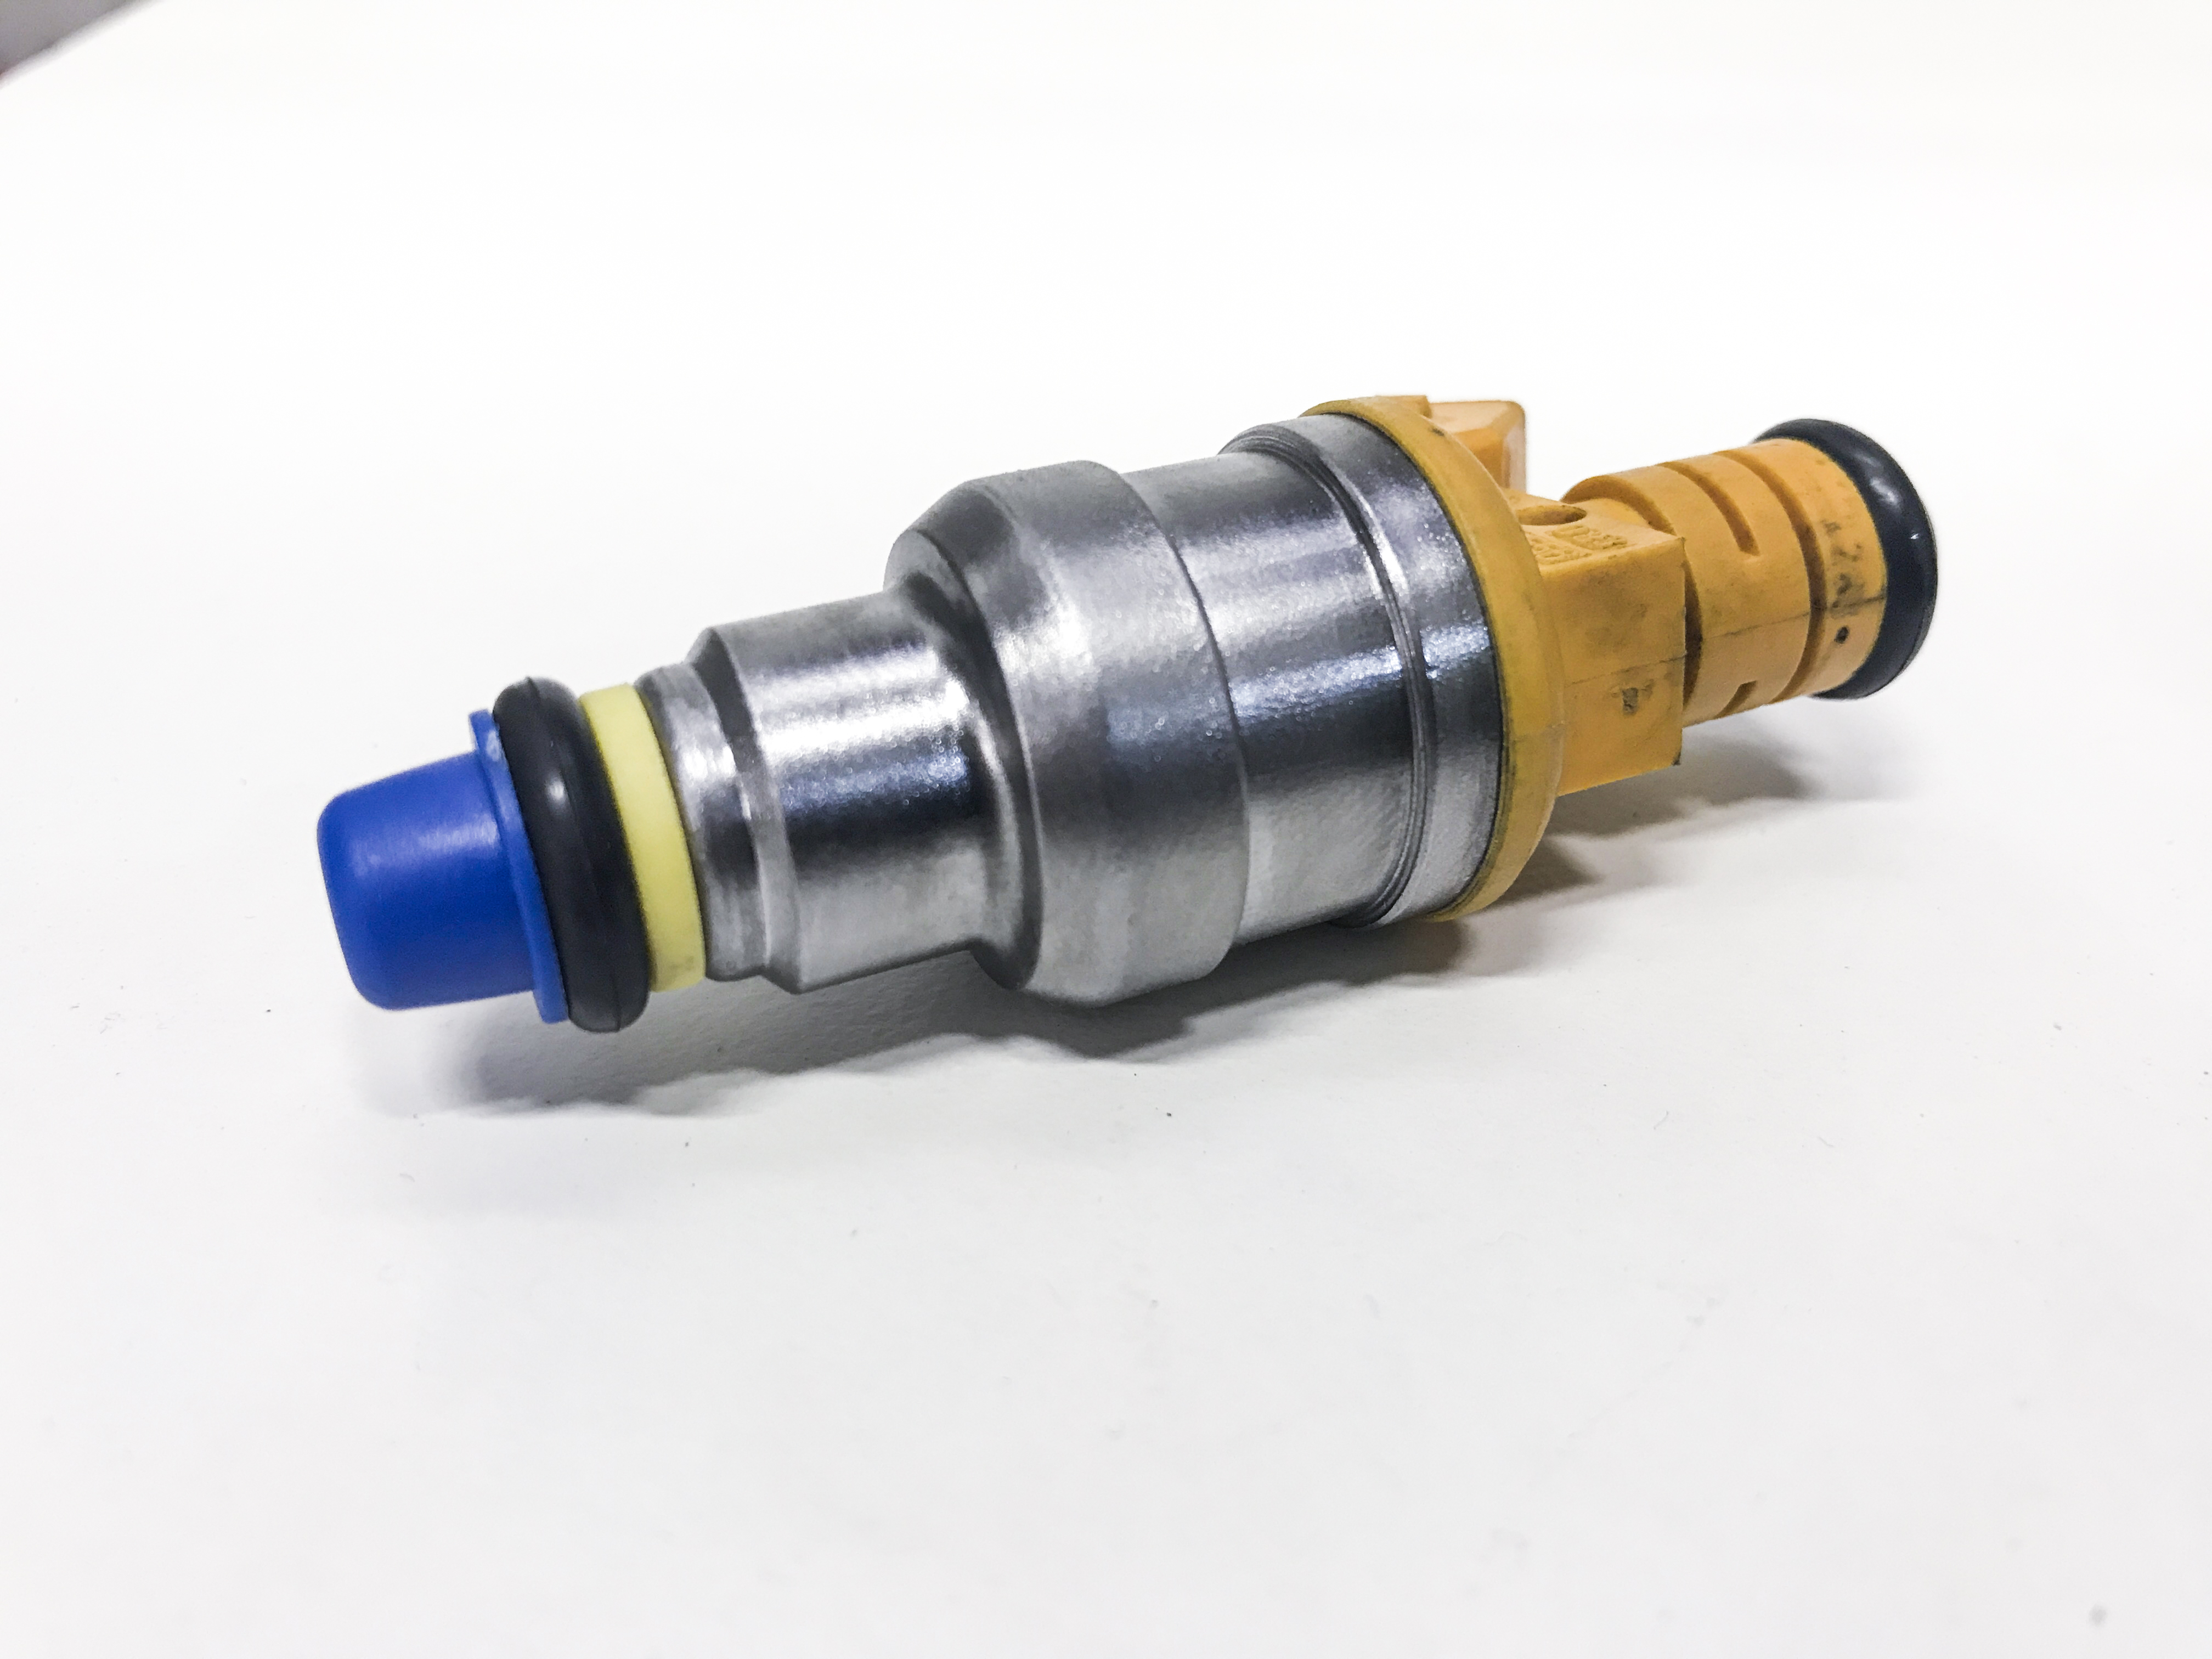
All new O-rings, pintle caps, and filters. what a beautiful thing.
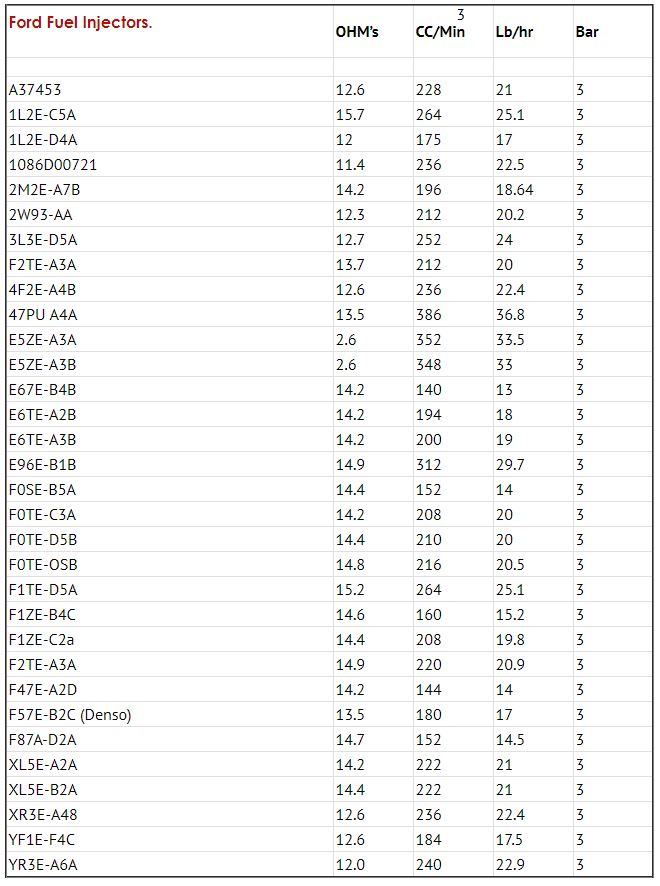
I will note that I got 5 total replacement injectors and learned quite a bit more than I expected about ford injectors. Turns out they have many variations due to the application. (EX: trucks were different than the cars) Each of the 5 injectors I got for replacements (all from different sources) were not the same as what was in the car. Here is a chart for the types of injectors that could be installed:
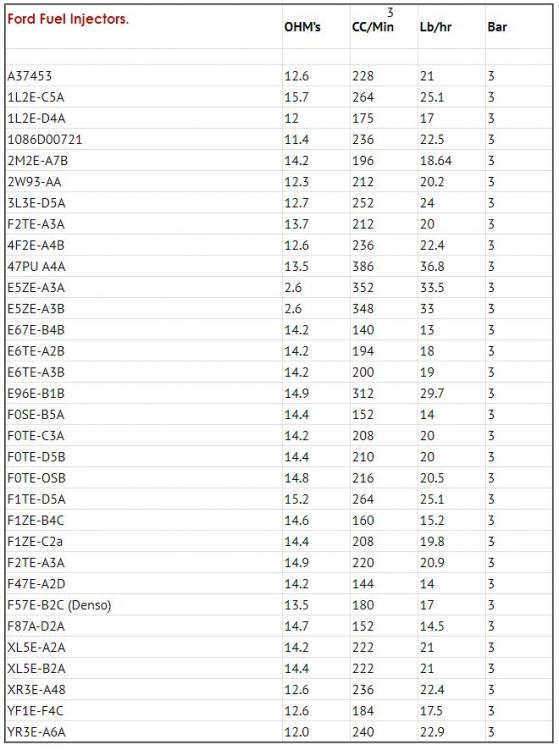
With that, the ones that are in the car are F1ZE-C2A which are 208cc/min-19.8lb/hr. The closest, best flowing replacement I had was F0TE-C3A which is 208cc/min-20lb/hr. So slight variation but I highly doubt it will matter. It will certainly be much better than just dumping fuel at all times. LOL
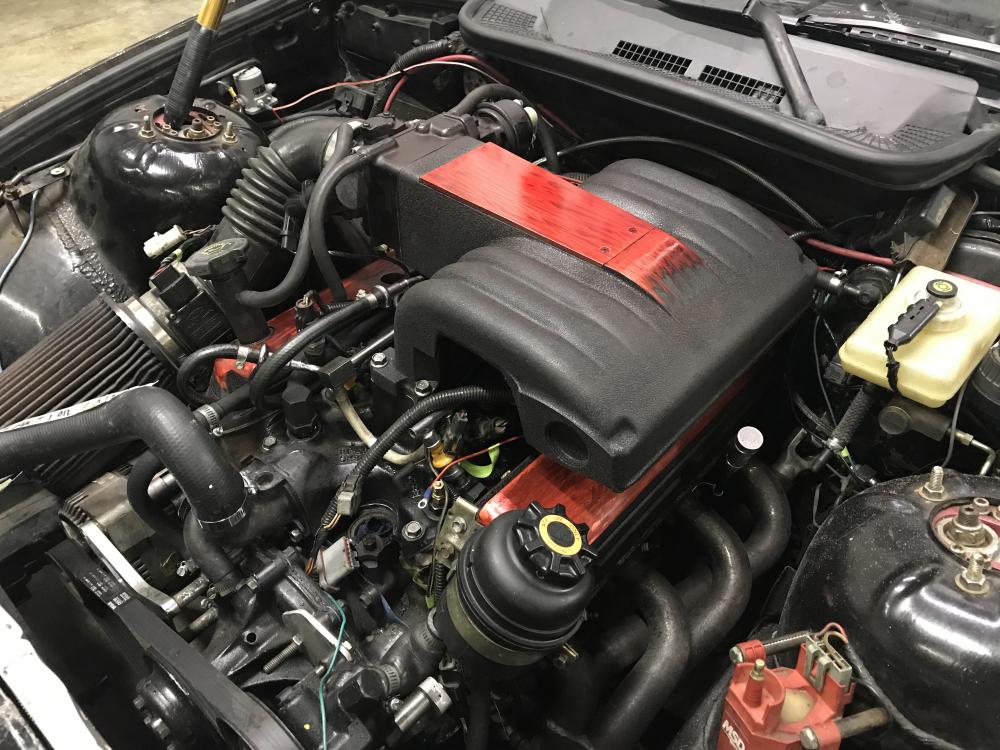
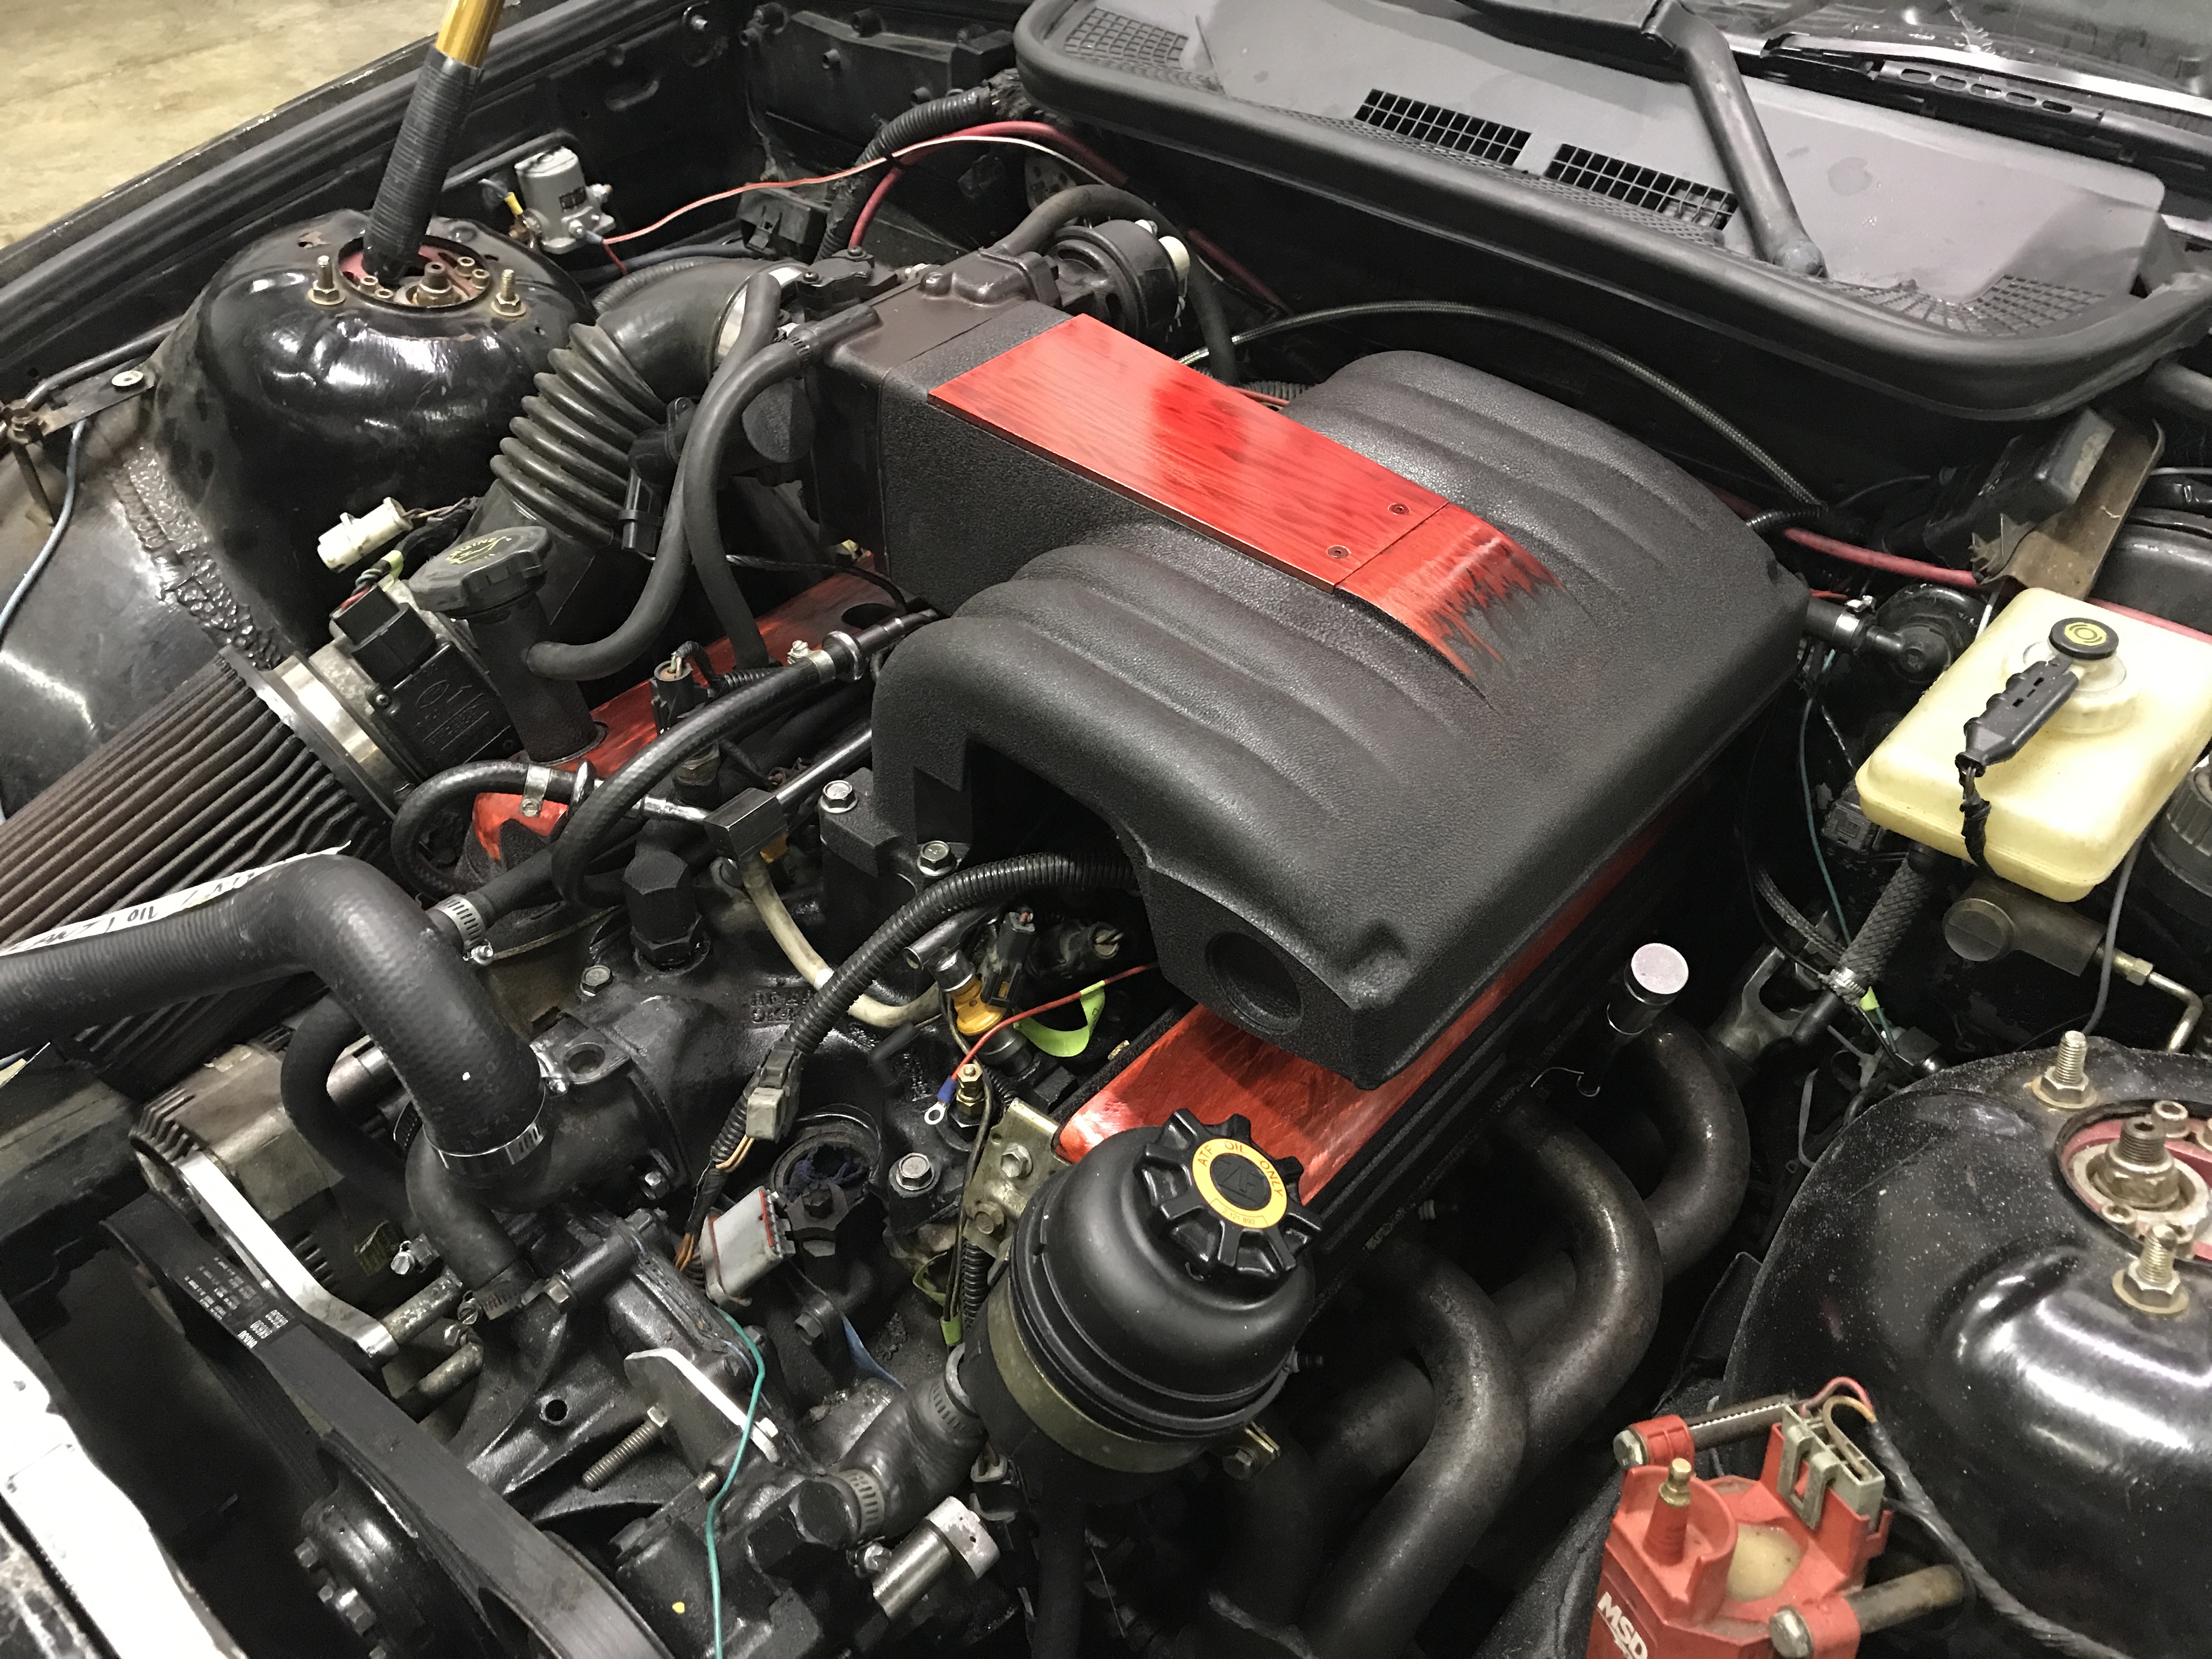
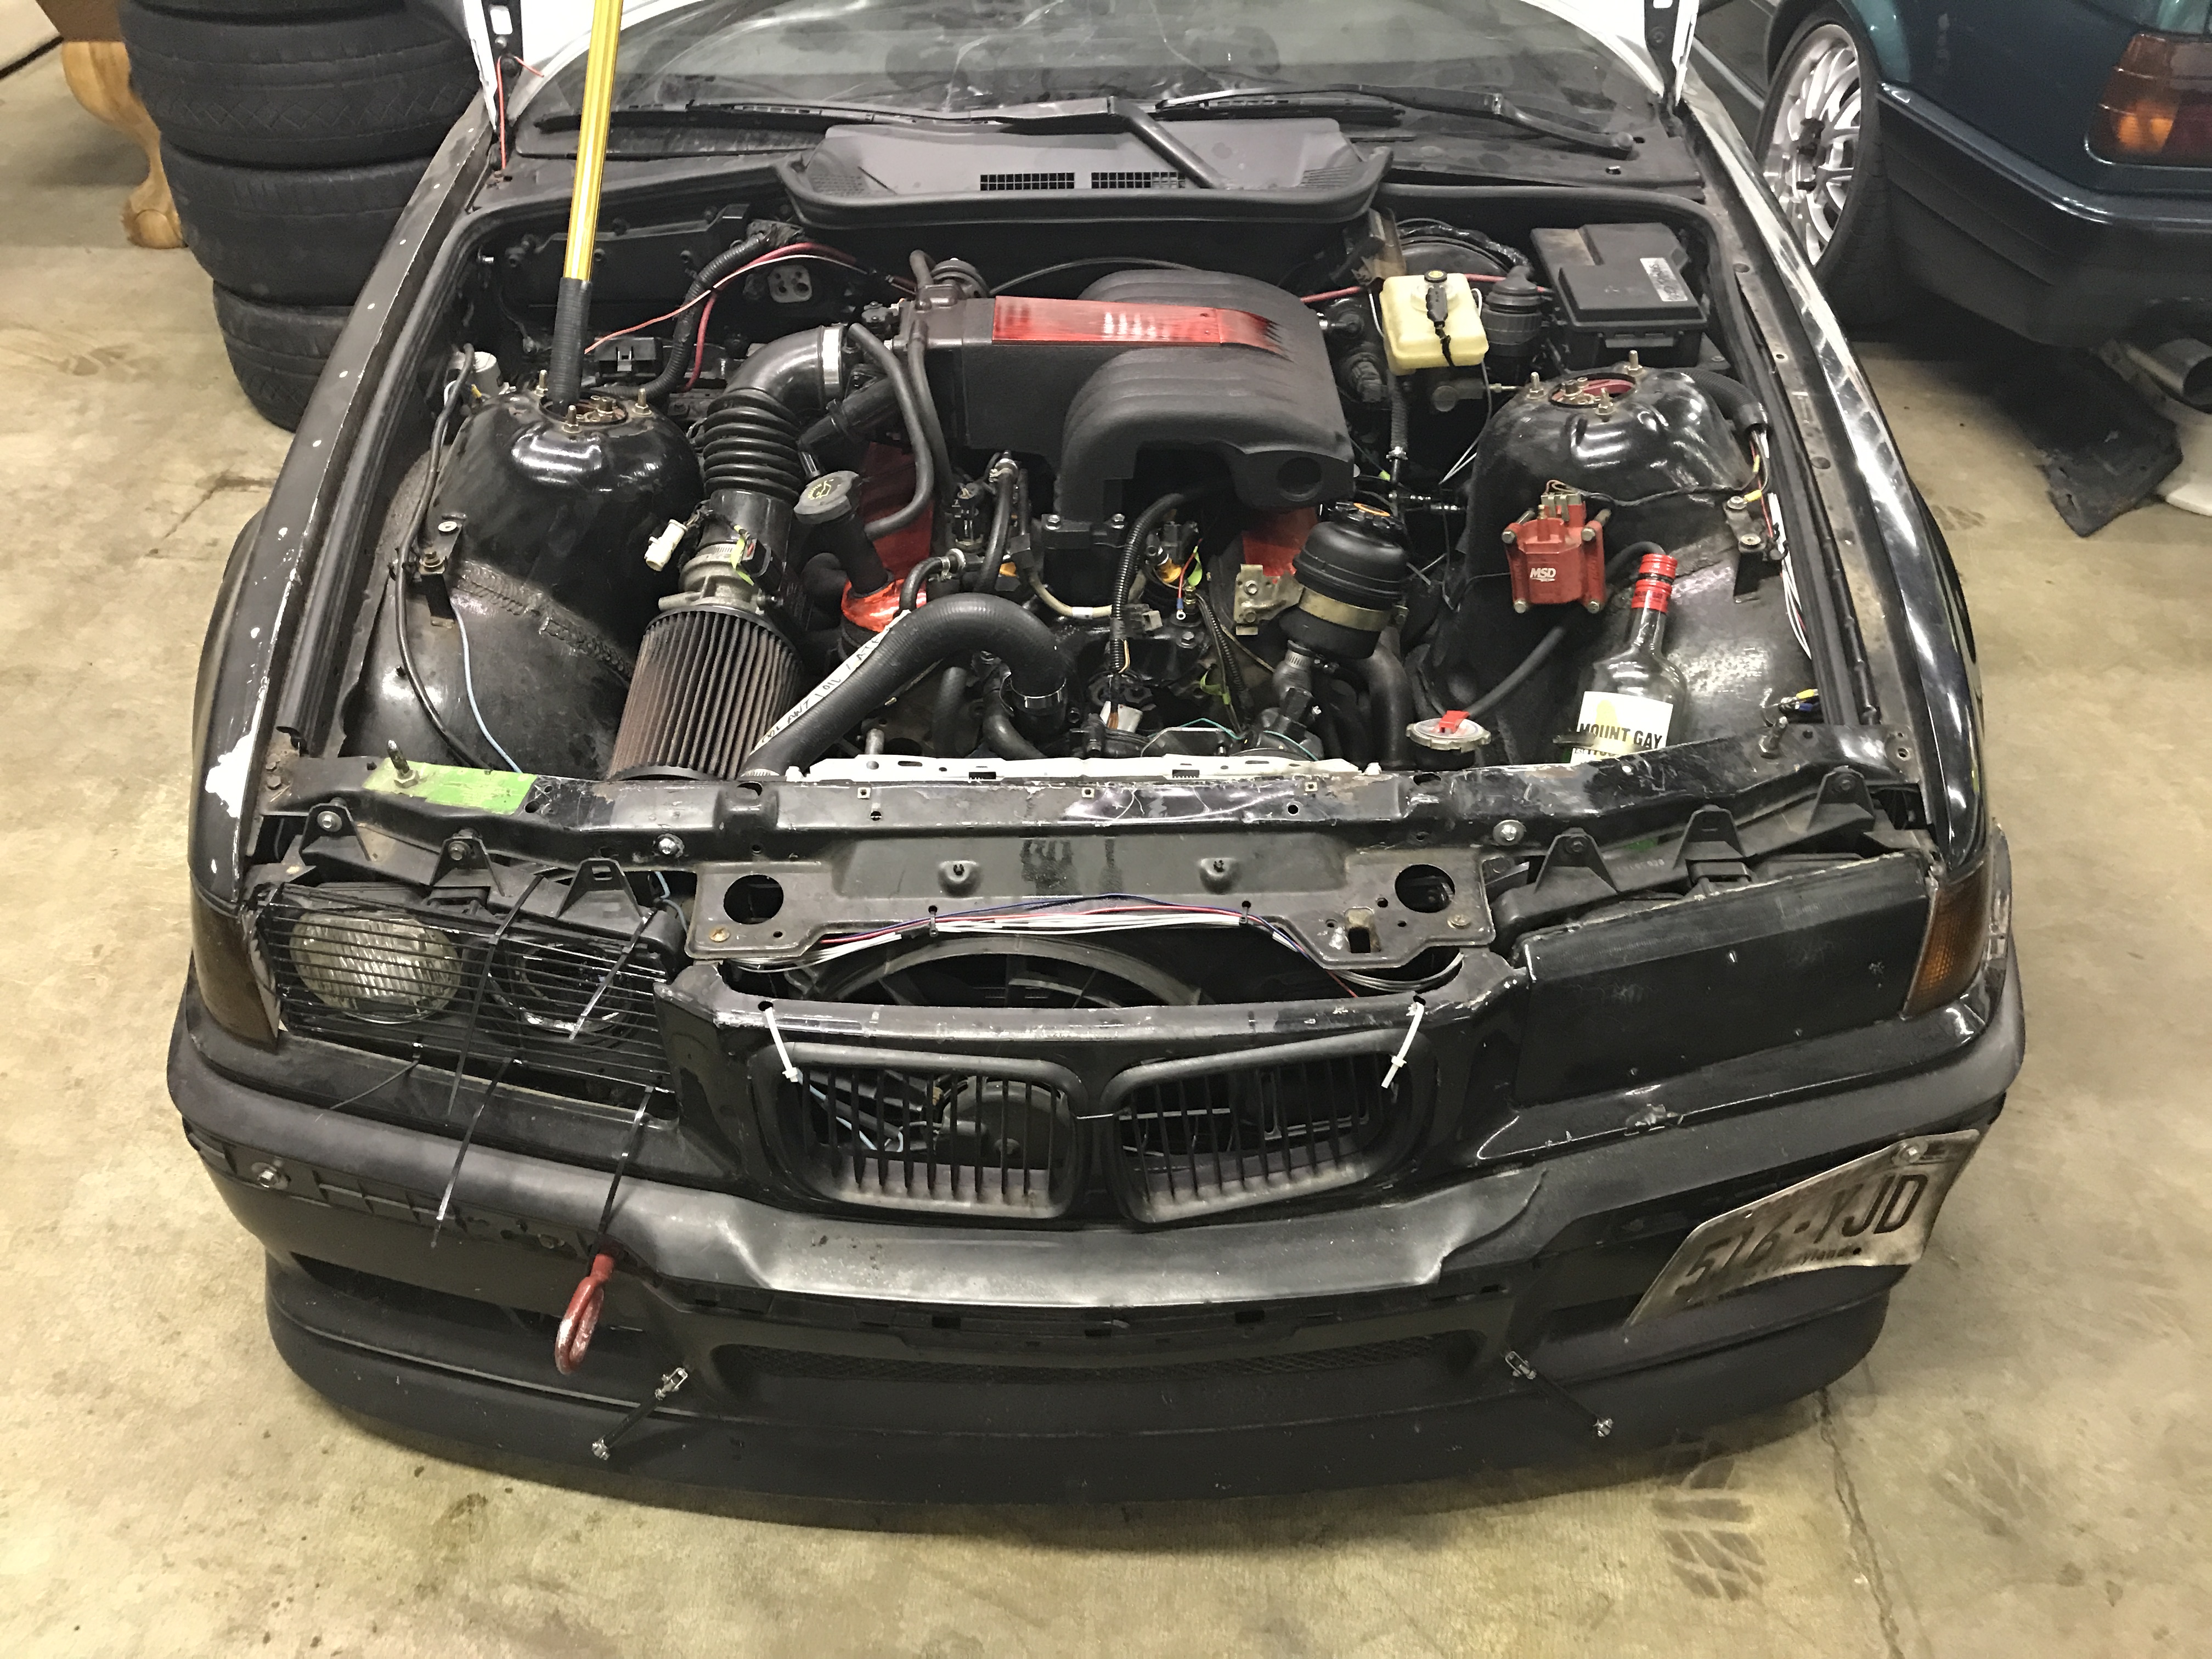
Here are some pics of the intake all back together, painted and completely installed with new hoses, new gaskets, and sub harness. AS I mentioned I still need to install the dizzy which takes some knowledge and a blinking light from what I am told. Silly ford.
https://www.instagram.com/_jdesigner_/ http://nevertoolow.tumblr.com/
🥳SOLD BMW E24 633CSI - BMW M30B32 🧪SOLD HCH ES9 - 1.3 LDA
👽BMW E30 325IC - Toyota 1JZ-GTE ⏰ HONDA EF9 CIVIC SI - JDM B18C5
☠️BMW E36 318i - Ford 5.0 FE302 🚴♂️ GT-Labomba - 26x2.75 Freeride
🤹♀️SOLD BMW E36/7 Z3 - BMW M54B25 🧓SOLD BMW E10 2002 - BMW M10M05




Hello! It looks like you're interested in this conversation, but you don't have an account yet.
Getting fed up of having to scroll through the same posts each visit? When you register for an account, you'll always come back to exactly where you were before, and choose to be notified of new replies (either via email, or push notification). You'll also be able to save bookmarks and upvote posts to show your appreciation to other community members.
With your input, this post could be even better 💗
Register Login