Skip to content
  • Categories
  • Recent
  • Tags
  • Popular
  • Users
  • Groups
Skins
  • Light
  • Brite
  • Cerulean
  • Cosmo
  • Flatly
  • Journal
  • Litera
  • Lumen
  • Lux
  • Materia
  • Minty
  • Morph
  • Pulse
  • Sandstone
  • Simplex
  • Sketchy
  • Spacelab
  • United
  • Yeti
  • Zephyr
  • Dark
  • Cyborg
  • Darkly
  • Quartz
  • Slate
  • Solar
  • Superhero
  • Vapor

  • Default (No Skin)
  • No Skin
Collapse
WIBIMMERS logo

WIBIMMERS

  1. Home
  2. General Discussion
  3. Members BMWs
  4. A purists nightmare - E46 drift build

A purists nightmare - E46 drift build
Scheduled Pinned Locked Moved Members BMWs
400 Posts 25 Posters 0 Views 1 Watching
  • Oldest to Newest
  • Newest to Oldest
  • Most Votes
Reply
  • Reply as topic
Log in to reply
This topic has been deleted. Only users with topic management privileges can see it.
  • JdesignJ
    JdesignJ
    Jdesign
    wrote on last edited by
    #308

    Looks damn good. are you just making a 4 point or are you planning on taking it further?

    SumBunny.jpg

    https://www.instagram.com/_jdesigner_/                                          http://nevertoolow.tumblr.com/

    🥳SOLD BMW E24 633CSI - BMW M30B32                                          🧪SOLD HCH  ES9 - 1.3 LDA
    👽BMW E30 325IC - Toyota 1JZ-GTE                                                     ⏰ HONDA EF9 CIVIC SI - JDM B18C5
    ☠️BMW E36 318i - Ford 5.0 FE302                                                         🚴‍♂️ GT-Labomba - 26x2.75 Freeride
    🤹‍♀️SOLD BMW E36/7 Z3 - BMW M54B25                                                🧓SOLD BMW E10 2002 - BMW M10M05

    1 Reply Last reply
    0
    • TkuhnT
      TkuhnT
      Tkuhn
      wrote on last edited by
      #309

      Jdesign said:

      Looks damn good. are you just making a 4 point or are you planning on taking it further?

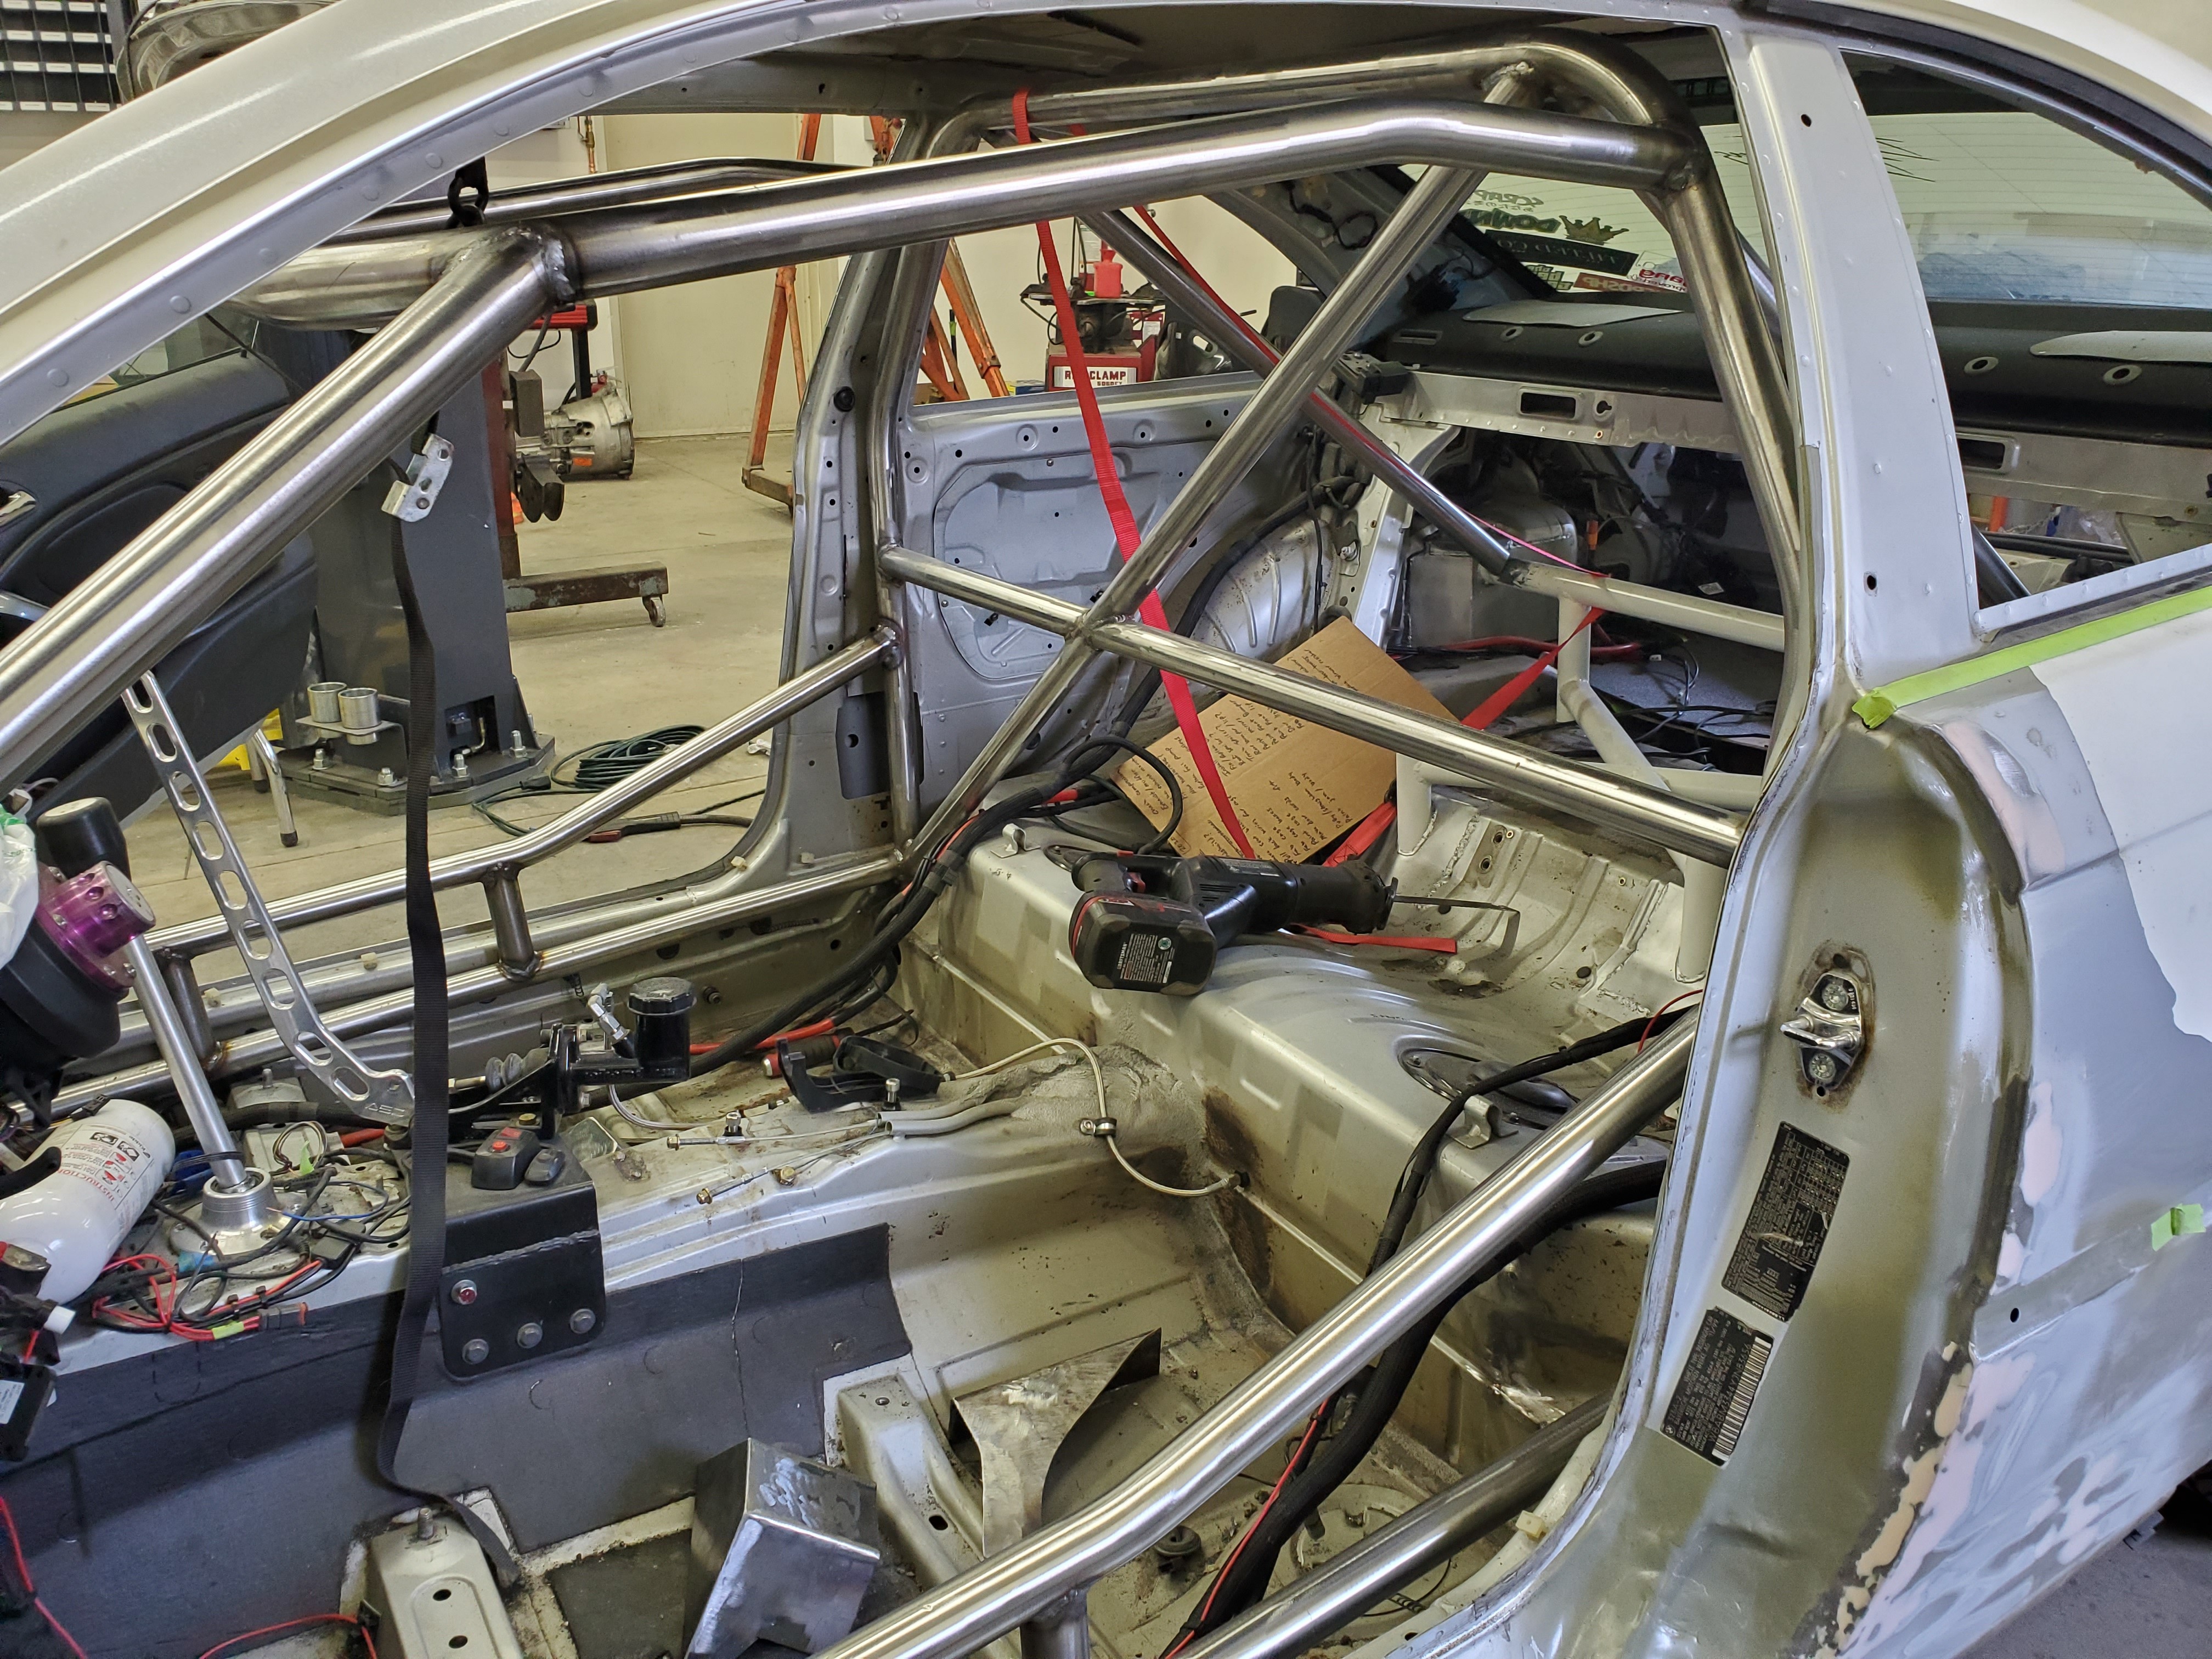
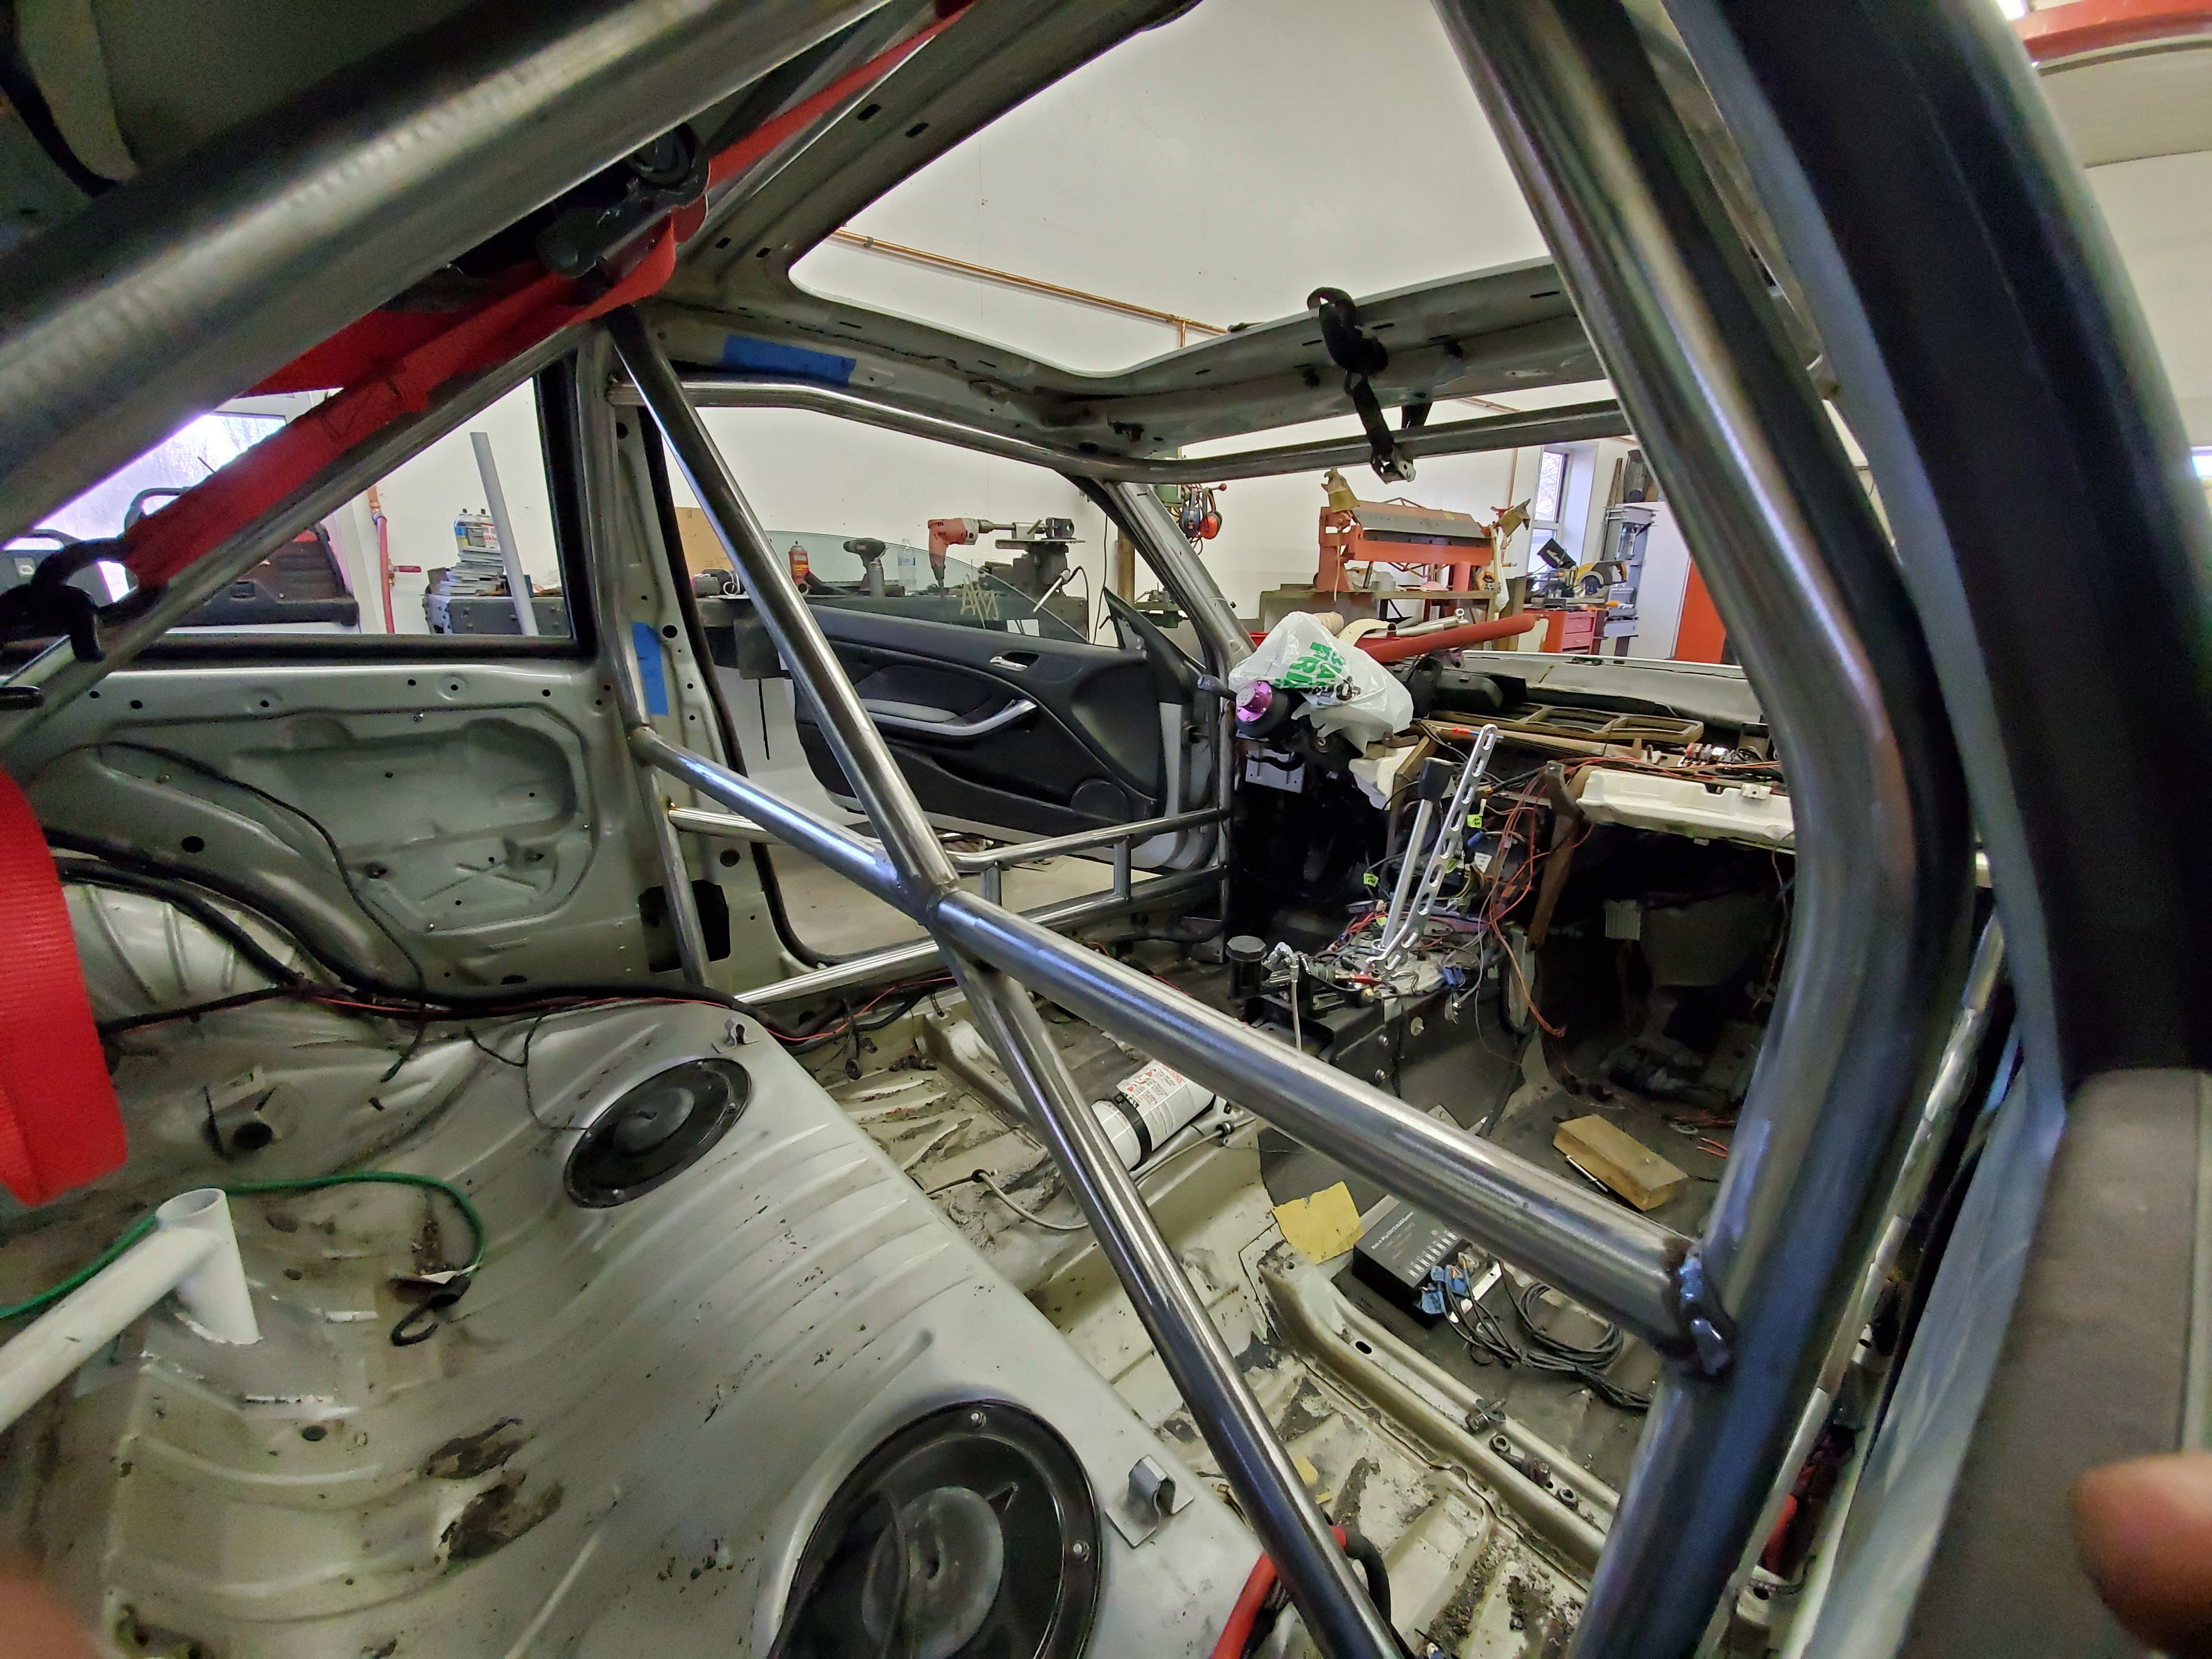
      Thanks! And it's going to be a 6 point with door bars. So yes much further haha

      1 Reply Last reply
      1
      • TkuhnT
        TkuhnT
        Tkuhn
        wrote on last edited by
        #310

        UPDATE!

        Got some really rewarding progress done this weekend 😊

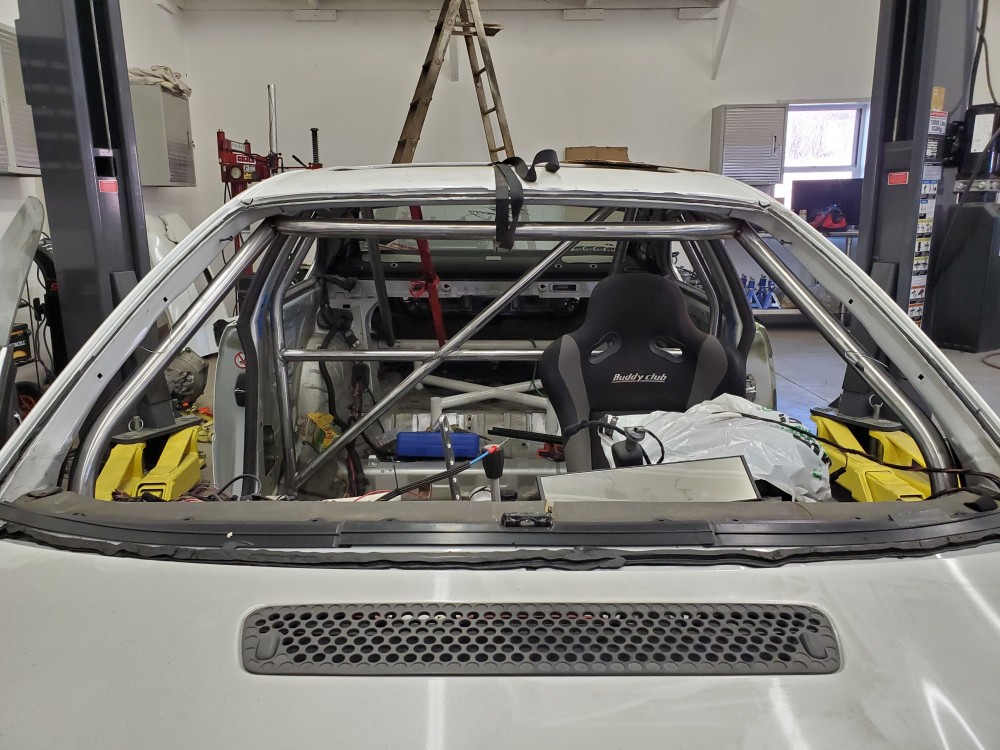
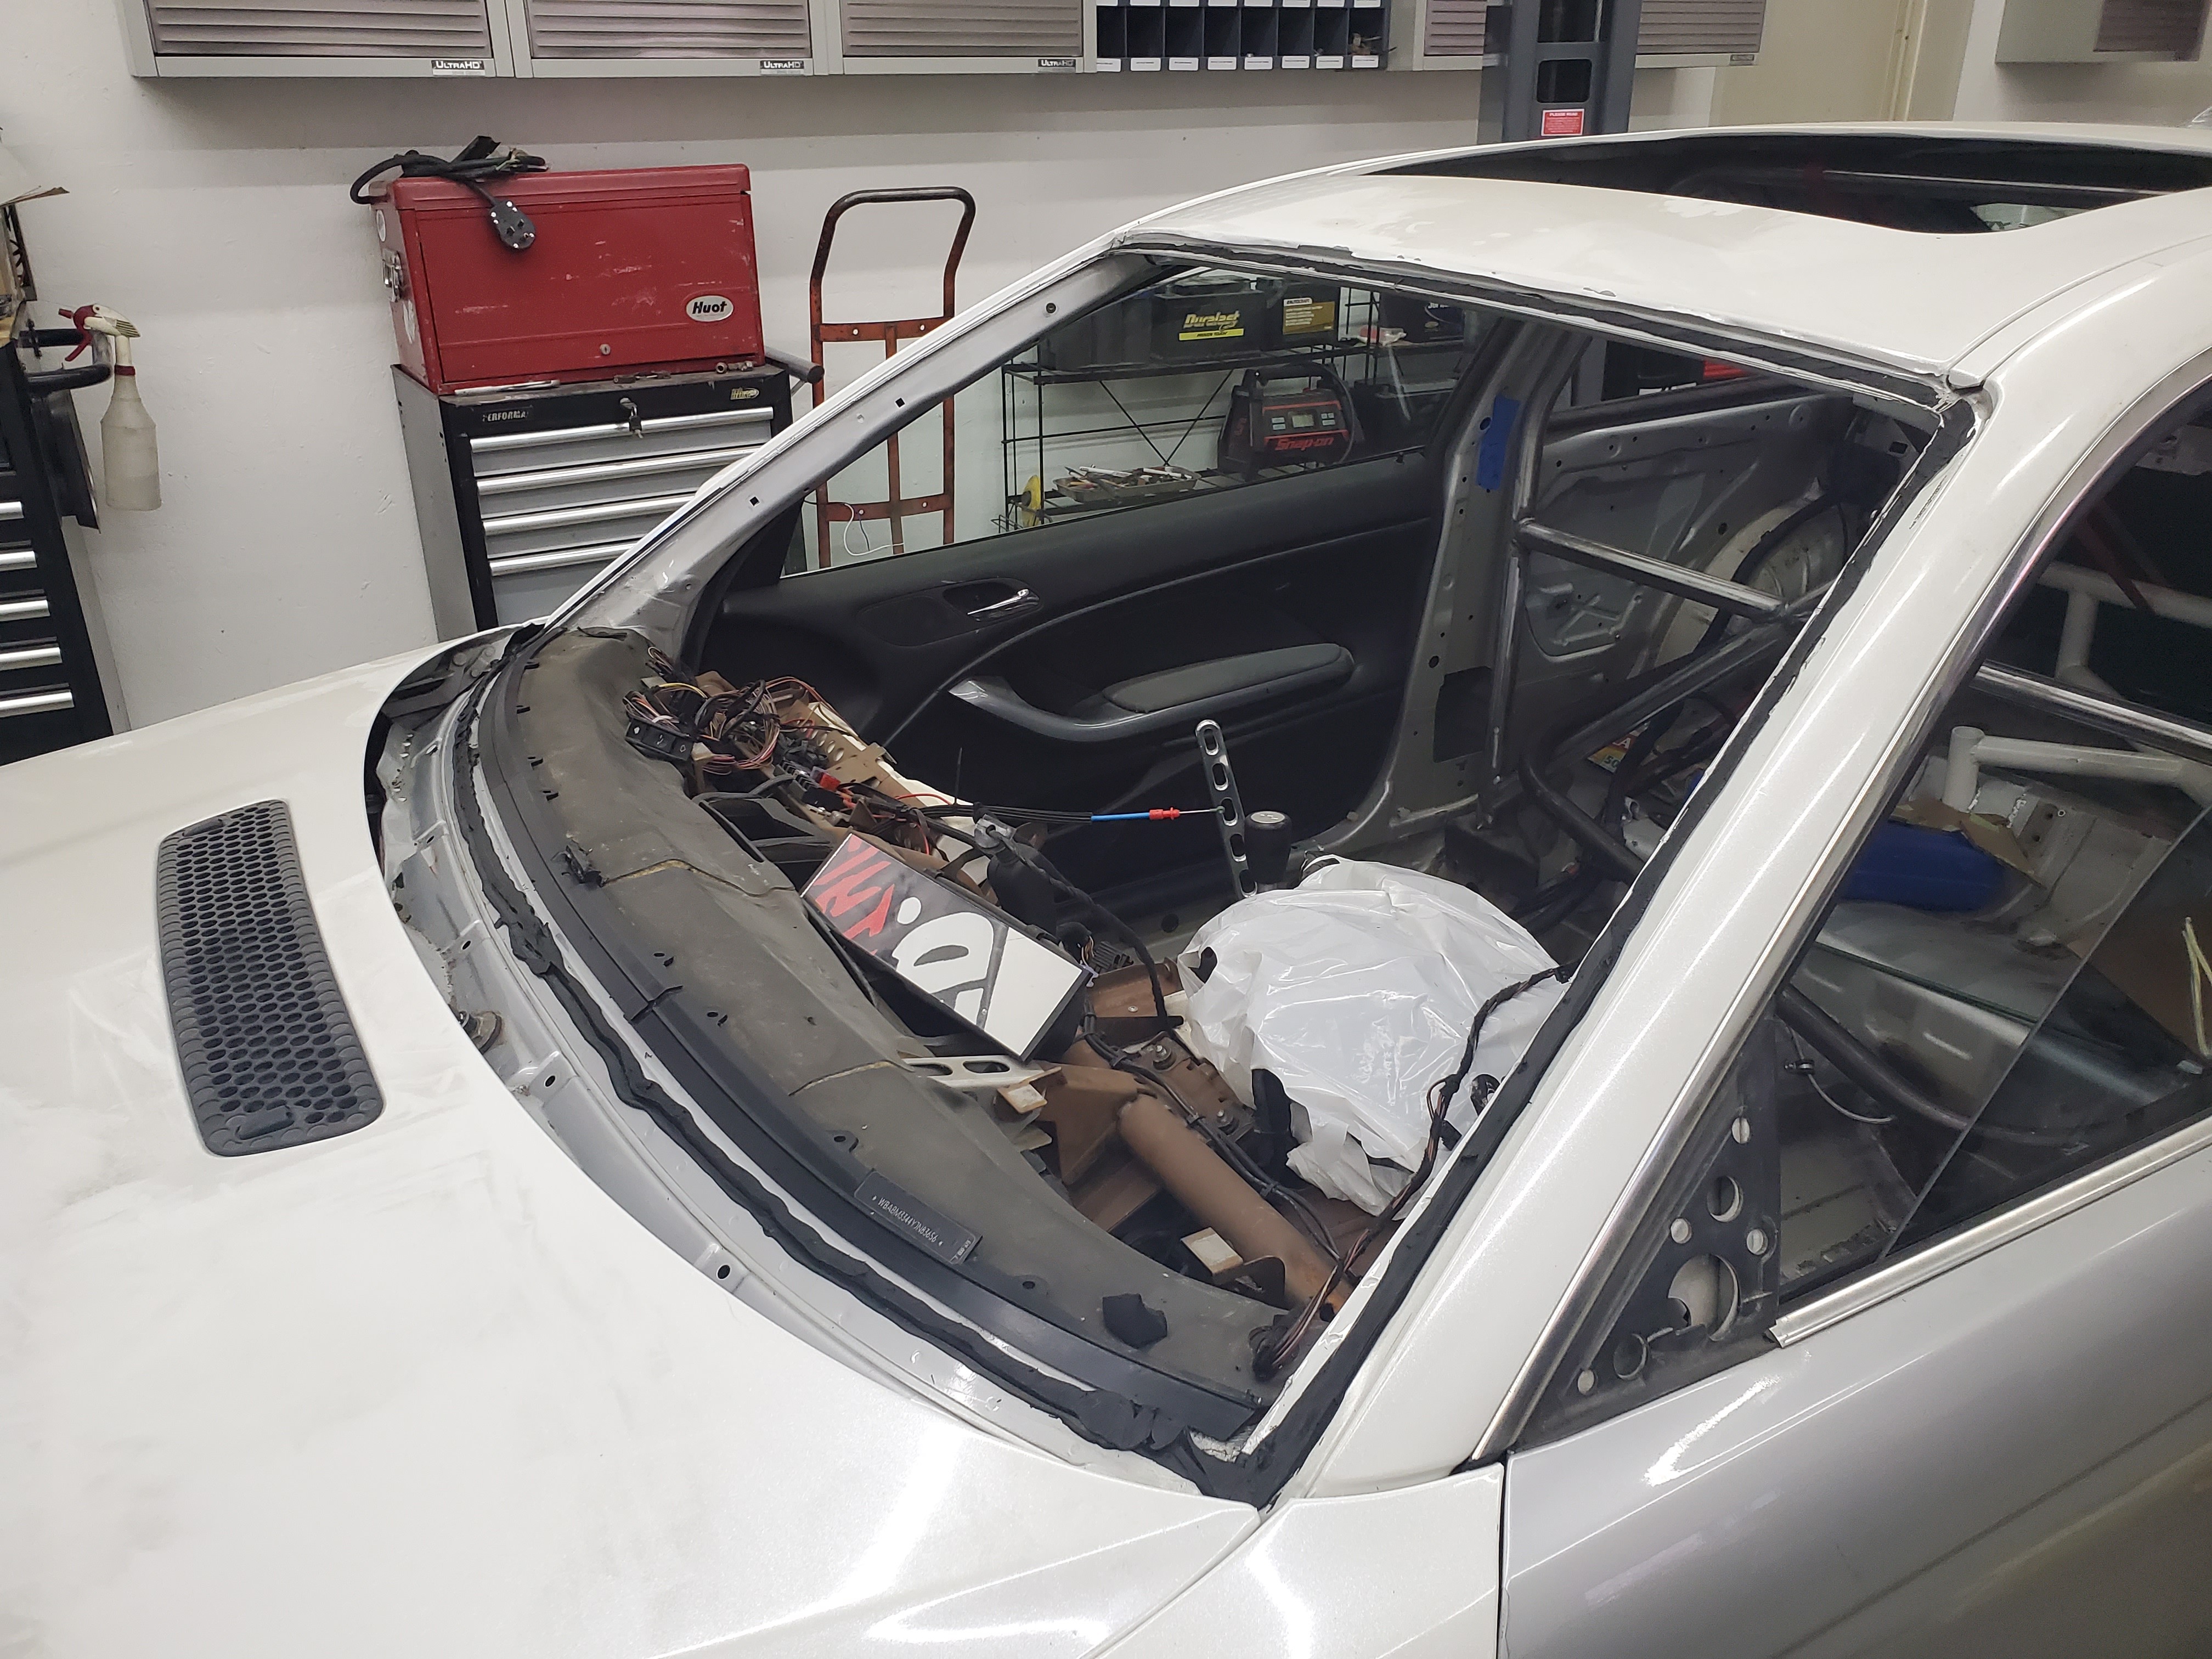
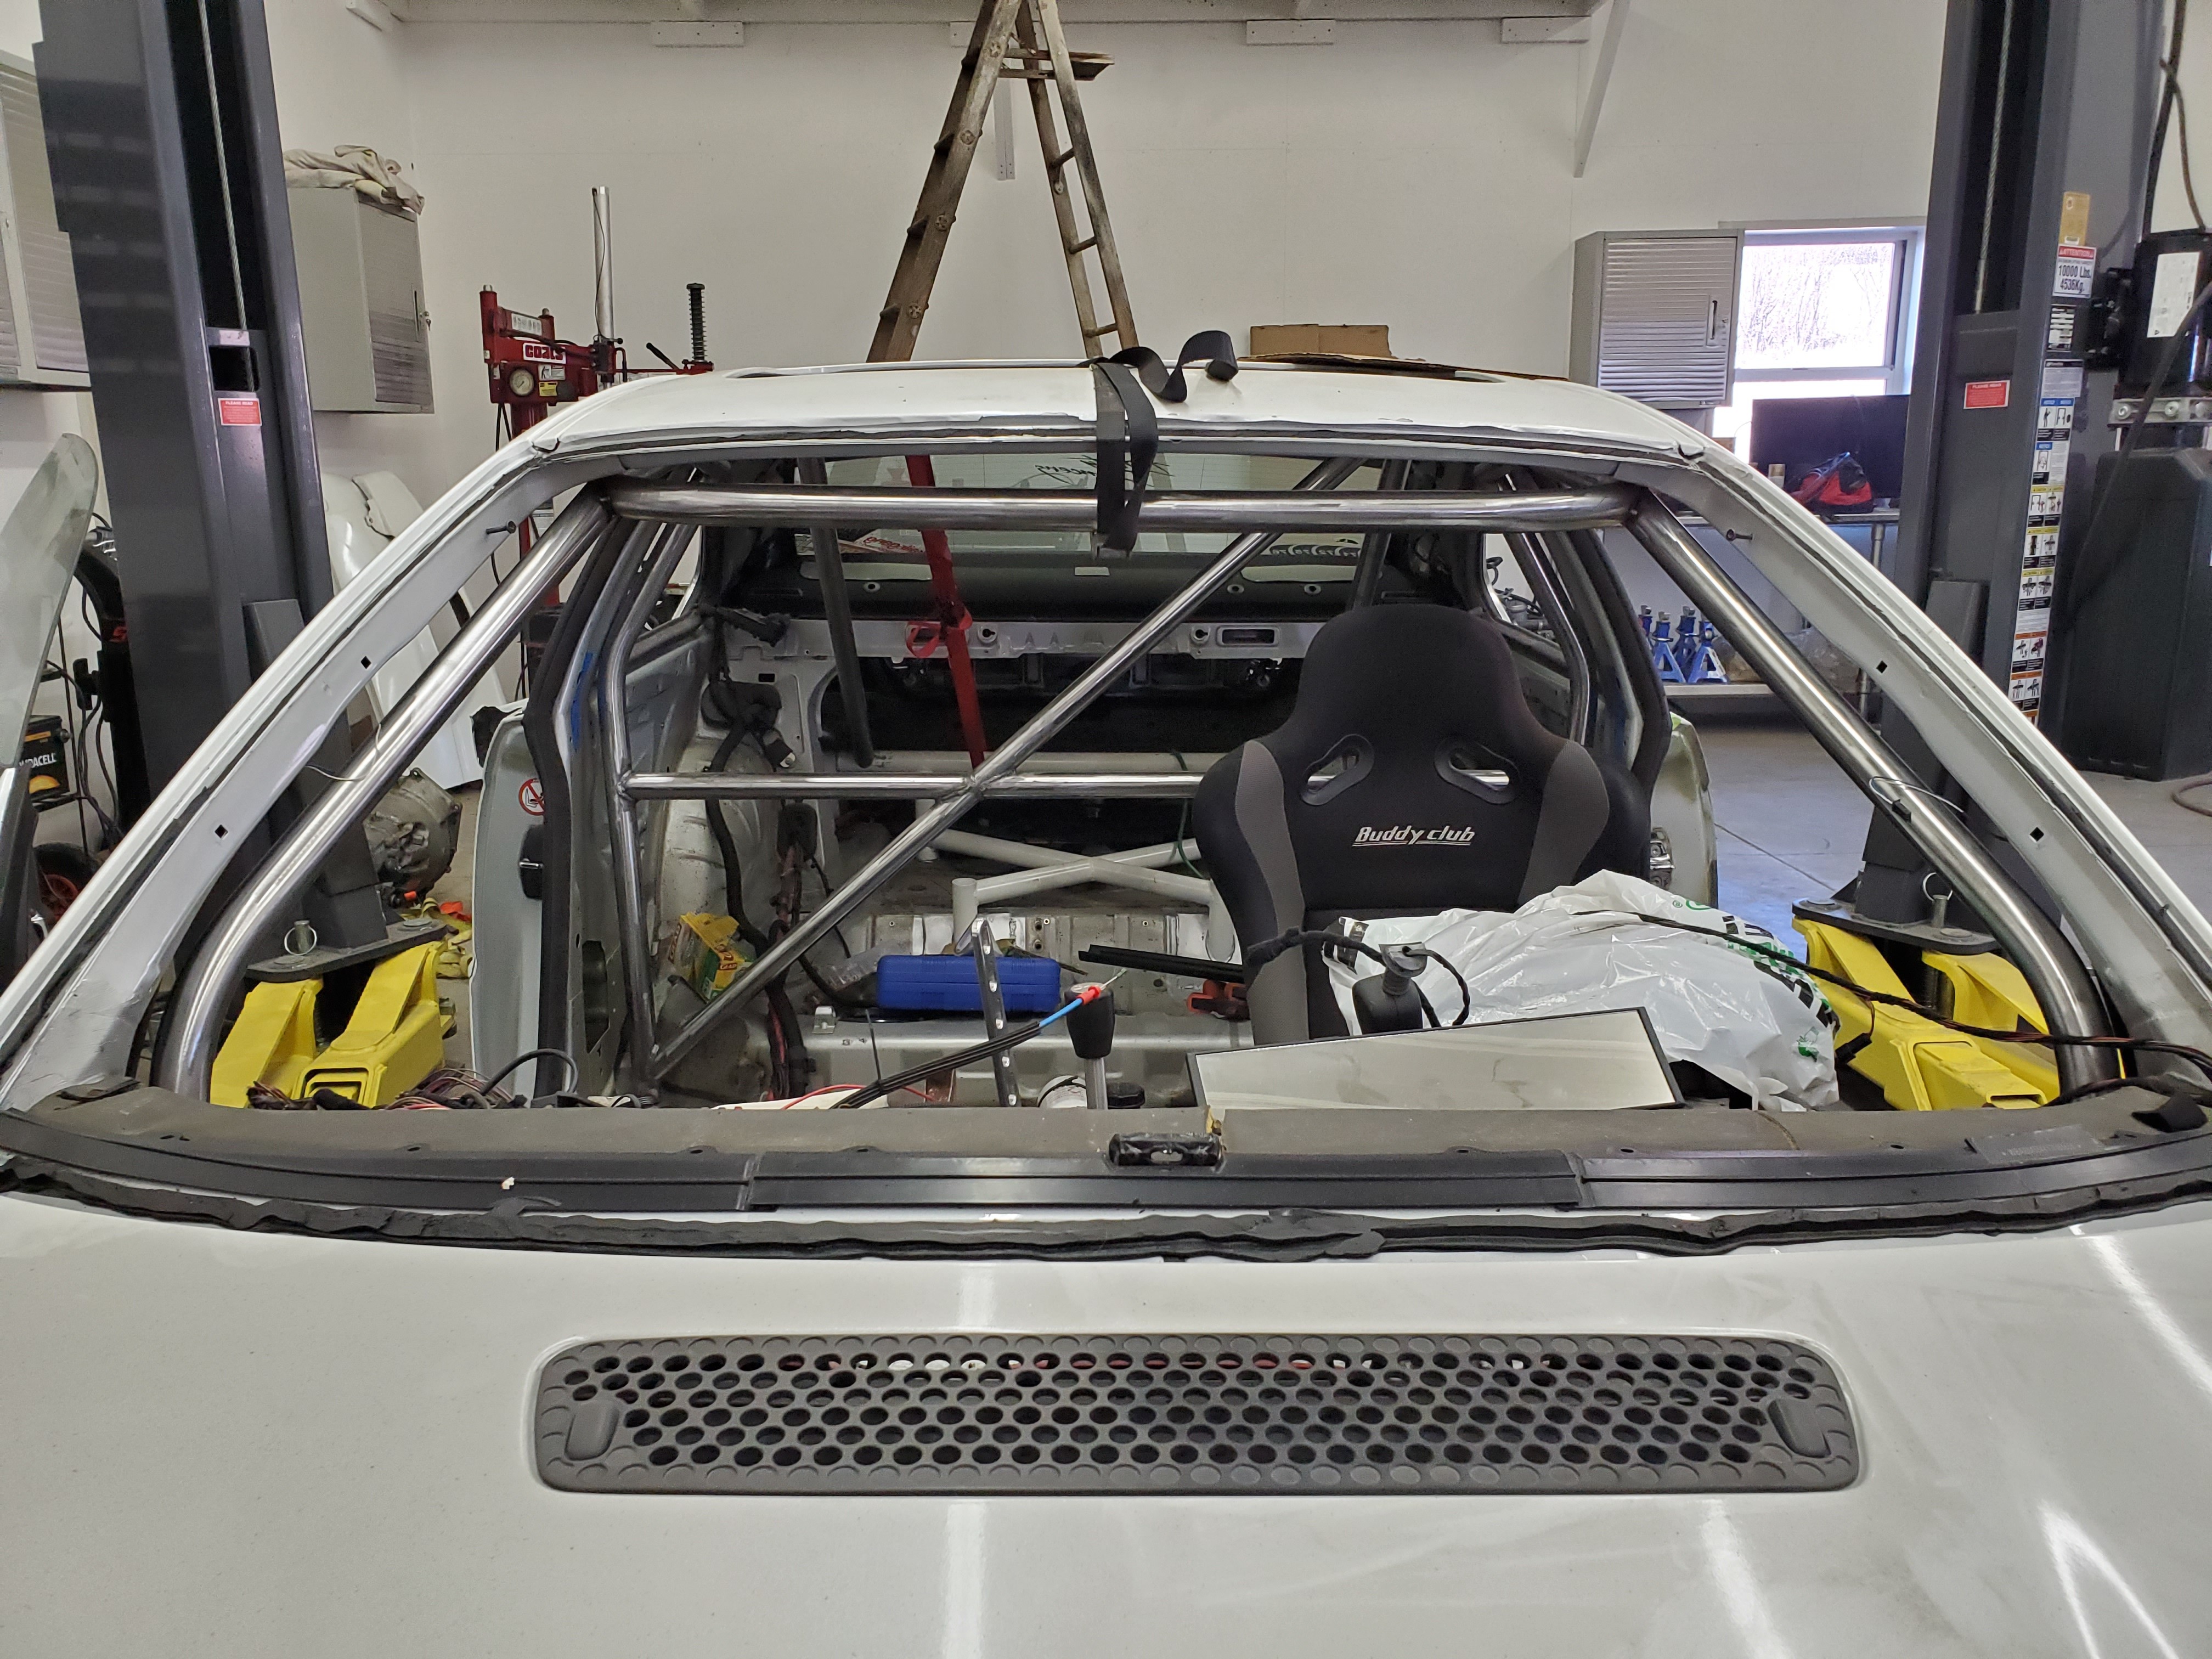
        Had the windshield removed during the week.
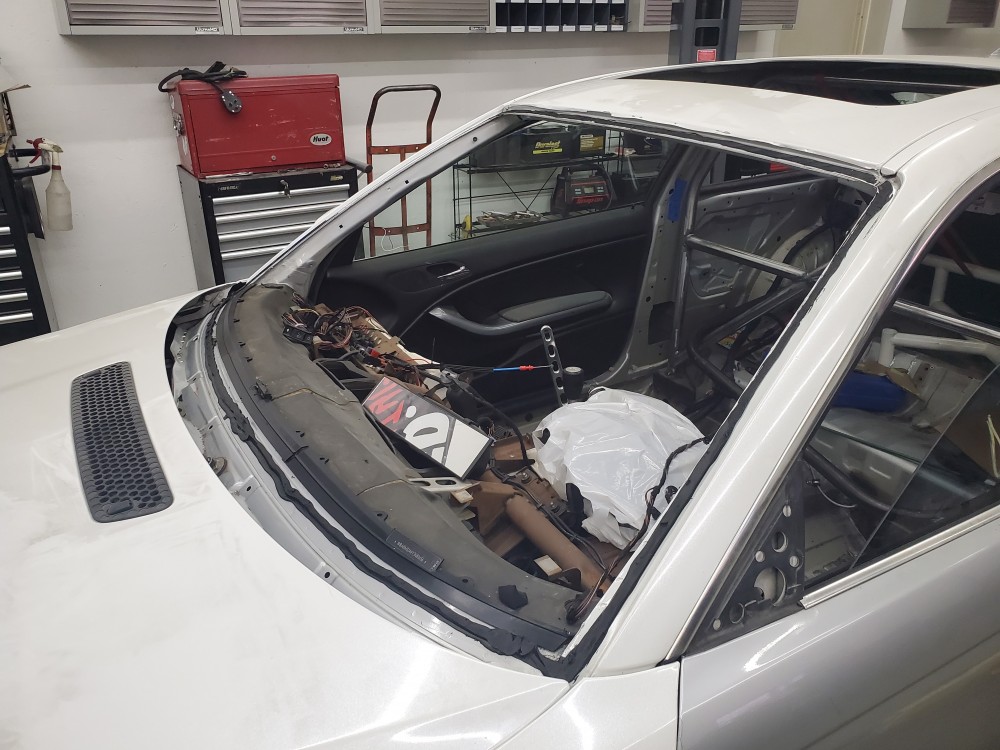
        20200313182046.jpg

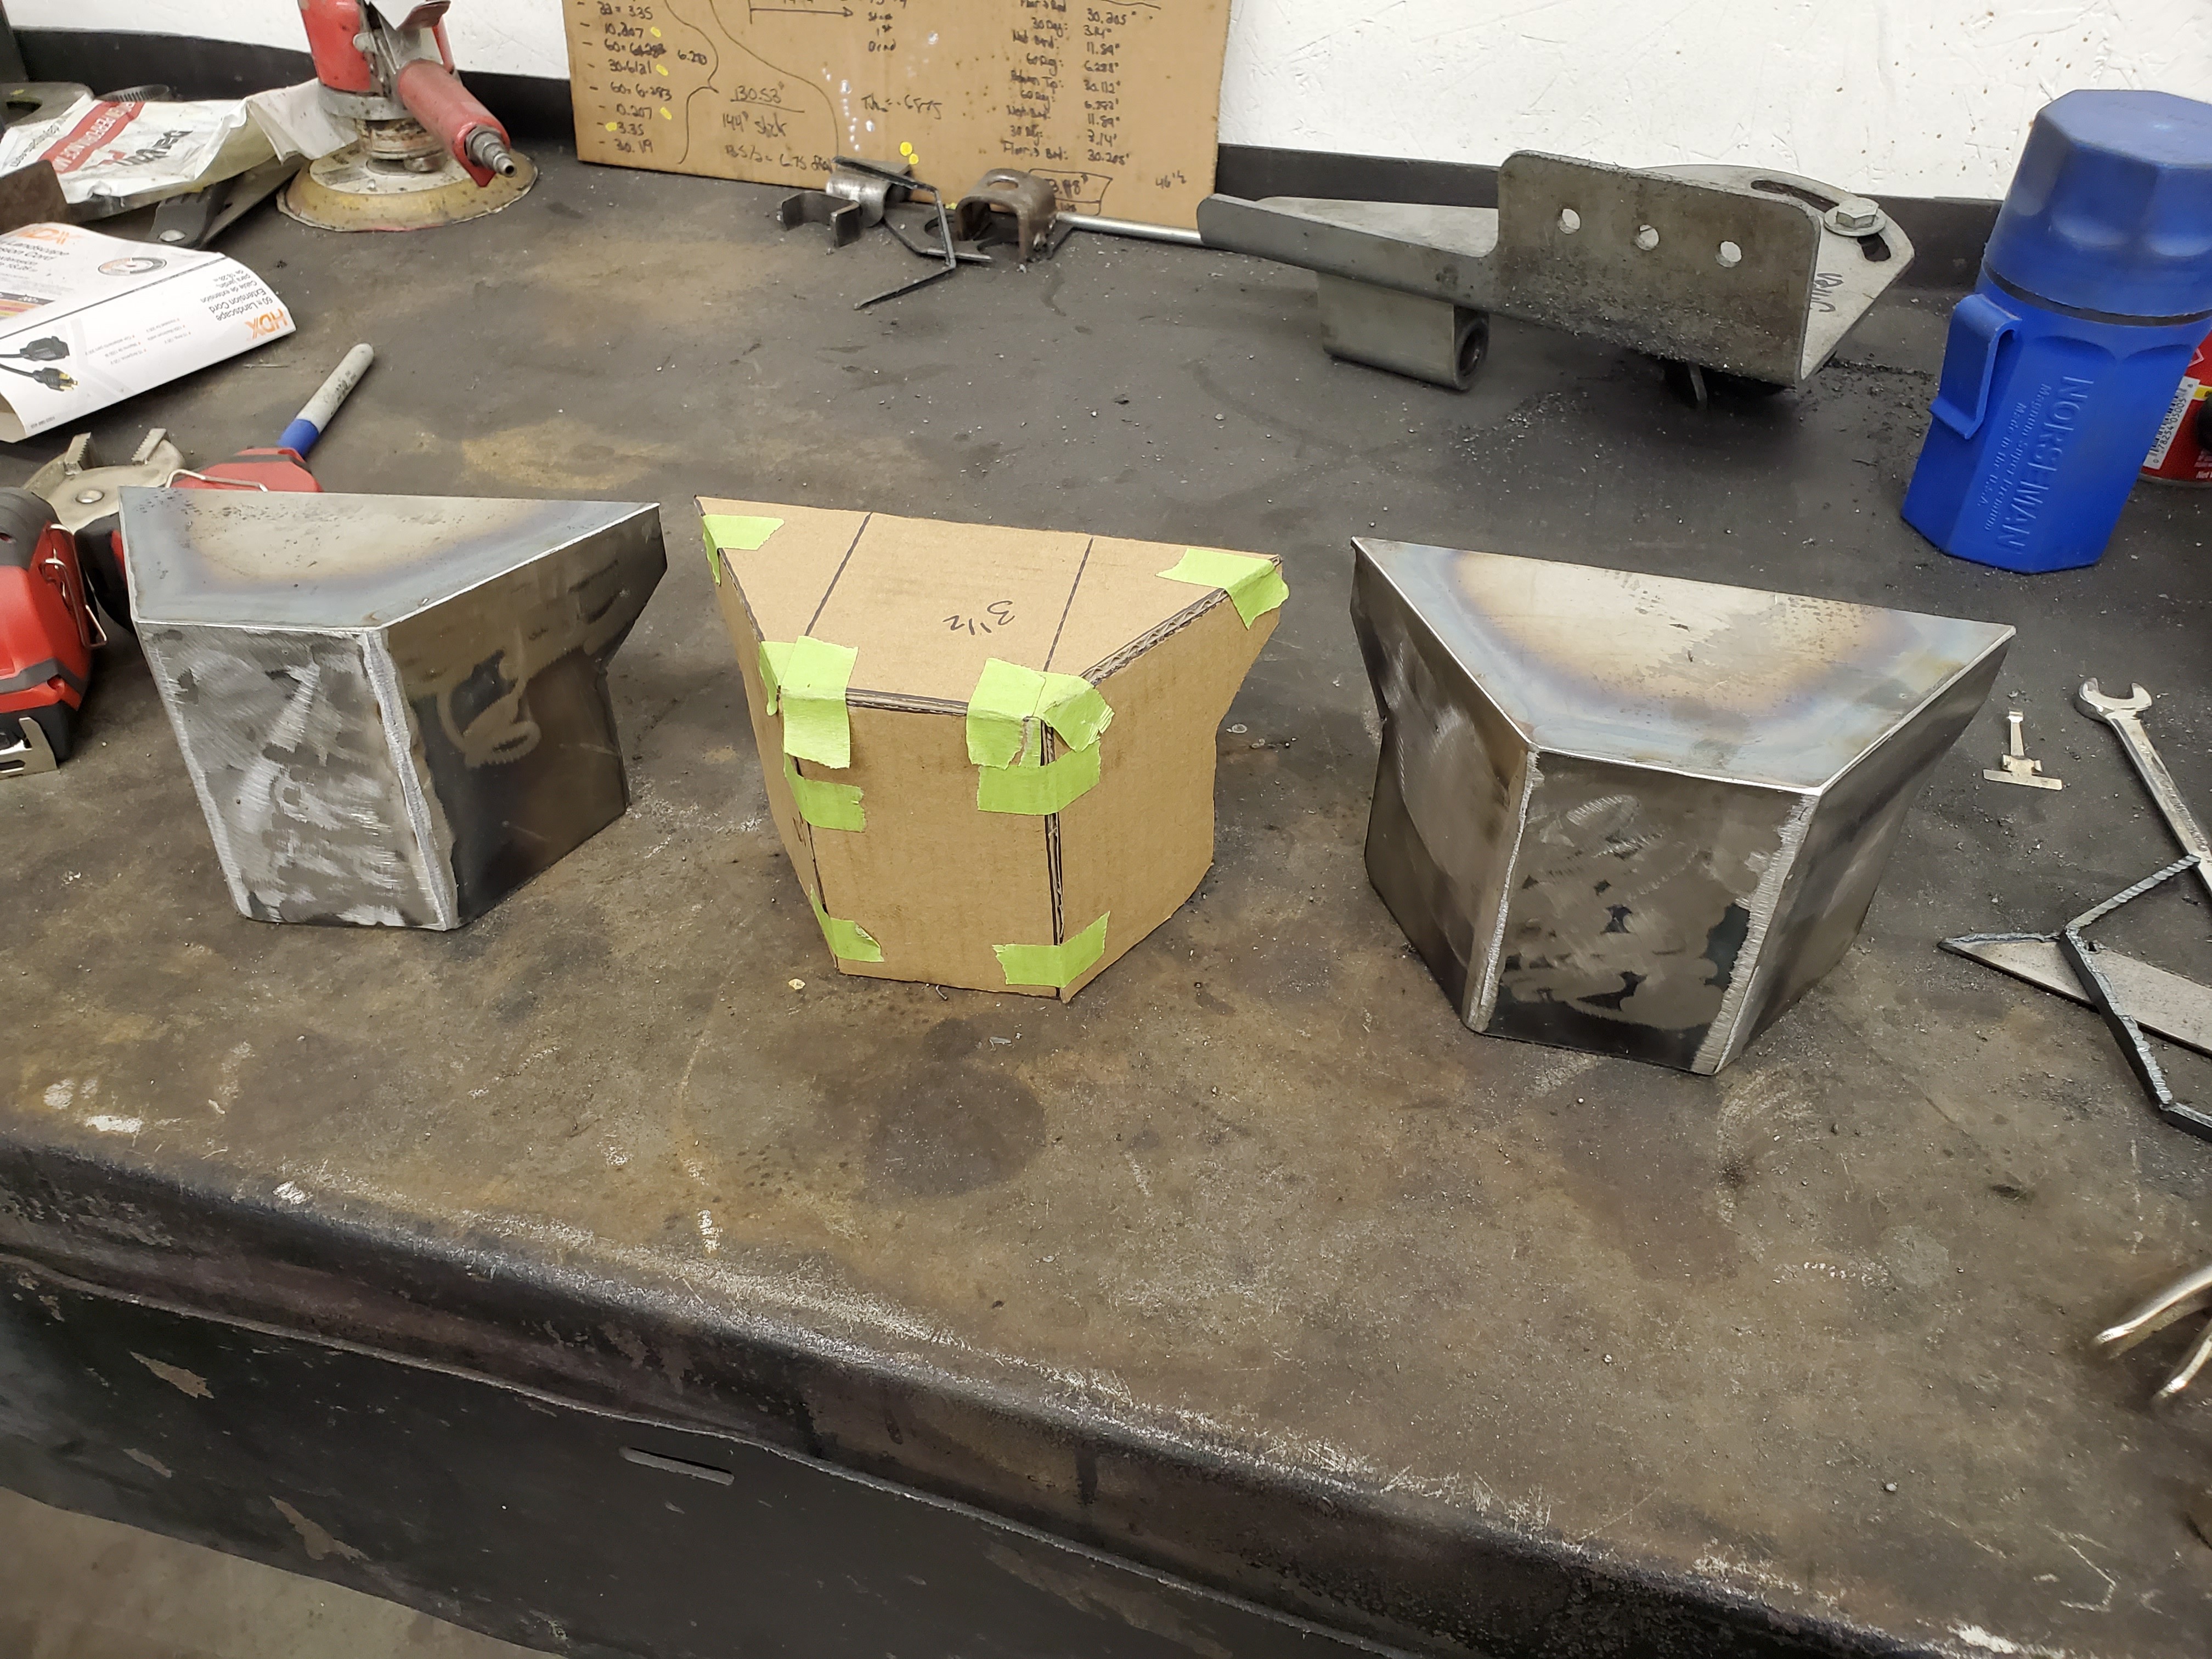
        Then moved on go making my CAD rocker boxes a reality.
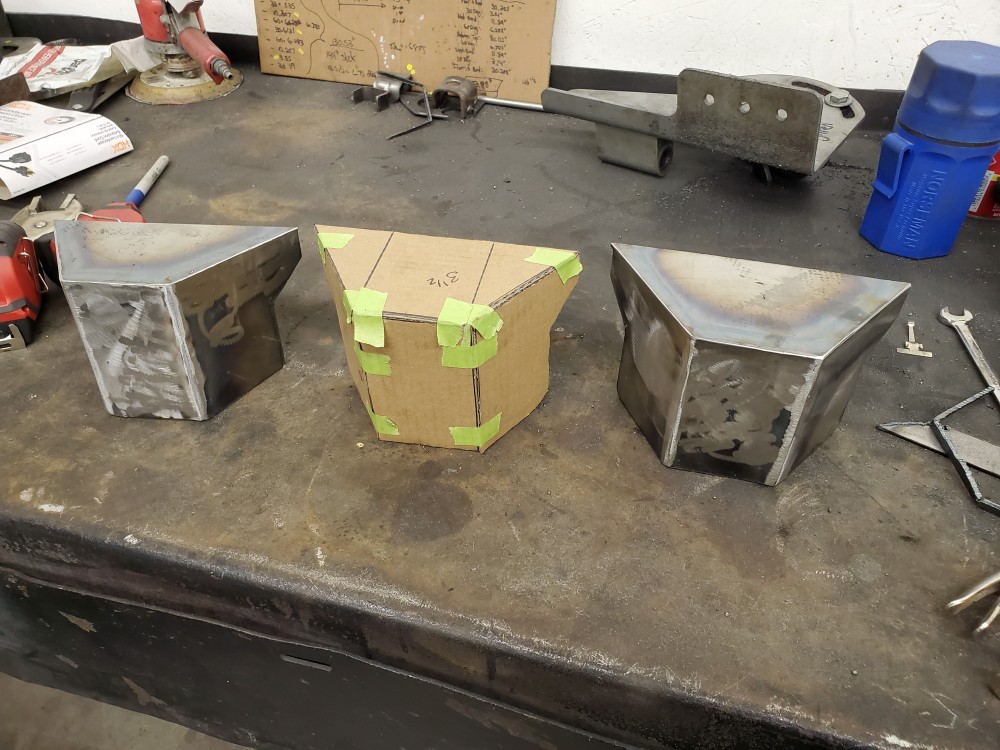
        20200314220406.jpg

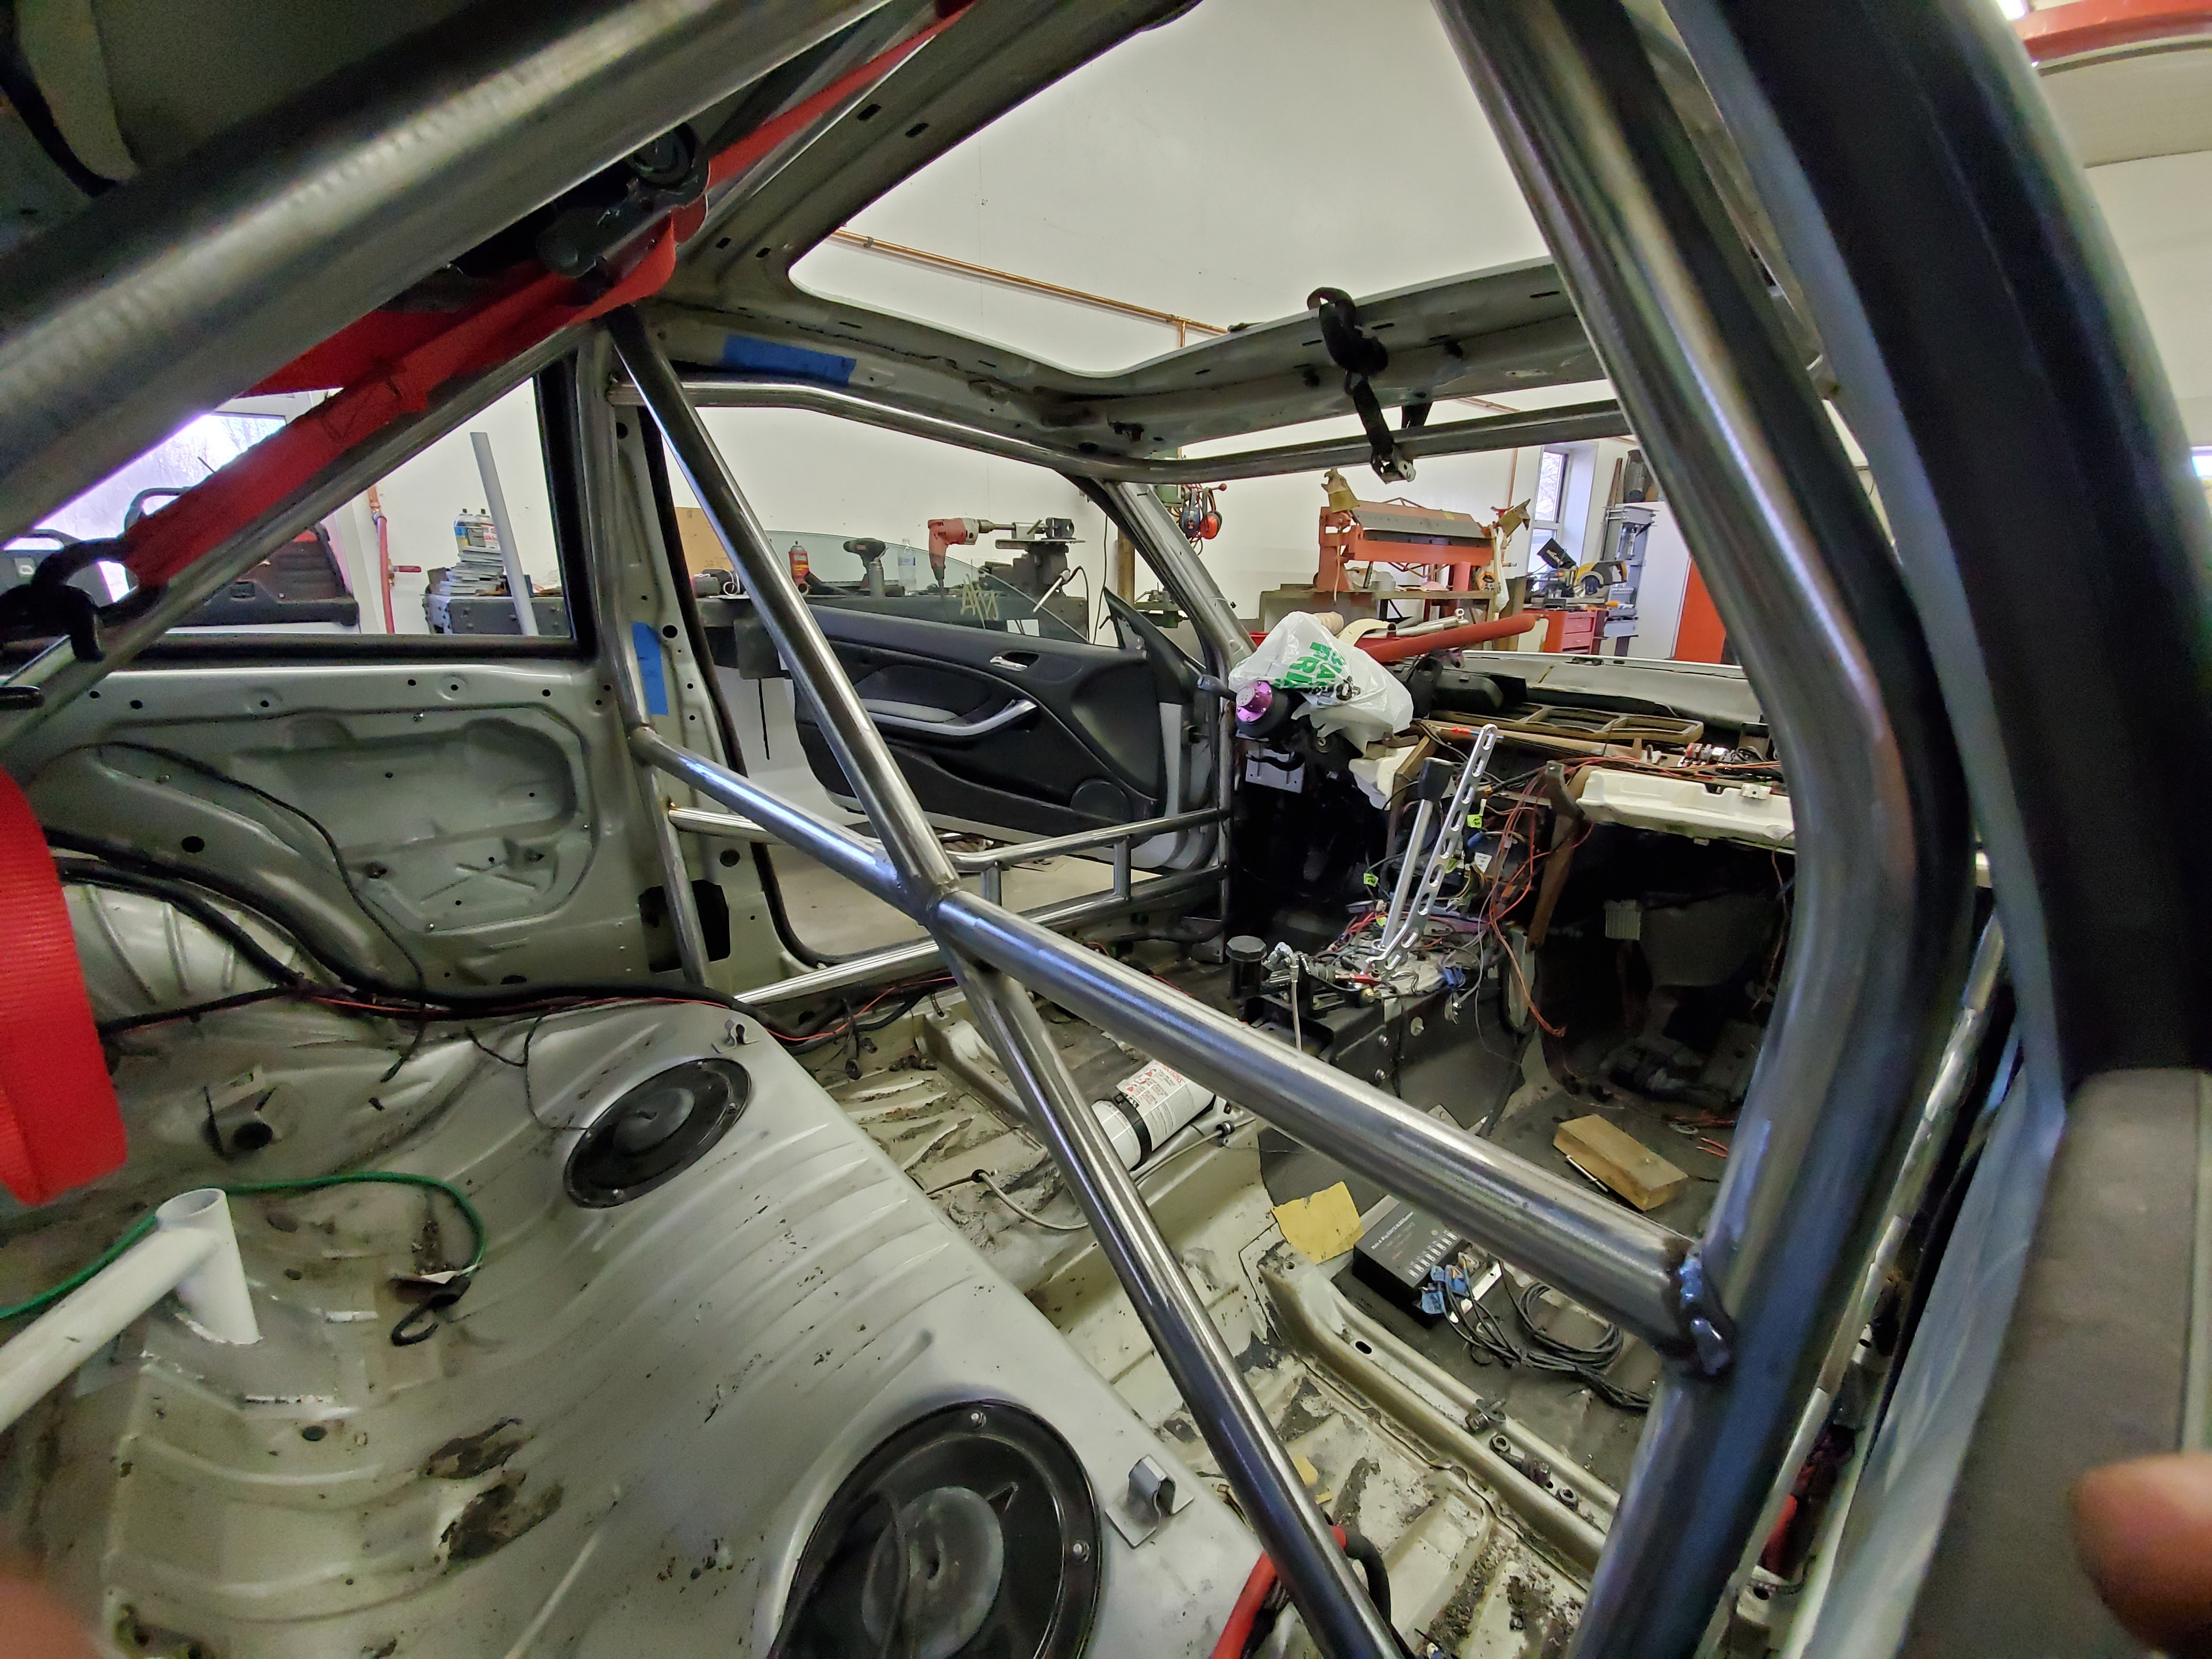
        Next was the A pillar bars. Notching them was a real trial and error process but again super grateful to Sam for the help on these as well.

        They fit really well and I'm happy with them.
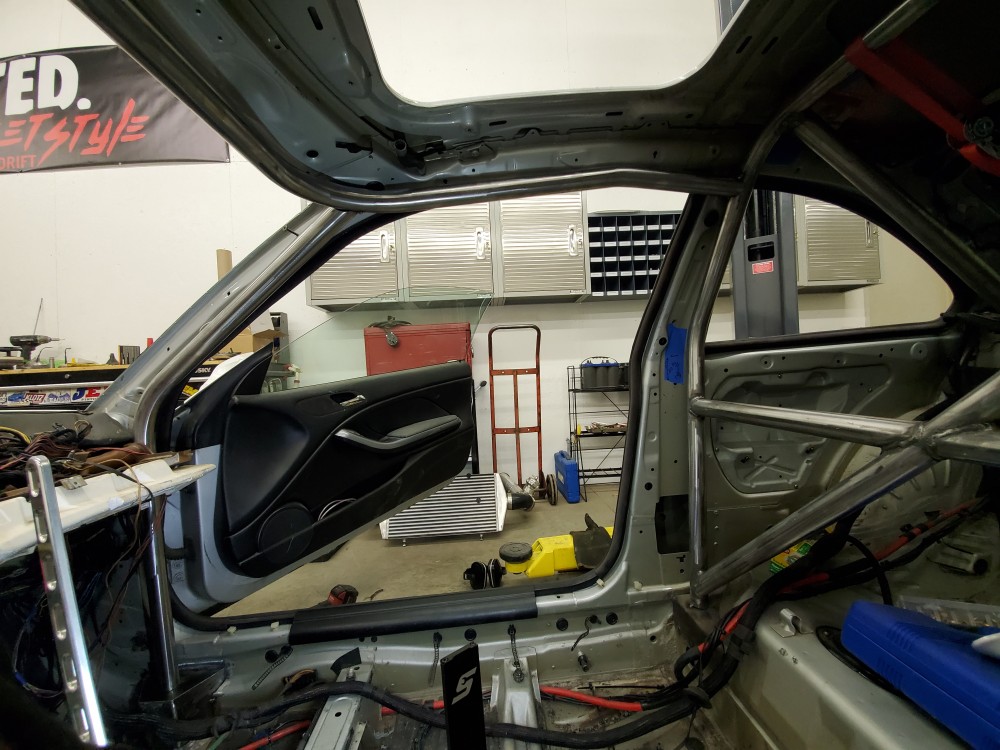
        20200314232058.jpg

        20200315161803.jpg

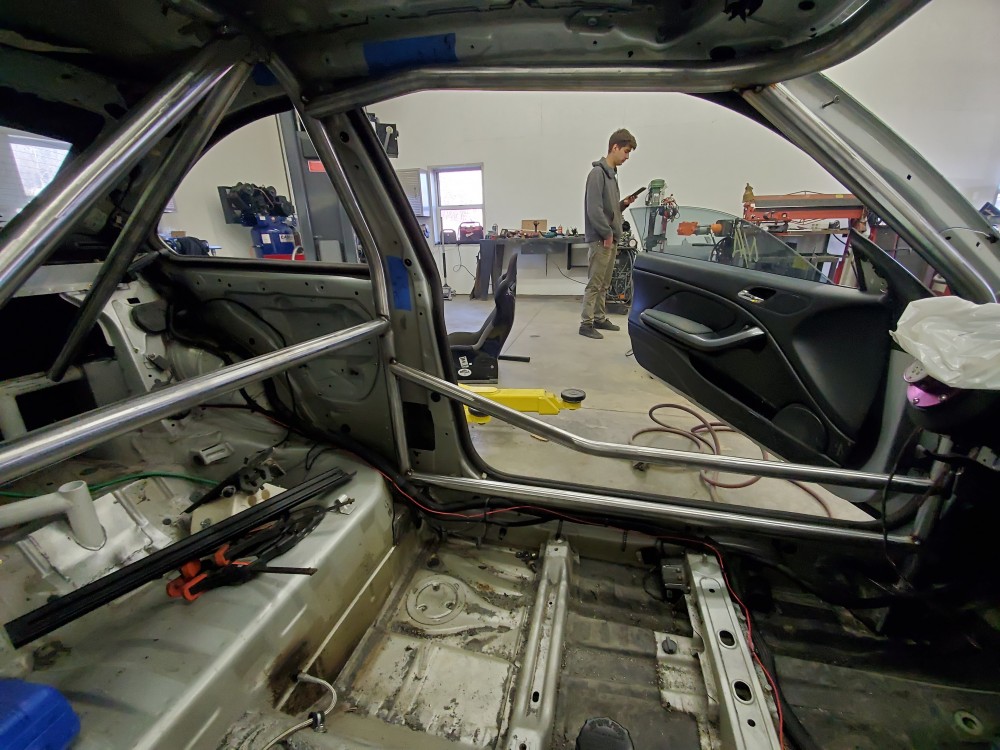
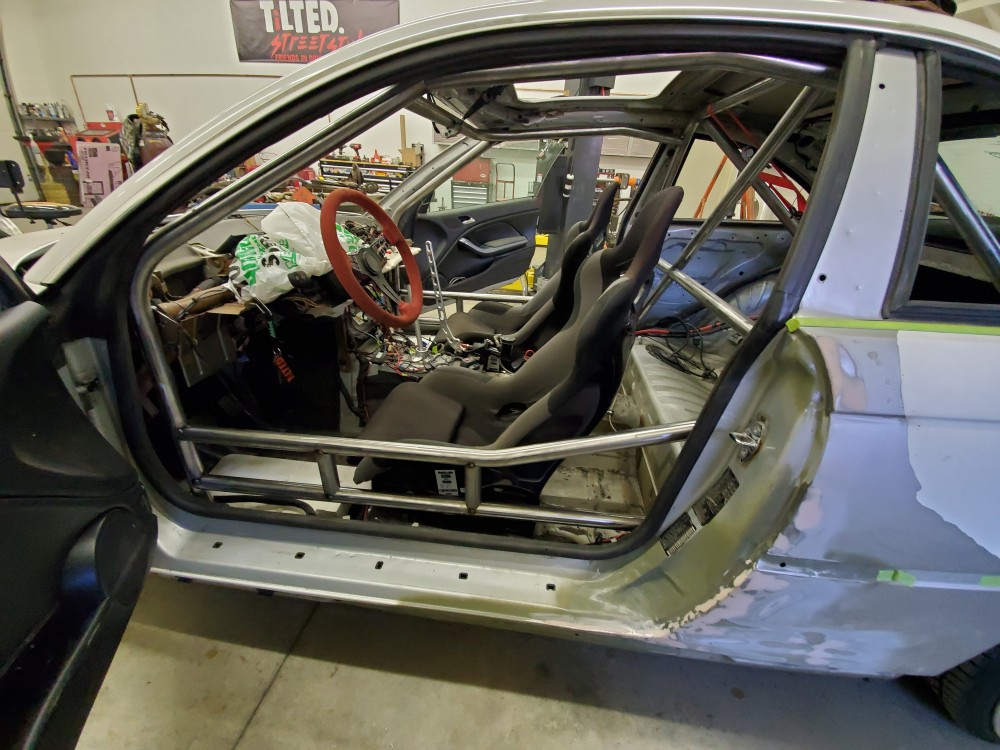
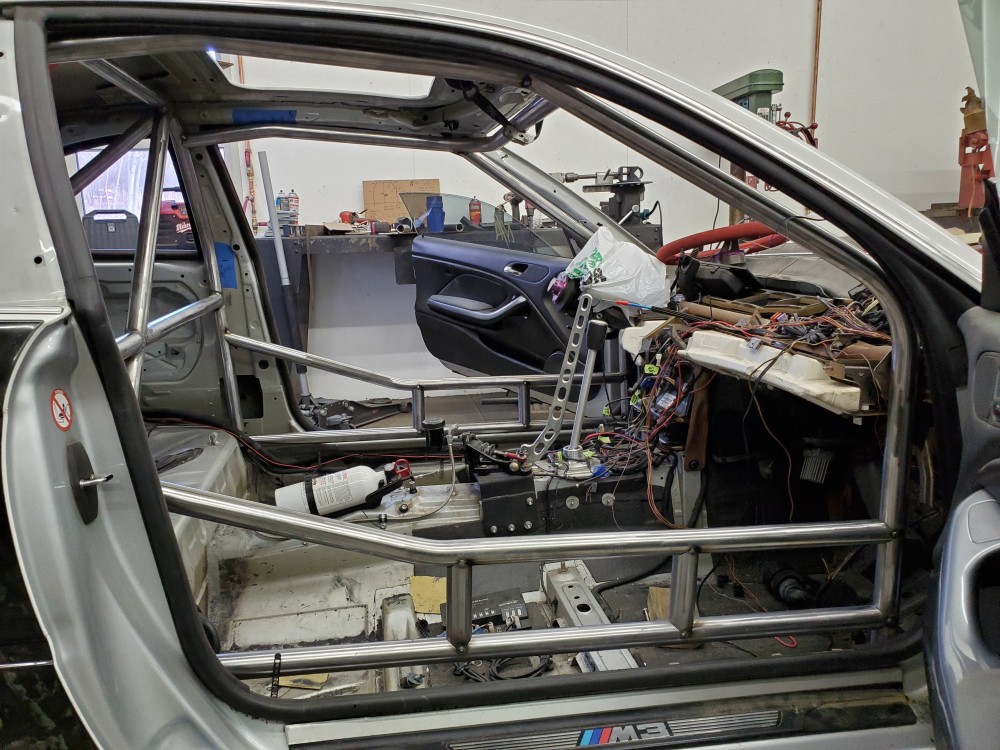
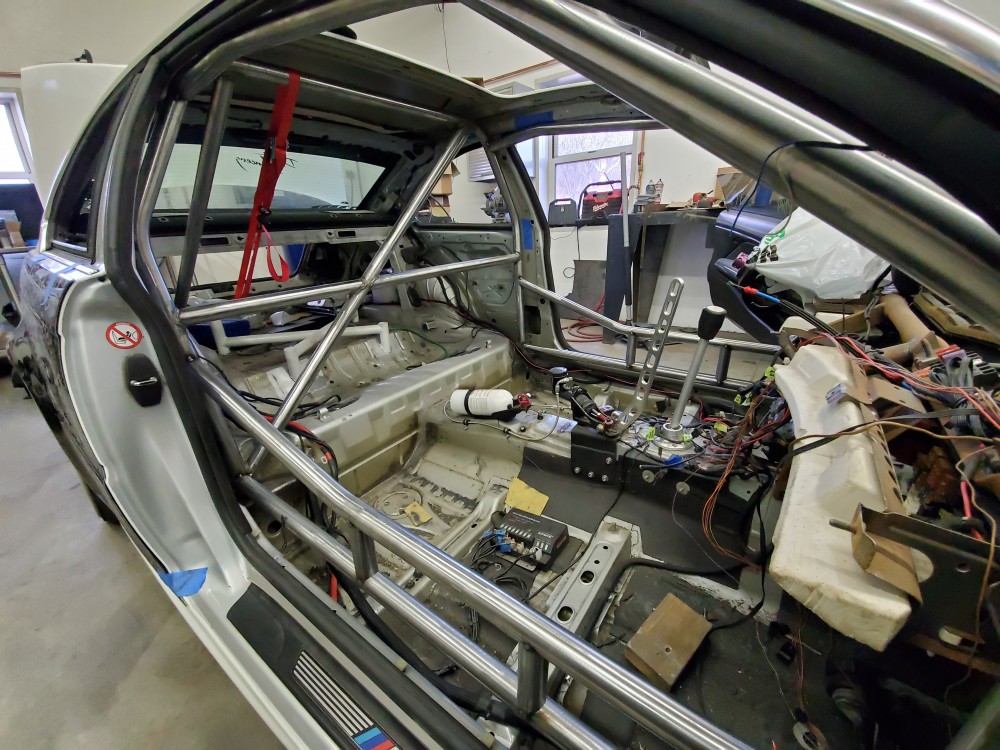
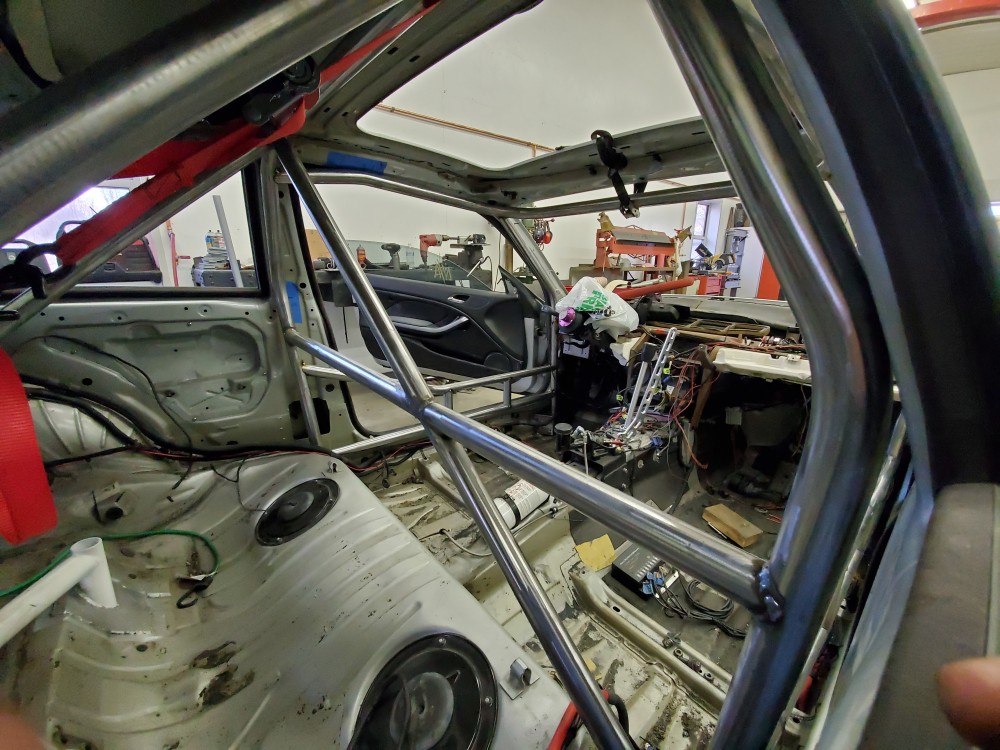
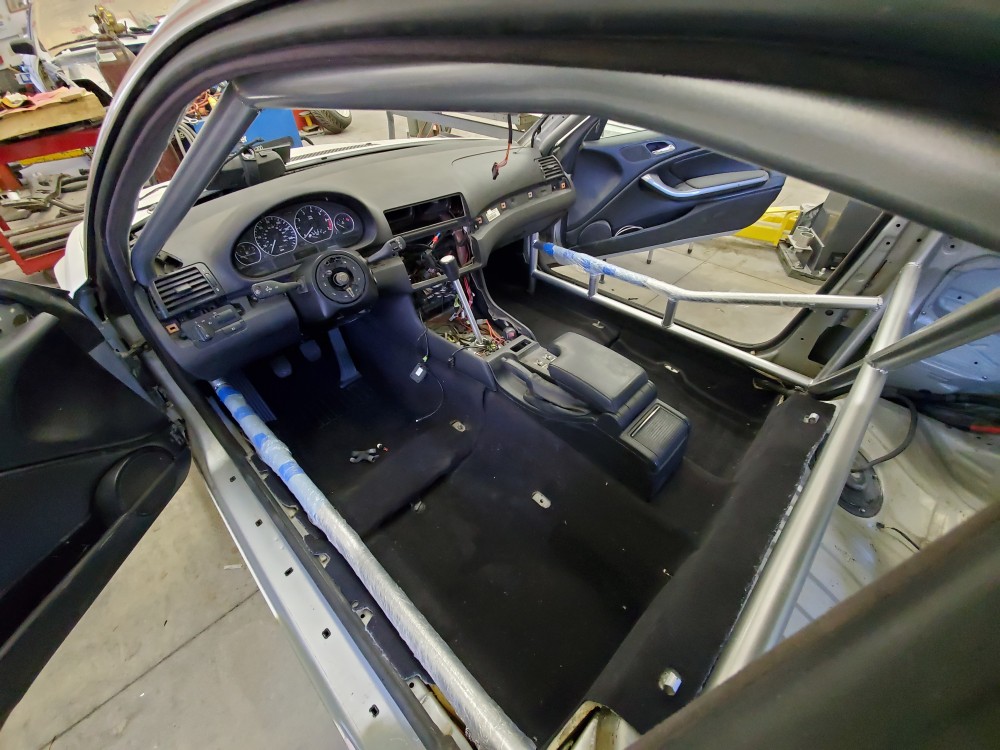
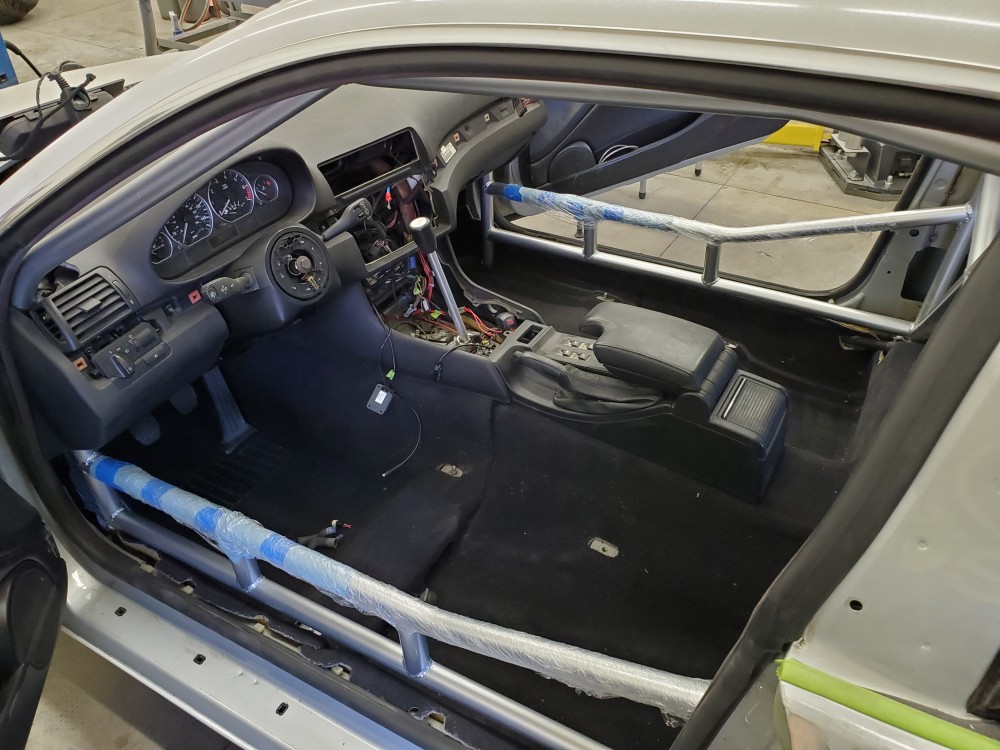
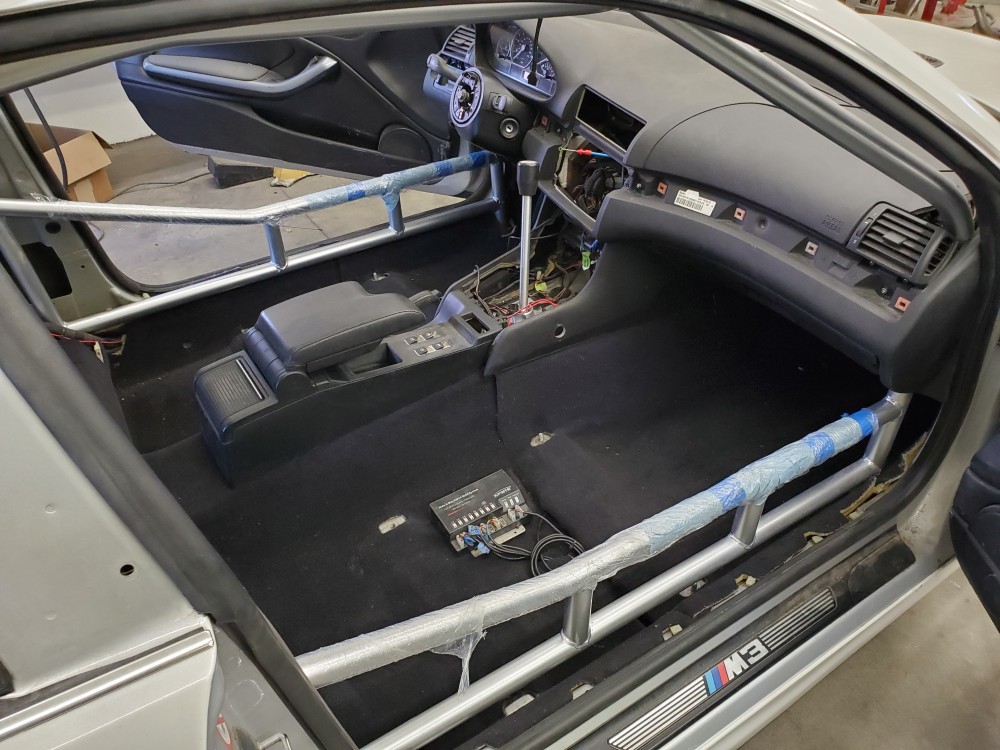
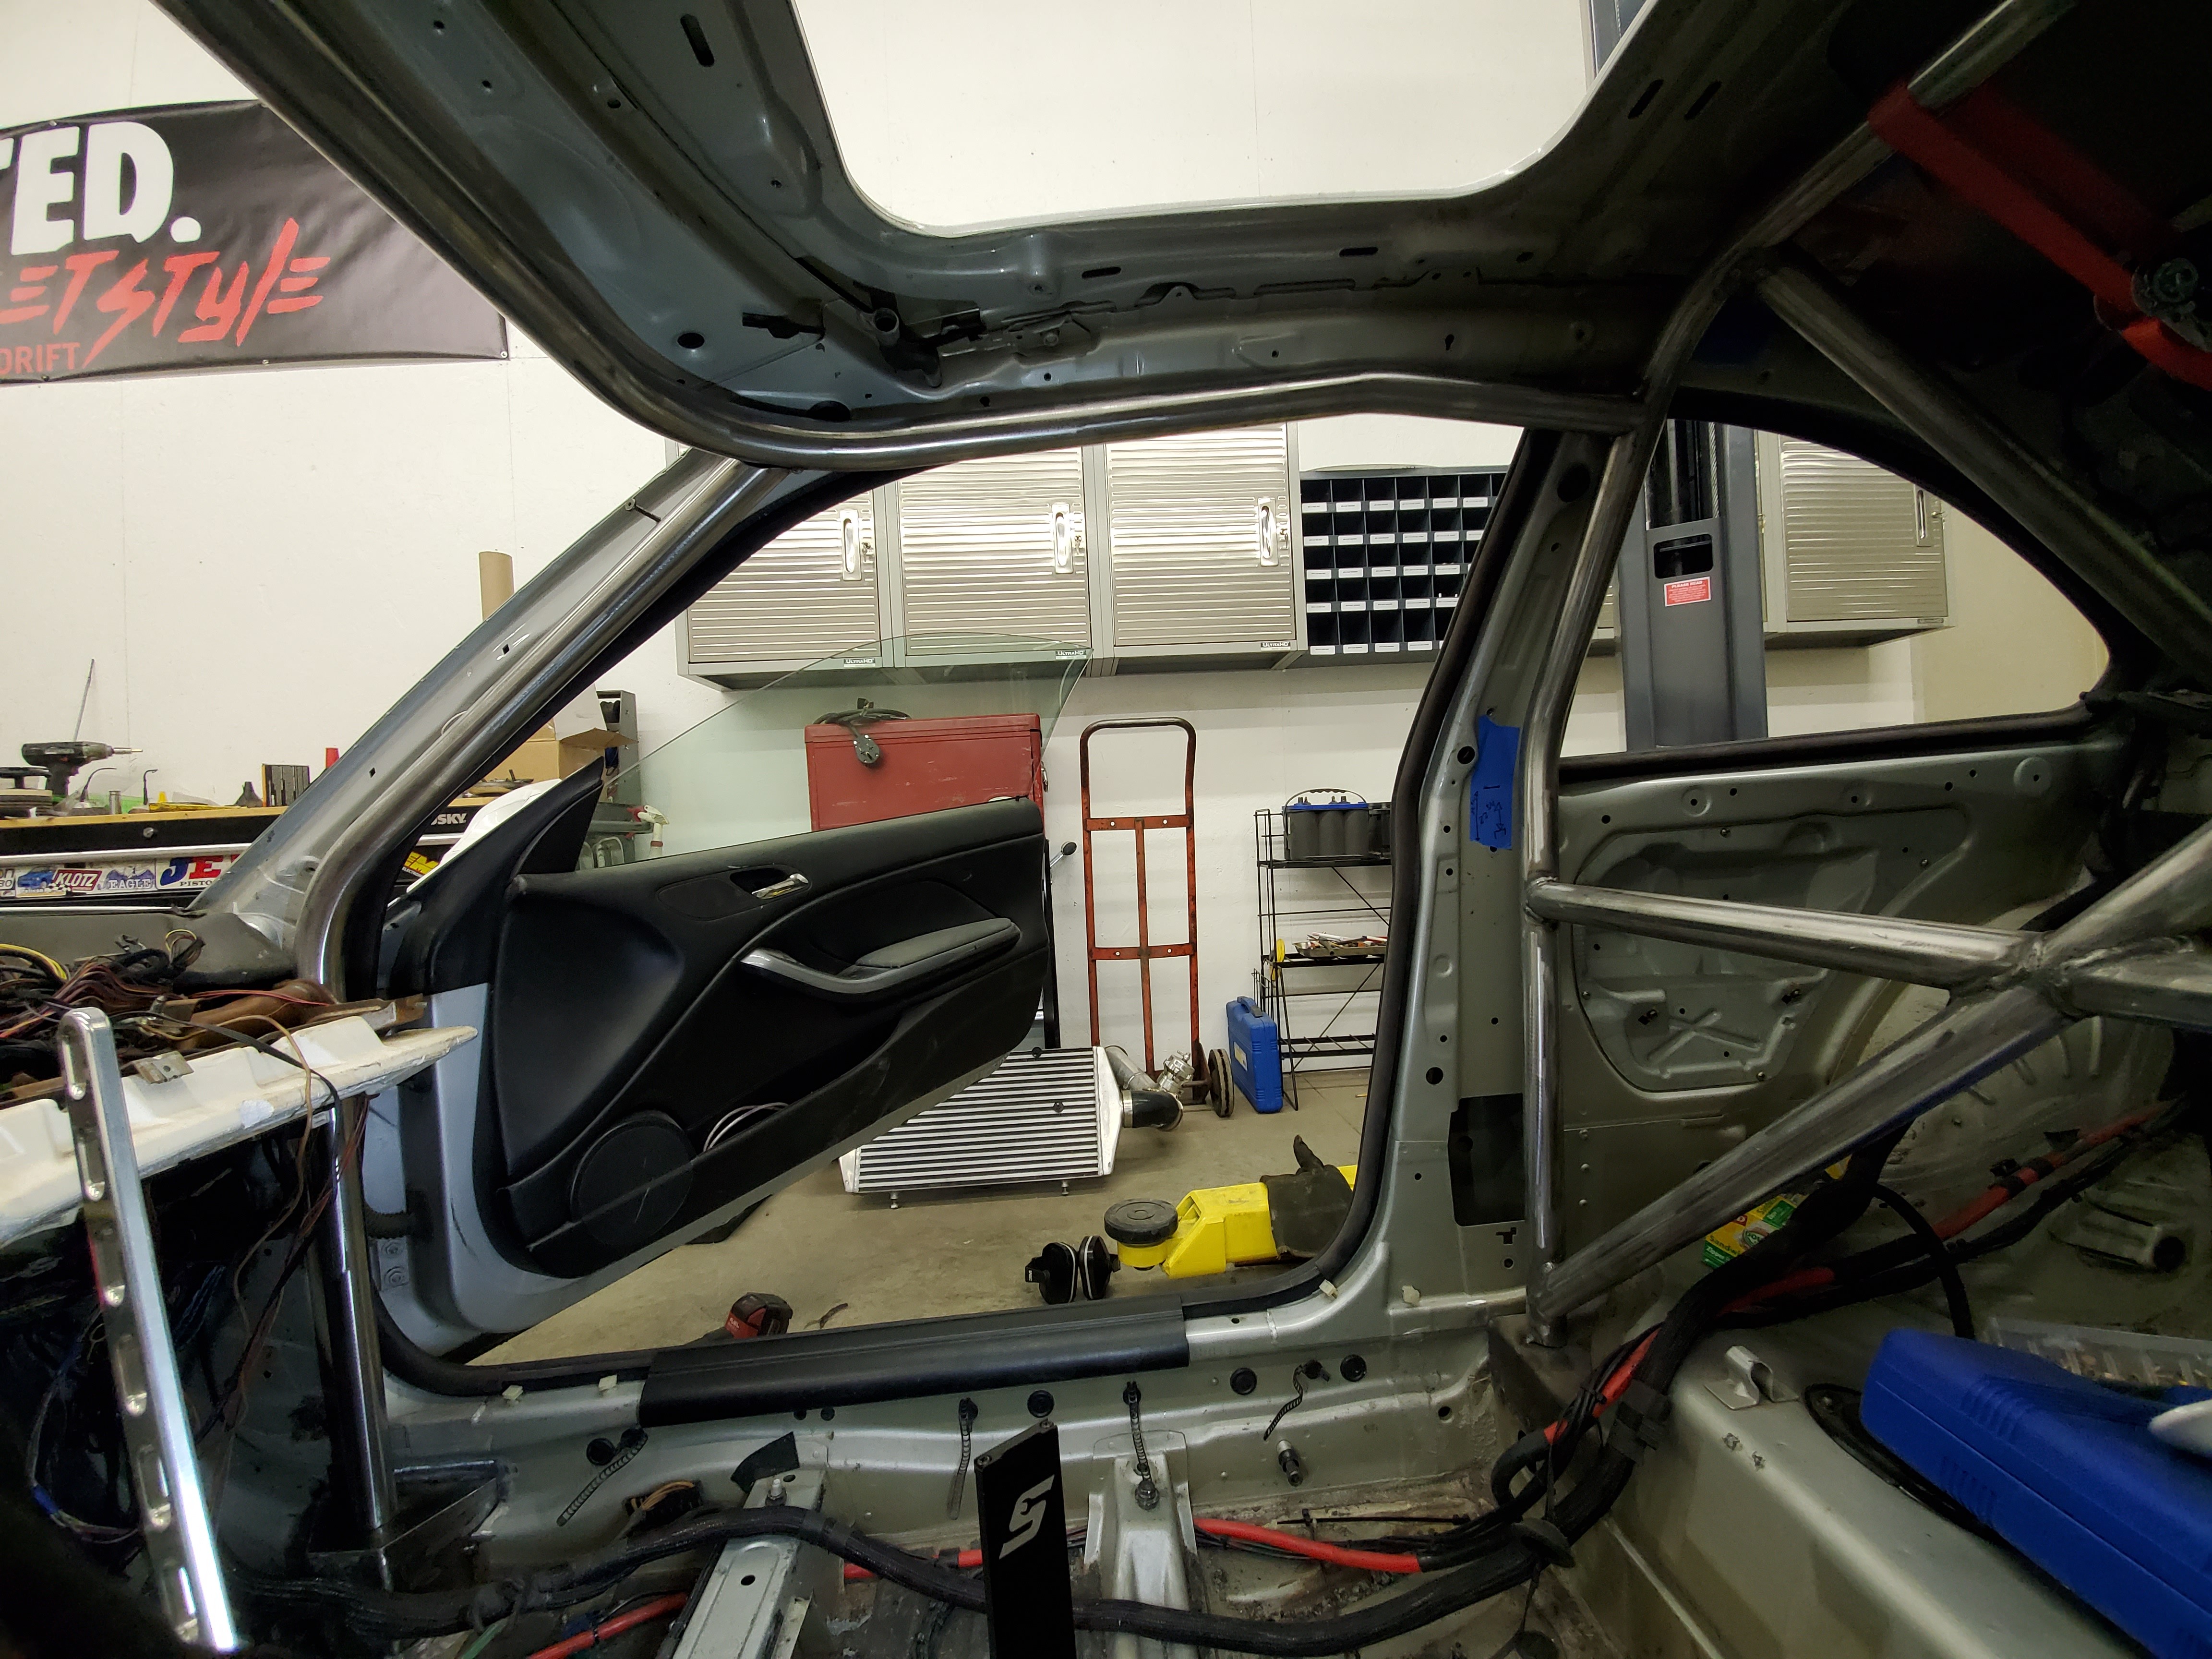
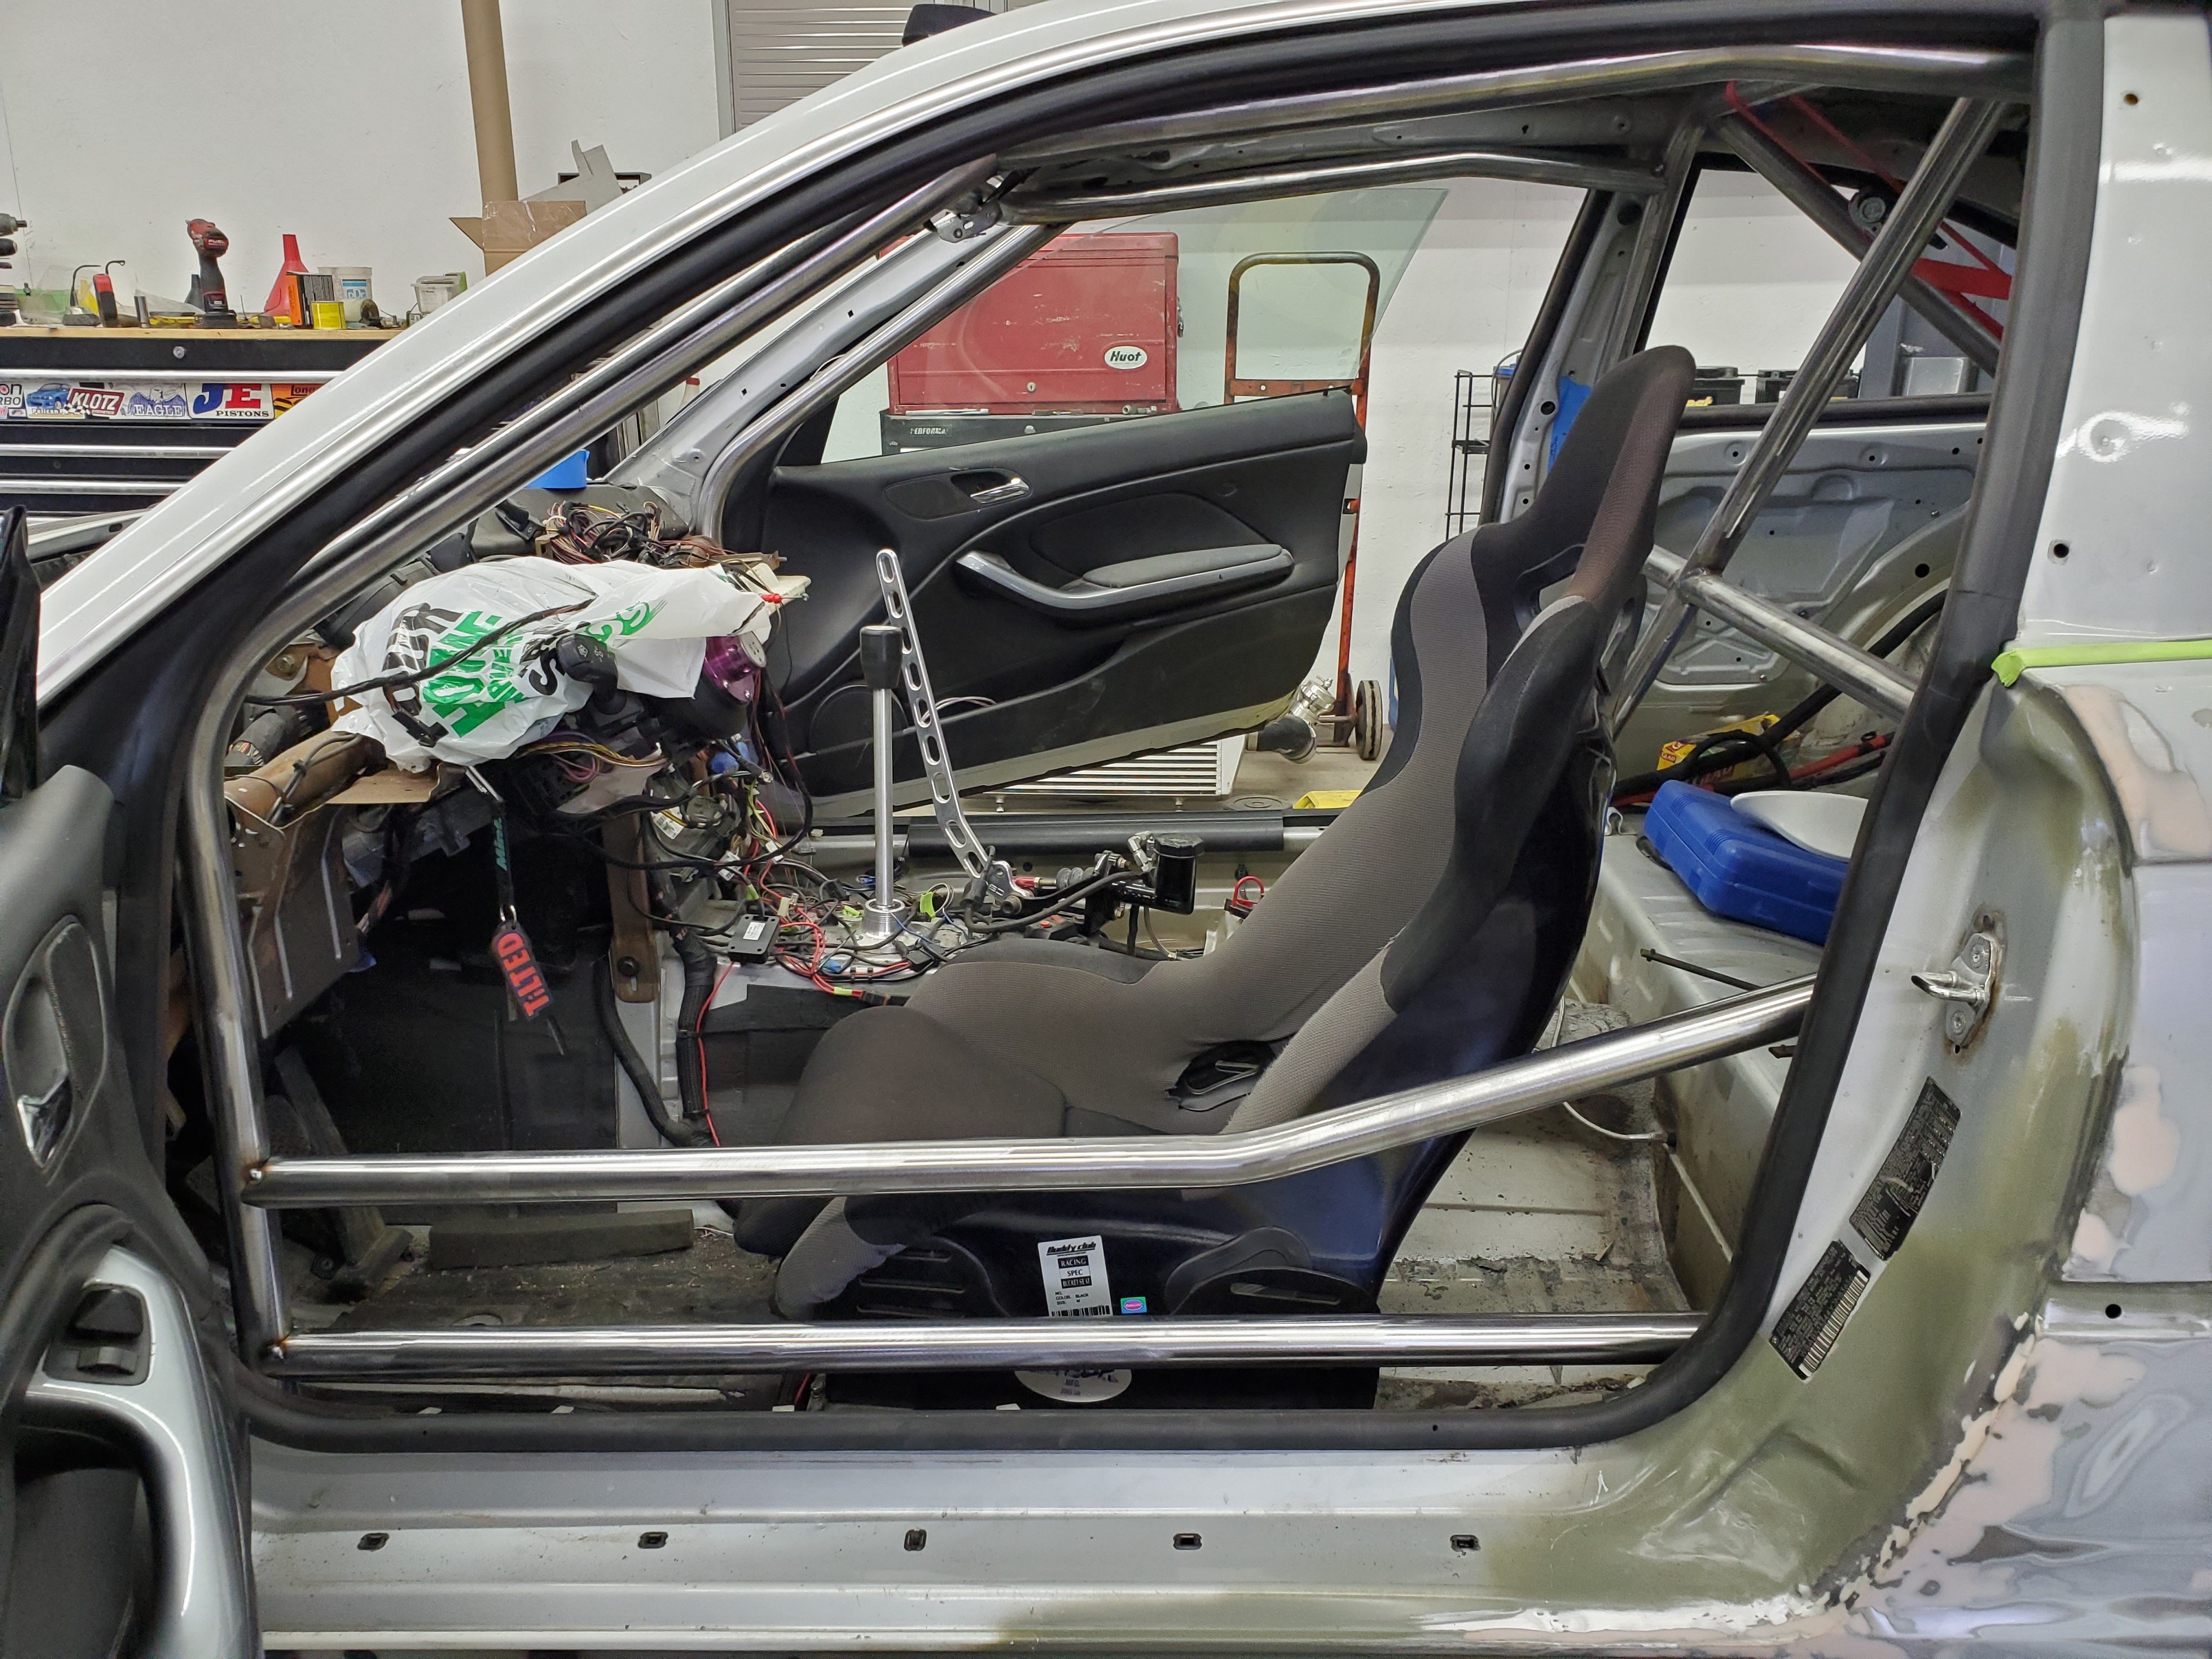
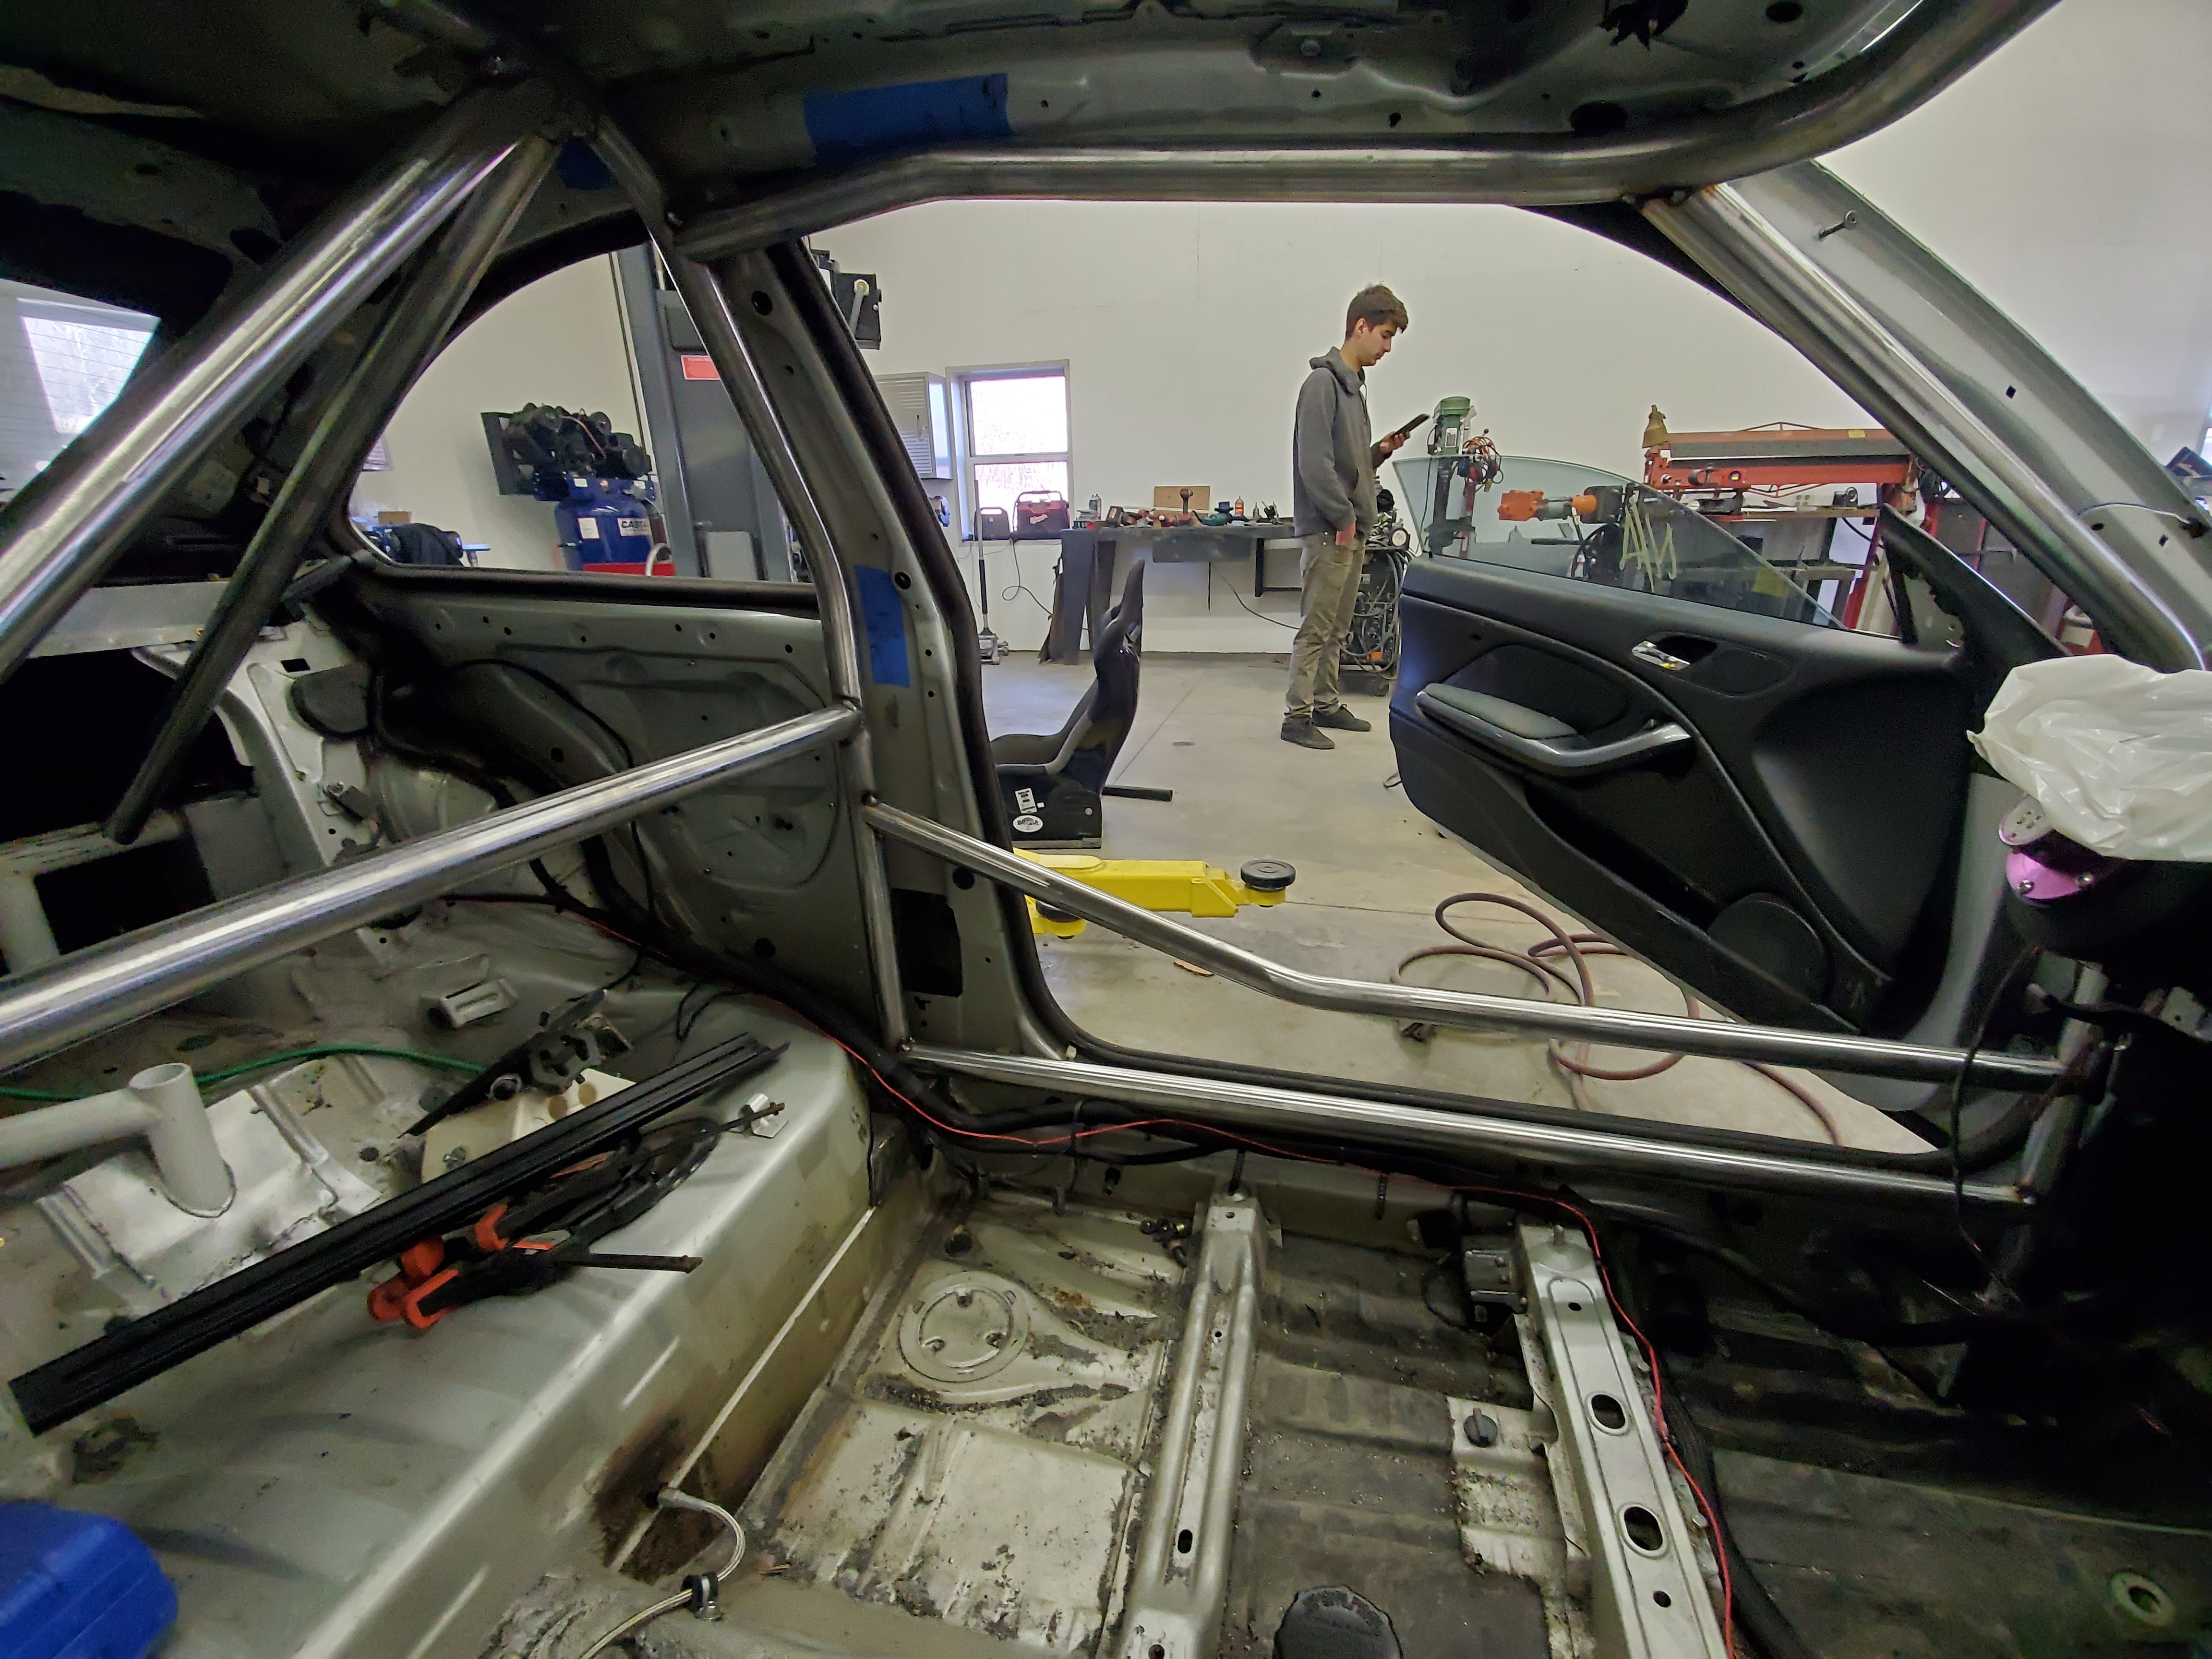
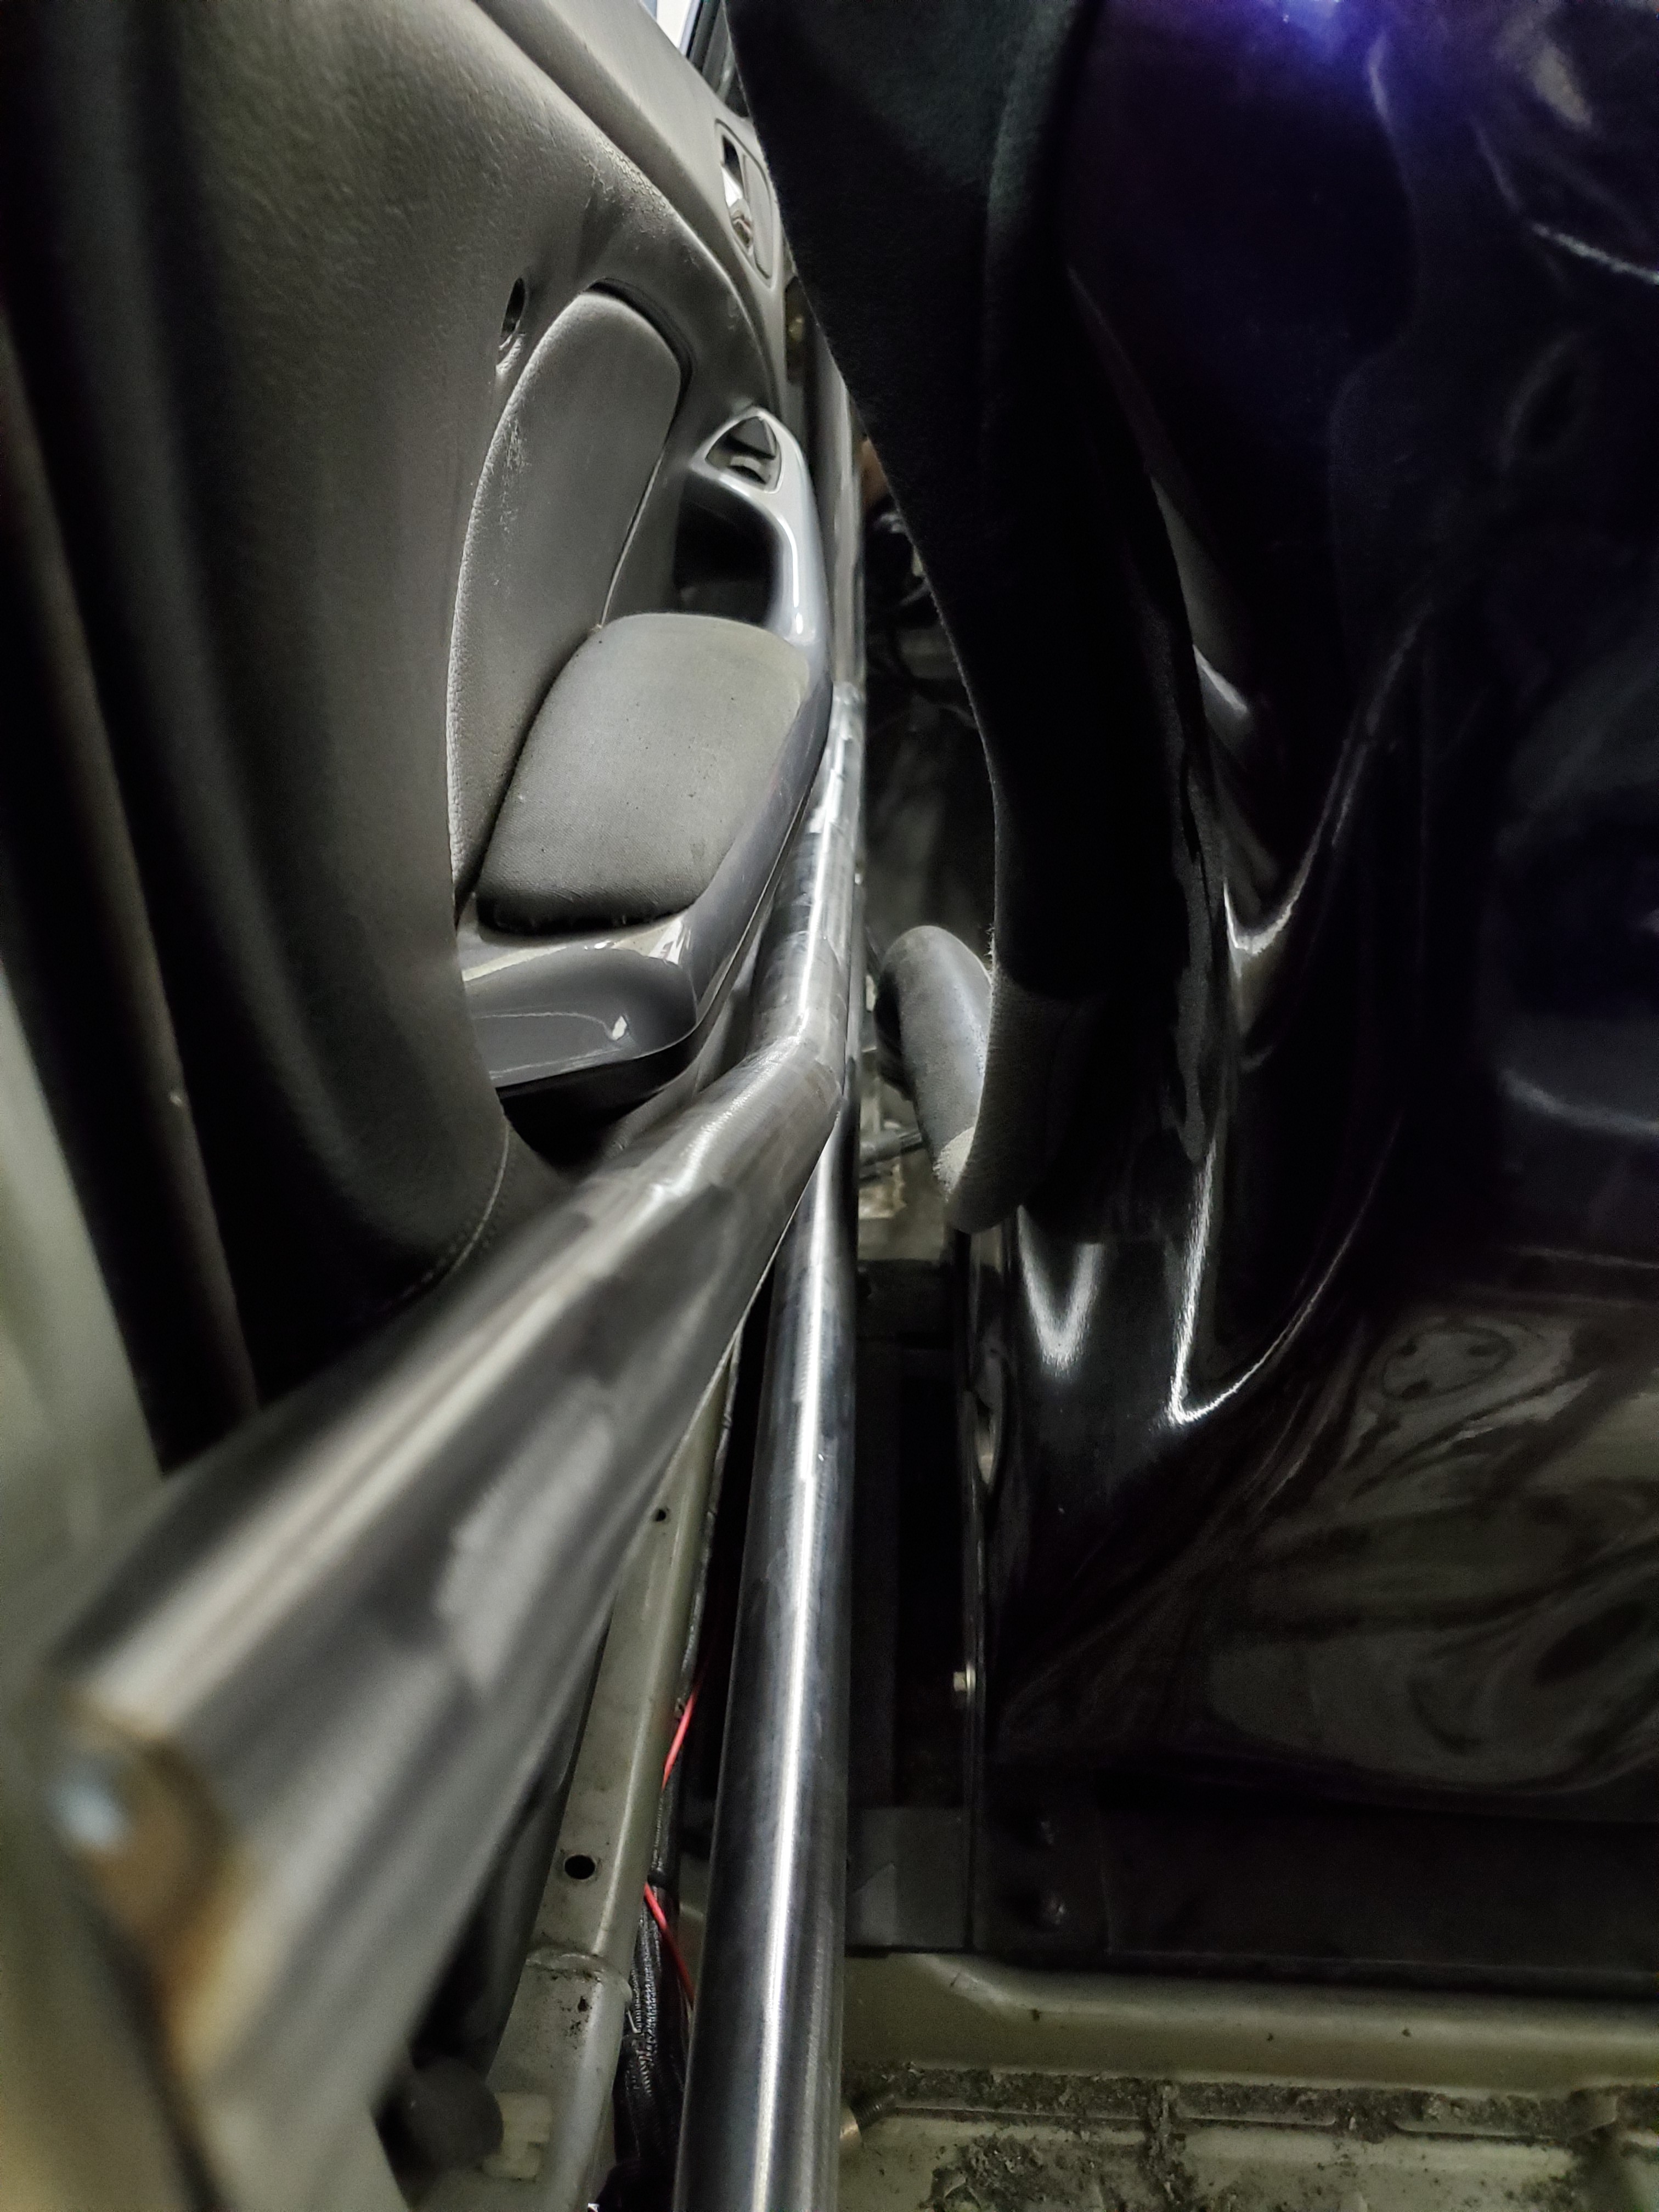
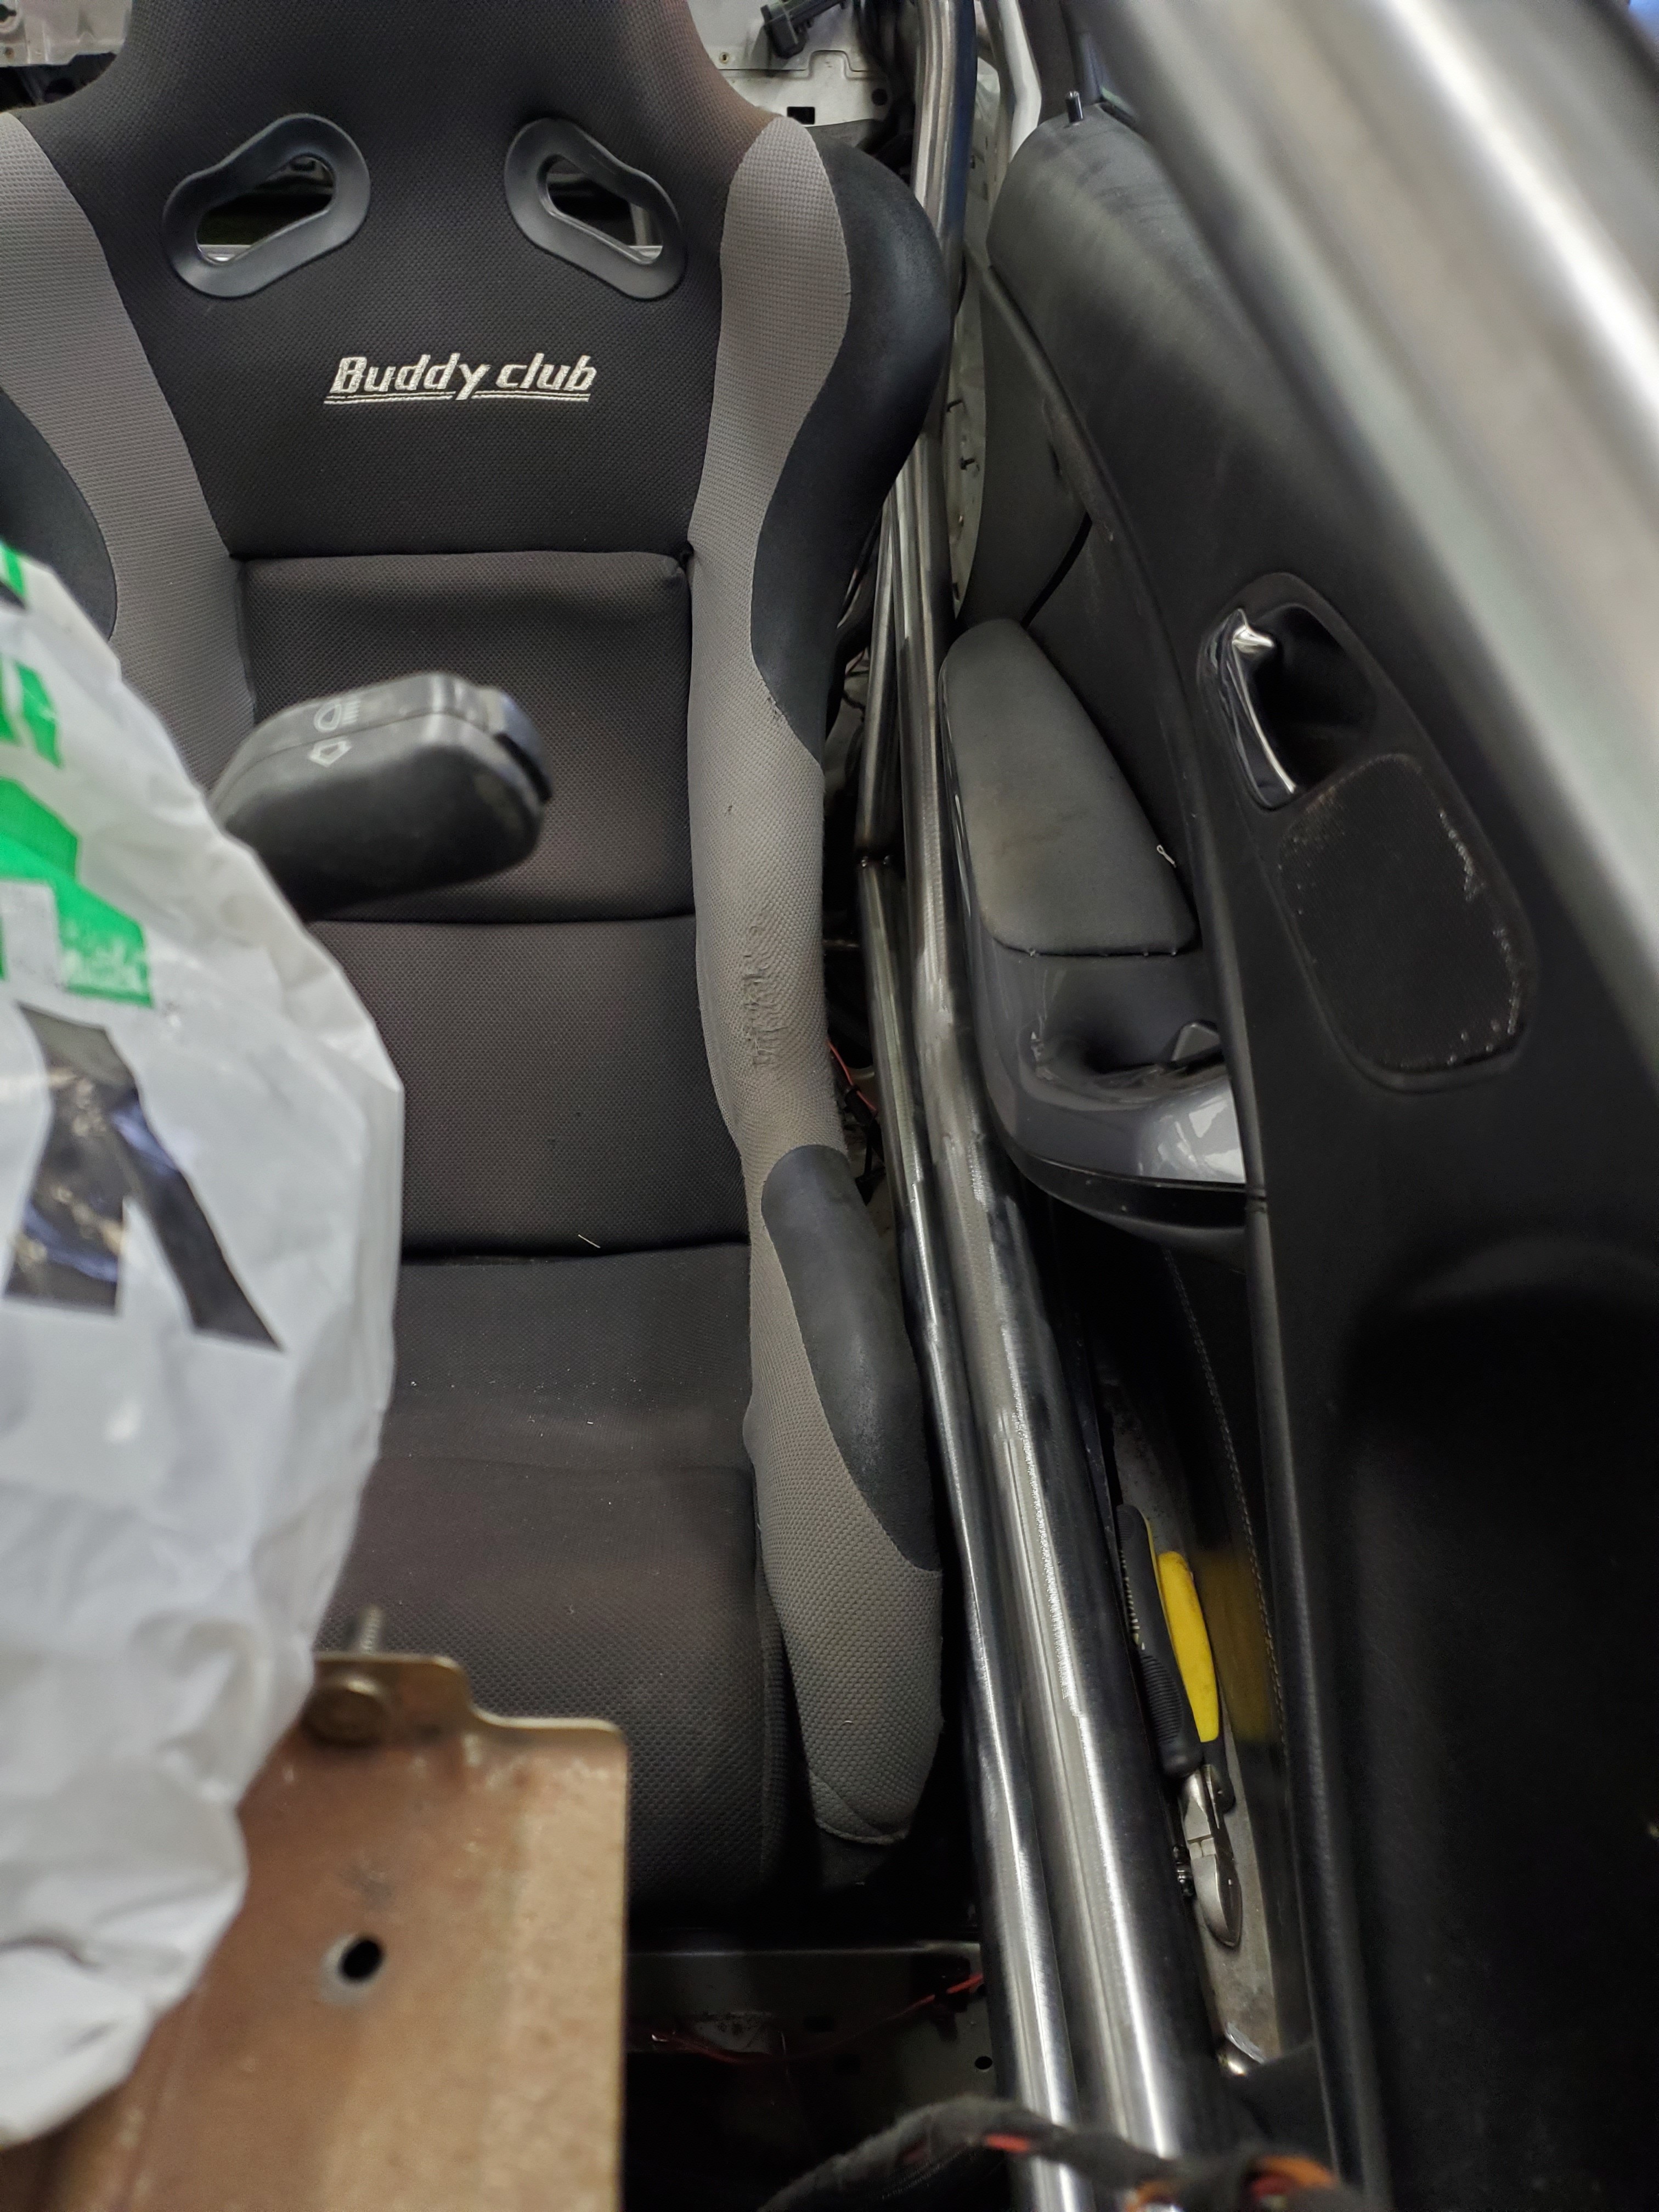
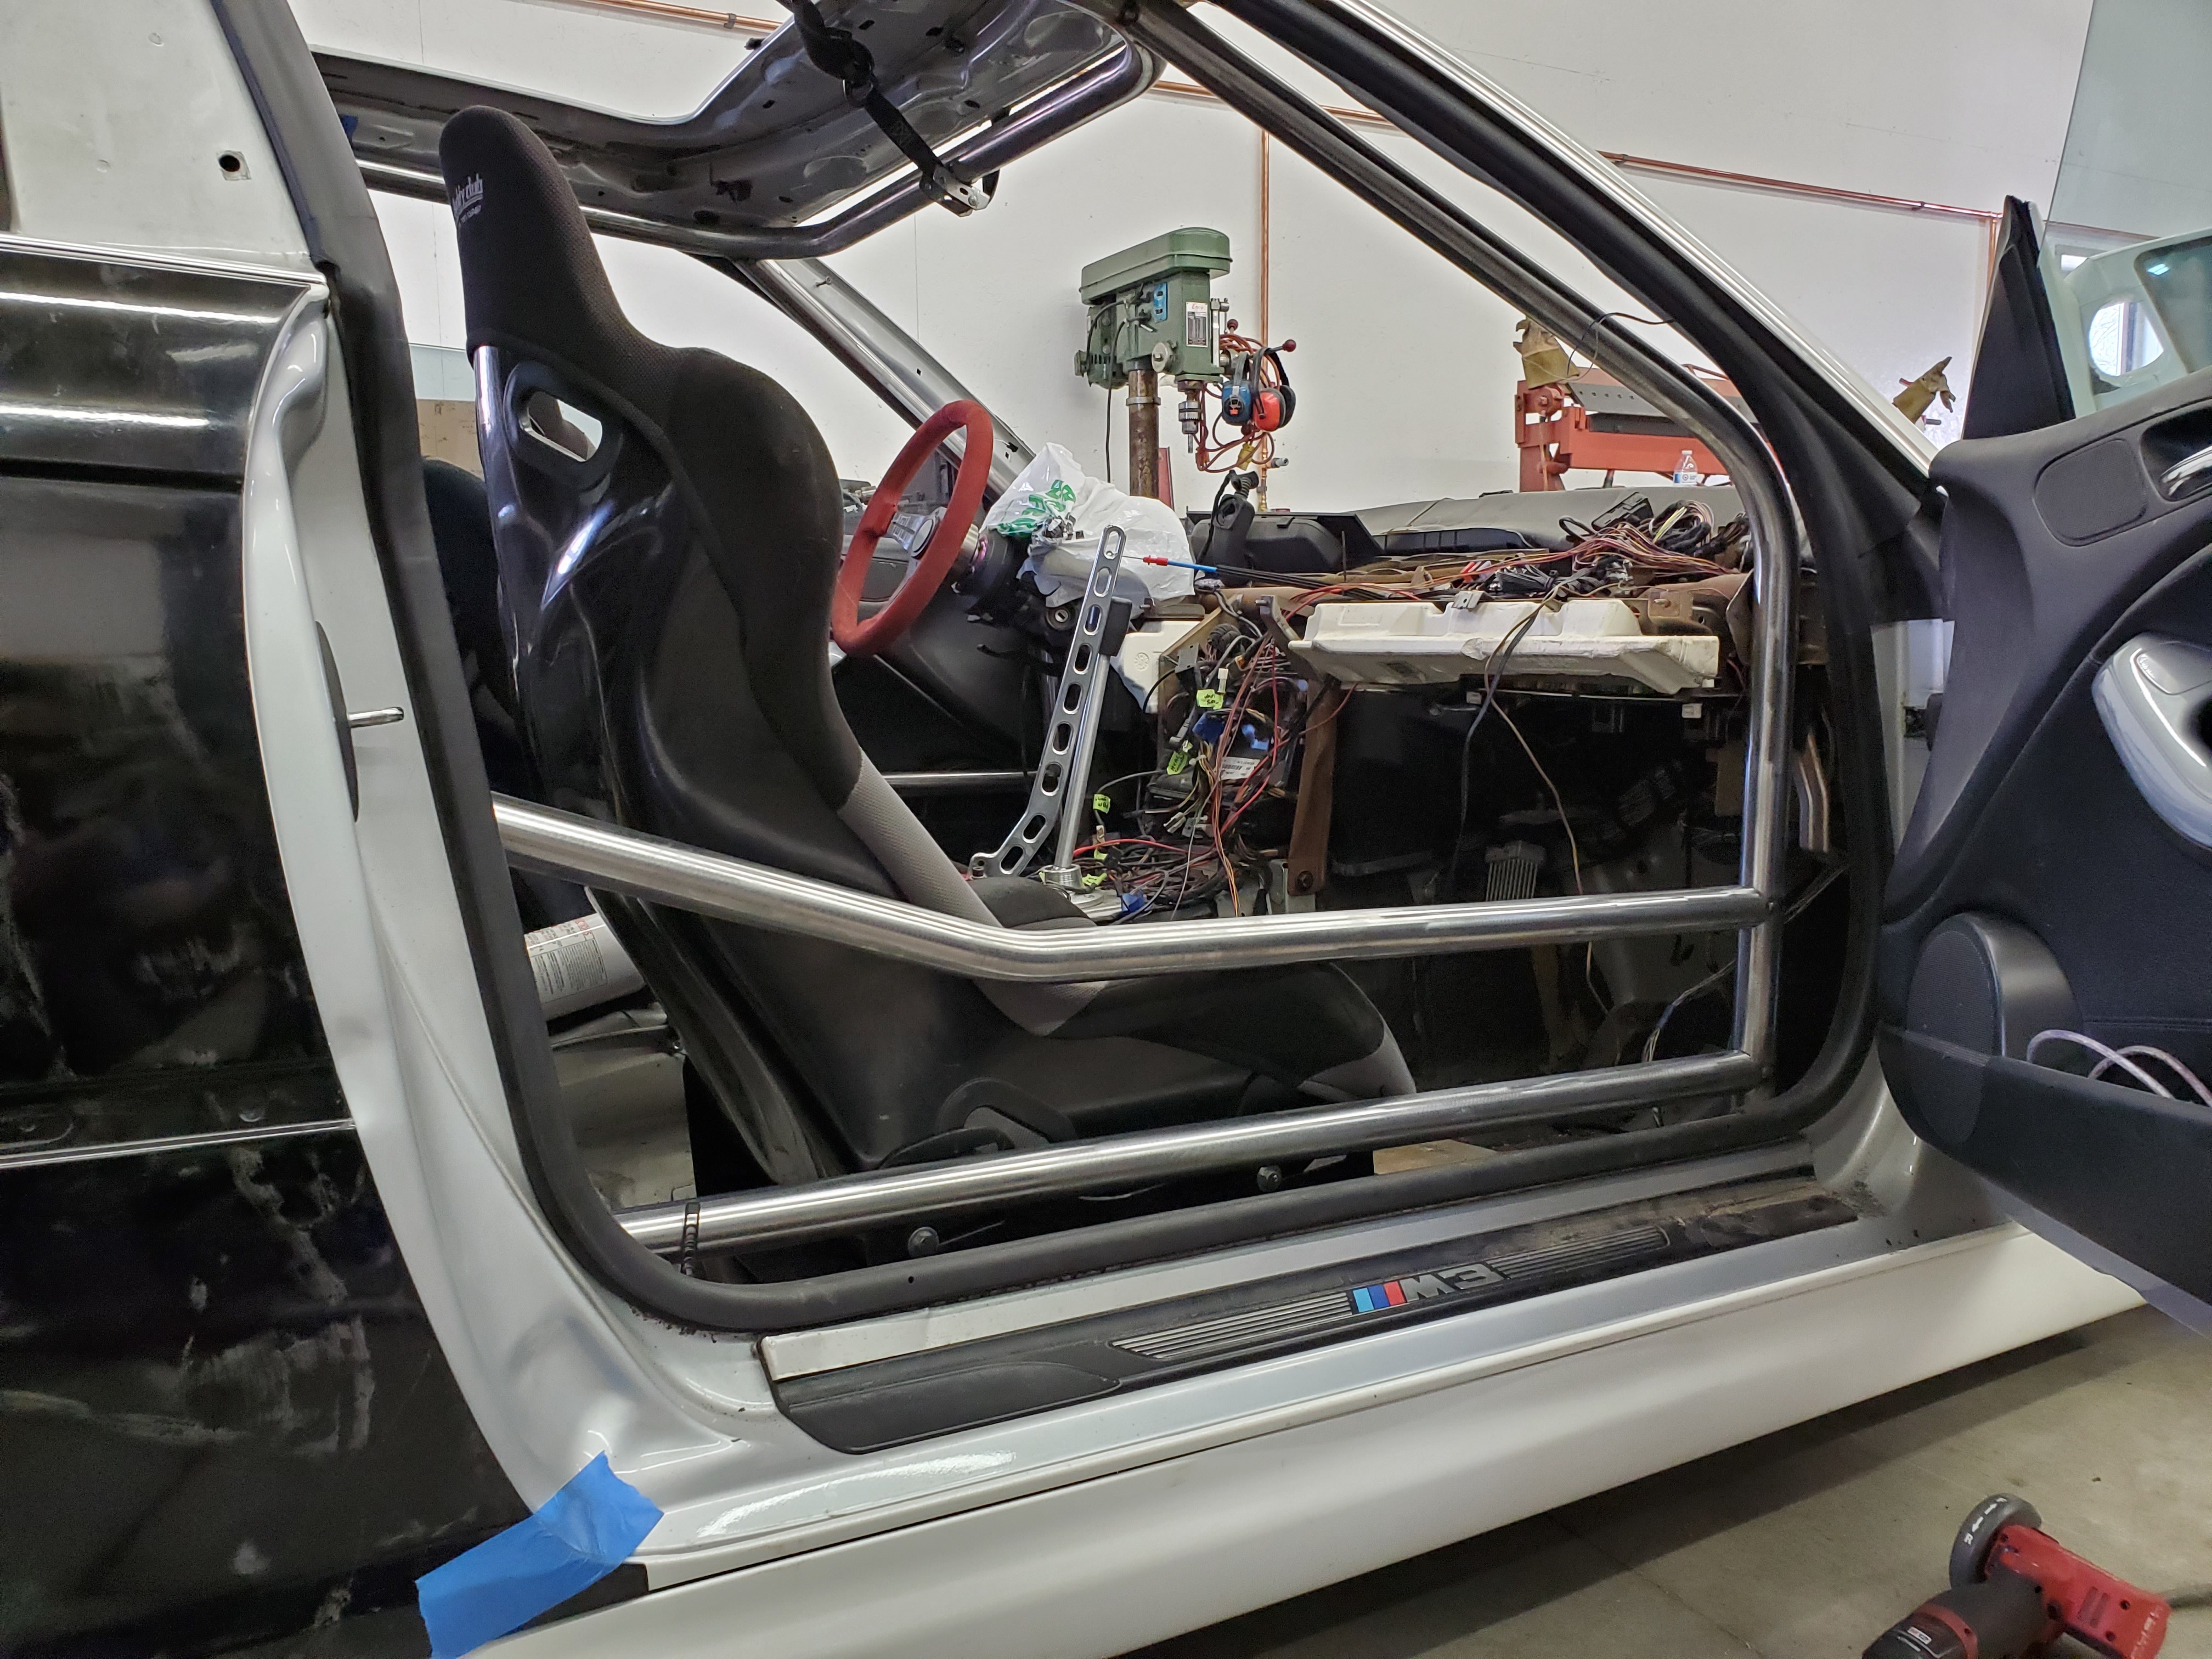
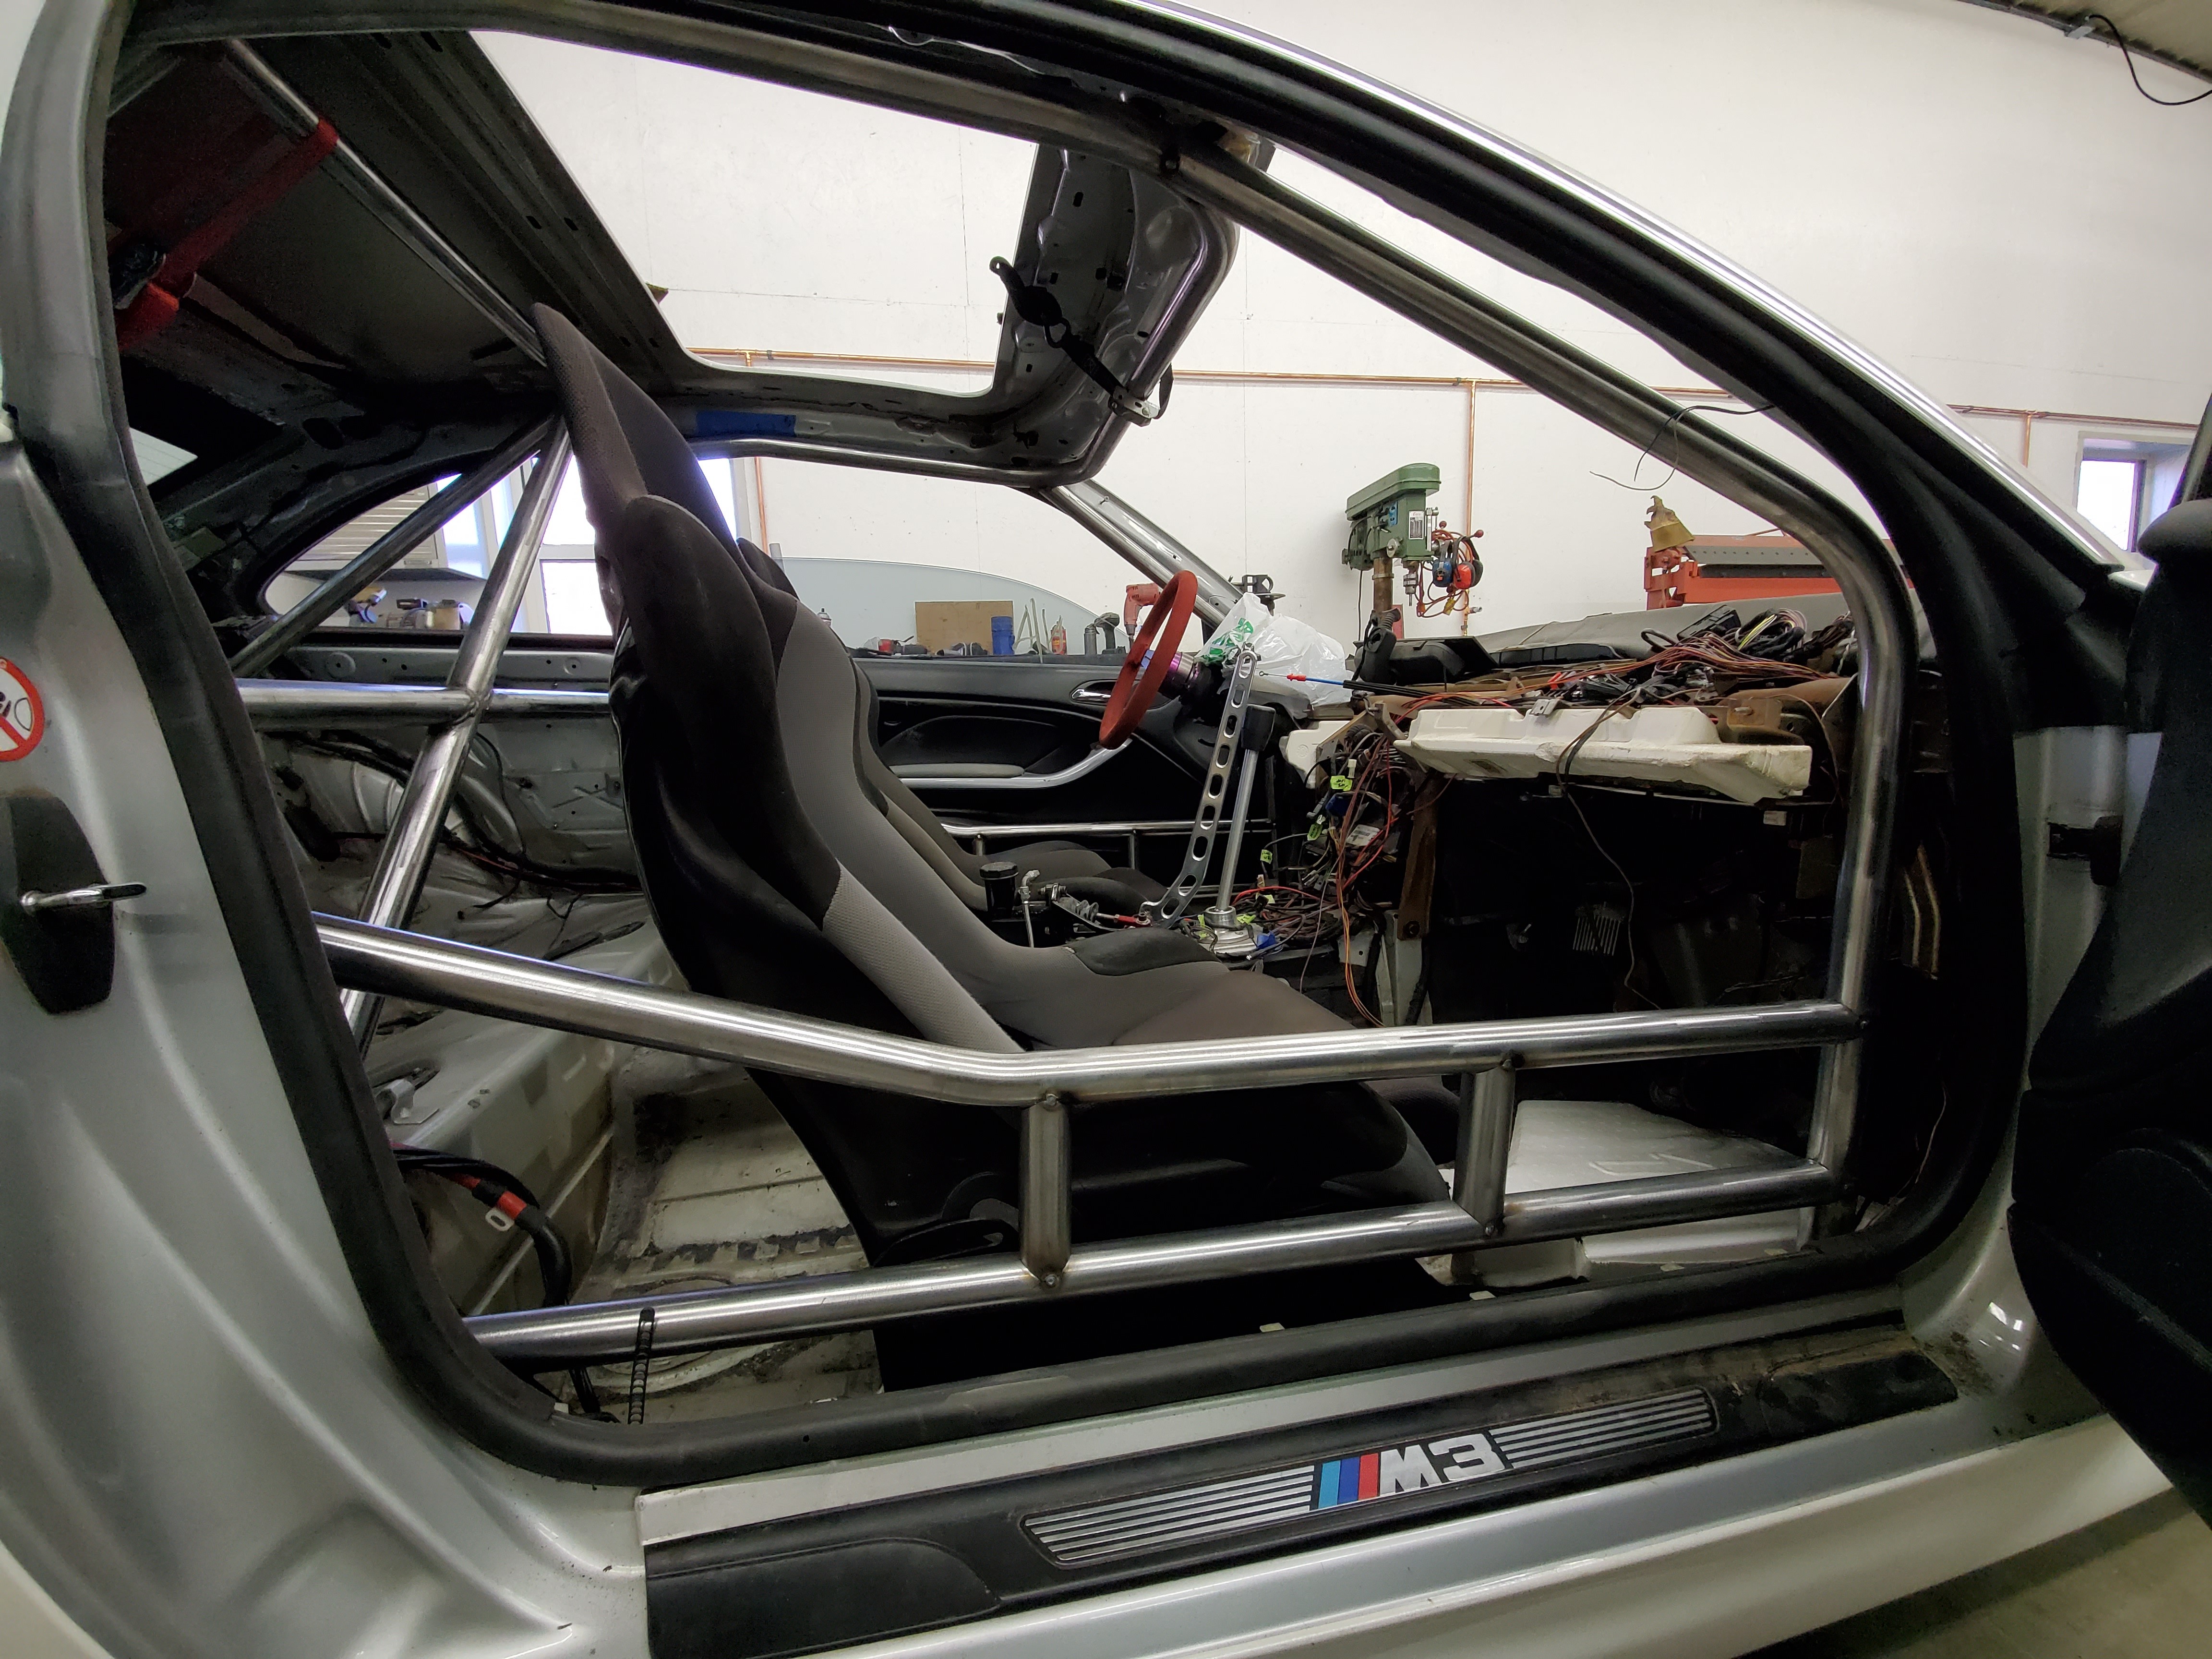
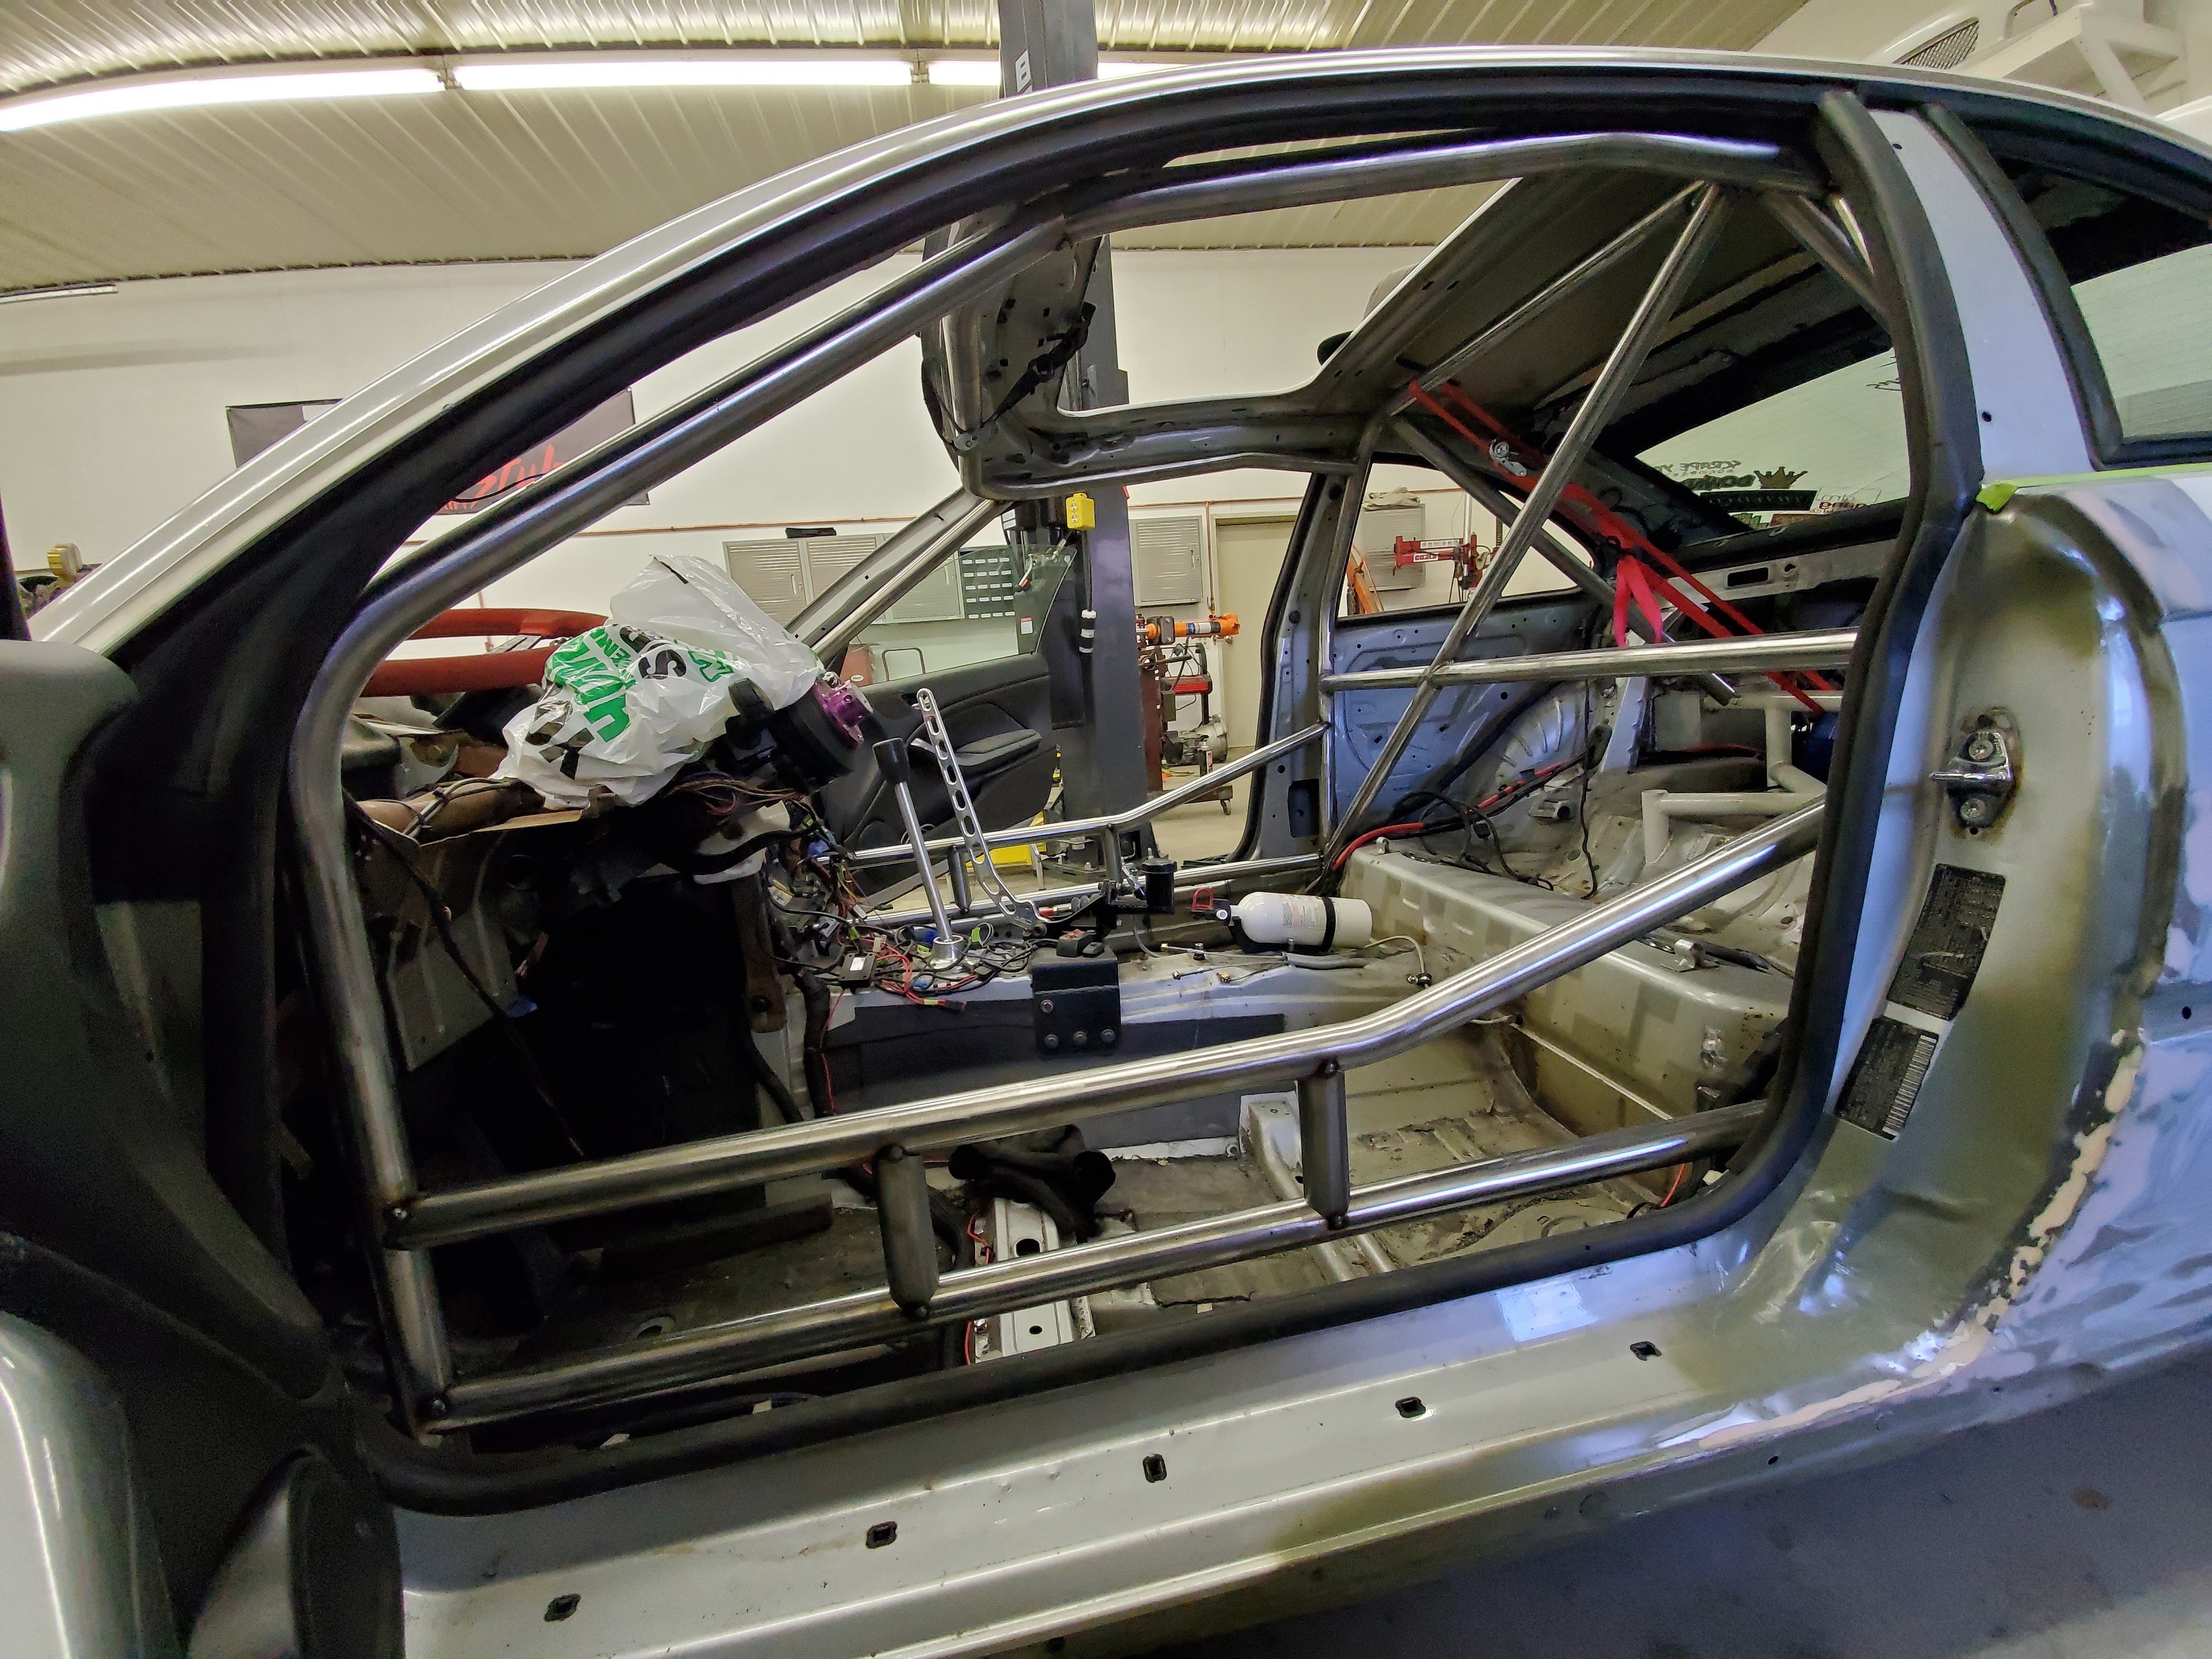
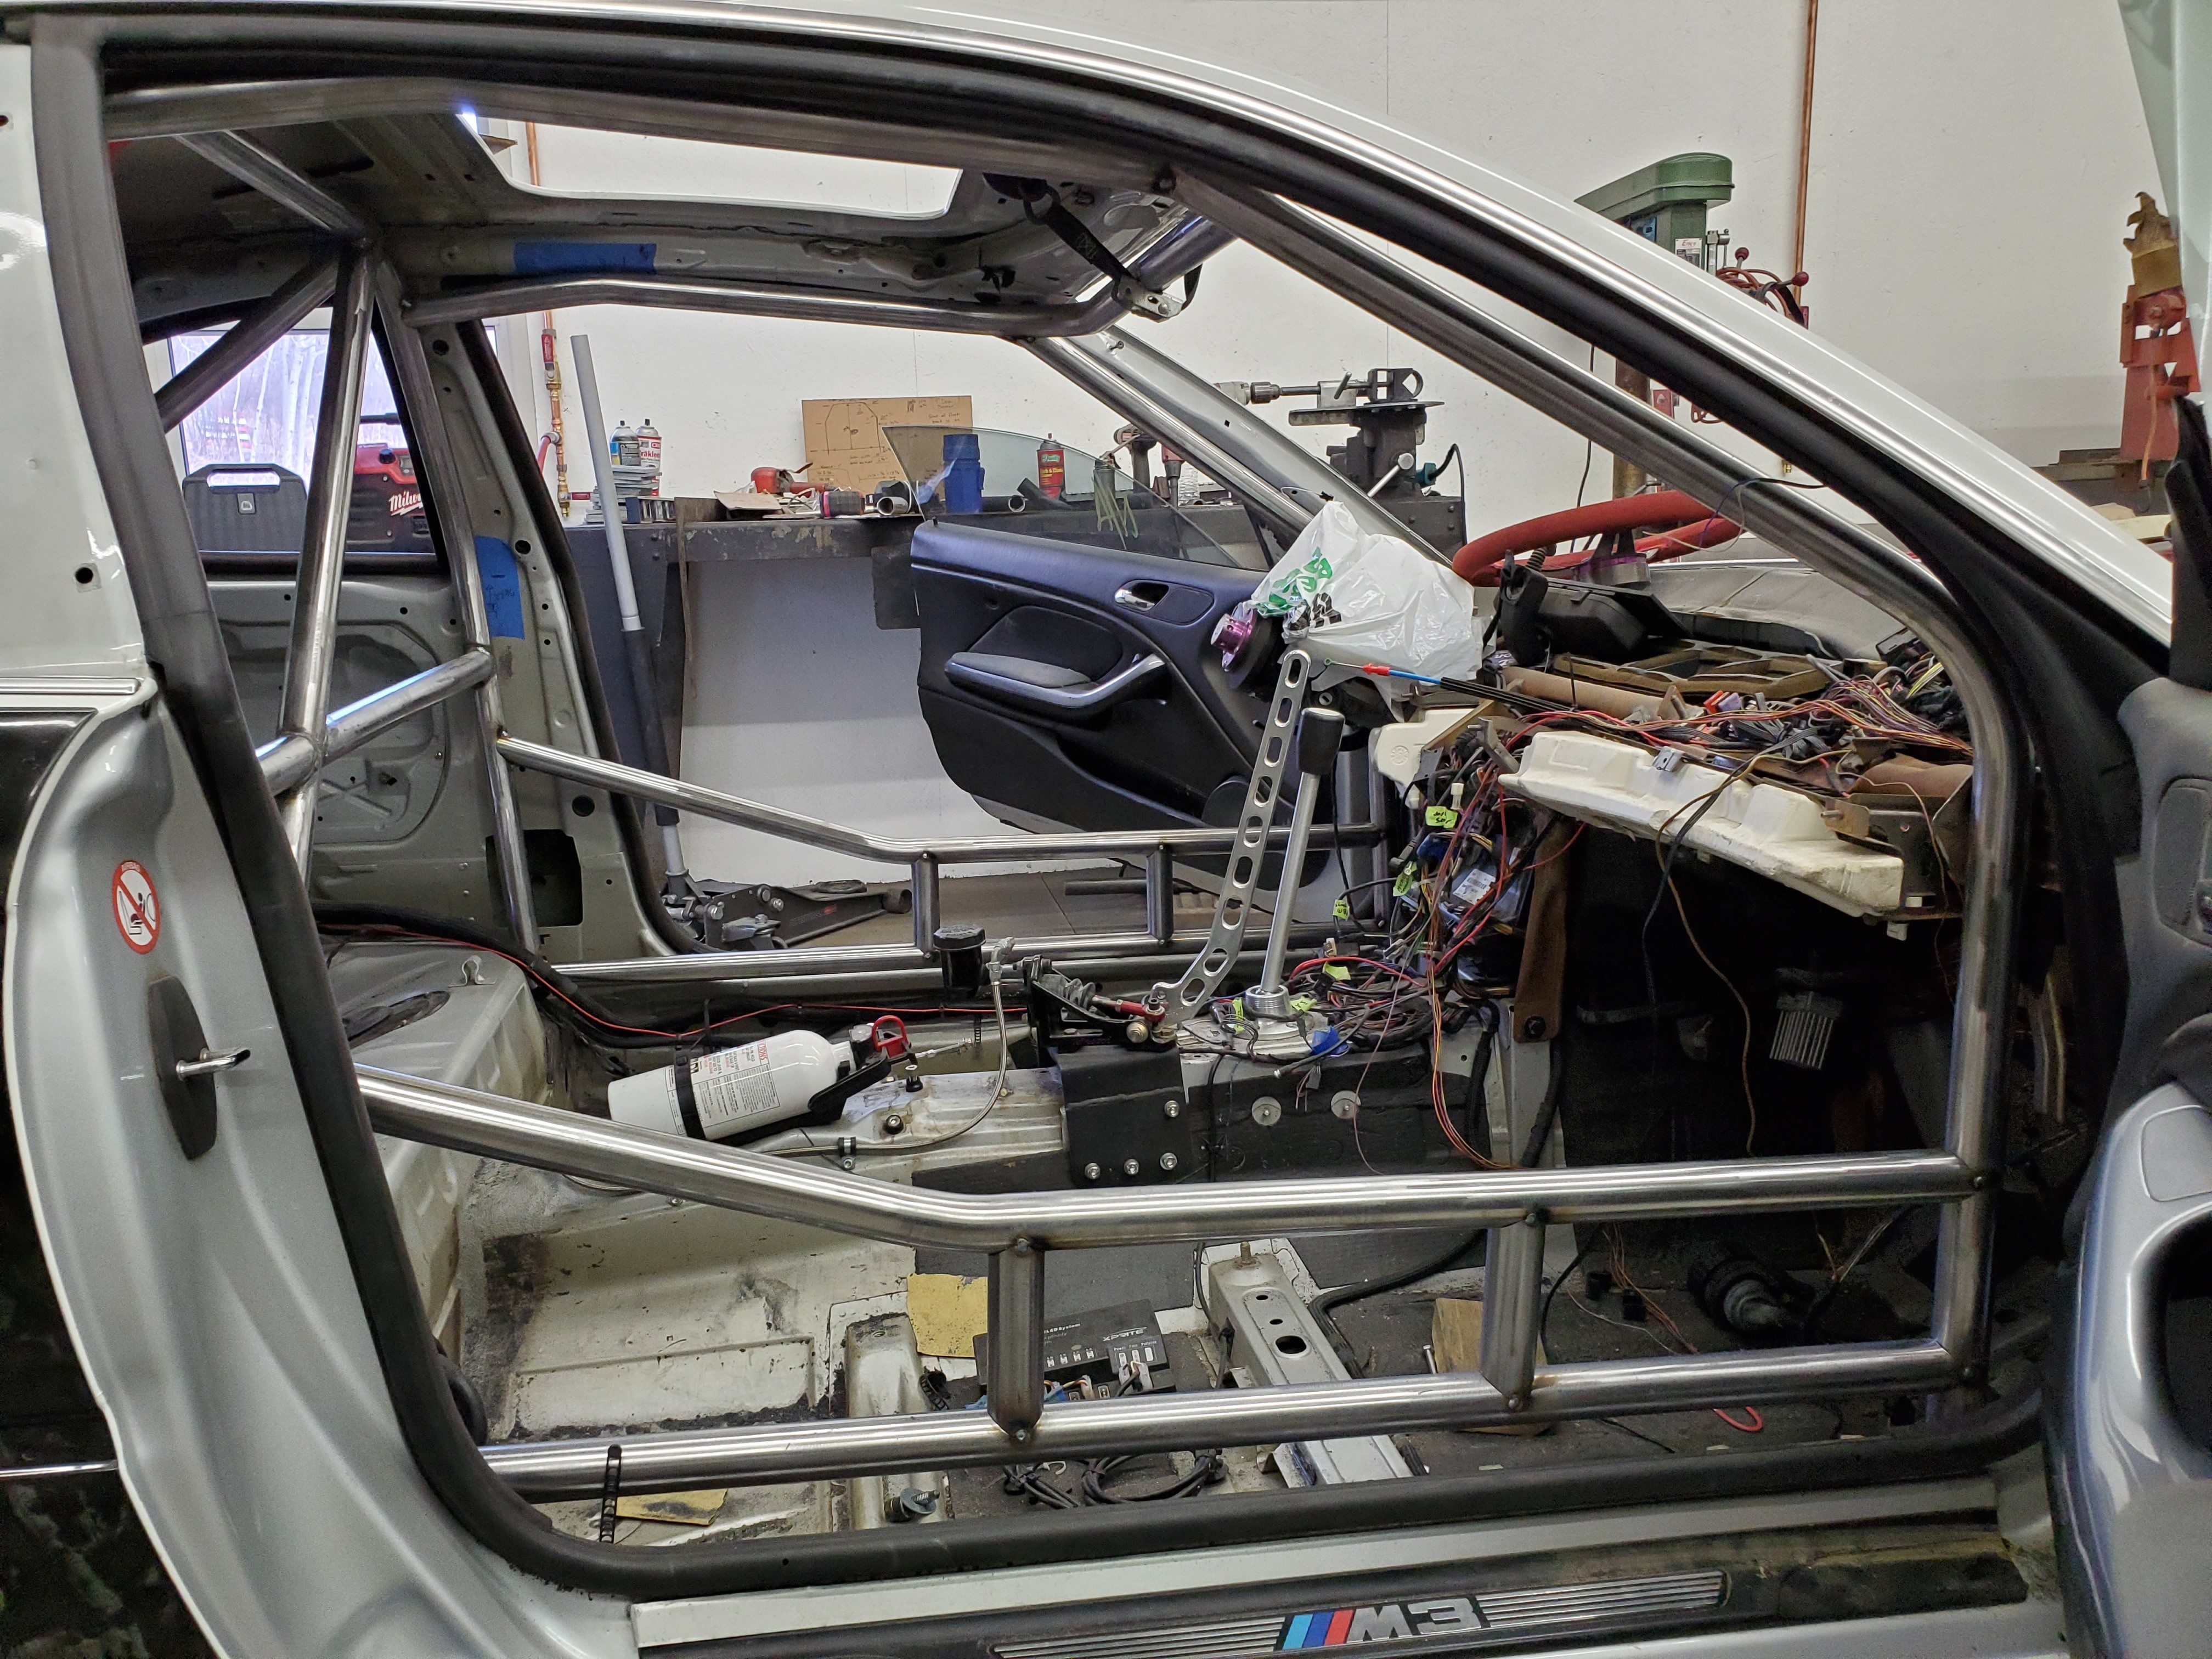
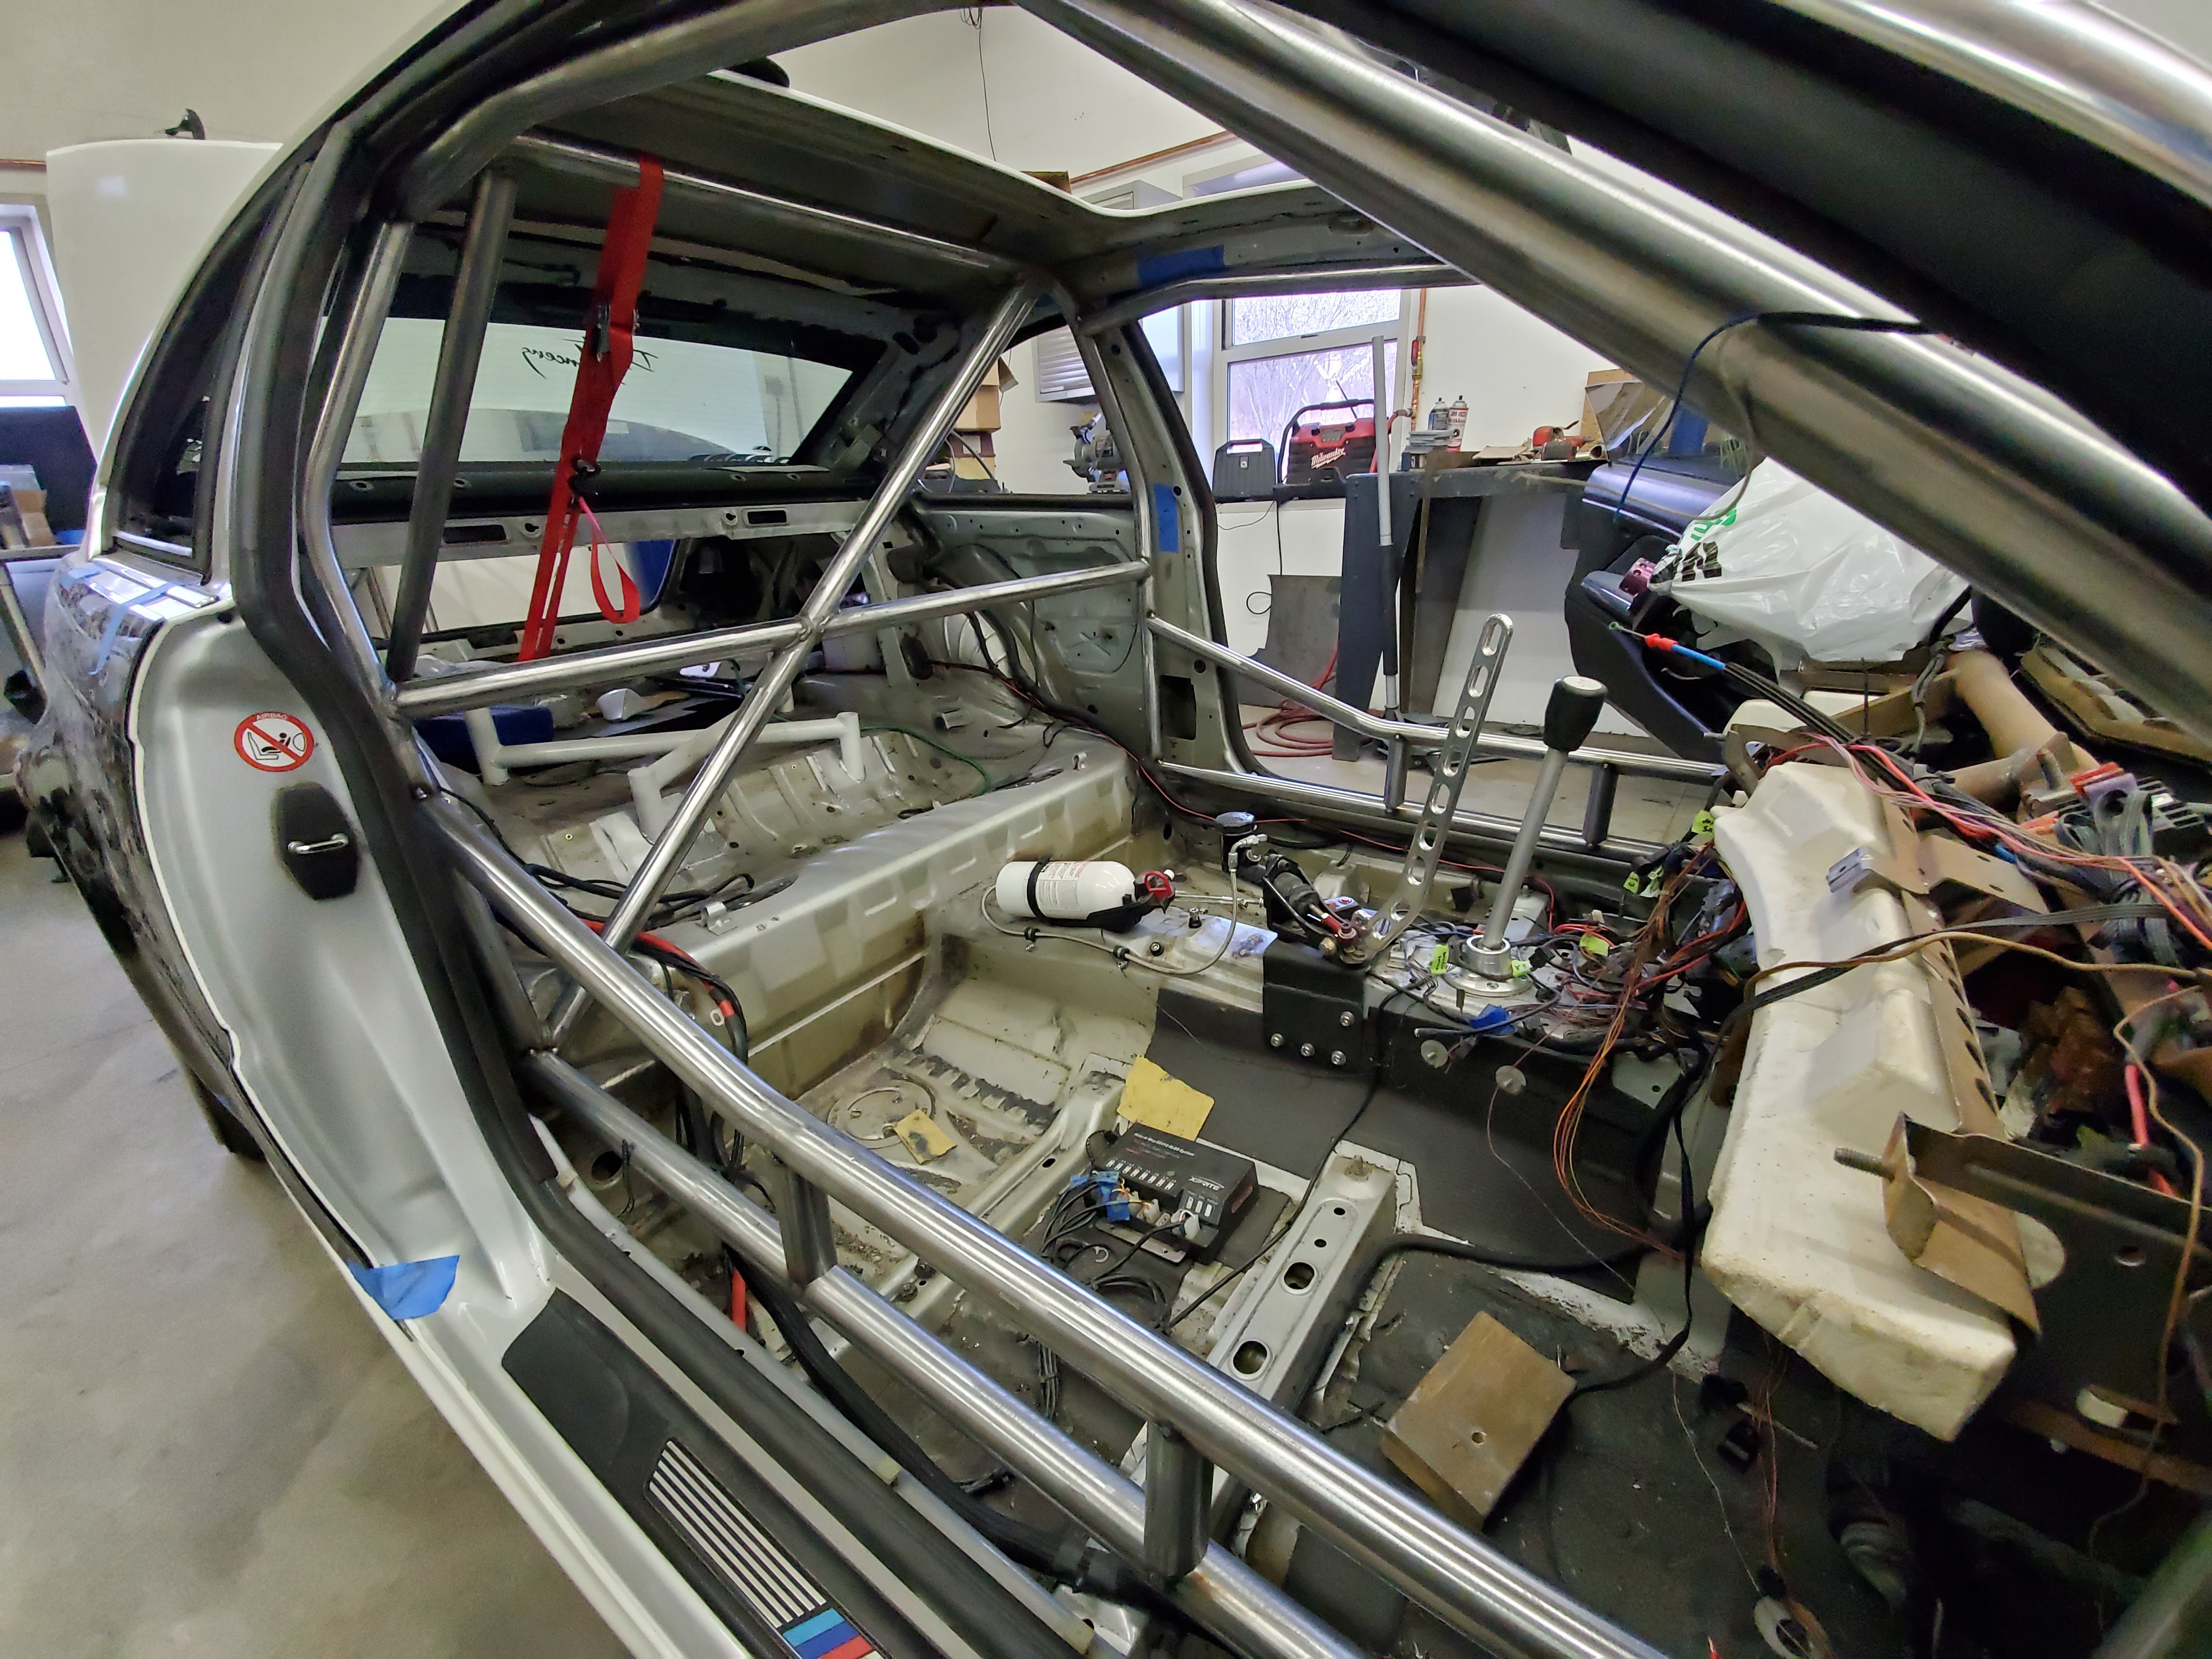
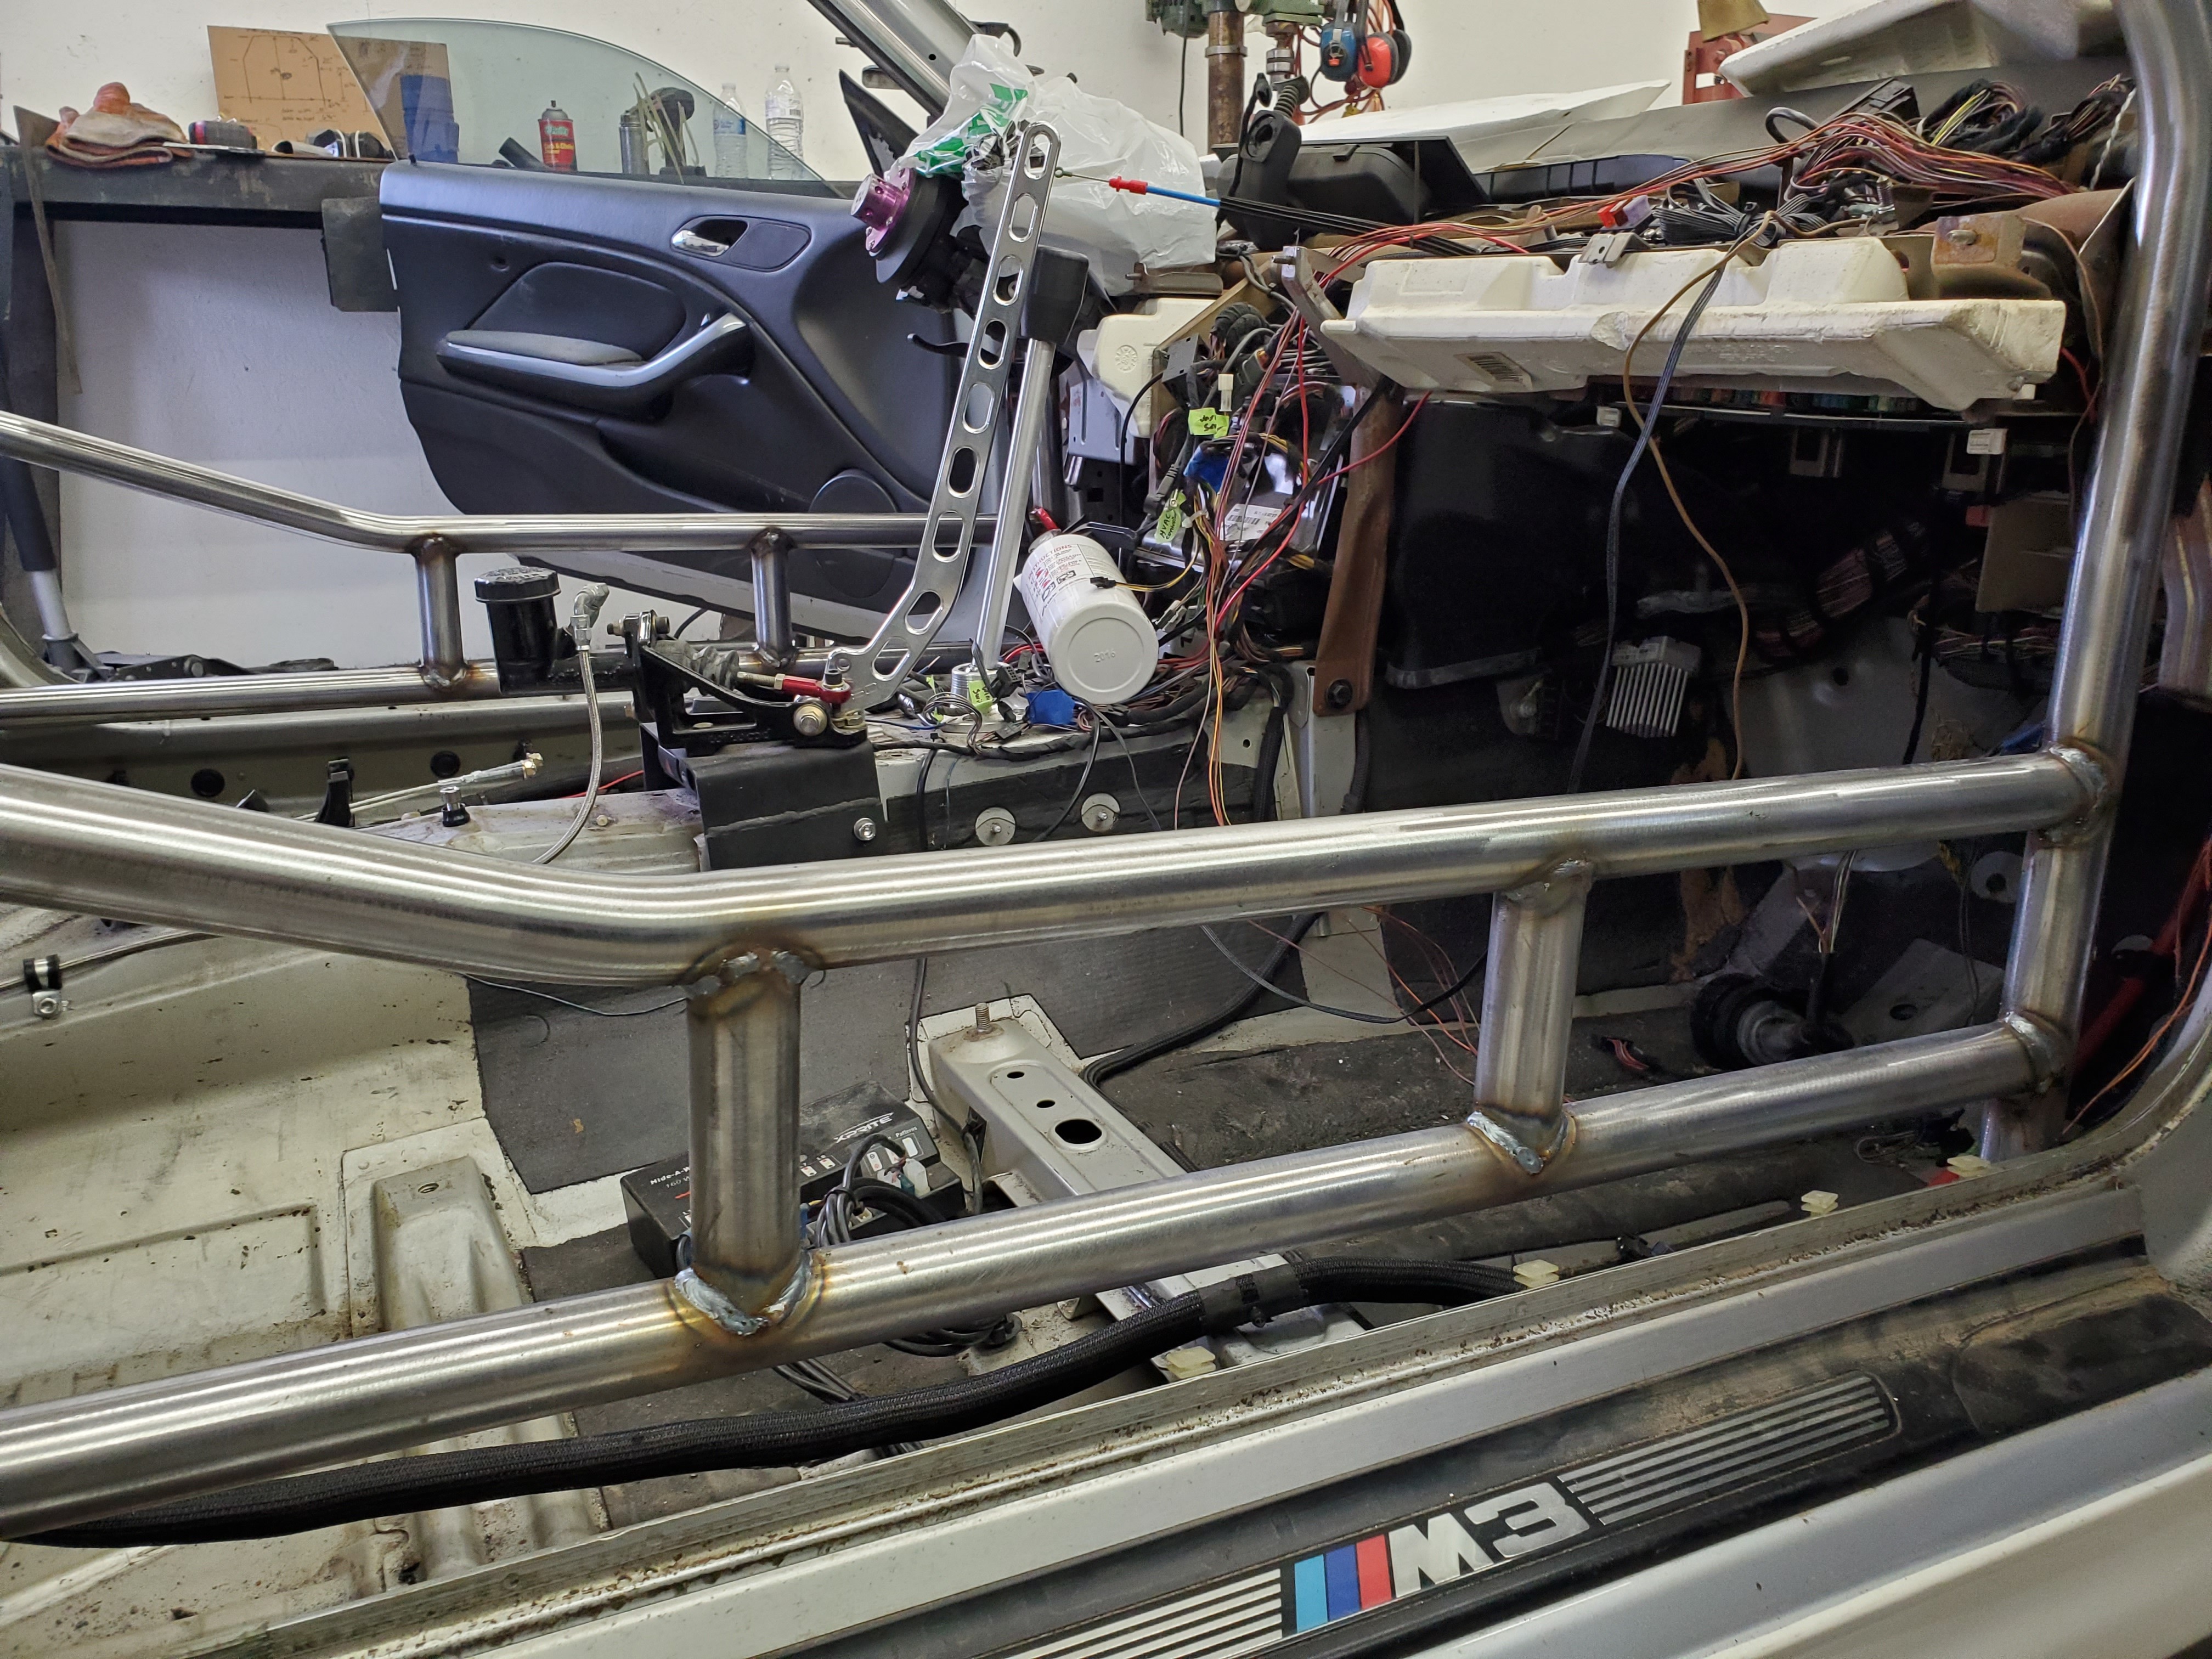
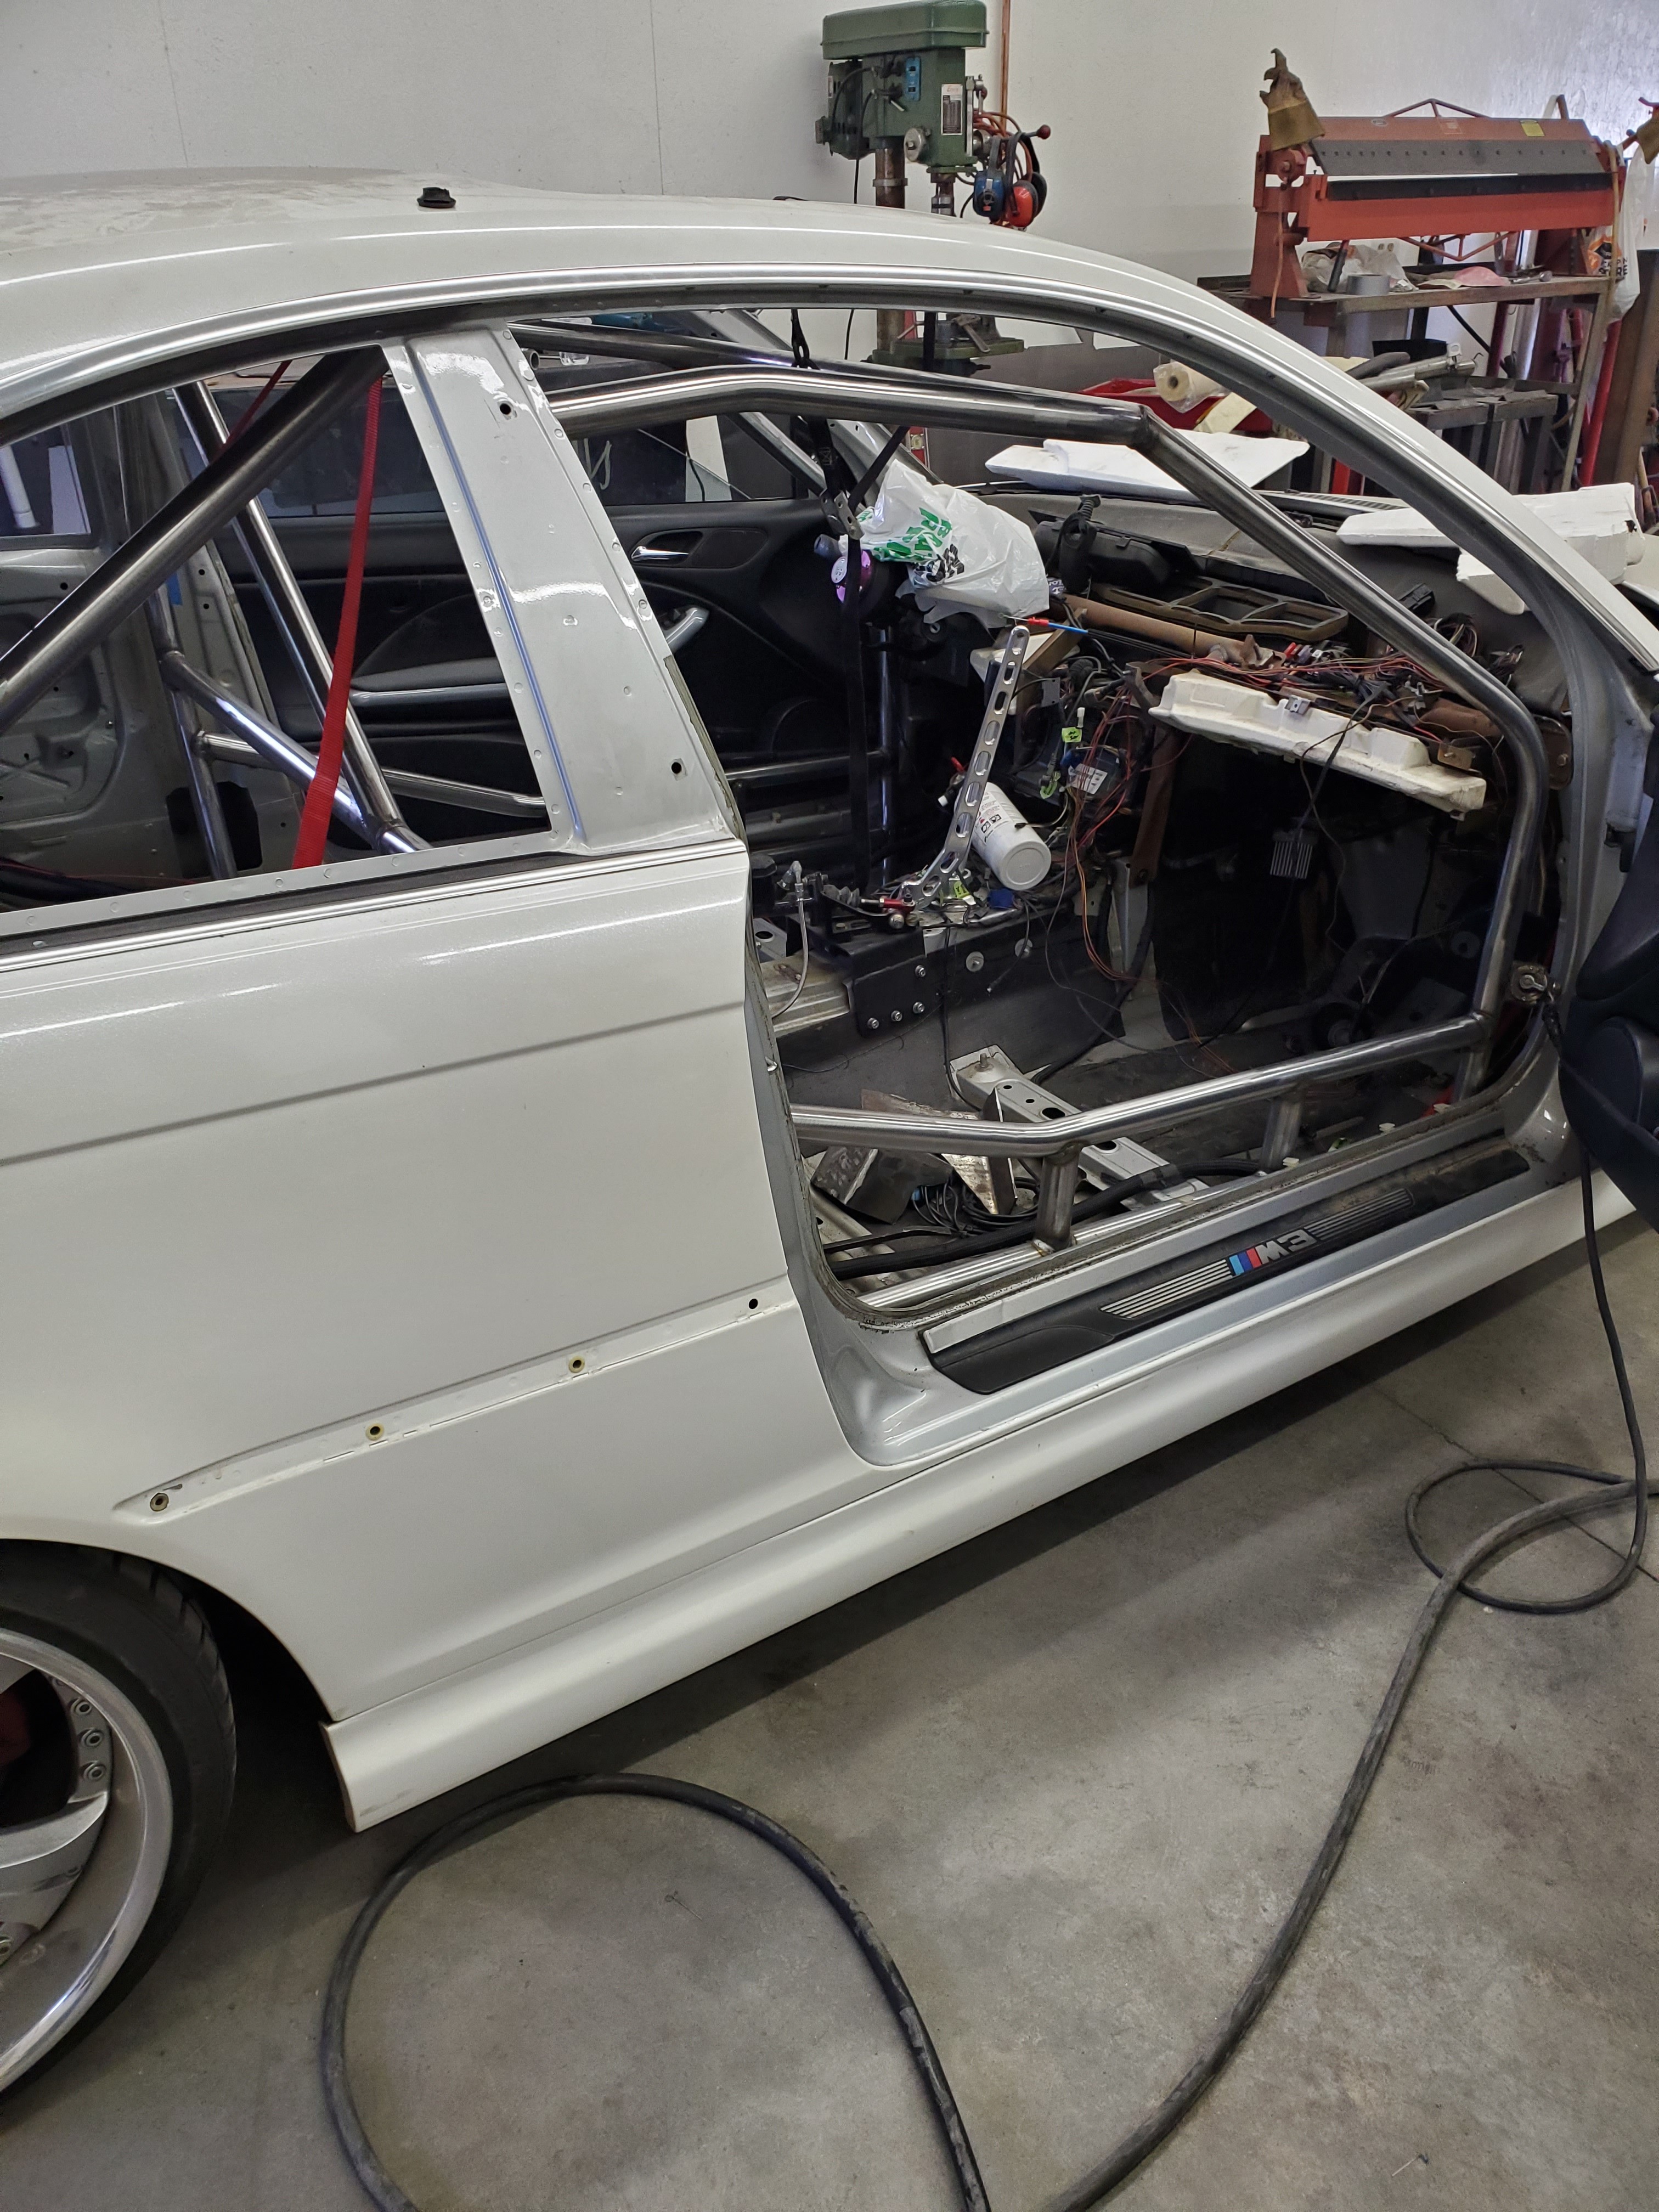
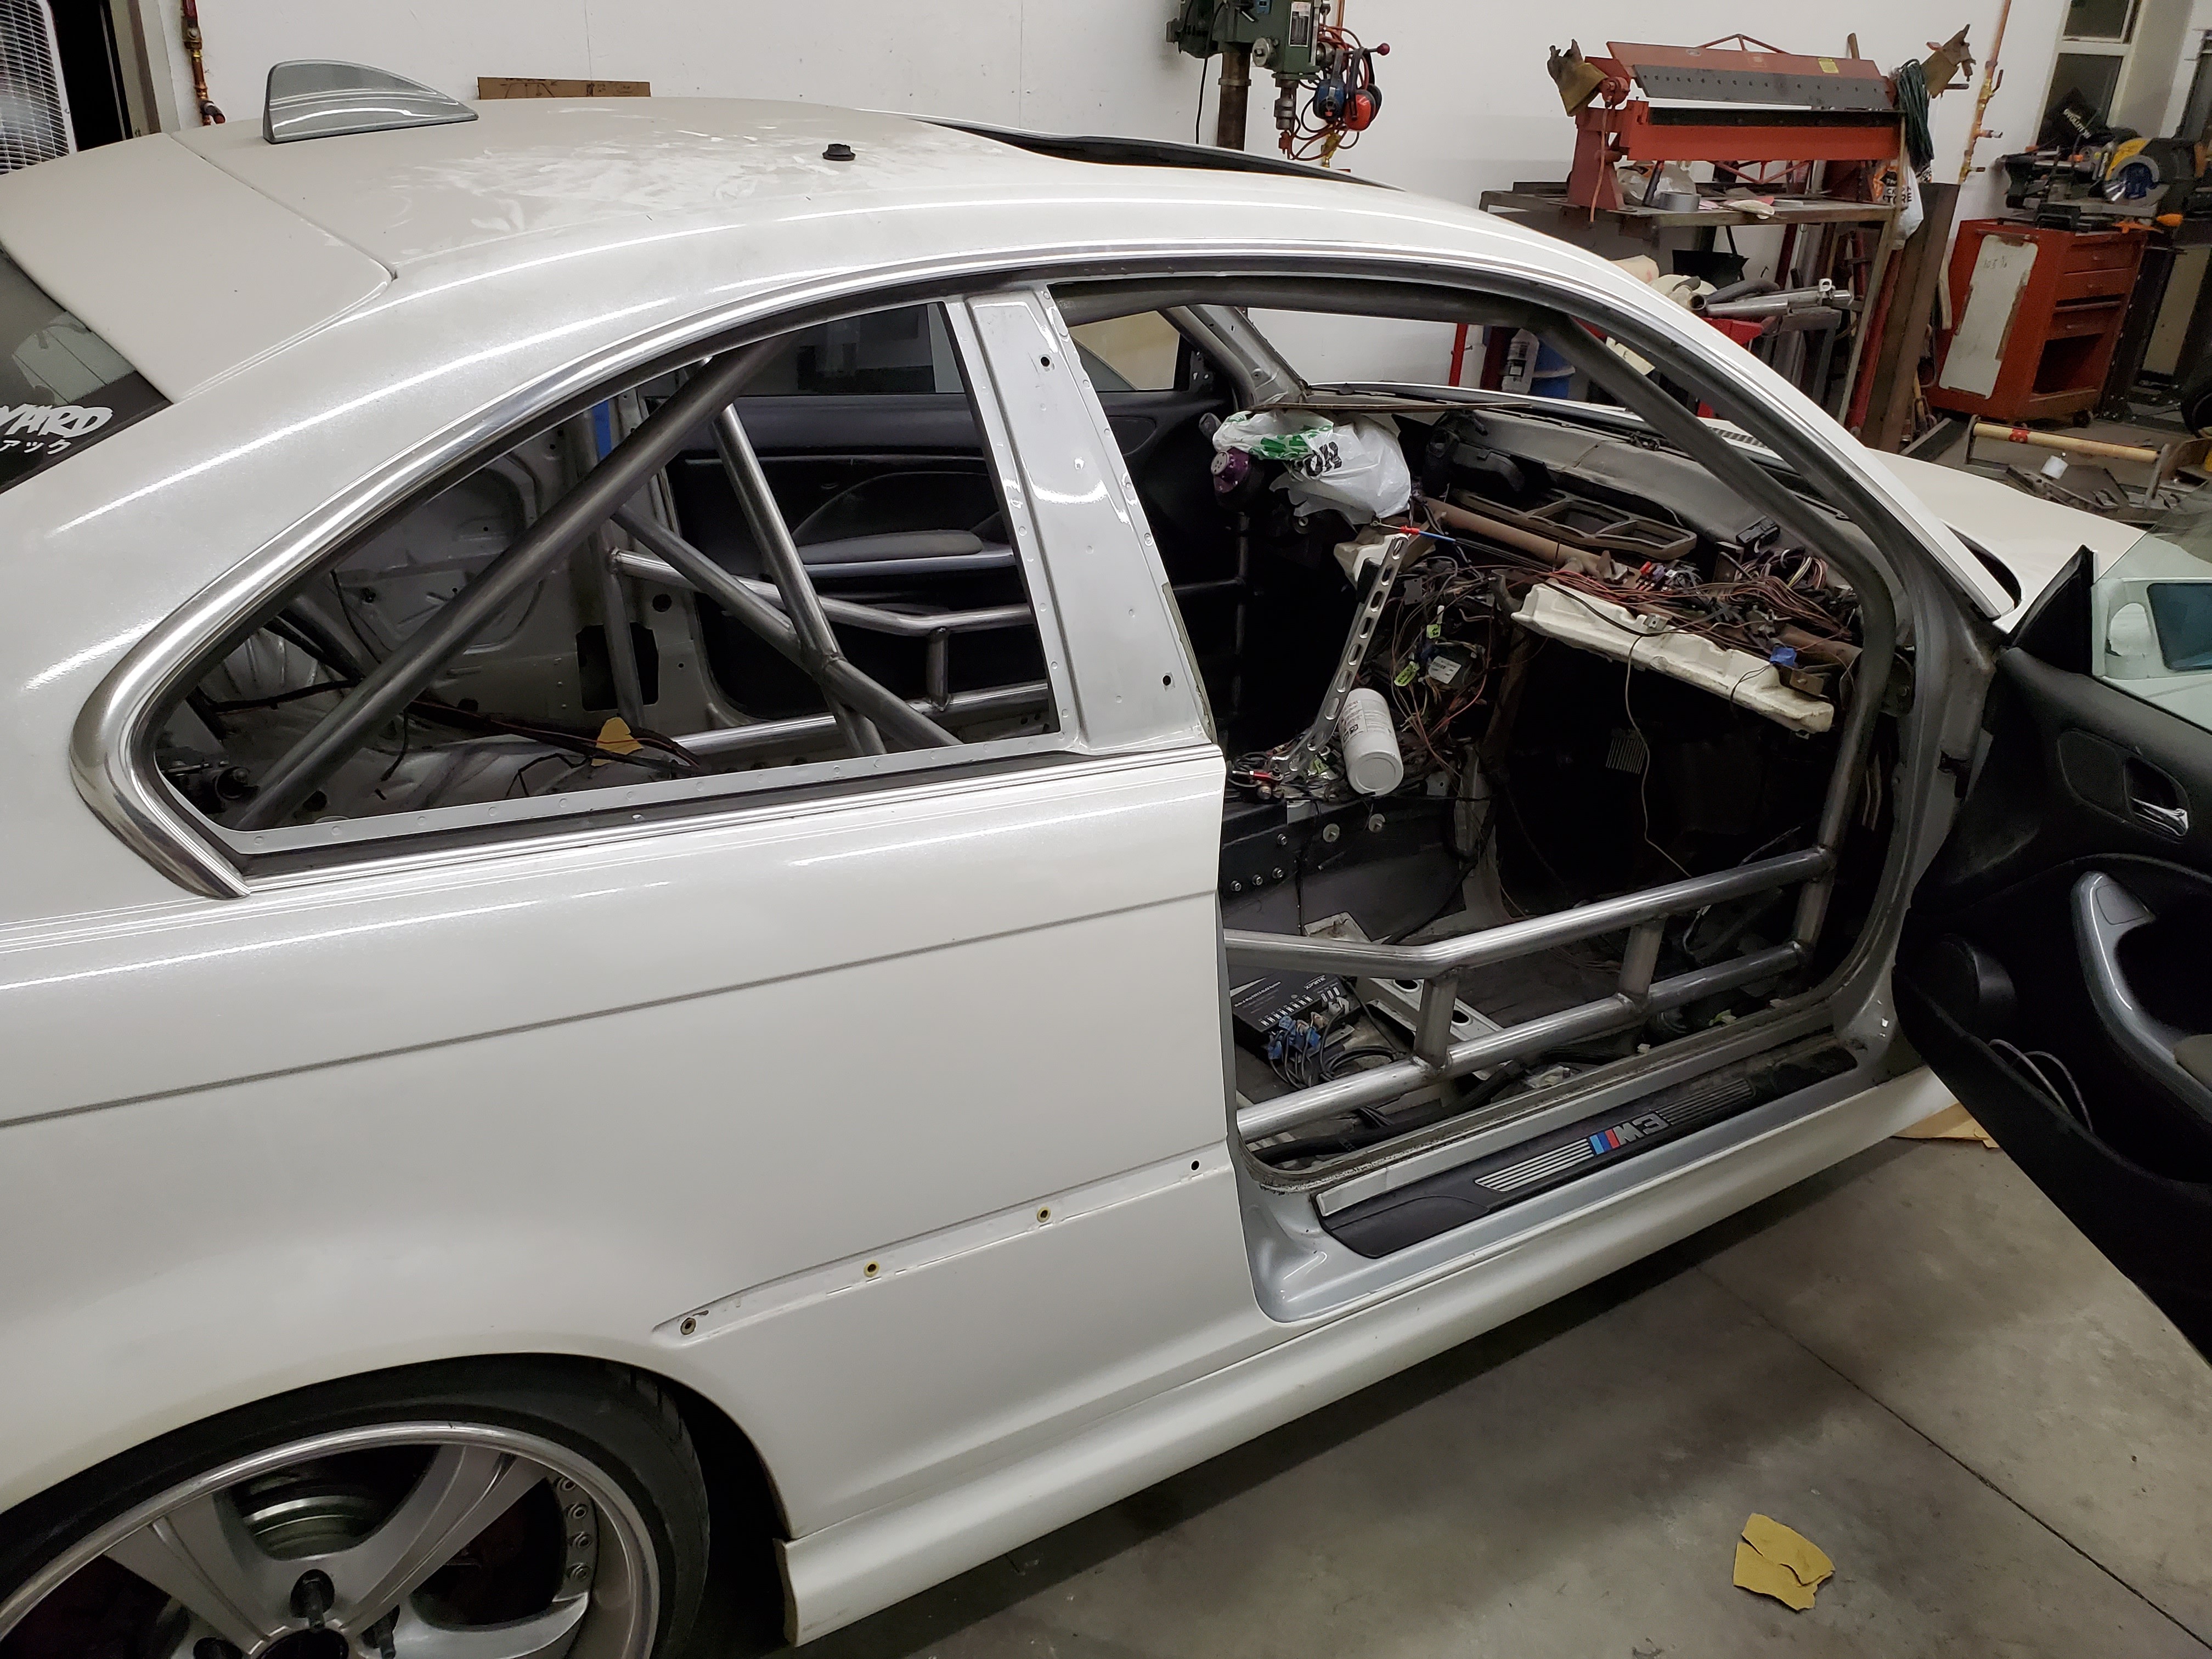
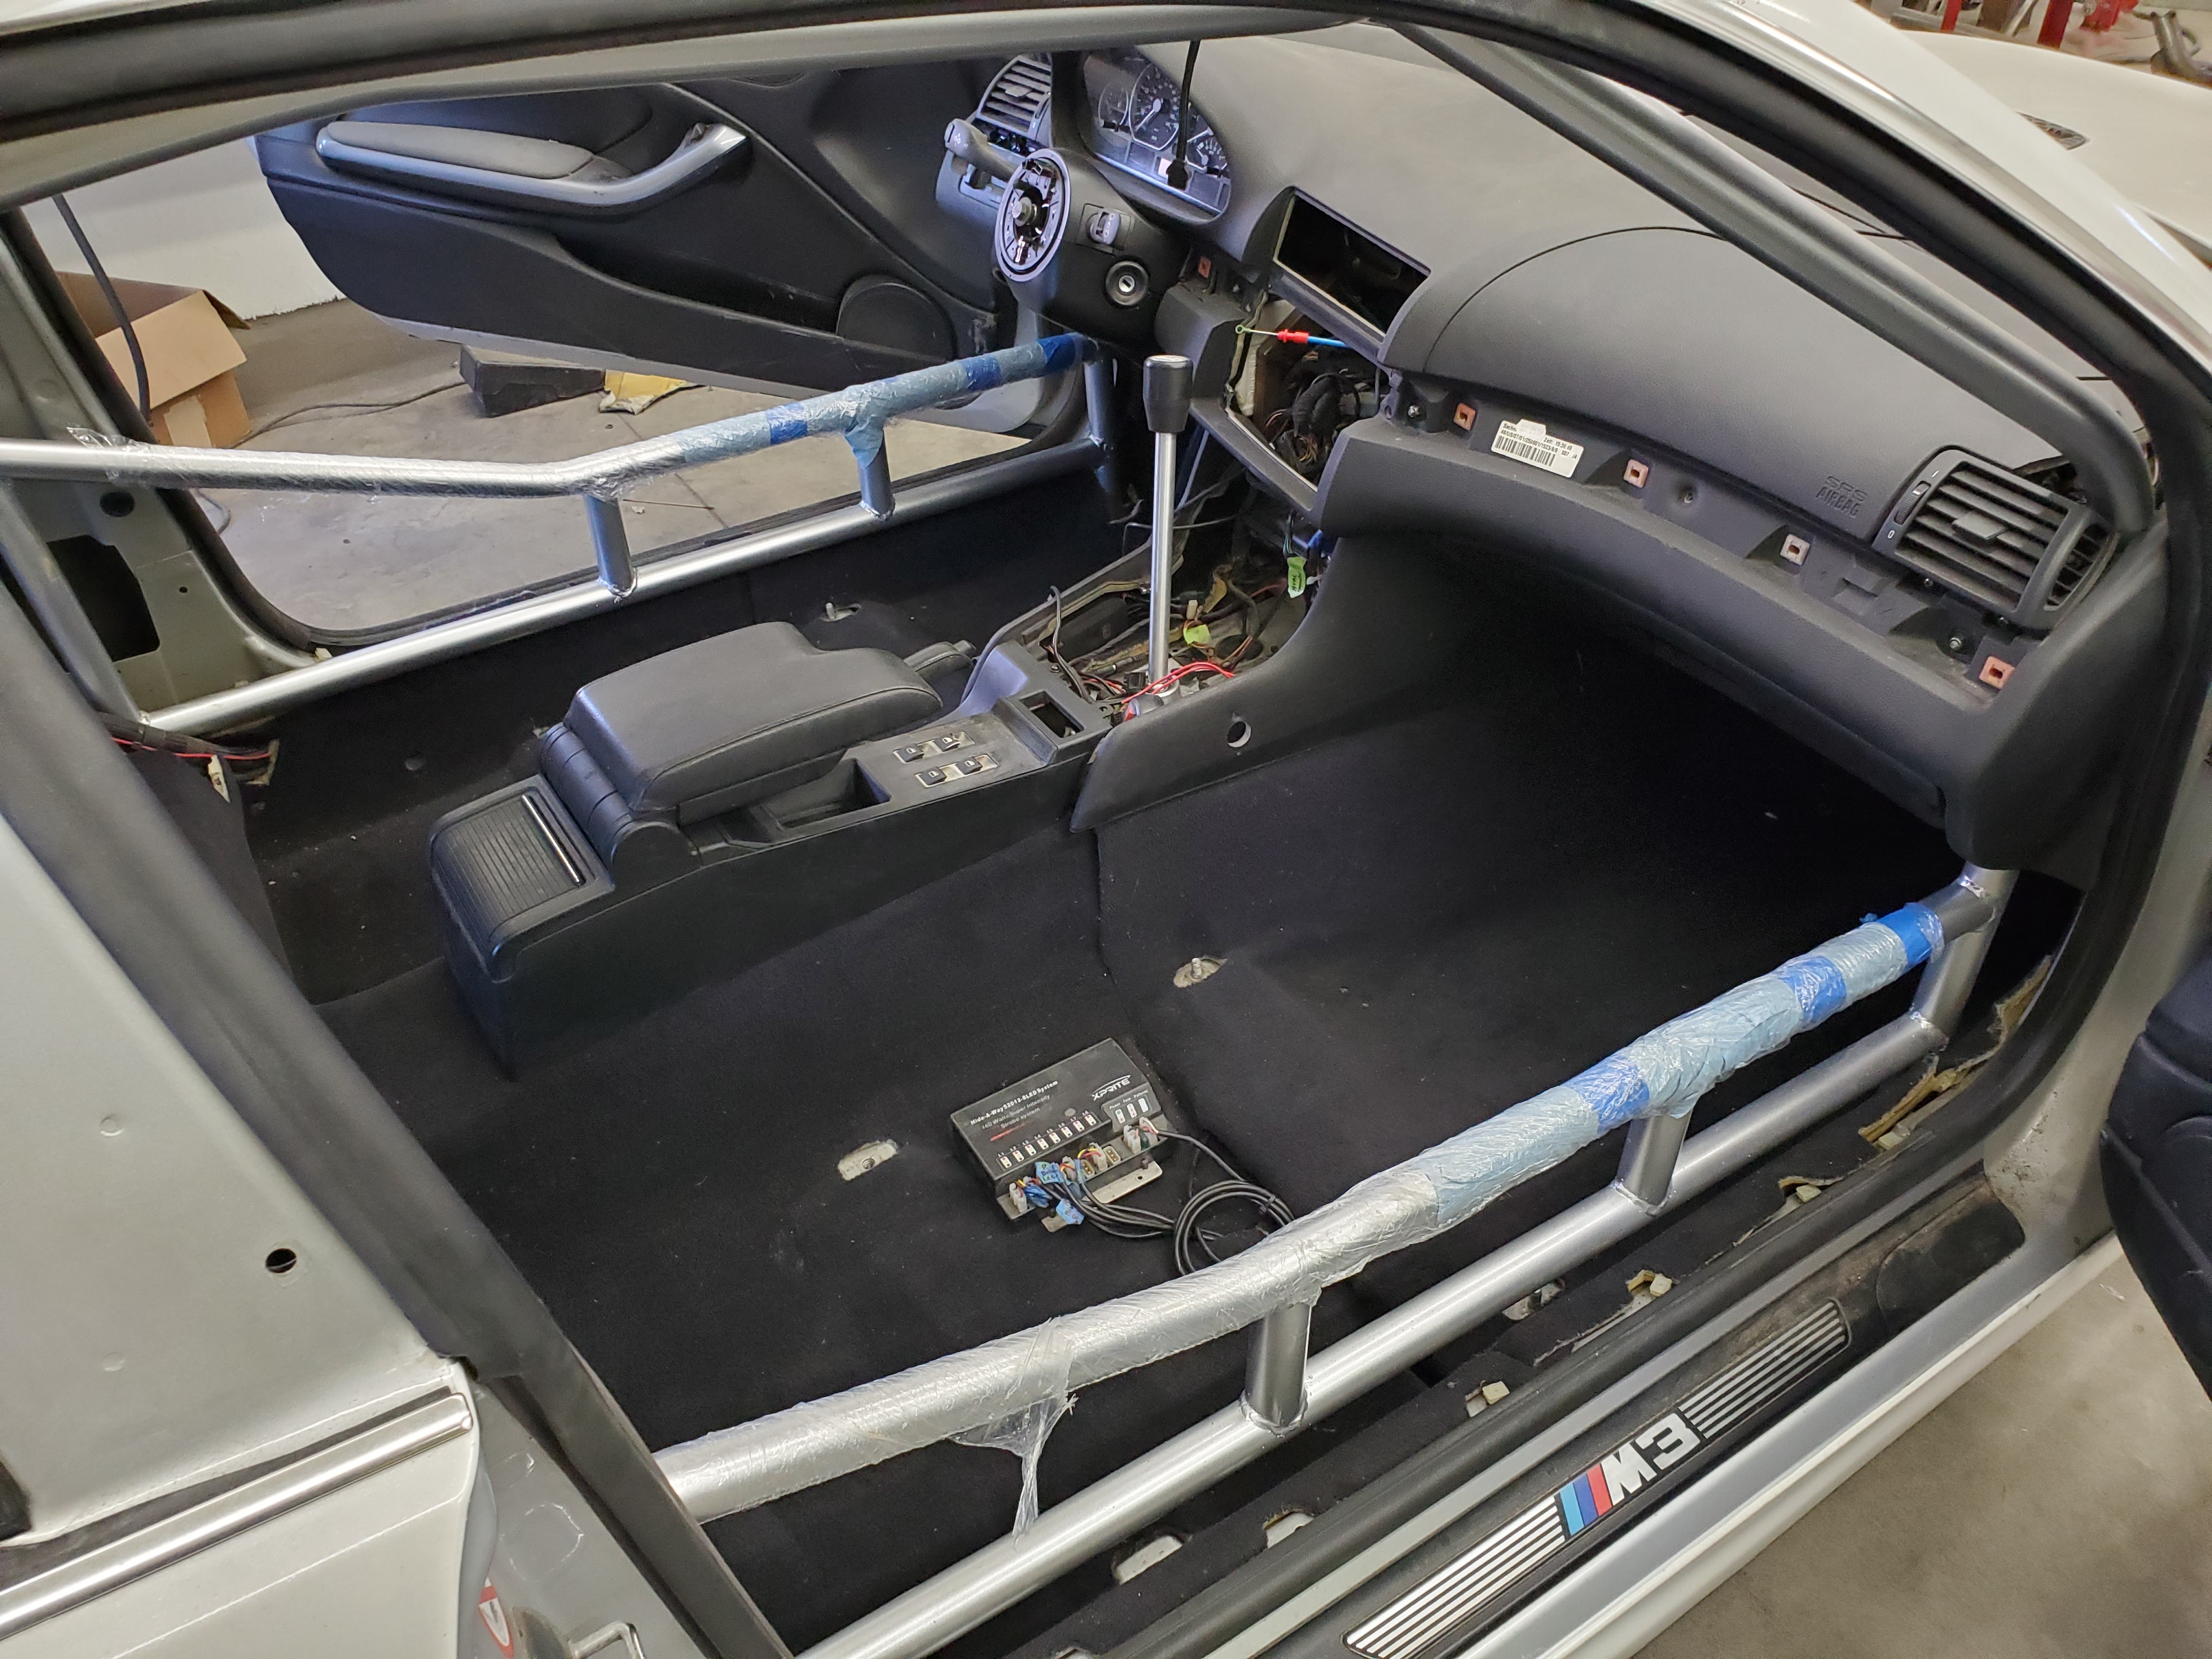
        Then I moved on to the door bars on the passenger side. Which turned out exactly how I envisioned them! Theres pleanty of ways to do a door bar but from day one this was what I wanted and I couldnt be happier.

        Just need to add the verticals for more support.
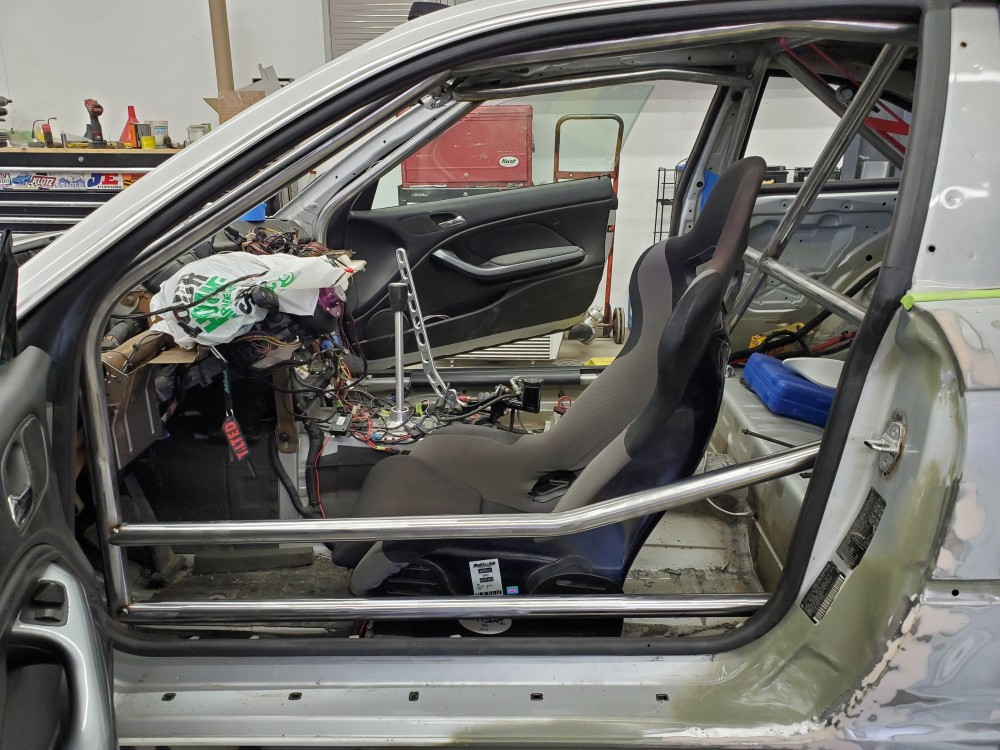
        20200315161652.jpg

        20200315161948.jpg

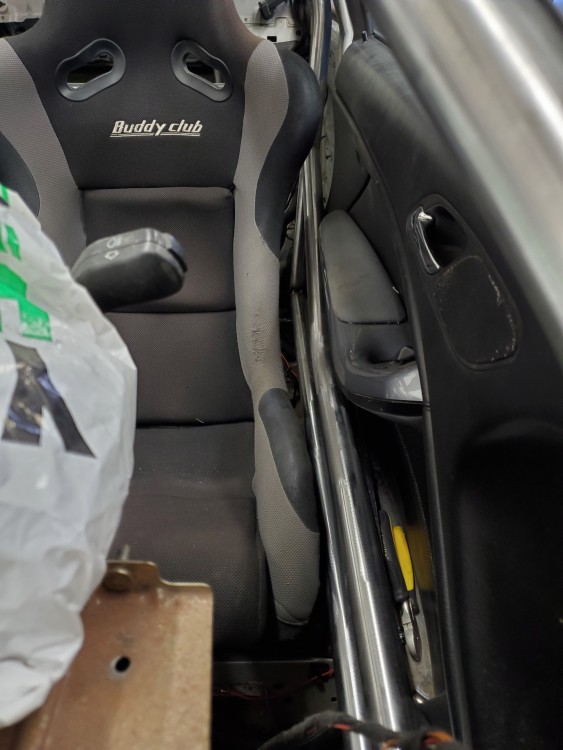
        And to further my excitement the door closes and fits perfectly with the seat and door panel!
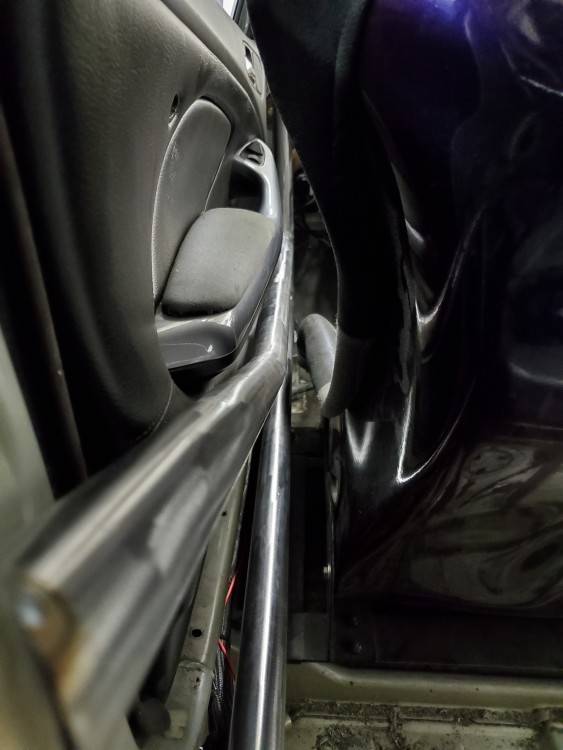
        20200315162050.jpg

        20200315162108.jpg

        Things are moving along so hopefully the other door bars go smoothly then final welding can commence.

        1 Reply Last reply
        3
        • TkuhnT
          TkuhnT
          Tkuhn
          wrote on last edited by
          #311

          UPDATE

          Started the weekend off with running down to a buddies in Waukegan to pick up a set of DonMusk M3 over fenders. Which I have wanted for a long time and timing worked out plus I saved huge not having to ship from Poland.
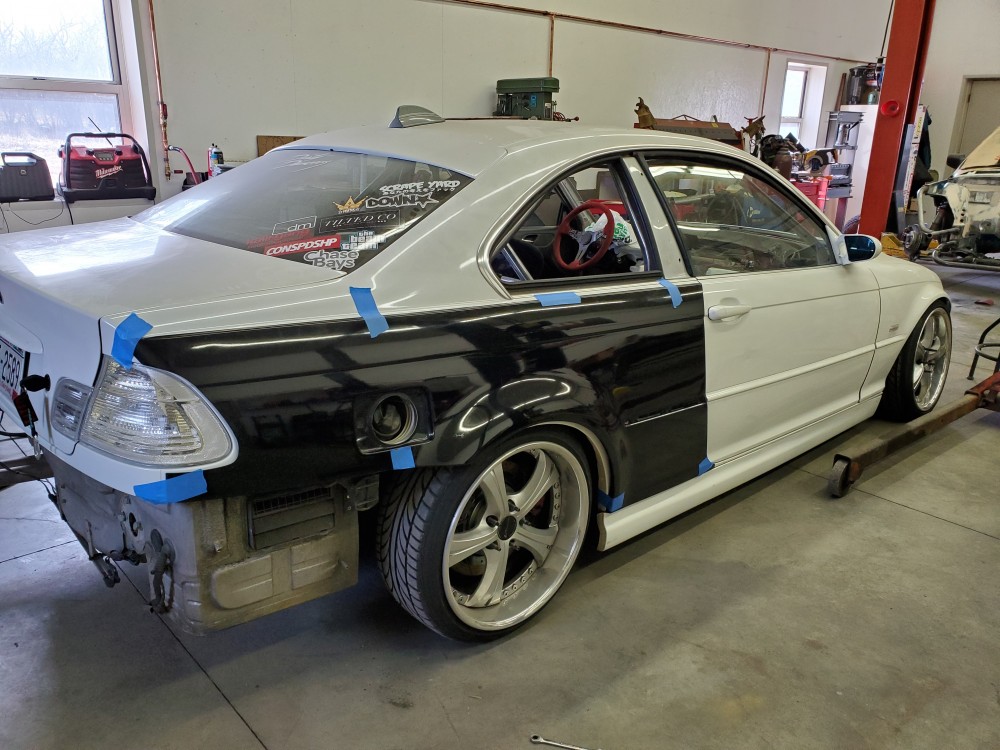
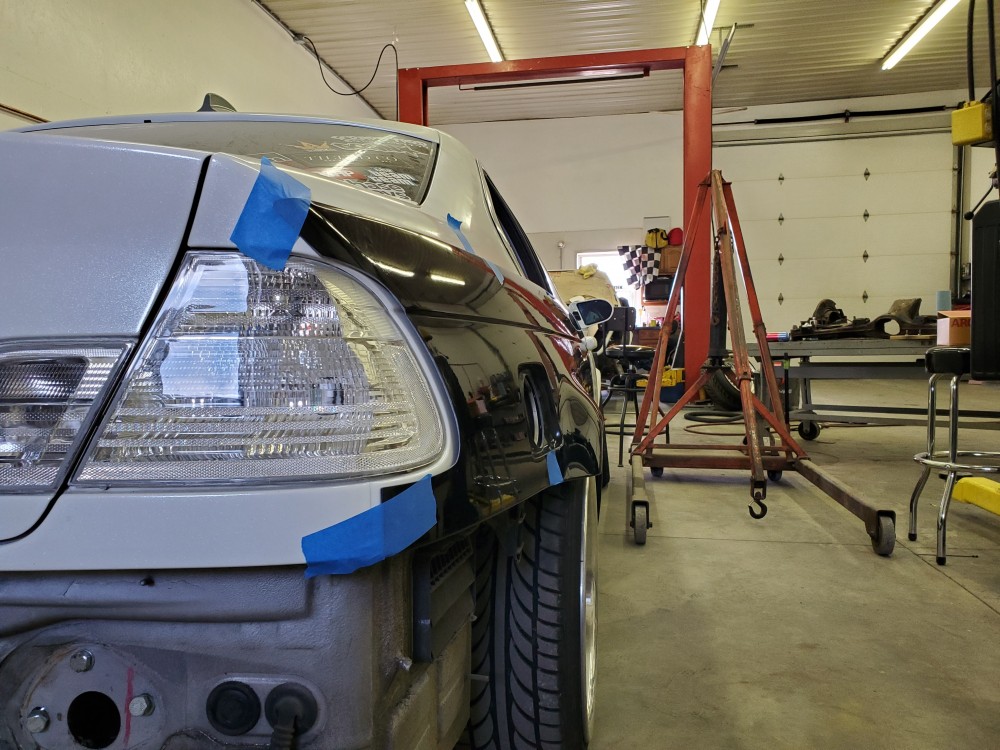
          20200321102835.jpg

          20200321102846.jpg

          going to take some work to get them fitted right, more so on the end of opening up my wheel wells. The overs themselves fit great.

          Then I moved onto passenger side door bars.
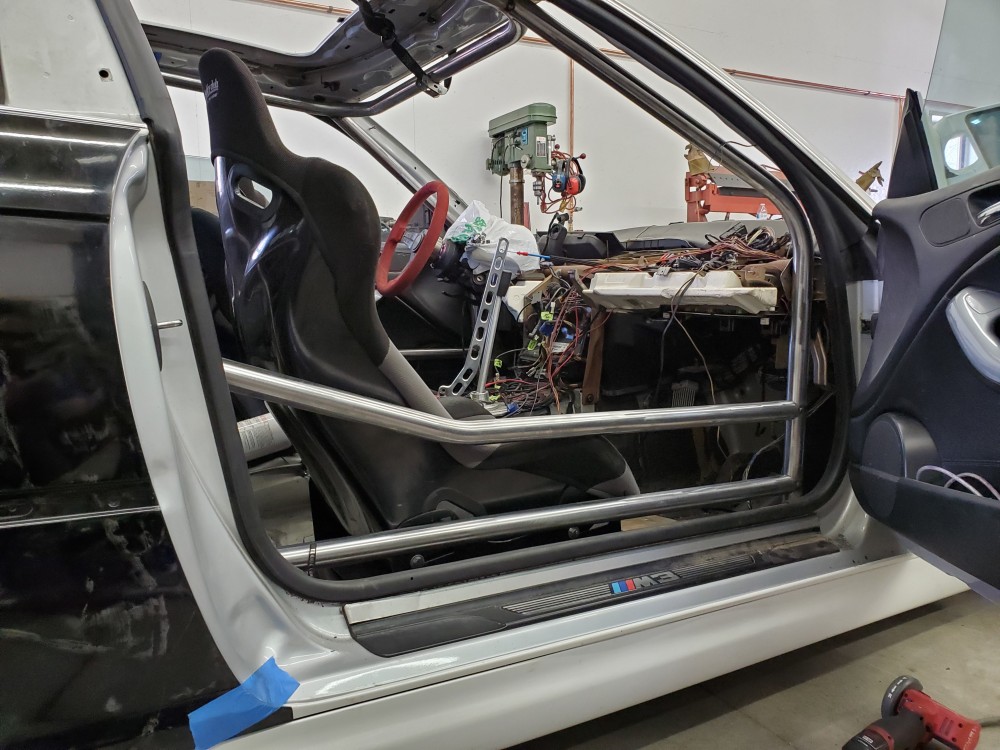
          20200321153144.jpg

           And after that was getting the gussets in for the door bars on both sides.
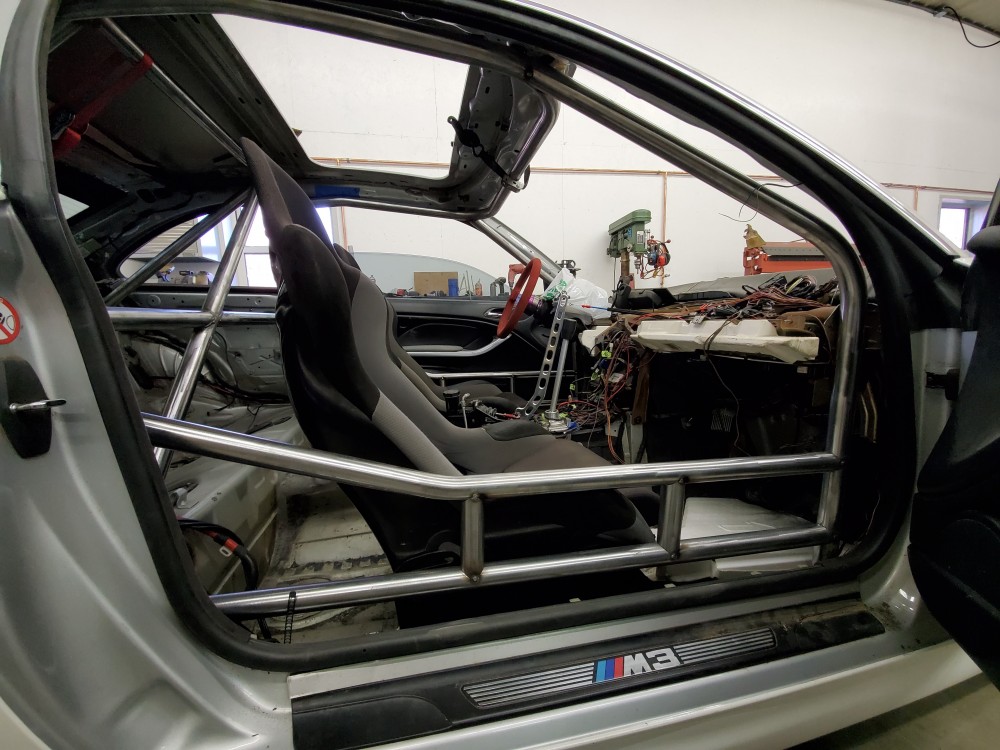
          20200321182259.jpg

          20200321182333.jpg

          With the gussets being completed that was the final touches of the true fab work. 
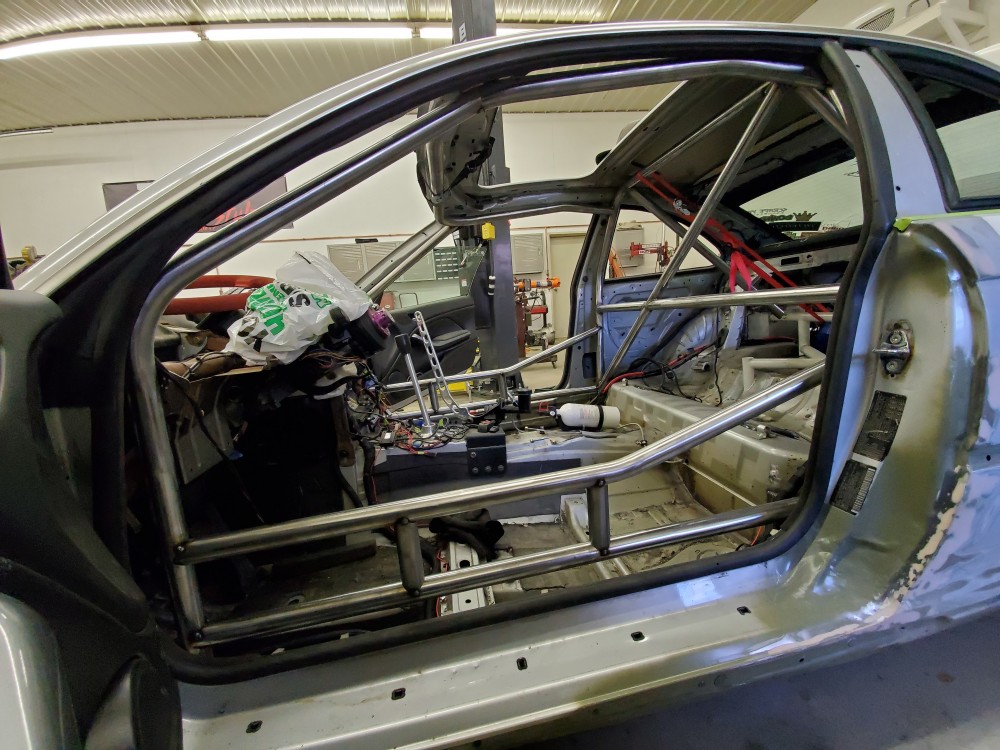
          20200321174322.jpg

          20200321174411.jpg

          20200321174442.jpg

          20200321174547.jpg

          Then on to final welding!

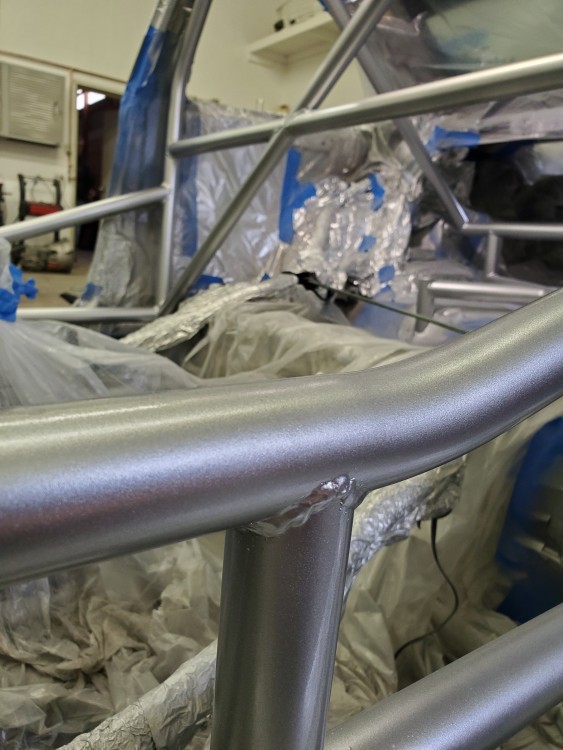
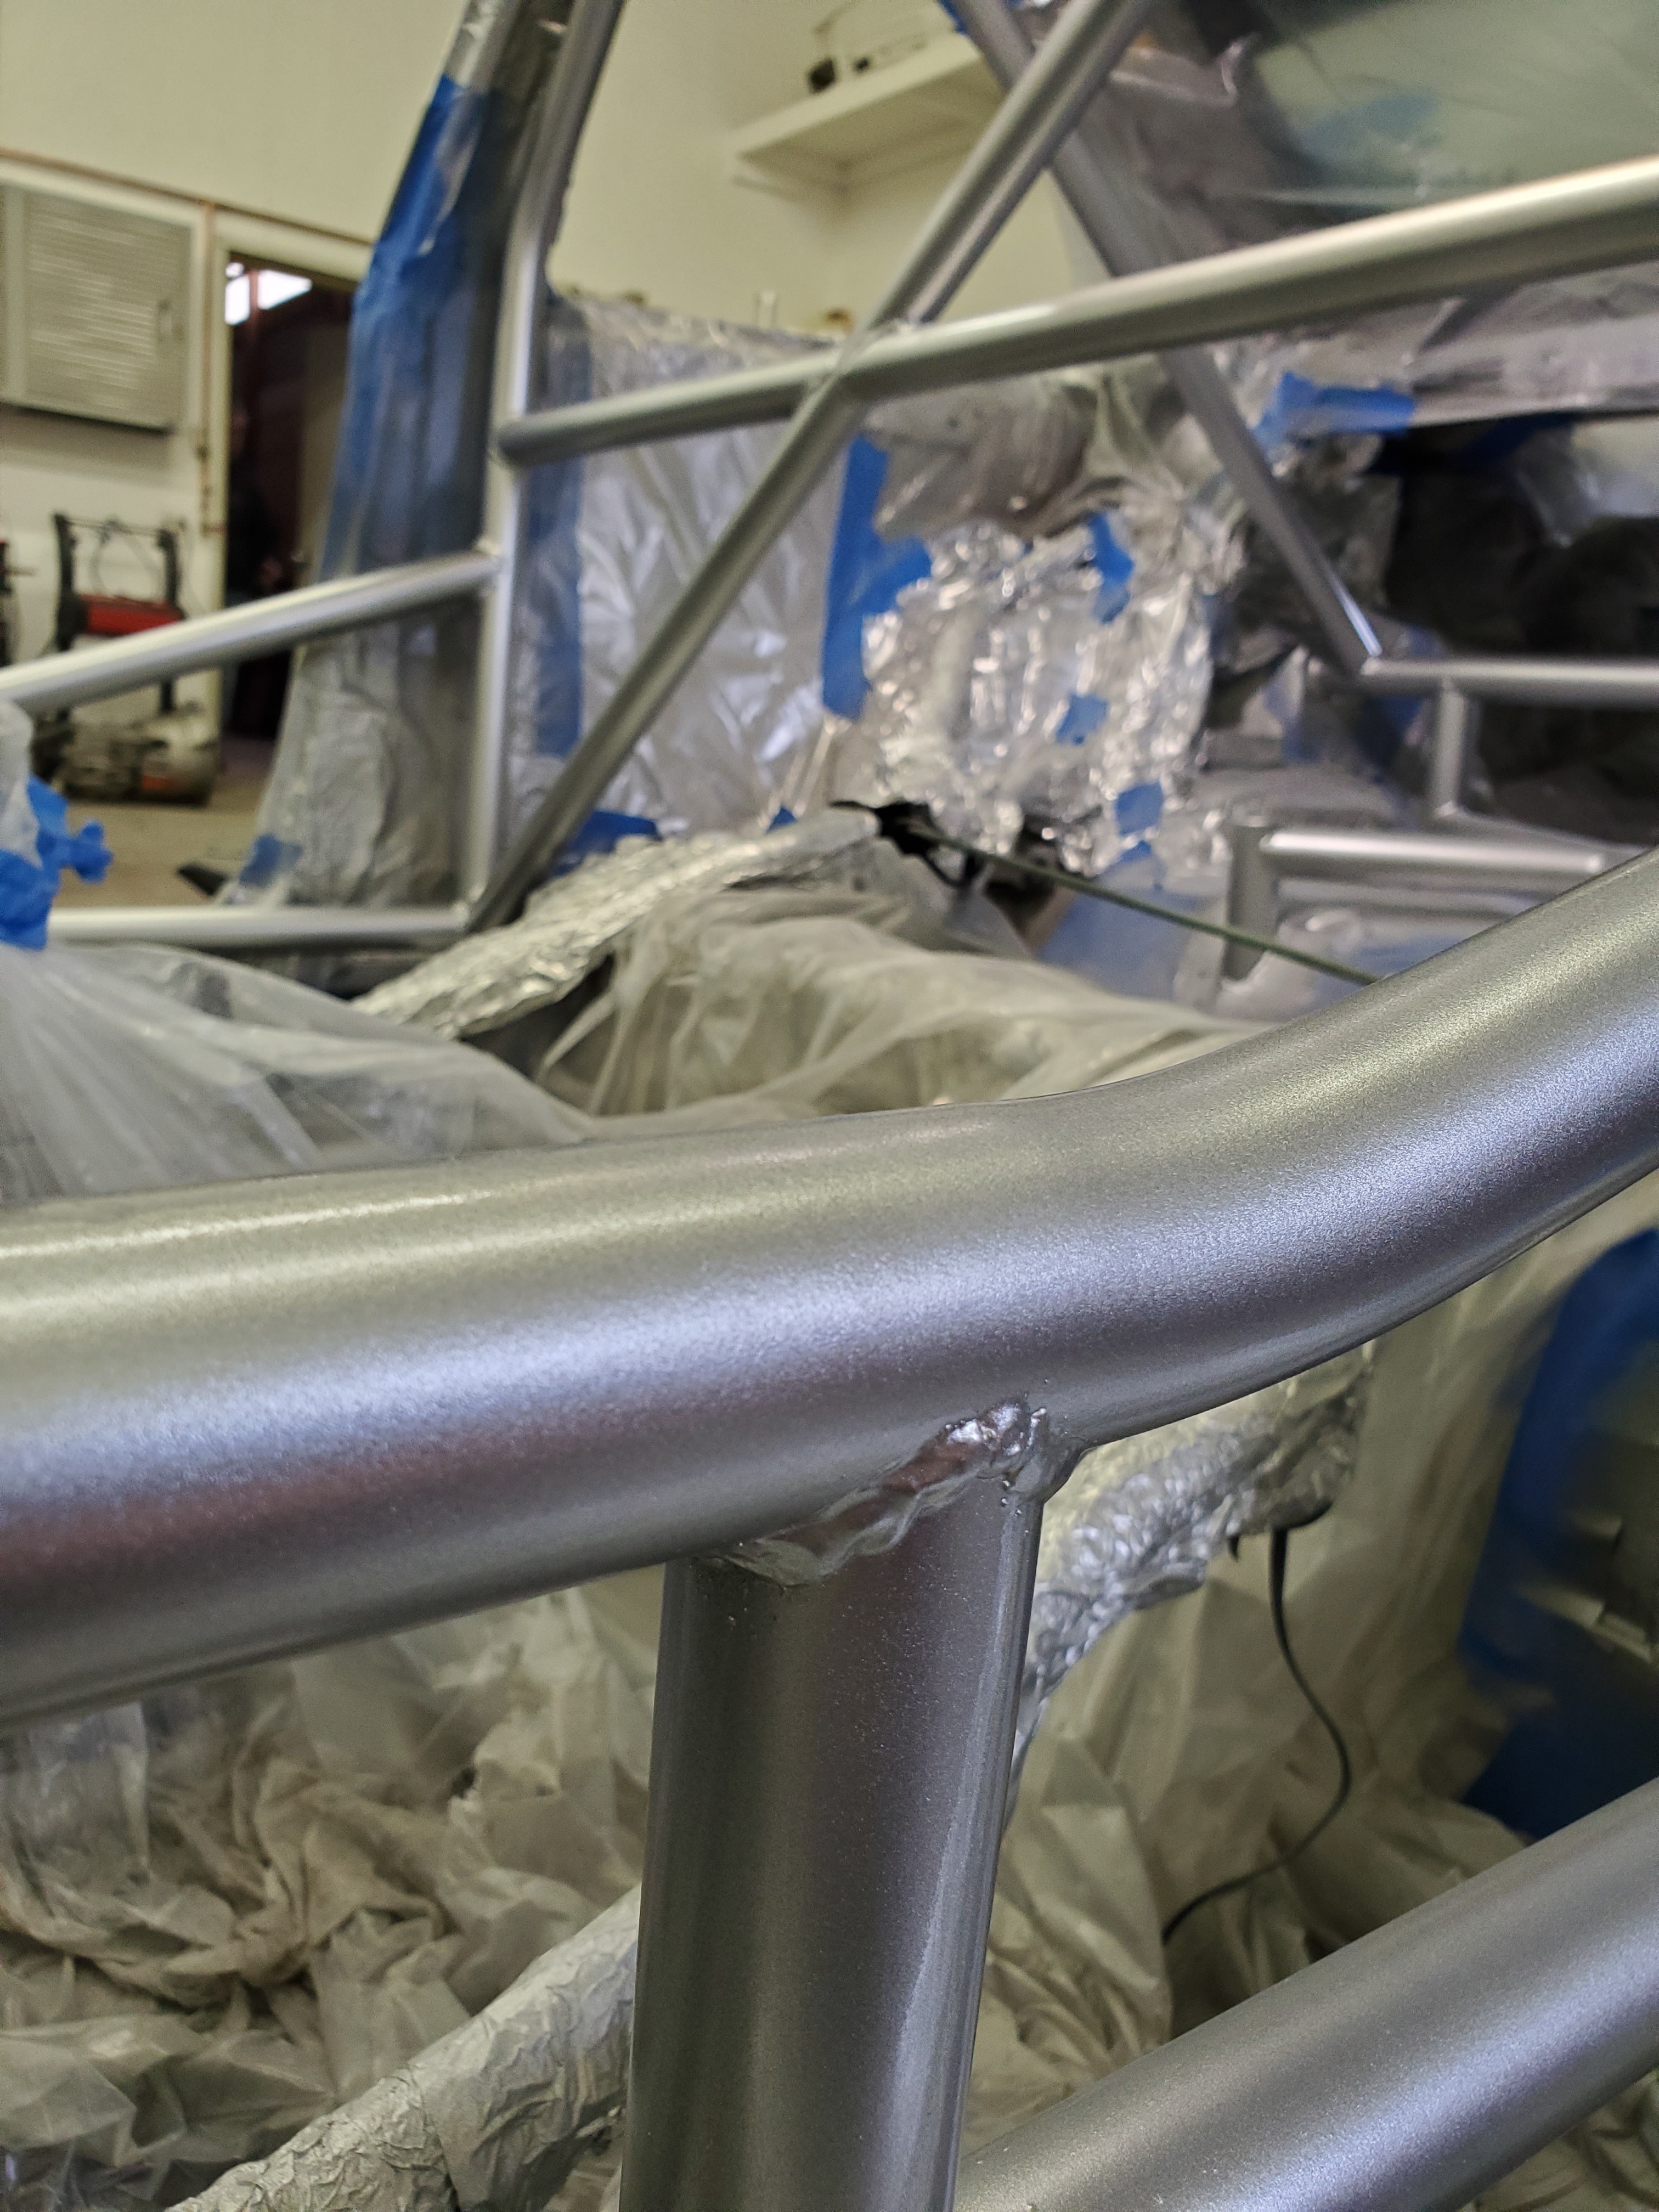
          Only pic I really took of final welds. Turned out ok.
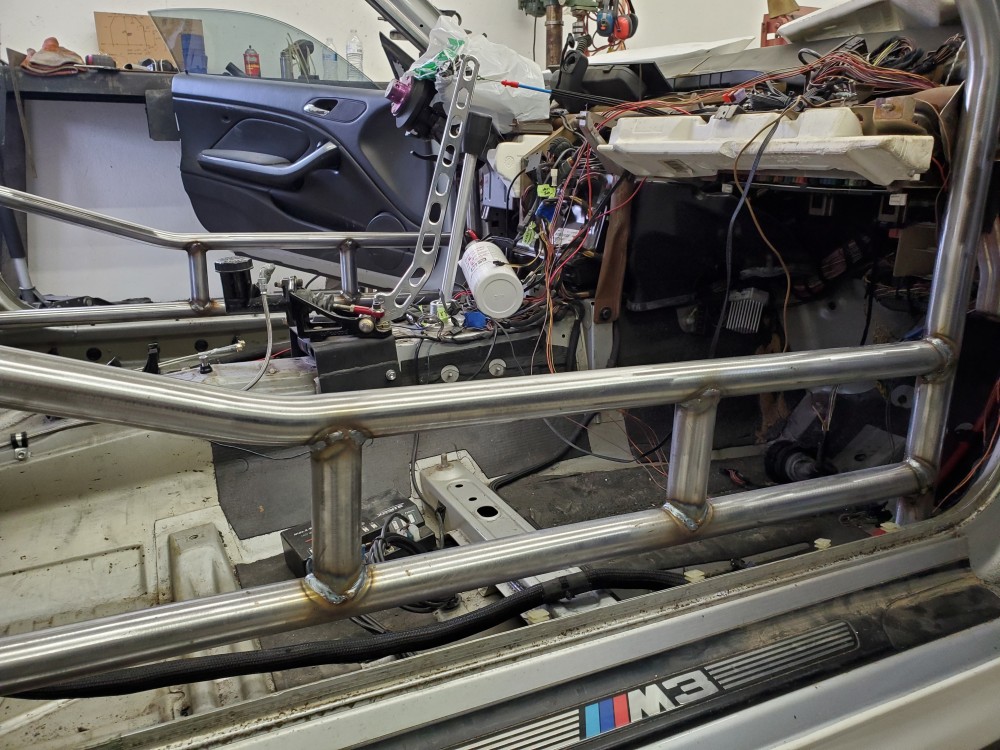
          20200322135425.jpg

          The next step to finish final welding was to remove all 4 rocker boxes and drop the cage down to get to the tops.
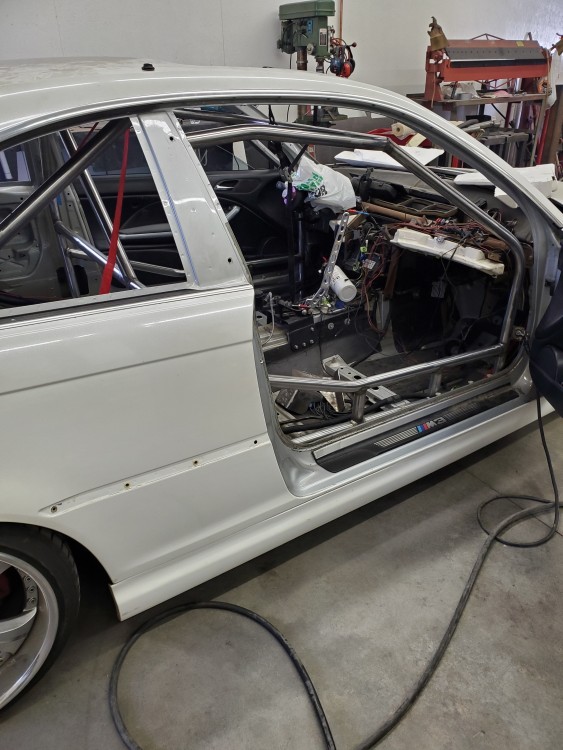
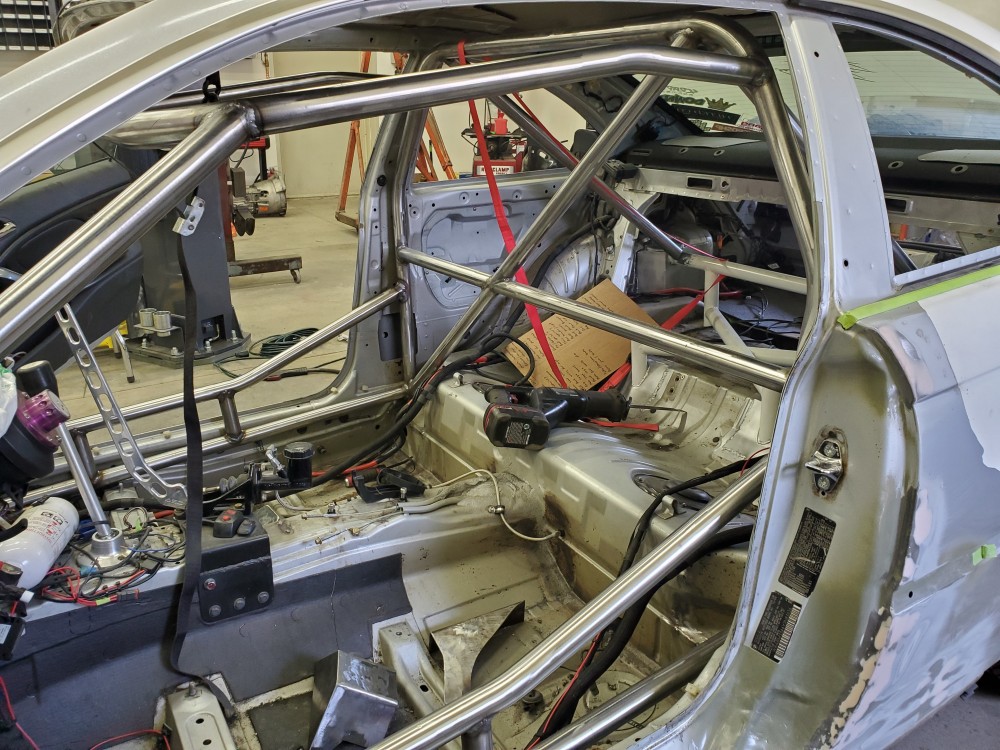
          20200322161227.jpg

          20200322161257.jpg

          That was about it for the weekend. Next weekend I am hoping to get the cage back up and in place, then weld the boxes to the car and the cage to the boxes and finally the daunting task of painting. Lol
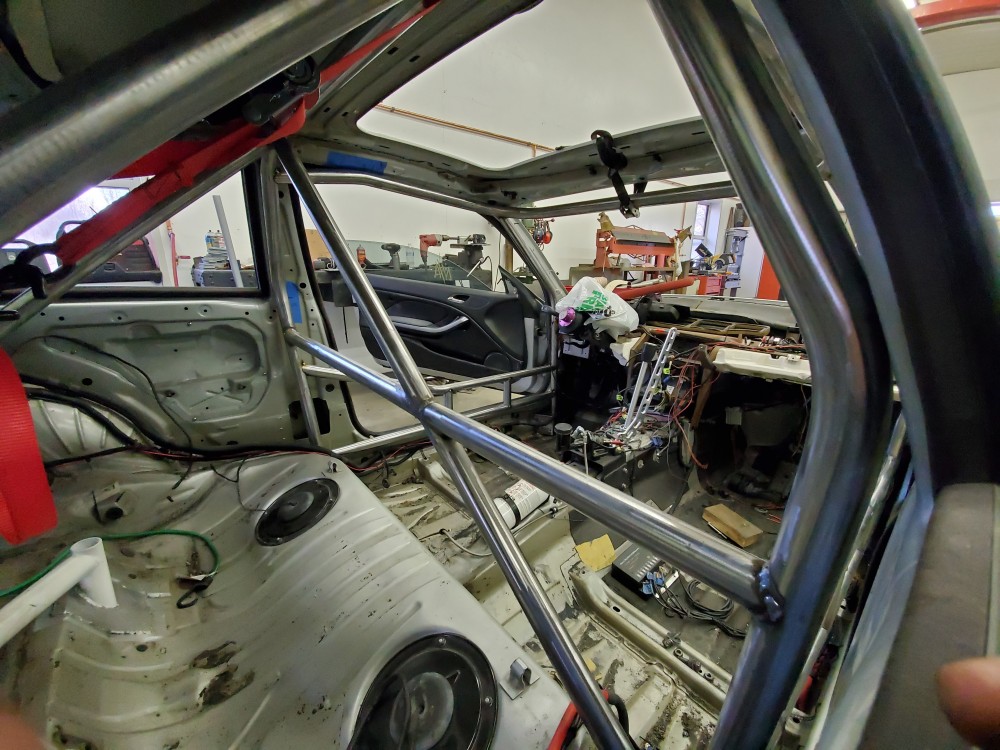
          20200321174547.jpg

          1 Reply Last reply
          3
          • TkuhnT
            TkuhnT
            Tkuhn
            wrote on last edited by
            #312

            UPDATE!

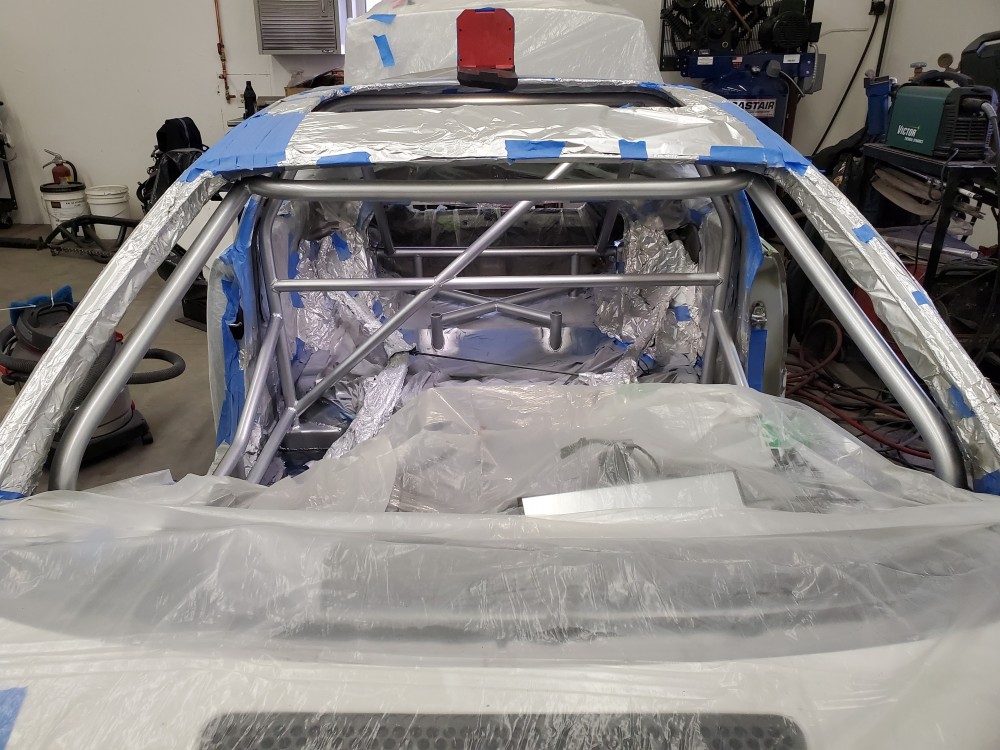
            Started the weekend off on Friday night by getting the cage back up on the rocker boxes and welding them in for good then welding the cage in for good as well.
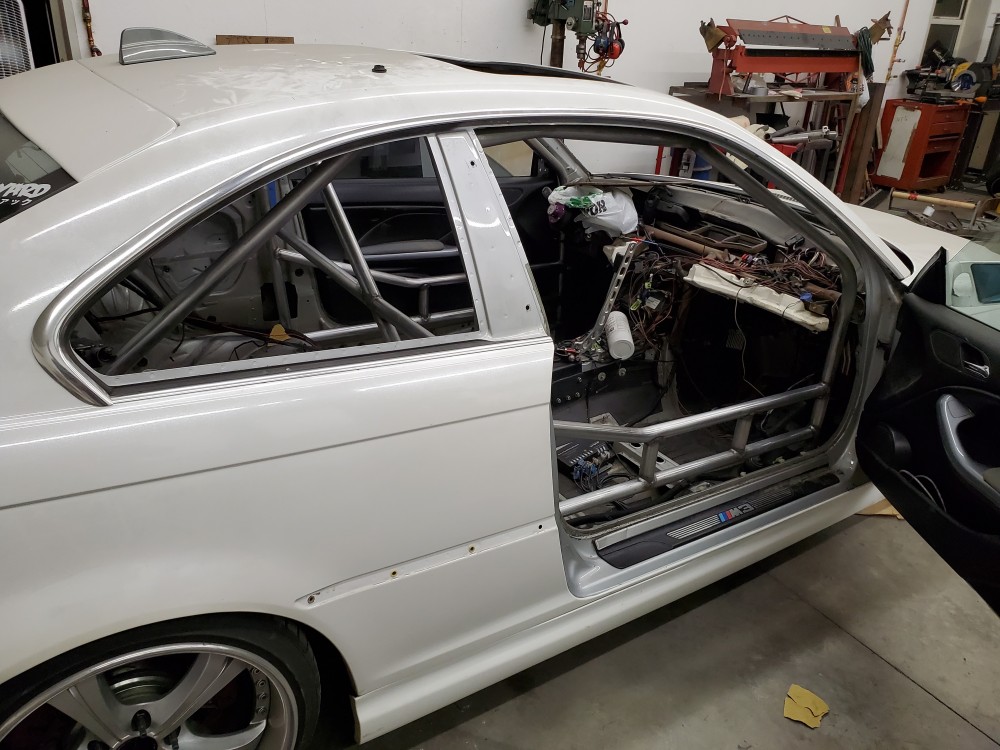
            20200327231629.jpg

            That task took all night and was definitely frustrating. But it's done 😁. Then I hit everything with some sandpaper in preperation for painting.

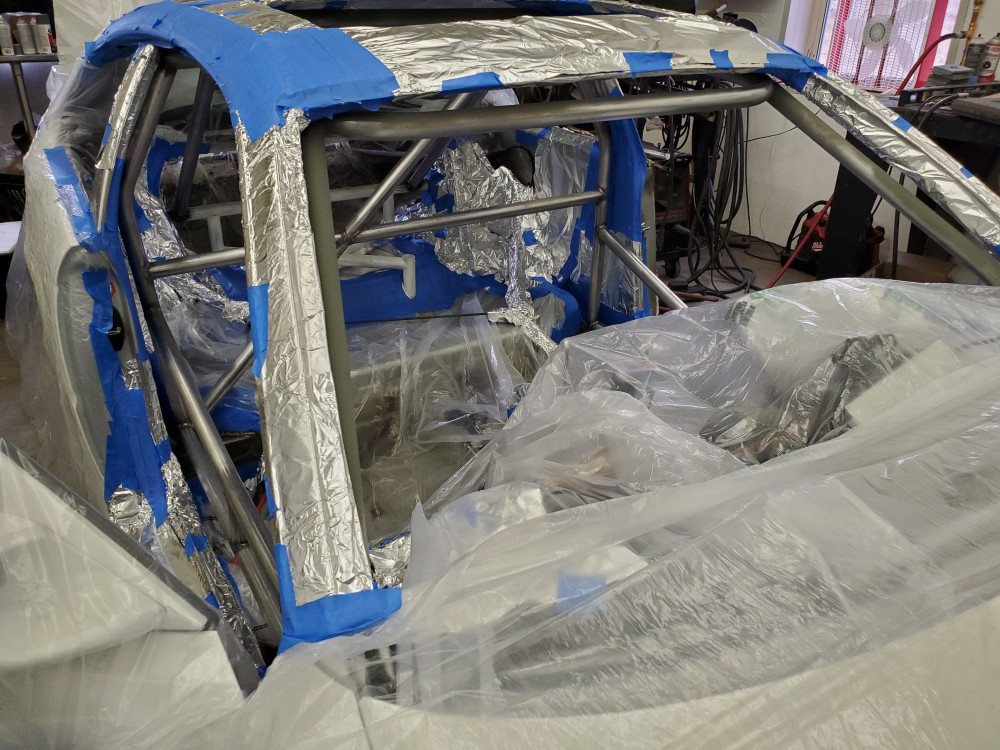
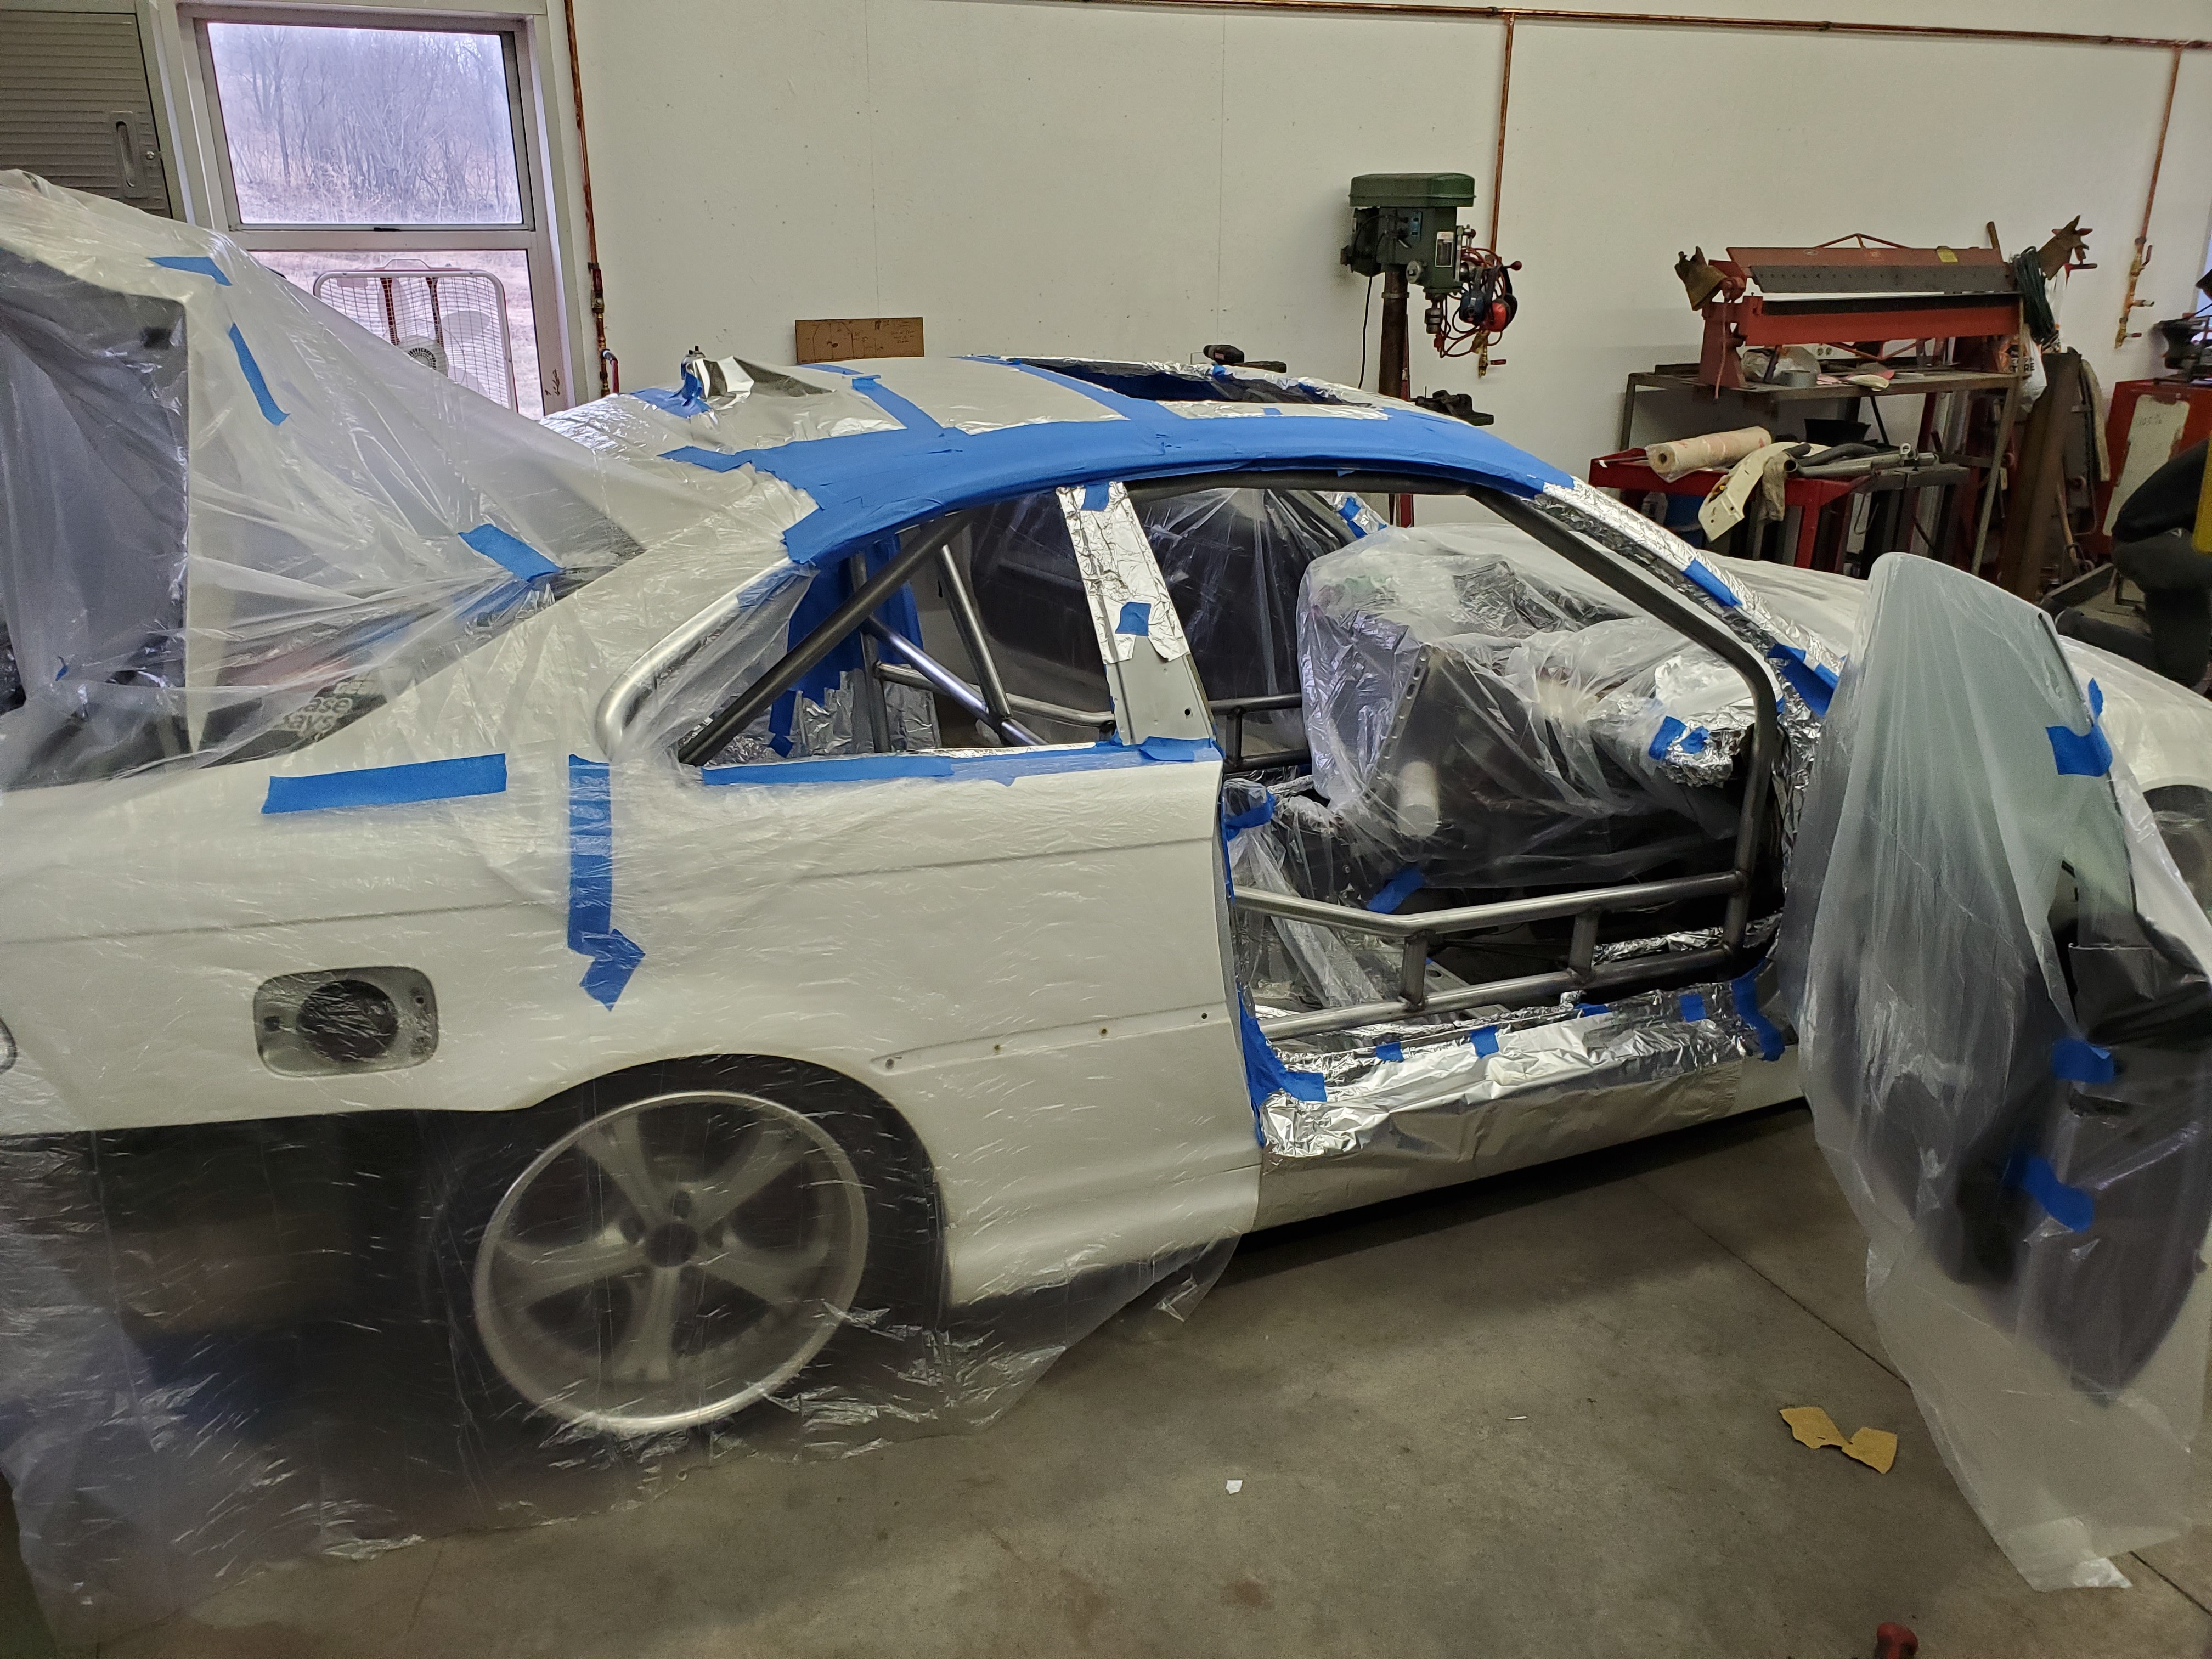
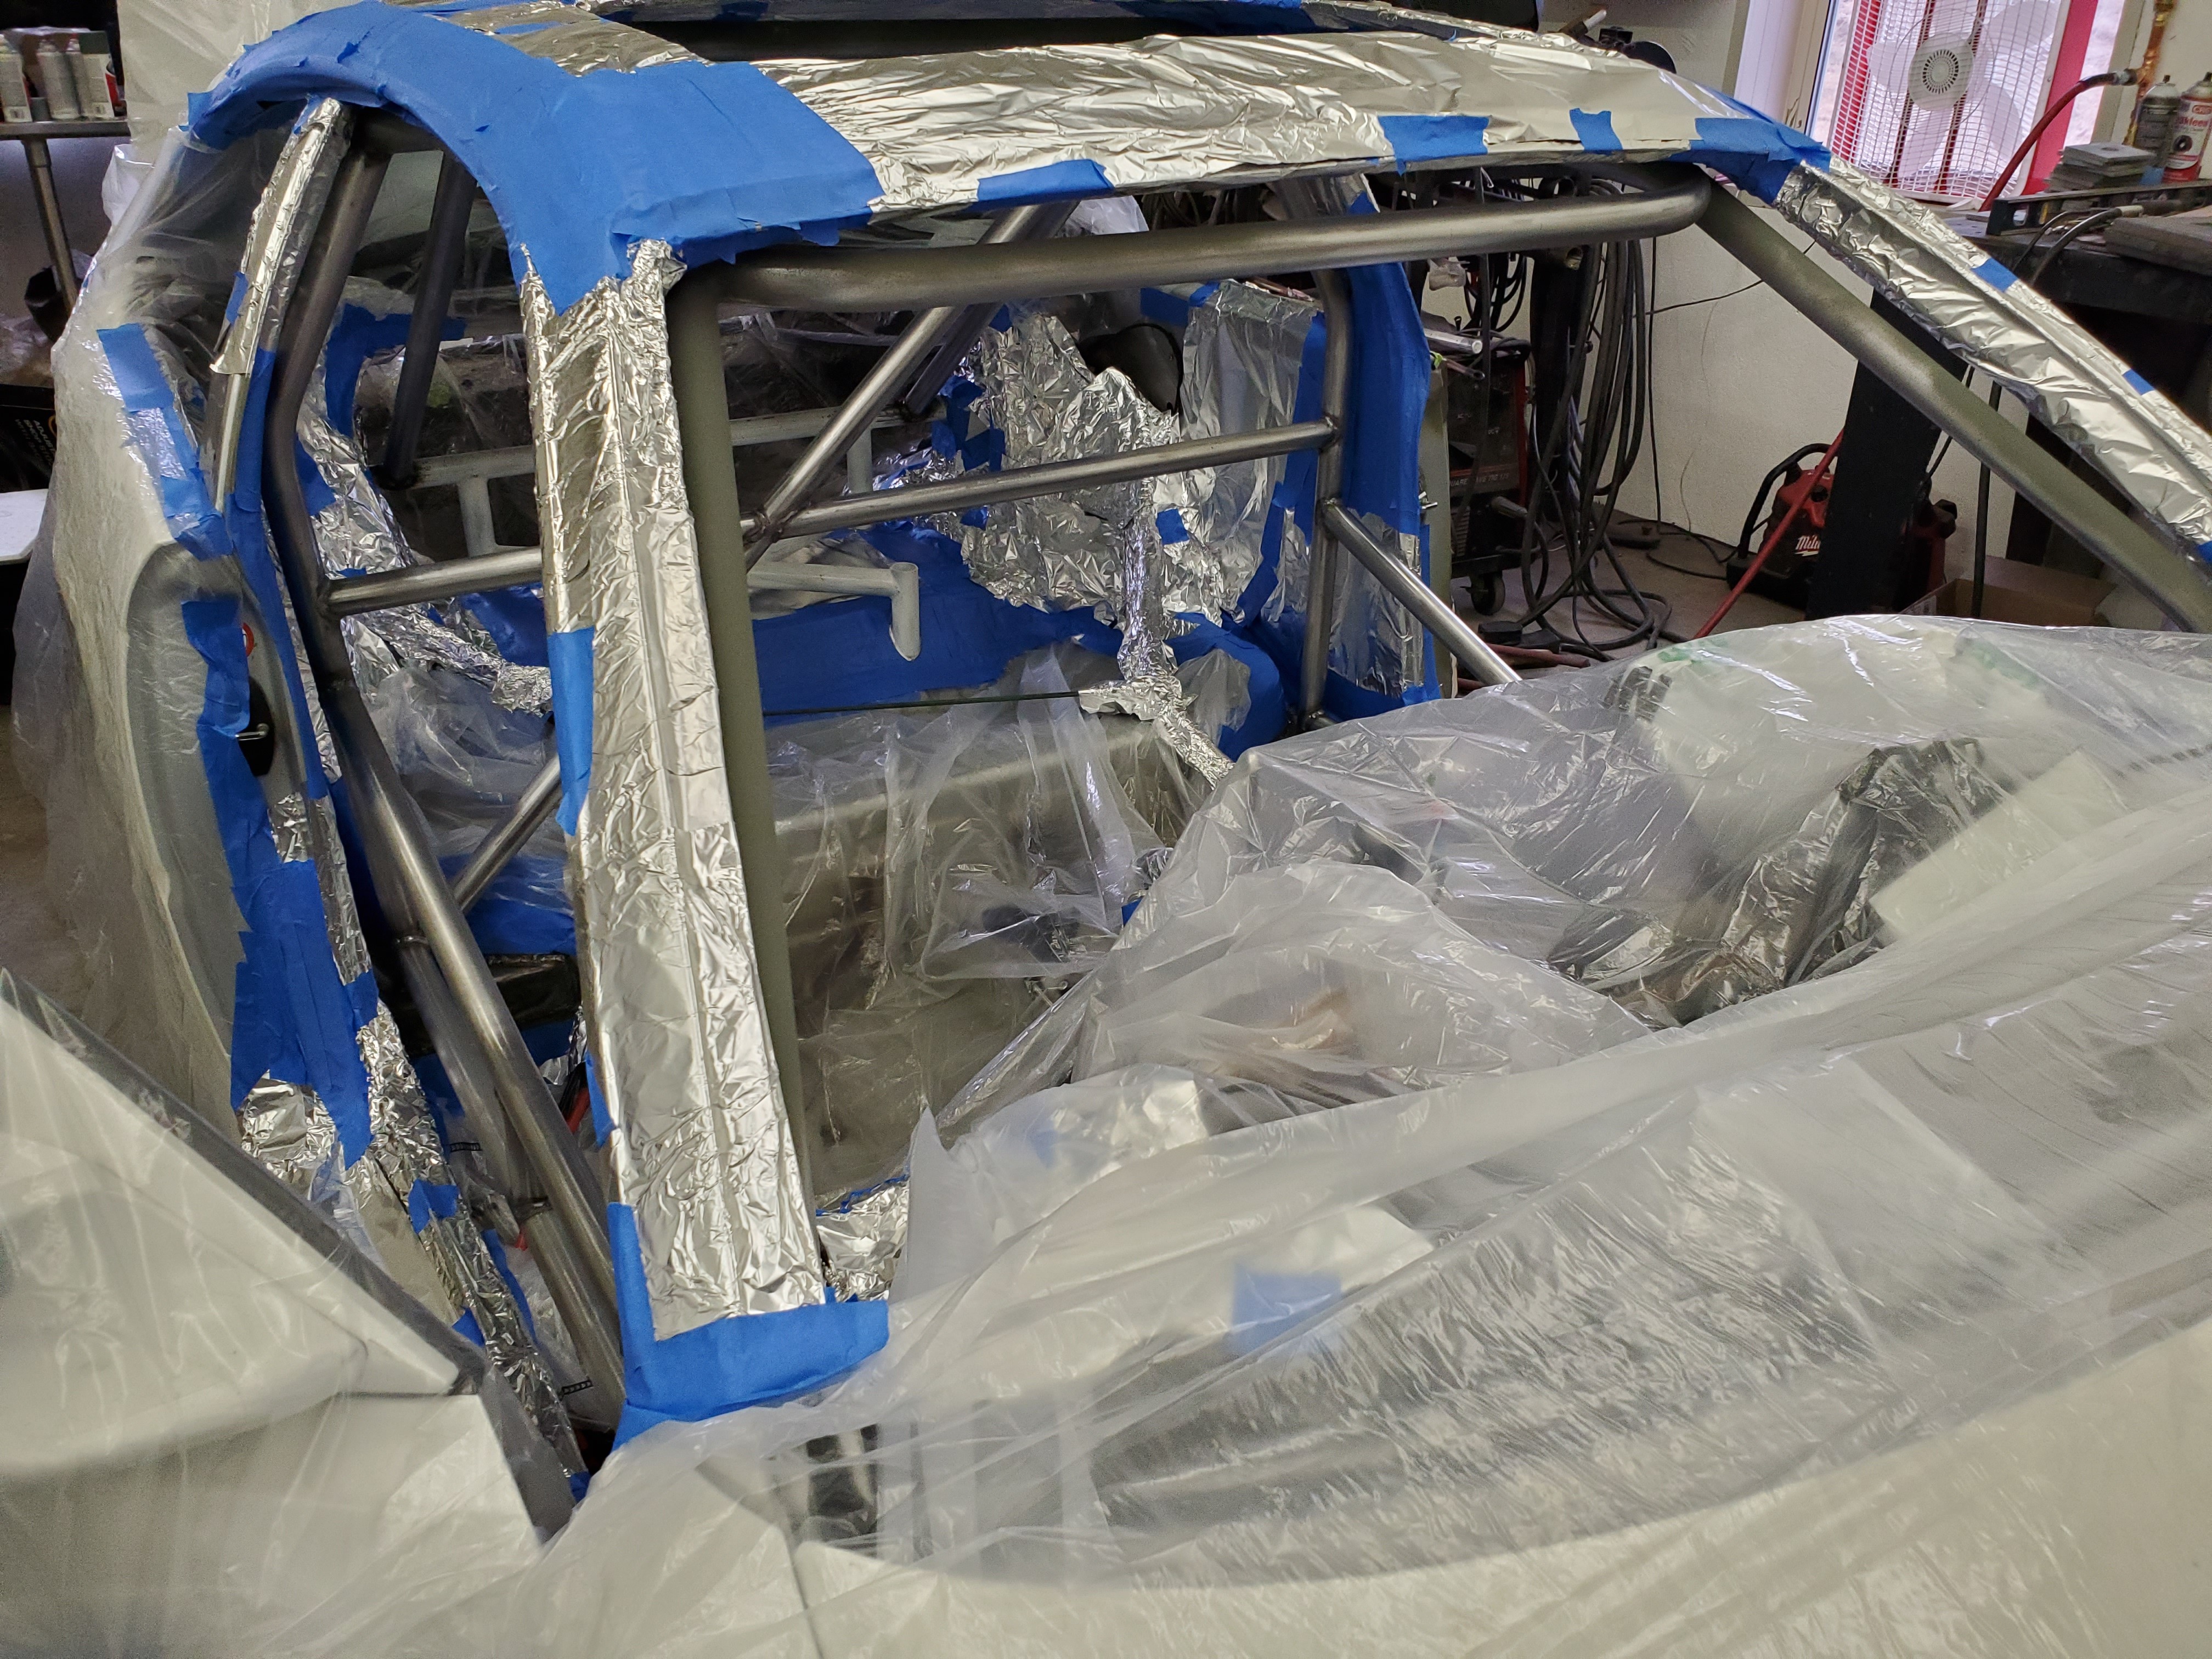
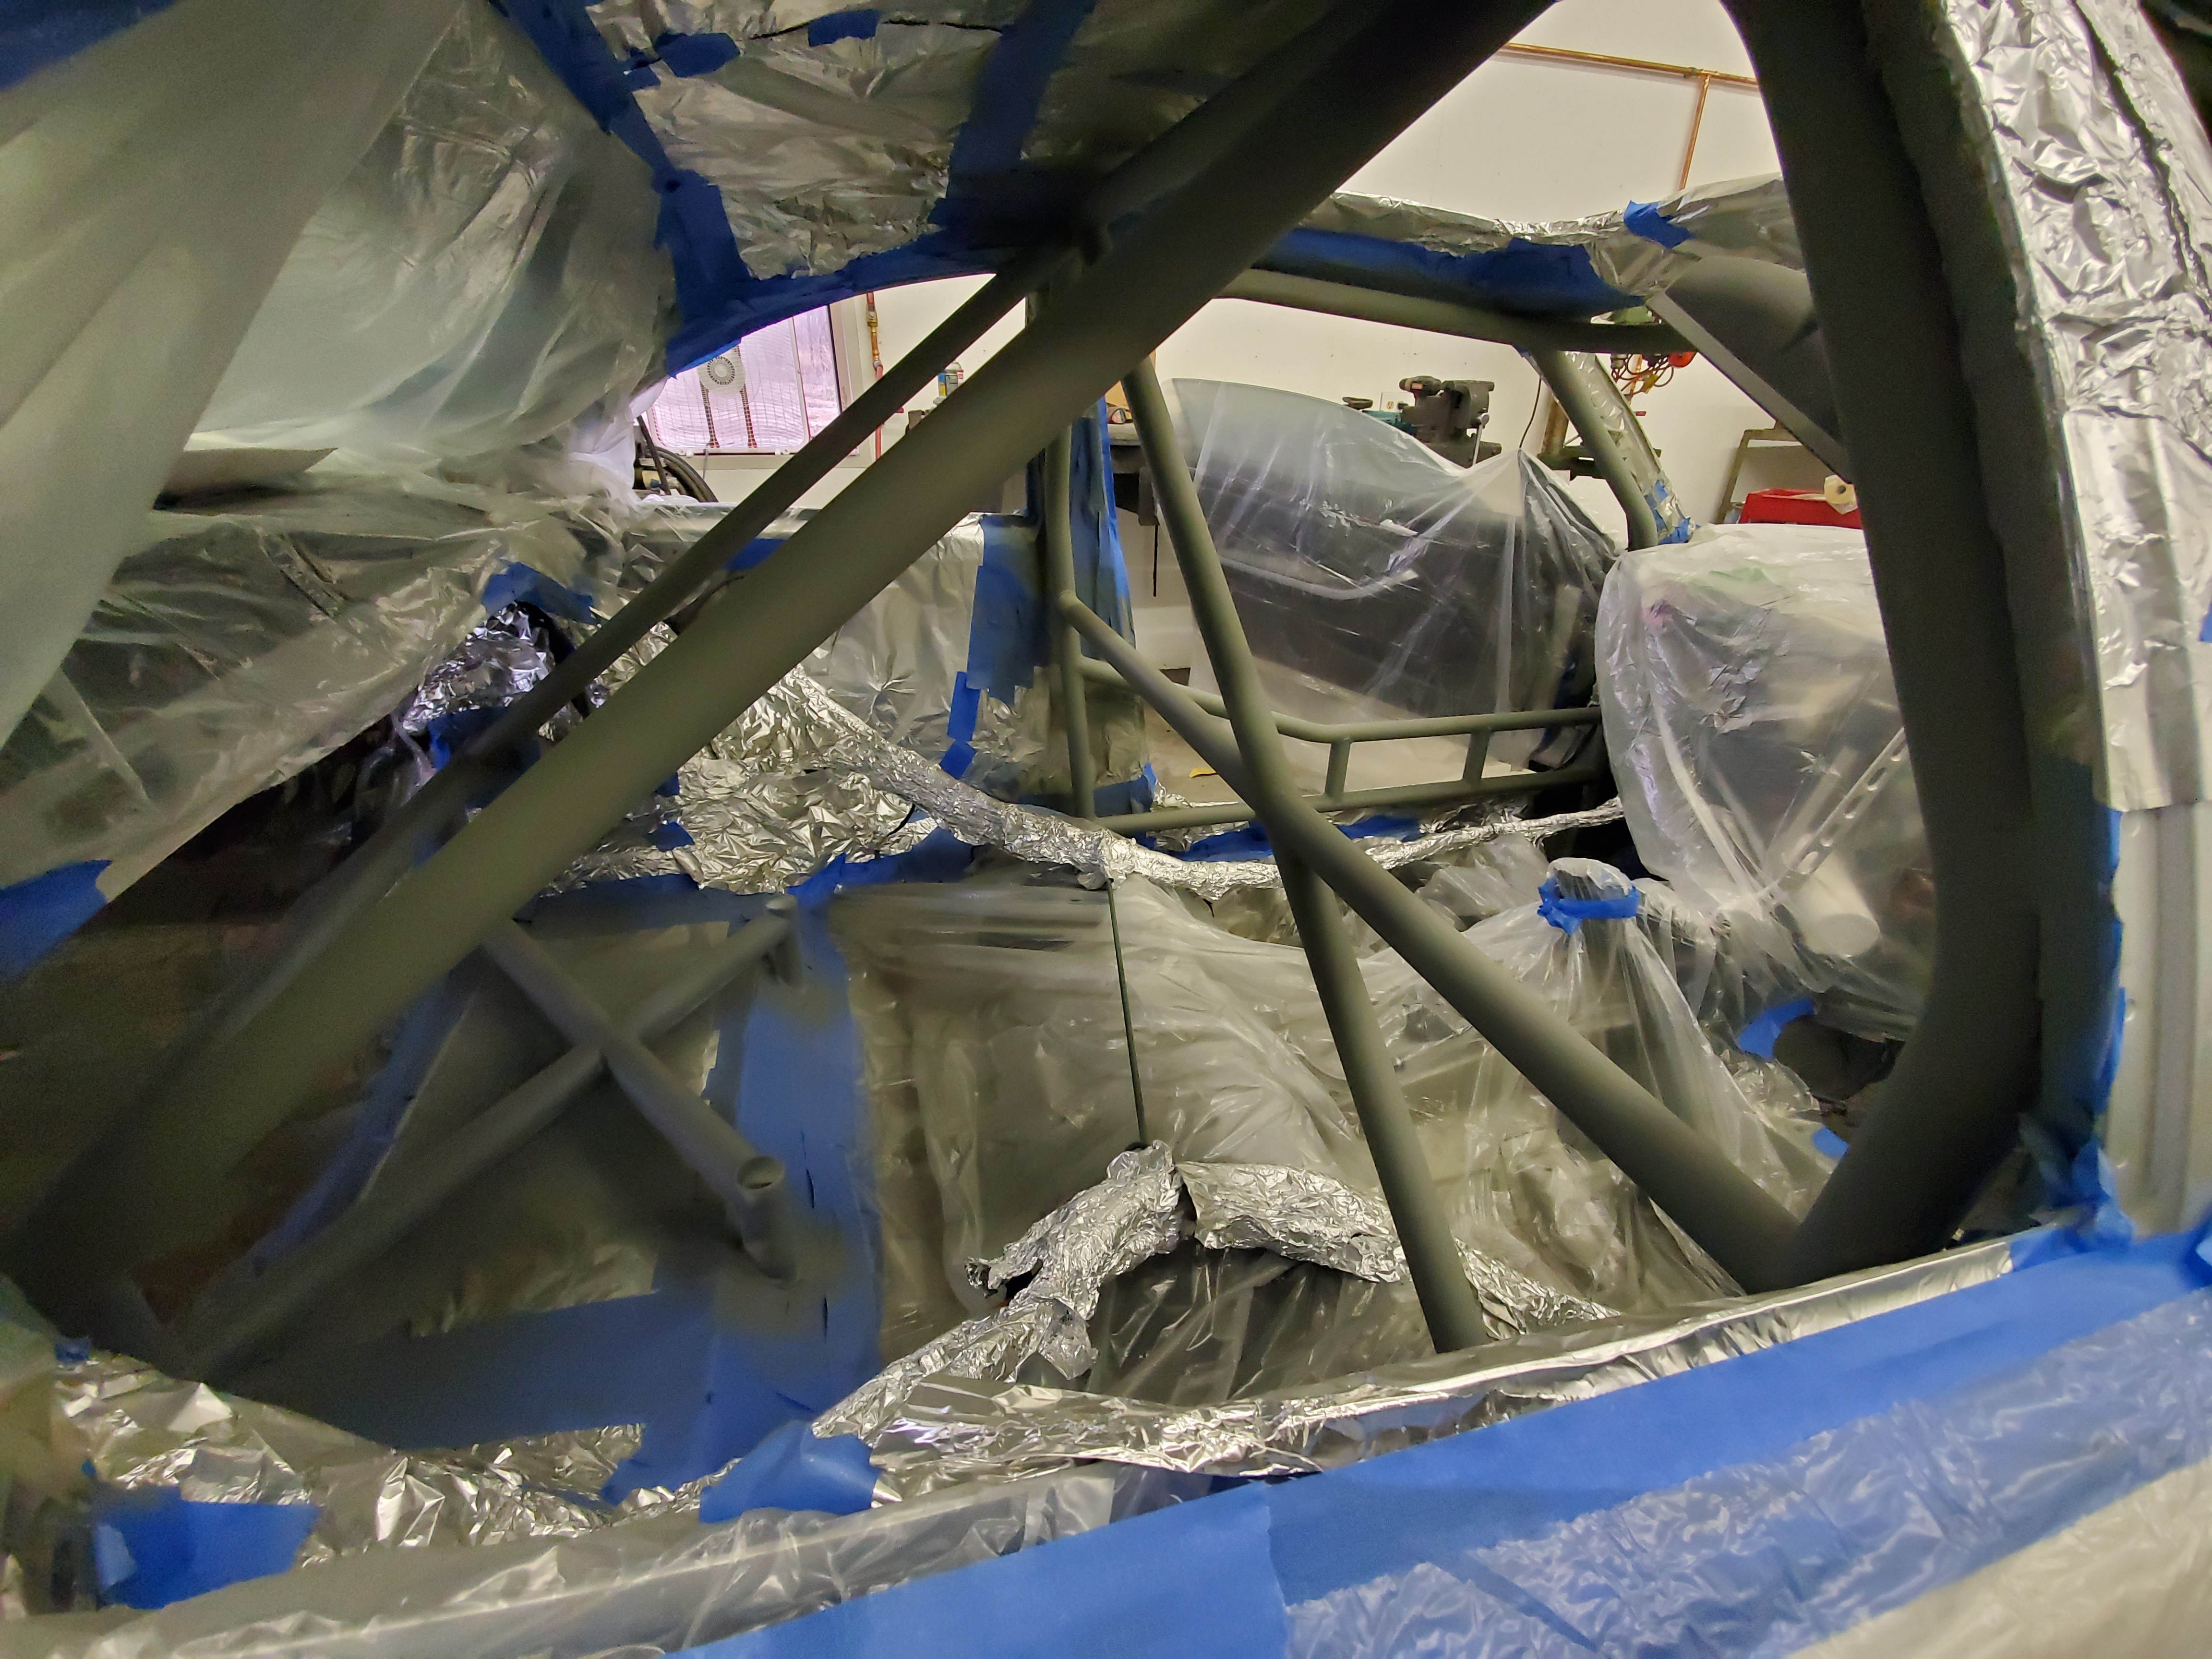
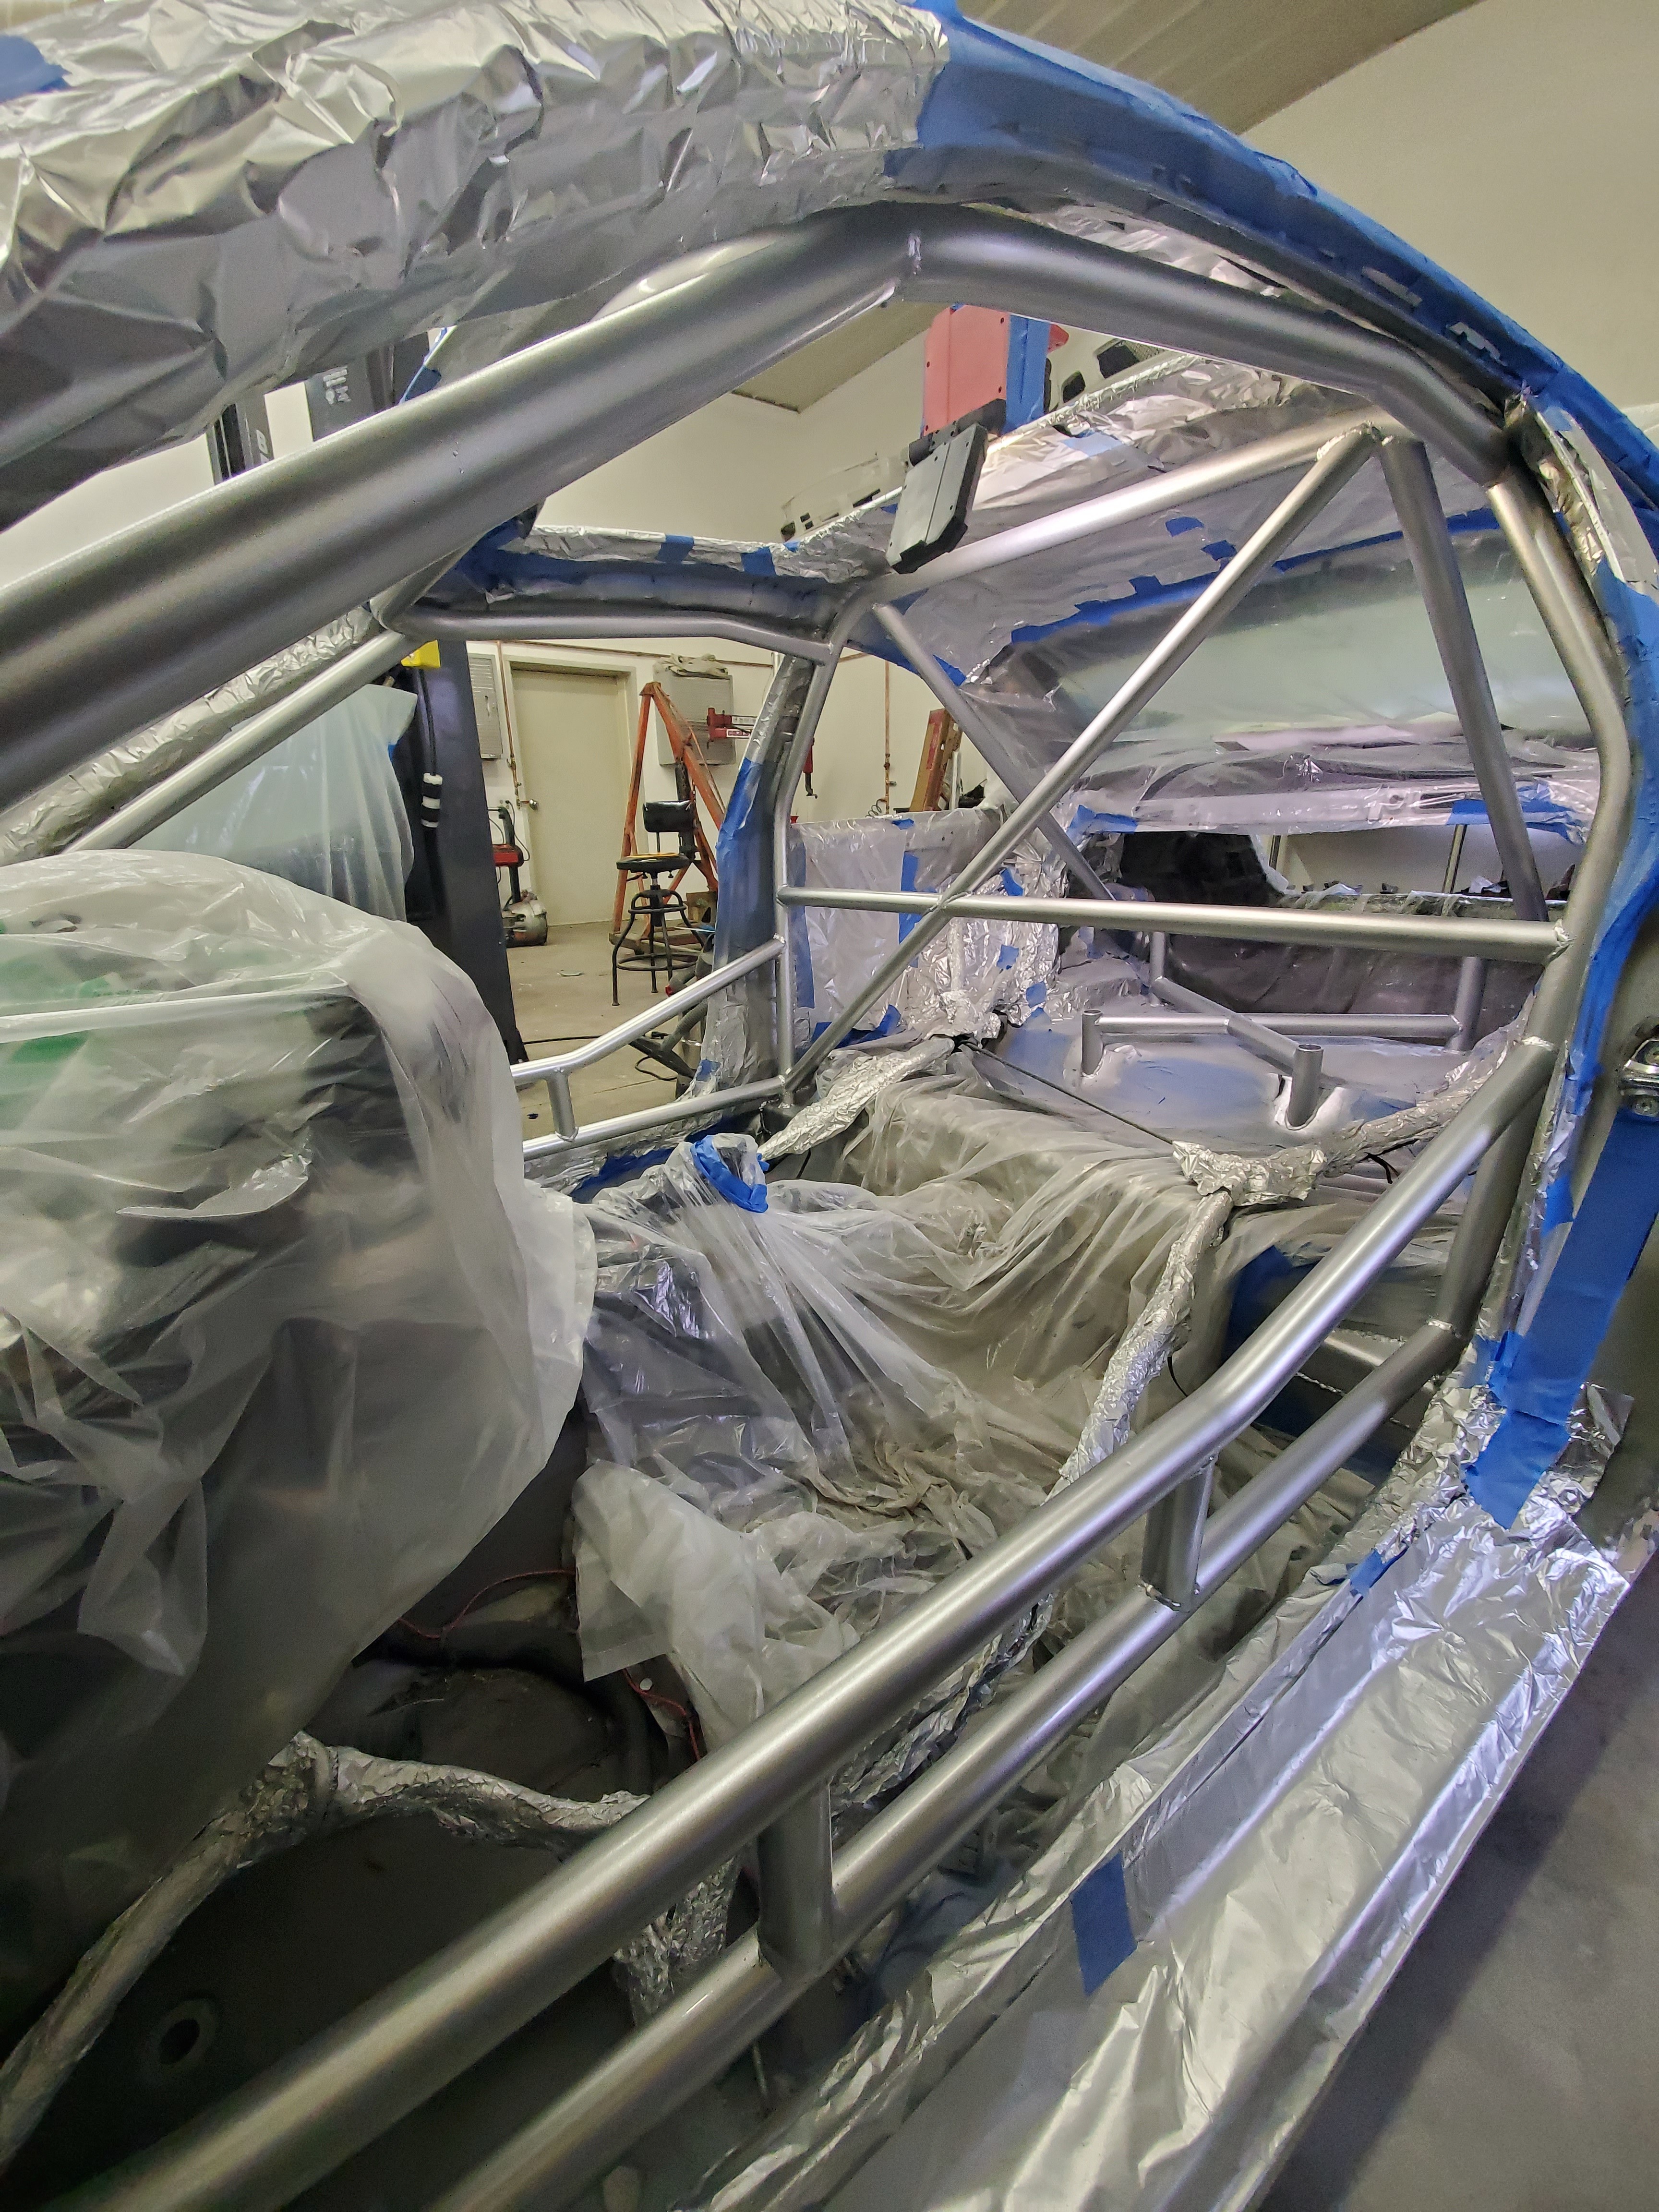
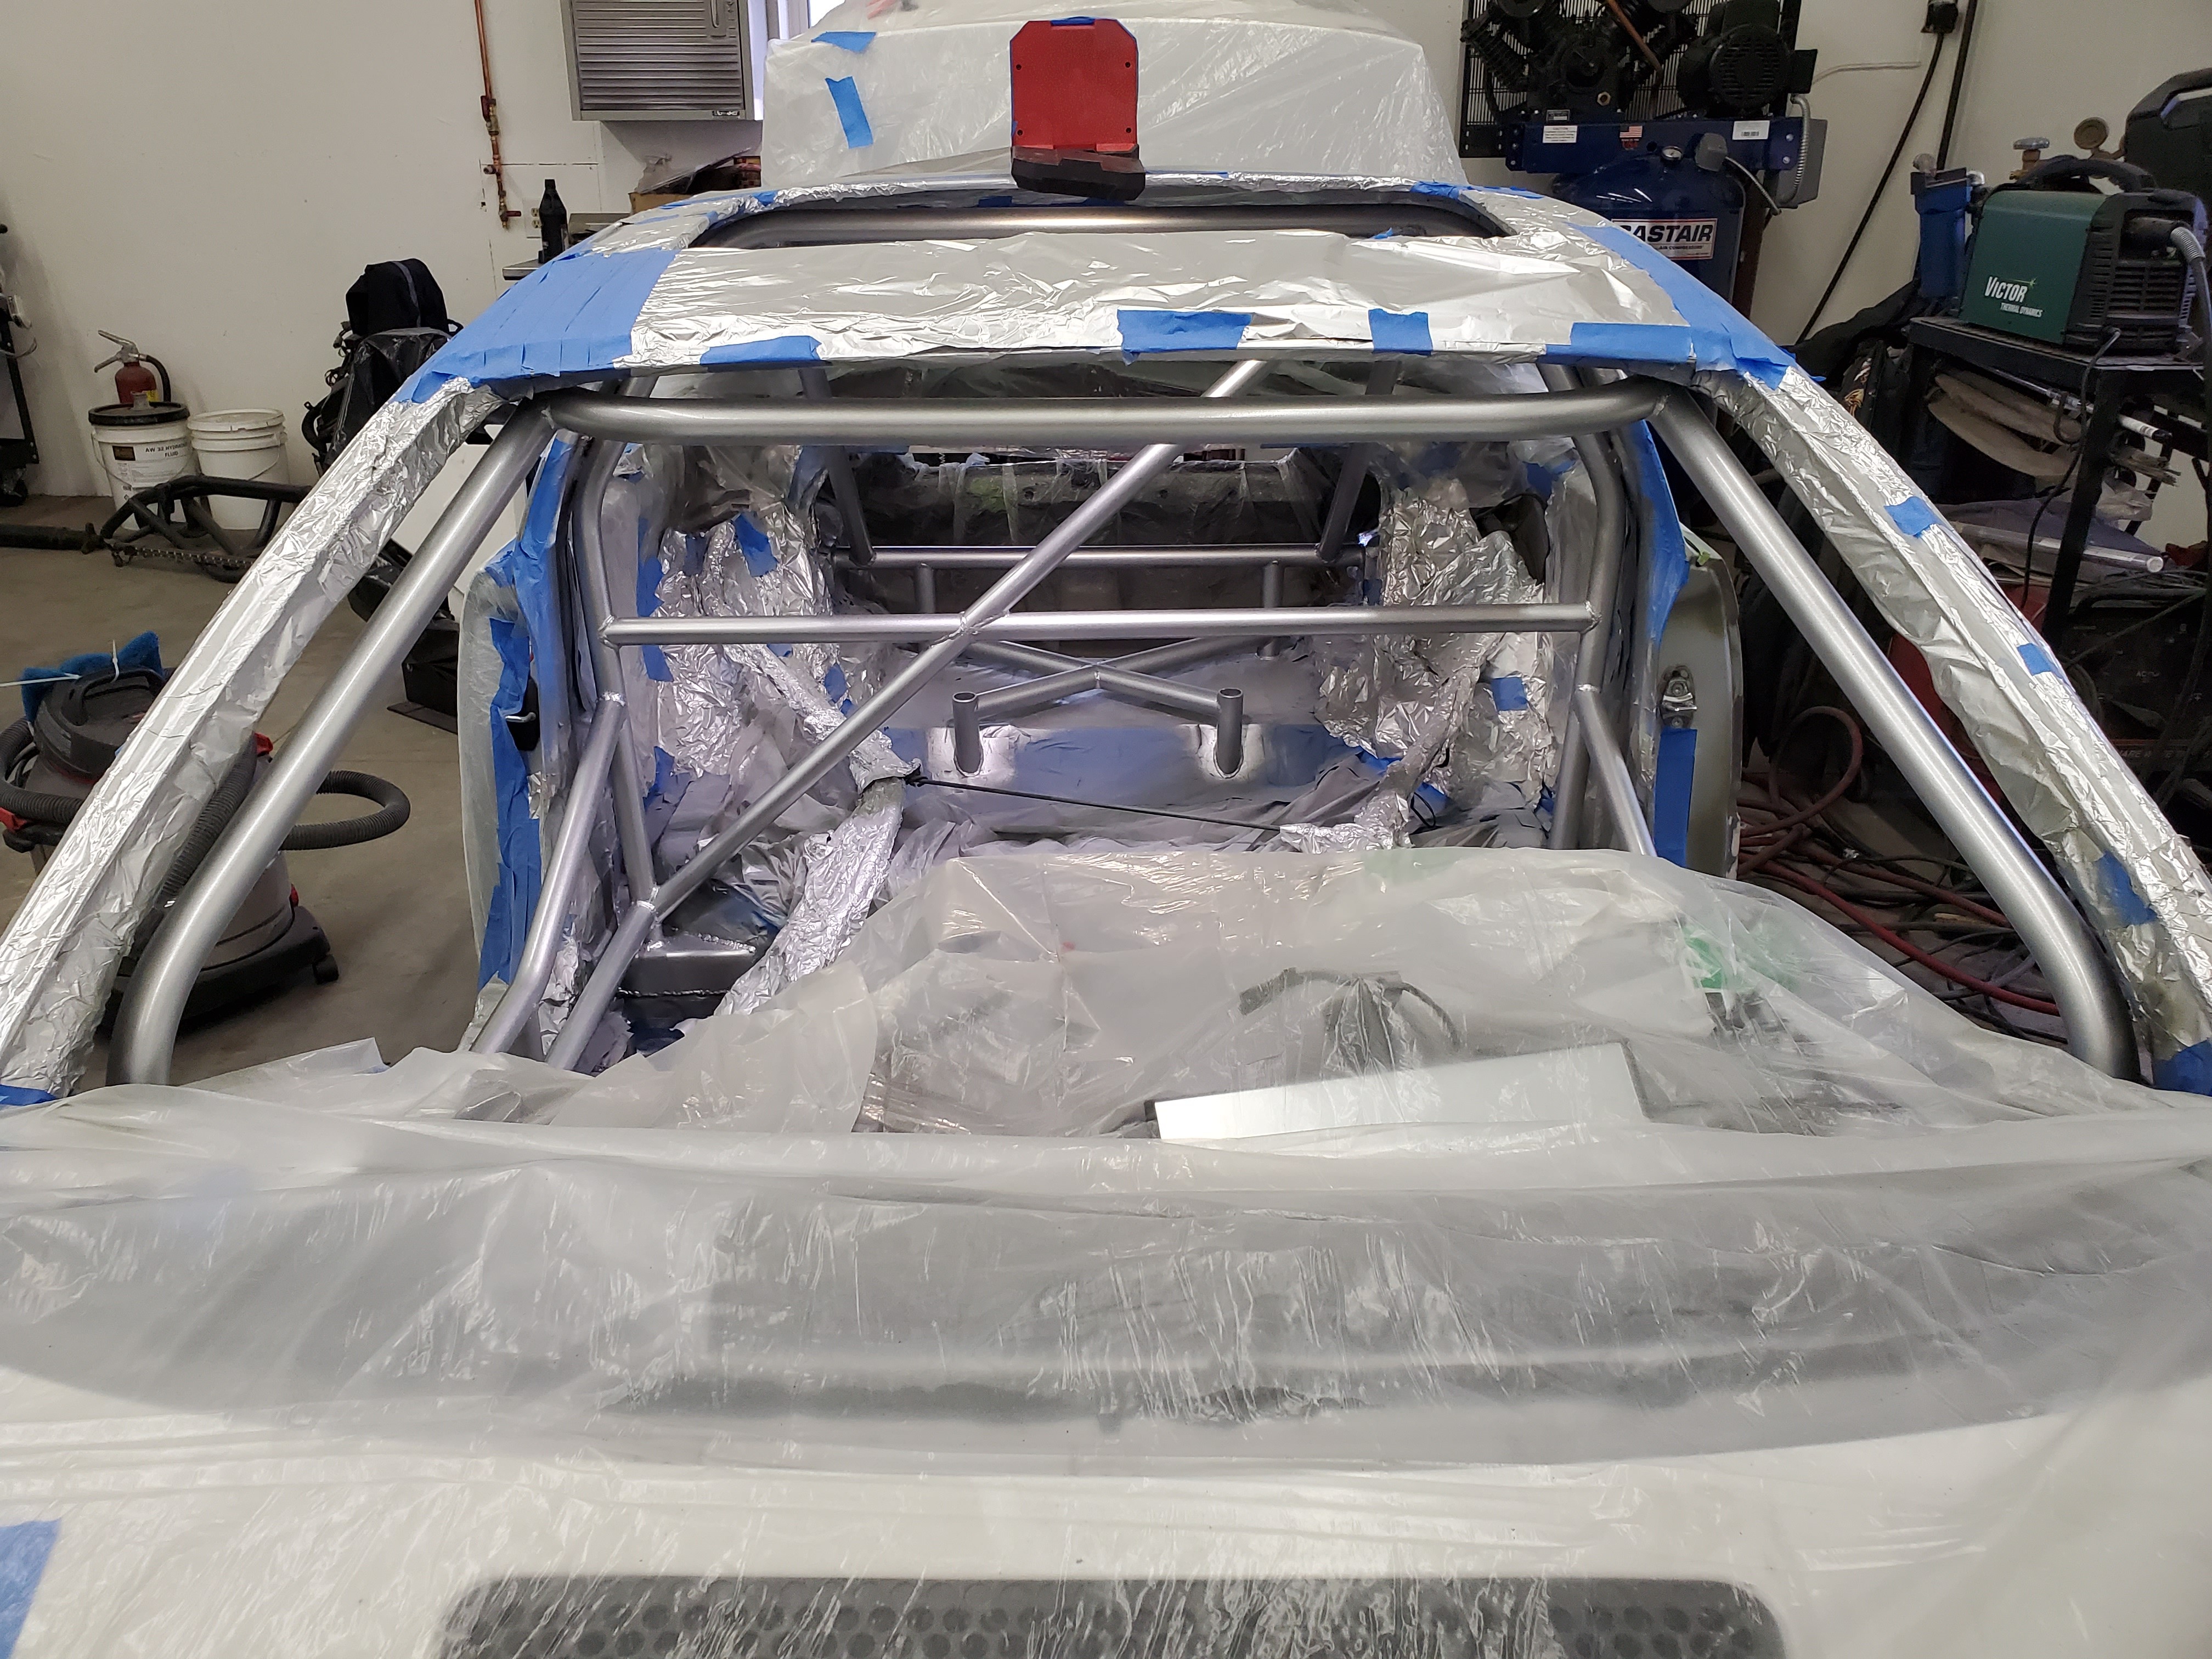
            Saturday morning I got to taping and making off the entire car. Which took alot longer than I planned lol.

            Pro tip: tin foil is a lifesaver and cheaper than tape and easier than plastic.
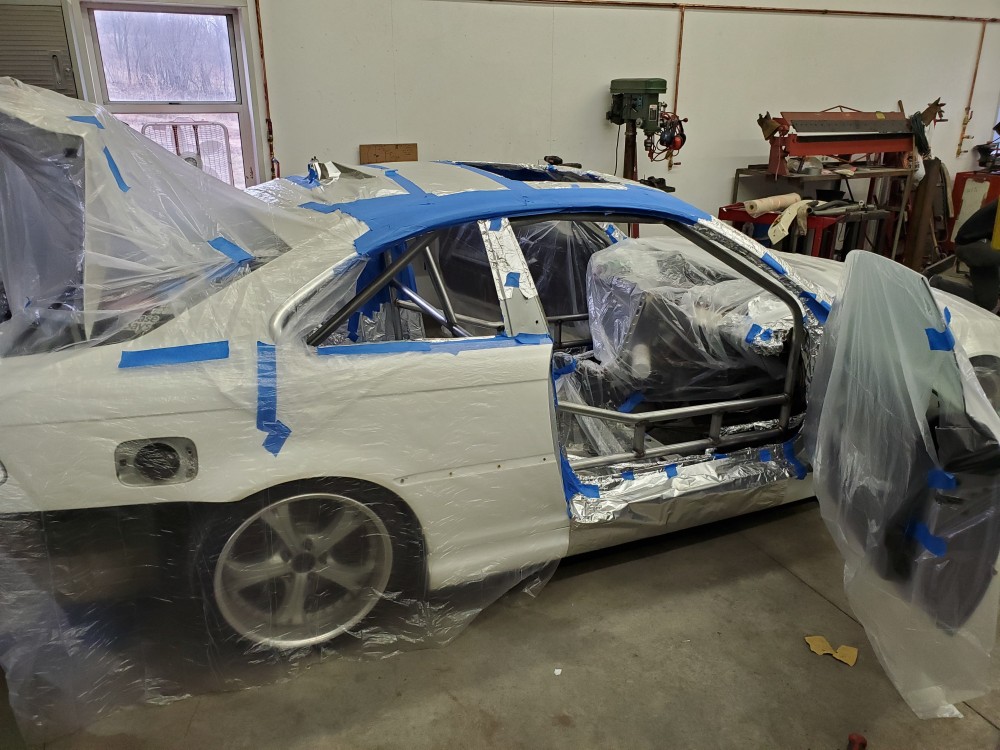
            20200328125138.jpg

            20200328125150.jpg

            Wiped the cage down with some prep solution and then played down 2 coats of self etching primer.

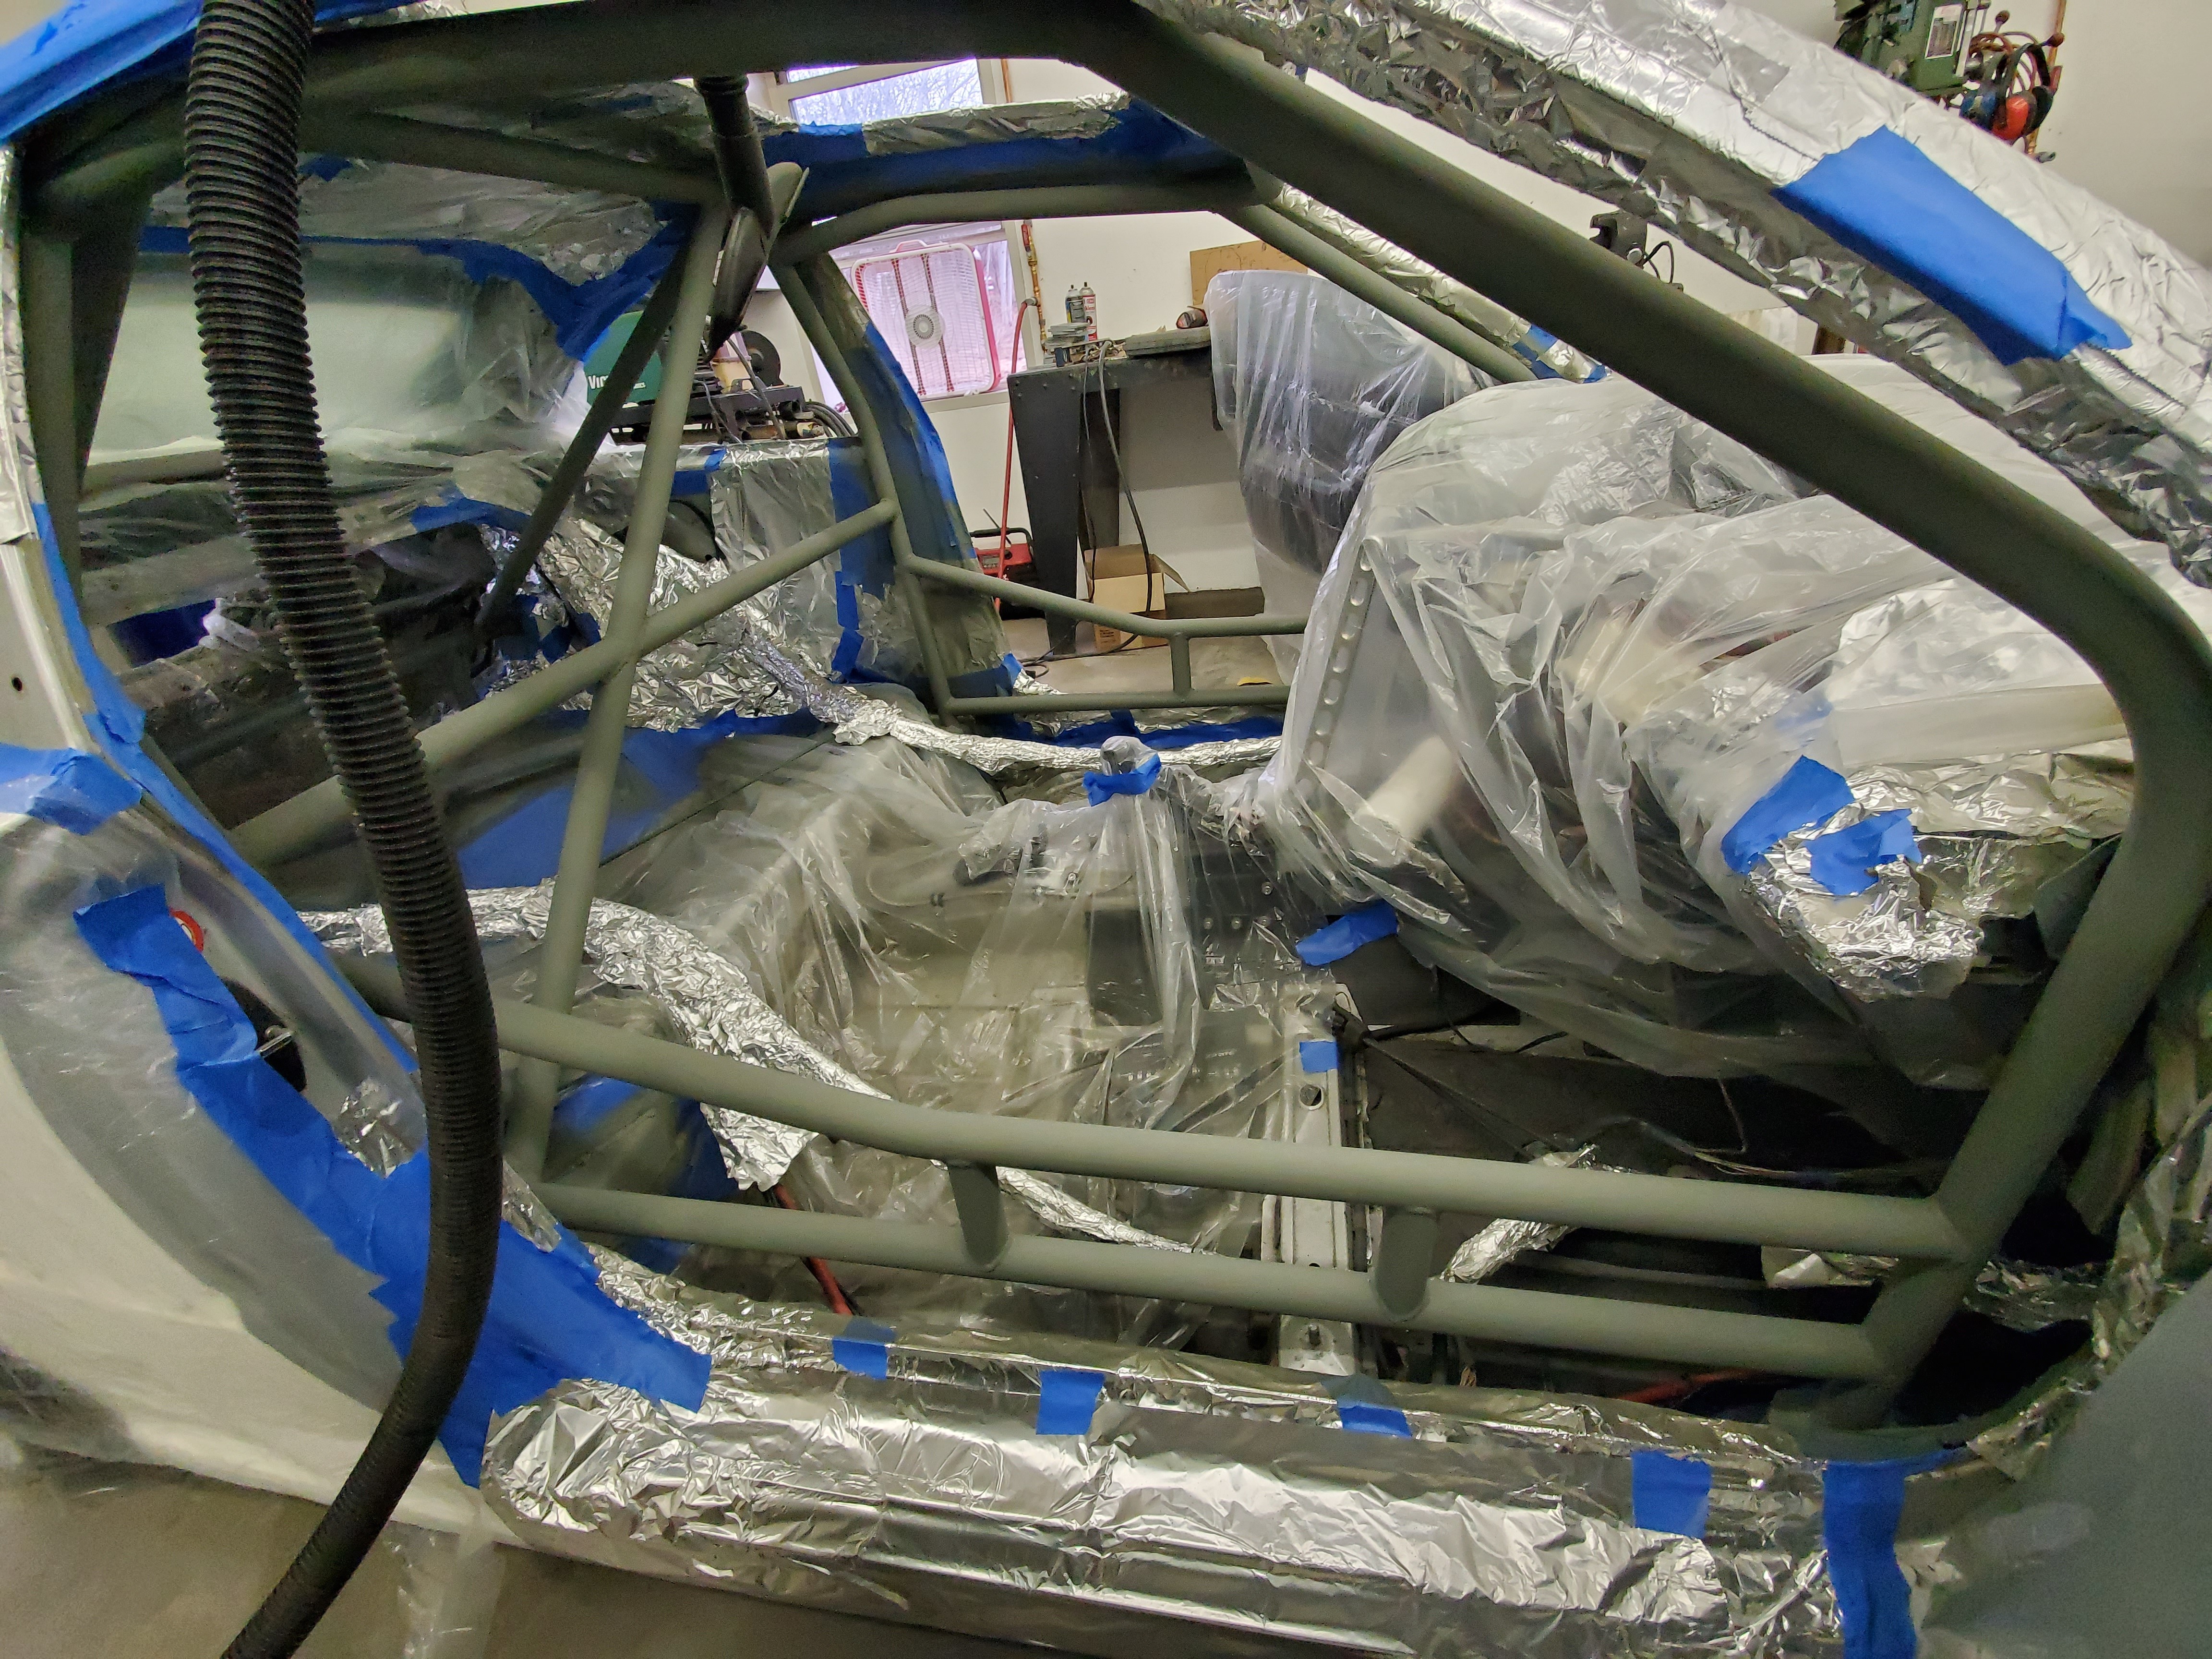
            "Pro tip #2" : I used my shop vac to try and keep over spray to a minimum and it did seem to work decently.
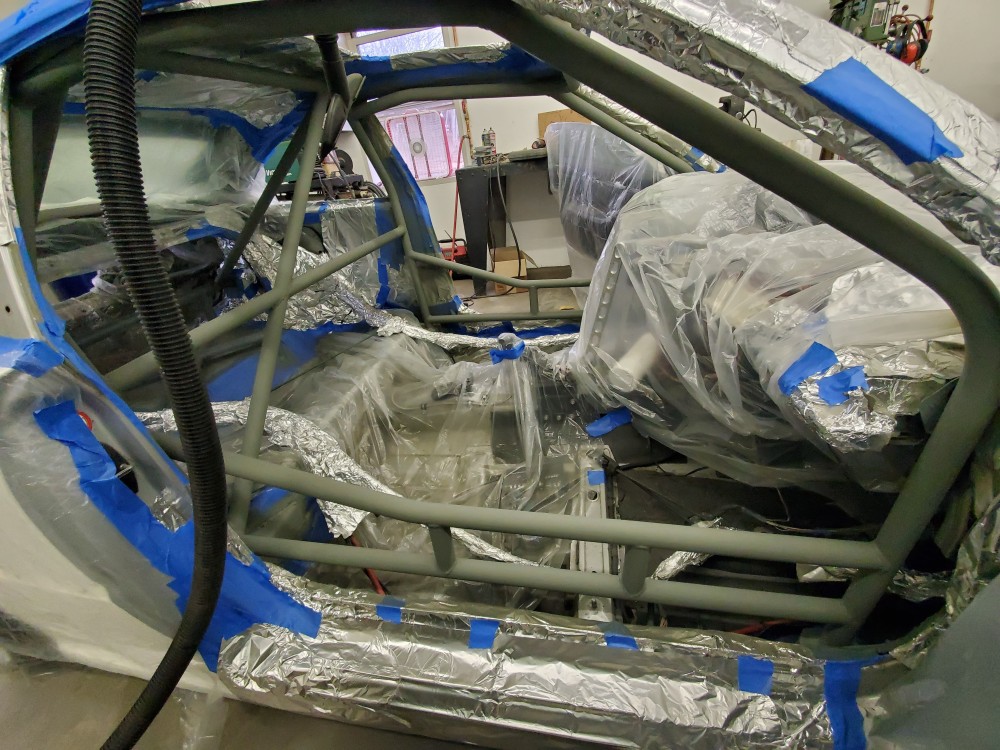
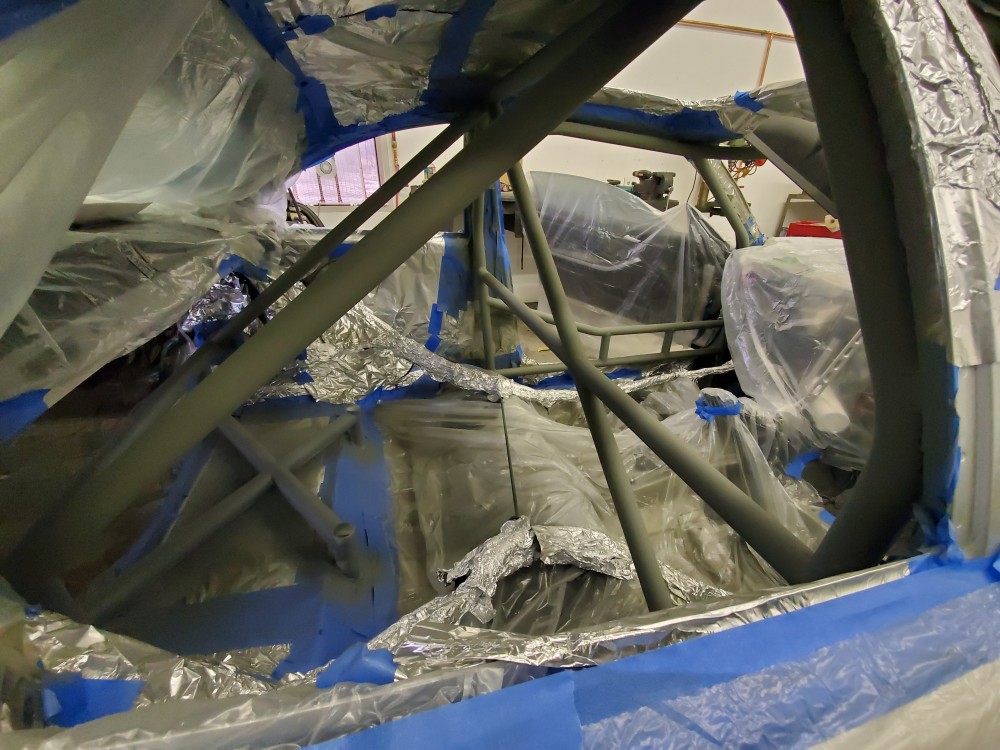
            20200328141702.jpg

            20200328141719.jpg

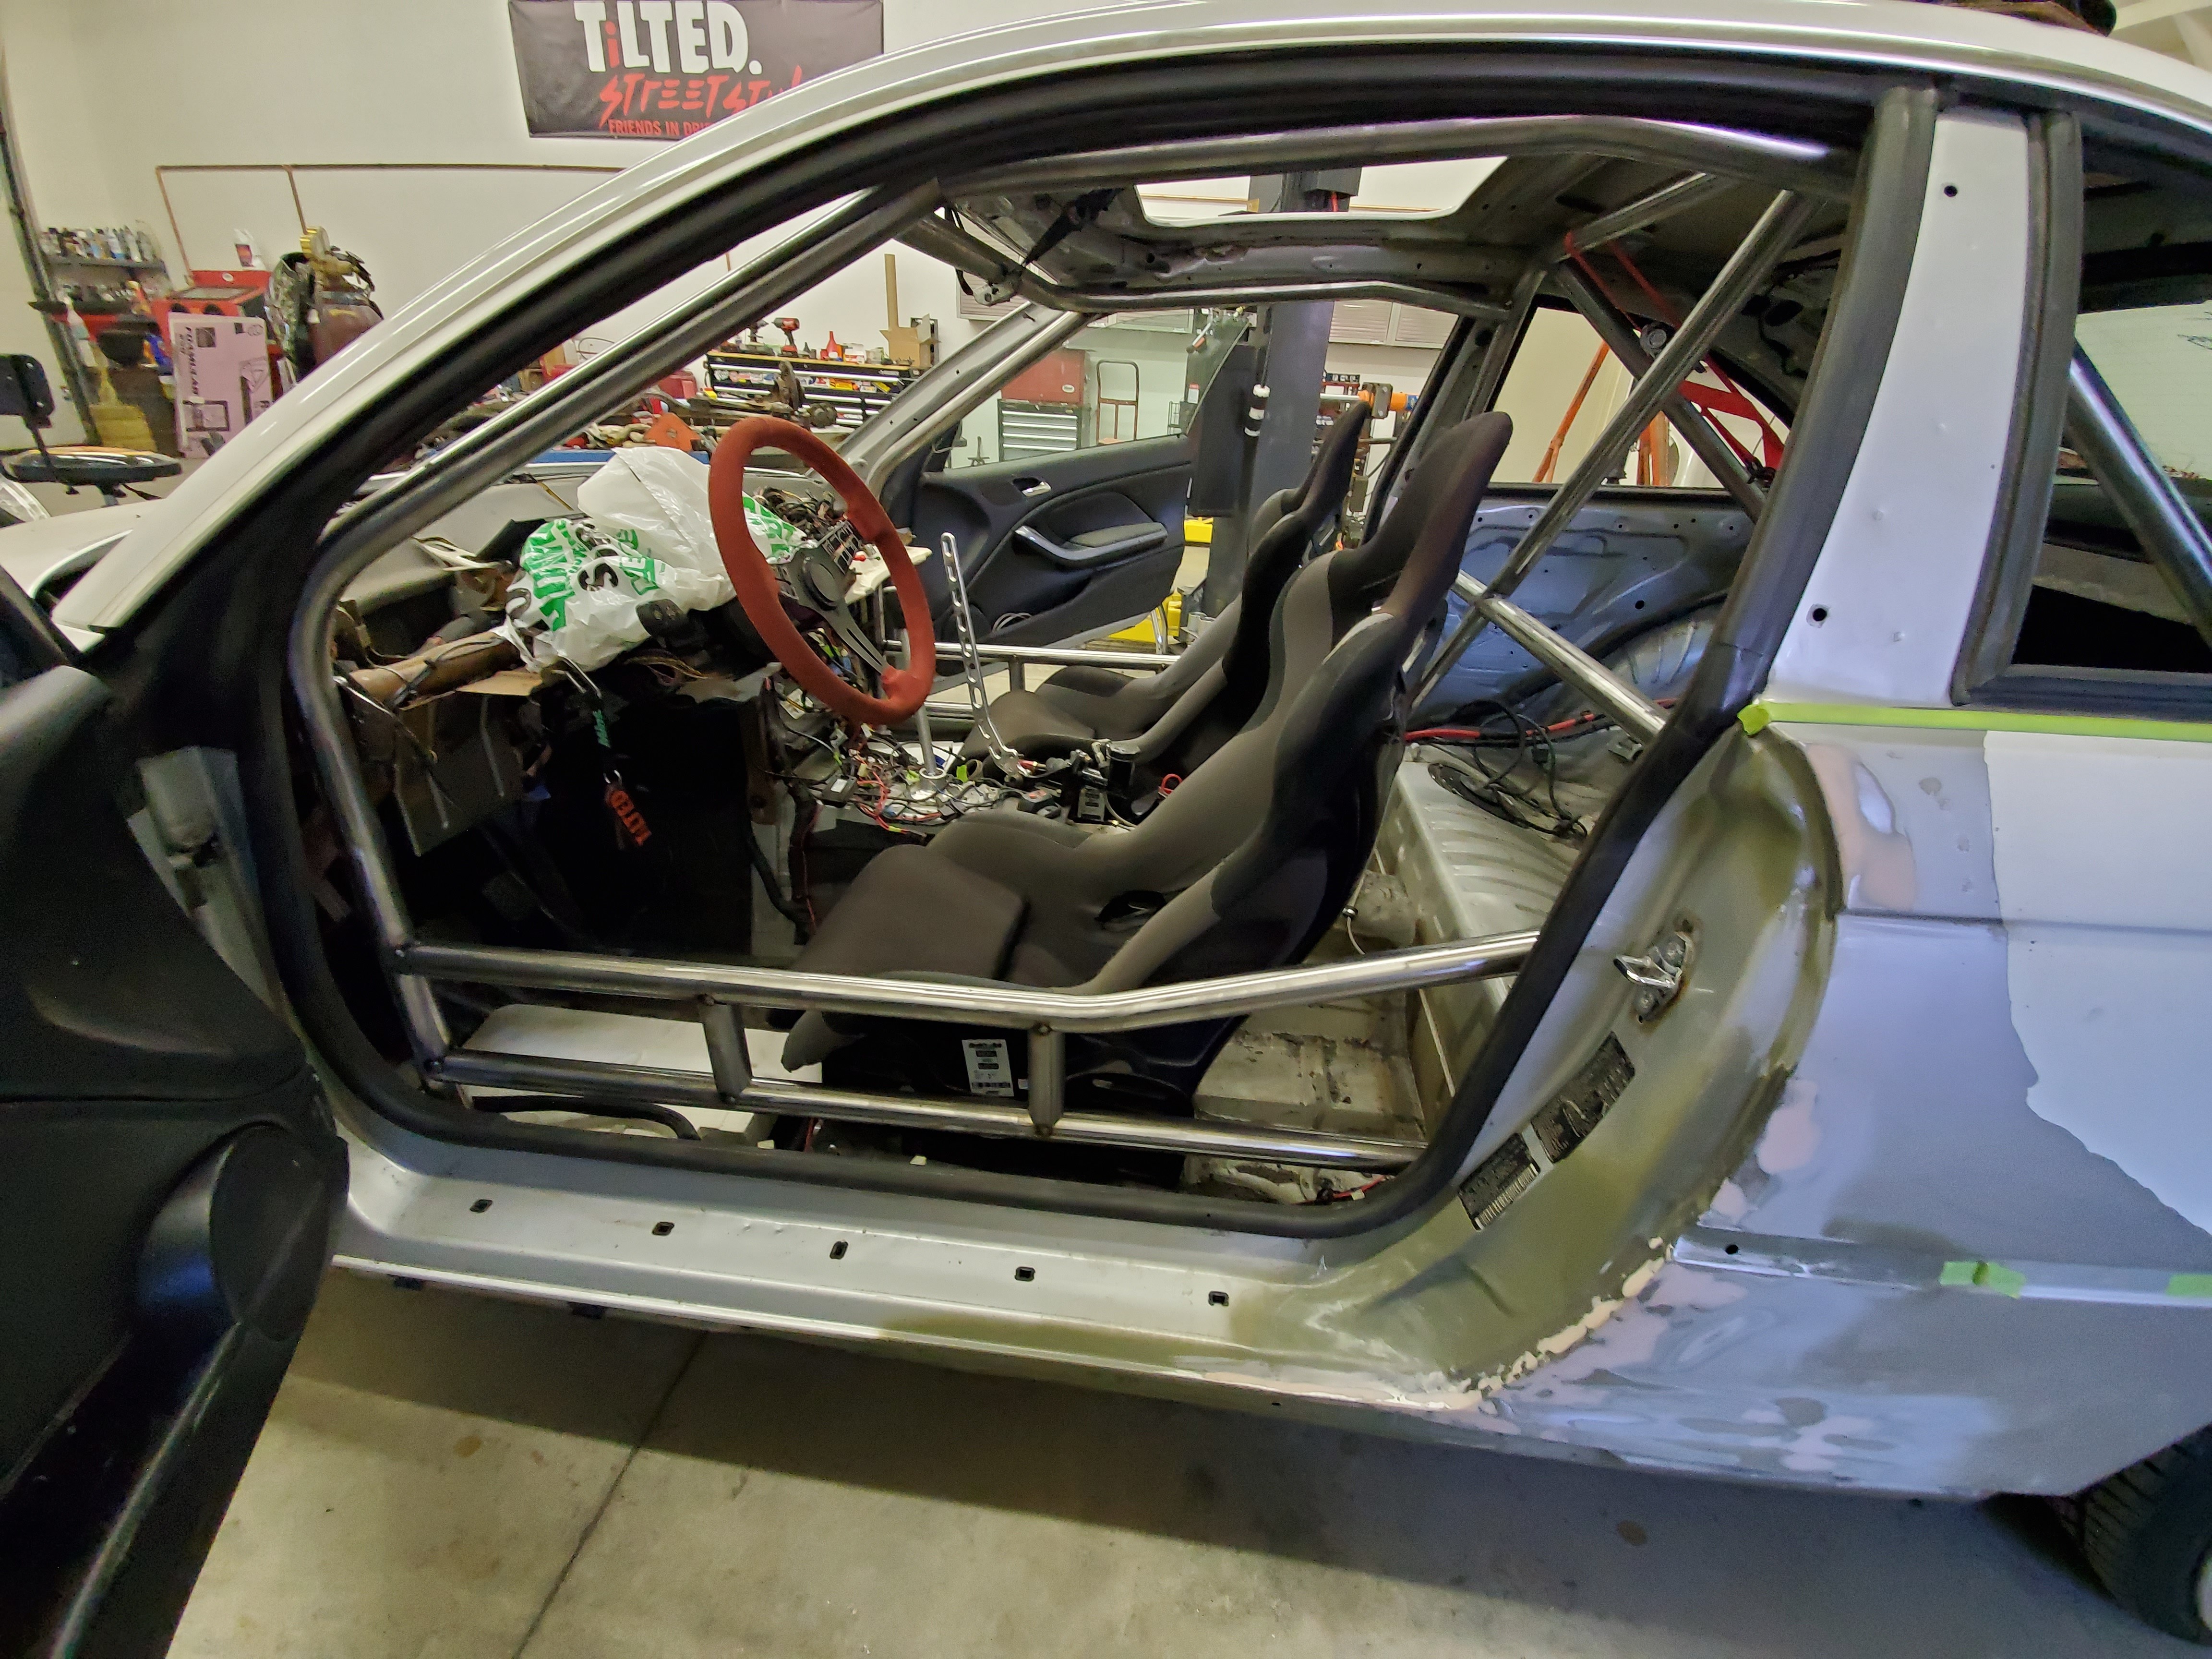
            Obviously next came color! I did 2 coats of color and then a third to finish off the last can in the areas that will be "higher traffic" like the door bars and a pillars. I do plan to put down clear vinyl on the door bars to keep them from scratching as well.

            I will spare you the repetitive photos and jump right to the ones with clear which I did on sunday afternoon. 
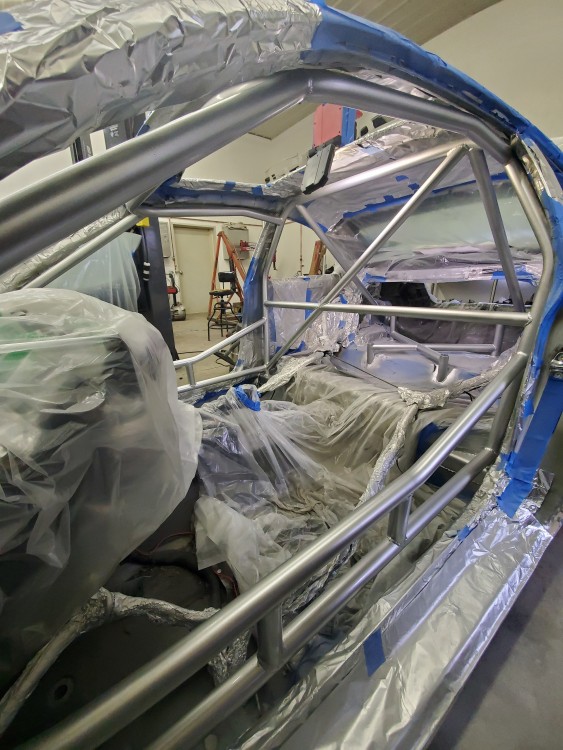
            20200329145049.jpg

            20200329145205.jpg

            20200329145117.jpg

            I am super excited at the way this turned out. 

            Every aspect was daunting for me just because I wanted to do it as well as possible, since we pride ourselves on good looking and also functional drift cars haha.

            I chose to use rattle can for a few reasons. With this tight area and the fact that I wasnt doing the entire interior a actual 2 stage paint with a gun would have made a huge mess with the air pressure and the hose.

            Secondly if it does get scratched, which I'm sure it will, touch up will be easier if necessary.

            And thirdly I do like to pride myself on tricking people to think that it was done with a gun but it's just spray paint lmao.

            Super excited to un-mask everything and get rolling on putting the interior back in along with a few other projects for the season yet!

            1 Reply Last reply
            3
            • KaiserRollsK
              KaiserRollsK
              KaiserRolls
              wrote on last edited by
              #313

              Looks good. Could always toss some 3m clear vinyl on the high wear areas. 

              2D216176-DF56-4909-AB5F-0C9AE6E45B6D.gif

              1 Reply Last reply
              1
              • TkuhnT
                TkuhnT
                Tkuhn
                wrote on last edited by
                #314

                KaiserRolls said:

                Looks good. Could always toss some 3m clear vinyl on the high wear areas. 

                2D216176-DF56-4909-AB5F-0C9AE6E45B6D.gif

                Thanks!! And yes that was my plan. Specifically on the door bars.

                1 Reply Last reply
                1
                • TkuhnT
                  TkuhnT
                  Tkuhn
                  wrote on last edited by
                  #315

                  Weekend update!

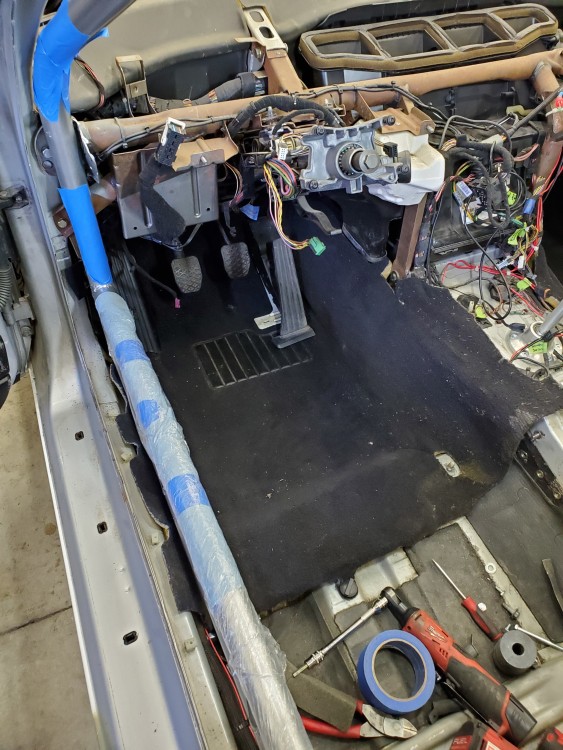
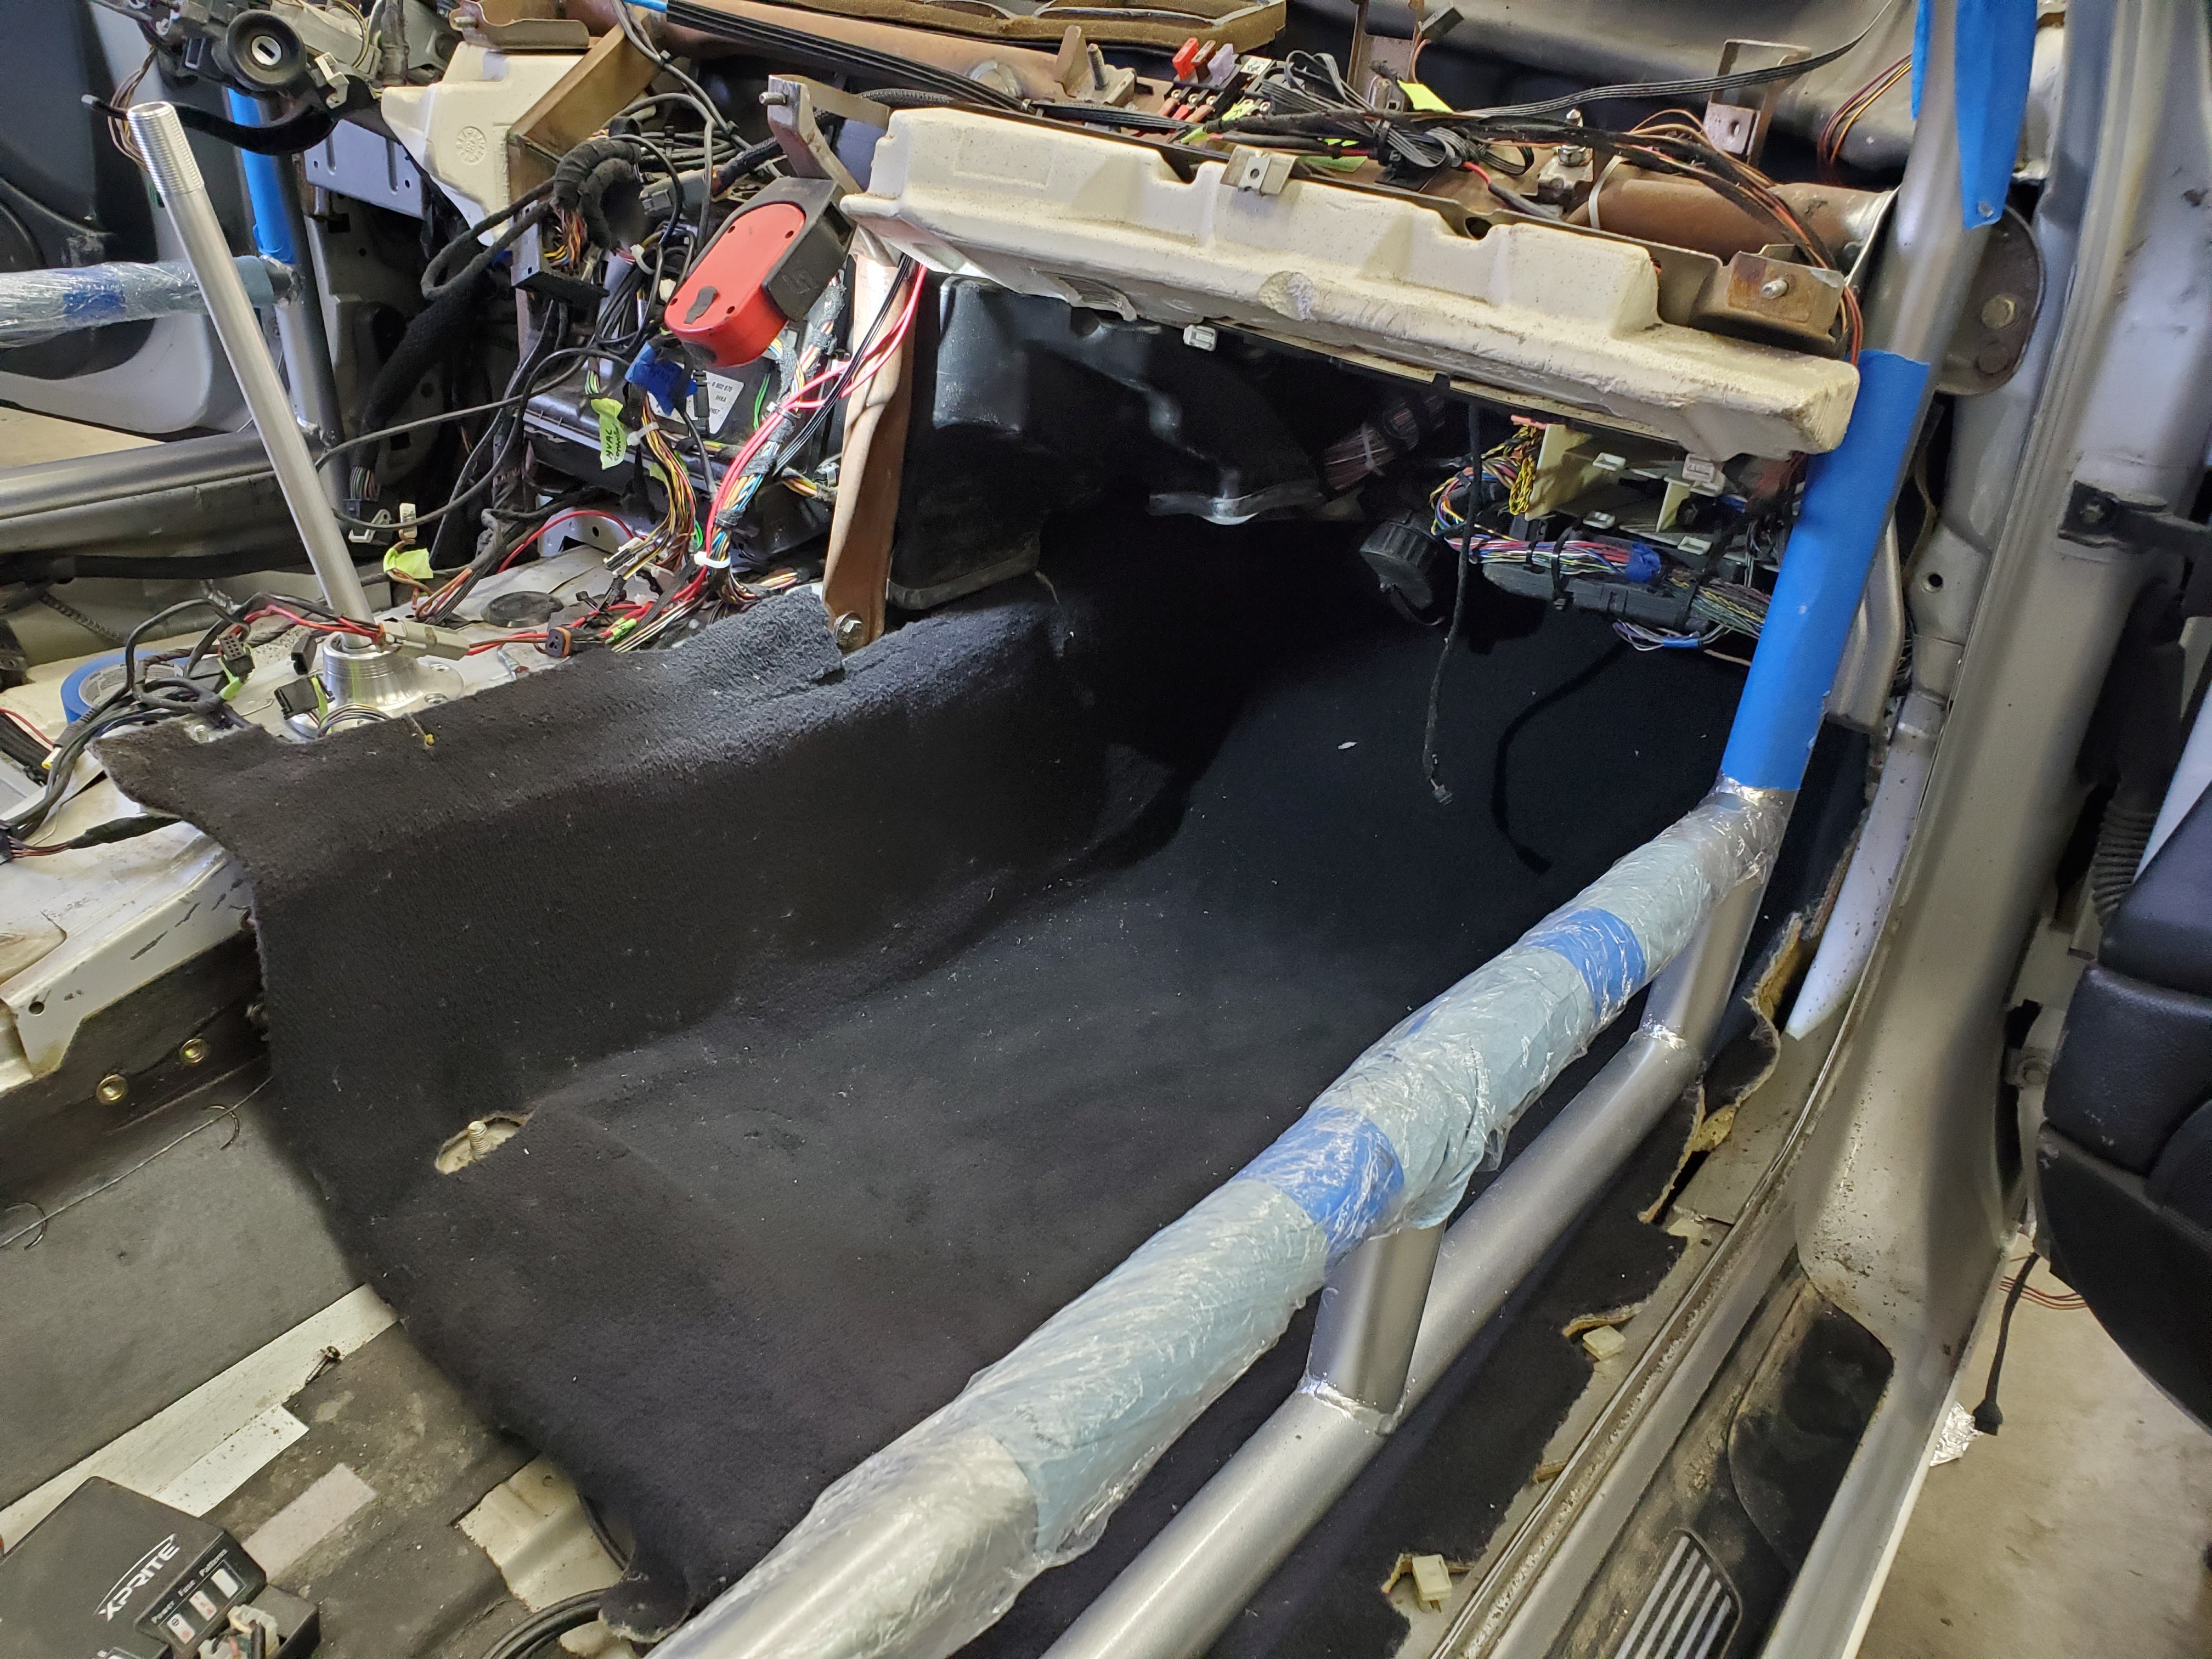
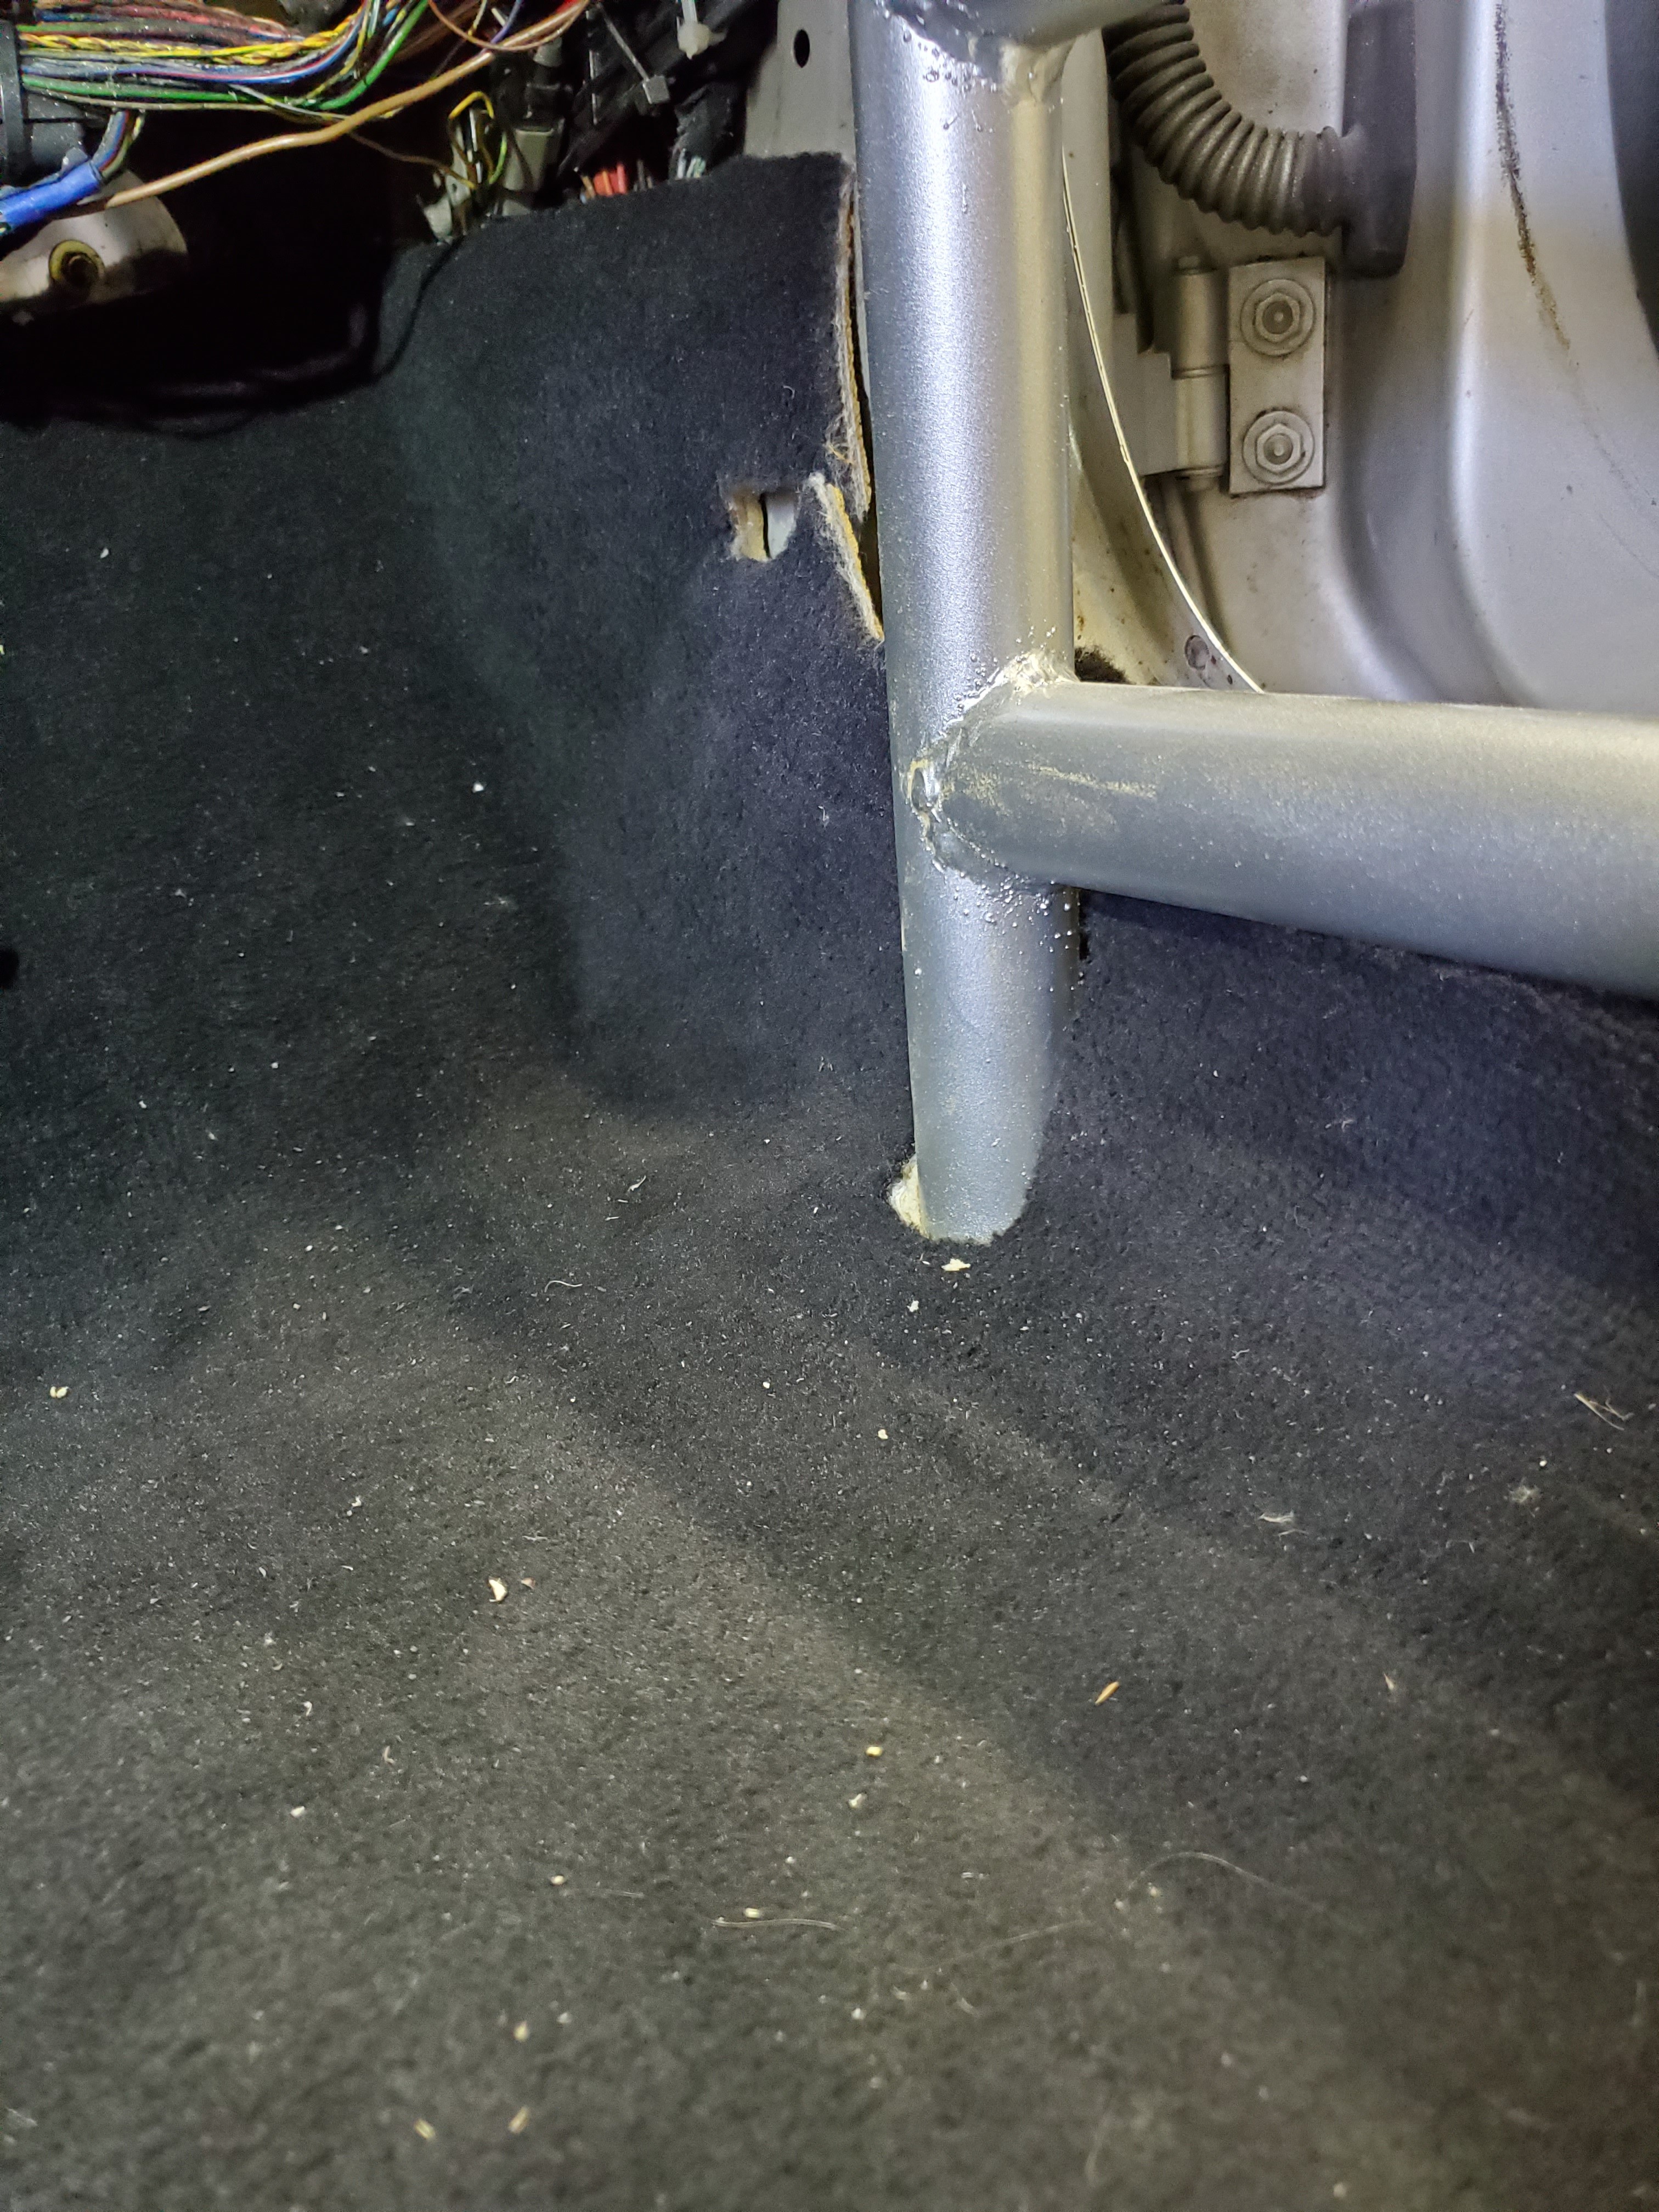
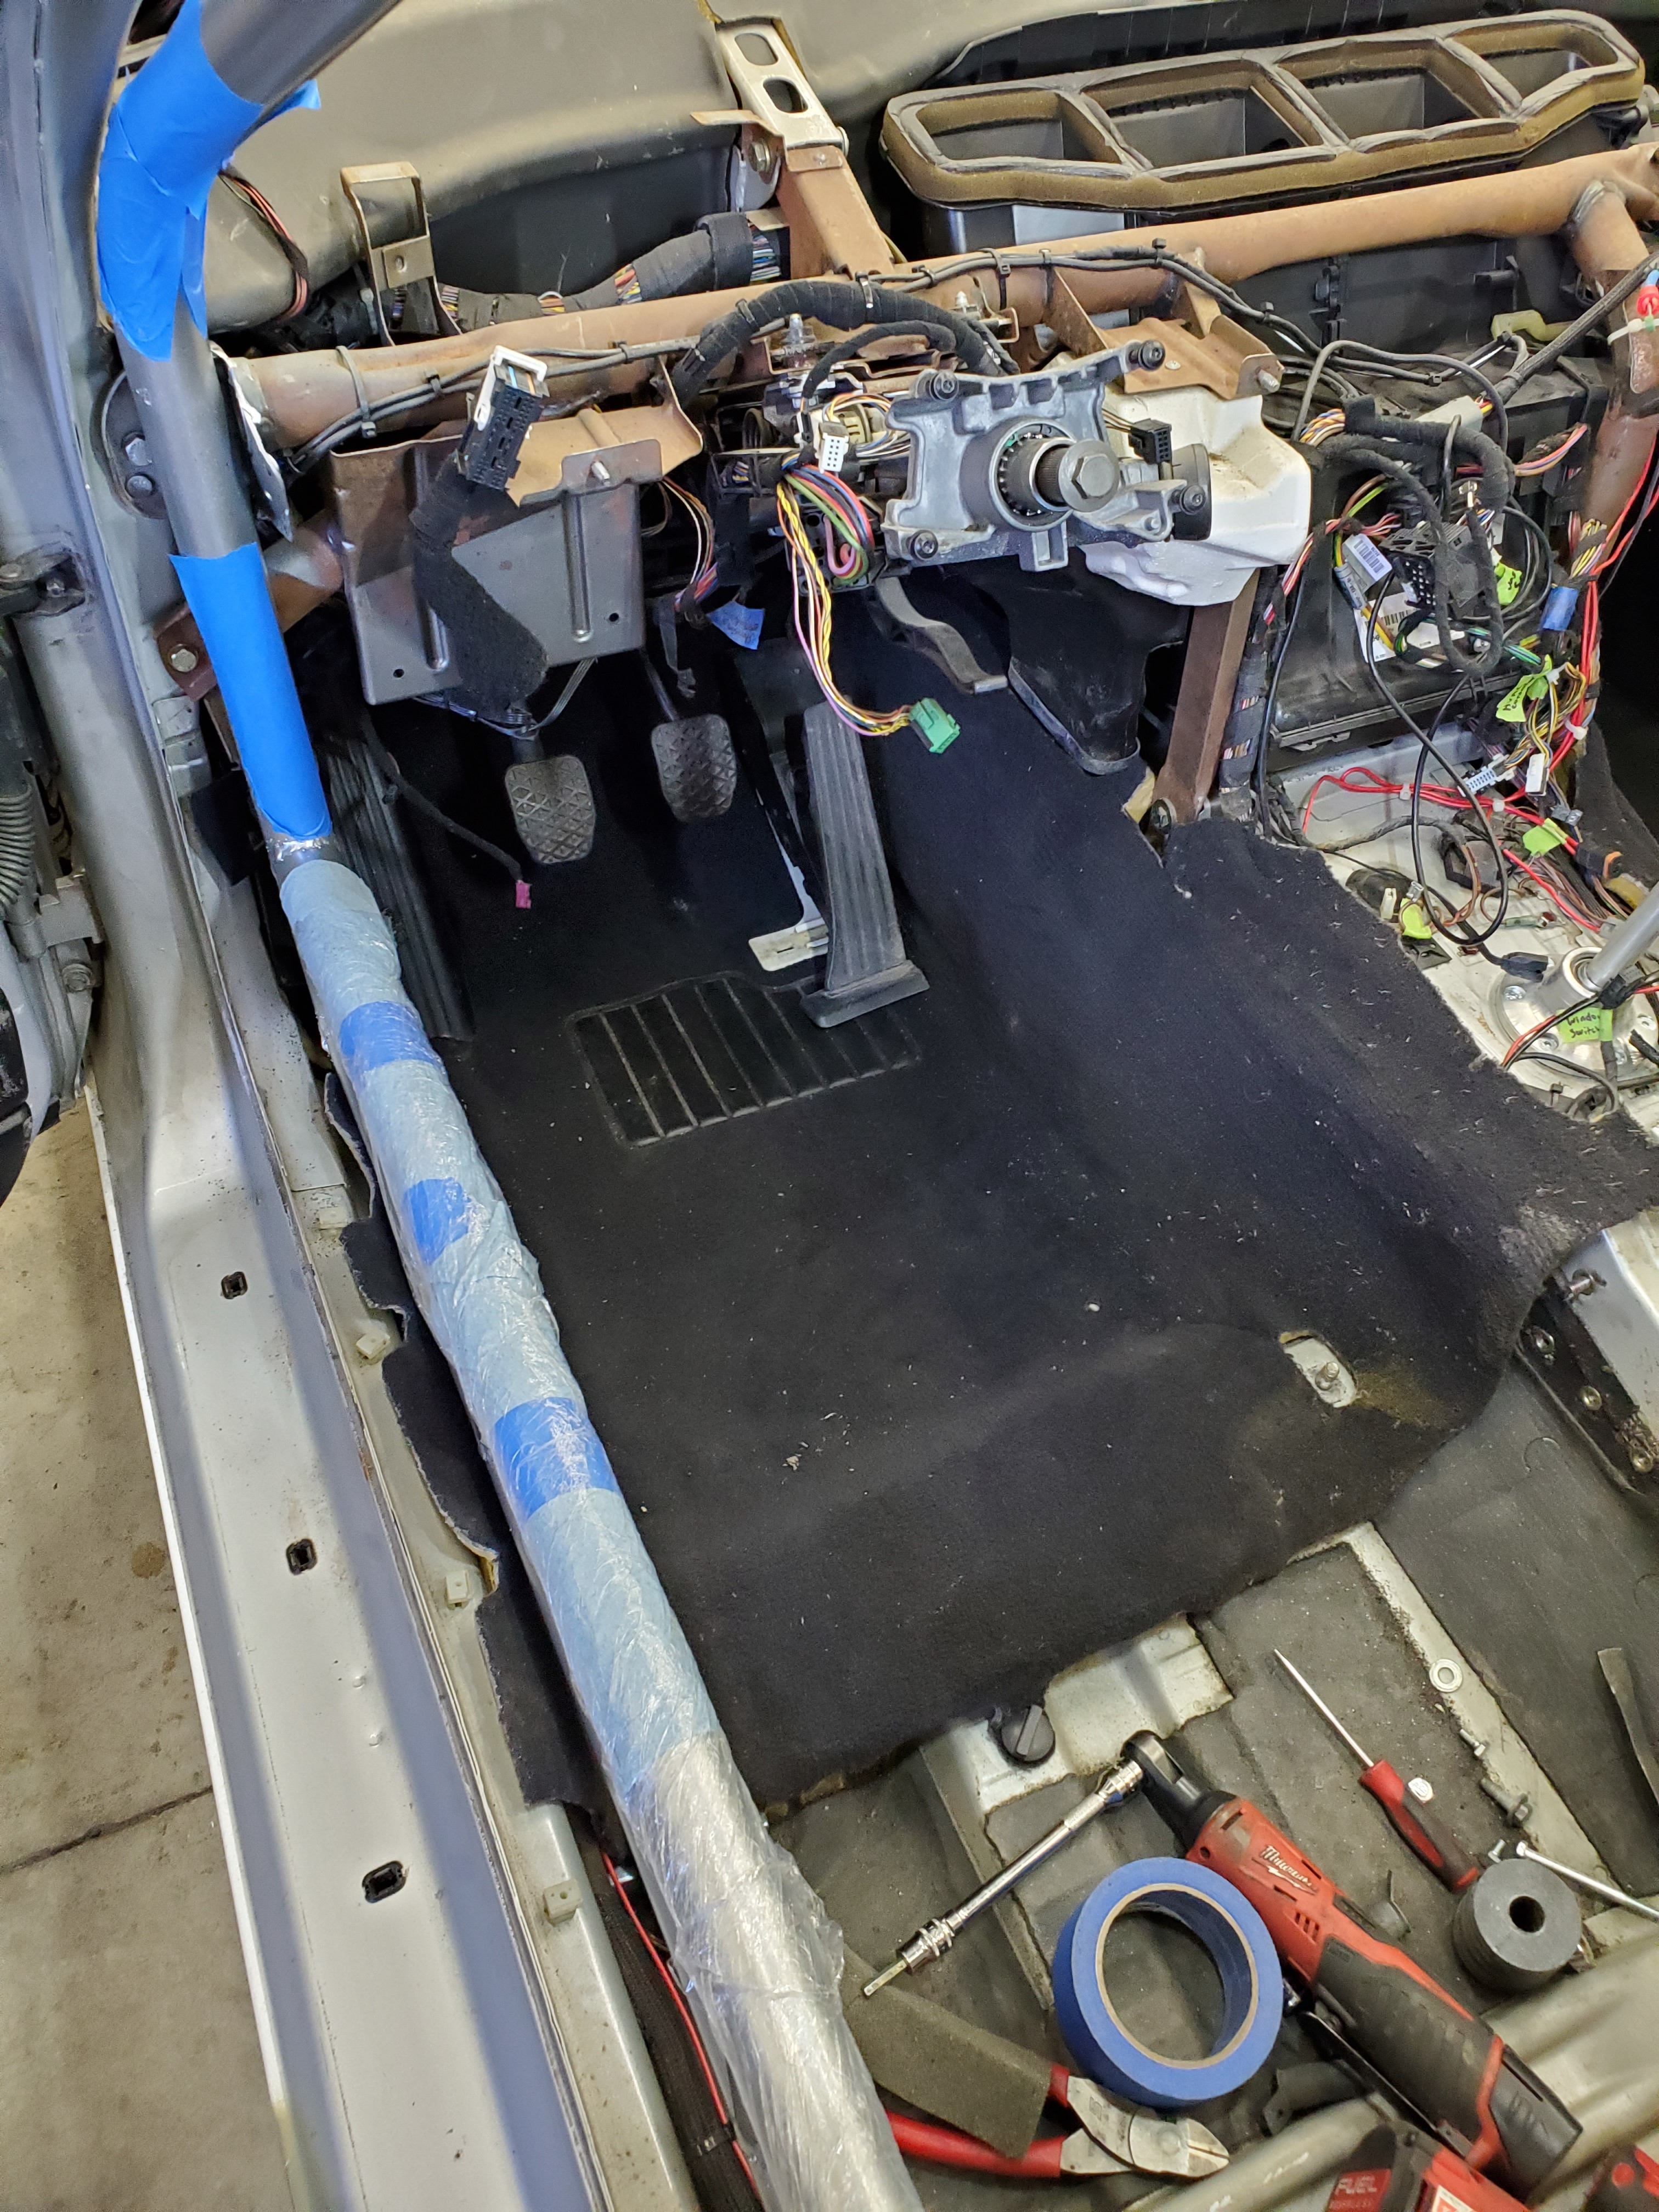
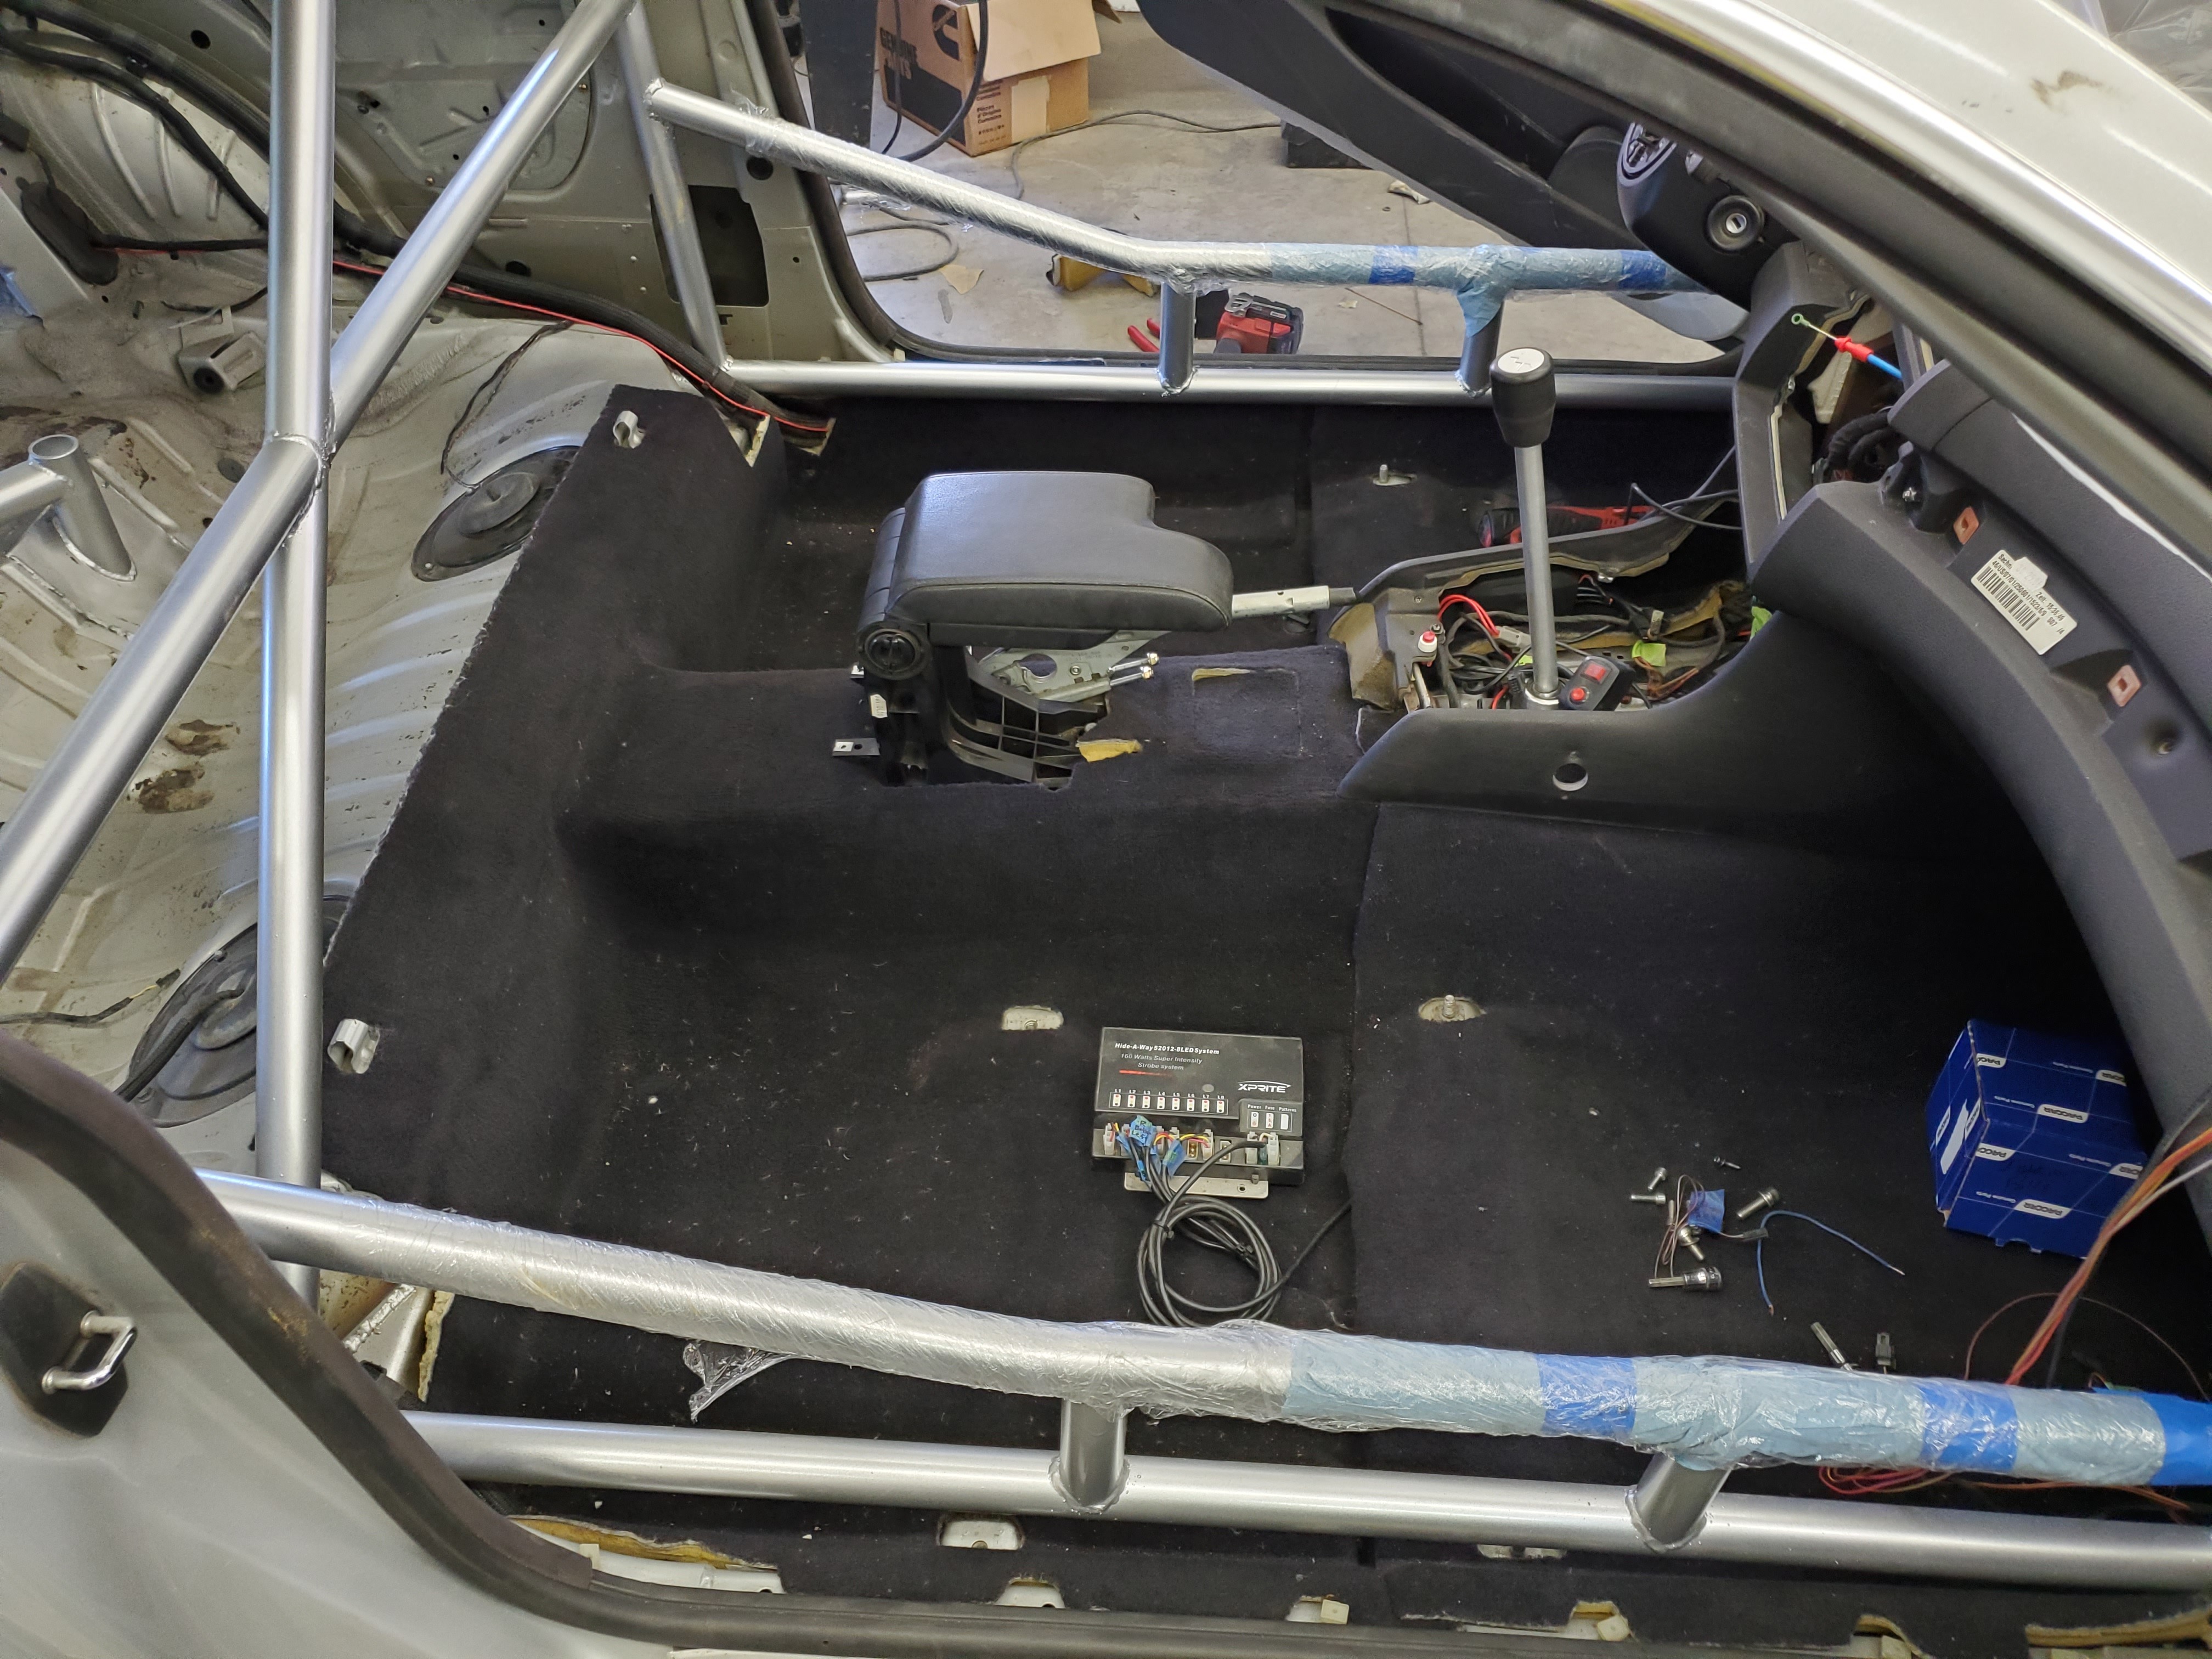
                  Started by getting the passenger and drive carpet buckets in. The carpet I bought from my part out guy was cut in the front because it goes under the heater core. So having them in 2 pieces works out better honestly.
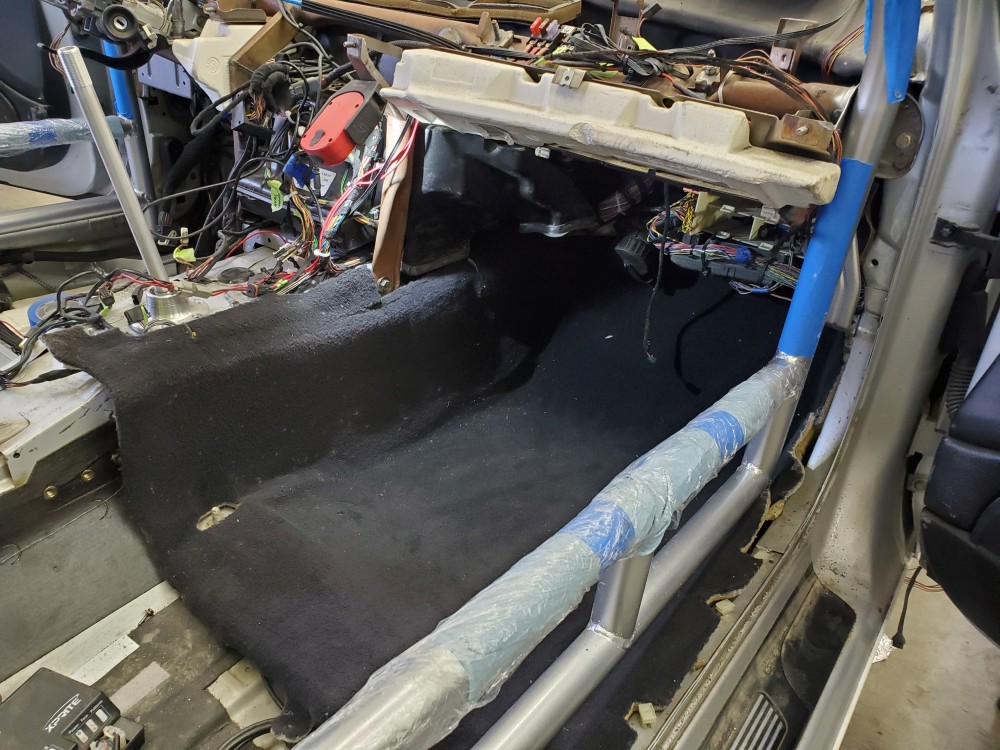
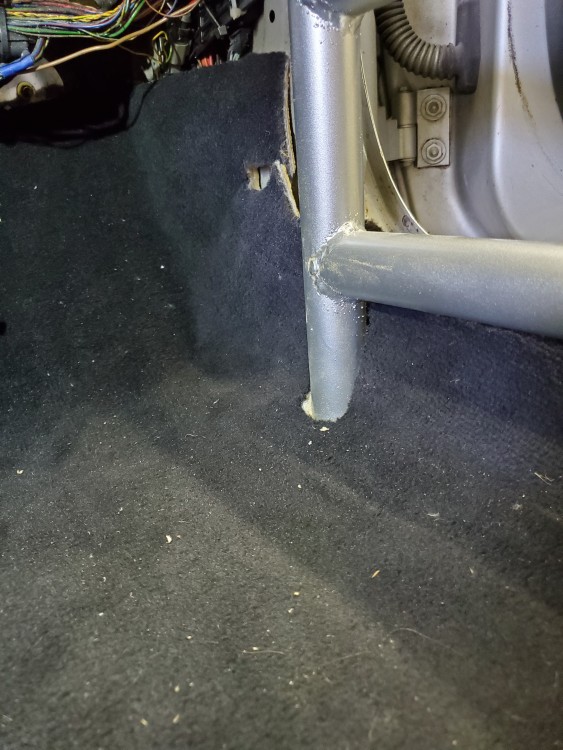
                  20200404121957.jpg

                  20200404122007.jpg

                  20200404140450.jpg

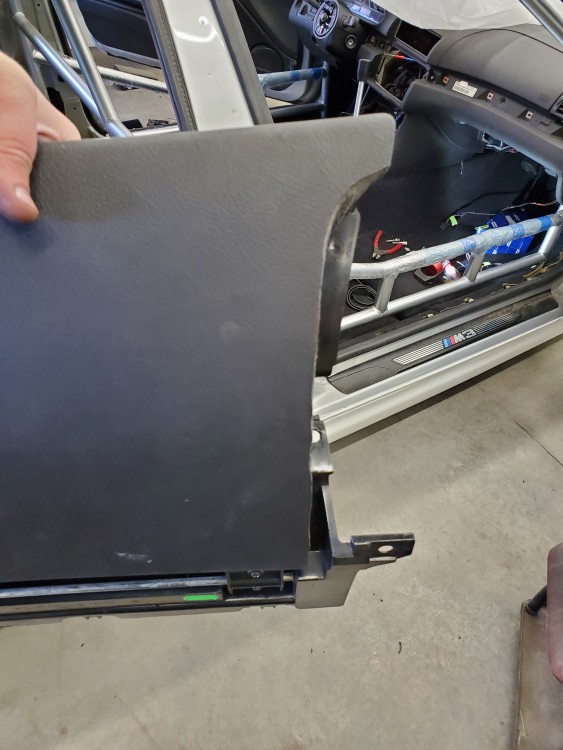
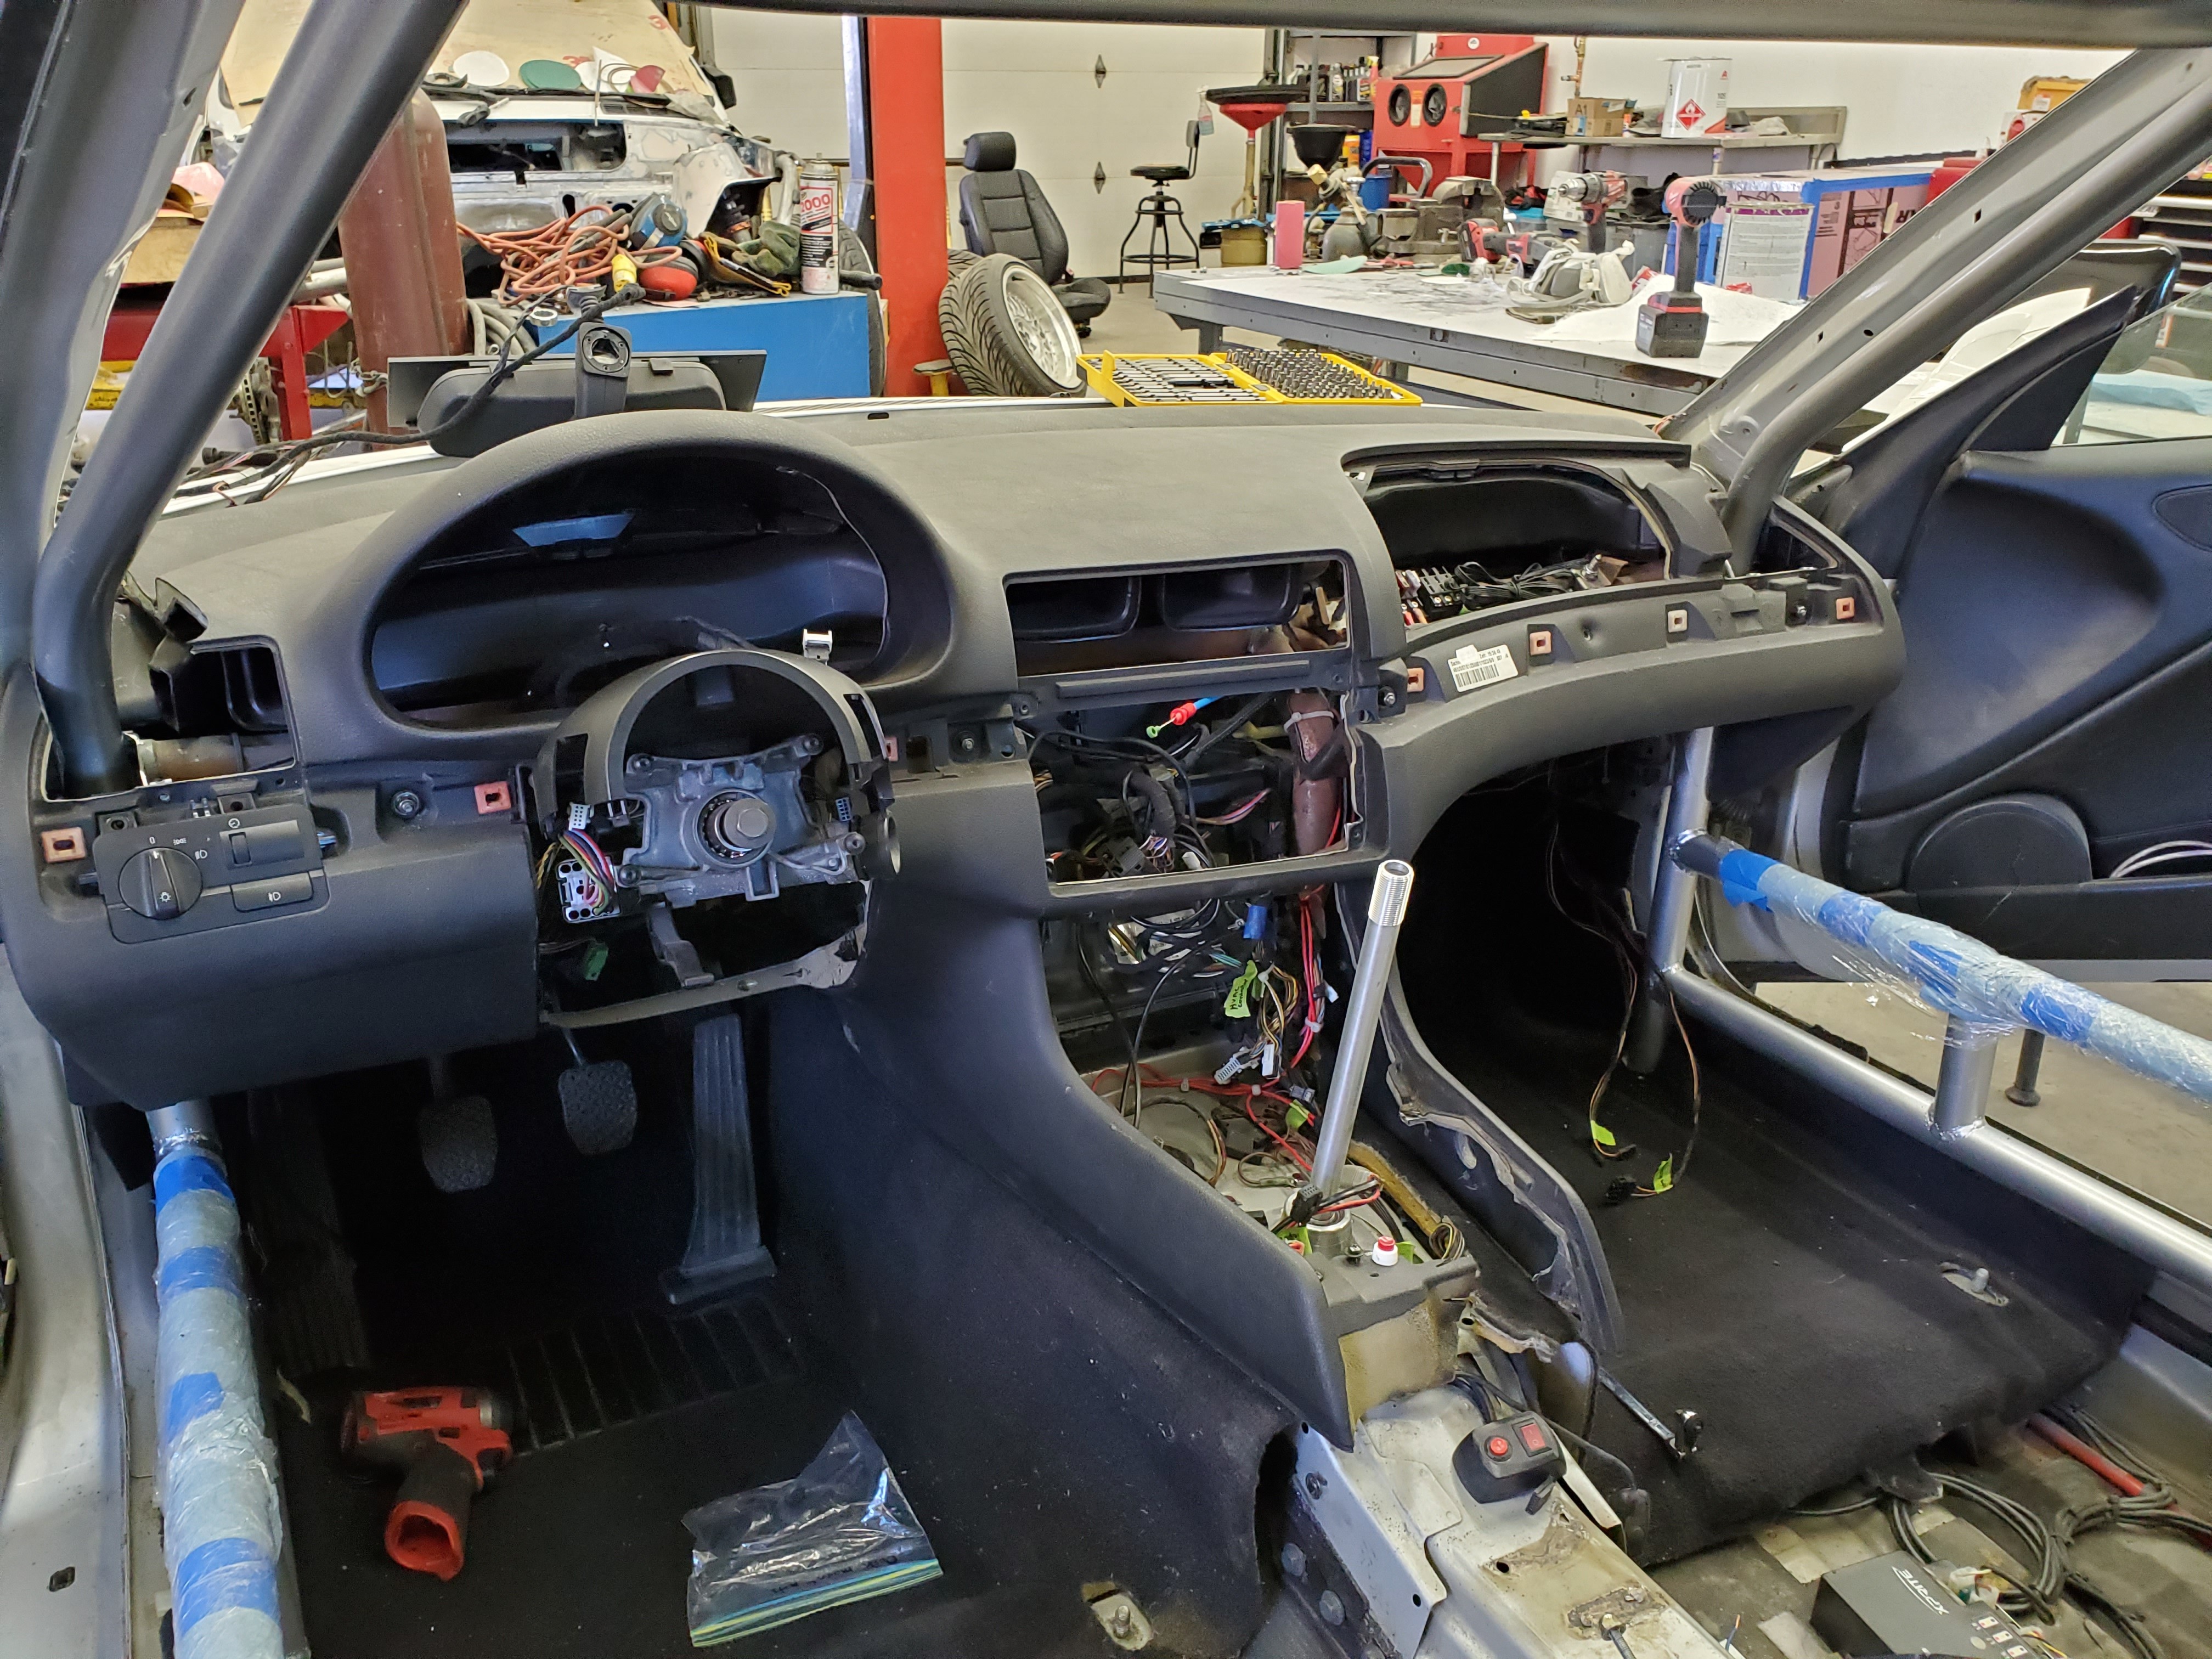
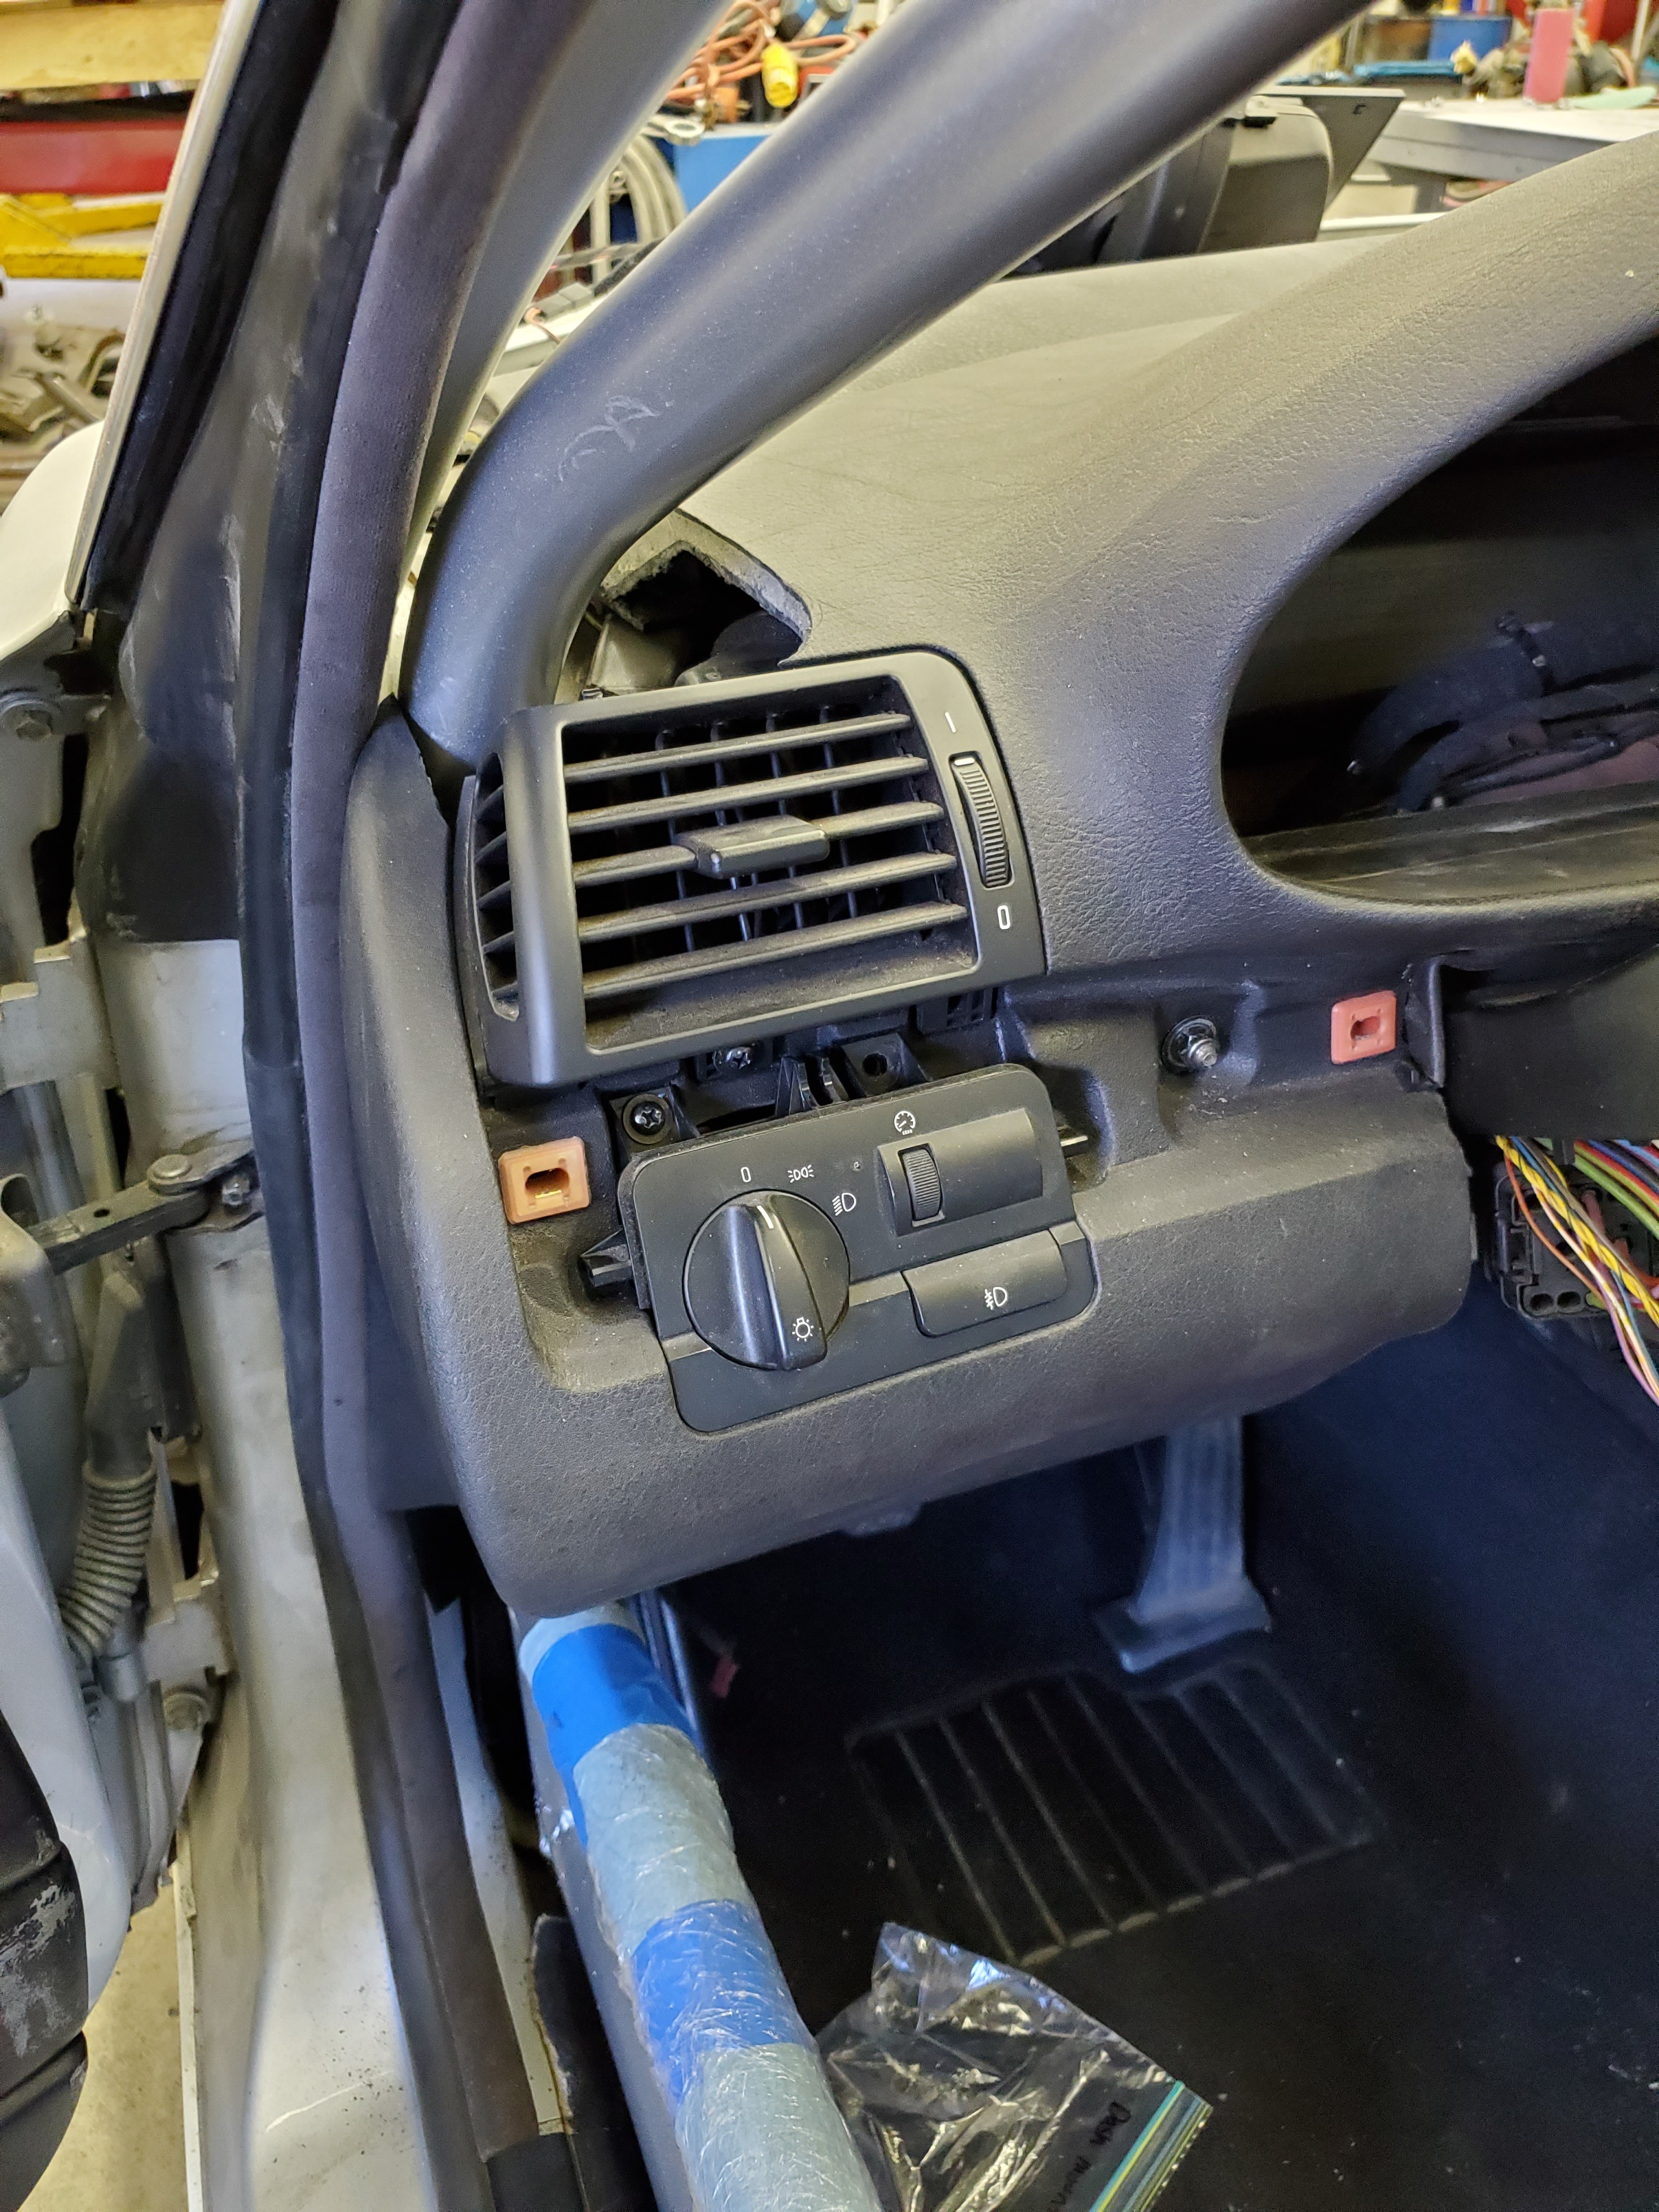
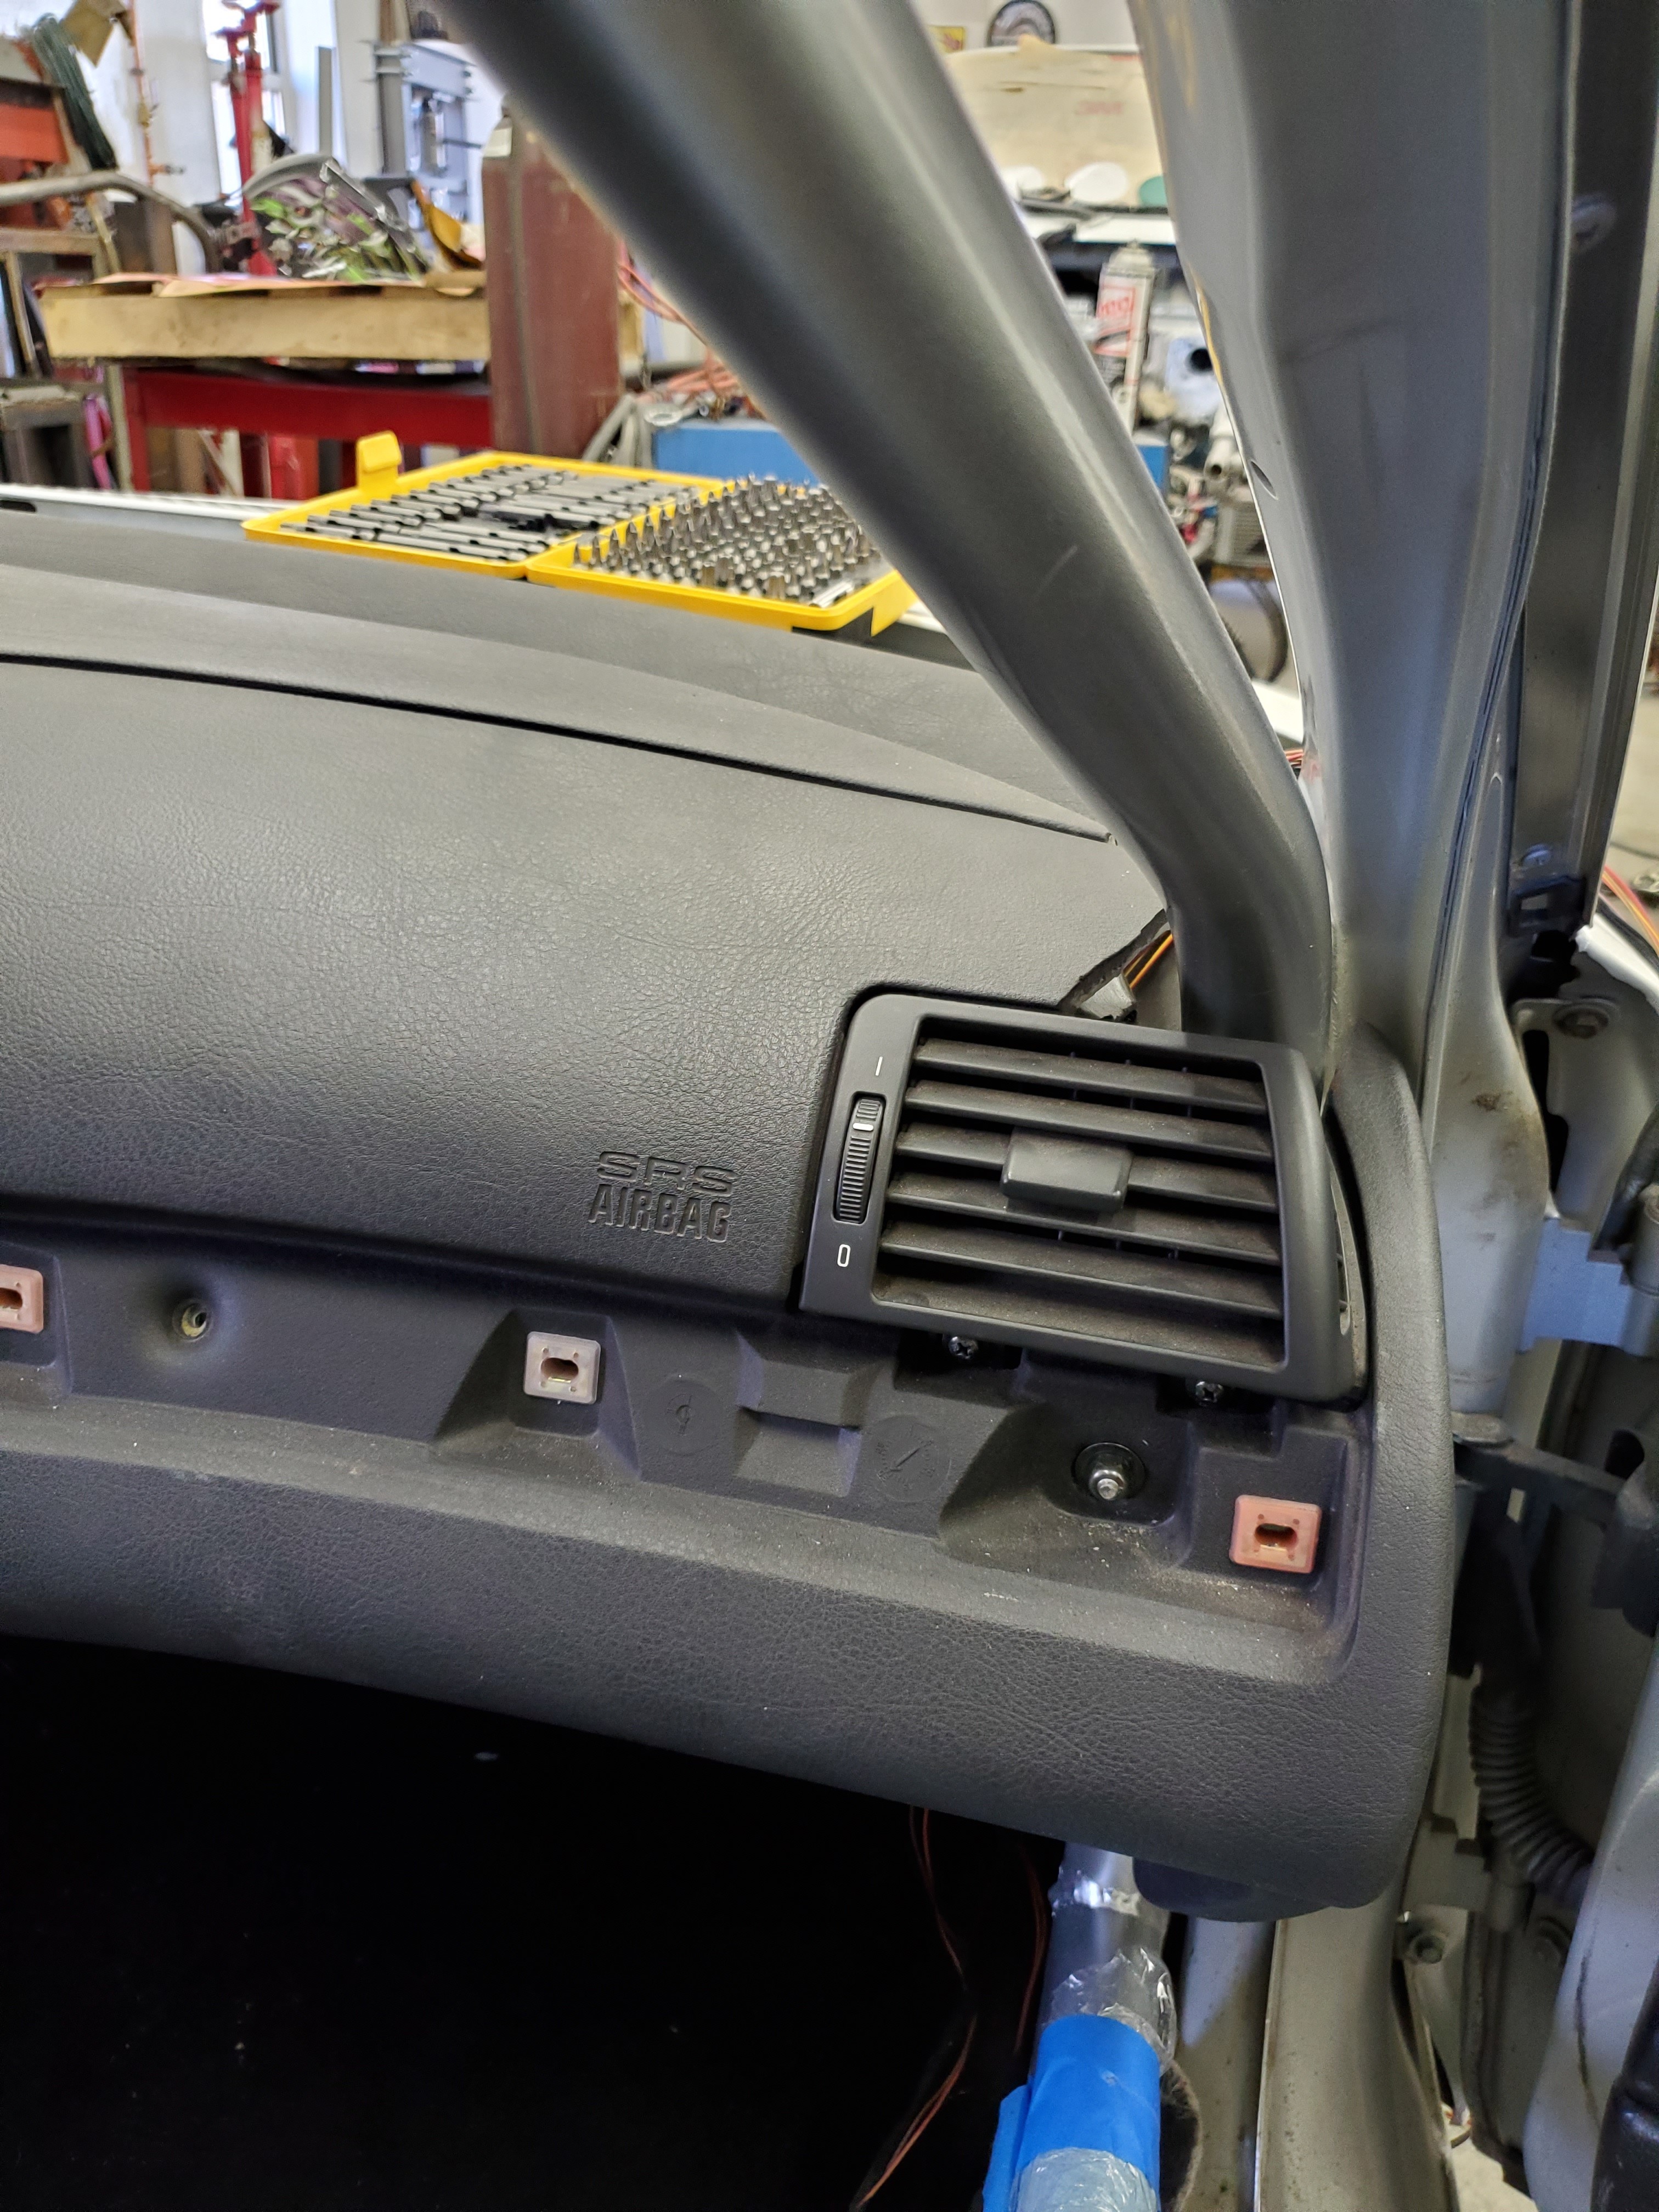
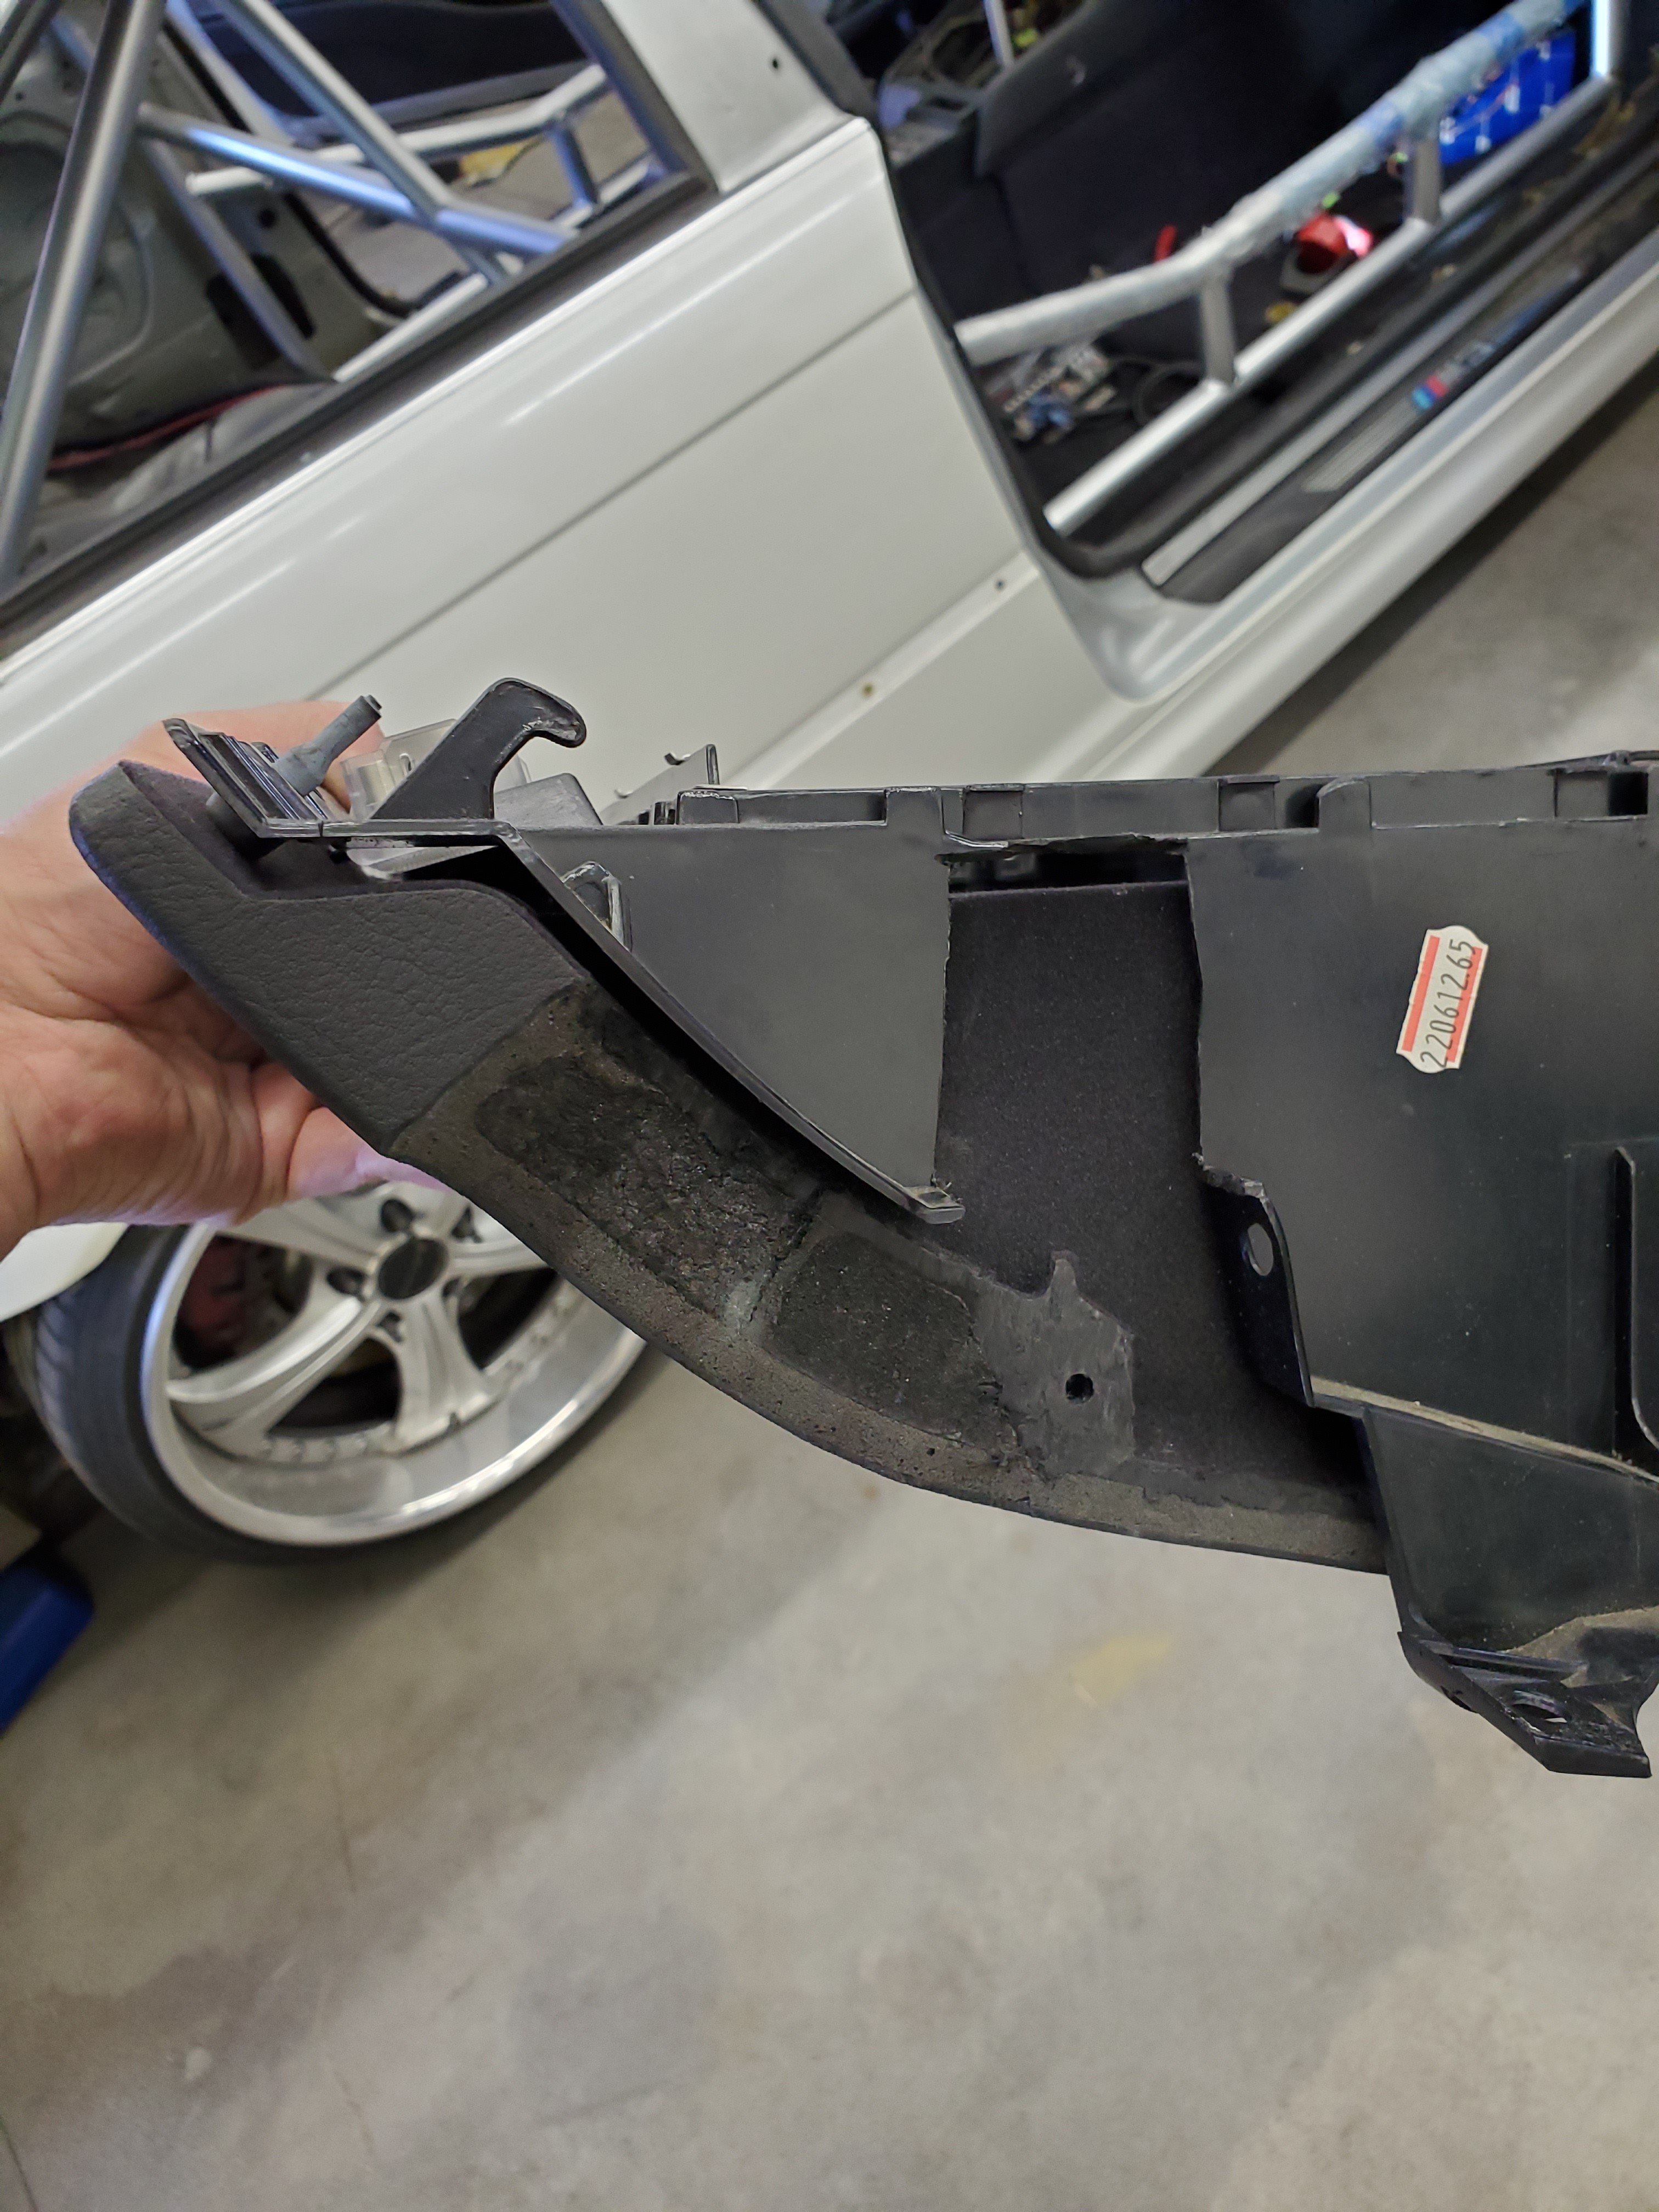
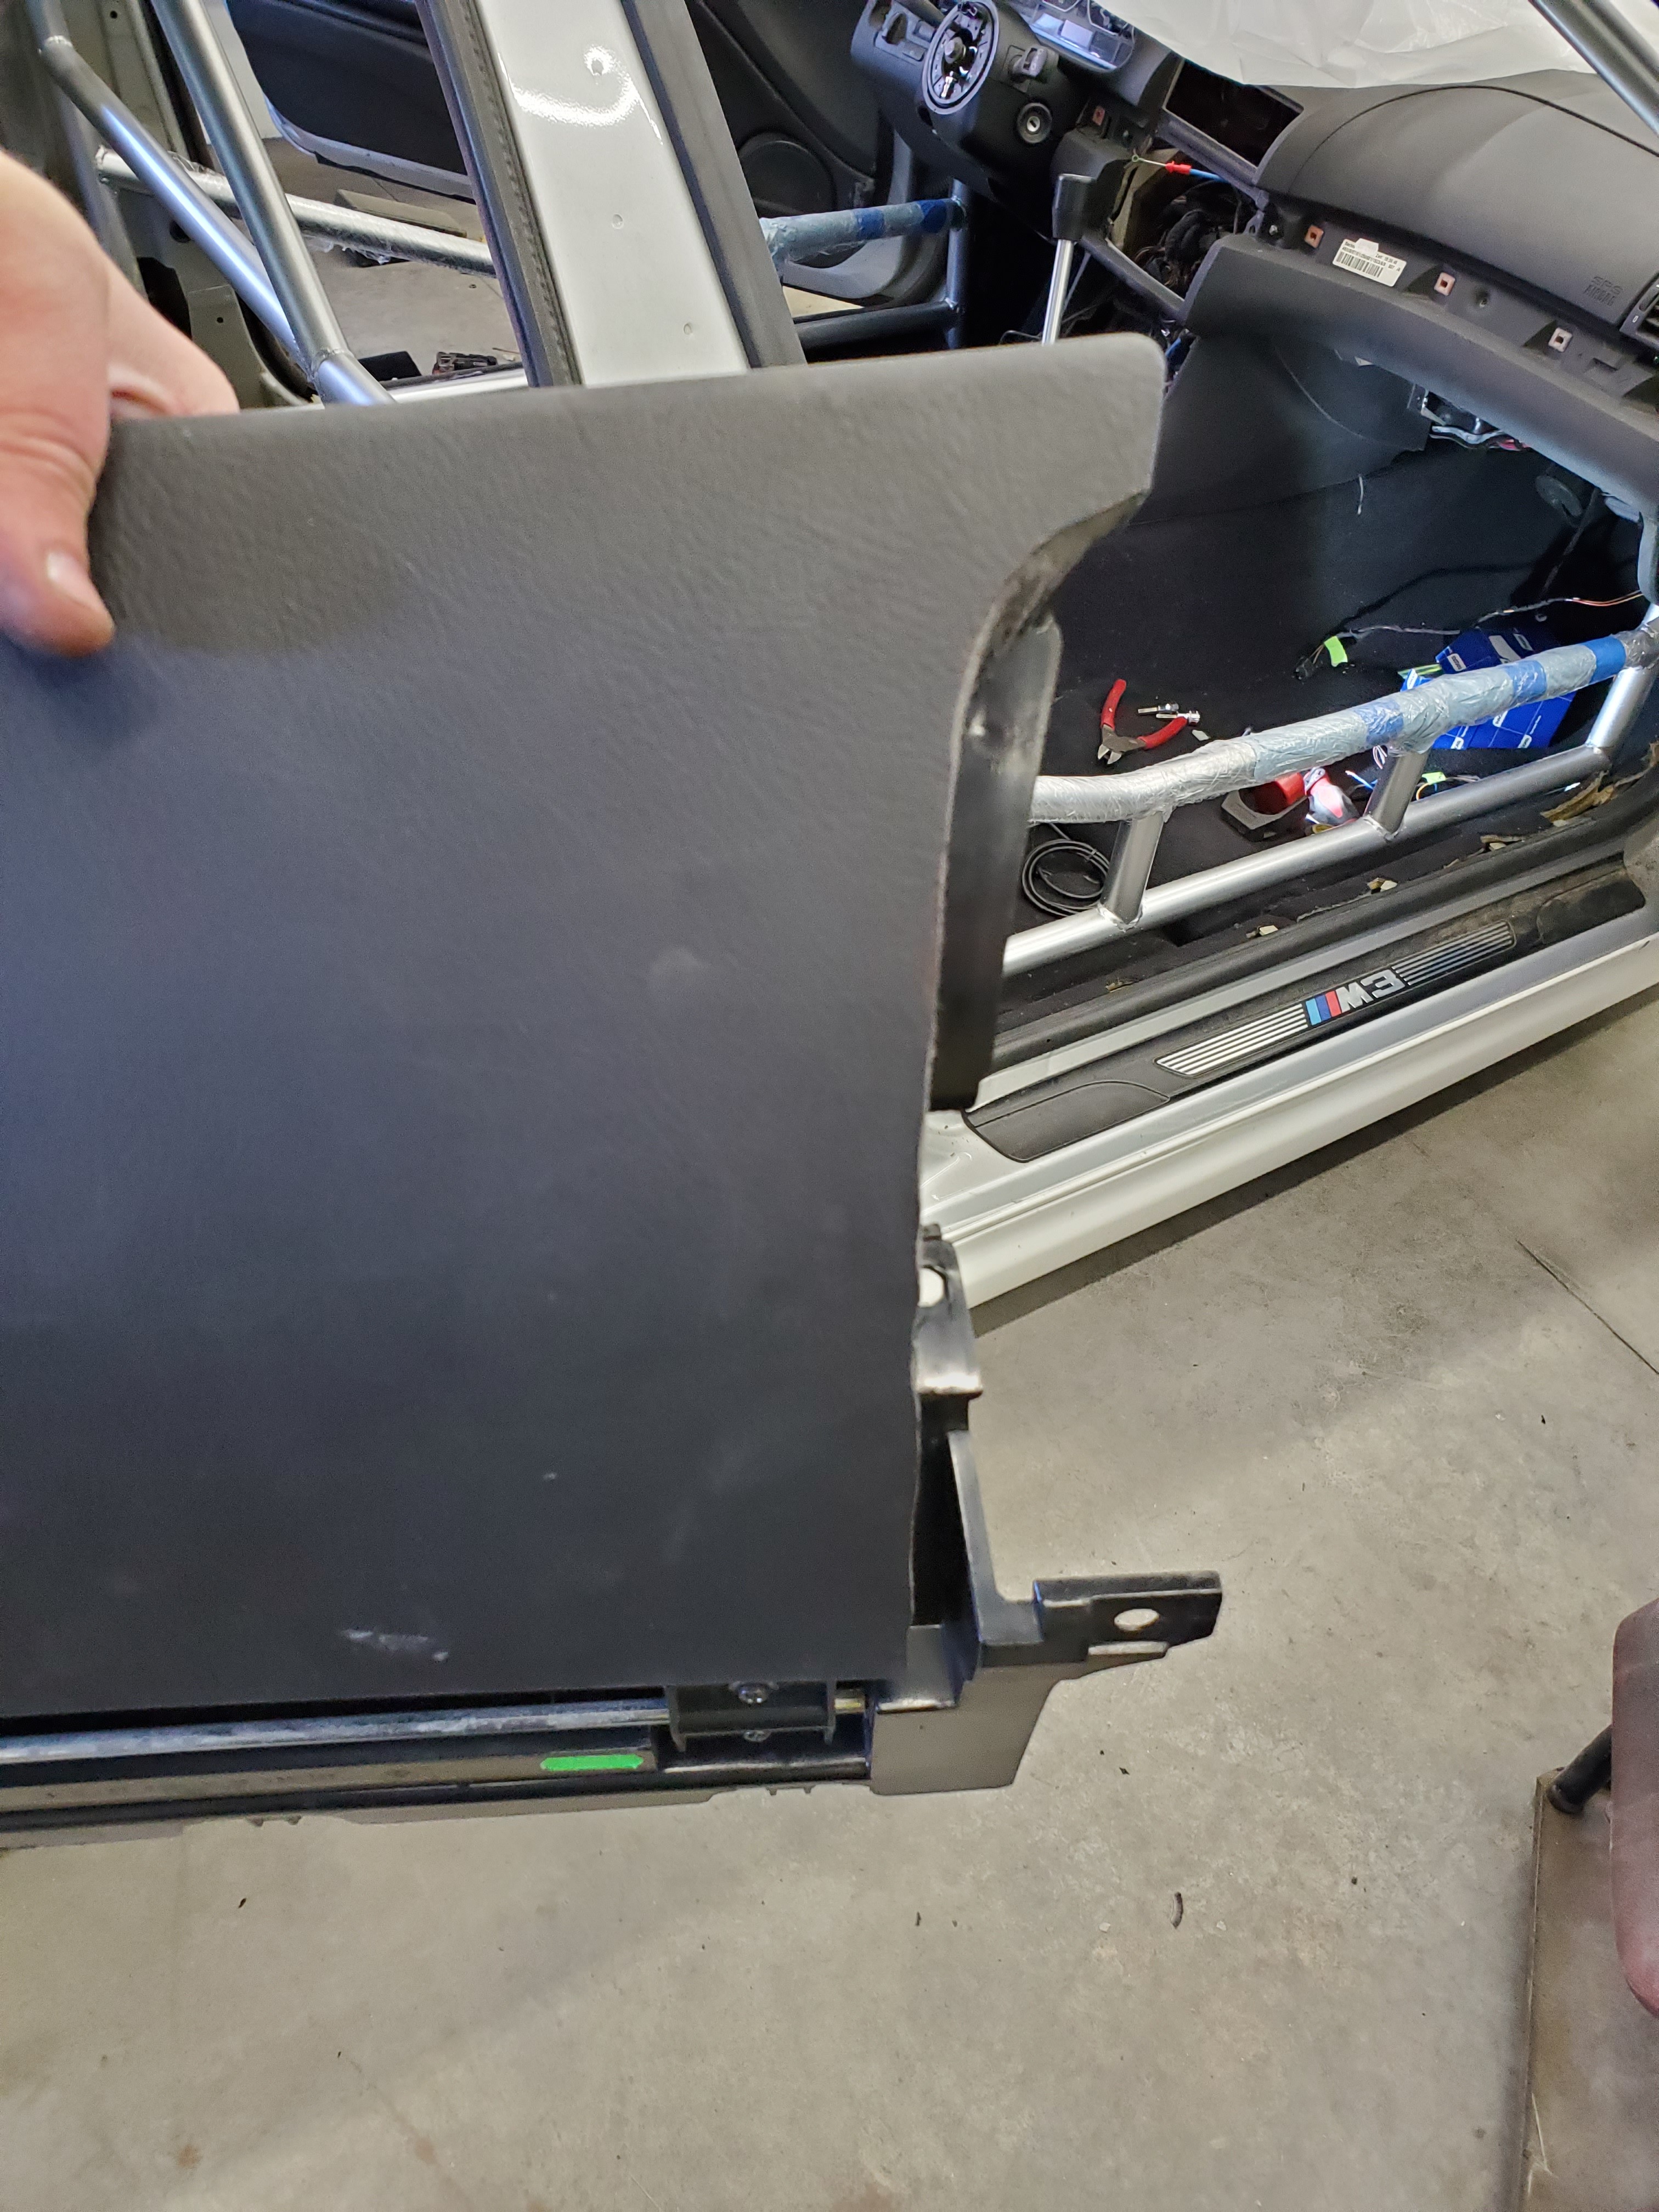
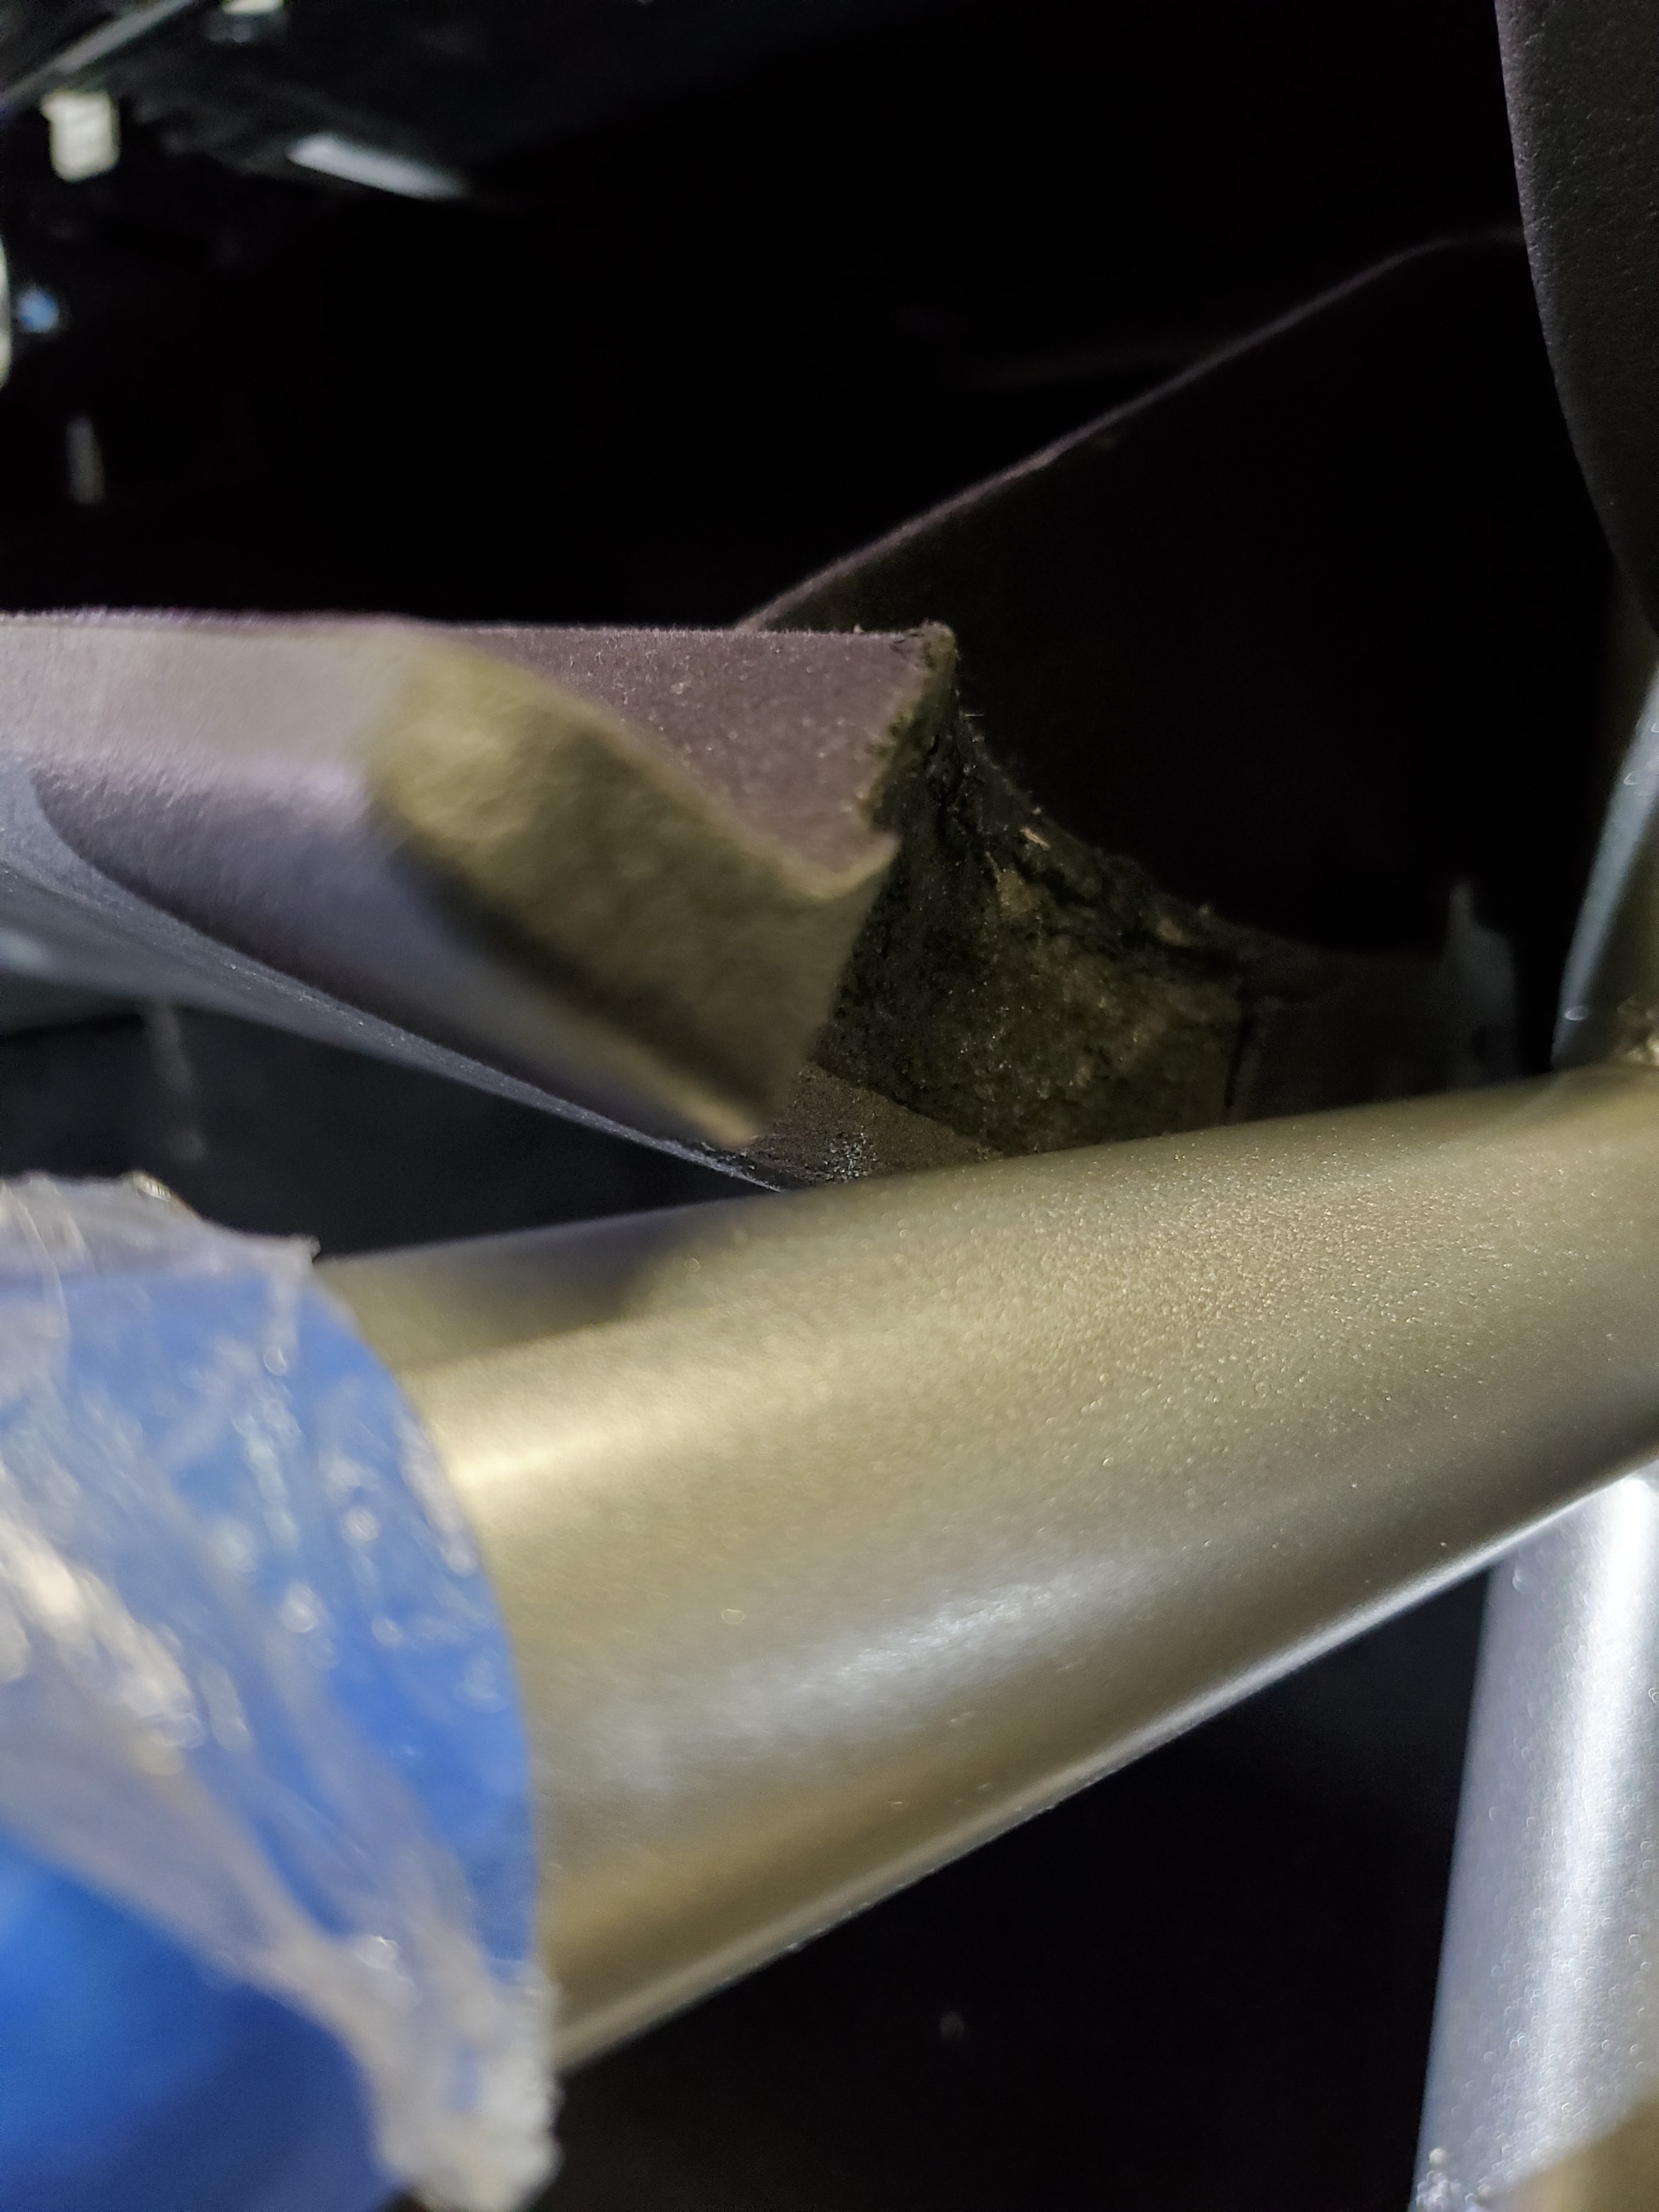
                  Next up was cutting the dash in the upper and lower corners to fit with the cage.

                  I did cut more than I would like on the top so maybe down the road I might buy another dash and trim it better.
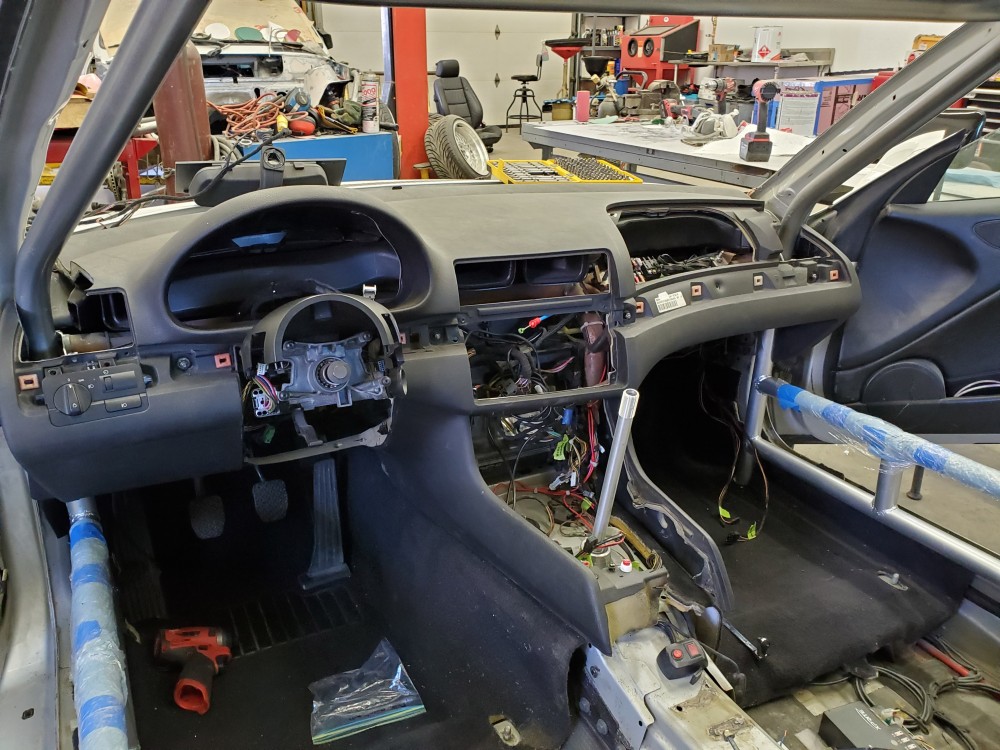
                  20200404152750.jpg

                  I also had to trim a little off the defrost vents for the sides.

                  Then trimmed the vents to fit.

                  Driver side. (Its also worth noting that usually the LCM does not fit, although I have some e46 buddies that figured out how to make it fit because the thing is GIGANTIC behind the face. Somehow mine barely fit without modifications. But I'm not complaining lol)
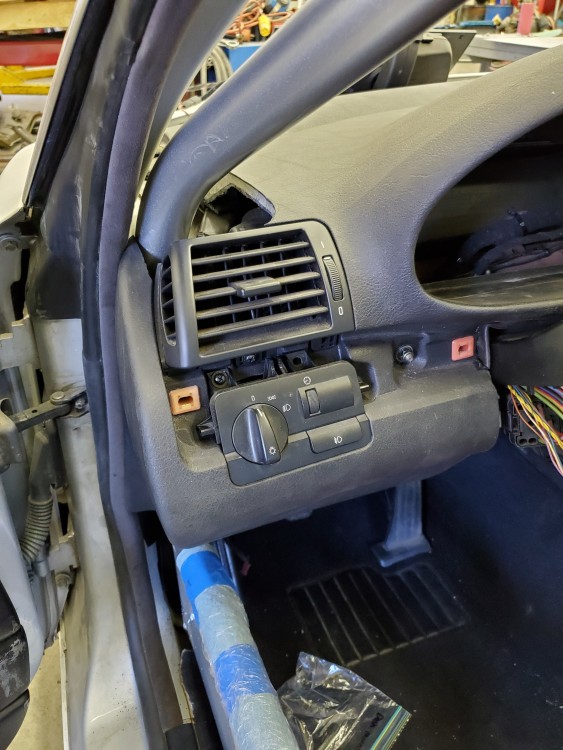
                  20200404154655.jpg

                  Here is the passenger vent trimmed to fit along with the airbag cover. I have another airbag cover that I might trim a little tighter since I know how it needs to be cut now.
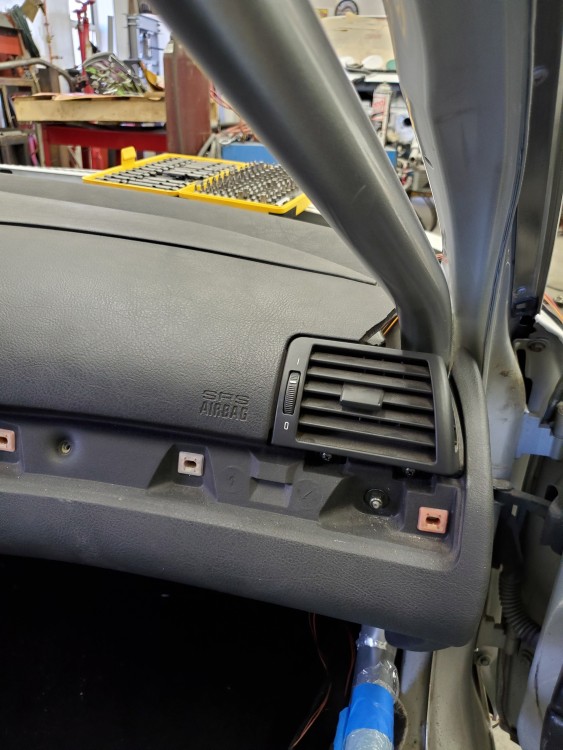
                  20200404154709.jpg

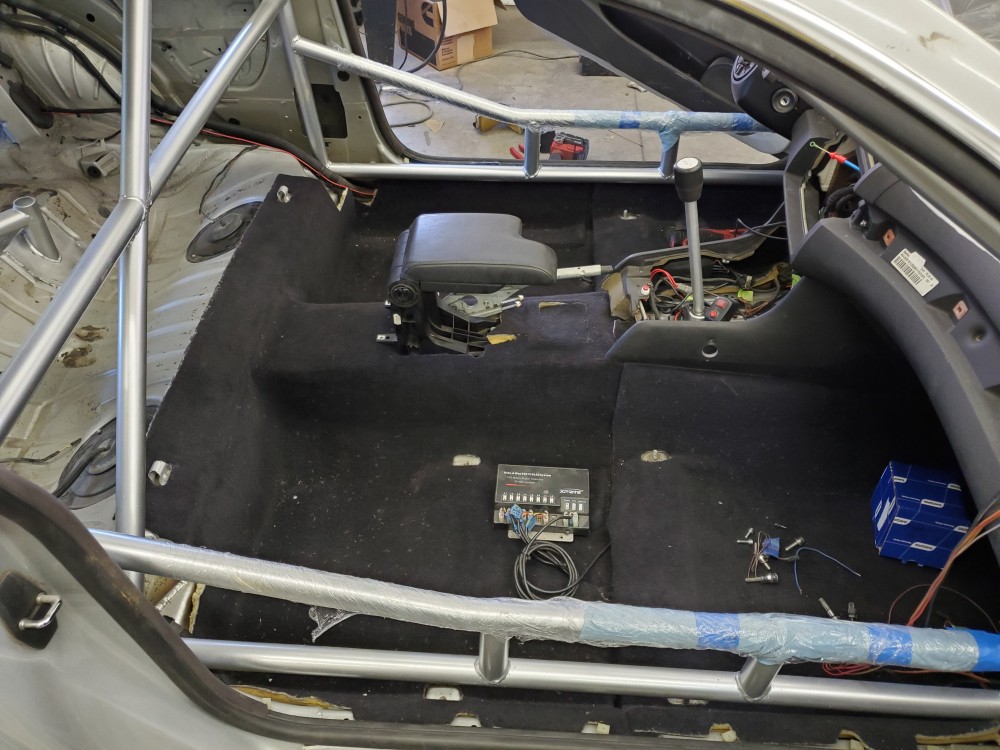
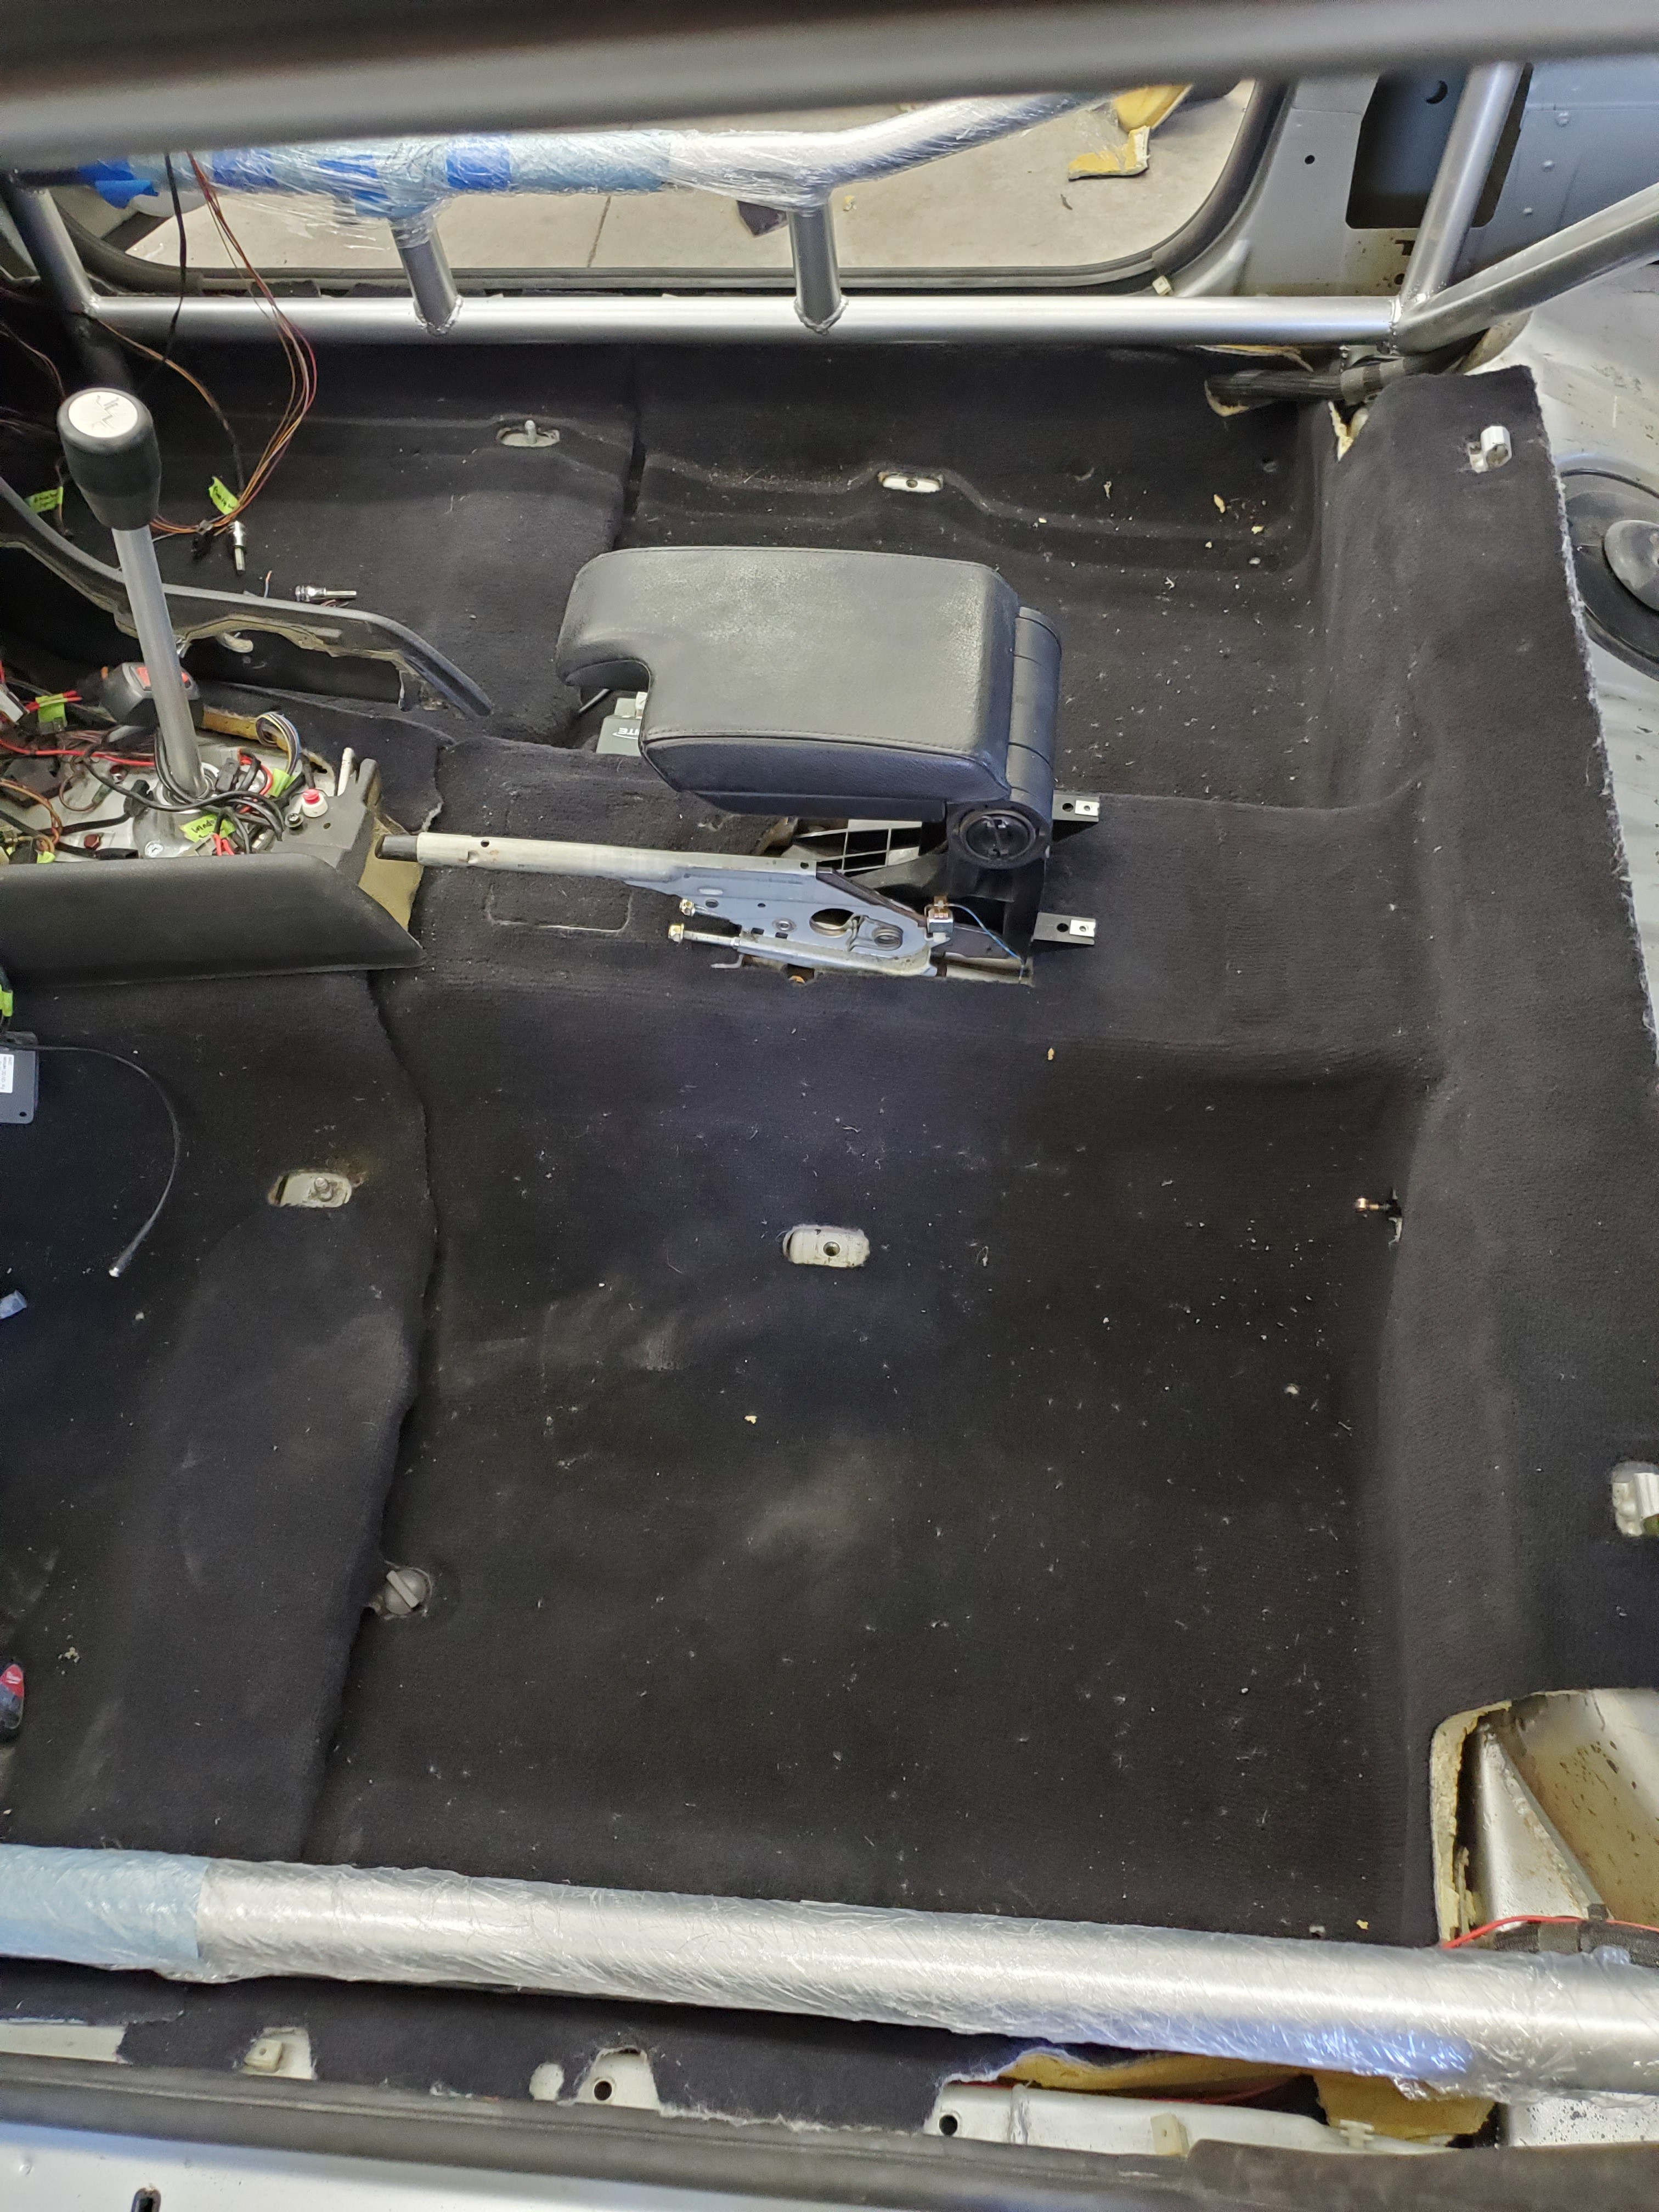
                  Next I installed the rear carpet piece and trimmed it to fit around the cage.
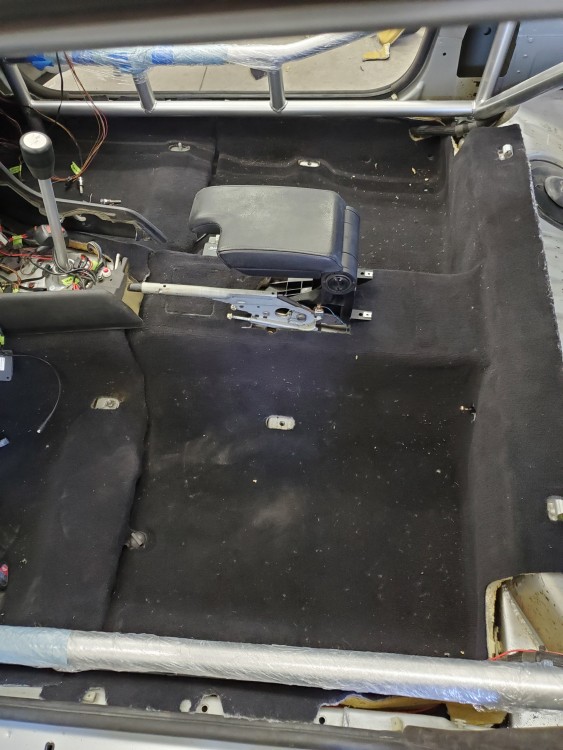
                  20200405131008.jpg

                  20200405131026.jpg

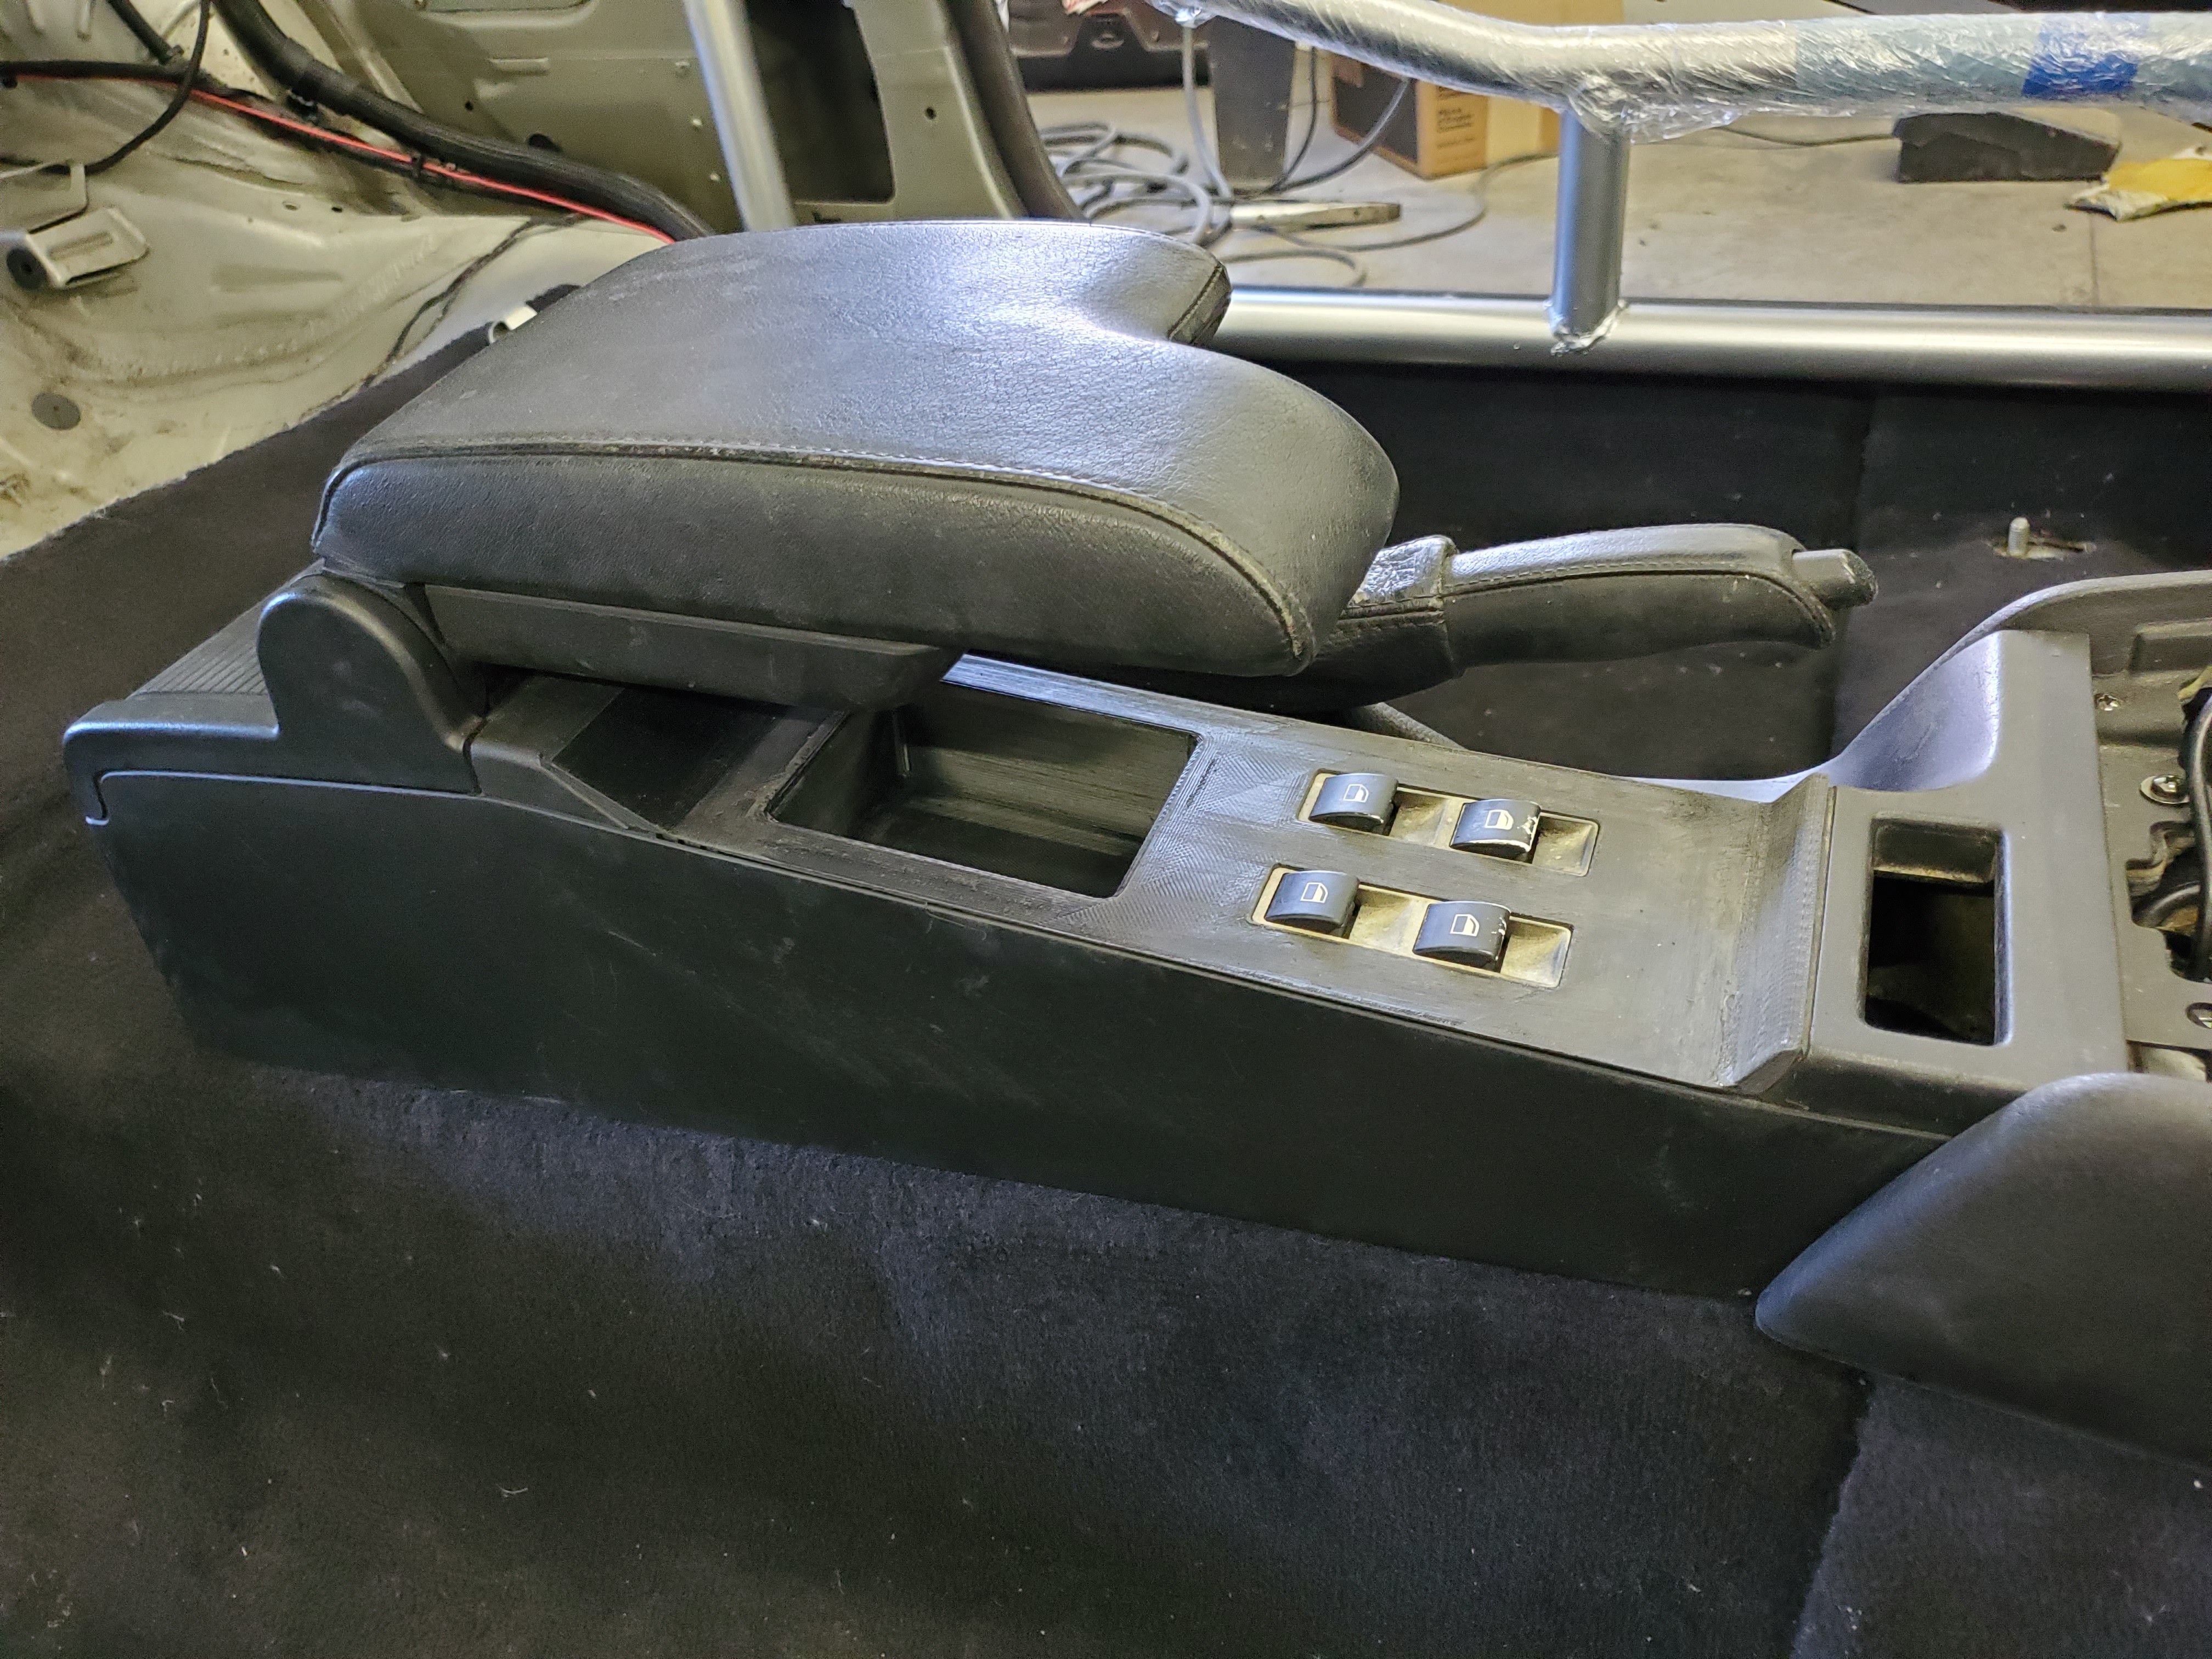
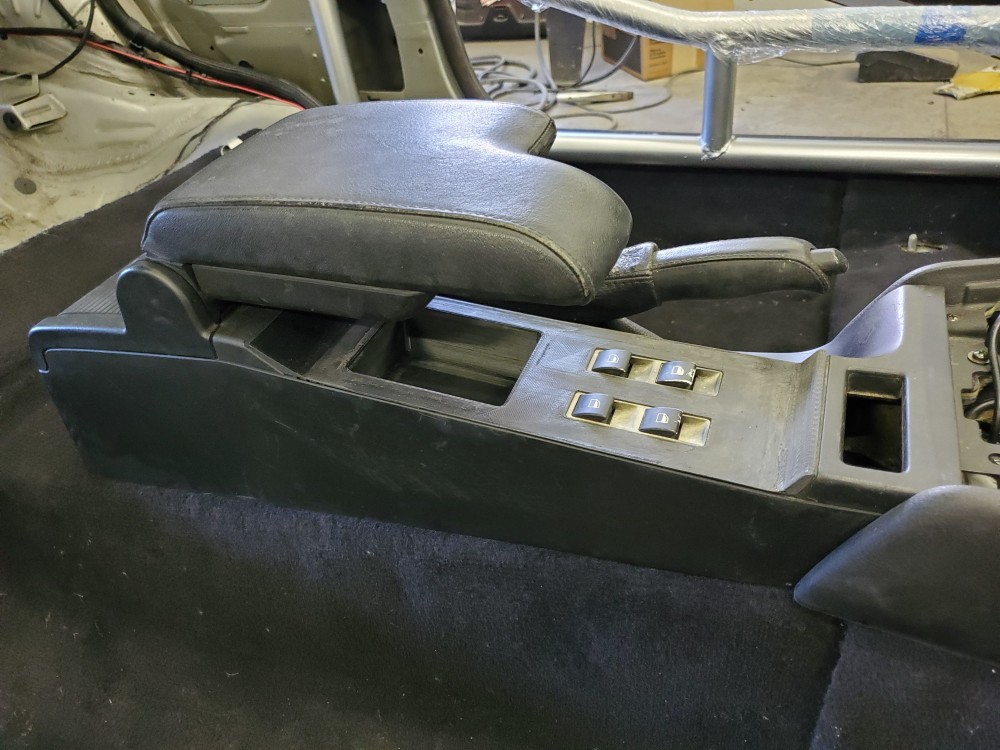
                  I then installed the center console and arm rest I found in a junkyard awhile back. 

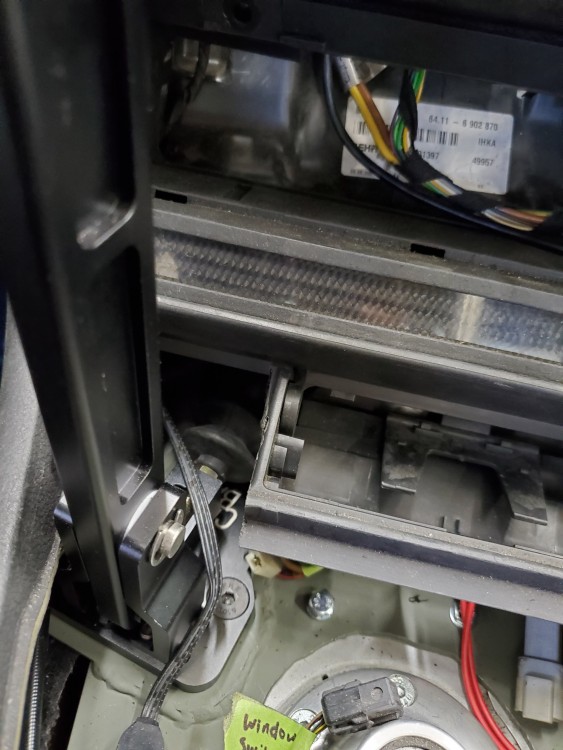
                  In this photo you can also see the prototype v1 of the window switch insert Sam made me.

                  Pretty excited with how it looks and will function.
                  20200405163434.jpg

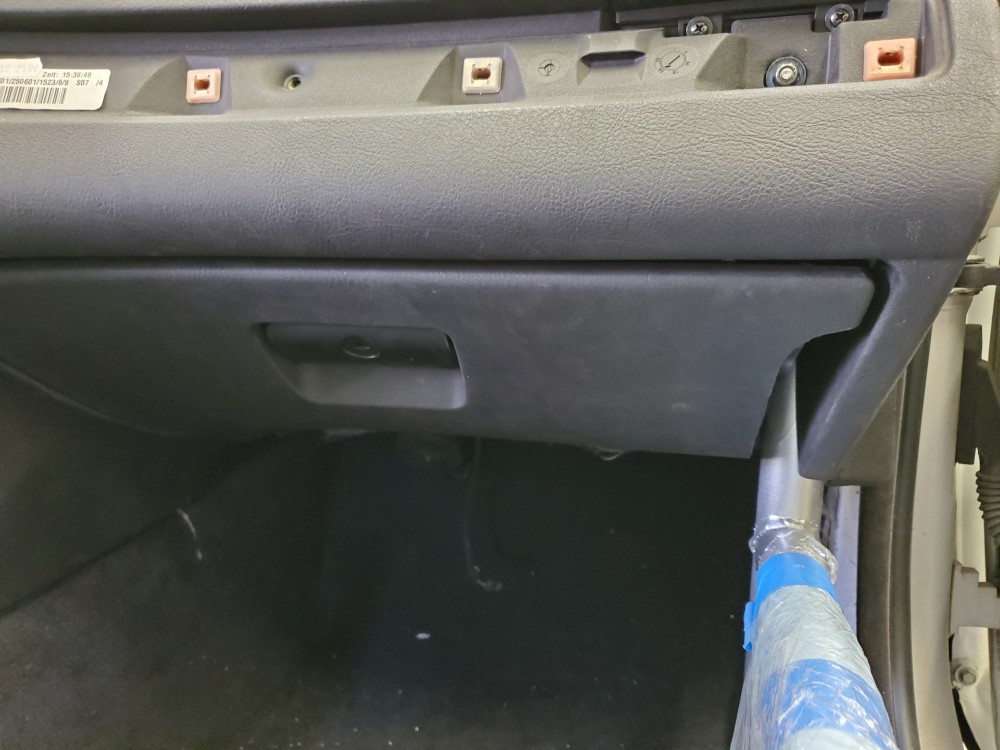
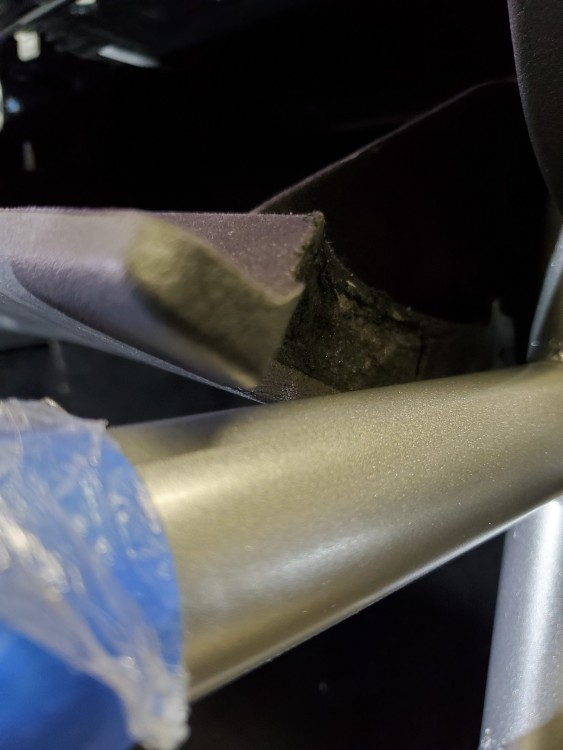
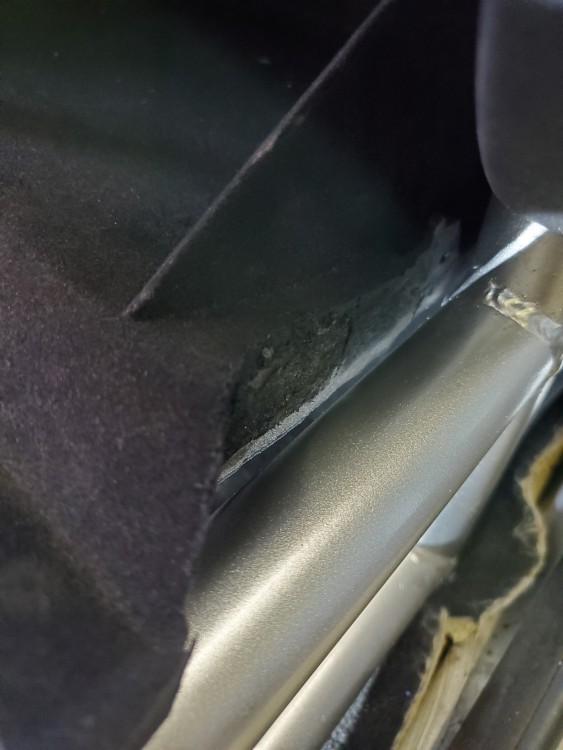
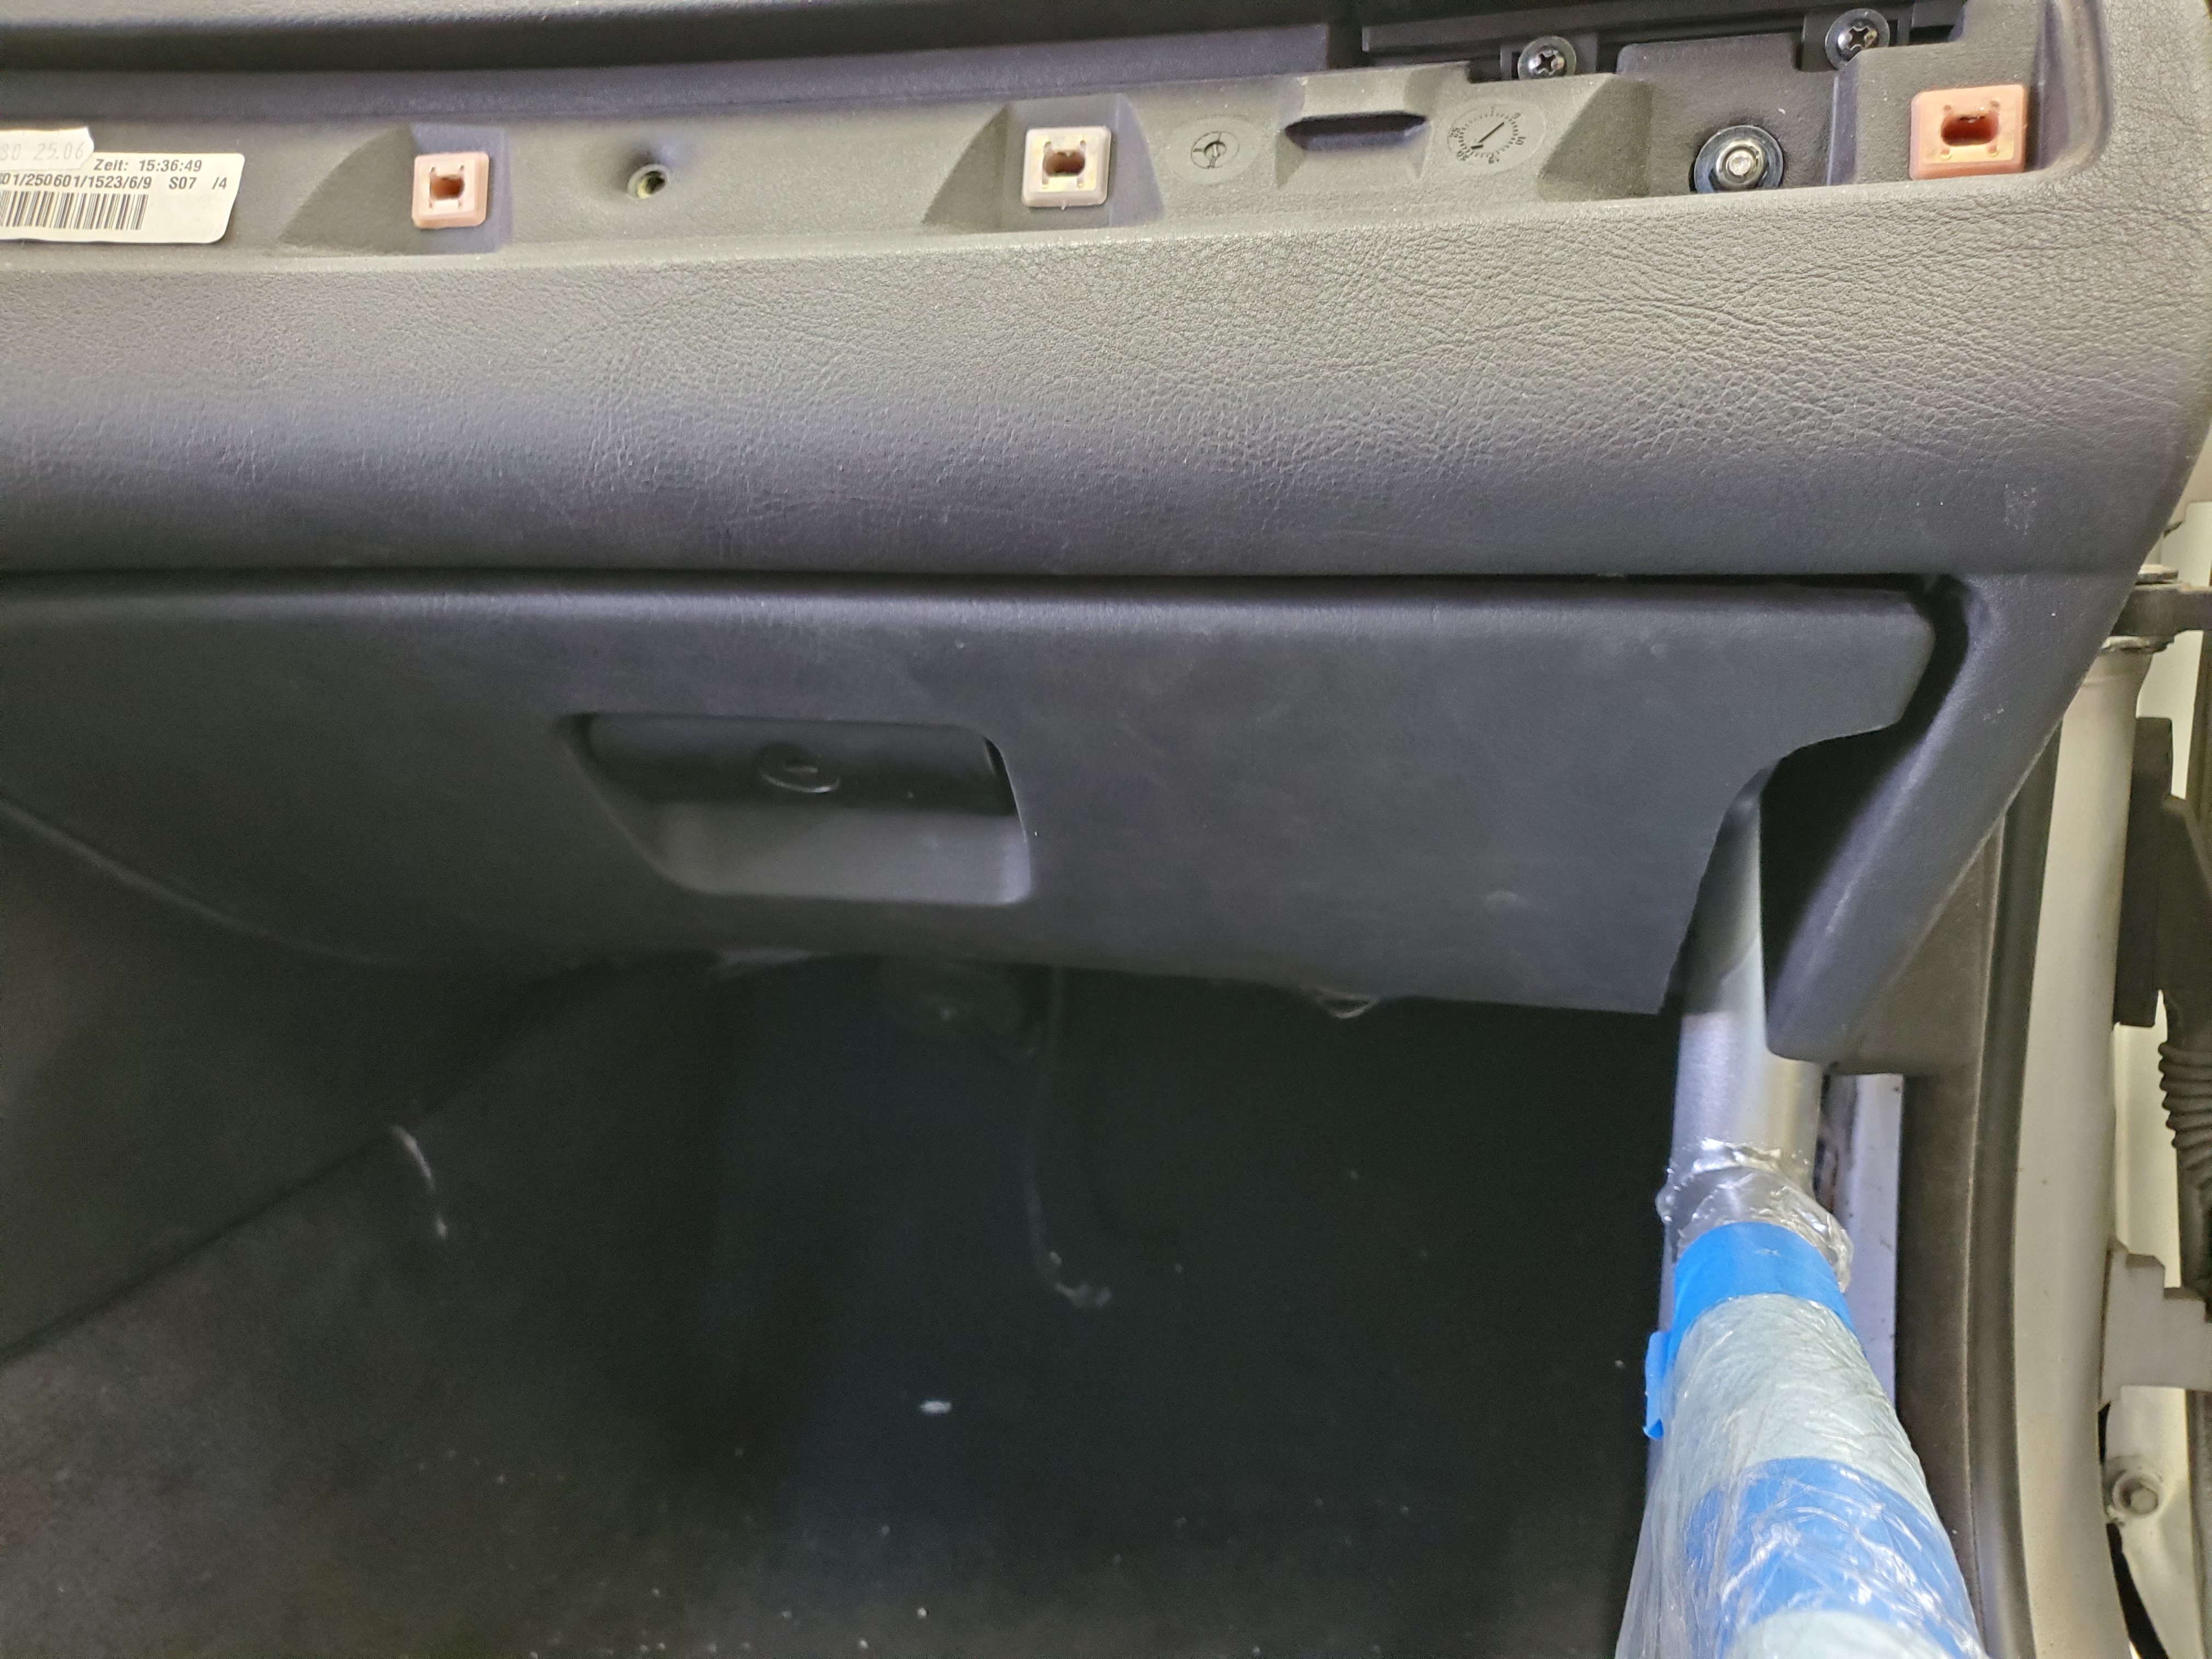
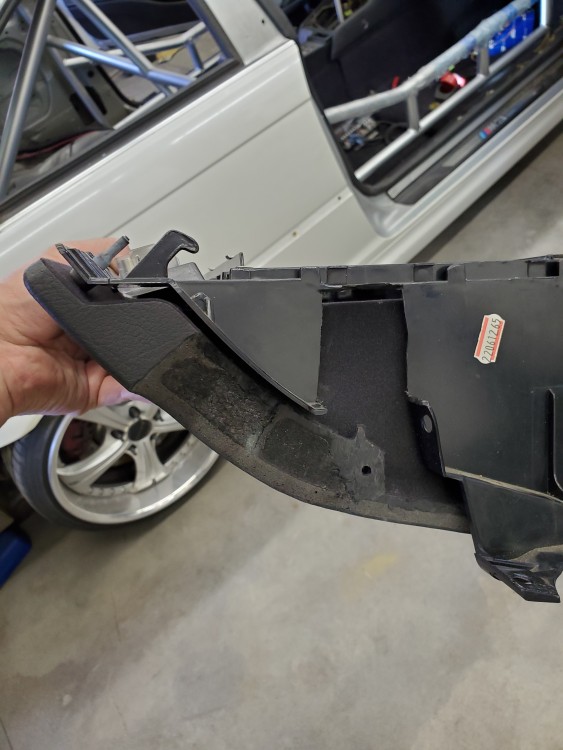
                  Then I moved on to trimming the glove box. Some say you cant make it fit. But with some info from another e46 friend and some thought it worked out great! 
                  20200405154411.jpg

                  20200405155313.jpg

                  20200405160523.jpg

                  Here's the clearance with it down 😁

                  20200405160634.jpg

                  20200405160648.jpg

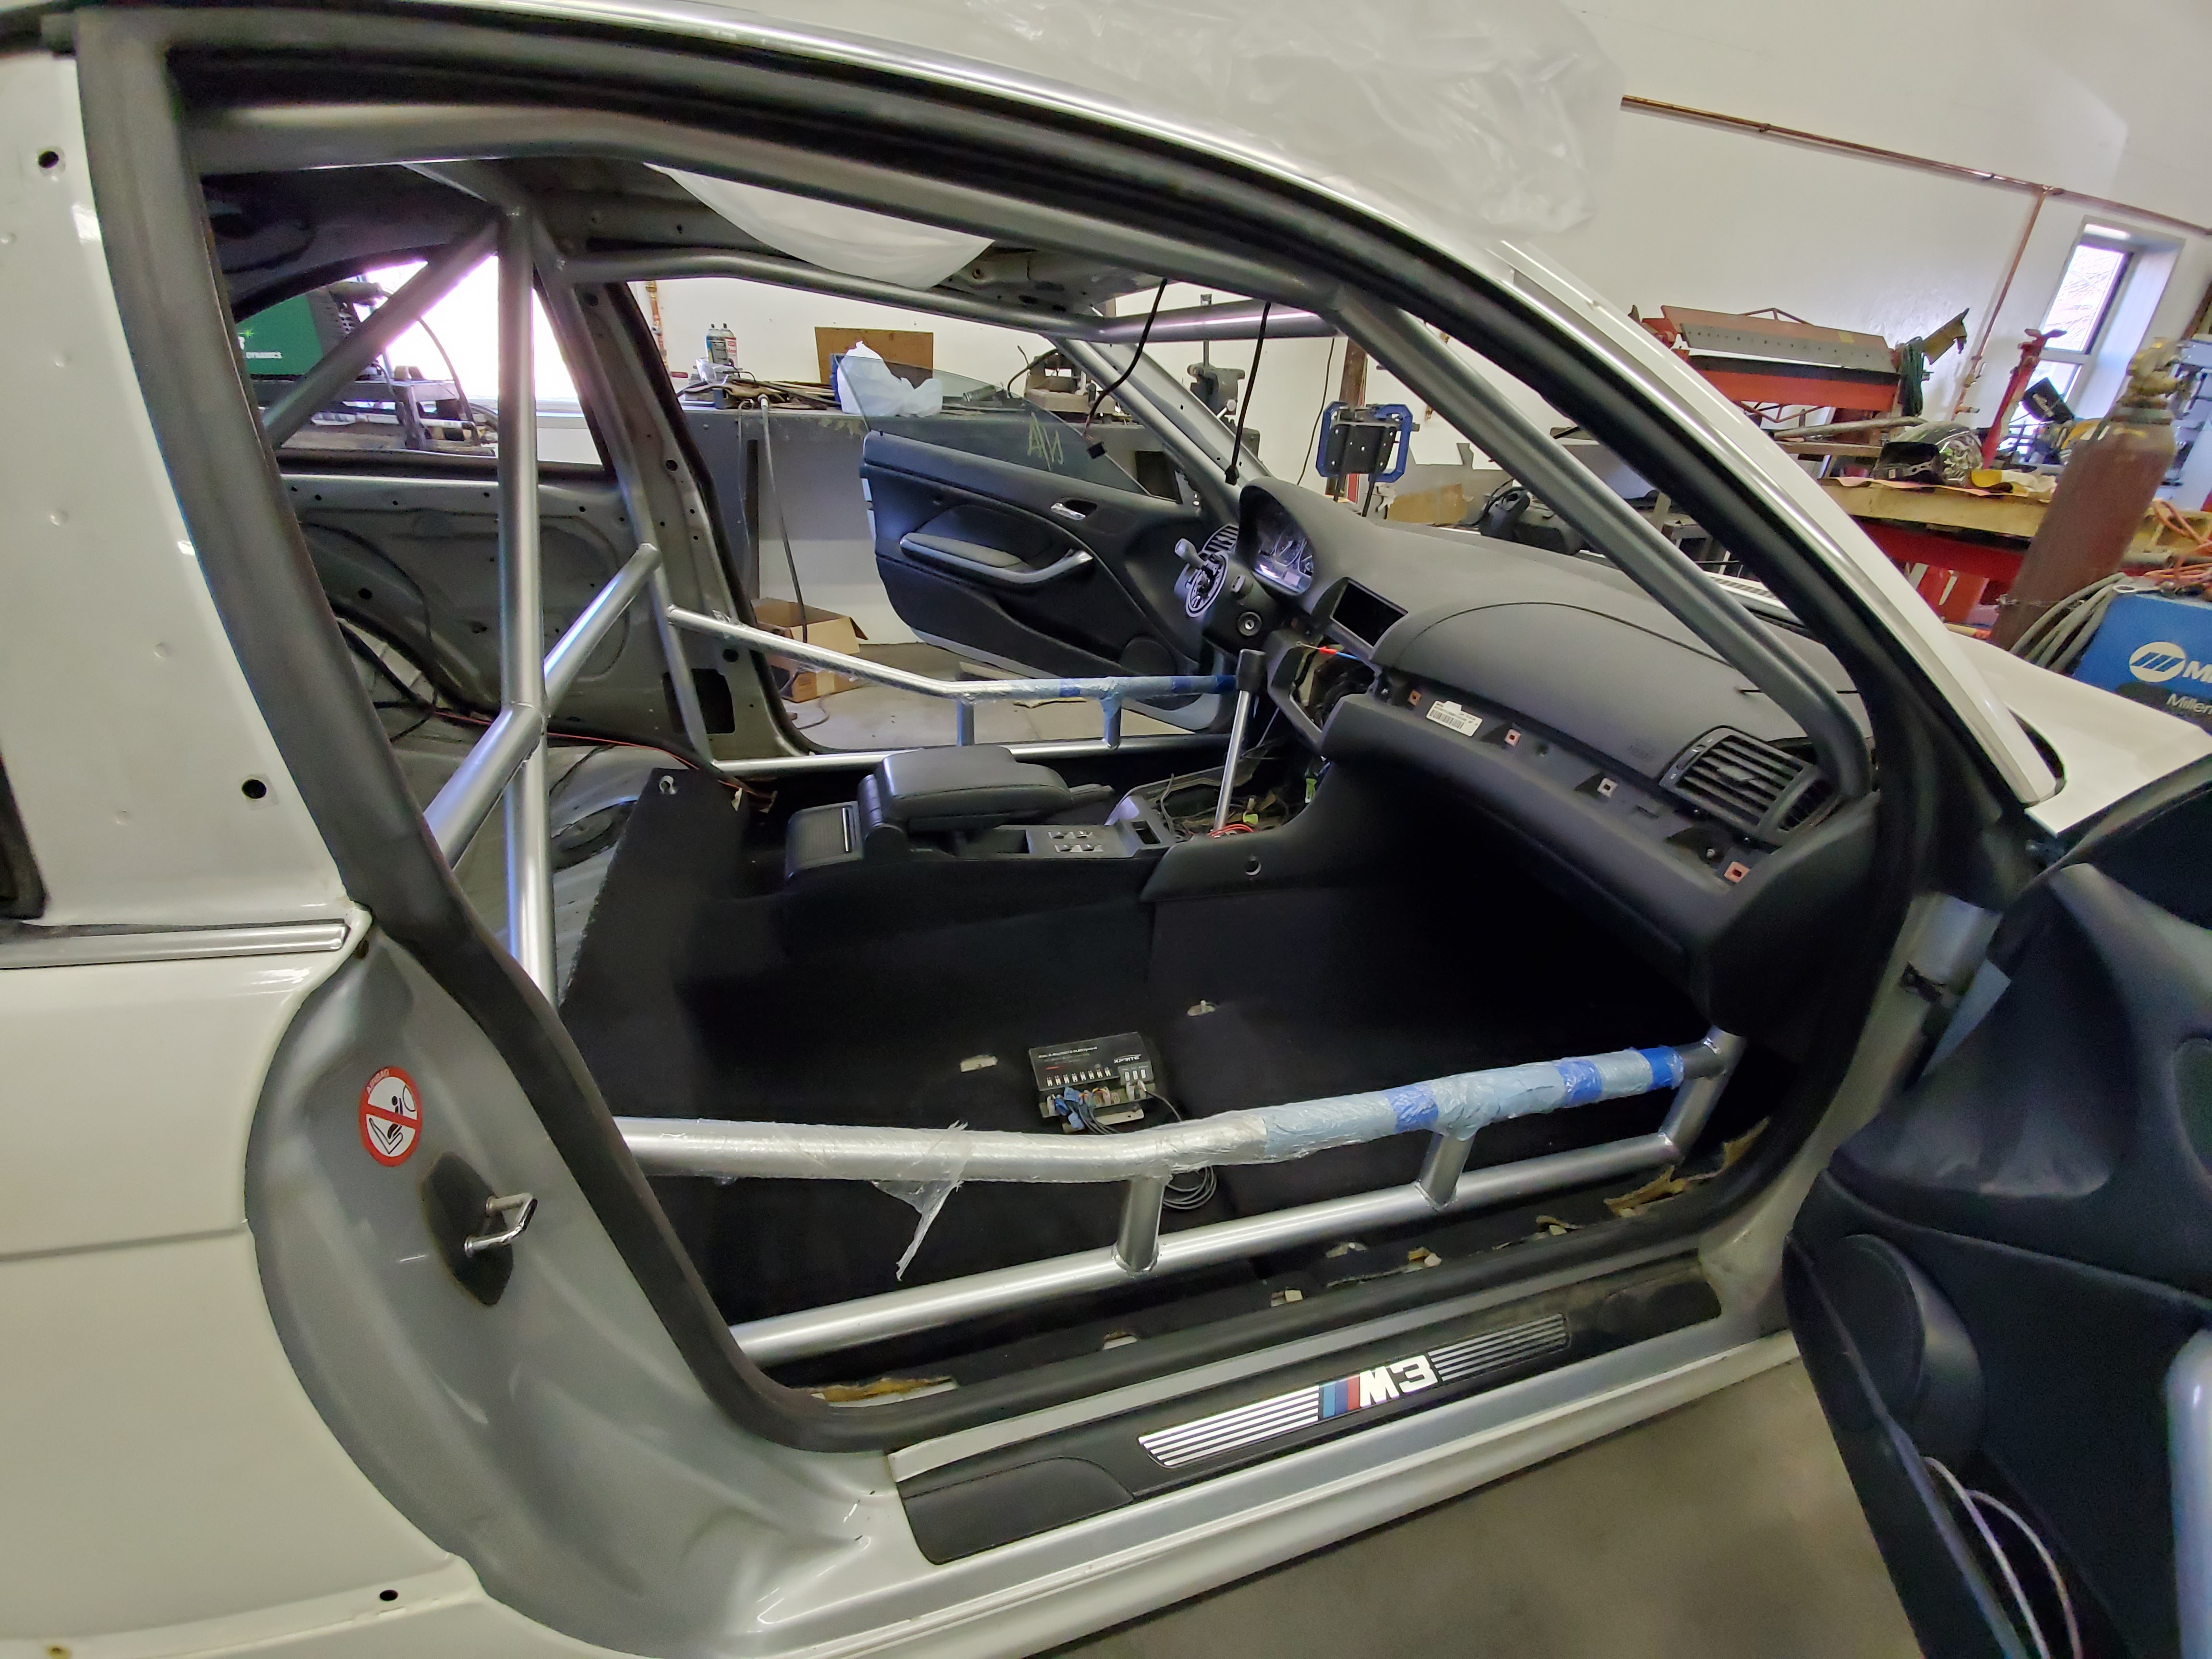
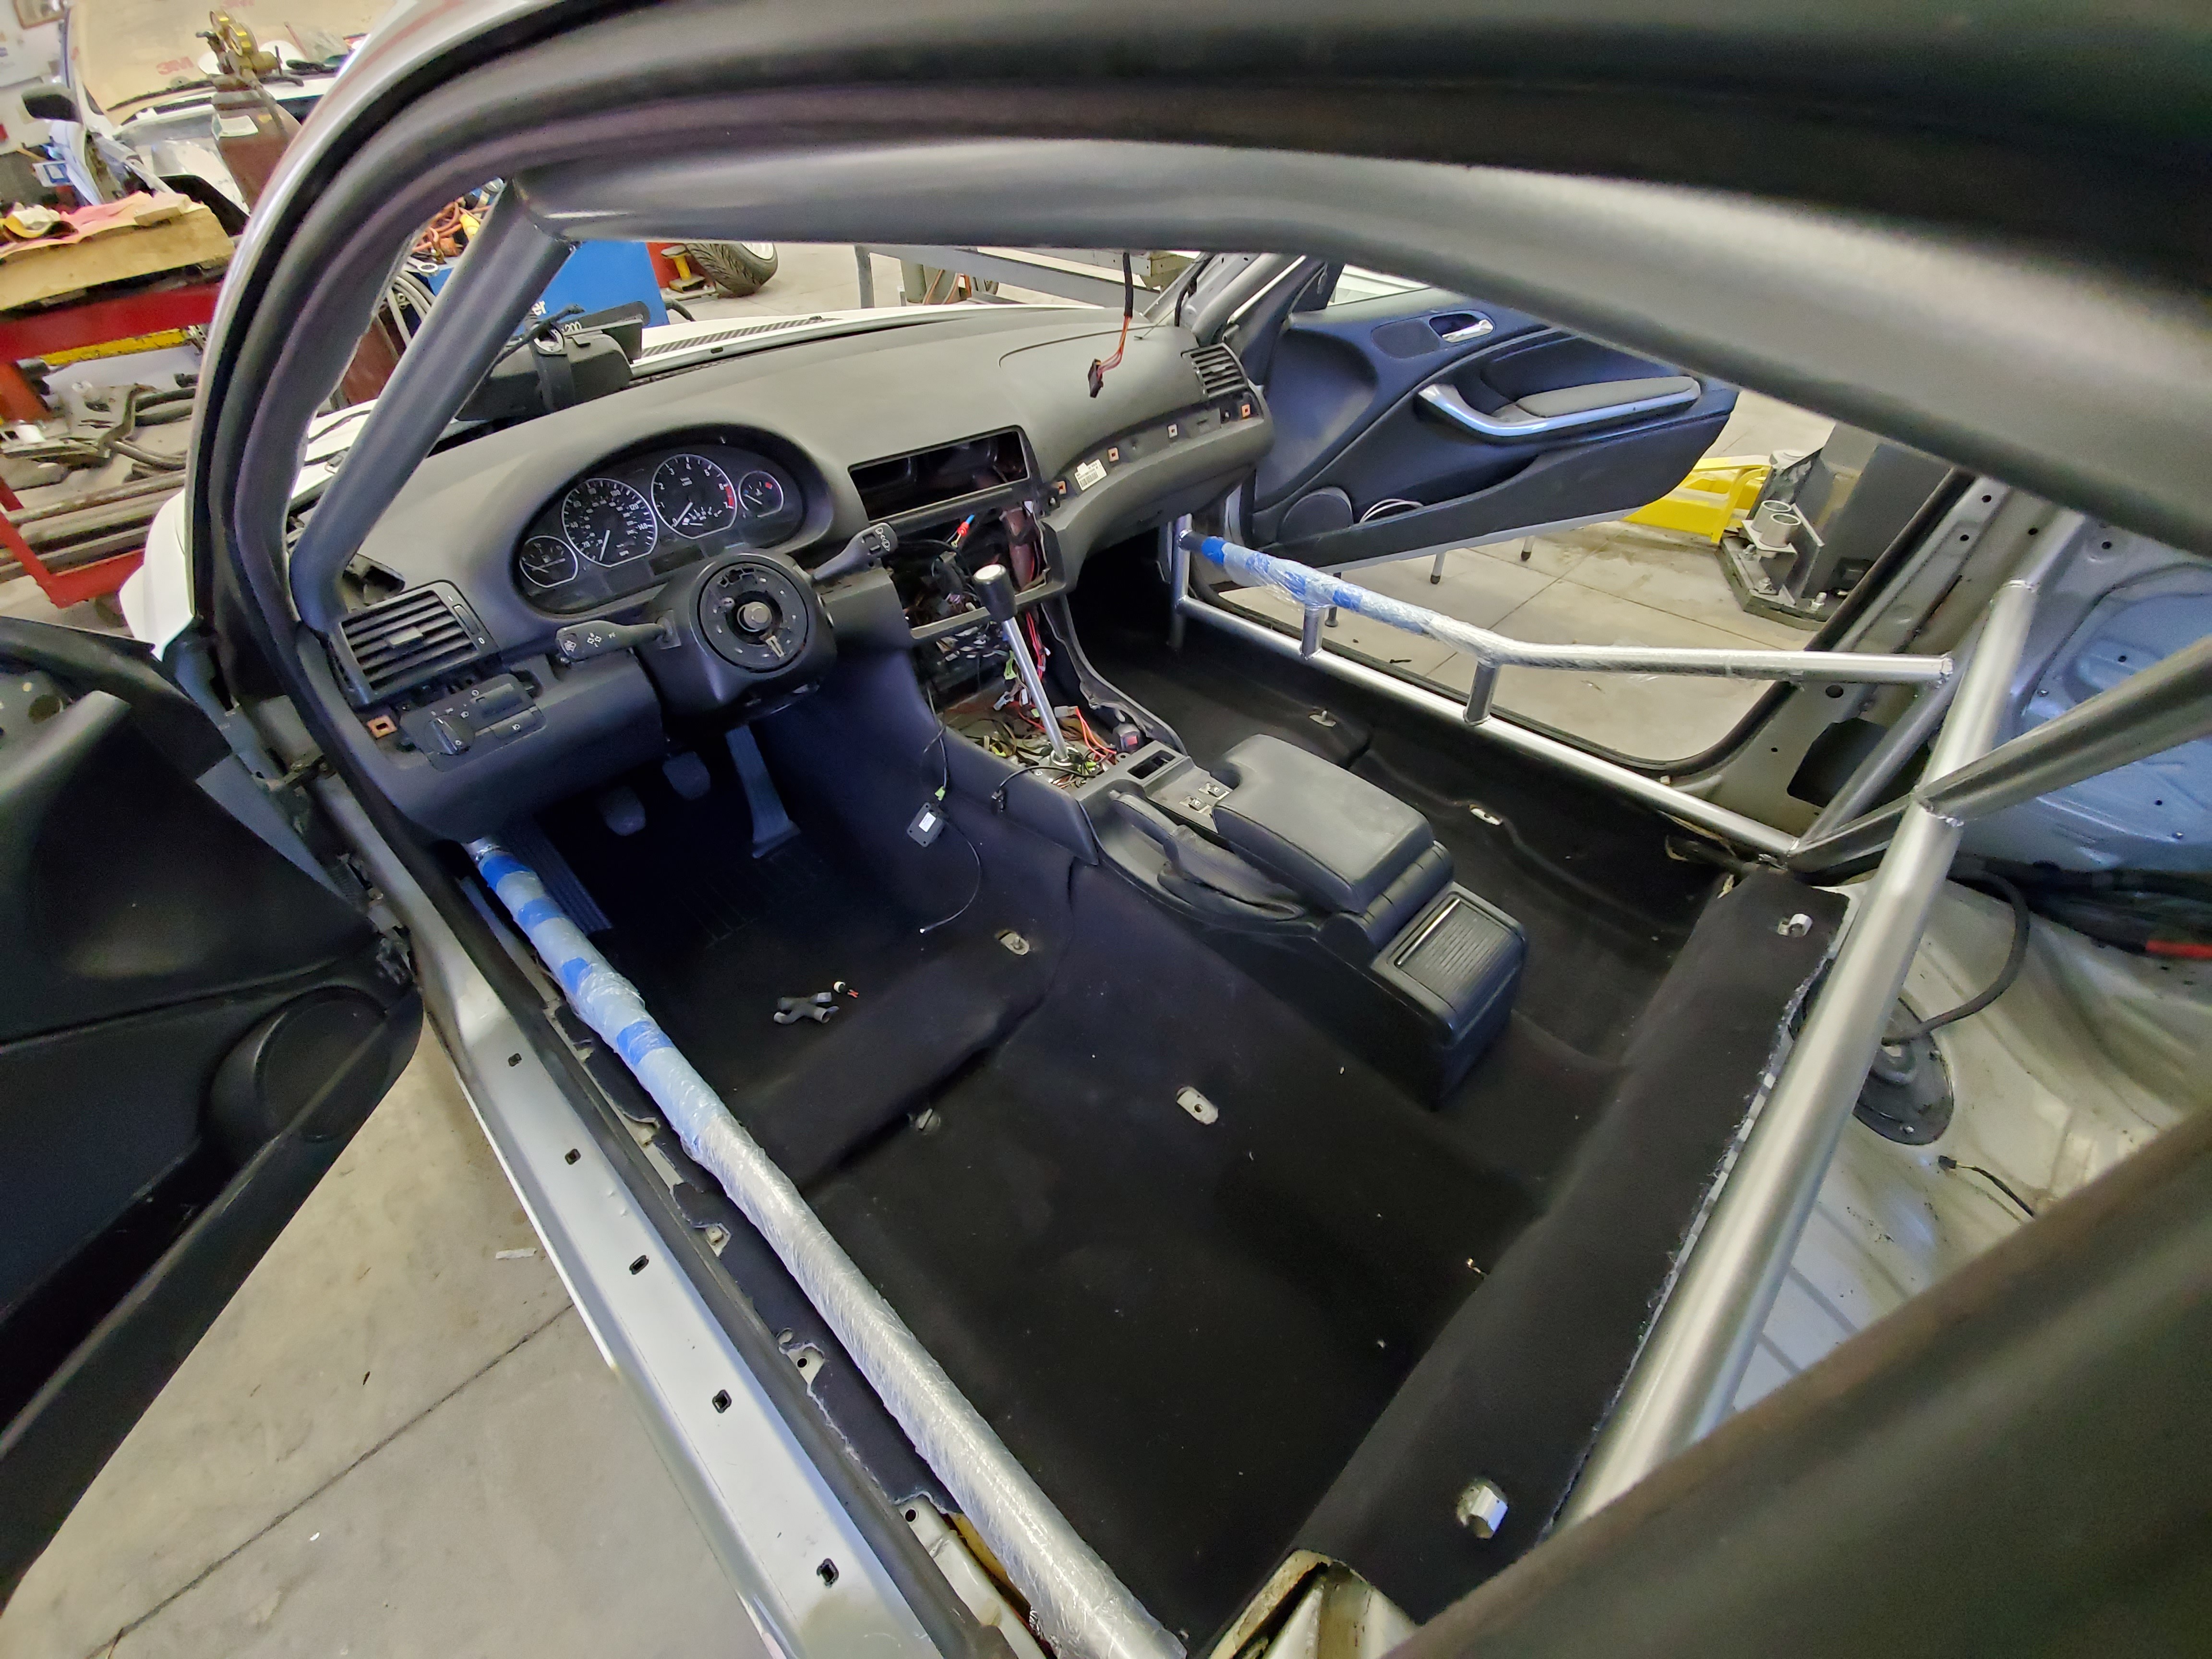
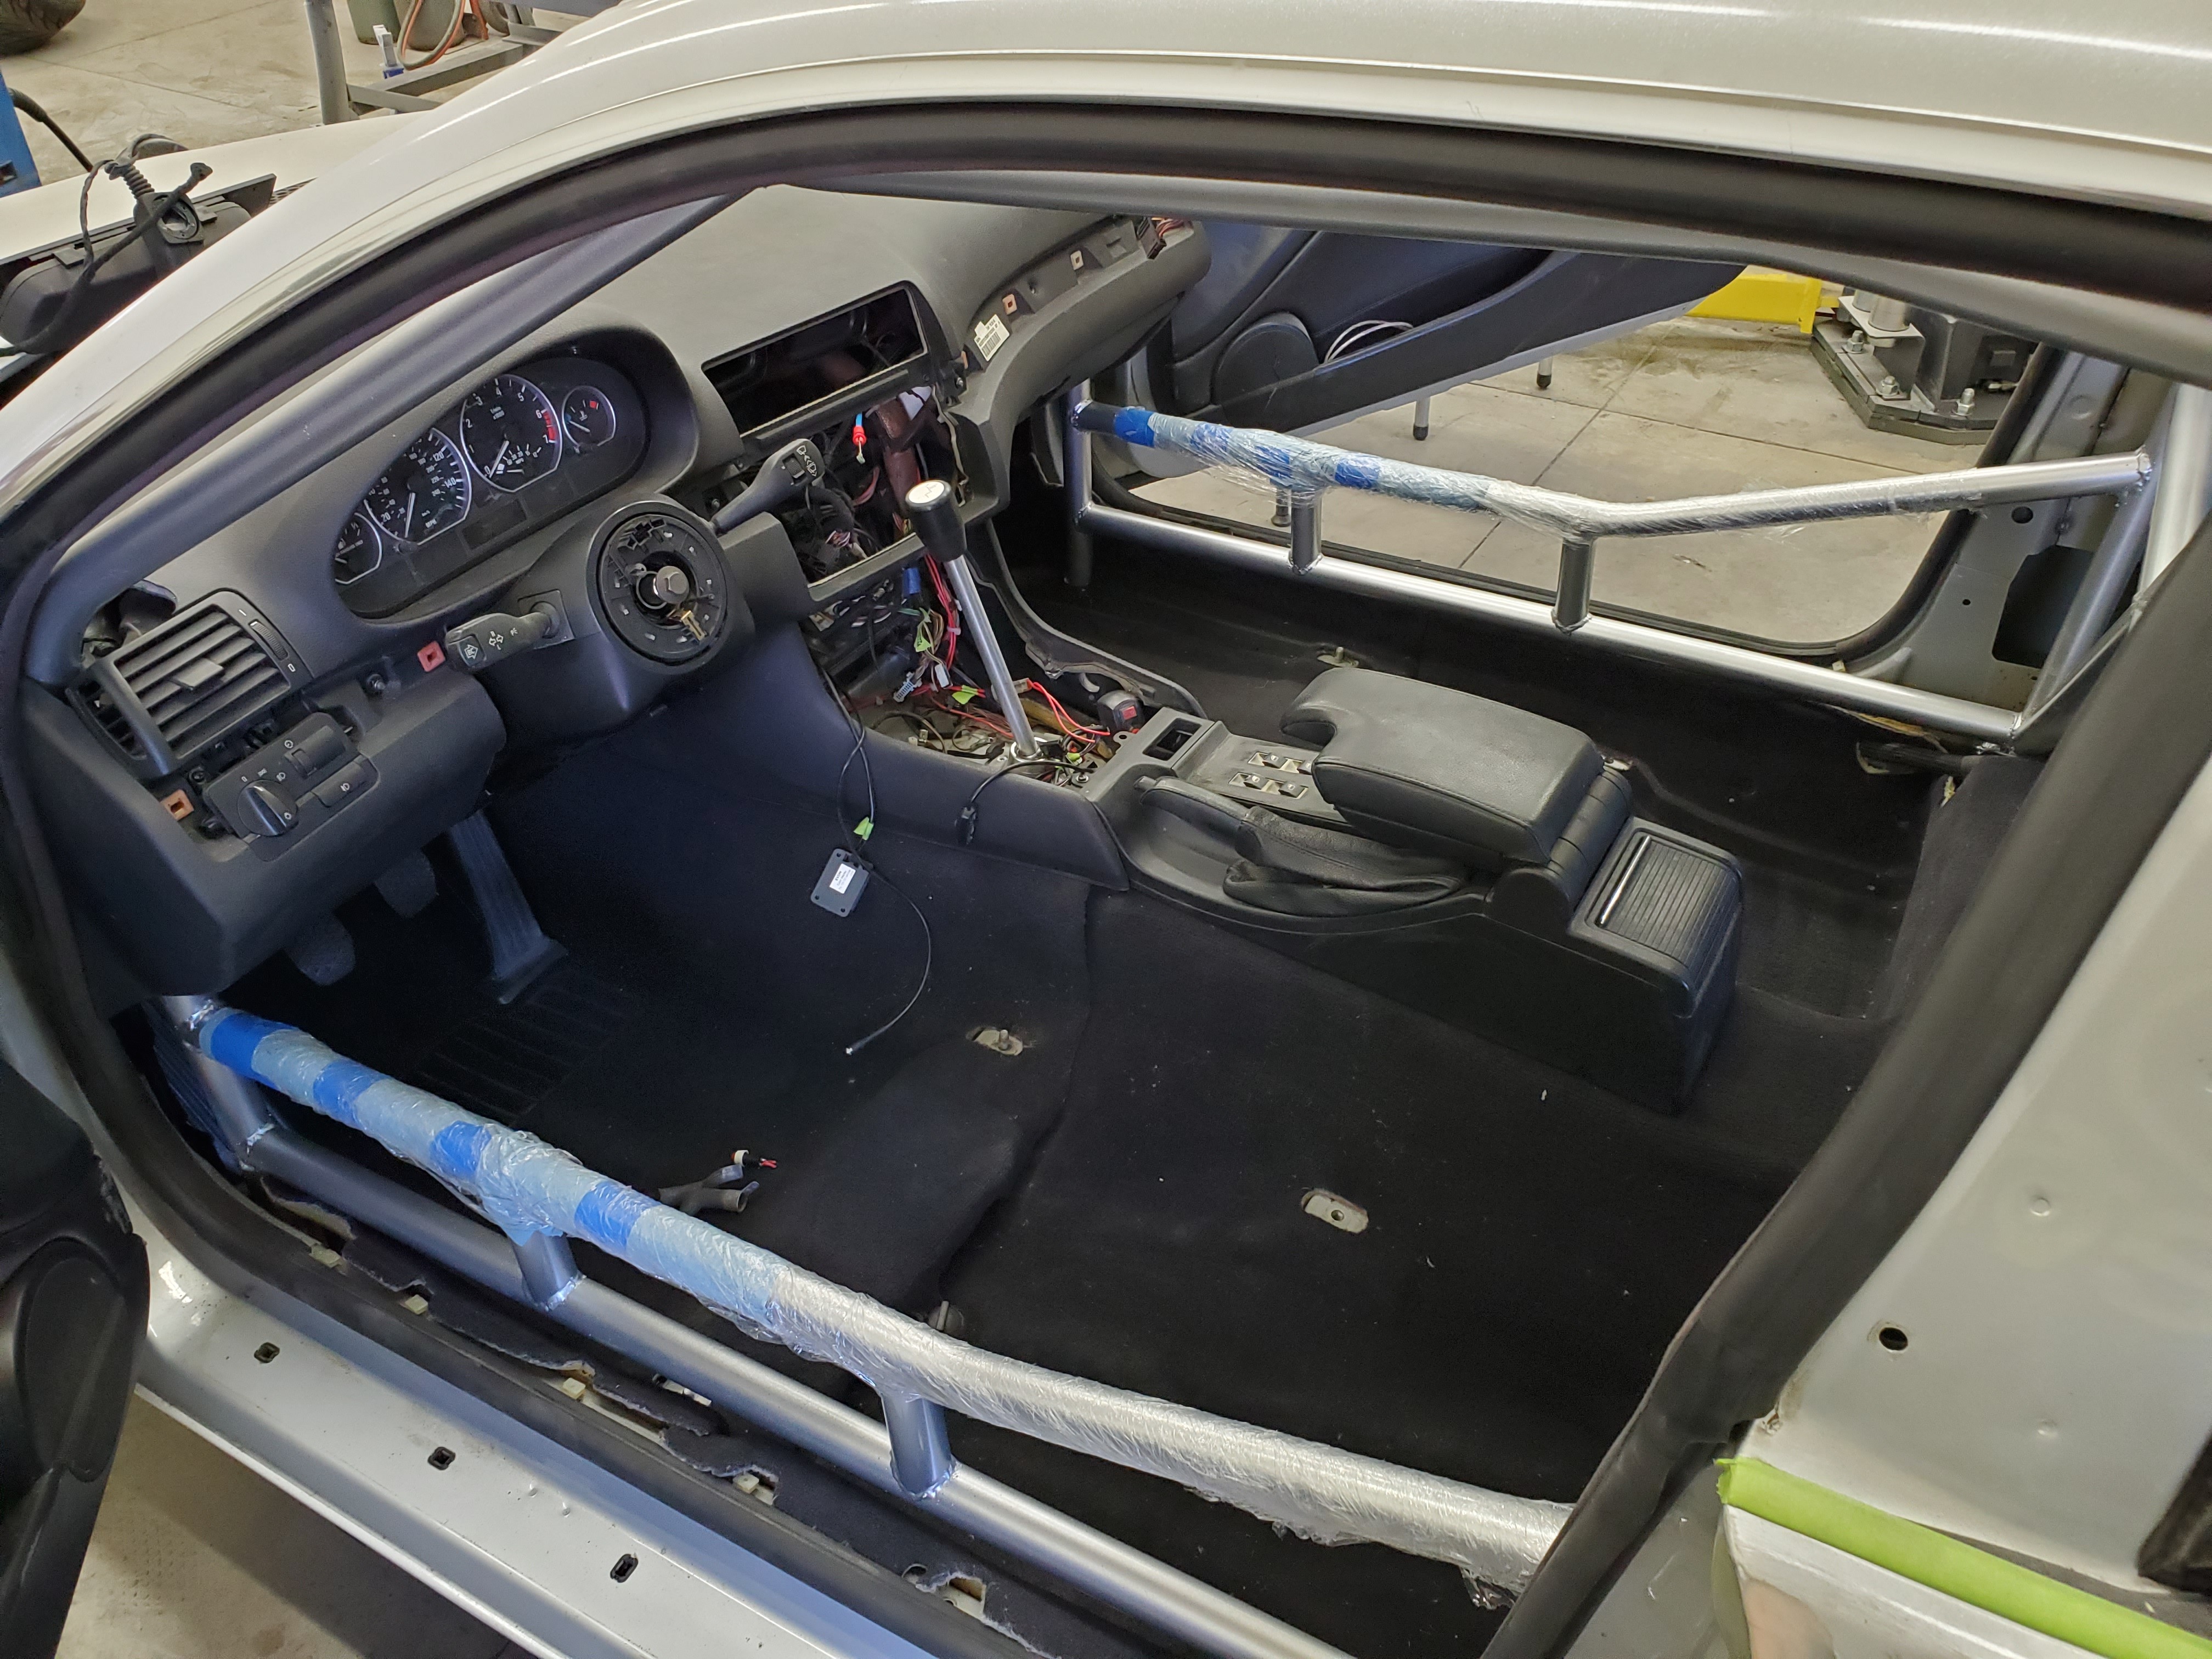
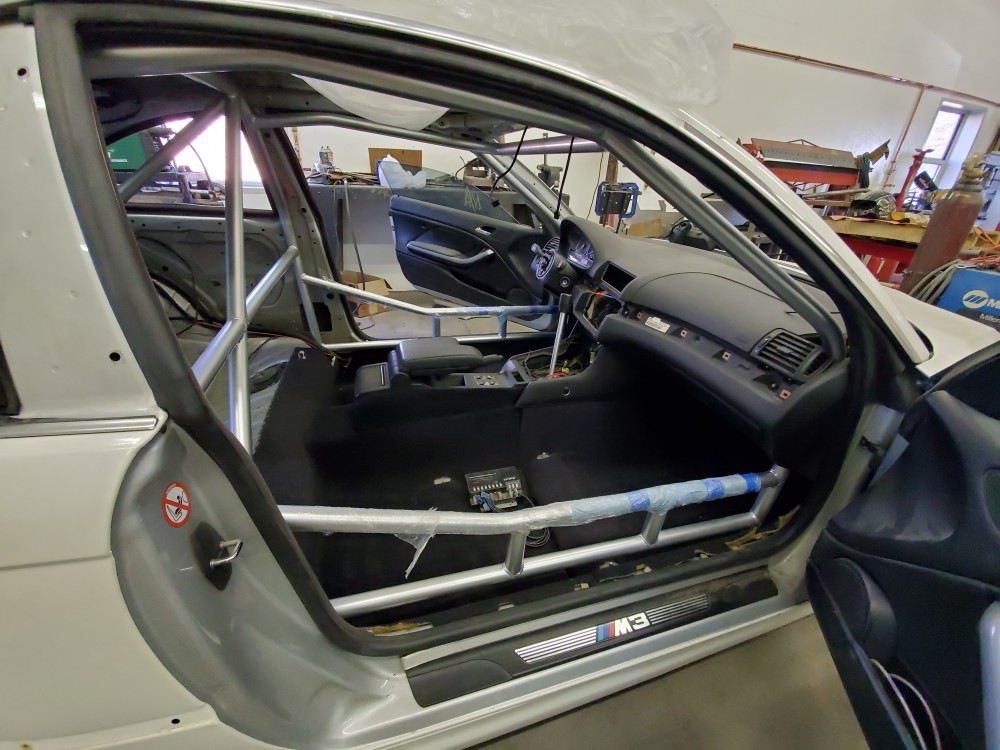
                  And some final photos of the interior for the weekend.
                  20200405163546.jpg

                  20200405163626.jpg

                  20200405163715.jpg

                  20200405163731.jpg

                  I was able to order my sunroof delete and the new handbrake set up so hopefully they dont take too long to ship thanks to this pandemic. 

                  I will need to extend the window switch wiring so that is one of the things on the docket for next weekend.

                  Until next time!

                  1 Reply Last reply
                  2
                  • RekpointR
                    RekpointR
                    Rekpoint
                    wrote on last edited by
                    #316

                    Your soon to have m3 hood hinges !!

                    1 Reply Last reply
                    1
                    • TkuhnT
                      TkuhnT
                      Tkuhn
                      wrote on last edited by
                      #317

                      Rekpoint said:

                      Your soon to have m3 hood hinges !!

                      You had a e46M partout!?

                      1 Reply Last reply
                      0
                      • RekpointR
                        RekpointR
                        Rekpoint
                        wrote on last edited by
                        #318

                        Tkuhn said:

                        You had a e46M partout!?

                        No. But a guy has a set across town from me had one and Im picking up some other things for earl. He requested them for you.

                        1 Reply Last reply
                        0
                        • TkuhnT
                          TkuhnT
                          Tkuhn
                          wrote on last edited by
                          #319

                          Rekpoint said:

                          No. But a guy has a set across town from me had one and Im picking up some other things for earl. He requested them for you. 

                          I appreciate that! I wish the dude had the door and rear quarter moldings. And the gas door lol

                          1 Reply Last reply
                          0
                          • TkuhnT
                            TkuhnT
                            Tkuhn
                            wrote on last edited by
                            #320

                            UPDATE

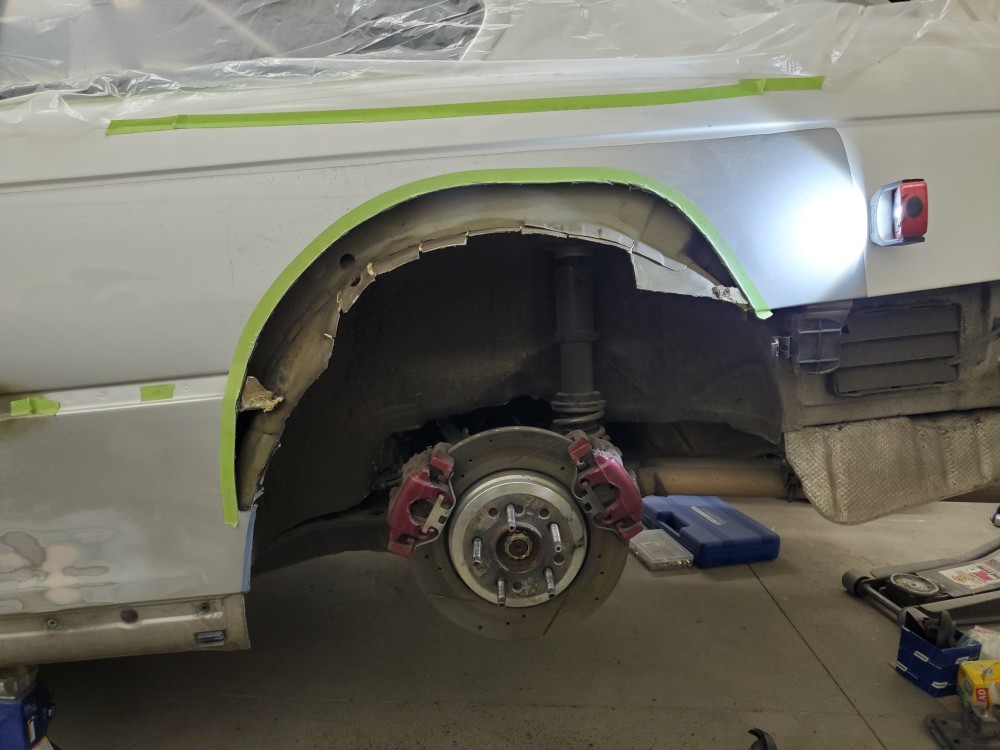
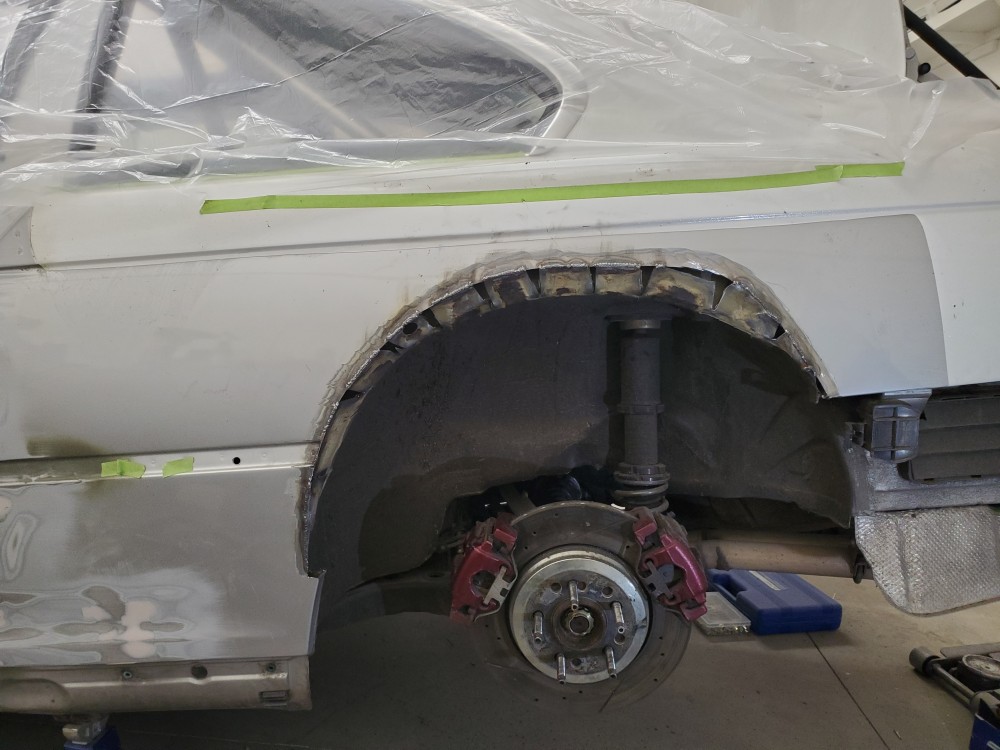
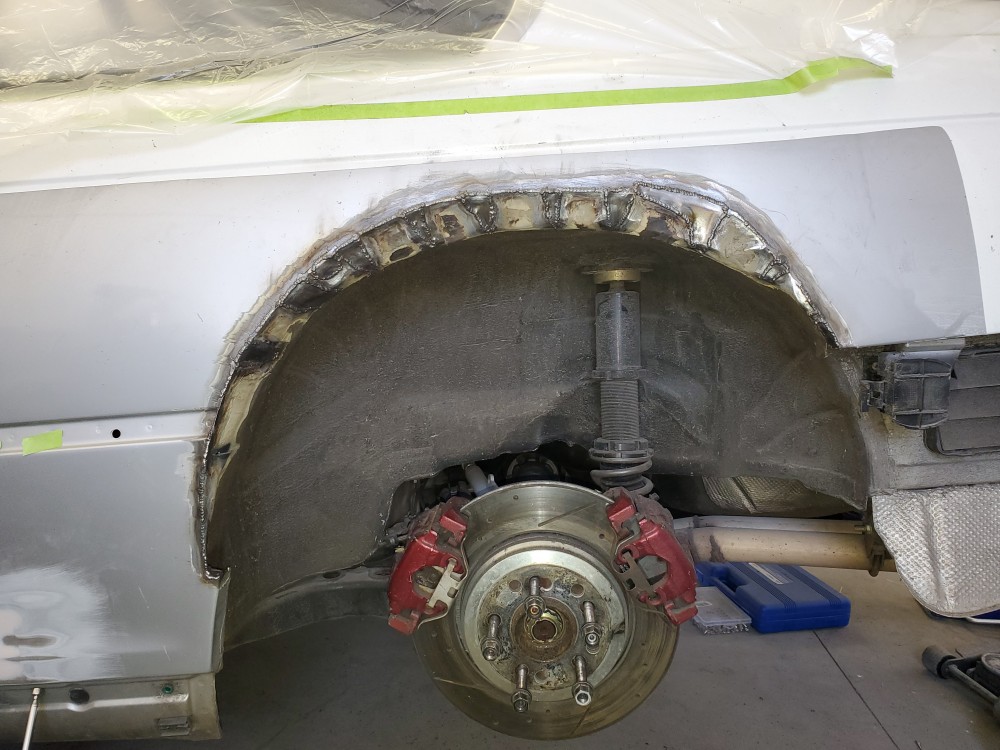
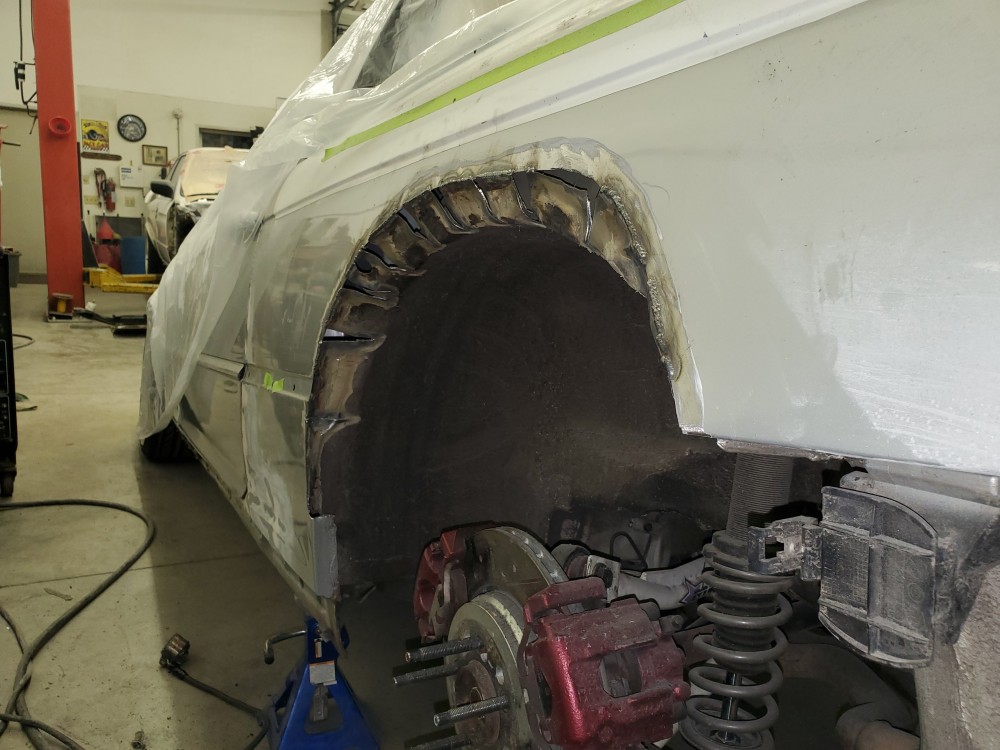
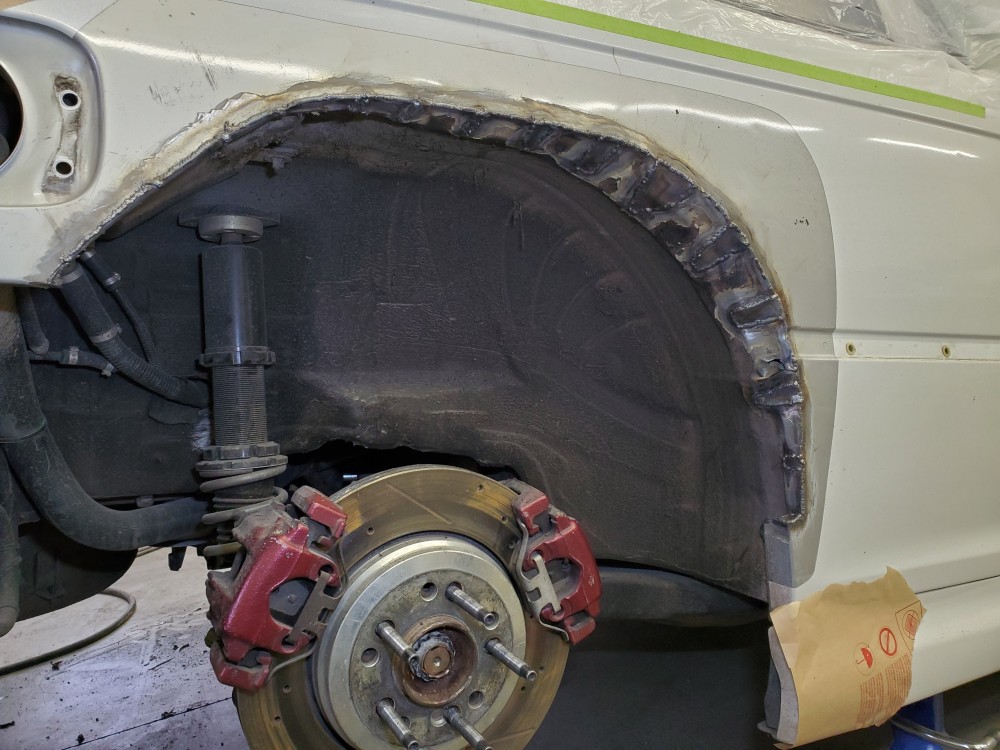
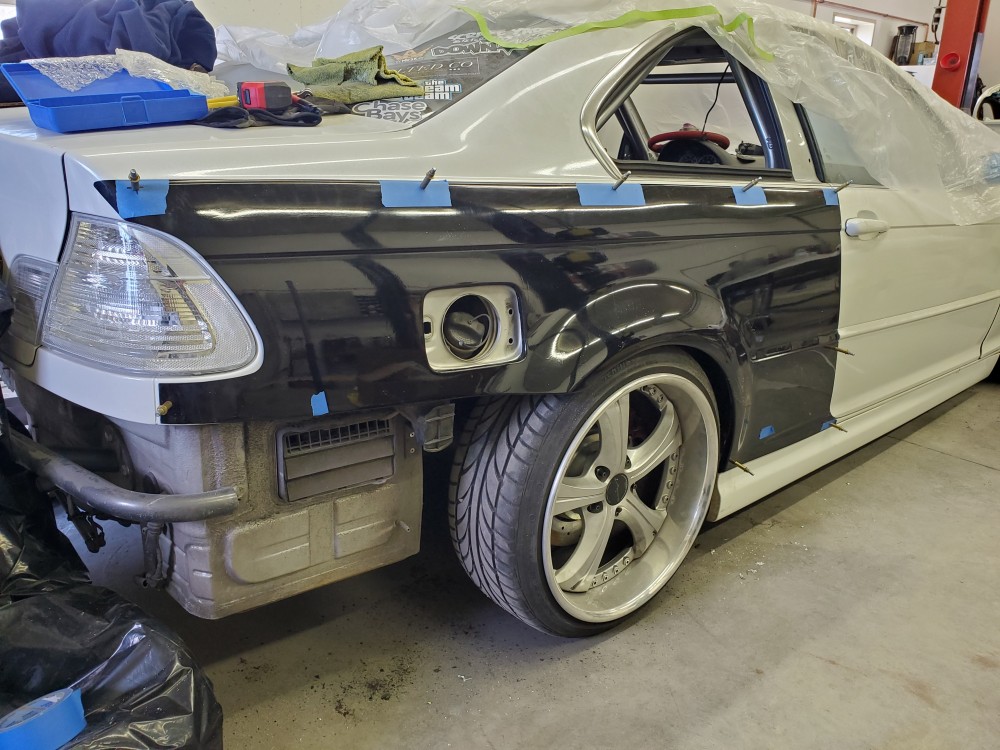
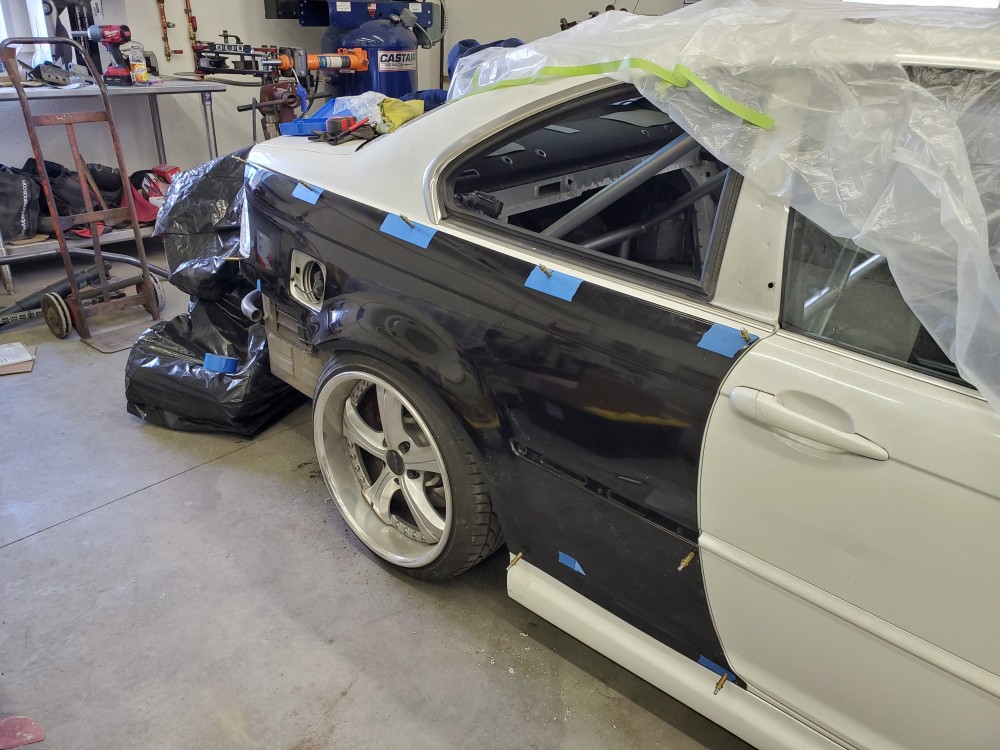
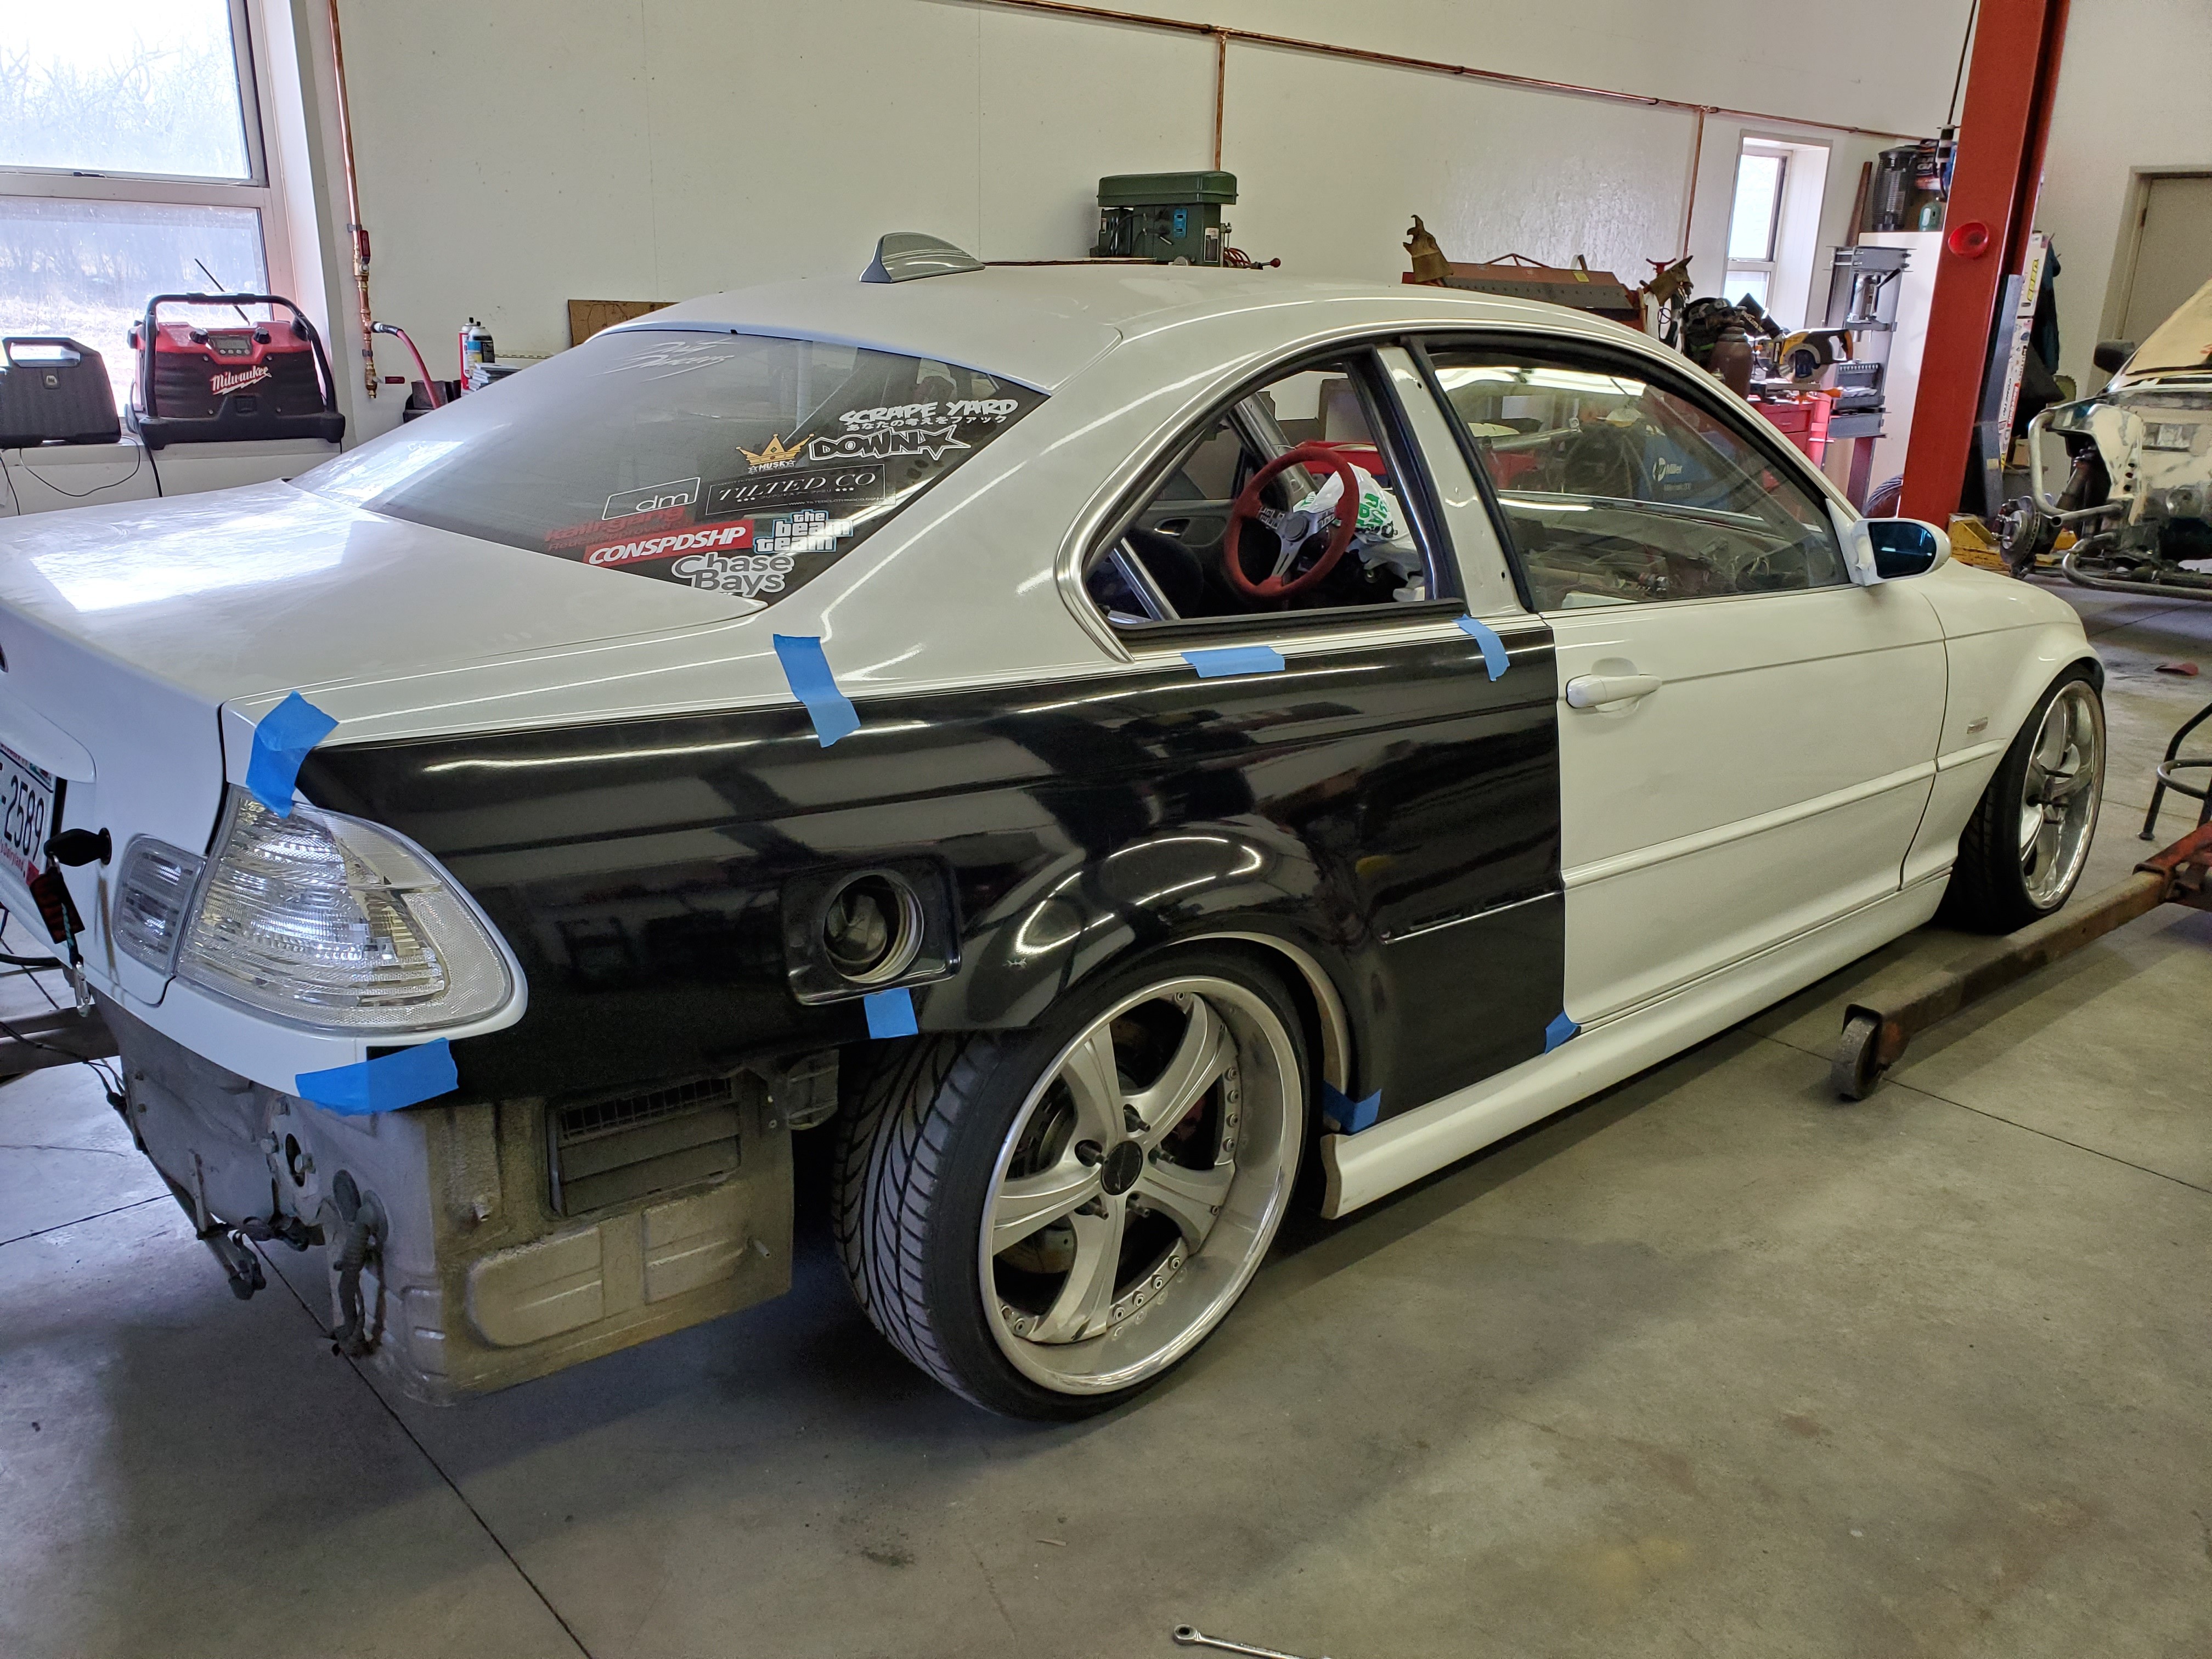
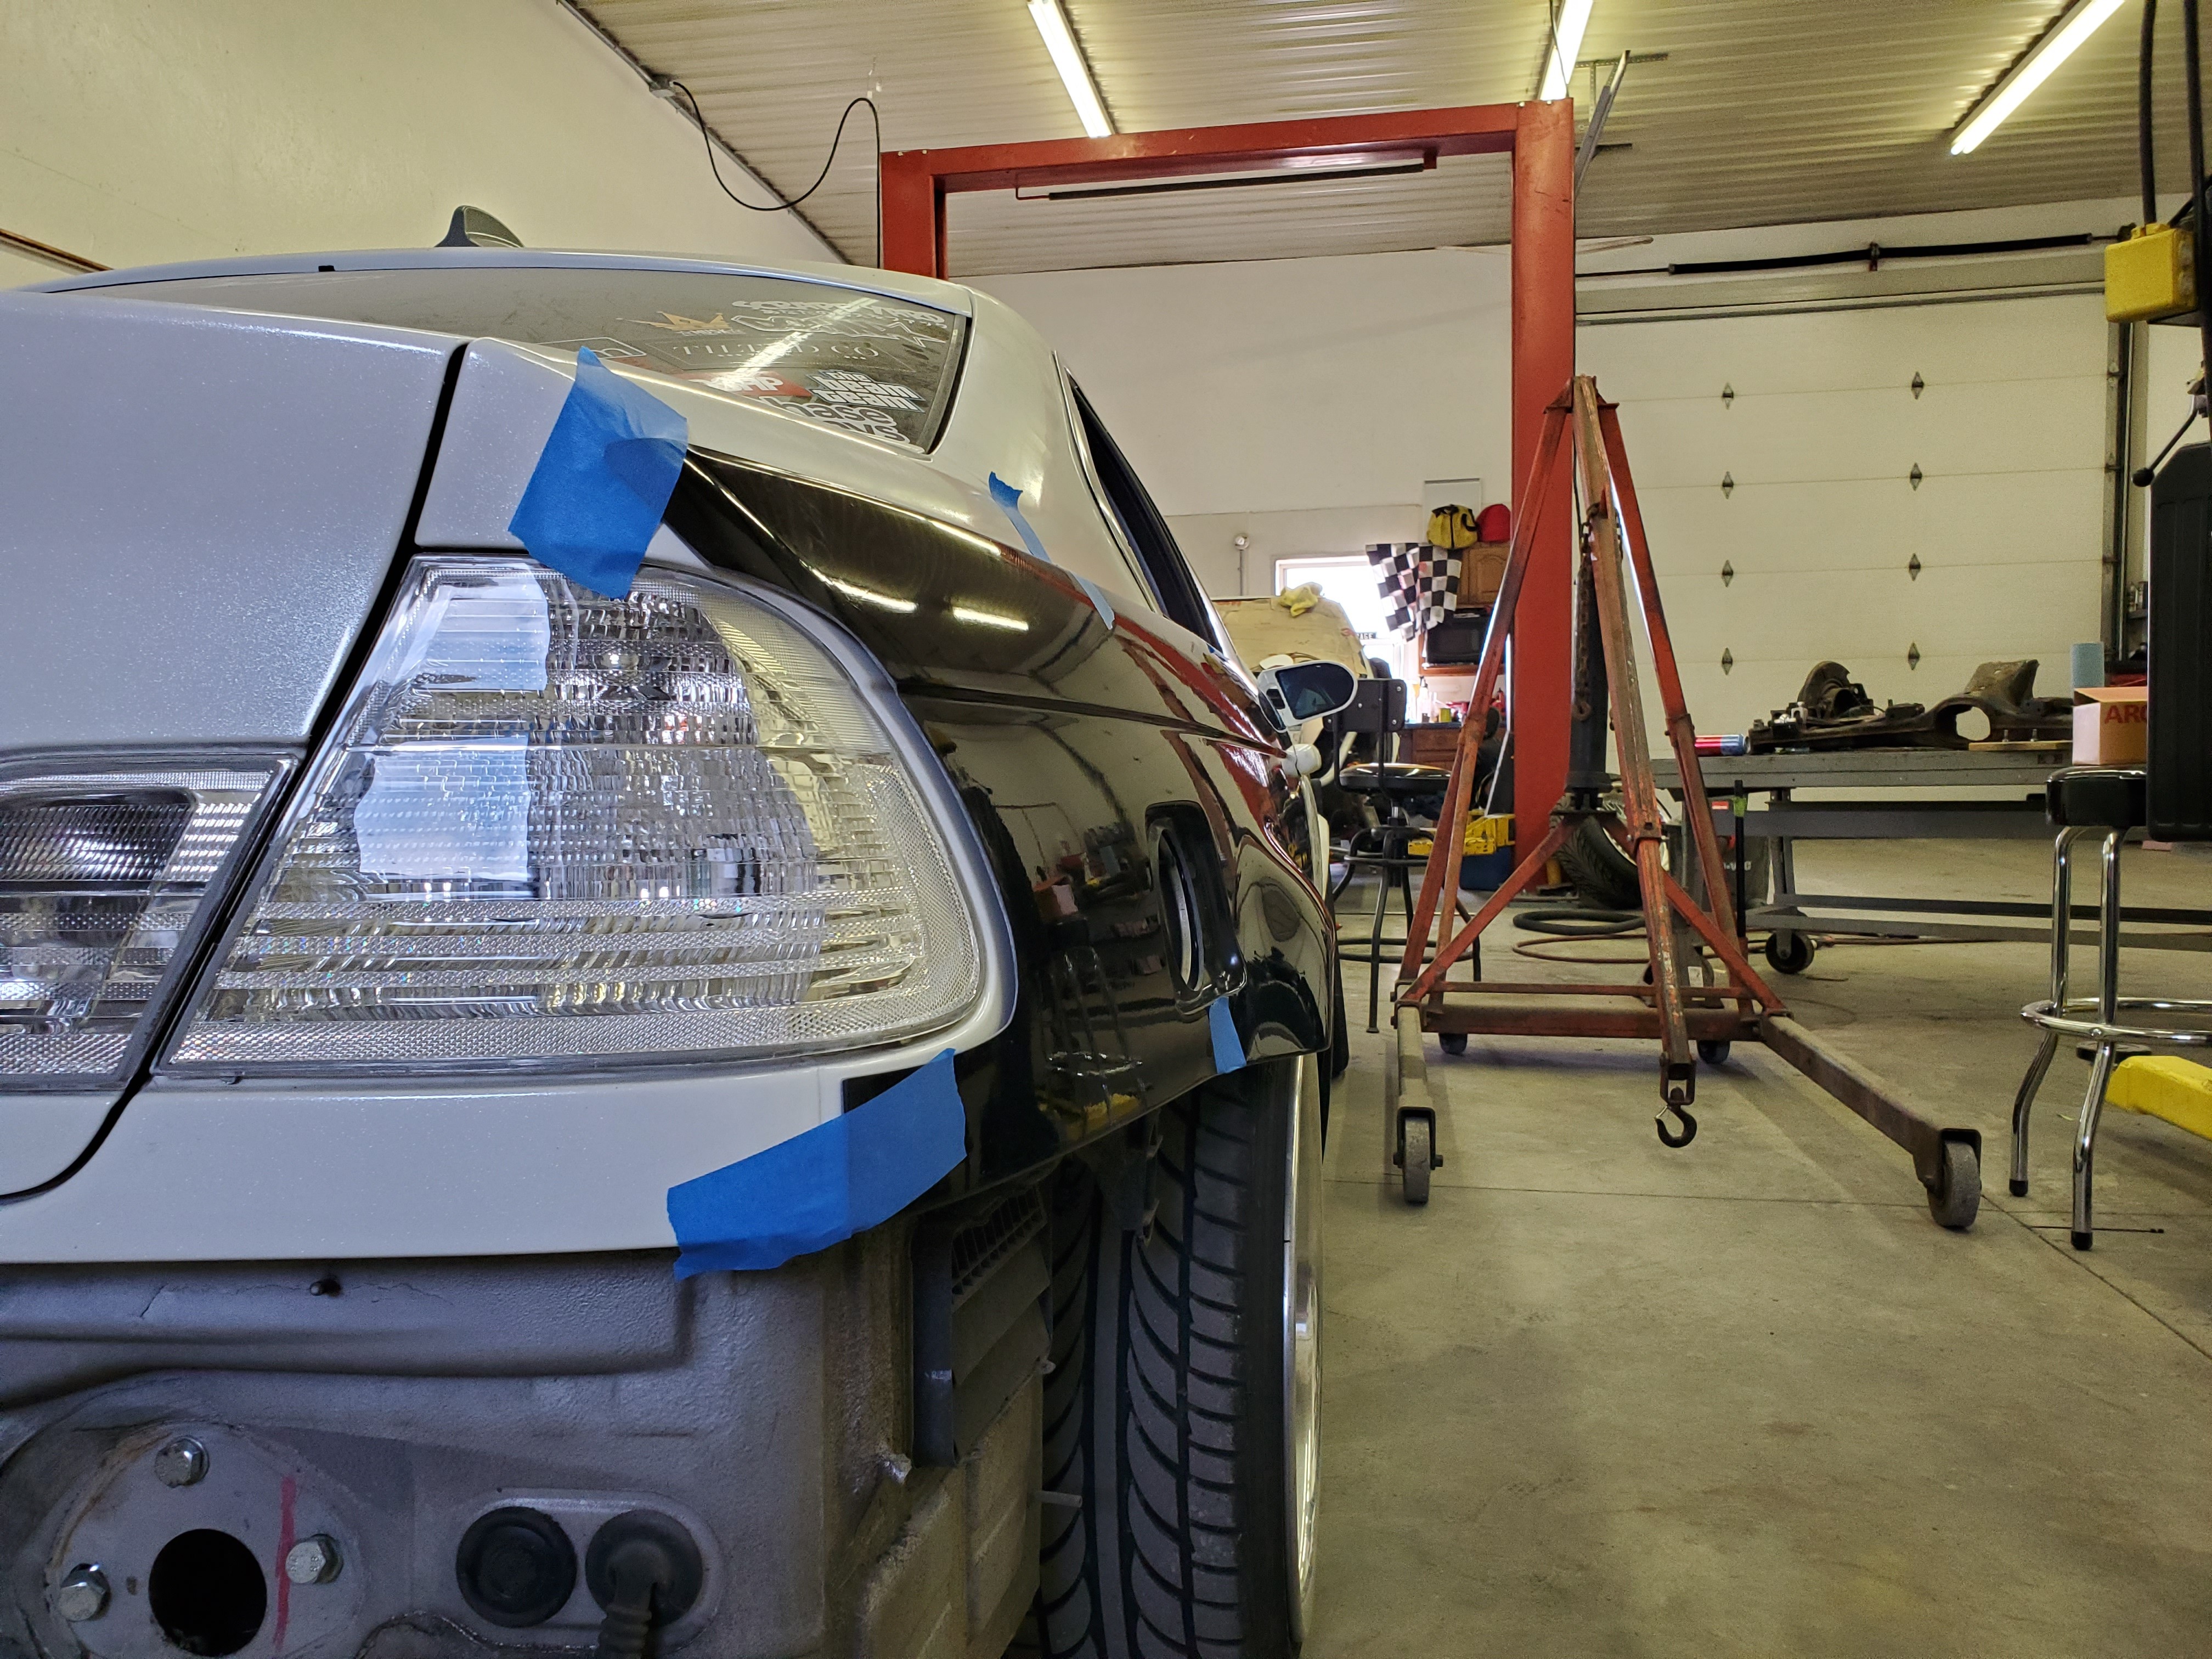
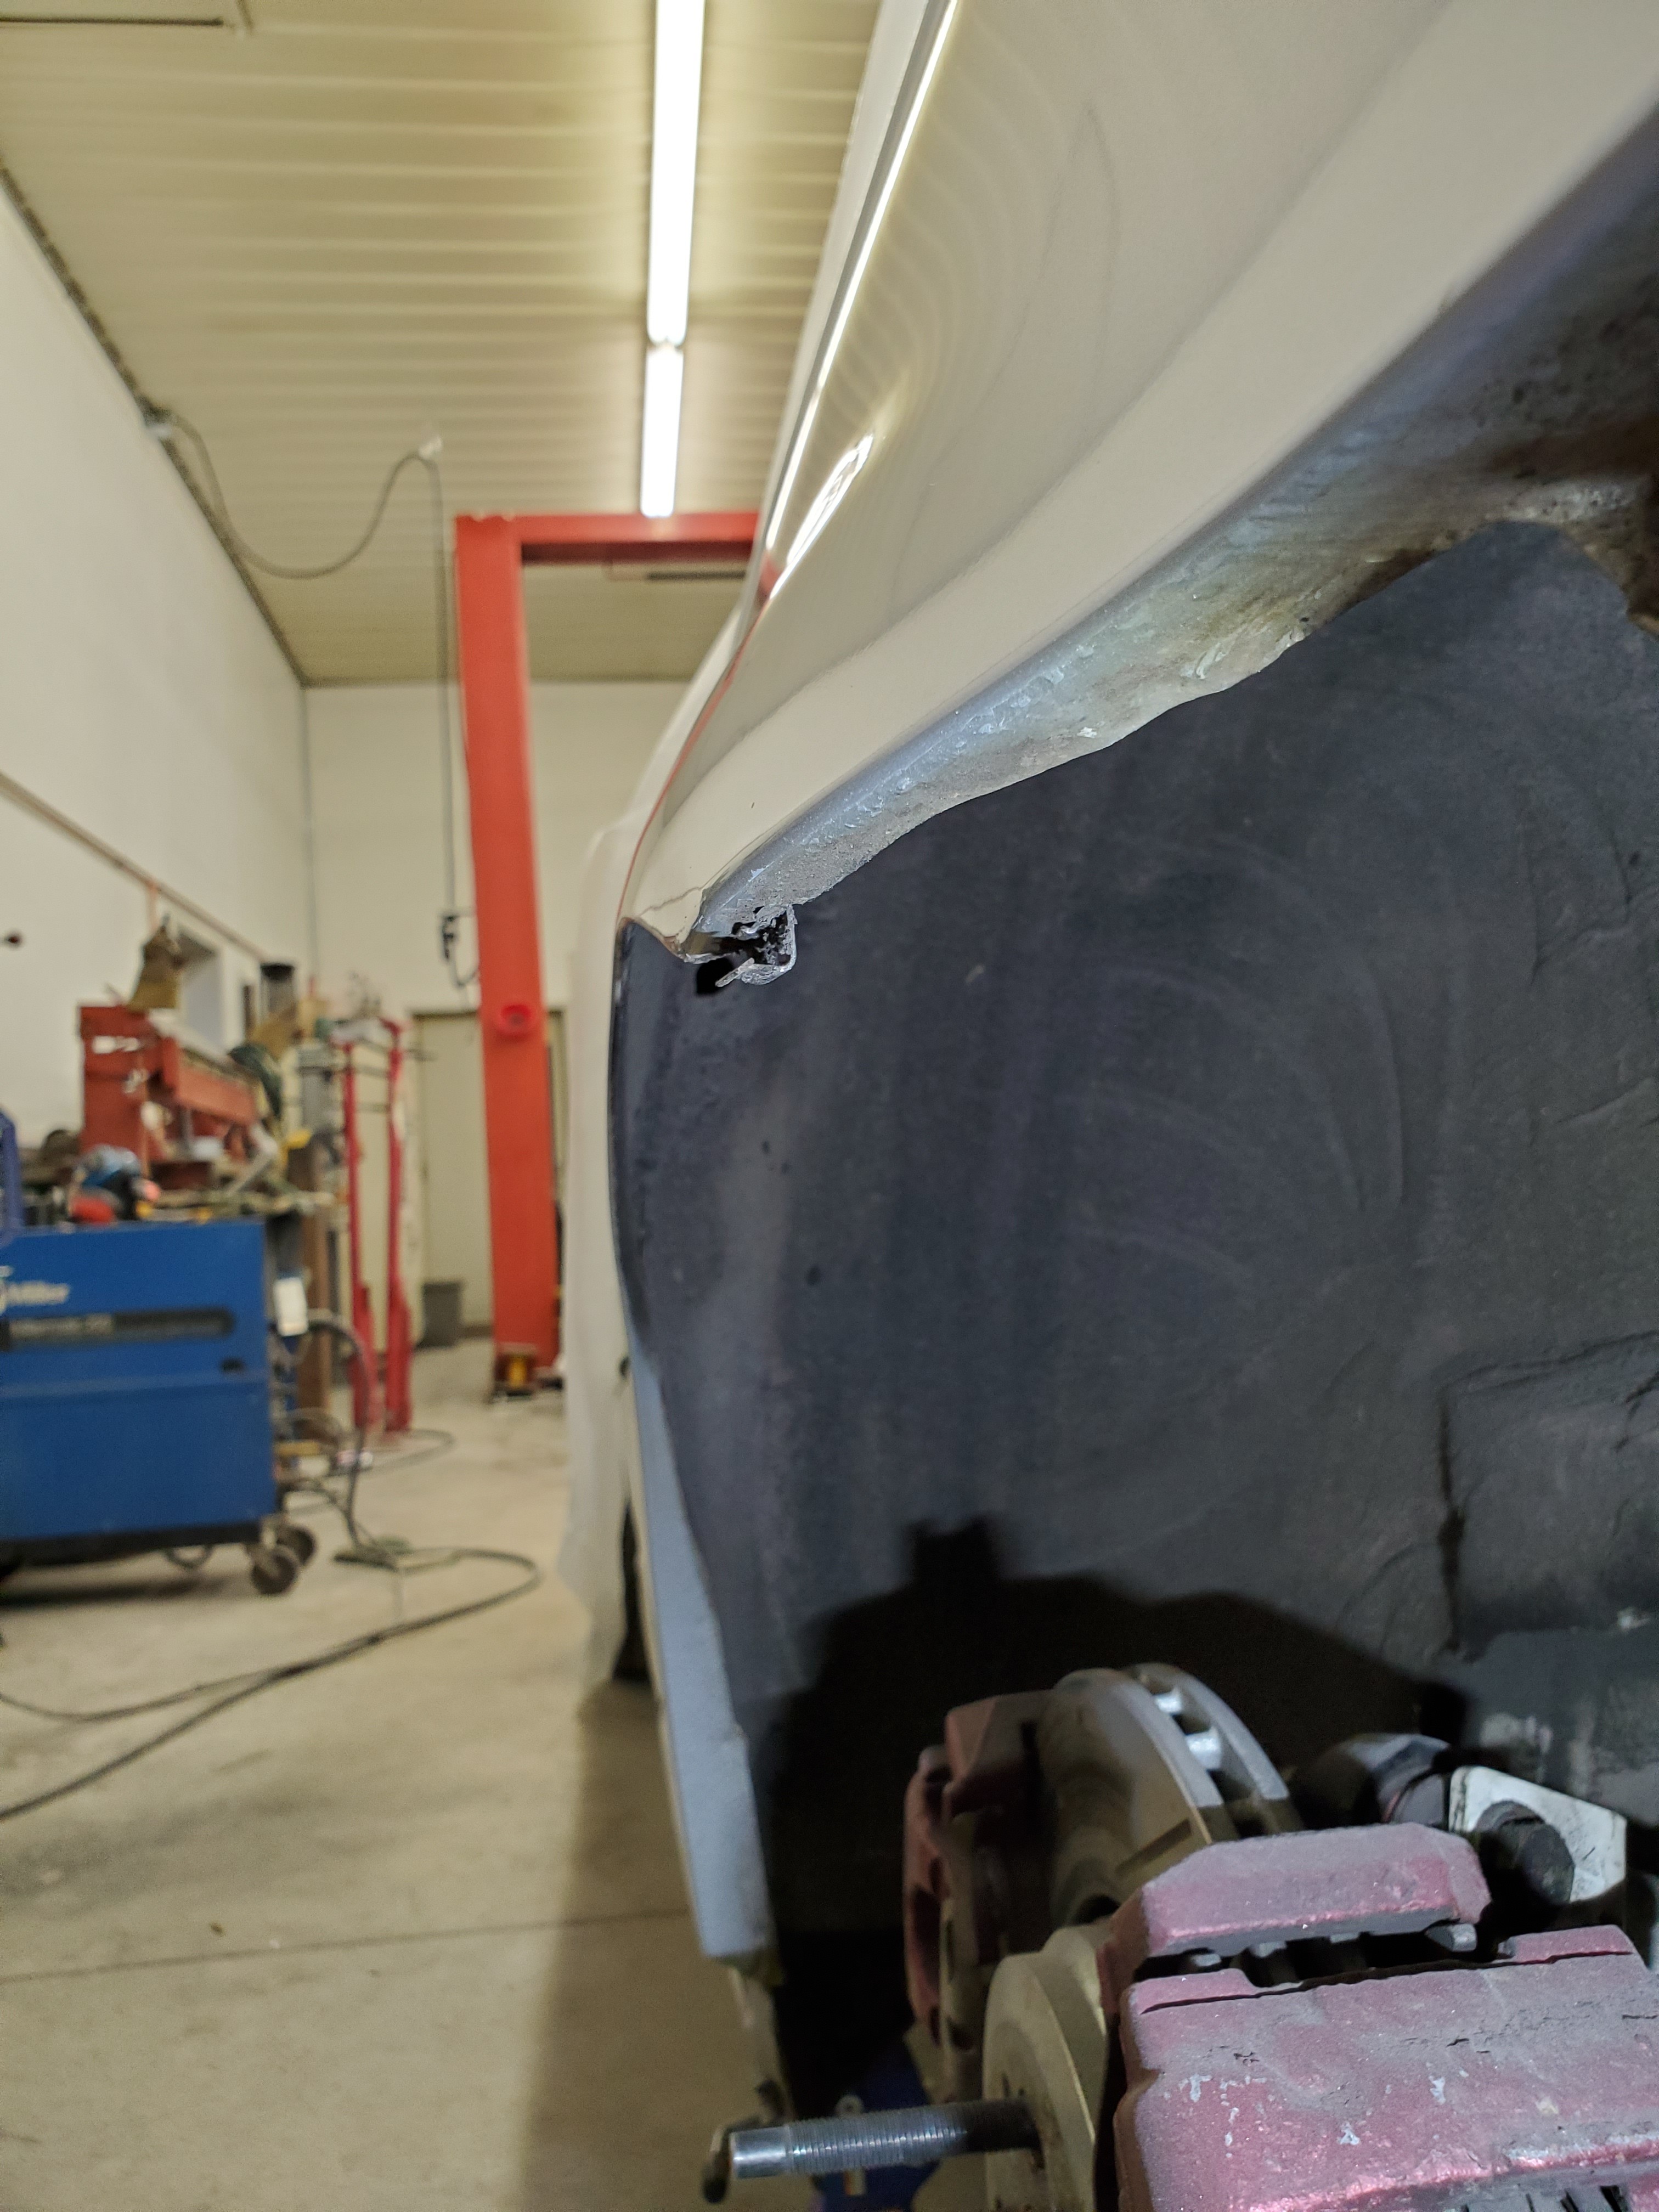
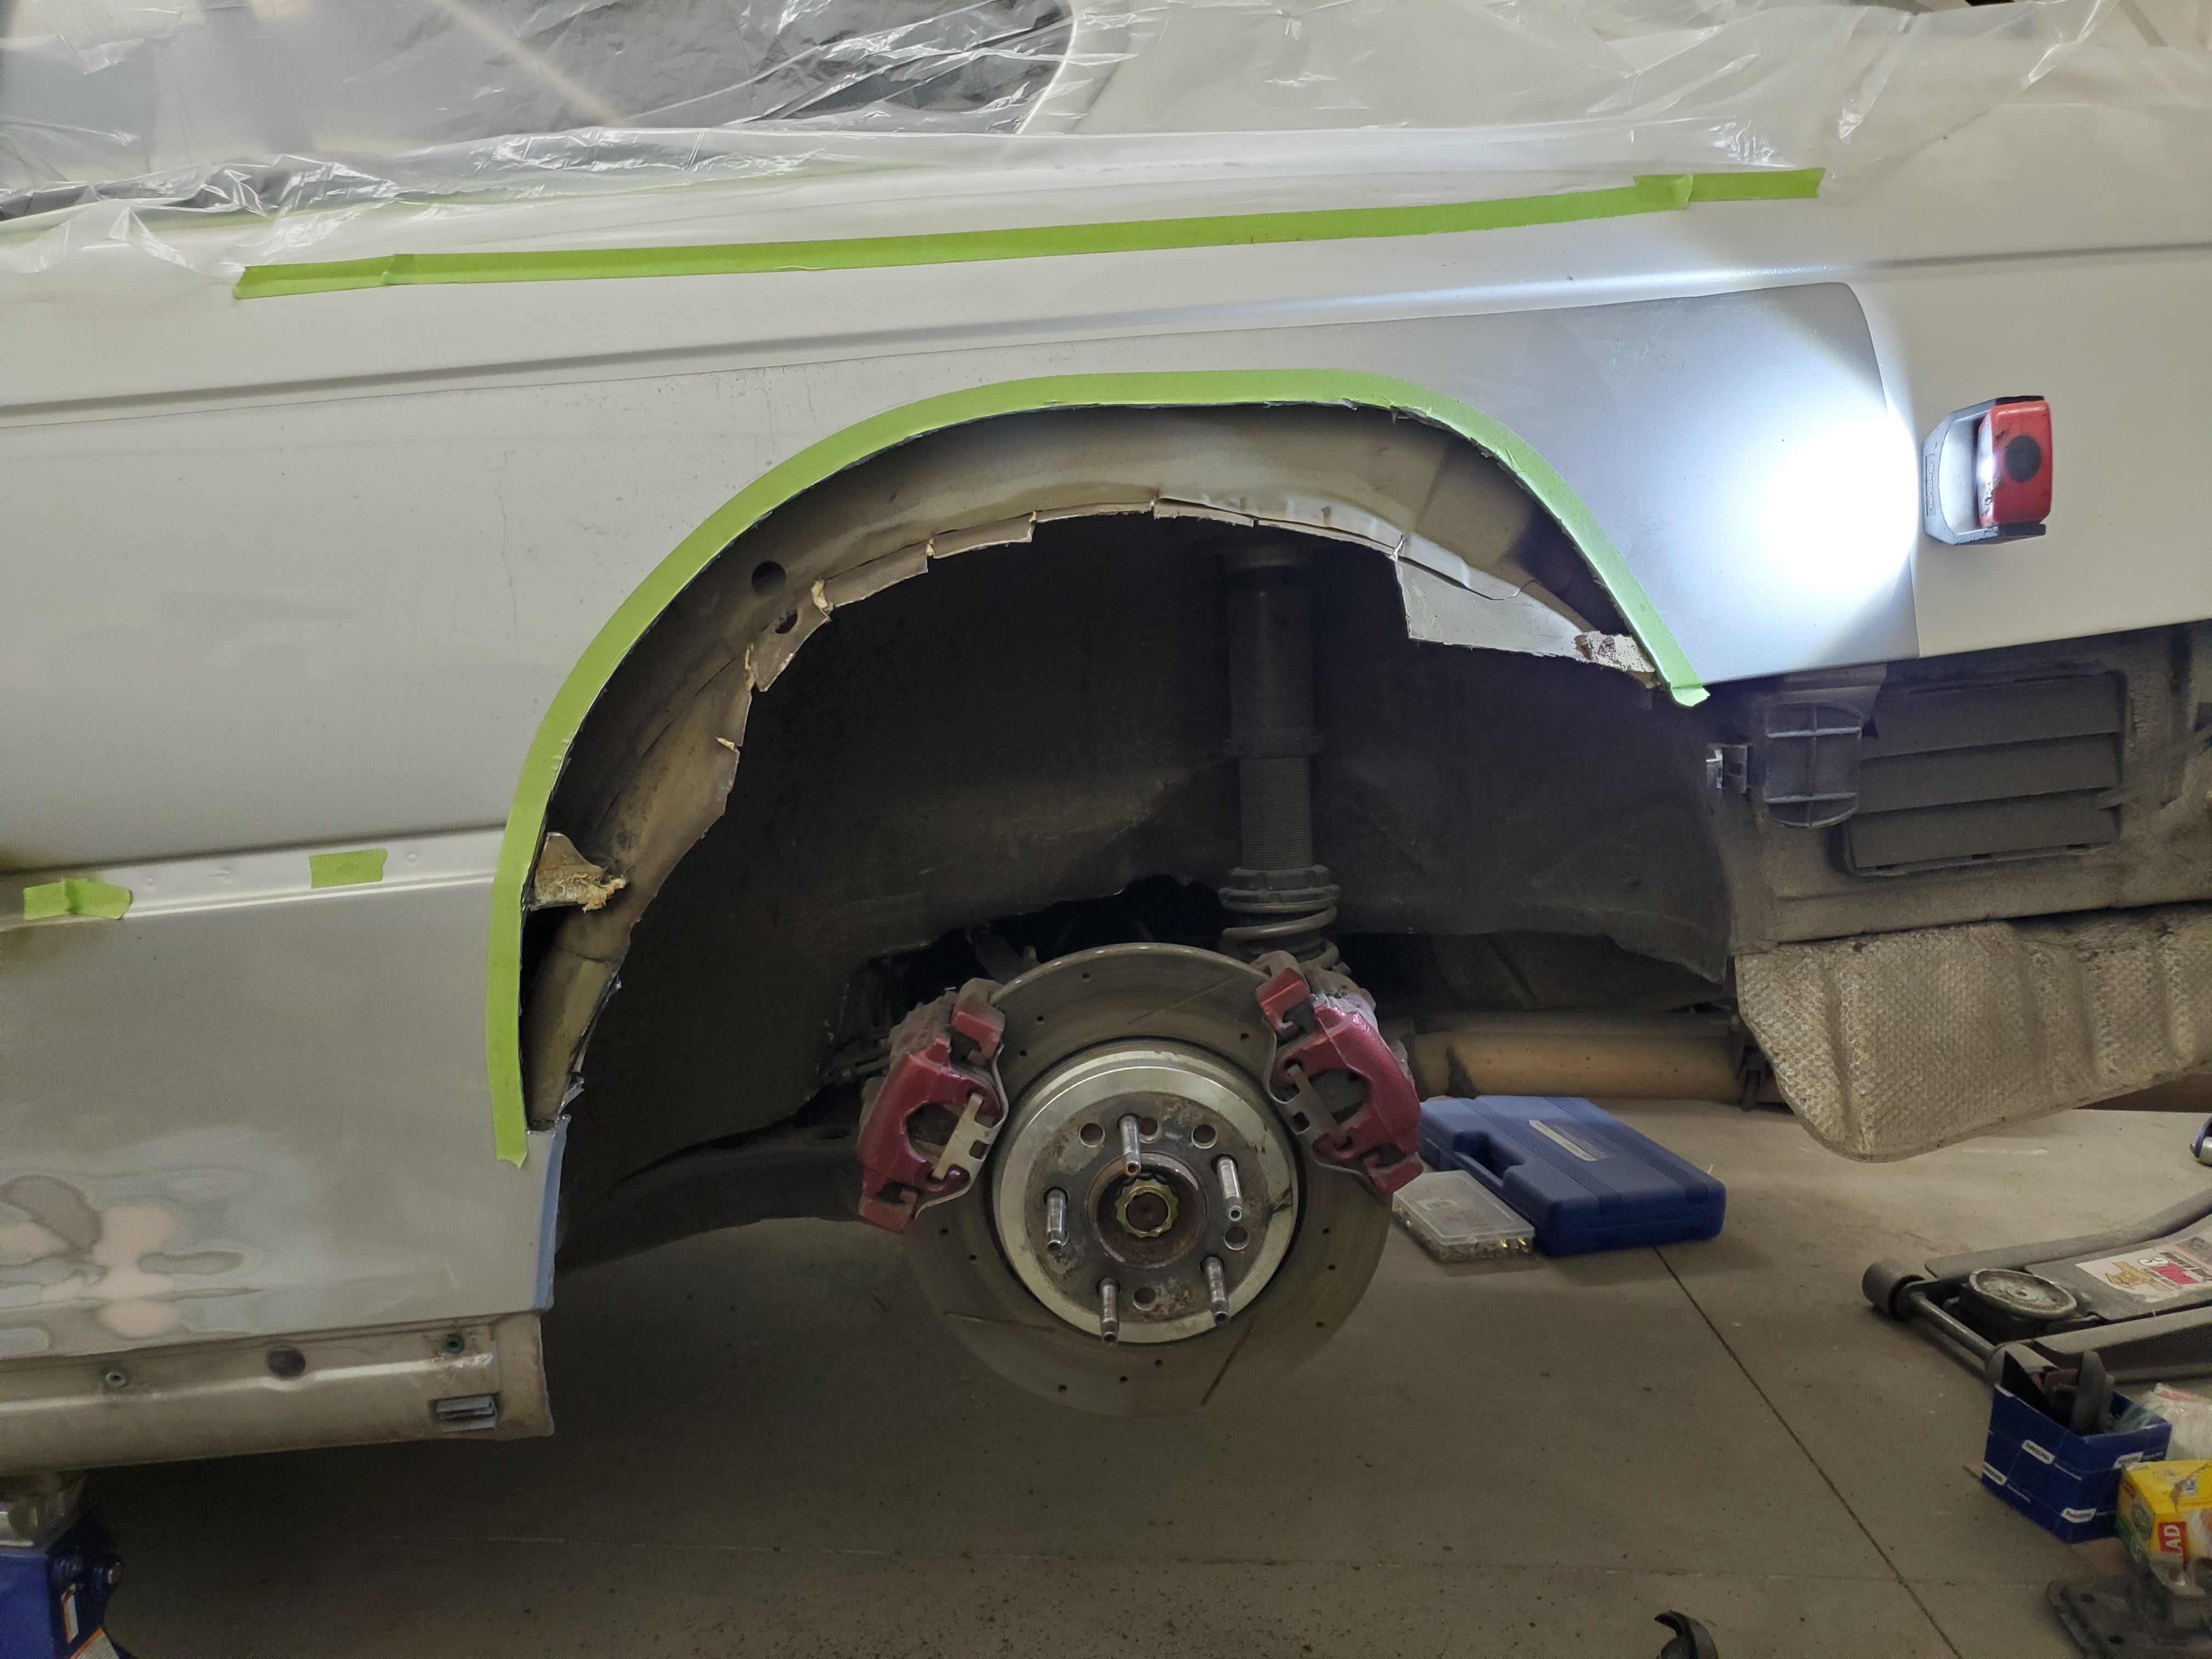
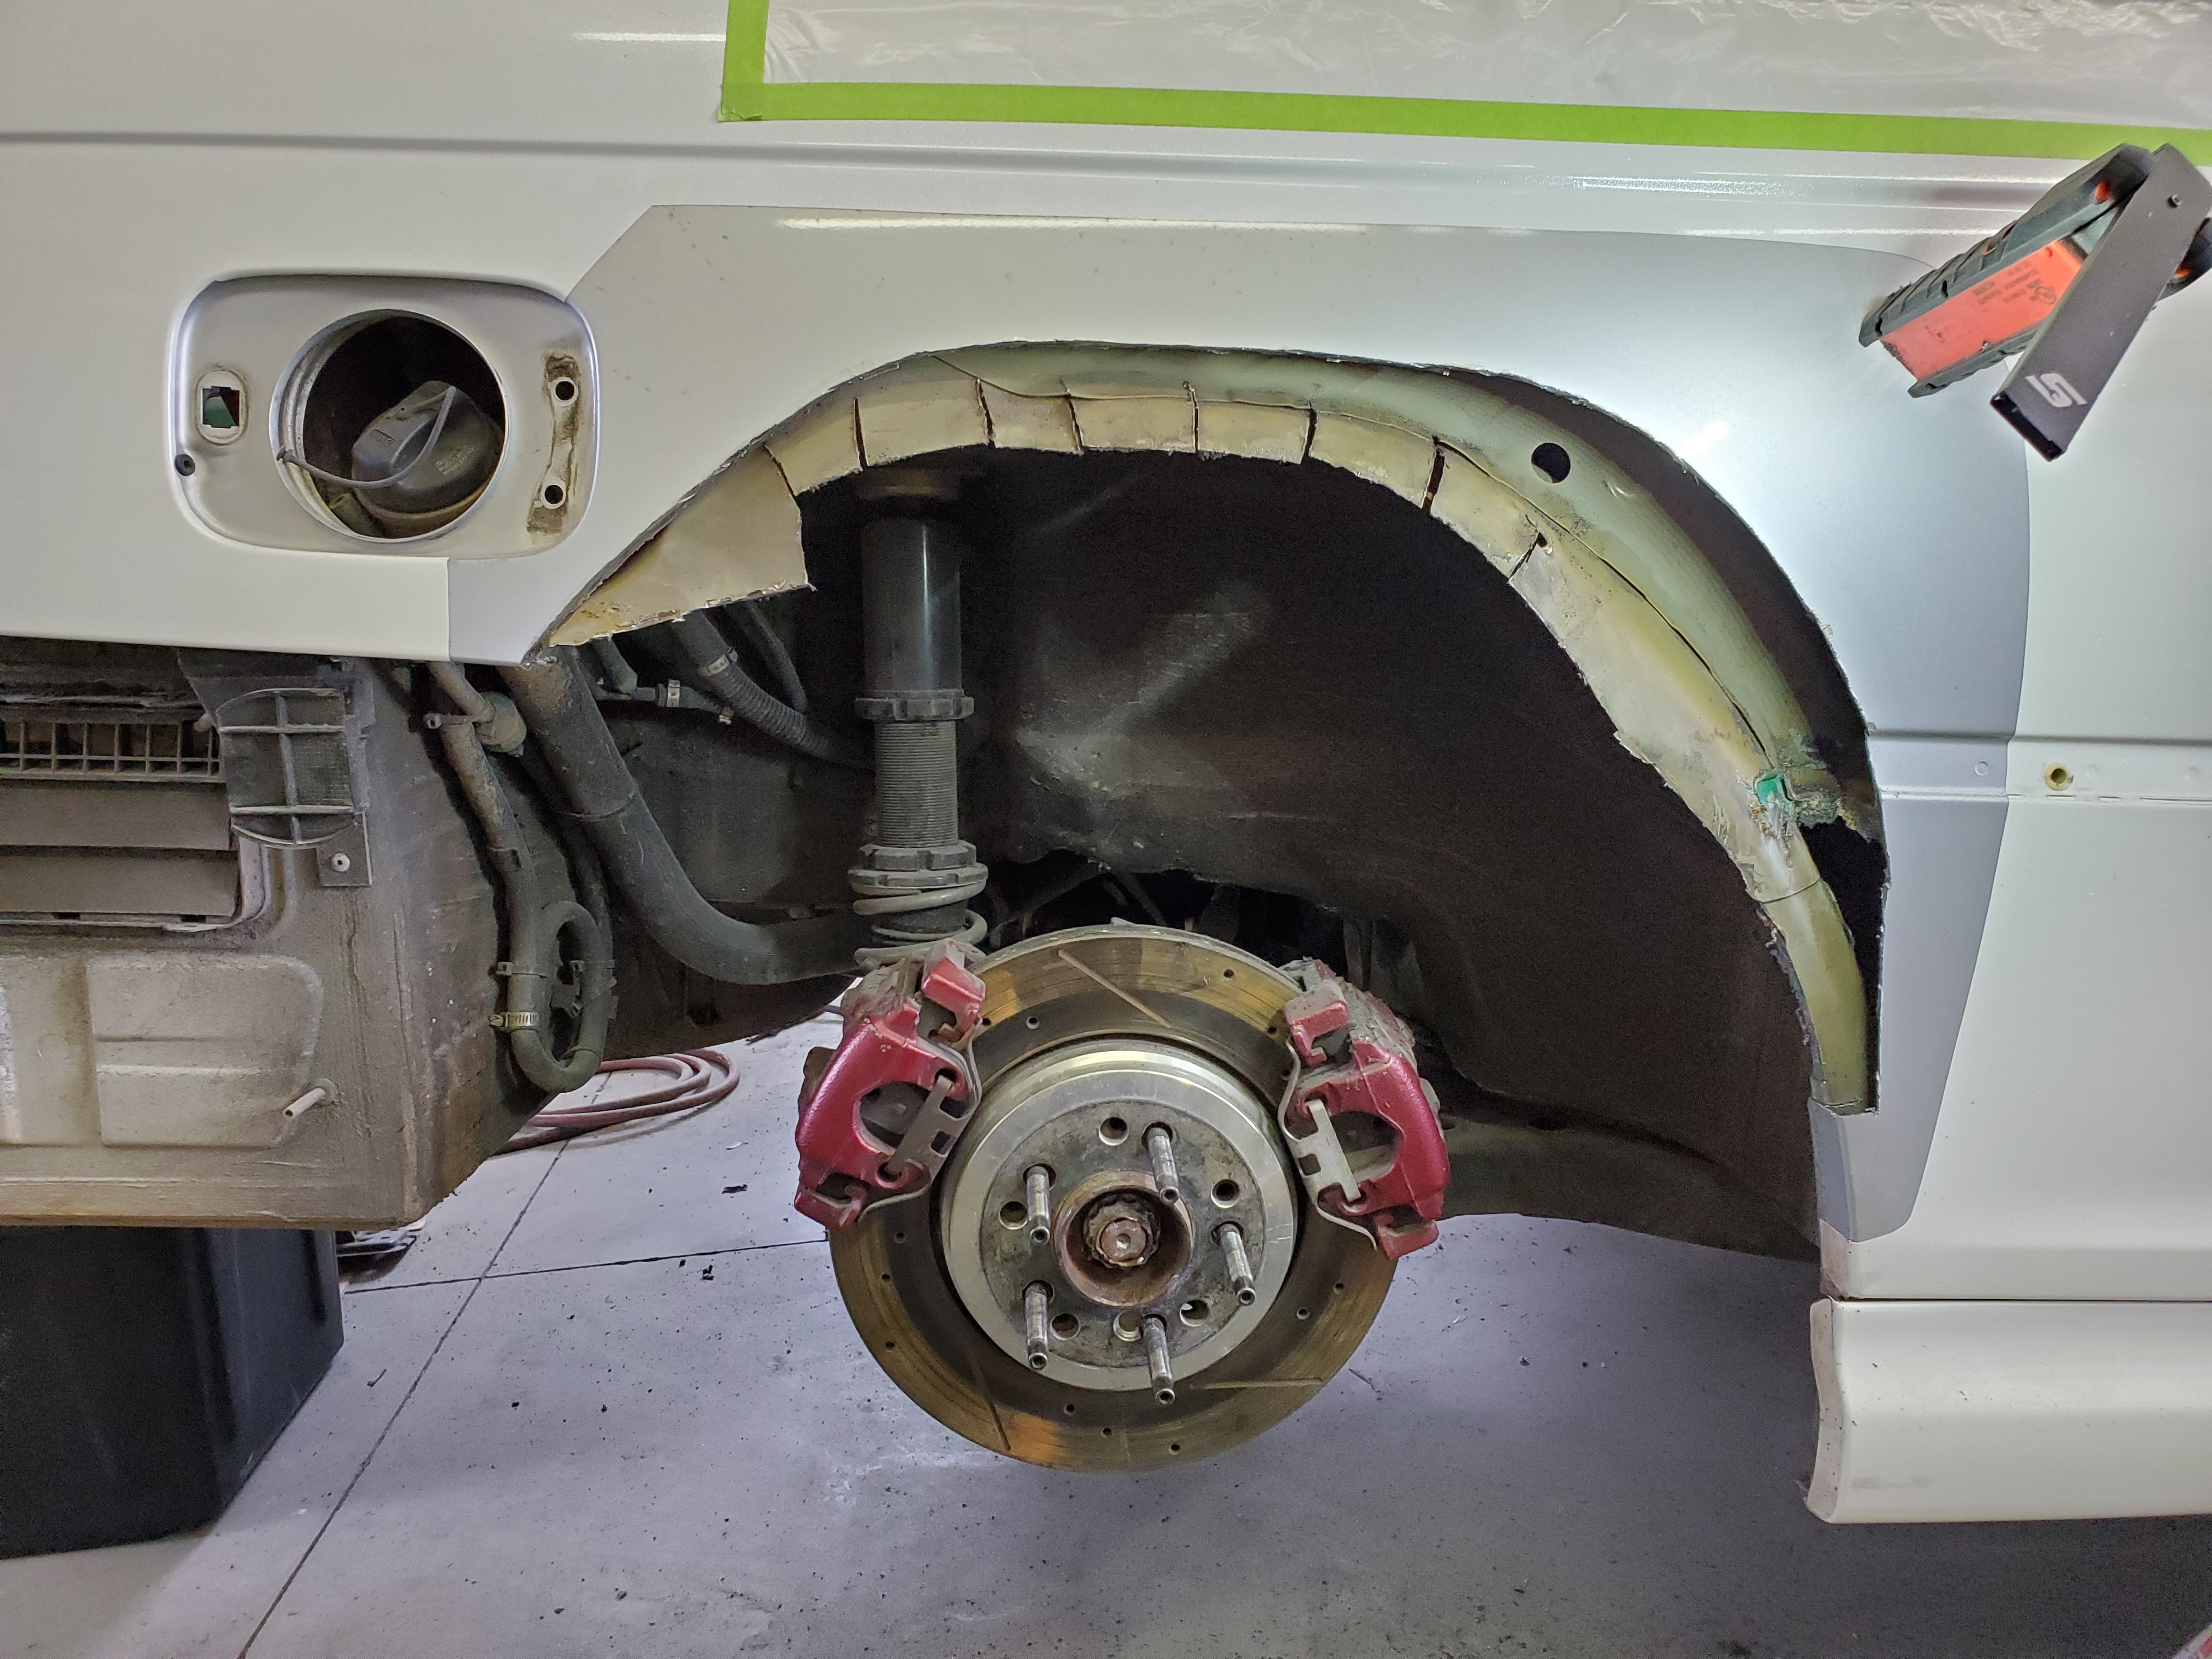
                            Decided to bite the bullet and chop up the rear quarters.

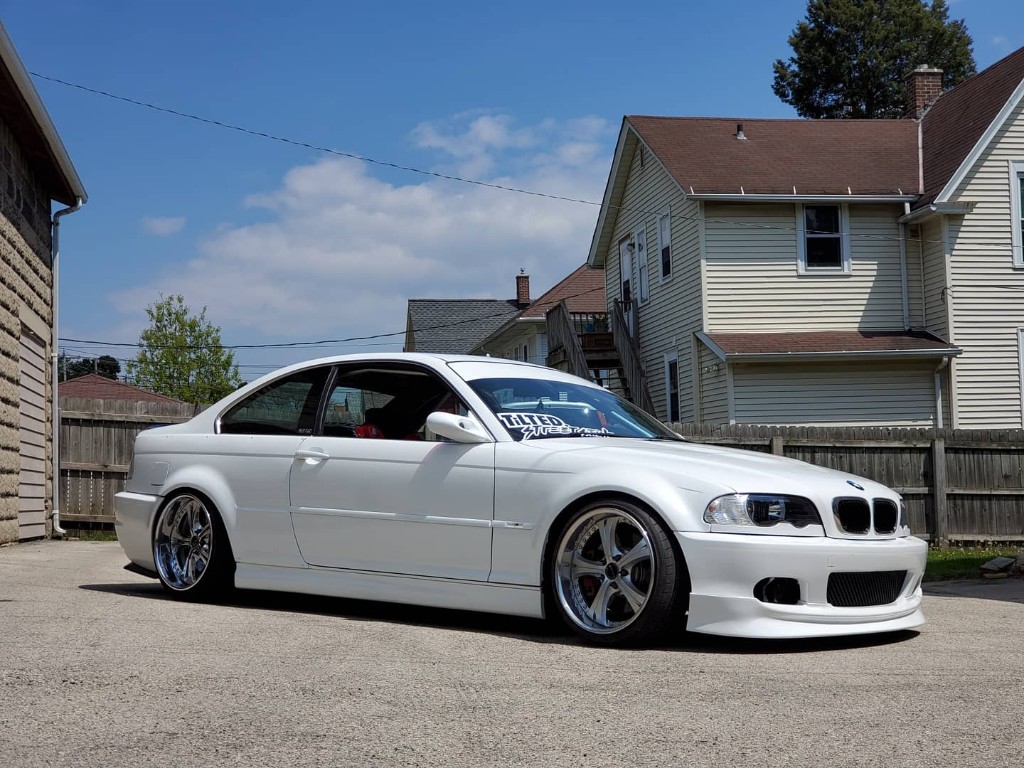
                            Now it is worth mentioning that I did feel bad after looking at how clean this thing is lmao BUT it was only for a half hour and after I asked some friends to tell me to stop being a bitch 😅 

                            So here is the last photo of the rust free quarter hahaha
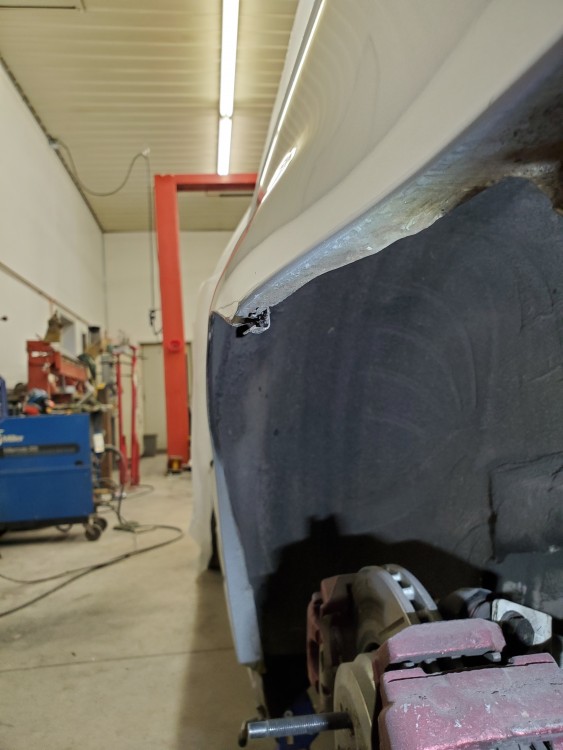
                            20200410193349.jpg

                            And setting up to cut.

                            20200410194555.jpg

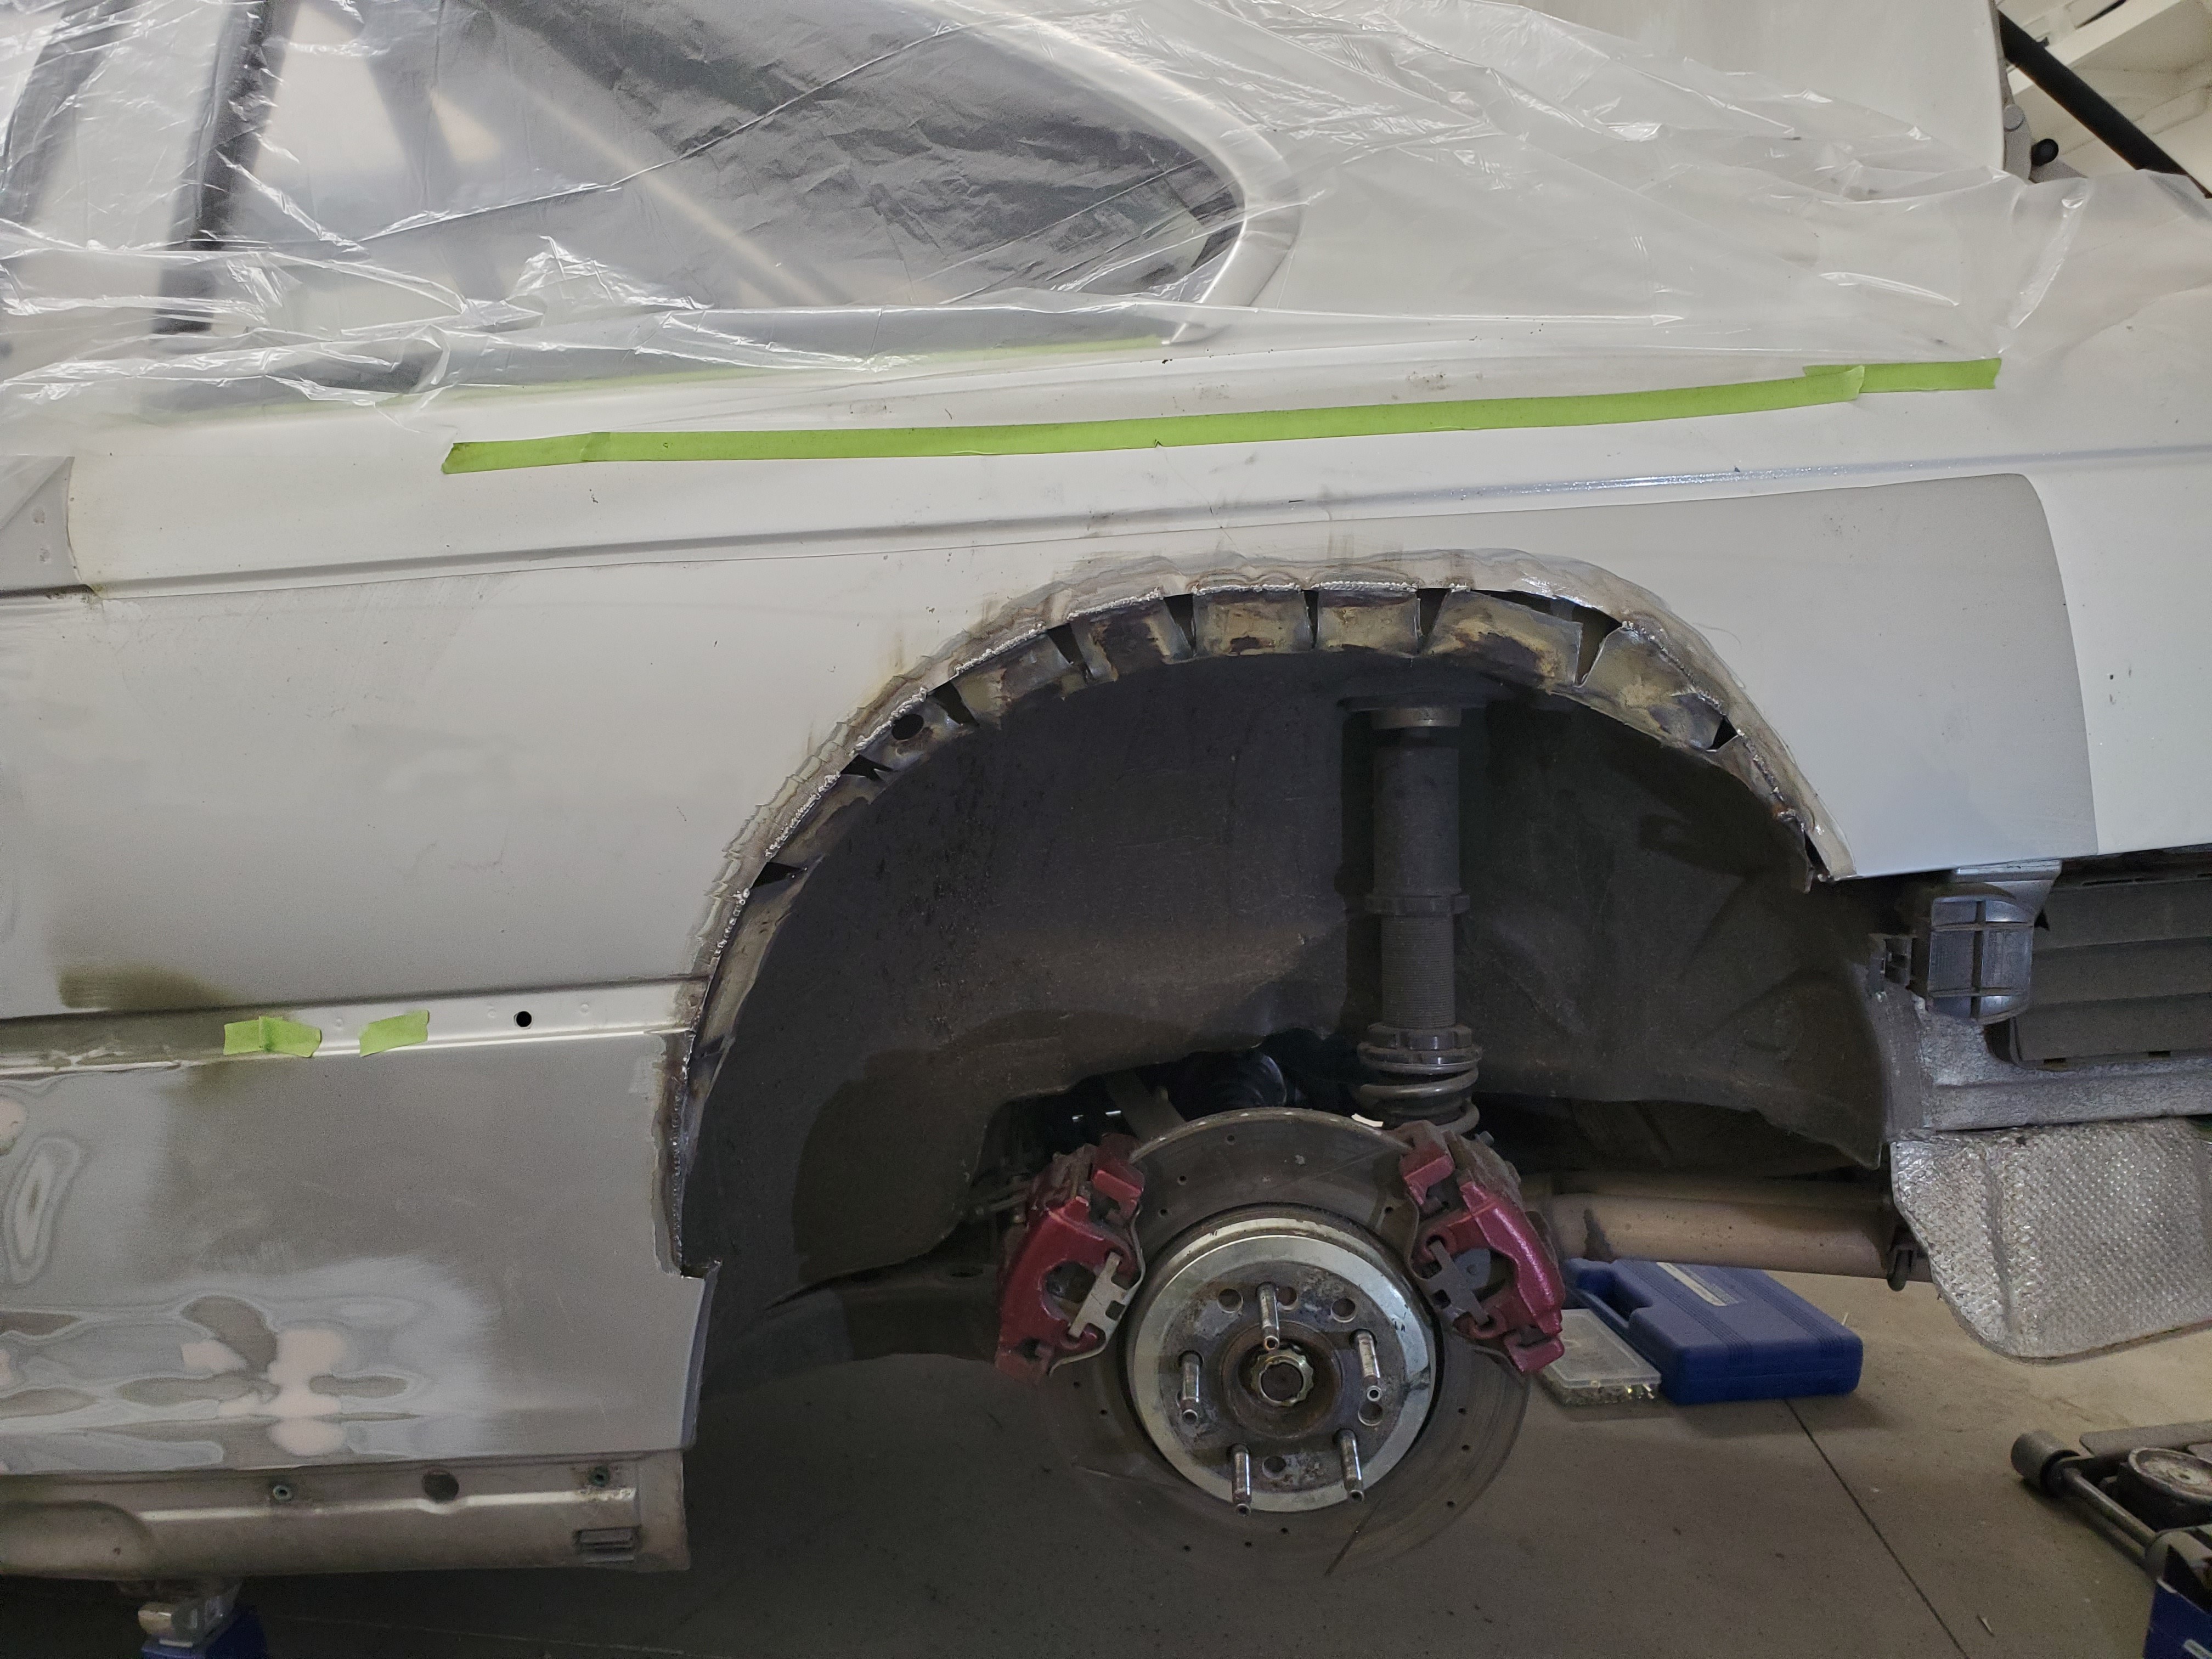
                            Chop chopped

                            20200410200921.jpg

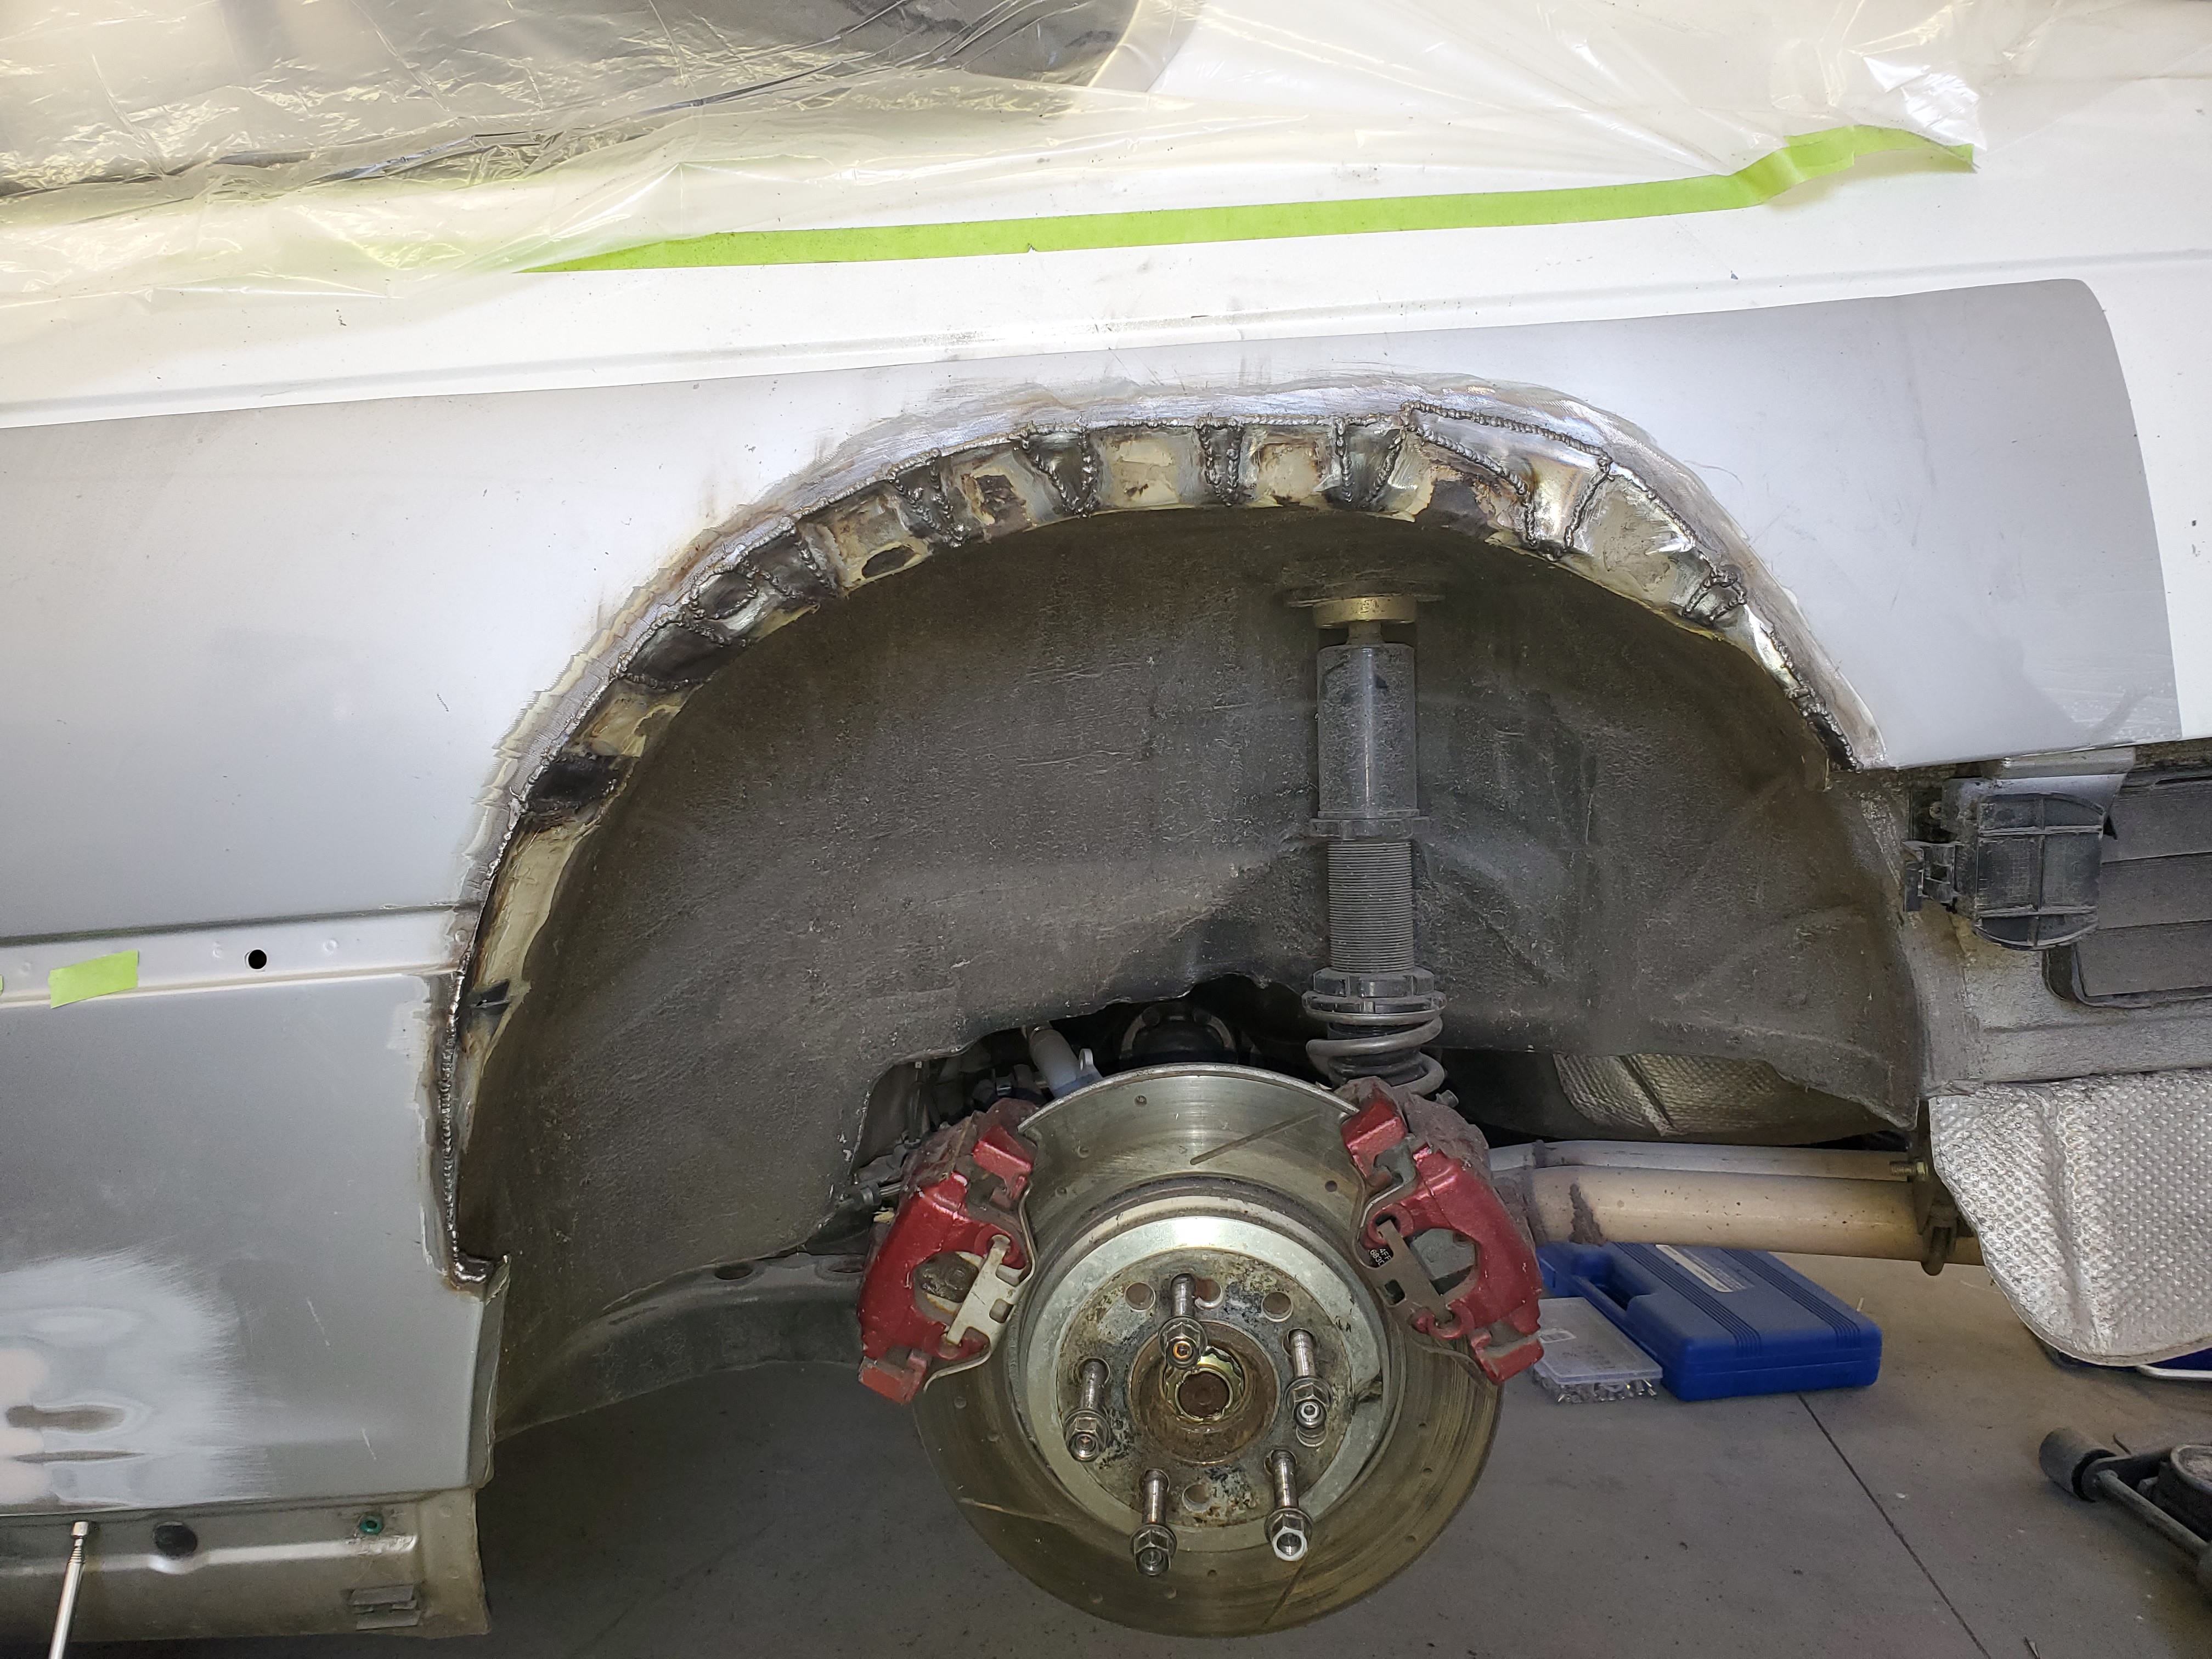
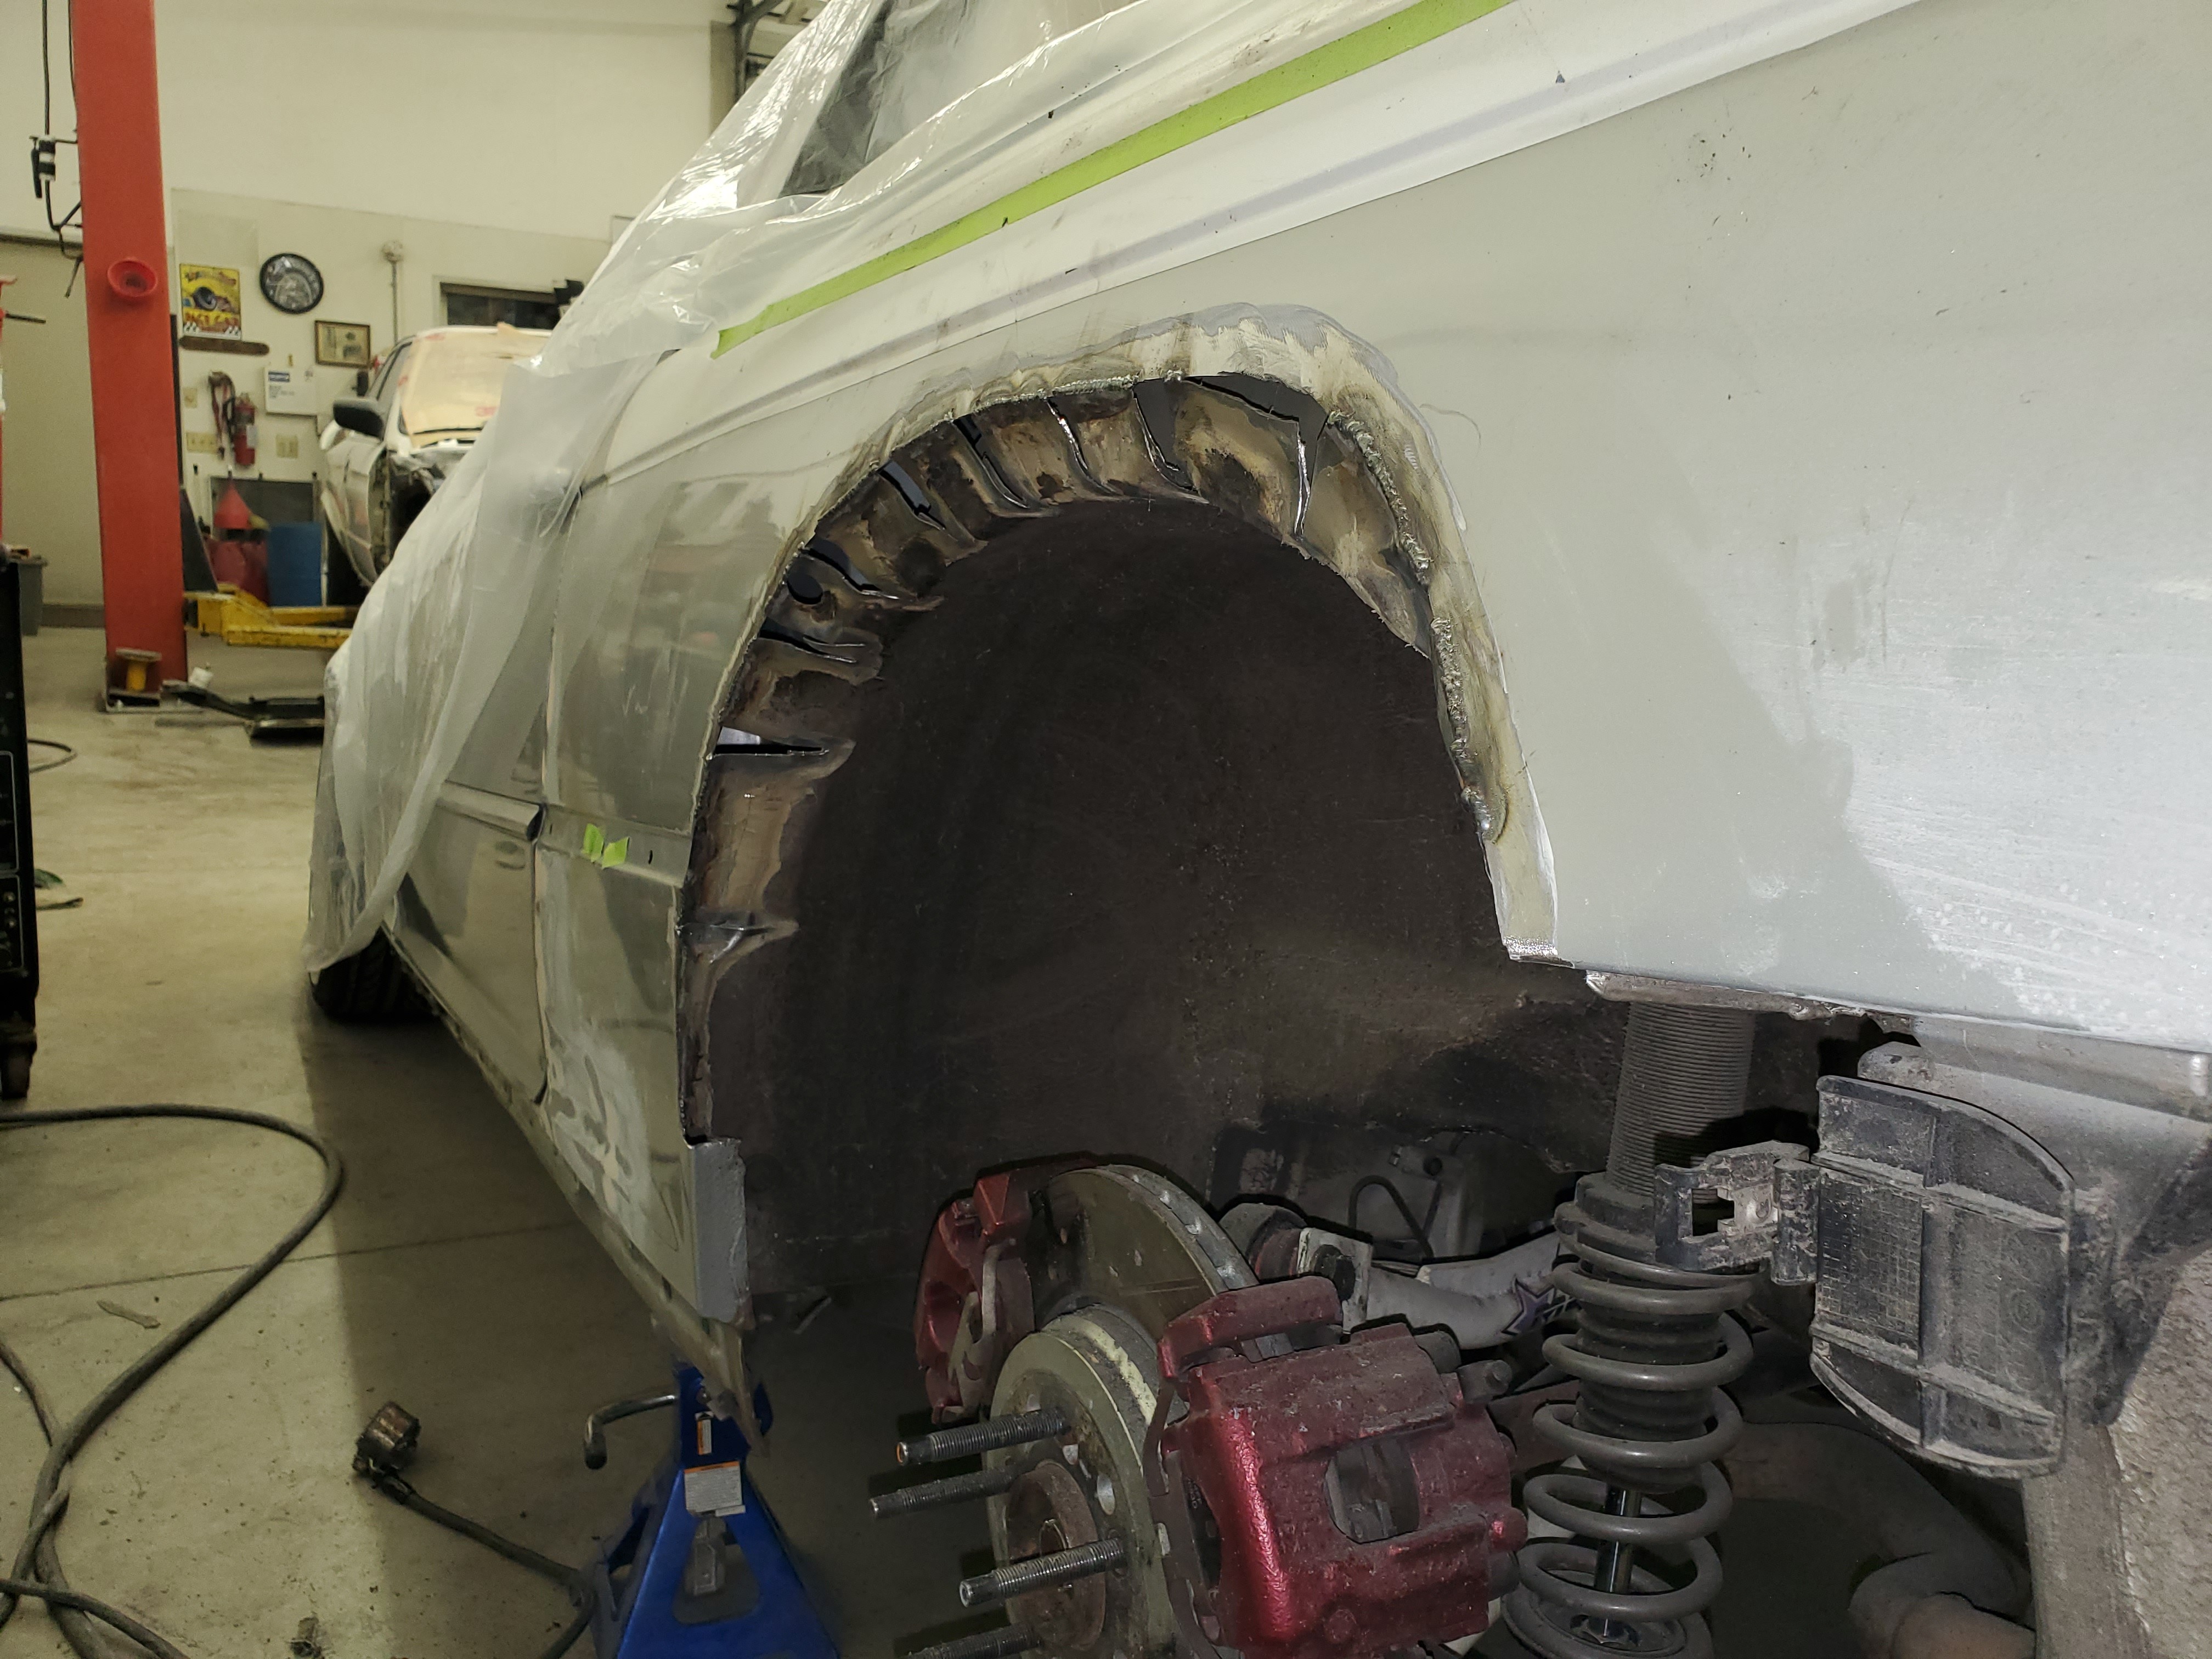
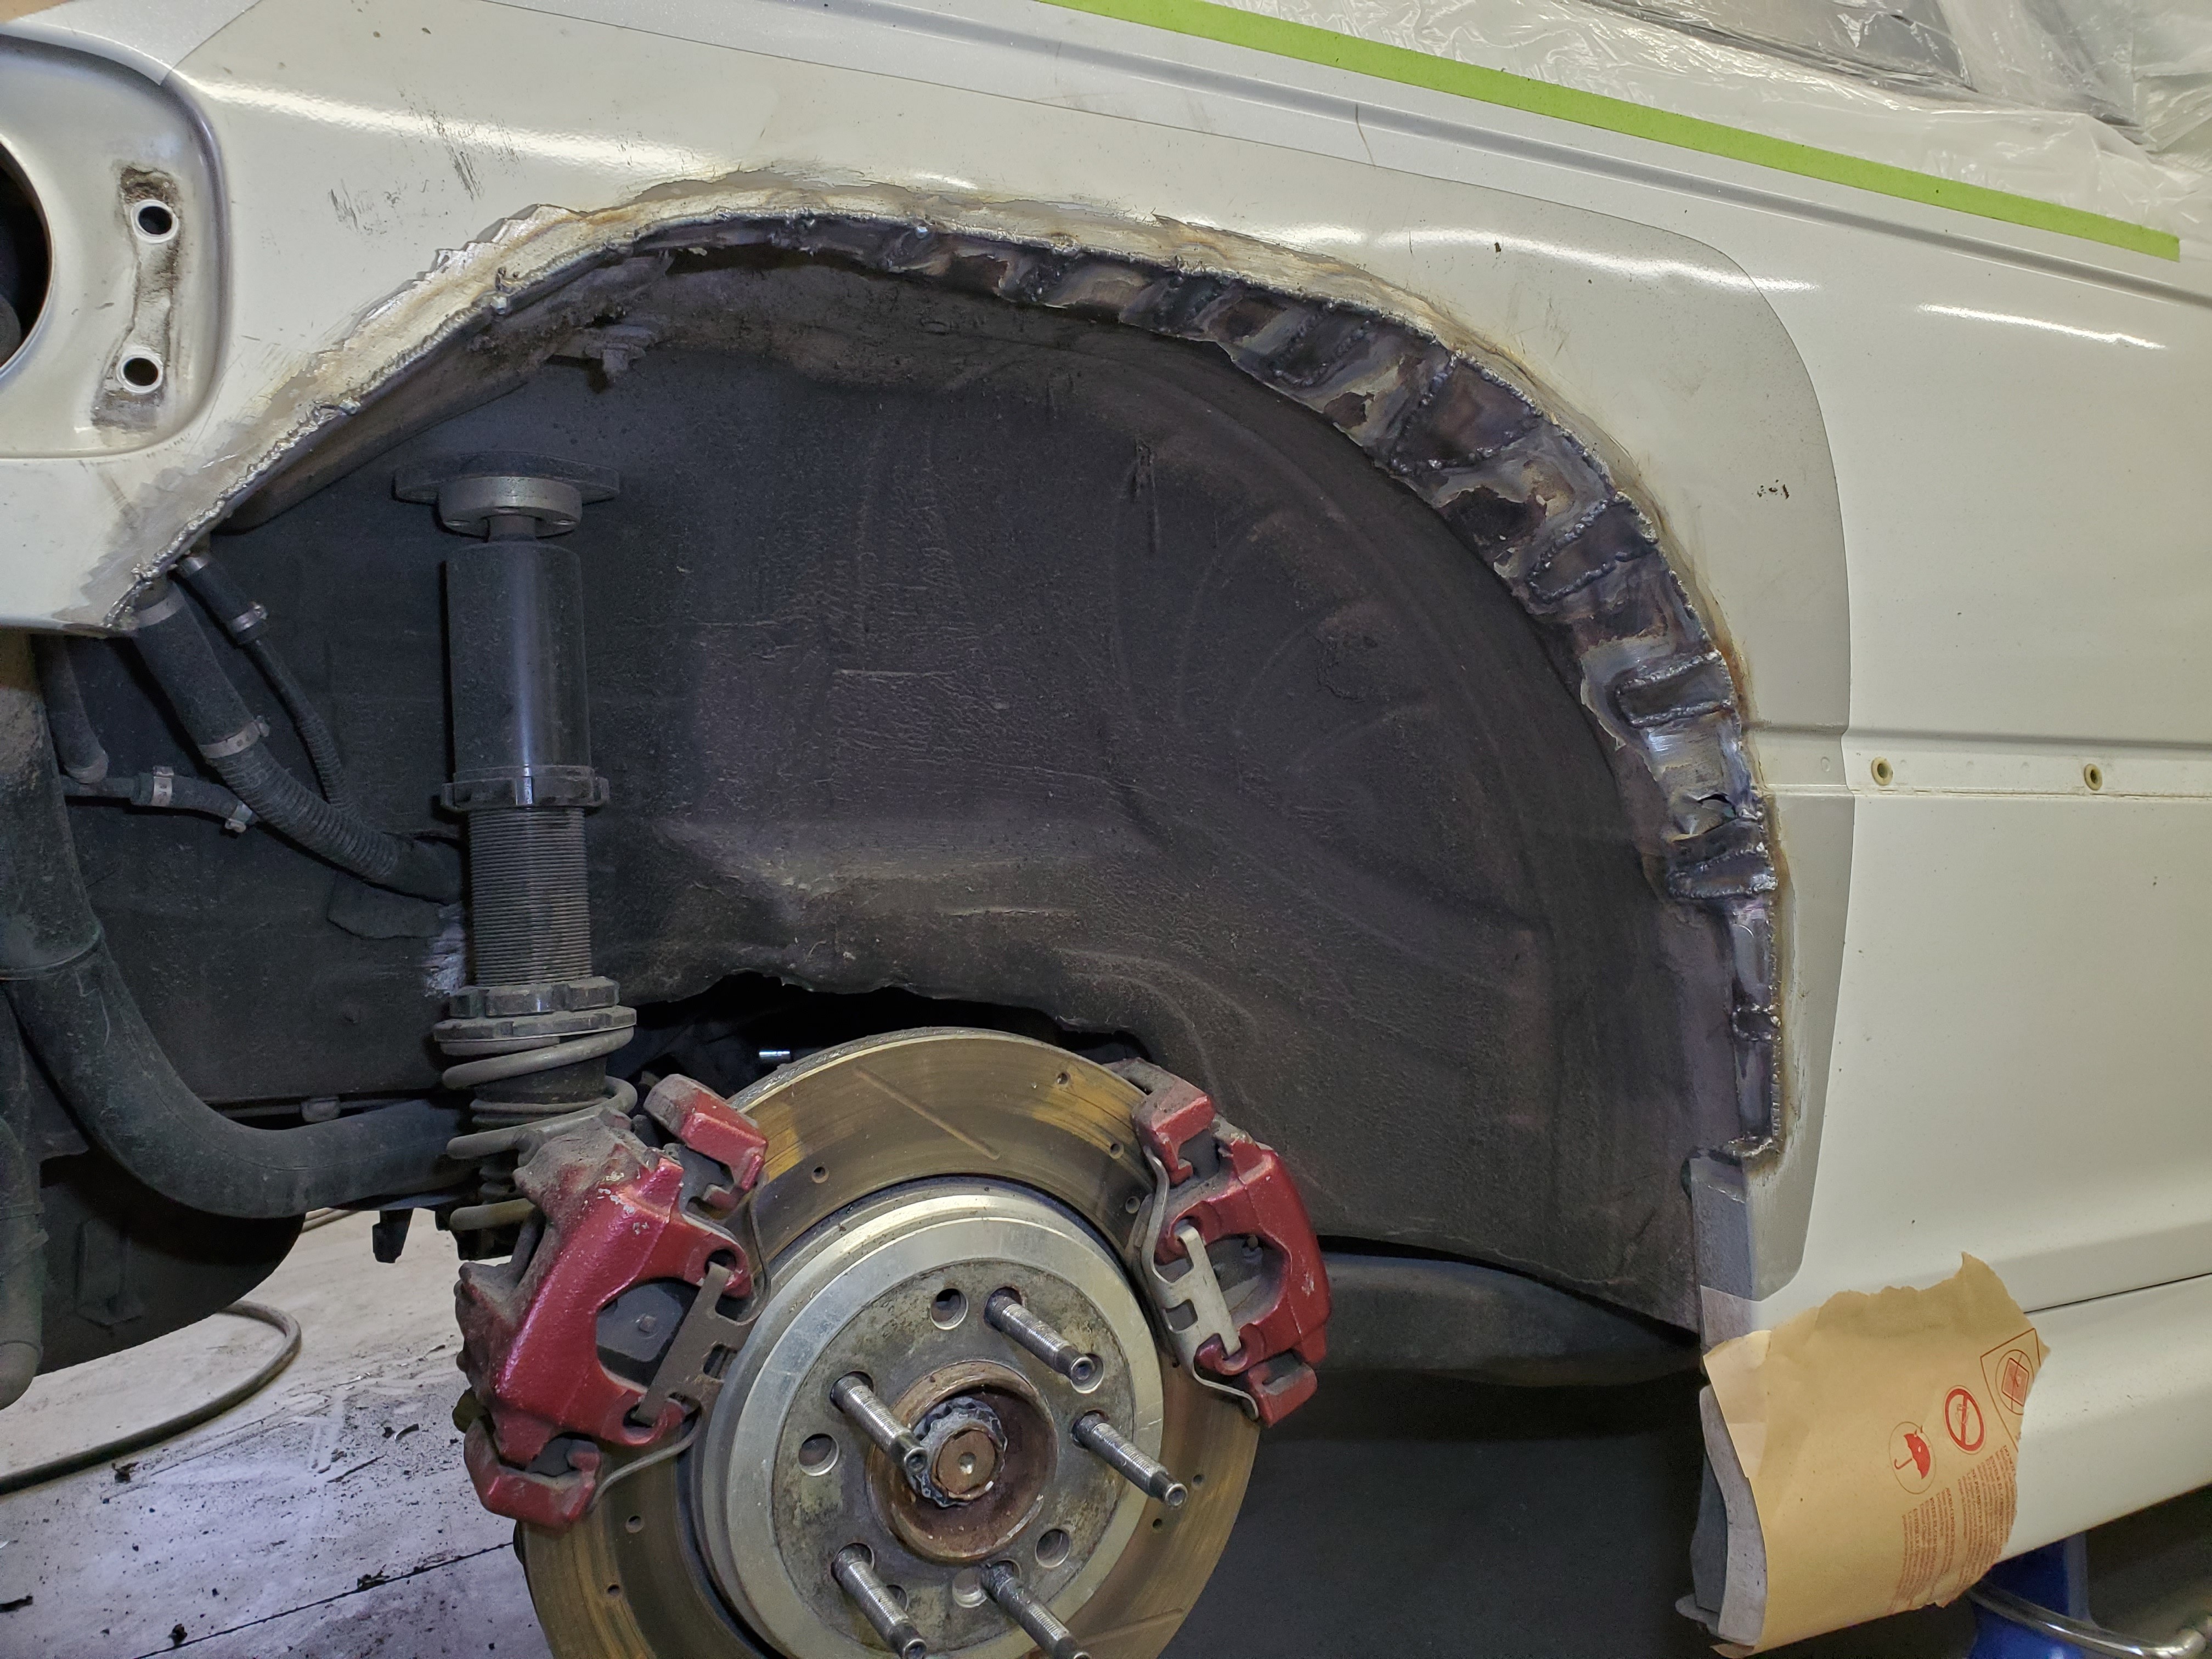
                            Bent up and welded the folds.

                            20200410223122.jpg

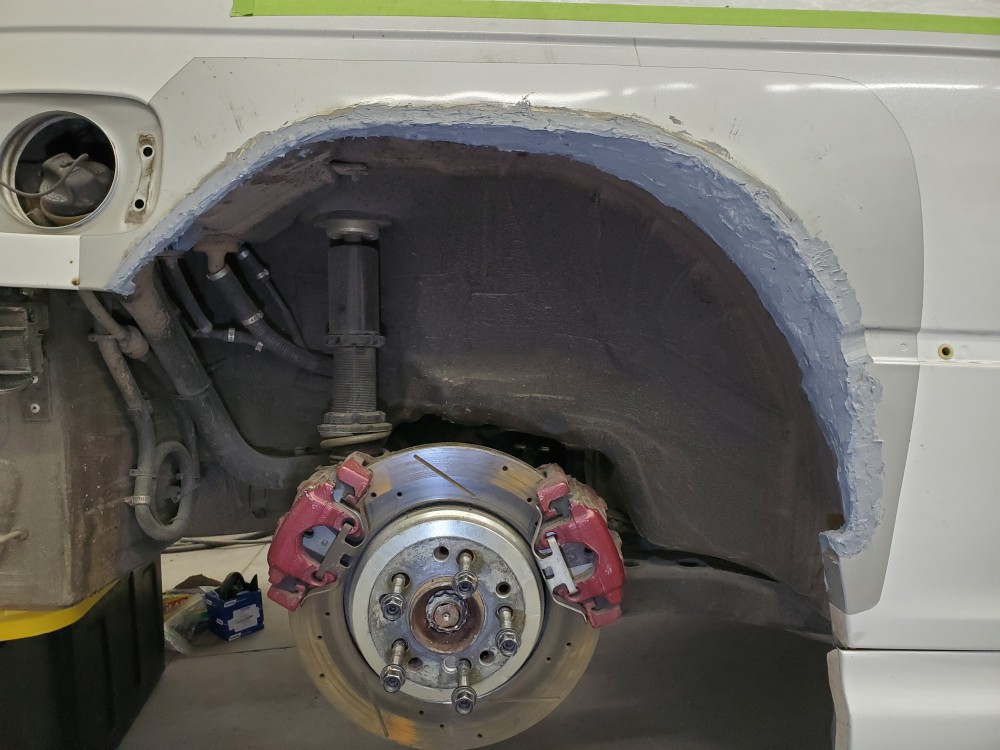
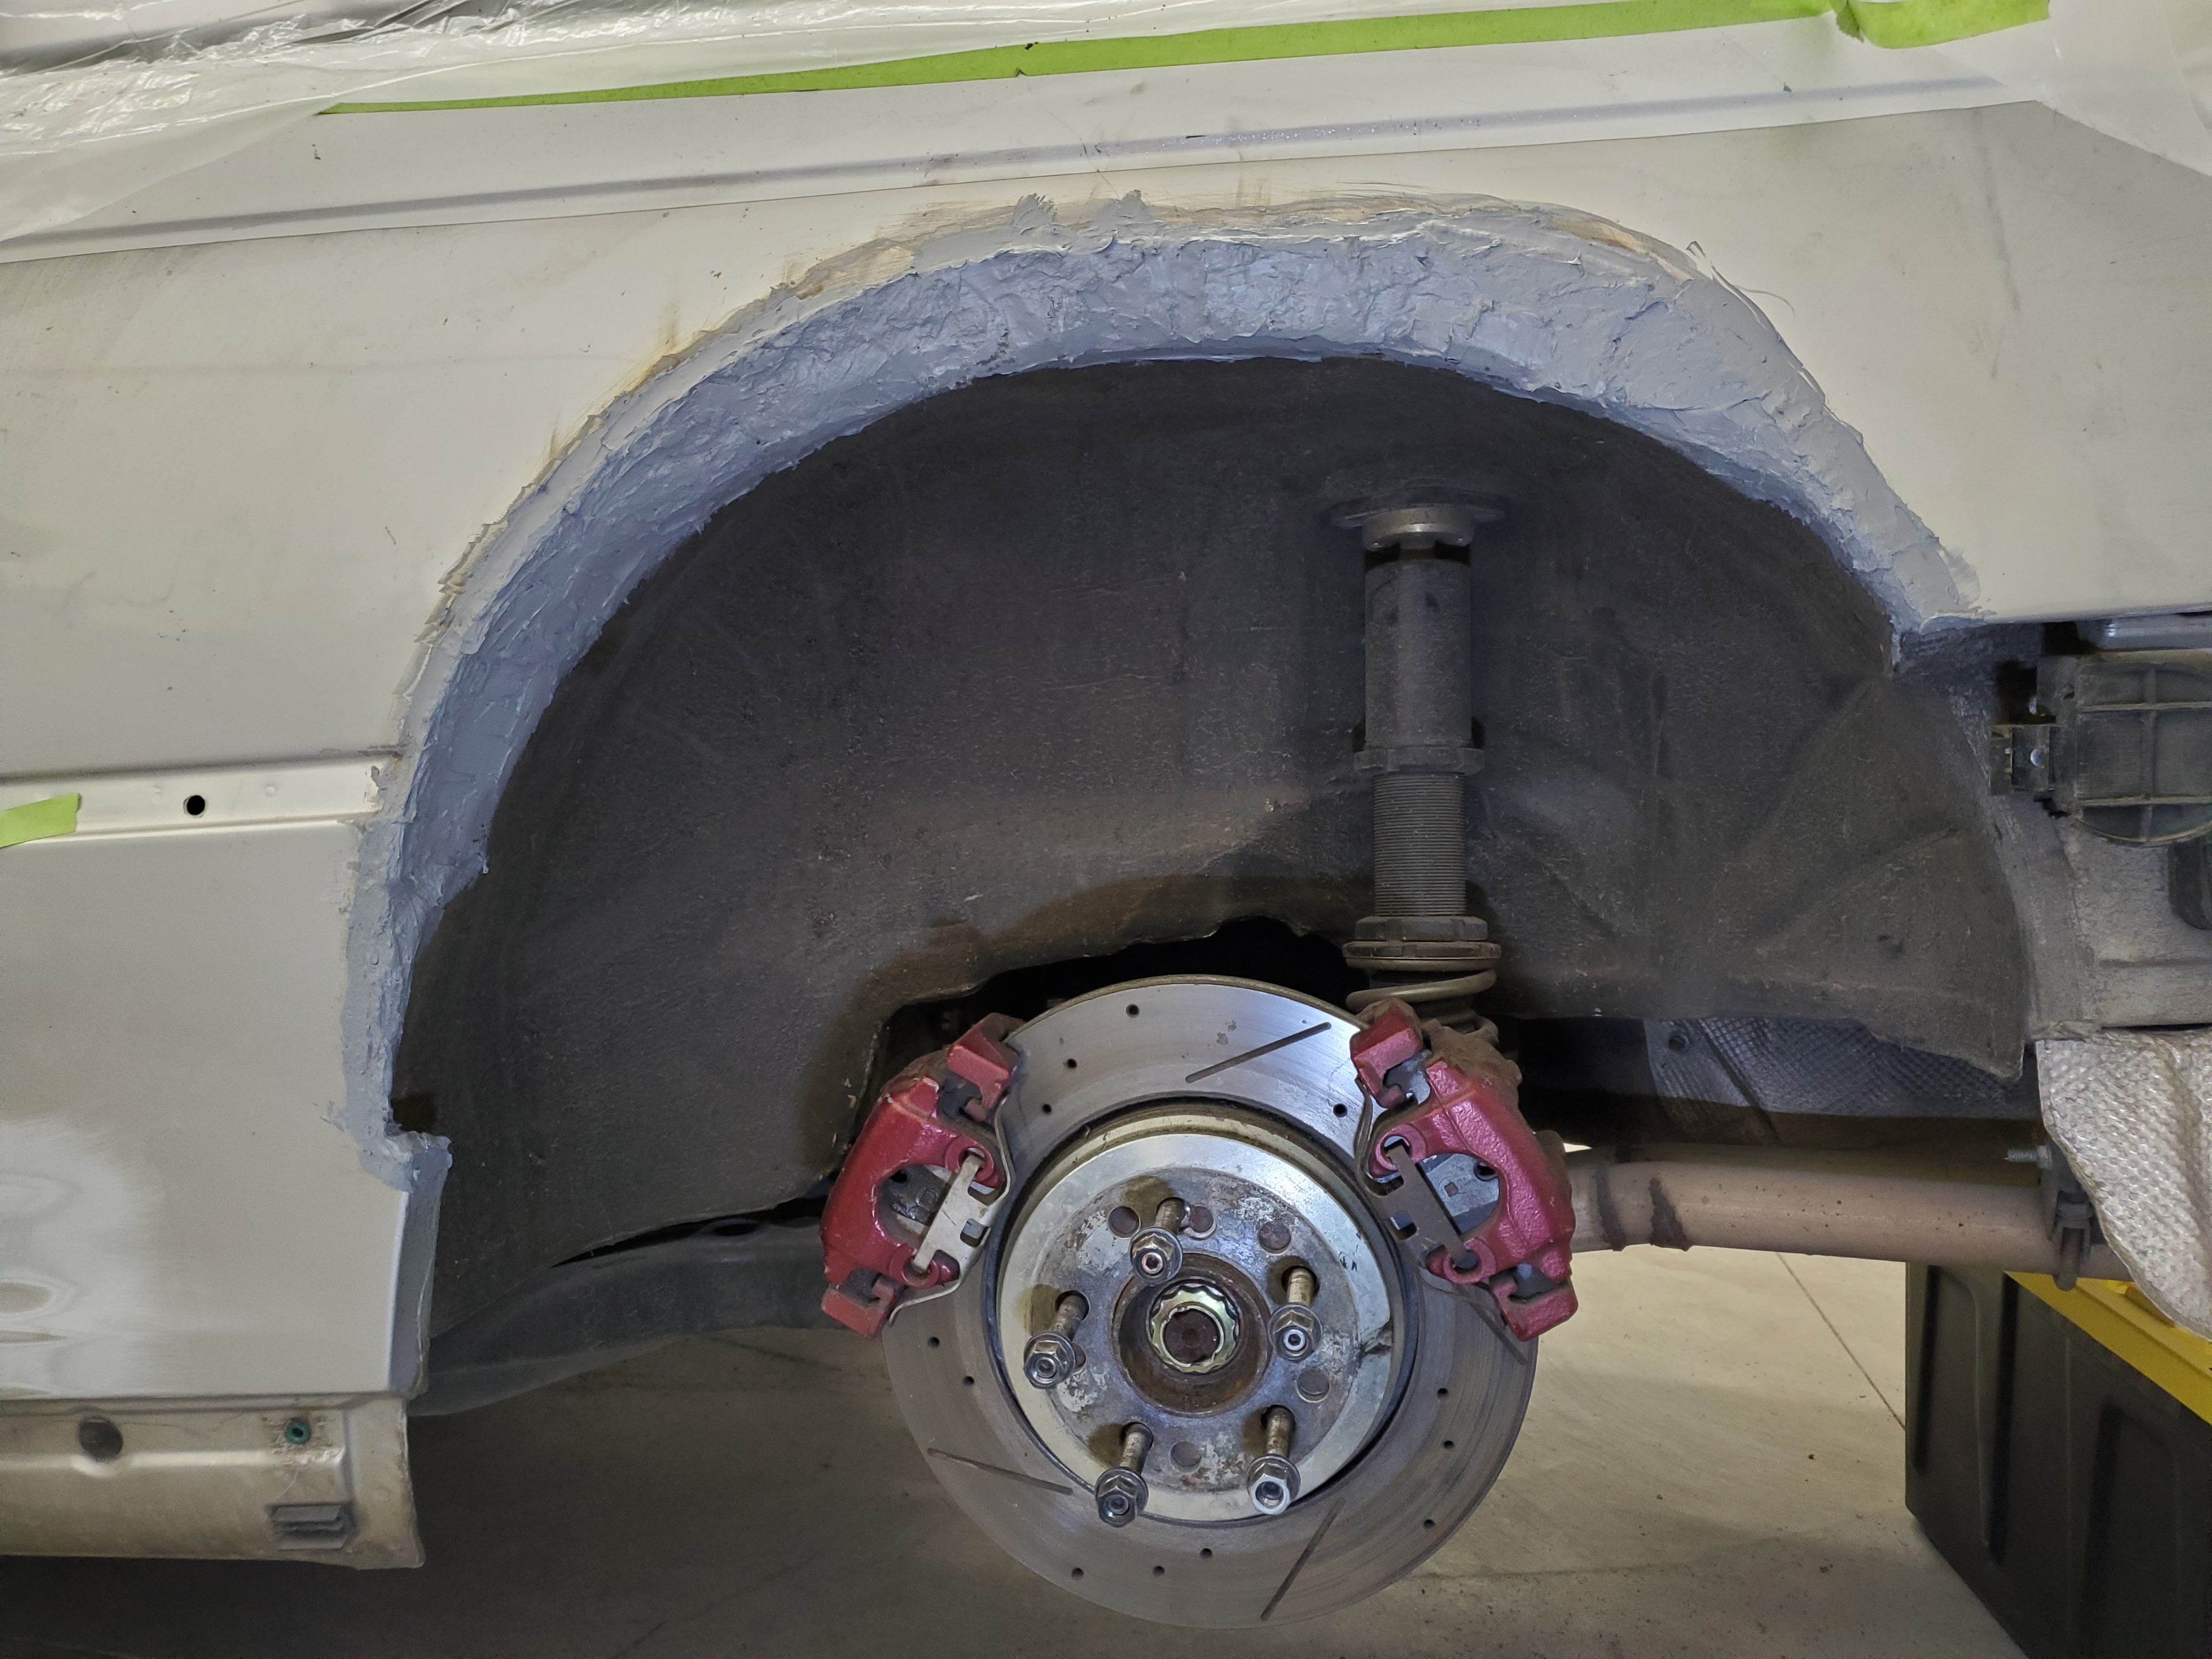
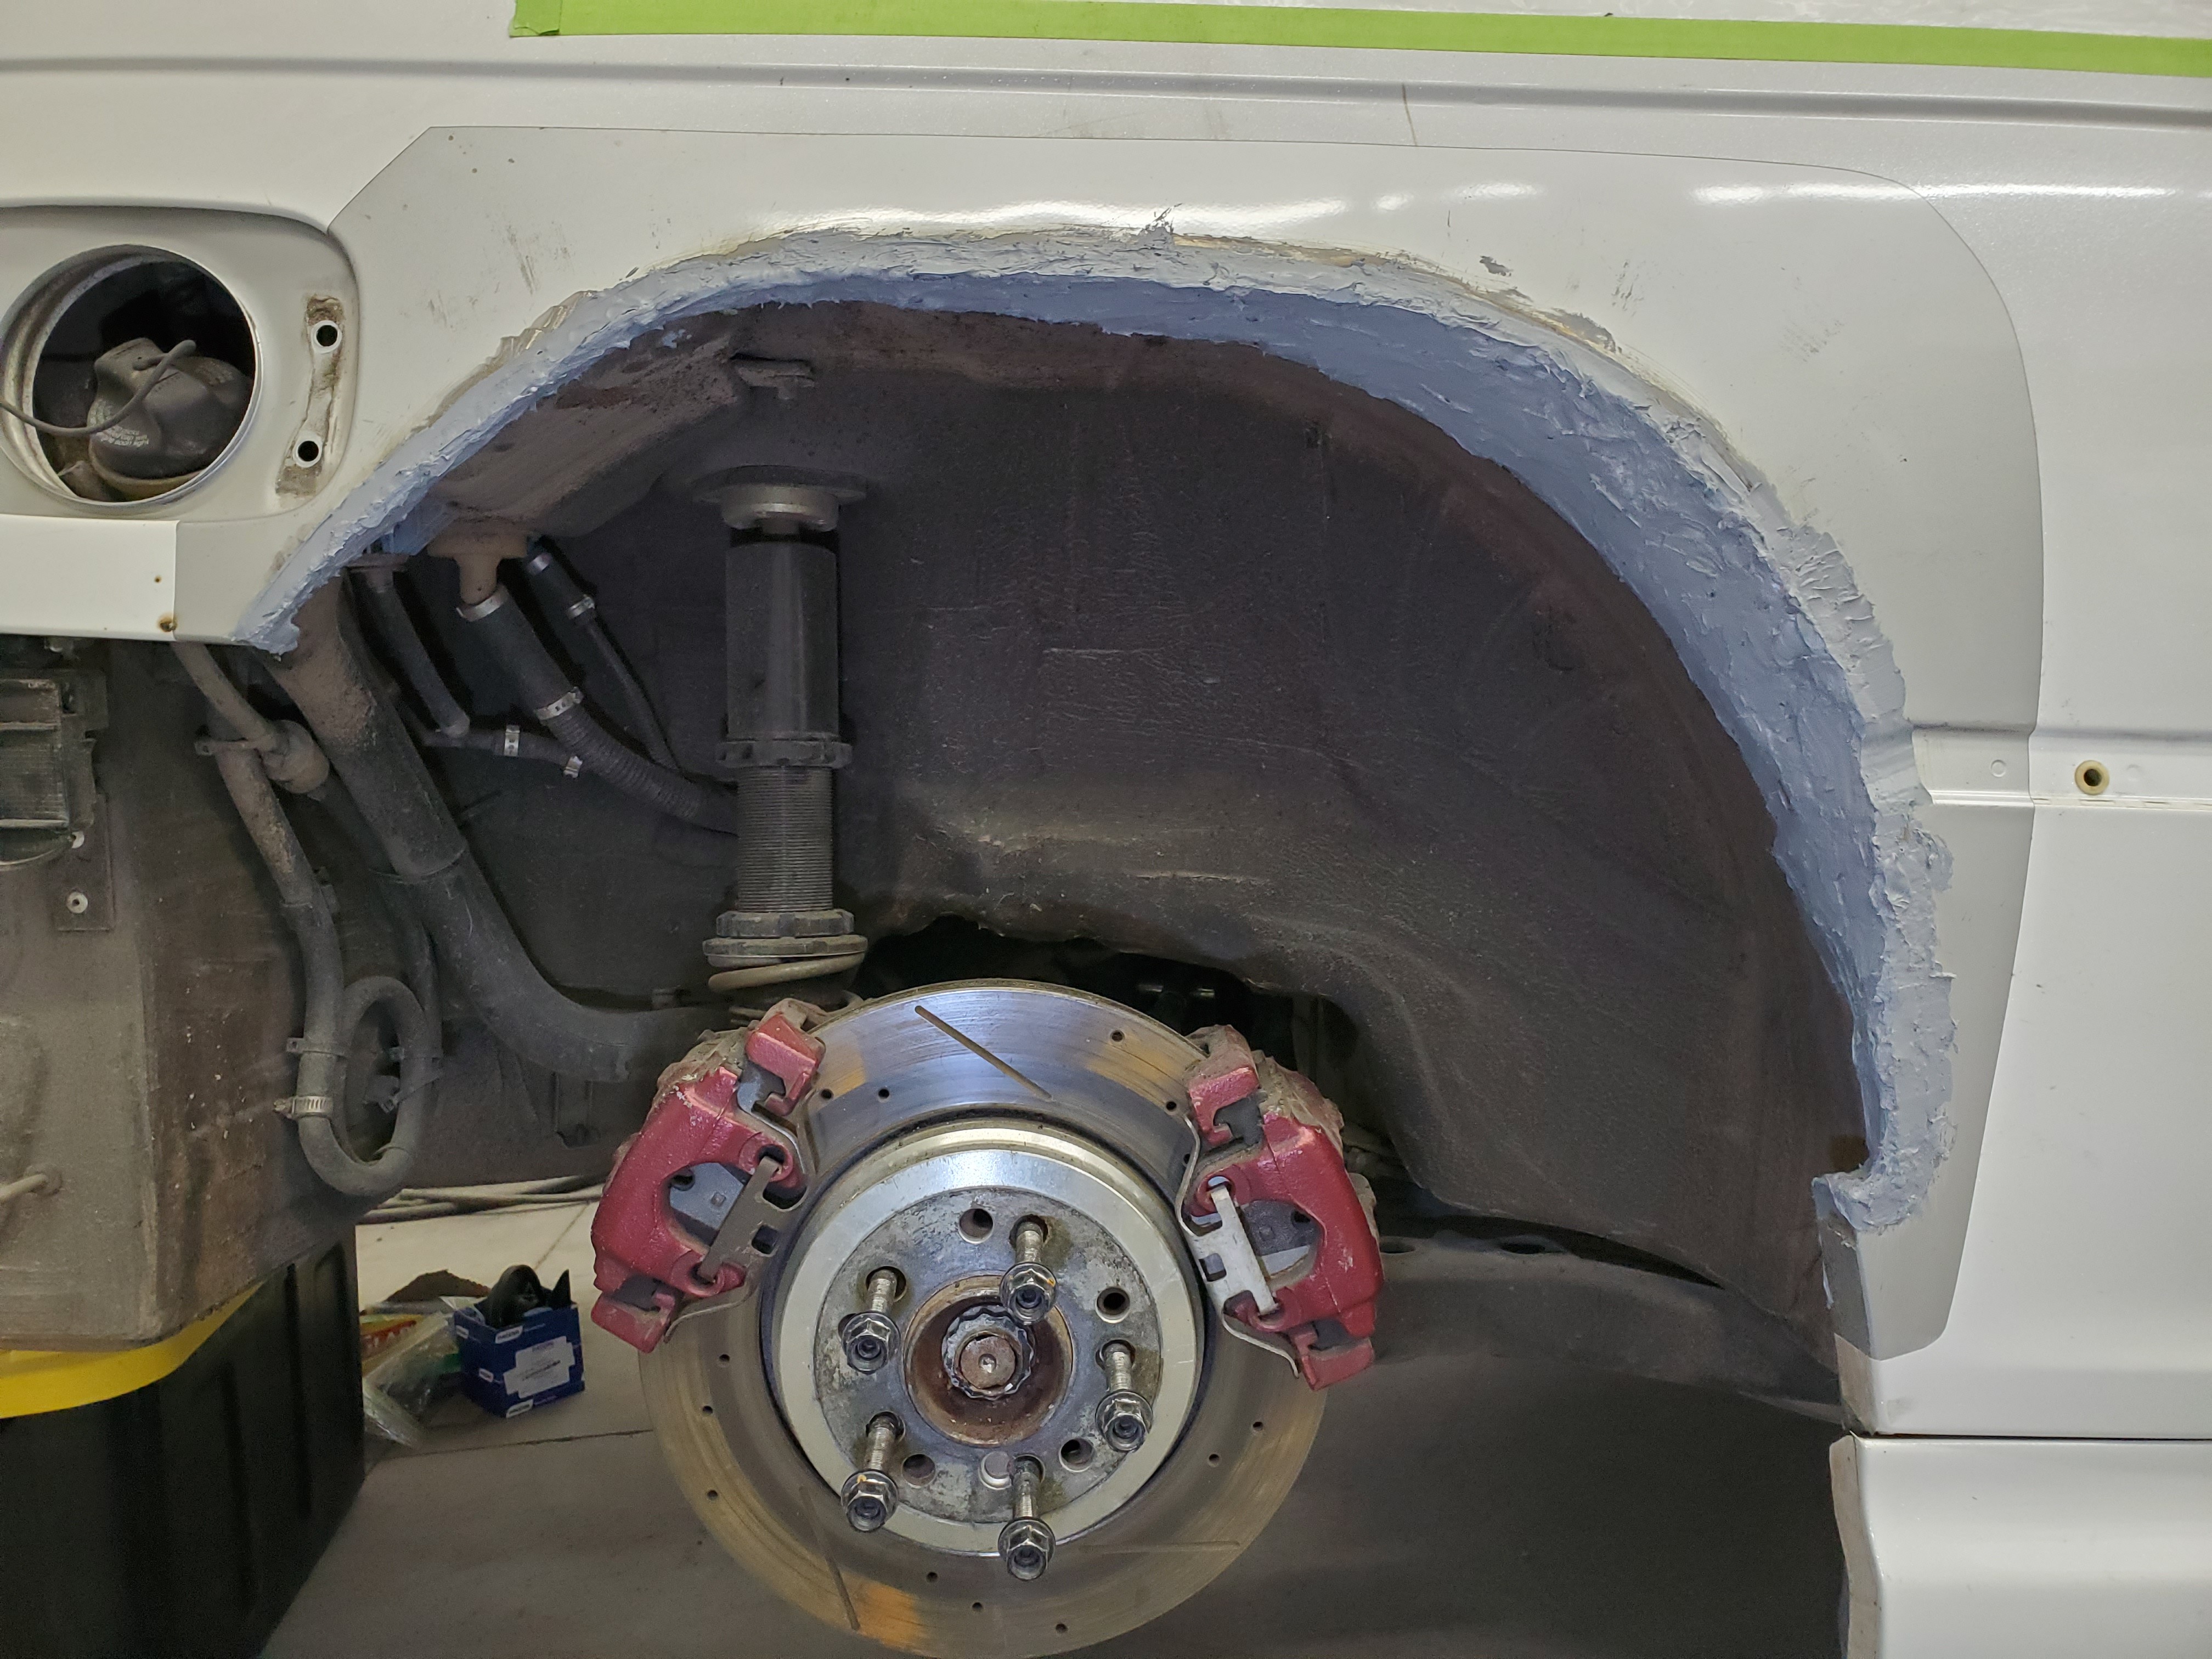
                            Then filled all the gaps.

                            20200411133207.jpg

                            20200410224538.jpg

                            Then moved on to the other side. Only 2 photos of this side.
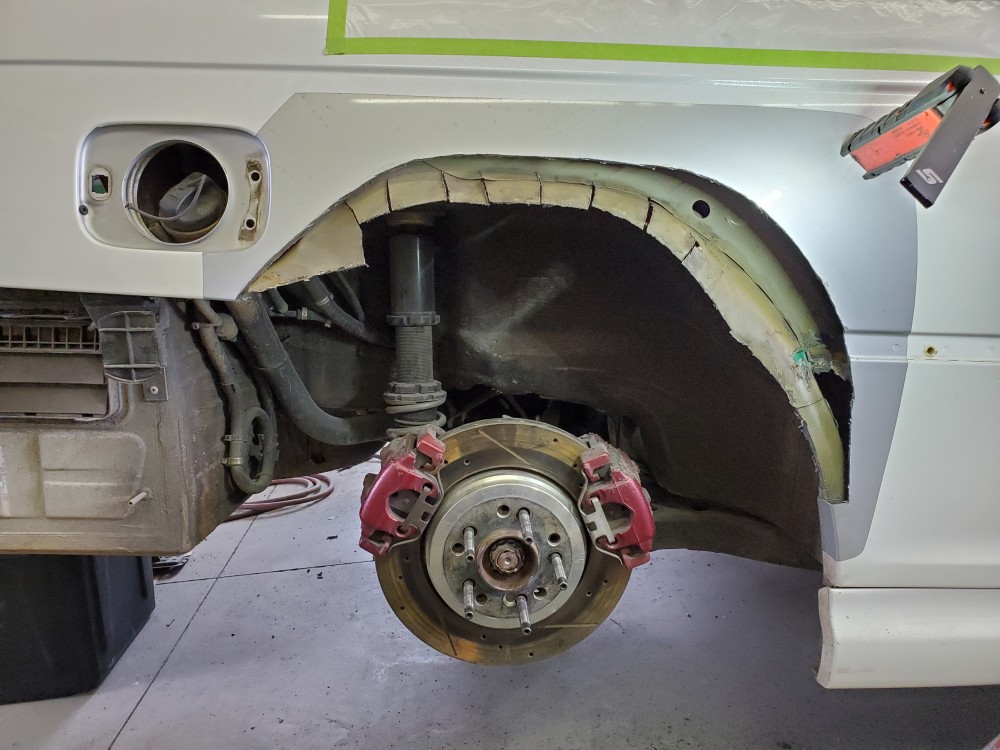
                            20200411150156.jpg

                            20200411174528.jpg

                            And finally finished off the day sealing them up with seam sealer.
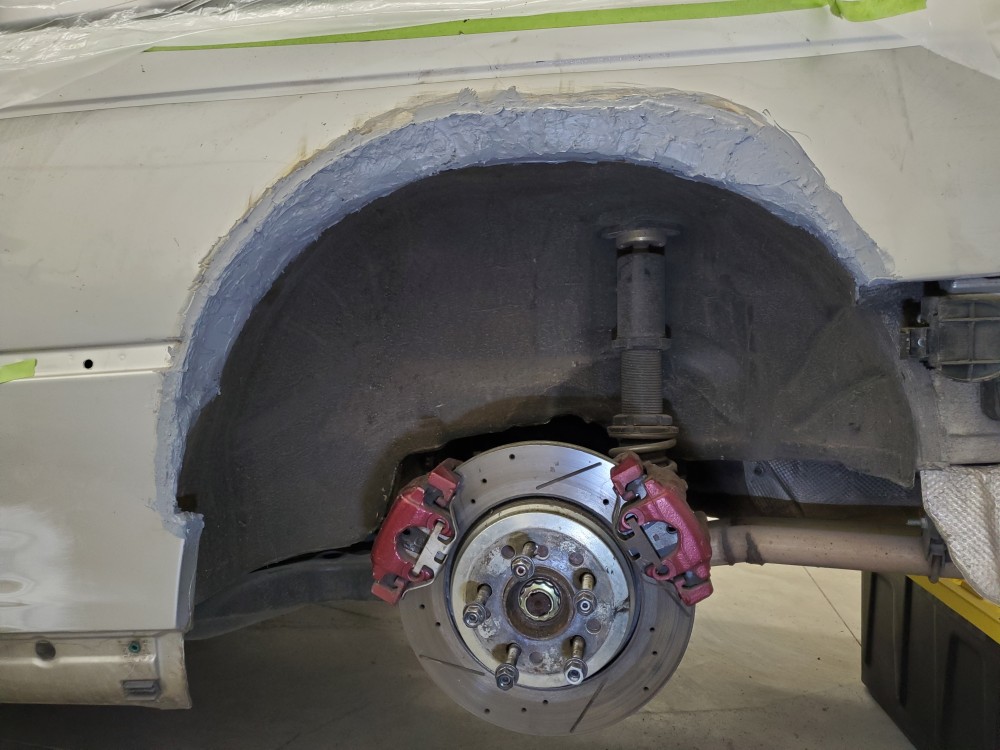
                            20200411192311.jpg

                            20200411192323.jpg

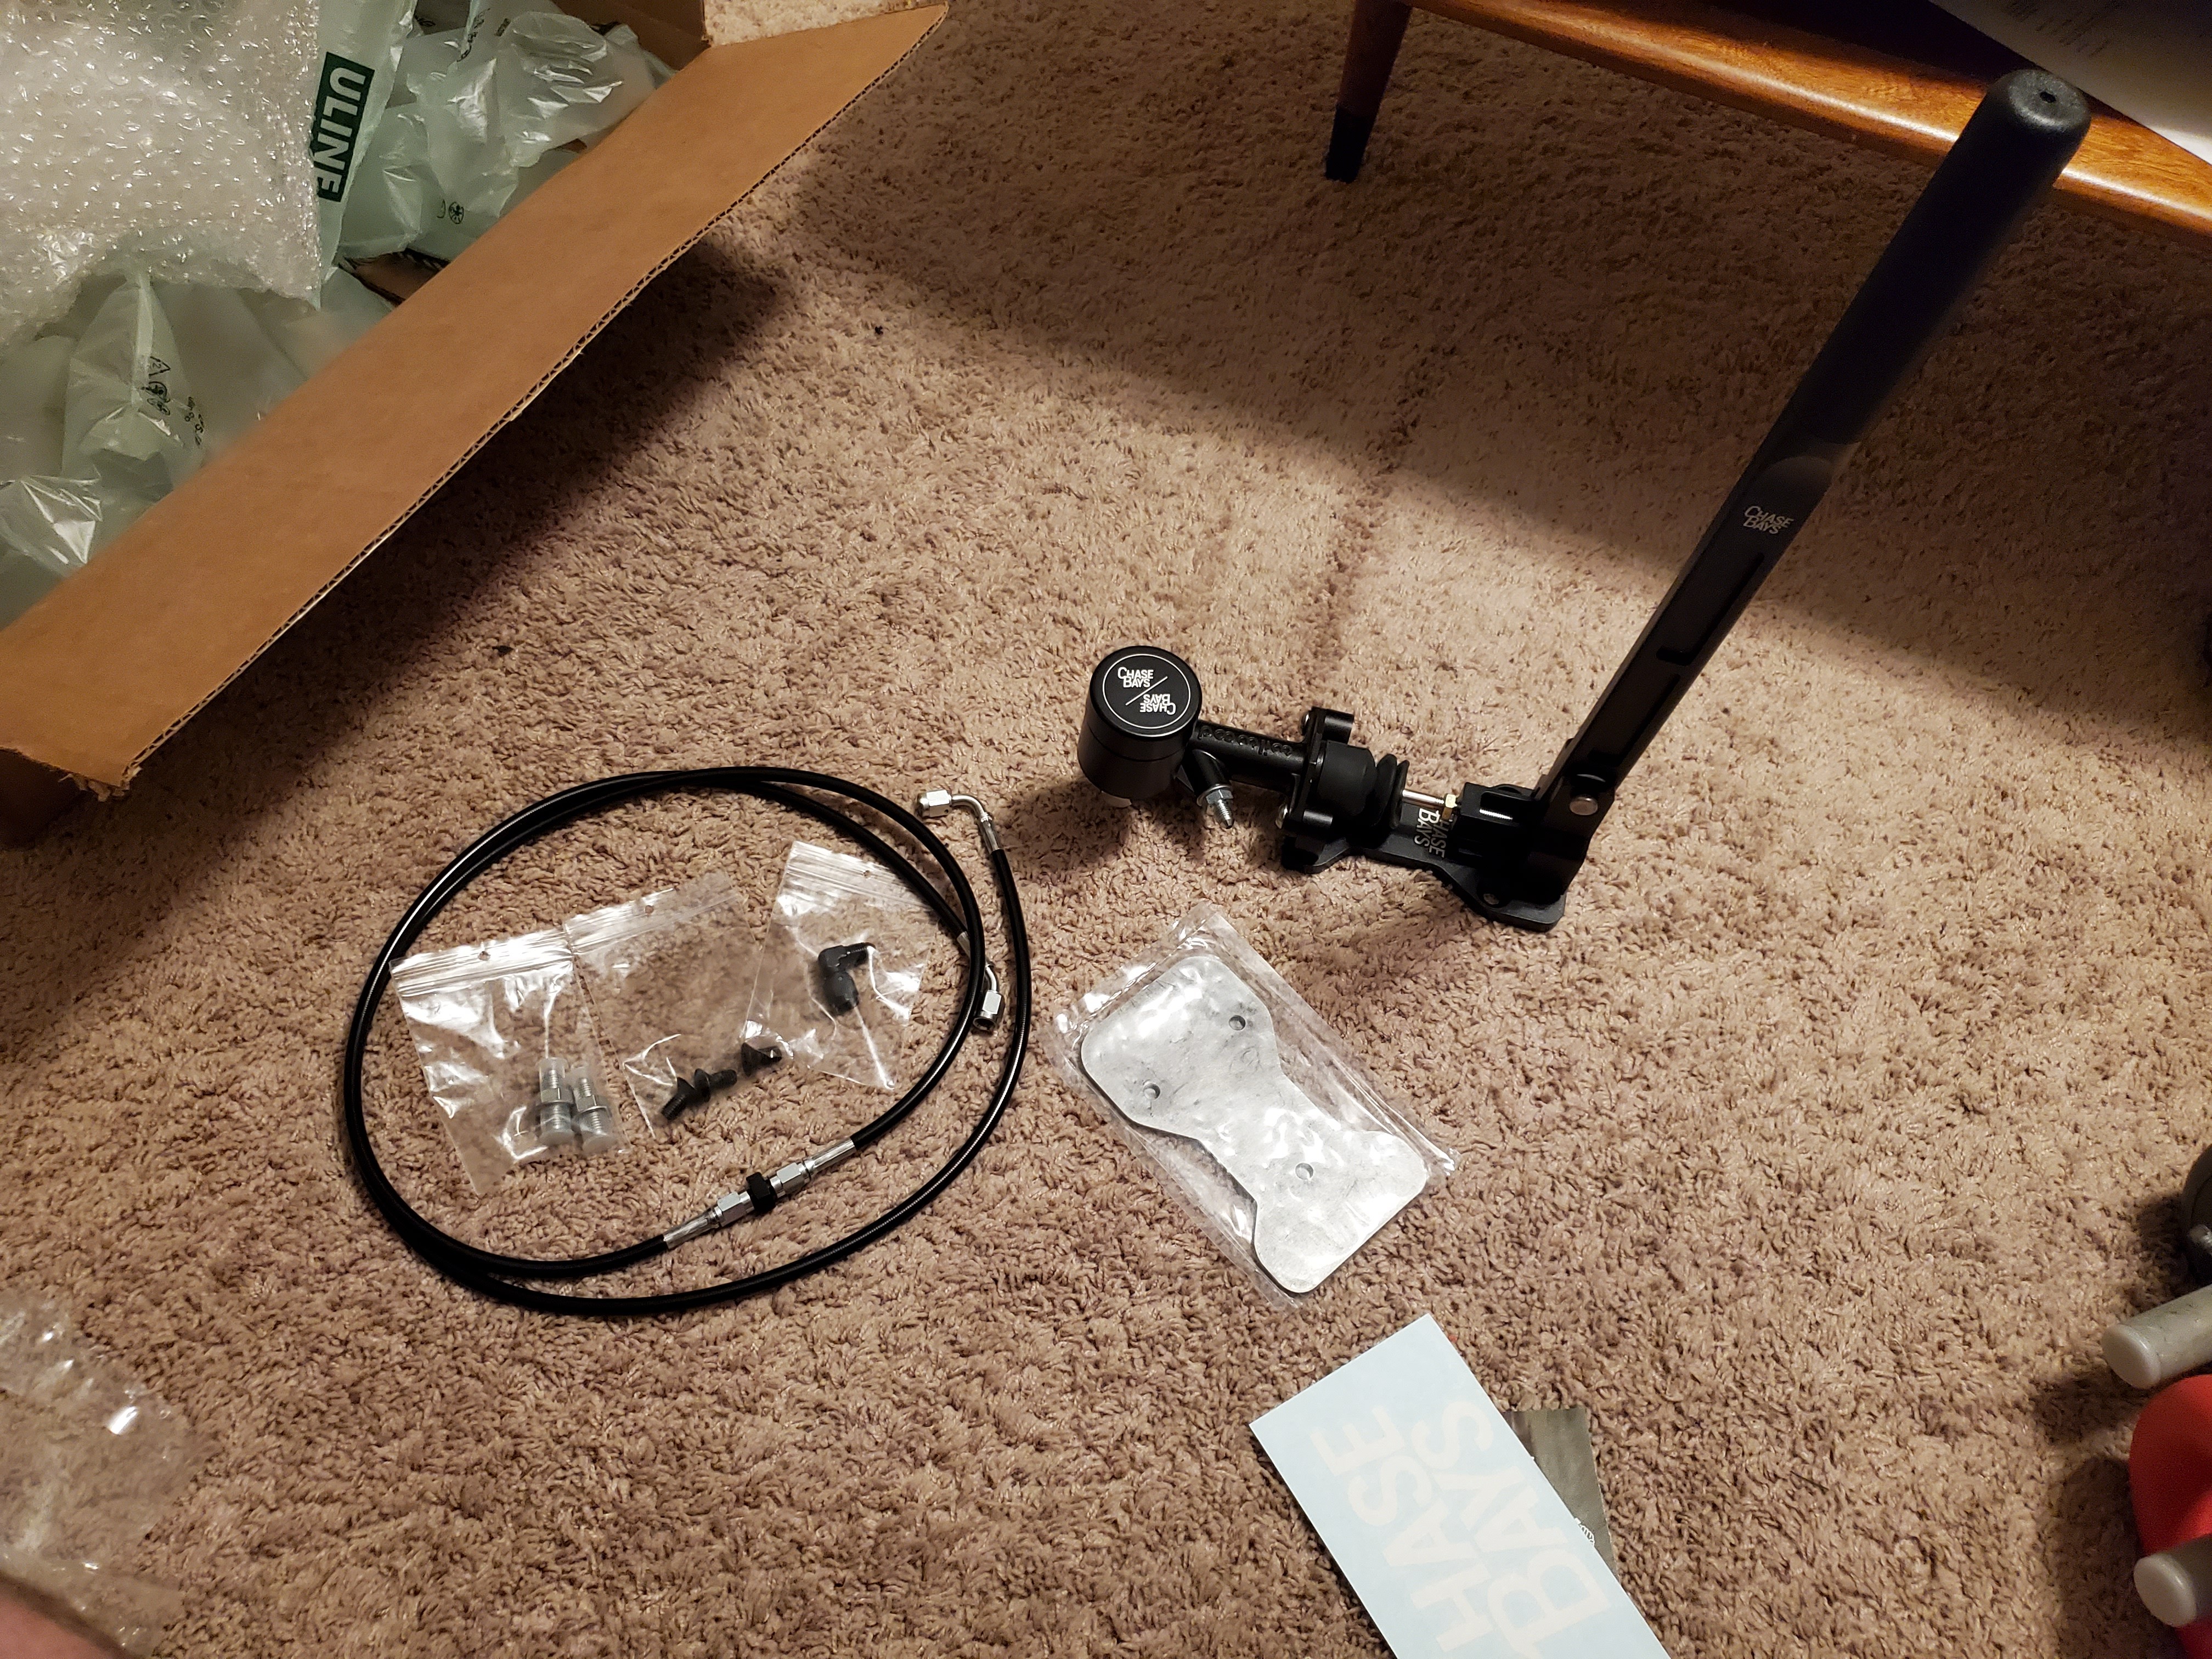
                            Also the new chase bays handbrake set up arrived 😁
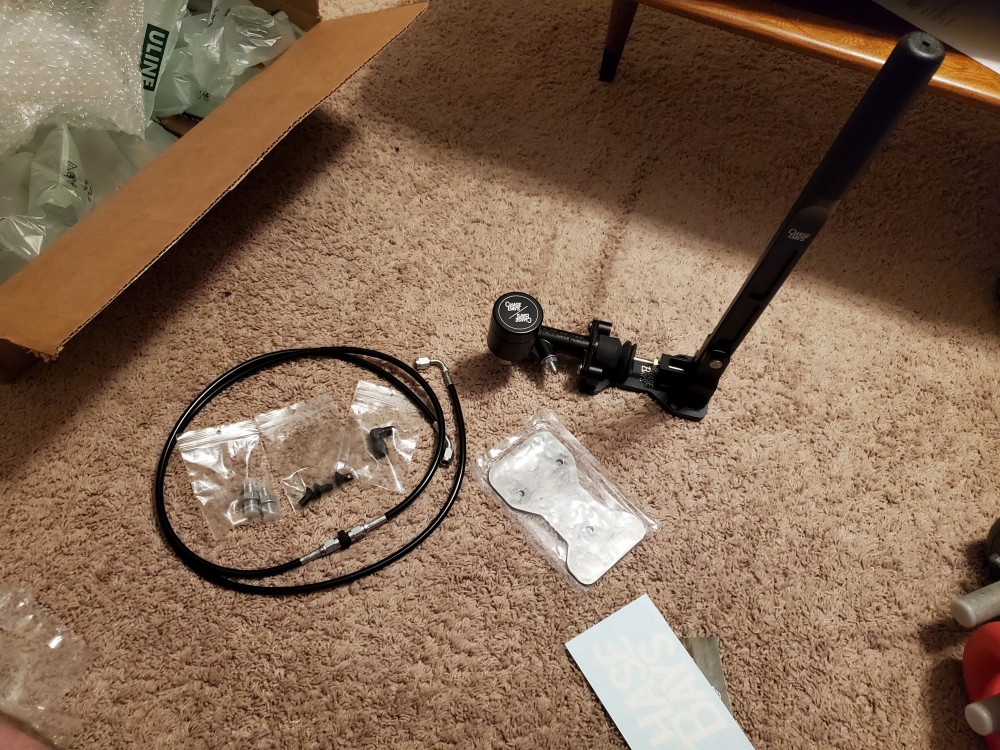
                            20200411210717.jpg

                            Thats it for now, next up will be undercoating the wheel wells and hopefully mocking up the overs.

                            1 Reply Last reply
                            3
                            • B
                              B
                              B C
                              wrote on last edited by
                              #321

                              love the updates man! Cant wait to see the overfenders on and wrapped

                              1 Reply Last reply
                              1
                              • TkuhnT
                                TkuhnT
                                Tkuhn
                                wrote on last edited by
                                #322

                                B C said:

                                love the updates man! Cant wait to see the overfenders on and wrapped

                                Thanks! Staying as active as I can and me too haha

                                1 Reply Last reply
                                0
                                • TkuhnT
                                  TkuhnT
                                  Tkuhn
                                  wrote on last edited by
                                  #323

                                  Not an update but excited to have another part come in!

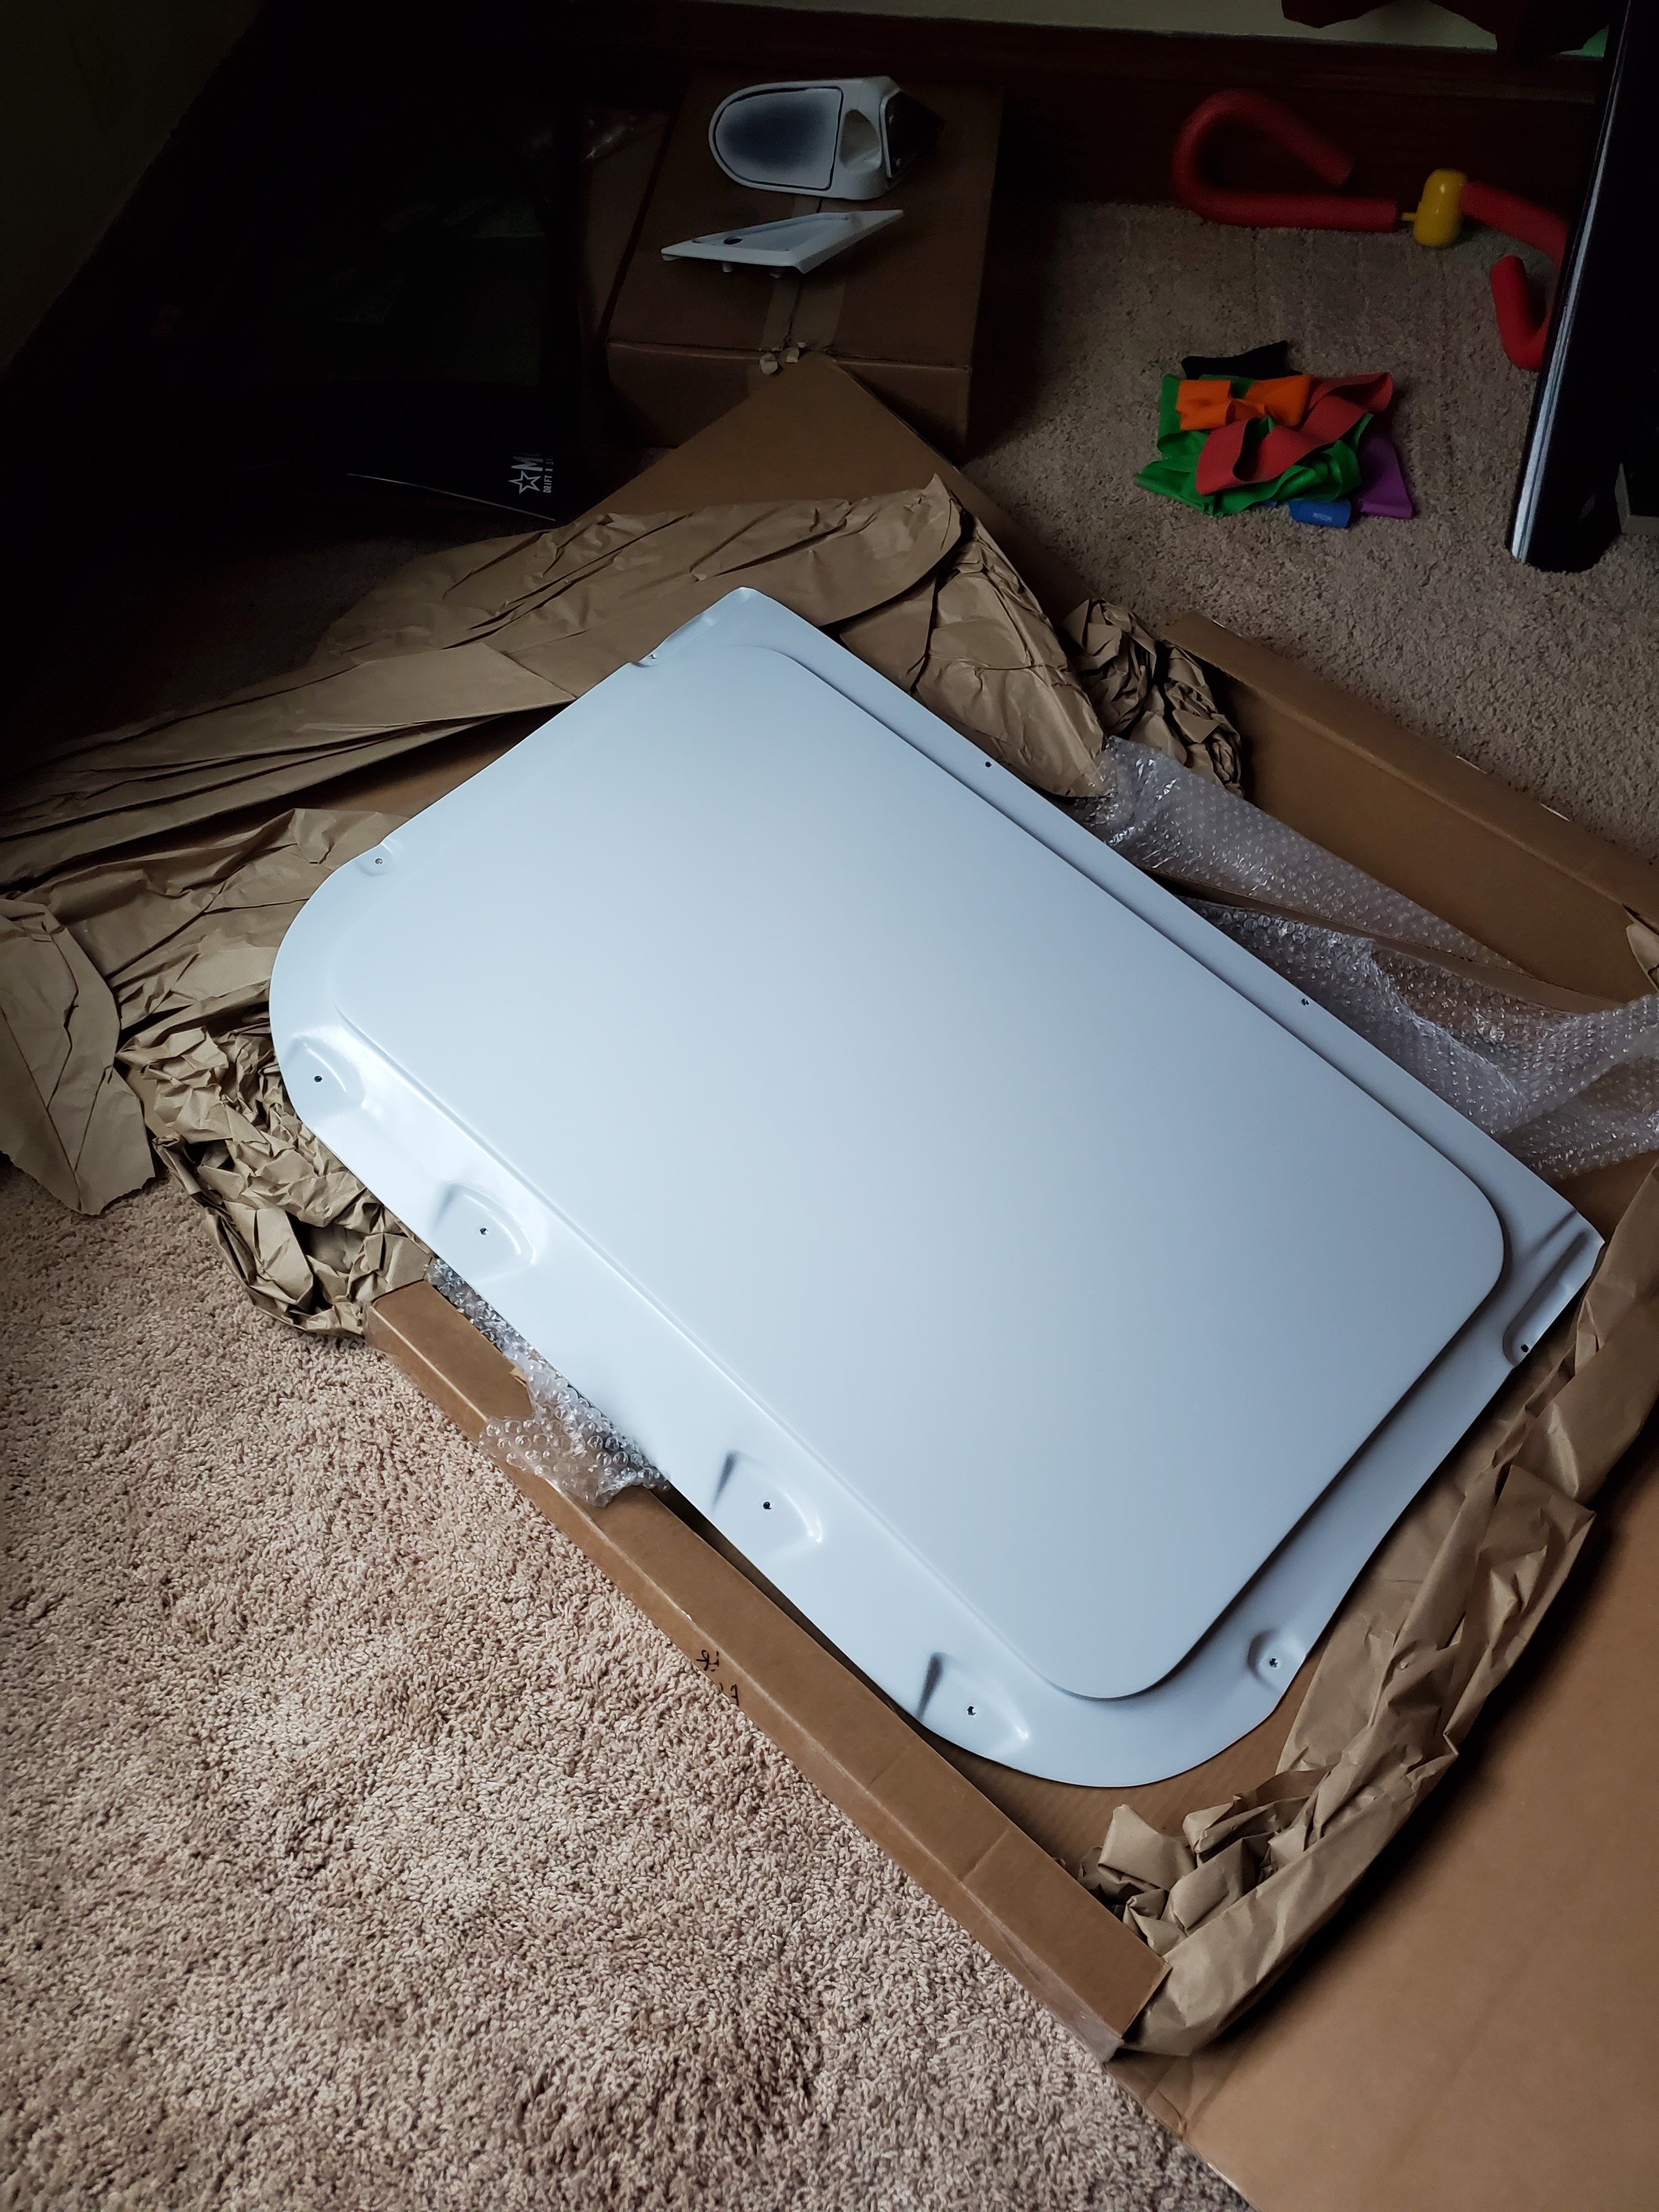
                                  S2rTuning sunroof delete!
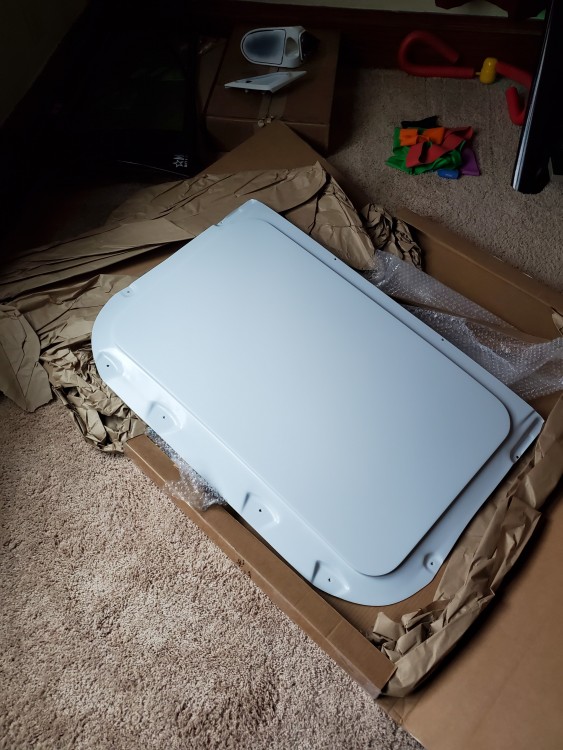
                                  20200415171500.jpg

                                  Definitely seems like another quality piece to add to the car. Excited to see how the fit is this weekend. Really love that this is the only one I have found on the market that uses the existing mounting holes from the oem cassette to mount. 

                                  Fingers crossed that it fits well!

                                  1 Reply Last reply
                                  1
                                  • TkuhnT
                                    TkuhnT
                                    Tkuhn
                                    wrote on last edited by
                                    #324

                                    UPDATE 

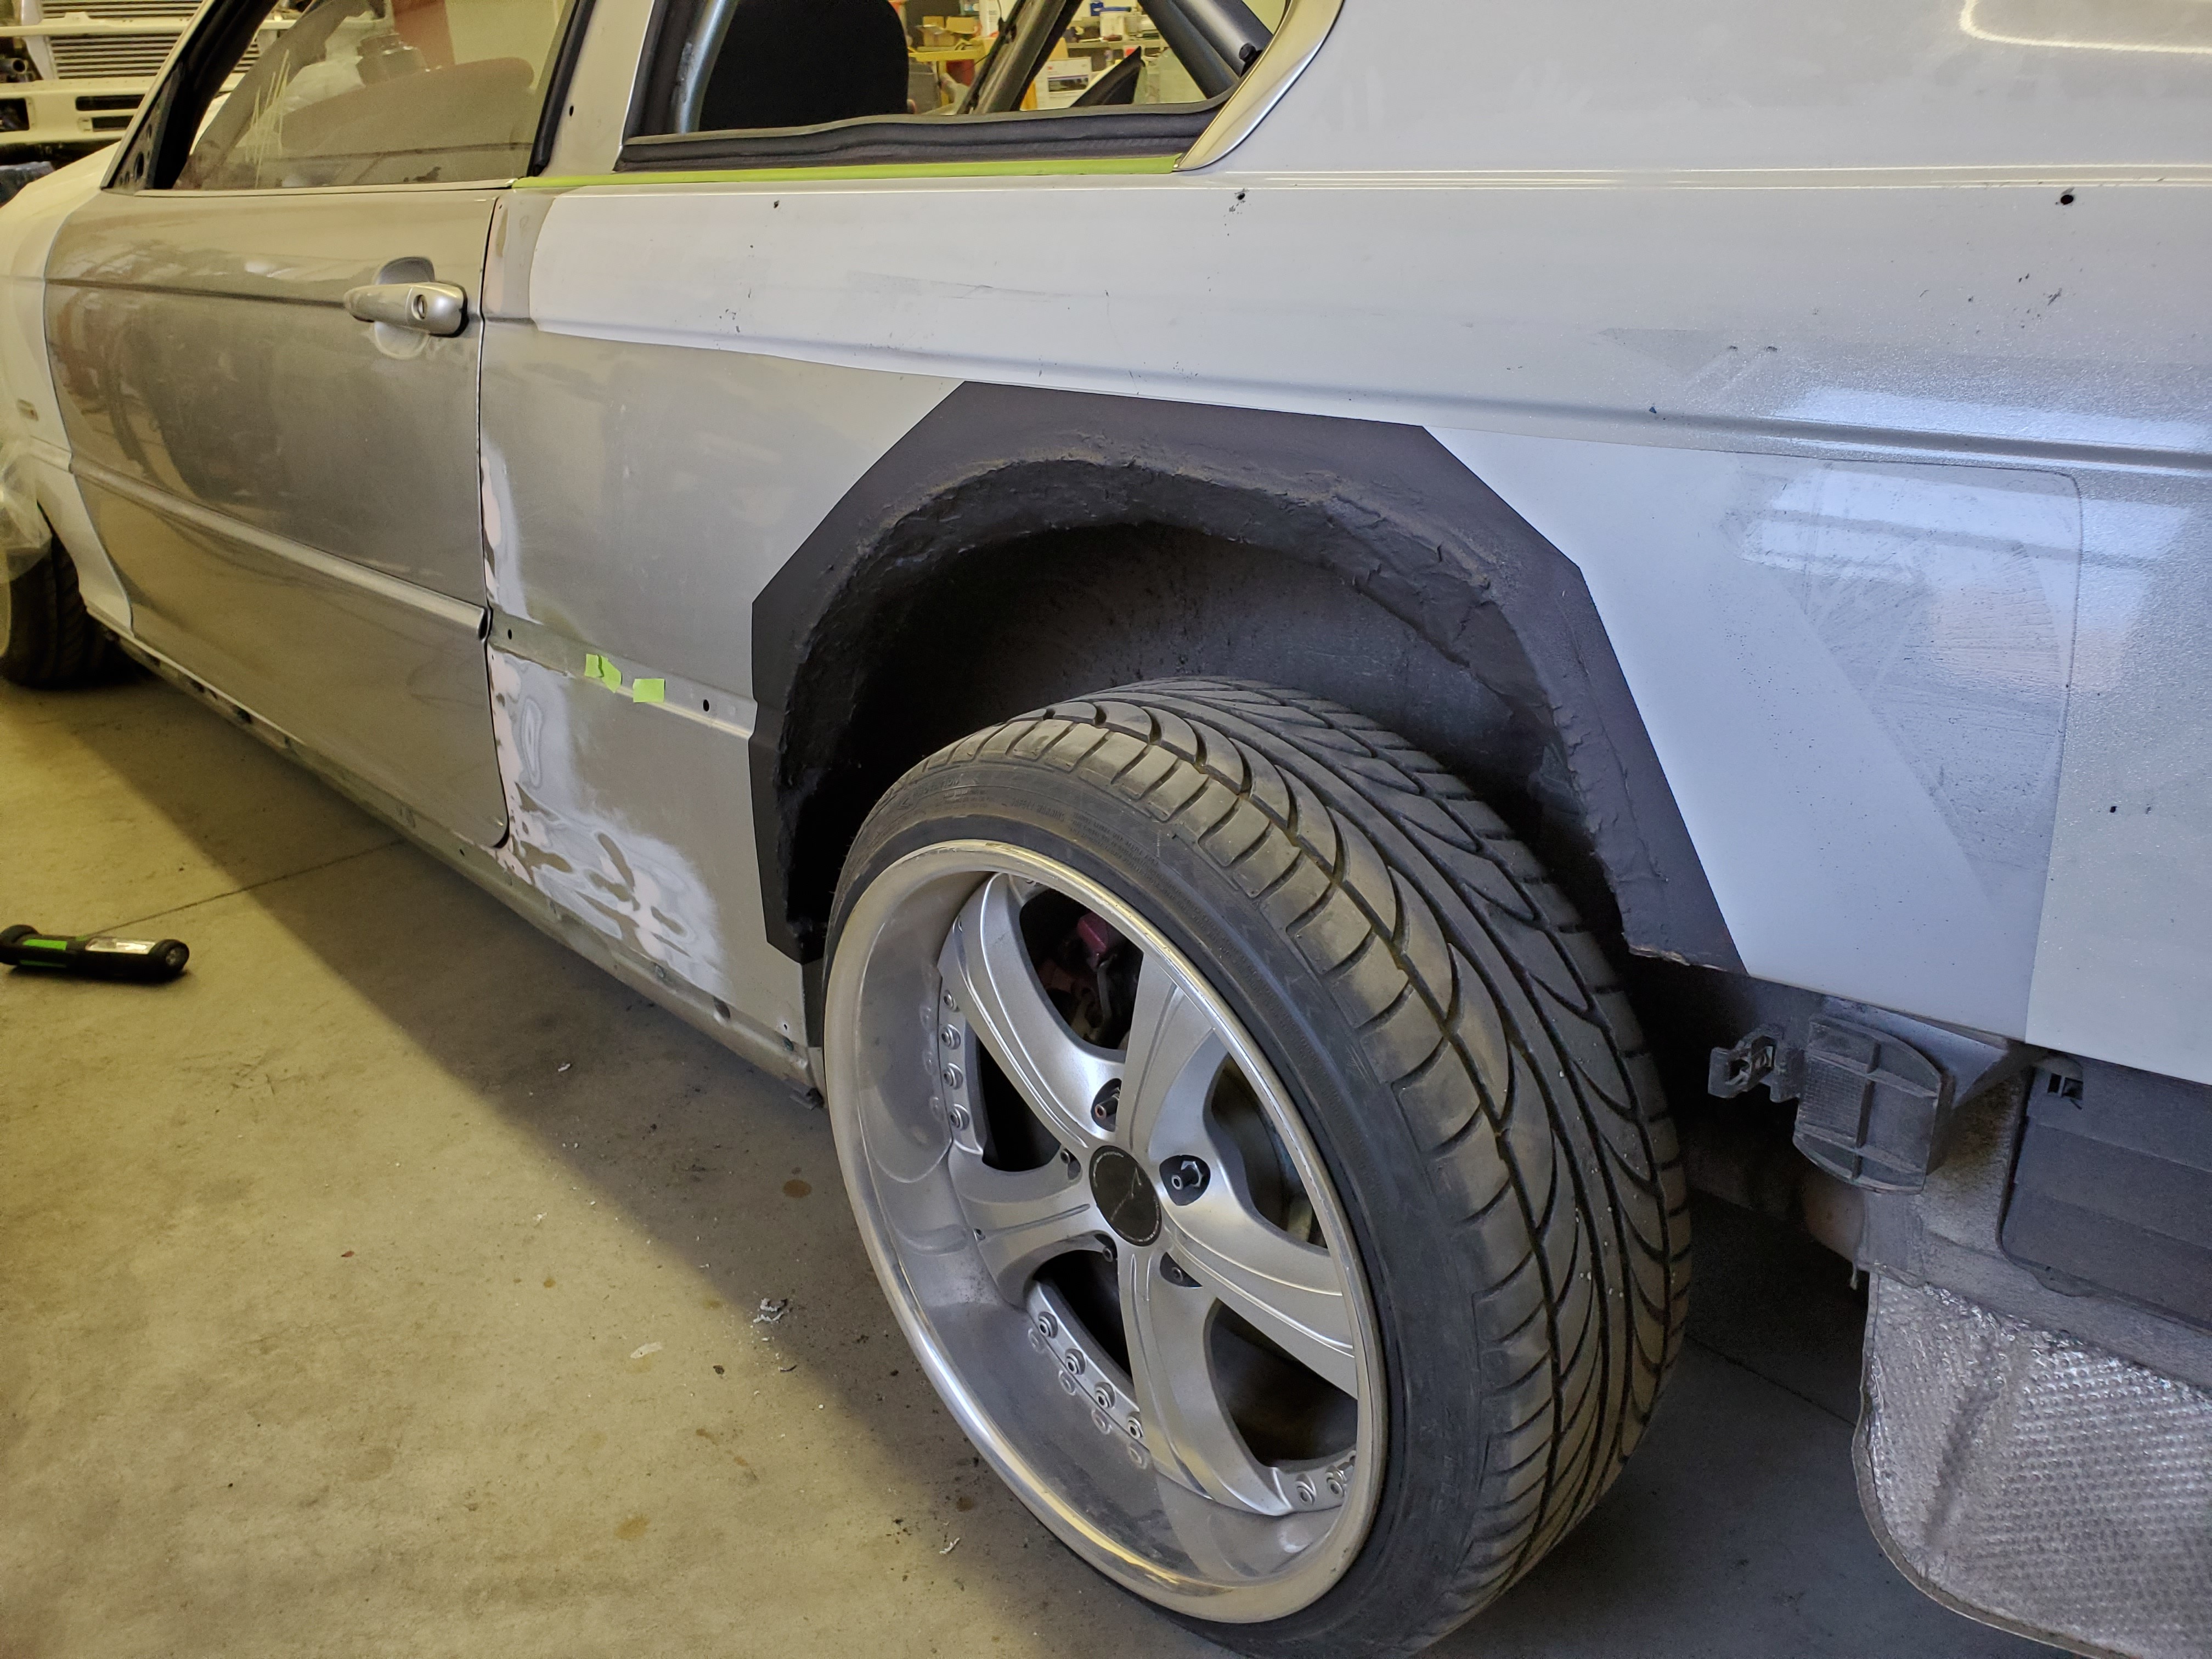
                                    Began the weekend by getting the quarters undercoated. 
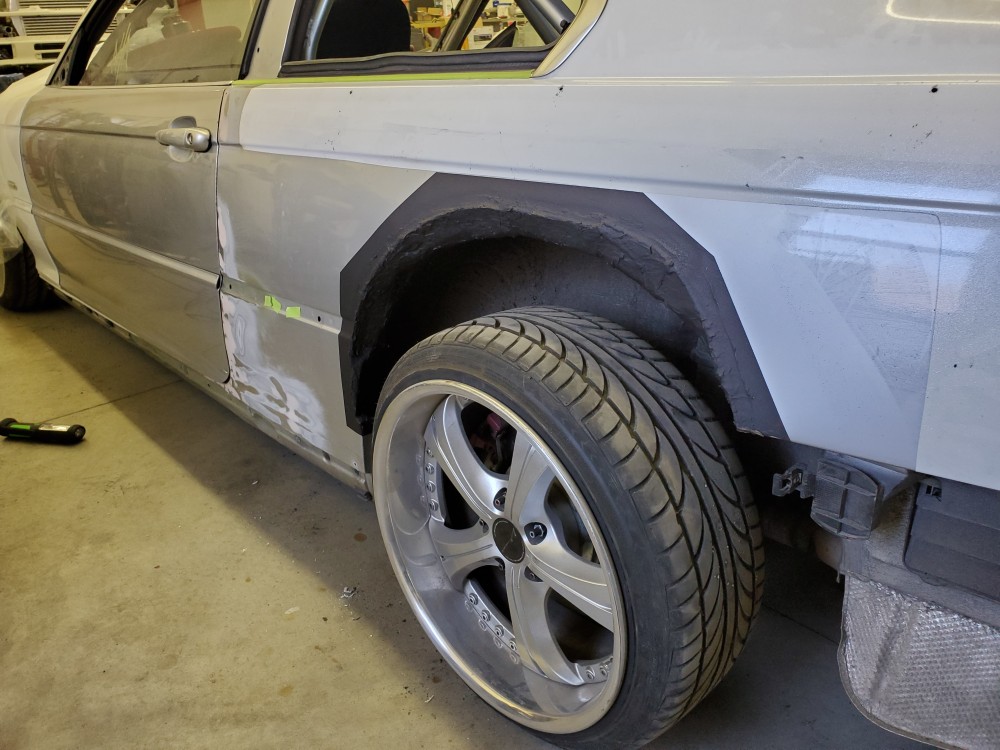
                                    20200418154628.jpg

                                    20200418171346.jpg

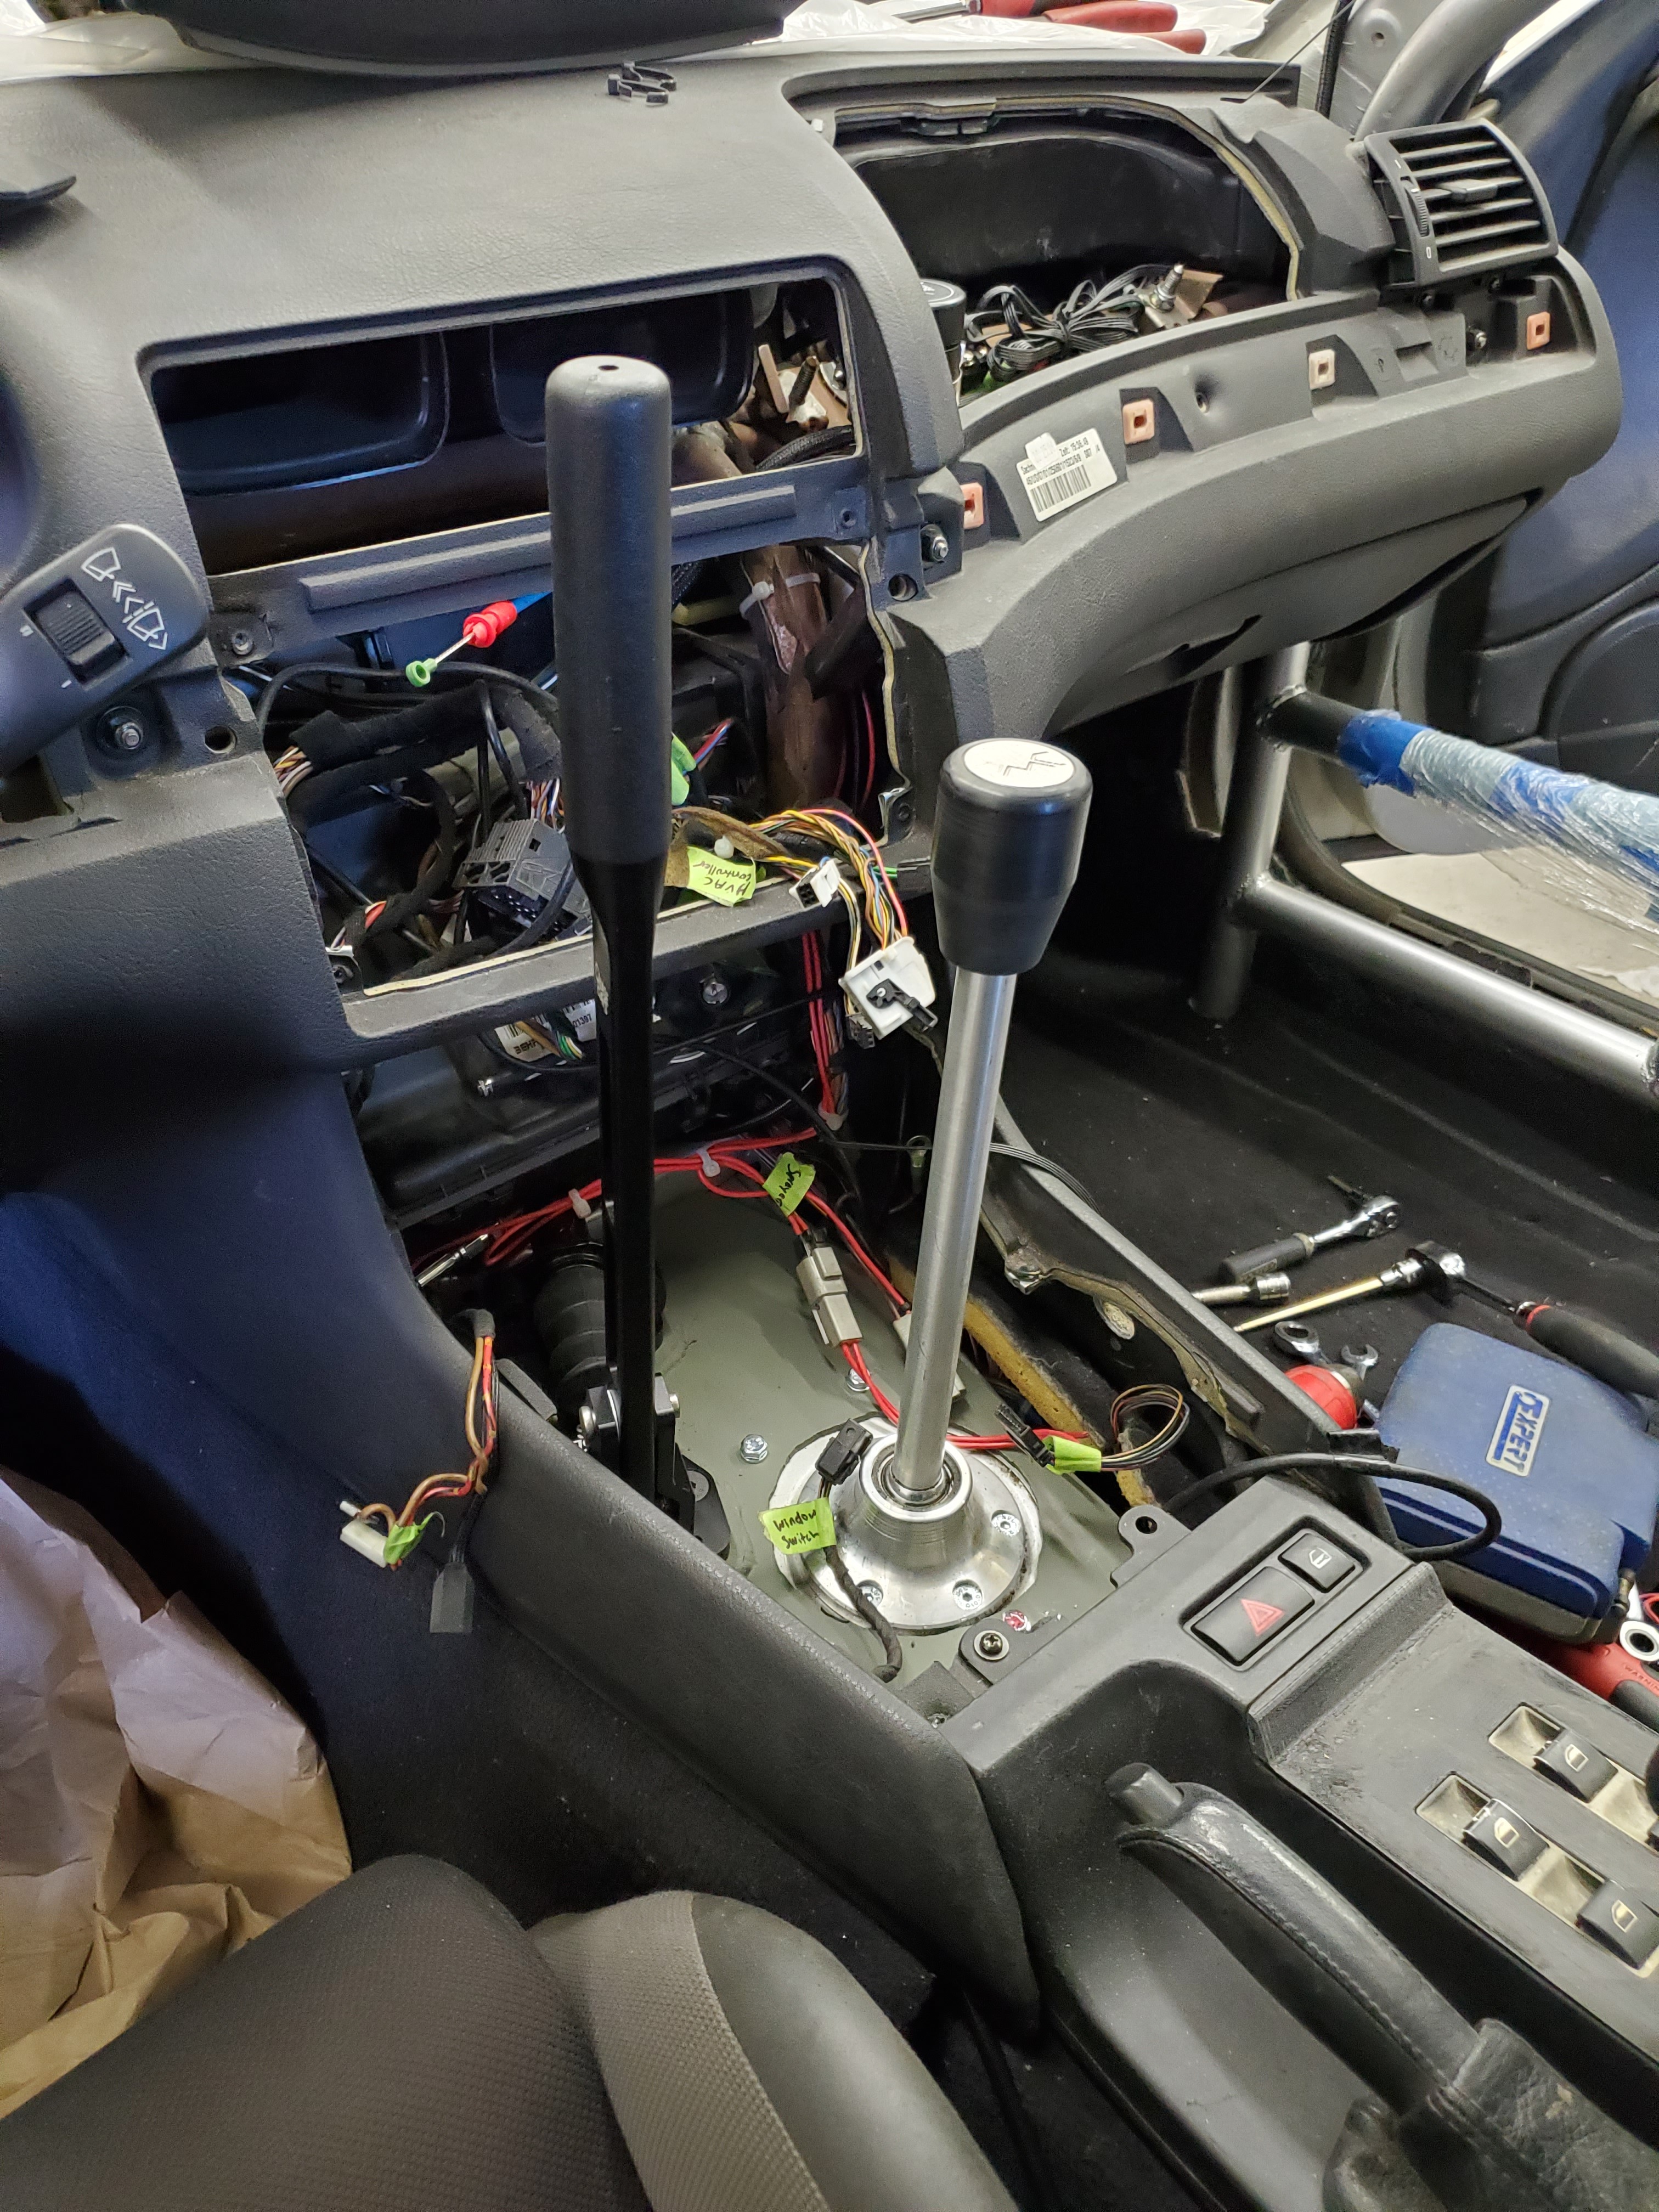
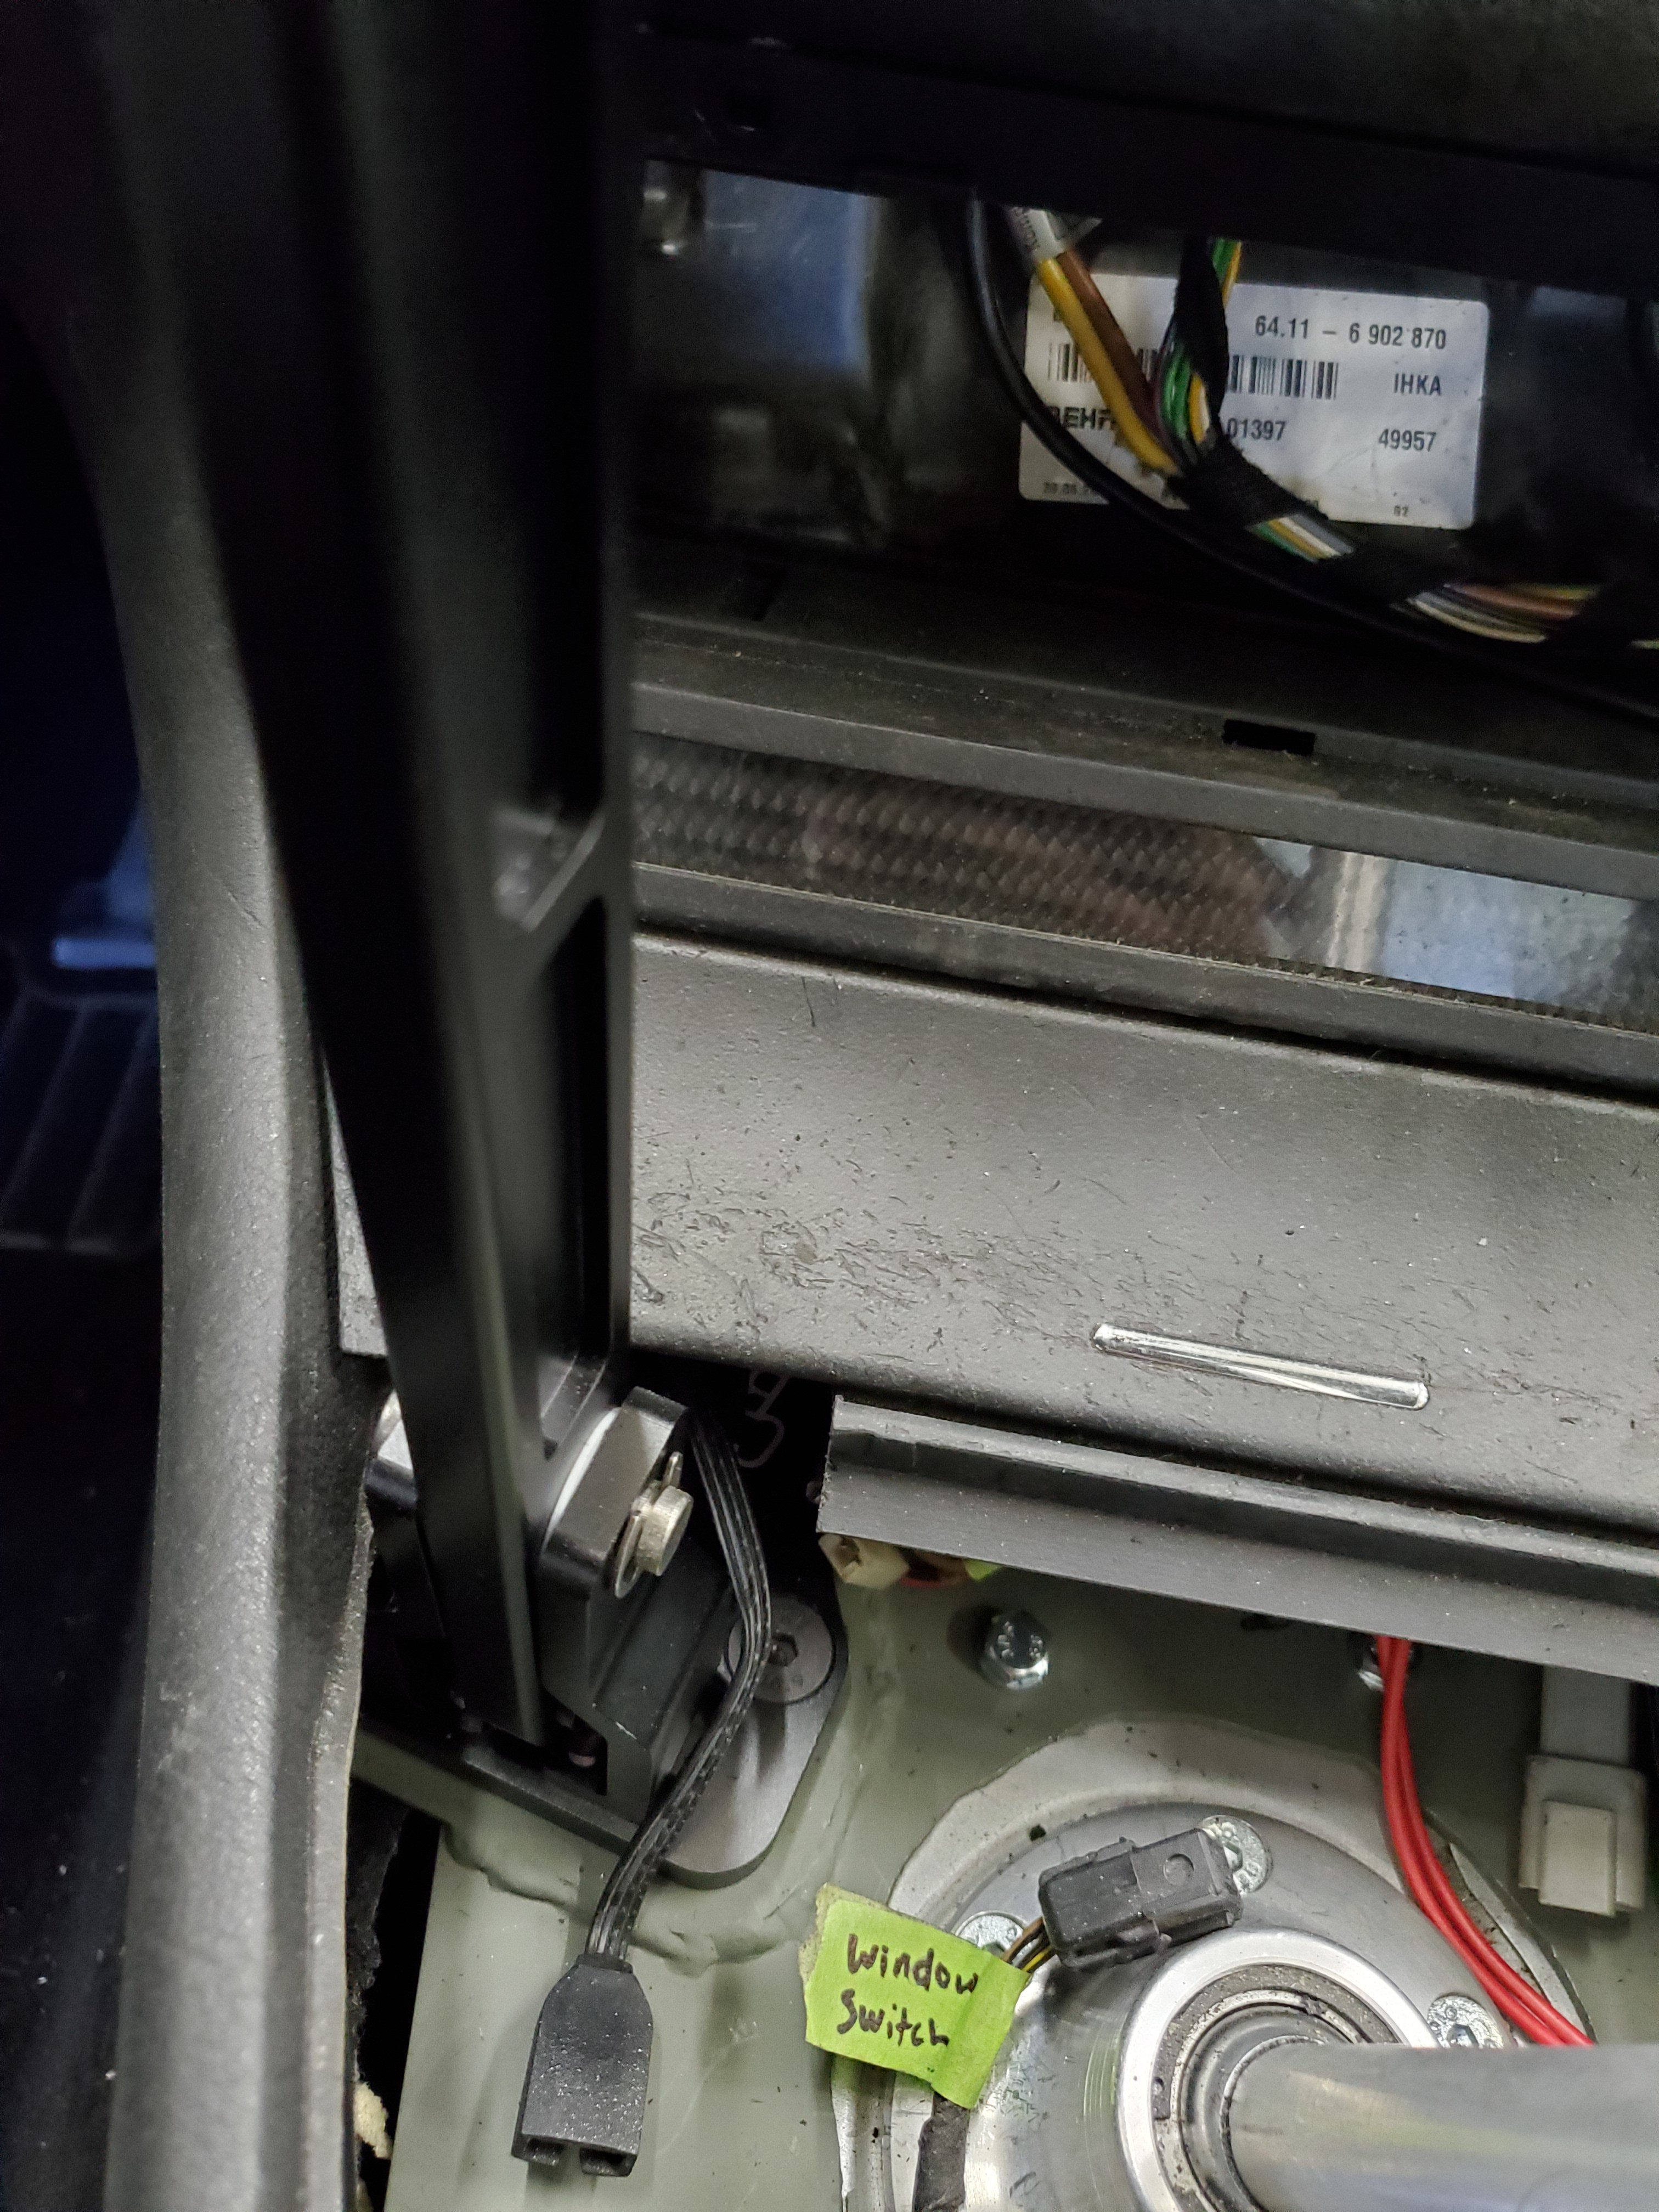
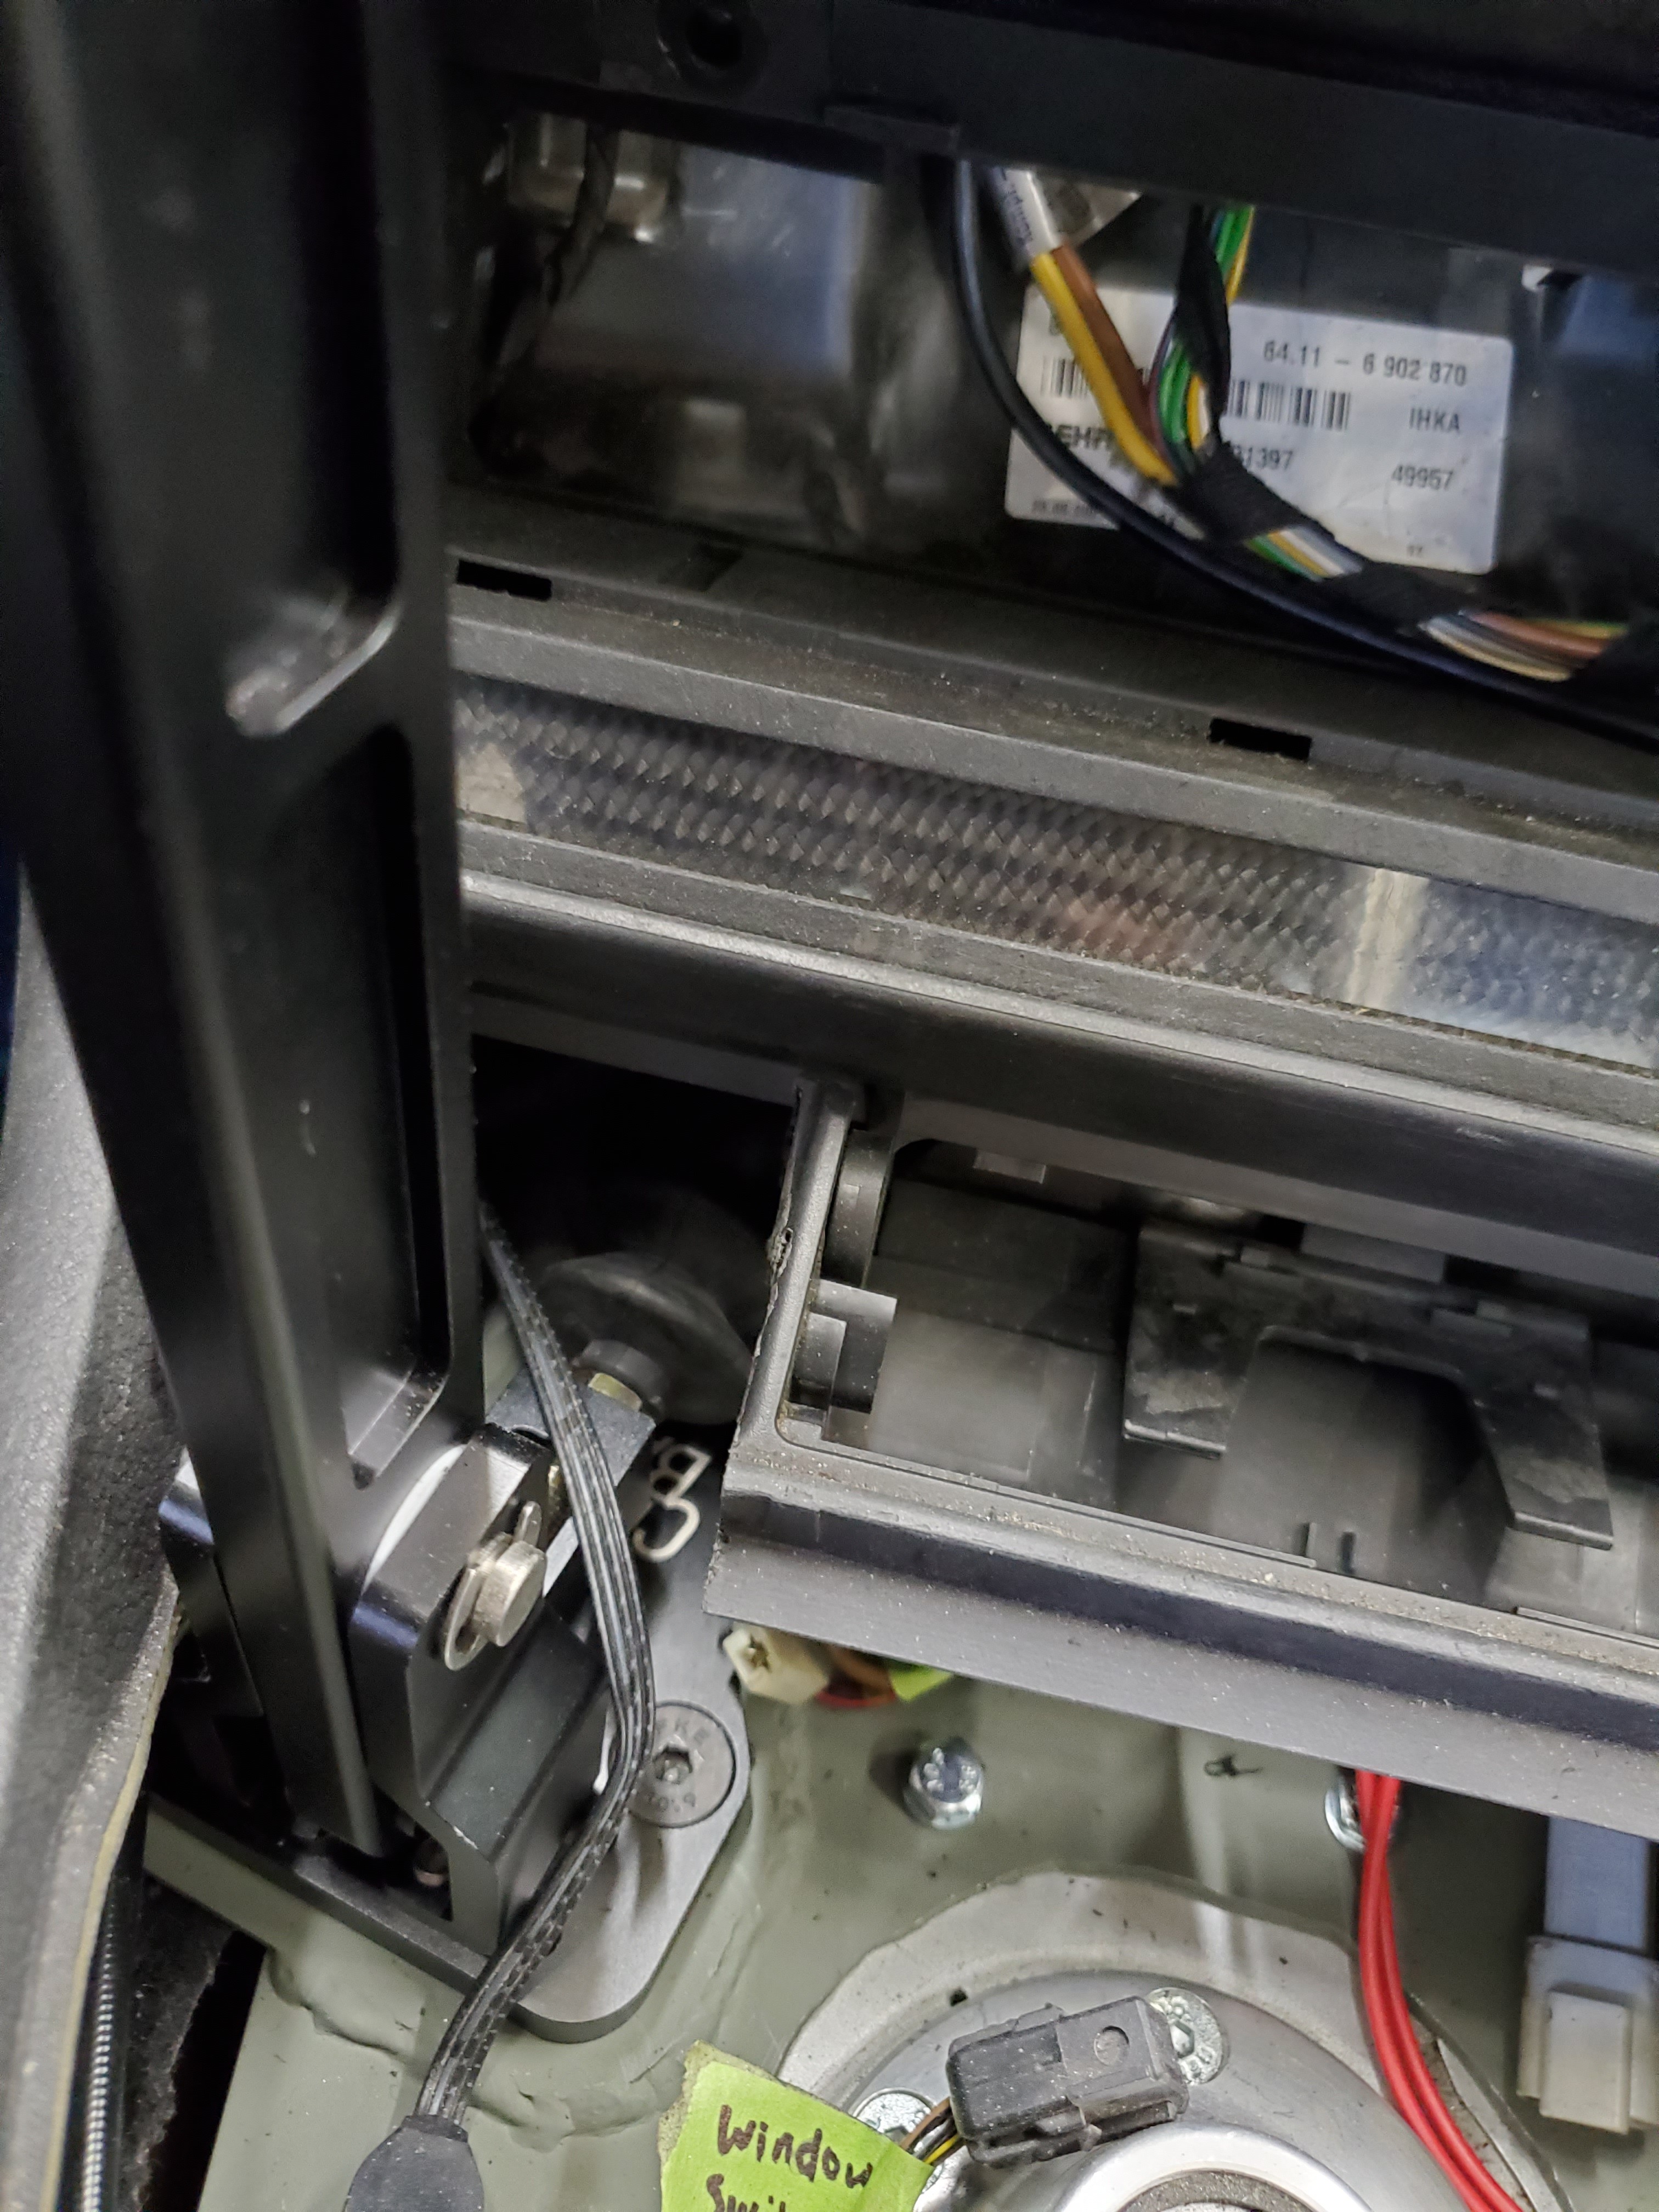
                                    Then I got to work figuring out my new hand brake set up. 

                                    For starters this was NOT working out how I planned... but I did figure it out after ALOT of staring at the center council area and moving things around. 

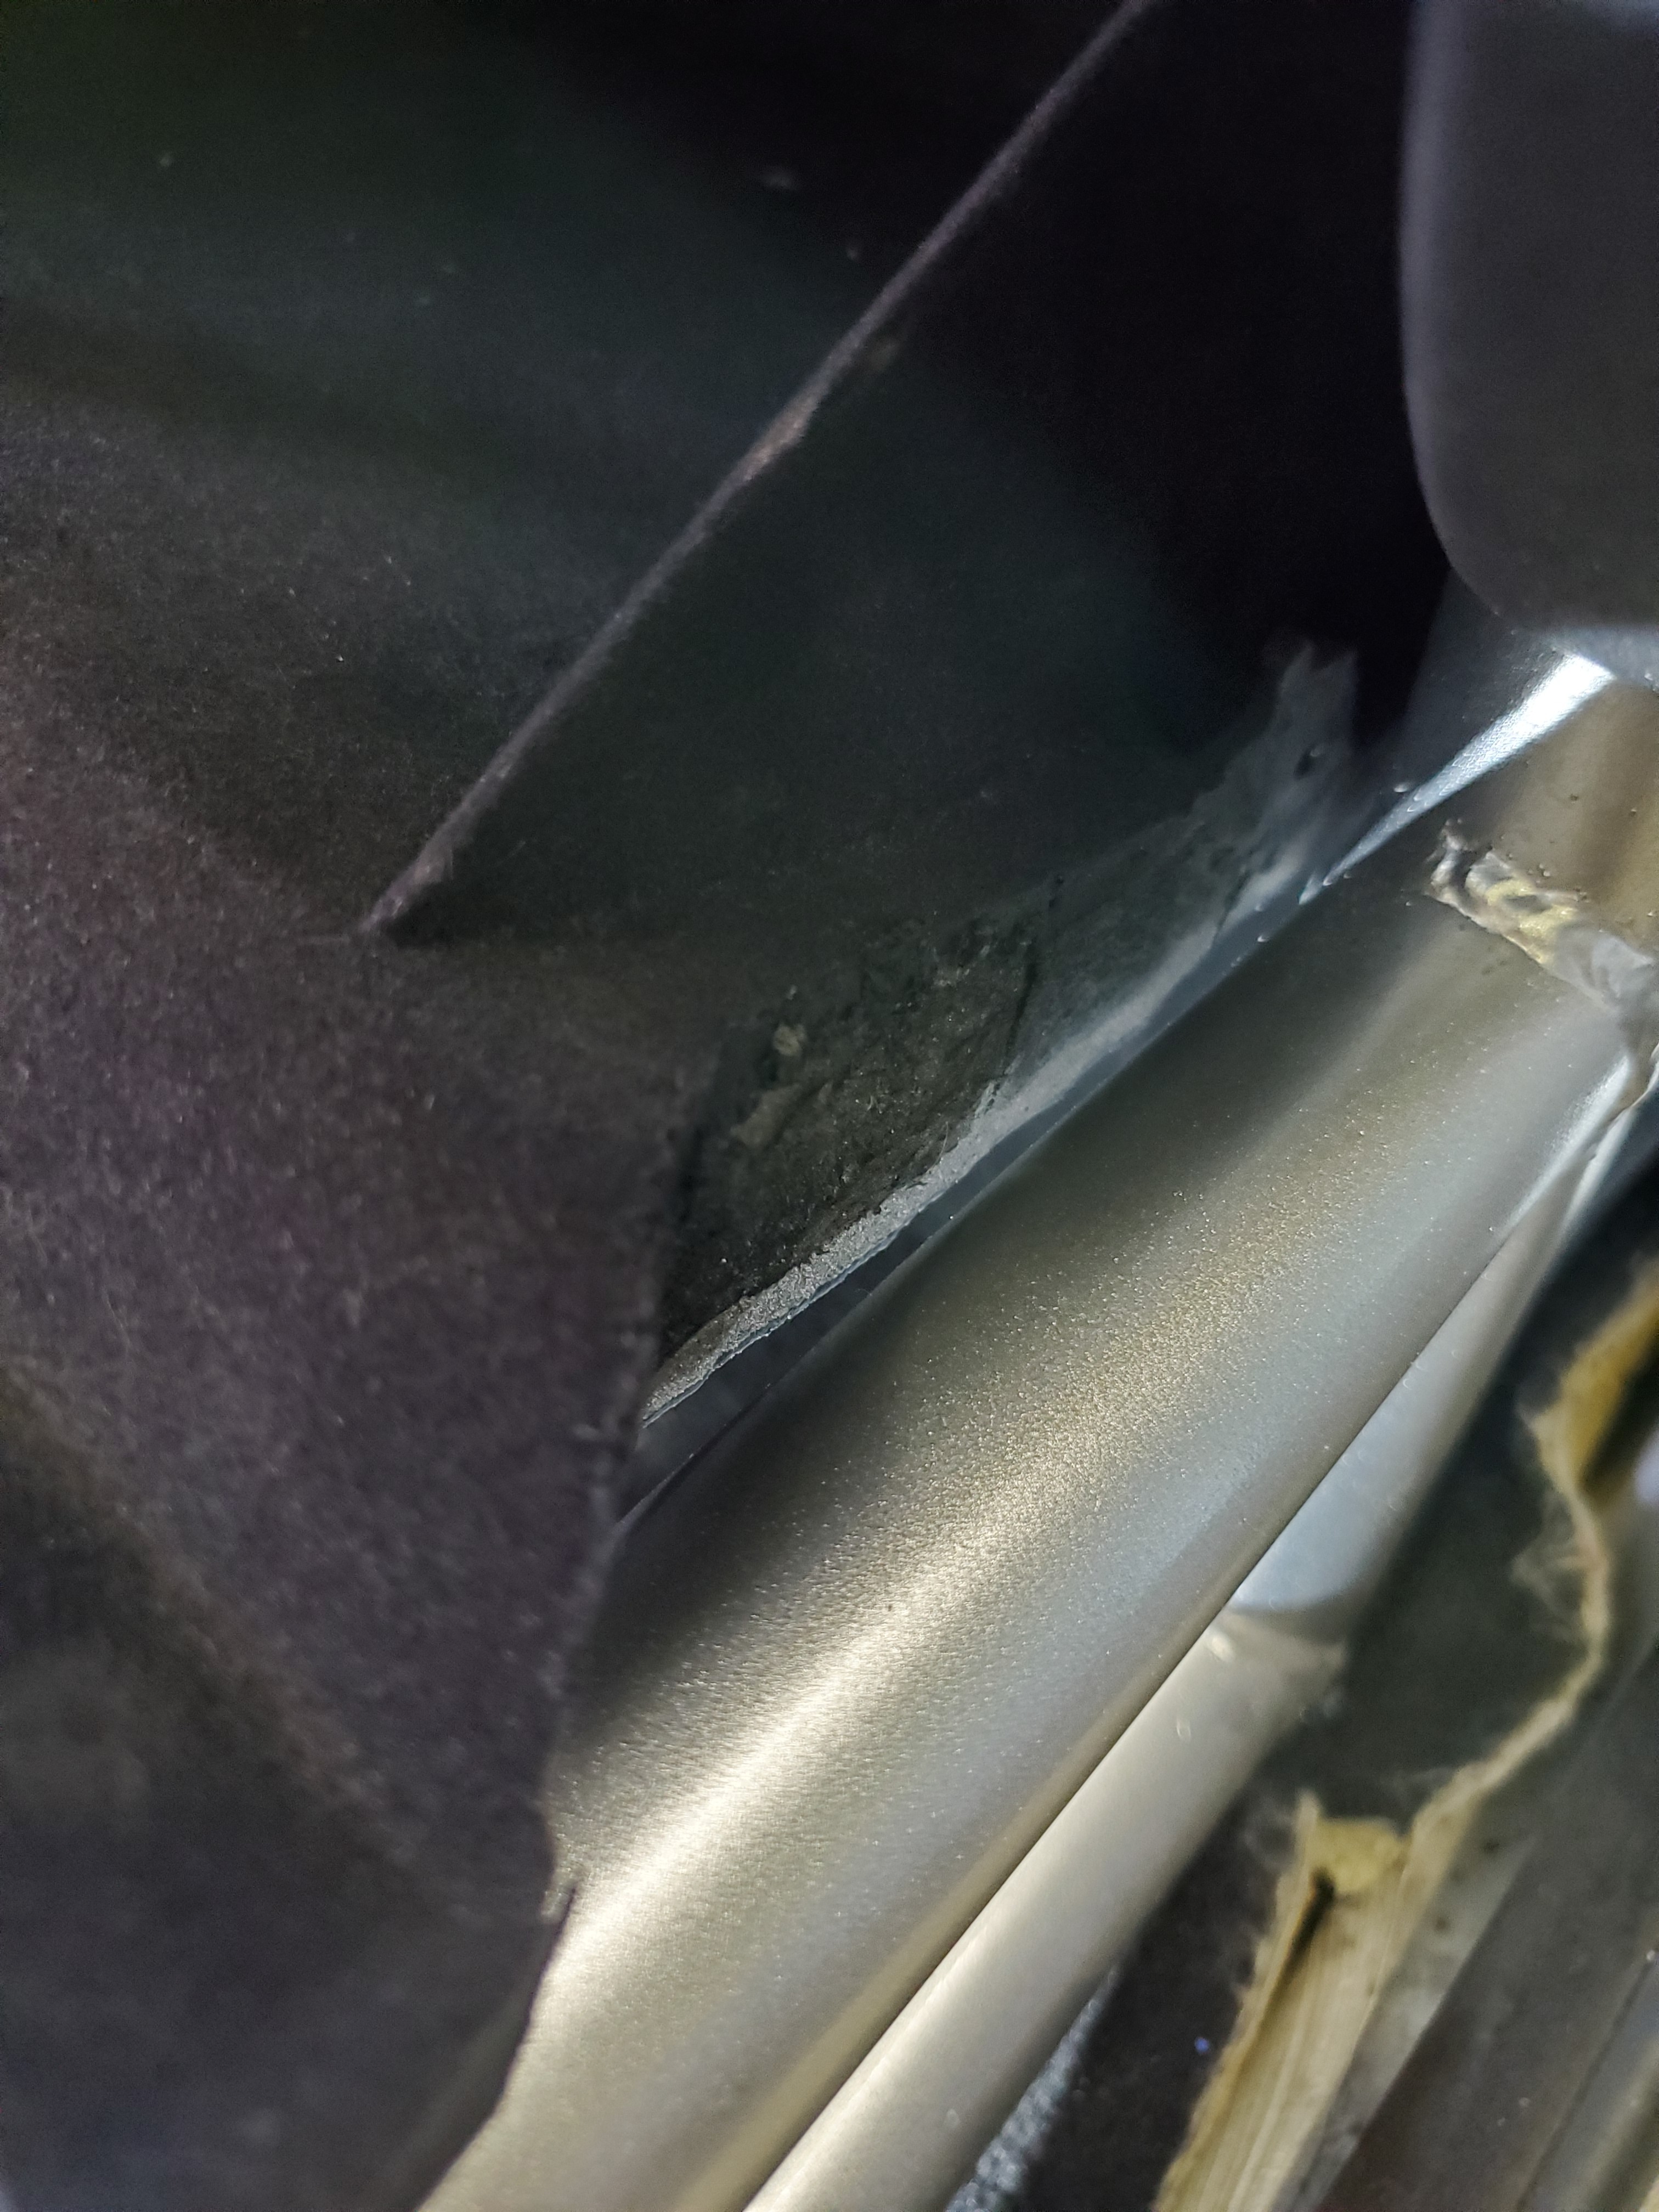
                                    I am happy with the final result so far, it did take some "adjustment " of a spot welded bracket under the heater core though lol.

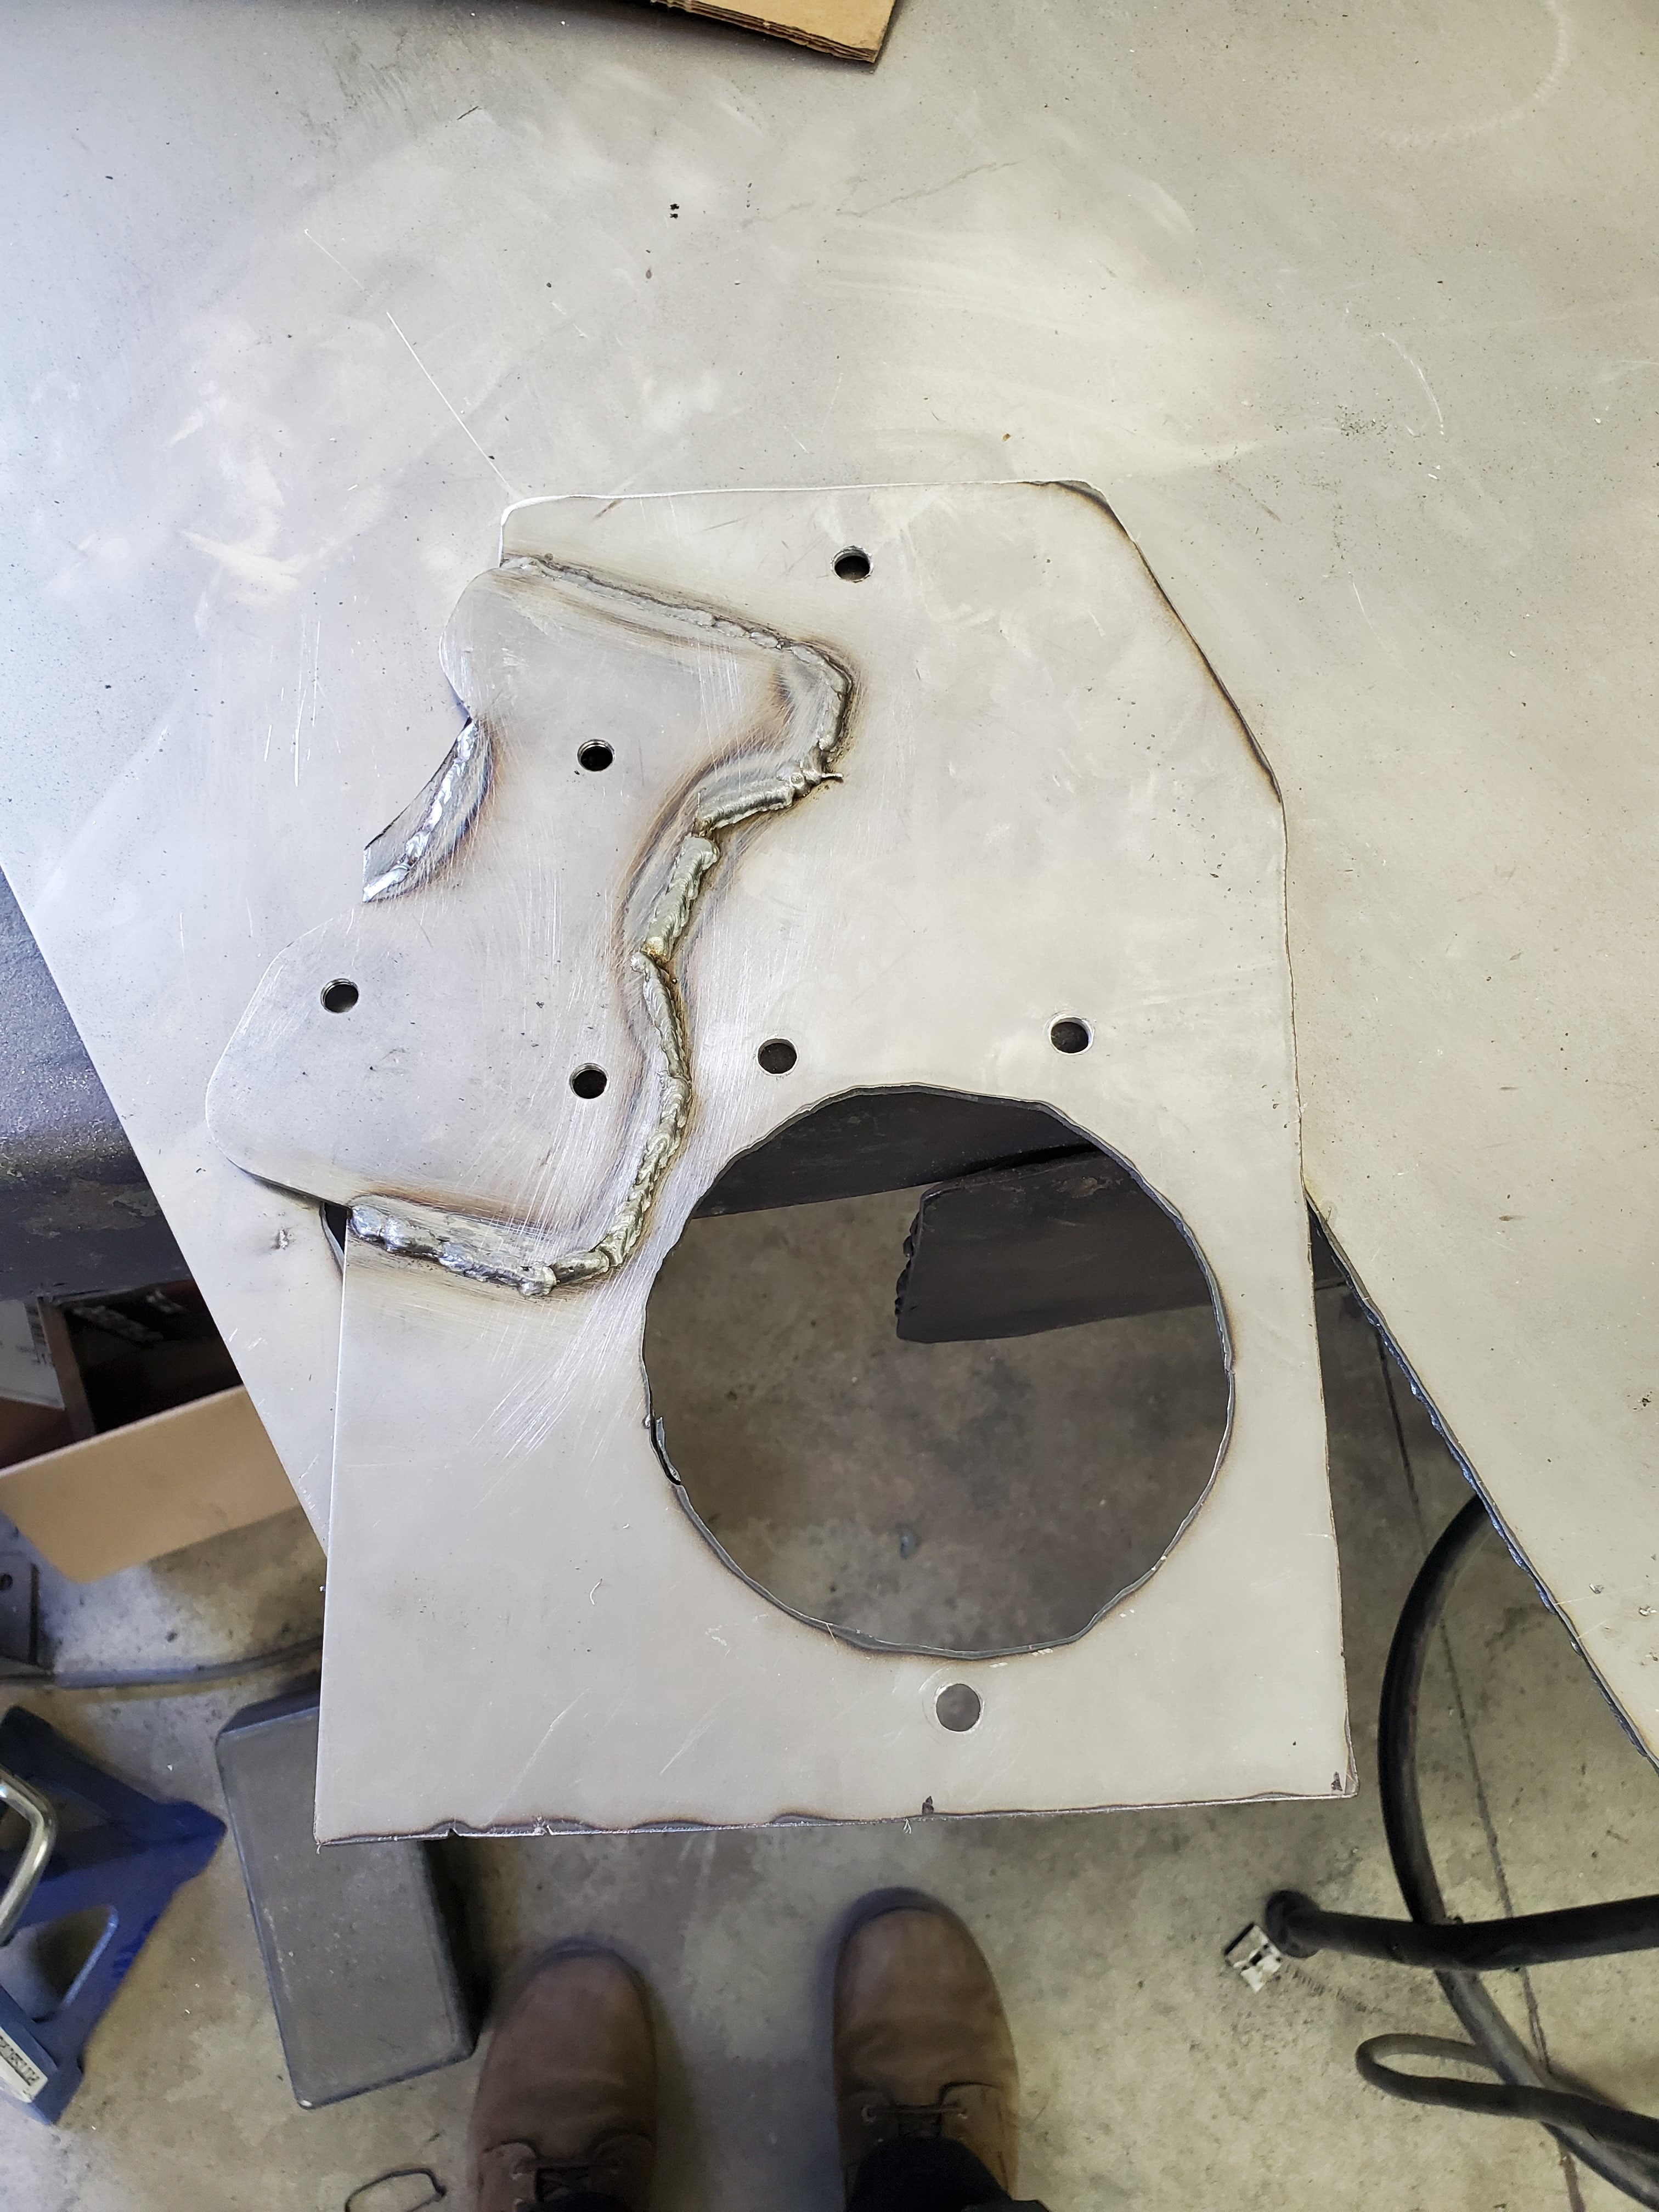
                                    Here is the plate I cut out with the handbrake mounting plate.
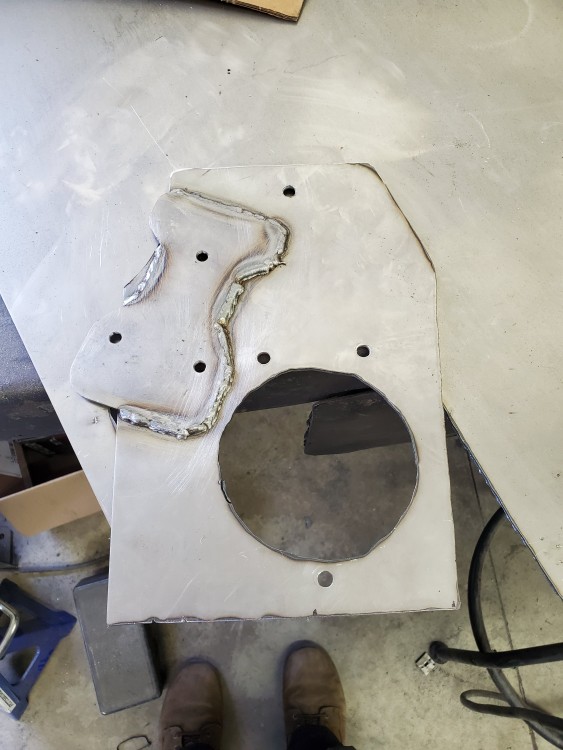
                                    20200418123401.jpg

                                    And here it is primed and installed with the hanbrake bolted in as well.
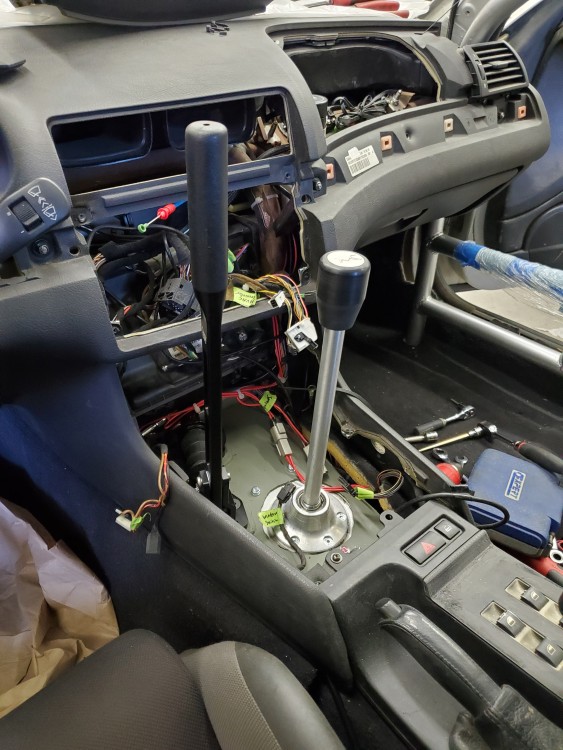
                                    20200418141924.jpg

                                    Really liking how the location worked out. It feels comfortable and my arm doesn't hit the armrest either which I was concerned about originally.

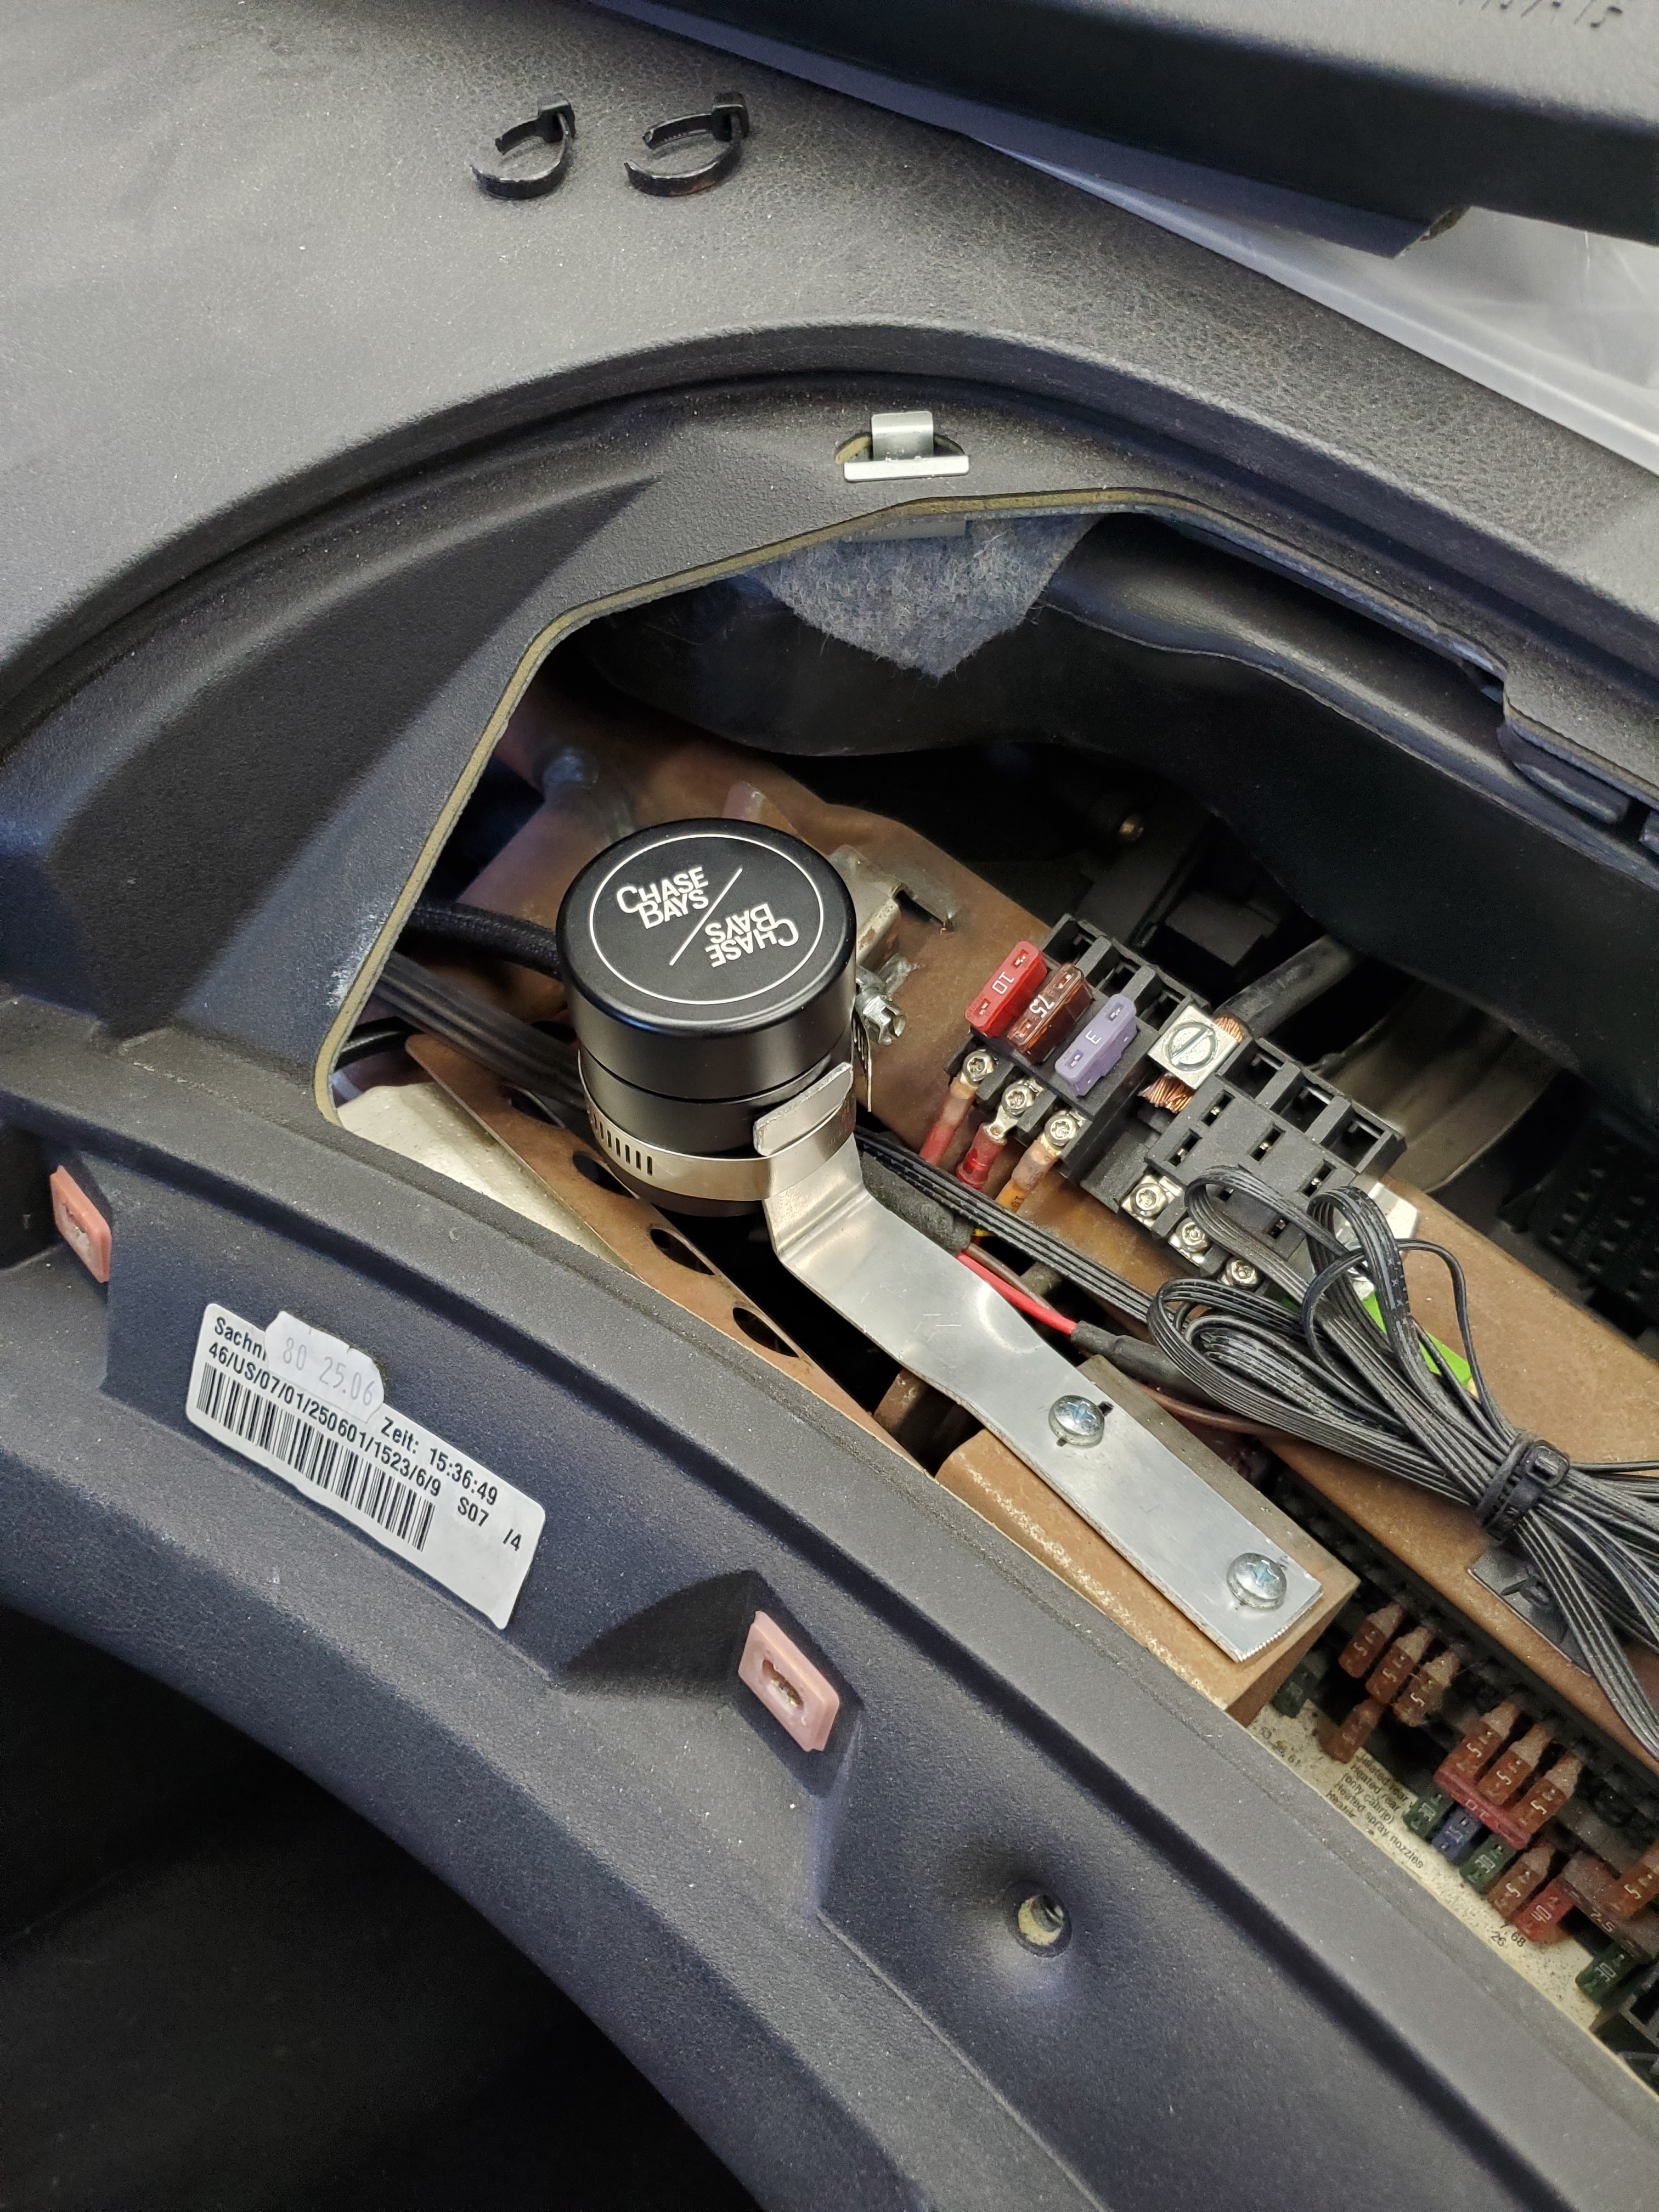
                                    I then mounted the resiviour which is now remote mounted rather than attached to the master.
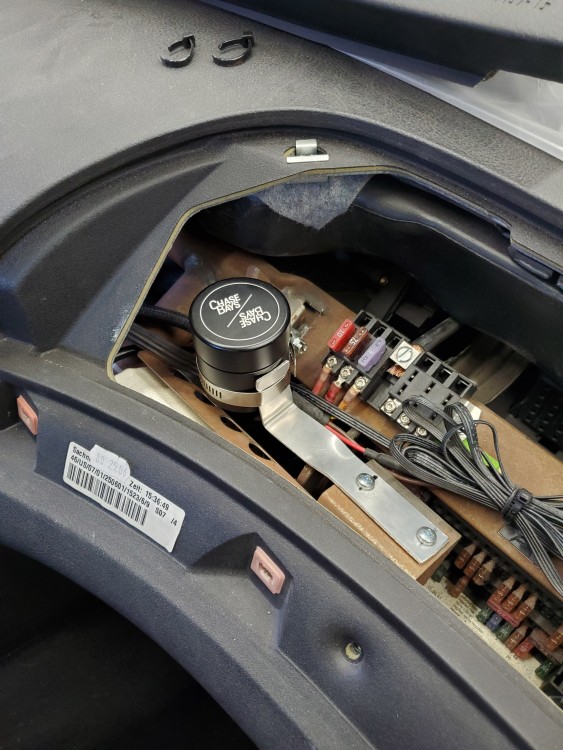
                                    20200418132558.jpg

                                    I routed all the lines and just need to pick up some DOT5 fluid and get it bled.

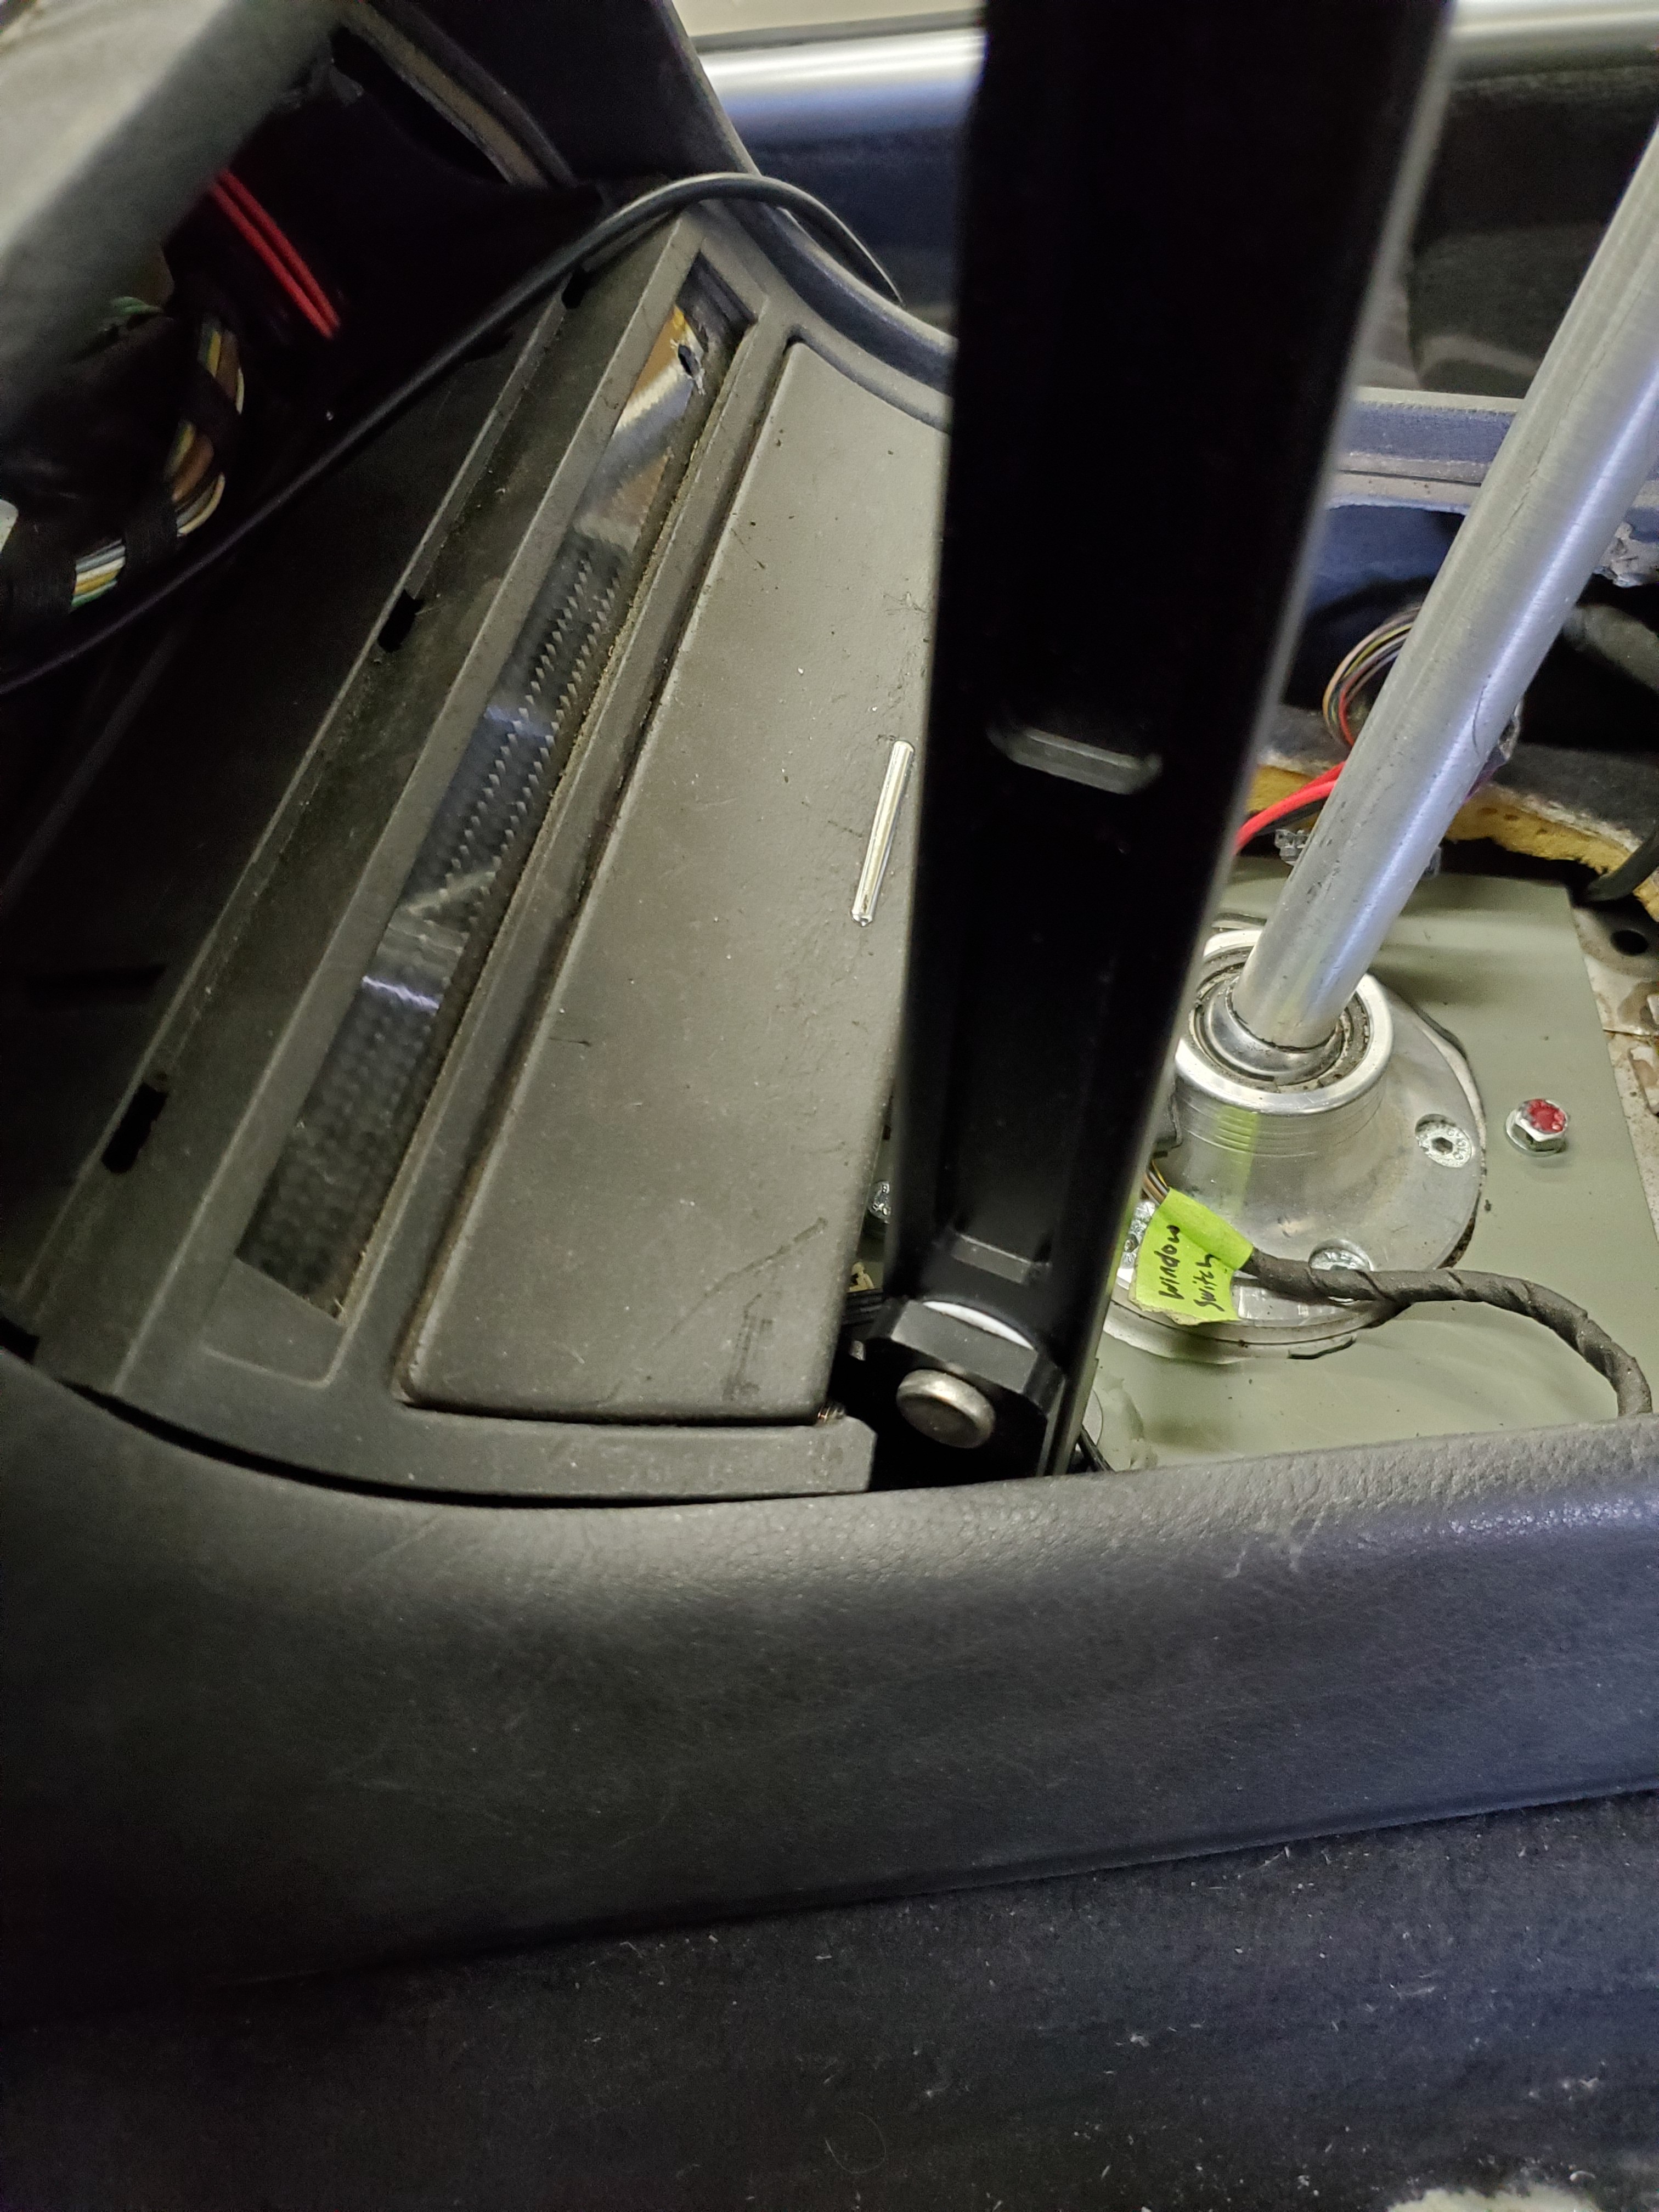
                                    So then I moved on to fitting the lower dash pocket thing near the handbrake. It worked out soooo well. Just trimmed out the 12v outlet and the result is below!
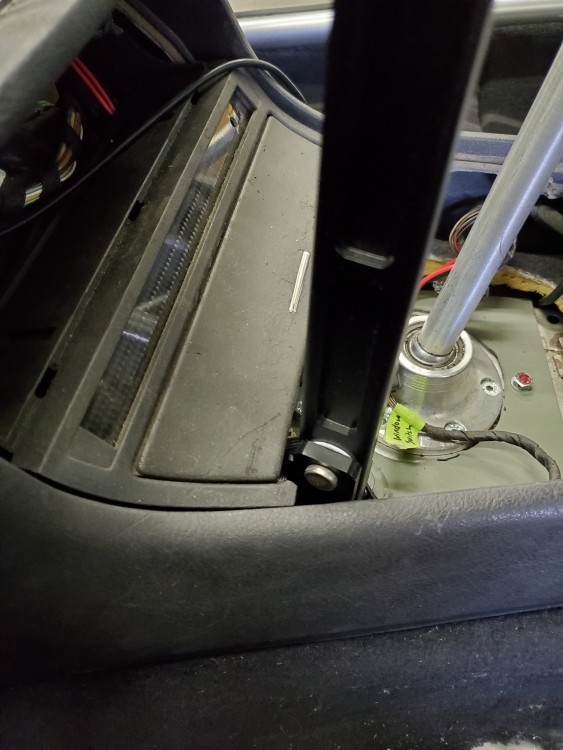
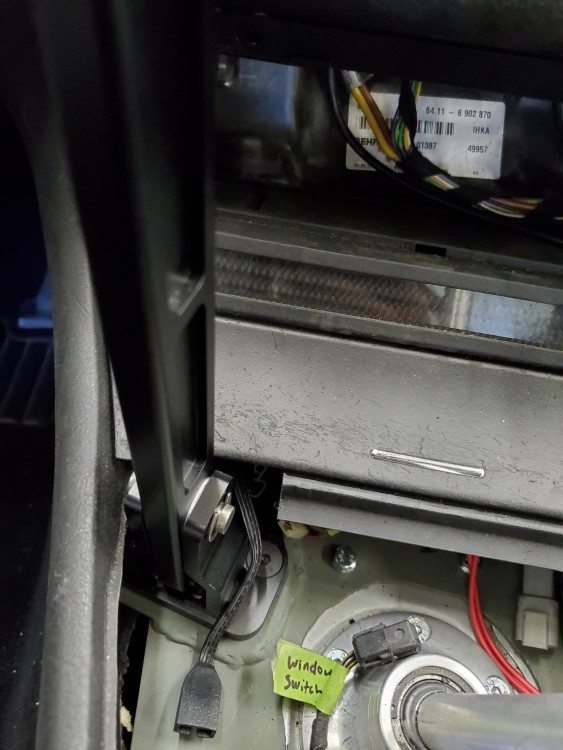
                                    20200418165654.jpg

                                    20200418165701.jpg

                                    20200418165713.jpg

                                    Still able to keep the ash tray which is cool too, not because I smoke but because its nice to keep smaller random stuff in there and not have it flying all over.

                                    Just need to find a new shifter bezel and trim the top left corner and things should be looking really complete.

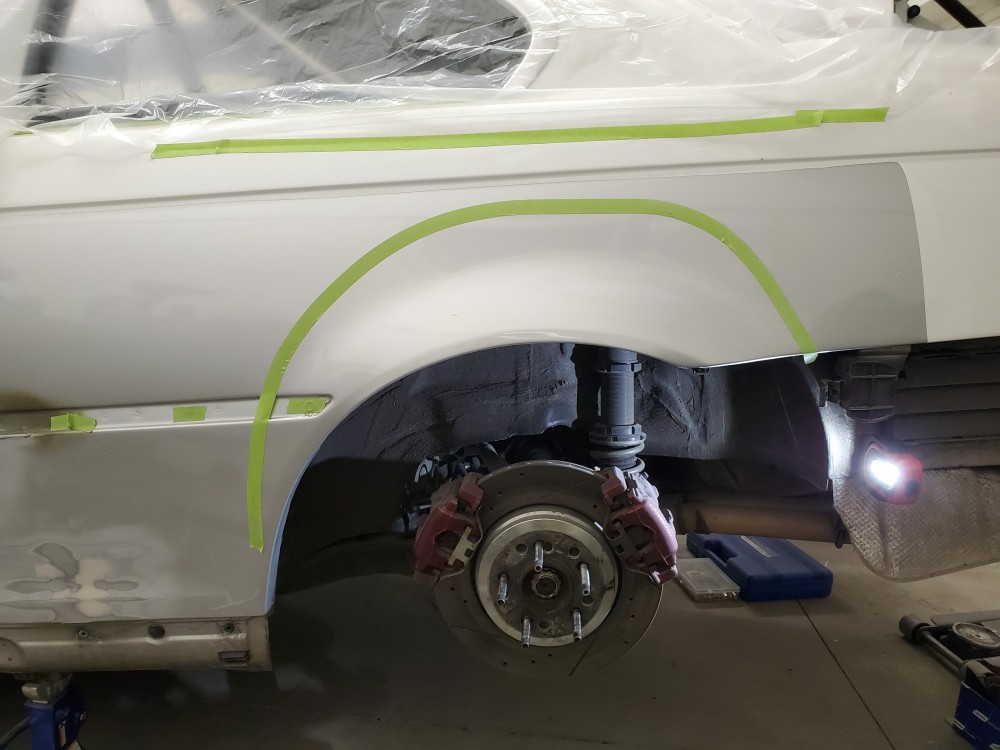
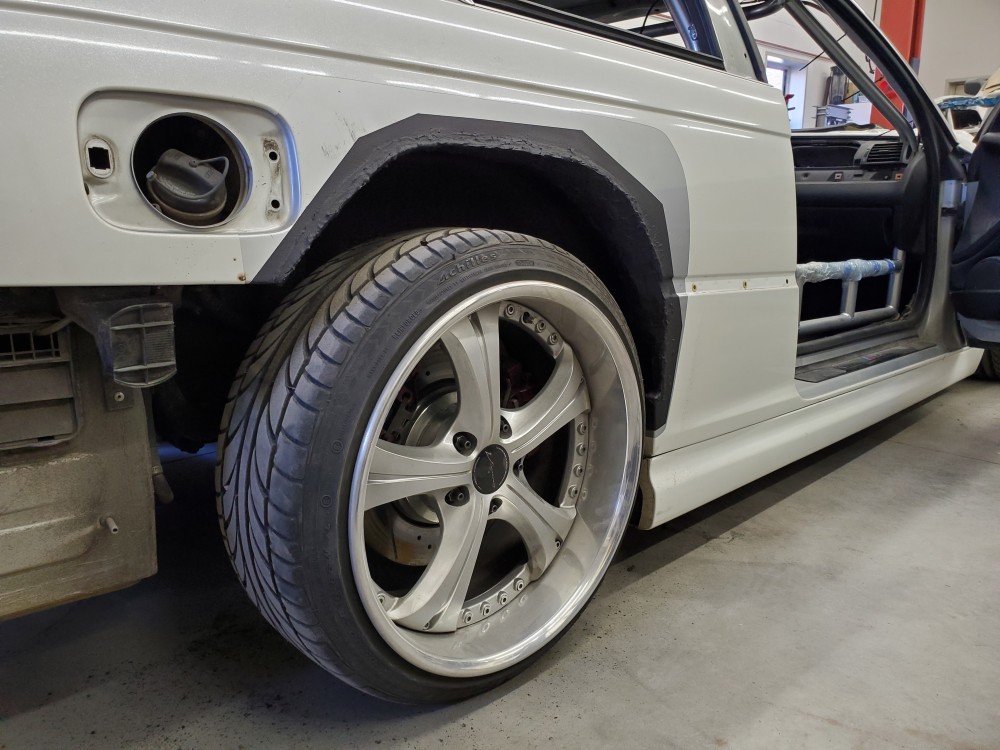
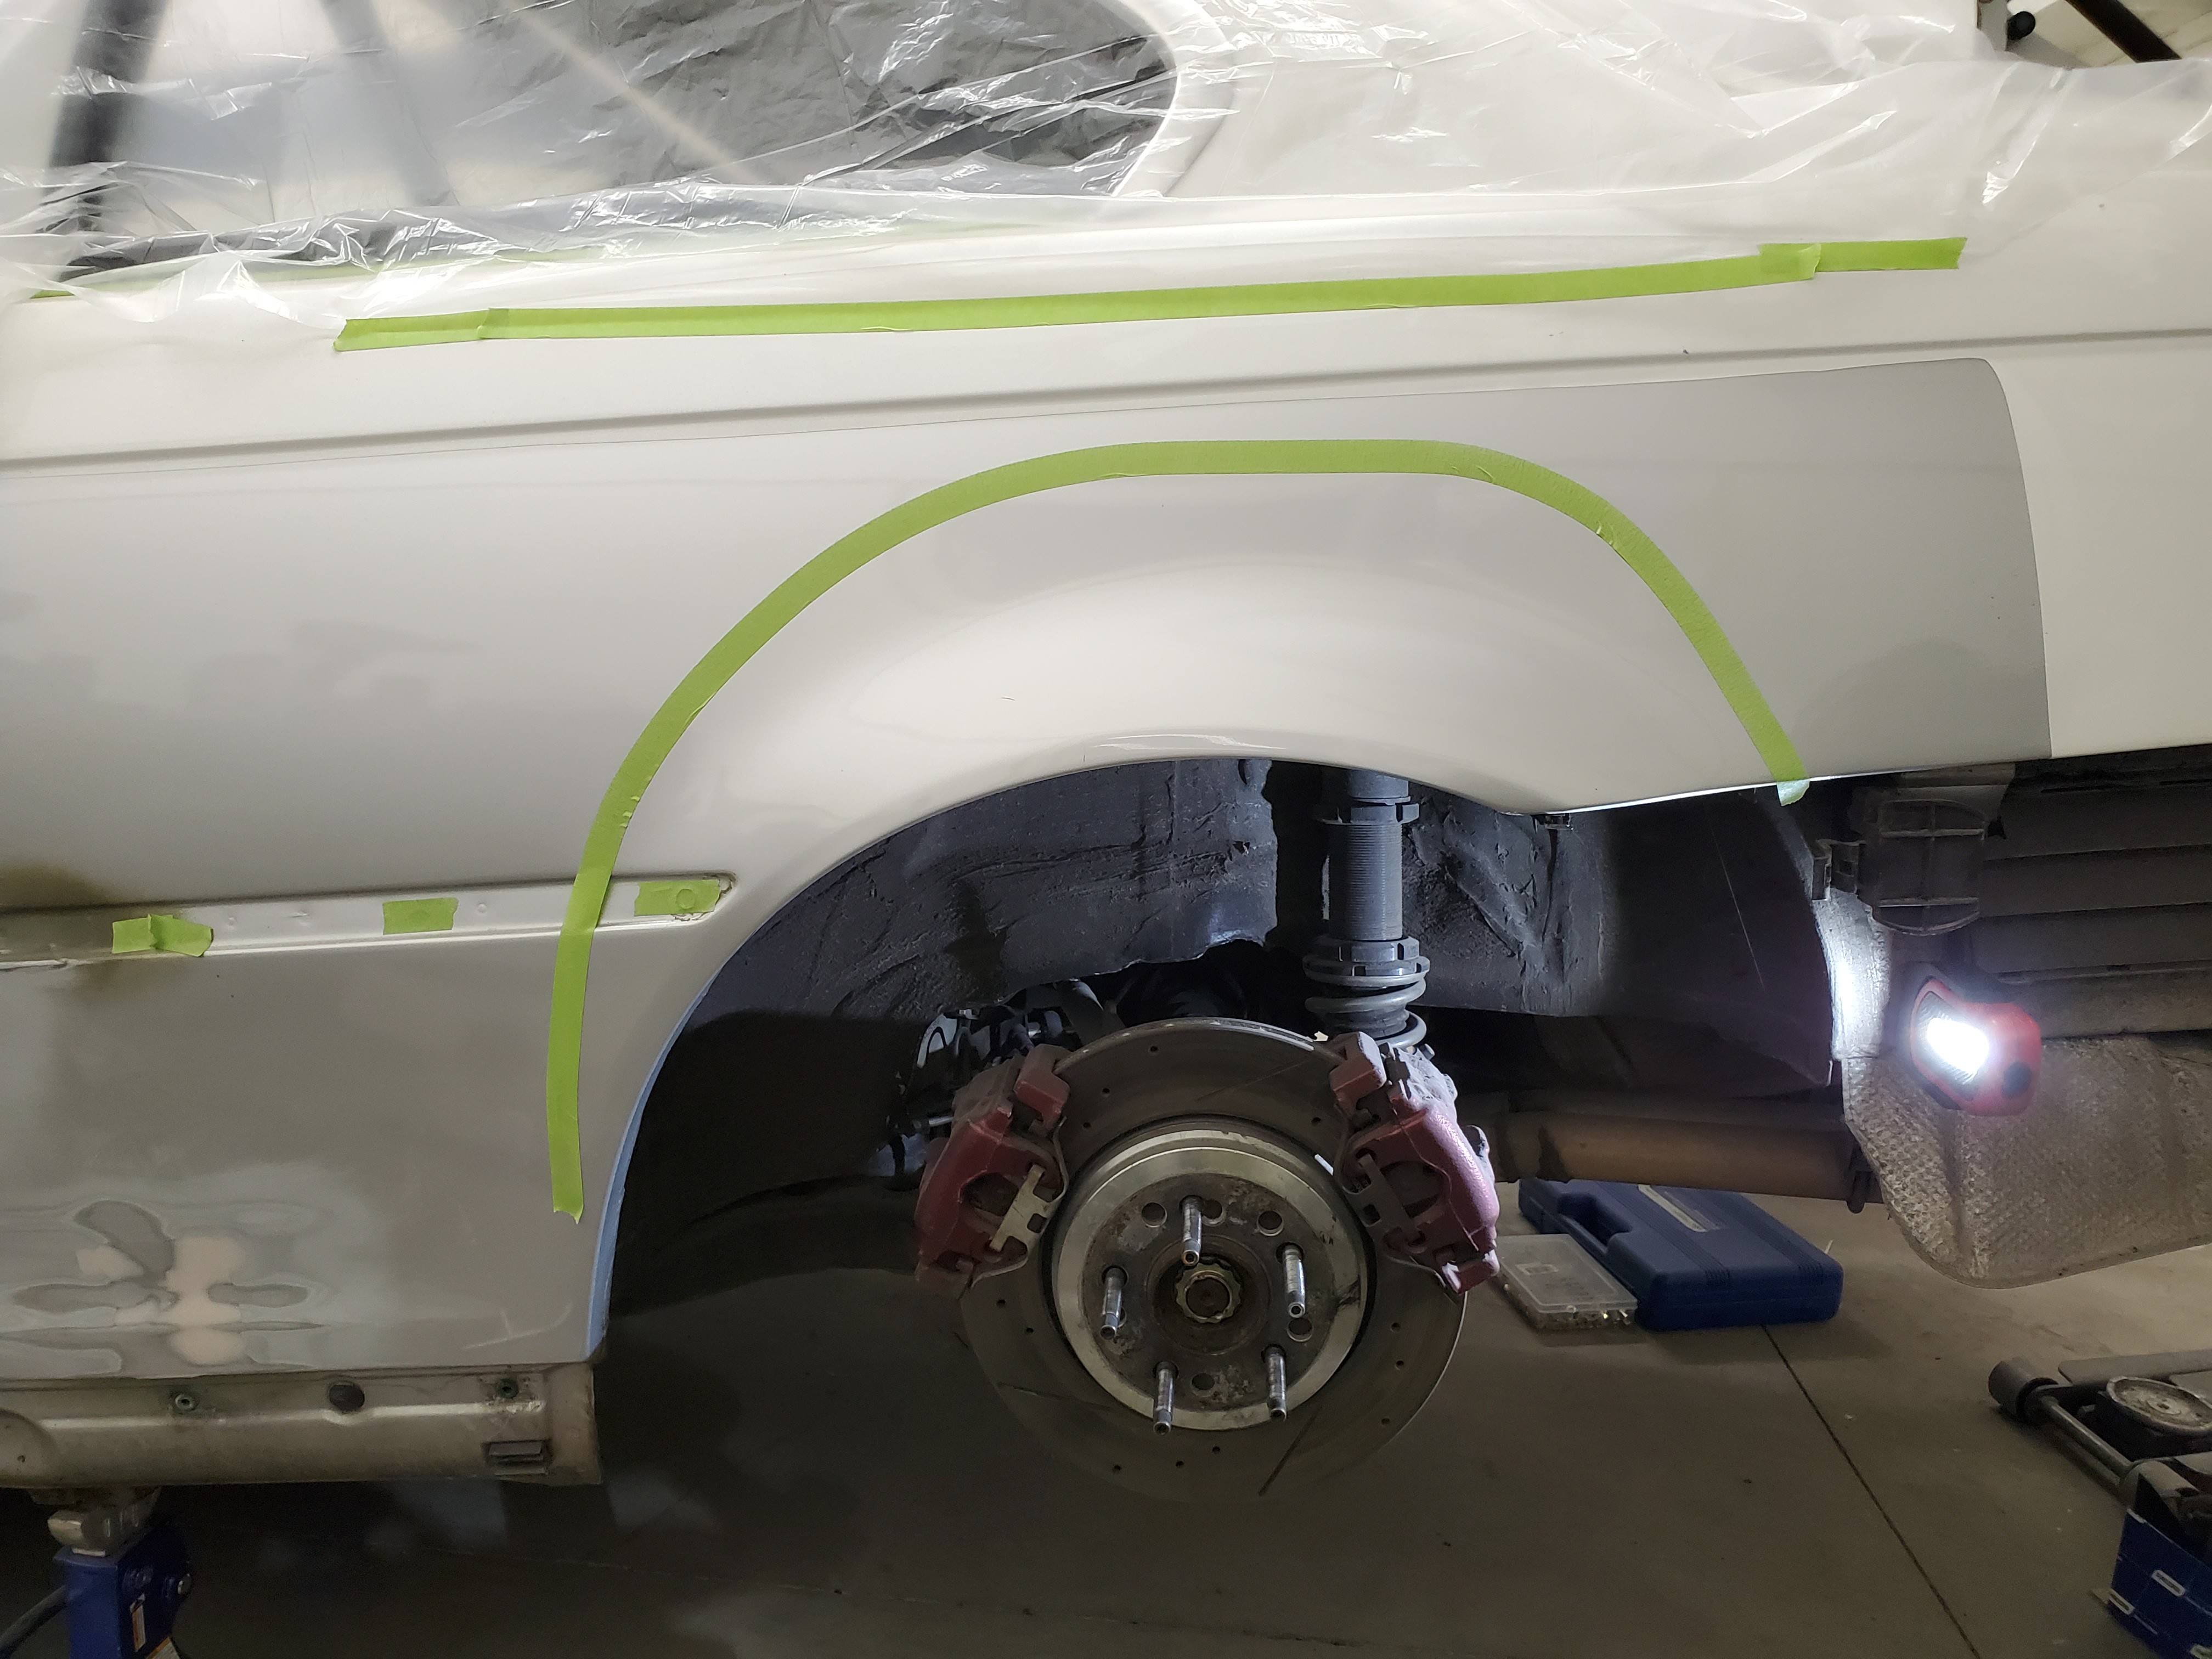
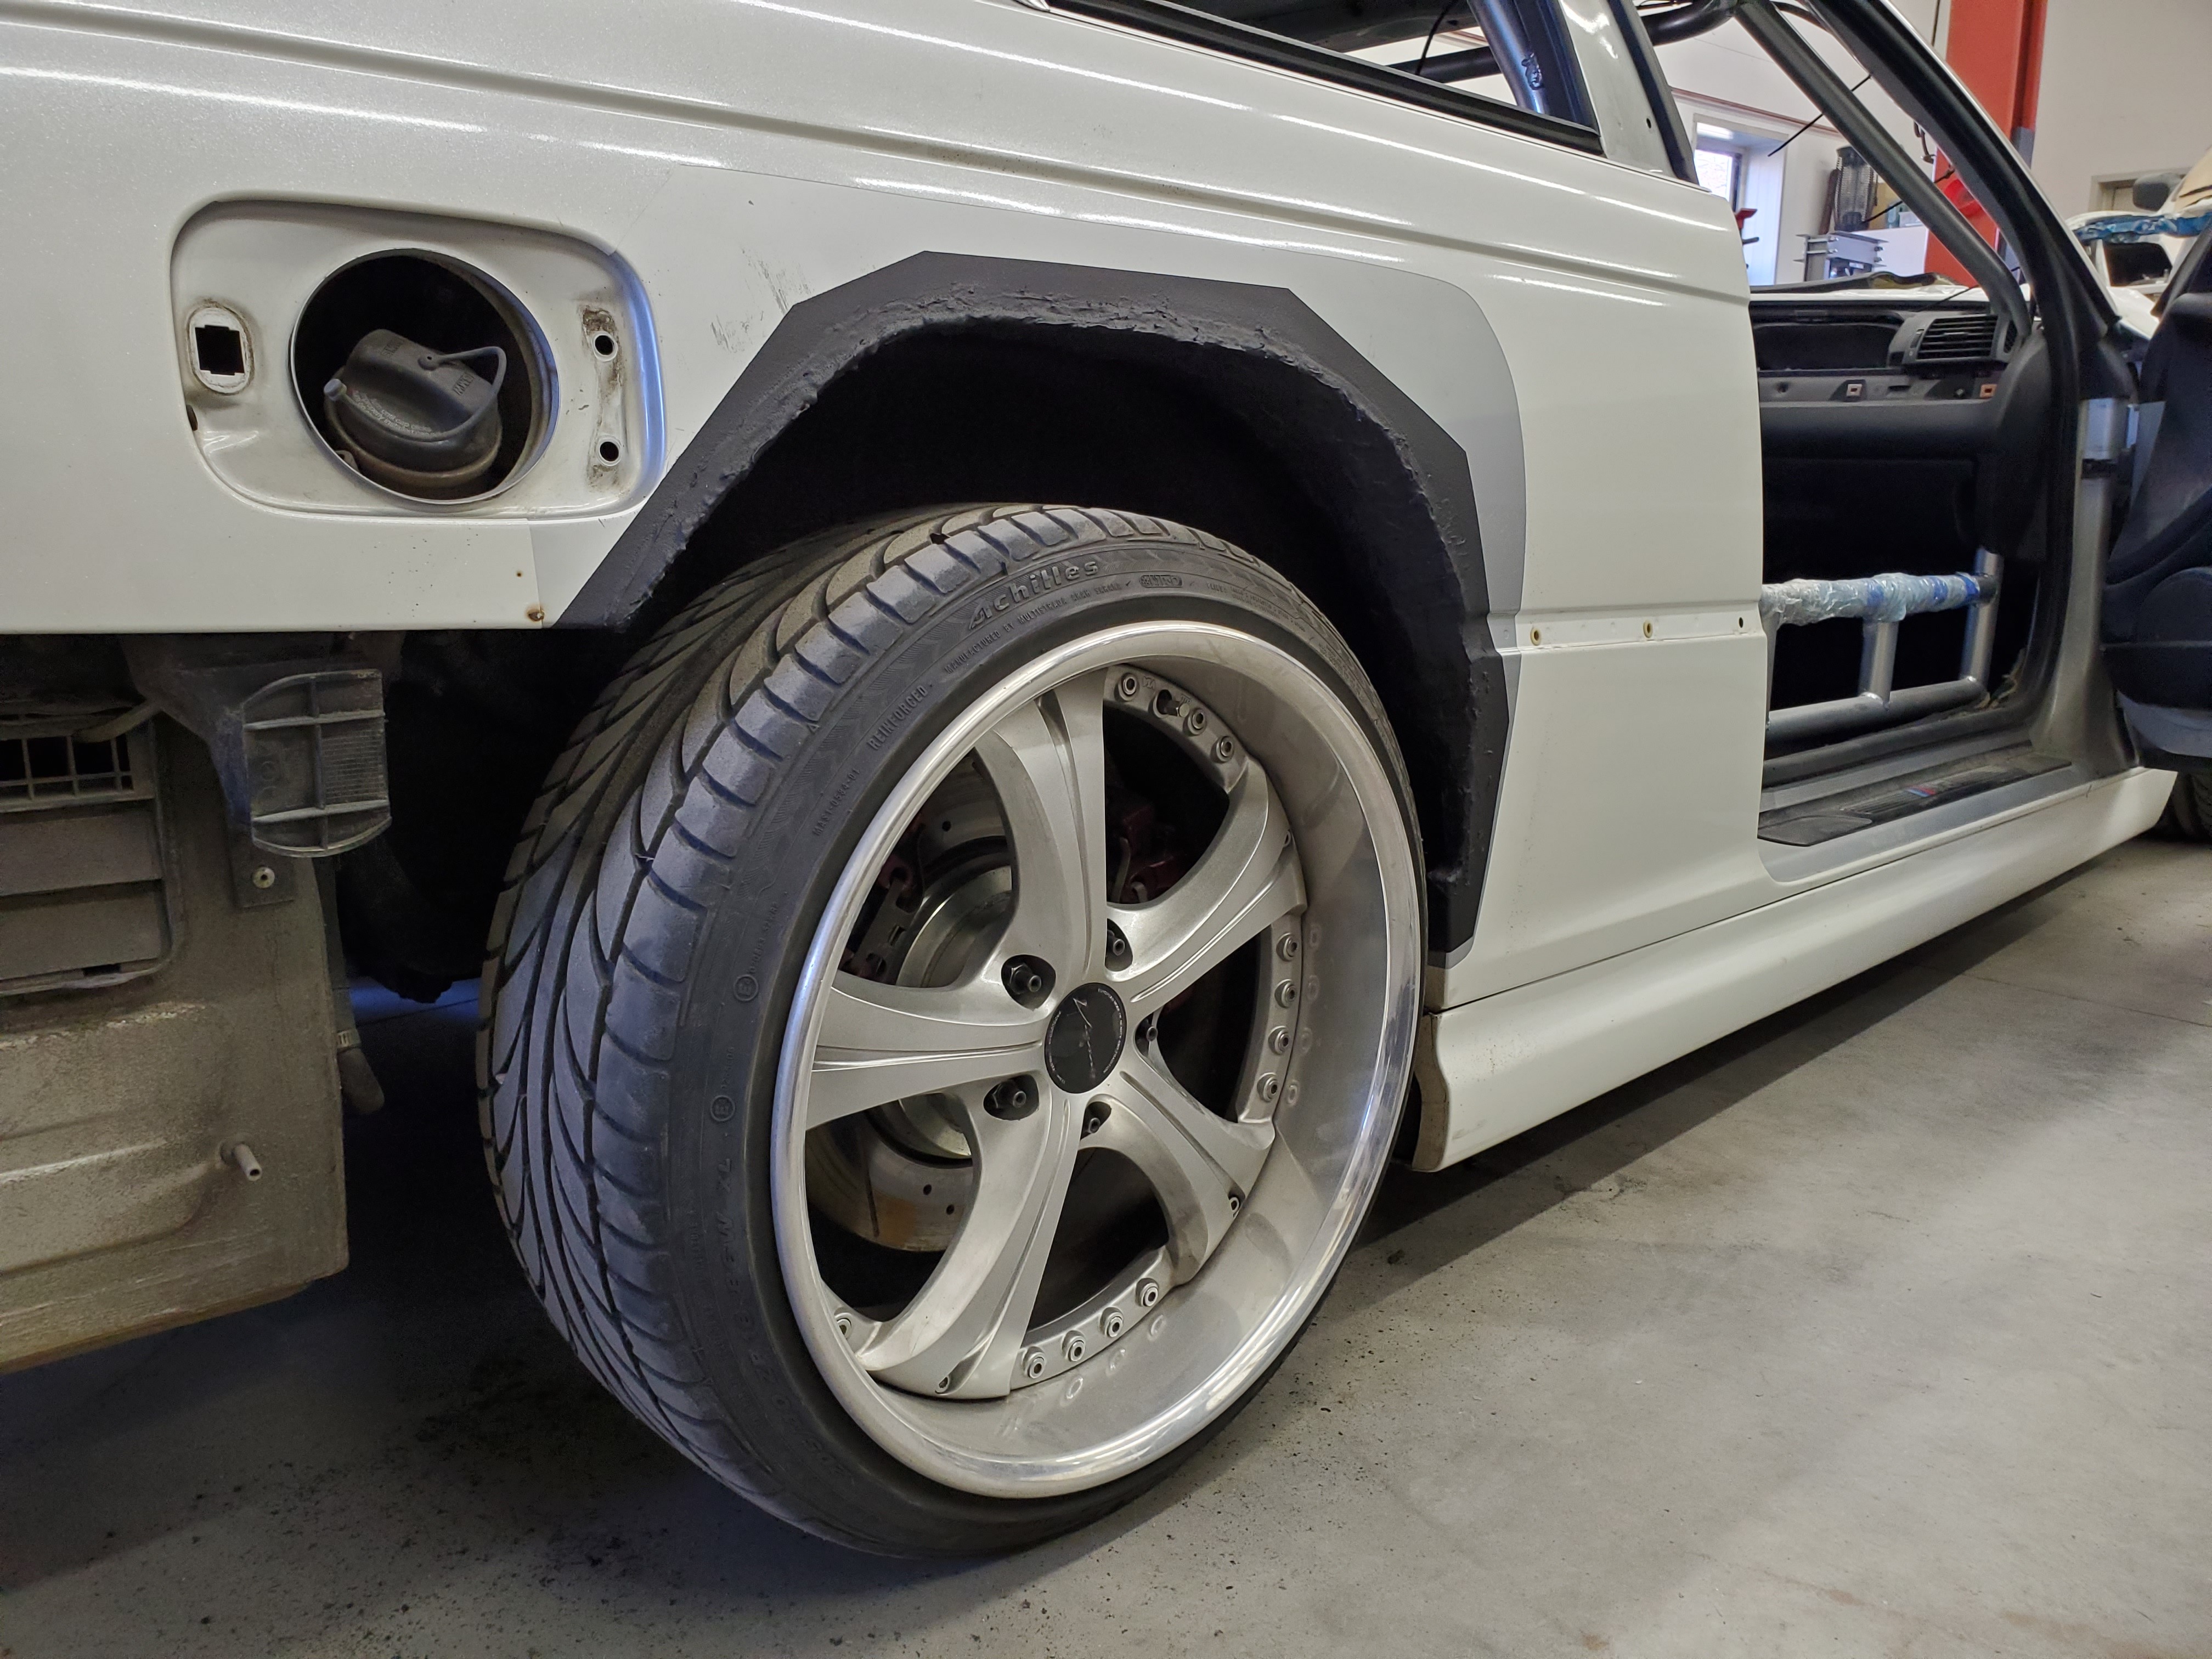
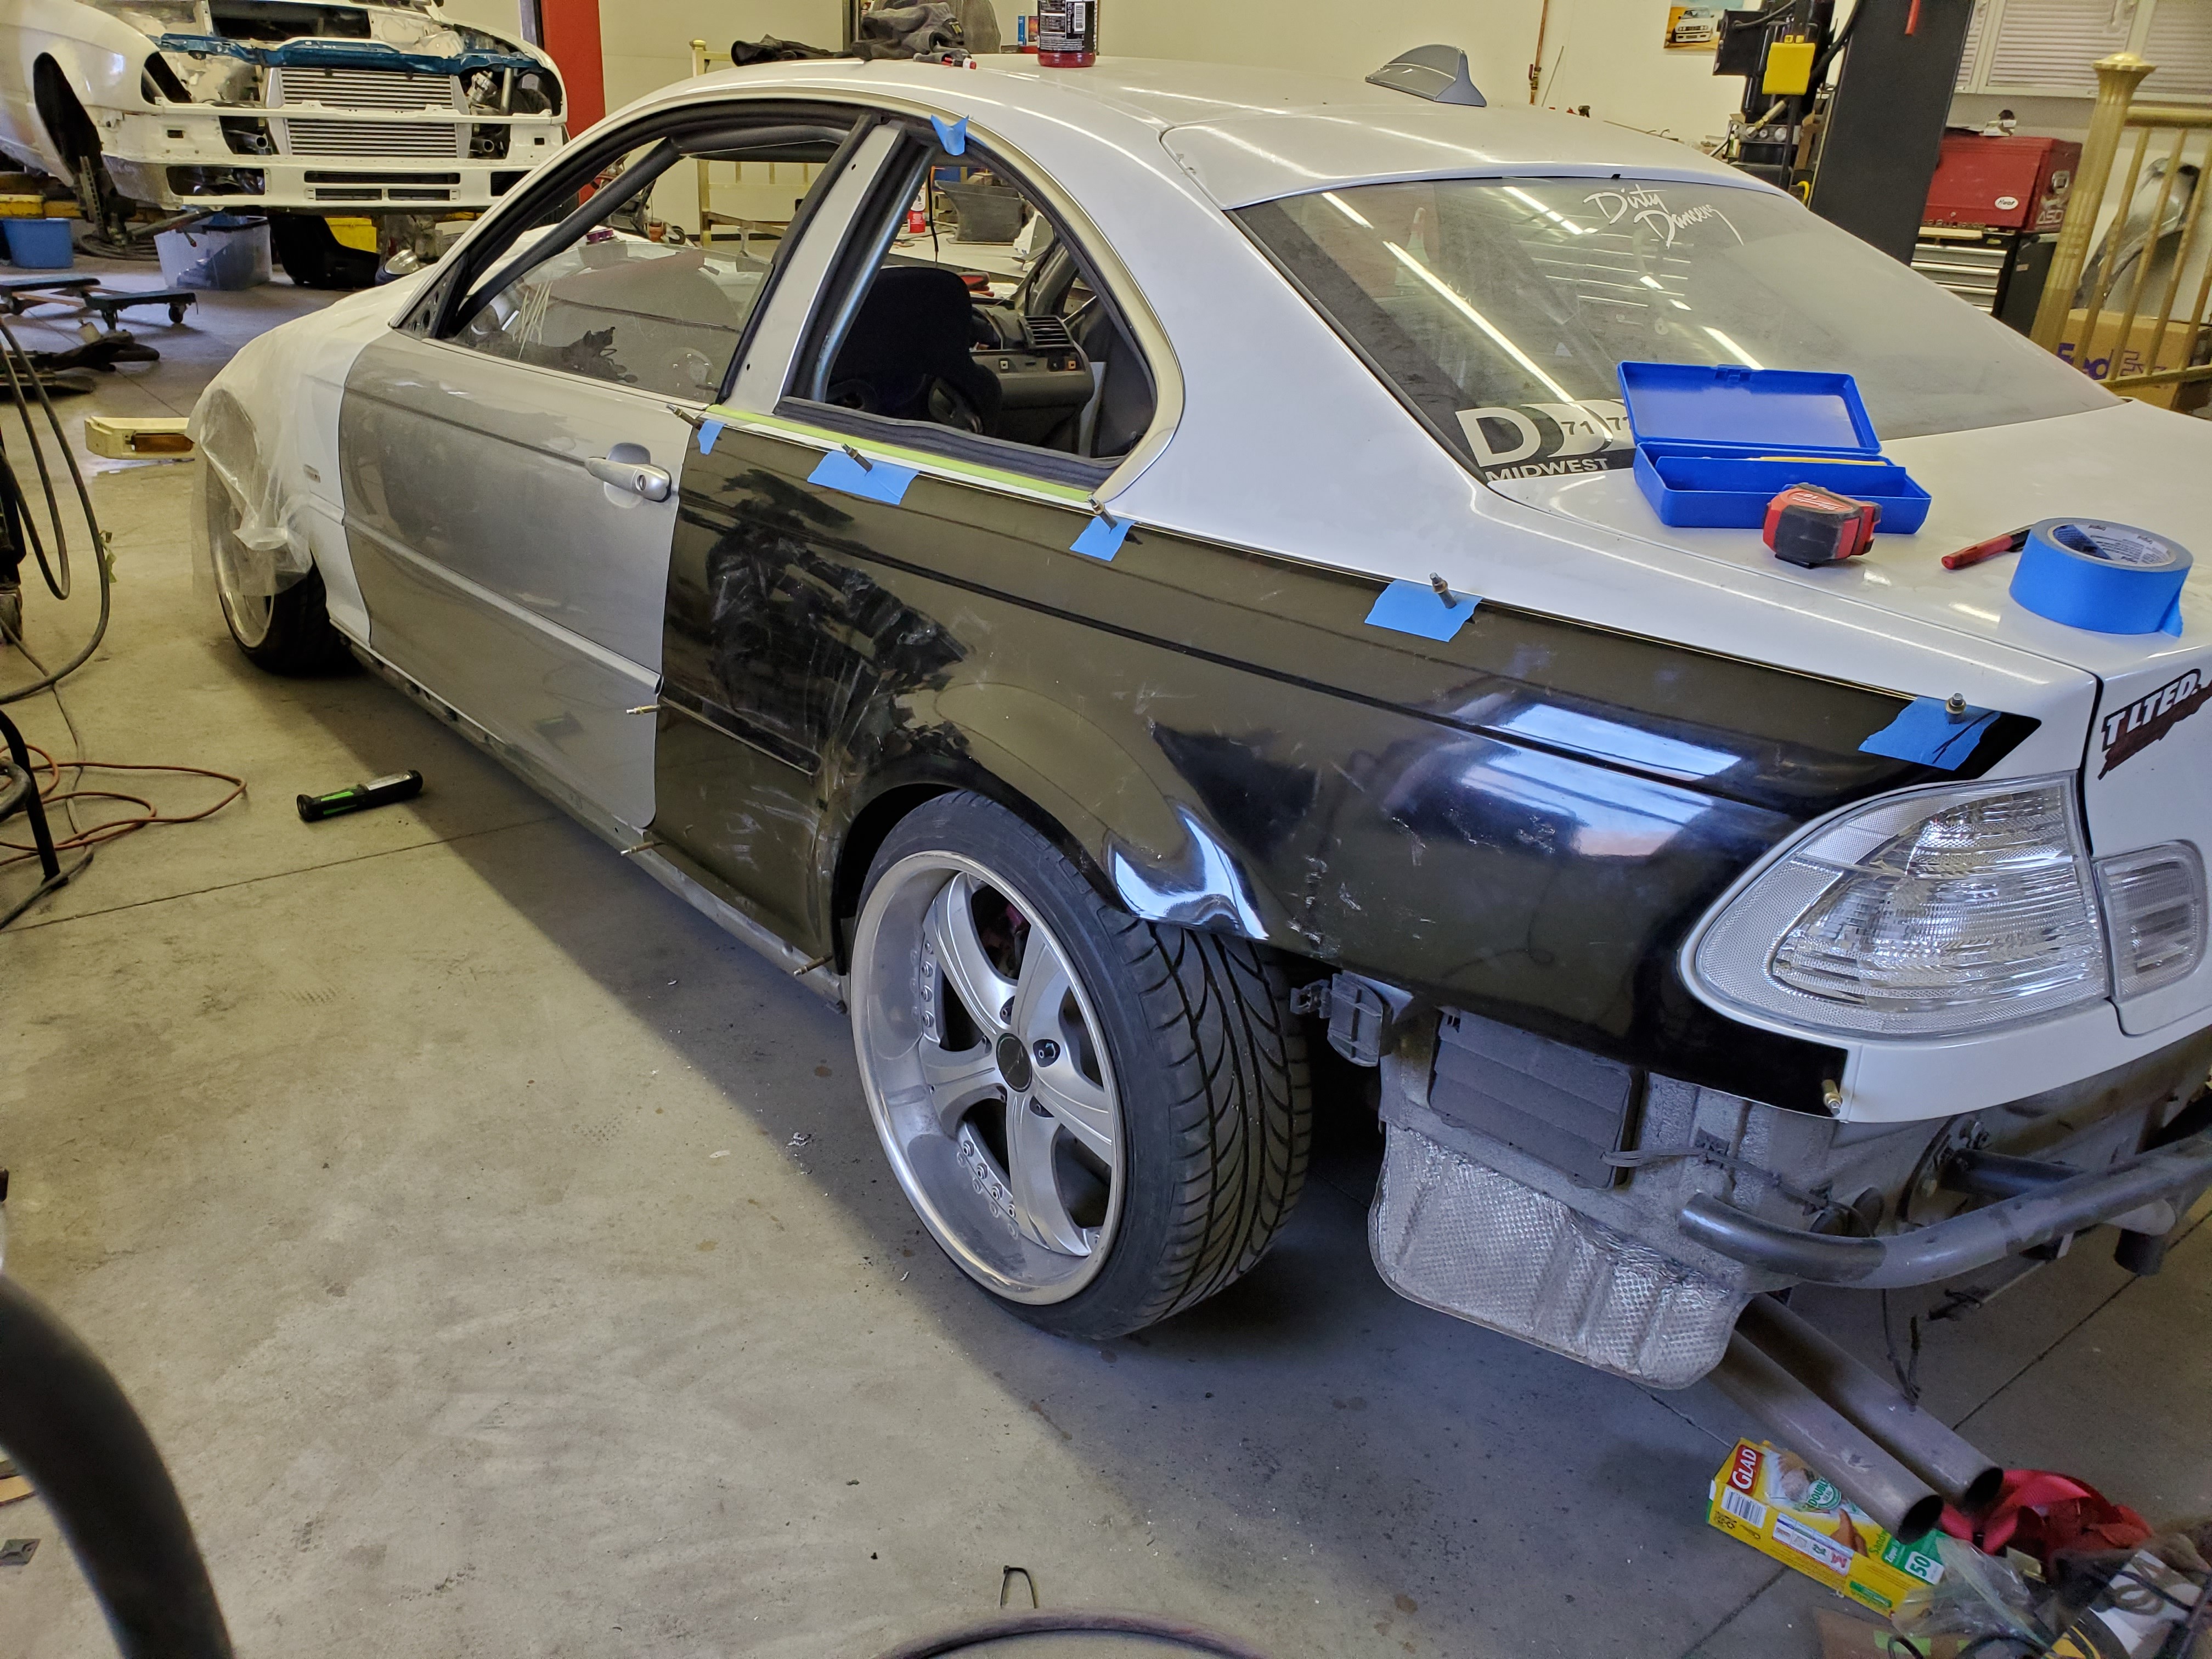
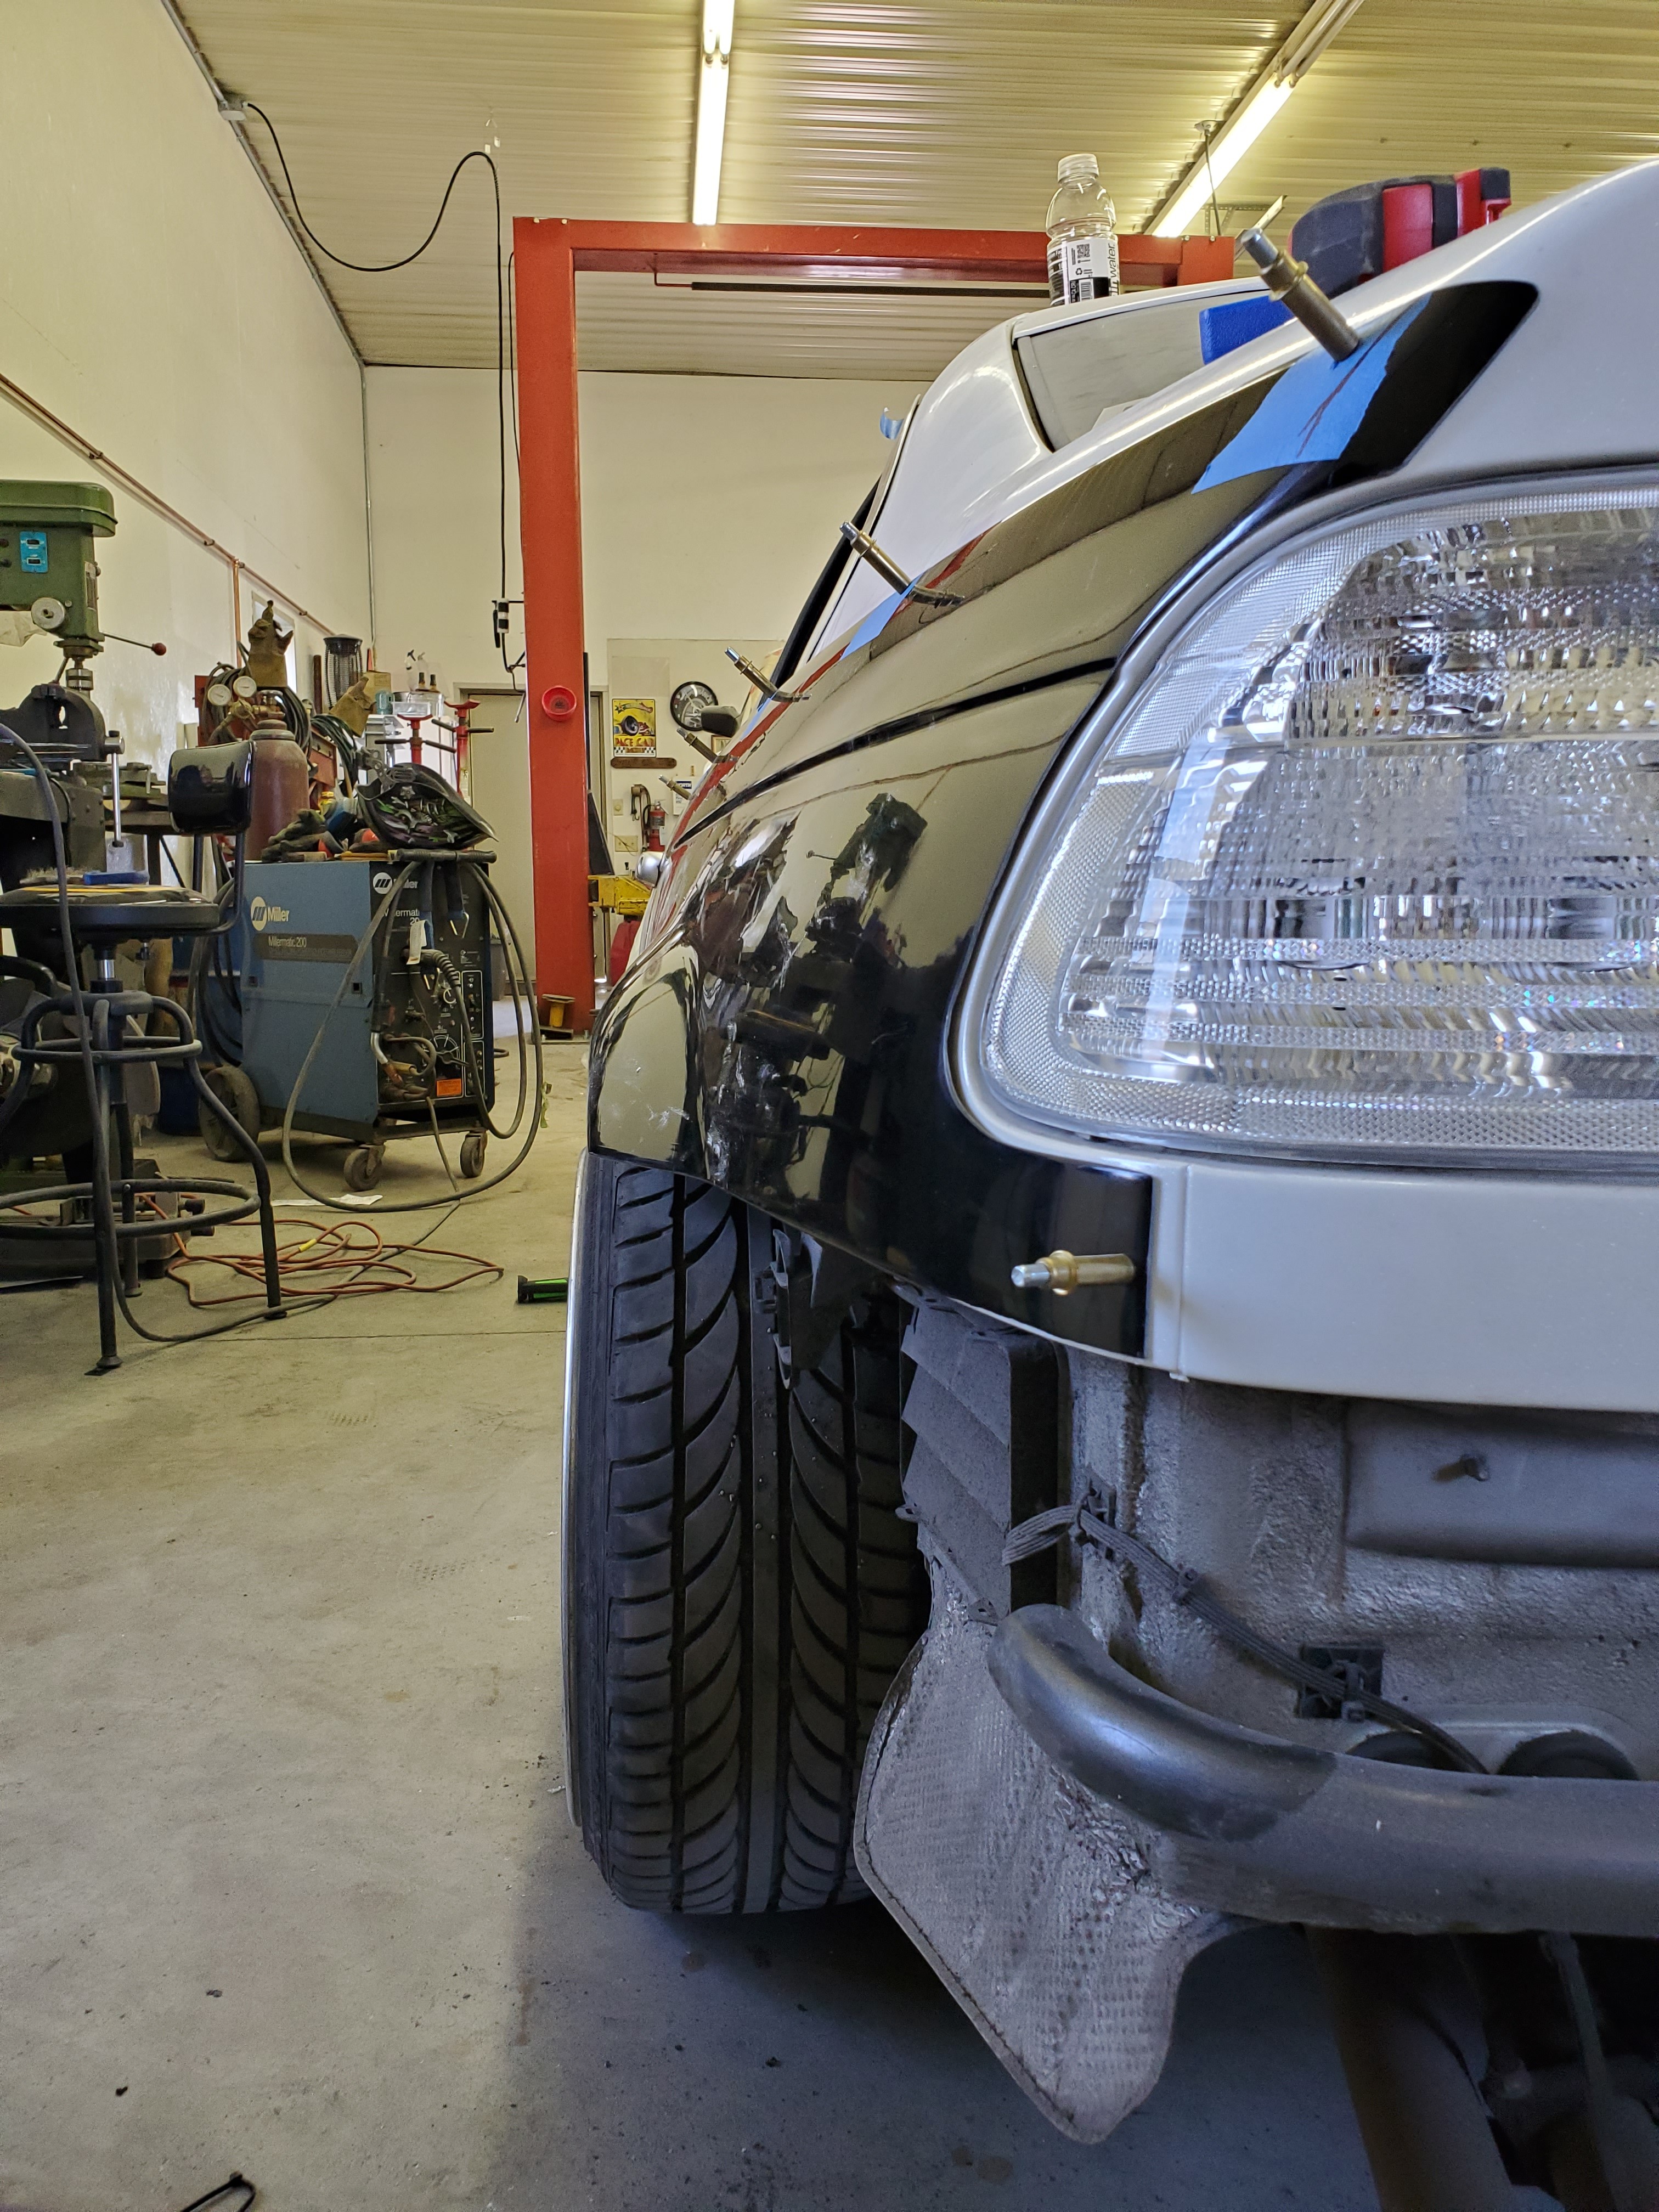
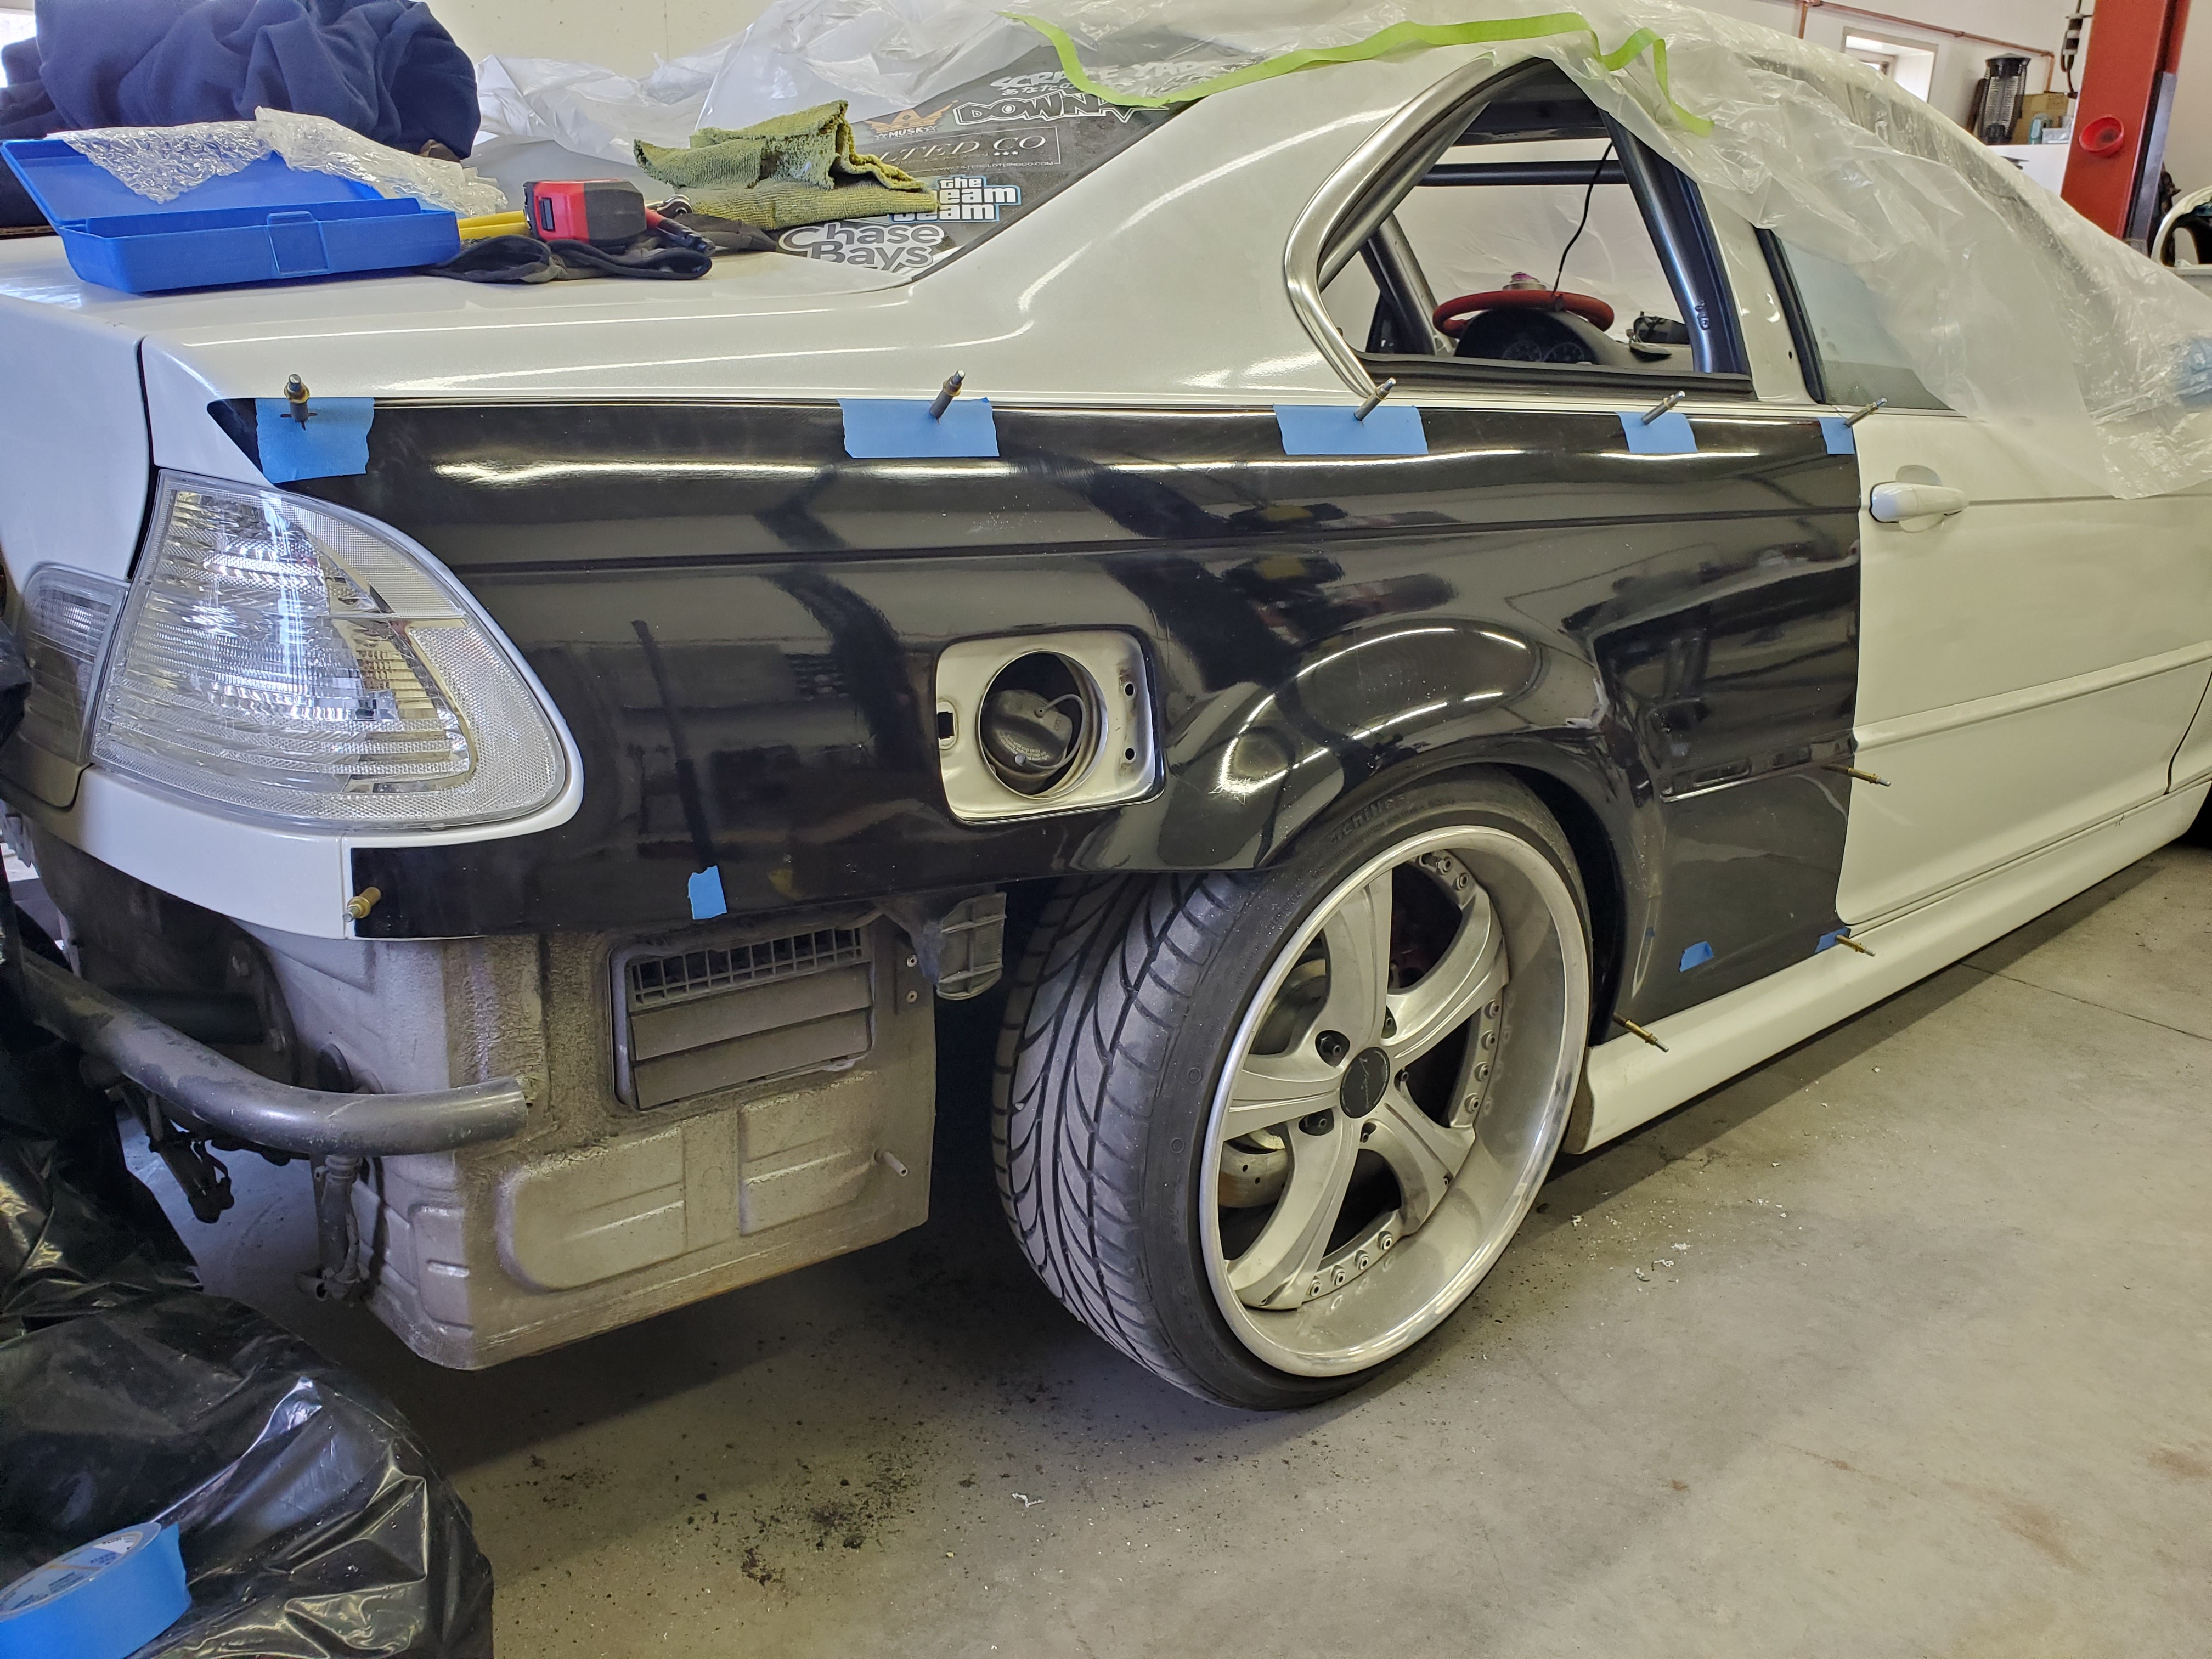
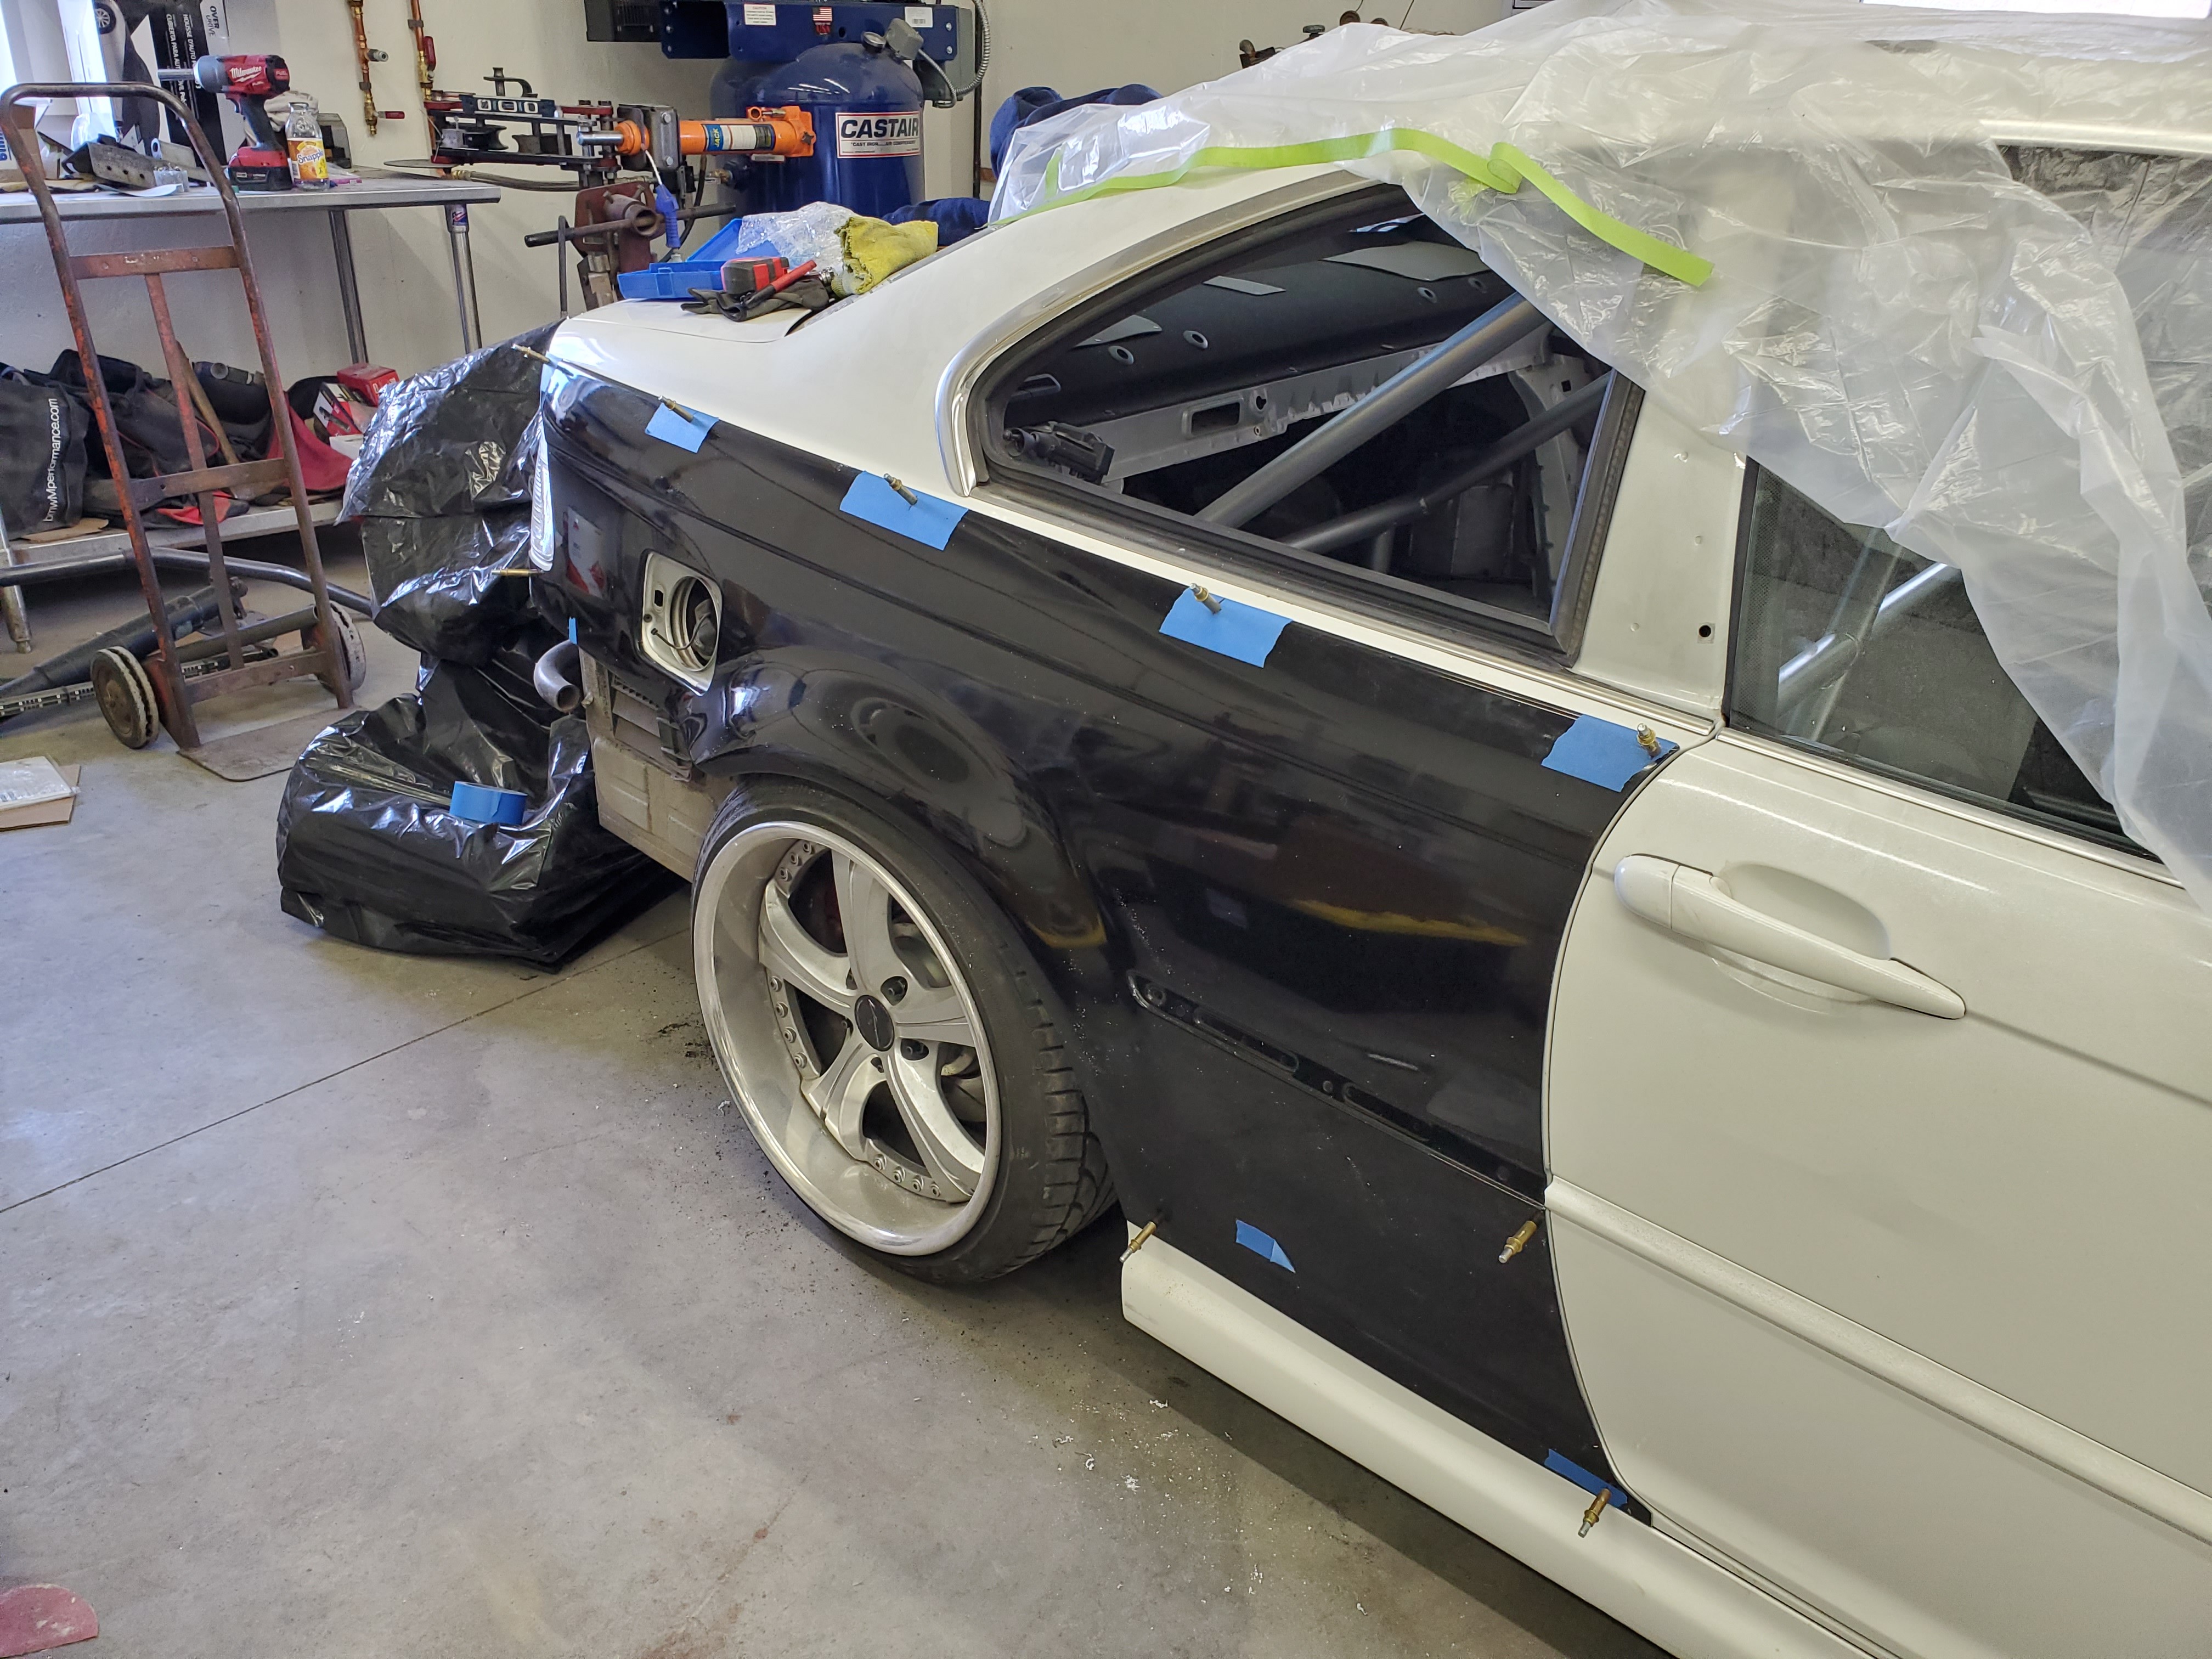
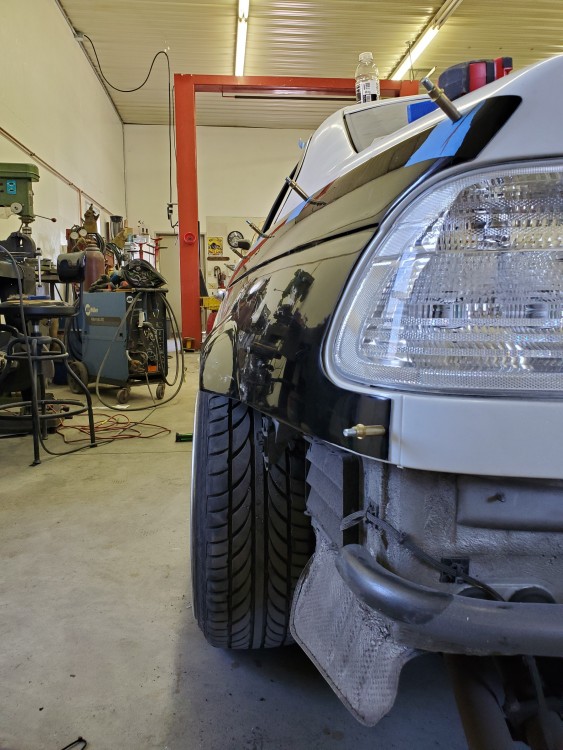
                                    Finally I fitted the rear overs, all they need now is some wrap and final install.

                                    Left side.
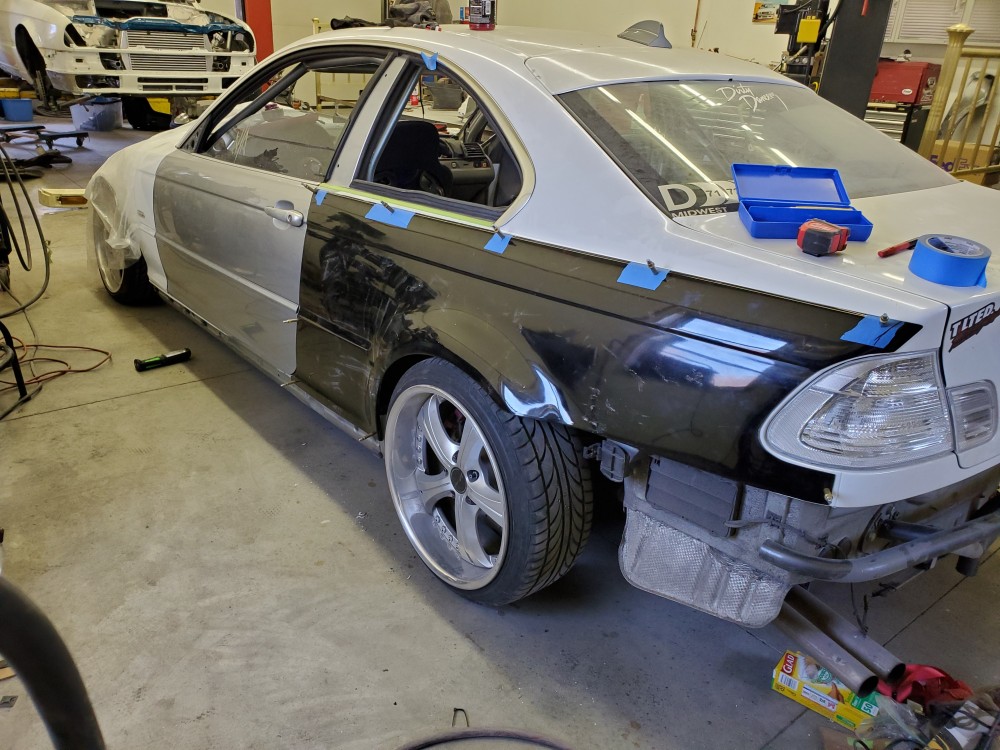
                                    20200418155615.jpg

                                    Here is the over mounted also with a 25mm spacer for now
                                    20200418155632.jpg

                                    And the right side.

                                    20200419124422.jpg

                                    20200419124436.jpg

                                    Things are moving along nicely. Alot of things to address still but nothing super huge.

                                    Also I did test fit the sunroof delete and it fits great, just need to get some new bolts.

                                    Hopefully the windshield will be installed this week as well.

                                    But thats it for this weekend!

                                    1 Reply Last reply
                                    0
                                    • SteelBlueS
                                      SteelBlueS
                                      SteelBlue
                                      wrote on last edited by
                                      #325

                                      Fitment looks great in the rear. What kit is it? Don Musk?

                                      1 Reply Last reply
                                      0
                                      • TkuhnT
                                        TkuhnT
                                        Tkuhn
                                        wrote on last edited by
                                        #326

                                        SteelBlue said:

                                        Fitment looks great in the rear. What kit is it? Don Musk? 

                                        Thanks! And yes these are the Musk M3 style overs. Fit very well, barely needed any trimming.

                                        1 Reply Last reply
                                        0
                                        • jc43089J
                                          jc43089J
                                          jc43089
                                          wrote on last edited by
                                          #327

                                          Are you sure about DOT5 fluid?  Totally different and incompatible with regular brake fluid.  Just a heads up, it isn't a higher number is better thing.  There is also DOT 5.1 which is compatible with other "normal" brake fluids.

                                          DOT5 can only be used if it is a brand new system and never had other brake fluid in it.  Which maybe is your situation.

                                          2/94 325i Sedan, Arctic Gray: UUC LTW FW, EVO 3 and DSSR, +.020 Maxsil pistons, ASC delete, Eibach shocks/springs, 16" contour reps 238k
                                          3/93 325i Coupe, Schwarz 2, Sketchy stance action, ebay turbo, 300k
                                          '89 325i Vert, Alpine White: 5spd swapped, sold.
                                          '04 Toyota Sienna: 24V to 24V swap in progress

                                          '05 Volvo V70R, 6spd.  200k
                                          '85 Toyota LandCruiser: Lifted, gas hog. 205k
                                          '99 Nissan Maxima: 5spd, Rusty but trusty winter beater. 252k RIP.

                                          1 Reply Last reply
                                          0

                                          Hello! It looks like you're interested in this conversation, but you don't have an account yet.

                                          Getting fed up of having to scroll through the same posts each visit? When you register for an account, you'll always come back to exactly where you were before, and choose to be notified of new replies (either via email, or push notification). You'll also be able to save bookmarks and upvote posts to show your appreciation to other community members.

                                          With your input, this post could be even better 💗

                                          Register Login
                                          Reply
                                          • Reply as topic
                                          Log in to reply
                                          • Oldest to Newest
                                          • Newest to Oldest
                                          • Most Votes


                                          • Login

                                          • Don't have an account? Register

                                          • Login or register to search.
                                          Powered by NodeBB Contributors
                                          • First post
                                            Last post
                                          0
                                          • Categories
                                          • Recent
                                          • Tags
                                          • Popular
                                          • Users
                                          • Groups