Skip to content
  • Categories
  • Recent
  • Tags
  • Popular
  • Users
  • Groups
Skins
  • Light
  • Brite
  • Cerulean
  • Cosmo
  • Flatly
  • Journal
  • Litera
  • Lumen
  • Lux
  • Materia
  • Minty
  • Morph
  • Pulse
  • Sandstone
  • Simplex
  • Sketchy
  • Spacelab
  • United
  • Yeti
  • Zephyr
  • Dark
  • Cyborg
  • Darkly
  • Quartz
  • Slate
  • Solar
  • Superhero
  • Vapor

  • Default (No Skin)
  • No Skin
Collapse
WIBIMMERS logo

WIBIMMERS

  1. Home
  2. General Discussion
  3. Members BMWs
  4. Non-BMW Stuff on a BMW Forum

Non-BMW Stuff on a BMW Forum
Scheduled Pinned Locked Moved Members BMWs
1.2k Posts 29 Posters 0 Views 1 Watching
  • Oldest to Newest
  • Newest to Oldest
  • Most Votes
Reply
  • Reply as topic
Log in to reply
This topic has been deleted. Only users with topic management privileges can see it.
  • jc43089J
    jc43089J
    jc43089
    wrote on last edited by
    #513

    4.8 cfm at 40PSI is not going to be enough.  I think my gun spec is around 12 cfm at 25psi.  Mine is about 4.5 @ 90PSI which is significantly more air than at 40PSI.  Also the more storage you have the more of a buffer you have.  I need to get my big compressor hooked up.  It puts out 21cfm at 175PSI.  It only runs about 50% duty even sandblasting.

    I used Nason brand paint from my local parts store and I would use it again, good price and it sprayed nicely.

    2/94 325i Sedan, Arctic Gray: UUC LTW FW, EVO 3 and DSSR, +.020 Maxsil pistons, ASC delete, Eibach shocks/springs, 16" contour reps 238k
    3/93 325i Coupe, Schwarz 2, Sketchy stance action, ebay turbo, 300k
    '89 325i Vert, Alpine White: 5spd swapped, sold.

    '04 Toyota Sienna: 24V to 24V swap in progress

    '05 Volvo V70R, 6spd.  200k
    '85 Toyota LandCruiser: Lifted, gas hog. 205k
    '99 Nissan Maxima: 5spd, Rusty but trusty winter beater. 252k RIP.

    1 Reply Last reply
    0
    • G
      G
      gilber33
      wrote on last edited by
      #514

      jc43089 said:

      4.8 cfm at 40PSI is not going to be enough.  I think my gun spec is around 12 cfm at 25psi.  Mine is about 4.5 @ 90PSI which is significantly more air than at 40PSI.  Also the more storage you have the more of a buffer you have.  I need to get my big compressor hooked up.  It puts out 21cfm at 175PSI.  It only runs about 50% duty even sandblasting.

      I used Nason brand paint from my local parts store and I would use it again, good price and it sprayed nicely.

      I was browsing compressors and found a few that are 6 scfm at 40psi and 5 scfm at 90. 

      Even if I invest in a new compressor and hvlp guns, the cost of that and paint is still SUBSTANTIALLY cheaper than giving the car to a shop to do.

      It would still be a diy paint job, and although I want it to look good, I need to maintain a bit of patina so I’m not afraid to drive it.

      1 Reply Last reply
      0
      • jc43089J
        jc43089J
        jc43089
        wrote on last edited by
        #515

        gilber33 said:

        I was browsing compressors and found a few that are 6 scfm at 40psi and 5 scfm at 90. 

        Even if I invest in a new compressor and hvlp guns, the cost of that and paint is still SUBSTANTIALLY cheaper than giving the car to a shop to do.

        It would still be a diy paint job, and although I want it to look good, I need to maintain a bit of patina so I’m not afraid to drive it. 

        This is how I justify many tool purchases.  Remember that that size class of compressors is borderline too small anyway.  I was painting a hood, bumper cover and one fender so I could pause between parts.  When you paint a whole car you need to keep going to maintain the wet edge so you can't just stop and wait for the compressor to keep up.

        A minimum of something like this would be good.  And it would do any other compressed air tasks.  Downsides are that it isn't portable, and it needs 240V which any decent sized compressor will.  And it is only a single stage so the efficiency is lower.

        https://www.menards.com/main/tools/air-compressors/masterforce-reg-belt-drive-60-gallon-155-psi-stationary-electric-vertical-air-compressor/mela3706056/p-1444439609007-c-12910.htm?tid=-6497802411279208338&ipos=1

        Going to a 2 stage is really nice because the volume of air jumps significantly and the compressor isn't working so hard to produce high pressures.  It takes more justifying to your wife though.

        https://www.menards.com/main/tools/air-compressors/masterforce-reg-2-stage-80-gallon-175-psi-stationary-electric-vertical-air-compressor/mev5048055/p-1444439608567-c-12910.htm?tid=-4341116177322132525&ipos=2

        Another option though is to borrow another smaller compressor like yours and hook them together and the combined air output will be plenty.  Just make sure they are plugged into different circuits so the breaker doesn't trip.

        2/94 325i Sedan, Arctic Gray: UUC LTW FW, EVO 3 and DSSR, +.020 Maxsil pistons, ASC delete, Eibach shocks/springs, 16" contour reps 238k
        3/93 325i Coupe, Schwarz 2, Sketchy stance action, ebay turbo, 300k
        '89 325i Vert, Alpine White: 5spd swapped, sold.

        '04 Toyota Sienna: 24V to 24V swap in progress

        '05 Volvo V70R, 6spd.  200k
        '85 Toyota LandCruiser: Lifted, gas hog. 205k
        '99 Nissan Maxima: 5spd, Rusty but trusty winter beater. 252k RIP.

        1 Reply Last reply
        0
        • G
          G
          gilber33
          wrote on last edited by
          #516

          Yeah, neither of those will be happening. Lol

          I can justify it by spending $300 on a compressor and it being just good enough. 

          I would most likely remove the hood and fenders to do it. I have some repairs that I need to make on those so I would do it in pieces. I think it also gives me some more room for error rather than trying to do the entire car at once.  

          Home Depot has a 30 gallon Husky compressor that is 6.8 scfm at 40psi for $300.

          the HF hvlp gun needs 6 scfm at 40 psi so that compressor should be on the bring of good enough.

          1 Reply Last reply
          0
          • G
            G
            gilber33
            wrote on last edited by
            #517

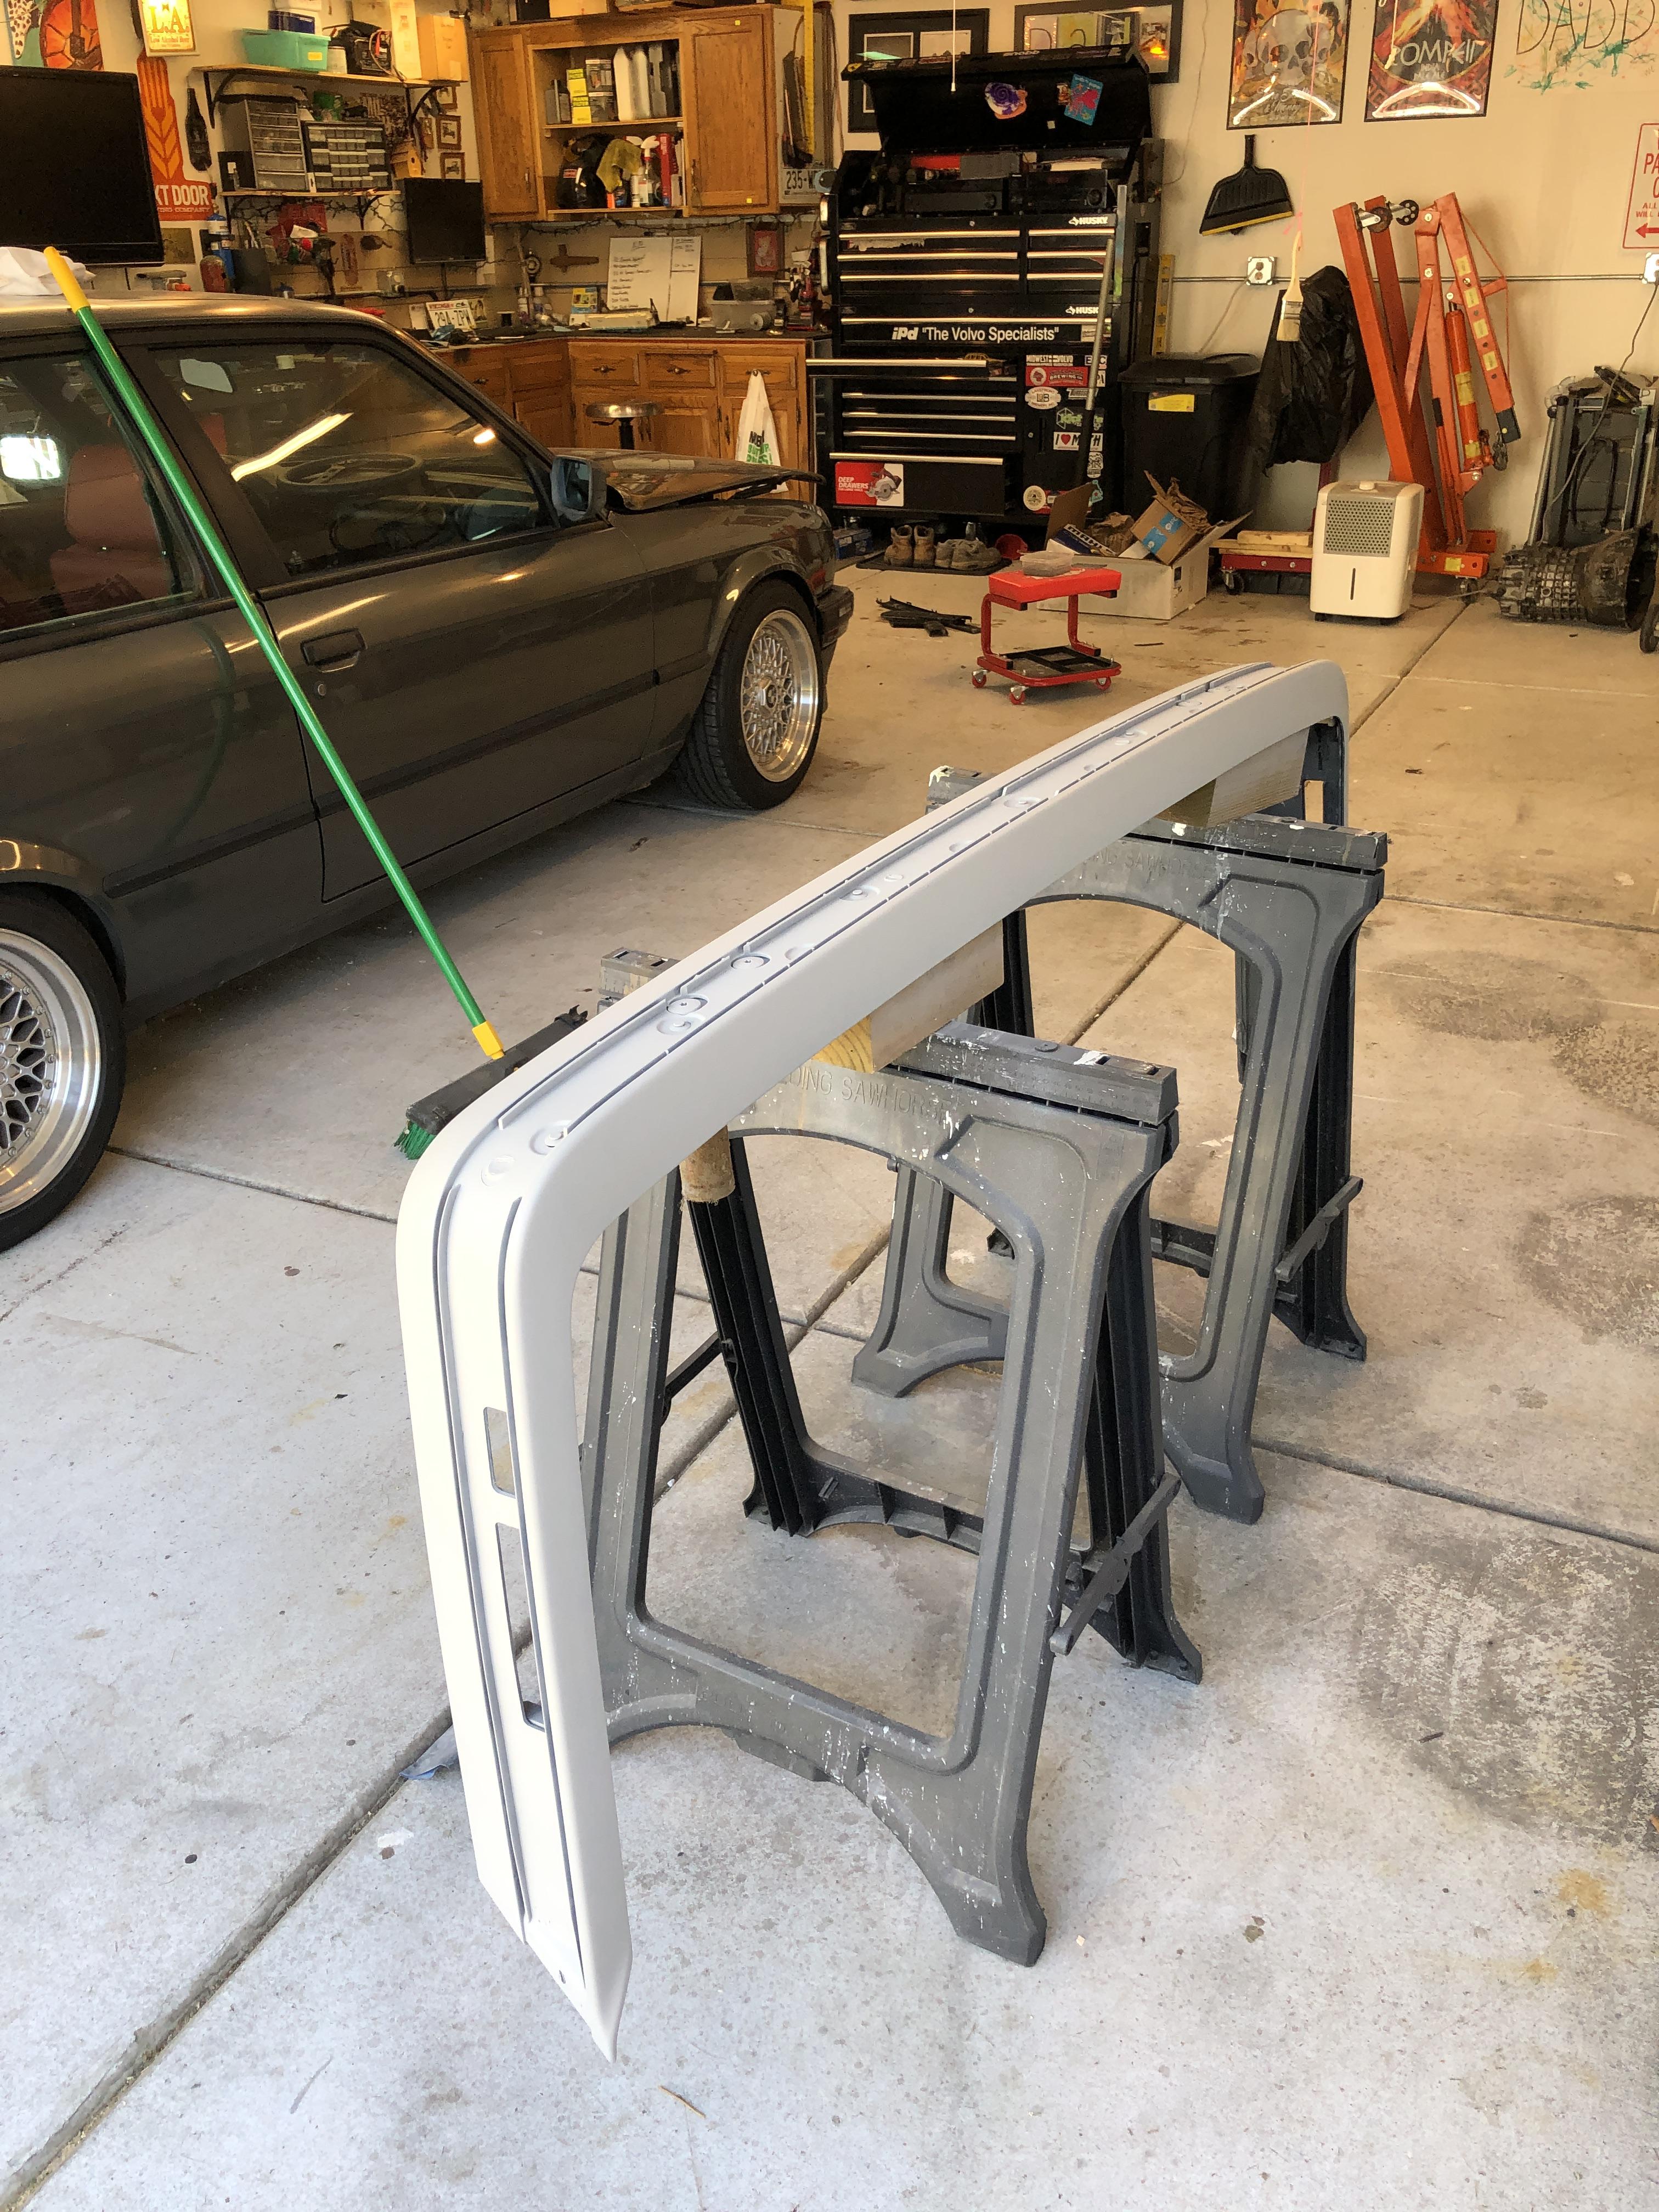
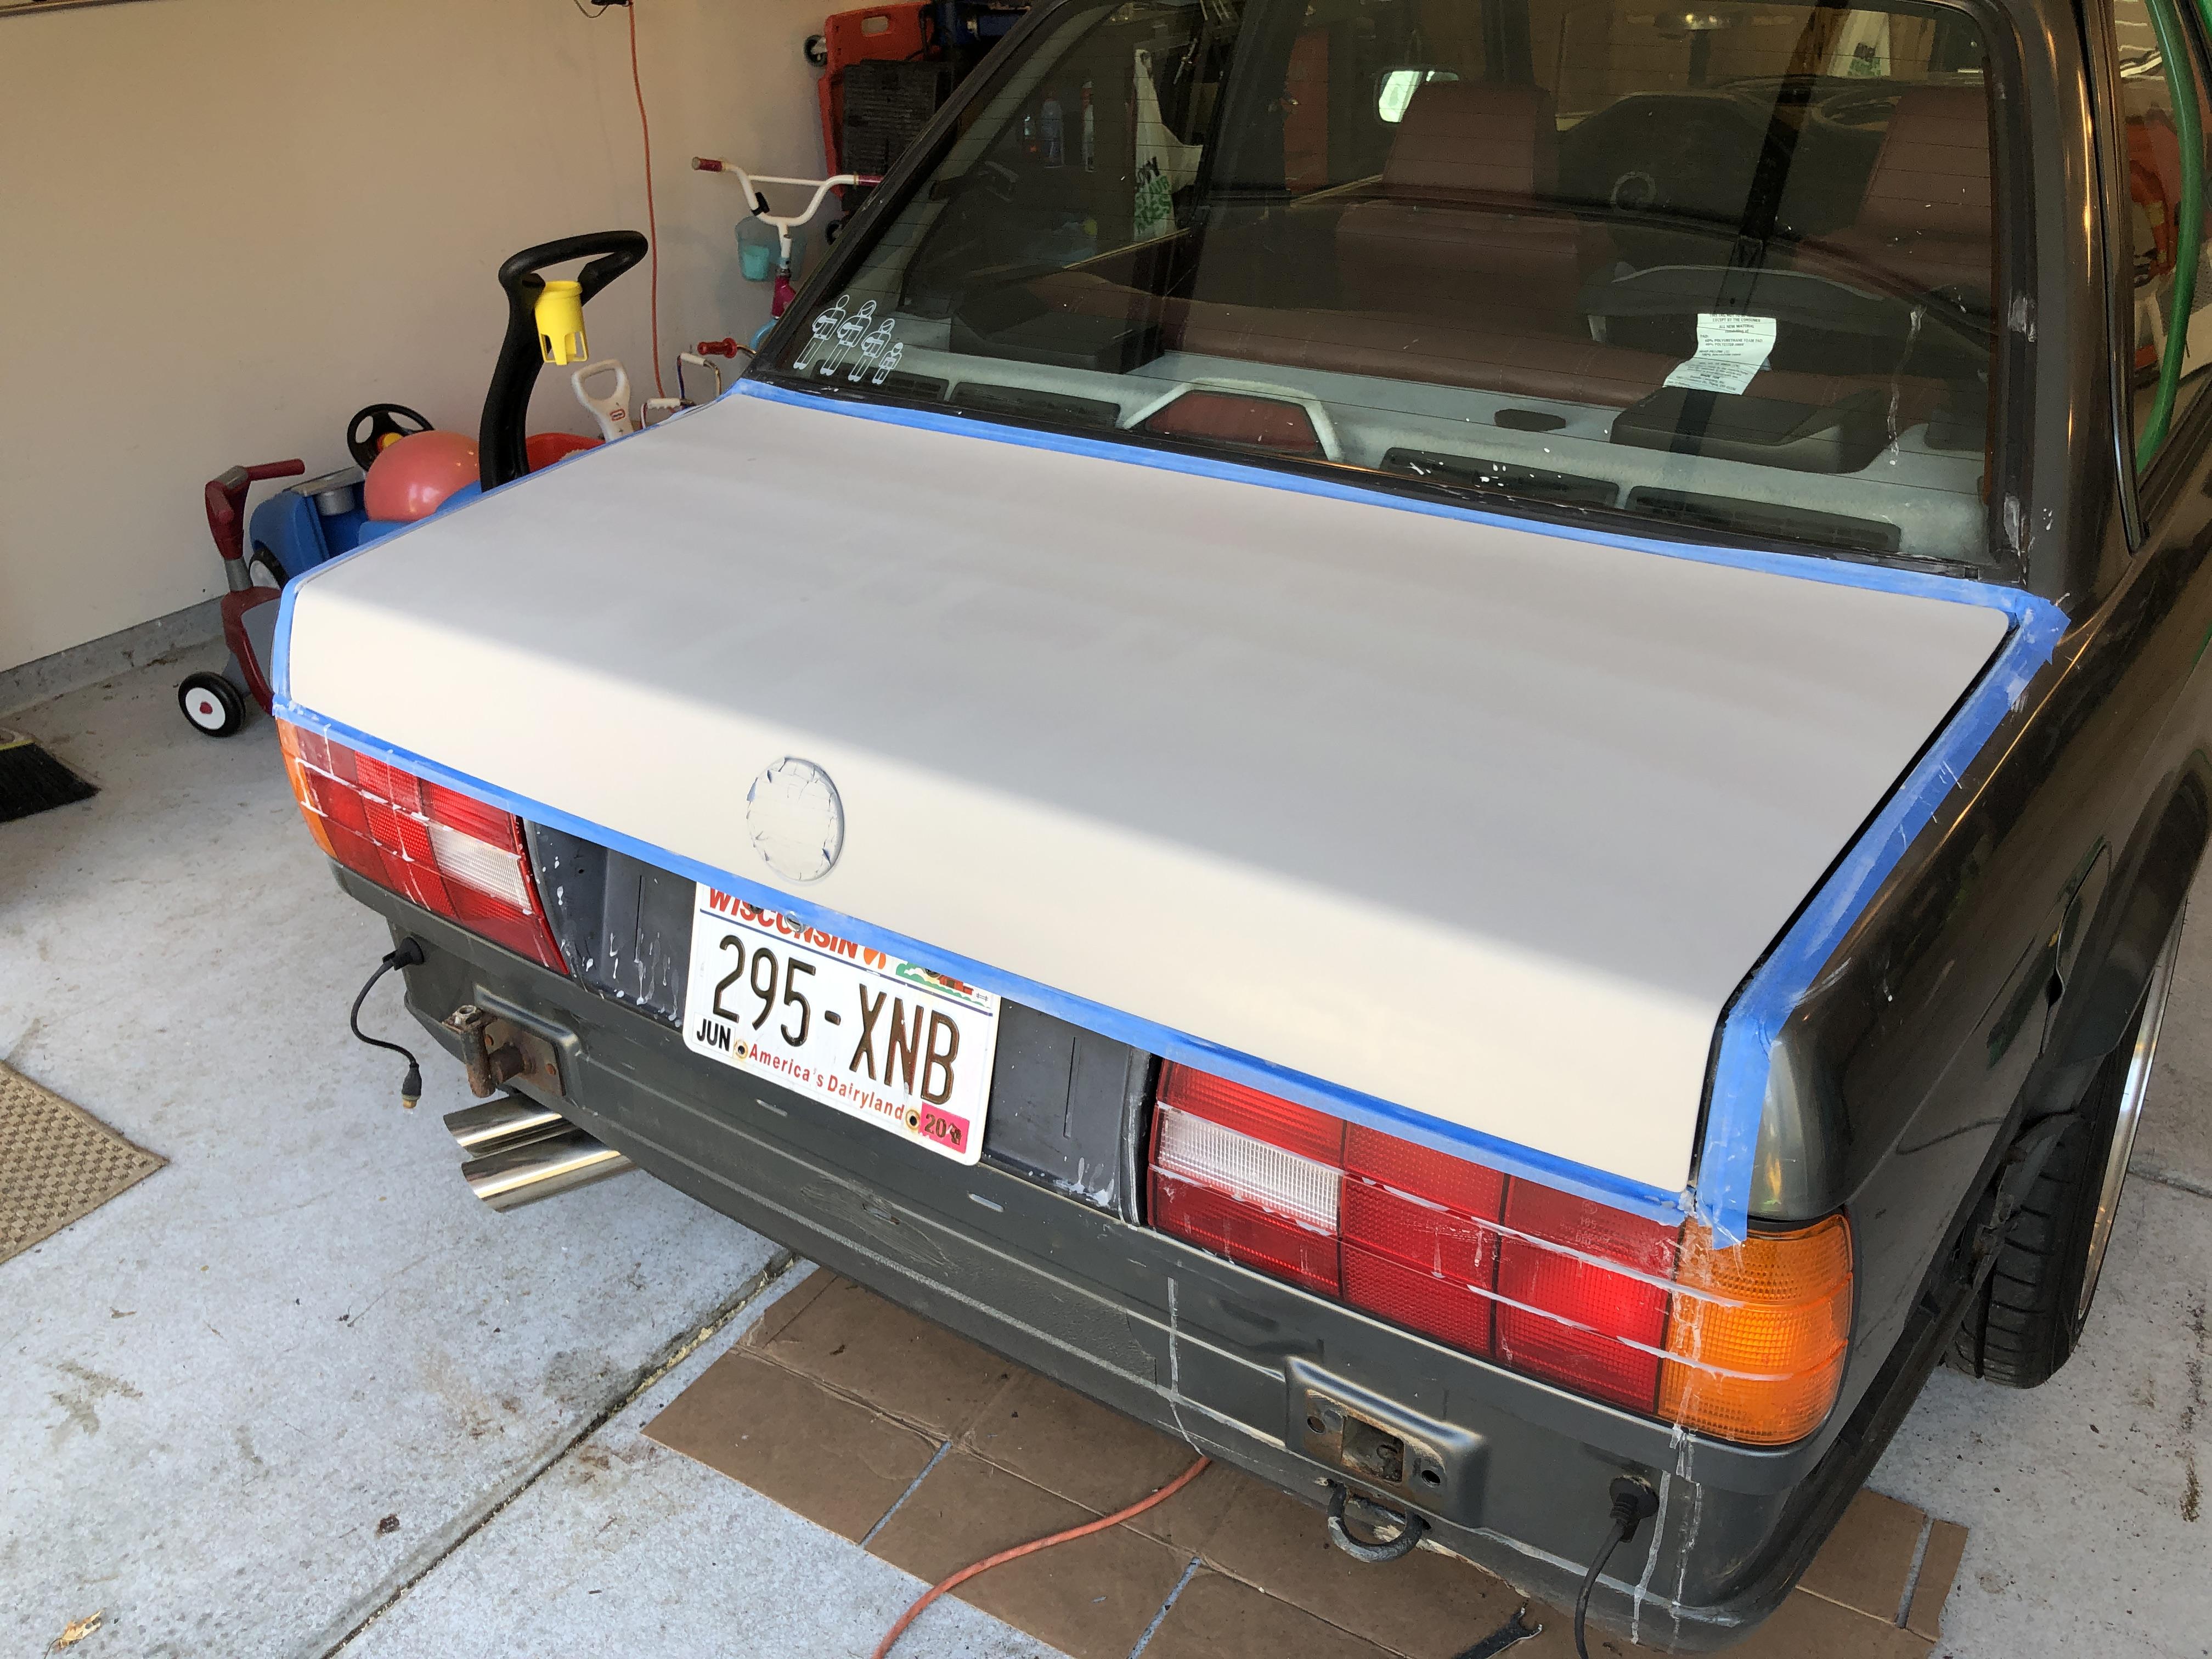
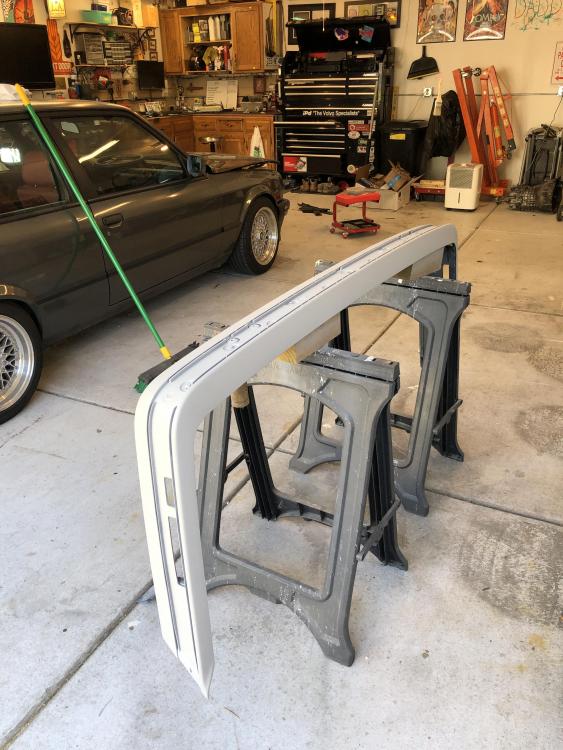
            Bumper and trunk lid are primed. What I’ve learned so far is to get more primer than you think you need. I could have used more can but I had just enough. Sanding by hand sucks and a pneumatic sander would save a significant amount of time. 

            I think this is good practice, however, I would say that anything over this amount of painting an hvlp setup is a must. 

            I also didn’t go full paint booth painting the primer because I know I’ll be sanding it, but after it’s sanded, I’ll be much more diligent in sealing the space off  
            30BA4174-44C7-4404-9A16-C34C852CD926.jpeg

            DF336140-C491-4359-A7F4-1758FD6341DF.jpeg

            1 Reply Last reply
            0
            • SteelBlueS
              SteelBlueS
              SteelBlue
              wrote on last edited by
              #518

              gilber33 said:

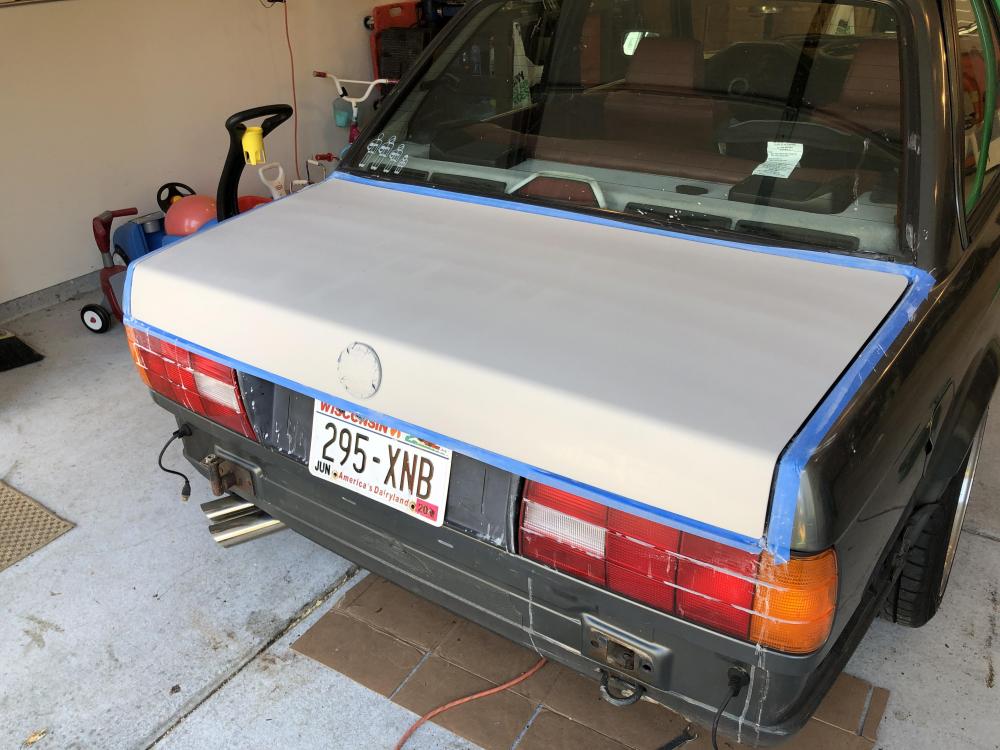
              Bumper and trunk lid are primed. What I’ve learned so far is to get more primer than you think you need. I could have used more can but I had just enough. Sanding by hand sucks and a pneumatic sander would save a significant amount of time. 

              I think this is good practice, however, I would say that anything over this amount of painting an hvlp setup is a must. 

              I also didn’t go full paint booth painting the primer because I know I’ll be sanding it, but after it’s sanded, I’ll be much more diligent in sealing the space off  
              30BA4174-44C7-4404-9A16-C34C852CD926.jpeg

              DF336140-C491-4359-A7F4-1758FD6341DF.jpeg

              Just make sure to wet sand in between coats to avoid orange peel. I’d also probably clay bar any of your existing paint that was in contact with the runs from the sanding that you’re doing on the car. Not sure how that material will stick to the clear coat. You getting the paint matched anywhere? There’s a good spot in Appleton that paint matches in aerosol cans(I don’t think you’re in Appleton).

              1 Reply Last reply
              0
              • GunMetalGreyG
                GunMetalGreyG
                GunMetalGrey
                wrote on last edited by
                #519

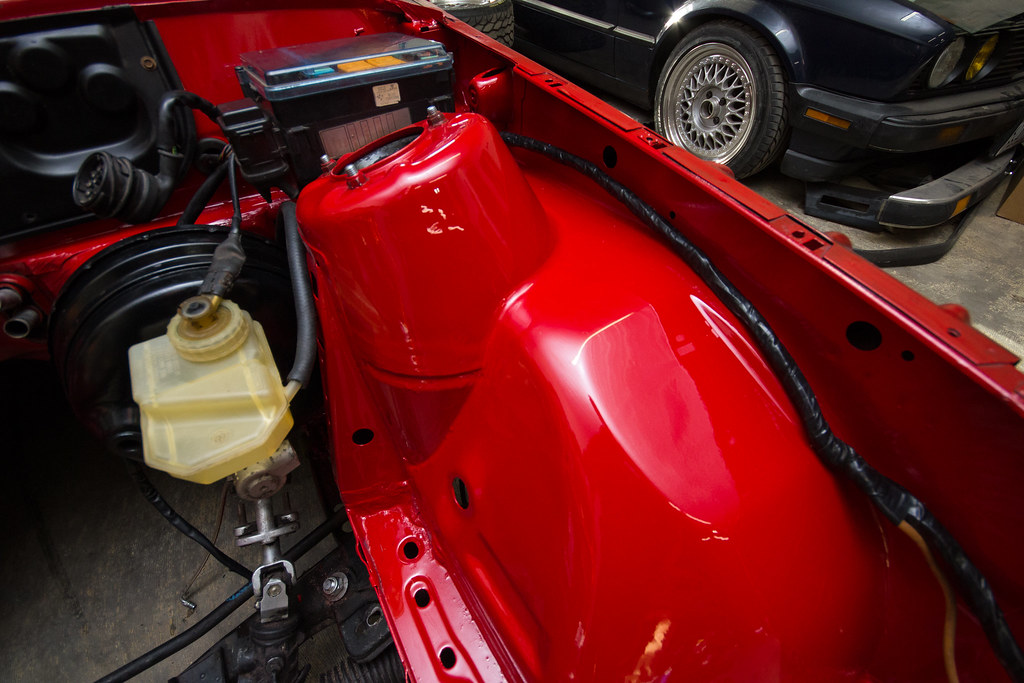
                I know I'm late to the party on the comments, but my engine bay had been shot with a home depot HVLP, and a 10 gal craftsman air compressor. 
                The only large difference is that I didn't have large flat areas that I had to worry about air consistency as much. Using an inline water trap, and a water trap right at the gun makes the largest difference. 
                Painting is something I always wanted to spend more time with, but takes time and space!

                Engine bay for reference. 

                Ben's E30 PaintBen's E30 Paint

                ...

                1 Reply Last reply
                1
                • G
                  G
                  gilber33
                  wrote on last edited by
                  #520

                  All the runs from sanding are behind the bumper and washes right off when I spray it with water. 

                  I wetsanded the clear coat. The directions from the company were to do the several coats of primer and then wetsand before base coat. 

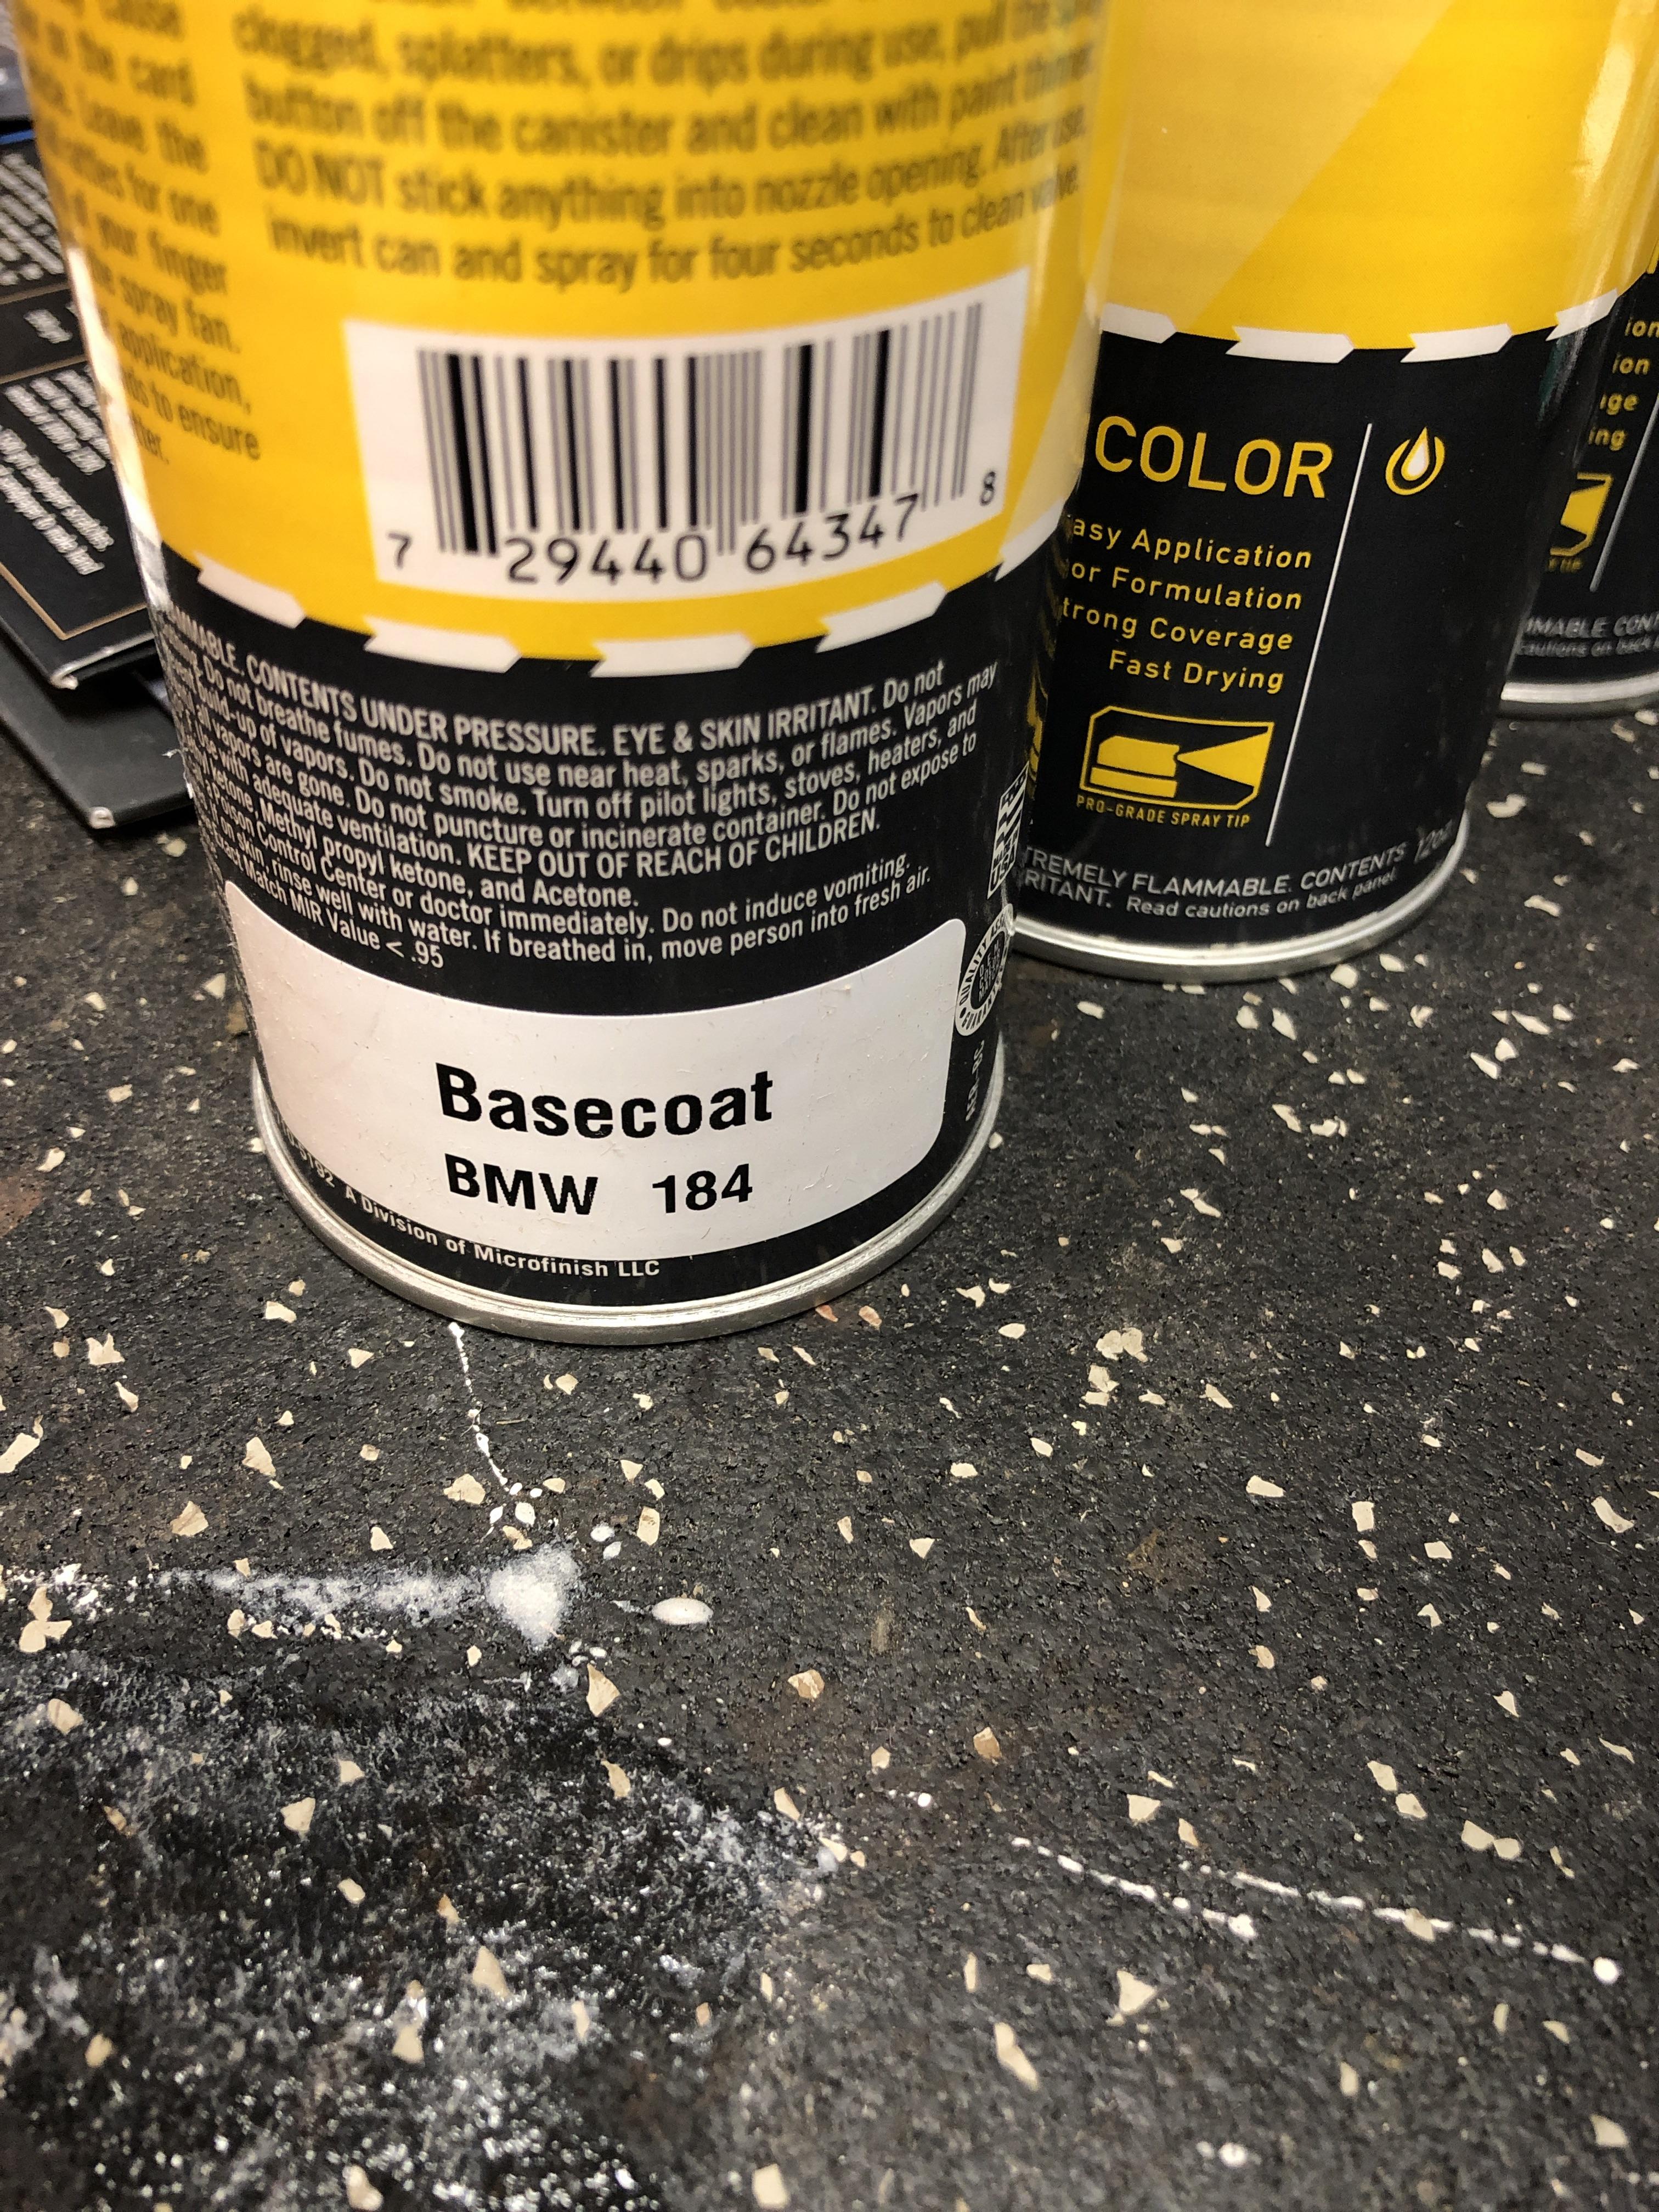
                  The paint is from automotive touchup. They mix your paint when you order it. So all the aerosol cans are premixed Delphin paint. 

                  They also do ready to spray paint for hvlp which is where I’ll get the next batch. 
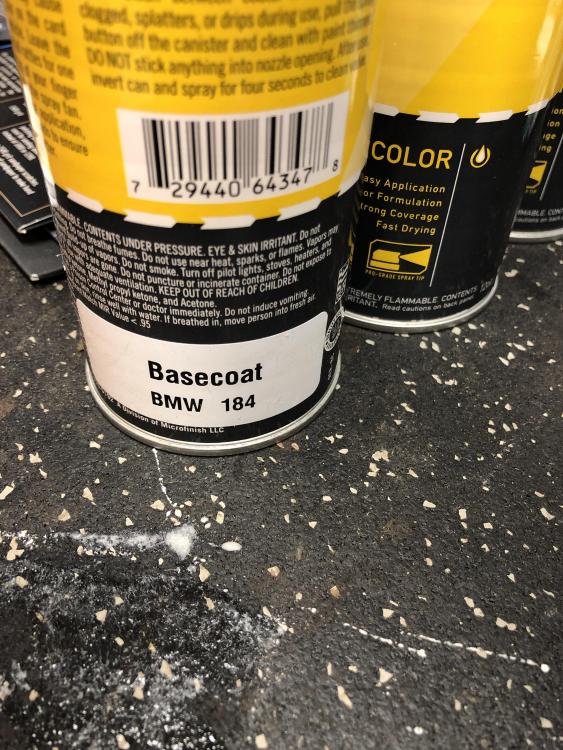
                  image.jpg

                  1 Reply Last reply
                  0
                  • GunMetalGreyG
                    GunMetalGreyG
                    GunMetalGrey
                    wrote on last edited by
                    #521

                    I've used those guys for my spray cans as well in the past, their price is good and the paint quality seems to be top notch.

                    Good work sir!

                    ...

                    1 Reply Last reply
                    1
                    • G
                      G
                      gilber33
                      wrote on last edited by
                      #522

                      GunMetalGrey said:

                      I know I'm late to the party on the comments, but my engine bay had been shot with a home depot HVLP, and a 10 gal craftsman air compressor. 
                      The only large difference is that I didn't have large flat areas that I had to worry about air consistency as much. Using an inline water trap, and a water trap right at the gun makes the largest difference. 
                      Painting is something I always wanted to spend more time with, but takes time and space!

                      Engine bay for reference. 

                      Ben's E30 PaintBen's E30 Paint

                      That looks really great. 

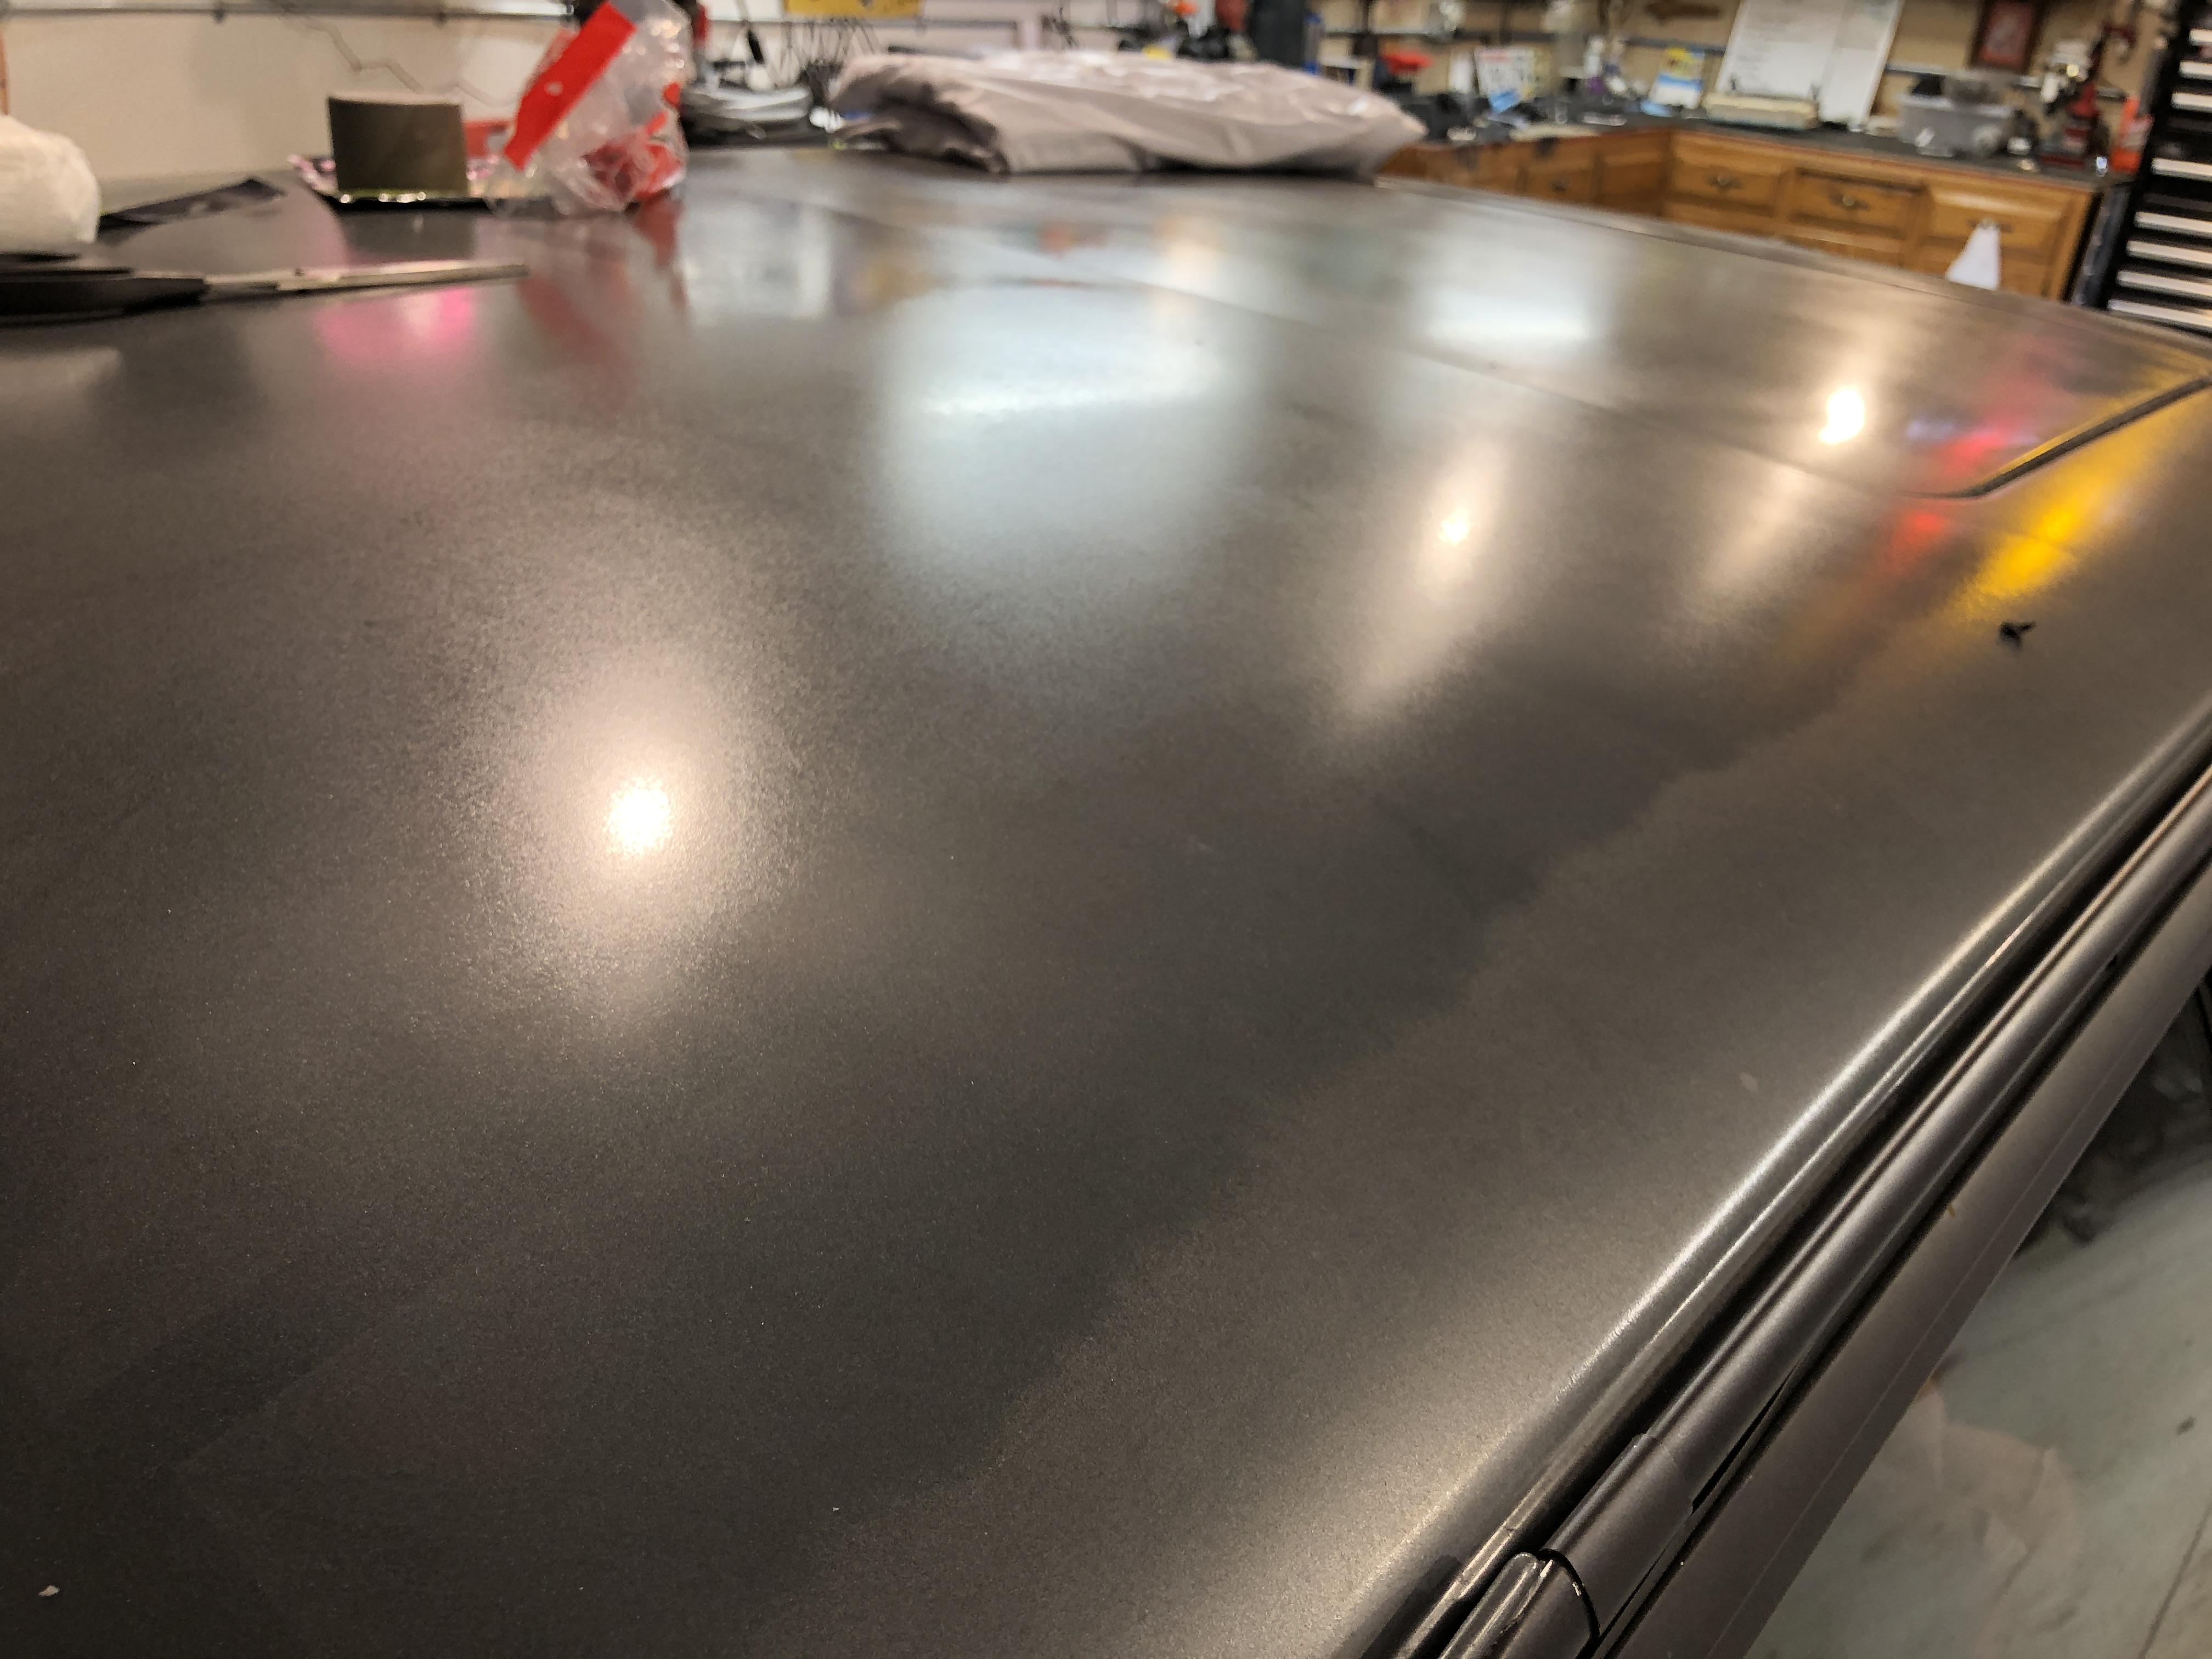
                      Ultimately I’m fine doing this in spraycans, but the rest I will do with a gun. I think this is giving me good practice for the process and the steps. Also, I can’t hand sand anymore, I need an air sander  

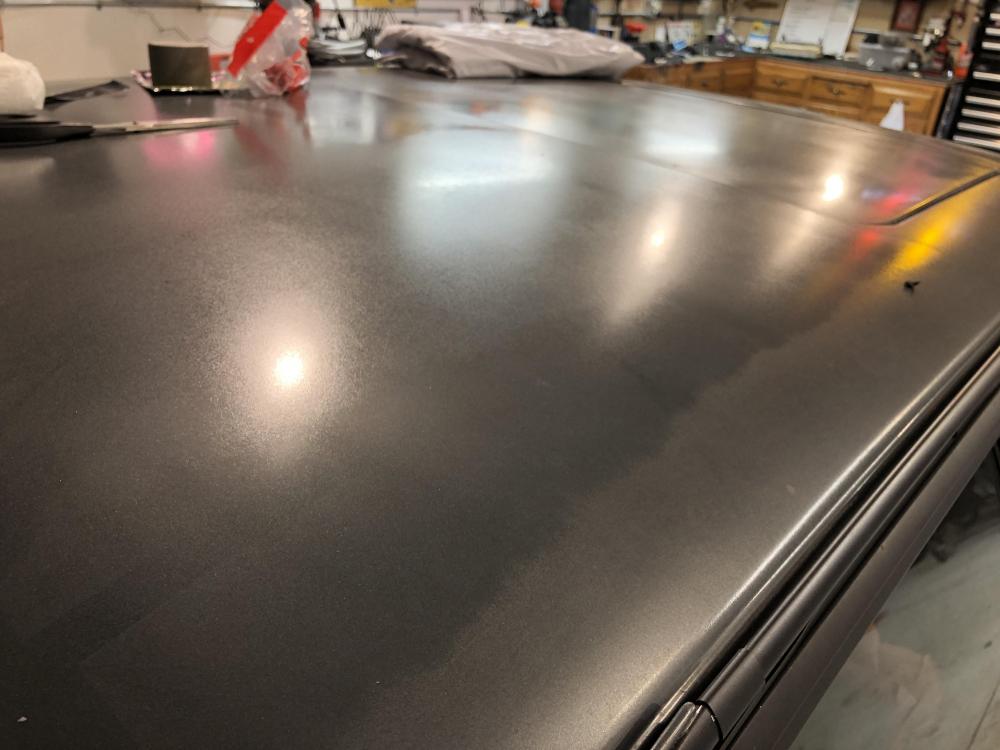
                      This is my roof. 
                      8159AA04-3C01-4744-8C38-52C3F851D335.jpeg

                      And I wish I could accurately take a picture of the rest of the car but it’s like the fender has clear coat on it and then the door has none. From afar, it’s not bad, but up close most of the clear coat is gone from the car.

                      1 Reply Last reply
                      0
                      • G
                        G
                        gilber33
                        wrote on last edited by
                        #523

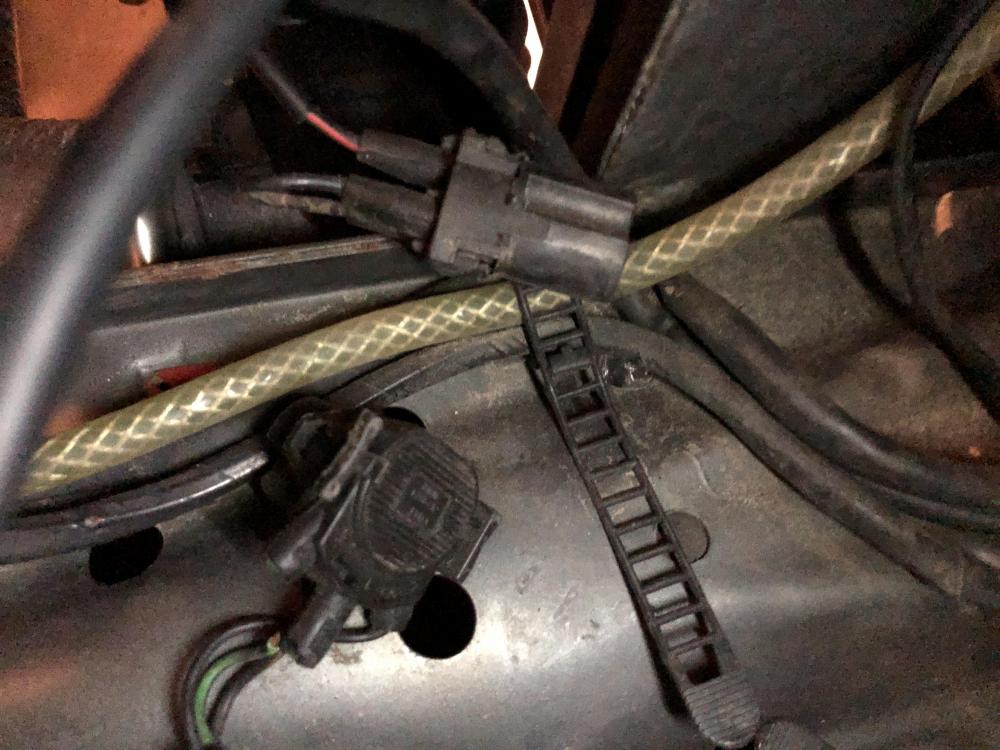
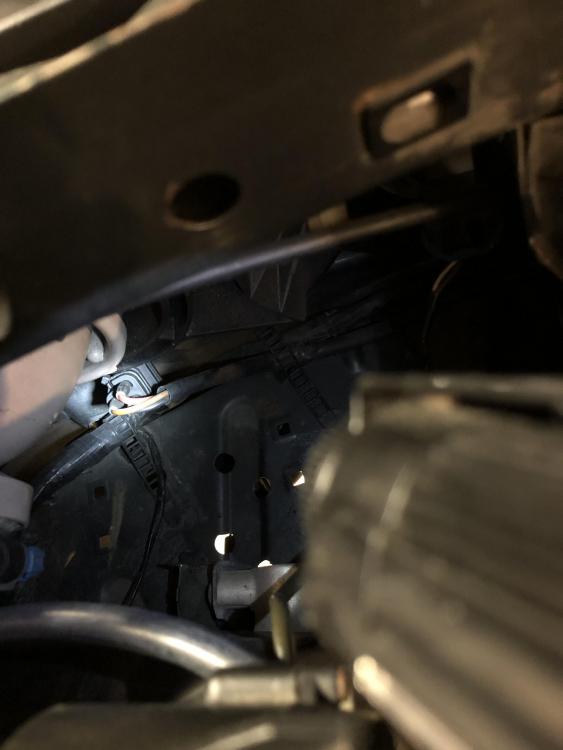
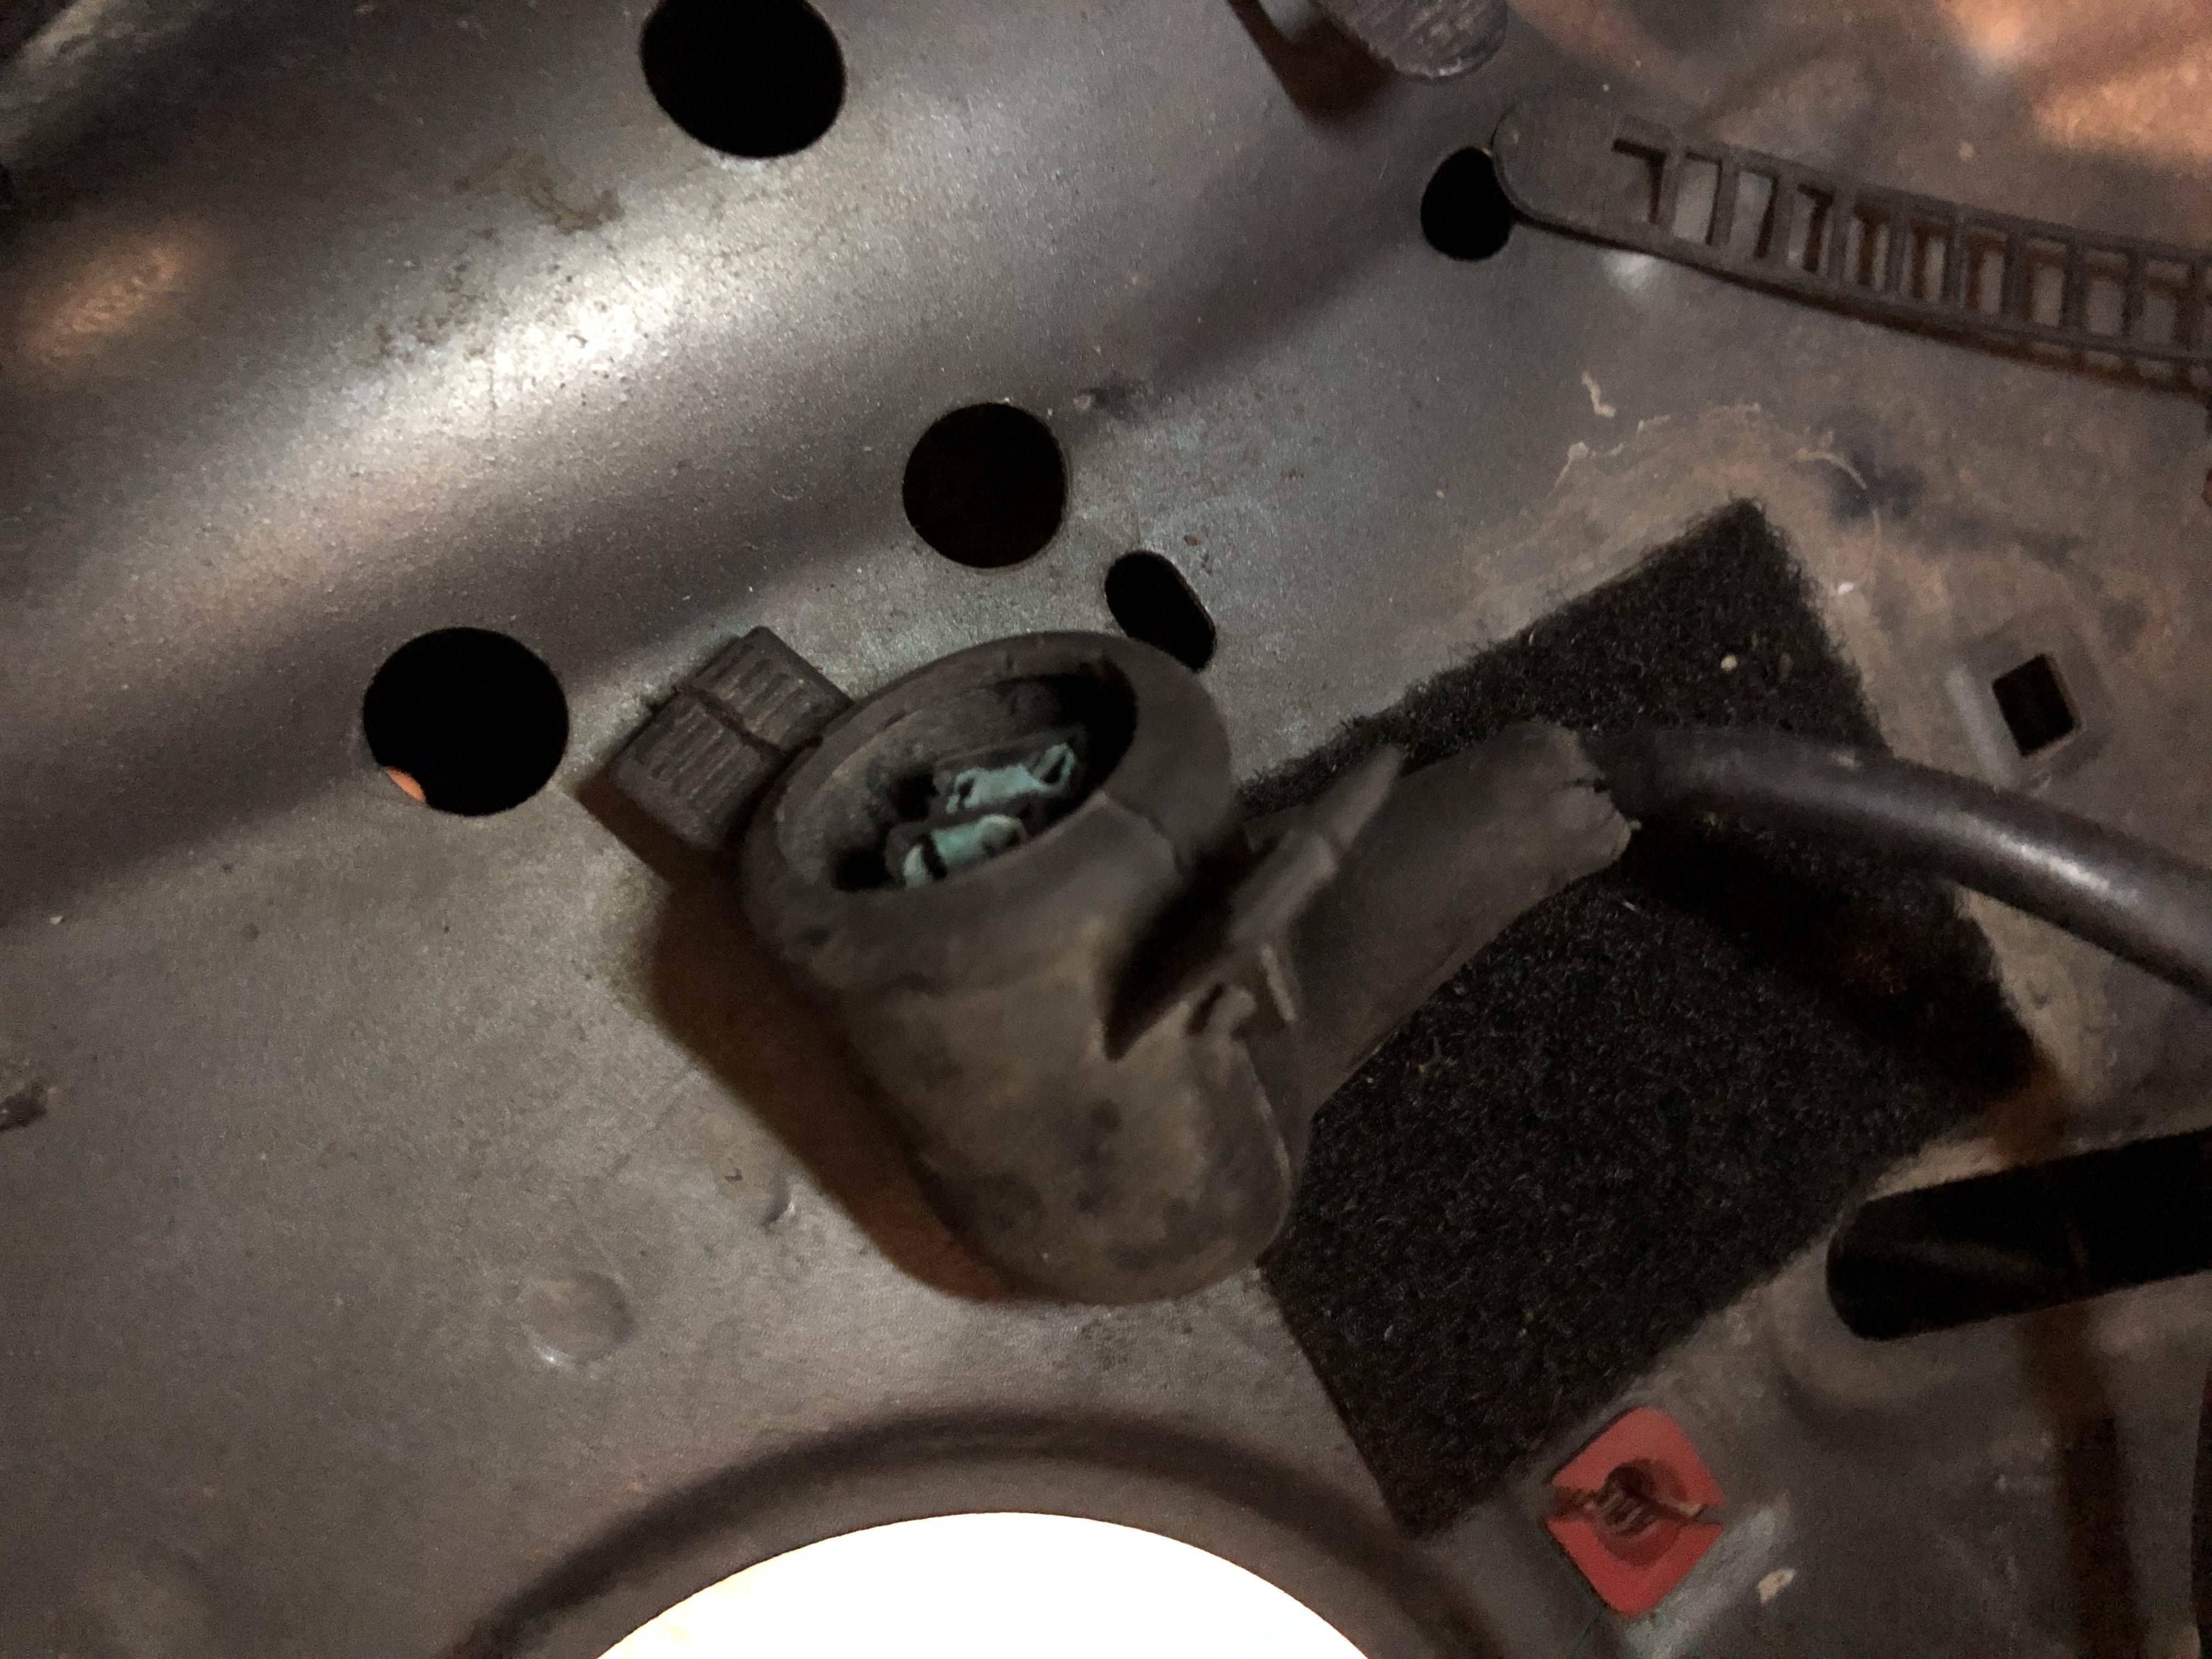
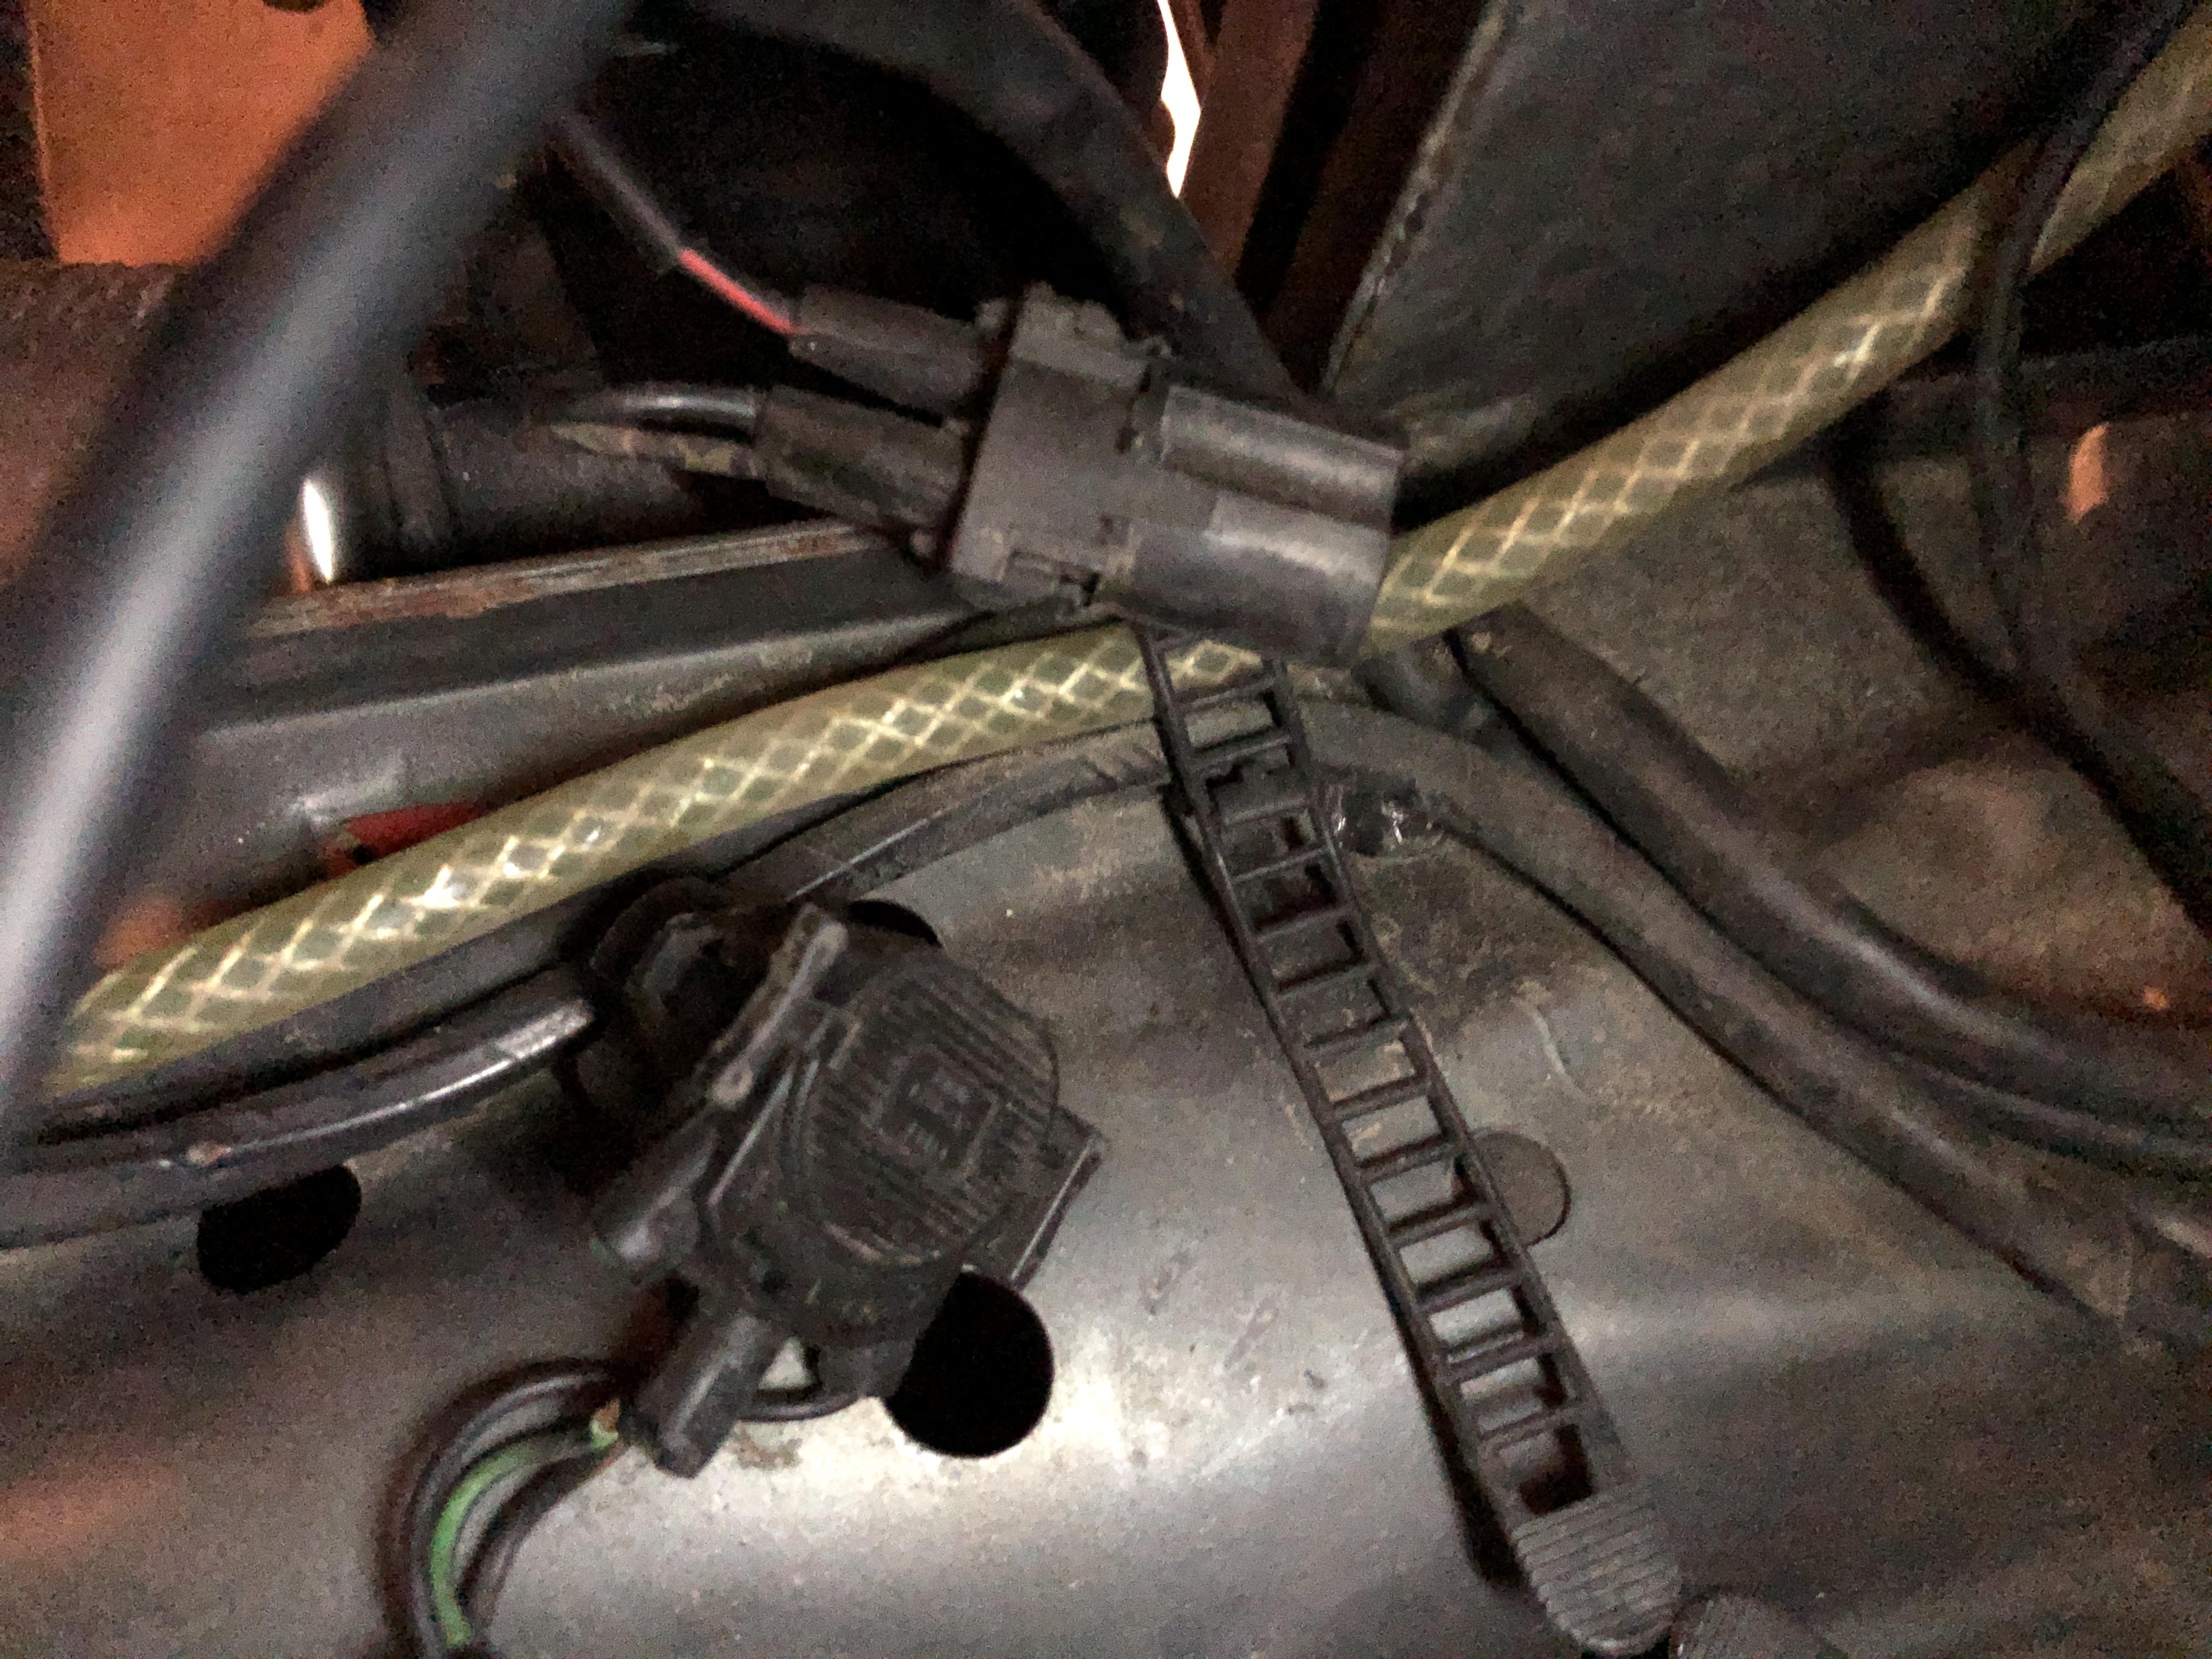
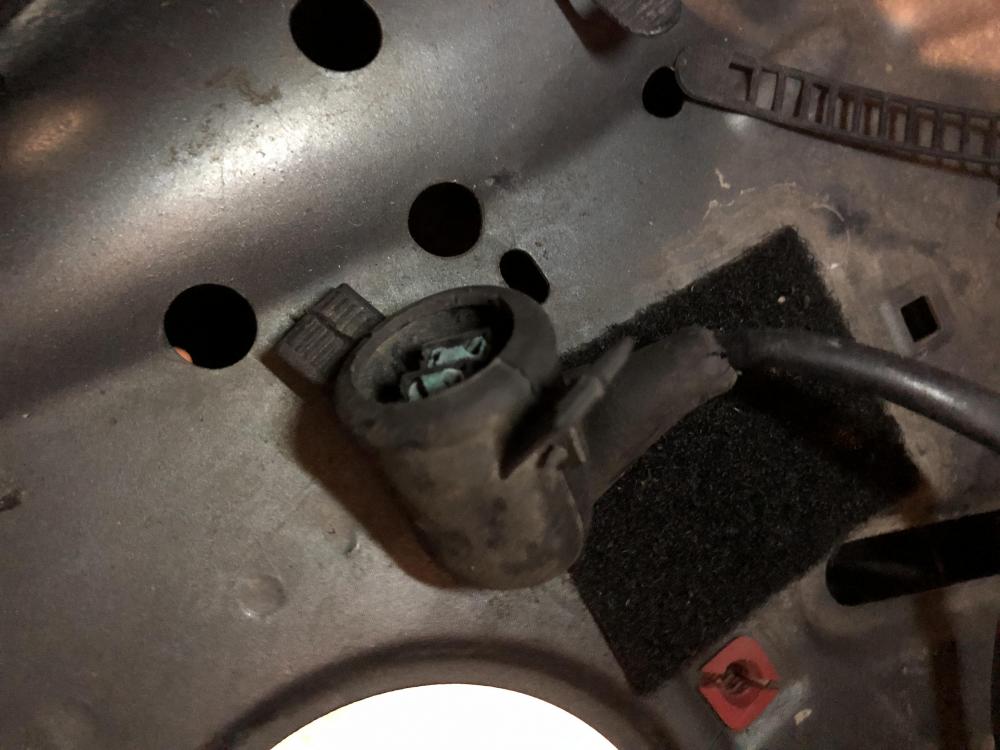
                        So one other project I’d like to starting compiling parts for is adding AC back to the car. The entire ac system on the engine side has been removed so I’m hoping someone can help me confirm I still have the connectors for it that I need.  

                        I have these three on the passenger side:
                        5E077438-4472-4D41-ADCA-8EA49D6ADD7C.jpeg

                        47975A8A-CDB1-4EE9-A80E-6E2DA3BAD279.jpeg

                        I’m assuming one is for the compressor, one fire the drier, and one for the temp sensor that would go in the radiator. Can anyone confirm that’s what these connectors are? 

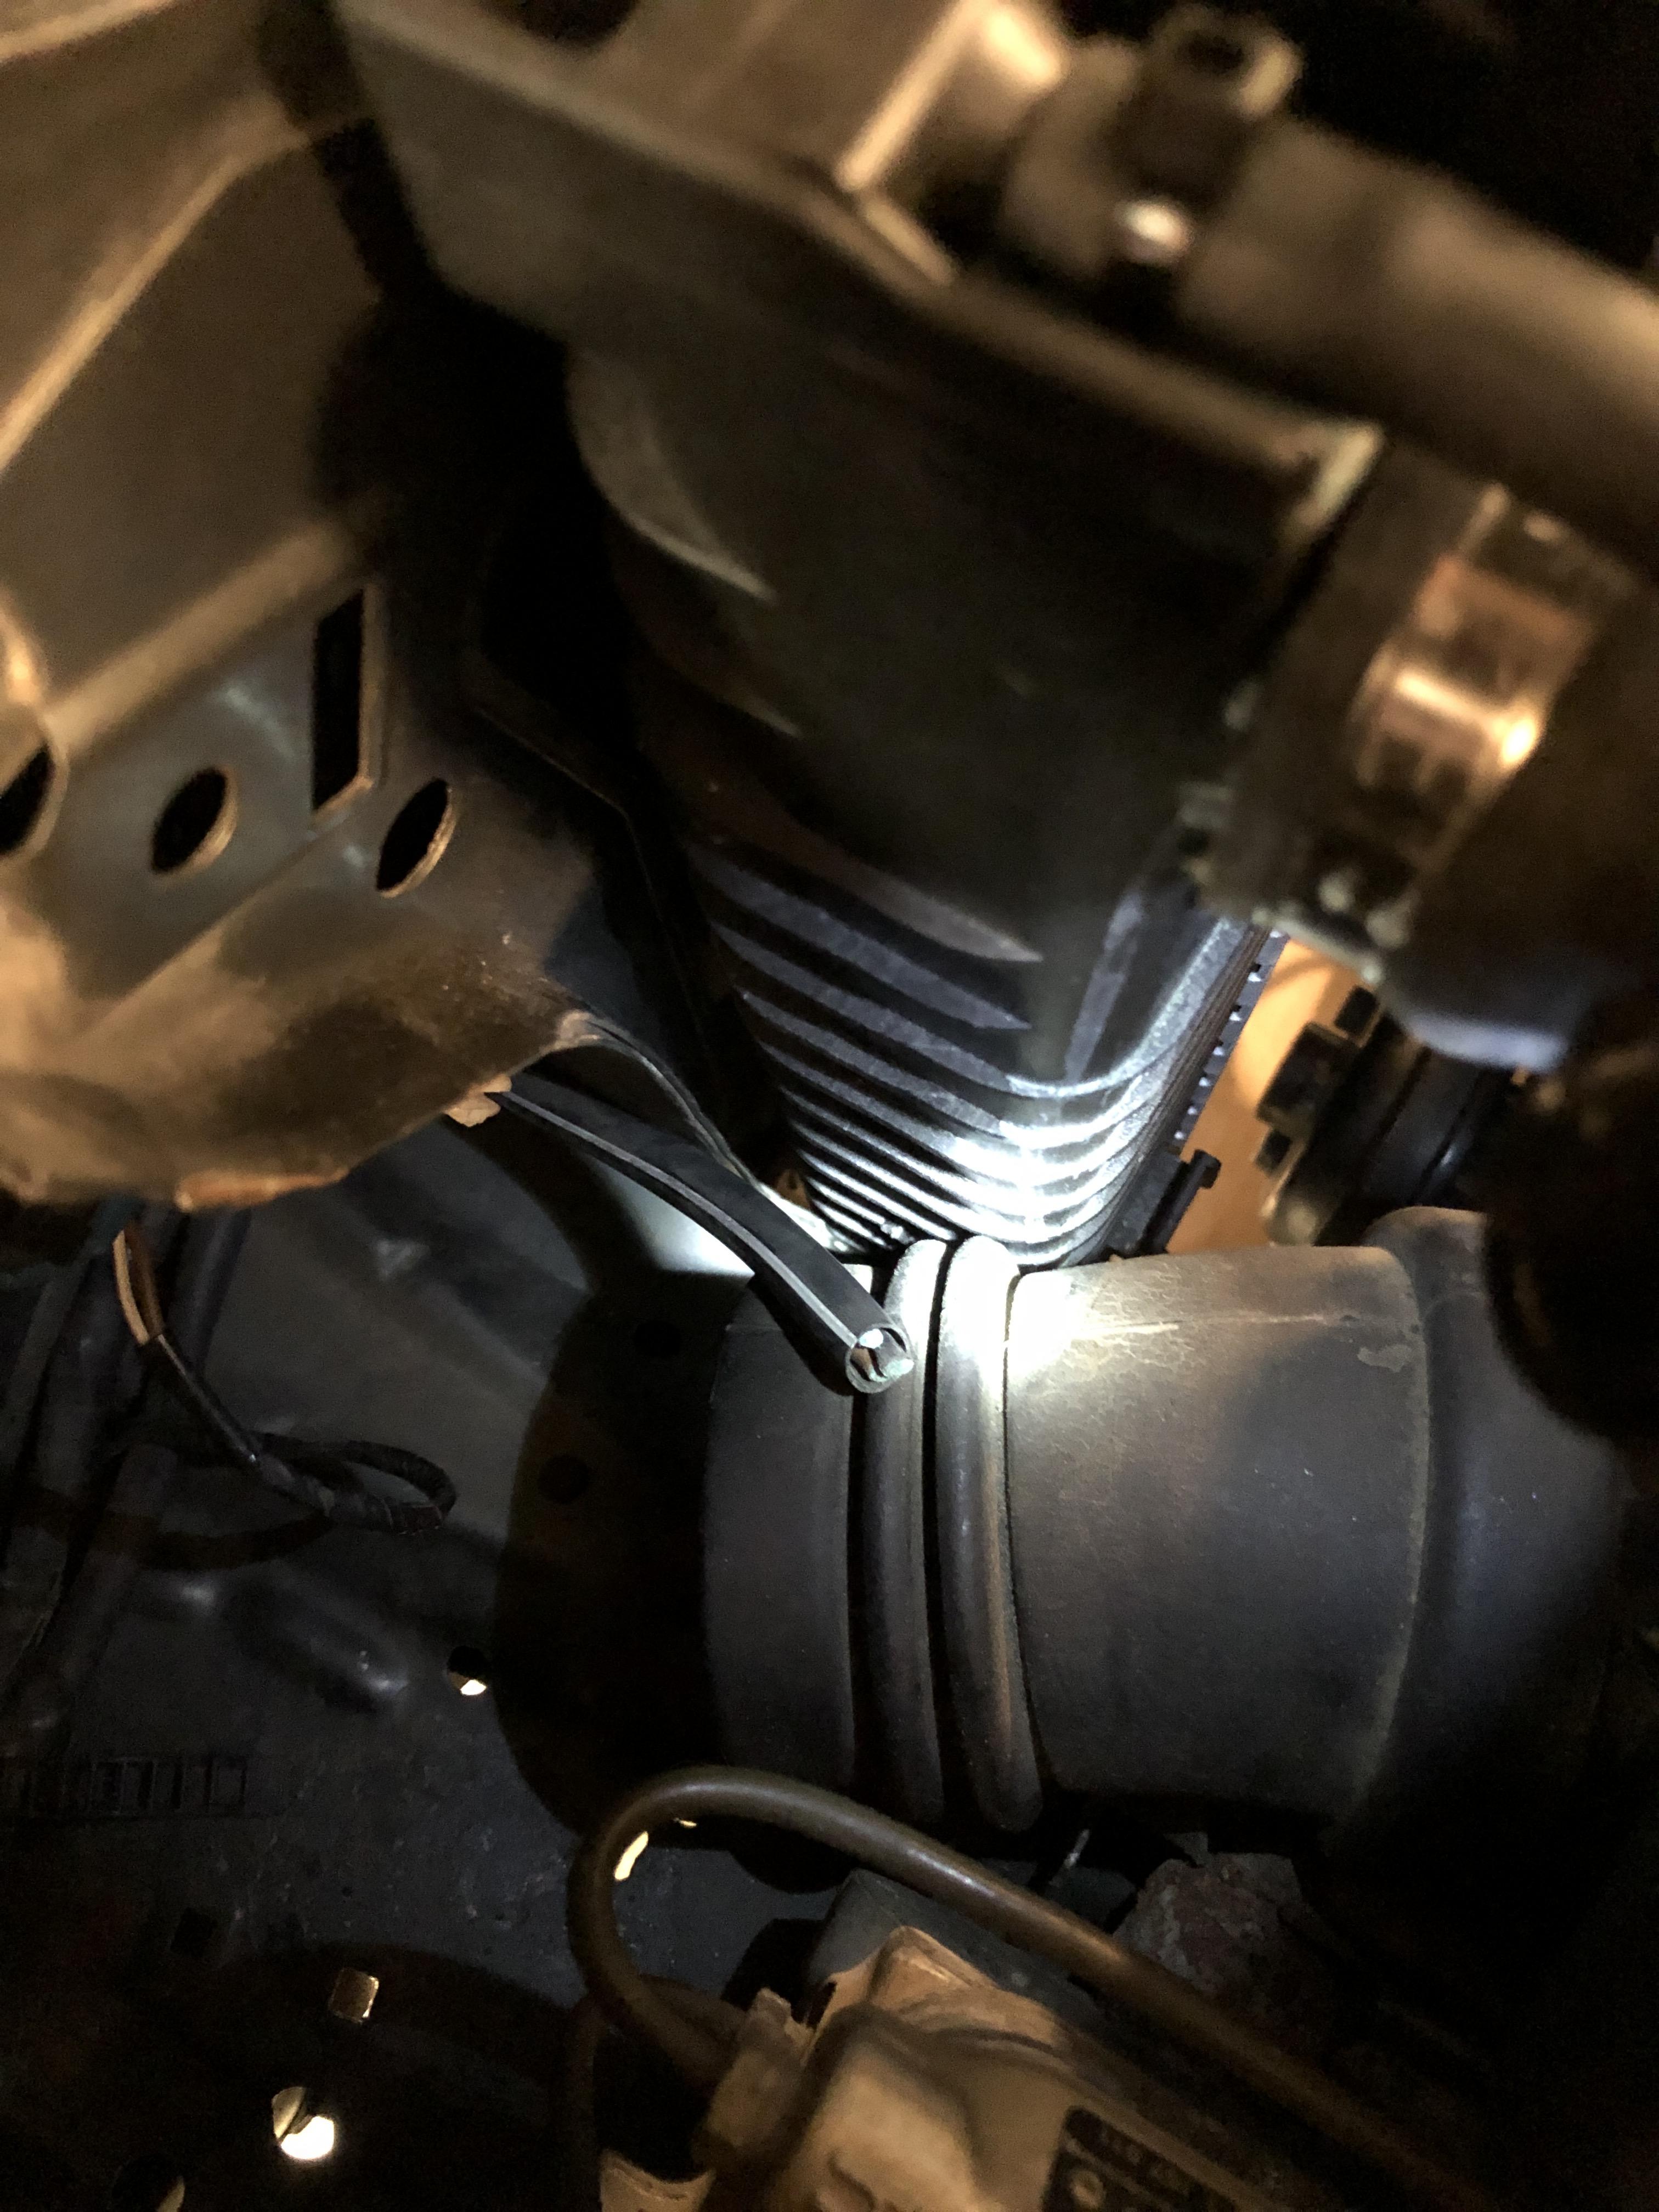
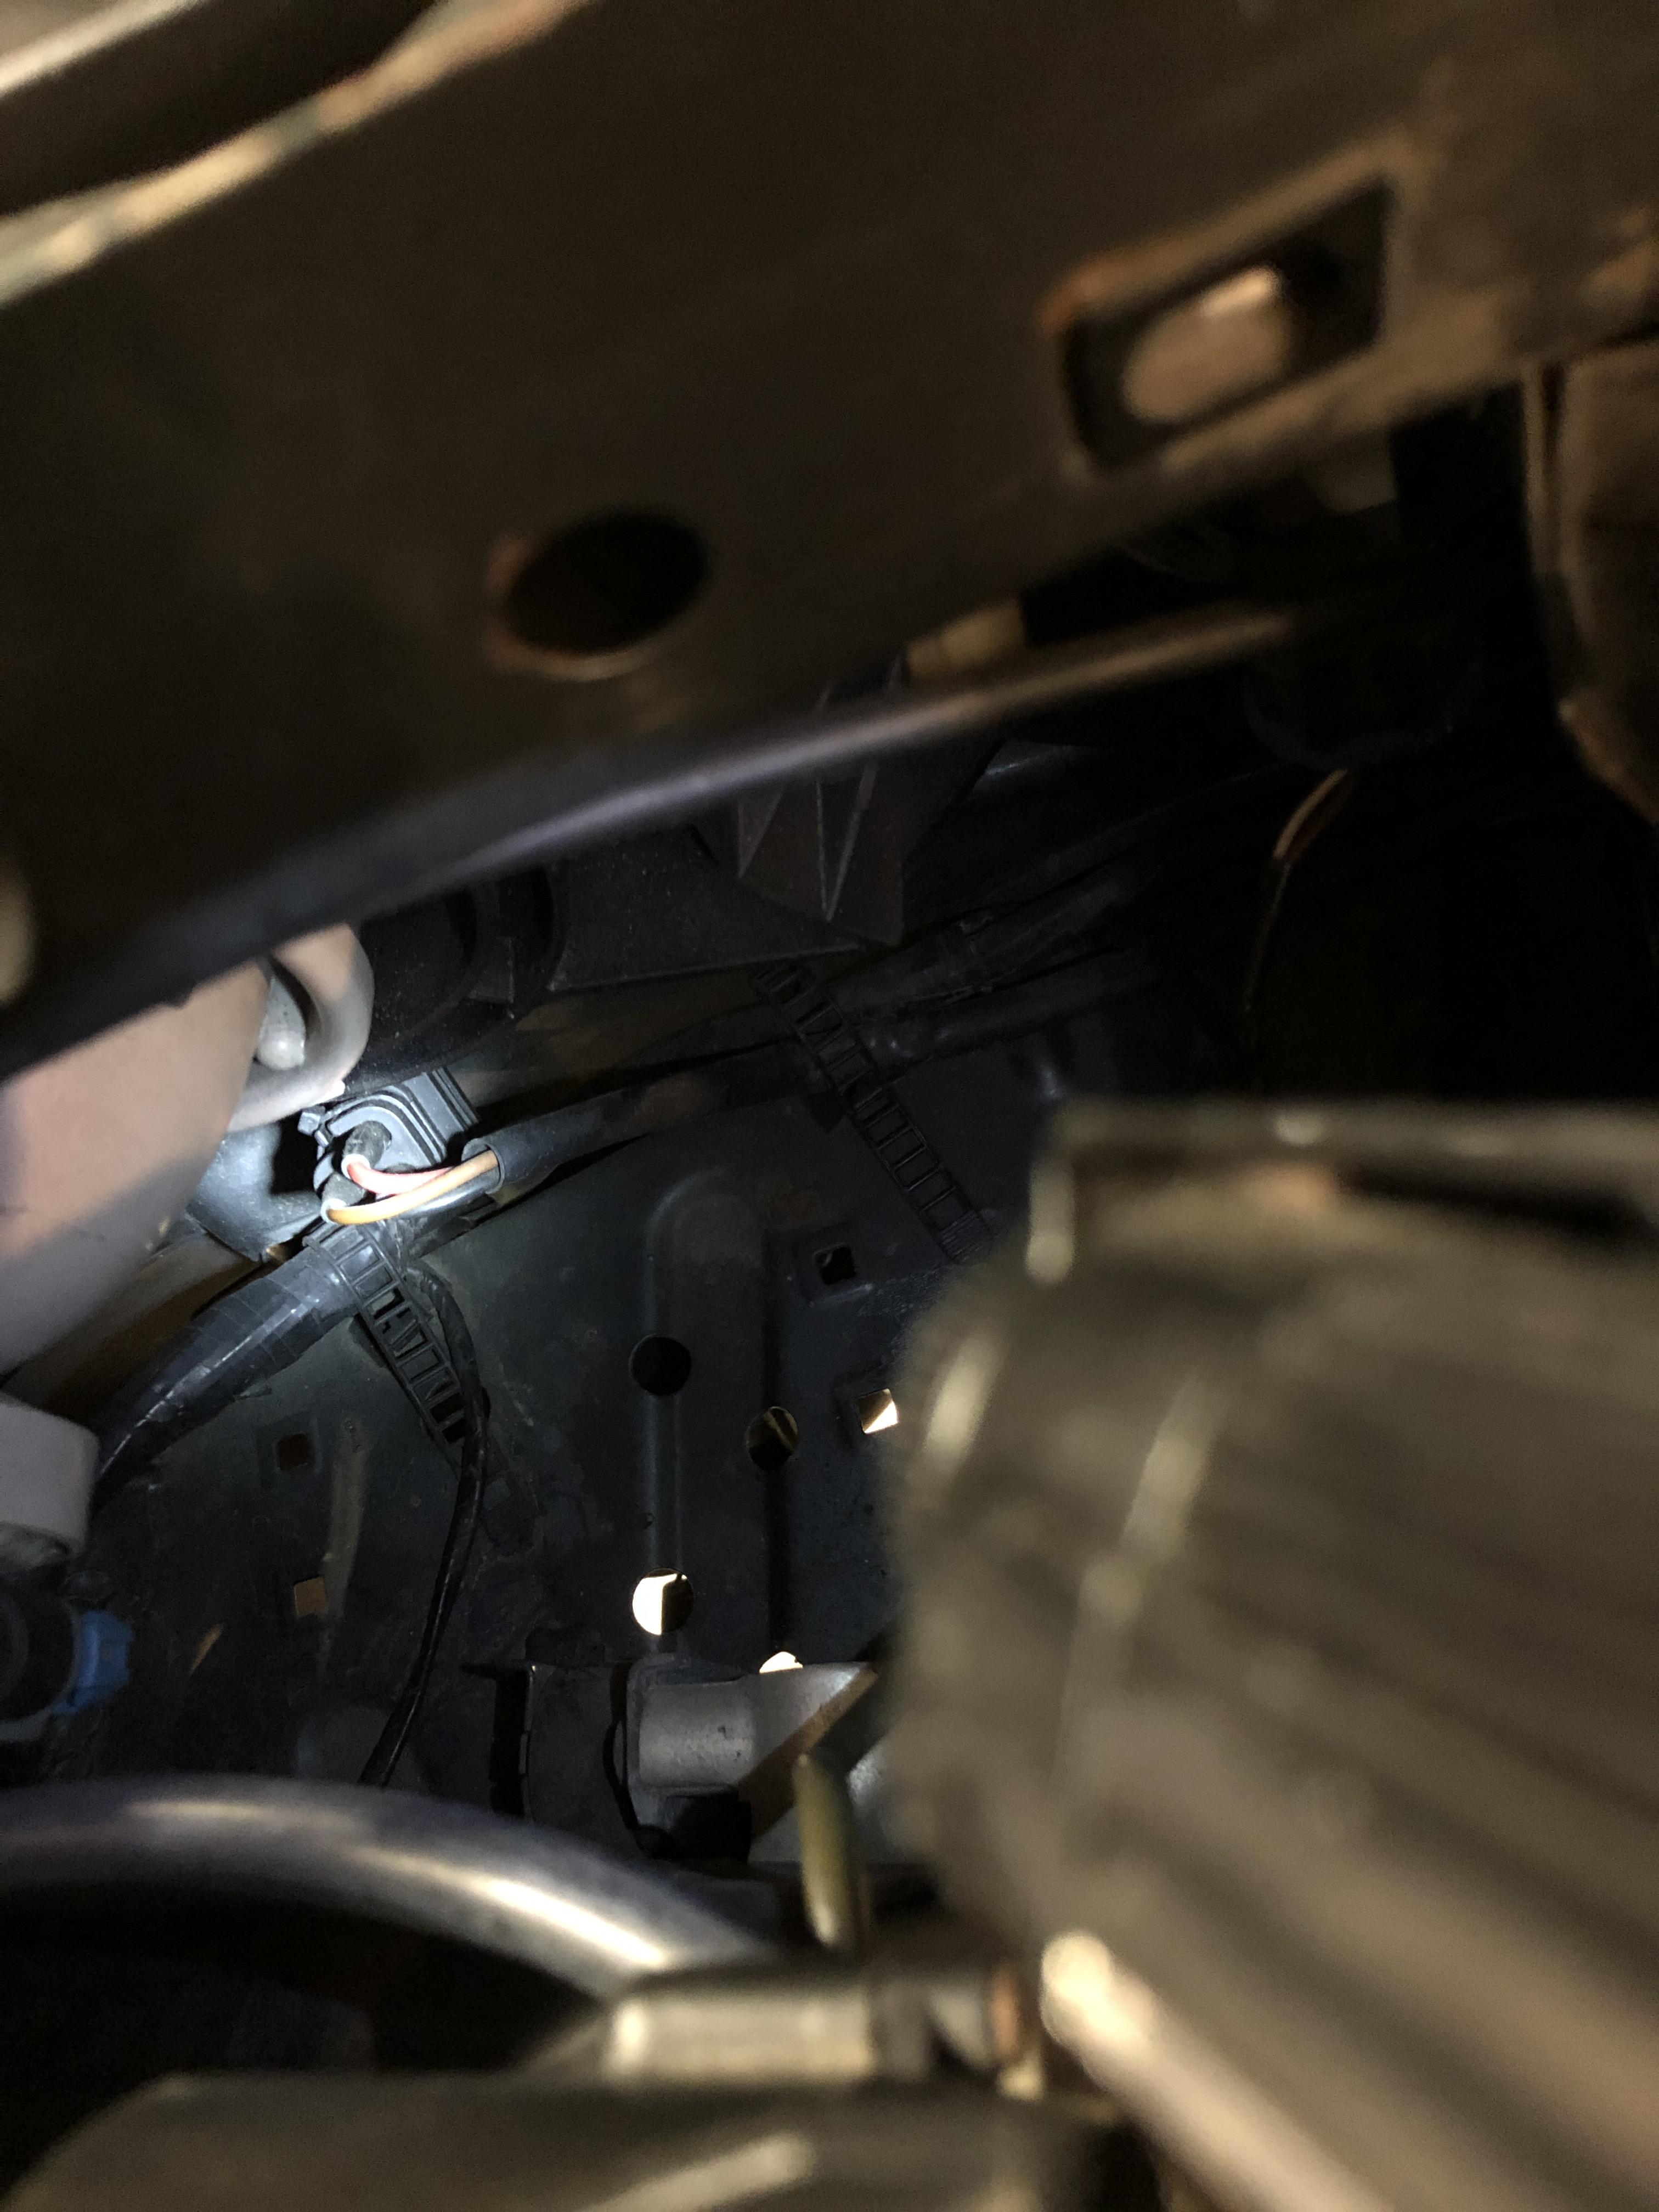
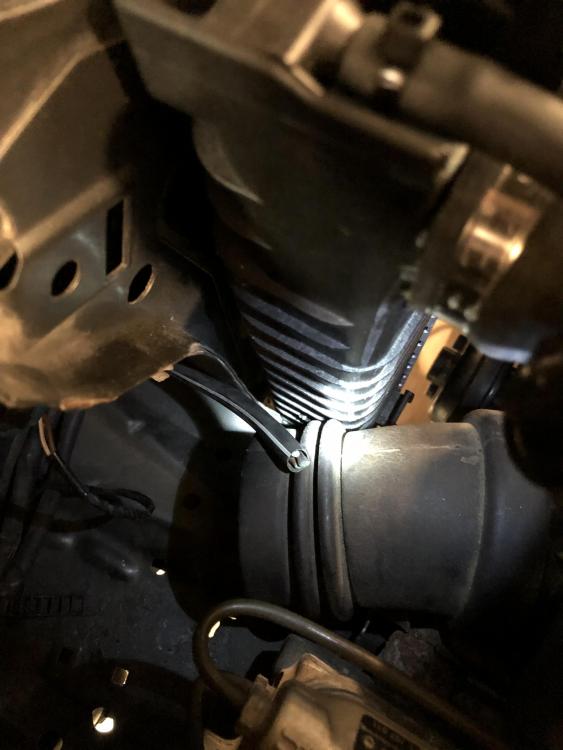
                        And then on the driver side I have this remnant pigtail which I assume is for the aux fan:
                        0888EB58-24DB-46D7-AA32-FC5C5CF736E8.jpeg

                        22C26769-B968-4537-89B9-12C25CF1986F.jpeg

                        Are those all the connectors that I need? I can’t think of what else on the ac system would have a connection?

                        1 Reply Last reply
                        0
                        • jc43089J
                          jc43089J
                          jc43089
                          wrote on last edited by
                          #524

                          Check out "wedo bmw etm" to find the right electrical manual for your exact month/year.  The wire colors will be spot on and it will have pinouts for every plug.  If you need help interpreting the schematics let me know.

                          2/94 325i Sedan, Arctic Gray: UUC LTW FW, EVO 3 and DSSR, +.020 Maxsil pistons, ASC delete, Eibach shocks/springs, 16" contour reps 238k
                          3/93 325i Coupe, Schwarz 2, Sketchy stance action, ebay turbo, 300k
                          '89 325i Vert, Alpine White: 5spd swapped, sold.

                          '04 Toyota Sienna: 24V to 24V swap in progress

                          '05 Volvo V70R, 6spd.  200k
                          '85 Toyota LandCruiser: Lifted, gas hog. 205k
                          '99 Nissan Maxima: 5spd, Rusty but trusty winter beater. 252k RIP.

                          1 Reply Last reply
                          0
                          • G
                            G
                            gilber33
                            wrote on last edited by
                            #525

                            Thank you! I will look into that. I’ve been able to deduce what each connector is, but I think there’s one more that is supposed to be in that area that I didn’t see last night.

                            1 Reply Last reply
                            0
                            • jc43089J
                              jc43089J
                              jc43089
                              wrote on last edited by
                              #526

                              It should be easyish to figure out because all of the A/C stuff will be in one spot.

                              2/94 325i Sedan, Arctic Gray: UUC LTW FW, EVO 3 and DSSR, +.020 Maxsil pistons, ASC delete, Eibach shocks/springs, 16" contour reps 238k
                              3/93 325i Coupe, Schwarz 2, Sketchy stance action, ebay turbo, 300k
                              '89 325i Vert, Alpine White: 5spd swapped, sold.

                              '04 Toyota Sienna: 24V to 24V swap in progress

                              '05 Volvo V70R, 6spd.  200k
                              '85 Toyota LandCruiser: Lifted, gas hog. 205k
                              '99 Nissan Maxima: 5spd, Rusty but trusty winter beater. 252k RIP.

                              1 Reply Last reply
                              0
                              • G
                                G
                                gilber33
                                wrote on last edited by
                                #527

                                jc43089 said:

                                It should be easyish to figure out because all of the A/C stuff will be in one spot.

                                My fear is more that  when it was removed, wires were cut rather than unplugged. Like the aux fan connector was cut instead of unplugged.

                                1 Reply Last reply
                                0
                                • jc43089J
                                  jc43089J
                                  jc43089
                                  wrote on last edited by
                                  #528

                                  gilber33 said:

                                  My fear is more that  when it was removed, wires were cut rather than unplugged. Like the aux fan connector was cut instead of unplugged. 

                                  Right, you will be able to tell by the wire colors what they are/were for even when the plug is gone.  And you can find what plugs/connectors you need.  I might have some spare plugs depending what you need.  The wire colors in the ETM are usually very accurately documented and reliable unlike wiring schematics in books like chiltons, and even the Bentley is not always right.  BMW ETMs usually cover a specific model year like 08/89 to 07/90 so look for the right month/year.

                                  2/94 325i Sedan, Arctic Gray: UUC LTW FW, EVO 3 and DSSR, +.020 Maxsil pistons, ASC delete, Eibach shocks/springs, 16" contour reps 238k
                                  3/93 325i Coupe, Schwarz 2, Sketchy stance action, ebay turbo, 300k
                                  '89 325i Vert, Alpine White: 5spd swapped, sold.

                                  '04 Toyota Sienna: 24V to 24V swap in progress

                                  '05 Volvo V70R, 6spd.  200k
                                  '85 Toyota LandCruiser: Lifted, gas hog. 205k
                                  '99 Nissan Maxima: 5spd, Rusty but trusty winter beater. 252k RIP.

                                  1 Reply Last reply
                                  0
                                  • straight6pwrS
                                    straight6pwrS
                                    straight6pwr
                                    wrote on last edited by
                                    #529

                                    These wire colors should be checked on your car and in the ETM.  The ETM actually has some of its own helpful diagnostic information for the AC system.

                                    compressor - 3 prong round  (Red/Black, ?, ?)

                                    drier - (the one with the rubber boot)

                                    radiator temp switch - 3 prong round (Black/Brown, Black/Green, Black)

                                    aux fan  - 3 prong (you are missing the plug?) (Black/Green, Black/Blue, Brown)

                                    you might as well use a better aftermarket fan instead of the factory aux fan in which case you'd use your own plug/wiring anyways.

                                    Dan

                                    yajsYRL.jpg.e5f350b4dfe961d76ac8b32efce2e1a6.jpg

                                    1 Reply Last reply
                                    0
                                    • G
                                      G
                                      gilber33
                                      wrote on last edited by
                                      #530

                                      straight6pwr said:

                                      These wire colors should be checked on your car and in the ETM.  The ETM actually has some of its own helpful diagnostic information for the AC system.

                                      compressor - 3 prong round  (Red/Black, ?, ?)

                                      drier - (the one with the rubber boot)

                                      radiator temp switch - 3 prong round (Black/Brown, Black/Green, Black)

                                      aux fan  - 3 prong (you are missing the plug?) (Black/Green, Black/Blue, Brown)

                                      you might as well use a better aftermarket fan instead of the factory aux fan in which case you'd use your own plug/wiring anyways.

                                      I found the plug. Whoever removed the fan just cut its harness instead if unplugging it. 

                                      But it appears I have everything I need to install the AC system. Now to find it all. Haha

                                      1 Reply Last reply
                                      1
                                      • G
                                        G
                                        gilber33
                                        wrote on last edited by
                                        #531

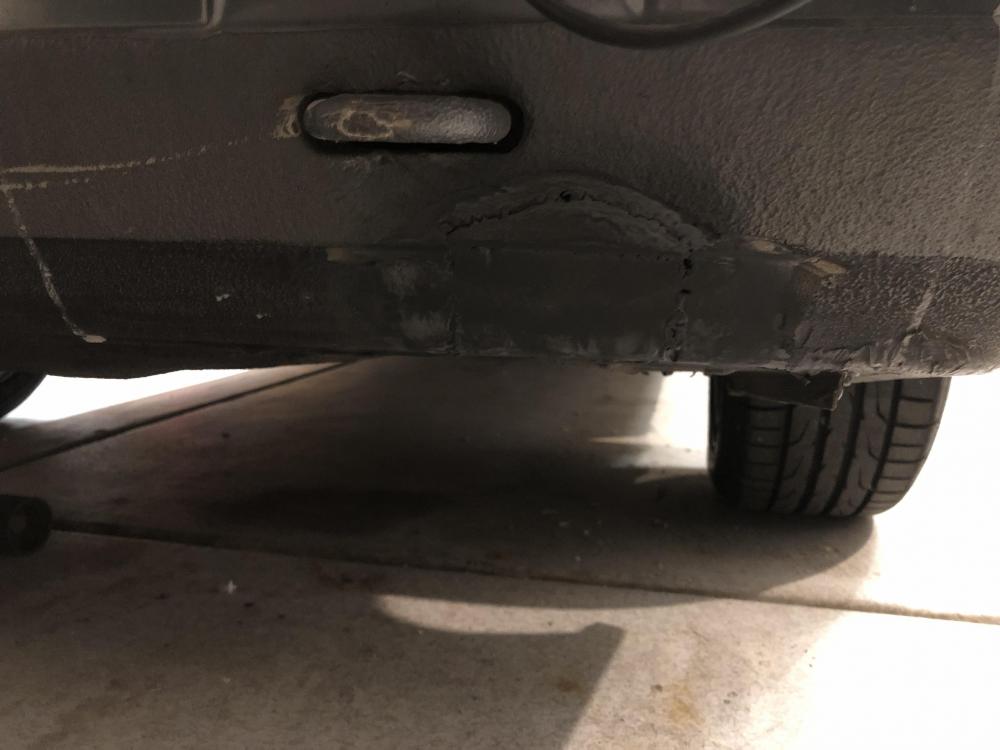
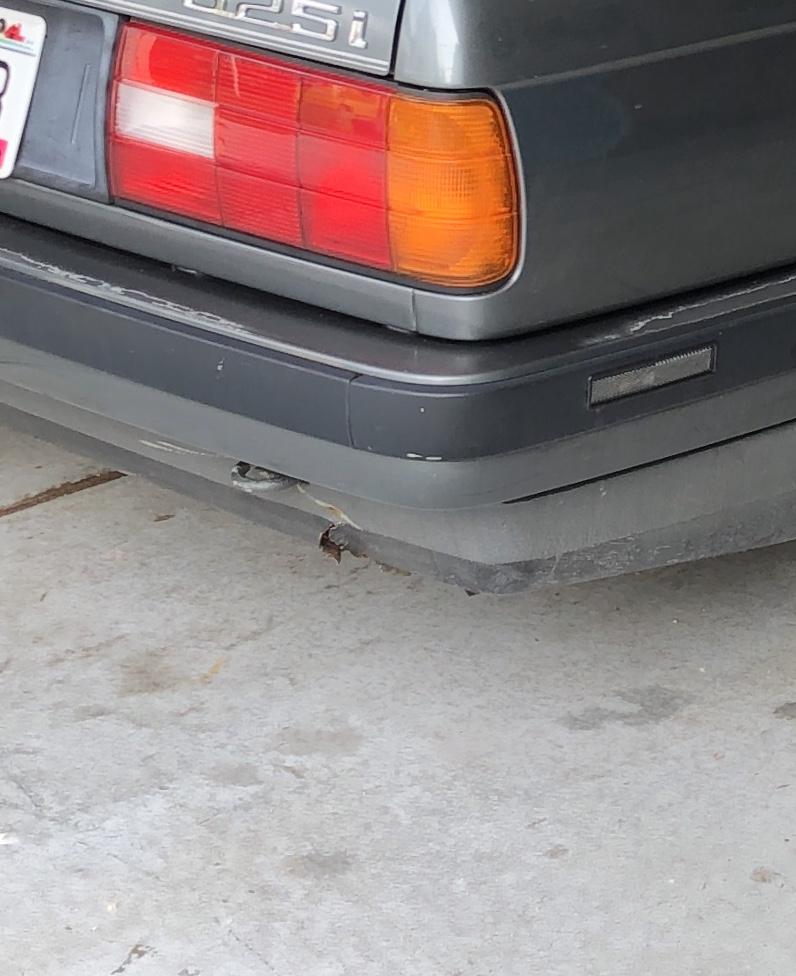
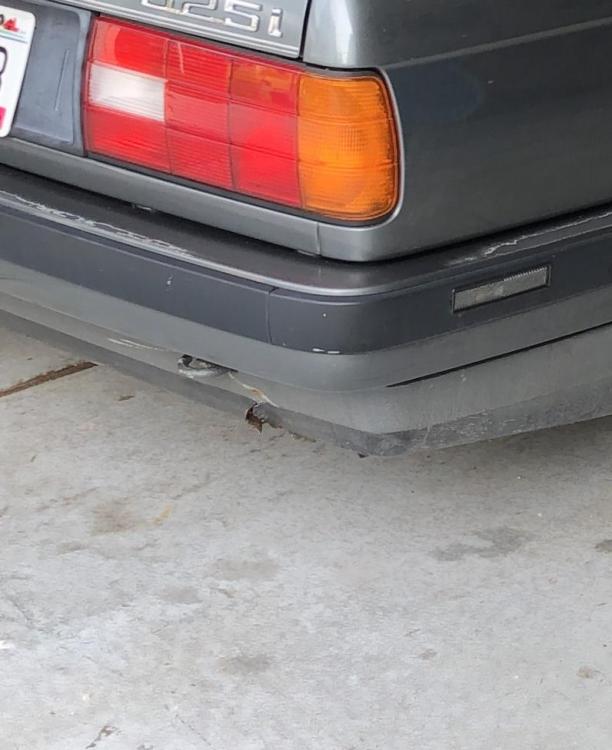
                                        After my welder went out and I was able to meet my dad so I could borrow his, I finally was able to patch the other rust hole in the rear bumper. You can kind of see it here:
                                        CF1D0A66-950B-45EA-8A70-4D17D0FC290D.jpeg

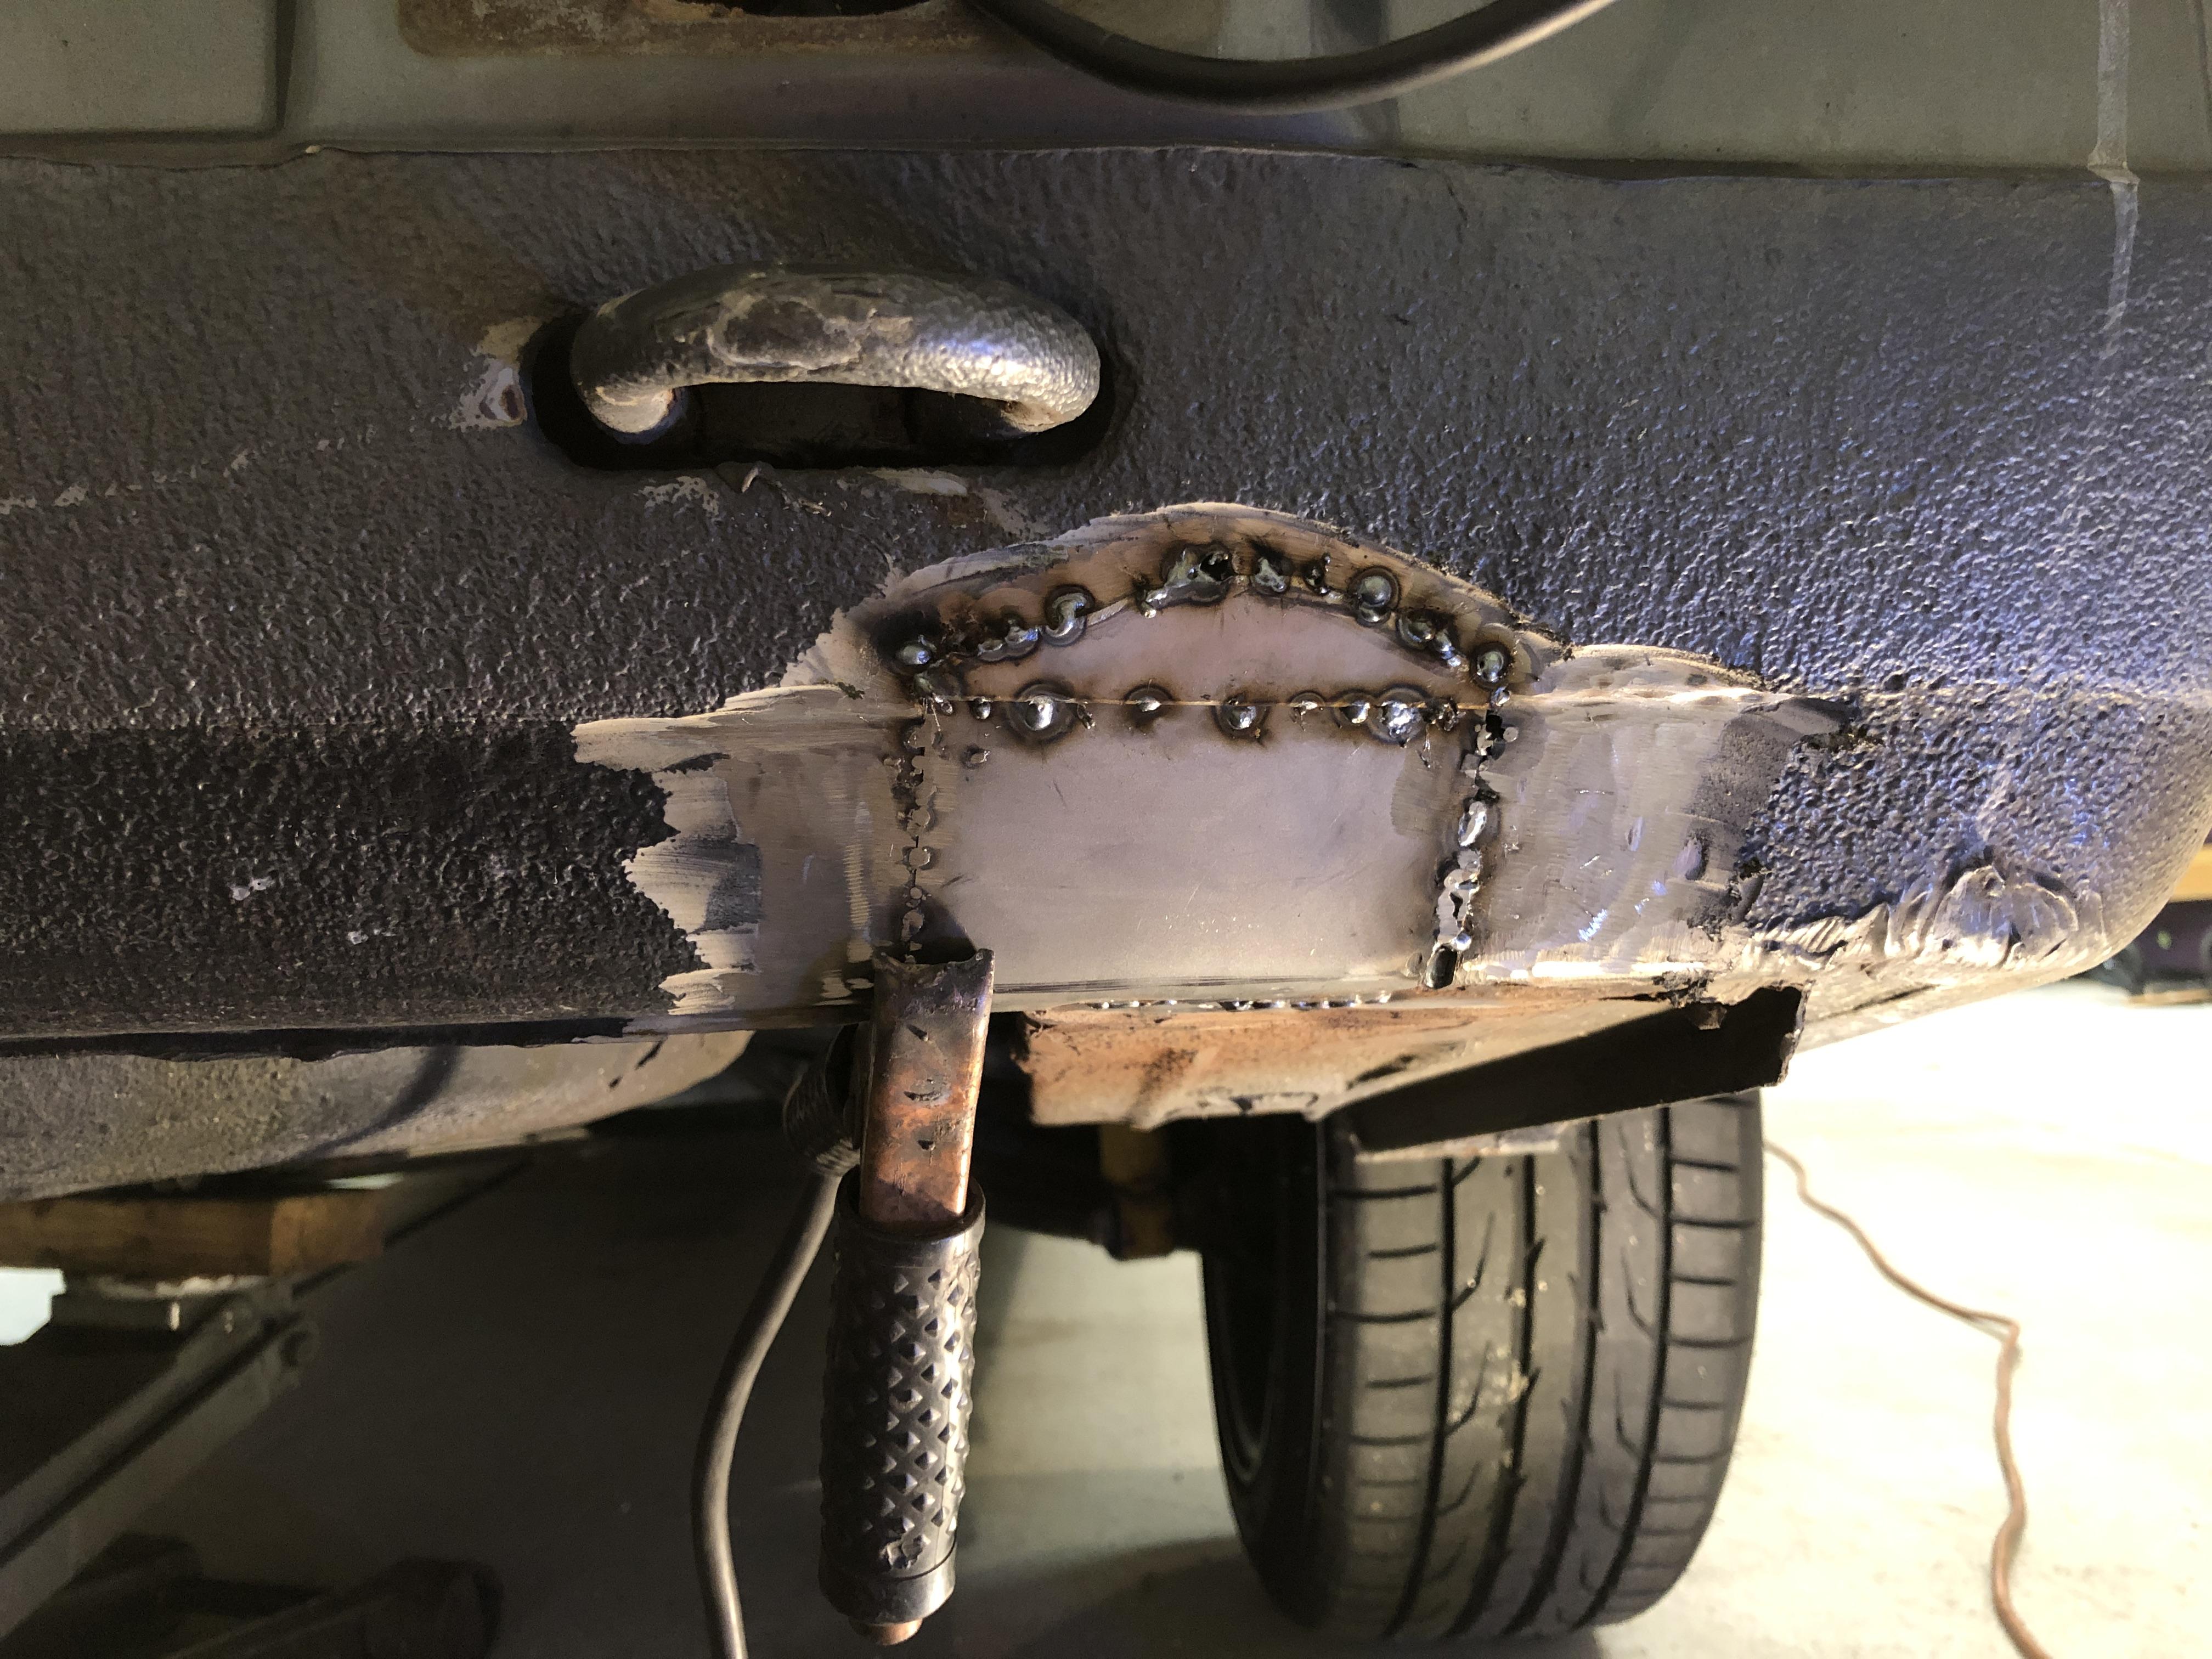
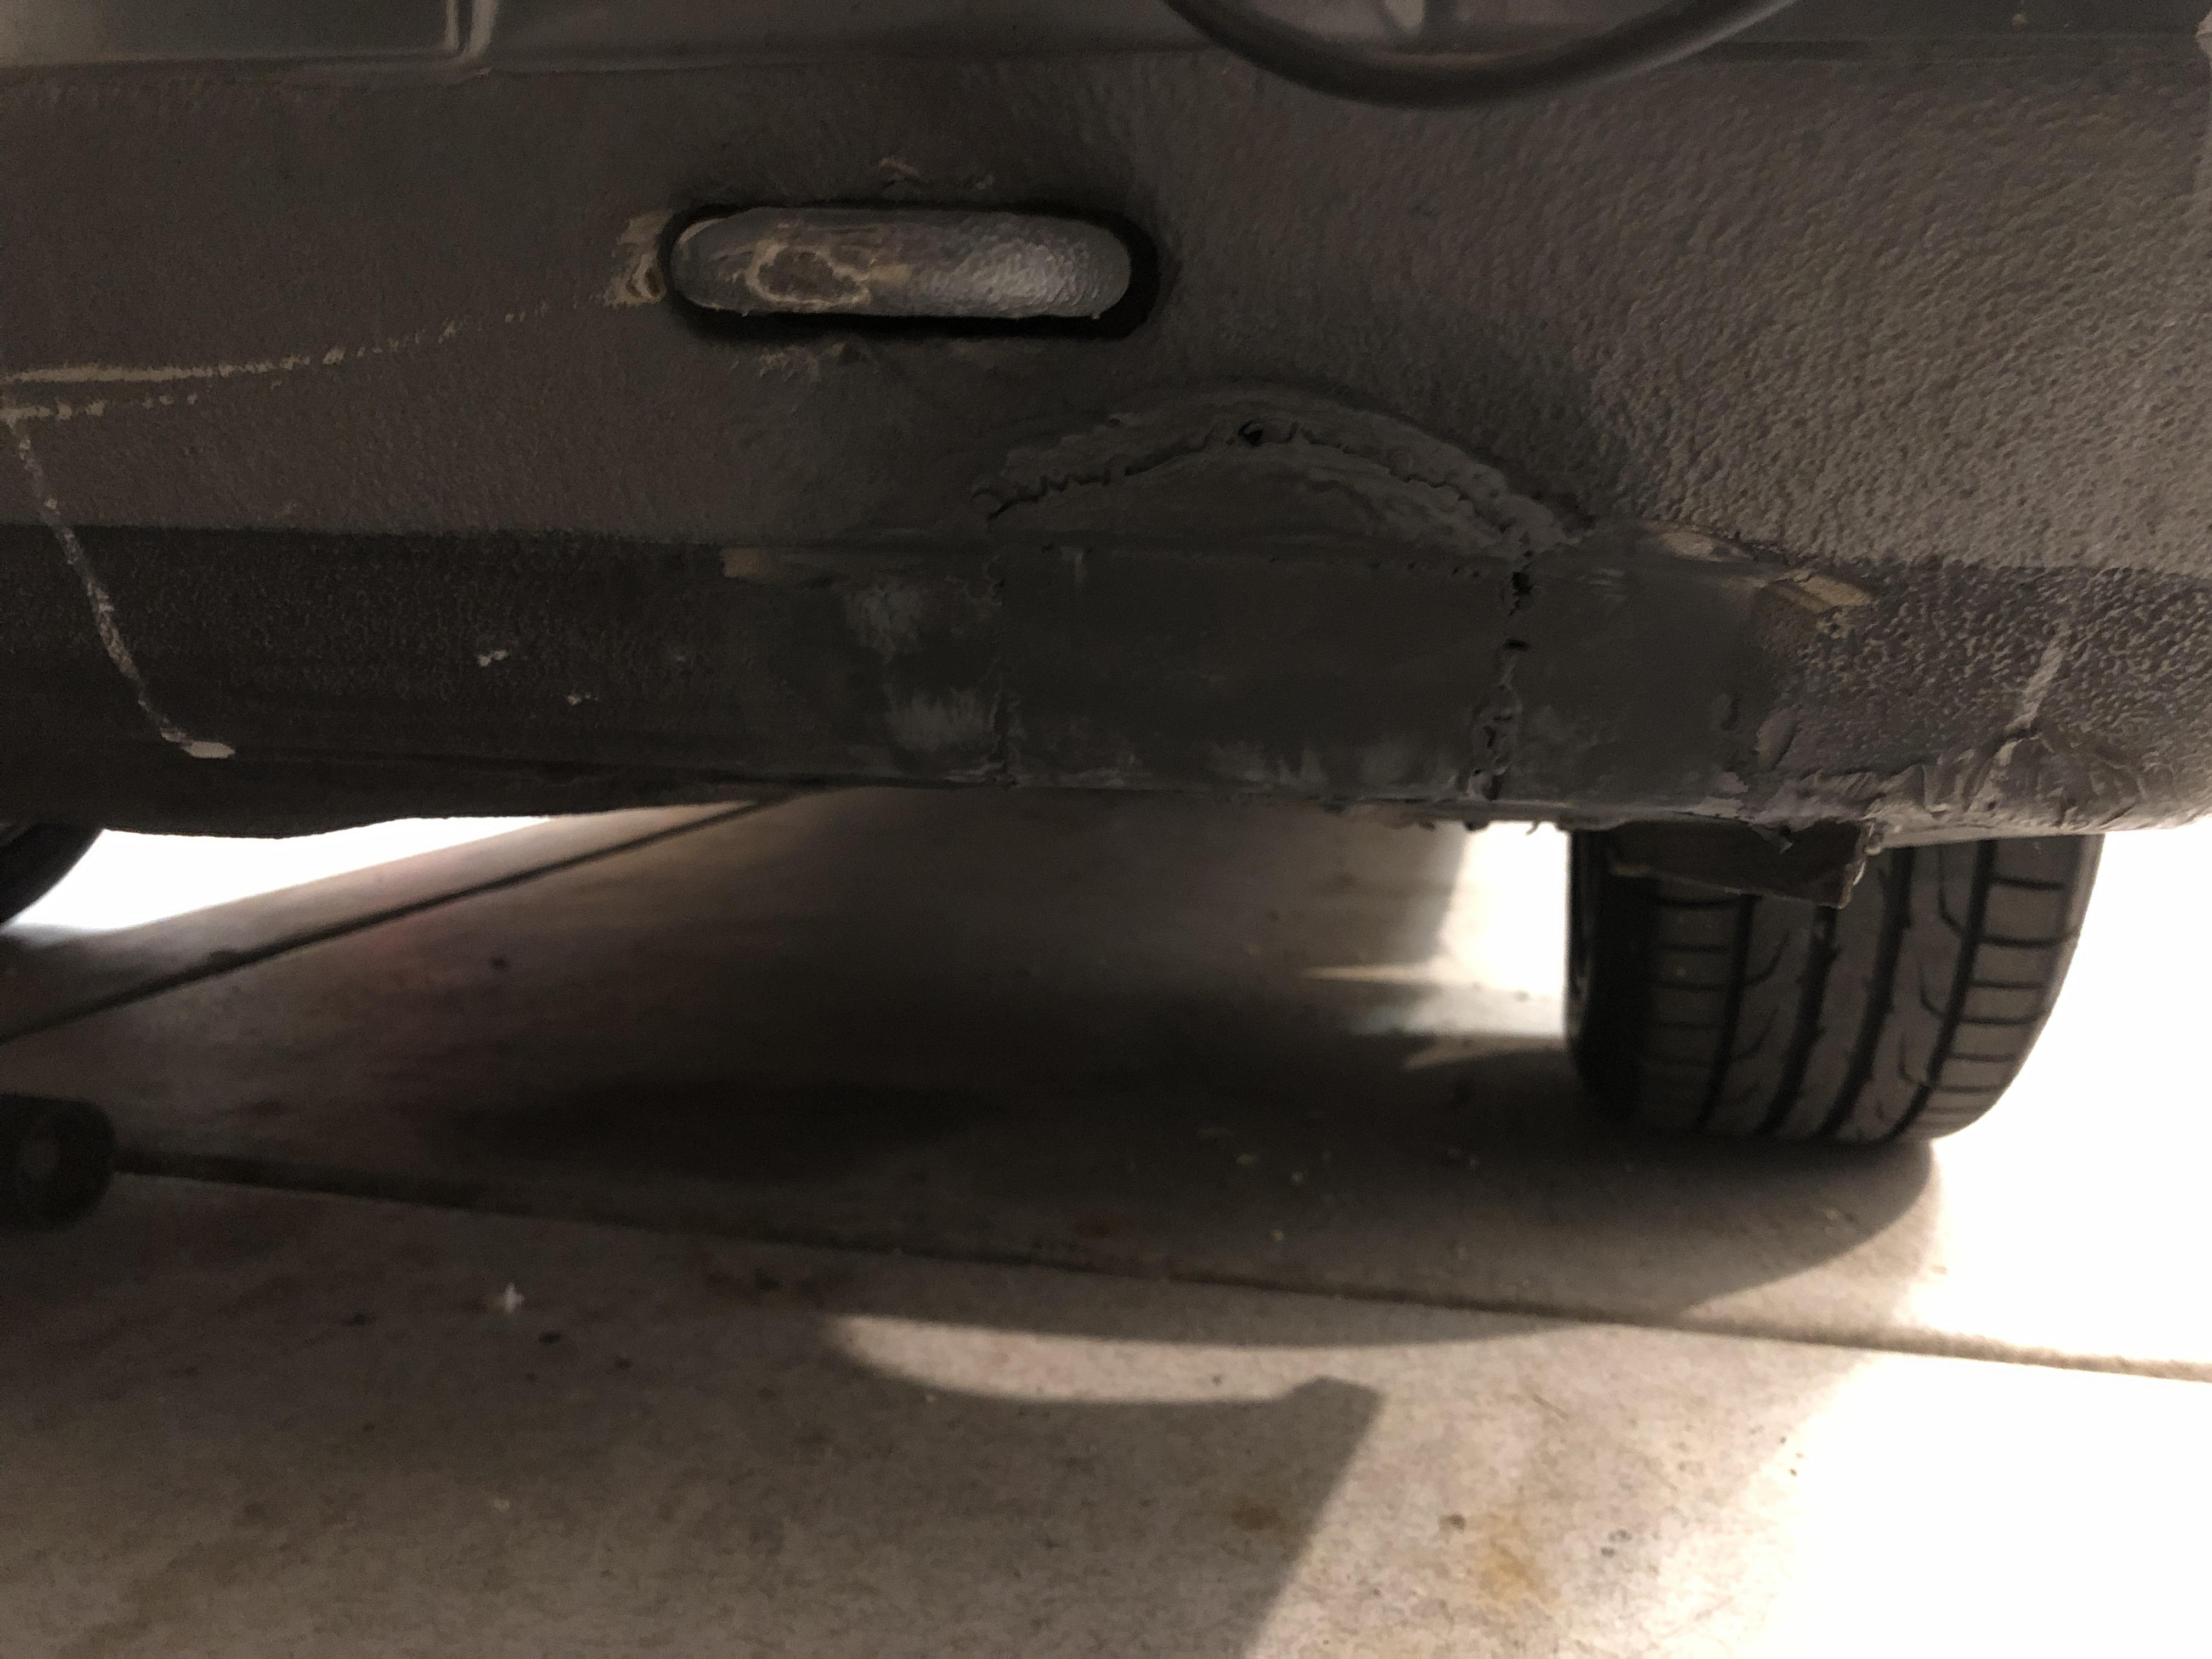
                                        I cut it out and welded in some new metal and the primed it for now. It’s not the prettiest, but I did it myself with my own tools, and that was what I really wanted to accomplish  
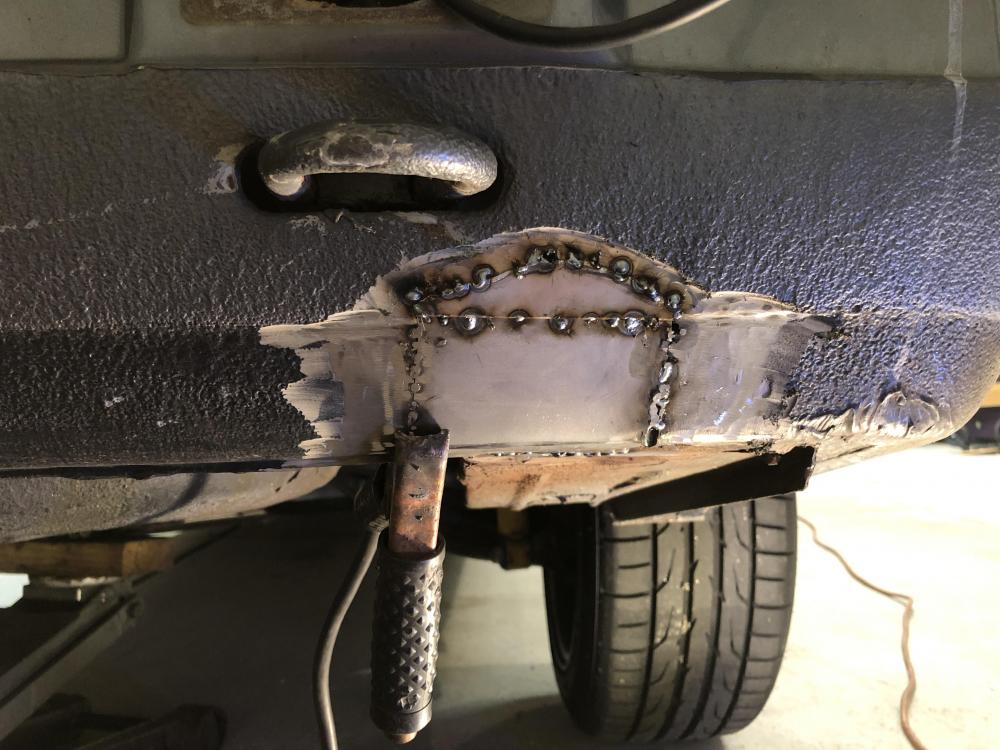
                                        B91BA674-49EB-4BEA-B6EB-55F9BF99622E.jpeg

                                        82B5FCCC-B26F-4346-BC7D-9B0CA0D9AADF.jpeg

                                        I need to get some type of seam sealer to go around the patch and then I need to bring the area back up to the thickness of the existing bumper. My guess is a truck bed liner will give me the depth and texture of the bumper coating.

                                        1 Reply Last reply
                                        0
                                        • SteelBlueS
                                          SteelBlueS
                                          SteelBlue
                                          wrote on last edited by
                                          #532

                                          Look around for bed liners. Some have a much finer pattern than the one you are looking for. I'm sure there are ways to manipulate that tho.

                                          Or as long as the surface is even and matches the lines of the valence, no ones gonna know as its black and so low on the car.

                                          1 Reply Last reply
                                          0

                                          Hello! It looks like you're interested in this conversation, but you don't have an account yet.

                                          Getting fed up of having to scroll through the same posts each visit? When you register for an account, you'll always come back to exactly where you were before, and choose to be notified of new replies (either via email, or push notification). You'll also be able to save bookmarks and upvote posts to show your appreciation to other community members.

                                          With your input, this post could be even better 💗

                                          Register Login
                                          Reply
                                          • Reply as topic
                                          Log in to reply
                                          • Oldest to Newest
                                          • Newest to Oldest
                                          • Most Votes


                                          • Login

                                          • Don't have an account? Register

                                          • Login or register to search.
                                          Powered by NodeBB Contributors
                                          • First post
                                            Last post
                                          0
                                          • Categories
                                          • Recent
                                          • Tags
                                          • Popular
                                          • Users
                                          • Groups