
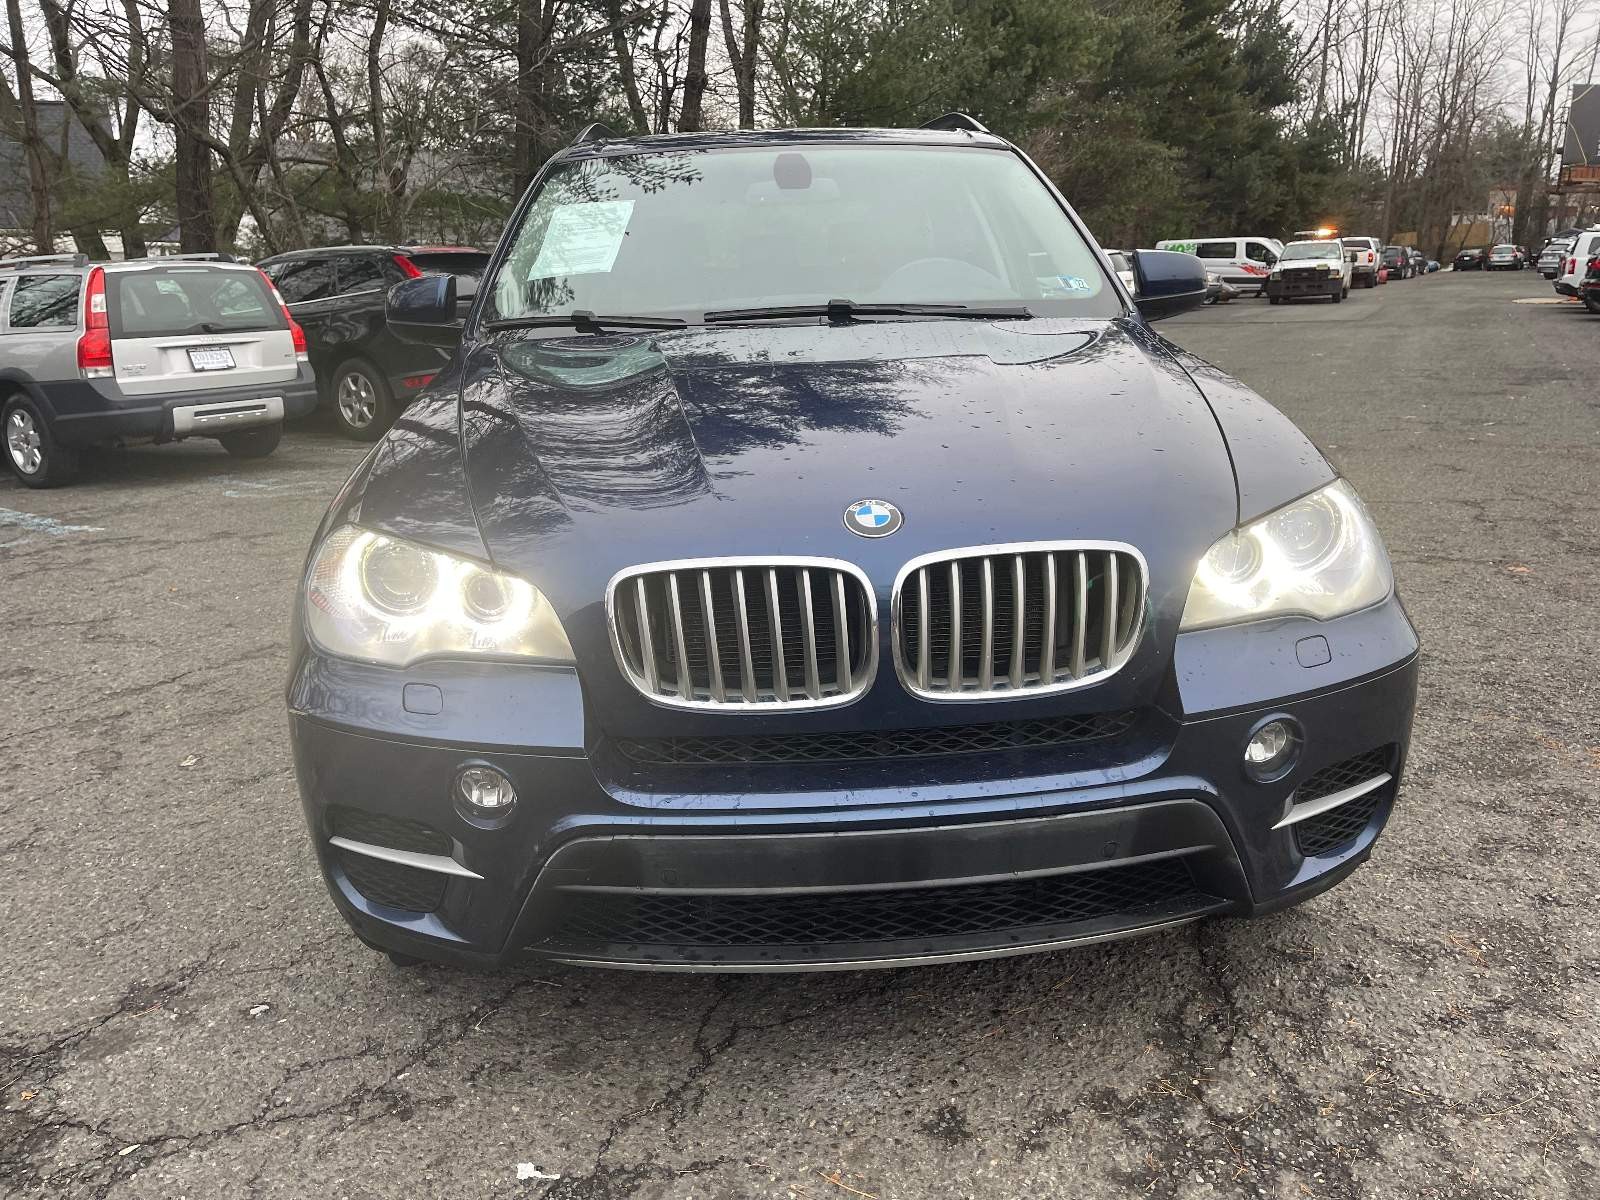
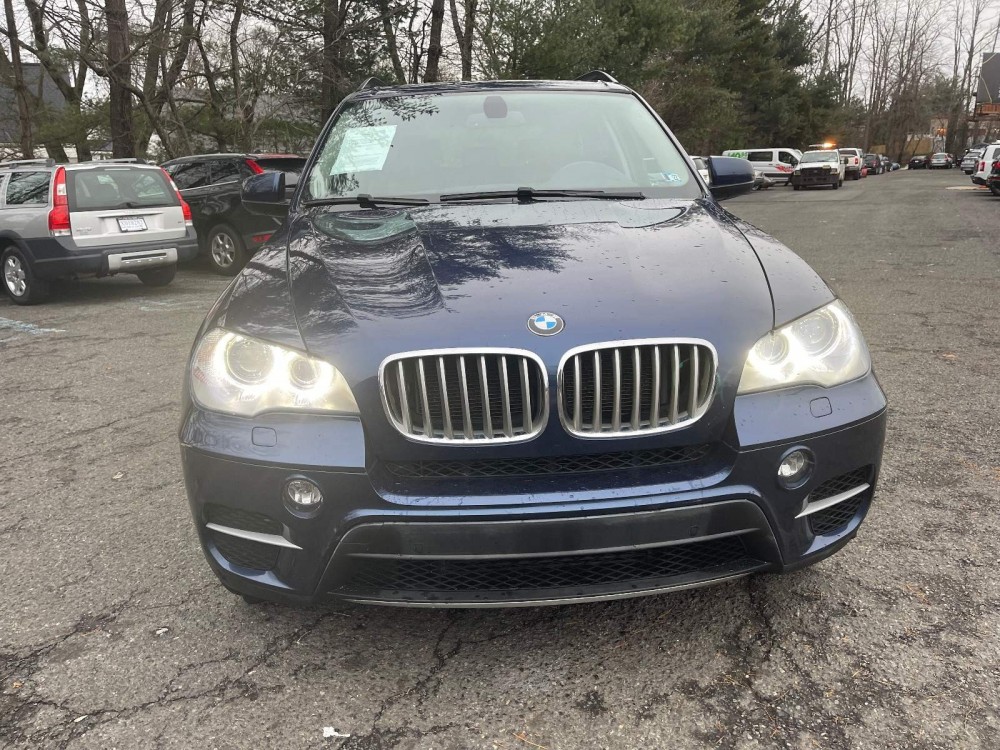
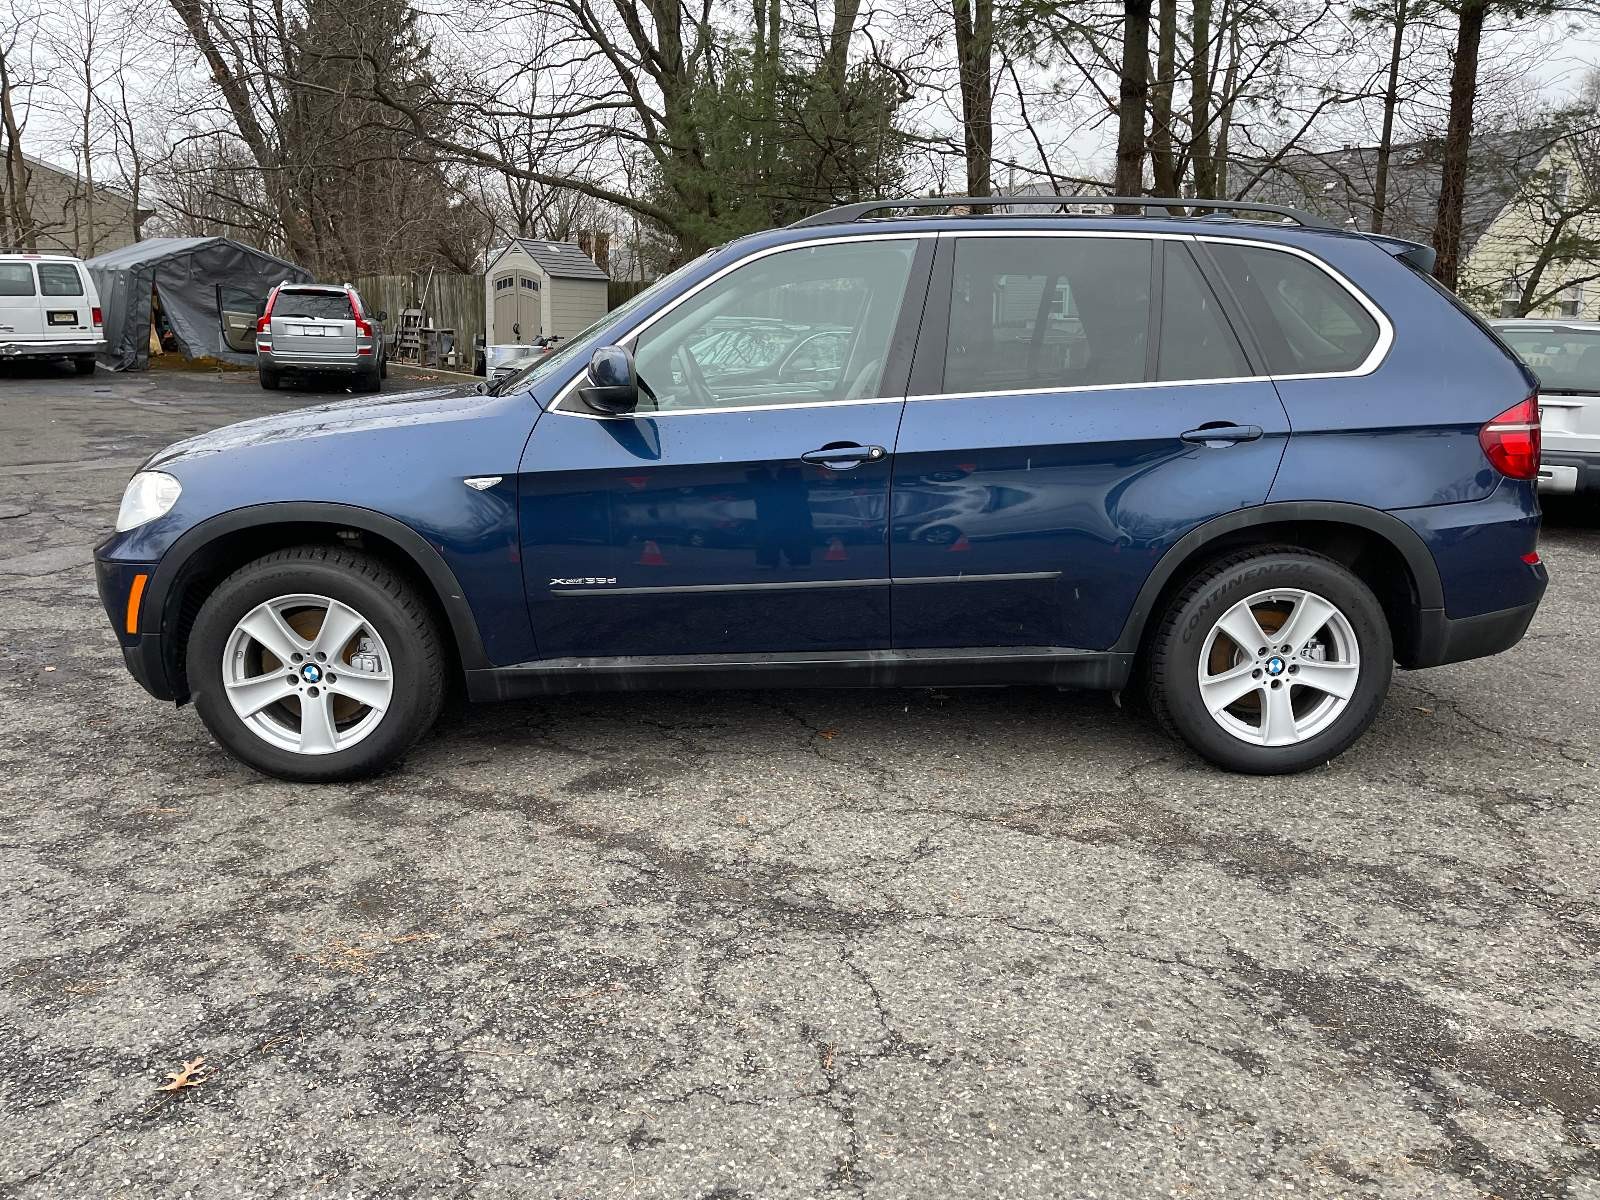
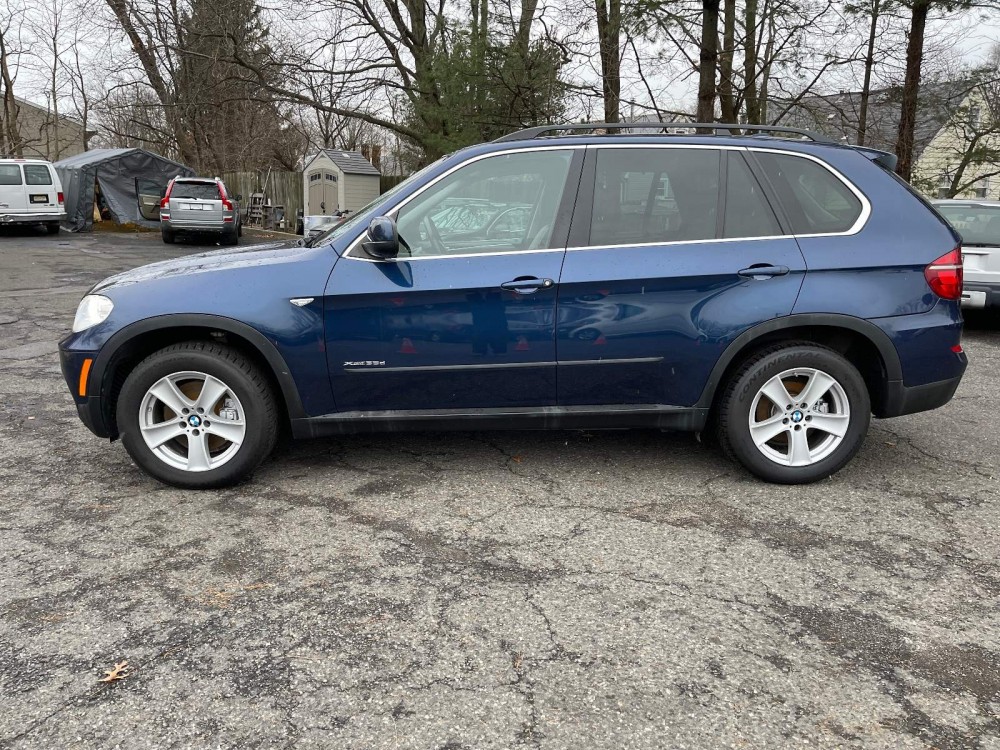
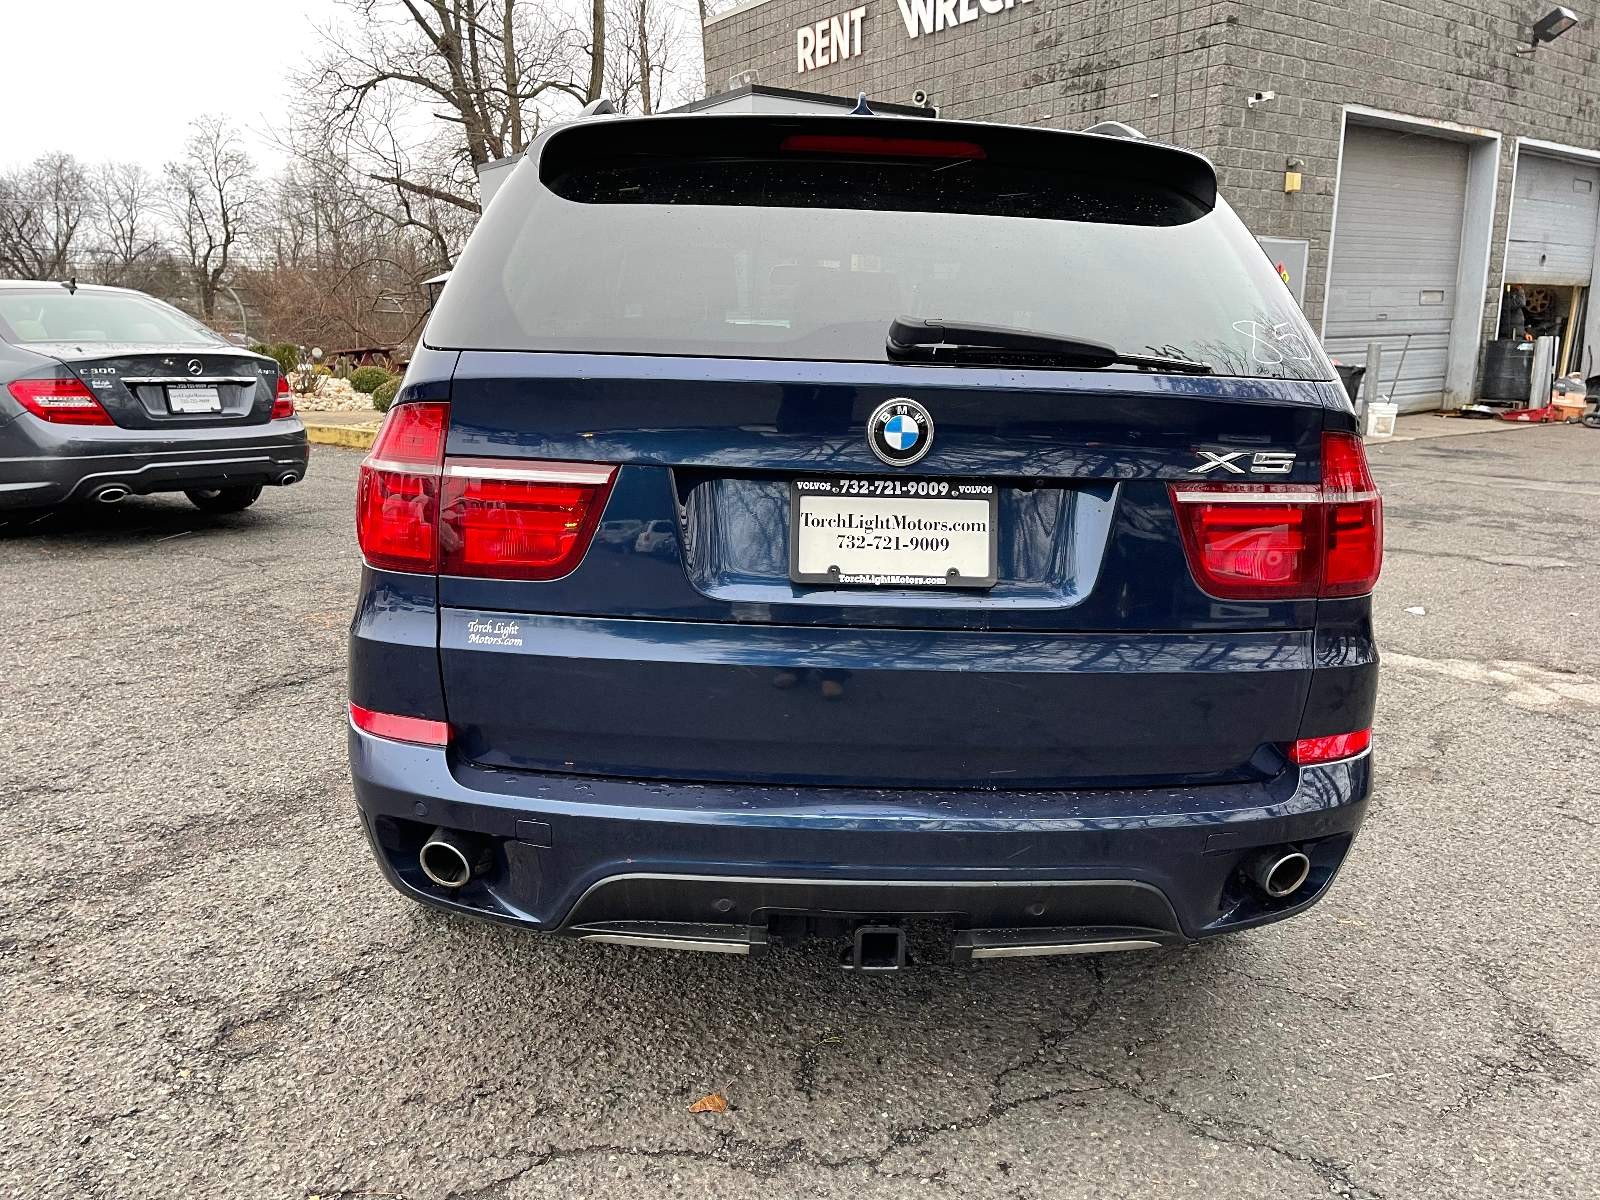
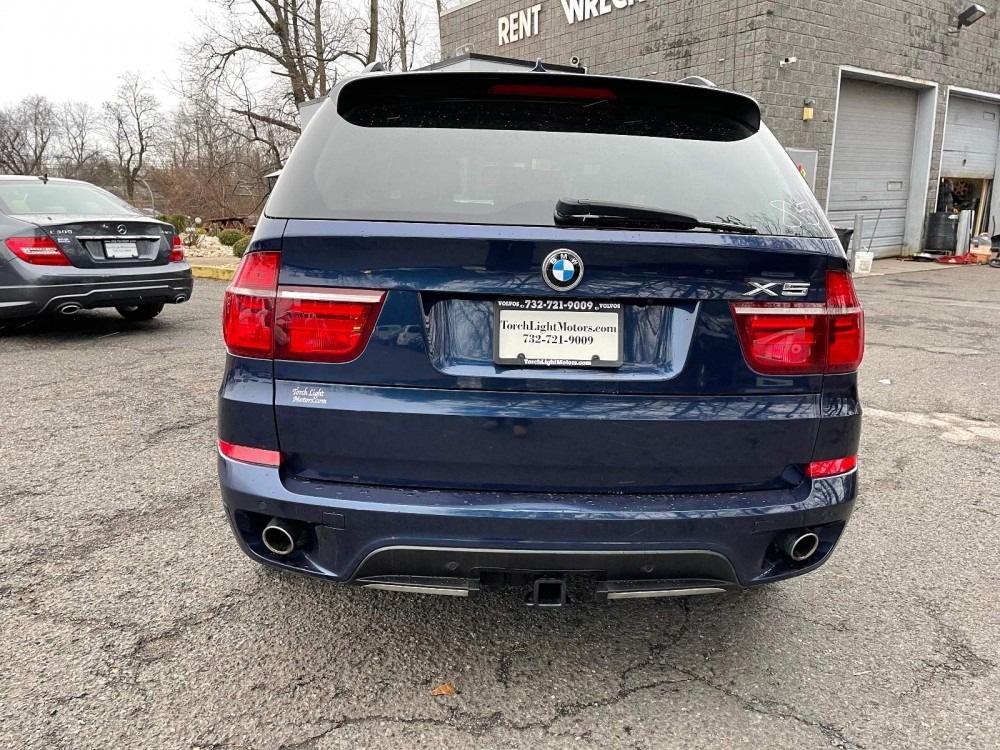
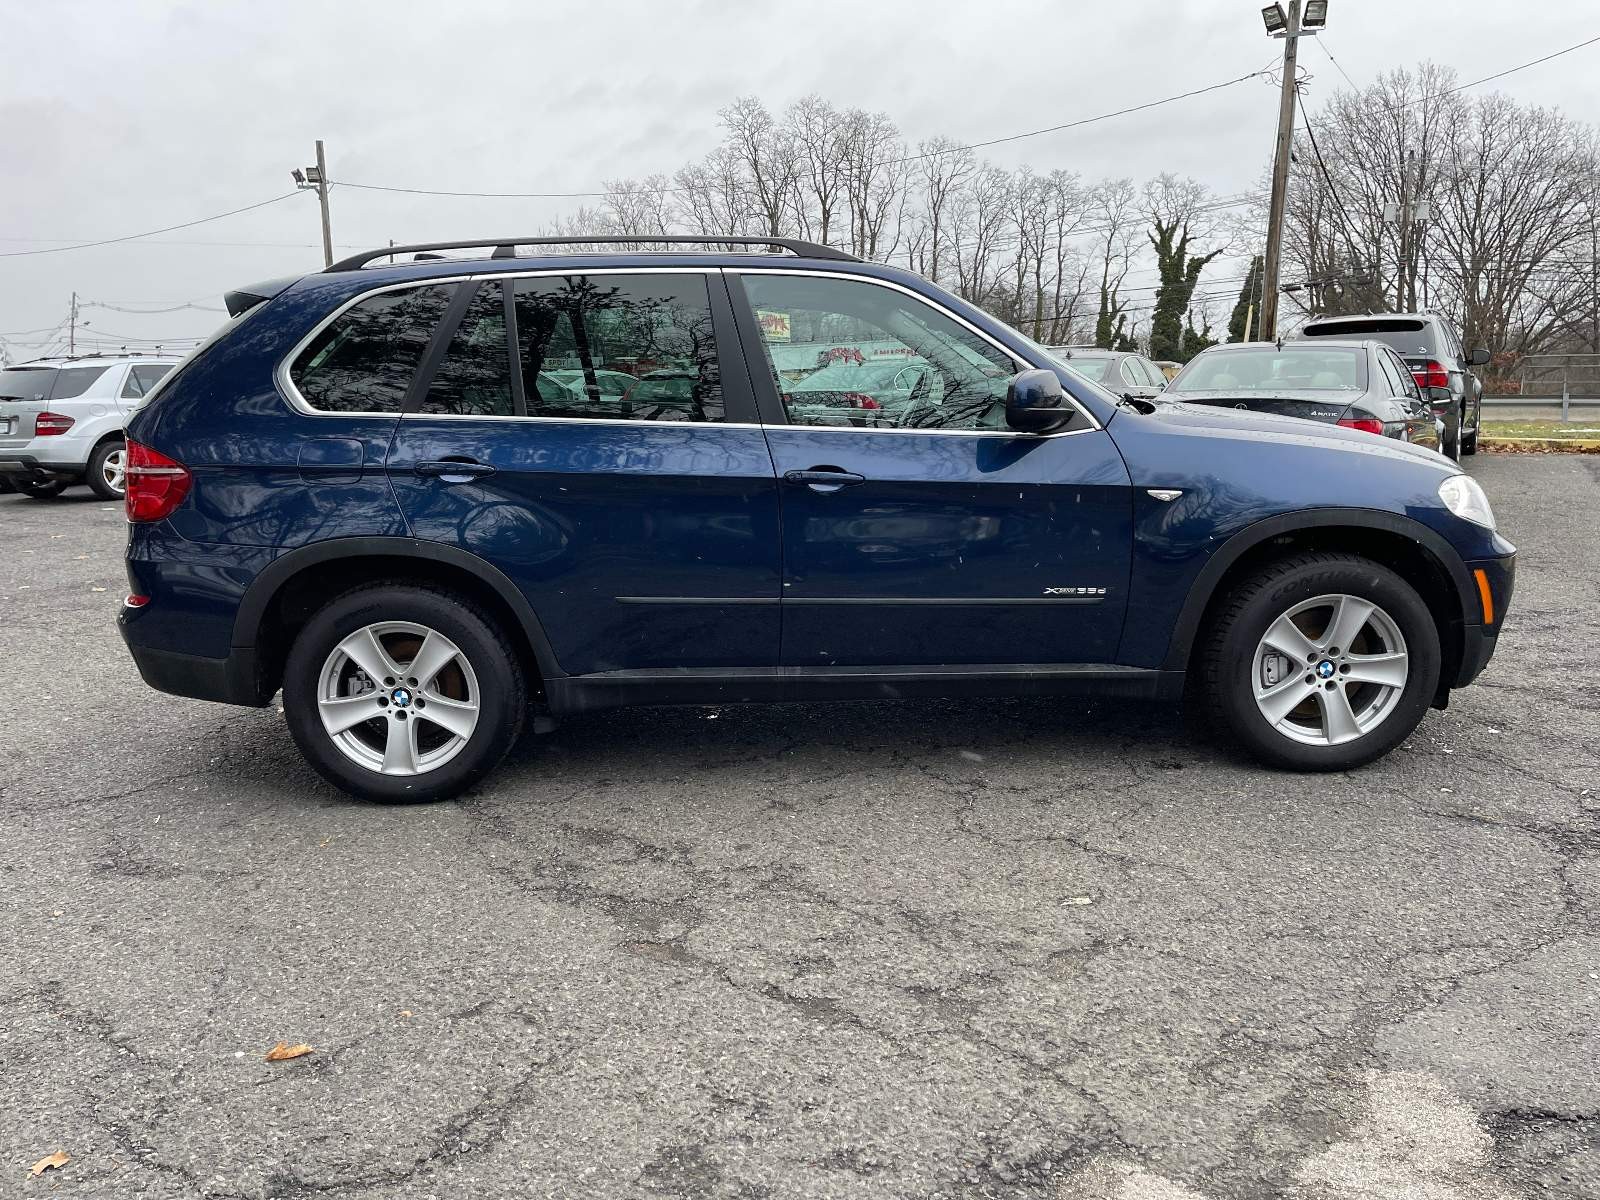
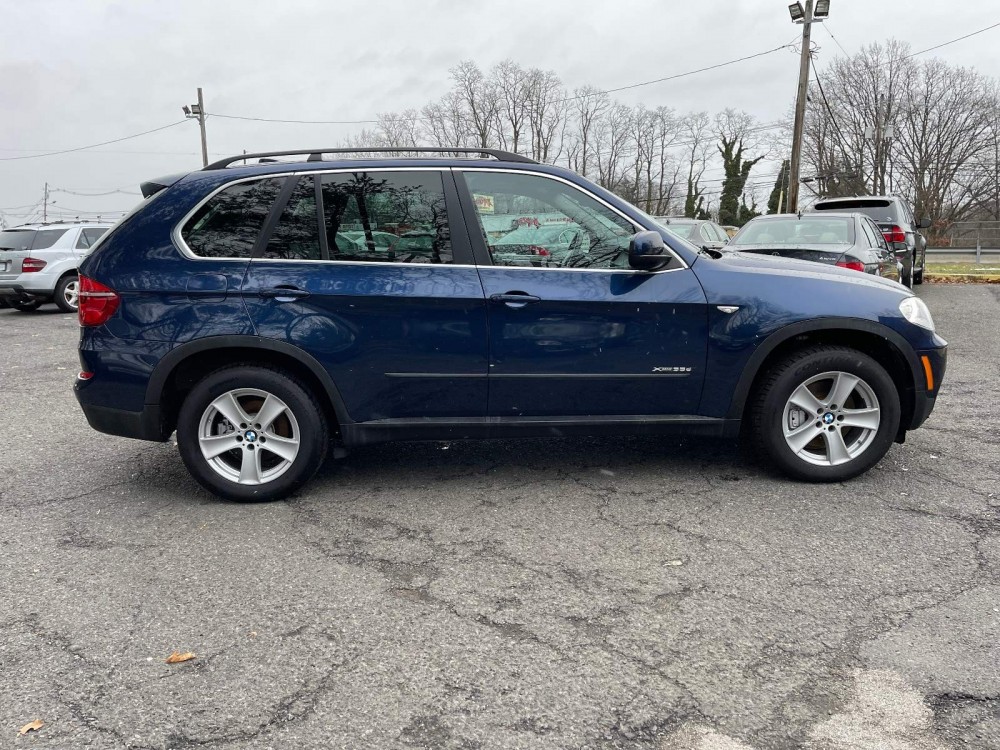
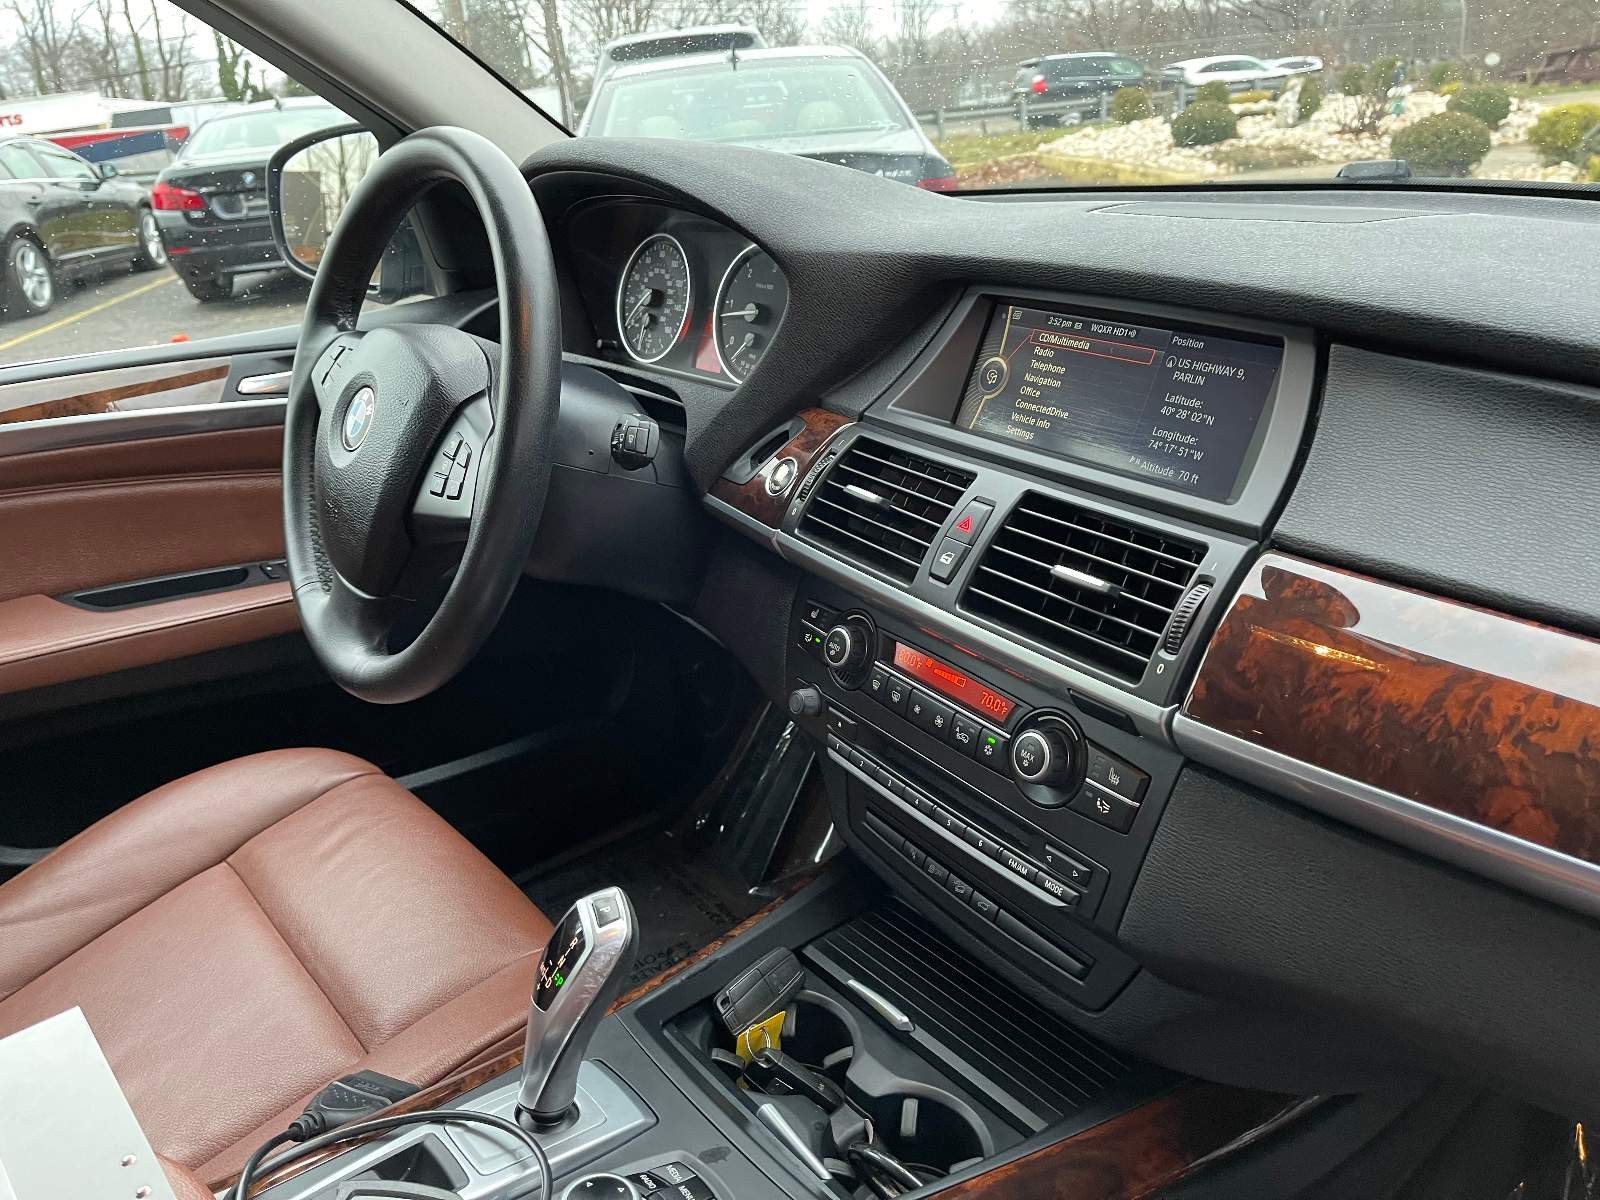
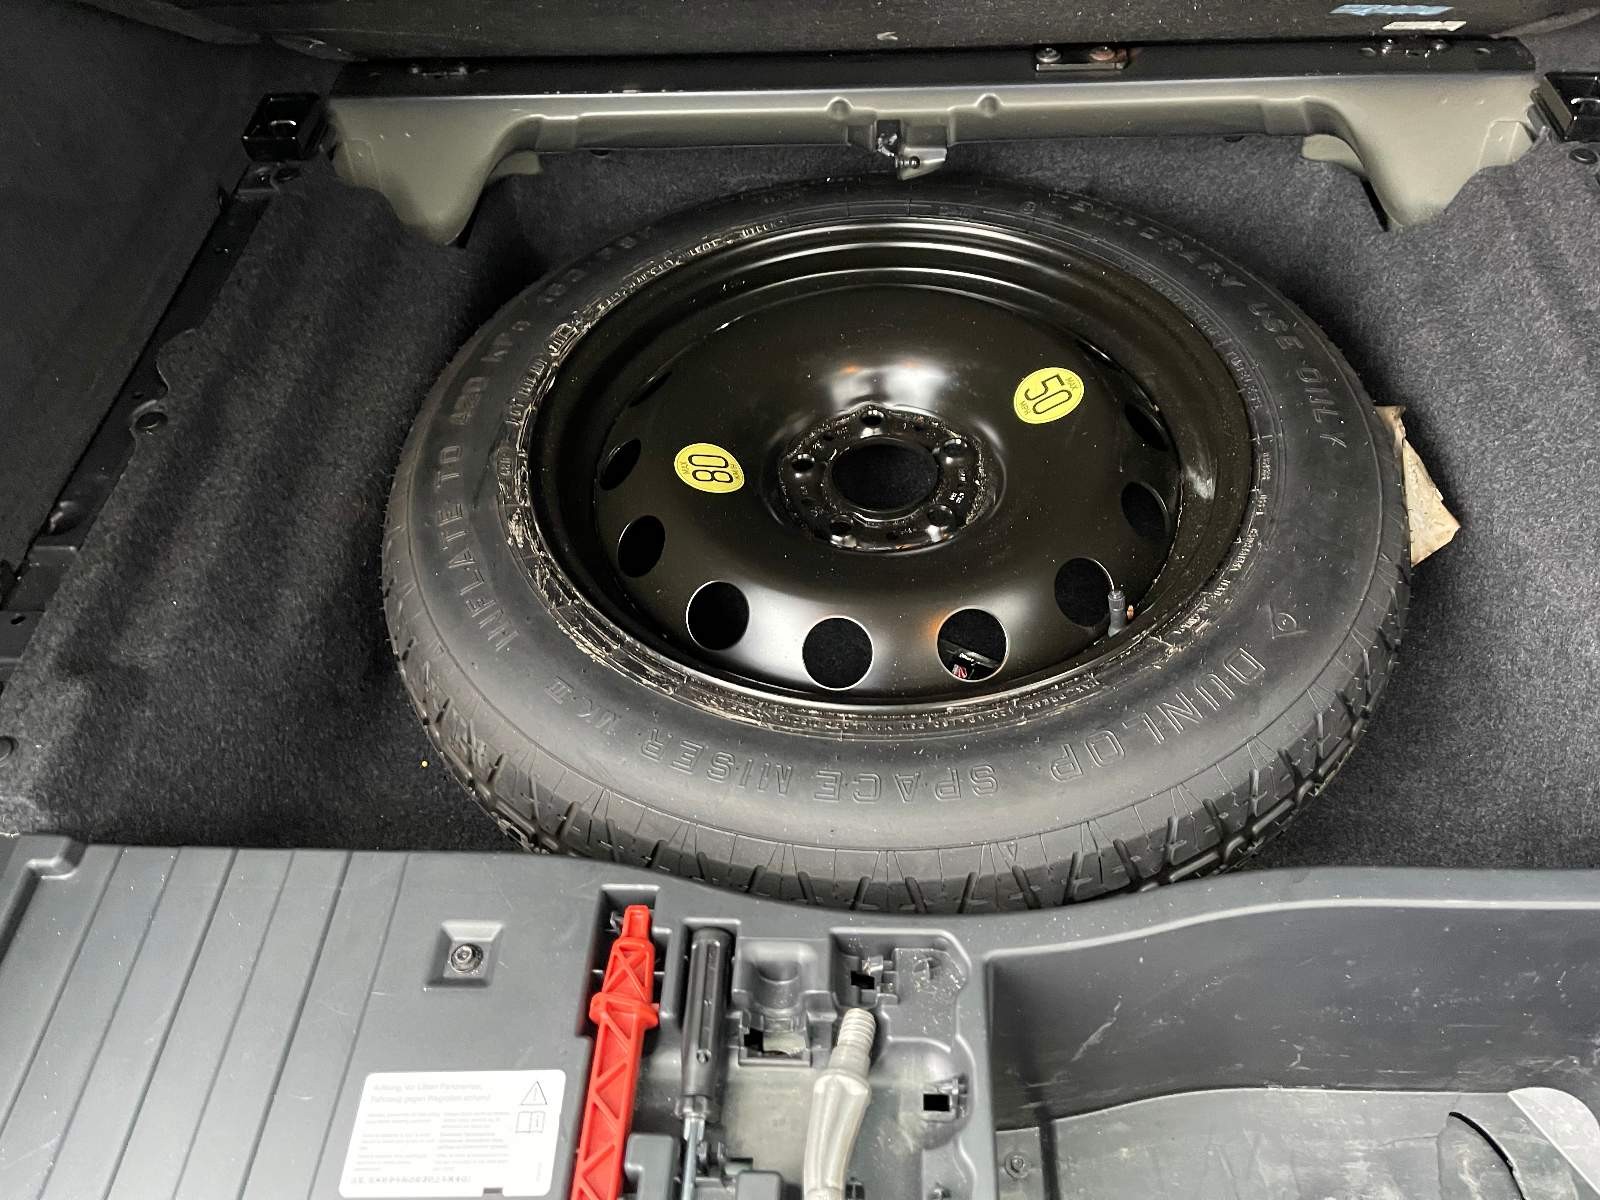
The Gang Buys a E70 xDrive35d
-
Sound is pleasant, lots of turbo noise and a tiny bit of engine with the windows open. With windows closed I can't tell a difference from stock which is nice.
I did the EGR racepipe at the same time (Bimmertune) and that came with the coolant blockoffs for that, and picked up the plate you linked above from a different source.
Perfect, looking to be incognito unless putting the hammer down. I reviewed all the exhaust options again and the Buzzken and VRSF are the only two systems that have Cats mounted on the down pipe. Consensus being that the cat will always be hot in that location where the DPF used to be. I've breathed enough nasty zero emissions diesel fumes in my life already and would like to be able to load groceries with the car running haha.
Seems like all the complaints on the VRSF fitment were from earlier versions so given that its more or less the same system plus a resonator made with 304ss over 419ss its better for $1k less. ECS/Turner has it on sale right now too so shopping list updated accordingly. Forgot to list the EGR race pipe as well.
-
Perfect, looking to be incognito unless putting the hammer down.
Hmm, not sure if I'd go that far. I turned a few heads last night rolling into a trailhead and had a guy roll over to say how sweet it sounded.
-
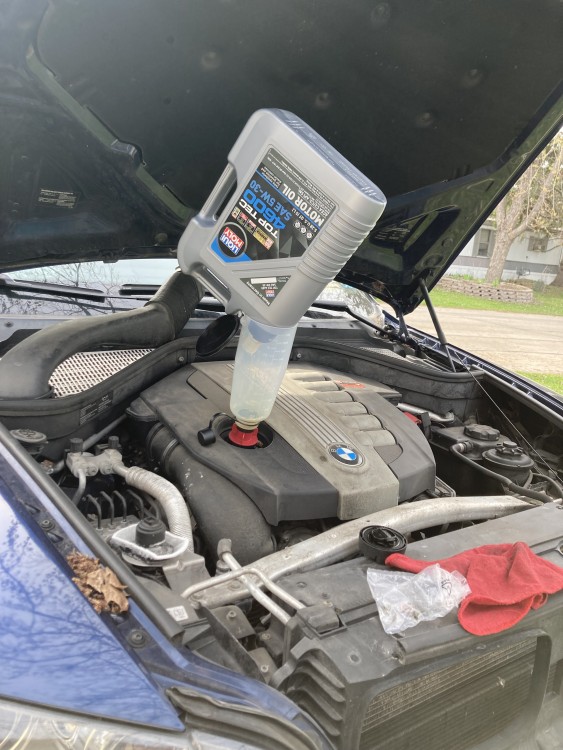
157045 Miles Checked a few things off the punch list. Changed the oil with the handy screw in oil funnel kit when it was on sale. Also installed a mishimoto magnetic drain plug. https://www.harborfreight.com/master-oil-funnel-filling-kit-56892.html
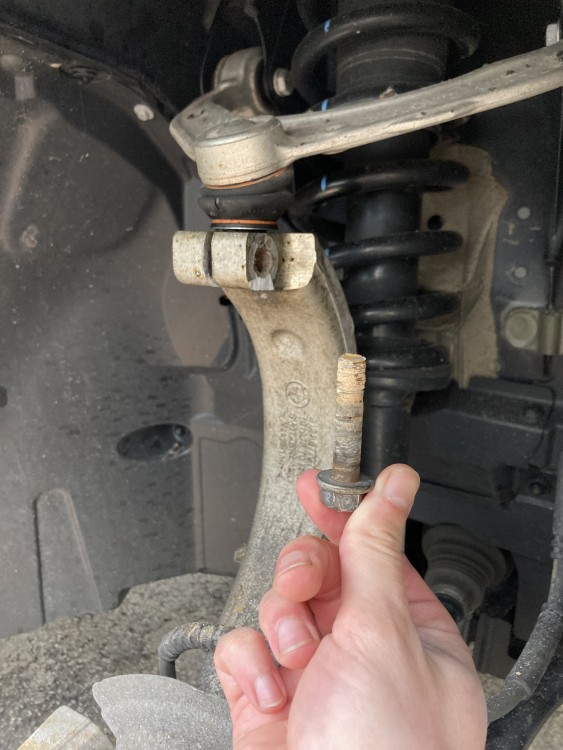
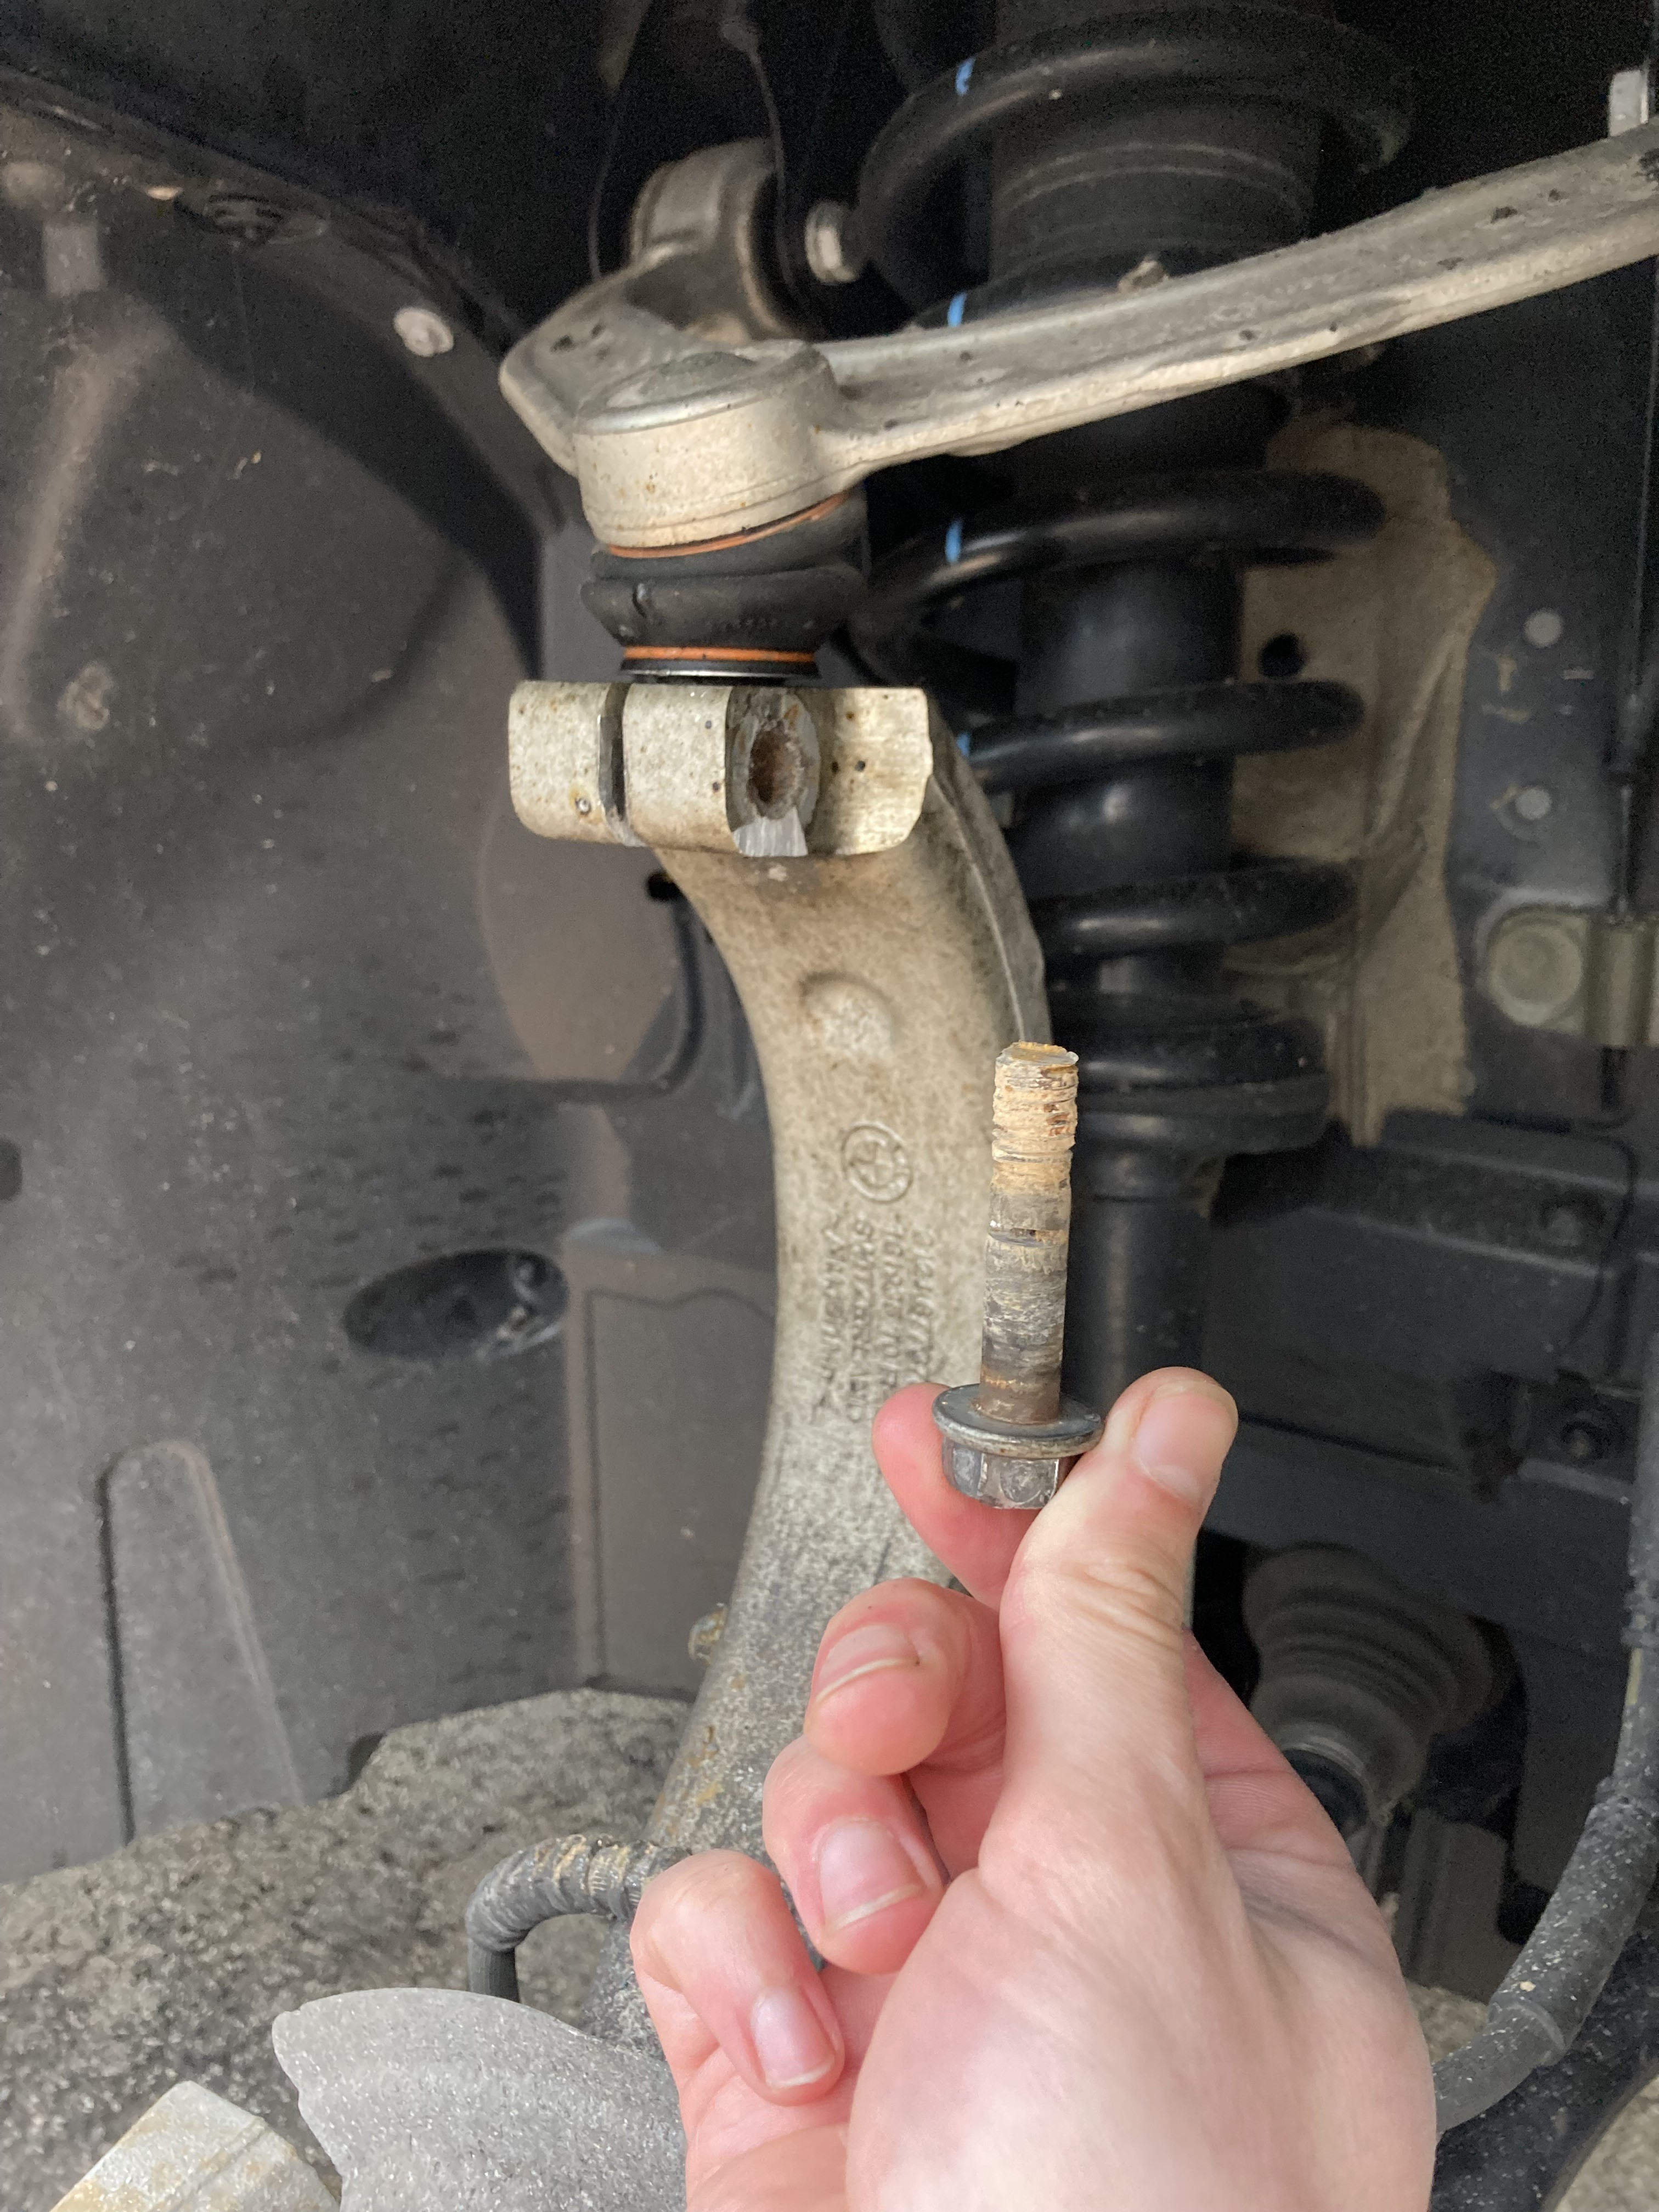
Attempted to start the front shocks, ball joint bolt had different plans. Very seized and had to cut/punch out. Replaced with a 10.9 bolt and haven't gone back to that project yet.
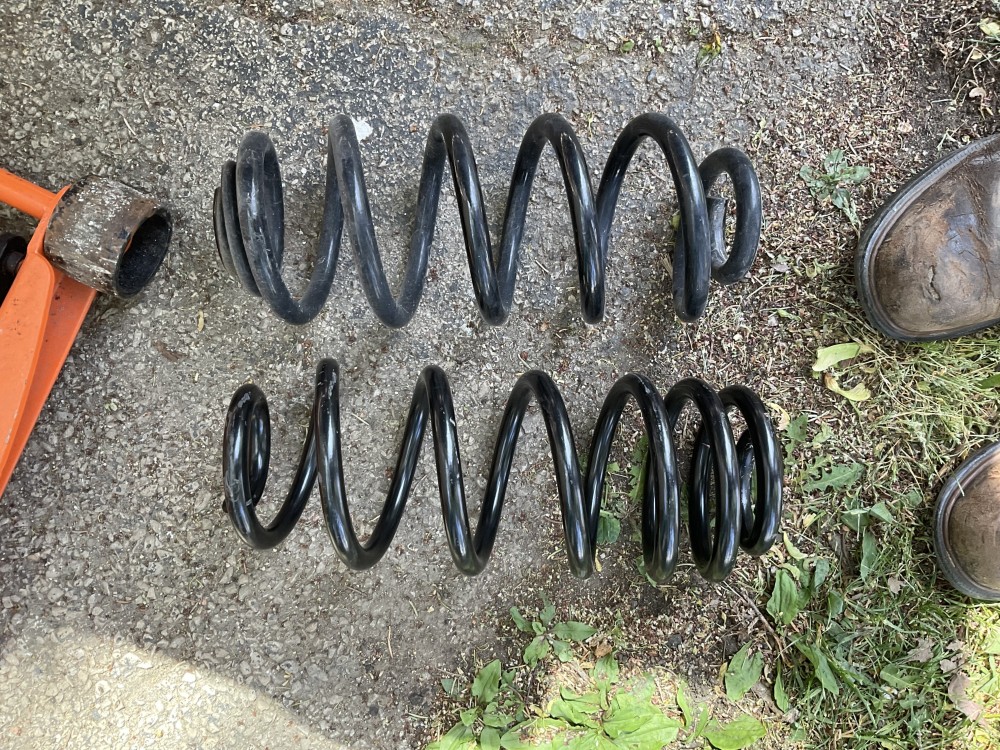
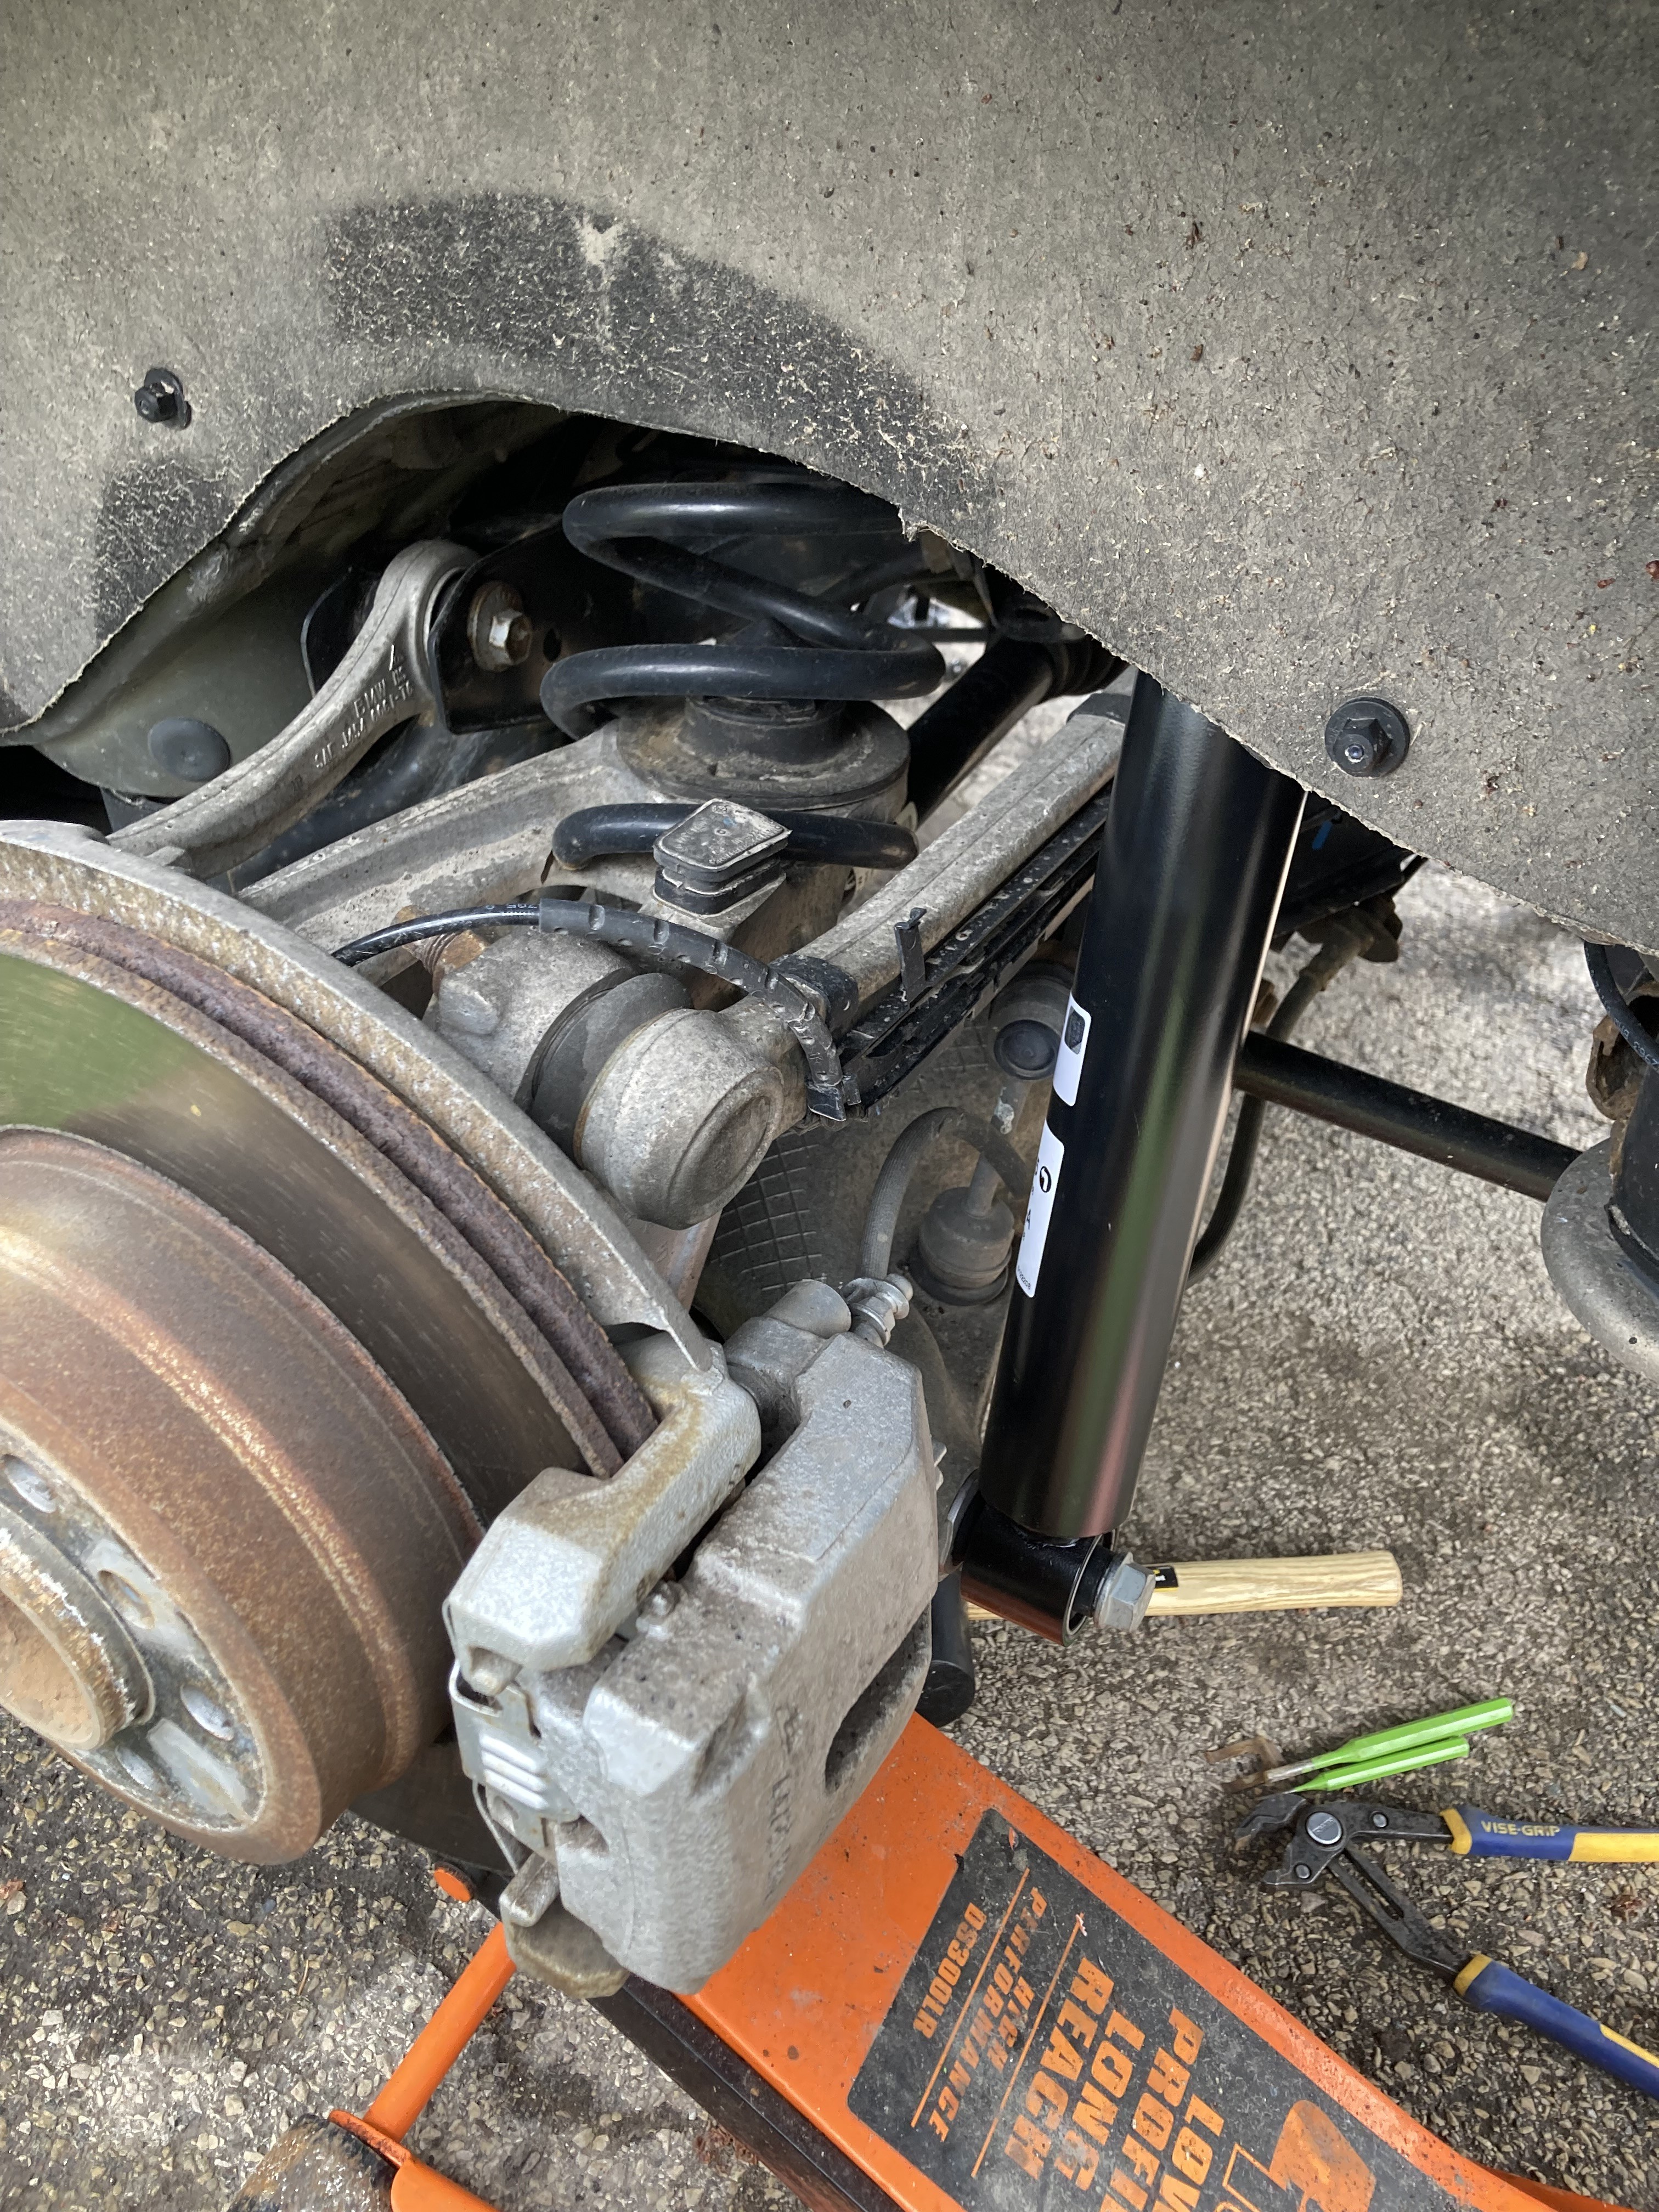
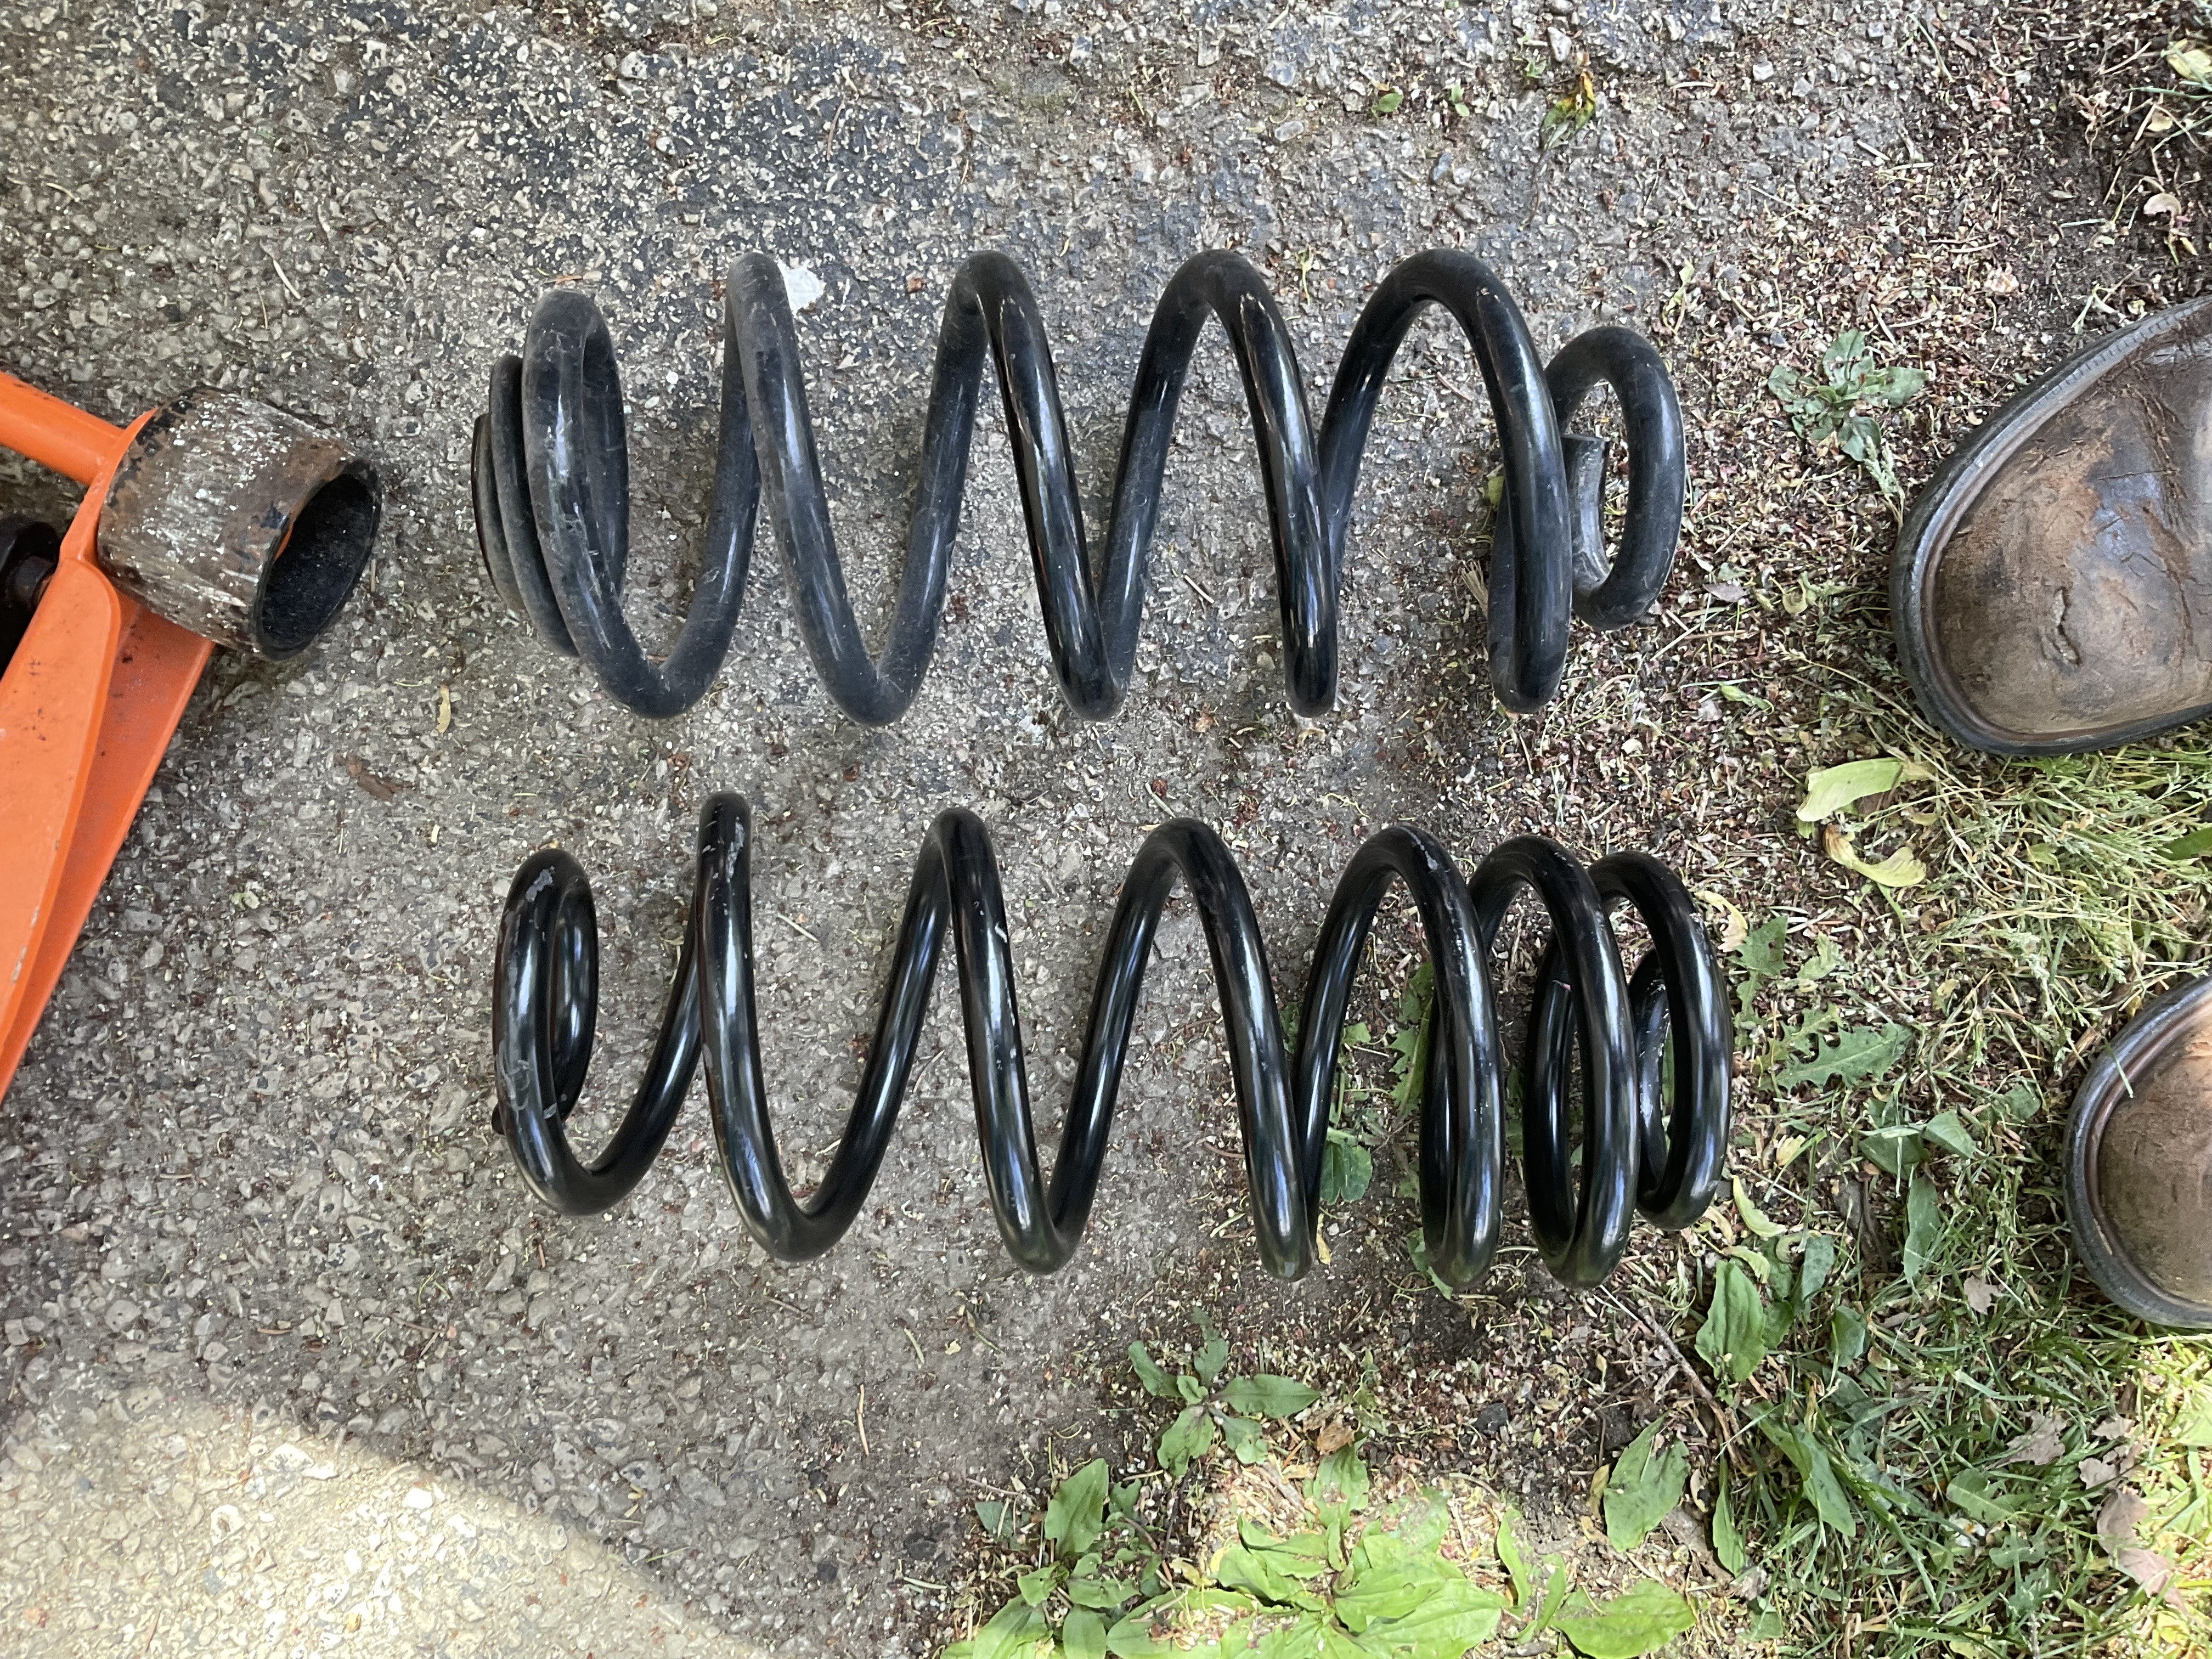
Discovered during the rear shocks replacement that the drivers rear spring had broke and wrapped itself around under the mount. Didn't notice any noise or handling issues so this was quite the surprise but apparently a common issue by 150k.
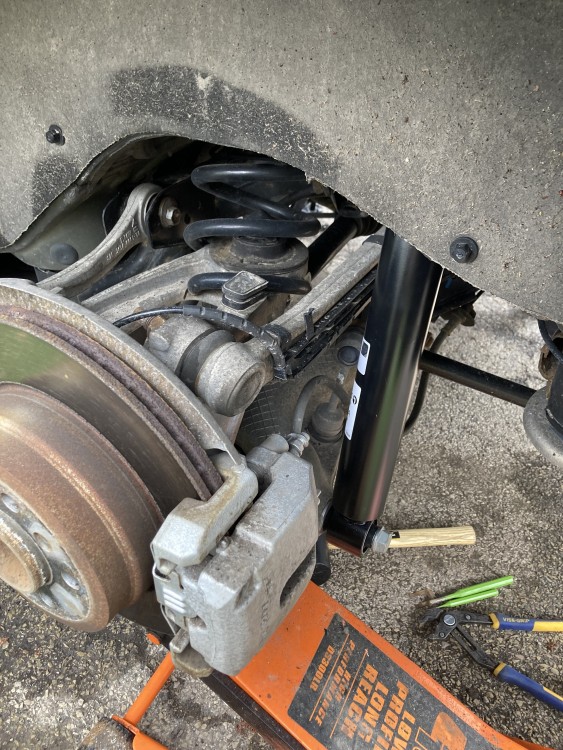
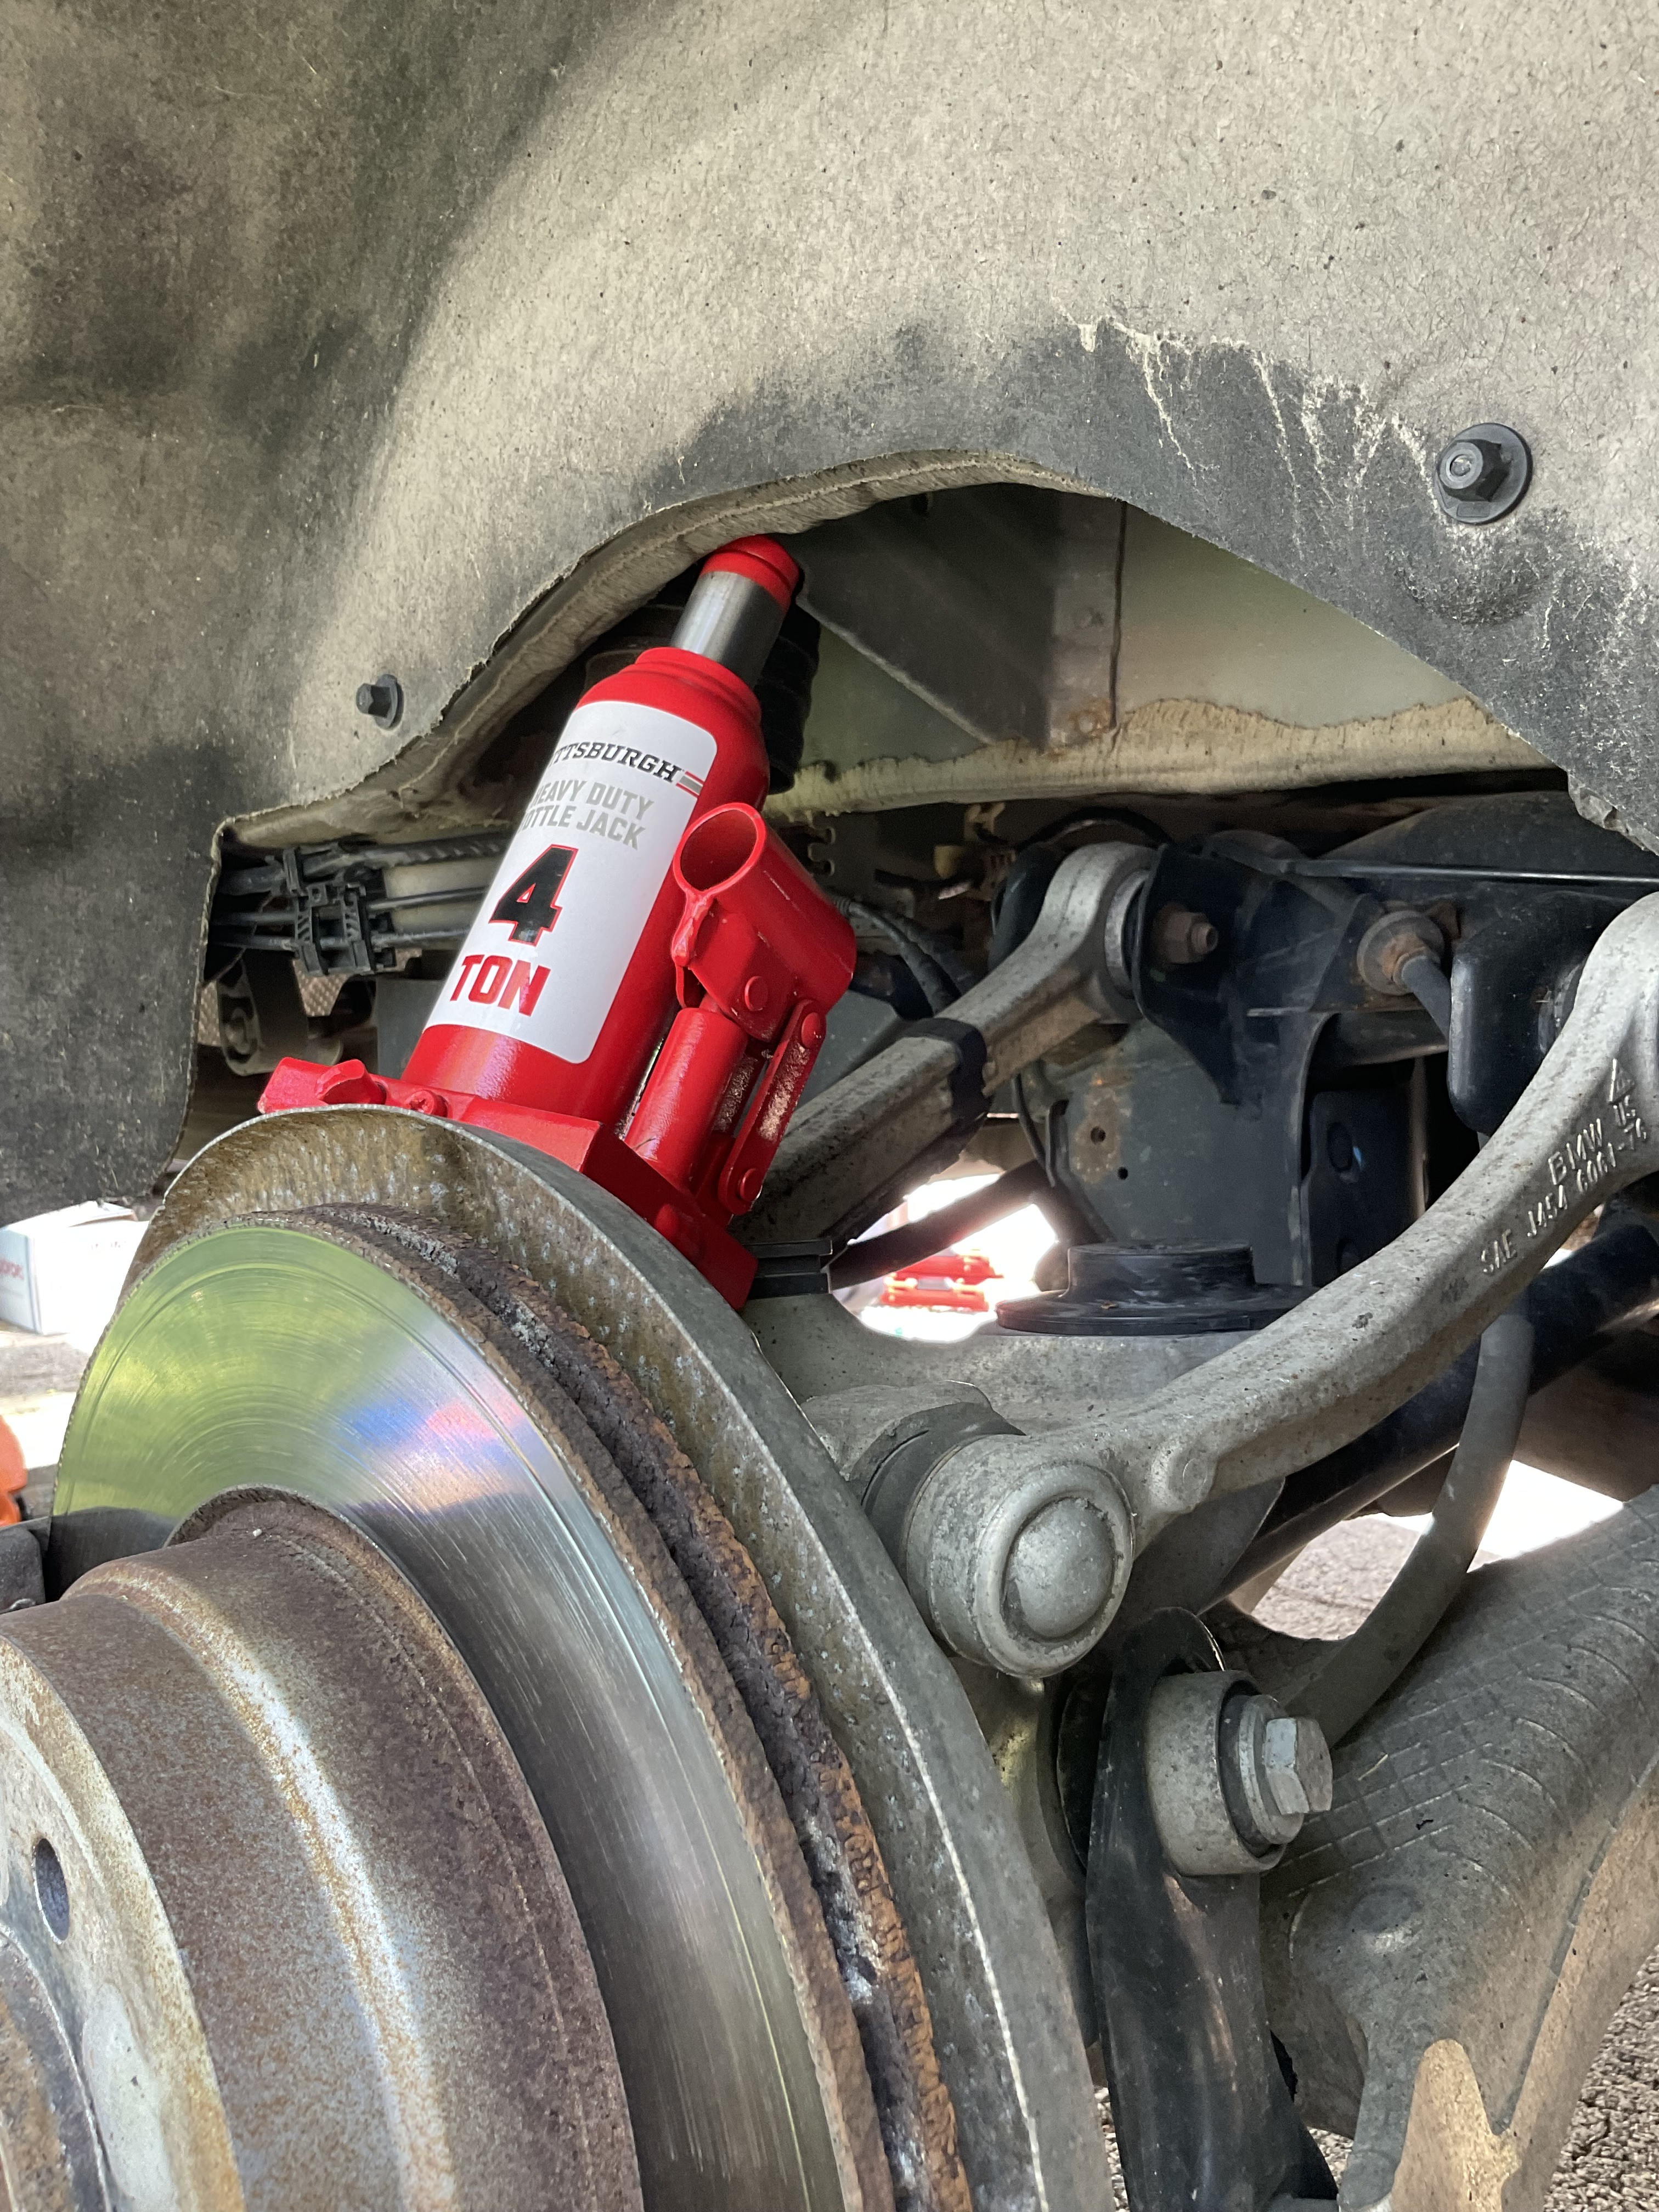
OEM spring compressor is short but extremely expensive. Not enough room to use standard ones so just ended up using a small bottle jack and got plenty of room to pull them out. Make sure the brake line is removed from the shock mount location.
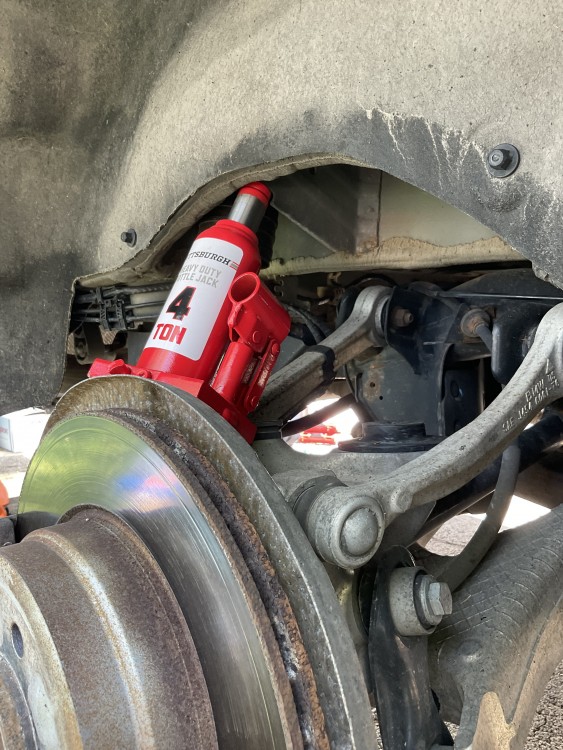
Replaced both sides with LESJÖFORS 4208476 from Rock Auto as they were $20 cheaper each than FCP and didn't care about warranty. Top is the unbroken stock, LESJÖFOR below. Little thicker than the OEM. Replaced rear upper and lower spring pads as well.
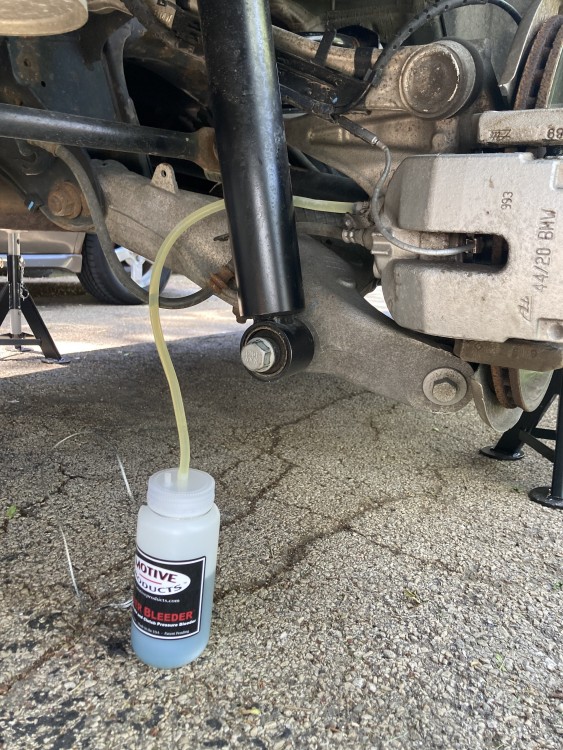
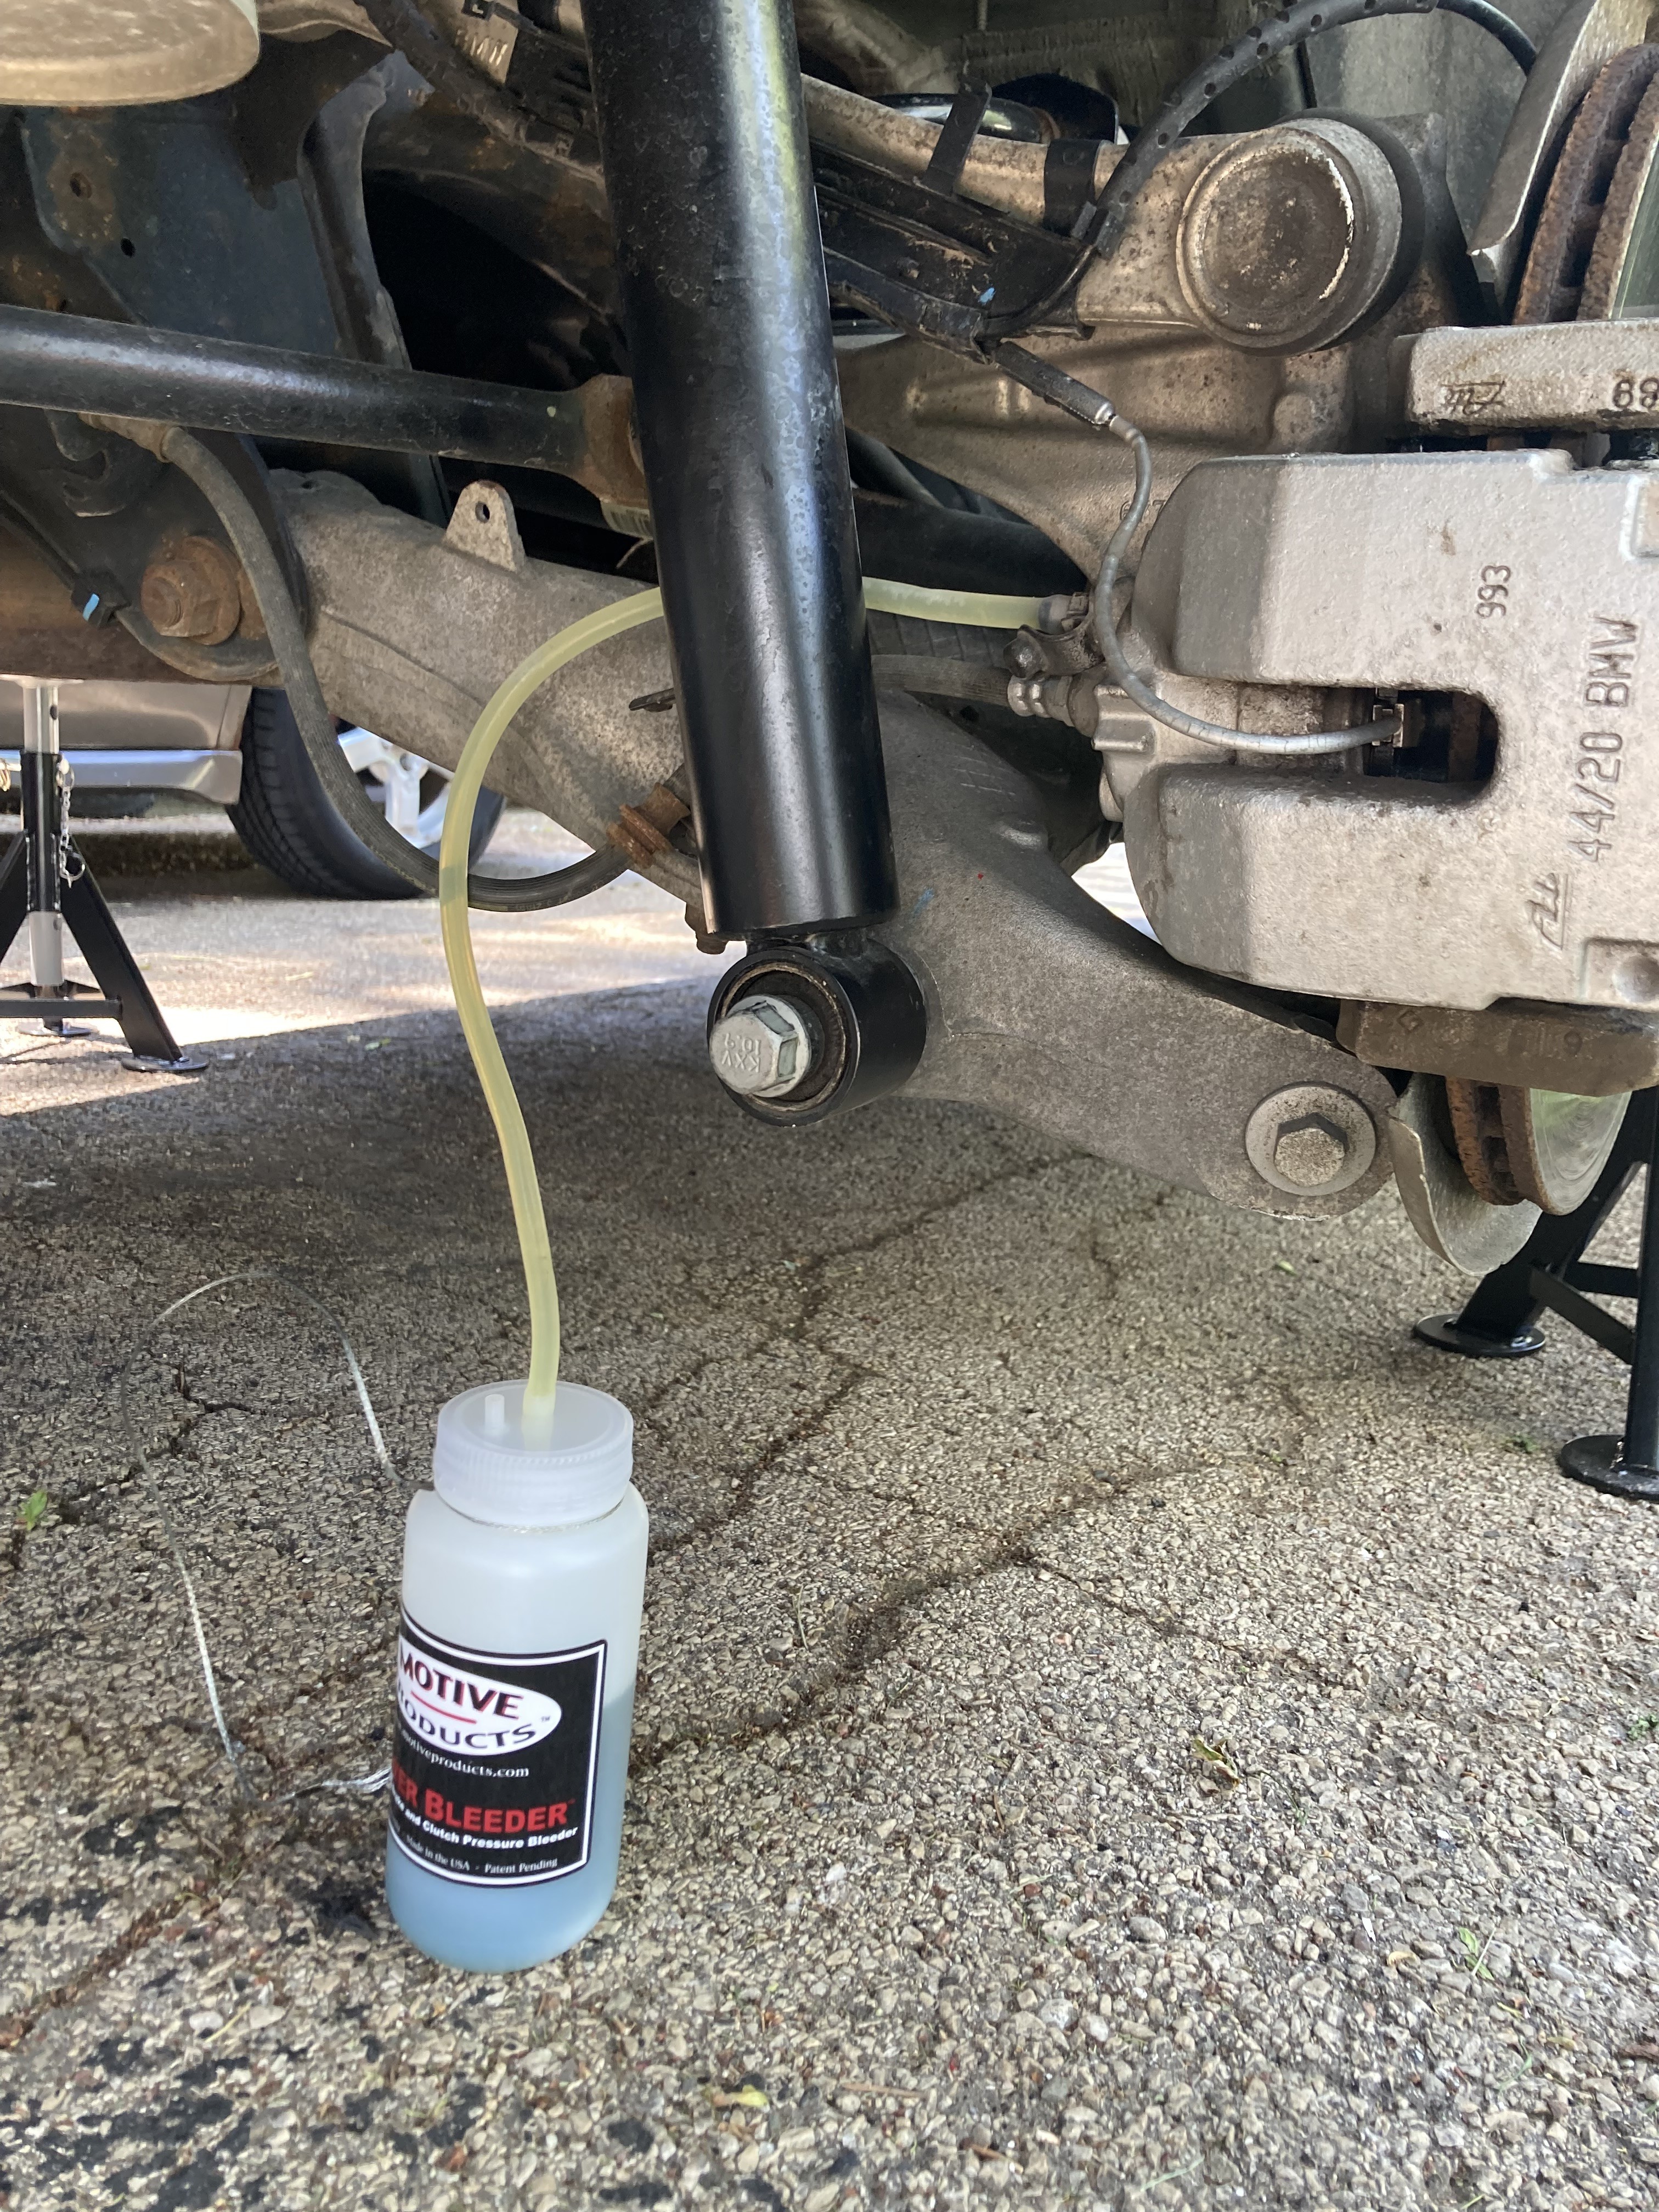
Finally pony up'd the $25 for the Motive bleeder bottles and was happy to toss away my gheto gatorade setup. The seal on my Motive 1100 power bleeder cap had swollen as well, FCP and Amazon don't offer the replacement. I ended up trimming a 3/8 x 2 1/4 with 1/8 center rubber washer from Menards down to 1 3/4 diameter tracing a hole saw bit. Brakes bleed with Pentosin DOT4-LV
Got all the other parts on hand, just need to purchase the tune yet and then I can dig into the major refresh items.
-
How has the power bleeder been to use? Been considering grabbing one.
it’s handy, my only complaint is the cap. Not having a rotating hose means it gets twisted from one end as you screw onto the reservoir. That cap can be bought for $50 itself from motive too so you don’t save any getting this vs the base kit from FCP. This wasn’t available when I bought mine.
https://www.fcpeuro.com/products/european-power-bleeder-black-label-motive-products-mot0109
-
How has the power bleeder been to use? Been considering grabbing one.
I've been happy with mine (European "Black Label" with aluminum swivel cap), I just use it as a pressure bleeder rather than putting fluid in it. Agreed that it's handy to have especially if you don't have an available "helper". I picked mine up on sale a while back for much less than the FCP listing. Just checked and ECS has the same for $90.
-
Did the full transmission service a few weekends ago now and got about 2500 trouble free miles on it since. I haven't floored it yet but very happy with the improvement on the 2-3 shift. Overall the job looks more intimidating than it was but it certainly was a full weekend project. This is pretty well covered in these videos but I'll share my tips.
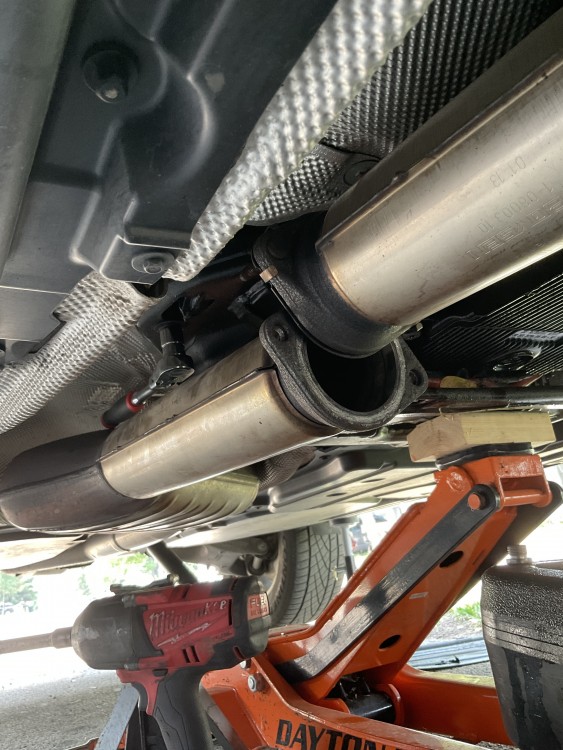
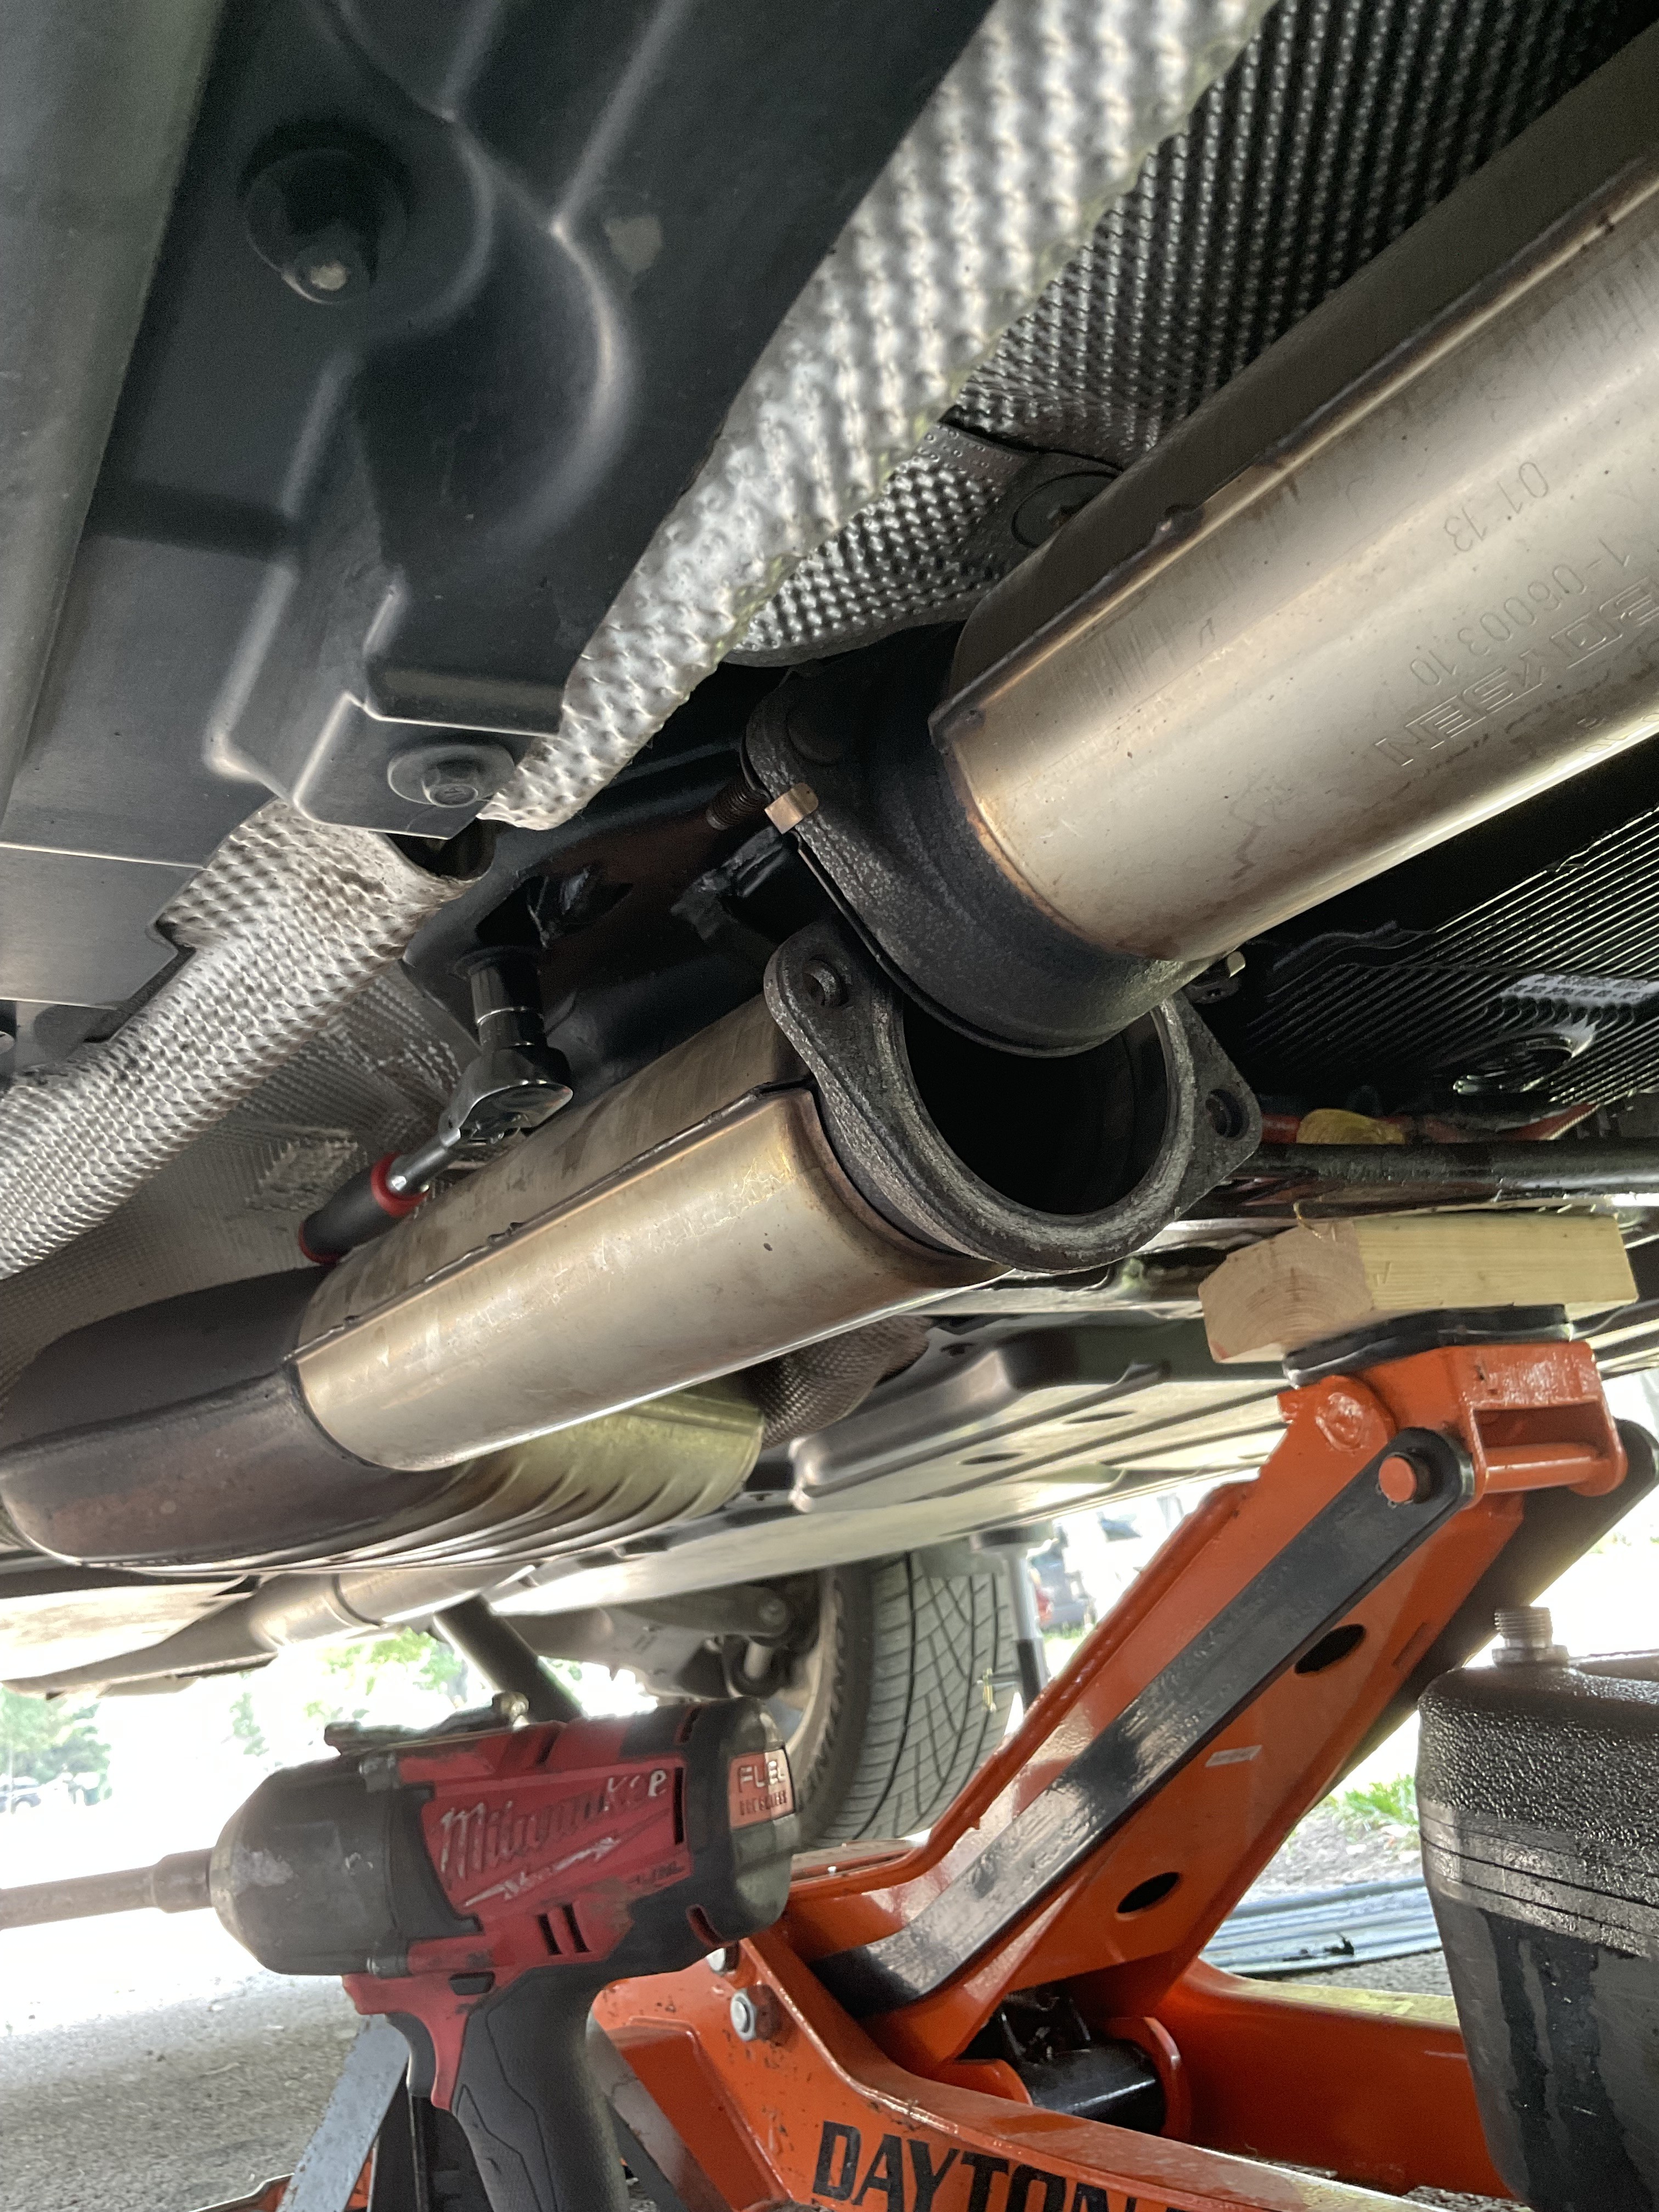
I did end up pulling the transfer case cross member. People buy or fabricate a shallow Torx wrench to get at the rear pan bolts blocked by the cross member that takes 10min to remove. I unbolted the exhaust as well to get additional clearance for the passenger side center bolt, no issues with that leaking afterwards and my flange nuts were in good shape.
6HP26/28 how to video. I followed this along with the TIS instructions. I would highly recommend marking the mechatronic sealing sleeve with a paint pen as I had a hell of a time getting that lined back up properly and that would've saved me the headache like the TIS suggests.
This is a E53 mechatronic rebuild but similar enough procedure with good assembly tips.
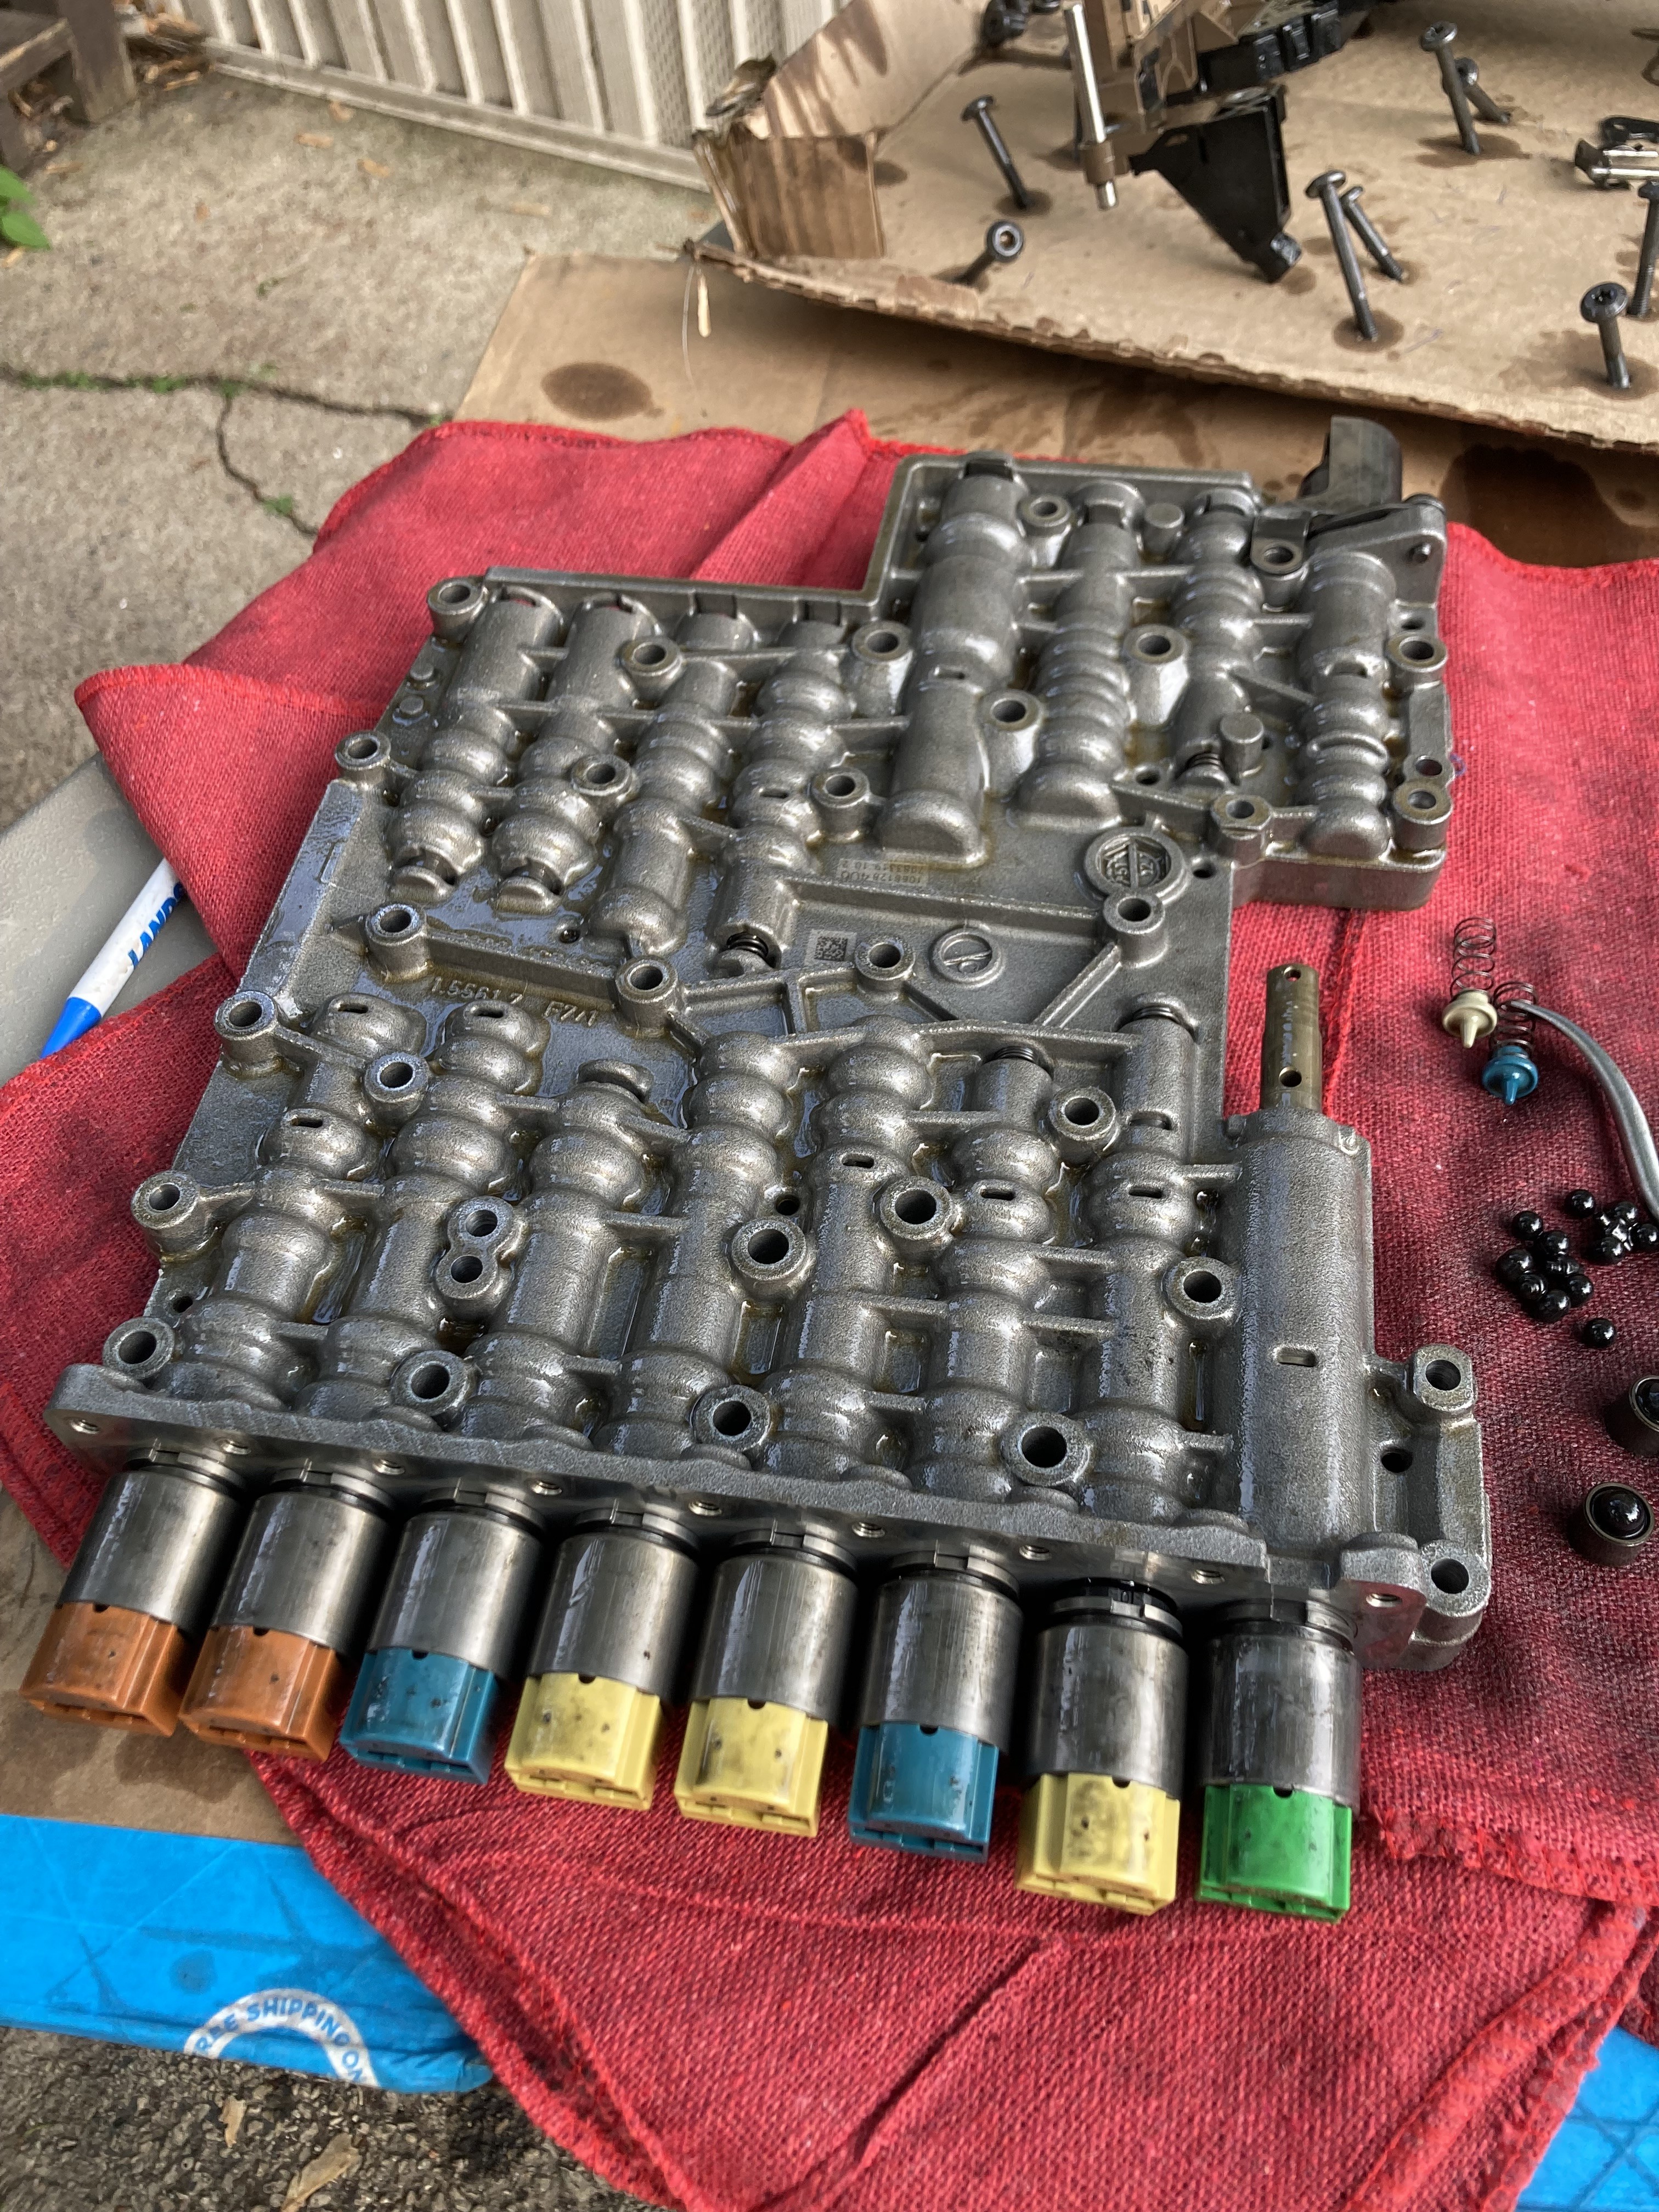
Mechatronic unit after removal and splitting. Split the plate this side up so the accumulator pistons and check valves don't fall out, those are reused along with the filter.
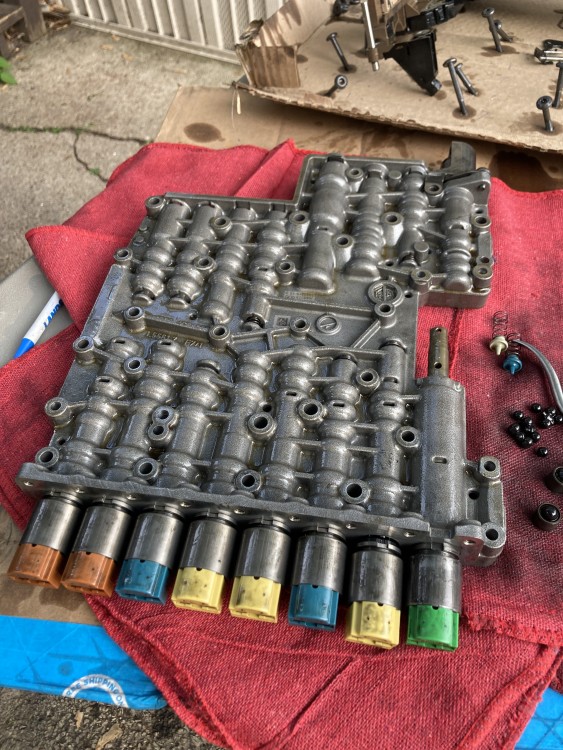
I let the transmission drain overnight too with the mechatronic unit out and I ended up needing the full 9.5l capacity, luckily NAPA does stock the Liquid Moly Top Tec 1800 so I was able to get what I needed to finish the job.
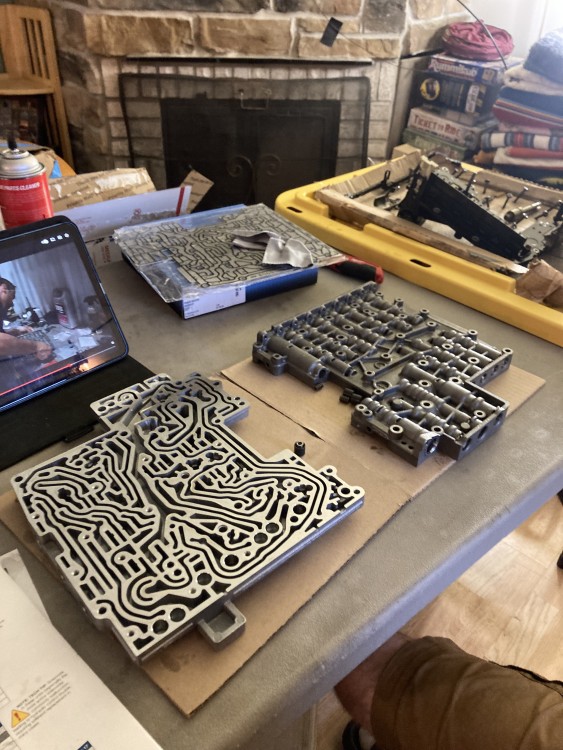
Just to reiterate, my E-Shift 6HP28X with with main parts list 1068-050-045 did indeed use the ZF 1068298047 mechatronic service kit as confirmed by California Transmission Supply and Automatic Choice. I even wrote to FCP Euro Support asking them about their product listing comparing to these sources and wrote back to me after a month stating that their BMW Catalog team confirmed this was not for my vehicle and to check with my local BMW Service Center. The dealers only sell the complete mechatronic unit so guessing thats why this "doesn't match my vin". Again not sure why FCP and ECS don't have as complete main parts list compatibility as those transmission sites do but I would reference those. I didn't have any luck getting into ZF's official catalog.
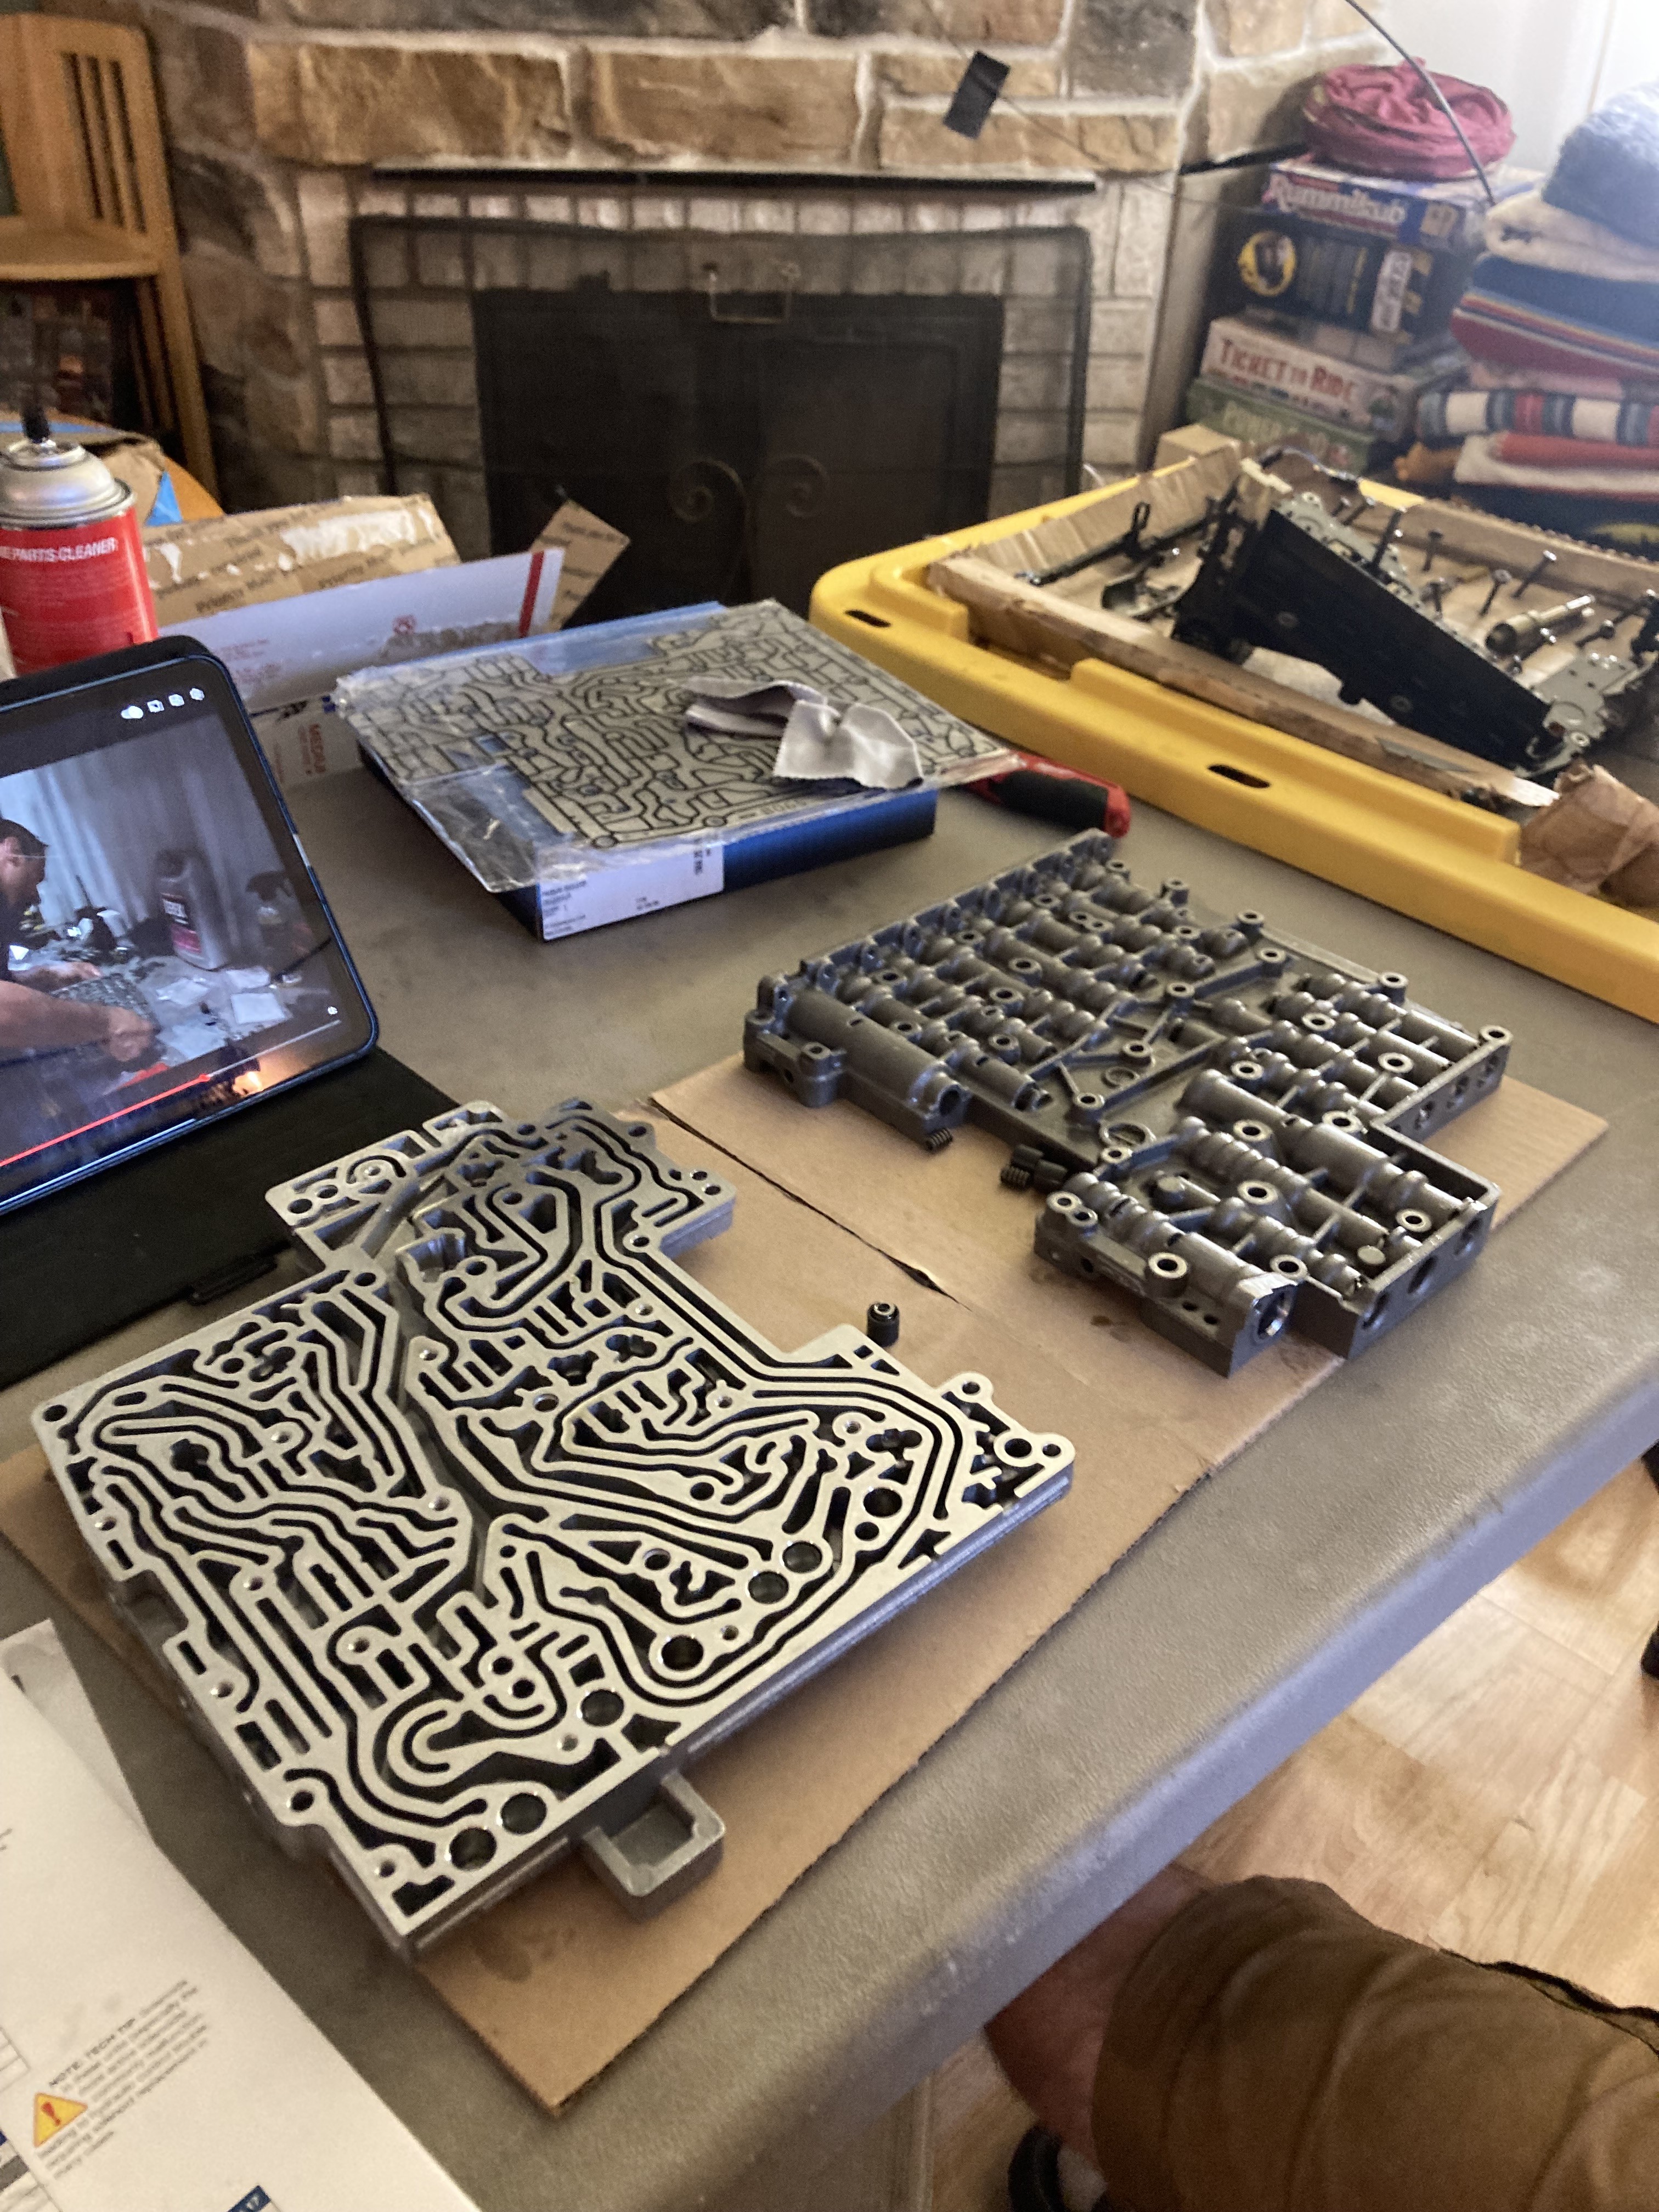
Also if you are going to do the Sonnax Zip-Kit, remember that the valve body separator plate needs to be replaced as well which in my case was the A065 plate also available through Sonnax. I just ended up doing all the end plugs, pressure regulator sleeves and Clutch A & E control boost valves since I had this out and given the mileage instead of diagnosing what it might just need. Only issue I did have was having to redo 1 or 2 o-rings during assembly as they got cut on the valve bores that were still tight tolerances. Just takes time and make sure everything is well lubricated. Again it's just a tedious job but glad I did it and saved a bunch of $$$.
-
I greatly appreciate your posts in here so I can follow your advice later!
My 2-3 shifts are quite hard especially cold, and know the trans is in need of some love.Keep crushing it!
-
M539 Restorations also did this on his E70 and it made a big difference.
Haven’t come across this channel, looks like great content!
I greatly appreciate your posts in here so I can follow your advice later!
My 2-3 shifts are quite hard especially cold, and know the trans is in need of some love.Keep crushing it!
Thanks! Eager to get all the boxes of parts out of my living room but it’s too damn hot to wrench for 2-3 days straight. Hopefully end of next month I can tackle the rest of the jobs.
-
Haven’t come across this channel, looks like great content!
Thanks! Eager to get all the boxes of parts out of my living room but it’s too damn hot to wrench for 2-3 days straight. Hopefully end of next month I can tackle the rest of the jobs.
Favorite channel on YouTube. Videos are great, I’ve watched all of them
-
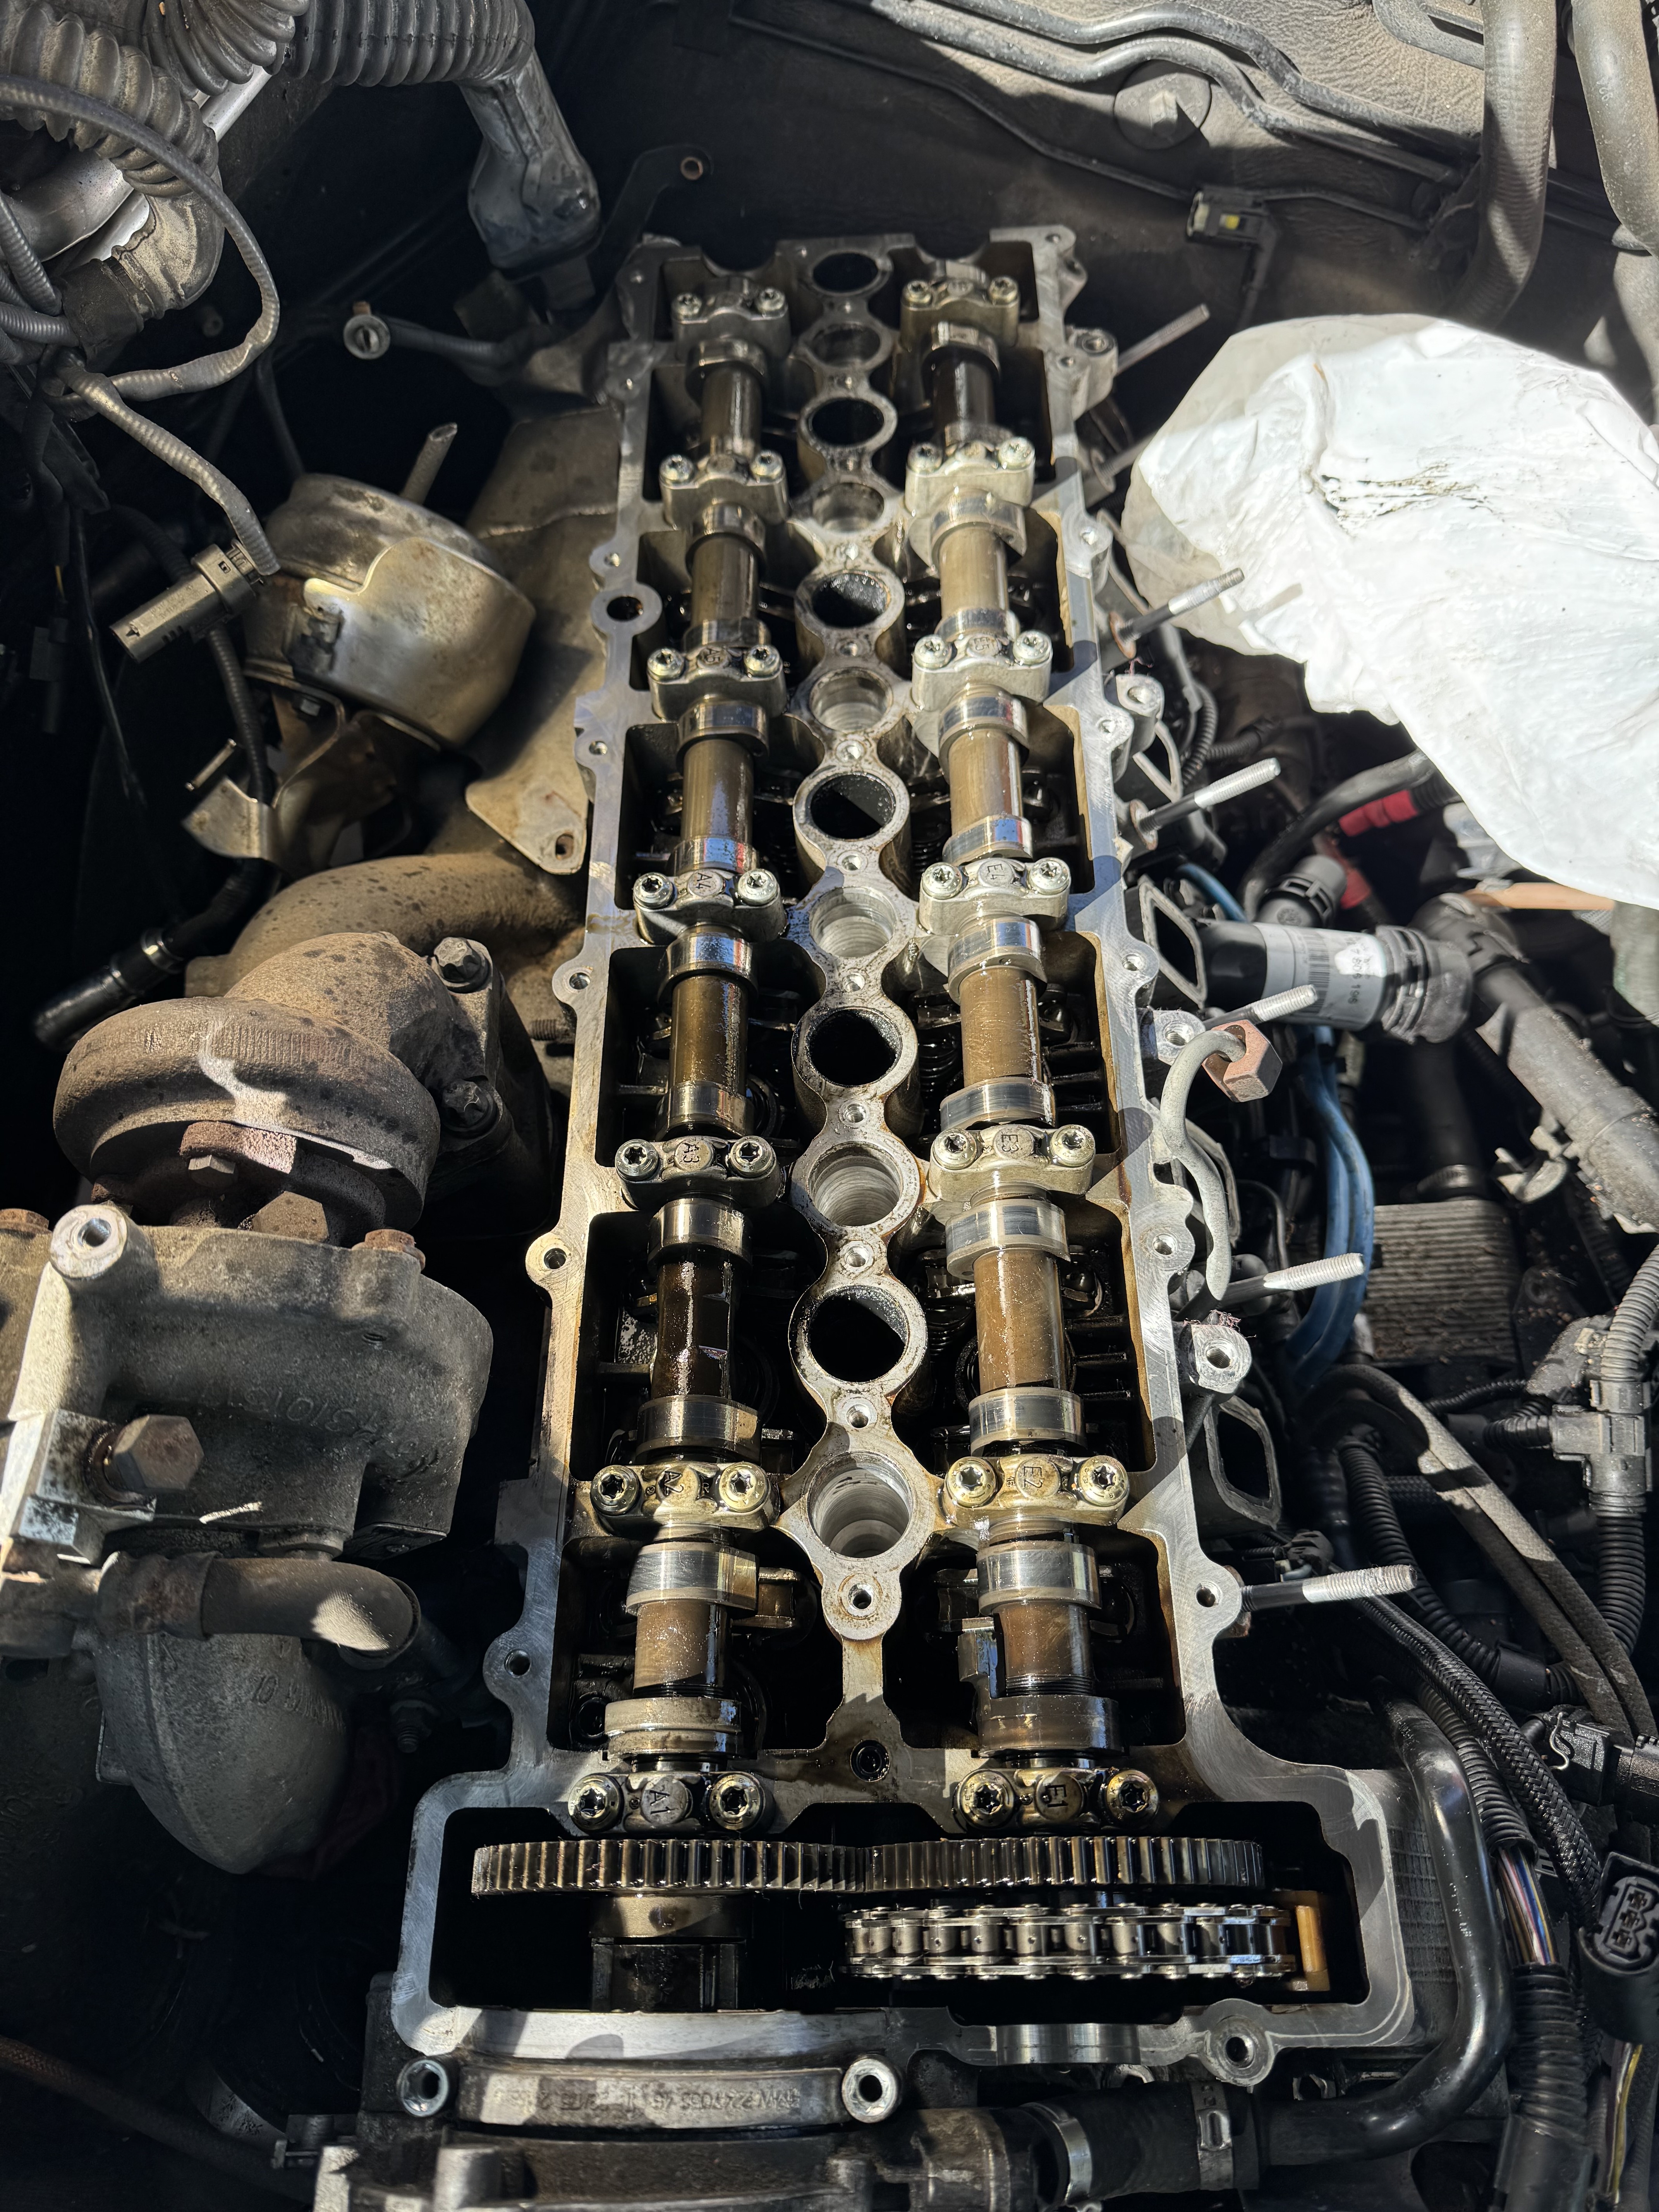
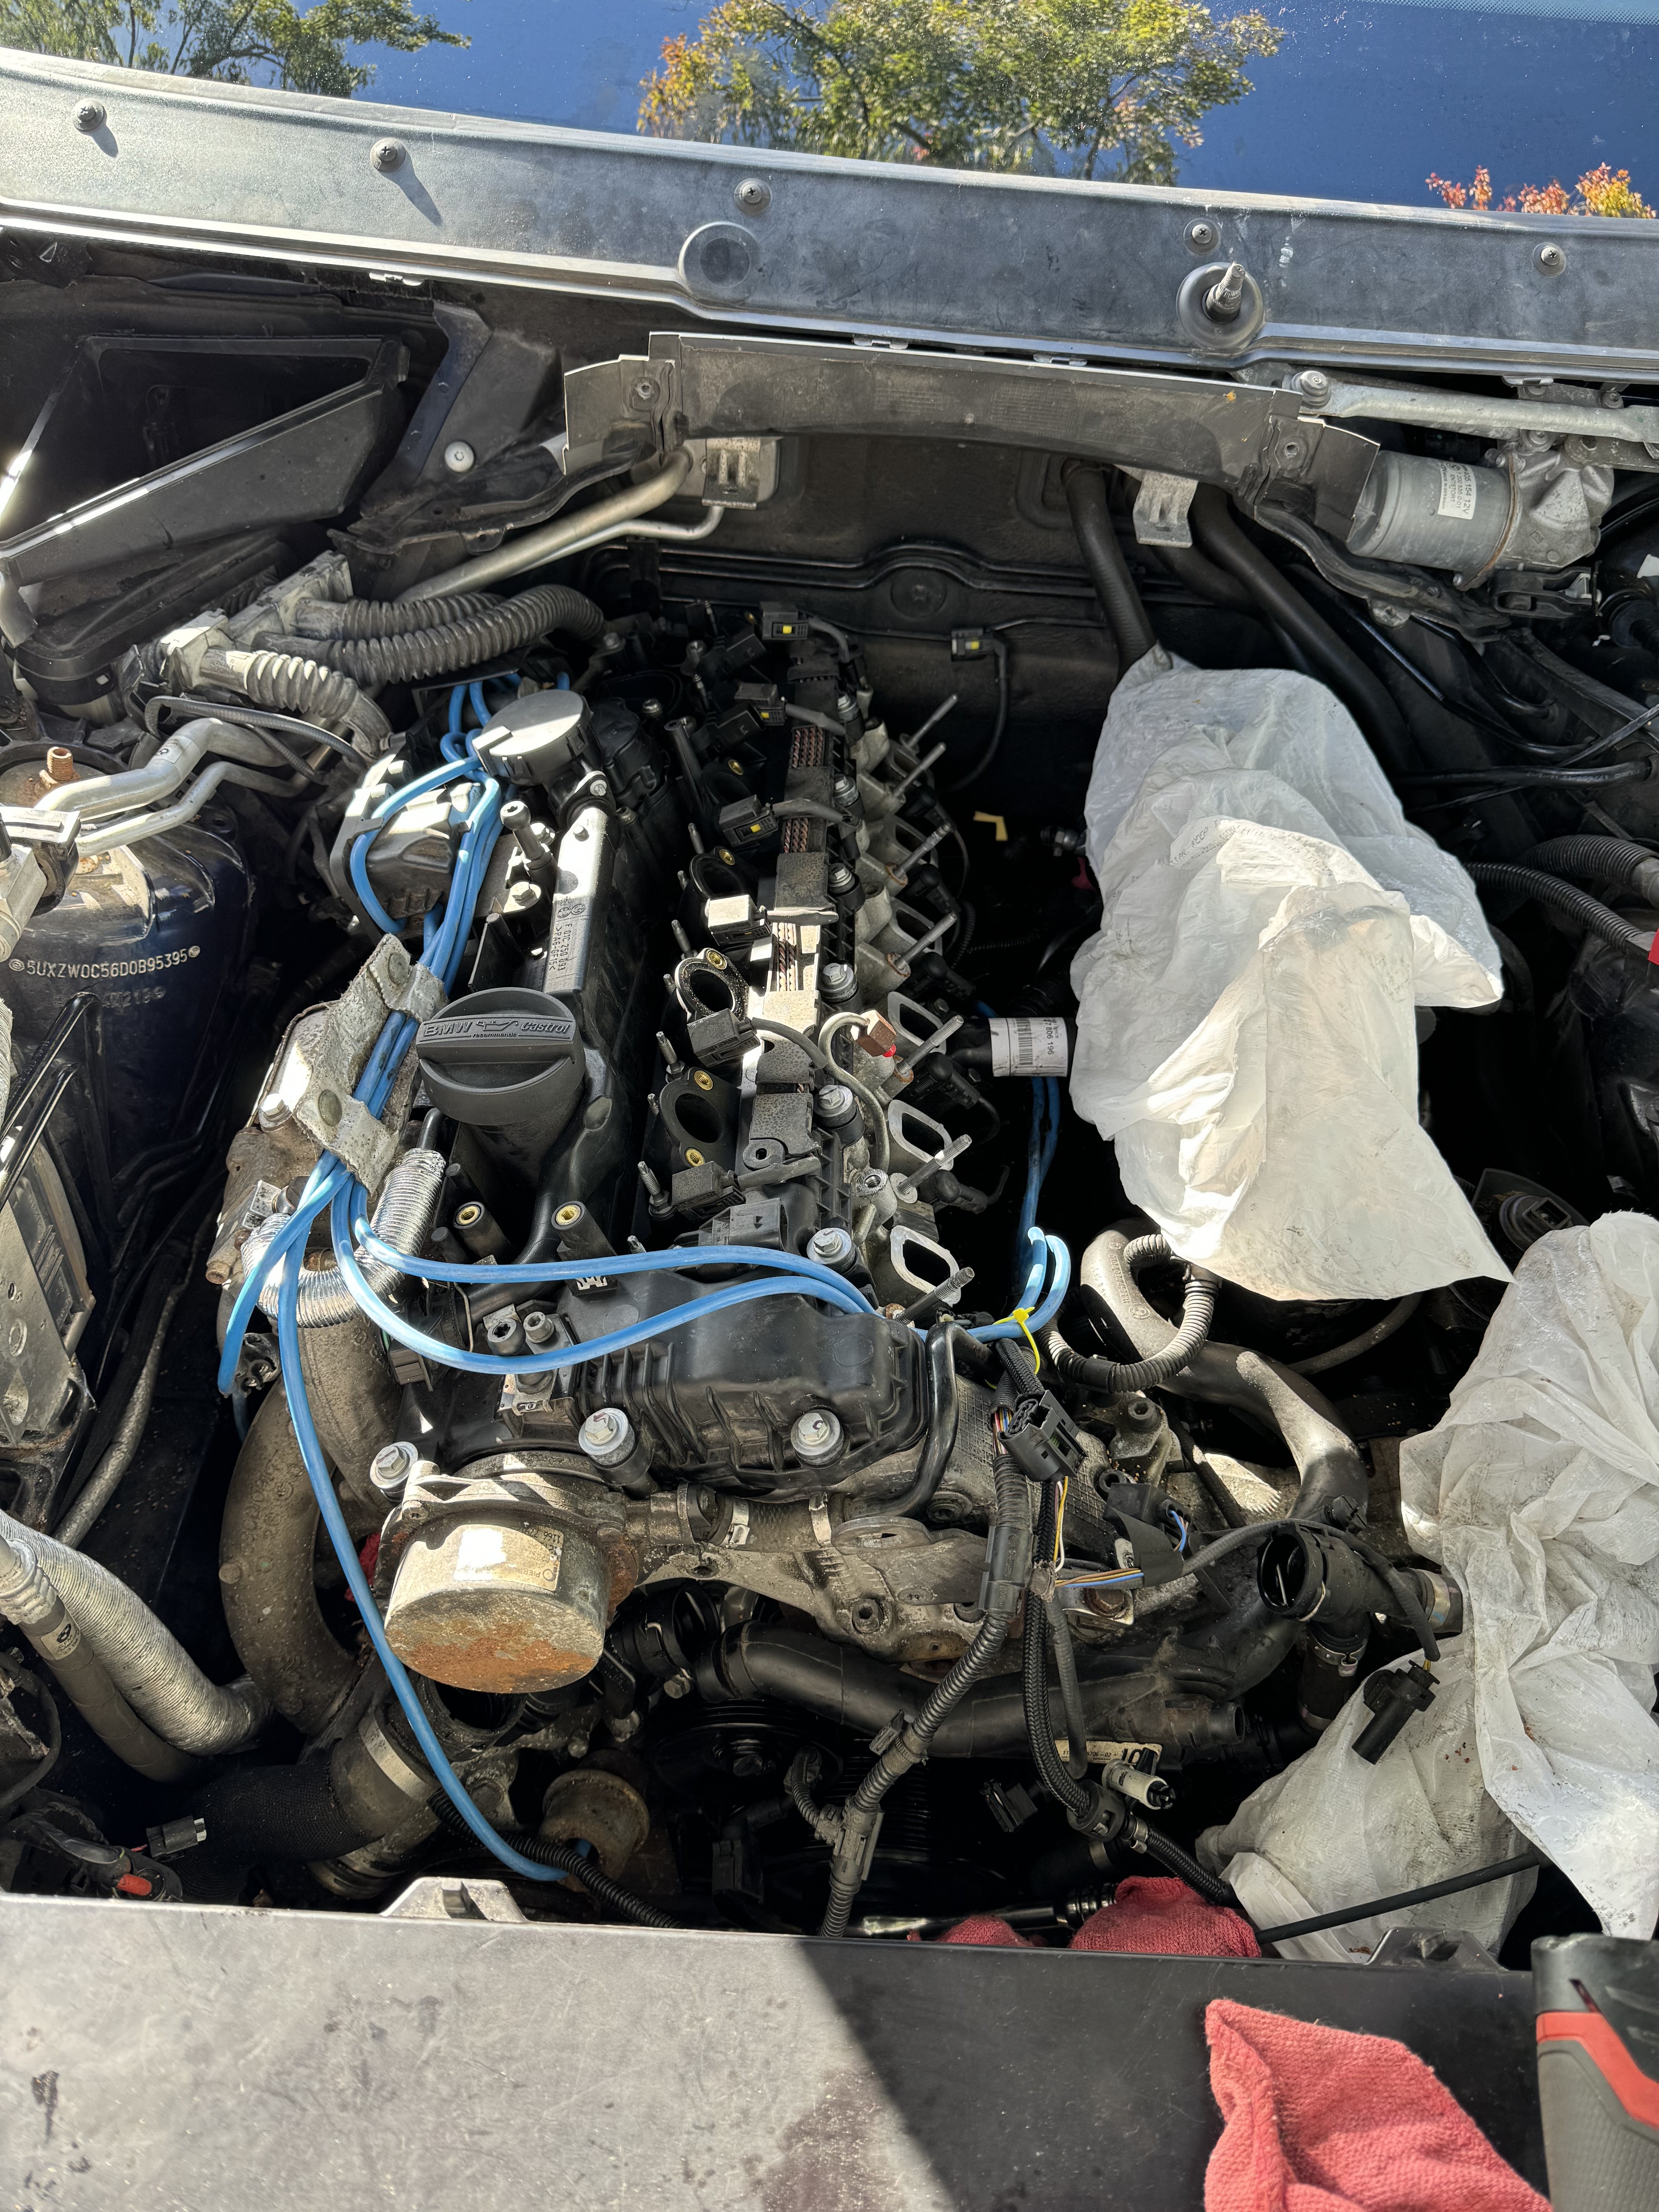
Behind on updates but October's project was the 100k service punch list. I won't be doing a project this big again without a garage, setup/organization and mainly weather dragged this out over 3.5 weekends for me but I'd say its a solid 3-4 day amount of wrenching for all of this. Overall the work itself wasn't as daunting as I anticipated.
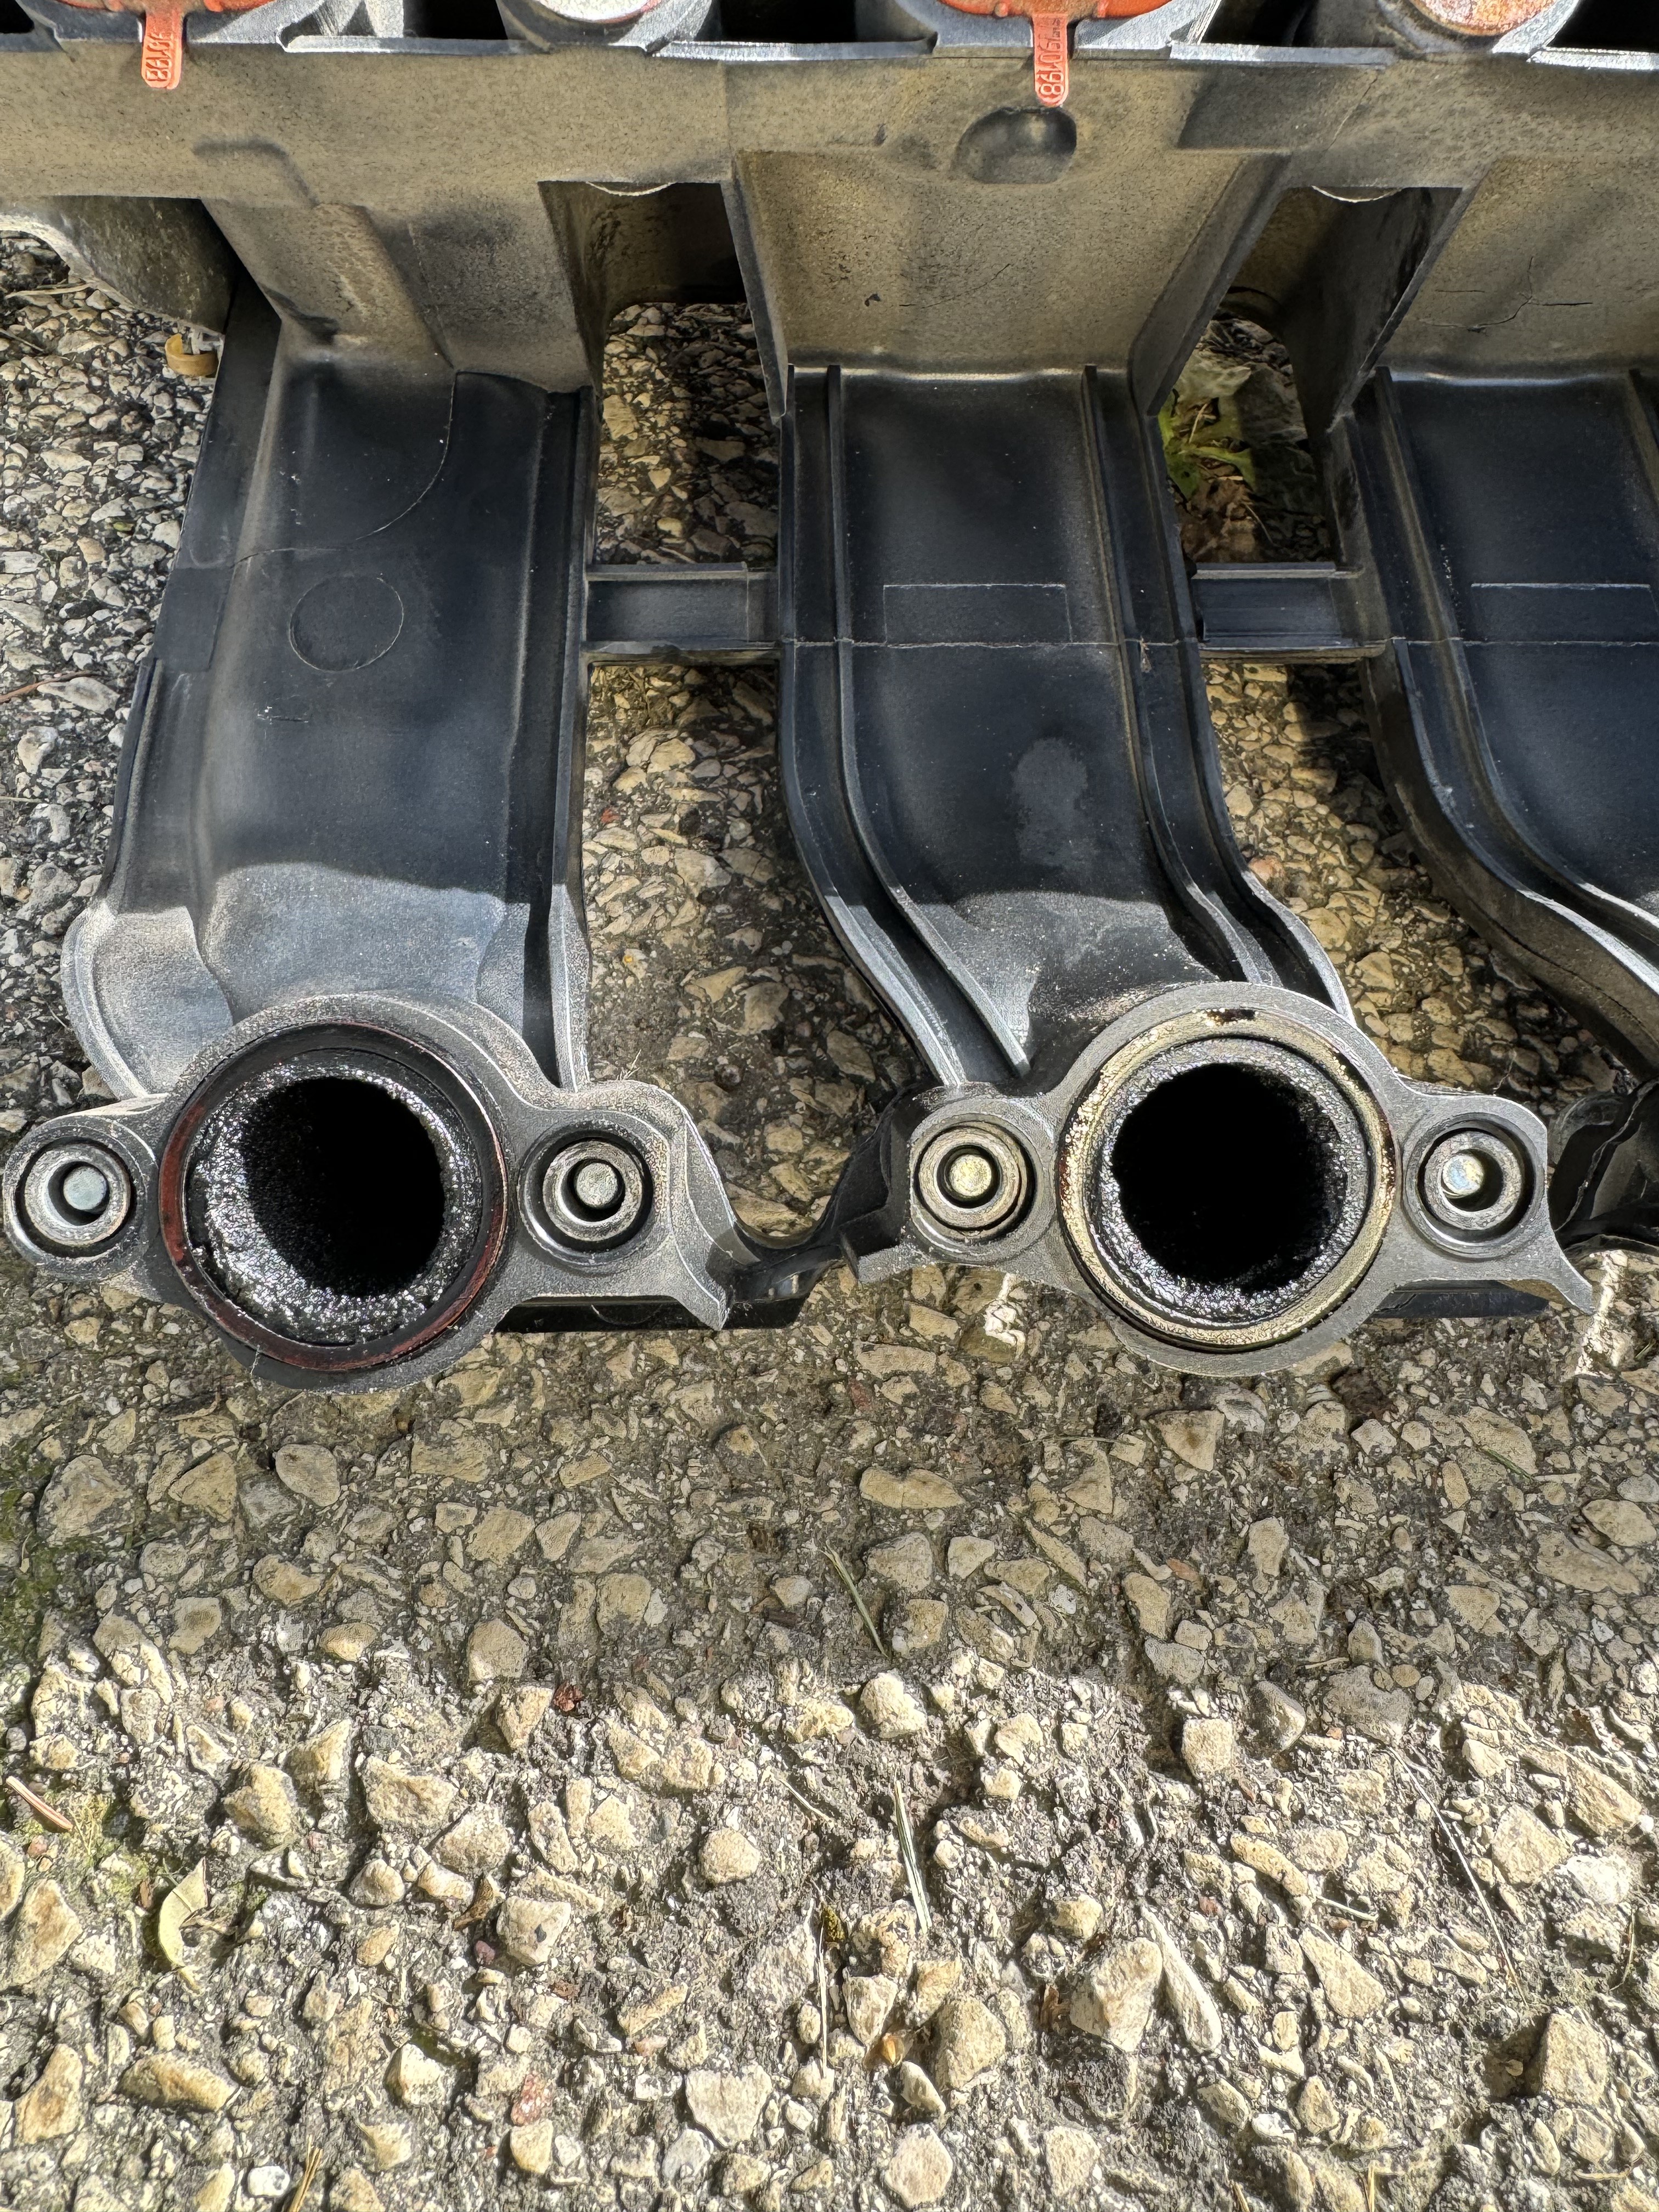
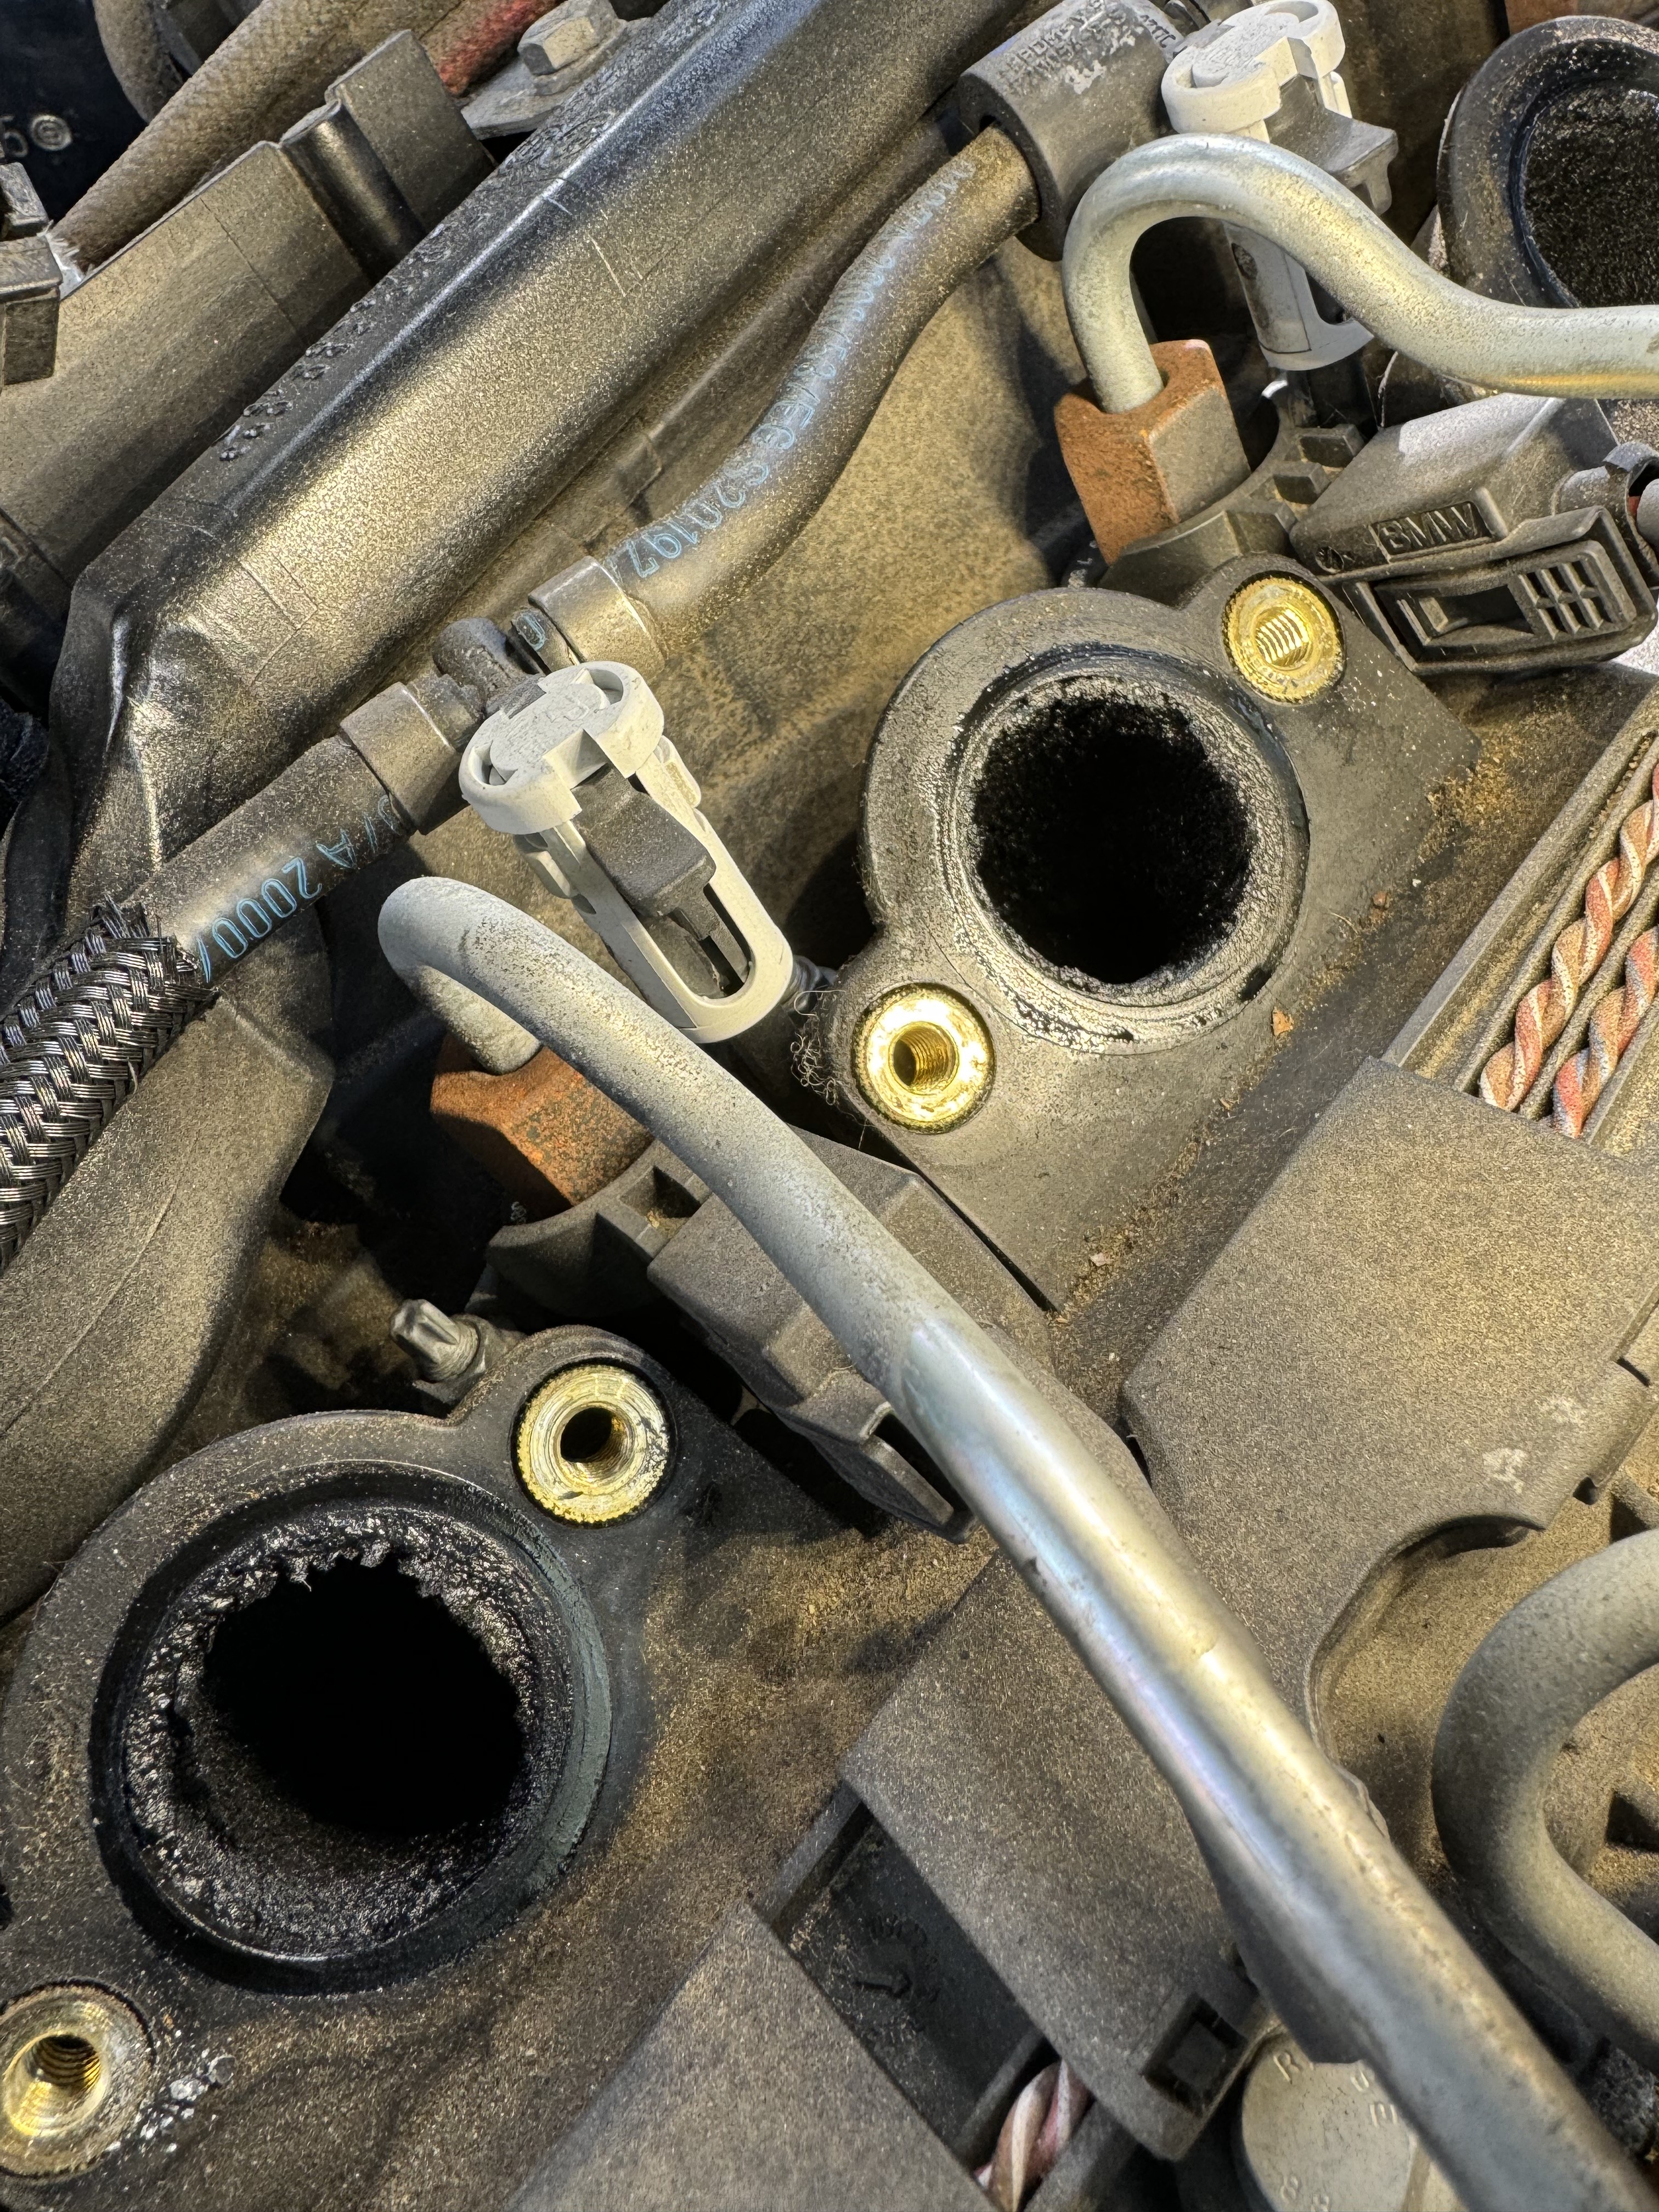
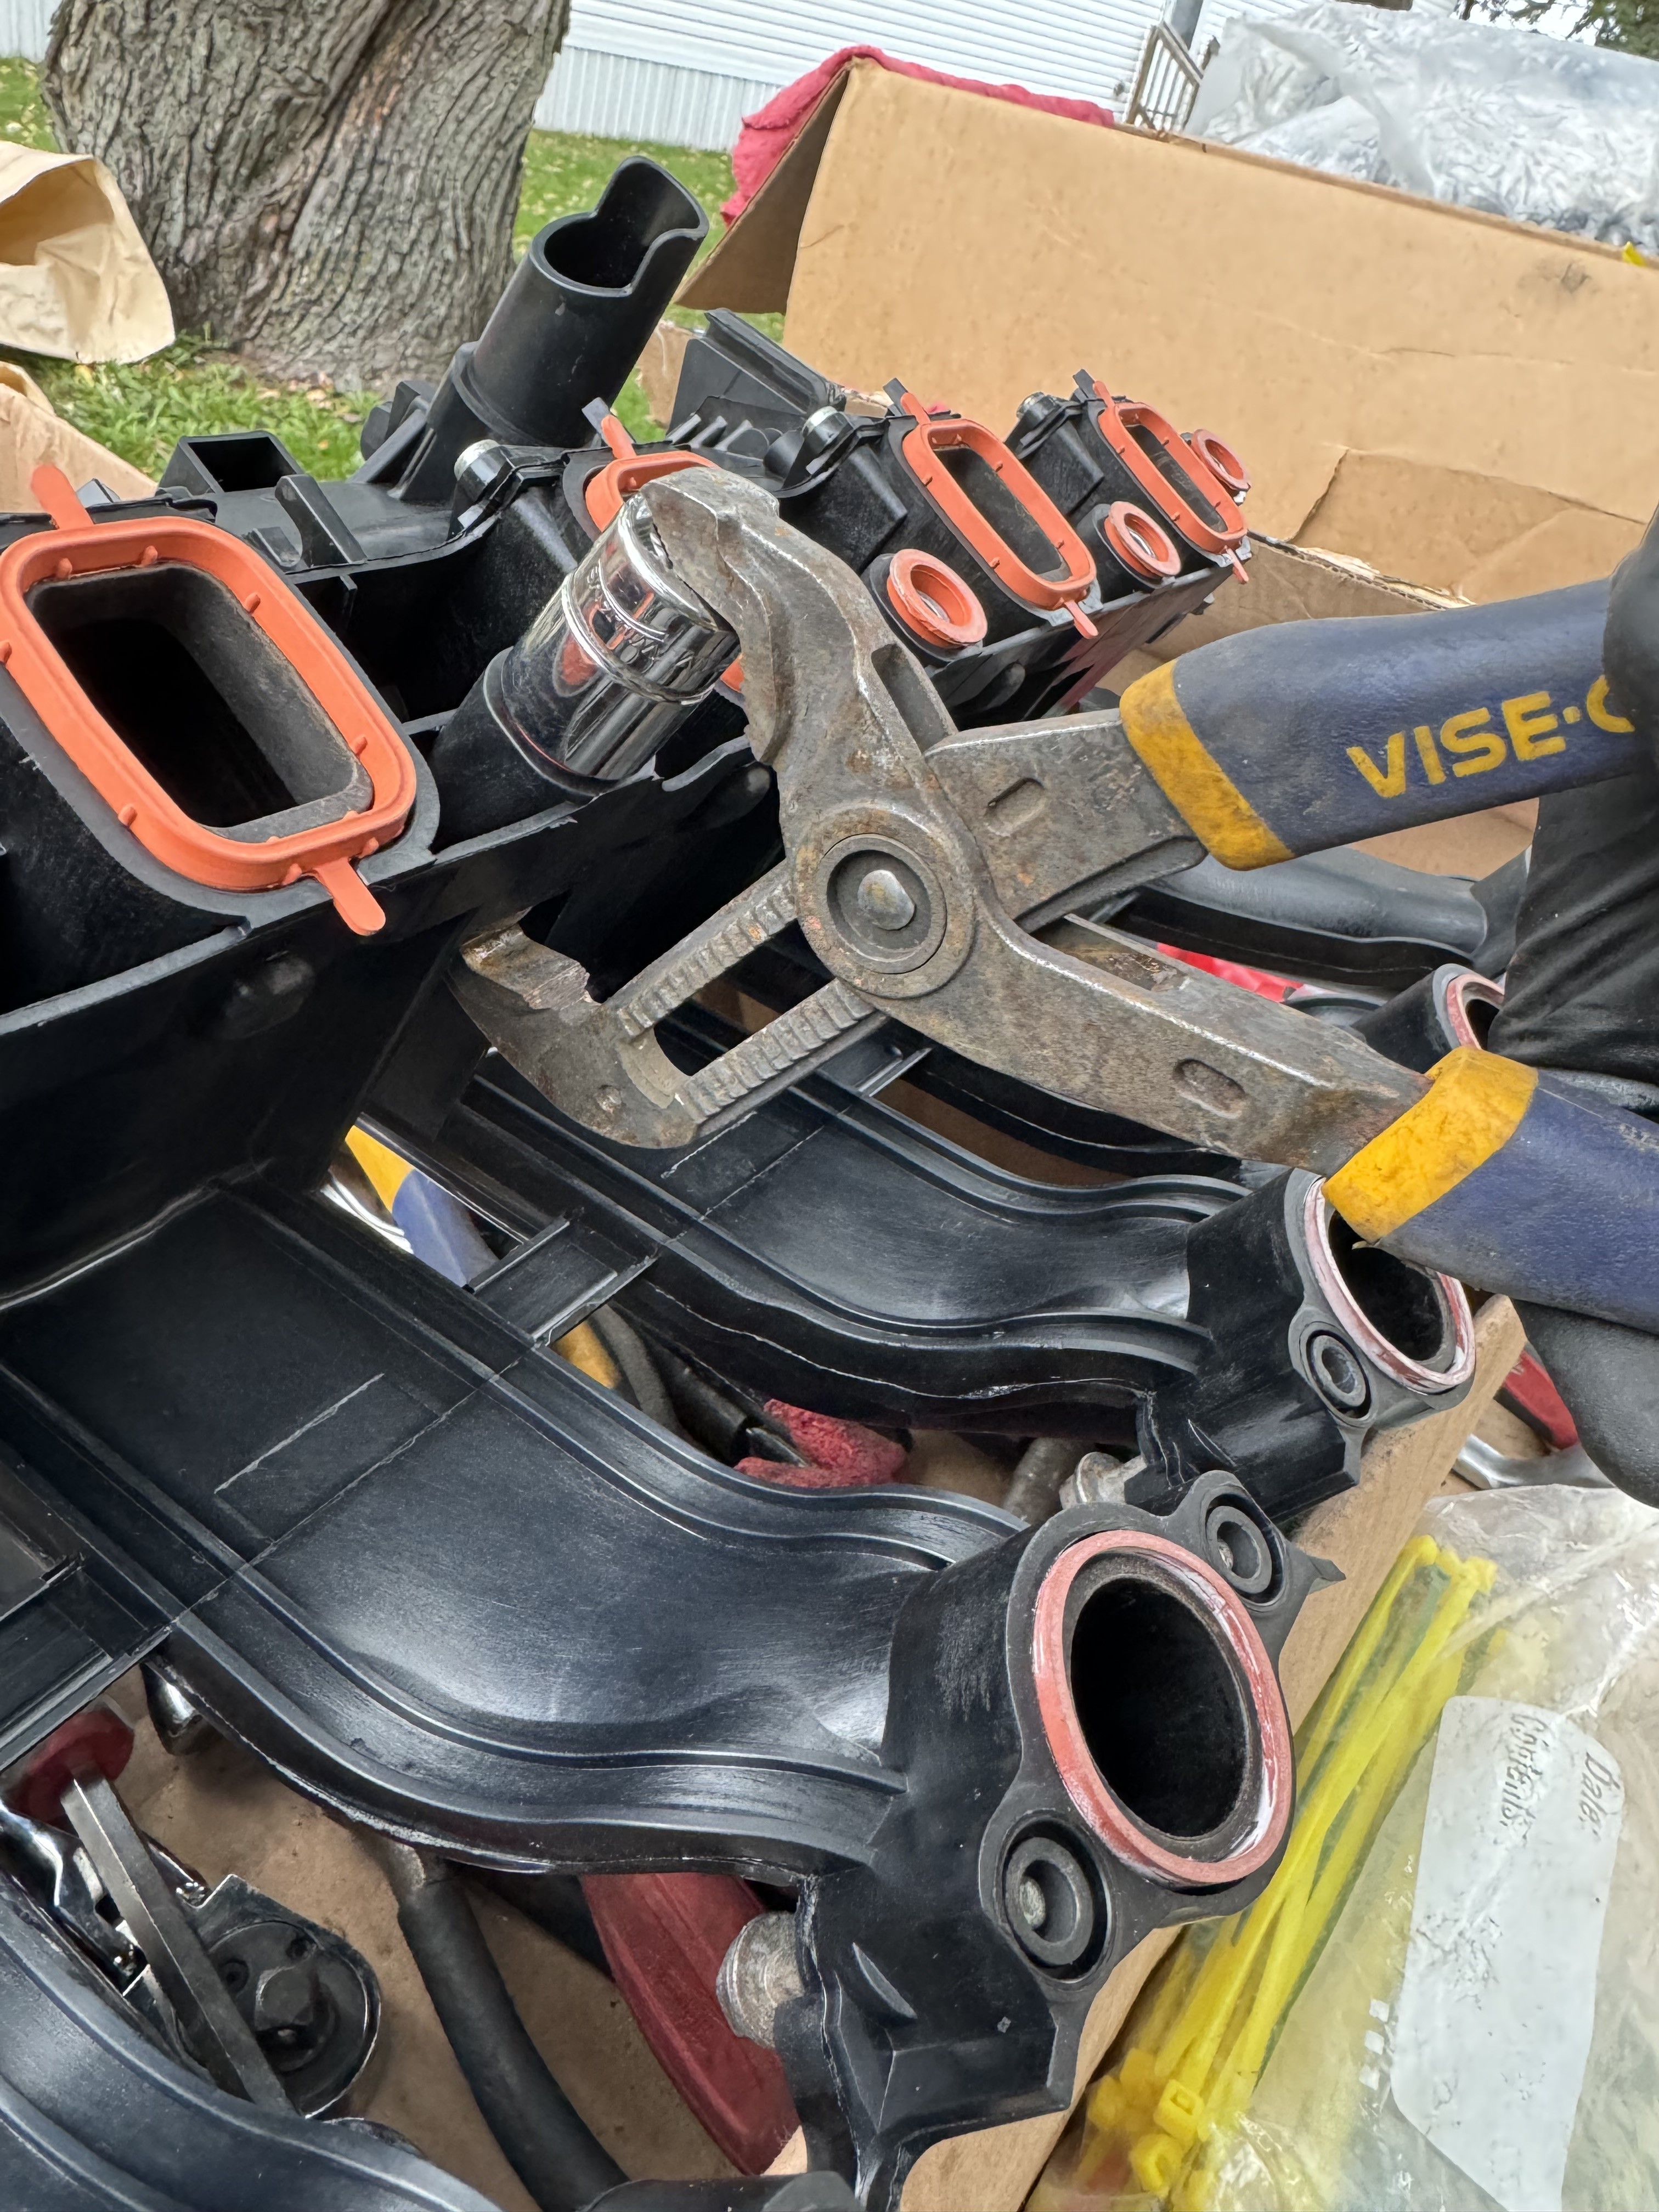
Im guessing this engine had a walnut blast at some point, the worst build up was in the intake runners themselves but the valves had minimal carbon buildup so I ended up not performing a walnut blast.
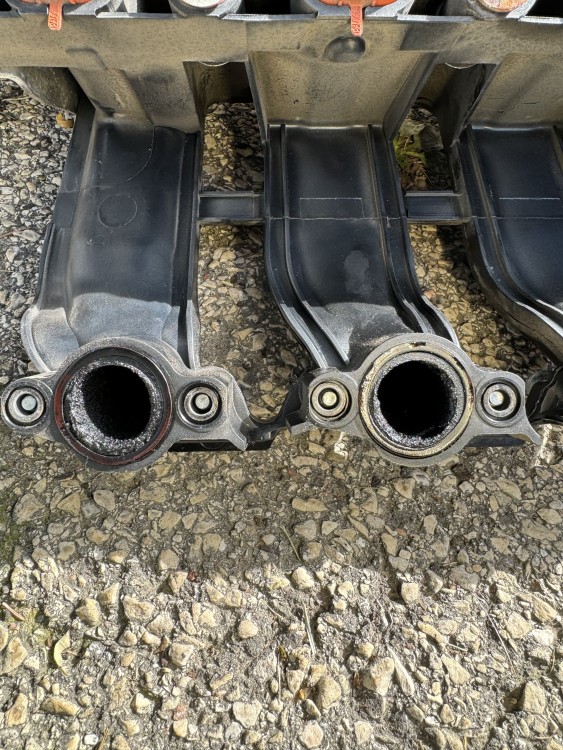
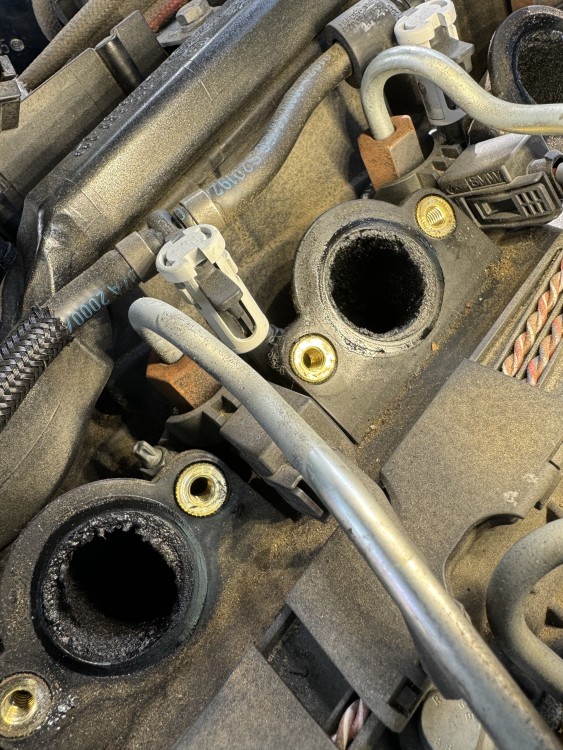
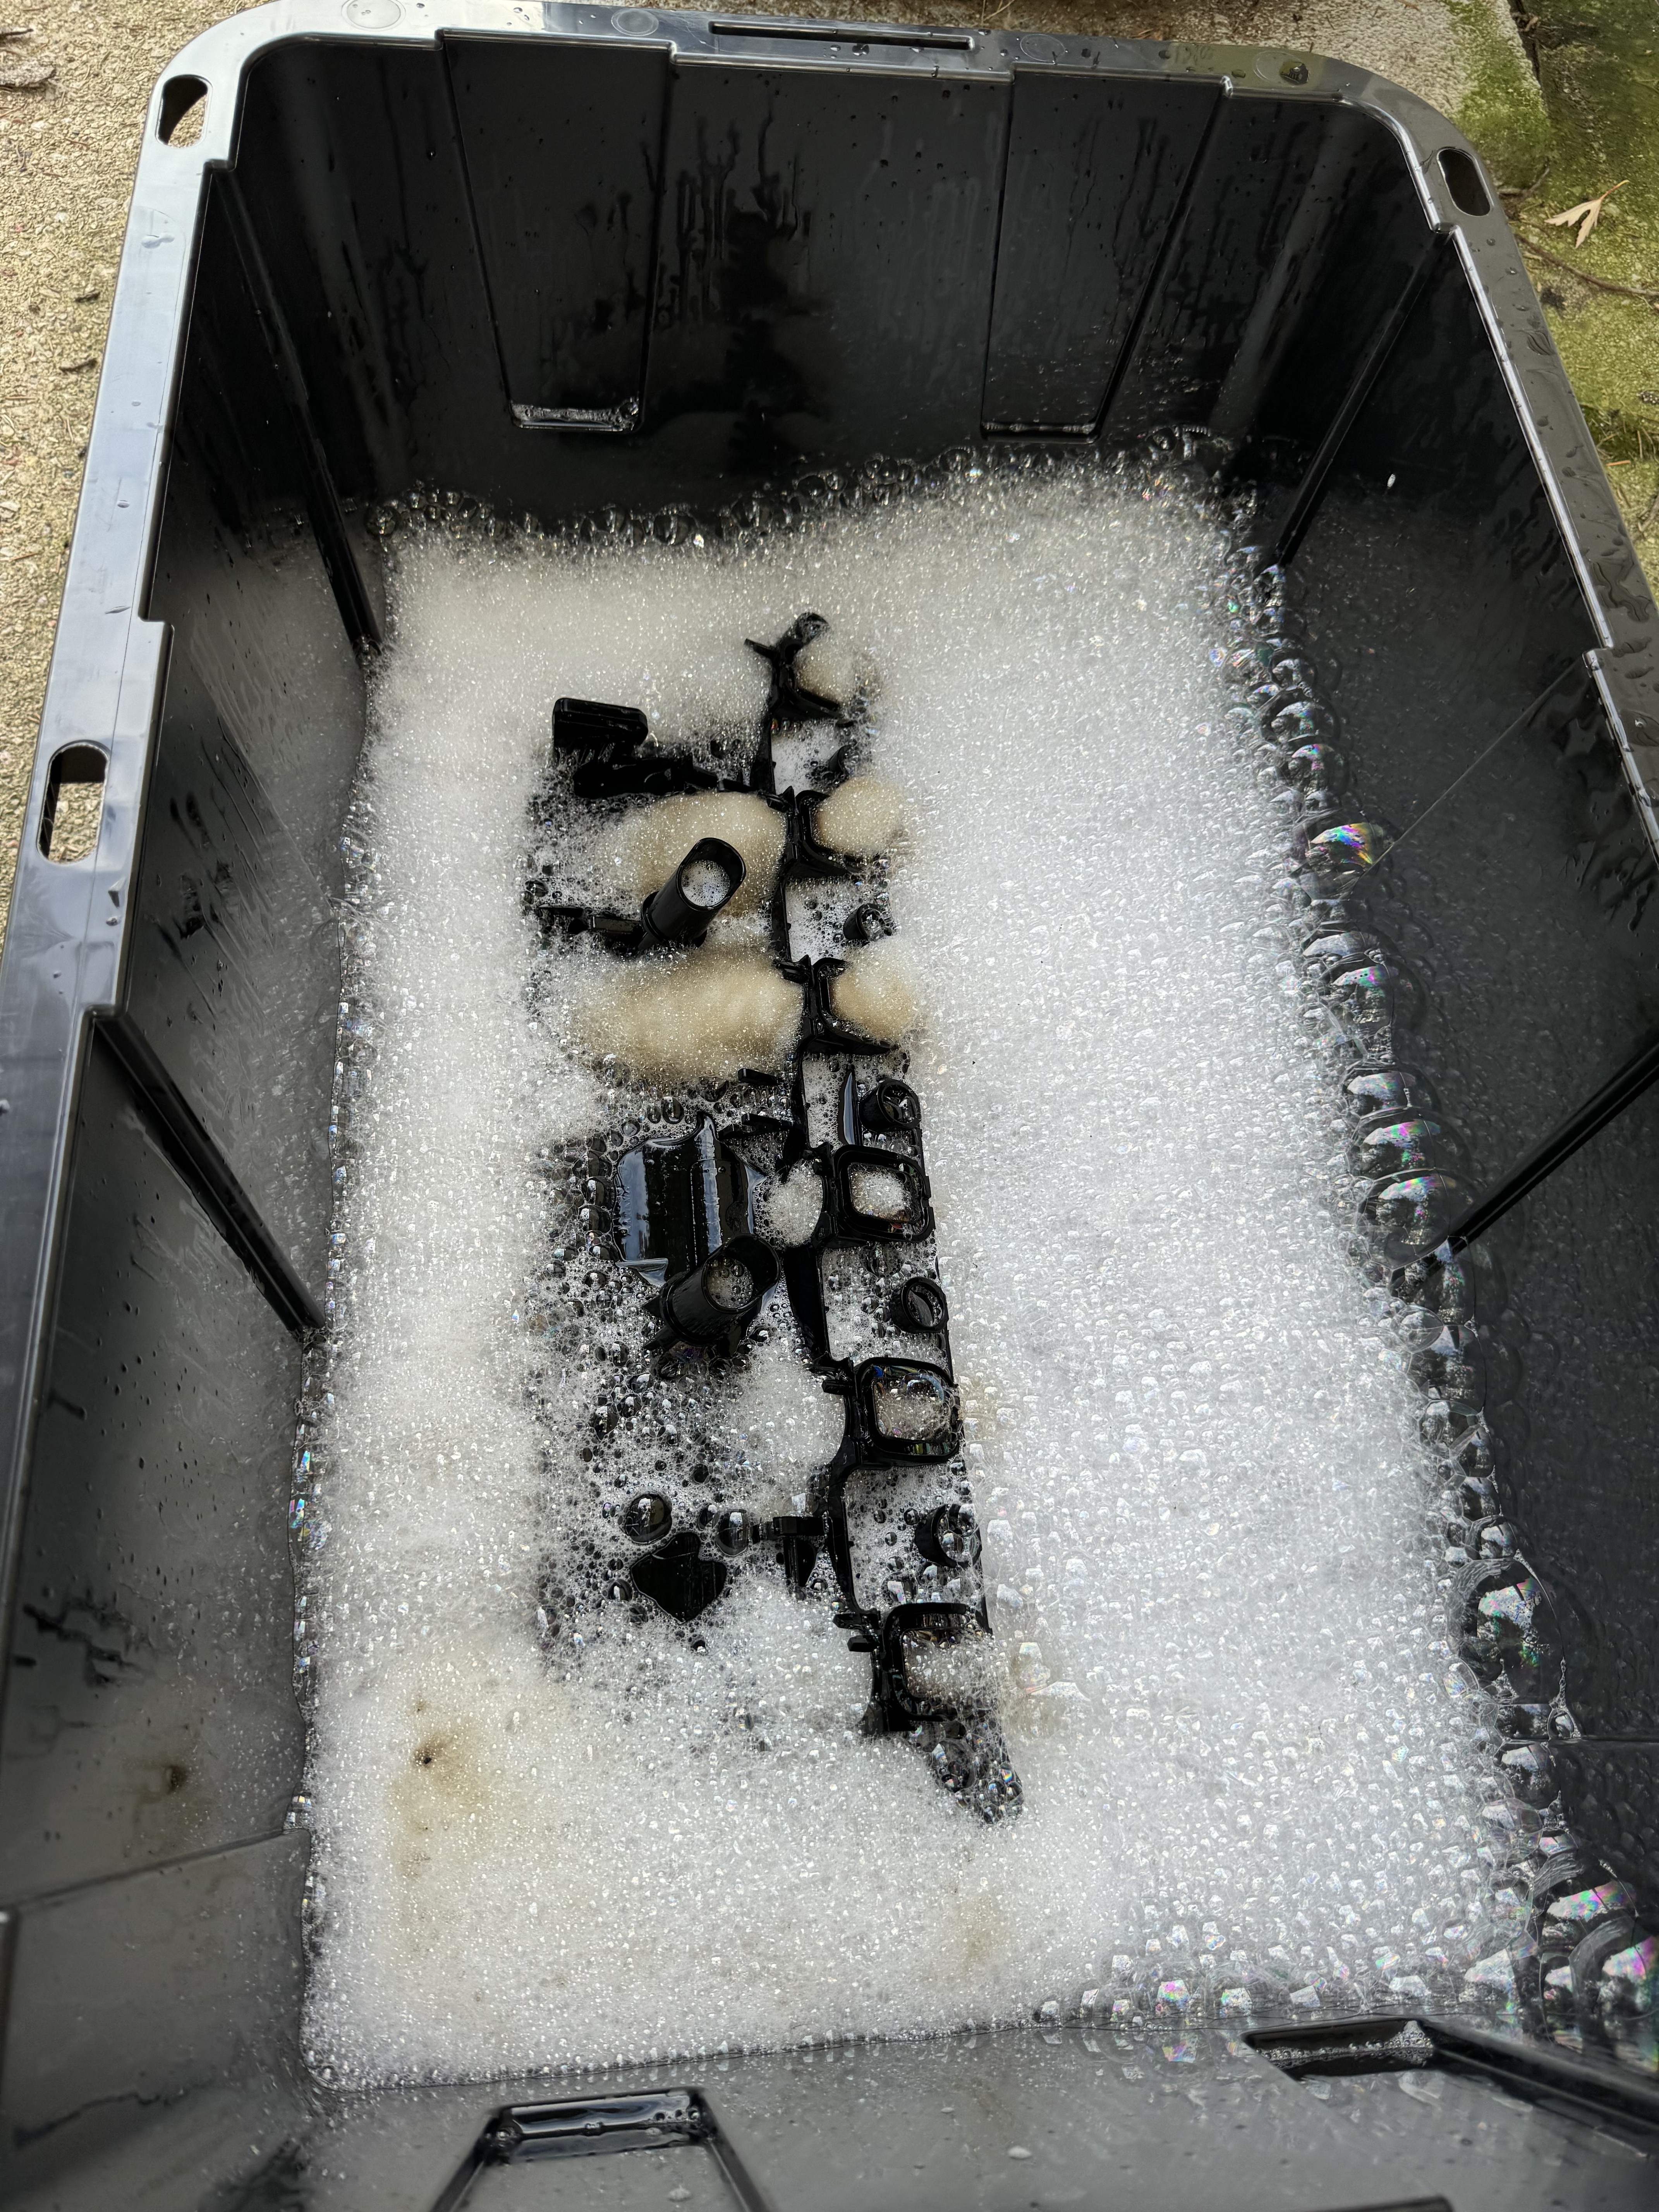
I had read online somewhere that somebody just soaked their intake manifold in ZEP Industrial Purple Degreaser so I gave it a shot and was pleased with the results. Menards has 5 gal jugs so I dumped all of that in and then added another 3ish gallons of water to get the intake completely submerged but wanted to keep the concentrate as strong as possible.
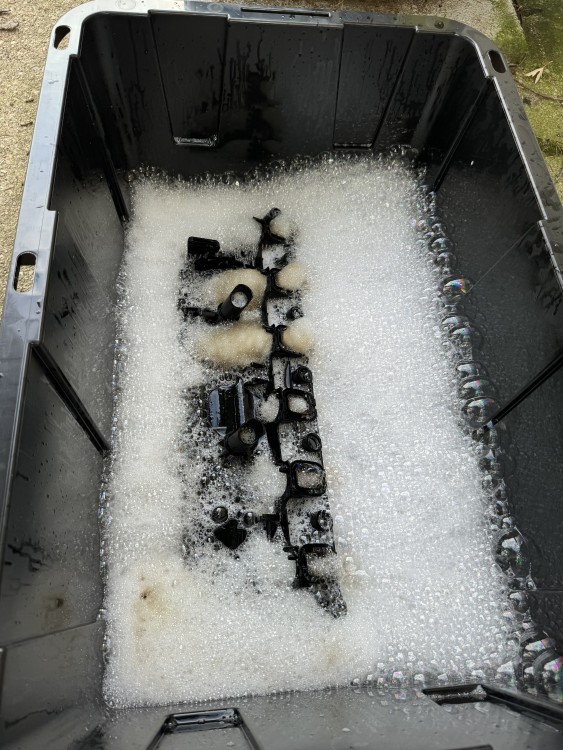
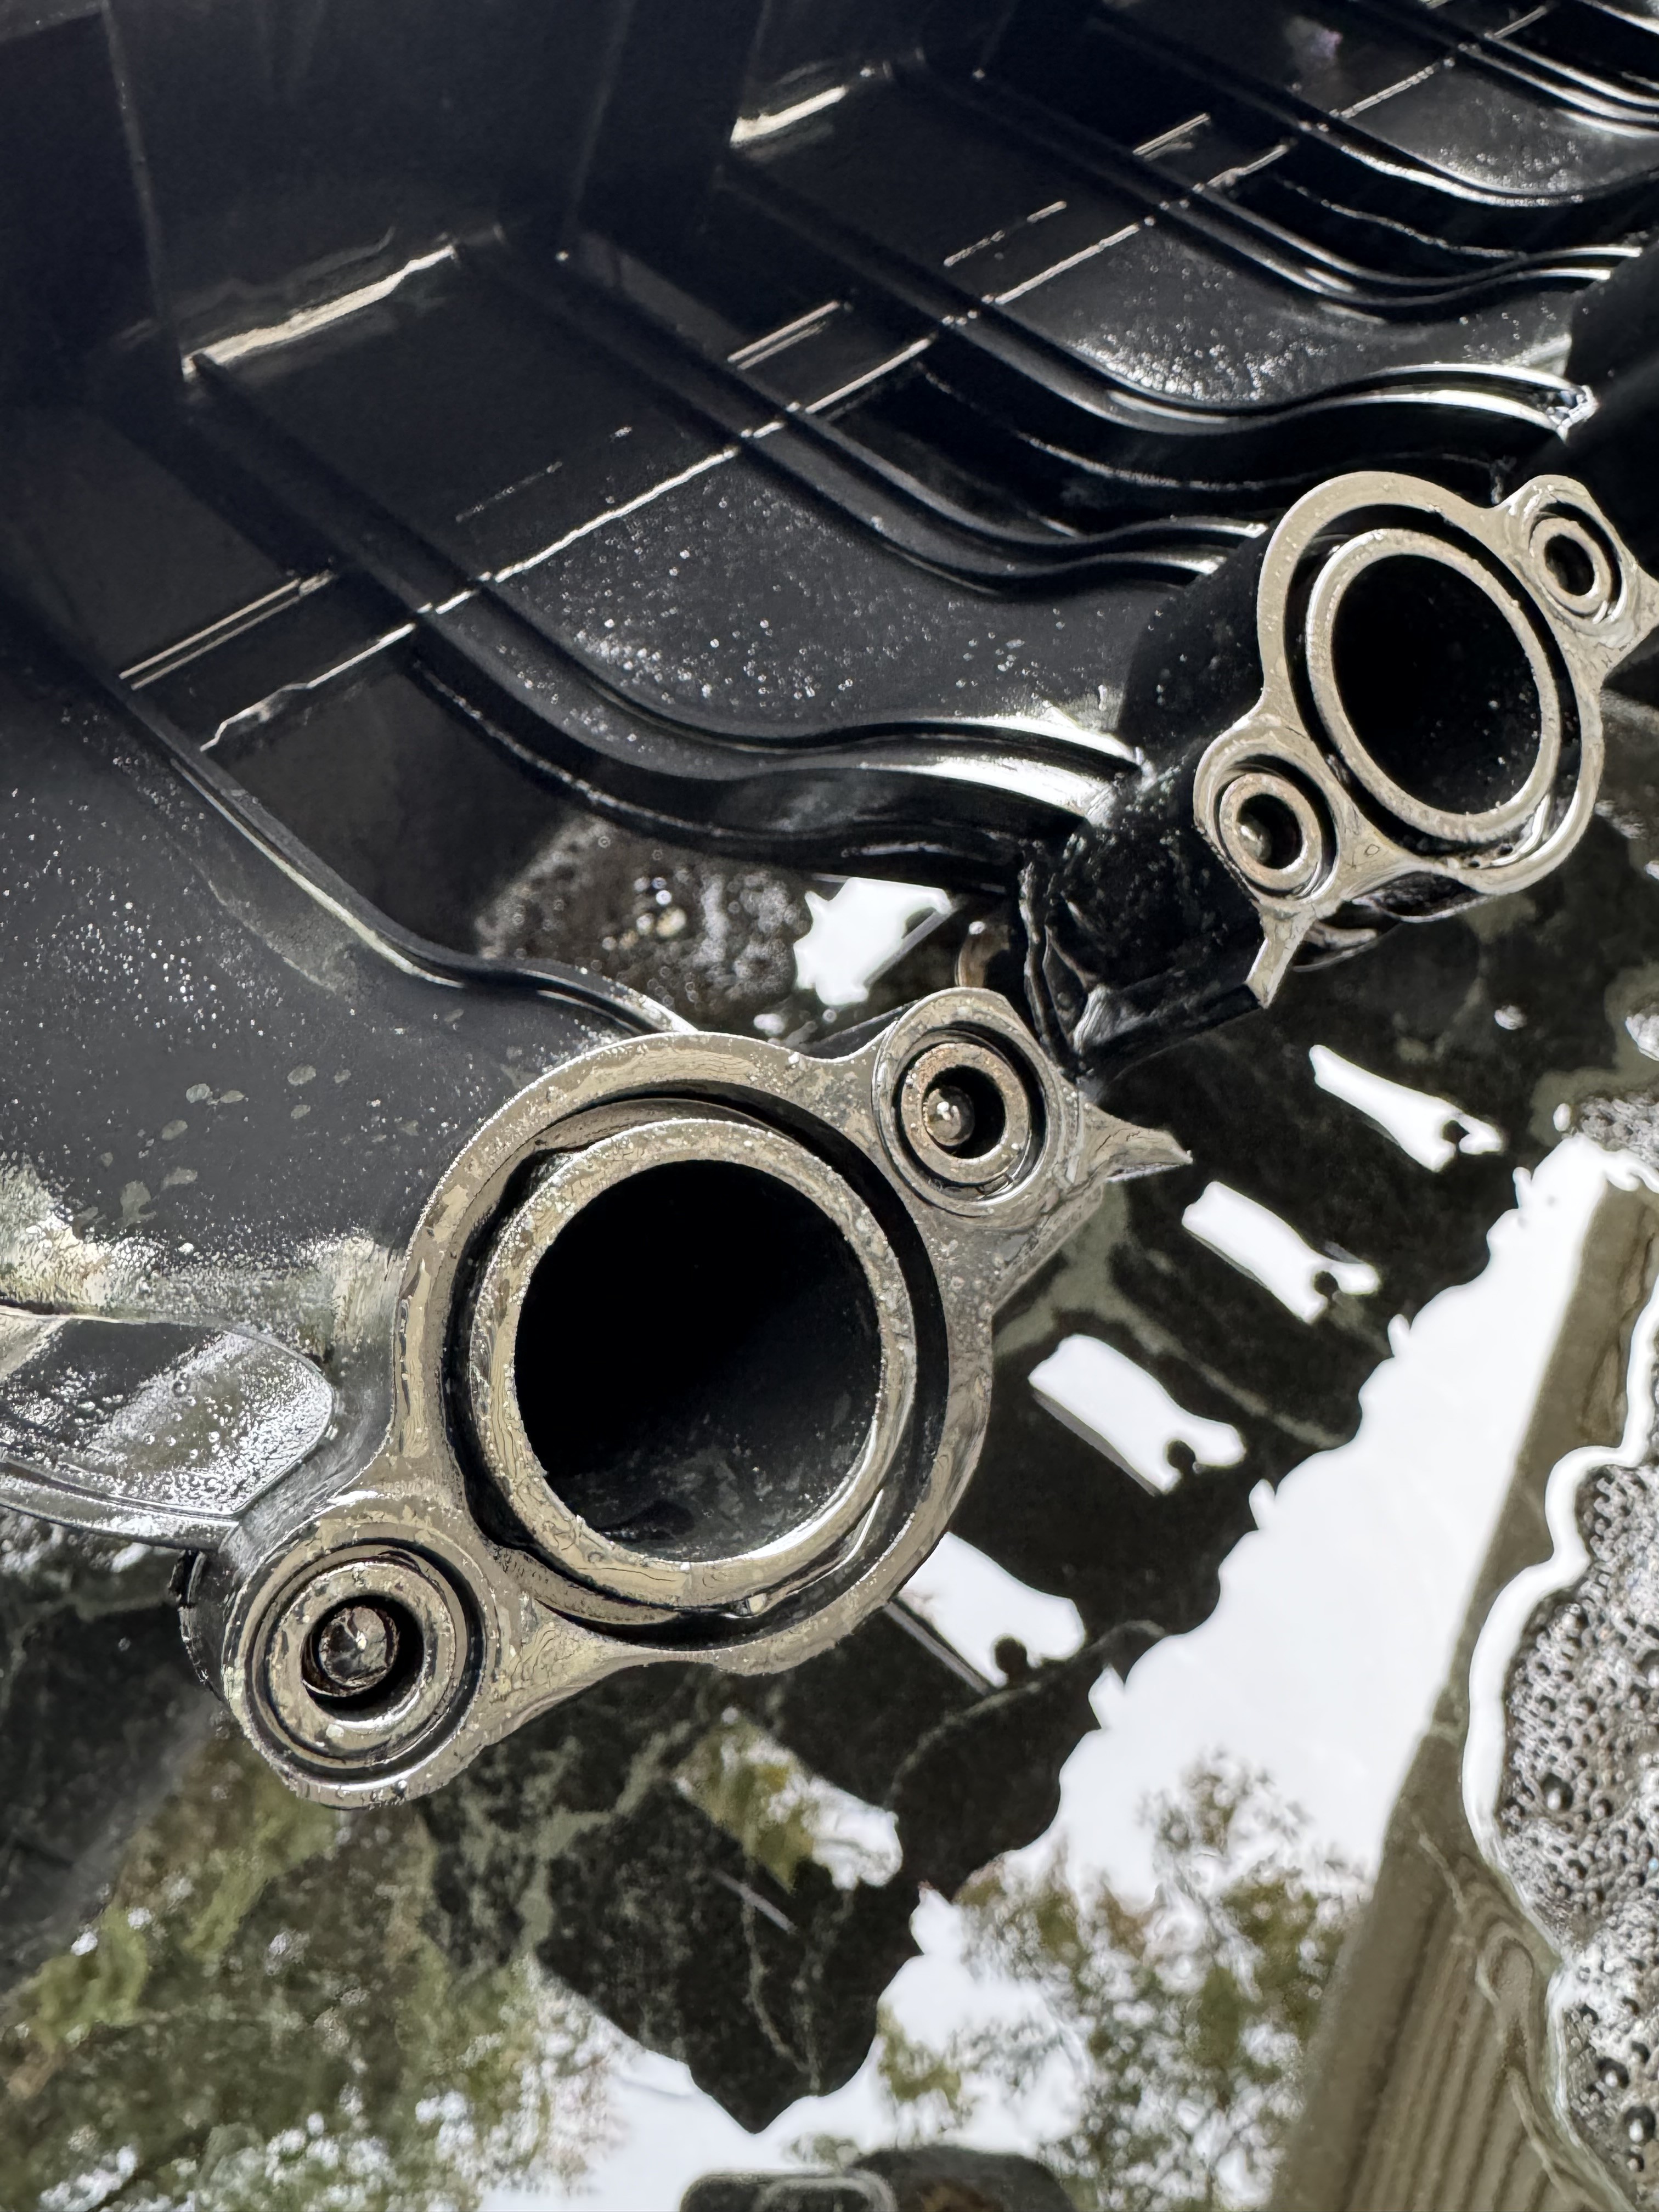
I ended up soaking it for a week, the runners came out almost perfect. All the heavy build up was taken care of but there were still sections of minimal surface buildup that was really baked on. I did pressure wash as well to clean out debris and I was able to get a little bit more of the surface buildup off but not too much.
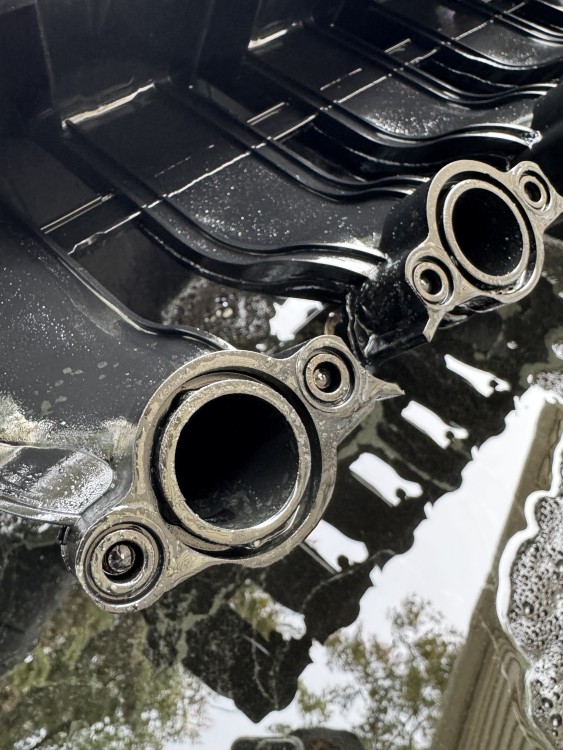
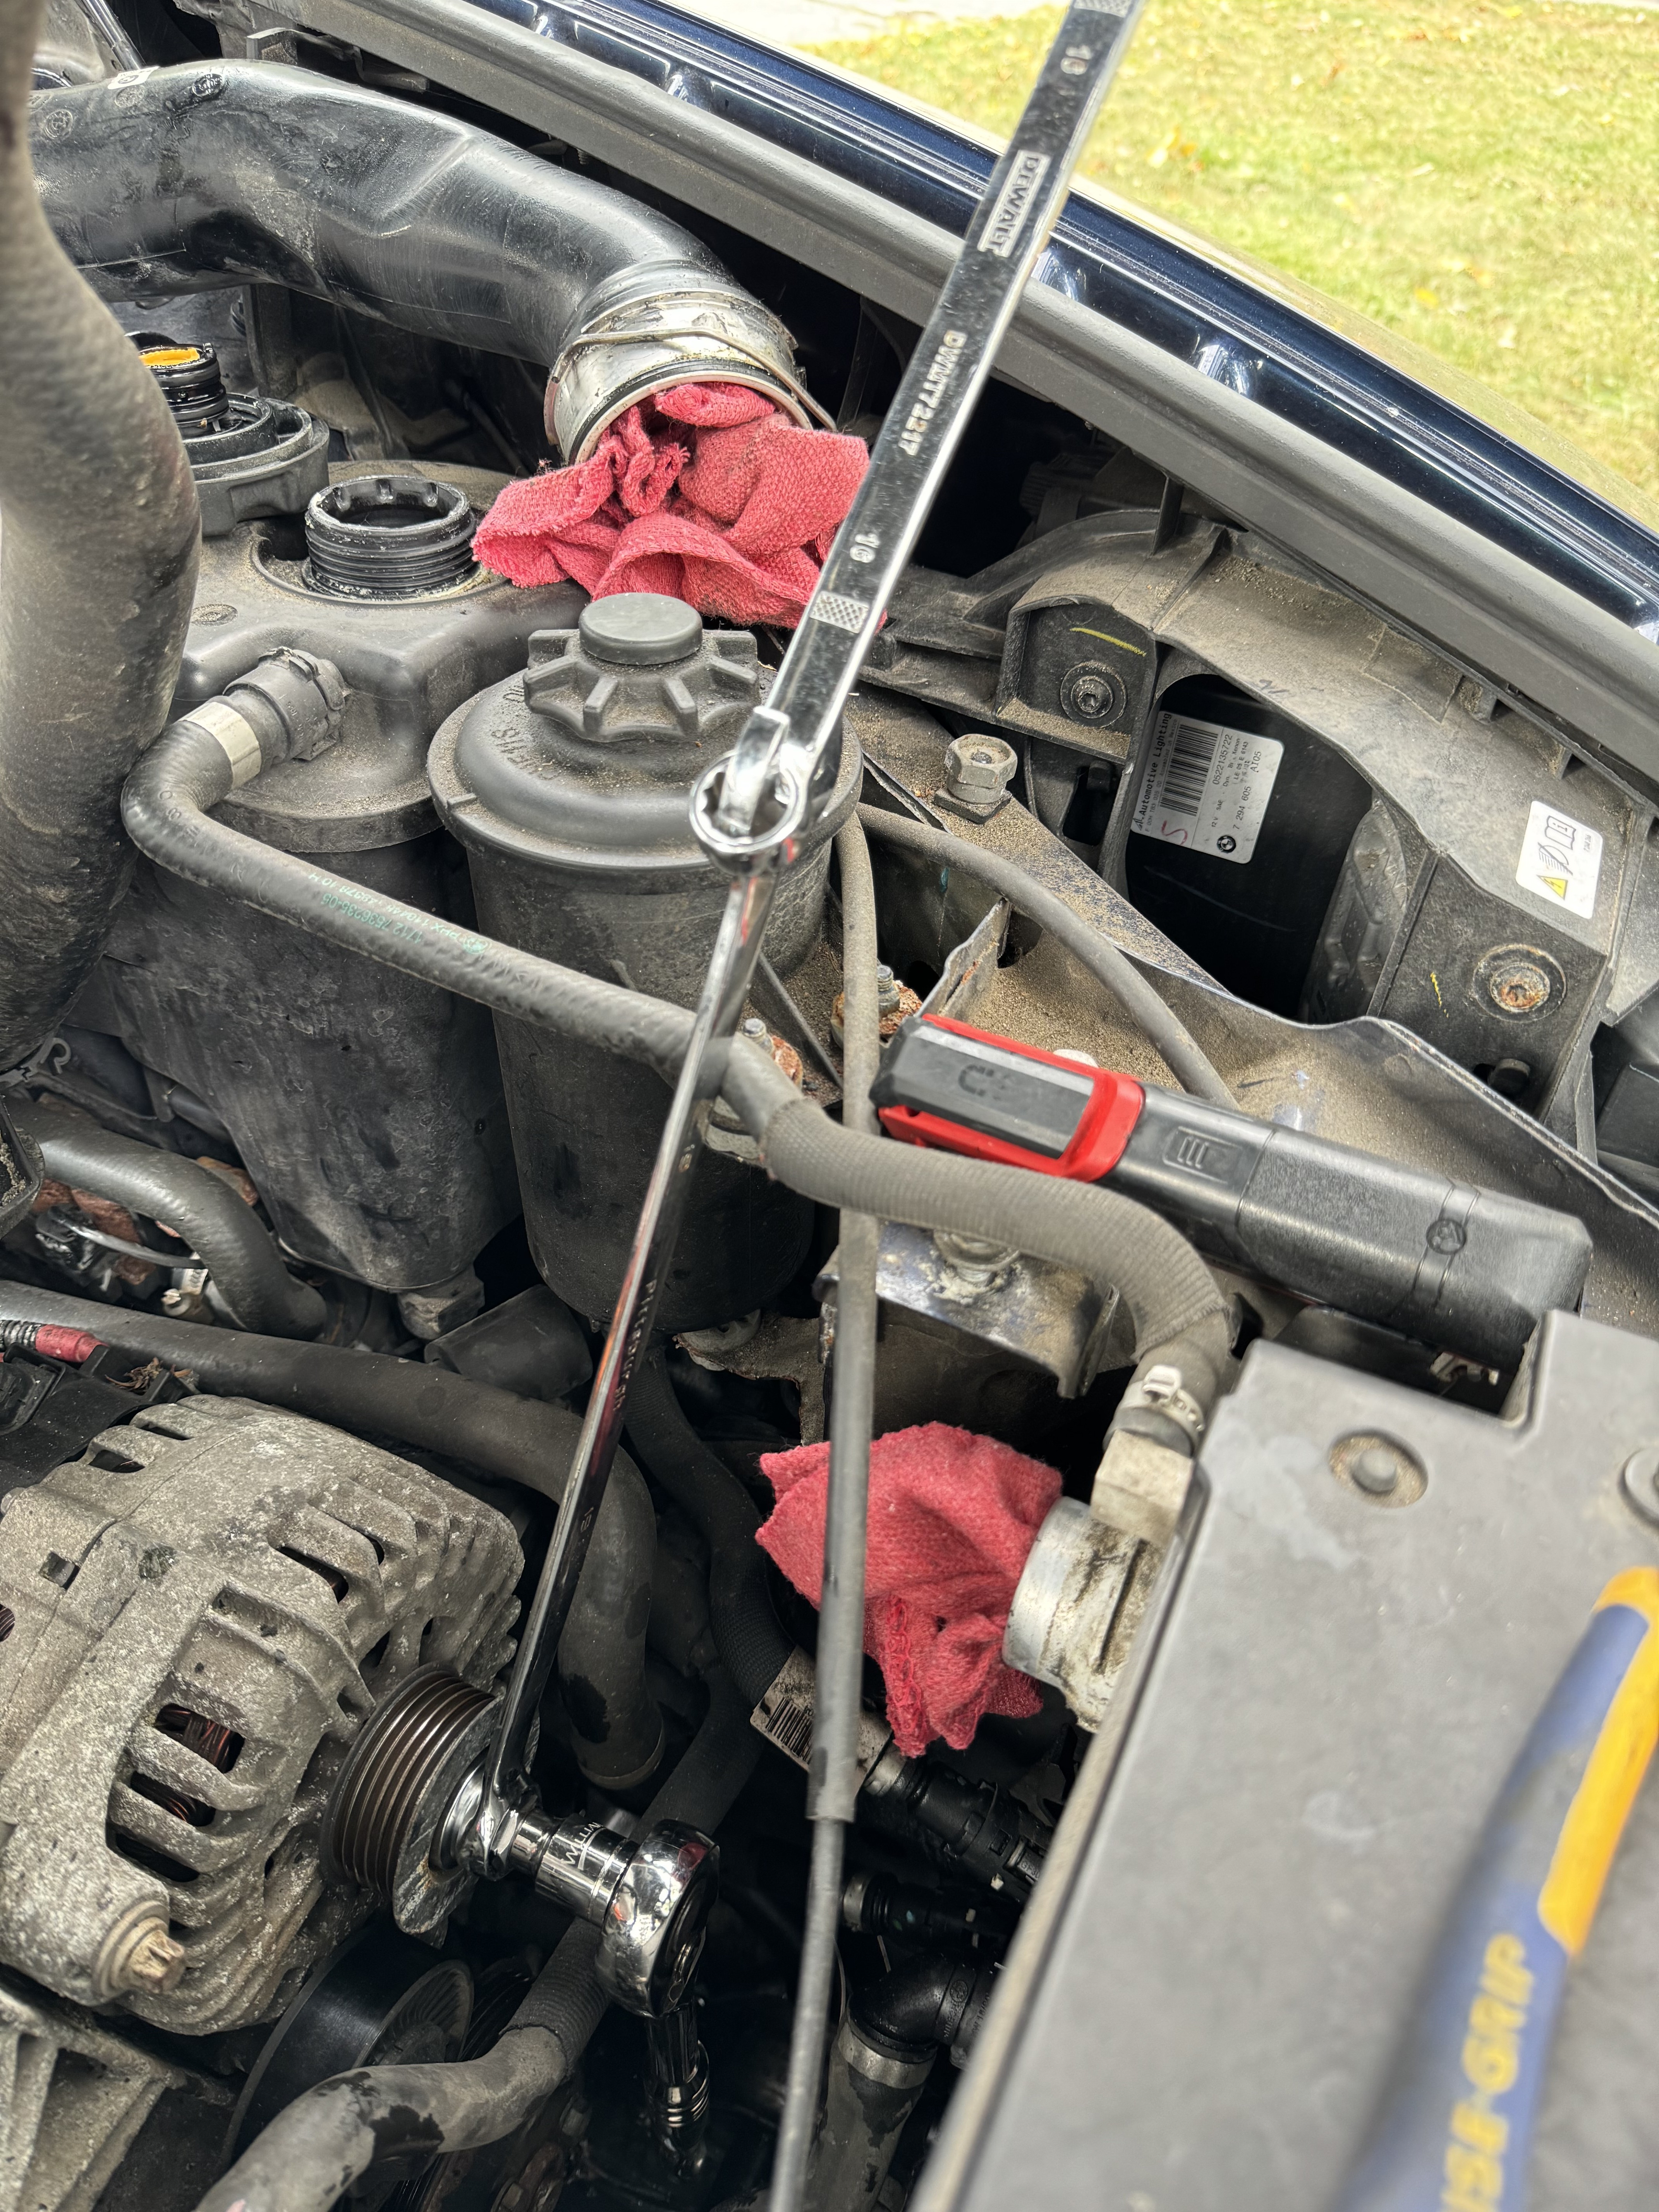
I think with another treatment of Liquid Moly Diesel Purge the valves will be in great shape as well. One thing that wasn't one the recommended parts list was 11612246949, the mating gaskets for the intake bolts. The metal washer was either rusted or separating from the gasket on about half of mine. I wanna say it was a 16mm I used to seat them.
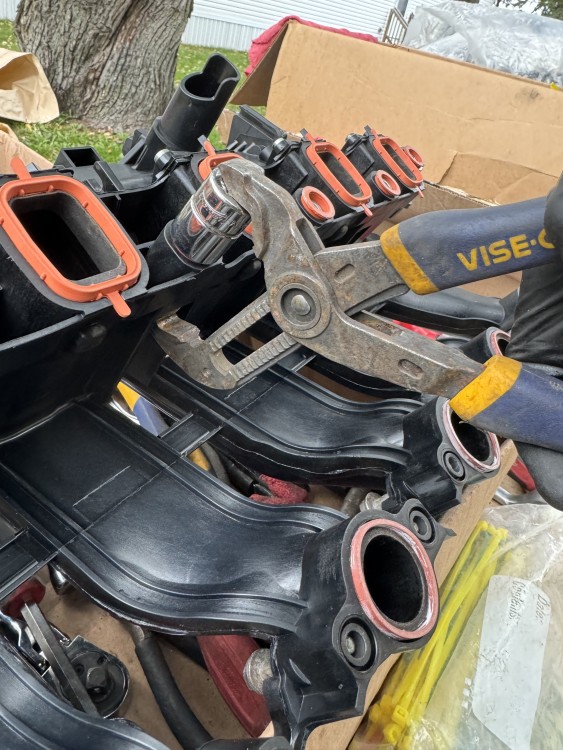
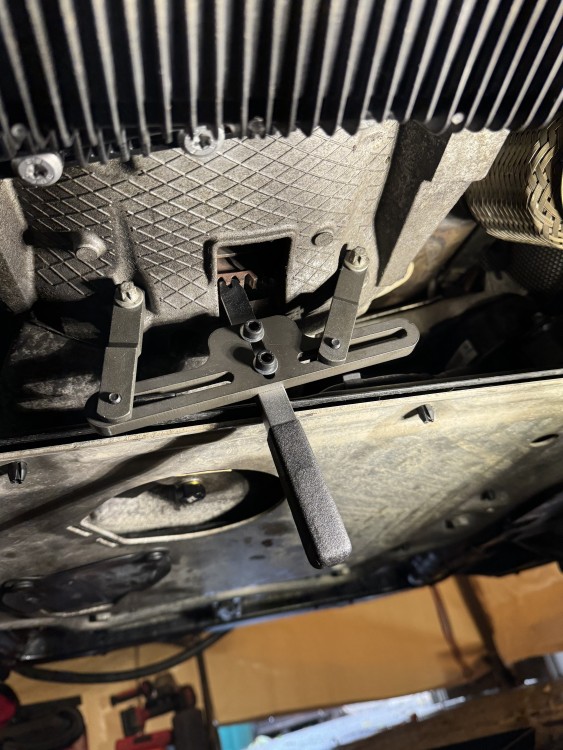
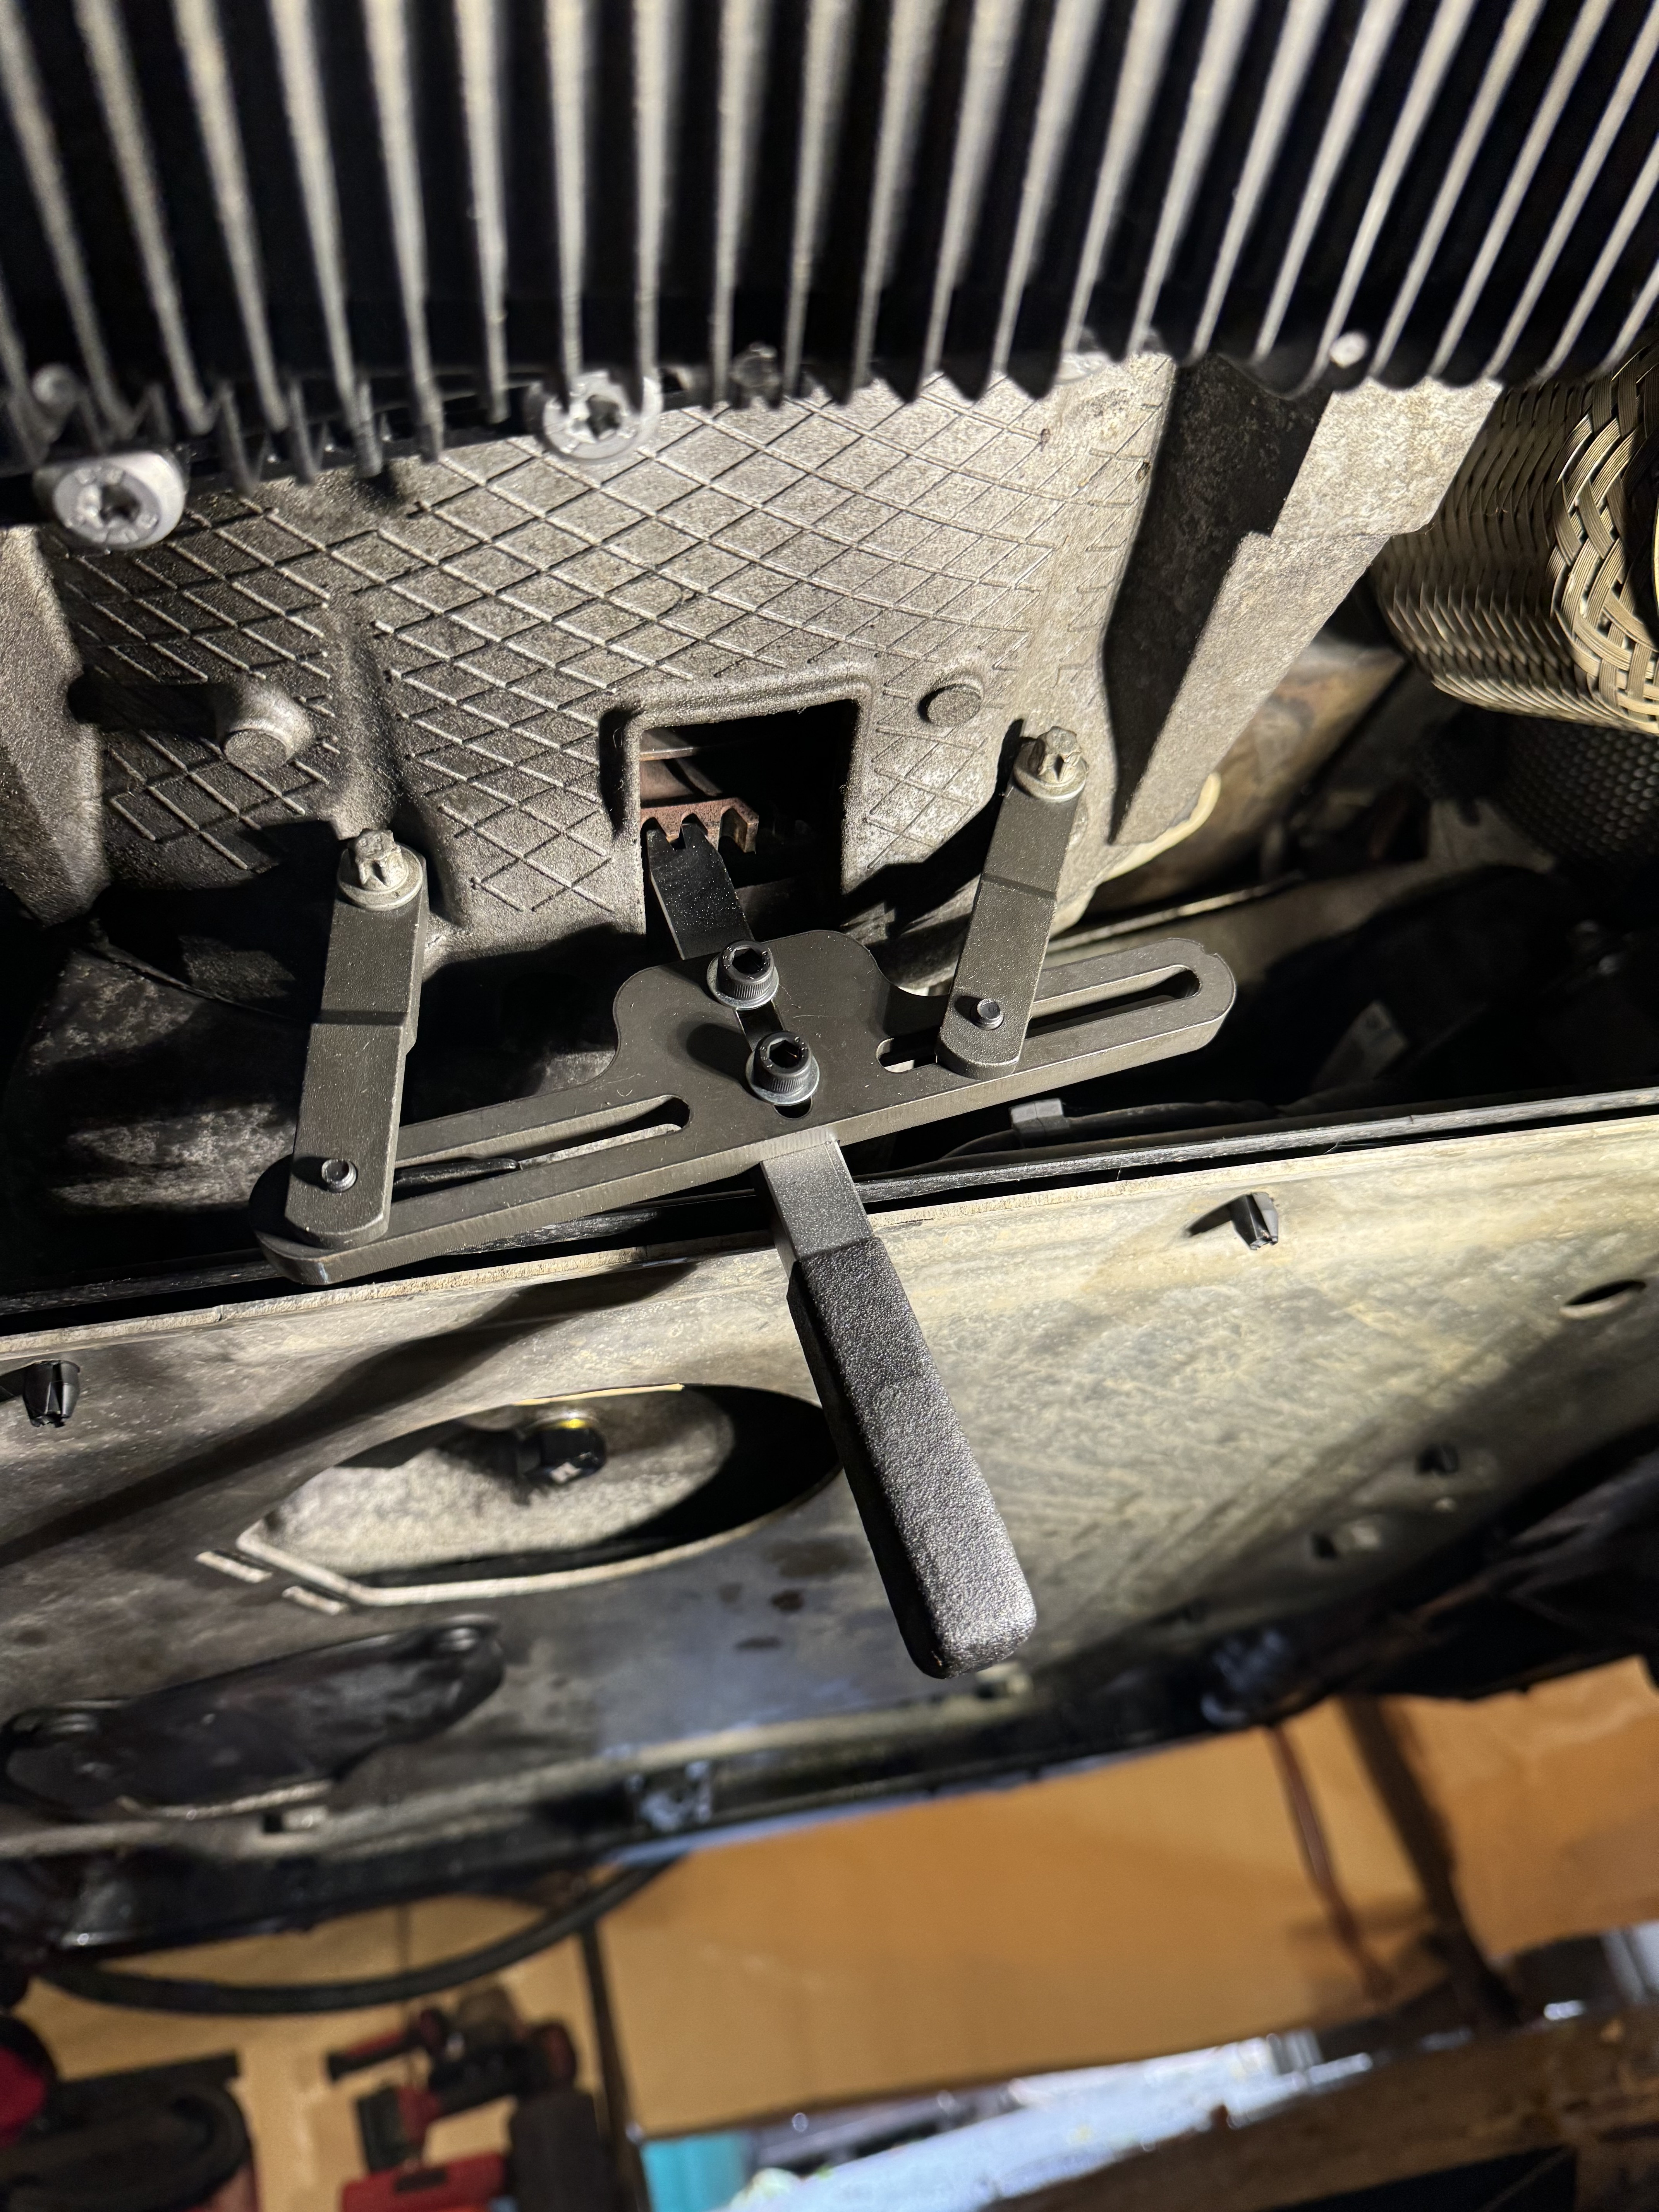
I did a majority of the jobs in 3 groups: top, front and exhaust side of the motor. I mainly referred to the TIS on instructions and torque values but the TME YouTube videos were a great help too for some tips/shortcuts. For doing the flywheel I did buy CTA Tools 2890 BMW T.D.C. Pin for locking the crank but that particular tool was just too long to fit into the access hole. I had bought a generic version of special tool 118180 per the TIS for walnut blasting so I ended up locking the crank that way. More expensive tool but easier to work with and I can use it on my other cars as well.
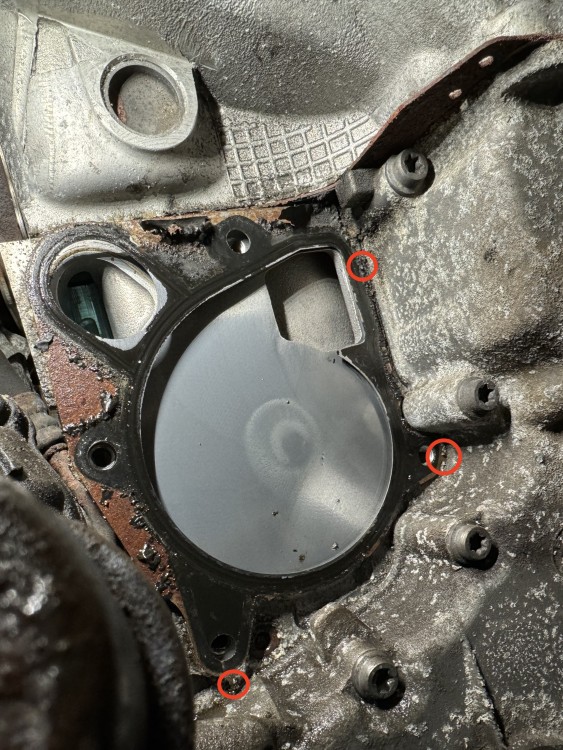
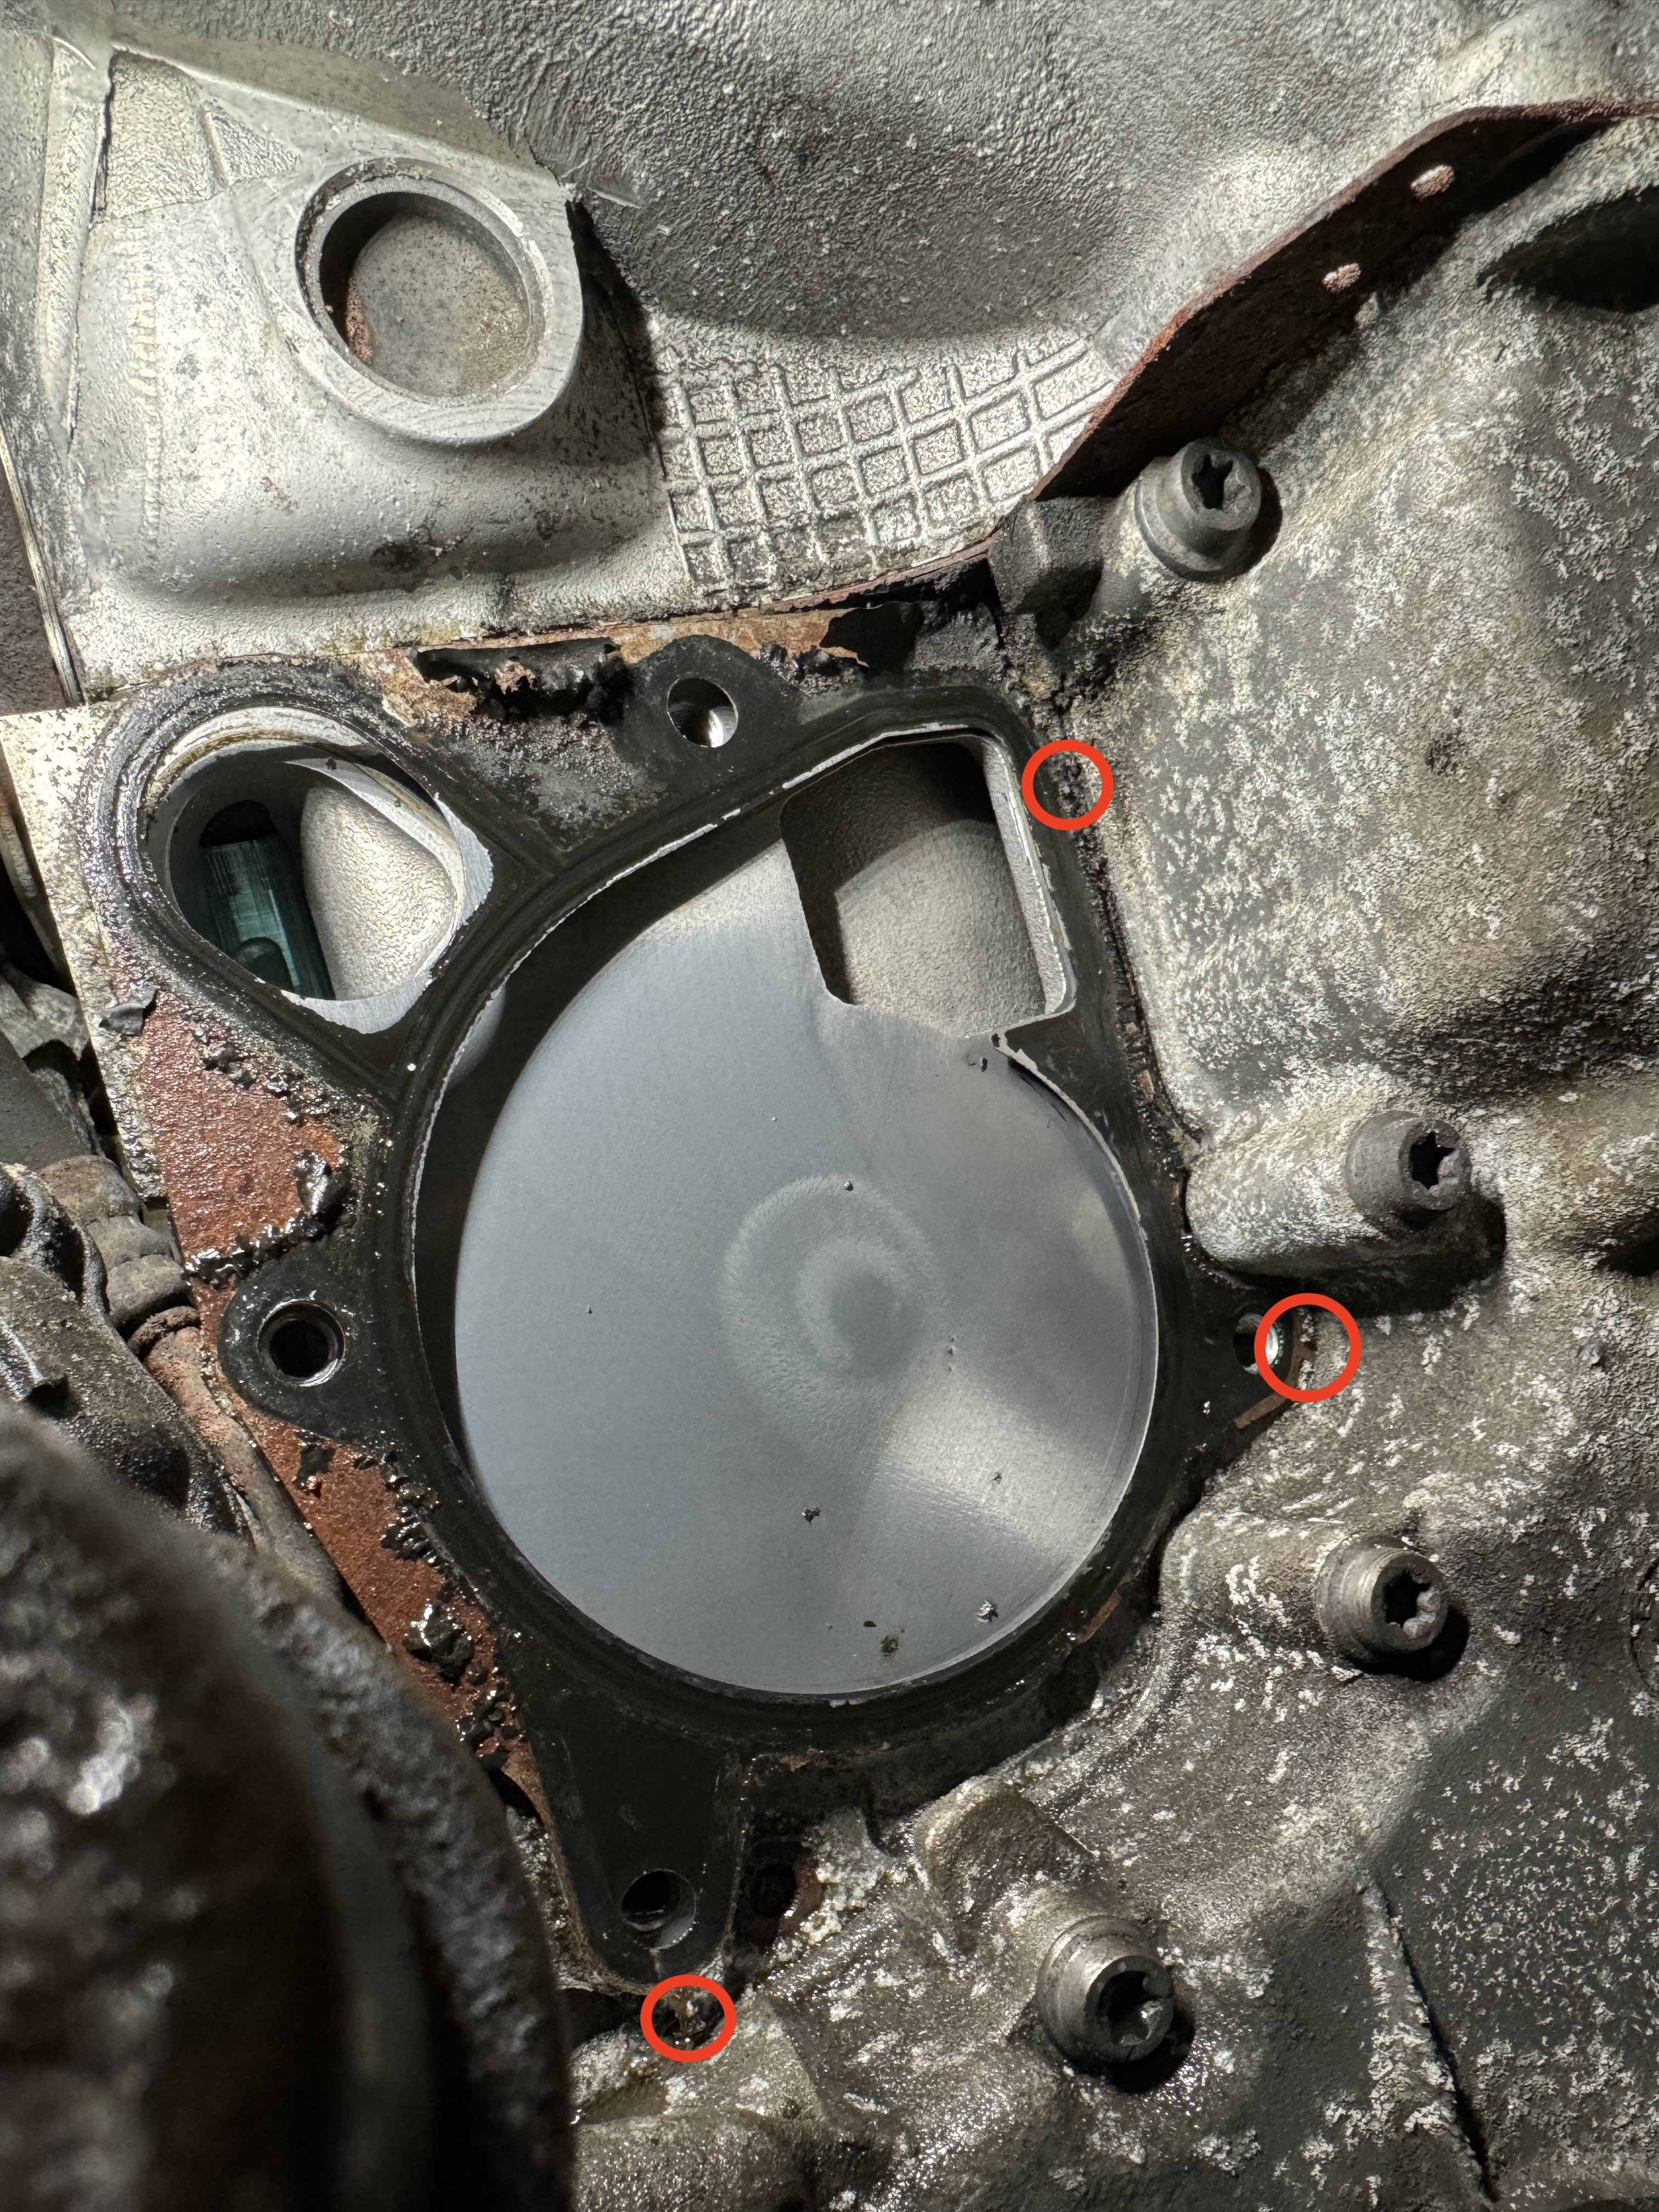
Per the TIS the factory M57 water pump gasket is integrated with another cover gasket and needs to be chiseled off at the 3 tabs. These are the 3 locations to take some of the guess work out as there wasn't a diagram.
The clutched alternator pulley also wasn't on my list and luckily TME had just a couple left in stock at the time. I did not end up doing the belt tensioner as the tube is seized into the motor. The idler pulley was already updated so I'm saving that battle for another day. Apparently removing the alternator and mounts below will gain more access into pulling that out. Took me quite a few tries to get the A/C belt back on as well as it kept being off by 1 rib.
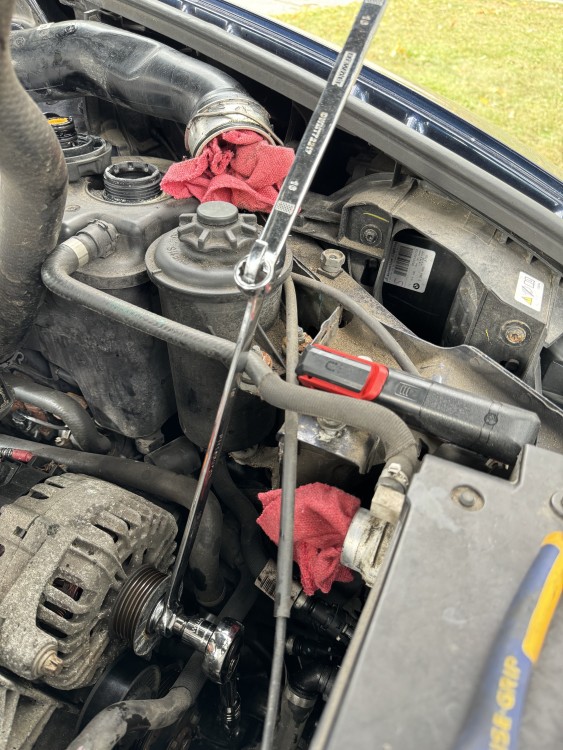
Didn't get pics but now that I have an air compressor I bought a UView 550000 as someone else on here had recommended a while back and holy shit was it worth every penny. It took me more time to mix the coolant concentrate then to fill the system itself to capacity and having the peace of mind knowing there weren't any leaks beforehand was great too. The UView 550500 is the all plastic economy version and cheaper yet HF has a Maddox clone now too but I preferred the metal body/fittings for just a bit more.
Valve cover gasket was easy and I was happy with how things looked under there.
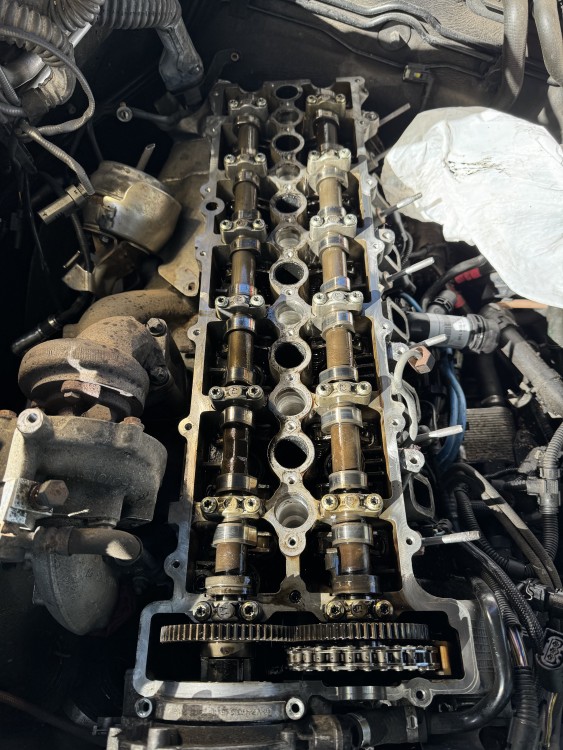
Besides the removal/install of the charge pipes, my other least favorite part of this project was the vacuum block. It's just a rats nest of plugs in a tight space to get it off but install is easier than removal.
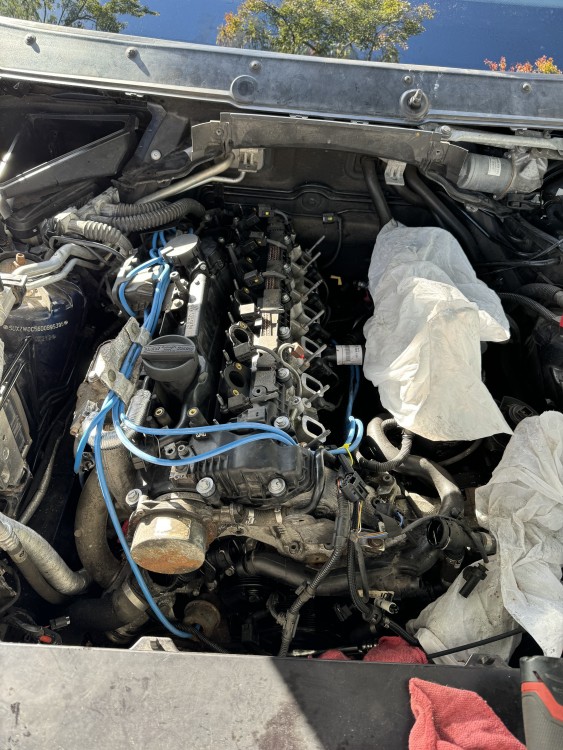
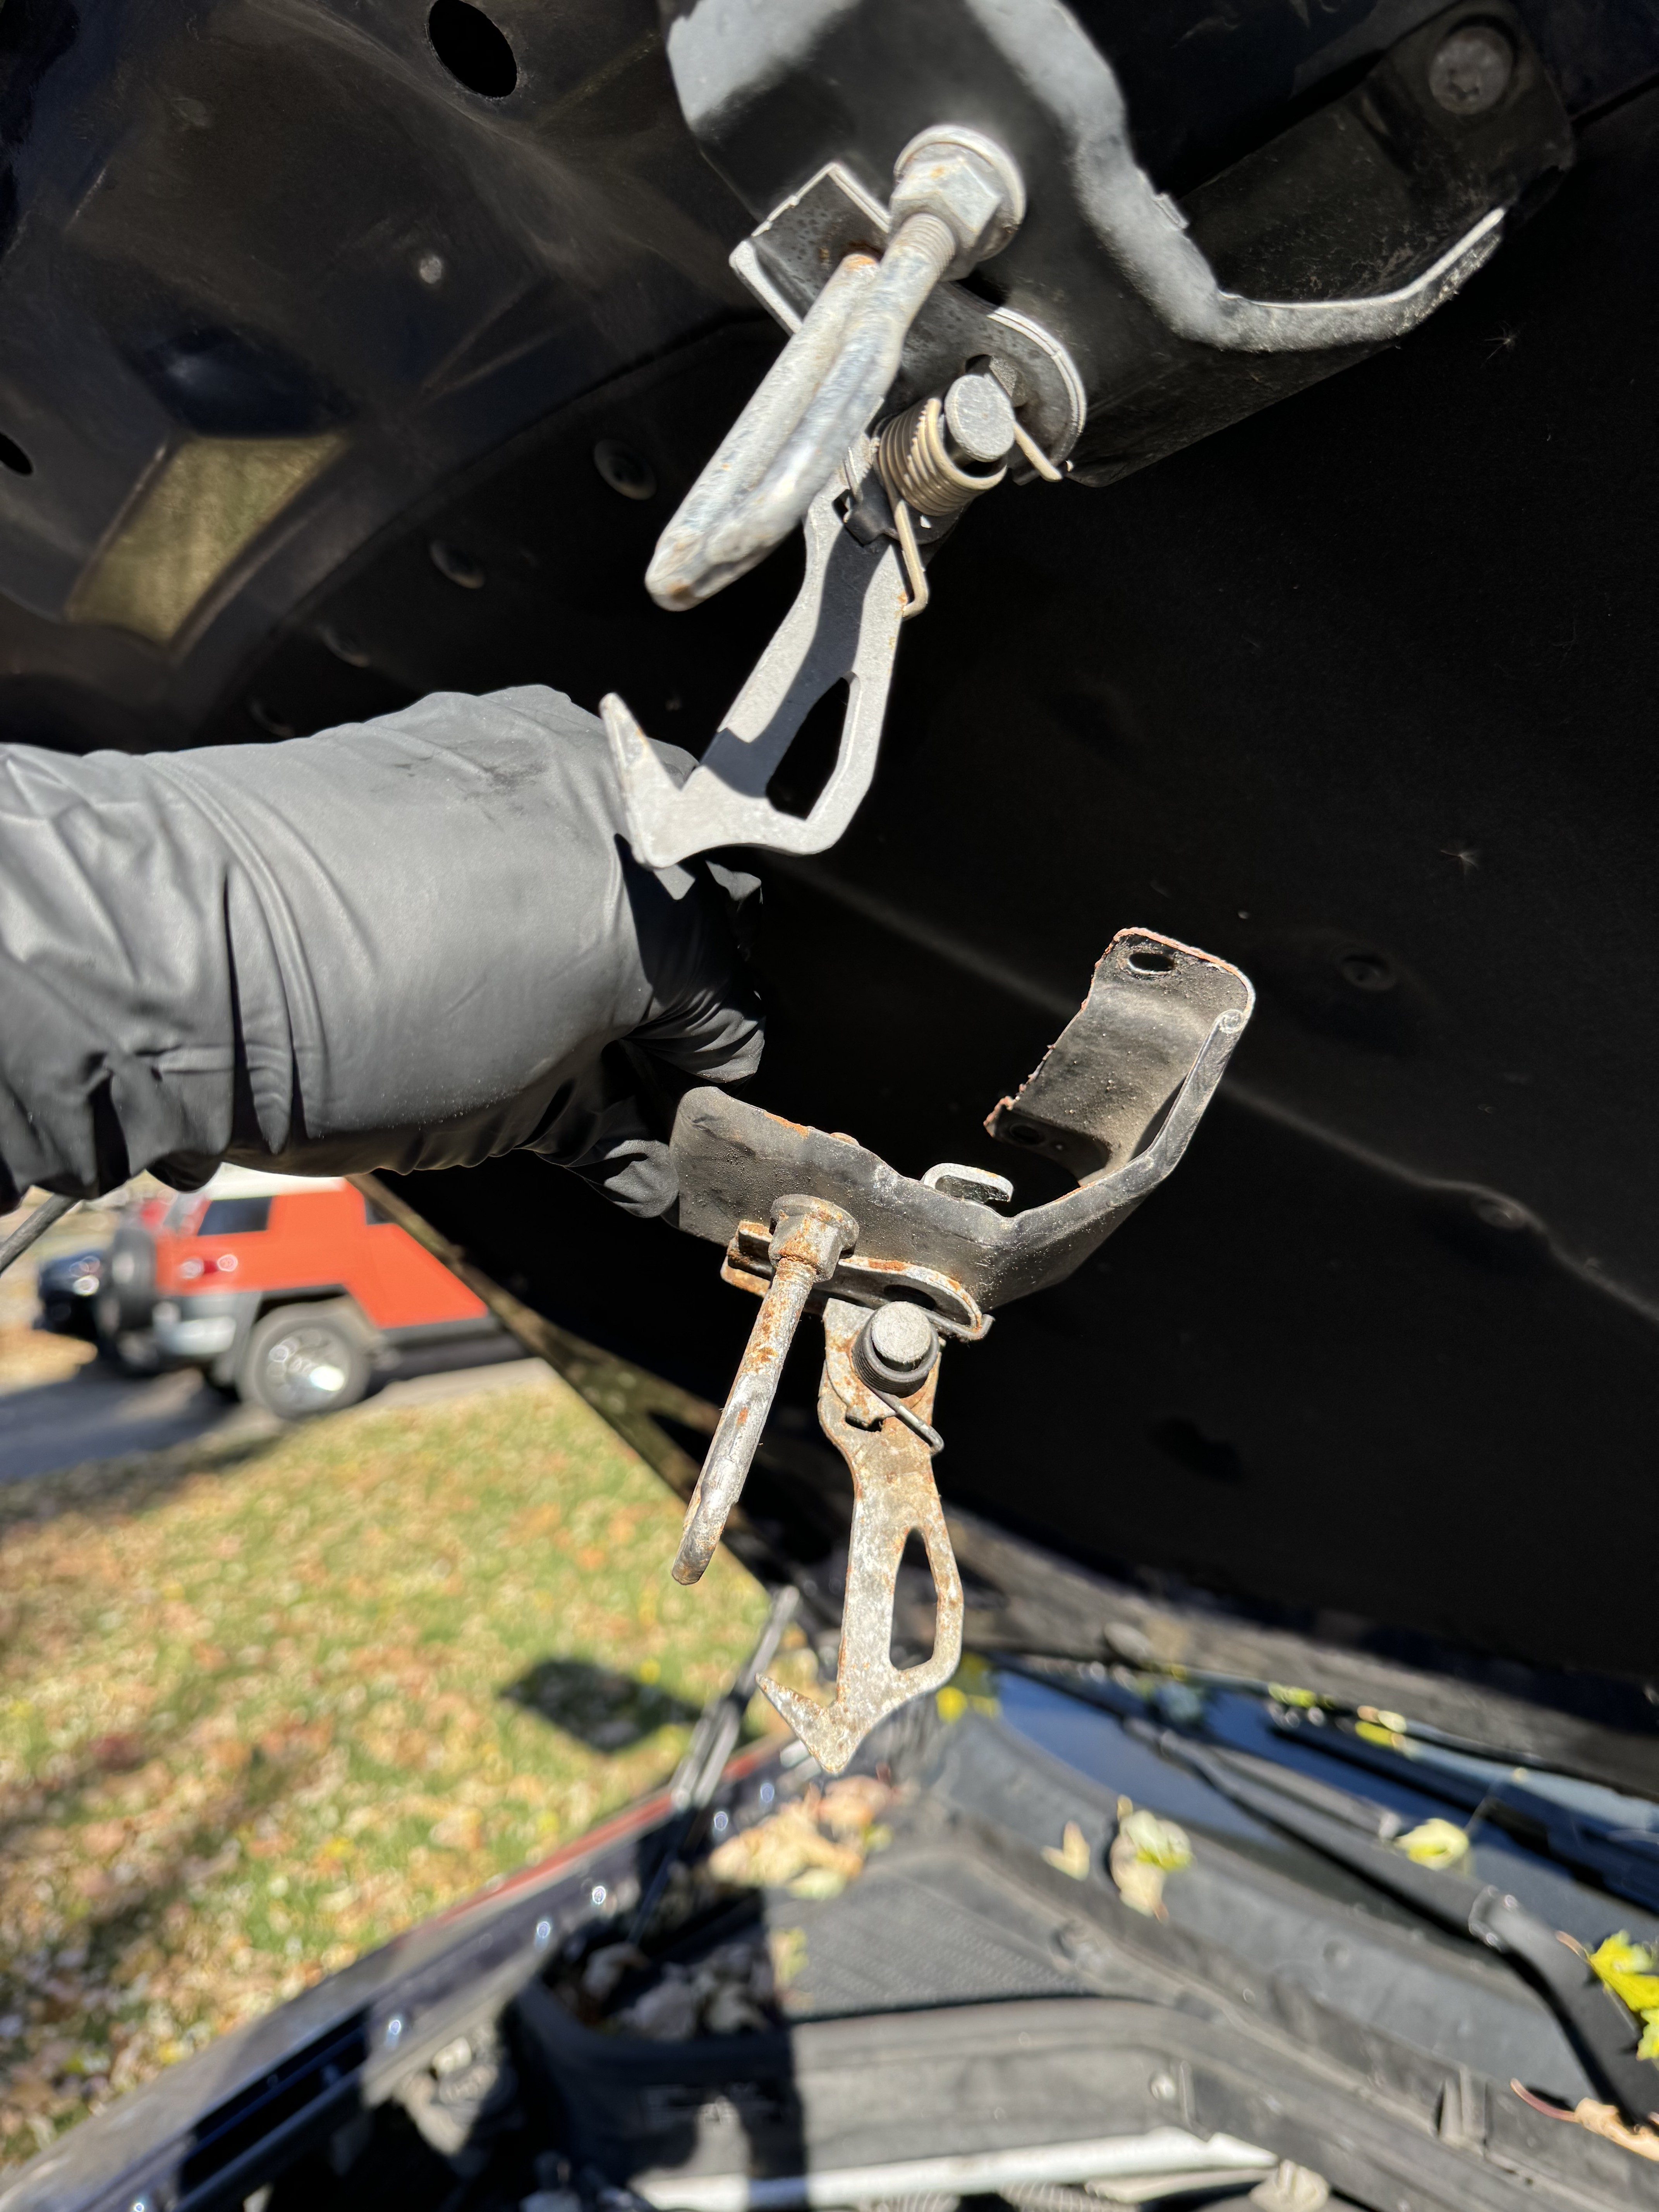
Still have a few things to button up but for the most part the motor is back in shape and we've continued to rack up the miles on this. Of course shutting the hood after finishing everything, the latch sounded different. Few days later when I went to add washer fluid I found out the passenger side latch is jammed or broke. Cables are all pretty stretched at this point but I tried the 3/16 rod trick to push on the latch through the gap between on the side of the radiator but it still won't release. So I get to perform another surgery this weekend

-
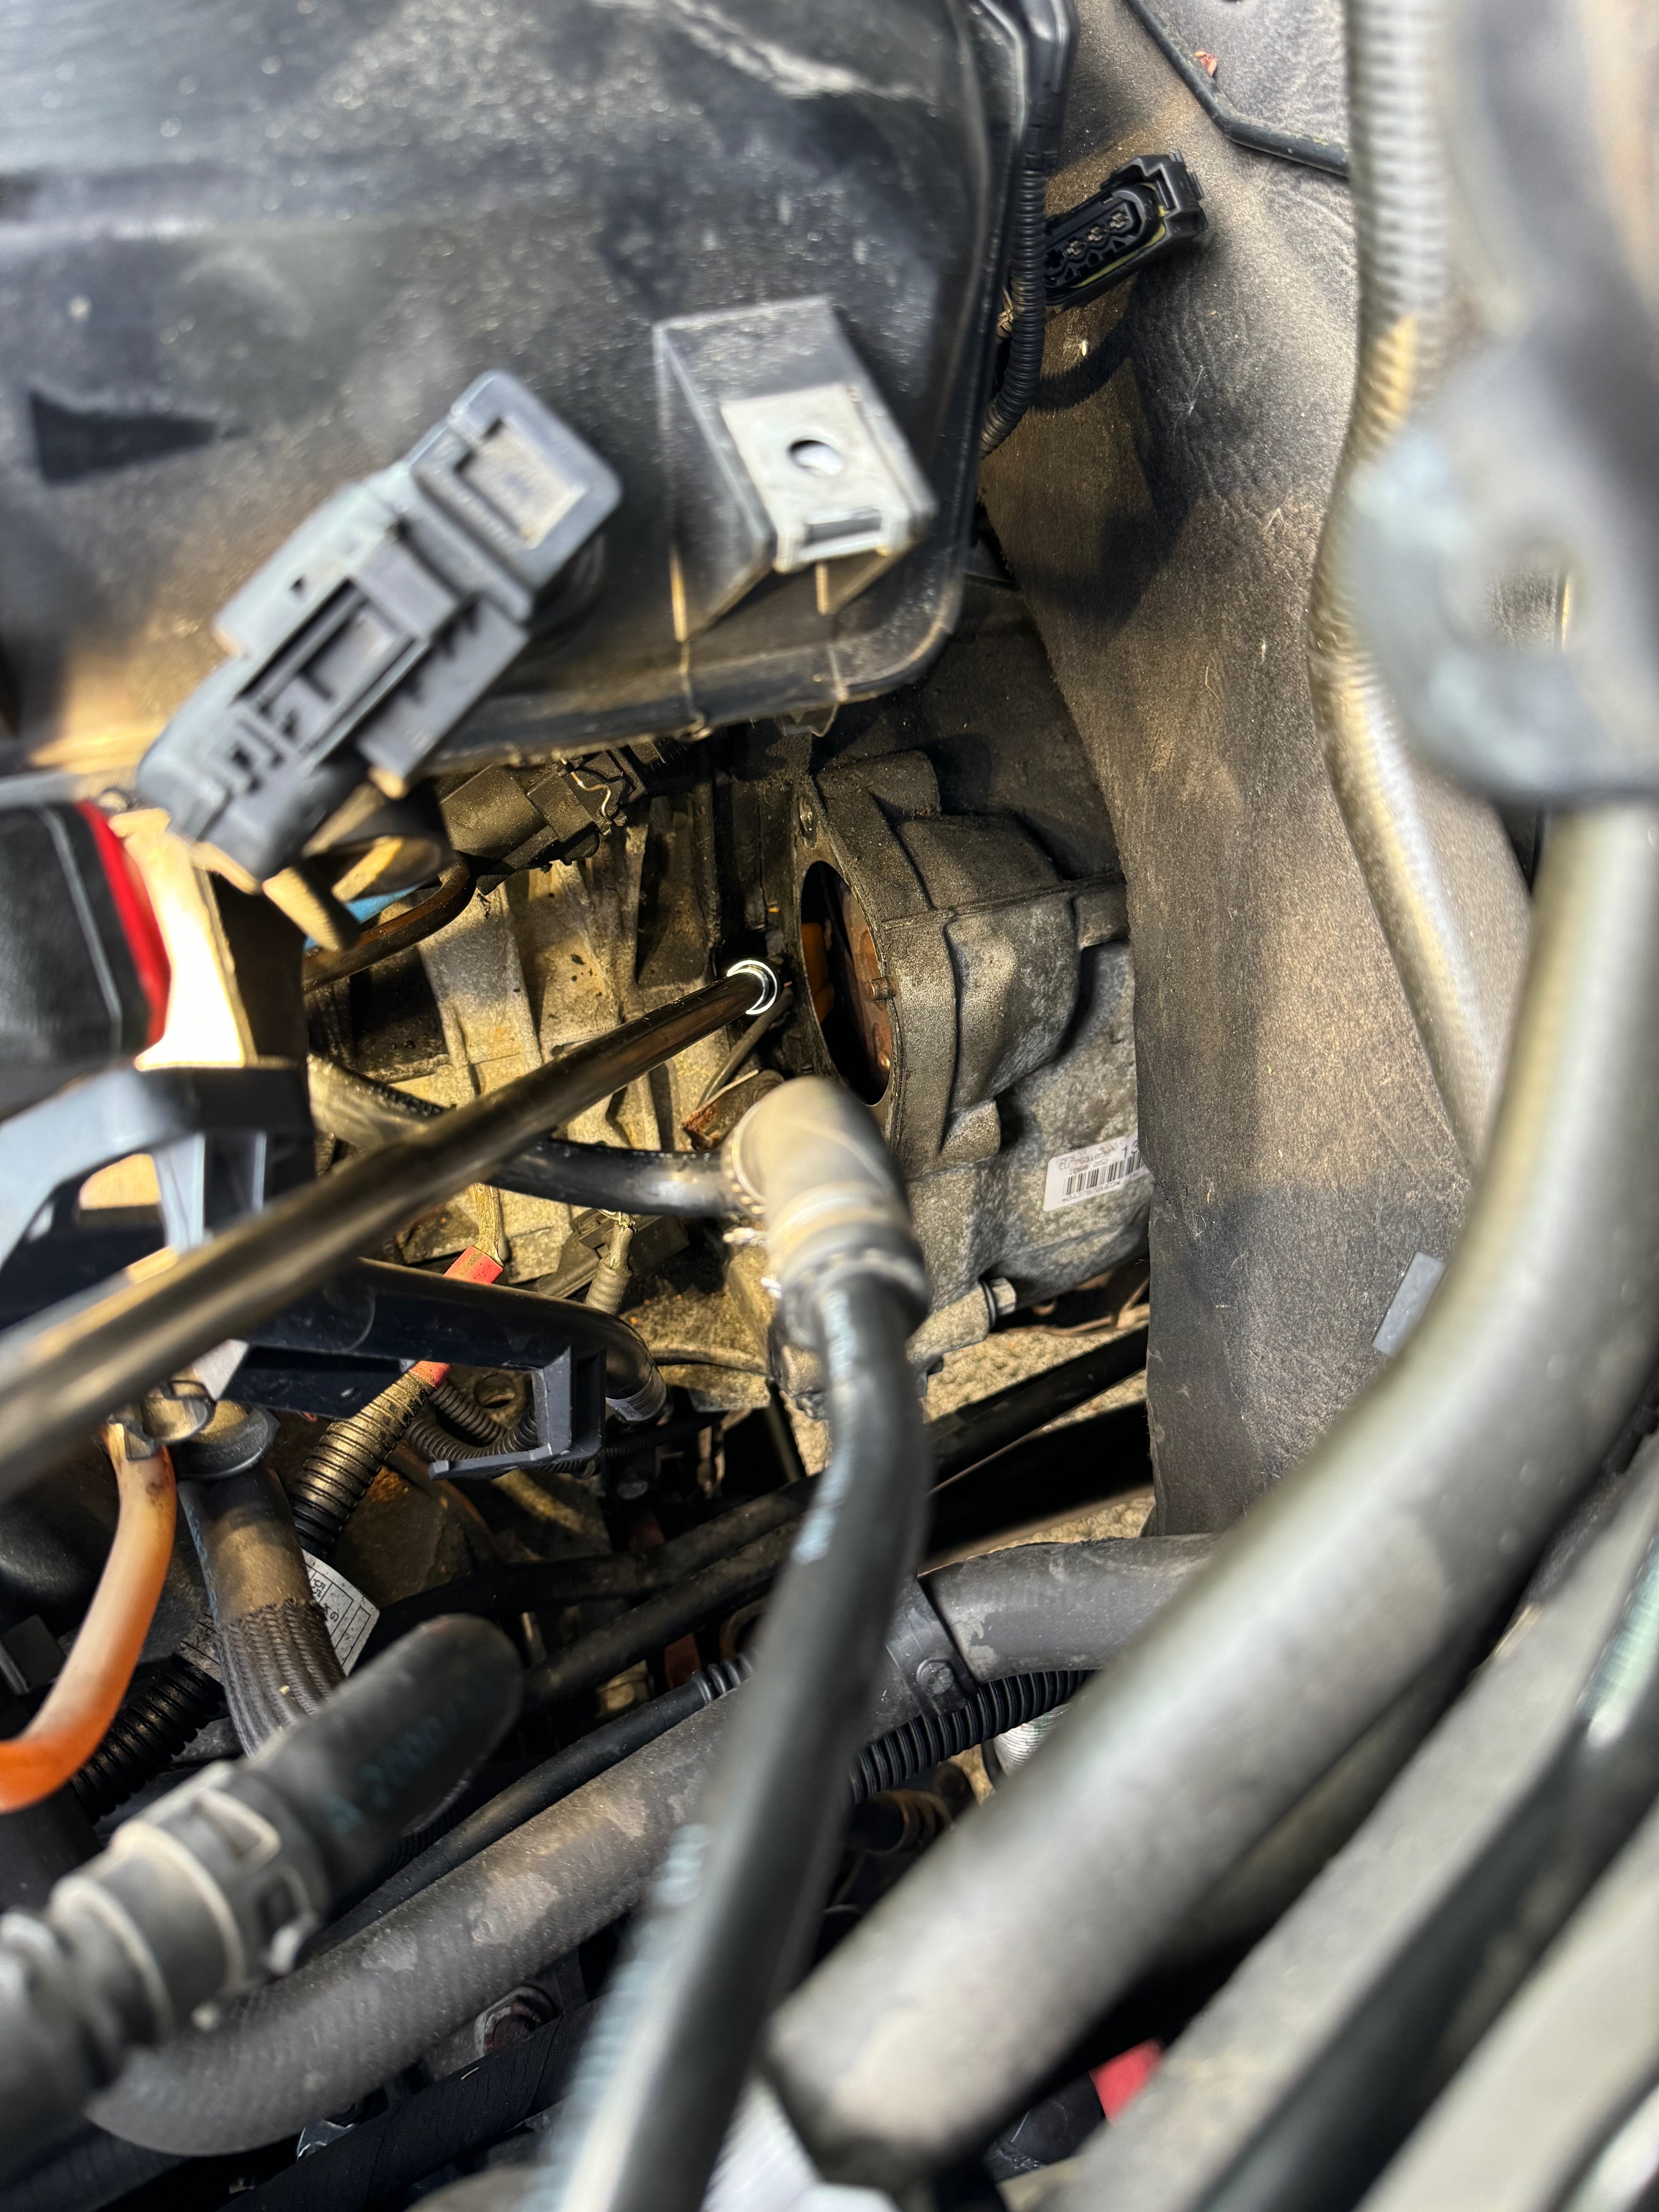
Behind on updates but this has cracked 170k now. Starting a few months ago we were having intermittent power loss while driving on the freeway which slowly progressed to shutting off at idle as well. Initially there was a code for the fuel rail pressure sensor and lots of random electrical issues like the trailer wiring plug? I had cleared those and the pressure sensor didn't come back but then a code for the crank sensor popped up. It had gotten to the point where the X5 was hard to restart after dying. It had been about 30k since the fuel filter was done so I replaced that which helped with starting but still had power cutting out at 18-1900rpm on the interstate occasionally and still often at idle when hot. The crank sensor code hadn't come back but at $60 and some mentions online that was a cause for shutting off at idle I figured I'd give that a shot.
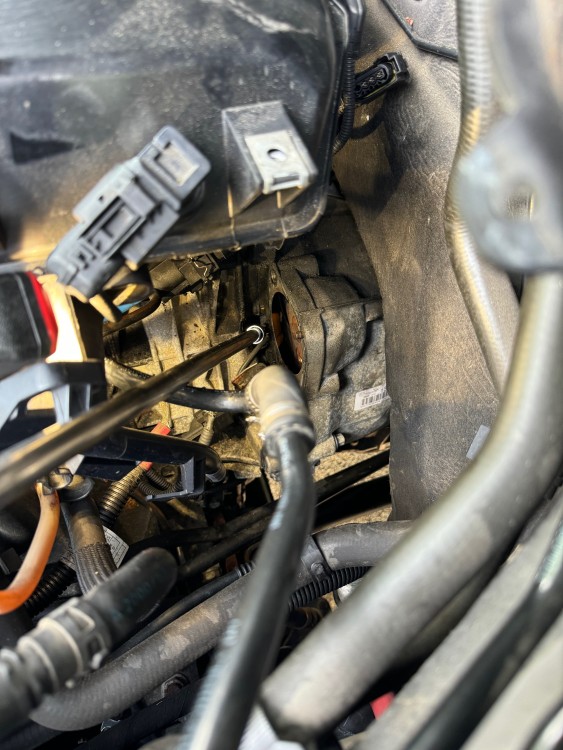
Leave it to BMW to put the sensor underneath the starter
Wasn't too bad of a job though and it seemingly fixed the issue. It did shut off at idle once 5 days after replacement but hasn't happened after so still keeping an eye on things. I had replaced the engine ground strap as well so when things cool down weather wise I plan to pull the injectors and flow test them. It's just odd not getting a CEL or consistent codes for any of these issues.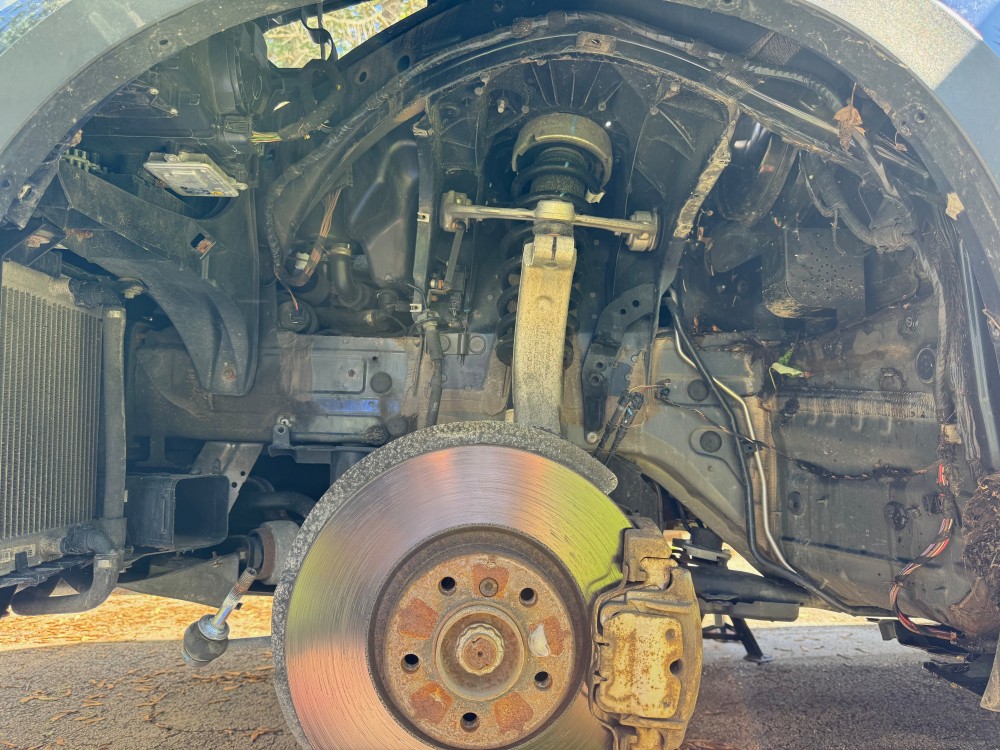
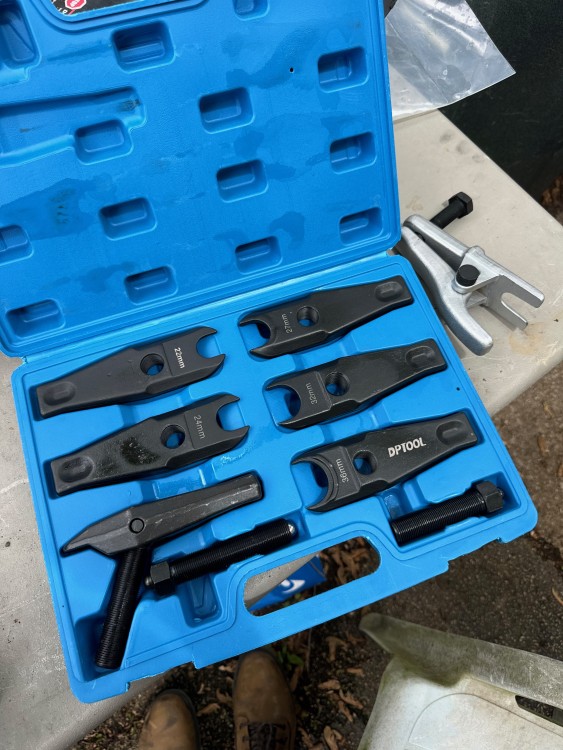
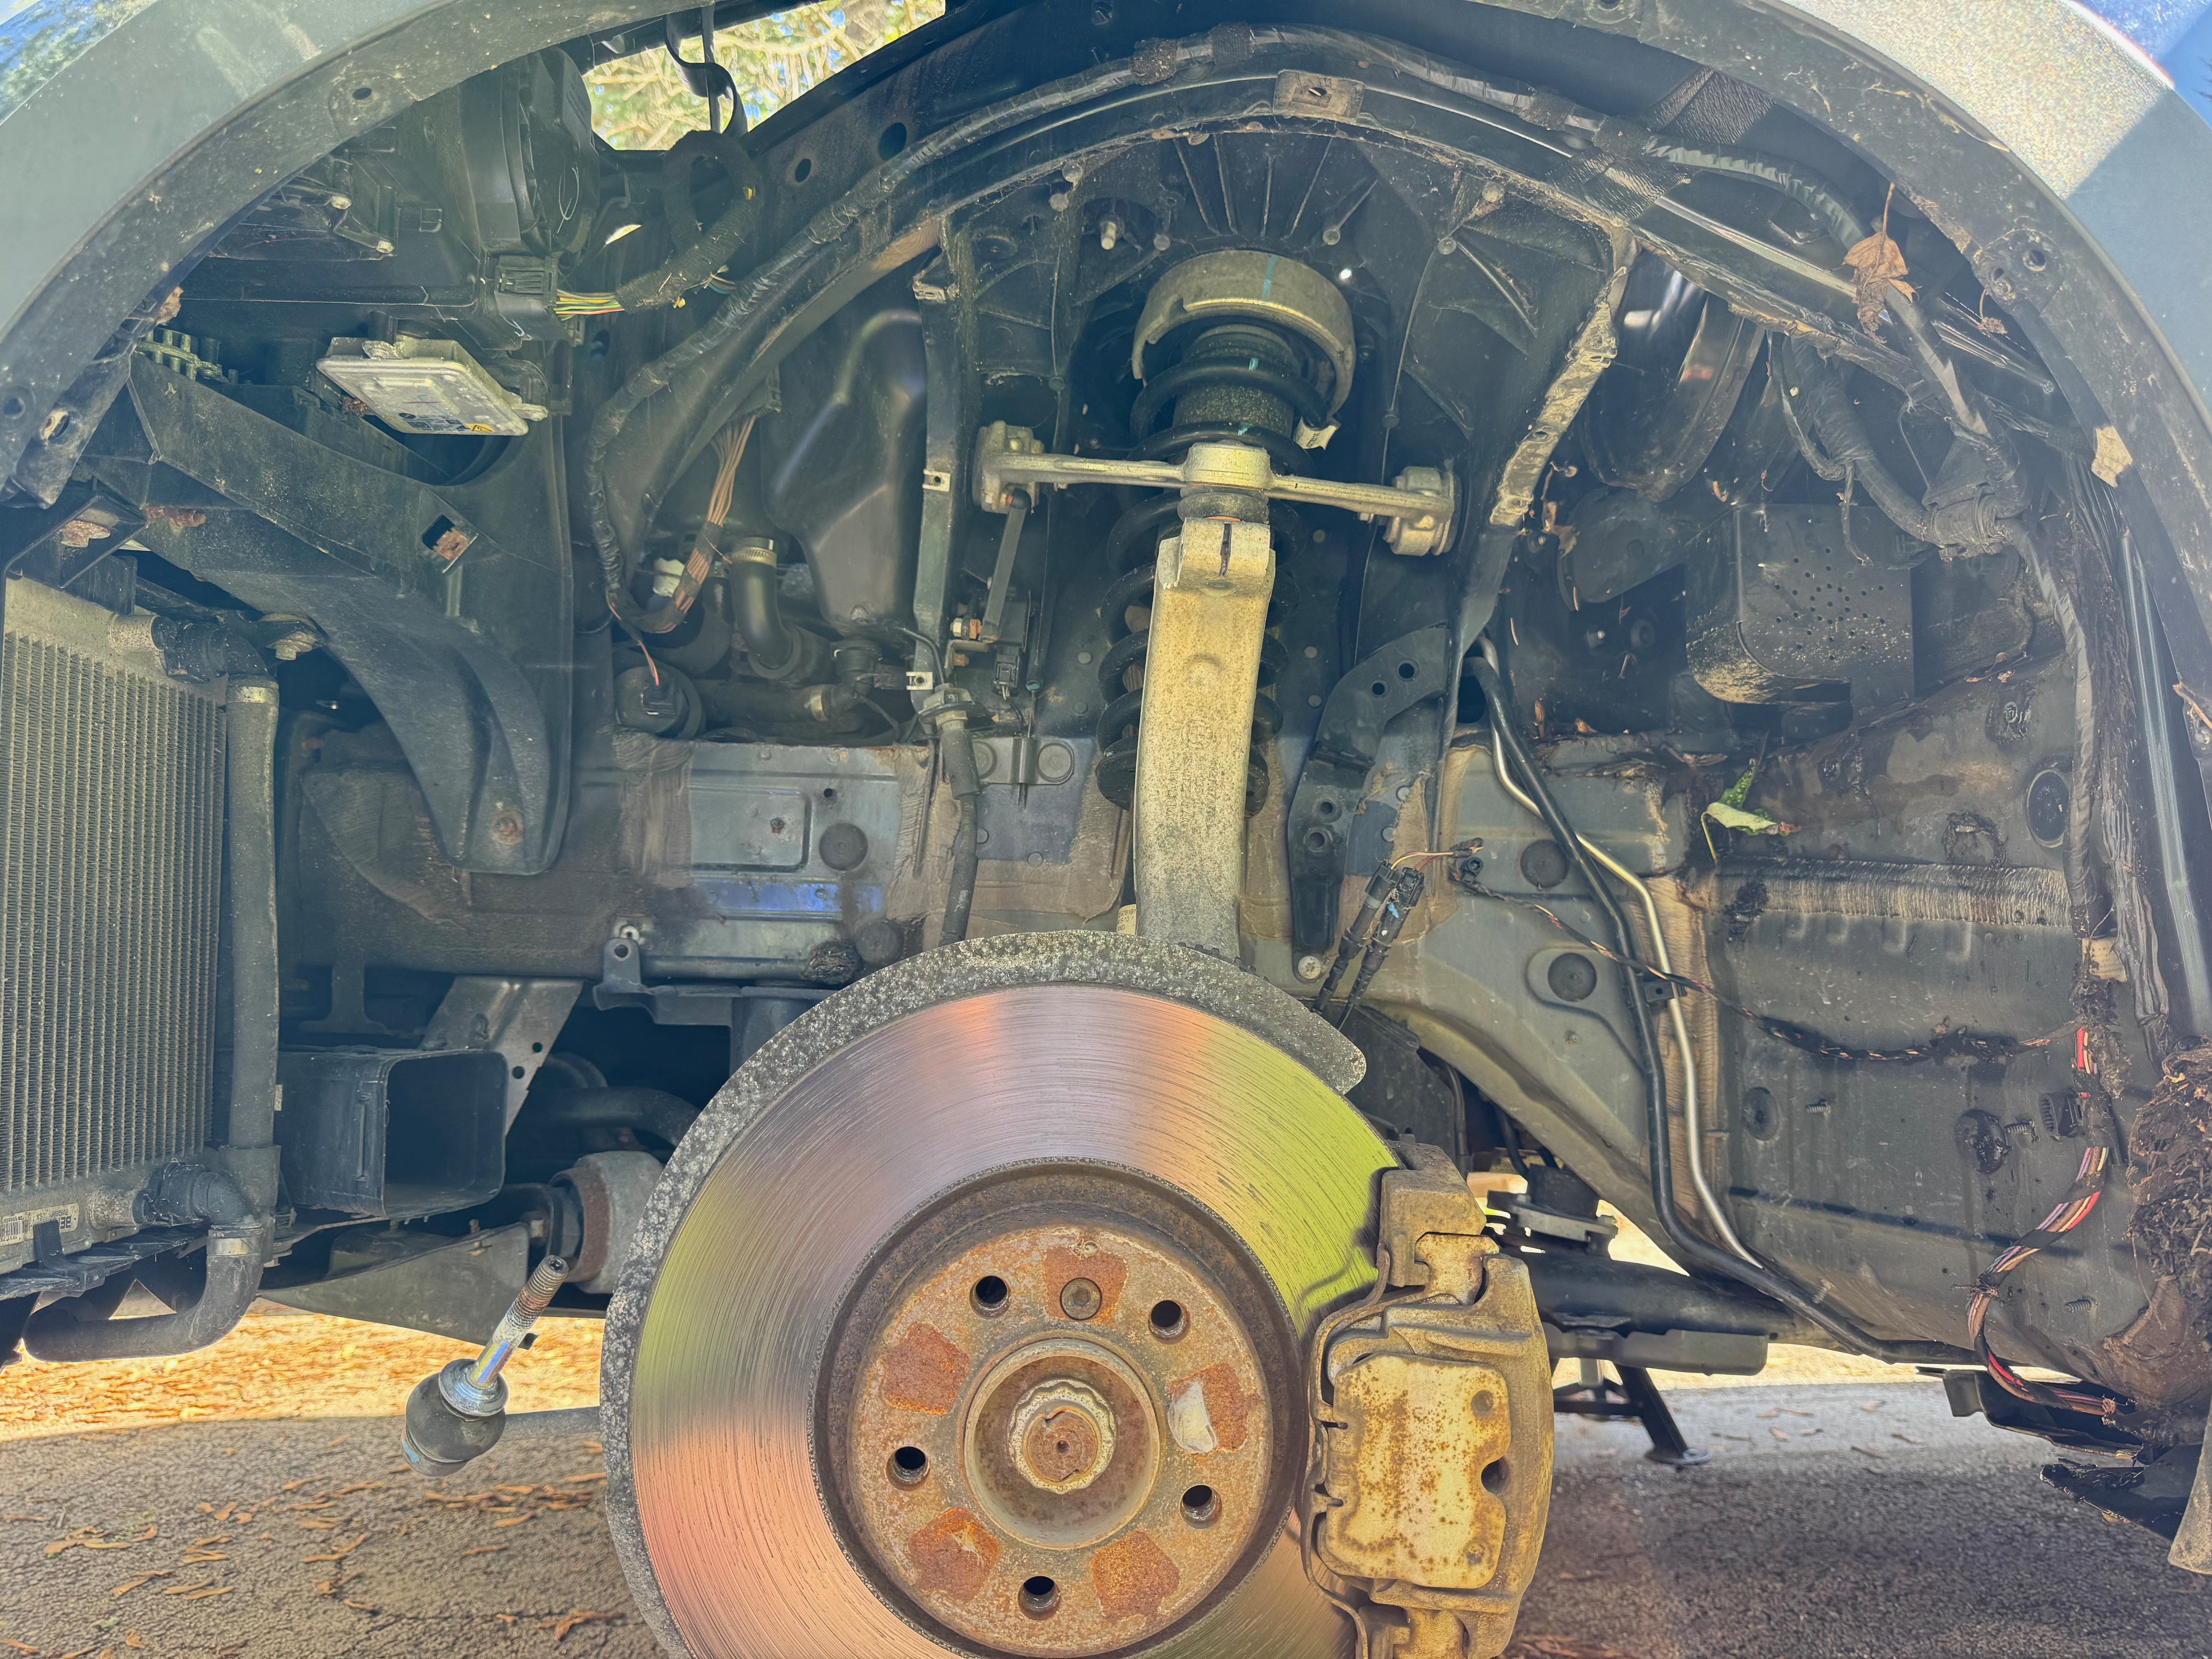
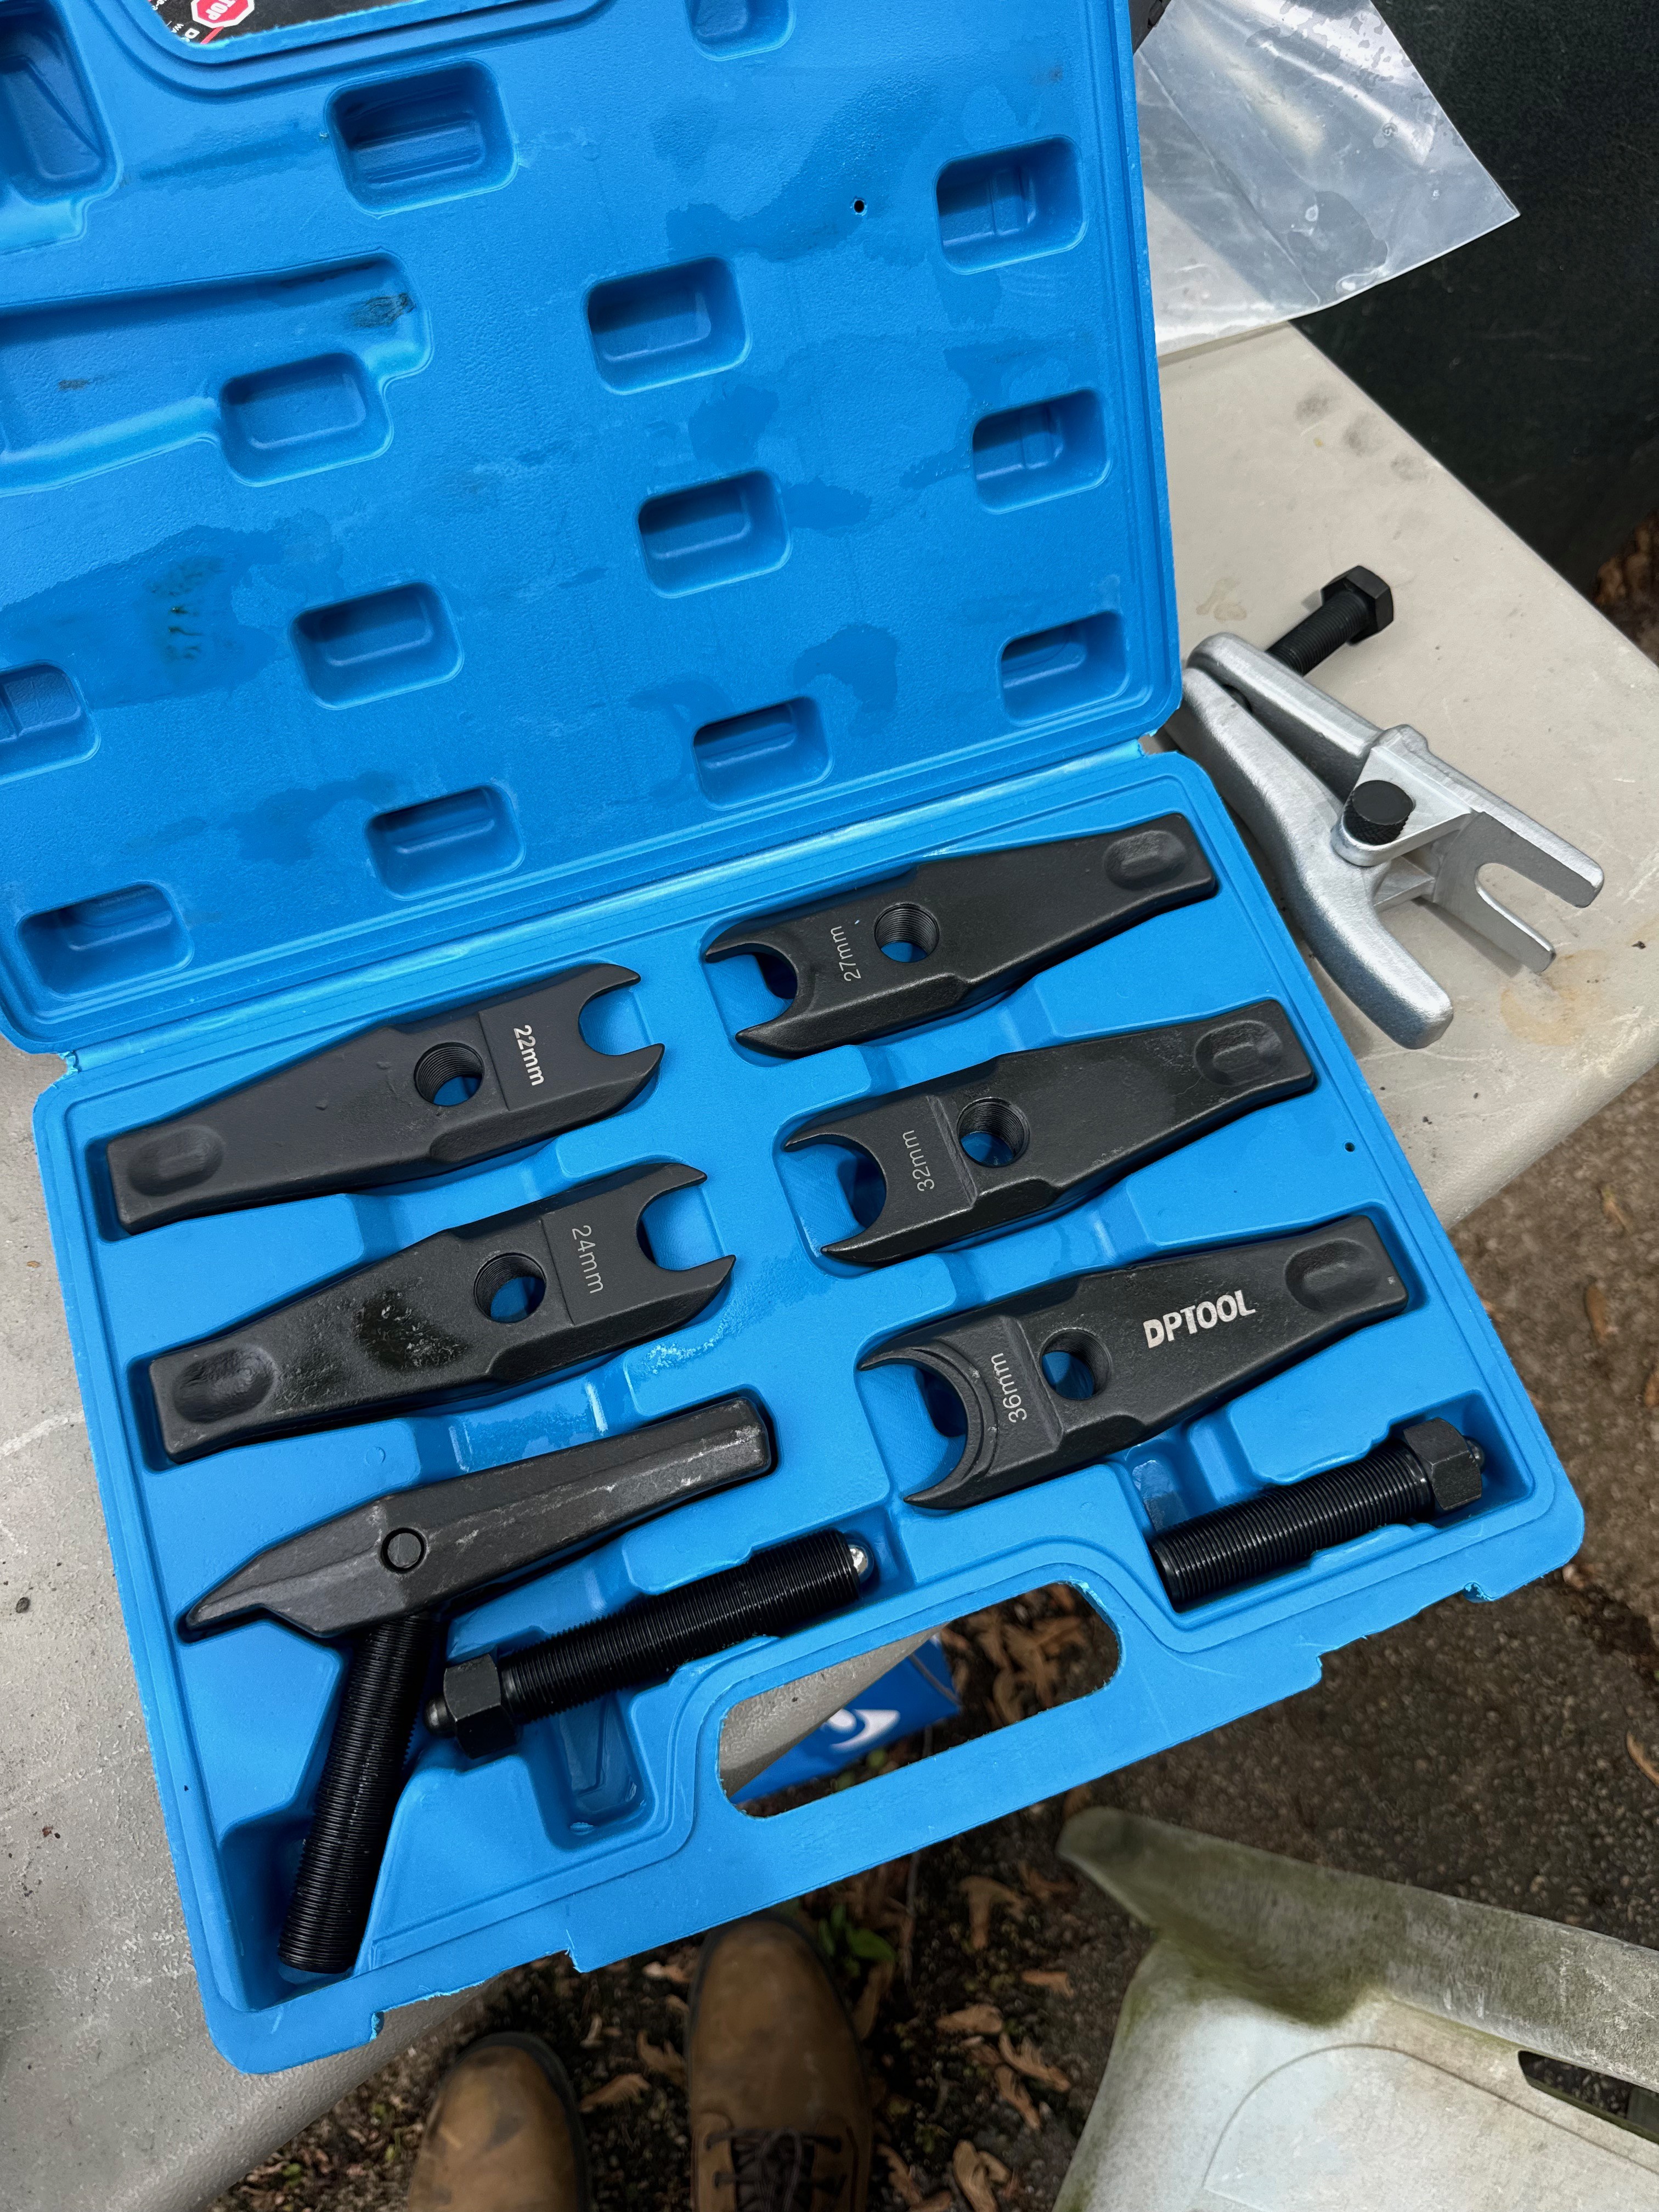
It was time for new tires which meant finishing the suspension refresh as well. Installed the lemforder kit from FCP along with sway bar links and sachs shocks. I learned my lesson on not checking the repair manual for special tools as standard small ball joint tool any auto stores carry wont fit and 2wd/4wd service kits dont work either. Luckily this 22-36mm Heavy Duty Ball Joint Separator was available next day and pop them out with 2-3 turns.
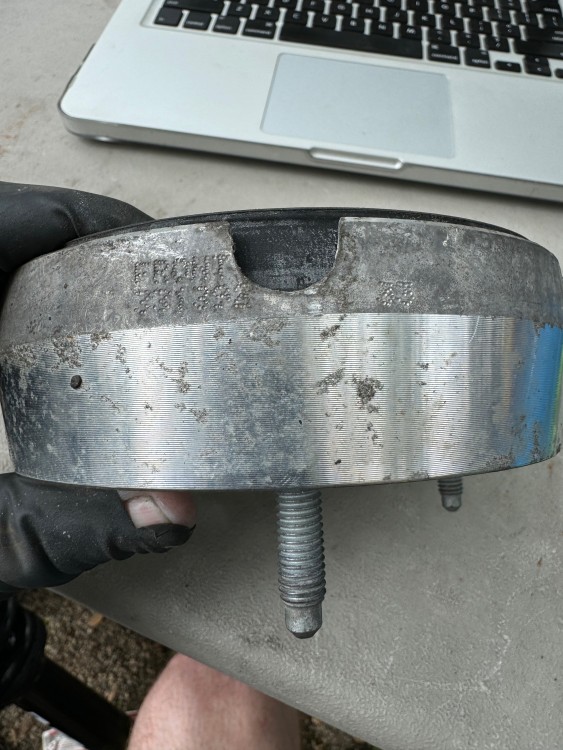
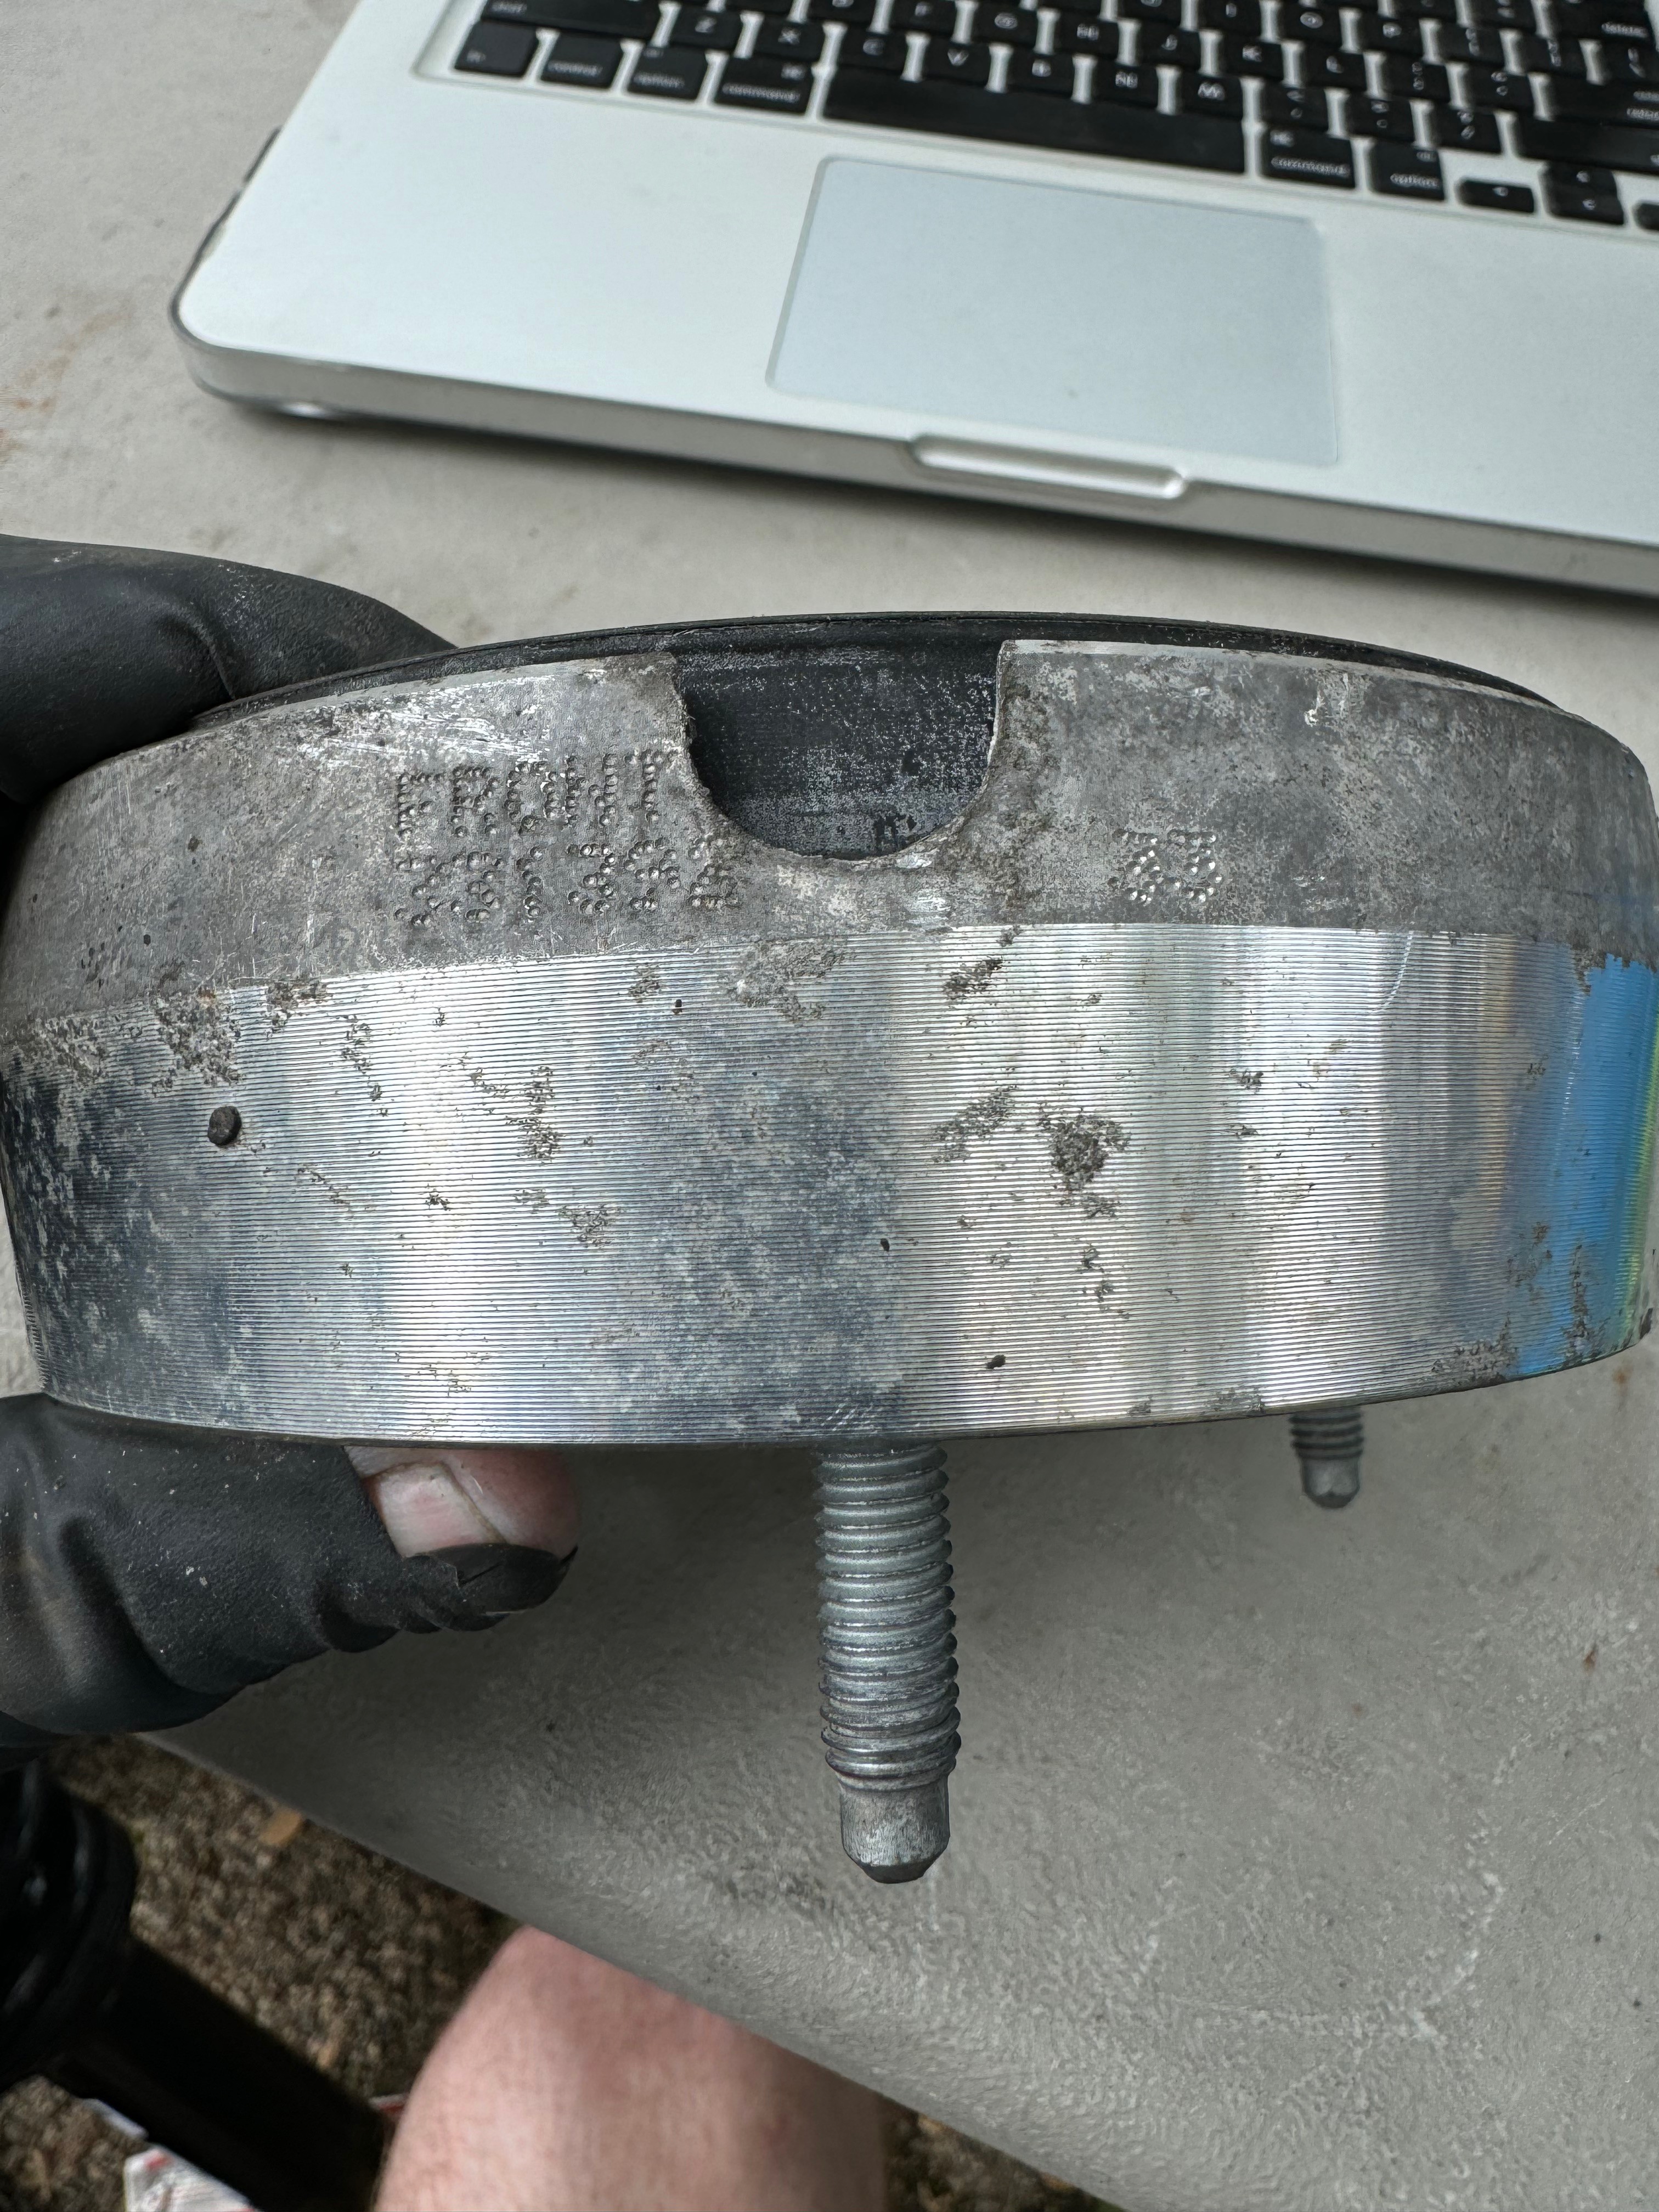
As much as it sucks to take all those covers off they sure do a good job of keeping things clean. One note that isn't specifically mentioned on the TIS is that the top hat is labeled for the #1 stud. I had accidentally installed them rotated 90 degrees for each side which cost me a lot of time compressing the springs again.
X5 drives amazing now with Michelin Defender LTX's and the refreshed suspension. Steering is very precise and handles like new. Next on the list is to address the leaky charge pipes.
-
Suspension looks identical to the F gen - I did the same thing with the top hats too lol. From my recollection they're actually slightly angled. Also, which spring compressor do you have? Looking for a new one after my cheapo amazon one blew up in my face.
From what I've read F15's were a slightly updated E70 underpinnings. Unfortunately I was using a screw type OTC 7294 but after wasting 4 hours cranking those things I ordered this and have it waiting for me for the next spring job. They make a 3ton as well but its only like $20 cheaper but that was available on prime. This was delivered directly in like 4days.
-
Let’s go, Chris
-
I know I'm N47, but do you use a fuel stabilizer or fuel additive? I add some PowerService or DieselKleen every handful of fill ups (4-8) depending on the amount I fill up or the timeline since my last fill as I don't drive the car all the time. I also swap out my fuel filter every other oil change (10k miles). I know BMW says not to use additives, and its a mix of reviews online, but if gives me a piece of mind that I'm doing "something" to treat the fuel and prevent issues as not all Diesel is the same and its a sticky substance.
Its wild that something like a crank sensor can cause such bizarre unrelated codes
. I hope that was your fix!
https://www.instagram.com/_jdesigner_/ http://nevertoolow.tumblr.com/
🥳SOLD BMW E24 633CSI - BMW M30B32 🧪SOLD HCH ES9 - 1.3 LDA
👽BMW E30 325IC - Toyota 1JZ-GTE ⏰ HONDA EF9 CIVIC SI - JDM B18C5
☠️BMW E36 318i - Ford 5.0 FE302 🚴♂️ GT-Labomba - 26x2.75 Freeride
🤹♀️SOLD BMW E36/7 Z3 - BMW M54B25 🧓SOLD BMW E10 2002 - BMW M10M05


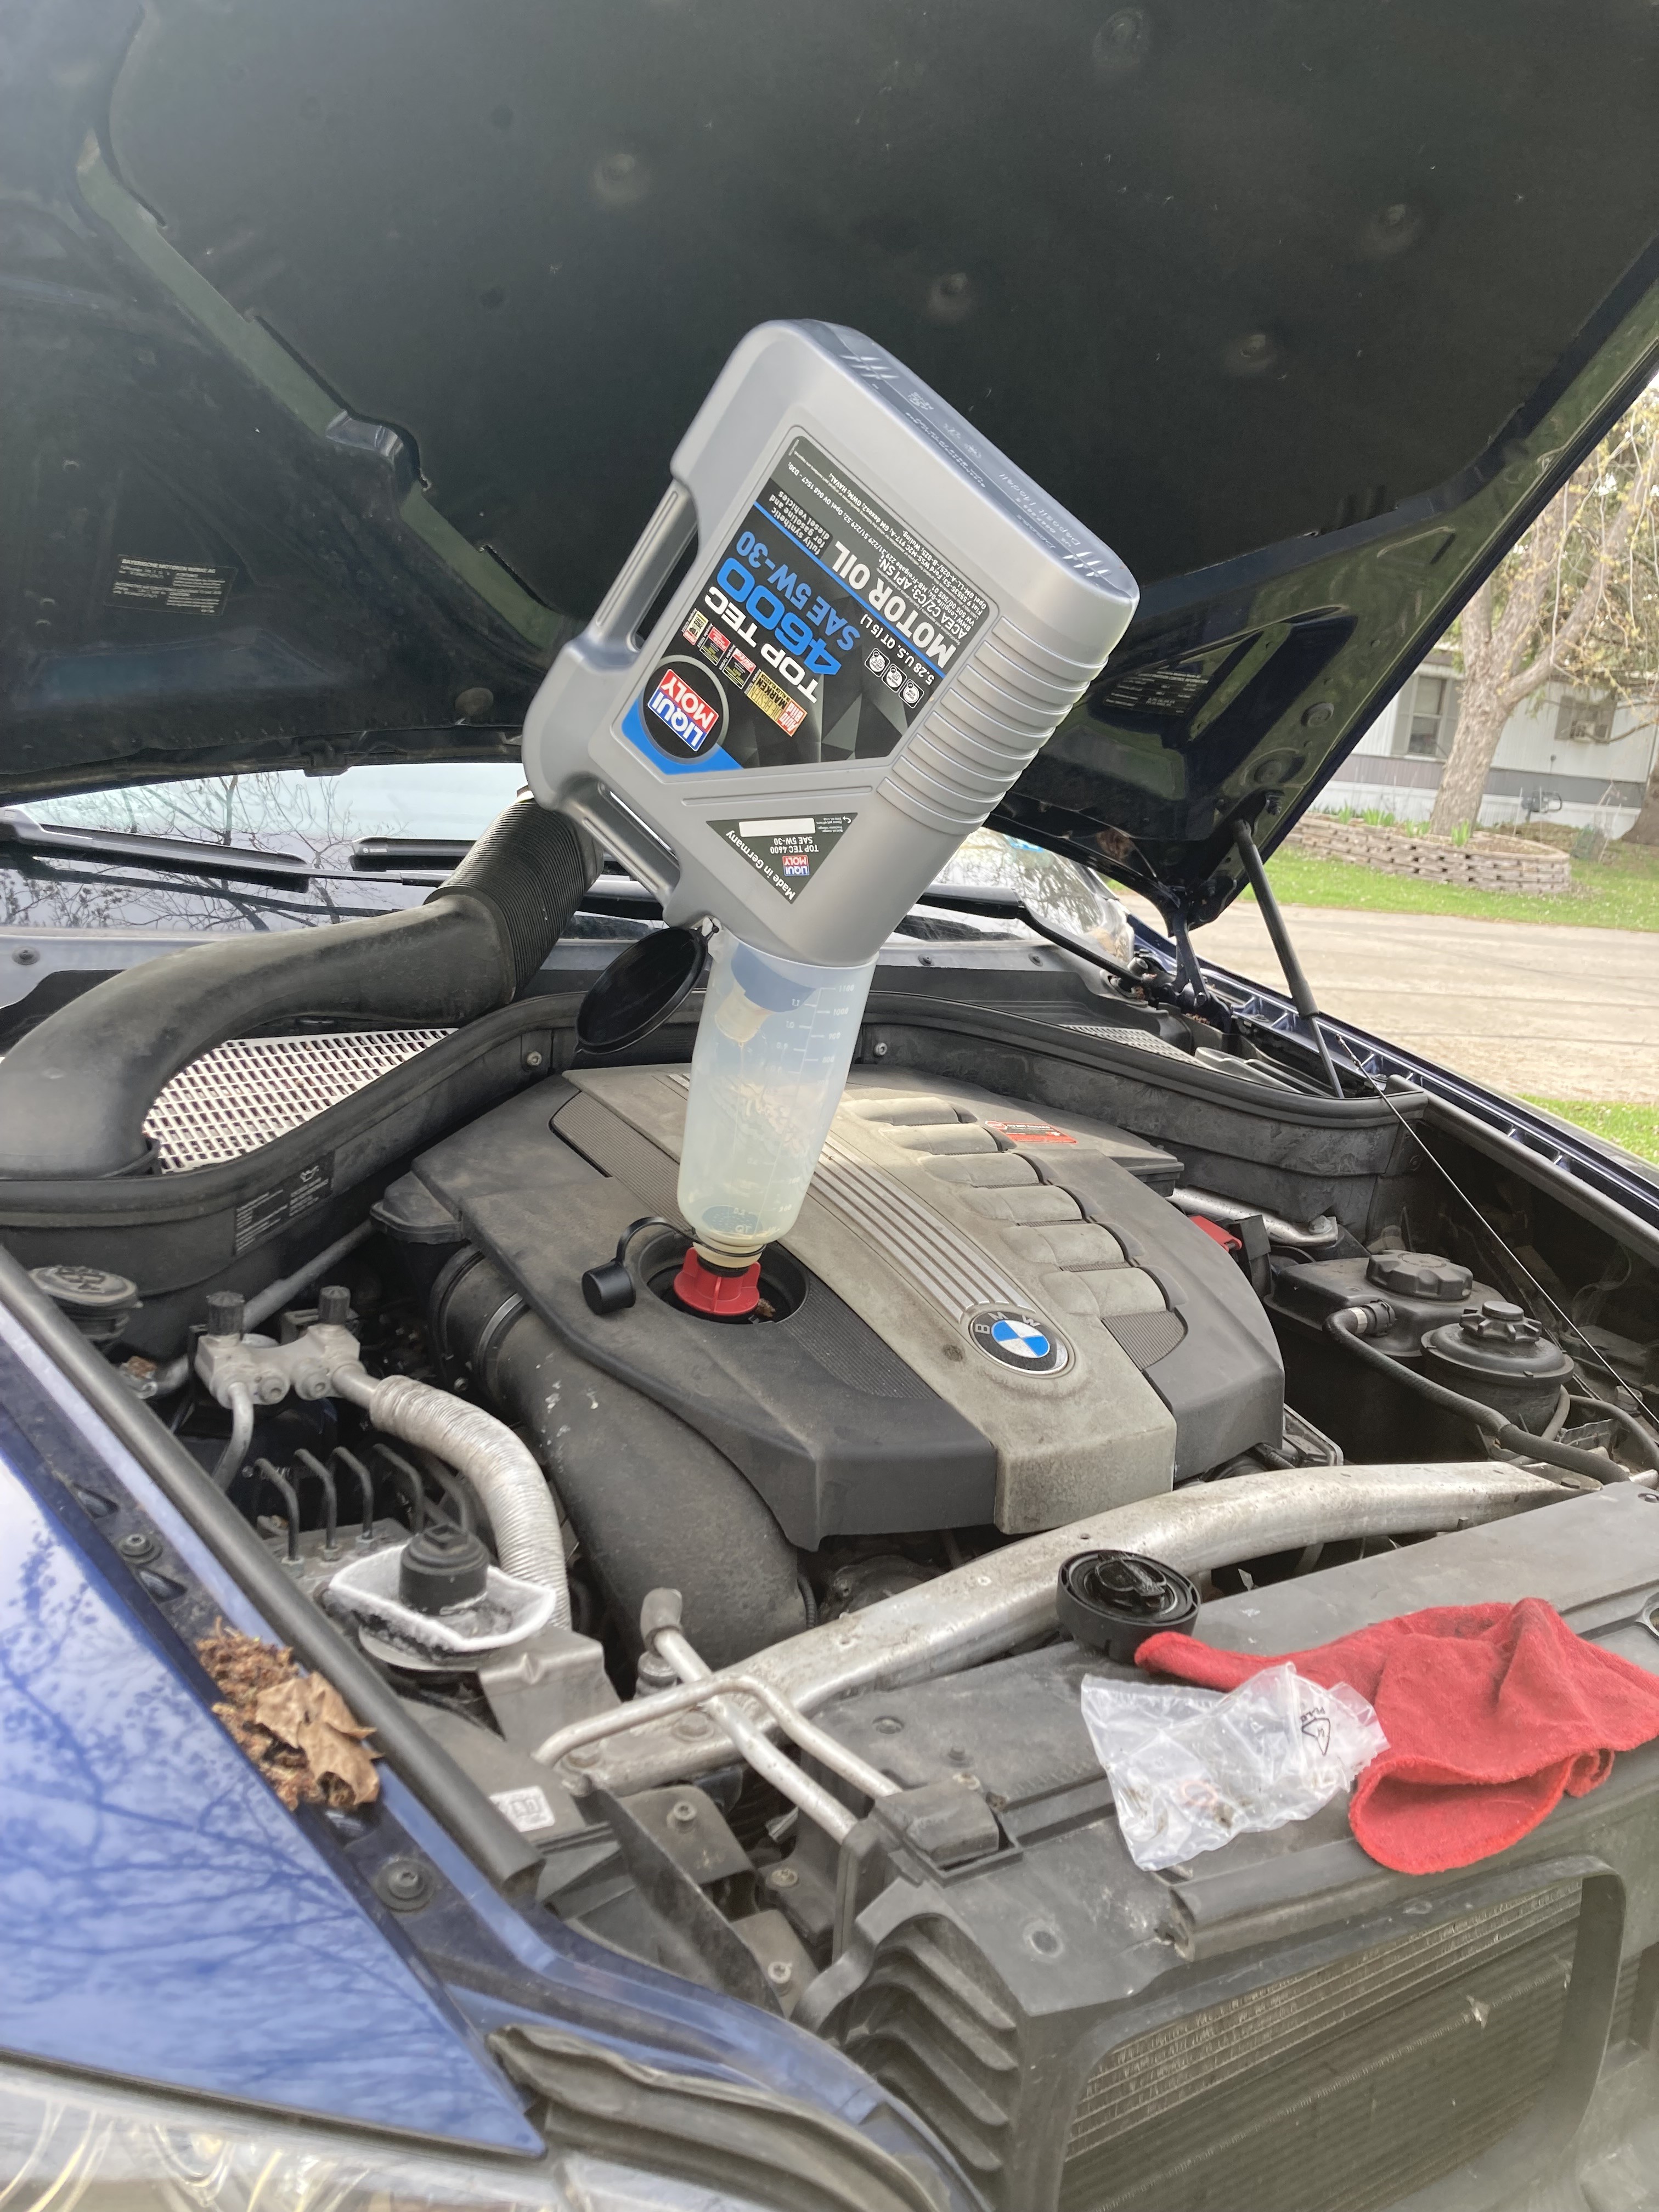




 I had not religiously used any additives except for the Liquid Moly system cleaning kit FCP sells initially but I’m now adding in Power Service every tank that I fill up or when I remember to toss some in while at home.
Hello! It looks like you're interested in this conversation, but you don't have an account yet.
Getting fed up of having to scroll through the same posts each visit? When you register for an account, you'll always come back to exactly where you were before, and choose to be notified of new replies (either via email, or push notification). You'll also be able to save bookmarks and upvote posts to show your appreciation to other community members.
With your input, this post could be even better 💗
Register Login